Saving Images Guide
User Manual:
Open the PDF directly: View PDF ![]() .
.
Page Count: 2
Quick Guide to Saving Images to Google Drive
Windows/MacOS:
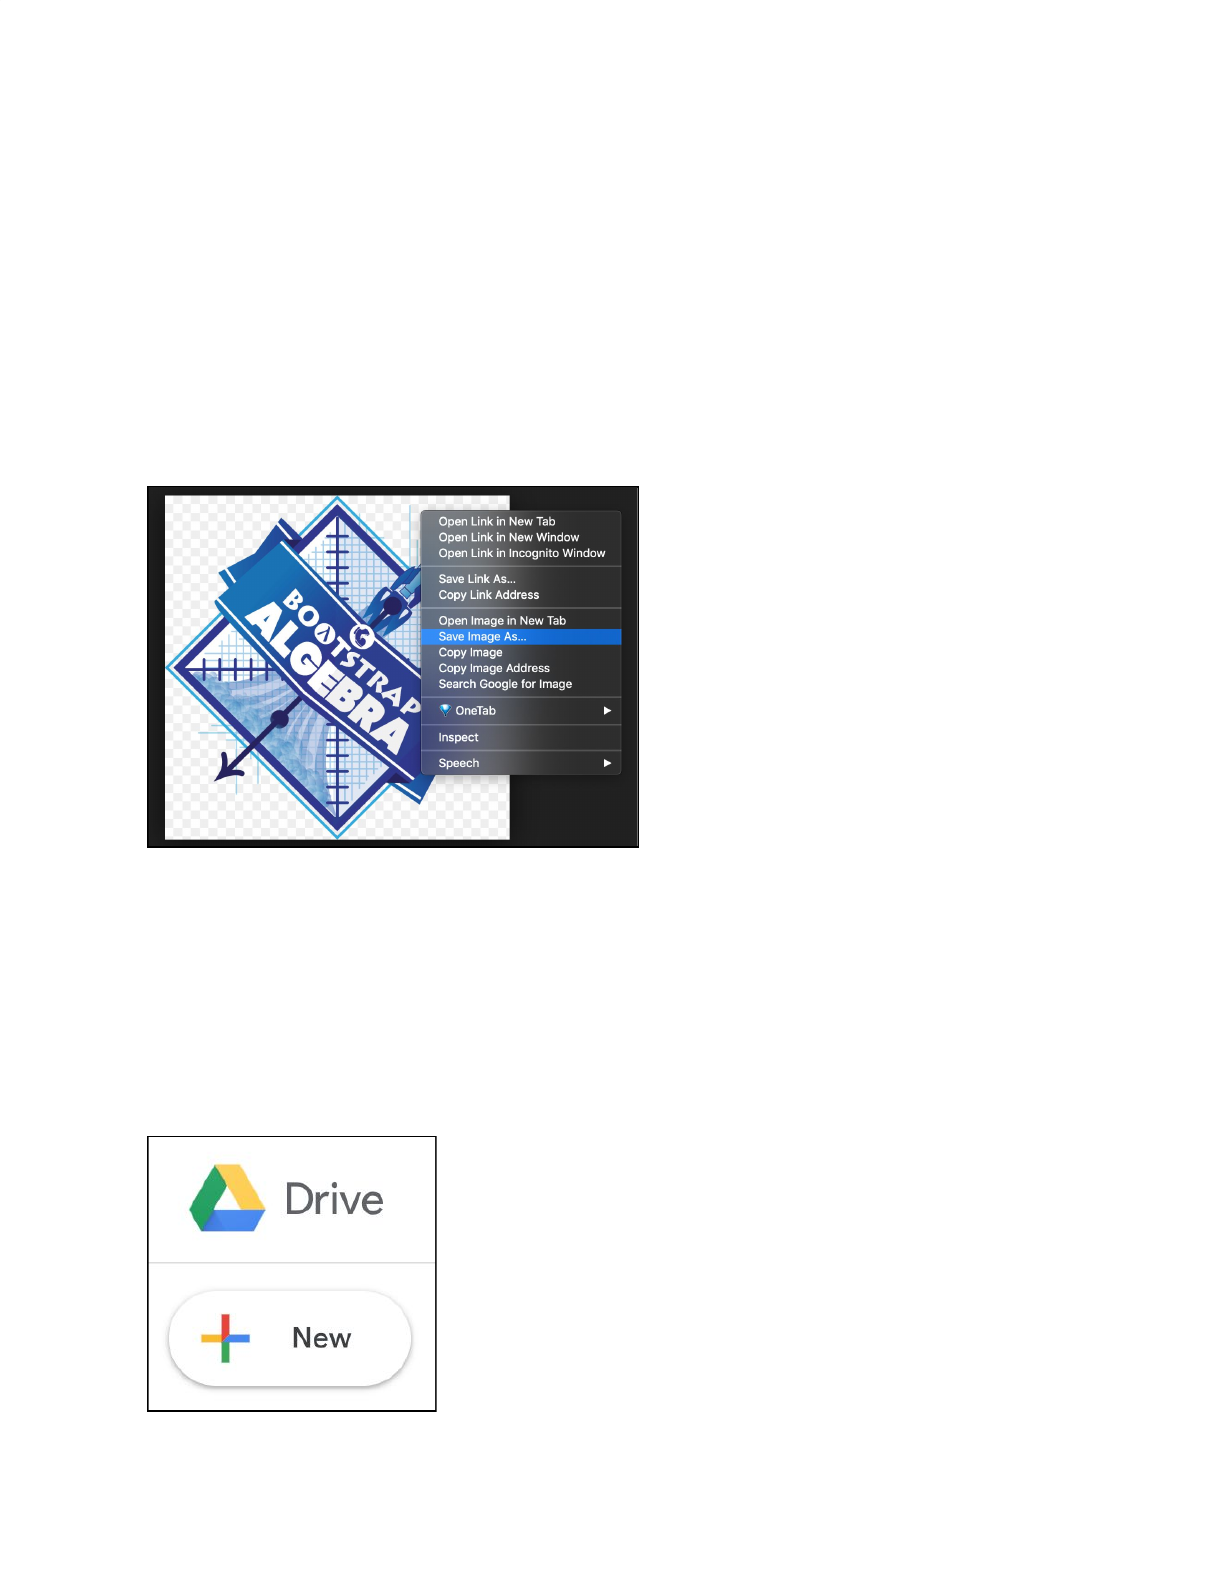
1. Find the image you’d like to save. If using Google Image Search or a
similar search engine, click once on the image to expand it.
2. Right-click (or 2-finger click on trackpad) on the expanded image.
3. Select “Save Image As” (or “Save Picture As”).
4. Name the file and select a location on your computer to save it to. (If
saving several images, you can make a folder to make uploading faster.)
5. Open Google Drive and sign in if needed.
6. Click the “New” button near the top left.
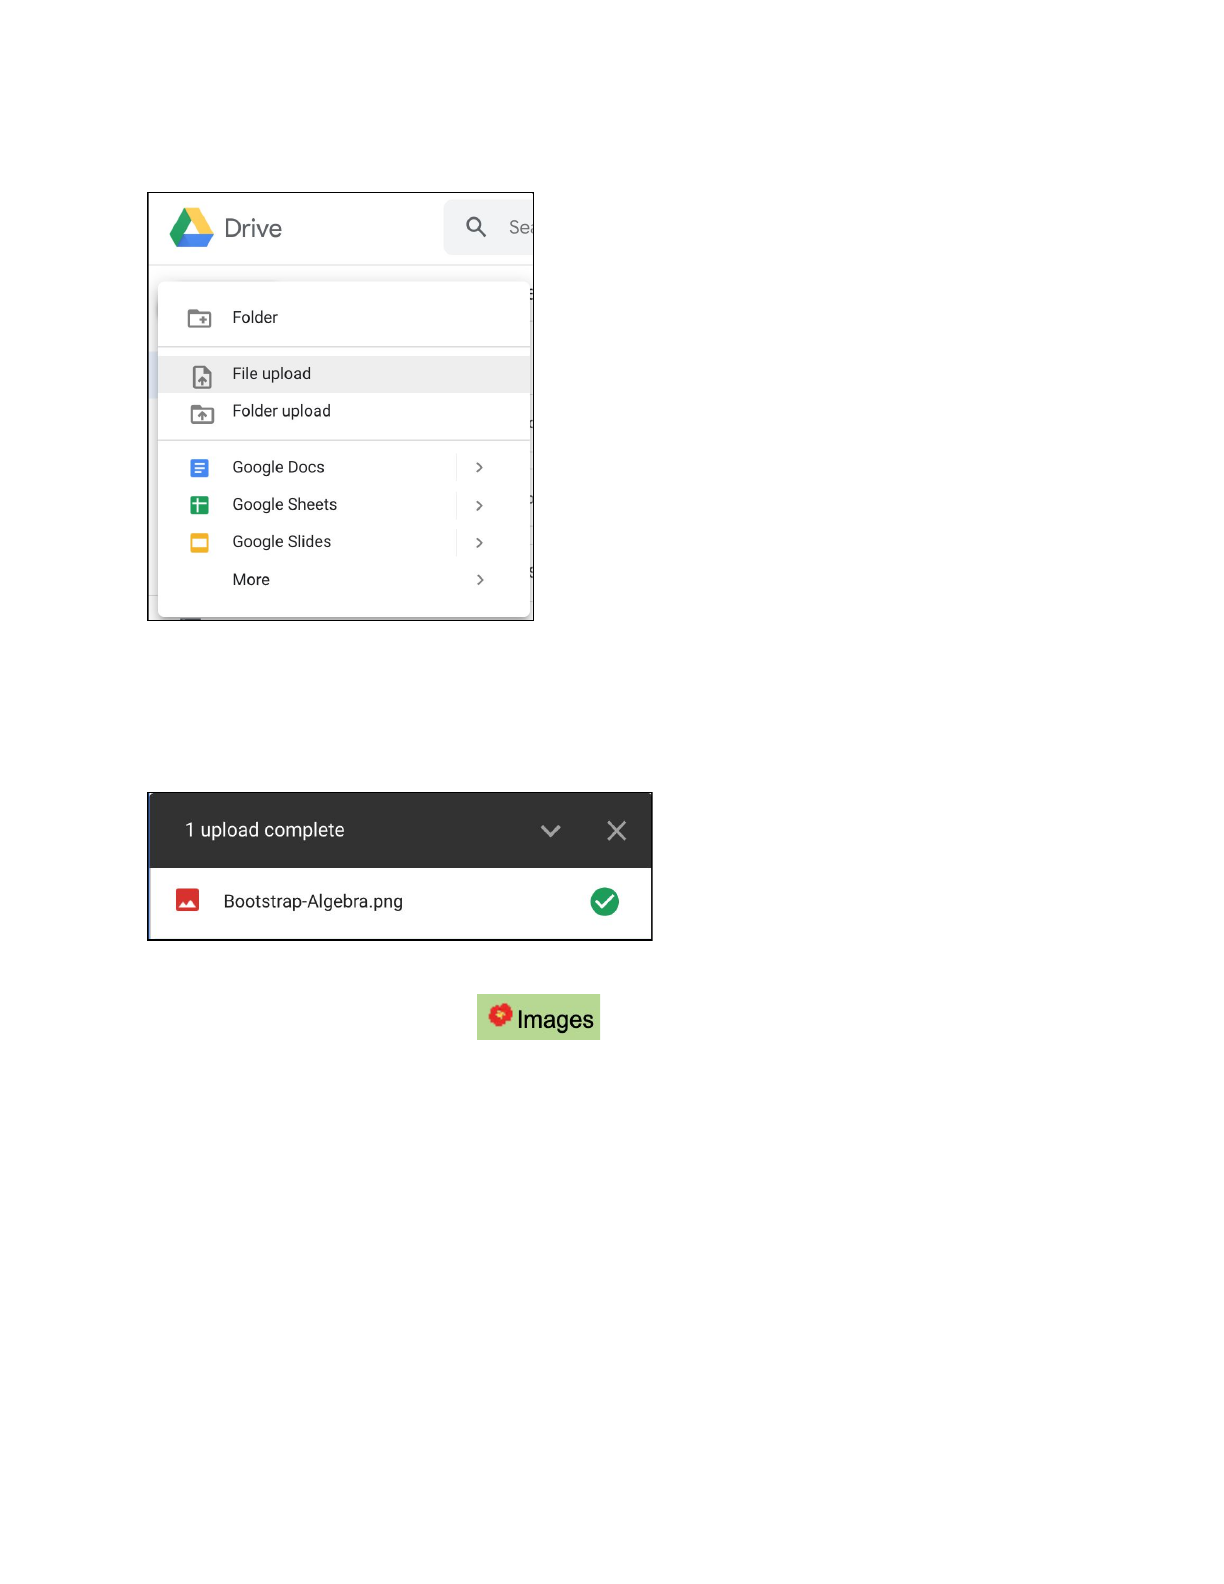
7. Select “File upload” (or “Folder upload” if you have a folder of images to
upload).
8. Select the file (or folder) you want and click “Open”.
9. Wait for the upload to finish (a green checkmark will appear).
10. In WeScheme, click the button and, if prompted, select the
Google account you’re using. (If the “Images” button isn’t there, you’ll
need to sign in to WeScheme.)
Select your image and you’ll see the code for your image (using
bitmap/url) appear!
