Scan Parser User Guide
Scan_Parser_User_Guide
User Manual:
Open the PDF directly: View PDF ![]() .
.
Page Count: 8

SCAN PARSER
USER GUIDE
FEA TUR I N G NES S US A N D LIG HTN IN G S C A N PA RS ING
Author: Jennifer Gregorio
7/17/2017
Revised: 6/7/2018
Revised by: Sara Bergman
Getting Started
Nessus is a security scanning tool which scans a computer and finds any vulnerabilities that hackers
could use to gain access to computers you have connected to a network. The Scan Parser is a tool that
can parse one or more files or folders of Nessus scans into a format that can be imported into other
applications. For each device recorded within the Nessus file, a series of data points are collected and
formatted for an import into another application.
Among the collected data points are the MAC addresses, which are used to match a device to a vendor
designated by the organization unique identifier. The vendor is then recorded and used to create the
appropriate Qualified name for the device, based on the vendor information. The oui.csv file contains
the first six alphanumeric characters of the MAC address and pairs it with a vendor. The vendors.csv file
contains a list of vendors and the qualified names for each.
To use the Scan Parser, you must have the oui.csv, vendors.csv, executable jar file, and the Nessus files
that you want parsed installed on your computer.
Run the executable jar. The window that opens will look like Figure 1:
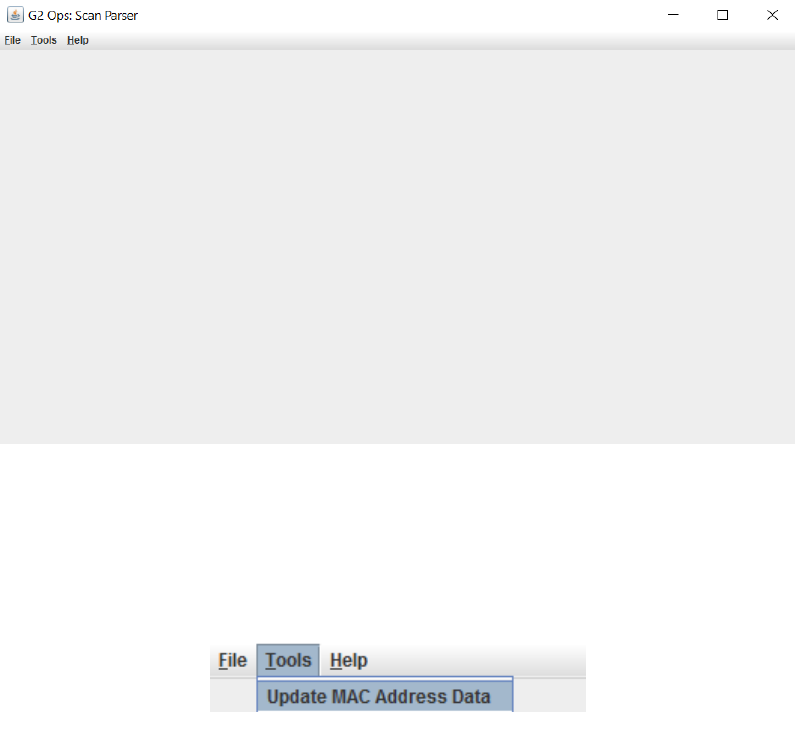
Before you begin using this tool, you want to make sure you have the most recent version of the oui.csv
file which includes the list of MAC addresses and vendors. In the top left corner click the Tools
dropdown menu and click Update MAC Address Data as seen in Figure 2.
Figure 2
Figure 1
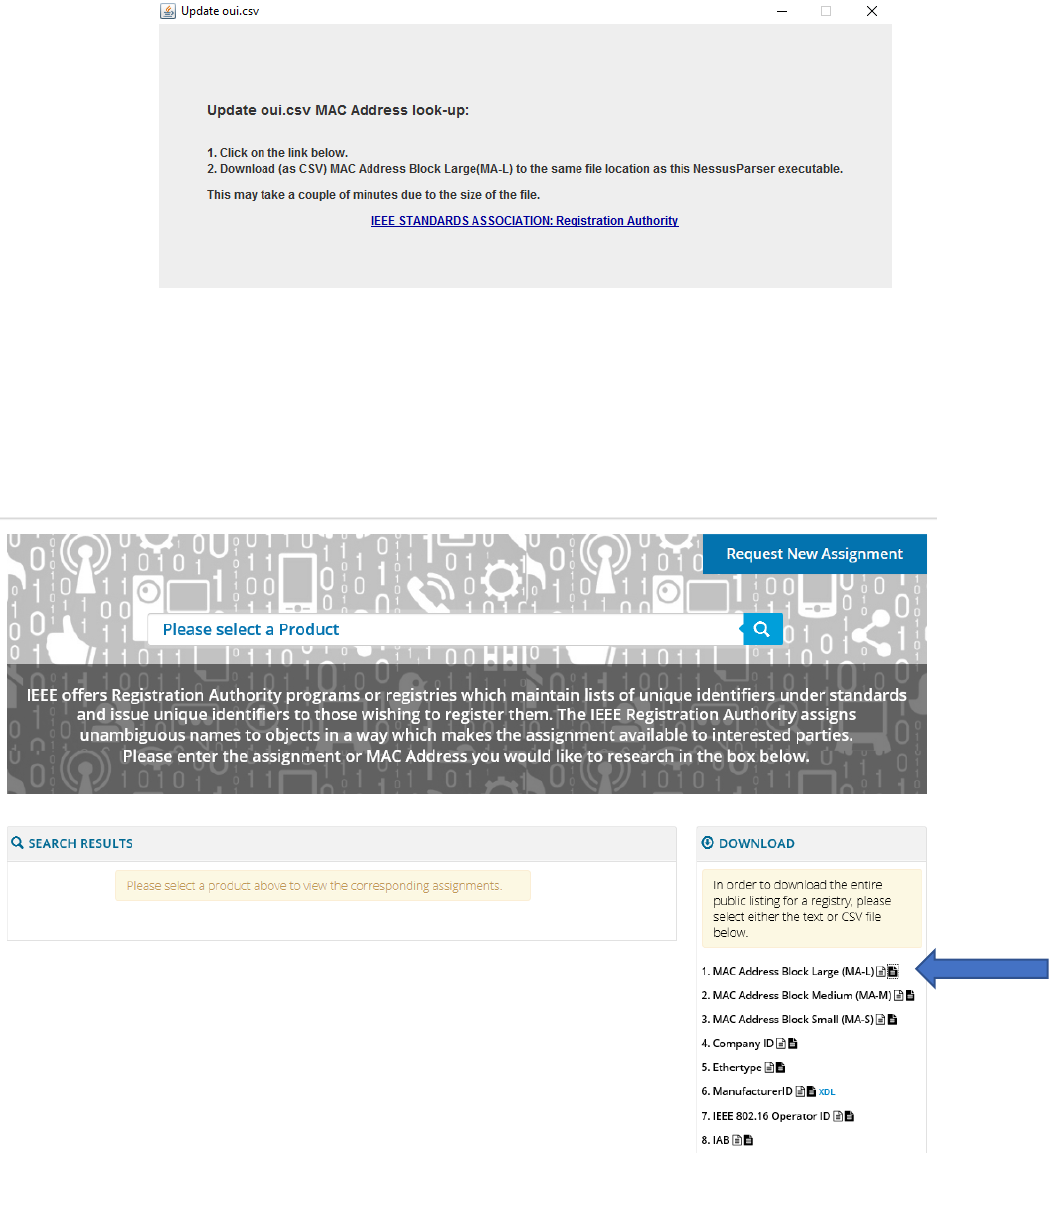
The window seen in Figure 3 will pop up with instructions on how to update your oui.csv file:
Upon clicking the link, you will be brought to the website (Figure 4) where you can download the most
recent version of the oui.csv (MAC Address Block Large). The blue arrow shows which file you should be
downloading. Make sure your oui.csv and vendors.csv files are all saved within a folder entitle
“parser_resources”, which should be located in the same directory as your executable jar.
Figure 3
Figure 4
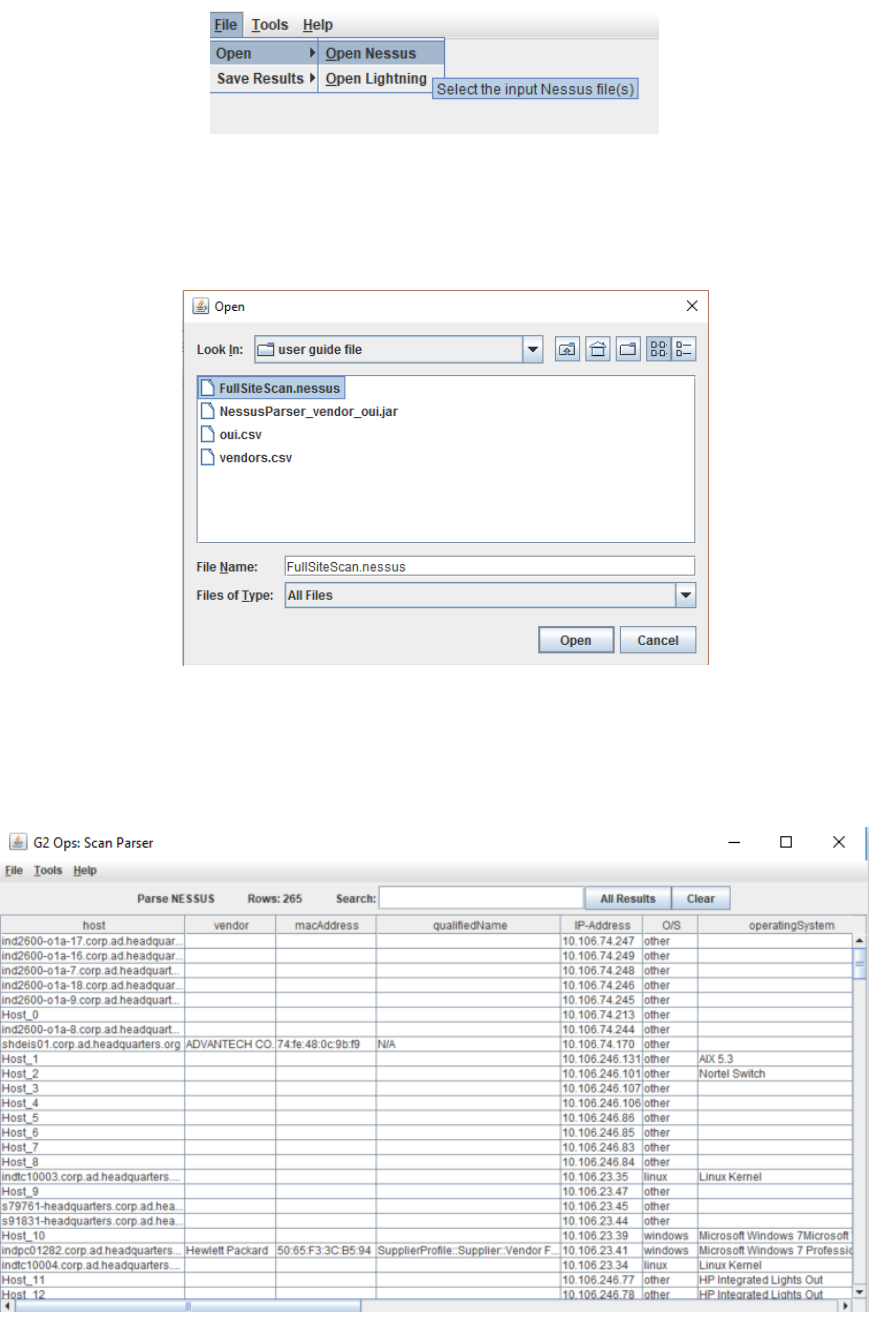
To open the Nessus files that you need parsed, click the File dropdown menu in the top left corner and
click Open.
A File Chooser will pop up as seen in Figure 6. From here you can navigate to the directory where you
have your Nessus files or folder containing your Nessus files.
You may also select Lightning scans by selecting Open>Open Lightning.
Select the files or folder containing your Nessus or Lightning files that you need and click Open, the
following screen (Figure 7) will show up:
Figure 5
Figure 6
Figure 7

To create the vendor file needed for the Scan Parser, navigate to the communications profile inside
MagicDraw. Create a report to extract vendors and set the file layout to include columns for the
sequence names, vendor names, and MagicDraw qualified names. The first few rows should look like
Figure 8.
Figure 8
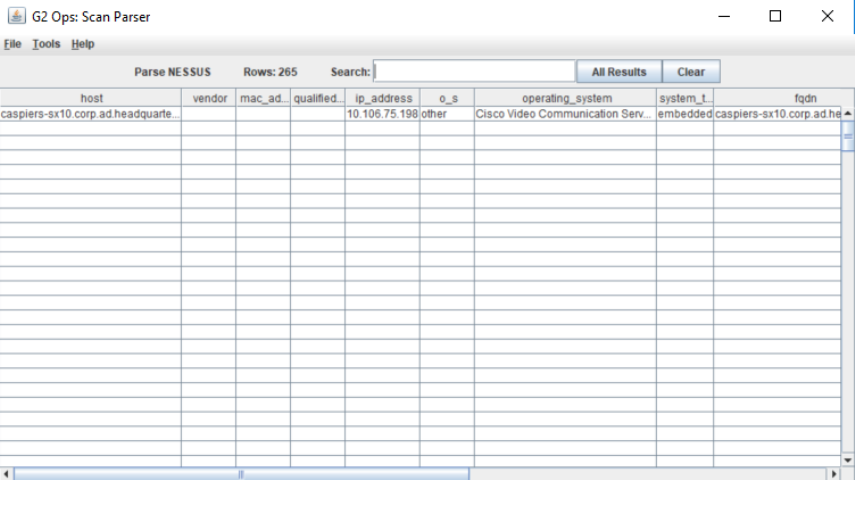
Filtering Results
In some cases, you may want to filter the results to only see a certain type of operating system, vendor,
FQDN, etc. At the top of the window in the Search bar you can type in a keyword and press Enter on
your keyboard to filter the results. As an example, Figure 9 shows the data filtered by the word “cisco”:
To get back to the original table without any filter results click in the All Results button to the right of
the Search bar. Click Clear to clear your data and open new files.
Figure 9
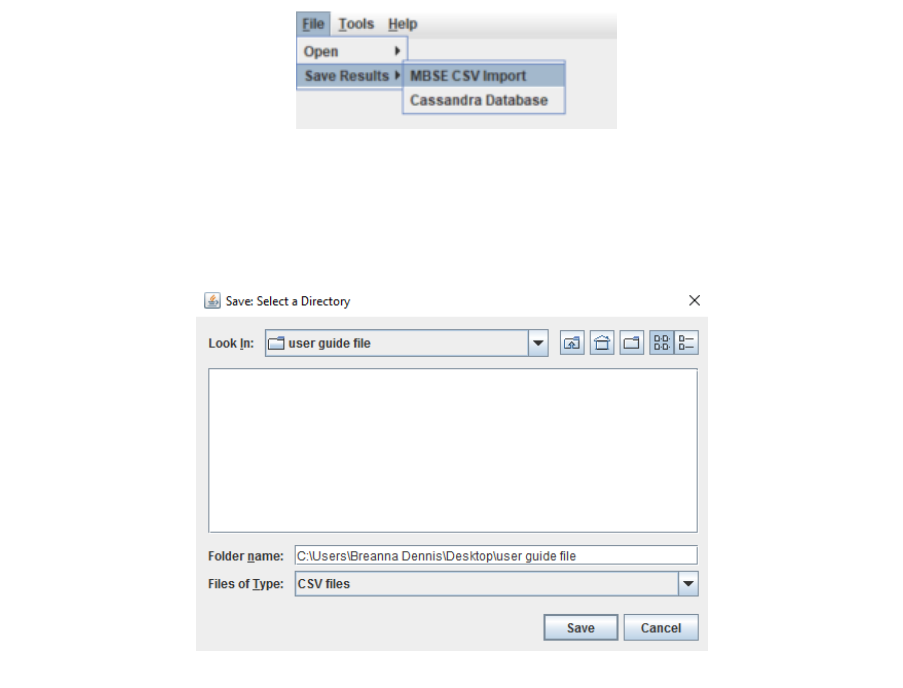
Saving Results as MBSE CSV Import
In the top left corner click File, then go to Save Results, and click MBSE CSV Import as seen in Figure 10.
A File Saver will pop up as seen in Figure 11. From here you can navigate to the directory where you
want to save the csv files and click Save.
A message will pop up telling you that four csv files (for Nessus parsing) or three files (for Lightning
parsing) have been saved to the directory path that you selected. Now, when you navigate to the
directory that you selected, you will see that a connector-ends.csv, host-ports.csv, host-
vulnerabilities.csv and an importSpreadsheet.csv file appear, which can now be imported into other
applications.
The importSpreadsheet.csv includes the information that is displayed within the window of the Nessus
Parser; connector-ends.csv records network connections between devices; host-ports.csv collects the
port, protocol, and service name within each host; and host-vulnerabilities.csv includes all the cvss base
and temporal scores that have been attributed to each host. Lightning output files will not include a
host-vulnerabilities.csv output file. Note that if you imported multiple files to be parsed, these files will
be aggregated to the same export csv files.
Figure 11
Figure 10
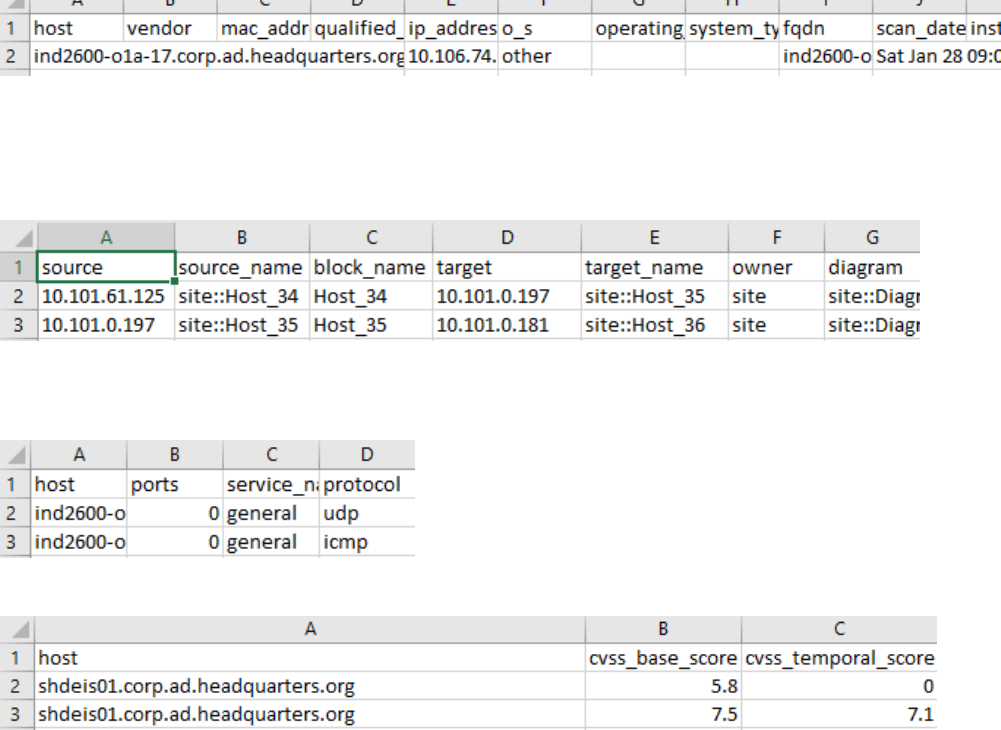
Here is what the first few lines of each file should look like:
importSpreadsheet.csv:
connector-ends.csv:
host-ports.csv:
host-vulnerabilities.csv
