Sectional Assembly.compressed
2016-10-03
: Sectional Assembly.Compressed sectional assembly.compressed images p55 p4dbimg
Open the PDF directly: View PDF ![]() .
.
Page Count: 2
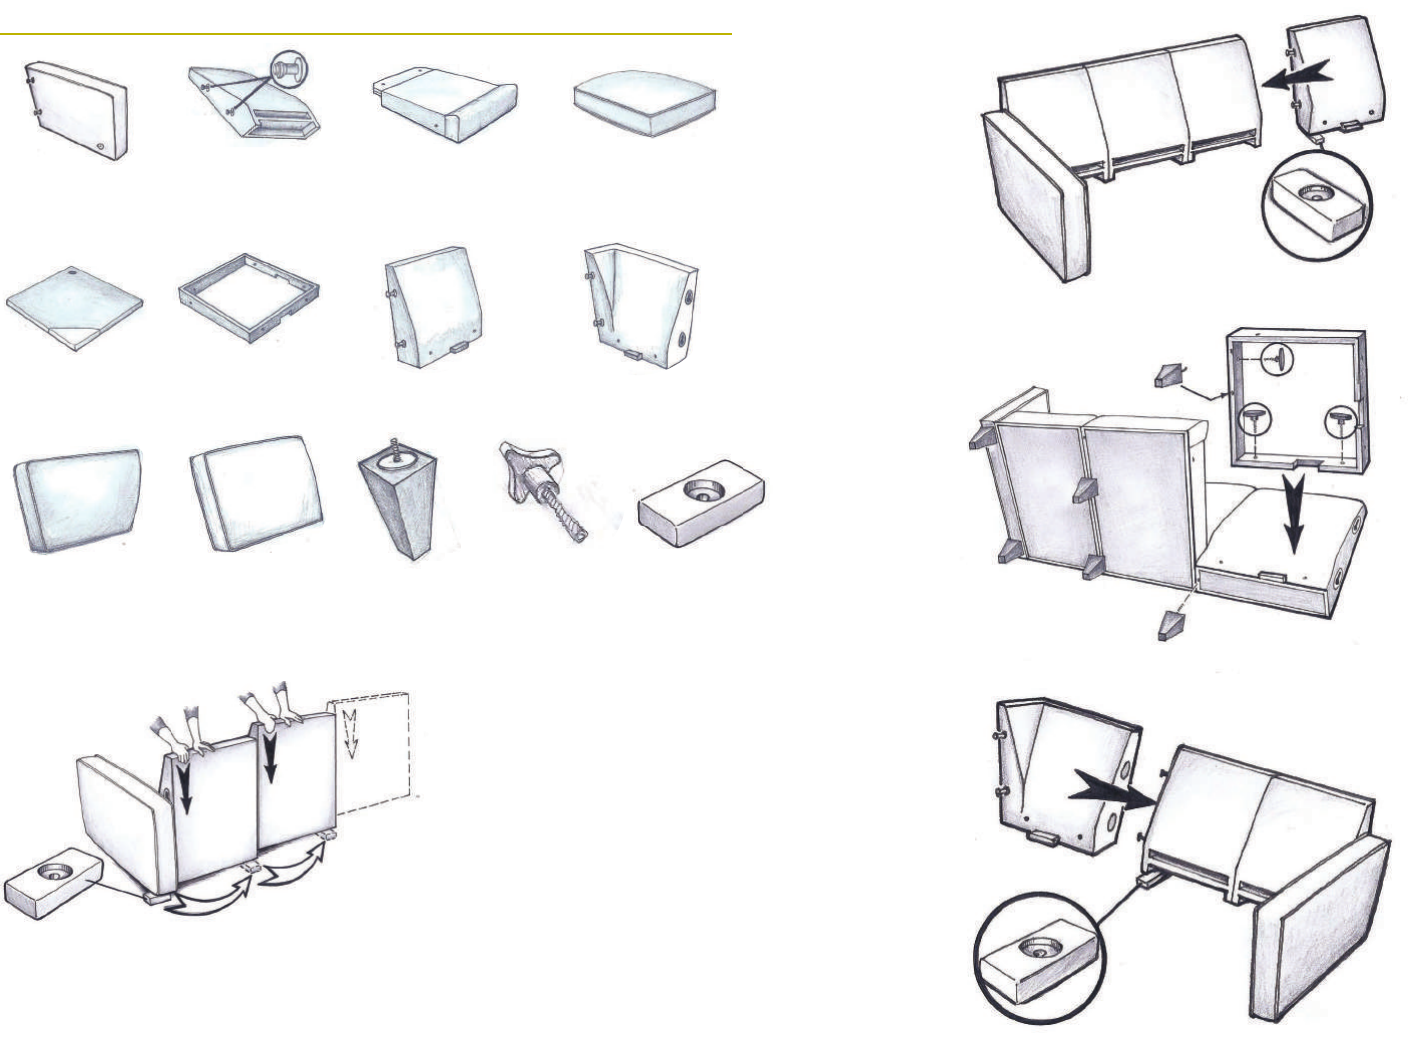
1. Complete steps 1 through 4 of the Sofa &
Loveseat Assembly to create the Le Facing
Assembly of your sectional (Fig. 5).
2. Place the Block under the Le Corner Back
and align the connectors on the Le Corner
Back with the openings on the Le Facing
Assembly. Insert the connectors into the
openings and push down on the Le Facing
Assembly to engage the connectors (Fig 10 & 11).
3. Turn the Assembly on its back and insert the
Seat Deck with the yellow arrow into the Seat
Back with the yellow arrow (Le Facing Seat
Back). Thread in two Thumb Bolts through the
1 Seat Deck per
Seat
7 Thumb Bolts
1 Seat Back per
Seat
SECTIONAL ASSEMBLY
2 Arms
1 Block
Seat Cushions
Back Cushions 12 Legs
Fig. 10
Corner Deck
1 Corner Back
1 Corner Frame 1 Left Corner Back 1 Right Corner Back
Fig. 11
Fig. 12
boom of the seat deck into the Seat
Back. Repeat for each Seat Deck (Fig 7).
4. Aach the Corner Frame to the Corner
Back and the Right Facing Seat using three
Thumb Bolts (Fig 12).
5. Join the Seat Decks to each other by
threading the Thumb Bolts from the le
side Seat Deck into the next Seat Deck.
Start all Thumb Bolts before tightening
(Fig 7).
6. Aach the Dust Cover for each Seat
(Fig 8).
7. Aach the Legs to the boom of the
frame (Fig. 8).
8. Assemble the Right Facing Assembly
by connecting the Seat Backs to the Right
Arm, just as you did to create the Le
Facing Assembly (Fig 6). Complete for
each seat.
9. Aach the Right Corner Back to the
Right Facing Assembly placing the Block
under the Right Corner Back and inserting
the connectors into the openings on the
Right Corner Back. Push down to engage
the connectors (Fig 13).
10. Turn the Right Facing Assembly on
its back and aach the Seat Decks, Dust
Cover, and Legs just as you did for the
Le Facing Assembly.
Fig. 13
Questions? Call us at 866 746-6303
homeware.com
homeware
SM
(but let’s not say goodbye)
homeware
SM
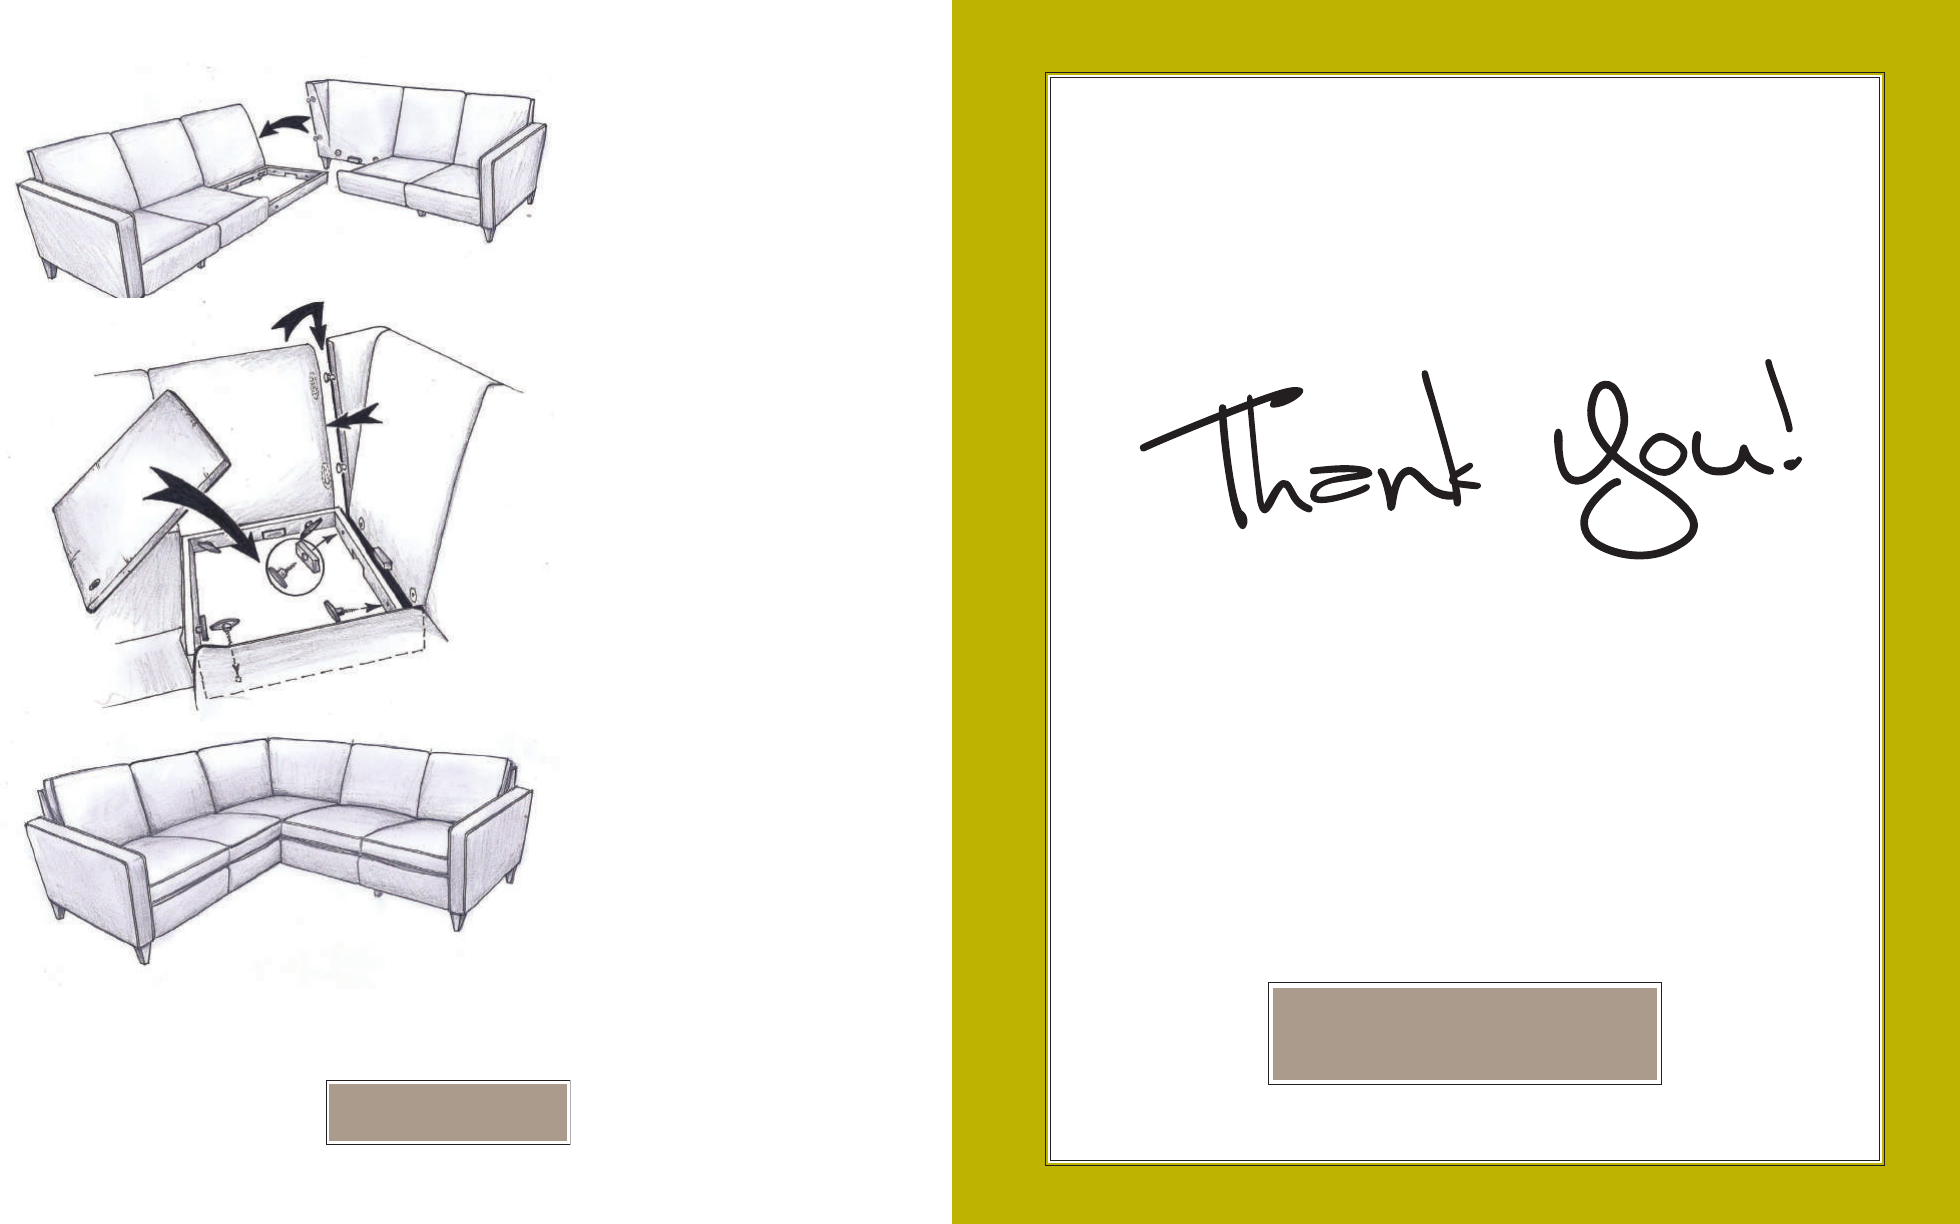
11. Turn both the Le and Right
Facing Assemblies upright and
move them into alignment with each
other (Fig 14).
12. Place the Block under the back
leg of the Le Facing Assembly
and push the corner parts together,
inserting the connectors in the
openings.
13. Remove the Block and push
down on the top of the Le Facing
Assembly to engage the connectors.
14. Finish connecting the Corner
Frame to the Right Facing Assembly
using three Thumb Bolts (Fig. 15).
Helpful Hint: the block can be
fastened with one of the Thumb
Bolts to the inside of the Corner
Seat Frame so it is handy if you
want to expand or contract your
sectional.
15. Add the Corner Deck with the
Cover Fabric facing the front corner
(Fig 15).
16. Add Seat Cushions and Back
Cushions.
Enjoy!
Fig. 14
Fig. 15
Fig. 16
