Microsoft Sig Page Generator Instructions User Guide
User Manual:
Open the PDF directly: View PDF ![]() .
.
Page Count: 29

How to Code Your Documents
for Signature Page Generator
Drew Gandy
Holland & Knight LLP
Atlanta - x48518

Background on How Sig Page Generator Works
•You add hidden text code on each signature page for each of your
documents to indicate to the software that the current page is a signature
page and who signs it.
•The hidden text looks like this: “##Signature Page-Borrower##” with “Borrower”
being replaced with whoever is signing the page.
•Because this text is hidden, it typically doesn’t show up (unless you are viewing
formatting in MS Word) and will not appear when printed or if a PDF is created.
•The software then opens each document and searches for that hidden text.
•When the hidden text is found, the software creates a PDF of that page,
naming it for the appropriate signatory.
•When all of the documents have been processed, the software collates the
individual PDF pages into separate packets for each signatory.
2
Working with Hidden Text:
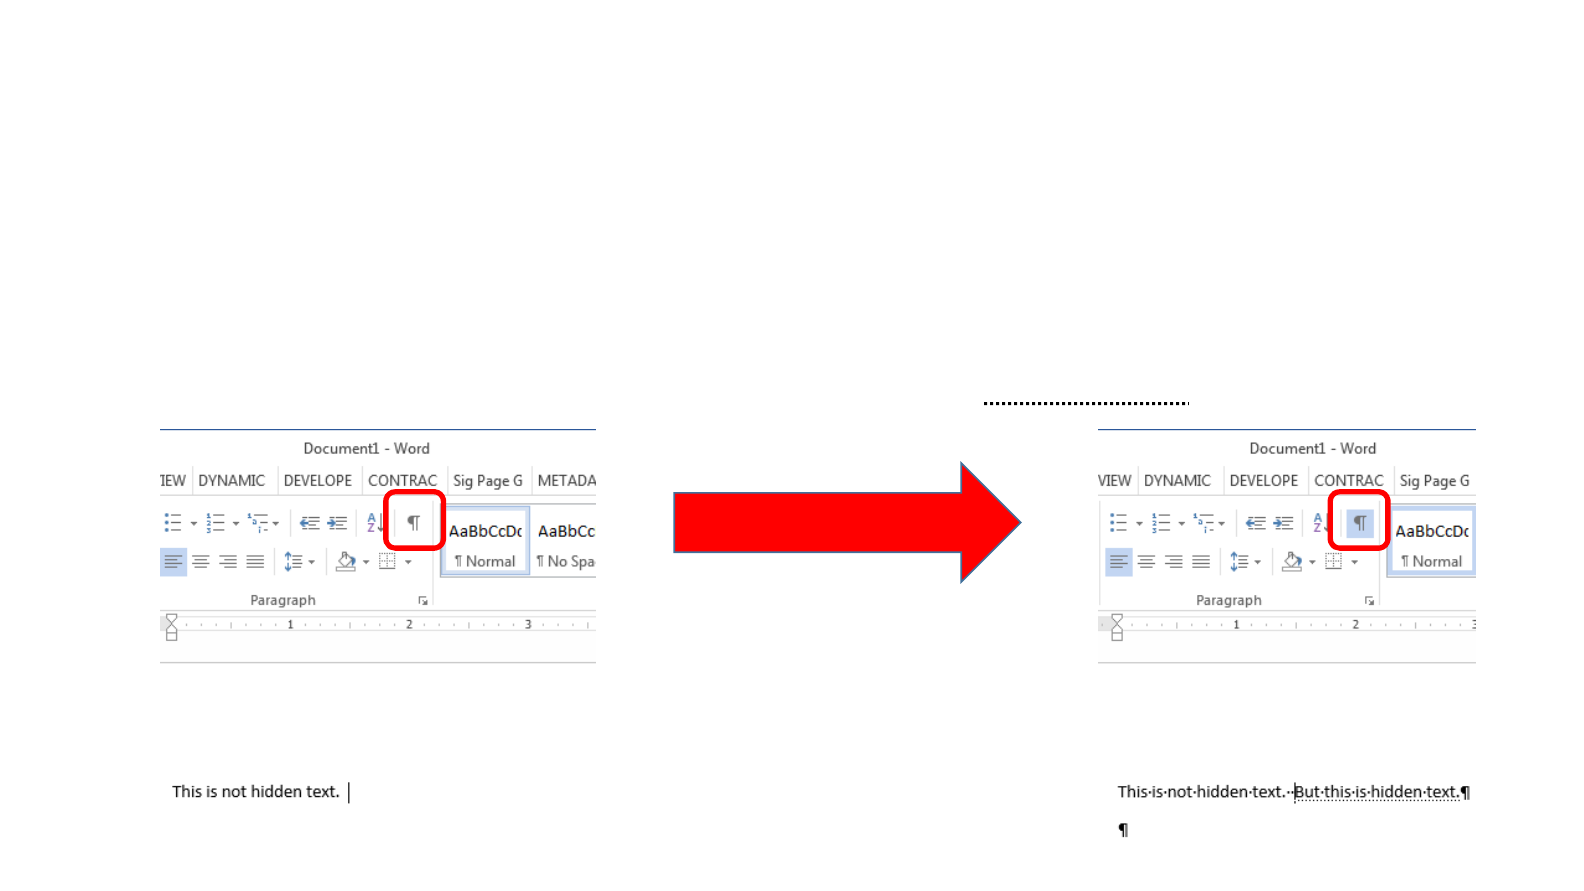
Showing/Hiding Hidden Text
•To show/hide hidden text, click the ¶ icon in the Paragraph section of
the Home ribbon.
•Note the examples below. Hidden text has a dotted line underneath.
3
Working with Hidden Text:
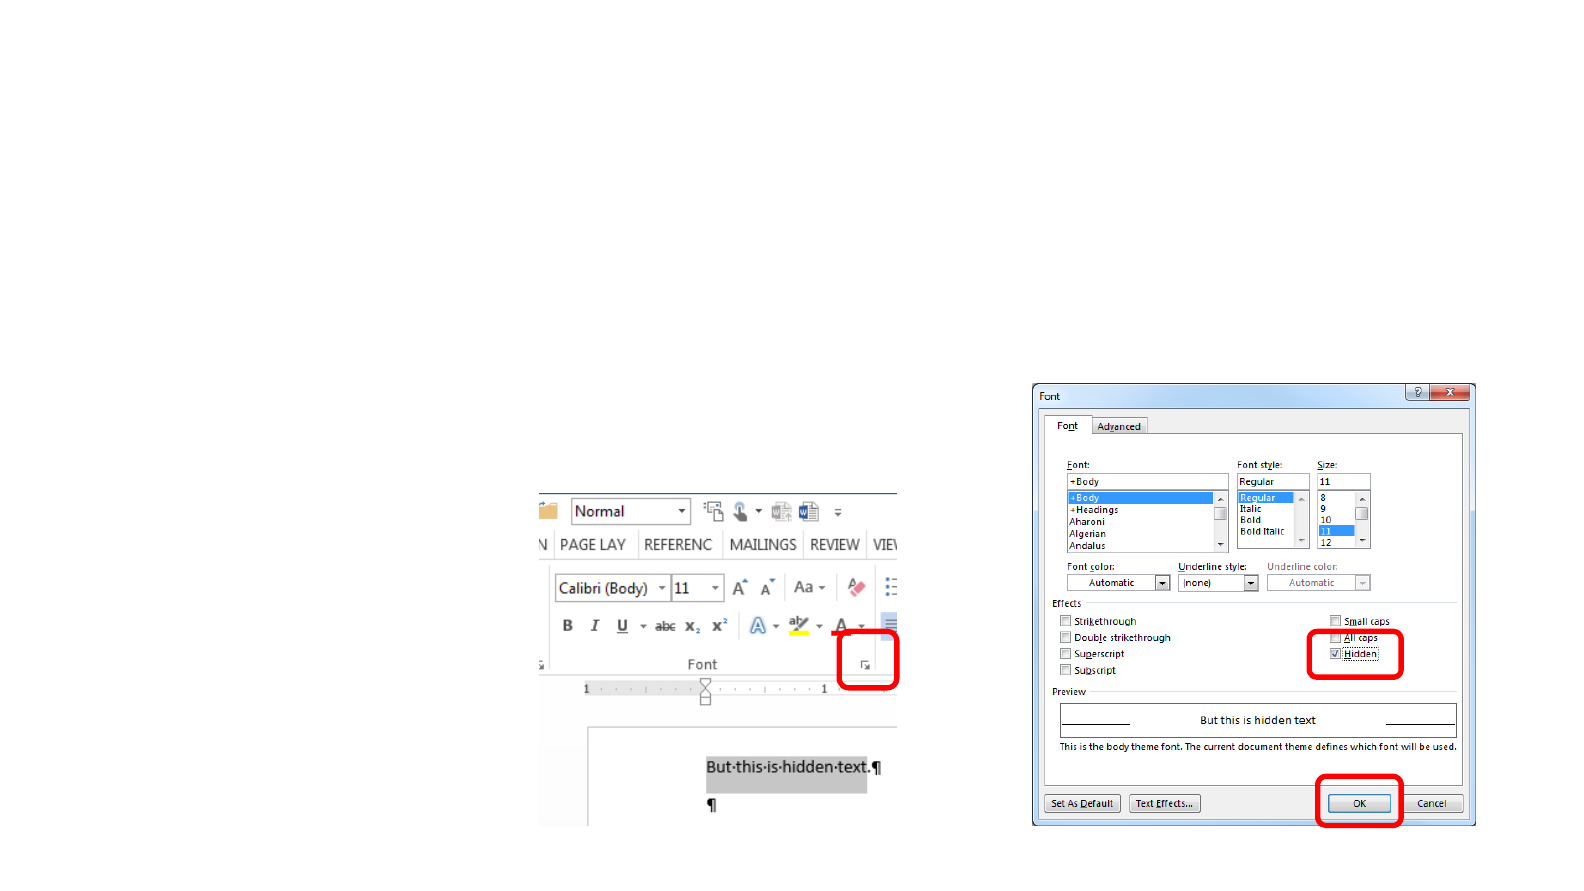
Creating Hidden Text
•Select the text you want to make hidden.
•Click the arrow in the bottom right corner of the Font section of the
Home ribbon.
•Select the “Hidden” checkbox
in the effects list.
•Then click “OK”.
4

Coding Your Documents
•On each signature page, add the following snippet as hidden text :
##Signature Page-[Signatory]##
•Replace “[Signatory]” with the party that is signing that page.
•e.g. ##Signature Page-Borrower##
•If more than one party signs the same page, add a snippet for each
party.
•e.g. ##Signature Page-Borrower## ##Signature Page-Lender##
5
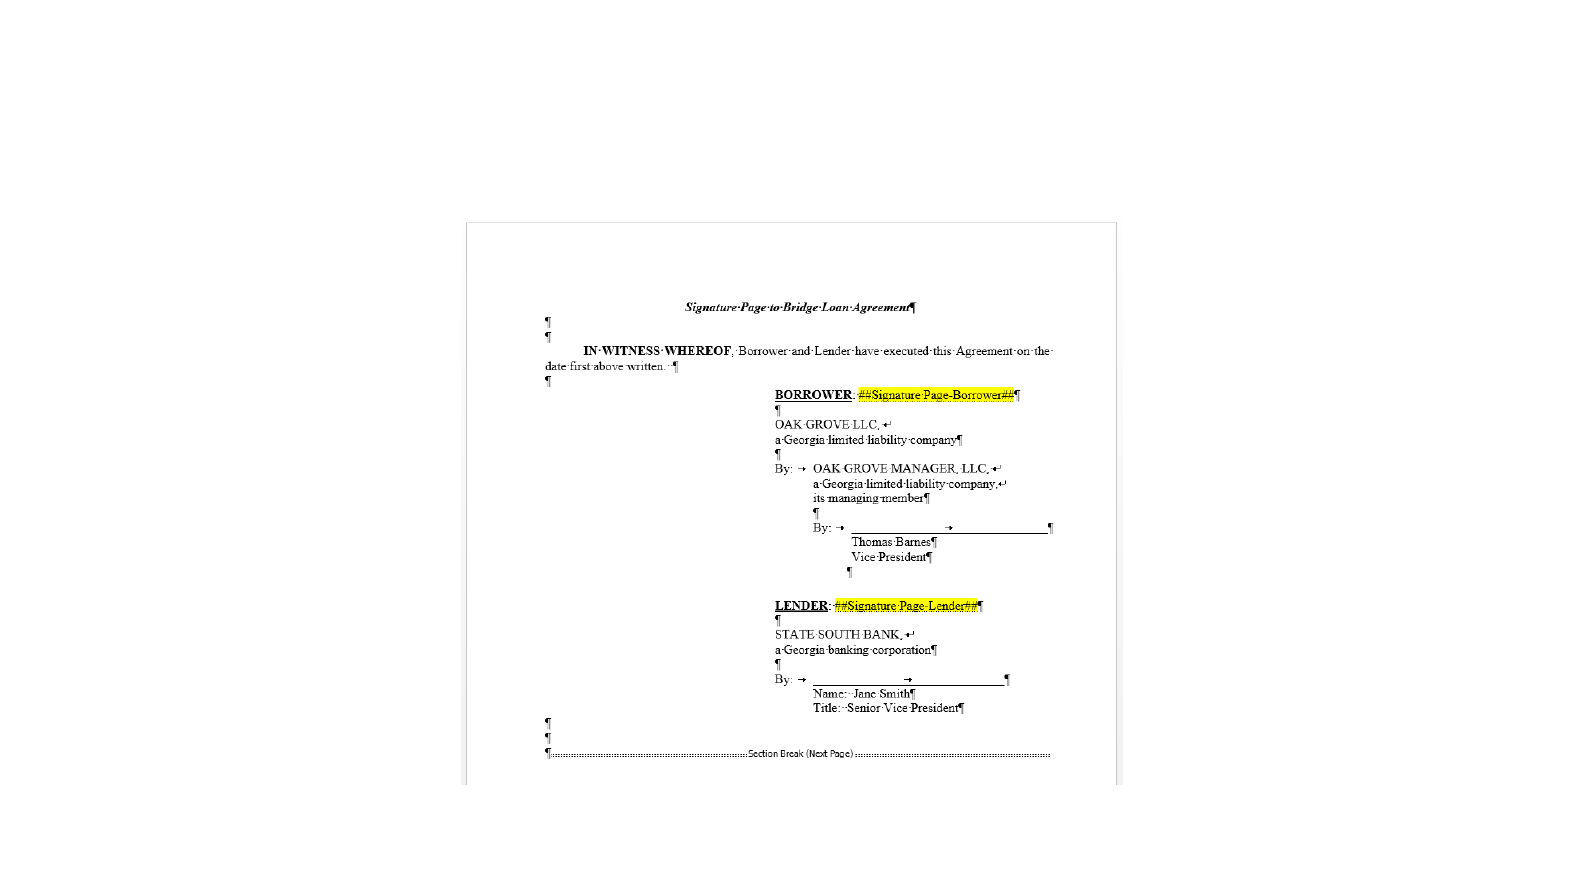
Example
(highlighting is only for reference purposes and not necessary.)
6

Advanced Coding
•If you only want a certain number of copies of a specific signature page to be generated, even if multiple
copies of other pages are being generated, add [Limit=#], where # is the maximum number of copies.
•e.g. ##Signature Page-Borrower [Limit=1]##
•This is helpful, for instance, when Borrower signs 3 copies of all of the loan documents, but only signs 1 copy of the
promissory note.
•See SPG Example – Promissory Note.docx for an example
•If a signature page encompasses more than one page, you can use [Pages=#], where # is the total number of
consecutive pages this signatory signs
•e.g. ##Signature Page-Borrower [Pages=2]##
•This is useful where a party signs one signature page, and a notary acknowledges that party’s signature on the next page. By
including [Pages=#], those pages will always be kept together in the packet.
•See SPG Example – Deed of Trust.docx for an example
•Separate packets can be made for the same party by naming the party differently in the snippet.
•e.g. ##Signature Page-Borrower (Recordable) ## for signature pages to be sent to the title company, and ##Signature Page-
Borrower (Non-Recordable) ## for signature pages that are to be sent to H&K.
•This is useful when a party is sending signed packets to different destinations.
•You can put any text (other than #, [, ] and -) where [Signatory] is in ##Signature Page-[Signatory]##.
•See SPG Example – Deed of Trust.docx for an example
7
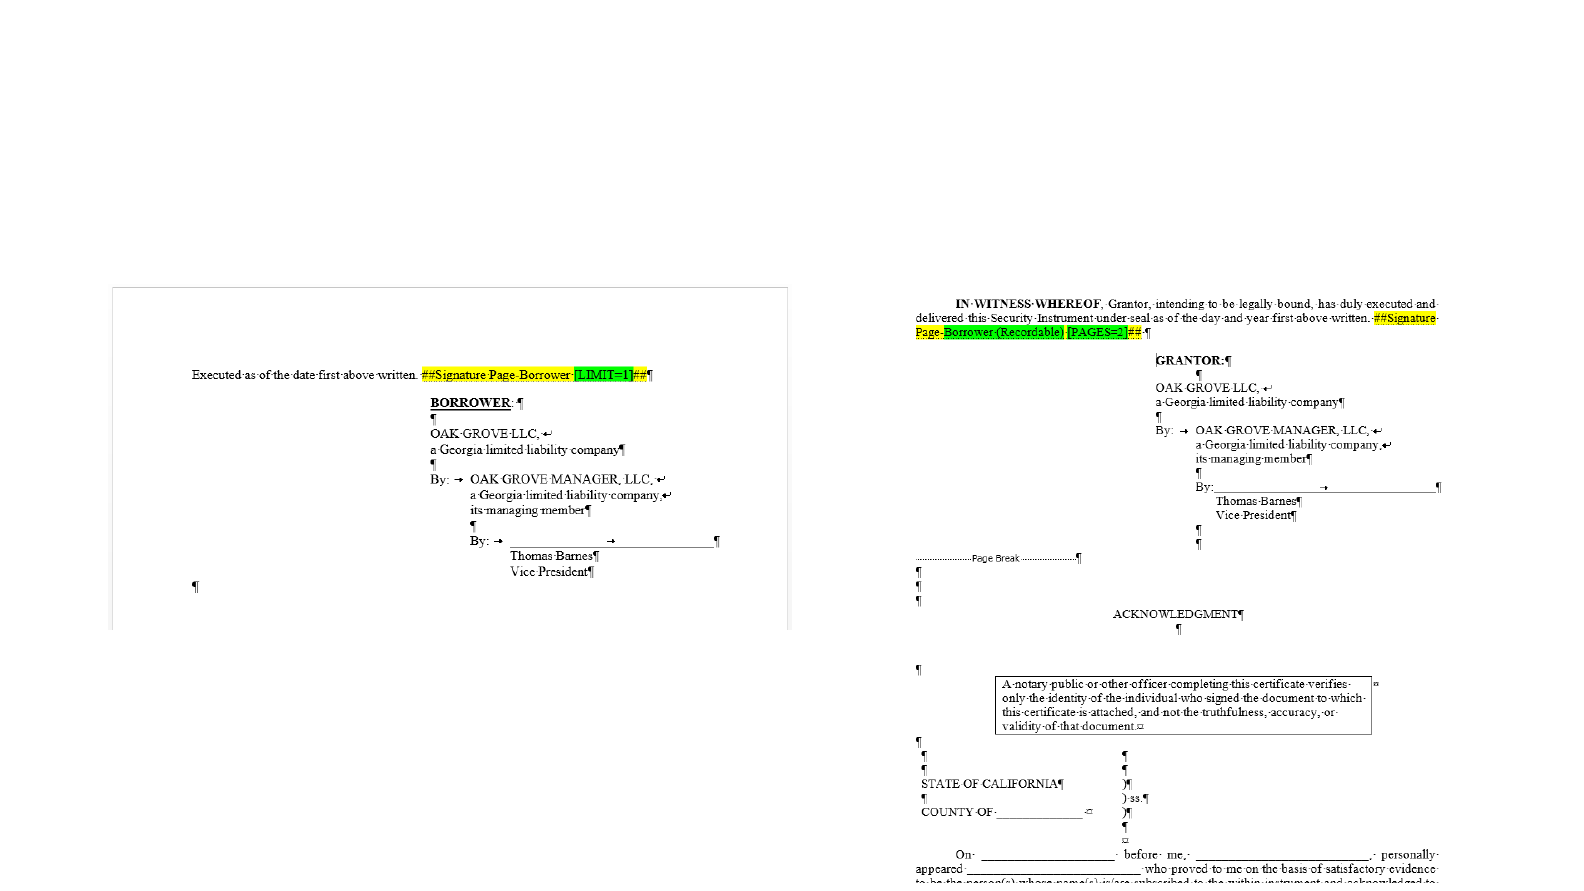
Examples
(highlighting is only for reference purposes and not necessary.)
[LIMIT=#]
[PAGES=#] and Separate packets for same
signatory (note notary block after Page Break)
8

Things to Keep in Mind…
•I try and insert the hidden text snippets in the signature page lead-in sentence or
another location that is unlikely to be edited (as opposed to inserting it within the
signature block). If the signature block is updated at a later date by copying and
pasting a new block over the old block, the snippet may be deleted inadvertently.
•If the same party signs the same page more than once, and you only want that
party to sign a single page (as opposed to signing separate pages for each party),
you will want to only include a single snippet for all of the related parties.
•For example, if the same individual signs for both the Guarantor and Borrower, and the
Guarantor and Borrower both sign the same signature page, you would only insert
##Signature Page-Borrower## and not include ##Signature Page-Guarantor##, because you
ultimately only want 1 signature page for both Borrower and Guarantor.
•See SPG Example – Guaranty.docx for an example
•If your signature page breaks across 2 pages when hidden text and formatting is
visible, that signature page may not output correctly.
•It is important to make sure your signature page is entirely on one page.
•This occurs most often when there is a signature block and notary block on the same page.
•See SPG Example – Sig Page That’s Too Long.docx for an example
9

How to Generate
Signature Pages
Drew Gandy
Atlanta - x48518
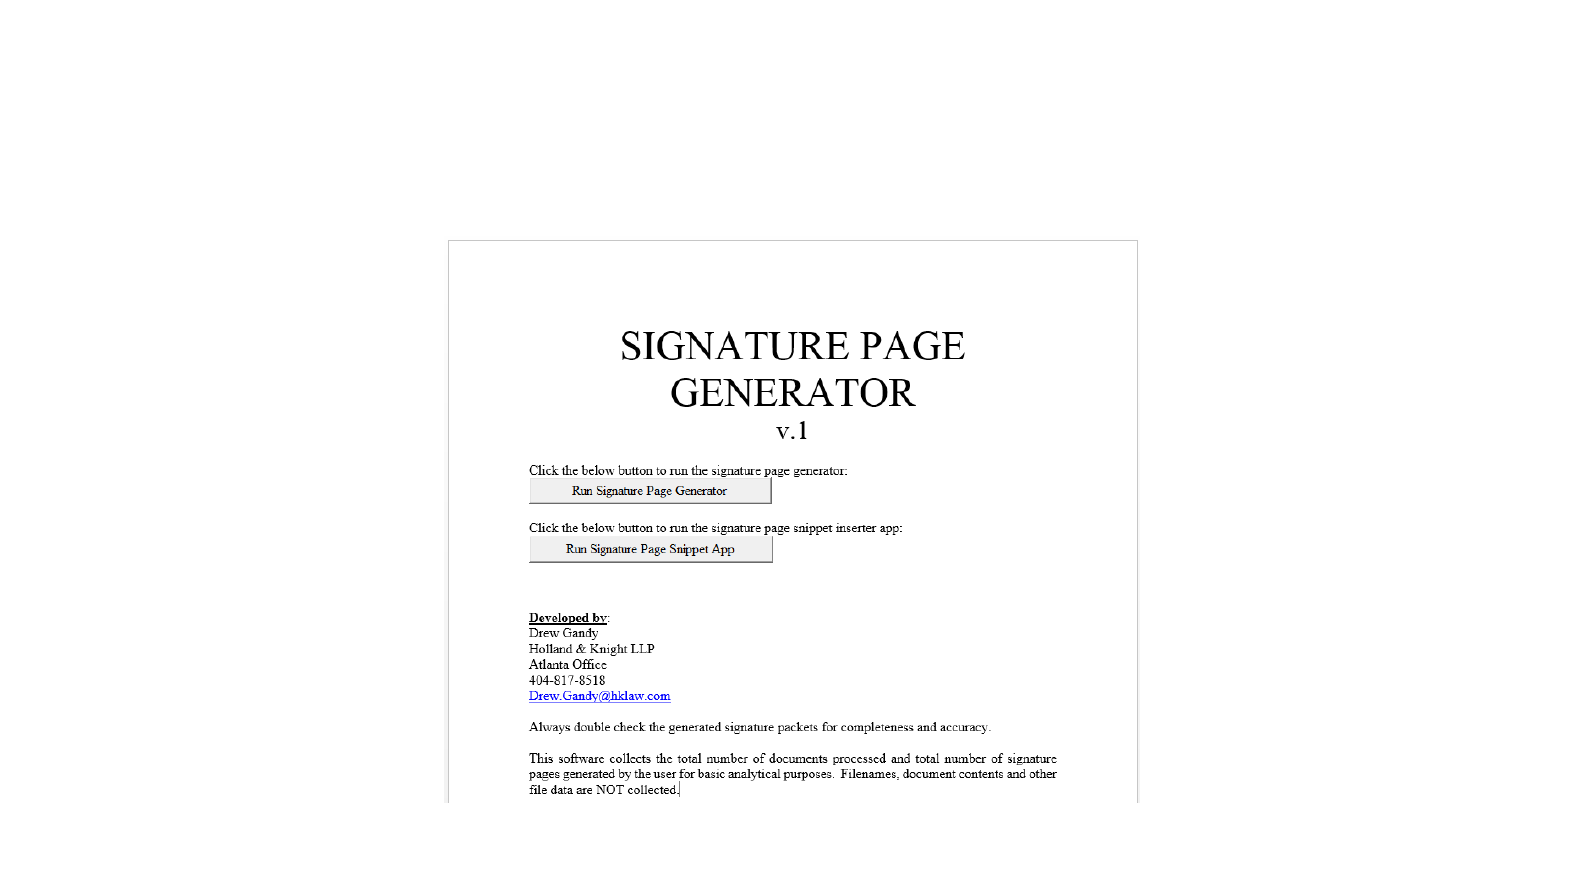
Open the “Sig Page Generator.docm” document
11
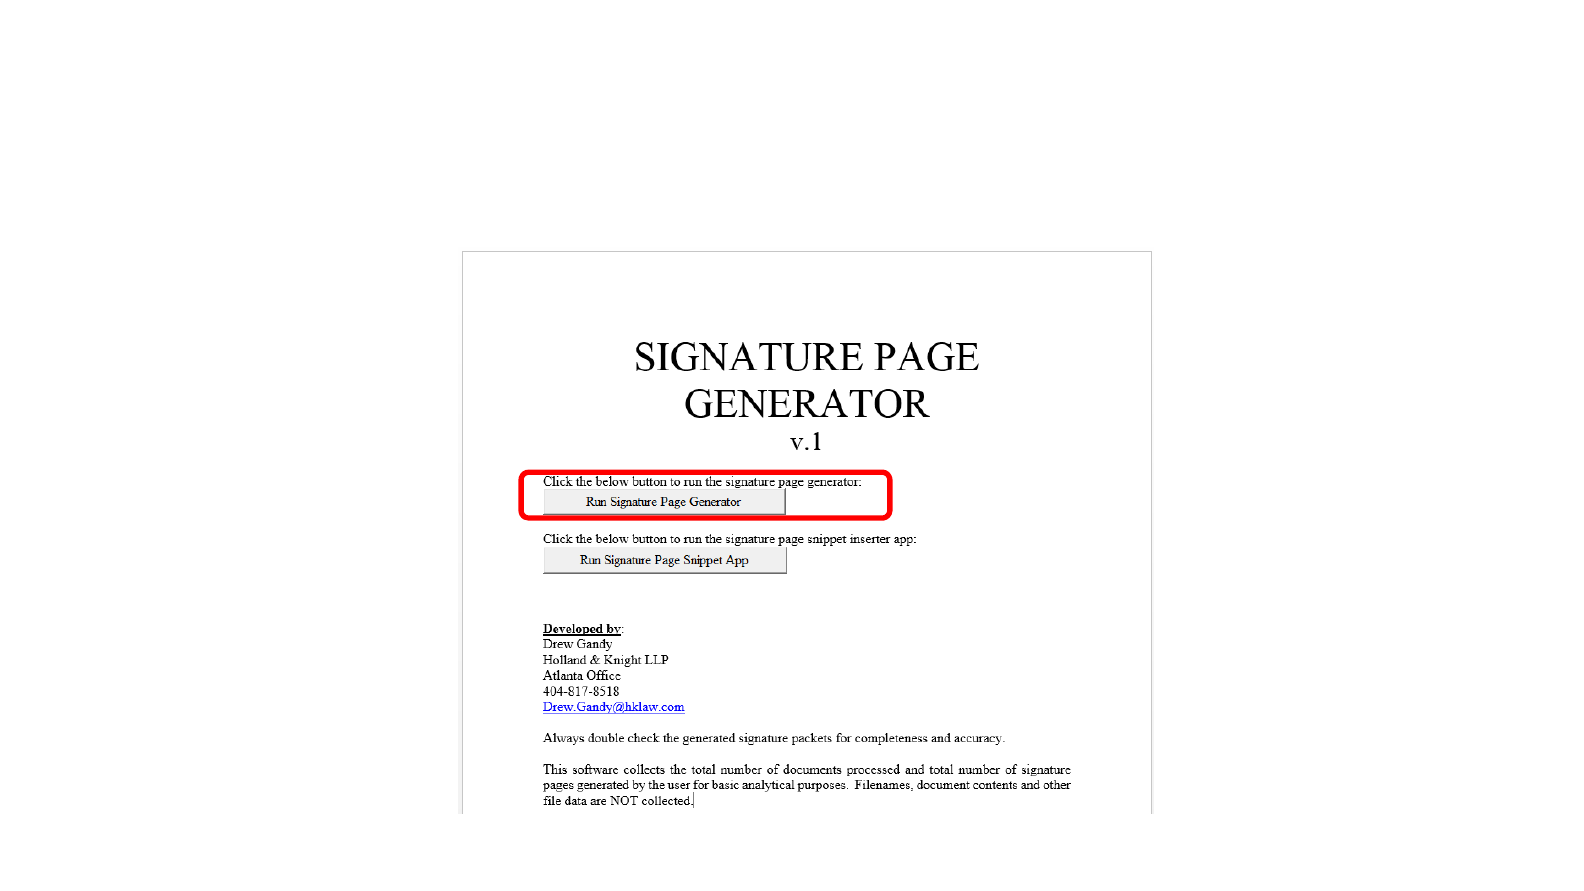
Click “Run Signature Page Generator”
12
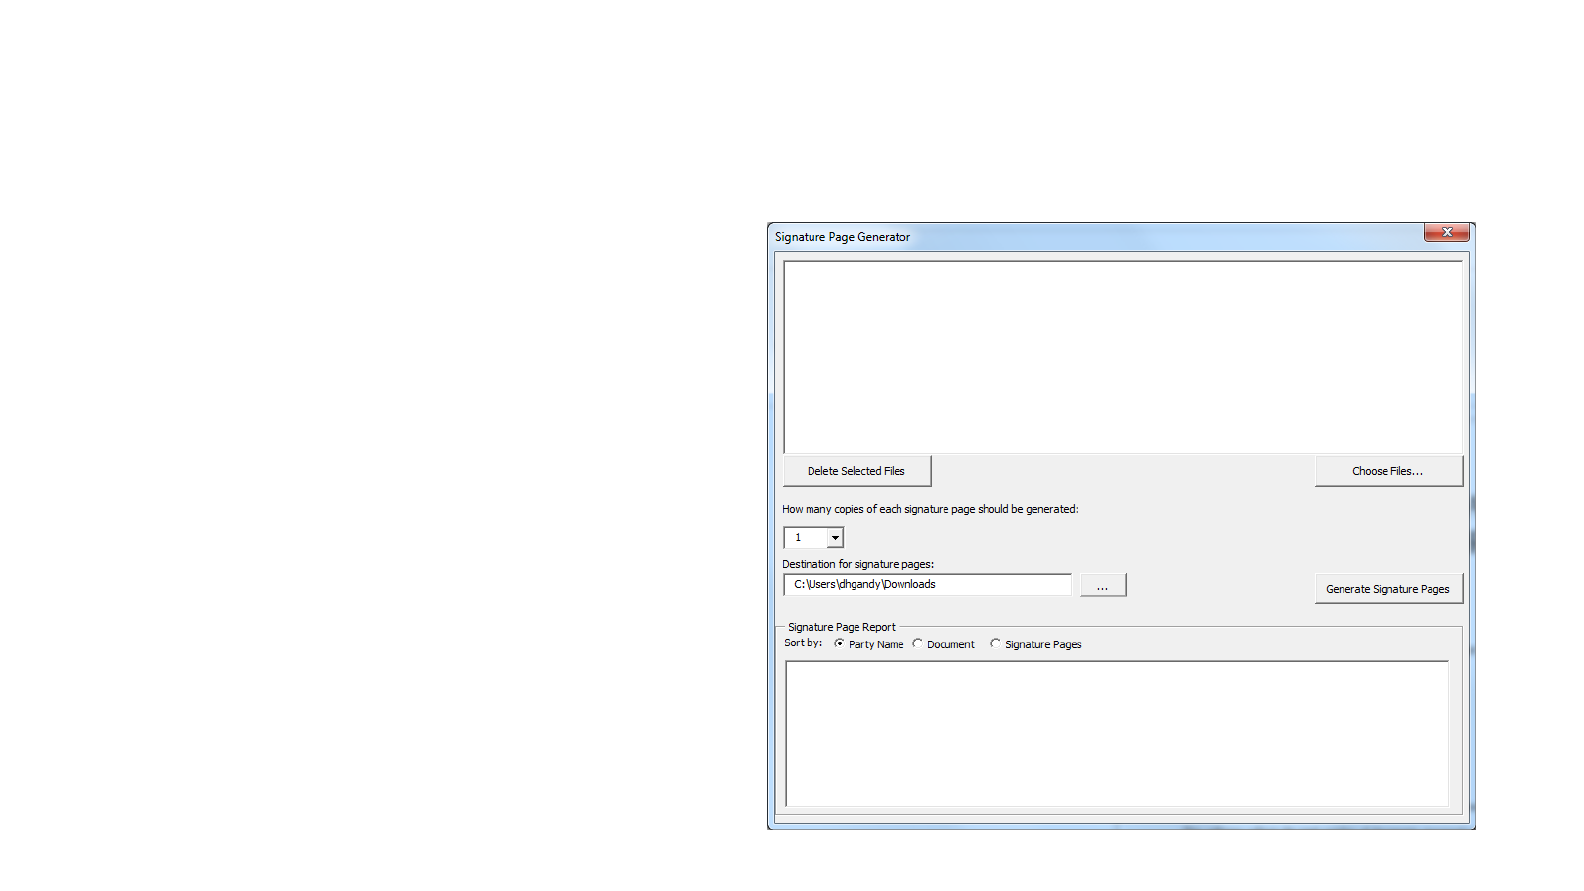
This is the Signature Page Generator interface
•From here you can:
•Add and remove your
documents from the list of
documents to process
•Select how many copies of
each signature page you want
•Select the destination for the
signature packets
•Review the report of all
signature pages generated
13
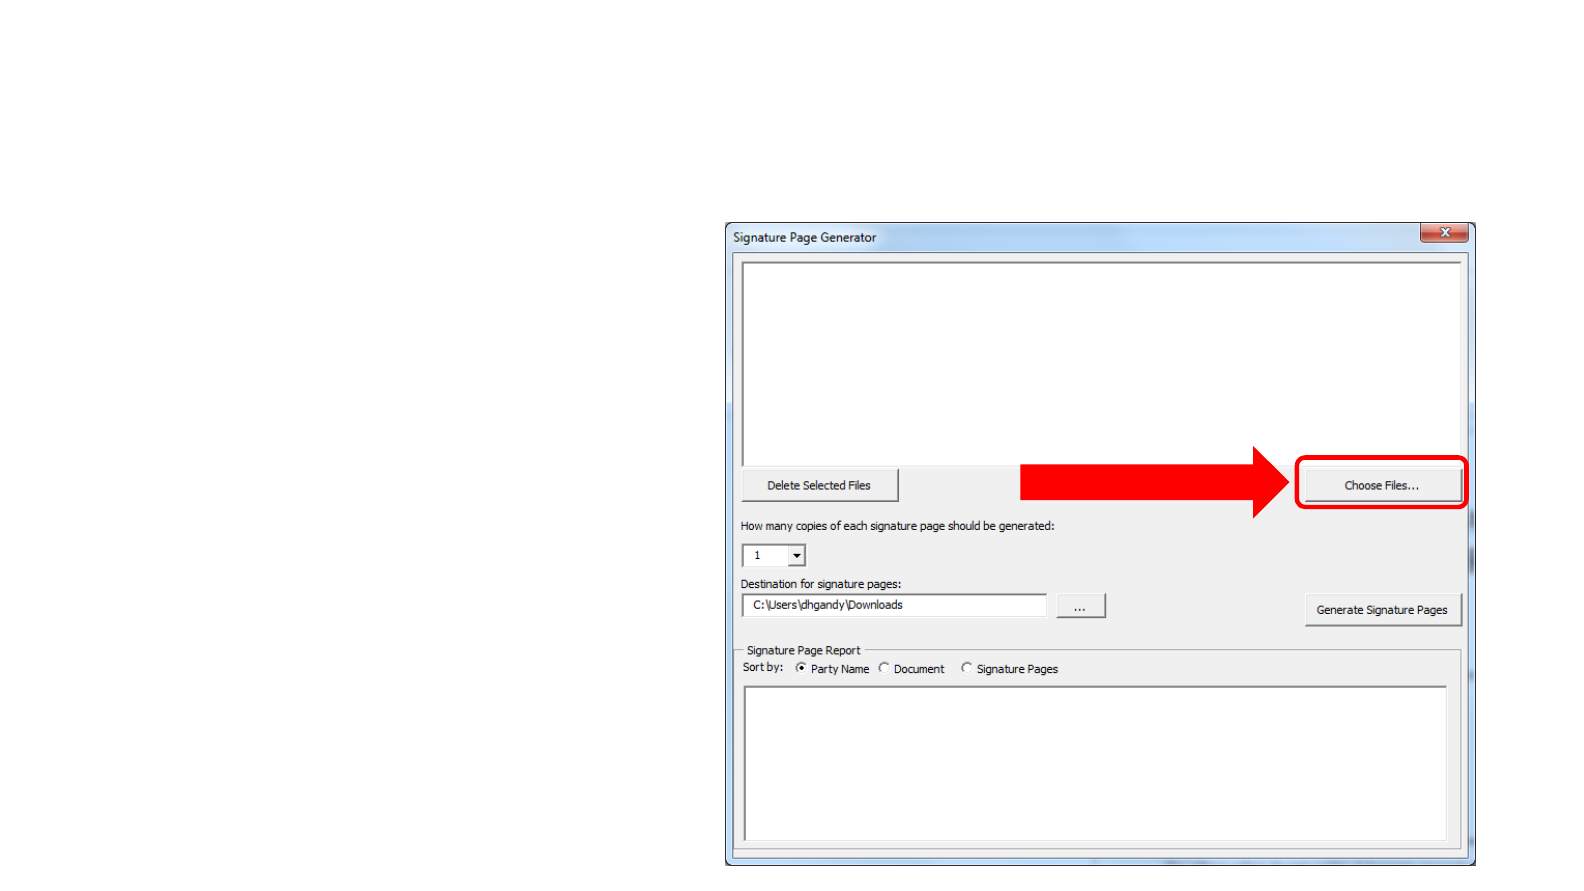
Click “Choose Files…” to select documents to
pull signature pages from.
•Note that this software cannot
(yet) interface with iManage.
Thus, you will need to save any
iManage documents locally before
running them through the
software.
•To export several files from
iManage at once, I select all of the
files I want, right click them, click
“Send” then “Send Document.”
This will create an Outlook email.
You can now drag the files from
the Outlook email to a local folder.
•“Delete Selected Files” will remove
the selected items from the list.
14
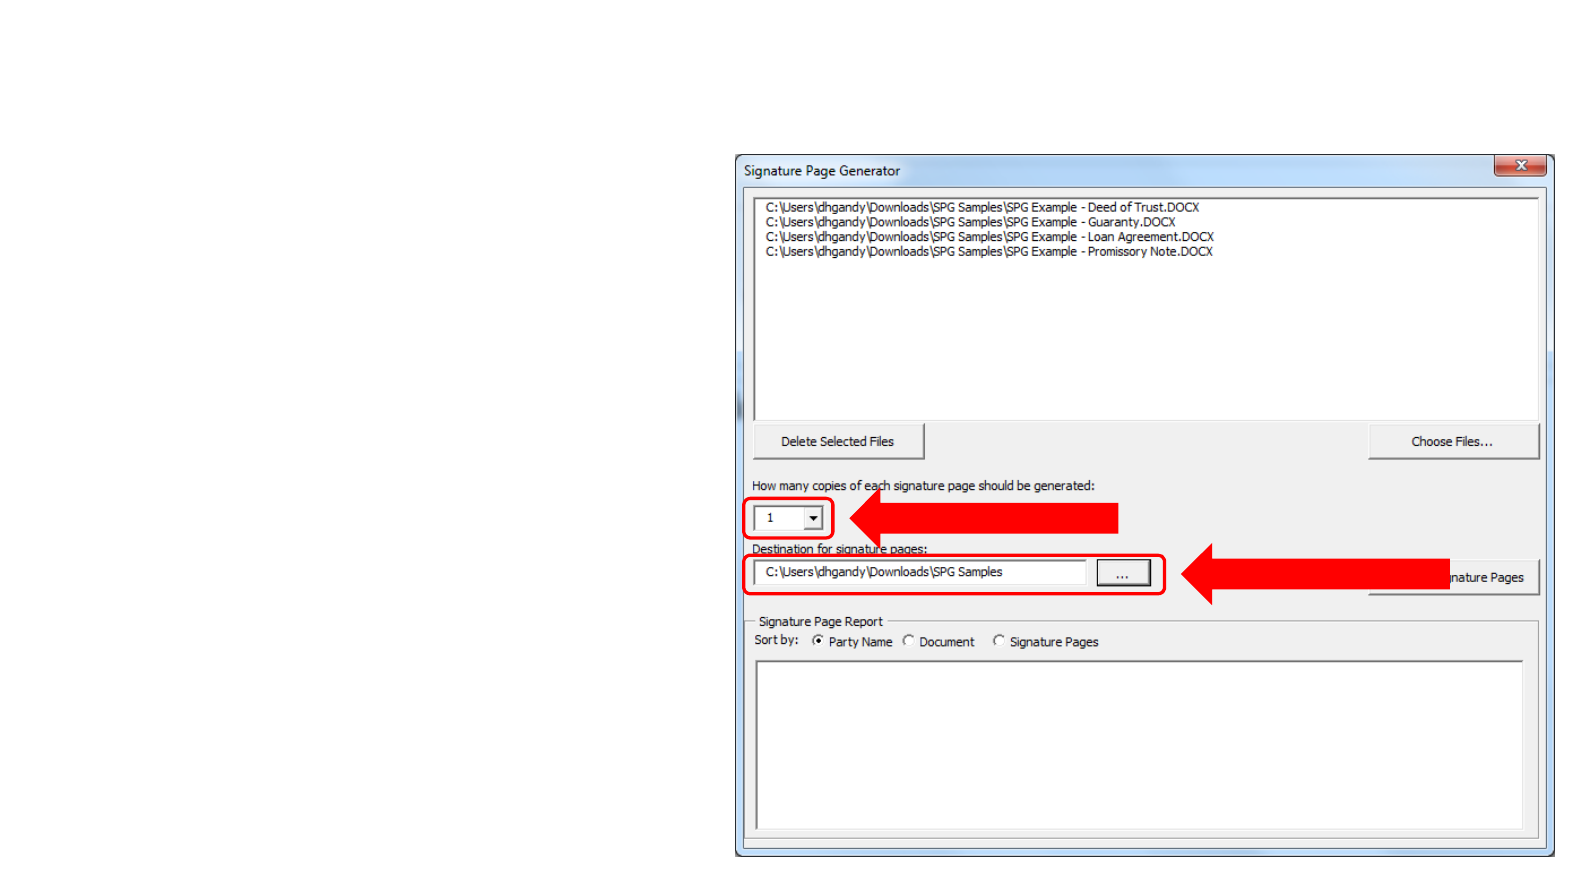
Choose options…
•Select the number of copies
of each signature page to be
generated.
•Select the location where the
signature packets should be
saved.
15
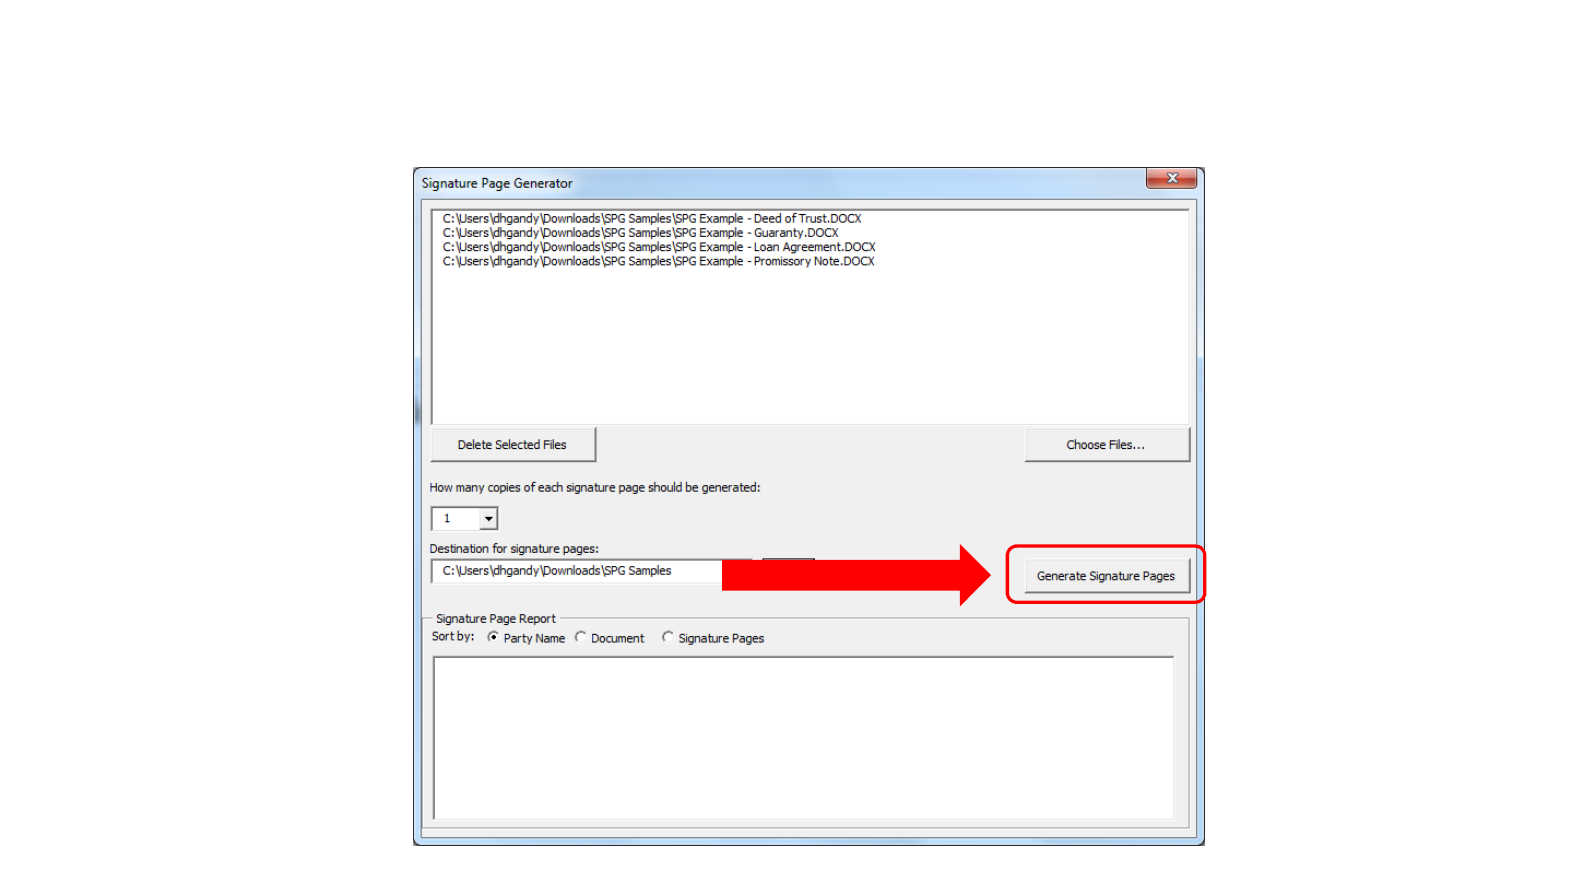
Click “Generate Signature Pages” to generate
packets
16
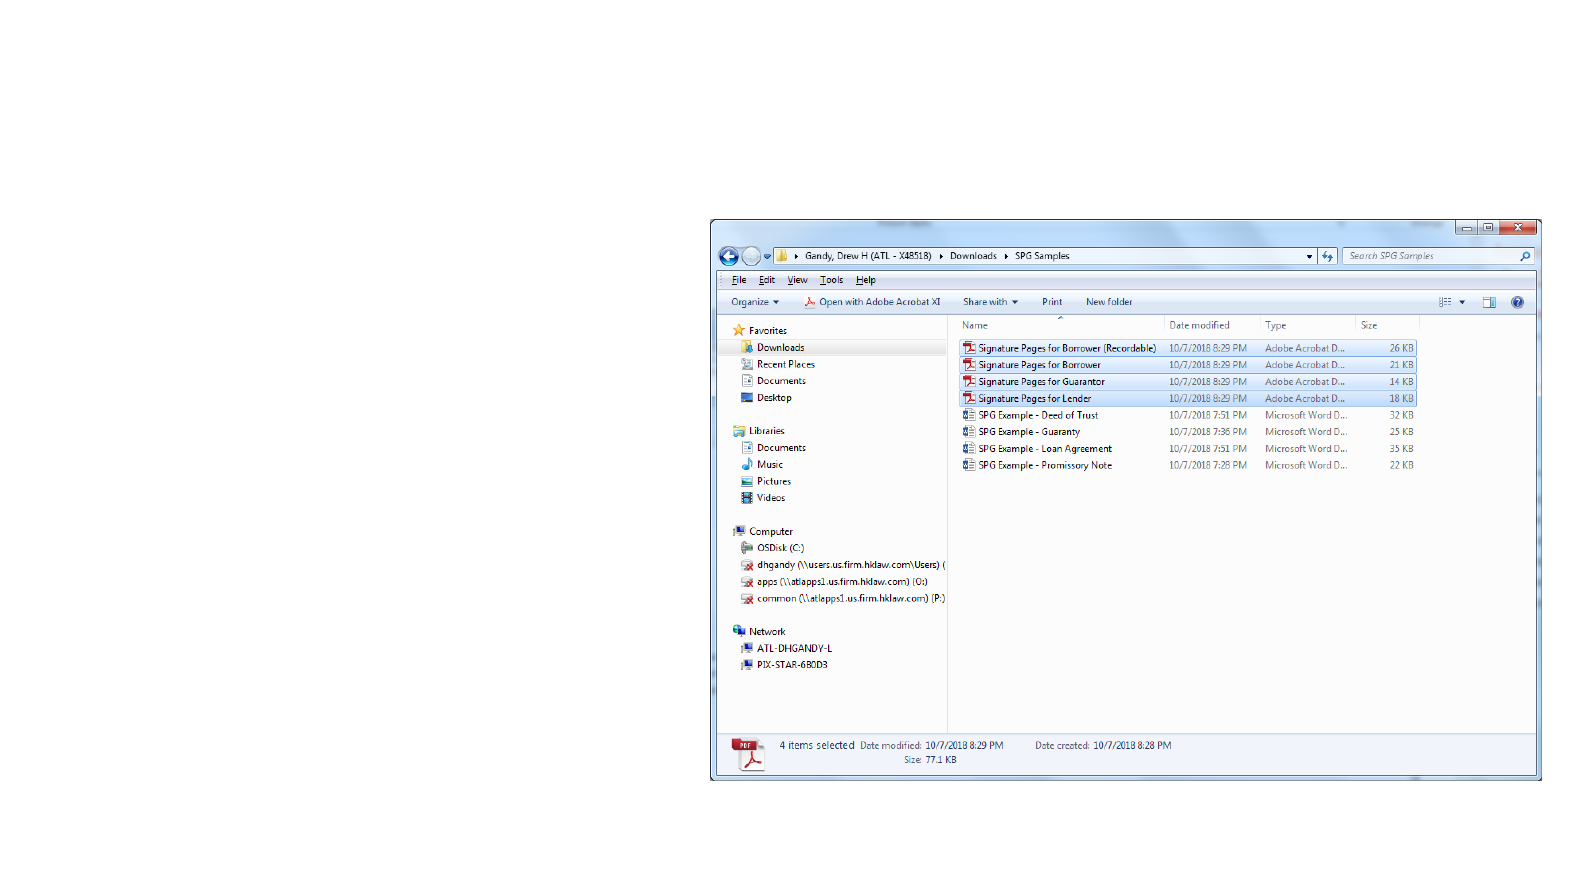
That’s it…
•The packets will be created
in the destination folder.
•Once done, you can review
the Signature Page Report
to confirm the appropriate
signature pages were
created.
•This list can be copied and
pasted in the email
distributing the packets if
you want to identify which
parties sign which
documents.
17

What’s on the roadmap
•iManage integration
•Custom cover pages included in packets for mailing instructions, etc.
•Update signature blocks and other info in documents on the fly
•Draft tag management
•When a new version is created, draft tag is blanked out (e.g. “10/__/18”)
•When ready to circulate documents to working group, draft tags are filled in
18

Don’t hesitate to let me know if you have any
questions or comments.
•Email: drew.gandy@hklaw.com
•Phone: 404-817-8518 or x48518
19

Setting Up Signature Page
Generator Software
Drew Gandy
Holland & Knight LLP
Atlanta - x48518

Download “Sig Page Generator.docm”
document
•The software is built into a Word document.
•The latest version may be obtained here:
https://github.com/drewgandy/Sig-Page-
Generator/raw/master/Sig%20Page%20Generator.docm
•The latest version of this user guide may be obtained here:
https://github.com/drewgandy/Sig-Page-
Generator/raw/master/Sig%20Page%20Generator%20User%20Guide.pdf
21
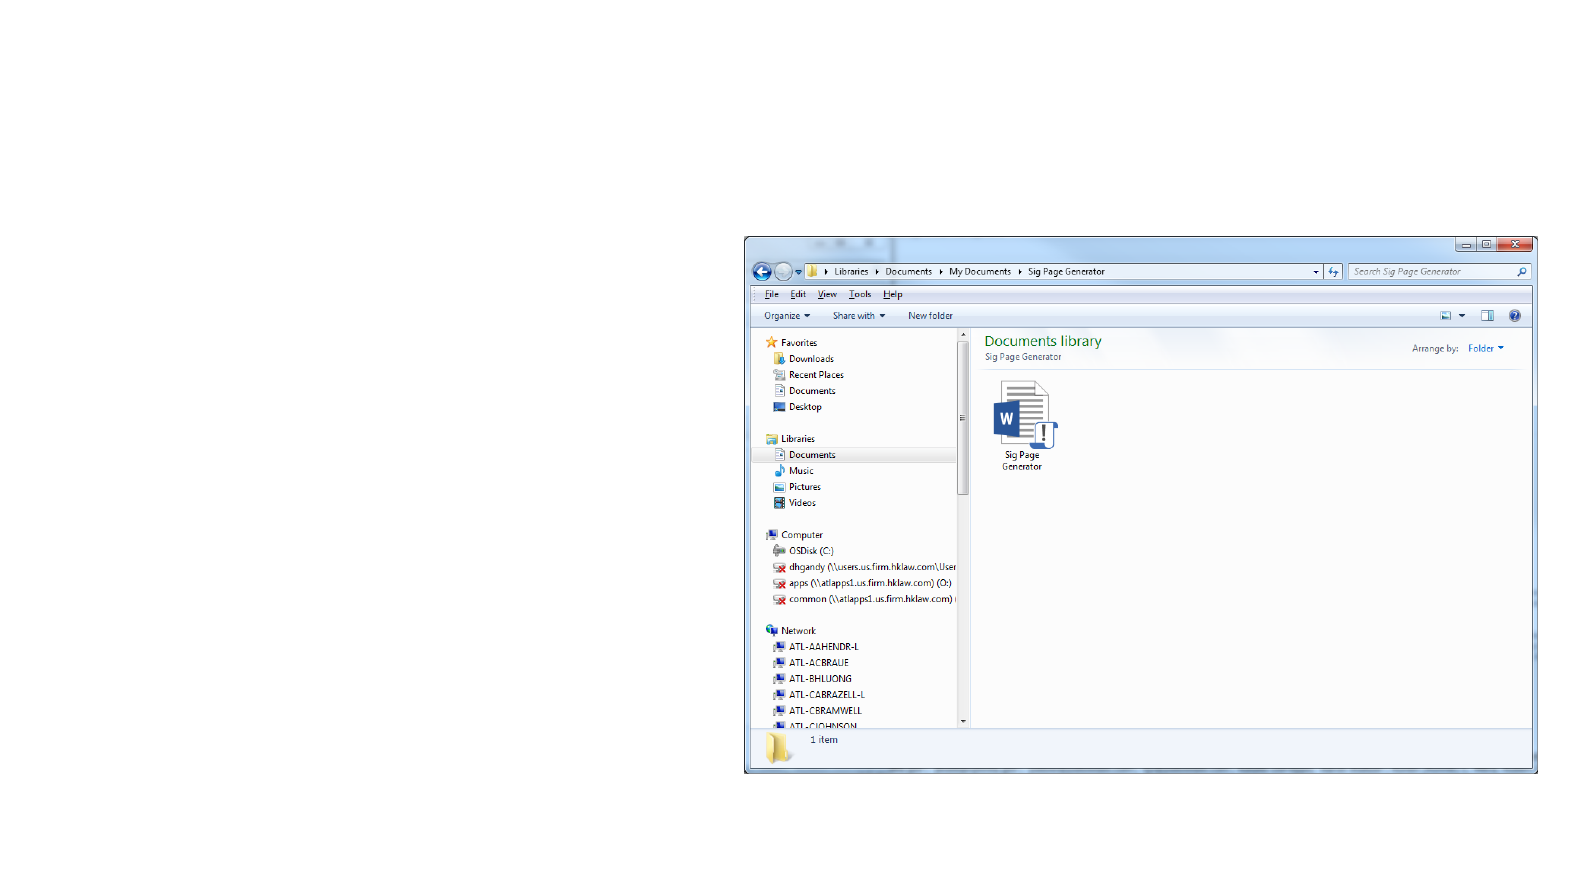
Save the Word Document somewhere
convenient. Remember where you saved it…
•You will be using this document
to run the Signature Page
Generator interface.
•The document should be saved
in a folder where you will not
save any other files.
•The suggested location is a sub-
folder in the My Documents
folder:
“C:\Users\[Username]\
Documents\Sig Page
Generator\”
22
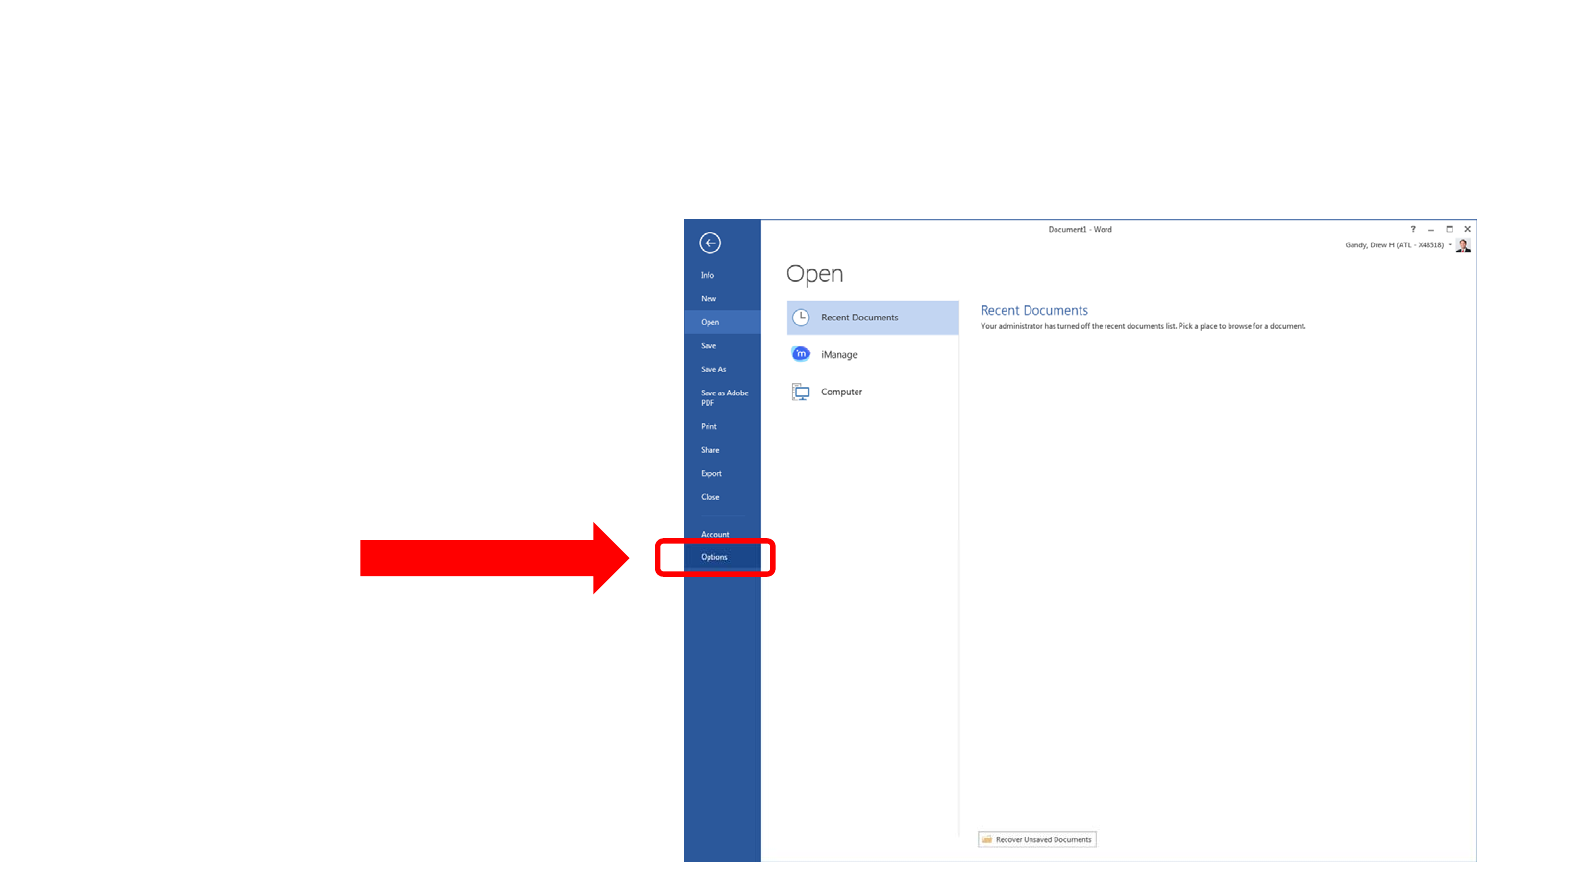
Open MS Word, click the “File” tab and select
“Options”
23
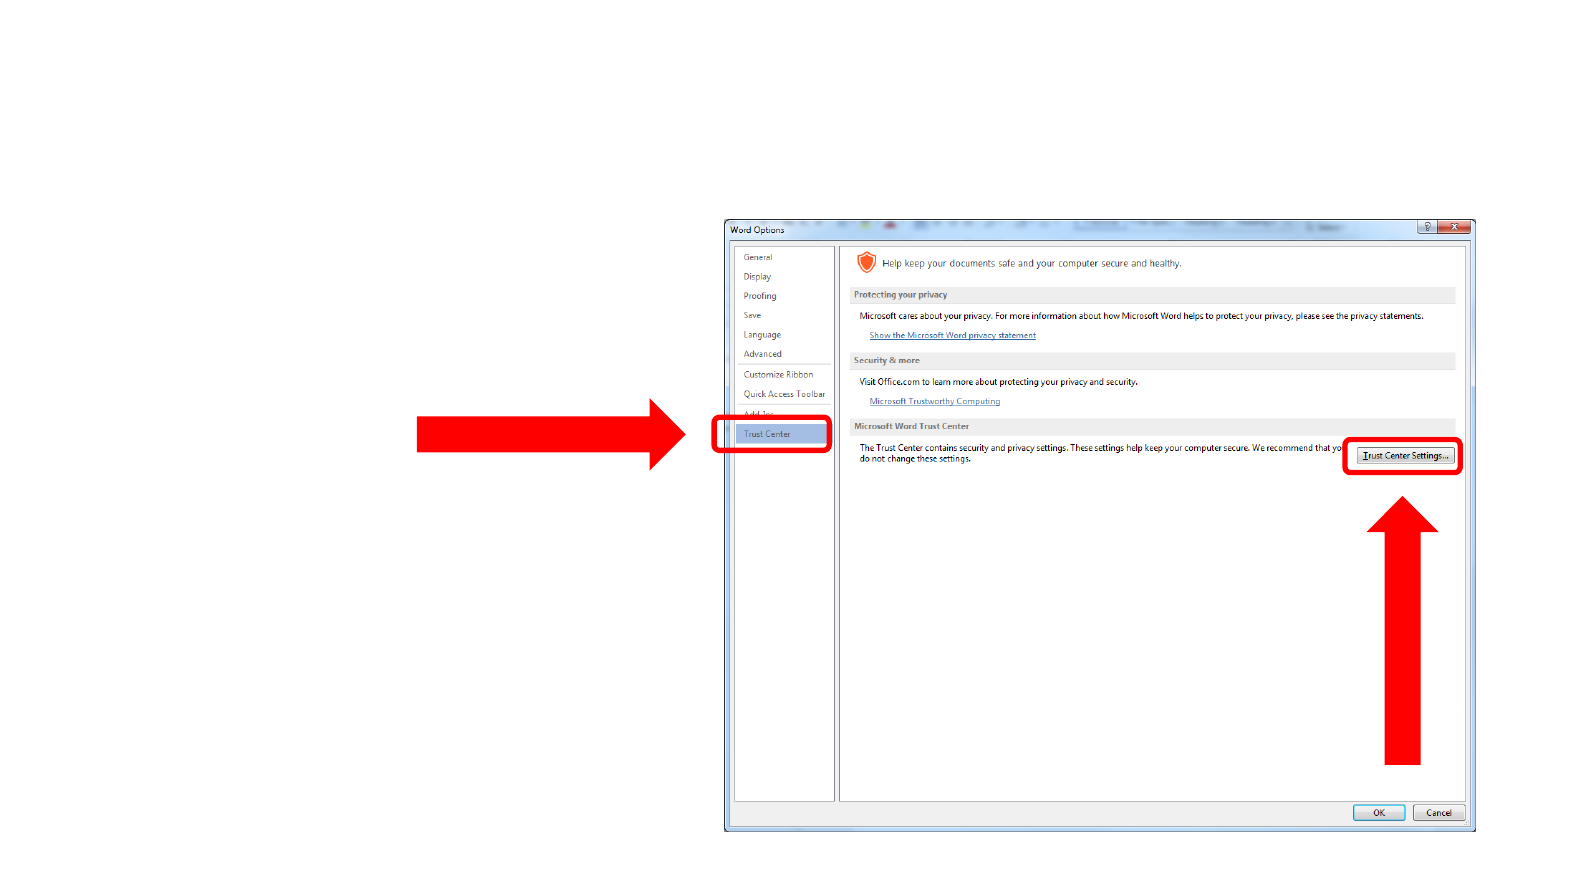
Click “Trust Center” from the list on the
right…
•Then click “Trust Center
Settings…”
24

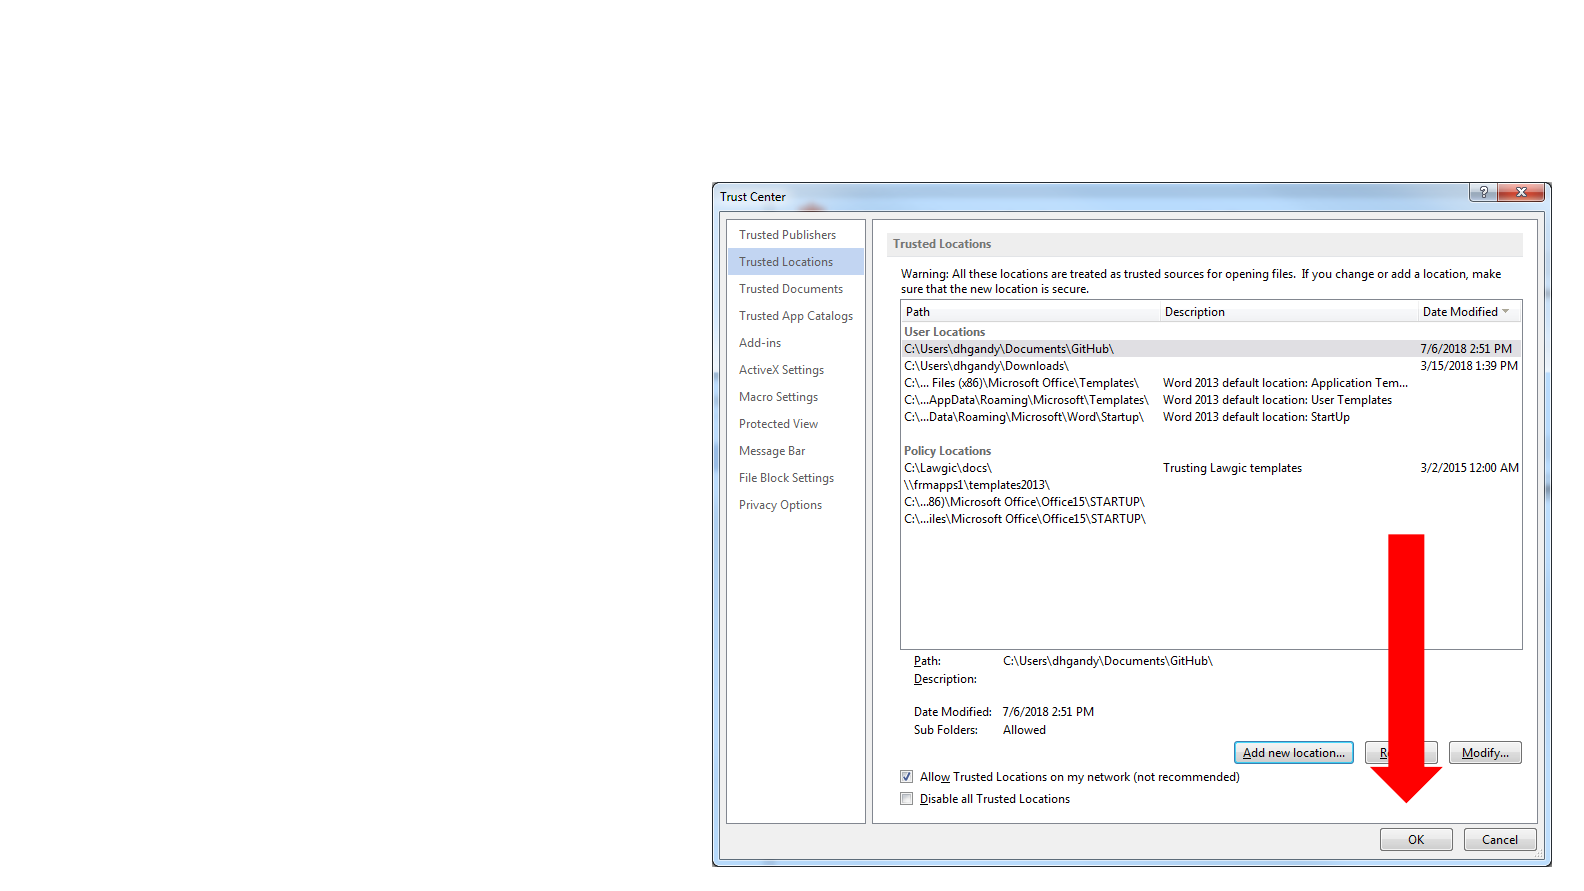
Click “Trusted Locations” from the list on the
right…
•Then click “Add new
location…”
25
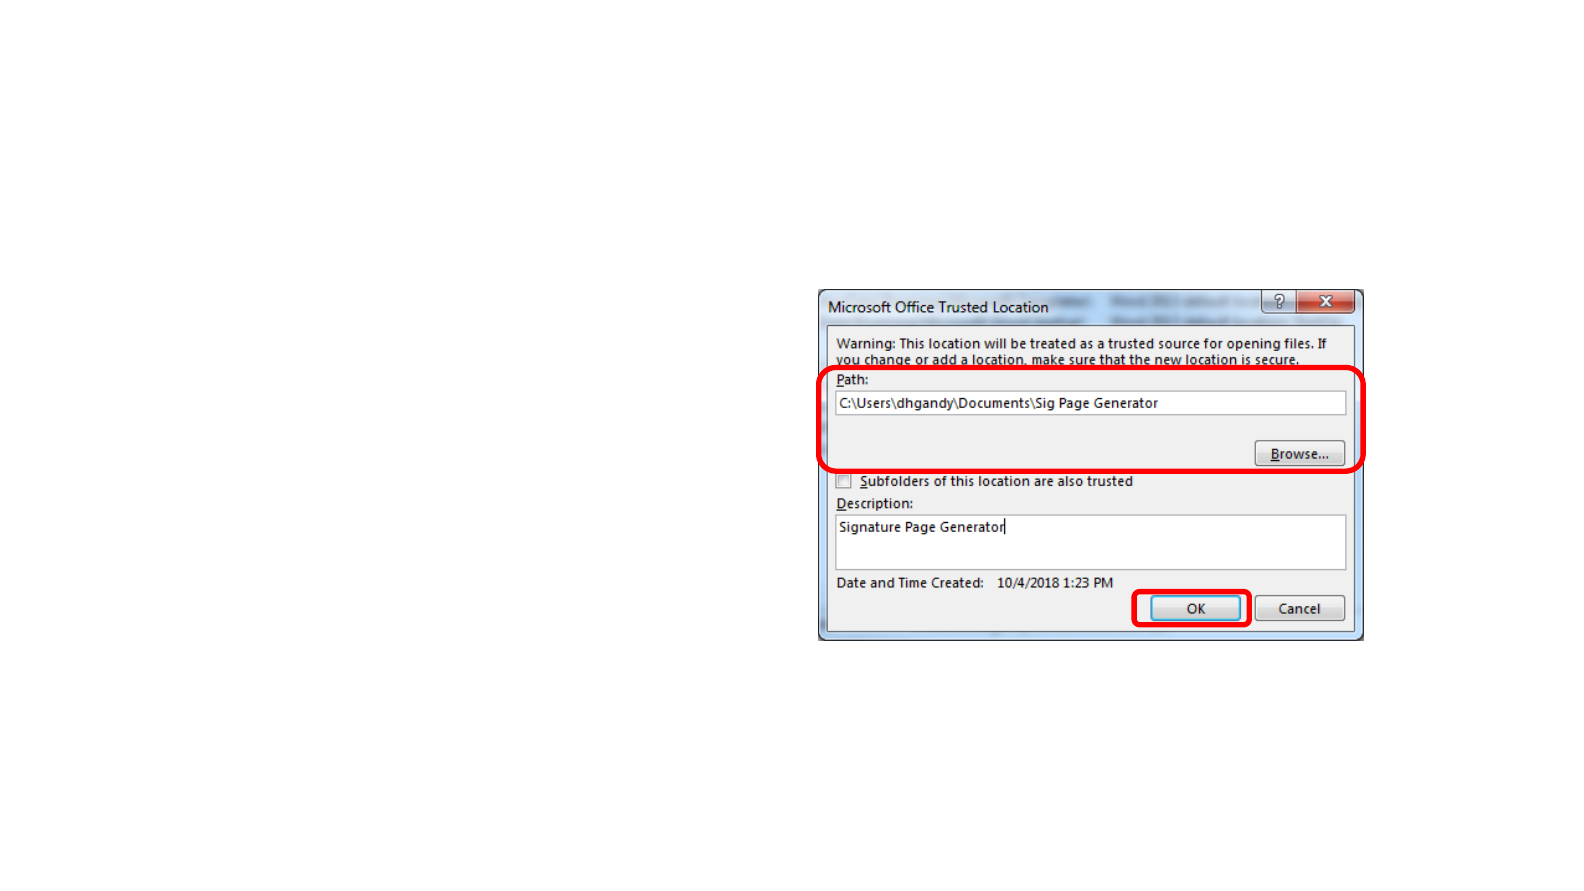
Enter the folder location in the “Path:” textbox
where you saved the Word document…
•Then click “OK”
•You can fill in a description, but this is not
necessary.
•If you move the “Sig Page Generator.docm” file
to another folder, you will need to update the
location in this path.
26
Click “OK” in the Trust Center window
27
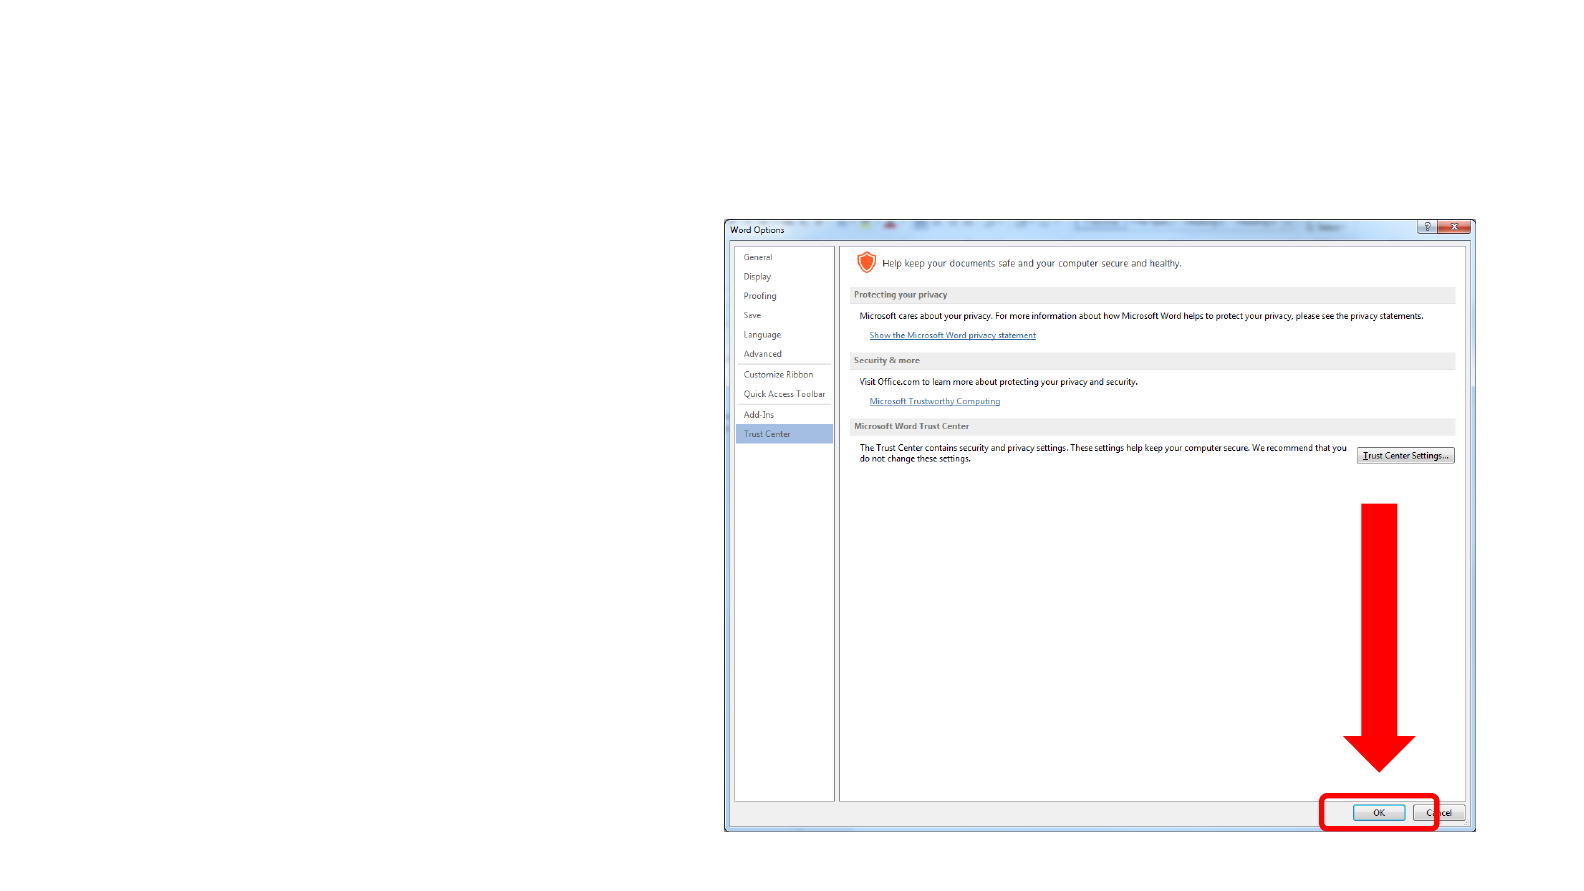
Click “OK” in the Word Options window
28
That’s it! You’re done.
Let’s test that the setup worked…
•Open “Sig Page Generator.docm” from where you saved it.
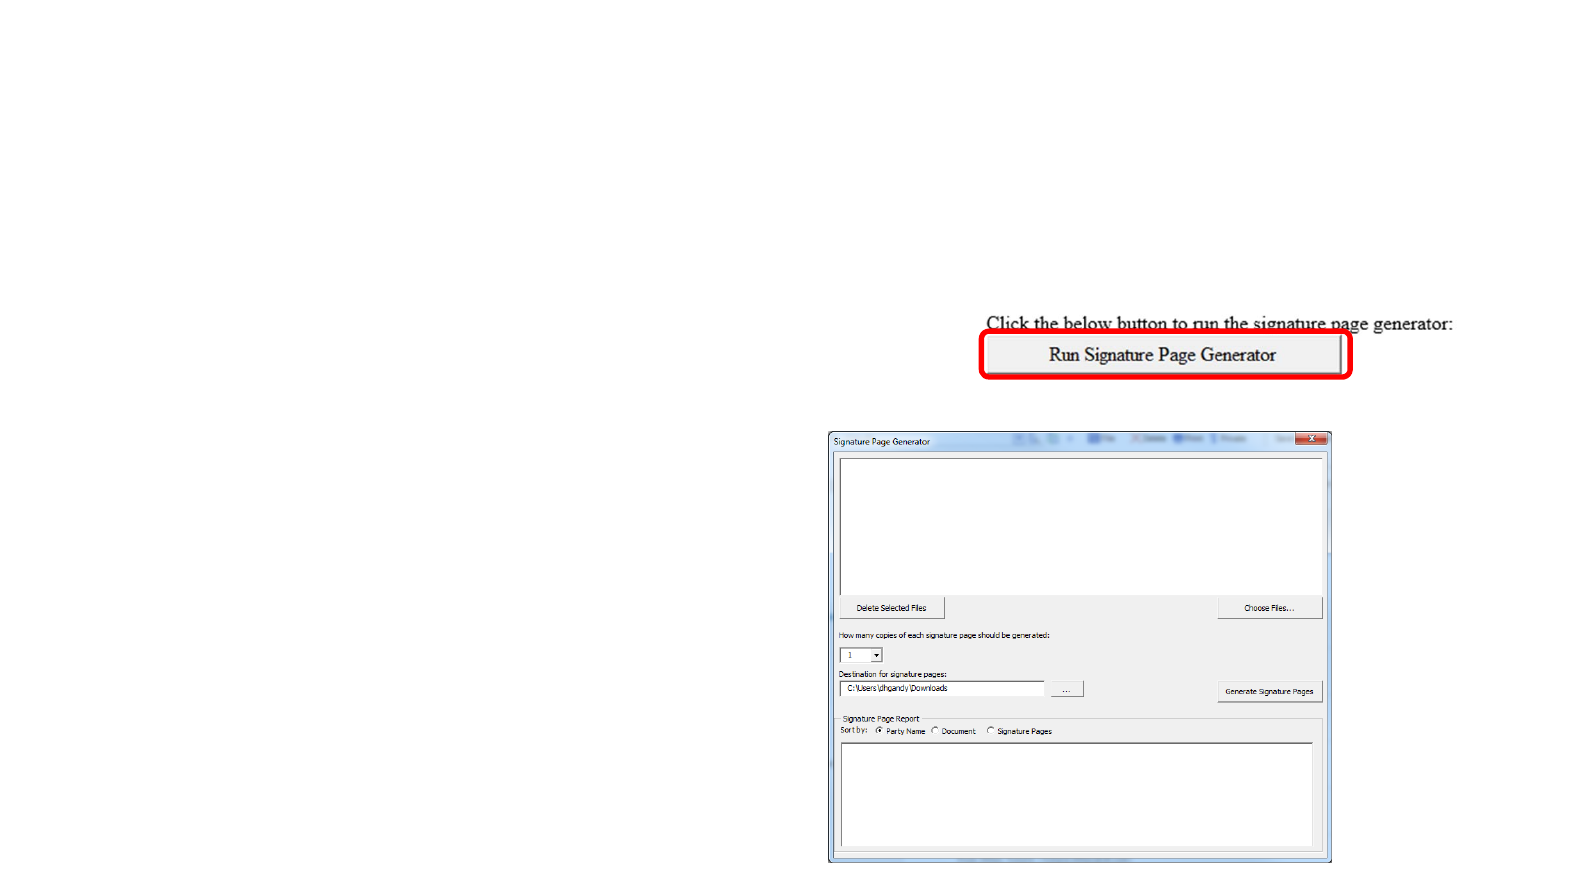
•Click the “Run Signature Page Generator”
button embedded in the Word document.
•If the following screen appears,
the software was setup correctly.
•You can now close MS Word if
you’d like.
29
