Simmons_SD1000_Manual Simmons SD1000 Manual
SD1000_Manual SD1000_Manual
User Manual: Simmons_SD1000_Manual
Open the PDF directly: View PDF ![]() .
.
Page Count: 48
TOM 4 CRASH 2 MIDI OUT MIDI IN
SD
OWNER’S MANUAL
The first name in electronic drums.
www.simmonsdrums.net
SD
ELECTRONIC DRUM KIT
www.SimmonsDrums.net
9861 Simmons SD1000 Drum Set Manual.indd 1 1/22/13 8:59 AM
SD
OWNER’S MANUAL
2
The first name in electronic drums.
safety instructions
1) Read these instructions.
2) Keep these instructions.
3) Heed all warnings.
4) Follow all instructions.
5) Do not use this apparatus near water.
6) Clean only with dry cloth.
7) Do not block any ventilation openings. Install in accordance
with the manufacturer’s instructions.
8) Do not install near the heat sources such as radiators, heat
registers, stoves, or other apparatus (including amplifiers) that
produce heat.
9) Do not defeat the safety purpose of the polarized or grounding-
type plug. A polarized plug has two blades with one wider
than the other. A grounding type plug has two blades and a
third grounding prong. The wide blade or the third prong are
provided for your safety, if the provided plug does not fit into
your outlet, consult an electrician for replacement of the obsolete
outlet.
10) Protect the power cord from being walked on or pinched
particularly at plugs convenience receptacles, and the point
where they exit from the apparatus.
11) Only use attachments/accessories specified by the manufacturer.
12) Use only with the cart, stand, tripod,
bracket, or table specified by the
manufacturer, or sold with the
apparatus. When a cart is used,
use caution when moving the cart/
apparatus combination to avoid injury
from tip-over (Figure1).
13) Unplug this apparatus during lightning storms or when unused
for a long periods of time.
14) Refer all servicing to qualified service personnel. Servicing
is required when the apparatus has been damaged in any
way, such as power-supply cord or plug is damaged, liquid
has been spilled or objects have fallen into the apparatus,
the apparatus has been exposed to rain or moisture, does not
operate normally, or has been dropped.
WARNING: To reduce the risk of fire or electric shock, do not
expose this apparatus to rain or moisture. CAUTION: Apparatus
shall not be exposed to dripping or splashing and no objects filled
with liquids, such as vases, shall be placed on the apparatus.
CAUTION: Apparatus shall not be exposed to dripping or
splashing and no objects filled with liquids, such as vases, shall be
placed on the apparatus.
The lighTning flash wiTh arrowhead symbol wiThin an equilaTeral Triangle is inTended To alerT The user To
The presence of uninsulaTed dangerous volTage wiThin The producT s enclosure ThaT may be of sufficienT
magniTude To consTiTuTe a risk of elecTric shock To persons.
apparaTus shall noT be eXposed To dripping or splashing and ThaT no obJecTs filled wiTh liquids, such as
vases, shall be placed on The apparaTus.
The eXclamaTion poinT wiThin an equilaTeral Triangle is inTended To alerT The user To The presence
of imporTanT operaTing and mainTenance(servicing) insTrucTions in The liTeraTure accompanying
The producT.
Figure 1
9861 Simmons SD1000 Drum Set Manual.indd 2 1/22/13 8:59 AM
www.simmonsdrums.net
3
The first name in electronic drums.
…on your purchase of Simmons’ SD1000 Electronic Drum Kit. To get the most enjoyment from this kit,
we recommend that you skim through this manual at least once, then refer back to it to learn more about
specific functions.
Caring for Your SD1000 Electronic Drum Set
Location
• Keep the drum kit away from direct sunlight, high temperature sources, and excessive
humidity to prevent deformation, discoloration, or more serious damage.
Power Supply
• TurnthepowerswitchOFFwhentheSD1000 is not in use.
• TheACadaptershouldbeunpluggedfromtheACoutletiftheSD1000 is not to be used
for an extended period of time.
• AvoidpluggingtheACadapterintoanACoutletthatisalsopoweringhigh-consumption
appliances such as electric heaters or televisions. Also avoid using multi-plug adapters,
since these can reduce sound quality, cause operation errors, and result in possible damage.
• To avoid damaging the unit, turn the SD1000 and all related devices OFF prior to
connecting or disconnecting cables.
Handling and Transport
• Neverapplyexcessiveforcetocontrols,connectors,andotherparts.
• Unplugcablesbygrippingtheplugrmly.Donotpullonthecable.
• Disconnectallcablesbeforemovingthemodule.
• Physicalshockscausedbydropping,bumping,orplacingheavyobjectsonthemodulecan
result in scratches and more serious damage.
Cleaning
• Cleanthemodulewithadry,softcloth.
• Aslightlydampclothmaybeusedtoremovestubborngrimeanddirt.
• Neverusecleanerssuchasalcoholorthinner.
• Toavoiddiscoloration,donotplacevinylobjectsontopofmodule.
Electrical Interference
• Themodulecontainsdigital circuitryandmay cause interferenceif placed too close to
radio or television receivers. If this occurs, move the SD1000 further away from the
affected equipment.
Service and Modification
• Therearenouserserviceablepartsinthedrummodule.
• Donotattempttoopenthesoundmoduleormakeanychangeinthecircuitsorpartsofthe
unit. This would void the warranty.
Congratulations!
9861 Simmons SD1000 Drum Set Manual.indd 3 1/22/13 8:59 AM
SD
OWNER’S MANUAL
4
The first name in electronic drums.
SD
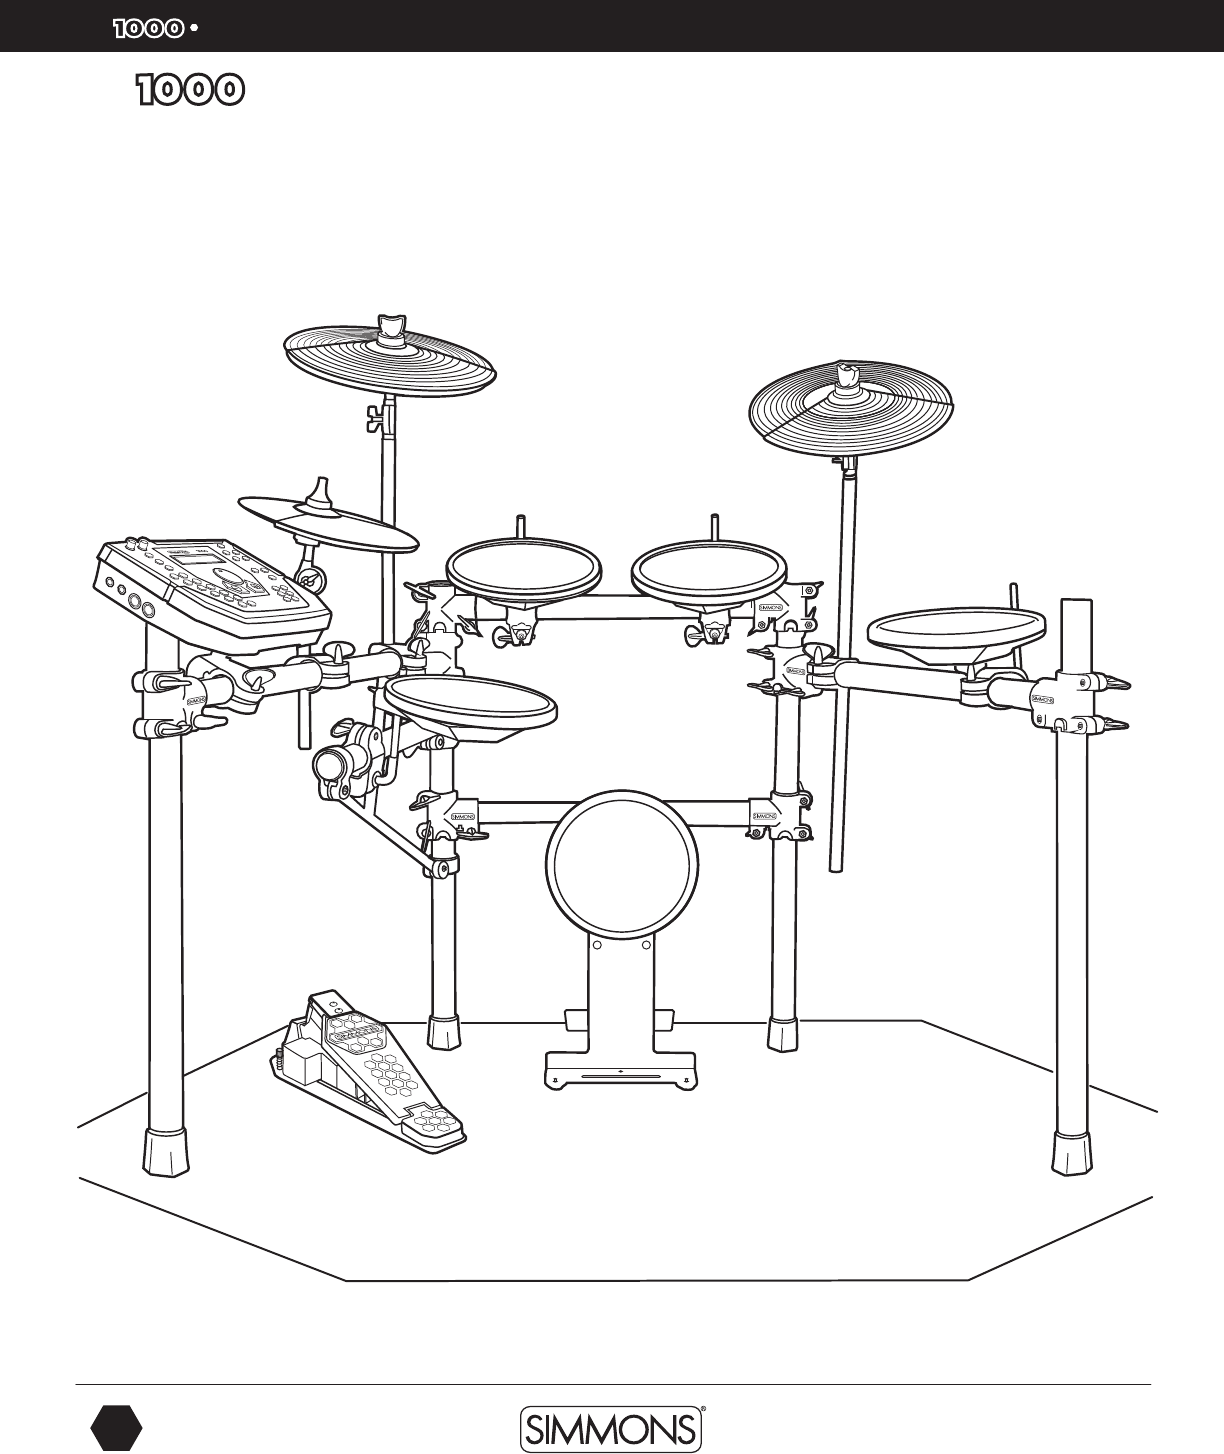
ASSEMBLED KIT
TOM 4 CRASH 2 MIDI OUT MIDI IN
SD
9861 Simmons SD1000 Drum Set Manual.indd 4 1/22/13 8:59 AM

www.simmonsdrums.net
5
The first name in electronic drums.
Table of Contents
SAFETY INSTRUCTIONS .................................................2
CARING FOR YOUR SD1000 ELECTRONIC DRUM .............3
ASSEMBLED KIT ............................................................4
FEATURES ....................................................................6
CONNECTIONS
Modules and Pads. . . . . . . . . . . . . . . . . . . . . . . . . . . . . . . . . . . . . . . . . . . . . . . . . . . . . . . . 7
AC Adapter ................................................................8
Connecting Audio Equipment .........................................8
Auxiliary/AUX Input .....................................................8
Connecting MIDI Devices and Computers .........................9
SOUND MODULE OPERATION
Top Panel Layout ....................................................... 10
Front Panel ................................................................11
Back Panel ................................................................11
Side Panel .................................................................11
Bottom Panel ............................................................ 12
LCD Layout .............................................................. 12
QUICK START OPERATIONS
Turning the Power On ................................................. 13
Basic Operation and Navigation . . . . . . . . . . . . . . . . . . . . . . . . . . . . . . . . . . . 13
Adjusting Values ........................................................ 13
Playing Song Demos .................................................. 14
Selecting a Kit .......................................................... 14
Selecting a Song ....................................................... 14
Playing a Song ......................................................... 14
Muting the Drum Part ................................................. 15
Quick Record ........................................................... 15
ADVANCED OPERATIONS
Editing a Kit ............................................................. 16
Sound Organization .................................................. 16
Editing the Pad Sound ................................................ 16
Pad Patterns ............................................................. 18
Exchanging the Kit Order ............................................ 19
Renaming a Kit .........................................................20
Saving a Kit .............................................................20
Mixer ..................................................................... 21
Editing Songs ...........................................................23
Song Part Settings . . . . . . . . . . . . . . . . . . . . . . . . . . . . . . . . . . . . . . . . . . . . . . . . . . . . . . 24
Erasing Parts in a Song ...............................................24
Saving a Song ..........................................................26
Muting Song Parts .....................................................27
Recording a New Song ..............................................28
Regular Song Recording ..............................................28
Utility Mode ............................................................. 31
Trigger Setup ............................................................ 31
Effects Settings ......................................................... 33
MIDI Settings .......................................................... 34
Factory Reset ........................................................... 34
Using an SD Card .....................................................35
Muting a Channel/Part on SD Card MIDI File .................. 35
File Operations .........................................................35
Loading a MIDI from on an SD Card ............................. 36
Deleting Files ........................................................... 37
Formatting the SD Card ............................................. 38
APPENDIX
Voice List ................................................................ 39
Kit List .................................................................... 43
Song List ................................................................ 44
Demo List ............................................................... 46
ASCII Character List .................................................. 46
Pad MIDI Note Assignments . . . . . . . . . . . . . . . . . . . . . . . . . . . . . . . . . . . . . . . . 46
MIDI Implementation Charts ....................................... 47
INDEX ...................................................................... 48
WARRANTY .............................................................. 48
9861 Simmons SD1000 Drum Set Manual.indd 5 1/22/13 8:59 AM
SD
OWNER’S MANUAL
6
The first name in electronic drums.
features
Polyphony
Voices - 64
Sounds
Drum Voices - 516
Drum Kits - 99 (55 Preset kits + 44 User kits)
Mixer
Drum Volume, Accompaniment Volume, SD Card MIDI Volume,
and Click/Metronome Volume
Effects
Master Reverb (Small Room, Med Room/Large Room,
Hall 1, Hall 2, Plate, Delay, Pan-Delay, 4 Band EQ)
Trigger Inputs*
1 x Kick, Single Zone
1 x Snare, Dual Zone
1 x Hi-Hat, Single Zone, Multi-pedal
1 x Ride, Single or Triple Zone
4 x Toms, Single or Dual Zone
2 x Cymbals, dual zone
MIDI
MIDI In, Out and Thru Functionality
MIDI USB (with computer)
SD Card
Save/Load Kits
Operating System Updates
S1000 Blue Drum Rack with Hardware
1 x S1000KIKS Single Zone 9” Kick Pad
1 x S1000PAD9D Dual Zone 9” Snare
3 x S1000PAD9S Single Zone 9” Tom Pad
Hardware
Drum Rack and Mounting Hardware
Kick Pad with Stand
9” Dual Zone Snare Pad
9” Tom Pads
10” Hi-Hat Cymbal Pad
12” Crash and Ride Cymbal Pads with Choke
Hi-Hat Control Pedal
External Connections
Headphone Output
Master Stereo Outputs (1/4” TS Unbalanced)
1/8” TRS Aux Input
MIDI IN and Out Jacks
USB Connection
Sequencer
Preset Songs - 100
User Songs - 100
Song parts - Up to 7 parts (drums, percussion and parts 1-5)
Play Modes - One-Shot, Loop, Tap and Hit
Tempo - 30-280 BPM
Click/Metronome - Click Voice, Time Signature, Tempo,
Interval, Volume
• CustomSoundLibrary.Completelynewsamplesetbasedonthemostpopularclassicandmodernkits.
• VariableAttackResponse.Signicantlyimprovedplaybackwithdynamicresponseaccordingtohitvelocity,
combined with alternating sample playback by velocity zone.
• Multi-PositionHi-HatControl.Realisticresponseforopen,closed,half-openhi-hattechniques.
• S1000SeriesPadswithincreasedsensitivity,andgreaterisolationformulti-zonepads.
NOTE: The SD1000 module requires S1000 Series pads, and is
not compatible with Simmons SD Series pads from older kits.
NOTE: S1000 series pads are not compatible with older Simmons sound modules - SD5K, SD5X, SD7K, SD7PK, and SD9K.
SD1000 Sound Module General Features
New Features of the SD1000 Kit
SD1000 Series Pads* and Hardware
1 x S1000CYM12SC Single Zone 12” Cymbal Pad with Choke
1 x S1000CYM12DC Dual Zone 12” Cymbal Pad with Choke
1 x S1000HHC1 Multi-position Foot Controller
1 x Multi-pin Cable Harness with 10 Inputs for SD1000 Sound Module
9861 Simmons SD1000 Drum Set Manual.indd 6 1/22/13 8:59 AM
www.simmonsdrums.net
7
The first name in electronic drums.
Connections
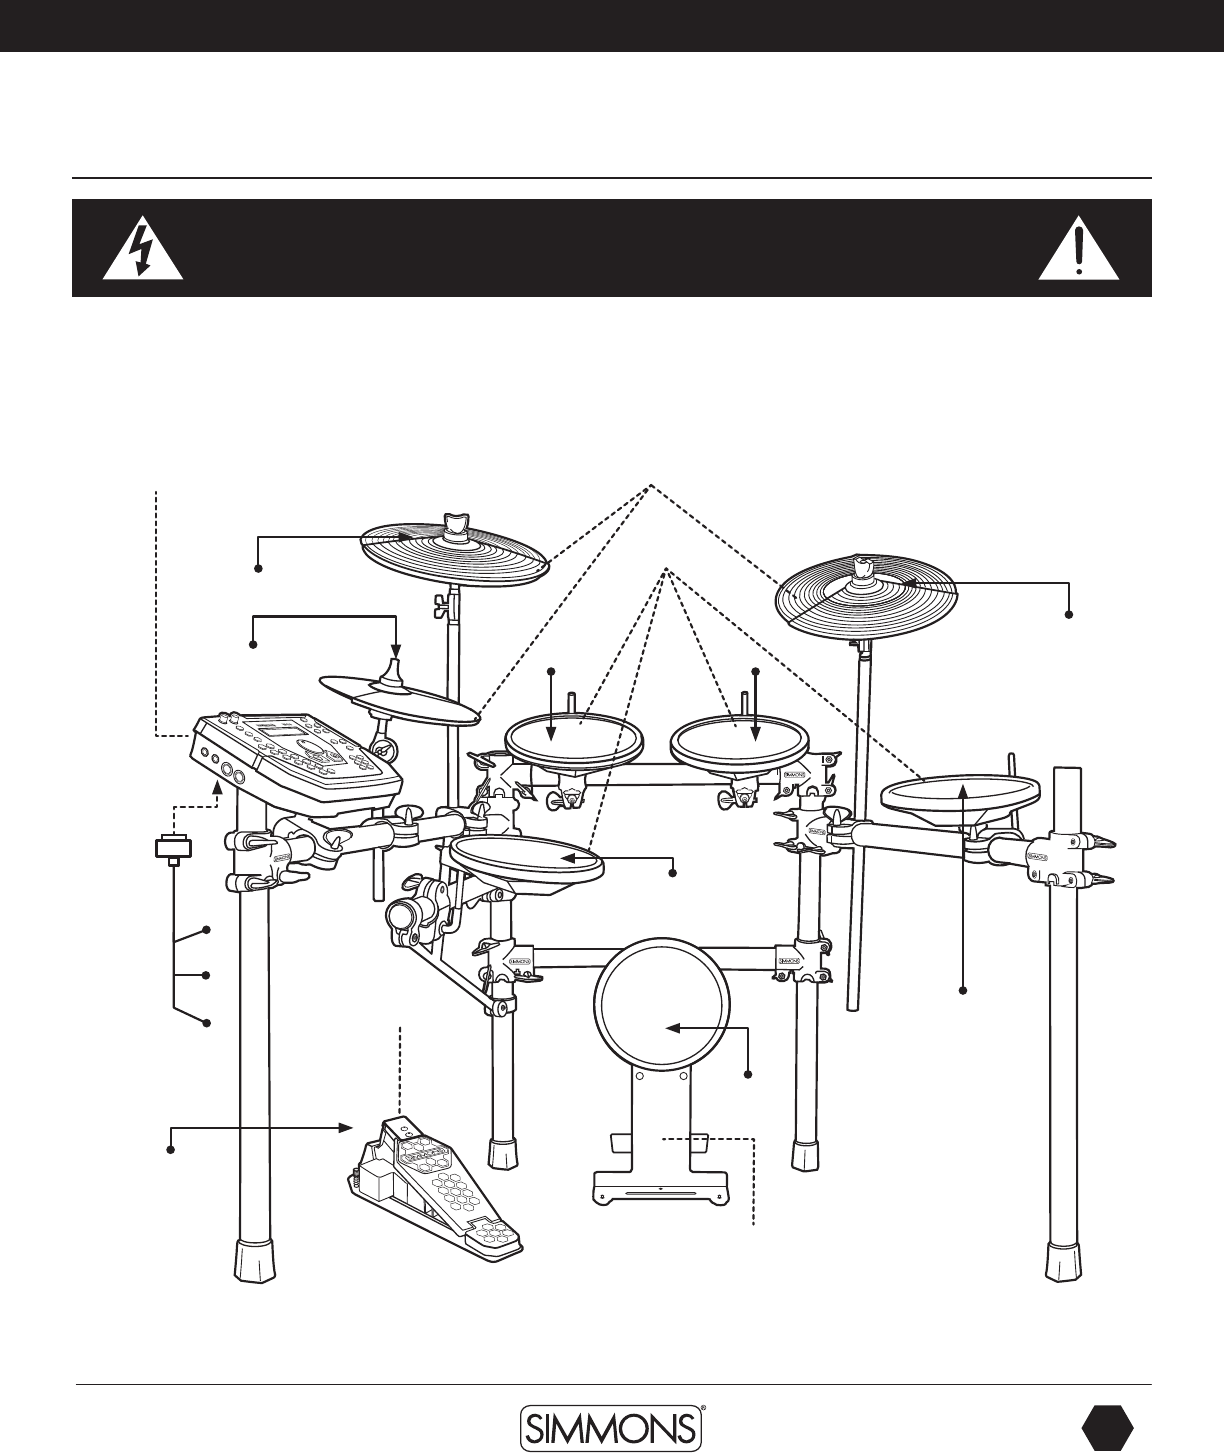
Connecting the Sound Module and Pads
CAUTION!
To prevent electric shock and damage to the device, make sure the power is switched
OFF on the sound module and all related devices before making any connection.
Using the provided cables, connect the 1/4” jacks to the
corresponding drum pads, cymbal pads and kick pad. The pin
connection will attach to the multi-pin connector serial port on
the bottom of the sound module. (See illustration below.)
The voice of the hi-hat pad is controlled by the hi-hat pedal. Plug
into the Hi-Hat pedal the plug that is labelled “Hi-Hat Control”.
Similar to a real drum kit, the hi-hat pad functions as an ‘open
hi-hat’ when the pedal is released. When the pedal is pressed
down, it functions as a ‘closed hi-hat’.
TOM 4 CRASH 2 MIDI OUT MIDI IN
SD
Cymbal Pad
To Hi-Hat
To Ride
Drum Pad
To Tom 1 To Tom 2
To Tom 3
To Hi-Hat
control
Hi-Hat Pedal
Kick Pad
To Kick
To Snare
To Crash
Sound Module
From Sound
Module to
9 Pads
The SD1000 kit includes 8 Pad Triggers and 1 pedal controller*. You can expand the total amount of trigger inputs to 10 by adding
optional drum or cymbal pads. These are connected via the extra inputs on the side panel of the SD1000 sound module.
*See Appendix for Pad, triggers, name and MIDI chart.
9861 Simmons SD1000 Drum Set Manual.indd 7 1/22/13 8:59 AM
SD
OWNER’S MANUAL
8
The first name in electronic drums.
Connections
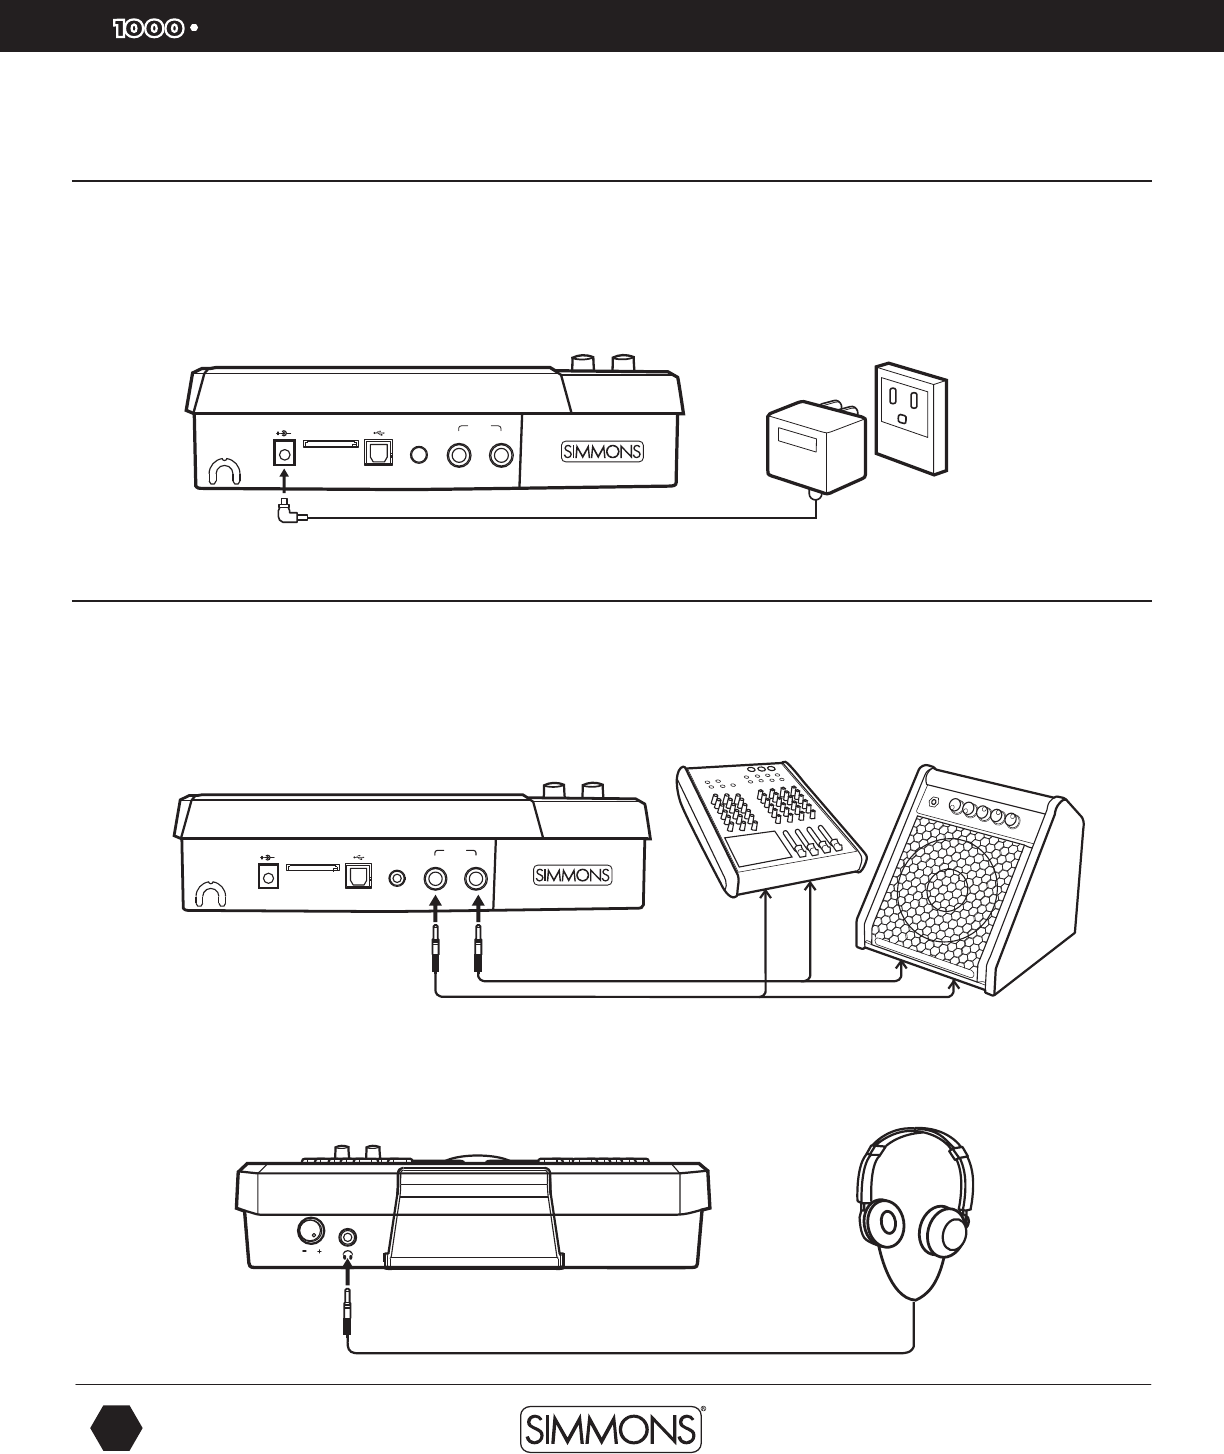
AC Adapter
The SD1000 sound module uses an external power supply called an AC Adapter. Make
sure the power is switched OFF on the module and connect the power adapter with the DC
IN jack on the rear panel.
NOTE: To protect the speakers, amplifier and the drum module from damage, lower the
volume to the minimum level before switching the power ON.
Connecting Audio Equipment
Mixers and Amplifiers
1. When you want to send the audio output to a mixer or amplifier. Connect using
the Output L/MONO and R jacks on the rear panel (for monaural playback, use the
L/MONO jack; for stereo playback, connect both L/MONO and R jacks.)
2. The volume from the module is adjusted with the MASTER knob.
Headphones
You can connect a standard pair of headphones the SD1000 sound module to listen to your
electronic drum set without disturbing others. Connect the headphones to the headphone jack
located on the front panel of the drum module. Adjust the volume to a comfortable level to
avoid damaging your hearing. The Headphone output is separate from the Master Volume
output control knob.
USB SD CARD9V-500mA AUX IN
L/MONO
R
OUTPUT
USB SD CARD9V-500mA AUX IN
L/MONO
R
OUTPUT
USB SD CARD9V-500mA AUX IN
L/MONO
R
OUTPUT
MP3
PLAYER
USB SD CARD9V-500mA AUX IN
L/MONO
R
OUTPUT
USB SD CARD9V-500mA AUX IN
L/MONO
R
OUTPUT
MP3
PLAYER
Make sure the power is switched
OFF when connecting the drum
module with external devices.
or or
9861 Simmons SD1000 Drum Set Manual.indd 8 1/22/13 8:59 AM
www.simmonsdrums.net
9
The first name in electronic drums.
Connections
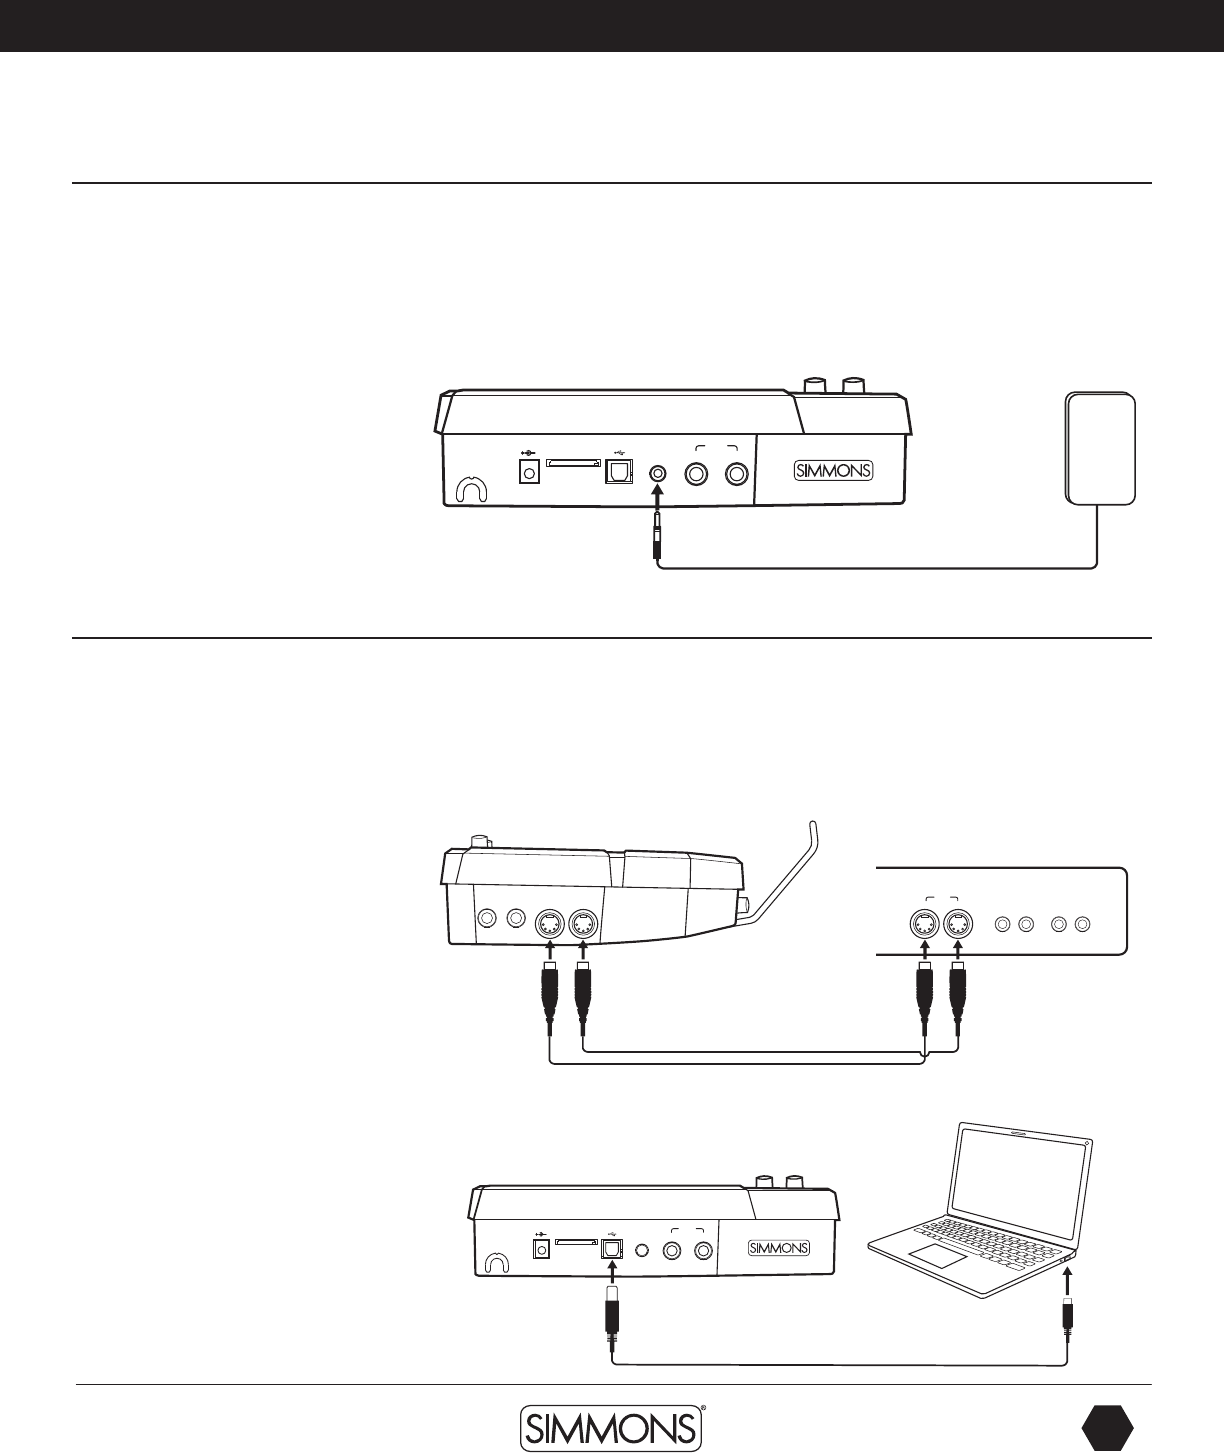
Auxiliary/AUX Input
This input allows you to mix external audio along with the SD1000 sound module’s internal
sounds.
1. Plug the audio output of MP3 player, or other audio source into the AUX IN jack on the
rear panel using a stereo 1/8” TRS cable.
2. The volume of the external signal is adjusted with the AUX IN knob. This will help you mix
the level of the aux input source with the internal sounds.
Connecting MIDI Devices and Computers
MIDI stands for Musical Instrument Digital Interface, which is a world-wide standard
communication interface that enables electronic musical instruments and computers (of all
brands) to communicate with each other. MIDI sends note and other communication between
devices. This exchange of information makes it possible to create a system of MIDI instruments
and devices that offer greater versatility and control than is available with isolated instruments.
Whether you interface with computers, sequencers, expanders or other controllers, your
musical horizons will be greatly enhanced.
USB SD CARD9V-500mA AUX IN
L/MONO
R
OUTPUT
USB SD CARD9V-500mA AUX IN
L/MONO
R
OUTPUT
MP3
PLAYER
TOM 4 CRASH 2 MIDI OUT MIDI IN
USB SD CARD9V-500mA AUX IN
L/MONO
R
OUTPUT
MIDI
OUTIN
MIDI connection
MIDI IN: This jack receives MIDI data from
other instruments or devices.
MIDI OUT: This jack transmits data from
the SD1000 sound module to other MIDI
devices.
USB connection
The USB connector allows you to connect the
module directly to your computer. It can be
connected without driver installation under
the Windows & MAC OSX environment.
The module will be recognized as ‘USB
Audio Device’ to receive and transmit MIDI
messages through a single USB cable, USB is
used only for MIDI messages (MIDI via USB).
NOTE: When the USB is connected to a
computer, all MIDI messages will be received
and transmitted via USB.
9861 Simmons SD1000 Drum Set Manual.indd 9 1/22/13 8:59 AM
SD
OWNER’S MANUAL
10
The first name in electronic drums.
drum module operation
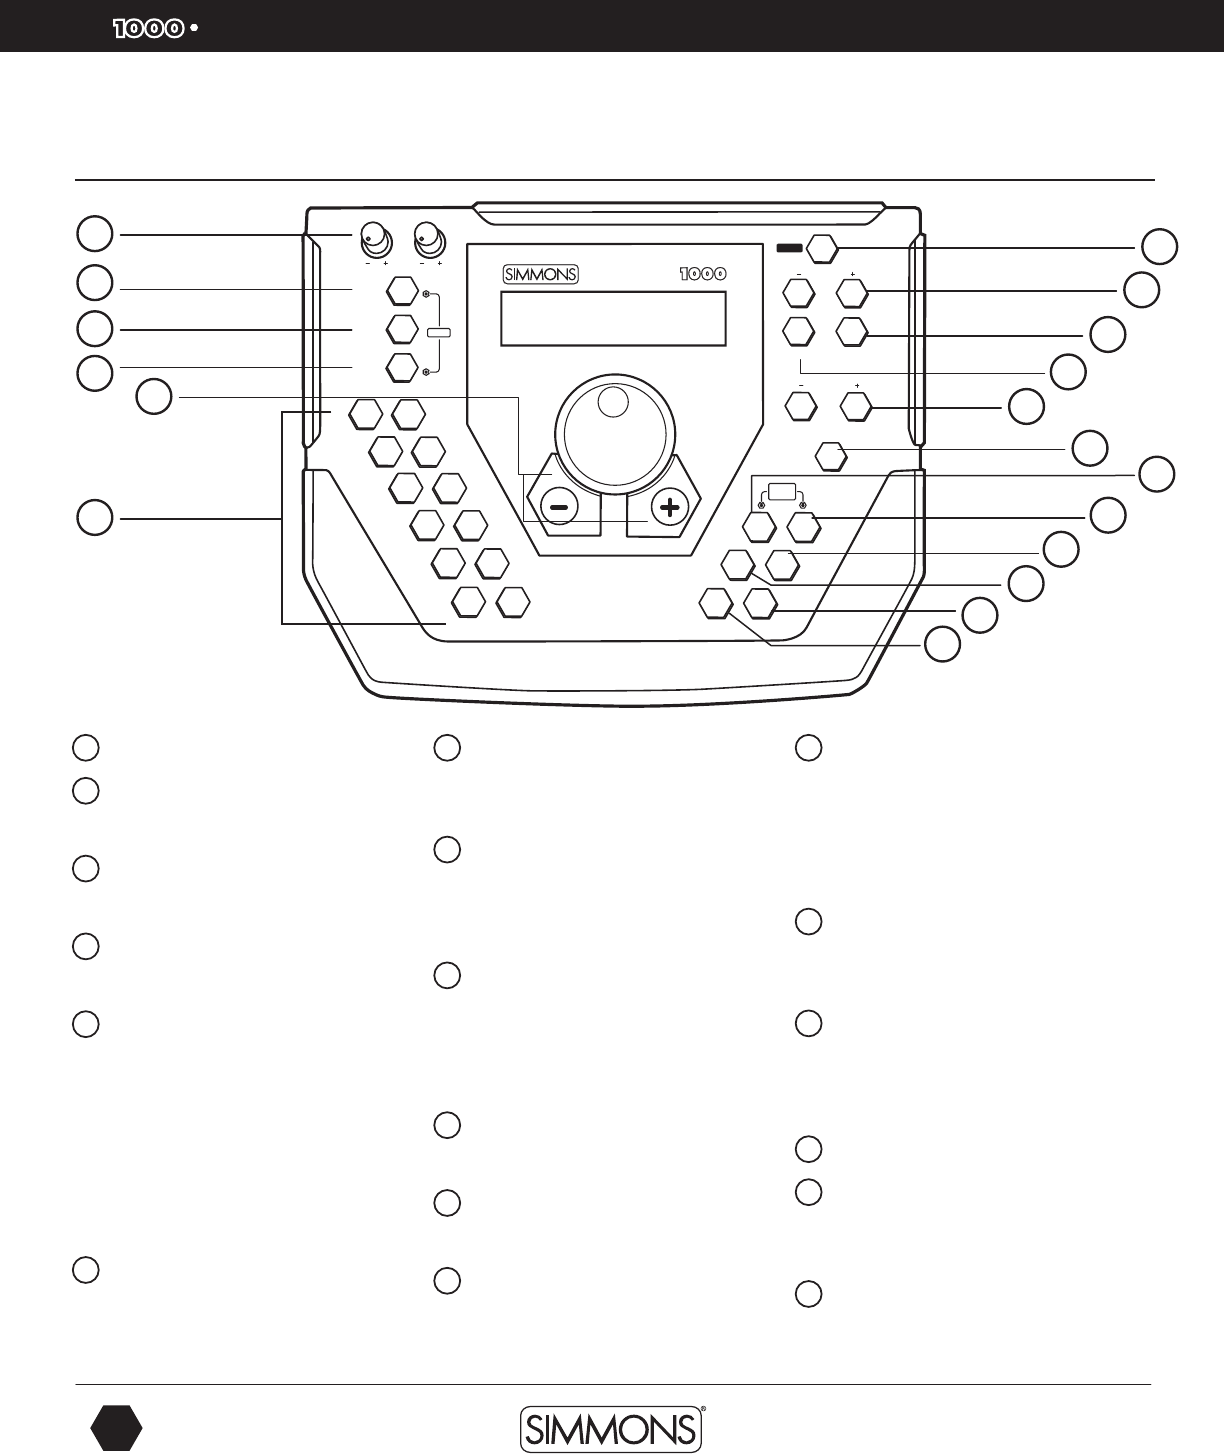
Top Panel
1 Master/Aux Volume Knobs
2 Kit Button
Access Kit Mode
3 Song Button
Access Song Mode
4 Utility Button
Access Utility Functions
5 Pad Select Buttons & Indicators
These buttons can play the pad voices
of the current kit. In the Kit, Mixer and
menus, you can select the pad to be
edited. The indicator LED’s show the
current selected pad. In the Song, and
Demo modes, the indicators will display
the pads being played by the drum
track.
6 Page [-/+] Buttons
These scroll through the menu pages
or move the cursor left or right when
naming kits.
7 Exit Button
Exits from the current sub-menu back to
the higher level menu.
8 Save/Enter Button
Enters the Save menu when it is
available. Also enters the current folder
or confirms a current operation.
9 Tempo [-/+] Buttons
Adjusts the current tempo of a Song or
Click. Pressing both the + and – buttons
simultaneously will reset the tempo to
the original Song tempo.
10 Part Mute Button
Used to Mute parts in a song.
11 Record Button
Used to enter the Record mode.
12 Play/Stop Button
Starts or Stops the playback of a Song.
13 Menu Button
Used to enter a Modes Menu to set
parameters. Holding the Menu button
while pressing Part Mute or the Click
buttons will enter the Mute or Click
settings menu.
14 Click
Turns the Click/Metronome function
ON/OFF.
15 Mixer
Used to enter the Mixer menu and for
editing the Kit, Accompaniment, Card,
MIDI and Click volumes.
16 Power Switch
17 Value Dial / [-/+]
For rapid change to parameters on
the screen.
18 Card
Used to enter the SmartMedia Card
operations.
AUX IN
MASTER
TOM 1
TOM 2
TOM 3
TOM 4 CRASH 2
CRASH 1
RIDE PART
MUTE
MENU
MIXER CLICK
REC
HI-HAT
CONTROL
PLAY/
STOP
HI-HAT
SNARE
RIM KICK
KIT
SONG
UTILITY
SAVE / ENTER
EXIT
POWER
PAGE
TEMPO
CARD
DEMO
QUICK
REC
SD
1
2
3
5
17
4
6
16
10
7
18
11
8
12
9
13
15
14
9861 Simmons SD1000 Drum Set Manual.indd 10 1/22/13 8:59 AM
www.simmonsdrums.net
11
The first name in electronic drums.
drum module operation
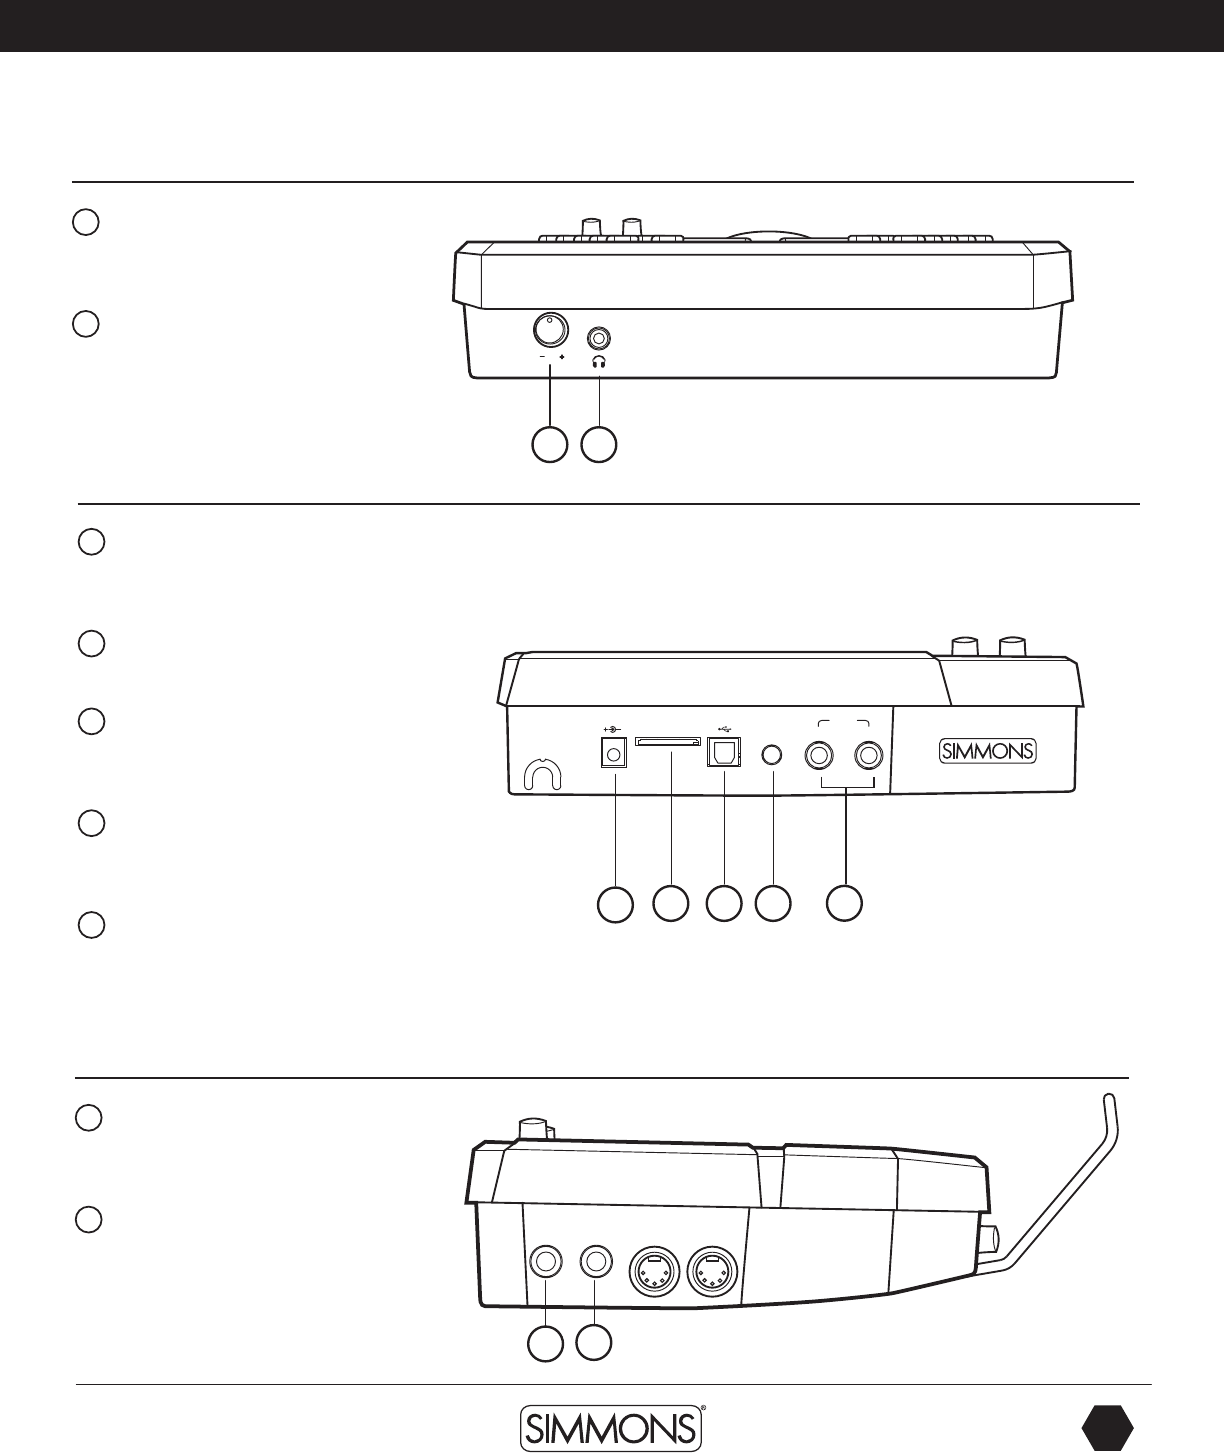
Front Panel
1 Headphone Volume Knob
Controls the audio level for the
headphone output.
2 Headphone Input Jack
Output for 1/8” stereo headphone plug.
Back Panel
1 AC Adapter Input
Connection for the 9V DC power
adapter.
2 SmartMedia Card
(SD) Card slot.
3 USB Port
Used for connecting the SD1000
module to a computer.
4 Aux Input Stereo 1/8” Jack
To connect output from CD or MP3
players to the module.
5 Outputs
Stereo audio outputs to connect to
external audio sources.
(Unbalanced 1/4”)
Side Panel
1 Tom Pad Trigger Input
Use to add an additional tom pad to
the drum set.
2 Crash Pad Trigger Input
Use to add an additional cymbal pad
to the drum set.
USB SD CARD9V-500mA AUX IN
L/MONO
R
OUTPUT
TOM 4 CRASH 2 MIDI OUT MIDI IN
1 2
12 3 4 5
12
9861 Simmons SD1000 Drum Set Manual.indd 11 1/22/13 8:59 AM
SD
OWNER’S MANUAL
12
The first name in electronic drums.
drum module operation
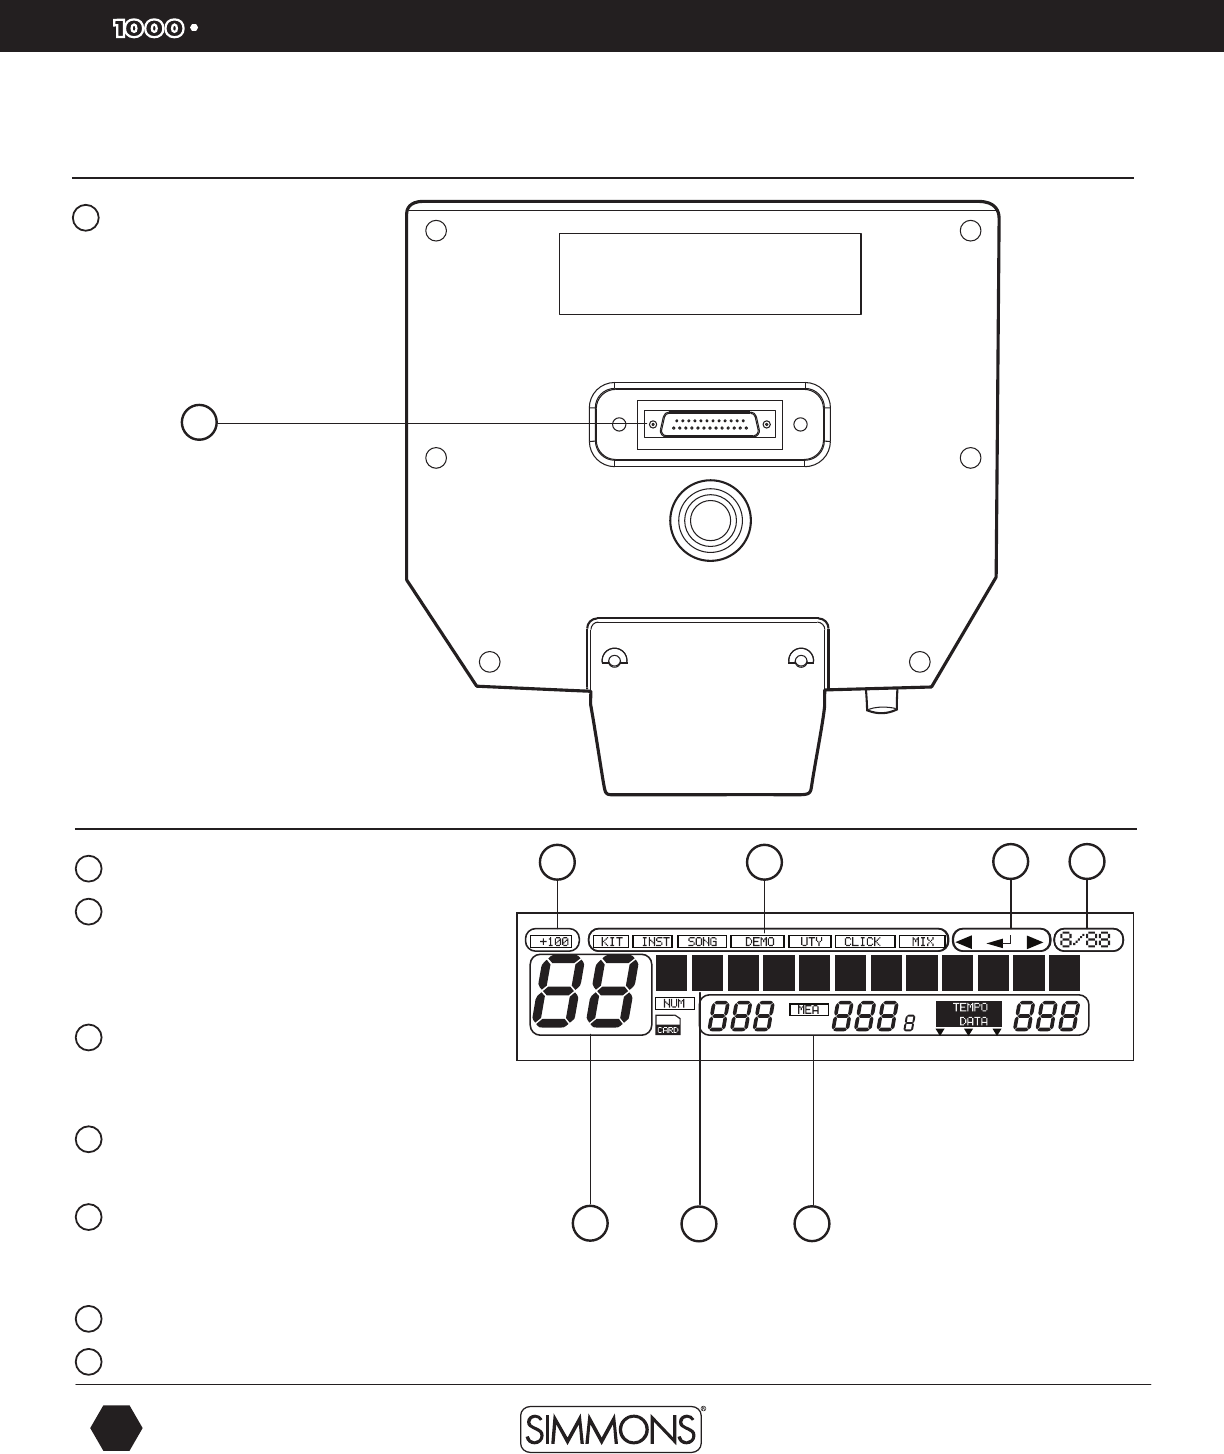
LCD Layout
1 Current Kit Index
2 Main Display
Used to display the current kit or Song name
as well as various menus. In all menus the
current selected field are highlighted.
3 Mode Icon
Displays the current mode that the module is in ie.,
Kit, Song, Demo, Utility, Click, Mix and Card.
4 Current Kit Index
Shows values within the 100’s.
5 Song Number, Measure, Beat and Tempo
Also indicates the current voice or song index in the
menu pages.
6 Indicates the Page -/+, Save/Enter is Valid
7 Current Time Signature
Bottom Panel
1 Multi-Pin Connection Jack
For the Pad Trigger cables
1
12
36 7
4
5
9861 Simmons SD1000 Drum Set Manual.indd 12 1/22/13 8:59 AM
www.simmonsdrums.net
13
The first name in electronic drums.
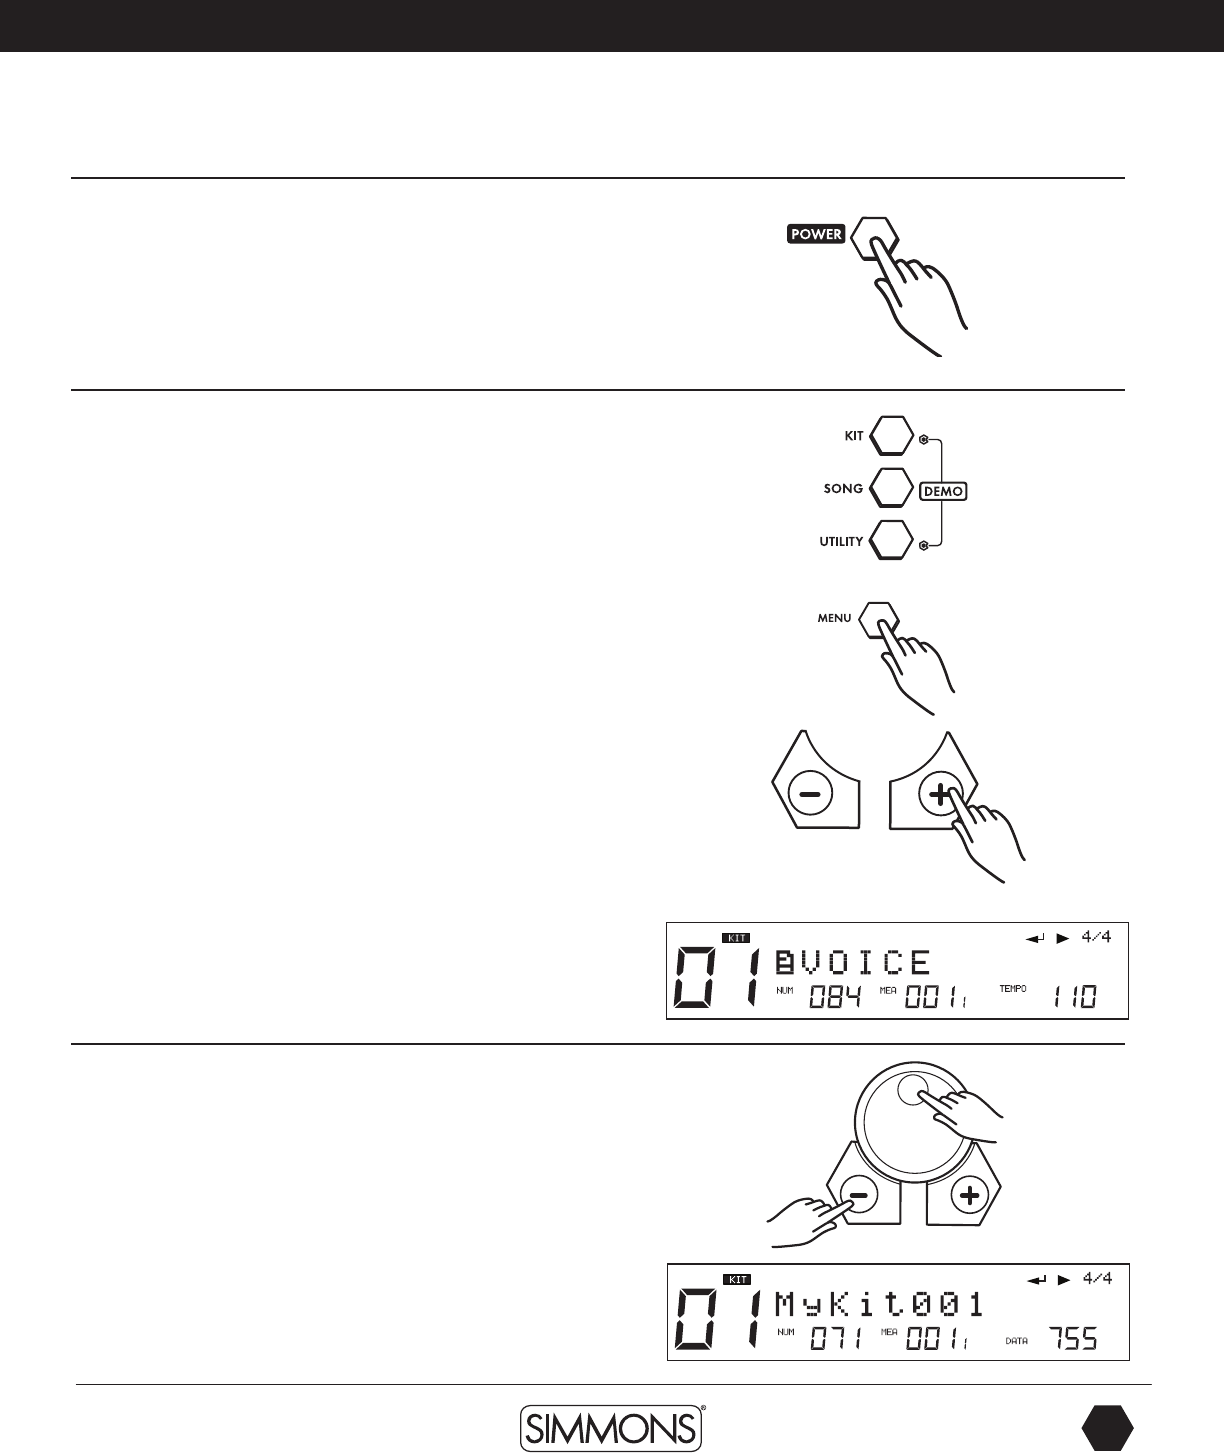
Turning the Power On
START UP SCREEN will show a moving display from left to right –
“SIMMONS SD1000”
1. Connect the DC9V power adapter to the drum module.
2. Press the [POWER] on the top panel.
Basic Operation and Navigation
Selecting Modes
There are 3 main modes for the module KIT, SONG and UTILITY.
To enter these modes press the corresponding buttons on the top
panel of the module.
Menu screens
Each mode has two menus that allow you to select various functions
within the modes.
1. Press [MENU] button to enter current menu (within the current
mode (Kit, Song or Utility mode).
2. Press the [PAGE -/+] buttons to move between menu selections.
3. Press the [EXIT] button to Exit from the current sub-menu back to
the top level menu. You can also press the corresponding buttons
such as [KIT] or [SONG] to immediately enter another menu.
Adjusting Values
1. Select the parameter to be adjusted.
2. Adjust the value using [-/+] buttons or the [VALUE DIAL].
Quick start operations
9861 Simmons SD1000 Drum Set Manual.indd 13 1/22/13 8:59 AM

SD
OWNER’S MANUAL
14
The first name in electronic drums.
Quick start operations
Playing Song Demos
The demo songs help to show you the capabilities and sounds of
the SD1000 sound module. There are two demos in the module.
The first demo song is an extended drum solo that switches between
various kits in the SD1000 sound module. The second demo song
plays a long song that has several patterns combined to show the
different genres of music that SD1000 sound module can play.
1. Press [KIT] and [UTILITY] button simultaneously to enter Demo
Mode. The first song demo will start playing.
2. Press the [PLAY/STOP] button to stop the demo.
3. Press the [-] or [+] buttons to select a demo to play; use Play
button to play the demos.
4. After stopping the Song, press any of the Mode buttons [KIT,
SONG OR UTILITY] to exit the Demo Mode.
Selecting a Kit
Entering KIT Mode
1. Press the [KIT] button. The LCD displays the current Kit number
and Kit name.
2. Press the [–/+] buttons or use the VALUE DIAL to select the Kit.
Selecting a Song
1. Press the [SONG] button and the SONG screen appears with
Song Number, Song Name, Beat and Measure. The bottom of
the LCD display will show the Number, Measure and Tempo.
2. Press the [–/+] buttons or [VALUE DIAL] to select the Song.
Playing a Song
1. Press [PLAY/STOP] to play a song. The PLAY/STOP button will
light indicating that a song is playing. During playback of a song,
you will see the drum pad buttons flash, which are corresponding
to the drums being played.
2. Press the [PLAY/STOP] button to stop playback of the song.
The indicator lights will go out.
NOTE: You can temporarily change the tempo of a song while
playback is in progress. The song returns to its preset tempo when
a different song is selected.
9861 Simmons SD1000 Drum Set Manual.indd 14 1/22/13 8:59 AM
www.simmonsdrums.net
15
The first name in electronic drums.
Quick start operations
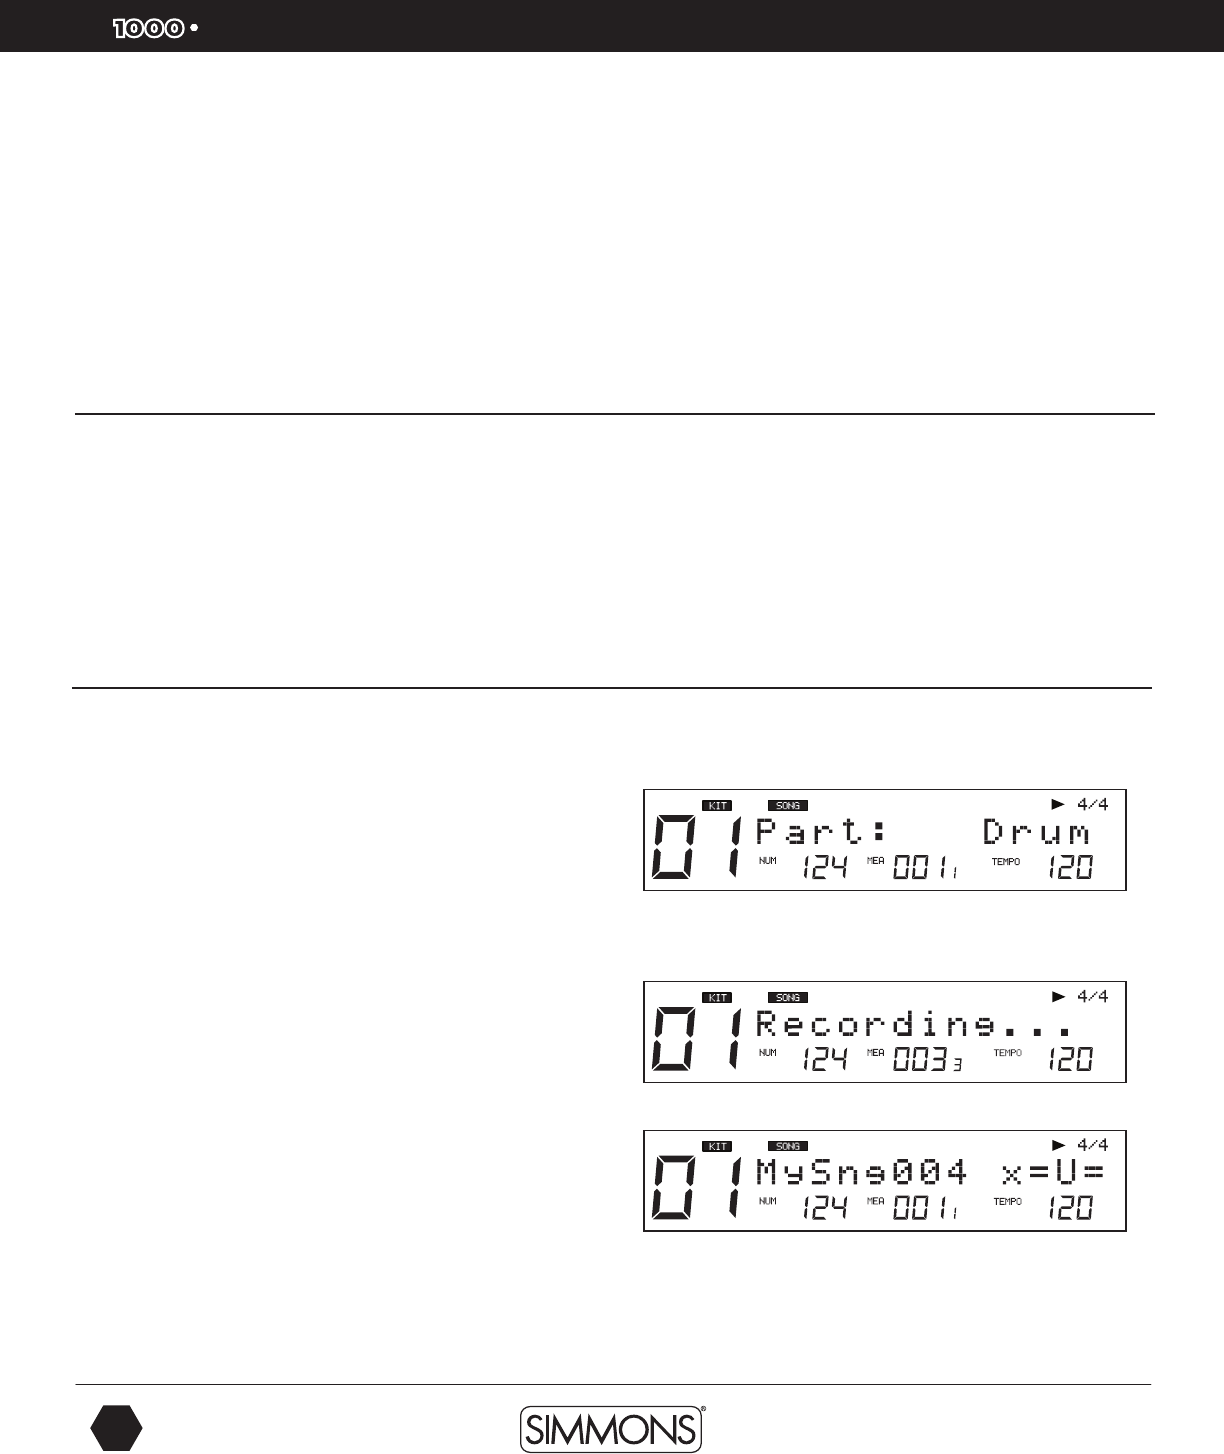
Muting the Drum Part
1. While a Song is playing press the [PART MUTE] button to enter
the Mute function.
2. Press the [PART MUTE] button to enter the Mute function. The
first part (drums) should now be muted while the rest of the song
is playing. The [PART MUTE] button’s LED should be flashing.
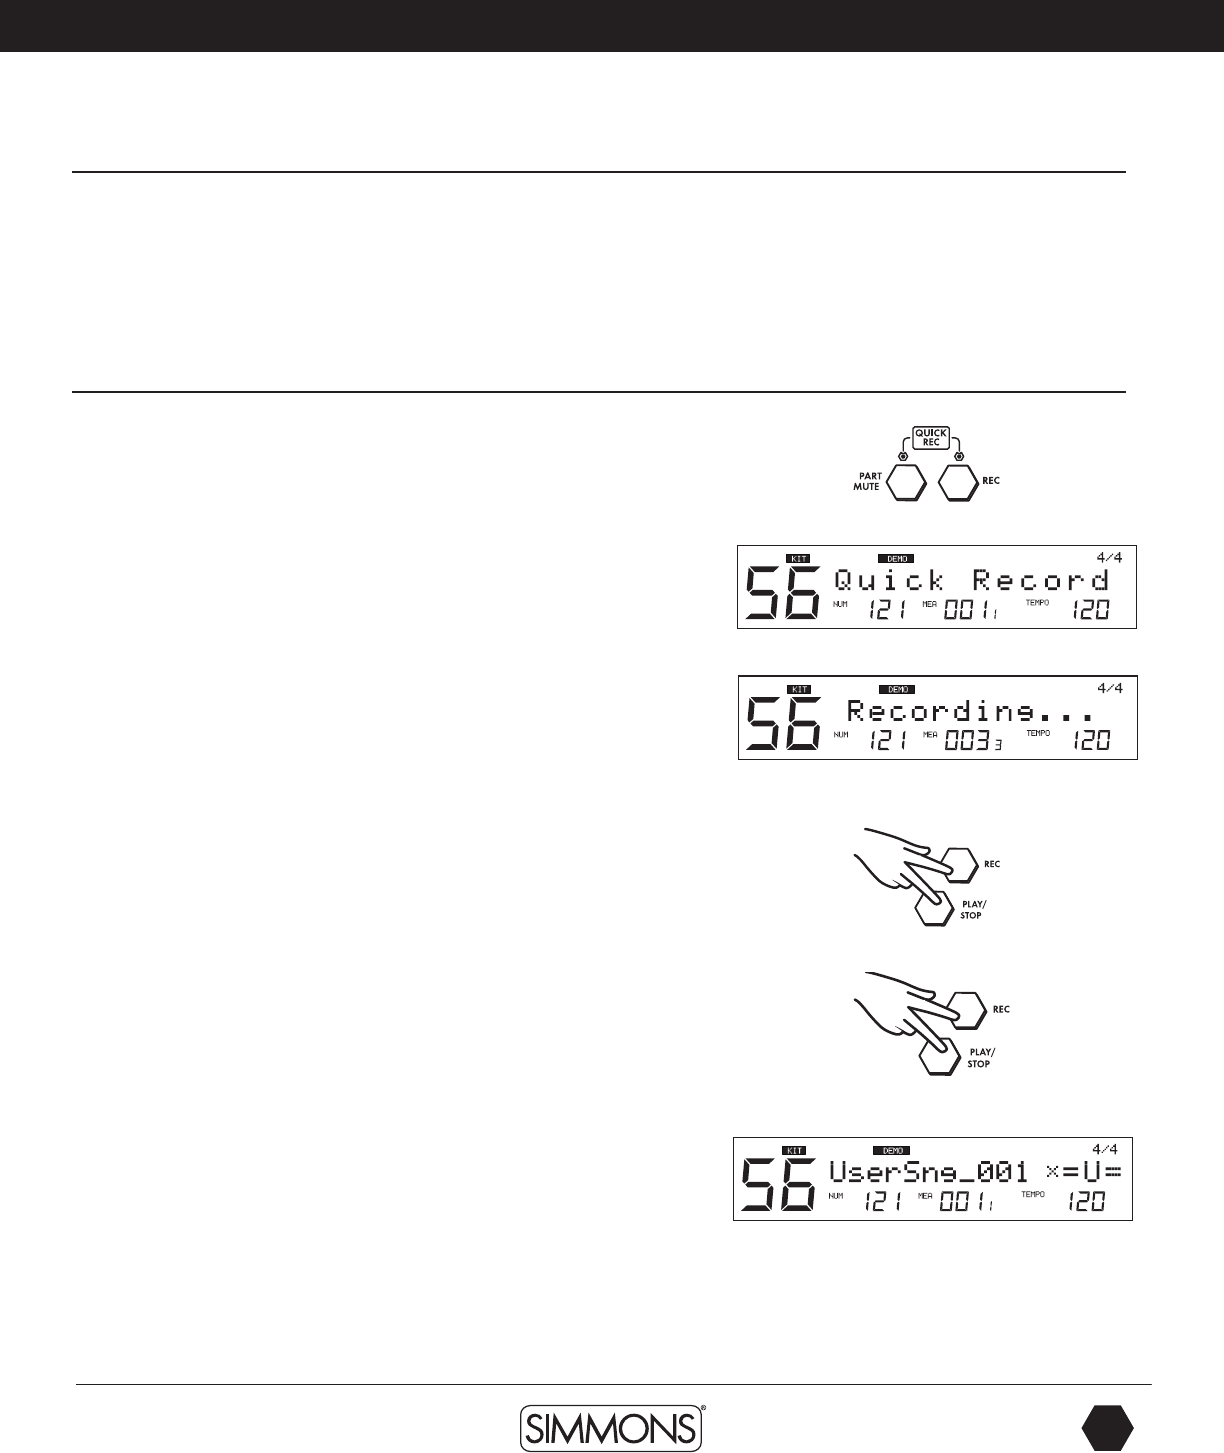
Quick Record
With Quick Record, you can immediately start recording your drums.
Quick Record does have some limitations. There is click sound while
recording, it cannot be quantized or edited. It’s great for quick,
scratch pad recording of your drum parts.
1. Press [REC] and [PART MUTE] buttons simultaneously to enter
recording. If this is a current Song the part you will be recording
to is the drum part. The song will be using SYNC mode, which
means you will hear the Click count, but the sequencer will not
start recording until you start playing.
Once you start playing you will see “Recording” on the screen and
the REC and PLAY/STOP button will be lighted.
2. Press [PLAY/STOP] to stop recording.
3. Press [PLAY/STOP] to play back what you recorded on the
drum part.
NOTE: Quick Record will function within any of the Modes (KIT,
SONG and UTILITY).
If there is a drum part already in the current song this will overwrite
it in the temporary memory. You will have to save the Song to a User
memory location to save it.
9861 Simmons SD1000 Drum Set Manual.indd 15 1/22/13 8:59 AM
SD
OWNER’S MANUAL
16
The first name in electronic drums.
Advanced Operations
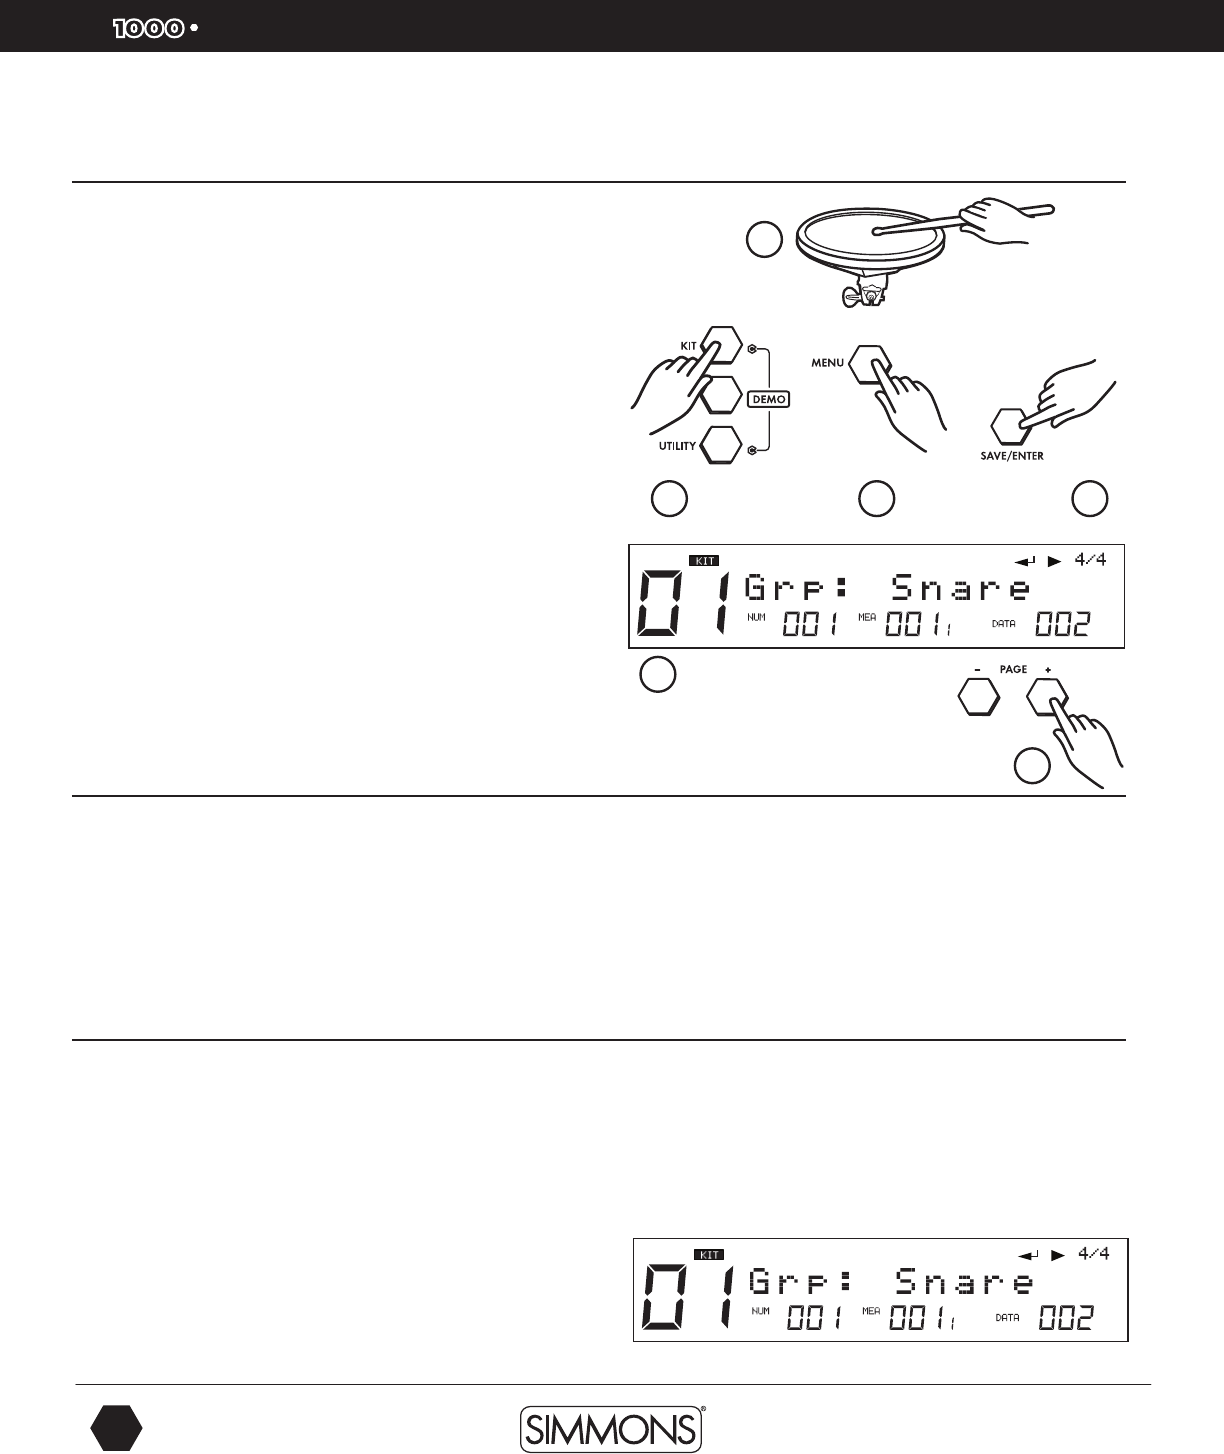
Editing a Kit
The drum kits of the SD1000 sound module can be modified from
the factory presets. See the steps below on how to make changes
and parameters for each pad input.
1. Strike a drum pad or press the corresponding Drum Pad button on
the module.
2. Press the [KIT] button.
3. Press the [MENU] button.
4. Press the [SAVE/ENTER] button. You will see the type of Group/
Bank of Sounds assigned to the Pad for example: Grp: SnareBK.
5. Press the [PAGE +] button. You will see the actual sound that is
assigned to the pad.
6. Press the [-/+] buttons or the VALUE DIAL to change the sound.
Sound Organization
When searching for sounds within the SD1000 sound module you
will need to be aware of how the sounds are organized.
GRP refers to a Pad Voice Group, which contains 12 common
voices/sounds such as Kick1, Snare1, Tom1, Ride1, Crash1, HiHat,
and Percusn. You can change the Voice Group with the [-/+] or
Value Dial.
Editing the Pad Sound
1. Strike a drum pad or press the corresponding Drum Pad button on
the module.
2. Press the [KIT] button.
3. Press the [MENU] button
4. Press the [SAVE/ENTER] button. You will see the Group/Bank of
Sounds assigned to the Pad for example: Grp: SnareBK.
5. Press the [PAGE +] button to go the following screens to adjust
the Kit parameters. The parameters available are:
1
6
5
2 3 4
9861 Simmons SD1000 Drum Set Manual.indd 16 1/22/13 8:59 AM
www.simmonsdrums.net
17
The first name in electronic drums.
Advanced Operations
Parameter Explain Pararameter Range [-/+]
Grp* Pad voice group (See Sound Organization)
Voc* Voice index/
HH combi group index 1~674 (See detail below)
Volume Volume 0~32
Pan Pan L8~R8/Center
Pitch Pitch -8~+8
Decay Decay 0~-5
RvbLevel Reverb Level 0~32
MIDINote* Pad note (MIDI out) (See page 46)
Duration Pad note length (MIDI out) 0.0s~0.8s
StartVol Pad voice start volume 0~32
Hi-Hat sounds are collections of sounds (Combis) to reproduce the hi-hat functionality. Hi-Hat
Combi groups are only used with the hi-hat Trigger input.
To set the Hi Hat group and volume use the steps below:
1. Press the [KIT] button.
2. Press the [MENU] button.
3. Press the [SAVE/ENTER] button.
4. Press the front panel Hi-Hat button.
5. Press the [PAGE +] button to select a Hi Hat Combi group (10).
6. Press the [PAGE +] button to set the Hi Hat trigger volume.
NOTE: After selecting the Hi-Hat Combi Group, you can adjust the parameters of all the
parameters of the hi-hat together - HIHAT, P HIHAT, Splash. Hi-Hat pedal volume (including
P HIHAT and SPLASH) can be adjusted separately.
Besides changing the Pad Voice/Sound assignment you can also alter the parameters of the
sound to give it more unique character.
9861 Simmons SD1000 Drum Set Manual.indd 17 1/22/13 8:59 AM
SD
OWNER’S MANUAL
18
The first name in electronic drums.
Advanced Operations
Pad Patterns
You can also set a pad to start playing a Song pattern when it is struck.
1. Strike a drum pad or press the corresponding Drum Pad button on the module.
2. Press the [KIT] button.
3. Press the [MENU] button
4. Press the [PAGE +] button. You will come to Pad Pattern setting.
ON: When triggering the pad, sound the pad pattern plays along with drum voice;
OFF: Default setting. When triggering the pad, just sound the pad.
Other Parameters for Pad Patterns
1. From the Pad Pattern setting press [SAVE/ENTER]. You should see the Song Group
assignment. For example “Grp: DrumLoop.
2. Press the [-/+] buttons or turn the VALUE DIAL to change the assignment. For this example
choose “PercLoop”
3. Press the [PAGE +] button and you will come to the Song assignment. For Example “Bonz
Beat”. Press the [-/+] buttons or turn the VALUE DIAL to change the assignment. Choose
3/4 Feel.
4. To get to the other parameters press the [-/+] buttons or VALUE DIAL to move to the other
pages that affect the Pad Pattern mode. See the table below for the parameters that are
available.
Parameter Explain Parameter (+1/-1)
Pattern* Pad Pattern Switch OFF/ON
Grp* Pad Pattern Group DrumLoop/1 Shot/PercLoop/HIT/
TAP/UserSong
Sng* Pad Pattern Index 1-220
Retrig* Retrigger Mode ST/SP ReST
VelCtrl* Velocity Control Volume OFF/ON
Volume Volume 0~127
X`Pose Pad Pattern’s Transpose 12~12
RstTime* Reset Time OFF/0 1s~4.0s(unit 0-1s)
DrumVoc* Whether Drum Voice Sound OFF/ON
9861 Simmons SD1000 Drum Set Manual.indd 18 1/22/13 8:59 AM
www.simmonsdrums.net
19
The first name in electronic drums.
Advanced Operations
*Definitions of Terms:
Patterns:
You can play up 7 patterns on your drum pads (Hit or Tap types) simultaneously.
Grp Sng:
All the Songs (including Preset Songs, User Songs) can be selected for pad pattern;
Use the DIAL or press the [-]/[+] button to select a song you like; when another song
group is selected, the menu ”Grp:”will refresh simultaneously.
VelCtrl:
You can choose to use the pad velocity to control the volume.
ON: Controls the volume of the pad pattern’s play by trigger velocity
OFF: Does not control the volume of the pad pattern’s play by trigger velocity, but use
the default volume (adjusted in the next menu”volume:”).
Restart Trigger/Restrig and Reset Time/RstTime:
This selection sets the restart trigger and time if TAP is selected.
Loop, 1shot and Hit: “RstTime” menu will display as “invalid”.
Tap: “Retrig” menu will display invalid “---”
MIDI Note: You may want to know the MIDI Note that a specific pad trigger is transmitting
through the MIDI OUT Port. For each pad trigger’s default MIDI Note, see Table on
page 47.
If current MIDI Note parameter has been selected by another trigger, the LCD will display “!”
to suggest that you should adjust it.
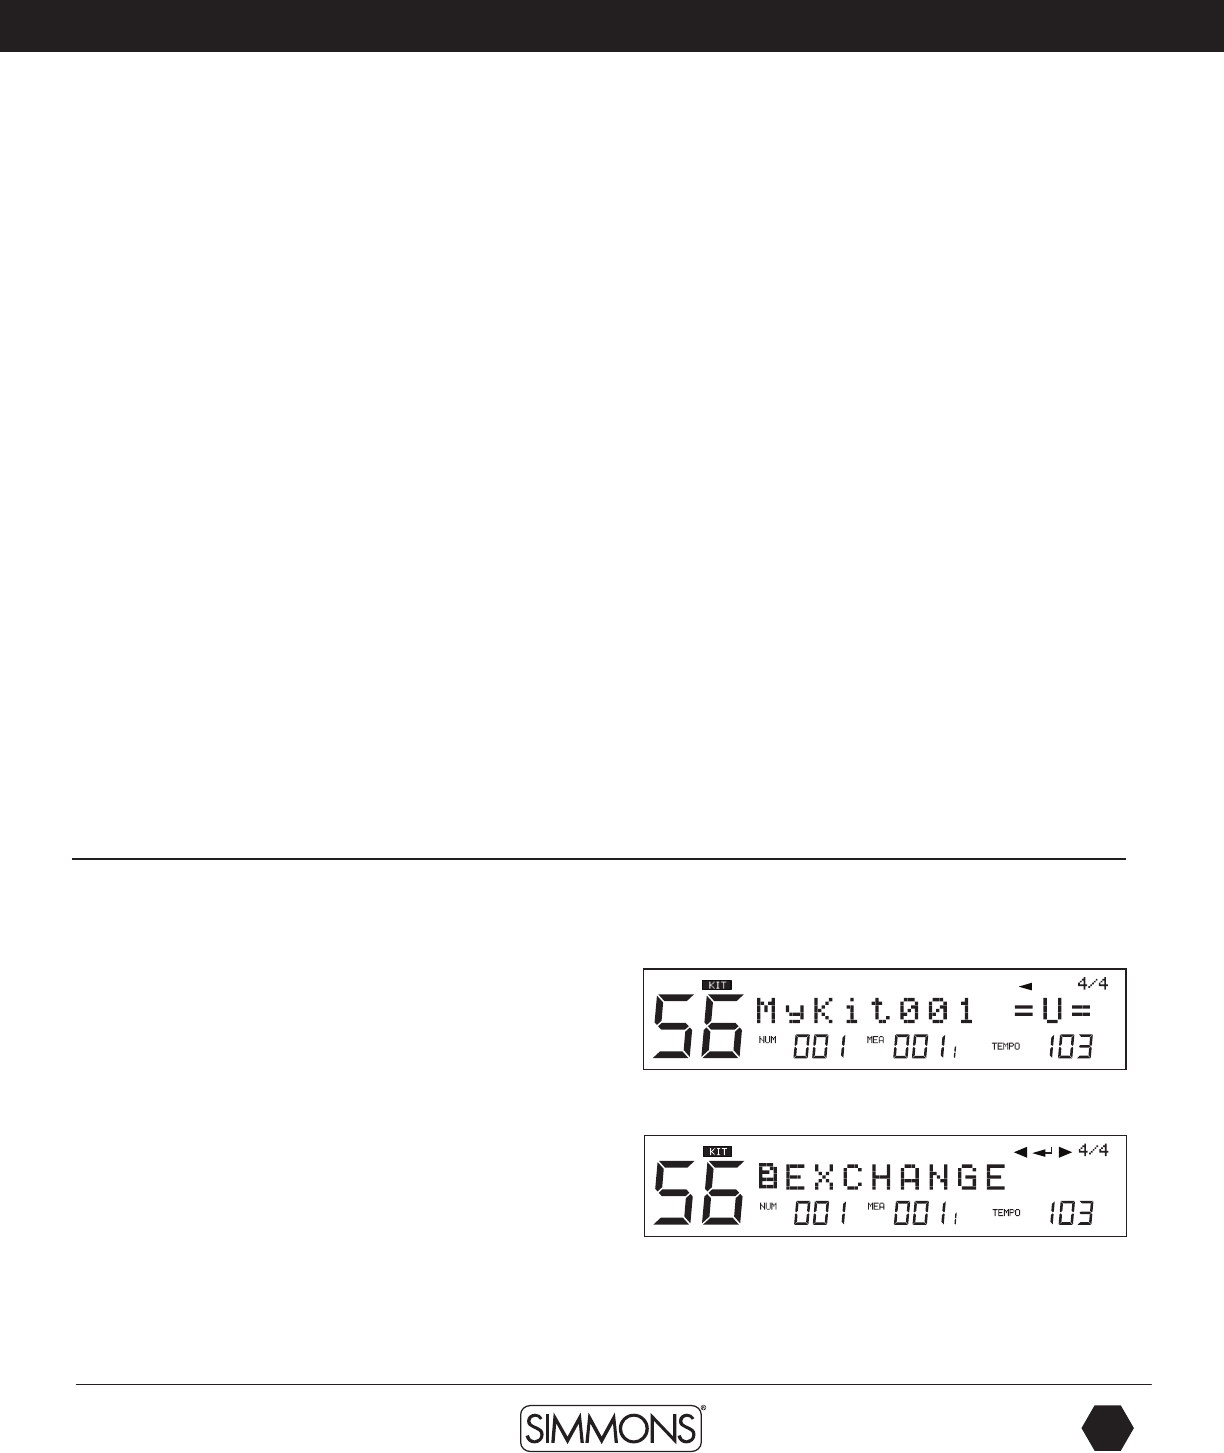
Exchanging the Kit Order
This function allows the user to exchange USER kits. Only user kits
(Kits 56-99 have the Kit Exchange function.
1. Select a USER Kit.
2. Press the [MENU] button, and the [PAGE –] or [+] button to
enter the menu to select “EXCHANGE”
3. Press the [SAVE/ENTER] button to set exchange position. You
will see “ EXCHANGE” on the screen and then the screen will
go the kit that was exchanged.
9861 Simmons SD1000 Drum Set Manual.indd 19 1/22/13 8:59 AM
SD
OWNER’S MANUAL
20
The first name in electronic drums.
Advanced Operations
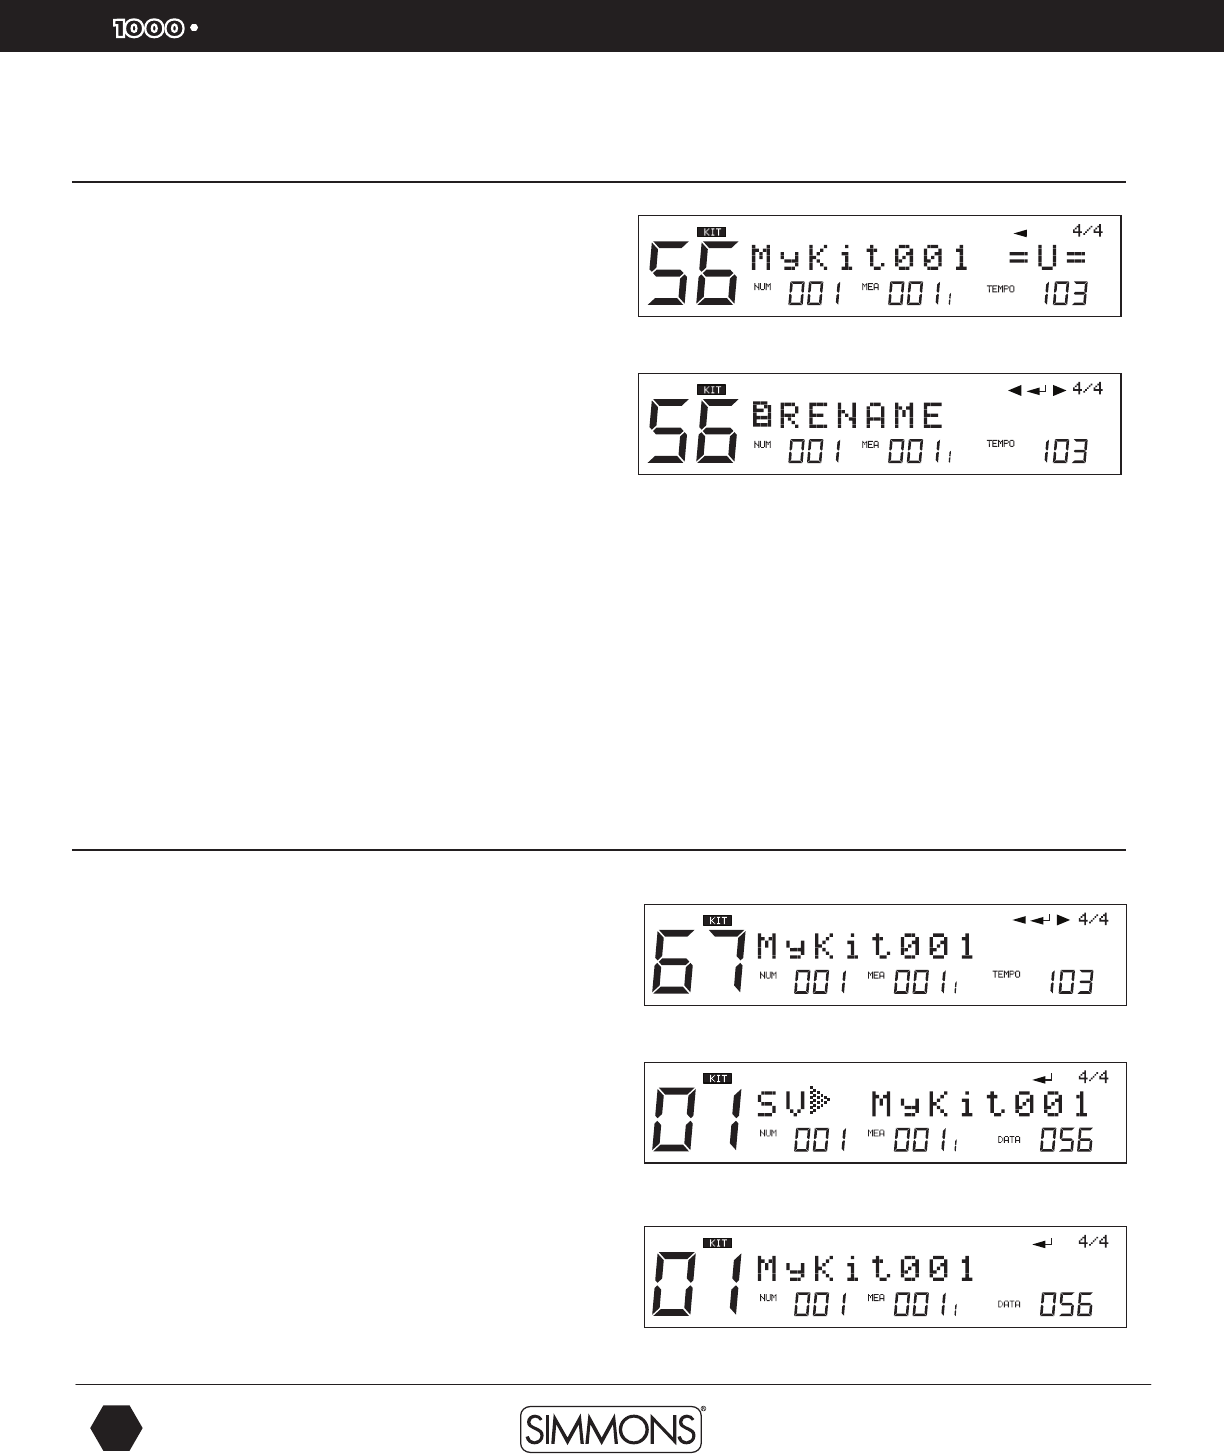
Renaming a Kit
1. Select a User Kit.
2. Press the [MENU] button, then press the [+] button until the menu
display shows “RENAME”.
3. Press the [SAVE/ENTER] button to enter the rename function.
Example: Renaming a Kit
1. Press [PAGE +] to move the cursor to the right.
2. Press [PAGE –] to move the cursor to the left.
3. Press [+] to change the character to the next highest value.
4. Press [–] to change the character to the next lowest value.
5. Press [SAVE/ENTER] to save the changed name.
To save the name, you will need to save the kit as well.
6. Press the [SAVE/ENTER] button to save it.
Saving a Kit
You can save or modify user Kits in the internal memory of the
module or on a SD Card.
Saving Preset and User Kits
1. Select a Kit.
2. Press the [SAVE/ENTER] button. The LCD will indicate “Sav
MyKit001 “ This will be for selecting a place to save current
preset (MyKit001 is the default location).
3. Press the [SAVE/ENTER] button. You will come to the rename
function. Use the steps from the Renaming a Kit to rename the kit
if you want.
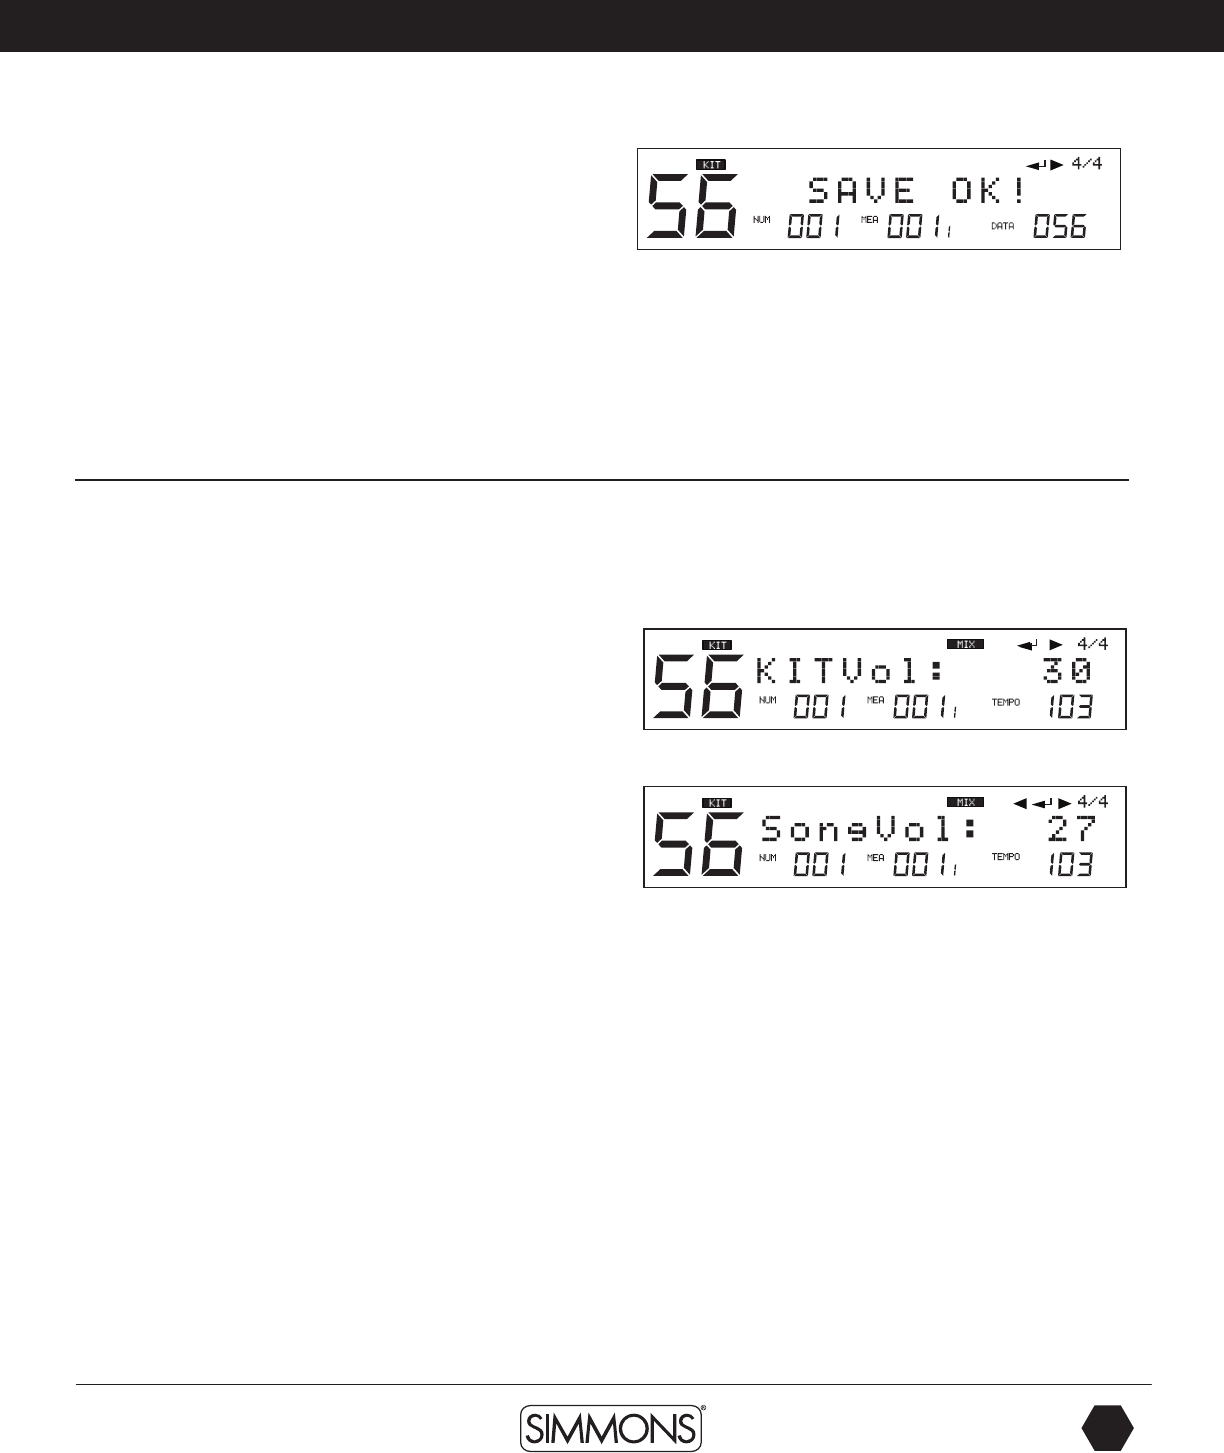
4. Press the [SAVE/ENTER] button to save the kit. You will see
“SAVE OK” on the screen temporarily and then you will see the
current kit name on the screen.
9861 Simmons SD1000 Drum Set Manual.indd 20 1/22/13 8:59 AM
www.simmonsdrums.net
21
The first name in electronic drums.
Advanced Operations
When saving User Kits you can overwrite the User kit that you are
editing. If you want this to be on a different location, be sure to
specify the new User location.
You can also save to SD Card locations if you have a SD card in the
slot. This will be specified as a location on the menu as you page to
that location.
NOTE: When saving Kits to a SD Card the SD1000 sound module
will save it to an internal memory location at the same time if the
SD card fails to write the file to the card. You will see “No Card” or
“Card error” if this occurs.
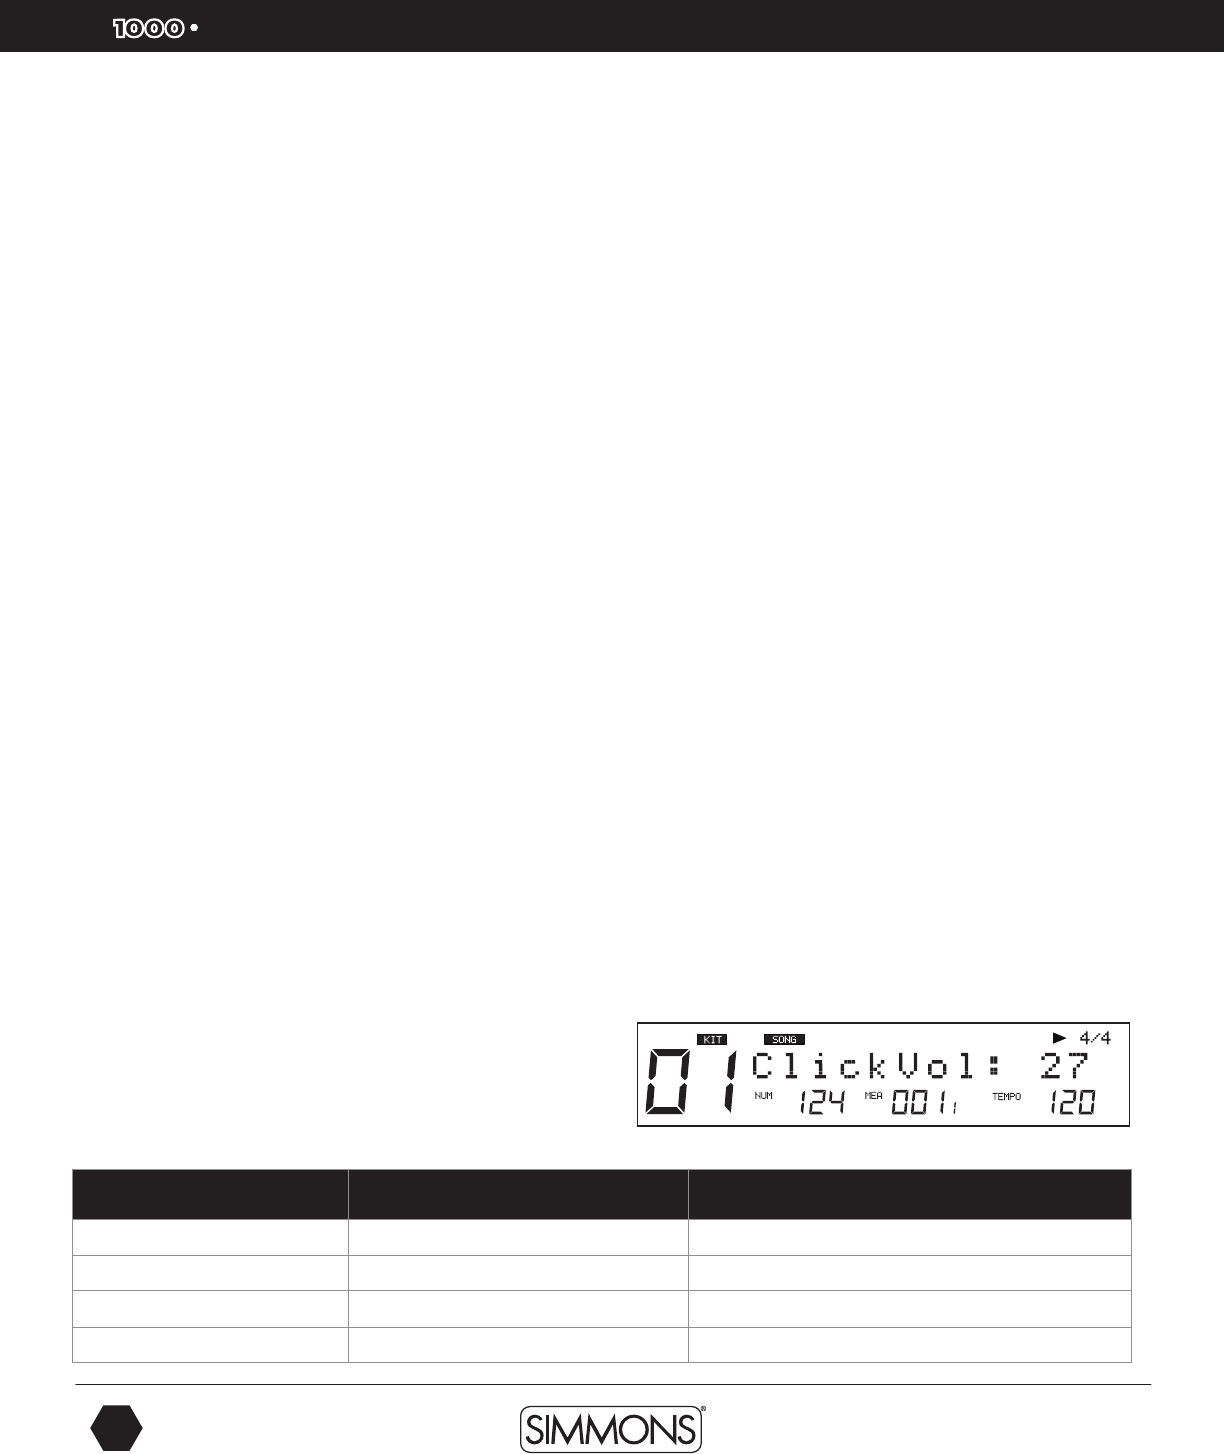
Mixer
The volumes for the Master Kit, Accompaniment, Click and Card
MIDI (the MIDI files on the card) can be balanced together in the
drum module mixer menu
Master Kit Volume
1. Press the [MIXER] button to enter the mixer menu:
2. Press the [PAGE +] button to select the volume you want to adjust
SongpVol, ClickVol. Then press the [-/+] buttons or VALUE DIAL
to adjust the volume for the part.
Inner Volumes
1. On the menu page for the Kit Volume (KITVol: 30) press the
[SAVE/ENTER] button to enter the Kit Trigger volume. This will
show the current pad trigger’s volume. You can adjust the value
using the -/+ buttons or VALUE DIAL.
2. The adjustments of the Kit Trigger volume are the same operation
as in KIT MENU. Don’t forget to save current Kit before you select
another Kit or power down the module otherwise your settings
will be lost.
9861 Simmons SD1000 Drum Set Manual.indd 21 1/22/13 8:59 AM
22
The first name in electronic drums.
SD1000 owner’s manual
Advanced Operations
Song Volume
This is the volume for the accompaniment parts.
1. From the Kit Volume screen press the [PAGE +] button. You should see the current settings
for the Song Volume (SongVol: 30).
2. Press the [SAVE/ENTER] button to enter the Songs volume pages. By pressing the
[PAGE –/+] buttons you can move to the various instrument pages, which show the
individual song part volumes. You can adjust the value using –/+ buttons or VALUE DIAL.
The adjustments of the Song Trigger volume are the same operation as in SONG MENU.
Don’t forget to save current Song before you select another Kit or power down the module
otherwise your settings will be lost.
Parameter Secondary
Parameter
Explain Value
KI TVol Master Kit volume 0~32
TrigVol Current Trigger volume 0~32
SongVol Master Accompaniment volume 0~32
DrumVol Current Song Drum volume 0~32
PercVol Current Song Percusion volume 0~32
Part1Vol Current Song Part 1 volume 0~32
Part2Vol Current Song Part 2 volume 0~32
Part3Vol Current Song Part 3 volume 0~32
Part4Vol Current Song Part 4 volume 0~32
Part5Vol Current Song Part 5 volume 0~32
ClickVol Click volume 0~32
CardVol Card MIDI volume 0~32
Song Mode
The SD1000 sound module comes with built-in songs, which split between Preset (Internal)
and User (internal and card memory) Songs.
The Song functions are controlled by a MIDI sequencer, which organizes music into seven
parts. The Drum Kit part is used to record/playback what is played on the pads. Additionally,
Percussion part, Part 1, Part 2, Part 3, Part 4 and Part 5 are the 6 backing instrument parts
(backing parts). The collective performance of these 7 parts is called a song.
Song Mode Operations - Advanced
Selecting a Song is discussed the Quick Start Operations earlier in the manual. Below are the
more advanced functions for Song Mode
There are 5 different Song categories, Pattern Loop, 1 Shot, Percussion Loop, Hit, Tap and
User Songs. See the appendix section for the listing of Song/Pattern loops that can be played.
9861 Simmons SD1000 Drum Set Manual.indd 22 1/22/13 8:59 AM
www.simmonsdrums.net
23
The first name in electronic drums.
Advanced Operations
Pattern Loop This plays the Song repeatly until the STOP button is pressed
1 SHOT This plays the Song one time and then stops
Percussion Loop This is a Song with just the Percussion part that plays repeatedly
Hit This plays a short musical phrase one time
TAP This plays a step of a musical phrase each time you play a pad
USER This is song created by the user and stored in a user location
Editing Songs
1. Press the [SONG] Button.
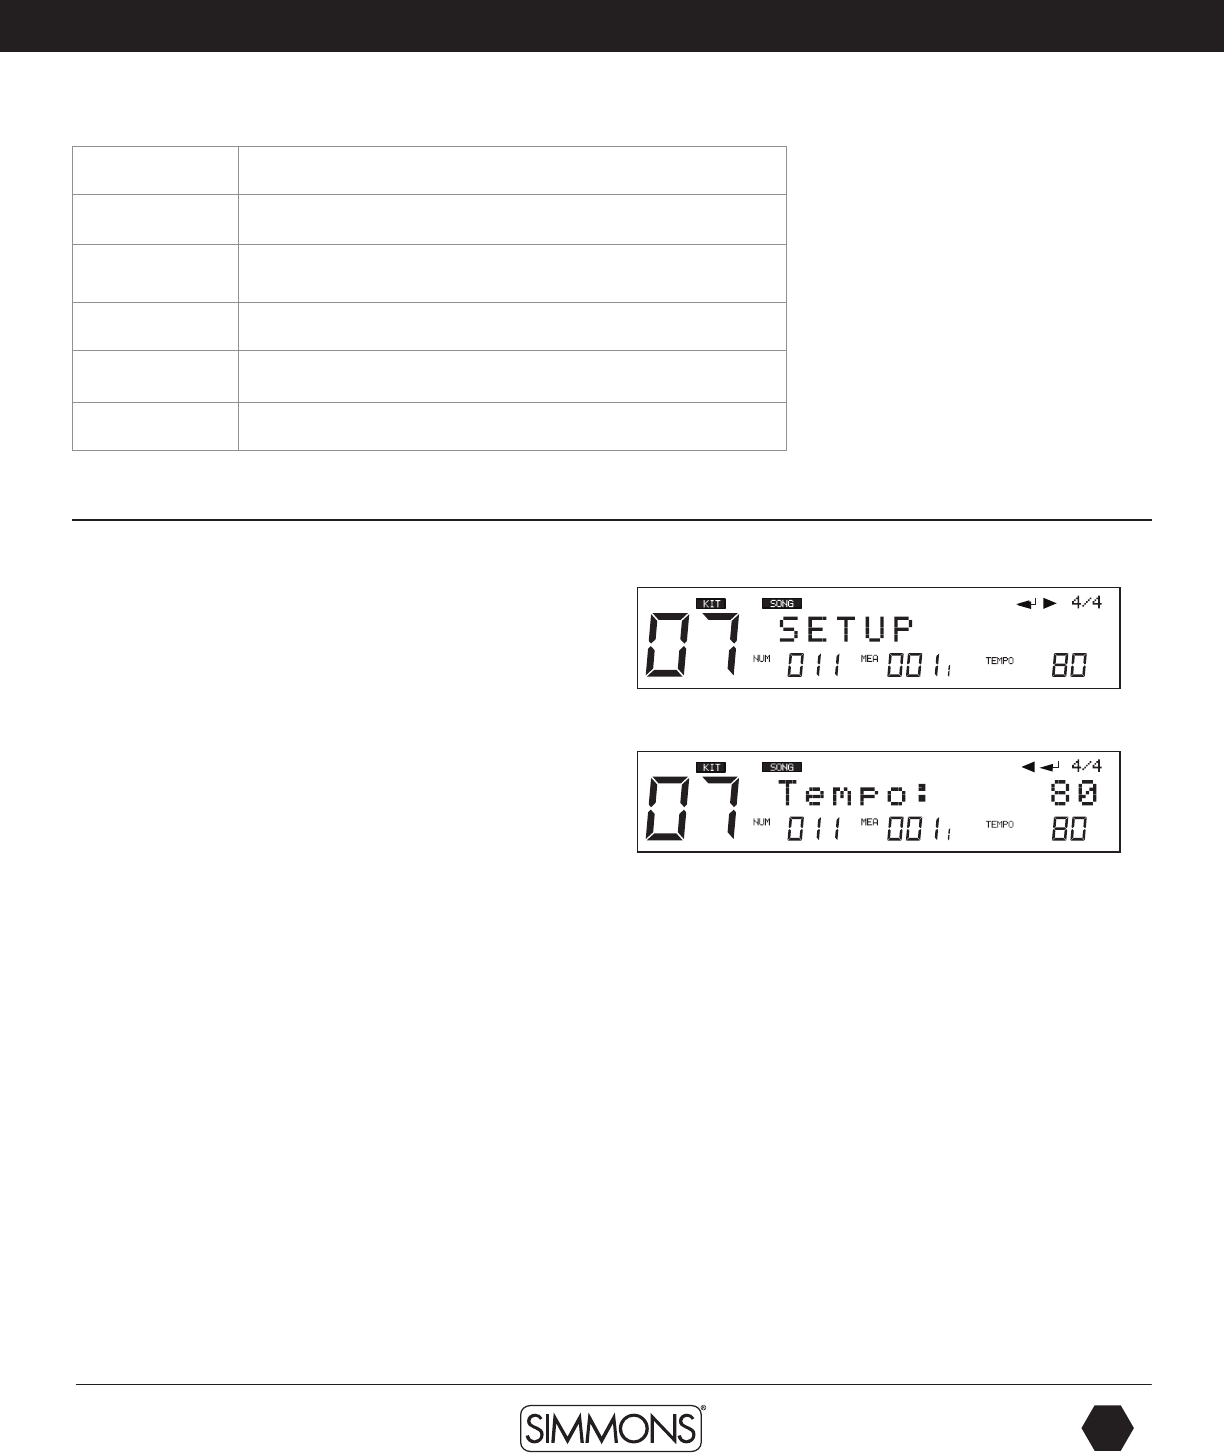
2. On song screen, press [MENU]. You will see “SETUP”
displayed on the screen.
3. Press the [SAVE/ENTER] button.
4. Press [PAGE +] or [ - ] to move between parameters for the Song.
5. Press the [–/+] buttons to move between the Pages for the settings of the song - Tempo,
Time Sig/Mode,Pre Count, Kit Link, Tap Sync. See the definitions below.
NOTE - The parameters of Pre Count, Kit Link, Tap Sync are global settings cannot be saved
to a user song.
Time Signature/Time-Sig
For the preset songs, this parameter shows the current song’s default value. For the user
songs that have material already recording on them the default value is 4/4 and cannot be
changed.
1. Each Song has its own mode as default.
2. If current song is the type of Loop/1Shot, the parameter can be changed and the
modification takes effect at real time. If current song is the type of TAP/HIT, the parameter
cannot be changed.
9861 Simmons SD1000 Drum Set Manual.indd 23 1/22/13 8:59 AM
SD
OWNER’S MANUAL
24
The first name in electronic drums.
Advanced Operations
Mode
1. Each Song has its own mode as default.
2. If current song is the type of Loop/1Shot, the parameter can be changed and the
modification takes effect in real time. If current song is the type of TAP/HIT, the parameter
cannot be changed.
Pre Count
This is the song count off function. This is an auxiliary function available when “LOOP” and
“1 SHOT” are specified as the Play Mode for the song.
You can specify the count-off (click) inserted before playback of a song begins.
0 - Playback begins without a count-in.
1 - Playback begins after a 1-measure count-in.
2 - Playback begins after a 2-measure count-in.
Kit Link
This is an auxiliary function available when “LOOP” and “1 SHOT” are specified as the play
mode for the song.
If this is set to “ON”, the kit selection will be changed according to the kit selection of the
drum part of the current song.
During playback of a song this function will be become effective when switched from “OFF”
to ”ON”. If you want to change to another kit for your performance enter the Kit mode to
select a new kit. If it is set to OFF the kit selection won’t be changed with the songs.
Tap Sync
This is an auxiliary function available when “TAP” and “HIT” are specified as the play mode
for the song.
In Tap and HIT playback if the sound is set to play before the previous sound has finished
playing. This setting allows you to either have the previous sound stop and the subsequent
sound start playing (ON). You can also have the two sounds layered (OFF).
ON: The previous sound continues to play to the end, while the subsequent sound is
superimposed on it. OFF: The previous sound stops and the subsequent sound starts playing.
Song Part Settings
Changing the Drum and Percussion settings
1. Press the [MENU] button, then press the [PAGE +] button.
2. Press the [SAVE/ENTER] button to enter the screen of
part settings.
9861 Simmons SD1000 Drum Set Manual.indd 24 1/22/13 8:59 AM
www.simmonsdrums.net
25
The first name in electronic drums.
Advanced Operations
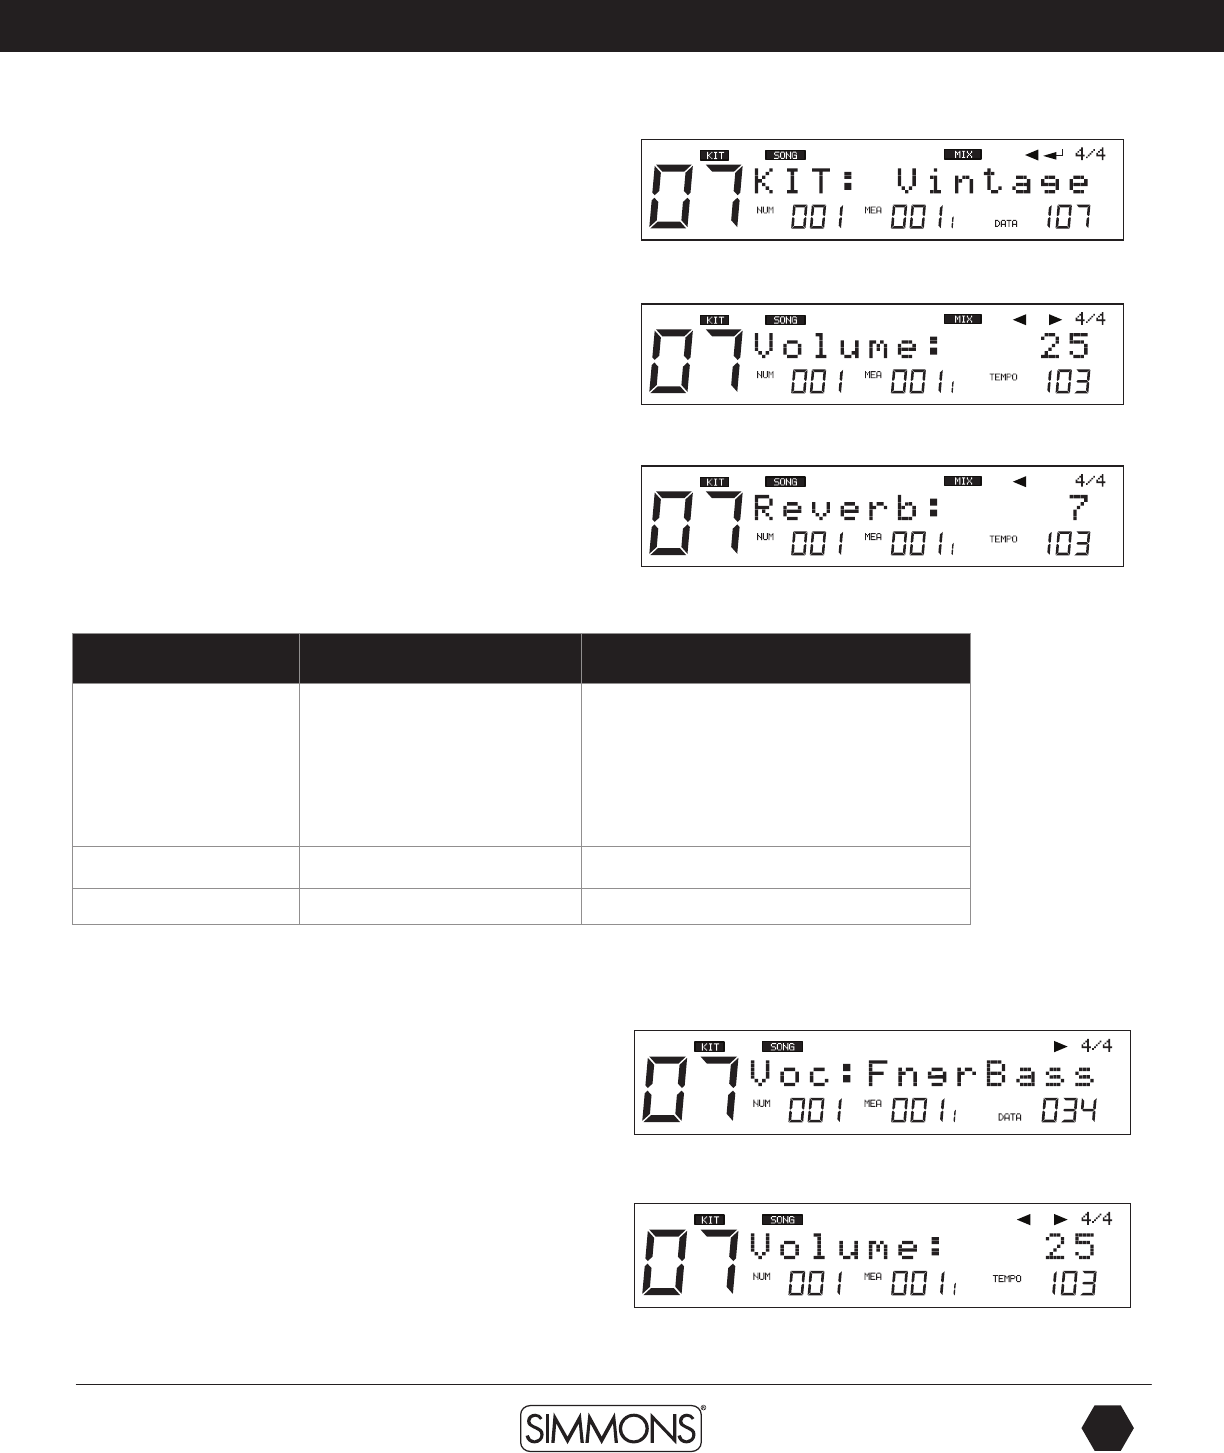
3. Press the [PAGE –/+] buttons to select the parameter you want
to edit.
4. Press [–/+] buttons or the [VALUE DIAL] to adjust settings of
the parameters.
Parameter Brief Explain Range
Kit Set Kit Number applied
for drum part
1-109 (include GM K IT)
1-99 (if progr ammed
with Local Kit)
100-109 (if programmed
with GM Kit)
Volume Part Volume 0~32
Reverb Part Reverb 0~32
Changing Parts 1 – 5 settings
These setting are slightly different that the Drum and Percussion
part settings.
1. Select the Song part by pressing the [-/+] buttons.
2. Press the [SAVE/ENTER] button to enter the screen of part settings:
3. Press the [PAGE –/+] buttons to select the parameter you
want to edit.
4. Press [–/+] buttons or the VALUE DIAL to adjust settings of the
parameters.
9861 Simmons SD1000 Drum Set Manual.indd 25 1/22/13 8:59 AM
SD
OWNER’S MANUAL
26
The first name in electronic drums.
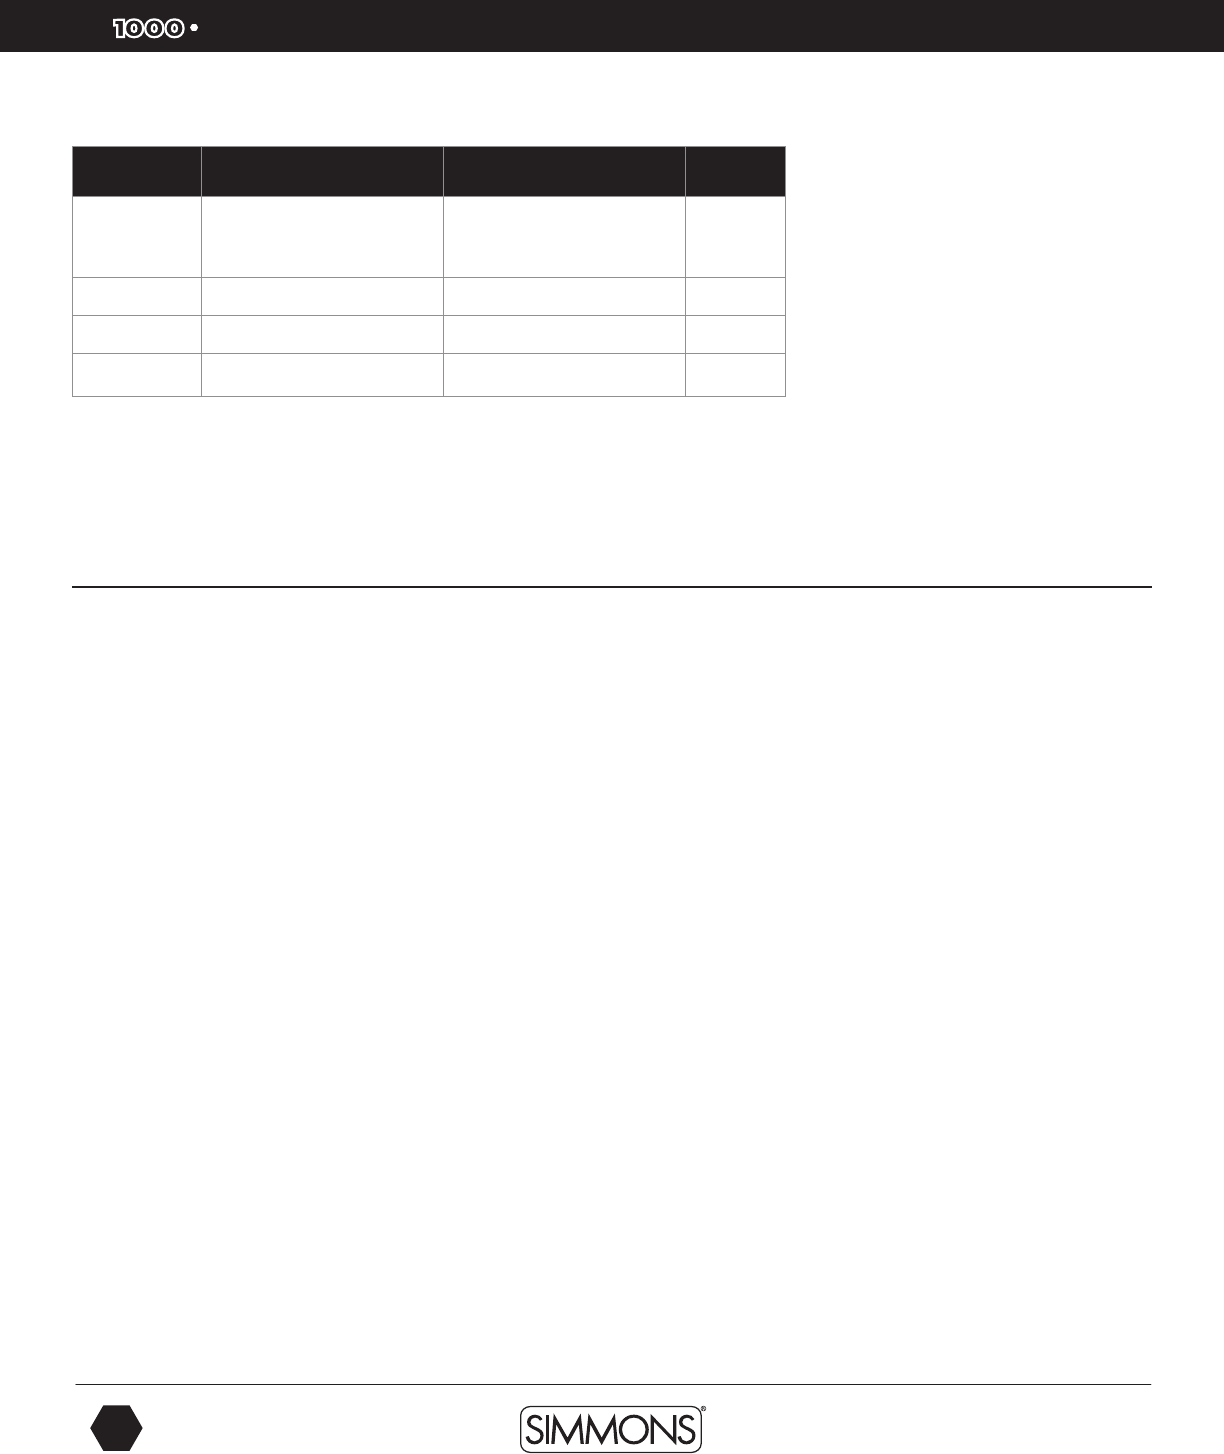
Parameter Brief explain Range Default
Voc*Voice applied for part1~
part 5 detailed instructions below --
Volume Part volume 0~32 100
Reverb Part reverb 0~32 64
Pan Part pan L8~Center~R 8 Center
*Parameter Definitions
VOC: Each preset song has its default voice. The DATA indicator in the right bottom side of
the LCD display will show the number of the current voice.
Erasing Parts in a Song
This function is only available for User Songs. You cannot erase a part on a Preset Song.
If you want to modify a Preset Song first save it to a User memory location.
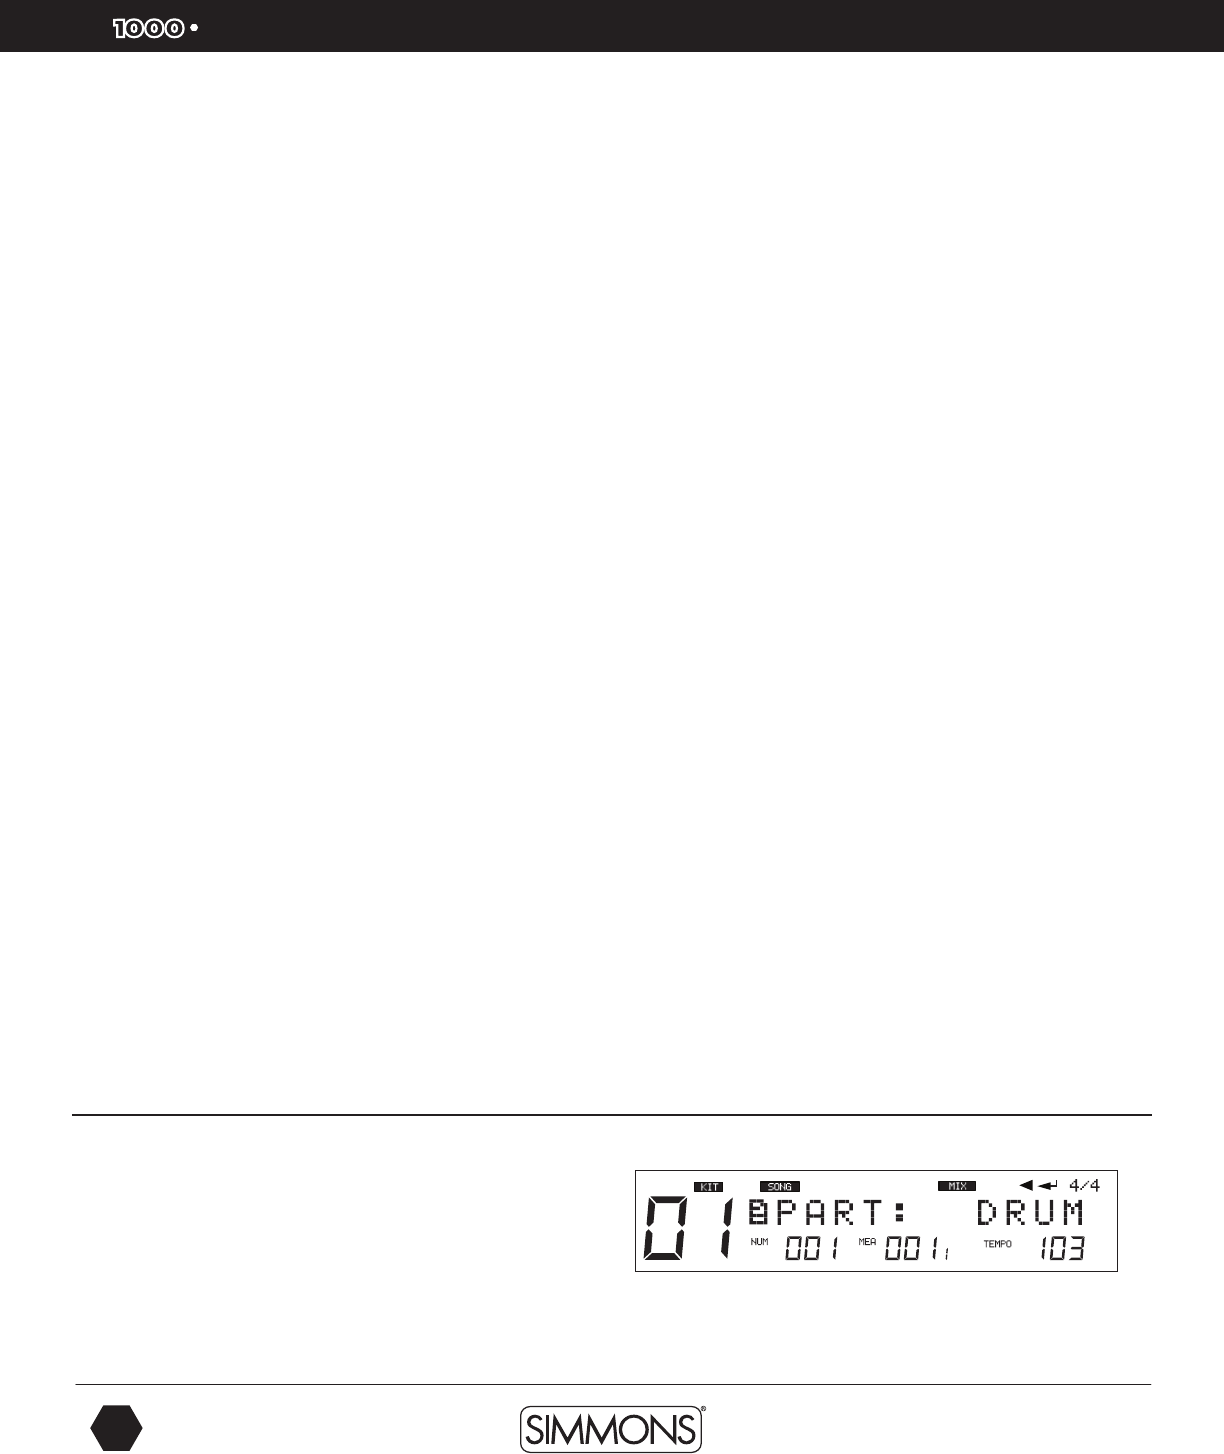
1. From the Song Mode press the [MENU] button.
2. Press the [PAGE +] button to select the Part screen (PART: DRUM usually comes up first).
3. Press the [PAGE +] button to go to the erase screen.
4. Press the [-/+] buttons or VALUE DIAL to select the part you want to erase (Drum, Percussion,
Parts 1-5 and All).
5. Press the [SAVE/ENTER] button to erase the part. You will see “Sure?” on the display.
6. Press the [SAVE/ENTER] button. You will see “Erase OK!”. The part should now be erased.
Advanced Operations
9861 Simmons SD1000 Drum Set Manual.indd 26 1/22/13 8:59 AM

www.simmonsdrums.net
27
The first name in electronic drums.
Advanced Operations
Saving a Song
The SD1000 sound module allows you to edit preset songs and
save them to user song memory locations. You can also save user
songs to SD card memory locations.
1. Select the [PRESET] or [USER] song to edit and save.
2 Press the [SAVE/ENTER] button.
3. Select the User or Card memory location that you want to save it to.
4. Press the [SAVE/ENTER] button. The screen will allow you to
rename the song.
5. After renaming the Song, press the [SAVE/ENTER] button. “Save
OK” will be displayed on the screen then the screen will return to
the song you just saved.
NOTE: When saving Songs to a SD Card the SD1000 sound
module will save it to an internal memory location at the same time
if the SD card fails to write the file to the card. You will see “No
Card” or “Card Error” if this occurs.
Muting Song Parts
Muting the Drum Part of a Song
1. While a Song is playing press and hold the [MENU] button, then
press the [PART MUTE] button to enter the Mute function. The
first part (drums) should now be muted while the rest of the song
is playing. The [PART MUTE] button’s LED should be flashing.
2. To change the mute setting to another part Press and hold the
[MENU] button then press the [PART MUTE] button.
3. Press the [-/+] buttons or turn the [VALUE DIAL] to make your
selection. After the drum part yoiu should see the following parts
available to mute: Acmp(Accompaniment), Parts 1-5 and
All Parts.
9861 Simmons SD1000 Drum Set Manual.indd 27 1/22/13 8:59 AM
SD
OWNER’S MANUAL
28
The first name in electronic drums.
Advanced Operations
Muting parts of a Song on a SD Card
1. When browsing the SD card, press and hold [MENU] button, then press [PART MUTE]
to select the settings of the mute option. You can select any of the 16 channels to be muted
when the part mute function is enabled.
2. You can press [PAGE+] or [ - ] buttons to select any of the 16 channels and press [ + ]
or [ - ] buttons to set it muted when the part mute function is enabled. (the default setting:
Ch10: Mute; other channels are Play)
Recording a New Song
To record your own song you should start with a blank user song.
Each song has 7 record tracks (Drum + Percussion + Part1~Part5), in which Parts 1- 5 can
only be recorded by external MIDI devices such as a keyboard or via USB from a computer.
There are two methods of recording, Quick Record, which works immediately or Regular
Song Recording, which requires some settings before you proceed. The steps for Quick
Record are listed earlier in the manual in the Quick Start Operations.
Regular Song Recording
This method is the more typical way to create a Song when recording
a part with the drum pads. This method will allow to quantize and
edit parts.
1. Choose a Blank [USER] Song.
2. Press the [RECORD] button. You will see the REC button blinking.
The screen will show the Drum part. Push the [+] button to select
the Percussion part if you want to record that part. Otherwise you
can record the drum part.
At this point you can either start recording or change parameters
for the song. There are several parameters you can adjust before
recording your song. To get to the recording parameter press the
[PART -/+] buttons. See the list below for the parameters that are
available.
3. After making your settings and you are ready to start recording
press the [PLAY/STOP] button. You will hear a 4-beat count off
and then the sequencer will start recording your playing. The REC
and PLAY/STOP buttons will blink.
4. When you have finished playing the part press the [PLAY/
STOP] button.
5. Press the [PLAY/STOP] button to hear the playback of the part
you just recorded.
9861 Simmons SD1000 Drum Set Manual.indd 28 1/22/13 8:59 AM
www.simmonsdrums.net
29
The first name in electronic drums.
Recording Parts 1- 5
To record on these parts you will need an external MIDI keyboard or MIDI device that can
output MIDI notes on MIDI channels 12-16. See the table below.
MIDI CHANNEL PART
12 PART 1
13 PART 2
14 PART 3
15 PART 4
16 PART 5
1. Connect a MIDI keyboard (or other MIDI equipment such as computer) to the MIDI IN
port of the SD1000 sound module.
2. On the MIDI keyboard set the MIDI transmit channel 12-16 would be recorded to
corresponding part. To select the sound that you are recording you will need to send a
Program Change to the SD1000 sound module. See the Voice list in the appendix section
for the corresponding MIDI program changes.
3. Press the [RECORD] button. It will start blinking to indicate that the module is ready to start
recording.
4. Press [PLAY/STOP] button to start recording. You will hear a 1 bar/4 beat count-in
before recording will start.
5. When you have finished you’re playing press the [PLAY/STOP] button. Press the [PLAY/
STOP] button to hear the playback of the part you just recorded.
Parameter Explain Parameter ([+]/(-)] Default
Part Select record part Drum/Perc Drum
TimeSig Record time signature 1-9/2, 1-9/4, 1-9/8,1-9/16 4/4
Tempo Tempo 30~280 120
Mode Record mode New/Overdub Overdub
Loop Loop length OFF/ALL/1~99 OFF
Qntize Quantize resolution OFF/8/8T/16/16T /32/32T/64 OFF
Sync-ST Synchronous start OFF/ON OFF
Precount Set pre-count measure 0~2 0
Advanced Operations
9861 Simmons SD1000 Drum Set Manual.indd 29 1/22/13 8:59 AM
SD
OWNER’S MANUAL
30
The first name in electronic drums.
Advanced Operations
Definition of Recording Parameters
Part
There are 7 sequencer Parts for the module. Drums and Percussion are the first 2 parts.
The accompaniment parts (1-5 must be recorded from an external MIDI device such as
a keyboard or via USB on computer. These use MIDI channels 12-15).
Mode/Recording Mode
This refers to how the sequencer will record the note information. Overdub mode records
the notes on top of what is already recorded. New mode replaces existing notes when
the sequencer is recording. Note that the Percussion part will always use the New mode.
Loop
This determines if the sequencer will repeat the part or not. The settings can be either
OFF, 1 shot, 1-99 loops, 1- 99 measures, All: Loop all measure (this appears only when
current song is not a new one)
Quantize/Qntize
Quantizing a part will fix timing errors in your playing by moving the notes recorded that
were recorded to the closest beat/note value within the song.
To adjust the amount of quantizing that will be done.
1. Select the quantize screen with the [PAGE – /+] buttons.
2. Use the [-/+] buttons or VALUE DIAL to select the amount of quantizing- off, 1/8, 1/8t(triplet),
1/16, 1/16t, 1/32,1/32t, 1/64.
Synchronous Start
This will start the sequencer recording once a note is played on a pad or via MIDI device.
Pre-count:
This sets the count-in of measures before the sequencer starts. You can set this from 0 to 2
measures (8 beats).
Click:
The Click or Metronome will give you an audio indication of the beat of the sequencer.
To Turn Click on or off:
1. Hold down the [MENU] button and press the [CLICK] button to
view the settings.
2. Press the [PAGE -/+] buttons to move through the menu of click
settings (ClickVol, TimeSig, Inter, Voc)
Parameter Explain Parameter ([+]/(-)]
ClickVol Click whole volume 0-32
TimeSig Click time signature 0-9/2, 0-9/4, 0-9/8, 0-9/16
Interval Click playback intereval 1/2, 3/8, 1/4, 1/8, 1/12, 1/16
Voc Click voice Voice/Metro/Claves/Sticks/Cowbell/Click
9861 Simmons SD1000 Drum Set Manual.indd 30 1/22/13 8:59 AM
www.simmonsdrums.net
31
The first name in electronic drums.
ClickVol:
The volume of the click sound.
Time Signature / TimeSig:
You can specify the time signature of the click sound. When the beats per measure is set
to “0,” no accent will be added to the first beat. The metronome click sound then plays at a
fixed volume.
NOTE: You cannot adjust the time signature of a song as it is playing.
Interval:
Specifies the note interval for the Click beat.
Voc:
Determines the sound for the click/metronome sound. The Utility mode is for the main
functions of the module such as trigger setup for the pads, effects, MIDI setup and saving
global settings.
Utility Mode
The Utility mode is for the main functions of the module such as trigger setup for the pads,
effects, MIDI setup and saving global settings.
Trigger Setup
You can set the parameters of each drum and cymbal pad in the Trigger menu. While editing
the settings, you can select each trigger by hitting the corresponding trigger pad or use the
drum pad buttons on the front panel.
Item Explain Parameter ([+]/(-)] Default
Sensitive* Sensitivity 0~32 --
Thresh* Threshold 0~31 --
Curve* Trigger curve Normal/Exp1/Exp2/Log1/Log2/Loud Normal
Retrig-C * Retrigger cancel 1~16 --
X-Talk * Cross talk 0~16 --
Rim* Rim sensitivity -- -- 1~16
Splash-S Splash sensitivity 1~8 1
Advanced Operations
9861 Simmons SD1000 Drum Set Manual.indd 31 1/22/13 8:59 AM
SD
OWNER’S MANUAL
32
The first name in electronic drums.
Advanced Operations
Parameter Definitions
Sensitivity
This adjusts the sensitivity of the pad trigger to regulate the pad response. Higher settings
result in higher sensitivity, so that the pad will produce a loud volume even when struck
softly. You can also adjust the sensitivity of the splash in SPLASH SENSITIVITY.
Threshold
This setting allows a trigger signal to be received only when the pad is struck harder
than a specified force. This can be used to prevent a pad from sounding in response to
extraneous vibrations from another pad.
Curve (Trigger curve)
This setting allows you to control the relation between the velocity (striking force) and
changes in volume (the dynamic curve.) Adjust this curve until the response feels as
natural as possible.
Retrig-C (Retrigger cancel)
Playing snare drum pads and other devices with commercially available acoustic drum
triggers attached may result in altered waveforms, which may also cause inadvertent
sounding. This occurs in particular at the decaying edge of the waveform. Retrigger
Cancel detects such distortion in and prevents retriggering from occurring. Although
setting this to a high value prevents retriggering, it then becomes easy for sounds to be
omitted when the drums played fast (roll etc.). Set this to the lowest value possible while
still ensuring that there is no retriggering.
X- Talk (Pad Crosstalk)
When two pads are mounted on the same stand, the vibration produced by hitting one
pad may trigger the sound from another pad unintentionally (This is called crosstalk.)
You can avoid this problem by adjusting Crosstalk Cancel on the pad that is sounding
inadvertently. If the value is set too high, then when two pads are played simultaneously,
the one that is struck less forcefully will not sound. So be careful and set this parameter
to the minimum value required to prevent such crosstalk. With a setting of 0 crosstalk
prevention does not function.
Splash-S
When the trigger input selected is hi-hat or splash this will determine the amount of Snare
rim sensitivity.
9861 Simmons SD1000 Drum Set Manual.indd 32 1/22/13 8:59 AM
www.simmonsdrums.net
33
The first name in electronic drums.
Advanced Operations
Effects Settings
The SD1000 sound module has built-in Reverb and 4 Band EQ effects, which are adjustable
in the Utility Effects setup. The available parameters are available below.
Item Explain Pararameters Default
Reverb Master reverb switch OFF/ON
RvbTyp Reverb type SRoom/MRoom/LRoom/Hall1/Hall2/
Plate/Delay/P.Dely
EQSwitch 4 band EQ master switch OFF/ON According to
current KIT
EQLow EQ low band -12DB~12db
EQL.Mid EQ low middle band -12DB~12db
EQH.Mid EQ high middle band -12DB~12db
EQHigh EQ high band -12DB~12db
To change the assignment for the Reverb:
1. Press the [UTILITY] Button.
2. Press the [PAGE -/+] buttons to select EFFECT.
3. Press [SAVE/ENTER]. You will see the Reverb screen.
4. Press the [PAGE +] button.
5. Press the [-/+] buttons or VALUE DIAL to select the Reverb type.
To change the settings for the Master 4 Band EQ:
1. From the Reverb type screen press the [PAGE +] button. You come to the EQ Switch screen.
2. Press the [PAGE -/+] buttons to select the EQ parameters that you want to change.
NOTE: If you want to save all the effects for the current kit, see the “Saving a Kit” section.
9861 Simmons SD1000 Drum Set Manual.indd 33 1/22/13 8:59 AM
SD
OWNER’S MANUAL
34
The first name in electronic drums.
Advanced Operations
MIDI Settings
The SD1000 sound module is a MIDI and USB MIDI compatible device. You can connect
SD1000 sound module to other MIDI devices via standard MIDI cables or to your PC via a
USB cable.
For use with MIDI devices you may want to set the module to use these settings.
• Local On - Buttons and triggers play internal sound and transmit MIDI OUT data.
• Local Off - Buttons and triggers only transmit MIDI OUT data.
• Soft Thru - This turns off the MIDI Out and makes the MIDI data coming into the MIDI input
go directly to the MIDI output. The default setting is OFF.
• GM Mode - When ON, MIDI program changes received on MIDI channel 10 will be sent
to General MIDI Kits. When OFF, program changes received on MIDI channel 10 will
select the regular internal Drum Kit sounds. The Default setting is ON.
NOTE: If you are experiencing difficulties with communicating with the module from your
computer change the GM Mode to OFF.
To get to the MIDI settings:
1. Press the [UTILITY] button.
2. Press the [PAGE -/+] buttons until you get to “MIDI SET” on the display.
3. Press [SAVE/ENTER]. You will see “LOCAL” on the display.
4. Press the [PAGE -/+] buttons to get to the other parameters.
4. Press [EXIT] to leave this mode.
Factory Reset
There may be occasions where you want the module to return to the factory settings. This
function will return the SD1000 sound module back to factory setup.
1. Press the [UTILITY] button.
2. Press the [PAGE -/+] buttons until you get to “RESET” on the display.
3. Press [SAVE/ENTER]. You will see “ResetPara” on the display.
4. Press the [SAVE/ENTER] button. You will see “RESET OK” on the display.
Item Explain
ResetPara Reset only global menu parameter settings (MIXER, UTILITY trigger settings, CLICK, Song setup, etc.)
ResetAll Reset the global menu parameters, and all user songs, and user kits.
After the operation, the LCD will show the main screen.
9861 Simmons SD1000 Drum Set Manual.indd 34 1/22/13 8:59 AM
www.simmonsdrums.net
35
The first name in electronic drums.
Advanced Operations
Using an SD Card
The SD1000 sound module can use a standard Smartmedia™ Card for backing up and storing
Song and Kit information that can be read directly from the card. The SD1000 sound module can
support the following files- .MID, *.KIT,*.SNG, *.SET files on a SD card.
The module supports SD cards from 16M to 2G, it supports FAT16 and FAT32. It does not
support a SD card which contains more than 1 partition, in this case, only the first partition can
be opened and browsed.
We strongly recommend use the SD card formatted by the SD1000 sound module.
Finding Files on an SD Card
1. Press the [CARD] button, the button will light, and the root folder of the card would be opened
on the display. You’ll see the folders and the supported files in the folder.
2. By pressing the [-/+] buttons or using the VALUE DIAL, you can browse through the files in a folder.
The files are sorted according to their types and their names.
3. By pressing the [PAGE -/+] buttons, you can jump to the first file of the next file type.
4. When a folder is selected, you can press the [SAVE/ENTER] button to enter the folder.
*NOTE: If there are no folders or supported files in current directory, “No File!!” would be shown
on the display and you can use the EXIT button to return to the last directory you were browsing.
Muting a Channel/Part on an SD Card MIDI File
When browsing the SD card, press and hold the [MENU] button, then press [PART MUTE] to
select the settings of the mute option. You can select any of the 16 channels to be muted when
the part mute function is enabled. To play the files use the [PLAY/STOP] button to play the MIDI
file from the SD card directly.
File Operations
You can easily delete a file, load back your previous settings, format the card or even put your
favorite song into the SD1000 sound modules user songs by using the SD card menu.
1. Press [CARD] button.
2. Press the [MENU] button when browsing the card to open the card menu.
3. Use [PAGE -/+] or to select operations, as shown in table below.
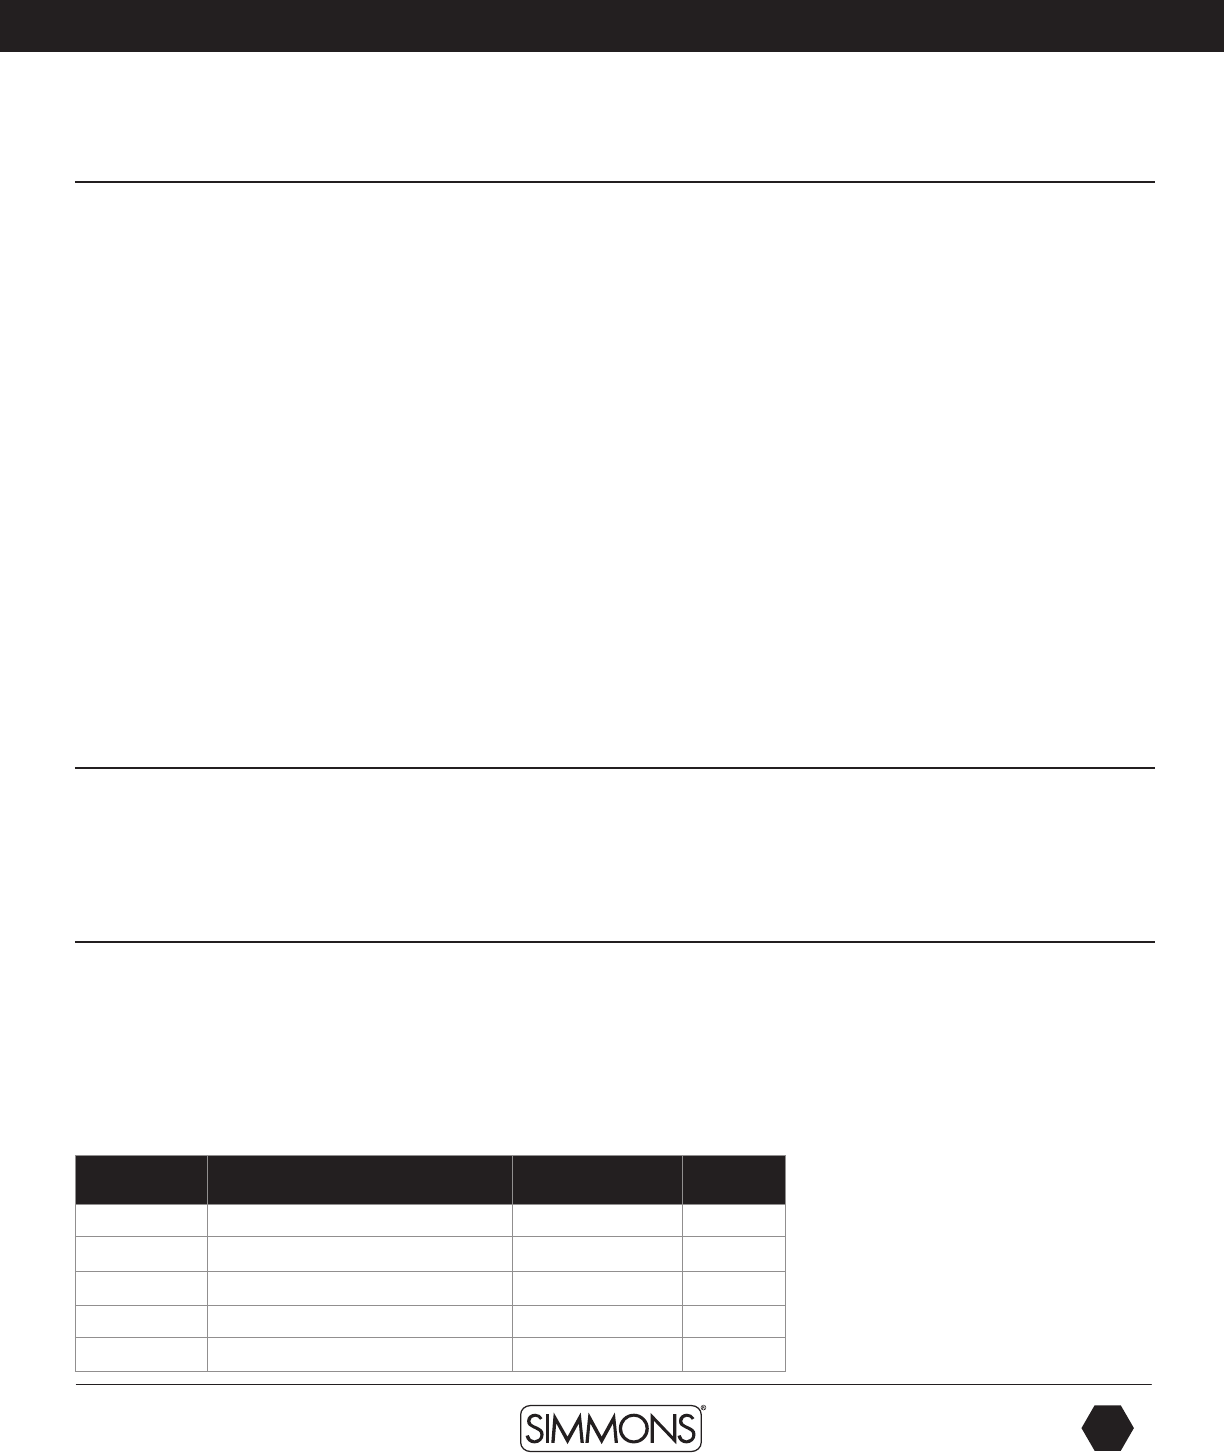
Operation Explain Parameters Default
LOAD Load current file -- --
DELETE Delete current file -- --
LOOP Select loop mode of the playback /1
PRECOUNT Set the pre-count of playback 0, 1, 2 0
FORMAT Format the card -- --
Note: “Load” and “Delete” are shown only
when the current selected item is a file
(not folder).
9861 Simmons SD1000 Drum Set Manual.indd 35 1/22/13 8:59 AM
SD
OWNER’S MANUAL
36
The first name in electronic drums.
Loading a MIDI File from an SD Card
You can load a MIDI file to be a user song, or load back the setting
of the KITs (*.KIT), all user songs (*.SNG), or your global setting
(*.SET).
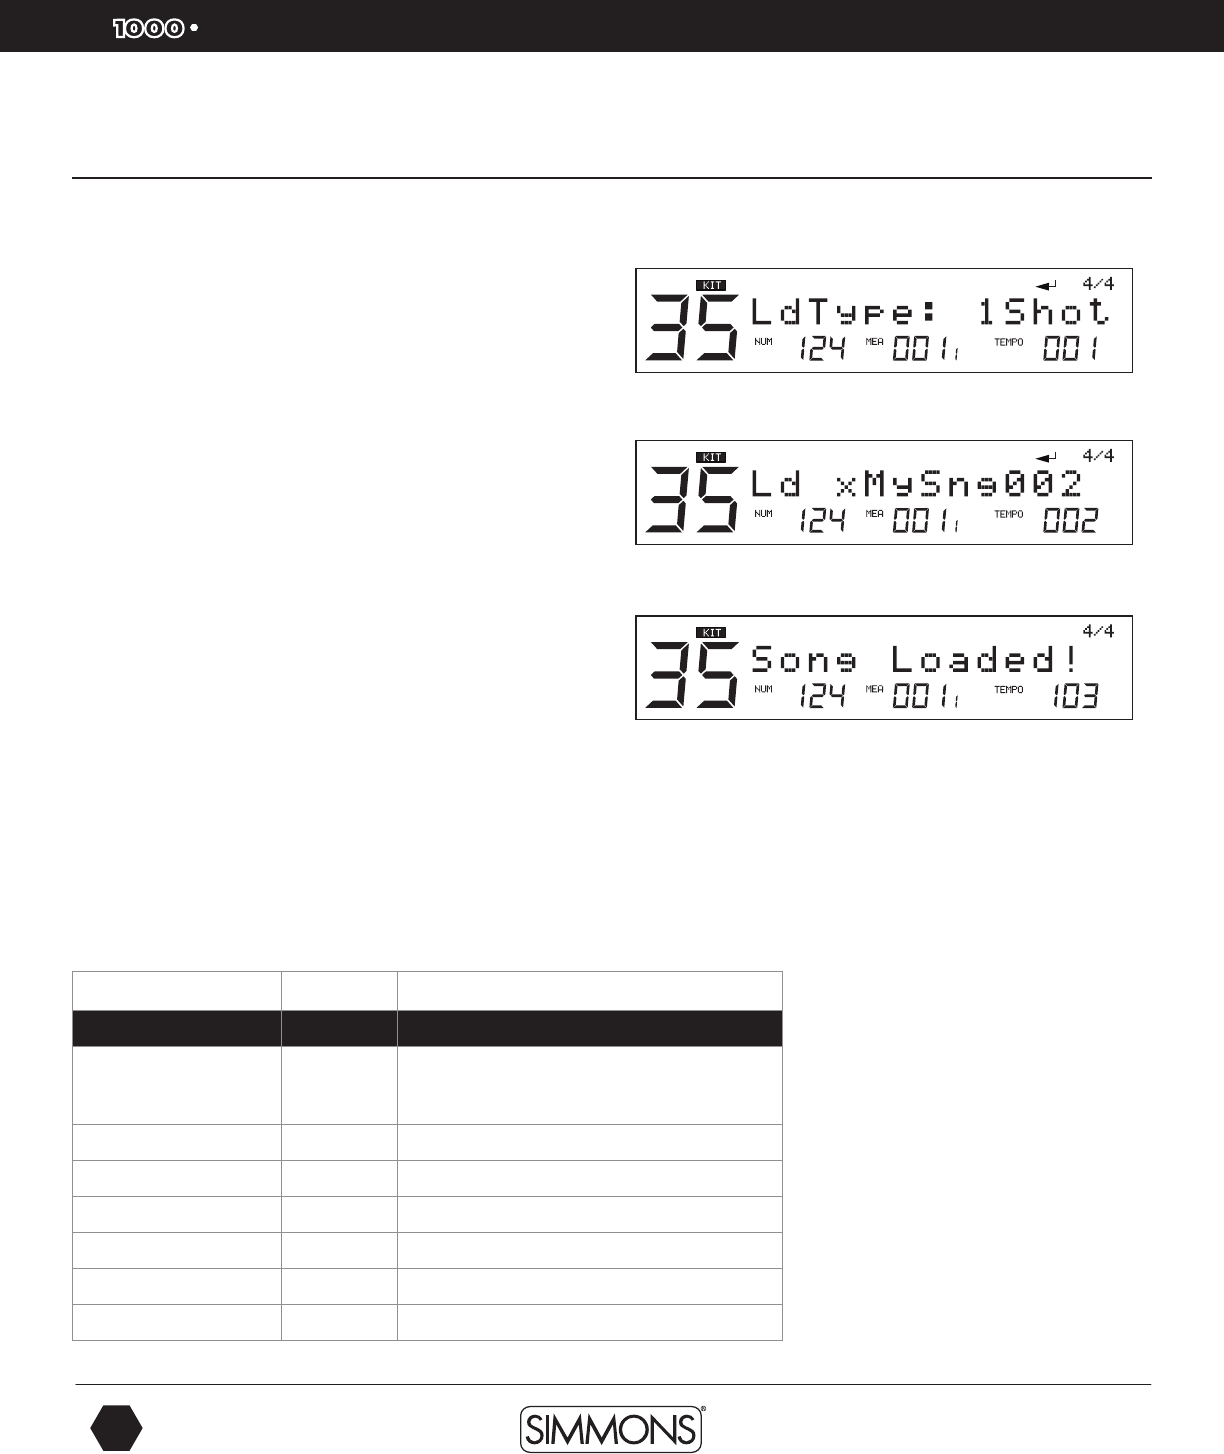
1. Press the [SAVE/ENTER] button, you’ll be asked to select the
type of the user song after the MIDI file is loaded. These are 1
Shot, Loop, Tap and Hit.
2. Press [SAVE/ENTER] button to confirm your selection. You will
be asked to select which user song memory slot to be used to save
the new song. If there’s a “*” before the name of the selection, it
means it’s empty and it’s safe to save the new song into it without
worrying about overwriting a previously saved song.
3. Press [SAVE/ENTER] to confirm your selection. If you have
selected a user song memory slot which is not empty, it will ask
you to confirm the over write operation. You can use [SAVE/
ENTER] to confirm or use [EXIT] to go back to the last step and
change your selection.
4. If you confirm the selection, the MIDI file would be loaded to the
selected user song memory slot, and you will see “Song Loaded!”
Advanced Operations
*NOTE: Only MIDI files smaller than 32 Kbytes can be loaded. The Load User Song function
supports SMF 1 only, and up to 7 channels of the MIDI file can be used in the 1 shot or
loop type user song. For tap or hit type, only 1 channel can be used. Here’s the table for the
available channels.
1 Shot/Loop Playback Parameters
MIDI Channel Part Note
10 Drum
Send MIDI controller 0 with a value of 127 to
select an internal KIT, otherwise the GM kit
will be played.
11 Percussion
12 Part 1
13 Part 2
14 Part 3
15 Part 4
16 Part 5
NOTE: On Tap/Hit playback only the first
of channel 12~16 in the MIDI file would
be used.
9861 Simmons SD1000 Drum Set Manual.indd 36 1/22/13 8:59 AM

www.simmonsdrums.net
37
The first name in electronic drums.
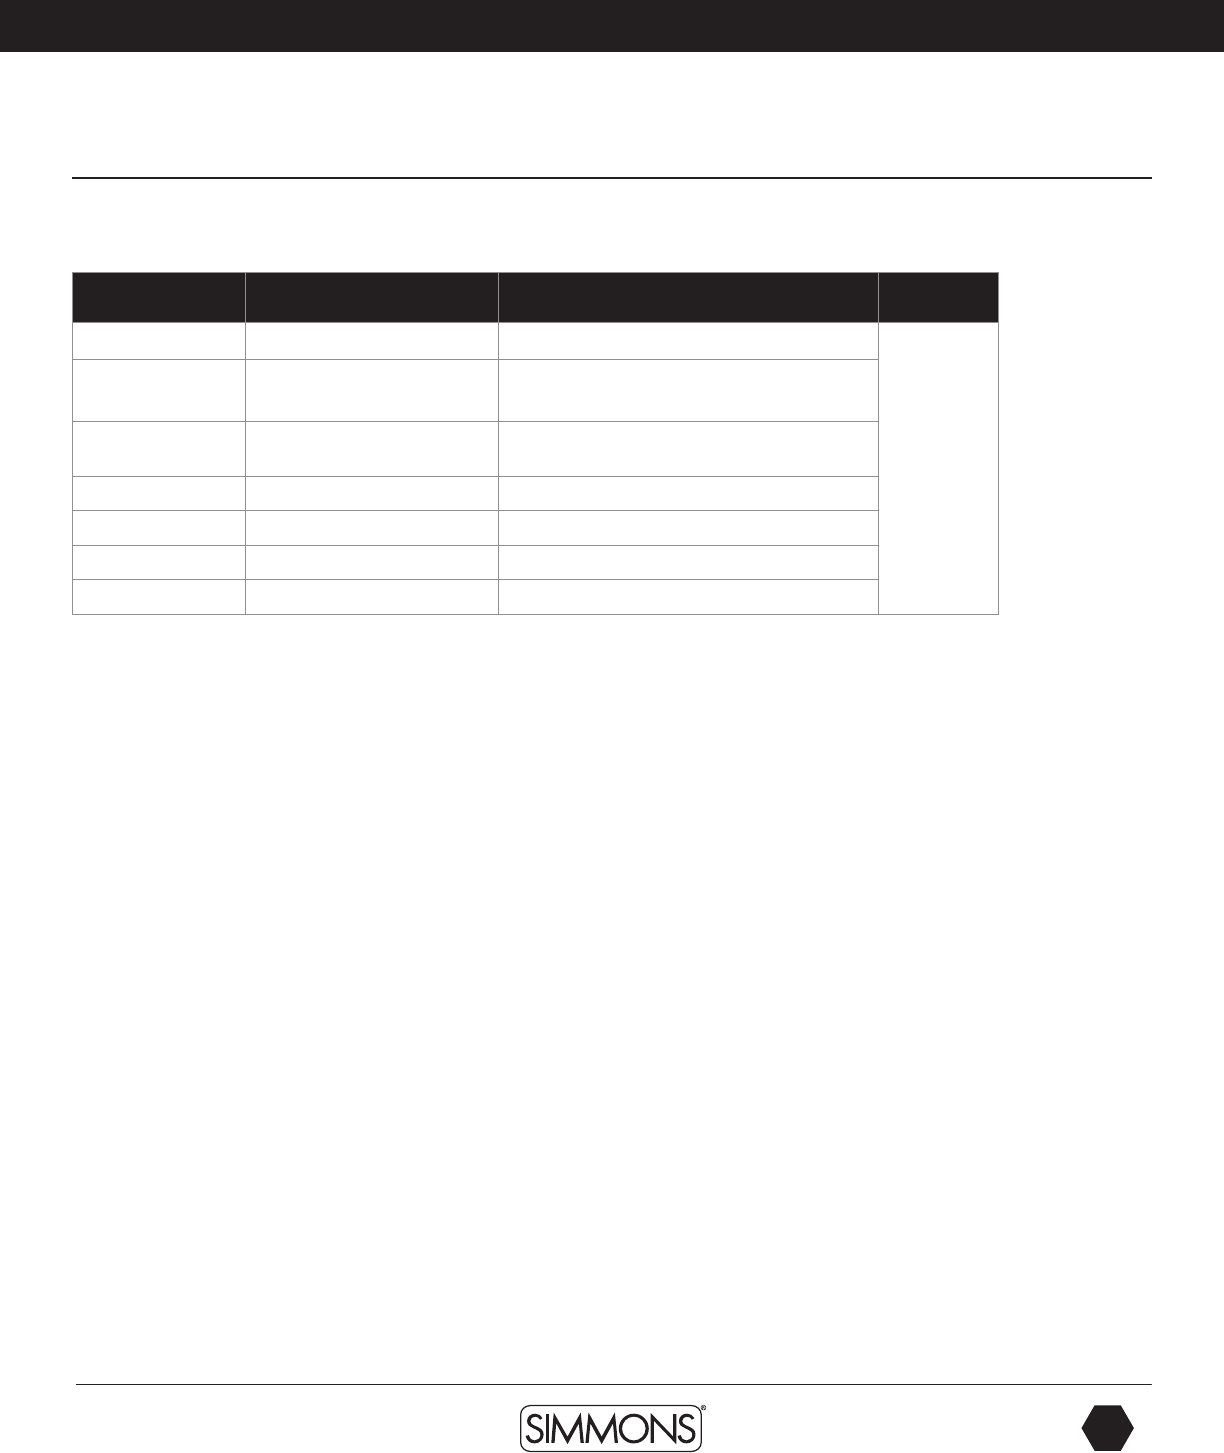
Errors that may occur when loading a MIDI file:
No Usable Data There are no notes in the MIDI file
”FileError” File error
“FileTooBig” The MIDI file is larger than 32 Kbytes
“No Space” the user data space is full
NOTE: If you load the MIDI file to a user song which is not empty, the original User Song
will be deleted even when display says “No Space”.
Deleting Files
1. Press the [CARD] button.
2. Press the [MENU] button.
3. Press the [PAGE -/+] button to Select “Delete”.
4- Press [SAVE/ENTER] to confirm the operation.
5. Press [SAVE/ENTER] to confirm or press [EXIT] to abort. After the deletion, the display
will go back to the folder you were browsing. If there are no supportable files in the folder,
a “No File!!” would be shown.
Looping Files
From the CARD MENU selection press the [PAGE -/+] buttons and select LOOP. This will
loop the play back for all the MIDI files in the current folder. The play back would loop the
current file only.
Advanced Operations
Formatting the SD Card
1. Select “Format” in card menu, press [SAVE/ENTER].
2. Press [SAVE/ENTER] to confirm the operation. While the card is
formatting you will see a “Wait” message
NOTE: After formatting the card, all previous data in the card
will be erased. Please make sure that you have backed up all the
important information in the card before this operation.
The SD1000 sound module supports Windows FAT16 and FAT32
disk formats only, some SD cards with small capacity (under 32M)
may be using FAT12, in this case, the card would be formatted
into FAT16.
9861 Simmons SD1000 Drum Set Manual.indd 37 1/22/13 8:59 AM
SD
OWNER’S MANUAL
38
The first name in electronic drums.
Errors that may occur when formatting a SD Card:
LCD Display Explanation
“No Card!” The card is not properly inserted in the card slot.
“Card Locked” The card has protected during the attempt to save,
delete or format
“Card Error” A fatal error occurred during reading or writing the card
“FS Error” The file system of card is not supported
Save All
One convenient feature of the SD1000 is the ability to save and
backup all your settings in the module to a SD card. See the list
below for all the settings that can be saved to SD card.
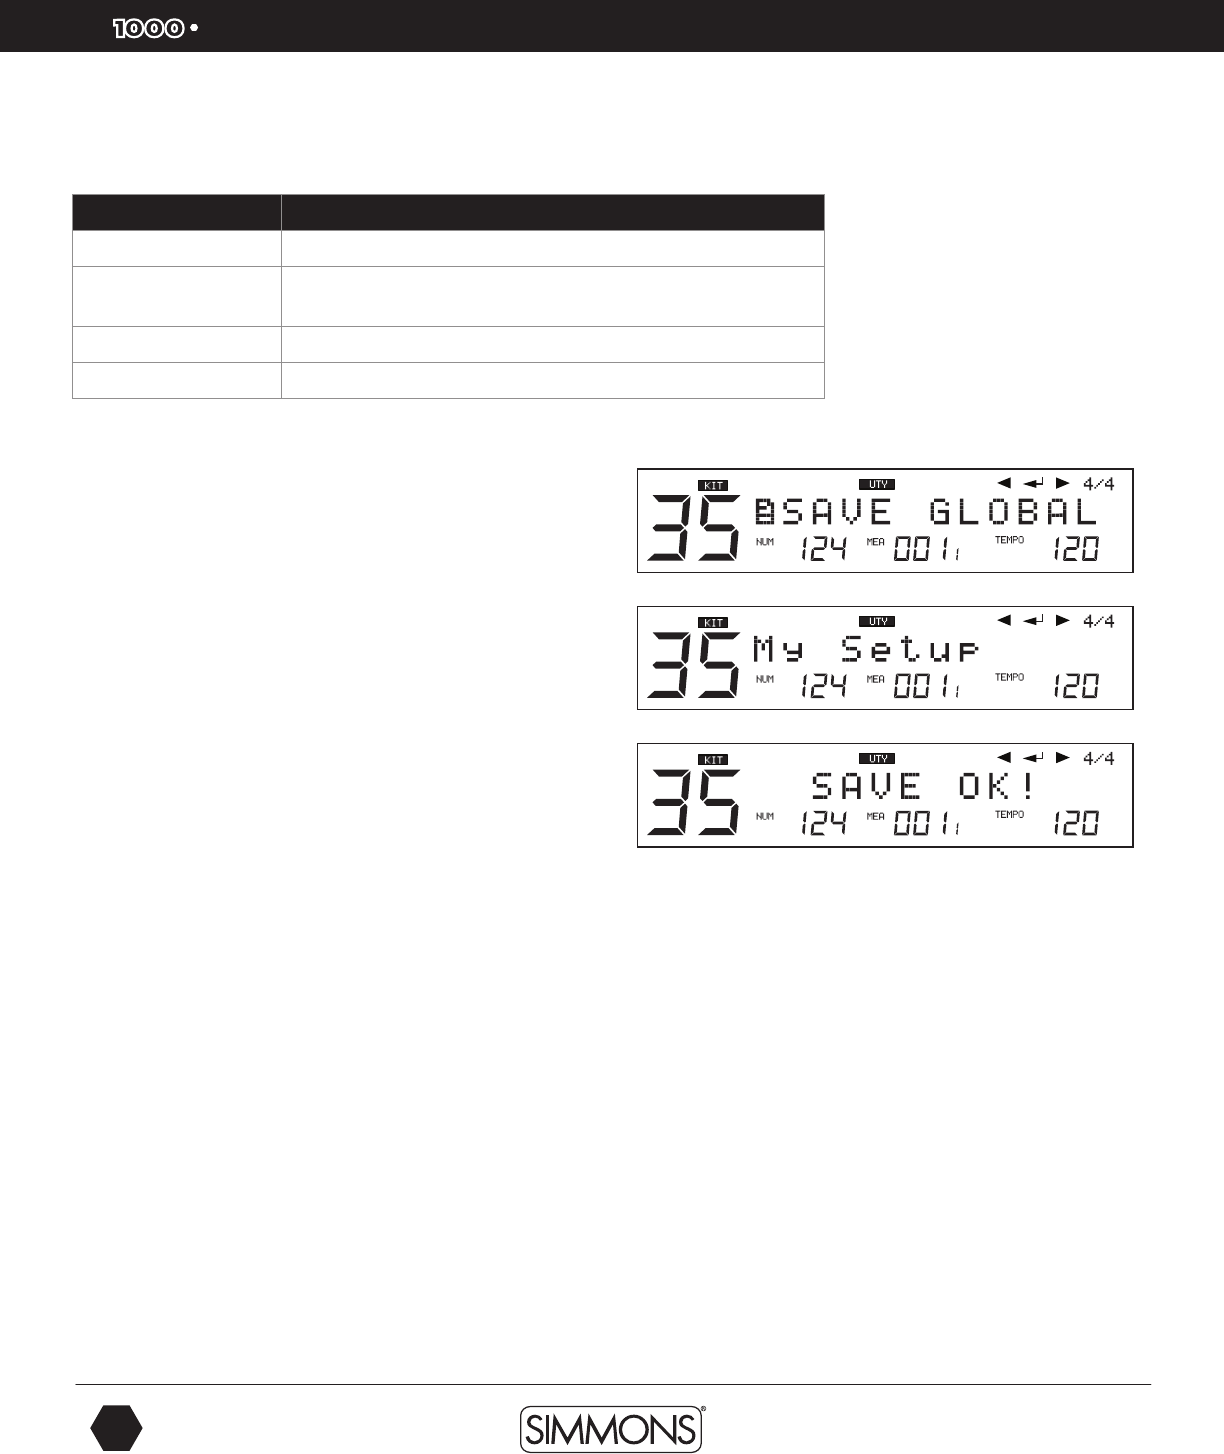
Saving your Global Setup
1. Be sure that your SD Card is inserted in the SD card slot on the
back of the module and valid.
2. Press the [UTILITY] button.
3. Press the [PAGE -/+] buttons to enter Save Global page.
4. Press [SAVE/ENTER]. The screen will show “Save OK” and then
return to the previous screen.
5.The screen will show “Save OK” and then return to the previous screen.
Advanced Operations
9861 Simmons SD1000 Drum Set Manual.indd 38 1/22/13 8:59 AM
www.simmonsdrums.net
39
The first name in electronic drums.
appendix
Voice List
# Voices
1BasicKick
2ShaftKick
3JazzKick1
4JazzKick2
5Jazzkick3
6JazzKick4
7PillowKick
8RoundKick
9RoundKick2
10 WarmKick
11 GateKick
12 TubbyKick
13 ShortGate
14 TightKick
15 ThinKick
16 ThinKick2
17 BigKick
18 BigKick2
19 ThunkKick
20 SmallKick
21 ShortKick
22 ShortKick2
23 ShortKick3
24 ShortKick4
25 Shortkick5
26 SmallKick
27 MetallicKick
28 SmallKick
29 LoKick
30 LoKick2
31 LoKick3
# Voices
32 NaturalKick
33 NaturalKick2
34 HollowKick
35 BoomKick
36 BoomKick2
37 BoomKick3
38 LowTiteKick
39 OvalKick
40 BangKick
41 EmptyKick
42 GateKick
43 Big&Round
44 80'sRockKick
45 70'sRockKick
46 GatedKick
47 GatedKick2
48 RoomKick
49 RoomKick2
50 TiteRoomKick
51 TiteKick
52 AmbKick
53 FlatKick
54 BullseyeKick
55 ThudKick
56 RubberKick
57 FunkKick
58 LowEndKick
59 Short&Low
60 HammerKick
61 WhamKick
62 RamKick
# Voices
63 JazzDynKick
64 DynKick1
65 DynKick2
66 DynKick3
67 VariKick
68 DynoKick
69 AtomicKick
70 BodyKick
71 DynGateKick
72 BigAKick
73 DynBoomKick
74 ClickBoom
75 CrunchKick
76 GuitarKick
77 LayerKick
78 GtarBiteKick
79 DistGTRKick
80 DiveBombKick
81 RiseKick
82 MuteKick
83 HybridKick
84 CrunchKick2
85 ThickKick
86 RockKick
87 DynWarmKick
88 80'sGateKick
89 ClassicRkKik
90 FunkRockKik
91 CollectorKik
92 RecordingKik
93 MetalKick
# Voices
94 StadiumKick
95 VintageKick
96 BigSimnsClap
97 BrushSnareRS
98 DynBrushSnar
99 Blastix
100 BlastixRS
101 DynSnare
102 DynSnare2
103 DynSnare2RS
104 MuteSnare
105 DynFunkSnare
106 FunkSnareCS
107 FunkSnareRS
108 DynPiccolo
109 GTRHitSnare
110 DynRingySnr
111 RingyRS
112 DynRKlSnre
113 SDSComboSnr
114 SDSHybrid
115 STDynSnare
116 AluminumSNR
117 AlumSNRCS
118 AlumSNRRS
119 BellBrassCS
120 BellBrassRS
121 BellBrassSNR
122 BubingaSNR
123 BubingaRS
124 BubingaCS
9861 Simmons SD1000 Drum Set Manual.indd 39 1/22/13 8:59 AM
SD
OWNER’S MANUAL
40
The first name in electronic drums.
Voice List
# Voices
125 DeepBrassSNR
126 DeepBrassRS
127 DeepBrassCS
128 ShBrassSNR
129 ShBrassCS
130 ShBrassRS
131 ShWoodSNR
132 ShWoodRS
133 ShWoodCS
134 SteelSnare
135 SteelSnareRS
136 SteelSnareCS
137 ShSteelSNR
138 ShSteelRS
139 ShSteelCS
140 80'sGateSNR
141 80'sGateCS
142 80'sGateRS
143 ClassicRkSNR
144 ClassicRkSRS
145 ClassicRkSCS
146 FunkRockSCS
147 FunkRockSRS
148 FunkRockSNR
149 CollectorSCS
150 CollectorSRS
151 CollectorSNR
152 RecordingSCS
153 RecordingSRS
154 RecordingSNR
155 MetalSnareCS
# Voices
156 MetalSnareRS
157 MetalSnare
158 StadiumSRS
159 StadiumSCS
160 StadiumSNR
161 VintageSNRCS
162 VintageSNRRS
163 VintageSnare
164 BrushTom 1
165 Brush Tom 2
166 Brush Tom 3
167 Brush Tom 4
168 Brush Tom 5
169 Brush Tom 6
170 RKTom 1
171 RKTom 2
172 RKTom 3
173 RotoTomMID
174 RotoTomHI
175 RotoTomLO
176 DynTom1
177 DynTom2
178 DynTom3
179 DynTom4
180 DynTom5
181 80'sGateTom1
182 80'sGateTom2
183 80'sGateTom3
184 ClassicRkTm1
185 ClassicRkTm2
186 ClassicRkTm3
# Voices
187 FunkRockTm1
188 FunkRockTm2
189 FunkRockTm3
190 CollectorTm1
191 CollectorTm2
192 CollectorTm3
193 RecordingTm1
194 RecordingTm2
195 RecordingTm3
196 MetalTom1
197 MetalTom2
198 MetalTom3
199 StadiumTom1
200 StadiumTom2
201 StadiumTom3
202 VintageTom1
203 VintageTom2
204 VintageTom3
205 13 SH-HiHat
206 13 SH-HiHatF
207 13 SH-Splash
208 14 ZM-HiHat
209 14 ZM-HiHatF
210 14 ZM-Splash
211 15 ZL-HiHat
212 15 ZL-HiHatF
213 15 ZL-Splash
214 Splash
215 WChinaCymbal
216 ChinaCymbal
217 SplashCymbal
# Voices
218 BrushCrshCym
219 18 SV-Crash
220 16 SV-Crash
221 20 ZRdBell1
222 20 ZRdBow1
223 20 ZVRdEdg1
224 20 ZRdBell2
225 20 ZRdBow2
226 20 ZRdEdge2
227 08Kick
228 HipHopKick
229 Electrokick1
230 HipHopKick2
231 08LongKick
232 09Kick
233 DrmNBassKick
234 Electrokick2
235 BeepKick
236 MachineKick
237 FilterKick
238 ElectroKick3
239 ThunkKik
240 09Kick2
241 KnockKick
242 SlamKick
243 BOOMKik
244 DeepKick
245 TweakKick
246 HouseKick
247 SmackKick
248 DigeriKick
appendix
9861 Simmons SD1000 Drum Set Manual.indd 40 1/22/13 8:59 AM

www.simmonsdrums.net
41
The first name in electronic drums.
# Voices
218 BrushCrshCym
219 18 SV-Crash
220 16 SV-Crash
221 20 ZRdBell1
222 20 ZRdBow1
223 20 ZVRdEdg1
224 20 ZRdBell2
225 20 ZRdBow2
226 20 ZRdEdge2
227 08Kick
228 HipHopKick
229 Electrokick1
230 HipHopKick2
231 08LongKick
232 09Kick
233 DrmNBassKick
234 Electrokick2
235 BeepKick
236 MachineKick
237 FilterKick
238 ElectroKick3
239 ThunkKik
240 09Kick2
241 KnockKick
242 SlamKick
243 BOOMKik
244 DeepKick
245 TweakKick
246 HouseKick
247 SmackKick
248 DigeriKick
appendix
# Voices
249 FunkyKick
250 ShotKick
251 NoiseKick
252 Backwardkick
253 MetallicKik
254 BassKick
255 BlipKick
256 ShortyKick
257 ElectroKick4
258 Bangkick
259 HipHopKick3
260 RoKitKick
261 StepKick
262 TankKick
263 SmackSnare
264 StepSnare
265 JunkySnare
266 JungleSnare
267 TightElecSNR
268 SimmonsSNR1
269 SimmonsSNR2
270 SimmonsSNR3
271 SimmonsSNR4
272 SimmonsSNR5
273 SimmonsSNR6
274 TechSnare
275 D'NBSnare
276 08Snare
277 09Snare
278 09Snare2
279 D'NBSnare2
# Voices
280 ElectMtalSNR
281 Soft09Snare
282 WetSnare
283 80'sMachSNR
284 TRSnare
285 DiscoSnare
286 ClapSnare
287 NaturalSNR
288 WackoSNR
289 90'sElectSNR
290 PipeSnare
291 BassSnare
292 LoFiSnare
293 MetallicSNR
294 CrackSnare
295 TweakSnare
296 LectroSnare
297 TrashSnare
298 LFOSnare
299 PitchSnare
300 LoFiSnare2
301 HipHopSnare
302 lectroSnare2
303 CompressSNR
304 SquashSNR
305 ClapSnare2
306 SmashSnare
307 SmackSnare2
308 IndustralSNR
309 HouseSnare
310 REzSnare
# Voices
311 JungleSnare2
312 08ShortSnare
313 MetalSnare2
314 ThudSnare
315 ThrashSnare
316 SmackitSnare
317 ElecSmakSNR
318 HipHopSnare2
319 HipHopSnare3
320 08Crash
321 08HiHat1
322 08HiHat2
323 08HiHat3
324 LoFiHiHat1
325 LoFiHiHat2
326 LoFiHiHat3
327 HipHopHat1
328 HipHopHat2
329 HipHopHat3
330 MachineClap
331 Zap 1
332 Zap 2
333 Bandhit
334 OrchHit
335 08Bell
336 08CongaHi
337 08CongaLo
338 08CongaMID
339 08Clave
340 08LoTom
341 08Marcas
# Voices
342 08RimShot
343 08Tom1
344 08Tom2
345 09Tom1
346 09Crash1
347 09Crash2
348 09ClosedHat
349 09OpenHat
350 09Tom2
351 09Tom3
352 09Tom4
353 DnBCrash
354 HH HatClsd
355 HornHit
356 JungleCrash
357 JungleHat
358 JungleBell
359 JungleStick
360 JungleTom
361 OrchHit2
362 StepRide
363 StepStick
364 StepSnare
365 StepTom
366 Scratch1
367 Scratch2
368 Scratch3
369 Scratch4
370 ScratchKick
371 ScratchSNR1
372 ScratchTom
Voice List
9861 Simmons SD1000 Drum Set Manual.indd 41 1/22/13 8:59 AM
SD
OWNER’S MANUAL
42
The first name in electronic drums.
# Voices
373 ScratchSNR2
374 CrunchSNR2
375 SDS1Kick
376 SDS5VKick
377 SDSVKick1
378 SDSVKick2
379 SDSVKick3
380 SDSVKick4
381 SDSKick1
382 SDSKick2
383 SDSKick3
384 SDSVSnare1
385 SDSVSnare2
386 SDSVSnare3
387 SDSVSnare4
388 SDSVSnare5
389 SDSVSnare6
390 SDSSnare1
391 SDSSnare2
392 SDSSnare3
393 SDSSnare4
394 SDSSnare5
395 SDSSnare6
396 SDSSnare7
397 SDSVTom1
398 SDSVTom2
399 SDSVTom3
400 SDSVTom4
401 SDSVTom5
402 SDSVTom6
403 SDSVTom7
# Voices
404 SDSTom1
405 SDSTom2
406 SDSTom3
407 SDSTom4
408 SDSTom5
409 SDSTom6
410 SDSBend
411 SDSClap
412 SDSClap2
413 SDSCowBell
414 SDSCrash
415 SDSMetal
416 One
417 Two
418 Three
419 Four
420 Five
421 Six
422 Seven
423 Eight
424 Nine
425 Ten
426 Eleven
427 Twelve
428 Baya1
429 Baya2
430 Baya3
431 Baya4
432 Baya5
433 Castanets1
434 Castanets2
# Voices
435 Cowbell1
436 Cowbell2
437 Cowbell3
438 Cowbell4
439 Cxxeke
440 Djembe1
441 Djembe2
442 DrumStick1
443 DrumStick2
444 Dumbek1
445 Dumbek2
446 Dumbek3
447 Dumbek4
448 Dumbek5
449 Dumbek6
450 Dumbek7
451 Dumbek8
452 Dumbek9
453 FingerCymbal
454 FingerSnap
455 Flexatone
456 Gong
457 Panderedo1
458 Panderedo2
459 Panderedo3
460 Piatti
461 Shaker
462 Sleighbells
463 SurdoMute
464 SurdoOpen
465 Tabla1
# Voices
466 Tabla2
467 Tabla3
468 Tabla4
469 Tabla5
470 Tabla6
471 Tabla7
472 Tabla8
473 Tabla9
474 Tabla10
475 Taiko
476 TaikoRim
477 Tambourine1
478 Tambourine2
479 Tambourine3
480 Timbale1
481 Timbale2
482 Timbale3
483 Timbale4
484 Timbale5
485 Timbale6
486 Timbale7
487 MetalDrum
488 MetalDrumRim
489 Timpani1
490 Timpani2
491 Udo1
492 Udo2
493 Udo3
494 VibraSnap
495 AgogoHi
496 AgogoLow
Voice List
appendix
9861 Simmons SD1000 Drum Set Manual.indd 42 1/22/13 8:59 AM
www.simmonsdrums.net
43
The first name in electronic drums.
# Voices
466 Tabla2
467 Tabla3
468 Tabla4
469 Tabla5
470 Tabla6
471 Tabla7
472 Tabla8
473 Tabla9
474 Tabla10
475 Taiko
476 TaikoRim
477 Tambourine1
478 Tambourine2
479 Tambourine3
480 Timbale1
481 Timbale2
482 Timbale3
483 Timbale4
484 Timbale5
485 Timbale6
486 Timbale7
487 MetalDrum
488 MetalDrumRim
489 Timpani1
490 Timpani2
491 Udo1
492 Udo2
493 Udo3
494 VibraSnap
495 AgogoHi
496 AgogoLow
appendix
Voice List
Kit List
# Style
Program
Change
#
1Maple 0
2ModernPop 1
3Classic Rock 2
4Funk Rock 3
5Grunge 4
6LAFunkRock 5
7Vintage 6
8ModernPop 7
9HeavyMetal 8
10 ClassicJazz 9
11 SessionFunk 10
12 Train Beat 11
13 BluesSet 12
14 Hard Funk 13
15 RhythmNBlues 14
16 Bubinga 15
17 Funkster 16
18 Nashville 17
19 MetalHead 18
# Style
Program
Change
#
20 Funkilicious 19
21 80's Gated 20
22 Ballad 21
23 Brushes 22
24 DrumN'Bass 23
25 MoreMetal! 24
26 StudioSet 25
27 R'nBHipHop 26
28 Jazz Maple 27
29 TightFunk 28
30 SoftRock 29
31 VintReggae 30
32 R'nBClassic 31
33 90'sRock 32
34 Rock'N Roll 33
35 ModernMetal 34
36 WarmReggae 35
37 ElectricFunk 36
38 80'sRock 37
# Style
Program
Change
#
39 08Machine 38
40 09Machine 39
41 HardRock 40
42 Jamaican 41
43 SurfsUp! 42
44 Techno 43
45 World-Perc 44
46 Hip Hop 45
47 Africa 46
48 Scratch IT! 47
49 House 48
50 Latin-Perc 49
51 Brass Snare 50
52 Simmons Orig 51
53 Shredder 52
54 Tablathon 53
55 Orchestra 54
# Voices
497 BongoHi
498 BongoLo
499 Cabasa
500 Clave
501 CongaHi
502 CongaLo
# Voices
503 CongaMute
504 WoodBlockHi
505 Guiro
506 Whistle
507 WoodBlockLo
508 Maracas
# Voices
509 CuicaMute
510 TriangleMute
511 CuicaOpen
512 TriangleOpen
513 GuiroShort
514 WhistleShort
# Voices
515 TimbaleHi
516 TimbaleLo
517 Mute
9861 Simmons SD1000 Drum Set Manual.indd 43 1/22/13 8:59 AM
SD
OWNER’S MANUAL
44
The first name in electronic drums.
# Style Genre
1 Bonz Beat Rock
2Alt Rock ROCK
3Train Groove ROCK
4Headbanger ROCK
5Nice & Funky FUNK
6Metal Head ROCK
7MoreCowbell! ROCK
8Funky Monkey FUNK
9Boogywoogy ROCK
10 FunkyStuff FUNK
11 80's Pop ROCK
12 70's Rock ROCK
13 Rock Blues ROCK
14 LA Funk FUNK
15 Big 70’s ROCK
16 ItsGot2BFnky FUNK
17 Ballad Rock ROCK
18 Rock'in Out ROCK
19 Blastbeat ROCK
20 80's Rock ROCK
21 Surf Rock ROCK
22 FusionGroove FUNK
23 Freakiness ROCK
24 Steelgroove ROCK
25 Texas Blues ROCK
26 ReggaeRock ROCK
27 Rock Shuffle ROCK
28 UpBeat ROCK
29 Fast Rock ROCK
30 Demonic ROCK
# Style Genre
31 Latin Rock ROCK
32 Fusion Rock ROCK
33 Flashback ROCK
34 Lite Ballad ROCK
35 Funky Beat ROCK
36 Punkster ROCK
37 50's Rock ROCK
38 Metal Groove ROCK
39 Bluesy Beat ROCK
40 Vintage Beat ROCK
41 Metallic ROCK
42 Funky Thang FUNK
43 Hey Mon! REGGAE
44 FunkyFeel FUNK
45 Groove Me FUNK
46 Funky 80's FUNK
47 Bossa Beat LATIN
48 R'NB Groove RNB
49 Modern Jazz JAZZ
50 Reggae Up REGGAE
51 WorldGroove WORLD
52 Brasilia LATIN
53 Island Gruv REGGAE
54 Jazz Waltz JAZZ
55 Swingin' it JAZZ
56 DubStepper TECHNO
57 Jazziness JAZZ
58 Jacuzzi Beat HIPHOP
59 HipHopR'nB HIPHOP
60 FunkyTime FUNK
Song List
appendix
9861 Simmons SD1000 Drum Set Manual.indd 44 1/22/13 8:59 AM
www.simmonsdrums.net
45
The first name in electronic drums.
appendix
Song List
# Style Genre
61 HonkeyTonk COUNTRY
62 Discotech TECHNO
63 Groovin RNB
64 Funky Africa WORLD
65 Funky Fusion FUNK
66 Pop Ballad ROCK
67 FunkItUp FUNK
68 BluesShuffle ROCK
69 Breakbeat ROCK
70 Steady 8th’sROCK
71 Basic Ballad ROCK
72 Salsa Groove LATIN
73 Big Ballad FUNK
74 Craziness ROCK
75 Funkster FUNK
76 Salsa Jazz LATIN
77 Swing Beat JAZZ
78 HipHop Beat HIPHOP
79 Line Dance COUNTRY
80 TechoGroove TECHNO
81 MapleSetSolo SOLO
82 VintageSetSolo SOLO
83 Sweet Groove SOLO
84 Rock Out! SOLO
85 SolidGroove SOLO
# Style Genre
86 3/4 Feel Percussion Loop
87 Bossa Percussion Loop
88 Africa Percussion Loop
89 Latin 1 Percussion Loop
90 Latin 2 Percussion Loop
91 Latin 3 Percussion Loop
92 Latin 4 Percussion Loop
93 Latin 5 Percussion Loop
94 Samba Percussion Loop
95 Latin 6 Percussion Loop
96 Synth 1 Hit
97 Piano Hit
98 GuitarChord Hit
99 GuitarFX 1 Hit
100 GuitarFX 2 Hit
101 Bassline 1 Tap
102 Bassline 2 Tap
103 Bassline 3 Tap
104 Bassline 4 Tap
105 GTR Chords 1 Tap
106 Pno Chords Tap
107 Clav Chords Tap
108 GTR Chords 2 Tap
109 GTR Chords 3 Tap
110 Bassline 5 Tap
9861 Simmons SD1000 Drum Set Manual.indd 45 1/22/13 8:59 AM

SD
OWNER’S MANUAL
46
The first name in electronic drums.
Pad # Trigger # Name MIDI Note
11 KICK 36
22 SNARE 38
3 SNARE R 40
34 TOM1 48
5 TOM1 R 50
46 TOM2 45
7 TOM2 R 47
58 TOM3 43
9 TOM3 R 58
610 TOM4 41
11 TOM4 R 39
712 RIDE 51
13 RIDE R 59
Pad # Trigger # Name MIDI Note
14 RIDE BELL 53
815 CRASH 1 49
16 CRASH 1 R 55
917 CRASH 2 57
18 CRASH 2 R 52
10 19 O HIHAT 46
20 O HIHAT R 26
21 HALF OPEN HIHAT 23
22 HALF OPEN HIHAT R 24
23 C HIHAT 42
24 C HIHAT R 22
CTRL 25 P HIHAT 44
26 SPLASH 21
Pad MIDI Note Assignments
Demo List
Demo Songs
1 Drum Solos
2 Song Demos
ASCII Character List
! # $ % & ` ( ) + =
- , ; @ 0 1 2 3 4
6 6 7 8 9 A B C D E
F G H I J K L M N O
P Q R S T U V W X Y
Z a b c d e f g h i
j k l m n o p q r s
T u v w x y z
appendix
9861 Simmons SD1000 Drum Set Manual.indd 46 1/22/13 8:59 AM
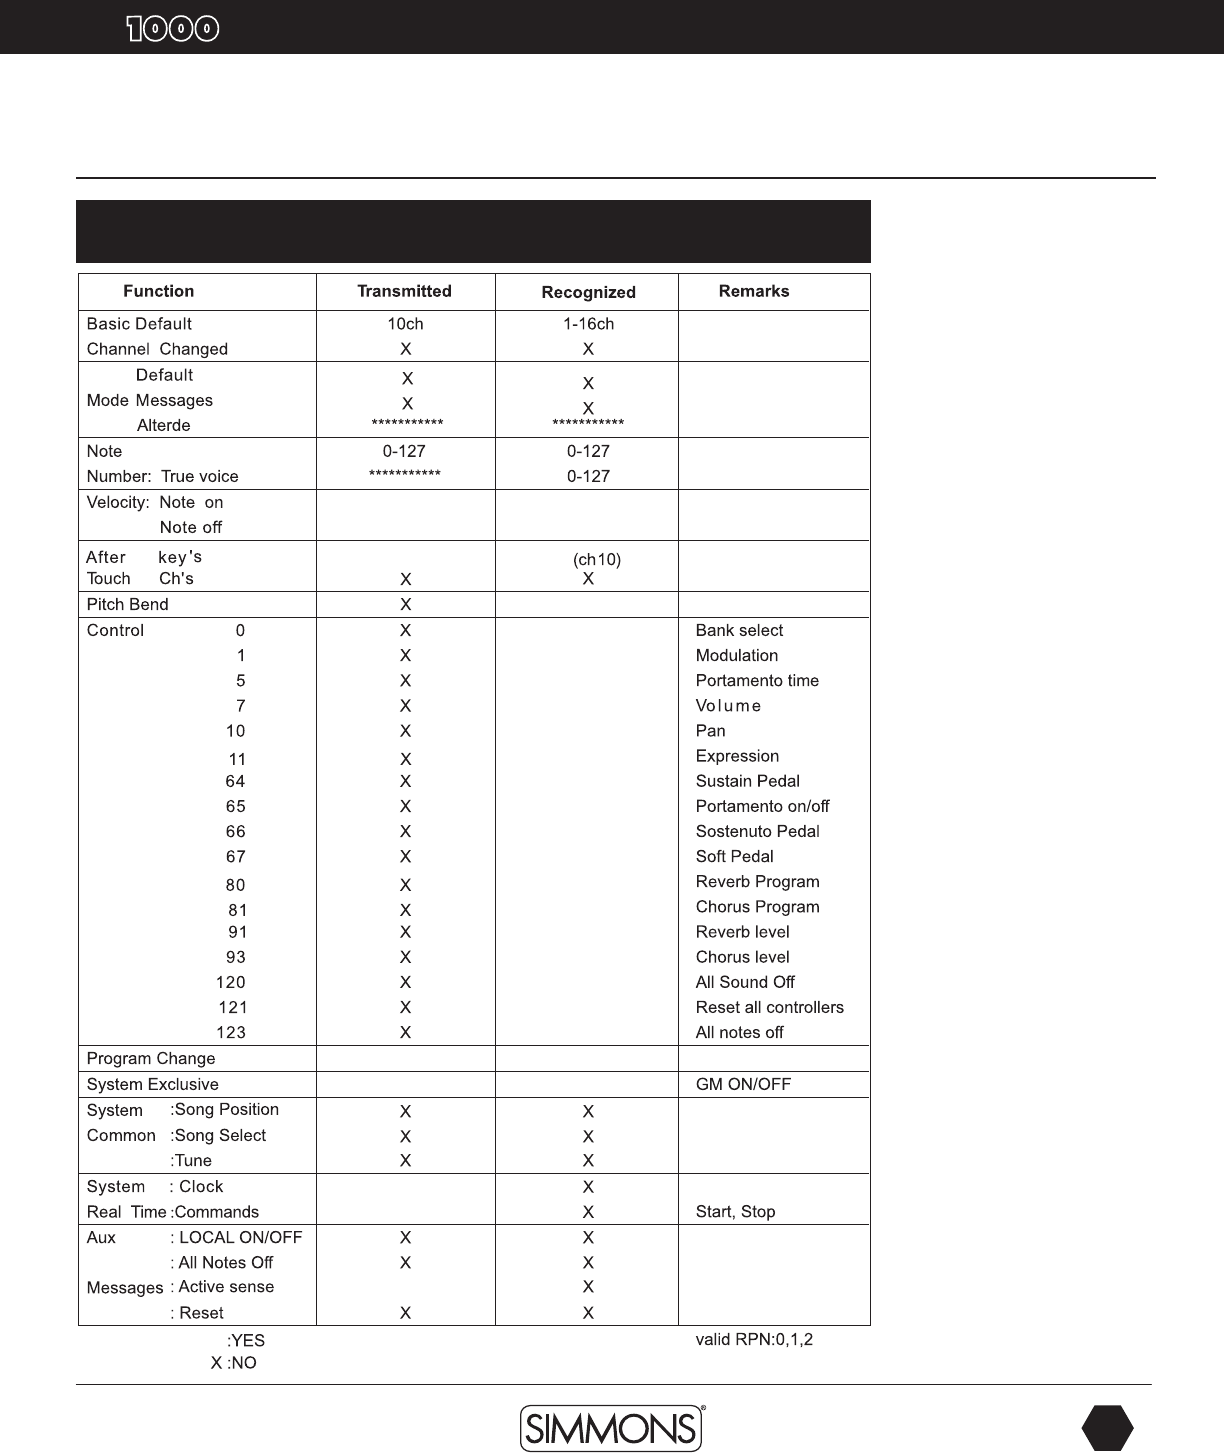
www.simmonsdrums.net
47
The first name in electronic drums.
apendix
owner’s manual
SD
MIDI Implementation Chart
MIDI Implementation Chart
〇
〇
〇
〇
〇
〇
〇
〇
〇
〇
〇
〇
〇
〇
〇
〇
〇
〇
〇
〇
〇
〇
〇
〇
〇
〇
〇
〇
〇
〇
〇
〇
9861 Simmons SD1000 Drum Set Manual.indd 47 1/22/13 8:59 AM

SD
OWNER’S MANUAL
48
The first name in electronic drums.
AC Adapter, p.11
AUX Input, p.9
Back Panel, p.11
Basic Operations, p.13
Bottom Panel, p.12
Click/Metronome Button Location, p.10
Connections
Pads, p.9
Audio, p.9
Headphones, p.9
MIDI, p.9
USB, p.9
CrossTalk / X Talk, p.30
Deleting Files, p.37
Demo Songs (Playing), p.13
Display (Layout), p.12
Effects, p.31
EQ, p.31
Exit Button Location, p.10
Factory Reset, p.32
Front Panel, p.10
Headphones
Knob Location, p.10
Jack Location, p.10
Kit
Selecting, p.14
Editing, p.15
Renaming, p.18
Exchange, p.18
Saving, p.19
List, p.42
Menu Button Location, p.13
index
FCC Statements
1. Caution: Changes or modifications to this unit not expressly approved by the party
responsible for compliance could void the user’s authority to operate the equipment.
2. Note: This equipment has been tested and found to comply with the limits for a
Class B digital device, pursuant to Part 15 of the FCC Rules. These limits are designed
to provide reasonable protection against harmful interference in a residential installa-
tion. This equipment generates, uses, and can radiate radio frequency energy and, if
not installed and used in accordance with the instructions, may cause harmful interfer-
ence to radio communications. However, there is no guarantee that interference will
not occur in a particular installation. If this equipment does cause harmful interference
to radio or television reception, which can be determined by turning the equipment
off and on, the user is encouraged to try to correct the interference by one or more
of the following measures:
•Reorientorrelocatethereceivingantenna.
•Increasetheseparationbetweentheequipmentandreceiver.
•Connecttheequipmentintoanoutletonadifferentcircuit.
Two (2) Years Limited Warranty
Subject to the limitations set forth below, Simmons® hereby represents and warrants that the components of this product
shall be free from defects in workmanship and materials, including implied warranties of merchantability or fitness for a
particular purpose, subject to normal use and service, for two (2) years to the original owner from the date of purchase.
Retailer and manufacturer shall not be liable for damages based upon inconvenience, loss of use of product, loss of time,
interrupted operation or commercial loss or any other incidental or consequential damages including but not limited to
lost profits, downtime, goodwill, damage to or replac ment of equipment and property, and any costs of recovering,
reprogramming, or reproducing any program or data stored in equipment that is used with Simmons® products. This
guarantee gives you specific legal rights. You may have other legal rights which vary from state to state. Some states do
not allow limitations on how long an implied warranty lasts, so the above limitation may not apply to you.
Simmons
P.O. Box 5111
Thousand Oaks, CA 91359-5111
All trademarks and registered trademarks mentioned herein are recognized as the property of their respective holders.
Made in China
1301-9861
MIDI
Settings, p.31
MIDI implementation, p.46
Pad Note numbers, p.45
Mixer Button Location, p.10
Mode Selecting, p.13
Mute
Part Mute Button Location, p.10
Muting the Drum Part, p.14
Muting Song Parts, p.25
Outputs, p.8
Pads
Sensitivity, p.29
Settings, p.29
Pad Patterns, p.17
Pad Selection Button Location, p.10
Pages Button Location, p.10
Part Mute Button Location, p.10
Play / Stop Button Location, p.10
Power Switch Location, p.10
Quantize, p.28
Quick Record, p.14
Record
Button Location, p.10
Recording a Song, p.26
Settings, p.27
Reverb, p.31
Save / Enter Button Location, p.10
Serial Connector Location, p.12
Smartmedia / SD Card
About, p.32
Format, p.36
Muting a Channel, p.33
Loading a MIDI File, p.34
Deleting a MIDI File, p.35
Song
Select, p.14
Playing, p.14
Edit, p.21
Erase, p.25
List, p.43
Name, p.
Button Location, p.10
Sound Organization, p.16
Tempo Button Location, p.10
Time Signature
Display, p.12
Setting, p.22
Recording Settings, p.28
Trigger Setup, p.29
Top Panel, p.10
USB, p.9
User
Kits, p.15
Songs, p.15
Utility Button Location, p.10
Value Dial Location, p.10
Voice
Edit, p.16
List, p.38
Volume
Master Kit, p.19
Songs, p.20
Click, p.20
Volume Knob, p.10
Part Volumes, p.23
9861 Simmons SD1000 Drum Set Manual.indd 48 1/22/13 8:59 AM
