Simplest Tetris Instructionsx Instructions
User Manual:
Open the PDF directly: View PDF ![]() .
.
Page Count: 9
Page 1 Last saved: 01 July 2018
download these instructions and more from https://github.com/ej3nk1ns/Code-Club
Simplest Tetris
This Scratch project is based on the famous Tetris game, where blocks fall down the
screen. This version is very basic!
You can see the finished project at https://scratch.mit.edu/projects/230976589/.
Step 1: Draw the backdrop and sprite
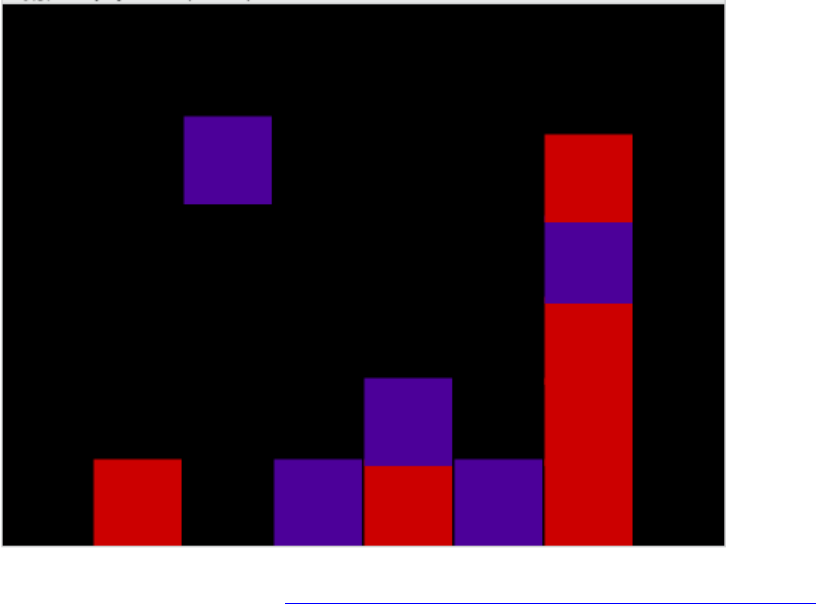
• The background to Tetris is usually black, so that’s what I chose, but it can
be any colour (as long as you don’t use the same colour on a sprite!). Colour
it with the paint can.
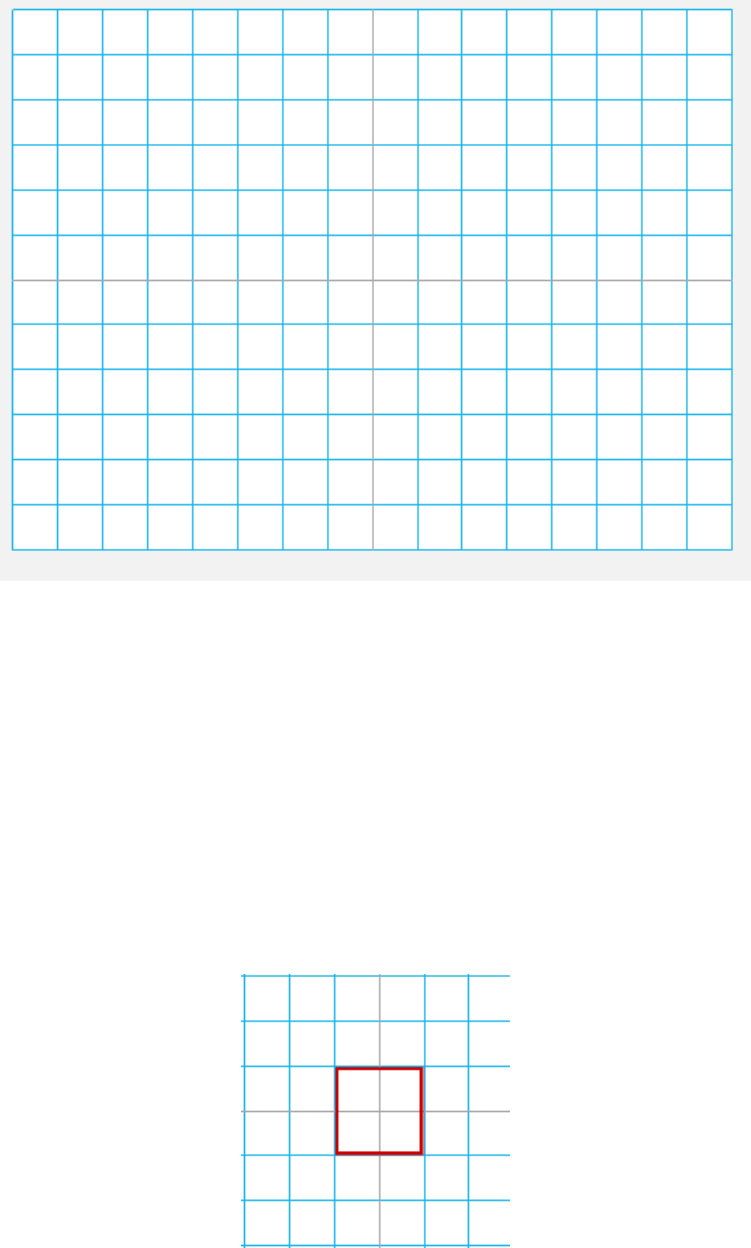
• Next, we want to draw a very accurate square for our sprite – it needs to be
accurate so the blocks look like they are fitting together. To help us do
this we will first choose the Scratch backdrop called xy-grid-30px, which is
in the Other category on the left. It looks like this.
Page 1 Last saved: 01 July 2018
download these instructions and more from https://github.com/ej3nk1ns/Code-Club
• We will not use this grid in the game, but it allows us to be super-accurate
when we draw our sprite, which is important so that the Tetris blocks fit
together.
• With this grid selected, click the paint brush to draw a new sprite. We will
use the grid lines to help us make it exactly the size we want.
• Choose a colour you haven’t used yet, and Hold down the Shift key and use the
rectangle tool to create a square that is the size of four squares of the
grid. You may have to guess a bit, and then adjust it but you are aiming for
something like this:
• Drag the sprite on the grid backdrop to measure it, and use the select tool to
resize it if necessary (but only drag the corners to resize it, or it will
stop being square!). Use the paint tool to fill it with colour.
Page 1 Last saved: 01 July 2018
download these instructions and more from https://github.com/ej3nk1ns/Code-Club
• Make sure the costume is centered – we need to know exactly where it is!
• This means each block should be 60 pixels square. If it is easier, Use the
grow and shrink tools to get this exact.
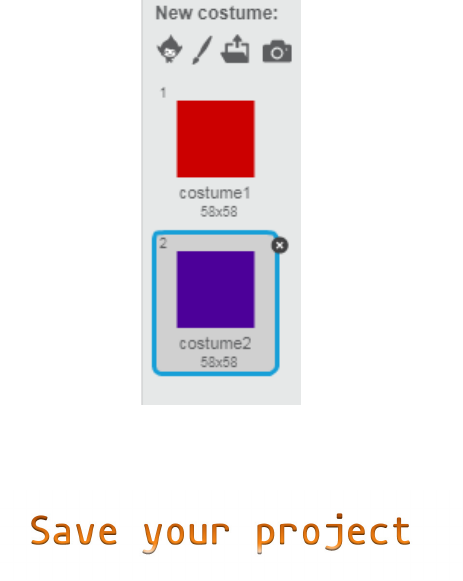
• Make one more costumes for this sprite, by duplicating the first one. That
way they will all be the same shape and size. Use the paint tool to colour
them different colours, like this:

Page 1 Last saved: 01 July 2018
download these instructions and more from https://github.com/ej3nk1ns/Code-Club
Step 2: Make the block fall
• Add this code to make your block fall down to the bottom of the screen:
• Test your code – it doesn’t work. :’(
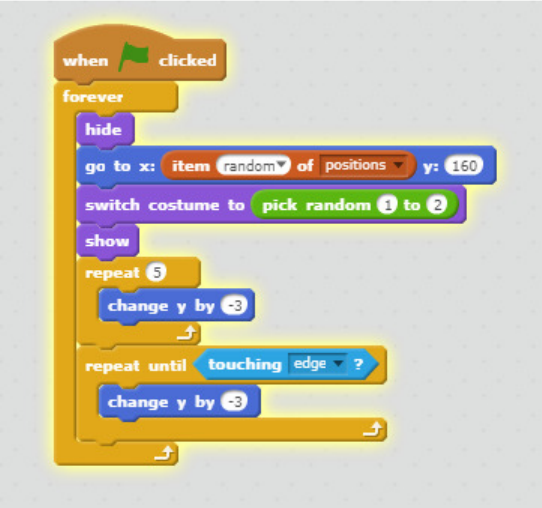
• The reason it doesn’t work, is that the block is already touching the edge, so
the repeat loop never runs! Add an extra repeat to your code so the block
falls away from the top edge, and then runs the rest of the script – it should
now look like this:
• If you want the block to fall faster or slower, try out different numbers in
the change y block. If you choose -1, it will fall very slowly, while -10 will
be very fast!
• Your block should now fall and stop at the bottom of the screen. But…
Page 1 Last saved: 01 July 2018
download these instructions and more from https://github.com/ej3nk1ns/Code-Club
• …it always falls from the same place – we want it to fall from a lot of
different positions along the top of the screen. Often we would use pick
random for this, do you know why that wouldn’t work here? (Turn to the end for
the answer).
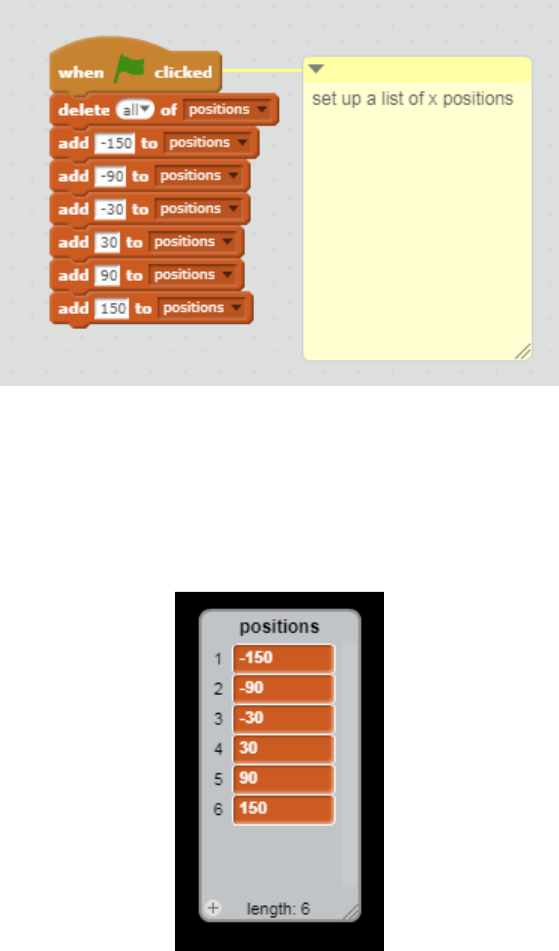
• Instead we will create the following list to set the possible starting x
positions of our block. The code will clear the list and rebuild it each time
we run the program. (If you are changing this project to use a different size
block, you will have to work out your own numbers to use ;-))
• Run your project again, and check your list looks like this:
Page 1 Last saved: 01 July 2018
download these instructions and more from https://github.com/ej3nk1ns/Code-Club
• Now clear the checkbox next to your list, as we don’t need to see it on the
screen.
• Once we have set up our list, we will pick a random x position from the values
in it. Replace 150 with item random of positions, and put a forever loop
around all your code so we don’t have to keep clicking to start it.
• Also, add pick random costume so we see both colours.
• It should now look like this:
• Test your code!
• This is a big part of the code we want, but one block is not enough – we need
to use clones.
Page 1 Last saved: 01 July 2018
download these instructions and more from https://github.com/ej3nk1ns/Code-Club
Step 3: Using clones
We need to make a few changes to our code, so we can have lots of blocks on the
screen at the same time.
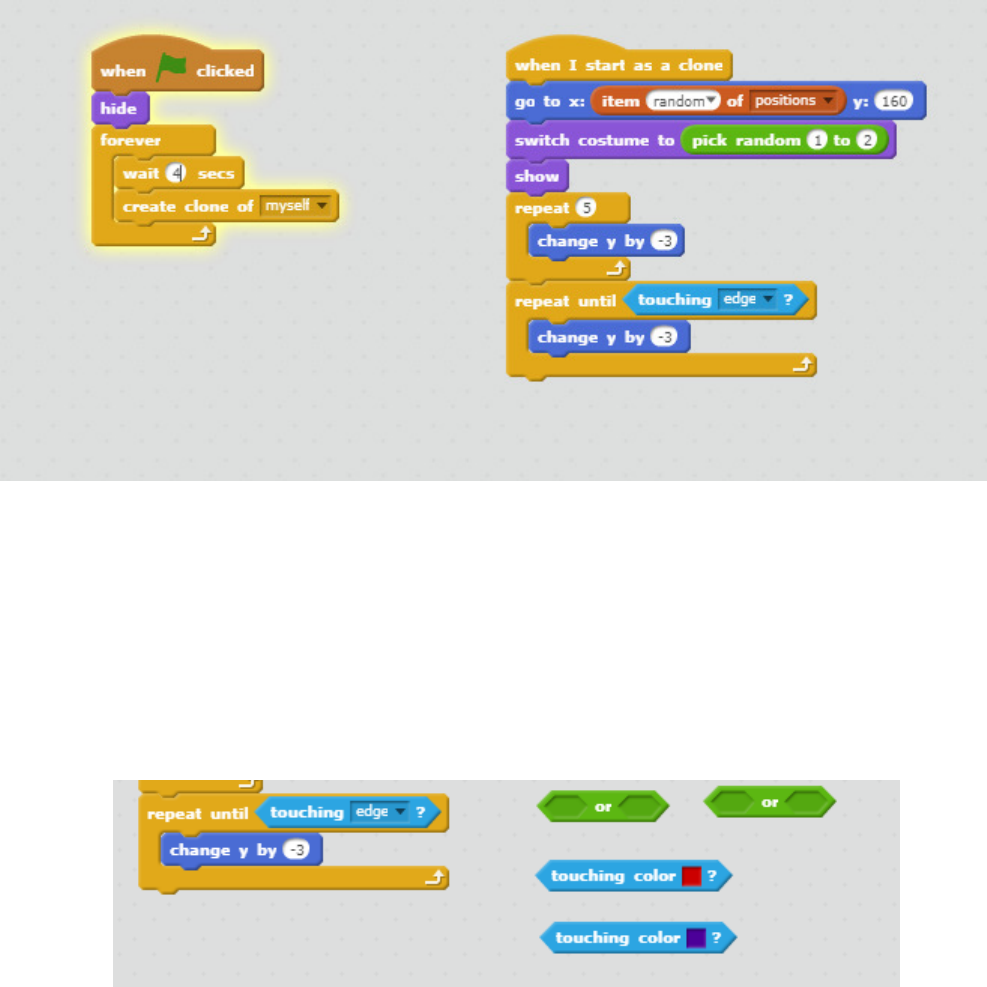
• Drag most of the code to the When I start as a clone hat block, and add the
wait and create clone blocks. I also moved the hide outside of the forever
loop, so everything will start hidden.
• Our blocks are not stacking up like we would like, so change the condition on
the repeat until loop to also test for touching colour, using the following:
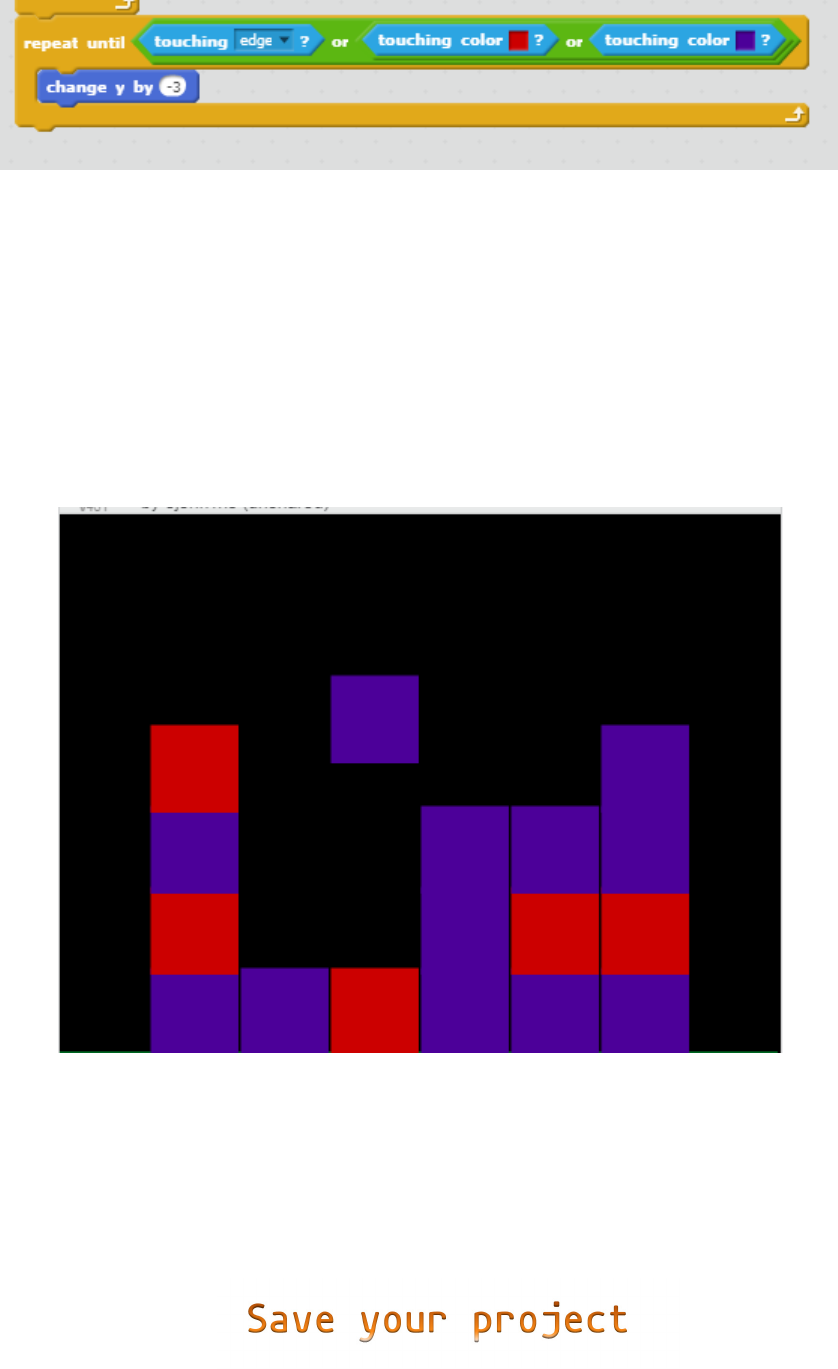
• Can you work out how to put them together? We want to stop the repeat loop if
touching the edge, or touching the first colour, or touching the second
colour. The finished code looks like this:
Page 1 Last saved: 01 July 2018
download these instructions and more from https://github.com/ej3nk1ns/Code-Club
• Adjust the time between clones and the rate they fall so that you only have
one block falling at any time. I used wait 4 seconds, and change y by -3.
• You may find your blocks get stuck touching the edge of another one, instead
of falling all the way down. To fix this, use the shrink tool until there is
a tiny amount of black between each block (and double-check your costumes are
all centered!).
• Once falling is sorted, add stacking, then moving left and right (how to only
allow one jump per second or so?), then not going off the black…
Page 1 Last saved: 01 July 2018
download these instructions and more from https://github.com/ej3nk1ns/Code-Club
More ideas
• Pick random won’t work to set the x position of our block because we want the
blocks to appear in very specific places, otherwise they won’t fit together
well. If you are not sure about this, change your code to use pick random,
and see the difference.
• How could we ‘zap’ a row once it is complete?
