Sofa & Loveseat Assembly
2015-10-01
: Sofa & Loveseat Assembly sofa & loveseat assembly images 1481 p4dbimg
Open the PDF directly: View PDF ![]() .
.
Page Count: 1
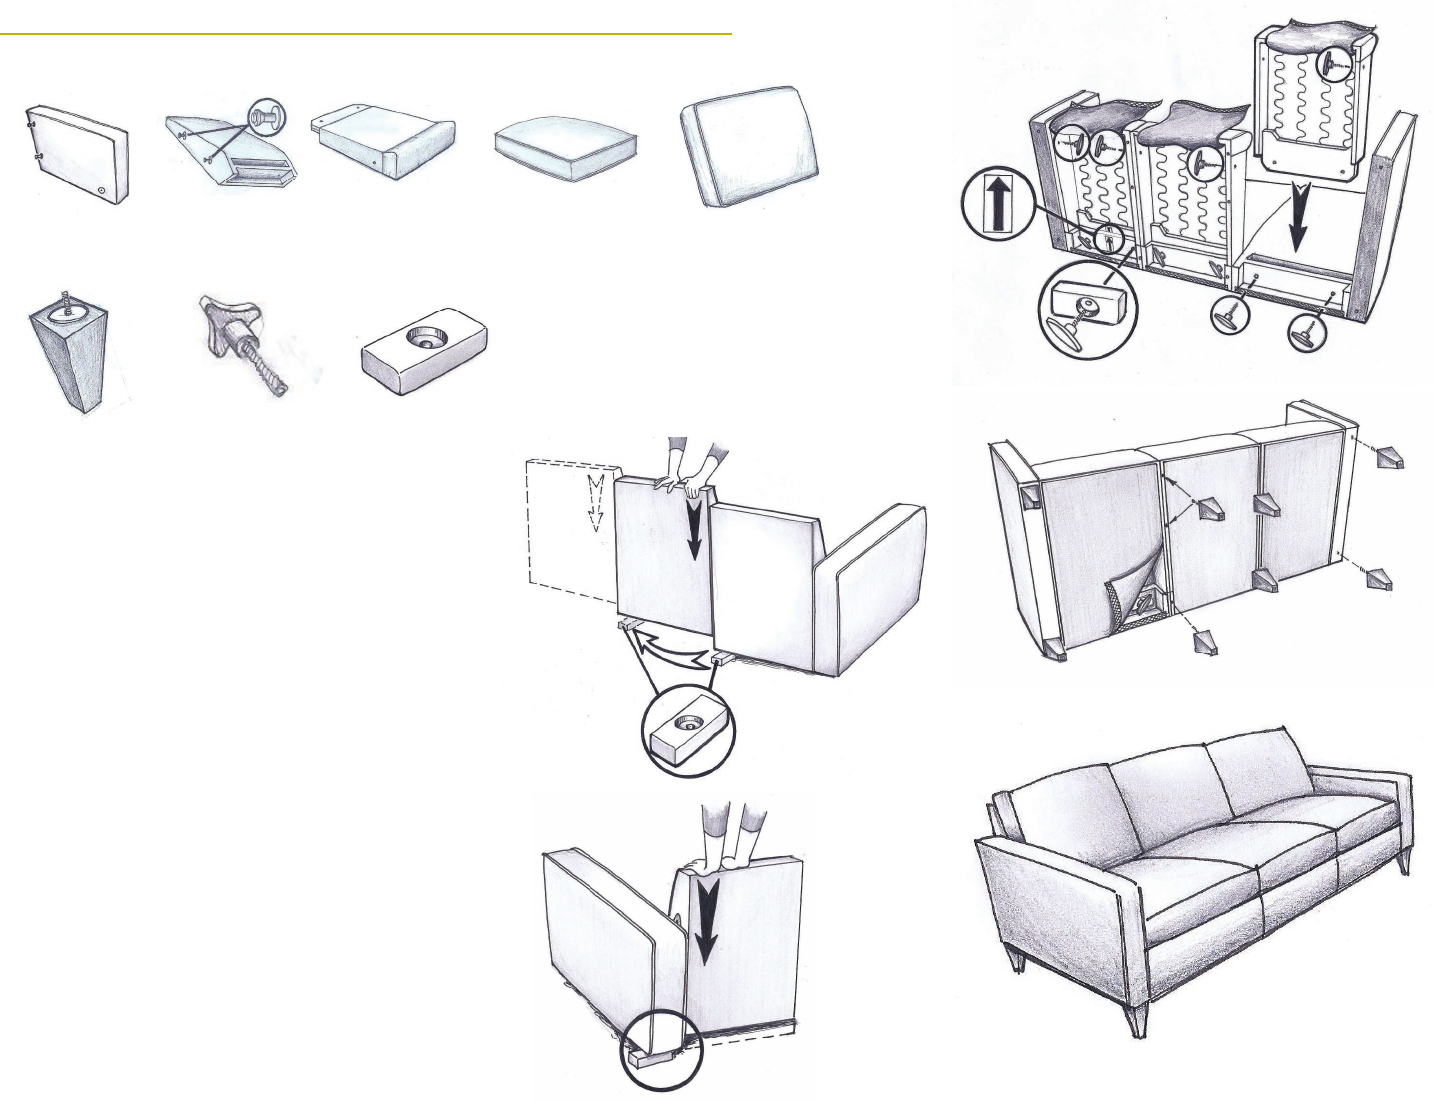
1. Using the Le Facing Arm and the Le Facing Seat
Back (seat back with yellow arrow sticker), complete
Steps 1 and 2 of the Chair Assembly. (Fig. 1)
2. Place the Block under the Seat Back, as shown. In Fig.
5, Align the next Seat Back so that the connectors line
up with the openings in the first Seat Back.
3. Insert the connectors into the openings and push
down to engage the connectors (Fig. 5).
4. Repeat steps 2 and 3 for as many seats as you
purchased (Fig. 5).
5. Aach the Right Facing Arm by placing the Block
under the Arm by inserting the Connectors on the Arm
into your last Seat Back. Push down on the Seat Back to
engage the Connectors (Fig 6).
6. Turn the loveseat / sofa on its back.
2 Seat Decks
3 for Sofa
7 Thumb Bolts
2 Seat Backs
3 for Sofa
SOFA & LOVESEAT ASSEMBLY
1 Block
2 Seat Cushions
3 for Sofa
2 Back Cushions
3 for Sofa
6 Legs
8 for Sofa Fig. 5
Fig. 6
7. Insert the Seat Deck with the yellow arrow
into the Seat Back with the yellow arrow (Le
Facing Seat Back). Thread in 2 Thumb Bolts
through the boom of the Seat Deck into the
Seat Back. Repeat for each Seat Deck (Fig. 7)
Helpful Hint: Thread the Thumb Bolts from the
le side seat deck into the next seat deck.
8. Once Seat Decks are secured to the Seat
Backs, thread the Thumb Bolts from the le
side Seat Deck into the next Seat Deck to
aach the Seat Decks together. Start all Thumb
Bolts before tightening (Fig. 7)
9. Thread the remaining 2 Thumb Bolts to
aach the Seat Decks to the Arms.
10. Aer all the thumb bolts are tightened,
aach the dust cover for each Seat (Fig 8).
11. Aach the legs to the boom of the frame
(Fig. 8).
12. Flip the Sofa or Love Seat upright and add
the Seat Cushions & Back Pillows.
Enjoy!
Fig. 7
Fig. 8
Fig. 9
2 Arms
