AB50 0002 Strata CTI Application Bulletin
User Manual: Strata CTI Application Bulletin
Open the PDF directly: View PDF ![]() .
.
Page Count: 9
Computer Telephony Integration
Application Bulletin
AB50-0002 Page 1 of 10
January 10, 1997
4170107
Toshiba America Information Systems, Inc.
Telecommunication Systems Division
9740 Irvine Blvd., Irvine, CA 92618-1697 (714) 583-3700
Installing ACT! Trial Size Demo Software
Trial Size Demo Software ACT! is a very powerful contact management PC application and
can add important functionality to your telephone system. As a TAPI-compatible application,
it works well with Strata DK systems to provide database lookup and Screen Pop features.
ACT! Trial Size is a small version of Symantec’s ACT! Version 2.0 software. This version
demonstrates the capabilities of TAPI and its inter-operation with the Toshiba Strata DK
systems. The purpose of this bulletin is to assist you in installing, setting options, and using
ACT! in TAPI demonstrations using a Strata DK system. This document is written for a Strata
DK16 system, but the concepts can be used for any of the Strata DK products.
Installing ACT! Trial Size
ACT! Trial Size is a special package of the popular ACT! Contact Manager software limited to
25 contacts to be used for demonstration purposes when needed. The following installation
procedures are presented for those who do not have the full version of the software.
Step 1: ACT! Trial Size Installation
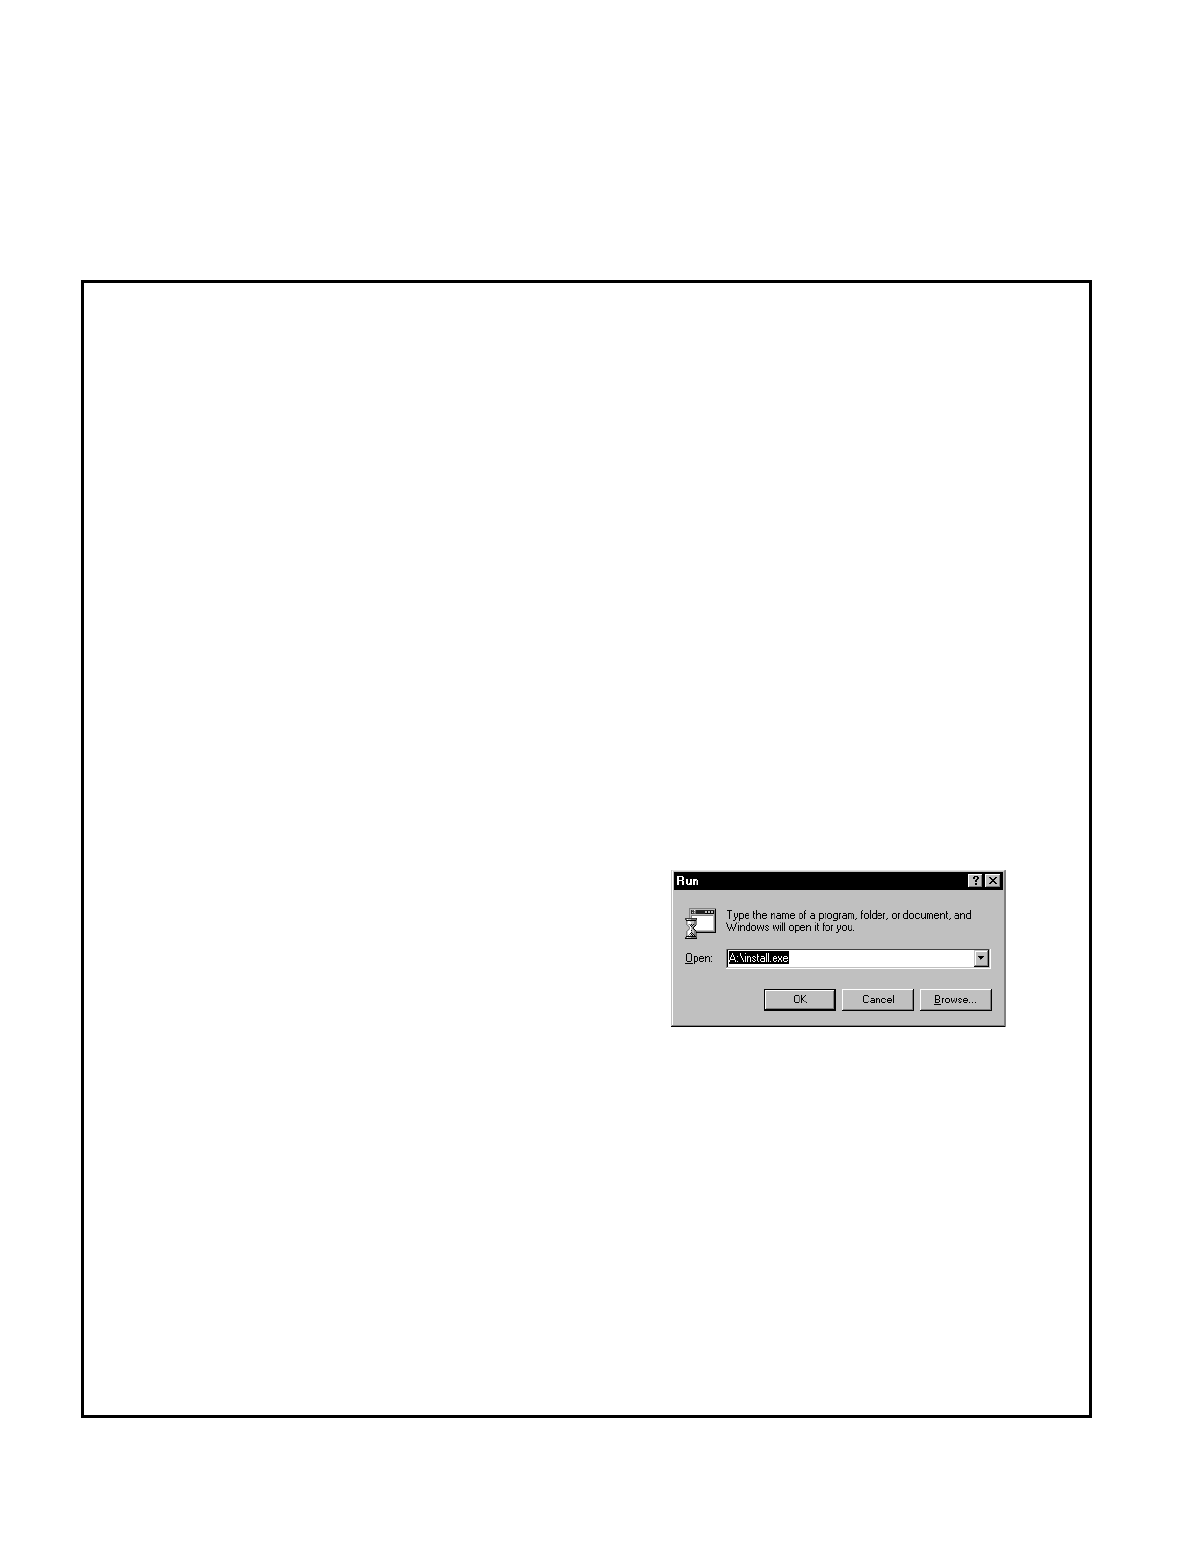
1. From Windows, choose the Run
command from the Start button on the
Task Bar. (Program Manager’s File
Menu in Windows.)
2. Place the ACT! Disk 1 into either drive
A or B. In the Run dialog box type:
A:\INSTALL and click the OK button.
AB50-0002 Page 2 of 10
January 10, 1997
Installing ACT! Trial Size Demo Software
3. Click the Easy Install button. Easy
Install lets you install all ACT! Files in a
new ACTWIN2 directory. Custom lets
you choose the files, reports, macro, or
templates to install. Toshiba
recommends the Easy Install to avoid
potential problems in your demo.
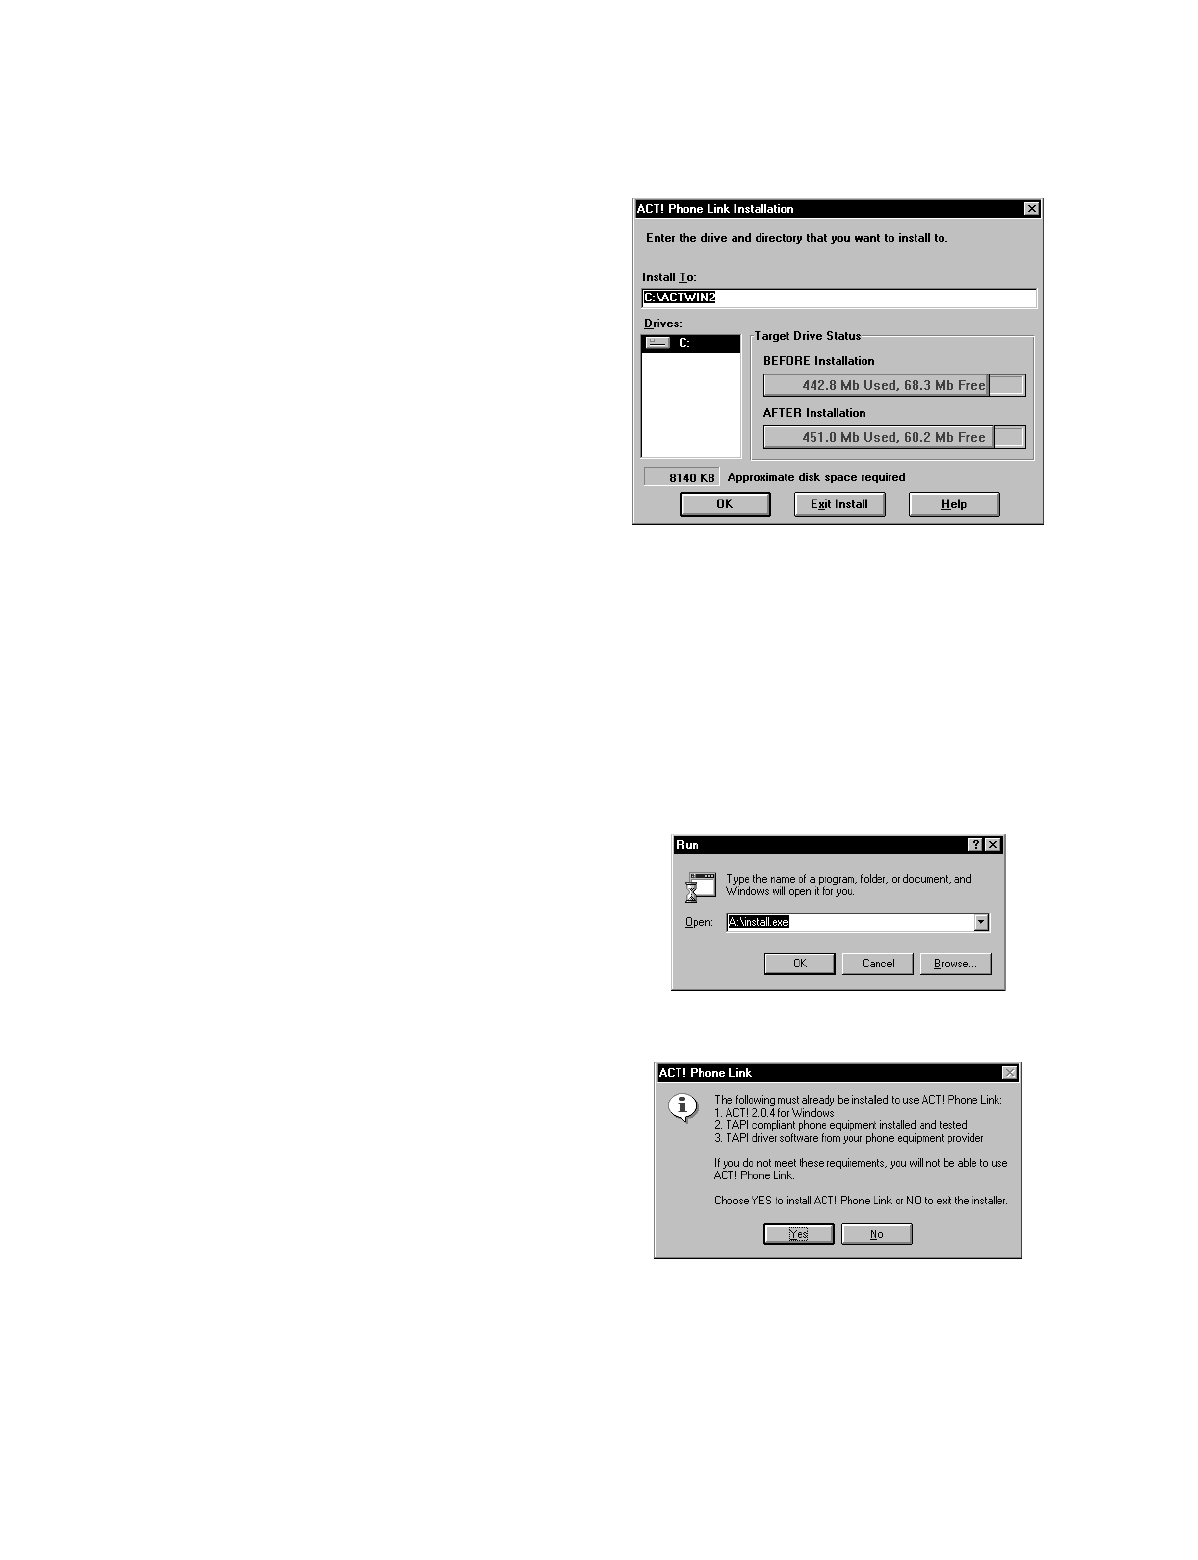
4. Click the OK button to install ACT! to
the default directory, C:\ACTWIN2. If
you want to change the drive or
directory, type the new path and click the
OK button.
5. When prompted, remove disk 1 and
insert disk 2. Click the OK button.
6. After all ACT! files have been copied,
the on-screen registration dialog box
appears. Fill in the requested
information, click the OK button, and
follow the prompts.
7. Click the OK button to finish
installation. Double-click the Read Me
icon for any updated ACT! information.
Step 2: Install ACT! Phone Link
1. Place the ACT! Phone Link disk into
drive A.
2. From Windows, choose the Run
command from the File Menu in the
Program Manager.
3. In the Run dialog box type:
A:\INSTALL and press Enter.
(B:\INSTALL if your disk is drive B.)
4. If you agree to the License Agreement
terms click the Yes button.

AB50-0002 Page 3 of 10
January 10, 1997
Installing ACT! Trial Size Demo Software
5. Select the drive and path (default
recommended) then click the OK
button.
AB50-0002 Page 4 of 10
January 10, 1997
Installing ACT! Trial Size Demo Software
6. Once the installation is complete
“Phone Link Installation Successful”
appears. Click the OK button. The
ACT! Phone Link appears and the
installation is complete.
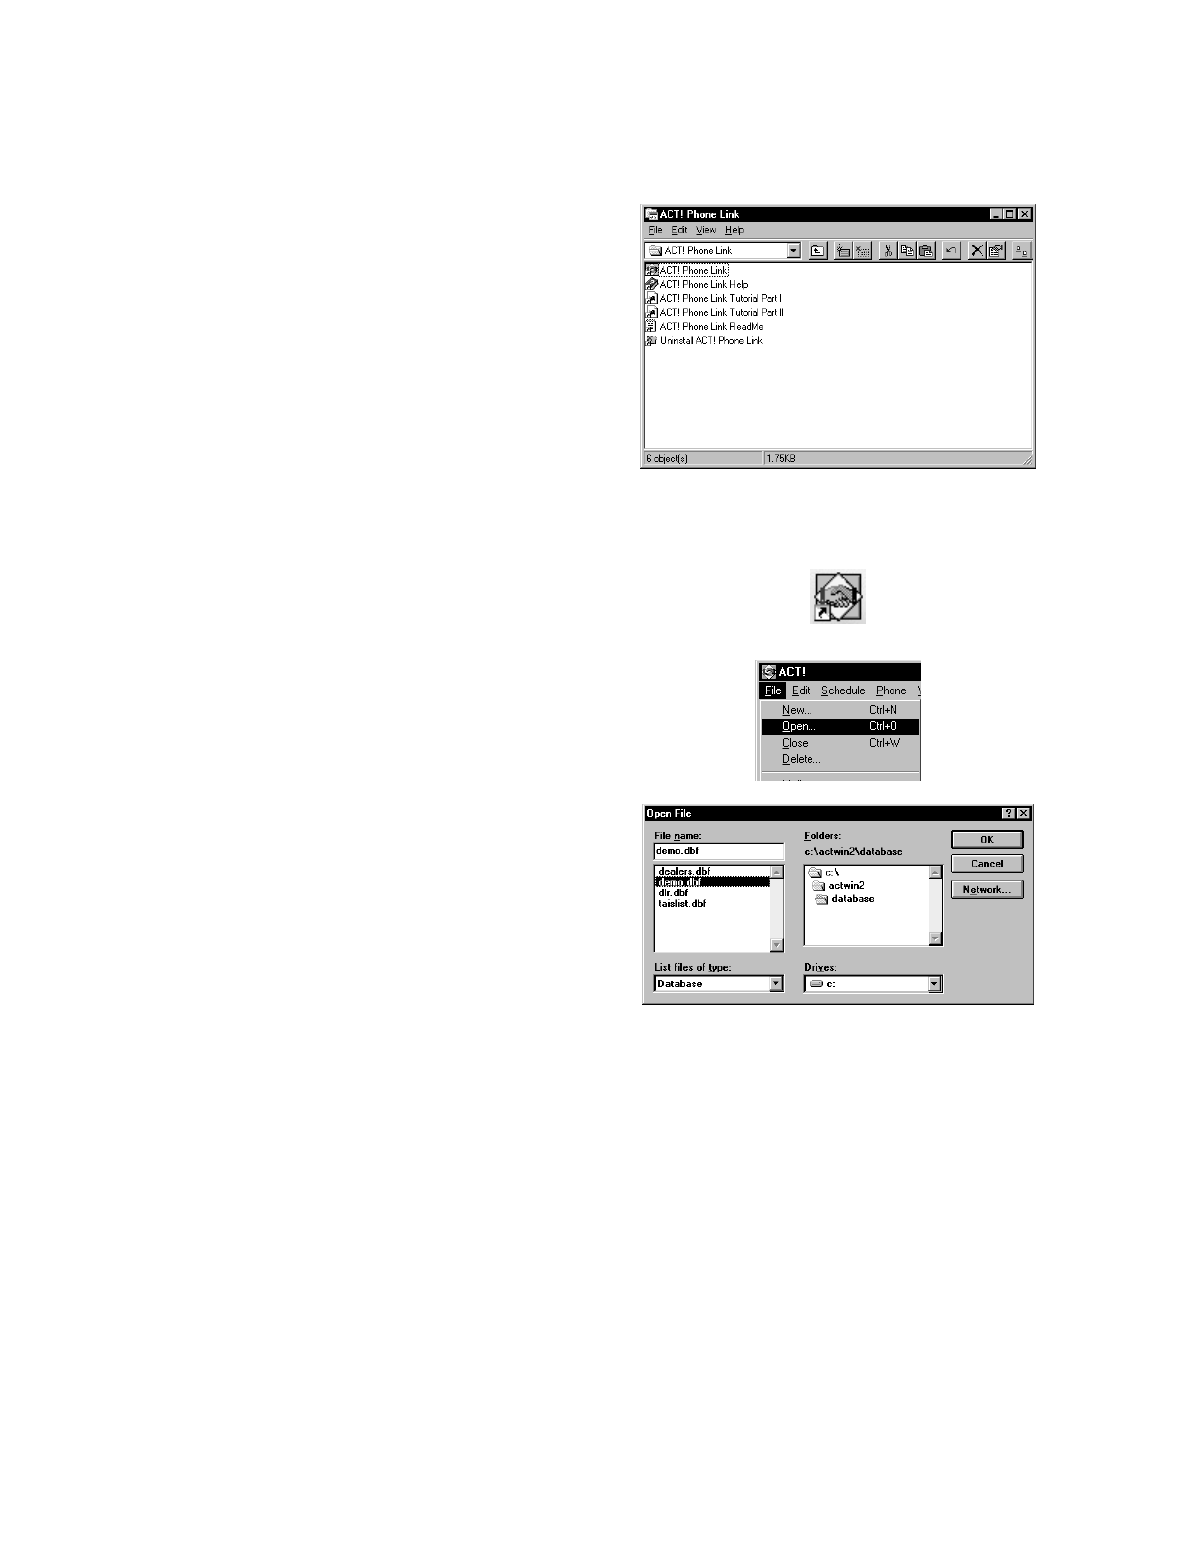
Step 3: Open the ACT! Trial Size Demo Database
1. Double-click the ACT! icon.
2. From the ACT! main screen, select
File; select Open.
3. Select demo.dbf and then click the OK
button.
4. From the ACT! File pull-down menu,
select Exit to quit.
Step 4: ACT! Phone Link Tutorial (Optional)
When ACT! Phone Link is installed a new program group labeled ACT! Phone Link is added
to the Windows Program Manager. Within the ACT! Phone Link group are two files called
ACT! Phone Link Tutorial Part I and ACT! Phone Link Tutorial Part II. The tutorials provide
an excellent overview of the new TAPI features supported by Symantec’s ACT! when used
with the Toshiba RPCI-DI.
AB50-0002 Page 5 of 10
January 10, 1997
Installing ACT! Trial Size Demo Software
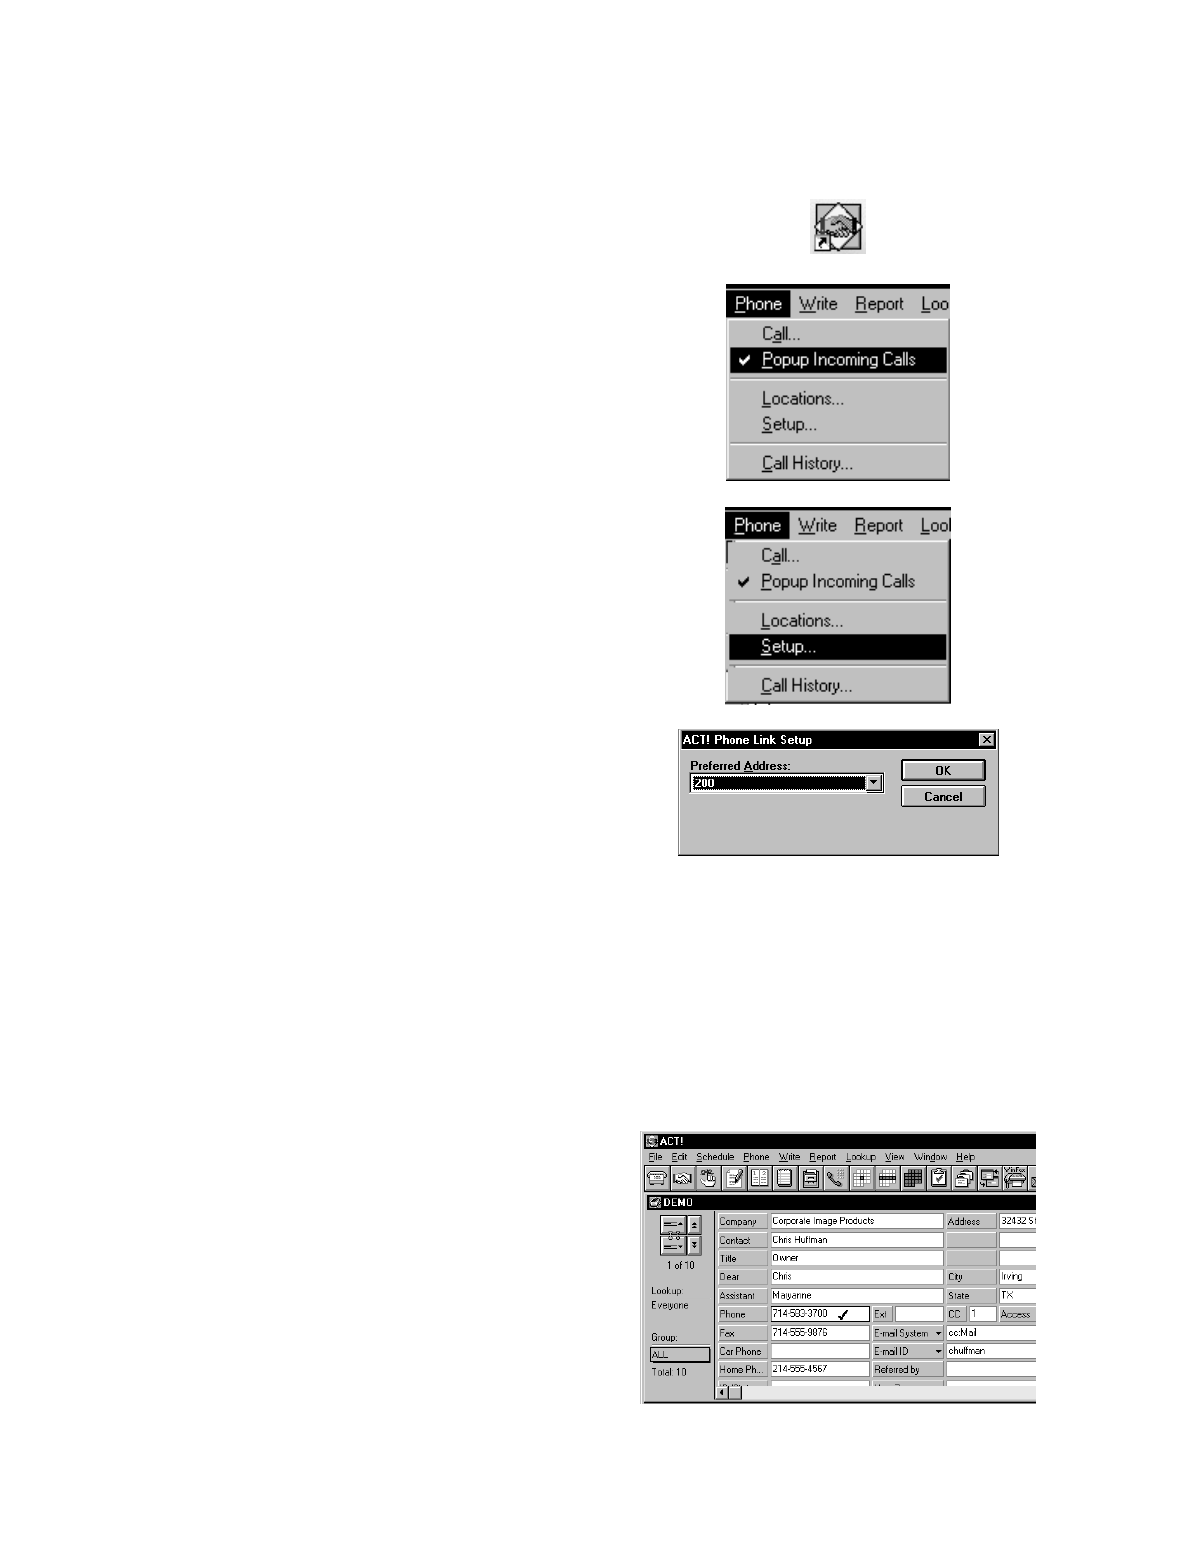
Step 5: Entering ACT! Settings
1. Start ACT! Phone Link.
2. From the Phone pull-down menu
ensure that the “Popup Incoming
Calls” is selected (checked).
3. Select Phone from the main menu and
then Setup.
4. Make sure “Intercom” or the Primary
DN of your station (in this case 200)
appears in the pull-down window; click
the OK button.
Setting up an ACT! Demo
Step 1: Check the Database Lookup
The Strata system delivers Caller ID/ANI information via TAPI to the ACT! Software. ACT!
uses this Caller ID to lookup the record in the open database and compare the received number
with the numbers recorded in the “Phone” field of each record. The Strata DK16 Demo sends
the station numbers (typically 10, 11, 12) as the Caller ID. The Caller ID’s received will need
to match records in the database to find a match.
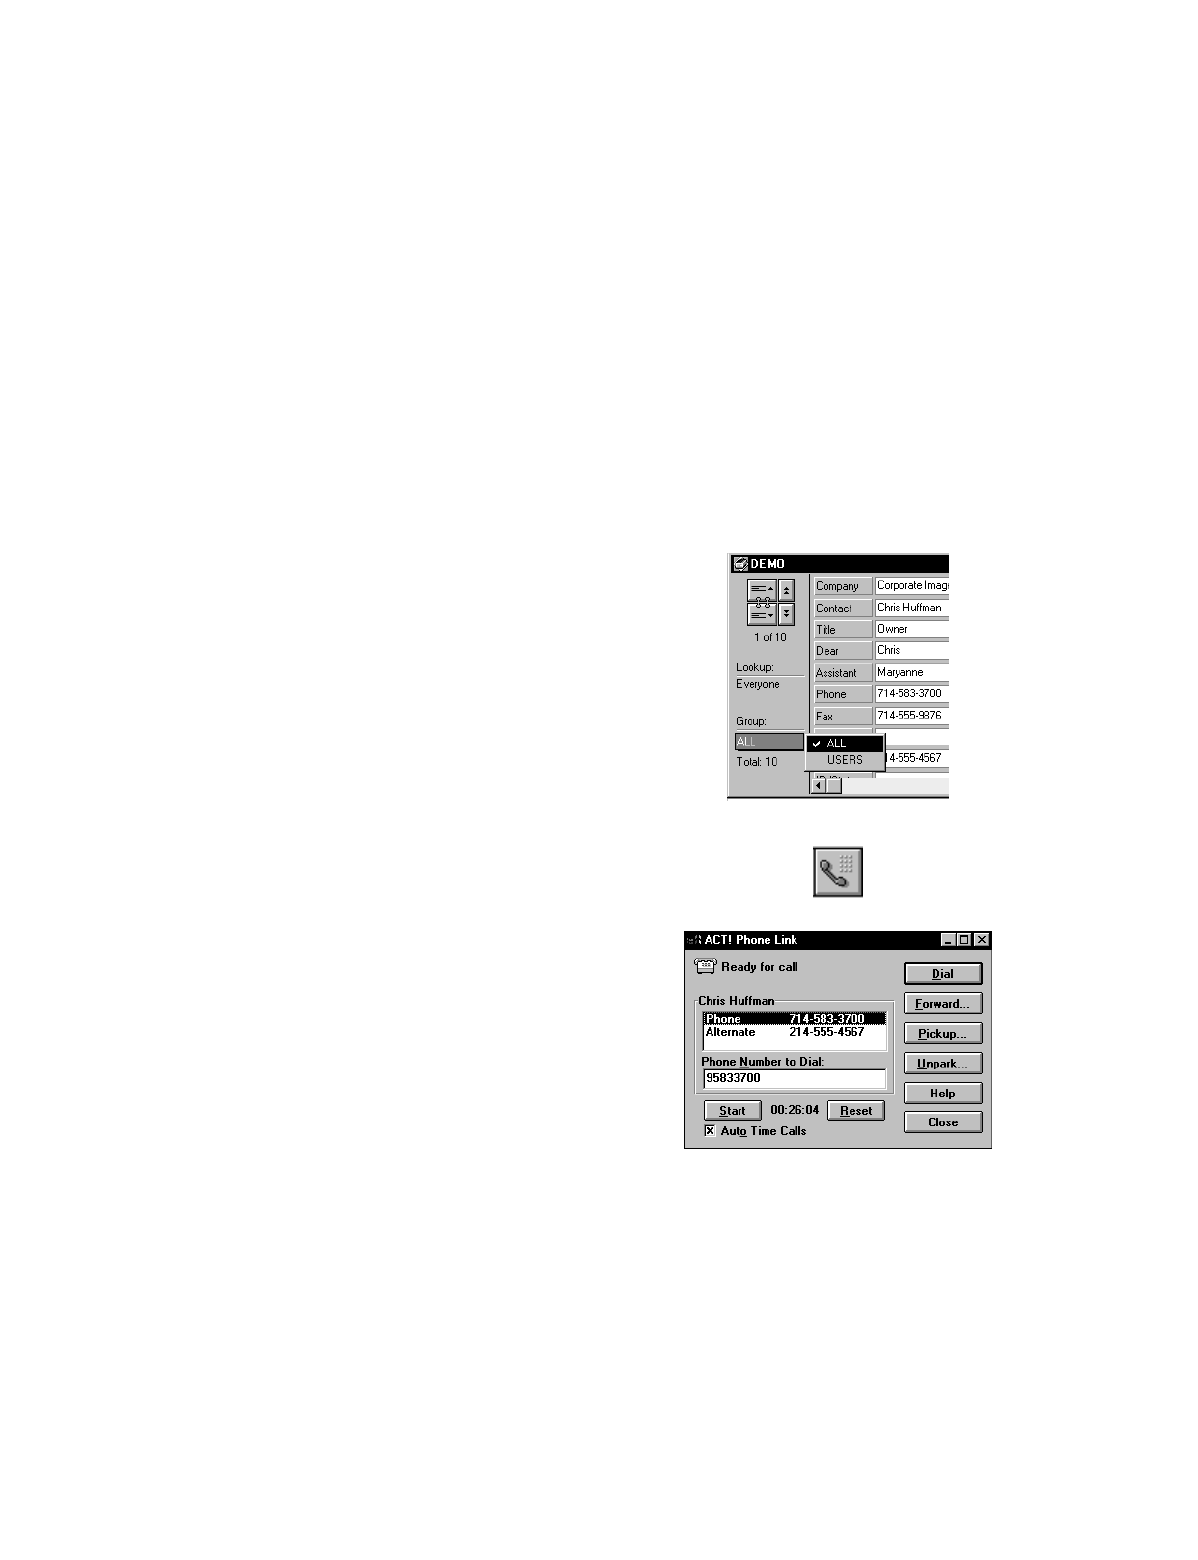
1. Select records in the Demo database
and change the Phone number to match
the Station numbers used to originate
the calls. Example: Change Chris
Huffman (record 1) Phone field from
214-555-9665 to 12.
AB50-0002 Page 6 of 10
January 10, 1997
Installing ACT! Trial Size Demo Software
Note To make the demonstration more realistic, use a text editor such as Notebook and add
the following lines to the file, C:\WINDOWS\SYSTEM\dktsp.ini:
[DEMO]
ANI=1
NUMBER=7145833700
NAME=CHRIS HUFFMAN
|
Any intercom call to the TAPI enabled telephone will present the defined Number and
Name.
Each time you call a station causing a screen pop in the ACT! Database, ACT! selects a
group of records that match the search criteria. Thus, the system reduces the number of
records in the search to only those that meet the criteria, typically only one. A manual
intervention will be required to open the search to all records.
2. Go to the Group function located on the
left side of the screen and select ALL.
This will open the next search to all
records.
Step 2: Verify Phone Link
1. Select the handset icon in the middle of
the tool bar or open Phone and select
Call from the Main Menu
2. If the Phone Link dialog box appears,
then you have successfully verified the
Phone Link.
3. If you see the My Record dialog box,
TAPI did not load and ACT! will
attempt to use the COM port modem to
dial. Be sure you:
♦Verify that ACT! Phone Link was
used to start ACT! rather than
ACT! 2.0 for Windows.
♦Verify that the Toshiba Service
Provider is installed per the
Installation Instructions.
♦Verify the RPCI-DI and cable
connection to the computer.
Note ACT! Phone Link requires that Toshiba Service Provider be the first driver installed
(Driver 0). You may need to remove all other drivers listed in Settings, Control Panel,
Telephony. In Windows 95 this includes double-clicking on Unimodem and removing

AB50-0002 Page 7 of 10
January 10, 1997
Installing ACT! Trial Size Demo Software
any modems installed. If needed, these drivers may be added back into the list once
you get your application working.
4. If the Phone Link dialog box did not work, but appears with the Dial, Forward, Pickup,
and Unpark buttons grayed-out, then the connection between the PC and RPCI-DI is no
longer working.
Verify the RPCI-DI and cable connection to the computer.Step 3: Check Phone System
Settings and DKT Display Mode
To identify the calling party, TAPI looks for the Station Identification in the LCD display data.
When the DKTs are in the name mode, TAPI sends the Caller ID Name to the application in
place of the Caller ID Number. ACT! ignores the name information and will display the
current record information in its database. The Toshiba Service Provider uses the information
on the top line of the LCD display for Caller ID information.
1. To have ACT! find the record of the calling DKT, clear the Name display on all phones
involved in the screen pops. To reset the display mode:
♦Strata DK8/16/96 - Press the Intercom button, dial 620, and press the Spkr button on
each phone.
♦Strata DK16e/280/424 - Press the [PDN] button, dial #620, and press the Spkr button
on each phone.
2. Make sure the correct switch type has been selected in the installation process of the DKT
Service Provider. This information is used to determine the format of the received data for
presenting it to the TAPI application.
Performing the TAPI Demo Using ACT! Phone Link
The Toshiba TAPI Demos take advantage of Strata DK280 Release 3 features such as Caller
ID and ANI functionality, notifying you of the source of an outside call, even before you
answer it. Additionally, the demos cover auto dialing and history record keeping that have
helped make ACT! a successful contact manager.
The following demo instructions are written for a Strata DK16 telephone system that is
configured with stations 10, 11, and 12 with an RPCI-DI connected to station 10. The contact
records in this tutorial have been created to demonstrate a working TAPI enabled system.
The “dktsp.ini” file is changed to reflect the additional line shown on Page 6.
Since Caller ID searches the Phone field for a unique number, remember to verify that
extensions numbers 10, 11, and 12 or the number recorded in “dktsp.ini”exist in the ACT!
database and are located in the Phone field rather than the Extension field of your contact
records.
AB50-0002 Page 8 of 10
January 10, 1997
Installing ACT! Trial Size Demo Software
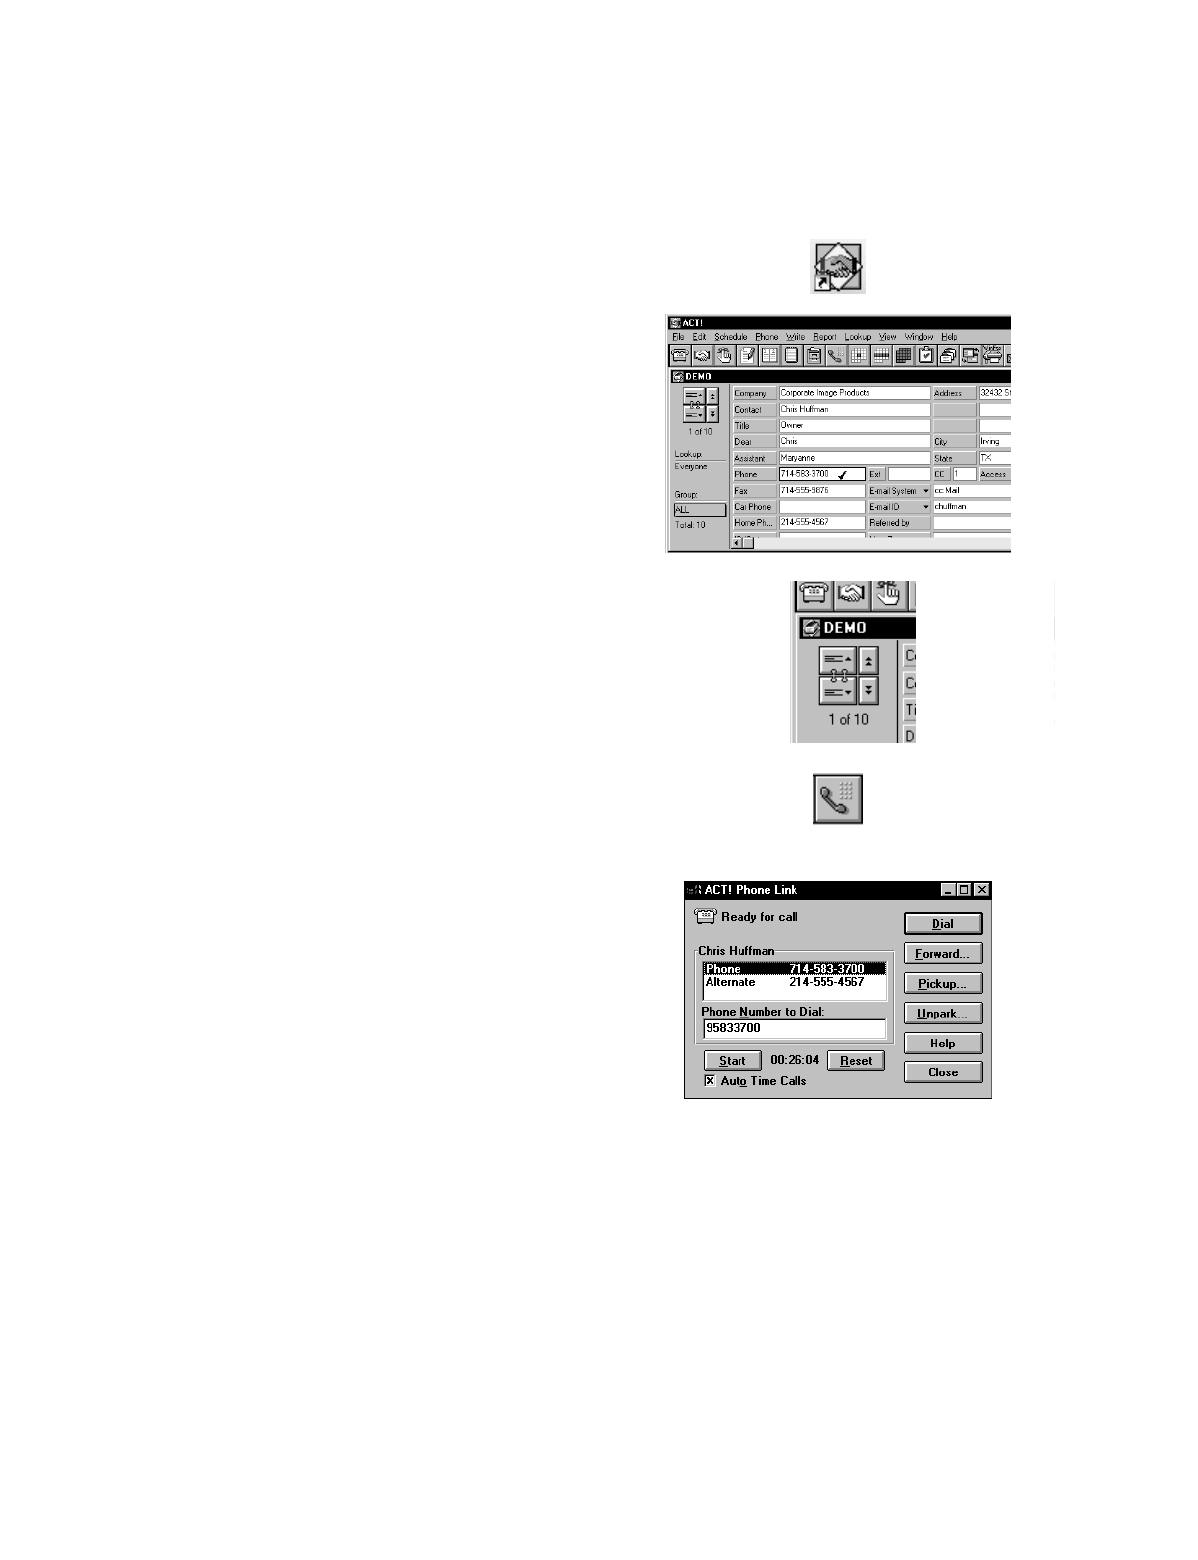
Demo 1: Placing a Call
1. Start ACT! Phone Link.
2. Select the record for Chris Huffman
from your ACT! database.
3. Use the Page Up and Page Down keys
to change contacts within the database,
or use the additional navigation buttons
on the left side of the screen.
4. Open by clicking on the Handset icon
in the middle of the toolbar or open the
Phone, Call option from the main
menu.
5. Choose the number to dial. You could
also type in the number to dial directly
into the Number to Dial field.
6. Set the Auto Time Calls option at the
bottom of the dialog box to
automatically start the timer when the
call is connected. Without this box
marked, the timer must be started
manually using the Start button.
7. Autodial the number by clicking the
Dial button. After a moment, the status
of the line changes to Ringing and
again later to Connected.
8. Explore your connected options.
Answer the call ringing at station 12,
the line Ringing state changes to the
Connected state. You may put the
conversation on hold by using the Hold
button and retrieving the call using
Unhold.
AB50-0002 Page 9 of 10
January 10, 1997
Installing ACT! Trial Size Demo Software
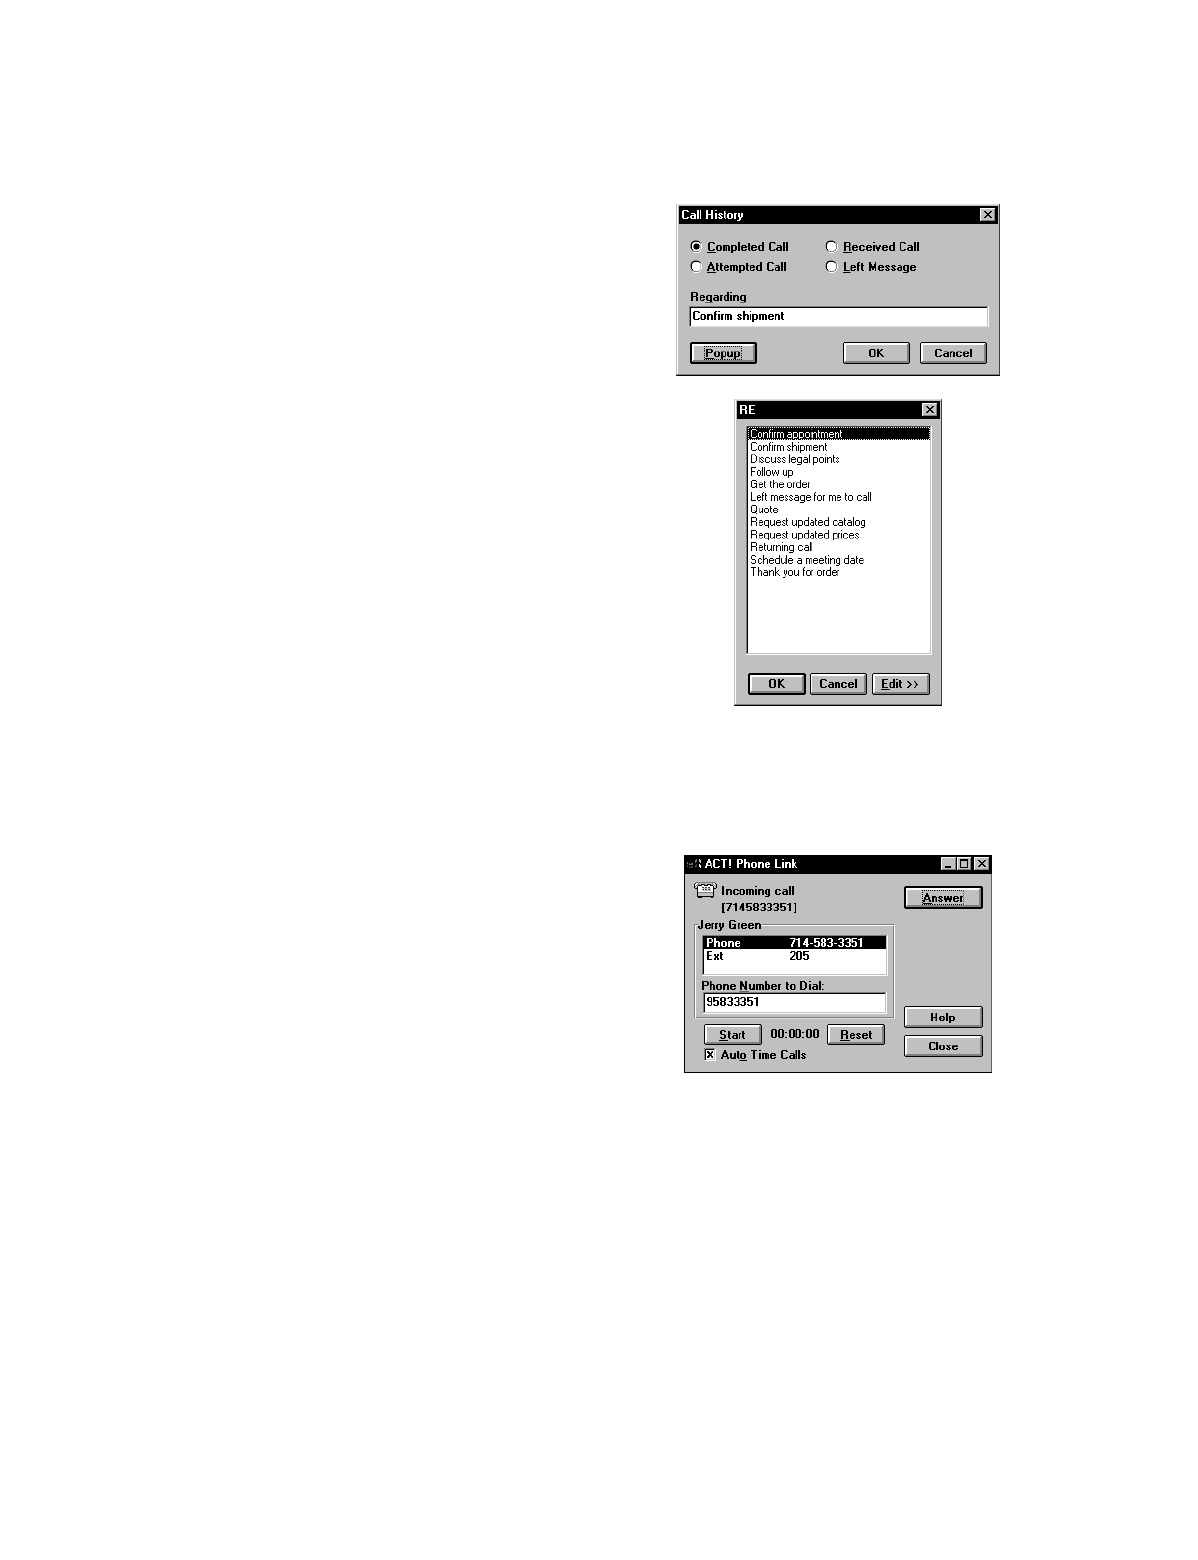
9. Hang up and record the call history. At
the called station (12) press the Spkr
button to end the call. ACT! displays
the Call History screen, where you can
record the results of your call.
10. You may also choose Popup to select
from your user-defined list of common
remarks.
Demo 2: “Screen-Pop” from an Incoming Call
1. Place a call to station 10 from station 12.
2. When the Strata DK receives ANI or
Caller ID, the phone number is passed
to the DKT Service Provider and on to
the ACT! application. ACT! searches
the contact database until it finds a
record that matches the incoming
phone number and then displays the
contact record. In this case, the record
for Chris Huffman is displayed before
you answer the call.
Note The number in brackets below the
phone status message is the number
received from TAPI as the Calling
Number.
