Stratagy Installation And Maintenance Manual Flash IPV8
User Manual: Stratagy Flash and IPV8 Installation and Maintenance Manual www.TelecomUserGuides.com Access User Guides, Manuals and Brochures
Open the PDF directly: View PDF ![]() .
.
Page Count: 260 [warning: Documents this large are best viewed by clicking the View PDF Link!]
- Title Page
- Publication Information
- TAIS TSD License Agreement
- TAIS TSD Limited Warranty
- Before You Install Stratagy Flash in Strata CTX...
- Before You Install Stratagy Flash in Strata DK...
- Before You Install Stratagy IVP8 in Strata CTX...
- Before You Install Stratagy IVP8 in Strata DK...
- Contents
- Introduction
- Chapter 1 - Overview
- Chapter 2 - Installation
- Chapter 3 - Access and Use Stratagy
- Chapter 4 - Configure Stratagy
- Chapter 5 - How Stratagy Operates
- User IDs
- Call Processing Control
- User ID Mailboxes
- How Stratagy Processes
- Feature Programming
- Automatic Scheduler
- Automatic System Recovery
- Busy Station Identification for IVP8
- Called Identification
- Caller Confirmation Prior to Transferring
- Call Screening
- Call Transfer
- Chaining
- Directory
- Disk Space Notification
- Distribution Lists
- Do Not Disturb
- Extensions—Scheduled
- Fax Tone Detection
- Future Delivery
- Greeting
- Greeting—Company
- Greeting—Port-Selectable
- Greeting Restart
- Group Partitions—Call Blocking
- Guest Users
- Interactive Voice Response (IVR)
- Message Continuous Delete/Playback
- Message Copy
- Message Copy with Delete
- Message Date and Time Control
- Message Length Control
- Message Notification
- Message Pause During Playback/Recording
- Message Playback Control
- Message Purging
- Message Retrieval Control
- Message Speed Control
- Message Volume Control
- Messages—New, Pending and Saved
- Messages—Urgent
- Multiple System Languages
- Name (and Extension) Control
- Networking (AMIS)
- Paging – Office
- Programmable Dial Actions
- Reports
- Ring Duration
- Screen Advertisement
- Shared Extensions
- Shutdown using the Telephone Dial Pad
- Single-digit Menus
- System Administrator’s Mailbox
- Token Programming
- Universal Ports
- User ID Security Code
- User ID—Variable/Fixed Length
- Varied Sampling Rates
- Voice Forms
- Chapter 6 - Menus
- Chapter 7 - Token Programming
- Chapter 8 - Customization Examples
- Chapter 9 - AMIS Networking
- Chapter 10 - System Reports
- Chapter 11 - Maintenance, Upgrades and Troubleshooting
- Appendix A - Checklists/Forms
- Appendix B - Special Greeting User ID Mailboxes
- Index

June 2002
726+,%$ Telecommunication Systems Division
Stratagy Flash, IVP8
Installation and
Maintenance Manual
®
Voice Processing Systems

Publication Information
Toshiba America Information Systems, Inc., Telecommunication Systems
Division, reserves the right, without prior notice, to revise this information
publication for any reason, including, but not limited to, utilization of new
advances in the state of technical arts or to simply change the design of this
document.
Further, Toshiba America Information Systems, Inc., Telecommunication
Systems Division, also reserves the right, without prior notice, to make such
changes in equipment design or components as engineering or
manufacturing methods may warrant.
STG-MA-FL/I8-VA
4025090
Version A, June 2002
© Copyright 2002
Toshiba America Information Systems, Inc.
Telecommunication Systems Division
All rights reserved. No part of this manual, covered by the copyrights
hereon, may be reproduced in any form or by any means—graphic,
electronic, or mechanical, including recording, taping, photocopying, or
information retrieval systems—without express written permission of the
publisher of this material.
Stratagy is a registered trademark of Toshiba America Information Systems,
Inc.
Strata is a registered trademark of Toshiba Corporation.
Trademarks, registered trademarks, and service marks are the property of
their respective owners.
Stratagy Voice Processing
General End User Information
The Stratagy Voice Processing Systems are registered in accordance
with the provisions of Part 68 of the Federal Communications
Commission’s Rules and Regulations.
FCC Requirements
Means of Connection: The Federal Communications Commission
(FCC) has established rules which permit the Stratagy systems to be
connected directly to the telephone network. Connection points are
provided by the telephone company—connections for this type of
customer-provided equipment will not be provided on coin lines.
Connections to party lines are subject to state tariffs.
Incidence of Harm: If the system is malfunctioning, it may also be
disrupting the telephone network. The system should be
disconnected until the problem can be determined and repaired. If
this is not done, the telephone company may temporarily
disconnect service. If possible, they will notify you in advance, but,
if advance notice is not practical, you will be notified as soon as
possible. You will be informed of your right to file a complaint with
the FCC.
Service or Repair: For service or repair, contact your local Toshiba
telecommunications distributor. To obtain the nearest Toshiba
telecommunications distributor in your area, call Toshiba America
Information Systems, Inc., Telecommunication Systems Division in
Irvine, CA (949) 583-3700.
Telephone Network Compatibility: The telephone company may
make changes in its facilities, equipment, operations, and
procedures. If such changes affect the compatibility or use of the
Stratagy system, the telephone company will notify you in advance
to give you an opportunity to maintain uninterrupted service.
Notification of Telephone Company: Before connecting a
Stratagy system to the telephone network, the telephone company
may request the following:
♦Your telephone number.
♦FCC registration number:
Stratagy Flash: EBZUSA-25267-VM-T
Stratagy IVP8: Tested to comply with FCC standards.
♦Ringer equivalence number: 0.6B. The ringer equivalence
number (REN) is useful to determine the quantity of devices
which you may connect to your telephone line and still have
all of those devices ring when your number is called. In most
areas, but not all, the sum of the RENs of all devices connected
to one line should not exceed five (5.0B). To be certain of the
number of devices you may connect to your line, as
determined by the REN, you should contact your local
telephone company to ascertain the maximum REN for your
calling area.
♦Network connection information USOC jack required:
RJ11C, RJ14C.
Radio Frequency Interference
Warning: This equipment generates, uses, and can radiate radio
frequency energy and if not installed and used in accordance with
the manufacturer’s instruction manual, may cause interference to
radio communications. It has been tested and found to comply with
the limits for a Class A computing device pursuant to Subpart J of
Part 15 of FCC Rules, which are designed to provide reasonable
protection against such interference when operated in a commercial
environment. Operation of this equipment in a residential area is
likely to cause interference, in which case, the user, at his/her own
expense, will be required to take whatever measures may be
required to correct the interference.
This system is listed with Underwriters Laboratory.
Important Notice — Busy-hold Music
In accordance with U.S. Copyright Law, a license may be required
from the American Society of Composers, Authors and Publishers,
or other similar organization, if radio or TV broadcasts are
transmitted through the busy-hold music feature of this voice
processing system. Toshiba America Information Systems, Inc.,
hereby disclaims any liability arising out of the failure to obtain
such a license.
UL
®
ITE
7B61
LISTED
CUS
CUS
®
E178305
Stratagy Flash Stratagy IVP8

TOSHIBA AMERICA INFORMATION SYSTEMS, INC. (“TAIS”)
Telecommunication Systems Division License Agreement
IMPORTANT: THIS LICENSE AGREEMENT (“AGREEMENT”) IS A LEGAL AGREEMENT BETWEEN YOU (“YOU”) AND TAIS. CAREFULLY READ THIS LICENSE AGREEMENT. USE OF ANY
SOFTWARE OR ANY RELATED INFORMATION (COLLECTIVELY, “SOFTWARE”) INSTALLED ON OR SHIPPED WITH A TAIS TELECOMMUNICATION SYSTEM PRODUCT OR OTHERWISE MADE
A
VAILABLE TO YOU BY TAIS IN WHATEVER FORM OR MEDIA, WILL CONSTITUTE YOUR ACCEPTANCE OF THESE TERMS, UNLESS SEPARATE TERMS ARE PROVIDED BY THE SOFTWARE
SUPPLIER. IF YOU DO NOT AGREE WITH THE TERMS OF THIS LICENSE AGREEMENT, DO NOT INSTALL, COPY OR USE THE SOFTWARE AND PROMPTLY RETURN IT TO THE LOCATION
FROM WHICH YOU OBTAINED IT IN ACCORDANCE WITH APPLICABLE RETURN POLICIES. EXCEPT AS OTHERWISE AUTHORIZED IN WRITING BY TAIS, THIS SOFTWARE IS LICENSED FOR
DISTRIBUTION ONLY TO END-USERS PURSUANT TO THIS LICENSE AGREEMENT.
1. License Grant. The Software is not sold; it is licensed upon payment of applicable charges. TAIS grants to you a personal, non-transferable and non-exclusive right to use the copy of the Software
provided under this License Agreement. You agree you will not copy the Software except as necessary to use it on one TAIS system at a time at one location. Modifying, translating, renting, copying,
distributing, transferring or assigning all or part of the Software, or any rights granted hereunder, to any other persons and removing any proprietary notices, labels or marks from the Software is strictly
prohibited; You agree violation of such restrictions will cause irreparable harm to TAIS and provide grounds for injunctive relief, without notice, against You or any other person in possession of the Software.
You and any other person whose possession of the software violates this License Agreement shall promptly surrender possession of the Software to TAIS, upon demand. Furthermore, you hereby agree not
to create derivative works based on the Software. TAIS reserves the right to terminate this license and to immediately repossess the software in the event that You or any other person violates this License
A
greement.
2. Intellectual Property. You acknowledge that no title to the intellectual property in the Software is transferred to you. You further acknowledge that title and full ownership rights to the Software will remain
the exclusive property of TAIS and/or its suppliers, and you will not acquire any rights to the Software, except the license expressly set forth above. You will not remove or change any proprietary notices
contained in or on the Software. The Software is protected under US patent, copyright, trade secret, and/or other proprietary laws, as well as international treaties. Any transfer, use, or copying of the
software in violation of the License Agreement constitutes copyright infringement. You are hereby on notice that any transfer, use, or copying of the Software in violation of this License Agreement constitutes
a willful infringement of copyright.
3. No Reverse Engineering. You agree that you will not attempt, and if you employ employees or engage contractors, you will use your best efforts to prevent your employees and contractors from
attempting to reverse compile, reverse engineer, modify, translate or disassemble the Software in whole or in part. Any failure to comply with the above or any other terms and conditions contained herein will
result in the automatic termination of this license and the reversion of the rights granted hereunder back to TAIS.
4. Limited Warranty. THE SOFTWARE IS PROVIDED “AS IS” WITHOUT WARRANTY OF ANY KIND. TO THE MAXIMUM EXTENT PERMITTED BY APPLICABLE LAW, TAIS AND ITS SUPPLIERS
DISCLAIM ALL WARRANTIES WITH REGARD TO THE SOFTWARE, EITHER EXPRESS OR IMPLIED, INCLUDING, BUT NOT LIMITED TO, THE WARRANTY OF NON-INFRINGEMENT OF THIRD
PARTY RIGHTS, THE WARRANTY OF YEAR 2000 COMPLIANCE, AND THE IMPLIED WARRANTIES OF MERCHANTABILITY AND FITNESS FOR A PARTICULAR PURPOSE. THE ENTIRE RISK AS
TO THE QUALITY AND PERFORMANCE OF THE SOFTWARE IS WITH YOU. NEITHER TAIS NOR ITS SUPPLIERS WARRANT THAT THE FUNCTIONS CONTAINED IN THE SOFTWARE WILL MEET
YOUR REQUIREMENTS OR THAT THE OPERATION OF THE SOFTWARE WILL BE UNINTERRUPTED OR ERROR-FREE. HOWEVER, TAIS WARRANTS THAT ANY MEDIA ON WHICH THE
SOFTWARE IS FURNISHED IS FREE FROM DEFECTS IN MATERIAL AND WORKMANSHIP UNDER NORMAL USE FOR A PERIOD OF NINETY (90) DAYS FROM THE DATE OF DELIVERY TO YOU.
5. Limitation Of Liability. TAIS’ ENTIRE LIABILITY AND YOUR SOLE AND EXCLUSIVE REMEDY UNDER THIS LICENSE AGREEMENT SHALL BE AT TAIS’ OPTION REPLACEMENT OF THE MEDIA OR
REFUND OF THE PRICE PAID. TO THE MAXIMUM EXTENT PERMITTED BY APPLICABLE LAW, IN NO EVENT SHALL TAIS OR ITS SUPPLIERS BE LIABLE TO YOU FOR ANY CONSEQUENTIAL,
SPECIAL, INCIDENTAL OR INDIRECT DAMAGES FOR PERSONAL INJURY, LOSS OF BUSINESS PROFITS, BUSINESS INTERRUPTION, LOSS OF BUSINESS INFORMATION/DATA, OR ANY
OTHER PECUNIARY LOSS OF ANY KIND ARISING OUT OF THE USE OR INABILITY TO USE THE SOFTWARE, EVEN IF TAIS OR ITS SUPPLIER HAS BEEN ADVISED OF THE POSSIBILITY OF
SUCH DAMAGES. IN NO EVENT SHALL TAIS OR ITS SUPPLIERS BE LIABLE FOR ANY CLAIM BY A THIRD PARTY.
6. State/Jurisdiction Laws. SOME STATES/JURISDICTIONS DO NOT ALLOW THE EXCLUSION OF IMPLIED WARRANTIES OR LIMITATIONS ON HOW LONG AN IMPLIED WARRANTY MAY LAST, OR
THE EXCLUSION OR LIMITATION OF INCIDENTAL OR CONSEQUENTIAL DAMAGES, SO SUCH LIMITATIONS OR EXCLUSIONS MAY NOT APPLY TO YOU. THIS LIMITED WARRANTY GIVES YOU
SPECIFIC RIGHTS AND YOU MAY ALSO HAVE OTHER RIGHTS WHICH VARY FROM STATE/JURISDICTION TO STATE/JURISDICTION.
7. Export Laws. This License Agreement involves products and/or technical data that may be controlled under the United States Export Administration Regulations and may be subject to the approval of the
United States Department of Commerce prior to export. Any export, directly or indirectly, in contravention of the United States Export Administration Regulations, or any other applicable law, regulation or
order, is prohibited.
8. Governing Law. This License Agreement will be governed by the laws of the State of California, United States of America, excluding its conflict of law provisions.
9. United States Government Restricted Rights. The Software is provided with Restricted Rights. Use, duplication, or disclosure by the United States Government, its agencies and/or instrumentalities is
subject to restrictions as set forth in subparagraph (c)(1)(ii) of The Rights in Technical Data and Computer Software Clause at DFARS 252.227-7013 (October 1988) or subparagraphs (c)(1) and (2) of the
Commercial Computer Software - Restricted Rights at 48 CFR 52.227-19, as applicable.
10. Severability. If any provision of this License Agreement shall be held to be invalid, illegal or unenforceable, the validity, legality and enforceability of the remaining provisions hereof shall not in any way be
affected or impaired.
11. No Waiver. No waiver of any breach of any provision of this License Agreement shall constitute a waiver of any prior, concurrent or subsequent breach of the same or any other provisions hereof, and no
w
aiver shall be effective unless made in writing and signed by an authorized representative of the waiving party.
YOU ACKNOWLEDGE THAT YOU HAVE READ THIS LICENSE AGREEMENT AND THAT YOU UNDERSTAND ITS PROVISIONS. YOU AGREE TO BE BOUND BY ITS TERMS AND CONDITIONS. YOU
FURTHER AGREE THAT THIS LICENSE AGREEMENT CONTAINS THE COMPLETE AND EXCLUSIVE AGREEMENT BETWEEN YOU AND TAIS AND SUPERSEDES ANY PROPOSAL OR PRIOR
A
GREEMENT, ORAL OR WRITTEN, OR ANY OTHER COMMUNICATION RELATING TO THE SUBJECT MATTER OF THIS LICENSE AGREEMENT.
Toshiba America Information Systems, Inc.
Telecommunication Systems Division
9740 Irvine Boulevard
Irvine, California 92618-1697
United States of America
TSD 081601
5932
Toshiba America Information Systems, Inc.
Telecommunication Systems Division
Limited Warranty
Toshiba America Information Systems, Inc., (“TAIS”) warrants that this voice processing equipment
(except for fuses, lamps, and other consumables) will, upon delivery by TAIS or an authorized TAIS
dealer to a retail customer in new condition, be free from defects in material and workmanship for
twenty-four (24) months after delivery. This warranty is void (a) if the equipment is used under other
than normal use and maintenance conditions, (b) if the equipment is modified or altered, unless the
modification or alteration is expressly authorized by TAIS, (c) if the equipment is subject to abuse,
neglect, lightning, electrical fault, or accident, (d) if the equipment is repaired by someone other than
TAIS or an authorized TAIS dealer, (e) if the equipment’s serial number is defaced or missing, or (f) if
the equipment is installed or used in combination or in assembly with products not supplied by TAIS
and which are not compatible or are of inferior quality, design, or performance.
Customer will, at its sole cost and expense, provide the necessary Uninterruptible Power Supply (UPS)
equipment as specified by TAIS in the Stratagy ES General Description for use with the Stratagy ES
system at all times. System failures and/or damages resulting from either not using a UPS with the
Stratagy ES or the use of a UPS not equivalent to that specified by TAIS are not covered by this
warranty.
The sole obligation of TAIS or Toshiba Corporation under this warranty, or under any other legal
obligation with respect to the equipment, is the repair or replacement by TAIS or its authorized dealer
of such defective or missing parts as are causing the malfunction with new or refurbished parts (at their
option). If TAIS or one of its authorized dealers does not replace or repair such parts, the retail
customer’s sole remedy will be a refund of the price charged by TAIS to its dealers for such parts as are
proven to be defective, and which are returned to TAIS through one of its authorized dealers within the
warranty period and no later than thirty (30) days after such malfunction, whichever first occurs.
Under no circumstances will the retail customer or any user or dealer or other person be entitled to any
direct, special, indirect, consequential, or exemplary damages, for breach of contract, tort, or
otherwise. Under no circumstances will any such person be entitled to any sum greater than the
purchase price paid for the item of equipment that is malfunctioning.
To obtain service under this warranty, the retail customer must bring the malfunction of the machine to
the attention of one of TAIS’ authorized dealers within the twenty-four (24) month period and no later
than thirty (30) days after such malfunction, whichever first occurs. Failure to bring the malfunction to
the attention of an authorized TAIS dealer within the prescribed time results in the customer being not
entitled to warranty service.
THERE ARE NO OTHER WARRANTIES FROM EITHER TOSHIBA AMERICA INFORMATION
SYSTEMS, INC., OR TOSHIBA CORPORATION WHICH EXTEND BEYOND THE FACE OF
THIS WARRANTY. ALL OTHER WARRANTIES, EXPRESS OR IMPLIED, INCLUDING THE
WARRANTIES OF MERCHANTABILITY, FITNESS FOR A PARTICULAR PURPOSE, AND
FITNESS FOR USE, ARE EXCLUDED.
No TAIS dealer and no person other than an officer of TAIS may extend or modify this warranty. No
such modification or extension is effective unless it is in writing and signed by the vice president and
general manager, Telecommunication Systems Division.

Before You Install Stratagy Flash with Strata CTX...
please read and complete both sides of this checklist.
This checklist only highlights important installation information. Please reference the Stratagy Installation &
Maintenance Manual for details on programming individual features, etc.
CAUTION! After making any significant program changes to the Stratagy, it is recommended the system
be properly shut down and restarted. This copies the most current database to the
C:\Stratagy\Archive\Good directory for use by the Automatic System Recovery feature (see
“Automatic System Recovery” on page 5-10 in the Stratagy Installation & Maintenance
Manual). Failure to do so could result in the loss of customer information if the system loses
power before it is properly shutdown and rebooted.
1+DQGOLQJWKH)ODVK9RLFH3URFHVVLQJ6\VWHP
Do not attempt to open the Flash enclosure. There are no field-serviceable parts inside.
Opening the Flash system voids the warranty.
❐Check the items contained in the package against the packing list. In addition to the hardware
components, you receive a copy of the Stratagy Flash Wall-Mounting Template and Instructions.
❐Inspect all equipment for damage. If equipment is missing or damaged, contact the shipping company
or your dealer sales specialist immediately.
❐Save the original shipping box for re-use when transporting system hardware. The original packing
material has been specifically designed to offer the Flash system maximum protection.
23RZHU&RQVLGHUDWLRQV
❐Always connect the Flash system to a dedicated 110VAC outlet.
❐If your Flash installation is in an area with unreliable power, you should also install a Power
Conditioner to avoid any failures that can be caused by power fluctuations, including hardware failure
and file corruption. A Toshiba recommended ONEAC™ Model ON400 (400 VA, 1/2 hour)
Uninterruptible Power Supply (UPS) with Power Conditioner and Ground Bar is available (Part
Number: ON400XRA-G0).
36\VWHP$GPLQLVWUDWLRQ
Stratagy Admin Release 3 software is only supported by the Flash and cannot be used with
any Release 2 Stratagy systems.
❐Telephone Administration is available on Flash systems. A special System Administrator User ID
mailbox (User ID 999) can be used by the System Administrators to add, delete and reset user
mailboxes, add user names to the directory, reset security codes on user mailboxes, change the time on
the Stratagy system and record the system announcement and busy music.
❐Local Administration on the Flash requires a portable or desktop PC with MS DOS® 6.2, Stratagy
Admin software, 5MB available hard disk space, a 3.5” 1.44 floppy disk drive and 580KB free RAM.
You’ll also need a 9-pin null-modem serial cable or Toshiba SG-ADMCBL cable to connect your PC
to the Flash.
Note In order to maintain Flash system integrity, customer-supplied anti-virus software should be
resident and active on any PC that is connected to the Flash system. Refer to Stratagy
Technical Bulletin TB40-0017 for further information.
❐Remote Administration on the Flash system requires an external modem be connected to the Flash’s
COM 2 port. (See the Stratagy Installation & Maintenance Manual for installation details.)
Copyright Toshiba America Information Systems, Inc. June 2002

4,VWKH6WUDWD&7;UHDG\"
Flash is compatible with all Strata CTXs. Strata CTX needs to recognize
Flash’s DTMF signaling. An ARCS card must be installed in the Strata CTX100 for this
DTMF signaling. Strata CTX670 allows four DTMF circuits in its default configuration.
❐Install and program an ARCS card in the Strata CTX100. When installed, the ARCS card by default
allows four circuits. Additional licenses may be required, depending upon the Strata CTX
configuration and applications.
❐Program slot in Strata CTX before installing the Stratagy. Refer to Strata CTX Programming Manual
for details.
560',&RQVLGHUDWLRQV
SMDI is required for the Call Record feature with Stratagy Release 3.3. The Strata CTX
must have a BSIS card.
❐Install and program serial card BSIS in the Strata CTX. Refer to the Strata CTX Programming Manual.
❐A serial cable must be installed between the BSIS card and the Stratagy. Toshiba’s PPTC-9 (with six-
conductor line-cord) is recommended.
❐Stratagy’s serial Port 1 is reserved for SMDI communication.
6-XVWD)HZ0RUH7KLQJV
❐Be sure to change the security code of the Shutdown Mailbox User ID 993. See the Stratagy
Installation & Maintenance Manual for details.
❐When using an internal modem in the Stratagy Admin PC, remember that Stratagy Admin does not
work with the COM 3 or 4 port.
❐Toshiba suggests that you do not write over the Stratagy Admin directory when installing a newer
version of Stratagy Admin. Always retain previous versions of the Stratagy Admin software for use
with other Flash systems.
❐Make sure you have your Stratagy I&M Manual and Strata CTX I&M and Programming Manuals on
hand for the installation. Be sure to read the instructions before installing the system.
❐Remember to back up your database after installation.
❐Remember to effectively update the Automatic System Recovery feature, you must shutdown and
restart the Flash after making important programming changes.
If you have read and completed this checklist, installation will be a breeze!
OK, let’s get started!
4011046

Before You Install Stratagy Flash with Strata DK...
please read and complete both sides of this checklist.
This checklist only highlights important installation information. Please reference the Stratagy Installation &
Maintenance Manual for details on programming individual features, etc.
CAUTION! After making any significant program changes to the Stratagy, it is recommended the system
be properly shut down and restarted. This copies the most current database to the
C:\Stratagy\Archive\Good directory for use by the Automatic System Recovery feature (see
“Automatic System Recovery” on page 5-10 in the Stratagy Installation & Maintenance
Manual). Failure to do so could result in the loss of customer information if the system loses
power before it is properly shutdown and rebooted.
1+DQGOLQJWKH)ODVK9RLFH3URFHVVLQJ6\VWHP
Do not attempt to open the Flash enclosure. There are no field-serviceable parts inside.
Opening the Flash system voids the warranty.
❐Check the items contained in the package against the packing list. In addition to the hardware
components, you receive a copy of the Stratagy Flash Wall-Mounting Template and Instructions.
❐Inspect all equipment for damage. If equipment is missing or damaged, contact the shipping company
or your dealer sales specialist immediately.
❐Save the original shipping box for re-use when transporting system hardware. The original packing
material has been specifically designed to offer the Flash system maximum protection.
23RZHU&RQVLGHUDWLRQV
❐Always connect the Flash system to a dedicated 110VAC outlet.
❐If your Flash installation is in an area with unreliable power, you should also install a Power
Conditioner to avoid any failures that can be caused by power fluctuations, including hardware failure
and file corruption. A Toshiba recommended ONEAC™ Model ON400 (400 VA, 1/2 hour)
Uninterruptible Power Supply (UPS) with Power Conditioner and Ground Bar is available (Part
Number: ON400XRA-G0).
36\VWHP$GPLQLVWUDWLRQ
Stratagy Admin Release 3 software is only supported by the Flash and cannot be used with
any Release 2 Stratagy systems.
❐Telephone Administration is available on Flash systems. A special System Administrator User ID
mailbox (User ID 999) can be used by the System Administrators to add, delete and reset user
mailboxes, add user names to the directory, reset security codes on user mailboxes, change the time on
the Stratagy system and record the system announcement and busy music.
❐Local Administration on the Flash requires a portable or desktop PC with MS DOS® 6.2, Stratagy
Admin software, 5MB available hard disk space, a 3.5” 1.44 floppy disk drive and 580KB free RAM.
You’ll also need a 9-pin null-modem serial cable or Toshiba SG-ADMCBL cable to connect your PC
to the Flash.
Note In order to maintain Flash system integrity, customer-supplied anti-virus software should be
resident and active on any PC that is connected to the Flash system. Refer to Stratagy
Technical Bulletin TB40-0017 for further information.
❐Remote Administration on the Flash system requires an external modem be connected to the Flash’s
COM 2 port. (See the Stratagy Installation & Maintenance Manual for installation details.)
Copyright Toshiba America Information Systems, Inc. June 2002

47HOHSKRQH6\VWHP&RQILJXUDWLRQ
The Flash Voice Processing system works with all Strata® DK280/DK424/DK424i,
DK40i/DK40/DK16e/DK16, DK14/DK8 and DK24/DK56/DK96 (Release 4) systems.
❐Make sure there are enough single line (analog) station ports on the Strata DK to support the number of
Flash ports required.
❐Strata DK needs to recognize the Flash’s DTMF signaling. Make sure an RRCS is installed on the
DK424i/DK424/DK280 RCTU, a K5RCU, K5RCU2 or K4RCU3 in the DK40i/DK40/DK16e/DK16,
or CRCU in the DK24/DK56/DK96.
❐Run Program 03 and assign these code(s) where the DTMF receiver is installed:
Note When DK14/DK8 is powered on, Program 03 automatically assigns the correct code for the
QRCU.
560',&RQVLGHUDWLRQV
We recommend Simplified Message Desk Interface (SMDI) integration for optimum
performance of both the Stratagy and Strata systems.
❐The Strata DK telephone system must be equipped with a PIOU/PIOUS, RSSU, or RSIU/RSIS card for
SMDI integration.
❐Strata DK280/DK424/DK424i: SMDI is available on all processors. The A processor must have
Release 3.1 software or higher.
❐Set code 43 in Program 03 for PIOU/PIOUS/RSSU or code 49 for RSIU/RSIS.
❐A serial cable must be installed between the PIOU/PIOUS/RSSU/RSIU card and the Flash. Toshiba’s
PPTC-9 (with six-conductor line cord) is recommended.
❐Refer to the Stratagy I&M Manual for complete instructions on configuring Stratagy Voice Processing
systems for SMDI integration.
6-XVWD)HZ0RUH7KLQJV
❐Be sure to change the security code of the Shutdown Mailbox User ID 983. See the Stratagy
Installation & Maintenance Manual for details.
❐When using an internal modem in the Stratagy Admin PC, remember that Stratagy Admin does not
work with the COM 3 or 4 port.
❐Toshiba suggests that you do not write over the Stratagy Admin directory when installing a newer
version of Stratagy Admin. Always retain previous versions of the Stratagy Admin software for use
with other Flash systems.
❐Make sure you have your Stratagy I&M Manual and Strata DK I&M and Programming Manuals on
hand for the installation. Be sure to read the instructions before installing the system.
❐Remember to back up your database after installation.
❐Remember to effectively update the Automatic System Recovery feature, you must shut down and
restart the Flash after making important programming changes.
If you have read and completed this checklist, installation will be a breeze!
OK, let’s get started!
DK424i/DK424/DK280 DK40i/DK40/DK16e/DK16 DK24/DK56/DK96
Code 92, 93, or 94 for slot 00 Code 92 for slot 00 Code 92 or 93
4011027

Before You Install Stratagy IVP8 in Strata CTX...
please read and complete both sides of this checklist.
This checklist only highlights important installation information. Please reference the Stratagy Installation &
Maintenance Manual for details on programming individual features, etc.
CAUTION! After making any significant program changes to the Stratagy, it is recommended the system be
properly shut down and restarted. This copies the most current database to the
C:\Stratagy\Archive\Good directory for use by the Automatic System Recovery feature (see
“Automatic System Recovery” on page 5-10 in the Stratagy Installation & Maintenance Manual).
Failure to do so could result in the loss of customer information if the system loses power before it
is properly shutdown and rebooted.
1$UH\RXDZDUHRIWKHSUHVFULEHGKDQGOLQJSUHFDXWLRQVIRUWKH6WUDWDJ\"
Whenever handling Stratagy, always wear the anti-static wrist strap (included); keep the strap by the unit.
❐Always hold the unit by its edges. Remember that an electrostatic charge from your body, even your own
body oils can damage the Stratagy.
❐Never drop or jar the Stratagy! Care should be taken whenever handling the unit.
❐Temperature changes greater than 20°F cause condensation on Stratagy’s flash drive. If there is such a
temperature variation, wait 24 hours before installation.
❐Always keep the Stratagy in its individual shipping box until it’s time to install it in the Strata CTX.
❐Never transport the Stratagy inside the Strata CTX.
2'R\RXKDYHHYHU\WKLQJ\RXQHHGIRUSURJUDPPLQJ6WUDWDJ\XVLQJ6WUDWDJ\
$GPLQ"
Stratagy Admin Release 3 software is only supported with the Flash and IVP8. Use with any Release 2 Stratagy
system may cause erratic behavior.
❐Local Administration? You’ll need a PC, 5MB hard drive space, 3.5” 1.44 floppy drive, and 580KB free
RAM. You’ll also need a 9-pin null-modem serial cable or Toshiba’s SG-ADMCBL cable to connect your PC
to the Stratagy.
❐Remote (modem) Administration? Use Stratagy Admin software with Stratagy’s internal (soft)
2400-baud modem. No additional equipment is necessary.
...or use Toshiba’s 9600 baud SG-FMOD modem or a Hayes-compatible, 14.4 baud, V32.bis modem
connected to Stratagy’s serial Port 2. You’ll need a customer-supplied 9-pin serial cable.
3,VWKH6WUDWD&7;UHDG\"
Stratagy is compatible with all Strata CTXs. Strata CTX needs to recognize Stratagy’s DTMF signaling. An
ARCS card must be installed in the Strata CTX100 for this DTMF signaling. Strata CTX670 allows four DTMF
circuits in its default configuration.
❐Install and program an ARCS card in the Strata CTX100. When installed, the ARCS card by default allows
four circuits. Additional licenses may be required, depending upon the Strata CTX configuration and
applications.
❐Program slot in Strata CTX before installing the Stratagy. Refer to Strata CTX Programming Manual for
details.
Copyright © Toshiba America Information Systems, Inc. June 2002

4'R\RXZDQWWRDFWLYDWHWKH'66%XV\/DPSIHDWXUH"
PDKU/BDKU cards must be installed and programmed for a DSS Console.
❐Install and program the PDKU/BDKU in the Strata CTX.
❐Refer to the Strata CTX Programming Manual for DSS programming.
❐Set the dss_active parameter to TRUE.
❐Configure the DSS Port field on the User Menu – Options screen for each mailbox.
5$UH\RXJRLQJWRKDYH60',"
SMDI is required for the Call Record feature with Stratagy Release 3.3/IVP8. A BSIS card must be located
close to the Stratagy.
❐Install and program serial card BSIS in the Strata CTX. Refer to the Strata CTX Programming Manual.
❐A serial cable must be installed between the BSIS card and the Stratagy. Toshiba’s PPTC-9 (with six-
conductor line-cord) is recommended.
❐Stratagy’s serial Port 1 is reserved for SMDI communication.
6:DQWWRV\QFK6WUDWDJ\V\VWHPWLPHZLWK6WUDWD&7;"
SMDI is required if the Stratagy is going to be synched with the Strata CTX system time. Night Transfer
Alternate Routing and Busy Station Identification do not require SMDI.
❐For clock synch, you must configure the ksu_time parameter and connect SMDI.
❐For Night Transfer Alternate Routing and Busy Station Identification, you must configure the console_slot_ID
and DSS_active parameters.
7$OOVHW"-XVWDIHZPRUHWKLQJV
❐Be sure to change the default password of the Shutdown Mailbox User ID 983 (see the Stratagy Installation &
Maintenance Manual).
❐Don’t forget to wear the anti-static wrist strap during handling.
❐When using an internal modem in the Stratagy Admin PC, remember that Stratagy Admin does not work with
COM 3 or 4. Do not write over the Stratagy Admin subdirectory on your remote PC when installing the newer
version of Stratagy Admin. Always retain previous versions of Admin.
❐Make sure your Strata I&M/Programming Manuals and Stratagy I&M Manuals are handy. Be sure to read
the entire instructions before installing.
❐Remember to back up your database after installation.
If you have read and completed this checklist, installation will be a breeze!
OK, let’s get started!
4011045

Before You Install Stratagy IVP8 in Strata DK...
please read and complete both sides of this checklist.
This checklist only highlights important installation information. Please reference the Stratagy Installation &
Maintenance Manual for details on programming individual features, etc.
CAUTION! After making any significant program changes to the Stratagy, it is recommended the system be
properly shut down and restarted. This copies the most current database to the
C:\Stratagy\Archive\Good directory for use by the Automatic System Recovery feature (see
“Automatic System Recovery” on page 5-10 in the Stratagy Installation & Maintenance Manual).
Failure to do so could result in the loss of customer information if the system loses power before it
is properly shutdown and rebooted.
1$UH\RXDZDUHRIWKHSUHVFULEHGKDQGOLQJSUHFDXWLRQVIRUWKH6WUDWDJ\"
Whenever handling Stratagy, always wear the anti-static wrist strap (included); keep the strap by the unit.
❐Always hold the unit by its edges. Remember that an electrostatic charge from your body, even your own
body oils can damage the Stratagy.
❐Never drop or jar the Stratagy! Care should be taken whenever handling the unit.
❐Temperature changes greater than 20°F cause condensation on Stratagy’s flash drive. If there is such a
temperature variation, wait 24 hours before installation.
❐Always keep the Stratagy in its individual shipping box until it’s time to install it in the Strata DK.
❐Never transport the Stratagy inside the Strata DK.
2'R\RXKDYHHYHU\WKLQJ\RXQHHGIRUSURJUDPPLQJ6WUDWDJ\XVLQJ6WUDWDJ\
$GPLQ"
Stratagy Admin Release 3 software is only supported with the Flash and IVP8. Use with any Release 2 Stratagy
system may cause erratic behavior.
❐Local Administration? You’ll need a PC, 5MB hard drive space, 3.5” 1.44 floppy drive, and 580KB free
RAM. You’ll also need a 9-pin null-modem serial cable or Toshiba’s SG-ADMCBL cable to connect your PC
to the Stratagy.
❐Remote (modem) Administration? Use Stratagy Admin software with Stratagy’s internal (soft)
2400-baud modem. No additional equipment is necessary.
...or use Toshiba’s 9600 baud SG-FMOD modem or a Hayes-compatible, 14.4 baud, V32.bis modem
connected to Stratagy’s serial Port 2. You’ll need a customer-supplied 9-pin serial cable.
3,VWKH6WUDWD'.UHDG\"
Make sure Stratagy is compatible with your Strata DK. It works with Strata DK424i/DK424/DK280 and
DK40i/DK40/DK16e/DK16 systems and DK24/DK56/DK96 with Release 4 software.
❐Always program Strata DK slot assignments before installing the Stratagy. Use these slot assignments:
❐Be sure to set the correct code in Strata DK programming for the slot where Stratagy is installed.
❐Always remember to shut down Stratagy software before powering down Strata DK (see the Stratagy
Installation & Maintenance Manual).
DK424i/DK424 DK280 (R3 or Higher) DK40i/DK40/DK16e/DK16 DK24/DK56/DK96
Use a universal slot,
starting with slot 12 or 13 (if
an RSIU is in slot 11); never
use slots 27, 28, 31, 37, 38,
47, 48, 51, 57, 58, 67, 68,
71, 77, or 78.
Use any universal slot,
starting with slot 12 (if a
PDKU or PEKU is in slot
11) or slot 13 (if an RSIU is
in slot 11); never use slots
31 or 51.
Use any expansion cabinet
slot that takes an eight-port
card (except slot 18 in the
DK40i/DK40/DK16e).
Use any slot after slot 01.
Copyright © Toshiba America Information Systems, Inc. June 2002

4,V6WUDWD'.·V'70)WRQHGHWHFWLRQHQDEOHG"
Strata DK needs to recognize Stratagy’s DTMF signaling.
❐Make sure an RRCS is installed on the DK424i/DK424/DK280 RCTU, a K5RCU, K5RCU2 or K4RCU3 in
the DK40i/DK40/DK16e/DK16, or CRCU in the DK24/DK56/DK96.
❐Run Program 03 and assign these code(s) where the DTMF receiver is installed:
5'R\RXZDQWWRDFWLYDWHWKH'66%XV\/DPSIHDWXUH"
A PDKU card must be installed that is programmed for a DSS Console.
❐Install and program the PDKU:
DK424i/DK424/DK280: When installing the Stratagy in an odd-numbered cabinet, make sure the PDKU is
in a lower-numbered slot in the same cabinet. When installing in an even-numbered cabinet, the PDKU must
be in a lower-numbered slot in the preceding odd-numbered cabinet.
DK40i/DK40/DK16e: set slot 11 in the Base Cabinet to code 64.
DK24/DK56/DK96: the PDKU must reside in slot 01.
❐Set code 64 using Program 03 for the PDKU slot.
❐Set the dss_active parameter to TRUE.
❐Configure the DSS Port field on the User Menu – Options screen for each mailbox.
6$UH\RXJRLQJWRKDYH60',"
A PIOU/PIOUS, RSSU, or RSIU/RSIS card must be located close to the Stratagy.
❐Strata DK424i/DK424/DK280: SMDI is available on all processors. The A processor must have Release 3.1
software or higher.
❐Set code 43 in Program 03 for PIOU/PIOUS/RSSU or code 49 for RSIU/RSIS.
❐A serial cable must be installed between the PIOU/PIOUS/RSSU/RSIU card and the Stratagy. Toshiba’s
PPTC-9 (with six-conductor line cord) is recommended.
❐Stratagy’s serial Port 1 is reserved for SMDI communication.
7:DQWWRV\QFK6WUDWDJ\V\VWHPWLPHZLWK6WUDWD'."
You’ll need an LCD telephone physically installed on the first port of the Strata DK’s PDKU card (see Step 5)
card. It is important that the phone’s LCD always displays the system time. For this to happen, no other LCD
features, including MW Indication, can be enabled on this phone.
❐You must configure the ksu_time and console_slot_id parameters.
❐The Strata DK uses a 24-hour system clock, but does not notate a.m./p.m. on the LCD display. Because of this,
during the initial installation or when the system has been shut down for any extended time, it is necessary to
program the correct date and time in the Stratagy Main Menu, Date/Time function or via Admin mailbox.
8$OOVHW"-XVWDIHZPRUHWKLQJV
❐Be sure to change the default password of the Shutdown Mailbox User ID 983 (see the Stratagy Installation &
Maintenance Manual).
❐Don’t forget to wear the anti-static wrist strap during handling.
❐When using an internal modem in the Stratagy Admin PC, remember that Stratagy Admin does not work with
COM 3 or 4. Do not write over the Stratagy Admin subdirectory on your remote PC when installing the newer
version of Stratagy Admin. Always retain previous versions of Admin.
❐Make sure your Strata I&M/Programming Manuals and Stratagy R3 I&M Manuals are handy. Be sure to
read the entire instructions before installing.
❐Remember to back up your database after installation.
If you have read and completed this checklist, installation will be a breeze!
OK, let’s get started!
DK424i/DK424/280 DK40i/DK40/DK16e/DK16 DK24/DK56/DK96
Code 92, 93, or 94 for slot 00 Code 92 for slot 00 Code 92 or 93
4011043

Stratagy I&M 06/02 i
Contents
Introduction
Organization...........................................................................................................................................ix
Conventions............................................................................................................................................. x
Related Documents/Media.....................................................................................................................xi
All Stratagy Products.......................................................................................................................xi
Stratagy Flash, IVP8........................................................................................................................xi
Stratagy eBrochure and Advisor CD-ROM.....................................................................................xi
Chapter 1 –Overview
Installers and System Administrators...................................................................................................1-1
Installer ..........................................................................................................................................1-1
System Administrator....................................................................................................................1-2
Memory................................................................................................................................................1-2
Software ...............................................................................................................................................1-2
Stratagy Flash.......................................................................................................................................1-3
Hardware .......................................................................................................................................1-3
Exclusive Flash Features ...............................................................................................................1-5
Unsupported Flash Features ..........................................................................................................1-6
Stratagy IVP8.......................................................................................................................................1-7
Hardware .......................................................................................................................................1-7
AMIS Networking.........................................................................................................................1-9
Exclusive IVP8 Features ...............................................................................................................1-9
Chapter 2 –Installation
Pre-installation Instructions .................................................................................................................2-1
Conduct a Pre-installation Company Survey.................................................................................2-1
Determine Stratagy Hardware Sizing............................................................................................2-1
Determine Stratagy’s Configuration and Integration ....................................................................2-3
Determine Stratagy’s Customized User ID Mailboxes .................................................................2-3
Fill out Checklists and Forms........................................................................................................2-4
Installation............................................................................................................................................2-4
Step 1: Unpack and Inspect Stratagy...................................................................................................2-4
Step 2: Program Strata.........................................................................................................................2-5
Strata CTX Systems.......................................................................................................................2-5
Strata DK Systems.........................................................................................................................2-6
Step 3: Shut Down Strata CTX/Strata DK..........................................................................................2-7
Step 4: Install Stratagy ........................................................................................................................2-7
Flash...............................................................................................................................................2-7
IVP8...............................................................................................................................................2-8
Step 5: Restart Strata CTX/Strata DK and Verify Stratagy is Functioning Properly .......................2-10

Contents
Chapter 3 – Access and Use Stratagy
ii Stratagy I&M 06/02
Step 6: Verify that Voice Playback, Basic Auto Attendant and Ports are Functioning Correctly....2-10
Step 7: Install Stratagy Admin Software (VSA.3x)..........................................................................2-11
Step 8: Connect Stratagy Admin PC to Stratagy...............................................................................2-11
Local Connection.........................................................................................................................2-12
Remote Connection .....................................................................................................................2-13
Step 9: Configure Stratagy Admin Software.....................................................................................2-14
Step 10:Access Stratagy.....................................................................................................................2-14
Step 11:Configure Stratagy................................................................................................................2-14
Step 12:Program the Mailboxes.........................................................................................................2-14
Step 13:Program the Applications .....................................................................................................2-14
%K Token....................................................................................................................................2-14
SMDI Calling Party Identification ..............................................................................................2-15
New User Tutorial Introductory Recording.................................................................................2-15
Exclusive IVP8 Tokens ...............................................................................................................2-16
Step 14:Record Special Greetings......................................................................................................2-17
Step 15:Shut Down Stratagy System .................................................................................................2-17
Step 16:(Optional) Back up Database, Mailbox Names and Greetings.............................................2-17
Chapter 3 –Access and Use Stratagy
Access Stratagy....................................................................................................................................3-2
Local Access ........................................................................................................................................3-2
Before You Start............................................................................................................................3-2
Access Stratagy Locally ................................................................................................................3-2
Remote Access.....................................................................................................................................3-3
Before You Start............................................................................................................................3-3
Access Stratagy Remotely.............................................................................................................3-3
Use Stratagy Remotely..................................................................................................................3-4
System Startup .....................................................................................................................................3-4
Use Stratagy .........................................................................................................................................3-4
Navigate the System......................................................................................................................3-4
Online Help Function...........................................................................................................................3-6
Help Line.......................................................................................................................................3-6
Detailed Help.................................................................................................................................3-6
System Shutdown.................................................................................................................................3-6
Methods of Shutdown....................................................................................................................3-6
Main Menu Options .............................................................................................................................3-8
Change System Date and Time .....................................................................................................3-9
Daylight Saving Time....................................................................................................................3-9
IVP8 System Time.........................................................................................................................3-9
Main Menu Field Descriptions...........................................................................................................3-10
Chapter 4 –Configure Stratagy
Configuring Stratagy Admin Software ................................................................................................4-2
Tools Utility .........................................................................................................................................4-4
Toshiba Plug and Play...................................................................................................................4-4
Telephone System Configuration..................................................................................................4-5
System Integration Patterns...........................................................................................................4-9
System Configuration........................................................................................................................4-13
Modify System Configuration Parameters ..................................................................................4-13
System Parameters .............................................................................................................................4-14

Contents
Chapter 5 –How Stratagy Operates
Stratagy I&M 06/02 iii
Serial Port Definition...................................................................................................................4-28
Serial Port Definition (Remote PC — Stratagy Admin) .............................................................4-29
AMIS Configuration....................................................................................................................4-29
SMDI/Serial Integration Definition.............................................................................................4-29
Per Port Definitions .....................................................................................................................4-29
Fixed Length User IDs ................................................................................................................4-30
SMDI Serial Integration.....................................................................................................................4-32
SMDI Calling Party Identification ..............................................................................................4-35
Chapter 5 –How Stratagy Operates
User IDs ...............................................................................................................................................5-1
Reserved User IDs.........................................................................................................................5-2
Call Processing Control........................................................................................................................5-3
Chains............................................................................................................................................5-3
Groups ...........................................................................................................................................5-3
Menus ............................................................................................................................................5-3
Token Programming Language .....................................................................................................5-3
User ID Mailboxes...............................................................................................................................5-4
Types of Mailboxes .......................................................................................................................5-4
Customizing Mailboxes.................................................................................................................5-4
How Stratagy Processes.......................................................................................................................5-5
User IDs.........................................................................................................................................5-5
User ID Mailboxes.........................................................................................................................5-8
Feature Programming.........................................................................................................................5-10
Automatic Scheduler ...................................................................................................................5-10
Automatic System Recovery .......................................................................................................5-10
Busy Station Identification for IVP8...........................................................................................5-11
Called Identification ....................................................................................................................5-11
Caller Confirmation Prior to Transferring...................................................................................5-11
Call Screening..............................................................................................................................5-11
Call Transfer................................................................................................................................5-12
Chaining.......................................................................................................................................5-12
Directory......................................................................................................................................5-12
Disk Space Notification...............................................................................................................5-12
Distribution Lists.........................................................................................................................5-12
Do Not Disturb ............................................................................................................................5-12
Extensions—Scheduled...............................................................................................................5-13
Fax Tone Detection .....................................................................................................................5-13
Future Delivery............................................................................................................................5-13
Greeting .......................................................................................................................................5-13
Greeting—Company....................................................................................................................5-13
Greeting—Port-Selectable...........................................................................................................5-14
Greeting Restart...........................................................................................................................5-14
Group Partitions—Call Blocking ................................................................................................5-14
Guest Users..................................................................................................................................5-14
Interactive Voice Response (IVR)...............................................................................................5-15
Message Continuous Delete/Playback.........................................................................................5-15
Message Copy..............................................................................................................................5-15
Message Copy with Delete..........................................................................................................5-15
Message Date and Time Control .................................................................................................5-15

Contents
Chapter 6 –Menus
iv Stratagy I&M 06/02
Message Length Control..............................................................................................................5-15
Message Notification...................................................................................................................5-16
Message Pause During Playback/Recording...............................................................................5-16
Message Playback Control ..........................................................................................................5-16
Message Purging..........................................................................................................................5-16
Message Retrieval Control ..........................................................................................................5-16
Message Speed Control ...............................................................................................................5-16
Message Volume Control............................................................................................................5-16
Messages—New, Pending and Saved .........................................................................................5-17
Messages—Urgent.......................................................................................................................5-17
Multiple System Languages ........................................................................................................5-17
Name (and Extension) Control....................................................................................................5-17
Networking (AMIS) ....................................................................................................................5-18
Paging – Office............................................................................................................................5-18
Programmable Dial Actions ........................................................................................................5-18
Reports.........................................................................................................................................5-18
Ring Duration ..............................................................................................................................5-18
Screen Advertisement..................................................................................................................5-18
Shared Extensions........................................................................................................................5-19
Shutdown using the Telephone Dial Pad.....................................................................................5-19
Single-digit Menus ......................................................................................................................5-19
System Administrator’s Mailbox.................................................................................................5-19
Token Programming....................................................................................................................5-19
Universal Ports ............................................................................................................................5-19
User ID Security Code.................................................................................................................5-20
User ID—Variable/Fixed Length................................................................................................5-20
Varied Sampling Rates................................................................................................................5-20
Voice Forms ................................................................................................................................5-20
Chapter 6 –Menus
Users Menu ..........................................................................................................................................6-1
Access and Exit the Users Menu ...................................................................................................6-1
Users Menu Options......................................................................................................................6-2
Create User ID Mailbox ................................................................................................................6-2
Modify User ID Mailbox...............................................................................................................6-3
Copy Mailbox(es)..........................................................................................................................6-3
Delete Mailbox ..............................................................................................................................6-4
BoxList ..........................................................................................................................................6-4
AmisNodeList................................................................................................................................6-4
Users Menu Field Descriptions .....................................................................................................6-5
Options Screen...............................................................................................................................6-8
Group/Chains Screen...................................................................................................................6-14
Info/Status Screen........................................................................................................................6-18
Auto (Scheduling) Menu....................................................................................................................6-20
How Stratagy Uses Auto Scheduling Records ............................................................................6-20
Access/Exit the Auto (Scheduling) Menu ...................................................................................6-21
Auto Menu Options .....................................................................................................................6-21
Create Auto Scheduling Records.................................................................................................6-21
Modify Auto Scheduling Records...............................................................................................6-22
Disable Auto Scheduling Records...............................................................................................6-22

Contents
Chapter 7 –Token Programming
Stratagy I&M 06/02 v
Auto (Scheduling) Menu Field Descriptions..............................................................................6-23
Notify Menu.......................................................................................................................................6-27
How Stratagy Uses Notify Records.............................................................................................6-27
Templates.....................................................................................................................................6-28
Access/Exit the Notify Menu ......................................................................................................6-28
Notify Menu Options...................................................................................................................6-28
Create Notify Records/Templates ...............................................................................................6-29
Modify Notify Records/Templates.............................................................................................6-29
Disable Notify Records/Templates..............................................................................................6-30
Notify Menu Field Descriptions..................................................................................................6-31
Chapter 7 –Token Programming
Using the Token Programming Language ...........................................................................................7-1
Users Menu’s Extension Field.......................................................................................................7-1
Auto’s Extension Field ..................................................................................................................7-1
Notify’s Method Field ...................................................................................................................7-1
Singular Tokens ...................................................................................................................................7-2
Replaced or Variable Tokens...............................................................................................................7-4
Defined Tokens....................................................................................................................................7-7
Chapter 8 –Customization Examples
Users Menu Examples..........................................................................................................................8-1
Using a Status User ID to Check Message Count for Multiple User IDs .....................................8-2
System Paging a User for Special Callers .....................................................................................8-3
System Paging for Ring No Answer..............................................................................................8-4
Switching and Maintaining Languages (IVP8) .............................................................................8-6
Order Shipment Information .........................................................................................................8-9
Holiday Greetings—Holiday Divert Mailbox.............................................................................8-11
Transferring a Caller Directly to a Mailbox................................................................................8-13
Notify Menu Examples ......................................................................................................................8-14
Message Waiting Light Control When Light On and Off Codes Differ .....................................8-14
Message Waiting Light Control When Light On and Off Codes Are the Same .........................8-15
Voice Notification .......................................................................................................................8-16
Notification to a Pager.................................................................................................................8-17
Notification to a Pager on Urgent Messages Only ......................................................................8-18
Relay Paging to a Pager...............................................................................................................8-19
Emergency Lists ..........................................................................................................................8-20
Auto Menu Examples.........................................................................................................................8-21
Time of Day Greetings ................................................................................................................8-21
Holiday Greetings—Same Day Each Year .................................................................................8-24
Holiday Greetings—Different Day Each Year............................................................................8-25
Extension Change........................................................................................................................8-26
Unsupervised Conferencing ........................................................................................................8-27

Contents
Chapter 9 –AMIS Networking
vi Stratagy I&M 06/02
Chapter 9 –AMIS Networking
AMIS Mailboxes..................................................................................................................................9-1
Gateway Mailboxes.......................................................................................................................9-1
Proxy Mailboxes............................................................................................................................9-2
AMIS Node..........................................................................................................................................9-2
System Identification Number .............................................................................................................9-3
Configuring Stratagy for AMIS ...........................................................................................................9-3
Testing AMIS.......................................................................................................................................9-7
AMIS Operation...................................................................................................................................9-7
Private/Urgent Message Handling.................................................................................................9-8
Notification....................................................................................................................................9-8
AmisNodeList ......................................................................................................................................9-8
Chapter 10 –System Reports
View System/User Activity................................................................................................................10-1
Main Menu Statistics...................................................................................................................10-1
Users Menu Statistics ..................................................................................................................10-2
Listen to System Activity...................................................................................................................10-2
Report Types......................................................................................................................................10-2
Log Information...........................................................................................................................10-2
Users Menu Information..............................................................................................................10-3
Report Definitions..............................................................................................................................10-3
Create Report Definitions............................................................................................................10-4
Load Exist Report Definition ......................................................................................................10-4
Run Report .........................................................................................................................................10-5
View Report .......................................................................................................................................10-6
Print Report........................................................................................................................................10-6
Save Report to Floppy Disk...............................................................................................................10-6
Automatic Report Generation ............................................................................................................10-6
Report Menu Field Descriptions ........................................................................................................10-7
Chapter 11 –Maintenance, Upgrades and Troubleshooting
Maintenance and Upgrades................................................................................................................11-1
Tools...................................................................................................................................................11-2
Backup Utility..............................................................................................................................11-3
Restore Utility..............................................................................................................................11-5
Upgrade Stratagy Software..........................................................................................................11-6
Retrieve Trace File ......................................................................................................................11-7
Trace Filter Setup Screen ............................................................................................................11-8
Filecopy .......................................................................................................................................11-9
Upgrading Stratagy Voice Ports.......................................................................................................11-10
Troubleshooting ...............................................................................................................................11-10
Determine Problem....................................................................................................................11-10
Initial Power Up.........................................................................................................................11-11
Stratagy Diagnostic Utilities......................................................................................................11-12
Automatic System Recovery .....................................................................................................11-14

Contents
Appendix A - Checklist/Forms
Stratagy I&M 06/02 vii
Appendix A – Checklists/Forms
Pre-installation Company Survey .......................................................................................................A-2
Pre-installation Checklist ....................................................................................................................A-3
Installation Checklist...........................................................................................................................A-4
Users Form..........................................................................................................................................A-5
Auto (Scheduling) Form .....................................................................................................................A-6
Notify Form.........................................................................................................................................A-7
Greeting Scripts Form.........................................................................................................................A-8
Appendix B – Special Greeting User ID Mailboxes
Record Mailbox Greetings.................................................................................................................. B-1
Initial Greeting Mailboxes .................................................................................................................. B-2
Company Greeting........................................................................................................................ B-2
Caller Instructions......................................................................................................................... B-3
Sample Initial Greetings............................................................................................................... B-3
Directory Mailbox............................................................................................................................... B-4
How Stratagy Maintains the Directory......................................................................................... B-4
Directory Instructions................................................................................................................... B-4
Operator Mailbox Greeting................................................................................................................. B-5
Index ......................................................................................................................................................IN-1

Contents
Index
viii Stratagy I&M 06/02

Stratagy I&M 06/02 ix
Introduction
This Installation and Maintenance (I&M) Manual provides detailed step-by-step instructions for
installing, programming, and maintaining Stratagy Flash and IVP8 voice processing systems. It is
intended for qualified Service Technicians (Installers) and System Administrators.
Unless noted otherwise in this book, references to Stratagy apply to Stratagy Flash and IVP8.
Organization
This manual is divided into the following chapters:
•Chapter 1 – Overview gives a brief description of the Flash and IVP8 products.
•Chapter 2 – Installation covers the unpacking, installing and setting up of Stratagy systems.
•Chapter 3 – Access and Use Stratagy gives information on how to access the Stratagy systems,
on-line help functions, system shutdown, main menu options and a description of the main menu
fields.
•Chapter 4 – Configure Stratagy provides detailed information about defining the Stratagy
system configuration and integration.
•Chapter 5 – How Stratagy Operates gives you an overview of the basic concepts of the system
— user ID mailboxes, call processing, etc. It also covers the basic system features and how to
program each one.
•Chapter 6 – Menus gives User, Auto (Scheduling), and Notify Menu screens and field
descriptions. It also provides instructions on creating, modifying, copying and deleting
mailboxes.
•Chapter 7 – Token Programming provides detailed instructions for customizing and
administering the Stratagy system. A complete list of tokens and descriptions are included.
•Chapter 8 – Customization Examples shows how to customize User IDs to record messages
from callers, provide information to callers, or direct the flow of a call.
•Chapter 9 – AMIS Networking provides a complete list of Audio Messaging Interchange
Specification (AMIS) parameters and information on configuring Stratagy for AMIS.
•Chapter 10 – System Reports covers running, viewing, saving and printing reports.
•Chapter 11 – Maintenance, Upgrades and Troubleshooting contains instructions on using
the backup and restore utilities, procedures for upgrading Stratagy software, retrieving trace
files, file copying and basic troubleshooting procedures.
•Appendix A – Checklists/Forms provides surveys, checklists, and forms to assist in the
installation of Stratagy systems.
•Appendix B – Special Greeting User ID Mailboxes gives instructions on setting up the Initial
Greeting, Directory and Operator Mailbox greetings.
•Index
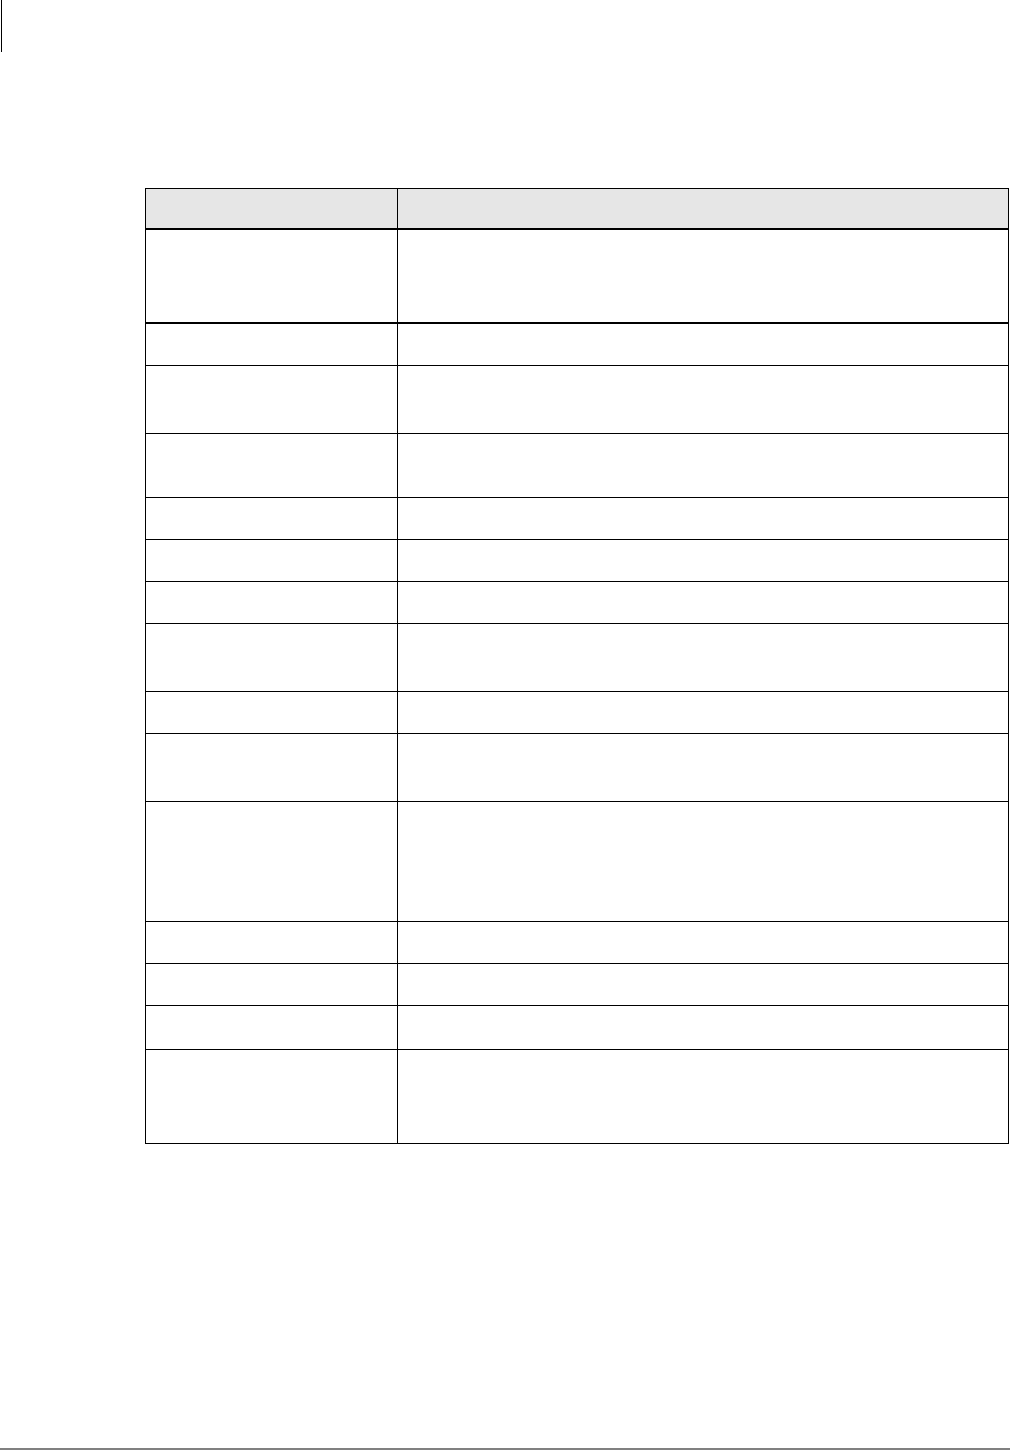
Introduction
Conventions
xStratagy I&M 06/02
Conventions
This manual uses these conventions:
Conventions Description
Note
Elaborates specific items or references other information. Within
some tables, general notes apply to the entire table and numbered
notes apply to specific items.
Important! Calls attention to important instructions or information.
CAUTION! Advises you that hardware, software applications, or data
could be damaged if the instructions are not followed closely.
WARNING! Alerts you when the given task could cause personal injury or
death.
$ULDO%ROG Represents telephone buttons.
Courier Shows a computer keyboard entry or screen display.
Helvetica Bold represents tokens. For example: M( ).
Italics represent parameter and menu/screen field names, and book titles.
For example: hot_box parameter, Extension field.
“Type”Indicates entry of a string of text.
“Press”Indicates entry of a single key. For example: Type prog then
press Enter.
Plus (+)
Shows a multiple PC keyboard or phone button entry. Entries
without spaces between them show a simultaneous entry.
Example: Esc+Enter. Entries with spaces between them show a
sequential entry. Example: # + 5.
Tilde (~) Means “through.” Example: 350~640 Hz frequency range.
➤Denotes the step in a one-step procedure.
➤Denotes a procedure.
See Figure 10 Grey words within the printed text denote cross-references. In the
electronic version of this document (Library CD-ROM or FYI
Internet download), cross-references appear in blue hypertext.

Introduction
Related Documents/Media
Stratagy I&M 06/02 xi
Related Documents/Media
Note Some documents listed here may appear in different versions on the CD-ROM, FYI, or in
print. To find the most current version, check the version/date in the Publication
Information on the back of the document’s title page.
You can find additional detailed information about Stratagy in the following companion
documents:
All Stratagy Products
•Stratagy General Description
•Stratagy Library CD-ROM
Stratagy Flash, IVP8
•Stratagy User Guide
•Stratagy Quick Reference Guide
•Stratagy System Administrator Guide
For authorized users, Internet site FYI (http://fyi.tsd.toshiba.com) contains all current Stratagy
documentation and enables you to view, print, and download current publications.
Stratagy eBrochure and Advisor CD-ROM
Packaged with every Stratagy shipped is a CD-ROM containing Stratagy eBrochure, and an end-
user tutorial, Stratagy Advisor. Additional copies of this CD-ROM can be purchased from your
Dealer Sales Representative.
eBrochure
The eBrochure provides a description of each of the Stratagy products along with audio
supplemented mini-demonstrations illustrating the capabilities of Stratagy voice processing. Also
included on the CD-ROM is an electronic copy of this Stratagy General Description.
Advisor
The Stratagy Advisor is an end-user tutorial that can be used as a learning tool for the new user or
as a refresher course for existing Stratagy users.
The Stratagy Advisor program covers general topics—such as play messages, send messages,
etc.—that are applicable to all models of Stratagy systems. All presentations interact with the
viewer in order to provide a better understanding of how Stratagy works.

Introduction
Related Documents/Media
xii Stratagy I&M 06/02

Stratagy I&M 06/02 1-1
Overview
Overview 1
This chapter covers the qualifications of Installers and System Administrators and provides an
overview of the Stratagy Flash and IVP8.
Installers and System Administrators
Service Technicians install, upgrade, and maintain the Stratagy system. System Administrators’
functions vary by company.
Installer
This manual is designed for a trained installer with some familiarity of PCs, an understanding of
telephone systems and a general knowledge of Stratagy. To install, upgrade, or maintain the system,
you must know:
•Stratagy features (refer to the Stratagy General Description)
•Stratagy operation, customization, and administration
•Stratagy installation procedures
•The telephone system to which you will connect Stratagy. (Refer to the appropriate installation
documentation.)
•Personal Computer (PC) terms, such as: I/O, serial port, parallel port, RS-232, Random Access
Memory (RAM), and Disk Operating System (DOS).
•How to safely open a PC and install/remove cards.
•How to identify basic components of a PC: e.g., motherboard, I/O controller, video card, I/O
ports, modem.
•How to connect the monitor and keyboard, and how to power on the PC.
•Telephony terms, such as: station side, Central Office (CO), single-line, hunt group, coverage
path, hookflash, call forward on ring-no-answer, call forward busy, call forward-all calls, Dual
Tone Multi-frequency (DTMF), and tone patterns.
•The difference between an RJ11 and RJ14 connector.
•The separation of the telephone switch and Stratagy.
•How to use a test set or line monitor to analyze test calls.
If you are unfamiliar with any of the above, please take the time to learn the necessary information
before you attempt to install Stratagy.

Overview
Memory
1-2 Stratagy I&M 06/02
System Administrator
Your company will assign all or some System Administrator functions to an employee who knows
your telephone system, organizational structure, and the needs of your customers and employees.
The Toshiba Dealer’s Technical Service Representative will perform the remaining functions.
System Administrator functions may include:
•Initial setup (assisting the Installer with defining your company’s configuration and
customization requirements)
•Customizing mailboxes
•Generating reports
•Performing system shutdown and restart
•Backing up the system
Memory
The Flash and IVP8 use a solid-state flash memory data storage device that uses non-volatile,
semiconductor, read/write storage technology. This means that if power is interrupted, the database
is not lost. The database information remains secure through power outages without employing
on-board batteries.
The flash memory has very high-data integrity with automatic bad-spot management and sparing,
and full Error Correction Coding (ECC) for high reliability. The flash memory data storage device
contains no moving parts, is fast, noiseless, light and rugged. It operates as an industry standard
Integrated Drive Electronics (IDE) hard disk drive.
It uses the same 512-byte sector size employed in all PC hard disk drives and emulates the disk
drive file structure. However, unlike disk drives, the operating speed of the flash memory data
storage device does not decrease with increasing amounts of data stored on the drive; nor does disk
storage fragmentation occur.
Software
The Flash and IVP8 require Stratagy Admin software, installed on a separate IBM-compatible
computer, for local or remote administration and maintenance. Some basic administrative
functions (e.g., adding User IDs, resetting passwords) can be performed by the System
Administrator using a touchtone telephone (see the System Administrator Guide on the Stratagy
Library CD-ROM for details).
See Chapter 6 – Menus for complete details on using the screens.

Overview
Stratagy Flash
Stratagy I&M 06/02 1-3
Overview
Stratagy Flash
The Stratagy Flash (shown right) is a stand-
alone two- or four-port, solid-state voice
messaging platform that combines Stratagy
software with flash memory and an integrated
Central Processing Unit (CPU), all enclosed in
a compact and easily installed unit
manufactured by Intel® Corporation.
Both models, the two-port (SG-F-2) and the
four-port (SG-F-4), are equipped with a flash
memory cartridge that provides approximately
four hours of voice storage. Upgrading the
Flash to four ports does not require additional
hardware. The upgrade is performed remotely by Toshiba.
Each Flash has been pre-programmed at the factory for out-of-box (plug-and-play) operation on
the Strata DK14 and DK40i/DK40. This includes the integration and configuration parameters,
default station (extension number) User ID mailboxes, and company greeting and instructions.
The supported systems and recommended software versions are:
•Strata CTX100/CTX670 — all releases
•Strata DK16/DK16e/DK40/DK40i — all releases
•Strata DK280/DK424/424i — all releases
•Strata DK8/DK14 — all releases
•Strata DK24/DK56/DK96 — Release 4
The Flash requires Stratagy Admin software, installed on a separate IBM-compatible Stratagy
Admin PC, for local or remote administration and maintenance. Some basic administrative
functions (e.g., adding User IDs, resetting passwords) can be performed by the System
Administrator using a touchtone telephone (see the System Administrator Guide on the Stratagy
Library CD-ROM for details).
Hardware
The Flash has a power light, status light, and four voice ports and corresponding voice port status
lights. On two-port models (SG-F-2), voice ports/status lights III and IIII are not active (see Figure
1-1).
The Flash’s two serial ports are allocated as follows: Serial Port 1 is reserved for the Station
Message Desk Interface (SMDI) and Port 2 for Stratagy Admin PC connection.
The Flash unit can be located on a desk/table top or wall mounted, if desired. Two wall-mounting
screws and anchors are included with the system.
3064
VOICE PROCESSING
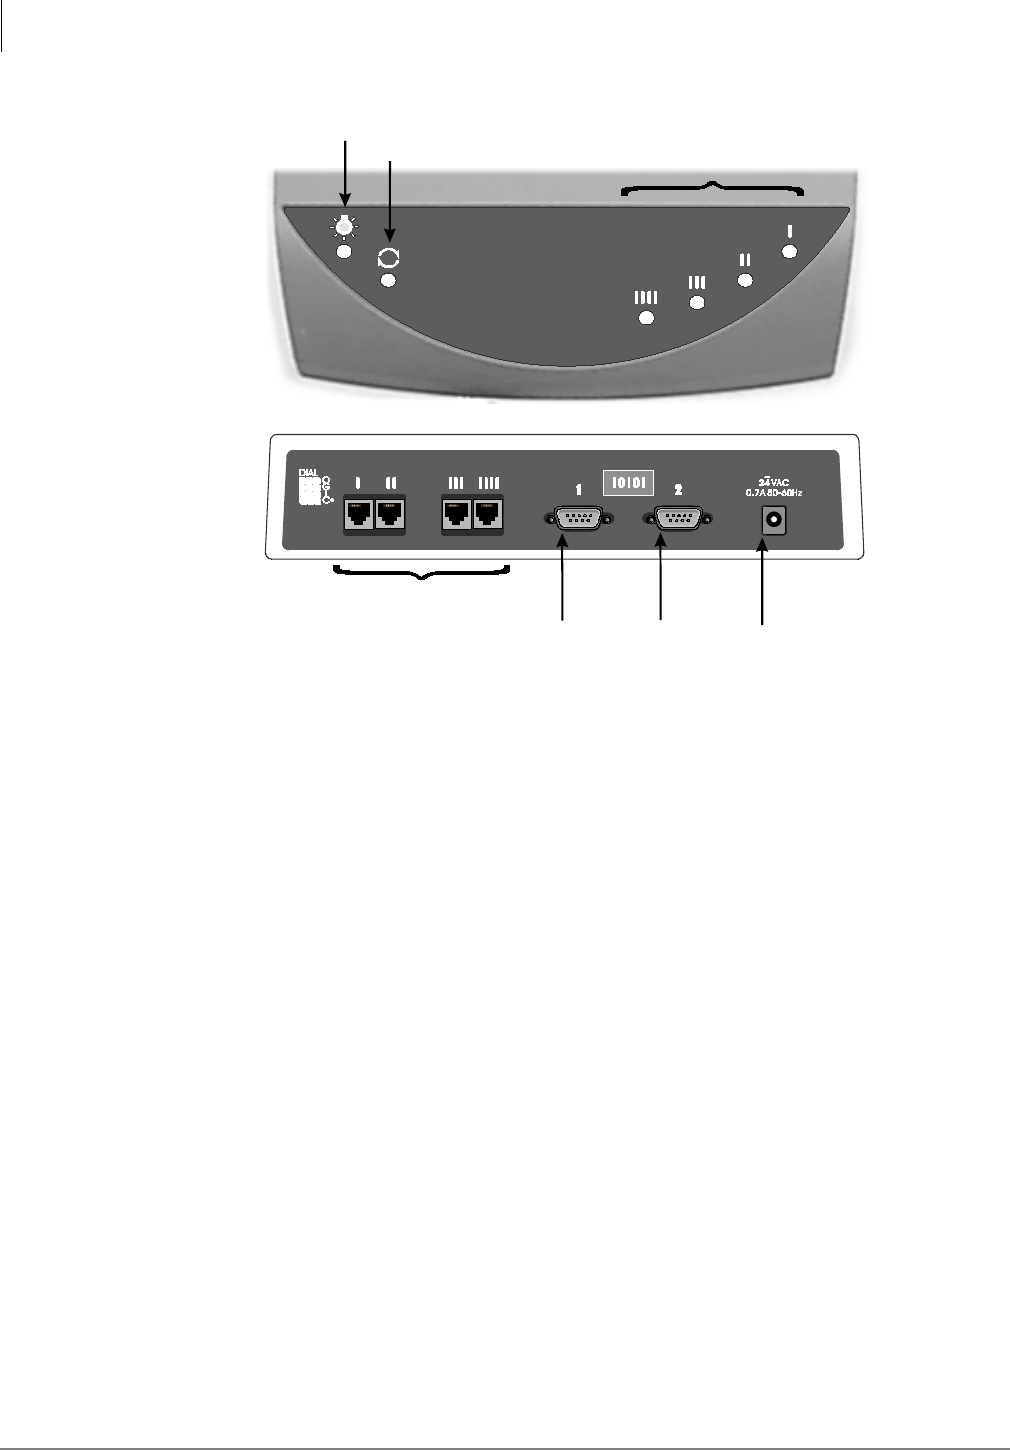
Overview
Stratagy Flash
1-4 Stratagy I&M 06/02
Figure 1-1 Flash Front and Back Panels
On/Off
The Flash is not equipped with an On/Off switch.
➤To turn the Flash On/Off
1. Use Stratagy Admin or Telephone Admin to shut down the Stratagy application.
2. Attach or detach the Flash power supply using a properly grounded electrical outlet. The Power
Light goes On/Off accordingly.
➤To reset the Flash
1. Use Stratagy Admin or Telephone Admin to shut down the Stratagy application.
2. Unplug the Flash’s power cord from the wall, wait a few seconds and then plug it back in.
Status Light
The status light indicates the state of the Stratagy application:
•On = Stratagy is running.
•Off = Stratagy is shutdown.
Rear Panel
4 Voice Ports
(III and IIII are not active
on the 2-port model)
Power Light
Status Light
Serial Port 1 Serial Port 2 Power Input
Voice Port Status Lights
Front Panel
3088

Overview
Stratagy Flash
Stratagy I&M 06/02 1-5
Overview
Voice Port Status Lights
Each port has a status light labelled I~IIII on the front of the Flash unit (see Figure 1-1) that
indicates the hookswitch and ring states of the port. The lights are On/Off based on the following
When Stratagy is shutdown, all connected port status lights are On.
Exclusive Flash Features
Reserved User IDs
The following is a list of reserved User ID mailboxes supported by the Flash. See Chapter 5 – How
Stratagy Operates for a complete description of the specific functions.
•User ID 0: Operator
•User ID 411: Directory
•User ID 982: System Shutdown 1
•User ID 983: System Shutdown 2
•User ID 990: Company Greeting
•User ID 991: Caller Instructions
•User ID 994: Hot Box
•User ID 997: Defaults Box
•User ID 998: Direct Message
•User ID 999: System Administrator User ID
Maximum Message Length
The default maximum message length for the Flash is 60 seconds. This is configurable on a
mailbox-by-mailbox basis from the Options screen of each User ID Mailbox.
Maximum Greeting Length
The default maximum greeting length for both the current greeting and the custom busy greeting is
30 seconds. This is configurable on a mailbox-by-mailbox basis from the Options screen of each
User ID. Longer user greetings reduce the amount of message storage time.
Signal (Loop Current On) Voice Port
Status Lights
Hookswitch On Off
On-HOOK X1
Off-HOOK X
1. When a ring signal is present, the voice port status light flickers rap-
idly during the audible part of the ringing.

Overview
Stratagy Flash
1-6 Stratagy I&M 06/02
Unsupported Flash Features
In order to preserve storage space, the following features are not supported by the Flash system
software.
•Future Delivery (User ID Mailbox 995)
•Guest User IDs (User ID Mailbox 996)
•Fax Mail (fax tone detect and transfer is supported)
•Audio Messaging Interchange Specification (AMIS)
•Bilingual prompts
•Speed control for message playback
•Alternate Rate feature
•Some Interactive Voice Response (IVR) related prompts (e.g., monies)
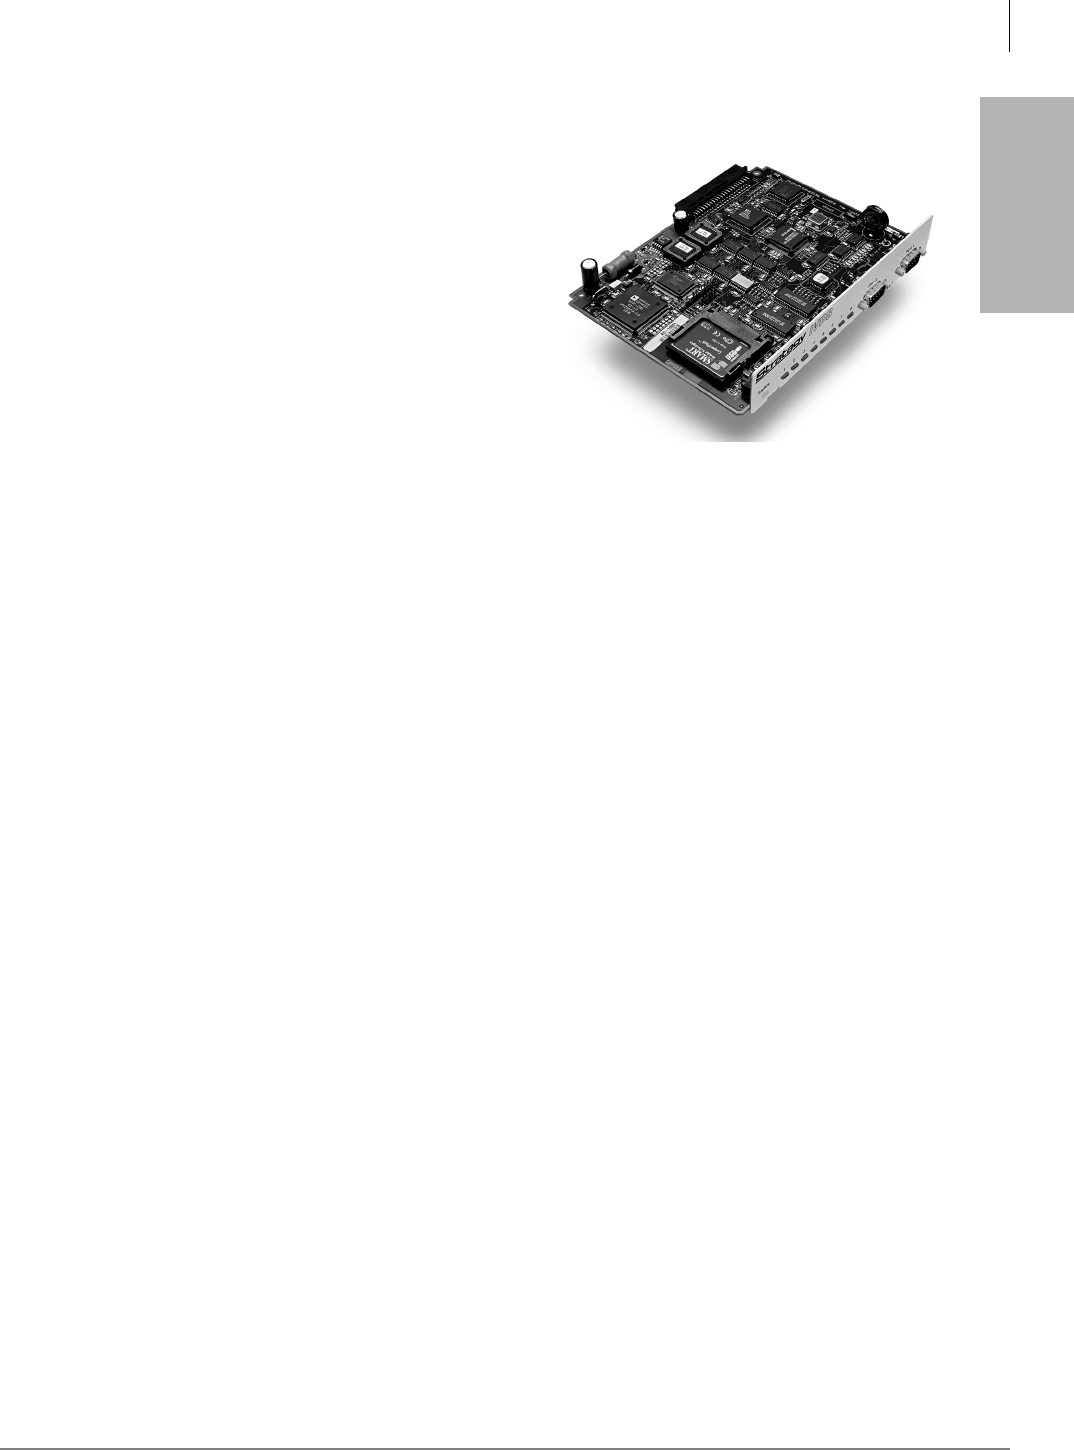
Overview
Stratagy IVP8
Stratagy I&M 06/02 1-7
Overview
Stratagy IVP8
The Stratagy IVP8 voice processing circuit card
(shown at right) supports up to eight ports, and installs
in selected card slots of a Strata CTX or DK Base or
Expansion Cabinet/Key Service Unit (KSU).
Each IVP8 has been preprogrammed at the factory for
out-of-box (plug-and-play) operation on the CTX.
This includes the KSU integration and configuration
parameters, default station (extension number) User
ID mailboxes, and company greeting and instructions.
The supported systems and recommended software
versions are:
•Strata CTX100/CTX670 — all releases
•Strata DK16/DK16e/DK40/DK40i — all releases
•Strata DK280/DK424/DK424i — all releases
•Strata DK24/DK56/DK96 — Release 4
The IVP8 requires Stratagy Admin software, installed on a separate IBM-compatible Stratagy
Admin PC, for local or remote administration and maintenance.
Voice mail integration is provided by Strata CTX or DK in-band (DTMF) integration. Strata CTX,
DK40i, DK280, DK424, and DK424i can also provide integration using the Simplified Message
Desk Interface (SMDI) output of the BSIS, PIOU, PIOUS, RSSU, RSIU, or RSIS SMDI port.
Hardware
The IVP8 consists of a flash drive with approximately four hours of storage, an internal modem, a
status light, and eight voice ports with corresponding voice port status lights (see Figure 1-2).
The IVP8’s two serial ports are allocated as follows: Serial Port 1 is reserved for SMDI and Port 2
for the Stratagy Admin PC connection.
6036
Overview
Stratagy IVP8
1-8 Stratagy I&M 06/02
Figure 1-2 IVP8 Hardware Components
Internal Modem
The IVP8 has an internal (soft) modem that operates at up to 2400 baud and can be used for remote
maintenance.
Status Light
The status light indicates the state of the IVP8:
Status LED
At boot-up:
Off No power
Blinking Amber Power-on, self-test
Red Failed self-test. The port LEDs indicate which test(s) failed:
Port LED Green Test Failed
1DRAM
2RTC
3EEPROM
4 EPROM Checksum
5 Flash Drive
6 Integration Processor
7 DSP #1
While system is operational:
Green
Green with Blinking Amber
System is operational.
System is operational and flash drive is active.
6027
Front
View
Side
View
Backplane Connector
Flash Drive
Strap
Port 2
Port LEDs
Status
Light
J4
Port 1
Port LEDs

Overview
Stratagy IVP8
Stratagy I&M 06/02 1-9
Overview
Voice Port Status Lights
Each port has a status light labelled 1~8 on the front of the IVP8 unit that indicates the hookswitch
and ring states of the port. The lights are On/Off based on the following:
AMIS Networking
With the addition of the Call Record feature to the DOS-based products with Release 3.3 software,
the number of default Audio Messaging Interchange Specification (AMIS) networking nodes has
been reduced to 200. In addition, further restriction to the number of AMIS networking nodes will
be required to support IVP8 systems with multi-lingual prompts.
The fewer AMIS nodes the system is configured for, the more operating system memory is
available for other features. The Stratagy systems reserve enough operating system memory to run
the number of AMIS nodes specified in the amis_max_nodes parameter in the Stratagy System
Configuration. Additionally, a system using more features and a higher configuration requires
more operating system memory. For example, an eight port IVP8 system with a high amount of
call traffic using the new Call Record feature requires more operating system memory than a
system with fewer ports and/or less traffic. Multi-lingual prompts have been specifically identified
as a feature that requires a reduction in the number of AMIS nodes to increase Operating System
(OS) memory for proper system operation.
Due to the number of feature configurations possible in a Stratagy system, it is not possible to
accurately identify the correct number of AMIS nodes in each case. If the system you are working
on runs out of OS memory, the failure causes the system to continually reboot. To correct this, the
number of AMIS nodes must be reduced.
Exclusive IVP8 Features
Parameters
Because of the unique nature of the interaction process between the IVP8 and Strata CTX or DK,
three parameters are used exclusively with the IVP8 (see “System Parameters” on page 4-14 for
the definitions and settings for these parameters).
•console_slot_id – identifies the PDKU slot. IVP8 monitors the Direct Station Select (DSS) for
Busy Station Identification.
•dss_active – tells the IVP8 to retrieve Busy Lamp Field (BLF) busy station information for the
assigned DSS Port field located on the Users Menu – Options screen (see “Users Menu
Options” on page 6-2 for information on programming the field).
•ksu_time – synchronizes IVP8’s system clock with the system clock of the supporting
Strata CTX/Strata DK telephone system. Use of this feature with the Strata CTX requires
SMDI integration.
Port LEDs
Off Port is on-hook and idle.
Green Port is off-hook and in use.

Overview
Stratagy IVP8
1-10 Stratagy I&M 06/02
Tokens
As with all Stratagy systems, the IVP8 retains all of the robust application programming that is
provided by tokens. There are two tokens supported only by the IVP8. These are:
•KM – Enables a Stratagy Admin PC’s modem to communicate with the IVP8 internal modem
(2400 baud). This token is factory programmed in User ID 993.
•KT( ) – Directs calls to a designated User ID when:
•DSS function is active (dss_active = true)
•Assigned in the “answering” mailbox
•Night Transfer on the DSS console is On.
DSS/Busy Lamp Feature
Once the DSS/Busy Lamp feature has been programmed using the console_slot_id and dss_active
parameters and the DSS Port field, IVP8 must be re-started two times. The first re-start configures
the DSS parameters/field. The second re-start “loads” the DSS parameters/field into active memory.
Busy Station Identification
The Busy Station Identification feature enables the IVP8 to determine if a station is “busy” without
performing a “hookflash” and transfer. IVP8 “reads” the data of a DSS console and knows
instantly if the station is busy or in Do Not Disturb (DND).
A station in DND mode signals a “busy” condition to a DSS console. DND and busy are processed
the same way by the IVP8 (i.e., the Busy chain is executed).
See “Busy Station Identification for IVP8” on page 5-11 and “DSS/Busy Lamp Feature (For all
Strata DK systems)” on page 2-9 for details.
IVP8 System Time
The Main Menu screen displays KSU time when this feature is enabled or the IVP8’s own system
time (standard, daylight savings) when it is disabled.
See “IVP8 System Time” on page 3-9 for details.
Night Transfer Alternate Routing
Using the KT( ) token, a feature called Night Transfer Alternate Routing is available. The feature
monitors the DSS Night Transfer key in order to activate the KT( ) token for alternate routing
applications.
See “Night Transfer Alternate Routing” on page 2-16 for details.

Stratagy I&M 06/02 2-1
Installation
Installation 2
This chapter provides step-by-step instructions on installing the Stratagy systems.
Pre-installation Instructions
The pre-installation requirements include:
•Conduct a pre-installation survey to determine how to configure and customize the Stratagy
system.
•Determine Stratagy hardware sizing.
•Select and prepare the hardware site.
•Determine Stratagy’s configuration and integration.
•Customize User ID mailboxes to define the automated attendant and voice messaging system.
•Fill out checklists and forms.
We provide a Stratagy Pre-installation Checklist in Appendix A – Checklists/Forms to assist you in
tracking your progress in meeting these requirements and to help you verify that you have
completed the necessary steps involved in installation.
Conduct a Pre-installation Company Survey
When conducting a pre-installation survey, you must obtain information about the company, its
telephone system, the desired Auto Attendant (AA) and voice mail functions, and the company’s
Audio Messaging Interchange Specification (AMIS) and fax/modem requirements. As appropriate,
use the items suggested below and include any additional questions. See “Pre-installation Company
Survey” on page A-2 for a survey form.
Determine Stratagy Hardware Sizing
To determine which Stratagy system will be needed for the installation, it is important that you
determine the number of ports and the amount of voice storage that will be required to support the
applications.
Number of Ports
The amount of ports that are required for an installation is dependent on the application.
•Is Stratagy the primary answering position?
•Will Stratagy be responsible for Telephone Answering/Voice Messaging for users?
•Or, will Stratagy be responsible for all of these applications?

Installation
Pre-installation Instructions
2-2 Stratagy I&M 06/02
It is essential to understand the application fully before sizing port quantity. Issues to be taken into
consideration when calculating the number of ports required for an application are:
Primary Answering Position
Will Stratagy be responsible for answering all or a majority of the incoming calls? If so then:
•How many CO lines are directed by telephone system programming to the Stratagy?
An acceptable ratio for an initial installation would be two CO Lines to every one Stratagy
voice port.
•Is Stratagy going to be programmed with menu options and information mailboxes?
These applications require increased port time. The 2-to-1 ratio should be sufficient. However,
attempts should be made to streamline these applications and design them to efficient
conclusions: e.g., recording a message or hanging up.
•How many calls per hour are projected for Stratagy to answer?
If the calls per hour are extensive, either more ports will be required above the 2 to 1 ratio, or an
overflow position could be defined for the voice mail in the telephone system’s programming
for peak times.
Telephone Answering/Voice Messaging
In a typical installation, the voice processing system is designated to take messages for users when
they are either on the telephone or away from their desks; this is termed telephone answering. In
addition, the voice processing system can be accessed by users to listen to messages and record new
messages for another user or a group of users; this is termed Voice Messaging.
The amount of ports depends on the application and call traffic. When sizing Stratagy voice ports
for Telephone Answering and Voice Messaging, consider:
•The quantity of calls that users receive.
•What proportion of time are users unavailable for taking calls?
•Will users be accessing Stratagy often to leave messages for other users?
Some acceptable port quantities to support Telephone Answering and Voice Messaging are:
Both Applications
If Stratagy is going to be responsible for both applications—Primary Answering and Telephone
Answering/Voice Messaging, use the larger of the two quantities calculated above. For example, if
you calculated that four ports would be needed for Primary Answering and two ports for Telephone
Answering/Voice Messaging, four ports would be required for the installation of Stratagy.
Users (up to) Ports
25 2
50 4
200 8
500 16
1000 24

Installation
Pre-installation Instructions
Stratagy I&M 06/02 2-3
Installation
Determine Stratagy’s Configuration and Integration
Determining Stratagy’s configuration and integration definitions involves the following (see
Chapter 4 – Configure Stratagy).
•Define Stratagy system configuration options: setting system-wide parameters for Stratagy
control, including system password, timeout values, and per port options.
•Define the telephone system dial codes, telephone system tone patterns, and system integration
patterns.
Each Stratagy system has been pre-installed at the factory for out-of-box (plug and play)
operation on a specific Toshiba telephone system:
Note Older Strata DK products are not listed on the Toshiba Plug and Play menu but are
configured by using the set_pbx_type parameter in the Stratagy System Configuration
Menu. The option does not build a system database or message waiting strings for the
mailboxes. These must be programmed manually.
All dial codes, tone patterns, and integration patterns specific to the system have been
pre-installed at the factory for each Stratagy system.
Important! Strata DK systems must be configured for the appropriate voice mail system settings
individually. See the specific Strata DK Installation and Maintenance manual for
these procedures.
•If you have a Toshiba telephone system, Stratagy automatically defines these parameters once
you select the appropriate system during installation (if not pre-installed).
•If you are defining how Stratagy and another manufacturer’s telephone systems communicate
together, you will also need to reference the telephone manufacturer’s installation
documentation.
Determine Stratagy’s Customized User ID Mailboxes
Determine the User IDs that must be customized to define the Automated Attendant and voice
messaging system.
Note With Toshiba Plug and Play, the Strata DK default station (extension number) User ID
mailboxes have been pre-installed for the specific Stratagy and Strata DK systems
described above.
For your convenience, Appendix A – Checklists/Forms provides the following: Users Form, Auto
(Scheduling) Form, Notify Form, and Greeting Scripts Form.
Stratagy System Strata System
IVP8 CTX100, CTX670
Flash DK14, DK40i, DK40
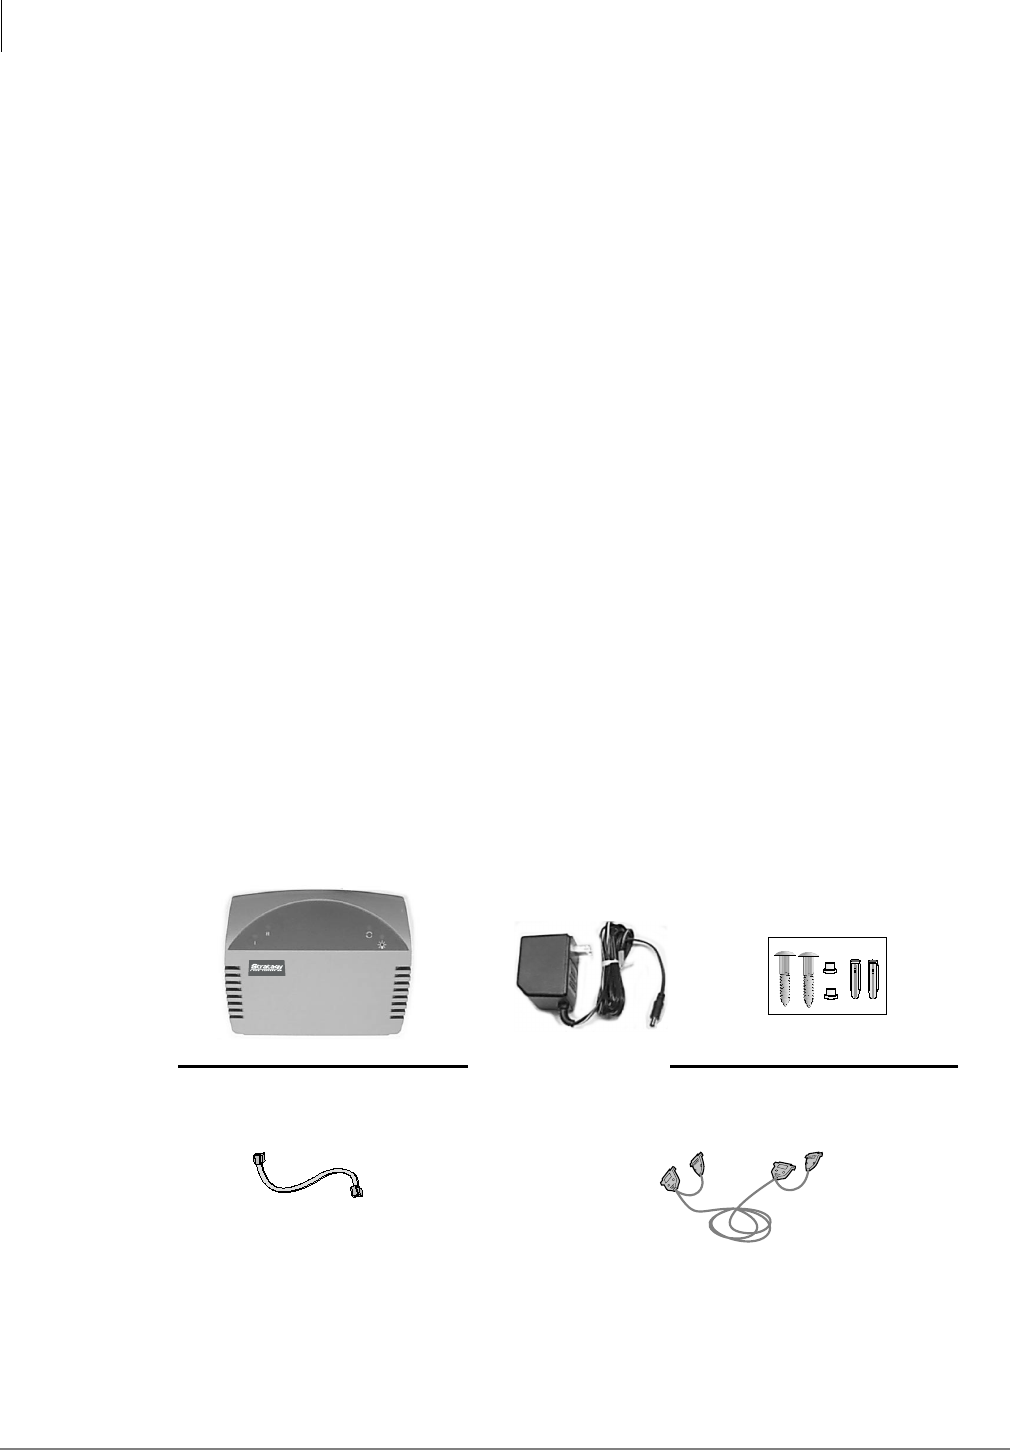
Installation
Installation
2-4 Stratagy I&M 06/02
Fill out Checklists and Forms
The following checklists, forms, and surveys are available in Appendix A – Checklists/Forms and
simplify the installation process. Make copies as needed.
•Pre-installation Company Survey
•Stratagy Pre-installation Checklist
•Stratagy Installation Checklist
•Users Form
•Auto (Scheduling) Form
•Notify Form
•Greeting Scripts Form
Installation
Before starting the installation, read through these instructions thoroughly. Important information
is included in this guide that is crucial to a successful installation.
Step 1: Unpack and Inspect Stratagy
1. When you receive the system, examine all packages carefully and note any visible damage. If
you find any damage, do not open the packages. Contact the delivery carrier immediately and
make the proper claims.
2. Check the items contained in the packages against the packing list. In addition to the hardware
components, you should receive an anti-static wrist strap, a caution sticker and a
documentation package with the IVP8. For Flash, you should receive the hardware components
shown below and a Stratagy Flash Wall-Mounting Template and Instructions with the
documentation package.
3. Inspect all equipment for damage. If equipment is missing or damaged, contact your supplier
immediately.
4. Remove any shipping tape and packing material used to protect the system during shipment.
Retain the packing materials for re-use when transporting system hardware.
2 mounting screws
with flange standoffs
2 wall anchors
(for drywall installation)
24VAC
700 mA
Power Supply
RJ11 cable for each port used
Stratagy Flash
Stratagy Admin Cable (SG-ADMCBL)
for communicating with computer or modem
6 ft. cord
Parts not included:
(available from Toshiba)
3296

Installation
Step 2: Program Strata
Stratagy I&M 06/02 2-5
Installation
CAUTION!
You will be handling the IVP8 when it is most fragile — unpacked and exposed. The IVP8, if
handled properly, will give long, reliable service. To ensure that the unit is not damaged
during installation or maintenance, follow these precautions.
Damage may not always be immediately evident (e.g., no physical damage on the outside of
the unit) and system failure may result weeks or months later.
•Handle the IVP8 with care. Mechanical shock from dropping, shaking, excessive force
when seating the board into the slot, rocking a connector on or other activities can
severely damage the disk assembly or the disk’s printed circuit board.
•Wear the anti-static wrist strap included in the package. It can also be re-used and left
with the Strata CTX or Strata DK cabinet. An electrostatic charge from your body can
damage the drive or circuitry permanently.
•Hold the IVP8 by the edges or the strap and never touch the board’s surface. Pressure on
the printed circuit board or contaminants from your hands (e.g., skin oil, food particles,
hand lotion) can cause component failure.
Step 2: Program Strata
Strata CTX Systems
DTMF Signaling
Stratagy is compatible with all Strata CTXs. Strata CTX needs to recognize Stratagy’s DTMF
signaling. An ARCS card must be installed in the Strata CTX100 for this DTMF signaling. Strata
CTX670 allows four DTMF circuits in its default configuration.
➤Install and program an ARCS card in the Strata CTX100. When installed, the ARCS card by
default allows four circuits. Additional licenses may be required, depending upon the
Strata CTX configuration and applications.
SMDI
Are you going to have SMDI? SMDI is required for the Call Record feature with
Stratagy Release 3.3. A BSIS card must be located close to the Stratagy.
1. Install and program serial card BSIS in the Strata CTX. Refer to the Strata CTX Programming
Manual.
2. A serial cable must be installed between the BSIS card and the Stratagy. Toshiba’s PPTC-9
(with six-conductor line-cord) is recommended.
3. Stratagy’s serial Port 1 is reserved for SMDI communication.
IVP8
To the Strata CTX processor, the IVP8 functions as an analog card (RSTU). Although there are
some special program settings required for the IVP8 (e.g., DSS/BLF feature), the Strata CTX
should be programmed just as it would for any external voice mail system that is to be connected
to it.

Installation
Step 2: Program Strata
2-6 Stratagy I&M 06/02
Important! The Strata CTX may need to be reset to initialize some Strata programming
assignments. It is important that you make all such assignments before installing the
IVP8.
➤Program slot in Strata CTX before installing the IVP8. Refer to Strata CTX Programming
Manual for details.
DSS/Busy Lamp Feature
Do you want to activate the DSS/Busy Lamp feature? PDKU/BDKU cards must be installed that is
programmed for a DSS Console.
➤Install and program the PDKU/BDKU in the Strata CTX.
Refer to the Strata CTX Programming Manual for DSS programming.
Note See “Busy Station Identification for IVP8” on page 5-11 for required settings on IVP8.
Strata DK Systems
The Stratagy Voice Processing system works with all Strata DK40i/DK40/DK16e/DK16, DK424i/
DK424/DK280, and DK24/DK56/DK96 (Release 4) systems.
In addition, Flash works with the Strata DK14/DK8.
DTMF Signaling
Strata DK needs to recognize Stratagy’s DTMF signaling. Make sure a K5RCU, K5RCU2 or
K4RCU3 is installed in the DK40i/DK40/DK16e/DK16, an RRCS on the DK424i/DK424/DK280
RCTU, or CRCU in the DK24/DK56/DK96.
➤Run Program 03 and assign these code(s) where the DTMF receiver is installed:
Flash
Make sure there are enough single line (analog) station ports on the Strata DK to support the number
of Flash ports required.
Note When DK14/DK8 is powered on, Program 03 automatically assigns the correct code for the
QRCU.
IVP8
Note The following instructions are based on the IVP8 being installed in a pre-existing
Strata DK. If the Strata DK is a new installation, see First-time Programming in Chapter 1 –
Overview of the Strata DK Programming Manual for more information.
To the Strata DK processor, the IVP8 functions as an analog card (RSTU). Although there are
some special program settings required for the IVP8 (e.g., DSS/BLF feature), the Strata DK should
be programmed just as it would for any external voice mail system that is to be connected to it.
Important! The Strata DK may need to be reset to initialize some Strata programming
assignments. It is important that you make all such assignments before installing the
IVP8.
1. Using Program 03–Flexible PCB Slot Assignments set/verify the following slot assignments:
•Set code 31 for the slot where IVP8 is installed (see Step 4: “Install Stratagy” on page 2-7).
DK40i/DK40/DK16e/DK16 DK424i/DK424/DK280 DK24/DK56/DK96
Code 92 for slot 00 Code 92, 93, or 94 for slot 00 Code 92 or 93

Installation
Step 3: Shut Down Strata CTX/Strata DK
Stratagy I&M 06/02 2-7
Installation
•Enable the Strata DK to receive DTMF signalling from the IVP8:
•For DK40i/DK40/DK16e/DK16: Set code 92 for slot 00 for the K5RCU, K5RCU2, or
K4RCU3.
•For DK424i/DK424/DK280: Set codes 92, 93, or 94 for slot 00 for the RRCS installed
on the RCTU.
•For DK24, DK56, DK96: Set codes 92 and 93 for CRCU.
•Set code 64 for the slot where the PDKU resides. IVP8 monitors this slot for the DSS/Busy
Lamp feature (see “Busy Station Identification” on page 1-10).
Note For DK40/DK16e/DK16: slot 11 in the Base Cabinet must be set for code 64.
•If SMDI is desired with the Strata DK424i/DK424/DK280: Set PIOU/PIOUS/RSSU for
code 43 or RSIU/RSIS for code 49 to enable the SMDI port (see Program 76 if installing
RSIU or RSIS SMDI port).
2. Program the Strata DK system for voice mail integration. See the Strata DK Programming
Manual for details.
Step 3: Shut Down Strata CTX/Strata DK
➤Turn off the main power switch to the Strata CTX/Strata DK system.
Step 4: Install Stratagy
Flash
➤Since the Flash and the telephone system must be physically connected, place the Stratagy by
the telephone system.
Power Requirements
We recommend the following for the Flash unit:
•A 15A circuit breaker and dedicated AC circuit that does not have an On/Off wall switch
(avoids accidental power interruption).
•A UPS in areas where the power source is not stable (frequent power failures, brownouts, etc.).
Environmental Considerations
The area in which you locate the Flash affects its operation. Place it in an appropriate area that is:
•Dry, clean, well ventilated, lighted (avoid placing it in direct sunlight), and easily accessible
•Not subject to extreme hot or cold, corrosive fumes, dust, other airborne contaminants, or
excessive vibration

Installation
Step 4: Install Stratagy
2-8 Stratagy I&M 06/02
Set up Flash System Hardware
1. If you are wall-mounting the Flash, see the Stratagy Flash Wall-Mounting Template and
Instructions included in the package for instructions on wall mounting the unit
...if the Flash is not going to be wall mounted, place the unit in the site determined.
2. Connect the RJ11C line cords from the Strata single line (analog) station ports to the
corresponding Flash port.
3. If using a UPS, plug it into a dedicated outlet.
Note A UPS is required in areas where the power source is not stable (frequent power failures,
brownouts, etc.).
4. Connect the six-ft. power supply cable included in the package. Once you have connected the
power supply cable, the Flash performs a self test while booting-up.
The Flash voice ports are off-hook for a short period during startup while Stratagy software loads.
During that time, the status light is Off and should turn On when finished.
IVP8
CAUTION! See cautions under Step 1 on page 2-4 before proceeding.
1. Locate the proper slot for the IVP8.
Note IVP8 can be installed in any
Strata CTX slot. For
Strata DK slot assignments,
see Table 2-1 and Figure 2-1.
2. Insert the card into the appropriate
slot, and apply firm, even pressure
to ensure proper mating of
connectors (CTX100 shown at
right).
CAUTION! Do not hit the board for proper seating. This can damage the IVP8 components.
6037
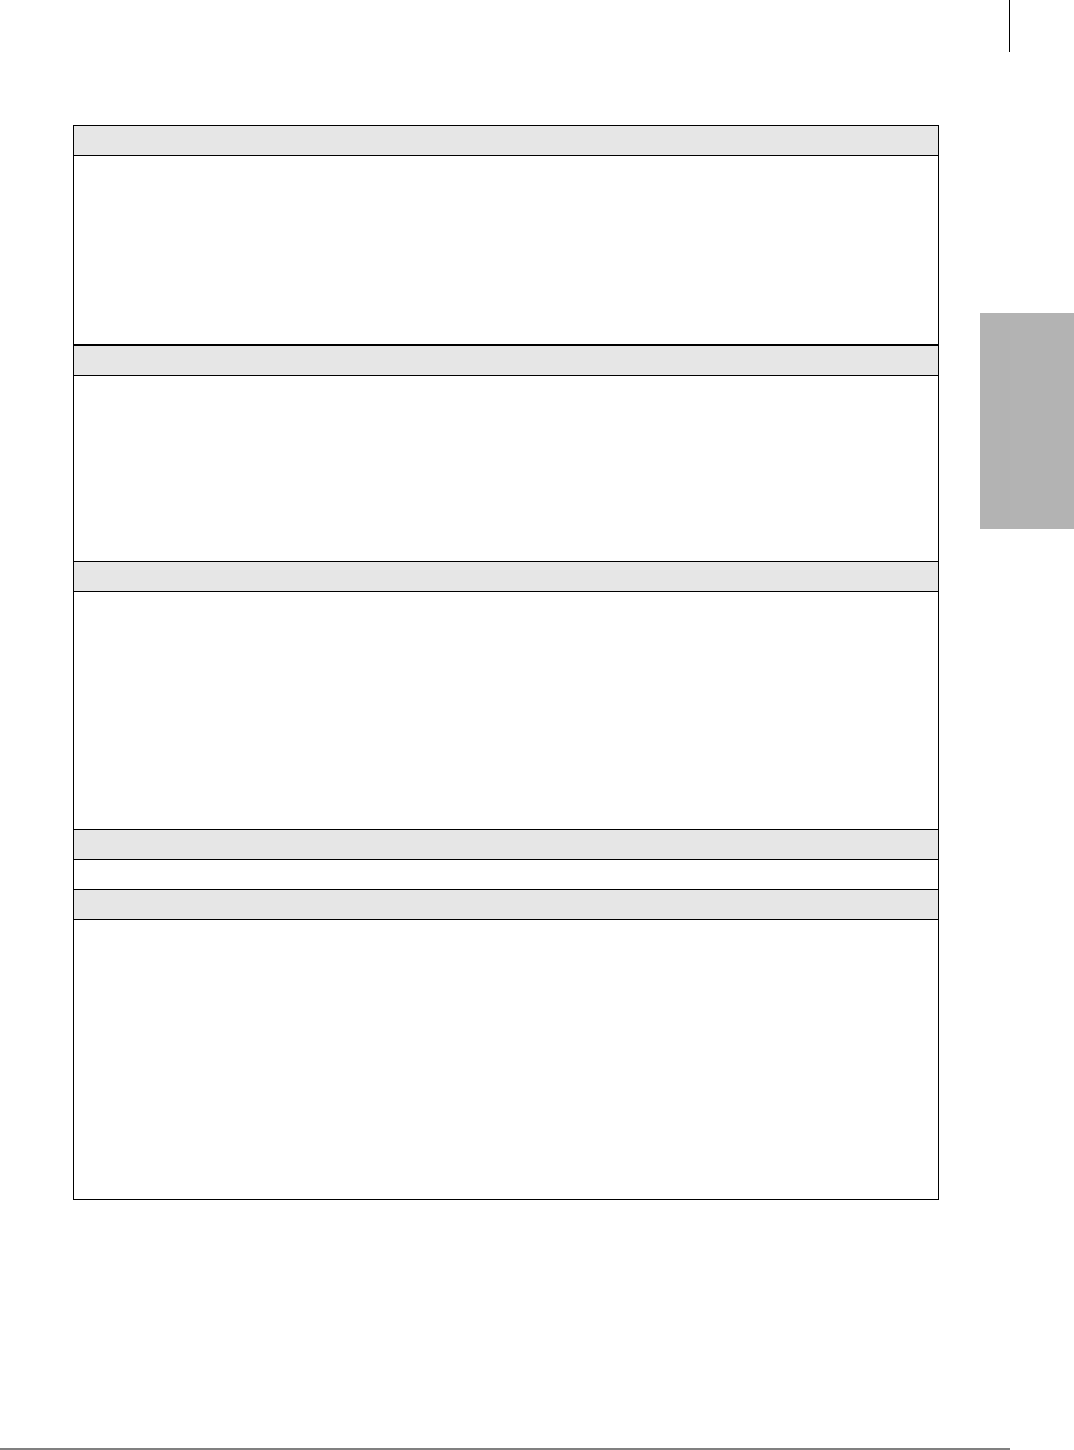
Installation
Step 4: Install Stratagy
Stratagy I&M 06/02 2-9
Installation
Table 2-1 IVP8 Strata DK Slot Assignments
DK40i/DK40/DK16e/DK16
Install the IVP8 in any slot in the Expansion KSU where an eight-port card can be inserted. For DK40i/
DK40/DK16e, see Chapter 2 – DK40i Configuration in the Strata DK I&M Manual for all possible
configurations.
Important! Do not install IVP8 in slot 18 of the DK40i/DK40/DK16e.
DK40i/DK40/DK16e/DK16: A K5RCU, K5RCU2, or K4RCU3 must be installed in the Base KSU to enable
end-to-end signaling.
Note Putting a IVP8 into a Strata DK40i/DK40/DK16e/DK16, eliminates eight telephone lines.
DK424i/DK424
Note For the DSS/BLF feature, the IVP8 must reside in a higher-numbered slot than the PDKU card
that the IVP8 monitors (see Figure 2-1 on page 2-10).
Install the card in a universal slot starting with slot 12 (if a PDKU or PEKU is in slot 11) or slot 13 (if a RSIU
is in slot 11).
Important! Do not install the IVP8 in slots 27, 28, 31, 37, 38, 47, 48, 51, 57, 58, 67, 68, 71, 77, or 78.
To enable end-to-end signaling, ensure that an RRCS -4, -8 or -12 is installed on the RCTU, and verify that
the RCTU code in Program 03 is for RRCS operation.
DK280
Important! The IVP8 does not function when installed in slots 31 or 51.
Note For the DSS/BLF feature, the IVP8 must reside in a higher-numbered slot than the PDKU card
that the IVP8 monitors (see Figure 2-1 on page 2-10).
DK280 (R2) — install the card in any universal slot (except slots 31 and 51), starting with slot 12 of the
Base Cabinet.
DK280 (R3 or higher) — install the card in any universal slot (except slots 31 and 51), starting with slot 12
(if a PDKU or PEKU is in slot 11) or slot 13 (if a RSIU is in slot 11).
DK280 (All releases) — To enable end-to-end signaling, an RRCS -4, -8 or -12 must be installed on the
RCTU. Verify that the RCTU code in Program 03 is for RRCS operation.
DK24, DK56, DK96
Install the card in any slot after slot 01. A CRCU must be installed to enable end-to-end signaling.
DSS/Busy Lamp Feature (For all Strata DK systems)
For the DSS/Busy Lamp feature to operate, the IVP8 must monitor the DSS/BLF data from a specific
PDKU card. The Strata DK telephone system restricts this capability to certain configurations. The IVP8:
•Cannot be installed in the first slot of any cabinet (i.e., 11~71).
•Can only monitor a PDKU that resides in an odd-numbered cabinet.
•Must always be in a higher-numbered slot than the PDKU card, even if the PDKU is in another
cabinet.
When IVP8 is installed in an odd-numbered cabinet, the system software searches for the PDKU in all
lower-numbered card slots in that cabinet (as defined by the console_slot_id parameter on page 4-17).
When the IVP8 is installed in an even-numbered cabinet, the system software searches for the PDKU in all
lower-numbered card slots of the preceding odd-numbered cabinet. see Figure 2-1 on page 2-10 for
examples.
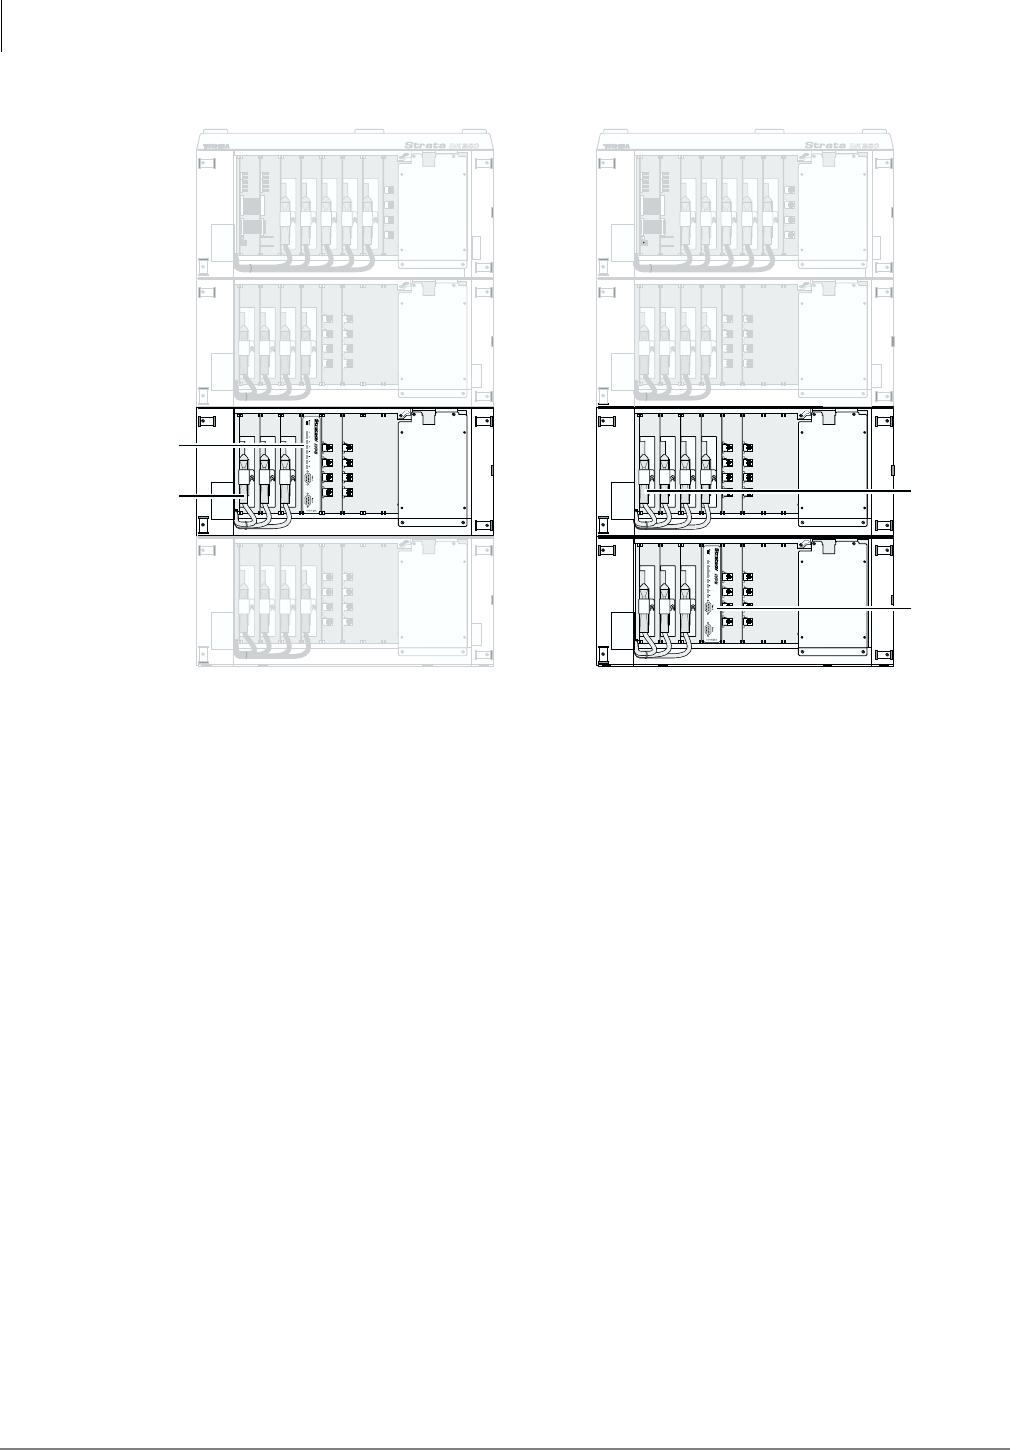
Installation
Step 5: Restart Strata CTX/Strata DK and Verify Stratagy is Functioning Properly
2-10 Stratagy I&M 06/02
Figure 2-1 Strata DK424i/DK424/DK280 PDKU DSS/Busy Lamp Field Slot Assignment Examples
(console_slot_id configured as 0)
Step 5: Restart Strata CTX/Strata DK and Verify
Stratagy is Functioning Properly
Note Each Stratagy has been preprogrammed at the factory for out-of-box (plug-and-play)
operation on the Strata CTX and Strata DK424i. This includes the integration and
configuration parameters, default station (extension number) User ID mailboxes, and
company greeting and instructions.
➤Turn on the main power switch to the Strata CTX or Strata DK system.
Note IVP8: During this process the status light is blinking amber and should turn solid green
when finished (see Figure 1-2 and “Status Light” on page 1-8). The process should take
approximately four to five minutes.
Step 6: Verify that Voice Playback, Basic Auto
Attendant and Ports are Functioning
Correctly
➤Dial the extension number for each port. Stratagy should (for each port):
•Answer and play the Toshiba Plug and Play company greeting (“Thank you for calling…”),
greeting 1 in User ID mailbox 990.
•Continue to play the Toshiba Plug and Play caller instructions greeting (“If you know the
extension of the person you wish to reach…”), greeting 1 in User ID mailbox 991.
R11
R11
S11
S11
RCTU
RCTU
S12
S12
S13
S13
S14
S14
S15
S15
S16
S16
S_3
S_3
S_6
S_6
S_7
S_7
S_8
S_8
S_1
S_1
S_2
S_2
S_4
S_4
S_5
S_5
S_3 S_6 S_7 S_8S_1 S_2 S_4 S_5
S_3
S_3
S_6
S_6
S_7
S_7
S_8
S_8
S_1
S_1
S_2
S_2
S_4
S_4
S_5
S_5
R11
R11
S11
S11
RCTU
RCTU
S12
S12
S13
S13
S14
S14
S15
S15
S16
S16
S_3
S_3
S_6
S_6
S_7
S_7
S_8
S_8
S_1
S_1
S_2
S_2
S_4
S_4
S_5
S_5
S_3 S_6 S_7 S_8S_1 S_2 S_4 S_5
S_3 S_6 S_7 S_8S_1 S_2 S_4 S_5
5989
Cabinet 1
Stratagy IVP8 in Even Number CabinetStratagy IVP8 in Odd Number Cabinet
Cabinet 2
Cabinet 3
PDKU
Stratagy IVP8
PDKU
Stratagy IVP8
Cabinet 4

Installation
Step 7: Install Stratagy Admin Software (VSA.3x)
Stratagy I&M 06/02 2-11
Installation
Step 7: Install Stratagy Admin Software (VSA.3x)
Note Loading the Stratagy Admin software can be done before/after connecting the Stratagy
Admin PC to the Stratagy.
The Stratagy Admin PC, connected to the Stratagy (see Step 8 “Connect Stratagy Admin PC to
Stratagy” below), must meet the following specifications:
•IBM-compatible
•3.5” 1.44 (high-density) floppy-disk drive
•Hard drive with a minimum of 5MB of available disk space
•580KB RAM free memory
CAUTION! Do not install the Stratagy Admin VSA.3x software into an existing Admin2 or
Admin3 directory used for Release 2 systems. If you do, file corruption can
occur when communicating with a Stratagy.
➤To install Stratagy Admin Software
1. Insert the Stratagy Admin disk into the floppy disk drive of the Stratagy Admin PC.
2. Access the DOS prompt (C:\).
3. To begin the installation procedure, type
a:install c:\VSA3x
where: x = the version letter of the Admin software you are installing.
Note It is recommended that you not overwrite the current Stratagy Admin directory but create a
new directory.
4. Press any key to continue. The Stratagy Admin program is installed on drive C: in subdirectory
VSA3x.
Step 8: Connect Stratagy Admin PC to Stratagy
Communication between the Stratagy Admin PC and the Stratagy is accomplished by one of two
methods: local or remote.
Stratagy uses the serial Port 2 by default to communicate with the Stratagy Admin PC (see Figure
1-2). This setting can be changed using the admin_port parameter in the Stratagy System
Configuration file (see “System Parameters” on page 4-14 for detailed information).
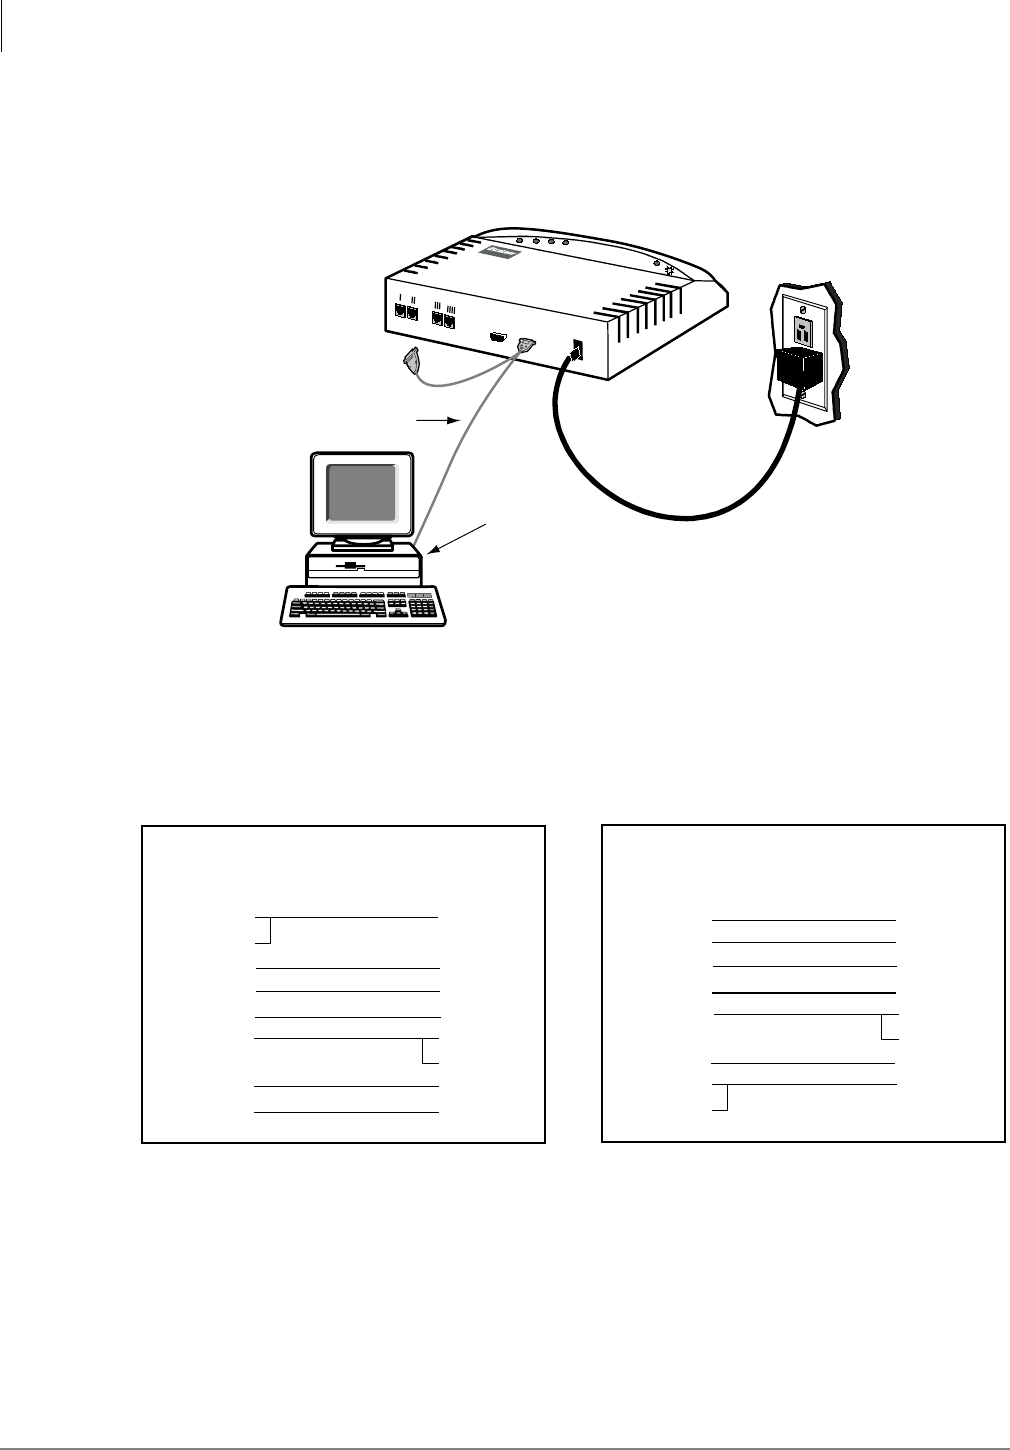
Installation
Step 8: Connect Stratagy Admin PC to Stratagy
2-12 Stratagy I&M 06/02
Local Connection
➤Using a null-modem cable, connect the Stratagy Admin PC to the Stratagy. A prefabricated
cable (SG-ADMCBL), designed expressly for Stratagy Admin communication with the
Stratagy is available from Toshiba. See Figure 2-2 below for the Flash configuration.
Figure 2-2 Stratagy Flash/Stratagy Admin PC Local Connection
Note If you wish to purchase individual cabling/connectors/adapters in lieu of purchasing the
Toshiba Stratagy Admin cable, we have provided the wiring diagrams (see Figures 2-3 and
2-4).
Stratagy Admin Cable
Serial COM Port
24 VAC
0.4A 50-60Hz
3089
12
Stratagy Admin PC
VOICE PROCESSING
Figure 2-3 RS-232 DB9 to DB9 Cabling
1
4
2
3
5
6
7
8
6
3
2
5
1
4
8
7
9-pin
female 9-pin
female
Figure 2-4 RS-232 DB25 to DB9 Cabling
2
3
4
5
6
7
8
20
2
3
8
7
1
4
5
6
25-pin
female 9-pin
female
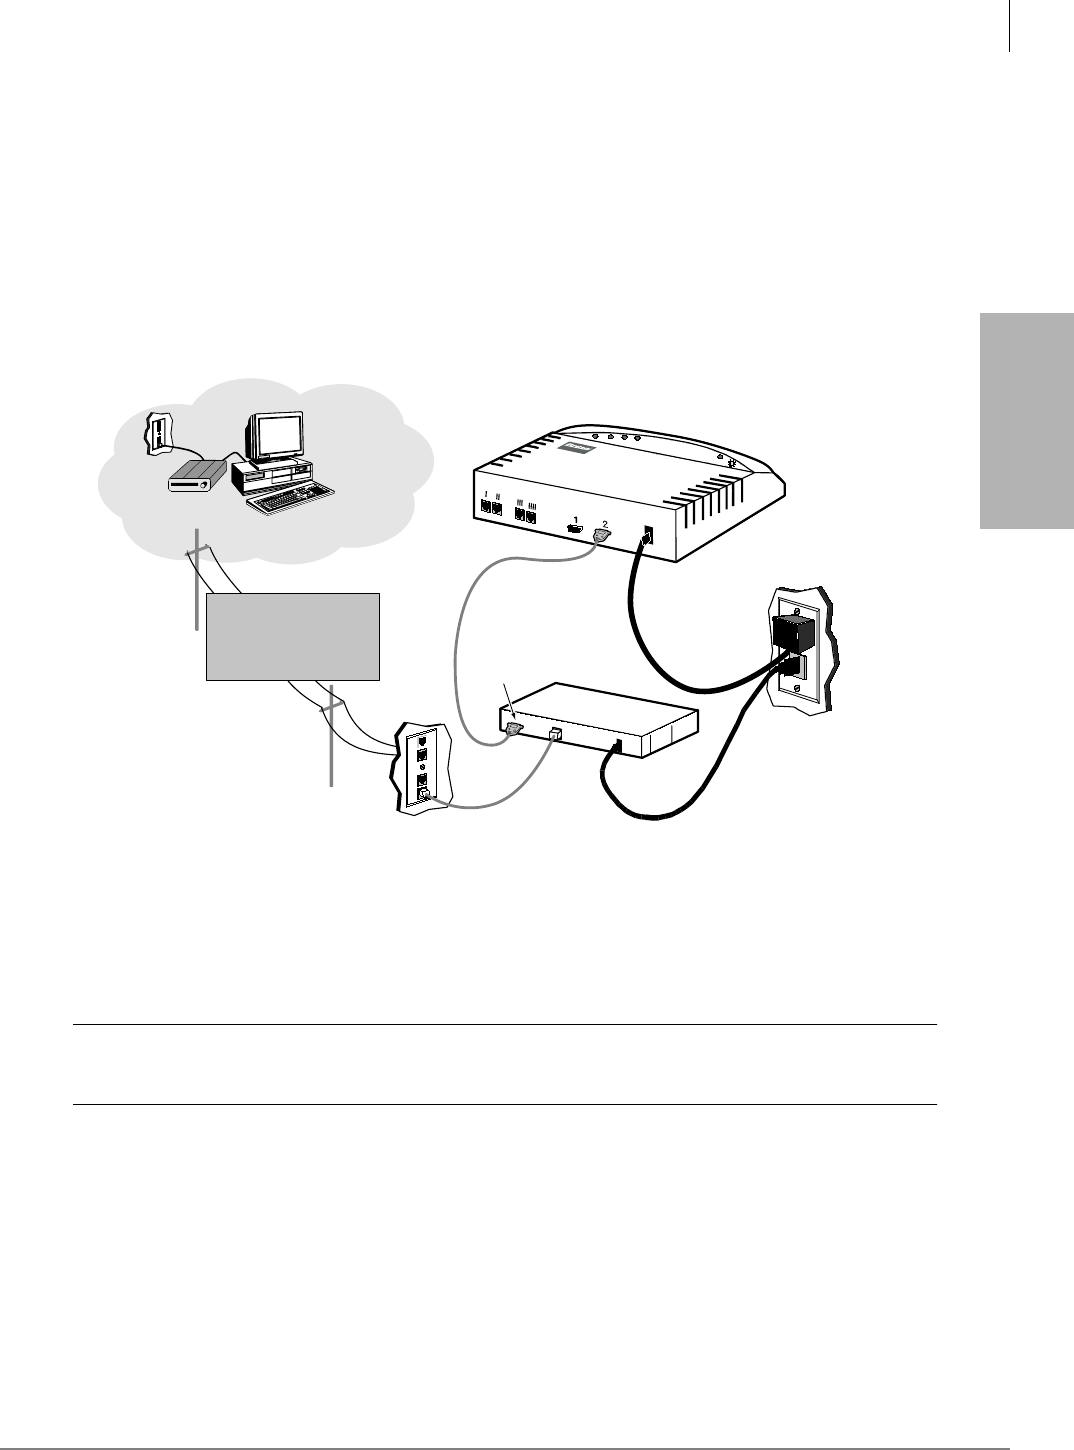
Installation
Step 8: Connect Stratagy Admin PC to Stratagy
Stratagy I&M 06/02 2-13
Installation
Remote Connection
Remote communication with the Stratagy requires the installation of a modem on the Stratagy
Admin PC (if a modem does not already exist).
The IVP8 comes equipped with an internal modem of 2400 baud and does not require any
additional equipment. A 9600 baud external modem can also be used for remote connection with
the IVP8.
Remote communication with the Flash (see Figure 2-5) requires the installation of an external
modem on the Flash.
Figure 2-5 Flash/Stratagy Admin PC Remote Connection
Stratagy Admin PC Modem
➤Prepare the Stratagy Admin PC by installing, connecting and configuring a modem. The
modem must be capable of communicating at a minimum of 9600 baud.
CAUTION! Internal modems configured for IVP8 COM ports 3 or 4 are not supported by
Stratagy Admin software.
Stratagy Modem
The Flash can communicate through a customer-supplied external modem. An external modem
can be installed on the Flash for a communication speed of 9600 baud.
The IVP8 can communicate through either an internal or external modem.
IVP8 Internal Modem
The IVP8 has an internal modem that communicates at up to 2400 baud. No additional equipment
is necessary. (See KM token in Step 13: “Program the Applications” on page 2-14 for
programming information.)
Remote Site
Modem
Serial
COM Port
24 VAC
0.4A 50-60Hz
Stratagy
Admin PC
3090
VOICE PROCESSING
Public
Telephone Network
(Central Office)

Installation
Step 9: Configure Stratagy Admin Software
2-14 Stratagy I&M 06/02
Flash and IVP8 External Modem
An external modem can be installed on the Stratagy for a communication speed of 9600 baud. If
use of an external modem is desired, use the following installation procedure.
➤To install an external modem
1. Equip the Stratagy with a Hayes-compatible 14.4KB V32.bis modem. Toshiba’s fax/modem
(SG-FMOD) has been tested for consistent operation and is recommended. Use of other
modem models cannot be guaranteed for trouble-free operation.
Note The default setting configured for the Stratagy remote access is serial port 2 (see Figure 1-
2). Both local and remote access use the same designated serial port on the Stratagy.
2. Connect a telephone line to the modem. Use either a station connected to the telephone system
or a dedicated Central Office (CO) line.
Step 9: Configure Stratagy Admin Software
➤Configure Stratagy Admin software using the Admin PC Configuration screen. See Chapter 4 –
Configure Stratagy for instructions on using the screen.
Step 10: Access Stratagy
➤Access Stratagy using the remote method (Chapter 3 – Access and Use Stratagy).
Step 11: Configure Stratagy
➤Configure Stratagy using the Stratagy Configuration Utility. See Chapter 4 – Configure
Stratagy for instructions on using the utility.
Step 12: Program the Mailboxes
➤Program the User mailboxes for the customer’s application. See Chapter 6 – Menus for
complete details on using the screens.
Step 13: Program the Applications
Note See Chapter 7 – Token Programming for complete details on all the Stratagy tokens.
%K Token
Stratagy recognizes the Calling Party Identification when sent from the Strata CTX/Strata DK
telephone system through a SMDI integration.
Once a value is determined to be a Calling Party ID number, it is stored in a buffer (%K token) for
the duration of the call. A User ID programmed with a token application that reads the %K value
performs the programmed function (e.g., a database look up for call routing based on the number
calling). When the call is completed, the value stored in the buffer (%K) is cleared.

Installation
Step 13: Program the Applications
Stratagy I&M 06/02 2-15
Installation
SMDI Calling Party Identification
The Strata CTX/Strata DK telephone system only provides the Stratagy with incoming Calling
Party ID via SMDI integration. Data messages or packets are sent into the system to provide
information concerning the type of call and the calling party ID.
Note When configuring the Stratagy for SMDI, make sure both the Stratagy and the telephone
system are configured concurrently. If the phone system is configured for a 10-digit Calling
Party ID, the Stratagy must also have the proper 10-digit integration patterns in the System
Integration Patterns screen (see “System Integration Patterns” on page 4-9). Also make sure
the correct notification template has been selected in the User ID Notify screen.
See “SMDI Serial Integration” on page 4-32 for detailed information on SMDI, caller ID, and %K
token use.
New User Tutorial Introductory Recording
The New User Tutorial feature plays a introduction prompt prior to beginning the tutorial. Stratagy
comes with a default recording that is saved in the system as a voice file called
‘TUTORIAL.VOX’. This file can be found in the STRATAGY directory on the hard drive.
This prompt can be rerecorded to personalize the introductory recording. For example the
recording could say, “The following is a new user tutorial that will walk you through the set up of
your mailbox... Please see Jane Doe your Installation Coordinator for XYZ Telecom if you have
any questions.”
The default recording can be rerecorded by the use of Token Programming.
Rerecord Tutorial
1. Create a new User ID in the system.
2. In the Extension field enter:
@KR(C:\\STRATAGY\\TUTORIAL.VOX)G(991)
@ stop normal processing
KR record a voice file
( ) file name and location within parentheses
G(991) Go to User ID 991
3. Call into the Stratagy system and dial the newly created mailbox. A beep will be heard to
indicate the start of recording.
4. Record the new TUTORIAL.VOX, finish recording by pressing .
5. To rerecord, redial the mailbox number.
6. To playback the new recording, create an additional User ID with the following Token string in
its Extension field:
@P(X,C:\\STRATAGY\\TUTORIAL.VOX)G(991)
@ stop normal processing
X valid DOS file name
( ) file name and location within parentheses
G(991) Go to User ID 991
7. As with all Token Programming, make sure that the Do Not Disturb feature is Off or the token
program will not run.
Installation
Step 13: Program the Applications
2-16 Stratagy I&M 06/02
Exclusive IVP8 Tokens
Tokens available exclusively for the IVP8 are:
•KM – Enables a Stratagy Admin PC’s modem to communicate with the IVP8 internal modem
(2400 baud). This token is factory programmed in User ID 993.
Example: @KM
•KT() – Directs calls to a designated User ID when DSS function is active (dss_active = true),
the DSS port is assigned in the “answering” mailbox, and the Night Transfer on the DSS
console is On.
Syntax: KT(XXX)G(YYY)
where:
XXX Box number used when Night Transfer is On.
YYY Box number used when Night Transfer is Off.
Night Transfer Alternate Routing
The KT( ) token is used by the Night Transfer Alternate Routing feature. The feature monitors the
DSS/BLF console’s Night Transfer key in order to activate the KT( ) token for alternate routing
applications.
IVP8 cannot be programmed to monitor the Night Transfer key when programmed on a telephone
only DSS Console. However, a Night Key can be programmed on both a telephone and DSS
Console.
Program Example
The following is an example on how to program this feature. In this example, we use:
•User ID: 900
•User ID when Night Transfer is On: 901
•User ID when Night Transfer is Off: 990
➤To program the IVP8 for Night Transfer Alternate Routing
1. Define the Users record to contain:
User ID 900
Extension @KT(901)G(990)
Do Not Disturb OFF
Store Messages NO
DSS Port port number
Note Set this field to the first port of the PDKU card designated for DSS/BLF
console and defined by the console_slot_id parameter. If PDKU is in card slot
11, then DSS Port assignment is 0. Strata CTX/Strata DK assigns the first
port of the slot 64 card as a DSS “host” port.

Installation
Step 14: Record Special Greetings
Stratagy I&M 06/02 2-17
Installation
2. In the Stratagy System Configuration file:
•Set the box_grt parameter for the specific port and type in 900.
Important! Remember to program a User ID (e.g., User ID 991) as the Done Chain of the
mailbox designated in the box_grt parameter (in this example 900) to prevent the
IVP8 from entering a loop that can cause IVP8 software to lock up. Refer to
Technical Bulletin TB40-0002 “Programming Caution” available on the Internet
FYI site.
•Activate the dss_active parameter by setting it to true.
3. Access the User ID 901 mailbox via telephone and record greeting 1.
When the Night Transfer key is enabled, calls for the specific port are routed to User ID 901.
When the Night Transfer key is disabled, calls route to User ID 990.
Step 14: Record Special Greetings
➤Record the initial greetings (company greeting, caller instructions), directory mailbox
instructions and operator mailbox greeting. See Appendix B – Special Greeting User ID
Mailboxes for instructions.
Step 15: Shut Down Stratagy System
The restore_config parameter defaults to true in the Stratagy System Configuration file (see
Chapter 4 – Configure Stratagy) and enables the Automatic System Recovery process. The
Stratagy uses the Automatic System Recovery process (see page 11-14) to restore the last known
good configuration if it encounters a problem on restart.
With restore_config set to true, you must now shut down and restart with the current software
version (see “System Shutdown” on page 3-6) to save the revised configuration files, etc. This
ensures that if an error is encountered during boot up the Stratagy reboots using the most current
database.
Step 16: (Optional) Back up Database, Mailbox
Names and Greetings
When you finish the installation process, we recommend you back up your new database, mailbox
names and greetings. See “Backup Utility” on page 11-3 for instructions.

Installation
Step 16: (Optional) Back up Database, Mailbox Names and Greetings
2-18 Stratagy I&M 06/02

Stratagy I&M 06/02 3-1
Access and Use
Stratagy
Access and Use Stratagy 3
This chapter discusses how to start up, use and shut down the Stratagy system for maintenance and
other functions. More specifically, this chapter discusses:
•Access Stratagy – Compares the two methods for accessing Stratagy: locally, or remotely.
•Local Access – Access Stratagy via a cable connecting the Stratagy system with a portable or
desktop PC.
•Remote Access – Access Stratagy via a modem from a portable or desktop PC.
•System Startup – How the Stratagy system starts up.
•Use Stratagy – Navigating through the menus and using online help.
•Online Help Function – Describes help line and detailed help.
•System Shutdown – Exiting the Stratagy program and accessing the Stratagy Configuration
Utility.
•Main Menu Options – Using the Main Menu for customization and administration.
•Main Menu Field Descriptions – shows the main menu and gives a definition of each field.

Access and Use Stratagy
Access Stratagy
3-2 Stratagy I&M 06/02
Access Stratagy
There are two ways to access the Stratagy system: local and remote:
Local Access
Local access refers to accessing the Stratagy system via a cable connecting the Stratagy system with
a portable or desktop PC. To perform local access, you must connect the local system to the Stratagy
system each time you access Stratagy locally (see Chapter 2 – Installation for details).
Before You Start
It is recommended that you:
•Back up your database prior to starting this procedure. (See Chapter 11 – Maintenance,
Upgrades and Troubleshooting for instructions.)
•Make a backup copy of the installation disks and store them in a safe place.
•Verify that Stratagy is operational by making a test call into the system.
Note Menu screens detailed in this section are available only in Stratagy Admin version VSA.2G
or later; however, only VSA.3x can be used with the Flash.
Access Stratagy Locally
1. From the DOS prompt (C:\VSA3 for Flash and C:\VSA3 for IVP8), type: admin and press
Enter. The Stratagy Admin screen displays.
Important! The Stratagy Admin PC must be configured for the correct serial port in Stratagy
Admin prior to performing Step 2.
2. Press Enter.The Stratagy Admin software prompts for the Stratagy’s system password.
3. Type the password (the default is Stratagy) and press Enter.
If a modem is not detected, Stratagy Admin establishes a direct connection (local access).
Method Description Requirements
Local Access Stratagy via a cable connecting
the Stratagy system with a portable or
desktop PC.
•Customer-supplied portable/desktop PC
•Stratagy Admin software
•Customer-supplied Stratagy Admin Cable
(SG-ADMCBL)
Remote Access Stratagy via a modem from a
PC located at this or another site. •Stratagy Admin software
•Customer-supplied modem for Flash
Note IVP8 has an internal modem.
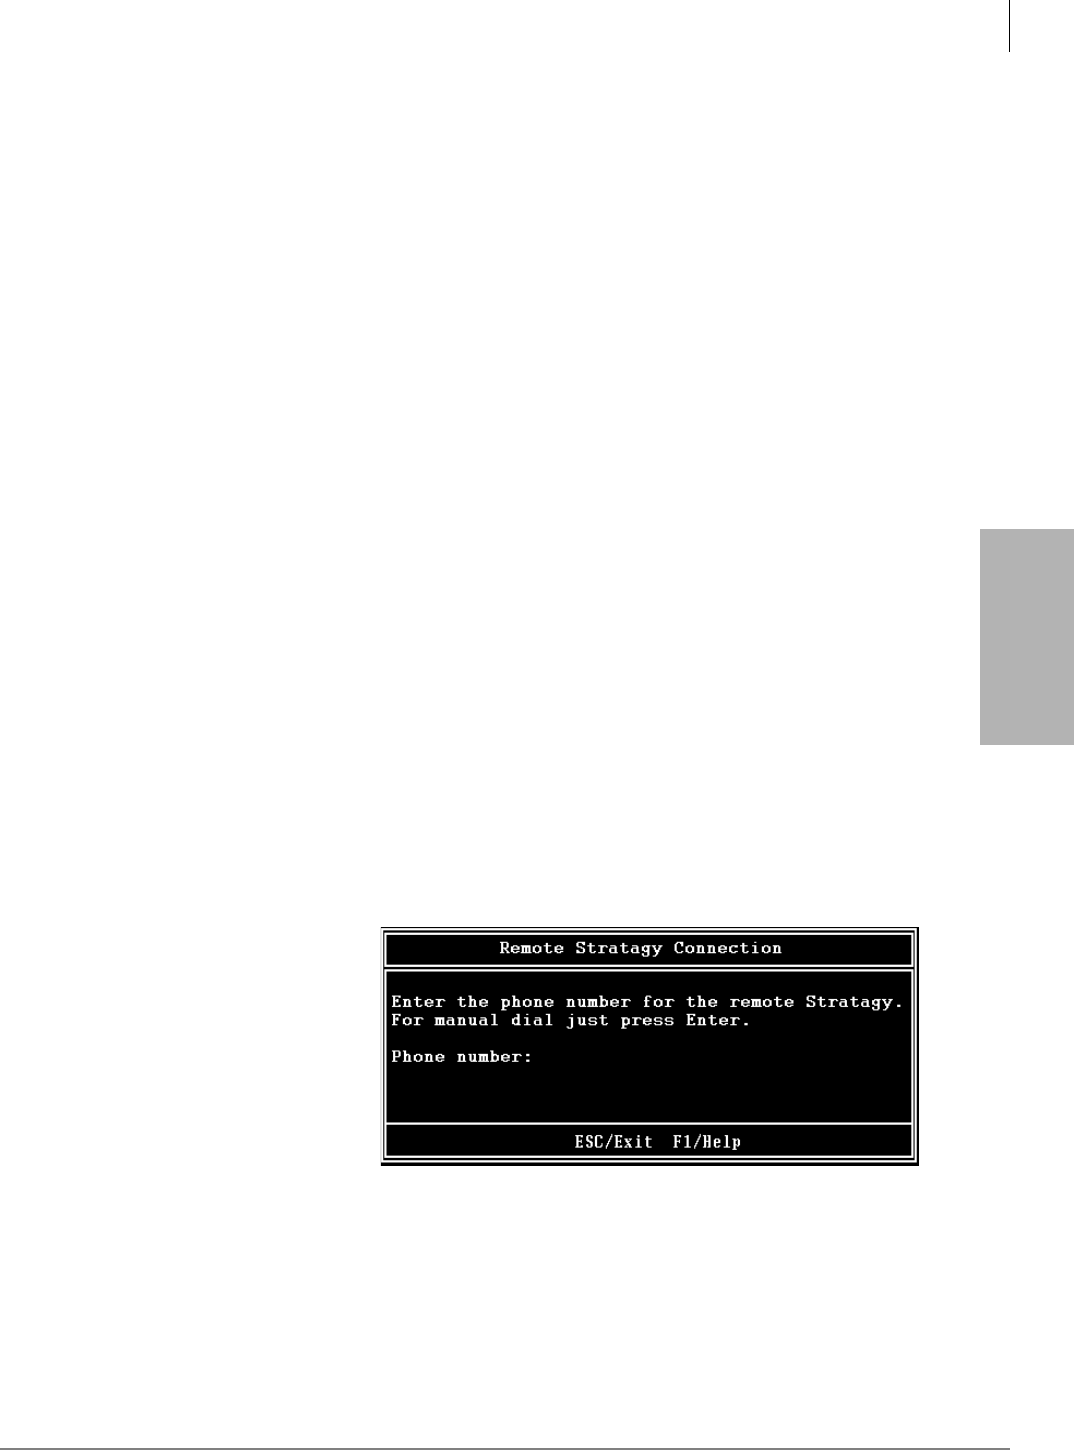
Access and Use Stratagy
Remote Access
Stratagy I&M 06/02 3-3
Access and Use
Stratagy
Remote Access
Remote access refers to accessing the Stratagy system via modem from a portable or desktop PC
located at this or another site.To perform remote access, you must prepare the Stratagy system by
installing and connecting the modem and preparing the portable/desktop PC by configuring the
modem (see Chapter 2 – Installation for details).
Stratagy Admin software version VSA.3x has two modes of accessing the Stratagy remotely:
•Direct Dialing Mode — the Stratagy modem has a dedicated telephone line, enabling you to
dial into the number directly.
•Manual Dialing Mode — the Stratagy modem does not have a dedicated telephone line and an
operator must transfer the call to the modem number.
Note Manual dialing requires a standard telephone be connected to the Stratagy Admin PC
modem.
Before You Start
It is recommended that you:
•Backup your database prior to starting this procedure. (See Chapter 11 – Maintenance, Upgrades
and Troubleshooting for instructions.)
•Make a copy of the Installation Disks as a backup copy and store them in a safe place.
•Verify that Stratagy is operational by making a test call into the system.
Access Stratagy Remotely
1. From the DOS prompt (C:\VSA3 for Flash and C:\VSA3 for IVP8), type: admin and press
Enter. The Stratagy Admin screen displays.
Important! The Stratagy Admin PC must be configured for the correct serial port in Stratagy
Admin prior to performing Step 2.
2. Press Enter.The Stratagy Admin software prompts for the Stratagy’s system password.
3. Type the password (the default is Stratagy) and press Enter.
If a modem is detected,
Stratagy displays the screen
shown at right:
Direct Dialing Mode
➤Type the telephone number (50 digits maximum). Do not use dashes (e.g., 9,7678989). Press
Enter.
Once the connection is made to the Stratagy modem, a carrier tone is heard. The Stratagy
Admin synchs up to the modem. A message reading Connection established appears
briefly on the screen and the Main Menu displays.
3297

Access and Use Stratagy
System Startup
3-4 Stratagy I&M 06/02
Manual Dialing Mode
1. Press Enter to go to the Manual Dialing Mode screen.
2. Go off-hook on the standard telephone and dial the telephone number. Once connection is made
to the Stratagy external modem, a carrier tone is heard.
3. Press Enter. Stratagy Admin synchs up to the modem. A message reading Connection
established appears briefly on the screen and the Main Menu displays.
Use Stratagy Remotely
Both the remote and the Stratagy system are active simultaneously. Use the remote as you would
from the Stratagy monitor and keyboard.
System Startup
When Stratagy Admin on a remote PC is accessed, the software automatically displays the Main
Menu. From the Main Menu, you can customize User ID mailboxes, maintain the system, and
perform administrative functions. Or, you can shut down Stratagy and use the Stratagy
Configuration Utility to backup or configure Stratagy with your telephone system.
Use Stratagy
The Stratagy system provides a series of menus to assist you in customizing User ID mailboxes and
performing administrative functions. In addition, Stratagy’s online help provides clarification as
needed.
Navigate the System
Using the Stratagy menus, you can navigate the system to customize User ID mailboxes and
perform administrative functions. The Main Menu is the core of the program. The administrative
functions (report generation, system shutdown, and filecopy) are available from the Main Menu.
The Users Menu, from which all User ID mailbox customization takes place, is also a Main Menu
option. For an illustration of how the menus are arranged, see Figure 3-1.
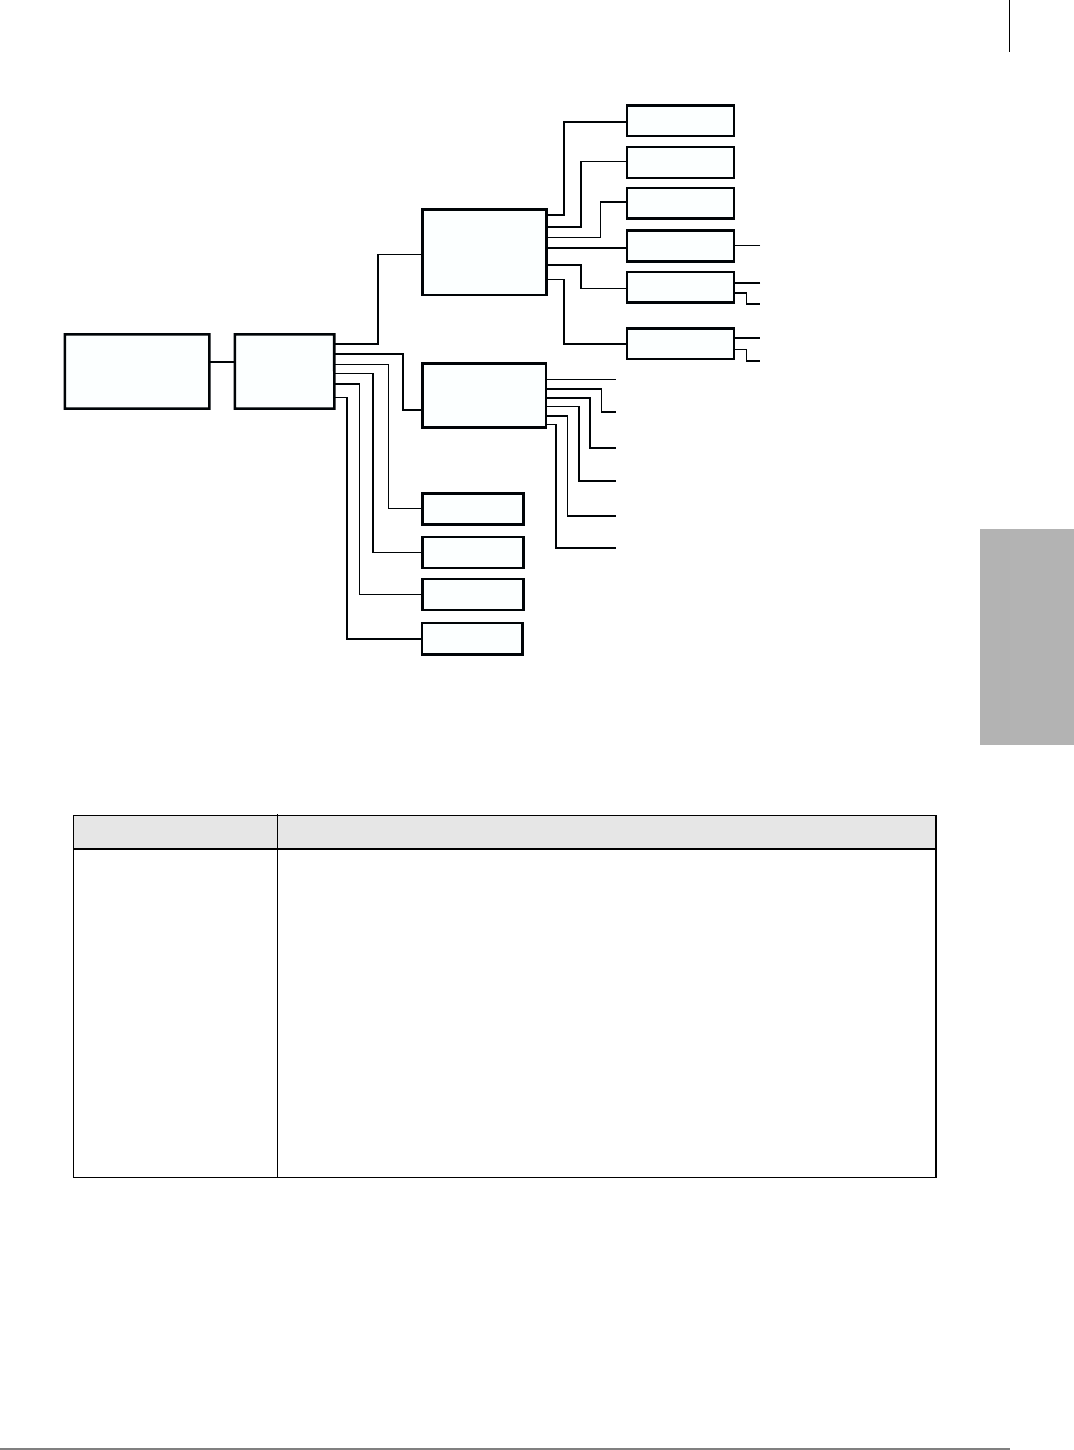
Access and Use Stratagy
Use Stratagy
Stratagy I&M 06/02 3-5
Access and Use
Stratagy
Figure 3-1 Navigating the Stratagy System
All screens/menus use the standard keys shown in Table 3-1.
Table 3-1 Standard Keys
Key Movement
arrow (↑↓) moves cursor to next field
F1 provides help text
Esc regresses one screen
spacebar toggles Enable/Disable, On/Off, Yes/No fields
Page Up/Down Users Menu: scrolls User IDs
Auto/Notify Menus: scrolls record summary information
Tab moves cursor through fields
Enter selects highlighted options
Home moves cursor to first field
End moves cursor to last field
Main Menu
(select menu item)
Users Menu
(Info/Status
Options
Group/Chains)
Reports Menu
Notify Menu
Auto Menu
Enter
Password
Shutdown
Tools
Load
Save
Run
View
Print
File
Table
Date/Time
Save
Copy
Delete
Templates
AMISNodeList
BoxList
Save
Save
6230
Quit

Access and Use Stratagy
Online Help Function
3-6 Stratagy I&M 06/02
Online Help Function
Stratagy’s online help function is content-specific and is available on a field-by-field basis. Stratagy
provides two types of online help—the help line and detailed help.
Help Line
The help line automatically displays the information about the current field at the bottom of the
screen.
Detailed Help
Additional help is available for most of the fields. To display the detailed help for a field, highlight
the field and press F1. Use the arrow keys (↑↓) to scroll through the information. To exit detailed
help, press Esc.
System Shutdown
Occasionally you need to shut down, or exit, Stratagy call processing. Circumstances include:
•Turning power off to perform hardware maintenance
•Moving the system to another location
CAUTION! Never shut down the Flash by pulling the Flash’s power cord from the wall or
the IVP8 by turning off the Strata CTX/Strata DK’s power. Doing so may
corrupt the system files that are in use.
Methods of Shutdown
Stratagy can be shut down in two ways:
•From a telephone dial pad
•From the Shutdown function on the Stratagy Admin’s Main Menu
Shutdown Using the Telephone Dial Pad Method
Important! System shutdown using the telephone dial pad is not operable if the Stratagy Admin
is connected.
➤To enable shutdown procedure and change mailbox 983 security code
Important! It is extremely important that the security code for mailbox 983 be changed. If the
security code is not changed, it is possible for someone who knows Stratagy’s default
password scheme to call into the system and shut it down.
1. Using Stratagy Admin, log on to the Stratagy. The Stratagy Admin Main Menu displays.
2. Press Alt+U. The Users Menu, Options screen displays.
3. In the User ID field, type 983 and press Enter. The Options screen displays for box 983.
4. Using the arrow down key, place the cursor in the Security Code field.
5. Type the new security code.
Note For added security, the security code does not appear on the screen as you type it.
6. Navigate to the Do Not Disturb field.

Access and Use Stratagy
System Shutdown
Stratagy I&M 06/02 3-7
Access and Use
Stratagy
7. Press the spacebar to change the field from On to Off.
Note Changing the Do Not Disturb option enables the token programming residing in the
Extension field of the mailbox. It is the token string in this mailbox that performs the
shutdown procedure.
8. Press Alt+S to save the changes.
➤To shut down the Stratagy using the telephone dial pad
1. From the telephone dial pad, call Stratagy. Once you dial into Stratagy, the system answers with
the standard company greeting. Stratagy prompts you to enter the User ID.
2. Enter . Stratagy prompts you to enter the security code.
Important! You must wait until the entire prompt has been played before entering the security
code. If the code is entered prior to the completion of the prompt, the shutdown does
not occur.
3. Enter the new security code (the default is ) and press . All inactive channels are
taken off-hook. All active channels are given a 60 second time delay to complete processing the
current activity. After 60 seconds, they are disconnected and the system shuts down.
Note The Stratagy is completely shut down when the status light is Out and all port LEDs are On.
Important! For security reasons, you should change the default security code.
Shutdown Using the Stratagy Admin’s Main Menu
1. From Stratagy Admin’s Main Menu, select Shutdown by pressing Alt+s. Stratagy asks for the
password.
2. Enter the password (the default is Stratagy) and press Enter. The screen enables you to
select one of the following options:
•Shutdown and Restart CURRENT Version — Restarts Stratagy.
Note This option must be used any time you make significant programming changes (see
“Automatic System Recovery” on page 11-14 for details).
•Shutdown and Trace CURRENT Version — Shuts down, then restarts Stratagy in the
TRACE mode (TRACE.OUT file is created) on Stratagy’s flash drive. See “Trace” on page
11-12 for details.
•Shutdown and Start NEW Version — Shuts down, then restarts Stratagy using the new
database and new Stratagy system software, if any.
•Shutdown and Start OLD Version — Shuts down, then restarts Stratagy using the software
version previous to the upgraded software.
•Shutdown, SCANDISK, and Restart — Shuts down, runs ScanDisk program and then
restarts Stratagy.
Note There is no screen interaction during the running of the ScanDisk Utility.
•Shutdown and STOP for power off — Takes Stratagy off-line and does not restart it.

Access and Use Stratagy
Main Menu Options
3-8 Stratagy I&M 06/02
Notes
•This option is not available when accessing Stratagy remotely.
•The Stratagy is completely shut down when the status light is Out and all port LEDs are
On.
•IVP8 – This is the only option on the Shutdown menu that parks the head.
3. From the Shutdown Menu, highlight your selection and press Enter.
4. If you chose the “Shutdown and STOP for power off” option, Stratagy asks you to confirm the
shutdown. Type Y to confirm. The DOS prompt (C:\VSA3) displays.
➤To restart/reset the IVP8 system after selecting “Shutdown and STOP for power off” option
Note If you select any of the first five options on the Shutdown Menu, Stratagy automatically
restarts.
1. Holding the Stratagy by the edges or the strap, gently pull the card part way out of the slot. The
card needs only to be pulled out so that the connectors do not meet.
2. Wait a few seconds and then gently push the card back into place. Apply firm, even pressure to
ensure proper mating of the connectors. This automatically restarts the system and puts all
channels on-hook and ready to accept calls.
➤To restart/reset the Flash system after selecting “Shutdown and STOP for power off”
Note If you select any of the first five options on the Shutdown Menu, Flash automatically
restarts.
➤Unplug the Flash’s power cord from the wall, wait a few seconds and then plug it back in. This
automatically restarts the system and puts all channels on-hook and ready to accept calls.
Main Menu Options
From the Main Menu (see Figure 3-2 on page 3-10), you can access the following options:
•Users (Alt+U): accesses the Users Menu (customizing User ID mailboxes). See Chapter 6 –
Menus for information on using the Users Menu screens.
•Reports (Alt+R): generates reports. See “Run Report” on page 10-5 for more information.
•Shutdown (Alt+S): shuts down the system. See “System Shutdown” on page 3-6 in this
chapter.
•Tools (Alt+T): uses the Filecopy Utility. See “Filecopy” on page 11-9 in this chapter.
•Date/Time: sets system date and time. See “Change System Date and Time” on page 3-9 in this
chapter.
➤To access the options
1. Press Alt+ the first character of the option (e.g., Alt+U for the Users Menu).
2. Type the password. (The default password is Stratagy, with the first letter uppercase.)

Access and Use Stratagy
Main Menu Options
Stratagy I&M 06/02 3-9
Access and Use
Stratagy
Change System Date and Time
1. From the Main Menu, select Date/Time by pressing Alt+D. Stratagy prompts: Password?
2. Type the password and press Enter. (The default password is
Stratagy, with the first letter uppercase.) The system date/time
screen displays (shown at right). The current date and time settings
display, with the date field highlighted. Use the arrow keys (↑↓) to
move between the date and time fields.
3. Press Enter to move to the next field
...or type the new date and time settings. The date format is: mm/
dd/yyyy. The time format (24-hour clock) is: hh:mm:ss
4. Press Esc. The Main Menu displays.
Daylight Saving Time
The system time can be configured to change automatically to daylight saving time. See
“daylight_saving_time” on page 4-17 for more information.
IVP8 System Time
Using the ksu_time parameter, you can synchronize IVP8’s system clock with the system clock of
the supporting Strata CTX/Strata DK telephone system. Setting this parameter to true, disables the
daylight_saving_time parameter.
Note An LCD telephone must always be physically installed on the first port of the PDKU card in
the Strata DK (defined in console_slot_id parameter). During installation, the IVP8’s
system time must be reset prior to syching with the Strata CTX/Strata DK. See “ksu_time”
on page 4-21 for details.
This feature requires SMDI integration to work with the Strata CTX.
4071
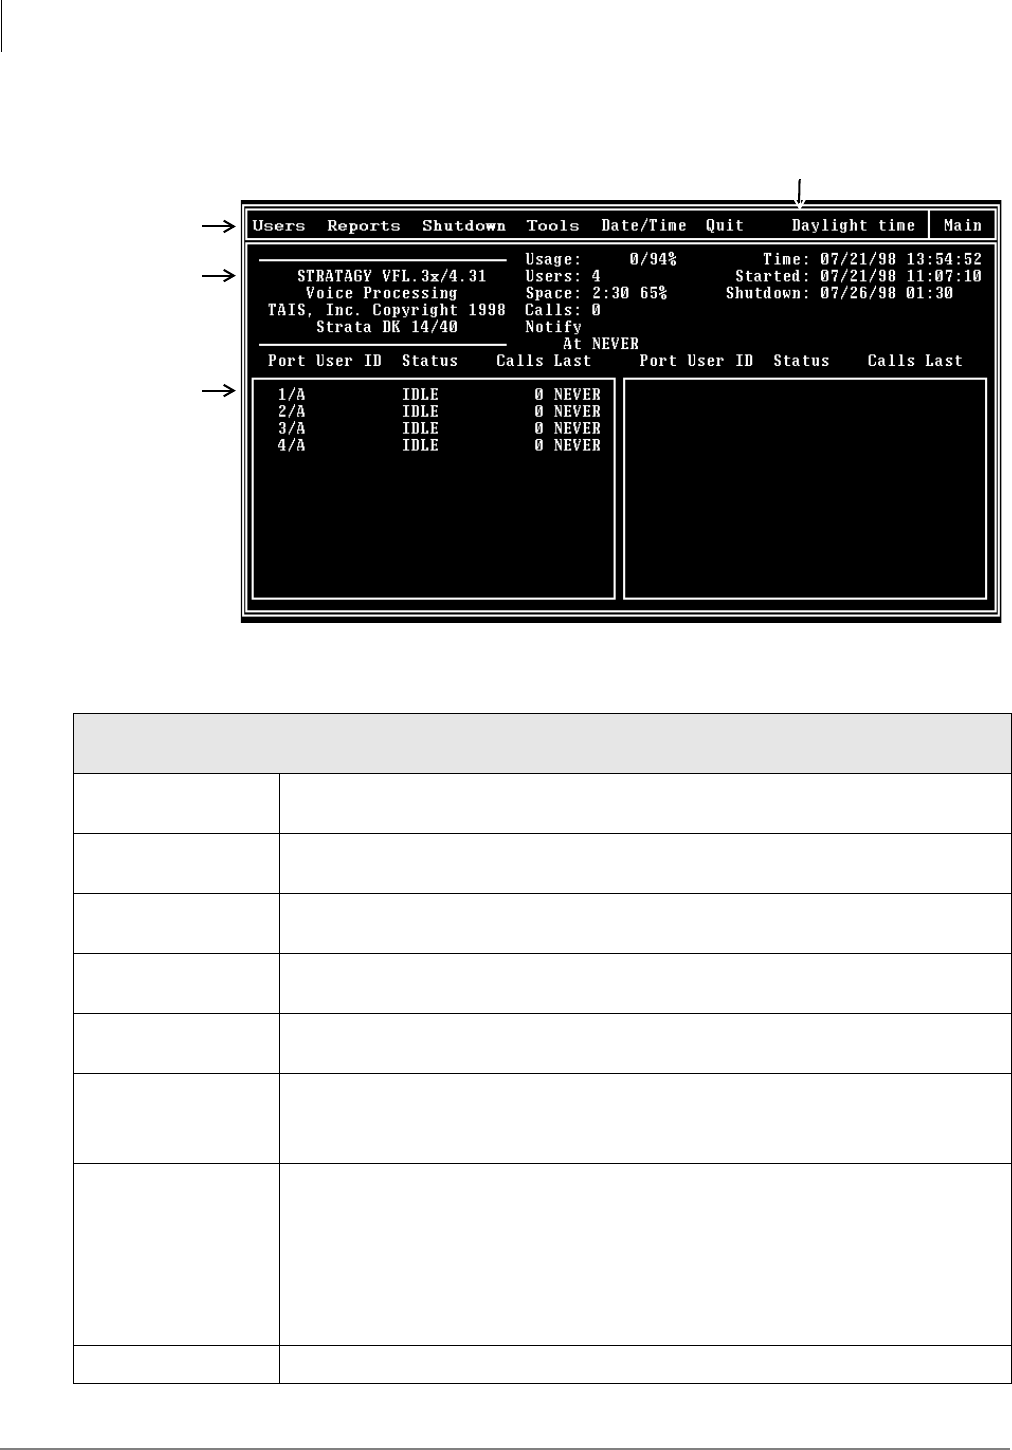
Access and Use Stratagy
Main Menu Field Descriptions
3-10 Stratagy I&M 06/02
Main Menu Field Descriptions
Figure 3-2 Main Menu with Sample Data
Table 3-2 Main Menu Screen Fields
Menu Bar
Access Options (select).
Users Press Alt+U to access the Users Menu.
See the Programming Section.
Reports Press Alt+R to generate reports.
See “Run Report” on page 10-5 for more information.
Shutdown Press Alt+S to shut down the Stratagy system.
See “System Shutdown” on page 3-6 for more information.
Tools Press Alt+T to use the Tool Utility.
See “Filecopy” on page 11-9 for more information.
Date/Time Press Alt+D to set the system date and time.
See “Change System Date and Time” on page 3-9 for more information.
Quit Important! This function quits the Stratagy Admin program and does not shut down the
IVP8.
Press Alt+Q. The remote PC exits Admin and returns to the DOS® prompt.
Daylight time (Display only) The menu displays Daylight time from the first Sunday in April until the last
Sunday in October. The system must be set for daylight savings time, using the
daylight_saving_time parameter. See Chapter 4 – Configure Stratagy.
If not set for Daylight time, Standard time is displayed.
For IVP8:
KSU time can also display when this feature is enabled or the IVP8’s own system time
(Daylight, Standard) when it is disabled.
Main Menu title.
3245
Menu Bar
System
Information
Port
Activity
Statistics
KSU Time displays if enabled
for the IVP8.
Access and Use Stratagy
Main Menu Field Descriptions
Stratagy I&M 06/02 3-11
Access and Use
Stratagy
System Information
(Display only, in addition to the fields, the screen displays the Stratagy voice processing model number, software
version, voice board driver, and TAIS, Inc. Toshiba telephone system name and model number.)
Usage System usage (n/pp%).
n: number of times all ports were busy
pp%: percent of time the CPU is idle
Users Number of defined User ID mailboxes.
Space Available remaining flash drive space in time (hh:mm) and percent of total flash drive
space (nn%).
Calls Number of calls Stratagy answered since system started.
Notify User ID mailbox the system is currently notifying.
Scan displays when the system is scanning mailboxes to determine where notification is
needed.
Notify At Date (mm/dd/yy) and time (hh:mm) of last notification. Time is in military format (24-hour
clock).
Time Current date (mm/dd/yy) and time (hh:mm:ss). Time is in military format (24-hour clock).
Started Date (mm/dd/yy) and time (hh:mm:ss) the system was last started. Time is in military
format (24-hour clock).
Shutdown The next date (mm/dd/yy) and time (hh:mm) Stratagy is scheduled to perform a scheduled
shutdown for disk maintenance. Stratagy shuts down automatically and restarts. Time is in
military format (24-hour clock).
Faxes Not supported.
Port Port number of each port, followed by the port’s mode. For example, 1/A, 2/A, 3/N.
Port Number: port number (1, 2, etc.) of each installed port channel. The ports may or may
not be active (connected to a station port of the telephone system or a CO trunk/line).
Port Mode: this port number’s mode.
A: answering port (if all ports are A, the system is in floating notification mode)
N: notification port only (or system in process of notifying)
Note If mode is N and status is idle, port has been designated exclusively for
notification. In this mode, port no longer accepts incoming calls. See “n_ochan” on
page 4-23 for more information.
User ID Current User ID mailbox the port is accessing. If the port’s status is IDLE, the last User ID
mailbox accessed displays.
Table 3-2 Main Menu Screen Fields (continued)

Access and Use Stratagy
Main Menu Field Descriptions
3-12 Stratagy I&M 06/02
Status Function system is performing on the port. Includes:
IDLE: Port is idle and available for calls.
GREETING: Mailbox greeting is currently playing.
RECORDING: Message currently being recorded.
DIAL: Stratagy is dialing out.
RING: Incoming call ringing is recognized.
BUSY: Dialed extension is busy.
PCPM: System tone patterns being analyzed.
MAIL: System prompts during message taking.
ANSWER: Stratagy has detected an answer after dialing out (transfer, paging).
MENU: #: Mailbox user menu choices are playing.
EXECUTE: Executing program of a mailbox (token programming).
CHAIN: Done, busy, or RNA chain is being executed. System accepting new
incoming digits while greeting of a Mailbox is playing.
LOGIN: User in process of logging on to Mailbox.
FIND: Directory mailbox executing.
NO ANSWER: No answer detected during transfer or dial out.
Calls Number of calls made or answered by the port.
Last Last time (hh:mm) the port started activity.
NEVER displays if the port has had no activity since the system was last started.
Table 3-2 Main Menu Screen Fields (continued)

Stratagy I&M 06/02 4-1
Configure Stratagy
Configure Stratagy 4
CAUTION! After making any significant program changes to the Stratagy, the system must
be properly shutdown and restarted using “Shutdown and Restart Current
Version” from the Shutdown menu. This procedure copies the most current
database to the C:\Stratagy\Archive\Good directory for use by the Automatic
System Recovery feature (see “Automatic System Recovery” on page 11-14). If
this procedure is not followed and the system loses power, loss of customer
information will result.
This chapter provides detailed information about configuring Stratagy and discusses:
•Configuring Stratagy Admin software
•Toshiba Plug and Play
•Telephone System Configuration
•Stratagy System Configuration
•System Parameters
•Simplified Message Desk Interface (SMDI) Serial Integration
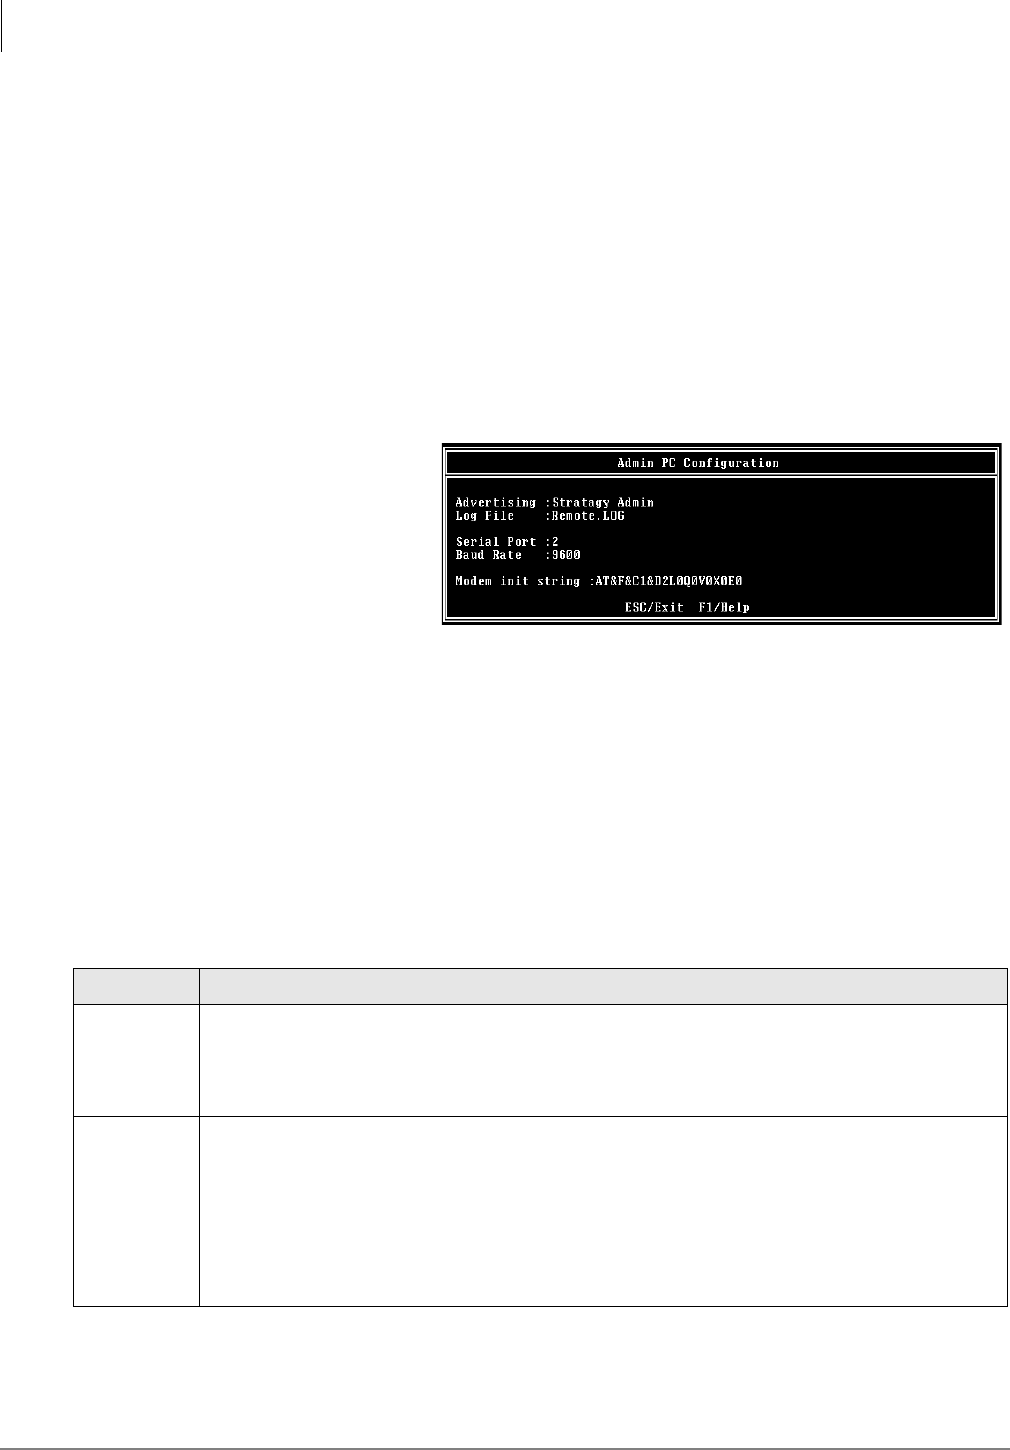
Configure Stratagy
Configuring Stratagy Admin Software
4-2 Stratagy I&M 06/02
Configuring Stratagy Admin Software
Settings for the communication port in Stratagy Admin must match the corresponding parameters
set in the Stratagy System Configuration file on the IVP8.
For example, the Stratagy Admin PC serial port settings made in the Serial Port field of this
procedure must be identical to the serial port definitions (i.e., set serial_port) set in the IVP8’s
System Configuration file (see “System Configuration” on page 4-13).
Note The menu screens detailed in this section are only available with Stratagy Admin version
VSA.2G or later.
➤To configure Stratagy Admin software
1. From the C:\VSA3 DOS prompt, type admin and press Enter. The Stratagy Admin screen
displays.
2. From the Stratagy Admin
Main screen, press 2 or
highlight the Configure
Admin option and press
Enter. The Admin PC
Configuration screen
displays (shown right).
Note Press F1 for help with
any settings in the
Stratagy Admin Configuration screen.
3. Make any changes needed. See Table 4-1 for a description of each of the fields.
Note Press F2 in the Serial Port and Baud Rate fields to display a pop-up box with valid entries.
4. To save your changes, you must have the cursor in the last field (i.e., Modem Init String), and
press Enter or the arrow down (↓) key
...or to exit without saving your changes, press Esc at any time.
The program returns to the Stratagy Admin Main screen.
Table 4-1 Stratagy Admin PC Configuration Fields
Field Description/Default
Advertising
Advertising string that displays when the Main Menu screen blanks after a specified number of
minutes of inactivity (per tmo_blank parameter in the install.cfg file).
Possible values: 60-character string. The single quotes are required.
Default: ‘Stratagy ADMIN’
Log File
System log file name. This log file contains connection information, any execution error information,
and file copy actions.
Note It is a good idea to periodically archive or delete this file once or twice a year, whenever
you perform preventive maintenance.
Possible values: Eight-character file name, plus three-character extension. The single quotes are
required.
Default: ‘Remote.LOG’
3230
Configure Stratagy
Configuring Stratagy Admin Software
Stratagy I&M 06/02 4-3
Configure Stratagy
Serial Port
Port number
Possible values: 1~2
Default: 2
Baud Rate
Baud rate of serial port.
Possible values: 1200, 2400, 9600
Default: 9600
Modem Init
String
Sets modem initialization string. The modem initialization string can be changed to work with
specific brand modems. Refer to the user’s manual for your individual modem for the initialization
string.
Note The protocol used by Stratagy Admin does not support error correction, data compression,
or auto baud rate adjustment. If problems are encountered connecting remotely, turn
these parameters off on the Stratagy Admin PC modem. Refer to your modem user guide
for instructions.
Default: AT&F&C1&D2L0Q0V0X0E1
where:
AT The command that tells the modem to come to Attention.
&F Return to factory defaults.
Instructs the modem to use the factory set parameters.
&C1 Data Carrier Detect (DCD) signal.
Set to on, it indicates presence of a data carrier.
&D2 Data Terminal Ready selected.
L0 Speaker volume.
Off or low volume.
Q0 Mode responses.
Enables result codes to be issued to the screen.
V0 Result code format.
Numeric format.
X0 Extended result codes.
Disables monitoring of busy tones unless forced otherwise by country requirements. Sends
only OK, connect, ring, no carrier, error and no answer result codes.
E0 Command Character Echo.
Disables echoing of the commands to the screen.
Table 4-1 Stratagy Admin PC Configuration Fields (continued)
Field Description/Default
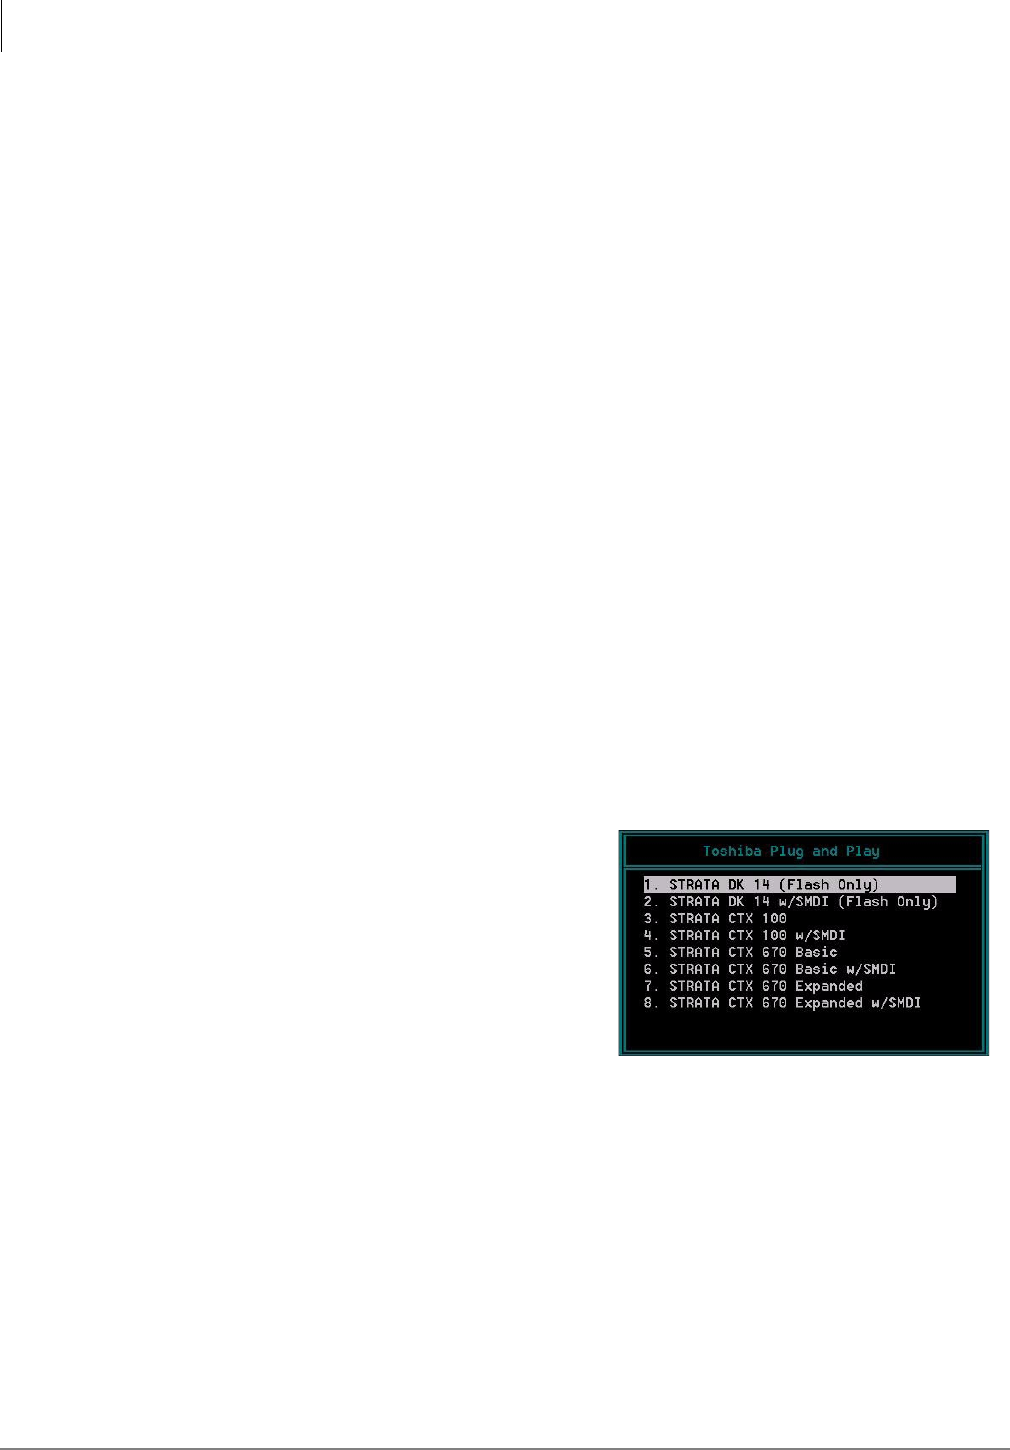
Configure Stratagy
Tools Utility
4-4 Stratagy I&M 06/02
Tools Utility
This section discusses the Tools menu. For the Backup Utility, Restore Utility, Upgrade Stratagy
Software, Retrieve Trace File and Filecopy functions, see Chapter 11 – Maintenance, Upgrades
and Troubleshooting.
➤To access Tools Option
1. Press Alt+t.
2. Type the password (the default password is Stratagy) and press Enter. See “Tools” on
page 11-2 for a description of the menu options.
Toshiba Plug and Play
The Stratagy is pre-installed for the Strata CTX and Strata DK processors. If you need to change
this selection to a different Strata telephone system, change it using this selection.
Note If you only want to change the PBX type, do not use this function. Instead, set the pbx_type
parameter in the Stratagy System Configuration screen.
Selecting this function:
•Changes all the settings to the new Toshiba telephone system default values.
•Deletes any User ID mailbox customizations.
•Installs the Stratagy default mailboxes.
Note Existing messages and mailbox greetings are not deleted when Plug and Play is selected.
For example, if Mailbox 200 has messages and greetings and Toshiba Plug and Play for
Strata CTX is run, then Mailbox 200 retains the messages and greetings from the previous
database.
Change Toshiba Plug and Play Option
1. From the Tools menu, press 5.
2. From the Toshiba Plug and Play screen, enter
the number of the selection.
The Stratagy utility automatically defines the
telephone system dial codes and tone patterns,
system integration patterns and default
mailboxes for the specific telephone system.
3. When the process is complete, press any key to
reboot. The DOS prompt displays.
6233
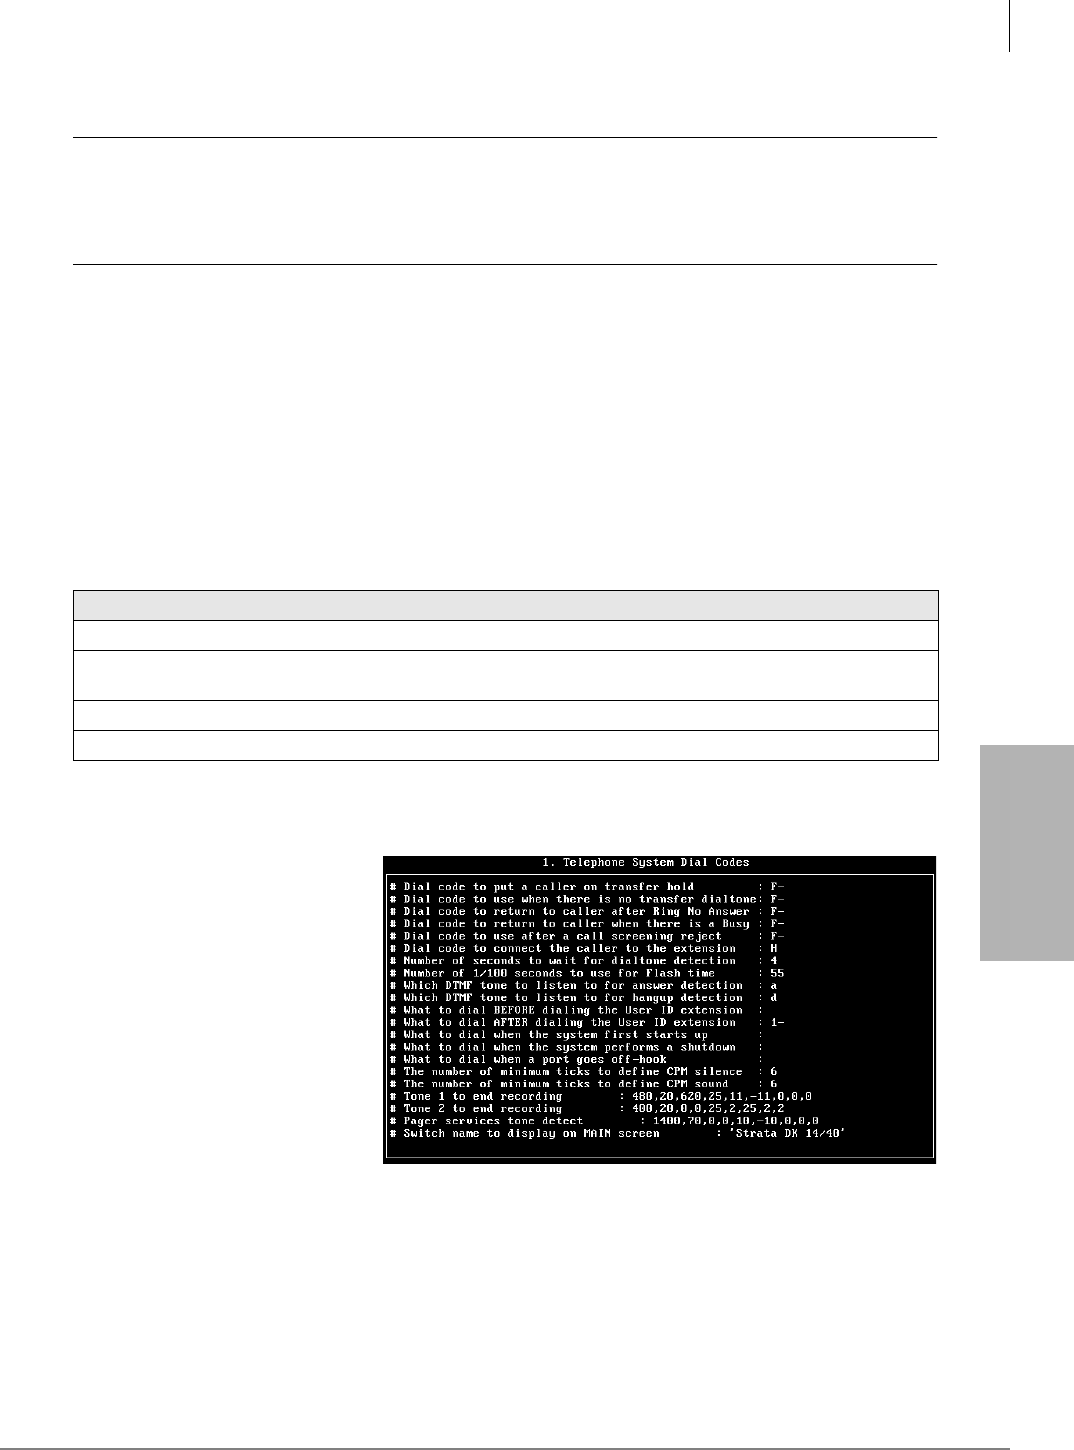
Configure Stratagy
Tools Utility
Stratagy I&M 06/02 4-5
Configure Stratagy
Telephone System Configuration
CAUTION! Take care when making changes and then restarting Stratagy. In some cases, if
invalid information has been entered, Stratagy may not reboot correctly. (See
“Automatic System Recovery” on page 11-14 for information on files created
during an unsuccessful restart.)
This function modifies the following codes/integration patterns:
•Telephone System Dial Codes – Stratagy performs certain actions on your telephone system by
using defined telephone system dial codes. To define the dial codes, you must modify the
telephone system dial code parameters.
•System Integration Patterns – Enables modification to the telephone system integration
patterns.
Note The telephone system configuration is set using the pbx_type parameter (see “pbx_type”
on page 4-23 for details).
With this option, preset dial codes for other manufacturers’ systems can be enabled or modified. As
an example:
Select a Predefined Dial Code
1. From the Tools menu, press 4. The Telephone System Configuration screen displays.
2. From the Telephone System
Configuration screen, press 1.
The Telephone System Dial
Codes screen displays (shown
right).
3. To select a default setting, use
the arrow keys (↑↓) and/or
Page Up and Page Down
keys to highlight your
selection and press Enter
...or to cancel without
selecting a dial code, press
Esc.
Note Select a default dial code only for non-Toshiba telephone systems and only during initial
configuration.
4. After making the selection, press ESC. The Telephone System Configuration screen displays.
5. From the Telephone System Configuration screen, press 1. The changes are transmitted to
Stratagy and Stratagy is shut down and restarted. By shutting down and restarting Stratagy, the
changes take effect.
If your Toshiba telephone system is configured for tone first, you would:
1. Press 1 to Edit System Dial Codes.
2. From the Telephone System Dial Codes screen, delete the suffix –1 from the line What to dial
AFTER dialing the User ID extension.
3. Press Esc.
4. Press 2 to save your changes without restarting IVP8.
4079
Configure Stratagy
Tools Utility
4-6 Stratagy I&M 06/02
...or 2.The changes are transmitted to Stratagy but Stratagy is not shut down or restarted. Until
you restart Stratagy, the changes do not take effect.
...or 3. The changes you made are cancelled and not saved.
6. If you pressed 1 to save the changes, press any key to reboot. The DOS prompt displays. To
continue, you must re-enter Stratagy Admin.
Modify a Dial Code
If the telephone system you desire does not appear on the Telephone System Dial Codes Screen or
further modifications to the dial codes are needed, you can modify a dial code parameter.
1. From the Tools menu, press 4. The Telephone System Configuration screen displays.
2. From the Telephone System Configuration screen, press 1. The Telephone System Dial Codes
screen displays.
3. Use the arrow keys (↑↓) and/or Page Up and Page Down keys to highlight the dial code
parameter and press Enter.
The line appears at the top of the screen.
4. Modify the dial code using the line editor at the top of the screen.
See Table 4-2 below for a listing of the dial code parameters and their definitions and settings.
5. After making the change(s), press ESC. The Telephone System Configuration screen displays.
6. From the Telephone System Configuration screen, press 1. The changes are transmitted to
Stratagy and Stratagy is shut down and restarted. By shutting down and restarting Stratagy, the
changes take effect.
...or 2.The changes are transmitted to Stratagy but Stratagy is not shut down or restarted. Until
you restart Stratagy, the changes do not take effect.
...or 3. The changes you made are cancelled and not saved.
7. If you pressed 1 to save the changes, press any key to reboot. The DOS prompt displays. To
continue, you must re-enter Stratagy Admin.
Table 4-2 Telephone System Dial Codes - Definitions and Settings
Parameter/Description
# Dial code to put a caller on transfer hold:
The code Stratagy sends the telephone system, before attempting to transfer a call to an extension, to put the
current call on “transfer hold” and send the transfer (or intercom) dial tone.
Typical value: F- (hookflash)
# Dial code to use when there is no transfer dialtone:
The code Stratagy dials to return to the caller when:
Stratagy is configured to verify transfer dial tone exists before attempting to transfer a call to the requested
extension
–and–
transfer dial tone is not available.
When this occurs, Stratagy treats the attempted transfer the same as a busy extension.
Typical value: F- (hookflash)

Configure Stratagy
Tools Utility
Stratagy I&M 06/02 4-7
Configure Stratagy
# Dial code to return to caller after Ring No Answer:
The code Stratagy dials, during supervised call transfers, to request the telephone switch reconnect the caller to
Stratagy when:
The attempted extension rings
–and–
does not answer within a specified number of rings (configurable per User ID in Users Menu Maximum Rings
field).
Typical value: F- (hookflash)
# Dial code to return to caller when there is a Busy:
The code Stratagy dials, during supervised call transfers, to request the telephone switch reconnect the caller to
Stratagy when the extension is busy.
Typical value: F- (hookflash)
# Dial code to use after a call screening reject:
The code Stratagy dials, during supervised call transfers, to reconnect the caller and play the User ID’s current
greeting when:
Call Screening is On
–and–
the extension called rejects the caller.
Typical value: F- (hookflash)
# Dial code to connect the caller to the extension:
The code Stratagy dials, during supervised call transfers, to complete the call transfer after:
Detecting an answer at the called extension
–or–
the extension called accepts the call when Call Screening is On.
Typical value: H (hang up)
# Number of seconds to wait for dialtone detection:
The longest amount of time Stratagy waits for the telephone system to give Stratagy one second of dial tone.
Setting this value to a number greater than zero enables Stratagy’s dial tone detection.
If your telephone system has a limited number of DTMF receivers or intercom paths for call transfers, there is
always the possibility that one may not be available to Stratagy to perform a call transfer.
Typical value: 4
# Number of 1/100 seconds to use for Flash time:
Time Stratagy must remain on-hook while performing a hookflash.
Typical value: 55 (just over one-half second)
# Which DTMF tone to listen to for answer detection:
Some telephone systems play a specific DTMF tone during a call transfer when the called extension answers. This
provides faster answer detection and call processing. If your telephone system supports this feature, enter the
DTMF tone.
Typical value: a
Table 4-2 Telephone System Dial Codes - Definitions and Settings (continued)
Parameter/Description

Configure Stratagy
Tools Utility
4-8 Stratagy I&M 06/02
# Which DTMF tone to listen to for hangup detection:
Some telephone systems play a specific DTMF tone whenever a caller hangs up. This provides faster hang up
detection and call processing. If your telephone system supports this feature, enter the DTMF tone.
Typical value: d
# What to dial before dialing the User ID extension:
The code Stratagy dials after dial tone detection and before dialing the extension number.
Typical value: left blank
# What to dial after dialing the User ID extension:
Code Stratagy dials after dialing the extension number.
Some applications use 1- to eliminate (system wide) voice announce during a call transfer by Stratagy
(necessary if you want Stratagy to perform supervised transfers). Use H to force all call transfers to be blind, or
unsupervised.
# What to dial when the system first starts up:
Initialization codes Stratagy dials when it first starts-up, e.g., removing call forwarding on the Stratagy ports.
# What to dial when the system performs a shutdown:
Codes Stratagy dials when it shuts down; e.g., enabling call forwarding on the Stratagy ports.
# What to dial when a port goes off-hook:
Codes Stratagy dials whenever it goes off-hook to enable a special feature, such as special types of serial, or
RS-232, integrations.
Table 4-2 Telephone System Dial Codes - Definitions and Settings (continued)
Parameter/Description

Configure Stratagy
Tools Utility
Stratagy I&M 06/02 4-9
Configure Stratagy
System Integration Patterns
If your telephone system supports integration, this selection controls the definition of its integration.
Perform this step only to refine, verify, or modify the integration of the Stratagy system with your
telephone system.
Some of the pre-defined telephone system dial codes already contain integration information, while
others are configurable.
Define the System Integration Pattern Fields
1. From the Tools menu, press 4. The Telephone System Configuration screen displays.
2. From the Telephone System
Configuration screen, press 2.
The System Integration
Patterns screen displays
(shown right).
3. Define Integration Timeout
by 1/10—amount of time
Stratagy waits for integration
information from the
telephone system.
Possible values: 0~99
(disable integration) (in 10ths
of seconds).
Suggested value: 10 (10 10ths = 1 second)
4. Define the remaining fields (i.e., integration strings) that Stratagy should match. Proceed to
“Define the Integration Strings Stratagy Matches” on page 4-11.
See Table 4-3 for definitions.
5. After making the change(s), press ESC. The Telephone System Configuration screen displays.
6. From the Telephone System Configuration screen, press 1. The changes are transmitted to
Stratagy and Stratagy is shut down and restarted. By shutting down and restarting Stratagy, the
changes take effect.
...or 2.The changes are transmitted to Stratagy but Stratagy is not shut down or restarted. Until
you restart Stratagy, the changes do not take effect.
...or 3. The changes you made are cancelled and not saved.
7. If you pressed 1 to save the changes, press any key to reboot. The DOS prompt displays. To
continue, you must re-enter Stratagy Admin.
4668
Configure Stratagy
Tools Utility
4-10 Stratagy I&M 06/02
Modify Integration Patterns
1. From the Tools menu, press 4. The Telephone System Configuration screen displays.
2. From the Telephone System Configuration screen, press 2. The System Integration Patterns
screen displays.
3. From the System Integration Patterns screen, use the arrow keys (↑↓)
...or Page Up and Page Down to highlight the integration pattern parameter. Press Enter.
4. Modify the integration pattern using the line editor at the top of the screen.
5. After making the change(s), press ESC. The Telephone System Configuration screen displays.
6. From the Telephone System Configuration screen, press 1. The changes are transmitted to
Stratagy and Stratagy is shut down and restarted. By shutting down and restarting Stratagy, the
changes take effect.
...or 2.The changes are transmitted to Stratagy but Stratagy is not shut down or restarted. Until
you restart Stratagy, the changes do not take effect.
...or 3. The changes you made are cancelled and not saved.
7. If you pressed 1 to save the changes, press any key to reboot. The DOS prompt displays. To
continue, you must re-enter Stratagy Admin.
Remove an Integration Pattern
1. From the Tools menu, press 4. The Telephone System Configuration screen displays.
2. From the Telephone System Configuration screen, press 2. The System Integration Patterns
screen displays.
3. Use the arrow keys (↑↓), or Page Up and Page Down, to highlight the integration pattern
parameter. Press Enter.
4. Press Del or the spacebar when the integration pattern parameter displays in the line editor at
the top of the screen.
5. After making the change(s), press ESC. The Telephone System Configuration screen displays.
6. From the Telephone System Configuration screen, press 1. The changes are transmitted to
Stratagy and Stratagy is shut down and restarted. By shutting down and restarting Stratagy, the
changes take effect.
Table 4-3 Telephone System Integration Patterns – Definitions and Settings
Parameter/Definitions
Direct call
Integration strings that Stratagy should match for a Direct call.
Example:***1eee
Forward from Ring No Answer
Integration strings that Stratagy should match for a forward from Ring No Answer.
Example:#02#sss#rrr#
Forward from Busy
Integration strings that Stratagy should match for a forward from Busy.
Example:#02#sss#bbb#

Configure Stratagy
Tools Utility
Stratagy I&M 06/02 4-11
Configure Stratagy
...or 2.The changes are transmitted to Stratagy but Stratagy is not shut down or restarted. Until
you restart Stratagy, the changes do not take effect.
...or 3. The changes you made are cancelled and not saved.
7. If you pressed 1 to save the changes, press any key to reboot. The DOS prompt displays. To
continue, you must re-enter Stratagy Admin.
Define the Integration Strings Stratagy Matches
➤Define the actual received codes with the call and the extension information. There are six
character codes. Each character code represents a call state, and the placement and quantity of
the code represents the extension information.
The character codes are:
rring no answer
bbusy
edirect dial (to access User ID directly by asking for security code)
sinformation regarding where the call came from (for handling message replies)
iimmediate record (play the record tone and start taking a message)
xa wild card that matches anything (use this carefully)
You have complete control for changing Stratagy’s integration behavior based upon your specific
requirements. For example, if your customer does not want to allow for Busy extensions, then
simply modify the integration character codes and replace the b’s with r’s.
Use Character Codes
The following example illustrates using the character codes.
•Direct Call
Start with the Direct test call. There is a integration pattern labeled Direct Call in the
description field. Part of the integration pattern should contain the extension number from
where you called. Edit the integration pattern to replace the extension number with one or more
e’s.
Example:
integration pattern displayed: ***1120
test extension you called from: 120
edit the dial code to read: ***1eee
•Forward from Ring No Answer
Under the Forward from Ring No Answer you should have two patterns. Both integration
patterns should contain the extension number that was call forwarded to Stratagy. Part of one
pattern probably contains the available extension number you called from. The other
integration pattern may or may not contain information pertaining to the CO line where the call
came from.
Example:
integration pattern displayed: #02#101#120# and #03##120
available extension you called from: 101
test extension that was call forwarded: 120
edit the dial codes to read: #02#sss#rrr# and #03##rrr# respectively

Configure Stratagy
Tools Utility
4-12 Stratagy I&M 06/02
•Forward from Busy
The Forward from Busy is modified in the same way as the Forward from Ring No Answer
above except that you use character code b instead of r.
Different Masks
Check that the integration patterns do not have the same “mask.” If you do have one or more masks
that are the same, you must modify them to be different or delete the extra ones. To test that
integration pattern masks are different, do the following:
1. List the dial codes on a piece of paper.
2. Compress the dial codes by re-writing them without any character codes.
What is left are dial code masks that must all be different.
Example:
Using the following dial codes: ***1eee, #02#sss#rrr#, and #03##rrr#
the integration pattern masks would be: ***1, #02###, and #03###
that are all different.
Additional Integration Patterns
Sometimes it is useful to have additional integration patterns that match the same way as the actual
integration patterns except for the first character. For example you might want to add a second
integration pattern for Direct calls (which had ***1eee in our example) as **1eee. This helps
to eliminate timing problems that sometimes arise from some telephone systems and Stratagy.
How Stratagy Matches Integration Patterns
The integration pattern strings are always sorted in like categories. When Stratagy receives a call,
it uses a buffer to match against the defined integration pattern strings, and selects the first string
that it matches.
Example 1:
integration pattern strings:
01rrr
02bbb
03eee
xxrrr
call Stratagy receives:
02100
integration pattern string Stratagy matches:
02bbb
Example 2:
integration pattern strings:
xxrrr
01rrr
02bbb
03eee
call Stratagy receives:
02100
integration pattern string Stratagy matches:
xxrrr (if on top, xxrrr always matched)
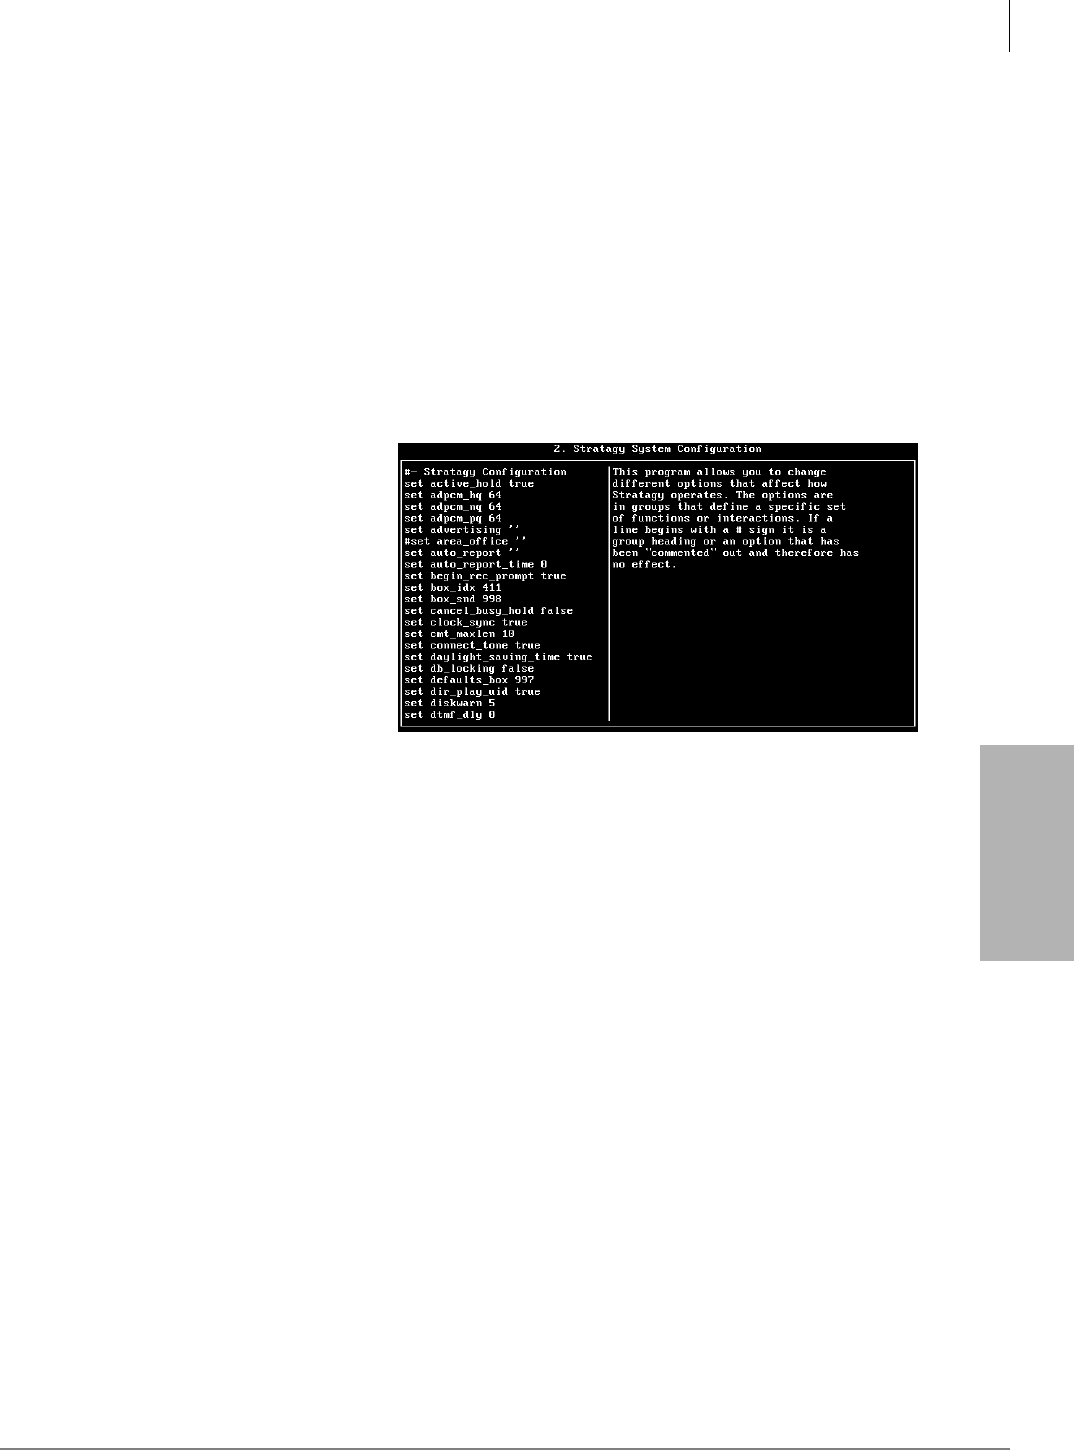
Configure Stratagy
System Configuration
Stratagy I&M 06/02 4-13
Configure Stratagy
System Configuration
Use this function to change Stratagy’s system options and parameters, define timeout values and
computer configurations, and control per port options. See “System Parameters” on page 4-14 for
a list of the parameters, their definitions and default settings.
Most Stratagy System Configuration options do not require modification. We recommend that you
modify the system password immediately. All other options have default values, but can be
modified as required.
We recommend that you use the Stratagy Backup Utility initially and periodically to preserve
system data. Before making changes to this selection, ensure you have a current backup. See
“Backup Utility” on page 11-3 and “Restore Utility” on page 11-5.
Modify System Configuration Parameters
1. From the Tools menu, press 6.
The Stratagy System
Configuration screen displays
(shown right). The parameters
are listed in alphabetical order.
The Stratagy System
Configuration Screen is split
into two areas: the left lists the
actual parameters and their
values, the right lists context-
sensitive help for each
parameter.
Note Fax settings are not
available to the Stratagy.
2. Highlight the parameter by using the arrow (↑↓)
...or Page Up and Page Down keys. Press Enter.
3. Modify the parameter using the line editor at the top of the screen.
If a line begins with a #, it is a heading or a parameter that is “commented out” and is not
active. To enable a parameter that is commented out, remove the starting # and set the value.
4. Press ESC.
5. From the Stratagy System Config screen, press 1. The changes are transmitted to Stratagy and
Stratagy is shut down and restarted. By shutting down and restarting Stratagy, the changes take
effect.
...or 2. The changes are transmitted to Stratagy but Stratagy is not shut down or restarted. Until
you restart Stratagy, the changes do not take effect.
...or 3. The changes you made are cancelled and not saved.
6. If you pressed 1 to save the changes, press any key to reboot. The DOS prompt displays. To
continue, you must re-enter Stratagy Admin.
4073
Configure Stratagy
System Parameters
4-14 Stratagy I&M 06/02
System Parameters
Most Stratagy System Configuration options do not require modification. We recommend that you
modify the system password immediately. All other options have default values, but can be
modified as required.
Parameter Description
accept_0_calling_id
Specifies whether Stratagy should accept 0 as valid mailbox number. If the
parameter is set to “false,” SMDI packets that include 0 for the “forwarding from
station number” (forwarded call SMDI packets) or for the “calling station number”
(direct call SMDI packet) are not accepted.
Possible values: false (mailbox 0 not accepted), true (mailbox 0 accepted)
Default: false
active_hold
Controls what a caller must do to hold for a busy extension.
True: Caller must continue pressingto hold for a busy extension, enter
another extension, or leave a message at the tone.
False: Caller selects
once to hold for a busy extension and the system enables
the caller to hold until he/she is either transferred, selects another
extension, or pressesagain to leave a message.
Possible values: true, false
Default: true
adpcm_hq
Sets the sampling rate for outgoing greetings. The higher the sampling rate, the
better the sound quality; however, the amount of disk space used is also higher.
CAUTION! If you change this parameter on an active system, all previously
recorded greetings are lost.
Possible values: 24, 32, 64
Recommended value: 64 (Flash: 24)
Default: 64
adpcm_nq
Sets the sampling rate for incoming messages. The higher the sampling rate, the
better the sound quality; however, the amount of disk space used is also higher.
CAUTION! If you change this parameter on an active system, all previously
recorded messages are lost.
Possible values: 24, 32, 64
Recommended value: Flash: 24, IVP8: 64
Default: 32
adpcm_pq
Sets the sampling rate for the system prompt file. This is predetermined by the
sampling rate at which the system prompt file was recorded.
CAUTION! Do not change this value unless you have installed the
appropriate system prompt file.
Possible values: 8, 24, 32, 64
Recommended value: 64 (Flash: 24)
Default: 64
advertising
Advertising string that displays when the Main Menu screen blanks after a specified
number of minutes of inactivity (per tmo_blank).
Possible values: 58-character string. The single quotes are required.
Default: No default

Configure Stratagy
System Parameters
Stratagy I&M 06/02 4-15
Configure Stratagy
area_office
When SMDI is being used on a Centrex switch, the value set in this parameter
identifies which calls are from voice mail subscribers by specifying the first few
digits (e.g., area and office codes) that are shared by all subscribers.
Example: In this example, the area_office parameter is set to ‘714583’.
When a call arrives from any telephone number with the first digits of “714583,” the
SMDI subsystem processes it as a subscriber call. If a call arrives and the switch
tells Stratagy that the first six digits are not “714583,” the SMDI subsystem treats
the caller as external. Note that the value of area_office does not need to be only
six digits long. If subscribers share the first five digits of their telephone numbers,
then just those five digits should be stored in this field.
Possible values: up to 10 numeric digits, any combination
Default: (no default) (To enable, remove the starting # and set the value.)
auto_report
Report definition file, (created using Stratagy’s Main Menu’s Reports option.
Generates a report automatically at the time specified by auto_report_time.
Example: ‘daily.rpt’
Possible values: valid DOS file name. The single quotes are required.
Default: (no report name)
auto_report_time
Time of day the automatic report generates using the file specified in auto_report.
The value is in 24-hour format with the colon (:) omitted.
Example: 1:30 a.m. is 0130
2:15 p.m. is 1415
Possible values: 0 (does not generate the auto_report), 0001~2400
Default: 0
begin_rec_prompt
Whether the system says “Begin recording at the tone, ... or hang up” before taking
a message. This also affects the “to re-record press 2” and “to append press 3”
menu selections given after a recording.
True: The system plays the above prompt.
False: The caller only hears a tone.
Possible values: true, false
Default: true
box_idx
Sets the Directory User ID for all ports or for specified ports. The Directory is a
special mode that enables Stratagy to search its User IDs for a match on the
Directory Name fields. For more information about the Directory, see Chapter 9 –
Special Greeting User ID Mailboxes.
Example: Define this parameter as box_idx 411 1 to set User ID 411 as the
directory search ID for port 1. If no port is defined, then 411 is enabled
for all ports.
Note Stratagy builds an index file based on information given in the Directory
Name fields. It enables you to use one or more letters to perform the search,
matching all entries possible. For every User ID that matches, Stratagy plays
the name recording—which really may play any recording you want, if
available.
Possible values: valid User ID and valid port
Default: 411 – enabled for all ports.
Parameter Description
Configure Stratagy
System Parameters
4-16 Stratagy I&M 06/02
box_snd
Sets the Direct Message User ID for all ports or for specified ports. The Direct
Message ID enables Stratagy to record a message for a User ID without having to
execute the Extension field and/or hear the User ID’s greeting. This is particularly
useful for an Operator transferring directly to voice mail.
Example: Define this parameter as box_snd 998 1 to set User ID 998 as the Direct
Message User ID for port 1. If no port is defined, then 998 is enabled for
all ports.
Possible values: valid User ID and valid port
Default: 998 – enabled for all ports.
cancel_busy_hold
Enables callers to hold for busy extensions.
True: Callers cannot hold for busy extensions.
Calls proceed as if a Ring No Answer.
False: Callers can hold for busy extensions.
Possible values: true, false
Default: false
clock_sync
Re-synchronizes the DOS software clock with the PC hardware clock. It may be
useful to turn this off (by setting it to False) if you have another utility controlling the
PC clock.
True: Stratagy re-synchronizes the DOS software clock with the PC hardware
clock.
False: Stratagy does not re-synchronize the clocks.
Possible values: true, false
Default: true
cmt_maxlen
Number of seconds for recording a list comment for the User parameter of Manage
Your Lists.
Possible values: 1~99 (seconds)
Default: 10
connect_tone
A beep plays when completing a transfer.
True: Stratagy plays a beep when completing a transfer.
False: Stratagy does not play a beep when completing a transfer.
Possible values: true, false
Default: true
Parameter Description
Configure Stratagy
System Parameters
Stratagy I&M 06/02 4-17
Configure Stratagy
console_slot_id
Identifies to IVP8 the physical slot in the Strata DK that contains the PDKU
programmed for DSS console in Program 03 (type 64). The IVP8 monitors this slot
for the busy lamp field (see dss_active parameter), and Night Transfer.
For Strata DK40i/DK40/DK16e/DK16 and DK24, DK56, and DK96: the
console_slot_id is always set to 0 (zero). Slot ID 0 corresponds to card slot S11 for
DK40i/DK40/DK16e/DK16 or slot 01 for DK24, DK56, and DK96.
CAUTION! For Strata DK16: If this parameter is set to 1, IVP8 is disabled. All
ports return “ring no answer” when dialed.
For Strata CTX100/CTX670, DK424i/DK424 and DK280: set this parameter per
the following table.
CTX100/CTX670
DK424i/DK424/DK280 Slot Assignment Console_slot_id
11, 31, 51 0
12, 32, 52 1
13, 33, 53 2
14, 34, 54 3
15, 35, 55 4
16, 36, 56 5
Important! For this feature to work, the PDKU must reside in an odd numbered
cabinet (see Figure 2-1 on page 2-10 for examples).
In all applications, the IVP8 must reside in a higher-numbered slot in
the same cabinet or next even numbered cabinet as the PDKU card
(defined as console_slot_id).
Possible values: 0~5
Default: 0 (zero) IVP8 only
daylight_saving_time
Resets Stratagy’s system time to daylight savings time.
Note The current setting is displayed at the top right corner of the Main Menu.
True: Stratagy sets the system automatically to daylight savings time at 2:00
a.m. the first Sunday in April and the last Sunday in October.
False: Stratagy does not reset system time and continues with standard time
(Stratagy clock).
Important! (IVP8 only) Setting the ksu_time parameter to true disables this
setting.
Possible values: true, false
Default: true
db_locking
Locks a database’s records before Stratagy reads them.
True: Stratagy tries to lock a database’s records before reading them (read
only).
False: Stratagy does not lock the database’s records.
Possible values: true, false
Default: false
Parameter Description

Configure Stratagy
System Parameters
4-18 Stratagy I&M 06/02
defaults_box
Designates the User ID Defaults Box Stratagy uses for the default values when
creating a new User ID. The field values in the Defaults Box User ID are copied into
a new User ID upon initialization.
•User’s Information fields are not copied. The User ID field contains the new
User ID you specified. Comment, Extension, and Directory Name fields are not
defined. If a Security Code is defined, Stratagy uses it instead of the User ID as
the default.
•Since guests can only access the User ID that created it and other guests of
that User ID, Stratagy defines Group1 as the User ID of the mailbox that
created it. For example, if the Guest User ID was created by User ID 76, then
Group 1’s value is 76.
•All other Users Menu Options and Group/Chains fields are copied. All Notify
and Auto records are copied.
•Define the Defaults Box settings before creating User IDs. This initializes all
new User IDs with a minimum number of settings. This is useful for setting
default settings such as message light On/Off.
Except for Group field values, this parameter operates in the same manner as the
guest_defaults parameter.
Possible values: valid User ID
Default: 997
dir_play_uid
Directory search feature plays the User ID of the mailboxes that it finds.
True: If a name recording is available, the caller hears both the name recording
and the digits for that person’s User ID. If a name recording is not
available, just the digits play.
False: If a name recording is available, the caller hears only the recording. If there
is no name recording, Stratagy does not present the entry.
Possible values: true, false
Default: true
diskwarn
Percentage threshold Stratagy uses for causing a Disk Notify to execute. This is a
remaining percentage threshold.
Example: To have Stratagy notify you when the remaining flash drive space falls
below 20%, use a value of 20.
For Stratagy to notify a user (usually the System Administrator) when flash drive
space is low, create a Notify record with the Type field set to DISK (see “Notify
Menu” on page 6-27).
Possible values: 1~99
Default: 5
dss_active
IVP8 monitors the Busy Lamp Field (BLF) indicators on the Strata CTX/Strata DK’s
DSS console port to determine if an extension is busy before attempting to transfer.
This parameter corresponds with the DSS Port field assignment in the Users Option
Menu of a User ID.
True: IVP8 monitors the BLF indicators before attempting to transfer a call.
False: IVP8 does not monitor the BLF indicators.
Important! If this parameter is set to false, the DSS Port field on the Users Option
Menu is disabled.
Possible values: true, false
Default: false IVP8 only
Parameter Description

Configure Stratagy
System Parameters
Stratagy I&M 06/02 4-19
Configure Stratagy
dtmf_dly
Controls the time between DTMF tones when Stratagy is dialing.
0: The time is country-dependent (50 ms in the US, 80 ms in the UK). This is
appropriate for almost all cases.
Possible values: 0, 3~19 (units of 10 ms)
Default: 0 IVP8 only
dtmf_gate
Stratagy, before dialing any User ID Extension field, first verifies that DTMF was
entered since the call last accessed the User ID (usually Caller Instructions User ID
991) specified in the Done chain of the initial User ID (usually Company Greeting
User ID 990).
This “gate” prevents the transfer of a dead/phantom call to the Operator on those
switches that do not have disconnect supervision.
True: Stratagy gates by requesting the caller to “Say yes at the tone” to complete
the chain and transfer.
False: Stratagy does not complete the chain and transfer by requesting the caller
to “Say yes at the tone.”
Note Regardless of this parameter setting, Stratagy does not perform the “gate”
action when the Extension field begins with @.
Possible values: true, false
Default: true
dtmf_on
Controls length the system plays the DTMF tones.
Example: 20 is .2 sec (200 ms).
Possible values: 10, 20, ..., 90 (units of 10 ms)
Default: 20 (.2 sec)
error_box
Box that receives a notification if the system encounters a panic error on startup.
The notification runs when the system successfully recovers.
Possible values: valid User ID
Default: 999
future_delivery
Future delivery enables users to specify the time and/or date when a message is
delivered. When the messages are awaiting future delivery, they are stored in the
User ID specified in this parameter. Therefore, the Future Delivery User ID cannot
be used for any other purpose. The future delivery messages in this User ID cannot
be deleted or listened to by accessing this User ID mailbox. This User ID mailbox
cannot be accessed by a security code.
The originator of the future delivery message can delete or listen to the message
from his\her User ID, using the Future Delivery Review parameter of Play
Messages.
Possible values: valid User ID
Default: 995 IVP8 only
gain_norm
Starting volume of the ports.
1. The ^( ) token enables you to change the volume of the current port to the
specified level (see Chapter 7 – Token Programming).
2. For the user, the current port volume can be set through the Users Menu’s
Message Volume field and by the user with the Play Message Controls (see
Chapter 6 – Menus).
Possible values: -10, -9, ..., 0, ..., 4, 5
Default: 0
Parameter Description

Configure Stratagy
System Parameters
4-20 Stratagy I&M 06/02
guest_defaults
Designates the Guest User ID Defaults Box Stratagy uses when creating a new
Guest User ID. The field values in the Guest Defaults User ID are copied into a
Guest User ID upon initialization.
•User’s Information fields are not copied. The User ID field contains the new
User ID you specified. Comment, Extension, and Directory Name fields are not
defined. If a Security Code is defined, Stratagy uses it instead of the User ID as
the default.
•Since guests can only access the User ID that created it and other guests of
that User ID, Stratagy defines Group1 as the User ID of the mailbox that
created it. For example, if the Guest User ID was created by User ID 76, then
Group 1’s value is 76.
•All other Users Menu Options and Group/Chains fields are copied. All Notify
and Auto records are copied.
•Define the Guest User ID Defaults Box settings before creating Guest User
IDs. This initializes all new Guest User IDs with a minimum number of settings.
This is useful for setting default settings such as message light On/Off.
Except for the Group field values, operates the same way as the defaults_box
parameter.
Possible values: valid User ID
Default: 996 IVP8 only
guest_max
Highest numbered Guest User ID. When used with the guest_min parameter, limits
the number of Guest User IDs that can be created.
Example: If this value is 90199, then the last Guest User ID that may be created is
User ID 90199.
Possible values: valid User ID larger than the guest_min parameter setting
Default: 90199 IVP8 only
guest_min
Lowest numbered Guest User ID. When used with the guest_max parameter, limits
the number of Guest User IDs that can be created.
Examples: If this value is 90000, then the first Guest User ID that is created has
User ID 90000. The second guest has User ID 90001, etc.
Possible values: valid User ID smaller than guest_max parameter setting
Default: 90000 IVP8 only
hangup_supervision
Whether the switch supports Loop Current Off/Drop for hang up supervision.
True: If your switch supports Loop Current Off/Drop for hang up supervision, this
parameter should be true. Even if your switch does not support this
capability, it usually has NO NEGATIVE EFFECT when set to true.
False: If you notice call transfer problems such as disconnects or three-way
conferencing, try setting this parameter to false. If the problems are not
solved by setting this parameter to false, set it back to true.
Possible values: true, false
Default: true
Parameter Description

Configure Stratagy
System Parameters
Stratagy I&M 06/02 4-21
Configure Stratagy
hot_box
User ID Stratagy “jumps” to when Stratagy detects a specific tone. Used to handle
incoming faxes, detect connections from TDD machines for deaf communication,
etc.
Up to 24 tones can be detected and directed to a mailbox by entering a User ID
followed by a number (1~24). To add a specific tone, such as a Fax connect tone, to
the tone table, it must be one of the first four tones defined, and it must be marked
as a “terminating tone.” The PCPM code associated with the tone must be in the
range 13~36, which corresponds to hot_boxes 1~24.
If no number is defined after the User ID, Stratagy directs calls that emit an industry
standard Fax CNG tone of a specific frequency (factory defined in the tone table) to
the defined User ID.
Syntax: set hot_box XXX Y
Where: XXX = User ID
Y = hot box number (1~24)
If Y is omitted, all 24 hot boxes are set to the User ID entered. For example:
set hot_box 994 sets all 24 to User ID 994
set hot_box 994 1 sets the first hot_box to User ID 994
Possible values: valid User ID, possibly followed by a hot_box value (1~24)
Default: 994
ksu_time
Synchronizes IVP8’s system clock with the system clock of the supporting
Strata CTX/Strata DK telephone system.
Information obtained by IVP8 from the Strata CTX/Strata DK system does not
contain “second” time; therefore, there may be a 1~60 second difference between
the Strata CTX/Strata DK system and the KSU time displayed on the main menu of
the Stratagy Admin program.
Important! The IVP8 electronically monitors the clock information on the LCD of
the defined PDKU port. If other LCD messages (e.g., message
waiting callback information) appear over the system time, the IVP8 is
unable to consistently synch to the KSU time.
True: IVP8 synchronizes the IVP8’s system clock with the Strata CTX/Strata
DK’s system clock. The KSU time displays at the top right corner of the
Main Menu. Setting this parameter to true, disables the
daylight_saving_time parameter.
False: IVP8 does not use the Strata CTX/Strata DK’s system clock.
Important!
•The Strata DK uses a 24-hour system clock, but does not notate a.m./p.m. on
the LCD display. Because of this, during the initial installation or when the
system has been shut down for any extended time, it is necessary to program
the correct date and time in the IVP8 Main Menu, Date/Time function or via
System Administrator’s mailbox.
•This feature requires SMDI integration to work with the Strata CTX.
Possible values: true, false
Default: false IVP8 only
lcoff
Minimum duration of loop current off before the RDSP driver posts event 20 to the
System Event Queue. In 10 ms units.
Default: comment line (#set lcoff -10)
To enable, remove the starting # and set the value.
Parameter Description

Configure Stratagy
System Parameters
4-22 Stratagy I&M 06/02
lcvalid
Delay that must occur after dialing a digit string and before the RDSP driver
considers the loop current drop to be answered. In 10 ms units.
Default: comment line (#set lcvalid 10)
To enable, remove the starting # and set the value.
lcwait
Delay that must occur after loop current drops and before the RDSP driver posts
event 18 to the System Event Queue. In 10 ms units.
Default: comment line (#set lcwait 10)
To enable, remove the starting # and set the value.
login_pound
Stratagy prompts “Finish by pressing the pound sign” when requesting the User ID
or the security code during log on.
If the system is configured with fixed-length User IDs (by changing the values of a
fixed_lenX parameter), users may be confused if they hear this prompt and attempt
to enter a pound sign ().
True: Stratagy says the prompt.
False: Stratagy does not say the prompt.
Possible values: true, false
Default: true
lognam
System log file name. This log file contains start-up information, any execution error
information, system actions, and shutdown information.
Note It is a good idea to periodically archive or delete this file once or twice a year,
whenever you perform preventive maintenance.
Possible values: valid DOS file name. The single quotes are required.
Default: ‘Stratagy.LOG’
max_dl_inits
Number of simultaneous ports that can go off-hook and dial the telephone system
initialization code. This is necessary because some switches are blocking.
Possible values: 1, 2, ..., number of ports
Default: 2
max_prompt
Number of times a prompt should repeat before hanging up.
Possible values: 1~9
Default: 2
minmsg
Sets the threshold for keeping or discarding messages. A message recording to be
considered valid and kept must be at least as long as this setting. Shorter
recordings are discarded. In 100 ms units.
Default: 10 (1 second)
msg_log
Logs every received message and User ID that checks for messages, along with
the DTMF entered.
Note When active, grows quickly. Archive or delete frequently.
Possible values: valid DOS file name. The single quotes are required.
Default: ‘MSG.LOG’ (To enable, remove the starting # and set the value.)
msg_pending_threshold
Number of seconds that a message must play before it is considered “pending.”
Possible values: 3~10 seconds
Default: 5
Parameter Description

Configure Stratagy
System Parameters
Stratagy I&M 06/02 4-23
Configure Stratagy
nam_maxlen
Maximum number of seconds for recording a User ID’s name and extension. The
name and extension recording is used for directory access and whenever Stratagy
tries to identify the User ID.
Possible values: 1~99 (seconds)
Default: 5
n_msg_scan
Threshold for message count. When a user logs onto their mailbox, if the total
number of messages (i.e., new, saved, pending, urgent) is less than the number
defined in this parameter, Stratagy scans the number of messages and reconciles
the message count if an error is encountered.
Possible values: 0~99
Default: 0 (no message scan at log in time)
n_ochan
Number of dedicated ports (starting with the highest port) to reserve for outbound
notify ports. This number must not exceed the total number of available ports. When
set, the defined port does not accept incoming calls.
Important! If the value is set to 0, Stratagy attempts to use the highest numbered
IDLE port. The danger of this is that Stratagy may inadvertently begin
a notification on a port with an incoming call.
Possible values: 0~24 (number of ports)
Default: 0
notify_restriction
Restricts Notify to only the defined port. The port still takes incoming calls. This is
particularly useful for those switches that require message lights to be turned off by
the same port that turned them on.
Possible values: 1, 2, ..., highest port number
Default: 1 (To enable, remove the starting # and set the value.)
partial_q_ok
Enables the Q( ) token to save the message even though all prompts are not
completed.
True: Q( ) token saves the messages.
False: Messages are not saved if prompts are not completed.
Possible values: true, false
Default: false (To enable, remove the starting # and set the value.)
password
Sets the system password. The password is case sensitive; i.e., uppercase letters
are different from lowercase letters.
Possible values: up to eight alphabetical characters. The single quotes are
required.
Default: ‘Stratagy’
pbx_type
Defines the model of Strata CTX/Strata DK that is used as the host system.
Possible values: DK8, DK16, DK16E, DK24, DK56, DK96, DK14/40, DK14/40S
(DK24/40 with SMDI), DK280, DK280S (DK280 with SMDI), DK424i, DK424,
DK424S (DK424 with SMDI)
Default: DK424i/DK424
Parameter Description
Configure Stratagy
System Parameters
4-24 Stratagy I&M 06/02
play_caller_id
Determines whether outside Caller ID is announced when the Caller ID is available.
Note This parameter works in conjunction with SMDI integration.
True: When a message plays from an outside caller and a caller ID is available,
the ID is announced in the place of the from field during the message
header playback.
False: Caller ID never plays.
Possible values: true, false
Default: true
play_skip
Number of seconds to rewind or skip forward during message playback when a
user pressesor.
Possible values: 1~99 (seconds)
Default: 5
please_hold
System announces “Please hold while I try that extension” before transferring a
caller.
True: The system plays the above prompt.
False: The system does not play the above prompt and immediately executes the
dl_dtwait string or the Extension string, as appropriate.
Possible values: true, false
Default: true
prompt_file
Default prompt file that Stratagy uses on an incoming call. This enables you to
redefine the default language prompt file from English. It does not preclude you
from changing the prompt file during the call.
Possible values: valid prompt file. The single quotes are required.
Default: ‘English’
purge
Number of days before a message is set for purging/deletion. Whenever a user
accesses his/her User ID and pressesto Play Messages, the system tells the
user how many messages will be automatically deleted when he/she exits the Main
Menu.
CAUTION! Once a message is deleted by purging, there is no way to
retrieve it.
Possible values: 0 (purging disabled), 1~99 (days)
Default: 0
restore_config
If the Stratagy system encounters a panic error on start-up, this parameter
determines whether Stratagy restores the last known good configuration during the
Automatic System Recovery process.
Note If you set this parameter to True, you must shut down and restart on the
current software version. This ensures that if an error is encountered during
boot up the Stratagy reboots using the most current database.
True: System restores the last known good configuration if it panics on start-up.
False: System does not restore the last known good configuration if it panics on
start-up.
Possible values: true, false
Default: true
Parameter Description
Configure Stratagy
System Parameters
Stratagy I&M 06/02 4-25
Configure Stratagy
restore_original
If the Stratagy system encounters a panic error on startup, this parameter
determines whether Stratagy restores the original configuration during the
Automatic System Recovery process.
True: System restores the original configuration if it panics on start-up.
False: System does not restore the original configuration if it panics on start-up.
Possible values: true, false
Default: true
security_max_length
Maximum length of the security code that Stratagy accepts as a new security code
when a user attempts to change it from a telephone.
Setting this parameter equal to the security_min_length parameter, creates “fixed-
digit” security codes. When fixed-digit security codes are enabled, there is no longer
a requirement for the user to press after entering a security code during log on.
CAUTION! Security_max_length must be equal to, or greater than, the
security_min_length parameter setting.
Possible values: 1~16
Default: 16
security_min_length
Minimum length security code that Stratagy accepts as a new security code when a
user attempts to change it from a telephone.
Possible values: 1~16
Default: 1
short_direct_send
What Stratagy plays when the Direct Message User ID (usually 998) is entered
followed by the User ID. (The Direct Message User ID is set using the box_snd
parameter.)
True: “You entered” and the User ID’s name recording plays.
False: User ID’s current greeting plays (as if a Ring No Answer was received).
Possible values: true, false
Default: false
shutdown
Designated day and time Stratagy performs automatic shutdown for flash drive
maintenance.
The first value between the single quotes is the day of week, where:
0 Sunday 4 Thursday
1 Monday 5 Friday
2 Tuesday 6 Saturday
3 Wednesday -1 everyday
The second value between the single quotes is the hour and minute when the
shutdown occurs. Use the 24-hour format with the colon (:) omitted.
Example: 3:30 a.m. on Monday is ’1 330’
Default: ‘2 130’ (Tuesday at 1:30 a.m.)
skip_name_announce
Sets the name announcement at user log on.
True: System skips the name announcement at log-on.
False: System announces the user’s name at log-on.
Possible values: true, false
Default: false
Parameter Description

Configure Stratagy
System Parameters
4-26 Stratagy I&M 06/02
tape_length
When a User selects option(Play Messages), and then(continuous play) or
(continuous delete), this parameter defines the total number of minutes to play
or delete. Usually defines the length of one side of a tape that might be used for
recording a set of messages in a User ID.
Possible values: 00, 10~99 (minutes). Setting the value to 00 disables the
Playback and Delete Continuous features.
Default: 30
timestamp_forwards
Controls the date/time stamp the system uses on a forwarded message.
True: Uses the date/time that the message was forwarded.
False: Uses the original date and time the message was first recorded.
Possible values: true, false
Default: true
tmo_2digit_menu
Amount of time Stratagy waits to receive the second digit after receiving the first
digit of a two-digit menu selection.
Example: When playing a message, means rewind 5 seconds, while means
replay the current message. If the user presses and doesn’t enter the until after
this time elapses, Stratagy processes the digit entered and rewinds 5 seconds.
Possible values: 10~99 (units of 100 ms)
Default: 12 (1.2 seconds)
tmo_blank
Total number of minutes Stratagy waits before blanking the Main Menu screen to
prevent screen burn-in.
Note This parameter only blanks the screen if the current screen is the Main Menu.
The advertising parameter contains the string that displays when the Main Menu
screen is blanked.
Possible values: 0 (disabled), 1~99 (minutes)
Default: 5
tmo_dtmf
Amount of time Stratagy waits to determine the caller has finished entering DTMF
digits (provided the caller does not press ).
Possible values: 10~99 (units of 100 ms)
Default: 12 (1.2 seconds)
tmo_dtmf_login
Amount of time Stratagy waits to determine the caller has finished entering DTMF
digits (provided that the caller does not press ) when entering the User ID and
security code during the log in process.
Possible values: 10~99 (units of 100 ms)
Default: 20 (2 seconds)
tmo_hold
Number of seconds before Stratagy attempts to transfer a call after the caller has
pressed to hold for a busy extension.
When a caller presses to hold for a busy extension, Stratagy plays a file called
C:\Stratagy\HOLD.VOX and then attempts to transfer the call. If that file is missing,
Stratagy is silent for the number of seconds specified by this parameter.
Note To have callers hear a specialty recording while on hold, record over
HOLD.VOX by accessing the System Administration Menu. See the System
Administrator Guide for details.
Default: 20 (seconds)
Parameter Description

Configure Stratagy
System Parameters
Stratagy I&M 06/02 4-27
Configure Stratagy
tmo_idle
When this value is greater than 0, it enables a special function in Stratagy to go
off-hook and back on-hook whenever a port is idle for the specified number of
seconds. This is necessary only when under rare circumstances a telephone switch
may not release a station that is connected to Stratagy even after Stratagy has
gone on-hook.
Possible values: 0 (disabled), any number (seconds)
Default: 0
tmo_menu
Amount of time Stratagy waits before repeating a choice menu.
Possible values: 1~99 (units of 100 ms)
Default: 20 (2 seconds)
tmo_pickup
Minimum amount of time the system waits between an on-hook and off-hook event.
Possible values: 10~99 (units of 100 ms)
Default: 20 (2 seconds)
tmo_resume
Number of seconds Stratagy pauses while playing or recording a message. If this
period elapses and the user does not tell Stratagy to resume, Stratagy
automatically continues to play messages (during playback) or cancels the
recording (during recording).
Possible values: 0~ 255 (seconds)
Default: 30 (seconds)
tmo_silence
Maximum amount of silence time the system waits before deciding to finish a
recording and hang up.
Possible values: 3~15 (seconds)
Default: 15 (IVP8 = 5)
tmo_sound
Maximum amount of sound/dial tone time the system waits before deciding to finish
a recording and hang up.
Possible values: 0~9 (seconds)
Default: 0 (IVP8 = 5)
trace_cap
Defines the size of the TRACE.OUT file in kilobytes. When the size of the file
reaches its defined maximum, new data begins to overwrite the oldest data in the
file, generating a continuous loop of information.
Possible values: Values vary depending on the amount of Trace information
required and the space available on IVP8’s flash drive. If this
value is set high, it could take an excessive amount of time to
copy the file to the portable/desktop computer. A standard
setting is 1440 for copying the file to the portable/desktop
computer’s floppy-disk drive.
Default: 1000 (kilobytes = 1 megabyte)
use_pvc
Whether Stratagy enables the voice board driver’s Positive Voice Control feature
when dialing and expecting a voice to answer.
True: Driver’s Positive Voice Control feature enabled.
False: Driver’s Positive Voice Control feature not enabled. On some switches,
setting this value to false avoids false answer detects.
Possible values: true, false
Default: true
Parameter Description
Configure Stratagy
System Parameters
4-28 Stratagy I&M 06/02
user_log
Whether the system makes an entry in the specified log file whenever a User ID is
accessed via DTMF. The log entry consists of the date, time and User ID. This is
useful for creating a data file that can later be analyzed for call distributions and
dates, days, and times mailboxes are accessed.
Note When active, grows quickly. Archive or delete frequently.
Possible values: valid DOS file name. The single quotes are required.
Default: ‘USERID.LOG’(To enable, remove the starting # and set the value.)
Serial Port Definition
baud1
Baud rate for logical serial port 1. This operates on the physical COM port as
defined by serial_port1.
Possible values: 300, 1200, 2400, 9600, 19200.
Default: 2400
baud2
Baud rate for logical serial port 2. This operates on the physical COM port as
defined by serial_port2.
Possible values: 300, 1200, 2400, 9600, 19200.
Default: 2400
databits1
Number of data bits for logical serial port 1.
Possible values: 7, 8
Default: 8
databits2
Number of data bits for logical serial port 2.
Possible values: 7, 8
Default: 8
parity1
Parity to use for logical serial port 1.
Possible values: none, even, odd, mark, space
Default: none
parity2
Parity to use for logical serial port 2.
Possible values: none, even, odd, mark, space
Default: none
serial_port1
In order for Stratagy to communicate with peripheral devices connected to COM/
RS232 ports, it needs to know which ports are connected. There is a mapping from
the port that Stratagy knows to the physical port on the computer. This mapping is
defined by this parameter. To define serial port 1 as active, simply define the COM
port where it should be mapped.
Examples: Set this parameter to 1 to connect serial port 1 (Stratagy) to COM1.
Possible values: 0 (not connected), 1 (COM1), 2 (COM2), 3 (COM3), 4 (COM4)
Default: 0
serial_port2
In order for Stratagy to communicate with peripheral devices connected to COM/
RS232 ports, it needs to know which ports are connected. There is a mapping from
the port that Stratagy knows to the physical port on the computer. This mapping is
defined by this parameter. To define serial port 2 as active, simply define the COM
port where it should be mapped.
Examples: Set this parameter to 2 to connect serial port 2 (Stratagy) to COM2.
Possible values: 0 (not connected), 1 (COM1), 2 (COM2), 3 (COM3), 4 (COM4)
Default: 0
Parameter Description
Configure Stratagy
System Parameters
Stratagy I&M 06/02 4-29
Configure Stratagy
stopbits1
Number of stop bits to use for logical serial port 1.
Possible values: 0, 1, 2
Default: 1
stopbits2
Number of stop bits to use for logical serial port 2.
Possible values: 0, 1, 2
Default: 1
Serial Port Definition (Remote PC — Stratagy Admin)
admin_port
In order for Stratagy to communicate with the Stratagy Admin PC connected to one
of its serial ports, Stratagy needs to know which port is to be used. This parameter
defines the logical port that Stratagy software uses.
Example: Set this parameter to 1 for logical serial port 1.
CAUTION! The connection may fail if the baud parameter for this port is set
higher than 9600 or the serial port definitions for this port do not
correspond to the definitions for the COM port being used on the
Stratagy Admin PC.
Possible values: 1 (COM1), 2 (COM2)
Default: 2
AMIS Configuration
Audio Messaging Interchange Specification (AMIS) is the analog networking protocol that enables Stratagy to pass
voice messages to any remote voice mail system that supports the AMIS protocol.
See Table 9-1 on page 9-4 of Chapter 9 – AMIS Networking for complete descriptions of all AMIS parameters.
SMDI/Serial Integration Definition
Stratagy can enable Simplified Message Desk Interface (SMDI) protocol to provide a RS-232 integration with
telephone systems that also have SMDI capabilities. This integration is used with Centrex installations.
See Table 4-4 on page 4-33 of “SMDI Serial Integration” on page 4-32 for complete descriptions of all SMDI
parameters.
Per Port Definitions
box_grt
Sets the starting User ID for the port given as the last value.
Examples: box_grt 990 1 means that on port 1, a new call starts at User ID 990.
Possible values: valid User ID and valid port
Default: 990 1
990 2
.
.
.
990 8
Parameter Description
Configure Stratagy
System Parameters
4-30 Stratagy I&M 06/02
n_rings
Number of rings to wait before answering per port. This is useful for those
telephone systems that do not allow incoming lines to ring in a station hunt group or
do not provide delayed ringing. Also, it may be used to set up backup answering for
a secondary attendant operation.
Note There is a side effect. When a user wants to pickup his messages, he must
wait the specified number of rings before Stratagy answers.
Example: To have port 1 answer on the second ring, use set n_rings 2 1.
Possible values: 1~9 (number of rings); valid port number
Default: 1 1
12
.
.
.
1 8
Fixed Length User IDs
The fixed length of a User ID is based on its first digit.
fixed_len0
Maximum digits Stratagy expects when a caller dials a User ID beginning with zero.
There is only one User ID mailbox that can have zero as its first digit, and that is
User ID 0. If the value of this parameter is changed to 1, and a caller dials 0 in a
place where a User ID mailbox number is expected, then Stratagy immediately
accepts the 0 as the User ID mailbox number and goes to the next processing step.
If the parameter’s value is left at 8, then a timeout or pound sign (#) is required to
terminate the User ID. This latter procedure is compatible with earlier versions of
Stratagy.
Possible values: 1~8
Default: 8
fixed_len1
Maximum digits Stratagy expects when a caller dials a User ID beginning with one.
When changing this value, make certain that it is still possible to log in and send
messages to all existing User ID mailboxes that begin with this digit. For example, if
there are five-digit User ID mailboxes that begin with this digit, then you should not
set the value of this parameter less than five. Check all User ID mailboxes,
including users, guests, and reserved (411, 990, etc.)
Possible values: 1~8
Default: 8
fixed_len2
Maximum digits Stratagy expects when a caller dials a User ID beginning with two.
When changing this value, make certain that it is still possible to log in and send
messages to all existing User ID mailboxes that begin with this digit. For example, if
there are five digit User ID mailboxes that begin with this digit, then you should not
set the value of this parameter less than five. Check all User ID mailboxes,
including users, guests, and reserved (411, 990, etc.)
Default: 1~8
Default: 8
Parameter Description

Configure Stratagy
System Parameters
Stratagy I&M 06/02 4-31
Configure Stratagy
fixed_len3
Maximum digits Stratagy expects when a caller dials a User ID beginning with
three.
When changing this value, make certain that it is still possible to log in and send
messages to all existing User ID mailboxes that begin with this digit. For example, if
there are five digit User ID mailboxes that begin with this digit, then you should not
set the value of this parameter less than five. Check all User ID mailboxes,
including users, guests, and reserved (411, 990, etc.)
Possible values: 1~8
Default: 8
fixed_len4
Maximum digits Stratagy expects when a caller dials a User ID beginning with four.
When changing this value, make certain that it is still possible to log in and send
messages to all existing User ID mailboxes that begin with this digit. For example, if
there are five digit User ID mailboxes that begin with this digit, then you should not
set the value of this parameter less than five. Check all User ID mailboxes,
including users, guests, and reserved (411, 990, etc.)
Possible values: 1~8
Default: 8
fixed_len5
Maximum digits Stratagy expects when a caller dials a User ID beginning with five.
When changing this value, make certain that it is still possible to log in and send
messages to all existing User ID mailboxes that begin with this digit. For example, if
there are five digit User ID mailboxes that begin with this digit, then you should not
set the value of this parameter less than five. Check all User ID mailboxes,
including users, guests, and reserved (411, 990, etc.)
Possible values: 1~8
Default: 8
fixed_len6
Maximum digits Stratagy expects when a caller dials a User ID beginning with six.
When changing this value, make certain that it is still possible to log in and send
messages to all existing User ID mailboxes that begin with this digit. For example, if
there are five digit User ID mailboxes that begin with this digit, then you should not
set the value of this parameter less than five. Check all User ID mailboxes,
including users, guests, and reserved (411, 990, etc.)
Possible values: 1~8
Default: 8
fixed_len7
Maximum digits Stratagy expects when a caller dials a User ID beginning with
seven.
When changing this value, make certain that it is still possible to log in and send
messages to all existing User ID mailboxes that begin with this digit. For example, if
there are five digit User ID mailboxes that begin with this digit, then you should not
set the value of this parameter less than five. Check all User ID mailboxes,
including users, guests, and reserved (411, 990, etc.)
Possible values: 1~8
Default: 8
fixed_len8
Maximum digits Stratagy expects when a caller dials a User ID beginning with eight.
When changing this value, make certain that it is still possible to log in and send
messages to all existing User ID mailboxes that begin with this digit. For example, if
there are five digit User ID mailboxes that begin with this digit, then you should not
set the value of this parameter less than five. Check all User ID mailboxes,
including users, guests, and reserved (411, 990, etc.)
Possible values: 1~8
Default: 8
Parameter Description
Configure Stratagy
SMDI Serial Integration
4-32 Stratagy I&M 06/02
SMDI Serial Integration
Stratagy can enable Simplified Message Desk Interface (SMDI) protocol to provide a RS-232
integration with telephone systems that also have SMDI capabilities. This integration is used with
Centrex installations and is an option for the Strata DK14/40i/40 and Strata DK424.
SMDI is the most efficient way of integrating Stratagy with a telephone system. SMDI relies on
data, not DTMF, to provide detailed call information that Stratagy can quickly use to direct callers
to user’s mailboxes. It provides calling party ID (to recognize users calling from their extensions)
so that there is no need to enter their User ID, only their security code, to log on to their mailboxes.
Data messages or packets are sent into the system to provide information concerning the type of call
that is ringing into Stratagy. Stratagy can use this status information to provide better call coverage
and perform custom applications using the RNA and Busy Chain options.
There are four types of incoming packets:
•A – All Call Forwarded Calls
•N – No Answer Forwarded Calls
•B – Busy Forwarded Calls
•D – Direct Calls
Message Waiting is also enabled and disabled through this link.
An example of an SMDI packet is:
Note The above values are examples and can be different for each installation.
fixed_len9
Maximum digits Stratagy expects when a caller dials a User ID beginning with nine.
When changing this value, make certain that it is still possible to log in and send
messages to all existing User ID mailboxes that begin with this digit. For example, if
there are five digit User ID mailboxes that begin with this digit, then you should not
set the value of this parameter less than five. Check all User ID mailboxes,
including users, guests, and reserved (411, 990, etc.)
Possible values: 1~8
Default: 8
Packet:
MD0010208B0000000205 0000000223
MD001 Message Desk Number. This information is not utilized by Stratagy for call processing and is
ignored.
0208 Terminal Number. This is the assigned number or extension number of the port that is
ringing into Stratagy.
BCall Status. Defines the type of call that is ringing into Stratagy as a Busy Forward call.
0000000205 Number of the Called Extension. Number length is 10 digits. Numbers that are shorter than
10 digits are padded with zeros.
0000000223 Number of the Calling Extension. Number length is 10 digits. Numbers that are shorter than
10 digits are padded with zeros.
Parameter Description
Configure Stratagy
SMDI Serial Integration
Stratagy I&M 06/02 4-33
Configure Stratagy
Step 1: Enable SMDI
1. Select the appropriate Strata DK system with SMDI integration from the Toshiba Plug and Play
screen. (See “Toshiba Plug and Play” on page 4-4 for instructions.)
2. Define parameters in Stratagy System Configuration for SMDI/Serial Integration (see Table
4-4).
3. Define the Serial Ports used for the link (see page 4-28). Strata DK settings are: 7, even, 1 stop.
4. Define Message Notification via SMDI in the Notify table of each mailbox. The S( ) token is
used to send the proper commands for enabling and disabling Message Waiting over the serial
port of the Stratagy. A number of default templates can be found in the Template table that
works with most SMDI applications. (See “Templates” on page 6-28.)
Example titles of the SMDI templates are:
COM1-3D LGHT On
COM1-3D LGHT Off
Where:
COM1 defines the COM port used as 1, and 3D defines the digit length of the User ID as 3.
Note By selecting the template, the token programming sequence, starting with the S( ) token, is
placed automatically by Stratagy in the Notify Menu’s Method field. To prevent Stratagy
from physically taking a port off-hook, you must place an “@” sign before the S( ) token
in the field.
Table 4-4 SMDI Parameters
Parameter Description
smdi_base_port Some SMDI installations use logical terminal numbers that do not begin with 1 (for
example, if it uses the extension or physical number to define the terminal). In these
situations, you must define the extension number where port 1 is connected. The
system assumes that the extension numbers are then connected in numerical order
to the remaining ports.
Example: 208 (extension number of port in Strata DK)
Default: 1
smdi_port Logical serial port Stratagy uses for SMDI integration.
Possible values: 0 (disables SMDI integration), 1, 2 (port number)
Default: 0
smdi_pretimeout Maximum number of seconds that an SMDI packet can precede the forwarded call.
Possible values: 5~50 (seconds)
Default: 50
smdi_type Protocol Stratagy uses with RS-232 data integration (outband integration).
‘smdi’: standard SMDI integration
‘s75’: System 75 integration
Possible values: ‘smdi’, ‘s75’ The single quotes are required.
Default: ’smdi’

Configure Stratagy
SMDI Serial Integration
4-34 Stratagy I&M 06/02
Step 2: Connect SMDI
SMDI connections use a RS-232 cable to connect the telephone system to one of Stratagy’s serial
ports.
For a Centrex installation, a data modem provides the SMDI connection. SMDI interface requires
that the Strata DK have a WSIU, TSIU, PIOU, PIOUS, RSSU or RSIU PCB installed.
Consult the Strata DK Installation and Maintenance Manual for installation instructions.
Step 3: Test SMDI
After the SMDI feature has been enabled in Stratagy and the serial link has been established with
the COM ports, the SMDI link can be tested.
Initial testing can be done by making test calls into Stratagy. Program a User ID with default
options. Use the default System Greeting and default System Busy greetings for the mailbox.
1. Make a call into Stratagy from an extension that is the same number as the User ID. Stratagy
receives a Direct Call packet and prompts “Please enter your security code.”
Note If the system plays the Company Greeting, then the link is not working. Recheck the
installation.
2. Call forward a telephone All Calls. From another extension, call the forwarded telephone. The
System Greeting for the mailbox plays.
Note If the system plays the Company Greeting, then the link is not working. Recheck the
installation.
3. Call forward a telephone for Busy. Make the extension busy, then call the busy extension from
another telephone. The System Busy Greeting plays.
Note If the system plays the Company Greeting, then the link is not working. Recheck the
installation.
4. If Steps 1, 2 and 3 were successful, make another call from an internal extension (that has a
User ID assigned on the system) to the forwarded extension, and leave a message.
5. Log on to the User ID that has the message. The header information for the message should
include the User ID number of the extension that left the message.
Play the message. If these tests are successful, the SMDI integration is working properly. If
these tests fail, then the link must be monitored to validate whether the data is being sent from
the host phone system or the data is not being processed correctly by Stratagy. Proceed to Step
4.
Step 4: (Optional) Validate the Link
If the tests in Step 3 on page 4-34 fail, then the link must be monitored to validate whether the data
is being sent from the host phone system or the data is not being processed correctly by Stratagy.
To validate the link, you must perform the following procedure.
Note For further assistance, contact Toshiba Technical Support.
1. Connect a portable or desktop PC to the RS-232 serial connection from the Host telephone
system.
Note The PC must have a communications program such as Microsoft Windows Terminal or
ProComm. The data packets are in ASCII format.
2. Make calls into the Stratagy voice ports. As calls ring in, data packets should be received on the
PC. If packets are being sent, then Stratagy is not processing them correctly. Continue to Step 4.

Configure Stratagy
SMDI Serial Integration
Stratagy I&M 06/02 4-35
Configure Stratagy
Note If packets are not seen, the host phone system may not be sending the packets or there is a
bad cable or connection.
3. Re-check configuration parameters in the Stratagy. Validate the data protocol parameters and
COM port are properly defined in the Serial Port Definition of the Stratagy System
Configuration.
4. Call each port individually and validate by the packet information that the Terminal number for
the first port correlates with the value defined by smdi_base_port in the Stratagy System
Configuration. Validate remaining Terminal numbers are sequential from the first.
5. Validate that the number of the Called Extension (defined in the packet) is a valid User ID. If
the User ID is less than seven digits long then the number is prefixed with zeros in the packet.
If the User ID is less than seven digits long but the Called Extension defined in the packet is
prefixed by numbers other than zero that information must be defined in the System Integration
Patterns screen (see page 4-9).
SMDI Calling Party Identification
The Strata CTX/Strata DK telephone system only provides the Stratagy with incoming Calling
Party ID via SMDI integration. Data messages or packets are sent into the system to provide
information concerning the type of call and the calling party ID.
Note When configuring the Stratagy for SMDI, make sure both the Stratagy and the telephone
system are configured concurrently. If the phone system is configured for a 10-digit Calling
Party ID, the IVP8 must also have the proper 10-digit integration patterns in the System
Integration Patterns screen (see page 4-5). Also make sure the correct notification template
has been selected in the User ID Notify screen.
See “SMDI Serial Integration” on page 4-32 for detailed information on SMDI, caller ID, and %K
token use.
Some examples of the available applications are adding the Calling Party ID to the message header,
playing a specific greeting and routing a call based on the telephone number received.
Calling Party ID in Message Header
One new application is playing the Calling Party ID in the header information of the message. To
configure this option, in addition to making the required changes for SMDI integration in the
Stratagy System Configuration, you must make sure the play_caller_id parameter is set to True.
Call Routing Based on Caller ID
The Stratagy can also play a specific greeting or route a call based on the telephone number received
from the SMDI/Caller ID information.
Each port on the Stratagy system stores the %K token’s value individually so multiple ports can run
this application simultaneously. The value of the %K token lasts for the duration of the call and is
cleared when the Stratagy voice port goes idle. When Stratagy transfers the call to a Strata DK LCD
telephone, the Caller ID information displays on the LCD.

Configure Stratagy
SMDI Serial Integration
4-36 Stratagy I&M 06/02
Example Application
In this example, mailbox 900 answers incoming calls to the Stratagy system. The Caller ID
information is temporarily stored as the %K token. Using the V token, Stratagy searches the
CALLERID.TXT file for the telephone number saved as %K. If there is a match for %K, the number
in the second column of the file (890 in this example) is stored as the variable %S2.
The final portion of the token string in mailbox 900 sends the call to mailbox %S2 to hear the correct
greeting, route the call to a specific location (e.g., customer support), etc. If there is no match found
for %K, the call follows the Done chain to mailbox 990 for normal call processing.
➤To configure this example for the Flash and IVP8
Note Flash only supports the V token when used in conjunction with SMDI integration.
1. Using any text editor, create the DOS text file (CALLERID.TXT) on the Stratagy Admin PC.
The format should be:
9495833700,890
9495876798,890
where: 9495833700 and 9495876798 are the Caller ID
phone numbers
890 is the GOTO mailbox
2. Save this file as C:\CALLERID.TXT.
3. From the Stratagy Admin Main Menu, press Alt+T to access the Tools menu.
4. Press 8. The Filecopy
screen displays.
5. Enter PC in the Source
System field, and
CALLERID.TXT in the
Copy From and Copy To
fields.
6. Press Enter. Stratagy
copies the file to the Flash/
IVP8’s C:\drive.
7. Press any key to continue.
8. Press Esc. Stratagy
Admin’s Main Menu
displays.
9. From the Main Menu, press
Alt+U to access the Users Menu.
10.From the Users Menu, create and save User ID mailbox 900. Enter the %K token string in the
Extension field. Set the mailbox’s Do Not Disturb field to Off and configure the Done and RNA
chains.
3233
3516
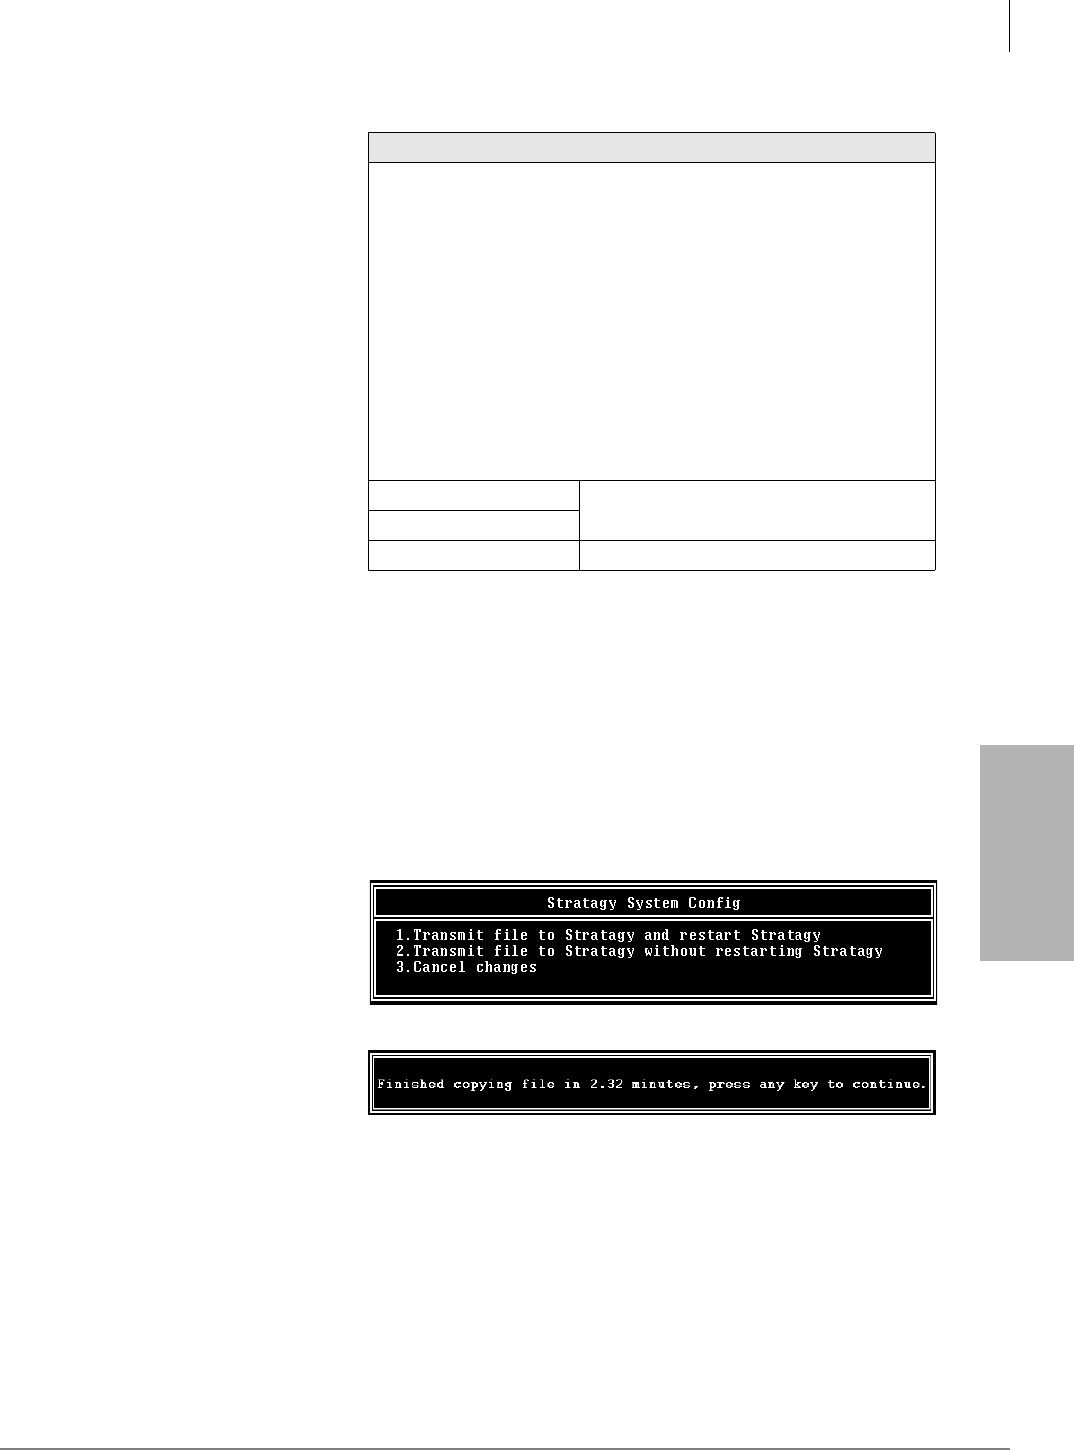
Configure Stratagy
SMDI Serial Integration
Stratagy I&M 06/02 4-37
Configure Stratagy
11. From the Users Menu,
create and save the Caller
ID greeting mailbox (890).
Set the Do Not Disturb
(DND) field to On for this
mailbox unless another
token string is being used to
run a subsequent
application.
12. Press Esc. The Stratagy
Admin Main Menu
displays.
13. Press Alt+T. The Tools
menu displays.
14. Press 6. The Stratagy
System Configuration
screen displays.
15. Modify the box_grt
parameter for the
appropriate number of ports in the Per Port Definitions portion of the Stratagy System
Configuration. The lines should look similar to this:
#- Per Port Definitions
set box_grt 900 1
set box_grt 900 2
set box_grt 900 3
set box_grt 900 4
16. Press ESC.
17. From the Stratagy System
Config screen, press 1. The
changes are transmitted to
Stratagy and Stratagy is
shut down.
When the copy is complete,
this status box displays:
18. Press any key to reboot.
Incoming calls are now
routed to User ID mailbox 900 where Stratagy searches for a Caller ID match.
The example mailbox 900 looks like this:
Mailbox 900
Extension @KFV(“CALLERID.TXT”,1,%K,2,%S2)
G(%S2)
@ Suppress normal process.
KF Suppresses DTMF gate.
V(“CALLERID.TXT”,1,%K,2,%S2)
Searches field 1 of the callerid.txt for a value that
matches %K. If a match is found, Stratagy stores the
value in field 2 of the callerid.txt as %S2. If no match is
found, the remaining values in the token string are
ignored and Stratagy executes the Done chain
(User ID 990).
G(%S2) Goes to mailbox number stored in %S2 (e.g., user ID
890).
Done Chain 990 Ensures the call is still handled in case of
an error in the process.
RNA Chain 990
DND Off Stratagy processes token string.
3241
3254

Configure Stratagy
SMDI Serial Integration
4-38 Stratagy I&M 06/02

Stratagy I&M 06/02 5-1
How Stratagy Operates
How Stratagy Operates 5
Stratagy connects to standard analog extensions on the telephone system. To the telephone system,
Stratagy looks like several ordinary telephones, not special digital or “fancy” telephone sets.
The telephone system controls the incoming calls until it directs them to Stratagy by ringing its
“telephone” or port. Once a call rings on a Stratagy port, Stratagy answers and then performs the
actions it is programmed to perform.
Stratagy’s design revolves around User ID mailboxes. How a User ID has been customized
determines what a caller hears and is able to do (see Chapter 4 – Configure Stratagy for details). For
example, if User ID 990 contains the initial company greeting, a caller accessing User ID 990 hears
the greeting recorded as the greeting for User ID 990.
Call processing control in Stratagy involves User IDs, chains, groups, menus, and a token
programming language. Using these control structures, you can define virtually any call handling
method.
This chapter discusses:
•User IDs
•Call processing control
•User ID mailboxes
•How Stratagy processes User IDs and User ID mailboxes
User IDs
All of Stratagy’s User IDs are stored in a flatfile database. As a result, every User ID in Stratagy
must be unique; you cannot have two User IDs with the same number.
Whenever a caller enters a User ID, Stratagy always accesses the same User ID. The exception is
single-digit menus. If you define a single-digit menu key (0~9), Stratagy processes the User ID
given for the menu key rather than the User ID with the single digit number. For example, if a caller
were in User ID 100 and User ID 100 had a single-digit key 0 mapped to User ID 222, then by
pressing 0 the caller would be sent to User ID 222 rather than to the operator defined by User ID 0.

How Stratagy Operates
User IDs
5-2 Stratagy I&M 06/02
Reserved User IDs
Stratagy comes with several pre-defined User IDs. Only User ID 999 cannot be assigned to another
User ID number. Each of the following User ID mailboxes performs a specific function.
Most of the mailbox numbers of the pre-defined User IDs can be changed, if required, to better meet
your customers needs.
Notes
●User IDs 989, 993, 995, and 996 are not supported by the Flash.
●User ID 993 is supported only by the IVP8.
User ID 0: Operator – For an after hours caller who is unable to direct his own call or does not
know the extension of the person he wants to reach. See Appendix B – Special Greeting User ID
Mailboxes for details.
User ID 411: Directory – Directory User ID for all ports or specified ports. The caller enters the
first few letters of the name of the person he/she wants to contact. Stratagy plays the corresponding
User ID’s name recording. See Appendix B – Special Greeting User ID Mailboxes for details. Also
see the Stratagy System Configuration parameter box_idx in Chapter 4 – Configure Stratagy.
User ID 982/983: System Shutdown 1 & 2 – These User IDs enable the System Administrator to
shut down the system via the telephone dial pad.
User ID 989: AMIS Loopback – User ID mailbox used by other AMIS nodes for testing the
network. Any AMIS message directed to this User ID mailbox is sent back to the sender, if
accessible to Stratagy. By default, the User ID mailbox is disabled. See the Stratagy system
configuration parameter amis_ltm in Chapter 9 – AMIS Networking.
User ID 990: Company Greeting – The salutation that lets the caller know which company he
called. See Appendix B – Special Greeting User ID Mailboxes for details.
User ID 991: Caller Instructions – Give the caller options for reaching departments or
information. See Appendix B – Special Greeting User ID Mailboxes for details.
User ID 993: Soft Modem – The KM token is factory programmed into this User ID. The token
enables a Stratagy Admin PC’s modem to communicate with the IVP8 internal modem (2400 baud).
User ID 994: Fax Tone Detect – User ID Stratagy “jumps” to when Stratagy detects a specific
tone. Used to handle incoming faxes, detect connections from TDD machines for deaf
communication, etc. See the Stratagy System Configuration parameter hot_box in Chapter 3 –
Configure Stratagy.
User ID 995: Future Delivery – Stores all messages awaiting future delivery. See the Stratagy
System Configuration parameter future_delivery in Chapter 4 – Configure Stratagy.
User ID 996: Guest Defaults – User ID Stratagy uses for the default values when creating a new
Guest User ID. The field values are copied into a new Guest User ID upon initialization. See the
Stratagy System Configuration parameter guest_defaults in Chapter 4 – Configure Stratagy.
User ID 997: Defaults Box – User ID Stratagy uses for the default values when creating a new User
ID. The field values are copied into a new User ID upon initialization. See the Stratagy System
Configuration parameter defaults_box in Chapter 4 – Configure Stratagy.
User ID 998: Direct Message – Direct Message User ID for all ports or specified ports. Stratagy
records a message for a User ID without having to execute the Extension field and/or hear the User
ID’s greeting. This is particularly useful for an Operator transferring directly to voice mail. See the
Stratagy System Configuration parameter box_send in Chapter 4 – Configure Stratagy.

How Stratagy Operates
Call Processing Control
Stratagy I&M 06/02 5-3
How Stratagy Operates
User ID 999: System Administrator User ID – Enables the System Administrator to create system
lists, record and delete system announcements, record the busy-hold music or message, manage
User IDs, and review system status. See System Administrator Guide for details. This mailbox has
a pre-programmed extension of H( ) for Hang-up. This enables (999) its use as a disconnect code
for telephone systems that provide this feature.
Call Processing Control
Call processing control in Stratagy goes beyond the definition of unique User IDs. Stratagy provides
four additional structures: chains, groups, menus, and a token programming language. These
control structures enable more complex control so that you can define virtually any call handling
method.
Chains
Chains are how you tell Stratagy what to do when one of three conditions apply:
•Done – The Done chain instructs Stratagy where to send a caller who remains on the line after
leaving a message or after listening to an announcement only mailbox.
•Ring No Answer (RNA) – The RNA chain instructs Stratagy where to send a caller when there
is a RNA at a User ID’s extension.
•Busy – The Busy chain instructs Stratagy where to send a caller when a User ID’s extension is
Busy.
Groups
Groups control which User IDs a call may access. Each User ID mailbox user can be a member of
up to four groups. To be able to access another User ID, the caller User ID must share at least one
group number with the currently accessed User ID.
Menus
Menus define the destination for a caller that presses one of ten possible single-digit menu options
while listening to a mailbox’s greeting. Menus can accommodate an unlimited number of special
applications.
Token Programming Language
Stratagy’s programming language enables Stratagy to perform such versatile features as obtaining
information from callers, message waiting light control, and confirming digits entered by a caller.
A series of tokens instruct Stratagy what actions to perform. See Chapter 7 – Token Programming
for details.

How Stratagy Operates
User ID Mailboxes
5-4 Stratagy I&M 06/02
User ID Mailboxes
Types of Mailboxes
User IDs fall into one of several general categories, based on how they are customized.
User
A typical User ID mailbox records messages from callers. A user can periodically check the User
ID for messages, or be notified by a variety of automatic notification methods. Typically, there is
one user for each User ID, although several User IDs may share a single extension because the users
themselves share a single telephone line.
Information
An information User ID mailbox does not accept messages from callers. Instead, Stratagy plays its
greeting to callers in order to provide them with information, such as the company’s hours of
operation and location. No user or telephone extension corresponds to this type of User ID.
Control
Using Stratagy’s Token Programming Language, a control User ID mailbox, directs the flow of a
call. Typically, it interacts with the caller in some way, then transfers the call to one or more
additional User IDs for further processing.
For example, a User ID might ask the caller to input his or her telephone number. If the telephone
number is seven digits long, Stratagy assumes it is valid and the User ID passes control to a second
User ID that makes use of that telephone number in some way (such as faxing a document to it). If
the telephone number is not seven digits long, Stratagy might transfer to a third User ID, which
would be an information box whose recording informs the caller that the telephone number was not
the right length. The User ID might then transfer control back to the original User ID to give the
caller another chance to enter the correct number of digits.
Customizing Mailboxes
Customizing User ID mailboxes involves defining User IDs using the following menus:
•Users Menu—The Users Menu consists of three screens (Info/Status, Options, Group/Chains)
that enable you to define, delete, and list User ID mailboxes. Features to define include:
company directory entries, Do Not Disturb, Call Screening, Greetings, and control structures
such as Chains, Groups, and Menus. Once you have defined and saved a User ID, you can
customize it using the Auto and Notify Menus. (See Chapter 6 – Menus for detailed
information.)
•Auto (Scheduling) Menu—With the Auto Menu, you can set up automatic changes for each
User ID Mailbox. You can set these changes to occur at a specified time, on certain days of the
week, or on a specified date. For example, you can set up different daytime and nighttime
greetings. (See “Auto (Scheduling) Menu” on page 6-20 for detailed information.)
•Notify Menu—The Notify Menu enables you to program Stratagy to automatically call a user
to notify him of messages. Notification methods include beepers, other telephones, and office
paging systems. (See “Notify Menu” on page 6-27 for detailed information.)
In addition to the programming capabilities provided by the Users, Auto, and Notify Menus,
Stratagy provides:
•Token Programming Language—Enables you to obtain additional features. These include
obtaining information from callers and message waiting light control. See Chapter 7 – Token
Programming for details.

How Stratagy Operates
How Stratagy Processes
Stratagy I&M 06/02 5-5
How Stratagy Operates
•Reserved User ID Mailboxes—These mailboxes have pre-programmed common features. See
“Reserved User IDs” on page 5-2 for more information.
•Notify Templates—Notify contains templates (e.g., message waiting light control and pagers)
you can use for defining User ID Notify records.
See Appendix A – Checklists/Forms for forms to use for defining the Users, Auto, and Notify
Menus. See Chapter 8 – Customization Examples for sample customized User ID mailboxes. If you
have questions about customizing User ID mailboxes, please contact Toshiba Technical Support.
How Stratagy Processes
User IDs
Whenever a call rings a port on Stratagy, Stratagy answers and begins processing the call starting
at a predefined User ID. After processing the initial User ID, Stratagy continues processing by
following a chain to the next User ID. At any time, should a caller enter DTMF, Stratagy translates
the DTMF to a User ID and continues processing at that User ID. Therefore, movement between
User IDs is accomplished automatically by following chains or by DTMF entry. (And a third way:
Stratagy’s Token Programming Language.)
How Stratagy Processes Movement Between User IDs
The process described is the default setup in Stratagy (see Figure 5-1). For example, User ID 990
(Company Greeting) and User ID 991 (Caller Instructions) are defaults; you can assign other User
ID mailboxes to perform these functions. In addition, you may override any of the described
processing by changing the chain and User ID definitions.
1. New Call – The process starts with an incoming call. Stratagy directs the call to the Company
Greeting User ID.
2. Company Greeting User ID (Default: User ID 990) – The Company Greeting User ID plays
the opening greeting (“Thank you for calling... ”). Stratagy determines whether the caller
entered DTMF during the greeting.
•Yes – Stratagy directs the call to that DTMF and processes the User ID. It then follows the
Done chain of the User ID. If there is no Done chain for this User ID, it follows the Done
chain for the Company Greeting User ID.
•No – Stratagy directs the call as per the Company Greeting User ID 990’s Done chain to the
Company Instructions User ID.
3. Caller Instructions User ID (Default: User ID 991) – The Company Instructions User ID
plays the caller instruction message, which is a menu of dialing choices (“To reach... enter...”).
Stratagy determines whether the caller entered DTMF during the message.
•Yes – Stratagy directs the call to that DTMF and processes the User ID. It then follows the
Done chain of the User ID. If there is no Done chain for this User ID, it follows the Done
chain for the Company Greeting User ID.
•No – Stratagy looks at the value of the Stratagy System Configuration parameter dtmf_gate.
4. dtmf_gate — Stratagy determines if the Stratagy System Configuration parameter dtmf_gate is
True. See Chapter 4 – Configure Stratagy for information on configuring dtmf_gate.
•Yes – Stratagy prompts the caller to say “yes” to the tone. If Stratagy detects any sound,
Stratagy transfers the call to the Operator User ID. If not, Stratagy hangs up.
•No – Stratagy transfers the call to the Operator User ID.
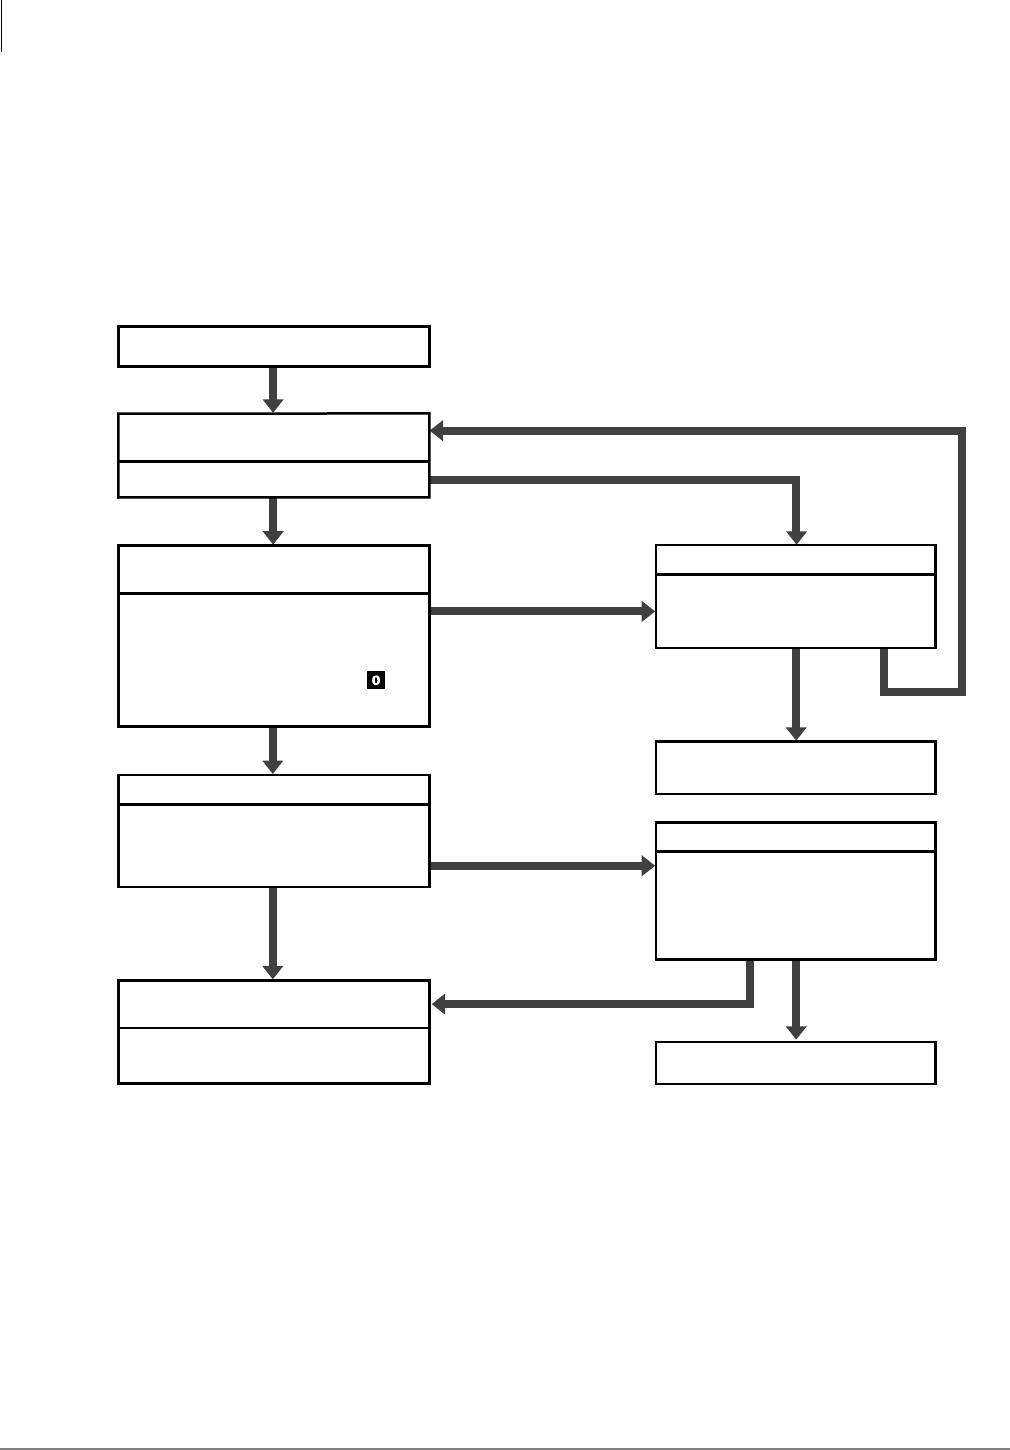
How Stratagy Operates
How Stratagy Processes
5-6 Stratagy I&M 06/02
5. Operator User ID (Default User ID 0) – This is the end of the Company Instructions User ID’s
Done chain.
If a caller presses after recording a message for a User ID, the message is sent to the
destination mailbox, the prompt, “message sent” plays and the call transfers to the Operator.
Note This feature is only available during the original message recording. If the caller presses
while re-recording or during the Message menu prompts, the Stratagy system reacts as if
the caller has pressed .
Company Greeting User ID
(default is User ID 990)
New Call
Follow the User ID
Done
chain.
Hang Up
Caller enters
DTMF
Yes
Done
Chain
Done
chain
“Thank you for calling…"
dtmf_gate
Is the configuration option
dtmf_gate
TRUE?
Process the User ID.
Does this User ID have a valid
Done
chain?
Operator User ID
(default is User ID 0)
Process User ID 0
(Operator)
No
Caller Instructions User ID
(default is User ID 991)
“To reach the person you are
calling, enter their extension
number.
To reach an Operator, press
or stay on the line.”
Caller enters
DTMF
Follow
Done
chain of Company Greeting User ID
No
Yes
Yes No
DTMF
“If you would like to speak to
the Operator, please say ‘Yes’
at the tone.”
Does Stratagy detect any
sound?
Caller on the Line?
2466
Figure 5-1 Movement Between User IDs
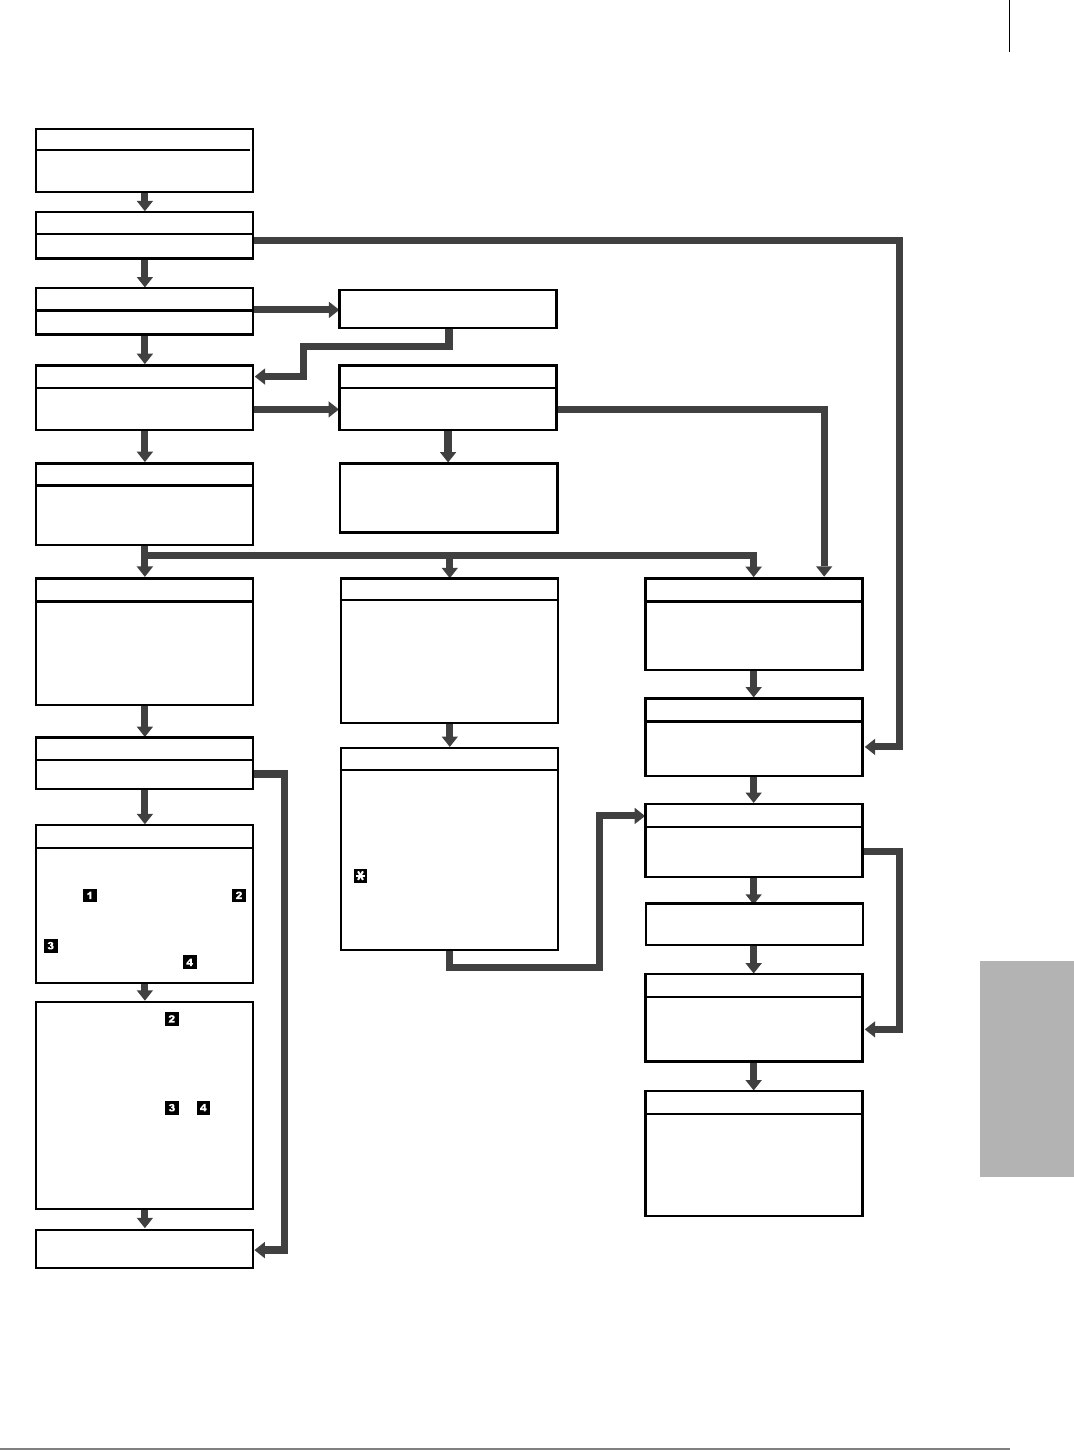
How Stratagy Operates
How Stratagy Processes
Stratagy I&M 06/02 5-7
How Stratagy Operates
Not Successful
Successful
Yes
No
No
No
Yes
Records caller’s message.
No
Yes
Call Screening
Is
Screen Calls
ON?
Do Not Disturb
Is
Do Not Disturb
ON?
Evaluate Extension
Is the first
character “@”?
Suppress Normal Process
Processes Token
Programming Language
Transfer Hold
Processes Token
Programming Language
(usually dials the extension).
Follows the
Done
chain of the
Company Greeting User ID
(default 990)
Connects the Caller
Yes
No
No
Start
Stratagy directs call
to this User ID.
Yes
Answer
If
ID Call?
is YES, Stratagy
plays the tone and then the
User ID's recorded name.
Otherwise, Stratagy plays a
tone.
Call Screening
Is
Screen Calls
ON?
Busy
If the User ID’s
Busy
chain is
defined, Stratagy follows it.
Otherwise, plays either the
system busy greeting or the
custom busy greeting, per the
User ID’s configuration.
Caller Response
If the caller enters another
User ID, Stratagy starts
processing at that User ID.
If the User ID's
Busy Hold
is
YES and the caller presses
to hold, Stratagy starts a hold
queue for the User ID.
If the caller does nothing,
Stratagy continues.
Ring No Answer
If the User ID’s
RNA
chain is
defined, Stratagy follows it.
Otherwise, continues.
Greeting
Plays the
current greeting.
Store Messages
Is
Store Messages
YES?
Copy Message To
If
Copy Message To
defines a
valid User ID, copies/records
the message to that User ID.
Done
If the User ID’s
Done
chain is
defined, Stratagy follows it.
Otherwise, follows the
Done
chain of the Company
Greeting User ID (default 990).
Play Caller Name
User accepts, rejects, or
transfers call. To accept call,
press 1 . To reject call, press 2
and hang up. To transfer call
with an announcement, press
3 . To transfer call without an
announcement, press 4.
If the user presses and
hangs up or does nothing,
Stratagy continues as if it
received a Ring No Answer
after dialing the extension.
If the user presses or ,
dials the extension, and hangs
up. Stratagy directs the call to
Start for the extension
transferred to.
Otherwise, continues.
Records Caller's Name
2467
Figure 5-2 User ID Mailbox Processing
How Stratagy Operates
How Stratagy Processes
5-8 Stratagy I&M 06/02
User ID Mailboxes
Stratagy processes a User ID mailbox (see Figure 5-2) based on:
•User ID mailbox field settings
•Whether an Answer, Busy, or RNA condition exists.
How Stratagy Processes User ID Mailboxes
1. Start – Stratagy directs the call to this User ID.
2. Do Not Disturb – Stratagy determines whether the User ID mailbox field Do Not Disturb is
On.
•Yes – Stratagy directs the call to the RNA greeting and proceeds with the RNA condition.
•No – Stratagy determines whether Call Screening is On.
3. Call Screening – Stratagy determines if Screen Calls is On.
•Yes – Stratagy records the caller’s name and then proceeds to dial the Extension.
•No – Stratagy dials the Extension.
4. Evaluate Extension – Stratagy determines if the Extension’s first character is @.
•Yes – Stratagy suppresses the normal process. Stratagy processes the Token Programming
Language, then proceeds to the RNA condition. If there is an error during processing,
Stratagy follows the Done chain of the Company Greeting User ID.
•No – Stratagy places the call on transfer hold, dials the digits in the User ID’s extension
field, then proceeds to the Answer, Busy, or RNA condition, as appropriate (see Table 5-1).
Table 5-1 Call Flow
Answer Busy Ring No Answer
Stratagy determines if ID Call is Yes.
Yes – Stratagy plays the user’s
recorded name. If the
recording does not exist,
Stratagy plays a tone.
Stratagy proceeds to Call
Screening.
No – Stratagy proceeds to Call
Screening.
Stratagy determines if the Busy
chain is defined.
Yes – Stratagy follows this User
ID’s Busy chain.
No – Stratagy proceeds to play
the busy greeting.
Stratagy determines if the Ring No
Answer chain is defined.
Yes – Stratagy follows the User
ID’s Ring No Answer chain.
No – Stratagy plays the current
greeting.
Call Screening – Stratagy
determines if Screen Calls is On.
Yes – Stratagy plays the name
the caller recorded.
No – Stratagy connects the
caller.
Play Busy Greeting – Stratagy
determines if there is a custom busy
greeting.
Yes – Stratagy plays the user’s
custom busy greeting.
No – Stratagy plays the system
busy greeting.
Play the Current Greeting –
Stratagy determines if there is a
custom greeting.
Yes – Stratagy plays the user’s
custom greeting.
No – Stratagy plays the system
greeting.
How Stratagy Operates
How Stratagy Processes
Stratagy I&M 06/02 5-9
How Stratagy Operates
Play Caller Name – User Accepts,
Rejects, or Transfers. Stratagy plays
“To accept... “
Accepts Call – User accepts call
(presses). Stratagy
proceeds to connect the
caller.
Rejects Call – User rejects call
(presses ) and hangs up.
Stratagy proceeds to the
Ring No Answer condition.
Transfers Call with Announcement –
User transfers call with
announcement
(presses ). The user dials
the extension to transfer
the call and hangs up.
Stratagy plays “Your call is
being transferred to” with
the name recording or User
ID of the extension where
the call is being transferred
and Stratagy transfers the
call. Stratagy proceeds to
Start for the extension
transferred to.
Transfers Call without
Announcement – User
transfers the call without
announcement
(presses ). The user dials
the extension to transfer
the call and hangs up.
Stratagy asks the caller to
continue to hold and
transfers the call. Stratagy
proceeds to Start for the
extension transferred to.
Caller Response – Stratagy directs
the call depending upon the caller’s
response.
Hold – If the User ID’s Busy Hold
is YES and the caller
presses to hold, Stratagy
starts a hold queue for this
User ID.
Another User ID – If the caller enters
another User ID, Stratagy
processes that User ID.
Nothing – If the caller does nothing,
Stratagy determines if
Store Messages is YES.
Store Messages – Stratagy
determines if Store Messages is
Yes.
Yes – Stratagy records the
caller’s message. Then
determines if there is a
Copy Message To mailbox.
No – Stratagy determines if
there is a Copy Message
To mailbox.
Store Messages – Stratagy
determines if Store Messages is
Yes.
Yes – Stratagy records the
caller’s message. Then
determines if there is a
Copy Message To.
No – Stratagy determines if
there is a Copy Message
To.
Copy Message To – Stratagy
determines if Copy Message To
contains a valid User ID.
Yes – Stratagy copies/records
that message to that User
ID. Stratagy then proceeds
to the User ID Done chain.
No – Stratagy proceeds to the
User ID Done chain.
Copy Message To – Stratagy
determines if Copy Message To
contains a valid User ID.
Yes – Stratagy copies/records
that message to that User
ID. Stratagy then proceeds
to the User ID Done chain.
No – Stratagy proceeds to the
User ID Done chain.
User ID Done Chain – Stratagy
determines if this User ID Done
chain is defined.
Yes – Stratagy follows the User
ID Done chain.
No – Stratagy follows the Done
chain of the Caller
Instructions User ID.
Connect the Caller – If the user
accepts the call, Stratagy connects
the caller and the user.
User ID Done Chain – Stratagy
determines if the User ID Done
chain is defined.
Yes – Stratagy follows the User
ID Done chain.
No – Stratagy follows the Done
chain of the Caller
Instructions User ID.
Caller Instructions User ID Done
Chain – Stratagy follows the Done
chain of the Company Greeting User
ID (default 990).
Caller Instructions User ID Done
Chain – Stratagy follows the Done
chain of the Caller Instructions User
ID (default 991).
Table 5-1 Call Flow (continued)
Answer Busy Ring No Answer

How Stratagy Operates
Feature Programming
5-10 Stratagy I&M 06/02
Feature Programming
This chapter lists (in alphabetical order) Stratagy’s programmable features and gives instructions
on programming each feature. All features are categorized as:
•System – Features set on a system-wide basis.
•User ID Mailbox – Features set on a User ID mailbox basis.
For descriptions of these features, see the Stratagy General Description. For additional information,
see:
•Parameters – Chapter 4 – Configure Stratagy
•Tokens – Chapter 7 – Token Programming
•Menus – Chapter 6 – Menus
Note Copies of the menus are available in Appendix A – Checklists/Forms. We recommend that
you fill in the appropriate forms and give copies to the System Administrator for their
reference.
Automatic Scheduler
Mailbox Feature
Set this feature using the Auto (Scheduling) Menu. You can program the following features to occur
automatically at a preset time, day, or date:
•Audiotex
•Call Screening (toggle On or Off)
•Company Greeting (toggle On or Off)
•Personal Greetings (change the Personal Greeting that plays by time of day)
•DND (toggle On or Off)
•Scheduled Extensions (change where a call is transferred to when a caller dials the User ID from
the Stratagy automated attendant)
•Message Notification
•Ring Duration (number of rings when a call is transferred to an extension by the Stratagy
automated attendant before it is considered Ring No Answer (RNA).
Automatic System Recovery
System-wide Feature
This feature defaults to enabled (True). To disable this feature, reset the restore_original and
restore_config parameters to False.
To receive notification of an unsuccessful startup, use the error_box parameter to designate a User
ID Mailbox to receive the message. The Notify menu for the mailbox should be set for a PANIC
notification type.

How Stratagy Operates
Feature Programming
Stratagy I&M 06/02 5-11
How Stratagy Operates
Busy Station Identification for IVP8
System-wide Feature
To use this feature you must configure the console_slot_id and dss_active parameters, program the
DSS Port field (see Chapter 4 – Configure Stratagy and Chapter 6 – Menus), and install/program a
PDKU as the DSS console (see “Busy Station Identification” on page 1-10).
➤To configure the feature in Stratagy
1. Set the dss_active parameter to TRUE.
2. Configure the DSS Port field on the User Menu – Options screen for each mailbox.
Important! Once the DSS/Busy Lamp feature has been programmed using the two parameters
and the DSS Port field, IVP8 must be restarted two times. The first restart configures
the DSS parameters/field. The second restart “loads” the DSS parameters/field into
active memory.
Called Identification
Mailbox Feature
This feature defaults to disabled (No). To enable it, set the ID Call? field (Users Menu Options
Screen) to Yes.
SMDI Caller ID
To configure this feature, use the play_caller_id parameter and the %K token. See “SMDI Calling
Party Identification” on page 4-35 for details.
Caller Confirmation Prior to Transferring
System-wide Feature
This feature defaults to enabled (True). To disable this feature, reset the dtmf_gate parameter to
False.
When enabled, the system states, “Say yes at the tone.” A verbal response completes the transfer to
a company operator and “no response” causes the system to disconnect the call.
Call Screening
Mailbox Feature
This feature defaults to disabled (Off).
To enable it, set the Screen Calls field (Users Menu Options Screen) to On. This enables the user
to turn this feature On or Off from the phone’s dial pad. If you set the Screen Calls Lock field to
On, the user is prevented from changing the Call Screening feature in this manner, and only the
Administrator can change it.
This feature can also be set to switch automatically to Call Screening mode and back again at a
certain time/day/date, using the Auto (Scheduling) Menu.

How Stratagy Operates
Feature Programming
5-12 Stratagy I&M 06/02
Call Transfer
Mailbox Feature
All Stratagy call transfers are controlled by the User ID and Extension fields (Users Menu Options
screen). Entering only the destination extension results in a supervised call transfer. Other call
transfer types are implemented with Tokens.
Note XXXH = blind transfer to extension XXX.
XXXU = release the call to extension XXX if ring tone is detected.
Chaining
Mailbox Feature
Stratagy’s chaining feature enables the flow of control during call processing to be directed from
one User ID to another, based on the results of dialing the Extension field (Users Menu Groups/
Chains screen).
Note The User ID can not be configured in Do Not Disturb mode.
The three possible chaining conditions are Done, RNA and Busy.
Directory
Mailbox Feature
Set the box_idx parameter for the User ID Mailbox that searches the directory for user names
(default is 411). You can also designate a different mailbox for different ports.
Disk Space Notification
System-wide Feature
This feature defaults to 5% free disk space. To reset the feature, use the diskwarn parameter (values
= 1~99). The value (percentage) becomes the threshold or percentage of available disk space that
remains on the flash drive.
To receive notification when the threshold has been reached, set User ID 999’s Type field (Notify
Menu) to DISK. Time intervals between notification, alternate notification destinations, etc., can
also be programmed using the Auto (Scheduling) Menu.
Distribution Lists
Mailbox Feature
Set the cmt_maxlen parameter for the time allowed for recording a list comment (defaults to 10).
Do Not Disturb
Mailbox FeatureThis feature defaults to disabled (Off).
To activate this feature, set the Do Not Disturb field (Users Menu Options Screen) to On. This
enables the user to turn this feature On or Off from the phone’s dial pad. If you set the Do Not
Disturb Lock field to On, the user is prevented from changing the DND feature in this manner, and
only the Administrator can change it.
This feature can also be set to switch automatically to DND mode and back again at a certain
time/day/date, using the Auto (Scheduling) Menu.

How Stratagy Operates
Feature Programming
Stratagy I&M 06/02 5-13
How Stratagy Operates
Extensions—Scheduled
Mailbox Feature
Set the scheduled extensions in the Auto (Scheduling) Menu.
Fax Tone Detection
System-wide Feature
This feature sends fax tone detection to User ID 994 (default). To change the User ID, set the
hot_box parameter for the new destination extension of the fax machine. The designated User ID
accepts the fax tone and a blind transfer to the extension connected to the fax machine follows.
Future Delivery
System-wide Feature
Dedicate a User ID (default User ID 995) mailbox for storing all future delivery messages using the
future_delivery parameter. The messages stored in the mailbox cannot be deleted or played by the
Administrator.
Note Not supported by the Flash.
Greeting
Mailbox Feature
Busy Greeting
This feature defaults to the System Busy Greeting (SYS). To change it to a custom busy greeting,
set the Busy Greeting field (Users Menu Options Screen) to CUS.
The amount of time allowed for recording the greeting is 45 secs (30 secs for the Flash). To increase
or decrease the time, set the Busy Greeting Max. field (Users Menu Options Screen) to 1~999.
Setting this field to 0 prevents the user from recording or changing a custom Busy Greeting.
Personal Greeting
By setting the Current Greeting Max field (Users Menu Options screen) to zero, the Administrator
can prevent the user from recording a new greeting or changing (recording over) an existing
greeting. This has the effect of locking the greeting recording(s), and prevents the user from
changing the current greeting number. If the user’s greetings are not locked, the user can change the
greeting number and/or record new greetings (up to the permitted length).
Greeting—Company
System-wide Feature
You must record all company greetings using the “Information User IDs,” such as the initial
greeting User ID (typically “990”). A company, for instance, can have a standard greeting play
during regular business hours, and a second greeting play after hours which informs callers that the
business is closed, etc.
A third greeting can also be recorded which explains that “the company is closed for the holiday.”
Since the Auto Scheduler permits holidays to be programmed up to a year in advance, and repeats
automatically at one year intervals, the holiday greeting can play automatically on each holiday.

How Stratagy Operates
Feature Programming
5-14 Stratagy I&M 06/02
Greeting—Port-Selectable
System-wide Feature
This feature defaults to User ID Mailbox 990 for all ports. This feature should be configured to start
processing with the appropriate User ID based on the expected use of the Stratagy ports. If you need
to change the default, use the box_grt parameter.
After verifying the box_grt parameter setting is correct, the User IDs must be created and
configured, and their greetings recorded to give callers the desired information.
Greeting Restart
Mailbox Feature
After a caller has left a voice message for a User ID, the call can either be transferred back to the
initial “company” greeting User ID or the system can say “Thank you for calling, good-bye” and
disconnect. By default a caller is returned to the “instruction greeting” (User ID 991). This can be
chained via the Done chain in the user’s mailbox.
Group Partitions—Call Blocking
Mailbox Feature
Define the group(s) that a User ID belongs to by filling in the group number(s) on the Users Menu
Groups/Chains screen. User IDs can only access other User IDs that are defined as being in the same
group.
Guest Users
Mailbox Feature
This feature defaults to disabled (-1). To enable it, enter 0~99 (number of guest User IDs the user
can create) in the Guests field (User Menu Options screen).
Note Flash does not support this feature.
The Administrator also controls the configuration of each created Guest User ID through the use of
the guest_defaults parameter. The parameter is set to a standard system template, User ID 996, but
a new template can be created and used in its place.
Guest Users Limit
This feature is set in two ways:
•System Limit: The Guest Users Limit for the entire system is set by entering values in the
guest_min (default 90000) and guest_max (default 90199) parameters. The difference of the
entries is the maximum number of guest user IDs that can be created by all users on the system.
•User ID Limit: A limit is set (default: -1) for each User ID by entering a value in the Guests field
on the User’s Options screen. Valid entries are:
•0~99 enables the user to create that number of guest user IDs.
•-1 stops the User from using the Guest Users feature.
The Administrator can also change the number remaining in the field to 0 at any time. The user has
access to the previously-created Guest User IDs but cannot create new ones.
If the Administrator changes the number remaining in the field to -1 after Guest User IDs have been
created, the Guest User IDs are not deleted but the user does not have access to them. Any new IDs
cannot be created.

How Stratagy Operates
Feature Programming
Stratagy I&M 06/02 5-15
How Stratagy Operates
Interactive Voice Response (IVR)
System-wide Feature
All of the IVR features are implemented using Stratagy’s flexible token programming language.
This means that a combination of User IDs can be used to implement a sophisticated IVR
application.
Enter the selected programming tokens in the Extension field (Users Menu Options screen) of the
appropriate User ID. The size and sophistication of the customer application determines the number
of User IDs and the tokens required. (See Chapter 8 – Customization Examples for examples on
using tokens for IVR applications.) Stratagy can contain up to 100 million User IDs, many of which
can be used simultaneously in this type of application.
Note The Flash does not support some IVR related prompts (e.g., monies).
Message Continuous Delete/Playback
System-wide Feature
This feature defaults to 30 minutes for continuous delete or playback. To change the setting use the
tape_length parameter (values are 10~99 minutes).
Note The time period set is normally the length of a continuous recording.
Message Copy
Mailbox Feature
To enable this feature enter a User ID mailbox number in the Copy Message To field (Users Menu
Options screen).
Set the Store Messages field (Users Menu Options screen) to Yes. Stratagy stores the message in
both the accessed User ID mailbox and the User ID mailbox shown in the Copy Message To field.
Any messages already stored in the originating User ID are not copied.
Message Copy with Delete
Mailbox Feature
To enable this feature enter a User ID mailbox number in the Copy Messages To field (Users Menu
Options screen). Set the Store Messages field to No. Stratagy stores the message only in the Copy
Message To User ID Mailbox. The first User ID does not store messages.
Message Date and Time Control
Mailbox Feature
This feature defaults to enabled (Yes) and the date/time is played automatically before the message.
To disable this feature, change the Play Date/Time? field (Users Menu Options screen) to No.
Message Length Control
Mailbox Feature
This feature defaults to 180 seconds (30 secs. in the Flash). To change the feature, reset the Store
Messages (Max) field (User Menu Options screen) to a value from 1~999 (seconds). If set to 0,
messages can have any length up to Stratagy’s disk capacity.

How Stratagy Operates
Feature Programming
5-16 Stratagy I&M 06/02
Message Notification
Mailbox Feature
Activate the Notify Menu. Notification records can become templates and used repeatedly (e.g.,
pager notification, turning on/off a message waiting light, etc.). Since the Method field (Notify
Menu) can consist of a number of different programming tokens, an almost unlimited range of
actions is available.
You can dedicate (reserve) a port(s) for outbound notifications, using the n_ochan parameter. If no
port is dedicated for notification use, Stratagy attempts to use the highest numbered IDLE port.
Message Pause During Playback/Recording
System-wide Feature
This feature is set to a default pause of 30 seconds. To change the setting, use the tmo_resume
parameter (system values are 0~255).
Message Playback Control
System-wide Feature
This feature is set to a default of five seconds. To change the setting, use the play_skip parameter
(possible values are 1~99 seconds).
Message Purging
System-wide Feature
This feature defaults to disabled. To enable it, use the purge parameter (possible values: 1~99 days).
Message Retrieval Control
Mailbox Feature
This feature defaults to First-in, First-out order. To reset this feature, use the Message Order field
(User Menu Options screen).
Message Speed Control
Mailbox Feature
This feature defaults to 0 (normal). If not reset, the system lacks an alternate rate speed and only
plays at one speed. To reset the feature use the Alternate Rate field (Users Menu Options screen) to
increase the alternate playback speed to 1~4. The user can toggle between the normal speed and the
faster (alternate) speed by pressing .
Note This feature is not supported by IVP8.
Message Volume Control
Mailbox Feature
This feature is set to normal/average sound (defaults to 0). To reset the feature, enter -8 (softest) to
8 (loudest) in the Message Volume field (Users Menu Options screen).
Changing the gain_norm parameter setting also affects this feature.

How Stratagy Operates
Feature Programming
Stratagy I&M 06/02 5-17
How Stratagy Operates
Messages—New, Pending and Saved
Mailbox Feature
Set Saved Msg Que field (Users Menu Options Screen) to Yes to create two queues, new and saved,
or No for one queue for all messages.
Pending Messages
Any message listened to for a shorter amount of time than that specified in the
msg_pending_threshold parameter is kept as a new message. The message remains in the New
Message Queue and the Message Waiting Off notification type is not processed. A message that is
listened to longer than the time specified but is not listened to all the way through or manually saved
(by pressing ) or deleted (by pressing ) is considered a Pending Message. The message remains
in the New Message Queue and the Message Waiting Off notification type is processed.
This feature defaults to disabled. To enable it set the Message Pending (Users Menu Options
screen) field to On. To reset the threshold time, use the msg_pending_threshold (default 5 seconds)
parameter (values are 3~10 seconds).
Messages—Urgent
Mailbox Feature
Set the Type field (Notify Menu) to URGENT to notify the user of urgent messages.
Multiple System Languages
System-wide Feature
This feature defaults to English prompts. To change the setting, you must:
•Load the desired additional prompt file(s) during system installation and configuration.
•Configure the system for the new language using the prompt_file parameter.
•Record a prompt to instruct callers on the steps for changing the file during a call.
Name (and Extension) Control
Mailbox Feature
This feature defaults to enabled (Yes). To disable this feature, set the Record Name? field (Users
Menu Options screen) to No.
The amount of recording time defaults to 5 seconds. To change the amount of recording time reset
the nam_maxlen parameter to 1~99 seconds.

How Stratagy Operates
Feature Programming
5-18 Stratagy I&M 06/02
Networking (AMIS)
System-wide Feature
An AMIS Analog protocol must be implemented on the other voice messaging system for AMIS
networking to function. If the networking feature is being used to network Stratagy with another
vendor’s systems, planning and coordination between the two locations’ Administrators is required
to create a workable numbering plan.
The feature defaults to disabled. To enable the feature, remove the comment sign () and set the
amis_enabled to True. See “amis_enabled” on page 9-4 for more instructions on setting the AMIS
parameters.
Note Not supported on the Flash.
Paging – Office
Mailbox Feature
This feature is set using the Type field (Notify Menu) to RELAY. See Chapter 8 – Customization
Examples for examples on setting up a notification to a pager.
Programmable Dial Actions
Mailbox Feature
Enter the token programming sequence into the Extension field (Users Menu Options screen). The
default is usually the same as the User ID number, since users’ ID numbers are often the same as
their telephone extension number.
Reports
System-wide Feature
See Chapter 10 – System Reports for procedures on using the Report feature. To schedule an
automatic report, use the auto_report and auto_report_time parameters. Reports can be scheduled
in advance (24-hour format).
Ring Duration
Mailbox Feature
This feature defaults to four maximum rings per call. To reset this feature use the Maximum Rings
field (Users Menu Options screen). Valid entries are 1~9 and 0 (sets the ring duration to system
default).
This value can also be changed automatically at a certain time/day/date using the Auto (Scheduling)
Menu.
Screen Advertisement
System-wide Feature
This feature is enabled (defaults to five minutes). To change the setting, use the tmo_blank
parameter (valid entries are 1~99 min.) or to disable the feature set the parameter to 0.
Note The screen saver activates only when the Main Menu is displayed.
To program an advertisement or slogan (58-characters long) that displays instead of the blank
screen use the advertising parameter.

How Stratagy Operates
Feature Programming
Stratagy I&M 06/02 5-19
How Stratagy Operates
Shared Extensions
Mailbox Feature
Each User ID is set to have the same shared Extension number, and the ID Call? field must be set
to Yes.
Shutdown using the Telephone Dial Pad
System-wide Feature
Change Security Code for User ID 983 and set DND to Off.
Single-digit Menus
Mailbox Feature
Define the single-digit menu numbers (up to 10) for each User ID on the Group/Chains screen of
the Users Menu. Leaving a given number’s field blank indicates the digit has no special significance
while this User ID is processed. A greeting must be recorded that the caller hears. An example is:
“I’m not available to answer your call. Press 1 to leave a message, 2 to talk to my personal assistant,
3 to page me, 4 to send me a fax or 0 to talk to the operator.”
The token programming language provides a special token M for prompting and processing menu
choices.
Note Single-digit menu 0 is normally reserved for the operator.
System Administrator’s Mailbox
System-wide Feature
See System Administrator Guide for information.
Token Programming
System-wide Feature
A token or group of tokens placed together to perform a specific function is referred to as a token
string. A token string that performs call processing applications (offsite call transfer via Centrex
lines, Fax Back, Fax on Demand, Holiday Application, etc.) are placed in the Extension field of a
User ID. Tokens can also be used in the Method field (Notify Menu) to customize notification
templates.
See Chapter 7 – Token Programming for a list of tokens and descriptions and Chapter 8 –
Customization Examples for example token applications.
Universal Ports
System-wide Feature
The number of ports reserved for outbound notification is set in the n_ochan parameter
(default = 0). When Stratagy is configured for 24 ports, at least 1 channel must be reserved for
outbound notification.
You can also restrict Notify to only a defined port in the notify_restriction parameter
(defaults to 1).

How Stratagy Operates
Feature Programming
5-20 Stratagy I&M 06/02
User ID Security Code
Mailbox Feature
Specify the initial security code in the Security Code field (Users Menu Options screen). Minimum
and maximum length restrictions can be set using the security_min_length (default = 1, values 1~8)
and security_max_length parameters (default = 16, valid entries are 1~16).
Using the System Administrator’s User ID mailbox 999, the Administrator can reset the code for a
User ID at any time. Although the Administrator can reset the code, he/she does not have access to
existing User ID security codes.
The default security code for User ID mailboxes is: User ID + Security Code for Defaults Box 997.
Since the Defaults Box’s security code defaults to 997, any User ID created would have a default
security code of User ID + 997. For example, User ID 234’s default security code would be 234997.
If you change the Defaults Box’s security code (for example to 555), all new mailboxes created have
the new default security code (234555).
User ID—Variable/Fixed Length
System-wide Feature
To set the length of User IDs, use the fixed_len0~9 parameters. System defaults to 8 digits.
Varied Sampling Rates
System-wide Feature
Use the following parameters to reset the sampling rates:
•adpcm_hq parameter for greetings and name recordings
•adpcm_nq parameter for incoming messages
•adpcm_pq parameter for system prompt file
Note Once the rates have been set, they cannot be changed since greetings or messages
previously recorded are lost.
Voice Forms
Mailbox Feature
Program the Q (Question and Answer) token into the User ID. Each question is recorded as a
greeting, either in that User ID or in others. The Q token specifies which greetings play and in what
order. Up to 20 questions are allowed.

Stratagy I&M 06/02 6-1
Menus
Menus 6
This chapter covers the screens used to configure the individual User ID mailboxes in the Stratagy
system. See Figure 3-1 on page 3-5 for a diagram of the Stratagy menu system.
Users Menu
The Users Menu screens is where User IDs are created, modified, saved, and deleted. Features
available through the Users Menu include:
•Company directory entries
•Basic options (RNA, DND, call screening, message storage, message playback, etc.)
•AMIS options
•User information and statistics
•Control structures (chains, groups, and menus)
Once you have defined and saved a User ID, you can further customize it using the Auto and Notify
Menus. See “Auto (Scheduling) Menu” on page 6-20 and “Notify Menu” on page 6-27.
This chapter discusses:
•Access and exit the menu
•Menu options
•Create, modify, copy or delete a mailbox
•Boxlist
•AmisNodeList
•Users Menu field descriptions
Access and Exit the Users Menu
See Chapter 3 – Access and Use Stratagy for information about the Main Menu.
Access Users Menu
1. From the Main Menu, press Alt+U. Stratagy prompts you for your password.
2. Enter the password (the default password is Stratagy, with the first letter uppercase) and press
Enter. The password does not display as you type. If you enter it incorrectly, you must select
the Users Menu again. The Options screen displays, from which you can access the other Users
Menu screens (Info/Status and Group/Chains).
Access a Screen
➤Press Alt+O. The Options Screen displays.
...or Alt+G. The Group/Chains Screen displays.
...or Alt+I.The Info/Status Screen displays.

Menus
Users Menu
6-2 Stratagy I&M 06/02
Exit Users Menu
1. Press Alt+S. Your changes are saved.
Important! To save your modifications to the current User ID mailbox, you must press Alt+S
before pressing Esc.
2. Press Esc. The Main Menu displays.
Users Menu Options
The Users Menu (see Figure 6-1 and Table 6-1 on page 6-5) consists of three screens:
•Options (see Figure 6-2 and Table 6-2 on page 6-8) – Basic (RNA, DND, Call Screening and
message information) and AMIS options for the User ID mailbox.
•Group/Chains (see Figure 6-3 and Table 6-3 on page 6-14) – Chain, group and menu information
for the User ID mailbox.
•Info/Status (see Figure 6-4 and Table 6-4 on page 6-18) – Displays statistics for the User ID
mailbox that can be used to generate reports.
Create User ID Mailbox
Note When you create a User ID mailbox, Stratagy uses the Defaults Box User ID (default 997)
as a template for the new User ID mailbox.
1. From the Users Menu, Options screen, type a unique number in the User ID field and press
Enter. Stratagy initializes the remaining fields with the values specified in the Defaults Box
User ID.
2. To change any field settings, place the solid color edit block that appears on the screen next to
the field name. Type the information in the field and press Enter
...or for some fields, press the spacebar to toggle the value.
Notes
•Use Enter or the arrow keys (↑↓) to move between fields.
•To display detailed help for the current field, press F1. See “Online Help Function” on page
3-6.
3. When finished, press Alt+S.
4. If necessary access the Groups/Chains screen and make any required changes to the field
settings. The Groups/Chains screen displays.
5. When finished, press Alt+S. The User ID mailbox is saved and the Box Created and Box
Saved fields of the Info/Status Screen change from NEVER to the current date and time.
6. As appropriate, continue defining the User ID mailbox using the Auto and Notify Menus.
See “Auto (Scheduling) Menu” on page 6-20 and “Notify Menu” on page 6-27 for detailed
information.
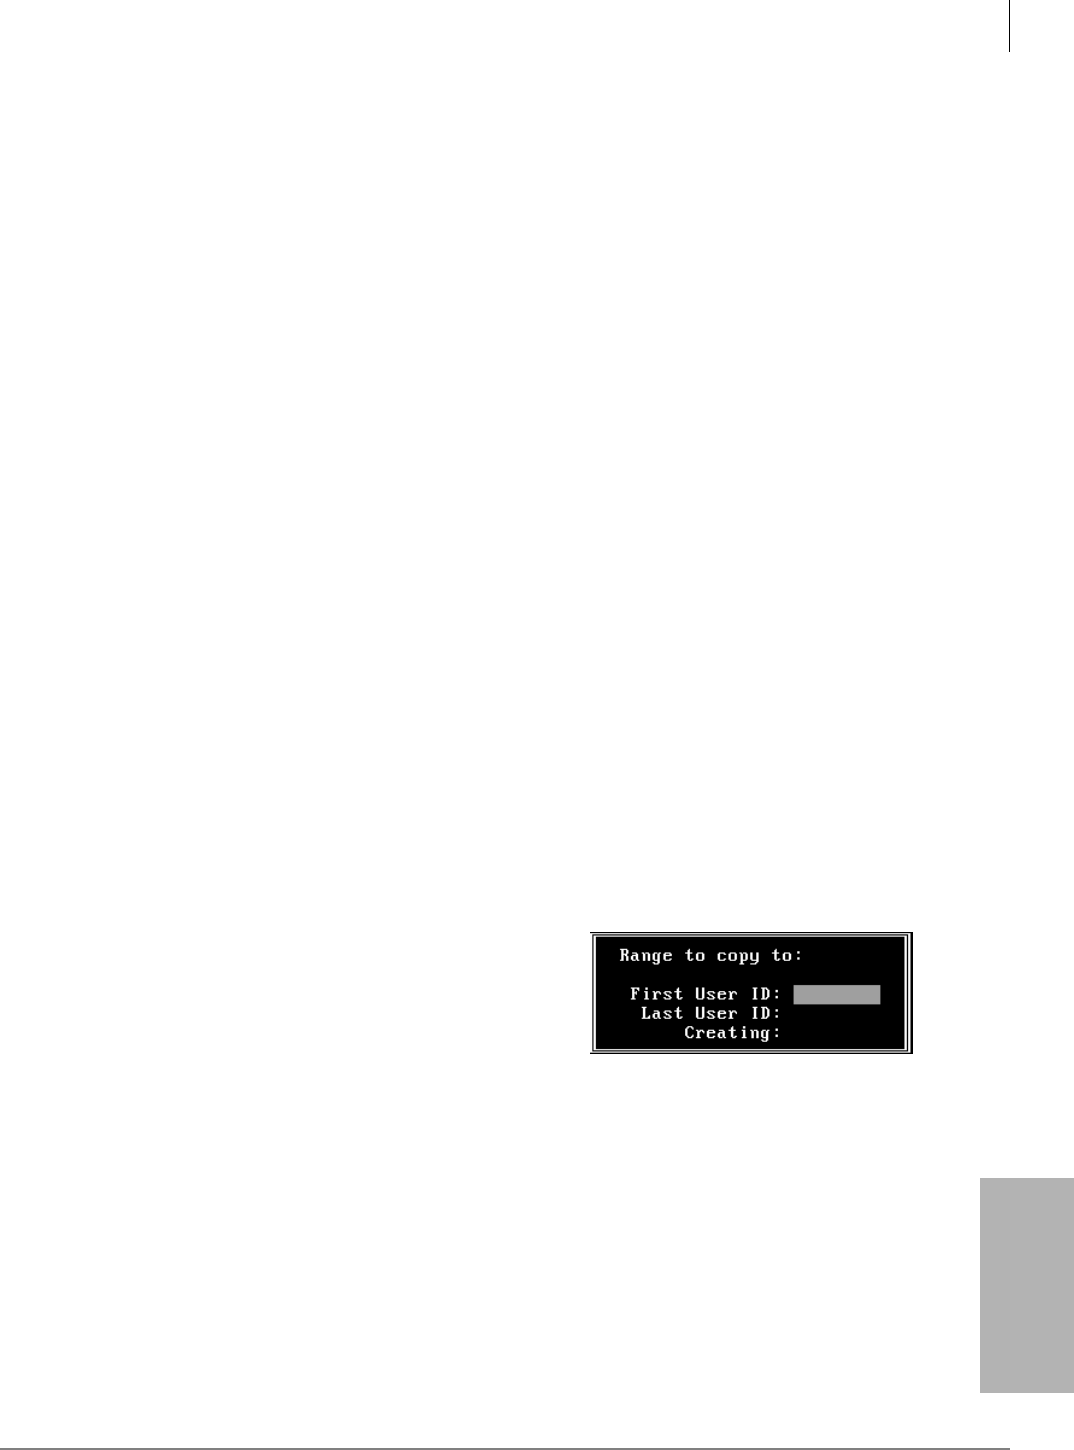
Menus
Users Menu
Stratagy I&M 06/02 6-3
Menus
Modify User ID Mailbox
1. From the Users Menu, Options screen, type the User ID mailbox number in the User ID field.
Press Enter. Stratagy automatically loads the User ID mailbox. If the User ID does not exist,
Stratagy assumes that you are creating a new User ID mailbox (see “Create a Mailbox” above).
Note To determine whether a particular User ID has already been created, look at the Box
Created field in the Info/Status Screen.
2. Access the Users Menu screens as needed and define the User fields (user’s information, basic
options, AMIS options, groups, chains, menus).
Notes
•Use Enter or the arrow keys (↑↓) to move between fields.
•To display detailed help for the current field, press F1.
3. When finished, press Alt+S. The User ID mailbox is saved.
4. As appropriate, continue defining the User ID mailbox using the Auto and Notify Menus.
See “Auto (Scheduling) Menu” on page 6-20 and “Notify Menu” on page 6-27 for detailed
information.
Copy Mailbox(es)
When you copy a User ID mailbox, Stratagy uses the existing mailbox as a template to create the
new mailboxes.
Notes
•User’s Information fields are not copied. The User ID field contains the new User ID you
specified. Comment, Extension, and Directory Name fields are not defined. If the Security
Code field is defined in the Defaults Box User ID, Stratagy uses it instead of the User ID.
•All other Users Menu Options and Group/Chains fields are copied. All Notify and Auto
records are copied.
1. From the Users Menu, Options screen, type the User ID mailbox number in the User ID field.
Press Enter. Stratagy automatically loads the User ID mailbox.
2. Press Alt+C. A pop-up box displays (shown right).
3. Type the range. Press Enter. Stratagy creates the
specified range of User ID mailboxes using the
displayed User ID mailbox as a template.
4. To customize the first User ID mailbox copied, define
the User fields (user’s information, basic options,
AMIS options, groups, chains, menus).
Note Use Enter or the arrow keys (↑↓) to move between fields.
5. Press Alt+S. The changes are saved.
6. As appropriate, continue defining the User ID mailbox using the Auto and Notify Menu.
See “Auto (Scheduling) Menu” on page 6-20 and “Notify Menu” on page 6-27 for detailed
information.
7. Repeat Steps 4~6 for each of the User ID mailboxes copied.
4184
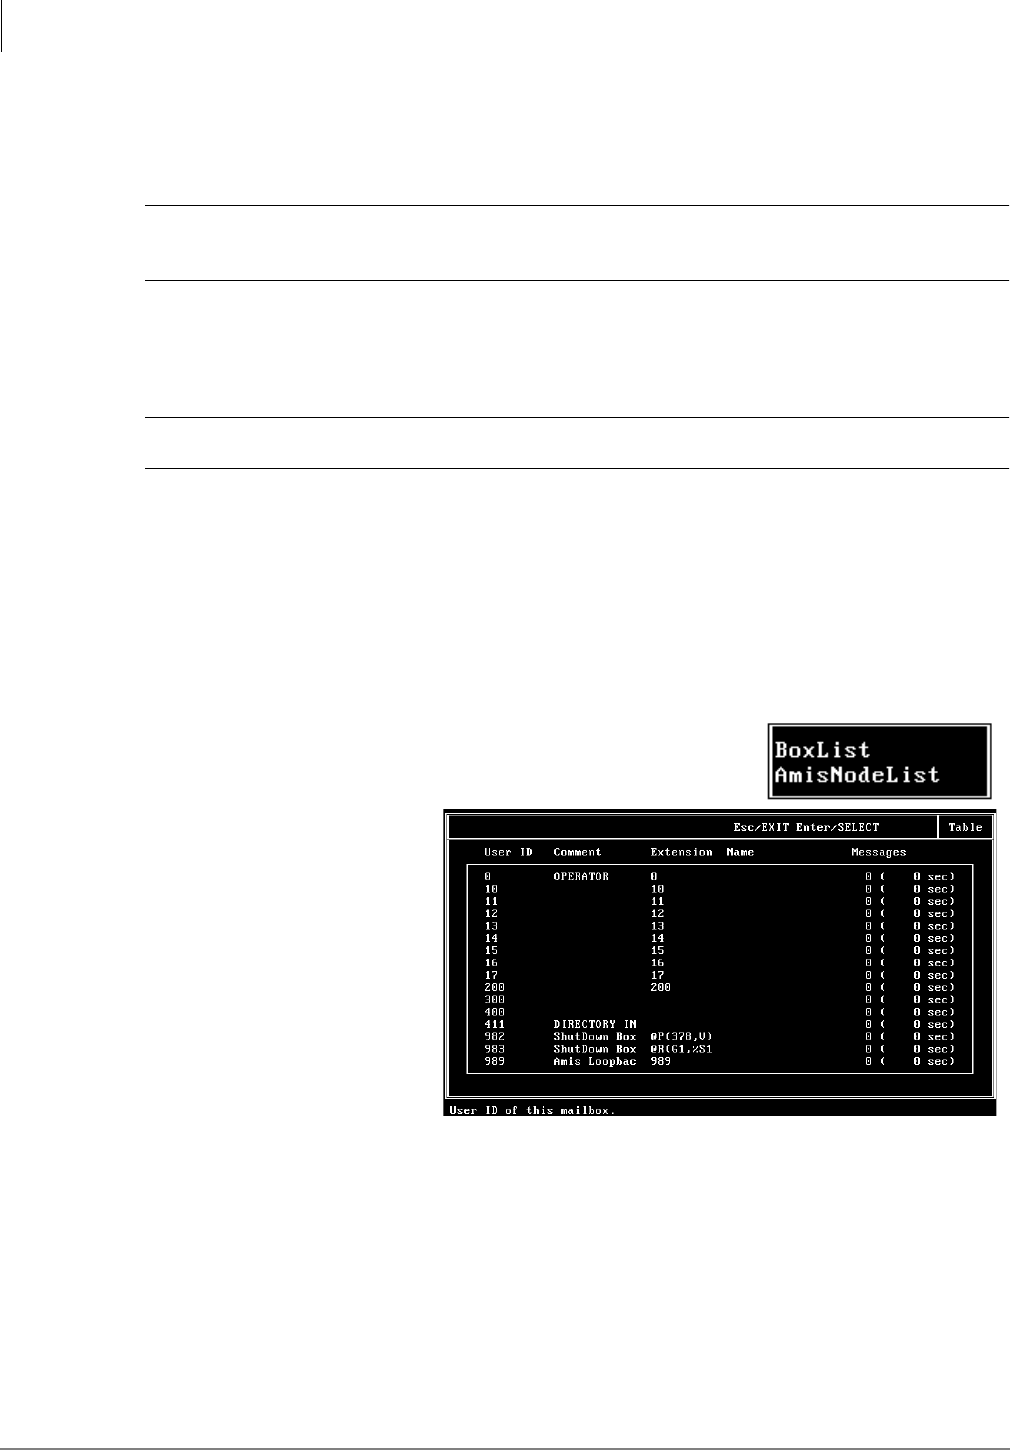
Menus
Users Menu
6-4 Stratagy I&M 06/02
Delete Mailbox
Important! When you delete an existing User ID mailbox, all messages and recordings for the
mailbox are deleted.
CAUTION! Delete all Guest User IDs of this User ID mailbox before deleting the User ID
mailbox.
1. From the Users Menu, Options screen, type the User ID mailbox number in the User ID field.
Press Enter. Stratagy automatically loads the User ID mailbox.
2. Press Alt+D. You are asked to confirm the deletion.
CAUTION! Once deleted, there is no way to retrieve the User ID mailbox.
3. Verify that this is the User ID mailbox you want to delete. Press Y. The User ID is deleted.
BoxList
This is a list of User ID mailboxes. The User IDs appear in numerical order. Each entry on the list
contains the Comment, Extension, Name (Directory Name 1, Directory Name 2), and Messages
(Messages Current) field information. For field definitions, see “Options Screen” on page 6-8.
View Existing User ID Mailboxes
1. Press Alt+T. A pop-up box displays (shown right).
2. Press Enter. The BoxList
screen displays (shown
right).
3. Use the arrow keys (↑↓) or
the Page Up/Down keys
to scroll through the list.
4. Press Esc. The Users
Menu displays.
Access a Specific User ID from BoxList Screen
1. From the Table BoxList screen, use the arrow keys (↑↓) to highlight the User ID.
2. Press Enter. The Users Menu displays the selected User ID’s information.
AmisNodeList
The AmisNodeList lists mailboxes that have “Gateway Box” set to Yes. See “AmisNodeList” on
page 9-8 for information on using this feature.
4064
4669

Menus
Users Menu
Stratagy I&M 06/02 6-5
Menus
Users Menu Field Descriptions
Figure 6-1 Options Screen with Sample Data
Table 6-1 Users Menu Screen Fields
Menu Bar
Access and viewing options.
Save Press Alt+S to save the current User ID mailbox.
Delete Press Alt+D to delete the current User ID mailbox.
Copy Press Alt+C to copy the current User ID mailbox.
Auto Press Alt+A to access the Auto Menu.
Notify Press Alt+N to access the Notify Menu.
Table Press Alt+T to select a table:
BoxList:Press Enter to list all User ID mailboxes.
AmisNodeList:Use the arrow keys (↑↓) to highlight AmisNodeList and then press
Enter to list all Amis nodes.
Esc/EXIT Press Esc to exit the Users Menu and return to the Main Menu.
Pg/Dn NEXT Press Page Down to view the next User ID mailbox.
PgUp/PREV Press Page Up to view the previous User ID mailbox.
Options Press Alt+O to access the current User ID’s basic and AMIS options.
Info/Status Press Alt+I to view the current User ID’s statistics.
Group/Chains Press Alt+G to access the current User ID’s group, chain, and menu options.
User’s
Information
Menu Bar
4067
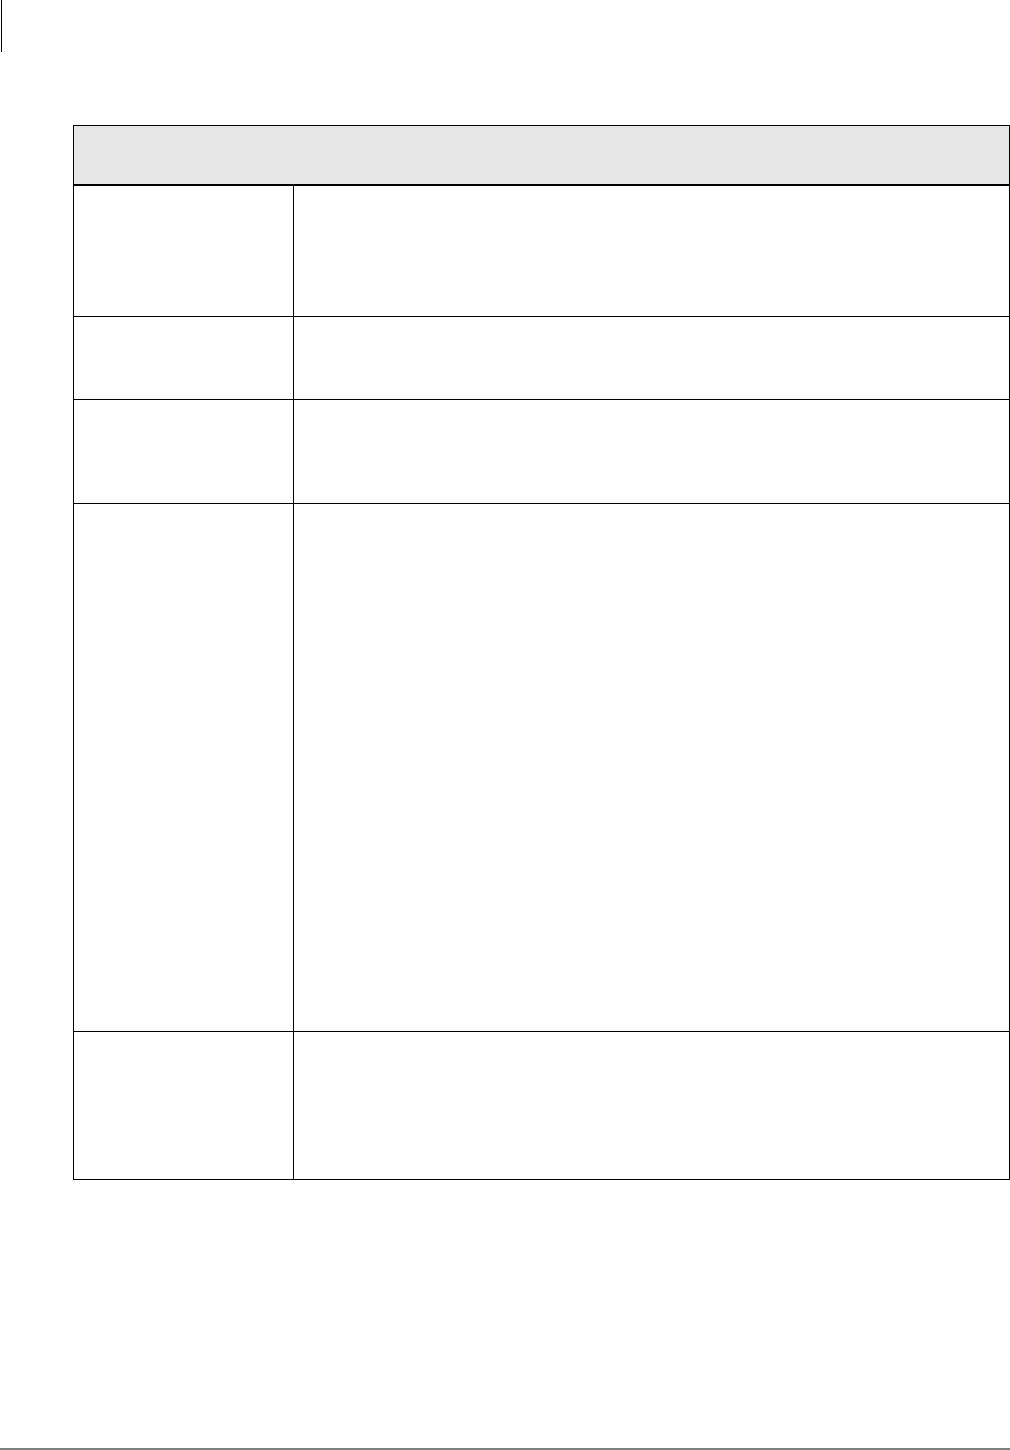
Menus
Users Menu
6-6 Stratagy I&M 06/02
User’s Information
Minimum information Stratagy requires for a standard User ID that transfers calls and takes messages.
User ID User ID mailbox number. Usually associated with a telephone extension (for simplicity).
Employees without a telephone extension can have a mailbox from which they can send
and receive messages. Mailboxes can be used for special functions such as directories
or question and answer surveys.
Possible values: 0~99999999 (must be unique).
Comment Notation or reminder about the function of the mailbox.
For example, a User ID may be identified by function (extension, information box, etc.)
or contents (greeting, directory, etc.).
Extension Programmed dial actions Stratagy performs to transfer a call that has accessed the User
ID (i.e., Do Not Disturb is Off). Includes transfer to a User ID mailbox, a remote number,
or paging. Normally a simple extension number.
Default: value entered in User ID field.
Directory Name 1 The first of two names Stratagy searches when a caller uses the directory (default 411).
For most companies, this is the User ID owner’s first name. For User IDs that do not
appear in the directory, leave this field blank.
Notes
•It is important that each user record his/her name.
•When the System Administrator enters a user’s name into the directory using the
telephone dial pad, the name is stored in the Options screen Directory Name 1 and
Name 2 fields as numeric digits. For administration clarity, it is advisable to change
the digits to their alpha equivalents.
The directory works as follows. If a caller wants to speak with Donna, the caller would
enter digits corresponding to these letters on the tone-dialing telephone (i.e., ).
For the first User ID Directory Name field that matches the caller’s entry, Stratagy plays
the name recording. Depending upon the Stratagy System Configuration parameter
dir_play_uid, Stratagy also plays the digits of the User ID field. If no name recording is
available, depending on the dir_play_uid setting, Stratagy does not present an entry or
play the digits of the User ID field.
Since Stratagy plays the name recording of all User IDs that match a caller’s entry for
the company directory, you can use this capability as a general search and playback
system. The User ID used for directory searching can be defined on a per-port basis
using the box_idx Stratagy System Configuration parameter.
For details about the Stratagy System Configuration parameters, see Chapter 4 –
Configure Stratagy.
Directory Name 2 The second of two names Stratagy searches when a caller uses the directory (default
411).
For most companies, this is the User ID owner’s last name or another way to reference
this User ID, such as a variation in spelling (Cathy, Kathy) or a nickname (Michael,
Mike). It can also be used for the name of an additional user when a User ID is shared.
For User IDs that do not appear in the directory, leave this field blank.
Table 6-1 Users Menu Screen Fields (continued)

Menus
Users Menu
Stratagy I&M 06/02 6-7
Menus
Security Code Password that permits the user access to this User ID mailbox. The security code
ensures that only appropriate users can change greeting, record custom busy message,
listen to messages left for this User ID, or change option settings.
The initial value is the number of the new mailbox plus the value in the Defaults Box
User ID (default 997) Security Code field.
For example, the security code for default box 997 is 997. If a mailbox 234 is created,
the default security code for the new mailbox is 234997. The only exception to this rule
is the security code for the Defaults Box User ID (default 997). Its security code would
be 997.
If the security code of the Defaults Box User ID (default 997) is changed, only the
mailboxes created after rebooting the system have the new default security code.
If the security code is set to something untypeable at a telephone (such as an X), no one
can log into the User ID mailbox.
The user can change the password to assure confidentiality. For added security, the
code does not display on the screen. You cannot view the security code; you can only
change it.
Table 6-1 Users Menu Screen Fields (continued)
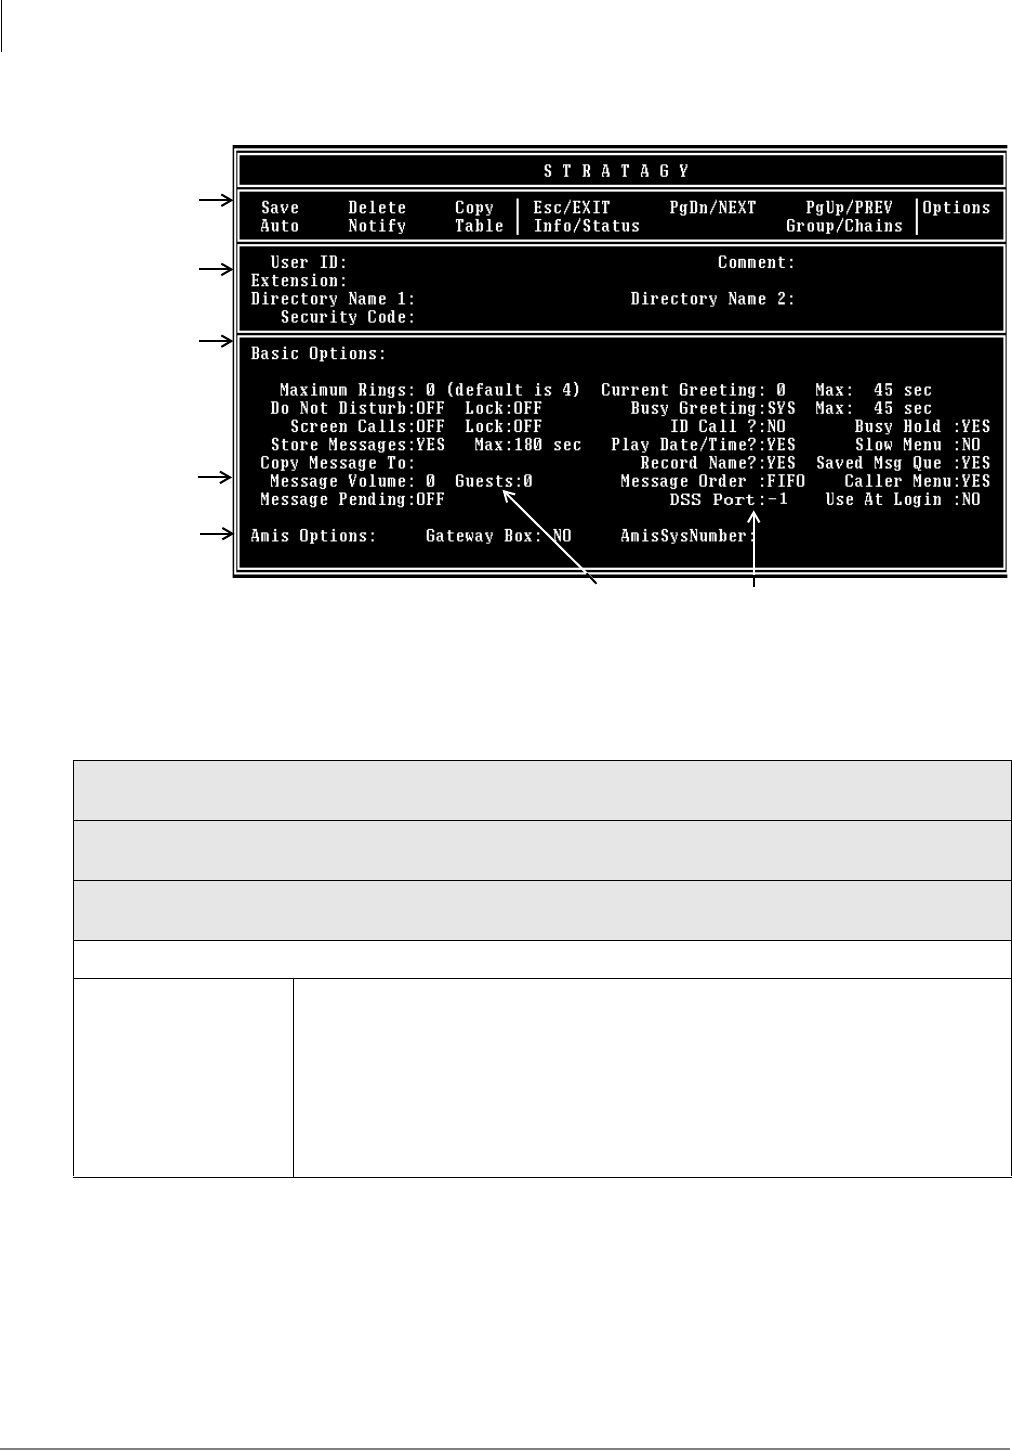
Menus
Users Menu
6-8 Stratagy I&M 06/02
Options Screen
Figure 6-2 Options Screen with Sample Data
Table 6-2 Options Screen Fields
Menu Bar
See “Users Menu Field Descriptions” on page 6-5 for a definition of the fields.
User’s Information
See “Users Menu Field Descriptions” on page 6-5 for a definition of the fields.
Basic Options
RNA, DND, Call Screening, and message information for the User ID mailbox.
Ring No Answer (RNA)
Maximum Rings When transferring a call to the User ID, the number of rings Stratagy waits before
determining a RNA status. This option only works when Stratagy is controlling the call
transfer during a monitored, or supervised transfer.
For example, if the telephone is not answered within four rings, Stratagy may play this
User ID’s greeting and take a message, or transfer the call to another extension if an
RNA chain is being used.
Possible values: 0 (uses system default), 1~9
Default: 4
User’s
Information
Menu Bar
AMIS Options
(not supported
by Flash) 3436 DSS Port field (not supported by the
Flash)
Basic
Options
Message
Volume
field (not
supported by
IVP8)
Guests (not supported
by Flash)

Menus
Users Menu
Stratagy I&M 06/02 6-9
Menus
Do Not Disturb (DND)
Do Not Disturb Whether Stratagy transfers callers directly to a user’s mailbox without ringing the user’s
phone. If Lock Do Not Disturb is set to Off, the user can toggle this feature on or off
through the telephone.
If the intention of the User ID is to offer recorded information, set Do Not Disturb to On
and Lock Do Not Disturb to On.
On: Do Not Disturb is On. Calls to this User ID are never transferred to an extension.
The greeting plays immediately.
Off: Do Not Disturb is off.
Possible values: On, Off
Default: Off (DND not active)
Lock Locks the current Do Not Disturb setting. The current Do Not Disturb setting cannot be
changed by the user through the telephone.
If the intention of the User ID is to offer recorded information, set Do Not Disturb to On
and Lock Do Not Disturb to On.
On: User is not permitted to access or change the Do Not Disturb setting through the
telephone.
Off: User can change the Do Not Disturb setting.
Possible values: On, Off
Default: Off (not locked)
Call Screening
Screen Calls Whether Stratagy asks the caller to record his name before attempting a transfer to the
user’s extension, enabling a user to accept, decline, or transfer the call:
On: Stratagy asks the caller to record his name, and then attempts to reach the user. If
the user answers, Stratagy plays that recording. The user can press:
to accept the call. Stratagy connects the caller to the user.
to reject the call and hang up. Stratagy reconnects the caller and plays the
user’s mailbox greeting. Stratagy follows the procedures used for the Ring No
Answer chain.
to transfer the call with an announcement. The user dials the extension to
transfer the call and hangs up. Stratagy plays “Your call is being transferred to”
and the name recording or the User ID of the extension where the call is being
transferred. Stratagy transfers the caller to the new extension.
to transfer the call without announcement. The user dials the extension to
transfer the call and hangs up. Stratagy asks the caller to continue to hold and
transfers the caller to the new extension.
Off: Stratagy transfers the caller to the extension without inquiry.
Possible values: On, Off
Default: Off (Call screening is off)
Lock Locks the current Screen Calls setting. The current Screen Calls setting cannot be
changed by the user through the telephone.
On: User is not permitted to access or change the Screen Calls setting through the
telephone.
Off: User can change Screen Calls selection.
Possible values: On, Off
Default: Off (not locked)
Table 6-2 Options Screen Fields (continued)

Menus
Users Menu
6-10 Stratagy I&M 06/02
Messages and Greetings
Store Messages Whether Stratagy enables the User ID mailbox to store messages.
Certain applications require a User ID mailbox to play information only and not record
messages. To prevent Stratagy from taking messages after the User ID’s greeting plays,
set Store Messages to No and Copy Messages To to blank.
Yes: This User ID mailbox may store messages.
No: This User ID mailbox may not store messages.
Note If Copy Message To has a valid User ID, the message is recorded, then stored in
the Copy Message To User ID mailbox.
Possible values: Yes, No
Default: Yes (Store Messages is On)
Max (Store Messages) Maximum message length in seconds a caller is given when leaving a message.
Possible values: 0 (unlimited), 1 ~ 999 (seconds)
Default: 180 (180 seconds = 3 minutes)
Copy Messages To User ID mailbox which receives a copy of this User ID mailbox’s messages.
Note Messages can only be copied once. Stratagy does not chain copy to multiple
mailboxes.
If Store Messages is set to Yes, Stratagy stores the message in both the accessed User
ID mailbox and the Copy Messages To User ID mailbox.
If Store Messages is set to No, Stratagy stores the message only in the Copy Messages
To User ID mailbox.
Certain applications require a User ID mailbox to play information only and not record
messages. To prevent Stratagy from taking messages after the User ID’s greeting plays,
set Store Messages to No and Copy Messages To to blank.
Possible values: blank, valid User ID mailbox
Default: blank (Copy Messages To is off)
Message Volume Volume at which messages are played back to the user. This value can be set by the
user through the telephone, using the Play Message Controls.
Note The IVP8 does not support this feature.
Possible values: -8 (softest) ~ 8 (loudest)
Default: 0
Guests Number of Guest User IDs the User ID can create. For each Guest User ID created, the
value decrements by 1. For example, if the Guests field was set to 5 and the user
created 3 Guest User IDs, Guests would now display 2.
0 ~ 99: Number of Guest User IDs the user can create.
-1: User cannot use the Guest User ID feature
Note The Flash does not support this feature.
Possible values: -1 (cannot use Guest User IDs) 0 ~ 99
Default: -1
Table 6-2 Options Screen Fields (continued)

Menus
Users Menu
Stratagy I&M 06/02 6-11
Menus
Message Pending Messages that a user partially hears (five seconds or longer set by
msg_pending_threshold parameter) are called Pending messages. They remain in the
New Message Queue, the Message Waiting LED is turned off, and a Return Receipt is
sent, if applicable.
Note If the Saved Msg Que field is set to No, the setting for this field has no effect on
the voice mail system.
Yes: This User ID mailbox may store pending messages.
No: This User ID mailbox may not store pending messages.
Possible values: Yes, No
Default: No (Message Pending is Off)
Current Greeting Which of eight User ID greetings plays. This value can be set by the user through the
telephone unless Current Greeting Max is set to 0.
Each mailbox user may record up to seven custom greetings. The system default
greeting is “Please leave a message for [name],” as per the user’s name recording.
Possible values: 0, 1~7
Default: 0 (system greeting)
Max (Current Greeting) Maximum greeting length (seconds) for each custom greeting recorded by the user.
Whether the user can change the current greeting.
Possible values: 0 (user cannot record or change greetings), 1~999
Default: 45
Busy Message Greeting caller receives when the extension is busy. This value can be set by the user
through the telephone unless Busy Greeting Max is set to 0. (See “Manage Your
Mailbox” in the Stratagy User Guide for more information.)
SYS: System busy greeting. Stratagy advises the caller that he may hold for the
extension by pressing , dial another extension, or leave a message by waiting
for the tone. If the caller chooses to hold, Stratagy informs the caller of his position
in the hold queue and then plays 30 seconds of the Busy-Hold Music file before
trying the extension again. After each transfer attempt, the caller is given the
same options.
CUS: Custom busy greeting.
Possible values: CUS, SYS
Default: SYS
Max (Busy Message) Maximum greeting length (seconds) for the custom busy greeting recorded by the user.
Whether the user can change the busy greeting.
Possible values: 0 (user cannot record or change greeting), 1~999
Default: 45 (seconds)
ID Call? Identify callee. Play the name recording of the User ID mailbox the caller dialed.
Yes: Stratagy plays the name recording of the User ID accessed to reach the
extension. Used when more than one User ID mailbox is assigned to the same
telephone extension.
No: Stratagy plays a connection tone to the answering party.
Possible values: Yes, No
Default: No
Table 6-2 Options Screen Fields (continued)

Menus
Users Menu
6-12 Stratagy I&M 06/02
Busy Hold Whether a caller can press to hold when the extension is busy.
Yes: The caller can press to hold.
No: The caller cannot hold.
Possible values: Yes, No
Default: Yes
Play Date/Time? During message playback, play the date and time a message was recorded.
Yes: Play the date and time before playing the message.
No: Do not play date and time.
Possible values: Yes, No
Default: Yes (play date and time).
Slow Menu Length of time Stratagy pauses between User ID mailbox menu choices when stating
them to the user (e.g. Main Menu options).
Yes: Add extra time between menu choices.
No: Do not add extra time.
Possible values: Yes, No
Default: No
Record Name? Whether the user can record his/her name for playback/identification to a caller.
Yes: User can record his/her name
No: User cannot record his/her name.
Possible values: Yes, No
Default: Yes
Saved Msg Que Whether Stratagy uses separate message lists of new and saved messages.
Yes: Two message queues: new and saved.
No: One message queue.
Possible values: Yes, No
Default: Yes
CAUTION! Delete all messages in this mailbox before changing the number of
message queues.
Message Order Order in which Stratagy plays back caller messages to the user.
FIFO: First-In First-Out. Stratagy plays the oldest messages first.
LIFO: Last-In First-Out. Stratagy plays the most recent message first.
Possible values: FIFO, LIFO
Default: FIFO
Caller Menu Whether Stratagy presents a message menu to outside callers.
Yes: Before pressing to send a message, outside callers can review, re-record,
append, add destinations, set urgent or private, or cancel.
No: Outside callers can only press to send a message.
Possible values: Yes, No
Default: Yes
Alternate Rate This option is replaced by the DSS Port field on the IVP8 and is not supported by the
Flash.
Table 6-2 Options Screen Fields (continued)

Menus
Users Menu
Stratagy I&M 06/02 6-13
Menus
DSS Port
(available only on IVP8
menu)
This field is indicative of the button position of a DSS console with default programming.
Simply put, the IVP8 assumes that the programming of the DSS console is fixed and
cannot be changed. The IVP8 always identifies key 01 of the DSS console as port 000.
So if a port other than 000 is programmed under key 01, the DSS Port field for that
corresponding mailbox is “000.”
Example
Let’s say that a programmer has changed key 01 in Program 29 (Strata DK424i/DK424)
to provide BLF indication for port 023, and the extension associated for that port, which
by default is extension 223, has a corresponding mailbox in the IVP8. If the IVP8 is
expected to monitor busy activity for this extension, the DSS Port setting for Mailbox 223
would be “023.”
Important! If the dss_active parameter in the install.cfg file is set to false, this field is
disabled.
Possible values: 0~57, -1 disables feature
Default: -1
Use At Login Whether Stratagy plays messages at the alternate rate when a user logs in.
Yes: Stratagy uses the alternate rate.
No: Stratagy uses the normal rate.
Possible values: Yes, No
Default: No
AMIS Options
AMIS information for the User ID mailbox.
Gateway Box Whether this User ID mailbox is an AMIS gateway.
Note The Flash does not support this feature.
Possible values: Yes, No
Default: No
AmisSysNumber Telephone number of the AMIS gateway box used to identify incoming AMIS calls. This
number is the same as to the identification number of a remote node.
Note The Flash does not support this feature.
Format: 1#area code#number
Example: 1#714#5551212
Table 6-2 Options Screen Fields (continued)

Menus
Users Menu
6-14 Stratagy I&M 06/02
Group/Chains Screen
Figure 6-3 Groups/Chains Screen with Sample Data
Table 6-3 Groups/Chains Screen Fields
Menu Bar
See “Users Menu Field Descriptions” on page 6-5 for a definition of the fields.
User’s Information
See “Users Menu Field Descriptions” on page 6-5 for a definition of the fields.
Chains
Chain information for the User ID mailbox.
Chains are how you tell Stratagy what to do with a call when one of three specific
conditions apply: Done, RNA, Busy.
CAUTION! Avoid programming chains that contain loops. For normal Stratagy
operation, we recommend that you program all chains to eventually
end at System Administrator User ID 999 (which defaults to
disconnect, @H) and never change the User ID 999 default.
Stratagy, by enabling you to program chains, provides the flexible call routing solutions
needed for many varied customer applications. If you create a loop when programming
Stratagy with chains of User IDs, all Stratagy ports become busy and you must reboot
the system.
Conditions which create loops include:
•The most common condition is usually triggered by no caller DTMF action followed
by a hang up.
For the following explanation, assume that the reserved User IDs are set to their
default values.
Operator User ID 0
Caller Instructions User ID 991
System Administrator User ID 999
User’s
Information
Chains/
Groups
Menu Bar
Menus
4671

Menus
Users Menu
Stratagy I&M 06/02 6-15
Menus
By default, if there is no caller DTMF action, all Stratagy User IDs return to Caller
Instructions User ID 991 when done. User ID 991 defaults to dtmf_gate, which
defaults to True. At dtmf_gate, Stratagy asks the caller to say “yes” if he would like
to transfer to the Operator. If Stratagy detects any verbal response, Stratagy
transfers the caller to the extension for the Operator User ID 0. If there is no
response, Stratagy disconnects the caller. This is normal operation for Stratagy (see
Chapter 5—How Stratagy Operates for more information).
However, some applications require dtmf_gate to be False, so there is no query of
the caller. If the gate is False and the Operator User ID 0 Done chain is set to Caller
Instructions User ID 991 (or no Done chain, defaulting to 991), a loop has been
created and Stratagy ports eventually lock up. To avoid this, you can program User
ID 0 to have System Administrator User ID 999 as its Done chain (User ID 999
defaults to disconnect, @H).
•Programming one or more User IDs Done chains to loop back to the same User IDs
causes Stratagy ports to lock up. For example; do not program User ID 200 Done
chain to User ID 200. And, do not program User ID 200 Done chain to User ID 201
and User ID 201 Done chain to User ID 200, etc.
Chain Done Instructs Stratagy where to send a caller who remains on the line after leaving a
message or after listening to an announcement only User ID mailbox.
blank: Stratagy uses the Done chain of the Company Greeting User ID (generally
990), that normally points to User ID 991 (Caller Instructions User ID).
Possible values: blank, another User ID
Default: blank (Done chain of the Company Greeting User ID)
Chain RNA Instructs Stratagy where to send a caller when there is a Ring No Answer at this User
ID’s extension. Defining an RNA chain enables Stratagy to control extension hunting.
Possible values: blank, another User ID
Default: blank (plays the current greeting for the mailbox)
Chain Busy Instructs Stratagy where to send a caller when this User ID’s extension is Busy.
Possible values: blank, another User ID
Default: blank (plays the busy greeting for the mailbox and takes a message)
Chain Delay Number of tenths of seconds Stratagy waits after playing this User ID’s greeting before
continuing processing. Callers may enter DTMF to transfer processing to another User
ID.
Possible values: 10ths of seconds (a value of 10 equals 1 second)
Default: 0 (no additional delay)
Table 6-3 Groups/Chains Screen Fields (continued)
Menus
Users Menu
6-16 Stratagy I&M 06/02
Groups
Group information for the User ID mailbox.
Groups control which User IDs a call can access. Each User ID mailbox user can be a
member of up to four groups. To be able to access another User ID, the caller User ID
must share at least one group number with the currently accessed User ID. If all groups
are set to 0, then no other User ID may be accessed.
For example, assume the following:
User ID Group 1 Group 2 Group 3 Group 4
100 1 0 0 0
222 1 5 0 0
303 5 7 0 0
440 7 0 0 0
For the above example, User ID 100 may access User ID 222 only. User ID 222 may
access User IDs 100 and 303. User ID 303 may access User IDs 222 and 440. User ID
440 may access User ID 303 only.
Groups are useful for isolating different departments in the same company or different
companies sharing one system. For example, suppose two companies share the same
President, Vice President, and Controller and you would want them accessible to all
companies; but each company has a different Human Resources department that you
may want to prevent caller access from one to the other.
Group 1 First of four groups.
Possible values: 0(not in use), 1~99,999,999
Default: 1 (Group 1. This is Stratagy’s default; and may have been redefined
during configuration.)
Group 2 Second of four groups.
Possible values: 0 (not in use), 1~99,999,999
Default: 0 (not in use. This is Stratagy’s default; and may have been redefined
during configuration.)
Group 3 Third of four groups.
Possible values: 0 (not in use), 1~99,999,999
Default: 0 (Not in use. This is Stratagy’s default; and may have been redefined
during configuration.)
Group 4 Fourth of four groups.
Possible values: 0 (not in use), 1 ~ 99,999,999
Default: 0 (not in use. This is Stratagy’s default; and may have been redefined
during configuration.)
Table 6-3 Groups/Chains Screen Fields (continued)

Menus
Users Menu
Stratagy I&M 06/02 6-17
Menus
Menus
Menu information for the User ID mailbox.
Menus define the destination the call is sent when the caller presses 1 of the 10 possible
menu options while listening to the mailbox’s greeting. Menus can accommodate an
unlimited number of special applications.
Each User ID mailbox may reference up to 10 single-digit menu selections. Each menu
selection may be assigned to a particular User ID. If the caller dials an assigned menu
selection, Stratagy transfers the caller to the assigned User ID. Stratagy processes
unassigned menu digits normally. For example, if the menu digit 0 is not defined and the
caller dials 0, Stratagy selects User ID 0 (typically, the operator).
A special function User ID mailbox set up for customer service using menus might be
defined as follows. For Sales Assistance, press 1; for Product Information, press 2; for
Service, press 3; or press 0 for the operator. The menu set up would look like:
1: 222 2: 350 3: 516
4: 5: 6:
7: 8: 9:
0: 240
If the caller selects 1 (Sales Assistance), the call would be transferred to User ID
mailbox 222. If the caller selects 2 (Product Information), the call would be transferred to
User ID mailbox 350. If the caller selects 3, the call would be transferred to User ID
mailbox 516 (Service). If the caller selects 0 (Operator), the call would be transferred to
the customer service secretary at extension 240. If the caller presses a menu digit that
does not contain a User ID, the call would be transferred to that User ID
(e.g., pressing 7, would transfer the call to User ID 7).
Table 6-3 Groups/Chains Screen Fields (continued)
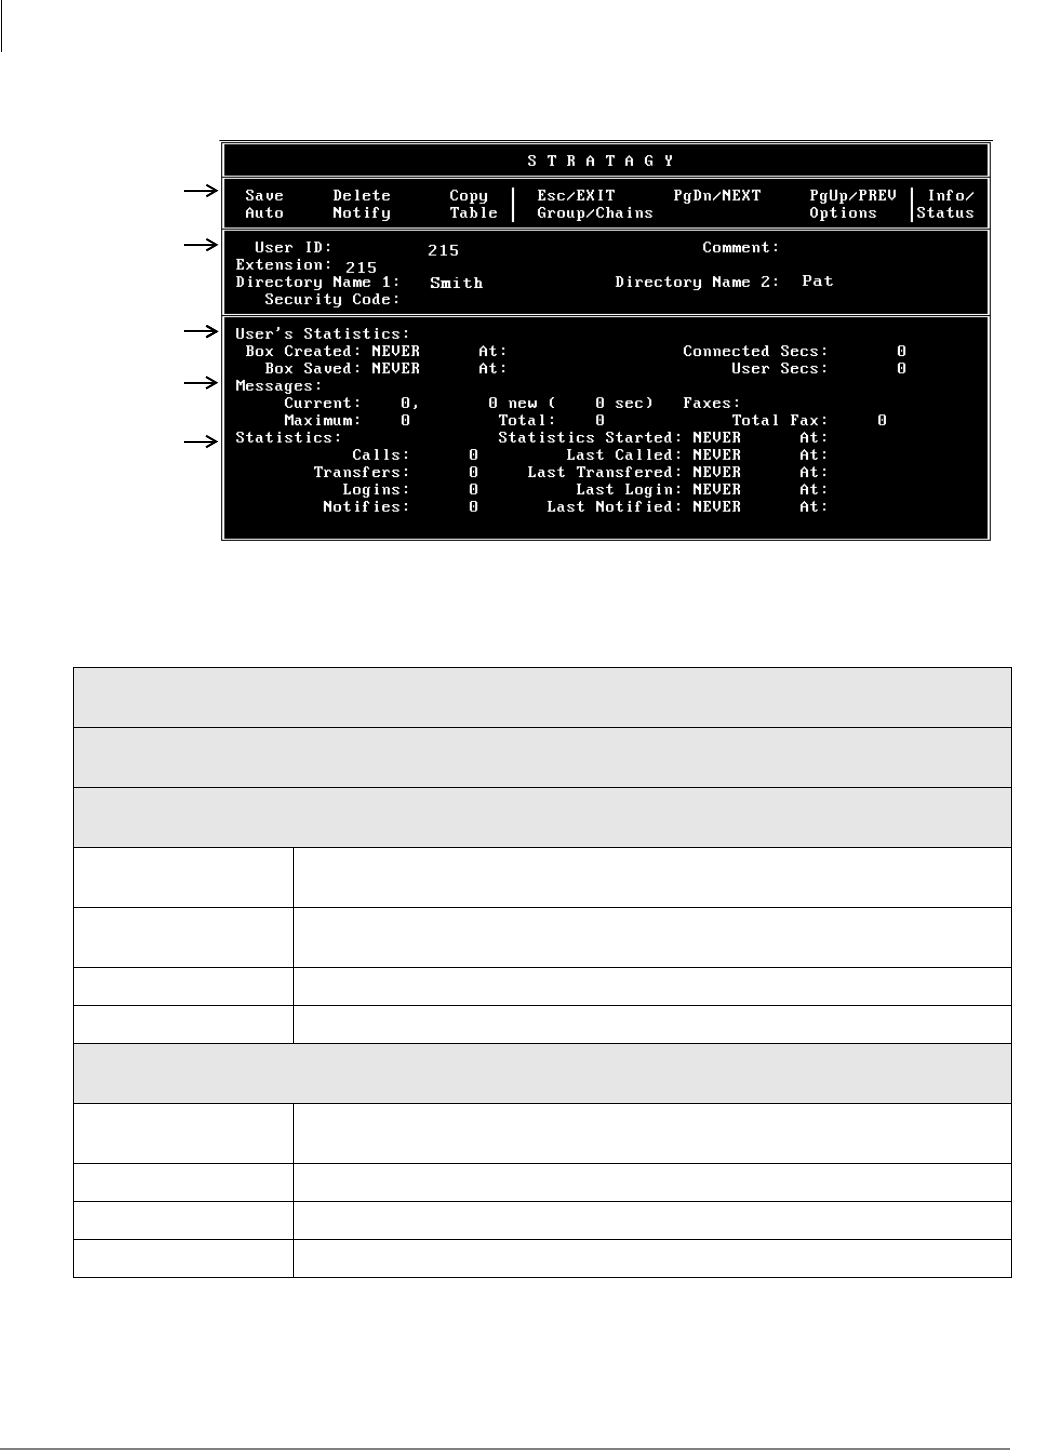
Menus
Users Menu
6-18 Stratagy I&M 06/02
Info/Status Screen
Figure 6-4 Info/Status Screen with Sample Data (this screen is for display only)
Table 6-4 Info/Status Screen Fields (Display Only)
Menu Bar
See “Users Menu Field Descriptions” on page 6-5 for a definition of the fields.
User’s Information
See “Users Menu Field Descriptions” on page 6-5 for a definition of the fields.
User’s Statistics
Statistics (creation, saved and connect) for the User ID mailbox.
Box Created Date (mm/dd/yy) and time (hh:mm) the User ID mailbox was originally created. Time is
in military format (24-hour clock).
Box Saved Date (mm/dd/yy) and time (hh:mm) the User ID mailbox was last updated. Time is in
military format (24-hour clock).
Connected Secs Number of seconds callers have been connected to the mailbox since it was created.
User Secs Number of seconds users have been connected to the mailbox since it was created.
Message Statistics
Message statistics for the User ID mailbox.
Current Number of messages currently stored and number of seconds for playback of these
stored messages.
New Number of new messages.
Maximum Maximum number of messages stored at the same time since the mailbox was created.
Total Number of messages stored since the mailbox was created.
User’s
Information
User’s
Statistics
Menu Bar
Statistics
Message
Statistics/
Faxes
4063
Menus
Users Menu
Stratagy I&M 06/02 6-19
Menus
Faxes
Not supported.
Total Faxes
Statistics
Call, transfer, log in and notify statistics for the User ID mailbox.
Statistics Started Last time statistics were reset. Statistics can be reset by selecting reset after running a
System Report, using the Report option on the Main Menu, or by using the System
Administrator User ID option of Reset User ID.
Calls Number of times the User ID mailboxes was accessed by a caller since statistics were
last reset.
Last Called Date (mm/dd/yy) and time (hh:mm) of the last call. Time is in military format
(24-hour clock).
Transfers Number of times Stratagy successfully completed a call transfer to the extension
associated with this User ID since statistics were last reset.
Last Transferred Date (mm/dd/yy) and time (hh:mm) of the last transfer. Time is in military format
(24-hour clock).
Logins Number of times the mailbox user accessed the mailbox for message retrieval or other
mailbox functions since statistics were last reset.
Last Login Last time (date and time) the mailbox user accessed the mailbox for message retrieval
or other mailbox functions since statistics were last reset. Time is in military format
(24-hour clock).
Notifies Number of times the mailbox user was notified of new messages.
Last Notified Last time (date and time) the mailbox user was notified of new messages. Time is in
military format (24-hour clock).
Table 6-4 Info/Status Screen Fields (Display Only) (continued)

Menus
Auto (Scheduling) Menu
6-20 Stratagy I&M 06/02
Auto (Scheduling) Menu
Customizing User ID mailboxes involves defining User IDs using the Users, Auto (Scheduling),
and Notify Menus. This chapter discusses the following Auto (Scheduling) Menu functions:
•How Stratagy uses Auto Scheduling records
•Access and exit the menu
•Menu options
•Create, modify, or disable auto scheduling records
•Auto (Scheduling) Menu field descriptions
How Stratagy Uses Auto Scheduling Records
The Auto (Scheduling) Menu enables you to set up automatic changes for each User ID mailbox.
You can set these changes to occur at a specific time, on certain days of the week, or on a specified
date. For example, based on your Auto definition, Stratagy can answer your company’s telephone
during the day with your daytime (open) greeting and during off-hours with your nighttime (closed)
greeting.
By defining Auto fields, you can schedule when a User ID mailbox can change the:
•DND setting
•Call Screening setting
•Greeting number
•Destination defined in the Extension field
•Number of rings before taking a message for this extension
The following concepts are the keys to understanding how Stratagy uses Auto Scheduling records:
•Stratagy waits for the right date, time, and day, and then makes the specified changes.
•The changes remain in effect until you either disable the Auto Scheduling record or another
record with different options is scheduled to start.
•If the re-schedule information does not fall on a valid day, Stratagy increments the Next Change
date until it falls on a valid day as defined by the Days of the Week, Restricted To field.
For example, to schedule a greeting to play on Thanksgiving Day each year you would set the
following fields to:
•Enabled—Yes
•Change On—11/24/99 (Thanksgiving Day in 1999)
•At—8:00
•And Every Month(s)—12
•Restrict To: MTWTFSS
NNNYNNN
Stratagy checks for the next Thursday after 11/24/99 and displays Next Change:11/28/99,
which is the next day that meets the criteria specified in the record.
See Appendix A – Checklists/Forms for a form to use for defining Auto records.
See Chapter 5 – How Stratagy Operates for information about customizing User ID mailboxes.
See “Users Menu” on page 6-1 and “Notify Menu” on page 6-27 for information about the other
menus. See Chapter 8 – Customization Examples for sample customized User ID mailboxes.

Menus
Auto (Scheduling) Menu
Stratagy I&M 06/02 6-21
Menus
Access/Exit the Auto (Scheduling) Menu
See “Users Menu” on page 6-1 for information about accessing and exiting the Users Menu.
Access Auto Menu
➤While viewing a specific User ID mailbox record, press Alt+A. The Auto Menu displays.
Exit Auto Menu
1. Press Alt+S. Your changes are saved.
Important! To save your modifications to the current User ID mailbox, you must press Alt+S
before pressing Esc.
2. Press Esc. The Users Menu displays.
Auto Menu Options
The Auto (Scheduling) Menu (see Figure 6-5 and Table 6-5 on page 6-23) consists of four sections:
•Menu Bar: access and viewing options (select).
•User’s Information: overlay of information about this User ID mailbox from the Users Menu
(display).
•Auto Scheduling Record Summary: 10 one-line descriptions of existing schedules (display).
•Auto Scheduling Record Options: Auto fields for the record highlighted in the Auto Record
Summary (modify).
Create Auto Scheduling Records
Important! When creating Auto (Schedule) records, be careful that records do not overlap, begin
or end at the exact same time.
1. In the Auto Record Summary section of the Auto Menu, highlight the first available
<Disabled> description line.
Note Use the PgDn and PgUp keys to move between lines.
2. Press the spacebar to toggle the Auto Record Options Enabled field to YES.
3. To change any field settings, place the solid color edit block that appears on the screen next to
the field name. Type the information in the field and press Enter
...or for some fields, press the spacebar to toggle the value.
Notes
•Use Enter or the arrow keys (↑↓) to move between fields.
•To display detailed help for the current field, press F1. See “Online Help Function” on page
3-6.
4. When finished, press Alt+S. You are asked if you want to overwrite the Auto Record.
5. Press Y. Stratagy automatically transfers the data to the description line in the Auto Scheduling
Record Summary highlighted in Step 1.

Menus
Auto (Scheduling) Menu
6-22 Stratagy I&M 06/02
Modify Auto Scheduling Records
1. In the Auto Scheduling Record Summary section of the Auto Menu, highlight the record you
want to define.
Note Use the PgDn and PgUp keys to move between lines.
2. If appropriate, press the spacebar to toggle the Auto Scheduling Record Options Enabled field
to YES.
3. Define the Auto Scheduling Record Options fields.
Note To display detailed help for the current field, press F1.
4. When finished, press Alt+S. You are asked if you want to overwrite the current auto record.
5. Press Y. Stratagy automatically transfers the data to the description line in the Auto Scheduling
Record Summary highlighted in Step 1.
Disable Auto Scheduling Records
1. In the Auto Scheduling Record Summary section of the Auto Menu, highlight the appropriate
<Enabled> description line.
Note Use the PgDn and PgUp keys to move between lines.
2. Press the spacebar to toggle the Auto Scheduling Record Options Enabled field to NO.
3. When finished, press Alt+S. You are asked if you want to overwrite the current auto record.
4. Press Y. Stratagy automatically changes the description line in the Auto Scheduling Record
Summary highlighted in Step 1 to <Disabled>.

Menus
Auto (Scheduling) Menu
Stratagy I&M 06/02 6-23
Menus
Auto (Scheduling) Menu Field Descriptions
Figure 6-5 Auto Menu with Sample Data
Table 6-5 Auto Menu Screen Fields
Menu Bar
Access and viewing options.
Save Press Alt+S to save the current Auto record.
Esc/EXIT Press Esc to exit the Auto Menu and return to the Users Menu.
PgDn/NEXT Press Page Down to view the next Auto record for this User ID.
PgUp/PREV Press Page Up to view the previous Auto record for this User ID.
Auto Menu title.
User’s Information
Display only—changes to these fields must be made in the Users Menu—see “Users Menu” on page 6-1.
User ID User ID mailbox number.
Comment Notation or reminder about the functions of this mailbox.
Security Code Password that permits the user access to the User ID mailbox. (Does not display.)
Extension Programmed dial actions Stratagy performs to transfer a call that has accessed the
User ID (i.e., Do Not Disturb is Off). Includes transfer to a User ID mailbox, a remote
number, or paging.
Directory Name 1 The first of two names Stratagy searches when a caller uses the directory (default
411).
Directory Name 2 The second of two names Stratagy searches when a caller uses the directory
(default 411).
Auto Scheduling Record Summary
Display only—one-line descriptions of each existing Auto Scheduling record.
User’s
Information
Menu Bar
Auto
Scheduling
Record
Options
Auto
Scheduling
Record
Summary
4068
Menus
Auto (Scheduling) Menu
6-24 Stratagy I&M 06/02
Auto Scheduling Record Options
Auto fields for the record highlighted in the Auto Scheduling Record Summary.
Enabled Enable or disable the current Auto record (auto scheduling).
Yes Enable the record. Stratagy carries out the instructions defined by the record.
No Disable the current Auto Schedule record.
Possible values: Yes, No
Default: No
First Scheduled Change
Change On Date (mm/dd/yyyy) of first scheduled change.
At Time (hh:mm) of first scheduled change. Military format (24-hour clock).
To guarantee that Stratagy programs a holiday schedule after the open greeting
schedule, set the holiday greeting’s Change At time one minute after the regular
open greeting time in case the holiday and open greeting schedules take place on
the same day.
Frequency of Change
Stratagy adjusts the next event time forward one day at a time per Days of the
Week, Restricted To until the first valid day is found, regardless of the values in the
Frequency of Change fields.
To program holidays that occur on different days each year, such as Thanksgiving
and Labor day, define the Frequency of Change fields of as 11 months and 29 days,
restricted to the appropriate Days of the Week.
And Every Month(s) Number of months before the change re-occurs at the time defined under Change
On/At. For example, most holiday greetings would be set to occur every 12 months
on the day specified.
Possible values: 0~12
Default: 0 (months)
And Every Day(s) Number of days before the change re-occurs at the time defined under Change On/
At. With every 1 day, the change occurs daily; with every 14 days, the change
occurs every two weeks.
Possible values: 0~31
Default: 0 (days)
And Every Hour(s) Number of hours before the change re-occurs. With every 12 hours, the change
occurs twice daily.
Possible values: 0~23
Default: 0 (hours)
And Every Minute(s) Number of minutes before the change re-occurs. With every 30 minutes, the change
occurs every half hour.
Possible values: 0~59
Default: 0 (minutes)
Table 6-5 Auto Menu Screen Fields (continued)
Menus
Auto (Scheduling) Menu
Stratagy I&M 06/02 6-25
Menus
Days of the Week
Restricted To Days of the week to which the change is restricted.
Y: Change occurs on this day of the week.
N: Change does not occur on this day of the week.
Stratagy adjusts the next event time forward one day at a time until the first valid day
is found, regardless of the values in the Frequency of Change fields.
In the following example, the change is scheduled for Monday through Friday only.
Restricted To:MTWTFSS
YYYYYNN
Possible values: Y, N
Default: Y
Next Change
Next Change Display only—date and time the next change occurs (mm/dd/yyyy hh:mm). Time is
expressed in military format (24-hour clock). If an Auto Scheduling record is
disabled, this field displays NEVER.
User ID Settings
Extension New extension Stratagy rings when the record is active. More specifically,
programmed dial actions Stratagy performs after the change occurs to transfer a call
that has accessed the User ID (i.e., Do Not Disturb is Off). For example, ring a
different extension after hours rather than during the day.
Possible values: include User ID mailbox, telephone extension, Token
Programming Language
Default: Users Menu’s Extension value for the User ID
Rings When the change occurs, the maximum number of rings Stratagy must wait when
transferring a call to the User ID before determining a Ring No Answer.
Possible values: 0 (uses system default), 1~9
Default: 0
Do Not Disturb Value for Do Not Disturb when the change occurs, even if the Users Menu’s Lock Do
Not Disturb is On.
On: Stratagy plays the User’s mailbox greeting to the caller without attempting to
ring the extension.
Off: Stratagy follows the dialing instructions provided in the Extension field.
Possible values: On, Off
Default: Off (DND not active)
Table 6-5 Auto Menu Screen Fields (continued)

Menus
Auto (Scheduling) Menu
6-26 Stratagy I&M 06/02
Call Screening Value for Call Screening when the change occurs, even if the Users Menu’s Lock
Call Screening is On.
On: Stratagy asks the caller to record his name, and then attempts to reach the
user. If the user answers, Stratagy plays that recording. The user can press:
to accept the call. Stratagy connects the caller to the user.
to reject the call and hang up. Stratagy reconnects the caller and plays the
user’s mailbox greeting. Stratagy follows the procedures used for the Ring
No Answer chain.
to transfer the call with an announcement. The user dials the extension to
transfer the call and hangs up. Stratagy plays “Your call is being
transferred to” and the name recording or the User ID of the extension
where the call is being transferred. Stratagy transfers the call to the new
extension.
to transfer the call without announcement. The user dials the extension to
transfer the call and hangs up. Stratagy asks the caller to continue to hold
and transfers the call to the new extension.
Off: Stratagy transfers the call to the extension without inquiry.
Possible values: On, Off
Default: Off (Call Screening is off)
Greeting # Which of eight greetings—the system greeting or one of seven User ID greetings—
this extension/mailbox plays when the change occurs. Plays even if Users Menu’s
Current Greeting Max is set to 0 (user cannot change greeting).
Possible values: 0, 1~7
Default: 0 (system greeting)
Table 6-5 Auto Menu Screen Fields (continued)

Menus
Notify Menu
Stratagy I&M 06/02 6-27
Menus
Notify Menu
Customizing User ID mailboxes involves defining User IDs using the Users, Auto (Scheduling),
and Notify Menus. This chapter discusses the following Notify Menu functions:
•How Stratagy uses Notify records
•Templates
•Access/exit the menu
•Menu Options
•Create, modify, or disable records/templates
•Notify Menu field descriptions
How Stratagy Uses Notify Records
The Notify Menu enables you to program Stratagy to automatically notify a caller of messages, or
a System Administrator of low-disk space or unsuccessful system startup. There are ten Notify
records available for each User ID. Each record represents one method of notifying the user of new
messages.
The six types of notification (normal, relay, pickup, disk, urgent and panic) are based on the action
that activates the notification. Notification methods are programmed using the Token Programming
Language (see Appendix B – Special Greeting User ID Mailboxes) and include message waiting
lights, beepers, pagers, other telephones (inside extensions or outside numbers), and office paging
systems.
By using available templates (predefined notification instructions), fields may be defined and
assigned to one or more mailboxes that require the same type of notification (for example, message
waiting lights). Stratagy accommodates variable information, such as the User’s extension number
when lighting a message light, to streamline notification set up.
Notification can occur based on the following:
•Days of the week
•Hours of the day
•Time interval between notifications (e.g., every 30 minutes)
•Number of times to repeat notification process (e.g., two times)
See Appendix A – Checklists/Forms for a form to use when defining Notify records.
See Chapter 5 – How Stratagy Operates for information about customizing User ID mailboxes. See
“Auto (Scheduling) Menu” on page 6-20 and “Notify Menu” on page 6-27 for information about
the other menus. See Chapter 8 – Customization Examples for sample customized User ID
mailboxes.

Menus
Notify Menu
6-28 Stratagy I&M 06/02
Templates
Templates are general notification actions which may be used for any number of Notify records and
User ID mailboxes. By having User IDs share templates, you can make changes to all notification
records for those User IDs by simply changing one template.
Stratagy provides a group of preset templates covering notification methods for Toshiba telephone
systems, SMDI, AMIS, and paging applications. These default templates can be used as is or
modified for other related purposes. See “Create Notify Records/Templates” on page 6-29 and
“Modify Notify Records/Templates” on page 6-29 for instructions on creating and modifying
templates.
View Existing Templates
1. From the Notify Menu, press Alt+T. A dialog box with a list of templates displays.
2. Highlight the template you want, using the Page Down and Page Up keys and press Enter.
Stratagy displays the template information in the appropriate Notify Record Options fields.
Access/Exit the Notify Menu
See “Users Menu” on page 6-1 for information about accessing and exiting the Users Menu.
Access the Notify Menu
➤While viewing a specific User ID mailbox record, press Alt+N. The Notify Menu displays.
Exit Notify Menu
1. Press Alt+S. Your changes are saved.
Important! To save your modifications to the current User ID mailbox, you must press Alt+S
before pressing Esc.
2. Press Esc. The Users Menu displays.
Notify Menu Options
The Notify Menu (see Figure 6-6 and Table 6-6 on page 6-31) consists of four parts:
•Menu Bar: access and viewing options (select).
•User’s Information: overlay of information about this User ID mailbox from the Users Menu
(display).
•Notify Record Summary: ten one-line descriptions of existing notifications (display).
•Notify Record Options: Notify fields for the record highlighted in the Notify Record Summary
(modify).
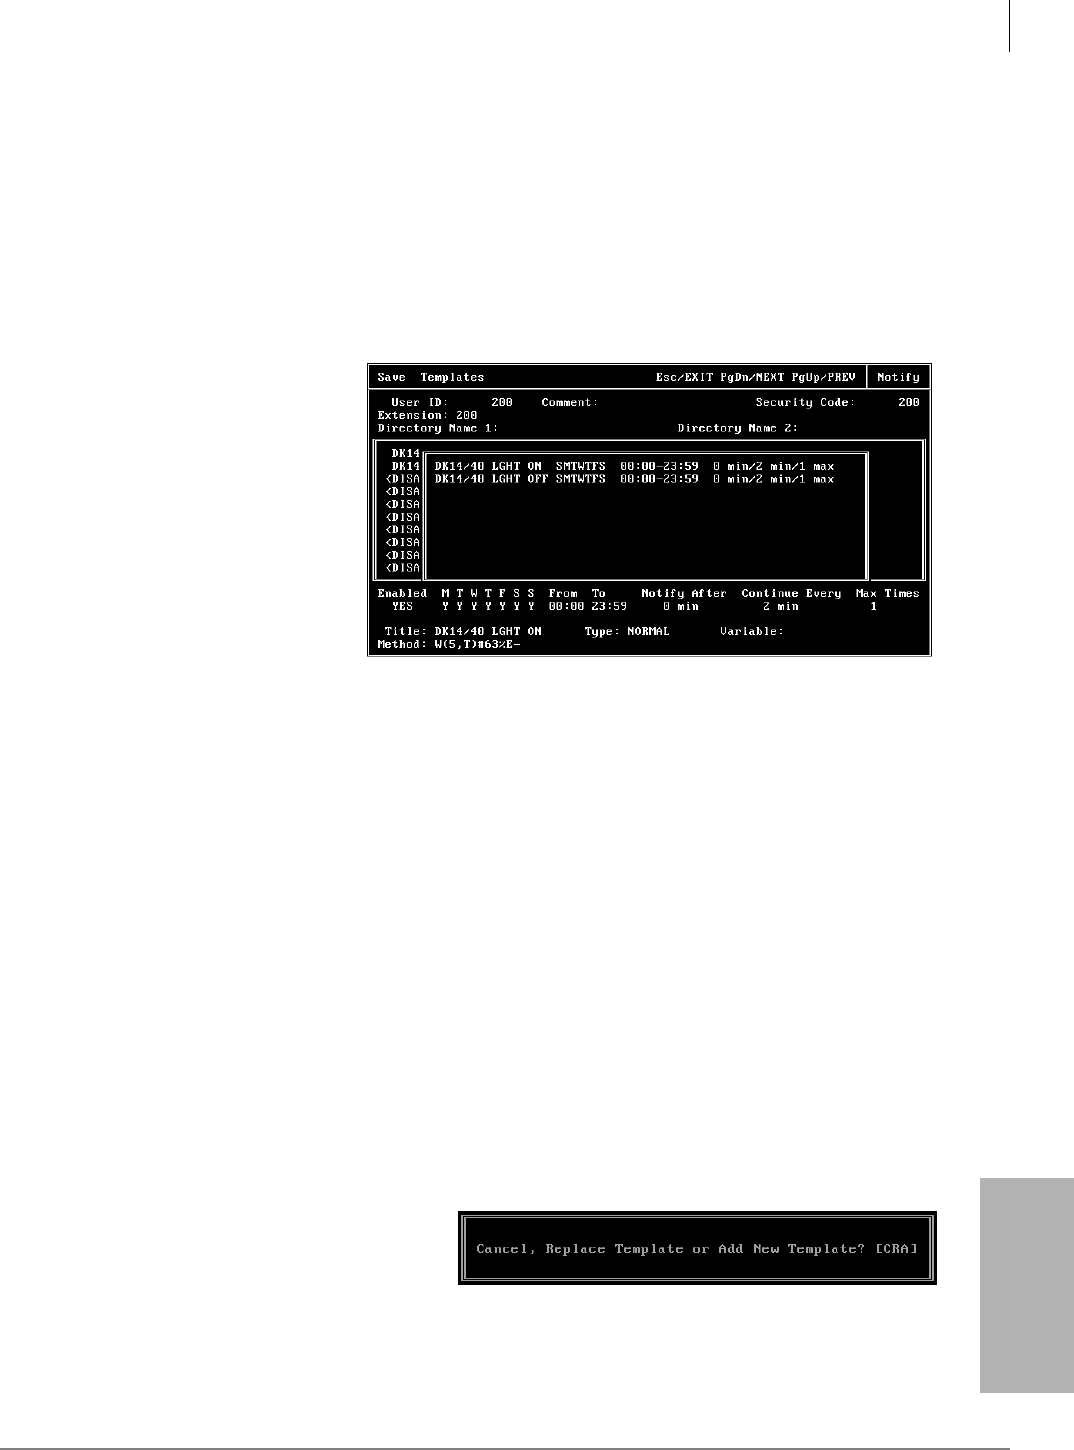
Menus
Notify Menu
Stratagy I&M 06/02 6-29
Menus
Create Notify Records/Templates
1. In the Notify Record Summary section of the Notify Menu, highlight the first available
<Disabled> description line.
Note Use the PgDn and PgUp keys to move between lines.
2. Press the spacebar to toggle the Notify Record Options Enabled field to YES.
3. Define the Notify Record Options fields
Note Use Enter or the arrow keys (↑↓) to move between fields. To display detailed help for
the current field, press F1.
...or press Alt+t to select a
template. The Template
screen displays (shown
right).
Highlight the template,
using the Page Down and
Page Up keys and press
Enter.
Stratagy displays the
template information in the
appropriate Notify Record
Options fields.
4. (Optional) If you are using a template and the Method field contains the characters %V, fill in
the Variable field with the appropriate telephone number or information.
5. Press Alt+S. You are asked if you want to add a new template.
6. Type Y. You are asked if you want to overwrite the Notify Record.
7. Type Y again.
Stratagy adds this Notify record to the template database, overwrites the default notification
template with this information and automatically transfers the data to the description line in the
Notify Record Summary highlighted in Step 1.
Modify Notify Records/Templates
Important! Modifying the template changes the template for all User IDs using the template.
1. In the Notify Record Summary section of the Notify Menu, highlight the first available
<Disabled> description line.
Note Use the PgDn and PgUp keys to move between lines.
2. If appropriate, press the spacebar to toggle the Notify Record Options Enabled field to YES.
3. Define the Notify Record Options fields. Use Enter or the arrow keys (↑↓) to move between
fields. To display detailed help for the current field, press F1.
4. When finished, press Alt+S. Your
changes are saved and Stratagy
prompts (shown right):
C: (cancel) Prevent the Notify record
from overwriting the existing template.
R: (replace template) Overwrite the old template with this new Notify record.
4066
4188

Menus
Notify Menu
6-30 Stratagy I&M 06/02
A: (add) Add this Notify record to the template
database as a new template.
Important! Replacing an existing template affects all User ID mailboxes currently using the
template unless the change is confined to the Notify record’s Variable field.
5. Enter C for cancel, R for replace template or A for add. Stratagy automatically transfers the data
to the description line in the Notify Record Summary highlighted in Step 1.
Disable Notify Records/Templates
1. In the Notify Record Summary area of the Notify Menu, highlight the appropriate <Enabled>
description line.
Note Use the PgDn and PgUp keys to move between lines.
2. Press the spacebar to toggle the Notify Record Options Enabled field to NO.
3. Press Alt+S. You are asked if you want to overwrite the current record.
4. Press Y. Stratagy automatically disables the appropriate description line in the Notify Record
Summary. In addition, Stratagy keeps the original information so you can reactivate the Notify
record by changing the Enabled field to YES.

Menus
Notify Menu
Stratagy I&M 06/02 6-31
Menus
Notify Menu Field Descriptions
Figure 6-6 Notify Menu with Sample Data
Table 6-6 Notify Menu Screen Fields
Menu Bar
Access and viewing options (select).
Save Press Alt+S to save the current new or modified Notify record.
Templates Press Alt+T to view existing template (pre-set notification instructions).
Esc/EXIT Press Esc to return to the Users Menu.
Page Down/NEXT Press Page Down to view the next Notify record for the User ID.
Page Up/PREV Press Page Up to view the previous Notify record for the User ID.
Notify Menu title.
User’s Information
Display only—changes to these fields must be made in the Users Menu—see “Users Menu” on page 6-1.
User ID User ID mailbox number.
Comment Notation or reminder about the function of the mailbox.
Security Code Password that permits the user access to the User ID mailbox. (Does not display.)
Extension Programmed dial actions Stratagy performs to transfer a call that has accessed the User ID
(i.e., Do Not Disturb is Off). Includes transfer to a User ID mailbox, a remote number, or
paging.
Directory Name 1 The first of two names Stratagy searches when a caller uses directory (default 411).
Directory Name 2 The second of two names Stratagy searches for when a caller uses the directory (default
411).
Notify Record Summary
Display only—10 one-line descriptions of existing notifications.
User’s
Information
Menu Bar
Notify Record
Options
Notify Record
Summary
4065
Menus
Notify Menu
6-32 Stratagy I&M 06/02
Notify Record Options
Notify fields for the record highlighted in the Notify Record Summary area.
Enabled Enable or disable the current Notify record.
Yes: Enable the record. Stratagy carries out the instructions defined by the record.
No: Disable the current Notify record.
Important! Using Stratagy’s User Notification option for his/her User ID mailbox, a user
can enable or disable an existing Notify record and modify the contents of the record’s
Variable field.
Possible values: Yes, No
Default: No (disabled)
Frequency of Notification
MTWTFSS Days of the week to which notification is restricted.
Y: Notification occurs on this day of the week.
N: Notification does not occur on this day of the week.
In the following example, notification is scheduled for Monday, Wednesday, and Friday only.
Restricted To:MTWTFSS
YNYNYNN
Possible values: Y, N
Default: Y
From Start notification time (hh:mm). Military format (24-hour clock); e.g., 5:30 p.m. is
represented as 17:30. Always less than To. To specify 24 hours, set From at 00:00 and To
at 23:59.
Default: 00:00
To End notification time (hh:mm). Military format (24-hour clock). Always more than From. To
specify 24 hours, set From at 00:00 and To at 23:59.
Default: 23:59
Notify After Number of minutes before Stratagy attempts the first notification to a user after someone
leaves a new message.
Important! If this is the only enabled Notify record, use the default value 0. If there is
more than one enabled Notify record for the same date and time, set Notify After to a
different number of minutes for each record. This avoids potential conflict.
Possible values: 0~ 60
Default: 0 (immediately)
Continue Every Number of minutes before Stratagy re-attempts notification after the first notification. For
example, every 60 minutes means notify this user every hour after the first notification.
Possible values: 0~60
Default: 60 (minutes)
Max Times Number of notification attempts when new messages exist in this user’s mailbox.
Stratagy counts only successful tries; i.e., successfully performing each action in the
Method field.
Possible values: 0~999
Default: 0 (Stratagy continues until the user has played every new message.)
Table 6-6 Notify Menu Screen Fields (continued)

Menus
Notify Menu
Stratagy I&M 06/02 6-33
Menus
Notify Features
Title Comment or reminder that identifies the type or purpose of this Notify record/template. For
example, message light on, digital pager, home. (Field is 16 characters long.)
Type Notification type for this record. To select the type:
1. When the cursor is in the Type field to display the options, press F2.
2. Use the arrow keys (↑↓) to highlight the type you want.
3. Press Enter to select the type.
NORMAL: Notify user of new messages in his mailbox by lighting the message light or
calling a telephone number.
Notification begins when a message is left in the User ID mailbox.
User notified of new messages in his mailbox by lighting the message light, calling a
home telephone, calling a cellular telephone, or calling any off-premise location.
Notification ends when the user picks up messages or when the maximum number of
tries (Max Times) has been reached.
RELAY: Notify user by relaying the caller’s telephone number to the user’s beeper display.
Notification begins when a caller uses the relay paging feature to record a telephone
number. Stratagy prompts the caller to:
1. Press while connected to the personal greeting of the user’s mailbox.
2. Enter his/her telephone number and press .
Stratagy stores the telephone number in the Method field token %R.
User notified when the caller’s telephone number is relayed to the user’s beeper
display or forwarded to a voice answered telephone.
Notification ends when the maximum number of tries (Max Times) has been reached.
PICKUP: Turn off a message waiting light after a user has retrieved messages from his
mailbox.
Notification begins after the user picks up all new messages and exits from the Play
Messages selection.
Notification ends when the maximum number of tries (Max Times) has been reached.
Therefore, be sure to enter 1 when you define Max Times.
DISK: Notify user (usually System Administrator) when available flash drive space is low.
Notification begins when the available flash drive storage space reaches the
predefined limit (set using the Stratagy system configuration parameter diskwarn).
The default is 5%.
Notification ends when the maximum number of tries (Max Times) has been reached.
URGENT: Notify user of an urgent message in his mailbox.
Notification begins when a User ID mailbox receives a message the caller marked as
urgent.
Notification ends when the maximum number of tries (Max Times) has been reached.
PANIC: Automatically notifies the System Administrator or support personnel that an error
has occurred on the system whenever an unsuccessful restart occurs during the Automatic
System Recovery.
Possible values: NORMAL, RELAY, PICKUP, DISK, URGENT, PANIC
Default: NORMAL
Table 6-6 Notify Menu Screen Fields (continued)
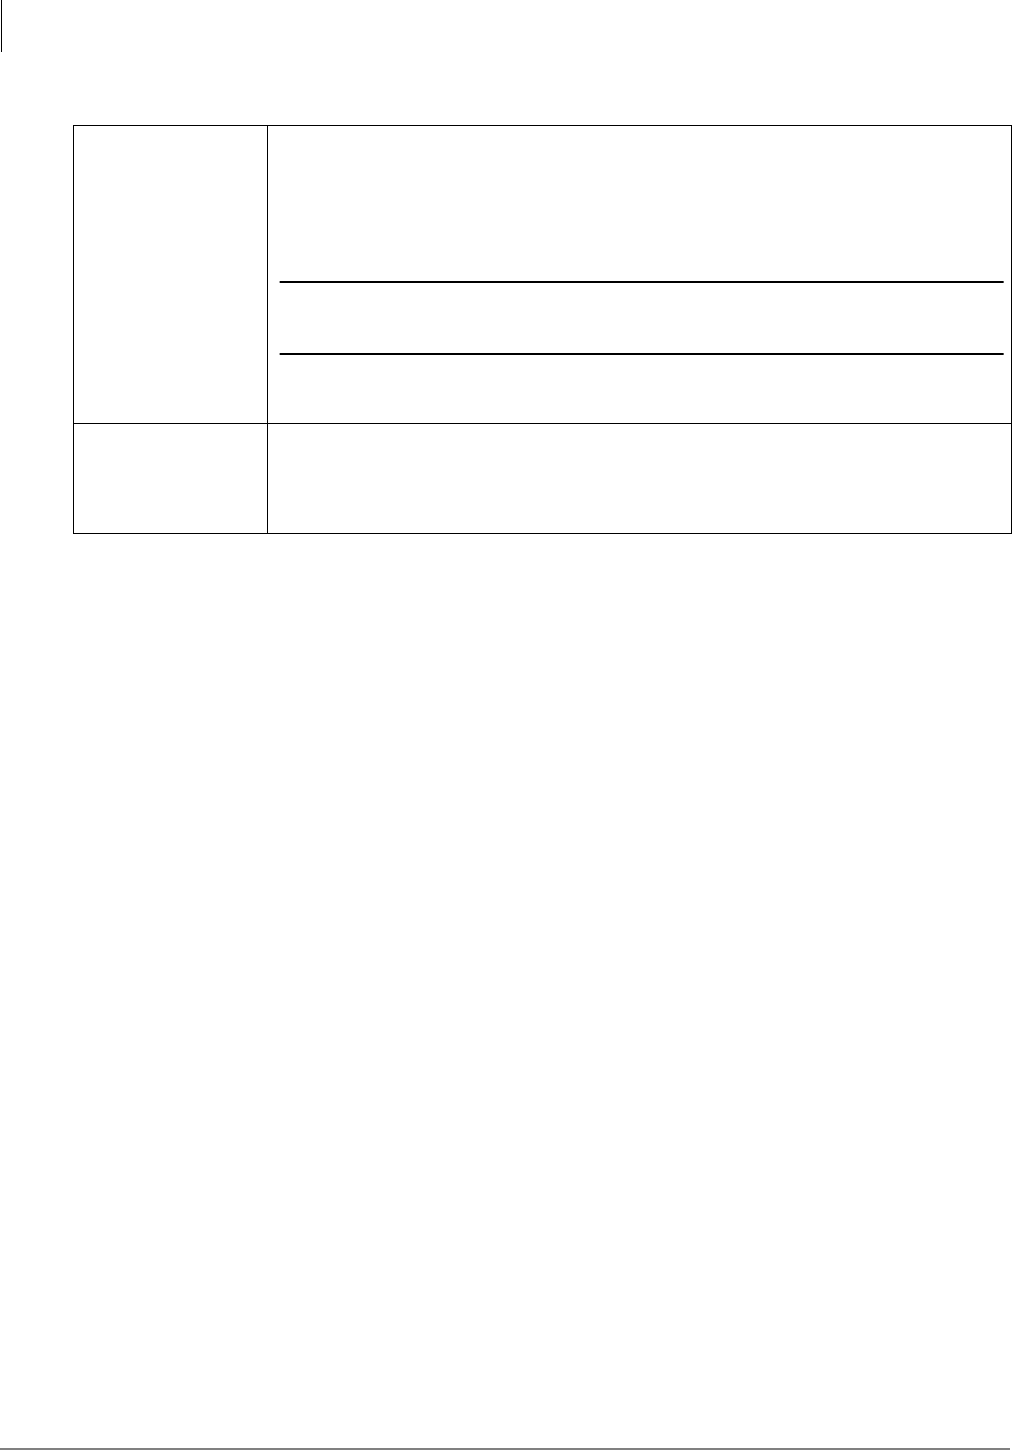
Menus
Notify Menu
6-34 Stratagy I&M 06/02
Variable Value Stratagy inserts in place of the %V in the Method field. Typically, this is pager or
similar value associated with the record rather than the template.
The uses include:
•Notification templates can be used for many users.
•Field personnel can be notified at different destinations during the day or week.
Important! Using Stratagy’s User Notification option for his/her User ID mailbox, a user
can enable or disable an existing Notify record and modify the contents of the record’s
Variable field.
Possible values: blank, telephone number, extension, Token Programming Language
Default: blank
Method Programmed dial actions Stratagy performs to notify the user.
Possible values: include User ID mailbox, telephone extension, Token Programming
Language
Default: blank
Table 6-6 Notify Menu Screen Fields (continued)

Stratagy I&M 06/02 7-1
Token Programming
Token Programming 7
Stratagy’s Token Programming Language consists of commands, or tokens, that instruct Stratagy
what actions to perform. The tokens that are generally used are simple and perform standard
expected actions such as dialing an extension.
The Token Programming Language gives the system versatility. Its capabilities include, but are not
limited to:
•Gathering information from callers
•Confirming digits entered by a caller
•Relaying messages to digital pagers
•Controlling message waiting lights
The Token Programming Language uses three types of tokens: singular, defined, and replaced. For
a detailed description of each token, see Tables 7-1~7-3.
Using the Token Programming Language
The Token Programming Language may be used in the following fields:
Users Menu’s Extension Field
Typically the Users Menu’s Extension field contains the actual telephone station/extension number
for the corresponding User ID. It may contain tokens. Or, it may be empty.
Auto’s Extension Field
The default value for the Auto record’s Extension field is the value in the User’s Extension field.
However, it may contain tokens. When the Auto record is active, Stratagy uses this Extension field
rather than the Users Menu’s Extension field.
Notify’s Method Field
The Notify record’s Method field must always be defined for Stratagy to perform the proper type
of notification.
To program the Extension or Method fields, enter a series of commands, or tokens, that instruct
Stratagy what actions to perform. A field would, therefore, contain TokenTokenToken...Token,
where Token defines how to perform the actions.
Some IVR tokens are not supported by the Flash.
Stratagy provides reserved User ID mailboxes that have common features pre-programmed,
including future delivery, guest defaults, and fax tone detect. Notify contains templates (e.g.,
message waiting light control and pagers) you can use for defining User ID Notify records.
See Chapter 8 – Customization Examples for examples on how to use the Token Programming
Language.

Token Programming
Singular Tokens
7-2 Stratagy I&M 06/02
Singular Tokens
Singular Tokens are single character commands that perform a single action that cannot be
modified. For example, the token 1 performs the action of playing DTMF 1.
Table 7-1 Singular Tokens
Token Syntax Description
@@
Suppress normal process—prevents Stratagy from normally processing an Extension
or Method field.
•Normally when Stratagy evaluates an Extension field, it plays the “Please hold...”
prompt to the caller, puts the caller on transfer hold, and then evaluates the
tokens in the field. If the first character in the field is the @ token, however,
Stratagy immediately begins processing the next token without performing the
transfer procedure.
•In the case of the Method field, Stratagy does not attempt to access a port for an
outbound notification call.
11Plays DTMF tone 1.
22Plays DTMF tone 2.
33Plays DTMF tone 3.
44Plays DTMF tone 4.
55Plays DTMF tone 5.
66Plays DTMF tone 6.
77Plays DTMF tone 7.
88Plays DTMF tone 8.
99Plays DTMF tone 9.
00Plays DTMF tone 0.
**Plays DTMF tone *.
##Plays DTMF tone #.
AAPlays DTMF tone A.
BBPlays DTMF tone B.
CCPlays DTMF tone C.
DDPlays DTMF tone D.
- (dash) -Short pause—pauses 0.5 (one-half) second.
, (comma) ,Long pause—pauses two seconds.
~~Timed break recall—pulse dials the digit 1 to effect a timed break recall.
EEEarth recall—performs an earth recall. This is used in place of the hookflash (the F
token) on some switches.
FF
Hookflash—performs a hookflash. The length of the hookflash specified under the
Telephone System Dial Codes option # Number of 1/100 seconds to use for flash time.
(See Chapter 4 – Configure Stratagy.)
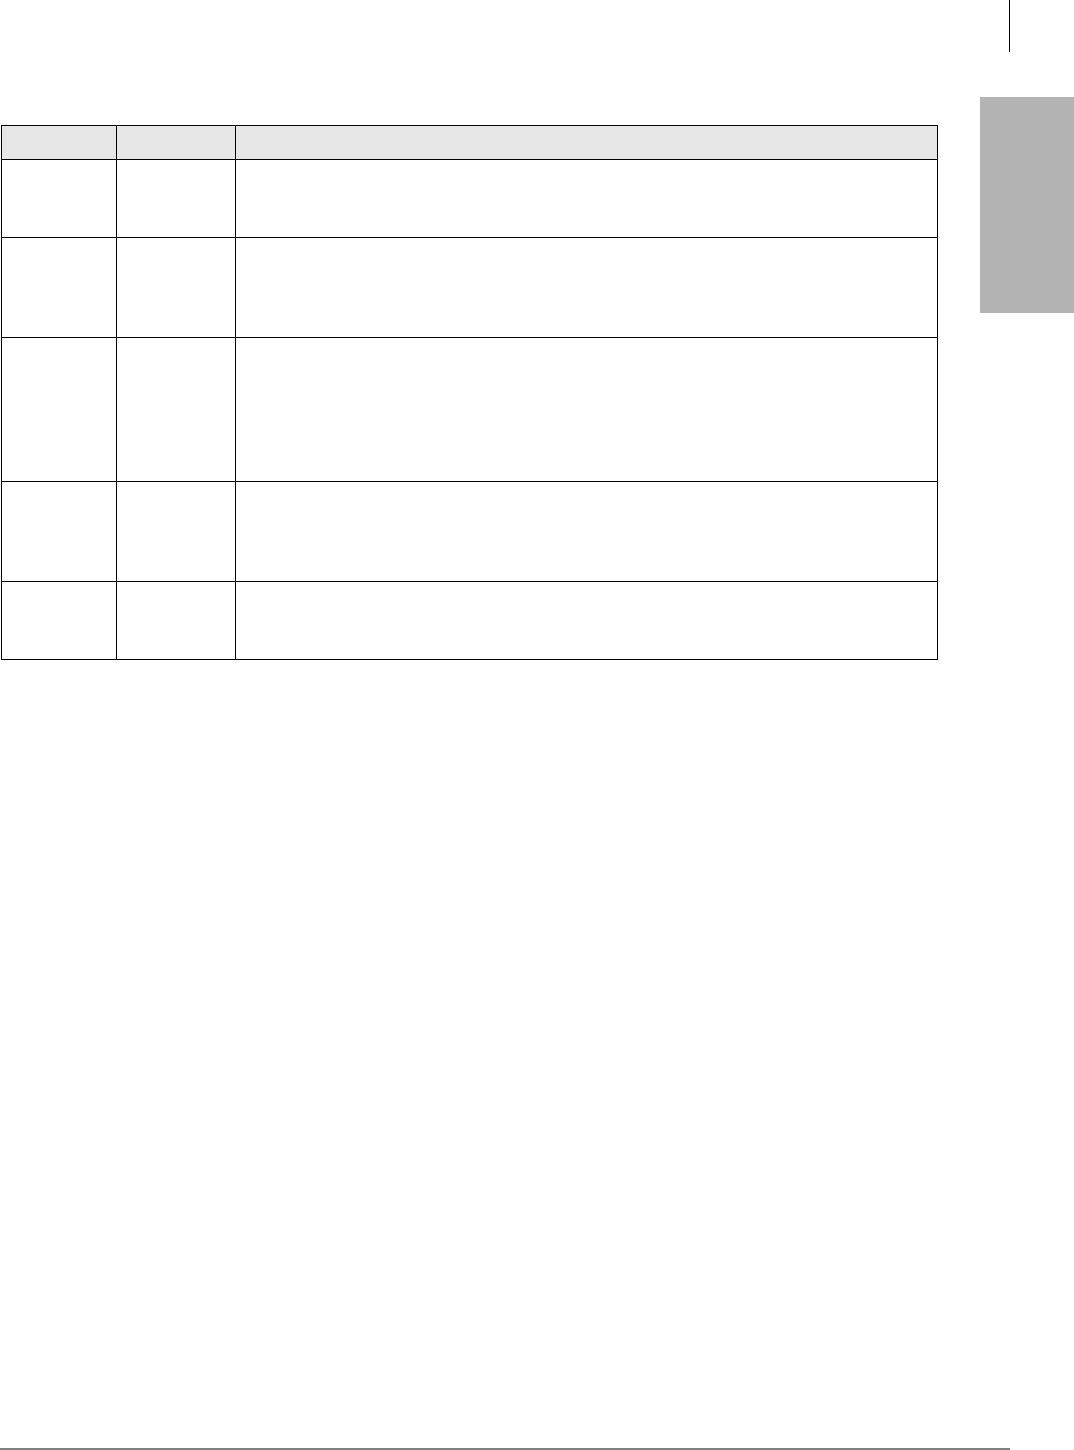
Token Programming
Singular Tokens
Stratagy I&M 06/02 7-3
Token Programming
HH
Go on hook—immediately hangs up. If entered after an extension number, performs
an immediate hang-up without waiting for system tone cadences. This is called a Blind
Transfer.
UU
Return to transferring User ID if Extension field number busy—if entered after a
number in the Extension field, performs a partially supervised transfer. If ringing is
returned, the system hangs up for a blind transfer. If busy is returned, the Stratagy
retrieves the call to be processed by the transferring User ID.
XX
Remember event—message waiting light control—creates the file LIGHT.ON in the
User ID’s directory. Used with the Y and Z tokens to control Stratagy’s processing of
tokens, particularly in situations where Stratagy should perform an action once
regardless of the number of times the tokens are attempted.
A message waiting light that uses the same codes to turn on the light as it does to turn
off the light; i.e., a toggle. See Chapter 8 – Customization Examples for details.
YY
Forget event – message waiting light control—deletes the LIGHT.ON file in the User
ID’s directory.
A message waiting light that uses a different code to turn off the light than to turn on
the light. See Chapter 8 – Customization Examples for details.
ZZ
Test event – message waiting light control—tests for the existence of the LIGHT.ON
file in the User ID’s directory. If the file is there, immediately stops processing the rest
of the tokens for this User ID.
Table 7-1 Singular Tokens (continued)
Token Syntax Description

Token Programming
Replaced or Variable Tokens
7-4 Stratagy I&M 06/02
Replaced or Variable Tokens
Replaced or Variable Tokens are specified with a preceding % sign and cause Stratagy to replace
the token given with the value associated with the token. For example, The token %M would be
replaced with the current number of messages for the current User ID being accessed.
Table 7-2 Replaced Tokens
Token Description
%A
Public network line access codes—replaced with the value of the Stratagy System configuration
parameter fax_dl_init (public network line access) (Chapter 4 – Configure Stratagy)
Syntax %A
%B1~%B6
Board serial number—replaced with the appropriate value that represents the serial number of the
appropriate voice board.
%B1 voice board 1
%B2 voice board 2
%B3 voice board 3
%B4 voice board 4
%B5 voice board 5
%B6 voice board 6
Syntax %B1,%B2,%B3,%B4,%B5,%B6
%C Replaced with the current port number.
Syntax %C
%D
Flash drive space remaining—replaced with the value that represents the percent of free flash drive
space at the time it is used.
Syntax %D
Example P(%D,N)
Says (plays) the percentage of free flash drive space as a number.
%E Extension field—replaced with the contents of the current User ID’s Extension field.
Syntax %E
%F
User ID’s Directory Name 1, Directory Name 2, or Comment field—replaced with the contents of the
Users Menu’s Directory Name 1, Directory Name 2, or Comment field for the User ID.
Syntax %F(n[,uid])
where:
n Number representing one of the following Users Menu fields.
1 Directory Name 1
2 Directory Name 2
3 Comment
uid Valid User ID. Defaults to current User ID if not specified.
Example %F(3)
Replaced with the contents of the Users Menu’s Comment field for the current User ID.

Token Programming
Replaced or Variable Tokens
Stratagy I&M 06/02 7-5
Token Programming
%K Value held in the Calling Party ID buffer.
Syntax %K
%M Number of messages—replaced with the total number of messages for the current User ID.
Syntax %M
%N Number of new messages—replaced with the number of new messages for the current User ID.
Syntax %N
%P
Previously accessed User ID—replaced with the User ID previously accessed
Syntax %P
Example
If while accessing User ID 100 a caller enters 222, then while User ID 222 is accessed %P has the
value 100.
%R
Relay page DTMF—replaced with the DTMF digits entered by the caller who invoked RELAY paging
notification. Used mostly for sending a telephone number directly to a User’s pager/beeper from his
User ID.
Syntax %R
%S0~%S19
Store value—Stratagy has twenty storage tokens (variables) that enable you to input, modify,
retrieve, and output values. Upon each new call, all the variables are initialized to null (no defined
value).
%S0 storage token 0 %S10 storage token 10
%S1 storage token 1 %S11 storage token 11
%S2 storage token 2 %S12 storage token 12
%S3 storage token 3 %S13 storage token 13
%S4 storage token 4 %S14 storage token 14
%S5 storage token 5 %S15 storage token 15
%S6 storage token 6 %S16 storage token 16
%S7 storage token 7 %S17 storage token 17
%S8 storage token 8 %S18 storage token 18
%S9 storage token 9 %S19 storage token 19
Each port has a unique set of twenty %S tokens which do not conflict. Therefore, two different ports
may use the same %S token without disrupting each other’s value.
Syntax %S0,%S1,%S2,%S3,%S4,%S5,%S6,%S7,%S8,%S9,%S10,%S11,%S12,
%S13,%S14,%S15,%S16,%S17,%S18,%S19
%T
Connect time—replaced with the current connect time, i.e., the total number of seconds that the port/
call has been active.
Syntax %T
%U User ID—replaced with the current User ID number.
Syntax %U
Table 7-2 Replaced Tokens (continued)
Token Description

Token Programming
Replaced or Variable Tokens
7-6 Stratagy I&M 06/02
%V
Variable—replaced with the value of the current Notify record’s Variable field. Useful for defining
notification templates for User IDs that perform the same type of notification with a difference only in
the telephone number that Stratagy should dial, e.g., pager/beeper telephone numbers.
Syntax %V
%W
Current day of the week—replaced with the current day of the week, where:
1 Sunday5 Thursday
2 Monday6 Friday
3 Tuesday7 Saturday
4 Wednesday
Syntax %W
%X
Transfer hold codes—replaced with the value of the Telephone System Dial Codes that puts a caller
on transfer hold (# Dial code to put a caller on transfer hold). See Chapter 4 – Configure Stratagy.
Syntax %X
%Y
Current date—replaced with the current date (mmddyyyy). This is the same format used in the P( )
token for dates.
Syntax %Y
Example P(%Y,D)
Says the current date: month, day, year.
%Z
Current time—replaced with the current time in 24-hour format (hhmm). This is the same format used
in the P( ) token for time.
Syntax %Z
Example P(%Z,T)
Says the current time in 24-hour format: hours, minutes.
LEN[ ]
Length—replaced with the total number of characters in the %Sn variable.
Syntax LEN[%Sn]
where:
%Sn One of the %S storage variables (range: 0~19).
Example P(LEN[%S1],N)
Says the number of characters in %S1 as a number.
Table 7-2 Replaced Tokens (continued)
Token Description
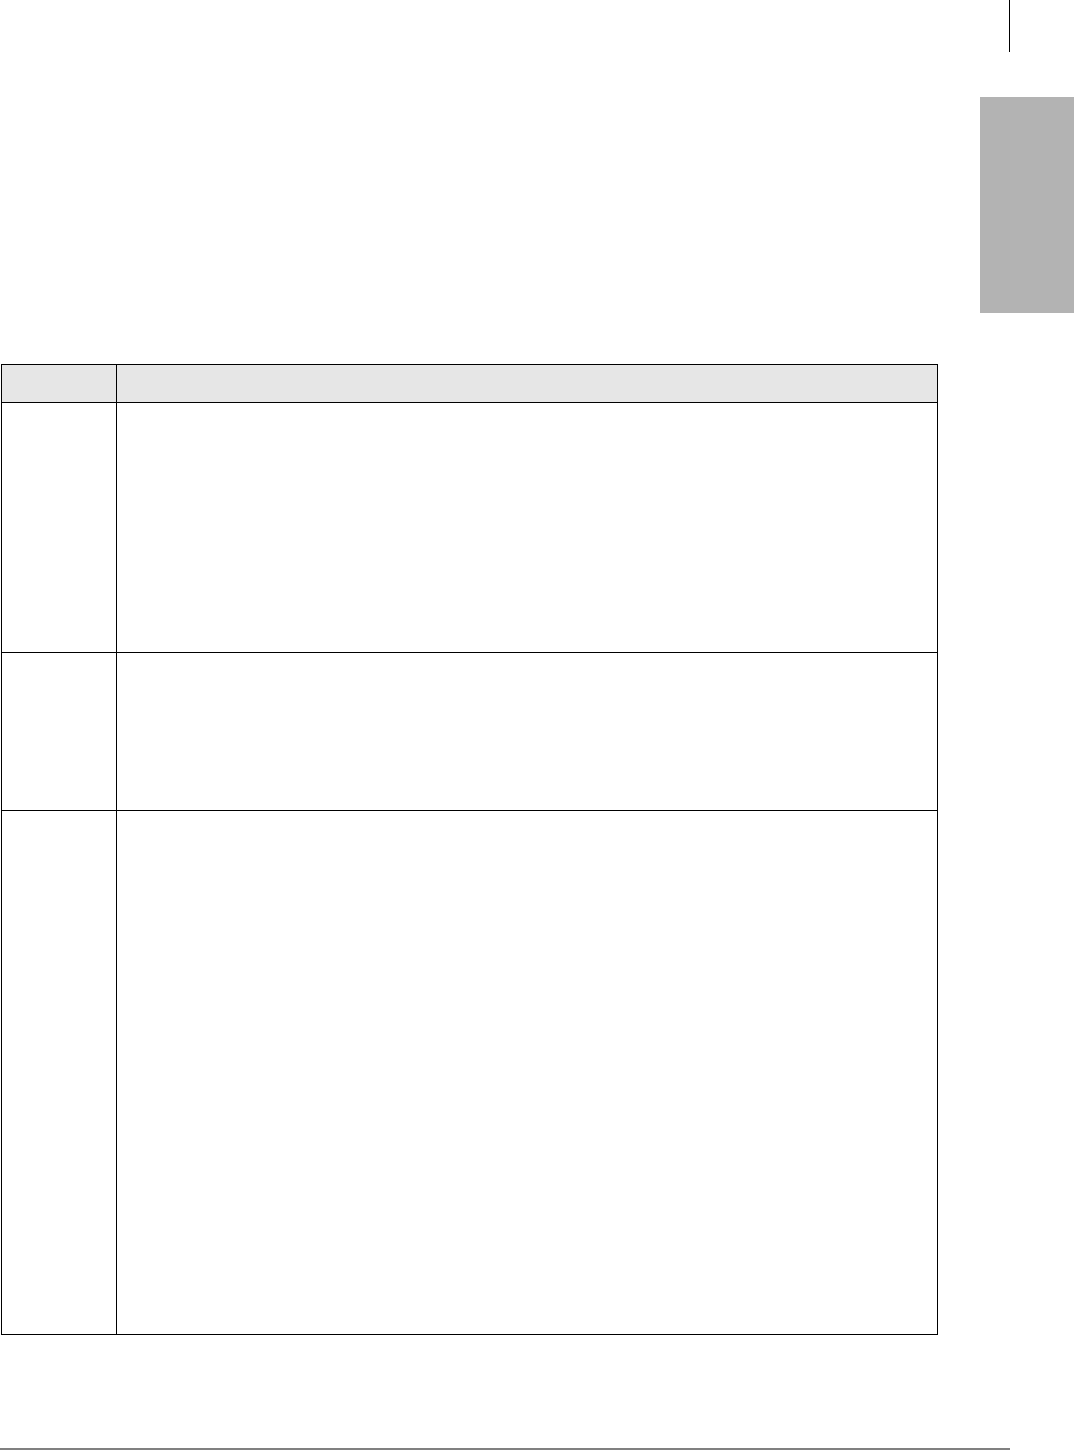
Token Programming
Defined Tokens
Stratagy I&M 06/02 7-7
Token Programming
Defined Tokens
Defined Tokens are expressed with left and right parentheses surrounding one or more definitions
that determine how the token should work. For example, the Goto token G( ) only takes one
definition. Stratagy immediately “goes to” the User ID specified for processing. For G(123),
Stratagy continues processing at User ID 123.
Strings that contain a space, comma or quotes, must be enclosed with quotes (e.g., “9,%S1”) or
Stratagy may misread the token.
Table 7-3 Defined Tokens
Token Description
G( )
Go to User ID—immediately continues processing at the User ID specified. Stratagy continues
standard processing at the User ID per the User ID mailbox processing diagram (Chapter 5 – How
Stratagy Operates).
Syntax G(uid)
where:
uid User ID
Example G(299)
Goes to User ID 299.
H( )
Hang-up process—defines the specified uid as the uid that Stratagy processes when it detects a
hang-up condition. This is useful for performing cleanup and/or exit routines when a caller hangs up.
Syntax H(uid)
where:
uid Valid User ID
I( ) If conditional—if the relationship between the first string and the second string is true, then continue
processing at the User ID specified by uid. Otherwise, processing continues with the next token.
Syntax I(string,relationship,string,uid)
where:
string Any quoted set of characters, numbers, and/or variables.
relationship Either >, <.=,! which test for greater than, less than, equal, or not equal.
uid Valid User ID. Can be a variable.
Examples
I("111",<,"222",1000)
Immediately continues processing at User ID 1000.
I("111",>,"222",1000)
Does not continue processing at User ID 1000 and instead continues with the next token.
I("%S1",=,"1234",2000)
Continues processing at User ID 2000 only if %S1 has the value 1234.
I("%S1",=,"SPANISH",2000)
Continues processing at User ID 2000 only if %S1 = SPANISH.

Token Programming
Defined Tokens
7-8 Stratagy I&M 06/02
KB( )
Plays a tone on the channel.
Syntax KB(freq,ms)
where:
freq Frequency of the tone.
ms Duration (in milliseconds) of the tone.
KC( )
Compare security code—the KC( ) token compares value of sec to the security code for the User ID.
If equal, processing continues with the next token. Otherwise, processing proceeds to the value
defined in the Done chain.
Syntax KC(uid,sec)
where:
uid Valid User ID. Can be a variable.
sec Value to be compared with the security code. Can be a variable.
Example KC(375,23456)
Compares 23456 with the value of User ID 375’s security code. If equal, processes the next token.
Otherwise, proceeds to the value defined in the Done chain.
KD( )
Delete User ID mailbox message—deletes the message in the specified message queue from the
User ID mailbox.
Syntax KD(msg,msgq[,uid])
where:
msg Message number. Can be a variable.
msgq Message queue. Can be a variable.
U Urgent Message Queue
N New Message Queue
S Saved Message Queue
uid Valid User ID. Can be a variable. Defaults to current User ID if not specified.
Example KD(2,U)
Deletes message number 2 in the Urgent Message Queue for the current User ID.
Table 7-3 Defined Tokens (continued)
Token Description

Token Programming
Defined Tokens
Stratagy I&M 06/02 7-9
Token Programming
KF
Suppresses DTMF_gate function.
Syntax @KFV(CALLERID.txt,field,%K,field,%Sn)G(%Sn)
where:
@ Suppress normal process.
KF Suppress DTMF gate function.
V Searches Callerid.txt file.
Callerid.txt File to be searched.
field Field in Callerid.txt file that is searched for %K match (e.g., phone number).
%K Value held in Calling Party ID buffer.
field If a match to %K is found, this field is searched for the associated value (e.g., User ID)
and the value is stored in %Sn.
%Sn One of the %S storage variables (range: 0~19).
G (%Sn) Goes to mailbox number stored in %Sn.
Example @KFV(CALLERID.txt,1,%K,2,%S2)G(%S2)
@ Suppress normal process
KF Suppress DTMF gate.
V(CALLERID.TXT,1,%K,2,%S2)
Searches field 1 of the callerid.txt for a value that matches %K. If a match is found,
Stratagy stores the value in field 2 of the callerid.txt as %S2. If no match is found, the
remaining values in the token string are ignored and Stratagy executes the Done
chain.
G(%S2) Goes to mailbox number stored in %S2 (e.g., user ID 890).
KI( )
Position of substring in string—the KI( ) token searches string for the first occurrence of substring.
The result of the search is the position of the substring within the string, and it is stored as the
variable.
Syntax KI(substring,string,%Sn)
where:
substring Any alphanumeric substring. Can be a variable.
string Any alphanumeric string. Can be a variable.
%Sn One of the %S storage variables (range: 0~19).
Example KI(”d”,”abcdefg”,%S0)
Searches string “abcdefg” for the first occurrence of substring “d,” and places the value of the position
of the substring within the string in storage variable 0. The result is the %S0 variable containing 4,
because “d” is the fourth character in the string.
Table 7-3 Defined Tokens (continued)
Token Description

Token Programming
Defined Tokens
7-10 Stratagy I&M 06/02
KL( )
Logs caller into User ID.
Note Cannot be used in the Notify Menu.
Syntax KL(uid)
where:
uid Valid User ID.
Example KL(239)
Logs the caller into User ID 239
KM
Enables a Stratagy Admin PC’s modem to communicate with the IVP8 internal modem (2400). This
token is factory programmed in User ID 993.
Example @KM
KN( )
Access AMIS networking—the KN( ) token enables access to AMIS networking (see Chapter 9 –
AMIS Networking).
Syntax KN(phone[,mbx])
where:
phone DTMF digits representing the telephone number to dial to connect to the AMIS network.
mbx Valid mailbox on remote system or current User ID (Proxy Box). If not defined, Stratagy
uses value defined when AMIS message was addressed via the Gateway Box. See
Chapter 9 – AMIS Networking for details.
Example KN(9-1-7145555555,345)
9 Dials for an outside line.
- Pauses (0.5 second).
1 Dials 1 for long distance access.
- Pauses (0.5 second).
7145555555 Dials the telephone number.
345 Dials the User ID.
KR( )
Creates a recording—if the destination is an existing User ID, Stratagy inserts the recording into that
mailbox as a new message. Otherwise, the destination is assumed to be the name of an existing file
and the recording is placed there.
Syntax KR(dest)
where:
dest Destination—User ID or file (valid DOS file name). Can be a variable.
Example KR(532)
Inserts the recording in User ID 532 as a new message.
Table 7-3 Defined Tokens (continued)
Token Description

Token Programming
Defined Tokens
Stratagy I&M 06/02 7-11
Token Programming
KT( )
Directs calls to a designated User ID when DSS function is active (dss_active = true), the DSS port is
assigned in the “answering” mailbox, and the Night Transfer on the DSS console is On.
Syntax: KT(XXX)G(YYY)
where:
XXX Box number used when Night Transfer is On.
YYY Box number used when Night Transfer is Off.
KV( )
Delete record from a database—for the file specified, deletes the first record with the value in that
field (if any).
If file ends with .DBF, Stratagy assumes it is in dBase format. Otherwise, Stratagy assumes it is the
name of an ASCII file with columns separated by commas.
Syntax KV(file,field,value)
where:
file dBase file (.DBF) or ASCII file with columns separated by commas (comma delimited). Valid
DOS file name. Can be a variable.
field dBase file field name or ASCII file column number. (1 is the value of the field before the
comma.) Can be a variable.
value Any alphanumeric string. Can contain %S variables.
Example KV(xyz.dbf,client,”abc”)
For dBase file xyz.dbf, deletes the first record where the field named client contains the string “abc.”
L( )
Switch system language—immediately changes the system prompts to use the specified file (usually
the specified file’s name indicates the language). All system prompts change, including User mode
prompts.
Syntax L(language_file)
where:
language_file File name in the Stratagy directory that represents a Stratagy system language file
which has the DOS suffix .IDX.
Examples
L(ENGLISH)
Uses the ENGLISH.IDX system prompt file in the C:\STRATAGY directory.
L(SPANISH)
Uses the SPANISH.IDX system prompt file in the C:\STRATAGY directory.
Table 7-3 Defined Tokens (continued)
Token Description

Token Programming
Defined Tokens
7-12 Stratagy I&M 06/02
M( )
Audiotex menu—the M( ) token enables you to specify fast single-digit entry for audiotex menu
selections. While Stratagy processes this token, it plays (or says) the specified greeting while waiting
for a single DTMF digit to be pressed by the caller. When the caller presses the single DTMF digit,
Stratagy looks up the menu selection that matches and continues processing at the specified User ID.
Therefore, this eliminates the normal delay for determining completed DTMF entry.
Note While this Token is active, no other digits, except the defined menu selections, is recognized.
Syntax M(Gn,count,delay)
where:
Gn User ID’s greeting number (range: 1~7).
count Number of times to play the greeting.
delay Time (in 10ths of seconds) to wait after each saying of the greeting.
Example M(G1,2,20)
Plays greeting 1 up to two times with a 2 second delay after each time the greeting plays, waiting for
the caller to press a DTMF.
•If the caller presses 5, Stratagy immediately continues processing at the User ID specified in the
Menu 5 field.
•If the caller makes no selection, Stratagy continues processing at the next token.
•If the caller makes an invalid selection, Stratagy continues processing at the Done chain.
N( )
Update database record—the N( ) token enables you to update the values of a database record. It
searches a file for the first record that has s-value in s-field. It updates the record by placing n-value in
r-field, and then saves that record back to the database.
Syntax N(file,s-field,s-value,r-field,n-value[,r-field,
n-value...])
where:
file dBase file (.DBF) or ASCII file with columns separated by commas (comma delimited).
Valid DOS file name. Can be a variable.
s-field Search dBase file field name or ASCII file column number. (1 is the value of the field
before the comma.) Can be a variable.
s-value Search alphanumeric string. Can contain %S variables.
r-field Replacement dBase file field name or ASCII file column number to update.
n-value New alphanumeric string. Can contain %S variables.
Table 7-3 Defined Tokens (continued)
Token Description

Token Programming
Defined Tokens
Stratagy I&M 06/02 7-13
Token Programming
N( )
(continued)
Examples
Suppose an ASCII file contains a listing of dealers, available parts, and orders on those parts. You
could use the R( ) token to obtain information about how many parts the dealer wants to order and
then use the N( ) token to update the database.
R(G1,%S1,40)
G1 Plays greeting 1: “Please enter your dealer number.”
%S1 Stores the caller’s entry in variable %S1.
40 Waits 4 seconds (40 ÷ 10 = 4) for DTMF after playing the greeting.
R(G2,%S2,20)
G2 Plays greeting 2: “Please enter the number of telephones you want to order.”
%S2 Stores the caller’s entry in variable %S2.
20 Waits 2 seconds (20 ÷ 10 = 2) for DTMF after playing the greeting.
R(G3,%S5,20)
G3 Plays greeting 3: “Please enter the number of key systems you want to order.”
%S5 Stores the caller’s entry in variable %S5.
20 Waits 2 seconds (20 ÷ 10 = 2) for DTMF after playing the greeting.
N(ORDERS.DOC,5,%S1,9,%S2,12,%S5)
•Searches ORDERS.DOC for the first record that has the value of %S1 in field 5.
•Replaces the current value of field 9 with %S2.
•Replaces the current value of field 12 with %S5.
•Saves the record back to the database.
O( )
Timed on-hook—an on-hook condition for the specified amount of time. Depending upon the value of
tenths, you can effect a flash, or even a hang-up condition. This is useful for generating an
intermediate hang-up condition during token processing without terminating the actual continued
token processing.
Syntax O(tenths)
where:
tenths Time in tenths of seconds.
Example O(60)
Goes on-hook for 6 seconds (60 ÷ 10 = 6).
Table 7-3 Defined Tokens (continued)
Token Description

Token Programming
Defined Tokens
7-14 Stratagy I&M 06/02
P( )
Play—the P( ) token enables you to communicate information in a variety of ways to a caller or to a
user when used in a Notify record’s Method field. While Stratagy is playing, the skip (, ) and volume
(, ) keys on the telephone work.
Syntax Prepeat(item)
where:
repeat Number of times to play the item. If omitted, defaults to 1.
item Each item causes Stratagy to say specific information. The items are defined as follows:
where:
A, string Alphanumeric string.
D Percentage of remaining disk space.
G[n, uid] Greeting n of the current User ID or User ID uid.
M[, uid] Total number of messages and number of new messages for the current User ID or User
ID uid.
Mn[, uid] Message n in the Saved Message Queue, if enabled, of the current User ID or User ID
uid.
MNn[, uid] Message n in the New Message Queue of the current User ID or User ID uid.
MSn[, uid] Message n in the Saved Message Queue of the current User ID or User ID uid.
MUn[, uid] Message n in the Urgent Message Queue of the current User ID or User ID uid.
nn,V System prompt nn.
R DTMF digits entered by a caller who has invoked relay paging (used only in the Notify
record Method field).
%Sn DTMF digits currently represented by the variable %Sn, where n is a number from 0 to 9.
This is most effective for repeating the DTMF entered by a caller for confirmation.
%Sn, N DTMF digits currently represented by the variable %Sn, as a number where the range is
assumed to be between 0 and 999 million.
%Sn, D DTMF digits currently represented by the variable %Sn, as a date, where the format is
assumed to be either mmddyy (which assumes a year in the 1900s) or mmddyyyy.
%Sn, T DTMF digits currently represented by the variable %Sn, as a time of day, where the
format is assumed to be hhmm.
%Sn, $ DTMF digits currently represented by the variable %Sn, as a dollar amount, where the
last two digits are assumed to be cents.
%Sn, F The same as %Sn, $ except Stratagy uses francs and centimes.
%Sn, P The same as %Sn, $ except Stratagy uses pesos and centavos.
U[, uid] “Name and extension” recording for the current User ID or User ID uid. If there is no
recording, Stratagy says the current User ID digits or User ID digits uid.
V Digits in the Notify record’s Variable field.
X, file Voice file defined by file.
Examples
P(G1)
Stratagy plays greeting 1 for the current User ID. This enables you to record and play any prompt.
P(06261994,D)
Stratagy says “June twenty-sixth, nineteen ninety-four.”
P(06261994,$)
Stratagy says “Sixty-two thousand six hundred nineteen dollars and ninety-four cents.”
Table 7-3 Defined Tokens (continued)
Token Description

Token Programming
Defined Tokens
Stratagy I&M 06/02 7-15
Token Programming
Q( )
Question and answer (Voice Forms)—the Q( ) token enables you to ask a caller a series of questions
and store all the caller’s responses as a single message or multiple messages in the current User ID.
Record each question as a greeting. Stratagy plays each question/greeting with a tone, records a
response, and then plays the next question/greeting until all the specified questions/greetings have
been played.
You can ask the caller up to 20 questions. To play more than seven questions (using greetings 1 to 7
for the current User ID), use questions from other User IDs by specifying which User ID’s greeting to
access with a # sign followed by the uid. For example, G7#123 would use greeting 7 from User ID
123.
Syntax Q(Gn,...,E...)
where:
Gn Greeting number (range: 1~7).
E Groups the responses to the previous greetings as a single message.
... Additional greetings or groupings.
Examples
Q(G1,G2,G3,G4,G5,G6,G7,G1#9000,G2#9000)
Stratagy asks nine questions as recorded in the specified greetings (seven greetings from the current
User ID and two greetings from User ID 9000), records nine responses, and stores the responses as
one message.
Q(G1,G2,E,G3,E)
Stratagy groups the responses to greetings 1 and 2 as one message and the response to greeting 3
as a different message.
R( )
Read DTMF from a caller—the R( ) token enables you to obtain caller information while prompting
the caller with the specified recorded greeting. The token plays the greeting specified for the current
User ID and enables the caller to make DTMF entry which is stored in the specified %S variable.
Stratagy interrupts the greeting as soon as the caller enters the first DTMF tone. If there is no caller
DTMF entry, Stratagy initializes the %S variable to empty, i.e., ””.
Syntax R(Gn,%Sm,delay)
where:
Gn Greeting number for the current User ID (range 1~7).
%Sm One of the %S storage variables (range: 0~19).
delay Time in tenths of seconds to wait for DTMF after playing the greeting (range: 0~99). If
omitted, defaults to 0.
Example
To prompt and have a caller enter a telephone number and have Stratagy store that telephone
number to be used later, you could:
Record in greeting 1: “Enter your telephone number. Finish by pressing the # sign.”
Use R(G1,%S6,20):
G1 Plays greeting 1.
S6 Stores the caller’s entry in variable %S6.
20 Waits 2 seconds (20 ÷ 10 = 2) for DTMF after playing the greeting.
Table 7-3 Defined Tokens (continued)
Token Description

Token Programming
Defined Tokens
7-16 Stratagy I&M 06/02
S( )
Serial port access—the S( ) token gives Stratagy access to serial ports. By communicating over
serial ports, Stratagy can access other computers and store and/or retrieve information from remote
databases.
Once an S( ) token has been executed, the serial port is locked for exclusive access by the current
User ID. The lock is removed only when Stratagy finishes executing the User ID's Extension field.
This enables several related S( ) tokens to be executed while the port is locked.
To properly use this token, the physical serial port must have certain configuration parameters
defined. These parameters are grouped together under “Serial Port Descriptions” of the Stratagy
System Configuration options (Chapter 4 – Configure Stratagy).
Syntax S(port,S,%Sn,termination,length,timeout)
where:
port Logical serial port (1 or 2) mapped onto a physical port number by the Stratagy System
Configuration parameter serial_port1 for logical port 1 or serial_port2 for logical port 2
(Chapter 4 – Configure Stratagy).
S String sent out on the specified port. It may contain any alphanumeric characters, %S
variables, and the following special characters:
\A Attention (bell sound), or Ctrl+G
\N Newline, or Ctrl+J
\R Return, or Ctrl+M
\T Tab, or Ctrl+I
\\ Backslash, the actual \ character
%Sn One of the %S storage variables (range: 0~19), which stores any response from the
serial port. If omitted, Stratagy does not wait for a response.
length Maximum number of characters to expect as input on the serial port. If the maximum
number of characters is received, processing continues immediately with whatever
characters that were received in the %Sn variable. If this option is omitted, it defaults to
the maximum length of %Sn (128 characters).
termination List of characters that defines when Stratagy should stop reading from the serial port for
storing in the specified %Sn variable. If omitted, defaults to “\N\R” as specified under
“S”. The terminating character, if any, is not part of %Sn.
timeout Maximum time (tenths of seconds) Stratagy waits for input on the serial port when
reading into the %Sn variable. When the timeout expires, Stratagy continues
processing with the next token. Whatever characters, if any, received up to that point
are placed in the %Sn variable. If this option is omitted, the default is the value of the
Stratagy System Configuration parameter tmo_serial (Chapter 4 – Configure Stratagy).
Example S(1,”GET INFO”,%S1,”\N”,80,40)
where:
1 Logical serial port.
”GET INFO”String sent out of port by Stratagy.
%S1 Store response in %S1 variable.
\N Newline (Line feed)
80 Maximum number of characters expected as input from serial port.
40 Four-second time out waiting for input from serial port.
Table 7-3 Defined Tokens (continued)
Token Description

Token Programming
Defined Tokens
Stratagy I&M 06/02 7-17
Token Programming
V( )
Search for value—the V( ) token searches the specified file, in the specified field, for the value given
by item. If Stratagy finds the value, it stores the contents of the second field into variable %Sn. If
Stratagy does not find the value, the token terminates and returns to the Done state.
If file ends with .DBF, Stratagy assumes it is in dBase format. Stratagy assumes field names instead
of field numbers and invokes dBase file processing (including record locking, if specified). Otherwise,
Stratagy assumes that it is the name of an ASCII file with columns separated by commas.
There may be several pairs of fields and %Sn values, and Stratagy retrieves them.
Syntax V(file,field,item,field,%Sn[,field,%Sn...])
where:
file dBase file (.DBF) or ASCII file with columns separated by commas (comma delimited). Valid
DOS file name. Can be a variable.
field dBase file field name or ASCII file column number. (1 is the value of the field before the
comma.) Can be a variable.
item An alphanumeric string. Can contain %S variables.
%Sn One of the %S storage variables (range: 0~19).
Examples
A caller enters his customer number to hear his credit line:
@R(G1,%S1,20)
G1 Plays greeting 1: “Please enter your customer number.”
%S1 Stores the caller’s entry in variable %S1.
20 Waits 2 seconds (20 ÷ 10 = 2) for DTMF after playing the greeting.
@V(credit.doc,1,%S1,2,%S2)
•Searches CREDIT.DOC for customer number %S1 in field 1.
•Stores the contents of field 2 in variable %S2.
P(G2)P(%S2,$)
P(G2) Plays Greeting 2: “Your credit line is ”
P(%S2,$) Says the value stored in %S2 as a dollar amount: “five thousand dollars.”
Table 7-3 Defined Tokens (continued)
Token Description

Token Programming
Defined Tokens
7-18 Stratagy I&M 06/02
W( )
Wait (pause) for event—general wait token that enables Stratagy to wait for confirmation of specific
events. It is useful for confirming dial tone and for notification to confirm that the appropriate answer
has occurred. If the event does not occur, Stratagy terminates all remaining token processing.
Syntax W(n)
W(n,P)
W(n,V)
W(n,T)
where:
n Wait (pause) for n tenths of a second.
n, P Wait up to n rings for a pager/beeper to answer.
n, V Wait up to n rings for a voice to answer.
n, T Wait up to n seconds to hear a dial tone.
Example W(3,P)
Waits up to 3 rings for a paging/beeping system to answer. You can use this to confirm that the paging
company answered before playing DTMF to the paging company for pager notification of messages.
X( )
Creates a zero length file called file.
Syntax X(file)
where:
file Valid DOS file name.
Example X(NEW.TXT)
Creates zero length file NEW.TXT.
Y( )
Deletes file.
Syntax Y(file)
where:
file Valid DOS file name. Can be a variable.
Example Y(OLD.TXT)
Deletes the file OLD.TXT.
Z( )
Execute Done chain User ID—checks for the existence of file. If the file exists, Stratagy executes the
Done chain User ID. If the file does not exist, the system processes additional tokens.
Syntax Z(file)
where:
file Valid DOS file name. Can be a variable.
Example Z(CHECK.TXT)
Stratagy checks if the file CHECK.TXT exists. If the file exists, Stratagy executes the RNA chain User
ID.
Table 7-3 Defined Tokens (continued)
Token Description

Token Programming
Defined Tokens
Stratagy I&M 06/02 7-19
Token Programming
+( )
Addition—enables you to perform modifications to values for calculation and control. Ideal for
controlling limits and loops.
Syntax +(%Sn[,item])
where:
%Sn One of the %S storage variables (range: 0~19).
item Positive or negative value or another %S variable. Defaults to 1 if not specified.
=( )
Equate—gives the specified storage variable the value specified. The value may be a string or a
numeric and should be quoted. The four-option syntax enables substring assignments.
Syntax =(%Sn,item)
=(%Sn,item,start,end)
where:
%Sn One of the %S storage variables (range: 0~19).
item Any alphanumeric string. Can contain %S variables.
start Starting character position for assigning a portion of item.
end Ending character position to assign when used with start.
Examples
=(%S1,"FRENCH")
Gives %S1 the value of “FRENCH”.
=(%S1,"FRENCH",3,5)
Gives %S1 the value of ENC (E is the start character and C is the end character).
=(%S1,%S2,1,3)
where %S2 = 7530414. Extracts prefix of the telephone number in %S2 (the first through third
number) and gives %S1 the value of 753.
¦()
Append variables to file—writes all twenty %S variables (%S0~%S19) to the specified file. If the file
already exists, the variable values are appended to the file; otherwise, the file is created. The values
are separated by commas and terminated by a new line.
Note Use two backslashes \\ to signify one backslash \. For example, to specify the file name
C:\STRATAGY\NEW.TXT, use C:\\STRATAGY\\NEW.TXT.
The ¦() token is supported by IVP8.
Syntax ¦(file)
where:
file Valid DOS file name.
Table 7-3 Defined Tokens (continued)
Token Description

Token Programming
Defined Tokens
7-20 Stratagy I&M 06/02
[( )
Read %S variables state—reads the values of all twenty %S variables (%S0~%S19) from the
specified file. The format expected is a one line, comma delimited, ASCII file where the first value is
%S0, the second is %S1, etc.
When the [( ) token is used with the ]( ) token, you can read, modify, and write (remember) %S
variables.
Notes
•Use two backslashes \\ to signify one backslash \. For example, to specify the file name
C:\STRATAGY\NEW.TXT, use C:\\STRATAGY\\NEW.TXT.
•To avoid potential simultaneous access errors: within the same User ID, if you read with the [( )
token, write with the ]( ) token.
Syntax [(file)
where:
file ASCII file with columns separated by commas (comma delimited). Valid DOS file name. Can
be a variable.
]( )
Write %S variables state—writes the values of all twenty %S variables (%S0~%S19) to the specified
file. Typically, you would use this with the [( ) token which reads the %S variables.
Notes
•Use two backslashes \\ to signify one backslash \. For example, to specify the file name
C:\STRATAGY\NEW.TXT, use C:\\STRATAGY\\NEW.TXT.
•To avoid potential simultaneous access errors: within the same User ID, if you read with the [( )
token, write with the ]( ) token.
Syntax ](file)
where:
file ASCII file with columns separated by commas (comma delimited). Valid DOS file name. Can
be a variable.
^( )
Change port volume—changes the volume of the current port to the specified level.
Notes
•The Stratagy system configuration gain_norm parameter sets the starting volume for all ports
(Chapter 4 – Configure Stratagy).
•For the user, the current port volume can be set through the Users Menu’s Message Volume field
and by the user with the Play Message Controls (Chapter 6 – Menus).
Syntax (n)
where:
n Volume of current port
(range: -8~8). -8 is the softest
0 is the default initial volume
8 is the loudest.
Table 7-3 Defined Tokens (continued)
Token Description

Stratagy I&M 06/02 8-1
Customization
Examples
Customization Examples 8
Using Stratagy, you can customize User IDs to record messages from callers, provide information
to callers, or direct the flow of a call. With this type of flexibility, you can define virtually any call
handling method.
Stratagy provides reserved User ID mailboxes that have common features pre-programmed,
including future delivery and guest defaults. Notify contains templates (e.g., message waiting light
control and pagers) you can use for defining User ID Notify records.
This chapter provides examples, grouped by menu (i.e., Users, Notify, Auto), of some of Stratagy’s
capabilities. Each example provides detailed information, including the programming and how it
works. For examples that use the Token Programming Language, each token is defined.
Note See Chapter 7 – Token Programming for complete details about the Token programming
language.
Some IVR tokens are not available for the Flash.
Users Menu Examples
The following examples are included in this section:
•“Using a Status User ID to Check Message Count for Multiple User IDs” on page 8-2
•“System Paging a User for Special Callers” on page 8-3
•“System Paging for Ring No Answer” on page 8-4
•“Switching and Maintaining Languages (IVP8)” on page 8-6
•“Order Shipment Information” on page 8-9
•“Holiday Greetings—Holiday Divert Mailbox” on page 8-11
•“Transferring a Caller Directly to a Mailbox” on page 8-13

Customization Examples
Users Menu Examples
8-2 Stratagy I&M 06/02
Using a Status User ID to Check Message Count for Multiple
User IDs
The creation of the status User ID involves using an optional argument.
Suppose that one person owns several User IDs that he/she has given out to different classes of
callers (personal friends one number, business clients another, etc.). This person would like to be
able to call in to check if any of these User IDs have messages waiting for him without having to
access each User ID in turn.
The token string P(Gn) plays greeting n for the current User ID or P(M) plays the total number of
messages and number of new messages for the current User ID. This is normally what you want.
However, the P( ) token takes an optional second argument, which in some cases indicates another
User ID whose information is to be played. Using this feature, you can create a status User ID that
tells the number of messages waiting in several other User IDs.
Program Example
In the following example:
•Message User IDs: 1000, 2000, 3000
•Status User ID: 9999
➤To program the example
For User ID 9999, define the user’s record to contain:
How It Works
For each of the three User IDs, the name recording associated with the User ID plays, followed by
the total number of messages and number of new messages waiting for that User ID.
Extension @P(U,1000)P(M,1000)P(U,2000)P(M,2000)P(U,3000)P(M,3000)
@ Suppress normal process
P(U,1000) Plays the name recording for User ID 1000. If no recording exists, says the User ID
number.
P(M,1000) Says the total number of messages and number of new messages for User ID 1000.
P(U,2000) Plays the name recording for User ID 2000. If no recording exists, says the User ID
number.
P(M,2000) Says the total number of messages and number of new messages for User ID 2000.
P(U,3000) Plays the name recording for User ID 3000. If no recording exists, says the User ID
number.
P(M,3000) Says the total number of messages and number of new messages for User ID 3000.

Customization Examples
Users Menu Examples
Stratagy I&M 06/02 8-3
Customization
Examples
System Paging a User for Special Callers
Perhaps you would like to create a special User ID for family, friends, or special customers that
would:
1. When accessed, page you over the telephone paging system in your office.
2. Let you know that you have an important call.
3. Transfer that call to your extension through a “back door,” even though your regular extension
User ID may be in Do Not Disturb mode.
You would program Stratagy to:
1. Dial the telephone system’s paging access code.
2. Say something like “There is an important call for David.’’
3. Transfer the caller to a back door User ID.
Program Example
In the following example:
•Telephone system’s paging access code: 33*
•Special User ID: 5222
•Back door User ID: 6222
•System code to return to a caller placed on transfer hold: F-
➤To program the example
1. Customize User ID 5222 by defining the Users record and recording the greeting.
2. Define the user’s record to contain:
3. Access the User ID mailbox via telephone. Record:
Greeting 1: “There is an important call for David.’’
How It Works
When Stratagy tries to transfer a caller that has entered User ID mailbox 5222, it:
1. Places the caller on transfer hold.
2. Dials the telephone system paging code.
3. Plays greeting 1.
4. Performs a hookflash to return to the caller.
5. Continues processing at User ID 6222, which should be configured to ring an extension that
may be answered by the user.
Extension @F-33*P(G1)G(6222)
@ Suppresses normal process.
F- Performs a hookflash and pauses 0.5 second. (Some telephone systems require
F-F to return to a caller placed on transfer hold.)
33* Telephone system’s paging access code. (The code varies depending upon the
telephone system.)
P(G1) Plays greeting 1 for this User ID.
G(6222) Goes to the User ID 6222.
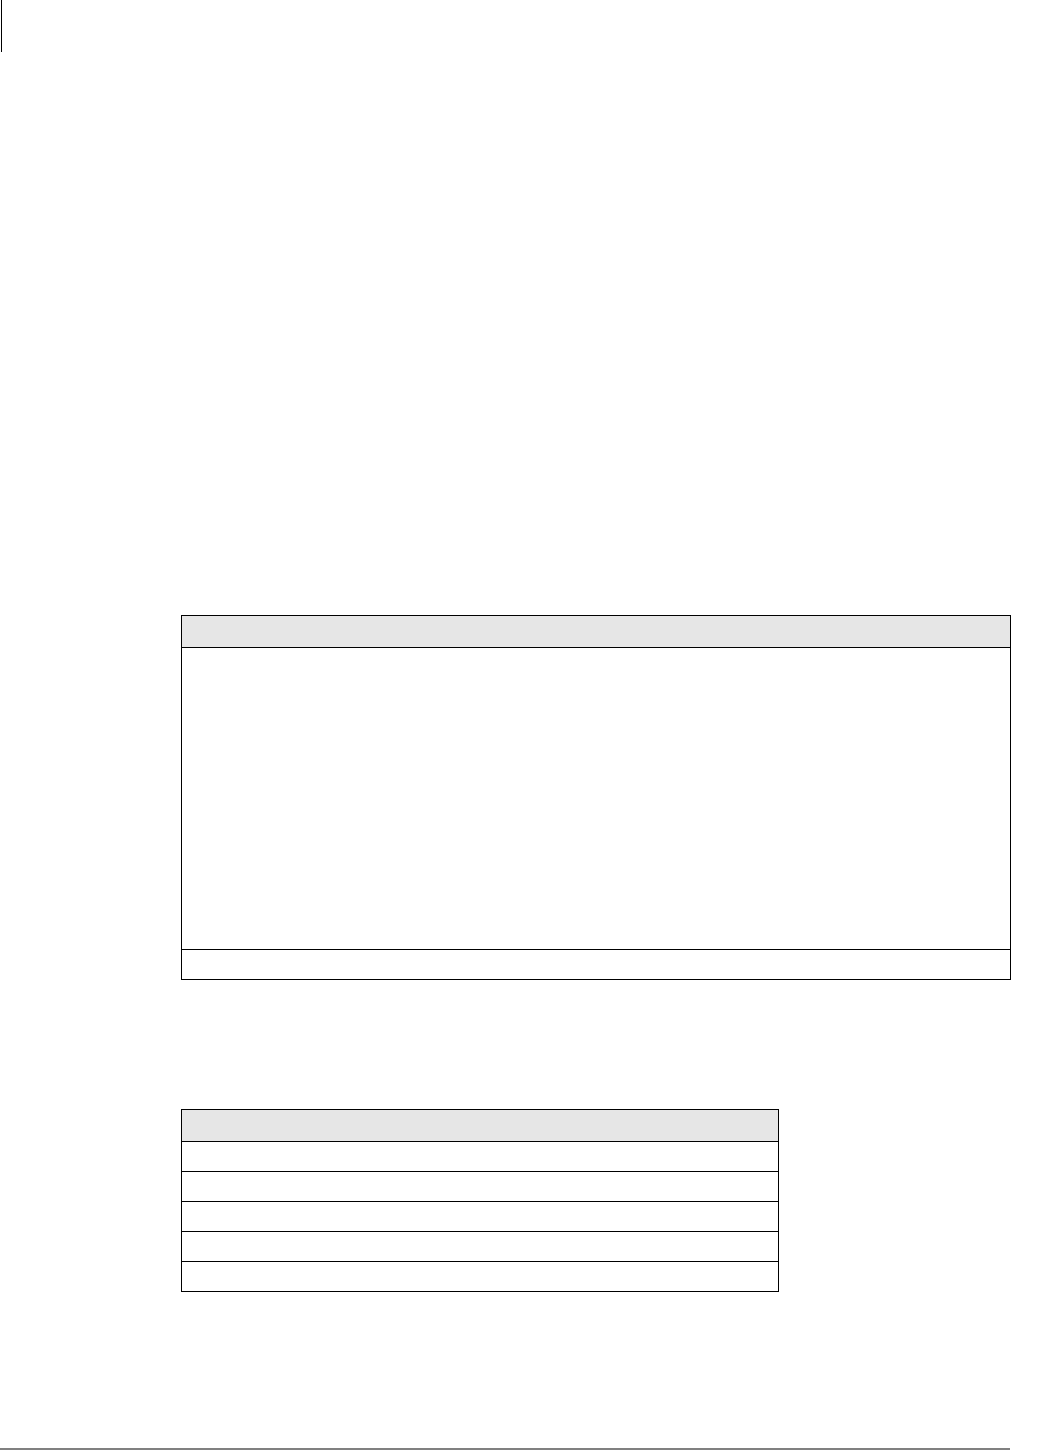
Customization Examples
Users Menu Examples
8-4 Stratagy I&M 06/02
System Paging for Ring No Answer
Stratagy can call a user’s extension and then, after receiving a Ring No Answer, give the caller the
option to page the user through the office paging speakers. Stratagy can then transfer the caller to
an extension where the call can be picked up by the user using Direct Call Pick Up.
The following example illustrates one way to do this on a Strata DK424, using a phantom standard
station port as a park zone.
Program Example
In the following example:
•User ID 5: Page Party User ID.
•User ID 500: Call Park Station User ID.
•User ID 501: Back to Original Extension User ID.
•Call pickup code: #5#5
•Telephone number to pick up call: 240
➤To program the example
1. For User ID 5 (Page Party), define the user’s record to contain:
2. Access the User ID mailbox via telephone. Record:
Greeting 1: “...has a call holding. To pickup, dial #5240.”
3. For User ID 500 (Call Park Station), define the user’s record to contain:
Extension @=(%S0,%P)F-#30-P(U,%P)P(G1)F,G(500)
@ Suppresses normal process.
=(%S0,%P) Remembers previous User ID mailbox, and stores it in %S0.
F- Performs a hookflash and pauses 0.5 second.
#30 Dials #30 to page.
- Pauses 0.5 second.
P(U,%P) Plays user name recording from previous User ID mailbox.
P(G1) Plays greeting 1.
F, Performs a hookflash and pauses 2 seconds.
G(500) Goes to User ID 500 (to perform the supervised transfer).
Do Not Disturb Off
Extension 240 (The standard station port to transfer to for pickup.)
Maximum Rings 9
Do Not Disturb Off
Store Messages No
RNA Chain 501
Busy Chain 501
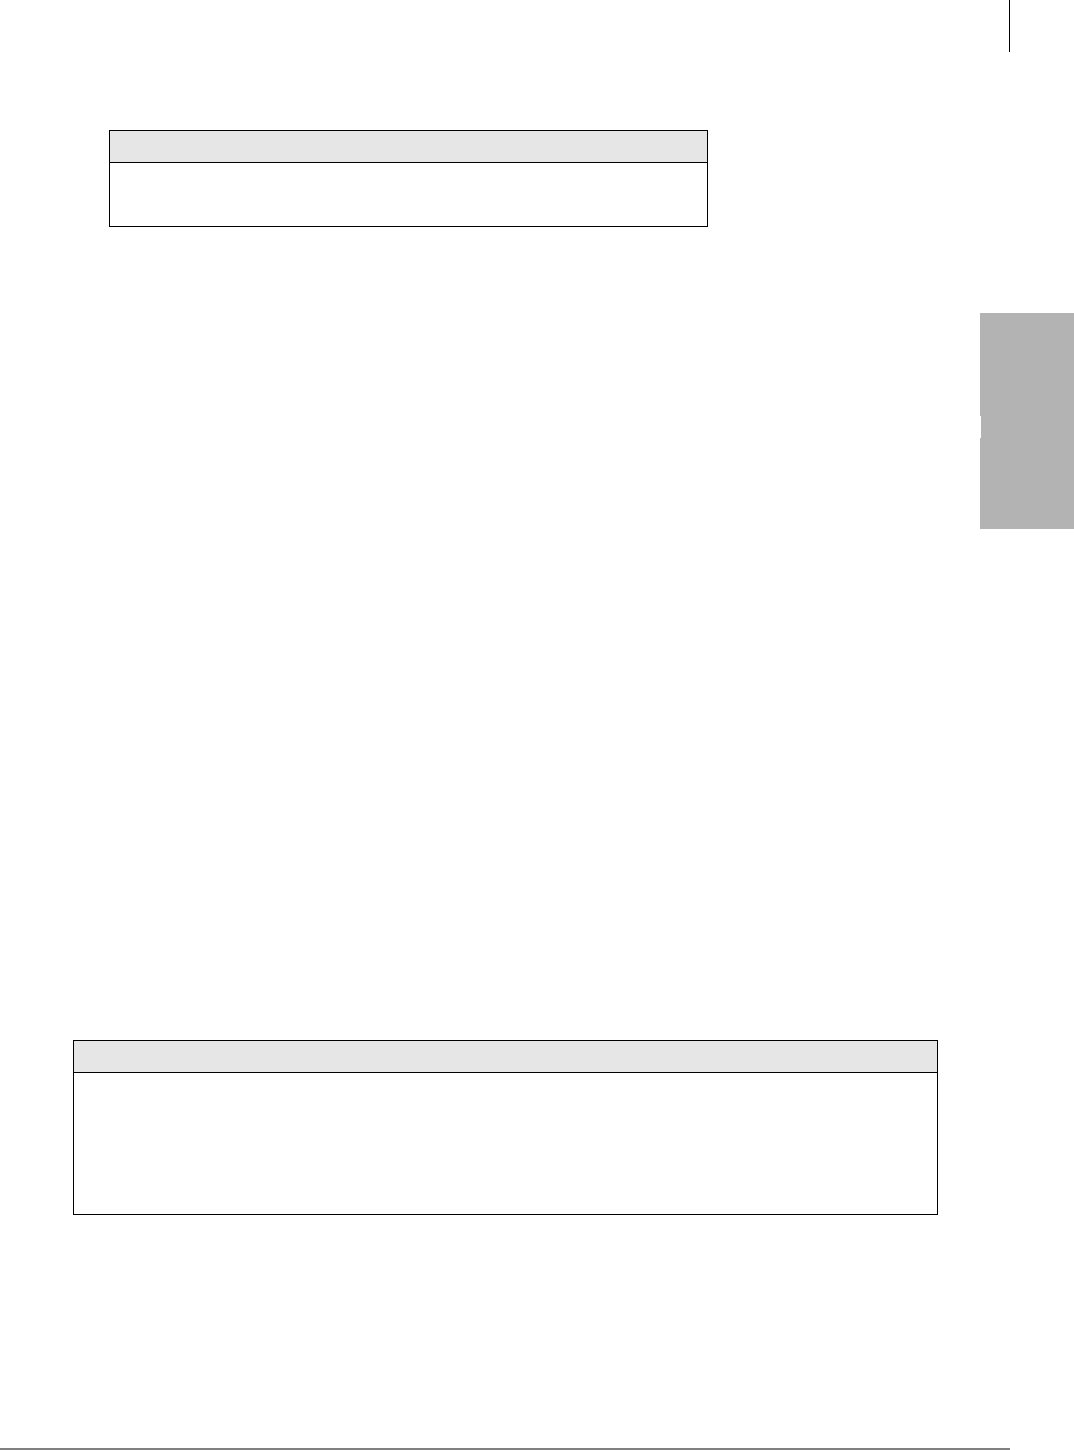
Customization Examples
Users Menu Examples
Stratagy I&M 06/02 8-5
Customization
Examples
4. For User ID 501 (Back To Original Extension), define the user’s record to contain:
How It Works
The user’s greeting says “... leave a message after the tone, or to page me press 5...” If the caller
presses, he/she is routed to User ID 5.
User ID 5 does the following:
1. Remembers the previous User ID mailbox and stores the number in %S0.
2. Dials #30 to page.
3. Plays the previous User ID mailbox’s name recording.
4. Plays greeting 1.
5. Goes to User ID 500 to perform the supervised transfer.
6. User ID 500 calls the standard station port that acts as a park zone. On a Ring No Answer,
Stratagy flashes the caller back, then goes to User ID 501 via the RNA chain.
7. User ID 501 goes to the User ID stored in %S0. This sends the caller back to the original User
ID.
8. Stratagy performs a hookflash and calls the original station again before taking a message.
Second User ID
There is no simple way to directly take a message without calling a second time. In order to do that
a second User ID must be created for each station using this feature.
Each of these new User ID's have:
To make matters more complex, the user needs to record a greeting in both mailboxes. If you do
this, the original User ID stored in %S0 could be translated to the message mailbox User ID with
the following tokens:
Extension @G(%S0)
@ Suppresses normal process.
G(%S0) Goes to the User ID stored in %S0.
Do Not Disturb On
Store Messages No
Copy Message To <original mailbox>
Extension @=(%S1,%S0,2,3)G(7%S1)
@ Suppresses normal process.
=(%S1,%S0,2,3) Assigns characters 2~3 of %S0 to %S1. For example, if the User ID is “234”, %S1
equals “34”
G(7%S1) Goes to User ID 734. (Go to the User ID mailbox with the first number of 7 and the value
of %S1 (34) combined.)

Customization Examples
Users Menu Examples
8-6 Stratagy I&M 06/02
Every User ID using this feature would be required to have a corresponding message taking User
ID, with a first digit of 7. In this example, the User ID mailbox 734 would be programmed as
follows:
Switching and Maintaining Languages (IVP8)
Stratagy can support multiple languages simultaneously on any set of ports. The only requirements
are that you install an alternative language and configure the User IDs to enable a caller to change
to the alternate language. Additionally, you can control which User IDs a caller has access to when
selecting a specific language.
When Stratagy answers a call, processing begins at the Company Greeting User ID (default is User
ID 990). After playing the greeting, processing continues (by default) with the Caller Instructions
User ID (default is User ID 991), which plays the caller instructions. During either the Company
Greeting or Caller Instructions, you can give the caller the option to press a digit to hear the
instructions in a different language. When the caller enters the digit, Stratagy accesses another User
ID that contains the instructions in the proper language.
In order for callers to always access the proper language Caller Instructions User ID, you can
program Stratagy to perform the following:
1. If French is selected, remember the language selected.
2. Before playing the default Caller Instructions User ID (991), determine which language Caller
Instructions User ID should play.
Program Example
In the following example:
•The foreign language is French, and the French system prompts are in a file called
FRENCH.IDX in the C:\STRATAGY directory.
•User ID 990: Company Greeting User ID (default); English and contains the choice to select
French
•User ID 991: default Caller Instructions User ID (English)
•User ID 980: assigns French as the language selected
•User ID 981: French Caller Instructions User ID
•User ID 992: determines which language Caller Instructions User ID should play
➤To program the example
1. For Greeting User ID 990, define the User’s record to contain:
Menu 1: 980 (if the caller selects 1, Stratagy transfers the caller to User ID 980)
Done Chain: 991 (default)
2. Access the User ID mailbox via telephone. Record:
Greeting 1: “Thank you for calling our company. For English please stay on the line. [In
French] “For French, please press 1 now.”
3. For Caller Instructions User ID 991, access the User ID mailbox via telephone. Record:
Do Not Disturb On
Store Messages No
Copy Messages To 234
Customization Examples
Users Menu Examples
Stratagy I&M 06/02 8-7
Customization
Examples
Greeting 1: “To reach the person you are calling, enter his extension. For information...”
4. For User ID 980, define the user’s record to contain:
5. For Greeting User ID 981, access the User ID mailbox via telephone. Record:
Greeting 1: [In French] “To reach the person you are calling, enter his extension. For
information...”
6. For User ID 992, Define the user’s record to contain:
How It Works
The customization controls Stratagy’s standard processing by keeping the caller connected to the
correct language Instruction User ID. This works because whenever a new call is answered,
Stratagy initializes the %S tokens to ”” (empty string). Therefore, if the caller never presses 1 for
French, the %S1 is never set to the value ”FRENCH” and control continues automatically from
User ID 991 to User ID 992.
Figure 8-1 shows how switching and maintaining languages works for this example. When Stratagy
answers the call, Company Greeting User ID 990 plays and offers the caller the choice of selecting
French.
Extension @L(FRENCH)=(%S1,”FRENCH”)G(981)
@ Suppresses normal process.
L(FRENCH) Switches the system prompts to the file FRENCH.IDX in the C:\STRATAGY
directory.
=(%S1,”FRENCH”) Assigns %S1 the value of “FRENCH”.
G(981) Goes to User ID 981.
Extension @I(%S1,=,”FRENCH”,981)G(991)
@ Suppresses normal process.
I(%S1,=,”FRENCH”,981) If %S1 equals “FRENCH”, go to User ID 981.
G(991) Goes to User ID 991.
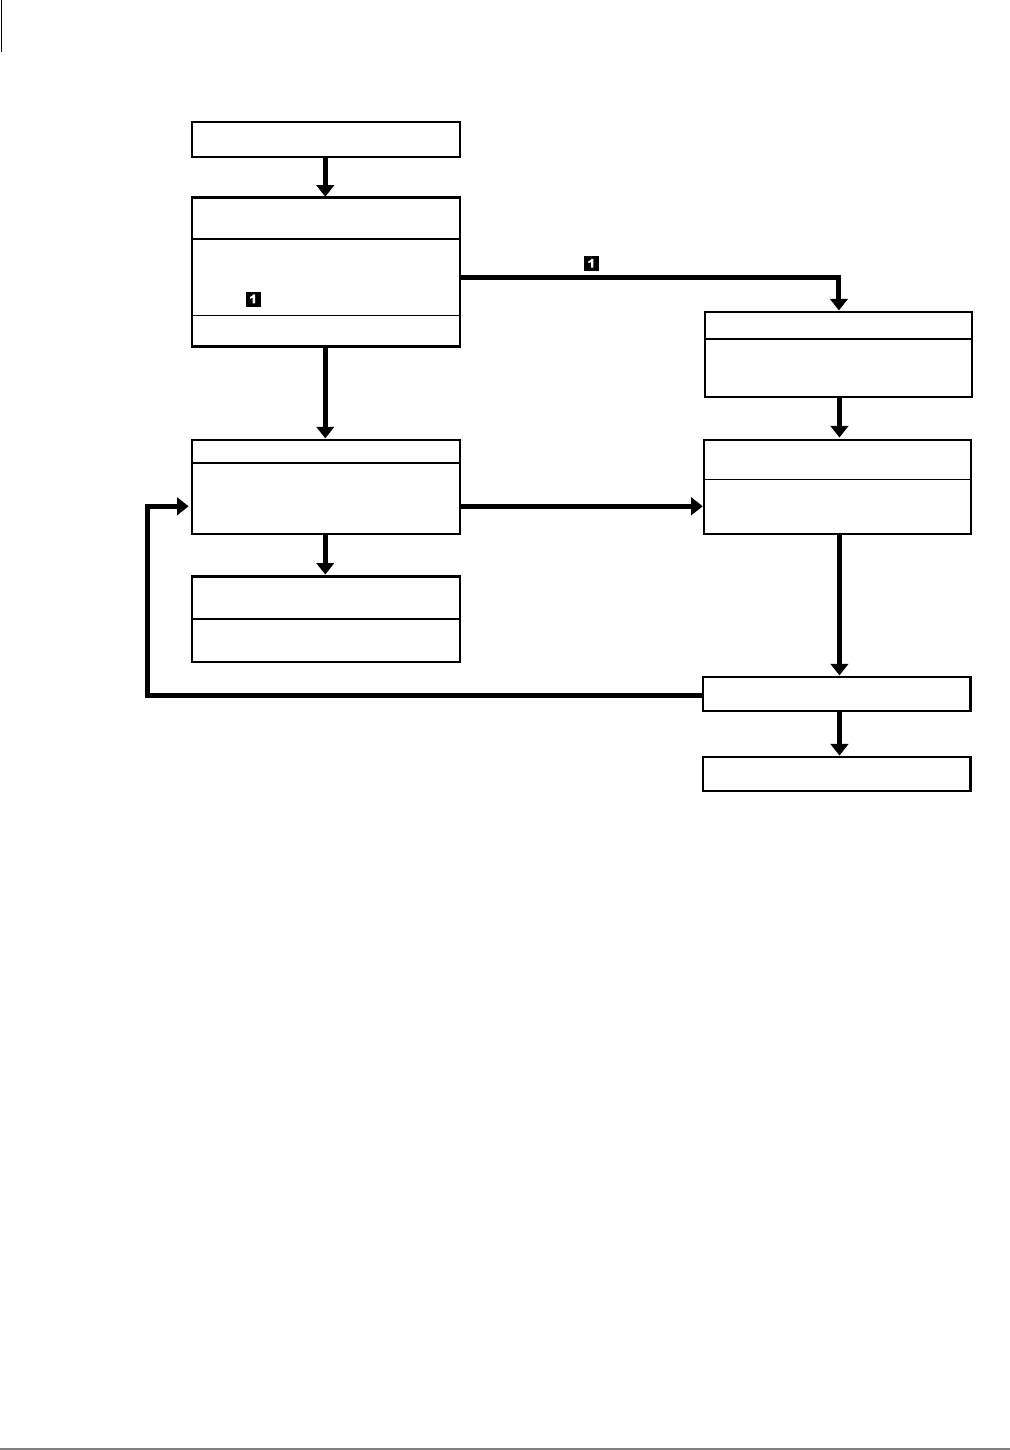
Customization Examples
Users Menu Examples
8-8 Stratagy I&M 06/02
Figure 8-1 Switching and Maintaining Languages
If the caller does not select French:
1. Stratagy processes User ID 992 which determines that French is not being used (%S1 does not
have the value “FRENCH”).
2. Stratagy plays the English Caller Instructions User ID 991.
If the caller selects French:
1. Stratagy processes User ID 980, which assigns %S1 the value “FRENCH”.
2. Stratagy plays the French Caller Instructions User ID 981.
3. Stratagy determines if the User ID is valid.
4. If valid, Stratagy follows the User ID’s Done chain. If invalid, Stratagy processes User ID 992
which determines that French is being used (%S1 has the value “FRENCH”). Stratagy then
processes the French Caller Instructions User ID 981.
Company Greeting User ID
(default is User ID 990)
New Call
Caller presses
%S1 equals "FRENCH"
%S1 does not equal "FRENCH"
NO
YES
“Thank you for calling our company.
For English please stay on the line.
[In French] For French, please
press now.”
Menu
1
: 980 User ID 980
Extension:
@L(FRENCH)=(%S1,"FRENCH")G(981)
French Caller Instructions
User ID 981
Valid User ID?
“[In French] To reach the person
you are calling . . .”
User ID 992
English Caller Instructions User ID
(default is User ID 991)
“To reach the person your are
calling . . .”
Extension:
@I(%S1,=,"FRENCH",981)G(991)
Follow the User ID
Done
chain.
2478

Customization Examples
Users Menu Examples
Stratagy I&M 06/02 8-9
Customization
Examples
Order Shipment Information
This example illustrates how you can interact with data files to retrieve useful information that
Stratagy gives to callers by request. Stratagy does the following:
1. Asks the caller to enter an order number.
2. Determines whether the order has shipped. For example, by requesting it from another host
computer (using the serial port access S( ) token), accessing a file on Stratagy’s flash drive, or
accessing a file on a network server.
3. If the order has not shipped, tells the caller. Otherwise, tells the caller the date the order was
shipped.
Program Example
In the followings example, Stratagy system’s flash drive contains the following files:
•SHIPPED: An ASCII text file with order numbers that have been shipped. One order number
per line. For example:
11111
22222
33333
12345
•SHIPDATE: An ASCII text file where each line contains an order number and its ship date
separated by a comma. One per line. For example:
11111,06301999
22222,070111999
33333,07061999
12345,07121999
➤To program the example
1. For User ID 2000, define the user’s record to contain:
2. Access the User ID mailbox via telephone. Record:
Greeting 1: “Please enter the five-digit order number now.”
3. For User ID 2001, access User Mode via telephone. Record:
Greeting 1: “Your order number must be five digits. Good-bye.”
Extension @R(G1,%S1,20)I(LEN[%S1],!,5,2001)G(2002)
@ Suppresses normal process.
R(G1,%S1,20) Plays greeting 1. Waits for the caller to enter a telephone number. Reads
the DTMF the caller entered into variable %S1. Waits (20/10 = 2) seconds
for DTMF.
I(LEN[%S1],!,5,2001) If the length of variable %S1 does not equal 5, goes to User ID 2001.
G(2002) Goes to User ID 2002.
Customization Examples
Users Menu Examples
8-10 Stratagy I&M 06/02
4. For User ID 2002, define the user’s record to contain:
5. Access the User ID mailbox via telephone. Record:
Greeting 1: “Sorry, but your order has not yet shipped. Please call back tomorrow.”
6. For User ID 2003, define the user’s record to contain:
7. Access the User ID mailbox via telephone. Record:
Greeting 1: “Your order was shipped on.”
How It Works
The order shipment example works as follows.
1. Stratagy asks the caller to enter the order number.
2. Stratagy determines if the order number is five digits long.
If five digits long, Stratagy continues.
If not, Stratagy plays “Your order number must be five digits. Good-bye.”
3. Stratagy determines if the order number has shipped.
If shipped, Stratagy plays “Your order was shipped on” and the date of shipment.
If not, Stratagy plays “Sorry, but your order has not yet shipped. Please call back tomorrow.”
For example, if the caller entered order number 12345, Stratagy would play “Your order was
shipped on July twelfth, nineteen ninety-nine.”
Extension @?(%S1,SHIPPED,2003)P(G1)
@ Suppresses normal process.
?(%S1,SHIPPED,2003) If variable %S1 exists in file shipped, goes to User ID 2003.
P(G1) Plays greeting 1.
Extension @V(SHIPDATE,1,%S1,2,%S2)P(G1)P(%S2,D)
@ Suppresses normal process.
V(SHIPDATE,1,%S1,2,%S2)
In file SHIPDATE, searches field 1 for variable %S1. Stores field 2 in
variable %S2.
P(G1) Plays greeting 1.
P(%S2,D) Plays the DTMF digits represented by the variable %S2 as a date.
Customization Examples
Users Menu Examples
Stratagy I&M 06/02 8-11
Customization
Examples
Holiday Greetings—Holiday Divert Mailbox
With only 10 Auto Scheduling entries per User ID, it can be difficult to make both the daily
schedules (morning, afternoon, night, weekend) and the holiday schedules work in one mailbox.
The following is an alternative method—using a Holiday Divert mailbox to search a list of holidays
for the year and divert to a Holiday Greeting mailbox.
Program Example
In the following example:
•User ID 900: Holiday Divert
•User ID 900 sends the call to User ID 980 if it is a holiday; otherwise, the call is routed to User
ID 900’s RNA chain for normal call processing.
•User ID 980: Holiday Greeting
•Greeting 2 plays: “Toshiba is closed for the holiday...”
•DOS text file HOLIDAYS.TXT lists all holiday dates.
•Stratagy System Configuration’s per Port Definitions box_grt parameter is configured to start at
User ID 900 for all valid ports.
➤To program the example
1. For User ID 900 (Holiday Divert), define the user’s record to contain:
2. For User ID 980 (Holiday Greeting), define the Users record to contain:
•Do Not Disturb: On (unless using a Menu token)
•Greeting: 2
3. Access the User ID mailbox via telephone. Record a generic holiday greeting:
Greeting 2: “Toshiba is closed for the holiday...”
Extension @?(%Y,HOLIDAYS.TXT,980)
@ Suppresses normal process.
?(%Y,HOLIDAYS.TXT,980)
In file HOLIDAYS.TXT, search for the current date (%y). If found, goes to User
ID 980.
Done Chain 991
RNA Chain 990

Customization Examples
Users Menu Examples
8-12 Stratagy I&M 06/02
➤To create the DOS text file
You can use this method to update HOLIDAYS.TXT without shutting down the system.
1. On the Stratagy Admin PC, use DOS Edit to create the DOS text file HOLIDAYS.TXT. Enter
the holidays for the year (or the next ten years if you prefer) in the following format:
mmddyyyy. One date per line. For example:
02201998
04141998
05291998
07041998
09041998
11241998
12251998
01011999
2. Save as HOLIDAYS.TXT
3. Connect to the Stratagy system with Stratagy Admin.
4. From the Main Menu, press Alt+T to select the Tools option.
5. Select Filecopy form the Tools Menu.
6. In the Source System field (where the file currently resides), press F2 to display a pop-up box
of selections. Highlight PC and press Enter.
7. In the Copy From: field, type the directory and file names (e.g.,
C:\VSA32\ABCCOMP\HOLIDAYS.TXT).
8. In the Copy To: field, type HOLIDAYS.TXT and press Enter. The file copies to the Stratagy
system’s drive (drive C:).
➤To configure the Stratagy System
➤Use the Stratagy System Configuration option of the Stratagy Configuration Utility to modify
the Per Port Definition box_grt. See Chapter 4 – Configure Stratagy for detailed information.
The following lines correspond to the number of ports installed on your system. In the example
below, ports 1~4 start at User ID 900.
set box_grt 900 1
set box_grt 900 2
set box_grt 900 3
set box_grt 900 4
How It Works
When a call rings in, Stratagy routes it to User ID 900 instead of User ID 990. The token string in
User ID 900 checks HOLIDAYS.TXT for today's date. If it finds a match, the call is sent to User
ID 980. Otherwise, the call is routed to the RNA chain (User ID 990) for normal call processing.
User ID 980 acts as the generic holiday mailbox, having a greeting like “Toshiba is closed for the
holiday...” User ID 980 could also have its own Auto schedule that changes the greeting each
holiday season.

Customization Examples
Users Menu Examples
Stratagy I&M 06/02 8-13
Customization
Examples
Transferring a Caller Directly to a Mailbox
Without customizing Stratagy or the telephone system, the procedure an Operator uses to transfer
a caller to a user’s personal greeting involves dialing:
<Stratagy pilot voice mail number> + 998# + <User ID> + #
Note User ID 998 (Direct Message) is the reserved User ID that enables Stratagy to record a
message for a User ID without executing the Extension field or hear the User ID’s
greeting. See Chapter 5 – How Stratagy Operates for more information.
You can customize Stratagy and the telephone system so that when the Operator presses a DSS key,
Stratagy plays “Enter the destination User ID.” The Operator dials the User ID, and Stratagy plays
its greeting. The example below illustrates this using Stratagy and the Strata DK.
Program Example
In the following example:
•User ID 800: User ID assigned to standard station port
•User ID 998: Direct Message (default)
•User ID 800 chains to User ID 998
➤To program the example
➤For User ID 800, set the Chain RNA field to 998.
➤To program the telephone system
1. Program a DSS key that rings a spare standard station port.
2. Call forward the standard station port to voice mail.
3. Enter the voice mail ID digits for this station under #656, matching the new User ID (91 800 in
this example).
How It Works
When the Operator presses the DSS key for the standard station port, the call forwards to voice mail.
When Stratagy answers, the telephone system sends it the digits 91 800, routing the call to User ID
800. Stratagy handles a DTMF packet preceded by “91” as a Ring No Answer call, so it
immediately jumps to the RNA chain (User ID 998; Direct Message). Now the Operator can dial the
User ID and receive his/her greeting without the auto attendant attempting to transfer the call.

Customization Examples
Notify Menu Examples
8-14 Stratagy I&M 06/02
Notify Menu Examples
The following examples are included in this section:
•“Message Waiting Light Control When Light On and Off Codes Differ” on page 8-14
•“Message Waiting Light Control When Light On and Off Codes Are the Same” on page 8-15
•“Voice Notification” on page 8-16
•“Notification to a Pager” on page 8-17
•“Notification to a Pager on Urgent Messages Only” on page 8-18
•“Relay Paging to a Pager” on page 8-19
•“Emergency Lists” on page 8-20
Message Waiting Light Control When Light On and Off Codes
Differ
Some telephone systems support message waiting lights that can be controlled by special sequence
keys. The following method works if the telephone system uses different codes to turn on and off
the message waiting light.
Program Example
In the following example:
•Code for turning on the message waiting light: #63
•Code for turning off the message waiting light: #64
➤To program the example
1. For turning on the light, define the Notify record to contain:
2. For turning off the light, define the Notify record to contain:
Title <enter title/comment for identification>
Type NORMAL
Method W(5,T)#63%E
W(5,T) Wait five seconds for dial tone before sending #63%E.
#63 Turns on the message waiting light. (The code varies depending upon the telephone
system.)
%E Dials the DTMF digits given in the User ID’s Extension field.
Title <enter title/comment for identification>
Type PICKUP
Method W(5,T)#64%E
W(5,T) Wait five seconds for dial tone before sending #64%E.
#64 Turns off the message waiting light. (The code varies depending upon the telephone
system.)
%E Dials the DTMF digits given in the User ID’s Extension field.
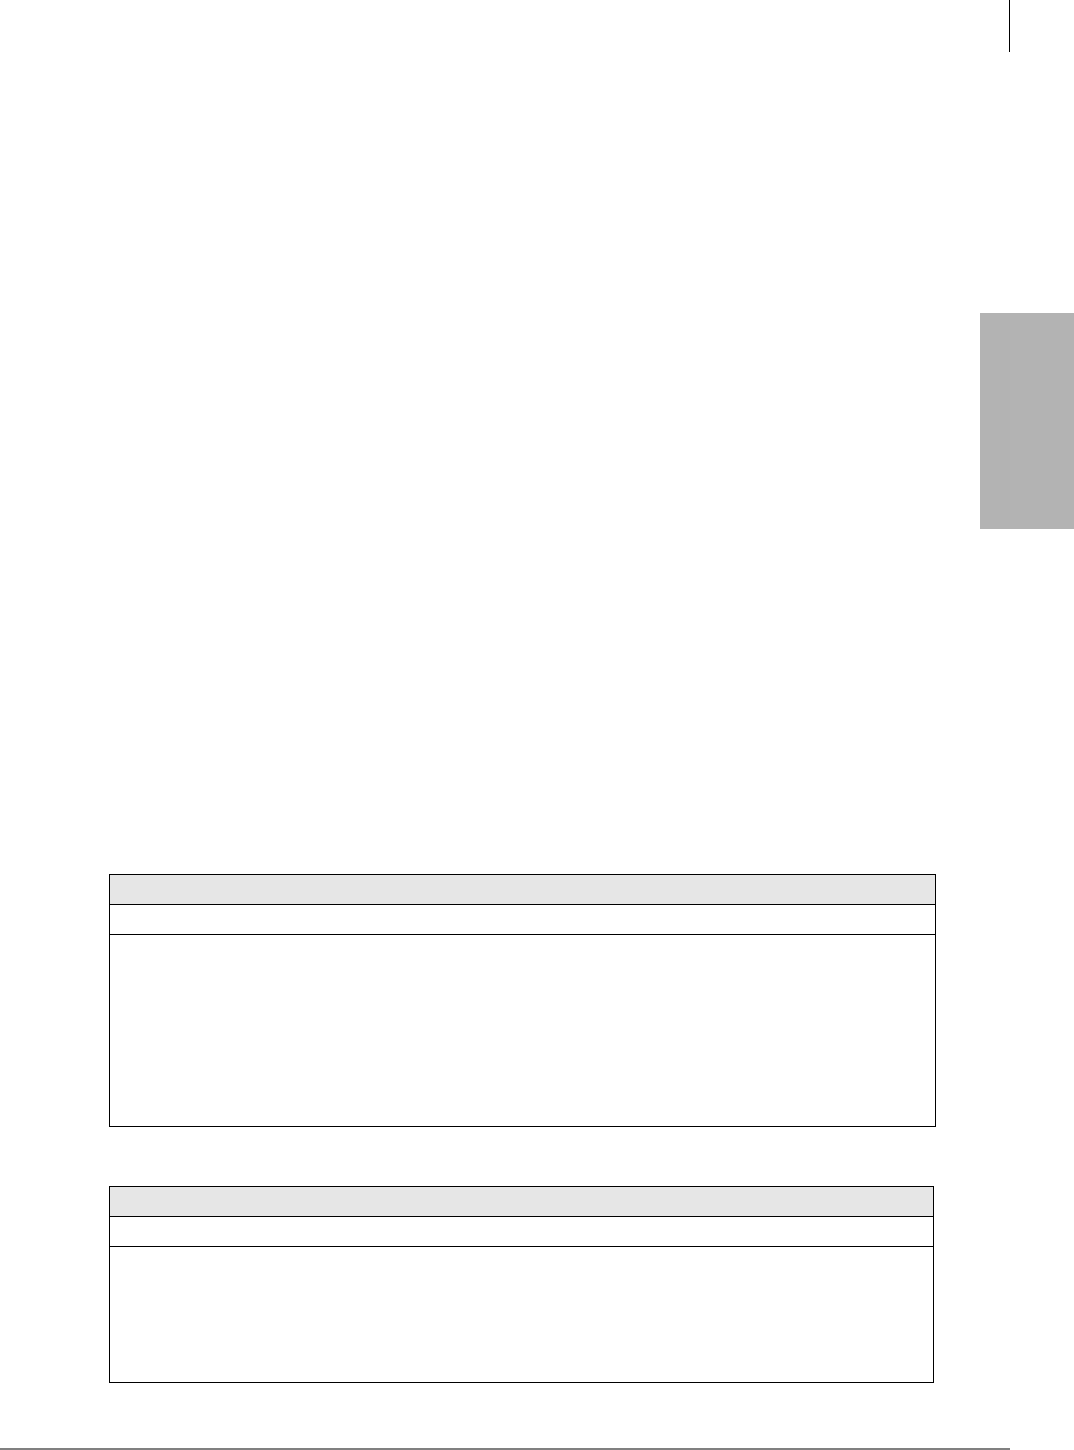
Customization Examples
Notify Menu Examples
Stratagy I&M 06/02 8-15
Customization
Examples
How It Works
If your telephone system uses different codes for turning on and off the message light, Stratagy:
1. Turns on the light at the extension defined by the User ID’s Extension field.
2. Turns off the light at the extension defined by the User ID’s Extension field.
Message Waiting Light Control When Light On and Off Codes
Are the Same
If your telephone switch uses the same code to turn on the message waiting light as it does to turn
it off (i.e., toggles the light using a single code), then the method above will not work as you might
expect. This is because every time a new message is saved, Stratagy performs the light on code
regardless of whether the light was already on. Therefore, for the first new message, Stratagy turns
the light on, but on the second new message, if the user has not picked up the first new message,
Stratagy turns the light off since it was already on!
To solve this problem, do the following:
➤To turn on the light
1. Check if you have already turned on the light (Z). If you haven’t continue to Step 2.
2. Turn on the light and remember that you have turned it on (X).
➤To turn off the light
➤Turn off the light and forget that you had turned it on (Y).
Program Example
In the following example—Code for turning on/off the message waiting light: #60
➤To program the example
1. For turning on the light, define the Notify record to contain:
2. For turning off the light, define the Notify record to contain:
Title <enter title/comment for identification>
Type NORMAL
Method Z#60%EX
Z Tests for existence of LIGHT.ON file in the User ID’s directory. If it exists, Stratagy
stops processing the string.
#60 Turns on/off the message waiting light. (The code varies depending upon the
telephone system.)
%E Dials the DTMF digits given in the User ID’s Extension field.
X Creates the LIGHT.ON. file in the User ID’s directory.
Title <enter title/comment for identification>
Type PICKUP
Method #60%EY
#60 Turns on/off the message waiting light. (The code varies depending upon the
telephone system.)
%E Dials the DTMF digits given in the User ID’s Extension field.
Y Deletes the LIGHT.ON file in the User ID’s directory.

Customization Examples
Notify Menu Examples
8-16 Stratagy I&M 06/02
How It Works
When Stratagy turns on the message light, it:
1. Checks if the light is already turned on (if the LIGHT.ON file exists in the User ID’s directory).
If it exists, Stratagy stops processing the Method field.
2. Turns on the light at the extension defined by the User ID’s Extension field.
When Stratagy turns off the message light, it:
1. Turns off the light at the extension defined by the User ID’s Extension field.
2. Deletes the LIGHT.ON file in the User ID’s directory.
Voice Notification
You can program Stratagy to notify a user via voice. Voice notification is commonly used in lieu
of message waiting lights.
In the example below, assume you want Stratagy to notify a user of the number of new messages in
his mailbox.
Program Example
In the following example:
•User ID: 405
•“name recording”: Ken
•Number of new messages in User ID mailbox 405: 3
➤To program the example
Define the Notify record to contain:
How It Works
Per the notification schedule, Stratagy:
1. Dials the user’s telephone number.
2. Waits for a voice to answer.
3. Says the user’s recorded name: “Ken.”
4. Says the user’s total number of messages and number of new messages: “3.”
Title <enter title/comment for identification>
Type NORMAL
Method %EW(3,V)P(U)P(M)
%E Dials the DTMF digits given in the User ID’s Extension field. This should be the user’s
telephone number.
W(3,V) Waits up to 3 rings for a voice to answer.
P(U) Plays the name recording for the current User ID. If there is no recording, says the User
digits.
P(M) Plays the total number of messages and number of new messages for the current User
ID.

Customization Examples
Notify Menu Examples
Stratagy I&M 06/02 8-17
Customization
Examples
Notification to a Pager
You can program Stratagy to notify a user via his digital pager.
In the example below, assume you want Stratagy to notify the user of the total number of messages
and the number of new messages in his User ID mailbox.
Program Example
In the following example:
•Dial 9 for an outside line
•The paging system uses the * to designate a “-” in the pager display
•User ID: 405
•Total number of messages in User ID 405: 5
•Number of new messages in User ID 405: 3
➤To program the example
Define the Notify record to contain:
How It Works
Per the notification schedule, Stratagy:
1. Dials the user’s digital pager’s telephone number.
2. When the pager answers:
•Relays the User ID.
•Relays the total number of messages.
•Relays the number of new messages.
For this example, the following displays on the pager: 405-5-3.
Title <enter title/comment for identification>
Type NORMAL
Variable <digital pager’s telephone number>
Method 9W(4,T)%V,,W(2,P)-%U*%M*%N#-
9 Dials 9 for an outside line.
W(4,T) Waits up to 4 seconds to hear dial tone.
%V Dials the contents of the Notify record’s Variable field. This should be the digital pager’s
telephone number.
,, Pauses 4 seconds (2 seconds x 2).
W(2,P) Waits up to 2 rings for the pager/beeper to answer.
- Pauses 0.5 second to enable the pager’s answer confirmation tones.
%U Relays the User ID.
*Dials
. (Used by many paging systems to designate a “-” in the pager display.)
%M Relays the total number of messages in this User ID mailbox.
*Dials
. (Used by many paging systems to designate a “-” in the pager display.)
%N Relays the number of new messages in this User ID mailbox.
#Dials to end call.
- Pauses 0.5 second.

Customization Examples
Notify Menu Examples
8-18 Stratagy I&M 06/02
Notification to a Pager on Urgent Messages Only
You can program Stratagy to light a message waiting light for all messages, while paging or calling
the user offsite when he receives a message marked Urgent. To do this, for the particular paging
Notify record, change the Type field from Normal to Urgent.
To program Stratagy to notify a user via his digital pager when he receives a message marked
Urgent is similar to “Notification to a Pager.” To program Stratagy to light the message waiting
light for all messages, see “Message Waiting Light Control When Light On and Off Codes Differ”
on page 8-14 or “Message Waiting Light Control When Light On and Off Codes Are the Same” on
page 8-15.
Program Example
In the following example:
•User ID: 405
•Dial 9 for an outside line
•The paging system uses the * to designate a “-” in the pager display
➤To program the example
Define the Notify record to contain:
How It Works
When Stratagy receives an Urgent call for this User ID, Stratagy:
1. Dials the user’s digital pager’s telephone number.
2. When the pager answers, Stratagy relays the User ID.
For this example, the following displays on the pager: 405.
Title <enter title/comment for identification>
Type URGENT
Variable <digital pager’s telephone number>
Method 9W(4,T)%V,,W(2,P)-%U#-
9 Dials 9 for an outside line.
W(4,T) Waits up to 4 seconds to hear dial tone.
%V Dials the contents of the Notify record’s Variable field. This should be the digital pager’s
telephone number.
,, Pauses 4 seconds (2 seconds x 2).
W(2,P) Waits up to 2 rings for the pager/beeper to answer.
- Pauses 0.5 second to enable the pager’s answer confirmation tones.
%U Relays the User ID.
# Dials # to end call.
- Pauses 0.5 second.

Customization Examples
Notify Menu Examples
Stratagy I&M 06/02 8-19
Customization
Examples
Relay Paging to a Pager
With relay paging, the caller enters his/her number on the telephone dial pad and Stratagy notifies
the user by relaying the caller’s telephone number to the user’s pager display. A caller can page
without redialing, or even knowing, the user’s pager number.
Program Example
In the following example:
•Dial 9 for an outside line
•The paging system uses the * to designate a “-” in the pager display
•User ID: 2765
•Caller’s telephone number: 583-3700
•To activate relay paging, the caller presses # when the User ID’s greeting plays
➤To program the example
Define the Notify record to contain:
How It Works
Per the notification schedule, Stratagy:
1. Dials the user’s digital pager’s telephone number.
2. When the pager answers:
•Relays the User ID.
•Relays the caller’s telephone number.
For this example, the following displays on the pager: 2765-5833700.
Title <enter title/comment for identification>
Type RELAY
Variable <digital pager’s telephone number>
Method 9W(4,T)%V,,W(2,P)-%U*%R#-
9 Dials 9 for an outside line.
W(4,T) Waits up to 4 seconds to hear dial tone.
%V Dials the contents of the Notify record’s Variable field. This should be the digital pager’s
telephone number.
,, Pauses 4 seconds (2 seconds x 2).
W(2,P) Waits up to 2 rings for the pager/beeper to answer.
- Pauses 0.5 second to enable the pager’s answer confirmation tones.
%U Relays the User ID.
* Dials *. (Used by many paging systems to designate a “-” in the pager display.)
%R Relays the DTMF digits entered by the caller. This should be the caller’s telephone
number.
# Dials # to end call.
- Pauses 0.5 second.

Customization Examples
Notify Menu Examples
8-20 Stratagy I&M 06/02
Emergency Lists
In an emergency list, Stratagy is programmed to notify a series of users if a new message is not
picked up. If the original recipient, after a specified time interval, has not picked up the new
message, Stratagy continues to notify him/her but also begins notification to a second person.
After another time interval if the new message has still not been picked up, Stratagy continues to
notify the first two people and starts notifying a third person. Stratagy continues the process until
the message is picked up or everyone has been notified.
When creating an emergency list, carefully define the initial time to wait before starting the
notification and the repeat time.
Program Example
Assume that you want to create three Notify records for one User ID. Each record contains a
different telephone number to call; one for each of the three people who will potentially be notified.
➤To program the example
1. Define the first Notify record to contain:
Notify After: 0
Continue Every: 5
Max Times: 0
2. Define the second Notify record to contain:
Notify After: 15
Continue Every: 5
Max Times: 0
3. Define the third Notify record to contain:
Notify After: 30
Continue Every: 5
Max Times: 0
How It Works
When the emergency occurs:
1. The first Notify record starts notification immediately.
2. If the message is not picked up, the first Notify record continues notification every 5 minutes.
3. After 15 minutes, if the message is not picked up, the second Notify record starts notification
every 5 minutes in conjunction with the first Notify record.
4. After 30 minutes, if the message is not picked up, the third Notify record starts notification
every 5 minutes in conjunction with the first and second Notify records.
5. All three Notify records continue every 5 minutes until the message is picked up.
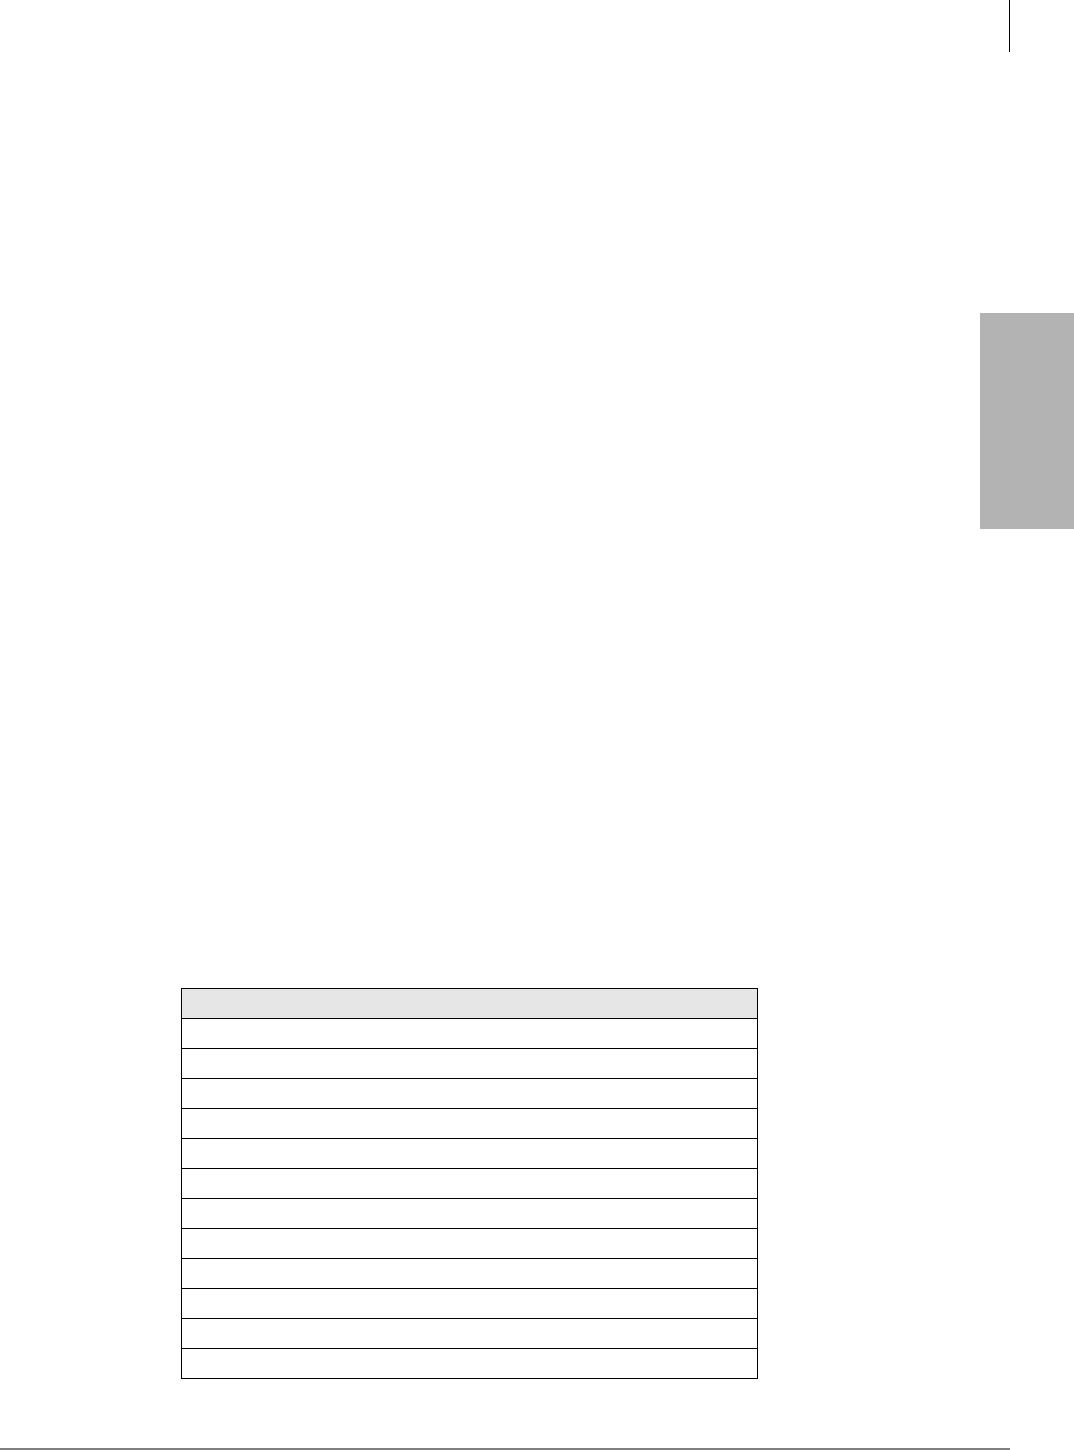
Customization Examples
Auto Menu Examples
Stratagy I&M 06/02 8-21
Customization
Examples
Auto Menu Examples
The following examples are included in this section:
•“Time of Day Greetings” on page 8-21
•“Holiday Greetings—Same Day Each Year” on page 8-24
•“Holiday Greetings—Different Day Each Year” on page 8-25
•“Extension Change” on page 8-26
•“Unsupervised Conferencing” on page 8-27
Time of Day Greetings
You can program Stratagy so that your company has different greetings for mornings, afternoons,
evenings, and weekends.
Program Example
In the following example, the User ID 990 (Company Greeting) assumptions are as follows.
The greetings:
Greeting 1 plays: “Thank you for calling Toshiba.”
Greeting 2 plays: “Good morning. Thank you for calling Toshiba.”
Greeting 3 plays: “Good afternoon. Thank you for calling Toshiba.”
The schedules:
morning greeting schedule starts at: 8:00 a.m. Monday through Friday
afternoon greeting schedule starts at: 12:01 p.m. Monday through Friday
evening greeting schedule starts at: 5:01 p.m. Monday through Thursday
weekend greeting schedule starts at: 5:01 p.m. Friday
➤To program the example
Scheduling the greetings includes defining the Auto records and recording the greetings for User
ID 990.
For the morning greeting, define the Auto record as follows:
Enabled Yes
Change On (date) 08/15/98
Change At (time) 08:00 (8:00 a.m.)
Every Month(s) 0
Every Day(s) 1
Every Hour(s) 0
Every Minute(s) 0
Restricted To (MTWTFSS) YYYYYNN
Extension (leave blank)
Rings (leave blank)
Do Not Disturb On
Call Screening Off
Greeting 2
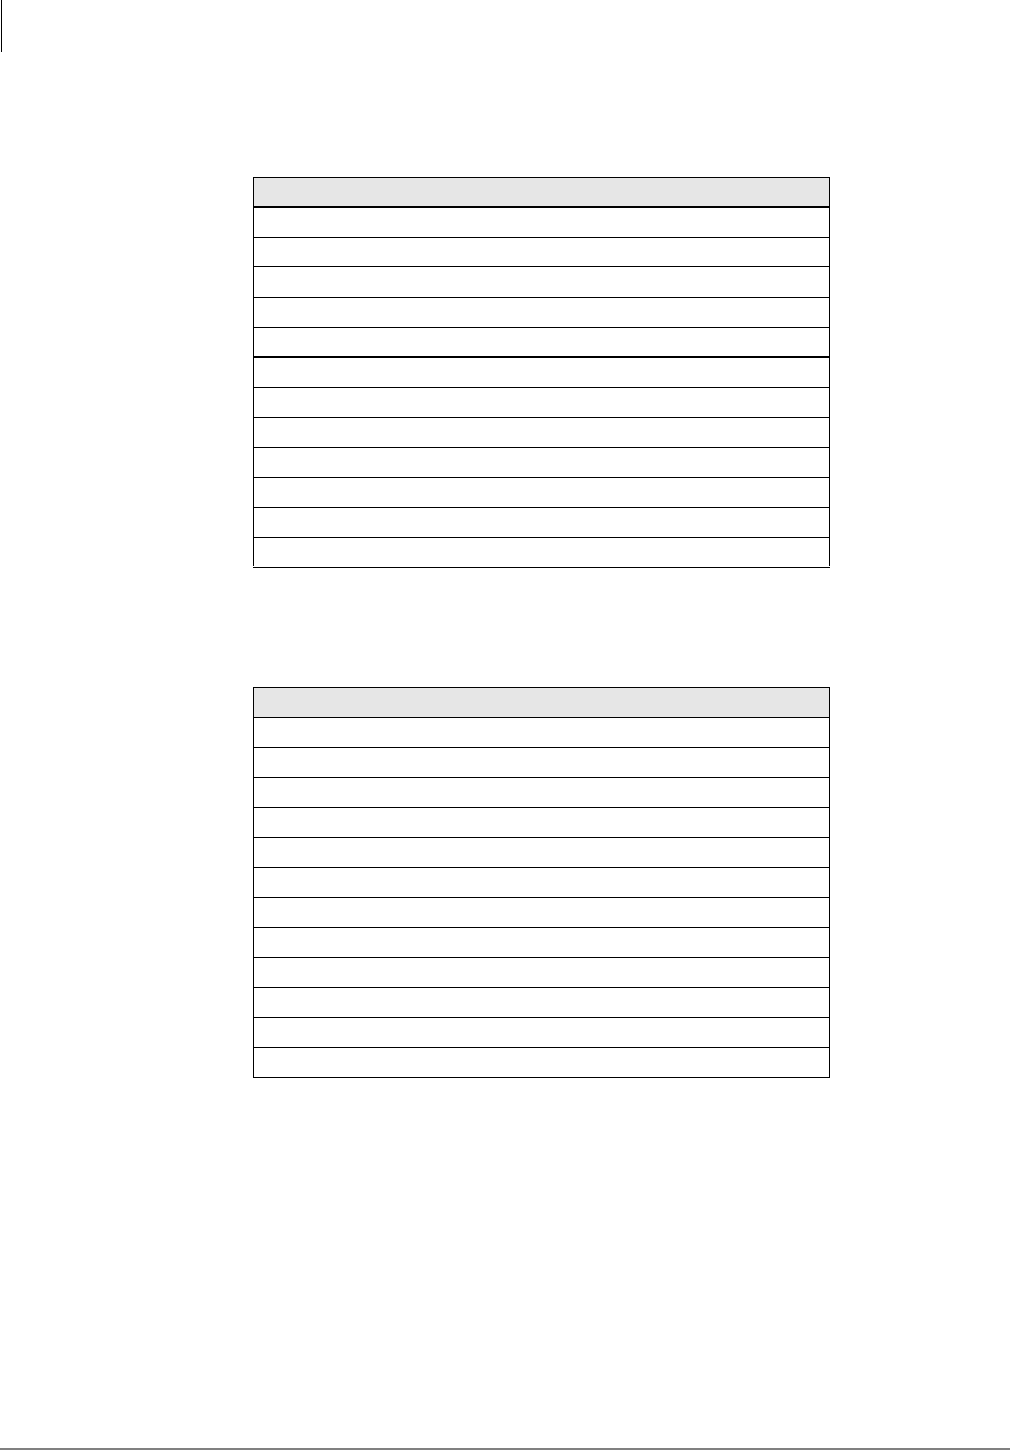
Customization Examples
Auto Menu Examples
8-22 Stratagy I&M 06/02
For the afternoon greeting, define the Auto record as follows:
For the evening greeting, define the Auto record as follows:
Enabled Yes
Change On (date) 08/15/98
Change At (time) 12:01 (12:01 p.m.)
Every Month(s) 0
Every Day(s) 1
Every Hour(s) 0
Every Minute(s) 0
Restricted To (MTWTFSS) YYYYYNN
Extension (leave blank)
Rings (leave blank)
Do Not Disturb On
Call Screening Off
Greeting 3
Enabled Yes
Change On (date) 08/15/98
Change At (time) 17:01 (5:01 p.m.)
Every Month(s) 0
Every Day(s) 1
Every Hour(s) 0
Every Minute(s) 0
Restricted To (MTWTFSS) YYYYYNN
Extension (leave blank)
Rings (leave blank)
Do Not Disturb On
Call Screening Off
Greeting 1
Customization Examples
Auto Menu Examples
Stratagy I&M 06/02 8-23
Customization
Examples
For the weekend greeting, define the Auto record as follows:
Access the User ID mailbox via telephone. Record:
Greeting 1: “Thank you for calling Toshiba.”
Greeting 2: “Good morning. Thank you for calling Toshiba.”
Greeting 3: “Good afternoon. Thank you for calling Toshiba.”
How It Works
If a caller accesses User ID 990 (Company Greeting) during the morning (8:01 a.m. to 12:00 noon
Monday through Friday), Stratagy:
1. Plays User ID 990’s greeting 2 (Company Greeting).
2. Follows the User ID 990 chain to User ID 991 (Caller Instructions).
If a caller accesses User ID 990 (Company Greeting) during the afternoon (12:01 p.m. to 5:01 p.m.
Monday through Friday), Stratagy:
1. Plays User ID 990’s greeting 3 (Company Greeting).
2. Follows the User ID 990 chain to User ID 991 (Caller Instructions).
If a caller accesses User ID 990 (Company Greeting) during the evenings (5:01 p.m. Monday
through Thursday to 7:59 a.m. the next morning) and weekends (5:01 p.m. Friday to 7:59 a.m.
Monday), Stratagy:
1. Plays User ID 990’s greeting 1 (Company Greeting).
2. Follows the User ID 990 chain to User ID 991 (Caller Instructions).
Enabled Yes
Change On (date) 08/15/98
Change At (time) 00:01 (12:01 a.m.)
Every Month(s) 0
Every Day(s) 1
Every Hour(s) 0
Every Minute(s) 0
Restricted To (MTWTFSS) NNNNNYY
Extension (leave blank)
Rings (leave blank)
Do Not Disturb On
Call Screening Off
Greeting 1

Customization Examples
Auto Menu Examples
8-24 Stratagy I&M 06/02
Holiday Greetings—Same Day Each Year
Certain holidays, such as Independence Day (July 4th), Christmas (December 25), and New Year’s
day (January 1st), occur on the same date each year.
To inform callers that your offices are closed for the holiday, you can record a greeting that plays
only on the holiday.
Program Example
In the following example, the User ID 990 (Company Greeting) assumptions are:
•Greeting 1 plays: “Thank you for calling...”
•User ID 990 chains to User ID 991
The User ID 991 (Caller Instructions) assumptions are:
•Christmas greeting: greeting 4
•Start greeting time: 8:01 a.m.
•Days greeting plays: Monday through Friday
➤To program the example
Scheduling the Christmas greeting includes defining the Auto record and recording the greeting for
User ID 991.
1. Define the Auto record as follows:
2. Access the User ID mailbox via telephone. Record:
Greeting 4: “Our offices are closed December 25th to celebrate Christmas. We wish you all a
happy holiday season. Please call back during regular business hours.”
How It Works
When December 25th falls on a weekday, if a caller accesses User ID 990 (Company Greeting) after
8:01 a.m., Stratagy:
1. Plays User ID 990’s greeting 1 (Company Greeting).
2. Follows the User ID 990 chain to User ID 991 (Caller Instructions).
Enabled Yes
Change On (date) 12/25/99
Change At (time) 08:01 (8:01 a.m.)
Every Month(s) 12
Every Day(s) 0
Every Hour(s) 0
Every Minute(s) 0
Restricted To (MTWTFSS) YYYYYNN
Extension (leave blank)
Rings (leave blank)
Do Not Disturb On
Call Screening Off
Greeting 4
Customization Examples
Auto Menu Examples
Stratagy I&M 06/02 8-25
Customization
Examples
3. Plays User ID 991’s greeting 4 (Christmas greeting).
To guarantee that Stratagy programs the holiday schedule after the open greeting schedule, the
holiday schedule starting time was scheduled one minute after the regular open greeting schedule.
Holiday Greetings—Different Day Each Year
Certain holidays, such as Thanksgiving and Labor Day, occur on different days each year.
To inform callers that your offices are closed for the holiday, you can record a greeting that plays
only on the holiday.
Program Example
In the following example, the User ID 990 (Company Greeting) assumptions are:
•Greeting 1 plays: “Thank you for calling...”
•User ID 990 chains to User ID 991
The User ID 991 (Caller Instructions) assumptions are:
•Thanksgiving greeting: greeting 5
•Start greeting time: 8:01 a.m.
•Days greeting plays: Thursday
➤To program this example
Scheduling the Thanksgiving greeting includes defining the Auto record and recording the greeting
for User ID 991.
1. Define the Auto record as follows:
2. Access the User ID mailbox via telephone. Record:
Greeting 5: “Our offices are closed today so that we can celebrate Thanksgiving with our
families. Please call back during regular business hours.”
Enabled Yes
Change On (date) 11/24/99
Change At (time) 08:01 (8:01 a.m.)
Every Month(s) 11
Every Day(s) 29
Every Hour(s) 0
Every Minute(s) 0
Restricted To (MTWTFSS) NNNYNNN
Extension (leave blank)
Rings (leave blank)
Do Not Disturb On
Call Screening Off
Greeting 5

Customization Examples
Auto Menu Examples
8-26 Stratagy I&M 06/02
How It Works
Every year on Thanksgiving, if a caller accesses User ID 990 (Company Greeting) after 8:01 a.m.,
Stratagy:
1. Plays User ID 990’s greeting 1 (Company Greeting).
2. Follows the User ID 990 chain to User ID 991 (Caller Instructions).
3. Plays User ID 991’s greeting 5 (Thanksgiving greeting).
To guarantee that Stratagy programs the holiday schedule after the open greeting schedule, the
holiday schedule starting time was scheduled one minute after the regular open greeting schedule.
To program holidays that occur on different days each year, define the Frequency of Change fields
as 11 months and 29 days, restricted to the appropriate Days of the Week.
Extension Change
You can program a User ID to automatically access a different telephone number for the user on a
particular day of the week, time of day, etc. by entering the telephone number in the Auto Record’s
Extension field.
Normally, Stratagy processes calls to the Users Menu Extension field; however, when a scheduled
event occurs, Stratagy processes the calls using the Auto Record’s Extension field.
For this example, assume that an employee works in a different office on Fridays than he does on
Monday through Thursday.
Program Example
In the following example:
•User ID: 6340
•Friday’s office telephone number: 3700
➤To program the example
1. Define the Auto Record as follows.
How It Works
Every Friday after 8:00 a.m., if a caller accesses User ID 6340, Stratagy directs the call to extension
3700.
Enabled Yes
Change On (date) 08/09/98
Change At (time) 08:01 (8:00 a.m.)
Every Month(s) 0
Every Day(s) 7
Every Hour(s) 0
Every Minute(s) 0
Restricted To (MTWTFSS) NNNNYNN
Extension 3700
Rings (leave blank)
Do Not Disturb On
Call Screening Off
Greeting (leave blank)

Customization Examples
Auto Menu Examples
Stratagy I&M 06/02 8-27
Customization
Examples
Unsupervised Conferencing
If your telephone system supports unsupervised conferencing, you can schedule Stratagy to call an
off-premise location for the conference call.
Program Example
In the following example:
•Conference code: *3
•Operation required to connect to calls in a conference: F-F-
•Telephone number: 583-3700
•Dial 9 for an outside line
➤To program the example
Define the Auto record to contain:
How It Works
For the day and time scheduled, Stratagy:
1. Dials the off-premise location for the conference call.
2. Connects the calls in a conference.
3. Hangs up.
Extension *3-9W(2,T)5833700W(3,V)F-F-H
*3 Conference code. (The code varies depending upon the telephone system.)
- Pauses 0.5 second.
9 Dials 9 for an outside line.
W(2,T) Waits up to 2 seconds to hear dial tone.
5833700 Dials the telephone number 583-3700.
W(3,V) Waits up to 3 rings for a voice to answer.
F-F- Performs a hookflash and pauses 0.5 second. Repeats function. (The code varies
depending upon the telephone system.)
H Hangs up immediately.

Customization Examples
Auto Menu Examples
8-28 Stratagy I&M 06/02

Stratagy I&M 06/02 9-1
AMIS Networking
AMIS Networking 9
Note Stratagy Flash does not support AMIS.
Audio Messaging Interchange Specification (AMIS) is the analog networking protocol that enables
Stratagy to pass voice messages to any remote voice mail system that supports the AMIS protocol.
This chapter discusses the following:
•AMIS mailboxes
•AMIS node
•System Identification Number
•Configuring Stratagy for AMIS
•Testing AMIS
•AMIS operation
•AmisNodeList
Note The AMIS analog networking specification does not support transmission of a fax
message over the AMIS analog network.
AMIS Mailboxes
Stratagy implements AMIS by using two specific mailboxes – Gateway and Proxy – that contain
information and direction about a remote voice mail system or node. The node identifies itself to
Stratagy by a local telephone number (i.e., System Identification Number) that is sent to the
receiving voice mail system during the transmission process.
Remote mailboxes, whether represented by Proxy mailboxes or through Gateway mailboxes, can
be members of distribution groups.
Gateway Mailboxes
Each system in the AMIS network must have a unique mailbox address called a node. The only
requirements for a node number is that it be one~eight digits long and be unique. For example, the
Stratagy system’s Gateway mailbox at the Dallas office might be node “40,” while the Stratagy at
Los Angeles might be “33.”
To send a message to another Stratagy system user using a Gateway mailbox, you must enter the
Stratagy system’s node number plus the addressee’s User ID mailbox number.
For example, when a user in the Dallas office (node 40) sends a message to mailbox 200 in Los
Angeles (node 33), the destination address is: “33200.” Once the message is addressed and sent, the
local Stratagy system (node 40) does the following:
1. Accesses its Gateway mailbox (node 40) and uses the information stored there to contact the
remote voice mail system (node 33).
2. Provides some handshake signals requesting mailbox 200.
3. Audibly transmits the message.

AMIS Networking
AMIS Node
9-2 Stratagy I&M 06/02
The remote system (node 33) receives the message and stores it in mailbox 200.
An exception occurs if the 33200 destination address also exists on the local Stratagy system. The
user must follow the node number with “*” (e.g., 33*200) when entering the destination. This flags
the message as an AMIS message and the Stratagy system delivers the message to Gateway mailbox
33 at Los Angeles instead of Dallas mailbox 33200.
Proxy Mailboxes
The Proxy mailbox represents a specific User ID mailbox on a remote node and resides on the local
Stratagy system. A Stratagy user addresses a message to a Proxy Mailbox in the same manner as
he/she would a local user. Once the message is addressed and sent, the Proxy mailbox initiates the
AMIS transfer. This gives the appearance to the local user that the remote user has a mailbox on the
local system.
For example, assume User ID mailbox 2300 is a mailbox on a voice mail system in Dallas. The same
number also resides as a Proxy mailbox on the local Stratagy. When messages are left for Proxy
mailbox 2300 on Stratagy, the system uses the information stored there to contact the Dallas voice
mail system, provides some handshake signals requesting User ID mailbox 2300, then audibly
transmits the message. The Dallas voice mail system would receive the message and store it in User
mailbox 2300.
Important! It is not necessary for the remote mailbox number to match the Proxy mailbox
number in Stratagy.
AMIS Node
An AMIS node is a voice mail system in an AMIS network. Each node in the network is identified
in two ways. First, there is a unique node number (the box number of the Gateway mailbox) that
must be used as part of the message address when sending, forwarding or replying to a message.
Second, the nodes use the System Identification Number, which is part of the AMIS protocol, to
identify themselves to each other during AMIS connections.
As more advanced features have been added to the DOS®-based Stratagy systems, memory
management has become a critical issue in software development. Because of this, TAIS/TSD
looks toward feature interaction as a way to create more operating system memory when
developing new features. With the addition of the Call Record feature to the DOS-based products
with Release 3.3 software, the number of default Audio Messaging Interchange Specification
(AMIS) networking nodes has been reduced to 200. In addition, further restriction to the number of
AMIS networking nodes will be required to support IVP8 systems with multi-lingual prompts.
The fewer AMIS nodes the system is configured for, the more operating system memory is
available for other features. The Stratagy systems reserve enough operating system memory to run
the number of AMIS nodes specified in the amis_max_nodes parameter in the Stratagy System
Configuration. Additionally, a system using more features and a higher configuration requires
more operating system memory. For example, an eight port IVP8 system with a high amount of
call traffic using the new Call Record feature requires more operating system memory than a
system with fewer ports and/or less traffic. Multi-lingual prompts have been specifically identified
as a feature that requires a reduction in the number of AMIS nodes to increase Operating System
(OS) memory for proper system operation.
Due to the number of feature configurations possible in a Stratagy system, it is not possible for
TAIS/TSD to accurately identify the correct number of AMIS nodes in each case. If the system
you are working on runs out of OS memory, the failure causes the system to continually reboot. To
correct this, the number of AMIS nodes must be reduced.
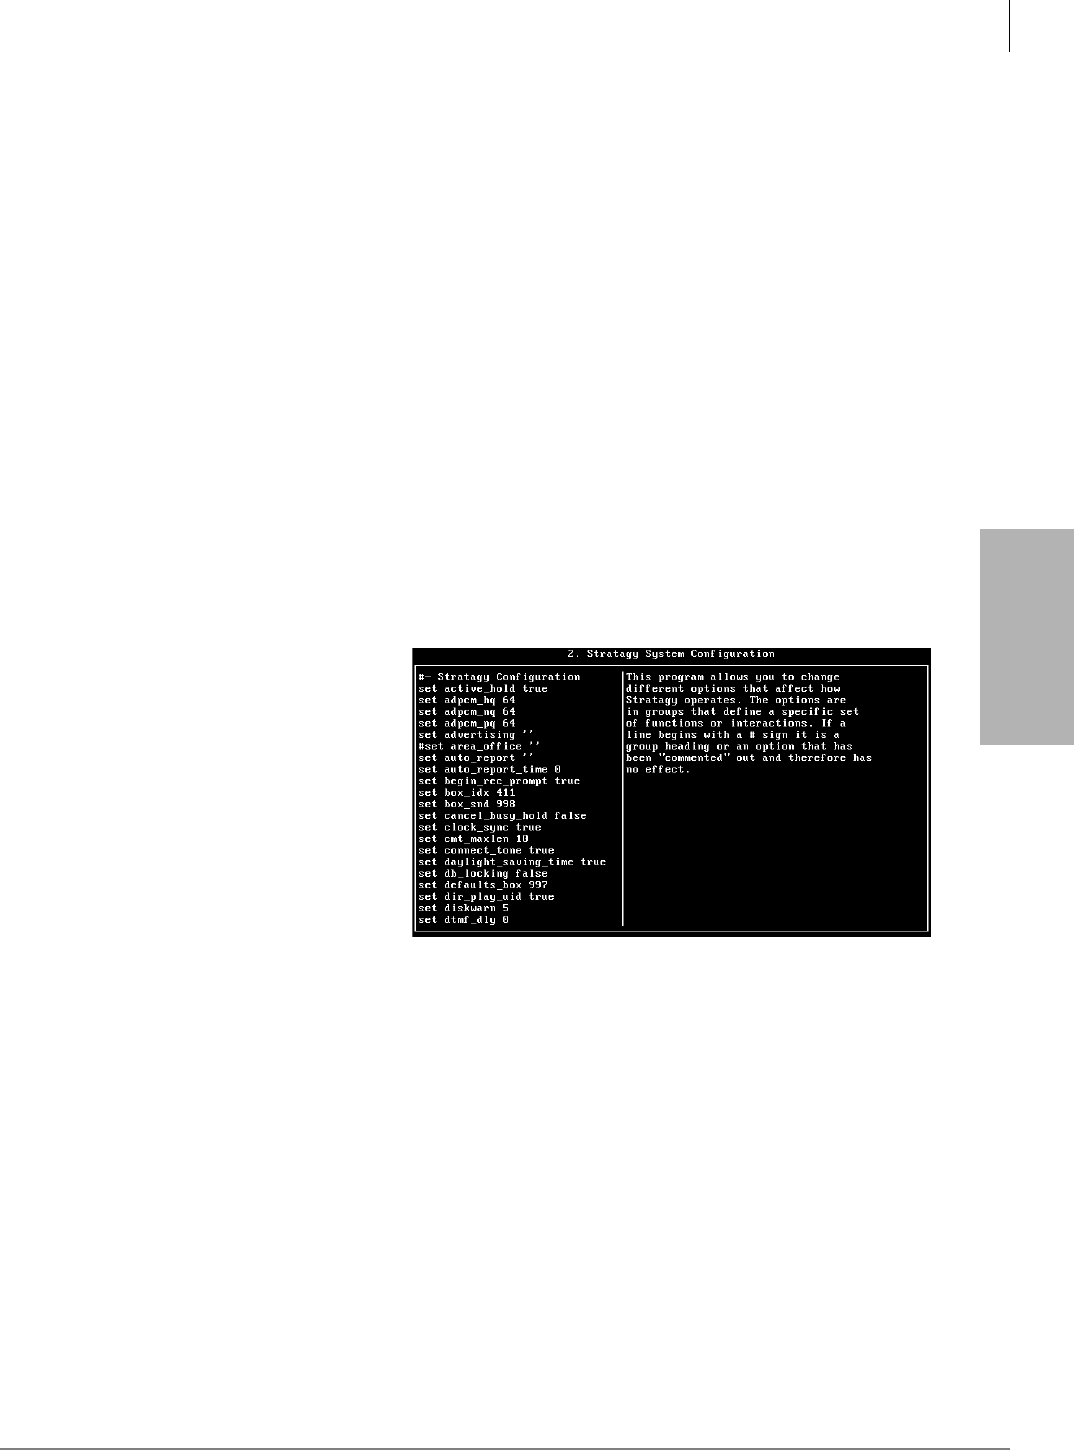
AMIS Networking
System Identification Number
Stratagy I&M 06/02 9-3
AMIS Networking
System Identification Number
The System Identification Number consists of a country code (the digit “1” in North America), area
code, and seven-digit phone number. This number not only identifies the calling system, but can
also be used by the administrator to configure the local system to enable message replies.
Configuring Stratagy for AMIS
There are three steps to configuring Stratagy to act as an AMIS node:
1. Set the Stratagy AMIS system parameters.
2. Create Gateway mailboxes for each remote system with which Stratagy communicates.
3. Create Proxy mailboxes for each remote user that wishes to have a local mailbox.
Step 1: Set AMIS Parameters
For AMIS to operate correctly, you must activate the AMIS configuration parameters in the
Stratagy system and modify their settings. Table 9-1 lists the required parameters and their correct
settings.
1. From the Stratagy Configuration Utility screen, press 2
...or use the arrow keys (↑↓) to highlight Stratagy System Configuration and press Enter.
The Stratagy System
Configuration Screen is split into
two areas: the left screen area lists
the actual parameters and their
values, the right screen area lists
context-sensitive help for each
parameter. See Table 9-1 for a list
of the parameters, their
definitions and default settings.
2. Using the arrow (↑↓) or Page
Up and Page Down keys scroll
to the AMIS configuration
parameter section.
3. Modify the parameter using the line editor at the top of the screen. For each parameter listed in
Table 9-1, remove the starting #. Then set appropriately.
4. Press Enter to save your changes
...or Esc to exit without saving changes.
5. Press Esc. The Stratagy Configuration Utility screen displays.
Note We recommend that you back up the current database at this time by selecting the Stratagy
Backup Utility. See “Backup Utility” on page 11-3 .
6. Press Esc again. Stratagy reboots and returns to the Main Menu for call processing or Stratagy
programming.
4073

AMIS Networking
Configuring Stratagy for AMIS
9-4 Stratagy I&M 06/02
Table 9-1 AMIS Parameters
Parameter Description
amis_diskfull Percentage of the flash drive that must be free in order for Stratagy to accept new
AMIS messages. If free space is less than this figure, Stratagy tells the calling AMIS
system that the flash drive is full.
Default: 5 (To enable, remove the starting # and set the value.)
amis_enabled Whether Stratagy processes incoming AMIS calls.
True: Stratagy processes incoming AMIS calls.
False: AMIS calls told that this node is not accepting network calls.
Possible values: true, false
Default: true (To enable, remove the starting # and set the value.)
amis_ltm User ID to use for the AMIS Loopback mailbox. User ID mailbox other AMIS nodes
can use for testing the network. Any AMIS message to this mailbox is sent back to
the sender, if accessible from this Stratagy system.
Possible values: valid User ID. The single quotes are required.
Default: ‘989’ (To enable, remove the starting # and set the value.)
amis_max_attempts Special retry count that keeps track of how many times this system was called
without a successful handshake after answer. If the count is exceeded, then the
gateway is disabled.
Possible values: 1~5
Default: 3 (To enable, remove the starting # and set the value.)
amis_max_node Maximum number of remote nodes (Gateway and Proxy mailboxes) that can be in
the network. If the actual number exceeds this value, some nodes are inaccessible.
Possible values: 1~256
Default: 256 (To enable, remove the starting # and set the value.)
amis_rna Enables the ring no answer time-out to be increased to enable slow answers from
AMIS systems.
Possible values: 1~9
Default: 3 (To enable, remove the starting # and set the value.)
area_code Area code of the resident Stratagy system. Single quotes are required.
Default: ’ ’ (To enable, remove the starting # and set the value.)
country_code Country code of the resident Stratagy system. Single quotes are required.
Default: ‘1’ (North America)
(To enable, remove the starting # and set the value.)
local_amis_node User ID of the Gateway box that represents the local AMIS node. Messages
addressed to this node are delivered directly to the real local box number instead of
being shipped out on the network.
Possible values: valid User ID.
Default: 0 (To enable, remove the starting # and set the value.)
phone_number Local telephone number of the resident Stratagy system. Single quotes are
required.
Default: ‘ ’ (To enable, remove the starting # and set the value.)
unknown_node_action Whether Stratagy accepts messages from unknown AMIS nodes.
1: Refuses to accept messages.
2: Delivers this message even though replies are impossible.
Possible values: 1, 2
Default: 2 (To enable, remove the starting # and set the value.)
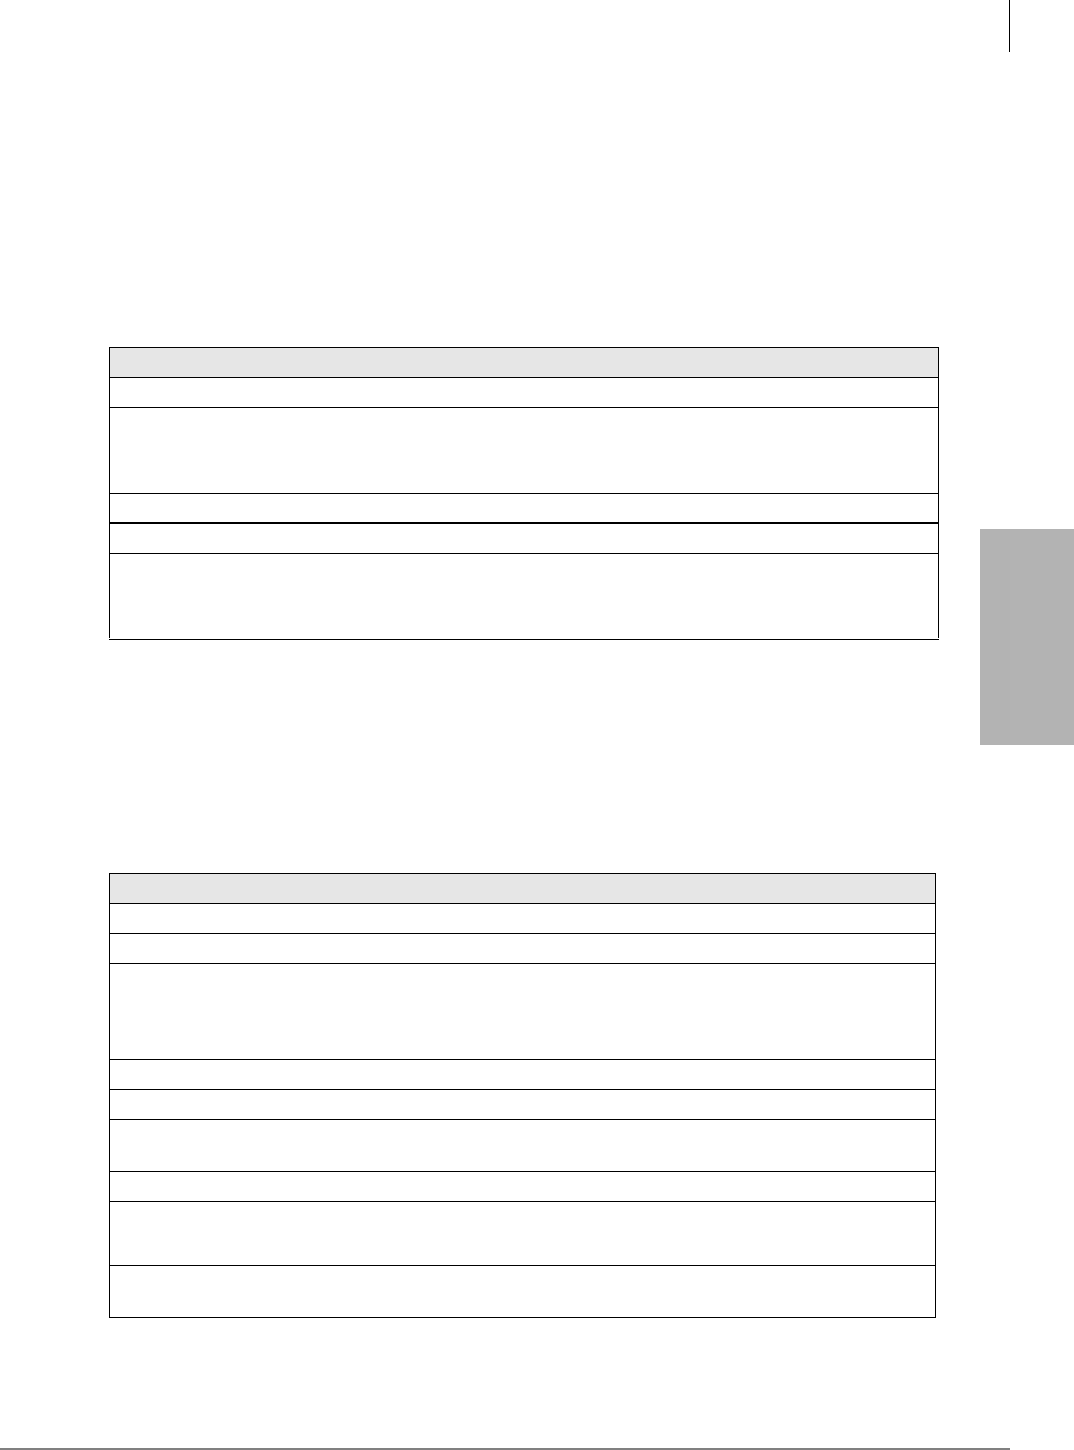
AMIS Networking
Configuring Stratagy for AMIS
Stratagy I&M 06/02 9-5
AMIS Networking
Step 2: Create and Program AMIS Mailboxes
Messages are forwarded to, or received from, the remote User ID mailboxes via the Gateway or
Proxy mailboxes. The Gateway and Proxy mailboxes must be programmed for AMIS networking
to operate properly and involves defining Users and Notify Menu fields. Stratagy processes the
Notify record information, including the KN( ) token programmed in the Method field, to perform
AMIS out-dialing and access the AMIS network.
➤To create and program a Gateway mailbox
1. From the Users Menu, define the following Users Menu fields (see Chapter 6 – Menus).
2. From the Notify Menu, highlight the first available <Disabled> description line and press the
spacebar to toggle the Notify Record Options Enabled field to YES. (See “Notify Menu” on
page 6-27.)
3. Press ALT+T to select Templates.
4. Highlight the AMIS DELIVERY template and press Enter.
5. Define the Notify Menu fields:
6. Press Alt+S to save the record.
User ID Any valid User ID
Comment GATEWAY MAILBOX and any other identifying information.
Extension Play greeting that explains that this is a network mailbox then route the call to hang
up or another menu.
Example @P(G1)H
Store Messages YES
Gateway Box YES
AmisSysNumberTelephone number remote node uses as identification. The format (including #
signs): 1#area code#telephone number#.
Example 1#714#5551212#
MTWTFSS Toggle between Y and N for days AMIS should attempt to call the remote node.
From Time for Stratagy to start attempting AMIS call outs.
To Time for Stratagy to stop attempting AMIS call outs.
Notify After Number of minutes after the message has been sent to the Gateway mailbox
should Stratagy attempt to contact the remote node. If this is the only record in the
Notify Menu, uses the default value 0. If other records appear in this Notify Menu,
set Notify After to a different number of minutes for each record to avoid conflicts.
Continue Every Number of minutes between each retry attempt to contact the remote node.
Max Times Number of times Stratagy should attempt to contact the remote node.
Title AMIS DELIVERY. Comment or reminder that identifies the call out definition or
destination.
Type NORMAL (standard) or URGENT (optional), as appropriate.
Method Program the KN( ) token inserting the line access code and the %V variable.
ExampleKN(“9,%V”). (For details see Chapter 7 – Token Programming.)
Variable Value Stratagy inserts in place of %V in the Method field. Enter the telephone
number of the remote node. Programming Language Tokens.)

AMIS Networking
Configuring Stratagy for AMIS
9-6 Stratagy I&M 06/02
7. Access the User ID mailbox via telephone and record Greeting 1: <explains that this is a
network mailbox>.
➤To create and program a Proxy mailbox
1. From the Users Menu, define the following Users Menu fields (see Chapter 6 – Menus).
2. From the Notify Menu, highlight the first available <Disabled> description line and press the
spacebar to toggle the Notify Record Options Enabled field to YES. (See “Notify Menu” on
page 6-27 .)
3. Press ALT+T to select Templates.
4. Highlight the AMIS PROXY template and press Enter.
5. Define the following Notify Menu fields:
6. Press Alt+S to save the record.
7. Have the owner of the mailbox record a personal greeting for the Proxy mailbox.
User ID Any valid User ID or the same number as the remote mailbox, providing there are no
conflicts with existing User ID mailboxes on the local system.
Comment PROXY MAILBOX and any other identifying information.
Do Not Disturb ON
Store Messages YES
Gateway Box YES
AmisSysNumberTelephone number remote node uses as identification. The format (including #
signs)1#area code#telephone number#.
Example 1#714#5551212#.
MTWTFSS Toggle between Y and N for days AMIS should attempt to call the remote node.
From Time for Stratagy to start attempting AMIS call outs.
To Time for Stratagy to stop attempting AMIS call outs.
Notify After Number of minutes after the message has been sent to the Gateway mailbox should
Stratagy attempt to contact the remote node. If this is the only record in the Notify
Menu, uses the default value 0. If other records appear in this Notify Menu, set
Notify After to a different number of minutes for each record to avoid conflicts.
Continue Every Number of minutes between each retry attempt to contact the remote node.
Max Times Number of times Stratagy should attempt to contact the remote node.
Title AMIS PROXY. Comment or reminder that identifies the call out definition or
destination.
Type NORMAL (standard) or URGENT (optional), as appropriate.
Method Program the KN( ) token inserting the line access code, the %V variable, and the
number of the User ID mailbox on the remote node. If the number is the same as the
Proxy mailbox on the local Stratagy, then use %U (replaces with current User ID
number).
Example KN(“9,%V,%U”).
Variable Value Stratagy inserts in place of %V in the Method field. Type the telephone
number of the remote node.

AMIS Networking
Testing AMIS
Stratagy I&M 06/02 9-7
AMIS Networking
Testing AMIS
One method of testing AMIS involves using the AMIS Loopback User ID (default 989). When
enabled using the Stratagy system configuration parameter amis_ltm, this User ID can be used by
other AMIS nodes for testing the network. Stratagy sends any AMIS message to this User ID back
to the sender, assuming the sending system is accessible from the Stratagy system.
A line monitor can be used to analyze AMIS transmissions. However, to validate AMIS completely,
an in-depth knowledge of AMIS Analog Protocol is required.
AMIS Operation
Note AMIS messages can only be sent from User ID mailboxes.
AMIS networking operation consists of the following steps:
➤To send a message over the AMIS network
1. The user logs into his/her mailbox.
2. From the Main Menu, the user presses for the Send Messages menu.
3. The user specifies the destination address as one of the following:
•node + mailbox number – if the address is a unique combination of the Gateway mailbox
and destination mailbox.
•node + + mailbox number – if the address is not a unique combination of the Gateway
mailbox and destination mailbox.
•Proxy mailbox number – if addressing the message to a Proxy mailbox.
where:
NODE = up to eight digits
remote mailbox number = up to 16 digits
4. The user records the message and presses # to stop recording.
5. The user presses again to send the message to the specified node.
Once the message has been sent, Stratagy dials the remote System Identification Number. The
message is placed in the remote mailbox and the user is returned to the Main Menu. If the
transmission fails, Stratagy retries up to nine times before returning the message back to the user
for one of the following reasons:
•Remote node does not answer
•Remote node is busy
•Message is too long
•Node’s phone number is incorrect
•Mailbox number does not exist
•Mailbox not accepting messages
•Mailbox is full
•Protocol error

AMIS Networking
AmisNodeList
9-8 Stratagy I&M 06/02
Private/Urgent Message Handling
Because AMIS does not support Special Delivery Options, the Stratagy proprietary options such as
“private” or “urgent” are striped off when the message is sent via AMIS. These messages at the
receiving mailbox are handled as normal messages.
However by using the Notify record, Stratagy can use the “urgent” option to determine the timing
of the transmission. For example, normal messages can be delivered after 5:00 p.m. and the urgent
messages immediately.
Notification
Each remote node is represented by a Gateway mailbox in the local node. The node number is the
mailbox’s User ID. When a message is addressed to a remote node, it is placed in the Gateway
mailbox, with information in its header that identifies the remote box number, and the fact that it is
an AMIS-deliverable message.
A notify task is started to deliver messages to the remote site. There can be several notification tasks
for a Gateway mailbox. For each notification task, a maximum of nine messages can be transmitted.
The number of messages that can be stored in the Gateway mailbox is set by the system maximum.
If a notify task was started as the result of an urgent message being placed in the Gateway mailbox,
it is only allowed to deliver the urgent message to the remote node. The urgent status is stripped
from the message when it is sent.
AMIS Notification Templates
Two templates exist:
•AMIS DELIVERY – for Gateway mailboxes
•AMIS PROXY – for Proxy mailboxes
AMIS Tokens
The notification token program in a Gateway mailbox must use an “AMIS delivery” KN( ) token
which is responsible for actually sending the message to the remote site.
Note For detailed information on the AMIS token or templates, see Steps 1 and 2 under
“Configuring Stratagy for AMIS” on page 9-3.
AmisNodeList
This is a list of known nodes in the network. Each entry on the list contains the node’s User ID, a
comment identifying the node and the AmisSystem Number (the node number plus the node’s
System Identification Number).
The list displays the:
•Mailboxes that have the Gateway Box field set to Yes
•Mailbox number of AMIS mailboxes
•Comments of AMIS mailboxes
•AMIS system number
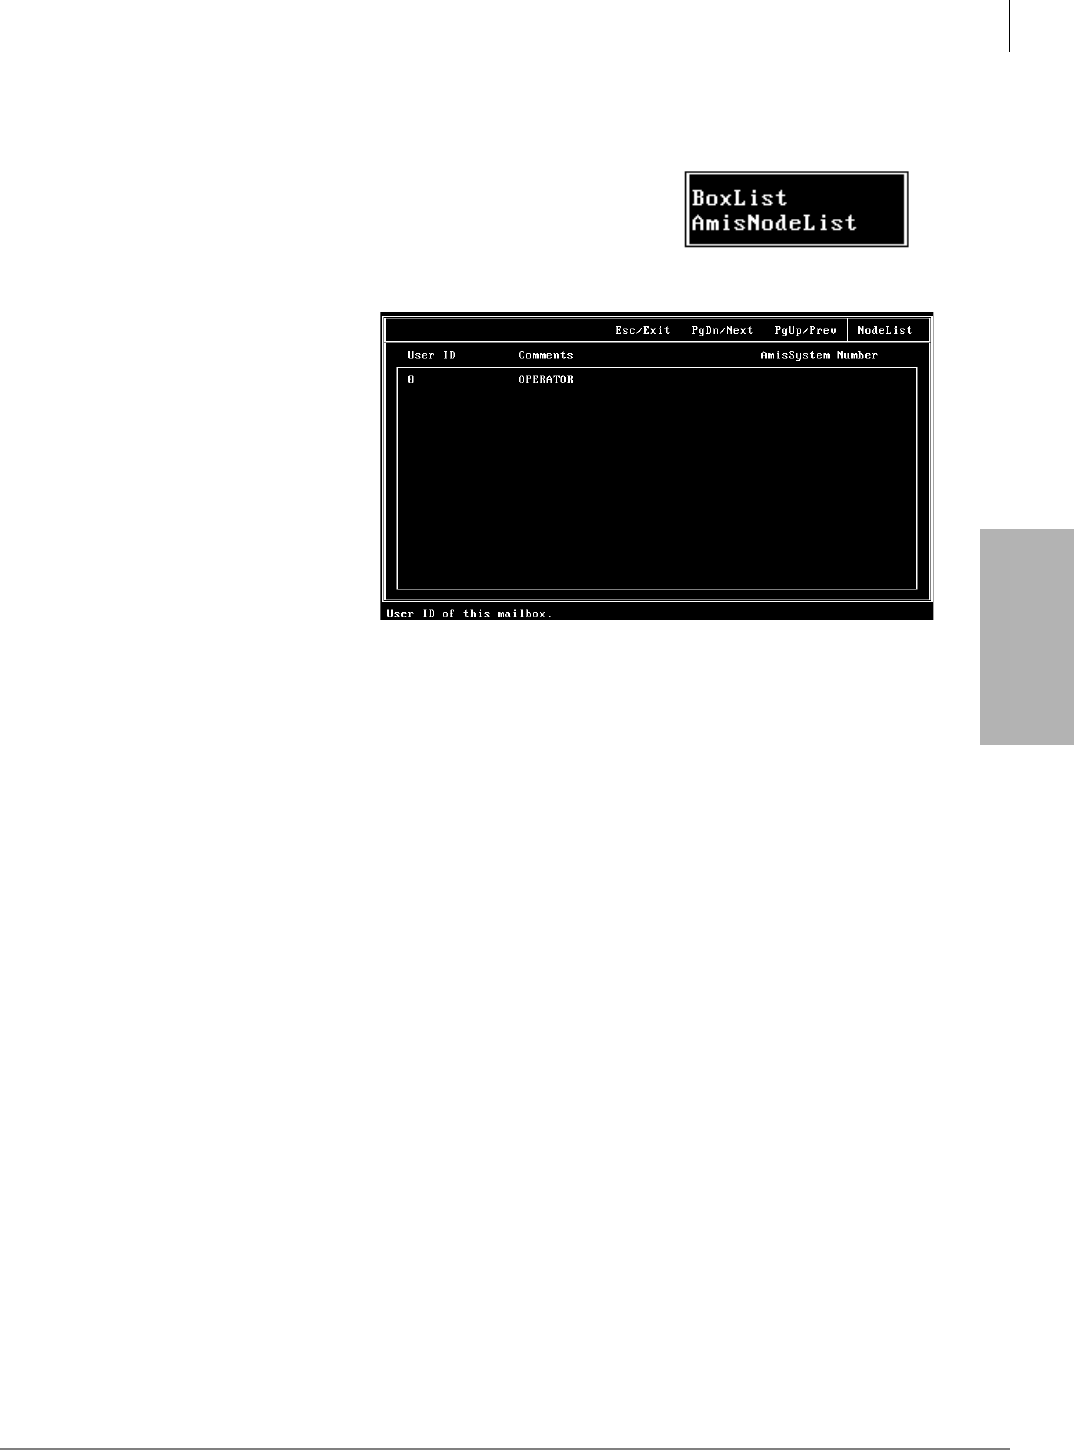
AMIS Networking
AmisNodeList
Stratagy I&M 06/02 9-9
AMIS Networking
View AMIS Node User IDs
1. Press Alt+T.
2. Use the arrow keys (↑↓) to highlight AmisNodeList.
3. Press Enter. AMIS node
User IDs list in numerical
order. For field definitions,
see the “Options Screen” on
page 6-8 for screen fields
descriptions.
4. Press Esc. The Users Menu
displays.
Access Specific User ID from AmisNodeList Screen
1. From the NodeList screen, use the arrow keys (↑↓) to highlight the User ID.
2. Press Enter. The Users Menu displays with this User ID’s information.
4064
4670

AMIS Networking
AmisNodeList
9-10 Stratagy I&M 06/02
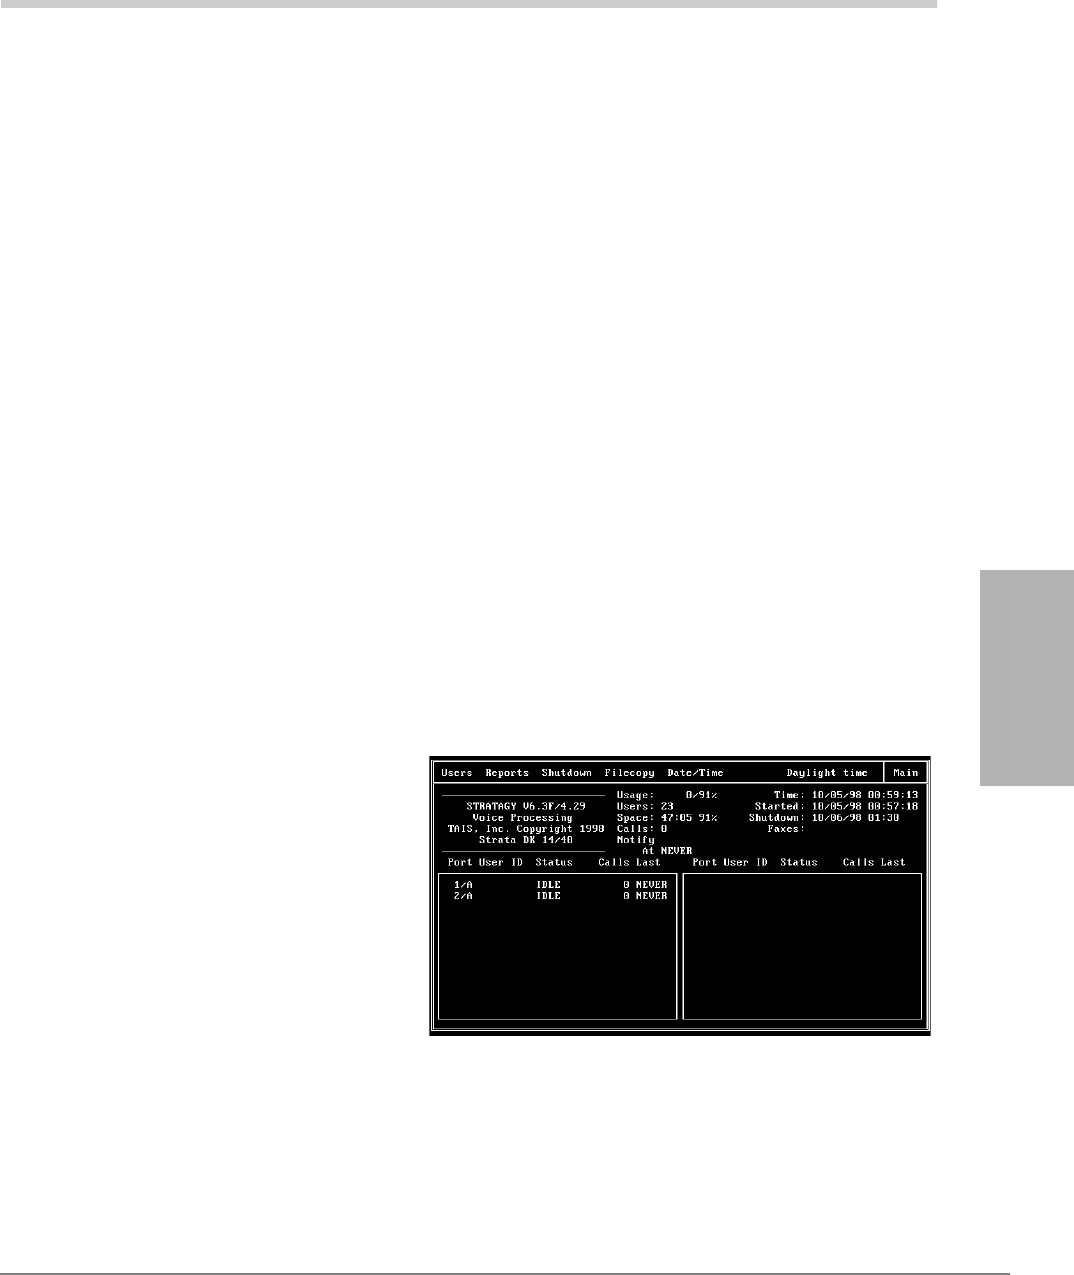
Stratagy I&M 06/02 10-1
System Reports
System Reports 10
Tracking the Stratagy system involves analyzing system operation and User ID activity. This
chapter discusses:
•View system/user activity
•Listen to system activity
•Report types
•Report definitions
•Run, view, print a report
•Save report to floppy disk
•Automatic report generation
Note Stratagy is also equipped with a diagnostic tool called Trace which assists you in
troubleshooting applications. See Chapter 11 – Maintenance, Upgrades and
Troubleshooting for information.
View System/User Activity
You can track system and user activity on the Stratagy system by viewing the Main and Users
Menus, respectively.
Main Menu Statistics
The Main Menu displays (shown at
right) the system activity statistics.
The menu provides:
•Port activity and CPU usage
•Number of defined User ID
mailboxes
•Available flash drive space in time
and percent of the flash drive
•Number of calls answered since the
system started
•Notify activity
•Date and time system last started
•Next date and time of scheduled shutdown
See Chapter 3 – Access and Use Stratagy for details.
4061
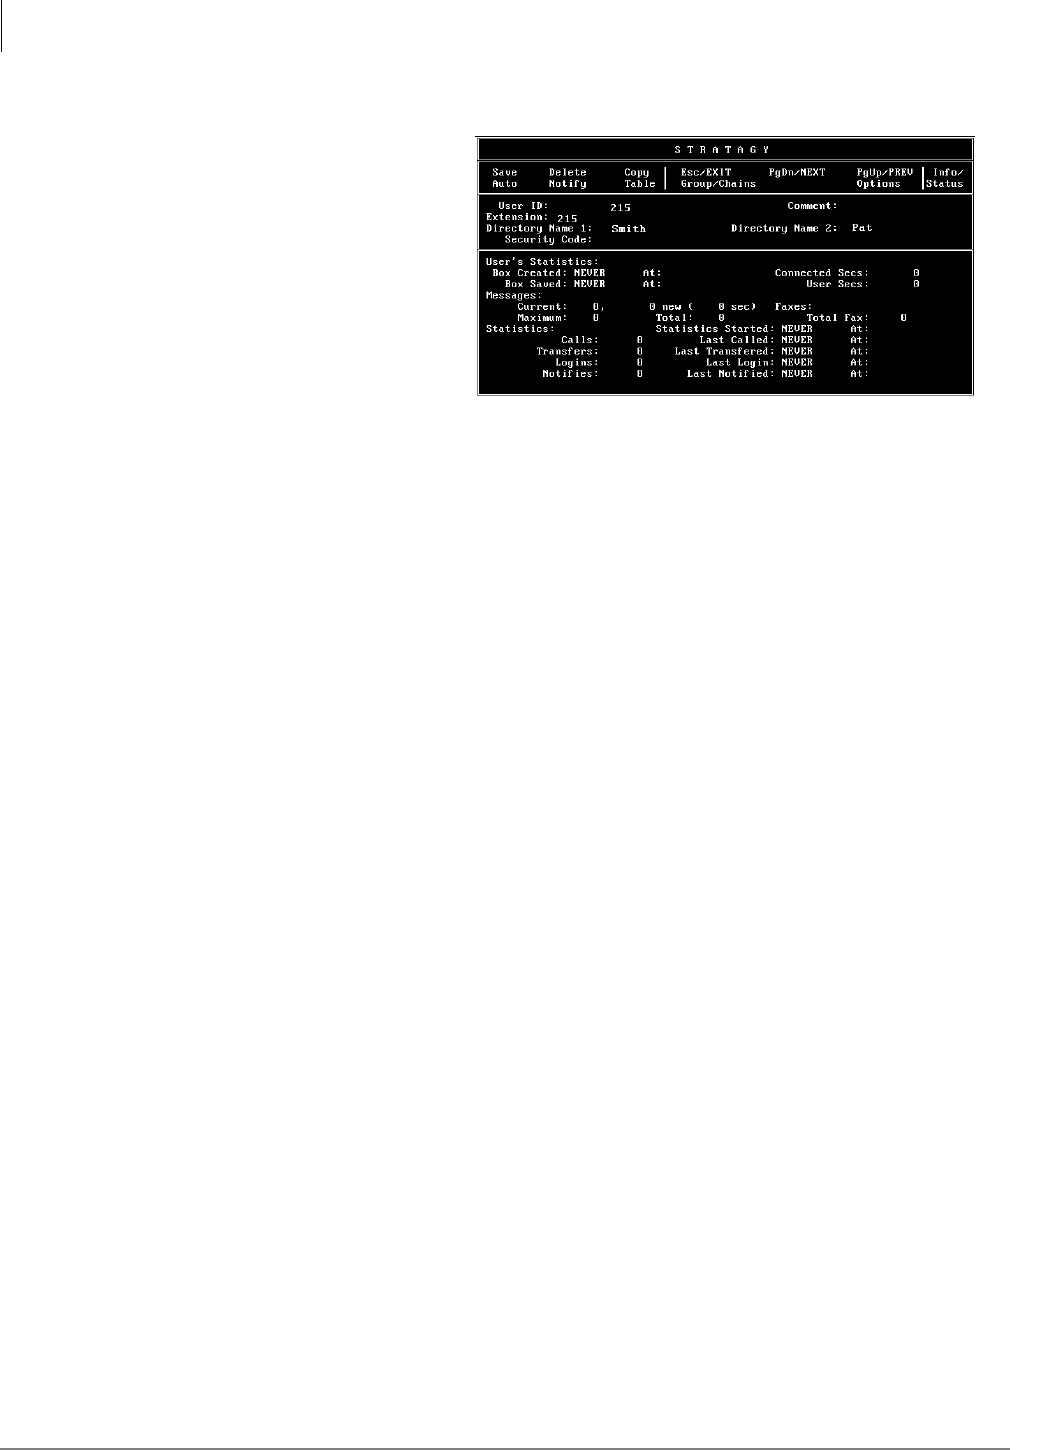
System Reports
Listen to System Activity
10-2 Stratagy I&M 06/02
Users Menu Statistics
The Users Menu (Info/Status
Screen) displays (shown at
right) the User ID statistics.
In addition to the screen display,
a report can also be generated
based on the statistics shown.
(“Report Definitions” on page
10-3.) The menu provides:
•Date and time User ID was
created
•Date and time User ID was
last modified
•When date and time statistics were last reset
•Message activity
•Caller activity
•User activity
See Chapter 6 – Menus for details on the statistics.
Listen to System Activity
When logged on to the System Administrator User ID mailbox, you can select Review System
Status. Stratagy plays (verbally) the status information:
•Percent of flash drive space remaining
•Number of ports in use
•System date and time
See Chapter 8 – Customization Examples for details.
Report Types
You can generate a variety of reports that provide information about the Stratagy system and User
ID mailboxes.
•Log information using the Stratagy Filecopy option to import a log file into a program on another
PC (see “Log Information” on page 10-2 for details)
•Users Menu information using the Stratagy Reports Menu
Log Information
If you need more system or User ID information, Stratagy provides the following logs.
•Message – Logs every received message and every User ID that checks for messages along with
the DTMF entered. Includes date and time for each entry.
•Stratagy (System) – Logs startup, execution error, and shutdown information and system
actions.
4063

System Reports
Report Definitions
Stratagy I&M 06/02 10-3
System Reports
•User ID – Logs the date, time, and User ID number whenever a User ID is accessed via DTMF.
Useful for creating a data file which can later be analyzed for call distributions and accesses by
dates, days, and times.
•Fax – (not supported)
•Trace.out/Trace.old – Logs system activity while Stratagy is active.
•Ctask.log/Ctask.old – Logs debugging information to a file if the system encounters a fatal error
caused by an invalid pointer.
See Chapter 11 – Maintenance, Upgrades and Troubleshooting and Chapter 4 – Configure Stratagy
for instructions on activating and using these log files.
Users Menu Information
With the Reports Menu, you can generate a variety of reports that provide information about the
Stratagy system and User ID mailboxes.
Reports may be run for a specific User ID, a range of User IDs, or all active User IDs. When you
run a report, Stratagy compiles information according to the report definition for the User ID
mailboxes selected.
After running a report, you can view, print, or save the report to a file. Viewing and printing is
restricted to 80 characters across; outputting to a file is not restricted.
Report Definitions
Defining the contents of a report involves selecting the Report Definition Fields from the Reports
Menu. This report definition can be saved for future reports you want defined using this format, and
once saved, can be used to generate a report automatically at a specified time each day.
Once a report definition is created, you can run a report using the definition. Stratagy selects and
sorts the report information according to the report definition (See “Run Report” on page 10-5).
After running a report, you can view, print, or save the report to a file.

System Reports
Report Definitions
10-4 Stratagy I&M 06/02
Create Report Definitions
1. From the Main Menu, press Alt+R.
2. Type the password and press Enter. (The default password is Stratagy, with the first letter
uppercase.) The Reports screen displays (see Figure 10-2).
3. Number the Report Definition Fields in the column order you want them to appear on the
report.
For example, if you want a report listing the User ID, Calls Last, and Messages Maximum from
left to right, the values for these fields would be:
User ID: 1
Messages Maximum: 3
Calls Last: 2
4. Select Save by pressing Alt+S.
Note Only report definitions which you plan on using again should be saved.
5. Enter the name and press Enter.
Report names may be up to eight
alphanumeric characters long (A~Z,
0~9) and are not case sensitive, e.g.,
report names LISTING, Listing, and
listing all reference the same file. The
Reports Menu displays.
6. When you have finished with the Reports Menu, press Esc. The Main Menu displays.
Load Exist Report Definition
1. From the Reports screen, press Alt+L.
2. Type the name of the report definition
...or press F2 to display a list of saved
report definitions. Highlight the report
name and press Enter.
3. Press Enter again. The Reports Menu
displays the report definition selection.
4216
4070
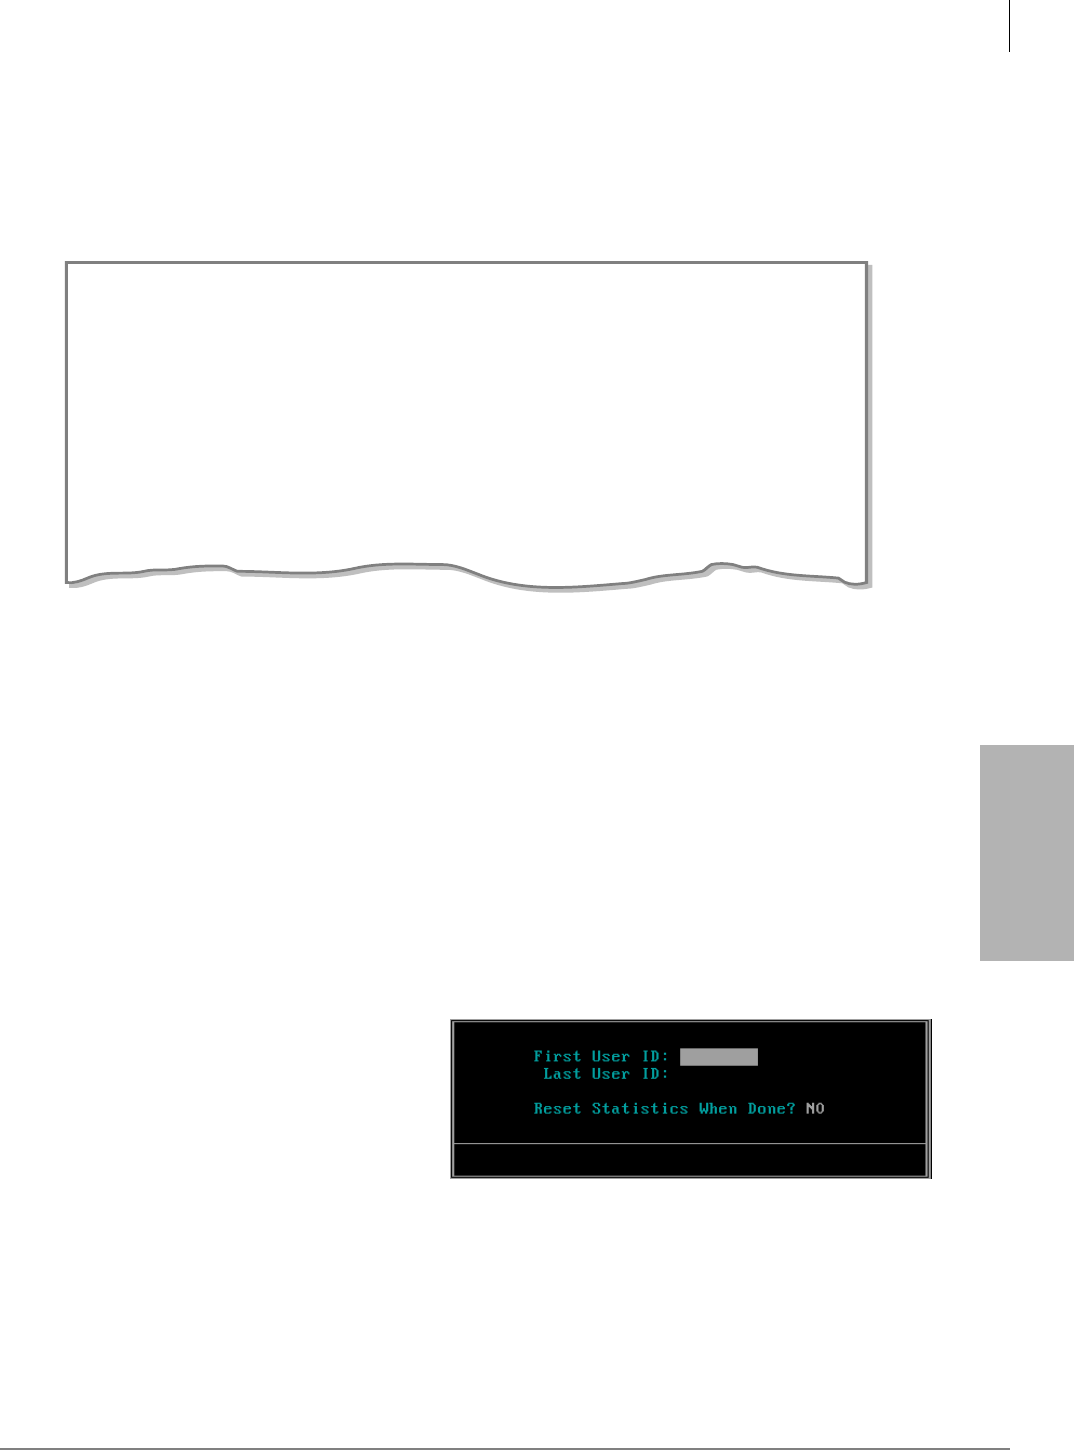
System Reports
Run Report
Stratagy I&M 06/02 10-5
System Reports
Run Report
When you run a report, Stratagy compiles the report according to the report definition and User
ID mailboxes you selected. The reports are compiled in columns, displaying each column’s
title across the top of the page. User IDs are listed in increasing order. See Figure 10-1 for a
sample report.
Figure 10-1 Sample Report
After running the report, Stratagy stores it in a temporary file on the flash drive. When the next
report is run, the previous report file is overwritten.
Until another report is run, you can view, print, or save the report to a file on a floppy disk.
Note Reports are run and saved on the Stratagy system but must be file copied to the remote PC
using the Stratagy Admin software to view or print them.
1. From the Reports screen, create a report definition (see “Create Report Definitions” on page
10-4)
...or load an existing definition (see “Load Exist Report Definition” on page 10-4).
The Report screen with the definition displays.
2. Press Alt+R.
3. Type the range of User IDs you want
to include in the report or leave both
fields blank to access all User IDs.
4. In the Reset Statistics When Done
field, press Enter to accept the NO
default. Stratagy does not reset the
statistics.
...or type YES and press Enter.
Stratagy initializes the statistics for each User ID in the selected range to 0.
Important! If you reset the statistics, Stratagy cannot retrieve the old values after running the
report.
The report starts running. While running, Stratagy displays the User ID currently being
processed. When Stratagy finishes compiling the report, the Reports Menu displays.
Page 1
User ID
200
201
202
203
204
200
201
202
203
204
0
8
14
1
0
Smith
Henry
Adams
Chan
Thomas
Joe
John
Bill
George
Steve
Extension
Directory
Name 1
Directory
Name 2
#
Mesgs
Stratagy Report Mon Mar 29 18:02:51 1996
2493
4217

System Reports
View Report
10-6 Stratagy I&M 06/02
View Report
1. From the Reports Menu, press Alt+V.
Note Viewing is restricted to 80 characters across. If your report is too wide for the screen, only
the columns that fit display.
2. Use the arrow keys (↑↓) or Page Up and Page Down to view different parts of the report.
3. Press Esc to exit the report.
Print Report
To use the Print option, the Stratagy system Configuration parameter 1pt_port must define the
printer port Stratagy should use. See Chapter 4 – Configure Stratagy.
➤From the Reports Menu, press Alt+P to select Print.
Note Printing is restricted to 80 characters across.
Save Report to Floppy Disk
By saving the report to a floppy disk, you can read or import it to another PC that has a 1.44 MB
floppy-disk drive. Since Stratagy creates reports in standard ASCII format, you can edit and import
reports into programs such as word processors, spreadsheets, and databases.
Important! Do not output the report to a permanent file on Stratagy’s drive. Saving reports to
the flash drive can lead to outdated files that are never deleted and an inefficient use
of drive space that is needed for voice processing.
1. Place a formatted standard IBM-compatible 3.5-inch 1.44 MB floppy disk in drive A: of the
Stratagy Admin PC.
2. From the Main Menu, press Alt+T to select the Tools option.
3. Select Filecopy form the Tools Menu.
4. In the Source System field (where the file currently resides), press F2 to display a pop-up box
of selections. Highlight PC and press Enter.
5. In the Copy From: field, type the directory and file names (e.g., A:\report.txt).
6. In the Copy To: field, type report.txt and press Enter. The file copies to the Stratagy
Admin PC’s floppy-disk drive (drive A:).
Automatic Report Generation
Using a saved report definition, you can configure Stratagy to generate automatically a report at a
specified time each day. See Chapter 4 – Configure Stratagy for detailed instructions on modifying
parameters.
➤To generate automatically a report using the Stratagy Configuration Utility
1. Set the auto_report parameter to active and specify the name of the report to be generated
automatically. For example, if the name of the saved report definition is daily.rpt, the parameter
is set auto_report ‘daily.rpt’.
2. Set the auto_report_time parameter to active and specify the time of day to generate the report
each day. For example, if the time is 2:15 p.m., the parameter is set auto_report_time 1415.

System Reports
Report Menu Field Descriptions
Stratagy I&M 06/02 10-7
System Reports
Report Menu Field Descriptions
Figure 10-2 Reports Menu with Sample Data
Table 10-1 Reports Menu Screen Fields
Menu Bar
Access Options (select)
Load Press Alt+L to load a previously saved report definition.
Save Press Alt+S to save current report definition.
Run Press Alt+R to compile a report using the report definition you just created or loaded
and the User ID range selected.
View Press Alt+V to display the last report you ran.
Print Press Alt+P to print the last report you ran.
File Press Alt+F to output the last report you ran to a file.
Esc/Exit Press Esc to exit the Reports Menu and return to the Main Menu.
Report Definition Fields
(Select to create a report definition: See Chapter 6 – Menus for field definitions.)
3257
4069
Report
Definition
Fields
Menu Bar

System Reports
Report Menu Field Descriptions
10-8 Stratagy I&M 06/02

Stratagy I&M 06/02 11-1
Maintenance,
Upgrades and
Maintenance, Upgrades
and Troubleshooting 11
This chapter covers the maintenance and upgrade procedures for the Stratagy system. In addition,
it gives you procedures to identify and correct faults within the system.
Maintenance and Upgrades
The Stratagy system’s integrated design makes it easy to maintain and relatively maintenance free.
Since the serial communications ports, the RJ-11C voice port connectors and the flash memory are
all resident on the motherboard, the need for peripheral boards and internal connectors is
eliminated. In addition, the flash memory device used in the Stratagy unit contains no moving
parts, unlike traditional hard drives.
The Stratagy Admin software provides the utility and diagnostic programs to maintain and monitor
the Stratagy system.
This section discusses:
•Tools Utility – Available from the Main Menu, this utility consists of procedures that:
•Back up and restore databases and/or mailbox names and greetings
•Upgrade Stratagy software
•Retrieve trace files
•Copy files to and from the flash memory of the Stratagy and the Stratagy Admin PC’s hard
drive
•Configure the Stratagy software
•Change the Toshiba Plug and Play option
•Modify codes and integration patterns using the Telephone System Configuration option
Note For instructions on using the Stratagy System Configuration, Toshiba Plug and Play, and
Telephone System Configurations options, see Chapter 4 – Configure Stratagy.
•Stratagy Voice Port Upgrade gives you information required when requesting a port upgrade.
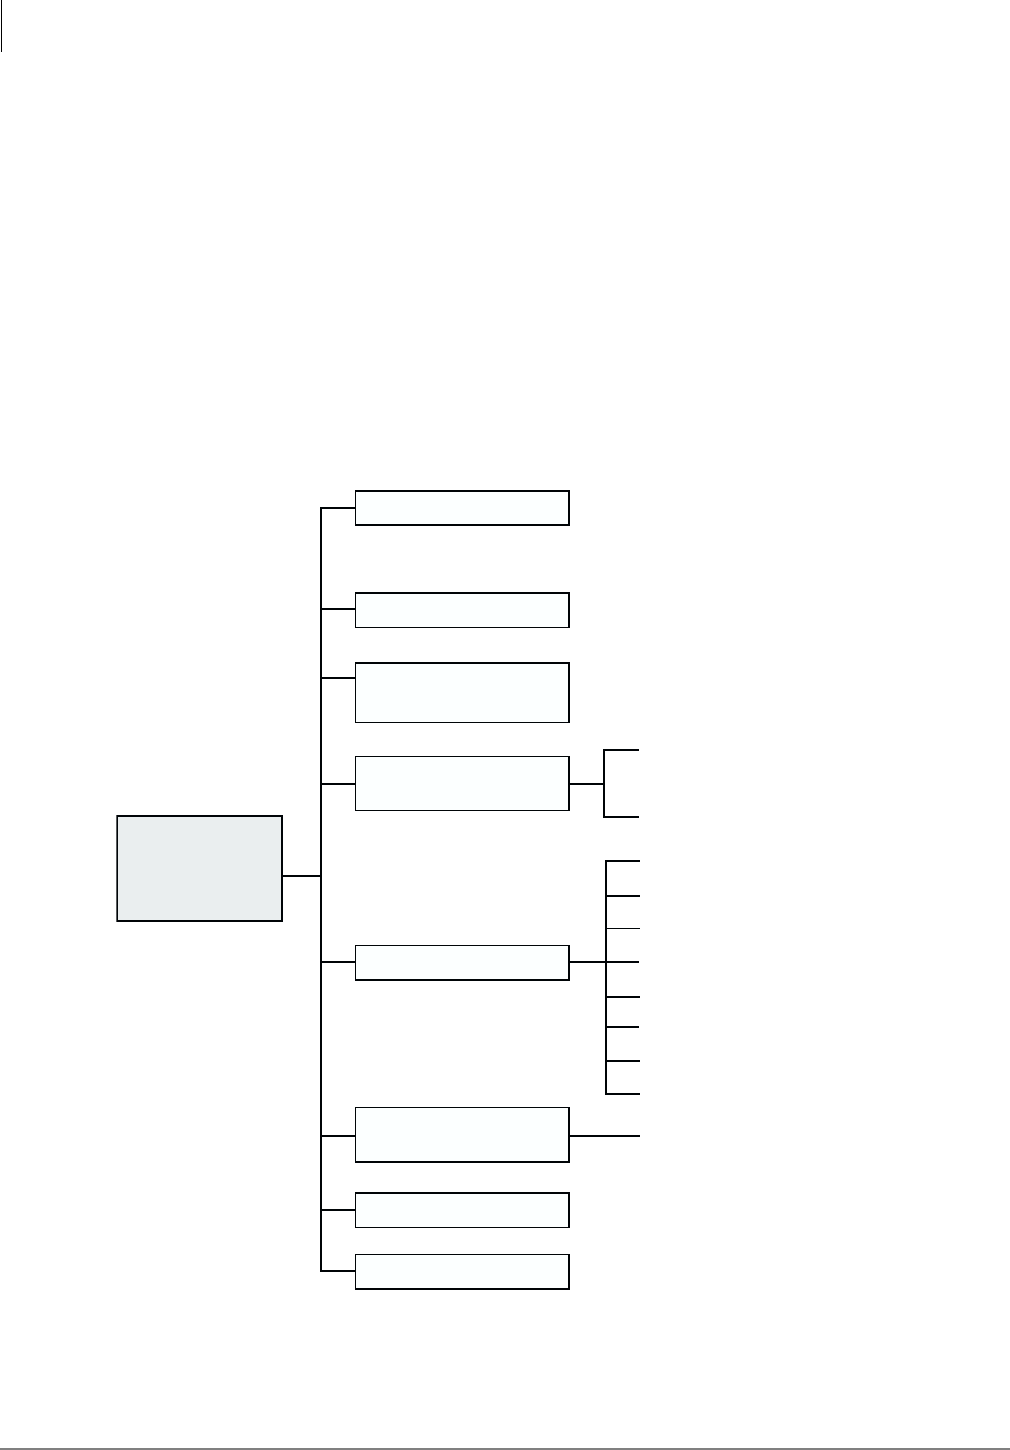
Maintenance, Upgrades and Troubleshooting
Tools
11-2 Stratagy I&M 06/02
Tools
This section discusses the following selections on the Tools menu:
•Backup Utility
•Restore Utility
•Upgrade Stratagy Software
•Retrieve Trace File
•Filecopy
Figure 11-1 shows the complete Tools menu. For the Telephone System Configuration, Toshiba
Plug and Play, and Stratagy System Configuration options, see Chapter 4 – Configure Stratagy for
details.
Figure 11-1 Navigating the Tools Menu
Tools Menu
(select menu item)
Backup Utility
Stratagy System
Configuration
Edit Telephone Systems Dial Codes
(select dial codes)
Upgrade Stratagy
Software
Toshiba Plug and Play
Restore Utility
Edit System Integration Patterns
Retrieve Trace File
Filecopy
Telephone System
Configuration
Parameters
2060
Strata DK14 (Flash only)
Strata DK14 w/SMDI (Flash only)
Strata CTX 100
Strata CTX 100 w/SMDI
Strata CTX 670 Basic
Strata CTX 670 Basic w/SMDI
Strata CTX 670 Expanded
Strata CTX 670 Expanded w/SMDI
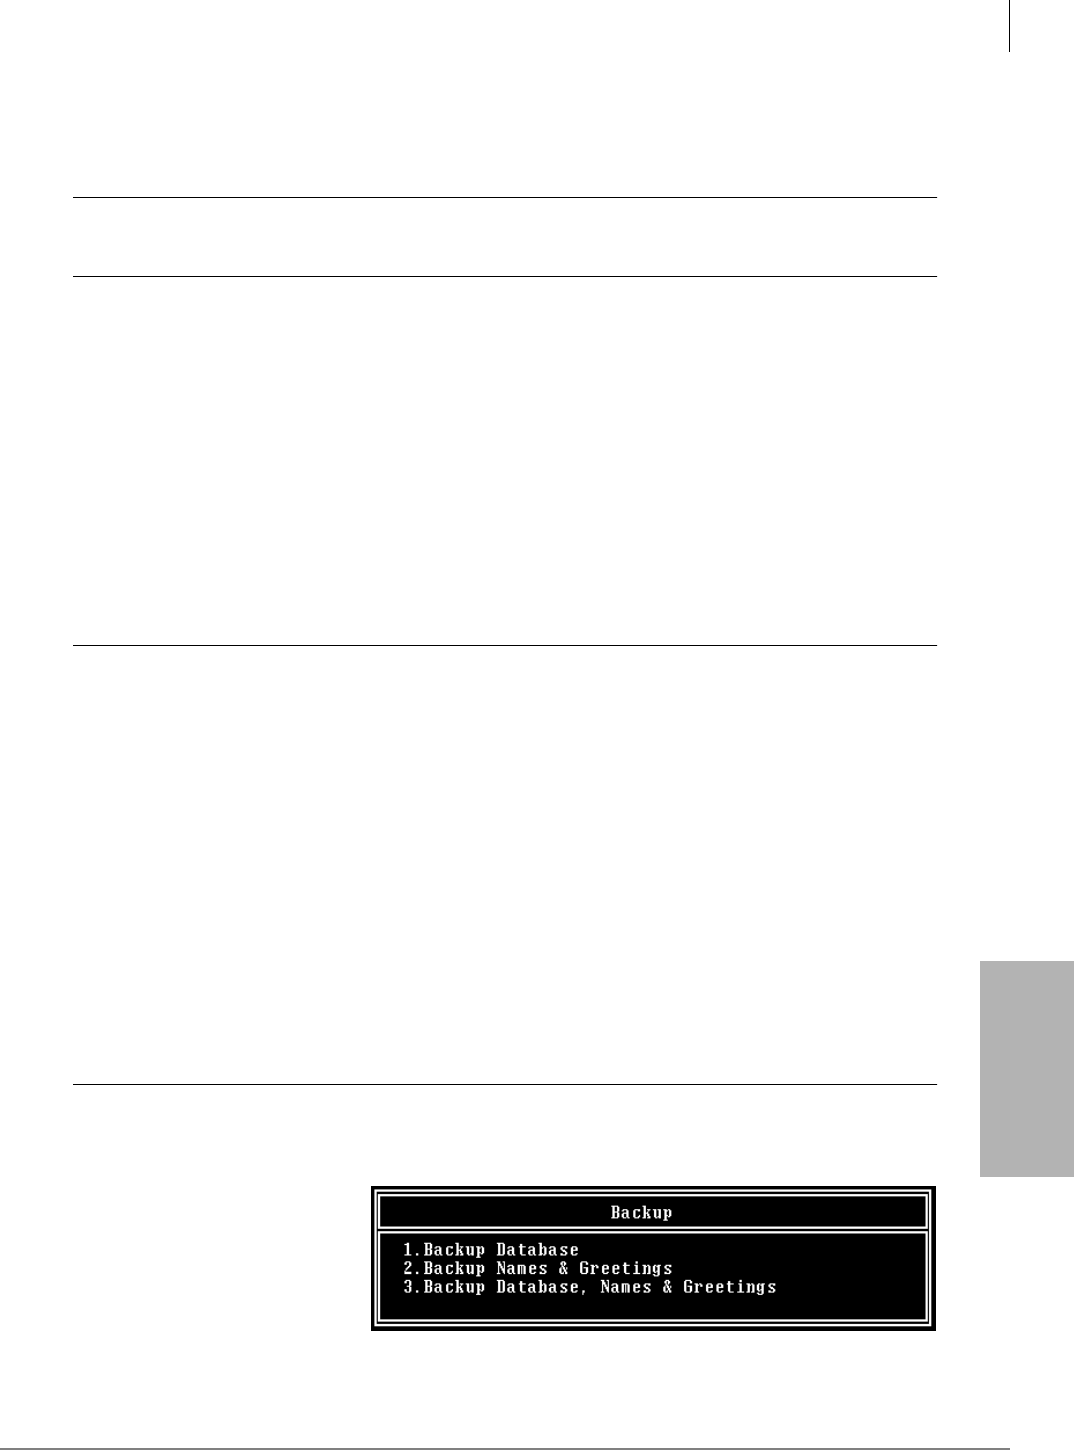
Maintenance, Upgrades and Troubleshooting
Tools
Stratagy I&M 06/02 11-3
Maintenance,
Upgrades and
Backup Utility
The Stratagy Backup Utility is used to back up information from the flash memory of the Stratagy
to the Stratagy Admin PC’s hard drive.
CAUTION! Because of possible errors that can be induced through the telephone network,
Toshiba advises that you perform the Backup Utility on site.
Backup functions are available for either a customer’s database or mailbox names and greetings, or
both. They consist of:
•Database
All mailbox settings and information, Stratagy system configuration settings, notification
templates, auto schedules, and all information concerning the selected telephone system’s
integration information.
•Mailbox names and greetings
All names and greetings that have been recorded for all programmed mailboxes (personal and
company).
Backing up your Stratagy system regularly enables you to restore the system with minimal data
loss if the system fails.
Note Messages cannot be backed up.
CAUTION! During the Backup and Restore procedures, the Stratagy cannot process calls.
When any Backup or Restore function is selected, Stratagy Admin queries the
Stratagy concerning calls currently in progress. If calls are in progress, Stratagy
Admin asks if the calls can be terminated. If call termination is selected, any
current connection is disconnected, and all ports are commanded to go off-hook
to prevent any further calls. If call termination is denied, the Backup or Restore
procedure is halted.
If the connection between the Stratagy Admin PC and Stratagy is lost,
communication can be re-established by simply shutting down and restarting
the Stratagy Admin in the usual manner.
If the connection between the Stratagy Admin PC and the IVP8 is through the
internal modem, that connection is the only one NOT dropped if a Backup or
Restore function is selected. If this type of connection is dropped, the IVP8 port
goes idle and accepts new incoming calls. Connection to the internal modem can
be re-established through this port.
Back up the Database(s)/Names/Greetings
1. From the Tools menu, press Enter.
2. From the Backup screen
(shown at right), enter the
selection number.
A second screen requesting a
backup directory displays.
3. The directory defaults to
C:\VSA3\BACKUP on the 3234
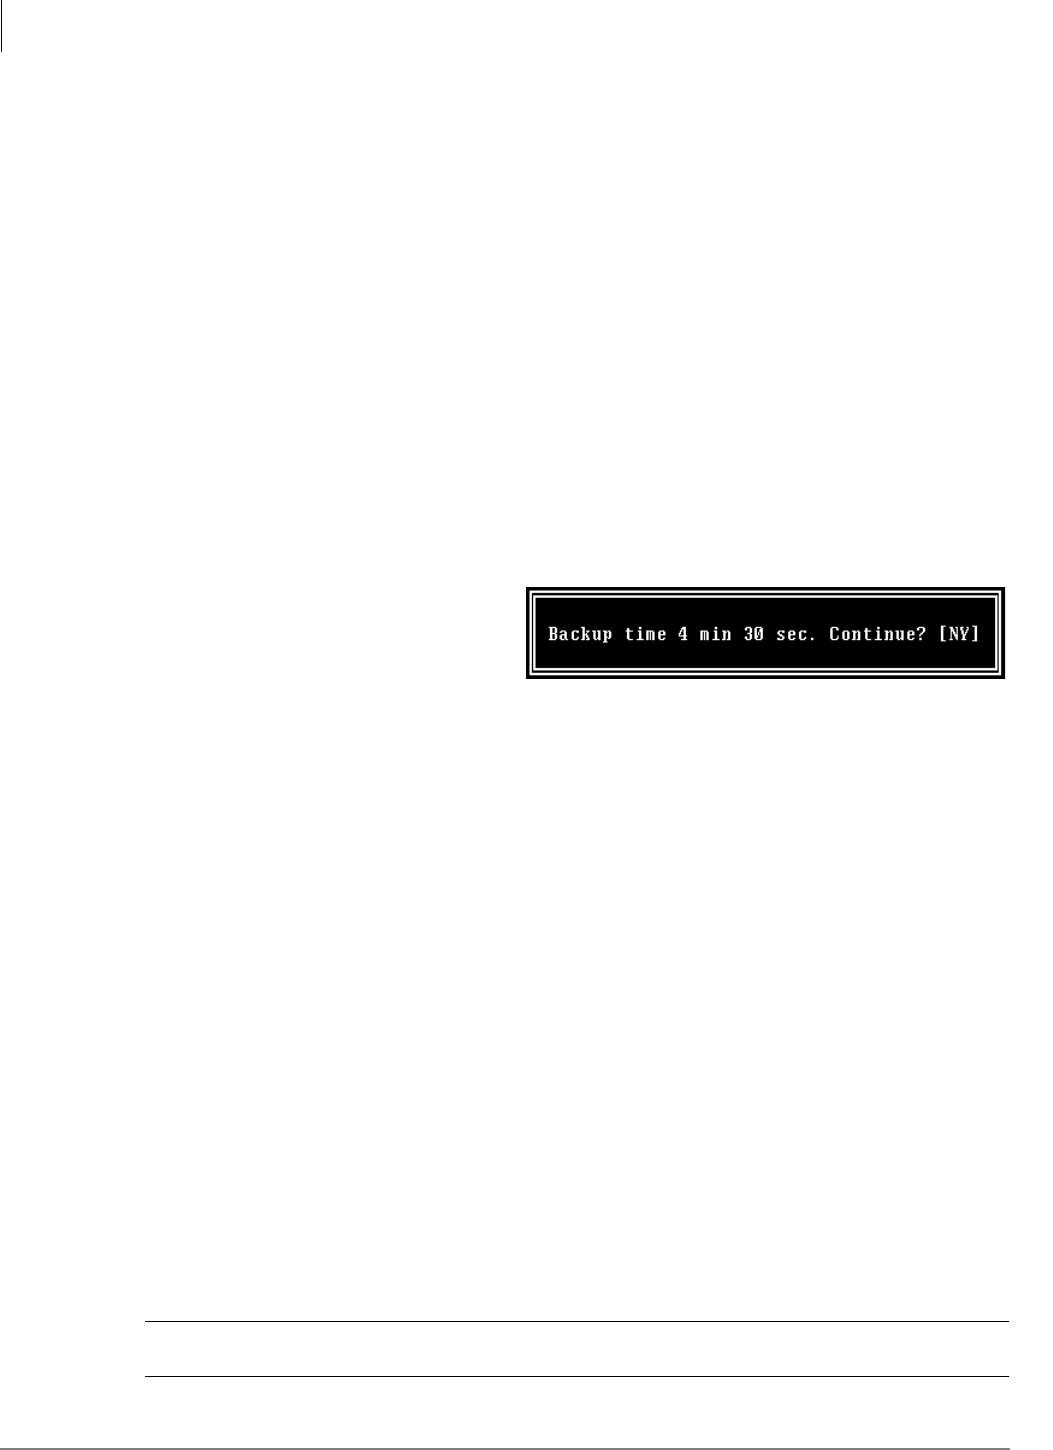
Maintenance, Upgrades and Troubleshooting
Tools
11-4 Stratagy I&M 06/02
Stratagy Admin PC for the Flash and C:\ADMIN3\BACKUP for the IVP8. If you want the
back up to be stored in a different directory, type over the default. Press Enter.
We recommend that the new directory name represent the site that is being backed up. For
example, if backing up ABC Company, you can enter the directory name
“C:\xxxx\BACKUP\ABC”.
Notes
•You cannot back up files to the Stratagy Admin PC’s floppy disk drive.
•Be sure to enter the complete path, including the drive letter.
4. (Optional) If you entered selection 2 “Backup Names & Greetings” in Step 2, you are asked to
enter a beginning and ending mailbox number. Type the mailbox numbers and press Enter
after each entry.
Note Leaving both fields blank defines all mailboxes.
...or if you entered selection 3 “Backup Database, Names & Greetings” in Step 2, press Enter
in the mailbox fields to leave them blank.
Important! This selection backs up the entire database and all names and greetings. You cannot
backup selective mailboxes.
Before the backup starts, Stratagy
Admin calculates the time the backup
takes and displays a status message
(sample shown at right).
5. Verify that the Stratagy Admin PC has enough available disk space to accommodate the backup
file.
Based on the Stratagy’s estimated Backup time (shown on your screen), use the calculations
shown below to estimate the required flash drive space.
Transmitting at: Bytes Per Second (bps) written to
flash drive:
9600 bps 800 bytes
4800 bps 400 bytes
2400 bps 200 bytes
Example: If Stratagy Admin displays a five minute backup time and communication is at 9600
bps, then:
5 minutes = 300 seconds
300 seconds x 800 bytes = 240,000 bytes
BPS values are not exact. Additional amounts have been factored in to estimate a higher
quantity of space than is actually required.
6. If your Stratagy Admin PC’s hard drive has enough available disk space, press Y to backup the
files
...or if not, press N to cancel the backup procedure.
You are asked if you want to shut down active voice channels.
7. Press Y to continue.
CAUTION! If Stratagy is not rebooted, all ports remain in an off-hook condition.
3235

Maintenance, Upgrades and Troubleshooting
Tools
Stratagy I&M 06/02 11-5
Maintenance,
Upgrades and
8. When the backup is complete, press Y to reboot Stratagy. The Stratagy Admin PC returns to the
C:\ DOS prompt.
Note You cannot reconnect to IVP8 using Stratagy Admin until the IVP8 status light is green.
Any attempt prior to that time fails.
Restore Utility
CAUTION! Because of possible errors that can be induced through the telephone network,
Toshiba advises that you perform the Restore Utility on site.
The Stratagy Restore Utility is used to restore previously backed up names, greetings and/or
database from the Stratagy Admin PC to the Stratagy.
Restore the Database(s)/Names/Greetings
CAUTION! Stratagy Voice Processing is suspended during the restore procedure. Any
existing connection is broken. For additional information on the Restore
procedure, see the Caution on page 11-3.
1. From the Tools menu, press
2.
2. From the Restore screen
(shown at right), enter the
selection number. A second
screen displays requesting
the source directory.
3. The directory defaults to C:\VSA3\BACKUP on the Stratagy Admin PC for Flash and
C:\VSA3\BACKUP for the IVP8. If you have the file(s) backed up to a different directory,
type over the default. Press Enter.
Notes
•Restoring files from the Stratagy Admin PC’s floppy disk drive is not supported.
•Be sure to enter the complete path, including the drive letter.
4. (Optional) If you entered selection 2 “Restore Names & Greetings” in Step 2, you are asked to
enter a beginning and ending mailbox number. Press Enter after each entry
Note Leaving both fields blank defines all mailboxes.
...or if you entered selection 3 “Restore Database, Names & Greetings” in Step 2, press Enter
in the mailbox number fields to leave them blank.
Important! This selection restores the entire database and all names and greetings. You cannot
restore selective mailboxes.
Before the restore starts, Stratagy Admin
calculates the time the process takes and
displays a status message (sample shown
at right).
5. Press Y to restore the files
...or N to cancel the procedure.
You are asked if you want to shut down active voice channels.
3240
3239

Maintenance, Upgrades and Troubleshooting
Tools
11-6 Stratagy I&M 06/02
6. Press Y to continue.
CAUTION! If Stratagy is not rebooted, all ports remain in an off-hook condition.
7. When the restore is complete, press Y to reboot Stratagy. The Stratagy Admin PC returns to the
C:\VSA3 DOS prompt. When the Stratagy status light becomes a solid green, Stratagy is
operational.
Note You cannot reconnect to IVP8 using Stratagy Admin until the IVP8 status light is green.
Any attempt prior to that time fails.
Upgrade Stratagy Software
Notes
•Make a copy of the new software disks as a backup. Destination disks should be scanned
first for viruses and the new disks write protected after the copies are made.
•It is recommended that you back up any database prior to starting any upgrade procedure.
•Loading the Stratagy Admin software can be done before/after connecting the Stratagy
Admin PC to the Stratagy.
To upgrade Stratagy system software, you need the correct set of upgrade disk(s).
CAUTION! Because of possible errors that can be induced through the telephone network,
Toshiba advises that you perform the Upgrade Utility on site.
1. From the Tools menu, press
3. The Upgrade screen
displays (shown at right).
2. Place the upgrade disk into
the Stratagy Admin PC’s
floppy disk drive.
3. The default directory is A:.
If your Stratagy Admin PC
uses a different drive, type
over the default. Press
Enter.
4. When the upgrade procedure is complete, press any key. The Stratagy Admin PC returns to the
DOS prompt.
Note You cannot reconnect to IVP8 using Stratagy Admin until the IVP8 status light is green.
Any attempt prior to that time fails.
3251
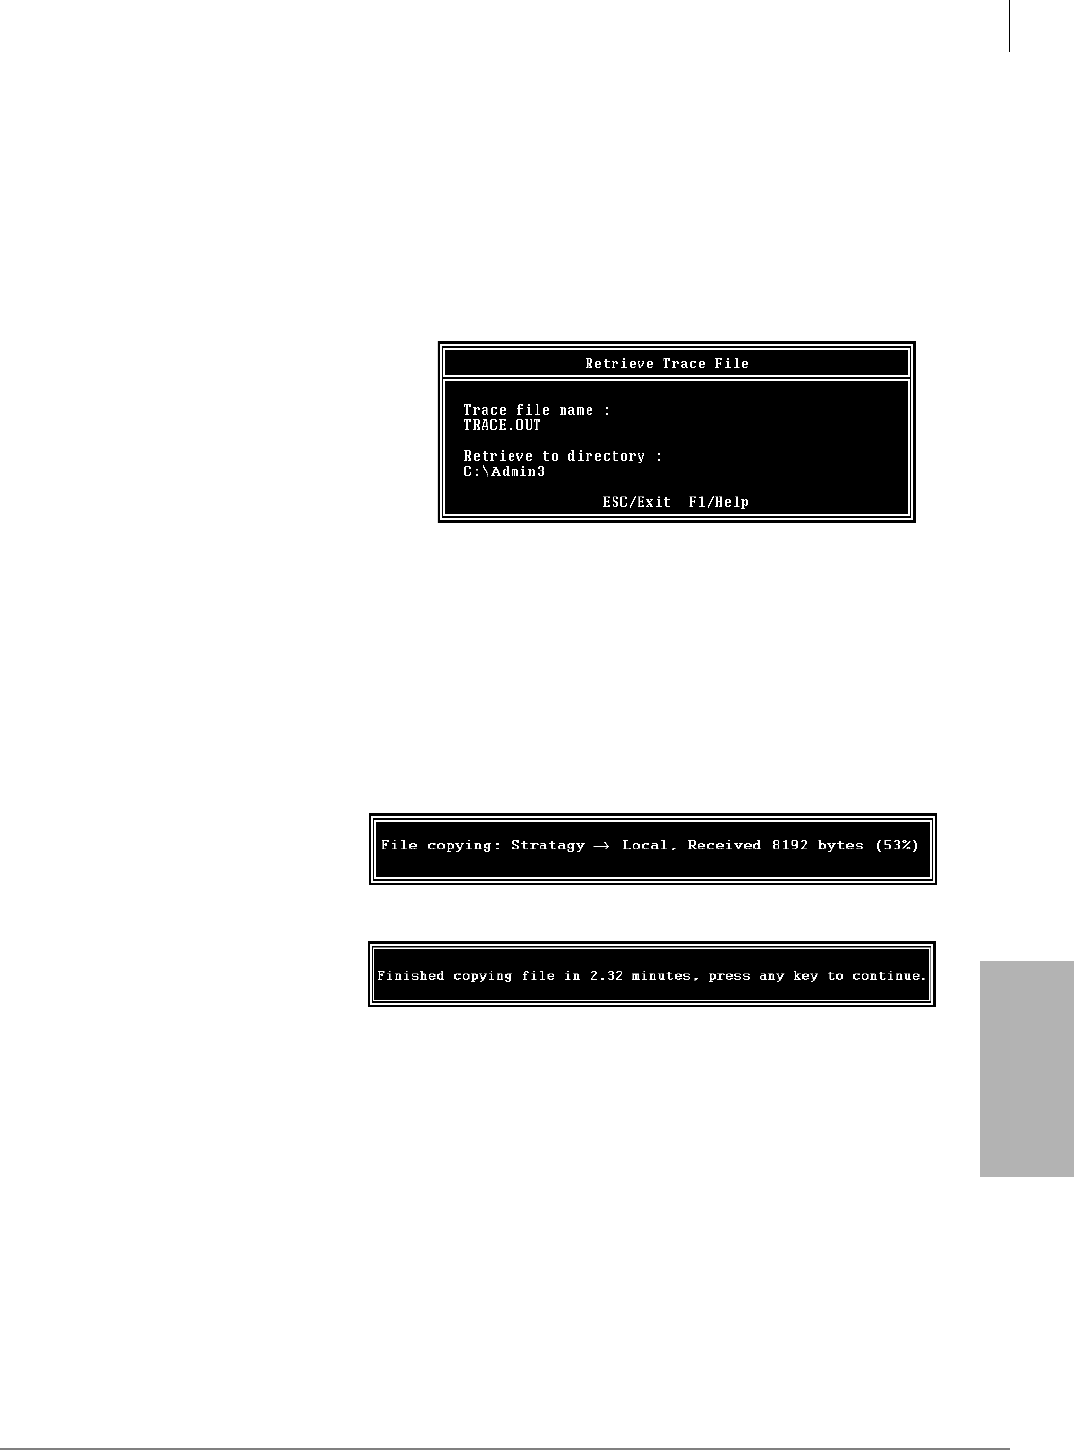
Maintenance, Upgrades and Troubleshooting
Tools
Stratagy I&M 06/02 11-7
Maintenance,
Upgrades and
Retrieve Trace File
This function copies the trace data log file (TRACE.OUT) to the Stratagy Admin PC’s hard drive.
As part of this function, a new Trace Filter Setup screen (see Figure 11-1 on page 11-8) enables
you to specify the filtering rules for selecting the desired trace records.
After Stratagy Admin filters the trace data, it decodes and expands the data into records containing
the information requested by you in the Trace Filter Setup screen.
Note The size of the trace file can be set using the trace_cap parameter in the install.cfg file of
Stratagy (see “trace_cap” on page 4-27 for a description of the parameter)
1. From the Tools menu, press 7.
2. The trace file name defaults to
TRACE.OUT. From the Retrieve
Trace File screen (shown at right),
press Enter.
3. Enter the directory where you want
to copy the file. The default is:
C:\xxxx.
If you need a different directory, type over the default. Press Enter. Be sure to enter the
complete path. If the directory already exists, you are given the option of entering a new
directory or overwriting the file. The Trace Filter Setup screen displays (see Figure 11-1 on
page 11-8).
4. Select the items you want included in the TRACE.OUT file. Refer to the field descriptions on
page 11-8.
5. When you are finished, press Alt+e.
Once the data has been
expanded, Stratagy copies
the file to the directory/file
specified in Step 3 of this
procedure. A dialog status
box displays (shown at
right).
When the copy is complete,
another status box displays
(shown at right):
You can use any text editor
to review the file.
3237
3253
3254

Maintenance, Upgrades and Troubleshooting
Tools
11-8 Stratagy I&M 06/02
Trace Filter Setup Screen
Figure 11-2 Trace Filter Setup Screen with System Defaults
The following fields appear on the screen:
Categories
Categories/classes of the traced records. Use the spacebar to toggle between Yes for inclusion of data or
No for exclusion.
Detail
Detail system information.
Note Since this information is very detailed and complex, it is only useful for
advanced technical personnel trying to debug the system.
Normal General system activities including digits dialed and boxes executed.
Call Activity Log ins, log outs, messages received, and messages retrieved.
Traffic Information concerning system load and possible problems caused by the load.
System Control flow between functions.
Error Abnormal conditions, faults, exceptions, etc.
Threads
Program processes. Use the spacebar to toggle between Yes for inclusion of data or No for exclusion.
Main System messages and trace events relating to the overall system.
Interface Communication protocol between the Stratagy and Stratagy Admin.
Event Anything that happens to the Stratagy from outside the system (e.g., detects voice,
dial tones, ringing, etc.).
Rover Actions that the Stratagy takes (e.g., notifications and internal scheduling).
Watch Timers, system self-monitoring.
SMDI SMDI information.
3248

Maintenance, Upgrades and Troubleshooting
Tools
Stratagy I&M 06/02 11-9
Maintenance,
Upgrades and
Filecopy
Use Stratagy Admin’s Filecopy option to copy files to and from the flash memory of the Stratagy
and the Stratagy Admin PC’s hard drive.
1. From the Tools menu, press
8. The Filecopy screen
displays (shown right).
2. In the Source System field
(where the file currently
resides), press F2 to display
a pop-up box of selections.
3. Highlight PC to copy from
the Stratagy Admin PC or Stratagy to copy from the Stratagy. Press Enter.
4. In the Copy From field, type the directory name, if necessary, and the file name.
Note If a directory name is not entered, Filecopy searches the Stratagy or Stratagy Admin
directory (Stratagy Admin PC) for the file to be copied.
5. Press Enter when finished.
6. In the Copy To field, type the directory name, if necessary, and the file name.
Note If a directory name is not entered, Filecopy assigns the destination for the file to the Stratagy
or Stratagy Admin directory.
7. Press Enter when
finished. While Stratagy
copies the file, a dialog
status box displays (shown
at right).
When the copy is complete,
this status box displays
(shown right):
8. Press any key to continue.
Parameters
Limiting factors (date/time range, channel information, mailbox information).
Time From Starting date and time for trace data. Enter in dd/mm/yy hh:mm:ss format.
Time To Ending date and time for trace data. Enter in dd/mm/yy hh:mm:ss format.
Channels List Channel numbers. When no numbers are entered, all channels are included in the
output.
Mailboxes List When this parameter is used, only mailbox activities (log in, log out, message
delivery, pickup, message delete, etc.) are displayed in the trace output. This option
is useful when only mailbox activities need to be monitored.
3249
3253
3254

Maintenance, Upgrades and Troubleshooting
Upgrading Stratagy Voice Ports
11-10 Stratagy I&M 06/02
Upgrading Stratagy Voice Ports
Upgrading the number of voice ports on the Stratagy does not require any hardware. Please call
Customer Service with the following information:
•Dealer Name and Number
•Order Number
•Dealer Contact and telephone number
•Site telephone number
•Stratagy’s modem telephone number, if different from the site telephone number
•Stratagy system’s password
•Stratagy system serial number
The port upgrade is activated by Toshiba remotely.
Note The Stratagy must be reset for the new ports to be activated.
Troubleshooting
This section discusses procedures to identify and correct faults within the Stratagy Voice Processing
system. Once faults are identified, it may be necessary to replace hardware components or make
alterations, such as upgrades or configuration modifications, to the software of the system.
•Automatic System Recovery – This feature controls the startup procedure in case a problem is
detected during the restart process.
This section also covers the following diagnostic programs available in the Stratagy to assist in
maintaining the integrity of the product:
•Diagnostics – Stratagy has powerful troubleshooting tools. The following three files assist you
in determining the source of a problem:
•TRACE.OUT logs the Stratagy’s activity.
•STRATAGY.LOG contains information on how many channels (ports) the system started up
with and the CKDB execution summary (tells you basically that all of your messages have a
home), etc.
•MSG.LOG logs all messages received and every mailbox that checks for messages along
with the DMTF entered.
In addition to these files, Stratagy has a Scandisk utility that detects, diagnoses, and repairs disk
errors on uncompressed drives.
Determine Problem
Resolving problems will be much easier if you consider the following:
•If you cannot start Flash, make sure that you have attached the power cord.
•Check that all connecting cables are correctly and firmly attached. Loose cables can cause
erroneous or intermittent signals. You may need to inspect the cables for loose wires and
connectors for loose pins.
•If a problem occurs while Stratagy is functioning, document as much information concerning
what is happening as possible. Once the information is obtained, shut the system down to
prevent any extensive file corruption.
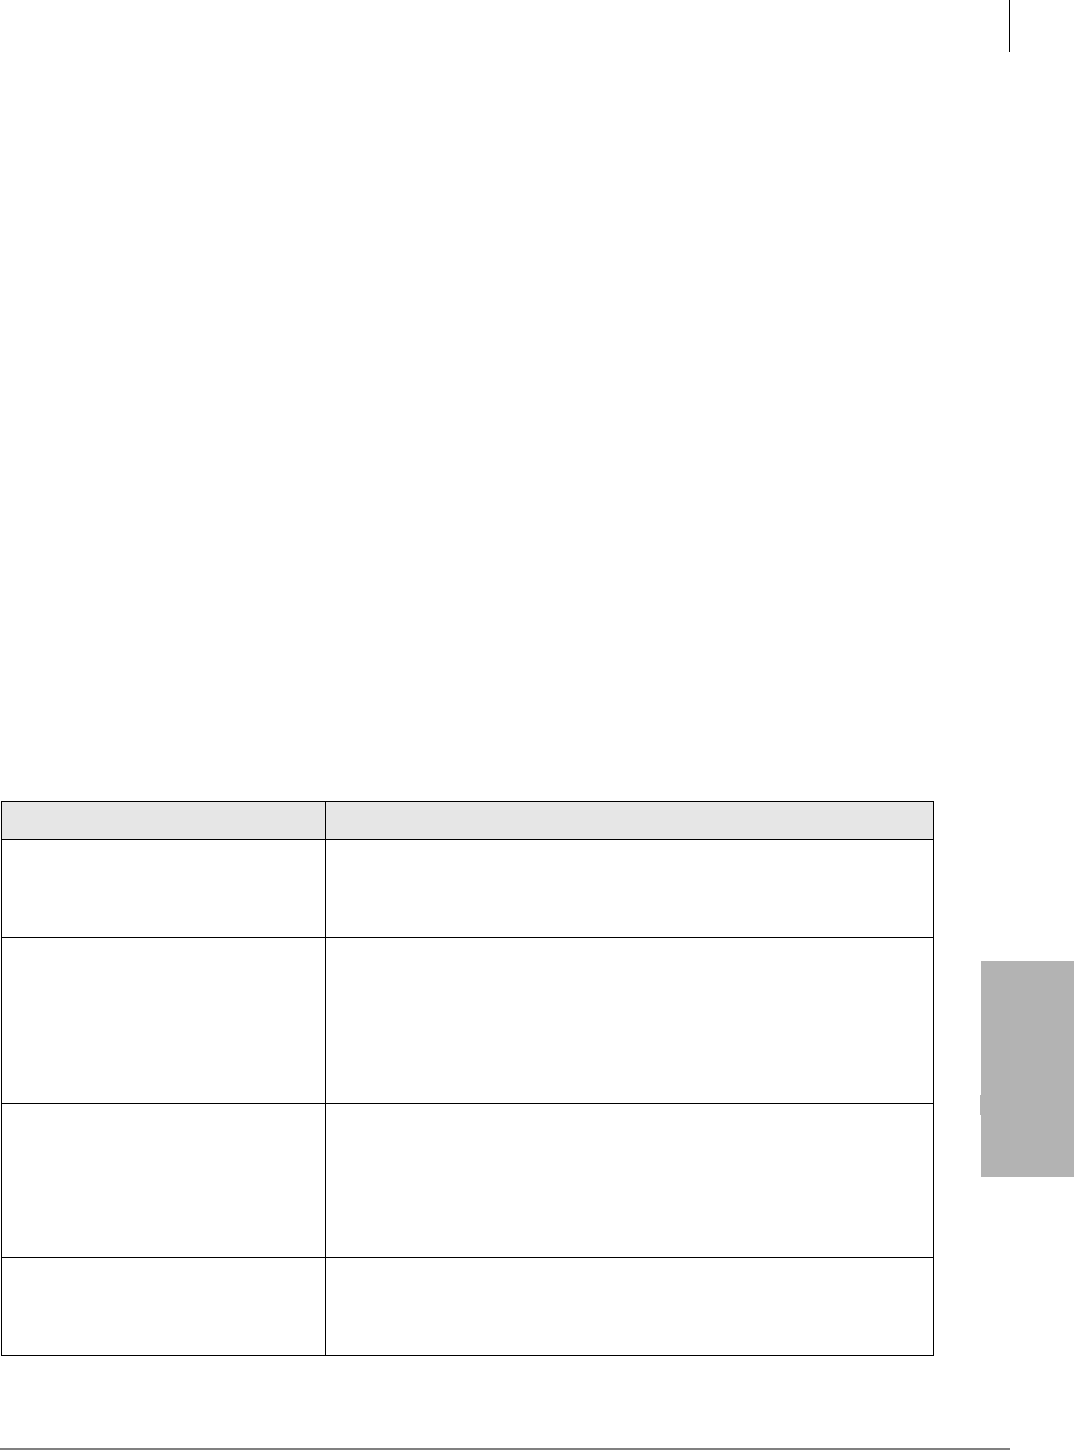
Maintenance, Upgrades and Troubleshooting
Troubleshooting
Stratagy I&M 06/02 11-11
Maintenance,
Upgrades and
•Remember to document what is happening. Write down what the system is doing and what
actions you took, if any, immediately prior to and after the problem.
•Consider the simplest solution first. Ask yourself logical questions and consider the alternatives.
•Which part of the system is operating erratically?
•Can you connect with Stratagy Admin? Do you see any messages or random characters?
•Do any of the indicator LEDs glow? Which ones? Do they stay on or do they blink?
•Do you hear any beeps? How many? Are they long or short? Is the system making any
unusual noises?
•Isolate the problem. Disconnect any peripheral equipment that may be connected to the COM or
parallel ports.Temporarily remove the programming PC to see if it is causing the problem. You
can connect a telephone port into a Stratagy voice port to verify operation when the Remote
terminal is not connected.
•Make sure you are operating under the specified environmental conditions. These points serve
as a guide. They are not definitive problem solving techniques. Some problems require the
assistance of Toshiba Technical Support, but before you call, make sure of all the facts
surrounding the problem.
Initial Power Up
Before beginning to do any detailed troubleshooting, take a moment and refer back to the
installation section of this manual (see Chapter 2 – Installation) to make sure that all the appropriate
steps have been taken for a proper installation.
Power up the system.
Table 11-1 Troubleshooting Tips
Problem Description Possible Explanation
No activity. No LEDs, no beeps, no
display, no sound. •No incoming power.
•Bad power cable
•Bad power supply
System seems to boot up. LEDs glow,
system beeps, but no display.
Note Before considering part failure,
take a moment and plug an
analog port into Stratagy’s voice
port to see if it answers a call.
•Bad motherboard
•Other major hardware failure (Stratagy replacement recommended)
•Problem with Stratagy Admin software
•Bad cable from Remote PC to Stratagy
•Problem with COM port used for Remote
View boot sequence over COM port
using a communications software
such as HyperTerminal.
Stratagy begins to boot up with a
display, but does not reach Stratagy
Main menu screen.
Note failure on screen:
•CMOS failure
•Memory failure
•Flash drive failure
Bad flash drive
System boots up to the Main menu,
but does not answer. •Wrong analog port being used.
•Bad analog port from phone system.
•Bad line cord.

Maintenance, Upgrades and Troubleshooting
Troubleshooting
11-12 Stratagy I&M 06/02
Stratagy Diagnostic Utilities
Stratagy has several very powerful troubleshooting tools—TRACE.OUT, STRATAGY.LOG, and
MSG.LOG. All three of these files are stored in the Stratagy directory and are best utilized in
combination with each other. For example, if you are looking for actions related to a specific
message, enable MSG.LOG and start a trace. If you think you have a site with a power problem,
viewing STRATAGY.LOG and TRACE.OUT would be the best course of action.
In addition to these files, Stratagy has a Scandisk utility that detects, diagnoses, and repairs disk
errors on uncompressed drives.
Trace
Trace is a diagnostic tool designed to assist you in troubleshooting Stratagy’s activity. When Trace
is enabled, it is automatically turned on when Stratagy loads up and logs data until Stratagy
software is shut down.
The Stratagy stores the trace data in a text file called TRACE.OUT. The size of the trace file can be
configured using the trace_cap parameter (see “System Parameters” on page 4-14). This
parameter defines the size of the trace file in kilobytes. When the size of the trace file reaches the
setting limit, the existing file is overwritten, beginning with the oldest record.
To copy the TRACE.OUT file to the Stratagy Admin PC’s hard drive, use the Retrieve Trace File
option on the Tools menu (see “Retrieve Trace File” on page 11-7).
➤To enable TRACE.OUT
1. From the Main Menu, press Alt+s to select the shutdown function. Stratagy asks for the
password.
2. Enter the password (the default is Stratagy) and press Enter.
3. From the Shutdown Menu, highlight Shutdown and Trace CURRENT Version option. Press
Enter. A dialog box displays asking you to confirm the shutdown.
4. Press Y to continue. Stratagy shuts down, then restarts in Trace mode. Trace runs continuously
until Stratagy is shut down. The DOS prompt displays on the Stratagy Admin PC.
5. (Optional) Restart Stratagy Admin.
STRATAGY.LOG
Stratagy contains a file named STRATAGY.LOG that is written to every time the Stratagy system
is properly shut down and successfully boots up. If a Stratagy system is turned off without a proper
shutdown, there may be file corruption. A startup without a shutdown preceding it in the
STRATAGY.LOG is the first indication.
Some of the information contained in this file is how many channels (ports) the system started up
with and the CKDB execution summary, which tells you basically that all of your messages have a
home.
➤To copy STRATAGY.LOG
1. From the Tools menu, press 8. The Filecopy screen displays (see page 11-9 for details).
2. Using the Filecopy option, copy the STRATAGY.LOG file to the Stratagy Admin PC’s hard
drive. You can view it using any common text editor.

Maintenance, Upgrades and Troubleshooting
Troubleshooting
Stratagy I&M 06/02 11-13
Maintenance,
Upgrades and
MSG.LOG
If you need to check actions related to specific types of messaging, you can enable MSG.LOG in
the System Configuration file. In this file, Stratagy logs every message received and every mailbox
that checks for messages along with the DTMF entered.
Important! Since the MSG.LOG file continuously collects information, we recommend that you
do not enable the file unless you are looking for specific information. Otherwise, the
file takes up space in the flash memory that could be used for message storage.
➤To enable MSG.LOG
1. From the Tools menu, press 6. The system configuration file displays. The parameters are
listed in alphabetical order.
2. Enable the msg_log parameter by removing the # sign in the string:
#set msg_log ‘MSG.LOG’
See Chapter 4 – Configure Stratagy for instructions.
3. Press ESC. The Stratagy System Config screen displays.
4. From the Stratagy System Config screen, press 1 to save your changes. Stratagy Admin
transmits the file to the Stratagy.
5. When complete, press any key to continue. The system starts logging the information to the
MSG.LOG file. The DOS prompt displays.
6. (Optional) Restart Stratagy Admin.
➤To copy MSG.LOG
1. From the Tools menu, press 8. The Filecopy screen displays (see page 11-9 for details).
2. Using the Filecopy option, copy the STRATAGY.LOG file to the Stratagy Admin PC’s hard
drive. You can view it using any common text editor.
ScanDisk
ScanDisk is a utility that detects, diagnoses, and repairs disk errors on uncompressed drives.
ScanDisk repairs file system (e.g., crosslinks and lost clusters) errors.
➤To perform ScanDisk
1. From the Main Menu, press Alt+s to select the shutdown function. Stratagy asks for the
password.
2. Enter the password (the default is Stratagy) and press Enter. The Shutdown Menu
displays.
3. From the Shutdown Menu, highlight Shutdown SCANDISK, and Restart option. Press Enter.
A dialog box displays asking you to confirm the shutdown.
4. Press Y to continue. Stratagy shuts down and performs ScanDisk. If crosslinked files or lost
clusters are found, ScanDisk automatically fixes the bad files and stores them as .chk files in
the root directory. When the process is complete, Stratagy automatically reboots.

Maintenance, Upgrades and Troubleshooting
Troubleshooting
11-14 Stratagy I&M 06/02
Automatic System Recovery
This feature is controlled by two parameters in the Stratagy System Configuration file,
restore_original and restore_config. The parameters default to TRUE and enable the Stratagy to
create an Archive directory (c:\Stratagy\Archive).
The directory contains copies of the files used for system startup (i.e., Stratagy batch and
configuration files, and mailbox database) and is divided into three subdirectories: Original, Good
and Suspect.
When the Stratagy system software is first installed, a copy of the files are automatically stored in
an Archive subdirectory named Original. Each time you restart the system successfully, the files
automatically write to an Archive subdirectory named Good, thereby saving the most up-to-date
database changes.
If an unsuccessful startup is detected by the program, the system copies the problem files to an
Archive subdirectory named Suspect and restarts using the files in the Good subdirectory. The
Suspect files can be used for debugging purposes.
To receive notification of the unsuccessful startup, a new error_box parameter enables you to
designate an User ID Mailbox to receive the message. The Notify menu for the mailbox can be set
for a new “Panic” notification type.

Stratagy I&M 06/02 A-1
Checklists/Forms
Checklists/Forms A
This appendix provides surveys, checklists and forms to assist you in the installation of the Stratagy
systems.
Survey/Checklists
•Pre-installation Company Survey
•Stratagy Pre-installation Checklist
•Stratagy Installation Checklist
Forms
•Users Form
•Auto (Scheduling) Form
•Notify Form
•Greeting Scripts Form
Make copies as needed.
Checklists/Forms
Pre-installation Company Survey
A-2 Stratagy I&M 06/02
Pre-installation Company Survey
Company
Number of employees
Number of employees using mailboxes
Number of locations
Telephone System (to which you will connect Flash)
Manufacturer, model, and software release
Voice mail integration capabilities
Types of Hunt Groups for single-line stations
Number of Central Office lines
Number of single line stations
Auto Attendant Information
Number of companies using the system
Whether it is the primary answering position and how many Central
Office lines will be answered by Stratagy
Company greetings and instructions
Menus (sales, service, etc.)
Voice Mail Information
Number of employees requiring voice mailboxes
Message waiting lights
Notification requirements
Directory requirements
AMIS Information
Whether two or more voice messaging systems need to exchange
messages

Checklists/Forms
Pre-installation Checklist
Stratagy I&M 06/02 A-3
Checklists/Forms
Pre-installation Checklist
Done ✔Item
Know the Reference Documentation
(See Chapter 2 – Installation.)
❏1. Know Stratagy’s features.
❏2. Know Stratagy operation, customization, and administration.
❏3. Know Stratagy installation.
❏4. Know how to configure the voice mail system settings for your telephone system.
Conduct the Pre-installation Company Survey
(See “Pre-installation Company Survey” on page A-2.)
❏1. Conduct the Pre-installation survey.
Determine Stratagy’s Configuration and Integration
(See Chapter 2 – Installation and Chapter 4 – Configure Stratagy.)
❏1. Define Stratagy system configuration options.
❏2. Define system integration options.
Customize User ID Mailboxes and Call Processing
❏1. Determine the company greeting.
❏2. Determine the caller instructions.
❏3. Obtain the busy-hold music (optional).
❏4. Determine the employee directory instructions.
❏5. Program the User IDs.
Select and Prepare the Hardware Sites
(See “Flash” on page 2-7.)
❏1. Stratagy system.
❏2. Remote or local system.
Checklists/Forms
Installation Checklist
A-4 Stratagy I&M 06/02
Installation Checklist
Done ✔Item
Install the Hardware
(See Chapter 2 – Installation, Chapter 3 – Access and Use Stratagy.)
❏1. Inspect and unpack the system.
❏2. Install Stratagy voice boards (as appropriate).
❏3. Set up the Stratagy system PC hardware.
❏4. Power up Stratagy and verify Stratagy’s basic functions.
❏5. Configure your telephone system’s voice mail system settings individually (as appropriate).
❏6. Connect line cords from the voice boards to the telephone system.
❏7. Install the modem for remote maintenance.
❏8. Prepare (hardware and software) the remote or local system to access the Stratagy host system.
❏9. Access Stratagy.
Configure Stratagy Using the Stratagy Configuration Utility
(See Chapter 4 – Configure Stratagy, “Backup Utility” on page 11-3 and “Restore Utility” on page 11-5.)
❏1. Define Stratagy system configuration options.
❏2. Define Stratagy integration options.
For a Toshiba telephone system, selected the appropriate system.
For a non-Toshiba telephone system, define:
❏Telephone system dial codes.
❏Telephone system tone patterns.
❏System integration options.
❏3. Back up Stratagy using the Stratagy Backup Utility.
Customize User ID Mailboxes and Call Processing
❏1. Record the company greeting.
❏2. Record the caller instructions.
❏3. Record the busy-hold music (optional).
❏4. Record the employee directory instructions.
❏5. Program the User ID mailboxes.
❏6. Back up Stratagy using the Stratagy Backup Utility.
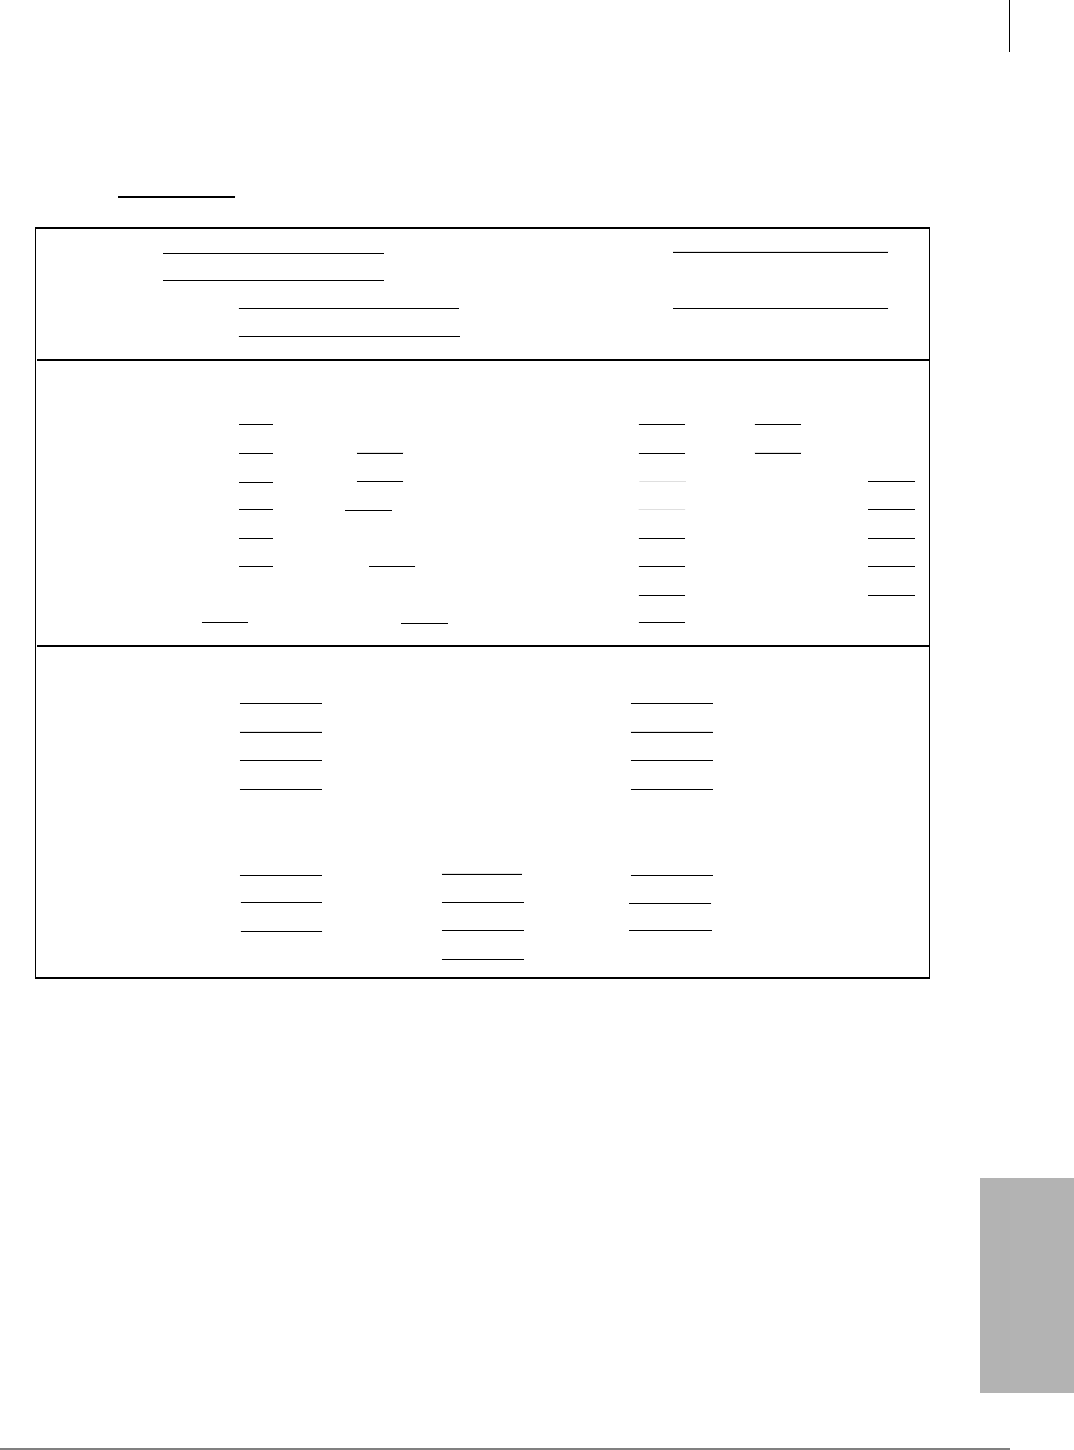
Checklists/Forms
Users Form
Stratagy I&M 06/02 A-5
Checklists/Forms
Users Form
2436
User ID: Comment:
Extension:
Directory Name 1: Directory Name 2:
Security Code:
Group/Chains Options
User ID
Copy as needed
Basic Options:
Maximum Rings: (default is 4) Current Greeting:
Do Not Disturb: Lock: Busy Greeting: Max: sec
Screen Calls: Lock: ID Call ?: Busy Hold :
Store Messages: Max: sec Play Date/Time?: Slow Menu :
Copy Message To: Record Name?: Saved Msg Que :
Message Volume: Guests: Message Order : Caller Menu:
Message Pending:___ Alternate Rate: Use At Login :
Chains: Groups:
Chain Done: Group1:
Chain RNA : Group2:
Chain Busy: Group3:
Chain Delay: Group4:
Menus:
1: 2: 3:
4: 5: 6:
7: 8: 9:
0:
Amis Options: Gateway Box: AmisSysNumber:
Max: sec
Does this User ID also have:
Auto Form: Yes No
Notify Form: Yes No
Greeting Scripts Form: Yes No
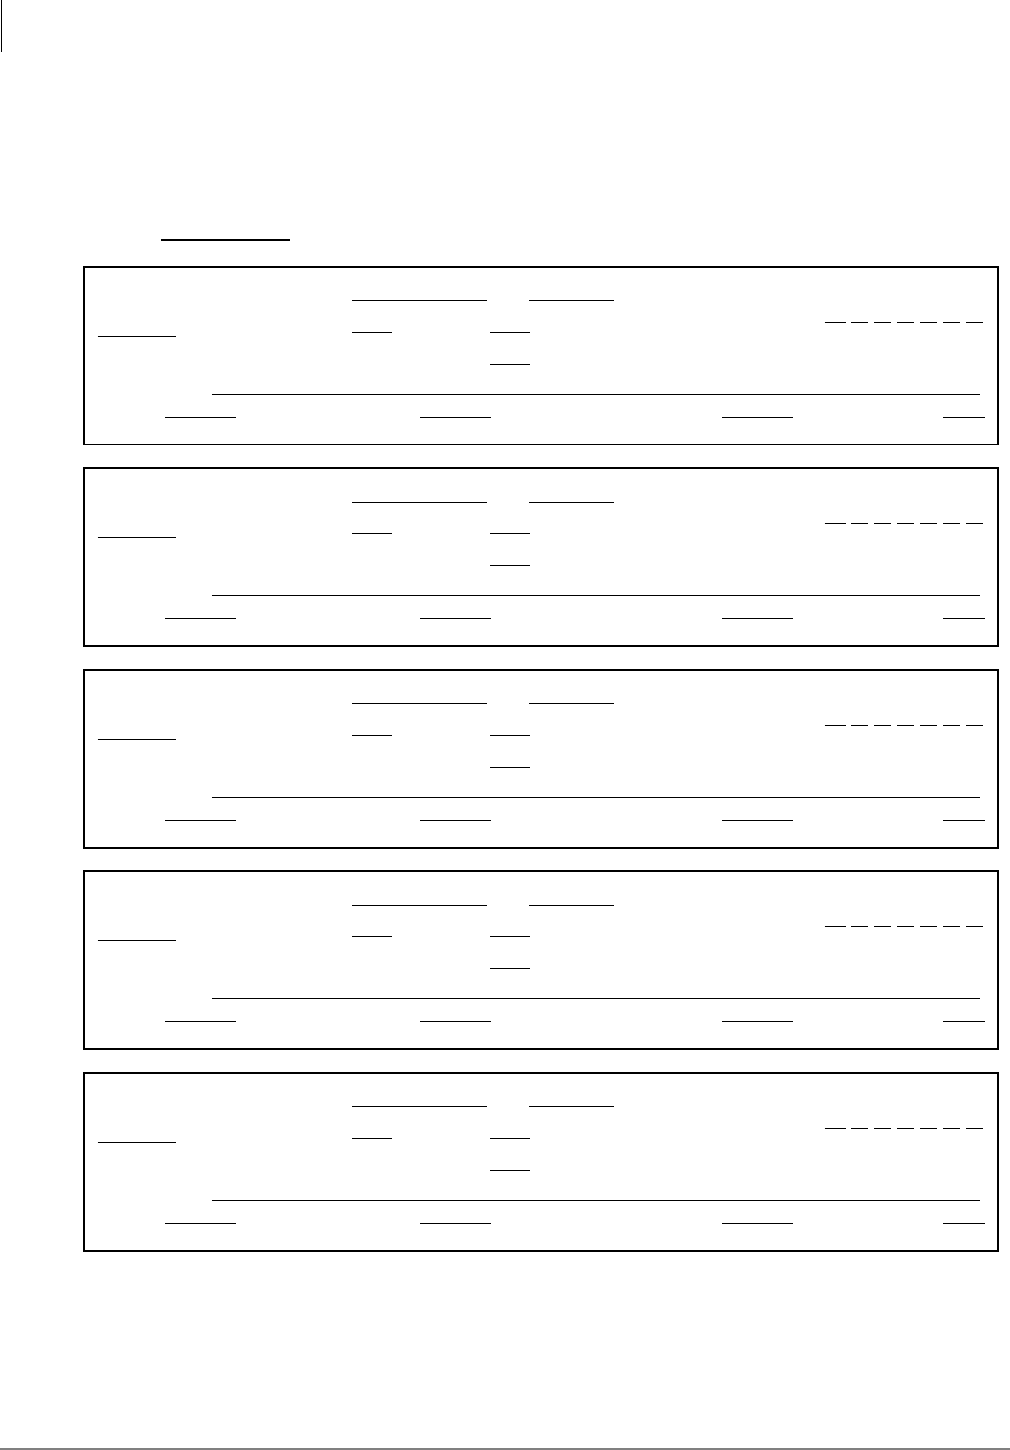
Checklists/Forms
Auto (Scheduling) Form
A-6 Stratagy I&M 06/02
Auto (Scheduling) Form
Enabled
Extension:
Rings: Do Not Disturb: Call Screening: Greeting #:
Change On:
And Every: month(s) day(s)
hour(s) minute(s)
Restrict To: M T W T F S S
Next Change:
At :
Enabled
Extension:
Rings: Do Not Disturb: Call Screening: Greeting #:
Change On:
And Every: month(s) day(s)
hour(s) minute(s)
Restrict To: M T W T F S S
Next Change:
At :
Enabled
Extension:
Rings: Do Not Disturb: Call Screening: Greeting #:
Change On:
And Every: month(s) day(s)
hour(s) minute(s)
Restrict To: M T W T F S S
Next Change:
At :
Enabled
Extension:
Rings: Do Not Disturb: Call Screening: Greeting #:
Change On:
And Every: month(s) day(s)
hour(s) minute(s)
Restrict To: M T W T F S S
Next Change:
At :
Enabled
Extension:
Rings: Do Not Disturb: Call Screening: Greeting #:
Change On:
And Every: month(s) day(s)
hour(s) minute(s)
Restrict To: M T W T F S S
Next Change:
At :
ser ID Copy as needed
2437
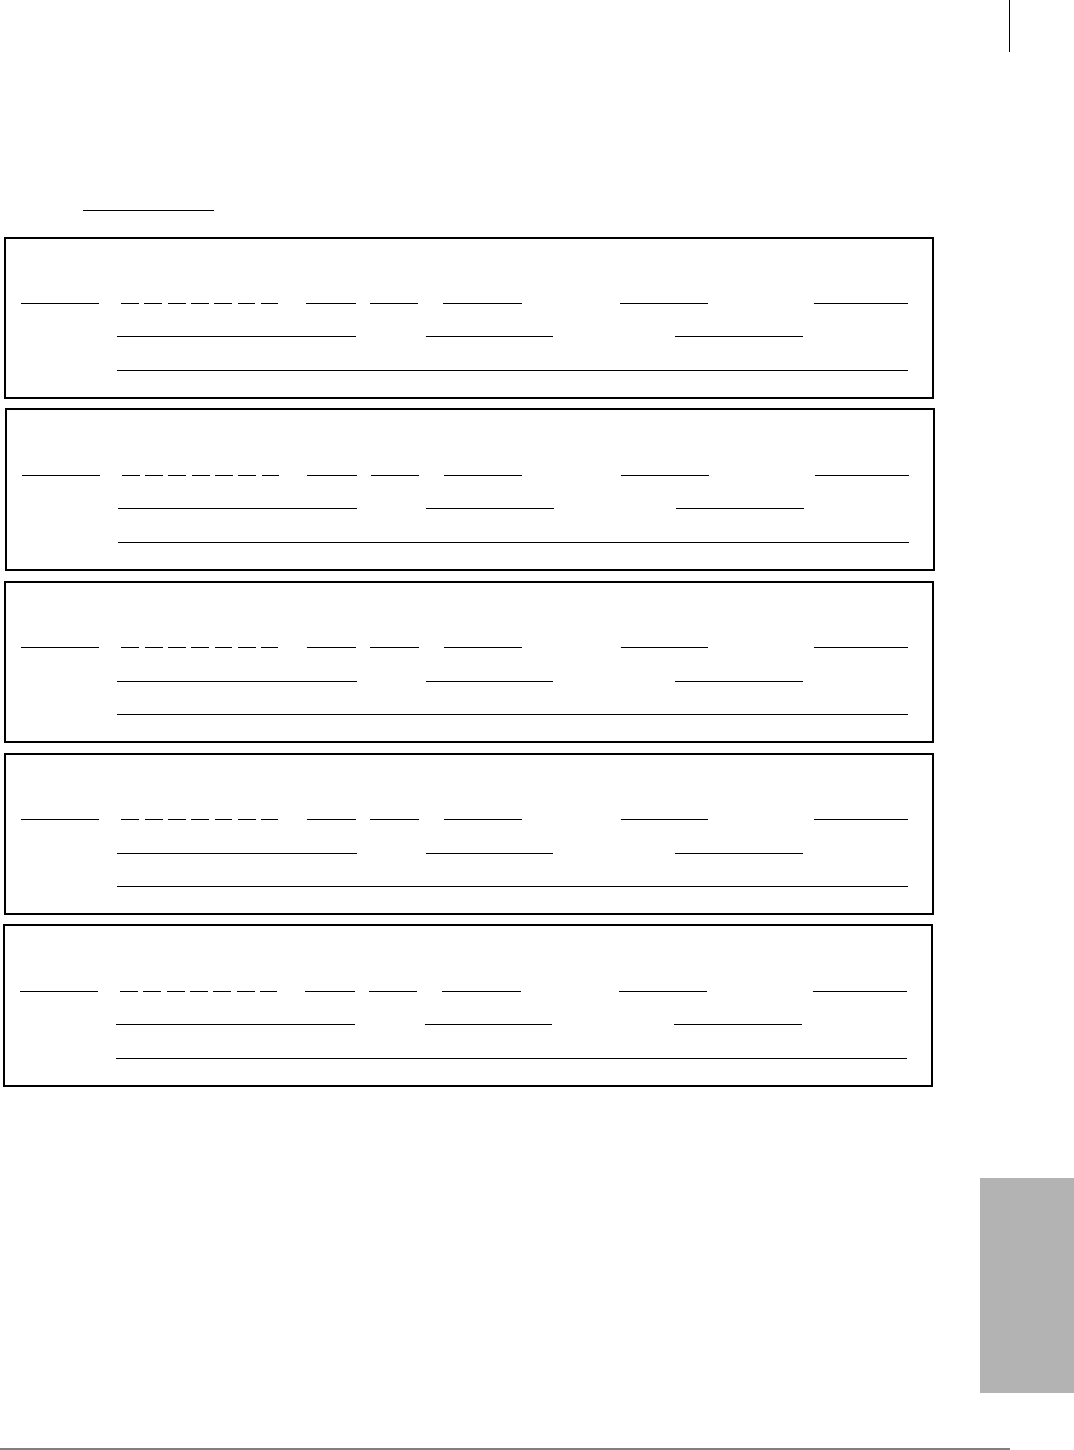
Checklists/Forms
Notify Form
Stratagy I&M 06/02 A-7
Checklists/Forms
Notify Form
M T W T F S S
User ID
Enabled
Title:
Method:
Type: Variable:
Notify After
min
Continue Every
min
Max TimesFrom To
::
M T W T F S S
Enabled
Title:
Method:
Type: Variable:
Notify After
min
Continue Every
min
Max TimesFrom To
::
M T W T F S S
Enabled
Title:
Method:
Type: Variable:
Notify After
min
Continue Every
min
Max TimesFrom To
::
M T W T F S S
Enabled
Title:
Method:
Type: Variable:
Notify After
min
Continue Every
min
Max TimesFrom To
::
M T W T F S S
Enabled
Title:
Method:
Type: Variable:
Notify After
min
Continue Every
min
Max TimesFrom To
::
Copy as needed
2438

Checklists/Forms
Greeting Scripts Form
A-8 Stratagy I&M 06/02
Greeting Scripts Form
User ID
Greeting 1
Greeting 2
Greeting 3
Greeting 4
Greeting 5
Greeting 6
Greeting 7
Copy as needed
2439

Stratagy I&M 06/02 B-1
Special Greeting User
ID Mailboxes
Special Greeting User ID Mailboxes B
Stratagy contains four special greeting User ID mailboxes:
•Initial Greeting Mailboxes
•Company Greeting
The salutation that lets the caller know which company he called. Default is User ID 990.
•Caller Instructions
Gives the caller options for reaching departments or information. Default is User ID 991.
•Directory Mailbox
The caller enters the first few letters of the name of the person he/she wants to contact. Stratagy
plays the corresponding User ID’s name recording. Default is User ID 411.
•Operator Mailbox Greeting
For an after hours caller who is unable to direct his own call or does not know the extension of
the person he/she wants to reach. Default is User ID 0.
When initially setting up the system, you need to define each of the special greeting mailboxes. This
includes recording the greetings and customizing the User ID mailbox (e.g., using the Auto
(Scheduling) Menu to schedule greetings).
You can modify these greetings and customizations as needed. This appendix discusses all four
greetings and how to record them.
Use the forms in Appendix A – Checklists/Forms as an aid in defining each of the special greeting
mailboxes. For detailed information about customization, see Chapter 6 – Menus and Chapter 8 –
Customization Examples.
Record Mailbox Greetings
Note For more details on recording greetings, see the Stratagy User Guide.
1. Enter Stratagy’s extension. Stratagy answers.
2. Press + the User ID mailbox number.
3. Enter your security code + .
4. From the Main menu, press . The Manage Mailbox menu plays.
5. Press . The Change Your Greeting menu plays.
6. Enter the personal greeting number you want to change or add
(~).
7. Press to select Record Greeting option. You are prompted to record your greeting. Speak
slowly and clearly.
8. Press when done.

Special Greeting User ID Mailboxes
Initial Greeting Mailboxes
B-2 Stratagy I&M 06/02
9. (Optional) After recording, you can press:
Review recording The complete greeting plays.
Re-record Press when done.The system prompts you to record at the beep.
Append recording Presswhen done. Appending a greeting enables you to add
information to the end of your already recorded greeting. The system
prompts you to record at the beep.
Cancel recording The greeting is canceled. The system returns to the previous menu.
Save recording Stratagy tells you that greeting (number) has been recorded and
returns to the previous menu. Again, you are given the option to
review or record over the greeting you have just recorded.
10.Press to return to the previous menu. You are given the option to record another greeting.
11.Press and select another greeting number (~).
12.Repeat Step 7 on page B-1.
Important! The last greeting selected or recorded is the greeting that callers hear as your User
ID greeting.
13.To return to the Main Menu, press. Stratagy plays the Main Menu options.
Initial Greeting Mailboxes
The initial greeting mailboxes are the Company Greeting and Caller Instructions. Stratagy ships
with these defined as User ID 990 and User ID 991, respectively.
You can schedule different initial greetings to play different times of the day or days of the week,
or even a specific day of the year.
See Chapter 5 – How Stratagy Operates for details about how Stratagy processes incoming calls. If
you need to change the initial greeting defaults for specific channel ports, use the Stratagy
Configuration Utility (see Chapter 4 – Configure Stratagy.)
Company Greeting
When a caller first reaches Stratagy, it plays the company greeting. Typically this salutation gives
the caller the company name (for example, “Thank you for calling…”). Stratagy then plays the
caller instructions.
You can record up to seven greetings that you can schedule to play as needed.
➤To record the Company Greeting
1. Access Stratagy from your telephone using default User ID: 990 and Security Code: 990997.
2. Record the greeting (see “Record Mailbox Greetings” on page B-1).
Note Change the security code as soon as possible.
➤To customize the Company Greeting User ID mailbox
1. From the Main Menu, press Alt+U to access the Users Menu.
Note Company Greeting User ID mailbox 990 chains to Caller Instructions User ID mailbox
991.
2. Use the Auto Menu to schedule the greetings to play as needed.
For detailed information about customization, see Chapter 6 – Menus and Chapter 8 –
Customization Examples.
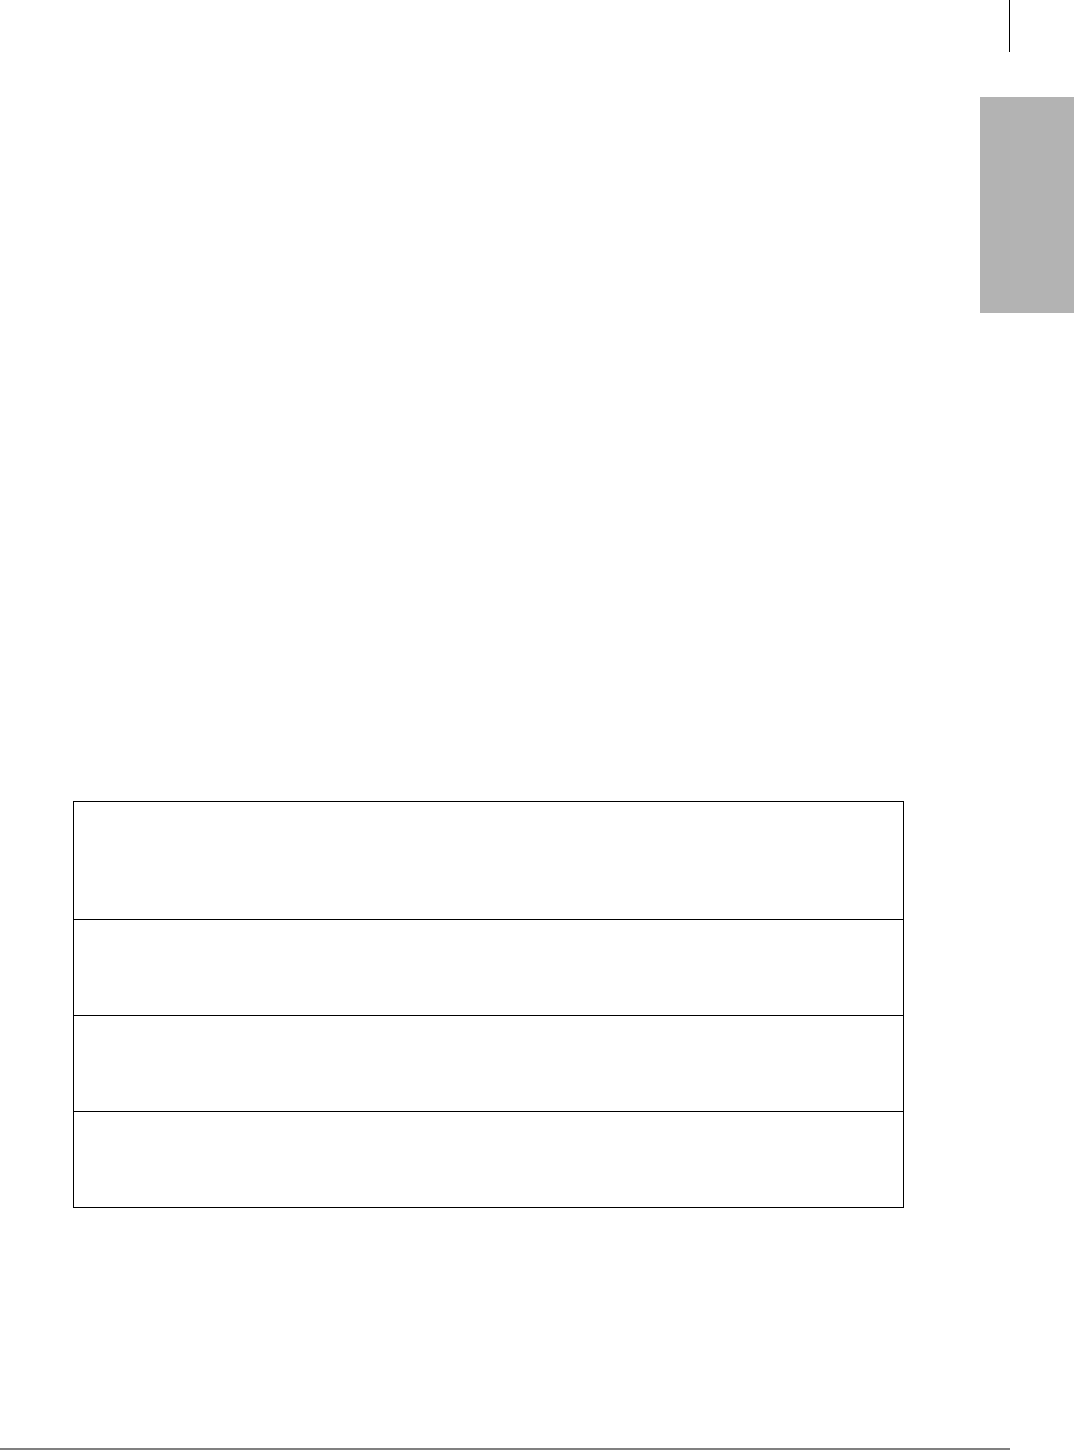
Special Greeting User ID Mailboxes
Initial Greeting Mailboxes
Stratagy I&M 06/02 B-3
Special Greeting User
ID Mailboxes
Caller Instructions
By default, Stratagy plays the caller instructions directly after the company greeting. In addition,
Stratagy plays the caller instructions whenever it has nowhere else defined to continue processing.
Typically, caller instructions give the caller options for reaching departments or information.
Providing this information is important to help process the call.
“To reach the person you are calling, enter their extension number. To reach the Operator, press
0 or stay on the line.”
You can record up to seven greetings (caller instructions) that you can schedule to play as needed.
➤To record the Caller Instructions
1. Access Stratagy from your telephone using default User ID: 991 and Security Code: 991997.
Note Change the security code as soon as possible.
2. Record the caller instructions (see “Record Mailbox Greetings” on page B-1).
➤To customize the Caller Instructions User ID mailbox
1. From the Main Menu, press Alt+U to access the Users Menu.
2. Use the Auto Menu to schedule the greetings to play as needed.
For detailed information about customization, see Chapter 6 – Menus and Chapter 8 –
Customization Examples.
Sample Initial Greetings
The following sample greetings play as a result of chaining the Company Greeting User ID mailbox
(990) to the Caller Instructions User ID mailbox (991).
Example 1
990 Thank you for calling (company name).
991 To reach the person you are calling, enter his extension. For information about our company
products and services, press 1. For customer support, press 2. For sales, press 3. To access the
employee directory, enter 411. To reach the Operator, press 0 or stay on the line.
Example 2
990 Good afternoon. Thank you for calling (company name).
991 If you know the extension of the person you are calling, you may enter it now. Otherwise, press
0 or stay on the line for Operator assistance.
Example 3
990 Thank you for calling (company name).
991 Sorry, our offices are closed. To leave a message in our Operator’s mailbox, press 0. Or call
during regular business hours – 8:00 to 5:00 Monday through Friday.
Example 4
990 Thank you for calling (company name).
991 Our offices are closed July 4th to celebrate Independence Day. Please call back during regular
business hours.

Special Greeting User ID Mailboxes
Directory Mailbox
B-4 Stratagy I&M 06/02
Directory Mailbox
Stratagy ships with User ID 411 predefined as the access box for the directory. The User ID and
port number for the directory can be specified using the Stratagy system configuration parameter
box_idx (Chapter 4 – Configure Stratagy).
When a caller uses the directory, he/she enters the first few letters of the name of the person he/she
wants to contact. When Stratagy makes a match using the Users Menu Directory Name fields, it
plays the User ID’s name recording.
Depending upon how the directory search feature is configured using the Stratagy system
configuration parameter dir_play_uid (Chapter 4 – Configure Stratagy), Stratagy also plays the
User ID digits. If a user has not recorded a name, Stratagy either does not play the entry or plays the
User ID’s digits. Stratagy plays the first match to the caller. The caller can select this directory name
(and/or User ID) or choose to hear the next match.
How Stratagy Maintains the Directory
Stratagy automatically maintains the directory using:
•The names you create from the Users Menu Directory Name 1 and Directory Name 2 fields. To
avoid having a User ID appear in the directory (default 411), leave these fields blank. Chapter 6
– Menus for details.
•Recordings made via telephone from Stratagy’s User mode. See the Stratagy User Guide for
details.
For example, Mary would translate to 6279 for access after a caller enters 411, while Jo Ann
translates to 56266. When Stratagy matches a directory name after accessing 411, it plays that User
ID’s name recording. Therefore, it is important that users record their names, e.g., “Donna Smith.”
If a user has not recorded a name, Stratagy either does not play the entry (default) or plays the User
ID’s digits. Stratagy plays the first match to the caller. The caller can select this directory name
(and/or User ID) or choose to hear the next match.
Directory Instructions
The recording you make should be consistent with your customization of User IDs.
Notes
●Since the letters Q and Z do not appear on the telephone dial pad, you need to provide special
directions to the caller. Stratagy translates Q to 7 and Z to 9.
●Stratagy ignores spaces and punctuation in a name.
➤To record the directory instructions
1. Access Stratagy from your telephone using default User ID: 411 and Security Code: 411997.
Note Change the security code as soon as possible.
2. Record the instructions (see “Record Mailbox Greetings” on page B-1).
The following is a sample directory greeting.
“Please enter the first few letters of the first or last name of the person you are calling. For
the letter Q, use 7; and for the letter Z, use 9.”
Stratagy ships with an initial directory recording:
“Enter the first few letters of the first or last name of the person you wish to reach.”

Special Greeting User ID Mailboxes
Operator Mailbox Greeting
Stratagy I&M 06/02 B-5
Special Greeting User
ID Mailboxes
Operator Mailbox Greeting
The default for the Operator or general mailbox is User ID mailbox 0. Stratagy provides the
Operator User ID mailbox for after hour callers who are unable to direct their own calls (rotary dial
telephone) or do not know the extension of the party they want to reach.
When a caller accesses the Operator User ID mailbox, Stratagy plays its greeting which advises the
caller on how the call is handled. The caller can then leave a message in the mailbox (which the
Operator usually forwards on the next business day).
The greeting should cover the following information:
•Inform the caller that he has reached the Operator mailbox
•Remind the caller to leave his/her own name
•Remind the caller to state who the message is for
•State that the message will be delivered to the proper person
You can record up to seven greetings that you can schedule to play as needed.
➤To record the Operator Mailbox greeting
1. Access Stratagy from your telephone using default User ID: 0 and Security Code: 0997.
Note Change the security code as soon as possible.
2. Record the greeting (see “Record Mailbox Greetings” on page B-1).
The following is a typical Operator User ID mailbox greeting:
“You have reached the Operator mailbox. Please leave a message at the tone. Your message
will be forwarded on the next business morning.”
➤To customize the Operator User ID mailbox greeting
1. From the Main Menu, press Alt+U to access the Users Menu.
2. Use the Auto Menu to schedule the greetings to play as needed.
For detailed information about customization, see Chapter 6 – Menus and Chapter 8 –
Customization Examples.

Special Greeting User ID Mailboxes
Operator Mailbox Greeting
B-6 Stratagy I&M 06/02

Stratagy I&M 06/02 IN-1
Index
Index
A
accessing Stratagy
local,3-2
remote,3-3
direct dialing mode,3-3
manual dialing mode,3-4
active_hold parameter,4-14
admin_port parameter,4-29
adpcm_hq parameter,4-14, 5-20
adpcm_nq parameter,4-14, 5-20
adpcm_pq parameter,4-14, 5-20
advertising parameter,4-14, 5-18
AMIS,5-18
amisnodelist,9-8
configuration parameters,4-29
configuring Stratagy for AMIS,9-3
gateway mailbox,9-1
options,6-13
proxy mailbox,9-2
testing AMIS,9-7
user ID 989,5-2
amis_diskfull parameter,9-4
amis_enabled parameter,5-18, 9-4
amis_ltm parameter,9-4
amis_max_attemp parameter,9-4
amis_max_node parameter,9-4
amis_rna parameter,9-4
area_code parameter,9-4
area_office parameter,4-15
audiotex
schedule,5-10
auto(scheduling) menu,6-20
access/exit,6-20
customization examples,8-21
field descriptions,6-23
menu options,6-21
records
create,6-21
disable,6-22
how Stratagy uses,6-20
modify,6-22
options,6-24
auto_report parameter,4-15, 5-18
auto_report_time parameter,4-15, 5-18
automatic scheduler,5-10, 5-13
automatic system recovery,11-10, 11-14
B
backup utility,11-3
baud1 ~ 4 parameter,4-28
before you install,2-1
begin_rec_prompt parameter,4-15
box_grt parameter,4-29, 5-14
box_idx parameter,4-15, 5-12
box_snd parameter,4-16
boxlist,6-4
busy greetings,5-13
busy station identification,1-10, 5-11
C
call blocking,5-14
call processing control,5-3
chains,5-3
groups,5-3
menus,5-3
token programming language,5-3
call screening,5-11, 6-26
call transfer,5-12
caller instructions,B-3
user ID 991,5-2
calling party identification,2-15, 4-35, 5-11
cancel_busy_hold parameter,4-16
centrex,4-29, 4-32
chains,5-3, 5-12

Index
D~F
IN-2 Stratagy I&M 06/02
character codes,4-11
checklists,2-4, A-1
clock_sync parameter,4-16
cmt_maxlen parameter,4-16, 5-12
company greeting,5-2, 5-13, B-2
configuration,2-3
AMIS,9-1
Stratagy,4-1
configuration utility
system configuration option,4-13
connect_tone parameter,4-16
connections,2-11
external modem,2-14
IVP8
local,2-12
remote,2-13
console_slot_id parameter,1-9, 4-17, 5-11
copy
mailbox,6-3
messages,6-10
country_code parameter,9-4
customization examples
auto menu,8-21
emergency lists,8-20
extension change,8-26
holiday greetings,8-11, 8-24~8-25
message waiting light,8-14
notification to pager,8-17~8-18
notify menu,8-14
order shipment information,8-9
switching/maintaining languages,8-6
system paging for ring no answer,8-4
system paging user for special callers,8-3
time of day greetings,8-21
transferring caller directly to mailbox,8-13
unsupervised conferencing,8-27
using a status user ID to check message
count,8-2
voice notification,8-16
customize
user ID forms,2-4, A-1
user ID mailboxes,2-3
D
databits1 ~ 4 parameter,4-28
date and time (see system date and time)
daylight time,3-9~3-10, 4-17
db_locking parameter,4-17
defaults box
parameter,4-18
user ID 997,5-2
defined tokens,7-7
delete
user ID mailbox,6-4
diagnostic programs
Stratagy diagnostic utilities,11-12
trace,11-10
diagnostics,11-10
MSG.LOG,11-13
scandisk,11-13
STRATAGY.LOG,11-12
dir_play_uid parameter,4-18
direct
message,5-2
transfer,8-13
directory,5-12
how Stratagy maintains the directory,B-4
instructions,B-4
mailbox,B-4
names,6-6
user ID 411,5-2
disk space notification,5-12
diskwarn parameter,4-18, 5-12
distribution lists,5-12
do not disturb,5-12, 6-9, 6-25
DSS/busy lamp feature,1-10
dss_active parameter,1-9, 4-18, 5-11
dtmf_dly parameter,4-19
dtmf_gate parameter,4-19, 5-11
dtmf_on parameter,4-19
E
emergency lists,8-20
error_box parameter,4-19, 5-10
exiting Stratagy (see system shutdown)
extension change,8-26
extensions,5-13
scheduled,5-10
shared,5-19
F
fault finding,11-10
trace,11-10
fax fax tone detect,4-21, 5-2, 5-13
status,3-11

Index
G~K
Stratagy I&M 06/02 IN-3
Index
features
busy station identification,1-10, 5-11
DSS/busy lamp,1-10
night transfer alternate routing,1-10, 2-16
Stratagy IVP8 system time,1-10, 3-9
FIFO,5-16, 6-12
filecopy,11-9
fixed length user ID parameters,4-30
fixed_len0 ~ 9 parameter,4-30
forms
auto (scheduling),A-6
greeting scripts,A-8
notify,A-7
user ID customization,2-4, A-1
users,A-5
future delivery,5-13
parameter,4-19
user ID 995,5-2, 5-13
future_delivery parameter,5-13
G
gain_norm parameter,4-19, 5-16
gateway mailbox,9-1
greeting length,1-5
greetings,6-10, 6-26
busy,5-13
caller instructions,B-3
company,5-10, 5-13, B-2
current,6-11
holiday,8-11, 8-24~8-25
initial greeting mailboxes,B-2
operator mailbox greetings,B-5
personal,5-10, 5-13
port selectable,5-14
record mailbox greetings,B-1
restart,5-14
time of day,8-21
group partitions,5-14
group/chains screen,6-14
groups,5-3, 6-16
guest defaults
parameter,4-20
user ID 996,5-2, 5-14
guest users,5-14
limit,5-14
guest_defaults parameter,5-14
guest_max parameter,4-20, 5-14
guest_min parameter,4-20, 5-14
H
hangup_supervision parameter,4-20
hard drive
space,3-11
hardware
determine hardware sizing,2-1
environmental considerations,2-7
front and back panel,1-4
maintenance,11-1
ports,2-1
power requirements,2-7
pre-installation,2-1
serial ports,1-3
set up,2-8
sizing,2-1
status light,1-4, 1-8
turning on/off,1-4
upgrade voice ports,11-10
voice port status lights,1-5, 1-9
help (see online help function)
holiday greetings,8-11, 8-24~8-25
hot_box parameter,4-21, 5-13
I
info/status screen,6-18
initial greeting mailboxes,B-2
caller instructions,B-3
company greeting,B-2
sample initial greeting,B-3
installation
before you install,2-1
checklists,2-4, A-1
pre-installation survey,2-1
installer,1-1
integration,2-3
centrex,4-29, 4-32
patterns
additional,4-12
character codes,4-11
how Stratagy matches,4-12
masks,4-12
SMDI,2-15, 4-32, 4-35
strings,4-11
Interactive Voice Response,5-15
internal modem,1-8
K
ksu_time parameter,1-9, 3-9, 4-21

Index
L~M
IN-4 Stratagy I&M 06/02
L
languages (switching/maintaining),8-6
lcoff parameter,4-21
lcvalid parameter,4-22
lcwait parameter,4-22
LIFO,5-16, 6-12
local access
before you start,3-2
connecting the cable,2-11
local_amis_node parameter,9-4
log information,10-2
types of logs
fax,10-2
message,10-2
Stratagy (system),10-2
user ID,10-2
login_pound parameter,4-22
lognam parameter,4-22
M
mailboxes
AMIS gateway,9-1
AMIS proxy,9-2
customize,5-4
customizing,2-3, 5-4
directory,B-4
initial greeting mailboxes,B-2
caller instructions,B-3
company greeting,B-2
operator mailbox greeting,B-5
record mailbox greetings,B-1
special greeting user ID mailboxes,B-1
types,5-4
control,5-4
information,5-4
user,5-4
user ID,5-4, 5-8, 6-1
main menu
access,3-8
daylight time,3-10
field descriptions,3-10
menu bar,3-10, 6-31, 10-7
options,3-8
shutdown,3-6
system date and time,3-9
system information,3-11
masks,4-12
max_dl_inits parameter,4-22
max_prompt parameter,4-22
memory,1-2
menu
auto(scheduling),6-20
group/chains screen,6-14
main,3-8
notify,6-27
options screen,6-8
users,6-1
message
alternate rate,6-12
busy,6-11
continuous delete,5-15
continuous playback,5-15
copy,5-15, 6-10
copy with delete,5-15
date/time,5-15, 6-12
length,5-15
new,5-17
notification,5-16
order,6-12
pause during playback/recording,5-16
pending,5-17
playback control,5-16
purging,5-16
queues,5-17
retrieval control,5-16
saved,5-17
speed control,5-16
statistics,6-18
store,6-10
urgent,5-17
volume,5-16, 6-10
message pending,6-11
message waiting light
customization example,8-14
messages
length,1-5
min_msg parameter,4-22
modems
external,2-14
internal,1-8, 2-13
portable/desktop computer,2-13
MSG.LOG,11-13
copy,11-13
enable,11-13
msg_log parameter,4-22
msg_pending_threshold parameter,4-22, 5-17
multiple system languages,5-17

Index
N~P
Stratagy I&M 06/02 IN-5
Index
N
n_msg_scan parameter,4-23
n_ochan parameter,4-23, 5-16, 5-19
n_rings parameter,4-30
nam_maxlen parameter,4-23, 5-17
name (and extension) control,5-17
networking (see AMIS)
night transfer alternate routing,1-10, 2-16
notification,8-17
enable/disable,6-32
features,6-33
frequency,6-32
method,6-34
pager on urgent messages,8-18
type,6-33
disk,5-12
panic,5-10
relay,5-18
urgent,5-17
notify menu,6-27
access/exit,6-28
customization examples,8-14
field descriptions,6-31
menu options,6-28
records
create,6-29
create without using template,6-29
disable,6-30
field values,6-29
modify,6-29
options,6-32
summary,6-31
templates,6-28, 6-31
notify_restriction parameter,4-23, 5-19
O
online help function,3-6
detailed help,3-6
help line,3-6
operator
mailbox greeting,B-5
user ID 0,5-2
options screen,6-8
P
pager,8-17~8-18
paging
customization example,8-3~8-4
office,5-18
parameters
active_hold,4-14
admin_port,4-29
adpcm_hq,4-14, 5-20
adpcm_nq,4-14, 5-20
adpcm_pq,4-14, 5-20
advertising,4-14, 5-18
amis_diskfull,9-4
amis_enabled,5-18, 9-4
amis_ltm,9-4
amis_max_attemp,9-4
amis_max_node,9-4
amis_rna,9-4
area_code,9-4
area_office,4-15
auto_report,4-15, 5-18
auto_report_time,5-18
baud1 ~ 4,4-28
begin_rec_prompt,4-15
box_grt,4-29, 5-14
box_idx,4-15, 5-12
box_snd,4-16
cancel_busy_hold,4-16
clock_sync,4-16
cmt_maxlen,4-16, 5-12
connect_tone,4-16
console_slot_id,1-9, 4-17, 5-11
country_code,9-4
databits1 ~ 4,4-28
daylight_saving_time,4-17
db_locking,4-17
defaults_box,4-18
dir_play_uid,4-18
diskwarn,4-18, 5-12
dss_active,1-9, 4-18, 5-11
dtmf_dly,4-19
dtmf_gate,4-19, 5-11
dtmf_on,4-19
error_box,4-19, 5-10
fixed_len0 ~ 9,4-30
future_delivery,4-19, 5-13
gain_norm,4-19, 5-16
guest_defaults,4-20, 5-14
guest_max,4-20, 5-14
guest_min,4-20, 5-14
hangup_supervision,4-20
hot_box,4-21, 5-13
ksu_time,1-9, 3-9, 4-21
lcoff,4-21
lcvalid,4-22

Index
P~P
IN-6 Stratagy I&M 06/02
lcwait,4-22
local_amis_node,9-4
login_pount,4-22
lognam,4-22
max_dl_inits,4-22
max_prompt,4-22
min_msg,4-22
msg_log,4-22
msg_pending_threshold,4-22, 5-17
n_msg_scan,4-23
n_ochan,4-23, 5-16, 5-19
n_rings,4-30
nam_maxlen,4-23, 5-17
notify_restriction,4-23, 5-19
parity1 ~ 4,4-28
partial_q_ok,4-23
password,4-23
pbx_type,4-23
per port definitions,4-29
phone_number,9-4
play_caller_id,4-24, 5-11
play_skip,4-24, 5-16
please_hold,4-24
prompt_file,4-24, 5-17
purge,4-24, 5-16
restore_config,4-24, 5-10
restore_original,4-25, 5-10
security_max_length,4-25, 5-20
security_min_length,4-25, 5-20
serial port definitions,4-28
serial_port1 ~ 4,4-28
short_direct_send,4-25
shutdown,4-25
skip_name_announce,4-25
smdi_base_port,4-33
smdi_port,4-33
smdi_pretimeout,4-33
smdi_type,4-33
stopbits1 ~ 4,4-29
tape_length,4-26, 5-15
timestamp_forwards,4-26
tmo_2digit_menu,4-26
tmo_blank,4-26, 5-18
tmo_dtmf,4-26
tmo_dtmf_login,4-26
tmo_hold,4-26
tmo_idle,4-27
tmo_menu,4-27
tmo_pickup,4-27
tmo_resume,4-27, 5-16
tmo_silence,4-27
tmo_sound,4-27
trace_cap,4-27
unknown_node_action,9-4
use_pvc,4-27
user_log,4-28
parity1 ~ 4 parameter,4-28
partial_q_ok parameter,4-23
password,3-9
password parameter,4-23
pbx_type parameter,4-23
per port definitions parameters,4-29
personal greetings,5-13
phone_number parameter,9-4
play_caller_id parameter,4-24, 5-11
play_skip parameter,4-24, 5-16
please_hold parameter,4-24
portable/desktop computer,2-11
ports
number of,2-1
parameters,4-28
per port definitions,4-29
universal,5-19
power
requirements,2-7
supply cable,2-8
UPS,2-7~2-8
pre-installation
checklists,2-4, A-1
forms,2-4
survey,2-1
program
application,2-14
mailboxes,2-14
Strata DK,2-5
programmable dial actions,5-18
programming
tokens,7-1
prompt_file parameter,4-24, 5-17
prompts,5-16
proxy mailbox,9-2
purge parameter,4-24, 5-16

Index
R~S
Stratagy I&M 06/02 IN-7
Index
R
record
mailbox greetings,B-1
remote access
manual dialing mode,3-4
prior to installation,3-3
using,3-4
replaced or variable tokens,7-4
reports,5-18, 10-1
automatic generation,10-6
definitions,10-3
listening to system activity,10-2
log information,10-2
menu options,10-3
print,10-6
run a report,10-5
save to floppy disk,10-6
types,10-2
view,10-6
system activity,10-1
user activity,10-1
reserved user IDs,1-5
restart Stratagy Flash,3-8
restart Stratagy IVP8,3-8
restore utility,11-5
restore_config parameter,4-24, 5-10
restore_original parameter,4-25, 5-10
retrieve trace file,11-7
ring duration,5-18
ring no answer
customization example,8-4
S
sampling rates,5-20
scandisk,11-13
scheduling (see auto(scheduling) menus)
screen advertisement,5-18
security code,5-20, 6-7
security_max_length parameter,4-25, 5-20
security_min_length parameter,4-25, 5-20
serial_port1 ~ 4 parameter,4-28
short_direct_send parameter,4-25
shut down
Strata DK,2-7
shut down procedure
via telephone set,3-6
shutdown (see system shutdown)
shutdown parameter,4-25
single-digit menus,5-19, 6-17
singular tokens,7-2
site environmental considerations,2-7
power requirements,2-7
skip_name_announce parameter,4-25
slot assignments,2-9
DSS/busy lamp field,2-10
SMDI
calling party identification,2-15, 4-35, 5-11
serial integration,4-32
connection,4-34
enabling,4-33
testing,4-34
validating the link,4-34
smdi_base_port parameter,4-33
smdi_port parameter,4-33
smdi_pretimeout parameter,4-33
smdi_type parameter,4-33
soft modem
user ID 993,5-2
special greeting user ID mailboxes,B-1
directory mailbox,B-4
operator mailbox greeting,B-5
statistics
faxes,6-19
main menu,10-1
message,6-18
user’s,6-18
users menu,10-2
status lights,1-4~1-5, 1-9
stopbits1 ~ 4 parameter,4-29
Strata CTX,2-5
Strata DK,2-6, 2-8
Stratagy Admin,2-11, 3-3
configuration fields,4-2
configure software,2-14
load software,2-11
Stratagy Flash
exclusive features
maximum greeting length,1-5
maximum message lenth,1-5
reserved user IDs,1-5
features
unsupported,1-6
Stratagy IVP8
configure,2-14
connect to portable/desktop computer,2-11
install,2-7

Index
T~T
IN-8 Stratagy I&M 06/02
modems
external,2-14
internal,2-13
slot assignments,2-9
system time,1-10, 3-9
verify
basic auto attendant functions,2-10
operation,2-10
port functions,2-10
voice playback,2-10
Stratagy software,1-2
upgrade,11-6
STRATAGY.LOG,11-12
copy,11-12
switching languages
customization example,8-6
system
accessing and using,3-1
activity
listening,10-2
view,10-1
AMIS networking,9-1
before you install,2-1
configuration,2-3, 4-1
date and time,3-9
diagnostic utilities,11-12
hardware
maintenance,11-1
how Stratagy operates,5-1
how Stratagy processes user IDs,5-5
integration,2-3
log information,10-2
navigating,3-4
paging,8-3~8-4
pre-installation survey,2-1
reports,10-1
shutdown,3-6, 3-10
via telephone set,5-19
startup,3-2
statistics,6-19
system information,3-11
token programming,7-1
trace,11-10
troubleshooting,11-10
user IDs,5-1
using,3-4
system administrator,1-1
mailbox,5-19
user ID 999,5-3, 5-12
system configuration option,4-13
modify parameters,4-13
system integration patterns
definitions and settings,4-10
remove,4-10
T
tape_length parameter,4-26, 5-15
telephone system configuration,4-5
telephone system dial codes
definition/settings,4-6
templates,6-28, 6-31
timestamp_forwards parameter,4-26
tmo_2digit_menu parameter,4-26
tmo_blank parameter,4-26, 5-18
tmo_dtmf parameter,4-26
tmo_dtmf_login parameter,4-26
tmo_hold parameter,4-26
tmo_idle parameter,4-27
tmo_menu parameter,4-27
tmo_pickup parameter,4-27
tmo_resume parameter,4-27, 5-16
tmo_silence parameter,4-27
tmo_sound parameter,4-27
token programming language,5-3, 5-19, 7-1
auto’s extension field,7-1
defined tokens,7-7
notify’s method field,7-1
programming tokens,7-2
replaced or variable tokens,7-4
singular tokens,7-2
user’s extension field,7-1
using,7-1
tokens
defined
+( ) addition,7-19
=( ) equate,7-19
[( ) read %S variables,7-20
]( ) write %S variable,7-20
^( ) change port volume,7-20
|( ) append variables,7-19
G( ) go to user ID,7-7
H( ) hang up process,7-7
I( ) if conditional,7-7
KB( ) plays tone,7-8
KC( ) compare security code,7-8
KD( ) delete mailbox message,7-8
KF( ) suppresses DTMF-gate,7-9
KI( ) position of substring,7-9

Index
U~U
Stratagy I&M 06/02 IN-9
Index
KL( ) log in caller,7-10
KM( ) soft modem,1-10, 2-16, 5-2, 7-10
KN( ) access AMIS,7-10
KR( ) creates a recording,7-10
KT( ) forwards calls,1-10, 2-16, 7-11
KV( ) delete record,7-11
L( ) switch system language,7-11
M( ) audiotex menu,7-12
N( ) update record,7-12~7-13
O( ) timed on-hook,7-13
P( ) play,7-14
Q( ) question and answer,7-15
R( ) read DTMF from a caller,7-15
S( ) serial port access,7-16
V( ) search for value,7-17
W( ) wait for event,7-18
X( ) creates zero length file,7-18
Y( ) deletes file,7-18
Z( ) execute done chain,7-18
replaced
%A public network line access,7-4
%B1 ~ %B6 board serial number,7-4
%C replaces port number,7-4
%D hard drive space remaining,7-4
%E extension field,7-4
%F user ID’s directory name,7-4
%K value held in calling party ID,7-5
%M number of messages,7-5
%N number of new messages,7-5
%P previously accessed user ID,7-5
%R relay page DTMF,7-5
%S0 ~ %S19 store value,7-5
%T connect time,7-5
%U user ID,7-5
%V variable,7-6
%W current day of week,7-6
%X transfer hold codes,7-6
%Y current date,7-6
%Z current time,7-6
LEN[ ] length,7-6
singular
- short pause,7-2
# plays DTMF tone,7-2
* plays DTMF tone,7-2
, long pause,7-2
@ suppress normal process,7-2
~ timed break recall,7-2
0 ~ 9 plays DTMF tone,7-2
A ~ D plays DTMF tone,7-2
E earth recall,7-2
F hookflash,7-2
H go off hook,7-3
U return to transferring user ID,7-3
X remember event,7-3
Y forget event,7-3
Z test event,7-3
tools utility,4-4, 11-1~11-2
navigating menu,11-2
Toshiba DK424,4-32
Toshiba plug and play,1-3, 4-4
trace,11-10, 11-12
filter setup screen,11-8
retrieve file,11-7
trace filter setup screen,11-8
trace out
enable,11-12
trace_cap parameter,4-27
troubleshooting,11-10
determining the problem,11-10
diagnostic programs
MSG.LOG,11-13
scandisk,11-13
STRATAGY.LOG,11-12
initial power up,11-11
Stratagy diagnostic utilities,11-12
trace,11-10
turning Stratagy Flash on/off,1-4
U
Uninterruptible Power Supply (see UPS)
unknown_node_action parameter,9-4
unpack and inspect,2-4
unsupervised conferencing,8-27
upgrade
Stratagy software,11-6
voice ports,11-10
UPS,2-7~2-8
urgent messages,5-17
use_pvc parameter,4-27
user ID,5-1, 5-5
0 operator,5-2
411 directory,5-2
982/983 System Shutdown,5-2
989 AMIS loopback,5-2
990 company greeting,5-2, 5-13
991 caller instructions,5-2
993 Stratagy IVP8 soft modem,5-2
994 fax tone detect,5-2, 5-13
995 future delivery,5-2, 5-13

Index
V~V
IN-10 Stratagy I&M 06/02
996 guest defaults,5-2, 5-14
997 defaults box,5-2
998 direct message,5-2
999 system administrator user ID,5-3, 5-12
customization examples,8-1
customization forms,2-4, A-1
fixed length parameters,4-30
how Stratagy processes,5-5
mailboxes,5-4, 5-8, 6-2
copy,6-3
create,6-2
customize,2-3
delete,6-4
modify,6-3
types
control,5-4
information,5-4
user,5-4
multiple,8-2
number defined,3-11
reserved,5-2
special greeting mailboxes,B-1
status,8-2
user statistics,6-18
user_log parameter,4-28
users menu,6-1
access,6-1
customization examples,8-1
directory names,6-6
examples,8-1
exit,6-1
field descriptions,6-5
group/chains screen,6-14
info/status screen,6-18
menu options,6-2
message statistics,6-18
options screen,6-8
security code,6-7
user ID mailbox
copy,6-3
create,6-2
delete,6-4
list amisnodelist,9-8
boxlist,6-4
modify,6-3
user statistics,6-18
utilities
configuration,4-1
scandisk,11-13
trace,11-10
V
view
system/user activity,10-1
voice forms,5-20
voice notification
customization example,8-16
voice ports,1-5, 1-9, 11-10
upgrade,11-1
