The Definitive Guide To HTML5 Video
User Manual:
Open the PDF directly: View PDF ![]() .
.
Page Count: 337 [warning: Documents this large are best viewed by clicking the View PDF Link!]
- Prelim
- Contents at a Glance
- Contents
- About the Author
- About the Technical Reviewer
- Acknowledgments
- Preface
- Introduction
- Audio and Video Elements
- CSS3 Styling
- JavaScript API
- HTML5 Media and SVG
- HTML5 Media and Canvas
- HTML5 Media and Web Workers
- HTML5 Audio API
- Media Accessibility and Internationalization
- 9.1 Alternative Content Technologies
- 9.1.1 Vision-impaired Users
- (1) Perceiving Video Content
- (2) Interacting with Content
- 9.1.2 Hard-of-hearing Users
- (1) Captions
- (2) Transcript
- (3) Sign Translation
- (4) Clear Audio
- 9.1.3 Deaf-blind users
- (1) Individual Consumption
- (2) Shared Viewing Environment
- 9.1.4 Learning Support
- 9.1.5 Foreign Users
- (1) Scene Text Translations
- (2) Audio Translations
- 9.1.6 Technology Summary
- 9.2 Transcriptions
- 9.3 Alternative Synchronized Text
- 9.4 Multitrack Audio/Video
- 9.5 Navigation
- 9.6 Accessibility Summary
- 9.1 Alternative Content Technologies
- Audio and Video Devices
- Summary and Outlook
- Index

this print for content only—size & color not accurate 7.5 x 9.25 spine = 0.75" 336 page count 444PPI
Pfeiffer
THE EXPERT’S VOICE® IN WEB DEVELOPMENT
The Definitive Guide to
HTML5
Video
CYAN
MAGENTA
YELLOW
BLACK
PANTONE 123 C
Silvia Pfeiffer
Companion
eBook
Available
Everything you need to know about the
new HTML5 video element
BOOKS FOR PROFESSIONALS BY PROFESSIONALS®
The Definitive Guide to HTML5 Video
HTML5 provides many new features for web development, and one of the most
important of these is the video element. The Definitive Guide to HTML5 Video
guides you through the maze of standards and codecs, and shows you the truth
of what you can and can’t do with HTML5 video.
Starting with the basics of the video and audio elements, you’ll learn how
to integrate video in all the major browsers, and which file types you’ll require
to ensure the widest reach. You’ll move on to advanced features, such as creat-
ing your own video controls, and using the JavaScript API for media elements.
You’ll also see how video works with new web technologies, such as CSS, SVG,
Canvas, and Web Workers. These will enable you to add effects, or to run video
processing tasks as a separate thread without disrupting playback. Finally,
you’ll learn how to make audio and video accessible. If you have assets to con-
vert or you need to create new audio and video that is compatible with HTML5,
the book also covers the tools available for that.
HTML5 is in its infancy and there are still aspects in development. This book
lets you know which parts are production-ready now, and which are changing
as browsers implement them. You’ll see how you can ensure the highest brows-
er compatibility of video features, and how you can future-proof your code
while being prepared for change.
The most important thing to remember, though, is that native video in
HTML is finally here. Enjoy your journey into the bright new world!
US $39.99
Shelve in
Web Development / HTML5
User level:
Beginner–Advanced
THE APRESS ROADMAP
Foundation
HTML5 Canvas
Programming
The Essential Guide to
HTML5
Pro HTML5
Beginning
HTML5 and CSS3
The Definitive Guide to
HTML5 Video
www.apress.com
SOURCE CODE ONLINE
Companion eBook
See last page for details
on $10 eBook version
ISBN 978-1-4302-3090-8
9781430230908
53 999
Silvia Pfeiffer
HTML5 Video
The Definitive
Guide to
http://freepdf-books.com

i
The Definitive Guide to
HTML5 Video
■ ■ ■
Silvia Pfeiffer
www.itbooksh
ub.com
|||||||||||||||||||||||||
|||||||||||||||||
www.cncmanu
al.com
http://freepdf-books.com

ii
The Definitive Guide to HTML5 Video
Copyright © 2010 by Silvia Pfeiffer
All rights reserved. No part of this work may be reproduced or transmitted in any form or by any
means, electronic or mechanical, including photocopying, recording, or by any information
storage or retrieval system, without the prior written permission of the copyright owner and the
publisher.
ISBN-13 (pbk): 978-1-4302-3090-8
ISBN-13 (electronic): 978-1-4302-3091-2
Printed and bound in the United States of America 9 8 7 6 5 4 3 2 1
Trademarked names, logos, and images may appear in this book. Rather than use a trademark
symbol with every occurrence of a trademarked name, logo, or image we use the names, logos, and
images only in an editorial fashion and to the benefit of the trademark owner, with no intention of
infringement of the trademark.
The use in this publication of trade names, trademarks, service marks, and similar terms, even if
they are not identified as such, is not to be taken as an expression of opinion as to whether or not
they are subject to proprietary rights.
President and Publisher: Paul Manning
Lead Editor: Frank Pohlmann
Technical Reviewer: Chris Pearce
Editorial Board: Steve Anglin, Mark Beckner, Ewan Buckingham, Gary Cornell, Jonathan
Gennick, Jonathan Hassell, Michelle Lowman, Matthew Moodie, Duncan Parkes, Jeffrey
Pepper, Frank Pohlmann, Douglas Pundick, Ben Renow-Clarke, Dominic Shakeshaft, Matt
Wade, Tom Welsh
Coordinating Editor: Adam Heath
Copy Editor: Mark Watanabe
Compositor: MacPS, LLC
Indexer: Becky Hornyak
Artist: April Milne
Cover Designer: Anna Ishchenko
Distributed to the book trade worldwide by Springer Science+Business Media, LLC., 233 Spring
Street, 6th Floor, New York, NY 10013. Phone 1-800-SPRINGER, fax (201) 348-4505, e-mail
orders-ny@springer-sbm.com, or visit www.springeronline.com.
For information on translations, please e-mail rights@apress.com, or visit www.apress.com.
Apress and friends of ED books may be purchased in bulk for academic, corporate, or promotional
use. eBook versions and licenses are also available for most titles. For more information, reference
our Special Bulk Sales–eBook Licensing web page at www.apress.com/info/bulksales.
The information in this book is distributed on an “as is” basis, without warranty. Although every
precaution has been taken in the preparation of this work, neither the author(s) nor Apress shall
have any liability to any person or entity with respect to any loss or damage caused or alleged to be
caused directly or indirectly by the information contained in this work.
The source code for this book is available to readers at www.apress.com.
www.itbooksh
ub.com
|||||||||||||||||||||||||
|||||||||||||||||
www.cncmanu
al.com
http://freepdf-books.com

iii
To Benjamin, who asked me yesterday if he was
allowed to read his mum's book
so he could do all those cool video demos.
And to John, who has made it all possible.
– Silvia
www.itbooksh
ub.com
|||||||||||||||||||||||||
|||||||||||||||||
www.cncmanu
al.com
http://freepdf-books.com

iv
Contents at a Glance
■Contents ................................................................................................................ v
■About the Author ................................................................................................... x
■About the Technical Reviewer .............................................................................. xi
■Acknowledgments ............................................................................................... xii
■Preface ............................................................................................................... xiii
■Chapter 1: Introduction ......................................................................................... 1
■Chapter 2: Audio and Video Elements ................................................................... 9
■Chapter 3: CSS3 Styling ...................................................................................... 49
■Chapter 4: JavaScript API ................................................................................... 81
■Chapter 5: HTML5 Media and SVG ..................................................................... 135
■Chapter 6: HTML5 Media and Canvas ................................................................ 165
■Chapter 7: HTML5 Media and Web Workers ...................................................... 203
■Chapter 8: HTML5 Audio API ............................................................................. 223
■Chapter 9: Media Accessibility and Internationalization .................................. 247
■Chapter 10: Audio and Video Devices ............................................................... 283
■Appendix: Summary and Outlook ...................................................................... 297
■Index ................................................................................................................. 303
www.itbooksh
ub.com
|||||||||||||||||||||||||
|||||||||||||||||
www.cncmanu
al.com
http://freepdf-books.com

v
Contents
■Contents at a Glance ............................................................................................ iv
■About the Author ................................................................................................... x
■About the Technical Reviewer .............................................................................. xi
■Acknowledgments ............................................................................................... xii
■Preface ............................................................................................................... xiii
■Chapter 1: Introduction ......................................................................................... 1
1.1 A Bit of History .......................................................................................................... 1
1.2 A Common Format? .................................................................................................. 2
1.3 Summary ................................................................................................................... 7
■Chapter 2: Audio and Video Elements ................................................................... 9
2.1 Video and Audio Markup ........................................................................................... 9
2.1.1 The Video Element ........................................................................................................................ 9
2.1.2 The Audio Element ...................................................................................................................... 20
2.1.3 The Source Element .................................................................................................................... 23
2.1.4 Markup Summary ....................................................................................................................... 29
2.2 Encoding Media Resources ..................................................................................... 30
2.2.1 Encoding MPEG-4 H.264 Video ................................................................................................... 30
2.2.2 Encoding Ogg Theora .................................................................................................................. 32
2.2.3 Encoding WebM .......................................................................................................................... 34
2.2.4 Encoding MP3 and Ogg Vorbis .................................................................................................... 35
www.itbooksh
ub.com
|||||||||||||||||||||||||
|||||||||||||||||
www.cncmanu
al.com
http://freepdf-books.com

■ CONTENTS
vi
*2.3 Publishing .............................................................................................................. 35
2.4 Default User Interface .................................................................................................................... 41
2.4.3 Controls Summary ...................................................................................................................... 47
2.5 Summary ........................................................................................................................................ 48
■Chapter 3: CSS3 Styling ...................................................................................... 49
3.1 CSS Box Model and Video ....................................................................................... 50
3.2 CSS Positioning and Video ...................................................................................... 52
3.2.1 Inline Box Type ............................................................................................................................ 52
3.2.2 None Box Type ............................................................................................................................ 54
3.2.3 Block Box Type ............................................................................................................................ 55
3.2.4 Relative Positioning Mode ........................................................................................................... 55
3.2.5 Float Positioning Mode ................................................................................................................ 58
3.2.6 Absolute Positioning Mode .......................................................................................................... 59
3.2.7 Video Scaling and Alignment Within Box .................................................................................... 60
3.3 CSS Basic Properties .............................................................................................. 62
3.3.1 Opacity ........................................................................................................................................ 63
3.3.2 Gradient ...................................................................................................................................... 64
3.3.3 Marquee ...................................................................................................................................... 66
3.4 CSS Transitions and Transforms ............................................................................. 68
3.4.1 Transitions .................................................................................................................................. 68
3.4.2 2D Transforms ............................................................................................................................ 70
3.4.3 3D Transforms ............................................................................................................................ 71
3.4.4 Putting a Video Gallery Together ................................................................................................. 74
3.5 CSS Animations ....................................................................................................... 76
3.6 Summary ........................................................................................................................................ 78
■Chapter 4: JavaScript API ................................................................................... 81
4.1 Content Attributes ................................................................................................... 82
4.2 IDL Attributes .......................................................................................................... 83
4.2.1 General Features of Media Resources ........................................................................................ 84
4.2.2 Playback-Related Attributes of Media Resources ....................................................................... 97
www.itbooksh
ub.com
|||||||||||||||||||||||||
|||||||||||||||||
www.cncmanu
al.com
http://freepdf-books.com

■ CONTENTS
vii
4.2.3 States of the Media Element ..................................................................................................... 107
4.3 Control Methods in the API ................................................................................... 122
4.4 Events ................................................................................................................... 127
4.5 Custom Controls .................................................................................................... 130
4.5 Summary ............................................................................................................... 134
■Chapter 5: HTML5 Media and SVG ..................................................................... 135
5.1 Use of SVG with <video> ...................................................................................... 136
5.2 Basic Shapes and <video> ................................................................................... 137
5.3 SVG Text and <video> .......................................................................................... 141
5.4 SVG Styling for <video> ........................................................................................ 143
5.5 SVG Effects for <video> ........................................................................................ 147
5.6 SVG Animations and <video> ............................................................................... 154
5.7 Media in SVG ......................................................................................................... 156
5.8. Summary .............................................................................................................. 163
■Chapter 6: HTML5 Media and Canvas ................................................................ 165
6.1 Video in Canvas ..................................................................................................... 166
6.2 Styling ................................................................................................................... 176
6.3 Compositing .......................................................................................................... 185
6.4 Drawing Text ......................................................................................................... 190
6.5 Transformations .................................................................................................... 192
6.6 Animations and Interactivity ................................................................................. 198
6.7 Summary ............................................................................................................... 200
■Chapter 7: HTML5 Media and Web Workers ...................................................... 203
7.1 Using Web Workers on Video ................................................................................ 204
7.2 Motion Detection with Web Workers ..................................................................... 208
7.3 Region Segmentation ............................................................................................ 212
7.4 Face Detection ...................................................................................................... 217
www.itbooksh
ub.com
|||||||||||||||||||||||||
|||||||||||||||||
www.cncmanu
al.com
http://freepdf-books.com

■ CONTENTS
viii
7.5 Summary ............................................................................................................... 222
■Chapter 8: HTML5 Audio API ............................................................................. 223
8.1 Reading Audio Data ............................................................................................... 224
8.1.1 Extracting Audio Samples ......................................................................................................... 224
8.1.2 Information about the Framebuffer ........................................................................................... 226
8.1.3 Rendering an Audio Waveform ................................................................................................. 227
8.1.4 Rendering an audio spectrum ................................................................................................... 230
8.2 Generating Audio Data .......................................................................................... 232
8.2.1 Creating a Single-Frequency Sound ......................................................................................... 232
8.2.2 Creating Sound from Another Audio Source ............................................................................. 233
8.2.3 Continuous Playback ................................................................................................................. 234
8.2.4 Manipulating Sound: the Bleep ................................................................................................. 236
8.2.5 A Tone Generator ...................................................................................................................... 237
8.3 Overview of the Filter Graph API ........................................................................... 239
8.3.1 Basic Reading and Writing ........................................................................................................ 239
8.3.2 Advanced Filters ....................................................................................................................... 240
8.3.3 Creating a Reverberation Effect ................................................................................................ 241
8.3.4 Waveform Display ..................................................................................................................... 243
8.4 Summary ............................................................................................................... 245
■Chapter 9: Media Accessibility and Internationalization .................................. 247
9.1 Alternative Content Technologies ......................................................................... 248
9.1.1 Vision-impaired Users ............................................................................................................... 248
9.1.2 Hard-of-hearing Users .............................................................................................................. 250
9.1.3 Deaf-blind users ........................................................................................................................ 253
9.1.4 Learning Support ...................................................................................................................... 254
9.1.5 Foreign Users ............................................................................................................................ 254
9.1.6 Technology Summary ............................................................................................................... 255
9.2 Transcriptions ....................................................................................................... 255
9.2.1 Plain Transcripts ....................................................................................................................... 255
9.2.2 Interactive Transcripts .............................................................................................................. 256
www.itbooksh
ub.com
|||||||||||||||||||||||||
|||||||||||||||||
www.cncmanu
al.com
http://freepdf-books.com
■ CONTENTS
ix
9.3 Alternative Synchronized Text .............................................................................. 258
9.3.1 WebSRT ..................................................................................................................................... 259
9.3.2 HTML Markup ............................................................................................................................ 267
9.3.3 In-band Use ............................................................................................................................... 269
9.3.4 JavaScript API ........................................................................................................................... 273
9.4 Multitrack Audio/Video .......................................................................................... 275
9.5 Navigation ............................................................................................................. 276
9.5.1 Chapters .................................................................................................................................... 277
9.5.2 Keyboard Navigation ................................................................................................................. 278
9.5.3 Media Fragment URIs ................................................................................................................ 278
9.6 Accessibility Summary .......................................................................................... 281
■Chapter 10: Audio and Video Devices ............................................................... 283
10.1 Architectural Scenarios ....................................................................................... 283
10.2 The <device> element ........................................................................................ 283
10.3 The Stream API ................................................................................................... 285
10.3 The WebSocket API ............................................................................................. 288
10.3 The ConnectionPeer API ...................................................................................... 295
10.4 Summary ............................................................................................................. 296
■Appendix: Summary and Outlook ...................................................................... 297
A.1 Outlook .................................................................................................................. 297
A.1.1 Metadata API ............................................................................................................................. 297
A.1.2 Quality of Service API ................................................................................................................ 298
A.2 Summary of the Book ........................................................................................... 299
■Index ................................................................................................................. 303
http://freepdf-books.com

■ CONTENTS
x
About the Author
■ Silvia Pfeiffer, PhD (nat sci), was born and bred in Germany, where she received a
combined degree in Computer Science and Business Management, and later gained a
PhD in Computer Science. Her research focused on audio-visual content analysis
aiming to manage the expected onslaught of digital audio and video content on the
Internet. This was in the last century during the first days of the Web, long before the
idea of YouTube was even born.
After finishing her PhD in 1999, Silvia was invited to join the CSIRO, the
Commonwealth Scientific and Industrial Research Organisation, in Australia. It was
here, after a brief involvement with the standardization of MPEG-7, that Silvia had the
idea of using audio-visual annotations for increasing the usability of media content on the Web.
Together with her colleagues they developed the idea of a “Continuous Media Web”, a Web where
all the information would be composed of audio and video content and you would browse through it
just as you do with text pages by following hyperlinks. Added onto this would be full, timed transcripts of
audio-visual resources, enabling search engines to index them and users to find information deep inside
media files through existing and well known web search approaches.
Silvia and her colleagues connected with the Xiph organization and realized their ideas through
extensions to Ogg, plug-ins for Firefox, and Apache server plug-ins. By implementing file support into a
CSIRO research web search engine, they set up the first video search engine in 2001 that was able to
retrieve video on the clip level through temporal URIs—something Google's video search added only
many years later.
Silvia remained with the CSIRO until 2006, when, inspired by Web 2.0 developments and YouTube's
success, she left to start a video search and metrics company, Vquence, with Chris Gilbey and John
Ferlito.
Currently, Silvia is a freelancer in web media applications, media standards and media accessibility.
She is the main organizer of the annually held Foundations of Open Media Software workshop (FOMS).
She is an invited expert at the W3C for the HTML, Media Fragments, Media Annotations, and Timed Text
Working Groups. She is contributing to HTML5 media technology through the WHATWG and W3C and
does short-term contracting with Mozilla and Google for progressing standards in media accessibility.
Silvia’s blog is at http://blog.gingertech.net.
Download from www.eBookTM.Com
http://freepdf-books.com

xi
About the Technical Reviewer
■ Chris Pearce is a software engineer working at Mozilla on the HTML5 audio and video playback
support for the open-source Firefox web browser. He is also the creator of the keyframe index used by
the Ogg media container and contributes to the Ogg/Xiph community. Chris has also worked on
Mozilla's text editor widget, and previously worked developing mobile software developer tools. Chris
works out of Mozilla's Auckland office in New Zealand, and blogs about matters related to Internet video
and Firefox development at http://pearce.org.nz.
http://freepdf-books.com

■ CONTENTS
xii
Acknowledgments
First and foremost I'd like to thank the great people involved in developing HTML5 and the related
standards and technologies both at WHATWG and W3C for making a long-time dream of mine come
true by making audio and video content prime citizens on the Web. I believe that the next 10 years will
see a new boom created through these technologies that will be bigger than the recent “Web2.0” boom
and have a large audio-visual component that again will fundamentally change the way in which people
and businesses communicate online.
I'd like to thank particularly the software developers in the diverse browsers that implemented the
media elements and their functionality and who have given me feedback on media-related questions
whenever I needed it. I'd like to single out Chris Pearce of Mozilla, who has done a huge job in technical
proofreading of the complete book and Philip Jägenstedt from Opera for his valuable feedback on
Opera-related matters.
I'd like to personally thank the Xiph and the FOMS participants with whom it continues to be an
amazing journey to develop open media technology and push the boundaries of the Web for audio and
video.
I’d like to thank Ian Hickson for his tireless work on HTML5 specifications and in-depth discussion
on video related matters.
I'd like to thank all those bloggers who have published their extraordinary experiments with the
audio and video elements and have inspired many of my examples. I'd like to single out in particular
Paul Rouget of Mozilla, whose diverse demos in HTML5 technology really push the boundaries.
I’d like to thank Chris Heilmann for allowing me to reuse his accessible player design for the custom
controls demo in the JavaScript chapter.
I'd like to thank the developers of the Audio API both at Mozilla and Google for all the help they
provided me to understand the two existing proposals for an Audio API for the media elements.
I'd like to thank the developers at Ericsson Labs for their experiments with the device element and
for allowing me to use screenshots of their demos in the device chapter.
I'd like to thank the experts in the media subgroup of the HTML5 Accessibility Task Force for their
productive discussions, which have contributed to the media accessibility chapter in this book. I'd like to
single out John Foliot and Janina Sajka, whose proofreading of that chapter helped me accurately
represent accessibility user needs.
I'd like to thank the colleagues in the W3C Media Fragment URI working group with whom it was a
pleasure to develop the specs that will eventually allow direct access to sections of audio and video as
described in the accessibility chapter.
I'd like to thank David Bolter and Chris Blizzard of Mozilla, who have on more than one occasion
enabled me to be part of meetings and conferences and continue the standards work.
I'd like to thank the team at Apress for keeping the pressure on such that this book was able to be
finished within this year.
And finally I'd like to thank all my family for their support, but particularly Mum and Dad for their
patience when I had to write a chapter during our holiday in Fiji, Ben for tolerating a somewhat
distracted mum, and John for continuing to cheer me on.
http://freepdf-books.com

xiii
Preface
It is ironic that I started writing this book on the exact day that the last of the big browsers announced
that it was going to support HTML5 and, with it, HTML5 video. On March 16, 2010, Microsoft joined
Firefox, Opera, Google Chrome, and WebKit/Safari with an announcement that Internet Explorer 9 will
support HTML5 and the HTML5 video element. Only weeks before the book was finished, the IE9 beta
was also released, so I was able to actually include IE9 behavior into the book, making it so much more
valuable to you.
During the course of writing this book, many more announcements were made and many new
features introduced in all the browsers. The book's examples were all tested with the latest browser
versions available at the time of finishing this book. These are Firefox 4.0b8pre, Safari 5.0.2, Opera 11.00
alpha build 1029, Google Chrome 9.0.572.0, all on Mac OS X, and Internet Explorer 9 beta
(9.0.7930.16406) on Windows 7.
Understandably, browsers are continuing to evolve and what doesn't work today may work
tomorrow. As you start using HTML5 video—and, in particular, as you start developing your own web
sites with it—I recommend you check out the actual current status of implementation of all relevant
browsers for support of your desired feature.
The Challenge of a Definitive Guide
You may be wondering about what makes this book a “definitive guide to HTML5 video” rather than just
an introduction or an overview. I am fully aware that this is a precocious title and may sound arrogant,
given that the HTML5 media elements are new and a lot about them is still being specified, not to speak
of the lack of implementations of several features in browsers.
When Apress and I talked about a book proposal on HTML5 media, I received a form to fill in with
some details—a table of contents, a summary, a comparison to existing books in the space etc. That
form already had the title “Definitive Guide to HTML5 Video” on it. I thought hard about changing this
title. I considered alternatives such as “Introduction to HTML5 Media,” “Everything about HTML5
Video,” “HTML5 Media Elements,” “Ultimate Guide to HTML5 Video,” but I really couldn't come up
with something that didn't sound more lame or more precocious.
So I decided to just go with the flow and use the title as an expectation to live up to: I had to write
the most complete guide to HTML5 audio and video available at the time of publishing. I have indeed
covered all aspects of the HTML5 media elements that I am aware exist or are being worked on. It is
almost certain that this book will not be a “definitive guide” for very long beyond its publication date.
Therefore, I have made sure to mention changes I know are happening and where you should check
actual browser behavior before relying on certain features.
Even my best efforts cannot predict the future. So there is only the option of a second edition, which
Apress and I will most certainly discuss when the time is ripe and if the book is successful enough. Leave
comments, errata, bug reports, suggestions for improvements, and ideas for topics to add at
http://apress.com/book/errata/1470 and they won't be forgotten.
In the meantime, I hope you enjoy reading this book and take away a lot of practical recipes for how
to achieve your web design goals with HTML5 media.
http://freepdf-books.com
■ PREFACE
xiv
Approaching This book
This book is written for anyone interested in using HTML5 media elements. It assumes an existing
background in writing basic HTML, CSS, and JavaScript, but little or no experience with media.
If you are a beginner and just want to learn the basics of how to include video in your web pages, the
first three chapters will be sufficient. You will learn how to create cross-browser markup in HTML to
include audio and video into your web pages and how to encode your video so you can serve all
playback devices. We will cover some of the open-source tools available to deal with the new HTML5
media elements. You will also learn how to style the display of your audio and video elements in CSS to
make them stand out on your site.
The next four chapters are about integrating the media elements with other web technologies. You
will learn how to replace the default controls of web browsers with your own. This is called “skinning”
your media player. You will learn how to use the JavaScript API for media elements. You will also learn
how to integrate media elements with other HTML5 constructs, such as SVG, Canvas, and Web Worker
Threads.
In the final four chapters, we turn our eyes on more advanced HTML5 media functionality. Most of
this functionality is experimental and not yet available uniformly across browsers. You will receive an
introduction about the current status and backgrounds for proposed progress. You will learn how to
read and manipulate audio data, how to make audio and video accessible in an internationalized way,
including captions, subtitles, and audio descriptions. You will learn how to access real-time videos from
devices and transfer them across the network. Finally, we will close with a summary and an outlook as to
what else may lie ahead.
Notation
In the book, we often speak of HTML elements and HTML element attributes. An element name is
written as <element>, an attribute name as @attribute, and an attribute value as “value”. Where an
attribute is mentioned for the first time, it will be marked as bold. Where we need to identify the type of
value that an element can accept, we use [url].
Downloading the Code
The source code to the examples used in this book is available to readers at www.apress.com and at
www.html5videoguide.net. At the latter I will also provide updates to the code examples and examples
for new developments, so you can remain on top of the development curve.
Contacting the author
Do not hesitate to contact me at silvia@html5videoguide.net with any feedback you have.
I can also be reached on:
Twitter: @silviapfeiffer
My Blog: http://blog.gingertech.net
http://freepdf-books.com

C H A P T E R 1
■ ■ ■
1
Introduction
This chapter gives you a background on the creation of the HTML5 media elements. The history of their
introduction explains some of the design decisions that were taken, in particular why there is not a
single baseline codec. If you are only interested in learning the technical details of the media elements,
you can skip this chapter.
The introduction of the media elements into HTML5 is an interesting story. Never before have the
needs around audio and video in web pages been analyzed in so much depth and been discussed among
this many stakeholders. Never before has it led to a uniform implementation in all major web browsers.
1.1 A Bit of History
While it seems to have taken an eternity for all the individuals involved in HTML and multimedia to
achieve the current state of the specifications and the implementations in the web browsers, to the
person on the street, it has been a rather surprising and fast innovation.
From the first mention of the possibility of a <video> element in HTML5 in about 2005, to the first
trial implementation in February 2007, to the first browser rolling it out in a nightly build in November
2007, and to Microsoft's Internet Explorer joining the party late in a developer preview in March 2010, it
has still been barely five years.
In contrast, other efforts to introduce media functionality natively into HTML without the use of
plug-ins in the <embed> or <object> elements have been less successful. HTML+Time was proposed in
1998 by Microsoft and implemented into IE 5, IE 5.5 and IE6, but was never supported by any other
browser vendor. SMIL (pronounced “smile”), the Synchronized Multimedia Integration Language, has
been developed since 1997 to enable authoring of interactive audiovisual presentations, but was never
natively supported in any browser other than the part that matched the HTML+Time specification.
This rapid development was possible only because of the dozens of years of experience with media
plug-ins and other media frameworks on the Web, including QuickTime, Microsoft Windows Media,
RealNetworks RealMedia, Xiph Ogg, ISO/MPEG specifications, and, more recently, Adobe Media and
Microsoft Silverlight. The successes of YouTube and similar hosting sites have vastly shaped the user
requirements. Many more technologies, standards, and content sites also had an influence, but it would
take too long to list them all here.
All this combined experience led eventually to the first proposal to introduce a <video> element into
HTML5. This is the first time that all involved stakeholders, in particular all browser vendors, actually
committed to a native implementation of media support in their browsers.
Before the introduction of the <video> and <audio> elements, a web developer could include video
and audio in web pages only through <object> and <embed> elements, which required browser plug-ins
be installed on user machines. Initially, these plug-ins simply launched a media player that was installed
on the user’s system to play back video. Later, they were able to display inside web pages, although often
users were taken into a pop-up. This was the case for all of the popular plug-ins, such as RealMedia,
QuickTime, and Windows Media. With the release of Flash Player 6 in 2002, Macromedia introduced
video support into its browser plug-in. It relied on the Sorenson Spark codec, which was also used by
http://freepdf-books.com

CHAPTER 1 ■ INTRODUCTION
2
QuickTime at that time. Most publishers already published their content in RealMedia, QuickTime and
Windows Media format to cover as much of the market as possible, so uptake of Flash for video was
fairly small at first.
However, Macromedia improved its tools and formats over the next few years with ActionScript.
With Flash Player 8 in 2005, it introduced On2’s VP6 advanced video codec, alpha transparency in video,
a standalone encoder and advanced video importer, cue point support in FLV files, an advanced video
playback component, and an interactive mobile device emulator. All of this made it a very compelling
development environment for online media.
In the meantime, through its animation and interactive capabilities, Flash had become the major
plug-in for providing rich Internet applications which led to a situation where many users had it
installed on their system. It started becoming the solution to publishing video online without having to
encode it in three different formats. It was therefore not surprising when Google Videos launched on
January 25, 2005 using Macromedia Flash. YouTube launched only a few months later, in May 2005, also
using Macromedia Flash.
On December 3, 2005, Macromedia was bought by Adobe and Flash was henceforth known as
Adobe Flash. As Adobe continued to introduce and improve Flash and the authoring tools around it,
video publishing sites around the world started following the Google and YouTube move and also
published their videos in the Adobe Flash format. With the introduction of Flash Player 9, Update 3,
Adobe launched support in August 2007 for the MPEG family of codecs into Flash, in particular the
advanced H.264 codec, which began a gradual move away from the FLV format to the MP4 format.
In the meantime, discussion of introducing a <video> element into HTML, which had started in
2005, continued. By 2007, people had to use gigantic <embed> statements to make Adobe Flash work
well in HTML. There was a need to simplify the use of video and fully integrated it into the web browser.
The first demonstration of <video> implemented in a browser was done by Opera. On February 28,
2007, Opera announced1 to the WHATWG (Web Hypertext Applications Technology Working Group2) an
experimental build of a <video> element, which Opera Chief Technology Officer Håkon Wium Lie
described as a first step towards making “video a first-class citizen of the web.”3 The specification was
inspired by the <img> element and was built similarly to an interface created earlier for an Audio()
JavaScript API.
Initially, there was much discussion about the need for a separate <video> element—why wouldn't
the <embed> element be sufficient, why not use SMIL, why not reanimate HTML+Time? Eventually it
dawned on people that, unless media was as simple to use as <img> and as integrated into all layers of
web applications, including the DOM, CSS, and JavaScript, <video> and <audio> would be hampered
from making further progress on the web beyond what was possible with plug-ins. This, of course,
includes the need for all browsers to support the specifications in an interoperable way. Thus, the need
for standardization of the <video> element was born.
1.2 A Common Format?
An early and ongoing debate around the HTML5 media elements is that of a baseline encoding format,
also called a “baseline codec”. A baseline codec is a video and audio encoding format that is supported
and implemented by all browser vendors and thus a web developer can rely on it to work in all browsers.
The question of a baseline codec actually goes beyond just the question of codecs. Codec data is
only the compressed audio or video data by itself. It never stands on its own, but is delivered in a
“container format”, which encapsulates the encoded audio and video samples in a structure to allow
1 See http://lists.whatwg.org/pipermail/whatwg-whatwg.org/2007-February/009702.html
2 See http://www.whatwg.org/
3 See http://people.opera.com/howcome/2007/video/
http://freepdf-books.com

CHAPTER 1 ■ INTRODUCTION
3
later decoding. You can think of it as analogous to packaging data packets for delivery over a computer
network, where the protocol headers provide the encapsulation.
Many different encapsulation formats exist, including QuickTime's MOV, MPEG's MP4, Microsoft's
WMV, Adobe's FLV, the Matroska MKV container (having been the basis for the WebM format), AVI and
Xiph's Ogg container. These are just a small number of examples. Each of these containers can in theory
support encapsulation of any codec data sequence (except for some container formats not mentioned
here that cannot deal with variable bitrate codecs).
Also, many different audio and video codecs exist. Examples of audio codecs are: MPEG-1 Audio
Level 3 ( better known as MP3), MPEG-2 and MPEG-4 AAC (Advanced Audio Coding), uncompressed
WAV, Vorbis, FLAC and Speex. Examples of video codecs are: MPEG-4 AVC/H.264, VC-1, MPEG-2, H.263,
VP8, Dirac and Theora.
Even though in theory every codec can be encapsulated into every container, only certain codecs
are typically found in certain containers. WebM, for example, has been defined to only contain VP8 and
Vorbis. Ogg typically contains Theora, Vorbis, Speex, or FLAC, and there are defined mappings for VP8
and Dirac, though not many such files exist. MP4 typically contains MP3, AAC, and H.264.
For a specification like HTML5, it is important to have interoperability, so the definition of a
baseline codec is important. The debate about a baseline codec actually started on the day that Opera
released its experimental build and hasn't stopped since.
A few weeks after the initial proposal of the <video> element, Opera CTO Wium Lie stated in a talk
given at Google:
“I believe very strongly, that we need to agree on some kind of baseline video format if [the video
element] is going to succeed. [...] We want a freely implementable open standard to hold the content we
put out. That's why we developed the PNG image format. [...] PNG [...] came late to the party. Therefore I
think it's important that from the beginning we think about this.”4
Wium Lie further stated requirements for the video element as follows:
“It's important that the video format we choose can be supported by a wide range of devices and
that it's royalty-free (RF). RF is a well-establish[ed] principle for W3C standards. The Ogg Theora format
is a promising candidate which has been chosen by Wikipedia.”5
The World Wide Web Consortium (W3C) is the standards body that publishes HTML. It seeks to
issue only recommendations that can be implemented on a royalty-free (RF) basis.6
The “Ogg Theora” format proposed as a candidate by Wium Lie is actually the video codec Theora
and the audio codec Vorbis in an Ogg container developed by the Xiph.org Foundation as open source.7
Theora is a derivative of a video codec developed earlier by On2 Technologies under the name VP38 and
released as open source in September 2001.9 With the release of the code, On2 also essentially provided a
royalty-free license to their patents that relate to the VP3 source code and its derivatives. After VP3 was
published and turned into Theora, Ogg Theora/Vorbis became the first unencumbered video codec
format. Google, which acquired On2 in 2010, confirmed Theora's royalty-free nature.10
4 See video of Håkon Wium Lie’s Google talk,
http://video.google.com/videoplay?docid=5545573096553082541&ei=LV6hSaz0JpbA2AKh4OyPDg&hl=un
5 See Håkon Wium Lie’s page on the need for a video element, http://people.opera.com/howcome/2007/video/
6 See W3C RF requirements at http://www.w3.org/Consortium/Patent-Policy-20030520.html#sec-Licensing
7 See Xiph.Org’s Website on Theora, http://theora.org/
8 See On2 Technologies’ press release dated June 24, 2002,
http://web.archive.org/web/20071203061350/http://www.on2.com/index.php?id=486&news_id=313
9 See On2 Technologies’ press release dated September 7, 2001,
http://web.archive.org/web/20071207021659/, http://www.on2.com/index.php?id=486&news_id=364
10 See Google blog post dated April 9, 2010,
http://google-opensource.blogspot.com/2010/04/interesting-times-for-video-on-web.html
http://freepdf-books.com
CHAPTER 1 ■ INTRODUCTION
4
Note that although the video codec format should correctly be called “Ogg Theora/Vorbis”, in
common terminology you will only read “Ogg Theora”.
On the audio side of things, Ogg Vorbis is a promising candidate for a baseline format. Vorbis is an
open-source audio codec developed and published by Xiph.Org since about 2000. Vorbis is also well
regarded as having superior encoding quality compared with MP3 and on par with AAC. Vorbis was
developed with a clear intention of only using techniques that were long out of patent protection. Vorbis
has been in use by commercial applications for a decade now, including Microsoft software and many
games.
An alternative choice for a royalty-free modern video codec that Wium Lie could have suggested is
the BBC-developed Dirac codec.11 It is based on a more modern compression technology, namely
wavelets. While Dirac's compression quality is good, it doesn't, however, quite yet expose the same
compression efficiency as Theora for typical web video requirements.12
For all these reasons, Ogg Theora and Ogg Vorbis were initially written into the HTML5 specification
as baseline codecs for video and audio, respectively, at the beginning of 2007:13
“User agents should support Ogg Theora video and Ogg Vorbis audio, as well as the Ogg container
format.”
However, by December 2007, it was clear to the editor of the HTML5 draft, Ian Hickson, that not all
browser vendors were going to implement Ogg Theora and Ogg Vorbis support. Apple in particular had
released the first browser with HTML5 video support with Safari 3.1 and had chosen to support only
H.264, criticizing Theora for inferior quality, for lack of support on mobile devices, and a perceived
increased infringement threat of as-yet unknown patents (also called the “submarine patent” threat).14
Nokia15 and Microsoft16 confirmed their positions for a similar choice. H.264 has been approved as a
standard jointly by the International Telecommunications Union (ITU) and the International Standards
Organization (ISO/IEC), but its use requires payment of royalties, making it unacceptable as a royalty-
free baseline codec for HTML5. The announcement of MPEG LA on August 26, 2010 that H.264 encoded
Internet video that is free to end users will never be charged for royalties17 is not sufficient, since all other
royalties, in particular royalties for commercial use and for hardware products, remain in place.
In December 2007, Ian Hickson replaced the should-requirement for Ogg Theora with the
following:18,19
“It would be helpful for interoperability if all browsers could support the same codecs. However,
there are no known codecs that satisfy all the current players: we need a codec that is known to not
require per-unit or per-distributor licensing, that is compatible with the open source development
model, that is of sufficient quality as to be usable, and that is not an additional submarine patent risk for
large companies. This is an ongoing issue and this section will be updated once more information is
available.”
11 See Dirac Website, http://diracvideo.org/
12See Encoder comparison by Martin Fiedler dated February 25, 2010, http://keyj.s2000.ws/?p=356
13 See Archive.org’s June 2007 version of the HTML5 specification at
http://web.archive.org/web/20070629025435/http://www.w3.org/html/wg/html5/#video0
14 See as an example this story in Apple Insider
http://www.appleinsider.com/articles/09/07/06/ogg_theora_h_264_and_the_html_5_browser_squabble.html
15 See Nokia submission to a W3C workshop on video for the Web at http://www.w3.org/2007/08/video/positions/Nokia.pdf
16 See W3C HTML Working Group Issue tracker, Issue #7 at http://www.w3.org/html/wg/tracker/issues/7
17 See http://www.mpegla.com/Lists/MPEG%20LA%20News%20List/Attachments/231/n-10-08-26.pdf
18 See Ian Hickson’s email in December 2007 to the WHATWG at http://lists.whatwg.org/pipermail/whatwg-whatwg.org/2007-
December/013135.html
19 See Archive.org's Feb 2008 version of the HTML5 specification at
http://web.archive.org/web/20080225170401/www.whatwg.org/specs/web-apps/current-work/multipage/section-video.html#video0
www.itbooksh
ub.com
|||||||||||||||||||||||||
|||||||||||||||||
www.cncmanu
al.com
http://freepdf-books.com

CHAPTER 1 ■ INTRODUCTION
5
H.264 has indeed several advantages over Theora. First, it provides a slightly better overall encoding
quality.20 Second, the de-facto standard for video publication on the Web had been set by YouTube,
which used Adobe Flash with MP4 H.264/AAC support. Choosing the same codec as Adobe Flash will
provide a simple migration path to the HTML5 video element since no additional transcoding would be
necessary. Third, there are existing hardware implementations of H.264 for mobile devices, used in
particular by Apple's iPod, iPhone, and iPad, which support this codec out of the box.
However, it is not inconceivable that the market will catch up over the next few years with software
support and hardware implementations for Ogg Theora, increasingly enabling professional use of these
codecs. In fact, in April 2010, Google funded a free, optimized implementation of Theora for the ARM
processor, which runs Google's Android devices.21 Theora is praised to be less complex and therefore
requiring less dedicated hardware support than H.264, making it particularly useful on mobile devices.
This was the situation until May 19, 2010, when Google announced the launch of the WebM project,
which proposes another opportunity to overcome the concerns Apple, Nokia and Microsoft have voiced
with Theora. WebM is a new open-source and royalty-free video file format, which includes the VP8
video codec, a codec Google had acquired as part of it acquisition of On2 Technologies, finalized in
February 2010.22 The VP8 video codec, together with the Vorbis audio codec, is placed inside a container
format derived from the Matroska23 file format to make up the full video encoding format called WebM.
Google released WebM with an obvious intention of solving the stalemate around a baseline video
codec in HTML5.24 To that end, Google released WebM and VP8 under a BSD style open-source license,
which allows anyone to make use of the code freely. They also grant a worldwide, non-exclusive, no-
charge, royalty-free patent license to the users of the codec25 to encourage adoption. They collaborated
with Opera, Mozilla, and Adobe and many others26 to achieve support for WebM, such as an
implementation of WebM in the Opera, Google Chrome, and Firefox browsers, and also move forward
with commercial encoding tools and hardware implementations. On October 15, 2010, Texas
Instruments was the first hardware vendor to demonstrate VP8 on its new TI OMAP™ 4 processor.27 VP8
is on par in video quality with H.264, so it has a big chance of achieving baseline codec status.
Microsoft's reaction to the release of WebM28 was rather positive, saying that it would “support VP8
when the user has installed a VP8 codec on Windows”. Apple basically refrained from making any official
statement. Supposedly, Steve Jobs replied to the question "What did you make of the recent VP8
announcement?" in an e-mail with a pointer to a blog post29 by an X.264 developer. The blog post hosts
an initial, unfavorable analysis of VP8's quality and patent status. Note that X.264 is an open-source
implementation of an H.264 decoder, the developer is not a patent attorney, and the analysis was done
on a very early version of the open codebase.
As the situation stands, small technology providers or nonprofits are finding it hard to support a
non-royalty-free codec. Mozilla and Opera have stated that they will not be able to support MP4
H.264/AAC since the required annual royalties are excessive, not just for themselves, but also for their
20 See Encoder comparison by Martin Fiedler dated February 25, 2010, http://keyj.s2000.ws/?p=356
21 See Google blog post dated April 9, 2010, http://google-opensource.blogspot.com/2010/04/interesting-times-for-video-on-
web.html
22 See http://www.google.com/intl/en/press/pressrel/ir_20090805.html
23 See http://www.matroska.org/
24 See http://webmproject.blogspot.com/2010/05/introducing-webm-open-web-media-project.html
25 See http://www.webmproject.org/license/additional/
26 See http://webmproject.blogspot.com/2010/05/introducing-webm-open-web-media-project.html
27 See http://e2e.ti.com/videos/m/application_specific/240443.aspx
28 See http://windowsteamblog.com/windows/b/bloggingwindows/archive/2010/05/19/another-follow-up-on-html5-video-in-ie9.aspx
29 See http://x264dev.multimedia.cx/?p=377
http://freepdf-books.com
CHAPTER 1 ■ INTRODUCTION
6
downstream users and, more important, because the use of patent encumbered technology is against
the ideals of an open Web.30 They have both implemented and released exclusive support for Ogg Theora
and WebM in their browsers. Apple's Safari still supports only MP4 H.264/AAC. Google Chrome supports
all these three codecs. Table 1–1 has a summary of the current implementation situation.
Table 1–1. Introduction of HTML5 video support into main browsers
Browser Nightly Release Formats
Safari November 2007 March 2008 (Safari 3.1) MP4 H.264/AAC
Firefox
J
uly 2008 June 2009 (Firefox 3.5) Ogg Theora, WebM
Chrome September 2008 May 2009 (Chrome 3) Ogg Theora, MP4 H.264/AAC, WebM
Opera February 2007 / July 2008 January 2010 (Opera 10.50) Ogg Theora, WebM
IE March 2010 (IE9 dev build) September 2010 (IE9 beta) MP4 H.264/AAC
In the publisher domain, things look a little different because Google has managed to encourage
several of the larger publishers to join in with WebM trials. Brightcove, Ooyala and YouTube all have
trials running with WebM content. Generally, though, the larger publishers and the technology providers
that can hand on the royalty payments to their customers are able to support MP4 H.264/AAC. The
others can offer only Ogg Theora or WebM (see Table 1–2).
Table 1–2. HTML5 video support into some major video publishing sites (social and commercial)
Site / Vendor Announcement Format
W
ikipedia Basically since 2004, stronger push since 2009 Ogg Theora, WebM
Dailymotion May 27, 2009 Ogg Theora, WebM
Y
ouTube January 20, 2010 MP4 H.264/AAC, WebM
V
imeo January 21, 2010 MP4 H.264/AAC, WebM
Kaltura March 18, 2010 Ogg Theora, WebM, MP4 H.264/AAC
Ooyala March 25,2010 MP4 H.264/AAC, WebM
Brightcove March 28, 2010 MP4 H.264/AAC, WebM
30 See http://shaver.off.net/diary/2010/01/23/html5-video-and-codecs/
Download from www.eBookTM.Com
http://freepdf-books.com

CHAPTER 1 ■ INTRODUCTION
7
An interesting move is the announcement of VP8 support by Adobe.31 When Adobe releases support
for WebM, this will imply that video publishers that choose to publish their videos in the WebM format
will be able to use the Adobe Flash player as a fallback solution in browsers that do not support the
WebM format, which includes legacy browsers and HTML5 browsers with exclusive MP4 H.264/AAC
support. This is a very clever move by Adobe and will allow smaller content publishers to stay away from
H.264 royalties without losing a large number of their audience and without having to make the content
available in multiple formats.
1.3 Summary
In this chapter we have looked back at the history of introducing audio and video on the Web and how
that led to the introduction of <video> and <audio> elements into HTML5. We also described the
discussions and status around finding a single video codec that every browser vendor could support as a
baseline format.
As the situation currently stands, any video publisher that wants to create web pages with videos
that are expected to universally work with any browser will be required to publish video in at least two
formats: in MP4 H.264/AAC and in either Ogg Theora or WebM. Currently, Ogg Theora support and tools
are still further developed than WebM tools, but WebM tools are improving rapidly. If you need to set up
a site from scratch, your best choice is probably MP4 H.264/AAC and WebM.
31 See http://blogs.adobe.com/flashplatform/2010/05/adobe_support_for_vp8.html
http://freepdf-books.com

CHAPTER 1 ■ INTRODUCTION
8
http://freepdf-books.com
C H A P T E R 2
■ ■ ■
9
Audio and Video Elements
This chapter introduces <audio> and <video> as new HTML elements, explains how to encode audio and
video so you can use them in HTML5 media elements, how to publish them, and what the user interface
looks like.
At this instance, we need to point out that <audio> and <video> are still rather new elements in the
HTML specification and that the markup described in this chapter may have changed since the book has
gone to press. The core functionality of <audio> and <video> should remain the same, so if you find that
something does not quite work the way you expect, you should probably check the actual specification
for any updates. You can find the specification at http://www.w3.org/TR/html5/spec.html or at
http://www.whatwg.org/specs/web-apps/current-work/multipage/.
All of the examples in this chapter and in the following chapters are available to you at
http://html5videoguide.net. You might find it helpful to open up your Web browser and follow along
with the actual browser versions that you have installed.
2.1 Video and Audio Markup
In this section you will learn about all the attributes of <video> and <audio>, which browsers they work
on, how the browsers interpret them differently, and possibly what bugs you will need to be aware of.
2.1.1 The Video Element
As explained in the previous chapter, there are currently three file formats that publishers have to
consider if they want to cover all browsers that support HTML5 <video>, see Table 2–1.
Table 2–1. Video codecs natively supported by the major browsers
Browser WebM Ogg Theora MPEG-4 H.264
Firefox --
Safari -- --
Opera --
Google Chrome
IE -- --
http://freepdf-books.com
CHAPTER 2 ■ AUDIO AND VIDEO ELEMENTS
10
As there is no fixed baseline codec (see history in Chapter 1), we will provide examples for all these
formats.
As is common practice in software, we start with a “Hello World” example. Here are three simple
examples that will embed video in HTML5:
Listing 2–1. Embedding Ogg video in HTML5
<video src=”HelloWorld.ogv”></video>
Listing 2–2. Embedding WebM video in HTML5
<video src=”HelloWorld.webm”></video>
Listing 2–3. Embedding MPEG-4 video in HTML5
<video src=”HelloWorld.mp4”></video>
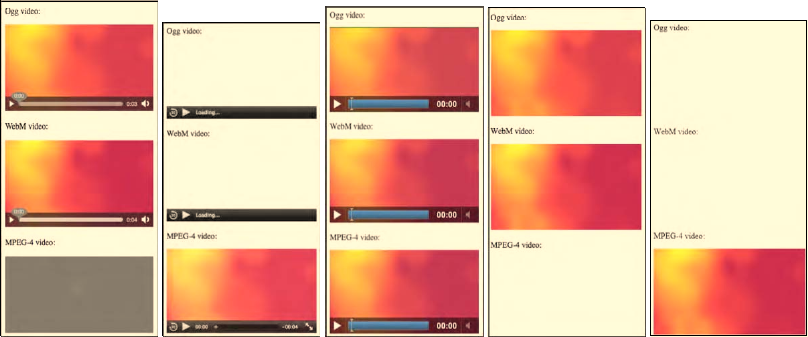
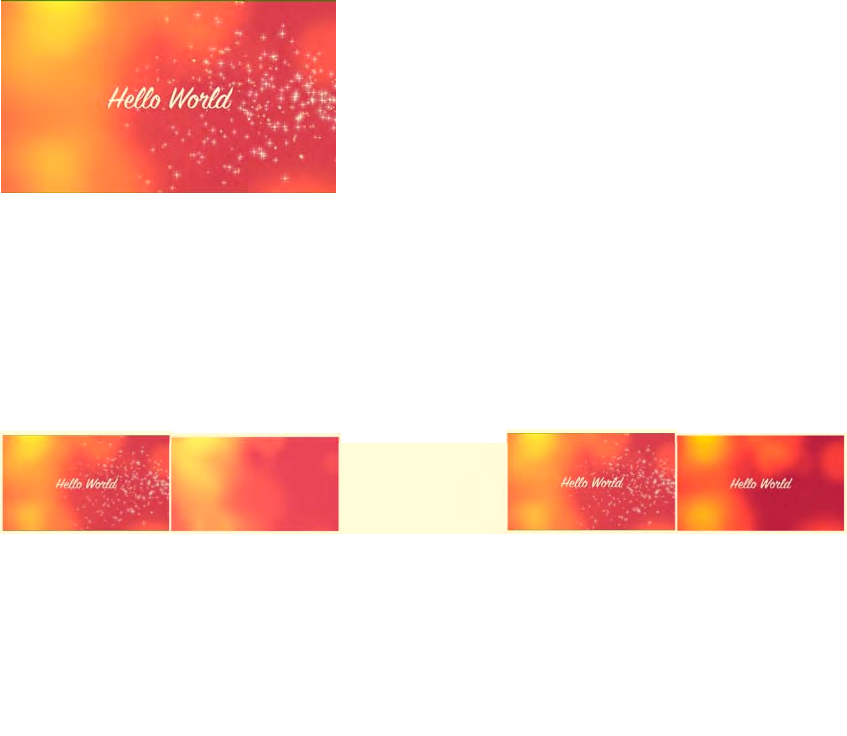
We've put all three Listings together on a single web page, added controls (that’s the transport bar at
the bottom; we’ll get to this later) and fixed the width to 300px to make a straight comparison between
all the five major browsers. Figure 2–1 shows the results.
Figure 2–1. The <video> element in five browsers, from left to right: Firefox, Safari, Chrome, Opera, and IE
Firefox displays the Ogg and WebM video and shows an error for the MPEG-4 video. Opera reacts
similarly, displaying nothing for the MPEG-4 video. Safari and IE both show nothing for the Ogg and
WebM videos and display only the MPEG-4 video. Chrome displays all three formats.
You may already have noticed that there are some diverging implementations of the video elements;
e.g. not all of them show an empty frame for a format they cannot decode and not all of them show the
controls only on a mouse-over. We will come across more such differences in the course of this chapter.
This is because the specification provides some leeway for interpretation. We expect that the browsers'
behavior will become more aligned as the specification becomes clearer about what to display. We will
analyze the features and differences in more detail below. This was just to give you a taste.
http://freepdf-books.com
CHAPTER 2 ■ AUDIO AND VIDEO ELEMENTS
11
Fallback Content
You will have noticed that the <video> element has an opening and a closing tag. There are two reasons
for this.
First, there are other elements introduced as children of the <video> element — in particular the
<source> and the <track> elements. We will get to these.
Second, anything stated inside the <video> element that is not inside one of the specific child
elements of the <video> element is regarded as “fallback content”. It is “fallback” in so far as web
browsers that do not support the HTML5 <audio> and <video> elements will ignore these elements, but
still display their contents and thus is a means to be backwards compatible. Browsers that support the
HTML5 <video> and <audio> elements will not display this content. Listing 2–4 shows an example.
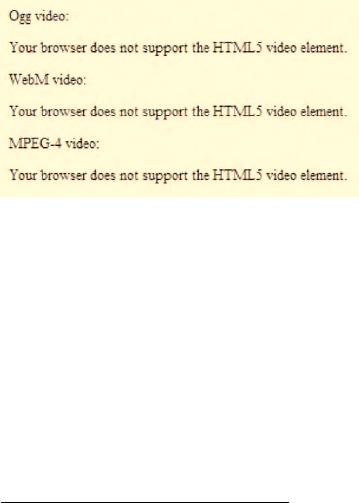
Listing 2–4. Embedding MPEG-4 video in HTML5 with fallback content
<video src=”HelloWorld.mp4”>
Your browser does not support the HTML5 video element.
</video>
When we include this in the combined example from above and run it in a legacy browser, we get
the screenshot in Figure 2–2.
Figure 2–2. The <video> element in a legacy browser, here it’s IE8
You can add any HTML markup inside the <video> element, including <object> and <embed>
elements. Thus, for example, you can provide fallback using an Adobe Flash player alternative with mp4
or flv, or the Cortado Java applet for ogv. These video plug-ins will not support the JavaScript API of the
HTML5 <video> element, but you can get JavaScript libraries that emulate some of the JavaScript API
functionality and provide fallback for many different conditions. Example libraries are mwEmbed1,
Video for Everybody!2, Sublime Video3, or VideoJS4.
Note that in Listing 2–4, if you are using a modern HTML5 web browser that does not support the
mp4 resource but supports Ogg or WebM, it still will not display the fallback content. You have to use
JavaScript to catch the load error and take appropriate action. We will learn how to catch the load error
in Chapter 4. This is really relevant only if you intend to use a single media format and want to catch
errors for browsers that do not support that format. If you are happy to support more than one format,
1 See http://www.kaltura.org/project/HTML5_Video_Media_JavaScript_Library
2 See http://camendesign.com/code/video_for_everybody
3 See http://sublimevideo.net/
4 See http://videojs.com/
http://freepdf-books.com
CHAPTER 2 ■ AUDIO AND VIDEO ELEMENTS
12
there is a different markup solution, where you do not use the @src attribute. Instead, you list all the
available alternative resources for a single <video> element through the <source> element. We will
introduce this later in Subsection 2.1.3.
Now, we’ll go through all the content attributes of the <video> element to understand exactly what
<video> has to offer.
@src
In its most basic form, the <video> element has only a @src attribute which is a link (or URL) to a video
resource. The video resource is the file that contains the video data and is stored on a server.
To create a proper HTML5 document, we package the <video> element into HTML5 boilerplate
code:
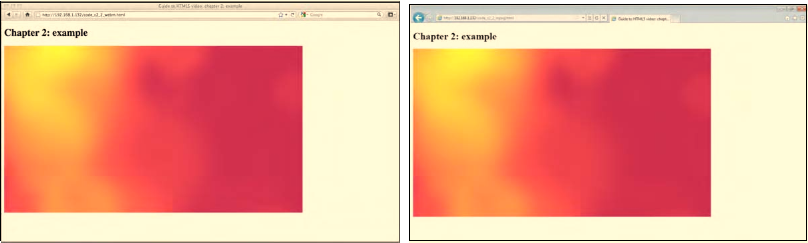
Listing 2–5. A HTML5 document with an MPEG-4 video
<!DOCTYPE html>
<html lang="en">
<head>
<title>Guide to HTML5 video: chapter 2: example </title>
</head>
<body>
<h1>Chapter 2: example </h1>
<video src="HelloWorld.mp4"></video>
</body>
</html>
Figure 2–3 shows what the example looks like in Firefox (with “HelloWorld.webm” as the resource
instead of “HelloWorld.mp4”) and IE9 (as in Listing 2–5). In fact, all browsers look identical when using a
supported resource in this use case.
Figure 2–3. A <video> with only @src in Firefox (left) and IE9 (right)
You will notice that the videos look just like simple images. This is because there are no controls to
start the video, nothing that shows it really is a video. Use of the video element in such a bare manner is
sensible in two circumstances only: either the video is controlled through JavaScript (which we will look
at in Chapter 4) or the video is explicitly set to automatically start play back immediately after loading.
Without any further attributes, the default is to pause after initializing the <video> element, and thus we
get the picture-like display.
http://freepdf-books.com

CHAPTER 2 ■ AUDIO AND VIDEO ELEMENTS
13
@autoplay
To make the video autostart, you only need to add an attribute called @autoplay. Without being set to
autoplay, a browser will download only enough bytes from the beginning of a video resource to be able
to tell whether it is able to decode it and to decode the header, such that the decoding pipeline for the
video and audio data is set up. That header data is also called “metadata”, a term used in multiple
different contexts with video, so be sure to understand what exactly it refers to from the context.
When the @autoplay attribute is provided, the video will automatically request more audio and
video data after setting up the decode pipeline, buffer that data, and play back when sufficient data has
been provided and decoded so that the browser thinks it can play the video through at the given
buffering rate without rebuffering. Listings 2–6 shows an example use of the @autoplay attribute.
Listing 2–6. Ogg video with @autoplay
<video src=”HelloWorld.ogv” autoplay></video>
The @autoplay attribute is a so-called boolean attribute, an attribute that doesn't take on any values,
but its presence signifies that it is set to true. Its absence signifies that it is set to false. Thus, anything
provided as an attribute value will be ignored; even if you set it to @autoplay=”false”, it still signifies
that autoplay is activated.
Providing the @autoplay attribute will make the video start playing. If no user or script interaction
happens, a video with an @autoplay attribute will play through from the beginning to the end of the
video resource and stop at the end. If the download speed of the video data is not fast enough to provide
a smooth playback or the browser's decoding speed is too slow, the video playback will stall and allow
for the playback buffers to be filled before continuing playback. The browser will give the user some
notice of the stalling — e.g. a spinner or a “Loading…” message.
Figure 2–4 shows the browsers at diverse stages of playback through the HelloWorld example: IE
and Safari on the MPEG-4 file and Firefox, Opera, and Chrome on the WebM file. When the video is
finished playing back, it stops on the last frame to await more video data in case it’s a live stream.
Figure 2–4. Different autoplay states in five browsers, from left to right: Firefox, Safari, Chrome, Opera,
and IE
@loop
To make the video automatically restart after finishing playback, there is an attribute called @loop.
Obviously, the @loop attribute makes the video resource continue playing in an endless loop.
Listing 2–7. WebM video with @autoplay and @loop
<video src=”HelloWorld.webm” autoplay loop></video>
The @loop attribute is also a boolean attribute, so you cannot specify a number of loops, just
whether or not to loop. If you wanted to run it only for a specified number of loops, you will need to use
the JavaScript API. We will learn the appropriate functions in Chapter 4. If specified in conjunction with
http://freepdf-books.com
CHAPTER 2 ■ AUDIO AND VIDEO ELEMENTS
14
@autoplay, the video will start automatically and continue playing in a loop until some user or script
interaction stops or pauses it.
All browsers except Firefox support this attribute.
@poster
In the screenshots in Figure 2–3 you can see the first frame of the video being displayed as the
representative image for the video. The choice of frame to display is actually up to the browser. Most
browsers will pick the first frame since its data typically comes right after the headers in the video
resource and therefore are easy to download. But there is no guarantee. Also, if the first frame is black, it
is not the best frame to present.
The user therefore has the ability to provide an explicit image as the poster. The poster is also a
representative image for the video. Videos that haven't started playback are replaced by the poster,
which is typically an image taken from somewhere further inside the video that provides an idea of what
the video will be like. However, any picture is possible. Some web sites even choose an animated gif to
display multiple representative images out of the video in a loop. This is also possible with the <video>
element in HTML5.
The @poster attribute of the <video> element provides a link to an image resource that the browser
can show while no video data is available. It is displayed as the video loads into the browser. The poster
in use here is shown in Figure 2–5.
Figure 2–5. The poster image in use in the following examples
Listing 2–8 shows how it is used in a video element.
Listing 2–8. Ogg video with @poster
<video src=”HelloWorld.ogv” poster=”HelloWorld.png”></video>
Figure 2–6 shows what the Listing looks like in the different browsers with appropriate video
resources.
Figure 2–6. A <video> with @src and @poster in Firefox, Safari, Opera, Chrome, and IE (left to right)
www.itbooksh
ub.com
|||||||||||||||||||||||||
|||||||||||||||||
www.cncmanu
al.com
http://freepdf-books.com
CHAPTER 2 ■ AUDIO AND VIDEO ELEMENTS
15
Note that there is a bug in the tested version of Opera with the display of the poster frame; that’s
why nothing is showing. The bug has been fixed since and will not appear in future releases. It is still
possible to get the video to start playing — either through JavaScript or through activating the context
menu. We will look at both these options at a later stage.
Firefox and Chrome will display the poster instead of the video and pause there, if given a @poster
attribute and no @autoplay attribute.
Safari and IE's behavior is somewhat less useful. Safari will show the poster while it is setting up the
decoding pipeline, but as soon as that is completed, it will display the first video frame. IE does the same
thing, but in between the poster display and the display of the first frame it also displays a black frame.
It is expected that further work in the standards bodies will harmonize these diverging behaviors.
Right now, it is up to the browsers and both behaviors are valid.
If @poster is specified in conjunction with @autoplay, a given @poster image will appear only briefly
while the metadata of the video resource is loaded and before the video playback is started. It is
therefore recommended not to use @poster in conjunction with @autoplay.
@width, @height
How do browsers decide in what dimensions to display the video?
You will have noticed in the above screenshots that the video is displayed with a given width and
height as scaled by the video's aspect ratio (i.e. the ratio between width and height). In the example
screenshots in Figure 2–3, the browsers display the videos in their native dimensions, i.e. the dimensions
in which the video resource is encoded. The dimensions are calculated from the first picture of the video
resource, which in the example cases are 960px by 540px.
In the example screenshots in Figure 2–2, the browsers were given a poster image so they used the
dimensions of the poster image for initial display, which in these cases was 960px by 546px, i.e. 6px
higher than the video. As the videos start playing back, the video viewport is scaled down to the video
dimensions as retrieved from the first picture of the video resource.
If no poster image dimensions and video image dimensions are available — e.g. because of video
load errors and lack of a @poster attribute — the video display area (also sometimes called “viewport”) is
displayed at 300px by 150px (minimum display) or at its intrinsic size.
As you can see, a lot of different scaling happens by default. This can actually create a performance
bottleneck in the browsers and a disruptive display when the viewport suddenly changes size between a
differently scaled poster image and the video. It is therefore recommended to control the scaling
activities by explicitly setting the @width and @height attributes on the <video> element. For best
performance, use the native dimensions of the video.
The poster image will be scaled to the dimensions given in @width and @height, and the video will
be displayed in that viewport with a preserved aspect ratio, such that the video is centered and letter-
boxed or pillar-boxed if the dimensions don't match. The @width and @height attributes are not
intended to be used to stretch the video size, but merely to shorten and align it. The value of @width and
@height are an unsigned long, which is interpreted as CSS pixels.
All browsers also tolerate it when the value of @width or @height is provided with “px” — e.g. as
“300px” — even though that strictly speaking is invalid. All browsers except IE also tolerate values
provided with “%” and then scale the video to that percentage in relation to the native video dimensions.
This also is not valid. If you want to do such relative scaling, you should use CSS (see Chapter 3). Listing
2–9 shows an example with these dimensions.
Listing 2–9. WebM video with @width and @height to fix dimensions
<video src=”HelloWorld.webm” poster=”HelloWorld.png”
width=”320” height=”180”></video>
<video src="HelloWorld.webm" poster="HelloWorld.png"
width="25%" height="25%"></video>
http://freepdf-books.com
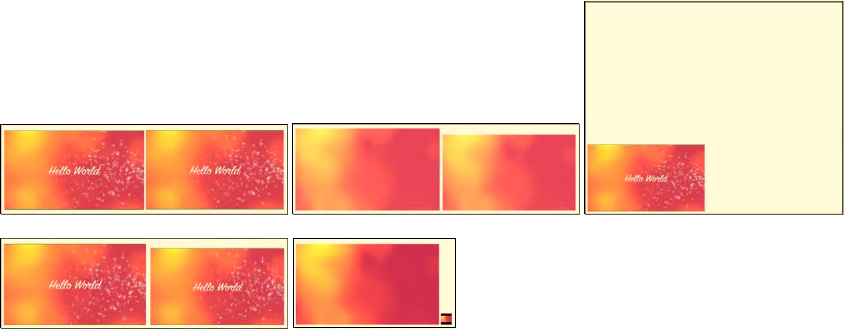
CHAPTER 2 ■ AUDIO AND VIDEO ELEMENTS
16
Figure 2–7 shows what the example looks like in the browsers, each using the appropriate file
format.
Figure 2–7. A <video> with @width and @height in Firefox and Safari (top), Opera (right), Chrome, and IE
(bottom)
Note that Firefox scales both identically — i.e. it uses the video dimensions to also scale the poster
— most likely to avoid the annoying scaling jump when the video starts playing. Both, Safari and
Chrome scale the percentage according to the height of the poster. IE doesn't support percentage
scaling, but instead interprets the percent value in CSS pixels. Opera has a bug introduced through use
of the @poster attribute in that the percentage-scaled video refuses to display at all (the dimensions of
the invisible video are 253px by 548px). However, the explicitly scaled video appears normally.
Obviously, providing explicit @width and @height in pixels is a means to overcome the Opera poster
bug.
So, what happens when you provide @width and @height attribute values that do not match the
aspect ratio of the video resource? Listing 2–10 has an example.
Listing 2–10. MPEG-4 video with @width and @height to fix dimensions with incorrect aspect ratio
<video src=”HelloWorld.mp4” poster=”HelloWorld.png”
width=”320” height=”90”></video>
<video src="HelloWorld.mp4" poster="HelloWorld.png"
width="160" height="180"></video>
Figure 2–8 shows what the example looks like in the browsers, each using the appropriate file
format. For better visibility, the video viewport has been surrounded by a one-pixel outline.
Download from www.eBookTM.Com
http://freepdf-books.com

CHAPTER 2 ■ AUDIO AND VIDEO ELEMENTS
17
Figure 2–8. A <video> with @width and @height in Firefox, Safari, Opera (top), Chrome, and IE (bottom)
Letter-boxing or pillar-boxing is not intended to be performed using traditional black bars, but
rather by making those sections of the playback area transparent areas where the background shows
through, which is more natural on the Web. To turn the boxes into a different color, you need to
explicitly set a specific background color using CSS (more on CSS in Chapter 3).
However, the browsers don't yet uniformly implement letter- and pillar-boxing. Firefox and IE do
no boxing on the poster attribute, but instead scale it. Because IE doesn't dwell on the poster, it moves
on to use black bars instead of transparent ones. Once you start playing in Firefox, the boxing on the
video is performed correctly.
@controls
Next, we introduce one of the most useful attributes of the <video> element: the @controls attribute.
If you simply want to embed a video and give it default controls for user interaction, this attribute is your
friend.
The @controls attribute is a boolean attribute. If specified without @autoplay, the controls are
displayed either always (as in Safari and Chrome), or when you mouse over and out of the video (as in
Firefox), or only when you mouse over the video (as in Opera and IE).
Listing 2–11 has an example use of @controls with an Ogg video. Figure 2–9 shows what the example
looks like in the browsers with a video width of 300px.
Listing 2–11. Ogg video with @controls attribute
<video src=”HelloWorld.ogv” controls></video>
http://freepdf-books.com
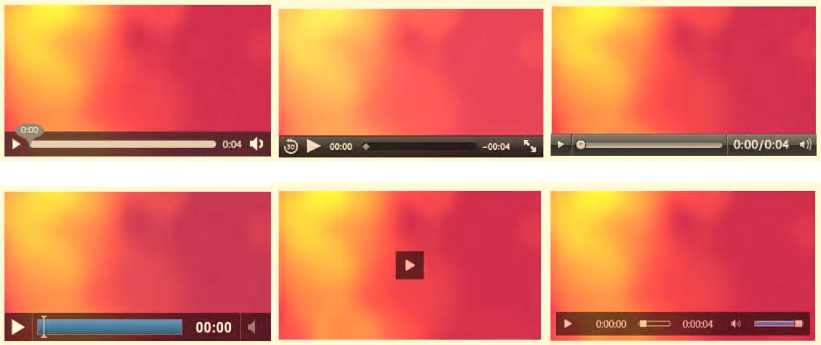
CHAPTER 2 ■ AUDIO AND VIDEO ELEMENTS
18
Figure 2–9. A <video> with @controls in Firefox, Safari and Opera (top row), Chrome, IE with width
300px, and IE with width 400px (bottom row)
Note that IE provides you with two different controls: one is a simple toggle button for play/pause
and one is an overlay at the bottom of the video, similar to the other browsers. The simple button is very
useful when the video becomes small and kicks in at less than 372px width for the given example.
@preload
The final attribute that we need to look at is the @preload attribute. It replaces an earlier attribute called
@autobuffer, which was a boolean attribute and thus unable to distinguish between several different
buffering requirements of users. This is why the @preload attribute was introduced, which allows web
developers to give the browser more detailed information about what they expect as the user's buffering
needs.
The @preload attribute is an attribute that you will not ordinarily want to use unless you have very
specific needs. Thus, these paragraphs are only meant for advanced users.
As a web browser comes across a <video> element, it needs to decide what to do with the resource
that it links to.
If the <video> is set to @autoplay, then the browser needs to start downloading the video resource,
set up the video decoding pipeline, start decoding audio and video frames and start displaying the
decoded audio and video in sync. Typically, the browser will start displaying audio and video even
before the full resource has been downloaded, since a video resource is typically large and will take a
long time to download. Thus, as the Web browser is displaying the decoded video, it can in parallel
continue downloading the remainder of the video resource, decode those frames, buffer them for
playback, and display them at the right display time. This approach is called “progressive download”.
In contrast, if no @autoplay attribute is set on <video> and no @poster image is given, the browser
will display only the first frame of the video resource. It has no need to immediately start a progressive
download without even knowing whether the user will start the video playback. Thus, the browser only
has to download the video properties and metadata required to set up the decoding pipeline, decode the
first video image, and display it. It will then stop downloading the video resource in order not to use up
users’ bandwidth with data that they may not want to watch. The metadata section of a video resource
typically consists of no more than several kilobytes.
http://freepdf-books.com
CHAPTER 2 ■ AUDIO AND VIDEO ELEMENTS
19
A further bandwidth optimization is possible if the <video> element actually has a @poster
attribute. In this case, the browser may not even bother to start downloading any video resource data
and just display the @poster image. Note that in this situation, the browser is in an information-poor
state: it has not been able to find out any metadata about the video resource. In particular, it has not
been able to determine the duration of the video, or potentially even whether it is able to decode the
resource. Therefore, most browsers on laptop or desktop devices will still download the setup and first
frame of the video, while on mobile devices, browsers more typically avoid this extra bandwidth use.
Now, as a web developer, you may be in a better position than the web browser to decide what
bandwidth use may be acceptable to your users. This decision is also an issue because a delayed
download of video data will also cause a delay in playback. Maybe web developers do not want to make
their users wait for the decoding pipeline to be set up.
Thus, the @preload attribute gives the web page author explicit means to control the download
behavior of the Web browser on <video> elements.
The @preload attribute can take on the values “none”, “metadata”, or “auto”.
Listing 2–12. Ogg video with @preload of “none”
<video src=”HelloWorld.ogv” poster=”HelloWorld.png”
preload=”none” controls></video>
You would choose “none” in a situation where you do not expect the user to actually play back the
media resource and want to minimize bandwidth use. A typical example is a web page with many video
elements — something like a video gallery — where every video element has a @poster image and the
browser does not have to decode the first video frame to represent the video resource. On a video gallery,
the probability that a user chooses to play back all videos is fairly small. Thus, it is good practice to set
the @preload attribute to “none” in such a situation and avoid bandwidth wasting, but accept a delay
when a video is actually selected for playback. You also accept that some metadata is not actually
available for the video and cannot be displayed by the browser, e.g. the duration of the video.
Listing 2–13. MPEG-4 video with @preload of “metadata”
<video src=”HelloWorld.mp4” poster=”HelloWorld.png”
preload=”metadata” controls></video>
You will choose “metadata” in a situation where you need the metadata and possibly the first video
frame, but do not want the browser to start progressive download. This again can be in a video gallery
situation. For example, you may want to choose “none” if you are delivering your web page to a mobile
device or a low-bandwidth connection, but choose “metadata” on high-bandwidth connections. Also,
you may want to choose “metadata” if you are returning to a page with a single video that a user has
already visited previously, since you might not expect the user to view the video again, but you do want
the metadata to be displayed. The default preload mode is “metadata”.
Listing 2–14. WebM video with @preload of “auto”
<video src=”HelloWorld.webm” poster=”HelloWorld.png”
preload=”auto” controls></video>
You will choose “auto” to encourage the browser to actually start downloading the entire resource,
i.e. to do a progressive download even if the video resource is not set to @autoplay. The particular
browser may not want to do this, e.g. if it is on a mobile device, but you as a web developer signal in this
way to the browser that your server will not have an issue with it and would prefer it in this way so as to
optimize the user experience with as little wait time as possible on playback.
Figure 2–10 shows the results of the different @preload values in Firefox, which also displays the
loaded byte ranges. It shows, in particular, that for “none” no video data is downloaded at all.
http://freepdf-books.com
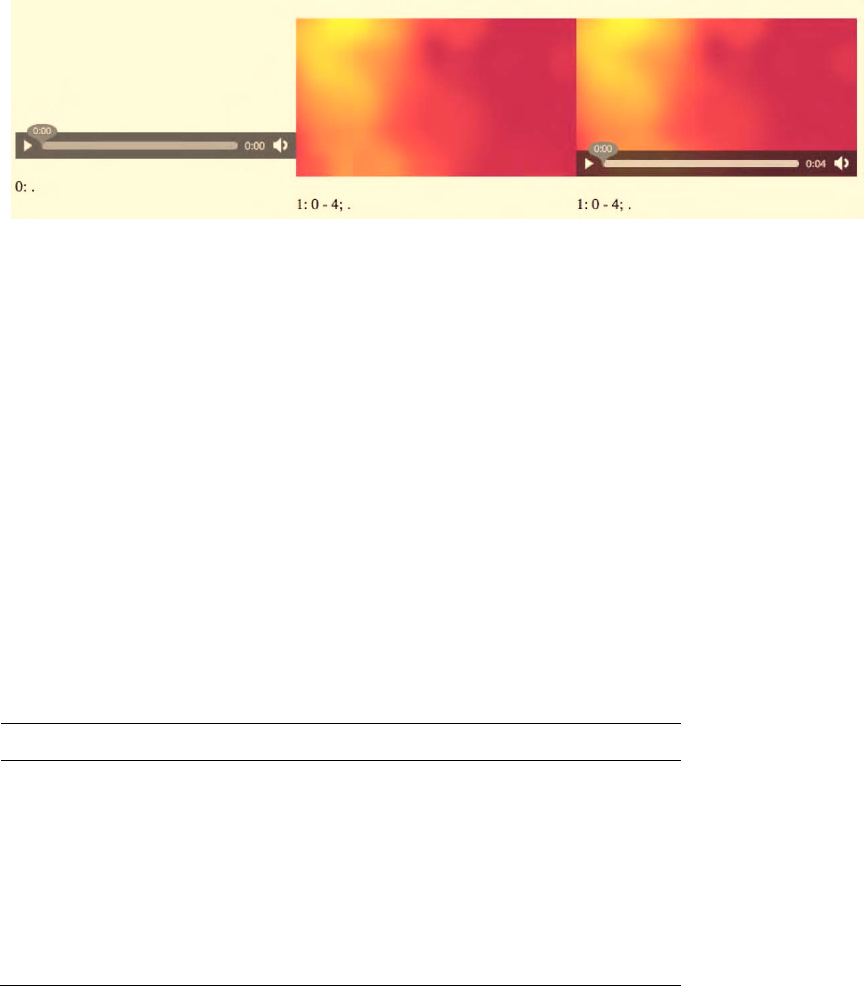
CHAPTER 2 ■ AUDIO AND VIDEO ELEMENTS
20
Figure 2–10. A <video> with @preload set to “none”, “metadata”, “auto” in Firefox
Note how we have put the same video resource with three different loading strategies into the
example of Figure 2–10. That approach actually confuses several of the browsers and gets them to
degrade in performance or die, so don't try to mix @preload strategies for the same resource on the same
web page.
Support for @preload is implemented in Firefox and Safari, such that “none” loads nothing and
“metadata” and “auto” set up the video element with its metadata and decoding pipeline, as well as the
first video frame as poster frame. Chrome, Opera, and IE don't seem to support the attribute yet and
ignore it.
As a recommendation, it is in general best not to interfere with the browser's default buffering
behavior and to avoid using the @preload attribute.
2.1.2 The Audio Element
Before diving further into the functionality of the <video> element, we briefly introduce its brother, the
<audio> element. <audio> shares a lot of markup and functionality with the <video> element, but it does
not have @poster, @width, and @height attributes, since the native representation of an <audio> element
is to not display visually.
At this point, we need to look at the supported audio codecs in HTML5. Table 2–2 displays the table
of codecs supported by the main HTML5 media supporting web browsers.
Table 2–2. Audio codecs natively supported by the major browsers
Browser WAV Ogg Vorbis MP3
Firefox --
Safari --
Opera --
Google Chrome
IE -- --
http://freepdf-books.com
CHAPTER 2 ■ AUDIO AND VIDEO ELEMENTS
21
Note that again there isn't a single encoding format supported by all web browsers. It can be
expected that IE may implement support for WAV, but as WAV is uncompressed, it is not a very efficient
option and should be used only for short audio files. At minimum you will need to provide Ogg Vorbis
and MP3 files to publish to all browsers.
@src
Here is a simple example that will embed an audio resource in HTML5:
Listing 2–15. WAV audio file
<audio src=”HelloWorld.wav”></audio>
Listing 2–16. Ogg Vorbis audio file
<audio src=”HelloWorld.ogg”></audio>
Listing 2–17. MP3 audio file
<audio src=”HelloWorld.mp3”></audio>
Because this audio element has no controls, there will be no visual representation of the <audio>
element. This is sensible only in two circumstances: either the <audio> is controlled through JavaScript
(see Chapter 4), or the <audio> is set to start playback automatically, for which it requires an @autoplay
attribute.
@autoplay
To make the audio autostart, you need to add an attribute called @autoplay.
Listing 2–18. WAV audio file with an @autoplay attribute
<audio src=”HelloWorld.wav” autoplay></audio>
The @autoplay attribute is a boolean attribute, just as it is with the <video> element. Providing it
will make the audio begin playing as soon as the browser has downloaded and decoded sufficient audio
data. The audio file will play through once from start to end. It is recommended this feature be used
sparingly, since it can be highly irritating for users.
The @autoplay attribute is supported by all browsers.
@loop
To make the audio automatically restart after finishing playback, you use the @loop attribute.
Listing 2–19. Ogg Vorbis audio file with a @loop attribute
<audio src=”HelloWorld.ogg” autoplay loop></audio>
The @loop attribute, in conjunction with the @autoplay attribute, provides a means to set
continuously playing “background” music or sound on your web page. This is not recommended; it is
just mentioned here for completeness.
http://freepdf-books.com
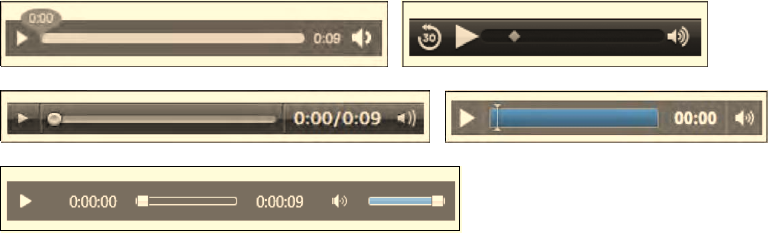
CHAPTER 2 ■ AUDIO AND VIDEO ELEMENTS
22
Note that if you accidentally create several such elements, they will all play at the same time and
over the top of each other, but not synchronously. In fact, they may expose a massive drift against each
other since each <audio> element only follows its own playback timeline. Synchronizing such elements
currently is not easily possible. You can use only JavaScript to poll for the current playback time of each
element and reset all elements to the same playback position at regular intervals. We will learn about the
tools to do this in Chapter 4 with the JavaScript API.
The @loop attribute is supported by all browsers except Firefox, where it is scheduled for version 5.
@controls
If you are planning to display an audio resource on your web page for user interaction rather than for
background entertainment, you will need to turn on @controls for your <audio> element.
Listing 2–20. MP3 audio file
<audio src=”HelloWorld.mp3” controls></audio>
Figure 2–11 shows what the example looks like in the browsers.
Figure 2–11. An <audio> element with @controls in Firefox, Safari (top row), Opera, Chrome (middle
row), and IE (bottom)
You will notice that the controls of each browser use a different design. Their width and height are
different and not all of them display the duration of the audio resource. Since the <audio> element has
no intrinsic width and height, the controls may be rendered as the browser finds appropriate. This
means that Safari uses a width of 200px; the others all use a width of 300px. The height ranges from 25px
(Safari, Opera), to 28px (Firefox), to 32px (Google Chrome), and to 52px (IE). In Chapter 4 we show how
you can run your own controls and thus make them consistent across browsers.
@preload
The @preload attribute for <audio> works like the one for <video>. You ordinarily should not have to deal
with this attribute.
The @preload attribute accepts three different values: “none”, “metadata”, or “auto”.
http://freepdf-books.com
CHAPTER 2 ■ AUDIO AND VIDEO ELEMENTS
23
Listing 2–21. WAV audio file with preload set to “none”
<audio src=”HelloWorld.wav” controls preload=”none”></audio>
Web developers may choose “none” in a situation where they do not expect the user to actually play
back the media resource and want to minimize bandwidth use. A browser would typically load the setup
information of the audio resource, including metadata, such as the duration of the resource. Without the
metadata, the duration of the resource cannot be displayed. Thus, choosing no preload only makes
sense when dealing with a large number of audio resources. This is typically only useful for web pages
that display many audio resources — an archive of podcasts, for example.
Listing 2–22. Ogg Vorbis audio file with preload set to “metadata”
<audio src=”HelloWorld.ogg” controls preload=”metadata”></audio>
Web developers may chose “metadata” in a situation where they do not expect the user to actually
play back the media resource and want to minimize bandwidth use, but not at the cost of missing audio
metadata information. This is typically the default behavior of the web browser unless the element is set
to autoplay, but can be reinforced by the web developer through this attribute if supported by the
browser.
Listing 2–23. MP3 audio file with preload set to “auto”
<audio src=”HelloWorld.mp3” controls preload=”auto”></audio>
Web developers may chose “auto” in a situation where they expect an audio resource to actually be
played back and want to encourage the browser to prebuffer the resource, i.e. to start progressively
downloading the complete resource rather than just the setup information. This is typically the case
where the <audio> element is the main element on the page, such as a podcast page. The aim of using
@preload with “auto” value is to use bandwidth preemptively to create a better user experience with a
quicker playback start.
Support for @preload is implemented in Firefox and Safari, such that “none” loads nothing and
“metadata” and “auto” set up the audio element with its metadata and decoding pipeline. Chrome,
Opera, and IE don't seem to support the attribute yet and ignore it.
2.1.3 The Source Element
As we have seen, both the <video> and the <audio> element do not have a universally supported
baseline codec. Therefore, the HTML5 specification has created a means to allow specification of
alternative source files through the <source> element. This allows a web developer to integrate all the
required links to alternative media resources within the markup without having to test for browsers'
support and use JavaScript to change the currently active resource.
@src
An example for a <video> element with multiple resources is given in Listing 2–24, an example for
<audio> in Listing 2–25.
http://freepdf-books.com

CHAPTER 2 ■ AUDIO AND VIDEO ELEMENTS
24
Listing 2–24. Embedding video in HTML5 with WebM Ogg and MPEG-4 formats
<video poster="HelloWorld.png" controls>
<source src="HelloWorld.mp4">
<source src="HelloWorld.webm">
<source src="HelloWorld.ogv">
</video>
Listing 2–25. Embedding audio in HTML5 with WAV, Ogg Vorbis and MP3 formats
<audio controls>
<source src="HelloWorld.mp3">
<source src="HelloWorld.ogg">
<source src="HelloWorld.wav">
</audio>
The <source> element is an empty element. It is not permitted to have any content and therefore
doesn't have a </source> closing tag. If such a closing tag were used, it may in fact create another
<source> element without any attributes, so don't use it. It is, however, possible to add a slash “/” at the
end of the <source> element start tag as in <source/> — HTML user agents will parse this — but it is not
an HTML5 requirement. If you were using XHTML5, though, you would need to close the empty element
in this way.
The list of <source> elements specifies alternative media resources for the <video> or <audio>
element, with the @src attribute providing the address of the media resource as a URL.
A browser steps through the <source> elements in the given order. It will try to load each media
resource and the first one that succeeds will be the resource chosen for the media element. If none
succeeds, the media element load fails, just as it fails when the direct @src attribute of <audio> or <video>
cannot be resolved.
Note that right now, there is a bug in the iPad that will stop the <video> element from working when
the MPEG-4 file is not the first one in the list of <source> elements. All browsers support <source>
elements and the @src attribute.
@type
The <source> element has a @type attribute to specify the media type of the referenced media resource.
This attribute is a hint from the web developer and makes it easier for the browser to determine whether
it can play the referenced media resource. It can even make this decision without having to fetch any
media data.
The @type attribute contains a MIME type with an optional codecs parameter.
Listing 2–26. Embedding video with Ogg Theora, WebM, and MPEG-4 formats and explicit @type
<video poster="HelloWorld.png" controls>
<source src="HelloWorld.mp4" type='video/mp4; codecs="avc1.42E01E, mp4a.40.2"'>
<source src="HelloWorld.webm" type='video/webm; codecs="vp8, vorbis"'>
<source src="HelloWorld.ogv" type='video/ogg; codecs="theora, vorbis"'>
</video>
Note that you need to frame multiple parameters with double quotes and thus you have to put the
@type value in single quotes or otherwise escape the double quotes around the @type attribute value.
www.itbooksh
ub.com
|||||||||||||||||||||||||
|||||||||||||||||
www.cncmanu
al.com
http://freepdf-books.com

CHAPTER 2 ■ AUDIO AND VIDEO ELEMENTS
25
You cannot use single quotes on the codecs parameter, since RFC 42815 specifies that they have a special
meaning. RFC 4281 is the one that specifies the codecs parameter on a MIME type.
Listing 2–27. Embedding audio with WAV, Ogg Vorbis and MPEG-4 formats and explicit @type
<audio controls>
<source src=”HelloWorld.wav” type=”audio/wav; codecs=1”>
<source src=”HelloWorld.ogg” type=”audio/ogg; codecs=vorbis”>
<source src=”HelloWorld.mp3” type=”audio/mpeg; codecs=mp3”>
</audio>
The browsers will parse the @type attribute and use it as a hint to determine if they can play the file.
MIME types do not always provide a full description of the media resource. For example, if “audio/ogg”
is provided, it is unclear whether that would be an Ogg Vorbis, Ogg Flac, or Ogg Speex file. Or if
“audio/mpeg” is given, it is unclear whether that would be an MPEG-1 or MPEG-2 audio file Layer 1, 2,
or 3 (only Layer 3 is MP3). Also note that codecs=1 for audio/wav is PCM.
Thus, based on the value of the @type attribute, the browser will guess whether it may be able to
play the media resource. It can make three decisions:
• It does not support the resource type.
• “Maybe”: there is a chance that the resource type is supported.
• “Probably”: the web browser is confident that it supports the resource type.
A confident decision for “probably” can generally be made only if a codecs parameter is present.
A decision for “maybe” is made by the browser based on information it has available as to which
codecs it supports. This can be a fixed set of codecs as implemented directly in the browser, or it can be a
list of codecs as retrieved from an underlying media framework such as GStreamer, DirectShow, or
QuickTime.
You can use the code snippet in Listing 2–28 to test your browser for what MIME types it supports.
Note that the canPlayType() function is from the JavaScript API, which we will look at in Chapter 4.
Listing 2–28. Code to test what video MIME types a web browser supports
<p>Video supports the following MIME types:
<ul>
<script type="text/javascript">
var types = new Array();
types[0] = "video/ogg";
types[1] = 'video/ogg; codecs="theora, vorbis"';
types[2] = "video/webm";
types[3] = 'video/webm; codecs="vp8, vorbis"';
types[4] = "video/mp4";
types[5] = 'video/mp4; codecs="avc1.42E01E, mp4a.40.2"';
// create a video element
var video = document.createElement('video');
// test types
for (i=0; i<types.length; i++) {
var support = video.canPlayType(types[i]);
if (support == "") support="no";
5 See http://www.ietf.org/rfc/rfc4281.txt
http://freepdf-books.com
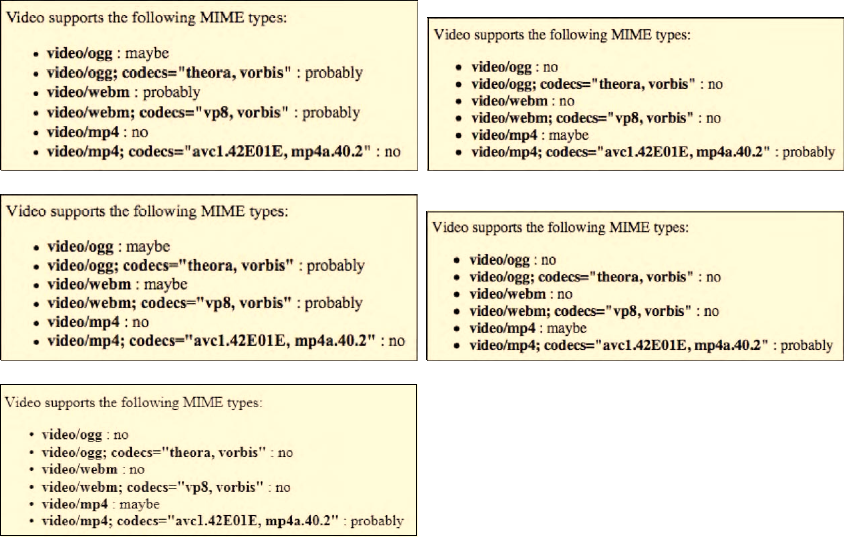
CHAPTER 2 ■ AUDIO AND VIDEO ELEMENTS
26
document.write("<li><b>"+types[i]+"</b> : "+support+"</li>");
}
</script>
</ul>
</p>
We can see the results for the MIME types in each browser in Figure 2–12.
Figure 2–12. The video codec support in Firefox and Safari (top row), Opera and Chrome (middle row),
and IE (bottom)
IE and Safari will return “maybe” when given a MIME type without codecs parameters and
“probably” when given one with codecs parameters.
Let's do the same exercise for audio MIME types with the code snippet in Listing 2–33.
Listing 2–29. Code to test what audio MIME types a web browser supports
<p>Audio supports the following MIME types:
<ul>
<script type="text/javascript">
var types = new Array();
types[0] = "audio/ogg";
types[1] = "audio/ogg; codecs=vorbis";
types[2] = "audio/mpeg";
Download from www.eBookTM.Com
http://freepdf-books.com
CHAPTER 2 ■ AUDIO AND VIDEO ELEMENTS
27
types[3] = "audio/mpeg; codecs=mp3";
types[4] = "audio/wav";
types[5] = "audio/wav; codecs=1";
types[6] = "audio/mp4";
types[7] = "audio/mp4; codecs=aac";
types[8] = "audio/x-m4b";
types[9] = "audio/x-m4b; codecs=aac";
types[10] = "audio/x-m4p";
types[11] = "audio/x-m4p; codecs=aac";
types[12] = "audio/aac";
types[13] = "audio/aac; codecs=aac";
types[14] = "audio/x-aac";
types[15] = "audio/x-aac; codecs=aac";
// create a audio element
var audio = document.createElement('audio');
// test types
for (i=0; i<types.length; i++) {
var support = audio.canPlayType(types[i]);
if (support == "") support="no";
document.write("<li><b>"+types[i]+"</b> : "+support+"</li>");
}
</script>
</ul>
</p>
We can see the results for the MIME types in each browser in Figure 2–13. The screenshots cover
even more codecs, since some browsers also support MPEG-4 AAC. Note that while Opera and Google
Chrome claim they may be able to play MPEG-4 AAC, they actually don't. Firefox is realistic about this,
and Safari is the only one that actually supports it.
Note that the “codecs” parameter is optional and even though it helps browsers be more confident
about whether they will be able to decode a resource, ultimately that test comes only with trying to load
the resource. It is therefore recommended to use only the MIME type without the codecs parameters.
There are even discussions to completely remove this attribute and have the browser determine
through successive header downloads which resource it can decode. This is called “sniffing”. The @type
attribute was created to remove the need for sniffing and speed up the resource selection and loading.
http://freepdf-books.com
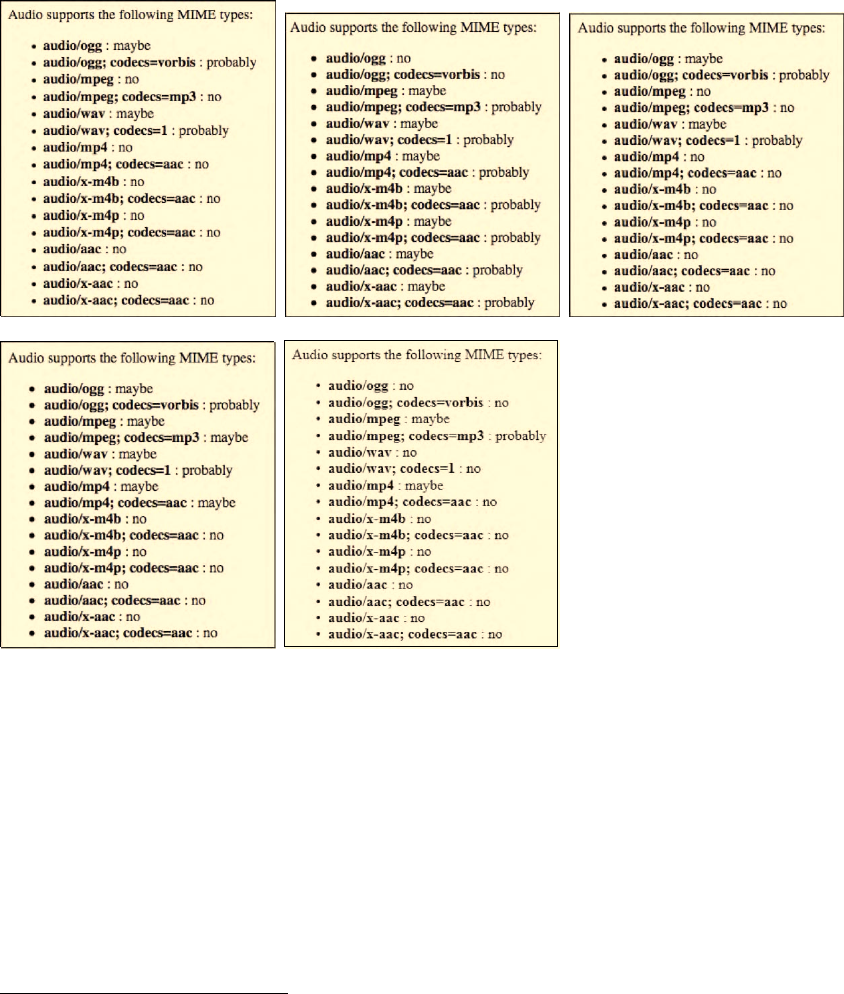
CHAPTER 2 ■ AUDIO AND VIDEO ELEMENTS
28
Figure 2–13. The audio codec support in Firefox, Safari, Opera (top row), Chrome, and IE (bottom row)
@media
The <source> element only exists to help the browser select the first acceptable media resource from a
list. The @type attribute helps identify whether the browser supports that media format. The @media
attribute further provides for associating so-called media queries6 with a resource.
Media queries exist to specify that a specific resource is tailored for a specific (range of) output
device(s). For example, a @media value of “min-width: 400px” specifies that the resource is targeted
toward display areas of at least 400px width.
Many different media queries are possible. Here are just a few examples used on media elements.
6 See http://www.w3.org/TR/css3-mediaqueries/
http://freepdf-books.com
CHAPTER 2 ■ AUDIO AND VIDEO ELEMENTS
29
• @media="handheld" to indicate that the media resource is appropriate for
handheld devices.
• @media="all and (min-device-height:720px)" to indicate that the media resource
is appropriate for screens with 720 lines of pixels or bigger.
• @media="screen and (min-device-width: 100px)" to indicate that the media
resource is appropriate for screens with 100 lines of pixels or higher.
While we are working with browsers on desktops and laptops, this attribute should not be of much
interest. Only Opera and Safari have implemented support for it..
2.1.4 Markup Summary
Lastly, we list all the introduced elements and attributes for reference purposes. This should help to
quickly find what you are looking for.
Table 2–3. Overview of all the media elements and their attributes
Element Attribute Values Description
<video> @src [url] Link to video resource.
@autoplay Autostart video playback after video loading.
@loop Restart video when reaching end.
@poster [url] Link to representative image for video.
@width, @height [length]
|[percentage]
Provide width and height dimensions for video.
@preload “none” |
“metadata” |
“auto”
Suggestion for how much of the video resource
to load.
@controls Display default video controls.
<audio> @src [url] Link to audio resource.
@autoplay Autostart audio playback after audio loading.
@loop Restart audio when reaching end.
@preload “none” |
“metadata” |
“auto”
Suggestion for how much of the audio resource
to load.
@controls Display default audio controls.
<source> @src [url] Link to media resource.
@type [MIME type] MIME type of media resource.
@media [media query] Media resource is tailored for such a device.
http://freepdf-books.com

CHAPTER 2 ■ AUDIO AND VIDEO ELEMENTS
30
2.2 Encoding Media Resources
After reading the previous section, you will have a clear understanding of how to include audio and
video resources into HTML But you may still be wondering how to actually create those audio and video
resources. In this subsection, we will look briefly at how to encode the main formats web browsers
support: Ogg Theora, WebM, and MPEG-4 H.264 for <video> and Ogg Vorbis and MP3 for <audio>. Feel
free to skip this subsection if you have already mastered the encoding challenge.
We focus on using open-source software to perform the encoding, since this software is available to
everyone, on every major platform and vendor-neutral. The use of online encoding services is
particularly interesting since they will run the software for you with already optimized parameters, and
the cost will scale with the amount of encoding you need to undertake.
2.2.1 Encoding MPEG-4 H.264 Video
Open-source tools for encoding MPEG-4 H.264 basically all use the x2647 encoding library, which is
published under the GNU GPL license. x264 is among the most feature-complete H.264 codecs and
widely accepted as one of the fastest.8 The best software for transcoding an existing video file to MPEG-4
H.264 is probably FFmpeg9, which uses x264 for MPEG-4 H.264 encoding.
FFmpeg is a command line tool to convert multimedia files between formats. It has binaries for all
major platforms. Even if you have an exotic platform, you pretty likely can make it work by compiling
from source code. Alternative open-source encoding software with a GUI include Handbrake10 and
VLC11. We will not look at these encoding tools, but focus on FFmpeg instead. Should you use one of those
GUI tools, it is still instructive to read about the profiles and presettings that FFmpeg uses for a better
understanding of encoding options.
Let’s assume you have a video file as a result of extracting video from a digital video camera. It could
already be in MPEG-4 H.264 format, but let's assume it instead is in DV, QuickTime, VOB, AVI, MXF, or
any other such format. FFmpeg understands almost all input formats (assuming you have the right
decoding libraries installed). Running “ffmpeg –formats“ will list all the supported codec formats. You
should avoid transcoding if at all possible. Transcoding means you are decoding from one encoding
format and reencoding in another. All transcoding creates new artifacts, even if you are transcoding for
the same codec. Artifacts are visible or audible effects created in the audio or video data that are not
present in the original material and introduced through the encoding process and which reduce the
quality of the material.
MPEG-4 H.264 actually includes a number of encoding profiles with varying characteristics.12 The
sheer number of available profiles makes it difficult to understand when to use what, but the most used
profiles are the following:
7 See http://www.videolan.org/developers/x264.html
8 See http://en.wikipedia.org/wiki/H.264#Software_encoder_feature_comparison
9 See http://www.FFmpeg.org/
10 See http://handbrake.fr/
11 See http://www.videolan.org/vlc/
12 See http://en.wikipedia.org/wiki/H.264/MPEG-4_AVC
http://freepdf-books.com

CHAPTER 2 ■ AUDIO AND VIDEO ELEMENTS
31
• Baseline Profile: use this profile for iPod and iPhone.13
• Main Profile: this is mostly a historic profile used for SD digital TV broadcasts.
• High Profile: use this profile for Web, SD, and HD video publishing.
FFmpeg provides simple presets to encode in typical formats. You can find them in the .ffpreset files
— e.g. libx264-main.ffpreset. The following presets may be useful14:
• baseline – a generic baseline profile.
• ipod320 – a baseline profile for 320×240 video.
• ipod640 – a baseline profile for 640×480 video.
• default – a generic main profile.
• normal – a generic high profile recommended for everyday use (and the default).
• hq – improved quality compared with the “normal” preset taking about twice
as long to encode, but with improved motion estimation
• max – a further improved quality compared with the “hq” preset taking about 20
times as long to encode, but with further improved motion estimation
With the following command in Listing 2–30, you should be able to create an MPEG-4 H.264 video
file with AAC audio from an input format supported by your installation of FFmpeg.
Listing 2–30. Encoding a video resource to the MPEG-4 H.264 format using presets
ffmpeg -i infile \
-vcodec libx264 -vpre <preset> \
-acodec libfaac \
-threads 0 outfile.mp4
In Listing 2–30 we've put all the video codec related options on one line and all the audio codec
related options on another. Setting the -threads parameter to 0 encourages FFmpeg to use as many
threads as appropriate. Choose your preferred preset and replace it for <preset>. Further, if you want to
control the bitrate, you can set it for the video with -vb <bitrate> and for the audio with -ab <bitrate>.
A typical encoding call is provided in Listing 2–31.
Listing 2–31. Typical encoding using the normal profile
ffmpeg -i HelloWorld.dv \
-vcodec libx264 -vpre normal -vb 3000k \
-acodec libfaac -ab 192k \
-threads 0 HelloWorld.mp4
You can do a lot to further improve video quality. One particularly effective approach is to perform a
two-pass encoding. For this, you run FFmpeg twice. The first time, you need to include only the video, no
audio, and use the -fastfirstpass preset, as well as a -pass 1 parameter. Also, you need to write the
13 More information at http://rob.opendot.cl/index.php/useful-stuff/ipod-video-guide/
14 See http://juliensimon.blogspot.com/2009/01/howto-ffmpeg-x264-presets.html
http://freepdf-books.com

CHAPTER 2 ■ AUDIO AND VIDEO ELEMENTS
32
output somewhere to a temporary file, since you are interested only in creating the log files that the
second pass requires. Then, in the second pass, you include a -pass 2 parameter and the audio.
Listing 2–32. Two-pass encoding example using the normal profile
ffmpeg -i Helloworld.dv -pass 1 \
-vcodec libx264 -vpre fastfirstpass \
-an -threads 0 tempfile.mp4
ffmpeg -i HelloWorld.dv -pass 2 \
-vcodec libx264 -vpre normal -vb 3000k \
-acodec libfaac -ab 192k \
-threads 0 HelloWorld.mp4
2.2.2 Encoding Ogg Theora
Open-source tools for encoding Ogg Theora basically use the libtheora15 encoding library, which is
published under a BSD style license by Xiph.org. There are several encoders written on top of libtheora,
of which the most broadly used are ffmpeg2theora16 and FFmpeg17.
The main difference between ffmpeg2theora and FFmpeg is that ffmpeg2theora is fixed to use the
Xiph libraries for encoding, while FFmpeg has a choice of codec libraries, including its own Vorbis
implementation and its own packaging. ffmpeg2theora has far fewer options to worry about. The files
created by these two tools differ. Recently, their performance has been comparable. If you want to use
FFmpeg for encoding Ogg Theora, make sure to use the -acodec libvorbis and not -acodec vorbis;
otherwise your files may be suboptimal.
Because ffmpeg2theora is optimized toward creating Ogg Theora files and has therefore more
specific options and functionality for Ogg Theora, we use it here.
You can use VLC18 or Miro Video Converter19 as a GUI-based encoding software for Ogg Theora. If
you like to do your encoding in Windows video editing software, you should install the Ogg DSF
DirectShow Filters20, which will enable support for all Windows software that makes use of the
DirectShow framework with Ogg Theora/Vorbis. If you are an Apple Mac user, you should install
XiphQT21, which are QuickTime components for the encoding and playback of Ogg Theora/Vorbis
through the QuickTime framework. It will enable iMovie to encode Ogg Theora/Vorbis, and Safari and
the QuickTime Player to decode Ogg Theora/Vorbis.
We should further point out that Firefox has a plug-in called FireFogg22, which allows encoding of
Ogg Theora/Vorbis directly in your Firefox browser, essentially turning it into a transcoding application.
It also uses ffmpeg2theora for encoding.
With the following command in Listing 2–33, you should be able to create an Ogg Theora video file
with Vorbis audio. It will simply retain the width, height, and framerate of your input video and the
15 See http://www.theora.org/downloads/
16 See http://v2v.cc/~j/ffmpeg2theora/
17 See http://www.FFmpeg.org/
18 See http://www.videolan.org/vlc/
19 See http://www.mirovideoconverter.com/
20 See http://www.xiph.org/dshow/
21 See http://xiph.org/quicktime/
22 See http://firefogg.org/
http://freepdf-books.com
CHAPTER 2 ■ AUDIO AND VIDEO ELEMENTS
33
samplingrate and number of channels of your input audio in a new Ogg Theora/Vorbis encoded
resource.
Listing 2–33. Encoding a video resource to the Ogg Theora/Vorbis format
ffmpeg2theora -o outfile.ogv infile
Seeing as you may want to encode all your files with the same kind of quality, you're probably
interested in using a standard preset. You can find out which presets exist by calling ffmpeg2theora -p
info. The following presets may be on your system:
• preview : Video: 320x240 if fps ~ 30, 384x288 otherwise
Quality 6
Audio: Max 2 channels - Quality 1
• pro: Video: 720x480 if fps ~ 30, 720x576 otherwise
Quality 8
Audio: Max 2 channels - Quality 3
• videobin: Video: 512x288 for 16:9 material, 448x336 for 4:3 material
Bitrate 600kbs
Audio: Max 2 channels - Quality 3
• padma: Video: 640x360 for 16:9 material, 640x480 for 4:3 material
Quality 6
Audio: Max 2 channels - Quality 3
• padma-stream: Video: 128x72 for 16:9 material, 128x96 for 4:3 material
Audio: mono quality -1
Listing 2–34 shows use of the preset “pro” with some additional restrictions.
Listing 2–34. Adapting the bitrate for audio and video for ffmpeg2theora
ffmpeg2theora -o HelloWorld.ogv -p pro \
--videobitrate 3000 \
--audiobitrate 192 \
infile
You will notice that there are different quality settings in these presets. ffmpeg2theora has 10 for
both, audio and video, with 10 being maximum and 0 being minimum quality. Default for video is 6 and
for audio 1. Listing 2–34 shows use of the profile pro with some additional restrictions.
Just like MPEG H.264, Ogg Theora also offers the possibility of two-pass encoding to improve the
quality of the video image. Listing 2–35 shows how to run ffmpeg2theora with two-pass.
Listing 2–35. Using two-pass encoding for Ogg Theora
ffmpeg2theora -o HelloWorld.ogv -p pro \
--two-pass infile
ffmpeg2theora also has many more options, in particular subtitles, metadata, an index to improve
seekability on the Ogg Theora file, and even options to improve the video quality with some built-in
filters. Note that inclusion of an index is activated by default since ffmpeg2theora version 0.27. The
index will vastly improve seeking performance in browsers.
Find out about all the options by calling ffmpeg2theora -h.
http://freepdf-books.com

CHAPTER 2 ■ AUDIO AND VIDEO ELEMENTS
34
2.2.3 Encoding WebM
Open-source tools for encoding WebM basically use the libvpx23 encoding library, which is published
under a BSD style license by Google.24 There are several encoders written on top of libvpx, which
includes DirectShow filters, a VP8 SDK, GStreamer plug-ins, and patches for FFmpeg.25
You can use VLC26 or Miro Video Converter27 as GUI-based encoding software for WebM. Also, the
Ogg DSF DirectShow Filters now have integrated WebM support28. For Apple Mac users, there is no
QuickTime component that supports WebM, but one is planned.
The Firefox plug-in FireFogg29 also allows encoding of WebM directly in your Firefox browser,
essentially turning it into a transcoding application. It uses FFmpeg for encoding.
With the command in Listing 2–40, you should be able to create a WebM file with VP8 video and
Vorbis audio. It will simply retain the width, height, and framerate of your input video and the
samplingrate and number of channels of your input audio in a new WebM-encoded resource.
Listing 2–36. Encoding a video resource to the WebM format
ffmpeg -i infile outfile.webm
Seeing as you might want to encode all your files into the same kind of quality, you're probably
interested in using a standard preset. You can find them in the .ffpreset files, e.g. libvpx-
1080p.ffpreset. The following presets may be useful:
• 1080p : Video: 1920x1080
• 1080p50/60: Video: 1920x1080, higher bitrate
• 720p: Video: 720x480
• 720p: Video: 720x480, higher bitrate
• 360p50/60: Video: 360x240
Listing 2–37 shows use of the profile “720p” with some additional restrictions.
Listing 2–37. Adapting the bitrate for audio and video for FFmpeg
ffmpeg -o HelloWorld.webm -p 720p \
--videobitrate 3000 \
--audiobitrate 192 \
infile
23 See http://www.webmproject.org/code/#libvpx_the_vp8_codec_sdk
24 See http://review.webmproject.org/gitweb?p=libvpx.git;a=blob_plain;f=LICENSE;hb=HEAD
25 See http://www.webmproject.org/tools/
26 See http://www.videolan.org/vlc/
27 See http://www.mirovideoconverter.com/
28 See http://www.xiph.org/dshow/
29 See http://firefogg.org/
www.itbooksh
ub.com
|||||||||||||||||||||||||
|||||||||||||||||
www.cncmanu
al.com
http://freepdf-books.com
CHAPTER 2 ■ AUDIO AND VIDEO ELEMENTS
35
2.2.4 Encoding MP3 and Ogg Vorbis
Encoding audio is far easier than encoding video. Thus, we will explain here briefly how to encode to
MP3 or Ogg Vorbis.
Several programs are available for encoding an audio recording to MP3, including lame or FFmpeg
(which incidentally uses the same encoding library as lame: libmp3lame). Most audio-editing software is
able to encode mp3.
In Listing 2–38 we use FFmpeg for our encoding example, since it is the most commonly used
audio/video encoder.
Listing 2–38. Encoding audio to MP3 using FFmpeg
ffmpeg -i audio -acodec libmp3lame -aq 0 audio.mp3
The aq parameter in Listing 2–38 signifies the audio quality and goes from 0 to 255 with 0 being the
best quality. There are further parameters available to change, among others, bitrate, number of
channels, volume, and sampling rate.
For encoding an audio recording to Ogg Vorbis, there are again a large number of programs
available, such as oggenc or FFmpeg.
In Listing 2–39 we use FFmpeg for our encoding example, since it is the most commonly used
audio/video encoder.
Listing 2–39. Encoding audio to Ogg Vorbis using FFmpeg
ffmpeg -i audio -f ogg -acodec libvorbis -ab 192k audio.ogg
The ab parameter in Listing 2–43 signifies the target audio bitrate. There are further parameters
available to change, among others, the number of channels, volume, and sampling rate.
You can also use oggenc to encode to Ogg Vorbis, which is slightly easier to use and has some
specific Ogg Vorbis functionality. Listing 2–40 shows a simple example with a target bitrate of 192k.
Listing 2–40. Encoding audio to Ogg Vorbis using oggenc
oggenc audio -b 192 -o audio.ogg
The oggenc command also offers multiple extra parameters, such as the inclusion of skeleton -
which will create an index to improve seeking functionality on the file - a quality parameter -q that goes
from -1 to 10, with 10 being the best quality, parameters to change channels, volume and sampling rate,
and a means to include name-value pairs of metadata.
2.3 Publishing
In Section 2.1 we introduced how to write web pages with HTML5 video elements. In Section 2.2 we
learned how to encode the media files so they are supported by HTML5 video capable browsers. Now we
close the circle by looking at how to actually publish the videos and their web pages. After this, we have
all the tools to make HTML5 web pages with video and audio available.
http://freepdf-books.com

CHAPTER 2 ■ AUDIO AND VIDEO ELEMENTS
36
2.3.1 Web Server and HTTP Progressive Download
For publishing web pages, one will ordinarily use a web server, of course. A web server is a piece of
software that can speak HTTP, the HyperText Transfer Protocol, and deliver web content through
computer networks. Several open-source Web servers exist, the most popular being Apache30.
Serving HTML5 video over HTTP is the standard way in which the HTML5 video element currently
is being supported by web browsers. When making a choice between which server software to choose,
make sure it supports HTTP 1.1 Byte Range requests. Most common web servers will support it, but
occasionally you can still find one that doesn't or doesn’t work properly.
Support of HTTP Byte Range requests is important because it is the standard way in which browsers
receive HTML5 media resources from web servers. When using progressive download, the browser first
retrieves the initial byte ranges of a media resource, which tells it what kind of media resource it is and
gives it enough information to set up the audio and video decoding pipelines. This enables it to play
back audio and video content.
Audio and video data in a media resource are typically provided in a multiplexed manner, i.e. a bit
of video, then the related bit of audio, then the next bit of video etc. Thus, if the browser asks for a byte
range on the resource, it will retrieve both, the audio and video data that belongs to the same time range
together. It can thus progressively download byte ranges and at the same time decode and start playing
back the audio-visual content already received.
The best result is achieved when the network is fast enough to feed the decoding pipeline quicker
than the decoder and graphics engine can play back the video in real time. This will give a smooth
playback impression to users without making them wait until the whole video is downloaded.
Progressive download and parallel playback by themselves pose a big restriction on users: they
cannot seek to any offset unless the download has reached those bytes. Key to the usability of
progressive download is therefore the ability to seek into not-yet downloaded sections by asking the web
server to stop downloading and start providing those future data chunks. This is implemented in
browsers using the HTTP 1.1 Byte Range request mechanism.
In practice the setup/connection time for each HTTP byte range request means that browsers try to
make as few byte range requests as possible. After setting up the metadata, the browser will typically
make only one request for the entire media resource and will start playing it back as the data arrives. For
a very long file, when download is very far ahead of the current playback position and the user stopped
watching the video, downloading may be interrupted by the browser. A condition that allows the
browser to pause download is that the web server supports byte range requests so the browser may
resume downloading when the playback position is again getting closer to the buffered position. This
will save bandwidth use particularly on videos that are longer than a few minutes.
All the received data will be cached in the browser. When the user seeks and the seek time is not yet
buffered, the browser will stop the download and request a byte range that starts at the given time offset
the user seeked to.
This is technical background to something the user will never really notice. When setting up your
web server to host HTML5 audio and video, you don't have to do anything special. For Firefox and
Opera, which perform limited content sniffing, you need to make sure that the media resources are
served with the correct MIME type. For an Apache web server this means adding the following media
types to your mime.types setup file:
audio/ogg ogg oga
audio/webm webm
video/ogg ogv
video/webm webm
30 See http://httpd.apache.org/
Download from www.eBookTM.Com
http://freepdf-books.com

CHAPTER 2 ■ AUDIO AND VIDEO ELEMENTS
37
To publish HTML audio and video, you only need to copy the files into a directory structure on your
web server and make sure that the resource location and hyperlinks are all correct and work. Listing 2–41
shows an example layout of a directory structure on a web server (/var/www is the typical root directory
of a web site hosted with Apache on a Linux server).
Listing 2–41. An example web server directory structure for video and audio publishing
/var/www/ - the Web server root directory, exposed e.g. as http://www.example.net/
/var/www/page.html – the Web page with a video element
/var/www/video/video.webm and
/var/www/video/video.mp4 – the video in two formats
/var/www/thumbs/video.png – the video's thumbnail
/var/www/audio/audio.ogg and
/var/www/audio/audio.mp3 – the compressed audio in two formats
With Listing 2–41, the web page at http://www.example.net/page.html would include a video
<source> with video/video.webm and video/video.mp4.
2.3.2 Streaming Using RTP/RTSP
Another traditional means of delivering audio and video over the Internet is streaming. Streaming is a
means where byte ranges exchanged between the streaming server and the streaming client are volatile,
i.e. they are not stored or cached on the client.
The original reason for development of streaming services was live video transmission, such as a live
lecture. In this situation, streaming clients can join and leave a live stream at any time. Seeking is not
possible on live streams.
More recently, streaming servers are also used for on-demand delivery of video files. RTSP, the Real-
Time Streaming Protocol, supports a Range header for seeking in this situation. The expectation with
such a delivery method is that it will be more difficult for a user to copy the content — in particular if an
additional encryption method is used over the network such that grabbing packets off the network card
won't help. In reality, it is impossible to fully protect against copying, since ultimately a screen recorder
can be used to grab a decoded video.
Streaming is mentioned here because there seems to be a need for browsers to also support the
Real-Time Streaming Protocol RTSP31: almost all web browsers have a user request for RTSP support:
WebKit/Safari32, Google Chrome33, Opera34, and Firefox35.
It is unclear as yet whether browsers will develop support for RTSP. Both needs — live streaming
and encrypted transmission — can also be satisfied with progressive download from a web server using
HTTP or HTTPS. Encrypted transmission and anti-piracy measures may require some additional
31 See http://www.ietf.org/rfc/rfc2326.txt
32 See https://bugs.webkit.org/show_bug.cgi?id=26416
33 See http://code.google.com/p/chromium/issues/detail?id=25573
34 See http://my.opera.com/community/forums/topic.dml?id=455521
35 See https://bugzilla.mozilla.org/show_bug.cgi?id=506834
http://freepdf-books.com

CHAPTER 2 ■ AUDIO AND VIDEO ELEMENTS
38
functionality installed both at the server and at the client, but you can certainly do some authentication
when you have control over the server and provide the adequate JavaScript on your Web page, or time-
limit the validity of your video URLs.
There are many issues with RTSP that may stop browser vendors from implementing support for it.
One, of course, is the need to implement support for an additional protocol in the browser — a
protocol that doesn't come easily to the Web. This is particularly an issue since available RTSP server
software isn't always compliant with the standardized RTSP features. Available open-source RTSP
servers are VLC, Flumotion, and Apple's QuickTime Streaming Server. Clients that can consume such
streams are VLC and MPlayer.
One of the main disadvantages of RTSP is that it requires a special streaming server to deliver the
streams — a web server won't do. This special streaming server also connects on special network ports,
namely port 554 or 8554. The problem with such ports is that a firewall — unless configured to explicitly
open these ports — will block traffic from them, making it impossible to create a universal video
transmission infrastructure around RTSP. RTSP administrators have found ways around firewalls, which
mostly consist of tunneling through the HTTP port 80, but that is only a poor fix to the situation.
RTSP is flexible with its underlying network protocol. When RTSP is run over the connection-free
RTP/UDP (Real-Time Protocol/User Datagram Protocol) combination and the network gets congested,
RTSP will lose data and the stream will be distorted or broken. This is similar to a drop-out of a phone
connection. This behavior is expected in live interactive video transmissions, where synchronization to
the real-world time is required, but it is not desirable for on-demand delivery. For this reason, RTSP can
also be run over TCP. Then, the difference to delivering a video over HTTP, which also uses TCP, is
minimal.
In summary, RTSP has been created for video communications analogous to voice-over-IP
applications. It is not the best protocol for on-demand streaming, where HTTP with byte range requests
achieves the same result. Extra functionality that RTSP supports is also increasingly available with HTTP
progressive download approaches. Only the live communication case is one that may require a
RTP/RTSP implementation over UDP to work with the required low latency.
Note that Adobe's proprietary RTMP protocol is very similar to RTSP and, in fact, shares most of the
problems of RTSP. It is supported by Adobe's proprietary Flash Media Server or through the open-source
Red5 server software. Adobe just recently opened the specifications for RTMP36.
2.3.3 Extending HTTP Streaming
RTSP-like streaming approaches that require special server and client software have increasingly failed
in an HTTP dominated world. For example, YouTube is entirely provided through HTTP progressive
download and does not use RTMP. In this situation, vendors have embraced HTTP progressive
download and developed their own feature extensions to improve HTTP-based streaming.
The aim here is to continue using normal web servers without any software extensions and to push
the complexity of streaming into the client software. This avoids all the issues of creating new protocols,
fighting firewalls, and installing new software on servers. It enables software vendors to put all the
functionality into the user's software. This is great because they can roll out new functionality through
user software updates and without having to update server software. In a world where most users are
always online and software increasingly auto-updates over the Internet, this is a much easier approach
to upgrading than the server- and protocol-centric approaches of the past.
One particular feature has caused the major vendors to actually create a new set of technologies:
adaptive HTTP streaming. Adaptive HTTP streaming is a process that adjusts the quality of a video
delivered over HTTP, based on changing network and user software conditions to ensure the best
possible viewer experience. This is particularly targeted at varying bandwidth availabilities and aims at
36 See http://www.adobe.com/devnet/rtmp/
http://freepdf-books.com

CHAPTER 2 ■ AUDIO AND VIDEO ELEMENTS
39
removing the buffering interruptions users on low-bandwidth networks can experience when watching
video over HTTP progressive download.
The different technologies in the market are:
• Apple HTTP Live Streaming.37
• Microsoft Smooth Streaming.38
• Adobe HTTP Dynamic Streaming.39
More recently, the MPEG group is working on a standard approach to adaptive HTTP streaming in
the DASH40 (Dynamic Adaptive Streaming for HTTP) specification. Independently of that, there are also
designs being discussed for open codecs in general at the WHATWG.41 So development of a generic open
solution can be expected over the next year or so. For now, the three vendor solutions above are the
main technologies in the market.
Apple supports HTTP Live Streaming in Safari and QuickTime on the desktop, iPhone, iPod, and
iPad. Apple's approach is openly specified in an IETF RFC.42 Microsoft Silverlight actually understands
both, Microsoft Smooth Streaming and Apple HTTP Live Streaming. Adobe launched HTTP Dynamic
Streaming with FlashPlayer 10.1 and is supporting it through Adobe Flash Media Server.
All of these basically work in the same way: several versions of the media resource encoded at
different bitrates and possibly different resolutions are made available on the web server. The client
software is informed about these resources and their features through a manifest file. The client will
continuously analyze the situation in the media player from a bandwidth and CPU perspective and will
select from the manifest file which next partial resource bit to request during its progressive download.
Listing 2–42 shows an example of how you can use Apple's live streaming approach with an m3u8
manifest file in Safari. It is the only browser that currently has native support for adaptive HTTP
streaming.
Listing 2–42. An HTML5 video element with an Apple HTTP live streaming manifest file
<video src="HelloWorld.m3u8" />
</video>
In Listing 2–43 we show how to encode the files for Listing 2–42.43 You need to use a modern build of
FFmpeg and a segmenter that will split the created MPEG file into multiple transport stream segments.
You can use, for example, the open source software called “segmenter” from Carson McDonald.44
37 See
http://developer.apple.com/iphone/library/documentation/NetworkingInternet/Conceptual/StreamingMediaGuide/Introduction/I
ntroduction.html
38 See http://www.iis.net/download/SmoothStreaming
39 See http://www.adobe.com/devnet/flashmediaserver/articles/dynstream_on_demand.html
40 See http://multimediacommunication.blogspot.com/2010/08/mpeg-news-report-from-93rd-meeting.html
41 See http://wiki.whatwg.org/wiki/Adaptive_Streaming
42 See http://tools.ietf.org/html/draft-pantos-http-live-streaming-04
43 See http://stackoverflow.com/questions/1093667/http-live-streaming-ffmpeg-ffserver-and-iphone-os-3
44 See http://www.ioncannon.net/programming/452/iphone-http-streaming-with-ffmpeg-and-an-open-source-
segmenter/comment-page-1/
http://freepdf-books.com

CHAPTER 2 ■ AUDIO AND VIDEO ELEMENTS
40
Listing 2–43. Encoding multiple versions of the resource for Apple HTTP live streaming
ffmpeg -i input \
-acodec libmp3lame -ac 1 \
-vcodec libx264 -s 320x240 \
-level 30 -f mpegts - | \
segmenter - 10 fileSequence HelloWorld.m3u8 \
http://example.com/path/medium/
In Listing 2–44 we then show the content of the manifest file used in Listing 2–42 and three different
bandwidth-scaled versions with their MPEG transport stream fragments. These m3u8 files will sit on the
server together with the transport stream files in the right directories.
Listing 2–44. The respective m3u8 files for Listing 2–42
HelloWorld.m3u8:
#EXTM3U
#EXT-X-STREAM-INF:PROGRAM-ID=1, BANDWIDTH=860000
high/HelloWorld.m3u8
#EXT-X-STREAM-INF:PROGRAM-ID=1, BANDWIDTH=512000
medium/HelloWorld.m3u8
#EXT-X-STREAM-INF:PROGRAM-ID=1, BANDWIDTH=160000
low/HelloWorld.m3u8
high/HelloWorld.m3u8; medium/HelloWorld.m3u8; low/HelloWorld.m3u8:
#EXTM3U
#EXT-X-TARGETDURATION:10
#EXT-X-MEDIA-SEQUENCE:0
#EXTINF:10,
fileSequence0.ts
#EXTINF:10,
fileSequence1.ts
#EXTINF:10,
fileSequence2.ts
#EXTINF:10,
fileSequence3.ts
#EXTINF:1,
fileSequence4.ts
#EXT-X-ENDLIST
Apple's and Adobe's approach include an encryption method, but are otherwise feature-identical to
Microsoft's approach. Apple uses extended m3u playlist files45, Microsoft creates SMIL-based manifest
files46, and Adobe creates its own extension to the Flash Media Manifest file F4M47.
It will be interesting to see a solution that all browsers are able to adopt and that works uniformly
across the different media formats.
45 See
http://developer.apple.com/mac/library/documentation/NetworkingInternet/Conceptual/StreamingMediaGuide/HTTPStreamingAr
chitecture/HTTPStreamingArchitecture.html
46 See http://msdn.microsoft.com/en-us/library/ee230810(VS.90).aspx
47 See http://opensource.adobe.com/wiki/display/osmf/Flash+Media+Manifest+File+Format+Specification
http://freepdf-books.com

CHAPTER 2 ■ AUDIO AND VIDEO ELEMENTS
41
2.4 Default User Interface
In this section we take a quick look at the user interfaces that browsers have implemented for audio and
video elements. These are still highly in flux, as YouTube launches a new player interface roughly every
six months, it can likely be expected that web browsers will make improvements and add features to
their audio and video players for a while to come.
The default user interface for HTML5 audio and video elements is separated into two different
types: the visible controls and the controls hidden in the context menu, usually reached through a right-
click on the element.
2.4.1 Visible controls
We have already come across the visible controls of the main browsers. Here, we look at them in more
detail to see what is exposed by all of them and what special functionalities individual browsers may
provide. Controls are mostly identical between audio and video elements.
Firefox's controls:
Figure 2–14 shows Firefox's controls with an exposed volume slider.
Figure 2–14. The controls on the video and audio elements in Firefox
Firefox's controls provide the following functionality:
• play/pause toggle.
• timeline with direct jump to time offset (seeking).
• timeline displays playback position and buffer progress.
• playback time display.
• volume slider.
• volume on/off button.
Firefox has made these controls accessible and easily usable through keyboard control.
Firefox's controls provide the following keyboard access:
• tab: tab onto and off video element.
• space bar: toggles between play and pause.
• left/right arrow: winds video forward/back by 15 seconds.
• CTRL+left/right arrow: winds video forward/back by 1/10 of the media duration.
• HOME+left/right arrow: jumps to beginning/end of video.
• up/down arrow: when focused on the volume button, increases/decreases
volume.
http://freepdf-books.com
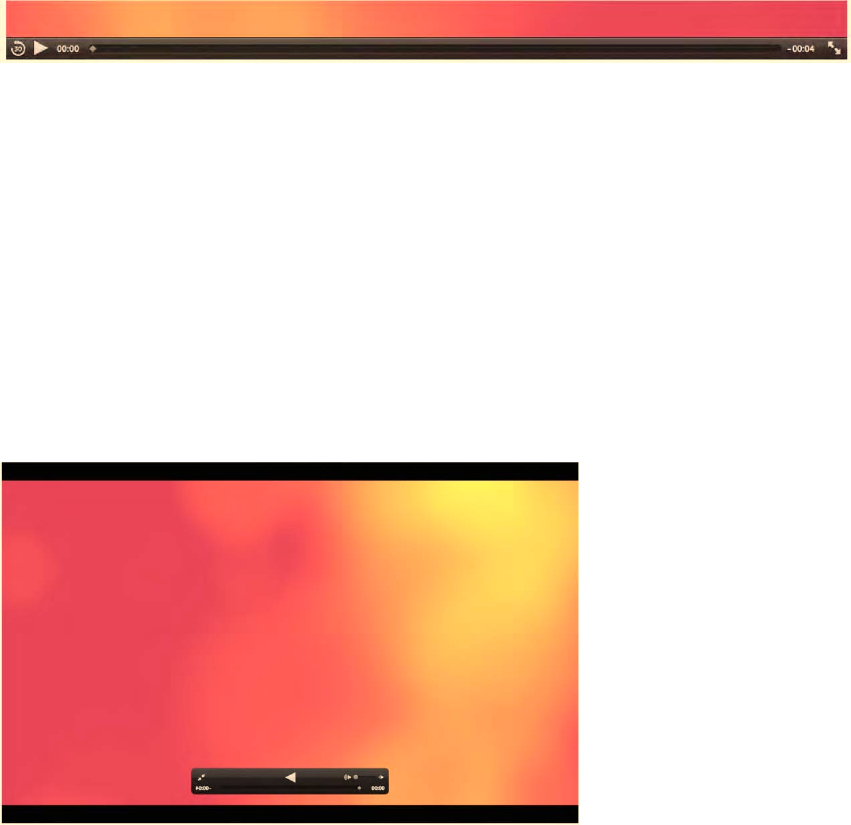
CHAPTER 2 ■ AUDIO AND VIDEO ELEMENTS
42
Safari's controls:
Figure 2–15 shows Safari's video controls.
Figure 2–15. The controls on the video elements in Safari
Safari's controls provide the following functionality:
• 30 second jump back button.
• play/pause toggle.
• timeline with direct jump to time offset (seeking).
• timeline displays playback position and buffer progress.
• playback count-down time display.
• fullscreen button.
If you flip back to Figure 2–9, you will see that the audio controls of Safari differ slightly. Instead of
the full-screen button at the end of the video controls, there is a volume on/off button. The full-screen
display of Safari is given in Figure 2–16. The controls have the same functionality as the normal video
controls, except they also contain a volume slider and a mute toggle button.
Figure 2–16. The full-screen display of the HelloWorld video in Safari
Safari doesn't yet seem to provide keyboard controls for the media elements.
http://freepdf-books.com
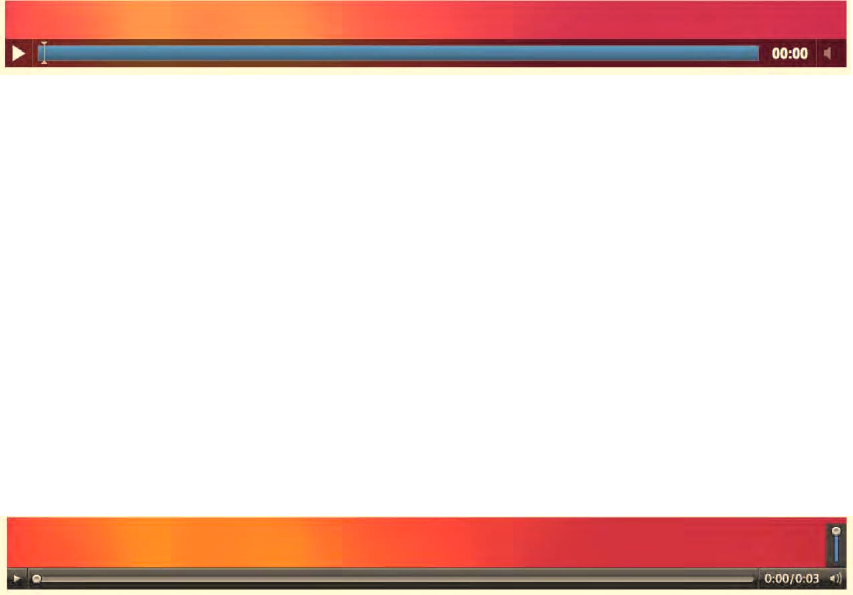
CHAPTER 2 ■ AUDIO AND VIDEO ELEMENTS
43
Google Chrome's controls:
Figure 2–17 shows Google Chrome's controls.
Figure 2–17. The controls on the video and audio elements in Google Chrome
Google Chrome's controls provide the following functionality:
• play/pause toggle.
• timeline with direct jump to time offset (seeking).
• timeline displays playback position and buffer progress.
• playback time display.
• volume slider.
• volume on/off button.
You may have noticed that the volume button is grayed out in Figure 2–15. That's because the video
element has no audio track. It seems to be the only browser that pays attention to this.
Google Chrome doesn't yet seem to provide keyboard controls for the media elements.
Opera's controls:
Figure 2–18 shows Operas controls with an exposed volume slider.
Figure 2–18. The controls on the video and audio elements in Opera
Opera's controls provide the following functionality:
• play/pause toggle.
• timeline with direct jump to time offset (seeking).
• timeline displays playback position and buffer progress.
• playback time and duration display.
• volume slider.
• volume on/off button.
Opera also makes these controls accessible and easily usable through keyboard control.
Opera's controls provide the following keyboard access:
http://freepdf-books.com
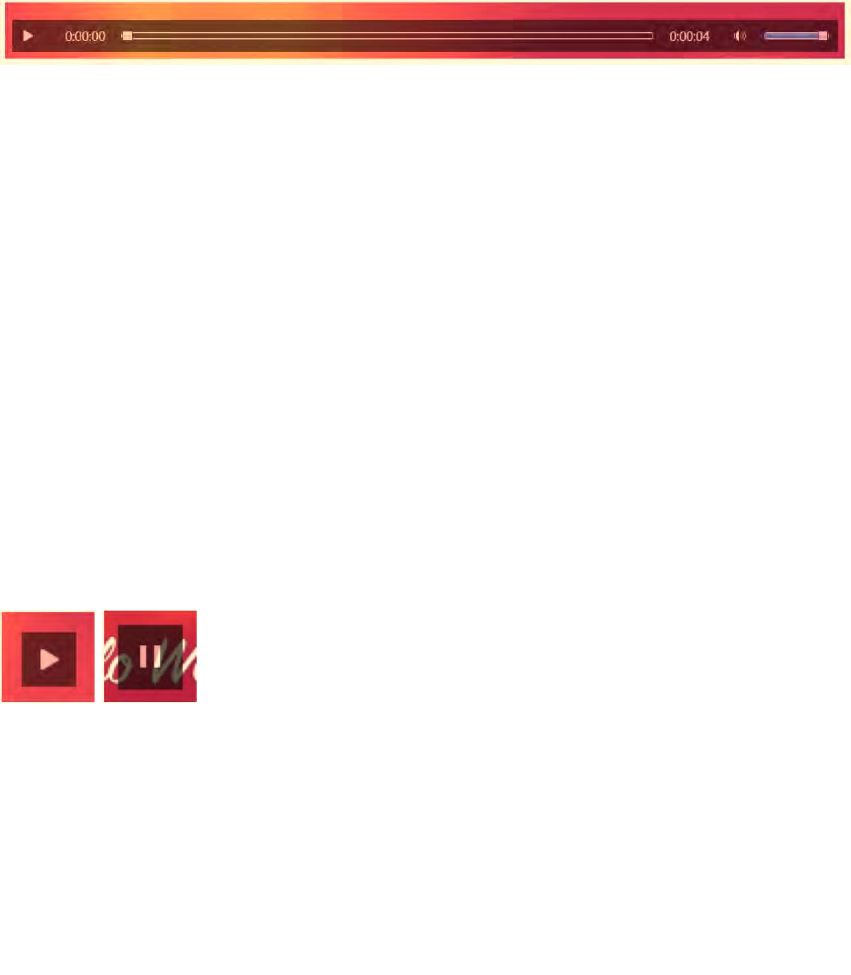
CHAPTER 2 ■ AUDIO AND VIDEO ELEMENTS
44
• tab: tab from play button to transport bar to volume control.
• space bar: toggles between play and pause.
• up/down arrow: when focused on the volume button, increases/decreases
volume.
IE's controls:
Figure 2–19 shows IE9's controls.
Figure 2–19. The controls on the video and audio elements in IE
IE's controls provide the following functionality:
• play/pause toggle.
• timeline with direct jump to time offset (seeking).
• timeline displays playback position and buffer progress.
• playback time and duration display.
• volume slider.
• volume on/off button.
IE also makes some of these controls accessible and usable through keyboard control.
IE's controls provide the following keyboard access:
• tab: tab onto and away from the video.
• space bar: toggles between play and pause.
• up/down arrow: increases/decreases volume.
• left/right arrow: winds video to the beginning/end.
When the displayed video size is rather small — in our example, the video was scaled to 372px by
209px — IE changes controls to a single pause/play toggle button, see Figure 2–20.
Figure 2–20. The IE controls on a small video element in IE
Note that the IE controls are semi-transparent. Firefox's controls are also semi-transparent. All the
other browsers have solid colored controls.
www.itbooksh
ub.com
|||||||||||||||||||||||||
|||||||||||||||||
www.cncmanu
al.com
http://freepdf-books.com
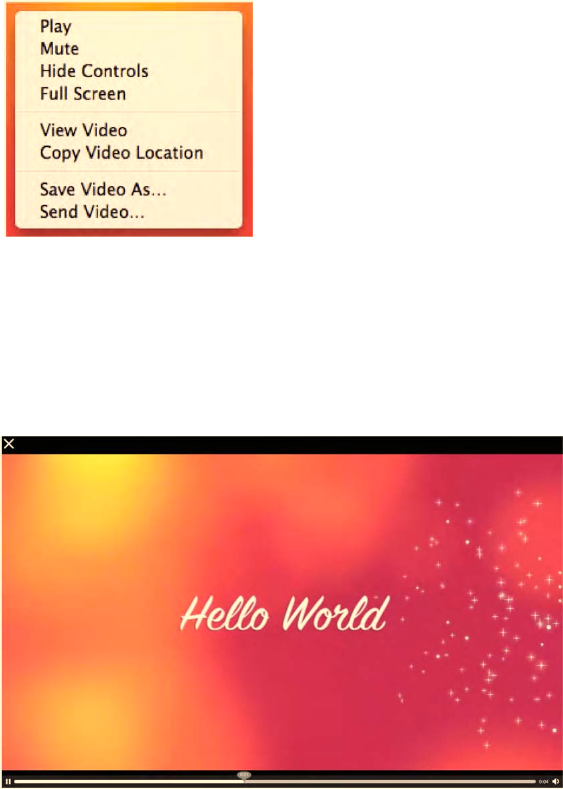
CHAPTER 2 ■ AUDIO AND VIDEO ELEMENTS
45
2.4.2 Context Menus
Context menus provide users with short cuts to common operations. Context menus are visible
when the user right-clicks on the video or audio element. Most functionality is the same for audio and
video, except for full screen where supported.
Firefox's context menu:
Firefox's context menu functionality:
• toggle play/pause
• toggle mute/unmute
•
toggle show/hide controls
•
go full screen (for video only)
•
view video (similar to view image)
•
copy video location
•
save video locally under a name
•
send video via email
Figure 2–21. The context menu on the video element in Firefox
The full-screen display of Firefox can be activated only through the context menu. Figure 2–22
shows what it looks like.
Figure 2–22. Full-screen video in Firefox
http://freepdf-books.com
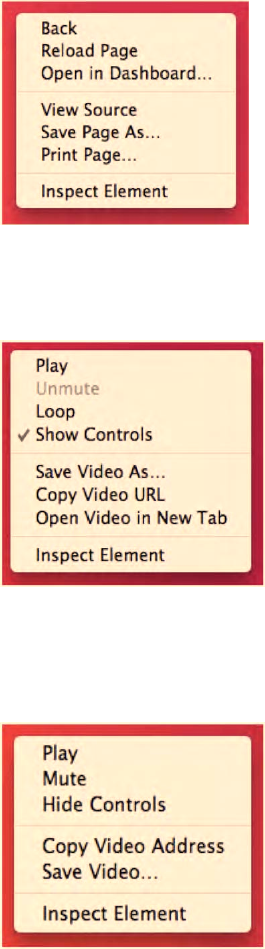
CHAPTER 2 ■ AUDIO AND VIDEO ELEMENTS
46
Safari's context menu:
Safari's context menu functionality:
•no media-specific content menu yet
Figure 2–23. The context menu on the video element in Safari
Google Chrome's context menu:
Google Chrome's context menu functionality:
•toggle play/pause
•toggle mute/unmute (when sound is
available)
•toggle looping on/off
•toggle show/hide controls
•save video locally under a name
•copy video location
•open video in new tab
Figure 2–24. The context menu on the video element in Google Chrome
Opera's context menu:
Opera's context menu functionality:
•toggle play/pause
•toggle mute/unmute
•toggle show/hide controls
•copy video location
•save video locally under a name
Figure 2–25. The context menu on the video element in Opera
Download from www.eBookTM.Com
http://freepdf-books.com
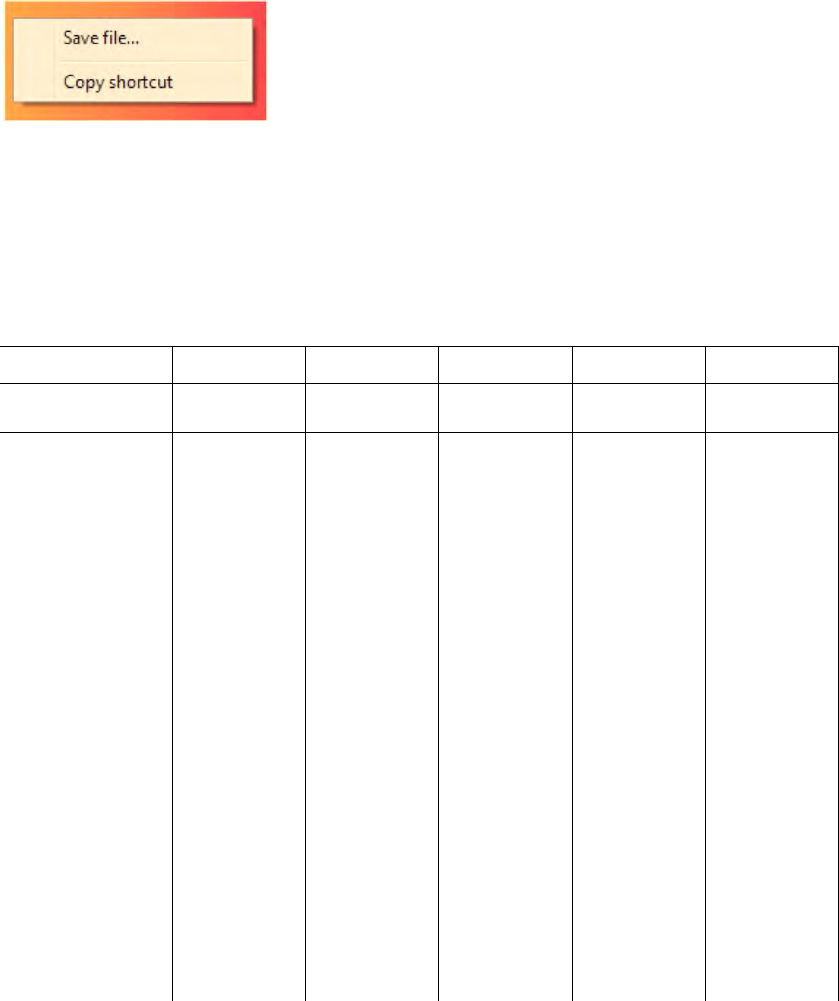
CHAPTER 2 ■ AUDIO AND VIDEO ELEMENTS
47
IE's context menu:
IE's context menu functionality:
•
save video locally under a
name
•
copy video location
Figure 2–26. The context menu on the video element in IE
2.4.3 Controls Summary
At the end of this subsection, for reference purposes, we list all the default controls functionalities. This
should help to quickly identify any missing functionality you may rely on.
Table 2–4. Overview of all the default controls in Web browsers
Function Firefox Safari Chrome Opera IE
Controls Keyboard Context
Menu Controls Keyboard Context
Menu Controls Keyboard Context
Menu Controls Keyboard Context
Menu Controls Keyboard Context
Menu
play/pause toggle
timeline with
direct jump to
time offset
(seeking)
timeline displays
playback position
and buffer
progress
playback time
display
volume slider
volume on/off
loop
15 sec
forward/rewind
1/10 duration
forward/rewind
http://freepdf-books.com

CHAPTER 2 ■ AUDIO AND VIDEO ELEMENTS
48
Function Firefox Safari Chrome Opera IE
Controls Keyboard Context
Menu Controls Keyboard Context
Menu Controls Keyboard Context
Menu Controls Keyboard Context
Menu Controls Keyboard Context
Menu
jump to
beginning/end
30 sec rewind
show/hide
controls
go full screen
View video
copy video
location
Save video as
send video
2.5 Summary
In this chapter we introduced HTML5 as well as <video> and <audio> elements together with all
their attributes. You should now be able to use audio and video in your HTML5 web pages. We have
identified where browsers show the same behavior and where they differ, so you can take appropriate
counter-measures.
We have further given you a brief view of some of the open-source tools available to encode the
required video and audio formats, and to publish them to a web server. We have explained the different
networking protocols in use for HTML5 media, in particular HTTP and adaptive HTTP streaming.
We finished the chapter with an overview of the user interface of <audio> and <video> and the
functionalities that browsers are still working on, such as full-screen and accessibility features.
http://freepdf-books.com

C H A P T E R 3
■ ■ ■
49
CSS3 Styling
Styling in HTML is performed using cascading style sheets (CSS). Modern web sites have moved on from
using inline styling in HTML pages to using CSS. They appreciate the separation that the W3C has
introduced between the text content and its presentation, including layout, colors, and fonts. This
separation enables multiple pages to share formatting, and reduces complexity and repetition in the
structural content. It can also help improve accessibility by allowing a choice in styling—in particular for
rendering on different devices.
We assume that you have a basic understanding of CSS. You should in particular understand that a
style sheet consists of a sequence of rules, which specify the element(s) to which they apply through a
selector and the styling through a block of styling property declarations. Selectors can identify:
• A single element.
• All elements of a specific class.
• Those that match a certain attribute.
• Those that are placed in a specific position within the HTML document object
model (DOM), the parse tree of a HTML document.
You should also understand pseudo-classes, which are a conditional application of styles to an
element, usually based on specific user actions or situational states, such as mousing over an element or
having visited a link before. Finally, you should understand pseudo-elements, which are used to add
special effects to situationally defined elements. These, in turn, are parts of real elements, such as the
first line in a block of text.
CSS is receiving a makeover of similar proportions to HTML. The new version is called CSS level 3,
or CSS3, and provides many new and improved features, including improved layout, more flexible
shapes, extended media queries, and improved directions on how to render text with speech synthesis.
Many of these features are also relevant to video and can make it easier for web developers to create
animations and special effects around video without having to use Adobe Flash. We will look at some
specific examples here.
All the usual CSS styling properties for visual elements can be applied to HTML5 video and audio
elements, though they are mostly useful only for video. None of the styling and positioning features used
in this chapter are specific to audio and video only; they apply equally to images and other objects.
However, the choices made in this chapter present typical ways of using audio and video, or
demonstrate novel ideas such as 3D cubes with videos on the faces. These ideas are meant to inspire you
to come up with your own particular presentation means for audio and video.
Note that in this chapter and the rest of the book we will use CSS inline and in <style> elements. This
is for illustration purposes only. It is recommended to use external style sheets in your own applications.
http://freepdf-books.com
CHAPTER 3 ■ CSS3 STYLING
50
3.1 CSS Box Model and Video
For every visual element, CSS defines a box model consisting of the properties that define the box in
which the element is laid out. These properties include:
• height and width – the actual width and height of the content box.
• padding – the space around the content box (takes on background of content box).
• border – the border around content and padding (takes on background of content
box).
• margin – a transparent space around the border box.
CSS3 adds to these the following new relevant properties:
• border-radius – to have rounded corners.
• border-image and border-corner-image – to use images for borders.
• border-shadow – to specify a drop-shadow on the box outside the border.
• box-sizing – to specify what a width/height specification applies to – only the
content (content-box) or the box, including padding and border (border-box).
Using box-sizing: border-box makes it easier to place elements with their padding and border next to
each other on a percentage scaled width, since padding and border are already calculated into the
element's extent.
Listing 3–1 shows an example document with a styled video element that has a border, a drop
shadow, and a border-box specification.
Listing 3–1. A HTML5 example document with a styled video element
<!DOCTYPE html>
<html lang="en">
<head>
<style type="text/css">
video {
width: 50%;
padding: 15px;
margin: 0px;
border: 5px solid black;
border-radius: 15px;
box-shadow: 10px 10px 5px gray;
box-sizing: border-box;
}
</style>
</head>
<body>
<video controls>
<source src="HelloWorld.mp4" type="video/mp4">
<source src="HelloWorld.webm" type="video/webm">
<source src="HelloWorld.ogv" type="video/ogg">
</video>
</body>
</html>
http://freepdf-books.com
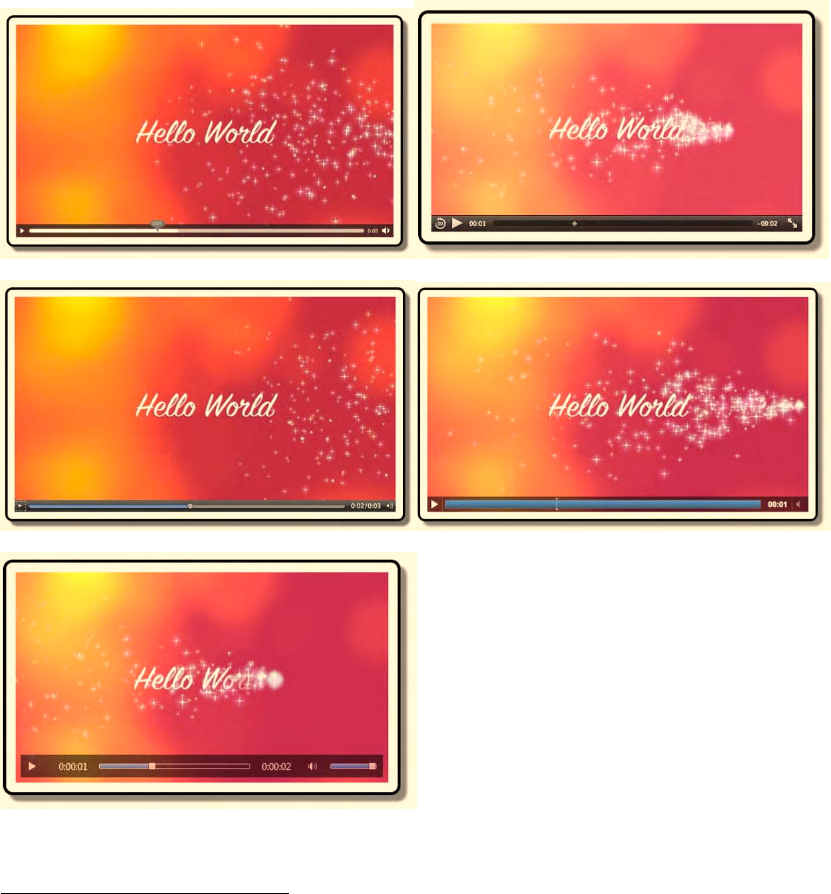
CHAPTER 3 ■ CSS3 STYLING
51
Note that the border-radius, box-shadow, and box-sizing CSS3 properties1 used to require a -moz
and -webkit prefix in Firefox and WebKit-based browsers (i.e. Safari and Chrome). Now, all browsers
seem to have implemented support for the actual property names under discussion at the W3C.
Figure 3–1 shows what the example looks like in Firefox, Safari, Opera, Chrome and IE.
Figure 3–1. A <video> with basic styling in Firefox, Safari (top row), Opera, Chrome (middle row) and IE
(bottom)
1 See http://www.w3.org/TR/2002/WD-css3–border-20021107/
http://freepdf-books.com
CHAPTER 3 ■ CSS3 STYLING
52
3.2 CSS Positioning and Video
A CSS box is normally rendered as an inline element, which places it visually in the normal flow of the
presented elements.
There are several means to change how the box is placed in the flow of presented elements. The
following properties influence an element's box type and thus its display position:
• display – whether to display it or not.
• float – whether to float it or not.
• position – explicitly position it.
There are four positioning modes in CSS: normal, relative, float, and absolute. And there are three
basic box types: inline, block, and none.
3.2.1 Inline Box Type
Audio and video elements are by default of type inline and follow the normal positioning mode.
Normal positioning mode can be turned on by setting the display property to static. In normal
positioning mode, block boxes flow vertically starting at the top of their containing block with each
placed directly below the preceding one. Inline boxes flow horizontally from left to right also within the
boundaries of their containing block.
Listing 3–2 shows an example of a video element inside other inline content in a <div> block box.
Listing 3–2. An example document with video inside surrounding inline content
<!DOCTYPE html>
<html lang="en">
<head>
<style type="text/css">
video {
width: 50%;
border: 5px solid black;
}
</style>
</head>
<body>
<div>A sentence before the video element.
<video controls>
<source src="HelloWorld.mp4" type="video/mp4">
<source src="HelloWorld.webm" type="video/webm">
<source src="HelloWorld.ogv" type="video/ogg">
</video>
A sentence after the video element.
</div>
</body>
</html>
Figure 3–2 shows what the example looks like in Firefox, Safari, Opera, Chrome, and IE.
http://freepdf-books.com

CHAPTER 3 ■ CSS3 STYLING
53
Figure 3–2. A <video> inline in Firefox, Safari, Opera, Chrome, and IE (top to bottom)
http://freepdf-books.com
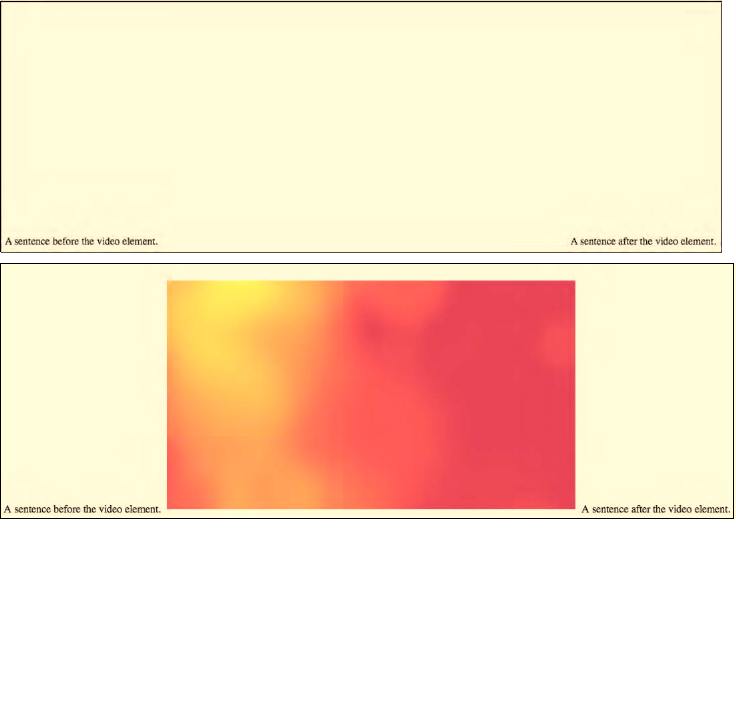
CHAPTER 3 ■ CSS3 STYLING
54
3.2.2 None Box Type
If an audio or video element is turned invisible through setting the visibility property to hidden, its box
will still take up the space in the normal presentation flow. See Figure 3–3. Only by turning the box type
to none through setting the display property to none will the space that its box takes up be freed.
Listing 3–3. An example style for a hidden video element.
<style type="text/css">
video {
width: 50%;
visibility: hidden;
}
</style>
<div>A sentence before the video element.
<video controls>
<source src="HelloWorld.mp4" type="video/mp4">
<source src="HelloWorld.webm" type="video/webm">
<source src="HelloWorld.ogv" type="video/ogg">
</video>
A sentence after the video element.</div>
Figure 3–3 shows as an example the display in Firefox and Safari.
Figure 3–3. A <video> inline in Firefox (top) and Safari (bottom) with visibility set to hidden
www.itbooksh
ub.com
|||||||||||||||||||||||||
|||||||||||||||||
www.cncmanu
al.com
http://freepdf-books.com
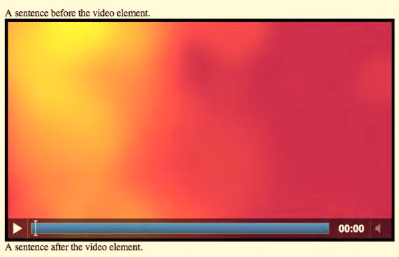
CHAPTER 3 ■ CSS3 STYLING
55
Firefox, Opera, and IE show the same behavior with displaying an empty video frame. Safari and
Chrome, however, display the first frame of the video. This is a bug and being worked on.
3.2.3 Block Box Type
Setting audio or video to a block type box is possible and sets a media element in its own paragraph
apart from surrounding inline elements. See Figure 3–4.
Listing 3–4. An example style for an inline video element.
<style type="text/css">
video {
width: 50%;
border: 5px solid black;
display: block;
}
</style>
<div>A sentence before the video element.
<video controls>
<source src="HelloWorld.mp4" type="video/mp4">
<source src="HelloWorld.webm" type="video/webm">
<source src="HelloWorld.ogv" type="video/ogg">
</video>
A sentence after the video element.
</div>
Figure 3–4. A <video> in Chrome with display set to block in surrounding inline text
All browsers support this functionality and produce the same result. Figure 3–4 shows Chrome as an
example.
3.2.4 Relative Positioning Mode
The relative positioning mode is activated by setting the position property to relative. It allows you
to change the position of a box relative to where it would be displayed in normal positioning mode. You
can, for example, move the box up, down, left, or right by using the top, bottom, left, or right properties
to offset the position from those edges. Such relative positioning may cause the box to overlap other
http://freepdf-books.com
CHAPTER 3 ■ CSS3 STYLING
56
boxes. Which box stays in the foreground is specified through the z-index property, which defines the
stacking order. Such relative positioning allows stacking of video elements on top of each other or of
other elements.
Listing 3–5. An example document with relative positioned video elements
<style type="text/css">
video {
width: 250px;
position: relative;
}
video#vid2 {
left: 40px; top: 10px;
}
</style>
<video controls>
<source src="video1.mp4" type="video/mp4">
<source src="video1.webm" type="video/webm">
<source src="video1.ogv" type="video/ogg">
</video>
<video id="vid2" controls>
<source src="HelloWorld.mp4" type="video/mp4">
<source src="HelloWorld.webm" type="video/webm">
<source src="HelloWorld.ogv" type="video/ogg">
</video>
<video controls>
<source src="video2.mp4" type="video/mp4">
<source src="video2.webm" type="video/webm">
<source src="video2.ogv" type="video/ogg">
</video>
Figure 3–5 shows what the example looks like in the browsers.
Download from www.eBookTM.Com
http://freepdf-books.com
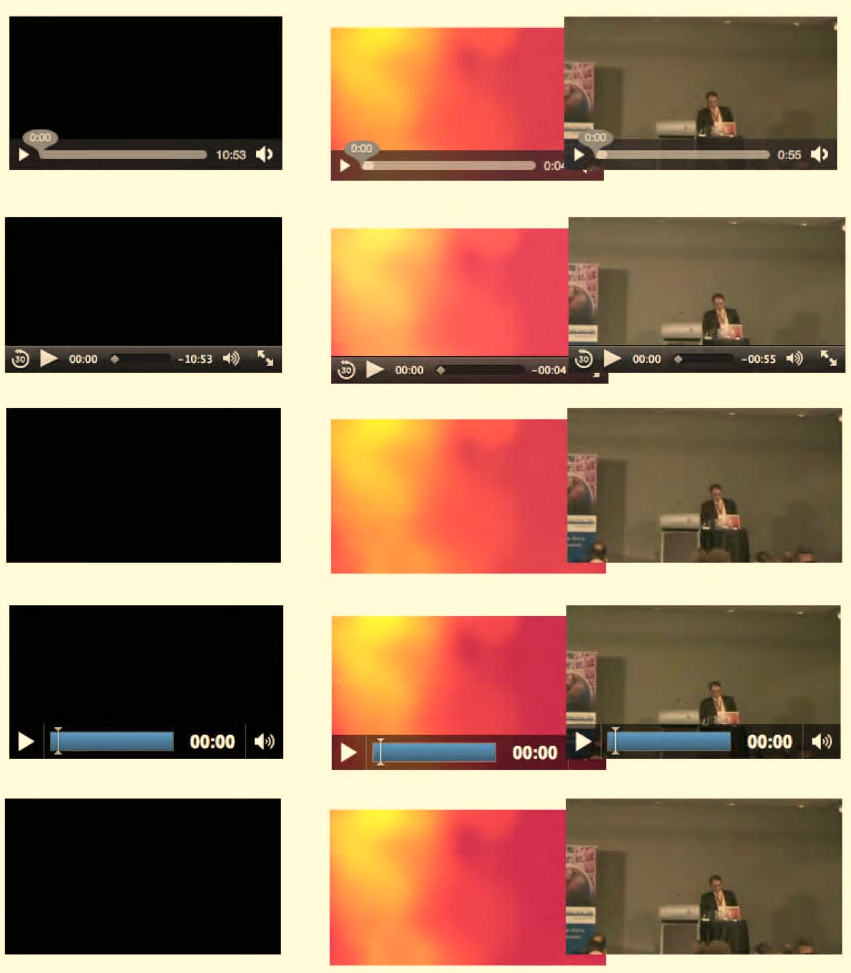
CHAPTER 3 ■ CSS3 STYLING
57
Figure 3–5. A <video> relative positioned in Firefox, Safari, Opera, Chrome, and IE (top to bottom)
http://freepdf-books.com
CHAPTER 3 ■ CSS3 STYLING
58
Note that the appearance of controls in the browsers is not uniform. Opera and IE display them only
when you mouse over the video, and they immediately disappear when you leave the video frame. Safari
and Chrome display them in pause state, and they disappear during playback only when leaving the
video frame. Firefox has them up when you load the video, but they disappear when you mouse in and
out.
3.2.5 Float Positioning Mode
The float positioning mode is activated by setting the float property to left or right. If an element's
parent is floating, a value of inherit will also activate float mode for an element, and a value of none will
turn float mode off. A floating element is positioned vertically where it would be in normal positioning
mode. But horizontally, it is positioned as far to the left or right of its containing block as possible. It will
avoid other floating elements that have previously been positioned within the same block. It will also
force neighboring inline content to flow around its edges and it can overlap block-level boxes
neighboring it in the normal text flow (the latter can be avoided by using the clear property on the
boxes). This allows placing a video element into a larger text flow. See Listing 3–6 and Figure 3–6 with an
example in Opera.
Listing 3–6. An example document with a floating video element
<!DOCTYPE html>
<html lang="en">
<head>
<style type="text/css">
video {
width: 50%;
border: 5px solid black;
float: right;
}
</style>
</head>
<body>
<video controls>
<source src="HelloWorld.mp4" type="video/mp4">
<source src="HelloWorld.webm" type="video/webm">
<source src="HelloWorld.ogv" type="video/ogg">
</video>
<p>A first paragraph after the video element. [etc.]</p>
<p>A second paragraph after the video element. [etc.]</p>
</body>
</html>
http://freepdf-books.com
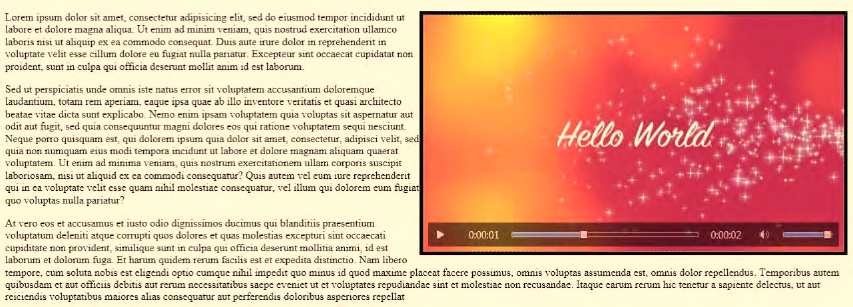
CHAPTER 3 ■ CSS3 STYLING
59
Figure 3–6. A <video> in IE floating over two paragraphs
Figure 3–6 shows the result of the example in IE. All browsers behave in the same way.
3.2.6 Absolute Positioning Mode
The absolute positioning mode is activated by setting the position property to absolute or fixed. Such
boxes are placed outside the normal flow order and are positioned using the left, top, right, or bottom
properties to offset the position from its containing block. An absolutely positioned element's
containing block is its nearest ancestor that has a position of absolute, relative, or fixed, or ultimately the
browser window.
When using the fixed property, the element is absolutely positioned in reference to the browser
window and fixed there for scrolling purposes. Overlapping elements again may be stacked with the z-
index property.
Absolute positioning allows positioning elements, including audio and video elements, at any
desired location. See Listing 3–7 for an example, with Figure 3–7 providing a screenshot from Safari.
Listing 3–7. An example document with absolutely positioned video elements
<style type="text/css">
video {
width: 250px; height: 140px;
position: absolute;
}
video#vid1 { left: 340px; top: 220px; }
video#vid2 { left: 440px; top: 110px; }
video#vid3 { left: 120px; top: 160px; }
</style>
<video id="vid1" controls>
<source src="video1.mp4" type="video/mp4">
<source src="video1.webm" type="video/webm">
<source src="video1.ogv" type="video/ogg">
</video>
<video id="vid2" controls>
<source src="HelloWorld.mp4" type="video/mp4">
http://freepdf-books.com
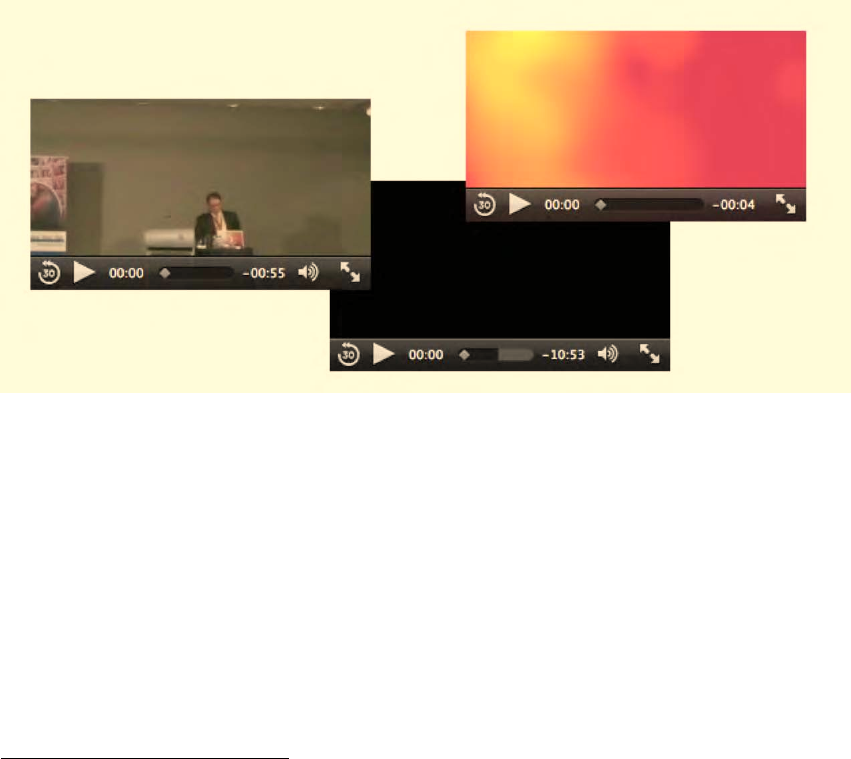
CHAPTER 3 ■ CSS3 STYLING
60
<source src="HelloWorld.webm" type="video/webm">
<source src="HelloWorld.ogv" type="video/ogg">
</video>
<video id="vid3" controls>
<source src="video2.mp4" type="video/mp4">
<source src="video2.webm" type="video/webm">
<source src="video2.ogv" type="video/ogg">
</video>
Figure 3–7 shows the example in Safari. All browsers behave the same.
Figure 3–7. Three absolutely positioned <video> elements in Safari.
3.2.7 Video Scaling and Alignment Within Box
In addition to the common box and positioning properties, video has a few further quirks to deal with
(similar to img). When a video is displayed within a box, but the box does not have the same aspect ratio
as the video, by default letter- or pillar-boxing happens, as explained in Chapter 2.1.1. This also means
that the video is placed in the center of the box. What if you need different functionality?
You can use the following properties:
• object-position2– defines the alignment of the video within the box.
• object-fit3– specifies how the contents of the video should be scaled relative to the
box.
2 See http://dev.w3.org/csswg/css3–images/#object-position
3 See http://dev.w3.org/csswg/css3–images/#object-fit
http://freepdf-books.com
CHAPTER 3 ■ CSS3 STYLING
61
Object-position is provided as a tuple of horizontal position and vertical position. As horizontal
position you can use a percentage, a pixel length, or the values “left,” “center,” or “right.” As vertical
position you can use a percentage, a pixel length, or the values “top,” “center,” or “bottom.” The default
is “50% 50%.” Percentage and pixel values are counted from the top left corner.
Object-fit can take on one of the values “fill,” “contain,” or “cover.” The value “fill” will stretch the
video to fill the box; “contain” will just scale the width and height down to fit into the box with borders—
it’s the default value. The value “cover” will scale the width and height such that at least one size fits and
the other is chopped off for being too big. The complete box will be covered.
Listing 3–8 shows an example and Figure 3–8 the rendering in Opera, since Opera is the only
browser that currently supports these elements. Note that Opera requires the “-o-” prefix for the
property to work.
Listing 3–8. An example document with object-scaled video
<style type="text/css">
video {
-o-object-position: left bottom;
border: 1px solid black;
}
</style>
<video width="320" height="90">
<source src="HelloWorld.mp4">
<source src="HelloWorld.webm">
<source src="HelloWorld.ogv">
</video>
<video width="160" height="180">
<source src="HelloWorld.mp4">
<source src="HelloWorld.webm">
<source src="HelloWorld.ogv">
</video><br/>
<video width="320" height="90" style="-o-object-fit: fill;">
<source src="HelloWorld.mp4">
<source src="HelloWorld.webm">
<source src="HelloWorld.ogv">
</video>
<video width="320" height="90" style="-o-object-fit: contain;">
<source src="HelloWorld.mp4">
<source src="HelloWorld.webm">
<source src="HelloWorld.ogv">
</video>
<video width="320" height="90" style="-o-object-fit: cover;">
<source src="HelloWorld.mp4">
<source src="HelloWorld.webm">
<source src="HelloWorld.ogv">
</video>
http://freepdf-books.com

CHAPTER 3 ■ CSS3 STYLING
62
Figure 3–8. A <video> in Opera with object-position and object-fit properties
The top two elements show the video positioned inside its box with “object-position: left bottom;.”
The bottom row shows three elements with the different object-fit properties. The left-most shows
“fit”; i.e. the video is scaled to fit the provided dimensions. This example scales horizontally. The middle
shows “contain,” the default display size. The right-most shows “cover”; i.e. the video is not scaled, but
just positioned at the bottom left aligned, and only as much as fits into the given size viewport will be
displayed. The video will get scaled up to cover the space if necessary.
3.3 CSS Basic Properties
A number of basic CSS functionalities are relevant to the HTML5 media elements. Here, we will take a
look at:
• background-color – the background color behind an element.
• opacity – a means to make an element transparent.
• gradient – these are browser-created images that smoothly transition from one
color to another, including the use of transparency.
• marquee – scrolling content.
Note that WebKit has some further, very nifty new properties, such as masks, gradients, and
reflections not yet introduced into the CSS specification. We will not look at them here, but you may
want to check them out if you have special needs.
The CSS color property is not very useful for media elements, since the foreground of a video is the
video itself. However, the background-color property is used if the video has padding, since the padding
space is regarded as part of the element and for filling the letter-boxing space. We will use background-
color in an upcoming example.
A few things are surprisingly not possible with video elements, considering that video can be used
for almost anything where images can be used.
First, video cannot generally be used as a background. There is a special -moz-element attribute for
Firefox to support it, but it is not (yet) part of the CSS3 specification. Thus, the only means to overcome
this is to place a large video at the bottom of the z stacking order in HTML. This means, though, that the
video is not regarded as a background, but rather as an actual element on the page and cannot be part of
stacking multiple backgrounds—to create background video with a gradient, for example.
http://freepdf-books.com

CHAPTER 3 ■ CSS3 STYLING
63
Second, the creation of reflections is not possible in plain CSS. WebKit-based browsers have the
-webkit-box-reflect property for this and Firefox has the -moz-element to achieve it4, but these haven't
found their way into CSS3 yet. You can create reflections in CSS only by duplicating the element and
applying some transforms, but this will not work for videos, since the two video elements will not play in
sync. We will therefore return to video reflections in the Canvas chapter.
3.3.1 Opacity
The property opacity has been around for a while, but was only standardized across browsers with
CSS35. Opacity is defined as a value between 0.0 and 1.0 where 0.0 means the element is fully
transparent and 1.0 the element is fully opaque.
Listing 3–9 shows an example use of opacity where the video is placed on top of an image with 70%
opacity.
Listing 3–9. An opacity example using video.
<style type="text/css">
video {
width: 25%;
position: absolute;
top: 100px;
left: 30px;
opacity: 0.70;
}
</style>
<img src="Sunrise.jpg"></img>
<video autoplay>
<source src="HelloWorld.mp4" type="video/mp4">
<source src="HelloWorld.webm" type="video/webm">
<source src="HelloWorld.ogv" type="video/ogg">
</video>
Figure 3–9 shows what it looks like in Firefox. Note that the image is a CC BY 2.0 licensed image from
Flickr.6
4 See http://hacks.mozilla.org/2010/08/mozelement/
5 See http://www.w3.org/TR/css3–color/#transparency
6 See http://www.flickr.com/photos/snapped_up/941451312/
http://freepdf-books.com
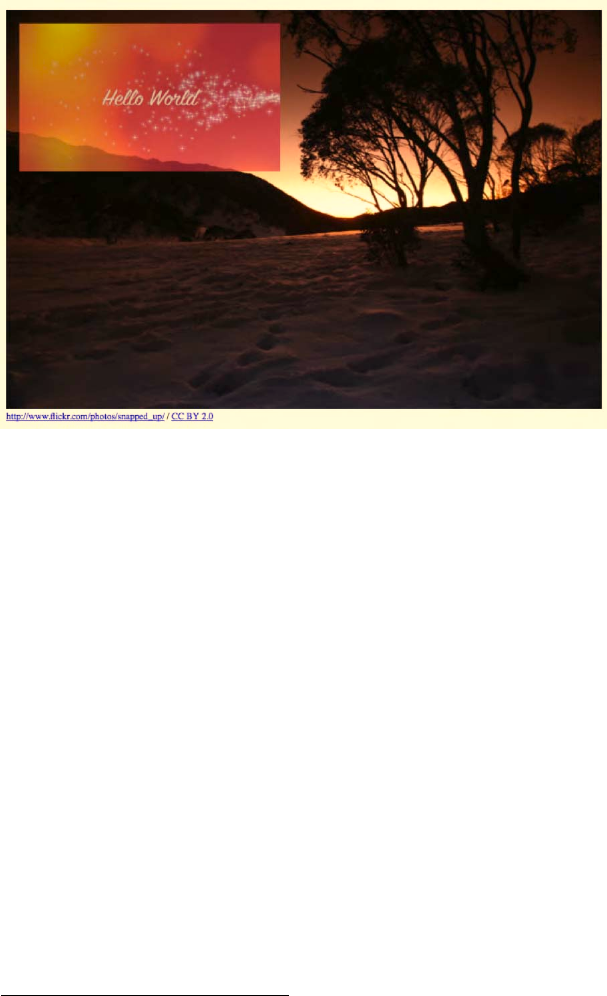
CHAPTER 3 ■ CSS3 STYLING
64
Figure 3–9. A transparent <video> element on top of an image in Firefox
All browsers support this functionality.
3.3.2 Gradient
Gradients are images created by morphing from one color to another over a given space from one given
position to another. Because gradients are actually regarded as browser-generated images, they can be
used where images are normally used in CSS, in particular for backgrounds. CSS3 specifies7 two
functions to create gradient images: linear-gradient() and radial-gradient(). Linear gradients apply the
color change from one side of the image to the opposite, while radial gradients evolve from a point on
the image out in a circle or ellipse. Changes between multiple colors can be introduced through stop-
positions, which define what color should be reached at a given middle point.
We want to apply a gradient over a video. For this, we have to create a div with a gradient that goes
from transparent to the background color of the video and overlay that div onto the video element.
Listing 3–10 shows how it's done.
Listing 3–10. An example document with a gradient on a video element
<style type="text/css">
div#gradient {
position: relative;
width: 400px;
height: 225px;
bottom: 229px;
7 See http://dev.w3.org/csswg/css3–images/#gradients
http://freepdf-books.com

CHAPTER 3 ■ CSS3 STYLING
65
background-image: linear-gradient(top,
rgba(255,255,255,0),
white);
background-image: -moz-linear-gradient(top,
rgba(255,255,255,0),
white);
background-image: -webkit-gradient(linear,
center top,
center bottom,
from(rgba(255,255,255,0)),
to(white));
}
video {
width: 400px;
height: 225px;
}
</style>
<video autoplay>
<source src="HelloWorld.mp4" type="video/mp4">
<source src="HelloWorld.webm" type="video/webm">
<source src="HelloWorld.ogv" type="video/ogg">
</video>
<div id="gradient"></div>
Note that this feature is not yet implemented in Opera and IE. Firefox and WebKit-based browsers
require the browser-specific prefix but also use diverging parameters. Figure 3–10 shows how it is
rendered in Safari – it looks the same in Chrome and Firefox.
Figure 3–10. A gradient on top of a <video> element in Safari
A side effect of this feature is that the video is actually hidden underneath the div, and, thus,
controls are no longer accessible. You can set the pointer-event CSS property on the div to none to avoid
this. The example uses autoplay to play back the video. If we rendered the controls instead, they would
display faded. An option to reintroduce non-faded controls for the video in such a situation is to create
your own controls using JavaScript. This is something we will learn in the next chapter.
http://freepdf-books.com

CHAPTER 3 ■ CSS3 STYLING
66
3.3.3 Marquee
Most HTML browsers have supported a non-standard <marquee> element for many years. The element
causes content to scroll up, down, left or right automatically at a given speed. The element, while
implemented by all major browsers, has never become part of the HTML4 specification. It is also not
part of HTML5.
In CSS3, a marquee property has been introduced8 and is actually defined in the context of an
overflowing element; i.e. an element that does not fit into its visible display area. When marquee is
chosen as an overflow-style, the content is animated and moves automatically back and forth.
The following properties are relevant to marquee:
•overflow-style – can be one of auto, marquee-line , or marquee-block. For auto, the
browser chooses the overflow style, which is typically scrollbars. Marquee-line
chooses marquee for the horizontal overflow mechanism, and marquee-block for
the vertical overflow mechanism.
•marquee-style – describes what marquee style to use as scroll, slide, or alternate.
For scroll, the element starts just outside the display area on one side, appears and
moves through until it disappears on the other end. For slide, the element starts
just outside the display area on one side and slides in until everything that can
slide in is visible. For alternate, the element slides in from either side alternately
creating a bounce effect.
•marquee-play-count – specifies how many times the element is supposed to move.
•marquee-direction – determines the initial direction in which the element moves
as a choice between forward and reverse, where forward is based on normal
reading order.
•marquee-speed – determines the speed of the content scroll between slow, normal,
and fast.
Listing 3–11 shows an example use of overflow where a sequence of three videos is placed in a div
box, and the videos are on autoplay and scroll in from the right.
Listing 3–11. An example document with a video marquee
<style type="text/css">
video {
height: 100px;
}
div#marquee{
position: relative;
width: 543px;
height: 104px;
padding: 4px 0px 0px 4px;
left: 300px;
border: 5px solid black;
overflow: hidden;
overflow-style: marquee-line;
overflow-x: -webkit-marquee;
8 See http://www.w3.org/TR/css3–marquee/
Download from www.eBookTM.Com
http://freepdf-books.com

CHAPTER 3 ■ CSS3 STYLING
67
marquee-speed: normal;
-webkit-marquee-speed: normal;
marquee-direction: reverse;
-webkit-marquee-direction: backwards;
marquee-style: slide;
-webkit-marquee-style: slide;
marquee-play-count: 1;
-webkit-marquee-repetition: 1;
}
</style>
<div id="marquee">
<video autoplay>
<source src="HelloWorld.mp4" type="video/mp4">
<source src="HelloWorld.webm" type="video/webm">
<source src="HelloWorld.ogv" type="video/ogg">
</video>
<video autoplay>
<source src="Video1.mp4" type="video/mp4">
<source src="Video1.webm" type="video/webm">
<source src="Video1.ogv" type="video/ogg">
</video>
<video autoplay>
<source src="Video2.mp4" type="video/mp4">
<source src="Video2.webm" type="video/webm">
<source src="Video2.ogv" type="video/ogg">
</video>
</div>
Note that the actual CSS3 specified marquee functionality hasn't been implemented in any browser
yet. However, WebKit-based browsers (i.e. Chrome and Safari) have similar properties to the ones
defined in the W3C specification, which are being used here as alternatives. These browsers provide
even further functionality around marquee; however, none of that functionality has entered the CSS3
specification yet and is therefore not used in the example.
Figure 3–11 shows a sequence of three screenshots that demonstrate what happens in Chrome. This
also works in Safari. The videos are moving into the div from the right until they hit the left most
boundary and stop there.
Figure 3–11. A sequence of three screenshots demonstrating the marquee CSS property in Chrome
While experimenting with this feature, it has become apparent that there are still many issues in
using it for practical purposes. Ideally one would like videos to stop moving as one hovers over – which is
possible by adding the marquee-style of none to the :hover pseudo-class of the div. However, upon
leaving the div, the scrolling jumps back to the beginning rather than continue where it stopped.
Also, it would be nice to start scrolling with videos already showing rather than having to start from
blank. Further, it would be nice to have all videos muted except for the one being hovered over. Some of
this can be achieved with CSS animations (see a later section in this chapter), but mostly we require a
reimplementation of marquee in JavaScript to achieve the full needs of a typical video scroller.
http://freepdf-books.com

CHAPTER 3 ■ CSS3 STYLING
68
3.4 CSS Transitions and Transforms
So far we have dealt only with rectangular regions for media elements that are simply placed somewhere
in the browser window. For richer interfaces it is often a requirement to include some animation or
effects to make the display more appealing to the user.
CSS3 introduces several features for this:
• transitions that allows movement of elements between different states.
• 2D transforms, which allow applications of two-dimensional transformations to
an element, such as rotating, scaling or skewing.
• 3D transforms, which provide the ability to make the element appear as though it
has three dimensions.
3.4.1 Transitions
Normally, when changing the value of a CSS property of an element, that value is applied immediately.
With CSS transitions,9 it is possible to animate that transition from one CSS state of a property to
another.
The following properties are available:
• transition-property – identifies the CSS property for which to apply the transition,
• transition-duration – specifies over what time the transition should be applied,
• transition-delay – specifies if there should be a startup delay for applying the
transition,
• transition-timing-function – defines the transition velocity; i.e. whether to speed it
up/slow it down, etc.
• transition – combines all the properties in one statement.
There is a long list of properties that transitions can be applied to.10 It includes borders,
backgrounds, colors, element extents and positioning, opacity and visibility, stacking order in z-index,
font weight, and size, shadows, and alignment.
The transition can be invoked through JavaScript, which explicitly changes the value of a property.
But also CSS pseudo-classes can cause a change in state for elements, such as the :hover, :focus, and
:active pseudo-classes. Finally, when a CSS element is animated through the CSS3 animation property,
transitions can also be applied.
In Listing 3–12 we have an example of a transition applied on a video as we mouse over it.
9 See http://www.w3.org/TR/css3–transitions/
10 See http://www.w3.org/TR/css3–transitions/#animatable-properties
http://freepdf-books.com
CHAPTER 3 ■ CSS3 STYLING
69
Listing 3–12. An example document with a video element that transitions on mouse-over
<style type="text/css">
video {
height: 200px;
padding: 10px;
left: 50px;
top: 50px;
background-color: white;
}
video:hover {
height: 250px;
padding: 15px;
left: 25px;
top: 25px;
background-color: black;
}
video, video:hover {
position: relative;
border: 5px solid black;
-moz-transition-property: all;
-moz-transition-duration: 0.5s;
-moz-transition-timing-function: linear;
-webkit-transition-property: all;
-webkit-transition-duration: 0.5s;
-webkit-transition-timing-function: linear;
-o-transition-property: all;
-o-transition-duration: 0.5s;
-o-transition-timing-function: linear;
}
</style>
<video controls>
<source src="HelloWorld.mp4" type="video/mp4">
<source src="HelloWorld.webm" type="video/webm">
<source src="HelloWorld.ogv" type="video/ogg">
</video>
In Listing 3–12 we change the height, padding, left, top, and background color for the video element
as we mouse over. The effect is that the video looks like it's coming towards us. We can do this even
while the video plays back. Notice that as we increase the video size, we also increase the padding and
the left/top positioning so it looks realistic. The background color shows in the padding area of the video
and goes from white through diverse shades of gray to black. As we mouse out of the video area,
everything returns to the previous state. Figure 3–12 tries to show the transition through a sequence of
screenshots.
Note that again the actual CSS3 transition properties are not used by the browsers yet, but only
browser-specific versions. As the CSS3 specification matures it can be expected that all browsers drop
the browser-specific prefix on the properties.
http://freepdf-books.com

CHAPTER 3 ■ CSS3 STYLING
70
Figure 3–12 A transition on a <video> element in Chrome given through three successive screenshots
All browsers except for IE support CSS transitions.
3.4.2 2D Transforms
The transform CSS property allows you to modify the coordinate space of the CSS visual formatting
model. The following transform functions are available:
• matrix – describes a linear transformation matrix on the box,
• rotate, rotateX, rotateY – describes how the box should be rotated,
• scale, scaleX, scaleY – describes how the x and y dimensions of the box should be
scaled,
• skew, skewX, skewY – describes how the element should be skewed around the x
and y axis by an angle,
• translate, translateX, translateY – is equivalent to relative positioning on the x and
y axis.
A simple rotation example is given in Listing 3–13 and Figure 3–13 shows the result in Firefox.
Listing 3–13. An example document with a rotated video element
<style type="text/css">
video {
height: 200px;
position: absolute;
left: 60px;
top: 200px;
border: 5px solid black;
transform: rotate(-30deg);
-webkit-transform: rotate(-30deg);
-o-transform: rotate(-30deg);
-moz-transform: rotate(-30deg);
}
</style>
<video controls>
<source src="HelloWorld.mp4" type="video/mp4">
<source src="HelloWorld.webm" type="video/webm">
<source src="HelloWorld.ogv" type="video/ogg">
</video>
http://freepdf-books.com
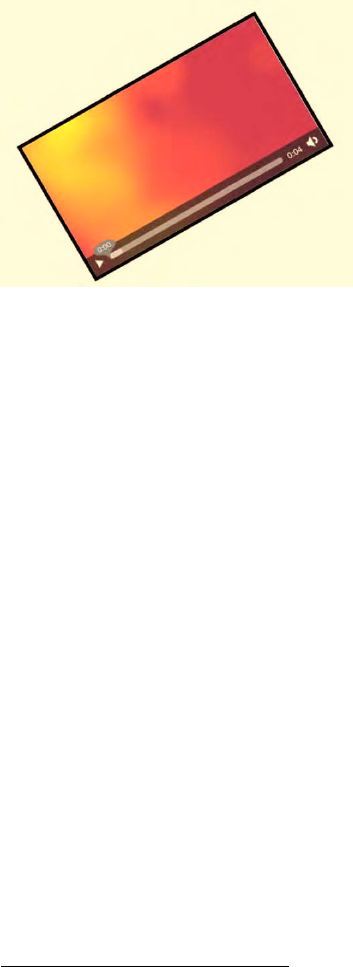
CHAPTER 3 ■ CSS3 STYLING
71
Figure 3–13. A rotated <video> element in Firefox.
Note how the transform property is not yet uniformly adopted by all browsers, but instead it is
required to use special prefixes for every browser platform. Once this feature of CSS3 stabilizes in the
specification, it is expected that all browsers adopt it. Also note that IE doesn't support CSS3 transforms yet.
The most powerful 2D transform function is the matrix. It is possible to achieve all the other effects
by using a linear transformation matrix. If you are a bit rusty on your math, you might want to check out
the examples at the Wikipedia article on linear transforms.11
It is also possible to combine transforms by listing several of them in the transform property. You
could for example define “transform: scale(2) rotate(45deg) translate(80px);.” Also, there is a lot more to
learn about transforms in CSS, e.g. the transform-origin property, which defines around which point in
the box the transform is to be executed. However, this is not a book about CSS, but we hope this has
given you a sufficient introduction to get started.
3.4.3 3D Transforms
As an extension to the 2D transforms described in the previous section, CSS3 also standardizes a set of
3D transform functions.12 They are used in the same way as the 2D transform functions as a value to the
transform property.
The following additional 3D transform functions are specified:
• translate3d, translateZ – allows you to move the element in the z-dimension; a
positive z moves it toward the viewer.
• scale3d, scaleZ – allows you to scale the element in the z dimension.
• rotate3d – allows rotation around a vector in the 3D space.
• perspective – allows introducing a 3D perspective into a transformation for a single
element.
• matrix3d – a linear transformation matrix in 3D with 4x4 values in column-major
order.
11 See http://en.wikipedia.org/wiki/Linear_transformation#Examples_of_linear_transformation_matrices
12 See http://www.w3.org/TR/css3–3d-transforms/
http://freepdf-books.com

CHAPTER 3 ■ CSS3 STYLING
72
To allow placement of elements in the 3D space, the transform-origin property has been extended
to allow three values, with the third one specifying a z offset for the transform origin.
As hierarchies of different objects in the 3D space are built, the perspectives between the different
elements should be preserved and the picture not flattened. To this end, there is a transform-style
property that allows you to choose between flat presentation and preserve-3d. The preserve-3d value
states that the element to which it is assigned does not flatten its children into it, but instead has them
live in a shared 3D space with the element.
In addition, for 3D effects, there is also the perspective property. The perspective and perspective-
origin properties determines how elements change size as they move away from the z=0 plane on their z-
offset. The default origin for the perspective effect is the center of the element’s box model, but can be
changed with the perspective-origin property.
Finally, there is the backface-visibility property, which allows you to prevent the back of content in
3D from shining through.
Listing 3–14 provides an example use of 3D properties. A cube is created in 3D with a video on each
side.13 The 3D space is created by setting a perspective and a perspective origin in a div. Within that div,
a 300x300 pixel area is created by using width, height and a preserve-3d transform. In contrast to using
2D transforms with skew and scale for creating 3D presentations, this ascertains that aspect ratios are
retained. Each side of the cube is then positioned within the 300x300 space by rotation around the x or y
axis and positioning away from the center along the z axis. The videos live on these sides. Note how you
can see the backface of the videos through the cube. This can be turned off by setting backface-visibility
to hidden.
Listing 3–14. An example document with a rotated video element
<style type="text/css">
div#room {
-webkit-perspective: 600;
-webkit-perspective-origin: 20% 70%;
}
div#cube {
margin: 0 auto;
height: 300px; width: 300px;
-webkit-transform-style: preserve-3d;
}
div.side {
position: absolute;
height: 280px; width: 280px;
padding: 10px;
border: 1px solid black;
background-color: rgba(50, 50, 50, 0.6);
}
div#one {
-webkit-transform: rotateX(90deg) translateZ(150px);
}
div#two {
-webkit-transform: translateZ(150px);
}
div#three {
-webkit-transform: rotateY(90deg) translateZ(150px);
}
13 Motivated by http://www.fofronline.com/2009-07/animated-css3–cube-interface-using-3d-transforms/
http://freepdf-books.com
CHAPTER 3 ■ CSS3 STYLING
73
div#four {
-webkit-transform: rotateY(180deg) translateZ(150px);
}
div#five {
-webkit-transform: rotateY(-90deg) translateZ(150px);
}
div#six {
-webkit-transform: rotateX(-90deg) rotate(180deg)
translateZ(150px) ;
}
video {
position: absolute;
top: 25%;
width: 280px;
opacity: 0.7;
}
</style>
<div id="room">
<div id="cube">
<div class="side" id="one">
<video controls src="HelloWorld.mp4"></video>
</div>
<div class="side" id="two">
<video controls src="video1.mp4"></video>
</div>
<div class="side" id="three">
<video controls src="video2.mp4"></video>
</div>
<div class="side" id="four">
<video controls src="video3.mp4"></video>
</div>
<div class="side" id="five">
<video controls src="video4.mp4"></video>
</div>
<div class="side" id="six">
<video controls src="video5.mp4"></video>
</div>
</div>
</div>
Note that the 3D CSS3 features are available only in Safari and Chrome. Thus, we have reduced the
example to only webkit prefix properties – otherwise it would have been even longer. Figure 3–14 shows
what it looks like in Safari.
http://freepdf-books.com
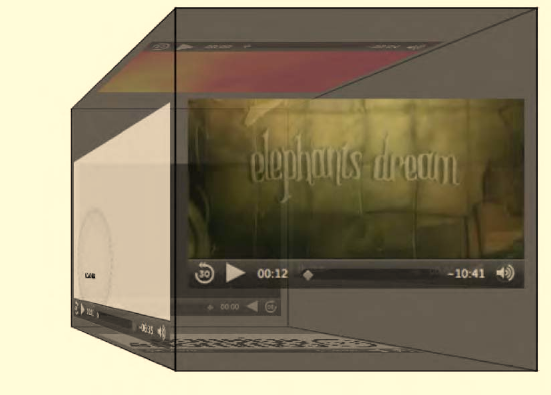
CHAPTER 3 ■ CSS3 STYLING
74
Figure 3–14. A <video> cube created with 3D CSS in Safari
Right now, the cube only sits there in 3D. Combining it with the transformation possibilities
described earlier would enable us to make it interactive. For example, when hovering over certain areas
of the cube, one could turn the cube in space. This exercise is left to the reader.
3.4.4 Putting a Video Gallery Together
To conclude this section, we will create an example that uses several features introduced in the section
in a creatively styled video gallery.
The example has six videos, each of which is put in a div styled to look somewhat like a smartphone
with silver rounded borders, and a black background. These “phones” are thrown in a pile, placed at
different positions through absolute top and left offsets. Upon mousing over a “phone,” a transition is
performed to a larger version of the “phone” in the foreground with a larger version of the video and
horizontally aligned. This produces somewhat of a zoom effect. In all browsers, the transition is
performed smoothly and resembles an action of picking up that “phone.” As you mouse out of the
“phone,” it drops back into place in the pile.
You can try to create the code for this example yourself. It uses only features that we have
previously discussed. The core parts of the code are displayed in Listing 3–15. Don't forget to add the
browser-specific versions of the CSS3 properties where necessary. The resulting display will be
something like what is shown in Figure 3–15. It works in all browsers except IE, where the “phones” are
all horizontally laid out. The screenshot is from Opera.
Listing 3–15. A HTML5 <video> gallery created with CSS exclusively
CSS code extract:
<style type="text/css">
div.container {
position: absolute;
width: 320px; height: 165px;
padding: 10px 35px 10px 35px;
http://freepdf-books.com
CHAPTER 3 ■ CSS3 STYLING
75
margin: 0px;
background-color: black;
border: 4px solid silver;
border-radius: 15px;
box-shadow: 5px 5px 2px gray;
box-sizing: border-box;
}
div.container:hover {
width: 520px; height: 268px;
padding: 16px 57px 16px 57px;
z-index: 10;
}
div.container, div.container:hover {
transition-property: all;
transition-duration: 0.5s;
transition-timing-function: linear;
}
video {
width: 100%;
height: 100%;
border: 1px solid #202020;
}
div#one:hover, div#two:hover, div#three:hover,
div#four:hover, div#five:hover, div#six:hover {
transform: rotate(0deg);
}
div#one {
left: 123px;
top: 228px;
transform: rotate(43deg);
}
// introduce your own versions for div #two to #six
</style>
HTML code extract:
<body>
<div class="container" id="one">
<video controls>
<source src="HelloWorld.mp4" type="video/mp4">
<source src="HelloWorld.webm" type="video/webm">
<source src="HelloWorld.ogv" type="video/ogg">
</video>
</div>
// introduce the other videos and divs analogously
</body>
http://freepdf-books.com
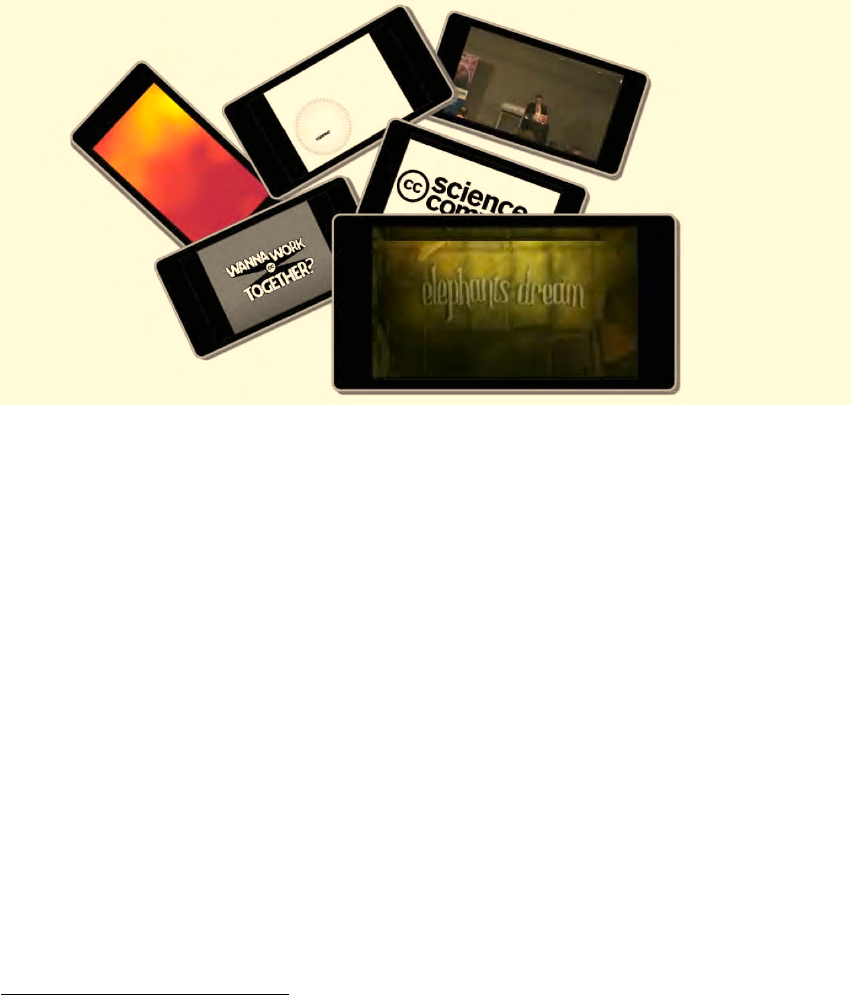
CHAPTER 3 ■ CSS3 STYLING
76
Figure 3–15. An HTML5 <video> gallery in Opera
3.5 CSS Animations
CSS3 introduces animations,14 which allow you to change CSS property values over time without
requiring JavaScript. This feature is still very new and supported only by Safari.
The proposal to introduce animations into CSS was discussed in controversy—after all, JavaScript
already allows achieving the effects that CSS animations provide. However, the key design principle for
the Web is to use HTML for content, CSS for display, and JavaScript for interaction. In the past,
JavaScript had to make up for many missing features in HTML and CSS – the new HTML5 and CSS3 are
closing some of these gaps, so animations fit the architecture and will make it easier to achieve well
styled content.
Animations are actually an extension to CSS transitions. In transitions, the start and end state are
known, and the transition is executed by moving the object from the start to the end state over a given
timing function. In animations, a sequence of intermediate states is added to a transition, which enables
finer control of the transitions. These intermediate states are called keyframes and are defined in a
special @keyframes selector. The @keyframes selector contains a sequence of rules for the different
stages of a transition from 0% to 100% and defines the intermediate states of the transition. In this way,
an @keyframes definition specifies the type of animation to be executed. It is given a name, so it can be
referenced by animation properties.
14 See http://www.w3.org/TR/css3–animations/
Download from www.eBookTM.Com
http://freepdf-books.com
CHAPTER 3 ■ CSS3 STYLING
77
The following animation properties are introduced:
• animation-name – makes the link to the @keyframes definition name that defines
the type of the animation to be used for an element.
• animation-duration – defines the total duration of the animation.
• animation-timing-function – declares the timing function to be used between the
different keyframe states. It is possible to apply a timing function to every state
change inside the @keyframes state rules. It has the same functionality and values
as the transition-timing-function property.
• animation-delay – allows specifying that an animation is to start with a delay after
the property has been applied.
• animation-iteration-count – defines how many times the animation is executed.
• animation-direction – defines whether the animation should play in reverse in
alternate cycles, e.g. if an element is to bounce back and forth between two points.
• animation-play-state – allows you to set the animation in paused/running state.
• animation – combines the above seven properties into a single line specification.
If you need a state change to be executed repeatedly and not just upon change of a particular
property, you will need to use animations rather than transitions.
Let's go back to Listing 3–14 of the 3D cube. This cube isn't very useful yet, since it is impossible to
reach any of the hidden sides of the cube. We will therefore add an animation that will make the cube
spin in the 3D space. Also, we will add an animation pause on mouse-over, such that it is possible to play
back the visible video. Listing 3–16 shows the key parts of the code.
Listing 3–16. Extending the video cube with animations – CSS code extract
@-webkit-keyframes '3dturn' {
0% {
-webkit-transform: rotateX(0deg) rotateY(0deg);
}
20% {
-webkit-transform: rotateX(0deg) rotateY(90deg);
}
40% {
-webkit-transform: rotateX(90deg) rotateY(180deg);
}
60% {
-webkit-transform: rotateX(0deg) rotateY(180deg);
}
80% {
-webkit-transform: rotateX(0deg) rotateY(270deg);
}
100% {
-webkit-transform: rotateX(-90deg) rotateY(360deg);
}
}
div#cube {
margin: 0 auto;
height: 300px; width: 300px;
http://freepdf-books.com
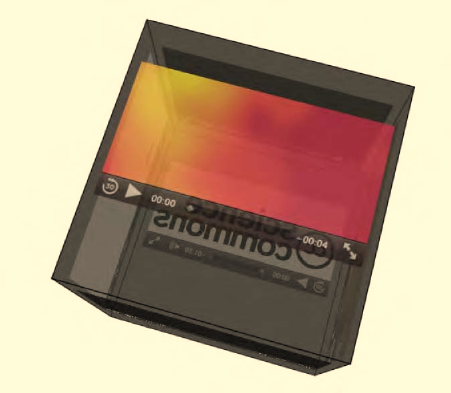
CHAPTER 3 ■ CSS3 STYLING
78
-webkit-transform-style: preserve-3d;
-webkit-transform: rotateX(0deg) rotateY(0deg);
-webkit-animation-name: '3dturn';
-webkit-animation-duration: 6s;
-webkit-animation-iteration-count: 4;
-webkit-animation-direction: alternate;
-webkit-animation-play-state: running;
}
div#cube:hover {
-webkit-animation-play-state: paused;
}
Because WebKit-based browsers are currently the only ones supporting the animation properties,
the code extract shows only the relevant WebKit-style properties. Note that the cube turns from side to
side in such a way that each one of the six faces will be shown once and in the correct orientation. This
3dturn animation is attached to the cube div of the code and paused on :hover. It plays for six seconds
going through four iterations; i.e. two full circles. The use of animation-play-state has an interesting side
effect: as you hover over the cube, the animation is restarted.
Figure 3–16 has a screenshot of the turning cube in Safari.
Figure 3–16. A spinning video cube fully created in CSS with animations in Safari
3.6 Summary
This section has given you a set of examples to use CSS3 properties with media elements. While we
focused on the <video> element, it is possible to apply most of the properties also to the <audio>
element, as long as it is visible with controls.
There are many more examples that you can implement yourself. Try to implement a video scroller
with CSS animations only, for example. (Hint: you will need two floating divs with videos that can follow
each other inside a scroll animation div.)
http://freepdf-books.com

CHAPTER 3 ■ CSS3 STYLING
79
At the end of this section we list all the CSS3 functionalities we discussed in this chapter, and we provide
an overview of which browser supports which feature for reference purposes. This should help you to
quickly identify any missing functionality you may rely on.
Function Firefox Safari Chrome Opera IE
Box Model:
border-radius
box-shadow
box-sizing
CSS Positioning:
display
float
position
visibility
object-fit
object-position
CSS Basic
Properties:
background-color
opacity
gradient -moz- -webkit- -webkit-
marquee
-webkit- -webkit-
CSS Transitions &
Transforms:
transition -moz- -webkit- -webkit- -o-
transform -moz- -webkit- -webkit- -o-
3d transform
-webkit- -webkit-
perspective
-webkit- -webkit-
backface-visibility
-webkit- -webkit-
animation
-webkit- -webkit-
http://www.cssplay.co.uk/menu/css3–marquee.html
http://freepdf-books.com

CHAPTER 3 ■ CSS3 STYLING
80
http://freepdf-books.com
C H A P T E R 4
■ ■ ■
81
JavaScript API
JavaScript is the scripting language used in web browsers for client-side programming tasks. As used in
browsers, it is a dialect of the standardized ECMAScript1 programming language. JavaScript programs
can execute all kinds of simple to complex tasks for web pages, ranging from the manipulation of a
simple user interface feature to the execution of a complex image analysis program. JavaScript
overcomes the limitations of HTML and CSS by providing full flexibility to change anything in the
Document Object Model (DOM) programmatically.
Because JavaScript support can be turned off in a web browser, it was important to explain what
HTML and CSS provide without further scripting. Adding JavaScript to the mix, however, turns these
web technologies into a powerful platform for the development of applications, and we will see what the
media elements can contribute.
In the years before the development of HTML5 and CSS3, JavaScript was used to bring many new
features to the Web. Where many people shared common requirements, JavaScript libraries2 and
frameworks, such as jQuery, YUI, Dojo or MooTools, were created that many Web developers now use to
simplify their development of web content. The experience with these libraries in turn motivated the
introduction of several new features of HTML5.
Because JavaScript executes in the web browser, it uses only the resources of the user's machine,
rather than having to interact with the web server to make changes to the web page. This is particularly
useful for dealing with any kind of user input and makes web pages much more responsive to users since
no exchanges over a network will slow down the page's response. The use of JavaScript, therefore, is
most appropriate when there isn’t a need to save entered user information on the server. For example, a
game can be written such that its logic executes in JavaScript in the browser and only the high score of
the user requires an interaction with the web server. This assumes, of course, that all the required assets
for the game—images, audio, etc.—have been retrieved.
JavaScript interfaces with HTML through the DOM (Document Object Model). The DOM is a
hierarchical object structure that contains all the elements of a web page as objects with their attribute
values and access functions. It represents the hierarchical structure of the HTML document and allows
JavaScript to gain access to the HTML objects. WebIDL, the Web interface definition language,3 has been
created to allow for the specification of the interfaces that the objects expose to JavaScript and that
browsers implement. WebIDL is particularly purpose-built to:
• Provide convenience structures that are used often in HTML, such as collections
of DOM nodes, token lists, or lists of name-value pairs.
1 See http://www.ecma-international.org/publications/standards/Ecma-262.htm
2 See http://en.wikipedia.org/wiki/List_of_JavaScript_libraries for a list of JavaScript libraries
3 See http://www.w3.org/TR/WebIDL/
http://freepdf-books.com

CHAPTER 4 ■ JAVASCRIPT API
82
• Expose the content attributes of the HTML element and enable the getting and
setting of their values.
• Explain what JavaScript types the HTML element attributes map to and how.
• Explain the transformations that have to be made to attribute values upon reading
them and before handing them to JavaScript; e.g. the resolution of a URL from a
relative to an absolute URL.
• List the states that an element may go through and the events that may be
executed on them.
• Relate to the browsing context of the HTML document.
It is important to understand the difference between the attributes of elements as they have been
introduced in Chapter 2 and attributes that are exposed for an element in the DOM. The former are
called content attributes, while the latter are IDL attributes.4 To simplify explanation of the JavaScript
API of the media elements, we will look at the IDL attributes created from content attributes and IDL-
only attributes separately. This will provide a better understanding of which attributes come through to
JavaScript from HTML and which are created to allow script control and manipulation.
For the purposes of this chapter, we assume that you have a basic understanding of JavaScript and
can follow the WebIDL specifications. Reading WebIDL is really simple and compares to reading class
definitions in object-oriented programming languages. We will explain the newly introduced interfaces
that the HTML5 media elements provide to JavaScript in WebIDL and give some examples on what can
be achieved with JavaScript by using these interfaces.
4.1 Content Attributes
We have already become acquainted with the content attributes of the HTML5 media elements in
Chapter 2. All of these map straight into the IDL interface of the media elements, see Listing 4–1.
Listing 4–1. WebIDL attributes of audio, video and source elements coming from content attributes
interface HTMLMediaElement : HTMLElement {
attribute DOMString src;
attribute DOMString preload;
attribute boolean autoplay;
attribute boolean loop;
attribute boolean controls;
};
interface HTMLAudioElement : HTMLMediaElement {};
interface HTMLVideoElement : HTMLMediaElement {
attribute unsigned long width;
attribute unsigned long height;
attribute DOMString poster;
};
interface HTMLSourceElement : HTMLElement {
4 See http://www.whatwg.org/specs/web-apps/current-work/multipage/infrastructure.html#terminology
http://freepdf-books.com
CHAPTER 4 ■ JAVASCRIPT API
83
attribute DOMString src;
attribute DOMString type;
attribute DOMString media;
};
All these attributes can be read (also called “get”) and set in JavaScript. Since we have already
explained all these attributes in detail in Chapter 2, we will not repeat this here. You can see the
JavaScript types that the content attributes map to in Listing 4–1.
For an example of how to set and get the values of the content attributes in JavaScript, see Listing 4–2.
Listing 4–2. Example media content attribute getting and setting in JavaScript
<video controls autoplay>
<source src="HelloWorld.mp4" type="video/mp4">
<source src="HelloWorld.ogv" type="video/ogg">
</video>
<script type="text/javascript">
videos = document.getElementsByTagName("video");
video = videos[0];
video.controls = false;
video.width = '400';
alert(video.autoplay);
</script>
Note how we display the value of the autoplay content attribute through a “getter” API function and
change the values of the width and controls attributes through a “setter,” which make the video shrink
and the controls disappear.
Attributes that do not have a value in the HTML source code will be treated as though they have an
empty string as value. This is of particular interest for the src attribute, since it is associated with the
video element. However, the media's source URL may actually be specified in a <source> element, as in
the above example. In this case, getting the value of the video's src content attribute will return an
empty string. This is where the additional IDL attributes become important.
4.2 IDL Attributes
IDL attributes—also called DOM attributes—reflect the state that a media element is in. The additional
IDL attributes that we look at in this subsection are mostly read-only attributes. Only a few can be set
that allow changing the playback of the media element. These are of particular importance to a web
developer.
Listing 4–3 shows a list of these IDL attributes for audio and video elements (the <source> element
has no IDL attributes, but only contributes back to the HTMLMediaElement). The state constants have been
omitted from this list and will be described as we go through the IDL attributes. There are quite a few
IDL attributes, so we will look at them in subsections of three groups: those conveying general state,
those conveying playback-related state, and those conveying error states.
Listing 4–3. WebIDL IDL attributes of audio and video
interface HTMLMediaElement : HTMLElement {
// error state
readonly attribute MediaError error;
// network state
http://freepdf-books.com
CHAPTER 4 ■ JAVASCRIPT API
84
readonly attribute DOMString currentSrc;
readonly attribute unsigned short networkState;
readonly attribute TimeRanges buffered;
// ready state
readonly attribute unsigned short readyState;
readonly attribute boolean seeking;
// playback state
attribute double currentTime;
readonly attribute double initialTime;
readonly attribute double duration;
readonly attribute Date startOffsetTime;
readonly attribute boolean paused;
attribute double defaultPlaybackRate;
attribute double playbackRate;
readonly attribute TimeRanges played;
readonly attribute TimeRanges seekable;
readonly attribute boolean ended;
// controls
attribute double volume;
attribute boolean muted;
};
interface HTMLAudioElement : HTMLMediaElement {};
interface HTMLVideoElement : HTMLMediaElement {
readonly attribute unsigned long videoWidth;
readonly attribute unsigned long videoHeight;
};
4.2.1 General Features of Media Resources
The following IDL attributes, which represent general features of a media resource, are explained in this
section:
• currentSrc
• startTime
• duration
• volume
• muted
• videoWidth
• videoHeight
http://freepdf-books.com

CHAPTER 4 ■ JAVASCRIPT API
85
@currentSrc
The resource location of the media element can be specified through content attributes either
directly on the <audio> or <video> element, or on the selected <source> element. The resulting resource
location is stored in the @currentSrc IDL attribute and can be read by JavaScript. To dynamically change
the resource location of the media element, you can always set the @src content attribute of the media
element using JavaScript and call the load() method to reload the element's media resource.
The actual process of selecting a media resource is somewhat complicated and involves queuing
tasks, firing events, setting network states, ready states, and potentially error states. This resource
selection algorithm is invoked as the media element is loaded and asynchronously executes thereafter. It
will also initiate the resource fetch algorithm, which actually downloads the media data and decodes it.
We will look at the different aspects of the resource selection algorithm through the different IDL
attributes as we discuss them. Here we focus on how the media resource location is identified and
@currentSrc is set.
@currentSrc is initially an empty string. You cannot rely on it to be available to JavaScript before the
resource selection algorithm has started fetching media data, which is signified through firing a progress
event. This, however, will not work when you are dealing with a buffered video resource, since in this
case, no progress event is fired. Thus, the event that will indicate a media resource is now usable is the
loadedmetadata event. You need to listen for the loadedmetadata event being fired before accessing
@currentSrc.
In JavaScript, there are three means for setting up an event listener. The first two follow the
traditional model,5 the third is the W3C's modern and recommended model.6
The first event listener method uses an event attribute created by adding the prefix “on” to the event
name. For example:
<video onprogress=”execute()” src=”video.ogv”></video>
The second is to use the event IDL attribute in JavaScript. For example:
video.onprogress = execute;
The third7 follows the W3C's DOM Events model by registering events explicitly:
video.addEventListener(“progress”, execute(), false);
Listing 4–4 shows as an example for how to retrieve the @currentSrc attribute during page load
time, after a progress event and after a loadedmetadata event. Figure 4–1 shows the results in the
browsers.
Listing 4–4. Getting the currentSrc value for a media element
<video controls autoplay width="400">
<source src="HelloWorld.mp4" type="video/mp4">
<source src="HelloWorld.webm" type="video/webm">
<source src="HelloWorld.ogv" type="video/ogg">
</video>
<p>CurrentSrc on start: <span id="first"></span>.</p>
<p>CurrentSrc after progress: <span id="progress"></span>.</p>
<p>CurrentSrc after loadedmetadata:
<span id="loadedmetadata"></span>.</p>
5 See http://www.quirksmode.org/js/events_tradmod.html
6 See http://www.quirksmode.org/js/events_advanced.html
7 See http://www.w3.org/TR/2000/REC-DOM-Level-2-Events-20001113/events.html
http://freepdf-books.com
CHAPTER 4 ■ JAVASCRIPT API
86
<script type="text/javascript">
video = document.getElementsByTagName("video")[0];
span1 = document.getElementById("first");
span1.innerHTML = video.currentSrc;
span2 = document.getElementById("progress");
function span2Update(evt) {
span2.innerHTML = video.currentSrc;
}
span3 = document.getElementById("loadedmetadata");
function span3Update(evt) {
span3.innerHTML = video.currentSrc;
}
video.addEventListener("progress", span2Update, false);
video.addEventListener("loadedmetadata", span3Update, false);
</script>
Note how Opera and IE already display a loaded resource on start, while the others don't. This is
because these two browsers have already parsed their DOM by the time they execute that JavaScript,
while the others haven't. You cannot rely on reading the @currentSrc attribute before the
loadedmetadata event has fired.
The behavior between the five browsers differs slightly on page reload. There are three ways in
which to reload a page:
1.Hit “enter” on the URL bar.
2.Hit the “reload” button.
3.Hit “shift” and the “reload” button or “ctrl” and “reload” if you are in IE.
The first and second are supposed to create the same effect: reloading the web page and resources
from cache, unless the cache timed out. The third is supposed to allow reloading a page and all its
resources by bypassing the cache; i.e. reloading them from the origin server. However, because browsers
often have a separate cache for media resources than for other browser resources, not every browser
supports this functionality.
Firefox and Safari will always reload the media resource when reloading the web page, no matter
what reload mechanism you choose. Thus, a new sequence of progress events will be fired. Opera and
Chrome don't reload a media resource unless the media URI changes, which is why the progress event
only fires when loading the media resource for the very first time. IE distinguishes between reloading
from cache and reloading all resources from the origin, which happens either when hitting the “reload”
or the “ctrl”-“reload” buttons. However, it always calls the progress event, no matter whether the
resource is loaded from the cache or remotely.
It is clear to see that you need to use the loadedmetadata event for catching the right time to ask
about which resource has been loaded from @currentSrc.
Download from www.eBookTM.Com
http://freepdf-books.com
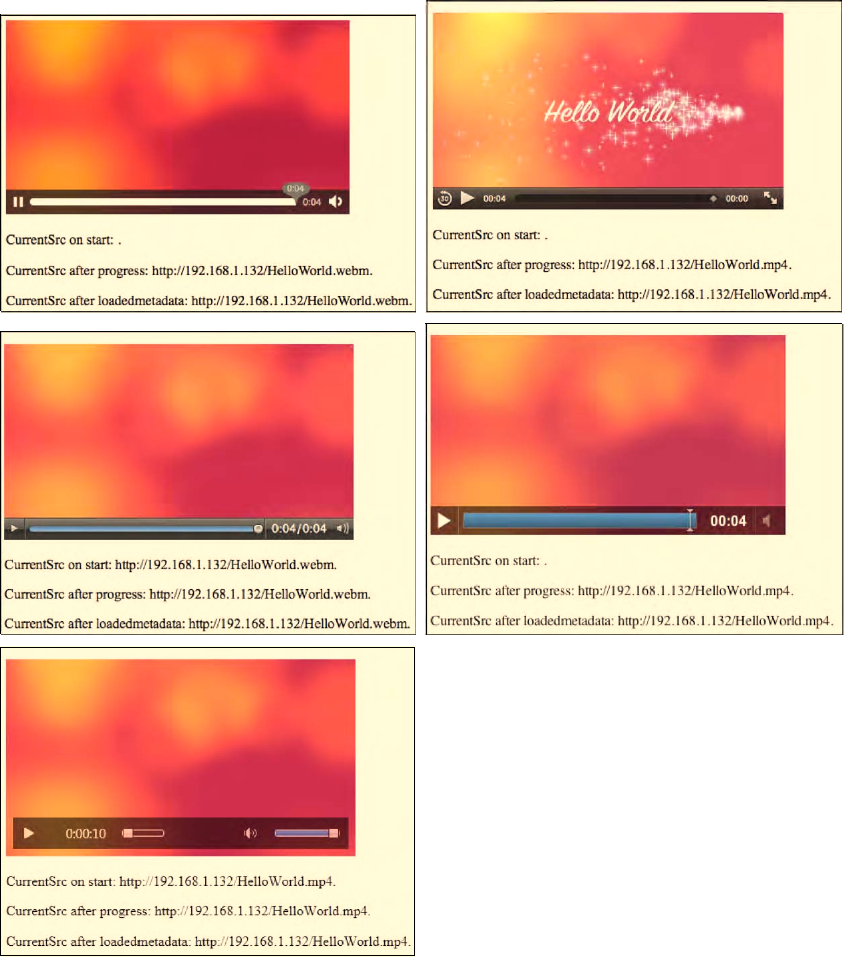
CHAPTER 4 ■ JAVASCRIPT API
87
Figure 4–1. Retrieving the @currentSrc value in Firefox, Safari (top row), Opera, Chrome (middle row),
and IE (bottom)
http://freepdf-books.com
CHAPTER 4 ■ JAVASCRIPT API
88
@startTime
After a media resource is loaded, it is possible to know what the timestamp is of the earliest possible
position that can be played back from the media resource. Typically, a media resource starts at
timestamp 0, but some resources have a positive time offset that they start from—either because they
may have been created as a fragment from a larger resource, or because they stem from a live stream
that a user tuned into later, or because the browser is unable to obtain certain parts of the stream after it
has expired from its buffer.
Thus, the read-only @startTime IDL attribute provides the earliest possible position in the stream or
resource that a browser is able to return to.
Listing 4–5 shows as an example how to retrieve the @startTime attribute during page load time,
after a loadedmetadata event and after an ended event. Figure 4–2 shows the results in Firefox and IE.
Listing 4–5. Getting the startTime value for a media element
<video controls autoplay width="400">
<source src="HelloWorld.mp4" type="video/mp4">
<source src="HelloWorld.webm" type="video/webm">
<source src="HelloWorld.ogv" type="video/ogg">
</video>
<p>StartTime on start: <span id="startTime_first"></span>.</p>
<p>StartTime after loadedmetadata:
<span id="startTime_loadedmetadata"></span>.</p>
<p>StartTime after timeupdate:
<span id="startTime_timeupdate"></span>.</p>
<p>StartTime after ended: <span id="startTime_ended"></span>.</p>
<script type="text/javascript">
video = document.getElementsByTagName("video")[0];
span1 = document.getElementById("startTime_first");
span1.innerHTML = video.startTime;
span2 = document.getElementById("startTime_loadedmetadata");
function span2Update(evt) { span2.innerHTML = video.startTime; }
span3 = document.getElementById("startTime_timeupdate");
function span3Update(evt) { span3.innerHTML = video.startTime; }
span4 = document.getElementById("startTime_ended");
function span4Update(evt) { span4.innerHTML = video.startTime; }
video.addEventListener("loadedmetadata", span2Update, false);
video.addEventListener("timeupdate", span3Update, false);
video.addEventListener("ended", span4Update, false);
</script>
http://freepdf-books.com
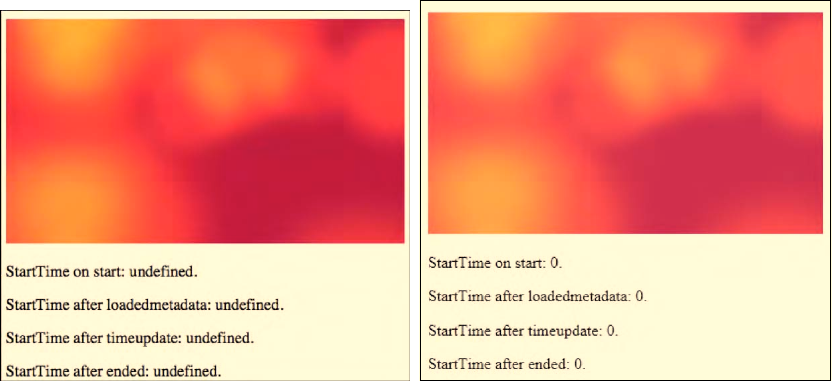
CHAPTER 4 ■ JAVASCRIPT API
89
Figure 4–2. Retrieving the startTime value in Firefox and IE
All browsers implement @startTime in the way IE implements it—except for Firefox, whose
implementation of the media timeline predates the @startTime attribute. According to their developers,
you can safely assume @startTime is always 0 in Firefox.
More recently, an explicit definition of a timeline has entered the HTML5 specification, and the
@startTime attribute has been removed. It can be replicated through the start time of the first range in
the @seekable attribute's TimeRanges object and is therefore no longer necessary. At the same time, new
attributes have been introduced: @initialTime and @startOffsetTime.
The new timeline specifies how to interpret times provided in media resources to the media
timeline for the element; e.g. how to deal with time gaps in a resource or time offsets that are common in
live streams.
The @startOffsetTime is a Date object and represents a mapping of the zero time in the media
timeline to a date given in the media resource for this time. This is particularly important when dealing
with live streaming and the time and date are actually given in the media resource.
The @initialTime stores the initial playback position for a media resource. In the absence of media
data, @initialTime is zero, but may later turn into an offset time on the media timeline. It comes into
play with the delivery of media fragments (see also Chapter 9, where we talk about media fragment
URIs).
None of the browsers has implemented this new timeline and the new attributes.
@duration
When a media resource's metadata is loaded and before any media data is played back, you can find
out about the duration of the resource. The read-only @duration IDL attribute returns the length of the
media resource in seconds. During loading time, @duration will return the NaN value (Not-a-Number).
If it is a live or an unbound stream, the duration is infinity, unless the stream ends, at which time the
duration changes to that given through the last samples in the stream set in relation to @startTime. Also
note that sometimes a UA is unable to get an accurate duration after loading the resource's metadata
and will provide only an approximate duration, which it can update during playback as it learns more
about the actual duration of the resource.
http://freepdf-books.com
CHAPTER 4 ■ JAVASCRIPT API
90
Every update of the @duration of the media resource causes a durationchange event to be fired, so
you can always retrieve the exact @duration value that the UA is working with. This will also happen if a
different resource is loaded.
Listing 4–6 shows an example of how to retrieve the @duration attribute during page load time, after
a loadedmetadata event, a durationchange event and after a ended event. Figure 4–3 shows the results in
the browsers.
Listing 4–6. Getting the duration value for a media element
<video controls autoplay width="400">
<source src="HelloWorld.mp4" type="video/mp4">
<source src="HelloWorld.webm" type="video/webm">
<source src="HelloWorld.ogv" type="video/ogg">
</video>
<p>duration on start: <span id="duration_first"></span>.</p>
<p>duration after loadedmetadata:
<span id="duration_loadedmetadata"></span>.</p>
<p>duration after durationchange:
<span id="duration_durationchange"></span>.</p>
<p>duration after ended: <span id="duration_ended"></span>.</p>
<script type="text/javascript">
video = document.getElementsByTagName("video")[0];
span1 = document.getElementById("duration_first");
span1.innerHTML = video.duration;
span2 = document.getElementById("duration_loadedmetadata");
function span2Update(evt) { span2.innerHTML = video.duration; }
span3 = document.getElementById("duration_durationchange");
function span3Update(evt) { span3.innerHTML = video.duration; }
span4 = document.getElementById("duration_ended");
function span4Update(evt) { span4.innerHTML = video.duration; }
video.addEventListener("loadedmetadata", span2Update, false);
video.addEventListener("durationchange", span3Update, false);
video.addEventListener("ended", span4Update, false);
</script>
http://freepdf-books.com
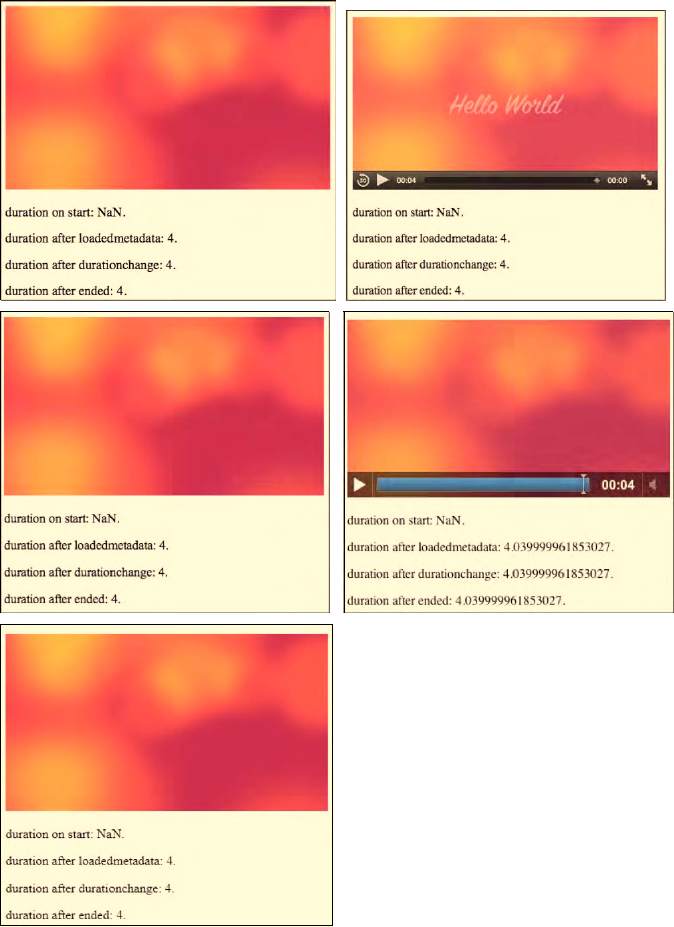
CHAPTER 4 ■ JAVASCRIPT API
91
Figure 4–3. Retrieving the duration value in Firefox, Safari (top row), Opera, Chrome (middle row), and IE
(bottom)
http://freepdf-books.com
CHAPTER 4 ■ JAVASCRIPT API
92
Note that the attribute value in Google Chrome is more accurate than in the other browsers, since it
returns duration as a double value of seconds. It seems the other MPEG-based browsers (IE and Safari)
round the duration values. When testing with FFmpeg,the duration of the Ogg file turns out to be 3.96s,
the WebM file is 4.00s and the MPEG-4 file 4.04s. Chrome, Opera, and Firefox return accurate durations.
More recently, the HTML5 specification has slightly changed the meaning of the @duration
attribute. It now represents the end time of the media resource. This has not been implemented by any
browser yet.
@volume
When reading the @volume IDL attribute of a media resource, the playback volume of the audio track
is returned in the range 0.0 (silent) to 1.0 (loudest). On initial load of the media resource, its @volume is set
to 1.0. After use of the media resource and change of its volume setting—either through user or script
interaction—the @volume value may have changed. The browser may remember this setting for a later
reload of the resource to allow a user to return to the volume adjustments made earlier.
The @volume IDL attribute can be set through JavaScript to change the volume of the media
resource. A value between 0.0 and 1.0 inclusive is allowed. Anything else will raise an INDEX_SIZE_ERR
exception. The playback volume will be adjusted correspondingly as soon as possible after setting the
attribute. Note that the range may not be linear, but is determined by the browser. Further, the loudest
setting may be lower than the system's loudest possible setting.
Whenever the volume of the media resource is changed—either through user interaction or
JavaScript—a volumechanged event is fired.
Listing 4–7 shows an example of how to get and set the @volume attribute using an audio element.
Every time the timeupdate event is raised, we reduce the volume by 0.05 until we reach a volume of less
than 0.1. Then we reset the value to 1.0 and start successively pulling it down again like a sawtooth.
Figure 4–4 shows the results in the browsers.
Listing 4–7. Getting and setting the volume value for a media element
<audio controls autoplay>
<source src="HelloWorld.m4a" type="audio/aac">
<source src="HelloWorld.mp3" type="audio/mp4">
<source src="HelloWorld.ogg" type="audio/ogg">
</audio>
<p>volume on start: <span id="volume_first"></span>.</p>
<p>volume after volumechange: <span id="volumechange"></span>.</p>
<p>volume after timeupdate: <span id="timeupdate"></span>.</p>
<script type="text/javascript">
audio = document.getElementsByTagName("audio")[0];
span1 = document.getElementById("volume_first");
span1.innerHTML = audio.volume;
span2 = document.getElementById("volumechange");
function span2Update(evt) {
span2.innerHTML = audio.volume;
}
span3 = document.getElementById("timeupdate");
function span3Update(evt) {
if (audio.volume > 0.1) {
audio.volume = audio.volume - 0.05;
} else {
audio.volume = 1.0;
}
http://freepdf-books.com
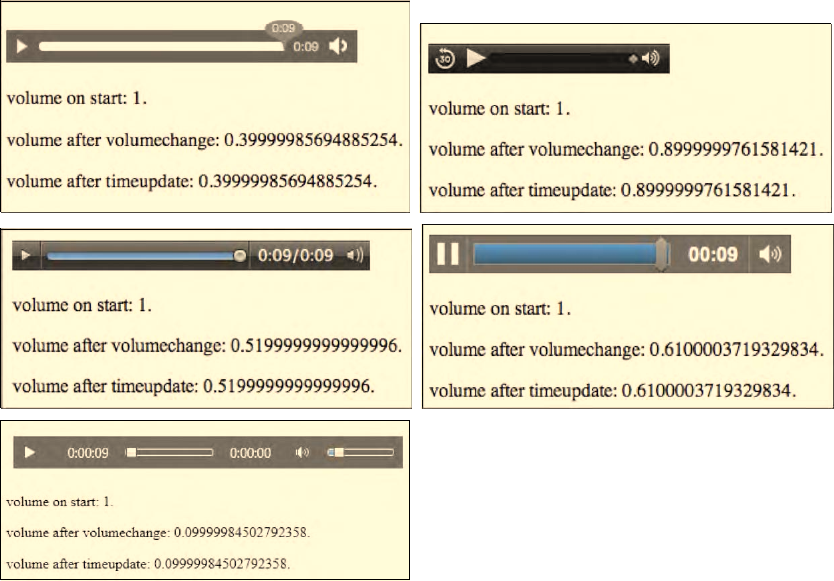
CHAPTER 4 ■ JAVASCRIPT API
93
span3.innerHTML = audio.volume;
}
audio.addEventListener("volumechange", span2Update, false);
audio.addEventListener("timeupdate", span3Update, false);
</script>
Figure 4–4. Retrieving and setting the volume value in Firefox, Safari (top row), Opera, Chrome (middle
row), and IE (bottom)
Note that the frequency at which timeupdate is being called is different among the browsers and, as
such, they all arrive at different volumes at the end of playback.
@muted
When reading the @muted IDL attribute of a media resource, it returns “true” if the audio channels
are muted and “false” otherwise. On initial load of the media resource, it is not muted. After use of the
media resource and change of its muted setting—either through user or script interaction—the @muted
value may have changed. The browser may remember this setting for a later reload of the resource to
allow a user to return to the mute adjustments made earlier. The @muted value overrides the @volume
setting.
The @muted IDL attribute can be set through JavaScript to “true” to mute the audio playback for the
media resource or “false” to unmute it.
http://freepdf-books.com
CHAPTER 4 ■ JAVASCRIPT API
94
Whenever the volume of the media resource is changed—either through user interaction or through
JavaScript—a volumechanged event is fired. This event fires both on @volume and @muted changes. The
@muted value is not changed when @volume changes; in particular, it is possible to change the volume
setting while the media element is actually muted.
Listing 4–8 shows an example of how to get and set the @muted attribute. In this example we change
the @muted setting every 20 timeupdate ticks. Note that we also show, together with the muted value, the
number up to which the timeupdate loop has counted since the last timeupdate. Figure 4–5 shows the
results in the browsers.
Listing 4–8. Getting and setting the muted value for a media element
<audio controls autoplay>
<source src="HelloWorld.m4a" type="audio/aac">
<source src="HelloWorld.mp3" type="audio/mp4">
<source src="HelloWorld.ogg" type="audio/ogg">
</audio>
<p>muted on start: <span id="muted_first"></span>.</p>
<p>muted after volumechange: <span id="muted_volumechange"></span>.</p>
<p>muted after timeupdate: <span id="muted_timeupdate"></span>.</p>
<script type="text/javascript">
audio = document.getElementsByTagName("audio")[0];
span1 = document.getElementById("muted_first");
span1.innerHTML = audio.muted;
span2 = document.getElementById("muted_volumechange");
function span2Update(evt) { span2.innerHTML = audio.muted; }
span3 = document.getElementById("muted_timeupdate");
i=0;
function span3Update(evt) {
if (i>20) {
audio.muted = !audio.muted;
i=0;
} else {
i=i+1;
}
span3.innerHTML = i + " " + audio.muted;
}
audio.addEventListener("volumechange", span2Update, false);
audio.addEventListener("timeupdate", span3Update, false);
</script>
http://freepdf-books.com
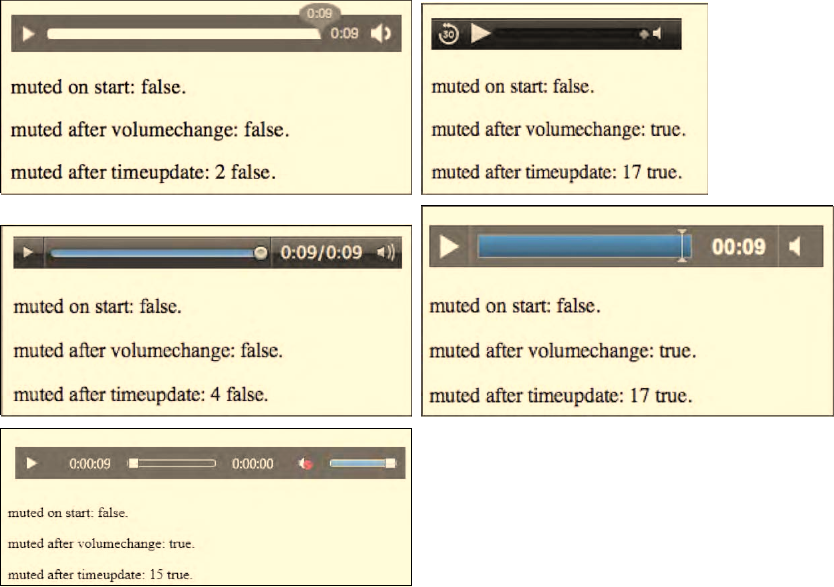
CHAPTER 4 ■ JAVASCRIPT API
95
Figure 4–5. Retrieving and setting the muted value in Firefox, Safari (top row), Opera, Chrome (middle
row), and IE (bottom)
For the 10sec file, Safari, Chrome and IE arrive at a state of @muted=”true” while Firefox, Opera
arrives at @muted=”false.” Note how the browsers explicitly display the muted state in their controls.
@videoWidth, @videoHeight
For video resources, there are read-only IDL attributes @videoWidth and @videoHeight, which return
the intrinsic width and height of the video, or zero if the dimensions are not known at video load time.
The intrinsic dimensions are calculated in CSS pixels, including information about the resource's
dimensions, aspect ratio, resolution, etc., as defined by the resource's file format.
It is important to understand the difference between the @width and @height content attributes and
these IDL attributes. With the @width and @height content attributes, you can set and get the displayed
width of the video in CSS pixels or in percentage. In contrast, the read-only @videoWidth and
@videoHeight IDL attributes refer to the width and height of the video itself as it comes from the
decoding pipeline. Changing the @width and @height content attribute values has no effect on the value
of the @videoWidth and @videoHeight attributes.
Listing 4–9 shows an example of how to get the @videoWidth and @videoHeight attributes. Figure 4–6
shows the results in Opera.
http://freepdf-books.com
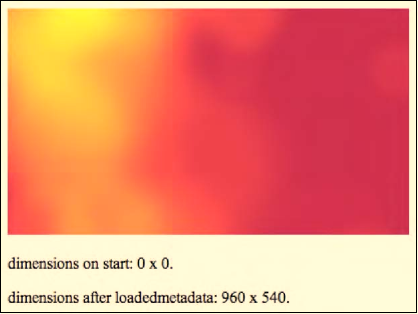
CHAPTER 4 ■ JAVASCRIPT API
96
Listing 4–9. Getting the intrinsic videoWidth and videoHeight values for a video element
<video controls width="400">
<source src="HelloWorld.mp4" type="video/mp4">
<source src="HelloWorld.webm" type="video/webm">
<source src="HelloWorld.ogv" type="video/ogg">
</video>
<p>dimensions on start: <span id="dimensions_first"></span>.</p>
<p>dimensions after loadedmetadata:
<span id="dimensions_loadedmetadata"></span>.</p>
<script type="text/javascript">
video = document.getElementsByTagName("video")[0];
span1 = document.getElementById("dimensions_first");
span1.innerHTML = video.videoWidth + " x " + video.videoHeight;
span2 = document.getElementById("dimensions_loadedmetadata");
function span2Update(evt) {
span2.innerHTML = video.videoWidth + " x " + video.videoHeight;
}
video.addEventListener("loadedmetadata", span2Update, false);
</script>
Figure 4–6. Retrieving the videoWidth and videoHeight values in Opera
All browsers show the same behavior for this property.
Download from www.eBookTM.Com
http://freepdf-books.com
CHAPTER 4 ■ JAVASCRIPT API
97
4.2.2 Playback-Related Attributes of Media Resources
The following IDL attributes, all related to playback position and control, are explained in this section:
• currentTime
• seeking
• paused
• ended
• defaultPlaybackRate
• playbackRate
@currentTime
The @currentTime IDL attribute returns the current playback position of the media resource in
seconds. If a media element has a non-zero @startTime, the first value of @currentTime will be the value
of @startTime. Under normal circumstances, the media resource starts at 0, in which case the
@currentTime during uninterrupted playback will contain the time passed since starting playback of the
media resource.
The @currentTime can also be set by JavaScript, which will initiate a seek by the browser to a new
playback position. Depending on whether the resource is seekable and that position is available and
reachable, the @currentTime is successfully changed or an exception is raised.
Seeking can be undertaken only when the media element's metadata has been loaded, so don't try
changing the @currentTime before the readyState is at least HAVE_METADATA. A timeupdate event will be
fired upon a successful seek.
A browser will interrupt any current seeking activities if you start a new seeking action. If you seek to
a time where the data is not available yet, current playback (if any) will be stopped and you will have to
wait until that data is available. A waiting event will be fired.
If you seek past the end of the media resource, you will be taken to the end. If you seek to a time
before the @startTime of the media resource, you will be taken to the @startTime. If you seek to a time
that is not seekable—i.e., it is not inside one of the time ranges in the @seekable attribute—the browser
will position the seek to the nearest seekable position. If your seek position is exactly between two
seekable positions, you will be positioned at the one closest to the current playback position.
Listing 4–10 shows an example of how to get and set the @currentTime attribute. After having played
one third of the resource, we jump forward by a third, then the next timeupdate event shows where we
jumped to. Figure 4–7 shows the results in the browsers.
Listing 4–10. Getting and setting the currentTime value for a media element
<video controls autoplay width="400">
<source src="HelloWorld.mp4" type="video/mp4">
<source src="HelloWorld.webm" type="video/webm">
<source src="HelloWorld.ogv" type="video/ogg">
</video>
<p>currentTime on start: <span id="currentTime_first"></span>.</p>
<p>currentTime after timeupdate:
<span id="currentTime_timeupdate"></span>.</p>
<p>currentTime after ended: <span id="currentTime_ended"></span>.</p>
<script type="text/javascript">
http://freepdf-books.com
CHAPTER 4 ■ JAVASCRIPT API
98
video = document.getElementsByTagName("video")[0];
span1 = document.getElementById("currentTime_first");
span1.innerHTML = video.currentTime;
span2 = document.getElementById("currentTime_timeupdate");
function span2Update(evt) {
span2.innerHTML = video.currentTime;
video.removeEventListener("timeupdate", span2Update, false);
}
span3 = document.getElementById("currentTime_ended");
function span3Update(evt) { span3.innerHTML = video.currentTime; }
function timeupdatecallback(evt) {
if (video.currentTime > video.duration/3) {
video.currentTime = 2*video.duration/3;
video.removeEventListener("timeupdate", timeupdatecallback, false);
video.addEventListener("timeupdate", span2Update, false);
}
}
video.addEventListener("timeupdate", timeupdatecallback, false);
video.addEventListener("ended", span3Update, false);
</script>
http://freepdf-books.com
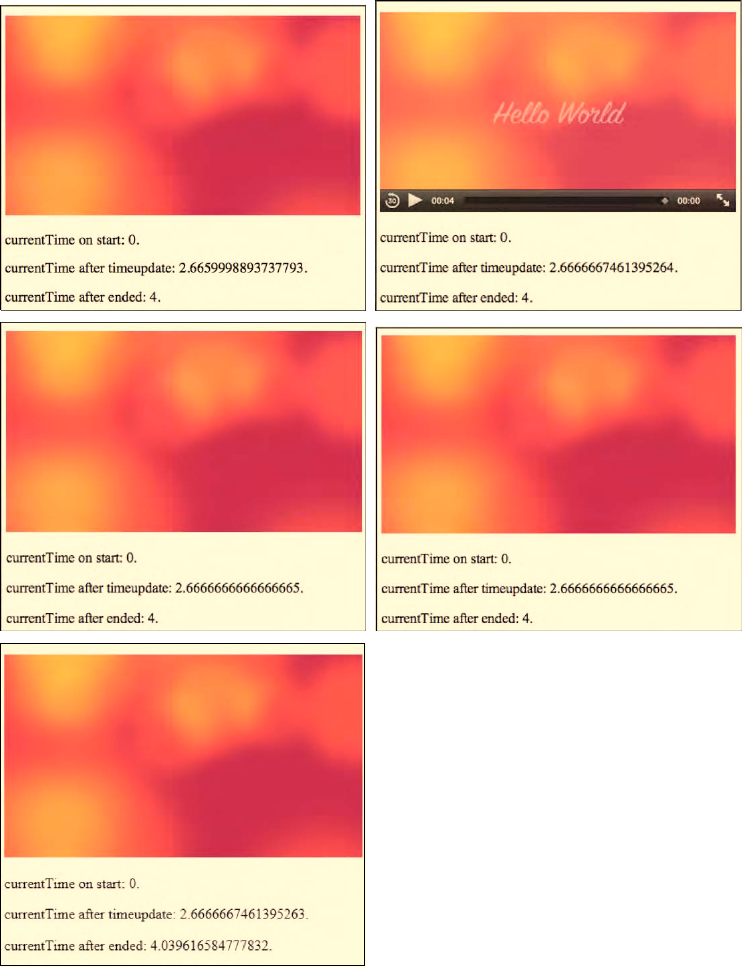
CHAPTER 4 ■ JAVASCRIPT API
99
Figure 4–7. Retrieving and setting the currentTime value in Firefox, Safari (top row), Opera, Chrome
(middle row), and IE (bottom)
http://freepdf-books.com
CHAPTER 4 ■ JAVASCRIPT API
100
All the browsers behave identically on a @currentTime update.
@seeking
The read-only @seeking IDL attribute is set by the browser to “true” during times of seeking and is
“false” at all other times.
Listing 4–11 shows as an example how to get the @seeking attribute. Since seeking times are
typically short, we have to catch the @seeking attribute value as soon as possible after starting to seek.
Thus, we print it straight after changing @currentTime. Figure 4–8 shows the results in Safari.
Listing 4–11. Getting the seeking value for a media element
<video controls autoplay width="400">
<source src="HelloWorld.mp4" type="video/mp4">
<source src="HelloWorld.webm" type="video/webm">
<source src="HelloWorld.ogv" type="video/ogg">
</video>
<p>seeking on start: <span id="seeking_first"></span>.</p>
<p>seeking after timeupdate: <span id="seeking_timeupdate"></span>.</p>
<p>seeking after ended: <span id="seeking_ended"></span>.</p>
<script type="text/javascript">
video = document.getElementsByTagName("video")[0];
span1 = document.getElementById("seeking_first");
span1.innerHTML = video.seeking;
span2 = document.getElementById("seeking_timeupdate");
function span2Update(evt) {
if (video.currentTime > video.duration/3) {
video.currentTime = 2*video.duration/3;
video.removeEventListener("timeupdate", span2Update, false);
span2.innerHTML = video.seeking;
}
}
span3 = document.getElementById("seeking_ended");
function span3Update(evt) { span3.innerHTML = video.seeking; }
video.addEventListener("timeupdate", span2Update, false);
video.addEventListener("ended", span3Update, false);
</script>
http://freepdf-books.com
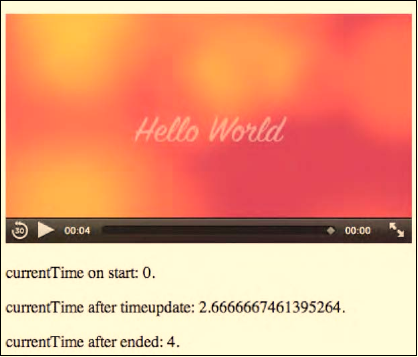
CHAPTER 4 ■ JAVASCRIPT API
101
Figure 4–8. Retrieving the seeking attribute value in Safari
You can see that @seeking is “true” just after seeking. All browsers exhibit the same behavior for
this example.
@paused
The read-only @paused IDL attribute is set by the browser to “true” if the media playback is paused.
Pausing can happen either through user interaction on the interface or through JavaScript. Initially,
@paused is “true” and is only set to “false” when the media resource is supposed to start playing.
It is not possible to assume that the video is playing when @paused is “false.” Even when @paused is
“false,” it is possible the media resource is in a state of buffering, in an error state, or has reached the end
and is waiting for more media data to be appended. Because there is no explicit @playing IDL attribute,
you need to use the @paused value and some other hints to determine if the browser is currently playing
back a media resource. The combined hints are:
• @paused is “false.”
• @ended is “false.”
• The readyState is HAVE_FUTURE_DATA or HAVE_ENOUGH_DATA.
• @error is null.
There are also events that can help you ensure that playback continues working: the playing event is
fired when playback starts and as long as no waiting or ended or error event is fired and @paused is
“false,” you can safely assume that you are still playing.
When the @paused IDL attribute changes value, a timeupdate event is fired.
Listing 4–12 shows as an example how to get the value of the @paused attribute and how to deduce
an assumption for a playing status. Halfway through the media resource, we briefly pause the video to
catch the states and then start playback again. Figure 4–9 shows the results in Chrome and IE.
http://freepdf-books.com
CHAPTER 4 ■ JAVASCRIPT API
102
Listing 4–12. Getting the paused value for a media element
<video controls autoplay width="400">
<source src="HelloWorld.mp4" type="video/mp4">
<source src="HelloWorld.webm" type="video/webm">
<source src="HelloWorld.ogv" type="video/ogg">
</video>
<p>paused on start: <span id="paused_first"></span>.</p>
<p>paused after pause(): <span id="paused_timeupdate"></span>.</p>
<p>paused after play(): <span id="paused_playing"></span>.</p>
<p>paused after ended: <span id="paused_ended"></span>.</p>
<script type="text/javascript">
video = document.getElementsByTagName("video")[0];
span1 = document.getElementById("paused_first");
function playing() {
return !video.paused && !video.ended && video.error==null &&
(video.readyState==video.HAVE_FUTURE_DATA ||
video.readyState==video.HAVE_ENOUGH_DATA);
}
span1.innerHTML = video.paused + " (playing: " + playing() + ")";
span2 = document.getElementById("paused_timeupdate");
function span2Update(evt) {
if (video.currentTime > video.duration/2) {
video.pause();
video.removeEventListener("timeupdate", span2Update, false);
span2.innerHTML = video.paused + " (playing: " + playing() + ")";
video.play();
span3 = document.getElementById("paused_playing");
span3.innerHTML = video.paused + " (playing: " + playing() + ")";
}
}
span4 = document.getElementById("paused_ended");
function span4Update(evt) {
span4.innerHTML = video.paused + " (playing: " + playing() + ")";
}
video.addEventListener("timeupdate", span2Update, false);
video.addEventListener("ended", span4Update, false);
</script>
http://freepdf-books.com

CHAPTER 4 ■ JAVASCRIPT API
103
Figure 4–9. Retrieving the paused attribute value and also a playing status in Chrome and IE.
Firefox, Safari, Opera, and Chrome all behave the same with the state of @paused. IE, however,
doesn't respect the idea that at the end of playback the state should be set to @paused=”false” to wait for
further data to arrive. Instead, IE rewinds to the beginning of the resource and pauses the video.
@ended
The read-only @ended IDL attribute is set by the browser to “true” if the media playback has ended
and the direction of playback is forward (see @playbackRate); otherwise @ended is “false.”
Note that @ended will not be set to “true” when the @loop content attribute is set to “true,” the
current playback position reaches the end of the media resource and the playback direction is forward.
Instead, the browser will seek to the @startTime of the media resource and continue playback.
When @ended is set to “true,” the browser will fire both a timeupdate event and an ended event.
Since Firefox does not implement @loop, you can imitate looping by catching the ended event and
then setting @currentTime to 0.
Interestingly, when the playback direction is backward and the playback position reaches the
@startTime of the media resource, the value of the @loop content attribute is irrelevant and playback
will stop. Only a timeupdate event will be fired.
Listing 4–13 shows as an example how to get the @ended attribute. Figure 4–10 shows the results in
Safari.
Listing 4–13. Getting the ended value for a media element
<video controls autoplay width="400">
<source src="HelloWorld.mp4" type="video/mp4">
<source src="HelloWorld.webm" type="video/webm">
<source src="HelloWorld.ogv" type="video/ogg">
</video>
<p>ended on start: <span id="ended_first"></span>.</p>
<p>ended after ended: <span id="ended_ended"></span>.</p>
<script type="text/javascript">
http://freepdf-books.com
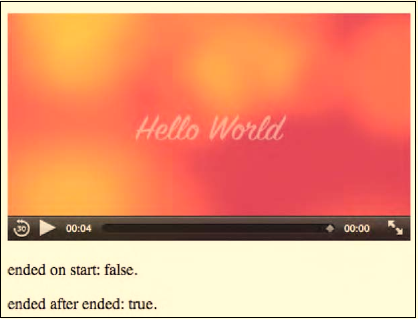
CHAPTER 4 ■ JAVASCRIPT API
104
video = document.getElementsByTagName("video")[0];
span1 = document.getElementById("ended_first");
span1.innerHTML = video.ended;
span2 = document.getElementById("ended_ended");
function span2Update(evt) { pan2.innerHTML = video.ended; }
video.addEventListener("ended", span2Update, false);
</script>
Figure 4–10. Retrieving the paused attribute value and also a playing status in Safari
All browsers exhibit the same behavior for this example.
@defaultPlaybackRate, @playbackRate
The @defaultPlaybackRate IDL attribute returns the speed at which the media resource is meant to
be played back as a multiple of its intrinsic speed. Initially, it is set to 1.0, which is normal playback
speed.
The attribute is mutable but changing it has no direct effect on playback. Rather, it is a default value
to which the @playbackRate is initialized or returns to after it has been changed for fast-forwarding or
reversing.
The @playbackRate IDL attribute returns the speed at which the media resource actually plays back
as a multiple of its intrinsic speed. You can implement fast forward and fast rewind with @playbackRate.
Initially, @playbackRate is set to the value of @defaultPlaybackRate. If @playbackRate is positive or 0,
then the direction of playback is forward. If it's negative, the direction is backward. If the @playbackRate
is 0, playback doesn't move forward even though the media resource is not paused.
When playing backward, the browser mutes the audio. When @playbackRate is forward, but very
slow (i.e. @playbackRate is close to 0) or fast pace (i.e. @playbackRate is pretty big), the browser mutes
the audio, too. For fast forward with @playbackRate around the value of @defaultPlaybackRate, the audio
is turned on, but the browser is encouraged to adjust the pitch to the original level to render the audio
faithfully.
Fast-forward and rewinding are implemented by changing the @playbackRate relative to the
@defaultPlaybackRate. Anything with a larger absolute value is faster; anything with a smaller absolute
value is slower. This means that while a media resource plays, its current playback position increases
monotonically at @playbackRate/@defaultPlaybackRate percent of the original speed.
When a user activates the “play” button in the browser controls, the @playbackRate IDL attribute's
value is reset to the value of the @defaultPlaybackRate before starting playback.
http://freepdf-books.com
CHAPTER 4 ■ JAVASCRIPT API
105
When the @defaultPlaybackRate or the @playbackRate attribute values are changed, a rateChange
event is fired.
Note that if you are playing back at a high @playbackRate, the download and decoding of the media
resource may not be able to keep up and you may get stalled as buffering takes place.
Listing 4–14 shows an example of how to make use of the @defaultPlaybackRate and the
@playbackRate attributes. First, we set the default to 0.8. When half the video is played back, we change
the playback direction to backwards and set the speed to 2. Figure 4–11 shows the results in the
browsers.
Listing 4–14. Getting the defaultPlaybackRate and playbackRate values for a media element
<video controls autoplay width="400">
<source src="HelloWorld.mp4" type="video/mp4">
<source src="HelloWorld.webm" type="video/webm">
<source src="HelloWorld.ogv" type="video/ogg">
</video>
<p>default/PlaybackRate on start:
<span id="defaultPlaybackRate_first"></span>.</p>
<p>default/PlaybackRate as set:
<span id="defaultPlaybackRate_set"></span>.</p>
<p>default/PlaybackRate after timeupdate:
<span id="defaultPlaybackRate_timeupdate"></span>.</p>
<p>default/PlaybackRate after ended:
<span id="defaultPlaybackRate_ended"></span>.</p>
<script type="text/javascript">
video = document.getElementsByTagName("video")[0];
span1 = document.getElementById("defaultPlaybackRate_first");
span1.innerHTML = video.defaultPlaybackRate + ", " +
video.playbackRate;
video.defaultPlaybackRate = 0.8;
span2 = document.getElementById("defaultPlaybackRate_set");
span2.innerHTML = video.defaultPlaybackRate + ", " +
video.playbackRate;
span3 = document.getElementById("defaultPlaybackRate_timeupdate");
function span3Update(evt) {
if (video.currentTime > video.duration/2) {
video.playbackRate = -2;
span3.innerHTML = video.defaultPlaybackRate + ", " +
video.playbackRate;
video.removeEventListener("timeupdate", span2Update, false);
}
}
span4 = document.getElementById("defaultPlaybackRate_ended");
function span4Update(evt) {
span4.innerHTML = video.defaultPlaybackRate + ", " +
video.playbackRate;
}
video.addEventListener("timeupdate", span3Update, false);
video.addEventListener("ended", span4Update, false);
</script>
http://freepdf-books.com
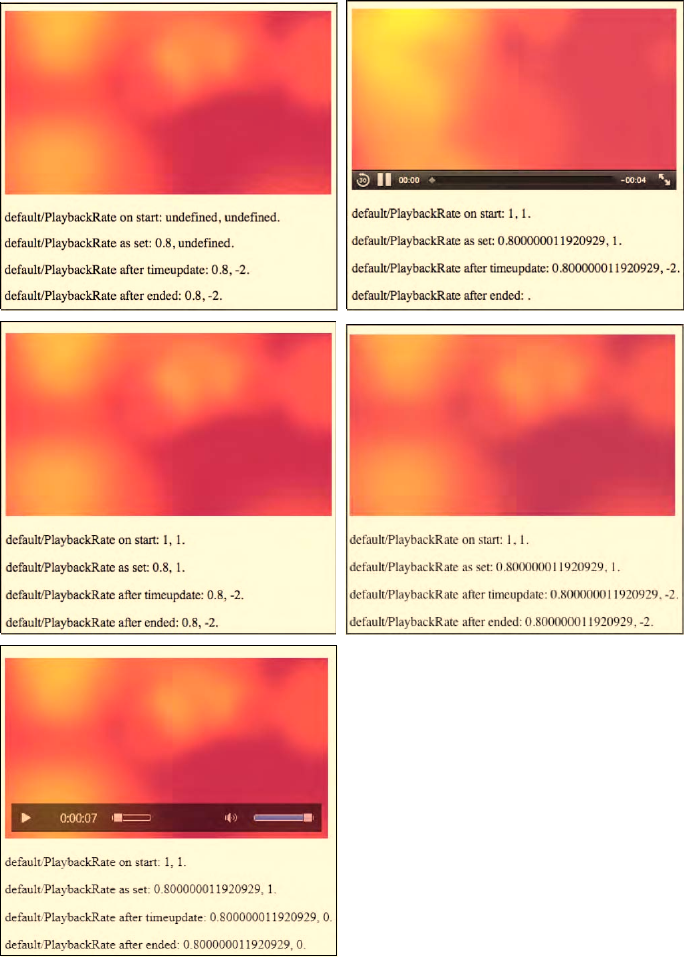
CHAPTER 4 ■ JAVASCRIPT API
106
Figure 4–11. Retrieving and setting playback rate attribute values in Firefox, Safari (top row), Opera,
Chrome (middle row), and IE (bottom)
Download from www.eBookTM.Com
http://freepdf-books.com
CHAPTER 4 ■ JAVASCRIPT API
107
As can be seen from the images in Figure 4–10, all browsers but Safari reach the end of the media
resource (they all display something after the ended event). In fact, they play back the media resource at
the normal playback speed, and none starts playing backward nor at a faster pace.
Only Safari reacts correctly to these attributes and changes the playback speed and playback
direction. It's quite impressive, actually, to see the video go backwards.
That none of the other browsers has implemented support of this attribute yet may be related to the
codec and media frameworks in use. The media frameworks in use in Chrome, Opera, IE, and Firefox
possibly require new functionality to play the codecs backward. In any case, at the time of this writing,
only Safari, using the QuickTime framework and MPEG-4 files, was able to correctly display the
standardized functionality.
4.2.3 States of the Media Element
The following IDL attributes, which represent web browser managed states of a media element, are
explained in this section:
• networkState
• readyState
• error
• buffered TimeRanges
• played TimeRanges
• seekable TimeRanges
@networkState
The @networkState IDL attribute represents the current state of network activity of the media
element. The available states are the following:
• NETWORK_EMPTY (0):
no @currentSrc has been identified. This may be because the element has yet to
be initialized, or because the resource selection hasn't found an @src attribute or
<source> elements and is waiting for a load() function call to set it.
• NETWORK_IDLE (1):
an @currentSrc has been identified and resource fetching is possible, but the
browser has suspended network activity while waiting for user activity. This
typically happens after the browser has downloaded the media element metadata
on a resource that is not set to @autoplay. It also happens when the media
resource has been partly downloaded, and the network buffering is suspended for
some reason. These could include a connection interruption, media resource file
corruption, a user abort, or for the simple fact that the browser has pre-buffered
more than enough media data ahead of the playback position so is waiting for the
user to catch up. Finally, it also occurs when a resource is completely downloaded.
A suspend event is fired as the browser enters the NETWORK_IDLE state.
• NETWORK_LOADING (2):
the browser is trying to download media resource data. The first time this happens
on a media resource as part of the resource selection, the loadstart event is fired.
If the @networkState changes at a later stage back to NETWORK_LOADING and the
browser is fetching media data, a progress event is fired periodically. If media
http://freepdf-books.com
CHAPTER 4 ■ JAVASCRIPT API
108
data is unexpectedly not arriving from the network while trying to load, a stalled
event is fired.
• NETWORK_NO_SOURCE (3):
the resource selection has identified a @currentSrc, but the resource has failed to
load or the URL couldn't be resolved, or there is no resource provided; i.e. no @src
or valid <source> children.
Listing 4–15 shows an example of how the different @networkState values can be reached – in
theory. The states are displayed before load, after loading the resource metadata, after a progress event,
and after changing the video's @src halfway through the video to a nonexistent resource. Figure 4–12
shows the results in the browsers.
Listing 4–15. Getting the networkState values for a media element
<video controls autoplay width="400">
<source src="HelloWorld.mp4" type="video/mp4">
<source src="HelloWorld.webm" type="video/webm">
<source src="HelloWorld.ogv" type="video/ogg">
</video>
<p>networkState on start: <span id="networkState_first"></span>.</p>
<p>networkState after loadedmetadata:
<span id="networkState_loadedmetadata"></span>.</p>
<p>networkState after progress:
<span id="networkState_progress"></span>.</p>
<p>networkState after timeupdate:
<span id="networkState_timeupdate"></span>.</p>
<script type="text/javascript">
video = document.getElementsByTagName("video")[0];
span1 = document.getElementById("networkState_first");
span1.innerHTML = video.networkState;
span2 = document.getElementById("networkState_loadedmetadata");
function span2Update(evt) {
span2.innerHTML = video.networkState;
}
span3 = document.getElementById("networkState_progress");
function span3Update(evt) {
span3.innerHTML = video.networkState;
}
span4 = document.getElementById("networkState_timeupdate");
function span4Update(evt) {
if (video.currentTime > video.duration/2) {
video.src = "notavail.mp4";
video.load();
span4.innerHTML = video.networkState;
}
}
video.addEventListener("loadedmetadata", span2Update, false);
video.addEventListener("progress", span3Update, false);
video.addEventListener("timeupdate", span4Update, false);
</script>
http://freepdf-books.com
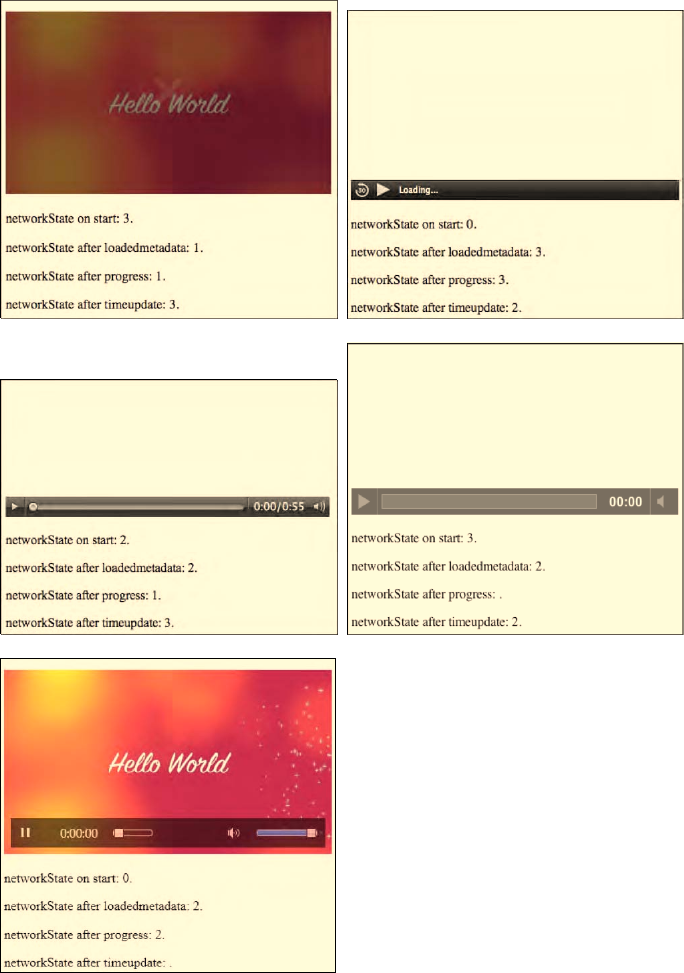
CHAPTER 4 ■ JAVASCRIPT API
109
Figure 4–12. Retrieving the networkState attribute values in Firefox, Safari (top row), Opera, Chrome
(middle row), and IE (bottom)
http://freepdf-books.com
CHAPTER 4 ■ JAVASCRIPT API
110
As can be seen, the browsers have some diverging interpretations of the specification probably
because they were implemented at different stages of the specification's evolution.
At the start, we can find the browsers in all possible networks states: Firefox and Chrome start in
@networkState NETWORK_NO_SOURCE (3), IE in NETWORK_LOADING (2), Opera in NETWORK_IDLE (1), and
Safari in NETWORK_EMPTY (0).
After the metadata is loaded, Opera, Chrome, and IE set the @networkState to NETWORK_LOADING (2),
Firefox to NETWORK_IDLE (1), and Safari to NETWORK_NO_SOURCE (3). It seems if a media resource is
buffered, NETWORK_IDLE is the correct state; if it's not buffered, NETWORK_LOADING seems right, but Safari's
state seems inexplicable.
Chrome never seems to throw the progress event. Opera and Firefox agree that they are in
NETWORK_IDLE state when hit by a progress event. Safari thinks it is still in NETWORK_NO_SOURCE state, and
IE is in NETWORK_LOADING state even though all downloading is done for this player. It also keeps a frame
behind.
After trying to load the new media resource in vain, Safari and Google Chrome enter the
NETWORK_LOADING state, while Firefox and Opera are in NETWORK_NO_SOURCE state. It seems IE doesn't raise
a timeupdate event.
Clearly, not all states can be relied on to be set consistently across browsers. So as you do your
implementations, be sure to test this well if you need this feature, then event raising is probably more
reliable than the states.
@readyState
The @readyState IDL attribute represents the current state of the media element in relation to its
playback position. The available states are the following:
• HAVE_NOTHING (0):
no information regarding the video resource is available, including nothing about
its playback position. This is typically the case before the media resource starts
downloading. Media elements whose @networkState attribute is set to
NETWORK_EMPTY are always in the HAVE_NOTHING @readyState.
• HAVE_METADATA (1):
the setup information of the media resource has been received, such that the
decoding pipeline is set up, the width and height of a video resource are known,
and the duration of the resource (or a good approximation of it) is available.
Seeking and decoding is now possible, even though no actual media data is
available yet for the current playback position. As the HAVE_METADATA state is
reached, a loadedmetadata event is fired.
• HAVE_CURRENT_DATA (2):
decoded media data for the current playback position is available, but either not
enough to start playing back continuously or the end of the playback direction has
been reached. If this state is reached for the first time, a loadeddata event is fired.
Note that this state may not be taken, but rather a HAVE_FUTURE_DATA or
HAVE_ENOUGH_DATA state may be directly achieved after HAVE_METADATA, in which
case the loadeddata event is fired upon reaching them for the first time. This state
will also be reached when waiting for enough data to download for playback; e.g.
after a seek or after the buffered data ran out—in this case, a waiting and a
timupdate event are fired.
• HAVE_FUTURE_DATA (3):
decoded media data for the current playback position and the next position is
available; e.g. the current video frame and the one following it. If this state is
reached for the first time, a canplay event is fired. If the element is not paused and
not seeking and HAVE_FUTURE_DATA is reached, a playing event is fired. If the
http://freepdf-books.com
CHAPTER 4 ■ JAVASCRIPT API
111
browser actually starts playback at this stage, it may still need to stop soon
afterward to buffer more data.
• HAVE_ENOUGH_DATA (4):
enough decoded media data is available for the current and next playback
positions. The network download rate is fast enough that the browser estimates
data will be fetched and decoded at the @defaultPlaybackRate sufficiently to allow
continuous playback to the end of the media resource without stopping for
further buffering. If this state is reached without going through HAVE_FUTURE_DATA,
a canplay event is fired. If the element is not paused and not seeking and this state
is reached without going through HAVE_FUTURE_DATA, a playing event is fired. If the
HAVE_ENOUGH_DATA state is reached for the first time, a canplaythrough event is
fired.
Listing 4–16 has an example of how the different @readyState values can be reached. We have taken
a longer video so that there is a possibility for the browsers not to load all the data from the start. We
check the state at specific events: after starting to load the video, after the metadata is loaded, after a
timeupdate event, and after a progress event. Figure 4–13 shows the results in the browsers.
Listing 4–16. Getting the readyState values for a media element
<video controls width="400">
<source src="video1.mp4" type="video/mp4">
<source src="video1.webm" type="video/webm">
<source src="video1.ogv" type="video/ogg">
</video>
<p>readyState on start: <span id="readyState_first"></span>.</p>
<p>readyState after loadedmetadata:
<span id="readyState_loadedmetadata"></span>.</p>
<p>readyState after progress:
<span id="readyState_progress"></span>.</p>
<p>readyState after timeupdate:
<span id="readyState_timeupdate"></span>.</p>
<script type="text/javascript">
video = document.getElementsByTagName("video")[0];
span1 = document.getElementById("readyState_first");
span1.innerHTML = video.readyState;
span2 = document.getElementById("readyState_loadedmetadata");
function span2Update(evt) {
span2.innerHTML = video.readyState;
}
span3 = document.getElementById("readyState_progress");
function span3Update(evt) {
span3.innerHTML = video.readyState;
}
span4 = document.getElementById("readyState_timeupdate");
function span4Update(evt) {
span4.innerHTML = video.readyState;
}
video.addEventListener("loadedmetadata", span2Update, false);
video.addEventListener("progress", span3Update, false);
video.addEventListener("timeupdate", span4Update, false);
</script>
3
http://freepdf-books.com

CHAPTER 4 ■ JAVASCRIPT API
112
Figure 4–13. Retrieving the readyState attribute values in Firefox, Safari (top row), Opera, Chrome (middle
row), and IE (bottom)
http://freepdf-books.com
CHAPTER 4 ■ JAVASCRIPT API
113
At the start, all browsers are in a HAVE_NOTHING (0) state.
After the video element has been initialized, Firefox and Safari go into the HAVE_FUTURE_DATA (3)
state, Opera and Chrome into the HAVE_ENOUGH_DATA (4), and IE into HAVE_CURRENT_DATA (2). IE's
choice seems odd, given that the browser is actually playing back the video.
As we press the play button and the video starts playing, the timeupdate event provides us with
HAVE_ENOUGH_DATA (4) ready state on Safari, Opera and Chrome, with HAVE_FUTURE_DATA (3) in Firefox,
and again with HAVE_CURRENT_DATA (2) in IE.
As we reach a progress event (which for IE, Opera and Chrome implies loading a previously
noncached resource), Firefox, Safari and Chrome show HAVE_ENOUGH_DATA (4) upon the progress event,
Opera says HAVE_NOTHING (0), and IE sticks with HAVE_CURRENT_DATA (2).
Clearly some alignment between the browser interpretations of the @readyState is still necessary.
@error
The @error IDL attribute represents the latest error state of the media element as a MediaError
object.
The MediaError object looks as follows:
interface MediaError {
const unsigned short MEDIA_ERR_ABORTED = 1;
const unsigned short MEDIA_ERR_NETWORK = 2;
const unsigned short MEDIA_ERR_DECODE = 3;
const unsigned short MEDIA_ERR_SRC_NOT_SUPPORTED = 4;
readonly attribute unsigned short code;
};
If there is no error, @error will be null, otherwise @error.code will have the error state. The
available states are as follows:
• MEDIA_ERR_ABORTED (1):
this error is raised when the fetching process for the media resource was aborted
by the browser at the user's request; e.g. when browsing to another web page. The
@networkState will be either NETWORK_EMPTY or NETWORK_IDLE, depending on when
the download was aborted. An abort event is fired.
• MEDIA_ERR_NETWORK (2):
this error is raised when any kind of network error caused the browser to stop
fetching the media resource after the resource was established to be usable; e.g.
when the network connection is interrupted. The @networkState will be either
NETWORK_EMPTY or NETWORK_IDLE, depending on when the download was aborted.
An error event is fired.
• MEDIA_ERR_DECODE (3):
this error is raised when decoding of a retrieved media resource failed and video
playback had to be aborted; e.g. because the media data was corrupted or the
media resource used a feature that the browser does not support. The
@networkState will be either NETWORK_EMPTY or NETWORK_IDLE, depending on when
the download was aborted. An error event is fired.
• MEDIA_ERR_SRC_NOT_SUPPORTED (4):
this error is raised when the media resource in the @src attribute failed to load or
the URL could not be resolved. The media resource may not load if the server or
the network failed or because the format is not supported. The @networkState will
be either NETWORK_EMPTY or NETWORK_IDLE, depending on when the download was
aborted. An error event is fired.
http://freepdf-books.com
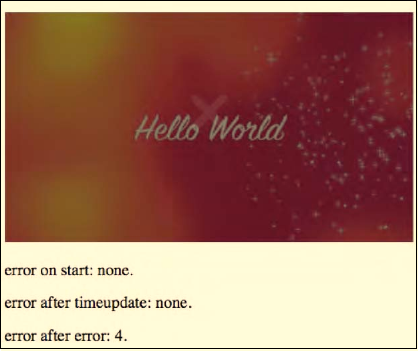
CHAPTER 4 ■ JAVASCRIPT API
114
Listing 4–17 has an example for catching an @error value. We catch an error after loading a
nonexistent media resource. Figure 4–14 shows the results in Firefox.
Listing 4–17. Getting the error values for a media element
<video controls autoplay width="400">
<source src="HelloWorld.mp4" type="video/mp4">
<source src="HelloWorld.webm" type="video/webm">
<source src="HelloWorld.ogv" type="video/ogg">
</video>
<p>error on start: <span id="error_first"></span>.</p>
<p>error after timeupdate: <span id="error_timeupdate"></span>.</p>
<p>error after error: <span id="error_error"></span>.</p>
<script type="text/javascript">
video = document.getElementsByTagName("video")[0];
span1 = document.getElementById("error_first");
span1.innerHTML = (video.error ? video.error.code : "none");
span2 = document.getElementById("error_timeupdate");
function span2Update(evt) {
if (video.currentTime > video.duration/2) {
video.src = "notavail.mp4";
video.load();
span2.innerHTML = (video.error ? video.error.code : "none");
}
}
span3 = document.getElementById("error_error");
function span3Update(evt) {
span3.innerHTML = (video.error ? video.error.code : "none");
}
video.addEventListener("timeupdate", span2Update, false);
video.addEventListener("error", span3Update, false);
</script>
Figure 4–14. Retrieving the error attribute values in Firefox
http://freepdf-books.com
CHAPTER 4 ■ JAVASCRIPT API
115
The browsers throw an error event after which @error.code is MEDIA_ERR_SRC_NOT_SUPPORTED. All
browsers have the same behavior.
@buffered
The @buffered IDL attribute retains the ranges of the media resource that the browser has buffered.
The value is stored in a normalized TimeRanges object, which represent a list of ranges (intervals or
periods) of time.
The TimeRanges object looks as follows:
interface TimeRanges {
readonly attribute unsigned long length;
float start(in unsigned long index);
float end(in unsigned long index);
};
The IDL attributes of the TimeRanges object have the following meaning:
• @length: contains the number of ranges in the object, counting from 0 to @length - 1.
• start(i): returns the start time for range number i in seconds from the start of the
timeline.
• end(i): returns the end time for range number i in seconds from the start of the
timeline.
• start(i) and end(i) raise INDEX_SIZE_ERR exceptions if called with an index
greater than or equal to @length.
A normalized TimeRanges object is one that consists only of ranges that:
• Aren't empty: start(i) < end(i) for all i.
• Are ordered, don't overlap, and don't touch: start(i) > end(j) for all j<i.
• If adjacent ranges would need to be created, they are instead folded into one
bigger range.
The timeline of the @buffered IDL attribute is the timeline of the media resource.
Typically, the @buffered IDL attribute contains a single time range that starts at the @startTime of
the media resource and grows as media data is downloaded until all of it has been received. However, for
a large resource where seeking is undertaken to later points in the resource, the browser may store
multiple byte ranges, thus creating multiple TimeRanges.
Note that browsers are free to discard previously buffered data, so time ranges that may be available
earlier are not guaranteed to be still available at a later time.
Listing 4–18 retrieves the @buffered value at different playback states and prints the ranges. Figure
4–15 shows the results in the four browsers.
Listing 4–18. Getting the buffered ranges for a media element
<video controls width="400">
<source src="video1.mp4" type="video/mp4">
<source src="video1.webm" type="video/webm">
<source src="video1.ogv" type="video/ogg">
</video>
<p>buffered on start: <span id="buffered_first"></span>.</p>
<p>buffered after loadedmetadata:
http://freepdf-books.com
CHAPTER 4 ■ JAVASCRIPT API
116
<span id="buffered_loadedmetadata"></span>.</p>
<p>buffered after seeking: <span id="buffered_seeking"></span>.</p>
<p>buffered after timeupdate: <span id="buffered_timeupdate"></span>.</p>
<script type="text/javascript">
function printTimeRanges(tr) {
if (tr == null) return "undefined";
s= tr.length + ": ";
for (i=0; i<tr.length; i++) {
s += tr.start(i) + " - " + tr.end(i) + "; ";
}
return s;
}
video = document.getElementsByTagName("video")[0];
span1 = document.getElementById("buffered_first");
span1.innerHTML = printTimeRanges(video.buffered);
span2 = document.getElementById("buffered_loadedmetadata");
function span2Update(evt) {
span2.innerHTML = printTimeRanges(video.buffered);
span3 = document.getElementById("buffered_seeking");
video.currentTime = video.duration/2;
video.play();
span3.innerHTML = printTimeRanges(video.buffered);
}
span4 = document.getElementById("buffered_timeupdate");
function span4Update(evt) {
span4.innerHTML = printTimeRanges(video.buffered);
}
video.addEventListener("loadedmetadata", span2Update, false);
video.addEventListener("timeupdate", span4Update, false);
</script>
Download from www.eBookTM.Com
http://freepdf-books.com
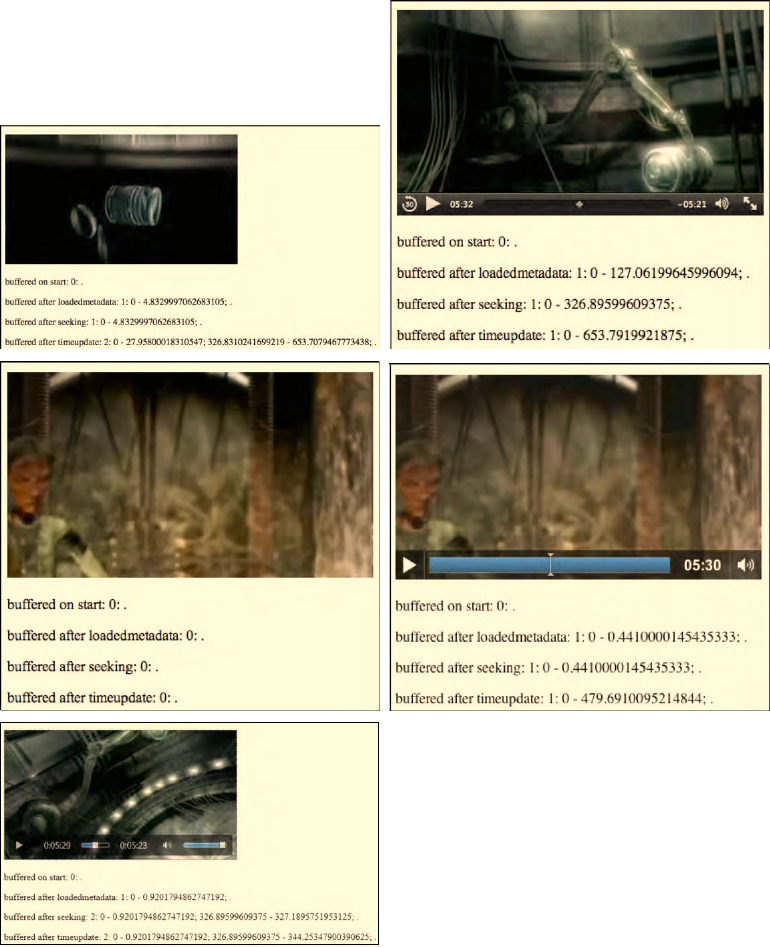
CHAPTER 4 ■ JAVASCRIPT API
117
Figure 4–15. Retrieving the buffered attribute values in Firefox, Safari (top row), Opera, Chrome (middle
row), and IE (bottom)
http://freepdf-books.com
CHAPTER 4 ■ JAVASCRIPT API
118
As the screenshots show, Opera hasn't implemented the @buffered attribute yet and doesn't even
initialize the structure. All others – Firefox, Safari, Chrome, and IE – provide the attribute and update its
content.
The attribute also exposes some of the buffering strategy. Safari seems to load as much of the media
data as possible (note that this example is on a fast connection), while Firefox only prebuffers the next
roughly 25 seconds and doesn't continue loading more until the end of this buffer is reached.
@played
The @played IDL attribute retains the ranges of the media resource the browser has played. The
value is stored in a normalized TimeRanges object (see @buffered attribute). The timeline of the @played
IDL attribute is the timeline of the media resource.
Typically, the @played IDL attribute contains a single time range that starts at the @startTime of the
media resource and grows as more media data is downloaded and played until all the media data has
been received. However, for a large resource where seeking is undertaken to alter points in the resource,
the browser may store multiple byte ranges, thus creating multiple time ranges.
Listing 4–19 retrieves the @played value at different playback states and prints the ranges basically
the same way as the @buffered example. Figure 4–16 shows the results in the browsers.
Listing 4–19. Getting the played ranges for a media element
<video controls width="400">
<source src="video1.mp4" type="video/mp4">
<source src="video1.webm" type="video/webm">
<source src="video1.ogv" type="video/ogg">
</video>
<p>played on start: <span id="played_first"></span>.</p>
<p>played after loadedmetadata:
<span id="played_loadedmetadata"></span>.</p>
<p>played after seeking: <span id="played_seeking"></span>.</p>
<p>played after timeupdate: <span id="played_timeupdate"></span>.</p>
<script type="text/javascript">
function printTimeRanges(tr) {
if (tr == null) return "undefined";
s = tr.length + ": ";
for (i=0; i<tr.length; i++) {
s += tr.start(i) + " - " + tr.end(i) + "; ";
}
return s;
}
video = document.getElementsByTagName("video")[0];
span1 = document.getElementById("played_first");
span1.innerHTML = printTimeRanges(video.played);
span2 = document.getElementById("played_loadedmetadata");
function span2Update(evt) {
span2.innerHTML = printTimeRanges(video.played);
span3 = document.getElementById("played_seeking");
video.currentTime = video.duration/2;
video.play();
span3.innerHTML = printTimeRanges(video.played);
}
span4 = document.getElementById("played_timeupdate");
function span4Update(evt) {
span4.innerHTML = printTimeRanges(video.played);
http://freepdf-books.com
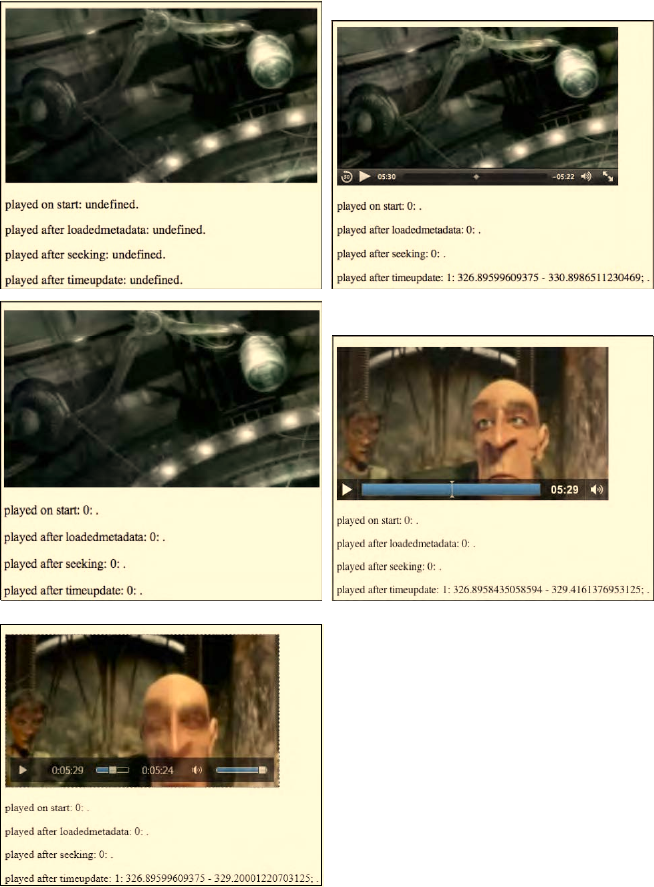
CHAPTER 4 ■ JAVASCRIPT API
119
}
video.addEventListener("loadedmetadata", span2Update, false);
video.addEventListener("timeupdate", span4Update, false);
</script>
Figure 4–16. Retrieving the played attribute values in Firefox, Safari (top row), Opera, Chrome (middle
row), and IE (bottom).
http://freepdf-books.com
CHAPTER 4 ■ JAVASCRIPT API
120
As before, it seems that neither Firefox nor Opera has implemented support for the @played IDL
attribute. Chrome, Safari and IE support the attribute and report the played time ranges correctly. Note
that if the user seeks to different time ranges and plays them back, several time ranges will be reported in
the @played attribute. We'll leave this as an exercise to the user.
@seekable
The @seekable IDL attribute retains the ranges of the media resource to which the browser can seek.
The value is stored in a normalized TimeRanges object (see @buffered attribute). The timeline of the
@seekable IDL attribute is the timeline of the media resource.
Typically, the @seekable IDL attribute contains a single time range that starts at the @startTime of
the media resource and ends at the media resource @duration. If the duration is not available from the
start, such as on an infinite stream, the time range may change continuously and just keep a certain
window available.
Listing 4–20 retrieves the @seekable value at different playback states and prints the ranges basically
the same way as the @buffered example. Figure 4–17 shows the results in the browsers.
Listing 4–20. Getting the seekable ranges for a media element
<video controls width="400">
<source src="video1.mp4" type="video/mp4">
<source src="video1.webm" type="video/webm">
<source src="video1.ogv" type="video/ogg">
</video>
<p>seekable on start: <span id="seekable_first"></span>.</p>
<p>seekable after loadedmetadata:
<span id="seekable_loadedmetadata"></span>.</p>
<script type="text/javascript">
function printTimeRanges(tr) {
if (tr == null) return "undefined";
s = tr.length + ": ";
for (i=0; i<tr.length; i++) {
s += tr.start(i) + " - " + tr.end(i) + "; ";
}
return s;
}
video = document.getElementsByTagName("video")[0];
span1 = document.getElementById("seekable_first");
span1.innerHTML = printTimeRanges(video.seekable);
span2 = document.getElementById("seekable_loadedmetadata");
function span2Update(evt) {
span2.innerHTML = printTimeRanges(video.seekable);
}
video.addEventListener("loadedmetadata", span2Update, false);
</script>
http://freepdf-books.com

CHAPTER 4 ■ JAVASCRIPT API
121
Figure 4–17. Retrieving the seekable attribute values in Firefox, Safari (top row), Opera, Chrome (middle
row), and IE (bottom)
http://freepdf-books.com
CHAPTER 4 ■ JAVASCRIPT API
122
As before, it seems that neither Firefox nor Opera has implemented support for the @seekable IDL
attribute. Chrome, Safari and IE support the attribute and report the full duration of the media resource
as seekable once the resource's metadata is loaded. You can simply assume for Firefox and Opera that
the media resource as loaded is seekable from @startTime=0 to @duration.
4.3 Control Methods in the API
The following JavaScript control methods defined on media elements are explained in this section:
• load()
• play()
• pause()
• canPlayType()
load()
The load() control method, when executed on a media element, causes all activity on a media
resource to be suspended (including resource selection and loading, seeking and playback), all network
activity to be seized, the element to be reset (including removal of pending callbacks and events), and
the resource selection and loading process to be restarted.
In a typical scenario for a successful load(), roughly the following sequence of steps will happen:
• Initialization:
• @networkState is set to NETWORK_EMPTY.
• @readyState is set to HAVE_NOTHING.
• @paused is set to “true.”
• @seeking is set to “false.”
• @ended is set to “false.”
• @currentTime is set to 0.
• @error is set to null.
• @buffered, @played, and @seekable are set to empty.
• @playbackRate is set to the value of @defaultPlaybackRate.
• Resource selection:
• @currentSrc is set from the given @src value or the <source> elements.
• @networkState is set to NETWORK_LOADING.
• the loadstart event is fired.
• Resource fetching:
• begin downloading the media resource identified in the @currentSrc
attribute.
http://freepdf-books.com
CHAPTER 4 ■ JAVASCRIPT API
123
• progress event is fired roughly every 350ms or for every byte received
(whichever is less frequent).
• @preload and @autoplay values help determine how much to download.
• when the resource's metadata has been downloaded:
@startTime is determined.
@currentTime is set to @startTime.
@duration is determined.
the durationchange event is fired.
@videoWidth and @videoHeight are determined (if video element).
@seekable is determined.
@readyState is set to HAVE_METADATA.
the loadedmetadata event is fired.
• seek to the appropriate start time given in the media resource or the
@currentSrc URI:
@currentTime is set to this start time.
the timeupdate event is fired.
• potentially more media data is downloaded (and decoded):
@readyState changes to HAVE_CURRENT_DATA or higher.
the loadeddata event is fired.
the canplay event is fired for any @readyState higher than
HAVE_FUTURE_DATA.
@buffered is updated.
• @networkState is set to NETWORK_IDLE.
• playback start, if @autoplay is “true”:
• download more data until @readyState is HAVE_FUTURE_DATA or higher
(preferably HAVE_ENOUGH_DATA so playback doesn't get stalled).
• @paused is set to “false.”
• the play event is fired.
• the playing event is fired.
• playback is started.
Note that many error and network state situations are also dealt with through the loading process.
For example, if the network download stalls and the browser hasn't received data for more than about 3
seconds, a stalled event will be fired.
Several previous examples in this chapter have made use of the load() control method; see e.g.
Listings 4–15 and 4–17. We will not include another example here.
http://freepdf-books.com
CHAPTER 4 ■ JAVASCRIPT API
124
play()
The play() control method executed on a media element sets the @paused IDL attribute to “false”
and starts playback of the media resource, downloading and buffering media data as required.
In a typical scenario for a successful play(), roughly the following sequence of steps will happen:
• if @networkState is NETWORK_EMPTY—i.e. no @currentSrc has been determined yet
(e.g. because the @src of the element was empty as the element was set up, but
now the attribute was set through JavaScript and the resource can be fetched)—
“resource selection” and “resource fetching,” as described for load() above, are
executed.
• if @ended is “true” and the playback direction is forward, the browser seeks to
@startTime.
• @currentTime is set to @startTime.
• timeupdate event is fired.
• “start playback” as described for load() above is executed.
We'll look at an example use of play() together with pause().
pause()
The pause() control method, when executed on a media element, sets the @paused IDL attribute to
“true” and stops playback of the media resource.
In a typical scenario for a successful pause(), roughly the following sequence of steps will happen:
if @networkState is NETWORK_EMPTY—i.e. no @currentSrc has been determined yet—“resource
selection” and “resource fetching,” as described for load() above, are executed. @currentSrc may not
have been determined yet because the @src of the element was empty as the element was set up, but
now the attribute was set through JavaScript and the resource can be fetched.
• pause playback:
• @paused is set to “true.”
• timeupdate event is fired.
• pause event is fired.
• downloading of more media data is potentially suspended and a suspend event is
fired if the browser is far ahead of the current playback position.
Listing 4–21 makes use of both, play() and pause(). At first, no media resource is specified for a
video element. Then, we set the @src attribute, depending on what format a browser supports, and call
play(). Later we call pause() halfway through playing. Figure 4–18 shows the results in the browsers.
Listing 4–21. Using the play() and pause() control methods for a media element
<video controls width="400">
</video>
<p>currentSrc on start: <span id="currentSrc_first"></span>.</p>
<p>currentSrc after loadedmetadata:
<span id="currentSrc_loadedmetadata"></span>.</p>
<p>currentTime on pause: <span id="currentTime_pause"></span>.</p>
<script type="text/javascript">
video = document.getElementsByTagName("video")[0];
http://freepdf-books.com
CHAPTER 4 ■ JAVASCRIPT API
125
source = document.getElementsByTagName("source");
span1 = document.getElementById("currentSrc_first");
span1.innerHTML = video.currentSrc;
if (video.canPlayType("video/ogg") != "") {
video.src = "HelloWorld.ogv";
} else if (video.canPlayType("video/webm") != "") {
video.src = "HelloWorld.webm";
} else if (video.canPlayType("video/mp4") != "") {
video.src = "HelloWorld.mp4";
}
video.play();
span2 = document.getElementById("currentSrc_loadedmetadata");
function span2Update(evt) { span2.innerHTML = video.currentSrc; }
function callpause(evt) {
if (video.currentTime > video.duration/2) {
video.pause();
}
}
span3 = document.getElementById("currentTime_pause");
function span3Update(evt) { span3.innerHTML = video.currentTime; }
video.addEventListener("loadedmetadata", span2Update, false);
video.addEventListener("timeupdate", callpause, false);
video.addEventListener("pause", span3Update, false);
</script>
http://freepdf-books.com
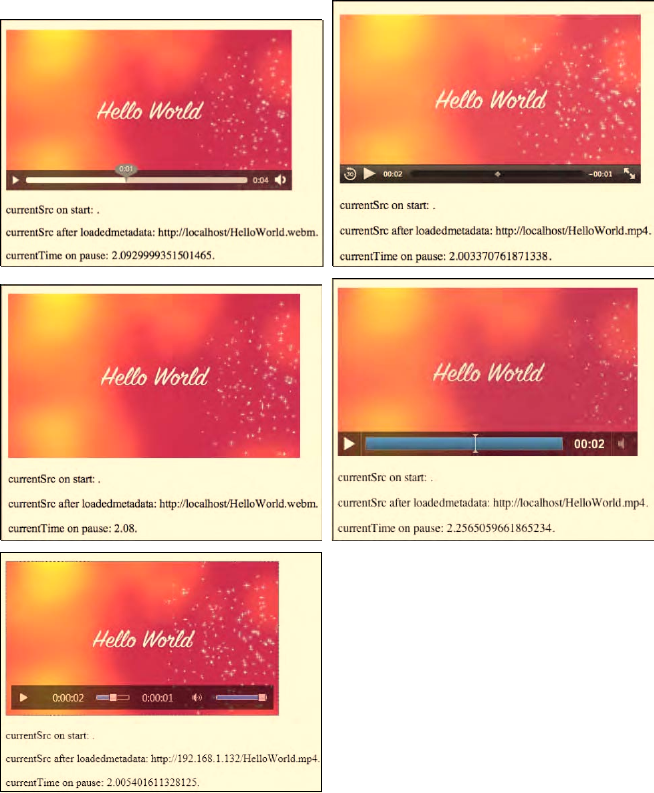
CHAPTER 4 ■ JAVASCRIPT API
126
Figure 4–18. Using the play() and pause() control methods in Firefox, Safari (top row), Opera, Chrome
(middle row), and IE (bottom)
All browsers support this functionality.
canPlayType()
The canPlayType(in DOMString type) control method for a media element takes a string as a
parameter that is of a MIME type and returns whether the browser is confident that it can play back that
media type.
Possible return values are:
Download from www.eBookTM.Com
http://freepdf-books.com

CHAPTER 4 ■ JAVASCRIPT API
127
• the empty string “”:
the browser is confident it cannot decode and render this type of media resource
in a media element.
• "maybe":
the browser is not sure if it can or cannot render this type of media resource in a
media element.
• "probably":
the browser is confident that it can decode and render this type of media resource
in a media element; because this implies knowledge about whether the codecs in
a container format are supported by the browser. Browsers are encouraged to only
return “probably” for a MIME type that includes the codecs parameter.
The previous example in Listing 4–21 has made use of the canPlayType() control method, and it has
also been used in Chapter 2 in Listings 2–28 and 2–29.
4.4 Events
In the following table we summarize all the available events, many of which we have already used in
previous examples. This is just an overview table to find everything in one place.
Event Is dispatched when... Preconditions
loadstart the browser begins looking for media data, as
part of the resource selection upon media
element load, or load(), play(), or pause().
@networkState is NETWORK_LOADING
for the first time.
progress the browser is fetching media data. @networkState is NETWORK_LOADING.
suspend the browser has paused fetching media data,
but does not have the entire media resource
downloaded yet.
@networkState is NETWORK_IDLE.
abort the browser was stopped from fetching the
media data before it is completely
downloaded, but not due to an error—rather
due to a user action, such as browsing away.
@error is MEDIA_ERR_ABORTED.
@networkState is either
NETWORK_EMPTY or NETWORK_IDLE,
depending on when the download
was aborted.
error an error occurred while fetching the media
data.
@error is MEDIA_ERR_NETWORK or
higher. @networkState is either
NETWORK_EMPTY or NETWORK_IDLE,
depending on when the download
was aborted.
http://freepdf-books.com

CHAPTER 4 ■ JAVASCRIPT API
128
Event Is dispatched when... Preconditions
emptied a media element has just lost the network
connection to a media resource, either
because of a fatal error during load that's
about to be reported or because the load()
method was invoked while the resource
selection algorithm was already running.
@networkState is NETWORK_EMPTY for
the first time and all the IDL
attributes are in their initial states.
stalled the browser tried to fetch media data, but data
has not arrived for more than 3 seconds.
@networkState is NETWORK_LOADING.
play playback has begun upon media element load
with an @autoplay attribute through user
interaction or after the play() method has
returned.
@paused is newly “false.”
pause playback has been paused either through user
interaction, or after the pause() method has
returned.
@paused is newly “true”.
loadedmetadata the browser has just set up the decoding
pipeline for the media resource and
determined the @duration and dimensions.
@readyState is HAVE_METADATA or
greater for the first time.
loadeddata the browser can render the media data at the
current playback position for the first time.
@readyState is HAVE_CURRENT_DATA or
greater for the first time.
waiting playback has stopped because the next media
data is not yet available from the network, but
the browser expects that frame to become
available in due course; i.e. less than 3 seconds.
This can be after a seek or when the network is
unexpectedly slow.
@readyState is newly equal to or less
than HAVE_CURRENT_DATA, and
@paused is “false.” Either @seeking is
“true,” or the current playback
position is not contained in any of
the ranges in @buffered.
playing playback has started. @readyState is newly equal to or
greater than HAVE_FUTURE_DATA,
@paused is “false,” @seeking is
“false,” or the current playback
position is contained in one of the
ranges in @buffered.
canplay the browser can start or resume playback of
the media resource, but without being certain
of being able to play through at the given
playback rate without a need for further
buffering.
@readyState newly increased to
HAVE_FUTURE_DATA or greater.
http://freepdf-books.com

CHAPTER 4 ■ JAVASCRIPT API
129
Event Is dispatched when... Preconditions
canplaythrough the browser is certain that with the given
media data, the rate at which the network
delivers further media data and the given
playback rate, the media resource can play
through without further buffering.
@readyState is newly equal to
HAVE_ENOUGH_DATA.
seeking the browser is seeking and the seek operation
is taking long enough that the browser has
time to fire the event.
@seeking is “true” and @readyState
is less than HAVE_FUTURE_DATA.
seeked the browser is finished seeking. @seeking has changed to “false.”
timeupdate the current playback position changed as part
of normal playback every 15 to 250ms. It is also
fired when seeking, or when fetching a new
media resource. It is also fired when playback
has ended, is paused, is stopped due to an
error or because the media resource needs to
buffer from the network.
@seeking is newly “true” OR
@startTime is newly set OR @ended
is newly “true” OR @paused is newly
“true” OR @readyState newly
changed to a value lower than
HAVE_FUTURE_DATA without @ended
is “true” OR @error is newly non-
null with @readyState being
HAVE_METADATA or more OR @seeking
is “false,” @paused is “false,” @ended
is “false,” @readyState is at least
HAVE_FUTURE_DATA, and the last
timeupdate was fired more than 15-
250ms ago
ended playback has stopped because the end of the
media resource was reached.
@ended is newly “true” and
@currentTime is equal to @startTime
plus @duration.
ratechange either the default playback rate or the playback
rate has just been updated.
@defaultPlaybackRate or
@playbackRate is newly changed.
durationchange the duration has just been changed upon
media element load, or after an explicit change
of @src and media resource fetching, or when
the browser has a better estimate; e.g. during
streaming.
@readyState is HAVE_METADATA or
greater for the first time.
volumechange either the volume or the muted state of the
media element changed.
@volume or @muted changed.
http://freepdf-books.com
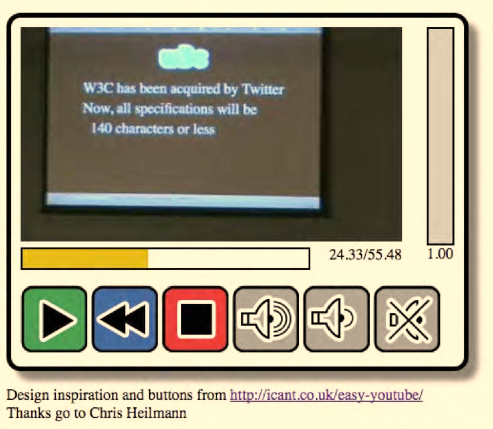
CHAPTER 4 ■ JAVASCRIPT API
130
4.5 Custom Controls
The JavaScript API's foremost use case will be to roll your own controls with a style that looks identical
across all browsers. Because this is such a common use case, we provide you with an example on how to
do so. This includes a skeleton of the HTML code, some CSS, and the required JavaScript calls to control
it.
We want to build the player displayed in Figure 4–19. It is inspired by an accessible YouTube player
implemented by Christian Heilmann and available at http://icant.co.uk/easy-youtube/.
Figure 4–19. A custom video player using the JavaScript API
The player consists of several interface elements. It has a progress display (the bar underneath the
video), behind which it shows the seconds played and the video duration. Below that is a collection of
buttons to start playing (a play/pause toggle), rewind by 5sec, stop playback (and reset to file start),
increase volume by 10 percent, reduce volume by 10 percent, and mute/unmute. To the right of the
video is the volume display. It is grayed out when muted, and the volume level is shown as a percentage
in height.
We start implementing this player by providing a skeleton of the HTML code that creates this player.
Listing 4–22 shows the skeleton.
Listing 4–22. An HTML markup skeleton for the video player in Figure 4–19
<div id="player">
<div id="video">
<video width="400" height="225">
<source src="video2.mp4" type="video/mp4">
<source src="video2.webm" type="video/webm">
<source src="video2.ogv" type="video/ogg">
</video>
http://freepdf-books.com
CHAPTER 4 ■ JAVASCRIPT API
131
<div id="positionview">
<div id="transportbar"><div id="position"></div></div>
<div id="time">
<span id="curTime">00:00</span>/<span id="duration">00:00</span>
</div>
</div>
</div>
<div id="volumecontrol">
<div id="volumebar"><div id="volume"></div></div>
<div id="vol"></div>
</div>
<div style="clear: both;"></div>
<div id="controls">
<div><input id="play" type="image" src="0.gif" alt="Play"></div>
<div><input id="repeat" type="image" src="0.gif" alt="Repeat"></div>
<div><input id="stop" type="image" src="0.gif" alt="Stop"></div>
<div><input id="louder" type="image" src="0.gif" alt="Louder"></div>
<div><input id="quieter" type="image" src="0.gif" alt="Quieter">
</div>
<div><input id="mute" type="image" src="0.gif" alt="Mute"></div>
</div>
</div>
A <div> encapsulates the complete player code such that we can later give it a style that shows it as
an entity. Inside the #player div are three main divs: #video, #volumecontrol, and #controls. The
#video part contains the video element, as well as the transport bar and time displays. The
#volumecontrol contains the volume bar and volume number display. The #controls contains all the
buttons.
Note that the video element does not have a @controls attribute—as we want to run these controls
ourselves. Also notice how the <input> elements that represent the buttons have been made accessible
by making them of type “image” and giving them an @alt attribute value. Since we are going to provide
the actual buttons in CSS through a single PNG, we have to put a placeholder 1x1 px GIF into the @src
attribute of the <input> elements so that they do not show up as broken images.
Next, we move on to styling this HTML skeleton. Listing 4–23 shows an extract of the CSS in use.
Listing 4–23. CSS for the HTML skeleton in Listing 4–22 and the video player in Figure 4–18
<style type="text/css">
#player {
padding: 10px;
border: 5px solid black;
border-radius: 15px;
box-shadow: 10px 10px 5px gray;
box-sizing: content-box;
max-width: 455px;
}
#positionview {
width: 400px; height: 40px;
}
#transportbar {
height: 20px;
width: 300px;
position: relative;
float: left;
http://freepdf-books.com
CHAPTER 4 ■ JAVASCRIPT API
132
border: 2px solid black;
}
#position {
background: #D7BC28;
height: 20px;
width: 0px;
}
#time {
position: relative;
float: right;
}
#video {
position: relative;
float: left;
padding: 0;
margin: 0;
}
// include your own CSS for the volume control here and
// style every button with an offset on buttons.png (we only show one)
#controls div input {
background:url(buttons.png) no-repeat top left;
border:none;
height: 60px;
width: 60px;
padding: 5px;
display: inline-block;
}
#controls div #repeat {
background-position:0 -901px;
}
</style>
The player div gets a nice border, rounded corners, and a shadow to make it stand out. For the
position display we have an outer <div> and an inner <div>, where the outer one provides the box into
which the playback position can grow and the inner one grows with the playback speed of the video. The
buttons all use the same PNG with an offset and a 60x60 px cropping area.
Finally we add the JavaScript that will make it all work in Listing 4–24.
Listing 4–24. JavaScript for the HTML skeleton in Listing 4–22 and the video player in Figure 4–19
<script type="text/javascript">
video = document.getElementsByTagName("video")[0];
position = document.getElementById("position");
curTime = document.getElementById("curTime");
duration = document.getElementById("duration");
volume = document.getElementById("volume");
vol = document.getElementById("vol");
play = document.getElementById("play");
repeat = document.getElementById("repeat");
stop = document.getElementById("stop");
louder = document.getElementById("louder");
quieter = document.getElementById("quieter");
mute = document.getElementById("mute");
http://freepdf-books.com
CHAPTER 4 ■ JAVASCRIPT API
133
video.addEventListener("loadedmetadata", init, false);
function init(evt) {
duration.innerHTML = video.duration.toFixed(2);
vol.innerHTML = video.volume.toFixed(2);
}
video.addEventListener("timeupdate", curTimeUpdate, false);
function curTimeUpdate(evt) {
curTime.innerHTML = video.currentTime.toFixed(2);
position.style.width = 300*video.currentTime/video.duration + "px";
}
video.addEventListener("volumechange", dispVol, false);
function dispVol(evt) {
vol.innerHTML = video.volume.toFixed(2);
}
play.addEventListener("click", togglePlay, false);
function togglePlay(evt) {
if (video.paused == false) {
video.pause();
play.style.backgroundPosition = "0 0";
} else {
video.play();
play.style.backgroundPosition = "0 -151px";
}
}
repeat.addEventListener("click", rewind, false);
function rewind(evt) {
video.currentTime = video.currentTime - 2.0;
}
stop.addEventListener("click", restart, false);
function restart(evt) {
video.pause();
play.style.backgroundPosition = "0 0";
video.currentTime = 0;
}
louder.addEventListener("click", volInc, false);
function volInc(evt) {
changeVolume(video.volume+0.1);
}
quieter.addEventListener("click", volDec, false);
function volDec(evt) {
changeVolume(video.volume-0.1);
}
mute.addEventListener("click", toggleMute, false);
function toggleMute(evt) {
video.muted = !video.muted;
http://freepdf-books.com
CHAPTER 4 ■ JAVASCRIPT API
134
if (video.muted) {
volume.className = 'disabled';
} else {
volume.className = '';
}
}
function changeVolume(changeTo) {
if(video.muted){
toggleMute();
}
if(changeTo > 1.0) {
changeTo = 1.0;
} else if (changeTo < 0.0) {
changeTo = 0.0;
}
volume.style.height = 225*changeTo +'px';
volume.style.marginTop = 225-(225*changeTo) + 'px';
video.volume = changeTo;
}
</script>
The full JavaScript for the player is replicated here. Take a minute to go through the code. Note how
every button has an onclick event handler and there are extra event handlers for the loadedmetadata,
timeupdate, and volumechange events. You will notice many familiar IDL attributes: video.duration,
video.volume, video.currentTime, video.paused, and video.muted are all used here to provide the
functions behind the buttons. Finally, you will also notice the play() and pause() control methods.
4.5 Summary
In this chapter we introduced the JavaScript API of the <video> and <audio> elements.
We have approached this in a structured way, starting with the IDL attributes that represent the
content attributes from the HTML markup, such as @src, @width, and @height. Then we discussed the
IDL attributes that represent resource features, such as @currentSrc, @duration, and @volume. Then we
looked at the playback related IDL attributes such as @currentTime, @paused, and @ended.
After the IDL attributes, we introduced the states of a media resource, including networkState,
readyState, and played, buffered, or seekable TimeRanges.
After the states came the control methods load(), play(), pause(), and canPlayType().
We finished analyzing the JavaScript API with a listing of the events that the media elements fire.
There is a fair number, including loadedmetadata, canplay, playing, pause, seeking, volumechange,
durationchange, and ended.
We concluded the chapter with a practical use case of the JavaScript API: running your own custom
controls.
We now have all the tools at hand to successfully use <audio> and <video> in HTML5 applications.
The next chapters will analyze how <audio> and <video> interact with other elements and JavaScript
functionalities in HTML5, including SVG, the Canvas, and WebWorkers.
http://freepdf-books.com

C H A P T E R 5
■ ■ ■
135
HTML5 Media and SVG
SVG stands for Scalable Vector Graphics and is a language used to describe two-dimensional graphical
objects in XML. In the past, SVG has been a standalone format used in web browsers through Adobe
Flash as an embedded resource or as an image resource. Nowadays, all modern browsers support SVG
natively, including Internet Explorer 9.
The main use of SVG on the Web is to allow the creation of interactive graphics with many objects
that can be viewed at any zoom-factor without loss of resolution. Maps, technical diagrams, and
hierarchical system diagrams are typically good examples of uses of SVG.
SVG Features
The current version of SVG supported in browsers is SVG 1.1.1 The next version, SVG 1.22, also exists as a
working draft and has a large number of additional features specified in so-called modules. In particular,
it has a “Media” module3 that contains <audio> and <video> elements. Of all the modern web browsers,
only Opera supports some of the additional SVG 1.2 features, including the Media module.
In this chapter, we will look at how SVG 1.1 features can be used to manipulate HTML5 video.
Because <video> has a visual dimension, SVG applies to it. It doesn't really apply to <audio>, though you
can render SVG graphics together with audio elements. We will focus on SVG 1.1 features, but also look
at the SVG 1.2 Media module to see what additional functionalities it provides.
We cannot give an in-depth introduction to SVG here, but since we will use only a few of the
elements, it will be easy to follow. For a bit of a background, here is a list of the different types of
elements that exist in SVG 1.1:
• structural elements (<svg>, <defs>, <desc>, <title>, <metadata>, <symbol>, <use>,
<g>, <switch>, <a>, <view>).
• shapes (<circle>, <ellipse>, <rect>, <line>, <polyline>, <polygon>, <path>,
<cursor>).
• text (<text>, <tspan>, <tref>, <textPath>, <altGlyph>, <altGlyphDef>,
<altGlyphItem>, <glyphRef>, <font> and font features).
• styling (<style>, <marker>, <linearGradient>, <radialGradient>, <stop>, <pattern>).
• effects (<clipPath>, <mask>, <filter> and filter effects).
1 See http://www.w3.org/TR/SVG/intro.html for specification.
2 See http://www.w3.org/TR/SVG12/
3 See http://www.w3.org/TR/2004/WD-SVG12-20041027/media.html
http://freepdf-books.com

CHAPTER 5 ■ HTML5 MEDIA AND SVG
136
•animations (<animate>, <set>, <animateMotion>, <animateTransform>,
<animateColor>, <mpath>).
•<script>, <image> and <foreignObject>.
If you are looking for some good resources to help you get started with using SVG in the different
browsers, we highly recommend the following links:
•Firefox: https://developer.mozilla.org/En/SVG_in_Firefox
•WebKit (Chrome and Safari): http://webkit.org/projects/svg/status.xml
•Opera: http://www.opera.com/docs/specs/opera95/svg/
•IE: http://blogs.msdn.com/b/ie/archive/2010/03/18/svg-in-ie9-roadmap.aspx
This Wikipedia article is very useful to check which browser has implementation support for which 1.1 feature:
http://en.wikipedia.org/wiki/Comparison_of_layout_engines_(Scalable_Vector_Graphics).
5.1 Use of SVG with <video>
There are three different ways in which the <video> element and SVG can interact: inline SVG, SVG for
masking, and video in SVG.
Inline SVG
With HTML5, SVG has been natively integrated into web pages through its own <svg> element or as a
referenced CSS property. Thus, you can now create web pages with inline SVG graphics, where the SVG
graphics are fully integrated with the rest of the page; e.g. following CSS styling, allowing JavaScript to
interact with SVG objects, drawing graphics, or creating effects on hover-over of certain SVG objects.
Also, you can use inline SVG to modify given graphics and videos; e.g. cropping them, adding a filter, or
adding animations.
Note that only Firefox, IE, and Chrome support SVG inline for HTML pages at this time; i.e. they
allow the use of the <svg> element inside the HTML page. Safari and Opera support inline SVG only for
XHTML pages, because XML can deal with the namespace inclusion. Where we want to use SVG
elements to control a video element through JavaScript, we use XHTML with inline SVG at this stage.
Also note that IE's support of SVG is still very sketchy, in particular for some of the features we use in this
chapter.
SVG for Masking
A major use of SVG with HTML pages is as an advanced styling and effects tool. In Firefox, we have the
CSS attributes4 filter, mask, and clip-path to use inline or external SVG fragments for effects. In the
WebKit-based browsers, it is possible to use external SVG files as a CSS mask through the -webkit-mask
CSS attribute. Inline SVG cannot be used in -webkit-mask. Opera and IE at this stage have no means of
using an SVG in CSS for extra effects, whether defined inline or in an external SVG file.
4 Also proposed to W3C for standardization http://people.mozilla.com/~roc/SVG-CSS-Effects-Draft.html
Download from www.eBookTM.Com
http://freepdf-books.com
CHAPTER 5 ■ HTML5 MEDIA AND SVG
137
Video in SVG
All browsers except for IE are capable of supporting <video> inside an SVG definition, either natively as a
SVG 1.2 feature as is the case with Opera or through the <foreignObject> feature of SVG. IE hasn't
implemented any SVG 1.2 feature yet, which means it does not yet support <video> or <foreignObject>.
Our examples
The examples in this chapter will make use of all three ways of using SVG with HTML and <video>.
We use HTML and XHTML where we demonstrate only inline SVG elements together with a direct
hook into the video element through JavaScript; e.g. for custom controls. This works in all browsers.
For demonstrating the use of SVG effects such as masking on video, we will use HTML and an
external SVG file. In the HTML file, we will incorporate different CSS code for WebKit-based browsers
(Safari and Google Chrome) and for Firefox. Unfortunately, this leaves Opera and IE out of these
examples.
Where we want to experiment with both inline SVG elements and SVG effects, we can use only
Firefox and thus we will use inline SVG.
Finally, we will also look at the use of video in SVG, but only as inline SVG with XHTML either
through the <video> or the <foreignObject> element. This currently is probably the most cross-browser
compatible means of using SVG effects for video, even though it still leaves IE out in the cold. It can be
expected that IE will implement <foreignObject> or possibly even <video> in SVG relatively soon.
5.2 Basic Shapes and <video>
At the most basic level, SVG allows the creation of basic shapes and outlines:
• <circle>
• <ellipse>
• <rect>
• <line>
• <polyline>
• <polygon>
• <path>
Shapes as a mask
We can use any of the shapes as a mask to overlay onto video. This means we can clip a video to a
complex shape defined by SVG. For this, we use an SVG image (in WebKit browsers) or an SVG fragment
(in Firefox) as a mask through CSS. Listing 5–1 shows an example using the SVG file in Listing 5–2. The
SVG file contains a circle that is applied as a mask on the video. Figure 5–1 shows the result in Firefox
and Safari.
http://freepdf-books.com

CHAPTER 5 ■ HTML5 MEDIA AND SVG
138
Listing 5–1. Styling a video using an external SVG resource as a mask
<video class="target" height="270px" width="480px" controls >
<source src="HelloWorld.mp4" type="video/mp4">
<source src="HelloWorld.webm" type="video/webm">
<source src="HelloWorld.ogv" type="video/ogg">
</video>
<style>
.target {
mask: url("basic_example_c5_1.svg#c1");
-webkit-mask: url("basic_example_c5_1.svg");
}
</style>
Listing 5–2. The SVG resource used by Listing 5–1
<?xml version="1.0" standalone="no"?>
<!DOCTYPE svg PUBLIC "-//W3C//DTD SVG 1.1//EN"
"http://www.w3.org/Graphics/SVG/1.1/DTD/svg11.dtd">
<svg version="1.1" xmlns="http://www.w3.org/2000/svg"
xmlns:xlink="http://www.w3.org/1999/xlink">
<defs>
<mask id="c1" maskUnits="userSpaceOnUse"
maskContentUnits="userSpaceOnUse">
<circle id="circle" cx="240" cy="135" r="135" fill="white"/>
</mask>
</defs>
<use xlink:href="#circle"/>
</svg>
Figure 5–1. Applying an SVG mask to a video in Firefox and Safari
Opera and IE don't yet have support for applying SVG images as masks to HTML elements through
CSS. They simply display the full video and we, therefore, have not included screenshots here. We will
later look at how we can achieve this same effect with Opera, but we don't have a solution for IE.
Chrome is a special case. The example actually once worked in Chrome 6.0.xxx versions, but with
the eventual version used for this book, it was broken and displayed just the same full video as Opera
http://freepdf-books.com

CHAPTER 5 ■ HTML5 MEDIA AND SVG
139
and IE. It seems that SVG masking has stopped working for <video>, even though it continues to work for
<img>. A bug has been filed.5
You will note in the code that Firefox requires a link directly to a SVG fragment, addressed through a
fragment URL (#), while the WebKit-based browsers link to the full SVG resource. Therefore, we provide
two different specifications in the SVG resource: the <mask> element is for Firefox and the <use> element
is for the WebKit-based browsers. The <use> element allows us to avoid repeating the definition of the
circle. Instead, we just reference it, which requires inclusion of the xlink namespace. The <use> element
basically instantiates the circle as a mask for WebKit-based browsers, while Firefox requires only the
definition.
An interesting observation with all the masked videos is that as the video controls are turned on, it is
possible to control playback by mouse clicks and guessing where in the hidden area are the play button
and transport bar. This shows that mouse events penetrate the masked area—something to pay
attention to since it might create unexpected side effects for users. It might be better to run your own
controls instead.
Note that the <mask> element in SVG has two means of styling: you can set the @maskUnits and
@maskContentUnits either to “userSpaceOnUse” or “objectBoundingBox.” When you use
”userSpaceOnUse,” you can define the dimensions as absolute dimensions and position the mask
within the boundaries of the object anywhere. If you decide instead to use “objectBoundingBox.” the
circle centre coordinates cx and cy as well as the radius r are interpreted as percentages in relation to the
x and y dimensions of the object.
Listing 5–3 shows two different versions of the SVG using <mask> with “objectBoundingBox” in
Firefox and results in the rendering in Figure 5–2. We've put this SVG inline, so you can see how it is
done. The masks are defined in a <defs> element as they are not meant to be visible by themselves.
Listing 5–3. Two SVG masks as used by Firefox with “objectBoundingBox”
<video class="target1" height="270px" width="480px" controls >
<source src="HelloWorld.webm" type="video/webm">
<source src="HelloWorld.ogv" type="video/ogg">
</video>
<video class="target2" height="270px" width="480px" controls >
<source src="HelloWorld.webm" type="video/webm">
<source src="HelloWorld.ogv" type="video/ogg">
</video>
<style>
.target1 { mask: url("#c1"); }
.target2 { mask: url("#c2"); }
</style>
<svg version="1.1" xmlns="http://www.w3.org/2000/svg">
<defs>
<mask id="c1" maskUnits="objectBoundingBox"
maskContentUnits="objectBoundingBox">
<circle cx="0.5" cy="0.5" r="0.5" fill="white"/>
</mask>
<mask id="c2" maskUnits="objectBoundingBox"
maskContentUnits="objectBoundingBox">
<circle cx="0.25" cy="0.25" r="0.5" fill="white"/>
</mask>
</defs>
</svg>
5 See http://code.google.com/p/chromium/issues/detail?id=63055
http://freepdf-books.com

CHAPTER 5 ■ HTML5 MEDIA AND SVG
140
Figure 5–2. Applying a circle SVG mask to a video in Firefox using the object's bounding box as reference
The stretched circle in the second video is displaced with its center at 25% of the video's width and
height.
When using <svg> inline, the @namespace attribute on the <svg> element is required because SVG
runs in a separate namespace. Thus, if you want to manipulate an element inside the <svg> namespace
through JavaScript, you need to use the namespace versions of the functions. Listing 5–4 shows an
example where the SVG mask with the circle is extended with a rectangle shape. The resulting rendering
in Firefox is shown in Figure 5–3. None of the other browsers supports this yet.
Listing 5–4. Manipulating inline SVG with JavaScript in Firefox
<video class="target" height="270px" width="480px" controls >
<source src="HelloWorld.webm" type="video/webm">
<source src="HelloWorld.ogv" type="video/ogg">
</video>
<style>
.target { mask: url("#c1"); }
</style>
<svg version="1.1" xmlns="http://www.w3.org/2000/svg">
<defs>
<mask id="c1" maskUnits="objectBoundingBox"
maskContentUnits="objectBoundingBox">
<circle cx="0.25" cy="0.25" r="0.5" fill="white"/>
</mask>
</defs>
</svg>
<script>
var rect = document.createElementNS("http://www.w3.org/2000/svg",
"rect");
rect.setAttribute("x", "0.5"); rect.setAttribute("y", "0.5");
rect.setAttribute("width", "0.5"); rect.setAttribute("height", "0.5");
rect.setAttribute("fill", "white");
var mask = document.getElementById("c1");
mask.appendChild(rect);
</script>
http://freepdf-books.com

CHAPTER 5 ■ HTML5 MEDIA AND SVG
141
Figure 5–3. Adding a rectangle to the SVG mask on a video in Firefox using JavaScript
5.3 SVG Text and <video>
Another basic SVG construct consists of text elements:
• <text>
• <tspan>
• <tref>
• <textPath>
• <altGlyph>
• <altGlyphDef>
• <altGlyphItem>
• <glyphRef>
• <font> and font features
In this section we will use SVG text as a mask for video.
Listing 5–5 shows an example video with a text mask using the SVG file in Listing 5–6. The SVG file
contains a circle applied as a mask to the video. Figure 5–4 shows the result in Firefox and Safari.
Listing 5–5. Styling a video using an external SVG resource as a mask
<video class="target" height="270px" width="480px" controls autoplay>
<source src="HelloWorld.mp4" type="video/mp4">
<source src="HelloWorld.webm" type="video/webm">
<source src="HelloWorld.ogv" type="video/ogg">
</video>
<style>
.target {
mask: url("basic_example_c5_4.svg#textClip");
-webkit-mask: url("basic_example_c5_4.svg");
http://freepdf-books.com
CHAPTER 5 ■ HTML5 MEDIA AND SVG
142
}
</style>
Listing 5–6. The SVG resource used by Listing 5–5
<?xml version="1.0" standalone="no"?>
<!DOCTYPE svg PUBLIC "-//W3C//DTD SVG 1.1//EN"
"http://www.w3.org/Graphics/SVG/1.1/DTD/svg11.dtd">
<svg version="1.1" xmlns="http://www.w3.org/2000/svg"
xmlns:xlink="http://www.w3.org/1999/xlink">
<defs>
<mask id="textClip" maskUnits="userSpaceOnUse"
maskContentUnits="userSpaceOnUse">
<text id="text1" x="40" y="120" dx="0,5,5,5,0" dy="10,0,0,0,-20"
rotate="-20 -30 -40 -50 0 0 -10" font-size="120" fill="white"
font-family="Verdana" font-weight="bold">
<tspan x="40">HELLO</tspan>
<tspan x="0" dy="120">WORLD</tspan>
</text>
</mask>
</defs>
<use xlink:href="#text1"/>
</svg>
Figure 5–4. Applying a SVG text mask to a video in Firefox and Safari
The mask consists of two lines of text in <tspan> elements starting at a x=40 px and y=120 px offset
with a dx and dy distances and individual letter rotations. Again, Opera and IE don't yet support SVG in
CSS and Chrome is broken due to a bug.
You might have noticed that the SVG masks are all filled with the color “white.” This is because of
the way in which masking is specified.
In WebKit browsers, the image (even the SVG image) is interpreted as an alpha mask, which is an
image that contains alpha values ranging from 0 to 1. Any color, including black and white, is masked as
a fully transparent area; colors with a higher transparency result in less transparency in the mask.
In Firefox by contrast, the mask value is calculated from both the color and alpha channel values as
per the SVG specification.6 A linear luminance value is computed from the color channel values and then
6 See http://www.w3.org/TR/SVG/masking.html#Masking
http://freepdf-books.com
CHAPTER 5 ■ HTML5 MEDIA AND SVG
143
multiplied by the alpha channel value. For a black picture, all color channel values are thus 0, which is
why a mask from a black picture results in nothing in Firefox. So make sure to fill your mask with a
nonblack color. For full transparency, use white as in the examples above.
5.4 SVG Styling for <video>
With CSS3, much of the advanced styling functionalities of SVG have found entry into HTML. However,
some of the advanced features of SVG, such as masks, clipPaths, filters and animations, can be styled
only in SVG.
SVG Play/Pause Toggle
One particularly nice application of SVG for video is to run your own video controls. Listing 5–7 shows an
example of a video without native controls, but with a SVG play/pause toggle that hooks into the video
JavaScript API and uses the page's CSS. Because this uses inline SVG and hooks into the JavaScript of the
web page, we need to use XHTML to allow it to render in all browsers. Figure 5–5 shows the result.
Listing 5–7. Running your own controls in SVG
<!DOCTYPE html>
<html xmlns="http://www.w3.org/1999/xhtml" lang="en" xml:lang="en">
<head>
<style>
.svginside > * {
position: absolute;
}
.svgbutton path {
pointer-events: none;
}
</style>
<script>
/* <![CDATA[ */
var vid;
window.onload = function() {
vid = document.getElementsByTagName("video")[0];
vid.addEventListener("ended", updateButton, true);
vid.addEventListener("play", updateButton, true);
updateButton();
}
function updateButton() {
document.querySelector("#controls .play").style.display =
isPlaying(vid) ? "none" : "block";
document.querySelector("#controls .pause").style.display =
!isPlaying(vid) ? "none" : "block";
}
function isPlaying(video) {
return (!video.paused && !video.ended);
}
function togglevideo() {
!isPlaying(vid) ? vid.play() : vid.pause();
updateButton();
http://freepdf-books.com
CHAPTER 5 ■ HTML5 MEDIA AND SVG
144
} /* ]]> */
</script>
</head>
<body>
<div id="controls" class="svginside">
<video height="270px" width="480px">
<source src="HelloWorld.mp4" type="video/mp4"/>
<source src="HelloWorld.webm" type="video/webm"/>
<source src="HelloWorld.ogv" type="video/ogg"/>
</video>
<svg height="270px" width="480px" xmlns="http://www.w3.org/2000/svg"
xmlns:xlink="http://www.w3.org/1999/xlink" >
<g class="svgbutton">
<circle stroke="black" fill="transparent" fill-opacity="0"
stroke-width="12" cx="240" cy="135" r="40"
onclick="togglevideo();"/>
<path class="play" fill="black" d="M 230 120 v 30 l 25 -15 Z"/>
<path class="pause" stroke-width="12" stroke="black"
d="M 230 120 v 30 m 16 -30 v 30"/>
</g>
</svg>
</div>
</body>
</html>
Note that because this is XHTML, you need to put the JavaScript into a CDATA section.
The XHTML page contains first a list of JavaScript functions. There is a function to toggle the play
and pause state of the video, one to identify which state it actually is in, one to update the image upon
toggling play/pause, and one to initialize the hook-up of toggle button events to the functions. Then we
display the video and the SVG toggle button overlay, which consists of a circle, a path that draws the play
image, and a path that draws the pause image. The SVG is positioned absolutely by nailing the video
down to 480x270, and the circle, pause and play buttons are centered on that. By taking away pointer
events from the play triangle and the pause rectangles, we give all the pointer events to the circle to call
the toggleVideo function.
We also created the same version of this web page as an HTML page, which works in Firefox,
Chrome, and IE, but not in Safari and Opera.
http://freepdf-books.com
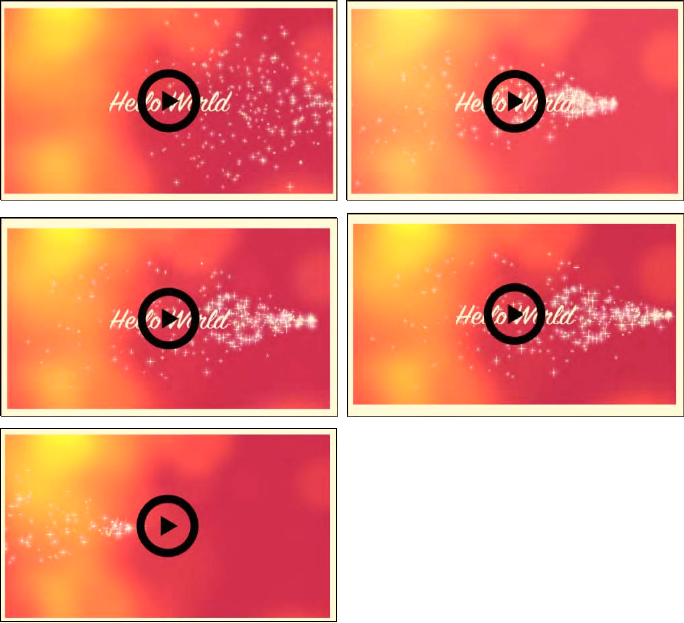
CHAPTER 5 ■ HTML5 MEDIA AND SVG
145
Figure 5–5. Running your own SVG controls for a video
SVG Gradients
Being able to use SVG gradients on SVG masks, clipPaths, and other SVG effects is another styling
advantage of SVG over CSS. Listing 5–8 shows an example of an SVG mask for a video that has a gradient
applied to everything that's not masked. The HTML file required for this is very similar to the one in
Listing 5–1. Figure 5–6 shows the result.
Listing 5–8. A SVG mask with a gradient
<?xml version="1.0" standalone="no"?>
<!DOCTYPE svg PUBLIC "-//W3C//DTD SVG 1.1//EN"
"http://www.w3.org/Graphics/SVG/1.1/DTD/svg11.dtd">
<svg version="1.1" xmlns="http://www.w3.org/2000/svg"
xmlns:xlink="http://www.w3.org/1999/xlink">
<defs>
<mask id="c1" maskUnits="userSpaceOnUse"
http://freepdf-books.com

CHAPTER 5 ■ HTML5 MEDIA AND SVG
146
maskContentUnits="userSpaceOnUse">
<g id="group">
<linearGradient id="grad" gradientUnits="objectBoundingBox"
x2="0" y2="1">
<stop stop-color="white" offset="0"/>
<stop stop-color="white" stop-opacity="0" offset="1"/>
</linearGradient>
<circle id="circle" cx="240" cy="135" r="135" fill="white"/>
<rect x="0" y="0" width="480" height="270" fill="url(#grad)"/>
</g>
</mask>
</defs>
<use xlink:href="#group"/>
</svg>
Figure 5–6. An SVG mask and a gradient applied to a video in Safari and Firefox shows the same effect
The SVG mask is defined by a circle in the center of the video and a rectangle over the whole height.
The rectangle is filled with the gradient, which starts at the top boundary of the image and increases
toward a final value of white at the bottom. Two mask shapes come together, so the mask multiplies
these two together before applying it to the video.
It certainly makes a lot of sense in the above example to run your own controls instead of having the
semi-transparent default controls shine through the mask. One can imagine creating a video player that
plays back a series of videos and uses SVG and JavaScript to provide transition effects, such as wipes or
fades.
SVG Pattern
In the next example, we use a circle as a pattern to blend in more than the central circle of the video.
Listing 5–9 shows the SVG mask. The HTML file required for this is very similar to the one in Listing 5–1.
Figure 5–7 shows the result.
Download from www.eBookTM.Com
http://freepdf-books.com

CHAPTER 5 ■ HTML5 MEDIA AND SVG
147
Listing 5–9. An SVG mask with a pattern
<?xml version="1.0" standalone="no"?>
<!DOCTYPE svg PUBLIC "-//W3C//DTD SVG 1.1//EN"
"http://www.w3.org/Graphics/SVG/1.1/DTD/svg11.dtd">
<svg version="1.1" xmlns="http://www.w3.org/2000/svg"
xmlns:xlink="http://www.w3.org/1999/xlink">
<defs>
<mask id="c1" maskUnits="userSpaceOnUse"
maskContentUnits="userSpaceOnUse">
<g id="group">
<pattern id="pat" patternUnits="userSpaceOnUse" x="0" y="0"
width="20" height="20">
<circle cx="6" cy="6" r="5" fill="white" stroke="white"/>
</pattern>
<rect x="0" y="0" width="480" height="246" fill="url(#pat)"/>
<circle id="circle" cx="240" cy="122" r="122" fill="white"/>
<rect x="0" y="246" width="480" height="25" fill="white"/>
</g>
</mask>
</defs>
<use xlink:href="#group"/>
</svg>
Figure 5–7. A patterned mask applied to a video in Firefox and Safari
First we have a rectangle over the complete video to which the small circle pattern is applied. Over
this we mask the big circle for the video center. Finally, we also have a small rectangle that roughly
covers the video controls and provides for better usability. In browsers where the controls disappear
during pause time, this looks rather funny, as can be seen in the Firefox example. It, however, works
mostly with Safari.
5.5 SVG Effects for <video>
We've already seen multiple examples of masks. Other interesting SVG effects are clip-paths and filters.
Clip-paths restrict the region to which paint can be applied, creating a custom viewport for the
referencing element. This also means that pointer events are not dispatched on the clipped regions of
http://freepdf-books.com

CHAPTER 5 ■ HTML5 MEDIA AND SVG
148
the shape. This is in contrast to masks, where only visibility and transparency of the masked regions is
changed, but the masked regions still exist and can be interacted with.
SVG Clip-Path
Listing 5–10 shows an example use of clip-path on a video. We need the controls to be able to interact
with the video. This currently will work only in Firefox in HTML since it is the only browser that supports
inline SVG, which is necessary for the controls. You can get Safari to display it, too, but you need to move
to XHTML and use the -webkit-mask CSS property; see Listing 5–11. See Figure 5–8 for the result.
Listing 5–10. An SVG clip-path used with the controls from Listing 5–7
<?xml version="1.0" standalone="no"?>
<!DOCTYPE svg PUBLIC "-//W3C//DTD SVG 1.1//EN"
"http://www.w3.org/Graphics/SVG/1.1/DTD/svg11.dtd">
<svg version="1.1" xmlns="http://www.w3.org/2000/svg"
xmlns:xlink="http://www.w3.org/1999/xlink">
<defs>
<clipPath id="c1" maskUnits="userSpaceOnUse"
maskContentUnits="userSpaceOnUse">
<polygon id="poly" fill="white"
transform="translate(-180,-90) scale(1.2)"
points="350,75 379,161 469,161 397,215
423,301 350,250 277,301 303,215
231,161 321,161" />
</clipPath>
</defs>
<use xlink:href="#poly"/>
</svg>
Listing 5–11. Addition to the HTML page in Listing 5–7
<style>
video {
clip-path: url("basic_example_c5_8.svg#c1");
-webkit-mask: url("basic_example_c5_8.svg");
}
</style>
Figure 5–8. A clip-path in the form of a star applied to a video in Firefox and Safari with SVG controls
http://freepdf-books.com

CHAPTER 5 ■ HTML5 MEDIA AND SVG
149
The HTML page from example Listing 5–5 is extended with a CSS feature called clip-path. This
feature links to the SVG block that contains the <clipPath>. In our example, that clipPath contains a
polygon that describes a star, which creates a cut-out from the video. Onto this, the controls of Listing
5–7 are rendered to enable interaction with the video.
SVG Filters
Now let's move on to the most interesting functionality that SVG can provide for the video element:
filters. Filters are composed from filter effects, which are a series of graphics operations applied to a
given source graphic to produce a modified graphical result. They typically are applied to images and
videos to expose different details from the graphical image than are typically seen by the human eye or
to improve a particular image feature—be that for image/video analysis or for artistic purposes.
A long list of filter effects, also called filter primitives, is defined in the SVG specification7:
• Blending two images together: <feBlend>.
• Color matrix transformation: <feColorMatrix>.
• Component-wise remapping of pixel data: <feComponentTransfer> using one of
the following component transfer functions: identity, table, discrete,
linear, gamma on one of the color channels through <feFuncR>, <feFuncG>,
<feFuncB>, <feFuncA>.
• Combine two input images pixel-wise: <feComposite>.
• Matrix convolution of pixels with their neighbors: <feConvolveMatrix>.
• Light image using the alpha channel as a bump map: <feDiffuseLighting>,
<feSpecularLighting>.
• Spatially displace an image based on a second image: <feDisplacementMap>.
• Create filled rectangle: <feFlood>.
• Gaussian blur on input image: <feGaussianBlur>.
• Load external graphic into filter into RGBA raster: <feImage>.
• Collapse input image layers into one: <feMerge> with a list of <feMergeNode>.
• Dilate (fatten)/erode (thin) artwork: <feMorphology>.
• Offset image: <feOffset>.
• Fill rectangle with repeated pattern of input image: <feTile>.
• Create turbulence or fractal noise: <feTurbulence>.
• Light source effects: <feDistantLight>, <fePointLight>, <feSpotLight>.
Firefox, Opera, IE, and the WebKit-based browsers support all of these filter effects for SVG, but the
use in HTML is supported only by Firefox8. Firefox made use of the CSS filter property for this, which
was previously supported only by IE.
7 See http://www.w3.org/TR/SVG/filters.html#FilterPrimitivesOverview
http://freepdf-books.com
CHAPTER 5 ■ HTML5 MEDIA AND SVG
150
Listing 5–12 shows application of a blur filter to the video element, defined in an inline SVG. Figure
5–9 shows the result in Firefox.
Listing 5–12. An SVG-defined blur filter applied to a video
<video class="target" height="270px" width="480px" controls >
<source src="HelloWorld.webm" type="video/webm">
<source src="HelloWorld.ogv" type="video/ogg">
</video>
<svg height="0">
<defs>
<filter id="f1">
<feGaussianBlur stdDeviation="3"/>
</filter>
</defs>
</svg>
<style>
.target {
filter: url("#f1");
}
</style>
Figure 5–9. A blur filter applied to a video in Firefox
In CSS you use the filter property to refer to the SVG <filter> element. The Gaussian blur effect is
the only filter primitive used here. It is possible to combine more filter effects in one filter. Note that the
filter is also applied to the default controls, so it is necessary to run your own controls.
8 See https://developer.mozilla.org/En/Applying_SVG_effects_to_HTML_content
http://freepdf-books.com
CHAPTER 5 ■ HTML5 MEDIA AND SVG
151
Let's look at a few more filters. Listing 5–13 shows several filters:
• f1: a color matrix, which turns the video black and white.
• f2: a component transfer, which inverts all the color components.
• f3: a convolution matrix, which brings out the borders of color patches.
• f4: a displacement map, which displaces the video pixels along the x and y axes
using the R color component.
• f5: a color matrix, which lightens the colors and moves them towards pastel.
Figure 5–10 shows the results of the filters used with the HTML code in Listing 5–12 in Firefox,
applied to a somewhat more interesting video. The first image is a reference frame without a filter
applied.
Listing 5–13. Several SVG filter definitions
<filter id="f1">
<feColorMatrix values="0.3 0.3 0.3 0 0
0.3 0.3 0.3 0 0
0.3 0.3 0.3 0 0
0 0 0 1 0"/>
</filter>
<filter id="f2">
<feComponentTransfer>
<feFuncR type="table" tableValues="1 0"/>
<feFuncG type="table" tableValues="1 0"/>
<feFuncB type="table" tableValues="1 0"/>
</feComponentTransfer>
</filter>
<filter id="f3">
<feConvolveMatrix order="3" kernelMatrix="1 -1 1
-1 -0.01 -1
1 -1 1"
edgeMode="duplicate"/>
</filter>
<filter id="f4" x="0%" y="0%" height="100%" width="100%">
<feDisplacementMap scale="100" in2="SourceGraphic"
xChannelSelector="R"/>
</filter>
<filter id="f5">
<feColorMatrix values="1 0 0 0 0
0 1 0 0 0
0 0 1 0 0
0 1 0 0 0"
style="color-interpolation-filters:sRGB"/>
</filter>
http://freepdf-books.com

CHAPTER 5 ■ HTML5 MEDIA AND SVG
152
Figure 5–10. Application of the filters in Listing 5–13 to a video in Firefox with the image at top left being
the reference image and the filters f1 to f5 applied from top right to bottom right.
Finally, we want to make a few combined filters. Listing 5–14 shows several combined filters:
• f1: a blue flood on the black color.
• f2: a canvas-style rendering.
• f3: two layers of blur and convolution merged.
• f4: a line mask on the re-colored video.
Figure 5–11 shows the results of the filters used with the HTML code in Listing 5–12 in Firefox.
http://freepdf-books.com
CHAPTER 5 ■ HTML5 MEDIA AND SVG
153
Listing 5–14. Several composite SVG filter definitions
<filter id="f1" x="0%" y="0%" width="100%" height="100%">
<feFlood flood-color="blue" result="A"/>
<feColorMatrix type="matrix" in="SourceGraphic" result="B"
values="1 0 0 0 0
0 1 0 0 0
0 0 1 0 0
1 1 1 0 0"/>
<feMerge>
<feMergeNode in="A"/>
<feMergeNode in="B"/>
</feMerge>
</filter>
<filter id="f2">
<feGaussianBlur in="SourceAlpha" stdDeviation="4" result="A"/>
<feOffset in="A" dx="4" dy="4" result="B"/>
<feSpecularLighting in="A" surfaceScale="5" specularConstant=".75"
specularExponent="20" lighting-color="#bbbbbb"
result="C">
<fePointLight x="-5000" y="-10000" z="20000"/>
</feSpecularLighting>
<feComposite in="C" in2="SourceAlpha" operator="in" result="C"/>
<feComposite in="SourceGraphic" in2="C" operator="arithmetic"
k1="0" k2="1" k3="1" k4="0" result="D"/>
<feMerge>
<feMergeNode in="B"/>
<feMergeNode in="D"/>
</feMerge>
</filter>
<filter id="f3">
<feGaussianBlur in="SourceGraphic" stdDeviation="6" result="A"/>
<feConvolveMatrix order="3" edgeMode="none" result="B"
kernelMatrix="1 -1 1 -1 -0.01 -1 1 -1 1"/>
<feMerge>
<feMergeNode in="A"/>
<feMergeNode in="B"/>
</feMerge>
</filter>
<filter id="f4">
<feColorMatrix values="1 1 0 0 0
0 0 1 0 0
0 0 0 1 0
0 0 0 0 1"
style="color-interpolation-filters:sRGB" result="A"/>
<feConvolveMatrix filterRes="100 100" preserveAlpha="true" in="A"
style="color-interpolation-filters:sRGB"
order="3" kernelMatrix="0 -1 0 -1 4 -1 0 -1 0" />
</filter>
http://freepdf-books.com

CHAPTER 5 ■ HTML5 MEDIA AND SVG
154
Figure 5–11. Application of the filters in Listing 5–14 to a video in Firefox with the image at top left being
the reference image and the filters f1 to f5 applied from top right to bottom right.
5.6 SVG Animations and <video>
We now briefly move on to SVG animations, which allow us to animate basically all the SVG effects and
features we have experimented with. Animation functionality in SVG originates from SMIL's animation
module9
SVG animate
The <animate> element is used to animate a single attribute or property over a time interval. Listing 5–15
has an example for animating the circular mask used in Listing 5–2. The HTML page for this example is
identical to the one in Listing 5–1. Figure 5–12 has the rendering in Firefox and Safari.
9 See http://www.w3.org/TR/2001/REC-smil-animation-20010904/
http://freepdf-books.com
CHAPTER 5 ■ HTML5 MEDIA AND SVG
155
Listing 5–15. An animated circle in SVG
<?xml version="1.0" standalone="no"?>
<!DOCTYPE svg PUBLIC "-//W3C//DTD SVG 1.1//EN"
"http://www.w3.org/Graphics/SVG/1.1/DTD/svg11.dtd">
<svg version="1.1" xmlns="http://www.w3.org/2000/svg"
xmlns:xlink="http://www.w3.org/1999/xlink">
<defs>
<mask id="c1" maskUnits="userSpaceOnUse"
maskContentUnits="userSpaceOnUse">
<circle id="circle" cx="240" cy="135" r="135" fill="white">
<animate attributeName="r" values="150;240;150" dur="3s"
repeatCount="10" />
</circle>
</mask>
</defs>
<use xlink:href="#circle"/>
</svg>
Figure 5–12. Applying an animated SVG mask to a video in Firefox and Safari
In the example, the circular mask on the video is animated from a radius of 150 px to 240 px and
back, which makes for a sliding width mask on the exposed video. This animation is executed 10 times
before the mask falls back to the original circle of 135 px radius as used in Listing 5–1.
SVG Animate Color and Transform
Note that the <animate> element allows animation of only simple attributes. To animate color-related
attributes, you need to use <animateColor> and to animate the @transform attribute, you need to use
<animateTransform>.
SVG Animate Motion
With the <animateMotion> element, it is possible to move an element along a certain path defined by
<mpath>. Listing 5–16 has an example for animating a small circular mask in searchlight fashion over
http://freepdf-books.com

CHAPTER 5 ■ HTML5 MEDIA AND SVG
156
the video. The HTML page for this example is identical to the one in Listing 5–1. Figure 5–13 has the
rendering in Firefox and Safari.
Listing 5–16. A motion animation in SVG used as a mask
<?xml version="1.0" standalone="no"?>
<!DOCTYPE svg PUBLIC "-//W3C//DTD SVG 1.1//EN"
"http://www.w3.org/Graphics/SVG/1.1/DTD/svg11.dtd">
<svg version="1.1" xmlns="http://www.w3.org/2000/svg"
xmlns:xlink="http://www.w3.org/1999/xlink">
<defs>
<mask id="c1" maskUnits="userSpaceOnUse"
maskContentUnits="userSpaceOnUse">
<circle id="circle" cx="120" cy="70" r="50" fill="white">
<animateMotion path="M 0 20 C 150 30 250 250 50 70"
begin="0s" dur="6s" fill="freeze" />
</circle>
</mask>
</defs>
<use xlink:href="#circle"/>
</svg>
Figure 5–13. Applying a motion animated SVG mask to a video in Firefox and Safari
In the example, a path is defined inside the <animateMotion> element. This could have been done in
a separate <path> element with an <mpath> subelement referencing it. However, the path was simple
enough to simply retain in the element.
5.7 Media in SVG
We've had plenty of examples now where SVG was used inline or as an externally referenced CSS mask
to provide effects into an HTML video element. In this subsection we turn this upside down and take a
look at using the HTML5 video element inside SVG resources. While this is strictly speaking the
development of SVG content and not of HTML, we will still take a look, because the SVG markup can be
used inline in HTML.
Download from www.eBookTM.Com
http://freepdf-books.com
CHAPTER 5 ■ HTML5 MEDIA AND SVG
157
Video in SVG
Let's start with the simple first step of displaying video in SVG. Opera has the <video> element of SVG 1.2
implemented, so you can just use <video> inside SVG. The other browsers require the use of the
<foreignObject> feature of SVG.
Listing 5–17 shows an XHTML file with inline SVG that just displays a video. The renderings in all
browsers except IE are shown in Figure 5–14. IE doesn't understand <video> or <foreignObject> yet, so it
shows nothing.
Listing 5–17. Inline SVG with a video element in XHTML
<!DOCTYPE html>
<html xmlns="http://www.w3.org/1999/xhtml" lang="en" xml:lang="en">
<body>
<svg version="1.1" xmlns="http://www.w3.org/2000/svg"
xmlns:xlink="http://www.w3.org/1999/xlink" width="480px"
height="270px">
<g id="video">
<foreignObject width="480px" height="270px">
<body xmlns="http://www.w3.org/1999/xhtml" style="margin:0;">
<video class="target" height="270" width="480"
controls="controls">
<source src="HelloWorld.mp4" type="video/mp4"/>
<source src="HelloWorld.webm" type="video/webm"/>
<source src="HelloWorld.ogv" type="video/ogg"/>
</video>
</body>
</foreignObject>
<video class="target" height="270" width="480" controls="controls"
xlink:href="HelloWorld.ogv">
</video>
</g>
</svg>
</body>
</html>
http://freepdf-books.com
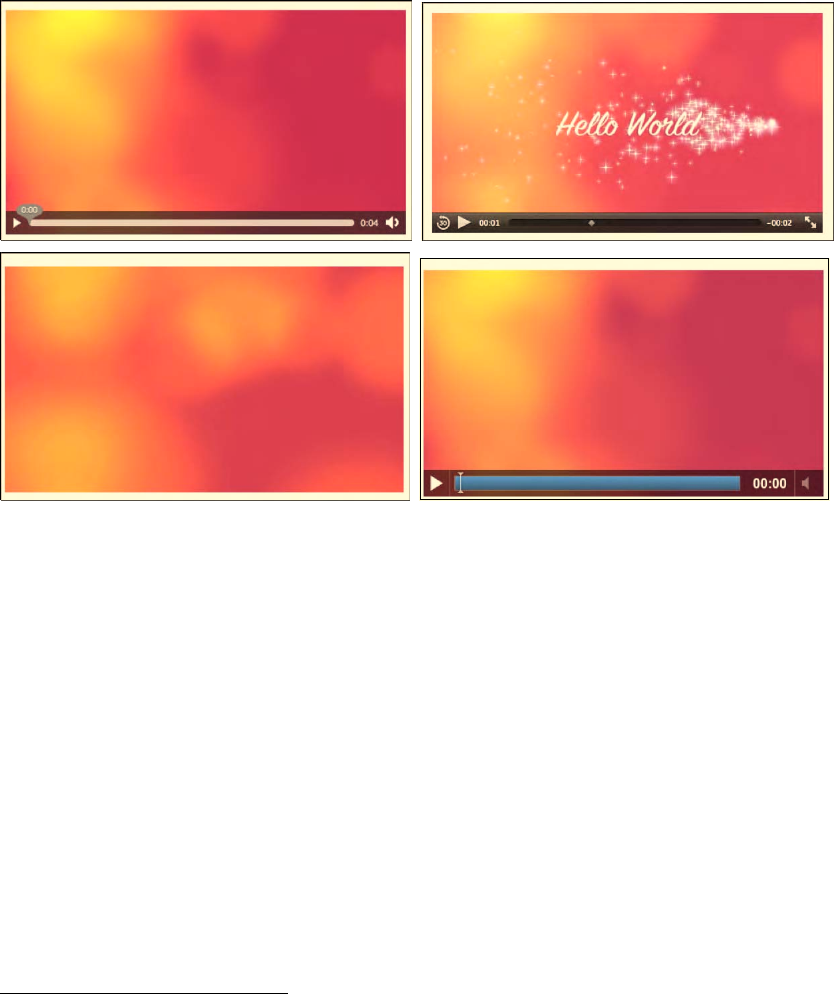
CHAPTER 5 ■ HTML5 MEDIA AND SVG
158
Figure 5–14. Rendering inline SVG with video in Firefox (top left), Safari (top right), Opera (bottom left),
and Google Chrome (bottom right).
Notice how it is necessary to put two video elements in the inline SVG: the first in a <foreignObject>
is interpreted on Firefox, Safari and Google Chrome, while the second one is interpreted by Opera. It has
an @xref:href instead of an @src attribute because it is native XML/SVG rather than a foreign object.
Because of this, it also doesn't deal with <source> elements, and it doesn't actually display controls, but
is always autoplay.10
Also note that we had to put a 0 margin on the <body> element in SVG since some browsers—in
particular Firefox—have a default margin on inline SVG.
This example works in all browsers except for IE.
Masking Video in SVG
Now we can try to replicate the example of Listing 5–1 inside SVG; i.e. put a circular mask on the
video. Listing 5–18 has the XHTML code and Figure 5–15 the renderings.
Listing 5–18. Inline SVG with a video element in XHTML and a circular mask
<svg version="1.1" xmlns="http://www.w3.org/2000/svg"
xmlns:xlink="http://www.w3.org/1999/xlink" width="480px"
10 See http://www.w3.org/TR/SVGMobile12/multimedia.html#VideoElement
http://freepdf-books.com

CHAPTER 5 ■ HTML5 MEDIA AND SVG
159
height="270px">
<defs>
<mask id="c1" maskUnits="userSpaceOnUse"
maskContentUnits="userSpaceOnUse">
<circle id="circle" cx="240" cy="135" r="135" fill="white"/>
</mask>
</defs>
<g>
<defs>
<g id="video">
<foreignObject width="480px" height="270px">
<body xmlns="http://www.w3.org/1999/xhtml" style="margin:0;">
<video class="target" height="270" width="480"
controls="controls">
<source src="HelloWorld.mp4" type="video/mp4"/>
<source src="HelloWorld.webm" type="video/webm"/>
<source src="HelloWorld.ogv" type="video/ogg"/>
</video>
</body>
</foreignObject>
<video class="target" height="270" width="480"
controls="controls" xlink:href="HelloWorld.ogv">
</video>
</g>
</defs>
<use xlink:href="#video" mask="url(#c1)"/>
</g>
</svg>
http://freepdf-books.com

CHAPTER 5 ■ HTML5 MEDIA AND SVG
160
Figure 5–15. Rendering inline SVG with circular filter on video in Firefox and Opera
The WebKit-based browsers don't seem to be able yet to apply a mask on a <foreignObject>. IE
doesn't support either masks or <foreignObject>. Opera works fine, so this provides the opportunity to
mix the implementation of Listing 5–1 with the implementation here to gain the same effect in all
browsers except IE.
To finish off this chapter, let's look at some more effects now provided in inline SVG on the video
elements.
SVG Reflection
Listing 5–19 shows the inline SVG code for a reflection created by copying the video in a <use>
statement, mirroring through a scale(1 -1) transform, moving it below the video through a translate(0 -
540) transform, and applying a gradient to the copied video. Figure 5–16 shows the renderings in Firefox
and Opera.
Listing 5–19. SVG code for a video reflection
<svg version="1.1" xmlns="http://www.w3.org/2000/svg"
xmlns:xlink="http://www.w3.org/1999/xlink"
width="480px" height="540px">
<defs>
<linearGradient id="grad" y2="1" x2="0">
<stop offset="0.2" stop-color="white" stop-opacity="0"/>
<stop offset="1" stop-color="white" stop-opacity=".4"/>
</linearGradient>
<mask id="c1" maskContentUnits="objectBoundingBox">
<rect width="1" height="1" fill="url(#grad)"/>
</mask>
</defs>
<g id="reflection">
<g id="video">
<foreignObject width="480px" height="270px">
<body xmlns="http://www.w3.org/1999/xhtml" style="margin:0;">
<video height="270" width="480" autoplay="autoplay">
<source src="HelloWorld.mp4" type="video/mp4"/>
<source src="HelloWorld.webm" type="video/webm"/>
<source src="HelloWorld.ogv" type="video/ogg"/>
</video>
http://freepdf-books.com
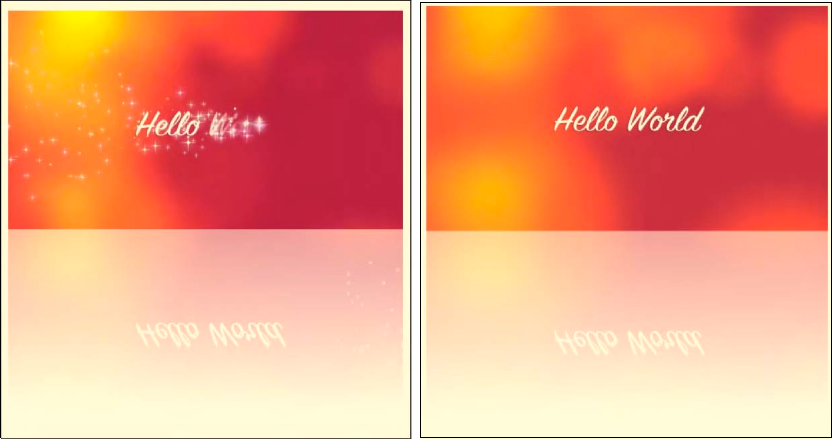
CHAPTER 5 ■ HTML5 MEDIA AND SVG
161
</body>
</foreignObject>
<video height="270" width="480" xlink:href="HelloWorld.ogv"/>
</g>
<use xlink:href="#video" transform="scale(1 -1) translate(0 -540)"
mask="url(#c1)"/>
</g>
</svg>
Figure 5–16. Rendering inline SVG with reflection on video in Firefox (left) and Opera (right)
Opera's presentation is much smoother than Firefox's, which seems to do a lot of processing. As we
can see from the screenshot, it seems that Firefox has two different renderings of the video data, since
the video and its reflection are not synchronized. In contrast, the <use> element just seems to copy the
data from the <video> element. Opera can possibly do some optimization since it is using <video> as a
native SVG element, while Firefox has to deal with the <video> in an HTML <foreignObject>. It seems to
be an advantage to have a native <video> element in SVG. It could be a good idea, however, to
synchronize the markup of the <video> element in SVG and HTML, in particular introduce a <source>
element.
SVG Edge Detection
Listing 5–20 shows the inline SVG code for edge detection created through a convolution matrix. Figure
5–17 shows the renderings in Firefox and Opera.
http://freepdf-books.com

CHAPTER 5 ■ HTML5 MEDIA AND SVG
162
Listing 5–20. SVG code for edge detection
<svg version="1.1" xmlns="http://www.w3.org/2000/svg"
xmlns:xlink="http://www.w3.org/1999/xlink"
width="480px" height="540px">
<defs>
<filter id="c1">
<feConvolveMatrix order="3" kernelMatrix="1 1 1
1 -8 1
1 1 1"
preserveAlpha="true"/>
</filter>
</defs>
<video height="270px" width="480px" xlink:href="HelloWorld.ogv"
filter="url(#c1)"/>
<defs>
<g id="video">
<foreignObject width="480px" height="270px">
<body xmlns="http://www.w3.org/1999/xhtml" style="margin:0;">
<video height="270px" width="480px" autoplay="autoplay">
<source src="HelloWorld.mp4" type="video/mp4"/>
<source src="HelloWorld.webm" type="video/webm"/>
<source src="HelloWorld.ogv" type="video/ogg"/>
</video>
</body>
</foreignObject>
</g>
</defs>
<use xlink:href="#video" filter="url(#c1)"/>
</svg>
Figure 5–17. Rendering inline SVG with edge detection on video in Firefox (left) and Opera (right)
The filter can be directly applied to the native SVG 1.2 <video> element in Opera. In Firefox, we need
to define the <foreignObject> and then apply the filter to the object through a <use> statement.
http://freepdf-books.com
CHAPTER 5 ■ HTML5 MEDIA AND SVG
163
5.8. Summary
In this chapter we analyzed how the HTML5 <video> element can interoperate with objects defined in
SVG. First, we looked at using objects specified in SVG as masks on top of the <video> element. In Safari
we can reference external SVG “images” in the -webkit-mask CSS property. This also used to work in
Chrome, but is currently broken. In Firefox we can use the mask CSS property with a direct fragment
reference to the <mask> element inside the SVG “image.” Use of URI fragments in the way in which
Firefox supports them is not standardized yet.
Firefox is also able to reference inline defined SVG masks through the fragment-addressing
approach. This means <mask> elements inside the same HTML file in an <svg> element can be used as
masks, too. IE and Chrome also support inline definition of <svg> elements in HTML, but since they
don't support the fragment-addressing approach inside the mask CSS property, they cannot use this for
masking onto HTML <video> elements.
The same approach with the mask and -webkit-mask CSS properties is also used later for applying
CSS animations to HTML5 <video> in Firefox and Safari.
We then moved on to using SVG inline for defining controls. If we define them in XHTML, all
browsers, including IE, display them. You can create some of the prettiest controls with SVG. Because
Safari and Opera do not support inline <svg> in HTML yet, we have to use XHTML. It is expected that
these browsers will move toward a native HTML5 parser in the near future, which will then enable <svg>
support inline in HTML pages, too.
Next we looked at how Firefox managed to apply SVG filter effects to HTML elements. It uses the
CSS filter property for this and again references SVG objects with a fragment reference. In this way you
can apply some of the amazing filter effects that are available in SVG to <video>, including blur, black-
and -white, false-color effects, pastel colors, and contours.
We rounded out the chapter by using the SVG <video> and <foreignObject> elements to play back
<video> directly in SVG. Such SVG was further included as inline SVG in an HTML page through <svg>.
This enabled us also to make use of masking and other effects on <video> in Opera, since it is the only
browser with native <video> element support in SVG.
http://freepdf-books.com

CHAPTER 5 ■ HTML5 MEDIA AND SVG
164
http://freepdf-books.com
C H A P T E R 6
■ ■ ■
165
HTML5 Media and Canvas
While the SVG environment is a declarative graphics environment dealing with vector-based shapes, the
HTML Canvas provides a script-based graphics environment revolving around pixels or bitmaps. In
comparison with SVG, it is faster to manipulate data entities in Canvas, since it is easier to get directly to
individual pixels. On the other hand, SVG provides a DOM and has an event model not available to
Canvas. Thus, applications that need graphics with interactivity will typically choose SVG, while
applications that do a lot of image manipulation will more typically reach for Canvas. The available
transforms and effects in both are similar, and the same visual results can be achieved with both, but
with different programming effort and potentially different performance.
When comparing performance between SVG and Canvas,1 typically the drawing of a lot of objects
will eventually slow down SVG, which has to maintain all the references to the objects, while for Canvas
it's just more pixels to draw. So, when you have a lot of objects to draw and it's not really important that
you continue to have access to the individual objects but are just after pixel drawings, you should use
Canvas.
In contrast, the size of the drawing area of Canvas has a huge impact on the speed of a <canvas>,
since it has to draw more pixels. So, when you have a large area to cover with a smaller number of
objects, you should use SVG.
Note that the choice between Canvas and SVG is not fully exclusive. It is possible to bring a Canvas
into an SVG image by converting it to an image using a function called toDataURL(). This can be used, for
example, when drawing a fancy and repetitive background for a SVG image. It may often be more
efficient to draw that background in the Canvas and include it into the SVG image through the
toDataURL() function.
So, let's focus on Canvas in this chapter. Like SVG, the Canvas is predominantly a visually oriented
medium — it doesn't do anything with audio. Of course, you can combine background music with an
awesome graphical display by simply using the <audio> element as part of your pages, as beautifully
executed, for example, by 9elements2 with a visualization of Twitter chatter through colored and
animated circles on a background of music.
Seeing as you already have experience with JavaScript, Canvas will not be too difficult to
understand. It's almost like a JavaScript library with drawing functionality. It supports, in particular, the
following function categories:
• Canvas handling: creating a drawing area, a 2D context, saving and restoring state.
• Drawing basic shapes: rectangles, paths, lines, arcs, Bezier, and quadratic curves.
• Drawing text: drawing fill text and stroke text, and measuring text.
1 See http://www.borismus.com/canvas-vs-svg-performance/
2 See http://9elements.com/io/?p=153
http://freepdf-books.com
CHAPTER 6 ■ HTML5 MEDIA AND CANVAS
166
•Using images: creating, drawing, scaling and slicing images.
•Applying styles: colors, fill styles, stroke styles, transparency, line styles, gradients,
shadows, and patterns.
•Applying transformations: translating, rotating, scaling, and transformation
matrices.
•Compositing: clipping and overlap drawing composition.
•Applying animations: execute drawing functions over time by associating time
intervals and timeouts.
6.1 Video in Canvas
The first step to work with video in Canvas is to grab the pixel data out of a <video> element into a
Canvas element.
drawImage()
The drawImage()function accepts a video element as well as an image or a Canvas element. Listing 6–1
shows how to use it directly on a video.
Listing 6–1. Introducing the video pixel data into a canvas
<video controls height="270px" width="480px" >
<source src="HelloWorld.mp4" type="video/mp4">
<source src="HelloWorld.webm" type="video/webm">
<source src="HelloWorld.ogv" type="video/ogg">
</video>
<canvas width="400" height="300" style="border: 1px solid black;">
</canvas>
<script>
window.onload = function() {
initCanvas();
}
var context;
function initCanvas() {
video = document.getElementsByTagName("video")[0];
canvas = document.getElementsByTagName("canvas")[0];
context = canvas.getContext("2d");
video.addEventListener("timeupdate", paintFrame, false);
}
function paintFrame() {
context.drawImage(video, 0, 0, 160, 80);
}
</script>
The HTML markup is simple. It contains only the <video> element and the <canvas> element into
which we are painting the video data. To this end, we register an event listener on the video element and
with every “timeupdate” event the currently active frame of the video is drawn using drawImage() at
canvas offset (0,0) with the size 160x80. The result is shown in Figure 6–1.
Download from www.eBookTM.Com
http://freepdf-books.com
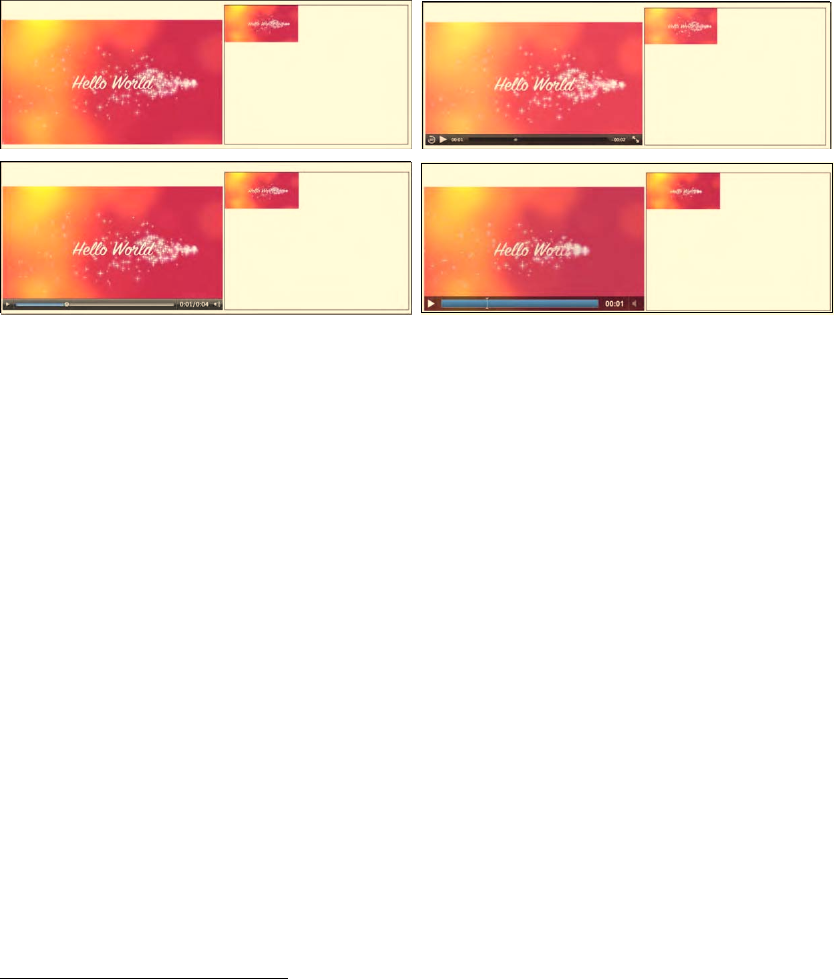
CHAPTER 6 ■ HTML5 MEDIA AND CANVAS
167
Figure 6–1. Painting a video into a canvas with every timeupdate event in Firefox, Safari (top row), Opera,
Chrome (middle row), and IE (bottom)
A few differences can be noticed between the browsers as we play back this example. As the page is
loaded, Safari displays the first frame directly in the Canvas, while Chrome, Opera, IE, and Firefox don't
and only start painting when the play button is pressed. This is obviously linked to the difference in
dispatching the “timeupdate” event described in Chapter 4.
It is important to understand that the “timeupdate” event does not fire for every frame, but only
every few frames—roughly every 100-250ms.3 There currently is no function to allow you to reliably grab
every frame. We can, however, create a painting loop that is constantly grabbing a frame from the video
as quickly as possible or after a given time interval. We use the setTimeout() function for this with a
timeout of 0 to go as quickly as possible.
Because the setTimeout() function calls a function after a given number of milliseconds and we
normally would run the video at 24 (PAL) or 30 (NTSC) frames per second, a timeout of 41ms or 33ms
would theoretically be more than appropriate. However, we cannot actually know how much time was
spent processing and what picture the video has arrived at. We may as well tell it to go as fast as possible
in these examples. For your application, you might want to tune the frequency down to make your web
page less CPU intensive.
In this situation, we use the “play” event to start the painting loop when the user starts playback and
run until the video is paused or ended. Another option would be to use the “canplay” or “loadeddata”
events to start the display independently of a user interaction.
We have implemented this approach in Listing 6–2. To make it a bit more interesting, we also
displace each subsequent frame by 10 pixels in the x and y dimension within the borders of the Canvas
box. The results are shown in Figure 6–2.
3 Firefox used to fire the event at a much higher rate previously. The HTML5 specification allows between 15 and 250ms, but all
browsers since Firefox 4 are taking a conservative approach.
http://freepdf-books.com
CHAPTER 6 ■ HTML5 MEDIA AND CANVAS
168
Listing 6–2. Painting video frames at different offsets into the canvas
<video controls height="270px" width="480px" >
<source src="HelloWorld.mp4" type="video/mp4">
<source src="HelloWorld.webm" type="video/webm">
<source src="HelloWorld.ogv" type="video/ogg">
</video>
<canvas width="400" height="300" style="border: 1px solid black;">
</canvas>
<script>
window.onload = function() {
initCanvas();
}
var context, video;
var x = 0, xpos = 10;
var y = 0, ypos = 10;
function initCanvas() {
video = document.getElementsByTagName("video")[0];
canvas = document.getElementsByTagName("canvas")[0];
context = canvas.getContext("2d");
video.addEventListener("play", paintFrame, false);
}
function paintFrame() {
context.drawImage(video, x, y, 160, 80);
if (x > 240) xpos = -10;
if (x < 0) xpos = 10;
x = x + xpos;
if (y > 220) ypos = -10;
if (y < 0) ypos = 10;
y = y + ypos;
if (video.paused || video.ended) {
return;
}
setTimeout(function () {
paintFrame();
}, 0);
}
</script>
http://freepdf-books.com
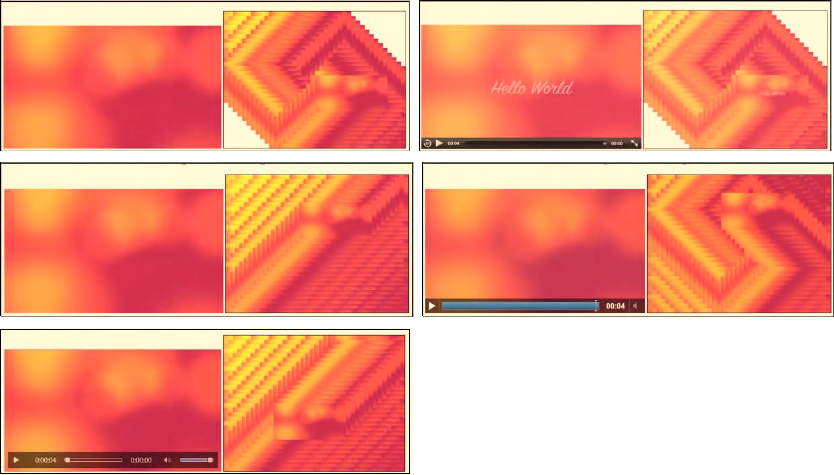
CHAPTER 6 ■ HTML5 MEDIA AND CANVAS
169
Figure 6–2. Painting a video into a canvas with the setTimeout event in Firefox, Safari (top row), Opera,
Chrome (middle row), and IE (bottom)
You may notice that the different browsers managed to draw a different number of video frames
during the playback of the complete four-second clip. This is a matter of the speed of the JavaScript
engine. Chrome is the clear winner in this race with the browser versions used here, followed by IE and
Opera. Firefox and Safari came last and reached almost exactly the same number of frames. The speed of
JavaScript engines is still being worked on in all browsers, so these rankings continuously change. The
exact browser versions in use for this book are given in the Preface.
Extended drawImage()
Thus far we have used the drawImage() function to directly draw the pixels extracted from a video onto
the Canvas, including a scaling that the Canvas does for us to fit into the given width and height
dimensions. There is also a version of drawImage() that allows extracting a rectangular subregion out of
the original video pixels and painting them onto a region in the Canvas.
An example of such an approach is tiling, where the video is split into multiple rectangles and re-
drawn with a gap between the rectangles. A naïve implementation of this is shown in Listing 6–3. We
only show the new paintFrame() function since the remainder of the code is identical to Listing 6–2.
Listing 6–3. Naïve implementation of video tiling into a canvas
function paintFrame() {
in_w = 960; in_h = 540;
w = 320; h = 160;
// create 4x4 tiling
http://freepdf-books.com
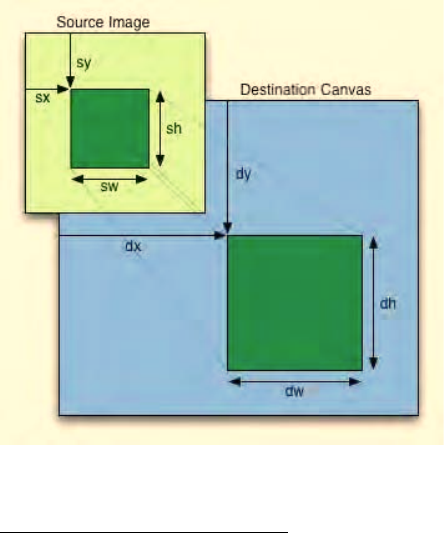
CHAPTER 6 ■ HTML5 MEDIA AND CANVAS
170
tiles = 4; gap = 5;
for (x = 0; x < tiles; x++) {
for (y = 0; y < tiles; y++) {
context.drawImage(video, x*in_w/tiles, y*in_h/tiles,
in_w/tiles, in_h/tiles,
x*(w/tiles+gap), y*(h/tiles+gap),
w/tiles, h/tiles);
}
}
if (video.paused || video.ended) {
return;
}
setTimeout(function () {
paintFrame();
}, 0);
}
The drawImage() function with this many parameters allows extraction of a rectangular region from
any offset in the original video and drawing of this pixel data into any scaled rectangular region in the
Canvas. Figure 6–3, as taken out of the HTML5 specification4, explains how this function works, where
the parameters are as follows: drawImage(image, sx, sy, sw, sh, dx, dy, dw, dh). In Listing 6–3 it is
used to subdivide the video into tiles of size in_w/tiles by in_h/tiles, which are scaled to size w/tiles
by h/tiles and placed with a gap.
Figure 6–3. Extracting a rectangular region from a source video into a scaled rectangular region in the
Canvas
4 See http://www.whatwg.org/specs/web-apps/current-work/
http://freepdf-books.com
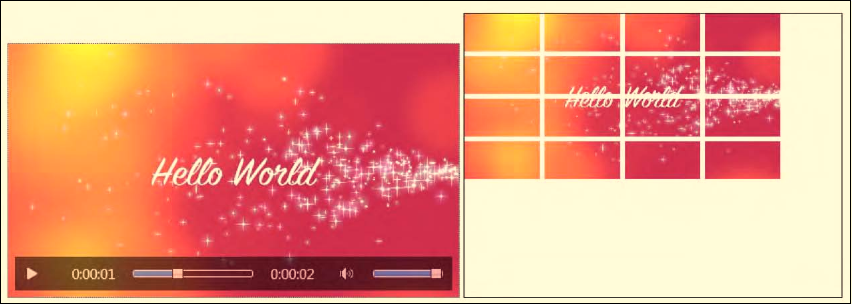
CHAPTER 6 ■ HTML5 MEDIA AND CANVAS
171
It is important to understand that the original video resource is used to extract the region from the
video and not the potentially scaled video in the video element. If this is disregarded, you may be
calculating with the width and height of the scaled video and extract the wrong region. Also note that it is
possible to scale the extracted region by placing it into a destination rectangle with different dimensions.
The result of running Listing 6–3 is shown in Figure 6–4 by example in IE. All browsers show the same
behavior.
Figure 6–4. Tiling a video into a canvas in IE
This implementation is naïve because it assumes that the video frames are only extracted once into
the Canvas for all calls of drawImage(). This is, however, not the case, as can be noticed when we turn up
the number of tiles that are painted. For example, when we set the variable tiles to a value of 32, we
notice how hard the machine suddenly has to work. Each call to drawImage() for the video element
retrieves all the pixel data again.
There are two ways to overcome this. Actually, there is potentially a third, but this one doesn't yet
work in all browsers. Let's start with that one, so we understand what may be possible in future.
getImageData(), putImageData()
Option 1 consists of drawing the video pixels into the Canvas, then picking up the pixel data from the
Canvas with getImageData() and writing it out again with putImageData(). Since putImageData() has
parameters to draw out only sections of the picture again, you should in theory be able to replicate the
same effect as above. Here is the signature of the function: putImageData(imagedata, dx, dy [, sx, sy,
sw, sh ]).
No scaling will happen to the image, but otherwise the mapping is as in Figure 6–3. You can see the
code in Listing 6–4—again, only the paintFrame() function is provided since the remainder is identical
with Listing 6–2.
Listing 6–4. Reimplementation of video tiling into a canvas with getImageData
function paintFrame() {
w = 320; h = 160;
context.drawImage(video, 0, 0, w, h);
frame = context.getImageData(0, 0, w, h);
context.clearRect(0, 0, w, h);
http://freepdf-books.com
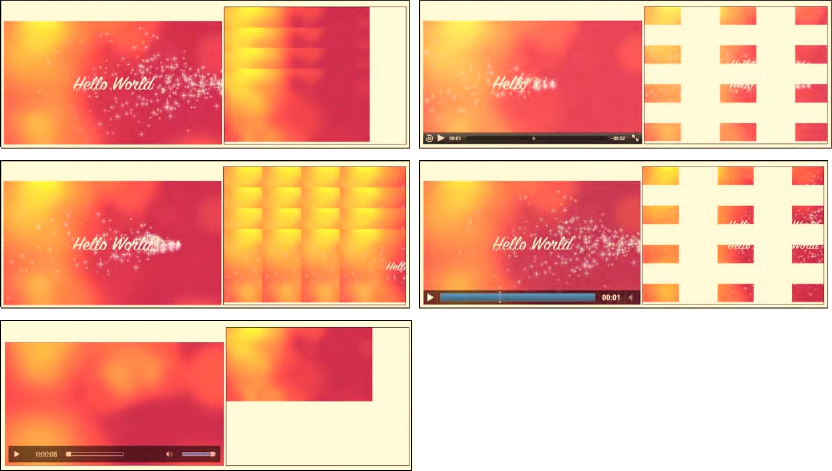
CHAPTER 6 ■ HTML5 MEDIA AND CANVAS
172
/* create 4x4 tiling */
tiles = 4;
gap = 5;
for (x = 0; x < tiles; x++) {
for (y = 0; y < tiles; y++) {
context.putImageData(frame, x*(w/tiles+gap), y*(h/tiles+gap),
x*w/tiles, y*h/tiles, w/tiles, h/tiles);
}
}
if (video.paused || video.ended) {
return;
}
setTimeout(function () {
paintFrame();
}, 0);
}
In this version, the putImageData() function uses parameters to specify the drawing offset, which
includes the gap and the size of the cut-out rectangle from the video frame. The frame has already been
received through getImageData() as a resized image. Note that the frame drawn with drawImage() needs
to be cleared before redrawing with putImageData(). The result of running Listing 6–4 is shown in
Figure 6–5.
Figure 6–5. Attempted tiling of a video into a Canvas using putImageData() in Firefox, Safari (top row),
Opera, Chrome (middle row), and IE (bottom)
http://freepdf-books.com
CHAPTER 6 ■ HTML5 MEDIA AND CANVAS
173
Note that you have to run this example from a web server, not from a file on your local computer.
The reason is that getImageData() does not work cross-site and security checks will ensure it only works
on the same http domain. That leaves out local file access.
Unfortunately, all browsers still have bugs implementing this function. Firefox and Opera do not
provide the cutting functionality and instead just display the full frame at every offset. Firefox actually
fails the script as soon as putImageData() tries to write outside the Canvas dimensions. These bugs are
being worked on. The WebKit-based browsers have an interesting interpretation of the function: dx and
dy are applied to the top left corner of the image and then the cut-out is applied. Thus, the resulting gap
is not just the size of the gap, but increased by the size of the tiles. There is a problem with IE using
getImageData() in the Canvas on video and writing it back out with putImageData(). IE extracts one
frame, but then breaks in putImageData(). Thus, we cannot recommend using the cut-out functionality
of putImageData() at this point to achieve tiling.
getImageData(), simple putImageData()
Option 2 is to perform the cut-outs ourselves. Seeing as we have the pixel data available through
getImageData(), we can create each of the tiles ourselves and use putImageData() with only the offset
attributes to place the tiles. Listing 6–5 shows an implementation of the paintFrame() function for this
case.
Note that Opera doesn't support the createImageData() function, so we create an image of the
required size using getImageData() on Opera. Because we cleared the rectangle earlier, this is not a
problem.
Also note that none of this works in IE yet, since IE doesn't support this combination of
getImageData() and putImageData() on videos yet.
Listing 6–5. Reimplementation of video tiling into a canvas with createImageData
function paintFrame() {
w = 320; h = 160;
context.drawImage(video, 0, 0, w, h);
frame = context.getImageData(0, 0, w, h);
context.clearRect(0, 0, w, h);
// create 16x16 tiling
tiles = 16;
gap = 2;
nw = w/tiles; // tile width
nh = h/tiles; // tile height
// Loop over the tiles
for (tx = 0; tx < tiles; tx++) {
for (ty = 0; ty < tiles; ty++) {
// Opera doesn't implement createImageData, use getImageData
output = false;
if (context.createImageData) {
output = context.createImageData(nw, nh);
} else if (context.getImageData) {
output = context.getImageData(0, 0, nw, nh);
}
// Loop over each pixel of output file
http://freepdf-books.com
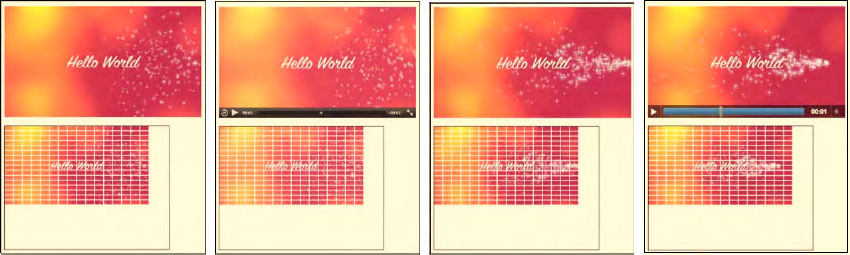
CHAPTER 6 ■ HTML5 MEDIA AND CANVAS
174
for (x = 0; x < nw; x++) {
for (y = 0; y < nh; y++) {
// index in output image
i = x + nw*y;
// index in frame image
j = x + w*y // corresponding pixel to i
+ tx*nw // which tile along the x axis
+ w*nh*ty; // which tile along the y axis
// go through all 4 color values
for (c = 0; c < 4; c++) {
output.data[4*i+c] = frame.data[4*j+c];
}
}
}
// Draw the ImageData object.
context.putImageData(output, tx*(nw+gap), ty*(nh+gap));
}
}
if (video.paused || video.ended) {
return;
}
setTimeout(function () {
paintFrame();
}, 0);
}
Because we now have to prepare our own pixel data, we loop through the pixels of the output image
and fill it from the relevant pixels of the video frame image. We do this for each tile separately and place
one image each. Figure 6–6 shows the results with a 16x16 grid of tiles.
This could obviously be improved by just writing a single image and placing the gap in between the
tiles. The advantage of having an image for each tile is that you can more easily manipulate the
individual tile—rotate, translate, or scale it, for example—but you will need to administer the list of tiles;
i.e. keep a list of pointers to them. The advantage of having a single image is that it will be rendered
faster; otherwise this is not really an improvement over Option 1.
Figure 6–6. Attempted tiling of a video into a canvas using putImageData() in Firefox, Safari, Opera, and
Google Chrome (from left to right).
http://freepdf-books.com
CHAPTER 6 ■ HTML5 MEDIA AND CANVAS
175
Scratch Canvas
Since the drawImage() function also takes a Canvas as input, Option 3 is to draw the video frames into a
scratch canvas and then use drawImage() again with input from that second canvas. The expectation is
that the image in the Canvas is already in a form that can just be copied over into the display Canvas
rather than having continuing pixel conversions as is necessary in Option 1, where scaling is happening,
or Listing 6–3, where the conversion happens by pulling in pixels from the video. Listing 6–6 has the
code. The output is identical to Figure 6–4.
Listing 6–6. Reimplementation of video tiling into a Canvas with two Canvases
<video controls height="270px" width="480px" >
<source src="HelloWorld.mp4" type="video/mp4">
<source src="HelloWorld.webm" type="video/webm">
<source src="HelloWorld.ogv" type="video/ogg">
</video>
<canvas width="400" height="300" style="border: 1px solid black;">
</canvas>
<canvas id="scratch" width="320" height="160"
style="display: none;"></canvas>
<script>
window.onload = function() {
initCanvas();
}
var context, sctxt, video;
function initCanvas() {
video = document.getElementsByTagName("video")[0];
canvases = document.getElementsByTagName("canvas");
canvas = canvases[0];
scratch = canvases[1];
context = canvas.getContext("2d");
sctxt = scratch.getContext("2d");
video.addEventListener("play", paintFrame, false);
}
function paintFrame() {
// set up scratch frames
w = 320; h = 160;
sctxt.drawImage(video, 0, 0, w, h);
// create 4x4 tiling
tiles = 4;
gap = 5;
tw = w/tiles; th = h/tiles;
for (x = 0; x < tiles; x++) {
for (y = 0; y < tiles; y++) {
context.drawImage(scratch, x*tw, y*th, tw, th,
x*(tw+gap), y*(th+gap), tw, th);
}
}
if (video.paused || video.ended) {
return;
}
setTimeout(function () {
paintFrame();
http://freepdf-books.com

CHAPTER 6 ■ HTML5 MEDIA AND CANVAS
176
}, 0);
}
</script>
Notice that there is now a second Canvas in the HTML. It has to be defined large enough to be able
to contain the video frame. If you do not give it a width and height attribute, it will default to 300x150
and you may lose data around the edges. But you have to make it “display:none” such that it doesn't
also get displayed. The video frames get decoded into this scratch canvas and rescaled only this once.
Then the tiles are drawn into the exposed Canvas using the extended drawImage() function as in Listing
6–3.
This is the most efficient implementation of the tiling since it doesn't have to repeatedly copy the
frames from the video, and it doesn't have to continuously rescale the original frame size. It also works
across all browsers, including IE.
An amazing example of tiling together with further Canvas effects such as transformations is shown
in “blowing up your video” by Sean Christmann5.
6.2 Styling
Now that we know how to handle video in a Canvas, let's do some simple manipulations to the pixels
that will have a surprisingly large effect.
Pixel Transparency to Replace the Background
Listing 6–7 shows a video where all colors but white are made transparent before being projected onto a
Canvas with a background image.
Listing 6–7. Making certain colors in a video transparent through a Canvas
function paintFrame() {
w = 480; h = 270;
context.drawImage(video, 0, 0, w, h);
frame = context.getImageData(0, 0, w, h);
context.clearRect(0, 0, w, h);
output = context.createImageData(w, h);
// Loop over each pixel of output file
for (x = 0; x < w; x++) {
for (y = 0; y < h; y++) {
// index in output image
i = x + w*y;
for (c = 0; c < 4; c++) {
output.data[4*i+c] = frame.data[4*i+c];
}
// make pixels transparent
r = frame.data[i * 4 + 0];
g = frame.data[i * 4 + 1];
b = frame.data[i * 4 + 2];
if (!(r > 200 && g > 200 && b > 200))
5 See http://craftymind.com/factory/html5video/CanvasVideo.html
k
Download from www.eBookTM.Com
http://freepdf-books.com
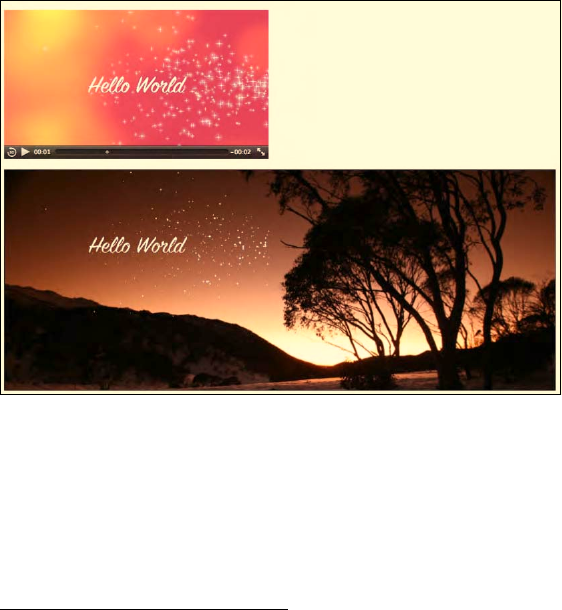
CHAPTER 6 ■ HTML5 MEDIA AND CANVAS
177
output.data[4*i + 3] = 0;
}
}
context.putImageData(output, 0, 0);
if (video.paused || video.ended) {
return;
}
setTimeout(function () {
paintFrame();
}, 0);
}
Listing 6–7 shows the essential painting function. The rest of the page is very similar to Listing 6–2
with the addition of a background image to the <canvas> styling. All pixels are drawn exactly the same
way, except for the fourth color channel of each pixel, which is set to 0 depending on the color
combination of the pixel. Figure 6–7 shows the result with the “Hello World” text and the stars being the
only remaining nontransparent pixels.
This example works in all browsers except IE. The IE bug—where image data read from <video>
through getImageData() cannot be written out via putImageData()—ears its head here, too.
Figure 6–7. Projecting a masked video onto a background image in the Canvas.
This technique can also be applied to a blue or green screen video to replace the background6.
6 See http://people.mozilla.com/~prouget/demos/green/green.xhtml for an example by Paul Rouget.
http://freepdf-books.com
CHAPTER 6 ■ HTML5 MEDIA AND CANVAS
178
Scaling Pixel Slices for a 3D Effect
Videos are often placed in a 3D display to make them look more like real-world screens. This requires
scaling the shape of the video to a trapeze where both width and height are scaled. In a Canvas, this can
be achieved by drawing vertical slices of the video picture with different heights and scaling the width
using the drawImage() function. Listing 6–8 shows an example.
Listing 6–8. Rendering a video in the 2D canvas with a 3D effect
function paintFrame() {
// set up scratch frame
w = 320; h = 160;
sctxt.drawImage(video, 0, 0, w, h);
// width change from -500 to +500
width = -500;
// right side scaling from 0 to 200%
scale = 1.4;
// canvas width and height
cw = 1000; ch = 400;
// number of columns to draw
columns = Math.abs(width);
// display the picture mirrored?
mirror = (width > 0) ? 1 : -1;
// origin of the output picture
ox = cw/2; oy= (ch-h)/2;
// slice width
sw = columns/w;
// slice height increase steps
sh = (h*scale-h)/columns;
// Loop over each pixel column of the output picture
for (x = 0; x < w; x++) {
// place output columns
dx = ox + mirror*x*sw;
dy = oy – x*sh/2;
// scale output columns
dw = sw;
dh = h + x*sh;
// draw the pixel column
context.drawImage(scratch, x, 0, 1, h, dx, dy, dw, dh);
}
if (video.paused || video.ended) {
return;
}
setTimeout(function () {
paintFrame();
http://freepdf-books.com
CHAPTER 6 ■ HTML5 MEDIA AND CANVAS
179
}, 0);
}
For this example we use a 1000x400 Canvas and a second scratch Canvas as in Listing 6–6 into which
we pull the pixel data. We show only the paintFrame() function in Listing 6–8. As we pull the video frame
into the scratch frame, we perform the scaling to the video size at which we want to undertake the effect.
For this scaling we have the variables “width” and “scale”. You can change these easily, for example, to
achieve a book page turning effect (change “width” for this) or an approaching/retreating effect (change
“scale” for this). The next lines define some variables important to use in the loop that places the pixel
slices.
Figure 6–8 shows the result using different “width” and “scale” values in the different browsers. All
browsers, including IE, support this example.
The width and scale variables in Figure 6–8 were changed between the screenshots to show some
of the dynamics possible with this example. For Firefox we used (width,scale)=(500,2.0), for Safari
(200,1.4), for Opera (50,1.1), for Chrome (-250,1.2), and for IE (-250,2).
http://freepdf-books.com
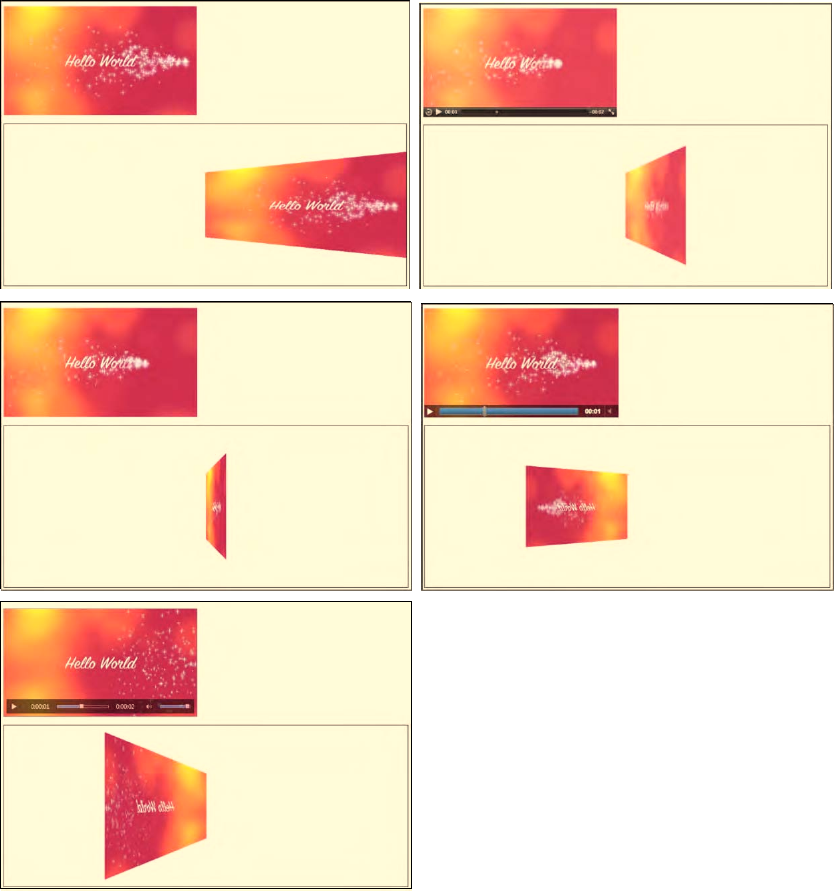
CHAPTER 6 ■ HTML5 MEDIA AND CANVAS
180
Figure 6–8. Rendering video in a 3D perspective in Firefox, Safari (top row), Opera, Chrome (middle row),
and IE (bottom).
http://freepdf-books.com
CHAPTER 6 ■ HTML5 MEDIA AND CANVAS
181
Ambient CSS Color Frame
Another nice effect that the Canvas can be used for is what is typically known as an ambient color frame
for the video. In this effect, a colored frame is created around the video, and the color of that frame is
adjusted according to the average color of the video.
Listing 6–9 shows an example implementation of such an ambient color frame.
Listing 6–9. Calculation of average color in a Canvas and display of ambient color frame
<style type="text/css">
#ambience {
-moz-transition-property: all;
-moz-transition-duration: 1s;
-moz-transition-timing-function: linear;
-webkit-transition-property: all;
-webkit-transition-duration: 1s;
-webkit-transition-timing-function: linear;
-o-transition-property: all;
-o-transition-duration: 1s;
-o-transition-timing-function: linear;
padding: 40px;
width: 496px;
outline: black solid 10px;
}
video {
padding: 3px;
background-color: white;
}
canvas {
display: none;
}
</style>
<div id="ambience">
<video controls height="270px" width="480px">
<source src="video1.mp4" type="video/mp4">
<source src="video1.webm" type="video/webm">
<source src="video1.ogv" type="video/ogg">
</video>
</div>
<canvas id="scratch" width="320" height="160"></canvas>
<script>
window.onload = function() {
initCanvas();
}
var sctxt, video, ambience;
function initCanvas() {
ambience = document.getElementById("ambience");
video = document.getElementsByTagName("video")[0];
scratch = document.getElementById("scratch");
sctxt = scratch.getContext("2d");
video.addEventListener("play", paintAmbience, false);
}
function paintAmbience() {
http://freepdf-books.com
CHAPTER 6 ■ HTML5 MEDIA AND CANVAS
182
// set up scratch frame
sctxt.drawImage(video, 0, 0, 320, 160);
frame = sctxt.getImageData(0, 0, 320, 160);
// get average color for frame and transition to it
color = getColorAvg(frame);
ambience.style.backgroundColor =
'rgb('+color[0]+','+color[1]+','+color[2]+')';
if (video.paused || video.ended) {
return;
}
// don't do it more often than once a second
setTimeout(function () {
paintAmbience();
}, 1000);
}
function getColorAvg(frame) {
r = 0;
g = 0;
b = 0;
// calculate average color from image in canvas
for (var i = 0; i < frame.data.length; i += 4) {
r += frame.data[i];
g += frame.data[i + 1];
b += frame.data[i + 2];
}
r = Math.ceil(r / (frame.data.length / 4));
g = Math.ceil(g / (frame.data.length / 4));
b = Math.ceil(b / (frame.data.length / 4));
return Array(r, g, b);
}
</script>
Listing 6–9 is pretty long, but also fairly easy to follow. We set up the CSS style environment such
that the video is framed by a <div> element whose background color will be dynamically changed. The
video has a 3px white padding frame to separate it from the color-changing <div>. Because we are
performing the color changes only once every second, but we want the impression of a smooth color
transition, we use CSS transitions to make the changes over the course of a second.
The Canvas being used is invisible since it is used only to pull an image frame every second and
calculate the average color of that frame. The background of the <div> is then updated with that color.
Figure 6–9 shows the result at different times in a video.
http://freepdf-books.com

CHAPTER 6 ■ HTML5 MEDIA AND CANVAS
183
Figure 6–9. Rendering of an ambient CSS color frame in Firefox(top left), Safari (top right), Opera (bottom
left), and Google Chrome (bottom right)
If you are reading this in the print version, in Figure 6–9 you may see only different shades of gray as
the backgrounds of the videos. However, they are actually khaki, blue, gray and red.
Note that because of the IE bug on getImageData() and putImageData() on video, this example
doesn't work in IE.
Other nice examples of ambient color backgrounds are available from Mozilla7 and Splashnology.8
Video as Pattern
The Canvas provides a simple function to create regions tiled with images, another Canvas, or frames
from a video: the createPattern() function. This will take an image and replicate it into the given region
until that region is filled with it. If your video doesn't come in the size that your pattern requires, you will
need to use a scratch Canvas to resize the video frames first. Listing 6–10 shows how it's done.
7 See http://videos.mozilla.org/serv/blizzard/35days/silverorange-ambient-video/ambient.xhtml
8 See http://www.splashnology.com/blog/html5/382.html
http://freepdf-books.com
CHAPTER 6 ■ HTML5 MEDIA AND CANVAS
184
Listing 6–10. Filling a rectangular canvas region with a video pattern
<video style="display: none;">
<source src="HelloWorld.mp4" type="video/mp4">
<source src="HelloWorld.webm" type="video/webm">
<source src="HelloWorld.ogv" type="video/ogg">
</video>
<canvas width="800" height="400" style="border: 1px solid black;">
</canvas>
<canvas id="scratch" width="160" height="80" style="display:none;">
</canvas>
<script>
window.onload = function() {
initCanvas();
}
var context, sctxt, video;
function initCanvas() {
video = document.getElementsByTagName("video")[0];
canvas = document.getElementsByTagName("canvas")[0];
context = canvas.getContext("2d");
scratch = document.getElementById("scratch");
sctxt = scratch.getContext("2d");
video.addEventListener("play", paintFrame, false);
if (video.readyState >= video.HAVE_METADATA) {
startPlay();
} else {
video.addEventListener("loadedmetadata", startPlay, false);
}
}
function startPlay() {
video.play();
}
function paintFrame() {
sctxt.drawImage(video, 0, 0, 160, 80);
pattern = context.createPattern(scratch, 'repeat');
context.fillStyle = pattern;
context.fillRect(0, 0, 800, 400);
if (video.paused || video.ended) {
return;
}
setTimeout(function () {
paintFrame();
}, 10);
}
</script>
Note how we are using the play() function to start video playback, but only if the video is ready for
playback; otherwise, we have to wait until the video reports through the “loadedmetadata” event that its
decoding pipeline is ready for it. This is why we are checking the state and potentially adding a callback
for the “loadedmetadata” event.
Every time the paintFrame() function is called, the current image in the video is grabbed and used
as the replicated pattern in createPattern(). The HTML5 Canvas specification states that if the image
http://freepdf-books.com
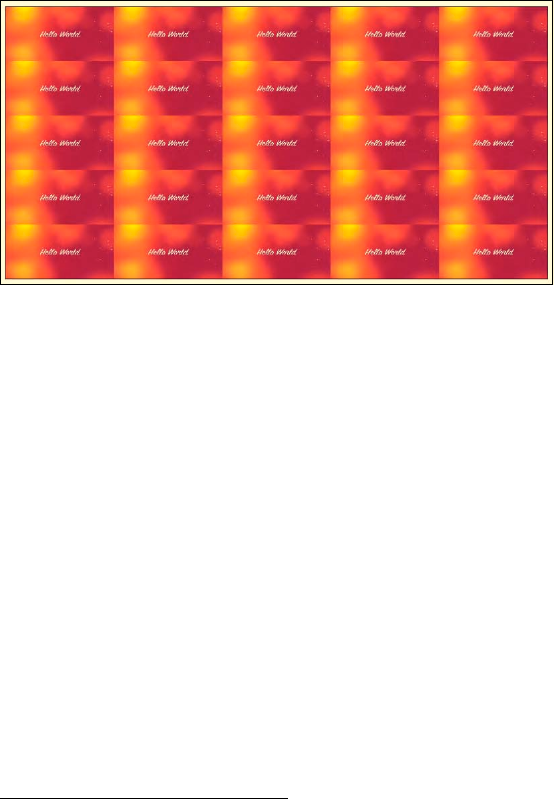
CHAPTER 6 ■ HTML5 MEDIA AND CANVAS
185
(or Canvas frame or video frame) is changed after the createPattern() function call where it is used,
that will not affect the pattern.
Because there is no means of specifying scaling on the pattern image being used, we have to first
load the video frames into the scratch Canvas, then create the pattern from this scratch Canvas and
apply it to the drawing region.
We do not want the pattern painting to slow down the rest of the web page; thus we call this
function again only after a 10ms wait. Figure 6–10 shows the rendering in Opera. Since all browsers show
the same behavior, this is representative for all browsers.
Figure 6–10. Rendering of a video pattern in Opera.
6.3 Compositing
When painting video frames on a Canvas, the frame pixels will be combined (also called: composited)
with the existing background on the Canvas. The function applied for this composition is defined by the
“globalCompositeOperation” property of the Canvas.9 By default, what is being drawn onto the Canvas is
drawn over the top of what is already there. But this property can be changed to allow for more
meaningful use of the existing content on the Canvas.
Mozilla provides a very nice overview at https://developer.mozilla.org/samples/canvas-
tutorial/6_1_canvas_composite.html to check what your browser does with each composite operation
type. Some browsers don't implement all the functionalities yet, so be careful what you choose. We look
at two examples here, one where we use a gradient for compositing and one where we use a path.
Gradient Transparency Mask
Gradient masks are used to gradually fade the opacity of an object. We have already seen in Chapter 5,
Listing 5-8, how we can use a liner gradient image defined in SVG as a mask for a video to make video
pixels increasingly transparent along the gradient. We could place page content behind the video and
the video would sit on top of that content and would be transparent where the gradient was opaque. We
used the CSS properties -webkit-mask and mask for this, but it doesn't (yet) work in Opera.
9 See http://www.whatwg.org/specs/web-apps/current-work/multipage/the-canvas-element.html#dom-context-2d-
globalcompositeoperation
http://freepdf-books.com
CHAPTER 6 ■ HTML5 MEDIA AND CANVAS
186
With Canvas, we now repeat this exercise with a bit more flexibility, since we can set individual
pixels in the middle of doing all this. We're reusing the previous example and are actually painting the
video into the middle of a Canvas now. That video is blended into the ambient background through use
of a radial gradient. Listing 6–11 shows the key elements of the code.
Listing 6–11. Introducing a gradient transparency mark into the ambient video
<style type="text/css">
#ambience {
-moz-transition-property: all;
-moz-transition-duration: 1s;
-moz-transition-timing-function: linear;
-webkit-transition-property: all;
-webkit-transition-duration: 1s;
-webkit-transition-timing-function: linear;
-o-transition-property: all;
-o-transition-duration: 1s;
-o-transition-timing-function: linear;
width: 390px; height: 220px;
outline: black solid 10px;
}
#canvas {
position: relative;
left: 30px; top: 30px;
}
</style>
<div id="ambience">
<canvas id="canvas" width="320" height="160"></canvas>
</div>
<video style="display: none;">
<source src="video1.mp4" type="video/mp4">
<source src="video1.webm" type="video/webm">
<source src="video1.ogv" type="video/ogg">
</video>
<canvas id="scratch" width="320" height="160" style="display: none;">
</canvas>
<script>
window.onload = function() {
initCanvas();
}
var context, sctxt, video, ambience;
function initCanvas() {
ambience = document.getElementById("ambience");
video = document.getElementsByTagName("video")[0];
canvas = document.getElementsByTagName("canvas")[0];
context = canvas.getContext("2d");
context.globalCompositeOperation = "destination-in";
scratch = document.getElementById("scratch");
sctxt = scratch.getContext("2d");
gradient = context.createRadialGradient(160,80,0, 160,80,150);
gradient.addColorStop(0, "rgba( 255, 255, 255, 1)");
gradient.addColorStop(0.7, "rgba( 125, 125, 125, 0.8)");
gradient.addColorStop(1, "rgba( 0, 0, 0, 0)");
Download from www.eBookTM.Com
http://freepdf-books.com
CHAPTER 6 ■ HTML5 MEDIA AND CANVAS
187
video.addEventListener("play", paintAmbience, false);
if (video.readyState >= video.HAVE_METADATA) {
startPlay();
} else {
video.addEventListener("loadedmetadata", startPlay, false);
}
}
function startPlay() {
video.play();
}
function paintAmbience() {
// set up scratch frame
sctxt.drawImage(video, 0, 0, 320, 160);
// get average color for frame and transition to it
frame = sctxt.getImageData(0, 0, 320, 160);
color = getColorAvg(frame);
ambience.style.backgroundColor =
'rgba('+color[0]+','+color[1]+','+color[2]+',0.8)';
// paint video image
context.putImageData(frame, 0, 0);
// throw gradient onto canvas
context.fillStyle = gradient;
context.fillRect(0,0,320,160);
if (video.paused || video.ended) {
return;
}
setTimeout(function () {
paintAmbience();
}, 0);
}
We do not repeat the getColorAvg() function, which we defined in Listing 6–9.
We achieve the video masking with a gradient through the change of the globalCompositeOperation
property of the display Canvas to “destination-in.” This means that we are able to use a gradient that is
pasted on top of the video frame to control the transparency of the pixels of the video frame. We create a
radial gradient in the setup function and reuse that for every video frame.
Figure 6–11 shows the results in the browsers except for IE, which doesn't display this example
because of the bug with getImageData() and putImageData().
7
http://freepdf-books.com
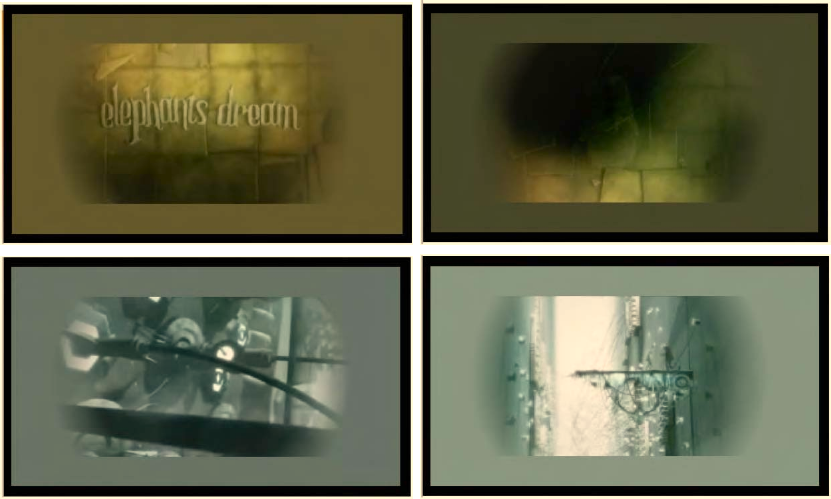
CHAPTER 6 ■ HTML5 MEDIA AND CANVAS
188
Figure 6–11. Rendering of video with a transparency mask onto an ambient color frame in Firefox(top
left), Safari (top right), Opera (bottom left), and Chrome (bottom right)
Clipping a Region
Another useful compositing effect is to clip out a region from the Canvas for display. This will cause
everything else drawn onto the Canvas afterwards to be drawn only in the clipped-out region. For this, a
path is drawn that may also include basic shapes. Then, instead of drawing these onto the Canvas with
the stroke() or fill() methods, we draw them using the clip() method, creating the clipped region(s)
on the Canvas to which further drawings will be confined. Listing 6–12 shows an example.
Listing 6–12. Using a clipped path to filter out regions of the video for display
<canvas id="canvas" width="320" height="160"></canvas>
<video style="display: none;">
<source src="HelloWorld.mp4" type="video/mp4">
<source src="HelloWorld.webm" type="video/webm">
<source src="HelloWorld.ogv" type="video/ogg">
</video>
<script>
window.onload = function() {
initCanvas();
}
var context, video;
function initCanvas() {
http://freepdf-books.com
CHAPTER 6 ■ HTML5 MEDIA AND CANVAS
189
video = document.getElementsByTagName("video")[0];
canvas = document.getElementsByTagName("canvas")[0];
context = canvas.getContext("2d");
context.beginPath();
// speech bubble
context.moveTo(75,25);
context.quadraticCurveTo(25,25,25,62.5);
context.quadraticCurveTo(25,100,50,100);
context.quadraticCurveTo(100,120,100,125);
context.quadraticCurveTo(90,120,65,100);
context.quadraticCurveTo(125,100,125,62.5);
context.quadraticCurveTo(125,25,75,25);
// outer circle
context.arc(180,90,50,0,Math.PI*2,true);
context.moveTo(215,90);
// mouth
context.arc(180,90,30,0,Math.PI,false);
context.moveTo(170,65);
// eyes
context.arc(165,65,5,0,Math.PI*2,false);
context.arc(195,65,5,0,Math.PI*2,false);
context.clip();
video.addEventListener("play", drawFrame, false);
if (video.readyState >= video.HAVE_METADATA) {
startPlay();
} else {
video.addEventListener("loadedmetadata", startPlay, false);
}
}
function startPlay() {
video.play();
}
function drawFrame() {
context.drawImage(video, 0, 0, 320, 160);
if (video.paused || video.ended) {
return;
}
setTimeout(function () {
drawFrame();
}, 0);
}
</script>
In this example, we don't display the video element, but only draw its frames onto the Canvas.
During setup of the Canvas, we define a clip path consisting of a speech bubble and a smiley face. We
then set up the event listener for the “play” event and start playback of the video. In the callback, we only
need to draw the video frames onto the Canvas. This is a very simple and effective means of masking out
regions. Figure 6–12 shows the results in Chrome. It works in all browsers the same way, including IE.
http://freepdf-books.com

CHAPTER 6 ■ HTML5 MEDIA AND CANVAS
190
Figure 6–12. Rendering of video on a clipped Canvas in Google Chrome.
6.4 Drawing Text
We can also use text as a mask for video, such that the filling on some text is the video. Listing 6–13
shows how it is done with a Canvas.
Listing 6–13. Text filled with video
<canvas id="canvas" width="320" height="160"></canvas>
<video style="display: none;">
<source src="HelloWorld.mp4" type="video/mp4">
<source src="HelloWorld.webm" type="video/webm">
<source src="HelloWorld.ogv" type="video/ogg">
</video>
<script>
window.onload = function() {
initCanvas();
}
var context, video;
function initCanvas() {
video = document.getElementsByTagName("video")[0];
canvas = document.getElementsByTagName("canvas")[0];
context = canvas.getContext("2d");
// paint text onto canvas as mask
context.font = 'bold 70px sans-serif';
context.textBaseline = 'top';
context.fillText('Hello World!', 0, 50, 320);
context.globalCompositeOperation = "source-atop";
video.addEventListener("play", paintFrame, false);
if (video.readyState >= video.HAVE_METADATA) {
startPlay();
http://freepdf-books.com
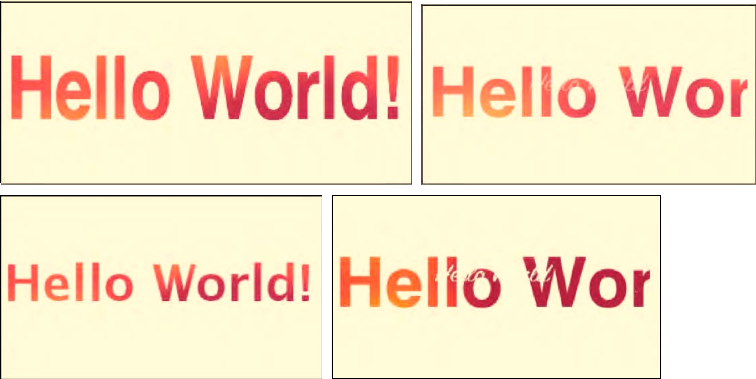
CHAPTER 6 ■ HTML5 MEDIA AND CANVAS
191
} else {
video.addEventListener("loadedmetadata", startPlay, false);
}
}
function startPlay() {
video.play();
}
function paintFrame() {
context.drawImage(video, 0, 0, 320, 160);
if (video.paused || video.ended) {
return;
}
setTimeout(function () {
paintFrame();
}, 0);
}
</script>
We have a target Canvas and a hidden video element. In JavaScript, we first paint the text onto the
Canvas. Then we use the “globalCompositeOperation” property to use the text as a mask for all video
frames painted onto the Canvas afterwards. Note that we used “source-atop” as the compositing
function; “source-in” works in Opera and WebKit-browsers, but Firefox refuses to mask the video and
simply displays the full frames. IE unfortunately doesn't yet support the global composition for video
images. Figure 6–13 shows the results in the other browsers that all support this functionality.
Figure 6–13. Rendering of video as a filling of text in Firefox(top left), Safari (top right), Opera (bottom
left), and Google Chrome (bottom right).
http://freepdf-books.com
CHAPTER 6 ■ HTML5 MEDIA AND CANVAS
192
Note that the text rendering with the optional maxWidth parameter on the fillText() function
doesn't seem to be supported yet in WebKit browsers, which is why their text is not scaled. In Firefox, the
text height is kept and the font horizontally scaled, while Opera chooses a smaller font.
6.5 Transformations
The usual transformations supported by CSS and SVG are also supported by Canvas: translating,
rotating, scaling, and transformation matrices. We can apply them to the frames extracted from the
video to give the video some special effects.
Reflections
A simple effect web designers particularly like to use is reflections. Reflections are simple to implement
and have a huge effect, particularly when used on a dark website theme. All you need to do is make a
copy of the content into a second Canvas underneath, flip it and reduce opacity along a gradient.
We weren't able to perform video reflections either in SVG or CSS in a cross-browser consistent way.
Only Opera supports synchronized reflections in SVG because it supports the <video> element inside
SVG, and only WebKit has a -webkit-box-reflect property in CSS. So only by using the Canvas can we
create reflections in a cross-browser consistent manner, while keeping the copied video and the source
video in sync.
Listing 6–14 shows an example implementation. This works in all browsers.
Listing 6–14. Video reflection using a Canvas
<div style="padding: 50px; background-color: #090909;">
<video style="vertical-align: bottom;" width="320">
<source src="video1.mp4" type="video/mp4">
<source src="video1.webm" type="video/webm">
<source src="video1.ogv" type="video/ogg">
</video>
<br/>
<canvas id="reflection" width="320" height="55"
style="vertical-align: top;"></canvas>
</div>
<script>
window.onload = function() {
initCanvas();
}
var context, rctxt, video;
function initCanvas() {
video = document.getElementsByTagName("video")[0];
reflection = document.getElementById("reflection");
rctxt = reflection.getContext("2d");
// flip canvas
rctxt.translate(0,160);
rctxt.scale(1,-1);
// create gradient
gradient = rctxt.createLinearGradient(0, 105, 0, 160);
gradient.addColorStop(1, "rgba(255, 255, 255, 0.3)");
gradient.addColorStop(0, "rgba(255, 255, 255, 1.0)");
rctxt.fillStyle = gradient;
http://freepdf-books.com
CHAPTER 6 ■ HTML5 MEDIA AND CANVAS
193
rctxt.rect(0, 105, 320, 160);
video.addEventListener("play", paintFrame, false);
if (video.readyState >= video.HAVE_METADATA) {
startPlay();
} else {
video.addEventListener("loadedmetadata", startPlay, false);
}
}
function startPlay() {
video.play();
}
function paintFrame() {
// draw frame, and fill with the opacity gradient mask
rctxt.drawImage(video, 0, 0, 320, 160);
rctxt.globalCompositeOperation = "destination-out";
rctxt.fill();
// restore composition operation for next frame draw
rctxt.globalCompositeOperation = "source-over";
if (video.paused || video.ended) {
return;
}
setTimeout(function () {
paintFrame();
}, 0);
}
</script>
The example uses the <video> element to display the video, though a second Canvas could be used
for this, too. Make sure to remove the @controls attribute as it breaks the reflection perception. We've
placed the video and the aligned Canvas underneath into a dark <div> element to make it look nicer.
Make sure to give the <video> and the <canvas> element the same width. We've given the reflection
one-third the height of the original video.
As we set up the Canvas, we already prepare it as a mirrored drawing area with the scale() and
translate() functions. The translation moves it down the height of the video, the scaling mirrors the
pixels along the x axis. We then set up the gradient on the bottom 55 pixels of the video frames.
The paintFrame() function applies the reflection effect after the video starts playback and while it is
playing back at the maximum speed possible. Because we have decided to have the <video> element
display the video, it is possible that the <canvas> cannot catch up with the display, and there is a
disconnect between the <video> and its reflection. If that bothers you, you should also paint the video
frames in a Canvas. You just need to set up a second <canvas> element and add a drawImage() function
on that Canvas at the top of the paintFrame() function.
For the reflection, we now paint the video frames onto the mirrored Canvas. When using two
<canvas> elements, you may be tempted to use the getImageData() and putImageData() to apply the
Canvas transformations; however, Canvas transformations are not applied to these functions. So you
have to use a Canvas into which you have pulled the video data through drawImage() to apply the
transformations.
Now we just need a gradient on the mirrored images. To apply the gradient, we use a composition
function of the gradient with the video images. We have used the composition before to replace the
current image in the Canvas with the next one. Creating a new composition property changes that. We
therefore need to reset the compositing property after applying the gradient. Another solution would be
to use save() and restore() functions before changing the compositing property and after applying the
gradient. If you change more than one Canvas property or you don't want to keep track of what previous
value you have to reset the property to, using save() and restore() is indeed the better approach.
Figure 6–14 shows the resulting renderings.
http://freepdf-books.com
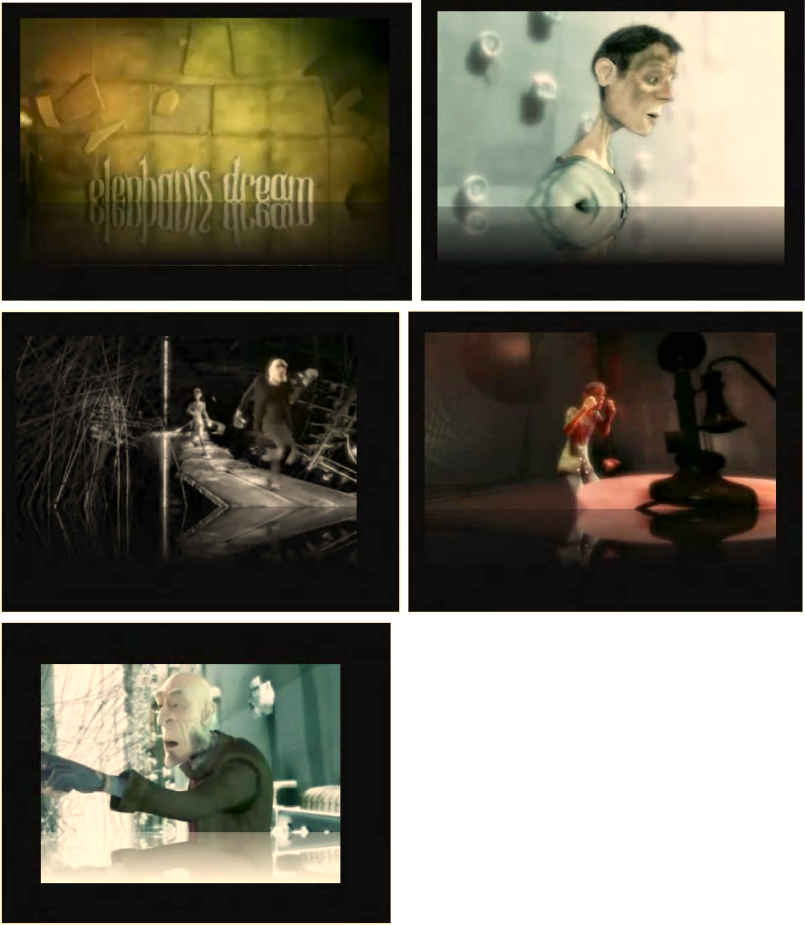
CHAPTER 6 ■ HTML5 MEDIA AND CANVAS
194
Figure 6–14. Rendering of video with a reflection in Firefox, Safari (top row), Opera, Chrome (middle row),
and IE (bottom)
http://freepdf-books.com
CHAPTER 6 ■ HTML5 MEDIA AND CANVAS
195
Note that in Firefox there is a stray one-pixel line at the end of the gradient. It's a small glitch in the
Firefox implementation. You can make the <canvas> element smaller by one pixel to get rid of it.
Also note that IE's mirror image is not quite correct. The gradient is not properly composed with the
imagery. It’s just a white overlay onto the mirrored imagery.
You could next consider putting a slight ripple effect on the reflection. This is left to the reader for
exercise.
Spiraling Video
Canvas transformations can make the pixel-based operations that we saw at the beginning of this
chapter a lot easier, in particular when you want to apply them to the whole Canvas. The example shown
in Listing 6–2 and Figure 6–2 can also be achieved with a translate() function, except you will still need
to calculate when you hit the boundaries of the canvas to change your translate() function. So you
would add a translate(xpos,ypos) function and always draw the image at position (0,0), which doesn't
win you very much.
We want to look here at a more sophisticated example for using transformation. We want to use
both a translate() and a rotate() to make the frames of the video spiral through the Canvas. Listing 6–
15 shows how we achieve this.
Listing 6–15. Video spiral using Canvas
<script>
window.onload = function() {
initCanvas();
}
var context, video;
var i = 0;
var repeater;
function initCanvas() {
video = document.getElementsByTagName("video")[0];
canvas = document.getElementsByTagName("canvas")[0];
context = canvas.getContext("2d");
// provide a shadow
context.shadowOffsetX = 5;
context.shadowOffsetY = 5;
context.shadowBlur = 4;
context.shadowColor = "rgba(0, 0, 0, 0.5)";
video.addEventListener("play", repeat, false);
}
function repeat() {
// try to get each browser at the same frequency
repeater = setInterval("paintFrame()", 30);
}
function paintFrame() {
context.drawImage(video, 0, 0, 160, 80);
// reset to identity transform
context.setTransform(1, 0,
0, 1,
0, 0);
// increasingly move to the right and down & rotate
i += 1;
context.translate(3 * i , 1.5 * i);
http://freepdf-books.com
CHAPTER 6 ■ HTML5 MEDIA AND CANVAS
196
context.rotate(0.1 * i);
if (video.paused || video.ended) {
clearInterval(repeater);
}
}
</script>
The <video> and <canvas> element definitions are unchanged from previous examples. We only
need to increase the size of our Canvas to fit the full spiral. We also have given the frames being painted
into the Canvas a shadow, which offsets them from the previously drawn frames.
Note that we have changed the way in which we perform the callback. Now, we don't run the
paintFrame() function as fast as we can, but rather every 30ms at most (depending on the processing
speed of the browser). For this, we have introduced the repeat() function as the callback to the play
event. The repeater is cancelled when we reach the end of the video or pause it.
The way in which we paint the spiral is such that we paint the new video frame on top of a translated
and rotated canvas. In order to apply the translation and rotation to the correct pixels, we need to reset
the transformation matrix after painting a frame. This is very important, because the previous
transformations are already stored for the Canvas such that another call — to translate(), for example
— will go along the tilted axis set by the rotation rather than straight down as you might expect. Thus,
the transformation matrix has to be reset; otherwise, the operations are cumulative.
Figure 6–15 shows the resulting renderings in all the browsers.
Note that they all achieve roughly the 130 frames for the four-second long video at 30ms difference
between the frames. When we take that difference down to 4s, Firefox and Safari will achieve 153 frames,
IE 237, Opera 624, and Chrome 634 out of the possible 1000 frames. This is for browsers downloaded and
installed on Mac OS X without setting up extra hardware acceleration for graphics operations.
Note that the WebKit-based browsers don't do the black mirror and consequently the images show
much less naturalism.
Download from www.eBookTM.Com
http://freepdf-books.com
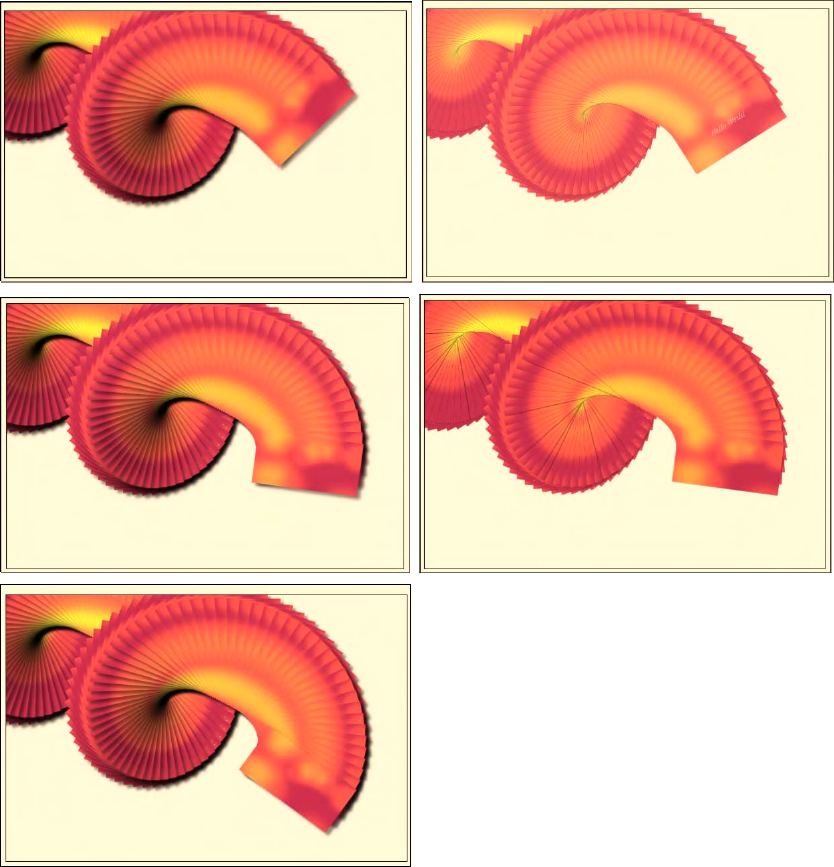
CHAPTER 6 ■ HTML5 MEDIA AND CANVAS
197
Figure 6–15. Rendering of spiraling video frames in Firefox , Safari(top row), Opera, Chrome (middle
row), and IE (bottom)
http://freepdf-books.com
CHAPTER 6 ■ HTML5 MEDIA AND CANVAS
198
6.6 Animations and Interactivity
We've already used setInterval() and setTimeout() with video in the Canvas to allow creating animated
graphics with the video frames in the Canvas in sync with the timeline of the video. In this section we
want to look at another way to animate the Canvas: through user interaction.
In comparison to SVG, which allows detailed attachment of events to individual objects in the
graphic, Canvas only knows pixels and has no concept of objects. It thus cannot associate events to a
particular shape in the drawing. The Canvas as a whole, however, accepts events, so you can attach the
click event on the <canvas> element, and then compare the x/y coordinates of the click event with the
coordinates of your Canvas to identify which object it might relate to.
In this section we will look at an example that is a bit like a simple game. After you start playback of
the video, you can click at any time again to retrieve a quote from a collection of quotes. Think of it as a
fortune cookie gamble. Listing 6–16 shows how we've done it.
Listing 6–16. Fortune cookie video with user interactivity in Canvas
<script>
var quotes = ["Of those who say nothing,/ few are silent.",
"Man is born to live,/ not to prepare for life.",
"Time sneaks up on you/ like a windshield on a bug.",
"Simplicity is the/ peak of civilization.",
"Only I can change my life./ No one can do it for me."];
window.onload = function() {
initCanvas();
}
var context, video;
var w = 640, h = 320;
function initCanvas() {
video = document.getElementsByTagName("video")[0];
canvas = document.getElementsByTagName("canvas")[0];
context = canvas.getContext("2d");
context.lineWidth = 5;
context.font = 'bold 25px sans-serif';
context.fillText('Click me!', w/4+20, h/2, w/2);
context.strokeRect(w/4,h/4,w/2,h/2);
canvas.addEventListener("click", doClick, false);
video.addEventListener("play", paintFrame, false);
video.addEventListener("pause", showRect, false);
}
function paintFrame() {
if (video.paused || video.ended) {
return;
}
context.drawImage(video, 0, 0, w, h);
context.strokeRect(w/4,h/4,w/2,h/2);
setTimeout(function () {
paintFrame();
}, 0);
}
function isPlaying(video) {
return (!video.paused && !video.ended);
}
http://freepdf-books.com

CHAPTER 6 ■ HTML5 MEDIA AND CANVAS
199
function doClick(e) {
var pos = clickPos(e);
if ((pos[0] < w/4) || (pos[0] > 3*w/4)) return;
if ((pos[1] < h/4) || (pos[1] > 3*h/4)) return;
!isPlaying(video) ? video.play() : video.pause();
}
function showRect(e) {
context.clearRect(w/4,h/4,w/2,h/2);
quote = quotes[Math.floor(Math.random()*quotes.length)].split("/");
context.fillText(quote[0], w/4+5, h/2-10, w/2-10);
context.fillText(quote[1], w/4+5, h/2+30, w/2-10);
context.fillText("click again",w/10,h/8);
}
</script>
In this example, we use an array of quotes as the source for the displayed “fortune cookies.” Note
how the strings have a “/” marker in them to deal with breaking it up into multiple lines. It is done this
way because there is no multiline text support for the Canvas.
We proceed to set up an empty canvas with a rectangle in it that has the text “Click me!” Callbacks
are registered for the click event on the Canvas, and also for “pause” and “play” events on the video.
The trick is to use the “click” callback to pause and un-pause the video, which will then trigger the
effects. We restrict the clickable region to the rectangular region to show how regions can be made
interactive in the Canvas, even without knowing what shapes there are.
The “pause” event triggers display of the fortune cookie within the rectangular region in the middle
of the video. The “play” event triggers continuation of the display of the video's frames thus wiping out
the fortune cookie. Note that we do not do anything in paintFrame() if the video is paused. This will deal
with any potentially queued calls to paintFrame() from the setTimeout() function.
You would have noticed that we are missing a function from the above example, namely the
clickPos() function. This function is a helper to gain the x and y coordinates of the click within the
Canvas. It has been extracted into Listing 6–17 because it will be a constant companion for anyone doing
interactive work with Canvas.
Listing 6–17. Typical function to gain the x and y coordinates of the click in a canvas10
function clickPos(e) {
if (e.pageX || e.pageY) {
x = e.pageX;
y = e.pageY;
} else {
x = e.clientX + document.body.scrollLeft +
document.documentElement.scrollLeft;
y = e.clientY + document.body.scrollTop +
document.documentElement.scrollTop;
}
x -= canvas.offsetLeft;
y -= canvas.offsetTop;
return [x,y];
}
10 See http://diveintohtml5.org/canvas.html
http://freepdf-books.com
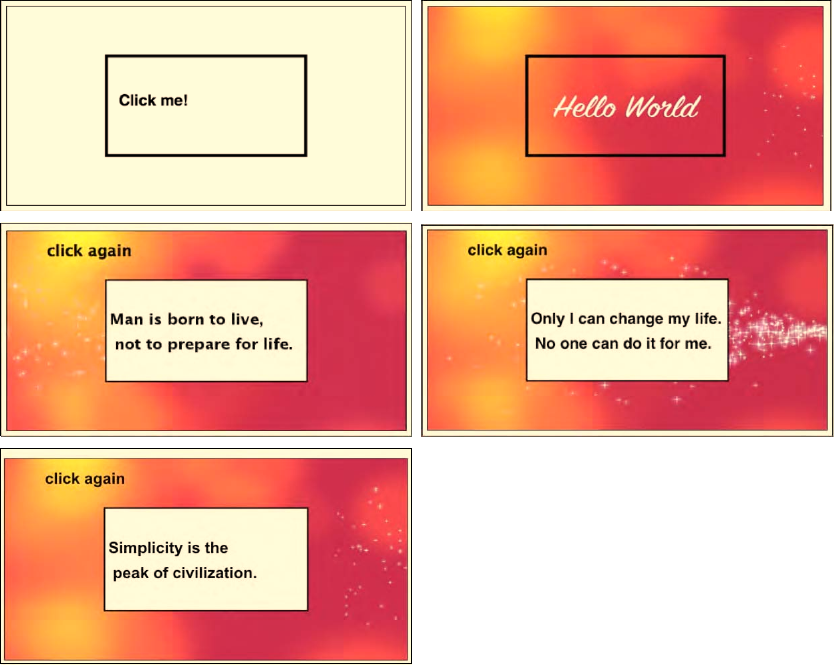
CHAPTER 6 ■ HTML5 MEDIA AND CANVAS
200
Figure 6–16 shows the rendering of this example with screenshots from different browsers.
Figure 6–16. Rendering of the fortune cookies example through an interactive Canvas with video in
Firefox, Safari (top row), Opera, Chrome (middle row), and IE (bottom).
Note that the fonts are rendered differently between the browsers, but other than that, they all
support the same functionality.
6.7 Summary
In this chapter we made use of some of the functionalities of Canvas for manipulating video imagery.
We first learned that the drawImage() function allows us to pull images out of a <video> element and
into a Canvas as pixel data. We then determined the most efficient way of dealing with video frames in
the Canvas and found the “scratch Canvas” as a useful preparation space for video frames that need to
be manipulated once and reused multiple times as a pattern.
http://freepdf-books.com
CHAPTER 6 ■ HTML5 MEDIA AND CANVAS
201
We identified the getImageData() and putImageData() functions as powerful helpers to manipulate
parts of a video's frame data. However, their full set of parameters aren't implemented across browsers
in a compatible manner, so we can use only their simple versions for the time being.
We then made use of pixel manipulation functions such as changing the transparency of certain
pixels to achieve a blue screen effect, scaling pixel slices to achieve a 3D effect, or calculating average
colors on video frames to create an ambient surrounding. We also made use of the createPattern()
function to replicate a video frame across a given rectangle.
Then we moved on to the compositing functionality of the Canvas to put several of the individual
functions together. We used a gradient to fade over from the video to an ambient background, a clip
path, and text as a template to cut out certain areas from the video.
With the Canvas transformation functionality we were finally able to create a video reflection that
works across browsers. We also used it to rotate video frames and thus have them spiral around the
Canvas.
We concluded our look at Canvas by connecting user interaction through clicks on the Canvas to
video activity. Because there are no addressable objects, but only addressable pixel positions on a
Canvas, it is not as well suited as SVG to catching events on objects.
http://freepdf-books.com

CHAPTER 6 ■ HTML5 MEDIA AND CANVAS
202
http://freepdf-books.com

C H A P T E R 7
■ ■ ■
203
HTML5 Media and Web Workers
We have learned a lot of ways in which the HTML5 media elements can be manipulated and modified
using JavaScript. Some of the video manipulations—in particular when used in Canvas—can be very
CPU intensive and slow. Web Workers are a means to deal with this situation.
Web Workers1 are a new functionality in HTML5. They provide a JavaScript API for running scripts
in the background independently of any user interface scripts, i.e. in parallel to the main page and
without disrupting the progress of the main page. Any JavaScript program can be turned into a Web
Worker. For interaction with the main page you need to use message passing, since Web Workers do not
have access to the DOM of the web page. Essentially, Web Workers introduce threading functionality
into the Web.
We will not provide an in-depth introduction to Web Workers here. You will find other HTML5 books
or articles that do so. A good introduction is provided by Mozilla2 at https://developer.mozilla.org/En/
Using_web_workers or the introduction by John Resig3. Instead, we focus here specifically on how to use
Web Workers with HTML5 media. As with every HTML5 technology, Web Workers are still novel and
improvements of both their specifications and implementations can be expected. Here are the functions
and events that Web Workers currently introduce:
• The Worker() constructor, which defines a JavaScript file as a Web Worker,
• The message and error events for the worker,
• The postMessage() method used by a worker that activates the message event
handler of the main page,
• The postMessage() method used by the main page that activates the message
event handler of the worker to talk back,
• JSON, used for message passing,
• The terminate() method used by the main page to terminate the worker
immediately,
• The error event consisting of a human readable message field, the filename of the
worker, and the lineno where the error occurred,
• The importScripts() method used by a worker to load shared JavaScript files,
1 See http://www.whatwg.org/specs/web-workers/current-work/
2 See https://developer.mozilla.org/En/Using_web_workers
3 See http://ejohn.org/blog/web-workers/
http://freepdf-books.com
CHAPTER 7 ■ HTML5 MEDIA AND WEB WORKERS
204
• The ability of Web Workers to call XMLHttpRequest.
Note that Web Workers will work only when used on a web server, because the external script needs
to be loaded with the same scheme as the original page. This means you cannot load a script from a
“data:”, “javascript:”, or “file:” URL. Further, a “https:” page can only start Web Workers that are also on
“https:” and not on “http:”.
Also note that the IE version used for this book does not support Web Workers yet. With the
getImageData() and putImageData() bug in IE mentioned in the previous chapter, none of the non-
worker examples in this chapter work either in IE, so we can't show any screen shots from IE.
7.1 Using Web Workers on Video
In this section we look at a simple example that explains how to turn an HTML5 video page with
JavaScript operations on the video data into one where the operations on the video data are being
executed in a Worker thread and then fed back to the main web page.
As an example, we use a sepia color replica of the video in the Canvas. Listing 7–1 shows how this is
achieved without a Web Worker.
Listing 7–1. Sepia coloring of video pixels in the Canvas
<video controls height="270px" width="480px" >
<source src="HelloWorld.mp4" type="video/mp4">
<source src="HelloWorld.webm" type="video/webm">
<source src="HelloWorld.ogv" type="video/ogg">
</video>
<canvas width="400" height="300" style="border: 1px solid black;">
</canvas>
<canvas id="scratch" width="400" height="300" style="display: none;">
</canvas>
<script>
window.onload = function() {
initCanvas();
}
var context, video, sctxt;
function initCanvas() {
video = document.getElementsByTagName("video")[0];
canvas = document.getElementsByTagName("canvas")[0];
context = canvas.getContext("2d");
scratch = document.getElementById("scratch");
sctxt = scratch.getContext("2d");
video.addEventListener("play", playFrame, false);
}
function playFrame() {
w = 320; h = 160;
sctxt.drawImage(video, 0, 0, w, h);
frame = sctxt.getImageData(0, 0, w, h);
// Loop over each pixel of frame
for (x = 0; x < w; x ++) {
for (y = 0; y < h; y ++) {
// index in image data array
i = x + w*y;
// grab colors
http://freepdf-books.com
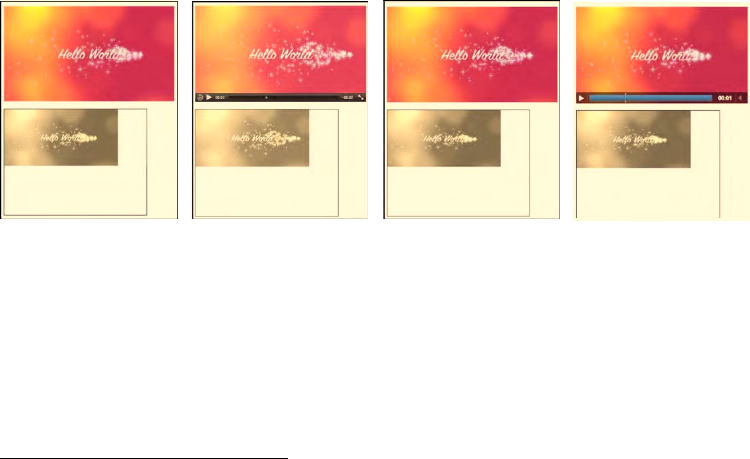
CHAPTER 7 ■ HTML5 MEDIA AND WEB WORKERS
205
r = frame.data[4*i+0];
g = frame.data[4*i+1];
b = frame.data[4*i+2];
// replace with sepia colors
frame.data[4*i+0] = Math.min(0.393*r + 0.769*g + 0.180*b,255);
frame.data[4*i+1] = Math.min(0.349*r + 0.686*g + 0.168*b,255);
frame.data[4*i+2] = Math.min(0.272*r + 0.534*g + 0.131*b,255);
}
}
context.putImageData(frame, 0, 0);
if (video.paused || video.ended) { return; }
setTimeout(function () {
playFrame();
}, 0);
}
</script>
Each pixel in the frame that is grabbed into the scratch Canvas is replaced by a new RGB value
calculated as a sepia mix from the existing colors.4 The modified frame is then written out into a visible
Canvas.
Note that we have to make sure the new color values do not exceed 255, because there are only 8
bits used to store the colors; i.e. any value larger than 255 may lead to an overflow value and thus a
wrong color. This, in fact, happens in Opera, while the other browsers limit the value before assigning. In
any case, using a Math.min function on the color values is the safe thing to do.
Figure 7–1 shows the result. If you look at the example in color, you will see that the video on top is
in full color and the Canvas below is sepia-colored.
Figure 7–1. Painting a sepia colored video replica into a Canvas in Firefox, Safari, Opera, and Chrome (left
to right).
Now, we can try and speed up the sepia color calculation—which loops over every single pixel and
color component of the captured video frames—by delegating the calculation-heavy JavaScript actions
to a Web Worker. We'll perform a comparison of speed further down. Listing 7–2 shows the web page
code and 7–3 the JavaScript that is the Web Worker for Listing 7–2. The Web Worker code is located in a
different JavaScript resource called “worker.js”. It has to be delivered from the same domain as the main
4 According to a mix published at http://www.builderau.com.au/program/csharp/soa/How-do-I-convert-images-to-grayscale-and-
sepia-tone-using-C-/0,339028385,339291920,00.htm
http://freepdf-books.com

CHAPTER 7 ■ HTML5 MEDIA AND WEB WORKERS
206
web page. This is currently the only way in which you can call a Web Worker. Discussions are under way
to extend this to allow inline defined Web Workers.5
Listing 7–2. Sepia coloring of video pixels using a Web Worker
<video controls height="270px" width="480px" >
<source src="HelloWorld.mp4" type="video/mp4">
<source src="HelloWorld.webm" type="video/webm">
<source src="HelloWorld.ogv" type="video/ogg">
</video>
<canvas width="400" height="300" style="border: 1px solid black;">
</canvas>
<canvas id="scratch" width="400" height="300" style="display: none;">
</canvas>
<script>
window.onload = function() {
initCanvas();
}
var worker = new Worker("worker.js");
var context, video, sctxt;
function initCanvas() {
video = document.getElementsByTagName("video")[0];
canvas = document.getElementsByTagName("canvas")[0];
context = canvas.getContext("2d");
scratch = document.getElementById("scratch");
sctxt = scratch.getContext("2d");
video.addEventListener("play", postFrame, false);
worker.addEventListener("message", drawFrame, false);
}
function postFrame() {
w = 320; h = 160;
sctxt.drawImage(video, 0, 0, w, h);
frame = sctxt.getImageData(0, 0, w, h);
arg = {
frame: frame,
height: h,
width: w
}
worker.postMessage(arg);
}
function drawFrame (event) {
outframe = event.data;
if (video.paused || video.ended) {
return;
}
context.putImageData(outframe, 0, 0);
setTimeout(function () {
postFrame();
}, 0);
5 See http://lists.whatwg.org/pipermail/whatwg-whatwg.org/2010-October/028844.html
Download from www.eBookTM.Com
http://freepdf-books.com
CHAPTER 7 ■ HTML5 MEDIA AND WEB WORKERS
207
}
</script>
In Listing 7–2 we have marked the new commands in bold. You will notice how the Web Worker is
created, a message prepared and then sent, and a function prepared that will take the sepia colored
frame as a message from the Web Worker when it finishes and sends it on. The key here is that we have
separated the preparation of the data for the calculations in postFrame and the drawing of the results in
drawFrame.
The Web Worker that does the calculations is stored in a different file, here called worker.js. It
contains only the callback for the onmessage event of the web page; it has no other data or functions to
initialize. It receives the original frame from the web page, calculates the new pixel values, replaces them
in the picture, and passes this redrawn picture back to the web page.
Listing 7–3. JavaScript Web Worker for Listing 7–2
onmessage = function (event) {
// receive the image data
var data = event.data;
var frame = data.frame;
var h = data.height;
var w = data.width;
var x,y;
// Loop over each pixel of frame
for (x = 0; x < w; x ++) {
for (y = 0; y < h; y ++) {
// index in image
i = x + w*y;
// grab colors
r = frame.data[4*i+0];
g = frame.data[4*i+1];
b = frame.data[4*i+2];
// replace with sepia colors
frame.data[4*i+0] = Math.min(0.393*r + 0.769*g + 0.189*b, 255);
frame.data[4*i+1] = Math.min(0.349*r + 0.686*g + 0.168*b, 255);
frame.data[4*i+2] = Math.min(0.272*r + 0.534*g + 0.131*b, 255);
}
}
// send the image data back to main thread
postMessage(frame);
}
This example provides a good handle on how to hook up video with a Web Worker. You cannot pass
a Canvas directly into a Web Worker as a parameter to the postMessage function, because it is a DOM
element and the Web Worker doesn't know about DOM elements. But you can pass ImageData to the
worker. Thus, the way to manipulate video is to grab a video frame with getImageData(), put it into a
message, and send it to the Web Worker with postMessage(), where the message event triggers the
execution of the video manipulation algorithm. The result of the calculations is returned to the main
thread through a postMessage() call by the Web Worker with manipulated image data as a parameter.
This hands control over to the onmessage event handler of the main thread to display the manipulated
image using putImageData() into the Canvas.
Because Web Workers are supported in all browsers except for IE, the results of the Web Workers
implementation of the sepia toning is no different to the non-worker implementation and its results
looks the same as in Figure 7–1.
http://freepdf-books.com

CHAPTER 7 ■ HTML5 MEDIA AND WEB WORKERS
208
Note that if you are developing in Opera and you expect your Web Worker to be reloaded on a
SHIFT-reload of the web page, you will be disappointed. So make sure to keep an extra tab open with a
link to the JavaScript file of the Web Worker and make sure to reload that one separately.
The sepia example is a simple one, so a question arises whether the overhead incurred by packaging
the message (i.e. copying the message data, including the frame), unpacking it, and doing the same for
the result, plus the delay in calling the events, actually outweighs the gain achieved by delegating the
video manipulation to a thread.
We compare the number of frames manipulated when run in the main thread with the number of
frames that a Web Worker crunches through to discover the limits of the approach. Note that this
approach is based on the self-imposed requirement to keep the Web Worker display and video playback
roughly in sync rather than allowing the Web Worker to be slower. Table 7–1 shows the results as the
number of frames processed during all of the four-second-long “Hello World” example video.
Table 7–1. Performance of the browsers without (left) and with (right) Web Workers on the sepia example
Firefox Safari Chrome Opera
89 53 (WW) 87 96 (WW) 77 54 (WW) 93 95 (WW)
The results in Table 7–1 were achieved on a machine with the same load by reloading the example
multiple times and taking the maximum achieved number of recolored frames. Note that the algorithm
with Web Workers on Firefox and Chrome churns through fewer frames than when the code is run on
the main web page. For Safari there is a speed increase running it in the worker, while Opera basically
achieves the same performance with or without a Web Worker.
These results seem to be influenced by the way in which the browsers implement Web Worker
support. Note that we are not comparing the performance between the different browsers, which is
clearly influenced by the speed of their JavaScript engines. But we see the effects of both the way in
which each browser implements Web Workers and the speed of the JavaScript engine.
Opera is built as a single-threaded browser, so its current implementation of Web Workers
interleaves code execution in the single thread. This is in contrast to Mozilla's implementation in
Firefox, where the Web Worker is actually a real operating system thread and the spawning of multiple
workers can take advantage of multiple processor cores. The overhead introduced by spawning a full
OS-level thread in our simple example here seems to incur a penalty on the number of frames that can
be decoded or handed over from the main thread during the time of playback.
The primary advantage of using a Web Worker is that the main thread's workload is reduced such
that it can continue executing at top speed. In particular, it can keep rendering the browsers UI, keep
checking your mail, etc. In our example this refers particularly to the playback speed of the video. In the
sepia example, our main thread wasn't particularly overloaded with the calculation, so introducing Web
Workers didn't actually achieve much. So let's look at something a bit more challenging.
7.2 Motion Detection with Web Workers
The general idea behind motion detection is to take the difference between two successive frames in a
video and determine whether there was a large enough change to qualify as motion. Good motion
detectors can cope with the change of lighting conditions, moving cameras, and camera and encoding
artifacts. For our purposes, we will simply determine whether a pixel has changed to determine if there
was motion. It's a simplistic but fairly effective approach and will do for demonstration purposes.
http://freepdf-books.com

CHAPTER 7 ■ HTML5 MEDIA AND WEB WORKERS
209
Gray-Scaling
The practical approach to motion detection includes preprocessing of the frames by turning them into a
gray-scale image. Because color doesn't influence motion, this is a reasonable abstraction and it reduces
the number of calculations necessary, since differences don't have to be calculated on all channels, but
only on a single dimension.
Gray-scaling is achieved by calculating the luminance—i.e. the light intensity—of each pixel and
replacing the red, green, and blue channel values with the luminance value. Since they then all have
identical values, the frame won't have any colors any more and will therefore appear gray.
It is possible to calculate the luminance from an average of the original red, green, and blue channel
values, but that does not represent human perception of luminance well. As it turns out, the best way to
calculate luminance is by taking 30% of red, 59% of green, and 11% of blue.6 Blue is perceived as a very
dark color and green a very bright one, contributing differently to the human perception of luminance.
Listing 7–4 shows the JavaScript Web Worker that creates a gray-scaled version of the video using
this algorithm. The main thread that goes with this Web Worker is identical to Listing 7–2. Figure 7–2
shows the resulting screenshots in different browsers. Note that if you can’t see it in color, the video on
top is in full color and the Canvas below is in black and white.
Listing 7–4. Gray-scaling of video pixels using a Web Worker
onmessage = function (event) {
// receive the image data
var data = event.data;
var frame = data.frame;
var h = data.height;
var w = data.width;
var x,y;
// Loop over each pixel of frame
for (x = 0; x < w; x ++) {
for (y = 0; y < h; y ++) {
// index in image data array
i = x + w*y;
// grab colors
r = frame.data[4*i+0];
g = frame.data[4*i+1];
b = frame.data[4*i+2];
col = Math.min(0.3*r + 0.59*g + 0.11*b, 255);
// replace with black/white
frame.data[4*i+0] = col;
frame.data[4*i+1] = col;
frame.data[4*i+2] = col;
}
}
// send the image data back to main thread
postMessage(frame);
}
6 See many more details about luminance at http://www.scantips.com/lumin.html
http://freepdf-books.com
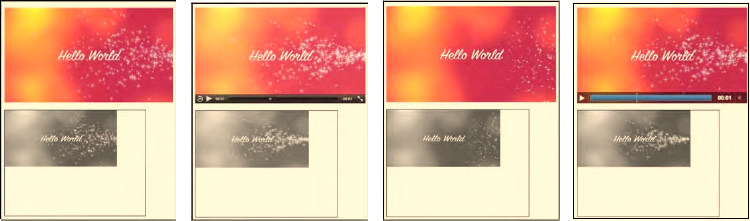
CHAPTER 7 ■ HTML5 MEDIA AND WEB WORKERS
210
Figure 7–2. Painting a gray-scaled video replica into a Canvas in Firefox, Safari, Opera, and Chrome (left
to right)
Now that we have seen that this algorithm creates a gray-scaled image, we can appreciate that we
don't actually need the full gray-scaled image to calculate the motion difference between two such
images. There is a lot of repetition that we can avoid in the three color channels, and we are also not
interested in the value of the alpha channel. Thus, we can reduce the frames to an array of the
luminance values.
Motion Detection
We now move to implementation of the motion detection. To visualize which pixels have been identified
as motion pixels, we will paint them in a rare color. We chose a mix of green=100 and blue=255. Listing
7–5 shows the Web Worker that implements the motion detection. The main thread is still the same as in
Listing 7–2.
Listing 7–5. Motion detection of video pixels using a Web Worker
var prev_frame = null;
var threshold = 25;
function toGray(frame) {
grayFrame = new Array (frame.data.length / 4);
for (i = 0; i < grayFrame.length; i++) {
r = frame.data[4*i+0];
g = frame.data[4*i+1];
b = frame.data[4*i+2];
grayFrame[i] = Math.min(0.3*r + 0.59*g + 0.11*b, 255);
}
return grayFrame;
}
onmessage = function (event) {
// receive the image data
var data = event.data;
var frame = data.frame;
// convert current frame to gray
cur_frame = toGray(frame);
http://freepdf-books.com
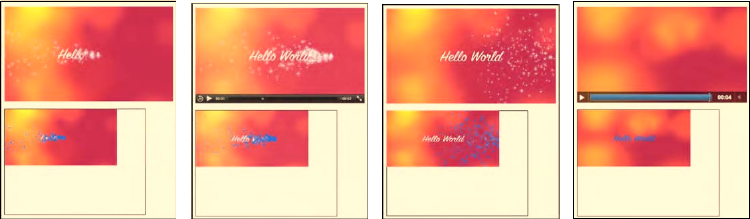
CHAPTER 7 ■ HTML5 MEDIA AND WEB WORKERS
211
// avoid calling this the first time
if (prev_frame != null) {
// calculate difference
for (i = 0; i < cur_frame.length; i++) {
if (Math.abs(prev_frame[i] - cur_frame[i]) > threshold) {
// color in pixels with high difference
frame.data[4*i+0] = 0;
frame.data[4*i+1] = 100;
frame.data[4*i+2] = 255;
}
}
}
// remember current frame as previous one
prev_frame = cur_frame;
// send the image data back to main thread
postMessage(frame);
}
You will have noticed that this Web Worker actually has some global data because we have to
remember the previous frame's data across different calls to this Web Worker. We initialize this array
with null such that we can avoid performing the difference calculation on the first call to this Web
Worker. The other global variable is the threshold, which we've chosen to set to 25, which gives a
reasonable tolerance to noise.
You will recognize the toGray() function from the previous algorithm, except we store only the
shortened array of gray values per image frame.
In the callback function for the onmessage event, we first calculate the gray-scaled version of the
current image frame, then use this to compare it with the previous frame and color in the pixels with a
luminance difference larger than the threshold. We then remember the current frame's luminance
values as the prev_frame for the next iteration and post the adjusted image frame back to the main
thread for display.
Figure 7–3 shows the results of this algorithm applied to the “Hello World” video in all browsers
except IE.
Figure 7–3. Motion detection results on a video using Web Workers in Firefox, Safari, Opera, and Chrome
(left to right).
Because the “Hello World” video is not very exciting to showcase motion detection, Figure 7–4
shows the effects of the algorithm on some scenes of the “Elephants Dream” video.
http://freepdf-books.com
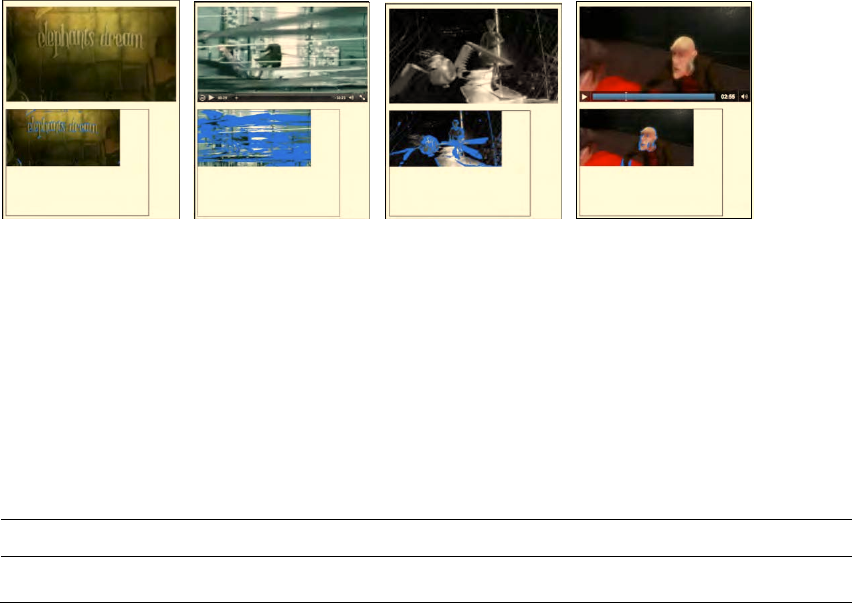
CHAPTER 7 ■ HTML5 MEDIA AND WEB WORKERS
212
Figure 7–4. Motion detection results on a second video using Web Workers in Firefox, Safari, Opera, and
Chrome (left to right)
As you are watching this algorithm work on your videos, you will immediately notice its drawbacks
and certainly you can come up with ideas on how to improve the performance or apply it to your needs,
such as alerting for intruders. There are many better algorithms for motion detection, but this is not the
place to go into them.
Let's again look at the performance of this algorithm in the different browsers. Table 7–2 shows the
comparison as before between an implementation without Web Workers and one with. The number
signifies the number of frames displayed in the Canvas when the algorithm is run without or with Web
Workers for the four second “Hello World” video.
Table 7–2. Performance of browsers without (left) and with (right) Web Workers on the motion detection
Firefox Safari Chrome Opera
82 48 (WW) 64 62 (WW) 105 75 (WW) 140 129 (WW)
In this case, there are basically two loops involved in every iteration of the Web Worker and there is
global data to store. The implementation on the main web page achieves more manipulated frames for
all of the browsers. The difference for Safari and Opera is not substantial, but the differences for Firefox
and Chrome are surprisingly high. This means the Web Worker code is actually fairly slow and cannot
keep up with the video playback speed. The Web Workers thus take a lot of load off the main thread to
allow the video to playback with less strain. The differences still are not visible when running the
algorithm with or without Web Workers, since the video plays back smoothly in both situations. So let's
take another step in complexity and introduce some further video processing.
7.3 Region Segmentation
In image processing, and therefore video processing, the segmentation of the displayed image into
regions of interest is typically very CPU intensive. Image segmentation is used to locate objects and
boundaries (lines, curves, etc.) in images aiming to give regions that belong together the same label.
We will implement a simple region segmentation approach in this section and demonstrate how we
can use Web Workers to do the processing-intensive tasks in a parallel thread and relieve the main
thread to provide smooth video playback.
http://freepdf-books.com

CHAPTER 7 ■ HTML5 MEDIA AND WEB WORKERS
213
Our region segmentation is based on the pixels identified by motion detection using the algorithm
of the previous section. In a kind of region-growing approach7, we will then cluster those motion pixels
together that are not too far apart from each other. In our particular example, the distance threshold is
set to 2; i.e. we limit the clustering to a 5x5 area around the motion pixel. This clustering can result in
many motion pixels being merged into a region. We will display a rectangle around all the pixels in the
largest region found per frame.
We will start this by developing a version without Web Workers. Generally, this probably is the best
approach, because it makes it easier to debug. Right now, there are no means to easily debug a Web
Worker in a web browser. As long as you keep in mind how you are going to split out the JavaScript code
into a Web Worker, starting with a single thread is easier.
Listing 7–6 shows the playFrame() function in use by the web page for the segmentation. The
remainder of the page in Listing 7–1 stays the same. Also, it uses the toGray() function of Listing 7–5. It
looks long and scary, but actually consists of nice blocks provided through comments, so we will walk
through these blocks next.
Listing 7–6. Segmentation of video pixels using a Web Worker
// initialisation for segmentation
var prev_frame = null;
var cur_frame = null;
var threshold = 25;
var width = 320;
var height = 160;
region = new Array (width*height);
index = 0;
region[0] = {};
region[0]['weight'] = 0;
region[0]['x1'] = 0;
region[0]['x2'] = 0;
region[0]['y1'] = 0;
region[0]['y2'] = 0;
function playFrame() {
sctxt.drawImage(video, 0, 0, width, height);
frame = sctxt.getImageData(0, 0, width, height);
cur_frame = toGray(frame);
// avoid calculating on the first frame
if (prev_frame != null) {
// initialize region fields
for (x = 0; x < width; x++) {
for (y = 0; y < height; y++) {
i = x + width*y;
// initialize region fields
if (i != 0) region[i] = {};
region[i]['weight'] = 0;
if (Math.abs(prev_frame[i] - cur_frame[i]) > threshold) {
// initialize the regions
region[i]['weight'] = 1;
7 See http://en.wikipedia.org/wiki/Segmentation_%28image_processing%29#Clustering_methods
http://freepdf-books.com
CHAPTER 7 ■ HTML5 MEDIA AND WEB WORKERS
214
region[i]['x1'] = x;
region[i]['x2'] = x;
region[i]['y1'] = y;
region[i]['y2'] = y;
}
}
}
// segmentation: grow regions around each motion pixels
for (x = 0; x < width; x++) {
for (y = 0; y < height; y++) {
i = x + width*y;
if (region[i]['weight'] > 0) {
// check the neighbors in 5x5 grid
for (xn = Math.max(x-2,0); xn <= Math.min(x+2,width-1); xn++) {
for (yn = Math.max((y-2),0);
yn <= Math.min((y+2),(height-1)); yn++) {
j = xn + width*yn;
if (j != i) {
if (region[j]['weight'] > 0) {
region[i]['weight'] += region[j]['weight'];
region[i]['x1'] = Math.min(region[i]['x1'],
region[j]['x1']);
region[i]['y1'] = Math.min(region[i]['y1'],
region[j]['y1']);
region[i]['x2'] = Math.max(region[i]['x2'],
region[j]['x2']);
region[i]['y2'] = Math.max(region[i]['y2'],
region[j]['y2']);
}
}
}
}
}
}
}
// find one of the heaviest pixels, i.e. one of the largest clusters
max = 0;
index = 0; // reset
for (x = 0; x < width; x++) {
for (y = 0; y < height; y++) {
i = x + width*y;
if (region[i]['weight'] > max) {
max = region[i]['weight'];
index = i;
}
}
}
}
// remember current frame as previous one and get rectangle coordinates
prev_frame = cur_frame;
x = region[index]['x1'];
http://freepdf-books.com
CHAPTER 7 ■ HTML5 MEDIA AND WEB WORKERS
215
y = region[index]['y1'];
w = (region[index]['x2'] - region[index]['x1']);
h = (region[index]['y2'] - region[index]['y1']);
// draw frame and rectangle
context.putImageData(frame, 0, 0);
context.strokeRect(x, y, w, h);
calls += 1;
if (video.paused || video.ended) {
return;
}
setTimeout(function () {
playFrame();
}, 0);
}
The code starts with an initialization of the memory constructs required to do the segmentation.
The prev_frame and cur_frame are the gray-scale representations of the previous and current frames
being compared. The threshold like before, is one that identifies pixels with motion. Width and height
identify the dimensions of the video display in the Canvas. The region array is an array of hashes that
contain information about each currently regarded image pixel: its weight is initially 1, but will grow
larger as more pixels are close to it; the (x1,y1) and (x2,y2) coordinates signify the region from which
pixel weights have been added. The index is eventually the index of the region array with the largest
cluster.
In playFrame()we start by extracting the current frame from the video and calculating its gray-scale
representation. We perform the segmentation only if this is not the very first frame. If it is indeed the first
frame, a region of (0,0) to (0,0) will result and be painted on the Canvas.
To perform the segmentation, we first initialize the region fields. Only those that qualify as motion
pixels are set to a weight of 1 and an initial region consisting of just their own pixel.
Then, we execute the region growing on the 5x5 grid around these motion pixels. We add the weight
of all the motion pixels found in that region around the currently regarded motion pixel to the current
pixel and set the extent of the region to the larger rectangle that includes those other motion pixels.
Because we want to mark only a single region, we then identify the last one of the largest clusters,
which is the cluster found around one of the heaviest pixels (the one with the largest weight). It is this
cluster that we will paint as a rectangle, so we set the index variable to the index of this pixel in the
region array.
Finally, we can determine the rectangular coordinates and paint the frame and rectangle into the
Canvas. We then set a timeout on another call to the playFrame() function, which makes it possible for
the main thread to undertake some video playback before performing the image analysis again for the
next frame.
Note that in some circumstances the extent of the region is incorrectly calculated with this simple
approach. Whenever a vertical or horizontal shape traces back in rather than continuing to grow, the last
motion pixel checked will be the heaviest, but it will not have received the full extent of the region. A
second run through this region would be necessary to determine the actual size of the region. This is left
to the reader as an exercise.
Figure 7–5 shows the results of this algorithm applied to the “Hello World” video.
http://freepdf-books.com
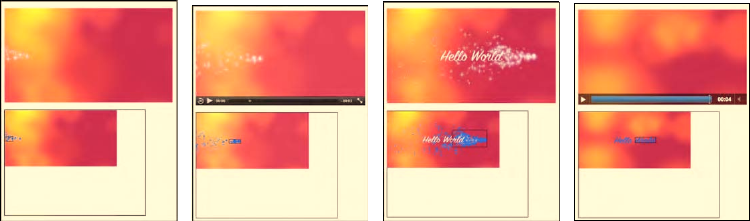
CHAPTER 7 ■ HTML5 MEDIA AND WEB WORKERS
216
Figure 7–5. Image segmentation results on a motion detected video in Firefox, Safari, Opera, and Chrome
(left to right)
Note that the video playback in all browsers except Safari now is seriously degraded. The videos are
all becoming jerky and it is obvious that the browser is having a hard time finding enough cycles to put
into video decoding rather than spending it on the JavaScript. This is a clear case for taking advantage of
the help of Web Workers. Turning down the frequency with which the analysis is done will work, too, but
it does not scale with the capabilities of the browser.
We have designed the code base such that it is easy to move the video manipulation code into a Web
Worker. We will hand over the current video frame and its dimensions into the Web Worker and receive
back from it the coordinates of the rectangle to draw. You may want to also manipulate the frame colors
in the Web Worker as before and display them in a different color to verify the segmentation result.
The code for the postFrame() and drawFrame() functions of the main web page is given in Listing 7–7.
The remainder of the main web page is identical to Listing 7–2. The code for the Web Worker contains
much of Listing 7–6, including the initialization and the toGray() function and a function to deal with
the onmessage event, receive the message arguments from the main web page, and post the frame and
the four coordinates back to the main page. The full implementation is left to the reader or can be
downloaded from the locations mentioned in the Preface of the book.
Listing 7–7. Segmentation of video pixels using a Web Worker
function postFrame() {
w = 320; h = 160;
sctxt.drawImage(video, 0, 0, w, h);
frame = sctxt.getImageData(0, 0, w, h);
arg = {
frame: frame,
height: h,
width: w
}
worker.postMessage(arg);
}
function drawFrame (event) {
msg = event.data;
outframe = msg.frame;
if (video.paused || video.ended) {
return;
}
Download from www.eBookTM.Com
http://freepdf-books.com

CHAPTER 7 ■ HTML5 MEDIA AND WEB WORKERS
217
context.putImageData(outframe, 0, 0);
// draw rectangle on canvas
context.strokeRect(msg.x, msg.y, msg.w, msg.h);
calls += 1;
setTimeout(function () {
postFrame();
}, 0);
}
Let's look at the performance of this algorithm in the different browsers. Table 7–3 shows the
comparison between an implementation without Web Workers and one with. As before, the numbers
represent the number of frames the Canvas has painted for the four-second-long example video. The
program will always try to paint as many video frames into the Canvas as possible. Without Web
Workers, this ends up being on the main thread and the machine is working as hard as it can. With Web
Workers, the main thread can delay the postMessage() function without an effect on the performance of
the main thread. It can thus hand over fewer frames to the Web Worker to deal with.
Table 7–3. Performance of browsers without (left) and with (right) Web Workers for motion segmentation
Firefox Safari Chrome Opera
36 22 (WW) 35 29 (WW) 62 50 (WW) 76 70 (WW)
The smallest difference in the number of frames that the Web Worker is given to the amount that is
processed when there is only one thread is in Safari and Opera. In Firefox, the Web Worker runs rather
slowly, processing only a small number of frames.
Using Web Workers relieves all of the stress from the main threads of Firefox and Chrome and
makes the video run smoothly again. The only browser left struggling with a jerky video playback is
Opera, which doesn't use proper threading on Web Workers, so this was to be expected.
Note that the video runs on the main thread, while the Canvas is fed from the Web Worker, and we
are only measuring the performance of the Web Worker. Unfortunately, we cannot measure the
performance of the video element in terms of number of frames played back. However, a statistics API is
in preparation for the media elements in the WHATWG that will provide us with this functionality once
implemented in browsers.
7.4 Face Detection
Determining whether a face exists in an image is often based on the detection of skin color and the
analysis of the shape that this skin color creates.8 We will take the first step here toward such a simple
face detection approach, namely the identification of skin color regions. For this, we will be combining
many of the algorithms previously discussed in this chapter.
The direct use of RGB colors is not very helpful in detecting skin color, since there is a vast shade of
skin tones. However, as it turns out, the relative presence of RGB colors can help overcome this to a large
degree. Thus, skin color detection is normally based on the use of normalized RGB colors. A possible
condition to use is the following:
8 See http://en.wikipedia.org/wiki/Face_detection
http://freepdf-books.com

CHAPTER 7 ■ HTML5 MEDIA AND WEB WORKERS
218
base = R + G + B
r = R / base
g = G / base
b = B / base
with
(0.35 < r < 0.5) AND (0.2 < g < 0.5) AND (0.2 < b < 0.35) AND (base > 200)
This equation identifies most of the pixels typically perceived as “skin color”, but also creates false
positives. It works more reliably on lighter than on darker skin, but in actual fact it is more sensitive to
lighting differences than skin tone. You may want to check out the literature to find improved
approaches.9 We will use this naïve approach here for demonstration purposes.
The false positive pixels can be filtered out by performing a shape analysis of the detected regions
and identify distinct areas such as eyes and mouth positions. We will not take these extra processing
steps here, but only apply the above equation and the previously implemented segmentation to find
candidate regions of potential faces.
Listing 7–8 shows the code of the main web page and Listing 7–9 shows the Web Worker.
Listing 7–8. Main thread of the face detection approach using a Web Worker
<video controls height="270px" width="480px" >
<source src="video5.mp4" type="video/mp4">
<source src="video5.ogv" type="video/ogg">
<source src="video5.webm" type="video/webm">
</video>
<canvas width="400" height="300" style="border: 1px solid black;">
</canvas>
<canvas id="scratch" width="400" height="300" style="display: none;">
</canvas>
<script>
window.onload = function() {
initCanvas();
}
var worker = new Worker("worker.js");
var context, video, sctxt, canvas;
function initCanvas() {
video = document.getElementsByTagName("video")[0];
canvas = document.getElementsByTagName("canvas")[0];
context = canvas.getContext("2d");
scratch = document.getElementById("scratch");
sctxt = scratch.getContext("2d");
video.addEventListener("play", postFrame, false);
worker.addEventListener("message", drawFrame, false);
}
function postFrame() {
w = 320; h = 160;
sctxt.drawImage(video, 0, 0, w, h);
frame = sctxt.getImageData(0, 0, w, h);
9 See for example http://www.icgst.com/GVIP05/papers/P1150535201.pdf for an improved approach.
http://freepdf-books.com
CHAPTER 7 ■ HTML5 MEDIA AND WEB WORKERS
219
arg = {
frame: frame,
height: h,
width: w
}
worker.postMessage(arg);
}
function drawFrame (event) {
msg = event.data;
outframe = msg.frame;
context.putImageData(outframe, 0, 0);
// draw rectangle on canvas
context.strokeRect(msg.x, msg.y, msg.w, msg.h);
if (video.paused || video.ended) {
return;
}
setTimeout(function () {
postFrame();
}, 0);
}
</script>
Listing 7–9. Web Worker for the face detection approach of Listing 7–8
// initialisation for segmentation
var width = 320;
var height = 160;
var region = new Array (width*height);
var index = 0;
region[0] = {};
region[0]['weight'] = 0;
region[0]['x1'] = 0;
region[0]['x2'] = 0;
region[0]['y1'] = 0;
region[0]['y2'] = 0;
function isSkin(r,g,b) {
base = r + g + b;
rn = r / base;
gn = g / base;
bn = b / base;
if (rn > 0.35 && rn < 0.5 && gn > 0.2 && gn < 0.5 &&
bn > 0.2 && bn < 0.35 && base > 250) {
return true;
} else {
return false;
}
}
onmessage = function (event) {
// receive the image data
var data = event.data;
http://freepdf-books.com
CHAPTER 7 ■ HTML5 MEDIA AND WEB WORKERS
220
var frame = data.frame;
var height = data.height;
var width = data.width;
// initialize region fields and color in motion pixels
for (x = 0; x < width; x++) {
for (y = 0; y < height; y++) {
i = x + width*y;
if (i != 0) region[i] = {};
region[i]['weight'] = 0;
// calculate skin color?
if (isSkin(frame.data[4*i],frame.data[4*i+1],frame.data[4*i+2])) {
// color in pixels with high difference
frame.data[4*i+0] = 0;
frame.data[4*i+1] = 100;
frame.data[4*i+2] = 255;
// initialize the regions
region[i]['weight'] = 1;
region[i]['x1'] = x;
region[i]['x2'] = x;
region[i]['y1'] = y;
region[i]['y2'] = y;
}
}
}
// segmentation
for (x = 0; x < width; x++) {
for (y = 0; y < height; y++) {
i = x + width*y;
if (region[i]['weight'] > 0) {
// check the neighbors
for (xn = Math.max(x-2,0); xn <= Math.min(x+2,width-1); xn++) {
for (yn = Math.max((y-2),0);
yn <= Math.min((y+2),(height-1)); yn++) {
j = xn + width*yn;
if (j != i) {
if (region[j]['weight'] > 0) {
region[i]['weight'] += region[j]['weight'];
region[i]['x1'] = Math.min(region[i]['x1'],
region[j]['x1']);
region[i]['y1'] = Math.min(region[i]['y1'],
region[j]['y1']);
region[i]['x2'] = Math.max(region[i]['x2'],
region[j]['x2']);
region[i]['y2'] = Math.max(region[i]['y2'],
region[j]['y2']);
}
}
}
}
}
}
}
http://freepdf-books.com
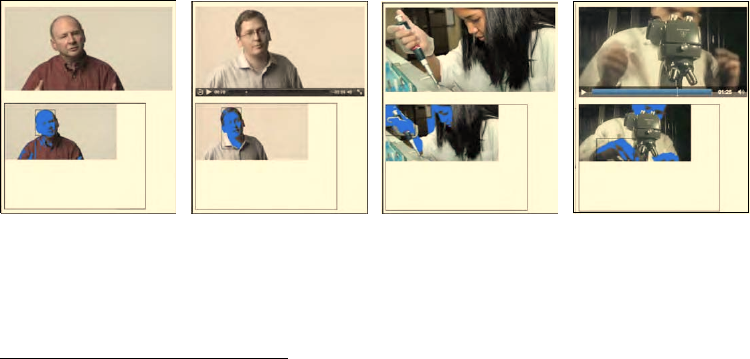
CHAPTER 7 ■ HTML5 MEDIA AND WEB WORKERS
221
// find one of the heaviest pixels, which is one of the largest clusters
max = 0;
index = 0; // reset
for (x = 0; x < width; x++) {
for (y = 0; y < height; y++) {
i = x + width*y;
if (region[i]['weight'] > max) {
max = region[i]['weight'];
index = i;
}
}
}
// send the image data + rectangle back to main thread
arg = {
frame: frame,
x: region[index]['x1'],
y: region[index]['y1'],
w: (region[index]['x2'] - region[index]['x1']),
h: (region[index]['y2'] - region[index]['y1'])
}
postMessage(arg);
}
You will notice that the code is essentially the same as for motion region detection, except we can
remove some of the administrative work required to keep the difference frames, and the toGray()
function has been replaced with an isSkin() function.
For our example we have chosen a Creative Commons licensed video about “Science Commons”10.
Some of the resulting analyzed frames are shown in Figure 7–6. These are all displayed in real time while
the video plays back.
Figure 7–6. Face detection results on a skin color detected video in Firefox, Safari, Opera, and Chrome (left
to right)
10 See http://sciencecommons.org/
http://freepdf-books.com
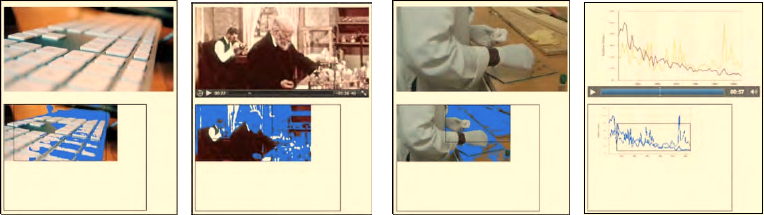
CHAPTER 7 ■ HTML5 MEDIA AND WEB WORKERS
222
These examples show where the skin color algorithm works well: the two screenshots from Opera
and Chrome show that the region segmentation didn't get the faces, but the hands, which take up larger
regions.
Examples of false positives on skin color are shown in Figure 7–7.
Figure 7–7. False positives on face detection using skin color in Firefox, Safari, Opera, and Chrome (left to
right).
The display of the analysis results in the Canvas underneath the video quickly degrades with
increasingly complex computational tasks like the ones discussed in this chapter. If you wanted to
continue displaying good quality video to your audience, but do the analysis in the background, it is
probably best to drop the pixel coloring in the Canvas and to only paint the rectangular overlays for the
detected regions onto the original video. This will provide you with a better performance from the Web
Worker thread.
7.5 Summary
In this chapter we looked at using Web Workers to take over some of the heavy lifting involved in video
processing when run inside web browsers in real-time. We analyzed their use for simple video
processing approaches, such as sepia toning, and found that for such simple tasks the overhead created
by spawning a thread and passing the data through messages back and forth is not worth off-loading the
processing.
We also analyzed their use for larger challenges, such as motion detection, region segmentation,
and face detection. Here, the advantage of using a Web Worker is that the incurred processing load can
be offloaded from the main thread, freeing it to continue staying responsive with the user. The downside
is that the browser does not work as hard at the video processing part and the Web Worker can become
starved of video frames. Thus, the increased responsiveness of the browsers overall is paid for by a
smaller framerate in video processing.
Web Workers are most productive for tasks that do not need a lot of frequent reporting back and
forth between the Web Worker thread and the main thread. The introduction of a simpler means for a
Web Worker to get access to the frames in a video outside the message passing path would also be
helpful to make Web Workers more productive for video processing.
Most of the algorithms used in this chapter were very crude, but this book does not intend to show
you how to do image analysis well. Find yourself a good video analysis book and the latest research
results in these fields and go wild. The big news is: you can now do it in your web browser in real time,
and Web Workers can help you do it such that it won't disrupt the speed of the display of your main web
page.
http://freepdf-books.com

C H A P T E R 8
■ ■ ■
223
HTML5 Audio API
With this chapter, we explore a set of features that are less stable and less firmly defined than the
features discussed in previous chapters. This and all following chapters present features that are at the
time of writing still work in progress. But they introduce amazing possibilities and we therefore cannot
ignore them. Some of the features have implementations in browsers, but no specification text in the
HTML5 and related standards. Others have draft specification text in the WHATWG or W3C documents,
but no implementations have confirmed the suitability of the specifications yet.
In this chapter we look at some of the work being done for a Web audio API. In the last few chapters
we have investigated many features that allow us to manipulate the image data that is provided by
videos. The audio API complements this by providing features to manipulate the sound data that is
provided by the audio track of videos or by audio resources.
This will enable the development of sophisticated Web-based games or audio production
applications where the audio is dynamically created and modified in JavaScript. It also enables the
visualization of audio data and the analysis of the data, for example to determine a beat or identify
which instruments are playing or whether a voice you are hearing is female or male.
A W3C Audio Incubator Group has been formed to focus on creating an extended audio API.
Currently, a draft specification exists1 which is under discussion. At the same time, the released Firefox 4
includes an implementation of a more basic audio data API2.
The Incubator Group draft specification is based on the idea of building a graph of AudioNode
objects that are connected together to define the overall audio rendering. This is very similar to the filter
graph idea that is the basis of many media frameworks, including DirectShow, GStreamer, and also JACK
the Audio Connection Kit. The idea behind a filter graph is that one or more input signals are connected
to a destination renderer by sending the input signals through a sequence of filters that each modifies
the input data in a specific way. The term audio filter can mean anything that changes the timbre,
harmonic content, pitch, or waveform of an audio signal. The Incubator Group draft specifies filters for
various audio uses: spatialized audio, a convolution engine, real-time frequency analysis, biquad filters,
and sample-accurate scheduled sound playback.
In contrast to this filter-graph based design, the more basic audio data API of Mozilla provides only
two functionalities: reading audio and writing audio. It does so by providing access to the raw audio
samples of the currently playing video or audio element, and it enables the writing of samples into an
HTML5 audio element. It leaves all the audio filter functionality to the JavaScript implementer.
Currently, Mozilla's audio data API is available for use in Firefox versions greater than 4. The more
complex filter graph API has an experimental implementation3 for Safari4. In addition, development of a
1 See http://chromium.googlecode.com/svn/trunk/samples/audio/specification/specification.html
2 See https://wiki.mozilla.org/Audio_Data_API
3 See http://chromium.googlecode.com/svn/trunk/samples/audio/index.html
4 See http://chromium.googlecode.com/svn/trunk/samples/audio/bin/
http://freepdf-books.com

CHAPTER 8 ■ HTML5 AUDIO API
224
JavaScript library is in progress that builds on top of Firefox's basic audio data API5. No other browsers
have any implementations of an audio API.
In this chapter, we will first cover the Mozilla audio data API as supported in Firefox 4 and
implement some examples that use it. Then we will gain an overview of the Web audio API and also
implement some basic examples that explain how to use it. At this stage, it is unclear what will
eventually become of the specification that is the basis for cross-browser compatible implementations
of an advanced audio API. This chapter provides you with information on the currently available
options.
8.1 Reading Audio Data
The Mozilla audio data API is centered on the existing audio and video elements of HTML5. Extensions
have very carefully been made such as not to disrupt the existing functionality of these elements.
8.1.1 Extracting Audio Samples
The way in which Firefox extracts the audio samples from a media resource is by way of an event on the
audio or video element which fires for every frame of audio data that has been decoded. The event is
accordingly called MozAudioAvailable. The event data provides an array called framebuffer containing
32bit floating point audio samples from the left and right channels for the given audio frame. An audio
sample is the representation of the pressure that an audio wave held (its amplitude) at a certain time
point at which it was sampled or measured6. A waveform is made up of a series of audio samples over
time.
Listing 8–1 shows an example of how to retrieve the audio samples. In order not to distract the
playback of the resource by rendering all the samples, only the very first sample in the event framebuffer
is printed.
Note that you cannot run the examples in this chapter from local file systems, because of security
constraints. You have to serve the files from a web server.
Listing 8–1. Reading audio samples from an audio element
<audio src="HelloWorld.ogg" controls>
</audio>
<div id="display"></div>
<script type="text/javascript">
var audio = document.getElementsByTagName("audio")[0];
var display = document.getElementById("display");
audio.addEventListener("MozAudioAvailable", writeSamples, false);
function writeSamples (event) {
display.innerHTML += event.frameBuffer[0] + ', ';
}
</script>
The registered callback on the MozAudioAvailable event writes the sample values simply to a div
element. Figure 8–1 shows the result.
5 See https://github.com/corbanbrook/dsp.js
6 See http://en.wikipedia.org/wiki/Sampling_%28signal_processing%29 for an explanation of audio sampling
http://freepdf-books.com
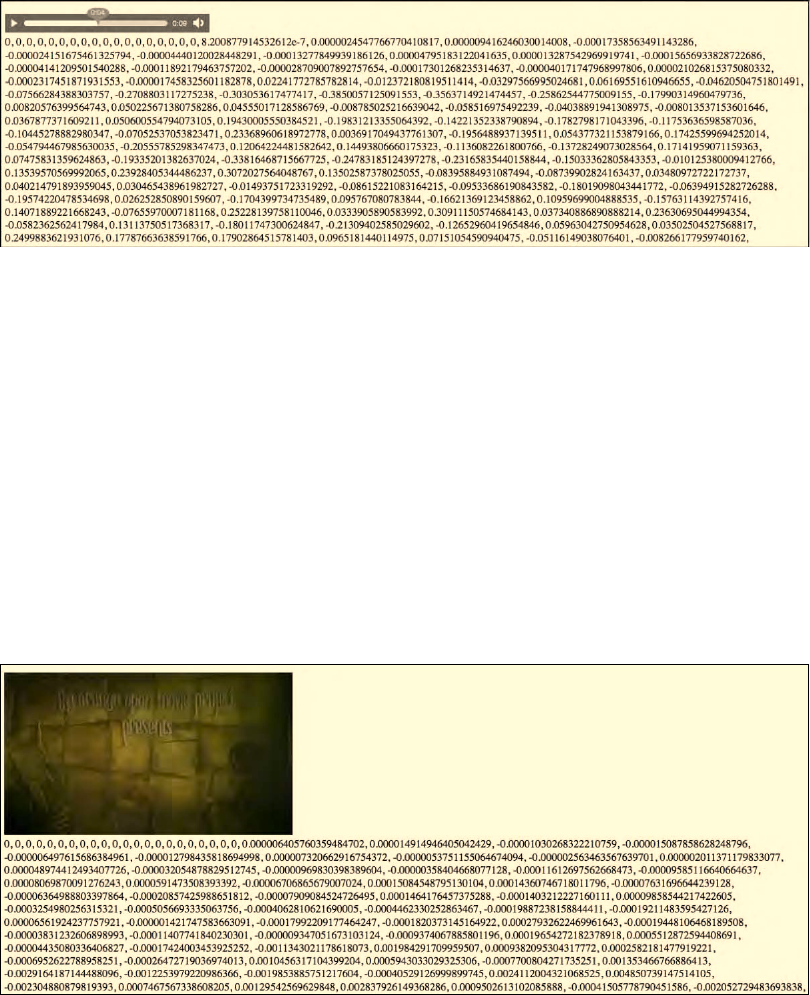
CHAPTER 8 ■ HTML5 AUDIO API
225
Figure 8–1. Reading audio sample values from an <audio> element using the Mozilla audio data API
The same can be achieved with a <video> element. Listing 8–2 shows the HTML and Figure 8–2
shows the results.
Listing 8–2. Reading audio samples from a video element
<video src="video1.ogv" controls>
</video>
<div id="display"></div>
<script type="text/javascript">
var video = document.getElementsByTagName("video")[0];
var display = document.getElementById("display");
video.addEventListener("MozAudioAvailable", writeSamples, false);
function writeSamples (event) {
display.innerHTML += event.frameBuffer[0] + ', ';
}
</script>
Figure 8–2. Reading audio sample values from a <video> element using the Mozilla audio data API
http://freepdf-books.com
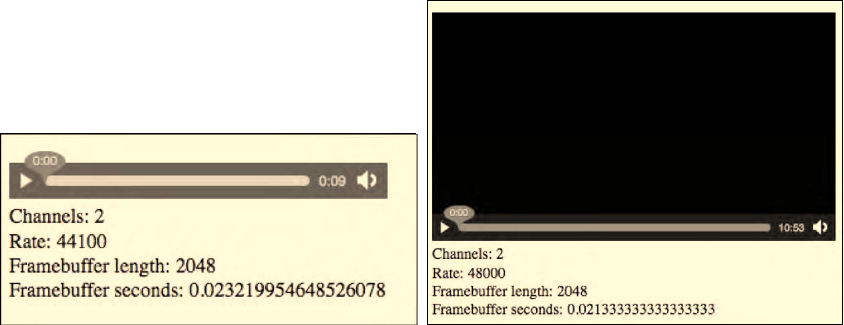
CHAPTER 8 ■ HTML5 AUDIO API
226
8.1.2 Information about the Framebuffer
The audio data API always returns a fixed number of audio samples with every MozAudioAvailable event
in the frameBuffer. The interpretation of this data depends on two encoding settings of the resource: the
number of present audio channels and the sampling rate of the recording. These two key pieces of
information about the audio samples are metadata information about the audio resource. They are thus
made available as part of the media resource once the loadedmetadata event has fired.
Listing 8–3 shows how to retrieve this information and Figure 8–3 shows the result for our audio and
video examples from Listings 8–1 and 8–2.
Listing 8–3. Reading audio metadata for the audio framebuffer
<audio src="HelloWorld.ogg" controls>
</audio>
<div id="display"></div>
<script type="text/javascript">
var audio = document.getElementsByTagName("audio")[0];
var display = document.getElementById("display");
audio.addEventListener("loadedmetadata", getMetadata, false);
var channels, rate, fbLength;
function getMetadata() {
channels = audio.mozChannels;
rate = audio.mozSampleRate;
fbLength = audio.mozFrameBufferLength;
duration = fbLength / (channels * rate);
display.innerHTML = "Channels: " + channels +
"<br/>Rate: " + rate +
"<br/>Framebuffer length: " + fbLength +
"<br/>Framebuffer seconds: " + duration;
}
</script
Figure 8–3. Getting information about the audio sample values in the framebuffer
Download from www.eBookTM.Com
http://freepdf-books.com
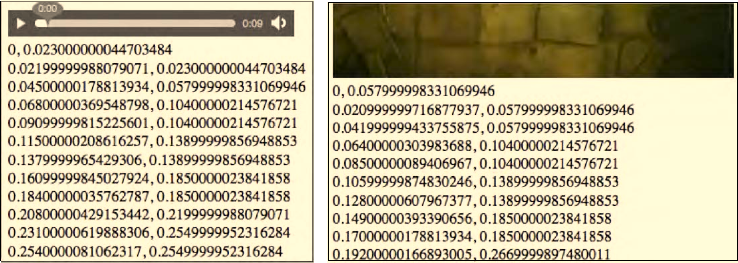
CHAPTER 8 ■ HTML5 AUDIO API
227
To determine the playback time of the audio resource that a framebuffer relates to, you could keep
track of the number of framebuffers previously received and their duration. However, the audio data API
provides a more robust means of getting this information, which also works across seeking and other
discontinuous navigation. As part of the MozAudioAvailable event data there is a field event.time, which
provides the start time for these samples measured from the start of the resource in seconds. Listing 8–4
and Figure 8–4 show the progress on the time of the samples and how they lag slightly behind the
current playback time.
Listing 8–4. Reading the event time for the audio framebuffer
<audio src="HelloWorld.ogg" controls>
</audio>
<div id="display"></div>
<script type="text/javascript">
var audio = document.getElementsByTagName("audio")[0];
var display = document.getElementById("display");
audio.addEventListener("MozAudioAvailable", writeSamples, false);
function writeSamples (event) {
display.innerHTML += event.time + ', ' + audio.currentTime +'<br/>';
}
</script>
Figure 8–4. Displaying ongoing event times of the audio framebuffer data
The event time is printed first and the current playback position is printed last in every row of
numbers in Figure 8–4.
8.1.3 Rendering an Audio Waveform
Now that we have the values of the audio samples, we can display the waveform by painting the samples
successively into a Canvas. For this, we set up a Canvas sized preferably the length of the framebuffer, or
some integer fraction thereof. Then we paint a path vertically centered with the sample values. Listing 8–
5 shows one such implementation.
http://freepdf-books.com
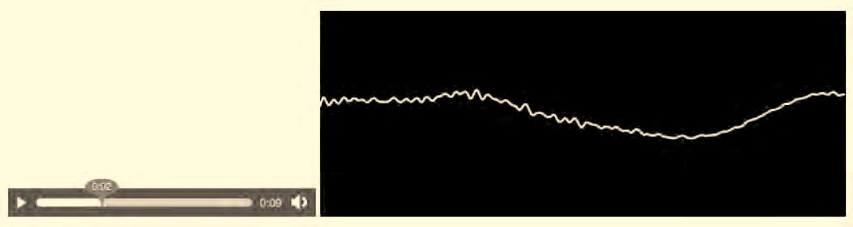
CHAPTER 8 ■ HTML5 AUDIO API
228
Listing 8–5. Rendering the audio samples in a waveform
<audio src="HelloWorld.ogg" controls></audio>
<canvas width="512" height="200"></canvas>
<script type="text/javascript">
var audio = document.getElementsByTagName("audio")[0];
var canvas = document.getElementsByTagName("canvas")[0];
var context = canvas.getContext('2d');
audio.addEventListener("MozAudioAvailable", writeSamples, false);
audio.addEventListener("loadedmetadata", getMetadata, false);
var fbLength, channels;
function getMetadata() {
channels = audio.mozChannels;
fbLength = audio.mozFrameBufferLength;
}
function writeSamples (event){
var data = event.frameBuffer;
var samples = 512;
var step = (fbLength / channels) / samples;
context.fillRect(0, 0, 500, 200);
context.strokeStyle = "#FFF";
context.lineWidth = 2;
context.beginPath();
context.moveTo(0, 100-data[0]*100);
for(var i=1; i< samples; i++){
context.lineTo(i, 100-data[i*step]*100);
}
context.stroke();
}
</script>
Here we have chosen a Canvas width of 512px, which is exactly half the length of the framebuffer on
one channel for this particular audio resource. Note that channel values are typically provided in an
interleaved fashion and drawing only the samples of one channel is the norm. Figure 8–5 shows the
output.
Figure 8–5. Display of the audio waveform
http://freepdf-books.com
CHAPTER 8 ■ HTML5 AUDIO API
229
This waveform display is quite interesting to watch, but the window into the waveform that we are
provided with is rather small. An improvement is to keep the past waveforms around for a bit longer, but
made increasingly transparent, thus keeping a decaying copy of past sample values around. This has
been implemented in Listing 8–6.
Listing 8–6. Rendering the audio samples in a waveform with history
<audio src="HelloWorld.ogg" controls></audio>
<canvas width="512" height="200"></canvas>
<canvas id="scratch" width="512" height="200"
style="display: none;"></canvas>
<script type="text/javascript">
var audio = document.getElementsByTagName("audio")[0];
var canvas = document.getElementsByTagName("canvas")[0];
var scratch = document.getElementById("scratch");
var context = canvas.getContext('2d');
var sctxt = scratch.getContext("2d");
context.fillRect(0, 0, 512, 200);
context.strokeStyle = "#FFFFFF";
context.lineWidth = 2;
audio.addEventListener("MozAudioAvailable", writeSamples, false);
audio.addEventListener("loadedmetadata", getMetadata, false);
var fbLength, channels;
function getMetadata() {
channels = audio.mozChannels;
fbLength = audio.mozFrameBufferLength;
}
function writeSamples (event){
var data = event.frameBuffer;
var samples = 512;
var step = (fbLength / channels) / samples;
img = context.getImageData(0, 0, 512, 200);
sctxt.putImageData(img, 0, 0, 512, 200);
context.globalAlpha = 0.5;
context.fillRect(0, 0, 512, 200);
context.drawImage(scratch, 0, 0, 512, 200);
context.globalAlpha = 1;
context.beginPath();
context.moveTo(0, 100-data[0]*100);
for(var i=1; i< samples; i++) {
context.lineTo(i, 100-data[i*step]*100);
}
context.stroke();
}
</script>
To redraw the lighter version of the waveform, we introduce a second canvas into which we copy the
image data. It is then written back into the main Canvas with 50% transparency and thus increasingly
fades out as historic data. Figure 8–6 shows the display.
http://freepdf-books.com

CHAPTER 8 ■ HTML5 AUDIO API
230
Figure 8–6. Display of the audio waveform with history
8.1.4 Rendering an audio spectrum
There are many more visualizations that can be performed using the audio sample data. We will finish
off the audio data reading section with a spectral display. For the calculation of the spectrum, we use the
Fast Fourier Transform (FFT)7 as described in https://wiki.mozilla.org/Audio_Data_API8. The example
is shown in Listing 8–7 with the FFT class omitted with its functions being rendered bold.
Listing 8–7. Rendering the audio samples in a spectrum
<audio src="HelloWorld.ogg" controls></audio>
<canvas width="512" height="200"></canvas>
<script type="text/javascript">
var audio = document.getElementsByTagName("audio")[0];
var canvas = document.getElementsByTagName("canvas")[0];
var context = canvas.getContext('2d');
context.strokeStyle = "#FFFFFF";
context.lineWidth = 2;
audio.addEventListener("MozAudioAvailable", writeSamples, false);
audio.addEventListener("loadedmetadata", getMetadata, false);
var fbLength, channels, rate;
function getMetadata() {
channels = audio.mozChannels;
fbLength = audio.mozFrameBufferLength;
rate = audio.mozSampleRate;
fft = new FFT(fbLength / channels, rate);
}
function writeSamples (event) {
var data = event.frameBuffer;
var length = data.length / channels;
var signal = new Float32Array(length);
for (var i = 0; i < length; i++ ) {
if (channels == 2) {
// merge channels into a stereo-mix mono signal
7 See http://en.wikipedia.org/wiki/FFT
8 See https://wiki.mozilla.org/Audio_Data_API#Complete_Example:_Visualizing_Audio_Spectrum
http://freepdf-books.com
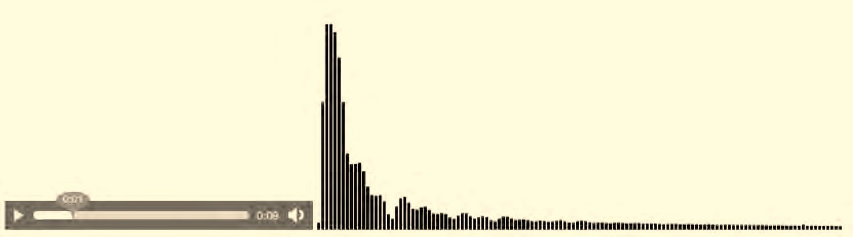
CHAPTER 8 ■ HTML5 AUDIO API
231
signal[i] = (data[2*i] + data[2*i+1]) / 2;
} else {
signal[i] = data[i];
}
}
fft.forward(signal);
context.clearRect(0,0, 512, 200);
for (var i = 0; i < fft.spectrum.length; i++ ) {
// multiply spectrum by a zoom value
magnitude = fft.spectrum[i] * 4000;
// Draw rectangle bars for each frequency bin
context.fillRect(i * 4, canvas.height, 3, -magnitude);
}
}
</script>
Note that we are preparing the audio samples for the Fourier transform by averaging the sample
values of the left and right channel if there are two channels. The code currently doesn't deal with more
than two channels. The result is shown in Figure 8–7.
Figure 8–7. Display of an audio spectrum
Note that the authors of the Mozilla audio data API are also working on a JavaScript library for
further digital signal processing functions at http://github.com/corbanbrook/dsp.js.
Further reading:
• Description of the full Mozilla audio data API:
https://wiki.mozilla.org/Audio_Data_API
• Tutorial for reading HTML5 audio data with Firefox 4:
http://weblog.bocoup.com/read-html5-audio-data-with-firefox-4
• Main author of audio data API David Humphrey:
Blog: http://vocamus.net/dave/?p=1148
Demo: http://www.youtube.com/watch?v=1Uw0CrQdYYg
• Diverse HTML5 audio visualizations:
http://blog.nihilogic.dk/2010/04/html5-audio-visualizations.html with demos at
http://www.nihilogic.dk/labs/pocket_full_of_html5/
http://www.storiesinflight.com/jsfft/visualizer/index.html
http://freepdf-books.com

CHAPTER 8 ■ HTML5 AUDIO API
232
• Beat detection:
http://sourceforge.net/projects/beatdetektor/
http://vimeo.com/11345685
http://cubicvr.org/CubicVR.js/bd3/BeatDetektor1HD.html
8.2 Generating Audio Data
The other part of the Mozilla audio data API enables JavaScript programmers to create sound from
JavaScript. The following methods are added to the media elements:
• mozSetup(channels, sampleRate): Sets the characteristics of a new audio element.
• mozWriteAudio(buffer): Writes an array of 32-bit floats to the audio element.
• mozCurrentSampleOffset(): Provides the current position of the audio element in
samples rather than time, which the currentTime attribute covers.
8.2.1 Creating a Single-Frequency Sound
The simplest example of creating a sound is to write a sine-wave — a single-frequency sound — to a new
audio element. Listing 8–8 shows how it's done.
Listing 8–8. Creating a new audio element with a sine wave
<script type="text/javascript">
var audio = new Audio();
audio.mozSetup(1, 44100);
var samples = new Float32Array(22050);
for(var i=0, l=samples.length; i< l; i++) {
samples[i] = Math.sin( i / 40 );
}
</script>
<button onclick="audio.mozWriteAudio(samples);">Play</button>
After creating the audio element and setting it up for single channel and 44.1kHz sampling rate
playback, the example creates an array of audio samples for exactly 1 second duration. This array is
written once to the audio element upon clicking the button. For displaying what we are writing to the
audio element Figure 8–8 includes the canvas waveform code shown earlier.
Figure 8–8. Playback of a sine wave created by a script, displayed at two different resolutions
http://freepdf-books.com
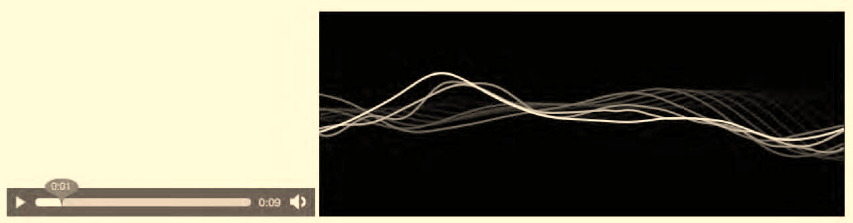
CHAPTER 8 ■ HTML5 AUDIO API
233
Note that in the left image of Figure 8–8 the full sine wave is shown, but only every 43rd sample; this
makes for a dense display of the wave. In contrast, the right image of Figure 8–8 shows only the first 512
samples of the sine wave.
8.2.2 Creating Sound from Another Audio Source
Since the mozWriteAudio() method accepts a 32-bit float array as input and the MozAudioAvailable event
returns a framebuffer of 32-bit floats, it is possible to take the output of one audio element and play it
back through another one, including intermediate processing if required. Listing 8–9 shows the core
code to achieve such reading and writing.
Listing 8–9. Creating a new audio element with a sine wave
<audio src="HelloWorld.ogg" controls></audio>
<script type="text/javascript">
var input = document.getElementsByTagName("audio")[0];
input.volume = 0;
var audio = new Audio();
input.addEventListener("loadedmetadata", getMetadata, false);
function getMetadata() {
audio.mozSetup(input.mozChannels, input.mozSampleRate);
}
input.addEventListener("MozAudioAvailable", writeSamples, false);
// Render the waveform
function writeSamples (event){
audio.mozWriteAudio(event.frameBuffer);
}
</script>
We first grab the given audio element and set its volume to 0 so as not to get funny effects with both
the input audio element and the scripted audio element playing at the same time. Then we create the
scripted audio element and use the metadata of the input audio element to initialize the scripted audio
element's metadata. In the callback for the MozAudioAvailable event we only need to grab the
framebuffer data from the event and write it to the scripted audio element.
There is no callback on the scripted audio element for retrieving samples, but since we already have
them in the writeSamples method, this is not necessary. To draw the samples to a canvas, we can simply
add the canvas rendering code of Listing 8–6 straight into the writeSamples function. We can see the
results in Figure 8–9.
Figure 8–9. Playback of extracted audio data into a new audio element
http://freepdf-books.com
CHAPTER 8 ■ HTML5 AUDIO API
234
8.2.3 Continuous Playback
Audio devices have a sample buffer that feeds the playback. No audio is played back before this sample
buffer is full. If this buffer runs low on data, you get unwanted pauses in the playback of the sound. If the
sample buffer is full and you try to write data to it, only some of your data may be accepted, and the rest
may be dropped and ignored; this also results in perceptible breaks in the playback. The simple
preceding implementations, where we just feed an array of audio samples straight to the audio element,
create such problems because we do not note the state of the sample buffer.
The Mozilla audio data API provides two means that allow us to better feed the sample buffer:
• A return value on the mozWriteAudio method, which tells us how many of the
audio samples that we tried to hand on to the sample buffer were actually handed
on.
• The mozCurrentSampleOffset method, which tells us how much the audio device
has actually played.
Using the mozCurrentSampleOffset() method, we can, for example, calculate the initial delay (or
latency) that your audio element is experiencing in comparison to the input audio element's playback
time. Listing 8–10 provides the key callback function on the MozAudioAvailable event—the remainder of
the page is essentially identical to Listing 8–9 with an extra paragraph.
Listing 8–10. Displaying latency between playback on original audio element and scripted audio
var par = document.getElementsByTagname("p")[0];
var showOffset = true;
var started = new Date().valueOf();
function writeSamples(event) {
prebufferSize = Math.floor(input.mozSampleRate / 1000 *
(new Date().valueOf() - started));
audio.mozWriteAudio(event.frameBuffer);
offset = audio.mozCurrentSampleOffset();
if (offset && showOffset) { // Play position moved?
par.innerHTML += offset + " first output sample position<br/>";
offset /= (input.mozChannels * input.mozSampleRate);
par.innerHTML += "Initial Delay: " + offset;
showOffset = false;
}
}
We set the started time of the input audio playback element first (this should be done in an onplay
callback). Then, as the samples come in, we record the first time that mozCurrentSampleOffset() returns
a value larger than 0 and print the respective sample offset and the time it maps to. Figure 8–10 shows
the result.
http://freepdf-books.com
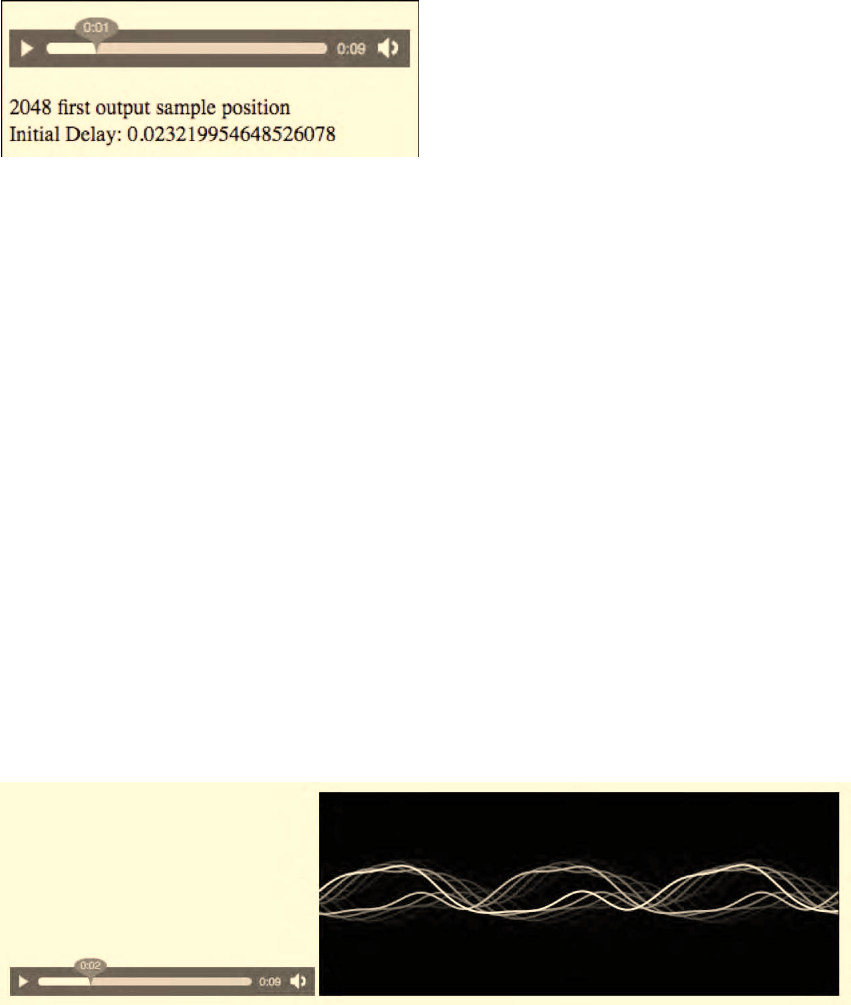
CHAPTER 8 ■ HTML5 AUDIO API
235
Figure 8–10. Latency between playback of original audio element and scripted audio
This means that our example had a latency of 23ms between the original audio element's sound and
the playback on the audio device from the scripted audio element. We now just need to feed the sample
buffer regularly with all the output data and not lose any samples from the mozWriteAudio() call. Listing
8–11 shows the loop that should be used for playback. The remainder of the code is as shown in Listing
8–9.
Listing 8–11. Playing back all the samples from an input source
var buffers = [];
function writeSamples(event) {
buffers.push(event.frameBuffer);
// If there's buffered data, write that
while (buffers.length > 0) {
var buffer = buffers.shift();
var written = audio.mozWriteAudio(buffer);
// If all data wasn't written, keep it in the buffers:
if (written < buffer.length) {
buffers.unshift(buffer.slice(written));
break;
}
}
}
Since not always all the audio data is written to the sample buffer of the audio device, it is important
to keep track of the samples that were not written for the next writing call. In Listing 8–11, the array
buffers holds the remaining samples from a previous call to writeSamples(). In buffer we then send the
data from all elements in buffers to the sound device. Figure 8–11 shows a display of this, though
nothing apparently changes—only all the sound samples are retained.
Figure 8–11. Writing all audio samples to the scripted audio element
http://freepdf-books.com
CHAPTER 8 ■ HTML5 AUDIO API
236
8.2.4 Manipulating Sound: the Bleep
The aim of grabbing audio samples from one element and writing them to another element is to
manipulate the data in between. To demonstrate, we will take the example of replacing short segments
of the input data with a sine wave; this is similar to the way swear words are “bleeped” out on TV. Listing
8–12 shows an example for the “Hello World” audio file that bleeps out the word “Hello”.
Listing 8–12. Bleeping out a section of audio with a sine wave
<audio src="HelloWorld.ogg" controls></audio>
<script type="text/javascript">
var input = document.getElementsByTagName("audio")[0];
input.volume = 0;
var audio = new Audio();
var samples, sampleRate, channels, insertFrom, insertTo;
input.addEventListener("loadedmetadata", getMetadata, false);
function getMetadata() {
sampleRate = input.mozSampleRate;
channels = input.mozChannels;
audio.mozSetup(channels, sampleRate);
// create enough buffer to play smoothly
samples = new Float32Array(2*sampleRate);
var k = 2* Math.PI * 400 / sampleRate;
for (var i=0, size=samples.length; i < size; i++) {
samples[i] = 0.1 * Math.sin(k * i);
}
insertFrom = 3.0 * sampleRate * channels;
insertTo = 4.0 * sampleRate * channels;
}
// Render the samples
var position = 0;
var insPos = 0;
input.addEventListener("MozAudioAvailable", writeSamples, false);
function writeSamples(event) {
if (position >= insertFrom && position <= insertTo) {
// replace with sine wave
for (i=0; i< event.frameBuffer.length; i++) {
event.frameBuffer[i] = samples[insPos++];
if (insPos == samples.length) insPos = 0;
}
}
position += audio.mozWriteAudio(event.frameBuffer);
}
</script>
At first we set up the scripted audio element as before with the channels and sampling rate of the
input audio element. As we set this up, we also set up a two-second long 400 Hz sine wave buffer (at 10%
of the amplitude), which will be used as the bleep. Then, for this simple example, we define the start and
end times (in samples) for the bleep. In a real-world program, such information could come from an
external cue file and be used to bleep out several sections.
During rendering, as the MozAudioAvailable event is raised, we keep track of the position up to
which the audio data has been written and when it reaches the bleep section we replace the samples in
the event.frameBuffer with the sine wave samples. We have to be careful with these samples, because
Download from www.eBookTM.Com
http://freepdf-books.com
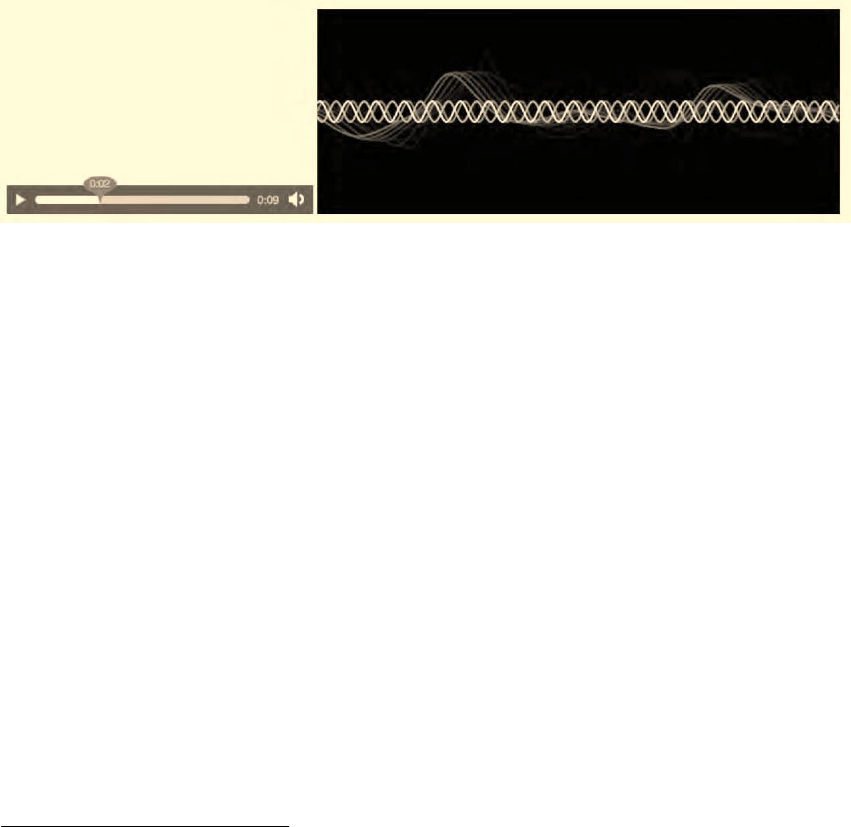
CHAPTER 8 ■ HTML5 AUDIO API
237
the size of the frameBuffer is not normally a multiple of the sine wave frequency, which means we will
get phase distortion9 if we just create a sine wave buffer of the frameBuffer length and concatenate these.
Instead, we make a long sinewave buffer, longer than the bleep, and take successive samples from that
buffer.
The result can be seen in Figure 8–12. We've added the canvas code from Listing 8–7 and we've also
added the improved buffer writing that doesn't lose any samples from Listing 8–11.
Figure 8–12. Adding bleeps to an audio source
8.2.5 A Tone Generator
We conclude this section with an interactive, Web-based tone generator10. It is based on the previously
shown code for creating single frequency samples, but the user can interactively change the setting.
Listing 8–13 shows the code.
Listing 8–13. A Web-based tone generator
<input type="text" size="4" id="freq" value="880"><label> Hz</label>
<button onclick="start()">play</button>
<button onclick="stop()">stop</button>
<script type="text/javascript">
var audio = new Audio();
rate = 44100;
audio.mozSetup(1, rate);
// set up sample array of size 500ms
var samples = new Float32Array(22050);
var intervalId;
function start() {
// prepare samples
var currentSoundSample = 0;
var frequency = 0;
frequency = parseFloat(document.getElementById("freq").value);
if (!frequency) {
return;
9 See http://en.wikipedia.org/wiki/Phase_distortion
10 Motivated by https://wiki.mozilla.org/Audio_Data_API
http://freepdf-books.com
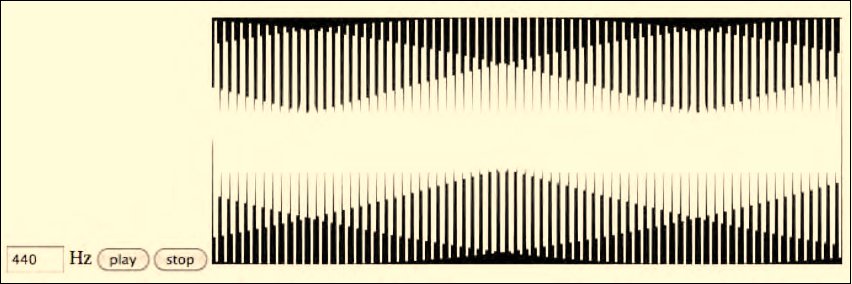
CHAPTER 8 ■ HTML5 AUDIO API
238
}
var k = 2* Math.PI * frequency / rate;
for (var i=0, size=samples.length; i < size; i++) {
samples[i] = 0.5 * Math.sin(k * currentSoundSample++);
}
// call playback per samples array
clearInterval(intervalId);
intervalId = setInterval(playSound,
parseInt(samples.length*1000/rate));
}
function stop() {
clearInterval(intervalId);
}
function playSound() {
audio.mozWriteAudio(samples);
}
</script>
First we set up the Web page with the input element and the buttons. Then we set up the output
audio element as a mono 44.1kHz sound and prepare the sample buffer.
As the user hits the “Play” button, the start method is called. Here, we read the user-provided
frequency and create a 500ms sample array of sine wave samples at the given frequency. Then we can
clear any previously playing sounds and start playing the new sample array. We play it in intervals that
are of the exact same duration as a sample array, namely 500ms.
As the user hits the “Stop” button, we remove the playSound method from being called regularly,
which stops the playback. Note that the playSound method should be improved with the code from
Listing 8–11 in order not to lose any samples during playback.
Figure 8–13 shows the results of Listing 8–13 when extended with the canvas functionality of Listing
8–7.
Figure 8–13. An interactive tone generator in Firefox 4+
Further reading:
• Description of the full Mozilla audio data API:
https://wiki.mozilla.org/Audio_Data_API
http://freepdf-books.com

CHAPTER 8 ■ HTML5 AUDIO API
239
• Generating sound with the Mozilla audio data API:
http://weblog.bocoup.com/generate-sound-with-javascript-in-firefox-4
• Excellent demos:
http://audioscene.org/?cat=9
• JavaScript audio synthesizer:
http://acko.net/blog/javascript-audio-synthesis-with-html-5
http://code.almeros.com/code-examples/sampler-firefox-audio-api/
We've now had a good introduction to the Mozilla audio data API and what is possible with it. We
can extract sample values and write sample values to HTML5 audio elements and use libraries of
methods in JavaScript to create more sophisticated analysis and synthesis functionality.
8.3 Overview of the Filter Graph API
In this section we want to take a look at the Web audio API11 as proposed by Google as part of the W3C
Audio Incubator Group and understand the differences and commonalities with Mozilla's audio data
API. We now have to switch over from running our examples in Firefox 4+ to running an experimental
version of Safari or Google Chrome12 on OS X, since that is the only platform for which an example
implementation has been developed.
8.3.1 Basic Reading and Writing
Similar to the way the Canvas introduces a new element into HTML for manipulating image data, the
Web audio API proposes the introduction of a new element into HTML for manipulating audio data. It is
called AudioContext. As it is currently defined, only one AudioContext can exist per Web page.
The AudioContext provides the environment for the filter graph to be put together and to result
eventually in a signal that is being output to the device through an AudioDestinationNode. It is a
“terminal” node in the AudioContext's filter graph.
Input to the AudioContext comes from AudioBufferSourceNodes, which can be connected to audio
resources. The demo implementation only accepts aif and mp4 audio files.
Listing 8–14 shows how to read an audio resource with the Web audio API and write it back out
using the AudioContext element.
Listing 8–14. Reading and writing sound using an AudioContext.
<div id="display"></div>
<script type="text/javascript">
var display = document.getElementById("display");
var context = new AudioContext();
display.innerHTML = context.sampleRate + " sampling rate<br/>";
display.innerHTML += context.destination.numberOfChannels
+ " output channels<br/>";
display.innerHTML += context.currentTime + " currentTime<br/>";
// create samples
11 See http://chromium.googlecode.com/svn/trunk/samples/audio/specification/specification.html
12 See http://chromium.googlecode.com/svn/trunk/samples/audio/index.html
http://freepdf-books.com
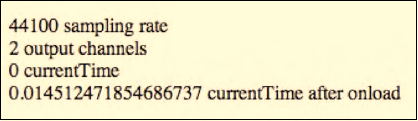
CHAPTER 8 ■ HTML5 AUDIO API
240
source = context.createBufferSource();
request = context.createAudioRequest("HelloWorld.aif", false);
request.onload = function() {
display.innerHTML += context.currentTime
+ " currentTime after onload<br/>";
source.buffer = request.buffer;
source.connect(context.destination);
source.noteOn(0);
}
request.send();
</script>
We first have to instantiate the AudioContext, which by default has a sampling rate of 44.1kHz
associated with it and an AudioDestinationNode that has stereo channels. It is unclear why there is a need
for an explicit AudioDestinationNode, when the AudioContext already sets up the default environment—
or why in fact the number of channels and the sampling rate cannot be different between the
AudioContext and the AudioDestinationNode. It is also unclear how an AudioContext can be created with
a different sampling rate and a different number of channels, since all of these parameters are read-only.
It seems that this part of the writing functionality could be nicely merged with the audio.mozSetup()
method of Mozilla's audio data API.
After the setup, we create an audio sample buffer and fill it from an input source aif file with
CreateAudioRequest. As we load the resource through request.send(), the onload event is fired, which
has the sample buffer. We hand that sample buffer on to the output device through the
AudioDestinationNode and tell the source to start playback with noteon(0).
It seems a bit strange to have an extra loading function for audio resources when the audio element
already has that functionality. Again, it seems that the MozAudioAvailable event for reading in the
Mozilla audio data API could be nicely combined with this functionality.
We will see what specification the W3C Incubator Group will eventually arrive at. For now, you can
see the output of Listing 8–14 in Figure 8–14.
Figure 8–14. Reading and writing audio data with the Web audio API
8.3.2 Advanced Filters
A set of different AudioNodes with different filter functionalities can be added into an AudioContext to
build the filter graph. The following node types are available:
• AudioGainNode: Takes one input, creates one output by changing the gain of the
signal smoothly
• DelayNode: Takes one input, creates one output by variably delaying the signal
without introducing clicks or glitches.
• LowPass2FilterNode: Takes one input, creates one output by applying a low pass
filter, where all the higher frequencies are removed,
http://freepdf-books.com

CHAPTER 8 ■ HTML5 AUDIO API
241
• HighPass2FilterNode: Takes one input, creates one output by applying a high pass
filter, where all the lower frequencies are removed,
• AudioPannerNode: Takes one input, creates one output by positioning/spatializing
incoming audio samples in three-dimensional space,
• ConvolverNode: Takes one input, creates one output by applying a linear
convolution given an impulse response13,
• AudioChannelSplitter: Takes one input, creates up to six outputs depending on
the number of present input channels,
• AudioChannelMerger: Takes up to six inputs and creates one interleaved output
sample stream,
• RealtimeAnalyserNode: Takes one input and creates one identical output audio
sample stream, plus real-time frequency and time-domain analysis information.
These filters are very useful and would make a great addition to the Mozilla audio data API. It is
important to add such functions to the core functionality of a Web browser because in this way
hardware-acceleration can be applied to functionalities that are otherwise software-only. Even the
application of Web Workers, which can relieve the main process from particularly CPU-intensive tasks,
cannot make up for reuse of hardware-provided functionality.
In the following, we will explore how these filters are applied to audio signals in a simple example.
8.3.3 Creating a Reverberation Effect
To understand how the Web audio API works, we are using an impulse response sound that creates a
spring-like reverberation; we convolve14 this with our HelloWorld audio example file. Listing 8–15 shows
how it is done.
Listing 8–15. Creating a reverberation effect using the AudioContext convolution filter
<script type="text/javascript">
var context = new AudioContext();
var convolver = context.createConvolver();
// create filter graph
source = context.createBufferSource();
source.connect(convolver);
convolver.connect(context.destination);
// load convolution buffer impulse response
var req1 = context.createAudioRequest("feedback-spring.aif", false);
req1.onload = function() {
convolver.buffer = req1.buffer;
// load samples and play away
request = context.createAudioRequest("HelloWorld.aif", false);
13 See http://en.wikipedia.org/wiki/Impulse_response
14 See http://en.wikipedia.org/wiki/Convolution
http://freepdf-books.com
CHAPTER 8 ■ HTML5 AUDIO API
242
request.onload = function() {
source.buffer = request.buffer;
source.noteOn(0);
}
request.send();
}
req1.send();
</script>
First, we set up the audio context and create the convolver in it. Then, we connect the filter graph
together—from the source buffer to the convolver to the destination display. Then we load the impulse
response of the convolution function. When its onload event returns, everything is ready to start playing.
We can load the input audio resource and upon its onload event returning, we call the noteOn(0)
function, which starts playback of sound from the pipeline. The resulting effect is that of a reverberation
on the original sound—it almost sounds like somebody is inside a cave.
We've now learned about the following interfaces:
AudioContext:
• readonly attribute float sampleRate
• readonly attribute float currentTime
• readonly attribute AudioDestinationNode::numberOfChannels
• AudioBufferSourceNode createBufferSource()
• ConvolverNode createConvolver()
• CachedAudio createAudioRequest(url, asynchronous)
AudioBufferSourceNode:
• attribute AudioBuffer buffer
• void noteOn(timeoffset)
• attribute boolean loop
ConvolverNode:
• attribute AudioBuffer buffer
CachedAudio:
• attribute AudioBuffer buffer
• onload event callback
• onerror event callback
http://freepdf-books.com
CHAPTER 8 ■ HTML5 AUDIO API
243
8.3.4 Waveform Display
To visualize the results of Listing 8–15, we need to introduce another filter into the filter graph, called
RealtimeAnalyzerNode. This node type allows grabbing time- or frequency-domain data out of the filter
graph where it is inserted. We can use this to create a waveform or frequency display.
Listing 8–16 shows how we can grab the sample values off the filter graph and display them in a
canvas.
Listing 8–16. Rendering waveform data from an AudioContext filter graph
<canvas width="512" height="200"></canvas>
<canvas id="scratch" width="512" height="200" style="display: none;">
</canvas>
<script type="text/javascript">
var context = new AudioContext();
var convolver = context.createConvolver();
var analyser = context.createAnalyser();
analyser.fftSize = 2048;
analyser.smoothingTimeConstant = 0.1;
// filter graph: source -> convolver -> analyser -> destination
source = context.createBufferSource();
source.looping = false;
source.connect(convolver);
convolver.connect(analyser);
analyser.connect(context.destination);
buffer = new Uint8Array(analyser.frequencyBinCount);
// prepare for rendering
var canvas = document.getElementsByTagName("canvas")[0];
var ctxt = canvas.getContext("2d");
var scratch = document.getElementById("scratch");
var sctxt = scratch.getContext("2d");
ctxt.fillRect(0, 0, 512, 200);
ctxt.strokeStyle = "#FFFFFF";
ctxt.lineWidth = 2;
// load convolution buffer impulse response
var req1 = context.createAudioRequest("feedback-spring.aif", false);
req1.onload = function() {
convolver.buffer = req1.buffer;
// load samples and play away
request = context.createAudioRequest("HelloWorld.aif", false);
request.onload = function() {
source.buffer = request.buffer;
source.noteOn(0);
draw();
}
request.send();
}
req1.send();
http://freepdf-books.com
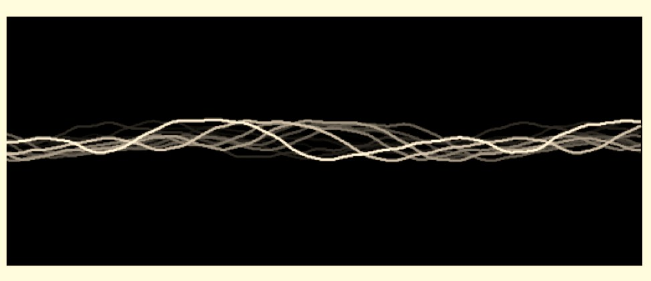
CHAPTER 8 ■ HTML5 AUDIO API
244
function draw() {
analyser.getByteTimeDomainData(buffer);
// do the canvas painting
var width = 512;
var step = parseInt(buffer.length / width);
img = ctxt.getImageData(0,0,512,200);
sctxt.putImageData(img, 0, 0, 512, 200);
ctxt.globalAlpha = 0.5;
ctxt.fillRect(0, 0, 512, 200);
ctxt.drawImage(scratch,0,0,512,200);
ctxt.globalAlpha = 1;
ctxt.beginPath();
ctxt.moveTo(0, buffer[0]*200/256);
for(var i=1; i< width; i++) {
ctxt.lineTo(i, buffer[i*step]*200/256);
}
ctxt.stroke();
setTimeout(draw, 0);
}
</script>
As in previous examples, we have a canvas into which the wave will be rendered. We set up the filter
graph by instantiating the AudioContext() and creating the convolver and anlyzer, then hooking them
up from the source buffer through the convolver and the analyzer to the destination display. As before,
we load the impulse response into the convolver and upon its onload event, we load the input source
into the context to hook it up to the filter graph and start playback.
Once we have turned on the filter graph for playback, we go into a draw() function, which grabs
from the analyser the waveform bytes. These are exposed through a getByteTimeDomainData() method,
which fills a provided Uint8Array. We take this array and draw it into the canvas. Then call the draw()
method again in a setTimeout() function call to grab the next unsigned 8–bit byte array for display. This
successively paints the waveform into the Canvas.
Figure 8–15 shows the result of running Listing 8–16.
Figure 8–15. Rendering the audio waveform in the Web audio API
The interface of the RealtimeAnalyserNode is as follows:
http://freepdf-books.com
CHAPTER 8 ■ HTML5 AUDIO API
245
RealtimeAnalyserNode:
• void getFloatFrequencyData(Float32Array)
• void getByteFrequencyData(Uint8Array)
• void getByteTimeDomainData(Uint8Array)
• attribute unsigned long fftSize
• readonly attribute unsigned long frequencyBinCount
• attribute float minDecibels
• attribute float maxDecibels
• attribute float smoothingTimeConstant
It is thus really easy to grab the frequency values out of this filter node.
The availability of these advanced audio processing methods in the Web audio API makes it very
powerful. Since the creation of the filter graph excludes the introduction of random audio processing
methods, a special JavaScriptNode had to be introduced which allows the integration of a self-created
filter in JavaScript into the filter graph. It has an onaudioprocess event and provides an input and an
output buffer for filters to work with.
The difference, therefore, between the audio data API and the Web audio API approach is that the
first one provides access directly to the audio samples in an HTML5 audio element and allows the
programmer to do anything with these samples—including having them drive other parts of the
interface, while the latter provides advanced audio functionalities in a structured filter graph approach,
the likes of which have been used successfully for many years to create advanced audio content. The
latter also provides hardware-acceleration on functions that would otherwise not be able to run in real
time.
Further reading:
• Specification of the Web audio API:
http://chromium.googlecode.com/svn/trunk/samples/audio/specification/speci
fication.html
• Use cases under consideration for the audio API specification:
http://www.w3.org/2005/Incubator/audio/wiki/Audio_API_Use_Cases
• Example uses of the Web audio API by its main author Chris Rogers:
http://chromium.googlecode.com/svn/trunk/samples/audio/index.html
•
8.4 Summary
In this chapter we learned about the existing proposals for an audio API that gives access to an <audio>
element’s audio samples, provides manipulation and visualization approaches for such audio data, and
explains how samples can be read out to the Web browser through another <audio> element.
There are currently two proposals for an audio API—one is amazingly simple and yet powerful and
the other is a complementary collection of manipulation functions.
http://freepdf-books.com

CHAPTER 8 ■ HTML5 AUDIO API
246
Download from www.eBookTM.Com
http://freepdf-books.com

C H A P T E R 9
■ ■ ■
247
Media Accessibility and
Internationalization
Accessibility and internationalization are two aspects of usability: the first one is for those users who
have some form of sensory impairment, the second for those who don't speak the language used by the
main audio-visual resource.
For web pages, we have developed a vast set of functionalities to cope with the extra requirements
introduced by these users: Web sites present themselves in multiple languages, and screen readers or
Braille devices provide vision-impaired users with the ability to consume web page content.
With the introduction of audio and video into HTML, we face some very tough additional
challenges. For the first time, we are publishing audio content that needs to be made accessible to
hearing-impaired users or users who do not speak the language used in the audio data. We are also
publishing for the first time HTML imaging content that changes over time and needs to be made
accessible to vision-impaired users.
The main means of addressing such needs has been the development of so-called “alternative
content technologies”, in which users who request it are provided with other content that gives an
alternative representation of the original content in a format they can consume. Examples are captions,
which are alternative content for the audio track for hearing-impaired users, subtitles, which are
alternative content for the audio track for foreign language users, and audio descriptions of video
content for vision-impaired users. Sometimes alternative content is also useful as additional content, for
example, in the case of subtitles or chapter markers. But we'll still use this terminology.
In this chapter we discuss the features that HTML5 currently offers, introduces, or will need to
introduce to satisfy accessibility and internationalization needs for media users. The development of
these features is still active for HTML5, and not every user need is currently satisfied by an existing
feature proposal. At the time of writing, no browser supports any of the new features natively yet.
However, the development of these features, in the form of both specification text in the HTML5
standard and implementations in browsers, is very active and we can already foresee some of the
functionality that will be available. Therefore, it would be a big oversight not to address this topic here.
We will start this chapter by providing an overview of the kinds of alternative content technologies
that have been developed for addressing the needs of accessibility and internationalization users. Then
we will introduce the features that are under discussion for HTML5 at varying stages of maturity.
Note that the creation of alternative content for videos has large implications for all users on the
Web, not just those with special needs or non-native users. The biggest advantage is that text is made
available that represents exactly what is happening in the video, and this text is the best means for
searches to take place. Because search technology is very advanced when it comes to text, but very poor
when it comes to audio or video content, alternative text provides the only reliable means of indexing
audio-visual content for high quality search.
http://freepdf-books.com
CHAPTER 9 ■ MEDIA ACCESSIBILITY AND INTERNATIONALIZATION
248
9.1 Alternative Content Technologies
This section will not contain the typical “feature—example—demo” approach used elsewhere in this
book. The reason for this section is, however, to explain the breadth of alternative content technologies
that have been developed to make media content usable for people in varying situations and thus to
provide a background for the set of features that are being introduced into HTML5 to satisfy these
diverse needs.
9.1.1 Vision-impaired Users
For users with poor or no vision, there are two main dimensions that pose a challenge: how to perceive
the visual dimension of the video imaging, and how to interact with media elements.
(1) Perceiving Video Content
The method developed to consume the imagery content of video as a vision-impaired user is called
Described Video. In this approach, a description of what is happening in the video is made available as
the video's time passes and the audio continues to play back. The following solutions are possible and
need to be supported by HTML5:
• Audio descriptions: a speaker explains what is visible in the video as the video
progresses.
• Text descriptions: time-synchronized blocks of text are provided in time with
what is happening on screen and a screen reader synthesizes this to speech for the
vision-impaired user.
The spoken description needs to fit into the times of the video when no other important
information is being expressed in the main audio. Text descriptions are synthesized at an average
reading speed and thus also calculated with a certain duration to fit into the gaps.
This approach doesn't change the timeline of the original content. It can be applied to a lot of
content, in particular movies, cartoons and similar TV content that typically have numerous audio gaps.
It is very hard to apply to content with continuous speech, such as lectures or presentations. For such
situations, it is necessary to introduce gaps into the original content during which the vision-impaired
user can consume the extra information. Such content is called “extended” because it extends the
timeline of consumption:
• Extended audio descriptions: Recordings of spoken descriptions are inserted into
the video while the video is paused.
• Extended text descriptions: The video is paused until the speech synthesizer
finishes reading out a text description.
Note that in a shared viewing experience—where a vision-impaired user and a nonimpaired user
are viewing the content together—the use of extensions may be limited depending on the flexibility and
needs of the nonimpaired users who will need to wait for the consumption of the video descriptions.
There will be situations where the additional information is very welcome to the nonimpaired users and
others where the delay would not be acceptable.
From a technical viewpoint, there are three ways of realizing described video:
http://freepdf-books.com

CHAPTER 9 ■ MEDIA ACCESSIBILITY AND INTERNATIONALIZATION
249
• Mixed-in: audio descriptions are mixed into the main audio track of the video;
that is, they are recorded into the main audio track and cannot be extracted again,
thus becoming part of the main resource. Such audio descriptions are sometimes
also called open audio descriptions because they are always active and open for
everyone. On the Web, the mixed-in approach can only work if the described
video is presented as an alternative to the non-described video, thus keeping
multiple copies of the same video around. This also creates the perception that
the “normal” content is the one without descriptions, and that described content
is something that needs to be specially activated. It thus discourages cross-
content browsing and cross-population interaction—something not desirable in a
social medium like the Web. In addition, the implied duplication of content is
undesirable, so this approach should only be used if no alternative means of
providing described video can be found.
• In-band: audio or text descriptions are provided as a separate track in the media
resource. This allows independent activation and deactivation of the extra
information similar to the way descriptive audio has been provided through
secondary audio programming (SAP)1. It requires web browsers to support
handling of multitrack video, something not yet supported by web browsers but
commonly found in content material such as QuickTime, MPEG, or Ogg.
• External: audio or text descriptions are provided as a separate resource and linked
to the media resource through HTML markup. This is sometimes also called “out-
of-band” by contrast with “in-band”. Similar to using separate tracks, this allows
independent activation and deactivation of the extra information. It requires
browsers to download, interpret, and synchronize the extra resource to the main
resource during playback.
(2) Interacting with Content
Vision-impaired users need to interact with described video in several ways:
• to activate / deactivate descriptions
• to navigate within and into the content
• to navigate between alternative content
• to navigate out of content
Other necessary interactions relate to keyboard-driven video controls (see Chapter 2 for how these
are supported), the speech synthesizer (choice of voice, reading speed, shortcuts), the styling of captions
(font, font size), and the quality of the content (adapting contrast, brightness, color mix, playback rate,
pitch, spatial location).
Activate/Deactivate Descriptions
Where described video is provided through separate in-band tracks or external resources, it is possible to
activate or deactivate the descriptions. This can be achieved through user preference settings, which for
http://freepdf-books.com
CHAPTER 9 ■ MEDIA ACCESSIBILITY AND INTERNATIONALIZATION
250
a specific user will always activate descriptions if they are available. It can also be achieved through the
creation of interactive controls such as a menu of all available tracks and their activation status.
Navigate Within and into Media
Since audio-visual content is a major source of information for vision-impaired users, navigation within
and into that content is very important. Sighted users often navigate through video by clicking on time
offsets on a playback progress bar. This direct access functionality also needs to be available to vision-
impaired users. Jumping straight into temporal offsets or into semantically meaningful sections of
content helps the consumption of the content enormously. In addition, a more semantic means of
navigating the content along structures such as chapters, scenes, or acts must also be available.
Navigate Between Alternative Content Tracks
When multiple dependent and hierarchically structured markups of tracks exist such as chapters,
scenes, or acts, it is also necessary to be able to navigate between these related tracks in a simple and
usable manner. Preferably a simple up/down arrow key navigation moves the vision-impaired user to
the same time in a different alternative content track.
Navigate out of Content
Finally, an important navigation means for vision-impaired users is the use of hyperlinks—the
underlying semantic pattern of the Web. Often, on-screen text provides a hyperlink that should not just
be read out to a vision-impaired user, but rather be made usable by providing actual hyperlinks in the
text description that vision-impaired users can activate. In web pages, vision-impaired users are able to
have a screenreader read out paragraphs in one reading, or switch to reading single words only, so they
can pause at a hyperlink and follow it. They can also navigate from hyperlink to hyperlink. Such
functionality should also be available for described video.
9.1.2 Hard-of-hearing Users
For users who have trouble hearing, the content of the audio track needs to be made available in an
alternative way. Captions, transcripts, and sign translations have traditionally been used as alternative
representations for audio. In addition, improvements to the played audio can also help hard-of-hearing
people who are not completely deaf to grasp the content of the audio.
(1) Captions
Captions are the main method used as alternative content for audio in videos. Captions are blocks of text
that transcribe what is being said in the audio track, but they also transcribe significant sound effects or
indicate the kind of music being played. Captions can be used both on video and audio resources. For
audio resources they are particularly useful in a shared viewing environment with hearing users—
otherwise, transcripts are probably preferable because they allow an independent reading speed of what
is being said in the audio file. On videos, transcripts cannot replace but only supplement captions. Video
with captions is rendered highly usable to hard-of-hearing users, so much that even users who have no
hearing-impairment but find themselves in adverse hearing situations, such as at airports or at a noisy
work environment, benefit from captions.
http://freepdf-books.com
CHAPTER 9 ■ MEDIA ACCESSIBILITY AND INTERNATIONALIZATION
251
For captions, we distinguish between:
• Traditional captions: Blocks of text are provided in time with what is happening
on screen and displayed time-synchronously with the video. Often they are
overlaid at the bottom of the video viewport, sometimes placed elsewhere in the
viewport to avoid overlapping other on-screen text, and sometimes placed
underneath the viewport to avoid any overlap at all. Mostly, very little if any styling
is applied to captions, just making sure the text is well readable with appropriate
fonts, colors, and a means to separate it from the video colors through, for
example, text outlines or a text background. Some captioned videos introduce
color coding for speakers, speaker labeling, and/or positioning of the text close to
the speakers on screen to further improve cognition and reading speed.
• Enhanced captions: In the modern Web environment, captions can be so much
more than just text. Animated and formatted text can be displayed in captions.
Icons can be used to convey meaning—for example, separate icons for different
speakers or sound effects. Hyperlinks can be used to link on-screen URLs to actual
web sites or to provide links to further information making it easier to use the
audio-visual content as a starting point for navigation. Image overlays can be used
in captions to allow displaying timed images with the audio-visual content. To
enable this use, general HTML markup is desirable in captions.
From a technical view-point, there are three ways of realizing captions:
• Mixed-in: Captions that are mixed into the main video track of the video are also
called burnt-in captions or open captions because they are always active and
open for everyone to see. Traditionally, this approach has been used to deliver
captions on TV and in cinemas because it doesn't require any additional
technology to be reproduced. This approach is, however, very inflexible since it
forces all users to consume the captions without possibilities for personal choice,
in particular without allowing the choice of using another language for the
captions.
On the Web, this approach is discouraged, since it is easy to provide captions as
text. Only legacy content where video without the burnt-in captions is not
available should be published in this way.
• In-band: captions are provided as a separate track in the media resource. This
allows independent activation and deactivation of the extra information. It
requires web browsers to support handling of multitrack video.
• External: captions are provided as a separate resource and linked to the media
resource through HTML markup. Similar to separate tracks, this allows
independent activation and deactivation of the extra information. It requires
browsers to download, interpret, and synchronize the extra resource to the main
resource during playback.
(2) Transcript
Full-text transcripts of the audio track of audio-visual resources are another means of making audio-
visual content accessible to hard-of-hearing users and in fact to anyone. It can be more efficient to
read—or cross-read—a transcript of a audio or video resource rather than having to sit through its full
http://freepdf-books.com

CHAPTER 9 ■ MEDIA ACCESSIBILITY AND INTERNATIONALIZATION
252
extent. One particularly good example is a site called Metavid, which has full transcripts of US senate
proceedings and is fully searchable2.
Two types of transcripts are typically used:
• Plain transcripts: These are the equivalent of captions but brought together in a
single block of text. This block of text can be presented simply as text on the web
page somewhere around the video or as a separate resource provided through a
link near the video.
• Interactive transcripts: These are also equivalent to captions, but brought
together in a single block of text with a tighter relationship between the text and
video. The transcript continues to have time-synchronized blocks such that a click
on a specific text cue will navigate the audio-visual resource to that time offset.
Also, as the video reaches the next text cue, the transcript will automatically move
the new text cue center stage, for example by making sure it scrolls to a certain on-
screen location and/or is highlighted.
Incidentally, the latter type of interactive transcript is also useful for vision-impaired users for
navigation when used in conjunction with a screen reader. It is, however, necessary then to mute the
audio-visual content while foraging through the interactive transcript, because otherwise it will compete
with the sound from the screen reader and make both unintelligible.
(3) Sign Translation
To hard-of-hearing users—in particular to deaf users—sign language is often the most proficient
language that they speak, followed by the written language of the country that they live in. They often
communicate much quicker and more comprehensively in sign language, which—much like Mandarin
and similar Asian languages—communicates typically through having a single symbol for semantic
entities. Signs exist for letters, too, but sign speaking in letters is very slow and only used in exceptional
circumstances. The use of sign language is the fastest and also most expressive means of communicating
between hard-of-hearing users.
From a technical view-point, there are three ways of realizing sign translation:
• Mixed-in: Sign translation that is mixed into the main video track of the video can
also be called burnt-in sign translation or open sign translation because it is
always active and open for everyone to see. Typically, open sign translation is
provided as a picture-in-picture (pip) display, where a small part of the video
viewport is used to burn in the sign translation. Traditionally, this approach has
been used to deliver sign translation on TV and in cinemas because it doesn't
require any additional technology to be reproduced. This approach is, however,
very inflexible since it forces all users to consume the sign translation without
possibilities for personal choice, in particular without allowing the choice of using
a different sign language (from a different country) for the sign translation.
On the Web, this approach is discouraged. Sign translation that is provided as a
small pip video is particularly hard to see in the small embedded videos that are
typical for Web video. Therefore only legacy content where video without the
burnt-in sign translation is not available should be published in this way. Where
possible, the sign translation should exist as separate content.
2 See http://en.wikipedia.org/wiki/Metavid
http://freepdf-books.com

CHAPTER 9 ■ MEDIA ACCESSIBILITY AND INTERNATIONALIZATION
253
• In-band: sign translation is provided as a separate track in the media resource.
This allows independent activation and deactivation of the extra information. It
requires web browsers to support handling of multitrack video.
• External: sign translation is provided as a separate resource and linked to the
media resource through HTML markup. Similar to separate tracks, this allows
independent activation and deactivation of the extra information. It requires
browsers to synchronize the playback of two video resources.
(4) Clear Audio
This is a feature that is not alternative content for the hearing-impaired, but a more generally applicable
feature that improves the usability of audio content. It is generally accepted that speech is the most
important part of an audio track, since it conveys the most information. In modern multitrack content,
speech is sometimes provided as a separate track to the remainder of the sound environment. This is
particularly true for Karaoke music content, but can also easily be provided for professionally developed
video content, such as movies, animations, or TV series.
Many users have problems understanding the speech in a mixed audio track. But when the speech
is provided in a separate track, it is possible to allow increasing the volume of the speech track
independently of the rest of the audio tracks, thus rendering “clearer audio”—that is, more
comprehensible speech.
Technically, this can only be realized if there is a separate speech track available, either as a separate
in-band track or as a separate external resource. Just increasing the volume of typical speech frequency
bands may work for some types of content, but not typically for those where the background noise
makes the speech incomprehensible.
9.1.3 Deaf-blind users
It is very hard to provide alternative content for users who can neither see nor hear. The only means of
consumption for them is basically Braille, which requires text-based alternative content.
(1) Individual Consumption
If deaf-blind users consume the audio-visual content by themselves, it makes sense to only provide a
transcript that contains a description of what is happening both on screen and in audio. It's basically a
combination of a text video description and an audio transcript. The technical realization of this is thus
best as a combined transcript. Interestingly, Braille devices are very good at navigating hypertext, so
some form of enhanced transcript is also useful.
(2) Shared Viewing Environment
In a shared viewing environment, the combination of text and audio description needs to be provided
synchronously with the video playback. A typical Braille reading speed is 60 words per minute3.
Compare that to the average adult reading speed of around 250 to 300 words per minute4 or even a usual
speaking speed of 130-200 words per minute5 and you realize that it will be hard for a deaf-blind person
3 See http://nfb.org/legacy/bm/bm03/bm0305/bm030508.htm
4 See http://en.wikipedia.org/wiki/Words_per_minute
5 See http://www.write-out-loud.com/quick-and-easy-effective-tips-for-speaking-rate.html
http://freepdf-books.com
CHAPTER 9 ■ MEDIA ACCESSIBILITY AND INTERNATIONALIZATION
254
to follow along with any usual audio-visual presentation. A summarized version may be necessary,
which can still be provided in sync just as text descriptions are provided in sync and can be handed
through to a Braille device. The technical realization of this is thus either as an interactive transcript or
through a special text description.
9.1.4 Learning Support
Some users are not as fast as others in perceiving and understanding audio-visual content; for others,
the normal playback speed is too slow. In particular vision-impaired users have learnt to digest audio at
phenomenal rates. For such users, it is very helpful to be able to slow down or speed up a video or audio
resource's playback rate. Such speed changes require keeping the pitch of the audio so as to maintain its
usability.
A feature that can be very helpful to people with learning disabilities is the ability to provide
explanations. For example, whenever a word is used that is not a very commonly used term, it can be
very helpful to pop up an explanation of the term, e.g. through a link to Wikipedia or a dictionary. This is
somewhat analogous to the aims of enhanced captions and can be provided in the same manner
through allowing hyperlinks and/or overlays.
With learning material, we can also provide grammatical markup of the content in time-
synchronicity. This is often used for linguistic research, but can also help people with learning
disabilities to understand the content better. Grammatical markup can be augmented onto captions or
subtitles to provide a transcription of the grammatical role of the words in the given context.
Alternatively, the grammatical roles can be provided just as markers for time segments, relying on the
audio to provide the actual words.
Under the learning category we can also subsume the use case of music lyrics or karaoke. These
provide, like captions, a time-synchronized display of the spoken (or sung) text for users to follow along.
Here, they help users learn and understand the lyrics. Similar to captions, they can be technically
realized through burning-in, in-band multitrack, or external tracks.
9.1.5 Foreign Users
Users who do not speak the language that is used in the audio track of audio-visual content are regarded
as foreign users. Such users also require alternative content to allow them to comprehend.
(1) Scene Text Translations
The video track typically poses only a small challenge to foreign users. Most scene text is not important
enough to be translated or can be comprehended from context. However, sometimes there is on-screen
text such as titles that explain the location, for which a translation would be useful. It is recommended to
include such text into the subtitles.
(2) Audio Translations
There are two ways in which an audio track can be made accessible to a foreign user:
Dubbing: Provide a supplementary audio track that can be used as a replacement for the original
audio track. This supplementary audio track can be provided in-band with a multitrack audio-visual
resource, or external as a linked resource, where playback needs to be synchronized.
(Enhanced) Subtitles: Provide a text translation of what is being said in the audio track. This
supplementary text track can be provided burnt-in, in-band or as an external resource, just like
captions. And just like captions, burnt-in subtitles are discouraged because of their inflexibility.
http://freepdf-books.com
CHAPTER 9 ■ MEDIA ACCESSIBILITY AND INTERNATIONALIZATION
255
9.1.6 Technology Summary
When analyzing the different types of technologies that are necessary to provide alternatives to the
original content and satisfy special user requirements, we can see that they broadly fall into the
following different classes:
• Burnt-in: This type of alternative content is actually not provided as an
alternative, but as part of the main resource. Since there is no means to turn this
off (other than through signal processing), no HTML5 specifications need to be
developed to support them.
• Page text: This type covers the transcriptions that can be consumed either in
relation to the video or completely independent of it.
• Synchronized text: This type covers text in-band or external that is displayed in
sync with the content and includes text descriptions, captions, and subtitles.
• Synchronized media: This type covers audio or video in-band or external that is
displayed in sync with the content and includes audio descriptions, sign
translation, and dubbing.
• Navigation: This is mostly a requirement for vision-impaired users or mobility-
impaired users but is generally useful to all users.
In the next subsections we will analyze what alternative content technologies are available or
planned to be available in HTML5. We start with transcriptions, which are page text, and then go into
alternative synchronized text technologies where most of the current standards work is focused. We will
briefly touch on the synchronized media challenges and finish with a view of navigation.
9.2 Transcriptions
We identified in the “Transcripts” subsection above the need for plain transcripts and interactive
transcripts, and we described what each type consists of. This section demonstrates how to implement
each type in HTML5.
9.2.1 Plain Transcripts
Listing 9–1 shows an example of how to link a plain transcript to a media element. Figure 9–1 shows the
result.
Listing 9–1. Providing a plain transcript for a video element
<video poster="video1.png" controls>
<source src="video1.mp4" type="video/mp4">
<source src="video1.webm" type="video/webm">
<source src="video1.ogv" type="video/ogg">
</video>
<p>
<a id="videoTranscript" href="video1.html">
Read the transcript for this video.
</a>
</p>
http://freepdf-books.com
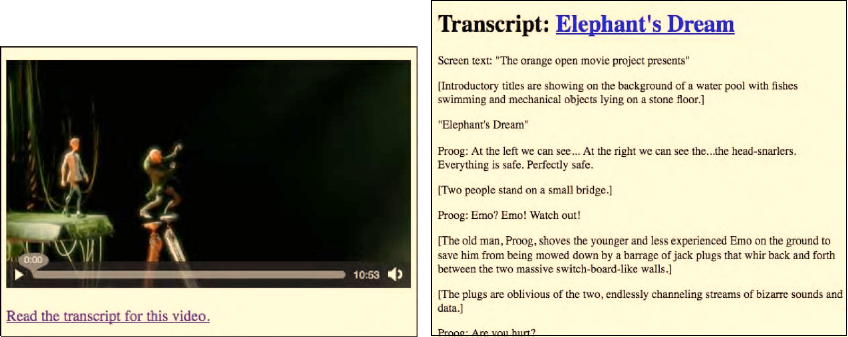
CHAPTER 9 ■ MEDIA ACCESSIBILITY AND INTERNATIONALIZATION
256
Figure 9–1. Plain external transcript linked to a video element
The plain transcript of Figure 9–1 has a transcription both of the spoken text and of what is
happening in the video. This makes sense, since one arrives at a new document that is independent of
the video itself, so it must contain everything that happens in the video. It represents both a text
description and a transcript, making it suitable for deaf-blind users once rendered into Braille.
9.2.2 Interactive Transcripts
Listing 9–2 shows an example of an interactive transcript for a media element.
Listing 9–2. Providing an interactive transcript for a video element
<video poster="video1.png" controls>
<source src="video1.mp4" type="video/mp4">
<source src="video1.webm" type="video/webm">
<source src="video1.ogv" type="video/ogg">
</video>
<div id="speaking" aria-live="rude" style="display: none;">
</div>
<div id="transcriptBox" style="width:60%; float:right;">
<div id="transcriptText"
style="height:300px; overflow-y:scroll;">
<p id="c1" class="cue" data-time="0.0" aria-live="rude" tabindex="1">
[Screen text: "The orange open movie project presents"]
</p>
<p id="c2" class="cue" data-time="5.0" aria-live="rude" tabindex="1">
[Introductory titles are showing on the background of a water pool with fishes
swimming and mechanical objects lying on a stone floor.]
</p>
<p id="c3" class="cue" data-time="12" aria-live="rude" tabindex="1">
[Screen text: "Elephant's Dream"]
</p>
<p id="c4" class="cue" data-time="15.0" tabindex="1">
Download from www.eBookTM.Com
http://freepdf-books.com
CHAPTER 9 ■ MEDIA ACCESSIBILITY AND INTERNATIONALIZATION
257
Proog: At the left we can see... At the right we can see the... the head-snarlers.
Everything is safe. Perfectly safe. Emo? Emo!
</p>
…
</div>
</div>
<script type="text/javascript">
window.onload = function() {
// get video element
var video = document.getElementsByTagName("video")[0];
var transcript = document.getElementById("transcriptBox");
var speaking = document.getElementById("speaking");
// register events for the clicks on the text
var cues = document.getElementsByClassName("cue");
for (i=0; i<cues.length; i++) {
cues[i].addEventListener("click", function(evt) {
var start = parseFloat(this.getAttribute("data-time"));
video.currentTime = start;
video.play();
}, false);
}
// pause video as you mouse over transcript
transcript.addEventListener("mouseover", function(evt) {
video.pause();
}, false);
// scroll to text as video time changes
video.addEventListener("timeupdate", function(evt) {
if (video.paused || video.ended) {
return;
}
for (i=0; i<cues.length; i++) {
if (video.currentTime >=
parseFloat(cues[i].getAttribute("data-time")) &&
video.currentTime <
parseFloat(cues[i+1].getAttribute("data-time"))) {
document.getElementById("transcriptText").scrollTop =
cues[i].offsetTop -
document.getElementById("transcriptText").offsetTop;
if (cues[i].getAttribute("aria-live") == "rude") {
speaking.innerHTML = cues[i].innerHTML;
}
}
}
}, false);
}
</script>
Next to the <video> element, we position a <div> element, which will be given the text cues that a
screenreader should read out. It has an @aria-live attribute, which signifies to the screenreader to read
out whatever text has changed inside the element as soon as the change happens. Next to that, we
display the transcript in a scrollable <div>. Each cue is provided with a @data-time attribute, which
http://freepdf-books.com
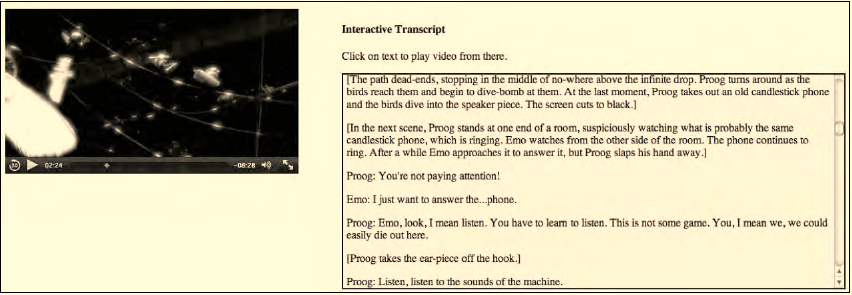
CHAPTER 9 ■ MEDIA ACCESSIBILITY AND INTERNATIONALIZATION
258
contains its start time, and a @tabindex to allow tabbing through it for vision-impaired users' navigation.
A cue implicitly ends with the next cue. The JavaScript handles the following functions:
• we register an onclick event on the cues, such that it is possible to use them to
navigate around the video.
• we register an onmouseover event on the transcription box, such that the video is
paused as soon as you move the mouse into the transcription box for navigation.
• we register an ontimeupdate event on the video, which checks the scrolling
position of the text and scrolls it up as necessary, and it also sets the value of the
aria-live <div>, such that the respective content is read out.
Figure 9–2 shows the results.
Figure 9–2. Interactive transcript for a video element
The elements as designed here work both for vision-impaired as well as hard-of-hearing users. As
you click “play” on the video, the video plays back normally, the caption text that is part of the
interactive transcript is displayed in a scrolling display on the right. If you have a screenreader enabled,
the markup in the transcript that has been marked with an @aria-live attribute is copied to the
screenreader <div> to be read out at the appropriate time.
9.3 Alternative Synchronized Text
While transcriptions provide text alternatives, they are really web page content and not resources that
can go with the audio-visual content and be used in desktop applications as well as on the Web. For this
purpose we have separate text documents that are synchronized to the audio-visual resources during
playback, in particular text descriptions, captions, and subtitles.
We start this subsection by explaining the proposed format for storing such separate text as a
baseline format for HTML called WebSRT. Then we explain how such a document format is referenced
in HTML markup and synchronized with the media element. Then we move to the in-band
representation of this data, and finish with the JavaScript API that is being provided to control such
separate text, independent of whether it originated from in-band or an external resource.
http://freepdf-books.com

CHAPTER 9 ■ MEDIA ACCESSIBILITY AND INTERNATIONALIZATION
259
9.3.1 WebSRT
WebSRT6 (Web Subtitle Resource Tracks) is the baseline format under consideration for HTML5 for
storing text cues that are supposed to appear in synchronization with an audio or video element.
To be clear, no final decision has been made as to what will be the ultimate baseline format, and
other formats could still be adopted. However, right now, the WHATWG version of the HTML5
specification contains the WebSRT specification7 and most of the browser vendors have indicated that
they are willing to undertake test implementations. Nothing, however, has been released at the time of
writing of this book.
In this section we introduce WebSRT through examples for the different use cases outlined in
Section 9.2.
Note that some of the specification of WebSRT as given in the WHATWG version of HTML5 will
almost certainly undergo change, so expect there to be a need to adapt the examples provided here.
Some of the changes under discussion at this stage are the introduction of a header and metadata at the
beginning of the WebSRT file and a change of the rendering markup. We will stick to the current
specification for the purpose of this chapter.
(1) Text Description
An example of a WebSRT file containing a text description is given in Listing 9–3.
Listing 9–3. Example WebSRT file with a text description
1
00:00:00,000 --> 00:00:05,000
The orange open movie project presents
2
00:00:05,010 --> 00:00:12,000
Introductory titles are showing on the background of a water pool with fishes swimming and
mechanical objects lying on a stone floor.
3
00:00:12,010 --> 00:00:14,800
Elephants dream
4
00:00:26,100 --> 00:00:28,206
Two people stand on a small bridge.
5
00:00:30,010 --> 00:00:40,000
The old man, Proog, shoves the younger and less experienced Emo on the ground to save him from
being mowed down by a barrage of jack plugs that whir back and forth between the two massive
switch-board-like walls.
6
6 See http://www.whatwg.org/specs/web-apps/current-work/websrt.html
7 See http://www.whatwg.org/specs/web-apps/current-work/multipage/video.html#websrt-0
http://freepdf-books.com

CHAPTER 9 ■ MEDIA ACCESSIBILITY AND INTERNATIONALIZATION
260
00:00:40,000 --> 00:00:47,000
The plugs are oblivious of the two, endlessly channeling streams of bizarre sounds and data.
7
00:00:48,494 --> 00:00:51,994
Emo sits on the bridge and checks his limbs.
8
00:01:09,150 --> 00:01:16,030
After the squealing plugs move on, Proog makes sure that Emo is unharmed and urges him onwards
through a crack in one of the plug-walls.
A WebSRT file contains a sequence of so-called cues that have an optional cue identifier, and a start
and an end time followed by some text. Cues are separated by two or more newline characters.
If you’re familiar with subtitling, you may notice that the above example looks a lot like a typical
SRT8 file as introduced by the SubRip software as a subtitle format. WebSRT as defined at this moment is
indeed a compatible extension of SRT with the restriction that WebSRT files have to be provided in the
UTF-8 character set, while SRT files can be in any character set. Thus, not all SRT files are legal WebSRT
files and most have to be converted to UTF-8 before being usable as a WebSRT file (we recommend use
of the open source iconv tool for this purpose9).
Listing 9–3 has been carefully crafted such that with an average reading speed a screen reader
should be able to finish reading the given text cues in the duration given for the cue. But this may not
always be the case. In a more general case, it makes a lot more sense for the screen reader to have the
ability to pause the video when it reaches the end of its given duration until it has finished speaking
every word in the cue. Whether this functionality can be implemented into Web browsers is still an open
question.
As a hack to allow for extended text description functionality in web browsers, it is possible to
specify a pause duration for a description cue, parse this via JavaScript, and pause the video for that
duration. This allows specification of heuristic estimates for how long a screen reader will take to read
out a cue when there isn't actually time for this cue. Listing 9–4 shows a possible WebSRT file that
contains such a duration cue.
Listing 9–4. Example WebSRT file for extended text descriptions
1
00:00:00,000 --> 00:00:03,040
<pause>2</pause>
Xiph.org logo
2
00:00:03,040 --> 00:00:05,370
<pause>2</pause>
Redhat logo
3
00:00:05,370 --> 00:00:07,380
<pause>3</pause>
A Digital Media Primer for Geeks
8 See http://en.wikipedia.org/wiki/SubRip
9 See http://en.wikipedia.org/wiki/Iconv
http://freepdf-books.com
CHAPTER 9 ■ MEDIA ACCESSIBILITY AND INTERNATIONALIZATION
261
4
00:00:07,380 --> 00:00:47,480
<pause>3</pause>
"Monty" Montgomery of Xiph.org
5
00:00:47,480 --> 00:01:03,090
<pause>5</pause>
Monty in front of a whiteboard saying "Consumer—be passive! be happy! look! Kittens!"
Note that the <pause> element is something that we made up; it is not part of the WebSRT definition.
It is supposed to stop the video element from moving forward along its timelines while the screen reader
finishes reading out the cue text. WebSRT allows inclusion of any textual content into the cues. Together
with the ability of the <track> element (see next section) to deliver cue content to JavaScript, this
flexibility enables Web developers to adapt the functionality of time-synchronized text to their needs. As
mentioned above, this particular example is a hack to introduce extended text description functionality
while no native solution to this problem is available in the browser yet. It pauses the video for the
duration of seconds in the <pause> element at the end of the cue.
(2) Captions
An example of a WebSRT file containing captions is given in Listing 9–5.
Listing 9–5. Example WebSRT file containing captions
Proog-1
00:00:15,000 --> 00:00:17,951
At the left we can see...
Proog-2
00:00:18,166 --> 00:00:20,083
At the right we can see the...
Proog-3
00:00:20,119 --> 00:00:21,962
...the head-snarlers
Proog-4
00:00:21,999 --> 00:00:24,368
Everything is safe.
Perfectly safe.
Proog-5
00:00:24,582 --> 00:00:27,000
Emo?
<i>Emo!</i>
Proog-6
00:00:28,206 --> 00:00:29,996
<b>Watch out!</b>
Note that in this example we made the cue identifier a string and not a number, which is perfectly
valid for a WebSRT file.
http://freepdf-books.com
CHAPTER 9 ■ MEDIA ACCESSIBILITY AND INTERNATIONALIZATION
262
Also note that the last two cues in the example extract contain formatting tags, <i></i> for italics
and <b></b> for bold. Other allowed markup elements are <ruby></ruby> with <rt></rt> for ruby text
inside, and timestamps such as <00:00:29,996> for fine-grained activation of cue text. <ruby> and <rt>
are new elements in HTML for short runs of text presented alongside base text, primarily used in East
Asian typography as a guide for pronunciation or to include other annotations. Japanese Furigana is an
example.
Any further styling can be done using the CSS features ‘color’, ‘text-shadow’, ‘text-outline’,
‘background’, ‘outline’, and ‘font’ through use of CSS pseudo-selectors from within the web page
through which a WebSRT file is paired with a media resource.
In Section 9.1.2 we also came across enhanced captions. A simple example of captions with
enhancement is shown in Listing 9–6.
Listing 9–6. Example WebSRT file containing enhanced captions
title-1
00:00:00,000 --> 00:00:02,050
<img src="xifish.png" alt="Xiph logo"/> <a href=http://www.xiph.org/about/ alt="link to
Xiph.org about page">About <i>Xiph.org</i></a>
title-2
00:00:02,050 --> 00:00:05,450
<img src="redhat-logo.jpg" alt="Redhat logo"/> <a href=http://www.redhat.com/ alt="link to
Redhat Website">Sponsored by <b>RedHat</b></a>
title-3
00:00:05,450 --> 00:00:07,450
<a href="http://www.xiph.org/video/vid1.shtml" alt="link to publication web page for
video">Original Publication</a>
<a href="http://webchat.freenode.net/?channels=xiph" alt="link to freenode irc channel for
Xiph">Chat with the creators of the video</a>
1
00:00:08,124 --> 00:00:10,742
<img src="Workstation.jpg" alt="image of workstation"/> Workstations and high end personal
computers have been able to
2
00:00:10,742 --> 00:00:14,749
manipulate <img src="audio_editor.jpg" alt="image of audio editing suite"/> digital audio
pretty easily for about fifteen years now.
3
00:00:14,749 --> 00:00:17,470
It's only been about five years that a decent workstation's been able
4
00:00:17,470 --> 00:00:21,643
to handle <img src="video_editor.jpg" alt="image of video editing suite"/> raw video without a
lot of expensive special purpose hardware.
Example 9–6 uses hyperlinks, icon-size images, and text markup to enhance the captions with
interactivity and graphics to capture what is going on. Other functionalities, such as more complex CSS,
can be included, too. The use of style sheets is again possible through use of CSS pseudo-selectors from
within the web page through which a WebSRT file is paired with a media resource. Note that to use this
http://freepdf-books.com
CHAPTER 9 ■ MEDIA ACCESSIBILITY AND INTERNATIONALIZATION
263
you have to implement the interpretation of the text yourself in JavaScript. Unless the images are really
small, some preloading may also be necessary.
(3) Subtitles
Subtitles are not fundamentally different from captions other than the fact that captions contain more
transcribed information, in particular about the music used in the video and sound effects, where these
make a difference to the perception of the video.
Subtitles transcribe what is being said in a different language to the video’s original language. An
example of a WebSRT file containing Russian subtitles is given in Listing 9–7.
Listing 9–7. Example WebSRT file containing Russian subtitles
1
00:00:08,124 --> 00:00:10,742
2
00:00:10,742 --> 00:00:14,749
.
3
00:00:14,749 --> 00:00:17,470
4
00:00:17,470 --> 00:00:21,643
.
5
00:00:21,643 --> 00:00:25,400
Just as we have extended captions with other markup, we can also extend subtitles with markup. It
will look exactly like Listing 9–6, but with the text being in diverse languages. These could include Asian
languages that need ruby markup and need to be rendered from top to bottom. All the requirements of
internationalization of text are relevant to subtitles, too. Listing 9–8 shows an example of Japanese
Furigana markup with the <ruby> tag and vertical rendering from top to bottom, top aligned, positioned
on the right edge.
http://freepdf-books.com
CHAPTER 9 ■ MEDIA ACCESSIBILITY AND INTERNATIONALIZATION
264
Listing 9–8. Example WebSRT file containing Japanese subtitles and rendering instructions
00:00:15,042 --> 00:00:18,042 A:start D:vertical L:98% <ruby><rt></rt></ruby><ruby>
<rt></rt></ruby>...
00:00:18,750 --> 00:00:20,333 A:start D:vertical L:98% <ruby><rt></rt></ruby><ruby>
<rt></rt></ruby>.
00:00:20,417 --> 00:00:21,917 A:start D:vertical L:98%
..…
00:00:22,000 --> 00:00:24,625 A:start D:vertical L:98%
|
The following rendering instructions, also called “cue settings”, are currently specified for WebSRT:
• vertical text: D:vertical (growing left) or D:vertical-lr (growing right)—specifies
that cue text should be rendered vertically.
• line position: L:x% (percent pos) or L:y (+- line pos)—specifies how much above
the baseline the cue text should be rendered.
• text position: T:x% (percentage of video size)—specifies at what distance from the
video’s left side the cue text should be rendered.
• text box size: S:x% (percentage of video size)—specifies the width of the text box in
relation to the video’s viewport.
• alignment: A:start or A:middle or A:end—specifies whether the text should be
start/middle/end aligned.
These are the only rendering instructions available to a WebSRT author. Any further needs for
styling and positioning in web browsers can be satisfied through CSS from the web page.
(4) Chapters
Under “Vision-Impaired Users”, we discussed that navigation requires a segmentation of the timeline
according to semantic concepts. This concept has been captured in WebSRT through so-called chapter
tracks. Chapter tracks—which could also be called “scenes” or “acts” or anything else that implies a
semantic segmentation of the timeline—are larger, semantically relevant intervals of the content. They
are typically used for navigation to jump from chapter to chapter or to directly navigate to a semantically
meaningful position in the media resource.
An example WebSRT file used for chapter markup appears in Listing 9–9.
Listing 9–9. Example WebSRT file containing chapter markup
1
00:00:00,000 --> 00:00:07,298
Opening credits
http://freepdf-books.com
CHAPTER 9 ■ MEDIA ACCESSIBILITY AND INTERNATIONALIZATION
265
2
00:00:07,298 --> 00:03:24,142
Intro
3
00:03:24,142 --> 00:09:00,957
Digital vs. Analog
4
00:09:00,957 --> 00:15:58,248
<group>Digital Audio</group>
5
00:09:00,957 --> 00:09:33,698
Overview
6
00:09:33,698 --> 00:11:18,010
Sample Rate
7
00:11:18,010 --> 00:13:14,376
Aliasing
8
00:13:14,376 --> 00:15:30,387
Sample Format
9
00:15:30,387 --> 00:15:58,248
Channel Count
The general format of Listing 9.9 is that of a chapter track as currently defined in the specification.
However, the specification does not support hierarchically segmented navigation; that is, navigation at a
lower or higher resolution. In Listing 9.9 we experiment with such a hierarchical navigation by
introducing a “group” chapter.
Chapter 4 is such a group chapter; that is, it covers multiple chapters which are provided in detail
after it. In this case, it covers the time interval of chapters 4-9. This particular use of chapters hasn't yet
been standardized. Right now only a linear list of chapters is available.
(5) Lyrics / Karaoke
Under “Learning Support” we mentioned the use of Karaoke or of music lyrics for learning purposes for
both foreign-language speakers and people with learning disabilities. In all of these cases we need to
present the individual words of a cue successively, such that the reader can follow along better and
connect the written words with what is being spoken. This use case can be regarded as a special case of
subtitles. WebSRT has a special markup to allow for this functionality.
Listing 9–10 shows an example of a WebSRT file containing Karaoke-style subtitles for a song.
http://freepdf-books.com
CHAPTER 9 ■ MEDIA ACCESSIBILITY AND INTERNATIONALIZATION
266
Listing 9–10. Example WebSRT file containing Karaoke-style subtitles for a song
1
00:00:10,000 --> 00:00:12,210
<00:00:10,035>Chocolate <00:00:11,000>Rain
2
00:00:12,210 --> 00:00:15,910
<00:00:13,250>Some <00:00:13,500>stay <00:00:13,750>dry <00:00:14,25>and <00:00:14,50>others
<00:00:15,00>feel <00:00:15,25>the <00:00:15,50>pain
3
00:00:15,910 --> 00:00:15,920
<00:00:16,000>Chocolate <00:00:16,500>Rain
<00:00:13,250>Some <00:00:13,500>stay <00:00:13,750>dry <00:00:14,25>and <00:00:14,50>others
<00:00:15,00>feel <00:00:15,25>the <00:00:15,50>pain
4
00:00:15,920 --> 00:00:18,000
<00:00:16,000>Chocolate <00:00:16,500>Rain
5
00:00:18,000 --> 00:00:21,170
<00:00:18,250>A <00:00:18,500>baby <00:00:19,000>born <00:00:19,250>will <00:00:19,500>die
<00:00:19,750>before <00:00:20,500>the <00:00:20,750>sin
6
00:00:21,180 --> 00:00:23,000
<00:00:21,200>Chocolate <00:00:21,500>Rain
Note the mid-cue time stamps that allow for a more detailed timing on the words within a cue.
There is a CSS pseudo-selector that applies to mid-cue timestamped sections and allows specification of
the styling of the text pre- and post-timestamp.
(6) Grammatical Markup
Under “Learning Support” we also mentioned the use of grammatical markup for learning purposes and
for people with learning disabilities. An example of a WebSRT file containing a grammatically marked-
up transcript is given in Listing 9–11. The <g> tags are made up and do not follow any standard markup
provided by WebSRT, but they show how you can go about providing such subtitle- or caption-in-line
metadata.
Listing 9–11. Example WebSRT file containing grammatically marked-up subtitles
1
00:00:08,124 --> 00:00:10,742
<g noun>Workstations</g> and <g adjective>high end</g> <g adjective>personal</a> <a
noun>computers</g>
2
00:00:10,742 --> 00:00:14,749
Download from www.eBookTM.Com
http://freepdf-books.com

CHAPTER 9 ■ MEDIA ACCESSIBILITY AND INTERNATIONALIZATION
267
<g verb>have been able to manipulate</g> <g adjective>digital</g> <g noun>audio</g> <g
adverb>pretty easily</g> <g preposition>for</g> <g adjective>about fifteen</g> <g
noun>years</g> <g interjection>now</g>.
3
00:00:14,749 --> 00:00:17,470
<g pronoun>It</g><g verb>'s</g> <g adverb>only</g> <g verb>been</g> <g adjective>about
five</g> <g noun>years</g> <g conjunction>that</g> <g adjective>a decent <g
noun>workstation</g><g verb>'s been able to handle</g>
4
00:00:17,470 --> 00:00:21,643
<g adjective>raw</g> <g noun>video</g> <g preposition>without</g> <g adjective>a lot of</g> <g
adjective>expensive special purpose</g> <g noun>hardware</g>.
The rendering of the example in Listing 9–11 is, of course, of paramount importance, since the
marked-up text is barely readable. It may be that you choose a different color per grammatical construct,
or match it with italics and bold, depending on what you want people to focus on, or just make it such
that when you mouse over there is an explanation of the word's grammatical meaning—possibly even
matched with a dictionary explanation. This is all up to you to define in your web page—WebSRT simply
provides you with the ability to provide this markup in a time-synchronized manner to a video or audio
resource.
9.3.2 HTML Markup
In the previous section we learned WebSRT by example. It is still a specification in progress, so we won't
go further into detail. WebSRT is one of many existing formats that provide external time-synchronized
text for a media resource, and it is likely to become the baseline format with support in many, if not all,
browsers because it is so versatile. This is the reason why we discussed it in more depth. Other formats
that browsers may support are the Timed Text Markup Language TTML10 or MPEG-4 Timed Text11 which
is based on an earlier version of TTML and is in use by MPEG-based applications for providing in-band
captions. We will look at the handling of in-band time-synchronized text later.
In this section we focus on the markup that has been introduced into HTML to associate such
external time-synchronized text resources with a media resource and that triggers download, parsing
and potentially rendering of the external resource into a web page.
(1) The <track> element
The HTML specification12 includes a new element that is to be used inside <audio> and <video>
elements. It is called <track> and references external time-synchronized text resources that align with
the <audio> or <video> element's timeline. Listing 9–12 shows an example for including the WebSRT
resource from Listing 9–3 in a web page.
10 See http://www.w3.org/TR/ttaf1-dfxp/
11 See http://en.wikipedia.org/wiki/MPEG-4_Part_17
12 See http://dev.w3.org/html5/spec/Overview.html#the-track-element
http://freepdf-books.com

CHAPTER 9 ■ MEDIA ACCESSIBILITY AND INTERNATIONALIZATION
268
Listing 9–12. Example of <track> markup with text description WebSRT file
<video poster="video1.png" controls>
<source src="video1.mp4" type="video/mp4">
<source src="video1.webm" type="video/webm">
<source src="video1.ogv" type="video/ogg">
<track src="video1_audesc_en.wsrt" kind="descriptions" srclang="en">
</video>
Note in particular the @kind attribute on the <track> element—it provides the browser with an
indication about the type of data that the resource at @src should be presented as. The @srclang attribute
provides an IETF language code according to BCP 4713. There are two further attributes available on the
<track> element: @label, which provides a short label that represents the track in a menu, and @charset,
which is meant to be used as a hint for track resources where the charset is not clear. This attribute was
introduced to allow backward compatibility with plain SRT files, which can use any character set.
The following @kind attribute values are available:
• subtitles: Transcription or translation of the dialogue, suitable for when the sound
is available but not understood (for example, because the user does not
understand the language of the media resource's soundtrack).
• captions: Transcription or translation of the dialogue, sound effects, relevant
musical cues, and other relevant audio information, suitable for when the
soundtrack is unavailable (for example, because it is muted or because the user is
deaf).
• descriptions: Textual descriptions of the video component of the media resource,
useful for audio synthesis when the visual component is unavailable (for example,
because the user is interacting with the application without a screen while driving,
or because the user is blind).
• chapters: Chapter titles, intended to be used for navigating the media resource.
• metadata: Tracks intended for use from script.
While we have specified the most useful use cases, we must not forget that there are also use cases
for people with cognitive disabilities (dyslexia or color blindness) or for learners of any of these
alternative content technologies.
Tracks that are marked as subtitles or as captions will have a default rendering on screen. At the
time of writing of this book, the only rendering area under consideration is the video viewport. There are
suggestions to also make other CSS boxes available as a rendering target, but these are early days yet.
Subtitles and captions can contain simple markup aside from plain text, which includes <i></i> for
italics, <b></b> for bold, <ruby><rt></rt><ruby> for ruby markup, and <00:00:00,000> timestamps for
word-level timing on cue text.
Tracks marked as descriptions will expose their cues to the screen reader API at the time of their
activation. Since screen readers are also the intermediaries to Braille devices, this is sufficient to make
the descriptions accessible to vision-impaired users. Descriptions can contain the same kind of simple
markup as captions or subtitles. Screen readers can use the italics and bold markup to provide some
kind of emphasis, the ruby markup to pick the correct pronunciation, and the timestamps to
synchronize their reading speed.
13 See http://www.rfc-editor.org/rfc/bcp/bcp47.txt
http://freepdf-books.com

CHAPTER 9 ■ MEDIA ACCESSIBILITY AND INTERNATIONALIZATION
269
Tracks marked as chapters will be exposed by the browser for navigation purposes. It is expected
that this will be realized in browsers through a menu or through some kind of navigation markers on the
timeline. Past uses of chapters have been analyzed14.
Finally, tracks marked as metadata will not be exposed by the browser at all, but only exposed in
JavaScript in a TimedTrackCueList. The web page developer can do anything they like with this data, and
it can consist of any text that the web page scripts want to decode, including JSON, XML, or any special-
purpose markup.
Of the WebSRT examples just listed, the following are tracks of type metadata: Listing 9–4 (extended
text description), Listing 9–6 (enhanced captions or subtitles), Listing 9–9 (hierarchical chapters), and
9–11 (grammatically marked-up subtitles). The display functionality for these has to be implemented in
JavaScript.
For the others, the browsers are expected to provide a default rendering on top of the video
viewport: Listing 9–3 (text description—@kind=description), Listing 9–5 (captions—@kind=captions),
Listing 9–7 (subtitles—@kind=subtitles, @srclang=ru), Listing 9–8 (subtitles—
@kind=subtitles,@srclang=jp) Listing 9–9 for chapters with literal rendering (chapters with literal
rendering of cue 4—@kind=chapters), and Listing 9–9 (lyrics—@kind=subtitles).
Listing 9–13 shows a more complete example of a video with multiple types of tracks available.
Listing 9–13. Example of <track> markup with multiple external WebSRT tracks
<video poster="video6.png" controls>
<source src="video6.mp4" type="video/mp4">
<source src="video6.webm" type="video/webm">
<source src="video6.ogv" type="video/ogg">
<track src="video6_audesc_en.wsrt" kind="descriptions" srclang="en">
<track src="video6_chapters_en.wsrt" kind="chapters" srclang="en">
<track src="video6_en.wsrt" kind="subtitles" srclang="en">
<track src="video6_fr.wsrt" kind="subtitles" srclang="fr">
<track src="video6_ptbr.wsrt" kind="subtitles" srclang="pt-BR">
<track src="video6_ru.wsrt" kind="subtitles" srclang="ru">
<track src="video6_en_enhanced.wsrt" kind="metadata" srclang="en">
<track src="video6_en_grammar.wsrt" kind="metadata" srclang="en">
</video>
Language codes in the @srclang attribute are specified according to IETF BCP4715.
9.3.3 In-band Use
The <track> element allows the association of time-synchronized text tracks with a media resource, and
the same effect can be achieved with text tracks that are encoded inside a media resource. Every
container format has a different means of “encoding” text tracks. However, the aim of the HTML
specification is to provide a uniform interface to the user. This includes the requirement that text tracks
that originate from in-band be presented in exactly the same manner to the user as external text tracks.
It also means that the same JavaScript API is made available for text tracks no matter whether they
originated from in-band or external.
We will look at the JavaScript API in the next section. For now, we want to analyze in some depth
what each of the commonly used audio and video container formats have to offer with regards to in-
14 See http://wiki.whatwg.org/wiki/Use_cases_for_API-level_access_to_timed_tracks#Chapter_Markers
15 See http://www.ietf.org/rfc/bcp/bcp47.txt
http://freepdf-books.com

CHAPTER 9 ■ MEDIA ACCESSIBILITY AND INTERNATIONALIZATION
270
band time-synchronized text tracks. We do this at the container level since this is where the choice of
time-synchronized text format is being made.
(1) Ogg
The Ogg container offers text tracks in the form of Kate16, an overlay codec originally designed for
Karaoke, but generally used for time-synchronized text encapsulated in Ogg. It is called a “codec”
because Kate allows description of much more than just text. There is existing software to encapsulate
SRT files in UTF-8 as a Kate track and extract it out again without loss. It can take any markup inside a
SRT cue. Kate supports language tagging (the equivalent of @srclang) and categories (the equivalent of
@kind) in the metadata of the text track. In addition, when using Skeleton on Ogg, you can provide a label
for the track (the equivalent of @label).
Ogg Kate is a binary encoding of time-synchronized text. There is a textual representation of that
binary encoding even though the Kate encoding and decoding tools will also accept other formats,
including SRT and LRC (lyrics file format). An example textual Kate file format can be seen in Listing 9–14.
Listing 9–14. Example of the Kate file format as used for Ogg time-synchronized text encapsulation
kate {
defs {
category "subtitle"
language "en"
directionality l2r_t2b
}
event {
id 0
00:00:15 --> 00:00:17.951
text "At the left we can see..."
}
event {
id 1
00:00:18.166 --> 00:00:20.083
text "At the right we can see the..."
}
}
The textual Kate format starts with a section of defines—header information that helps to determine
what is in the file and how it should be displayed. In this example we provide the category, the base
language, and the default directionality of display for the text. The cues themselves in Kate in this
example have an identifier, a start and end time, and a text.
There are many more parameters in Kate both for the setup section and for cues that can be used to
implement support for WebSRT, including markup for cues and positioning information. Kate is very
flexible in this respect and a mapping can be provided. Kate is perfectly capable of transporting the cues
of WebSRT in an Ogg container, even though the existing software doesn't implement support for
WebSRT yet.
16 See http://wiki.xiph.org/OggKate
http://freepdf-books.com

CHAPTER 9 ■ MEDIA ACCESSIBILITY AND INTERNATIONALIZATION
271
(2) WebM
The WebM container is a Matroska container. WebM has been specified to only contain VP8 and Vorbis,
and no specific choice for a text track format has been made. The idea was to wait until an appropriate
text format was chosen as a baseline for HTML5 and use that format to encode text tracks. Interestingly,
Kate can be encapsulated into Matroska17, and so can SRT18. If WebSRT is picked up as the baseline
codec for time-synchronized text, it will be encapsulated into Matroska similarly to the way SRT is
currently encapsulated and will then also be added to WebM as a “text codec.”
(3) MPEG
The MPEG container has been extended in the 3GPP Forum to carry text tracks19 as so-called 3GPP
Timed Text. This format is similar to QuickTime text tracks20. While 3GPP Timed Text is a binary format,
several text formats can be used for encoding. QuickTime itself can use the qttext file format21 (see
Listing 9–15 for an example) or the QuickTime TeXML file format22 (see Listing 9–16 for an example).
Listing 9–15. Example of QTTXT file format as used for QuickTime text tracks
{QTtext} {size:16} {font:Lucida Grande} {width:320} {height:42} {language:0}
{textColor:65535,65535,65535} {backColor:0,0,0} {doNotAutoScale:off} {timeScale:100}
{timeStamps:absolute} {justify:center}
[00:00:15.00]
At the left we can see...
[00:00:18.17]
At the right we can see the...
Listing 9–16. Example of TeXML file format as used for 3GPP text tracks
<?xml version="1.0"?>
<?quicktime type="application/x-quicktime-texml"?>
<text3GTrack
trackWidth="320.0"
trackHeight="42.0"
layer="0"
language="en"
transform="translate(0,144)"
timeScale="600">
<sample duration="3000">
<description
horizontalJustification="Left"
verticalJustification="Top"
17 See http://wiki.xiph.org/OggKate#Matroska_mapping
18 See http://www.matroska.org/technical/specs/subtitles/srt.html
19 See http://www.3gpp.org/ftp/specs/html-info/26245.htm
20 See http://developer.apple.com/library/mac/#samplecode/qttext/Introduction/Intro.html
21 See http://docs.info.apple.com/article.html?artnum=42643
22 See http://developer.apple.com/library/mac/#documentation/QuickTime/QT6_3/Chap1/QT6WhatsNew.html
http://freepdf-books.com

CHAPTER 9 ■ MEDIA ACCESSIBILITY AND INTERNATIONALIZATION
272
backgroundColor="0%, 0%, 0%, 100%"
format="tx3g">
<defaultTextBox width="176" height="36"/>
<fontTable>
<font id="1" name="Lucida Grande"/>
</fontTable>
<sharedStyles>
<style id="1">
{font-table : 1}
{font-size : 10}
{font-style : normal}
{font-weight : normal}
{text-decoration: normal}
{color : 100%, 100%, 100%, 100%}
</style>
</sharedStyles>
</description>
<sampleData targetEncoding="utf8">
<text styleID="1">
[00:00:15.00]
At the left we can see...
[00:00:18.17]
At the right we can see the...
</text>
</sampleData>
</sample>
</text3GTrack>
A third format used for authoring is GPAC TTXT23; see Listing 9–17 for an example. Other formats in
use are SRT, SUB, and more recently the W3C Timed Text Markup Language (TTML)24.
Listing 9–17. Example of TTXT file format as used for 3GPP text tracks
<?xml version="1.0" encoding="UTF-8" ?>
<!-- GPAC 3GPP Text Stream -->
<TextStream version="1.0">
<TextStreamHeader width="320" height="42" layer="0"
translation_x="0" translation_y="0">
<TextSampleDescription horizontalJustification="center"
verticalJustification="bottom"
backColor="0 0 0 0" verticalText="no"
fillTextRegion="no" continuousKaraoke="no"
scroll="None">
<FontTable>
<FontTableEntry fontName="Lucida Grande" fontID="1"/>
</FontTable>
23 See http://gpac.sourceforge.net/doc_ttxt.php
24 See http://www.w3.org/TR/ttaf1-dfxp/
http://freepdf-books.com

CHAPTER 9 ■ MEDIA ACCESSIBILITY AND INTERNATIONALIZATION
273
<TextBox top="0" left="0" bottom="0" right="0"/>
<Style styles="Normal" fontID="1" fontSize="36" color="ff ff ff ff"/>
</TextSampleDescription>
</TextStreamHeader>
<TextSample sampleTime="00:00:15.000"
text="At the left we can see..."/>
<TextSample sampleTime="00:00:18.166"
text="At the right we can see the..."/>
</TextStream>
Only MP4Box and QuickTime Pro seem to be able to encode 3GPP Timed Text25, although many
hardware and software media players support their decoding.
In the binary encoding there is a configuration section that sets up color, font size, positioning,
language, the size of the text box, and so on, similar to the header section of the QTTXT file, the
description section of the TeXML file, or the TextStreamHeader of the TTXT file. The data samples are
encoded in a different section.
3GPP Timed Text is perfectly capable of transporting the cues of WebSRT in an MP4 container, even
though the existing software doesn't implement support for WebSRT yet.
9.3.4 JavaScript API
The JavaScript API for time-synchronized text has been defined to be identical no matter whether the
text is sourced from in-band or is externally provided. In addition to these two options there is a means
to author and add script-created cues through a MutableTimedTrack interface.
The JavaScript API that is exposed for any of these track types is identical. A media element now has
this additional IDL interface:
interface HTMLMediaElement : HTMLElement {
...
readonly attribute TimedTrack[] tracks;
MutableTimedTrack addTrack(in DOMString kind,
in optional DOMString label,
in optional DOMString language);
};
A media element thus manages a list of TimedTracks and provides for adding TimedTracks
dynamically through addTrack().
(1) MutableTimedTrack
The created MutableTimedTrack has the following IDL interface:
interface MutableTimedTrack : TimedTrack {
void addCue(in TimedTrackCue cue);
void removeCue(in TimedTrackCue cue);
};
The constructor for a TimedTrackCue is as follows:
25 See http://en.wikipedia.org/wiki/MPEG-4_Part_17
http://freepdf-books.com
CHAPTER 9 ■ MEDIA ACCESSIBILITY AND INTERNATIONALIZATION
274
[Constructor(in DOMString id, in double startTime, in double endTime, in DOMString text, in
optional DOMString settings, in optional DOMString voice, in optional boolean pauseOnExit)]
The parameters id, startTime, endTime, and text represent the core information of a cue—its
identifier, time frame of activity and the text to be used during the active time. The settings parameter
provides positioning and styling information on the cue. The voice is a semantic identifier for the
speaker or type of content in the cue. The pauseOnExit parameter tells the media element to pause
playback when the cue endTime is reached to allow for something else to happen then.
Listing 9–18 has an example script snippet that uses the core track creation functionality and is
expected to work in future implementations of MutableTimedTrack in browsers.
Listing 9–18. Example JavaScript snippet to create a new TimedTrack and some cues in script
var video = document.getElementsByTagName("video")[0];
hoh_track = video.addTrack("English HoH", "descriptions", "en");
cue = new TimedTrackCue("1", "00:00:00,000", "00:00:03,040",
"<pause>2</pause> Xiph.org logo");
hoh_track.addCue(cue);
cue = new TimedTrackCue("2", "00:00:03,040", "00:00:05,370",
"<pause>3</pause> Redhat logo");
hoh_track.addCue(cue);
cue = new TimedTrackCue("3", "00:00:05,370", "00:00:07,380",
"<pause>3</pause> A Digital Media Primer for Geeks");
hoh_track.addCue(cue);
After creating a new track with English text descriptions, we continue creating new TimedTrackCues
and add them to the track. This new track is added to the same list of @tracks for the video to which the
resource in-band tracks and the external tracks associated through <track> are also added.
(2) TimedTrack
The timed tracks associated with a media resource in the @tracks attribute are added in the following
order:
1. The <track> element children of the media element, in tree order.
2. Tracks created through the addTrack() method, in the order they were added,
oldest first.
3. In-band timed text tracks, in the order defined by the media resource’s format
specification.
The IDL interface on HTMLMediaElement @tracks is a list of TimedTracks. The IDL interface of a
TimedTrack is as follows:
interface TimedTrack {
readonly attribute DOMString kind;
readonly attribute DOMString label;
readonly attribute DOMString language;
readonly attribute unsigned short readyState;
attribute unsigned short mode;
readonly attribute TimedTrackCueList cues;
readonly attribute TimedTrackCueList activeCues;
readonly attribute Function onload;
readonly attribute Function onerror;
p
http://freepdf-books.com
CHAPTER 9 ■ MEDIA ACCESSIBILITY AND INTERNATIONALIZATION
275
readonly attribute Function oncuechange;
};
The first three lines capture the value of the @kind, @label, and @srclang attributes of the <track>
element, or are provided by the addTrack() function for MutableTimedTracks, or are exposed from
metadata in the binary resource for in-band tracks.
The readyState captures whether the data is available and is one of the following: “NONE”,
“LOADING”, “LOADED”, or “ERROR”. Data is only available in “LOADED” state.
The @mode attribute captures whether the data is activated to be displayed and is either “OFF”,
“HIDDEN”, or “SHOWING”. In the “OFF” mode, the UA doesn’t have to download the resource,
allowing for some bandwidth management with <track> elements.
The @cues and @activeCues attributes provide the list of parsed cues for the given track and the
subpart thereof that is currently active, based on the @currentTime of the media element.
The onload, onerror, and oncuechange functions are event handlers for the load, error, and
cuechange events of the TimedTrack.
(3) TimedTrackCue
Individual cues expose the following IDL interface:
interface TimedTrackCue {
readonly attribute TimedTrack track;
readonly attribute DOMString id;
readonly attribute float startTime;
readonly attribute float endTime;
DOMString getCueAsSource();
DocumentFragment getCueAsHTML();
readonly attribute boolean pauseOnExit;
readonly attribute Function onenter;
readonly attribute Function onexit;
};
The @track attribute links the cue to its TimedTrack.
The @id, @startTime, and @endTime attributes expose a cue identifier and its associated time interval.
The getCueAsSource() and getCueAsHTML() functions provide either an unparsed cue text content or a
text content parsed into a HTML DOM subtree.
The @pauseOnExit attribute can be set to true/false and indicates whether at the end of the cue’s
time interval the media playback should be paused and wait for user interaction to continue. This is
particularly important as we are trying to support extended audio descriptions and extended captions.
The onenter and onexit functions are event handlers for the enter and exit events of the
TimedTrackCue.
There are also some positioning and semantic attributes for the TimedTrackCue, but because
particularly that part of the specification is still under discussion, we won't elaborate. Please check with
the implementations of the browsers as you are trying to implement or use these elements.
9.4 Multitrack Audio/Video
In Section 9.3 we analyzed the use of alternative content technologies that are provided through time-
synchronized text. In this section we look at alternative audio and video content and explain some of the
challenges that the standardization is currently facing. We have no solutions to offer, since no decisions
have been made, but we can explain what kind of solutions will need to be developed.
http://freepdf-books.com

CHAPTER 9 ■ MEDIA ACCESSIBILITY AND INTERNATIONALIZATION
276
The following alternative content technologies were mentioned earlier:
•(extended) audio descriptions
•sign language translation
•clear audio
•dubbed audio
Further additional audio-visual tracks may be alternative video angles or alternative microphone
positions.
These can be provided either as in-band audio or video tracks, or as separate audio or video
resources, which must be synchronized with the main media resource. Sometimes—as is the case for
dubbed audio—the respective channel in the main audio resource has to be replaced with this
alternative content; sometimes—as is the case for audio descriptions and sign translations—it is
additional content.
The extra audio and video tracks or resources create a real or virtual multitrack audio-visual
resource for the user. The aim of the browser should therefore be to provide a uniform interface to such
multitrack audio-visual resources, both through handling them uniformly in the user interface and in
the JavaScript API.
There is indeed a need for development of the following:
•HTML markup to synchronize multiple audio-visual resources together
•a JavaScript API that allows identifying the available types of media tracks, their
language, and turning them on and off
The following alternatives are currently under consideration26:
•the introduction of a synchronization element for multiple resources, similar to
what the <par> element achieves in SMIL27, together with synchronization control
as defined in SMIL 3.0 Timing and Synchronization28
•the extension of the <track> mechanism to audio and video tracks
•the introduction of synchronization attributes such as an @mediaSync attribute to
declare what element to sync to (instead of <par>) as proposed by Kompozer29
What the eventual solution will be is anybody's guess. You should get involved in the standards
discussions if you have an opinion and a good proposal.
9.5 Navigation
Thus far in this chapter we have looked at the alternative (or additional) content technologies that can
and should be made available for media resources to improve usability of the content for certain
audiences. In this section we look at solutions for improving the navigation possibilities within a media
26 See http://lists.w3.org/Archives/Public/public-html-a11y/2010Oct/0520.html
27 See http://www.w3.org/TR/2005/REC-SMIL2-20050107/smil-timing.html#Timing-ParSyntax
28 See http://www.w3.org/TR/SMIL3/smil-timing.html#Timing-ControllingRuntimeSync
29 See http://labs.kompozer.net/timesheets/video.html#syncMaster
Download from www.eBookTM.Com
http://freepdf-books.com

CHAPTER 9 ■ MEDIA ACCESSIBILITY AND INTERNATIONALIZATION
277
resource, into a media resource, and out of a media resource as introduced in the “Navigation”
subsection above. This is particularly important for vision-impaired users, but in fact all users will gain
improved usability of audio-visual content if it is made more navigable and thus more part of the Web.
9.5.1 Chapters
The first means of introducing navigation possibilities is through chapter markers. These markers
provide a means to structure the timeline into semantically meaningful time intervals. The semantic
meaning is caught in a short string. A chapter is aligned with a time interval; that is, it has a start and end
time. This sounds incredibly familiar and indeed the previously introduced WebSRT format will nicely
serve as a means to specify chapter markers. Listing 9–19 has an example.
Listing 9–19. Example WebSRT file created for Chapter markers
1
00:00:00,000 --> 00:00:07,298
Opening credits
2
00:00:07,298 --> 00:03:24,142
Intro
3
00:03:24,142 --> 00:09:00,957
Digital vs. Analog
Under “HTML Markup” we introduced how chapters provided through such external resources like
WebSRT files are combined with media resources using the <track> element. Chapters have also been
delivered as part of media resources in the past, in particular in QuickTime through QTtext30, as
demonstrated in Listing 9–15. And finally, chapters can also be created using the MutableTimedTrack
JavaScript API.
When implemented in browsers, a navigation means of some kind is expected to be exposed, for
example, a menu or markers along the timeline. The best means still has to be experimented with. In
addition to mouse access, there is also a need to make the chapters keyboard accessible.
There may even be a need to allow providing hierarchically structured chapter markers, similar to a
table of contents with sections and subsections. These can be specified within the same TimedTrack as
overlapping in time. However, right now there is no means to specify the hierarchical level of a chapter
marker. An example display of hierarchical chapter markers is provided in Figure 9–3, taken from
http://www.xiph.org/video/vid1.shtml.
30 See http://developer.apple.com/quicktime/icefloe/dispatch003.html
http://freepdf-books.com
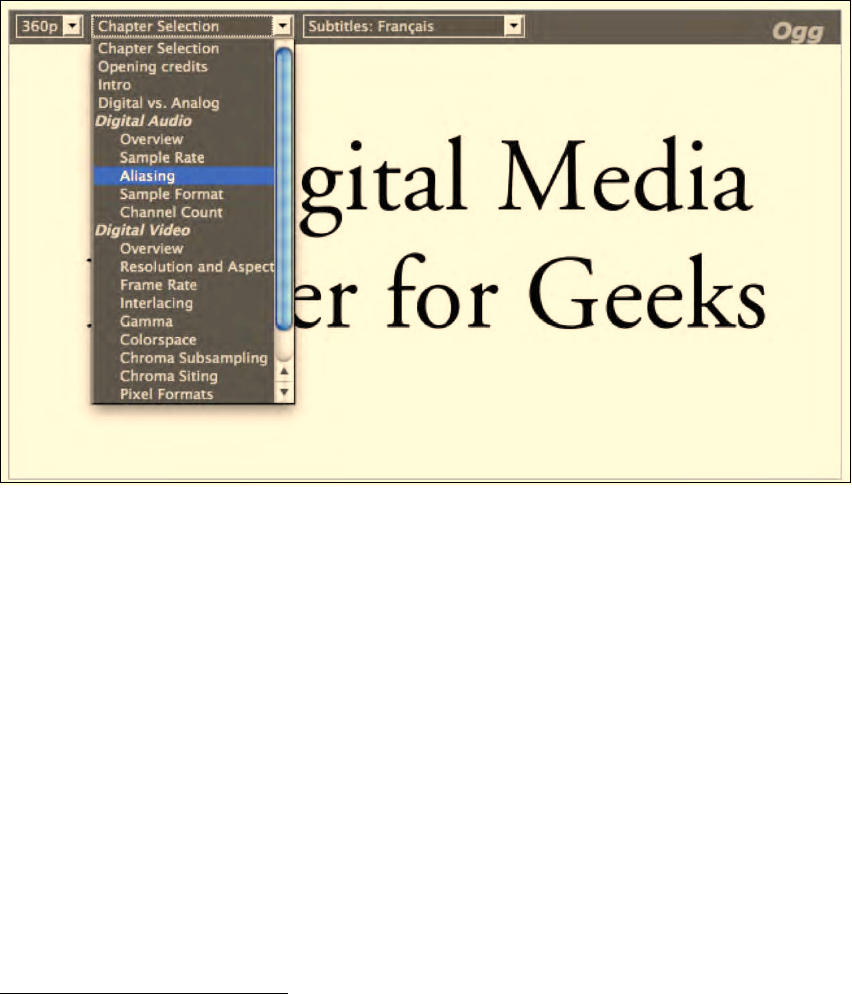
CHAPTER 9 ■ MEDIA ACCESSIBILITY AND INTERNATIONALIZATION
278
Figure 9–3. Displaying chapter markers
9.5.2 Keyboard Navigation
Another alternative means to the mouse for navigating within media resources is to use the keyboard.
This has been discussed in Section 2.4.1. Several browsers are already providing keyboard access to
jump around along the timeline of media resources—others are working on it. This functionality allows
vision-impaired users a rudimentary form of direct access to time offsets. Further navigation is possible
with time-synchronized text through navigation from cue to cue, from word to word, and from voice
markup to voice markup. Voice navigation is indeed becoming increasingly important for people with
repetitive strain, cognitive, dyslexia, and dexterity issues, or simply for people using a voice input device.
9.5.3 Media Fragment URIs
Means to navigate directly into media content are being standardized through the W3C Media Fragment
Working Group. The Media Fragment URI 1.0 spec31 contains the following syntax options:
31 See http://www.w3.org/TR/media-frags/
http://freepdf-books.com
CHAPTER 9 ■ MEDIA ACCESSIBILITY AND INTERNATIONALIZATION
279
1. Temporal media fragment URIs:
For example: http://example.com/example.ogv#t=10,20
These allow direct access to a time offset in a video (with the implicit end being
the end of the resource) or to time intervals (with start and end time). The given
example specifies the fragment of the media resource from 10 seconds to 20
seconds.
2. Spatial media fragment URIs:
For example: http://example.com/example.ogv#xywh=160,120,320,240
These allow direct access to a region in an image or a video (interval) and will
on a video resource probably mostly be used in combination with a temporal
dimension. The given example specifies a region that starts at the grid position
160x120 pixels from the top left corner and a 320x240 pixel rectangle.
3. Track fragment URIs:
For example: http://example.com/example.ogv#track=audio
These allow use of only the selected track(s) of a media resource, the audio
track in the above example.
4. Named media fragment URIs:
For example: http://example.com/example.ogv#id=chapter-1
These allow direct addressing of the identifier of a marker in one of the other
dimensions— typically in the temporal dimension— making it possible to
address by semantic rather than syntax. Identifiers of text tracks are a
particularly good means of using the named fragment URI specification.
All of these media fragment URIs are expected to be interpreted by the web browser and requests to
the server are sent where these fragments can be mapped to a byte range request. In an optimal world,
no changes to the web server should be necessary since most modern web servers understand how to
serve HTTP 1.1 byte ranges. This is particularly true for the temporal media fragment URIs—web
browsers already need to understand how to map time to byte ranges since they want to allow seeking
on the timeline. Therefore, retrieving just a time interval full of media data is simply a matter of having
the index of the video available, which tells the browser the mapping between time and byte range.
For the spatial dimension byte ranges can typically not be identified because, with typical modern
codecs, frame regions are not encoded into separately decodable byte ranges. Therefore, the complete
picture dimensions are retrieved and the web browser is expected to apply the fragmentation after
receiving the resource. It is expected that web browsers will implement spatial fragmentation as image
splicing; that is, they will crop the imagery to the given dimensions. This provides a great focus for the
viewer.
Implementation of track fragmentation is by only retrieving data that belongs to the requested
tracks. This has not been implemented by any web browser, since there is no simple means to get a
mapping to byte ranges for tracks. Typically, videos are encoded in such a way that the data of the
different tracks is interleaved along the timeline such as to flatten the delivery of the time-parallel tracks
and make the track data available to the player at the exact time that it needs it. A media index simplifies
identification of byte ranges along the time dimension, but not along the track dimensions. Therefore,
the solution to implementing track fragmentation is to retrieve the complete resource and only allow the
user access to the requested parts after retrieving the data. Browser vendors will probably only be able to
implement this kind of media fragment URI by muting or visually hiding the display of tracks.
Finally, named media fragment URIs are basically a means to address temporal or spatial regions
by giving them a name. For temporal regions we have already seen means of doing so: providing
identifiers on TimedTrackCues exactly fulfills that need. For spatial regions it would be necessary to
introduce image maps for video with identifiers for regions to allow such named addressing. We cannot
see that happen in the near future, so we'll focus on cue identifiers for now as the source of named
media fragment URI addresses.
http://freepdf-books.com
CHAPTER 9 ■ MEDIA ACCESSIBILITY AND INTERNATIONALIZATION
280
Media fragment URIs will be used basically in three distinct ways for direct access navigation in
browsers:
1. As URLs in the @src attribute or <source> elements of the <video> or <audio>
elements.
2. As direct URLs into just the media resource presented as the only content
3. As part of web page URLs to identify to the browser that a media resource needs
to be displayed with an active fragmentation rather than with the settings given
through the @currentSrc using a URL such as
http://example.com/page.html#video[0]:t=10.
All three cases are about displaying just the media fragment. In the first two cases it is simply a
media fragment URI as specified. If the media controls are shown, they will likely have a highlight on the
transport bar for the selected time range or chapter. However, no browser has implemented support for
media fragments yet, so this cannot be confirmed as yet.
The third case has not been standardized yet, so it is right now a matter of the web page author to
make use of and resolve such a URL. The web page author would reset the @currentSrc of a media
element on a page with the given URL fragment information using JavaScript. It is possible that if such
use becomes common it will at a later stage be turned into a standard URL scheme for HTML pages.
Listing 9–20 shows an example JavaScript extract for dealing with web page URI fragments such as
#video[0]:t=10&video[1]:t=40.
Listing 9–20. Example JavaScript for dealing with time offsets on page hash
// when the hash on the window changes, do an offset
window.addEventListener("hashchange", function() {
var url = location.href;
setVideoTimeFragments(url);
}, false);
// parse the time hash out of the given url
function setVideoTimeFragments(url) {
var fragment = url.split("#")[1];
if (fragment == null) return;
var params = fragment.split("&");
for (i=0; i<params.length; i++) {
var name = params[i].split("=")[0];
var video = name.split("video[")[1].split("]")[0];
var value = params[i].split("=")[1];
videos[video].currentTime = value;
}
}
At the time of writing of this book only Opera had experimented with an implementation of
temporal media fragment URIs in <video> elements. No released browser supports media fragment URIs
yet.
9.5.4 URLs in Cues
Finally, in order to navigate out of media content, one has to introduce hyperlinks inside media
resources. The most appropriate means for this is to have them as part of the markup of cues in text
tracks. This can be achieved by introducing hyperlinks into WebSRT cues—something that has
http://freepdf-books.com
CHAPTER 9 ■ MEDIA ACCESSIBILITY AND INTERNATIONALIZATION
281
previously been discussed in the context of enhanced captions or enhanced subtitles. It is also possible
to be introduced into text descriptions and would then allow vision-impaired users to jump from
hyperlink to hyperlink inside audio or video resources. An example use of URLs in WebSRT cues was
shown in Listing 9–6.
9.6 Accessibility Summary
Table 9–1 provides an overview of the identified accessibility functions and their planned or specified
possibilities of realization in HTML5.
Table 9–1. Overview of all the media accessibility functions
Function Possibility 1 Possibility 2 Possibility 3 Possibility 4
(extended) audio
description
Mixed into the
main audio track
In-band of media
resource as extra
audio track
External audio
resource to sync
with main media
resource
–
(extended) text
description
– In-band of media
resource as extra
text track
External text
resource (for
example,
WebSRT) to sync
with main media
resource
Added
dynamically
through
JavaScript API
(enhanced)
captions
Mixed into the
main video track
In-band of main
resource as extra
text track
External text
resource (for
example,
WebSRT) to sync
with main media
resource
Added
dynamically
through
JavaScript API
Sign language
translation
Mixed into the
main video track
In-band of main
resource as extra
video track
External video
resource to sync
with main media
resource
–
Clear audio – In-band of main
resource as extra
audio track
External audio
resource to sync
with main media
resource
–
Subtitles / Lyrics /
Karaoke /
Metadata
Mixed into the
main video track
In-band of main
resource as extra
text track
External text
resource (for
example,
WebSRT) to sync
with main media
resource
Added
dynamically
through
JavaScript API
http://freepdf-books.com
CHAPTER 9 ■ MEDIA ACCESSIBILITY AND INTERNATIONALIZATION
282
Function Possibility 1 Possibility 2 Possibility 3 Possibility 4
Dubbed audio Replacing the
main audio track
In-band of main
resource as extra
audio track
External audio
resource to
replace main
audio track
–
Semantic
Navigation:
chapters
– In-band of main
resource as extra
text/navigation
track
External text
resource (for
example,
WebSRT) to sync
with main media
resource
Added
dynamically
through
JavaScript API
Transcription Plain on web page
next to media
resource
Linked web page
next to media
resource display
Interactive
transcript on web
page scrolling in
sync with media
playback
–
More Navigation: Keyboard
controls to
navigate within
resource
Media fragment
URIs to navigate
into resource
URLs in text track
cues to navigate
out of resource
–
Activate /
deactivate
User preferences Interactive
selection in user
menu
Activate /
deactivate
through
JavaScript API
–
We started this chapter by analyzing alternative content technologies that users with different needs
require from accessibility technology. We looked at the needs of vision-impaired users, hard-of-hearing
users, deaf-blind users, and of people using the material for learning or internationalization purposes.
We then analyzed content technologies that have been created to provide access to people with
these special needs. We covered transcriptions, text descriptions, captions, subtitles, chapters,
lyrics/karaoke, and grammatical markup examples. In HTML5 the solutions created for the text-based
alternative content technologies are the WebSRT file format, the <track> element, and a JavaScript API
that does not distinguish between accessibility tracks that were provided through the <track> element
or came directly from the media resource. Even the navigation requirements can be satisfied using
WebSRT.
http://freepdf-books.com

C H A P T E R 10
■ ■ ■
283
Audio and Video Devices
In this chapter we look at the efforts that are being made to allow HTML5 to access audio and video
devices and to use these for live communications such as audio and video conferencing.
The specifications in this domain are still very raw. We will touch upon the components under
consideration with no guarantee that any of them will actually persist in the future. Interesting trial
implementations exist and will be discussed, since they lead the way. The main trial implementation
that we will refer to is one by Ericsson, which is an internal branch of WebKit and not publicly available.
We are concerned in this chapter with the <device> element, the Stream API, and the use of
WebSockets in conjunction with the <audio> and <video> elements. But let's start with an overview of
different architectural scenarios for which external devices can be used.
10.1 Architectural Scenarios
Device access by a web browser can take on several forms, from simply transporting data from an
external device into the browser for display in <audio> or <video>, to recording from an audio/video
device to a file on a server, all the way to teleconferencing with another browser.
In these and similar scenarios, the following components are necessary:
1. a means to access and control a device (camera, microphone): the <device>
element
2. transcoding the camera/microphone data to another format: the Stream API
3. saving to an audio or video file: the File API
4. transporting the audio/video data to a connected peer: the ConnectionPeer API
or the WebSocket API
5. display of the audio/video data: the <audio> and <video> elements
We already know how to perform the last part: how to get data into an <audio> or <video> element.
Let's approach the other components one by one.
10.2 The <device> element
The <device> element represents a device selector, to give the user the ability to allow the web page
access to a device, for example, a video camera or microphone. This is done through a dialog interface
http://freepdf-books.com
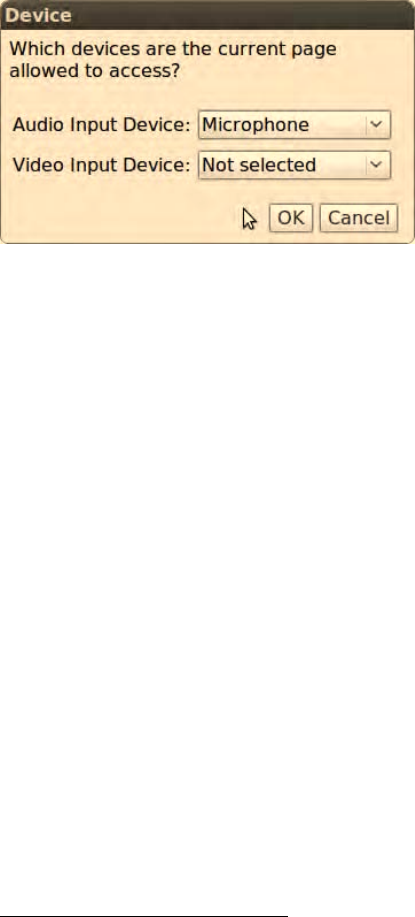
CHAPTER 10 ■ AUDIO AND VIDEO DEVICES
284
that pops up and asks the user to choose which devices to grant access to. See Figure 10–1 for an
example as implemented by Ericsson1.
Figure 10–1. Ericsson's implementation of the <device> element in WebKit
@type
The <device> element has a single attribute @type. This is where you specify which kind of device the
page wants to access through that <device> element.
The attribute can take on one of the following values:
• media: for a stream of audio/video data such as a Webcam and Microphone —
returns a Stream object
• fs: for a filesystem device such as a DVD player — returns a LocalFS object
• and some others that specify types of ports (usb, rs232) rather than devices, and
for which it is unclear if they will continue to be supported in the future
The example in Figure 10–1 will be created through Listing 10–1. Note that Ericsson used an old type
called “video_capture”, which was later renamed “media”.
Listing 10–1. Creating a device selector for a video stream
<device type="media">
</device>
@data
The data resulting from the <device> element is available through the @data IDL attribute to JavaScript. It
is of dynamic type, being a Stream object for type="media".
1 See https://labs.ericsson.com/developer-community/blog/beyond-html5-conversational-voice-and-video-implemented-WebKit-
gtk
http://freepdf-books.com

CHAPTER 10 ■ AUDIO AND VIDEO DEVICES
285
10.3 The Stream API
The Stream API consists of a Stream and a StreamRecorder interface as follows:
interface Stream {
readonly attribute DOMString url;
StreamRecorder record();
};
interface StreamRecorder {
File stop();
};
Self-view video
The <device> element in conjunction with a Stream object can be used to take the video from a
webcam, turn it into a video URL, and display it in a <video> element. Ericsson has an example
implementation of this in WebKit.2 Listing 10–2 shows the required JavaScript code as per the current
specification.
Listing 10–2. Displaying captured video from a device in a <video> element
<device type="media"></device>
<video width="320" height="240"></video>
<script type="text/javascript">
var video, videoDevice;
window.onload = function() {
videoDevice = document.getElementsByTagName("device")[0];
video = document.getElementsByTagName("video")[0];
videoDevice.addEventListener("change", play, false);
}
function play() {
var videoStream = this.data;
video.src = videoStream.url;
video.play();
}
</script>
The Stream API allows us to turn the data received from a <device> element into a URL that can be
used by the <video> element. Data will be received from the <device> element as soon as the user has
chosen the device in the <device> element. This event is raised in an onChange event.
Figure 10–2 shows a still from a YouTube video that Ericsson shot of a working implementation of
the self-view video, as described here.3
2 See https://labs.ericsson.com/developer-community/blog/beyond-html5-implementing-device-and-stream-management-WebKit
3 See http://www.youtube.com/watch?v=VjJ7EsJSgVk
http://freepdf-books.com
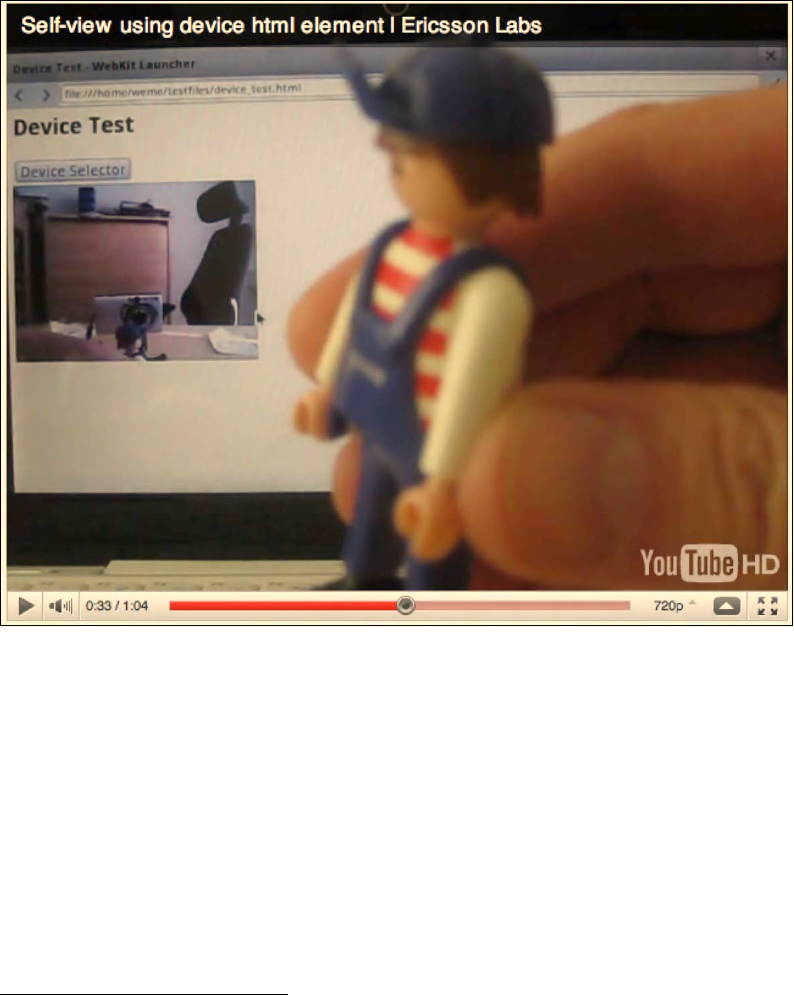
CHAPTER 10 ■ AUDIO AND VIDEO DEVICES
286
Figure 10–2. Ericsson's implementation of the self-view example
The picture shows the <device> selector and underneath it the video with the stream as coming
from the camera. The device is using a Webcam mounted onto the computer and pointed at the little
playmobil guy, which can be seen clearly in the screenshot, but also in the video element on the monitor
at the back.
Recording
As the next step we can use the Stream API to record from local devices. Ericsson has also done some
experiments with Stream and StreamRecorder objects for this type of application.4 A StreamRecorder
object is created from a Stream by using the Stream's record() function. Listing 10–3 shows how this is
done from a media source.
4 See https://labs.ericsson.com/developer-community/blog/beyond-html5-audio-capture-web-browsers
Download from www.eBookTM.Com
http://freepdf-books.com

CHAPTER 10 ■ AUDIO AND VIDEO DEVICES
287
Listing 10–3. Recording media from a device
<device type="media"></device>
<input type="button" value="Record" disabled></input>
<script type="text/javascript">
var device = document.getElementsByTagName("device")[0];
var button = document.getElementsByTagName("input")[0];
var recording = false;
window.onload = function() {
device.addEventListener("change", enableButton, false);
button.addEventListener("click", recordToggle, false);
}
function enableButton() {
var stream = this.data;
button.disabled = false;
}
function recordToggle() {
if (!recording) {
recorder = stream.record();
recording = true;
button.value = "Stop";
} else {
file = recorder.stop();
// do something with the file
upload(file);
recording = false;
button.value = "Record";
}
}
</script>
Here we have a button that activates or stops the recording. When the <device> element is ready,
the button is enabled through the onChange event. When the button is clicked, recording is started if it
wasn't recording, or stopped if it was. When recording is stopped, a media file has been created.
It is unclear how to distinguish between a recorded audio or video file at this time, since only a blob
(binary large object) of type File is created. There used to be a distinction between a <device> of type
“video_capture” and “audio_capture”, but that seems to have been removed. It is possible that this is
supposed to be a Blob object5, which actually has a MIME type and so could distinguish audio and video
recording results.
To handle the created file, you may want to check out the File API6 specification in more detail.
You can, for example, turn it into a temporary URL through the createObjectURL() method7 and show a
preview of the recorded file, or do local editing before uploading it to the server through an
XMLHttpRequest. That is, once browsers have actually implemented the <device> and Stream API
functionalities.
5 See http://www.w3.org/TR/FileAPI/#dfn-Blob
6 See http://www.w3.org/TR/FileAPI/
7 See http://www.w3.org/TR/FileAPI/#dfn-createObjectURL
http://freepdf-books.com

CHAPTER 10 ■ AUDIO AND VIDEO DEVICES
288
10.3 The WebSocket API
The next application that is enabled with the <device> element is video communication, such as video-
conferencing. This is where things become rather underspecified.
One approach to exchanging the video data created from a <device> element with another service
bi-directionally is WebSockets. This is the approach used by a further example implementation by
Ericsson.8 WebSockets are supported by all major browsers (Opera currently with a trial release, but
included in 10.70). Let's start by understanding how WebSockets work.
WebSockets API
WebSockets provide a JavaScript API for bi-directional communication between a browser and a server
natively by using a WebSocketProtocol running directly on TCP instead of using HTTP. WebSockets
communicate over a single TCP connection that is kept open between the browser and server. It is even
possible to multiplex several WebSockets over a single TCP connection. Every data exchange only
contains the data in question and thus WebSockets do not attract the overhead that Ajax attracts, where
every XMLHttpRequest creates a new HTTP exchange.
We're not providing much detail here; we encourage the interested reader to check out the W3C
specification for WebSockets9. An example WebSocket exchange can be seen in Listing 10–4, adapted
from websockets.org10 for a simple text echo service.
Listing 10–4. Simple WebSocket example using the websocket.org echo service
<div id="output"></div>
<script type="text/javascript">
var output = document.getElementById("output");
var socket = new WebSocket('ws://websockets.org:8787/echo');
socket.addEventListener("open", onOpen, false);
socket.addEventListener("close", onClose, false);
socket.addEventListener("message", onMessage, false);
function onOpen () {
output.innerHTML += "CONNECTED<br/>";
message = "Here comes the data";
socket.send(message);
output.innerHTML += "SENT: " + message + "<br/>";
}
function onClose() {
output.innerHTML += "DISCONNECTED<br/>";
}
function onMessage(evt) {
output.innerHTML += '<span style="color: blue;">RESPONSE: '
+ evt.data+'</span><br/>';
socket.close();
}
</script>
8 See https://labs.ericsson.com/developer-community/blog/beyond-html5-conversational-voice-and-video-implemented-WebKit-
gtk
9 See http://dev.w3.org/html5/websockets/
10 See http://www.websockets.org/echo.html
http://freepdf-books.com

CHAPTER 10 ■ AUDIO AND VIDEO DEVICES
289
A WebSocket is created that sets up a connection to a web server. Once the connection is
established, data frames can be sent back and forth between the client and the server in full-duplex
mode. The send() method allows the sending of frames and the onMessage event notifies of the arrival of
a message and provides that message. Since WebSockets are implemented in all modern browsers, we
can provide a screenshot of the example in Listing 10–4; see Figure 10–3.
Figure 10–3. WebSockets example of an echo server
For security reasons, WebSockets are not the same as raw TCP sockets. Instead, WebSockets extend
the HTTP protocol by defining a special handshake between the browser and the server so they can
establish a connection. Once both client and server have opted into the protocol, the message exchange
can happen without further overhead.
A WebSocket with a server is not sufficient to set up a two-way video exchange, for example a video
conference. What is required is a web server that connects two browsers together and hands on data
from one to the other. Let's look at an example for this.
Message exchange
In the following example, we will set up a WebSocket server that takes messages from a user and
broadcasts them to all connected users. In this way it is possible to share a local action with a remotely
connected user.
First we set up the server. For this we use node.js11 as a light-weight web server that runs
applications written in JavaScript. We also install the Node WebSocket Server12 called websocket-server,
which provides WebSocket functionality to JavaScript server applications. Now we are running a
WebSocket-enabled evented I/O framework for which we can easily write a WebSocket server.
The WebSocket server that we require will listen on a certain port for incoming WebSocket requests,
accept connections, return an identifier to the connection requestor, and broadcast all incoming
messages out to all connected WebSocket clients. Listing 10–5 has the details.
Listing 10–5. A WebSocket server written in JavaScript for node.js that broadcasts all incoming messages
var ws = require("./websocket-server/lib/ws");
var server = ws.createServer();
server.addListener("connection", function(conn){
conn.send("** Connected as: "+conn.id);
11 See http://nodejs.org/
12 See https://github.com/miksago/node-websocket-server/
http://freepdf-books.com
CHAPTER 10 ■ AUDIO AND VIDEO DEVICES
290
conn.addListener("message", function(msg){
server.broadcast("<"+conn.id+"> "+msg);
});
});
server.addListener("close", function(conn){
server.broadcast("<"+conn.id+"> disconnected");
});
server.listen(8080);
We send the connection acknowledgement back to the connecting client only, so it can identify its
connection number, which makes it possible to later separate its own messages from the messages of
other browsers.
Now we can write the web page that makes use of the WebSocket server to exchange messages.
Listing 10–6 has the details.
Listing 10–6. A client for the WebSocket server in Listing 10–5 that sends which buttons are pressed
<input type="button" value="Play"></input>
<input type="button" value="Pause"></input>
<div id="output"></div>
<script type="text/javascript">
var buttonPlay = document.getElementsByTagName("input")[0];
var buttonPause = document.getElementsByTagName("input")[1];
var output = document.getElementById("output");
var socket = new WebSocket('ws://localhost:8080/');
socket.addEventListener("open", onOpen, false);
socket.addEventListener("close", onClose, false);
socket.addEventListener("message", onMessage, false);
buttonPlay.addEventListener("click", sendPlay, false);
buttonPause.addEventListener("click", sendPause, false);
function onOpen () {
output.innerHTML += "CONNECTED<br/>";
}
function onClose() {
output.innerHTML += "DISCONNECTED<br/>";
}
function onMessage(evt) {
output.innerHTML += 'RESPONSE: ' + evt.data;
}
function sendPlay() {
message = "Play";
socket.send(message);
output.innerHTML += "SENT: " + message + "<br/>";
}
function sendPause() {
message = "Pause";
socket.send(message);
output.innerHTML += "SENT: " + message + "<br/>";
}
</script>
http://freepdf-books.com
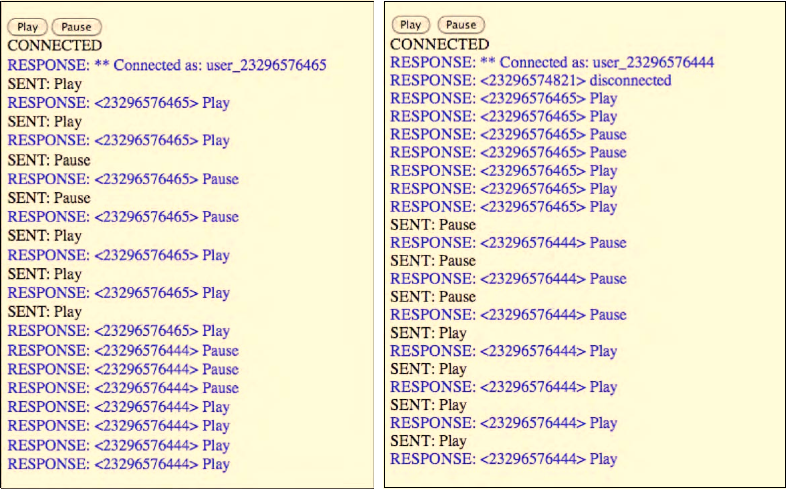
CHAPTER 10 ■ AUDIO AND VIDEO DEVICES
291
This client is a fairly simple extension of the previous example in Listing 10–4. The page has two
buttons. It connects to the web server that we created before and is running with node through port
8080. When the user clicks on one of the buttons, the button value will be packaged into the text content
of the WebSocket data, sent to the WebSocket server, and then the server broadcasts it out to everyone
connected. When the web page receives a message, it prints it. Figure 10–4 has examples of two web
browsers connected to the same WebSocket server.
Figure 10–4. WebSocket example of communicating sides, left in Firefox, right in Google Chrome
You will notice that the blue (if you’re looking at this in black-and-white: the grey) lines are all
responses, whereas the black ones are sent requests. The browser on the left (Firefox) is connected
under the id 23296576465, the one on the right (Google Chrome) under 23296576444. We start by
clicking “Play”, “Play”, “Pause”, “Pause”, “Play”, “Play”, “Play” in Firefox and can see that the response is
received by both Firefox and Google Chrome. Then we do a few clicks in Google Chrome and again the
responses are received by both browsers.
Shared video control
To make the WebSocket message-passing example a bit more useful, let's use it to control a video from
multiple browsers. You can imagine a use case where you share a web page with your friends for shared
remote viewing of a video and you all get to have control over the position and state of the video — if one
of you pauses, all players pause — if one seeks, all players seek.
Listing 10–7 shows the code for the web page. It still uses the same server as in Listing 10–5.
e
http://freepdf-books.com
CHAPTER 10 ■ AUDIO AND VIDEO DEVICES
292
Listing 10–7. A client for the WebSocket server in Listing 10–5 that allows shared video viewing
<video controls>
<source src="video1.mp4" type="video/mp4">
<source src="video1.webm" type="video/webm">
<source src="video1.ogv" type="video/ogg">
</video>
<script type="text/javascript">
window.onload = function() {
var video = document.getElementsByTagName("video")[0];
var socket = new WebSocket('ws://localhost:8080/');
socket.addEventListener("message", onMessage, false);
video.addEventListener("play", sendPlay, false);
video.addEventListener("pause", sendPause, false);
video.addEventListener("seeked", sendSeek, false);
var me = "";
var prev_seek = 0;
function onMessage(evt) {
pos = evt.data.indexOf("Connected as:");
if (pos != -1) {
// identify myself
me = evt.data.substring(pos+14);
} else {
id = evt.data.match(/<(.*?)>/);
if (id[1] != me) {
// execute commands if from peer
pos = evt.data.indexOf(">");
switch (evt.data.substring(pos+2,pos+7)) {
case "play ": video.play(); break;
case "pause": video.pause(); break;
case "seek ":
seekTime = evt.data.substring(20);
if (prev_seek != parseFloat(seekTime)) {
video.currentTime = parseFloat(seekTime);
}
break;
default:
}
}
}
}
function sendPlay() {
socket.send("play ");
}
function sendPause() {
socket.send("pause");
}
function sendSeek() {
prev_seek = video.currentTime;
msg = "seek "+prev_seek;
socket.send(msg);
}
}
</script>
http://freepdf-books.com
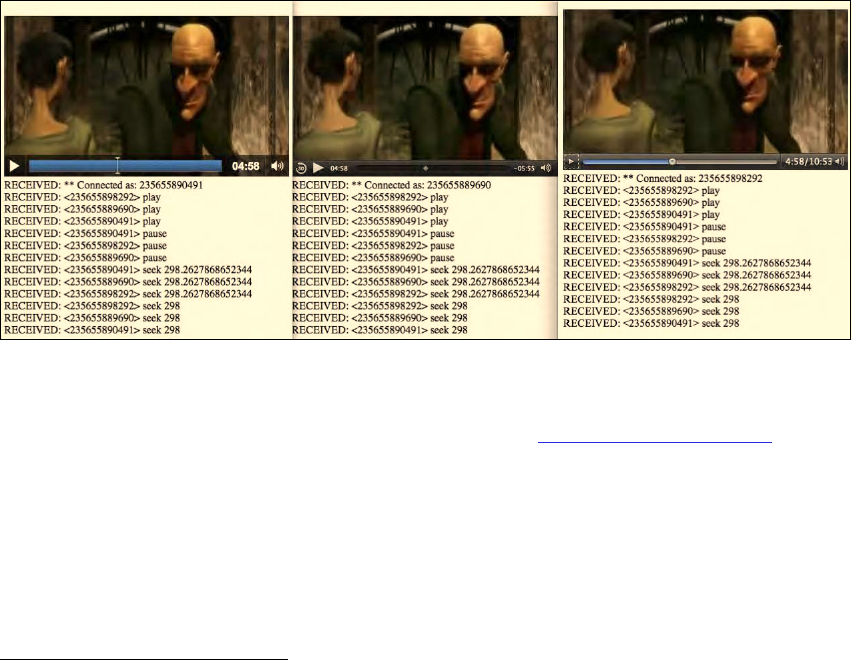
CHAPTER 10 ■ AUDIO AND VIDEO DEVICES
293
We set up a WebSocket with the server. All involved clients will connect to the same WebSocket
service and thus they all share the same messages. We set up a video element and callbacks for the
“play”, “pause”, and “seeked” events, which send a text message to the WebSocket service and
broadcast these messages to all other browsers. As we receive a message from the WebSocket service,
and it's not a message that we have sent ourselves, we execute the video.play(), video.pause(), or
video.currentTime seek actions to replicate the actions of the video elements in the other clients.
We have to be careful with the seek action, though, because when we seek, others will seek, too, and
we will go into an endless loop of seeks as the clients tell each other that they have just seeked and need
that replicated. We avoid that by only seeking again if we receive a new seekTime from another client.
For a real-world implementation of such a service we recommend a more robust implementation - for
example use of more informative messages in JSON - that will signify if a seek was user-originated or just
an acknowledgement for executing a remote command.13
Figure 10–5 shows the result in three parallel running browsers: Chrome, Safari, and Opera.
Figure 10–5. WebSocket example of communicating videos in Chrome, Safari, and Opera
As a user controls the video in one browser, all the other browsers receive the events and replicate
the same actions. You should try it out for yourself with a friend at http://html5videoguide.net/.
Video conferencing
With WebSockets we have seen a means to share data through a web server with other browser
instances. This now paves the way for hooking up the <device> element and a local camera and
microphone with a remote viewer.
Ericsson has made an implementation of a video chat web application using HTML514 based on
WebSockets. It builds on the earlier introduced implementation of self-view video in Listing 10–2.
13 Here is an example implementation in Java using Glassfish: http://weblogs.java.net/blog/spericas/archive/2010/09/29/web-
sockets-and-html5-glassfish
14 See https://labs.ericsson.com/developer-community/blog/beyond-html5-conversational-voice-and-video-implemented-WebKit-
gtk
http://freepdf-books.com

CHAPTER 10 ■ AUDIO AND VIDEO DEVICES
294
To use WebSockets for a video chat application one needs to transport binary data. However, right
now the WebSocket API is restricted to only deliver text strings. It is possible to encode binary data as
text, e.g. through base64 encoding15, however that will introduce the need to encode the data before
transmission and decode afterwards, adding delay to a video pipeline that already has network delay and
where real-time is of utmost importance. Work is ongoing to introduce such binary content functionality
into the WebSocket standard. Ericsson has a trial implementation.
In addition to the extension of the WebSocket functionality, Ericsson also had to hook up the media
data coming out of the Stream API to the WebSockets and make sure the data is handed on to the right
peer. As shown in the shared video control example, Listing 10–7, managing the data flow is important
so as not to overload the network or the receivers. Ericsson introduced a MediaStreamManager to package
audio-visual data from the Stream URIs for WebSocket transport. They also introduced a
MediaStreamTransceiver to control the network transport and data flow over WebSockets.
The core of their resulting example web page for video conferencing is replicated in Listing 10–8.
Listing 10–8. A video conferencing web page example using WebSockets and the <device> element
<device type="media"></device>
<video width="320" height="240" id="self_view"></video>
<video width="320" height="240" id="remote_video"></video>
<script type="text/javascript">
var transceiver = new
MediaStreamTransceiver("ws://150.132.141.60:8880/delayswitch?sid=0");
var videoDevice = document.getElementsByTagName("device")[0];
var selfView = document.getElementById("self_view");
var remoteVideo = document.getElementById("remote_video");
videoDevice.addEventListener("change", playLocal, false);
transceiver.addEventListener("connect", playRemote, false);
function playLocal(evt) {
var videoStream = this.data;
// exclude audio from the self view
selfView.src = videoStream.url + "#video";
selfView.play();
// set the stream to share
transceiver.localStream = videoStream;
}
function playRemote() {
remoteVideo.src = transceiver.remoteStream.url;
remoteVideo.play();
}
</script>
This page first sets up a device element and a video element each for local and remote playback. In
JavaScript it then creates a MediaStreamTransceiver which enables the connection and communication
to another browser identified through the stream identifier (sid) provided in the WebSocket URL. As the
user chooses a local device to take video input from, the video self-view is activated and the stream
handed on to the transceiver for remote sharing. This causes the connected party at the other end to
receive a connect event on their MediaStreamTransceiver object. The video element that is set up for
display of the remote stream then is handed the URL of the remote stream and set to play.
15 See http://en.wikipedia.org/wiki/Binary-to-text_encoding
http://freepdf-books.com
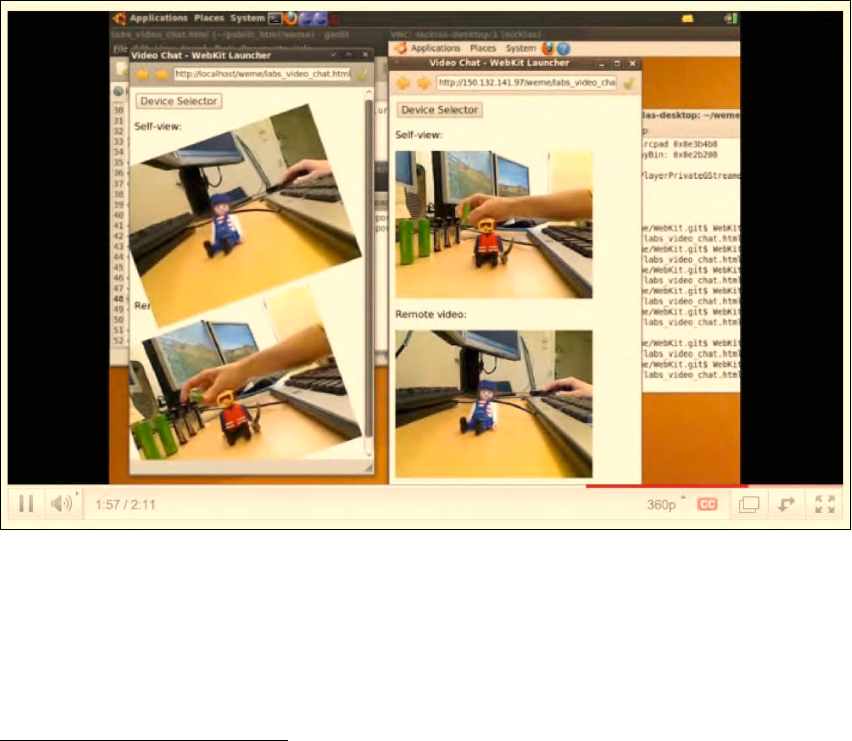
CHAPTER 10 ■ AUDIO AND VIDEO DEVICES
295
Note that for the local self-view video, the audio channel is turned off. Ericsson has created a
specific video URI for this with a “#video” fragment. This allows them to single out the video track from
the media resource and just play that back. The media fragment URI, as discussed in the previous
chapter, would be useful for this example and already provides a specification for addressing specific
tracks in a media resource. To extract just the video track out of an audio-visual resource would require a
URI fragment of the following form: “#track=video”. Neither is implemented by default in any released
browser, so do not expect this functionality to be available in <video> elements at this stage.
Ericsson's experiments were undertaken on a patched WebKit version and show the amazing
possibilities of this technology. Figure 10–6 shows a screenshot of Ericsson's demo video of the video
chat. They even applied CSS3 transformations to the video to show the full potential of the technology
when available in HTML5.
Figure 10–6. WebSocket-based video chat demo by Ericsson16
10.3 The ConnectionPeer API
The use of WebSockets for many-to-many communication is somewhat limiting. You always have a
server in the middle through which the data is replicated to everyone else. This makes sense in an
application where many people are working together so you don't have to build an n-by-n connection
16 See https://labs.ericsson.com/developer-community/blog/beyond-html5-conversational-voice-and-video-implemented-WebKit-
gtk
http://freepdf-books.com

CHAPTER 10 ■ AUDIO AND VIDEO DEVICES
296
network, but rather just n connections to a single server. However, where only two peers are involved, a
direct connection without the intermediary web server is a lot more resourceful.
The WHATWG has a ConnectionPeer API17 under development which is expected to provide this
functionality. Since the API is still very immature, we will not go into much detail here. The idea is that a
third-party server is used to gain information about the other party, which allows setting up a direct
connection. During the connection setup, there will be an exchange of their respective configuration to
agree on the protocol and share their respective IP addresses and other necessary details. Once
connected, there will be functions such as the following:
•sendText() — to send straight text
•sendBitmap() — to send HTMLImageElements
•sendFile() — to send arbitrary files
•addStream() — to send a video or audio stream
Similar to how WebWorkers hand on URLs, an addStream() method would also create a message
callback (tentatively called onStream) which would allow retrieval of the remote video URL to set a
<video> element's @src attribute to it for playback. The specification has some examples with a code
outline, in case you are curious.18 This part of the specification will still need a substantial amount of
work before we will see it rolled out in browsers.
10.4 Summary
In this chapter we took a peek at the possibilities that the <device> element introduces into the web
browser. This part of the HTML5 specification is still very raw and will likely see many changes before
stable implementations in browsers will exist. We were able to use the WebSocket functionality to
implement message passing between browser instances about video states and thus demonstrate a
shared video viewing application. Once this can be hooked up with the functionality of the <device>
element, we will see real-time video communication features become common practice in web
applications.
17 See http://www.whatwg.org/specs/web-apps/current-work/complete/commands.html#peer-to-peer-connections
18 See http://www.whatwg.org/specs/web-apps/current-work/complete/commands.html
Download from www.eBookTM.Com
http://freepdf-books.com

A P P E N D I X
■ ■ ■
297
Summary and Outlook
It has been a long journey—almost 300 pages about a couple of new elements in HTML. Who would
have thought there was this much to learn. However, realistically, we are only at the start of what will be
possible with audio and video in the coming years. Right now we are only seeing the most basic
functionality of multimedia implemented on the Web. Once the technology stabilizes, publishers and
users will follow, and with them businesses, and further requirements and technologies will be
developed. However, for now, we have a fairly complete overview of existing functionalities.
Before giving you a final summary of everything that we have analyzed in this book, let us mention
two more areas of active development.
A.1 Outlook
Two further topics deserve a brief mention: metadata and quality of service metrics. Both of these topics
sound rather ordinary, but they enable functionalities that are quite amazing.
A.1.1 Metadata API
The W3C has a Media Annotations Working Group1. This group has been chartered to create “an
ontology and API designed to facilitate cross-community data integration of information related to
media objects in the Web, such as video, audio, and images”. In other words: part of the work of the
Media Annotations Working Group is to come up with a standardized API to expose and exchange
metadata of audio and video resources. The aim behind this is to facilitate interoperability in search and
annotation.
In the Audio API chapter we have already come across something related: a means to extract key
information about the encoding parameters from an audio resource through the properties
audio.mozChannels, audio.mozSampleRate, and audio.mozFrameBufferLength.
The API that the Media Annotations Working Group is proposing is a bit more generic and higher
level. The proposal is to introduce a new Object into HTML which describes a media resource. Without
going into too much detail, the Object introduces functions to expose a list of properties. Examples are
media resource identifiers, information about the creation of the resource, about the type of content,
content rights, distribution channels, and ultimately also the technical properties such as framesize,
codec, framerate, sampling-rate, and number of channels.
While the proposal is still a bit rough around the edges and could be simplified, the work certainly
identifies a list of interesting properties about a media resource that is often carried by the media
1 See http://www.w3.org/2008/WebVideo/Annotations/
http://freepdf-books.com
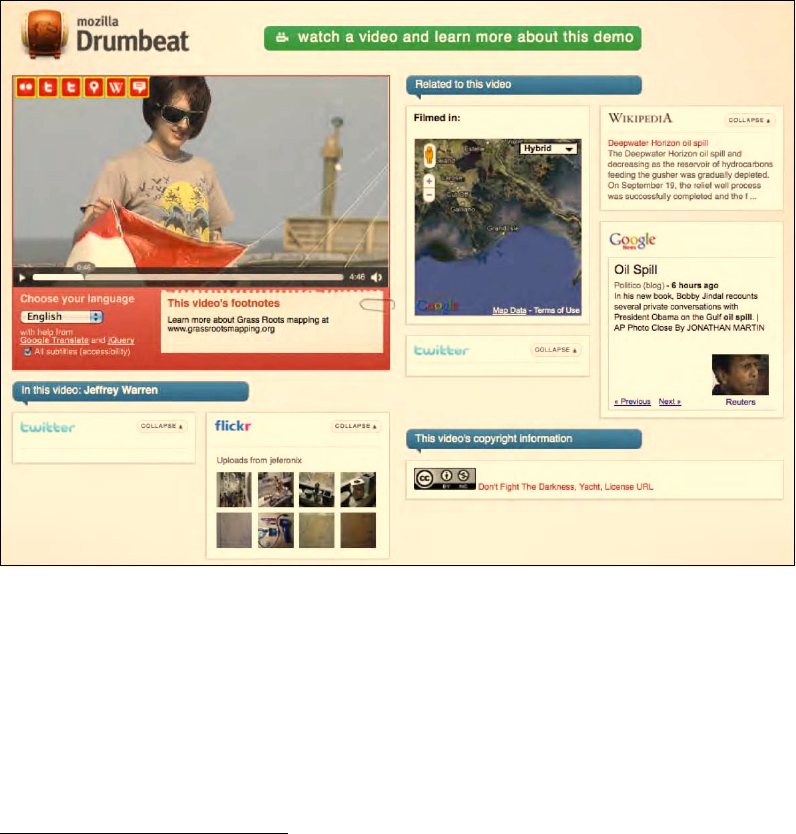
APPENDIX ■ SUMMARY AND OUTLOOK
298
resource itself. In that respect, it aligns with some of the requests from archival organizations and the
media industry, including the captioning industry, to make such information available through an API.
Interesting new applications are possible when such information is made available. An example
application is the open source Popcorn.js semantic video demo2. Popcorn.js is a JavaScript library that
connects a video, its metadata, and its captions dynamically with related content from all over the Web.
It basically creates a mash-up that changes over time as the video content and its captions change.
Figure A–1 has a screenshot of a piece of content annotated and displayed with popcorn.js.
Figure A–1. A screenshot of a video mashup example using popcorn.js
A.1.2 Quality of Service API
A collection of statistics about the playback quality of media elements will be added to the media
element in the near future. It is interesting to get concrete metrics to monitor the quality of service (QoS)
that a user perceives, for benchmarking and to help sites determine the bitrate at which their streaming
should be started. We would have used this functionality in measuring the effectiveness of Web Workers
in Chapter 7 had it been available. Even more importantly, if there are continuously statistics available
about the QoS, a JavaScript developer can use these to implement adaptive HTTP streaming.
2 See http://webmademovies.etherworks.ca/popcorndemo/
http://freepdf-books.com

APPENDIX ■ SUMMARY AND OUTLOOK
299
We have come across adaptive HTTP streaming already in Chapter 2 in the context of protocols for
media delivery. We mentioned that Apple, Microsoft, and Adobe offer solutions for MPEG-4, but that no
solutions yet exist for other formats. Once playback statistics exist in all browsers, it will be possible to
implement adaptive HTTP streaming for any format in JavaScript. This is also preferable over an
immediate implementation of support for a particular manifest format in browsers—even though Apple
has obviously already done that with Safari and m3u8. It is the format to support for delivery to the
iPhone and iPad.
So, what are the statistics that are under discussion for a QoS API? Mozilla has an experimental
implementation of mozDownloadRate and mozDecodeRate3 for the HTMLMediaElement API. These
respectively capture the rate at which a resource is being downloaded in bytes per second, and the rate
at which it is being decoded in bytes per second. Further, there are additional statistics for video called
mozDecodedFrames, mozDroppedFrames, and mozDisplayedFrames, which respectively count the number of
decoded, dropped, and displayed frames for a media resource. These allow identification of a bottleneck
either as a network or CPU issue.
Note that Adobe has a much more extensive interface for Flash4. A slightly different set of QoS
metrics for use in adaptive HTTP streaming is suggested in the WHATWG wiki5:
• downloadRate: The current server-client bandwidth (read-only)
• videoBitrate: The current video bitrate (read-only)
• droppedFrames: The total number of frames dropped for this playback session
(read-only)
• decodedFrames: The total number of frames decoded for this playback session
(read-only)
• height: The current height of the video element (already exists)
• videoHeight: The current height of the videofile (already exists)
• width: The current width of the video element (already exists)
• videoWidth: The current width of the videofile (already exists)
These would also allow identification of the current bitrate that a video has achieved, which can be
compared to the requested one and can help make a decision to switch to a higher or lower bitrate
stream. We can be sure that we will see adaptive HTTP streaming implementations shortly after, when
such an API has entered the specification and is supported in browsers.
This concludes the discussion of HTML5 media technologies under active development.
A.2 Summary of the Book
In this book we have taken a technical tour of HTML5 <audio> and <video>.
The Introduction told the story behind the formats and technologies that we have arrived at today
and, in particular, explained why we don't have a single baseline codec for either <audio> or <video>.
This is obviously a poor situation for content providers, but the technology has been developed around
it and there are means to deal with this. Ultimately, the availability of browser plugins—such as Adobe
3 See http://www.bluishcoder.co.nz/2010/08/24/experimental-playback-statistics-for-html-video-audio.html
4 See http://help.adobe.com/en_US/FlashPlatform/reference/actionscript/3/flash/net/NetStreamInfo.html
5 See http://wiki.whatwg.org/wiki/Adaptive_Streaming#QOS_Metrics
http://freepdf-books.com
APPENDIX ■ SUMMARY AND OUTLOOK
300
Flash, VLC, and Cortado for Ogg Theora—can help a content provider deliver only a single format
without excluding audiences on browsers that do not support that format natively.
The Introductory Chapters
In the Audio and Video Elements chapter we had out first contact with creating and publishing audio
and video content through the <audio> and <video> elements. We dug deep into the new markup
defined for <audio>, <video>, and <source>, including all their content attributes. We took a brief look at
open source transcoding tools that are used to get our content into a consistent format for publishing.
We briefly explained how to publish the content to a Web server and how it is delivered over HTTP. We
concluded the chapter with a comparison of user interfaces to the media elements between browsers, in
particular paying attention to the support of accessibility in implemented player controls.
Chapter 3 on CSS3 Styling saw us push the boundaries of how to present audio and video content
online. Simply by being native elements in HTML, <audio> and <video> are able to make use of the
amazing new functionalities of CSS3 including transitions, transforms, and animations. We also
identified some short-comings for video in CSS3, in particular that reflections cannot be achieved
through CSS alone, that the marquee property is too restricted to create a video scroller, and that video
cannot be used as a background to a web page. However, we were able to experiment with some
amazing new displays for video collections—one about a pile of smart phones where you can basically
pick one up and watch the video on it, and one with video playing on the faces of a 3D spinning cube.
The JavaScript API chapter saw us dig deep into the internal workings of the <audio>, <video>, and
<source> elements. The interface of these media elements is very rich and provides a web developer with
much control. It is possible to set and read the content attribute values through this interface. Particular
features of the underlying media resources are exposed, such as their intrinsic width and height. It is also
possible to monitor the stats and control the playback functionalities of the resources. We concluded
this chapter with an implementation of a video player with our own custom controls that make use of
many of the JavaScript API attributes, states, events, and methods.
At this point, we reached quite a sophisticated understanding of the HTML5 media elements and
their workings. These first four chapters provided a rather complete introduction. The next three
chapters focused on how <audio> and <video> would interact with other elements of HTML5, in
particular SVG, Canvas, and Web Workers.
Interacting with other HTML Elements
In HTML5 Media and SVG we used SVG to create further advanced styling. We used SVG shapes,
patterns, or manipulated text as masks for video, implemented overlay controls for videos in SVG, placed
gradients on top of videos, and applied filters to the image content, such as blur, black-and-white, sepia,
or line masks. We finished this section by looking at the inclusion of <video> as a native element in SVG
or through <foreignObject>. This, together with SVG transformations, enabled the creation of video
reflections or the undertaking of edge detection.
For further frame- and pixel-based manipulation and analysis, SVG isn't quite the right tool. In
Chapter 6, HML5 Media and Canvas, we focused on such challenges by handing video data through to
one or more <canvas> elements. We demonstrated video frames bouncing through space, efficient tiling
of video frames, color masking of pixels, 3D rendering of frames, ambient color frames for video, and
transparency masks on video. These functions allowed us to replicate some of the masking, text drawing,
and reflection functionalities we had previously demonstrated in SVG. We finished the chapter with a
demonstration how user interactions can also be integrated into Canvas-manipulated video, even
though such needs are better satisfied through SVG, which allows attachment of events to individual
graphical objects.
In Chapter 7, about HTML5 Media and Web Workers, we experimented with means of speeding up
CPU-intensive JavaScript processes by using new HTML5 parallelization functionality. A Web Worker is
http://freepdf-books.com
APPENDIX ■ SUMMARY AND OUTLOOK
301
a JavaScript process that runs in parallel to the main process and communicates with it through message
passing. Image data can be posted from and to the main process. Thus, Web Workers are a great means
to introduce sophisticated Canvas processing of video frames in parallel into a web page, without
putting a burden on the main page; it continues to stay responsive to user interaction and can play
videos smoothly. We experimented with parallelization of motion detection, region segmentation, and
face detection.
A limiting factor is the need to pass every single video frame that needs to be analyzed by a Web
Worker through a message. This massively slows down the efficiency of the Web Worker. There are
discussions in the WHATWG and W3C about giving Web Workers a more direct access to video and
image content to avoid this overhead.
All chapters through Chapter 7 introduced technologies that have been added to the HTML5
specifications and are supported in several browsers. The three subsequent chapters reported on further
new developments that have only received trial implementations in browsers, but are rather important.
Initial specifications exist, but we will need to see more work on these before there will be interoperable
implementations in multiple browsers.
Recent Developments
In Chapter 8, on the HTML5 Audio API, we introduced two complementary pieces of work for
introducing audio data manipulation functionalities into HTML5. The first proposal is by Mozilla and it
creates a JavaScript API to read audio samples directly from an <audio> or <video> element to allow it to
be rendered, for example, as a waveform or a spectrum. It also has functionality to write audio data to an
<audio> or <video> element. Through the combination of both and through writing processing functions
in JavaScript, any kind of audio manipulation is possible. The second proposal is by Google and
introduces an audio filter network API into JavaScript with advanced pre-programmed filters such as
gain, delay, panning, low-pass, high-pass, channel splitting, and convolution.
The chapter on Media Accessibility and Internationalization introduced usability requirements for
<audio> and <video> elements with a special regard towards sensory impaired and foreign language
users. Transcriptions, video descriptions, captions, sign translations, subtitles, and navigation markers
were discussed as formats that create better access to audio-visual content. Support for these alternative
content technologies is finding its way into HTML5. We saw the newly defined <track> element, a
JavaScript API, and the WebSRT file format as currently proposed specifications to address a large
number of the raised requirements.
Finally, Chapter 10, Audio and Video Devices, presented early experiments on the <device> element
and the Stream API, which together with Web Sockets allow the use of web browsers for video
conferencing. We referred to experiments made by Ericsson on an unreleased version of Webkit that
demonstrated how such live audio or video communication can be achieved. Many of the components
are already specified, so we were able to explain them in example code. We also analyzed how recording
from an audio or video device may be possible, and demonstrated how to use Web Sockets to create a
shared viewing experience of video presentations across several participating web browser instances.
I hope your journey through HTML5 media was enjoyable, and I wish you many happy hours
developing your own unique applications with these amazing new elements.
http://freepdf-books.com

APPENDIX ■ SUMMARY AND OUTLOOK
302
http://freepdf-books.com

Index
■ ■ ■
303
■ Symbols and Numerics
<animate> element, 154–155
<animateColor> element, 155
<animateMotion> element, 155–156
<animateTransform> element, 155
<audio> element
@autoplay attribute, 21
@controls attribute, 22
@loop attribute, 21–22
@preload attribute, 22–23
@src attribute, 21
description of, 20–21
@autoplay attribute
of <audio> element, 21
of <video> element, 13
@buffered IDL attribute, 115–119
@controls attribute
of <audio> element, 22
of <video> element, 17–18
@currentSrc IDL attribute, 85–86
@currentTime IDL attribute, 97–100
@data IDL attribute, 284
@defaultPlaybackRate IDL attribute, 104–107
@duration IDL attribute, 89–92
@ended IDL attribute, 103–104
@error IDL attribute, 113–115
@height attribute of <video> element, 15–17
@initialTime attribute, 89
@kind attribute of <track> element, 268
@loop attribute
of <audio> element, 21–22
of <video> element, 13–14
@media attribute of <source> element, 28–29
@muted IDL attribute, 93–95
@networkState IDL attribute, 107–110
@paused IDL attribute, 101–103
@playbackRate IDL attribute, 104–107
@played IDL attribute, 118–120
@poster attribute of <video> element, 14–15
@preload attribute
of <audio> element, 22–23
of <video> element, 18–20
@readyState IDL attribute, 110–113
@seekable IDL attribute, 120–122
@seeking IDL attribute, 100–101
@src attribute
of <audio> element, 21
of <source> element, 23–24
of <video> element, 12
@startOffsetTime attribute, 89
@startTime IDL attribute, 88–89
@type attribute
of <device> element, 284
of <source> element, 24–27
@videoHeight IDL attribute, 95–96
@videoWidth IDL attribute, 95–96
@volume IDL attribute, 92–93
@width attribute of <video> element, 15–17
<device> element, 283–284
http://freepdf-books.com
■ INDEX
304
<foreignObject> feature of SVG, 137
<source> element
@media attribute, 28–29
@src attribute, 23–24
@type attribute, 24–27
description of, 23
3D transforms, 71–74
3GPP Timed Text format, 271–273
<track> element, 267–269
2D transforms, 70–71
<video> element
@autoplay attribute, 13
@controls attribute, 17–18
@height attribute, 15–17
@loop attribute, 13–14
@poster attribute, 14–15
@preload attribute, 18–20
@src attribute, 12
@width attribute, 15–17
fallback content, 11–12
in legacy browser, 11
Opera and, 2
standardization of, 2–7
support for, 9–10
■ A
absolute positioning mode, 59–60
accessibility
See also alternative content technologies
clear audio, 253
overview of, 247, 281–282
activating described video, 249
adaptive HTTP streaming, 38, 299
Adobe
Flash
purchase of, 2
SVG and, 135
RTMP protocol of, 38
VP8 support by, 7
alignment of video in box, 60–62
alternative content technologies
challenges of, 275–276
for deaf-blind users, 253
description of, 247
for foreign users, 254
for hard-of-hearing users
captions, 250–251
sign translation, 252–253
transcripts, 251–252
interactive transcripts, implementing,
256–258
navigation
chapter markers, 277
keyboard navigation, 278
media fragment URIs, 278–280
overview of, 276
URLs in cues, 280–281
overview of, 255
plain transcripts, implementing, 255–256
synchronized text
HTML markup, 267–269
in-band use, 269–273
JavaScript API, 273–275
overview of, 258
WebSRT, 259–267
for users with learning disabilities, 254
for vision-impaired users
interacting with content, 249–250
perceiving video content, 248–249
ambient CSS color frames, 181–183
<animate> element, 154–155
<animateColor> element, 155
animated text displayed in captions, 251
<animateMotion> element, 155–156
<animateTransform> element, 155
animations
CSS, 76–78
in SVG
<animate> element, 154–155
<animateColor> element, 155
<animateMotion> element, 155–156
<animateTransform> element, 155
through user interaction, 198–200
Apple HTTP live streaming, 39–40
array buffers, 235
artifacts created by transcoding, 30
aspect ratio, 15
http://freepdf-books.com
■ INDEX
305
attributes
boolean, 13
content, 82–83
content compared to IDL, 82
IDL
@buffered, 115–119
@currentSrc, 85–86
@currentTime, 97–100
@defaultPlaybackRate, 104–107
@duration, 89–92
@ended, 103–104
@error, 113–115
@muted, 93–95
@networkState, 107–110
@paused, 101–103
@playbackRate, 104–107
@played, 118–120
@readyState, 110–113
@seekable, 120–122
@seeking, 100–101
@startTime, 88–89
@videoHeight, 95–96
@videoWidth, 95–96
@volume, 92–93
from content attributes, 82
general features of media resources, 84
overview of, 83–84
playback-related features of media
resources, 97
states of media elements, 107
audio API
filter graph
advanced filters, 240–241
basic reading and writing, 239–240
resources, 245
reverberation effect, creating, 241–242
waveform display, 243–245
Mozilla
bleeping out section with sine wave,
236–237
continuous playback, 234–236
extracting samples, 224–226
framebuffer, 226–227
generating data, 232
rendering spectrum, 230–232
rendering waveform, 227–230
resources, 231
single-frequency sound, creating,
232–233
sound from another audio source,
creating, 233–234
tone generator, 237–239
overview of, 223–224
audio codecs, 3, 20
audio data
generating
bleeping out section with sine wave,
236–237
continuous playback, 234–236
single-frequency sound, creating,
232–233
sound from another audio source,
creating, 233–234
tone generator, 237–239
reading
extracting samples, 224–226
framebuffer, 226–227
rendering spectrum, 230–232
rendering waveform, 227–230
audio devices. See external devices
<audio> element
@autoplay attribute, 21
@controls attribute, 22
@loop attribute, 21–22
@preload attribute, 22–23
@src attribute, 21
creating with sine wave, 232
description of, 20–21
audio filters, 223
Audio Incubator Group (W3C), 223, 239
audio samples
reading
from audio element, 224
from video element, 225–226
rendering
in spectrum, 230–231
in waveform, 227–228
in waveform with history, 229
audio translations for foreign users, 254
http://freepdf-books.com
■ INDEX
306
AudioContext filter
node types and, 240
reading and writing sound using, 239–240
rendering waveform data from, 243–244
reverberation effect, creating, 241–242
AudioDestinationNode, 240
@autoplay attribute
of <audio> element, 21
of <video> element, 13
autostarting
audio, 21
video, 13
■ B
background-color property (CSS), 62
backgrounds, replacing with pixel
transparency, 176–177
baseline codec
debate about, 3–5
description of, 2
bleeping out section of audio with sine wave,
236–237
block box type, 55
blur filter, SVG-defined, 150
boolean attributes, 13
box model for visual elements
absolute positioning mode, 59–60
block box type, 55
float positioning mode, 58–59
inline box type, 52–54
none box type, 54–55
overview of, 50–52
positioning modes, 52
relative positioning mode, 55–58
scaling and alignment within box, 60–62
browser plug-ins, media support in, 1
browsers
See also JavaScript; specific browsers
audio codecs natively supported by, 20
context menus, 45–47
controls in, 47–48
introduction of video support into, 6
performance of
on Web Workers motion detection, 212
on Web Workers region segmentation,
217
on Web Workers sepia example, 208
RTSP support by, 37
support for CSS3 functionalities by, 79
support for MIME types by, 25–27
video codecs natively supported by, 9–10
visible controls of, 41–44
@buffered IDL attribute, 115–119
buffering needs and @preload attribute, 18–20
burnt-in captions, 251
burnt-in sign translations, 252
burnt-in technologies, 255
Byte Range requests (HTTP), 36
■ C
canPlayType() control method, 126–127
Canvas
animations through user interaction,
198–200
bringing into SVG image, 165
compositing
clipping regions, 188–190
gradient transparency masks, 185–188
drawing text, 190–192
function categories supported by, 165–166
getImageData() function, 207
performance of, 165
putImageData() function, 207
styling
ambient CSS color frames, 181–183
createPattern() function, 183–185
pixel transparency to replace
backgrounds, 176–177
scaling pixel slices for 3D effect, 178–179
transformations
reflections effect, 192–195
spiraling effect, 195–196
video element
createImageData() function, 173–175
drawImage() function, 166–169, 175–176
drawImage() function, extended version
of, 169–171
getImageData() function, 171–173
putImageData() function, 171–173
Download from www.eBookTM.Com
http://freepdf-books.com
■ INDEX
307
captions
for hard-of-hearing users, 250–251
tracks marked as, 268
in WebSRT, 261–263
cascading style sheets. See CSS
chapter markers for navigation, 277
chapter tracks in WebSRT, 264–265
chapters, tracks marked as, 268–269
Chrome user interface
context menus, 46
visible controls, 43
clear audio, 253
click event, attaching on <canvas> element,
198–200
clickPos() function, 199
clip-path effects in SVG, 148–149
clipping regions from Canvas for display,
188–190
codec data, 2
codecs
audio, 3, 20
baseline, 2, 3–5
Dirac, 4
Kate overlay, 270
video, 3, 5, 7
color matrix filter, 151
component transfer filter, 151
compositing
clipping regions, 188–190
gradient transparency masks, 185–188
ConnectionPeer API, 295–296
content attributes, 82–83
content, interacting with, 249–250
context menus of browsers, 45–47
continuous playback, 234–236
control methods
canPlayType(), 126–127
load(), 122–123
pause(), 124–126
play(), 124–125
controls
of browsers, 47–48
custom (JavaScript), 130–134
play/pause toggle, styling in SVG, 143–144
@controls attribute
of <audio> element, 22
of <video> element, 17–18
convolution matrix filter, 151
createImageData() function, 173–175
createPattern() function, 183–185
CSS (cascading style sheets)
ambient color frames, 181–183
animations, 76–78
basic properties
linear-gradient and radial-gradient,
64–65
marquee, 66–67
opacity, 63–64
overview of, 62–63
box model for visual elements
absolute positioning mode, 59–60
block box type, 55
float positioning mode, 58–59
inline box type, 52–54
none box type, 54–55
overview of, 50–52
positioning modes, 52
relative positioning mode, 55–58
scaling and alignment within box, 60–62
browser support for, 79
overview of, 49
transforms
2D, 70–71
3D, 71–74
description of, 68
transitions, 68–70
video gallery, creating, 74
cue settings in WebSRT, 264
@currentSrc IDL attribute, 85–86
@currentTime IDL attribute, 97–100
■ D
DASH (Dynamic Adaptive Streaming for HTTP)
specification, 39
@data IDL attribute, 284
deactivating described video, 249
deaf-blind users, alternative content
technologies for, 253
http://freepdf-books.com
■ INDEX
308
debugging Web Workers, 213
@defaultPlaybackRate IDL attribute, 104–107
Described Video, 248–249
<device> element, 283–284
devices. See external devices
Dirac codec, 4
displacement map filter, 151
display
of audio resources on web pages, 22
of audio spectrum, 231
of audio waveform, 228
of audio waveform with history, 229
jof formatted text in captions, 251
of latency between playback of original
audio element and scripted audio, 234
Document Object Model (DOM), 81
DOM attributes. See IDL attributes
download behavior
controlling, 18–20
HTTP progressive download, 36–38
drawFrame() function, 216
drawImage() function, 166–169, 175–176
drawImage() function, extended version of,
169–171
drawing text, 190–192
dubbing, 254
@duration IDL attribute, 89–92
Dynamic Adaptive Streaming for HTTP (DASH)
specification, 39
■ E
echo service, WebSocket example of, 288–289
edge detection, 161–162
effects in SVG
clip-paths, 148–149
filters, 149–154
overview of, 147
empty element, <source> element as, 24
encapsulation formats, 3
encoding media resources
MP3 audio, 35
MPEG-4 H.264 video, 30–32
Ogg Theora video, 32–33
Ogg Vorbis audio, 35
WebM video, 34–35
@ended IDL attribute, 103–104
enhanced captions, 251
Ericsson implementation
of <device> element in Webkit, 284
of self-view video, 285
of video chat web application, 293–295
@error IDL attribute, 113–115
event listeners, methods for setting up, 85
events (JavaScript), 127–130
extended audio and text descriptions, 248
extending HTTP streaming, 38–40
external audio or text descriptions, 249
external captions, 251
external devices
architectural scenarios for use of, 283
ConnectionPeer API, 295–296
<device> element, 283–284
Stream API
displaying captured video from device in
<video> element, 285–286
recording, 286–287
WebSocket API
message exchange, 289–291
overview of, 288–289
shared video control, 291–293
video conferencing, 293–295
external sign translations, 253
extracting audio samples, 224–226
extracting rectangular subregion of video pixels
and painting onto canvas, 169–171
■ F
face detection with Web Workers, 217–222
fading opacity of objects, 185
fallback content, 11–12
false positives on face detection, 218, 222
FFmpeg
to convert multimedia files between
formats, 30–31
to encode audio
to MP3, 35
to Ogg Vorbis, 35
ffmpeg2theora encoder, 32–33
http://freepdf-books.com
■ INDEX
309
filter effects in SVG, 149–154
filter graph audio API
advanced filters, 240–241
basic reading and writing, 239–240
resources, 245
reverberation effect, creating, 241–242
waveform display, 243–245
filter graphs, 223
Firefox
See also Mozilla, audio data API
manipulating inline SVG with JavaScript in,
140
SVG masks used by with
“objectBoundingBox”, 139
user interface
context menus, 45–46
visible controls, 41
Flash (Adobe)
purchase of, 2
SVG and, 135
Flash (Macromedia), introduction of, 2
float positioning mode, 58–59
FLV format, 2
<foreignObject> feature of SVG, 137
foreign users, alternative content technologies
for, 254
formats
See also Ogg Theora video format; Ogg
Vorbis audio format
converting multimedia files between, 30–31
encapsulation, 3
FLV, 2
GPAC TTXT, 272
MP4, 2
qttext, 271
3GPP Timed Text, 271–273
formatted text displayed in captions, 251
fortune cookie video with user interactivity,
198–199
framebuffer, 226–227
■ G
generating audio data
bleeping out section with sine wave,
236–237
continuous playback, 234–236
single-frequency sound, creating, 232–233
sound from another audio source, creating,
233–234
tone generator, 237–239
getByteTimeDomainData() method, 244
getImageData() function, 171–173, 207
“globalCompositeOperation” property of
Canvas, 185–187, 191
Google
Chrome user interface
context menus, 46–47
visible controls, 43
Videos and Flash, 2
WebM project, 5–7
GPAC TTXT format, 272
gradient transparency masks, 185–188
gradients on SVG masks, 145–146
grammatical markup
for users with learning disabilities, 254
in WebSRT, 266–267
gray-scaling, 209–210
■ H
H.264 standard, 4–5
hard-of-hearing users, alternative content
technologies for
captions, 250–251
sign translation, 252–253
transcripts, 251–252
HAVE_CURRENT_DATA state, 110
HAVE_ENOUGH_DATA state, 111
HAVE_FUTURE_DATA state, 110
HAVE_METADATA state, 110
HAVE_NOTHING state, 110
@height attribute of <video> element, 15–17
Hickson, Ian, 4
hierarchical navigation, 265
HTML Canvas. See Canvas
HTML markup and <track> element, 267–269
HTML specifications, checking, 9
HTMLMediaElement API (Mozilla), 299
HTML+Time, 1
HTTP progressive download, 36–38
http://freepdf-books.com
■ INDEX
310
hyperlinks
for hard-of-hearing users, 251
in media resources, 280
for vision-impaired users, 250
■ I
identification of skin color regions with Web
Workers, 217–222
IDL attributes
@buffered, 115–119
@currentSrc, 85–86
@currentTime, 97–100
@defaultPlaybackRate, 104–107
@duration, 89–92
@ended, 103–104
@error, 113–115
@muted, 93–95
@networkState, 107–110
@paused, 101–103
@playbackRate, 104–107
@played, 118–120
@readyState, 110–113
@seekable, 120–122
@seeking, 100–101
@startTime, 88–89
@videoHeight, 95–96
@videoWidth, 95–96
@volume, 92–93
from content attributes, 82
general features of media resources, 84
overview of, 83–84
playback-related features of media
resources, 97
states of media elements, 107
IE (Internet Explorer)
user interface
context menus, 47
visible controls, 44
Web Workers and, 204
image overlays for hard-of-hearing users, 251
image segmentation with Web Workers,
212–217
in-band audio or text descriptions, 249
in-band captions, 251
in-band sign translations, 253
in-band time-synchronized text tracks
MPEG container, 271–273
Ogg container, 270
overview of, 269–270
WebM container, 271
@initialTime attribute, 89
inline box type, 52–54
inline SVG
description of, 136
manipulating with JavaScript in Firefox, 140
with video element in XHTML, 157
with video element in XHTML and circular
mask, 158
interacting with content, 249–250
interactive transcripts
for hard-of-hearing users, 252
implementing, 256–258
internationalization, 247, 254
Internet Explorer. See IE
■ J
JavaScript
content attributes, 83
control methods defined on media
elements
canPlayType(), 126–127
load(), 122–123
pause(), 124–126
play(), 124–125
custom controls, 130–134
DOM and, 81
event listeners, methods for setting up, 85
events, 127–130
manipulating inline SVG with, in Firefox,
140
operations on video data, moving to Worker
thread and feeding back to main web
page, 204–208
overview of, 81–82
JavaScript API for time-synchronized text
MutableTimedTrack interface, 273–274
TimedTrack interface, 274–275
TimedTrackCue interface, 275
JaveScriptNode filter, 245
http://freepdf-books.com
■ INDEX
311
■ K
Karaoke-style subtitles in WebSRT, 265–266
Kate overlay codec, 270
keyboard navigation, 278
keyframes, 76
@kind attribute of <track> element, 268
■ L
learning disabilities, users with, 254
letter-boxing video, 17
libvpx encoding library, 34
ligtheora encoding library, 32
linear-gradient property (CSS), 64–65
listings
adapting bitrate for audio and video
for FFmpeg, 34
ffmpeg2theora, 33
ambient color frames, calculation of
average color in and display of,
181–182
animated circle in SVG, 154
Apple HTTP live streaming
encoding multiple versions of resource
for with, 39
HTML5 video element with, 39
m3u8 files for, 40
bleeping out section of audio with sine
wave, 236
blur filter, SVG-defined, applied to video,
150
buffered ranges for media element, getting,
115–119
clipped path, using to filter out regions of
video for display, 188–189
composite SVG filter definitions, 152–153
controls, running in SVG, 143
currentSrc value for media element, getting,
85
currentTime value for media element,
getting and setting, 97–98
defaultPlaybackRate and playbackRate
values for media element, getting, 105
device selector, creating for video stream,
284
displaying captured video from device in
<video> element, 285
document
with absolutely positioned video
elements, 59
with floating video element, 58
with gradient on video element, 64–65
with MPEG-4 video, 12
with object-scaled video, 61
with relative positioned video element,
56
with rotated video element, 70–73
with styled video element, 50–51
with video element that transitions on
mouse-over, 68–69
with video inside surrounding inline
content, 52
with video marquee, 66–67
duration value for media element, getting,
90
embedding
audio resources in HTML5, 21
audio with @type attribute, 25
audio with multiple resources, 23
MPEG-4 video with fallback content, 11
video with @type attribute, 24
video with multiple resources, 23
encoding
audio to MP3 using FFmpeg, 35
audio to Ogg Vorbis using FFmpeg, 35
audio to Ogg Vorbis using oggenc, 35
two-pass, for Ogg Theora, 33
two-pass, using normal profile, 32
typical, using normal profile, 31
video resource to MPEG-4 H.264 format
using presets, 31
video resources to Ogg Theora/Vorbis
format, 32
video resources to WebM format, 34
ended value for media element, getting, 103
error values for media element, getting, 114
external SVG resource, styling video using,
141–142
extracted data, creating audio element with,
233
face detection
main web page code, 218–219
Web Worker code, 219–221
http://freepdf-books.com
■ INDEX
312
fortune cookie video with user interactivity,
198–199
function to gain x and y coordinates of click
in canvas, 199
gradient transparency mask, introducing
into ambient video, 186–187
gray-scaling of video pixels, 209
“Hello World” in HTML5, 10
hidden video element, style for, 54
IDL attributes
of audio and video, 83–84
from content attributes, 82
inline SVG, manipulating with JavaScript in
Firefox, 140
inline SVG with video element
in XHTML, 157
in XHTML and circular mask, 158
inline video element, style for, 55
interactive transcript, providing for video
element, 256
JavaScript
to create TimedTrack and cues in script,
274
dealing with time offsets on page hash,
280
Kate file format used for Ogg time-
synchronized text encapsulation, 270
latency between playback on original audio
element and scripted audio,
displaying, 234
media content attribute, getting and setting
in JavaScript, 83
motion animation used as mask, 156
motion detection of video pixels, 210–211
MP3 audio
with @controls attribute, 22
with preload set to “auto”, 23
MPEG-4 video
with @preload of “metadata”, 19
with @width and @height with incorrect
aspect ratio, 16
muted value for media element, getting and
setting, 94
networkState values for media element,
getting, 108
Ogg video
with @autoplay, 13
with @controls attribute, 17
with @poster, 14
with @preload of “none”, 19
Ogg Vorbis audio
with @loop attribute, 21
with preload set to “metadata”, 23
opacity example using video, 63
painting video frames at different offsets
into canvas, 167–169
patterns, filling canvas region with, 183–184
paused value for media element, getting,
101–102
pixel transparency through canvas, 176
plain transcript, providing for video
element, 255
play() and pause() control methods, using,
124–125
played ranges for media element, getting,
118
playing back all samples from input source,
235
qttxt format used for QuickTime text tracks,
271
reading
audio metadata for audio framebuffer,
226
event time for audio framebuffer, 227
reading and writing sound using
AudioContext, 239
reading audio samples
from audio element, 224
from video element, 225–226
readyState values for media element,
getting, 111
recording media from device, 286
reflection effect using canvas, 192–193
rendering
video in 2D canvas with 3D effect,
178–179
waveform data from AudioContext filter,
243–244
rendering audio samples
in spectrum, 230–231
in waveform, 227–228
http://freepdf-books.com
■ INDEX
313
in waveform with history, 229
reverberation effect, creating, 241–242
seekable ranges for media element, getting,
120
seeking value for media element, getting,
100
segmentation of video pixels
playFrame() function, 213–215
postFrame() and drawFrame()
functions, 216–217
sepia coloring of video pixels
JavaScript Web Worker, 207
painting into Canvas, 204–205
using Web Workers, 206–207
sine wave, creating audio element with, 232
spiraling effect, 195
startTime value for media element, getting,
88
SVG clip-path, 148
SVG edge detection, 161–162
SVG filter definitions, 151
SVG mask
with gradient, 145
with pattern, 146
used by Firefox with
“objectBoundingBox”, 139
SVG resources
example, 138
styling video using, 137
SVG video reflection, 160–161
testing
what audio MIME types browser
supports, 26–27
what video MIME types browser
supports, 25
TeXML format used for 3GPP text tracks,
271–272
text filled with video, 190–191
tiling video into canvas
naïve implementation of, 169
reimplementation of with
createImageData, 173–174
reimplementation of with
getImageData, 171
reimplementation of with two canvases,
175–176
tone generator, Web-based, 237–238
<track> markup
with multiple external WebSRT tracks,
269
with text description WebSRT file, 267
TTXT format used for 3GPP text tracks,
272–273
video conferencing web page, 294
video cube, extending with animations,
77–78
video gallery, creating with CSS, 74–76
video pixel data, introducing into canvas,
166
video player, creating
CSS for markup skeleton, 131–132
JavaScript for markup skeleton, 132–134
markup skeleton, 130
videoWidth and videoHeight values for video
element, getting, 95
volume value for media element, getting
and setting, 92–93
WAV audio
with @autoplay attribute, 21
with preload set to “none”, 22
web server directory structure for video and
audio publishing, 37
WebM video
with @autoplay and @loop, 13
with @preload of “auto”, 19
with @width and @height, 15
WebSocket example using websocket.org
echo service, 288
WebSocket server
client for, 290–291
client for that allows shared video
viewing, 291–293
written in JavaScript for node.js, 289
WebSRT file
for chapter markers, 277
with captions, 261
with chapter markup, 264–265
with enhanced captions, 262
with extended text description, 260
with grammatically marked-up subtitles,
266–267
http://freepdf-books.com
■ INDEX
314
with Japanese subtitles and rendering
instructions, 263
with Karaoke-style subtitles, 265–266
with Russian subtitles, 263
with text description, 259–260
<track> markup with, 267
load() control method, 122–123
loadedmetadata event, 85–86
locating objects and boundaries in images, 212
@loop attribute
of <audio> element, 21–22
of <video> element, 13–14
luminance and gray-scaling, 209
■ M
Macromedia Flash, introduction of, 2
marquee property (CSS), 66–67
masking with SVG
description of, 136
inline SVG with video element in XHTML
and circular mask, 158–160
masks
motion animations used as, 156
styling video using external SVG resources
as, 141–142
SVG gradients on, 145–146
using shapes as, to overlay onto video,
137–141
Media Annotations Working Group (W3C), 297
@media attribute of <source> element, 28–29
media elements
attributes of, 29–30
buffered ranges for, 115–119
control methods defined on
canPlayType(), 126–127
load(), 122–123
pause(), 124–126
play(), 124–125
currentSrc value for, 85
default user interfaces for
context menus, 45–47
controls in web browsers, 47–48
overview of, 41
visible controls, 41–44
defaultPlaybackRate and playbackRate
values, 105
duration value for, 90
ended value for, 103
error value for, 114
history of introduction of, 1–2
introduction of, 1
muted value for, 94
networkState value for, 108
paused value for, 101–102
played ranges for, 118
readyState value for, 111
resource locations of, 85
seekable ranges for, 120
seeking value for, 100
standardization of, 2–7
startTime value for, 88
volume value for, 92–93
media fragment URIs, 278–280
Media Fragment Working Group (W3C), 278
media queries, associating with resources, 28
media resources, encoding
MP3 audio, 35
MPEG-4 H.264 video, 30–32
Ogg Theora video, 32–33
Ogg Vorbis audio, 35
WebM video, 34–35
MediaError object, 113–114
message exchange with WebSocket API,
289–291
metadata, tracks marked as, 268–269
metadata API, 297–298
Metavid Web site, 252
methods. See control methods
MIME types and media resources, 24–27
mixed-in audio descriptions, 249
mixed-in captions, 251
mixed-in sign translations, 252
motion detection with Web Workers
gray-scaling, 209–210
implementation of, 210–212
overview of, 208
mouse events, and masked areas, 139
MozAudioAvailable event, 224
http://freepdf-books.com
■ INDEX
315
mozCurrentSampleOffset() method, 234
Mozilla
audio data API
bleeping out section with sine wave,
236–237
continuous playback, 234–236
extracting audio samples, 224–226
framebuffer, 226–227
generating data, 232
overview of, 223–224
rendering spectrum, 230–232
rendering waveform, 227–230
resources, 231
single-frequency sound, creating,
232–233
sound from another audio source,
creating, 233–234
tone generator, 237–239
HTMLMediaElement API, 299
mozSetup() method, 232–233
mozWriteAudio() method
creating sound from another audio source,
233–234
return value on, 234
MP3 audio
with @controls attribute, 22
embedding in HTML5, 21
encoding, 35
with preload set to “auto”, 23
MP4 format, 2
MP4 H.264/AAC support, 5–7
MPEG container and 3GPP Timed Text format,
271–273
MPEG-4 AAC (Advanced Audio Coding), 3
MPEG-4 H.264 video, encoding, 30–32
MPEG-4 video
document with, 12
embedding
in HTML5, 10
with fallback content, 11
with @preload of “metadata”, 19
with @width and @height with incorrect
aspect ratio, 16
MutableTimedTrack interface (JavaScript API),
273–274
@muted IDL attribute, 93–95
■ N
named media fragment URIs, 279
navigation
accessibility and, 255
between alternative content tracks for
vision-impaired users, 250
chapter markers for, 277
hierarchical, 265
into content for vision-impaired users, 250
keyboard navigation, 278
media fragment URIs, 278–280
out of content for vision-impaired users,
250
overview of, 276
URLs in cues, 280–281
@networkState IDL attribute, 107–110
node types and AudioContext, 240
node.js web server, 289
none box type, 54–55
normal positioning mode, turning on, 52
■ O
object-fit property, 61
object-position property, 61
Ogg container, 270
Ogg Theora video format
description of, 3–6
encoding, 32–33
Ogg video
embedding in HTML5, 10
with @autoplay, 13
with @controls attribute, 17
with @poster, 14
with @preload of “none”, 19
Ogg Vorbis audio format
description of, 4
embedding in HTML5, 21
encoding, 35
with @loop attribute, 21
with preload set to “metadata”, 23
oggenc to encode audio to Ogg Vorbis, 35
opacity property (CSS), 63–64
http://freepdf-books.com
■ INDEX
316
open audio descriptions, 249
open captions, 251
open sign translations, 252
Opera
experimental build of, 3
user interface
context menus, 46
visible controls, 43–44
<video> element and, 2
Web Workers and, 208
outlines, creating with SVG, 137–141
■ P
pages, reloading, 86
page text technologies, 255, See also transcripts
paintFrame() function, 173, 178–179
painting
sepia colored video replica into Canvas,
204–205
video frames at different offsets into canvas,
167–169
parallel playback, 36
patterns on SVG masks, 146–147
pause() control method, 124–126
@paused IDL attribute, 101–103
perceiving video content, 248–249
performance of browsers
on Web Workers motion detection, 212
on Web Workers region segmentation, 217
on Web Workers sepia example, 208
pillar-boxing video, 17
pixel slices, scaling for 3D effect, 178–179
pixel transparency to replace backgrounds,
176–177
plain transcripts
for hard-of-hearing users, 252
implementing, 255–256
playback
continuous, 234–236
parallel, 36
playback-related features of media
resources, 97
restarting
audio after finishing, 21–22
video after finishing, 13
@playbackRate IDL attribute, 104–107
play() control method, 124–125
@played IDL attribute, 118–120
play/pause toggle, styling in SVG, 143–144
playFrame() function for image segmentation,
213–215
Popcorn.js semantic video demo, 298
@poster attribute of <video> element, 14–15
postFrame() function, 216
@preload attribute
of <audio> element, 22–23
of <video> element, 18–20
progress event, 86
progressive download
description of, 18
publishing media files to web pages, 36–38
properties, CSS
linear-gradient and radial-gradient, 64–65
marquee, 66–67
opacity, 63–64
overview of, 62–63
pseudo-classes, 49
pseudo-elements, 49
publishing
media files to web pages
extending HTTP streaming, 38–40
streaming using RTP/RTSP, 37–38
web servers and HTTP progressive
download, 36–37
sites, introduction of video support into, 6
putImageData() function, 171–207
■ Q
qttext format, 271
quality of service API, 298–299
QuickTime text tracks, 271
■ R
radial-gradient property (CSS), 64–65
reading
audio data
extracting samples, 224–226
framebuffer, 226–227
rendering spectrum, 230–232
Download from www.eBookTM.Com
http://freepdf-books.com
■ INDEX
317
rendering waveform, 227–230
with filter graph API, 239–240
@readyState IDL attribute, 110–113
Real-Time Protocol/User Datagram Protocol
(RTP/UDP), 38
Real-Time Streaming Protocol, 37–38
RealtimeAnalyzerNode filter, 243–245
recording media from devices, 286–287
reflections, 63, 160–161
reflections effect, 192–195
region segmentation with Web Workers,
212–217
relative positioning mode, 55–58
reloading pages, 86
rendering
audio spectrum, 230–232
audio waveform, 227–230
waveform data from AudioContext filter,
243–244
rendering instructions in WebSRT, 264
repeat() function, 196
replicating images into regions, 183–185
resource locations of media elements, 85
restarting
audio after finishing playback, 21–22
video after finishing playback, 13
restore() function, 193
reverberation effect, creating, 241–242
rotate() function, 195–196
RTP/RTSP, streaming using, 37–38
■ S
Safari user interface
context menus, 46
visible controls, 42
sample buffer, feeding, 234–235
save() function, 193
Scalable Vector Graphics. See SVG
scaling
pixel slices for 3D effect, 178–179
video, 15–17, 60–62
scene text translations, 254
scratch canvas, and tiling video, 175–176
search technology, and audio or video content,
247
@seekable IDL attribute, 120–122
@seeking IDL attribute, 100–101
selectors (CSS), 49
self-view video, 285–286
sepia coloring of video pixels
JavaScript Web Worker, 207
painting into Canvas, 204–205
using Web Workers, 206–207
servers. See web servers; WebSocket server
setInterval() function, 198
setTimeout() function, 167, 198
shapes, creating with SVG, 137–141
shared video control with WebSocket API,
291–293
sign translations for hard-of-hearing users,
252–253
sine waves
bleeping out section of audio with, 236–237
creating audio element with, 232–233
single-frequency sound, creating, 232–233
skin color regions, identification of with Web
Workers, 217–222
SMIL (Synchronized Multimedia Integration
Language), 1
sniffing, 27
sound data. See audio API
<source> element
@media attribute, 28–29
@src attribute, 23–24
@type attribute, 24–27
spatial media fragment URIs, 279
specifications, checking, 9
spectrum, rendering audio samples in, 230–232
spiraling effect, 195–196
@src attribute
of <audio> element, 21
of <source> element, 23–24
of <video> element, 12
SRT files, WebSRT compared to, 260
@startOffsetTime attribute, 89
@startTime IDL attribute, 88–89
Stream API
displaying captured video from device in
<video> element, 285–286
recording, 286–287
http://freepdf-books.com
■ INDEX
318
streaming
HTTP, extending, 38–40
RTP/RTSP, using, 37–38
styling
See also CSS
in Canvas
ambient CSS color frames, 181–183
createPattern() function, 183–185
pixel transparency to replace
backgrounds, 176–177
scaling pixel slices for 3D effect, 178–179
in SVG
gradients, 145–146
<mask> element, 139
patterns, 146–147
play/pause toggle, 143–144
subtitles
for foreign users, 254
grammatically marked-up, in WebSRT,
266–267
Karaoke-style, in WebSRT, 265–266
tracks marked as, 268
in WebSRT, 263–264
SVG (Scalable Vector Graphics)
animations
<animate> element, 154–155
<animateColor> element, 155
<animateMotion> element, 155–156
<animateTransform> element, 155
basic shapes and outlines, creating, 137–141
edge detection, 161–162
effects
clip-paths, 148–149
filters, 149–154
overview of, 147
environment of, compared to Canvas, 165
examples using, 137
features of, 135–136
<foreignObject> feature of, 137
inline graphics, 136
masking video, 136, 158–160
overview of, 135
performance of, compared to Canvas, 165
reflection, 160–161
styling
gradients, 145–146
<mask> element, 139
patterns, 146–147
play/pause toggle, 143–144
text elements, 141–143
using video element inside SVG resources,
156–158
synchronized media technologies
challenges of, 275–276
description of, 255
Synchronized Multimedia Integration
Language (SMIL), 1
synchronized text technologies
description of, 255, 258
HTML markup and <track> element,
267–269
in-band use
MPEG container, 271–273
Ogg container, 270
overview of, 269–270
WebM container, 271
JavaScript API
MutableTimedTrack interface, 273–274
TimedTrack interface, 274–275
TimedTrackCue interface, 275
WebSRT
captions, 261–263
chapter tracks, 264–265
grammatical markup, 266–267
Karaoke-style subtitles, 265–266
subtitles, 263–264
text description, 259–261
■ T
technologies. See alternative content
technologies; synchronized media
technologies; synchronized text
technologies
temporal media fragment URIs, 279
text description
tracks marked as, 268
in WebSRT, 259–261
text elements (SVG), 141–143
text, drawing, 190–192
http://freepdf-books.com
■ INDEX
319
3D transforms, 71–74
3GPP Timed Text format, 271–273
tiling video into canvas
naïve implementation of, 169
reimplementation of
with createImageData, 173–176
with getImageData, 171
with two canvases, 175–176
TimedTrack interface (JavaScript API), 274–275
TimedTrackCue interface (JavaScript API), 275
TimeRanges object, 115, 120
time-synchronized text
in-band
MPEG container, 271–273
Ogg container, 270
overview of, 269–270
WebM container, 271
JavaScript API for
MutableTimedTrack interface, 273–274
TimedTrack interface, 274–275
TimedTrackCue interface, 275
timeupdate event, 92–93, 167
toDataURL() function, 165
tone generator, 237–239
<track> element, 267–269
track fragment URIs, 279
traditional captions, 251
transcoding, 30
transcripts
for deaf-blind users, 253
for hard-of-hearing users, 251–252
interactive, implementing, 256–258
plain, implementing, 255–256
transformations
reflections effect, 192–195
spiraling effect, 195–196
transforms, CSS
2D, 70–71
3D, 71–74
description of, 68
transitions, CSS, 68–70
translate() function, 195–196
translations for foreign users, 254
2D transforms, 70–71
two-pass encoding, 31
@type attribute
of <device> element, 284
of <source> element, 24–27
■ U
URLs in cues, 280–281
usability. See accessibility
user interaction
animations through, 198–200
tone generator settings, changing, 237–239
user interfaces for media elements
context menus, 45–47
controls in web browsers, 47–48
visible controls, 41–44
user preference settings, 249
■ V
video codecs, 3
video conferencing with WebSocket API,
293–295
video devices. See external devices
video element
@autoplay attribute, 13
@controls attribute, 17–18
@height attribute, 15–17
@loop attribute, 13–14
@poster attribute, 14–15
@preload attribute, 18–20
@src attribute, 12
@width attribute, 15–17
createImageData() function, 173–175
drawImage() function, 166–169, 175–176
drawImage() function, extended version of,
169–171
fallback content, 11–12
floating, document with, 58
getImageData() function, 171–173
gradient on, 64–65
hidden, style for, 54
inline, style for, 55
interactive transcript for, 256
in legacy browser, 11
Opera and, 2
http://freepdf-books.com
■ INDEX
320
plain transcript for, 255
putImageData() function, 171–173
relative positioned, 56
rotated, 70–73
standardization of, 2–7
styled, 50–51
support for, 9–10
that transitions on mouse-over, 68–69
videoWidth and videoHeight values for, 95
video gallery, creating, 74
@videoHeight IDL attribute, 95–96
video pixels
data from, introducing into canvas, 166
segmentation of
playFrame() function, 213–215
postFrame() and drawFrame()
functions, 216–217
sepia coloring of
painting into Canvas, 204–205
using Web Workers, 206–207
video player, custom, building, 130–134
video support, introduction of into main
browsers and video publishing sites, 6
@videoWidth IDL attribute, 95–96
viewport, 15
vision-impaired users, alternative content
technologies for
deaf-blind users, 253
interacting with content, 249–250
perceiving video content, 248–249
visual elements
absolute positioning mode, 59–60
box model for
block box type, 55
inline box type, 52–54
none box type, 54–55
overview of, 50–52
positioning modes, 52
float positioning mode, 58–59
relative positioning mode, 55–58
scaling and alignment within box, 60–62
@volume IDL attribute, 92–93
Vorbis audio format
description of, 4
embedding in HTML5, 21
encoding, 35
with @loop attribute, 21
with preload set to “metadata”, 23
VP8 video codec
description of, 5
support by Adobe, 7
Texas Instruments and, 5
■ W
W3C (World Wide Web Consortium)
Audio Incubator Group, 223, 239
description of, 3
Media Annotations Working Group, 297
Media Fragment Working Group, 278
WAV audio
with @autoplay attribute, 21
embedding in HTML5, 21
with preload set to “none”, 22
waveform
display of, 243–245
rendering audio samples in, 227–230
web browsers. See browsers; specific browsers
Web interface definition language (WebIDL),
purposes of, 81
web pages, reloading, 86
web servers
node.js, 289
publishing media files to web pages, 36–37
Web Subtitle Resource Tracks. See WebSRT
Web Workers
face detection, 217–222
functions and events, 203
IE and, 204
motion detection with
gray-scaling, 209–210
implementation of, 210–212
overview of, 208
moving operations on video data to thread
and feeding back to main web pages,
204–208
overview of, 203
region segmentation, 212–217
Web-audio API. See filter graph audio API
WebIDL (Web interface definition language),
purposes of, 81
http://freepdf-books.com
■ INDEX
321
WebM container, 271
WebM project (Google), 5–7
WebM video
with @autoplay and @loop, 13
embedding in HTML5, 10
encoding, 34–35
with @preload of “auto”, 19
with @width and @height, 15
WebSocket API
message exchange, 289–291
overview of, 288–289
shared video control, 291–293
video conferencing, 293–295
WebSRT (Web Subtitle Resource Tracks)
captions, 261–263
chapter tracks, 264–265
grammatical markup, 266–267
Karaoke-style subtitles, 265–266
rendering instructions, 264
subtitles, 263–264
text description, 259–261
WHATWG
adaptive HTTP streaming and, 299
ConnectionPeer API, 295–296
@width attribute of <video> element, 15–17
World Wide Web Consortium (W3C)
Audio Incubator Group, 223, 239
description of, 3
Media Annotations Working Group, 297
Media Fragment Working Group, 278
writing with filter graph API, 239–240
■ X
x264 encoding library, 30
XHTML
inline SVG with video element in, 157
inline SVG with video element in, and
circular mask, 158
■ Y, Z
YouTube and Flash, 2
http://freepdf-books.com
