The Way Of Web Er A Beginner Guide To Automating S
User Manual:
Open the PDF directly: View PDF ![]() .
.
Page Count: 243 [warning: Documents this large are best viewed by clicking the View PDF Link!]
- Cover
- Table of Contents
- Acknowledgements
- It’s Good to See You!
- Part I—Mapping the Pyramid
- Part II—Exploring the Pyramid
- Bibliography
- Index

Early praise for The Way of the Web Tester
The Way of the Web Tester is really The Way of the Conscientious Web Developer,
providing a comprehensive journey through automated behavior-testing for web
applications, from round-trip UI tests to fast-running unit tests. The examples
are never simplistic, and helpful characters, including Diane the Developer and
Tim the Tester, seem to know exactly what the reader is thinking. If you’re writing
web applications, you should have this book in your back pocket.
➤Dan North
Principal consultant, Dan North & Associates Ltd.
Everything in this book IS awesome! What I love most about The Way of the Web
Tester is that it’s a book for the whole team. Whether you’re a tester nervous about
coding skills, or a coder anxious about writing maintainable tests, this book will
encourage you to collaborate for success. The step-by-step visuals will guide you
through good coding and design practices and principles for robust, valuable au-
tomated tests. Most importantly, you’ll learn how to deliver great software by
writing tests first!
➤Lisa Crispin
Co-author with Janet Gregory of More Agile Testing: Learning Journeys for the
Whole Team,
www.agiletester.ca
This is a highly inspirational book on test automation: as a reader, you get a deep
understanding of what role test automation plays and the value it brings for the
tech industry. Whether you’re a tester, developer, or product owner, after finishing
there should no longer be any doubts: quality must be built in from the start.
➤Julia Oskö
Engineer, Spotify
This book has some great ideas and examples, and I will recommend it to teams
who are struggling with automation and how to start.
➤Janet Gregory
Agile coach, with focus on testing, DragonFire Inc.
Chapter 1 is probably the best overview of automated testing I have ever read.
➤PJ Hampton
PhD candidate and teaching assistant, Ulster University

The Way of the Web Tester
A Beginner’s Guide to Automating Tests
Jonathan Rasmusson
The Pragmatic Bookshelf
Raleigh, North Carolina

Many of the designations used by manufacturers and sellers to distinguish their products
are claimed as trademarks. Where those designations appear in this book, and The Pragmatic
Programmers, LLC was aware of a trademark claim, the designations have been printed in
initial capital letters or in all capitals. The Pragmatic Starter Kit, The Pragmatic Programmer,
Pragmatic Programming, Pragmatic Bookshelf, PragProg and the linking g device are trade-
marks of The Pragmatic Programmers, LLC.
Every precaution was taken in the preparation of this book. However, the publisher assumes
no responsibility for errors or omissions, or for damages that may result from the use of
information (including program listings) contained herein.
Our Pragmatic books, screencasts, and audio books can help you and your team create
better software and have more fun. Visit us at
https://pragprog.com
.
The yellow adhesive note graphic in Chapter 11 is designed by Layerace from Freepik.com.
The team that produced this book includes:
Susannah Davidson Pfalzer (editor)
Potomac Indexing, LLC (index)
Nicole Abramowitz (copyedit)
Gilson Graphics (layout)
Janet Furlow (producer)
For sales, volume licensing, and support, please contact
support@pragprog.com
.
For international rights, please contact
rights@pragprog.com
.
Copyright © 2016 The Pragmatic Programmers, LLC.
All rights reserved.
No part of this publication may be reproduced, stored in a retrieval system, or transmitted,
in any form, or by any means, electronic, mechanical, photocopying, recording, or otherwise,
without the prior consent of the publisher.
Printed in the United States of America.
ISBN-13: 978-1-68050-183-4
Encoded using the finest acid-free high-entropy binary digits.
Book version: P1.0—September 2016

Contents
Acknowledgements ...........ix
It’s Good to See You! ...........xi
Part I — Mapping the Pyramid
1. The Testing Pyramid ...........3
It Was Beautiful 3
The Wheels on the Bus 4
Three Hard Lessons Learned 5
Enter the Testing Pyramid 5
UI Tests 8
Integration Tests 8
Unit Tests 9
Rules of Thumb 9
Who’s Writing These Things 13
What We’ve Learned So Far 17
2. Smoking User Interface Tests ........19
Another Botched Release 20
Enter the User Interface Test 20
How They Work 26
HTML Is for Asserting 26
CSS Is for Selecting 27
What We’ve Learned So Far 30
3. Adding UI Tests to Legacy Systems .......31
Step 1: Confirm You’re on the Right Test Page 32
Step 2: Figure Out Your CSS Selectors 33
Step 3: Make Your Assertions 42
What We’ve Learned So Far 48
4. Connecting the Dots with Integration Tests .....51
There Is No UI 52
Enter the Integration Test 52
How the Web Works 54
Talking HTTP 56
Taking a REST 62
What We’ve Learned So Far 64
5. Integration Testing RESTful Web Services .....65
Testing the RESTful Permit API 66
HTTP GET 67
HTTP POST 70
HTTP PUT 73
HTTP DELETE 74
What We’ve Learned So Far 74
6. Covering Our Bases with Unit Tests .......77
Everything Is Awesome! 78
The Challenge with UI Tests 78
Enter the Unit Test 81
How They Work 83
Turning It Up 89
What We’ve Learned So Far 94
7. Unit Testing in the Browser with JavaScript .....97
Magic in the Browser 98
JavaScript and the Pyramid 102
Bug Hunt 104
Step 1: Scan the HTML 105
Step 2: Check the JavaScript 108
Step 3: Write the Tests 111
Static vs. Dynamic Typing 118
Open Mic 119
What We’ve Learned So Far 121
8. Climbing the Pyramid ..........123
The Pyramid in Action 123
Start with the Unit Tests 124
Step Up to the Integration Tests 125
Reach for the UI Tests 126
The Inverted Pyramid 127
Contents • vi
How to Deal with Flaky Tests 130
What We’ve Learned So Far 132
Part II — Exploring the Pyramid
9. Programming 101 ...........137
The Mechanics of Programming 138
The Importance of Style 141
Naming 141
Spacing 142
Dealing with Duplication 145
Playing the Game 148
Step 1: Fix the Spacing 150
Step 2: Choose Good Names 150
Step 3: Tackle Duplication in the Class 151
Step 4: Remove Duplication in the Test 155
What We’ve Learned So Far 158
10. Organizing Tests: Bringing Method to the Madness . . . 161
The Land of Confusion 162
The Beauty of Isolation 163
The Clarity of Context 168
Intruder Alert 174
What We’ve Learned So Far 176
11. Effective Mocking ...........177
Listen to the Music 178
Enter the Mock 179
Step 1: Prepare the Mock 180
Step 2: Set Expectations 182
The Shackles of Coupling 185
The Swamp of Mocking 187
Ports and Adapters 189
Open Mic 193
What We’ve Learned So Far 196
12. Writing Tests First ...........197
Where to Begin 198
What Is Test-Driven Development (TDD)? 200
Step 1: Write a Failing Test 201
Step 2: Make the Test Pass 201
Contents • vii
Step 3: Refactor 201
Advantages of Working This Way 202
Seeing It in Action 203
Cycle, Rinse, Repeat 209
Open Mic 218
What We’ve Learned So Far 221
Final Words 221
A1. CSS Cheat Sheet ...........223
A2. Google Chrome Developer Tools .......225
Bibliography ............229
Index ..............231
Contents • viii

Acknowledgements
This book would not have been possible were it not for the love of my life,
Tannis, and our three wonderful children, Lucas, Rowan, and Brynn, who
supported and loved me every step of the way.
A book like this doesn’t happen without a wonderful editor and publisher.
Everything quality can be attributed to Susannah Pfalzer. Everything else is mine.
And of course this book wouldn’t be what it is without the incredible feedback
and insight generously given by its reviewers and commenters:
Matteo Vaccari, Julia Oskö, Dan North, Kristian Karl, Fredrik Stridsman,
Lisa Crispin, Michael Thelin, Bianca Mihai, Anders Ivarsson, Peter Hampton,
Nigel Lowry, Javier Collado, Jason Yip, Elijah Wright, Michael Holland, Nicolae
Ciocan, Loren Sands-Ramshaw, Rod Hilton, Gustav Hedberg, Colin Yates,
Janet Gregory, Aisling Canton, Nouran Mhmoud, Jan Nonnen, Derek Graham,
Kay Korper, Alexander Henry, Olivier Laguionie, Paul Waring, Rachel Rosalia,
and the wonderful people at Spotify.
Special thanks also to Nicole Abramowitz and Gilson Graphics for world-class
copy editing and typesetting.
Thank you, Mom and Dad, for your love and encouragement.
And thanks to Dave and Andy for creating a company that lets aspiring
authors create and share their work with the world.
report erratum • discuss

It’s Good to See You!
This is a book about how to write automated tests for the web. It’s a book for
anyone who has ever wanted to learn:
•How automated testing on the web works
•What the different kinds of automated tests are
•And, most importantly, how to get started writing them, even if you have
little or no programming background or experience
Be warned—this isn’t your typical deep dive tutorial book. We aren’t going to
spend hundreds of pages walking you through how to set up this kind of test
framework or that. The technology changes too quickly.
Instead, we are going to focus on the fundamentals. Those things that simply
don’t change. These you will be able to take with you and apply to any project
—regardless of which automated test framework or platform you choose to use.
And it is good to see you because automated testing is one of the greatest levers
we’ve got for scaling the most valuable asset any software project has—you.
You see, you’re kind of a big deal. We need more of you. We need more of your
critical thinking. We need more of your creativity. And we need more of your
time. And by learning how to write automated tests, that’s really what you
are giving yourself and the others on your team. More time.
If you are a traditional software tester who has little or no programming
experience, this is the perfect book for getting started. Together we are going
to start from the ground up and give you everything you need to create and
start writing your very own automated tests today.
If you are a developer, but haven’t thought a ton about how automated testing
works, this is your crash course on how to move fast without breaking stuff.
That means more time working on fun things, like adding new features, and
less time working on the boring stuff, like fixing old bugs.
report erratum • discuss

And if you are a team lead, this is your Rosetta Stone. This book will not only
help you bridge the gap between traditional testers and developers, it will give
you and your team the time, the language, and the framework to set your
automated tests up right, while avoiding much of the duplication and wasted
effort that usually comes to teams when they are just starting out.
How to Read This Book
If there are two chapters everyone on your team should read, they are Chapter
1, The Testing Pyramid, on page 3, and Chapter 8, Climbing the Pyramid, on
page 123. These will give a nice overview of how automated testing works, along
with the different kinds of tests and where and when to use each one.
For the rest of you, who actually want to know how this stuff works, the book
is broken into two parts.
In Part I we go over the basics of how automated testing on the web works.
In Chapter 1, The Testing Pyramid, on page 3, we introduce the concept of
the testing pyramid: a model all teams can use to coordinate their testing
efforts and ensure we are all on the same page.
In Chapter 2, Smoking User Interface Tests, on page 19, we introduce the
concept of the user interface (UI) test and see how this test helps us test our
systems just like a regular user would. And in Chapter 3, Adding UI Tests to
Legacy Systems, on page 31, we put the theory into practice and see what it
takes to add UI tests to an existing legacy system.
In Chapter 4, Connecting the Dots with Integration Tests, on page 51, we then
dive deeper into the world of the web and see how to test web services
directly. We then apply that knowledge in Chapter 5, Integration Testing
RESTful Web Services, on page 65, where we see how to test what is arguably
the most popular kind of web API out there today: RESTful web services.
In Chapter 6, Covering Our Bases with Unit Tests, on page 77, we see why
unit tests play such an important role in test automation today. And, specif-
ically, we explore how to unit test JavaScript in the browser in Chapter 7,
Unit Testing in the Browser with JavaScript, on page 97.
And in Chapter 8, Climbing the Pyramid, on page 123, we bring it all together
and see how the pyramid works in action, starting at the top and then working
our way down to the bottom, highlighting a few of the challenges you’re likely
to meet along the way.
It’s Good to See You! • xii
report erratum • discuss

In Part II we move beyond the basics and get into some of the more advanced
topics that come with the territory.
In Chapter 9, Programming 101, on page 137, we look at the techniques pro-
grammers use to write good code, and see how to adapt those strategies for
writing good tests.
In Chapter 9, Programming 101, on page 137, we look at the techniques testers
and developers can use to write better tests, and see what kind of strategies
help us write tests that are easier to maintain.
In Chapter 10, Organizing Tests:, on page 161, we take a look at all those tests
you’re going to write, and see how we can go about organizing them in a nice
and easy way.
In Chapter 11, Effective Mocking, on page 177, we look at some of the pitfalls
developers can fall into when relying heavily on mocks and how to avoid them.
And in Chapter 12, Writing Tests First, on page 197, we see what writing tests
first is like, and how it can help us deal with the complexity and design
challenges we face when writing our very first tests.
A Few Conventions
One of the trickier things about writing a book like this is choosing the com-
puter language to do the examples in. I picked Ruby, along with its sidekick
Ruby on Rails, and JavaScript for a couple of reasons.
Ruby was chosen because there is a lot to be learned from this community
about automated testing and web development in general. That, and Ruby is
a fairly easy language to understand and learn—even if you aren’t a programmer.
JavaScript is in here because so much of the web is powered by it today. We
have an entire chapter dedicated to how it can be used to test functionality
in the browser.
But this shouldn’t be viewed as an authoritative book on JavaScript or Ruby.
These are simply the tools we use today.
Much more important are the fundamentals. Things like HTML, CSS, and
HTTP. So we are going to spend more time on these, and less on any particular
tool or framework.
The goal here is for you to get so good at the fundamentals that the frameworks
and tools they are built upon won’t matter.
report erratum • discuss
A Few Conventions • xiii

Fun Bits with Purpose
You can’t take this stuff too seriously, and it helps if you can approach the
material with a sense of humor.
To that end, I’ve tried to lighten things up with pictures, stories, and anecdotes
to share with you along the way.
War stories are real-life, from-the-trenches experiences about some of the
successes and failures I and others have had while writing automated tests.
You’ll know it’s a war story when you see the archer.
The Now You Try exercises are there to snap you out of reading and get you
into thinking and doing. So keep a pen or pencil handy.
This means you get to think and write!
Then there are Tim and Diane—our traditional tester and developer. Tim and
Diane don’t have a lot of experience when it comes to automated testing. But
what they lack in experience, they more than make up for in enthusiasm and
questions.
Tim the Tester Diane the Developer
I’ve never automated
a test before in my life !
I am tired of
fixing old bugs !
It’s Good to See You! • xiv
report erratum • discuss

And when you see a thumb, get ready for a timely tip or piece of advice.
Write good automated tests so you will have
more time to do exploratory testing.
Online Resources
You can always reach me, or just send feedback on how the book could be
better, at the book’s web page,
pragprog.com/book/jrtest
. Here you can find source
code, ask questions, report bugs, and generally discuss all things book
related. Make sure you drop by and say hi.
Alright. Let’s begin.
report erratum • discuss
Online Resources • xv

Part I
Mapping the Pyramid
The testing pyramid is the model we use to describe
the various kinds of automated tests we typically see
on projects. In this part, we are going to look at three
kinds of automated tests and develop some rules of
thumb around where and when to use each one.
CHAPTER 1
The Testing Pyramid
Hmmmmm ....
What kind of test should we write ?
Integration
UI Unit
Before we can talk automated testing, we need to lay down some groundwork.
In this chapter, we set up the framework, model, and language we’re going
to use to discuss automated testing for the rest of the book. Something called
the testing pyramid.
Learning the pyramid will not only make you more knowledgeable in automat-
ed testing, it will give you a feel for how each kind of test works, along with
how they fit together and complement one another.
This will give you the vocabulary to talk automated testing along with the
insight to know where and how to use each kind of test.
It Was Beautiful
The year was 2001, and my team and I were feeling rather proud of ourselves.
We had just put the finishing touches on what we thought was the Rolls-
Royce of automated testing tools. We had built our very own, homegrown,
fully automated, UI testing framework. And it was amazing!
report erratum • discuss

This thing had everything. With the click of a button, you could fire up the
app, record a test, and then play it back while making assertions about things
you had seen along the way. It was easy to use. Running the tests made for
great demos (because you could actually see the application running). And
the best part of all, our build engineers had even found a way to include the
scripts as part of our continuous build and integration process—meaning we
would know instantly if something had broken.
It was a masterpiece of human ingenuity.
We loved it. Our testers loved it. Our customers loved it. And everything was
great. Until…
The Wheels on the Bus
It didn’t happen all once. It kind of snuck up on us slowly at first. But we
eventually began to notice that the more we used our automated testing
framework, the harder it got to add new features to the system.
At first it wasn’t immediately clear why. We had good automated test coverage.
We were continuously integrating our changes and regularly releasing the
software to clients. We saw no reasons why writing lots of automated UI tests
like this should slow us down. But when we dug a little deeper, we discovered
a few disturbing trends.
First off, developers had stopped writing a certain kind of automated test
called a unit test. These tests were fast, little code-based tests that we relied
on to tell us quickly if anything was ever broken in the software. By not
writing those, and instead replacing them with longer-running user interface
tests, our automated builds took longer to run. Which meant we didn’t know
till much later which changes broke which tests.
This in turn created another problem. Because the tests were now taking
longer to run, developers stopped running them. Many started ignoring them
altogether. We had deadlines after all, and builds that used to take ten minutes
were now taking upwards of three hours. No one had time to wait for a three-
hour build. So the build was perpetually broken. And even worse, people
started checking in new code on top of it.
Then one day it all came to a head. We missed a critical deadline. We were
stuck. There were tons of bugs in the software. We couldn’t easily add any
new functionality. And for the first time, we had to confront the uncomfortable
truth that our beloved test framework was the source of many of our problems.
Chapter 1. The Testing Pyramid • 4
report erratum • discuss

What happened? How had something that started out so good morphed into
something that ended up hurting so bad?
Hmmmmm ....
UI
Unit
Integration
Three Hard Lessons Learned
While it didn’t feel particularly good at the time, this project taught us some
valuable lessons about test automation:
1. Not all automated tests are created equal. Some tests are better at testing
certain things than others.
2. Just because you can write a certain kind of automated test doesn’t nec-
essarily mean you should.
3. Speed and feedback matter. The longer it takes your test cases to run,
the less iterative and fast your development cycle.
What we and others were learning from these experiences was that automated
testing wasn’t a one-size-fits-all thing. There were different kinds of tests,
and each tested different kinds of things.
Fortunately, others were feeling the same pain we were. And eventually, some
of these learnings started to form as pictures and models in people’s minds.
And one very useful one that slowly emerged was called the testing pyramid.
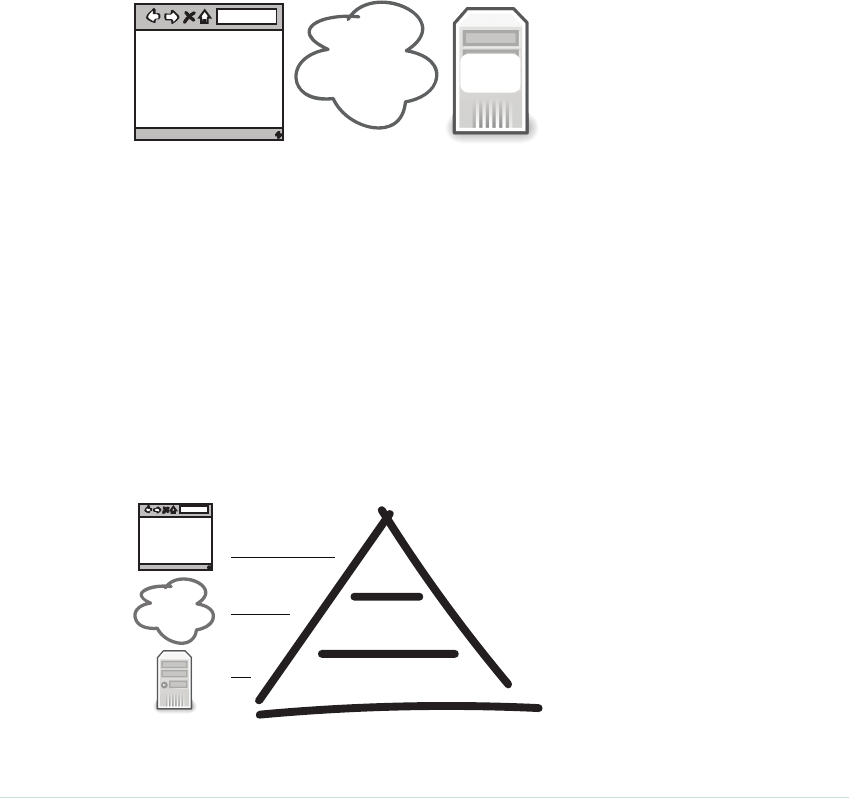
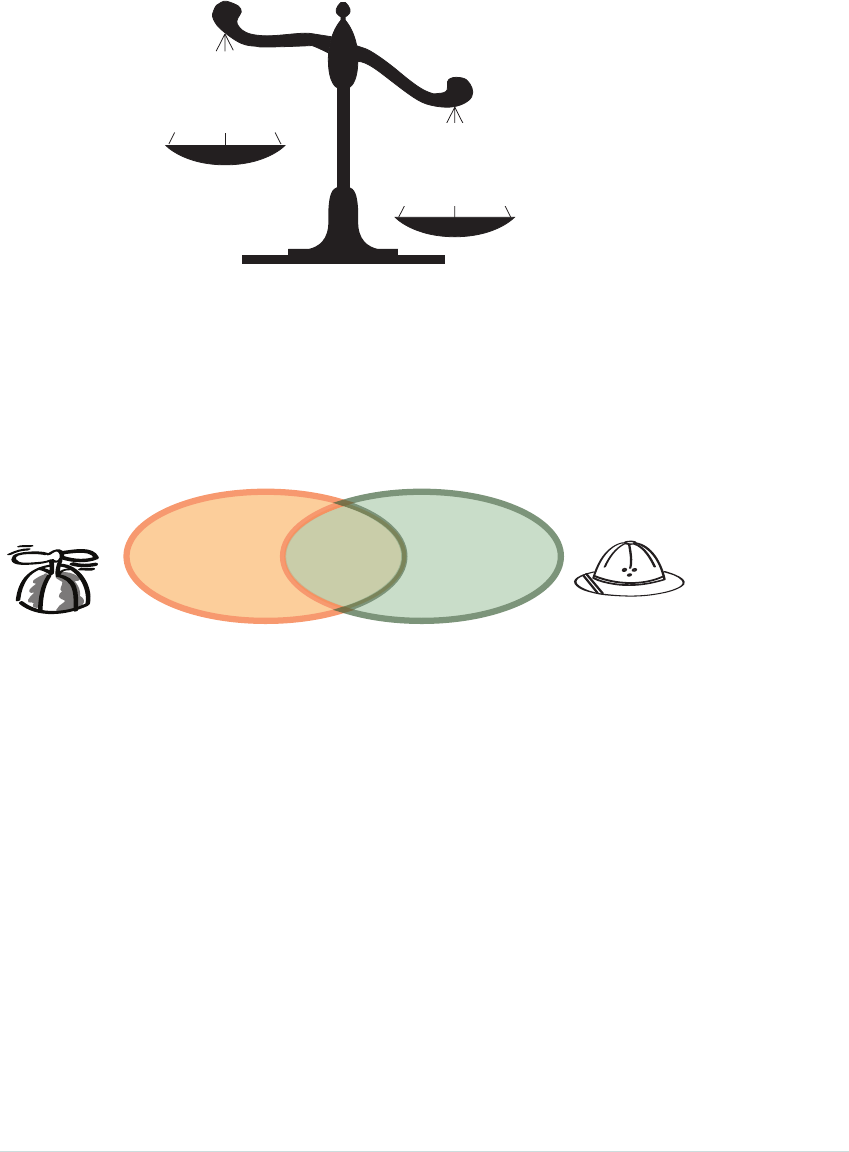
Enter the Testing Pyramid
The testing pyramid, first coined by Mike Cohn in Succeeding with Agile
[Coh09], is a model that teams use to show how three different kinds of tests
complement each other.
report erratum • discuss
Three Hard Lessons Learned • 5

UI
Integration
Unit tests
At the top of the pyramid, we’ve got these things called user interface or UI
tests. These tests go end-to-end through the entire system and act just like
a user would if they were using the system. We’ll cover UI tests in Chapter
2, Smoking User Interface Tests, on page 19.
Then we’ve got integration tests. These are like UI tests, except they don’t go
through the user interface. They instead go one layer beneath and directly
test the underlying services that make our user interfaces go. We cover these
in Chapter 4, Connecting the Dots with Integration Tests, on page 51.
Then at the base we’ve got these things called unit tests: small, fast, precise
code-level tests developers write to tell instantly when things are broken. These
come later, in [xxx](#unit).
Chapter Ordering
Now when it comes to exploring the pyramid, we’re going to start at the top
with the UI tests and then work our way down to the bottom. We’re going to
do this for three reasons:
1. Quick wins.
UI tests are the easiest of the three types of tests to get going with, and
scoring some quick wins will put some wind in our sails and make tackling
the subsequent chapters easier.
2. We need some basics.
The chapter on JavaScript won’t make sense until you understand a few
mechanics about how HTML and CSS work. So we are going to cover
those first in Chapter 2, Smoking User Interface Tests, on page 19.
3. Sticky learning.
Over the course of the book, I am going to occasionally lead you down
some garden paths and show you how some things seem great, only to
Chapter 1. The Testing Pyramid • 6
report erratum • discuss
then show you where they fail. This will give you a better feel for what
each type of test can do, along with where their limits lie.
So don’t think of the chapter ordering as showing the levels of impor-
tance—most teams start with unit tests first. But we are starting at the top
to aid with learning, which will hopefully make the material more sticky and
fun along the way.
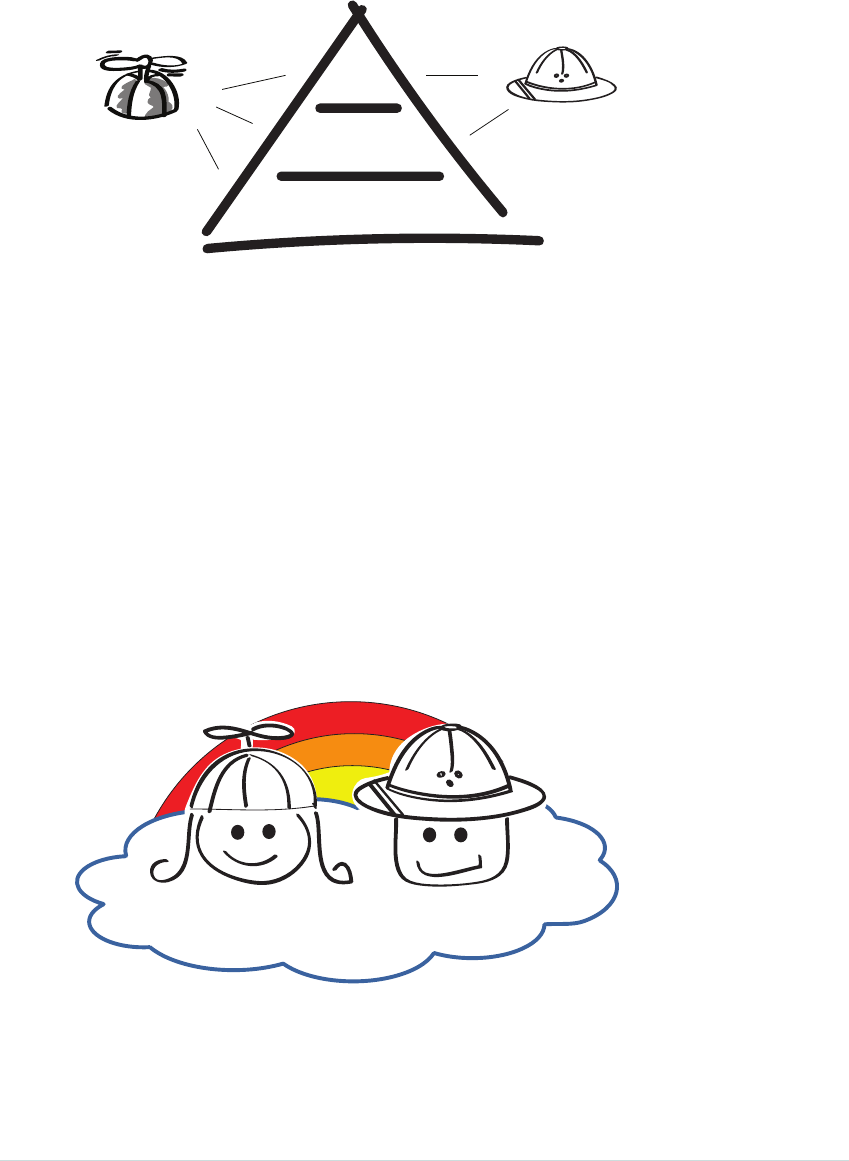
Three Levels
The testing pyramid makes more sense once you understand that most web
software architectures are made up of three distinct layers.
Service
UI Logic
Most software applications typically have three layers
There’s a UI layer, which contains the buttons and controls your customers
use when using your application. There’s the service layer, which feeds your
UI layer the data it needs to update its displays. And then there is the logic
layer, which contains the math, calculations, and brains of the operation.
Now of course not every application is built this way. Some have business logic
built into the service layer. Some applications don’t have any UI. These differ-
ences don’t usually matter. The fundamentals of the pyramid still tend to hold.
What matters is understanding that each layer of these applications maps to
a specific level in our pyramid, and that each level has a certain kind of test.
UI
Integration
Unit tests
UI
Service
Each layer maps to a layer of the pyramid
report erratum • discuss
Enter the Testing Pyramid • 7

Let’s take a quick look at each of these layers now.
UI Tests
The user interface tests test the application from the UI layer down.
Service
UI Logic
UI Tests
Go end-to-end
X
See what a user
would see
Expensive & slow
This is what makes UI tests so desirable. They cut through all the layers of
the architecture and ensure everything is hooked up. That’s what we mean
when we say UI tests go end-to-end.
The downside to this end-to-end awesomeness is speed and fragility. UI tests
tend to be slow and fragile. UI tests don’t have to be brittle (we’ll look at some
ways to make them more robust in Chapter 2, Smoking User Interface Tests,
on page 19). But there’s no getting around the fact that they are slow—orders
of magnitude slower than unit tests. So they are not the greatest for giving
rapid feedback. This is why UI tests sit at the top of the pyramid and tend to
be used more sparingly on projects.
Integration Tests
Integration tests, on the other hand, don’t go through the UI. They start one
layer down and test the underlying services. This gives them the advantage
of not having to deal with the fragility of the UI, while still retaining some of
the ability to check that things are properly hooked up and connected.
UI
Logic
Integration Tests
Web services & APIs
Connectivity
Not most precise
X
Service
The only downside to integration tests is that they aren’t very precise. By
precise, I mean that while they are great at telling you something is broken,
they can’t always tell you exactly where.
Chapter 1. The Testing Pyramid • 8
report erratum • discuss
So we like integration tests, because they are great at testing connectivity,
but we still don’t use them for everything because they can’t always tell us
exactly where our problems lie.
Unit Tests
For precision, speed, and coverage, we rely on unit tests. Unit tests are the
granddaddy of all automated tests. Developers started writing these things
years ago with the rise of agile methods like extreme programming,1 and they
have become a staple in modern programming languages and platforms.
Service
UI Logic
Unit Tests
Lightning fast
Extremely versatile
Miss integrations
X
They are extremely quick and very precise. And when things break, they tell
us exactly where things went wrong. They are essential for rapid iterative
development, and without these, we would be flying blind.
The only downside to all that speed and precision is integration. Sometimes
unit tests miss things. Certain bugs only appear when we hook things up.
This is why integration tests are still so valuable. And why developers will
typically write both when testing their systems.
When we bring all these tests together, some rules of thumb start to form.
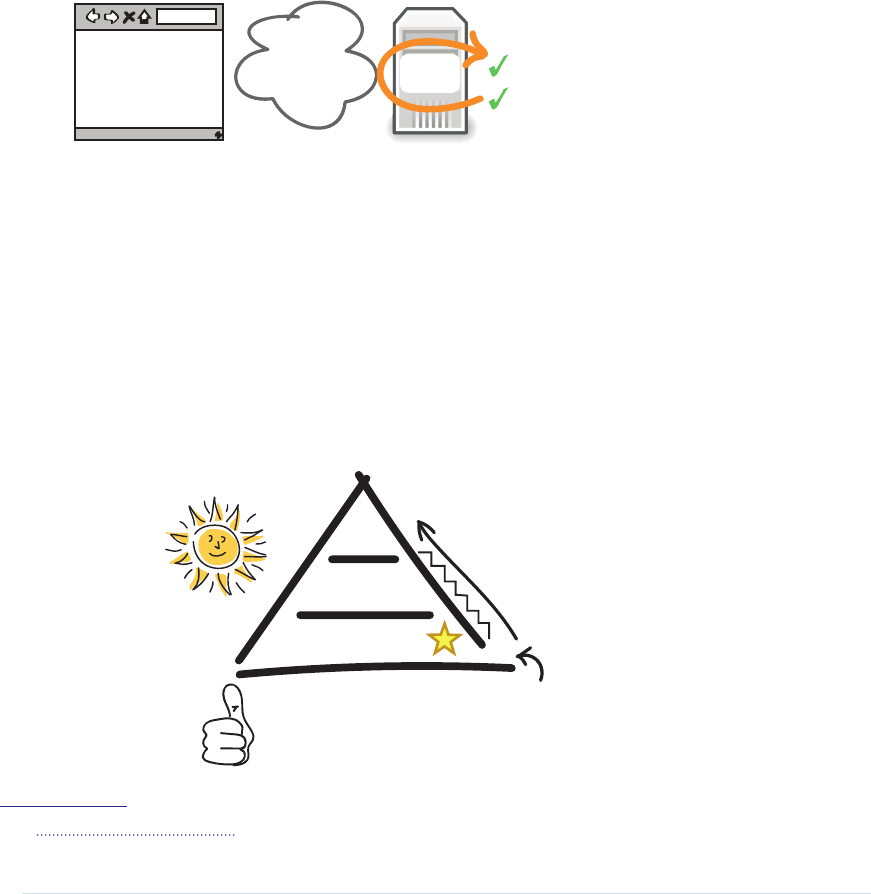
Rules of Thumb
UI
Integration
Unit tests
Start here
Climb as
necessary
1. Favor unit tests over UI.
2. Cover unit test gaps with integration tests.
3. Use UI tests sparingly.
1.
http://www.agilenutshell.com/xp
report erratum • discuss
Unit Tests • 9

The pyramid takes its shape from experience, which has taught us that it is
better to do the bulk of our automated testing down near the bottom, where
the tests are fast and cheap, than at the top where they are slow and expensive.
Not all projects have or need end-to-end UI-style tests. Some get by with just
unit and integration.
That’s why whenever we go and add new tests to the system, we always start
at the bottom first, and work our way up from there.
When adding a new test, always see if you can
cover it with a unit test first.
Now if you’re a tester, this is hard advice to follow because you won’t be
automating things near the bottom. You will instead be working with the
higher-level tests closer to the top. So the flip side of this for you is to:
Always push tests as far down the pyramid as you can.
That means if you can handle a given test case with an integration test, that’s
favorable to trying to automate everything up in the UI.
And this final rule of thumb takes a moment to say but a lifetime to master:
Don’t try to automate everything. Instead
automate just enough.
As wonderful as automated tests are, every test has a price in terms of cost
and maintenance. So we don’t want to automate everything. Instead we want
to automate just enough. Easy to say—hard to do. We will explore this Zen-
like principle more as we get further into the book.
Chapter 1. The Testing Pyramid • 10
report erratum • discuss
Hey. I’ve noticed some of the tests at the top
overlap with those near the bottom. Is that OK ?
Some overlap of tests in terms of functionality is inevitable, because tests
near the top are always going to be supersets of those near the bottom.
UI
Int
Unit
but they differ in terms of scope and intent.
Tests near the top wrap those near the bottom ...
For example, we might have a unit test that verifies that passwords need to
be at least eight characters in length, while any UI test that logs in will inad-
vertently end up testing the same thing too. So there’s no avoiding that.
What we can avoid, however, is blatant duplication. We never want to write
the exact same tests between different layers of the pyramid because that
would be wasteful. If we know we’ve got some scenario covered at the unit
test level, there’s no sense in duplicating it directly up top in the UI.
If it helps, think of the difference between UI and unit tests like this.
report erratum • discuss
Rules of Thumb • 11

Unit tests UI tests
are about verification
slow feedback
very high level
go end-to-end
expensive
slow
fragile
flaky / non-deterministic
used to test
test from customer’s POV
vs
are about development
rapid feedback
very low level
very local
cheap
fast
solid
reliable / deterministic
used to develop
test from developer’s POV
UI and integration tests are about connectivity. It’s OK for those tests to be
slower because they go through more layers of the architecture. That’s why
we love them! They are making sure things work end-to-end.
Unit tests, on the other hand, are about speed and feedback. We write unit
tests when we are looking for feedback about things that are important to us
during development. Things like:
•Did we get our design right?
•Did we break anything with the last set of changes?
•Do all our assumptions and edge cases check out?
•Is it safe to add new functionality?
Unit tests are what enable us to iterate quickly. UI and integration tests are
about making sure things work end-to-end. Both serve an important purpose.
They’re just two different sides of the same coin.
So yes, some duplication in functionality is perfectly fine, just so long as we
are not duplicating intent.
And that’s basically it! That’s the pyramid. The rest of the book is just going
to focus on the details of where and when to write each of these tests, and
show you how they work in the real world for the web.
But that does leave us with one interesting question. If you are on a mixed
team made up of developers and testers, who exactly should be writing these
things?
Chapter 1. The Testing Pyramid • 12
report erratum • discuss

Who’s Writing These Things
One of the interesting challenges with multi-disciplinary teams is figuring
out who’s doing what. Especially now that quality is a team responsibility.
Because not only does testing now blend what has been two traditional sepa-
rate camps in software (development and testing), we now get to deal with all
the different words, meanings, and sometimes even different philosophies
that go into the purpose of automated testing itself!
Conflicting philosophies
speed
development
offense
enabling change
test what’s required
correctness
verification
defense
playing it safe
test everything
Devs QA
around the purpose of automated testing
For example, for devs, automated testing is all about speed. Automated tests
(specifically unit tests) are what enable developers to move fast without
breaking stuff. Unit tests run quickly. They tell the developers when they’ve
broken stuff in the code. And they are what allow developers to make changes
fearlessly. So slow, long-running tests are no good for developers. All they are
looking for is rapid feedback and speed.
Traditional testers, on the other hand, are more worried about correctness.
We’ve traditionally put so much pressure on testers to be thorough and to
catch every possible bug, that to a traditional tester, testing is all about
thoroughness, breadth, and depth. To them, the more automated tests the
better—regardless of how fast or how long it takes them to run.
And therein lies the rub. You’ve got two conflicting, competing forces already
at play around the very purpose of automated testing, and you haven’t even
started your project.
report erratum • discuss
Who’s Writing These Things • 13
Trade-offs
The need
for speed
The urge to
test everything
This is why so many automated testing initiatives invariably start off looking
something like this.
DEV QA
Must test
everything !
THe faster
the better ! ?
I’ve already covered
those with unit tests ! What’s a unit test ?
I can automate everything
with a UI test
Do we even need
UI tests ?
Conflict. You’ve got different definitions of success. Different definitions of
tests. And a lot of confusion around who should be doing what when it comes
to these things called automated tests.
While there are no hard and fast rules about who does what, I’ve seen a
couple of different ways to make this work.
Testers typically work at the upper levels of the pyramid—specifically the UI
and integration layers. These tests tend to line up nicely with the kind of work
traditional testers are usually already doing: end-to-end system testing. If
you are a traditional tester, it’s natural to start up here.
Chapter 1. The Testing Pyramid • 14
report erratum • discuss
UI
Integration
Unit tests
Developers, on the other hand, are really into unit tests. Sure they can, and
often do, test at all levels of the pyramid. But there is usually so much auto-
mated testing work to be done, most are more than happy to have others chip
in and help out. They often work across all three, supporting testers at the
upper levels and helping set up the necessary tests and infrastructure needed
to get the testers going.
Developers today also realize that having a full-time dedicated tester on a
team is a luxury, and that the days of having others take responsibility for
the quality of their work are long gone. They are responsible for the quality
of their code—no one else.
However you and your team decide to do it, collaboration and pairing is key.
You want to avoid testers doing one thing at the top of the pyramid, oblivious
to what developers are doing at the bottom. That’s where all the waste and
duplicated effort usually sneaks in.
Together
report erratum • discuss
Who’s Writing These Things • 15

If you’re a tester, you want to be joined at the hip with your developer so you
can coordinate which kinds of automated tests you each want to write. In the
beginning, it may be the developer doing most of the setup (it’s always good
to get a few good examples going). But after that, there’s no reason why you
can’t jump in there and start taking on more test automation responsibility.
And if you’re a developer, it’s in your best interests to make your testers as
productive as possible, because the less time they have to spend retesting
things that can readily be automated, the more time you’ll both have for
exploratory testing—which is where the magic really happens. So pair with
your testers, teach them how to write their own automated tests, and coordi-
nate your actions with theirs. You’ll get better coverage and fewer bugs.
Regardless of what you and your team decide, know there is almost always
more automated testing to be done on any given project than time and
resources will allow. That’s why you gotta automate smart.
At the end of the day, don’t worry so much about who’s doing what. What’s
more important is that it gets done, and the people getting it done are most
often those with the passion and drive to make it happen. You don’t need to
have any fancy title or role for that.
Don’t Forget About Exploratory Testing
With all this automated testing going on, it’s easy to forget another important kind
of testing we always want to make sure we are doing on projects: exploratory testing.
Exploratory testing is just what the label says: unscripted, exploratory testing where
you systematically go through the application and try to break it.
It’s a powerful testing technique, because unlike the scripted tests, exploratory testing
is our chance to uncover things that simply don’t show up in automated tests.
Automated testing is a means to enable us to do more exploratory testing. So once
you’ve got a good suite of automated tests, don’t forget to go back and continuously
explore.
Read Explore It! [Hen13] by Elisabeth Hendrickson for a great book on exploratory
testing.
Chapter 1. The Testing Pyramid • 16
report erratum • discuss

What We’ve Learned So Far
Congratulations! You now know more about automated testing than most,
and you are all set for the next time the testing pyramid comes up as a con-
versation starter at your next cocktail party.
Here’s a quick recap of what we’ve covered so far:
•We typically write three kinds of automation tests on projects: UI,
integration, and unit.
•When adding a new test, see if you can cover it with a unit test first.
•Always push tests down the pyramid as far as you can.
•Avoid waste and duplication by collaborating with your team at all levels
of the pyramid.
This is a good first step. We now have some common language and some
shared vocabulary to talk about automated testing.
In the next chapter on UI testing, we are going to jump right in and see what
UI tests are, and the critical role they play in making sure the important stuff
always works. Let’s go!
report erratum • discuss
What We’ve Learned So Far • 17
CHAPTER 2
Smoking User Interface Tests
UI
Integration
Unit
In this chapter, we take a look at how to write the most complete end-to-end
test in our automated testing arsenal: the user interface test.
Learning how to write good UI tests will not only ensure key features of your
software are always up and running, but it will free you to spend more time
on the more tricky parts of your software that need your attention most—like
exploratory testing.
Testers, this is a good chapter for you because you definitely have a role to
play in helping write good UI tests. And developers, this chapter will help you
understand the mechanics behind how these automated UI test frameworks
work, so you can ultimately make your applications more testable.
report erratum • discuss
By the end of this chapter, you’ll know what UI tests are and how they work,
and you’ll have one super handy tool for ensuring key pieces of your system
are always up and running.
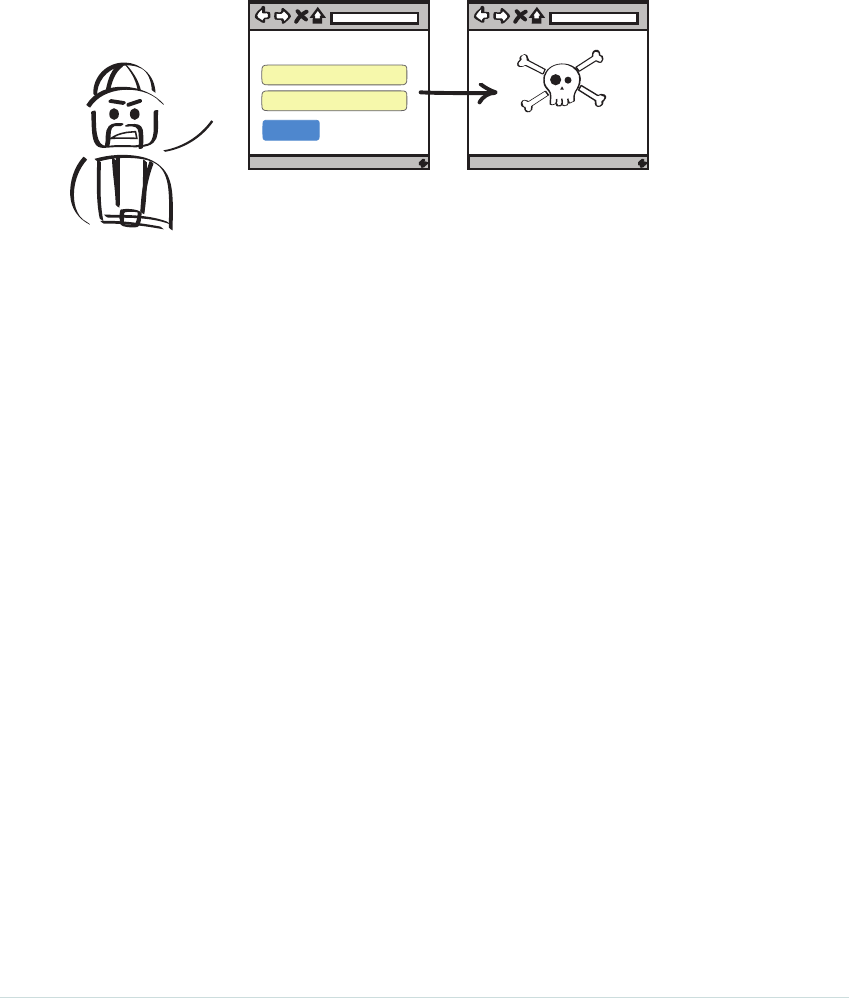
Another Botched Release
Why can’t our
customers Log in!
DAVE
Please sign in
Email
Password
Sign in Error
Dave the construction manager is normally a mild-mannered guy. But today
he’s upset. Dave is mad because for the second time this month, the login
page to his work permit system has broken. That means construction engi-
neers can’t log in. They can’t get their work permits. Which means they can’t
legally work. And Dave wants to know why!
Normally we would have run a set of manual QA scripts before pushing things
out, but Suzy was on holiday and no one told the developers we were pushing
things out a day early because of the holiday.
Obviously, we’ve got some communication problems, but isn’t there something
we can do, right now, to ensure this never happens again? Some kind of
script, or test thingy, that could just log in to the system, try some things
out, and report back if there were any errors?
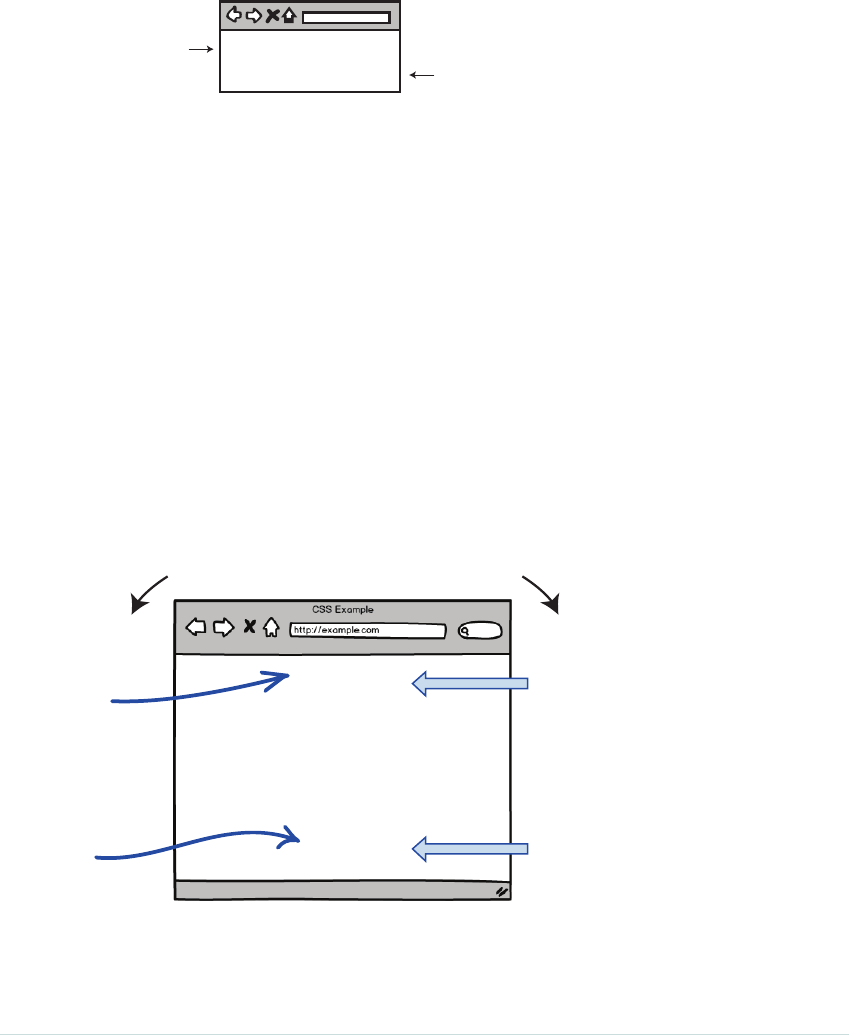
Enter the User Interface Test
User interface tests (or UI tests) are scripts that test your application in the
same way an end user would. They click, tap, select, log in, and do things
you or I would, which is why they are so handy.
Chapter 2. Smoking User Interface Tests • 20
report erratum • discuss
Integration testing
UI and integration tests
are good for
What makes UI tests nice is that they slice through all the layers of the
application and go end-to-end. End-to-end means exercising all the different
parts of the application—the user interface, the underlying services, all the
way to the database. This is what makes UI tests so good at testing connec-
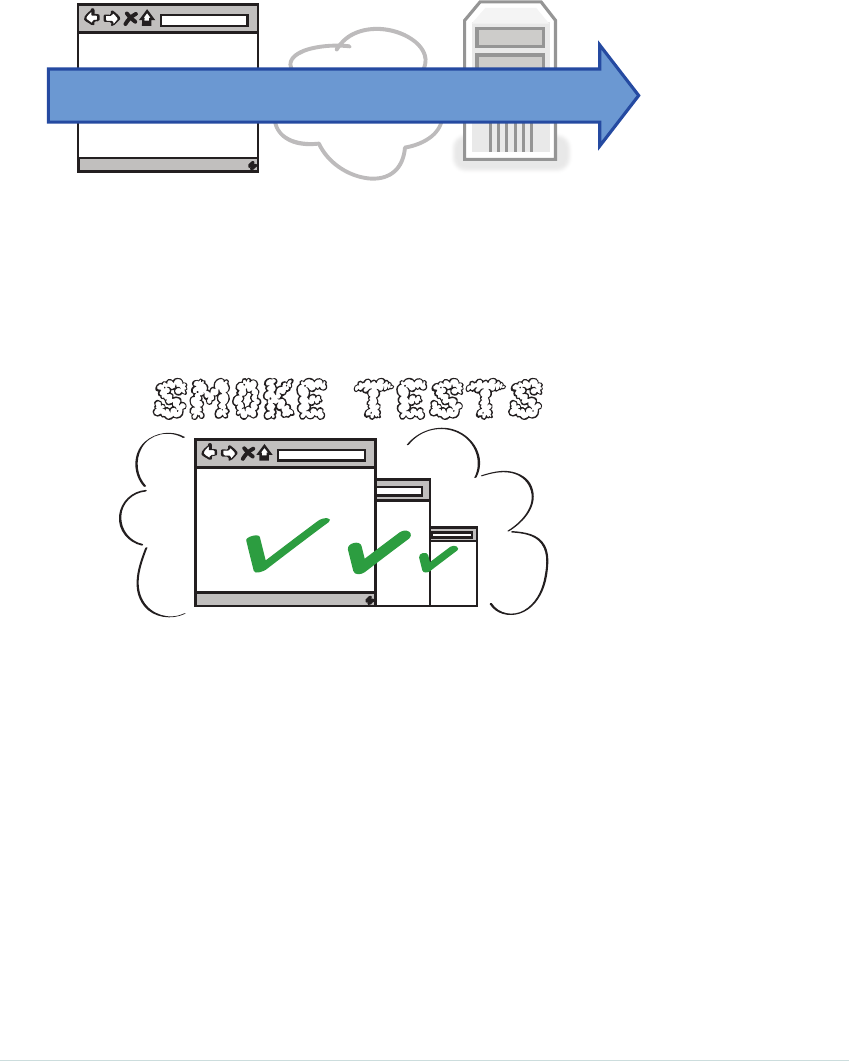
tivity, which is why we often use them as high-level smoke tests.
Search
Login
Sign in
Smoke tests are super high-level tests that verify that at some basic level our
system is up and running. They are handy because they tell us if
•Our applications are correctly deployed
•Our environments are correctly configured
•All the pieces of our architecture are connected and hooked up right
The term smoke test comes from the older days when if you wanted to see if
an electrical device was working, you could plug it into the wall and look for
smoke. If you saw any, that was bad.
report erratum • discuss
Enter the User Interface Test • 21
But we like smoke tests because they guarantee that at some minimal level
our systems are always working. Which is why they make great UI tests.
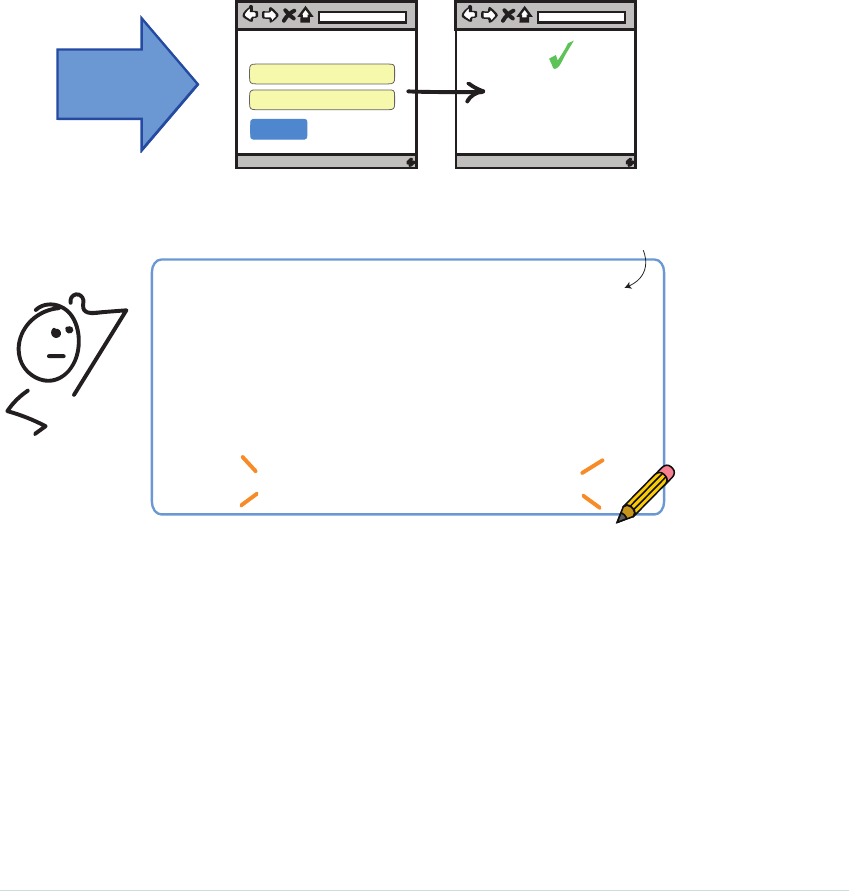
Take logging in, for example. If we were to write a UI test for logging in, what
steps would our test need to go through to verify that someone could enter their
credentials, log into the system, and then be redirected to the Welcome page?
Take a minute and see if you can write out in plain English the steps necessary
to do this yourself. Bonus points if you figure out what we should assert at
the end of our test.
Please sign in
Email
Password
Sign in
Welcome
UI Test
Hmmmmm .... steps to log in
#
#
#
#
#
Write here
Were you able to write out the basic steps? This is what we generally do when
writing UI tests. We think about what we would do as a user, and then write
that script out in the form of a test. Here’s one way we could go about
automating this.
Chapter 2. Smoking User Interface Tests • 22
report erratum • discuss
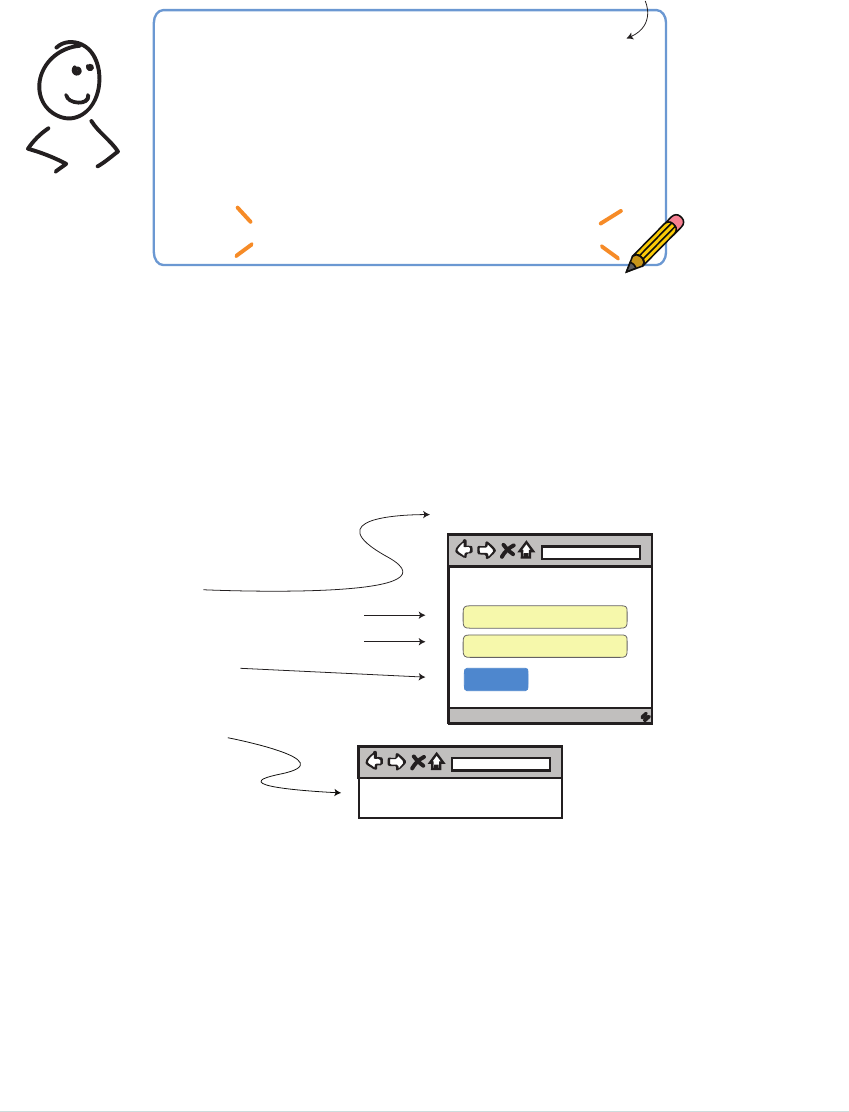
steps to log in
# visit login page
# fill in email address
# fill in password
# click sign-in button
# check for presence of ‘Welcome’
Beginnings of your UI test...
First we would have to navigate to the login page. Once there we could fill out
our email address and password. Next we would need to log in by clicking
the sign-in button. And then we would want to check and see that we somehow
got redirected to the Welcome page.
Once we’ve got our script, it’s simply a matter of converting it into some kind
of test. Something like this:
describe 'should be able to login' do
let(:user) { FactoryGirl.create(:user) }
before do
visit login_path
fill_in 'Email', with: user.email
fill_in 'Password', with: user.password
click_button 'Sign in'
end
it { should have_selector('h1', text: 'Welcome' )}
end
Please sign in
Email
Password
Sign in
http://localhost:3000/login
Welcome
Now this is our first automated test, so don’t worry if you don’t understand
everything going on here at first glance. We are going to walk every line of
this test shortly.
report erratum • discuss
Enter the User Interface Test • 23

Also, remember we are just getting our feet wet here with the basics in this
book, and you can always find more advanced, technical tutorial books on
the subject of how to set these tests up.
We are just using Rails here as an example. The principles we are about to
uncover will work just as well for any other testing/development framework
of your choice.
Now this test is written in Ruby using a library called RSpec. And the way
RSpec describes the names of its tests is that it puts the test name in quotes,
between those
describe
and
do
keywords. In this case, we are saying the name
of this test will be
should be able to login
.
describe 'should be able to login' do
The next line creates a fake test user for us.
let(:user) { FactoryGirl.create(:user) }
We can’t log in without a user. And this line here, using a Rails gem called
FactoryGirl, creates one for us. Gem is another word for library in Ruby, so
if you hear the word gem, just think library. All this line of code does is give
us access to a fake, but valid, user that we can access for a username and
password in our test.
With that setup done, we are now ready to visit the login page. The way we
get there in our tests is with this line here:
visit login_path
This line does pretty much what it says. It visits the login page by navigating
to the login page’s URL. In Rails, that is conveniently defined for us in a variable
called
login_path
. This variable actually maps to the URL
http://localhost:3000/login
.
Use variables to describe commonly used
URLs in your test cases.
Rails does this so you don’t have to remember and type that login URL string
every time you want to use it. Having variables also makes our tests easier
to read, so you will want to use variables in your tests whenever you can.
These three lines you can probably figure out:
fill_in 'Email',with: user.email
fill_in 'Password',with: user.password
click_button 'Sign in'
Chapter 2. Smoking User Interface Tests • 24
report erratum • discuss

The first two use that fake user we created earlier and fill its username and
password into their respective text boxes. And the third line there selects and
clicks the sign-in button.
See how easy that reads? Here we are literally filling in the email and password
text boxes with some valid user credentials.
After that, it’s simply one line to check and see that we got redirected to the
Welcome page correctly. We can be sure that we have, if we can find an HTML
H1 header containing the text Welcome.
it { should have_selector('h1',text: 'Welcome' )}
Congratulations! You’ve just walked through your first UI test. Well done!
Now that may not have looked too bad, but believe it or not, there was a lot
of magic going on behind the scenes to make all that happen.
Let’s now dive a little deeper and see how those UI test frameworks made
grabbing those page elements look so easy, as well as how they know which
page elements we were looking for.
Say No to Record/Playback
With all these automated user interactions going on, you’d think capturing UI tests
with record/playback tools would be a good thing. It usually isn’t. Here’s why.
Tests generated from record/playback tools tend to be brittle and fragile. Change one
little thing in the UI and boom! Your tests break.
Second, record/playbacks are highly unreadable. The tests these tools create may
be fine for machines, but they are practically unreadable to us humans.
And third, when we use record/playback, we give up the most powerful tool we have
for organizing our tests—writing them in code. Code is wonderful because when we
write tests in code, we get to do amazing things.
We can write reusable components. We have full control over what happens. And we
can see and understand exactly what’s going on. We give all that up when we go
record/playback.
It’s OK to use record/playback just to experiment, learn, and see how things are
going. But when it comes to writing production-ready tests, do yourself a favor and
set the record/playback aside. It may take you somewhere fast, but it’s going to take
you and your tests in the wrong direction.
report erratum • discuss
Enter the User Interface Test • 25
How They Work
Imagine for a second you are a UI test framework, and an automated tester
was asking you to grab certain page elements that they wanted to interact
with. How would you do it?
Please sign in
Email
Password
Sign in
Would you search for some matching text? Would you try to grab elements
by their type? Or perhaps would you look for some kind of unique identifier
separating one particular element from all the others?
Believe it or not, UI testing frameworks do all those things. And they do it on
the web by relying on two key technologies: HTML and CSS.
HTML Is for Asserting
HTML (HyperText Markup Language) is the markup language we use to describe
the content in our web pages. What do we mean by describe? Well, when we
view things in our browser, we need to describe what it is we are seeing.
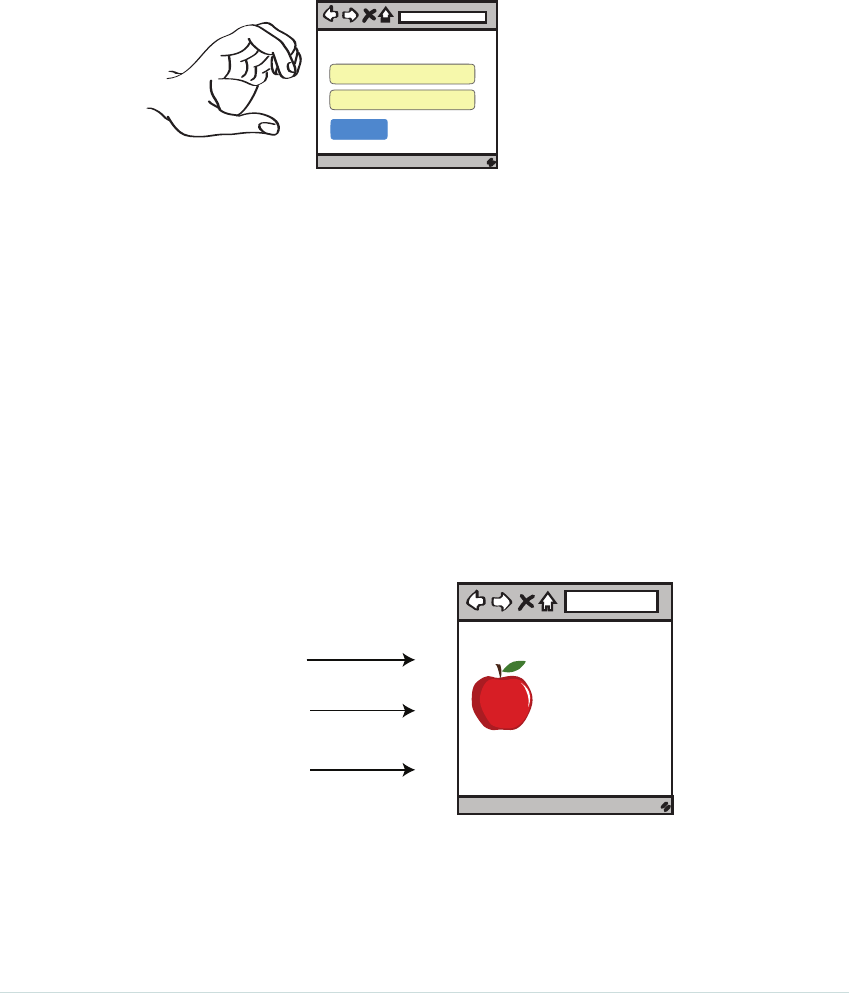
For example, say we wanted to create a page containing a heading, an image
of an apple, and a sentence. We could do all that in HTML like this.
<h1>About</h1>
<img src="/apple.png" />
<p>The brown fox jumps
over the lazy dog.</p>
heading
image
About
The brown fox jumps
over the lazy dog.
text
HTML
Those funny things in brackets you see (
<h1>
,
<img>
, and
<p>
) are
called tags. And when we put those things around the content we want to
describe, we mark it up.
Chapter 2. Smoking User Interface Tests • 26
report erratum • discuss
Now these tags are important because they are what our UI testing frameworks
look for when we write our automated UI tests.
<h1>Checkout</h1>
We look for these tags when writing tests
assert content
verify presence of
<p>3 items</p>
So when we ask our UI testing framework to make assertions (statements
that are either true or false) about what content should or should not appear
on the page, or to verify the presence of some control, we use these tags to
tell it what we are talking about.
But in order to get our hands on those tags, we first need to select them. And
for that we have CSS.
CSS Is for Selecting
CSS (Cascading Style Sheets), like HTML, is another markup language. But
instead of marking up content, with CSS we mark up style.
For example, let’s say we want to add a little polish to the content of our web
page, and style the page using a nice-looking footer, a header, and a main
content area. The content we would leave in the HTML, but styling we would
put in the CSS.
<div class=”header”>
Le Header
</div>
<div class=”main”>
Lorem ipsum...
</div>
<div class=”footer”>
Le Footer
</div>
Le Header
Lorem ipsum dolor sit amet, consectetur adipiscing elit.
Fusce ornare posuere dolor et placerat. Donec placerat
egestas sem, nec volutpat arcu fermentum vel. Proin
dignissim condimentum felis. Proin sit amet augue
lacinia, interdum urna eu, convallis augue. Donec
volutpat vitae purus a bibendum.
Le Footer
HTML CSS
.header {
text-align: center;
font-size:20px;
}
.main {
font-size:10px;
}
.footer {
color: grey;
text-align:center;
font-size:12px;
}
Content Style
report erratum • discuss
CSS Is for Selecting • 27
CSS is what gives our web pages their look and feel. It handles the alignment
of our page elements. It gives us the size and color of our text. CSS also has
one other unique property that we rely on heavily for UI tests—its ability to
select page elements.
With CSS selectors we can select elements
Sign Up
By using these things called CSS selectors, we can grab page elements we
want to manipulate in our tests, and get them to do things just like our users
would as if they were using the system.
For example, say we wanted to grab all the text input fields on a given web
page. We could do that with a CSS selector that looks something like this.
$("input[type=text]")
Select by element, type, and attribute
attribute value
CSS selector
element
Now this syntax may look a little strange at first. That
$( )
syntax is a shortcut
browsers use1 to save us some typing when we want to query a page for all
the elements matching a given CSS selector.
$( ) document.querySelector( )
CSS selector
The stuff we are interested in is what goes inside the
$( )
—namely, the selector.
The way to read the preceding selector goes something like this:
Give me all the
input
page elements with attribute
type text
.
1.
https://developers.google.com/web/tools/chrome-devtools/debug/command-line/expressions?hl=en#select-
elements
Chapter 2. Smoking User Interface Tests • 28
report erratum • discuss
And when you run this selector against a web page, that’s exactly what it will
do. It will return us all page elements of
type text
.
Now grabbing multiple text boxes is fine (this is normally what we want when
styling web pages with CSS). But when writing UI tests, we usually want just
one page element: the one we are interacting with.
One way to grab a specific page element in CSS is to modify our CSS slightly
and grab an element by its position.
$("input[type=text]")[0]
Select by position
1st text box
index
This might also look a little strange. First off, the results that come back to
us are in the form of an array (those things in square brackets containing a
0). What’s also weird is that the first element of that array starts with a 0.
Array elements starting with 0 is a convention that caught on early in com-
puter programming. It has to do with keeping the math simple when allocating
computer memory (it was easier to start the counting at 0 instead of 1). Any-
ways, it became a convention and now pretty much all computer languages
use this as the standard way to grab the first element of an array—in our
case, the first input field text box.
Now grabbing elements by their position works, but you need to be careful.
Be careful when grabbing UI elements by their position.
If you write UI tests that are dependent on an element’s relative position,
what do you think will happen as soon as someone changes the layout of
your page?
Boom! Your tests will break because the elements (and their indexes) are no
longer in the same position. This is one reason why UI tests are so fragile.
So to avoid this, the preferred way to grab UI elements is to select them with
something that uniquely identifies them. In the case of the web, it’s by their IDs.
report erratum • discuss
CSS Is for Selecting • 29
Select by ID
<input id="email"
type="text">
$("#email")
Preferred way
more readable
easier to grab
easier to maintain
By adding ID attributes to the elements you want to select, selecting your
page elements gets a whole lot easier.
By doing this, you guarantee that one—and only one—page element should
ever return for a given match. Because you get to choose the name of the ID
yourself, you can give it a nice easy-to-understand name, simultaneously
making your test easier to read and understand.
And that is how UI testing frameworks in general work. You give unique
identifiers to the elements you want to select, and then grab them according
to some selection criteria. For the web, that’s CSS selectors.
What We’ve Learned So Far
Are you still with me? I know a lot of this stuff can seem a little abstract and
weird at first, but now that we’ve got some of the theory out of the way, we
are in a good position because things are going to get very real shortly.
Here’s a quick recap of the important stuff from this chapter:
•UI tests make for great end-to-end smoke tests.
•We prefer tests written in code over record/playback scripts.
•HTML is what we look for when we are making assertions in our tests.
•CSS selectors are how we select page elements we want to grab.
•Page elements are easier to grab when they are decorated with
unique HTML IDs.
Now it’s time to put some of this theory into practice and see what it is like
to add automated UI tests for a legacy system. Which is exactly what Dave
would like us to do for him right now.
Chapter 2. Smoking User Interface Tests • 30
report erratum • discuss
CHAPTER 3
Adding UI Tests to Legacy Systems
Dave has another older legacy page that’s been acting up lately: his customer
sign-up page.
Think you can help us
test ol’betsy here ?
DAVE
Sign Up
Name
Email
Create my account
Name
Success!
Password
Confirmation
Ye Olde Legacy System
Moo!
At first glance, this page looks pretty similar to our login page. But when we
try writing a similar-looking UI test for it like we did with our login page, it fails!
cswp/spec/requests/user_pages_spec.rb
describe 'When creating a new user' do
subject { page }
describe 'with valid credentials' do
before do
# create a new user
visit signup_path
fill_in 'Name',with: 'New User'
fill_in 'Email',with: 'user@example.com'
fill_in 'Password',with: 'foobar'
fill_in 'Confirmation',with: 'foobar'
click_button 'Create my account'
end
report erratum • discuss

describe 'after saving the user' do
# find the new user we just created
let(:user) { User.find_by(email: 'user@example.com') }
# make some assertions
it { should have_content(user.name) }
it { should have_selector('.alert-success') }
end
end
end
For some reason, the tests and selectors we used in the previous login page
test don’t work here. And when we try running it, we get error messages
saying things like, “Unable to find fields Name, Email, and Password.”
To see why, let’s write this test from scratch and take a look at what’s going
on under the hood of this web page. And while doing this, let’s also look at
some useful techniques for writing UI tests from scratch.
Step 1: Confirm You’re on the Right Test Page
Before doing anything fancy in a test, it’s always good to confirm you’re testing
the right page. I know, this sounds obvious. But you’d be surprised how much
time you can waste thinking you’re testing one page, when you are inadver-
tently testing another.
The easiest way to verify you’re hitting the right page is simply to navigate to
it in your test, and then print out the HTML response that comes back.
http://localhost:3000/signup
visit signup_path
puts page.body
end
Response
bash
> rspec
...
<head>
<h2>Sign Up</h2>
...
Print Sign Up
Name
Email
Create my account
Password
Confirmation
it 'should be able to access' do
Chapter 3. Adding UI Tests to Legacy Systems • 32
report erratum • discuss
We haven’t covered the basics yet around how HTTP requests and responses
work (hang in there, we’ll do this shortly in Chapter 4, Connecting the Dots
with Integration Tests, on page 51). But all we are doing here is connecting
to a web page and then printing out its contents.
If you see some HTML that looks familiar (that is, it contains the headers and
text fields you’re looking for), you’ll know you are in the right place. If you
don’t, well then, give yourself a pat on the back—you’ve discovered the first
bug in your test!
Printing out HTML responses from test frameworks is usually pretty
straightforward. We first need to get our hands on the web server response,
and we need to print it out. Usually by doing something like this:
Print commandLanguage
puts "hello"
Ruby
System.out.println("hello");
Java
print("hello");
Python
console.log("hello");
JavaScript
Console.WriteLine("hello");
C#
NSLog("Welcome");
Objective-C
Once we’re confident we are in the right place, we can then get to work on
our selectors.
Step 2: Figure Out Your CSS Selectors
Before you can make anything happen in a UI test, you need to get your hands
on the controls you want to manipulate. For us, that means the four input
fields capturing the user account details, as well as the sign-in button that
triggers the form submission.
Sign Up
Name
Email
Create my account
Password
Confirmation
$("<CSS selector>")
report erratum • discuss
Step 2: Figure Out Your CSS Selectors • 33
For web pages, that means looking at the underlying HTML and then seeing
what CSS selectors we can write to grab them.
One way to do this is to open up your favorite browser (the following examples
use Google Chrome), navigate to the page under test, right-click anywhere
on the page, and select the View Page Source option.
<!doctype html>
<h2>Sign Up</h2>
<label>Name</label>
<input class="form-control" ... type="text">
<label>Email</label>
<input class="form-control" ... type="text">
...
<button class="btn" type="submit">Create my account</button>
Right-click
View Page Source
Your HTML page
HTML
Sign Up
Name
Email
Back
Forward
Reload
Save As ...
Print ...
Translate to English
View Page Source
Inspect
...
View Page Source shows us the underlying HTML of all the controls on the
page, as well everything else that went into this page’s construction.
Now what’s interesting about this legacy page is that when we look at the
controls we’re trying to select, we immediately see why our earlier test didn’t
work. The page elements we were trying to select don’t have any IDs!
No wonder we couldn’t grab those controls. Our test framework was expecting
our controls to be uniquely identified with IDs like
name, email
, and
password
,
but by not having them, our framework couldn’t grab them.
Chapter 3. Adding UI Tests to Legacy Systems • 34
report erratum • discuss
<!doctype html>
<h2>Sign Up</h2>
<label>Name</label>
<input class="form-control" ... type="text">
<label>Email</label>
<input class="form-control" ... type="text">
<label>Password</label>
<input class="form-control" ... type="password">
<label>Confirmation</label>
<input class="form-control" ... type="password">
<button class="btn-large" type="submit">Create my account</button>
View Page Source
No IDs!
Hmmmmm ....
Not having IDs on our elements isn’t the end of the world. But it certainly
makes grabbing the controls harder.
Sign In
Hard to grab
Could be ANY text box
Easy to grab
Must be THIS text box
$("input")
$("#<id>")
Using IDs has a number of advantages. For one, it makes our CSS selectors
way easier to write—all we need are the IDs of the controls we want to
manipulate and we’re done. But secondly, it makes our tests easier to read
because well-named IDs are much less cryptic than plain old CSS.
<!doctype html>
<h2>Sign Up</h2>
<label>Name</label>
<input ... id="user_name" ... type="text">
<label>Email</label>
<input ... id="user_email" ... type="text">
<label>Password</label>
<input ... id="user_password" ... type="password">
<label>Confirmation</label>
<input ... id="user_password_confirmation" ... type="password">
<button class="btn-large" type="submit">Create my account</button>
View Page Source
With IDs! The preferred way
report erratum • discuss
Step 2: Figure Out Your CSS Selectors • 35
Some Test Frameworks Have Built-In Affordances
One thing test frameworks sometimes do to make our testing lives easier is give us
convenience routines, or affordances, to make the selecting of page elements easier.
For example, did you notice how the login page UI test was able to use
Name
as a
selecting field?
fill_in 'Name',with: 'New User'
But our customer sign-in page had to use
user_name
?
fill_in 'user_name',with: 'New User'
That’s because in the login page test, the word
Email
was used as placeholder text in
the email text field itself, while in the customer sign-in page, there was no placeholder
text there at all.
This is an example of some of the affordances that testing frameworks (like the Capy-
bara gem for Rails) have built in to make our testing lives easier. They go to great
lengths to make selecting page elements simple, and automated tests easy to read.
Please sign in
Email
Password
Sign in
fill_in "Email"
placeholder text
So don’t panic if your tests don’t look exactly like the ones we write here. It may just
be that the framework you’re using doesn’t have the same affordances as the ones
we’re using here. It could have different ones.
So if we add some IDs to our page elements, our tests now look like this:
before do
# create a new user
visit signup_path
fill_in 'user_name',with: 'New User'
fill_in 'user_email',with: 'user@example.com'
fill_in 'user_password',with: 'foobar'
fill_in 'user_password_confirmation',with: 'foobar'
click_button 'Create my account'
end
Much better. These we could work with. And now our tests will run!
Chapter 3. Adding UI Tests to Legacy Systems • 36
report erratum • discuss
Add ID attributes to your page elements to make
your applications easier to test.
Now, if we really wanted to make things easy for ourselves, the simple fix here
would be to add IDs to all our page elements and use them in our tests, and
then we’d be done.
But just for the sake of adventure, let’s take the more bumpy, less travelled
road and instead see what it would be like to write selectors for these elements
if we couldn’t give them any unique IDs.
Let’s start by finding the CSS selector we would need to grab our
name
field.
One quick, easy way to see the underlying HTML for any control on a page is
to right-click it and select Inspect Element.
Inspect Element
Right-click the element you want to inspect
Select
Elements
Console
>
input[type="password"]
padding: 1px;
backgroud-color: white
<form action="/login" method="post">
<h2>Sign Up</h2>
<label>Name</label>
<input class="form-control" ... type="text">
<label>Email</label>
<input class="form-control" ... type="text">
...
<div>
<button type="submit" class="btn-large">Sign in</button>
</div>
</form>
HTML CSS
Console
Developer Tools
Sign Up
Name
Email
Password
Confirmation
Back
Forward
Reload
Save As ...
Print ...
Translate to English
View Page Source
Inspect
>
Click
Type CSS selectors here
$("input[type=text]")
[ <input id="session_email" type="text" ...> ]
And see the results show up here
report erratum • discuss
Step 2: Figure Out Your CSS Selectors • 37
Inspect Element takes us right to the line of HTML code responsible for ren-
dering that control, and it shows us the CSS used to style it.
Another nice feature of most modern browsers is that the developer tools also
have a Developer Console, where we can try out our CSS selectors.
For example, say we wanted to see if
$("input")
would give us the text field we want.
We could open up the Developer Console in our browser, and enter the CSS.
Console
>$("input")
[ <input type="text" ... >,
<input type="text" ... >,
<input type="password" ... >,
<input type="password" ... > ]
Selecting by element
$("input")
<input type="text" ... >
Name
Email
Password
Confirmation
<input type="text" ... >
<input type="password" ... >
<input type="password" ... >
Give me all the input fields ...
All input elements
>
By typing in
$("input")
into the console window and hitting return, the browser
prints out all the page elements matching our selector. In this case, we get
all four input fields:
name
,
email
,
password
, and
confirmation
.
To refine our search a little, we can modify our selector to grab only those
text boxes of type
text
.
Console
>$("input[type=text]")
[ <input type="text" ... >,
<input type="text" ... > ]
Selecting by element and type attribute
$("input[type=text]")
<input type="text" ... >
Name
Email
Password
Confirmation
<input type="text" ... >
<input type="password" ... >
<input type="password" ... >
All inputs of type text
>
Chapter 3. Adding UI Tests to Legacy Systems • 38
report erratum • discuss
This filters out the password input fields, and leaves us only with two text
input fields to differentiate between.
At this point, we don’t have any other distinguishing features separating the
Name input field from the Email field. So let’s grab Name by virtue of its
position.
Console
>$("input[type=text][0]")
[ <input type="text" ... >]
Selecting by element, type, and position
$("input[type=text][0]")
[0] <input type="text" ... >
Name
Email
Password
Confirmation
[1] <input type="text" ... >
[2] <input type="password" ... >
[3] <input type="password" ... >
First element matching
this selection criteria
grab the 1st
>
Yay! We got our Name input field. Using that same logic, see if you can now
figure out what the CSS selectors would be for the other three.
Sign Up
Name
Email
Password
Confirmation
$("input[type=text][0]")
$(" ")
$(" ")
$(" ")
Write the other CSS
selectors here
Hint: Use ‘type=password’ here
*
*
*
OK. So that takes care of our input text fields. But what about our “Create
my account” button? What CSS selector do you think we could use for that?
report erratum • discuss
Step 2: Figure Out Your CSS Selectors • 39

Create my account
$("<?>")
<button type="submit"
class="btn-large">Sign in</button>
Hmmmmm ....
How to grab ?
We’ve got a couple options here. We could select it by its element type
$('button')
.
And if we had more than one button, we could then grab it by its position.
But there’s another neat way to grab page elements. We can also select them
by their class.
Console
>$(".btn-large")
[ <button type="submit" class="btn-large">Sign in</button> ]
Typing this...
Selecting by class "."
$(".btn-large")
Select by class “.”
<button type="submit" class="btn-large">Create...</button>
returns this.
Create my account
The
class
attribute is how CSS selectors decorate or apply styles to elements
in our web pages. Fortunately for us, we can use this same ability to grab
page elements too!
That “.” dot in front of the
btn-large
is the CSS notation for grabbing an element
by its class. Grabbing elements by their class is handy when we’ve got hard-
to-reach page elements and we just don’t know how to get our hands on them.
By decorating, or surrounding, the element we want with a class we can
select, we can sometimes get to those hard-to-reach places without having
to write a weird, complex CSS selector.
With our button now selected, we have everything we need to grab our page
elements.
Chapter 3. Adding UI Tests to Legacy Systems • 40
report erratum • discuss

Sign Up
Name
Email
Password
Confirmation
$("input[type=text][0]")
$("input[type=text][1]")
$("input[type=password][0]")
$("input[type=password][1]")
These selectors will work ...
Create my account
$(".btn-large")
And when we throw these into a test, they look something like this:
before do
# create a new user
visit signup_path
all(:css,'input[type=text]')[0].set('New User')
all(:css,'input[type=text]')[1].set('user@example.com')
all(:css,'input[type=password]')[0].set('foobar')
all(:css,'input[type=password]')[1].set('foobar')
find(:css,'.btn-large').click
end
Hmmm. OK…not the prettiest test code to look at. I don’t know about you,
but I find this test kind of hard on the eyes. But let’s walk through it and see
what it does anyways. This line scans the entire page looking for any CSS
elements that match our selection criteria
'input[type=text]'
.
all(:css,'input[type=text]')[0].set('New User')
Then it puts some text into its contents with
set('New User')
. Same for password.
This line does the same thing, only when it finds the button, it clicks it instead.
find(:css,'.btn-large').click
It’s not impossible to read code like this. It’s just a lot of work, which is some-
thing we want to avoid when writing tests. It’s not immediately clear which
elements are being selected, and it’s hard to understand what’s going on.
This is the downside of writing automated UI tests without element IDs. You
get hard-to-understand tests. And worse, this test is brittle. As soon as someone
changes the layout of any of these elements, these tests are going to break.
That’s why, as mentioned before, the preferred way to do this is to give our page
elements unique IDs and write our tests based on these. It’s this ‘#’ pound sign,
in front of the element ID name, that CSS uses to select elements by their ID.
report erratum • discuss
Step 2: Figure Out Your CSS Selectors • 41
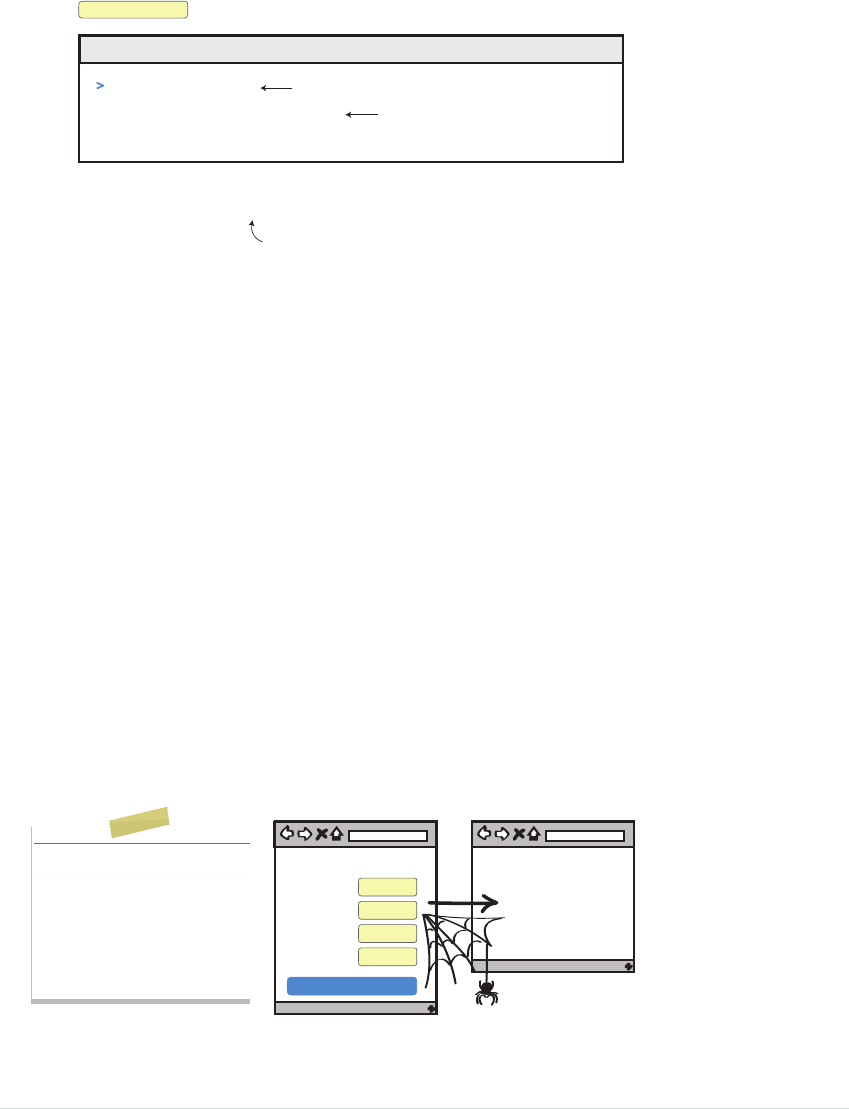
Console
>$("#user_name") Typing this and pressing ‘Enter’...
Selecting by ID "#"
$("#user_name")
Select by ID “#”
Email <input id="user_name" ... >
[<input id="user_name" ... > ] returns this
OK. So that’s how we grab page elements using regular, full-on CSS. And if
for some reason you can’t grab page elements by their IDs, at least you know
you can always also try to do it with regular, raw CSS.
With that under our belt, let’s forge ahead and make some assertions.
Step 3: Make Your Assertions
Finally. The fun part! Now that we’ve done the heavy lifting and written all our
selectors, here’s where we get to sit down and write an honest-to-goodness test.
Assertions are truths we express about our software in the form of code—in
our case, automated tests.
Here it would be good if we made two assertions about our login page:
•People with valid credentials can log in.
•People without valid credentials can’t.
Let’s start with the first one.
Testing the Valid Credentials
Sign Up
Name
Email
Create my account
New User
Success!
Password
Confirmation
New User
user@...
*******
*******
Story: Create User
- redirects to Welcome page
- displays username
- shows success message
Chapter 3. Adding UI Tests to Legacy Systems • 42
report erratum • discuss
Judging by this story’s acceptance criteria, it looks like there are three things
we’re going to want to test for here:
•A redirection to a Welcome page
•The user’s name displayed on that page
•A success message appearing at the top
Let’s start with the first two and leave the success message till last.
If we enter some valid user credentials, hit the “Create my account” button,
and then see the user’s name somewhere on the Welcome page, we’ll know
the redirect worked. We can check that with a simple assertion like this:
it { should have_content(user.name) }
This line scans the entire page looking for the content
user.name
and lets us
know if it doesn’t find it.
The success message is a bit more interesting. Here we need to figure out
how to select the element containing the Success message, and then assert
something about its existence.
Right-clicking it and selecting it with our ever-handy Inspect element tool
shows that the alert message is an HTML
div
or division tag, wrapped within
two nested CSS classes.
Elements
<div class="...">
<div class="alert alert-success">Success!</div>
</div>
html body div.alert.alert-success
What we want to do here is grab this
div
and then assert that it exists. There
are two ways we could grab this alert. We could select it by the first
alert
class
or the more descriptive second
alert-success
.
Console
>$('.alert')
[ <div class="alert alert-success">Success!</div> ]
>$('.alert-success')
[ <div class="alert alert-success">Success!</div> ]
report erratum • discuss
Step 3: Make Your Assertions • 43
Both would work here. But because I know we’re going to want to check for
error messages in the invalid credential section coming up, let’s go with the
more specific of the two and use the
alert-success
.
it { should have_selector('.alert-success') }
Question. Why aren’t you checking for the
presence of the word ‘Success!’in the message itself ?
Ah. Good question. This is a subtle but important point.
UI tests have the tendency to be brittle. The more specific, or coupled, we
make our tests in the UI, the more likely they will break. So when writing UI
tests, we always try to write them in the least coupled, or least specific, way.
In this case, a tightly coupled assertion that checks the contents of the alert
message itself would look like this:
it { should have_selector('.alert-success',text: 'Success!') }
A loosely coupled, or less specific, test that doesn’t check what the alert
message says (only that it exists) would look like this:
it { should have_selector('.alert-success') }
See the difference? In the first case, we’re checking for the text. In the second,
we’re not.
That’s the call you’ll have to make when writing UI tests: how coupled or tight
to make them to the UI. The tighter the coupling, the more fragile the test.
So the trick is to write your UI tests as loosely as you can, but no looser.
Loose means not getting too tied to the details. Checking for the presence of
things, without worrying about the underlying ever-changing contents, is one
way to do that.
But great question. This is probably the biggest pitfall people run into when
they first get into UI testing, and it’s often one of the things that trips them up.
Chapter 3. Adding UI Tests to Legacy Systems • 44
report erratum • discuss

Keep your UI tests loose. Don’t overly connect
them to any underlying details.
After doing some cleanup and adding in some unique page IDs, our valid
sign-up credential test looks like this:
cswp/spec/requests/user_pages_spec.rb
describe 'When creating a new user' do
subject { page }
describe 'with valid credentials' do
before do
# create a new user
visit signup_path
fill_in 'Name',with: 'New User'
fill_in 'Email',with: 'user@example.com'
fill_in 'Password',with: 'foobar'
fill_in 'Confirmation',with: 'foobar'
click_button 'Create my account'
end
describe 'after saving the user' do
# find the new user we just created
let(:user) { User.find_by(email: 'user@example.com') }
# make some assertions
it { should have_content(user.name) }
it { should have_selector('.alert-success') }
end
end
end
The
before
is new to us here. The contents of this block get run before each
and every test in our test suite. We can think of
before
as a way of giving us a
clean slate before running each test, which helps keep our tests isolated and
independent. It also sometimes goes by another name: setup.
Here it selects and fills out the controls and clicks the “Create my account”
button, which then redirects us to the success page.
The
describe
block assumes a user has already successfully been created, and
that we’ve already been redirected. All we need to do is find our brand-new user
and then verify we can see their name and the corresponding success message.
describe 'after saving the user' do
# find the new user we just created
let(:user) { User.find_by(email: 'user@example.com') }
report erratum • discuss
Step 3: Make Your Assertions • 45
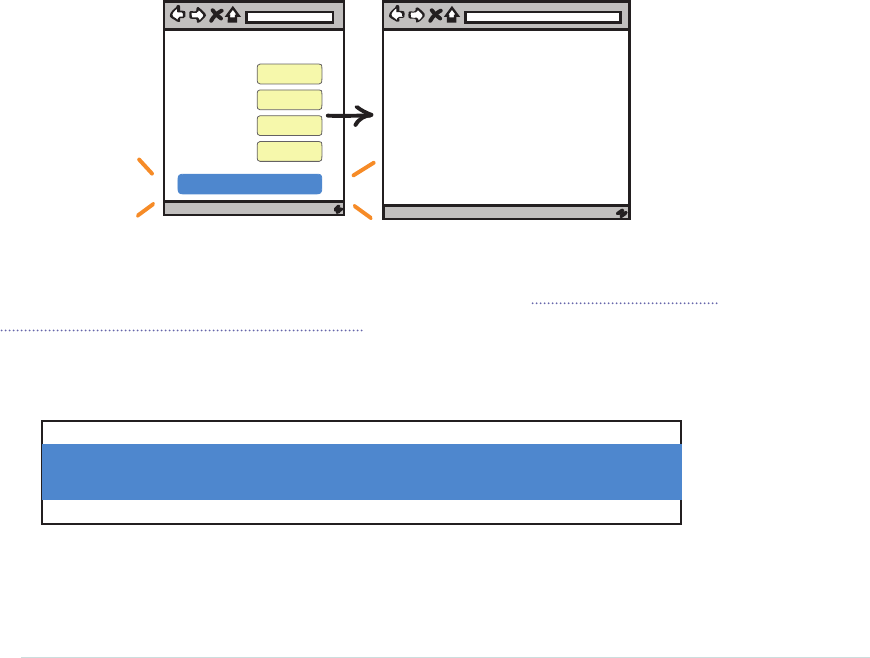
# make some assertions
it { should have_selector('.alert.alert-success') }
it { should have_title(user.name) }
end
This command is how Rails finds the user we just created, by looking them
up by their email address:
let(:user) { User.find_by(email: 'user@example.com') }
And this is the assertion that lets us check to see that their name was suc-
cessfully set in the title of the HTML page:
it { should have_title(user.name) }
Alright. Good stuff. Let’s do the same thing now for the failure case.
Testing the Invalid Credentials
The failure case is similar to the valid credentials case, except here instead
of getting redirected to a Welcome page, we stay on the same page and get
some error messages displayed nicely at the top.
Sign Up
Name
Email
Create my account
The form contains 6 errors
Password
Confirmation
* Name can’t be blank
* Email can’t be blank
* Email is invalid
* Password can’t be blank
* Confirmation can’t be blank
* Password too short
Now, we could write UI tests for each and every one of the error messages.
But let’s hold off for now (you’ll see why when we get to Chapter 6, Covering
Our Bases with Unit Tests, on page 77). Instead, let’s do what we did in the
previous section and just verify the presence of the error message itself.
Here’s what we see when we Inspect the error message.
<div id="error-explanation">
<div class="alert alert-danger">
The form contains 6 errors.
</div>
<ul>...</ul>
And here is the test, along with the CSS selector and a test to check for its
presence:
Chapter 3. Adding UI Tests to Legacy Systems • 46
report erratum • discuss

describe 'with invalid credentials' do
before do
visit signup_path
click_button 'Create my account'
end
it { should have_selector('.alert.alert-danger') }
end
Here we are triggering the error message by visiting the sign-up page and
then hitting the “Create my account” button without entering any credentials.
before do
visit signup_path
click_button 'Create my account'
end
Then here we check for the presence of the error message with a one-liner
like this:
it { should have_selector('.alert.alert-danger') }
And when we bring together the valid and invalid test cases, the whole test
in its entirety looks like this:
cswp/spec/requests/user_pages_spec.rb
require 'spec_helper'
describe 'When creating a new user' do
subject { page }
describe 'with valid credentials' do
before do
# create a new user
visit signup_path
fill_in 'user_name',with: 'New User'
fill_in 'user_email',with: 'user@example.com'
fill_in 'user_password',with: 'foobar'
fill_in 'user_password_confirmation',with: 'foobar'
click_button 'Create my account'
end
describe 'after saving the user' do
# find the new user we just created
let(:user) { User.find_by(email: 'user@example.com') }
# make some assertions
it { should have_title(user.name) }
it { should have_selector('.alert-success') }
end
end
report erratum • discuss
Step 3: Make Your Assertions • 47
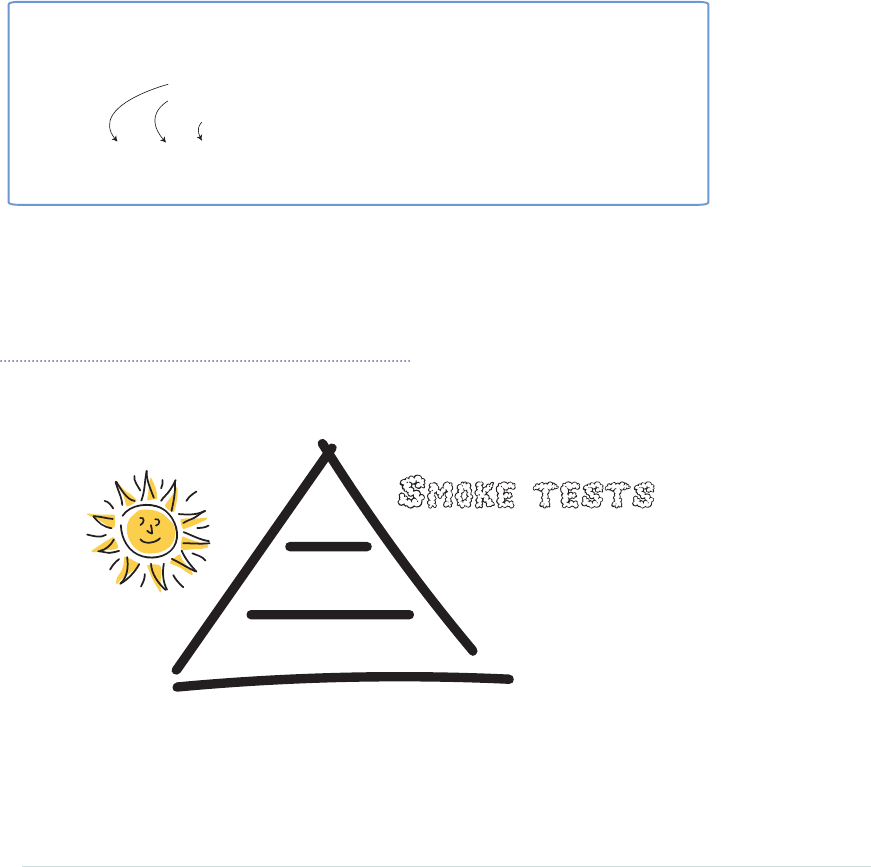
describe 'with invalid credentials' do
before do
visit signup_path
click_button 'Create my account'
end
it { should have_selector('.alert.alert-danger') }
end
end
Seeing tests broken down like this may seem a little strange at first, but the
way to read RSpec is to combine
describe
statements like this:
describe "Signup" do
describe "with invalid credentials" do
should have_selector("danger")
How to read RSpec describe statements
Signup with invalid credentials should have selector danger.
We start at the top, and then work our way down combining the
describe
s to
form sentences. It’s a neat way of embedding context into our tests, and orga-
nizing them in such a way that we can reuse a common setup. We will talk
more about this and other styles for grouping and organizing tests later in
Chapter 10, Organizing Tests:, on page 161.
What We’ve Learned So Far
UI
Integration
Unit
Chapter 3. Adding UI Tests to Legacy Systems • 48
report erratum • discuss

Hurray! We did it. Those were two big chapters on UI testing and we learned a lot:
•What UI tests are and how they work
•What CSS selectors are and how we use them when writing UI
tests for the web
•How much easier it is to write UI tests when your page elements have IDs
•How to keep our UI tests loose and avoid test fragility
With UI tests under our belt, we are now ready for the next stage of our
journey: integration tests.
So what are you waiting for? Turn the page and unravel some more testing
secrets of the web!
report erratum • discuss
What We’ve Learned So Far • 49
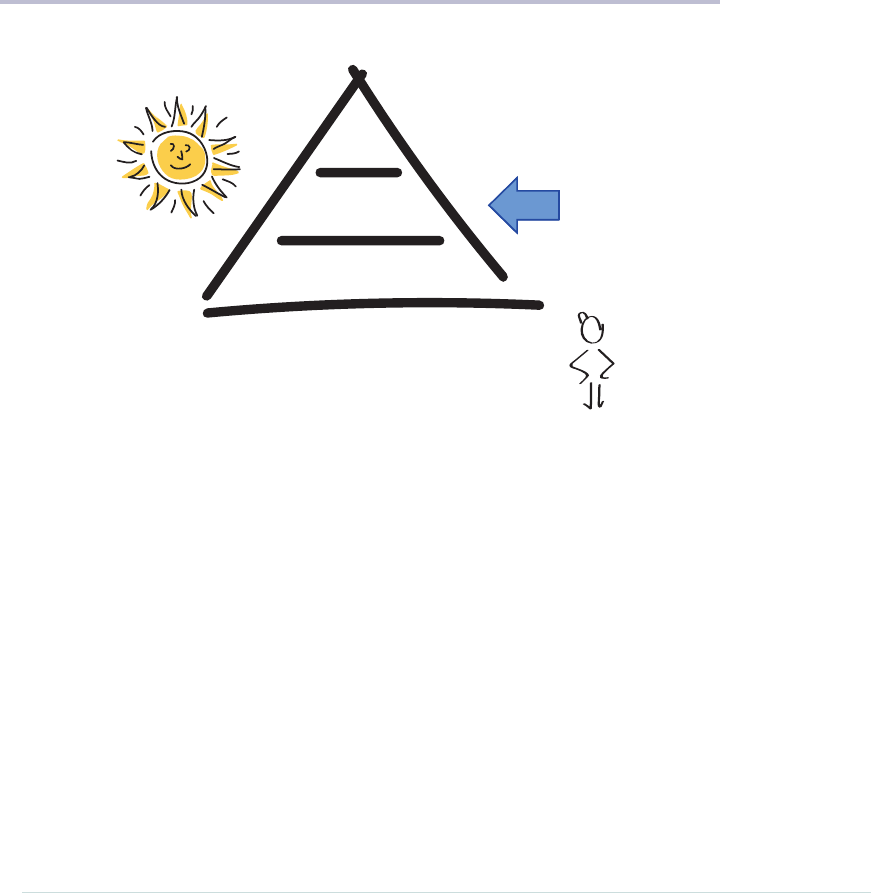
CHAPTER 4
Connecting the Dots with Integration Tests
UI
Integration
Unit
Once you’ve learned how to write integration tests, the world is your oyster.
Not only will you be able to test any back-end web service, you can script and
test just about any user interaction you can can think of from a browser, all
with a few simple HTTP commands.
Testers, this is a good chapter for you to study so you can start to get familiar
with how protocols like HTTP work, which is handy stuff to know if you’re
going to be testing web applications.
Developers, this chapter will show you the types of things we typically look
for when testing web services, and it will give you an alternative tool to UI
testing that you can keep in your back pocket.
report erratum • discuss

There Is No UI
DAVE
Any chance I can connect
through my phone ?
How to test?
Great. Just when we were getting comfortable with UI tests, Dave throws us
a curveball. He wants us to test his new back-end permit web service. The
only problem is…there is no user interface.
How are we going to do that? If we at least had a web page or something, we
could drive tests through that. But without a user interface, we have noth-
ing—only some dangling HTTP endpoints!
What we need here is another kind of test. Something that doesn’t need to
go through a UI. Something that can speak to the underlying web services,
yet is still fast enough to give that quick feedback if something breaks.
Enter the Integration Test
Integration tests are any kind of test that combines more than one thing
together. It’s a terrible name for a test, because UI tests are integration tests,
and technically you could argue unit tests are too (if you consider two objects
calling each other “integration”).
But in the context of this book, and the way many in our industry use the
term today, integration tests for us are going to be the underlying services
that power an application. For web applications, these are our web ser-
vices—programs that run on web servers and respond to HTTP requests.
Chapter 4. Connecting the Dots with Integration Tests • 52
report erratum • discuss
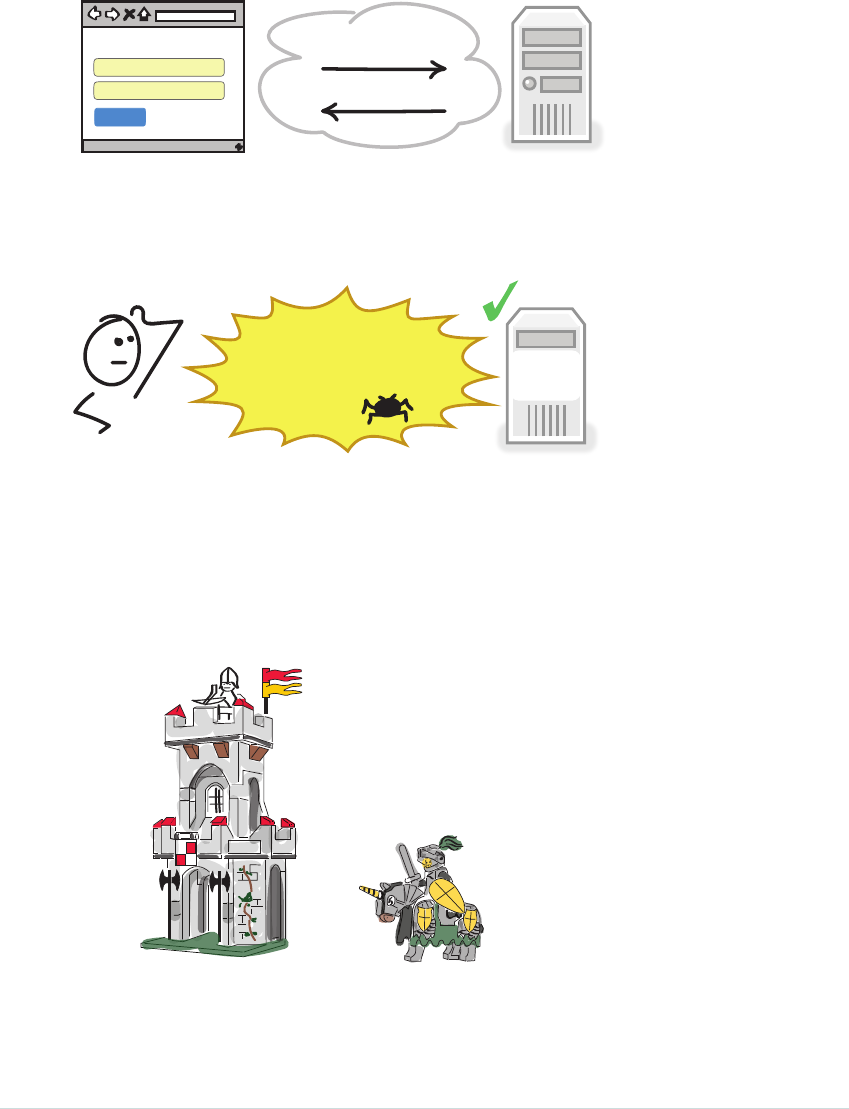
Please sign in
Email
Password
Sign In
HTTP Requests
HTTP Responses
Integration Tests
Integration tests are important for a number of reasons. First, they play a critical
role in helping us catch low-level bugs we miss at the lower unit-test level.
Hmmmmm ....
Unit
Unit Tests Pass
100%
Boom!
Haha
Missed me!
Good for catching missed integrations
Second, integration tests strike a balance between armor (UI tests) and
mobility (unit tests). They give us enough armor (integration) to know certain
things are connected, but also enough mobility (speed and feedback) to let
us develop iteratively.
Armor Mobility&
Strike a nice balance
between ...
report erratum • discuss
Enter the Integration Test • 53
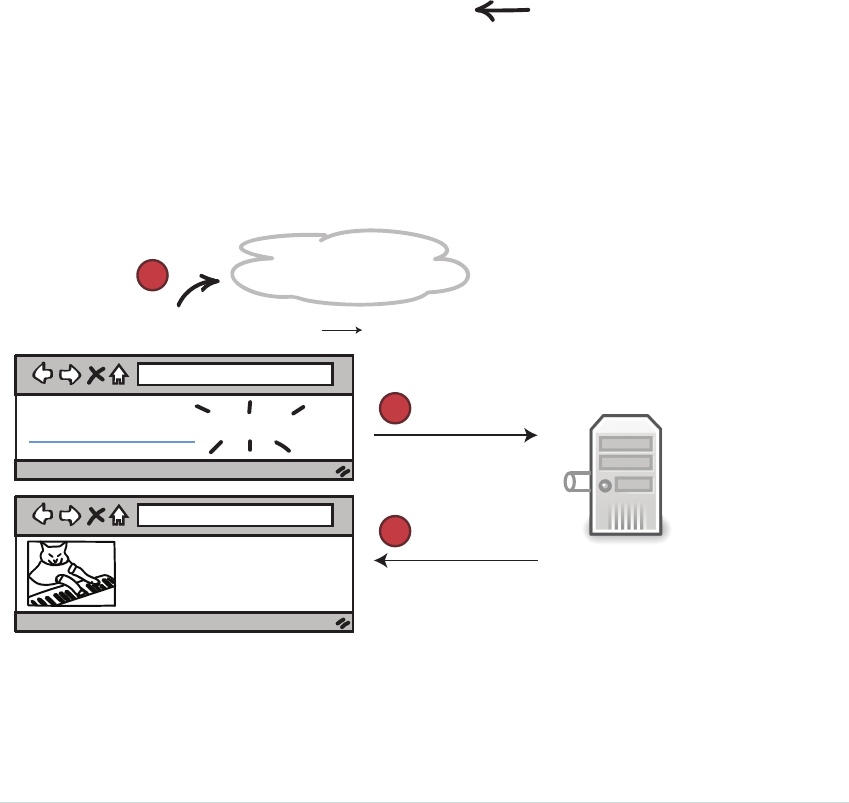
And third, they let us test systems at the same level they are built
on—specifically, the web. By being able to plug in and write tests at the same
level our application services are built on, we can leverage many of the tools
and techniques we use when interacting with the web every day, such as our
browsers.
If we are going to test the web, we should first get to know the web. Let’s
quickly review how the web works.
How the Web Works
The first thing to understand about the web is that everything, and I mean
everything, is a URL.
http://funnycatz.com URL
URLs (Uniform Resource Locators) are those links or addresses you see at
the top of your browser when you click things in the web. That Facebook
update. That banking transaction. That funny cat video. All of those are URLs.
And when you click those things in your browser, magical things start to
happen.
Request
Response
piano.html
Meow....
http://youtube.com/...
Funny cat video Click!
192.168.1.1
http://funnycatz.com/piano.html http://192.168.1.1:80/piano.html
80
DNS lookup
funnycatz.com 192.168.1.1=>
3
2
1
First, a lookup service called DNS (Domain Name System) takes part of that
URL you clicked and converts it into something called an IP address. That IP
Chapter 4. Connecting the Dots with Integration Tests • 54
report erratum • discuss
address is the unique address of the server hosting whatever resource it is
you’re looking for—in our case, a web page called piano.html.
With that IP address in hand, your browser is now able to create the URL
necessary to fulfill your request. It does this by creating a URL that looks
something like this.
http://192.168.1.1:80/piano.html
protocol IP address port resource
The first part is the protocol. It describes the communication standard your
browser is going to use when it makes the request to the hosting server. There
are other Internet protocols for things like email and file transfers. For us,
this is always going to be HTTP.
Next you’ve got your IP address. We already talked about this, but you can think
of this as the address of the server hosting the resource we’re looking for.
Then you’ve got your port number. Port numbers are the channels that servers
are listening for incoming requests on. By default, this is usually port 80, but
it could be anything (like 3000 or 8080).
And then you’ve got the resource itself. This is the thing we were looking
for—in this case, an HTML web page called piano.html.
With this URL, our browser can now send our request, and hopefully get back
a response containing the piano.html file along with all its assets (images and
style sheets) required to render this page in our browser.
<IP address>
<port>
<resource>
<protocol>
http://192.168.1.1:80/piano.html
(http) (80)
(piano.html)
(192.168.1.1)
report erratum • discuss
How the Web Works • 55
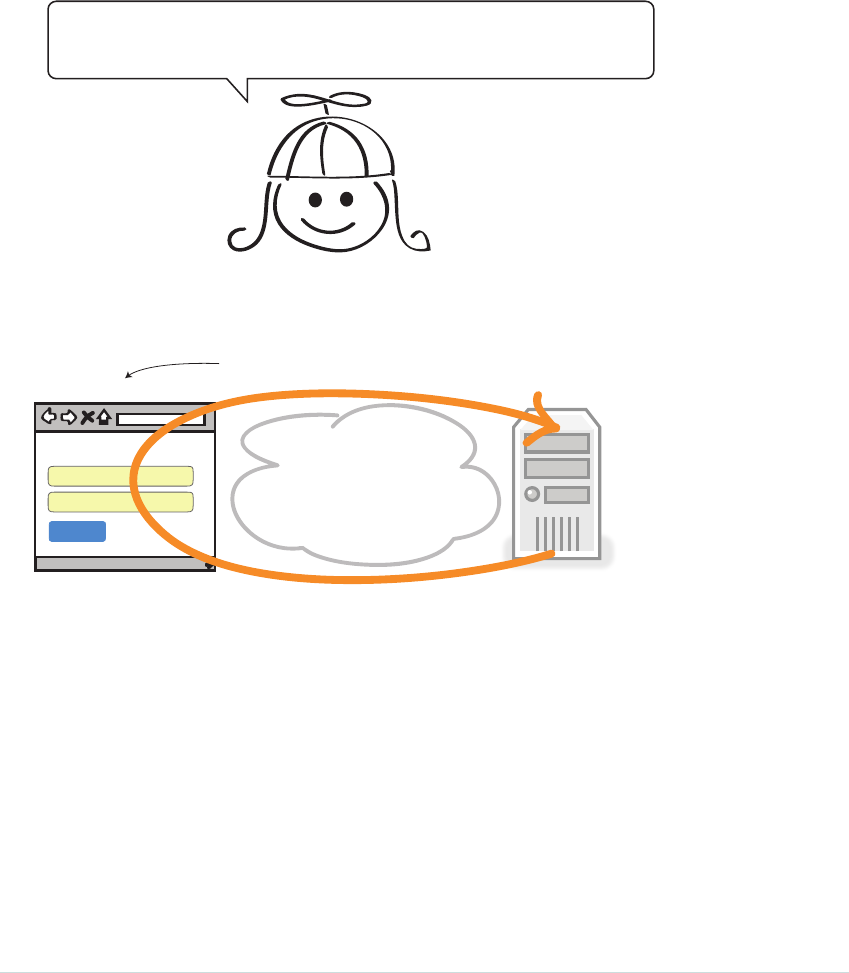
You aren’t going to see a ton of IP addresses used in the tests we write (Rails
represents URLs for us as variables like
login_path
). But it’s still important that
you understand how these things work.
Periodically you’ll come across an internal test server that you can only access
via its IP address. Now you’ll know what that means, and that it is simply the
IP address form of a URL.
Ah excuse me! This is really interesting and all ...
But what does any of this have to do with testing !?
I’m glad you asked! These URLs—these things we click when we surf the
Net—are what we are going to use to drive our HTTP integration tests.
Please sign in
Email
Password
Sign In
We can use URLs ...
to drive tests.
http://login
Once we know how to take an interaction in the browser and convert it into
its corresponding URL, look out! There’s nothing we can’t do when it comes
to testing our web services directly through our URLs.
But before we can do that, there’s one more language we need to speak—and
that’s HTTP.
Talking HTTP
You might have thought Chinese, Spanish, and English were the most popular
languages in the world—but they’re not. What makes the world go around
these days are three other languages: HTTP, HTML, and CSS (ha!).
Chapter 4. Connecting the Dots with Integration Tests • 56
report erratum • discuss
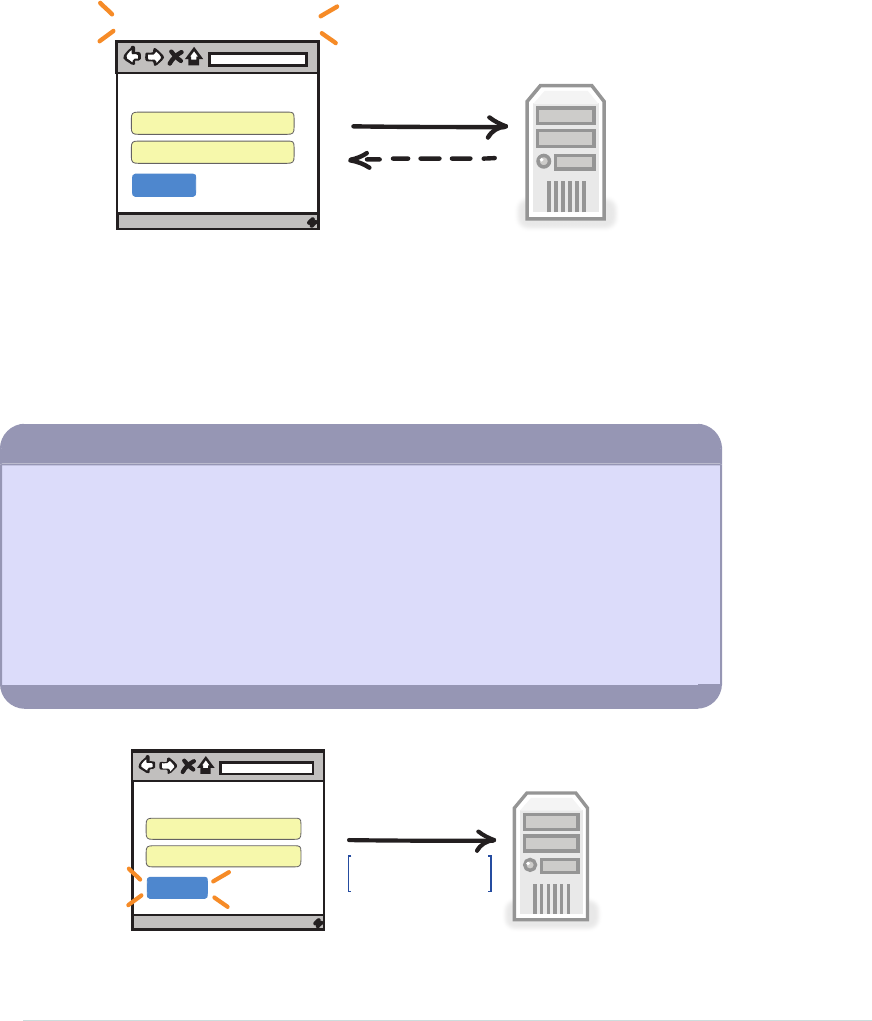
HTTP stands for Hypertext Transfer Protocol, and it is the protocol the web
speaks to send and receive information from one place to another.
You see, every time you click a hyperlink or navigate to another web page,
something called an HTTP GET request gets sent from your browser to a server.
HTTP GET
HTML, CSS, JavaScript
Please sign in
Email
Password
Sign In
http://localhost:3000/login
This HTTP GET is a command—more specifically, a verb that says, “I would
like to get something at this address.” In this case, we are getting a web page
along with all its underlying assets.
Now, when you fill out an HTML form and click the submit button, another
kind of HTTP request gets sent. This one is called an HTTP POST.
There’s No Place Like 127.0.0.1
localhost
is a shortcut for the IP address of any computer that tries to reference itself
locally: namely 127.0.0.1. When testing locally (meaning your integration tests are
running locally on your machine), you will often see
localhost
in the address bar of your
browser. All that means is that those requests from your browser are going to be sent
locally to this computer.
With that little bit of insight, you can now laugh along at your next cocktail party
when someone says, “There’s no place like 127.0.0.1.” Who said technologists don’t
have a sense of humor!
HTTP POST
email:
password:
foo@bar.com
*****
Please sign in
Email
Password
Sign In
http://localhost:3000/login
report erratum • discuss
Talking HTTP • 57
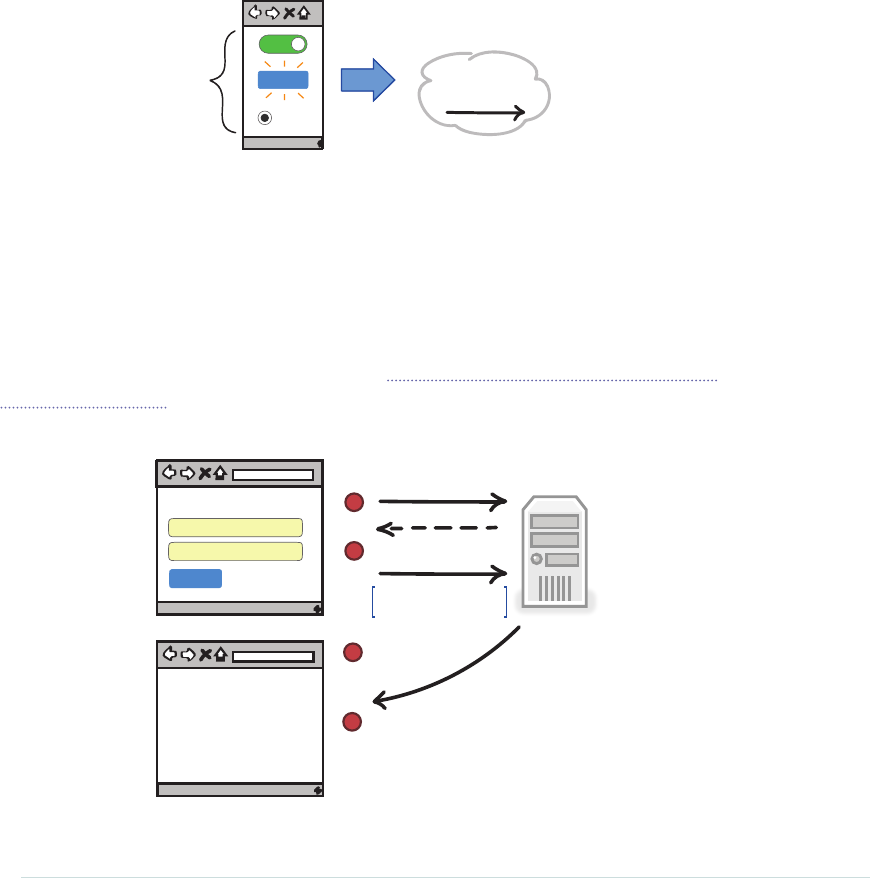
HTTP POSTs are one way browsers send information to servers (see the
sidebar for another). HTTP POST takes the contents of your HTML form,
bundles it up, and sends it to the server. This is how most login pages work.
Now, the important thing to note here is that every time you click a hyperlink,
fill out some form, or hit that share button, your action gets turned into an
outgoing HTTP request. Think about that for a minute.
Before the web server can redirect to your favorite cat video, log you into
Facebook, or share that selfie of you eating that piece of lemon meringue pie,
it first needs to convert that browser interaction into an HTTP request.
Click HTTP
Requests
Select
All of these
eventually get turned into one of these.
Once you realize this, you’ll also realize you have another powerful tool in
your testing arsenal—one that doesn’t require always having to write end-to-
end tests through the UI. But rather, one that slips under the surface one
layer deep, allowing you to test the underlying services directly themselves.
This is what integration tests are. Tests that skip the UI, directly test the
underlying services, and avoid the pain and suffering that come with UI testing.
Remember our login page UI test from Chapter 2, Smoking User Interface
Tests, on page 19? The one that filled out the login form and clicked the Sign
In button? Here’s the same test, rewritten using only HTTP requests and no UI.
HTTP GET
HTTP POST
redirect
HTML, CSS, JavaScript
email:
password:
foo@bar.com
foobar
Please sign in
Email
Password
Sign In
Welcome
1
2
4
3
4verify
Chapter 4. Connecting the Dots with Integration Tests • 58
report erratum • discuss
Another Way to Pass Information to a Server
HTTP forms are one way to send information to a server. Another is to pass the data
as part of the URL as a name-value pair.
HTTP GET
https://www.google.ca/search? q=pixar
name-value pair
You do this whenever you do a Google search. Whatever word you type in the Google
box gets added to an HTTP GET request and sent to Google’s servers. That pairing (a
variable along with its value) is what we call a name-value pair or query string. And
you can pass data to servers by embedding these directly into URLs.
This is fine for simple searches, but it exposes a lot of the internals about your system
(which makes it easier for hackers to see how your website works).
There is also a limit to how much information you can send as part of an HTTP GET.
So it’s not ideal for uploading pictures or lots of data.
That’s why you’ll see most non-trivial data sent from browsers in HTTP POSTs, and
query strings with HTTP GETs reserved for the more simple stuff.
def setup
@user = users(:user1)
end
test "login with valid credentials" do
get login_path
post login_path, session: {email: 'user@test.com',password: 'password' }
follow_redirect!
assert_select "h1","Welcome"
end
Just like we did before, we start by setting up a fake valid user. We then
navigate to our login page via an HTTP GET. We send the login credentials to
the server as an HTTP POST. And then we follow the redirect to the new page
where we can verify, with an assert, that we have landed at the right place.
If you ever want to see this in action in your browser, you can! Simply open
up your browser’s Developer Tools (we are using Google Chrome here):
View
Developer View Source
JavaScript Console
Developer Tools
Your browser
Google Chrome
report erratum • discuss
Talking HTTP • 59
Click the Network tab and reload your page in your browser. You will then see
the network traffic between the server and browser that renders your web page.
Network
Name Status Type
login 200 document
permit.css 200 stylesheet
... ... ...
HTTP GET
HTML, CSS, JavaScript
Please sign in
Email
Password
Sign In
1
Network traffic
The HTTP request
to GET the page
You will see requests of each of the downloaded files needed to render the
page. You will see the status of each request (200 means OK, and this is
something called a status code; we’ll talk more about this in the next chapter).
And by clicking any of these rows, you can inspect and analyze each and every
request that takes place between your server and your browser. It’s handy for
debugging and seeing what’s going on behind the scenes with the web services
you want to test. You can even see the traffic flowing both ways. Just look
what happens when you enter some login credentials and hit Sign In.
Network
Name Headers
login General
Please sign in
Email
Password
Sign In
HTTP POST
email:
password:
foo@bar.com
foobar
2
Preview Response
Request URL: http://localhost:3000/login
Request Method: POST
Status Code: 302 Found
...
Form Data
session[email]: foo@bar.com
sessions[password]: foobar
The HTTP POST sending our details to the server
Chapter 4. Connecting the Dots with Integration Tests • 60
report erratum • discuss
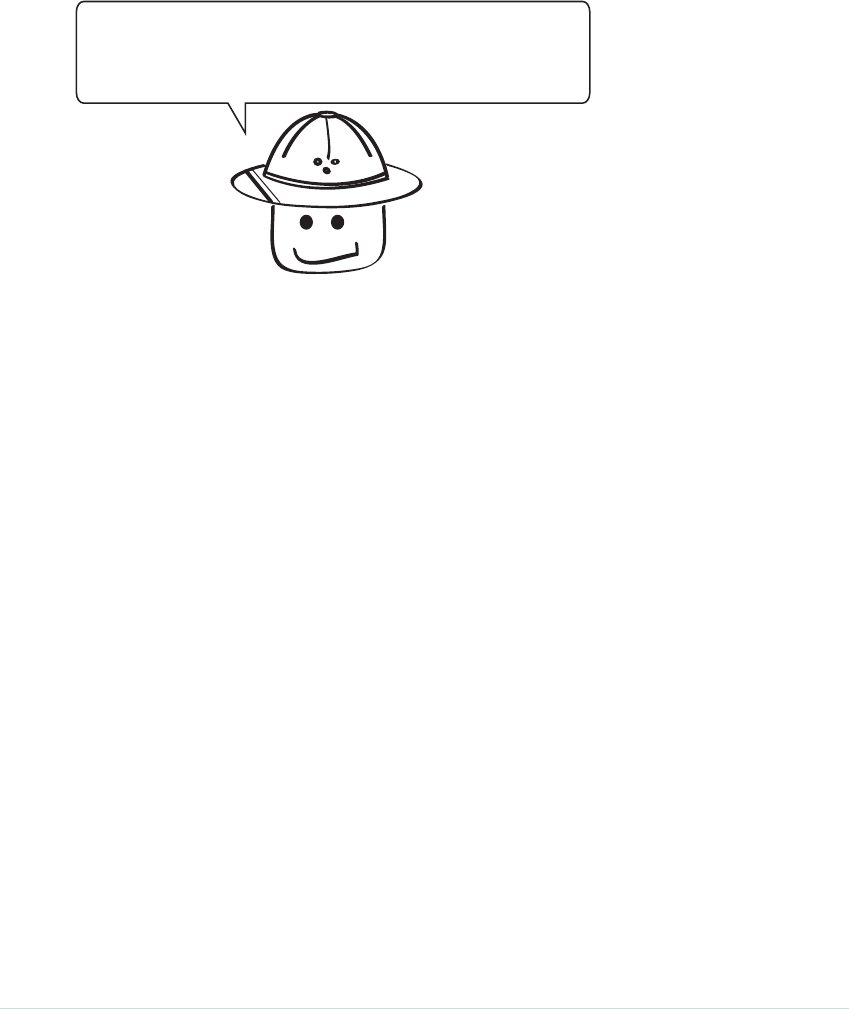
By clicking the Headers sub tab, you can see your actual HTTP POST request
being sent to the server. You can see that it was an HTTP POST, what the
status code was, and even the username and password itself being sent to
the server. These are all handy things to help us write and debug our integra-
tion tests when we start scripting HTTP requests from the browser.
Hold on. I’
Why are we rewriting UI tests
in the form of HTTP requests again ?
m confused...
We aren’t rewriting UI tests as integration tests (even though we could, and
that is sometimes a good idea). We are looking at an alternative way to test
back-end web services that doesn’t require us going through a UI.
Believe it or not, not every web service on the web today has a front end. In
fact, many don’t. Many are simply web APIs (application programming inter-
faces—the things people call when they want to talk to our programs) that
people create so others can interact with their web services. Twitter, Facebook,
Spotify—all these have web services you as a developer can call to get Twitter
feeds, Facebook updates, or track information about your favorite artists.
HTTP integration tests give us a way of testing those.
Having said that, some teams find testing through the UI so problematic that
they do the bulk of their integration testing through their web services, and
punt on doing any automated testing through the UI. This is how a lot of Rails
applications get tested today.
So view HTTP integration tests as a way to directly test your back-end web
services, as well as an alternative way to test web pages if you have a slow,
complicated UI.
Alright, with that, we are almost ready to tackle Dave’s create permit service.
But before we do, there is one other concept that is handy for you to under-
stand before we head out into the wild. And that is a form of web API design
that has taken the world by storm. It’s something called REST.
report erratum • discuss
Talking HTTP • 61
What’s with All the foobar?
foobar is placeholder text developers sometimes use when they need a value for
something, but the value itself doesn’t matter.
You may have seen copywriters do the same thing when they insert lorem ipsum as
placeholder text into documents (which means random text). foobar is the developer
version of that.
Taking a REST
REST stands for representational state transfer, and it is a simple, standard
way to design web APIs.
To see what I mean, imagine you’re designing a new photo-sharing site (yay!)
and you need to come up with a web API that allows people to create, read,
update, and delete their photos on your website. How would you do it?
Photos
update
find
create
delete
How many different ways can
you think of to interact with photos ?
write in your ideas here
If you think about it, there are literally dozens of ways you could build an API
to share photos. You could write a web service called
retrievePhoto
, where people
would pass you the
id
of their photo and you would send it back to them. Or
you could use another similar word such as
fetch
. That would work too.
Therein lies the problem. Because there was no one right way to describe the
fetching or retrieving of resources, everyone created their own. If you wanted
to interact with someone else’s web service, you had to sit down and learn
their customary, proprietary way of doing that.
Chapter 4. Connecting the Dots with Integration Tests • 62
report erratum • discuss
Photos
fetch
find read
get
create
insert upload
change
delete remove
There are countless ways we
could do this ...
inject
dispel
terminate
banish
preview
enhance
sync replace
retrieve recover
Then one day a smart guy named Roy Fielding came along and said (para-
phrasing here):
“Hey everyone. Instead of everyone defining their own way for accessing
resources on the web, why don’t we just use the name of the resource we’re
looking for as the URL, and then limit the interactions we can do to that
resource to these four HTTP verbs: GET, POST, PUT and DELETE.”
Read
Create
Update
Delete Photos
/photos/:id
/photos
/photos/:id
/photos/:id
HTTP GET
HTTP POST
HTTP PUT
HTTP DELETE
REST
With these four verbs we can update any resource
- four verbs, one resource
Whoa. This was brilliant. Suddenly, designing web APIs became a heck of a
lot easier. Now instead of everyone coming up with their own way of describing
how to interact with their resource, there are simply four:
•HTTP GET for getting existing resources
•HTTP POST for creating new ones
•HTTP PUT for updating existing resources
•HTTP DELETE for deleting existing ones
report erratum • discuss
Taking a REST • 63

All you have to do is supply a URL based on the name of the resource, along
with the ID of the thing you’re looking for, and bang! You’ve got your API.
http://localhost:3000 /photos
HTTP GET
HTTP POST
HTTP PUT
HTTP DELETE
/:id
resource ID
A RESTful URL ...
And that’s REST: a simple, elegant, compact way to describe how, with only
four verbs, you can interact with any resource on the web. It’s gotten so
popular that this is how most web services are built and designed today. If
this isn’t 100% clear, don’t worry—we are going to look at a concrete example
in the next chapter.
What We’ve Learned So Far
UI
Integration
Unit
Connectivity
OK. At this point, you’ve seen what integration tests are, and you know a few
things about how they and web services work, in general:
•All interactions in the browser eventually get turned into web requests.
•REST is one style of web service design that lets you modify resources
using one of four HTTP verbs.
•The web is made up of a bunch of URLs, which we use to drive our tests.
So that’s how things work in theory. You are now ready to put this into
practice. In the next chapter, you’re going to test a RESTful web service and
see what writing integration tests for a web service might look like.
By the end of the next chapter, you’ll be in a good place. You’ll have seen how
the web works, and you’ll have some techniques in your back pocket for
testing it. So turn the page, and wake up to see some RESTful web services.
Chapter 4. Connecting the Dots with Integration Tests • 64
report erratum • discuss
CHAPTER 5
Integration Testing RESTful Web Services
DAVE
Hey ! You haven’t
forgotten we’re
going mobile right ?
How to test?
No, sorry Dave—we haven’t forgotten. RESTful web services have become an
extremely popular way of designing web services. If you’re a tester, under-
standing the high-level design of how REST works will help you with the
mechanics of your tests. If you’re a developer, understanding the underlying
constructs of RESTful services is essential for building them. And there is no
better way to learn an architecture than to test it.
So with our new insights around how to script web requests with HTTP, and
a high-level understanding of how RESTful APIs work, let’s now see if we can’t
come up with some integration tests for Dave and his new RESTful permit
service.
report erratum • discuss
Testing the RESTful Permit API
Dave and his team have built a simple RESTful API that enables mobile
developers to get, create, update, and delete work permits.
Show Permit
Delete Permit
Edit Permit
Location
Create
Saskatoon
Create Permit
Location
Create
Saskatoon
Permits
/permits/:id
/permits
/permits/:id
/permits/:id
GET
POST
PUT
DELETE
RESTful Permit API
HTTP
To test this RESTful service, we’re going to write a test for each of the four
verbs: GET, POST, PUT, and DELETE. Let’s start with one of the simplest:
HTTP GET.
CRUD: Create, Read, Update, and Delete
CRUD is an acronym that stands for create, read, update, delete—four operations
common with any resource we want to interact with through an API.
It’s a handy acronym to know, because you will often hear people talk about APIs as
CRUD operations. Meaning if they call your API, they are expecting it to support each
of these operations.
For RESTful services, CRUD maps to our four HTTP verbs as follows:
•GET (read)
•POST (create)
•PUT (update)
•DELETE (delete)
So if you ever hear someone say CRUD, don’t worry—that doesn’t mean they are mad.
They are just saving time by rolling four common operations all up into one.
Chapter 5. Integration Testing RESTful Web Services • 66
report erratum • discuss
HTTP GET
With HTTP GET, what we are doing is getting something from the server. In
our case, it’s a work permit with an
id
of
1
.
HTTP GET /permits/1.json
Status 200 - success
{"id":1,"location":"Saskatoon"}
Get me this permit
1 Saskatoon
Now look at the full URL used to generate this request.
http://localhost:3000 /permits /1.json
resource ID
format
It’s made up of our resource name
permits
, the ID of the permit we are looking
for (1), and that last little bit that specifies the data format—JSON.
JSON (JavaScript Object Notation) is a simple data format we use all the time
on the web for sending data. It’s an array of name-value pairs, separated by
commas, and it makes sending data over the web compact and easy—which
is why it’s become much more popular than its clunky older cousin XML.
{
"id":1,
"location":"Saskatoon"
}
name value
JSON (JavaScript Object Notation)
pairs
Separated by commas
Now, the only thing missing from our GET URL is the GET verb. How do you
suppose we specify that? Well, a quick way to generate an HTTP GET, or test
the GET request for any RESTful service, is to drop the URL you are
requesting into your browser.
report erratum • discuss
HTTP GET • 67
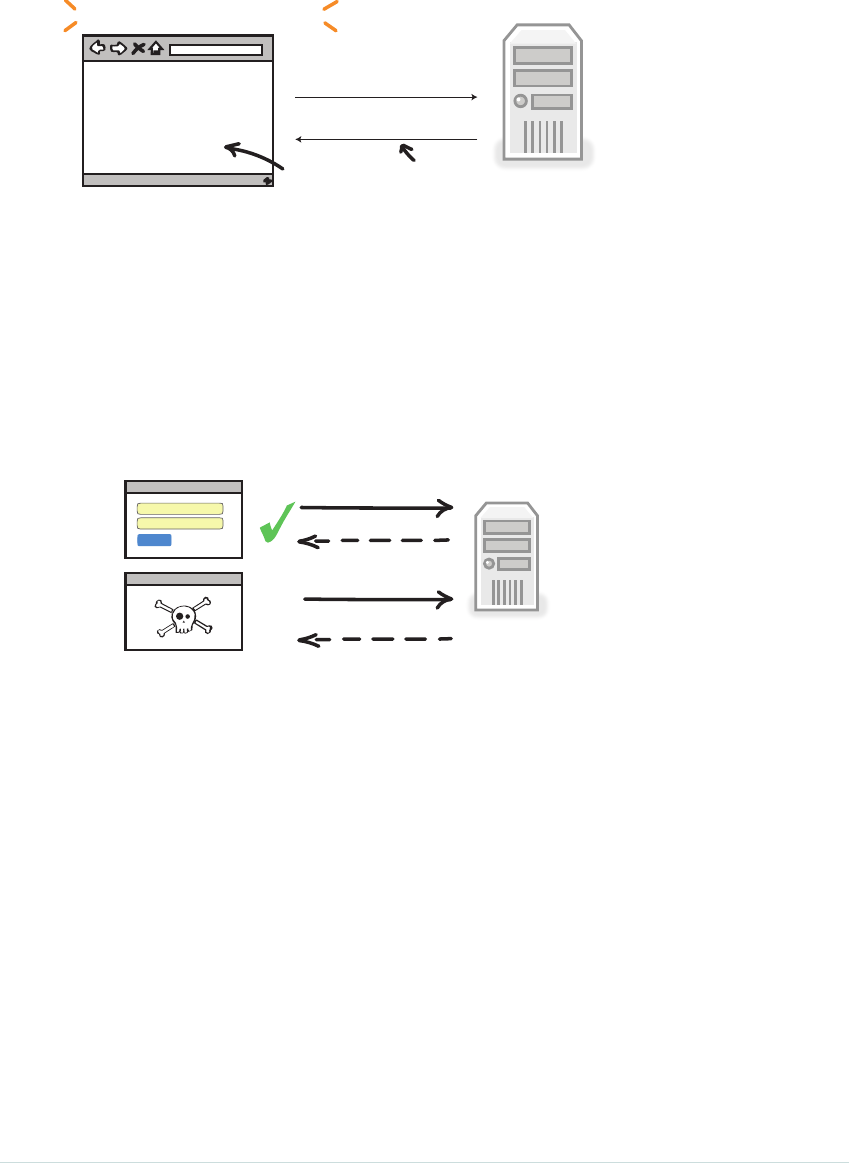
http://localhost:3000/permits/1.json
{
"id":1,
"location":"Saskatoon",
...
}
HTTP GET /permits/1.json
Status 200 - success
JSON Status code
That’s right! By simply dropping any URL into your web browser, your
browser will automatically send an HTTP GET to whatever URL you are
looking for. This is a handy way to quickly test any API. Simply drop the URL
into your browser and see what comes back.
Now when a server handles our request, it is going to want to tell us how
things went, like whether the request was successful or not. It does this via
these things called HTTP status codes.
HTTP GET /signin
200 OK
HTTP GET /oops
404 NOT FOUND
X
A good thing to test - HTTP Status Codes
These are good to know because sometimes we want to verify that we’re getting
redirected, and sometimes we want to check and see what error code we get
back if bad things happened.
For example, if we do an HTTP GET and the status code comes back 200,
that means everything is fine. If we typed in a bad URL, or asked it for
something the server didn’t have, then we would get a 404 or “Not found.”
Here are some of the common HTTP status codes we often see while testing.
DescriptionMeaningCode
Everything worked OK.Success200
You are being redirected to another page.Redirect302
We couldn’t find what you were looking for.Missing404
Something went wrong on our end.Error500
Chapter 5. Integration Testing RESTful Web Services • 68
report erratum • discuss
And when we bring this all together, we can then write an HTTP GET test
checking for all these things, which looks something like this:
def setup
@permit = permits(:saskatoon)
end
test 'HTTP GET' do
get permit_path(:id => @permit.id, :format => :json)
assert response.body.to_s.include? 'Saskatoon'
assert_response :success # 200 OK
end
This first part,
setup
, is a useful test construct.
setup
gives you a place to set
up your test objects and data before each test is run.
Because
setup
gets called before each test case, you can keep the results of
one test from interfering with the others. This is called isolation. And we
really like it in our tests because this way if one test breaks, it won’t break
the others.
In our case, we want to create a temporary fake permit that we can use to
test our GET method. This setup and corresponding test code create that fake
test permit for us.
def setup
@permit = permits(:saskatoon)
end
Saskatoon
A fake test permit we can use for testing
Now that we have some test data loaded, we are ready to query it with an
HTTP GET request, which is exactly what this line does here:
get permit_path(:id => @permit.id, :format => :json)
If this line looks a little strange, don’t worry—it did to me too the first time I
saw it. Let’s break it down and hopefully see it’s not as complicated as it looks.
The first word,
get
, specifies the HTTP verb we want to send out as part of
this request. For us, that’s an HTTP GET.
The next couple variables are just the
id
of the permit we are looking for (the
one we created in
setup
) and the format we would like the response to come
back to us in (in this case, JSON).
report erratum • discuss
HTTP GET • 69
So all this line does is create and send out an HTTP GET for the following
URL where localhost and 3000 are Rails defaults:
HTTP GET http://localhost:3000/permits/1.json
Once this gets sent out, we can then check the response coming back from
the server to see if we got the right permit. Fortunately, the HTTP response
is available to us in the test.
response = {
"id" : 1,
"location:" :"Saskatoon"
}
All we have to do is scan it for the word
Saskatoon
to verify we got the right one.
assert response.body.to_s.include? 'Saskatoon'
Finally, we can do a quick check for the HTTP status code, just to verify
everything is OK, which Rails represents with the
:success
variable.
assert_response :success # 200 OK
And that, my friend, is HTTP GET! One down, three to go. Let’s keep the
momentum going and take a look at HTTP POST.
HTTP POST
The mechanics of HTTP POST are pretty much the same as GET, only this
time we need to be sending some data to the server via POST.
HTTP POST /permits
["location":"Moose Jaw"]
Status 302 - redirect
Create me a new permit
with these details please...
Moose Jaw
Now how are we going test this? What would be a good end-to-end test that
checks to see if we can add new permits in the system?
Chapter 5. Integration Testing RESTful Web Services • 70
report erratum • discuss
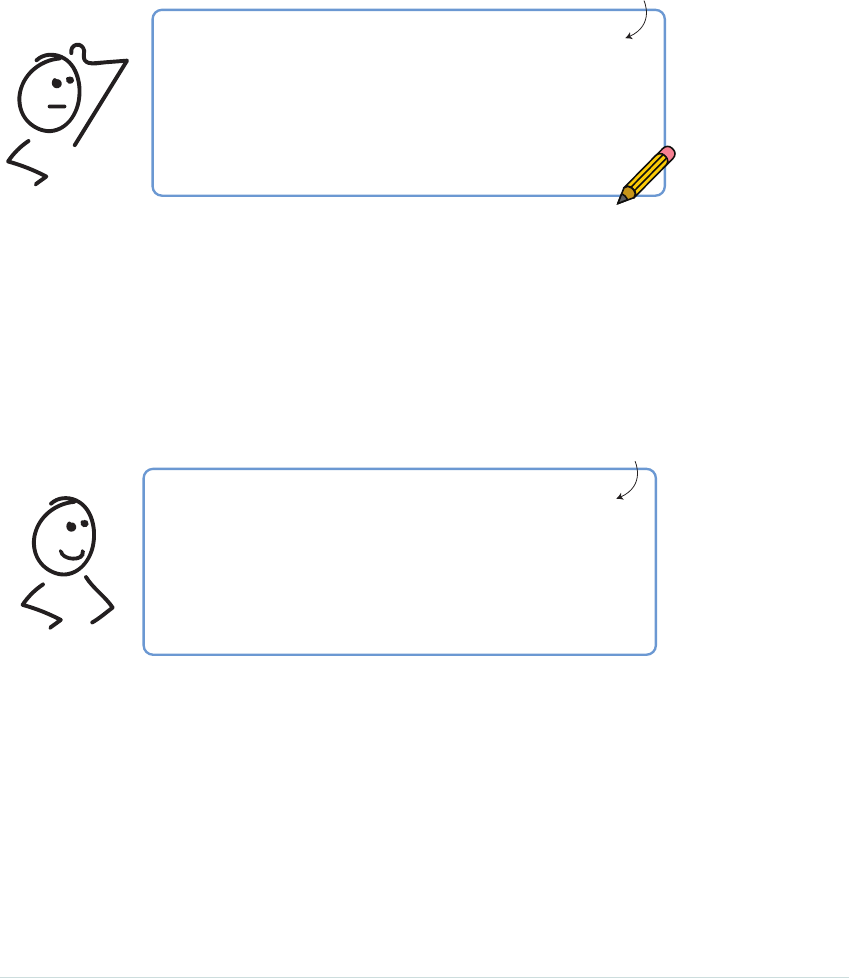
When faced with writing any new test, one technique that’s handy to get the
ball rolling is to just pseudocode (write out in plain English) out what you
would like to see happen.
Try it now. Use the following space to write out in plain language the steps
you would take to create a new permit in the system.
Hmmmmm ....
Write here
test 'HTTP POST' do
#
#
#
#
#
end
If you are getting caught up in “I don’t know what HTTP POST is” or “I’ve
never done this before”—don’t worry about it.
Just sit back, relax, and think. What are we trying to do here?
When you do this, ideas will start to flow. Here’s one idea. What if we checked
that the permit we want to create doesn’t yet exist, created it, then verified
that it now exists? The pseudocode to do that would look something like this.
Pseudocode
test 'HTTP POST' do
# search for existing permit by some attribute
# verify it doesn't exist
# create it
# search for it again
# verify was created
end
And the corresponding test, along with a status code check, could look like this:
test 'HTTP POST' do
# search for existing permit
permit = Permit.find_by_location('Moose Jaw')
# verify it doesn't exist
assert_nil permit
# create it
post permits_path, permit: {location: 'Moose Jaw'}
report erratum • discuss
HTTP POST • 71

# search for it again
permit = Permit.find_by_location('Moose Jaw')
# verify was created
assert_not_nil permit
# check status code (302)
assert_response :redirect
end
Here we are looking for a permit that doesn’t yet exist (Moose Jaw), creating
it, searching for it again, and then verifying that we found it. Not bad!
The 302 redirect is a standard thing many web pages do after you create a
new resource. It creates the new resource (permit) for you, and then redirects
you to a page saying saying “Hurray! You created a new permit.”
OK. So that’s not a bad test. Don’t worry about getting your tests perfect when
you start. The key is to get going. You can always adjust and try new things later.
Now, just to show you what’s possible, here’s a more “Rails way” of testing
the same HTTP POST:
test 'HTTP POST' do
assert_difference 'Permit.count', 1 do
post permits_path, permit: {location: 'Moose Jaw'}
end
assert_response :redirect
end
Now, before I got into Rails, I didn’t even know you could do this. This test
uses a convenience routine built into Rails that checks the number of permits
in the system before sending the HTTP POST request, and then compares
that to the number after. If the count goes up by one, we know we’ve created
a new permit. Cool, eh?
Now, either one of these tests will work. One does a slightly deeper check and
verifies that the attributes got saved to the database; the other one doesn’t.
The thing to understand here is you have options. There is no one way to test
this stuff, and the important thing isn’t trying to make your tests perfect in
the beginning. Just start. Once you start playing with your system and seeing
where the various bugs lie, you’ll get a better feel for where you need to focus
your energy.
Just understand we have options, and we are always discovering new and
better ways to test our stuff.
Let’s take a look at PUT.
Chapter 5. Integration Testing RESTful Web Services • 72
report erratum • discuss

HTTP PUT
HTTP PUT (some frameworks like Rails use a similar verb called PATCH) is
similar to POST. Only here, instead of creating a brand-new permit, we are
going to update an existing one.
HTTP PUT/permits/:id
["location":"Medicine Hat"]
Status 302 - redirect
Update this permit
Medicine Hat
with these attributes please...
If we go with a similar game plan to testing PUT as we did with POST, we can
write a similar-looking test that looks something like this:
test 'HTTP PUT' do
# search for permit by new attribute
permit = Permit.find_by_location('Medicine Hat')
# verify it doesn't exist
assert_nil permit
# update it
put permit_path(@permit), permit: {location: 'Medicine Hat'}
# search for it again
permit = Permit.find_by_location('Medicine Hat')
# verify was updated
assert_not_nil permit
# check response
assert_response :redirect
end
Same thing as before. We send an HTTP PUT command to
http://localhost:3000/per-
mits/:id
along with the attributes of our new permit with this line:
put permit_path(@permit), permit: {location: 'Medicine Hat'}
And then pretty much do the same checks that we did before, only this time
looking to see that our permit location changed from
Saskatoon
, which was set
for us via our setup, to
Medicine Hat
.
OK, only one more. HTTP DELETE.
report erratum • discuss
HTTP PUT • 73
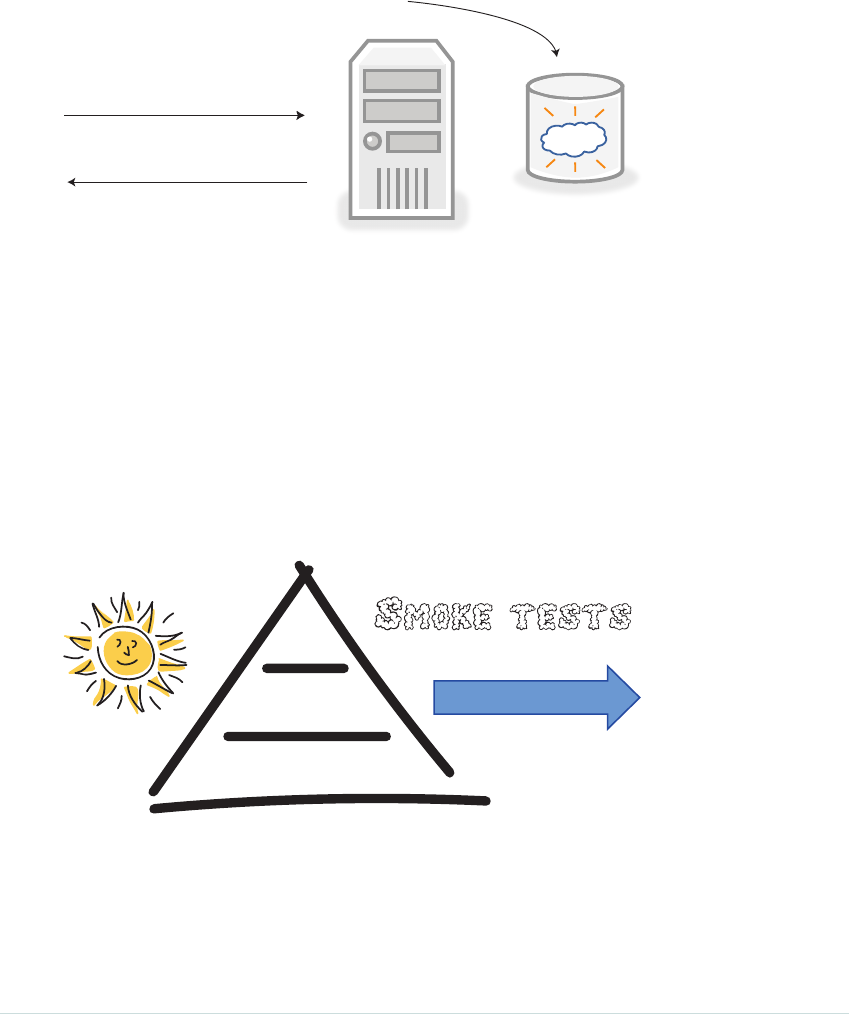
HTTP DELETE
No surprises here with HTTP DELETE. All we do here is send an HTTP DELETE
request along with the ID of the permit we would like to delete.
HTTP DELETE /permits/:id
Status 302 - redirect
Delete this permit
if you would be so kind
In this case, we can delete the test permit set up for us in
setup
and then ver-
ify it’s gone by searching for it after:
test 'HTTP DELETE' do
delete permit_path(@permit)
assert_response :redirect
assert_raises(ActiveRecord::RecordNotFound) do
get permit_path(@permit)
end
end
What We’ve Learned So Far
UI
Integration
Unit
Connectivity
That’s it! Congratulations—we have covered an absolute ton here. In combi-
nation with the previous chapter, you now have a solid understanding of how
the web and RESTful services work, as well as a great foundation to launch
suites of integration tests on your applications.
Chapter 5. Integration Testing RESTful Web Services • 74
report erratum • discuss

Here’s what we covered in this chapter:
•We can test RESTful services by first creating the right URL, and then
sending the correct HTTP verb and data.
•HTTP status codes are how servers tell us whether our HTTP requests
were successful or not.
•We can always inspect network traffic using our browser developer tools.
•An HTTP GET request is always available to us by simply dropping a URL
into our open browser.
In the next chapter on unit testing, we have come to the base of our pyramid,
and here we are going to see how and where we do the bulk of our automated
testing on projects. But don’t take my word for it. Turn the page and discover
the awesome power of the unit test.
report erratum • discuss
What We’ve Learned So Far • 75
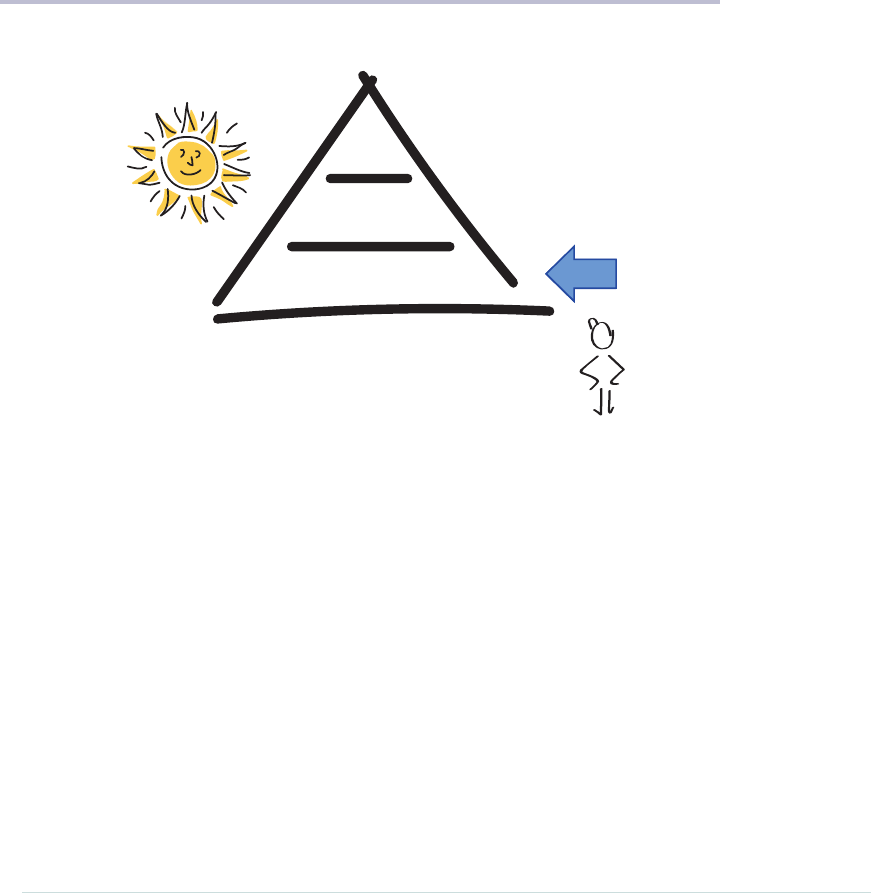
CHAPTER 6
Covering Our Bases with Unit Tests
UI
Integration
Unit
In this chapter, we’re going to look at these small little tests developers write
called unit tests.
While this chapter is primarily focused on developers, it’s a worthwhile read
for testers too. Learning what goes on down at the base of the pyramid will
not only help testers spot potential gaps at the upper levels, it will also give
them great insight into where they should go with their exploratory testing.
Regardless of whether you are a developer or a tester, by the end of this
chapter, you will know what unit tests are, how to write them, and why they
form the base of our pyramid.
report erratum • discuss
Everything Is Awesome!
Yeah! With our newfound UI testing superpowers, everything is suddenly
awesome! Not only can we write high-level smoke tests, but we can also write
UI tests for practically anything!
Need a smoke test? UI test.
Got a bug? UI test.
Need someone to fill out that pesky weekly timesheet? No problem—UI test
(yes, we actually did that).
UI Tests
Every problem
Yes, to us the world’s problems can now all be solved with one more UI test,
and things are going great! Except…
The Challenge with UI Tests
Hey! Have you noticed that our build times have started to take off?
time
Build
time
secs
hours
LONGER BUILD TIMES
Chapter 6. Covering Our Bases with Unit Tests • 78
report erratum • discuss
Huh! That’s strange. What used to take a couple of seconds and minutes now
takes tens of minutes and hours!
And what’s up with the state of our builds? Why have they all of a sudden
started to break?
X XX X
X XX
BROKEN BUILDS
Hmmmmm ....
Beats me! But all I know is with our builds taking longer, and the tests con-
stantly breaking, we are spending way more time fixing broken tests than
adding new features to our software.
I thought these automated test thingies were supposed to help!
This real-life story of teams simultaneously discovering the magic and pain
of going with lots of automated UI tests is unfortunately all too common.
It’s not that UI tests are bad. They are not. They are just not made for the
two things we crave above all else when doing rapid iterative development:
feedback and speed.
1ms
100ms
Integration Unit
UI
1000ms
Tend to be slow
report erratum • discuss
The Challenge with UI Tests • 79
You see, UI tests are slow. Really slow. What takes milliseconds in a unit test
can take seconds in a UI test. And while that may not sound like a long time,
once you start to get a lot of these longer running tests, the cumulative time
can really start to add up.
Not only are UI tests slow, they have a reputation for being flaky and fragile.
fill_in 'Name'
fill_in 'Address'
click_button 'Register'
Can be fragile
X
Flaky means they don’t always run reliably—sometimes they pass, sometimes
they fail (we will talk more about why later). But more than that, because UI
tests are so closely tied to the user interface, the smallest change in function-
ality can end up breaking a UI test, even though it looks like it had nothing
to do with it.
Finally, while UI tests are great at telling you that something’s wrong, they
are lousy at telling you where the problem is.
Integration?
UI? Unit?
Aren’t very precise
I know there’s a bug in here somewhere ...
Hehe
Remember—these tests go end-to-end. So finding and fixing a bug can be a
lot like searching for a needle in a haystack.
Chapter 6. Covering Our Bases with Unit Tests • 80
report erratum • discuss

Nope. As good and as cool as UI tests are, they alone are not enough. What
we need is another kind of test. Something that’s:
•Fast
•Cheap
•Precise
•Gives us rapid feedback
Enter the Unit Test
Unit tests are small, method-level tests developers write to prove to themselves
their software works.
For example, say you were writing a program that could play blackjack, and
you wanted to verify that all newly shuffled decks contained fifty-two cards.
You could write a unit test for that. Something like this:
def test_full_deck
full_deck = Dealer.full_deck
assert_equal(52, full_deck.count)
end
Unlike UI and integration tests, unit tests are small and fast. They don’t go
end-to-end through all the layers of a system. They tend to be more local.
And it’s this smallness that makes them fast, focused, and easy to work with.
You can write a unit test for just about anything—like testing assumptions.
52 cards
No Joker!
AKQJ1098765432 13 hearts, spades,
diamonds, clubs
Great for testing assumptions
Assumptions get us all the time in software. Not anymore. With automated
unit tests, hidden assumptions can now be tested and verified, along with
business logic.
report erratum • discuss
Enter the Unit Test • 81
Boom!
Calculations and business logic
Business logic can be complex. The rules we apply easily as humans all need
to be codified and somehow tested in the software. What better way to verify
we got the rules right than to code them up in the form of automated tests?
And when it comes to edge cases, unit tests have our backs there too.
if (salary < 100000)
taxRate = 30%
else if (salary < 70000)
taxRate = 20%
99,999?
100,000?
69,999?
70,000?
Edge cases and boundary conditions
Every time you can think of a new edge case, off-by-one error, or an error in
logic, you can write a unit test to confirm these things are working as expected.
For these reasons, unit tests have become an indispensable tool for writing
software today. This is why now every modern programming language has them.
101
011
Business logic
Program flow
Assumptions
Off-by-one errors
Edge cases
Permutations
Unit tests
for all your computing needs
Instant feedback!
100% Satisfaction! Guaranteed!
Chapter 6. Covering Our Bases with Unit Tests • 82
report erratum • discuss
OK. So that’s what unit tests are. Let’s now dig a little bit deeper and see how
these things work.
How They Work
At their heart, unit tests are pretty simple. Whenever you add any new func-
tionality to the system, you write a test for it.
Take this new tax-rate lookup feature Dave and his team added to the system.
It looks up your tax rate based on the region of the country you live in.
class RateManager
...
def lookup_tax_rate(region)
if (region.blank?)
raise ArgumentError.new('Region can\'t be blank!');
end
tax_rate = 0.3
if (region == 'Alberta')
tax_rate = 0.1
end
if (region == 'Saskatchewan')
tax_rate = 0.2
end
if (@is_new_customer)
tax_rate = 0.0
end
return tax_rate
end
end
Method
Functionality
we want to test
Class
Now when you look at this code, what sort of test cases come to mind?
Hmmmmm ....
Write here
1.
2.
3.
Things we could test ...
report erratum • discuss
How They Work • 83
This is what we do when we write unit tests. We look at a particular class, see
what methods it describes, and decide what kinds of tests we’d like to write.
Classes, Methods, and Objects
Three words you’ll occasionally hear when developers are talking unit testing are
classes, methods, and objects.
Classes are the blueprints or templates developers use to create the things that hold
a program’s data and behavior. You can think of classes as things. A Player, a Deck
of cards, or a RateManager. Those are all classes.
Methods are the behaviors describing what a class can do. shootWumpus, dealCard,
and lookUpRate are all things classes do through their methods. Which is why we
usually name methods after verbs.
And when you take a class and all its methods and you create it, you get what we
call an object. An object is just an instance of a class. We cover some other good
basics of programming later in Chapter 9, Programming 101, on page 137.
Now while there are no hard-and-fast rules around what makes a perfect unit
test, here are some things we typically look for when writing them.
1. Happy paths
2. Special cases
3. Exceptions
4. Program logic and flow
5. Anything else!
Assuming everything goes right, what does the
method do under ideal conditions?
Are there any special conditions or edge cases
that we should pay special attention to?
Under what conditions or exceptions might this
method possibly break?
Do all the programming paths, logic flow,
and conditional branches work?
What else would it take to give us real confidence
this method is working?
What to look for when writing unit tests
Happy path is a term we use to describe a test scenario where everything goes
right. As developers we are usually pretty good at testing the happy path.
Where we tend to struggle a bit is when things go wrong. That’s the stuff we
usually skip—which is exactly what we want to start looking at more closely
with our unit tests. Exceptions, those nasty off-by-one errors, all that great stuff.
So now if we look at our
lookup_tax_rate
method again through this lens of
exceptions and special cases, a few more things pop out.
Chapter 6. Covering Our Bases with Unit Tests • 84
report erratum • discuss
class RateManager
attr_accessor :is_new_customer
def initialize(is_new_customer)
@is_new_customer = is_new_customer
end
def lookup_tax_rate(region)
if (region.blank?)
raise ArgumentError.new('Region can\'t be blank!');
end
tax_rate = 0.3
if (region == 'Alberta')
tax_rate = 0.1
end
if (region == 'Saskatchewan')
tax_rate = 0.2
end
if (@is_new_customer)
tax_rate = 0.0
end
return tax_rate
end
end
Exceptions
Default behavior
Special cases
Edge cases
Hint: Look for ‘if’ statements
First, we could do a little method input validation and ensure that when
someone calls our
lookup_tax_rate
method, we make it known that they have to
pass us a region, or else they will get an error.
def test_error
assert_raises(ArgumentError) {@manager.lookup_tax_rate(nil)}
end
Here we can do that by passing in
nil
(Ruby’s way of saying nothing) into our
RateManager
and then verifying we get an error.
Next, we could test one of our happy path scenarios, and just see what the
default rate is for any given region. In this case, it’s
0.3
, just like we’d expect.
def test_default_behaviour
assert_equal(0.3, @manager.lookup_tax_rate('SomeRegion'))
end
report erratum • discuss
How They Work • 85

And after that we could go through any special cases or edge cases we need
to handle. Like verifying that those regions with their own tax rates get looked
up correctly.
def test_special_cases
assert_equal(0.1, @manager.lookup_tax_rate('Alberta'))
assert_equal(0.2, @manager.lookup_tax_rate('Saskatchewan'))
end
Along with this special deal Dave kindly gives first-time customers.
def test_edge_cases
@manager_new_customer = RateManager.new(true)
assert_equal(0.0, @manager_new_customer.lookup_tax_rate('Alberta'))
end
Awesome! Those are all typical examples of tests we would write when unit
testing code.
One last important thing about unit tests (actually all tests): naming.
We want to give our test methods good, intention-revealing names. So
renaming these test methods to things that describe what it is we are trying
to test is always a good idea. Something like this:
cswp/test/models/rate_manager_with_names_test.rb
require 'test_helper'
class RateManagerTest < MiniTest::Test
def setup
@manager = RateManager.new(false)# not new customer
end
def test_region_required
assert_raises(ArgumentError) {@manager.lookup_tax_rate(nil)}
end
def test_default_tax_rate
assert_equal(0.3, @manager.lookup_tax_rate('SomeRegion'))
end
def test_supported_provinces
assert_equal(0.1, @manager.lookup_tax_rate('Alberta'))
assert_equal(0.2, @manager.lookup_tax_rate('Saskatchewan'))
end
def test_new_customer
@manager_new_customer = RateManager.new(true)
assert_equal(0.0, @manager_new_customer.lookup_tax_rate('Alberta'))
end
end
Chapter 6. Covering Our Bases with Unit Tests • 86
report erratum • discuss
See the names on these test methods? They do a much better job describing
what it is we are testing and aren’t so focused on the how.
Picking good test names takes time and practice. Don’t be discouraged if you
find picking test names tricky. Just start by describing what it is you are
trying to test and iterating from there. We’ll talk more about naming later in
Chapter 10, Organizing Tests:, on page 161.
Two Hard Things
There are two hard things that are a real challenge in computer science:
1. Caching
2. Naming things
3. Off-by-one errors
Ha!
Question!!! How do I know when
I’ve written enough tests !?
Ah. The million dollar question. This is a tricky one.
Testing is about confidence. You want to feel good about your code—that’s
why we write tests. One measure of “have we created enough tests” is how
confident you feel about your code. And by “feel about your code,” I mean
pushing it into production. In other words, shipping it!
I realize that’s not very useful advice, let’s look at a few other things we can do.
1. Make Sure It Works
Does the code do what it needs to do? Sounds obvious. But this is the most
important thing you could test. Demonstrating, via a test, what the code does
and how it’s supposed to work.
report erratum • discuss
How They Work • 87
Not only will this give you confidence that your code works, it will show others
your code’s intent. This can be like gold for those coming behind you.
2. Test Everything That Could Possibly Break
“Test everything that could possibly break”1 is a mantra we use in Extreme
Programming2 to guide ourselves when writing tests. It means if there is a
reasonable chance something could break, test it.
Now of course we can’t test everything. That would take too long and be too
expensive. But common errors, edge cases, special conditions, and anything
else that is likely to break are all good candidates. It’s definitely a gray area.
But the good news is that it becomes less gray the more tests you write.
3. Write Your Tests First
Writing tests first is the practice where you write a failing test first, and then
add the production code that makes the test pass after. This is what is
sometimes referred to as test-driven development, or TDD. While it may sound
backwards, doing this has a number of advantages:
•You build only what you need.
•You design and build your systems in a testable, modular way.
•You end up with a nice suite of unit tests proving that your stuff works.
I don’t write the tests first all the time. Sometimes I don’t know what I want to
test, and I need to sit down and hack things out. When you have a clear sense
about what you need, try writing your tests first and see if it gives you code you
feel comfortable with, as opposed to writing tests last (or worse, not at all). For a
good book on TDD, see Kent Beck’s Test-Driven Development: By Example [Bec02].
We’ll talk more about TDD in Chapter 12, Writing Tests First, on page 197.
What about code coverage ?
1.
http://c2.com/cgi/wiki?TestEverythingThatCouldPossiblyBreak
2.
http://www.agilenutshell.com/xp
Chapter 6. Covering Our Bases with Unit Tests • 88
report erratum • discuss
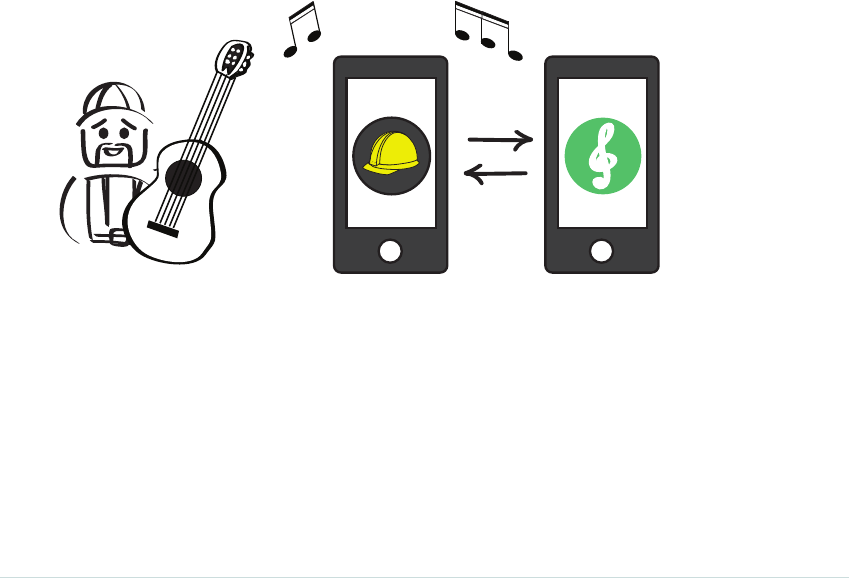
Code coverage is where you run your unit tests against your code, and a tool
tracks and sees what percentage of your code your tests cover.
I am usually not a huge fan of tracking code coverage (people tend to get fix-
ated on the coverage and think less about writing good tests). But if you have
an old code base, and you are writing tests after, code coverage can be handy
for showing you where in your code base you are lacking tests.
Just to be clear though, it’s way better to have 30% unit test coverage with
some good unit tests, than 100% with some really bad ones. Good teams
usually land somewhere in the 70–80% range.
So don’t get stressed if your code coverage isn’t immediately high. Just keep
writing as many little tests as you can and try adding a test every time you
add new functionality. Before long, your coverage will naturally start to climb.
Alright. That’s one textbook example of how to write unit tests. Let’s now look
at something a little more advanced.
Turning It Up
In the spirit of innovation, Dave and the team have decided that what their
mobile construction app really needs is music.
DAVE
Everything is better
with music !
Using an SDK (software development kit) from an up-and-coming music
provider, Dave and his team have figured out that if you send a
Hello
message,
followed by an
Authenticate
message, you can remote control and play music
through your app!
The code for sending the messages looks like this.
report erratum • discuss
Turning It Up • 89

How to handle the network?
How to verify this happens?
Hello
Challenge
Authenticate
Welcome
class ConnectionHandler
def receive(message)
if is_challenge(message)
client.send_authenticate_message
@is_connected = false
elsif is_welcome(message)
@is_connected = true
end
end
The problem is Dave and company aren’t sure how to test it.
For the message handling to work, a live music-streaming service would have
to be up and running in order to receive the incoming
Hello
and
Authenticate
requests.
But we don’t want to do that, because constantly having to run a music-
streaming service in the background is a huge pain in the butt. Not to mention
flaky and problematic. That’ll be challenge number one.
Challenge number two will be trying to figure out how to get our hands on
that
client
object that sends the authenticate message.
if is_challenge(message)
client.send_authenticate_message
It would be nice to write a test that verifies that
client.send_authenticate_message
gets called every time the
Challenge
message is received.
The only problem is we have no way of knowing when the
Challenge
message
is received because we don’t have access to the client object from our unit
tests. We’ll have to figure out something there.
But let’s start with the network.
One way to deal with networks in unit tests is simply pretend they are not
there. Instead of calling the network directly, just take the data the network
call would have normally returned and use it directly in your test instead.
Chapter 6. Covering Our Bases with Unit Tests • 90
report erratum • discuss
def test_is_challenge
message = { :type => 'challenge' }
assert(@connection_handler.is_challenge(message))
end
def test_is_welcome
message = { :type => 'welcome' }
assert(@connection_handler.is_welcome(message))
end
Pretend you already got the data
and here you are just passing it in
Challenge
Welcome
The advantage of writing unit tests this way is that we are no longer tied to
the network. We are decoupled from it (meaning we are no longer dependent
on it). This makes our tests easier to write and our software easier to test.
We just need to make sure that if the message from the server changes, we
will update our test messages accordingly.
Avoid connecting directly to the network when
writing unit tests. Use raw test data instead.
Now the next thing to verify is that when a challenge message is received, an
authentication message gets sent out. But there’s our problem. We have no
way of getting our hands on the client object in our unit test.
Hmmmmm ....
class ConnectionHandler
if is_challenge(message)
client.send_authenticate_message
isConnected = false
end
end
This is a classic problem in unit testing. The thing you want to test isn’t
available to you in your unit test. Sometimes this is a reflection of how we’ve
done our design. But mostly it’s because when most people write code these
days, they don’t write it with testing in mind. It’s de-testable (ha!).
One technique for dealing with this conundrum is to inject the class you want
to monitor into the constructor of the class you want to test.
report erratum • discuss
Turning It Up • 91

class ConnectionHandler
def initialize(client)
@client = client
end
def receive(message)
if is_challenge(message)
@client.send_authenticate_message
end
Inject here
So we can
monitor here
Dependency Injection
We call this dependency injection and it, along with a technique known as mocking,
is a way we get our hands on objects within test methods we want to test.
Mocks are fake objects we sometimes use in testing to record things that
happen to our objects when in a test. For example, in this case we want to
know if
@client.send_authenticate_message
is called when a challenge message is
received by our
ConnectionHandler
.
Our regular
@client
object—the one we would normally use when running the
application—can’t tell us if it’s been called. It doesn’t have the smarts or
ability to record when methods are called on it. But mocks do.
So instead of using a real
@client
object here, we inject a fake one or a mock
that can. Then, when we run the test, we can ask the mock if its
send_authenti-
cate_message
method was called. If it was, we know our code worked.
To make this work in our test, we first need to create a mock for our
Client
class, and then inject it into our
ConnectionHandler
via its constructor. To help
us create our mock in Rails, we are using a gem called
Mocha
.
class ConnectionHandlerTest < MiniTest::Test
def setup
@mockClient = mock()
@connection_handler = ConnectionHandler.new(@mockClient)
end
Then we need to set some expectations on our client mock. In this case, we
expect our
@mockClient
to have its
send_authenticate_message
method be called at least
once when a
message
of type
challenge
is received. We can write that like this:
def test_authentication_sent_when_challenge_received
@mockClient.expects(:send_authenticate_message).at_least_once
message = { :type => 'challenge' }
@connection_handler.receive(message)
end
Chapter 6. Covering Our Bases with Unit Tests • 92
report erratum • discuss

Now we are ready to go. For this test to pass, the
send_authenticate_message
method
has to be called at least once.
@mockClient.expects(:send_authenticate_message).at_least_once
This happens when we send it the challenge message like this:
message = { :type => 'challenge' }
@connection_handler.receive(message)
Ta-da. It works! We now know our code can handle a challenge message.
If mocking seems a bit strange and you are wondering why we would even
want to write a unit test like this in the first place, hold that thought. We are
going to get into the pros and cons of mocking later on in Chapter 11, Effective
Mocking, on page 177.
But regardless of whether you use mocks extensively or not, they are a good
technique to have and handy to pull out if you ever need them.
Here is the
ConnectionHandler
class and its corresponding test class in all its
glory.
cswp/app/models/connection_handler.rb
class ConnectionHandler
attr_accessor :is_connected
attr_accessor :client
def initialize(client)
@client = client
end
def receive(message)
if is_challenge(message)
@client.send_authenticate_message
@is_connected = false
elsif is_welcome(message)
@is_connected = true
end
end
def is_challenge(message)
message[:type] == 'challenge'
end
def is_welcome(message)
message[:type] == 'welcome'
end
end
report erratum • discuss
Turning It Up • 93

cswp/test/models/connection_handler_test.rb
require 'test_helper'
class ConnectionHandlerTest < MiniTest::Test
def setup
@mockClient = mock()
@connection_handler = ConnectionHandler.new(@mockClient)
end
def test_is_challenge
message = { :type => 'challenge' }
assert(@connection_handler.is_challenge(message))
end
def test_is_welcome
message = { :type => 'welcome' }
assert(@connection_handler.is_welcome(message))
end
def test_authentication_sent_when_challenge_received
@mockClient.expects(:send_authenticate_message).at_least_once
message = { :type => 'challenge' }
@connection_handler.receive(message)
end
end
And that’s it! Our very own unit tests proving in code that our
ConnectionHandler
works against a certain suite of incoming messages. If we get any new mes-
sages or edge conditions we suddenly need to handle, we can always come
back here and add more. It’s a handy suite of tests to have.
What We’ve Learned So Far
UI
Integration
Unit Details
Connectivity
Hey—congratulations. You have now covered all three levels of the pyramid!
Here’s a quick recap of some of the things we learned about unit tests:
Chapter 6. Covering Our Bases with Unit Tests • 94
report erratum • discuss

•Unit tests form the base of our pyramid and are where we like to do the
bulk of our testing.
•They are extremely quick and great for rapid feedback.
•They are highly local—which means we prefer to avoid things like
network calls.
•Mocking is a technique we can use to get at hard-to-reach places in the
code that we want to test.
Now that you’ve got the basics of unit testing covered, it’s time to look at a
particular kind of unit test that’s very popular when testing the logic in our
browsers—JavaScript tests.
Let’s turn the page now to see what these things are, how they work, and
how they can take us to even greater heights when it comes to UI testing.
report erratum • discuss
What We’ve Learned So Far • 95
CHAPTER 7
Unit Testing in the Browser with JavaScript
Canada
Directions
Turn left
Turn right
Go straight
Stop @ Big Moose
Select
Update
UI
Integration
Unit tests
JavaScript plays a big role in the web today, and in this chapter you are going
to see why. By learning how to write tests in JavaScript, not only will you
gain the ability to test what’s going on in your browser, you’ll be able to do it
in a way that’s fast, enabling you to write as many UI tests as you want.
Developers, this will be a good chapter for those of you who write a lot of Java-
Script and are looking for ideas around how to test. Testers, you better come
along too, as you never know when you may have to get in there and start writing
some JavaScript for certain automated testing frameworks out there.
report erratum • discuss
Magic in the Browser
Believe it or not, there was a time when web pages were completely static.
No, I’m serious! All you could do was type in a URL, go to that page, and read
it. That’s it!
JavaScript, along with a technology called Ajax, changed that. By giving users
the ability to manipulate and change things directly in the browser, the web
suddenly started doing things that were previously reserved for the desktop.
Canada
Directions
Turn left
Turn right
Go straight
Stop @ Big Moose
Select
Update
JavaScript
Makes our pages dynamic
The Magic of Ajax
Ajax (asynchronous JavaScript and XML) is the technology that allows JavaScript
programs running in the browser to send and receive information to the back end
without requiring the entire web page to do a refresh. That may not sound all that
impressive, but it was a key technology in enabling some of the dynamic functionality
you see in your browser today.
It enabled you to drop pins onto maps. Collaborate with people around the world on
documents in real time. And it opened up the web to a host of new applications and
possibilities that were never possible before.
JavaScript originally started out as a client-side scripting language. Client-
side means the code you program runs in the client. In our case, the browser.
Scripting language means that the code doesn’t need to be compiled before
it can be run. It can be interpreted and run directly in the browser as soon
as it loads. More on this in a bit.
Chapter 7. Unit Testing in the Browser with JavaScript • 98
report erratum • discuss
How is JavaScript different than the Ruby
we’ve been working with so far ?
Great question. Ruby is a server-side scripting language. That means that
when we run Ruby, we are running it on a server.
HTTP
UI Ruby
Ruby runs on the server
Running on a server means a request comes in, then our Ruby on Rails pro-
gram does something, and then sends the result back (usually as HTML and
JSON). All this happens on the server.
JavaScript, on the other hand, runs in the client.
HTTP
JavaScript
JavaScript runs in the client
report erratum • discuss
Magic in the Browser • 99
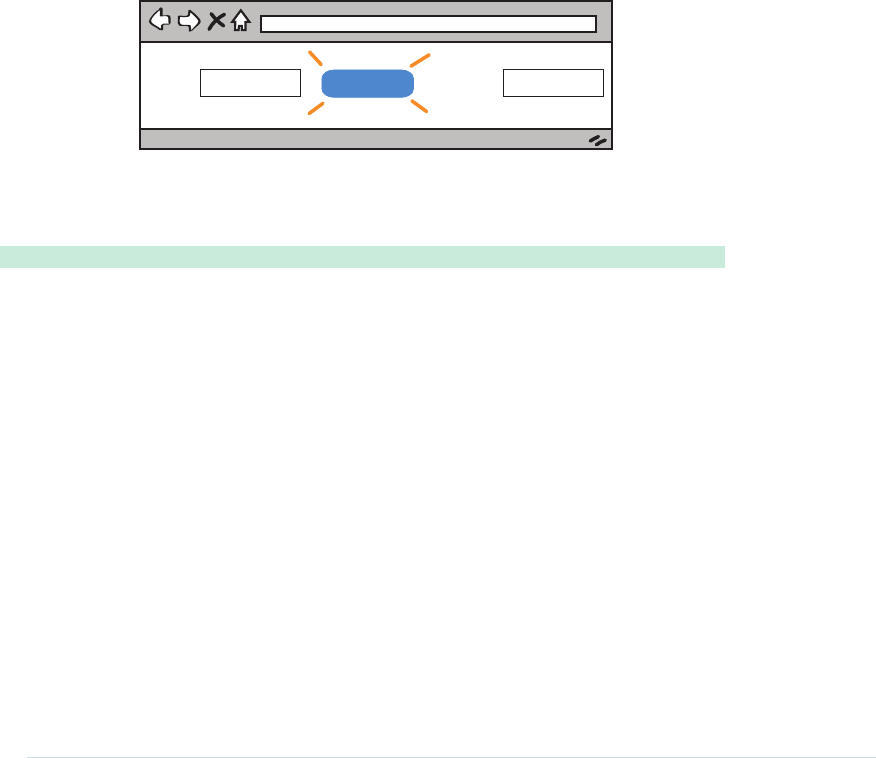
That means all the magic, logic, and calculations happen right in your browser.
This is why JavaScript needs to be very fast—it’s running on your device.
That’s the biggest difference. Ruby runs on the server. And JavaScript runs
in the client.
This means we need to write unit tests in both places. All of the unit tests
we’ve written so far have been server-side Ruby. In this chapter, we’re going
to see how to write unit tests for JavaScript in the client.
But great question. Thank you for asking.
Now technically speaking, JavaScript doesn’t just have to run only in the
browser. Some people run it in the server too. But for the purposes of this
introduction, we will stick to JavaScript in the browser. Starting with some-
thing simple like this.
Feet Calculate Meters1 0.3048
This is a JavaScript program. Actually, it’s a JavaScript program embedded
within an HTML page.
javascript/JavaScriptInTheBrowser.html
<html>
<head>
<script language="JavaScript">
function toMeters(form) {
var feet = parseFloat(form.Feet.value, 10);
var meters = feet * 0.3048;
form.Meters.value = meters;
}
</script>
</head>
<body>
<form>
Feet
<input name="Feet" value="0" maxlength="15" size=15>
<input name="Calculate" value=" -> " type=button onClick=toMeters(this.form)>
Meters
<input name="Meters" readonly size=15>
</form>
</body>
</html>
Chapter 7. Unit Testing in the Browser with JavaScript • 100
report erratum • discuss
The JavaScript program is this little bit at the top embedded between those
JavaScript language tags.
<script language="JavaScript">
function toMeters(form) {
var feet = parseFloat(form.Feet.value, 10);
var meters = feet * 0.3048;
form.Meters.value = meters;
}
</script>
And the rest is plain old HTML. JavaScript and HTML have a special relation-
ship with one another. HTML is what gets displayed and rendered in your
browser. JavaScript is the engine that can manipulate it and make it go.
For example, most of the HTML on this page is for display and layout. But
the Calculate button, between the two text boxes, does something different.
See if you can figure out what’s going on here.
<INPUT NAME="Calculate" VALUE=" -> " TYPE=BUTTON onClick=toMeters(this.form)>
This line of HTML does more than display an HTML button. When it is clicked,
it also calls the JavaScript
toMeters
method, passing the
form
as an argument.
<INPUT …onClick=toMeters(this.form)>
This is one of several ways HTML page elements can connect themselves to
JavaScript code. They can listen for specific events and then call JavaScript
when these events happen.
Once clicked, the JavaScript
toMeters
method takes over.
Feet to Meters1 0.3048
onClick=toMeters(this.form)
How JavaScript interacts with HTML
function toMeters(form) {
var feet = parseFloat(form.Feet.value, 10);
var meters = feet * 0.3048;
form.Meters.value = meters;
}
3
2
1
report erratum • discuss
Magic in the Browser • 101

First
toMeters
reads the numeric value for feet from the feet text box.
var feet = parseFloat(form.Feet.value, 10);
Then it does the conversion calculation.
var meters = feet * 0.3048;
And then it updates the meter text box after that.
form.Meters.value = meters;
That’s it. Congratulations! You just walked through your first JavaScript
program. Every JavaScript program in the world, no matter how complex,
goes through the same basic mechanics you and I just did here.
There are obviously more fancy ways to do this stuff, and we’ll look at a less
trivial example shortly. But that’s all JavaScript is. Interacting with HTML.
Updating page elements. And reacting to screen events.
Before we look at our next example, let’s quickly touch base with the pyramid
though. Just to remind ourselves where we are.
Working Through the DOM
While it’s not critical that we go deeply into it now, one thing worth mentioning is
this thing that sits between your HTML page and your JavaScript—something called
the DOMa or Document Object Model.
The DOM is a programmable interface that represents each node in your HTML doc-
ument. For example, when you define a table or a paragraph in your HTML, the DOM
represents that programmatically through its API so that if you want to read,
manipulate, or update that element, you have the means to do so. The DOM is what
your JavaScript calls to make this happen.
While it’s OK to think of JavaScript as a way of manipulating HTML, just be aware
there is another layer between your JavaScript and the HTML—the DOM.
a. https://en.wikipedia.org/wiki/Document_Object_Model
JavaScript and the Pyramid
JavaScript testing in the browser can be a bit strange at first because we’re
combining two worlds we previously kept separate: unit testing and the UI.
Chapter 7. Unit Testing in the Browser with JavaScript • 102
report erratum • discuss
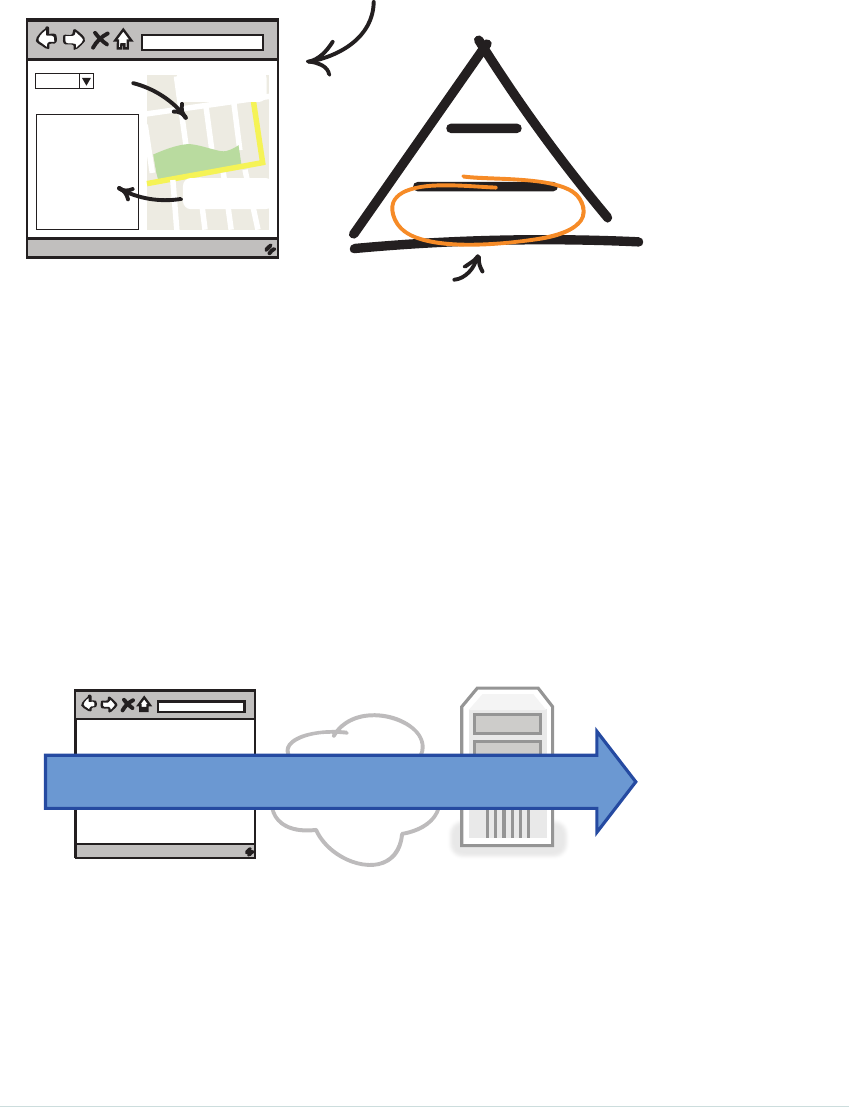
Canada
Directions
Turn left
Turn right
Go straight
Stop @ Big Moose
Select
Update
UI
Integration
Unit tests
Even though we are testing up here...
...the tests we are going to write live down here.
The UI tests, as we’ve defined them thus far, generally go end-to-end. Which
is what makes them so great for testing end-to-end functionality.
But UI tests don’t always have to go end-to-end. In fact, often it’s better, and
faster, to run them locally within the UI itself. This is exactly what we are
doing here when we write our JavaScript tests.
Now to be clear, these are two different kinds of tests. End-to-end UI tests,
sitting at the top of the pyramid, cut through all the layers of our application
and go end-to-end.
Integration
UI tests can either go end-to-end
The UI tests we are talking about here, however, will be different. These won’t
go end-to-end. They will be highly local and test only what’s going on in the
browser.
report erratum • discuss
JavaScript and the Pyramid • 103
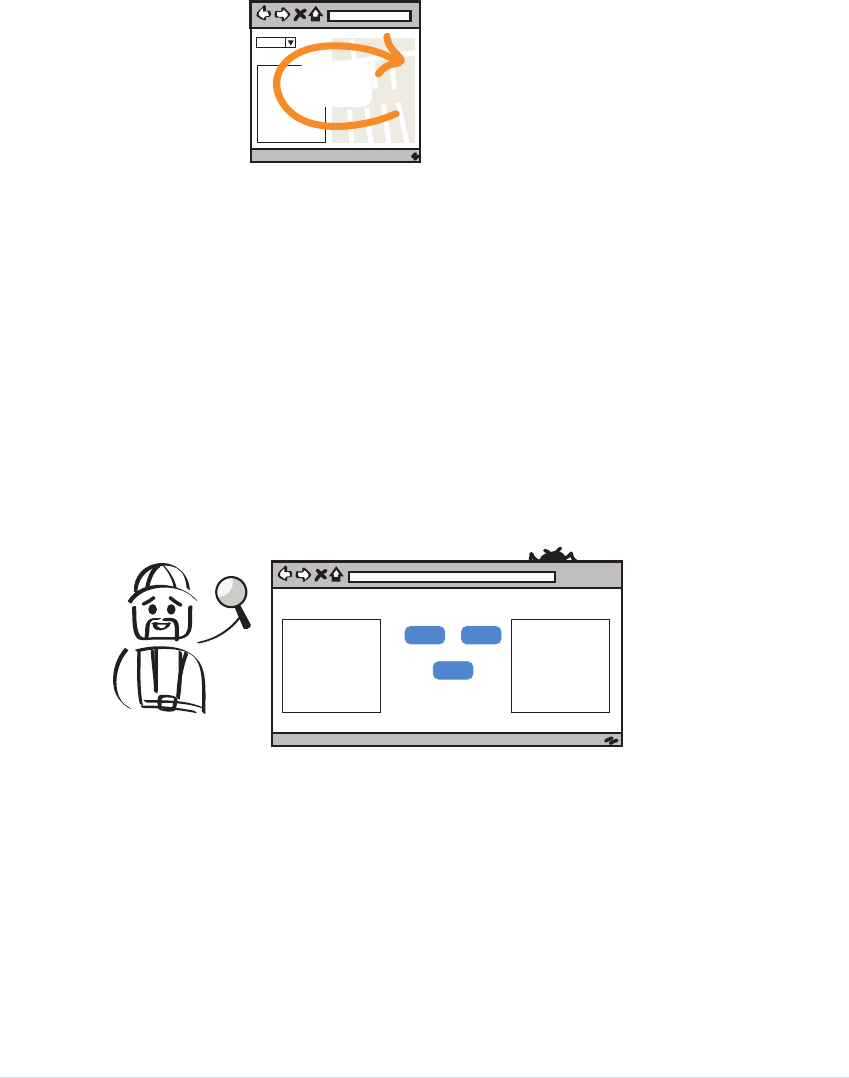
Or they can be very local
and test only what’s going on in the browser
Logic
What that means in practice is that you and your team are going to have to
decide where your end-to-end UI tests stop and your JavaScript unit tests begin.
It doesn’t have to be a hard line. There is going to be some overlap. But what
you want to avoid is blatant duplication. That’s only going to slow you down.
So just be aware that UI tests don’t always have to be end-to-end. They can
be local too.
Alright. We are ready. Let’s see if we can help Dave by joining him on his bug
hunt now.
Bug Hunt
><
Onsite
Phil Phillips
Rob Robertson
Offsite
Alan Wrench
Think you can give me a hand
tracking down this bug ?
DAVE
HeHe
Save
Dave’s people-tracker page keeps track of who’s on and offsite for any given
construction job. And normally it works great. You simply highlight the people
on the list you want to categorize, click the appropriate left or right arrow to
move them in or out of the appropriate list, and bam! The screen updates
itself. No fuss.
Except big fuss! The left arrow button—the one that moves people from the
offsite to the onsite list—is no longer working.
Chapter 7. Unit Testing in the Browser with JavaScript • 104
report erratum • discuss
><
OnsiteOnsite
Phil Phillips
Rob Robertson
Offsite
Alan Wrench
http://localhost:3000/EmployeeTrackerPage.html
There’s a bug in here somewhere ...
Save
Now when you highlight people on the right, and click the left arrow button,
nothing happens. The list doesn’t update!
Let’s see if we can’t help Dave track down this bug. And maybe while we are
at it we can write a test to ensure it never comes back too. Let’s start with
the HTML.
Step 1: Scan the HTML
Whenever you debug JavaScript, it’s good to get the lay of the land and see
what the HTML that’s hosting it looks like.
Here is the HTML code for this page.
javascript/EmployeeTrackerPage.html
<html>
<head>
<meta content="text/html;charset=utf-8" http-equiv="Content-Type">
<meta content="utf-8" http-equiv="encoding">
<script src="https://ajax.googleapis.com/ajax/libs/jquery/3.0.0/jquery.min.js">
</script>
<!-- include source files here... -->
<script type="text/javascript" src="src/EmployeeModel.js"></script>
<script type="text/javascript" src="src/EmployeeController.js"></script>
<script type="text/javascript">
$(document).ready(function () {
new EmployeeController().init();
});
</script>
</head>
report erratum • discuss
Step 1: Scan the HTML • 105

<body>
<div>
<div style="width:auto;float:left; margin-left:20px">
<table>
<tr>
<td>
Onsite
</td>
</tr>
<tr>
<td>
<select id="Onsite" size="4" multiple="multiple" style="width:300px">
<option value="1">Alan Wrench</option>
<option value="2">Phil Phillips</option>
<option value="2">Rob Robertson</option>
</select>
</td>
<td style="text-align:center">
<input id="leftArrow" type="button" value="<"/>
<input id="rightArrow" type="button" value=">"/>
</td>
</tr>
</table>
</div>
<div style="float:left; margin-left:20px;">
<table>
<tr>
<td>
Offsite
</td>
</tr>
<tr>
<td>
<select id="Offsite" size="4" multiple="multiple" style="width:300px">
</select>
</td>
</tr>
</table>
</div>
<div style="clear: both; padding-left: 220px;">
<input id="save" type="submit" value="Save"/>
</div>
</div>
</body>
</html>
Now don’t be alarmed if this looks like a lot of code. It’s not. Most of this is
just standard HTML table markup. The actual lines of code doing any work
in here are relatively few.
Chapter 7. Unit Testing in the Browser with JavaScript • 106
report erratum • discuss

Starting at the top, this line here imports a third-party library that Dave and
his crew like:
<script src="https://ajax.googleapis.com/ajax/libs/jquery/3.0.0/jquery.min.js">
</script>
It’s called jQuery.1 It helps them select page elements like the listboxes, among
other things, in their JavaScript programs.
Unlike the previous example, there’s not a lot of JavaScript in this file. That’s
because it’s all loaded externally from separate files like this:
<script type="text/javascript" src="src/EmployeeModel.js"></script>
<script type="text/javascript" src="src/EmployeeController.js"></script>
This is the JavaScript code Dave and crew wrote for this page. This is what
we are going to test later. Here they are loading it into the HTML page, so they
can access and make use of their JavaScript objects like this:
<script type="text/javascript">
$(document).ready(function () {
new EmployeeController().init();
});
</script>
This is Dave’s gateway into his JavaScript code for the page. Here he can
instantiate his objects, initialize them, and let them work their magic.
And the rest of the page is just plain old HTML. Fortunately for us, there are
only five elements we need to concern ourselves with: the two listboxes and
the three buttons.
<select id="Onsite" size="4" multiple="multiple" style="width:300px">
<option value="1">Alan Wrench</option>
<option value="2">Phil Phillips</option>
<option value="2">Rob Robertson</option>
</select>
<select id="Offsite" size="4" multiple="multiple" style="width:300px"></select>
<input id="leftArrow" type="button" value="<"/>
<input id="rightArrow" type="button" value=">"/>
<input id="save" type="submit" value="Save"/>
What’s nice about each of these elements is they all have nice unique IDs,
which makes them selectable and easy to grab.
1.
https://jquery.com/
report erratum • discuss
Step 1: Scan the HTML • 107
$("#Onsite")
$("#Offsite")
$(" ")
$(" ")
Write the other CSS
selectors here
Hint: Select page elemnts by
their ‘ids’
*
Onsite
<
<
Offsite
Save
$("#save")
So that’s the HTML, and those are the page elements Dave’s code is going to
be interacting with.
Let’s switch gears and take a look at the JavaScript that’s going to make all
this HTML go.
Step 2: Check the JavaScript
As we saw earlier, there are two JavaScript files Dave’s page needs to run:
EmployeeModel
and
EmployeeController
. Let’s take a look at the model first.
javascript/src/EmployeeModel.js
var EmployeeModel = function(){
function getOnsite(){
var selectedArray = [];
$.each($('#Onsite option'),function(key,option) {
selectedArray[selectedArray.length] = $(option).val();})
return selectedArray;
}
function getOffsite(){
var selectedArray = [];
$.each($('#Offsite option'),function(key,option) {
selectedArray[selectedArray.length] = $(option).val();})
return selectedArray;
}
function getOnsiteIsEmpty(){
var selectedArray = [];
$.each($('#Onsite option'),function(key,option) {
selectedArray[selectedArray.length] = $(option).val();})
return selectedArray.length === 0;
}
Chapter 7. Unit Testing in the Browser with JavaScript • 108
report erratum • discuss

function saveParameters(){
var employees = $("#Onsite > option").map(function() {
var jsonData = {};
jsonData[$(this).val()] = $(this).text();
return jsonData;
}).get();
return {"employees": employees};
}
return {
getOnsite : getOnsite,
getOffsite : getOffsite,
getOnsiteIsEmpty : getOnsiteIsEmpty,
saveParameters: saveParameters
}
};
EmployeeModel
is responsible for accessing the data Dave’s program needs from
the page. It reads values from the two listboxes (
getOnsite
and
getOffsite
), checks
to see if the Onsite listbox is empty (
getOnsiteIsEmpty
), and saves the onsite
parameters into a format that can be sent to a back-end server for saving
(
saveParameters
).
While the
EmployeeModel
accesses the page data, the
EmployeeController
controls it.
javascript/src/EmployeeController.js
var EmployeeController = function (pModel) {
var model = pModel || new EmployeeModel();
function init() {
var that = this;
$('#leftArrow').click(function () {
$('#Offsite option:selected').appendTo('#Onsite');
});
$('#rightArrow').click(function () {
$('#Onsite option:selected').appendTo('#Offsite');
});
$('#save').click(function () {
if (that.model.getOnsiteIsEmpty()) {
that.showErrorDialog();
}else {
that.save();
}
});
return this;
}
report erratum • discuss
Step 2: Check the JavaScript • 109

function save() {
params = model.saveParameters();
$.ajax({
type:"POST",
traditional:true,
url:"/tracker",
data: params,
dataType:'json',
success:function (result) {
$('#SuccessMessage').html(result.message);
}
});
}
function showErrorDialog() {
alert('Error - Onsite cannot be empty');
}
return {
init: init,
save: save,
showErrorDialog: showErrorDialog,
model: model
};
};
This code here sets up the actions on the button presses. For example, when
you click the
#leftArrow
button, it takes the contents of the
#OffSite
listbox and
appends its contents to
#Onsite
.
$('#leftArrow').click(function () {
$('#Offsite option:selected').appendTo('#Onsite');
});
The
#rightArrow click()
does the same thing, just going in the opposite direction.
$('#rightArrow').click(function () {
$('#Onsite option:selected').appendTo('#Offsite');
});
There’s a little more going on with the Save button. When you click Save, it
checks to see if the Onsite listbox is empty. If it is, it displays an error dialog.
If it isn’t, it goes ahead and saves the selected names in the onsite model.
$('#save').click(function () {
if (that.model.getOnsiteIsEmpty()) {
that.displayErrorDialog();
}else {
that.save(that.model);
}
});
Chapter 7. Unit Testing in the Browser with JavaScript • 110
report erratum • discuss

Now the reason these objects are called model and controller is Dave and the
team are using a popular design pattern here called the model-view-controller
or MVC.2
MVC is an ancient yet powerful software pattern used in many libraries to
this day. It encourages you to separate your data (your model) from your view
(your HTML page) and coordinate their interactions through something called
a controller.
The idea here is that your view should never talk directly to your data and
vice versa. All communication between the two should go through the con-
troller. This helps make the code more readable as well as more maintainable
by giving your objects clear responsibilities.
Those details aside, let’s get to the fun part and see how we can write some
tests and hopefully find Dave’s bug while we’re at it.
Step 3: Write the Tests
We are going to keep it simple when it comes to testing this JavaScript code.
We’re going to start with the model and verify that it can read those page
elements correctly. Then we’ll shift gears and test the controller actions, ver-
ifying they’re doing what we expect them to do.
The testing framework we are going to use here is called Jasmine.3 It’s one
of the more popular JavaScript unit testing frameworks, but it is by no means
the only one. We are also going to use another third-party library called jas-
mine-jquery,4 which helps Jasmine and jQuery play nicely together.
OK, ready? Let’s do this, starting with the model.
The Model
JavaScript unit tests are just like any other kind of unit test in that there is
usually a setup phase, where you set up your objects and data, and then a
test phase, where you run your tests against the data and see if everything
works.
For example, to test these four methods:
2.
https://en.wikipedia.org/wiki/Model%E2%80%93view%E2%80%93controller
3.
https://github.com/jasmine/jasmine
4.
https://github.com/velesin/jasmine-jquery
report erratum • discuss
Step 3: Write the Tests • 111
Onsite
<
<
Offsite
Save
var EmployeeModel = function(){
function getOnsite(){...}
function getOffsite(){...}
function getOnsiteIsEmpty(){...}
function saveParameters(){...}
};
Model tests
We could do the following:
javascript/spec/EmployeeModelSpec.js
describe("When selecting elements for employee",function(){
var model;
beforeEach(function() {
setFixtures(
'<select id="Onsite" size="4" multiple="multiple">' +
'<option value="1">One</option>' +
'<option value="2">Two</option>' +
'</select>' +
'<select id="Offsite" size="4" multiple="multiple">' +
'<option value="3">Three</option>' +
'<option value="4">Four</option>' +
'</select>'
);
model = new EmployeeModel();
});
it("should be able to get Onsite",function () {
expect(model.getOnsite()).toEqual(['1','2']);
});
it("should be able to get Offsite",function () {
expect(model.getOnsite()).toEqual(['1','2']);
});
it("should be able to get saveParameters",function(){
var expected = {"employees": [{"1":"One"},{"2":"Two"}]};
expect(model.saveParameters()).toEqual(expected);
});
it("should be able to detect if Onsite is empty",function(){
expect(model.getOnsiteIsEmpty()).toBeFalsy();
});
});
Chapter 7. Unit Testing in the Browser with JavaScript • 112
report erratum • discuss
The first thing we’d do is set up our two listboxes, populate them with some
fake data, and then instantiate our
EmployeeModel
so it’s ready for action. That’s
what this code does here:
describe("When selecting elements for employee ",function(){
var model;
beforeEach(function() {
setFixtures(
'<select id="Onsite" size="4" multiple="multiple">' +
'<option value="1">One</option>' +
'<option value="2">Two</option>' +
'</select>' +
'<select id="Offsite" size="4" multiple="multiple">' +
'<option value="3">Three</option>' +
'<option value="4">Four</option>' +
'</select>'
);
model = new EmployeeModel();
});
Once our test page is set up, we’re ready to test our model against it to see
how it works.
For example, to verify that our
getOnsite()
method returns the IDs of the
employees listed in the
#OnSite
listbox, we could test that out like this:
it("should be able to get Onsite",function () {
expect(model.getOnsite()).toEqual(['1','2']);
});
This test uses the model to try to access the IDs we defined in our test data,
and then asserts that they are equal. The
beforeEach
wrapper around the
setFix-
tures
ensures that the test data is freshly loaded before each test run.
Onsite
1, One
2, Two
<select id="Onsite"
<option value="1">One</option>
<option value="2">Two</option>
</select>
function getOnsite(){
$.each($('#Onsite option'),function(key,option) {
return selectedArray;
}
it("should be able to get Onsite", function(){
expect(model.getOnsite()).toEqual(['1','2']);
});
EmployeeModel
Test
['1','2']
['1','2']
setFixtures
report erratum • discuss
Step 3: Write the Tests • 113
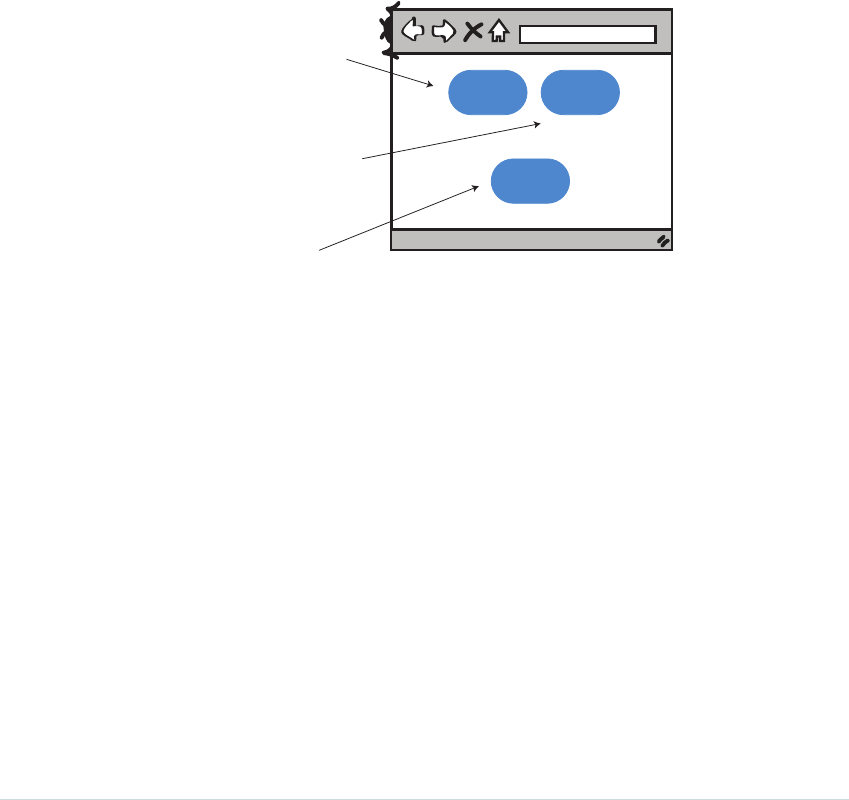
We can do the same thing for the
getOffsite()
,
getOnsiteIsEmpty
, and
saveParameter
methods. We can add some more test data in our setup, give those IDs some
different values, and then test the remaining methods in a similar way. This
is exactly what we’ve done.
When we run these tests, they all seem to pass. It doesn’t look like we are
going to find our bug here.
Let’s continue our search in the controller.
The Controller
The controller is responsible for what happens when the buttons are
pressed—specifically, the left and right arrows along with the Save button.
<
<
Controller test cases
Save
$('#leftArrow').click(function () {
// ...
});
$('#rightArrow').click(function () {
// ...
});
$('#save').click(function () {
// ...
});
We know we’ve got a problem with the left arrow, so let’s keep the suspense
going and save it for last. Let’s test the Save button first.
The Save Button
The Save button is interesting because it does a check first to see if the Onsite
listbox is empty before doing the save.
$('#save').click(function () {
if (that.model.getOnsiteIsEmpty()) {
that.showErrorDialog();
}else {
that.save();
}
});
Chapter 7. Unit Testing in the Browser with JavaScript • 114
report erratum • discuss

Now we don’t want to call
that.save
when we run our unit test. That would do
a network call out to some server, and we’d prefer not to call from within our
unit test.
But what we could do instead is check to see that the error dialog and save are
called under the right conditions. For example, we could do something like this:
javascript/spec/EmployeeControllerSpec.js
describe("When saving the tracker list",function() {
var controller = null;
describe("and Onsite has people",function() {
beforeEach(function() {
setFixtures(
'<select id="Onsite" size="4" multiple="multiple">' +
'<option value="1">One</option>' +
'<option value="2">Two</option>' +
'</select>' +
'<input type="submit" id="save" value="Save"/>'
);
controller = new EmployeeController().init();
});
it("should save",function() {
spyOn(controller, 'save');
$('#save').click();
expect(controller.save).toHaveBeenCalled();
});
});
describe("and Onsite is empty ",function() {
beforeEach(function() {
setFixtures(
'<select id="Onsite" size="4" multiple="multiple">' +
'</select>' +
'<input type="submit" id="save" value="Save"/>'
);
controller = new EmployeeController().init();
});
it("should show error dialog",function() {
spyOn(controller, 'showErrorDialog');
$('#save').click();
expect(controller.showErrorDialog).toHaveBeenCalled();
});
});
});
report erratum • discuss
Step 3: Write the Tests • 115

There are two tests running here. The first checks to see that
save
is called if
the Onsite listbox has people in it. The second one verifies that it doesn’t, and
shows an error dialog instead if it’s empty.
Both tests do this by making use of something Jasmine calls a spy.
it("should save",function() {
spyOn(controller, 'save');
$('#save').click();
expect(controller.save).toHaveBeenCalled();
});
We touched on mocking briefly in the previous chapter (and we’ll really get
into it later in Chapter 11, Effective Mocking, on page 177), but the way Jasmine
does its mocks and stubs is with these little things called spies.
What
spyOn
does, as you can probably guess by its name, is to
spyOn
any given
object and see if its methods got called during the running of the test.
It’s handy for us because we don’t want to call the
save
method on the con-
troller for real. We just want to know that our logic leading up to the call is
right, and these spies are a handy way to do that.
OK. After running these tests, no bug seems to be found here. Let’s move on
to the arrows.
The Arrows
Testing the arrows is similar to what we did with the model. Here we set up
our listboxes with some HTML data, and then click the left and right arrows
to check that they move people from one list to the next correctly.
javascript/spec/EmployeeControllerSpec.js
describe("When adding employees",function(){
var model;
var controller;
beforeEach(function() {
setFixtures(
'<select id="Onsite" size="4" multiple="multiple">' +
'<option value="1">One</option>' +
'<option value="2">Two</option>' +
'</select>' +
'<input id="leftArrow" type="button" value=" < " />' +
'<input id="rightArrow" type="button" value=" > " />' +
'<select id="Offste" size="4" multiple="multiple">' +
'<option value="3">Three</option>' +
'<option value="4">Four</option>' +
'</select>'
);
Chapter 7. Unit Testing in the Browser with JavaScript • 116
report erratum • discuss

model = new EmployeeModel();
controller = new EmployeeController().init();
});
it("should be able to transfer from Onsite to Offsite",function(){
expect(model.getOnsite()).toEqual(['1','2']);
expect(model.getOffsite()).toEqual(['3','4']);
$("#Onsite").val('2');
$('#rightArrow').click();
expect(model.getOnsite()).toEqual(['1']);
expect(model.getOffsite()).toEqual(['3','4','2']);
});
it("should be able to transfer from Offsite to Onsite",function(){
expect(model.getOnsite()).toEqual(['1','2']);
expect(model.getOffsite()).toEqual(['3','4']);
$("#Offsite").val('3');
$('#leftArrow').click();
expect(model.getOnsite()).toEqual(['1','2','3']);
expect(model.getOffsite()).toEqual(['4']);
});
});
Lines like these two check the values in the lists to make sure our data is set
up right for each test:
expect(model.getOnsite()).toEqual(['1','2']);
expect(model.getOffsite()).toEqual(['3','4']);
And lines like these mimic what the user does when interacting with the page:
$("#Onsite").val('2');
$('#rightArrow').click();
The first line selects the list item with a value of
'2'
via our
#Onsite
CSS selector.
And the second one clicks the right arrow by similarly selecting it and then
manually firing the button’s
click()
event.
These last two lines check the results. If all goes well, the Onsite listbox should
only contain one number, while the Offsite listbox should now contain three.
expect(model.getOnsite()).toEqual(['1']);
expect(model.getOffsite()).toEqual(['3','4','2']);
Except it doesn’t. The test fails! Which means the bug Dave mentioned is
somewhere nearby.
Let’s look back over our
setFixtures
code and see if anything is amiss here.
report erratum • discuss
Step 3: Write the Tests • 117
'<select id="Offste" size="4" multiple="multiple">' +
'<option value="3">item 3</option>' +
'<option value="4">item 4</option>' +
'</select>'
See anything wrong with the previous code? Anything wrong with the word
Offste? You bet there is. It’s missing an “i”. It should be Offsite.
That’s our bug! A typo in the ID of our
#Offsite
element. But how could that
happen?
This is probably as good a time as any to talk about something that’s impor-
tant to know about JavaScript—type safety.
Static vs. Dynamic Typing
When computer programs run, they apply a collection of rules and checks to
ensure our variables and methods are all properly declared and fit for running.
This is called type checking, and its main purpose is to help us catch bugs
earlier in the code writing process.
For example, if you were to make a mistake in a strongly typed language like
Java (say you inadvertently tried to assign a
String
to an
int
), the Java compiler
would let you know about it.
bash
> javac DoggyProgram.java
X
Error: incompatible types
required : int
found: String
int numberOfDogs = "five";
Static type checking - compile time
Phew !
This is called static type checking, and strongly typed languages like Java and
C# do this check as part of their compilation stage and make you fix mistakes
before you can run your program.
What’s different about JavaScript is there is no compilation stage. JavaScript
is a dynamically typed language. Which means no compilation step is required.
It simply runs.
Chapter 7. Unit Testing in the Browser with JavaScript • 118
report erratum • discuss
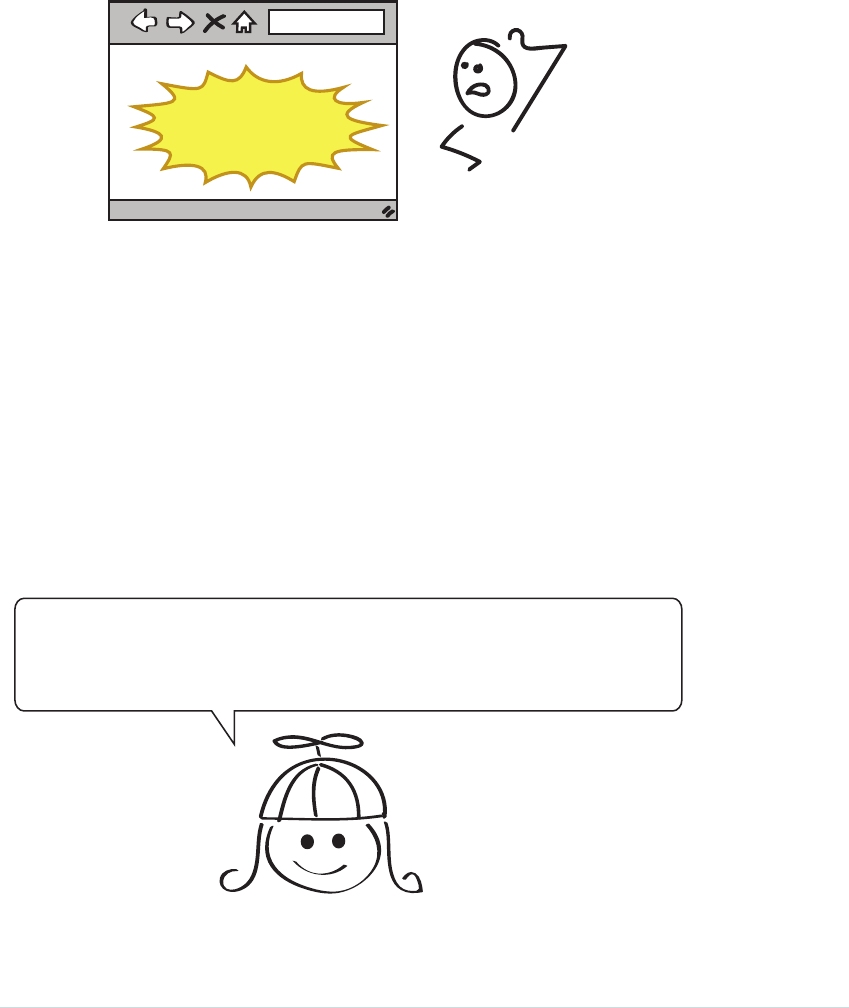
This is good in that you can iterate and try out your code more quickly. The
downside is if you mistype something, you won’t find out about it until you
catch it in a unit test or it blows up in your browser.
Boom !!!
Dynamic type checking - run time
This is what makes JavaScript tricky. There is no compilation step. That
means JavaScript developers have to be a little more careful when it comes
to writing code and ensuring that all their object types line up.
It also means unit testing has an even more important role to play. And unit
tests, along with tools like jslint (a tool for catching common JavaScript errors),
can go a long way toward making your JavaScript more robust and bug-free.
Phew. That was a big chapter. But congratulations! You just walked through
your very first JavaScript test. Give yourself a pat on the back.
Let’s now open up the floor for questions.
Open Mic
Won’t embedding HTML directly in the test
run the risk of it getting out of sync
with the actual page !?
report erratum • discuss
Open Mic • 119
Yes. Good point. When we embed HTML directly into our unit tests, we
absolutely run the risk of them getting out of sync with the actual HTML files.
If you’re not careful, you could end up in the situation where your unit tests
pass and your production code fails—precisely because they differ!
That’s why many frameworks allow you to load fixtures externally from files
like this:
describe("When selecting elements for employee - external fixture",function(){
var model;
beforeEach(function() {
loadFixtures('ListboxFixture.html');
model = new EmployeeModel();
});
it("should be able to get Onsite",function(){
expect(model.getOnsite()).toEqual(['1','2']);
});
});
But there are some advantages to including snippets in your test. For one, it
makes the tests easier to read by having the test data closer to the code that’s
testing it. It’s also easier to debug and troubleshoot sometimes when you only
look at the HTML needed for that particular test and not the entire page. So
it’s a trade-off.
Try experimenting with both and see what you like. In some cases you may
prefer one over the other.
I looked at some other examples of JavaScript
on the web and they looked different than
what we did here. Why is that !?
One of the nice things about working in JavaScript is you will never be short
of new ideas, tools, and opinions on how to go about writing and testing
JavaScript.
Chapter 7. Unit Testing in the Browser with JavaScript • 120
report erratum • discuss
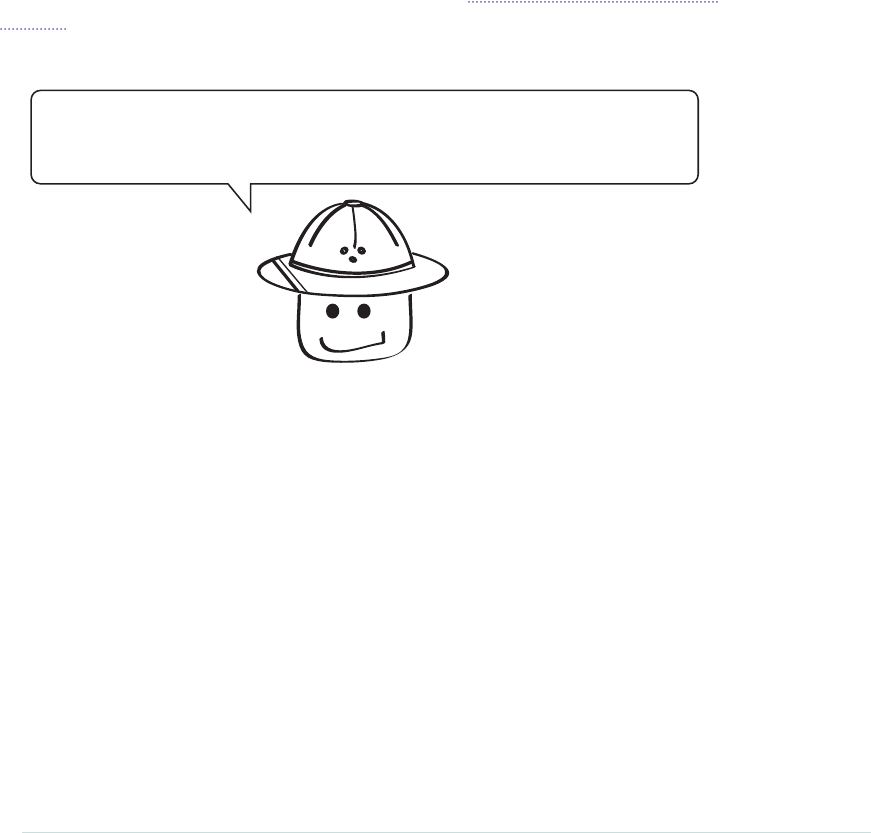
So don’t be alarmed if you see many different styles and ways to do this stuff.
There is definitely more than one way.
That’s why learning the basics is so important. Once you know a little bit
about what JavaScript is, how it works, and where its gotchas lie, you’ll be
in a much better position to judge for yourself which tools and techniques
you like.
Don’t think this is easy. Some of the smartest engineers in the world struggle
with this stuff, so don’t feel bad if it feels like it is constantly changing and
there seems to be an endless wave of new tools and frameworks coming out.
It is constantly changing. And that’s part of the game.
Just learn the basics. Keep practicing. And read JavaScript: The Good Parts
[Cro08]. It’s a short book (ha!), but it helps with some of JavaScript’s more
rough edges.
What’s important for us testers to take
away here ?
Know that you have options when it comes to UI testing. Not everything has
to be an end-to-end test.
In other words, if you are having a hard time automating something end-to-
end in the UI, talk to your friendly neighborhood developer and see if there’s
a way they can cover it with a unit test in the UI.
It may be a heck of a lot easier than going end-to-end, not to mention faster
and hopefully easier to maintain.
What We’ve Learned So Far
Good stuff! That was a big chapter with a lot going on. But you made it.
report erratum • discuss
What We’ve Learned So Far • 121

Key things to remember in this chapter are:
•We can unit test what goes on in the browser.
•UI tests don’t always need to go end-to-end.
•JavaScript is not a static typed language—so you gotta watch for typos
around the keyboard.
We just scratched the surface of this important topic. If you’d like to learn
more, be sure to read other books on JavaScript testing like Test-Driving
JavaScript Applications [Sub16] by Venkat Subramaniam.
Now that you’ve seen each level of the pyramid, it’s time to bring it all together.
In the next chapter, we are going to see how all the tests work in concert with
each other, and see how they can all be used when testing a system.
So turn the page to conclude our deep dive into the magic of the testing
pyramid.
Chapter 7. Unit Testing in the Browser with JavaScript • 122
report erratum • discuss

CHAPTER 8
Climbing the Pyramid
UI
Integration
Unit tests
At this point you’ve seen each kind of test. You know how they work. You’ve
seen them in action. You are now ready to bring it all together.
The goal of this chapter is to just give you a feel for how the pyramid works.
We are going to take a small feature, walk each level of the pyramid, and
discuss which tests we would typically write where, along with how each kind
of test supports and complements the others.
By the end of this chapter you will have a solid understanding of where each
kind of test should go, where the lines sometimes blur in our tests, and how
to deal with the gotchas that you and your team may encounter along the way.
If there are two chapters in this book everyone on your team should read, it’s
this one, along with Chapter 1, The Testing Pyramid, on page 3.
The Pyramid in Action
To get a sense of how this whole pyramid thing works, let’s take our create user
feature from [xxx](#ui), and see what it would be like to write tests at all three
levels of the pyramid for it from scratch.
report erratum • discuss
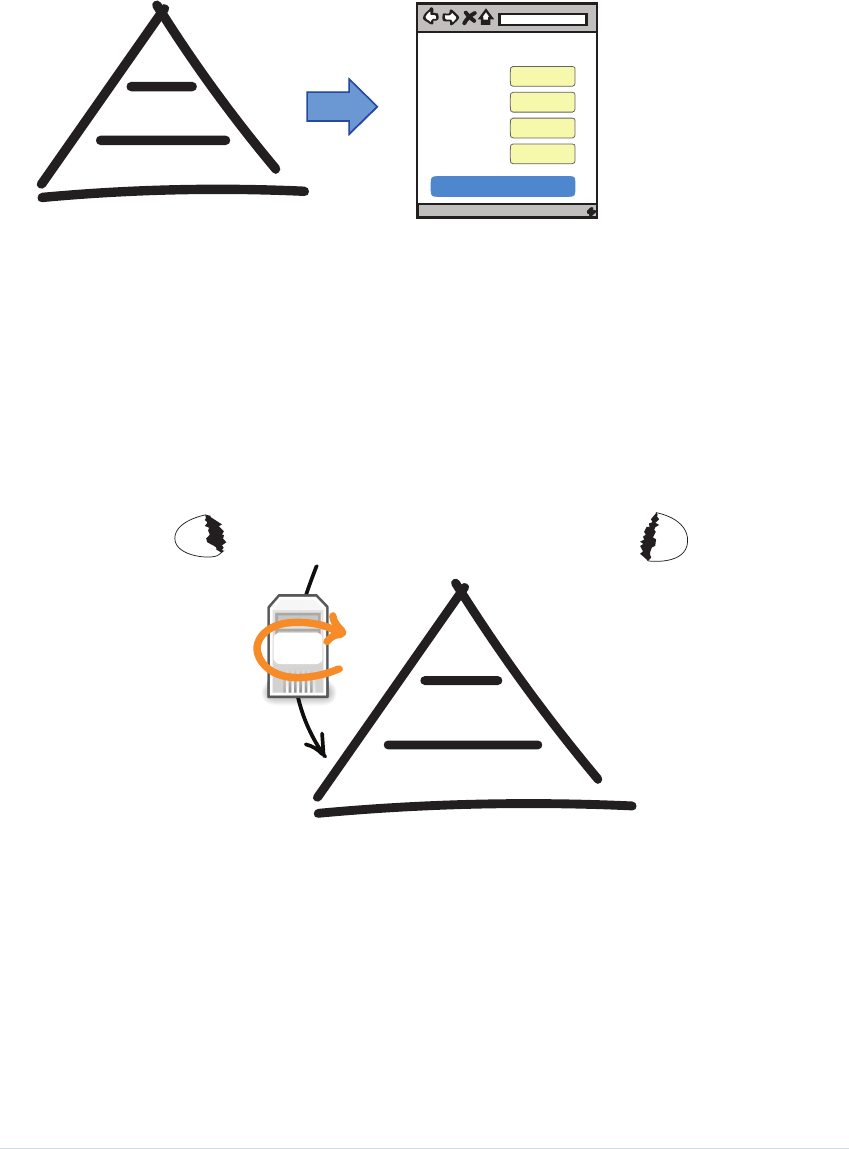
Sign Up
Name
Email
Create my account
Password
Confirmation
UI
Integration
Unit tests
Start with the Unit Tests
Now even though we started out the book looking at UI tests first, that doesn’t
necessarily mean this is where you should start.
Most teams start with unit tests because unit tests are what developers write
every time they add a feature to the system. The idea here is to test everything
that could possibly break.
UI
Integration
Unit tests
Everything that could possibly break
name required field
email required field
password required field
confirmation required field
name minimum length
email minimum length
password minimum length
confirmation minimum length
password and confirmation match
create/read/delete/update user
valid email addresses
email uniqueness
Unit tests
Logic
“Test everything that could possibly break” is an old XP (extreme programming)
maxim that means, “Test as much of this as you reasonably can, but under-
stand that you won’t get it all.” We know we can’t test everything. But with
the right 20%, we sure as heck can test a lot.
Remember that unit tests don’t just live on the server. They can live in the
browser, or anywhere else you have code too. The idea is to do most of our
heavy lifting down here where the tests are cheap, so we don’t have to do as
much later near the top.
Chapter 8. Climbing the Pyramid • 124
report erratum • discuss
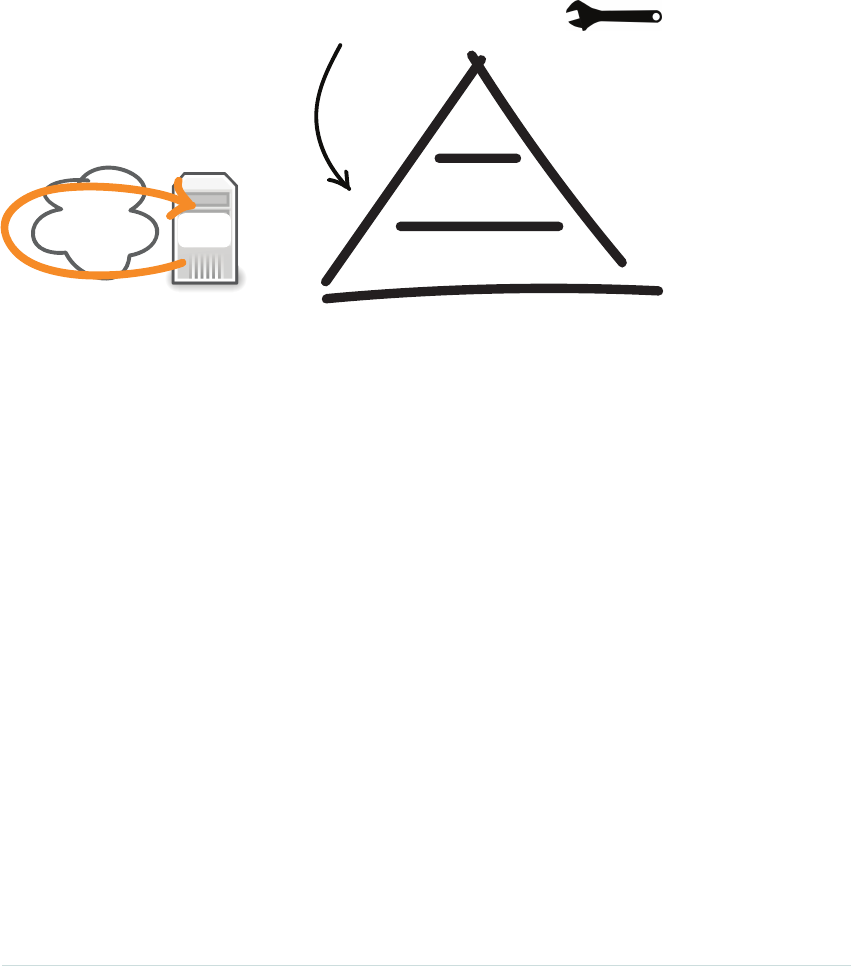
Step Up to the Integration Tests
When we step up to the integration level, our attitude shifts a bit. Here we
aren’t looking to test everything that could possibly break. Here we are looking
for gaps and high-level connectivity.
Create user with valid credentials
Create user with invalid credentials
HTTP status codes
HTTP redirects
Integration tests
UI
Integration
Unit tests
Check the plumbing
Web Logic
Do the web requests flow down to the database? Is the authentication service
correctly connected to the login code? This is what we are looking for here—not
the low-level details we already covered with the unit tests.
Now don’t be alarmed if you see developers writing unit tests that happen to
look a lot like integration tests. This is mainly for historical reasons.
In the early days of automated testing, there was no distinction between unit
or integration tests. There were only tests—and developers didn’t really differ-
entiate between the two. They would just test whatever they needed, unit or
not, and call them all unit tests.
But for us, and for the purposes of our web testing pyramid, integration tests
are going to be tests that focus on the testing of our web services. And unit
testing will be the testing of the underlying objects.
Good tests for us here would be the testing of our valid and invalid login
credentials, along with any of the corresponding HTTP status codes and
redirects we’d like to verify are working.
report erratum • discuss
Step Up to the Integration Tests • 125
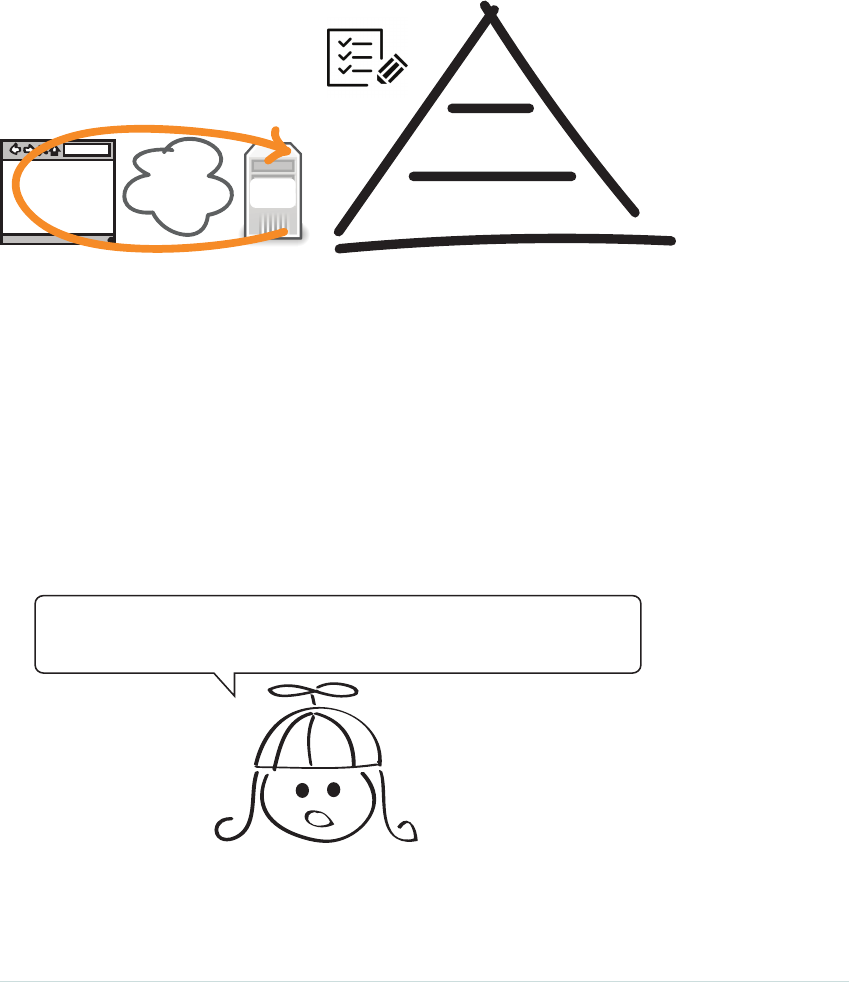
Reach for the UI Tests
By the time we reach this level of the pyramid, we should be feeling good
about ourselves. We know we’ve got a well-tested system. We know we can
handle all the details at the unit level. All we are looking for here is end-to-
end system confirmation and connectivity with the UI.
Create user with valid credentials
Create user with invalid credentials
UI tests
UI
Integration
Unit tests
Buy some
insurance
Web
UI Logic
Be careful at this level of the pyramid. UI tests are the best end-to-end tests
we’ve got, and you are going to be tempted to do a lot of testing up here. Don’t.
Always push as much testing as you possibly can further down the pyramid
where the tests are faster, more reliable, and less flaky. View these tests as
high-level end-to-end smoke tests that can be added to projects once the user
interface has settled down, and not during early-stage development when a
lot of changes are still being made to the UI. That’ll just be frustrating.
And don’t feel bad if you don’t have any UI tests for your system. Not all
applications need it. UI tests take the most work to set up and the most effort
to maintain, and they are the slowest to run. So tread lightly up here.
So if UI tests are so expensive and such a pain...
Why talk about them at all !?
Chapter 8. Climbing the Pyramid • 126
report erratum • discuss
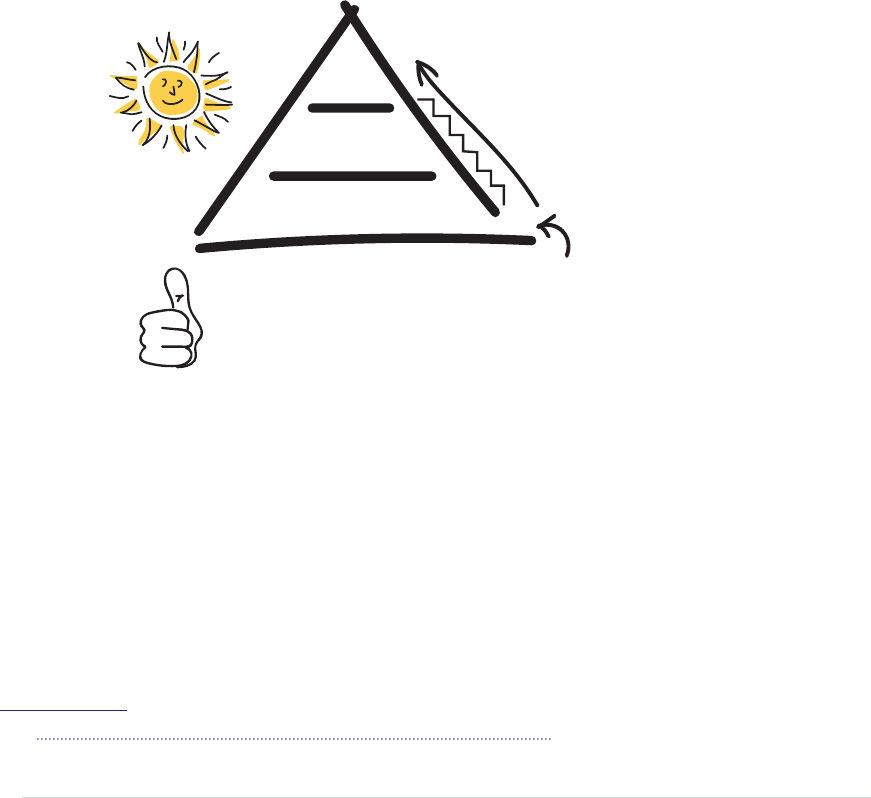
Because despite all the pain and cost it takes to set up and maintain UI tests,
in certain situations UI tests can be extremely valuable. For example, we
couldn’t ship our Spotify application to millions of people around the world
if we didn’t have some form of automated UI testing. We would have to hire
an army of testers and spend a big bag of money just to ship our product
every two weeks.
I have also worked on super secure, financial trading applications where
making a mistake in the UI could cost millions of dollars. UI tests were handy
there too.
Don’t worry if your pyramid isn’t always perfect, or if you think you are writing
too many UI tests and not enough unit tests. Half the battle is just being
aware.
UI
Integration
Unit tests
Start here
Climb as
necessary
1. Favor unit tests over UI.
2. Cover unit test gaps with integration tests.
3. Use UI tests sparingly.
Now before we go, let’s quickly take a look at two common pitfalls teams face
when they first start climbing the pyramid: inverted pyramids and flaky tests.
The Inverted Pyramid
The inverted pyramid, or ice cream cone,1 is what we call a system with lots
of UI tests at the top, and little or no unit tests at the bottom.
1.
http://watirmelon.com/2012/01/31/introducing-the-software-testing-ice-cream-cone
report erratum • discuss
The Inverted Pyramid • 127

UI
Integration
Unit
Lots of UI tests
on top ...
Few if any unit tests on the bottom
The Inverted Pyramid
aka Ice Cream Cone
Inverted pyramids happen for a variety of reasons. One common scenario is
that a team realizes it could benefit from having some kind of automated
testing in its application, but no one wants to do it—save the testers. So the
team members reach for the one tool at arm’s reach—the UI tests—and they
go to town automating pretty much everything they can.
The ice cream tastes good at first, but then something funny starts to happen.
The testers start to find out just how much time and effort go into making
these things stable. Not only that, the tests are constantly breaking with all
the changes the developers are continuously making to the app.
The developers want nothing to do with these tests—they see them as a testing
problem. And eventually the whole thing either collapses under its own weight,
or it trudges along in a zombie-like state and gets chalked up as another
failed automated testing effort.
That’s one way things could go.
The other way is where the testers and developers get together and collaborate.
The developers realize automated testing is as much their responsibility as
anyone else’s, so they start learning how to write unit tests and start covering
the bulk of the test cases down near the bottom of the pyramid.
Chapter 8. Climbing the Pyramid • 128
report erratum • discuss

Push the UI tests further down
UI
Integration
Unit
Push these down
to the bottom where they belong
Yummy...
Now an inverted test pyramid isn’t the end of the world. Listen to how Julia
Oskö, an engineer at Spotify, describes her experience with the testing pyramid.
I agree with the pyramid in theory, but not always in practice. When dealing with
large legacy systems lacking automated tests, then it can be worthwhile to invert
the pyramid. Quick wins in terms of low investment compared to backfilling unit
tests. Same goes for emerging platforms, like when we started with mobile at
Spotify. Originally there was very little support for the different platforms, i.e., no
usable libraries for integration/unit testing. So we started with the UI tests, and
they served us well at the time.
I agree with Julia wholeheartedly here. An inverted test pyramid is better
than no pyramid. And if you can get some quick wins by adding some smoke
tests, you should definitely go for it.
Just remember that the inverted pyramid is a place—not our end destination.
If we want to continue to make changes to our software, at some point we are
going to want to push those slower, more fragile tests that are up near the
top, down to the bottom where they are fast and cheap.
So feel free to hang out at the inverted pyramid for while. Just don’t plan on
staying there forever.
report erratum • discuss
The Inverted Pyramid • 129
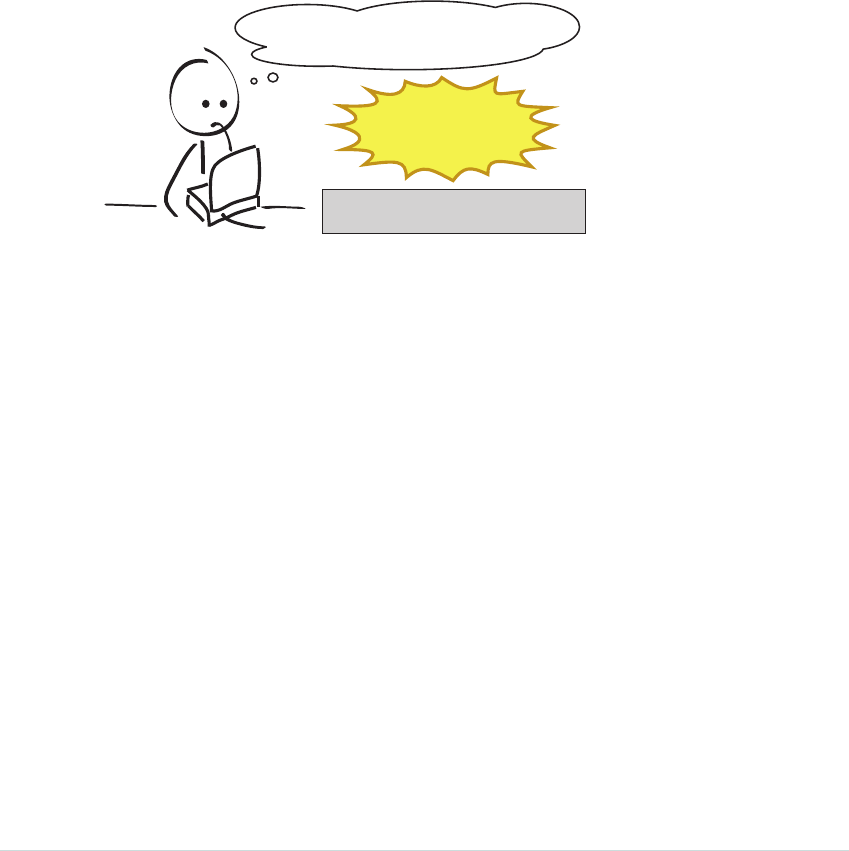
How to Deal with Flaky Tests
Flaky tests are like kryptonite to the automated tester—they sap your strength,
slow you down, and generally just waste your time.
What’s a flaky test? Any test that doesn’t run reliably.
Say, for example, that you have a UI test that logs someone into the system,
plays a song, and then logs them back out. When you run that test, it passes
99 times out of 100. That’s a flaky test because every once in awhile, when
it does periodically fail, you have to stop what you are doing, run the test
again, and then hope that it passes. Complete waste of time.
Hmmm... is it safe to check in?
should I not check in ?
Waste a lot of our time
Broken build!
We want our automated tests (all of them) to be highly deterministic. That
means consistent. They should run exactly the same way, reliably, every
single time.
It’s not just the tests themselves that can be flaky. It’s everything else that
goes with it.
Listen to how Kristian Karl, one of our senior testers, describes some of the
things contributing to the flakiness of tests.
In the book, the expression “flaky tests” is mentioned numerous times. An
example is made from Spotify. I have some strong opinions about this. They are
(generally speaking) not flaky tests. They are flaky test results. It’s a huge differ-
ence. It sort of implies where the big problems with automation lie. It’s typically
not the tests alone. It’s everything! The system under test is usually the biggest
culprit, not to mention the test environments, etc. The naming of the problem
itself can be a problem. Saying it’s a flaky test points the finger at the test
automation code, when saying “flaky test results” is more of an open question.
Which is more helpful for the team, I think.
Flaky tests are also masters of disguise and are great at avoiding detection.
They like to lie there in wait and then hit when you least expect it.
Chapter 8. Climbing the Pyramid • 130
report erratum • discuss

So this is what you’ve got to fight. You’ve got to resist that urge to ignore
them, and instead form a hunting party and track them down head on.
Here are three options for how to do just that.
1. Rewrite the Test
Look at what it is you are trying to test and see if you can test it in a different
way. Maybe you don’t need to play the song before logging out. Maybe you
don’t need to book the hotel and the car before canceling the reservation.
Just take a look at the test, see what you are trying to do, and then see if you
can do it in some other way.
2. Push the Test Further Down the Pyramid
We should always be doing this anyway, but it’s so important, it’s worth
repeating. Take a look at the test and see if there is another way we can test
it further down the pyramid.
Testers, this is particularly important for you. You are going to be living
nearer the top of the pyramid, and you are going to see a lot more flakiness
up there (flaky tests are more prevalent in integration and UI tests because
of all the moving parts).
When you see a flaky test, bring a developer in and show them what you are
trying to do. Then see if there is any way you can push it down and tackle it
at the unit level. You may not be able to test everything in exactly the way
you’d like, but the trade-off may be well worth it because these flaky tests
are going to throw you off too. And it may be better just to thoroughly explore
it manually and come up with with a simpler, new kind of test after.
3. Kill It—It May Not Be Worth It
That’s right. Not all automated tests are worth the effort. If you’ve absolutely
exhausted all options, and this thing is becoming a huge thorn in your side,
kill it and cover the risk some other way.
This is what Facebook does. If they detect a flaky test, they delete it—auto-
matically.2 Why? Because they found it’s not worth it. It’s not worth the
maintenance. It’s not worth the disruptions. It’s not worth fixing. So they
delete it and then just add new tests for the stuff that breaks.
2.
https://www.quora.com/How-would-you-deal-with-a-large-codebase-that-has-built-up-a-lot-of-flickery-tests-over-
the-years
report erratum • discuss
How to Deal with Flaky Tests • 131
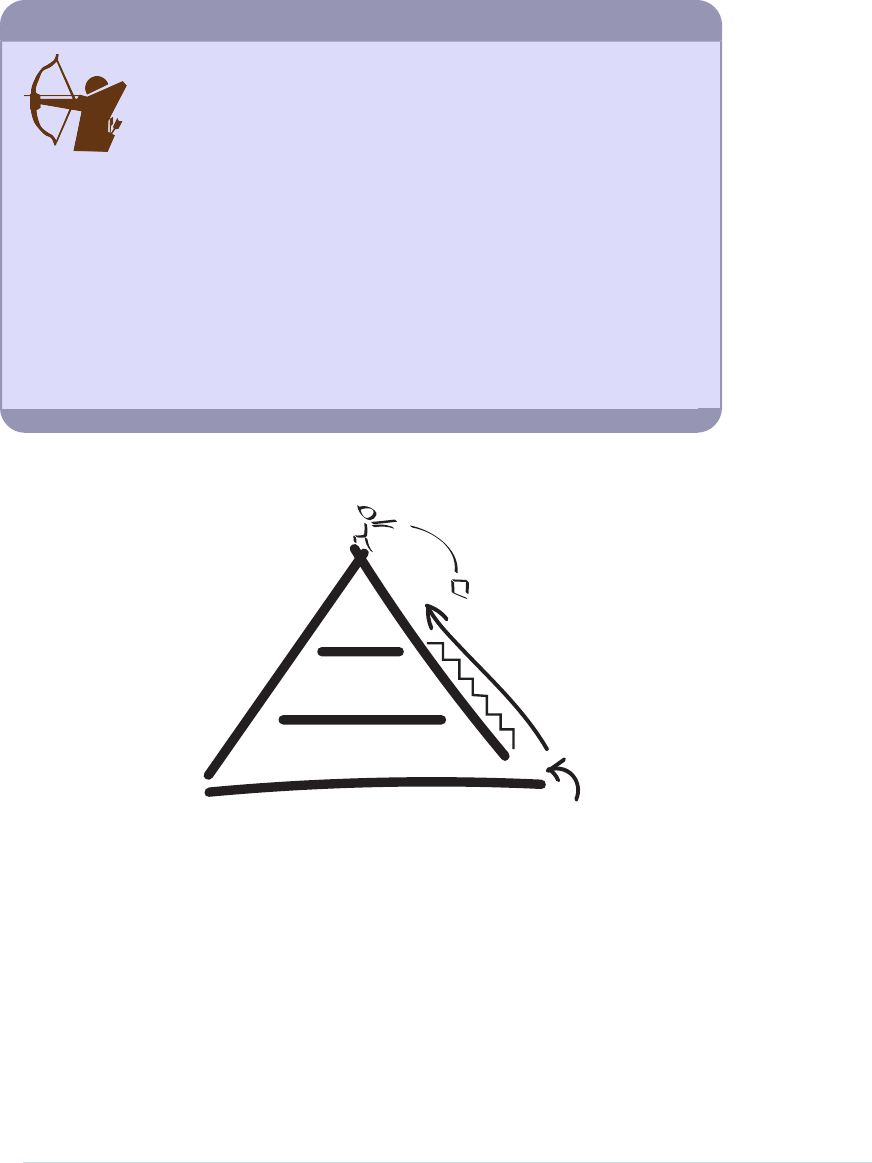
Declaring War on Flaky Tests
Flaky tests became such a problem for us at Spotify that we created
a squad (our word for team), called Developer Productivity, one of
whose main goals was to help other squads track down and eliminate
flaky tests.
It wasn’t easy (we had a lot of flakiness), but the effort was well worth it. Once we
rallied the company around fixing these things, we noticed immediate improvements
in our ability to cut releases more steadily and reliably while saving countless hours
fixing and re-running phantom broken tests. It just made the machinery run better,
and everyone was happier. And while I can’t prove it, I think we all lost weight and
had better social lives.
You may not have the luxury or resources of forming your own developer productivity
team, but take flaky tests seriously, and tackle them as soon as you can. You won’t
regret it.
What We’ve Learned So Far
UI
Integration
Unit tests
Start here
Climb as
necessary
Always push down
Phew. You made it. You are still here and now you’ve seen the testing pyramid,
experienced some of the challenges we face, and looked at some ways we deal
with them.
Automated testing isn’t easy. It’s a lot of hard work. You never really get there.
You are constantly tweaking, learning, and adjusting, but there are a few
rules of thumb that can mostly keep you out of trouble. And that’s hopefully
what you’ve learned here so far.
Chapter 8. Climbing the Pyramid • 132
report erratum • discuss

If nothing else sticks with you, just remember:
•Do the bulk of your testing at the unit level of the pyramid.
•Catch as many integrations and gaps that you can at the integration level.
•Use UI tests, but use them sparingly. We shouldn’t be sweating the
details up here.
And that concludes Part I of our book. Congratulations! You are now officially
dangerous.
The next step is to turn you into a pro. To do that, it helps to understand a
few basic principles about writing code, as well as how to think about orga-
nizing all those automated tests you’re going to be writing.
But first take a breather. Close your eyes. And just imagine what it would be
like to write beautiful automated tests. Then turn the page and get ready to
enter the world of programming.
report erratum • discuss
What We’ve Learned So Far • 133

Part II
Exploring the Pyramid
Here we expand on the basics and look at various
techniques to make you even more effective at each
level of the pyramid. Here you will learn the basics
of sound programming, strategies for how to group
and organize your tests, as well as some advanced
topics around the fine art of unit testing.

CHAPTER 9
Programming 101
if (x)
then (y)
Not everyone getting into automated testing is going to be an expert computer
programmer. But the good news is you don’t have to be. In this chapter you’ll
get a crash course on programming and on the thought patterns programmers
use daily to write great code.
Testers, you are going to be writing a lot of automated tests in code. This will
be a good chapter for you to learn some of the basics around programming
structure and to think about code.
Developers, there shouldn’t be any surprises in this chapter for you, other
than that occasionally reflecting on our craft can be good for helping us explain
what it is we do to others. This may be helpful for you when mentoring others.
To be clear, the goal here isn’t to turn you into the next Ada Lovelace or Grace
Hopper (you’ll have to do that on your own). But by the end of this chapter,
you will know some of the basics of good programming and how to write tests
that are easy to read and a joy to maintain.
report erratum • discuss
The First Programmers
Ada, the Countess of Lovelace, was an English mathematician who is generally
regarded as the first computer programmer. While this feat alone is pretty impressive,
what’s even more impressive was that she introduced many of the concepts we use
in computing today back in 1832 when there weren’t even any computers around.
Equally impressive are the achievements of Rear Admiral Grace M. Hopper, who was
one of the first programmers of one of the first real computers to be created—the Harvard
Mark I. Not only was Grace instrumental in programming the Mark I, she co-invented
the first compiler for computers, which eventually led to the creation of COBOL.
These remarkable women gave us a lot of what we take for granted today. By learning
some of the basics of programming, you should know that you are in good company
following in the footsteps of these early pioneers.
The Mechanics of Programming
Not many people know this, but coding is a lot like writing. When we write,
we use expressions and phrases to express what we are thinking. We do the
same thing in programming, only instead of words and sentences, we use
things like variables, methods, and classes.
Take this sentence, for example:
There are five dogs.
How do you think we could write this sentence in a way a computer could
understand? Well, one way you could do it in Java is like this:
int numberOfDogs = 5;
This is called a variable. It’s an abstraction of some thought or thing we want
to represent as data in our software, and we use these things all the time
when we program.
For example, to define a variable for a web page we want to test in Ruby, we
could do this:
Chapter 9. Programming 101 • 138
report erratum • discuss

login_page = "http://127.0.0.1:3000/signup"
name
type
value
Variables store information
(string)
Variables are made up of three parts. The type defines what the variable is.
Numbers, like
int
and
float
, for example, are types that can be added and
subtracted.
String
s, on the other hand, can’t be added. But they are good at
holding words and text.
The name is what we humans call the thing we are referring to when program-
ming. Names are important because they remind us what our thing is and
what it does. More on names shortly.
And value, as you can probably imagine, is the data of the thing we want to
store in our variable. For a number, it could be its quantity (for example, 5).
For a string, it could be the text (for example, “Hello!”).
Not all languages define variables the same way. Java, for example, likes
programmers to make the type explicit, and forces you to type it out, along
with a semicolon at the end of every line.
Ruby, on the other hand, doesn’t require a type—it’s implicit, or it figures it
out on its own. And Ruby doesn’t require any semicolons at the end of the
line, in case you were wondering.
Variables are useful because they let us define things once and then use them
over and over again in these things called methods.
def test_login_page_success
visit login_page
...
end
def setUp
login_page = "http://127.0.0.1:3000/signup"
end
def test_login_page_failure
visit login_page
...
end
We manipulate variables and do work in methods
methods
variable
report erratum • discuss
The Mechanics of Programming • 139

Methods are where we get stuff done in our programs. Think of a method as
an operation. Log someone into the system. Calculate the return on a tax.
Display a high score. These are all examples of methods.
When we have a collection of methods and variables that does something
interesting, we then collect them together and put them in something called
a class.
class LoginPageTest class
def test_login_page_success
...
end
def setup
@login_page = "http://127.0.0.1:3000/signup"
end
def test_login_page_failure
...
end
variable
methods
We collect variables and methods in classes
A class is a collection of like-minded data and operations. If we were building
a calculator, we might put our variables and math operations in something
called a
Calculator
class. Or if we needed a dealer for a card game, we might
create a
Dealer
class and put the cards and shuffle operations in there.
This style of programming—the one we’ve used throughout the book—is
known as object-oriented programming. Object-oriented programming has
been around for a long time. It started to pick up steam in the ’80s, and today
it’s pretty much how most modern programming languages work.
I don’t want to bore you with the details, but object-oriented programming
(or OOP, as we call it in the biz) is exactly this idea of grouping data and
operations into these things called classes, which when used get turned into
these things called objects. That’s why it’s called object-oriented programming.
But for now, just start getting used to seeing variables, methods, and classes
organized this way, because this is how we’ve organized our tests. Don’t
worry if this seems strange at first. Once we get started, you’ll see what these
things look like in action. It will soon be second nature and you won’t even
have to think about it.
OK. Next let’s talk about the importance of writing style.
Chapter 9. Programming 101 • 140
report erratum • discuss

The Importance of Style
def process(command)
if command = "s"
print "You’ve killed the Wumpus!"
else if command = "r"
print "Sir Robin bravely runs away."
end
It was a dark and stormy night.
The Wumpus is nearby!
Type ‘s’ to shoot your arrow
or ‘r’ to run away.
Just like in writing, style makes a big difference in the clarity of your program-
ming. Style is important because while computers run the programs, it’s
people like you and me who read and maintain them. So the clearer we can
make our code, the easier it’s going to be to modify, change, and support (not
to mention contain fewer bugs).
To help you with your style, we are going to look at three things programmers
constantly do to increase the quality of their code. Specifically, we are going
to look at naming, spacing, and removing duplication.
Naming
Names really matter in programming. When we get the name of something right,
understanding the program becomes a breeze. Get the name of something wrong,
however, and understanding even our own code can be a bit of a nightmare.
Take this little method. You gotta feel sorry for whoever’s responsible for maintain-
ing this. It’s not at all clear what the author was thinking when they wrote it.
if (val(b))
redirect :wlcm_pg
else
redirect :lgn_pg
end
I have no idea!
report erratum • discuss
The Importance of Style • 141

Yet when we change a few words and rename a couple variables—bam! The
intent suddenly becomes clear.
I get it...
if valid(password)
redirect :welcome_page
else
redirect :login_page
end
It’s hard to give super concrete advice on naming, because so much of what
makes a good name is contextual. The perfect word on one project can be
confusing and overloaded on another.
But here are some general guidelines to think about when choosing names.
s
red
60
nasa_aeronautics_space_administration
days
isNotValid
salary
brand_color
seconds_per_minute
nasa
workDays
isValid
Good Bad
Are easy to understand
Make intent clear
Explain
Aren’t too long
Are descriptive
Avoid double negatives
Good names...
It comes down to treating code like an author would treat the words and
paragraphs in a good short story. You want to be clear with what you are
saying, you want the program to be easy to read, and you don’t want to make
the reader work too hard to see and understand what it is you are doing.
And another element of style that can help with that is spacing.
Spacing
Spacing? That’s right. Believe it or not, how you space and indent your code
makes a big difference in its readability. Just like reading paragraphs in a book,
understanding code gets hard if things aren’t spaced and indented properly.
And it’s not just for readability that spacing matters. Some authors of languages
like Python and early versions of Fortran thought spacing was so important
that your program wouldn’t even run if you didn’t space things correctly!
Chapter 9. Programming 101 • 142
report erratum • discuss
Naming Conventions: Go with the Flow
Every computer language has a convention for how it likes people to name things.
Java, for example, uses a convention called CamelCase, where you alternate the
capitalization of the letters when combining words.
int highScore = 1000;
String firstName = "Steve";
float myBankAccountAfterComingBackFromVacation = 0.0;
Ruby uses CamelCase for defining classes, but when it comes to naming variables
and methods, the convention then is to separate them with underscores.
int max_number_of_songs_in_playlist = 1000
float currenct_exchange_rate = 2.4;
int average_age_of_hockey_player_in_nhl = 27
Whatever language you end up writing your automated tests in, it’s probably a good
idea if you stick with the coding convention for that language and go with the flow.
It will make your tests easier to read and will be less confusing to others following in
your footsteps.
def display_high_score
if (new_score > old_score)
enter_initials
else
redirect :game_over
end
end
What the ...
def display_high_score
if (new_score > old_score)
enter_initials
else
redirect :game_over
end
end
Ahh...
The other thing that helps with making your programs easier to understand
is grouping related things together.
report erratum • discuss
Spacing • 143
def some_hard_to_read_test
get new_password_reset_path
assert_template 'password_resets/new'
post password_resets_path, password_reset: { email: "" }
assert_not flash.empty?
assert_template 'password_resets/new'
post password_resets_path, password_reset: { email: @user.email }
assert_not flash.empty?
assert_redirected_to root_url
end
I know something important
is happening here ...
When you group related things together and add a little something we call
whitespace (blank lines between paragraphs of code), a big jumble of code can
suddenly become a lot clearer. Now when you read the code, you don’t have to
think as much. You can scan it at a glance and see instantly what’s going on.
def a_nicely_spaced_test
# Go to page
get new_password_reset_path
assert_template 'password_resets/new'
# Try invalid email
post password_resets_path, password_reset: { email: "" }
assert_not flash.empty?
assert_template 'password_resets/new'
# Try valid email
post password_resets_path, password_reset: { email: @user.email }
assert_not flash.empty?
assert_redirected_to root_url
end
Of course! whitespace
comments are OK too!
what about comments ?
Someone told me I should try to write comment-free code ?
What did they mean by that ?
Chapter 9. Programming 101 • 144
report erratum • discuss
Comment-free code is a term developers use to challenge and remind them-
selves that the code they write should be so clear and easy to understand
that no comments are required. It should all just make sense.
While comment-free code is a nice goal and something we should all definitely
strive for, there is nothing wrong with dropping the occasional comment in
your code to clarify or explain your thinking.
What we want to avoid with comments is redundancy. If the code already
clearly explains what’s going on, no additional comments should be required.
But if there is some wrinkle, a hidden gotcha, or a non-obvious reason for
why something might happen in the code, a well-placed comment is perfectly
fine and desired.
Next let’s look at the root of all evil in software—duplication.
Dealing with Duplication
if (x)
if (x)
if (x)
Copy paste ...
Copy paste ...
Yes my pretty ...
= Duplication =
Copying and pasting code is one of these double-edged swords in software.
On the one hand, it’s great for quickly getting things up and running. But on
the other hand, it makes our code more fragile and harder to change.
To see what I mean, take a look at the following test code. A common pattern
in testing is to get the first test working, and then copy and paste the same
code for the other test cases afterward, resulting in code that looks like this:
report erratum • discuss
Dealing with Duplication • 145

test 'can access welcome page' do
@user = users(:user1)
get login_path
post login_path, session: {email: 'user@test.com',password: 'password' }
follow_redirect!
assert_select 'h1','Welcome'
end
test 'can access company financials' do
@user = users(:user1)
get login_path
post login_path, session: {email: 'user@test.com',password: 'password' }
follow_redirect!
get financials_path
assert_select 'h1','Financials'
end
test 'can access plans for world domination' do
@user = users(:user1)
get login_path
post login_path, session: {email: 'user@test.com',password: 'password' }
follow_redirect!
get world_domination_path
assert_select 'h1','Step1: Take Saskatchewan'
end
The advantage of copying and pasting here is that it is simple and quick. We
get immediate feedback with regards to whether our tests are working. That
is good.
The downside of stopping here, however, is that if we ever decide to change
anything about how these tests work (like logging in with a new password),
we now need to do it in three places instead of one.
One way to clean this code up a bit would be to pull all the common code shared
between the methods into one
setup
method, and then call that
setup
method at
the beginning of each test. That code would look something like this:
def setup
@user = users(:user1)
get login_path
post login_path, session: {email: 'user@test.com',password: 'password' }
follow_redirect!
end
test 'can access welcome page' do
assert_select 'h1','Welcome'
end
test 'can access company financials' do
assert_select 'h1','Financials'
end
Chapter 9. Programming 101 • 146
report erratum • discuss

test 'can access plans for world domination' do
get world_domination_path
assert_select 'h1','Step1: Take Saskatchewan'
end
This is much cleaner, much simpler, and much easier to read. The reason
you don’t see
setup
being called directly from each method is that
setup
is a
special test method that automated testing frameworks support for doing this
sort of thing automatically for us. So in this case, we don’t need to call it
ourselves.
What we just did here (this small but important act of removing duplication),
developers call refactoring. In layman’s terms, refactoring is nothing more
than going back and cleaning your code up. It can include things like
renaming variables and picking better method names. But it usually boils
down to removing duplication and making the code easier to read.
We want to do these kinds of things when we are writing our tests. Any
duplication we see, we are going to want to pull out and get rid of. Doing so
will not only make our tests easier to read, it will also make them way easier
to change and understand.
Remove Duplication by Continuously Refactoring
Refactoring is the act of improving the design of your code without changing its
underlying functionality. That may sound a little weird, but it is an important part
of the programming processes.
You see, when we write code and tests, we are in two states of mind. One is to get
the test or piece of code working. But the other, often missed step, is to go back and
make sure that everything is as clean as possible, and that the code is as simple and
easy to read as possible.
That’s what refactoring is. It’s that critical step that prevents code from decaying over
time and collapsing under its own weight, and instead continuously improves it so
it remains a joy to work with.
To learn more about this technique and other ways to improve your software, check
out Martin Fowler’s book on the subject, Refactoring: Improving the Design of Existing
Code [FBBO99].
OK. Those are some basic techniques for writing good code. Let’s try them
out now and see what they look like in action.
report erratum • discuss
Dealing with Duplication • 147

Playing the Game
DAVE
Any idea what’s going on with
our meter reading report here !?
case meter.type
when 'gas'
when 'wind'
when 'solar'
report << "Type: Solar\n"
end
?
Dave and crew are in a bit of a bind. They’ve got some code and tests that
print a simple little report for each type of meter on their various work permits,
but the engineer who did most of the work has moved on and nobody seems
to be able to make heads or tails of the code.
Knowing he can count on you, he asks you to take a look at the code and see
if there’s anything you can do to improve it.
Here’s the class and test code for the meter printing feature:
class MeterPrinter
def print(m)
r = StringIO.new
case m.type
when 'gas'
r << "Meter Report\n"
r << "Type: Gas\n"
r << "Construction Co. Ltd.\n"
when 'wind'
r << "Meter Report\n"
r << "Type: Wind\n"
r << "Construction Co. Ltd.\n"
when 'solar'
r << "Meter Report\n"
r << "Type: Solar\n"
r << "Construction Co. Ltd.\n"
end
return r.string
end
end
Chapter 9. Programming 101 • 148
report erratum • discuss

And here is the corresponding test:
require 'test_helper'
class MeterPrinterTest < MiniTest::Test
def setup
end
def test_print_gas
header = "Meter Report\n"
footer = "Construction Co. Ltd.\n"
gas_meter = Meter.new('gas')
meter_printer = MeterPrinter.new
report = meter_printer.print(gas_meter)
expected = header + "Type: Gas\n" + footer
assert_equal(expected, report)
end
def test_print_wind
header = "Meter Report\n"
footer = "Construction Co. Ltd.\n"
wind_meter = Meter.new('wind')
meter_printer = MeterPrinter.new
report = meter_printer.print(wind_meter)
expected = header + "Type: Wind\n" + footer
assert_equal(expected, report)
end
def test_print_solar
header = "Meter Report\n"
footer = "Construction Co. Ltd.\n"
solar_meter = Meter.new('solar')
meter_printer = MeterPrinter.new
report = meter_printer.print(solar_meter)
expected = header + "Type: Solar\n" + footer
assert_equal(expected, report)
end
end
Hmmm. While the tests are at least readable, it looks like we’ve got our work
cut out for us in that class. Let’s start there.
report erratum • discuss
Playing the Game • 149

Step 1: Fix the Spacing
A quick scan of the code reveals that while the test code is spaced reasonably
nicely, the class itself is in a bit of a mess. Nothing is lined up. The flow of
the method is confusing. And it takes just too much mental work to figure
out what is going on.
Let’s see what happens though, if we indent things properly and we inject a
few well-placed lines of whitespace.
class MeterPrinter
def print(m)
r = StringIO.new
case m.type
when 'gas'
r << "Meter Report\n"
r << "Type: Gas\n"
r << "Construction Co. Ltd.\n"
when 'wind'
r << "Meter Report\n"
r << "Type: Wind\n"
r << "Construction Co. Ltd.\n"
when 'solar'
r << "Meter Report\n"
r << "Type: Solar\n"
r << "Construction Co. Ltd.\n"
end
return r.string
end
end
Ahh. That’s better. We can at least see the flow of the method now and what
it’s doing. Let’s next see if we can’t improve on the names of some of those
variables.
Step 2: Choose Good Names
Looking at the class code again, one thing that makes this code harder to
read is that the variable names are short—like
m
for meter or
r
for report.
def print(m) # m = meter
r << "Type: Gas\n" # r = report
Chapter 9. Programming 101 • 150
report erratum • discuss

There’s nothing wrong with short variable names themselves. But when they
hide or make the intent of the code harder to read, that’s usually a sign that
we want to change them.
Let’s go ahead and expand those names and use whole words to better describe
what they represent. Tweaking the names a bit, here’s what we have now:
class MeterPrinter
def print(meter)
report = StringIO.new
case meter.type
when 'gas'
report << "Meter Report\n"
report << "Type: Gas\n"
report << "Construction Co. Ltd.\n"
when 'wind'
report << "Meter Report\n"
report << "Type: Wind\n"
report << "Construction Co. Ltd.\n"
when 'solar'
report << "Meter Report\n"
report << "Type: Solar\n"
report << "Construction Co. Ltd.\n"
end
return report.string
end
end
OK, that’s better. This is coming along nicely. Now it’s clear what this method
is doing and what the objects are named. Like Dave said, this method is just
taking in a meter, and then based on its type, returning the text representing
that meter for a report.
Next let’s see if we can clean things up even further by looking for duplication,
starting with the class.
Step 3: Tackle Duplication in the Class
Here’s the
MeterPrinter
class. What kind of duplication do you see in there?
Grab a pencil and circle anything you suspect you may want to refactor.
Bonus points if you can figure out what we should do with it after.
report erratum • discuss
Step 3: Tackle Duplication in the Class • 151
class MeterPrinter
def print(meter)
report = StringIO.new
case meter.type
when 'gas'
report << "Meter Report\n"
report << "Type: Gas\n"
report << "Construction Co. Ltd.\n"
when 'wind'
report << "Meter Report\n"
report << "Type: Wind\n"
report << "Construction Co. Ltd.\n"
when 'solar'
report << "Meter Report\n"
report << "Type: Solar\n"
report << "Construction Co. Ltd.\n"
end
return report.string
end
end
Circle any duplication you see here
Circle in
here
How to crush bugs
Bonus Points Write any ideas for how to remove here
HeHe!
Hopefully after scanning this, you were able to identify a few of the following culprits.
It seems like the
Meter Report
header and the
Construction Co. Ltd.
footer are added
regardless of which type of meter is present (a clear case of copy and paste).
The question now is what to do about it.
Chapter 9. Programming 101 • 152
report erratum • discuss
class MeterPrinter
def print(meter)
report = StringIO.new
case meter.type
when 'gas'
report << "Meter Report\n"
report << "Type: Gas\n"
report << "Construction Co. Ltd.\n"
when 'wind'
report << "Meter Report\n"
report << "Type: Wind\n"
report << "Construction Co. Ltd.\n"
when 'solar'
report << "Meter Report\n"
report << "Type: Solar\n"
report << "Construction Co. Ltd.\n"
end
return report.string
end
end
Circle any duplication you see here
Circle in
here
Bonus Points Write any ideas for how to remove here
Extract common code into method
Call common code before and after case statement
?
If your first instinct was to pull this code into a common method somewhere,
your instincts are good. This is something we would normally do when faced
with duplication in a method. Just pull it out and call it from wherever it is used.
In this case, however, it’s not only the code that is duplicated, it’s the pattern
in which it is called. What might make more sense in this case is to simply
pull the
Meter Report
line before the case statement is called, and push the
Construction Co. Ltd.
part till after. Something like this:
report erratum • discuss
Step 3: Tackle Duplication in the Class • 153
Circle any duplication you see here
Bonus Points Write any ideas for how to remove here
Extract common code into method
Call common code before and after case statement
class MeterPrinter_refactored
def print(meter)
report = StringIO.new
report << "Meter Report\n"
case meter.type
when 'gas'
report << "Type: Gas\n"
when 'wind'
report << "Type: Wind\n"
when 'solar'
report << "Type: Solar\n"
end
report << "Construction Co. Ltd.\n"
return report.string
end
end
Pull here
Push there
Now there is no header or footer duplication in the method, and the code is
a little easier to read and understand.
But believe it or not, there is still some duplication left in this method!
Cleaning code and removing duplication is like that. After you remove the
first layer of duplication, another layer usually becomes clear.
See if you can clean up this code and remove even a little bit more. The
solution will be waiting for you at the end of the chapter.
Now let’s take a look and do the same thing for the test class.
Chapter 9. Programming 101 • 154
report erratum • discuss
Step 4: Remove Duplication in the Test
Scanning the tests, we can see instantly that this is another classic case of
copy and paste. No need to pass judgement here. We don’t know the kind of
pressure the author was under when they wrote this. At least we have tests!
Going through a similar exercise with the tests, let’s start by circling all the places
we see duplication, and then thinking of some options for dealing with it after.
Circle any duplication you see here
Bonus Points Write any ideas for how to remove here
require 'test_helper'
class MeterPrinterTest < MiniTest::Test
def test_print_gas
header = "Meter Report\n"
footer = "Construction Co. Ltd.\n"
gas_meter = Meter.new('gas')
meter_printer = MeterPrinter.new
report = meter_printer.print(gas_meter)
expected = header + "Type: Gas\n" + footer
assert_equal(expected, report)
end
def test_print_wind
header = "Meter Report\n"
footer = "Construction Co. Ltd.\n"
wind_meter = Meter.new('wind')
meter_printer = MeterPrinter.new
report = meter_printer.print(wind_meter)
expected = header + "Type: Wind\n" + footer
assert_equal(expected, report)
end
def test_print_solar
header = "Meter Report\n"
footer = "Construction Co. Ltd.\n"
solar_meter = Meter.new('solar')
meter_printer = MeterPrinter.new
report = meter_printer.print(solar_meter)
expected = header + "Type: Solar\n" + footer
assert_equal(expected, report)
end
end
Any duplication ?
Here’s some stuff that immediately jumps out.
report erratum • discuss
Step 4: Remove Duplication in the Test • 155
Circle any duplication you see here
Bonus Points Write any ideas for how to remove here
Pull into a setUp method
require 'test_helper'
class MeterPrinterTest < MiniTest::Test
def test_print_gas
header = "Meter Report\n"
footer = "Construction Co. Ltd.\n"
gas_meter = Meter.new('gas')
meter_printer = MeterPrinter.new
report = meter_printer.print(gas_meter)
expected = header + "Type: Gas\n" + footer
assert_equal(expected, report)
end
def test_print_wind
header = "Meter Report\n"
footer = "Construction Co. Ltd.\n"
wind_meter = Meter.new('wind')
meter_printer = MeterPrinter.new
report = meter_printer.print(wind_meter)
expected = header + "Type: Wind\n" + footer
assert_equal(expected, report)
end
def test_print_solar
header = "Meter Report\n"
footer = "Construction Co. Ltd.\n"
solar_meter = Meter.new('solar')
meter_printer = MeterPrinter.new
report = meter_printer.print(solar_meter)
expected = header + "Type: Solar\n" + footer
assert_equal(expected, report)
end
end
The header and footer variables are redeclared in each test—no need for that.
And the
meter_printer
variable is also redefined three times.
The simplest thing to do in this case is the same thing we did before. Pull
these variables up into the testing framework’s
setup
method and then let
setup
re-initialize them from scratch before each test run.
Remember,
setup
is a special testing framework construct where we can embed
reusable code. That’s why we don’t have to call the method explicitly in each
test—the testing framework does that automatically for us.
Chapter 9. Programming 101 • 156
report erratum • discuss
Doing that, our test code now looks like this.
Circle any duplication you see here
Bonus Points Write any ideas for how to remove here
Pull into a setup method
class MeterPrinterTest_refactored < MiniTest::Test
def setup
@header = "Meter Report\n"
@footer = "Construction Co. Ltd.\n"
@meter_printer = MeterPrinter.new
end
def test_print_gas
gas_meter = Meter.new('gas')
report = @meter_printer.print(gas_meter)
expected = @header + "Type: Gas\n" + @footer
assert_equal(expected, report)
end
def test_print_wind
wind_meter = Meter.new('wind')
report = @meter_printer.print(wind_meter)
expected = @header + "Type: Wind\n" + @footer
assert_equal(expected, report)
end
def test_print_solar
solar_meter = Meter.new('solar')
report = @meter_printer.print(solar_meter)
expected = @header + "Type: Solar\n" + @footer
assert_equal(expected, report)
end
end
Pull here
less code
easier to read
easier to change
+
+
+
Ohh...
Hurray! Good job. Much better. This is code we could be proud of, and this
is code that will be much easier to read and maintain into the future. Future
readers of this code will thank you for your efforts.
Spacing, naming, and removing duplication. That’s the game we constantly
play when writing code. And the fun part is it never ends. You are always
going to come up with better ways to express things. So don’t worry about
getting it perfect the first time—it never is.
report erratum • discuss
Step 4: Remove Duplication in the Test • 157
Just keep improving the code incrementally as you go, and over time it will
get better. Before long others will find your code a pleasure to maintain and
a joy to read.
Oh, and here is the cleaned up code courtesy of reviewer Matteo Vaccari, who
correctly pointed out that there was indeed more duplication to be removed
from the code. Our class is now looking much better.
class MeterPrinter
def print(meter)
case meter.type
when 'gas'
report_type = "Gas"
when 'wind'
report_type = "Wind"
when 'solar'
report_type = "Solar"
end
report = StringIO.new
report << "Meter Report\n"
report << "Type: " + report_type + "\n"
report << "Construction Co. Ltd.\n"
return report.string
end
end
Solution to further class refactoring
What We’ve Learned So Far
Good stuff! You now have in your possession three handy tools for writing
good code and creating maintainable tests:
•Spacing
•Naming
•Removing duplication
Chapter 9. Programming 101 • 158
report erratum • discuss

All good elements of programming style, sharing the same goals we go after
when writing: clarity, intent, and purpose.
There’s a lot more to be said about programming, and if you are a tester and
new to programming, I encourage you to write lots of tests, read books, and
befriend your neighborhood developers. Most will be happy to share with you
what they know, along with many other good practices and techniques that
they use for writing good code.
With this knowledge under our belt, we are now ready to focus on another
area critical to good automated test maintenance: organization.
report erratum • discuss
What We’ve Learned So Far • 159
CHAPTER 10
Organizing Tests:
Bringing Method to the Madness
Testing
Horror
Sci-Fi
Art
Science
Comedy
Organizing tests may not sound all that sexy, but the ease and grace with
which you can find, add, and update new tests plays a big role in the quality
of your test life.
In this chapter, targeted at both testers and developers, we are going to look
at two techniques for keeping your tests simple and organized. By learning
the art of isolation as well as grouping tests by context, you’ll be able to
quickly find old tests, easily add new ones, and never be at a loss for where
your next test should go.
report erratum • discuss
The Land of Confusion
When the juices are flowing and you are on a roll, it will seem natural and
convenient to just want to add new tests to existing test cases.
Take this area calculator test, for example. It calculates the various areas of
geometric shapes.
class AreaTest < MiniTest::Test
def setup
@length = 3.0
@width = 4.0
@base = 5.0
@height = 2.0
@abase = 6.0
@bbase = 7.0
end
def test_areas
assert_equal(12, Rectangle.area(@length, @width))
assert_equal(5, Triangle.area(@base, @height))
assert_equal(13, Trapezoid.area(@abase, @bbase, @height))
end
end
OK ...
This test is great! It’s small. It’s short. It’s easy to read. Seems like a natural
place to add more things to do with geometric shapes.
But watch what happens when we add the ability to test something that seems
related but really isn’t. Namely, the ability to calculate a shape’s perimeter.
Boom! Confusion land. Now we have to rename the test of our class to
something long and awkward like
AreaAndPerimeterTest
. Then it’s not immediately
clear which tests go with which data. And thirdly, what used to be simple
and easy is now cumbersome and hard. We have to think too hard just to try
and understand what’s going on.
Chapter 10. Organizing Tests: Bringing Method to the Madness • 162
report erratum • discuss
class AreaAndPerimeterTest < MiniTest::Test
def setup
@length = 3.0
@width = 4.0
@base = 5.0
@height = 3.0
@abase = 6.0
@bbase = 7.0
@a = 1.0
@b = 2.0
@c = 3.0
@d = 4.0
end
def test_areas
assert_equal(12, Rectangle.area(@length, @width))
assert_equal(7.5, Triangle.area(@base, @height))
assert_equal(19.5, Trapezoid.area(@abase, @bbase, @height))
end
def test_perimeters
assert_equal(6, Rectangle.perimeter(@a, @b))
assert_equal(6, Triangle.perimeter(@a, @b, @c))
assert_equal(10, Trapezoid.perimeter(@a, @b, @c, @d))
end
end
Good name ?
Which tests go with which data ?
What about volumes ?
What we need are some thoughts and ideas around how we should organize
our tests. Something that lets us:
•Add new tests easily
•Keep the ones we have simple and easy to understand
•Not make our heads hurt every time we come back and look at it
The Beauty of Isolation
Testing in isolation means when you write a test, try to focus on testing one
thing or concept at a time.
report erratum • discuss
The Beauty of Isolation • 163
For example, look what happens if we rearrange our shape calculator tests
slightly so that instead of trying to test all geometric shapes at once, we test
only rectangles.
class RectangleTest < MiniTest::Test
def setup
@length = 3.0
@width = 4.0
end
def test_area
assert_equal(12, Rectangle.area(@length, @width))
end
def test_perimeter
assert_equal(14, Rectangle.perimeter(@length, @width))
end
end
Tests one thing
Only tests related to rectangles
Only the data we need
Way cleaner. By focusing only on the rectangle, the test name is now clearer.
No more confusing data to have to sift through (we keep only what we need).
And all the tests that appear are related to rectangles, and nothing else.
While all our tests obviously won’t be this simple or neat, this is the attitude
we shoot for going into any new test—simple, clear, and to the point.
We want to be able to come back to our tests repeatedly, understand them
at a glance, and then quickly make our changes so we can move on.
Someone told me good test isolation means
I should only ever have one assertion per test.
Is that true?
Chapter 10. Organizing Tests: Bringing Method to the Madness • 164
report erratum • discuss

Good question. It’s true that tests that only have one assertion per test can be
easier to read, maintain, and understand. But it’s not a hard-and-fast rule.
For example, take a style of automated testing my good friend Dan North
pioneered, known as BDD,1 or behavior-driven development. In BDD you first
describe the context or scenario that you are testing, and then you typically
have one assertion per test thereafter.
class WhenSomethingHappens
def setup
# prepare data/context and do something
end
def then_foo
# assert foo outcome
end
def then_bar
# assert bar outcome
end
end
For example, if you wanted to test the creation of a new card, you could do
it BDD style like this:
class WhenCreatingANewCard < MiniTest::Test
def setup
@card = Card.new(2, 'Hearts')
end
def test_that_card_value_is
assert_equal(2, @card.value)
end
def test_that_card_suit_is
assert_equal('Hearts', @card.suit)
end
end
This is a nice way to write tests (for reasons we are going to talk more about
in the next section). You’ve got a test with clear focus. A nice short name. And
writing tests in this style tends to result in many more little focussed tests.
But we could have just as easily written the same test using multiple asser-
tions, and this would have been fine too.
1.
https://en.wikipedia.org/wiki/Behavior-driven_development
report erratum • discuss
The Beauty of Isolation • 165
class CardTest < MiniTest::Test
def setup
@card = Card.new(2, 'Hearts')
end
def test_new_card
assert_equal(2, @card.value)
assert_equal('Hearts', @card.suit)
end
end
One assertion per test is a fine thing to shoot for, but we don’t need to be dogmatic
about it. If you need multiple assertions in your tests, go ahead and use them.
What’s more important is the concept of testing one thing per test. If you do
that, you won’t have a lot of assertions in every test anyways, and your code
will be easier to read and cleaner for it.
Test Frameworks Encourage Isolation by Design
Ever notice how you can’t string a series of tests together in any good automated
testing frameworks? That’s by design.
The first test framework designers, like Kent Beck who created JUnit, knew the pain
that came with having different tests interact with each other. So he designed the
first massively popular unit testing framework, JUnit, so that each test would pass
or fail completely independently of the other. In other words, each test was isolated.
The other thing he did was create the concept of
setUp
and
tearDown
for tests. Which
is where you put common stuff you want to
setUp
and
tearDown
before and after the
running of each test.
These are just a few of the ways your test framework can help you write isolated tests.
Use them to keep your tests separated.
OK. Let’s try this out. Here is the formula for calculating the volume of a
rectangle. Note there is one new bit of information required for this calcula-
tion—
h
or height.
V = l * w * h
lw
h
Chapter 10. Organizing Tests: Bringing Method to the Madness • 166
report erratum • discuss
We are going to add the volume calculation to our
Rectangle
test. The question
is, where do you think we should stick the height variable?
class RectangleTest2 < MiniTest::Test
def setup
@length = 3.0
@width = 4.0
end
def test_area
assert_equal(12, Rectangle.area(@length, @width))
end
def test_perimeter
assert_equal(14, Rectangle.perimeter(@length, @width))
end
def test_volume
assert_equal(60, Rectangle.volume(@length, @width, @height))
end
end
Where should we put the @height variable ?
Here in the setup ?
Or here with the method ?
... this is where we use it
This one’s a bit tricky. It is nice to have all the data we want to use captured
in the same place at the beginning of the test—in a place like
setUp
.
def setup
@length = 3.0
@width = 4.0
@height = 5.0
end
On the other hand, we also like to group data close to the tests that use it.
Because area and perimeter calculations don’t need height, we could also
leave it down here.
def test_volume
@height = 5.0
assert_equal(60, RectangleCalculator.volume(@length, @width, @height))
end
report erratum • discuss
The Beauty of Isolation • 167

These are the kinds of trade-offs and decisions you are constantly going to
be making when writing tests—where to stick your data. Here’s a good rule
of thumb:
Group data as close as you can to the tests that
are going to be using it.
In this case I would probably keep the
@height
in the
test_volume
test and then
pull it up into
setup
as soon as other tests start to want to use it. But not until
then.
Alright. Next let’s take a look at the power of grouping things by context.
The Clarity of Context
When you first start out, there are going to be some natural ways of grouping
tests that just make sense for you and your project.
UI
Integration
Unit tests
Pages & Userflows
Services & Endpoints
Classes & Interfaces
For example...
Pages, for example, are a nice way to group UI tests. Services and endpoints
are natural points of integration. And 1:1 mappings between classes and tests
are already a common convention with unit tests.
There are times, however, when you may get a test with lots of permutations and
combinations, and you just need some alternative ways of organizing them.
Take this login page for example. Here are some good tests that test Dave’s
LoginPage
.
Chapter 10. Organizing Tests: Bringing Method to the Madness • 168
report erratum • discuss
class LoginPageTest < MiniTest::Test
def test_authentication_with_valid_credentials_should_have_signout_link
end
def test_authentication_with_invalid_credentials_should_not_have_error_message
end
def test_authentication_with_valid_credentials_should_have_correct_title
end
def test_authentication_with_invalid_credentials_should_have_signin_link
end
def test_authentication_with_invalid_credentials_should_have_error_message
end
end
A little loooooooong ...
What could we do to make this
easier to read ?
The tests are good. Each one individually is easy to read. But as we start to
get more and more combinations, it’s going to get harder and harder to see
what’s going on.
Pause and pretend this was your code for a second. What would you do to
improve the readability or organization of these tests?
Three ways we could improve the
organization of these tests :
1.
2.
3.
report erratum • discuss
The Clarity of Context • 169

Well, the first thing you could do is to simply group the related tests together.
class LoginPageTest
# valid credentials
def test_authentication_with_valid_credentials_should_have_signout_link
end
def test_authentication_with_valid_credentials_should_have_correct_title
end
# invalid credentials
def test_authentication_with_invalid_credentials_should_not_have_error_message
end
def test_authentication_with_invalid_credentials_should_have_signin_link
end
def test_authentication_with_invalid_credentials_should_have_error_message
end
end
Group like things together
Grouping like-minded tests together immediately reduces the mental overload
necessary to understand this test and what is going on. And if we wanted to
clarify things even further, we could drop in a comment or two just to make
the groupings pop a bit more.
What else could we do?
Well, if we look closely at the name of each test, we’d see that the word
authentication
is repeated a lot. Meaning it’s probably safe to assume that all
these tests have to do with authentication.
Why don’t we make that more clear, and put the word
authentication
right into
the name of the test itself? Like this:
Chapter 10. Organizing Tests: Bringing Method to the Madness • 170
report erratum • discuss
class Login Authentication PageTest
# valid credentials
def valid_credentials_should_have_signout_link
end
def valid_credentials_should_have_correct_title
end
# invalid credentials
def invalid_credentials_should_not_have_error_message
end
def invalid_credentials_should_have_signin_link
end
def invalid_credentials_should_have_error_message
end
end
Make the context explicit
What we are doing here is making the context of the test explicit. Anyone
reading this test now knows that all these tests have to do with
LoginPageAuthen-
tication
, and if they are wanting to add any more tests related to that, they
should do so here.
Grouping by context, and making that context explicit, are just two simple
things you can do to make your tests easier to organize and easier to read.
And some frameworks, like RSpec, even take this concept further by letting
you embed the context of your test in the test itself.
describe "Authentication"
describe "signin page"
describe "with valid credentials"
High Level
Low Level
deeper context
Embed the context
report erratum • discuss
The Clarity of Context • 171

That’s what’s going on in RSpec when you see tests written like this:
describe "Authentication" do
describe "signin page" do
describe "with valid credentials" do
describe "with invalid credentials" do
This way of describing your tests, by progressively embedding the context, is
handy because it lets you define specific scenarios, and then punch out and
write test cases for them when you need to.
Here we can add a new authentication test page easily by simply grouping it
with the
Authentication
context already set up there.
describe "Authentication" do
describe "signin page" do
describe "with valid credentials" do
describe "with valid credentials" do
describe "new super secret page" do
describe "with valid credentials" do
describe "with valid credentials" do
The way to read these tests is to combine all the
describe
keywords into one
sentence like this:
describe "Authentication signin page with valid credentials"
describe "Authentication signin page with invalid credentials"
describe "Authentication super secret page with valid credentials"
describe "Authentication super secret page with invalid credentials"
Organizing our tests like this not only makes our tests easier to read, it makes
it easier to:
•Spot bugs
•Find patterns
•See missing test cases
And when we bring it all together in a full-on RSpec test, the result looks
something like this:
require 'spec_helper'
describe "Authentication" do
subject { page }
describe "signin page" do
before { visit signin_path }
it { should have_content('Sign in') }
it { should have_title('Sign in') }
end
Chapter 10. Organizing Tests: Bringing Method to the Madness • 172
report erratum • discuss

describe "signin" do
before { visit signin_path }
describe "with valid information" do
let(:user) { FactoryGirl.create(:user) }
before do
fill_in "Email",with: user.email.upcase
fill_in "Password",with: user.password
click_button "Sign in"
end
it { should have_title(user.name) }
it { should have_link('Sign out',href: signout_path) }
it { should_not have_link('Sign in',href: signin_path) }
describe "followed by signout" do
before { click_link "Sign out" }
it { should have_link('Sign in') }
end
end
describe "with invalid information" do
before { click_button "Sign in" }
it { should have_title('Sign in') }
it { should have_error_message('Invalid') }
describe "after visiting another page" do
before { click_link "Home" }
it { should_not have_selector('div.alert.alert-error') }
end
end
end
end
Now just to be clear, you’re not going to need all these fancy ways of organizing
tests when you first start out. Start simply by creating one file for each set
of tests. It doesn’t need to be much more complicated than that.
But just be aware that you have options. And as your test suite grows, know
that there are alternatives to grouping and organizing tests other than what
you see before you. Experiment. Try things out, and trust your gut when it
tells you this feels right and this feels wrong.
And don’t sweat it if you aren’t using RSpec. The tool isn’t important—it’s the
concept that counts. You can always get away with using much simpler tools
like directories and filenames for organizing your tests too.
Tests/LoginPage/Authentication/ValidCredentialsTest.rb
Tests/LoginPage/Authentication/InvalidCredentialsTest.rb
report erratum • discuss
The Clarity of Context • 173
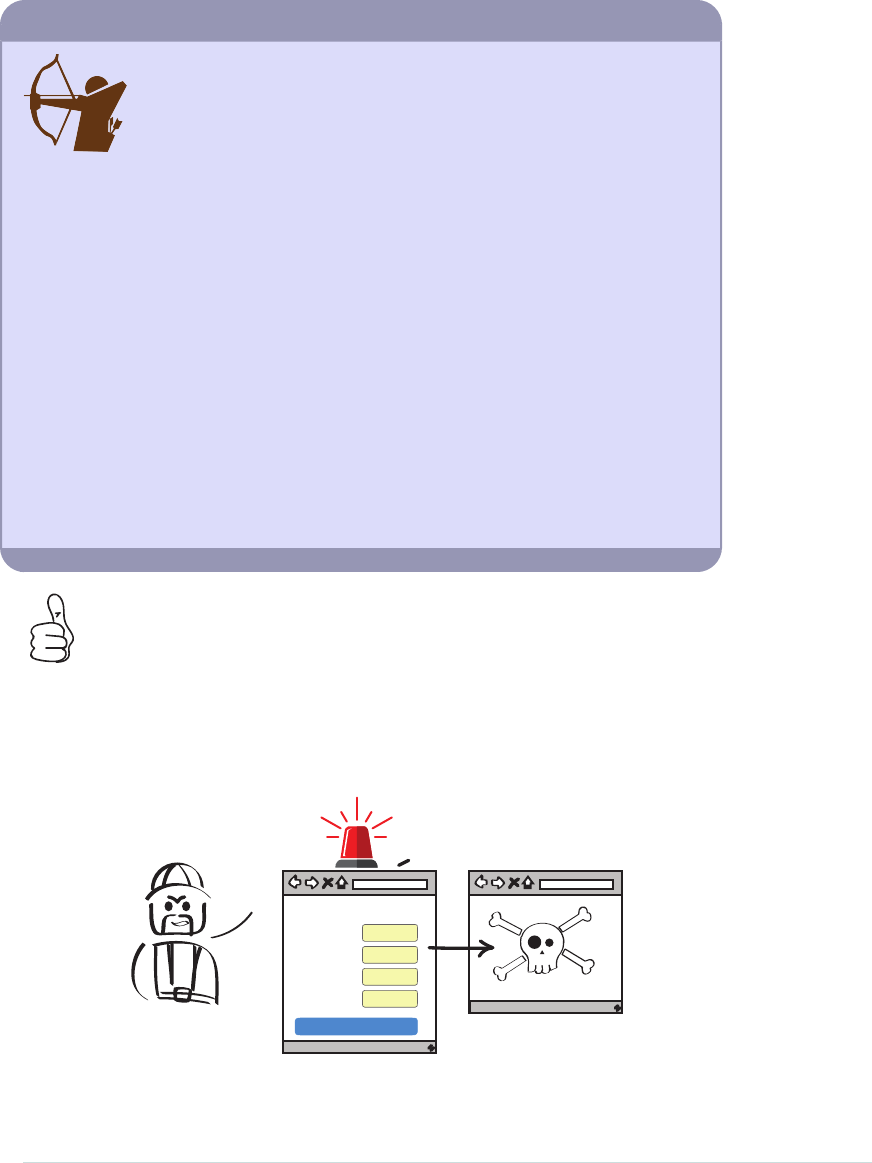
Money Out the Window
I was on a team once that really got bit from not keeping its tests
separated. The team members were using an automated test framework
called FIT, which conveniently read data from an Excel spreadsheet
and then fed the numbers into the system to be tested.
I have nothing against FIT, but one of the challenges with FIT and these other table-
based data entry systems is it makes it easy for teams to add more data, without
thinking about how that data should be grouped or separated.
After doing this for several months, the team was in a real bind. The FIT tests were
valuable, because they caught important financial calculation bugs from ever entering
the system. But they were also a nightmare to maintain because of the amount of
time it took testers to figure out which data went with which tests, and how not to
break all the tests and data with every little change to the system.
Be wary of tools and frameworks that encourage you to generate lots of data and
tests. They can seem like a good idea at the time, but most of the time you don’t need
them. Instead just write a simple, clear, focused test case for the scenario you want
to test and understand, and drop the endless rows of data.
Your tests will be much clearer. Your concerns more isolated. And your tests less
brittle and easier to understand.
Group related tests by context to make them
easier to read and support.
Good stuff. Let’s try organizing some tests now and see how this works in action.
Intruder Alert
Got any tests for
authorization ?
DAVE
Sign Up
Name
Email
Create my account
Password
Confirmation
Shields up!
Chapter 10. Organizing Tests: Bringing Method to the Madness • 174
report erratum • discuss
Whoa! Some hackers are trying to access the website, and Dave would like
to add some authorization tests in a hurry. The good news is the tests are
already written. The bad news is he doesn’t know where to put them!
Should we add them to our existing page tests? Or put them into their own
new test file focused purely on authorization?
LoginPageTest
test_foo
test_bar
test_authorization
PermitPageTest
test_foo
test_bar
test_authorization
OR
AuthorizationTests
test_login_page
test_permit_page
a) Existing page tests b) A new test file
Where should we put the new test?
The automatic response most people give in a situation like this is to go with
option a), add the new tests to the existing ones already there.
The reason for this is ease. It would be easy to just add a couple authorization
tests to the end of each page file and be done with it. Life would go on. And
we would probably be fine.
But option b), putting all the authorization tests in a single file, has some
merit too. The beauty of grouping all the authorization tests together into one
file is that if we ever want to see how authorization for the website works,
we’ve got all the tests in one place.
It’s also easier to add new authorization tests, and to note any exceptions or
patterns because you have all the authorization tests in one place.
So what’s the right answer? That’s up to you. In this case I would probably
group the authorization tests together into their own test suite. But under-
stand, there is no one way to do this stuff. You are free to group and organize
report erratum • discuss
Intruder Alert • 175

your tests however you like. Just because you are currently doing it one way
doesn’t mean you can’t experiment and try something else.
The point of this exercise isn’t that there is a right or wrong answer here. It’s
to show that you have options and that sometimes grouping things by context,
instead of by the functionality, is one way to go.
What We’ve Learned So Far
This was a slightly more advanced chapter, but I think you were up for it.
Once you start writing tests on your own, you will start to develop your own
feeling and rules of thumb around what grouping strategies make sense for
your project and which don’t.
The big takeaway from this chapter is that how you organize your tests makes
a big difference in your ability to change them, that there is no one way, and
you’ve got lots of options. So don’t be afraid to try different things and to mix
things up.
However, these two things will definitely help:
•Keep your tests focused and isolated—and don’t try to test too
many things at once.
•Group similar tests by context, as it’s much easier on your brain.
With this under our belt, we are now ready for our final push. In the next two
chapters we are going to look at some of the finer points of unit testing, like
how to write tests first. And how to deal with a phenomenon automated testers
at all levels of the pyramid face—something known as coupling.
Chapter 10. Organizing Tests: Bringing Method to the Madness • 176
report erratum • discuss
CHAPTER 11
Effective Mocking
Coupling
Mocks Unit
Tests
Code
Mocking is an effective tool for unit testing code, but it can be overused. Too
many of the wrong kinds of mocks can make your tests brittle and hard to
maintain. But the right kind of mocks can give you confidence while simulta-
neously enabling you to change your designs.
In this chapter we are going to look at the pros and cons that come with this
style of unit testing, and see how you can use mocks effectively. By the end
of the chapter you’ll not only know where the perils of mocking lie, you’ll know
how to avoid them and make mocks work for you in your code.
Developers, this chapter is on unit testing and is directly focused on you.
Testers, you better come along too, as mocking is a term you will hear often,
and it would be good if you understood how these things worked.
report erratum • discuss
Listen to the Music
DAVE
Any chance I can
play a track ? Player.playTrack('track:xxx')
Dave and the team are pumped. Last week they went and saw their favorite
band play, The Construction Workers, and then it hit them. What would make
their work permit application really shine is the ability to choose which track
plays while creating a permit.
So the next week they came up with the following design, tried it, and it worked!
Player Connector
playTrack('track:xxx')
There was just one snag. While testing, they discovered that the connection
to the music-streaming service went down periodically. Before the next track
would play, the connection would need to be refreshed.
Here is the reconnection logic. What they aren’t sure about is how to test it.
class Player
attr_accessor :connector
def initialize
@connector = Connector.new
end
def playTrack(track)
if !@connector.is_connected
@connector.connect
end
return @connector.handle_request(track)
end
end
I Wonder how I could test that ...
- hard to reach
- connects to real service
Chapter 11. Effective Mocking • 178
report erratum • discuss
There is no way from the unit test to control whether the music service is up
or down. Even if there was, there’s no way of knowing whether
@connector.connect
got called after, which is what we’d like to know.
This is all too common in unit testing. You have a fix. It’s embedded deep in
the code. And you have no easy way to get your hands on the code and objects
you want to test. It’s de-testable (ha!).
In Chapter 12, Writing Tests First, on page 197, we’ll look at some ways to make
our code more testable. But until then, we are in a bit of a pickle. What we
need is a way of unit testing that lets us:
•Control and monitor objects deep inside our tests
•While at the same time letting us set up our code to test in specific
ways—preferably, without calling the real service
Enter the Mock
Mocks, also sometimes referred to as test doubles,1 are fake objects we peri-
odically use in automated tests in place of real ones.
Now you may be wondering why on earth we’d ever want to do that. Isn’t it
always better to test with the real thing? And the answer would normally be
yes. Real objects don’t lie. They are easier to read. And there’s no magic in
setting them up—they just work.
But there are occasions when calling the real thing may be problematic. One
is when the service you are calling from your unit tests is expensive or slow.
Good for faking big external services
Hawaii Real
30C
WeatherForecaster
Fake if Hawaii
return 30C
100 ms
1 ms
Fast
Mock/Stub
1.
https://en.wikipedia.org/wiki/Test_double
report erratum • discuss
Enter the Mock • 179

If you recall from Chapter 6, Covering Our Bases with Unit Tests, on page 77,
we always want our unit tests to be fast. So any service that is slow or flaky
is a good candidate for a mock.
The other occasion is when you have code that is hard to reach.
Hmmmmm ....
HaHa
You can’t test me!
Hard to reach places
By being able to drop a mock in, and control and monitor how it works from
the outside, you gain a lot of flexibility and power over how you can configure
and set up your tests. Not to mention, a mock is a valuable tool for checking
whether certain things get done.
Through this lens, let’s now return to Dave’s example, and see how mocks
may be able to help him out.
Step 1: Prepare the Mock
The challenge we face with testing Dave’s reconnection logic is we have no
way to control what that connector returns when called in the
playTrack
method.
def playTrack(track)
if !@connector.is_connected
@connector.connect
end
return @connector.handle_request(track)
end
The way the code is currently written, the
@connector
is going to try to connect
to the real music service every time it’s called, and what we want to do is
replace the real
@connector
object with a fake one—or a mock.
Chapter 11. Effective Mocking • 180
report erratum • discuss

Mocks vs. Stubs
Mocks and stubs are two words you will hear used interchangeably sometimes in
automated testing, but they mean two slightly different things.
Stubs are test doubles that return hard-coded data. There’s almost no logic to a stub.
You simply replace your expensive real-world operation with a hard-coded, stubbed-
out fake one and you’re done. You just let it do its thing.
class StubWeatherForecaster
def predict_weather(city)
if city === 'Hawaii'
return 30
elsif city === 'Stockholm'
return 0
elsif city === 'Winnipeg'
return -20
end
end
end
Mocks, on the other hand, not only return data, but they can be remote controlled
and monitored.
For example, if you want your weather forecaster to simulate freezing temperatures
in Hawaii, or you want to verify that a special humidity calculation got called if the
temperature dipped below 0, you could write that with a mock like this:
@mockForecaster.expects(:predict_weather).with('Hawaii').returns(-10)
@mockForecaster.expects(:calculate_cold_humidity)
If any of these expectations aren’t met, the test would fail, proving they never happened.
There aren’t any hard-and-fast rules when it comes to choosing mocks or stubs. If
all you need is some simple hard-coded data, go with the stub. But if you want to
monitor and control, you probably need something more along the lines of a mock.
The most common way to set up test code to be mocked is to inject the objects
you want to mock, in through the constructor of the object under test. This
is known as dependency injection.2
The way dependency injection works is you pass in any objects you want to
monitor or control, into the object under test via its constructor. By doing
that you gain the ability to do two important things:
2.
https://en.wikipedia.org/wiki/Dependency_injection
report erratum • discuss
Step 1: Prepare the Mock • 181
1. Control your mock from the outside in your unit test
2. Monitor, track, and make assertions on the things that happen to your
mock as the unit test is run
This is how mocking works. You pass in objects you want to control, and then
set expectations on them after.
class PlayerTest < MiniTest::Test
def setup
@mockConnector = mock()
@player = Player.new(@mockConnector)
end
def test_connector_reconnects_if_not_connected
@mockConnector.expects(...)
end
end
Inject mock here
So we can
control and
monitor here
S.S. Dependency Injection
class Player
...
def initialize(connector)
@connector = connector
end
def playTrack(track)
if !@connector.is_connected()
@connector.connect
end
return @connector.handle_request(track)
end
Toot toot !
Step 2: Set Expectations
The expectations you set on your mock depend on the scenario you want to
test. In our case, we want to verify that
@connector.connect
gets called in the
event the
@connector
is not connected.
Chapter 11. Effective Mocking • 182
report erratum • discuss
class Player
...
def initialize(connector)
@connector = connector
end
def playTrack(track)
if !@connector.is_connected()
@connector.connect
end
return @connector.handle_request(track)
end
class PlayerTest < MiniTest::Test
def setup
@mockConnector = mock()
@player = Player.new(@mockConnector)
end
def test_connector_reconnects_if_not_connected
@mockConnector.expects(:is_connected).returns('false')
@mockConnector.expects(:connect)
@player.playTrack('track:xxx')
end
end
Setting expectations
I will return false
This better happen !!!
where we set our expectations
2
1
2
3
We start by first making sure that when
playTrack
is called on
Player
, the
@con-
nector.is_connected
returns
false
. We cover that with this line here:
@mockConnector.expects(:is_connected).returns(false)
Next, we want to ensure that
@connector.connect
is called. This is the basis of
our test, and how we will know the reconnection logic is working. We cover
that with this line here:
@mockConnector.expects(:connect)
report erratum • discuss
Step 2: Set Expectations • 183

Then thirdly, we need a line of code to make it all go and kick the whole thing
off. And that’s this line here:
@player.playTrack('track:xxx')
When we bring it all together, we have a nice little test that ensures our
reconnection logic is called, all without talking to the real music service.
class PlayerTest < MiniTest::Test
def setup
@mockConnector = mock()
@player = Player.new(@mockConnector)
end
def test_connector_reconnects_if_not_connected
@mockConnector.expects(:is_connected).returns(false)
@mockConnector.expects(:connect)
@player.playTrack('track:xxx')
end
end
And that’s how mocking works! You inject your objects, set their expectations,
and then verify they happen.
def playTrack(track)
if !@connector.is_connected()
@connector.connect
end
return @connector.handle_request(track)
end
What about this line here ?
Don’t we need to mock this ?
Ah—good question! There are two types of mocking frameworks out there.
Those that are strict and those that are loose.
Strict mocking frameworks are those that make you explicitly write out every
call to every mock in your test—whether you are testing them or not. So if
you were using a strict mocking framework, you would indeed need to include
that line in your test case—else it would complain and fail.
Loose mocking frameworks, on the other hand, are much more forgiving. So
long as the expectation on the mocks you set is met, the test will be happy.
Loose mocks are the most popular of the two today. By keeping a mock loose,
the intent of your test is made clearer (less noise), your code is less brittle
Chapter 11. Effective Mocking • 184
report erratum • discuss
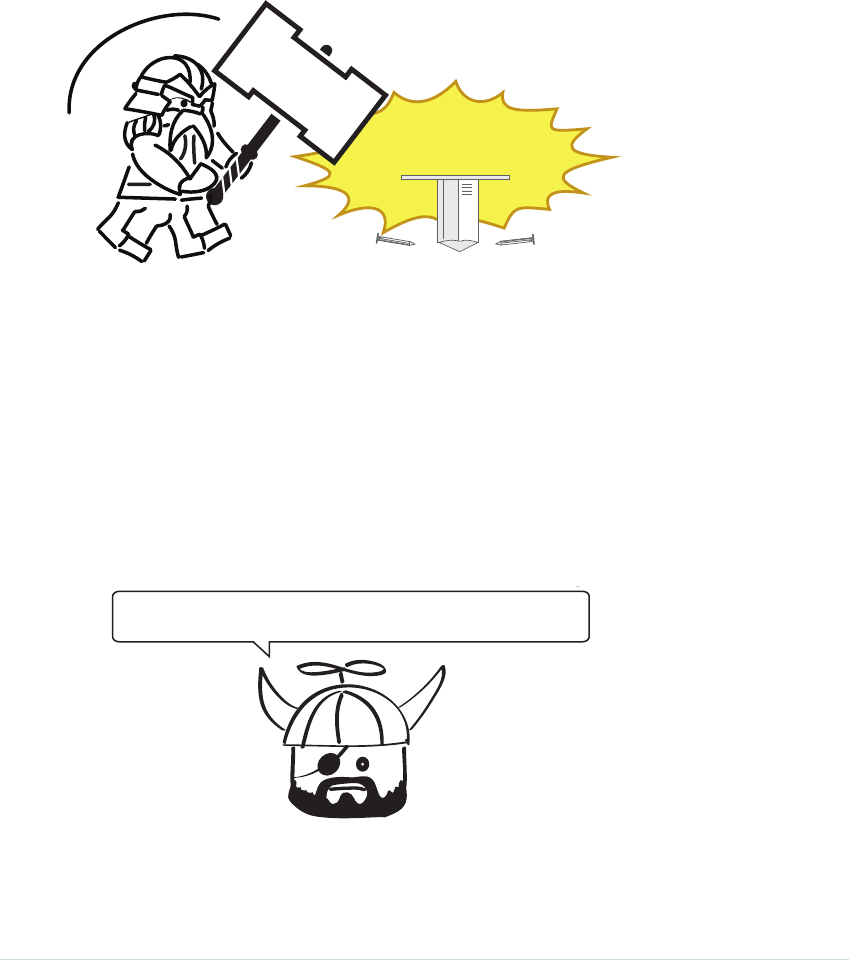
(less coupling—more on this shortly), and your test suites in general are
easier to maintain (more joy).
But good question. My recommendation is to keep it loose.
Now with all this wonderful mocking knowledge under your belt, you may be
tempted to rush out and start mocking all those annoying dependencies you’ve
got in your test cases.
Mocks
Every test
But before you do, stick around and see what happens when Dave and crew
do exactly that, and witness the challenges we face when we start heavily
mocking our code.
The Shackles of Coupling
Having a senior engineer like Erik join the team had an immediate impact on
the direction and spirit of our automated tests. Not only was Erik a wealth
of knowledge about design and testing, he helped us look at our code in a
new light and with a fresh set of eyes. Which is why we all stood up and lis-
tened when he said:
I think we are writing too many tests...
EriK - Grizzled VetEran
report erratum • discuss
The Shackles of Coupling • 185

Too many unit tests? What? How is that even possible? We had been under
the impression there was no such thing as too many tests. What could possibly
go wrong by adding more tests!?
He then proceeded to draw a picture and started to explain this term we had
heard of but never fully understood—something called coupling.
Player Connector
One object sending a message to another
playTrack
Coupling
Coupling is the degree with which two objects are connected. When our
Player
object calls a method on our
Connector
object, those objects become coupled.
We can’t change one without also changing the other.
Now all programs require some degree of coupling. If there were no coupling,
our objects wouldn’t be able to speak to each other. Nothing would happen.
But one thing we do try to avoid when building systems is over-coupling our
objects and systems together. Because the more coupled things are, the
harder things become to change. That’s why we only speak to objects through
their public APIs, and leave their internal data and methods to themselves.
Now where things get interesting is when you bring unit tests into the mix,
because unit tests are a form of coupling too.
PlayerSkipTest
PlayTest
NextTest
playTrack
skip
next
Unit tests are a form of coupling too
public APIs
Xprivate APIs
coupling
Chapter 11. Effective Mocking • 186
report erratum • discuss
So long as we keep it high level and stick to the public APIs of our objects,
we are generally OK. Not too much coupling.
Test the public APIs of your objects. Not the
internal private ones.
But look what happens once our designs start to get a little more complicated,
and we continue to expose the internals of our objects in our tests. Coupling city!
class PlayerTest
@mockConnector.expects(:X)
@mockConnector.expects(:Y)
@mockConnector.expects(:Z)
end
class ConnectorTest
@mockHandler.expects(:X)
@mockHandler.expects(:Y)
@mockHandler.expects(:Z)
end
class HandlerTest
@mockTransport.expects(:X)
@mockTransport.expects(:Y)
@mockTransport.expects(:Z)
end
Connector
Handler
Transport
The Shackles of Coupling
Lots of internal stuff...
Exposed in our tests!
Now not only are our objects coupled together, but so are the mocks, their
expectations, and our tests! Too much coupling. It’s all locked in.
And if we continue this pattern and get lazy with our design, it won’t be long
before we all end up in a place no developer ever wants to go. The Swamp of
Mocking.
The Swamp of Mocking
The Swamp of Mocking is where unit test codebases go that have been so
completely overrun by mocks that the original tests don’t even make sense
anymore.
report erratum • discuss
The Swamp of Mocking • 187

class LoginServiceTest < MiniTest::Test
def setup
@mockRoles = mock()
@mockPermissions = mock()
@mockAuthorization = mock()
@mockAuthentication = mock()
@mockAnalytics = mock()
@mockDatabaseAdapter = mock()
@mockMainFrame = mock()
@mockLogging = mock()
@login_service = LoginService.new(@mockRoles, @mockPermissions,
@mockAuthorization, @mockAuthentication,@mockAnalytics,
@mockDatabaseAdapter, @mockMainFrame, @mockLogging)
end
def test_valid_login
@mockRoles.expects(:check_role)
@mockPermissions.expects(:check_permissions)
@mockAuthorization.expects(:authorize)
@mockAuthentication.expects(:authenticate)
@mockAnalytics.expects(:record_login)
@mockDatabaseAdapter.expects(:connect)
@mockMainFrame.expects(:predict_weather)
@mockLogging.expects(:log)
@login_service.login('username', 'password')
end
end
x10,000 lines of setup
x15,000 lines of verification
one line of test
You’ll know you are in the Swamp of Mocking when:
•You have more lines of mock, expectation, and setup than actual test code.
•Every time you go to make a change, you back out because the change
would be too painful because of all the coupling and tests it would break.
•You have no idea what the original intent of the test was.
Life is tough in the swamp. The very tests that were meant to speed you up
end up instead hurting you and slowing you down. There is so much noise,
you can no longer make heads or tails of what the tests are supposed to do.
You only know that every time you go to make a change, something breaks.
And improving the design ends up being painful. So you don’t.
Chapter 11. Effective Mocking • 188
report erratum • discuss
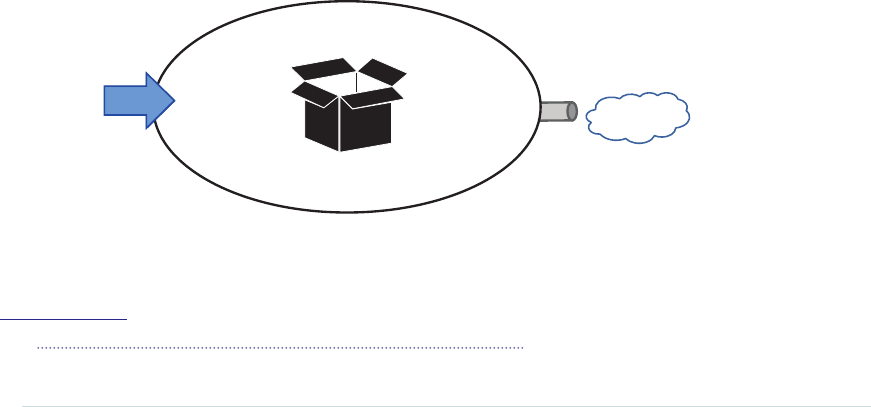
Now to be fair, this isn’t just a mocking problem. It’s a design problem.
Classes with this amount of coupling between objects and tests are going to
be hard to maintain no matter what.
But mocking-style unit tests seem drawn to the Swamp of Mocking more than
others, and if you aren’t careful how you use your mocks, they’ll end up using
you and you’ll end up here before you know it.
Fortunately, there is a way of using mocks that doesn’t require this amount
of coupling. It involves sticking to only testing the surface of your objects,
and leaving the details inside alone.
Ports and Adapters
Ports-and-adapters3 is a software architecture that encourages you to separate
the core functionality of your application from any external boundaries or
services.
A port or adapter is typically an external service like a web server, but it could
equally be a call to any external service, or even the input stream from your
keyboard. Anything that is an input or an output to your system could be a
candidate.
The beauty of thinking about your software this way is it lets you take a much
more black box–style approach to your testing. Instead of aggressively testing
all the internals of your systems (and coupling everything together), you stick
to the surface and instead focus more on the inputs and outputs.
Connector
Handler
Transport
Player
Port/Adapter
Ports and Adapters
playTrack
pause
skip
next
APIs
Input Output
i.e. Web
3.
http://www.dossier-andreas.net/software_architecture/ports_and_adapters.html
report erratum • discuss
Ports and Adapters • 189
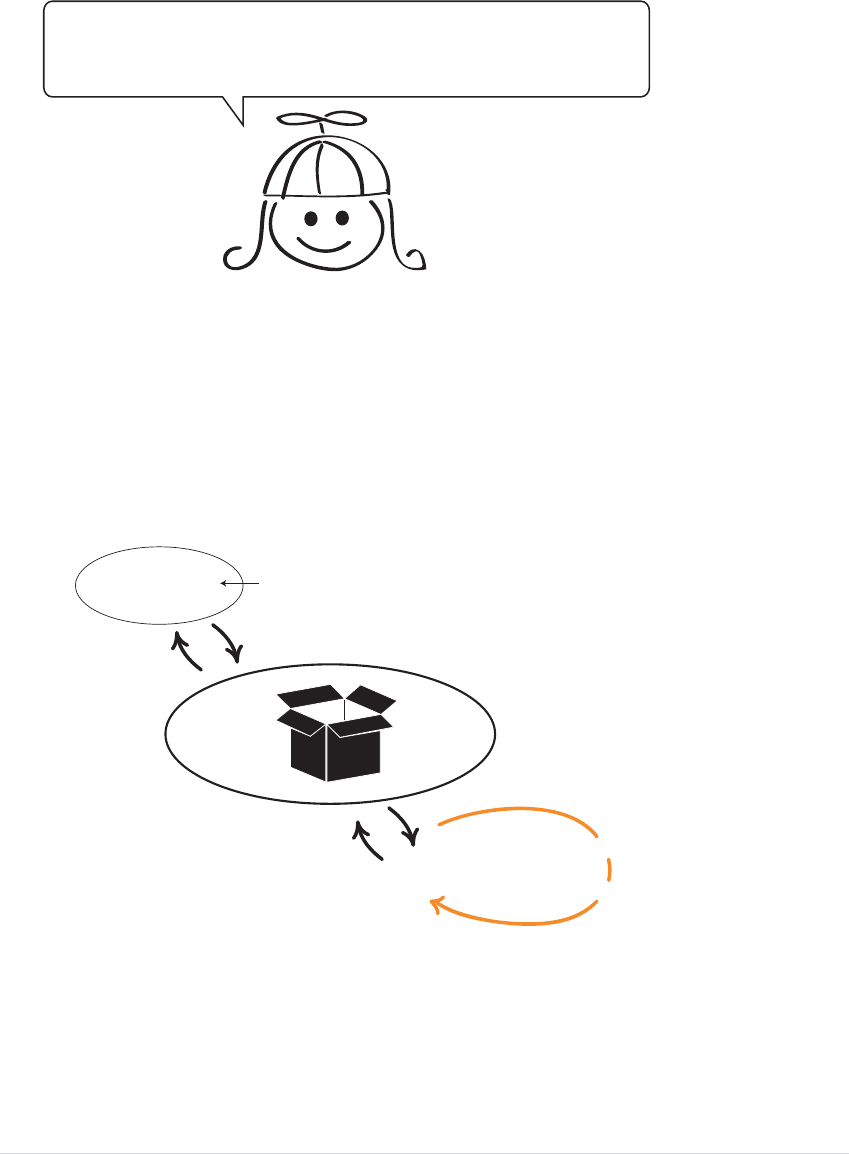
Hold on. Are you actually saying
we should write fewer unit tests,
and not test the internals of our objects ?
Kind of, yes. Think about it like this. We could mock and test every interaction
of every method, and have an extremely coupled, highly tested system that
would work, but would be nearly impervious to change.
Or, we could forget the internals, test our system from the outside in, and
simply mock the one thing we don’t want our unit tests talking to—the outside
world. In this case, a music service.
FakeTransport
Mock or Stub here !
if valid_track
return { "success" : "true" }
Mock the external ports and adapters
if invalid_track
return { "success" : "false" }
Player FakeTransport
Use real objects
Connector Handler
By mocking or stubbing the
Transport
(the object responsible for communicating
with the outside world), we can do all sorts of things.
We can echo back server errors. We can simulate disconnects. All while using
real
Connector
and
Handler
objects inside.
Chapter 11. Effective Mocking • 190
report erratum • discuss

Here’s the hardcoded
FakeTransport
stub that would return canned responses
to certain predetermined tests:
class FakeTransport
def send(uri)
if uri == 'valid_track'
return true;
end
if uri == 'invalid_track'
return false;
end
end
end
And here’s the dependency-injected
Player
object and tests. Testing would
happen if a good or a bad track request is sent to the music server.
class PlayerStubTest < MiniTest::Test
def setup
@fakeTransport = FakeTransport.new
@player = Player.new(@fakeTransport)
end
def test_can_play_valid_track
assert @player.playTrack('valid_track')
end
def test_fails_with_invalid_track
assert !@player.playTrack('invalid_track')
end
end
Taking this more black box4 approach to unit testing has a number of other
advantages:
Take a more black box approach to testing
+ Real objects
+ Less coupling
+ Easier to change
+ Better coverage
+ Fewer bugs
4.
https://en.wikipedia.org/wiki/Black-box_testing
report erratum • discuss
Ports and Adapters • 191

1. Getting to work with real objects
Real objects are always preferable to mocks because real objects don’t
lie. They reflect how the system is going to behave at runtime (meaning
production). So there is no danger of setting up the mock incorrectly in
a test and then having it blow up in production.
2. Way less coupling
Coupling is the killer of change. By testing our objects from the outside
in, and looking at our systems as more of black boxes, our tests are way
less coupled to our code, which makes our designs easier to change.
3. Easier to change
This is so important it bears repeating. As you gain more understanding
and insight into how your code works, you are going to want to change
it. Writing tests without a whole bunch of highly invasive mocks lets you
do that.
4. Better coverage
Outside-in tests exercise our object models from end-to-end—not just the
one layer down from the object we are testing. This gives better end-to-
end coverage while exercising the code closer to how it’s going to behave
in production.
5. Fewer bugs—better tests
Black box–style tests don’t suffer from the overhead and setup the way
heavily mocked tests do. There is way less swamp here. The tests are
generally easier to read, easier to maintain, and more fun to write because
they test stuff we care about, like what our objects do.
It may be hard to see in this trivial example, but mocking your tests with
ports and adapters is a powerful testing technique.
Once you know where the ports and adapters are in your system, and you
realize you can mock them out, you can come up with some powerful testing
infrastructure that not only gives you great confidence in your tests, but also
enables you to update and change your design.
And if you can pull that off, that’s a pretty neat trick.
Alright. Let’s open up the microphone to the floor and see if people have any
questions for discussion.
Chapter 11. Effective Mocking • 192
report erratum • discuss
There Is Nothing Like the Real Thing
I once almost broke a whole bunch of Spotify car integrations because
of my overuse of mocking. I was adding the ability to save the currently
playing track to the user’s playlist. I thought I had my bases covered
by testing the various permutations and combinations of IDs and
tracks in my mocks.
I was wrong.
Only by doing some last-minute gut checking on some actual physical car devices
did I realize my mistake. And of course it was the afternoon before a Swedish long
weekend, which means nobody was around.
I learned three good lessons that day.
One. If you are not sure your feature is 100% correct, it’s always good to do a sanity
check on real physical devices.
Two. Favor real objects over fake ones. If I had taken the time to write my code against
the real thing and not taken the easy way out and used the fakes, I would have caught
this bug much earlier and saved myself a lot of stress and running around.
But perhaps most important is three. Never check in big sweeping changes just before
a long weekend.
Open Mic
By hard-coding the server responses into
Fake Transport, aren’t you just swapping one form
of coupling for another !?
Yes! You are absolutely right. By hard-coding the server response into the
stub itself, we have now introduced another form of coupling between the
server and the unit tests. If the server response changes, we need to update
our unit tests accordingly. Coupling isn’t just for objects. We can have coupling
between systems and data too.
report erratum • discuss
Open Mic • 193
Here is a table summarizing the main differences between these two
approaches, which Martin Fowler refers to as the Classicist vs. Mockist
approach to unit testing.5
Classicist Mockist
Prefers fake
vs
Likes real objects
Don’t mind creating query methods
to support testing
Tests more coarse grained -
more integration style tests
Mockists do
Tests more fine grained -
may miss integrations
Don’t couple tests to implementation
Uses mocks all the time
Will mock collaborations
Mockists do
Mockists typically don’t have to
Don’t like thinking about implementation
when writing tests
Will hard-code collaborations
Uses mocks occasionally to test
collaborations, ports, and adapters
You make it sound like mocking is really bad.
Are you saying we should never mock ?
No. Not at all. Mocking and dependency injection are great tools for helping
us write good test code. Without mocks, and the ability to inject ourselves
deeply into certain places in our code, testing certain collaborations would
be really, really hard.
But…if there is one thing I want you to walk away from in this chapter, it’s
that you don’t have to mock. And it’s often better to stick with testing with
plain old objects when you can instead.
5.
http://martinfowler.com/articles/mocksArentStubs.html
Chapter 11. Effective Mocking • 194
report erratum • discuss
What if there is an internal method I want to test...
but it’s not part of the public interface.
How should I go about testing that ?
Whoa—good question. Usually the best thing to do there is to always see if
you can test the private methods through one of your public interfaces.
Testing it this way ensures that the method will be exercised in the same way
that your clients will use it. And if you can’t trigger that method via one of
your public interfaces, maybe you don’t need it in the first place.
What, if anything,
is the big takeaway here for us testers ?
The takeaway for testers here is that coupling is something we need to deal
with in tests, just like developers need to deal with it in code.
For example, when we write UI tests, we are coupling our tests to that user
interface. So if the UI changes, so do our tests. This is why it’s sometimes
best to hold off on writing UI tests until the UI has gone through a lot of
iterations and finally settled down. No sense in coupling prematurely before
we need to.
With integration tests, and the testing of our web services, we have the same
thing, only here we are coupled to responses from web servers and the data
they return. But we are coupled nonetheless.
report erratum • discuss
Open Mic • 195

The other big one, which we haven’t really gotten into, is data. Test data is a
form of coupling too. If your tests expect certain data to be there when they
run, the tests and the data are coupled. You can’t do one without the other.
So coupling is everywhere in automated testing, and we need to be careful
how we manage it. Some coupling is always inevitable. But where we can, we
like to reduce it. Because the more we couple, the less our software is open
to change.
What We’ve Learned So Far
Wow. That was a tricky chapter. We got into some pretty deep stuff there, and
if all of that doesn’t make a lot of sense, don’t worry. It only took me ten years
to wrap my head around some of these ideas, and if you understood half of
what we covered here, you are way ahead of me when I was in your shoes.
But here are a few key takeaways for the chapter:
•Unit tests don’t have to be mocks. You can (and should) prefer to work
with real objects instead.
•By limiting your unit tests to the public APIs of your objects, and by
testing your objects from the outside in, you can reduce coupling, making
your objects more open to design, and easier to change.
•Mocks are a handy tool, but try not to overuse them. They are great for
dealing with tricky, hard-to-program scenarios, but they can be abused.
So try to stay out of the swamp.
•As much as you can, focus your unit tests on external behavior (not
internal object mechanics). Coupling is the killer. The more you can test
from the outside in, the easier your tests and design will be to maintain
and change.
Phew. Do you have the energy for one more? In the last chapter on TDD, we
are going to look at one final technique for writing unit tests that can help
developers get going when they are at a loss for what to test and aren’t quite
sure how to begin.
So hop on the bus for one more stop. Let’s wrap things up by learning about
the mind-bending powers that come with writing tests first.
Chapter 11. Effective Mocking • 196
report erratum • discuss

CHAPTER 12
Writing Tests First
What’s good enough ?
What should
I test ?
What should
I NOT test ?
Where should I begin ?
Am I done yet ?
I am so confused !!
This is so complex !
Knowing what to test can be a real challenge. There is no magic line in the
sand that tells you when you’ve tested enough. There is a lot of complexi-
ty—even dealing with simple tasks. And there’s no guarantee that whatever
you produce will be of good design. In short, there are a lot of things to master.
But one technique, if properly applied, can help unlock these and other
mysteries of the universe. By learning the technique of test-driven development
(TDD), you’ll learn how to keep your code clean and your solutions simple.
To be sure, writing your tests first is no guarantee of either great code or
perfect tests—but it does help deal with complexity while simultaneously
keeping you from feeling overwhelmed.
Developers, this chapter is going to give you yet another powerful tool to aid you
in writing your unit tests. Testers, you may just want to stick around because
even though this chapter focuses on unit testing, the ideas behind it might just
contain some food for thought around how you go about writing your tests too.
So hang out and stay tuned for the Open Mic section near the end.
report erratum • discuss
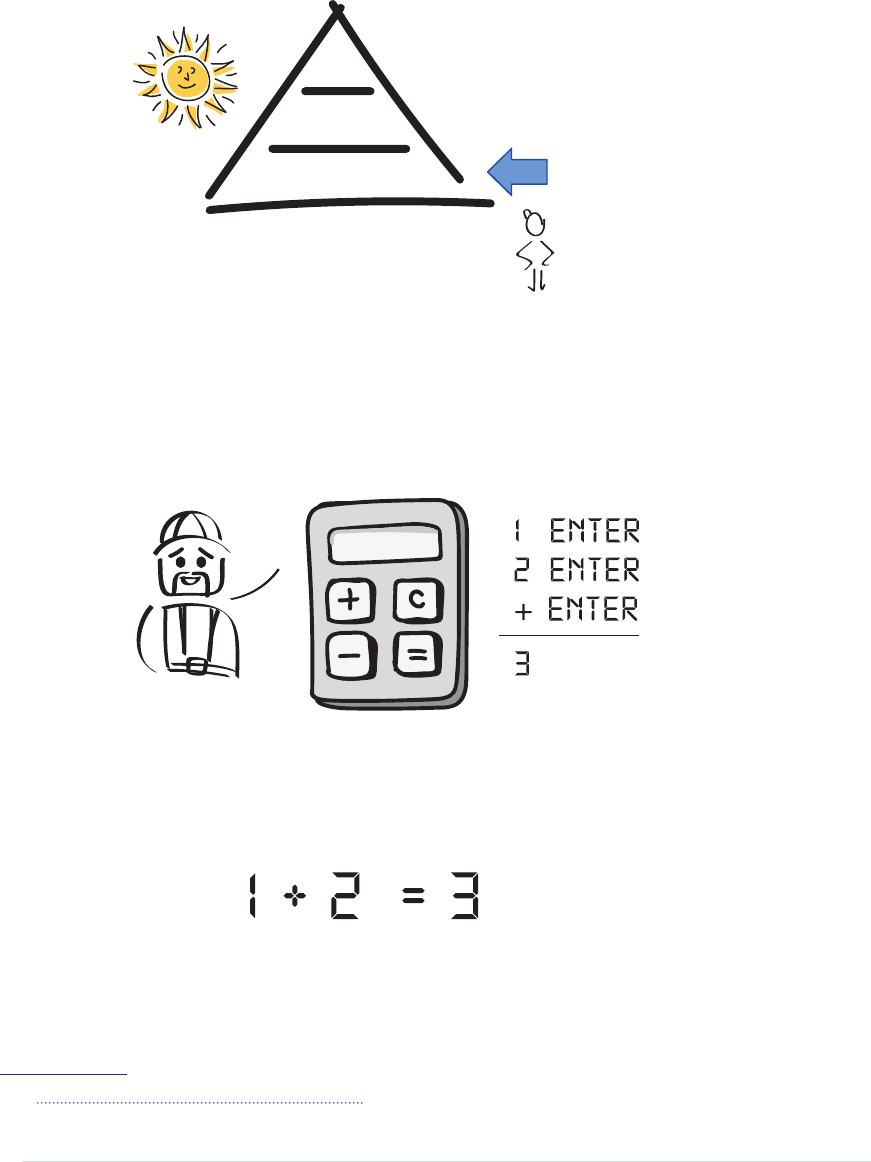
UI
Integration
Unit TDD
Where to Begin
Dave and his engineers are longing for a style of calculator they used back
in the good old days—something they reverently refer to as the RPN or Reverse
Polish notation1 style calculator.
Ahh... those were the days !
DAVE
RPN calculators are just like regular old calculators with one key difference. With
RPN style calculators you enter your numbers first, and your operations after.
So instead of simply adding two numbers by typing:
On an RPN style calculator you would instead type:
1.
https://en.wikipedia.org/wiki/Reverse_Polish_notation
Chapter 12. Writing Tests First • 198
report erratum • discuss
+
Adding two numbers
Voila!
Now before we look at how to create this calculator using full-on TDD, let’s
spend a minute thinking about what kind of unit tests we would like to write.
Don’t worry about fancy user interfaces or anything like that. Instead, just
think about what kind of unit tests you’d like to write for the brains of the
calculator using plain old objects.
Write down at least three unit test cases you think you would write to support
the adding of two numbers RPN style.
Test cases that would give us confidence
we could add two numbers RPN style
1.
2.
3.
Write here
Don’t look ahead! This is a chance for you to practice doing TDD in a safe
environment. Don’t worry, we’ll go over the answer soon enough. Go back
and give it a go.
If you came up with some tests different than what you see below, congrats!
You can add these as an exercise later for practice. But for now, let’s start
with these three.
report erratum • discuss
Where to Begin • 199

Test cases that would give us confidence
we could add two numbers RPN style
1.
2.
3.
We are going to write these test first
Enter single number
Enter two numbers
Add two numbers
OK, we are almost ready. Let’s first go over the concept of TDD, and then see
what it feels like to drive development with Dave’s RPN style calculator.
What Is Test-Driven Development (TDD)?
Test-driven development, or TDD, is the practice of writing tests first before
adding production code. Now you may be wondering why on earth anyone
would want to do that. Isn’t it hard enough writing the code regularly and
then testing it after? What could we possibly gain by doing this backwards?
Well it turns out that writing tests first helps deal with one of the devils we
all need to handle in software—stress.
You see, when we write software, complexity, stress, and a sense of being
overwhelmed are never far from our doorstep. And it doesn’t take much for
even the simplest of tests to quickly spiral out of control and seem daunting.
Someone divides by Zero ? It isn’t thread-safe ?
It’s full of bugs ?
A meteor strikes !?
Someone Tries adding
before any numbers are
entered ?
I am so worried !
No one likes my design ?
It’s too complex ?
What if ....
The UI doesn’t
work with the code ?
Chapter 12. Writing Tests First • 200
report erratum • discuss
TDD helps to give you focus. By starting with a single test and ignoring the
rest of the outside world, you eliminate and ignore much of the conventional
thinking and noise that distracts you from your mission, enabling you to
focus on one thing at a time.
The way TDD does this is by working in three distinct steps.
Test fails
Test passes
Refactor
TDD circle
of life
Step 1: Write a Failing Test
In this step you aren’t thinking about a solution. Here you are thinking about
design. Here you are writing a test to verify that the code you are about to
add in the second step works. So here you need to put your design hat on
and “think” the API for the code into existence.
Step 2: Make the Test Pass
Here you take off your design hat and get into solution mode. You are now
free to do whatever it takes to make the test pass. You can be cheeky and
return a hardcoded value simply to make the test pass. Or you can take a
bigger step, and implement a more robust solution. It’s up to you.
Step 3: Refactor
Arguably the most important step out of the three, and the easiest to forget,
refactoring is where you go back over your test and solution and make any
necessary adjustments in the spirit of improving your overall design. With
the tests at your back, you are now free to make changes.
report erratum • discuss
Step 1: Write a Failing Test • 201

Here you can extract methods, rename variables, and the like. It’s a crucial
step because it’s here where you really improve your design and make it more
maintainable. In step 2, you are making the tests pass. In step 3, you are
making them pass in style.
Once you finish with refactoring, you are then free to grab another test and
repeat the process all over again. You continue to do this until you can think
of no more tests, or your system does everything it needs to do for the scope
of this feature.
Advantages of Working This Way
The advantages of working this way, as opposed to testing last or not testing
at all, are the following:
1. It helps prevent over-engineering.
If you apply TDD by the book, you aren’t allowed to add any production
code until you have a failing test first proving that you need it. This simple
act does something remarkable to code. It prevents it from becoming over-
engineered.
XP (extreme programming) has a term called Yagni,2 or You Ain’t Gonna
Need It. Meaning before you add that big hairy complex ball of spaghetti
to the codebase, can you show me the failing unit test that indicates we
need it first? TDD and YAGNI are how XPers keep their code solutions
simple and their code humble.
2. It tends to produce better designed, better tested code.
Because you are thinking about design and testing from the beginning,
not only does TDD help prevent over-engineering, it tends to produce code
that is simpler to maintain and easier to read—two attributes we’d all like
to see more of in our codebases.
3. It helps deal with complexity.
When you start any new project or feature, there are so many things to
check and so many things that can go wrong, that if you don’t have a
strategy for dealing with the stress, it’s easy to feel overwhelmed.
The beauty of TDD is it helps keep the demon of stress at bay by letting
you focus on one test at a time. This simple act greatly simplifies the
problem and allows you to focus.
2.
http://martinfowler.com/bliki/Yagni.html
Chapter 12. Writing Tests First • 202
report erratum • discuss
4. It feels good.
Once you get into the habit of writing your tests first, you will notice a
natural rhythm and feel good about the work you’re doing. You’ll get these
quick hits of instant gratification, you’ll feel like you’re making steady
progress forward, and you’ll always have a working system as each
passing test moves you closer to your goal.
But don’t take my word for it. Let’s go back to Dave and his calculator and
try it out now.
Seeing It in Action
OK. So these are the three test cases we are going to TDD out.
Test cases that would give us confidence
we could add two numbers RPN style
1.
2.
3.
We are going to write these test first
Enter single number
Enter two numbers
Add two numbers
We will just take these logically in the order a user would as if they were using
the calculator. Let’s start with entering a single number.
Step 1: Write a Failing Test
1. Enter a single number
report erratum • discuss
Seeing It in Action • 203
Show time. Time to put your design beret on and see if you can’t write a test
that does two things:
1. Verifies our calculator can take a single number
2. Then returns the result (which for us will always be the last number added
or operated on)
Take a moment and try writing a unit test that could do that.
class RPNCalculatorTest < MiniTest::Test
end
def test_enter_single_number
end
write test here
OK. How did that go? Did the code come flowing? Did it pour out of your
pencil faster than you could write?
If you are like most of us when we first got into TDD, the answer was probably
no. Because you know what? Writing tests first can be kinda hard. And you
know why? Complexity.
Even after shutting off the rest of the outside world and focusing on just that
one test, look at the sheer number of design decisions to go into writing a
single line of code.
class RPNCalculator
def push_operand(operand)
parent class
method name variable name
variable typereturn typemethod visibility
x6 design decisions
For a single line of code!
Chapter 12. Writing Tests First • 204
report erratum • discuss
In order to push a single number into our calculator, we need to think about
the following:
•Responsibility—where am I going to put the behavior for this new method?
•Naming—what am I going to call it, and the parent class that is
going to hold it?
•Input variables—what am I going to pass this thing as input?
•Output variables—what is it going to return?
•Visibility—is this thing going to be public or private?
Yes—all this for a little line of code. And we haven’t even gotten around to
actually doing anything yet!
So how do we cut through all this complexity? Easy.
Pretend the code
is already there!
Now you are simply calling it from your test and typing it out.
class RPNCalculatorTest < MiniTest::Test
end
def test_enter_single_number
end
Oui oui!
@calculator = Calculator.new
@calculator.push_operand(1.0)
assert_equal(1.0, @calculator.result);
report erratum • discuss
Seeing It in Action • 205

For example, we can pretend that our
RPNCalculator
class has a method called
push_operand
that takes an operand (a fancy word for number) and stores it
somewhere (we’ll worry where in step 2). And that it has another method called
result
that simply returns the result of the last number pushed. That’s it!
When you start to imagine that the code you need already exists, interesting
things start to happen:
1. You flip into design mode.
Test-driven development may start with a “T,” but what it’s really about
is “D,” or design. When you write tests first, you are designing your soft-
ware. That does a couple of things. For one, it gives you exactly what you
need—because it’s you designing it. And two, you get instant feedback
about whether your design is working in the form of a test.
2. You write testable code.
Testable code in itself isn’t the goal—building a great high-quality product
for our customers is. But building testable code helps us in getting there.
So by thinking about your code in terms of tests, it helps you get closer
to these other important things in return.
When we run this test…boom! It fails. It fails because we haven’t created the
RNPCalculator
object yet. Which is good. We always want to start out with a
failing test.
bash
> rake test
LoadError: cannot load such file -- RPNCalculator
X
No production code without first writing a failing test.
Now that we’ve got one, we are ready to make it pass.
Step 2: Make It Pass
This is where to take off our design beret and flip back into engineering mode.
Here we are thinking of nothing else other than how best to make this test pass.
Chapter 12. Writing Tests First • 206
report erratum • discuss
The goal here isn’t to build and design everything. It’s to build just enough
to get this test to pass. Now that’s a very subjective statement. Let me explain.
There’s a school of thought in TDD that recommends always doing the simplest
thing possible when making a test pass. If you took that literally, you might
choose just to store that number as a variable
RPNCalculator
class, and then
return it as part of the result like this.
class RPNCalculator
attr_accessor :operand
def initialize
@operand = 0
end
def result
@operand
end
def push_operand(operand)
@operand = operand
end
end
That works ...
Simplest
variable
This is a perfectly valid way to get our test to pass. And it’s probably the simplest
thing we can code (returning hardcoded
0
from
result
would be even simpler).
But if we look ahead a bit, we know long term that this solution isn’t going
to cut it. What we really want is something a bit more heavy—like a
Stack
or
an
Array
. Something capable of supporting multiple numbers.
class RPNCalculator
attr_accessor :stack
def initialize
@stack = []
end
def result
@stack.first
end
def push_operand(operand)
@stack.push(operand)
end
end
That will work too...
Slightly
more complex
array
report erratum • discuss
Seeing It in Action • 207
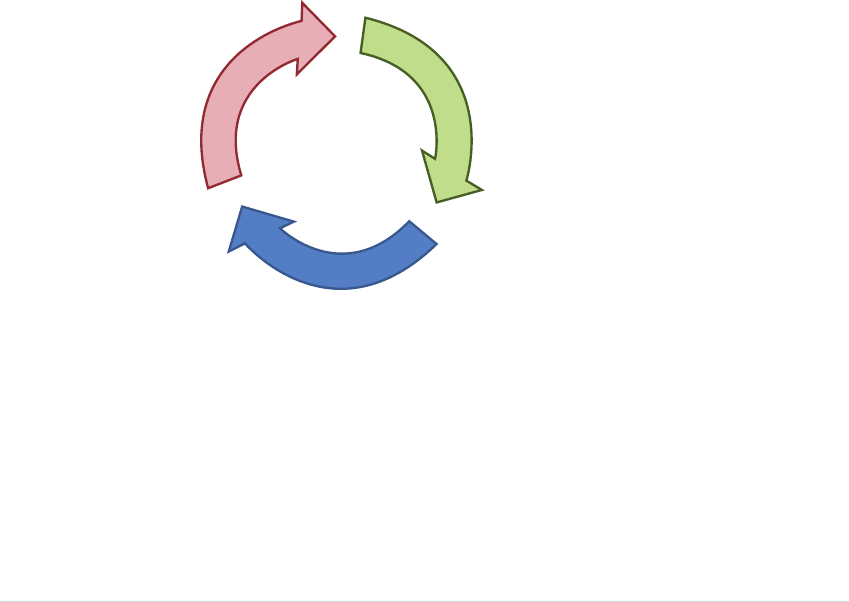
Now you may be wondering—why would we ever want to go for the first
solution over the second? The answer is most times you wouldn’t. You would
almost always go with number two.
Except when you get into trouble.
When TDDers get stuck, they sometimes find it handy to "gear down." Gearing
down means committing whatever sins are necessary to get the current test to
pass. And then once it’s passing, go back in and look for the real solution after.
Think of it like the gears in a big 4x4 truck climbing a mountain. If the road
is clear, you can see exactly where you are going, kick it into high gear, drop
in the obvious solution, and feel free to race ahead.
So usually you would go with the obvious solution. But when the obvious
solution isn’t there, don’t be afraid to gear down.
Another way to stay out of the mud is to always refactor.
Step 3: Refactor
Refactoring is where we go over all the code we’ve recently written, and see if
there is any way we can improve our design.
Test fails
Test passes
Refactor
TDD circle
of life
Unfortunately, there’s not much for us to improve at this point in our journey.
We haven’t written much code and everything looks pretty clean. But we’ll be
refactoring something shortly in the next couple tests.
OK. So that’s one pass through the TDD cycle of life. Let’s turn the crank
again quickly and add that second and third test.
Chapter 12. Writing Tests First • 208
report erratum • discuss

Cycle, Rinse, Repeat
2. Enter two numbers
OK, here is test number two. This is just like test number one, except now
we want to enter two numbers in our calculator, and ensure that the second
number is the one that would show up on our display.
First step is to write a failing test.
def test_enter_two_numbers
@calculator = RPNCalculator.new
@calculator.push_operand(1.0)
@calculator.push_operand(2.0)
assert_equal(2.0, @calculator.result);
end
Bonjour
bash
> rake test
X
Expected: 2.0
Actual : 1.0
Step 1: Write failing test
OK, good. We’ve got our failing test. Now we just need to make it pass. Which
we can by instead returning the last element added to our array and not the
first. Like this.
report erratum • discuss
Cycle, Rinse, Repeat • 209
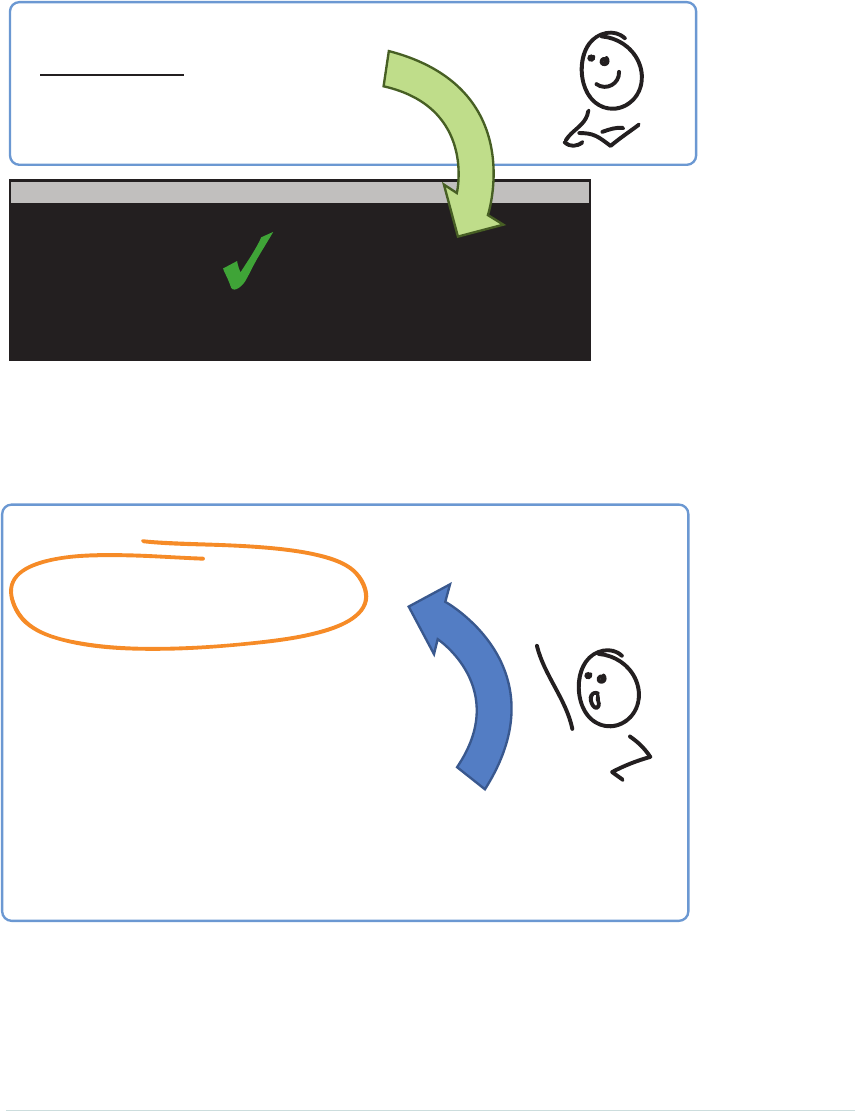
def result
@stack.first
@stack.last
end
bash
> rake test
0 failures, 0 Errors
Step 2: Make it pass
Now we are ready to refactor, which we can do by pulling out some common
setup code into its own method.
class RPNCalculatorTest < MiniTest::Test
def setup
@calculator = RPNCalculator.new
end
def test_enter_single_number
@calculator.push_operand(1.0)
assert_equal(1.0, @calculator.result);
end
def test_enter_two_numbers
@calculator.push_operand(1.0)
@calculator.push_operand(2.0)
assert_equal(2.0, @calculator.result);
end
end
Step 3: Refactor
Chapter 12. Writing Tests First • 210
report erratum • discuss
OK. That wasn’t so bad. Two down. One to go. Here comes test number three.
This is the one where we actually add our two numbers.
3. Add two numbers
Let’s start again with the test.
class RPNCalculatorTest < MiniTest::Test
def test_add_two_numbers
@calculator.push_operand(1.0)
@calculator.push_operand(2.0)
@calculator.???
assert_equal(3.0, @calculator.result);
end
end
Step 1: Test
The code we need to add two numbers doesn’t exist yet. We need to create it.
This is the most fun part of TDD (actually it’s all pretty fun). Because here
you get to manifest and pull from the universe whatever it is you need to
make the adding of two numbers a reality. It’s like magic.
Imagine the code you want to use already exists. You are simply going to use
it. Here are a few options to get you going.
report erratum • discuss
Cycle, Rinse, Repeat • 211
a) ______
b) ______
c)______
do_the_math()
execute_operation('+')
add()
d)______
(design your own)
@calculator.???
Creative Design Mode Which API should we
use for add ?
The
do_the_math
method is probably a little too ambiguous for our taste.
exe-
cute_operation
holds promise, as we can probably expect a plus sign to come at
us eventually somewhere in the program.
But the simplest one we can go with for now is probably calling our newly
created method
add
. So let’s go with this for now.
def test_add_two_numbers
@calculator.push_operand(1.0)
@calculator.push_operand(2.0)
@calculator.add
assert_equal(3.0, @calculator.result);
end
Chocolat!
bash
> rake test
X
Expected: 3.0
Actual : 2.0
Step 1: Write failing test
What should I do if I come up with new test cases...
as I am making a current test case pass ?
Chapter 12. Writing Tests First • 212
report erratum • discuss
Ah ha! Great question. As you start writing tests, you are inevitably going to
discover some new ones. What you can do in these cases is write the new test
cases down either on a pad of paper, or as TODO comments at the end of
your test first. Like these.
More tests for the adding of two numbers
4.
5.
6.
Enter three numbers
Enter three numbers followed by ‘+’
Enter ‘+’ with no numbers
Enter single number followed by ‘+’
7.
WooHoo!!!
That way when you finish whatever test it is you are currently working on,
you can come back and handle any new test cases. So don’t be afraid to keep
a notepad nearby ready to jot things down.
Here’s one way we could go about adding two numbers in our
add
method.
def add
# pop the first number
first = stack.pop
# pop the second number
second = stack.pop
# add them together
result = first + second
# push the result back on the stack
@stack.push(result)
end
end
bash
> rake test
0 failures, 0 Errors
Step 2: Make it pass
Here we simply pop each number off the stack, add them together, and then
push the result back on. That would do it. And all our tests would pass.
report erratum • discuss
Cycle, Rinse, Repeat • 213

But don’t sip that cocktail just yet. Remember, we always need to go back
and do that last crucial step, refactoring, to see if there is anything we could
improve in our design.
def add
# pop the first number
first = stack.pop
# pop the second number
second = stack.pop
# add them together
result = first + second
# push the result back on the stack
@stack.push(result)
end
end
Step 3: Refactor
Anything we can do here ?
As nicely as this code reads, we could clean up a few things in here. One
refactoring we could do is
inline
the
first
and
second
variables.
def add
# pop the first number
first = stack.pop
# pop the second number
second = stack.pop
# add them together
result = first + second
# push the result back on the stack
@stack.push(result)
end
end
Step 3: Refactor (cont’)
inline variables
bash
> rake test
0 failures, 0 Errors
By inlining these two variables right into
result
, we can shave off a few lines
of code and make things a little easier to read.
Chapter 12. Writing Tests First • 214
report erratum • discuss
def add
# pop the first number
# pop the second number
# add them together
result = stack.pop + stack.pop
# push the result back on the stack
@stack.push(result)
end
Step 3: Refactor (cont’)
inline variable again
bash
> rake test
0 failures, 0 Errors
Here we can do this same trick again, only this time we can inline the
result
itself into the
@stack.push
operation like this.
def add
# pop the first number
# pop the second number
# add them together
# push the result back on the stack
@stack.push(stack.pop + stack.pop)
end
Step 3: Refactor (cont’)
remove comments
This is looking good. All we need to do is clean up some leftover comments.
def add
@stack.push(stack.pop + stack.pop)
end
Step 3: Refactor (cont’)
TaDa!
bash
> rake test
0 failures, 0 Errors
report erratum • discuss
Cycle, Rinse, Repeat • 215
And voila! We have some nicely refactored, easy-to-read code!
I can’t over emphasize the importance of this last refactoring step. It’s the
one that’s the most difficult to remember, and the one you are most likely to
skip and gloss over too. So make a sticky. Put it on your monitor. And
remember.
* A loaf of bread
* A container of milk
* A stick of butter
REFACTOR!!!
Also notice how we ran the tests after each stage of our refactoring? That’s
something you are going to want to get into the habit of doing. That way you’ll
know instantly when you’ve broken something.
Here’s the final product, including unit tests for all those new ones we discov-
ered along the way. Here are the unit tests:
cswp/test/models/calculator/rpn_calculator_test.rb
require 'test_helper'
require 'calculator/rpn_calculator'
class RPNCalculatorTest < MiniTest::Test
def setup
@calculator = RPNCalculator.new
end
def test_enter_single_number
@calculator.push_operand(1.0)
assert_equal(1.0, @calculator.result);
end
def test_enter_two_numbers
@calculator.push_operand(1.0)
@calculator.push_operand(2.0)
assert_equal(2.0, @calculator.result);
end
Chapter 12. Writing Tests First • 216
report erratum • discuss

def test_add_two_numbers
@calculator.push_operand(1.0)
@calculator.push_operand(2.0)
@calculator.add
assert_equal(3.0, @calculator.result);
end
def test_entering_threenumbers
@calculator.push_operand(1.0)
@calculator.push_operand(2.0)
@calculator.push_operand(99.0)
assert_equal(99.0, @calculator.result);
end
def test_entering_threenumbers_followed_by_a_plus
@calculator.push_operand(1.0)
@calculator.push_operand(2.0)
@calculator.push_operand(3.0)
@calculator.add
assert_equal(5.0, @calculator.result);
end
def test_entering_plus_with_no_numbers
@calculator.add
assert_equal(0.0, @calculator.result);
end
def test_enter_single_number_followed_by_plus
@calculator.push_operand(1.0)
@calculator.add
assert_equal(1.0, @calculator.result);
end
end
And here is our handy dandy RPN calculator:
cswp/app/models/calculator/rpn_calculator.rb
class RPNCalculator
attr_accessor :stack
def initialize
@stack = []
end
def result
if @stack.count == 0
return 0.0
end
@stack.last
end
def push_operand(operand)
@stack.push(operand)
report erratum • discuss
Cycle, Rinse, Repeat • 217
end
def add
if @stack.count > 1
@stack.push(stack.pop + stack.pop)
end
end
end
Alright. So we covered a lot there. Let’s go to the mic and see if we can’t now
take a few questions from the audience.
Open Mic
Does doing TDD mean I don’t have to do any
big up-front design ?
That depends on what you mean by up-front design. If you mean going off
into the Himalayas and thinking about how you are going to design your
system for six months, then yes.
But there’s nothing wrong with stopping and thinking about your design, or
collaborating with peers on how you’d like to build something.
TDD isn’t an excuse to hack or not think. What it is there for is to give you a
sandbox to quickly try your designs out on real production code.
TDDers are always suspicious of designs or architecture diagrams that haven’t
been touched by code. So while they aren’t against doing some upfront
thinking about how they’d like to go about designing things, they don’t really
trust their designs until they see them running in working code.
That gives them the confidence that their designs are going to work and their
abstractions are fit for purpose. But good question.
Chapter 12. Writing Tests First • 218
report erratum • discuss
How does TDD relate to the other levels of the pyramid ?
For example, should I be doing TDD with my UI tests ?
Here’s the thing. TDD as a concept is super handy. Whenever you need to
add a new feature, or fix a new bug, thinking about what success looks like
before you actually do the work helps define success, limit scope, and really
focus on what’s important. So the concept of thinking about tests first at the
other levels of the pyramid transfers really well. The mechanics of writing
tests first, however, don’t.
I wouldn’t, for example, recommend TDDing your UI tests. Doing test first on
UI tests is one of those things that sounds good on paper yet turns out not
to work so well in practice.
For one, you’ve got the fact that the UI, at least in the early stages of develop-
ment, is always changing. So trying to write UI tests against a changing UI
is like trying to hit a moving target. Not very easy and extremely frustrating.
Then you’ve got the fact that until the actual UI gets built, your tests can’t
prove anything. TDD is about feedback. And these kinds of tests don’t give
you any. They aren’t built for it. Same goes for integration tests.
So as testers, keep the TDD mindset around when you are thinking about
adding new features, and certainly begin with the end in mind, as Steven
Covey would say in The 7 Habits of Highly Effective People [Cov94], when
writing new tests. But don’t sweat the mechanics. Let the UI settle down first.
Then add the UI and integration tests after.
Any other big take aways for us testers here ?
report erratum • discuss
Open Mic • 219
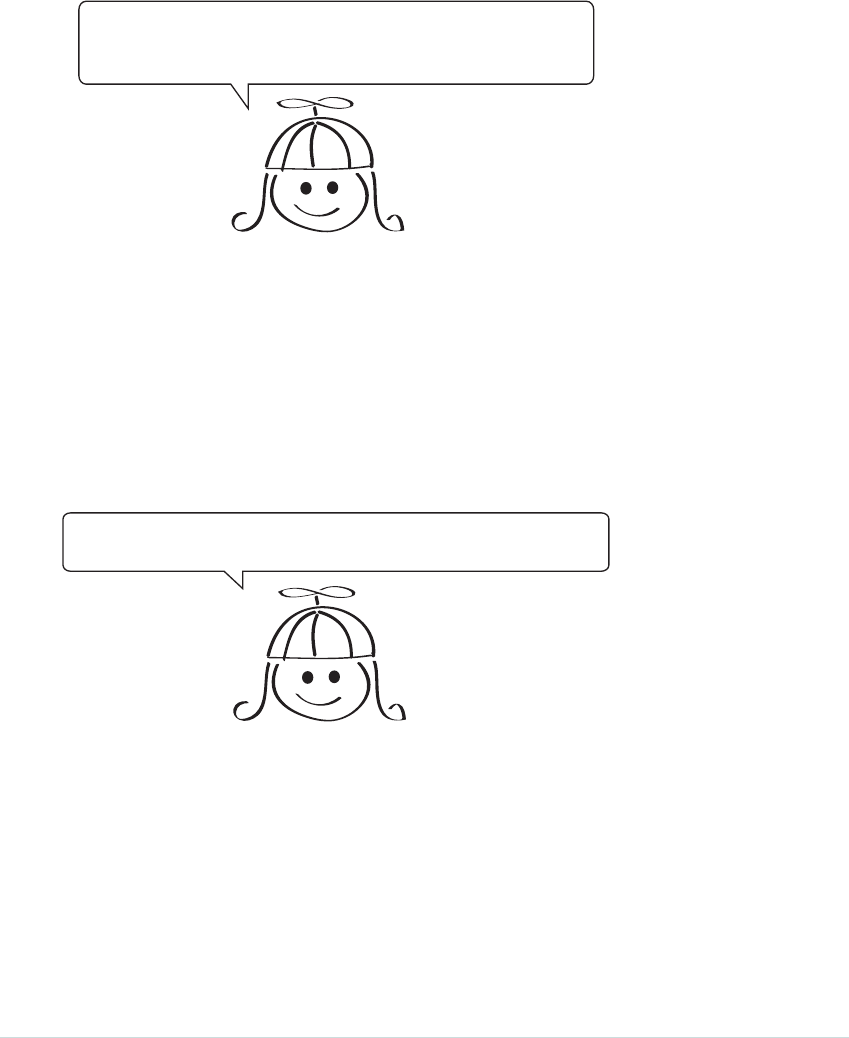
Refactoring. Did you see how we refactored the code in that final test case
from eight lines down into one? You need to do the same things when you’re
writing code for your tests too. Always look for ways to remove duplication
and keep your tests clean.
By writing all these tests in the code,
is there any chance none of this connects when we
hook it up to the UI ?
Yes! Good point. TDD gives us really good feedback in the code around whether
our design at that level is working, but we always want to hook it up as soon
as possible to something that goes end-to-end to see that everything is
working.
Because you are right. The way we need to interact with the UI or web services
may change how we do things down below. So yes. Start things off with some
unit tests, and think about how the data will be reaching your code. But then
quickly prove it out end-to-end shortly thereafter.
Are there any places where TDD doesn’t really work ?
Yes, there are a few. Anything that is non-deterministic or random is hard to
test. It’s hard to test the shuffle algorithm on a deck of cards or for a thousand
songs in a user’s playlist, for example.
Multi-threaded code is hard to test. But in these instances, breaking function-
ality into smaller, more testable pieces is usually your best approach here.
And then bringing it together and testing it the old-fashioned way when you
need to make sure it all hangs together.
Chapter 12. Writing Tests First • 220
report erratum • discuss

What We’ve Learned So Far
Well done, amigo. You made it. You slogged through the building of an RPN
style calculator, and you got to experience what it feels like to write tests first.
The only thing holding you back now is practice. Lots of practice.
TDD doesn’t come naturally to folks. At least not at first. But once you get
that you have the ability to create anything you want, and codify it in the
form of a test, that’s powerful stuff. And this technique will serve you well for
all your programming days.
Here’s what we saw in this chapter:
•Writing tests first is as much about design as it is about testing.
•You always start with a failing test, and then make it pass and
refactor from there.
•TDD is a great place to go to if you’re ever feeling stuck and you just want
to make something happen one test at a time.
•It’s no silver bullet. TDD doesn’t magically give you perfect code or won-
derful design. You do that. TDD is merely a tool—one of many—to help
you get there. Getting there, however, is up to you.
We’ve only scratched the surface on this huge topic. But if you are interested
in learning more, I highly recommend Test-Driven Development: By Example
[Bec02] by the man who defined it himself, Kent Beck.
Well that’s the end of our journey, my friends. A few parting words before you
head out into the yonder.
Final Words
Congratulations. You made it!
report erratum • discuss
What We’ve Learned So Far • 221
Certificate of Completion
This certicate is presented to
For completing a book on
Automated Web Testing
Your name
Testers, you now should have the vocabulary, and the beginnings of enough
technical skill, to start writing your own automated tests. Congratulations.
What you need now is practice. So get out there and look for opportunities
to practice what you’ve learned, and before long you’ll be a maestro of auto-
mated testing.
Developers. Thank you for reading. None of this automated testing stuff
happens without you. So keep giving us the solid base of unit tests all auto-
mated testing initiatives require, and continue to help testers with the setup
of automated testing environments. There is so much automated testing to
be done, it’s in your best interests to help out and get everyone going.
And above all, work together. Testing and development clearly go hand in
hand. Collaborate with each other, work together, and push the boundaries
of this incredible medium of expression that combines art, science, design,
and technology.
Anyone can write automated tests. All it takes is some drive, some will, and
a little bit of technical know-how. All of which you now possess. So get out
there and do it!
Good luck! Till next time.
Chapter 12. Writing Tests First • 222
report erratum • discuss
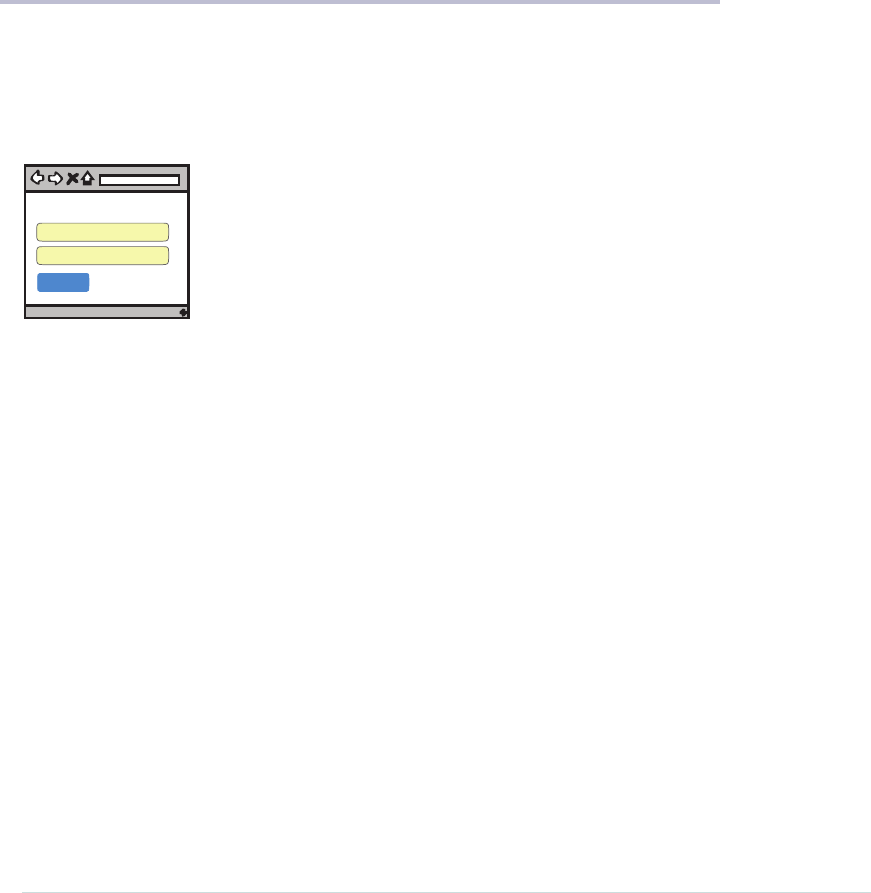
APPENDIX 1
CSS Cheat Sheet
CSS selectors can be tricky to remember. Here’s a quick cheat sheet to help
you figure out what the CSS selectors are for page elements you want to
interact with in your UI tests.
Please sign in
Email
Password
Sign In
Email CSS Selector
<input type="text"
id="session_email"
name="session[email]"
placeholder="Email">
$("input[type='text']")
$("#session_email")
$("input[type='text'][name='session[email]']")
$("input[type='text'][placeholder='Email']")
HTML
Password CSS Selector
<input type="password"
id="session_password"
name="session[password]"
placeholder="Password">
$("input[type='password']")
$("#session_password")
$("input[type='password'][name='session[password]']")
$("input[type='password'][placeholder='Password']")
HTML
Button CSS Selector
<button
class="btn"
type="submit">Sign in</button>
$("button")
$(".btn")
$("button[type=submit]")
HTML
Google Developer Console
1. Right-click and select Inspect
2. Select Console tab
> $("input[type='text']")
Grabbing a text box
report erratum • discuss
APPENDIX 2
Google Chrome Developer Tools
View
Developer View Source
JavaScript Console
Developer Tools
Your browser
Google Chrome
Google Chrome (and other web browsers) have some wonderful tools to help
you write your UI and integration tests right from within your browser.
Right-clicking on an HTML page is a quick way to see the underlying HTML. It’s
useful for seeing all the underlying controls you may need to grab for UI tests.
<!doctype html>
<h2>Sign Up</h2>
<label>Name</label>
<input class="form-control" ... type="text">
<label>Email</label>
<input class="form-control" ... type="text">
...
<button class="btn" type="submit">Create my account</button>
Right-click
View Page Source
Your HTML page
HTML
Sign Up
Name
Email
Back
Forward
Reload
Save As ...
Print ...
Translate to English
View Page Source
Inspect
...
report erratum • discuss
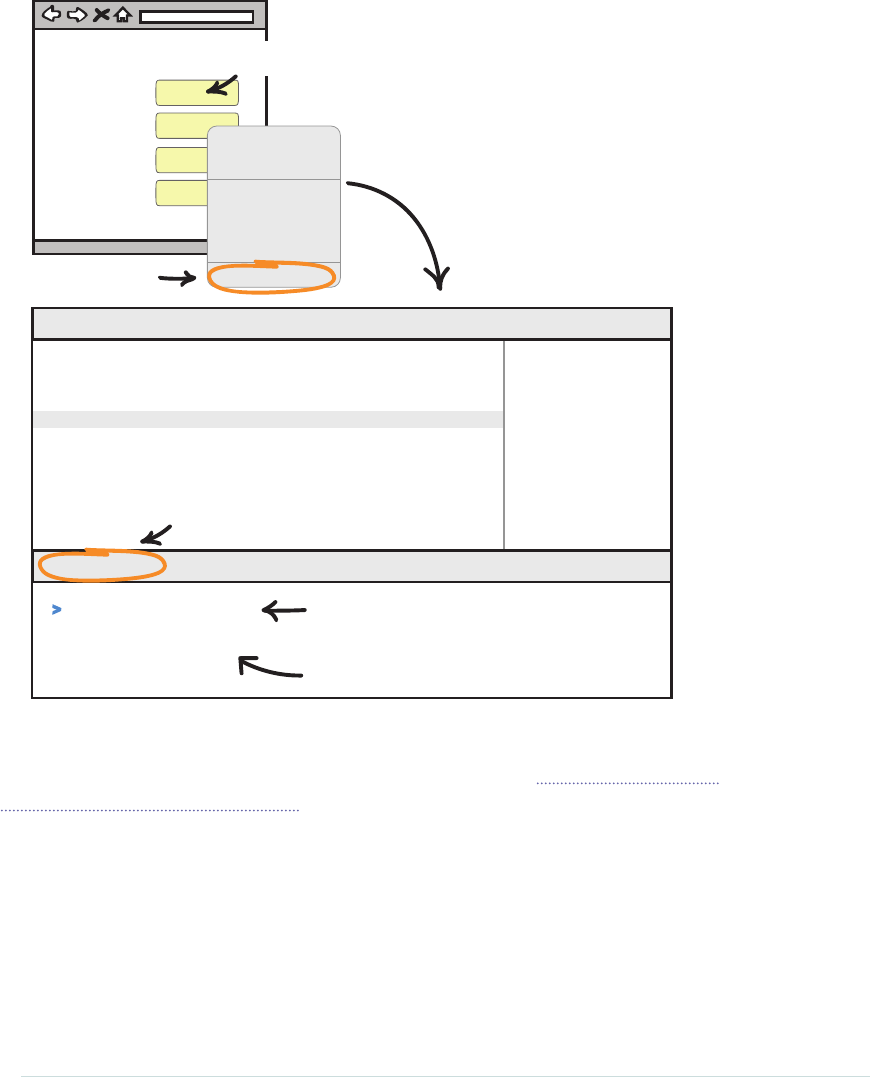
When you find an element you want to grab, right-click it and select Inspect
Element or Inspect to see the underlying control.
Inspect Element
Right-click the element you want to inspect
Select
Elements
Console
>
input[type="password"]
padding: 1px;
backgroud-color: white
<form action="/login" method="post">
<h2>Sign Up</h2>
<label>Name</label>
<input class="form-control" ... type="text">
<label>Email</label>
<input class="form-control" ... type="text">
...
<div>
<button type="submit" class="btn-large">Sign in</button>
</div>
</form>
HTML CSS
Console
Developer Tools
Sign Up
Name
Email
Password
Confirmation
Back
Forward
Reload
Save As ...
Print ...
Translate to English
View Page Source
Inspect
>
Click
Type CSS selectors here
$("input[type=text]")
[ <input id="session_email" type="text" ...> ]
And see the results show up here
From there, you can then practice writing your CSS selectors to see which
page elements you need to grab and use in your tests. See Chapter 2, Smoking
User Interface Tests, on page 19, for a refresher on how all this works.
Those tools are handy for UI tests. For integration tests, Chrome has your
back there too. You can always inspect network traffic if you want to see what
kind of HTTP requests are going on when you load a page.
Appendix 2. Google Chrome Developer Tools • 226
report erratum • discuss
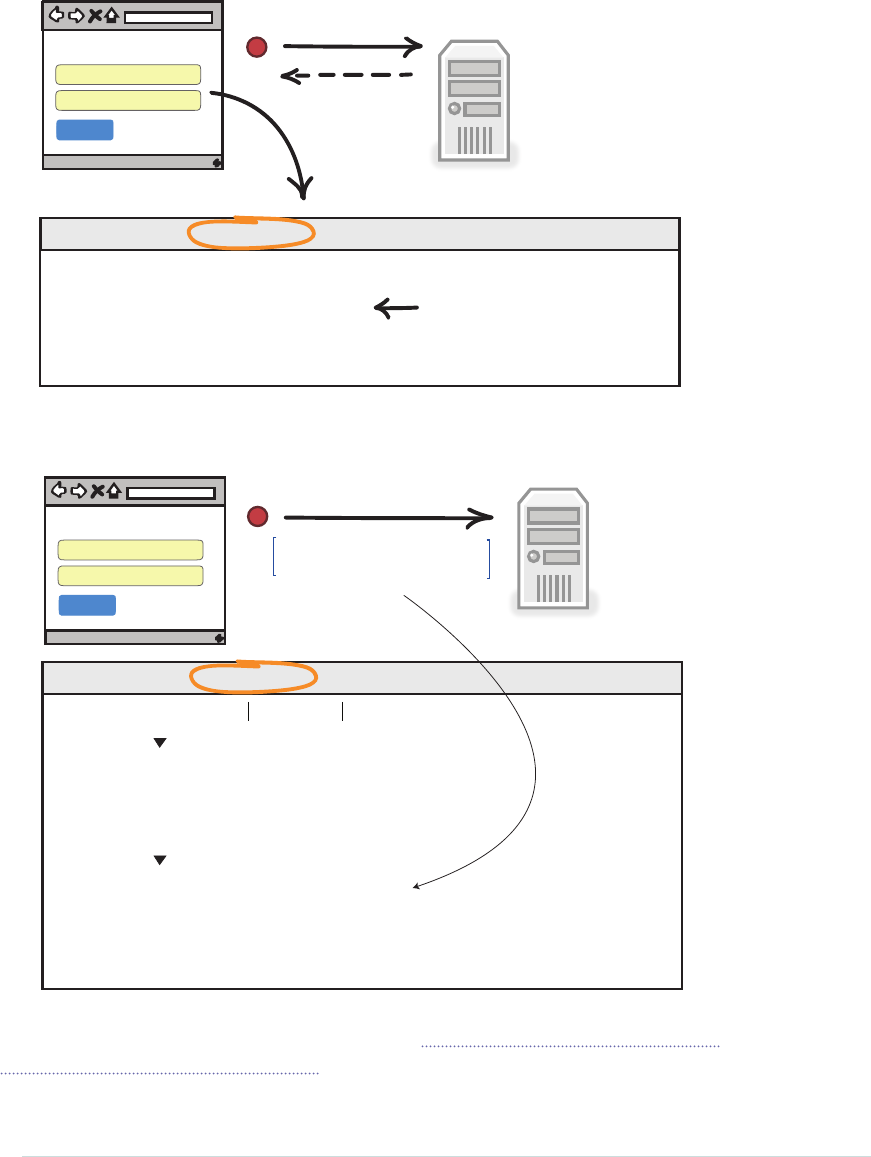
Network
Name Status Type
login 200 document
permit.css 200 stylesheet
... ... ...
HTTP GET
HTML, CSS, JavaScript
Please sign in
Email
Password
Sign In
1
Network traffic
The HTTP request
to GET the page
Or if you want to see the results of an HTTP POST.
Network
Name Headers
login General
Please sign in
Email
Password
Sign In
HTTP POST
email:
password:
foo@bar.com
foobar
2
Preview Response
Request URL: http://localhost:3000/login
Request Method: POST
Status Code: 302 Found
...
Form Data
session[email]: foo@bar.com
sessions[password]: foobar
The HTTP POST sending our details to the server
You can see more of how we used these in Chapter 4, Connecting the Dots
with Integration Tests, on page 51.
report erratum • discuss
Appendix 2. Google Chrome Developer Tools • 227

Bibliography
[Bec02] Kent Beck. Test-Driven Development: By Example. Addison-Wesley, Boston,
MA, 2002.
[Coh09] Mike Cohn. Succeeding with Agile: Software Development Using Scrum.
Addison-Wesley, Boston, MA, 2009.
[Cov94] Stephen R. Covey. The 7 Habits of Highly Effective People. The Free Press,
New York, NY, 1994.
[Cro08] Douglas Crockford. JavaScript: The Good Parts. O’Reilly & Associates, Inc.,
Sebastopol, CA, 2008.
[FBBO99] Martin Fowler, Kent Beck, John Brant, William Opdyke, and Don Roberts.
Refactoring: Improving the Design of Existing Code. Addison-Wesley, Boston,
MA, 1999.
[Hen13] Elisabeth Hendrickson. Explore It!. The Pragmatic Bookshelf, Raleigh, NC,
2013.
[Sub16] Venkat Subramaniam. Test-Driving JavaScript Applications. The Pragmatic
Bookshelf, Raleigh, NC, 2016.
report erratum • discuss

Index
SYMBOLS
$( )
(dollar sign, parentheses),
enclosing query selector, 28
# (hash sign)
preceding comments, 145
preceding page element
IDs, 29
_ (underscore), in names, 143
A
affordances, in testing frame-
works, 36
Ajax (Asynchronous Java-
Script and XML), 98
applications, layers of, 7–8,
see also legacy systems
arrays, 29
assertions, 27, 42–48
for invalid credentials,
46–48
loosely coupled, 44–45
number of, per test, 165
for valid credentials, 43–
46
assumptions, unit tests for,
81
Asynchronous JavaScript and
XML, see Ajax
authorization tests example,
175
automated testing, see al-
so tests
benefits of, xi
guidelines for, 132
testing pyramid for, 5–
12, 102–104, 123–129
B
BDD (behavior-driven develop-
ment), 165
before
statement, 45
black box testing, 191–192
browser
developer tools in, 225–
227
dynamic content in, 98
unit tests for, 103–118
bug hunt example, 104
business logic, unit tests for,
82
buttons, CSS selectors for,
223
C
CamelCase, 143
Cascading Style Sheets,
see CSS
classes, 140
for page elements, 40
in unit testing, 84
click_button
statement, 25
client-side scripting language,
98–100, see also JavaScript
code coverage, tracking, 89
comments, 145
controller tests, 114–118
controls, see page elements
conventions used in this
book, xiii–xv
coupling, 185–189, 193
CRUD (create, read, update,
delete), 66
CSS (Cascading Style Sheets),
27–30
CSS selectors, 28–30
determining, for legacy
systems, 33–42
element ID in, 29, 34–37,
41
element class in, 40
element position in, 29,
39
element type in, 28, 38
elements in, 28, 38
list of, 223
querying web page for, 28
D
DELETE request, HTTP, 63–
64, 74
dependency injection, 92, 181
describe
statement, 24, 45, 48,
172
Developer Console, in brows-
er, 38–40
developers, see also program-
ming
collaboration with testers,
15, 222
role of, 13–16, 222
DNS (Domain Name System),
54
dollar sign, parentheses (
$( )
),
enclosing query selector, 28
DOM (Document Object Mod-
el), 102
Domain Name System,
see DNS

duplication in code, avoiding,
145–147, 151–158
dynamic typing, 118–119
E
edge cases, testing, 82, 86
elements, see page elements
email, CSS selector for, 223
end-to-end tests, 8, 21, 103,
see also UI tests
black box–style tests for,
192
connecting TDD to, 220
precision of, 80
examples
authorization tests, 175
bug hunt, 104
login page, 20
meter reading report, 148
music service, 89, 178
RPN (Reverse Polish nota-
tion), 198–199, 203–
218
sign-up page, 31
tax-rate lookup, 83
web services test, 52, 65
exceptions, testing, 84–86
exploratory testing, 16
F
FactoryGirl gem, 24
fill_in
statement, 25
FIT testing framework, 174
fixtures, loading externally,
120
flaky tests, handling, 130–131
foobar, 62
G
GET request, HTTP, 57, 59,
63–64, 67–70
Google Chrome, developer
tools in, 225–227
grouping tests, 168–170,
175–176
H
happy paths, testing, 84–86
hash sign (#)
preceding comments, 145
preceding page element
IDs, 29
HTML (HyperText Markup
Language), 26–27
fixtures, loading external-
ly, 120
JavaScript embedded in,
100–102, 120
viewing, for page ele-
ments, 37, 226
viewing, for web pages,
33–35, 225–226
HTML forms, 57
HTTP (Hypertext Transfer
Protocol), 56–61
HTTP requests
DELETE, 63–64, 74
GET, 57, 59, 63–64, 67–
70
POST, 57, 61, 63–64, 70–
72
PUT, 63–64, 73
HTTP response, testing, 32–
33, 70
HTTP status codes, 68
HyperText Markup Language,
see HTML
Hypertext Transfer Protocol,
see HTTP
I
icons used in this book, xiv–
xv
IDs, for page elements, 29,
34–37, 41
indenting, see spacing
input
elements, CSS selectors
for, 28, 223
Inspect Element, in browser,
37, 226
integration tests, 6, 8, 52–54
HTTP requests for, 57–61
for RESTful web services,
65–74
when to write, 125
who should write, 14
inverted pyramid, 127–129
IP address, in URL, 54–56
isolation of tests, 163–168
it
statement, 25, 43
J
jQuery, 107, 111
Jasmine testing framework,
111
jasmine-jquery library, 111
JavaScript, 97–119
compared to Ruby, 99
dynamically typed, 118–
119
embedding in HTML,
100–102, 120
unit tests using, 103–118
JSON (JavaScript Object No-
tation) data format, 67
L
legacy systems
assertions for, 42–48
CSS selectors, determin-
ing, 33–42
page access, confirming,
32–33
let
statement, 24
localhost, 57
logging in, UI test for, 22–25
logic layer, 7
login page example, 20
login_path
variable, 24
loose mocking framework,
184–185
loosely coupled assertions,
44–45
M
meter reading report example,
148
methods, 84, 139–140
mocking, 92–94, 177–180
compared to stubs, 181
expectations for, setting,
182–185
loose framework for, 184–
185
ports and adapters used
with, 189–192
potential problems with,
185–189, 193
setting up, 180–182
strict framework for, 184
Swamp of Mocking, 187–
189
when to use, 179–180,
194–196
model tests, 111–114
music service example, 89,
178
MVC (model-view-controller),
111
controller tests, 114–118
model tests, 111–114
Index • 232

N
naming, 141–142, 150–151
networks
decoupling from unit
tests, 90
traffic in, viewing, 60,
226–227
O
object-oriented programming,
140, see also programming
objects, 84
online resources, for this
book, xv
organizing tests, 161–176
P
page elements, 28, 38
classes for, 40
HTML for, viewing, 37,
226
IDs for, 29, 34–37, 41
positions for, 29, 39
querying web page for, 28
types for, 28, 38
password, CSS selector for,
223
port number, in URL, 55
ports and adapters, 189–192
positions, for page elements,
29, 39
POST request, HTTP, 57, 61,
63–64, 70–72
print commands, 33
program logic, testing, 84–86
programming, 138–140, see
also developers
classes, 84, 140
comments, 145
duplication, avoiding,
145–147, 151–158
history of, 138
methods, 84, 139–140
naming, 141–142, 150–
151
object-oriented, 140
refactoring, 147, 201,
208, 210, 214–216,
220
spacing, 142–145, 150
style of, 141–147
types, 139
variables, 138–140
programs, see applications;
legacy systems
protocol, in URL, 55
PUT request, HTTP, 63–64,
73
pyramid, see testing pyramid
Q
QA (Quality Assurance),
see testers
query selector, 28
query string, in URL, 59
R
Rails, FactoryGirl gem, 24
record/playback tools, disad-
vantages of, 25
refactoring, 147, 201, 208,
210, 214–216, 220
resource, in URL, 55
REST (Representational State
Transfer), 62–74
RPN (Reverse Polish notation)
example, 198–199, 203–218
RSpec library, 24, 171–173
Ruby, xiii, 24, 99, 138, see
also programming
S
scripting language, 98, see
also JavaScript; Ruby
SDK (software development
kit), 89
selectors, see CSS selectors
server-side scripting lan-
guage, 99, see also Ruby
service layer, 7
setup
method, 146, 156
should
keyword, 25, 43
sign-up page example, 31
smoke tests, 21–25
software, see applications;
legacy systems
software development kit,
see SDK
spacing, 142–145, 150
special cases, testing, 84–86
speed of tests, 4–5, 78–80
static typing, 118–119
status codes, HTTP, 68
strict mocking framework,
184
stubs, compared to mocks,
181
styles, 28, see also CSS
Swamp of Mocking, 187–189
T
tags, 26, see also HTML
tax-rate lookup example, 83
TDD (test-driven develop-
ment), 88, 197–198, 200–
203
advantages of, 202–203
connecting with end-to-
end tests, 220
design considerations,
218
steps in, 201–218
when not to use, 219–220
test doubles, see mocking
testers
collaboration with devel-
opers, 15, 222
role of, 13–16, 222
testing frameworks
affordances in, 36
FIT, 174
isolation reinforced by,
166
Jasmine, 111
RSpec, 24, 171–173
for UI tests, 24–30
testing pyramid, 5–12, 123–
129
inverted, 127–129
JavaScript tests in, 102–
104
tests, see also integration
tests; UI tests; unit tests
code coverage of, track-
ing, 89
context of, embedding in
test, 171–173
context of, making explic-
it, 170–171
end-to-end tests, 8, 21,
103
exploratory, 16
fixtures for, loading exter-
nally, 120
flaky, handling, 130–131
grouping, 168–170, 175–
176
guidelines for, 132
isolating by purpose,
163–168
number of, sufficient, 10
order to write, 10, 124–
127
organizing, 161–176
overlapping purposes of,
11–12
Index • 233

record/playback tools for,
25
smoke tests, 21–25
speed of, 4–5, 78–80
types of, appropriateness
of, 4–5
types of, described, 6
who should write, 13–16
text boxes, CSS selectors for,
223
types
for page elements, 28, 38
type checking, 118–119
for variables, 139
U
UI (user interface) layer, 7
UI (user interface) tests, 6, 8,
20–26
compared to unit tests,
11–12, 103–104
fragility of, 80
for legacy systems, 31–48
page access, confirming,
32–33
precision of, 80
smoke tests, 21–25
testing frameworks for,
24–30
time required to run, 4–
5, 78–80
when to write, 126–127
who should write, 14
underscore (_), in names, 143
unit tests, 6, 9, 81–94
compared to UI tests, 11–
12, 103–104
decoupling from network,
90
dependency injection in,
92
mocking in, 92–94
naming, 86–87
uses of, 81–86
when to write, 124
who should write, 15
writing in JavaScript,
104–118
writing in Ruby, 83–87
URLs (Uniform Resource Loca-
tors), 54–56
name-value pairs (query
strings) in, 59
user interface layer, see UI
layer
user interface tests, see UI
tests
V
variables, 138–140
View Page Source, in browser,
34–35, 225–226
visit
statement, 24
W
web addresses, see URLs
web pages
HTML for, viewing, 33–
35, 225–226
testing for correct page
access, 32–33
web services
RESTful, 62–74
testing, 52–54
web testing, see automated
testing; tests
website resources, see online
resources
whitespace, see spacing
Index • 234
Explore Testing and Cucumber
Explore the uncharted waters of exploratory testing and beef up your automated testing
with more Cucumber—now for Java, too.
Explore It!
Uncover surprises, risks, and potentially serious bugs
with exploratory testing. Rather than designing all tests
in advance, explorers design and execute small, rapid
experiments, using what they learned from the last
little experiment to inform the next. Learn essential
skills of a master explorer, including how to analyze
software to discover key points of vulnerability, how
to design experiments on the fly, how to hone your
observation skills, and how to focus your efforts.
Elisabeth Hendrickson
(186 pages) ISBN: 9781937785024. $29
https://pragprog.com/book/ehxta
The Cucumber for Java Book
Teams working on the JVM can now say goodbye for-
ever to misunderstood requirements, tedious manual
acceptance tests, and out-of-date documentation. Cu-
cumber—the popular, open-source tool that helps
teams communicate more effectively with their cus-
tomers—now has a Java version, and our bestselling
Cucumber Book has been updated to match. The Cu-
cumber for Java Book has the same great advice about
how to deliver rock-solid applications collaboratively,
but with all code completely rewritten in Java. New
chapters cover features unique to the Java version of
Cucumber, and reflect insights from the Cucumber
team since the original book was published.
Seb Rose, Matt Wynne & Aslak Hellesoy
(338 pages) ISBN: 9781941222294. $36
https://pragprog.com/book/srjcuc
Secure and Better JavaScript
Secure your Node applications and make writing JavaScript easier and more productive.
Secure Your Node.js Web Application
Cyber-criminals have your web applications in their
crosshairs. They search for and exploit common secu-
rity mistakes in your web application to steal user data.
Learn how you can secure your Node.js applications,
database and web server to avoid these security holes.
Discover the primary attack vectors against web appli-
cations, and implement security best practices and
effective countermeasures. Coding securely will make
you a stronger web developer and analyst, and you’ll
protect your users.
Karl Düüna
(230 pages) ISBN: 9781680500851. $36
https://pragprog.com/book/kdnodesec
CoffeeScript
Over the last five years, CoffeeScript has taken the web
development world by storm. With the humble motto
“It’s just JavaScript,” CoffeeScript provides all the
power of the JavaScript language in a friendly and ele-
gant package. This extensively revised and updated
new edition includes an all-new project to demonstrate
CoffeeScript in action, both in the browser and on a
Node.js server. There’s no faster way to learn to write
a modern web application.
Trevor Burnham
(124 pages) ISBN: 9781941222263. $29
https://pragprog.com/book/tbcoffee2
The Modern Web
Get up to speed on the latest HTML, CSS, and JavaScript techniques.
HTML5 and CSS3 (2nd edition)
HTML5 and CSS3 are more than just buz-
zwords—they’re the foundation for today’s web appli-
cations. This book gets you up to speed on the HTML5
elements and CSS3 features you can use right now in
your current projects, with backwards compatible so-
lutions that ensure that you don’t leave users of older
browsers behind. This new edition covers even more
new features, including CSS animations, IndexedDB,
and client-side validations.
Brian P. Hogan
(314 pages) ISBN: 9781937785598. $38
https://pragprog.com/book/bhh52e
Async JavaScript
With the advent of HTML5, front-end MVC, and
Node.js, JavaScript is ubiquitous—and still messy.
This book will give you a solid foundation for managing
async tasks without losing your sanity in a tangle of
callbacks. It’s a fast-paced guide to the most essential
techniques for dealing with async behavior, including
PubSub, evented models, and Promises. With these
tricks up your sleeve, you’ll be better prepared to
manage the complexity of large web apps and deliver
responsive code.
Trevor Burnham
(104 pages) ISBN: 9781937785277. $17
https://pragprog.com/book/tbajs

The Pragmatic Bookshelf
The Pragmatic Bookshelf features books written by developers for developers. The titles
continue the well-known Pragmatic Programmer style and continue to garner awards and
rave reviews. As development gets more and more difficult, the Pragmatic Programmers will
be there with more titles and products to help you stay on top of your game.
Visit Us Online
This Book’s Home Page
https://pragprog.com/book/jrtest
Source code from this book, errata, and other resources. Come give us feedback, too!
Register for Updates
https://pragprog.com/updates
Be notified when updates and new books become available.
Join the Community
https://pragprog.com/community
Read our weblogs, join our online discussions, participate in our mailing list, interact with
our wiki, and benefit from the experience of other Pragmatic Programmers.
New and Noteworthy
https://pragprog.com/news
Check out the latest pragmatic developments, new titles and other offerings.
Buy the Book
If you liked this eBook, perhaps you’d like to have a paper copy of the book. It’s available
for purchase at our store:
https://pragprog.com/book/jrtest
Contact Us
https://pragprog.com/catalog
Online Orders:
support@pragprog.com
Customer Service:
translations@pragprog.com
International Rights:
academic@pragprog.com
Academic Use:
http://write-for-us.pragprog.com
Write for Us:
+1 800-699-7764Or Call:
