Toad For Oracle Installation Guide
User Manual:
Open the PDF directly: View PDF ![]() .
.
Page Count: 17

Toad®for Oracle 11.6
Installation Guide

© 2012 Quest Software, Inc.
ALL RIGHTS RESERVED.
This guide contains proprietary information protected by copyright. The software described in
this guide is furnished under a software license or nondisclosure agreement. This software may be
used or copied only in accordance with the terms of the applicable agreement. No part of this
guide may be reproduced or transmitted in any form or by any means, electronic or mechanical,
including photocopying and recording for any purpose other than the purchaser’s personal use
without the written permission of Quest Software, Inc.
The information in this document is provided in connection with Quest products. No license,
express or implied, by estoppel or otherwise, to any intellectual property right is granted by this
document or in connection with the sale of Quest products. EXCEPT AS SET FORTH IN
QUEST'S TERMS AND CONDITIONS AS SPECIFIED IN THE LICENSE AGREEMENT FOR
THIS PRODUCT, QUEST ASSUMES NO LIABILITY WHATSOEVER AND DISCLAIMS
ANY EXPRESS, IMPLIED OR STATUTORY WARRANTY RELATING TO ITS PRODUCTS
INCLUDING, BUT NOT LIMITED TO, THE IMPLIED WARRANTY OF
MERCHANTABILITY, FITNESS FOR A PARTICULAR PURPOSE, OR NON-
INFRINGEMENT. IN NO EVENT SHALL QUEST BE LIABLE FOR ANY DIRECT,
INDIRECT, CONSEQUENTIAL, PUNITIVE, SPECIAL OR INCIDENTAL DAMAGES
(INCLUDING, WITHOUT LIMITATION, DAMAGES FOR LOSS OF PROFITS, BUSINESS
INTERRUPTION OR LOSS OF INFORMATION) ARISING OUT OF THE USE OR
INABILITY TO USE THIS DOCUMENT, EVEN IF QUEST HAS BEEN ADVISED OF THE
POSSIBILITY OF SUCH DAMAGES. Quest makes no representations or warranties with respect
to the accuracy or completeness of the contents of this document and reserves the right to make
changes to specifications and product descriptions at any time without notice. Quest does not
make any commitment to update the information contained in this document.
If you have any questions regarding your potential use of this material, contact:
Quest Software World Headquarters
LEGAL Dept
5 Polaris Way
Aliso Viejo, CA 92656
email: legal@quest.com
Refer to our Web site (www.quest.com) for regional and international office information.
Trademarks
Quest, Quest Software, the Quest Software logo, Benchmark Factory, Spotlight, Toad, T.O.A.D.,
Toad World, vSpotlight, and vToad are trademarks and registered trademarks of Quest Software,
Inc in the United States of America and other countries. For a complete list of Quest Software’s
trademarks, please see http://www.quest.com/legal/trademark-information.aspx. Other trademarks
and registered trademarks are property of their respective owners.
Toad for Oracle 11.6
Installation Guide
August 28, 2012

Contents
Installation Requirements 4
System Requirements 4
Virtualization Support 5
Required Windows Privileges 6
Install Toad 7
Install or Upgrade Toad 7
Install Toad on Citrix or Remote Desktop Services Systems 7
Uninstall Toad 8
Manually Import Toad Settings 8
Import Settings 8
Silently Install Toad 10
About Installing Silently 10
nExtract MSI Files 10
Install Toad through the Command Line 12
nCommand-Line Parameters (Toad for Oracle) 12
Install Patches Silently 15
Uninstall Toad for Oracle through Command Line 16
Appendix: Contact Quest 17

Installation Requirements
System Requirements
Before installing Toad, ensure your system meets the following minimum hardware and software
requirements:
Memory 1 GB RAM required for 32-bit
2 GB RAM required for 64-bit
Note: The memory required may vary based on the following:
lApplications that are running on your system
lSize and complexity of the database
lAmount of database activity
lNumber of concurrent users accessing the database
Hard Disk
Space
120 MB Toad for Oracle 32 bit
150 MB Toad for Oracle 64 bit
Operating
System
Windows Server 2003 (32-bit and 64-bit)
Windows XP (32-bit and 64-bit)
Windows Vista (32-bit and 64-bit)
Windows Server 2008 (32-bit and 64-bit) - 2 CPU required
Windows Server 2008 R2 (64-bit) - 2 CPU required
Windows 7 (32-bit and 64-bit)
Database
Client
Oracle Client 9.2.0.8
Oracle Client or Instant Client 10.2.0.3/10.2.0.4
Oracle Client or Instant Client 11.2.0.1/11.2.0.3
Note: You must use the 32-bit version of Toad with the 32-bit Oracle
client, and the 64-bit version of Toad with the 64-bit Oracle client.
Database
Server
Oracle 8.0.6; 8.1.7; 9i; 9i R2; 10g R1; 10g R2; 11g R1, 11g R2
Toad has been tested on Oracle Exadata 2.0 running Oracle database 11g
R2.
Important: It is recommended that your client version be of the same
release (or later) as your database server. This is an Oracle
recommendation to prevent performance issues.
1
Toad for Oracle Installation Guide
Installation Requirements
5
Cloud
Database
Service
Oracle databases running on Amazon EC2
IPv6 Internet Protocol Version 6 (IPv6) is being adopted by the US Federal
Government and industries around the world. In its most basic format, the
new protocol uses 128-bit addresses instead of 32-bit addresses used by
the current IPv4 to route packets over the Internet. Toad for Oracle
features such as FTP access the Internet through third-party vendors such
as /nSoftware's IP*Works that are IPv6 compliant. For access to Web sites
by way of the Toad Online window, Toad simply invokes the user-
defined or default Web browser.
Additional
Software
Microsoft Internet Explorer 6.0 or later (to view the Release Notes)
Adobe Acrobat Reader 7.0 or later (to view the Installation Guide)
Virtualization Support
Before installing Toad, review the following for virtualization support:
Application
Virtualization
Citrix XenApp 5.0 has been tested.
Desktop
Virtualization
(VDI)
Quest vWorkspace 7.0 has been tested.
Server
Virtualization
Oracle VM 3.1 has been tested.
VMware ESX Server 3.5 has been tested.
Note: Toad may work in virtualization environments other than the ones listed.

Toad for Oracle Installation Guide
Installation Requirements
6
Required Windows Privileges
In order to install and run Toad for Oracle, make a connection, and do basic operations, you must
have the following privileges:
Operating System Requirements
Windows XP
Windows Server
lRead access to the Oracle client folder
lRead/write privileges on the Oracle Homes directories
that you use for your connections
lBe a Power User or Administrator
Windows Vista
Windows 7
lRead access to the Oracle client folder
lRead/write privileges on the Oracle Homes directories
that you use for your connections
lIf UAC (user account control) is enabled, you must have
administrator privileges
Note: Other functionality in Toad may require additional privileges.

Install Toad
Install or Upgrade Toad
When you install Toad you can also install the additional applications that come with your Toad
Bundle, such as SQL Optimizer (SQL Tuning) or Toad Data Modeler.
If you already have Toad installed and you run the installer for a newer version, Toad
automatically imports your settings files.
lInstall the 32-bit version of Toad if you are using a 32-bit Oracle client.
lInstall the 64-bit version of Toad if you are using a 64-bit Oracle client.
Caution: If you also have the freeware version of Toad, you should not install the
commercial version over the freeware version. This will adversely affect some functions.
Install the commercial version in a different directory from the freeware version.
Notes:
lToad supports importing settings only if the new version is within two releases of the
previous version. If your versions are more than two releases apart, you need to install an
intermediate version to successfully import the files.
lIf you need to import your Toad settings from another computer, you can manually import
the settings. See "Manually Import Toad Settings" (page 8) for more information.
To install Toad for Oracle
1. Run the Toad bundle installation program from the DVD or download file.
2. Complete the wizard.
Note: On the Read-Only Installation page, select whether to install Toad as a typical
install with all features enabled, or whether you want to install as read-only. In read-only
mode, you cannot create, alter, or drop database objects.
Install Toad on Citrix or Remote Desktop
Services Systems
All user files are stored in a user_name directory. When a user opens Toad for the first time, Toad
copies the contents of this folder to the user’s associated Application Data folder for Toad.
Note: Write access is required to the Oracle directory if any of the users want to edit the
tnsnames.ora file by using the TNSNames Editor.
2

Toad for Oracle Installation Guide
Install Toad
8
To install Toad on a Citrix/Remote Desktop Services system
1. Connect to the system as an administrator.
2. Copy Toad to the Citrix/Remote Desktop Services server, if required.
3. Install Toad.
4. Right-click Toad.exe and select Properties. Make sure the Allow non-administrators to
run this program option is selected under Compatibility | User Account Privileges.
5. Repeat steps 2 through 4 for each server in the Citrix/Remote Desktop Services farm.
Note: Although you must install Toad on every server in the farm, you only need to
publish Toad once.
Uninstall Toad
When you use Toad, you create new Toad files such as SQL scripts, data output, or temp files.
When you run uninstall, Toad has no way of knowing what those files are, so it does not remove
files that you have created. You must manually delete them.
To uninstall Toad
» From Start | Programs | Quest Software | Quest Installer, select the Quest Installer, and
then follow the instructions for uninstalling the appropriate program.
Manually Import Toad Settings
Toad automatically imports your previous settings when you upgrade to a new version.
However, there are cases when you may need to manually import your Toad settings.
If you just need to import your connection settings or saved SQL, Toad has features that allow
you to easily import and export them from one copy of Toad to another. Review the following
topics in the online help for additional information:
lImport/Export Connection Settings
lImport/Export Saved SQL
Watch the Manually Importing Toad for Oracle Settings video on Quest's video channel.
Note: Toad supports importing settings only if the new version is within two releases of the
previous version. If your versions are more than two releases apart, you need to install an
intermediate version to successfully import the files.
Import Settings
If you are installing a new version of Toad on the same computer that has your previous Toad
version already installed, Toad automatically imports your settings. Complete the procedure

Toad for Oracle Installation Guide
Install Toad
9
below if your old settings are not located on the same computer.
To import settings from another computer
1. On your old computer, open Windows Explorer and locate the Toad settings folder.
Tip: To find the settings folder, select View | Toad Options | General. The folder
location is listed in the Application data directory field.
2. Copy the folder to the new computer, a network it can connect to, or a storage device.
3. Install and open Toad on the new computer.
Note: You need your license key to complete this step.
4. Select Utilities |Copy User Settings in the main Toad toolbar.
5. Click and navigate to the copied folder.
Note: You can also select Utilities |Copy User Settings to select Create a clean set of
user files from the base installation.
Toad for Oracle Installation Guide
Silently Install Toad
10
Silently Install Toad
About Installing Silently
In order to perform a silent install, you must first extract the MSI file from the Quest Installer.
Once the extraction completes, you can easily install through the silent install batch file, or
install through the command line.
Note: You do not need to install the Quest Installer on any of the computers where you
are silently installing Toad products. The Quest Installer is only used to extract the
required MSI files.
To install silently
1. Extract the MSI from the Quest Installer.
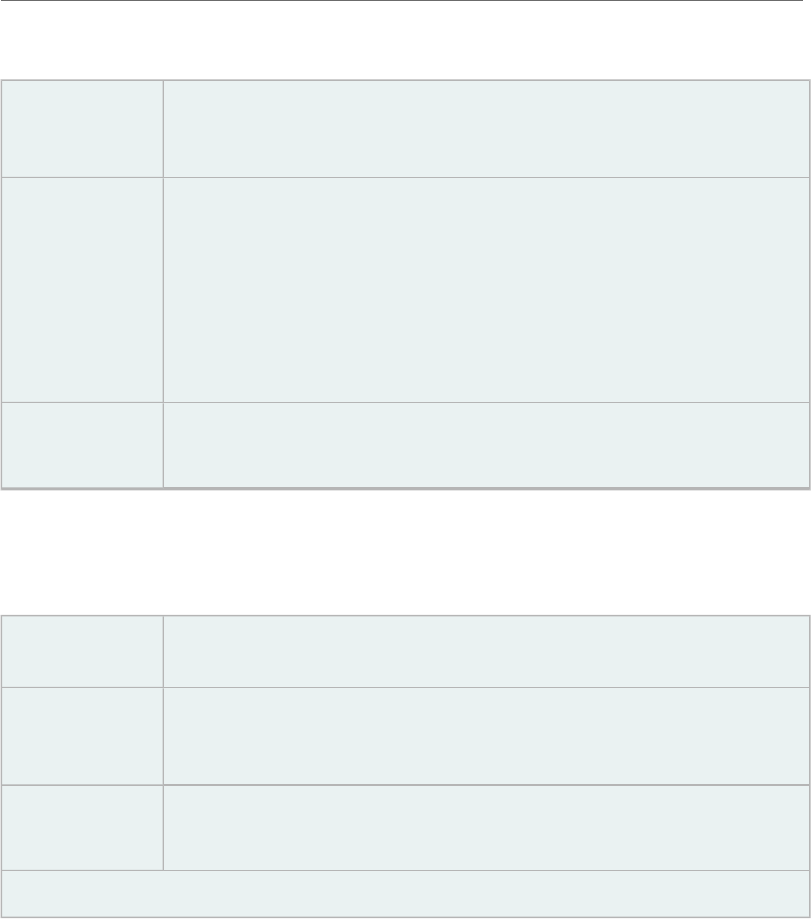
2. Silently install the product. Select one of the following options:
Run silent install
batch file
Run SilentInstall.bat to install the product. This file is located
with the extracted MSI files.
This is the easiest option to install silently. It uses all of the
default options.
Install through
command line
Execute command-line parameters to install.
This option allows you to change the parameters to fit your
environment or standards, such as installing to a different
directory.
nExtract MSI Files
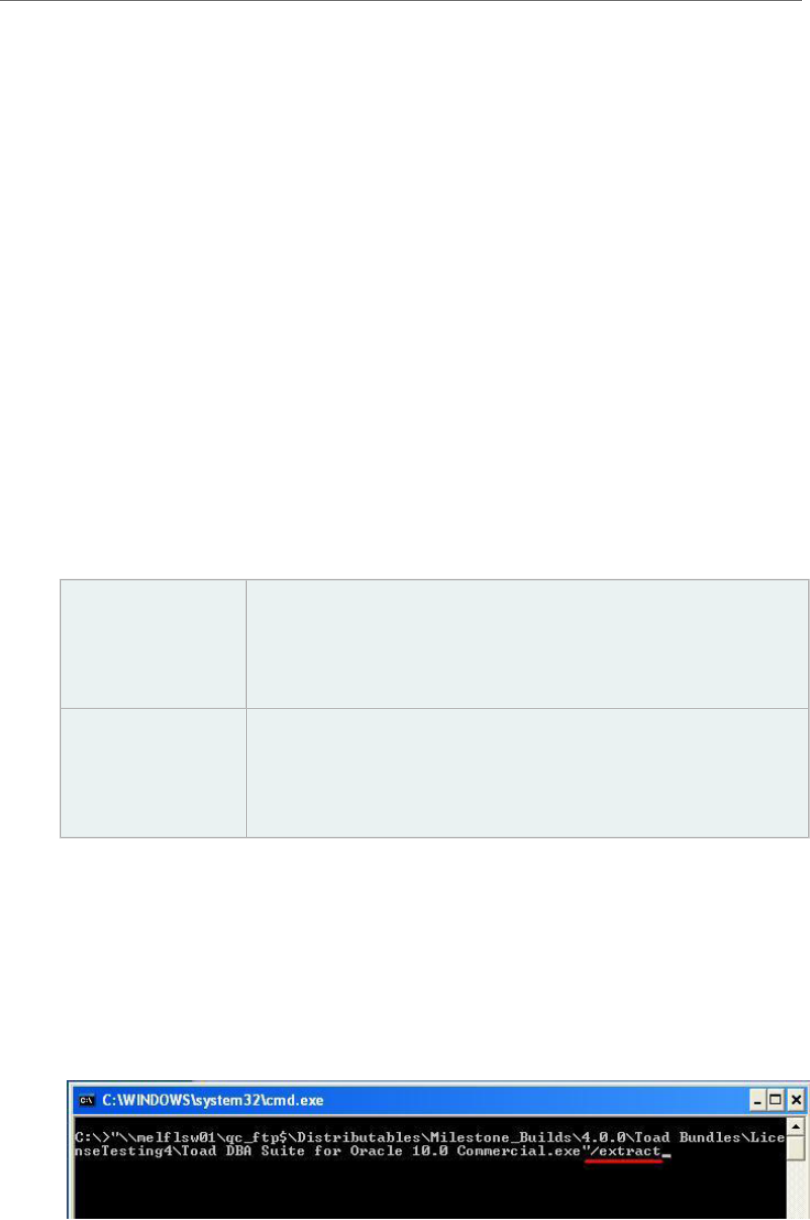
nnTo extract MSI files from the Quest Installer
1. Run your Toad bundle from the command prompt, including the correct path to the
directory where it resides and the /extract parameter. Since the executable contains
spaces, remember to include quotation marks. For example:
2. Complete the wizard.Review the following for additional information:
Toad for Oracle Installation Guide
Silently Install Toad
11
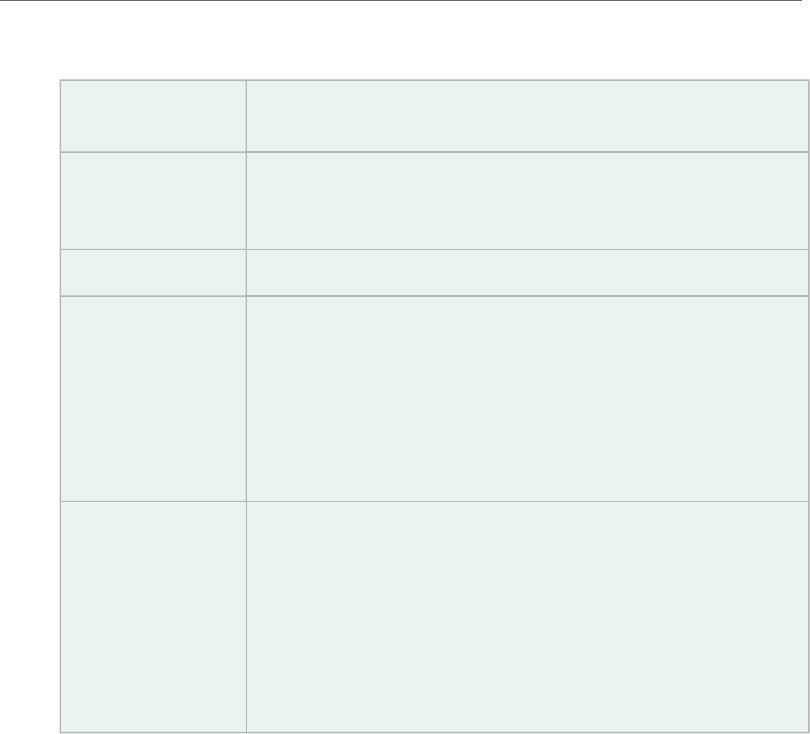
Product Selection
Page
Description
Select the
product you
want to extract
Verify that all the products you want to extract display in this
list. If a product does not display, you should start over and
select an edition that contains all the files.
Finish Page Description
"specified
location" link
Click this link to open the directory where your files have
been extracted. This directory also includes the silent
installation batch file (SilentInstall.bat).
The batch file contains the commands to silently install all the
products that you selected from the relative path. The install
requires the applicable directories from the locations that you
extract to and installs each product to the default directory.
"Readme.txt"
link
Click this link to open the extraction log as well as the
command-line parameters that are needed to perform default
installations of the products. This file also defines the order in
which the products need to be installed to satisfy the
dependencies between the products.
This option allows you to change the parameters to fit your
environment or standards, such as installing to a different
directory.
Toad for Oracle Installation Guide
Install Toad through the Command Line
12
Install Toad through the Command Line
To silently install Toad for Oracle through the command line
1. Extract the MSI from the Quest Installer.
2. Enter an install command similar to the following:
msiexec /i "<path to msi file\ToadforOracle_
version.msi>"INSTALLDIR="<installation folder>"
ADDLOCAL=Client,Server/q /l*v <path to install log, including file
name>
For example:
msiexec /i "C:\Documents and
Settings\Johndoe\desktop\ToadforOracle11.6.exe"
INSTALLDIR="C:\Programs\Quest Software\Toad for Oracle"
ADDLOCAL=Client,Server /q /l*v "C:\install.log"
nCommand-Line Parameters (Toad for Oracle)
nnYou can use the following parameters to silently install Toad for Oracle:
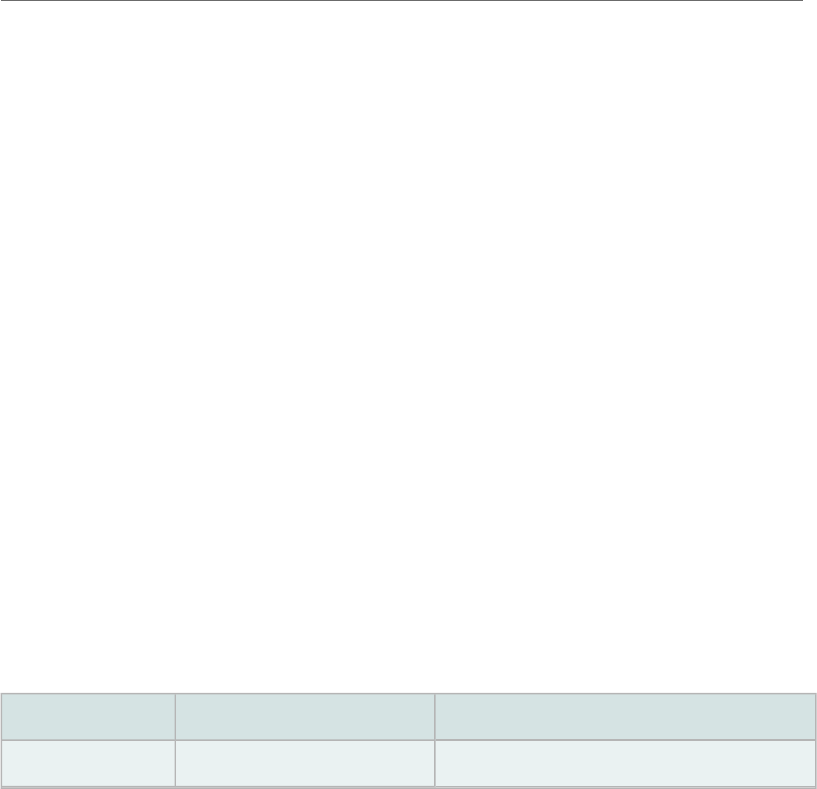
Option Parameter Description
/l Package|ProductCode Installs or configures the product.
Toad for Oracle Installation Guide
Install Toad through the Command Line
13
Option Parameter Description
/f [p|o|e|d|c|a|u|m|s|v]
Package|ProductCode
Repairs the product. This option ignores
any property values entered in the
command-line. The default argument list
for this option is 'omus.' The following
options are available:
lp—Reinstalls only if a file is
missing.
lo—Reinstalls if a file is missing
or an older version is installed.
le—Reinstalls if a file is missing or
an equal or older version is
installed.
ld—Reinstalls if a file is missing
or a different version is installed.
lc—Reinstalls if a file is missing or
the stored checksum does not
match the calculated value. This
option only repairs files that have
msidbFileAttributesChecksum in
the Attributes column of the File
table.
la—Forces all files to be
reinstalled.
lu—Rewrites all required, user-
specific registry entries.
lm—Rewrites all required,
computer-specific registry entries.
ls—Overwrites all existing
shortcuts.
lv—Runs from source and re-
caches the local package. Do not
use this option for the initial
installation of the product or
feature.
/a Package Installs the product on the network.
/x Package/ProductCode Uninstalls the product.

Toad for Oracle Installation Guide
Install Toad through the Command Line
14
Option Parameter Description
/l [i|w|e|a|r|u|c|m|o|p|v|x|+|!|*]
Logfile
Writes logging information to a logfile in
the specified path. The path to the logfile
location must already exist. The installer
does not create the directory structure for
the logfile. Flags indicate which
information to log. If no flags are set, the
default is 'iwearmo.' The following
options are available:
li—Status messages.
lw—Nonfatal warnings.
le—All error messages.
la—Start up of actions.
lr—Action-specific records.
lu—User requests.
lc—Initial UI parameters.
lm—Out-of-memory or fatal exit
information.
lo—Out-of-disk-space messages.
lp—Terminal properties.
lv—Verbose output.
lx—Extra debugging information.
Only available on Windows
Server 2003.
l+—Append to existing file.
l!—Flush each line to the log.
l"*"—Log all information except
for the v and x options. To
include the v and x options, enter
"/l*vx".
/q n|b|r|f Sets the user interface level. Review the
following options:
lq, qn—No UI
lqb—Basic UI. Use qb! to hide the
Cancel button.
lqr—Reduced UI with no modal
dialog box displayed at the end of
the installation.

Toad for Oracle Installation Guide
Install Toad through the Command Line
15
Option Parameter Description
lqf—Full UI and any authored
FatalError, UserExit, or Exit
modal dialog boxes at the end.
lqn+—No UI except for a modal
dialog box displayed at the end.
lqb+—Basic UI with a modal
dialog box displayed at the end.
The modal box does not display if
you cancel the installation. Use
qb+! or qb!+ to hide the Cancel
button.
lqb- —Basic UI with no modal
dialog boxes. Note that /qb+- is
not a supported UI level. Use qb-!
or qb!- to hide the Cancel button.
Note: The ! option is available with
Windows Installer 2.0 and works only
with basic UI. It is not valid with the full
UI.
RESTRICTIONS p Prevents users from saving their
connection password by disabling the
Save password field in the Database
Login window. For example:
RESTRICTIONS=p
i Prevents users from accessing the Internet
via Toad by disabling all Internet access
in Toad. This can be combined with the
'p' parameter; for example:
RESTRICTIONS=p,i
Install Patches Silently
If you already have Toad installed and want to upgrade silently, you must include
REINSTALLMODE=vo REINSTALL=ALL in the command. If these parameters are not included, the
MSI registers that Toad is already installed and does not upgrade it.
For example, if you are currently in the directory where the MSI resides, entering the following
command installs to the standard location:
msiexec.exe /i <path to msi file\ToadforOracle<version>SetupFull.msi>
REINSTALLMODE=vo REINSTALL=ALL

Toad for Oracle Installation Guide
Install Toad through the Command Line
16
You can also set additional parameters or run the MSI from a location other than the active
directory. For example:
msiexec /i "C:\Documents and Settings\johndoe\desktop\
ToadforOracleSetupFull.msi REINSTALLMODE=vo REINSTALL=ALL
INSTALLDIR="C:\Programs\Quest Software\Toad for Oracle\" /q /l*v
"C:\install.log"
Uninstall Toad for Oracle through Command Line
To silently uninstall Toad through the command line
» Enter a command similar to the following:
msiexec /x "<path to msi file\ToadforOracle_version.SetupFull.msi>" /q

Appendix: Contact Quest
Contact Quest Support
Quest Support is available to customers who have a trial version of a Quest product or who have
purchased a Quest product and have a valid maintenance contract. Quest Support provides
unlimited 24x7 access to our Support Portal at www.quest.com/support. From our Support Portal,
you can do the following:
lRetrieve thousands of solutions from our Knowledge Base
lDownload the latest releases and service packs
lCreate, update and review Support cases
View the Global Support Guide for a detailed explanation of support programs, online services,
contact information, policies and procedures.
The guide is available at www.quest.com/support.
Contact Quest Software
Email info@quest.com
Mail
Quest Software, Inc.
World Headquarters
5 Polaris Way
Aliso Viejo, CA 92656
USA
Web site www.quest.com
See our web site for regional and international office information.
About Quest Software, Inc
Quest Software simplifies and reduces the cost of managing IT for more than 100,000 customers
worldwide. Our innovative solutions make solving the toughest IT management problems easier,
enabling customers to save time and money across physical, virtual and cloud environments. For
more information about Quest go to www.quest.com.
Established in 1987, Quest Software (Nasdaq: QSFT) provides simple and innovative IT
management solutions that enable more than 100,000 global customers to save time and money
across physical and virtual environments. Quest products solve complex IT challenges ranging
from database management,data protection,identity and access management,monitoring,user
workspace management to Windows management. For more information, visit www.quest.com.
