TR29 Remote Control Tw32 Wall Control01611
2014-01-16
: Tw32 Wall Control01611 tw32 wall control01611 images 1148 p4dbimg
Open the PDF directly: View PDF ![]() .
.
Page Count: 1
I
II
III I
I
V
V
V
TW32 Wall Control
SPECIFICATION and INSTRUCTION SHEET
DESCRIPTION: One DC Motor Ceiling Fan and Light, 6 Speed, Reversing Remote Control
FAN MODEL USED: See Catalog or visit our website www.fanimation.com for more
information
How to Wire and Operate Your TW32 Wall Control
NOTE: If fan or supply wires are different colors than indicated,
have this unit installed by a qualified electrician.
To avoid possible electrical shock, be sure electricity is
turned off at the main fuse box before wiring.
NOTE: If you are not sure if the outlet box is grounded,
contact a licensed electrician for advice, as it must be
grounded for safe operation.
WARNING
Copyright 2011 Fanimation
2011/01
10983 Bennett Parkway
Zionsville, IN 46077
(888) 567-2055 • FAX (866) 482-5215
Outside U.S. call (317) 733-4113
Visit Our Website @ www.fanimation.com
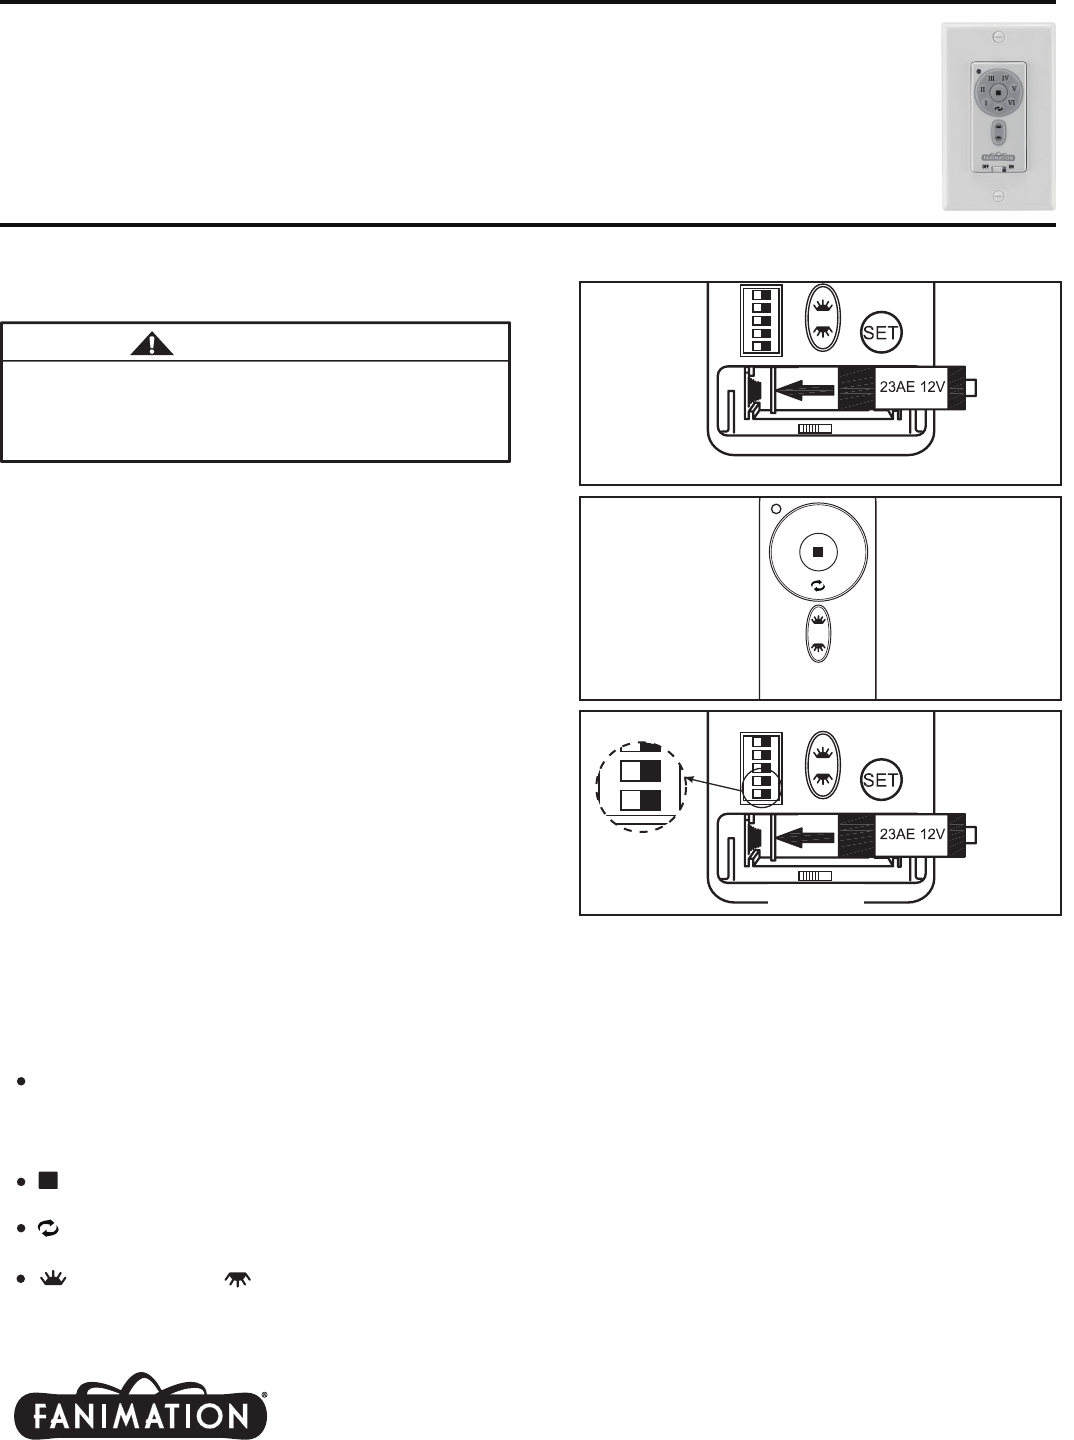
Figure 2
4. “D” and “ON” dip switch:
The “ON” selection is the light dimmable selection and is
to be used with all bulbs except bulbs other than CFL.
The “D” selection is the light on only (no dimming
function) and is to be used with CFL bulbs as CFL bulbs
cannot be dimmed.
The receiver provides the following protective function:
1. Lock position: The DC motor has a built-in safety
against obstruction during operation. If something stuck
the fan. The motor will be stopped and disconnect power
after 30 seconds of interruption. Please remove obstacles
before re-set.
2. Over 80W protection: When the receiver detects motor
power consumption which is greater than 80W, the receiver
power will be stopped and operation will immediately
discontinue. Turn the receiver power on after 5 seconds.
(Figure 3)
1. To make fan operational, remove the top panel then install
23A/12V battery (included) in wall control, with fan power off
, arrange code switches to desired code setting.
Then follow the remote code setting process. (If not used for
long periods of time, remove battery to prevent damage to
transmitter). Store the remote away from excessive heat or
humidly (Figure 1).
2. Remote Code Setting Process:
Follow the below steps to use the SET button
Step 1 Set code switches to desired code.
Turn fan power on, press and hold SET button with a
ball-pen or similar object on back of remote for 5 seconds
within 60 seconds of powering fan in order to synchronize
with fan motor.
Step 2 Speed setting: After setting the transmitter learning,
press the highest speed setting to set the rotational speed.
This can take up to 120 seconds to adjust speed.
Step 3 Same as step 3, reverse and press the highest
speed, speed rotation again can take up to 120 seconds
to reach speed setting selected.
NOTE: If you want to change the blades: turn the power
off→ change the blades →turn the power on →replay the
setting process.
3. The remote buttons instruct as below:
I = minimum speed II = low speed
III = medium low speed IV = medium speed
V = medium high speed VI = high speed
Button:
This button turns the fan off.
Reverse button (back of remote):
This button is to control fan direction.
(Figure 2).
Fan speed:
Down Light button:
The button is to control light, Infinite light levels
are available by holding the light on/off button
Up Light button /
Figure 1
ON ECE ON
12 3 4 D
Figure 2
ON ECE ON
12 3 4 D
Figure 3
code switch
ECE ON
34 D
