[CROSSMATCH] U.are.U SDK Platform Guide For Android
User Manual:
Open the PDF directly: View PDF ![]() .
.
Page Count: 28
U.are.U® SDK v3
Platform Guide for Android
Copyright © 2015-2016 Crossmatch. All rights reserved. Specifications are subject to change without prior notice. The Crossmatch
logo, Cross Match®, Crossmatch® and DigitalPersona® are trademarks or registered trademarks of Cross Match Technologies, Inc.
in the United States and other countries. DigitalPersona®, TouchChip®, Eikon®, U.are.U® and FingerJet™ are trademarks or
registered trademarks of DigitalPersona, Inc., which is owned by the parent company of Cross Match Technologies, Inc. All other
brand and product names are trademarks or registered trademarks of their respective owners.
Revised: November 10, 2016 (v3.0)

U.are.U SDK - Platform Guide for Android 3
Contents
INTRODUCTION 4
Getting Updated Documentation................................................................................... 4
INSTALLATION 5
Installing on the Development System ...................................................................... 5
Installing on the Target Hardware ............................................................................ 6
DEVELOPING APPLICATIONS WITH C/C++ 7
Pre-Requisites .......................................................................................................... 7
System Requirements ................................................................................................. 7
Development System .............................................................................................. 7
Target Hardware (Android-Based Device) .................................................................. 7
The Sample Applications ............................................................................................ 7
Building the Sample Applications ............................................................................ 7
Running the UareUSample Application ...................................................................... 8
Running the UareUCaptureOnly Application ............................................................. 14
DEVELOPING APPLICATIONS WITH JAVA 20
Pre-Requisites ......................................................................................................... 20
System Requirements ................................................................................................ 20
Development System ............................................................................................ 20
Target Hardware (Android-Based Device) ................................................................ 20
Installing on the Target Hardware .......................................................................... 20
The Java Sample Application ..................................................................................... 20
Selecting a Reader ............................................................................................... 22
Enrolling a Finger ................................................................................................ 24
Identifying a Fingerprint ....................................................................................... 25
Verifying a Fingerprint ......................................................................................... 26
Using the Capture and Streaming Feature ............................................................... 27

U.are.U SDK - Platform Guide for Android 4
Introduction
THIS CHAPTER PROVIDES AN OVERVIEW OF THE CHAPTERS IN THE U.ARE.U SDK PLATFORM GUIDE FOR ANDROID-
BASED PLATFORMS.
This manual describes how to use the U.are.U SDK to develop applications that will run on the Android platform. The
U.are.U SDK is available for multiple platforms and this document describes information specific to developing
applications that will run on Android-based platforms.
This SDK is available in two editions: the U.are.U SDK for Android (supporting optical readers only) and the U.are.U
SDK for Android with TouchChip Support (for use with both optical and silicon readers). The material in this
document applies to both editions unless otherwise noted.
Introduction (this chapter) describes how to get the latest version of this documentation.
Installation provides instructions for installing on your development system.
Developing Applications with C/C++ lists system requirements for developing and running applications in C/C++ and
describes the sample application.
Developing Applications with Java lists system requirements for developing and running applications using Java,
provides additional installation instructions and describes the Java sample application.
For a detailed description of the SDK, consult the U.are.U SDK Developer Guide.
Getting Updated Documentation
If you are viewing this guide from the download package for the U.are.U SDK, you may want to check online at our
website for an updated version of this document at
http://www.crossmatch.com/Support/Reference-Material/SDK-Reference-Material/
U.are.U SDK - Platform Guide for Android 5
Installation
THIS CHAPTER PROVIDES INSTRUCTIONS ON INSTALLING THE U.ARE.U SDK ON THE DEVELOPMENT AND TARGET
SYSTEMS.
Except as noted in the platform/language-specific chapters, the installation process is the same for all Android
development.
There are two steps to the installation:
• Installing on the development system
• Installing on the device (the target hardware)
These steps are described below.
Installing on the Development System
To install the SDK on an Intel-based Linux development system:
1. Unpack
CM-UareU
-3.0-<date.build>.tar.gz
into a directory.
2. Go to the directory where you unpacked the files.
3. Run
setup
.
4. Follow the prompts as they appear.
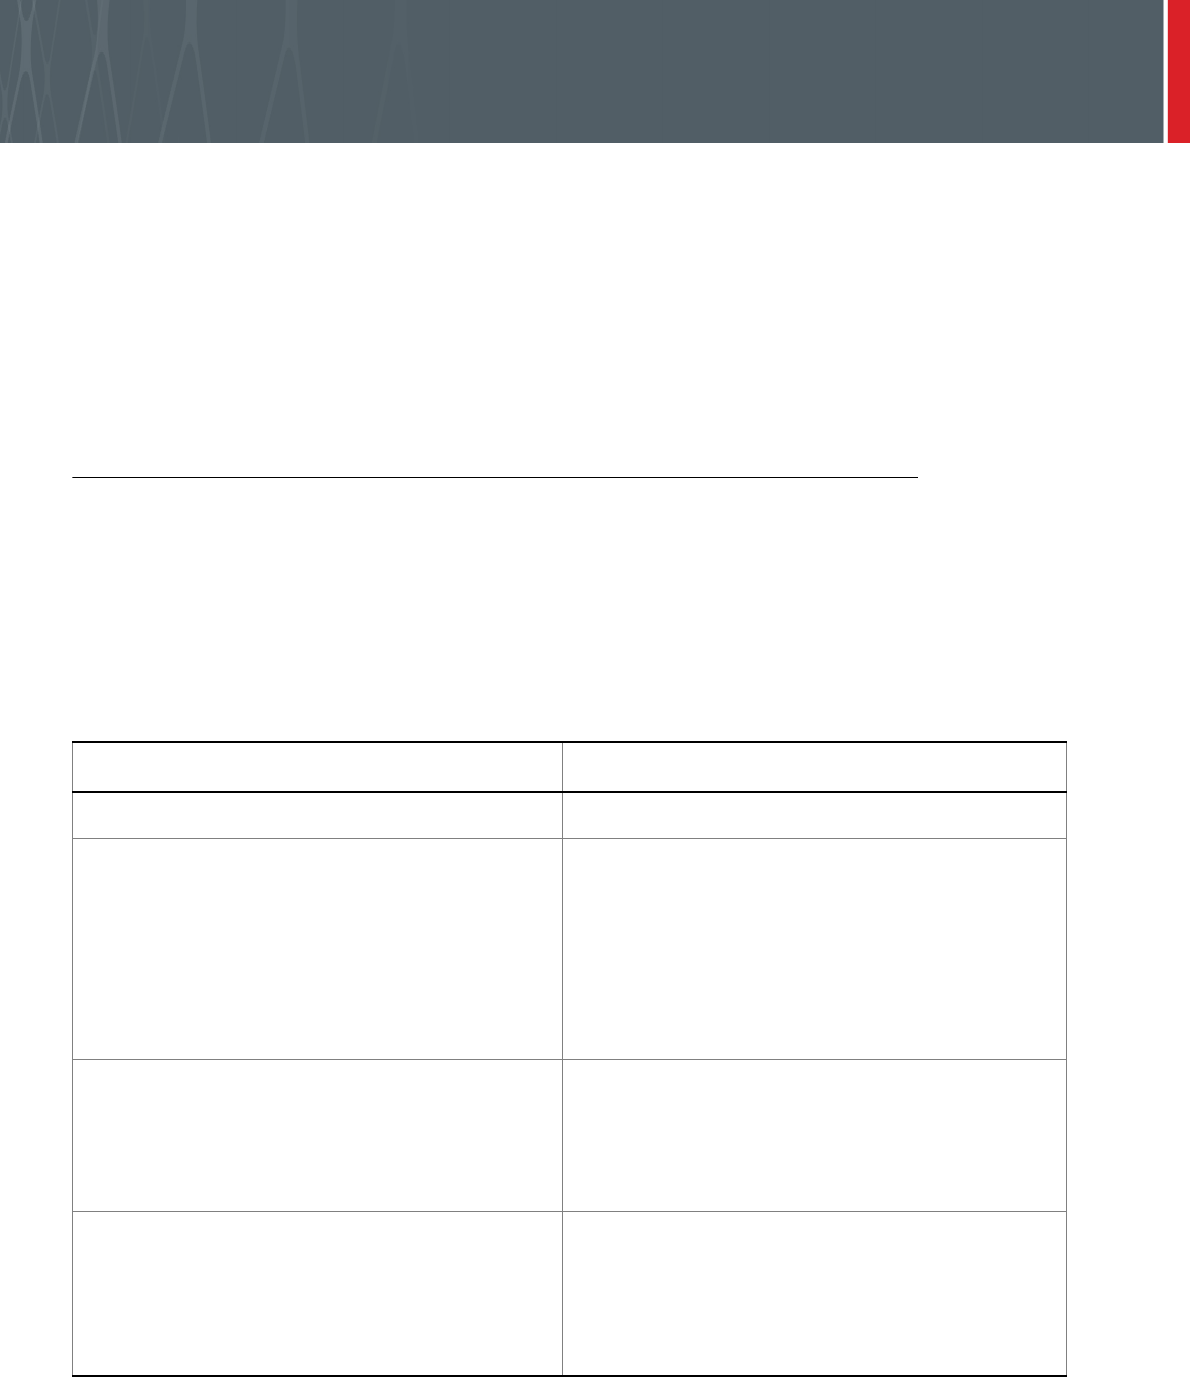
The installer copies all necessary files to the selected folder. The files installed on the developer’s machine are located
in the following folders within the main product folder:
Folder Contents
Include
Header files for C/C++ API.
Android/docs
End user license agreement (EULA) plus
documentation:
SDK Developer Guide - describes all APIs
Platform Guide for Android - Android-specific
details
C_API - Doxygen for C/C++ API
Java_API - Javadoc for Java API
Android/bin/android-14/arch-arm
Drivers for U.are.U fingerprint readers
Runtime files for:
arm
- C/C++ development for ARM
processors
java
- Java JAR file
Android/Samples
Source files for sample applications:
UareUSample
- C/C++ sample
UareUCaptureOnly
- C/C++ sample that
demonstrates only capture
UareUSampleJava
- Java sample
U.are.U SDK - Platform Guide for Android 6
Installation
Installing on the Target Hardware
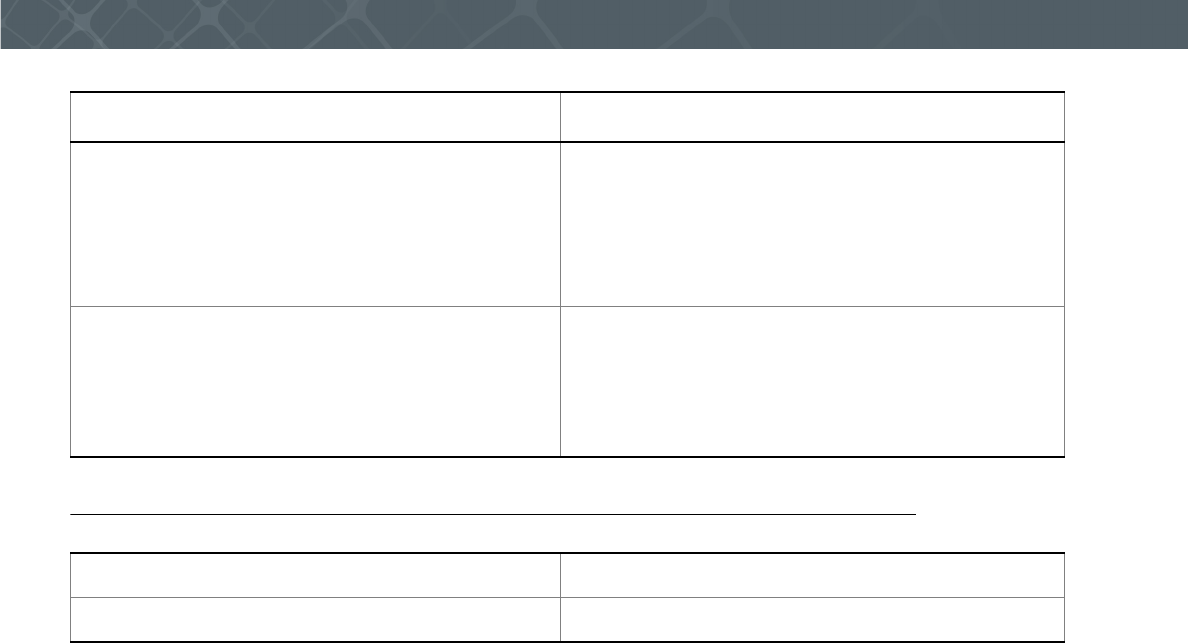
Android/Samples/bin Executables for sample applications:
UareUSample
- C/C++ sample
UareUCaptureOnly
- C/C++ sample that
demonstrates only capture
UareUSampleJava
- Java sample
Android/bin/android-14/arch-arm
- and -
Android/Samples/UareUSampleJava/libs/armeabi
TouchChip device support
libdpfpdd_tcd58.so
Installed only with the U.are.U SDK for Android -
TouchChip Support Edition.
C/C++ application See Building the Sample Applications on page 7.
Java application See Installing on the Target Hardware on page 20.
Folder Contents
U.are.U SDK - Platform Guide for Android 7
Developing Applications with C/C++
THIS CHAPTER PROVIDES INFORMATION NECESSARY FOR DEVELOPING ANDROID APPLICATIONS IN C/C++ WITH THE U.ARE.U
SDK.
Pre-Requisites
This chapter assumes that you have a working knowledge of C/C++ and that you know how to develop for applications
that will run on Linux platforms and devices.
System Requirements
Development System
The development system can be any Intel-based Linux system. The Android Native Development Kit (NDK) is
required to develop native (C/C++) applications and libraries.
Target Hardware (Android-Based Device)
The Android-based device must have Android 4.4 or better installed and the UVC (also known as Video4Linux)
kernel driver enabled. You must have root privileges on the Android device in order to develop and run C/C++
applications and samples. A USB port in host mode is required.
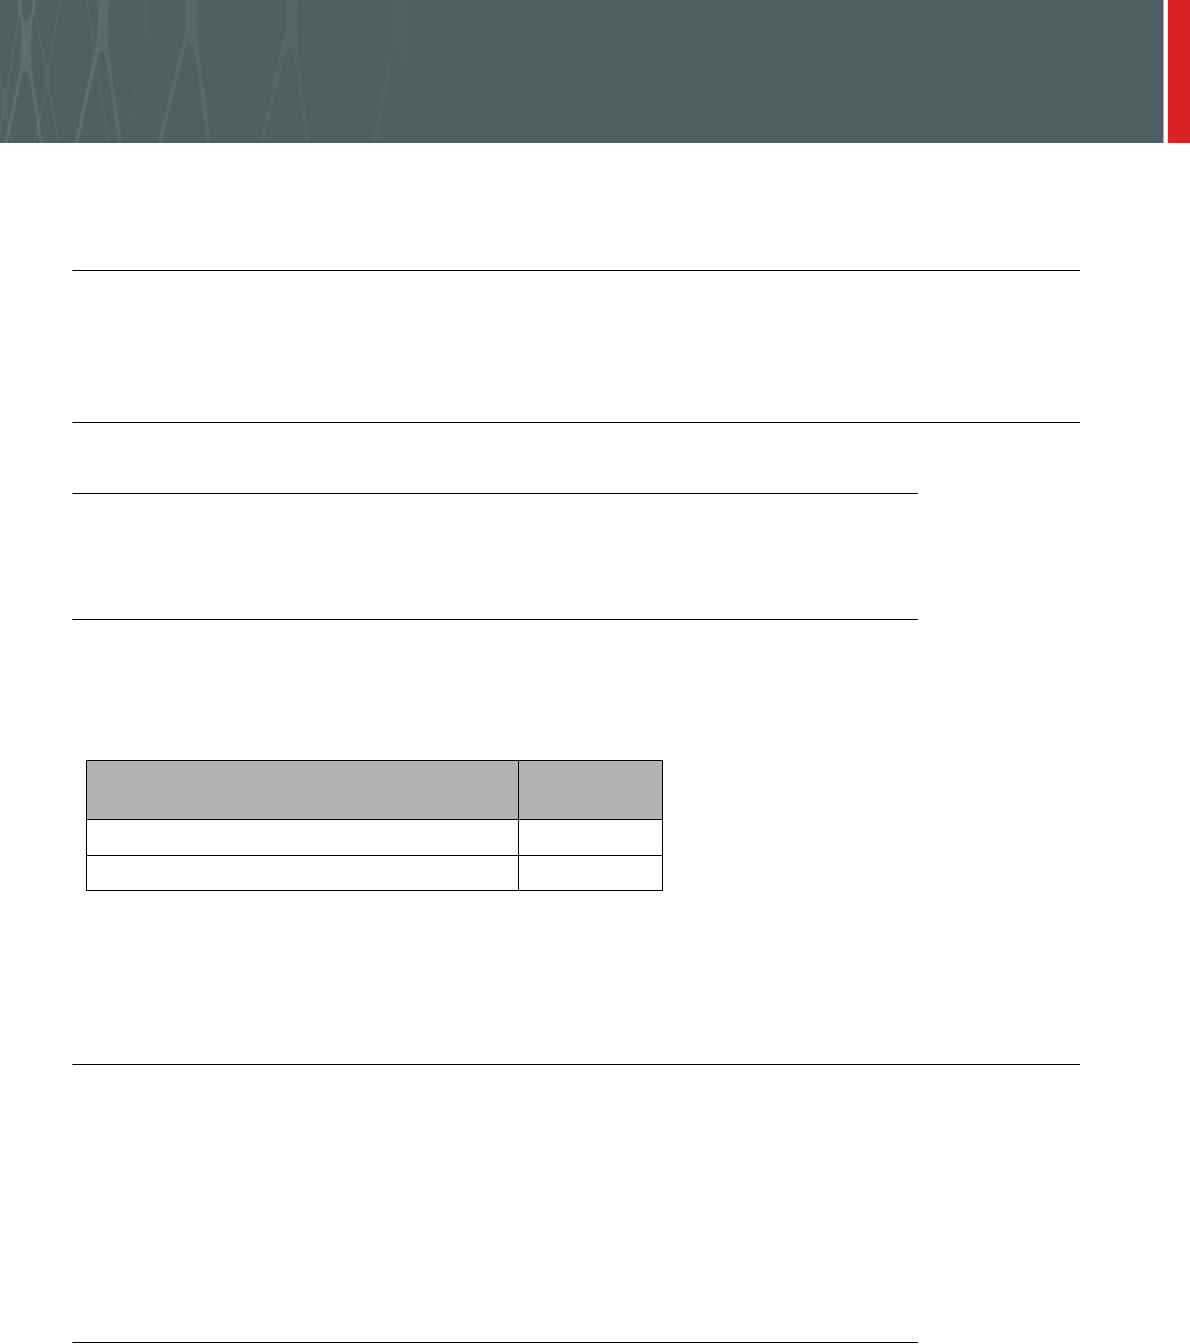
The file sizes are (in Kb):
In addition, the device must have 16 MB free memory.
The SDK works on a variety of hardware and is intended to have a small footprint so that it can run even on minimal
hardware. Less capable hardware will work, but response time may not be optimal.
The Sample Applications
U.are.U SDK includes sample applications to demonstrate the features of the SDK. The sample applications are
located in subfolders of the
/urusdk-android/Android/Samples
folder:
•The
UareUCaptureOnly
subdirectory contains the sources of the sample application that demonstrates
fingerprint capture. This application does not have any dependencies on the FingerJet engine libraries.
The
UareUSample
subdirectory contains the source for the sample application that demonstrates the full
functionality of the SDK: fingerprint capture, feature extraction and verification, identification and enrollment of
fingerprints. This application has dependencies on the capture and FingerJet Engine libraries.
Building the Sample Applications
UareUSample
and
UareUCaptureOnly
are built in the same way. The makefile relies on the following environment
variables:
NDK
and
TOOLCHAIN
. The default values are set assuming that the Android NDK is installed in the
$HOME/
Android/android-ndk-r8d
directory and the development system is Linux-x86. Modify the makefile or set the
environment variables according to the actual locations of the NDK directory and the toolchain directory. Once those
are set, you can build the sample application with the
make
command.
Android API
Level 14
Capture runtime (drivers + SDK layer) 580
Fingerprint recognition runtime 460
U.are.U SDK - Platform Guide for Android 8
Developing Applications with C/C++
Running the UareUSample Application
The
UareUSample
application demonstrates the Capture API and the FingerJet Engine API. It is a console application
- it does not require any graphic libraries. However it requires root privileges in order to access
/dev/videoX
devices,
and it requires the
adb
shell or an
ssh
connection to run.
In addition, the Gallery app (installed by default on most Android devices) must be disabled to avoid interruption of the
sample. To disable the Gallery app, navigate on your device’s display to Settings->Apps->Gallery App and click the
Disable button.
To run the
UareUSample
application:
1. Establish the adb shell connection with the device:
•adb shell
2. Type
su
to grant permission to the device
3. Create the directory where the libraries and application executable will be copied:
•mkdir /data/dpsample
4. Exit the root
•exit
5. Exit the shell and copy the libraries and executable to the created directory:
•exit
•adb push <UareU SDK folder>/urusdk-android/Android/bin/android-14/arch-arm/ /data/dpsample
•adb push <UareU SDKfolder>/urusdk-android/Android/Samples/bin/UareUSample /data/dpsample
•adb push <UareU SDKfolder>/urusdk-android/Android/Samples/bin/UareUCaptureOnly /data/dpsample
6. Reestablish adb shell connection with the device and change access permissions on the reader device.
7. Make sure that LD_LIBRARY_PATH points to the directory with SDK libraries:
•adb shell
•cd /data/dpsample
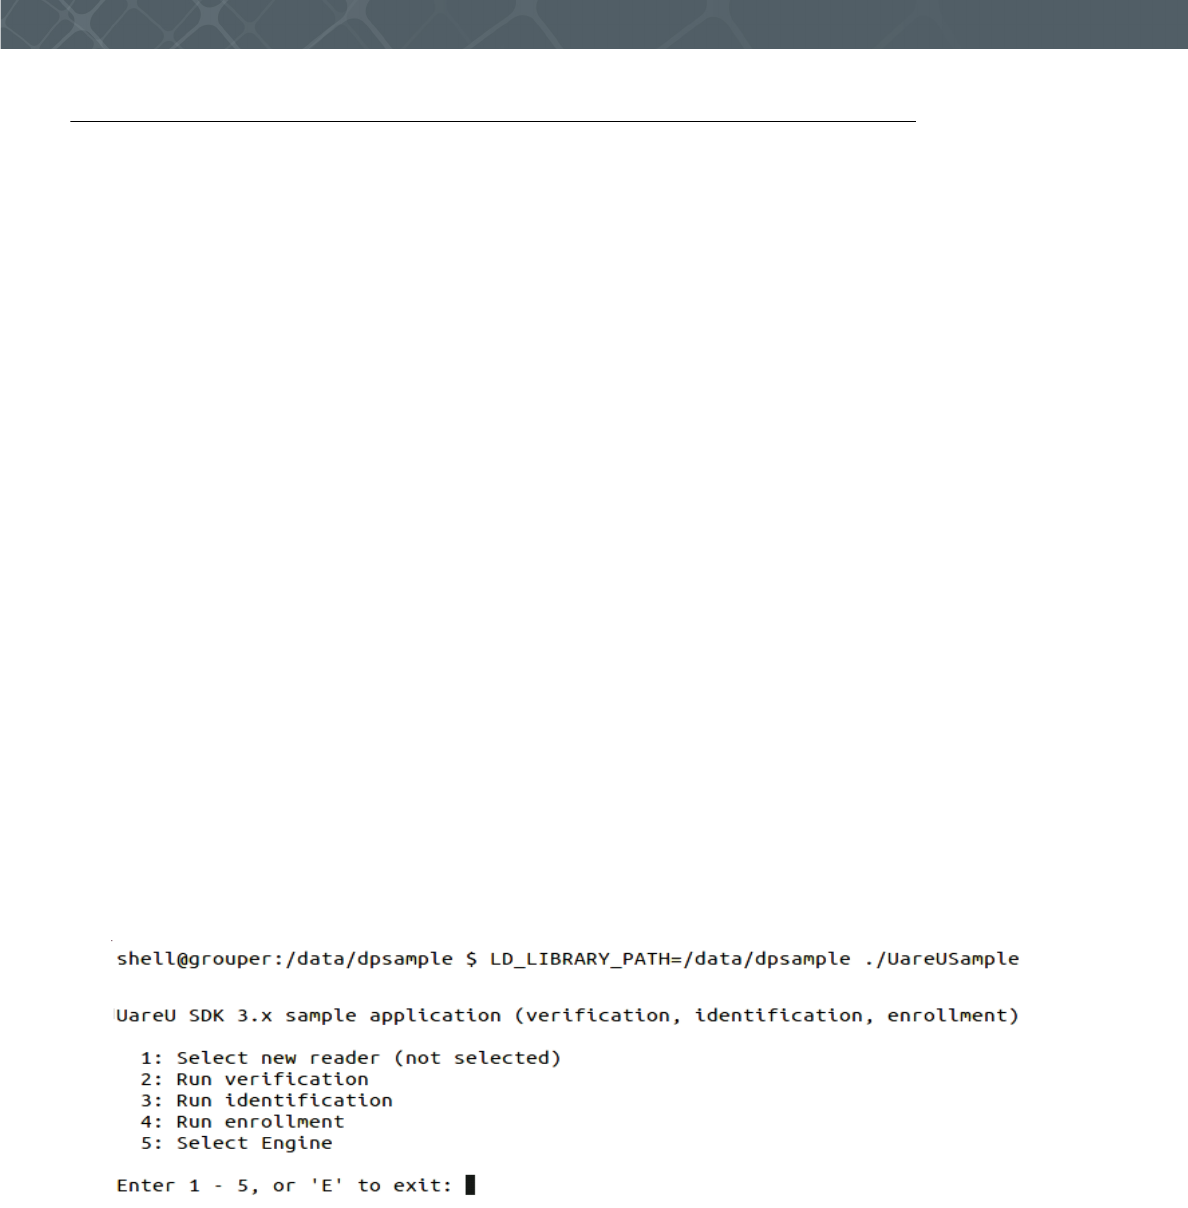
•LD_LIBRARY_PATH=/data/dpsample ./UareUSample
When you launch the application you will see the main menu, as shown below:
First, select a fingerprint reader device to use with the application. After you press 1 and Enter to select the reader, the
application will search for any fingerprint readers and display a list of the readers it finds, as shown below.

U.are.U SDK - Platform Guide for Android 9
Developing Applications with C/C++
Choose the desired reader and press Enter to continue.
Once a reader is selected, you will see a screen that shows information about the reader and its capabilities, as shown
below.
U.are.U SDK - Platform Guide for Android 10
Developing Applications with C/C++
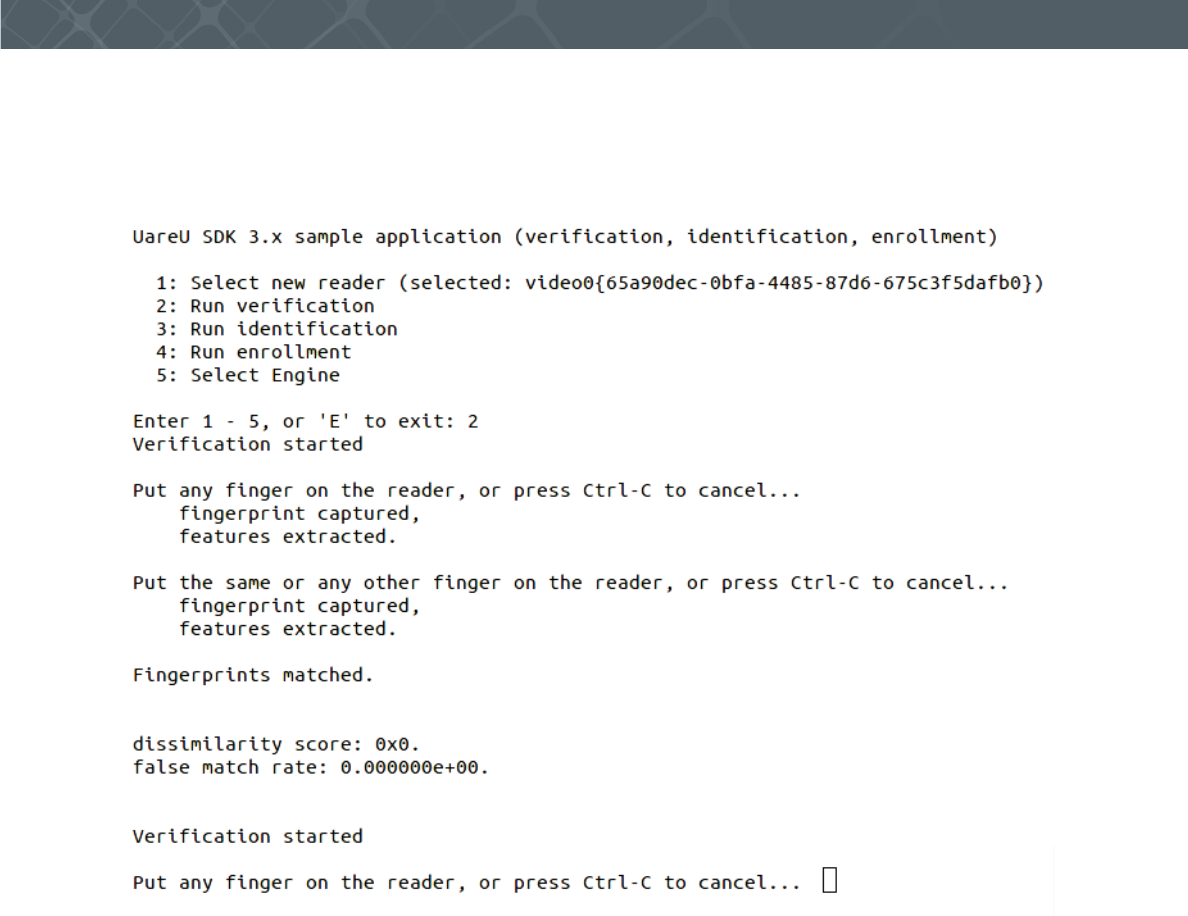
To test verification, press 2 and press Enter.
Follow the prompts on the screen as shown below and place your finger on the reader. You will see that the program
extracts the fingerprint features. Touch the reader again and the sample application will extract the features of the
second fingerprint and determine whether the fingerprints match or not.
Touch your index finger as the first fingerprint and your middle finger as the second fingerprint and note that they do
not match.
Press Ctrl-C to return to the main menu.
U.are.U SDK - Platform Guide for Android 11
Developing Applications with C/C++
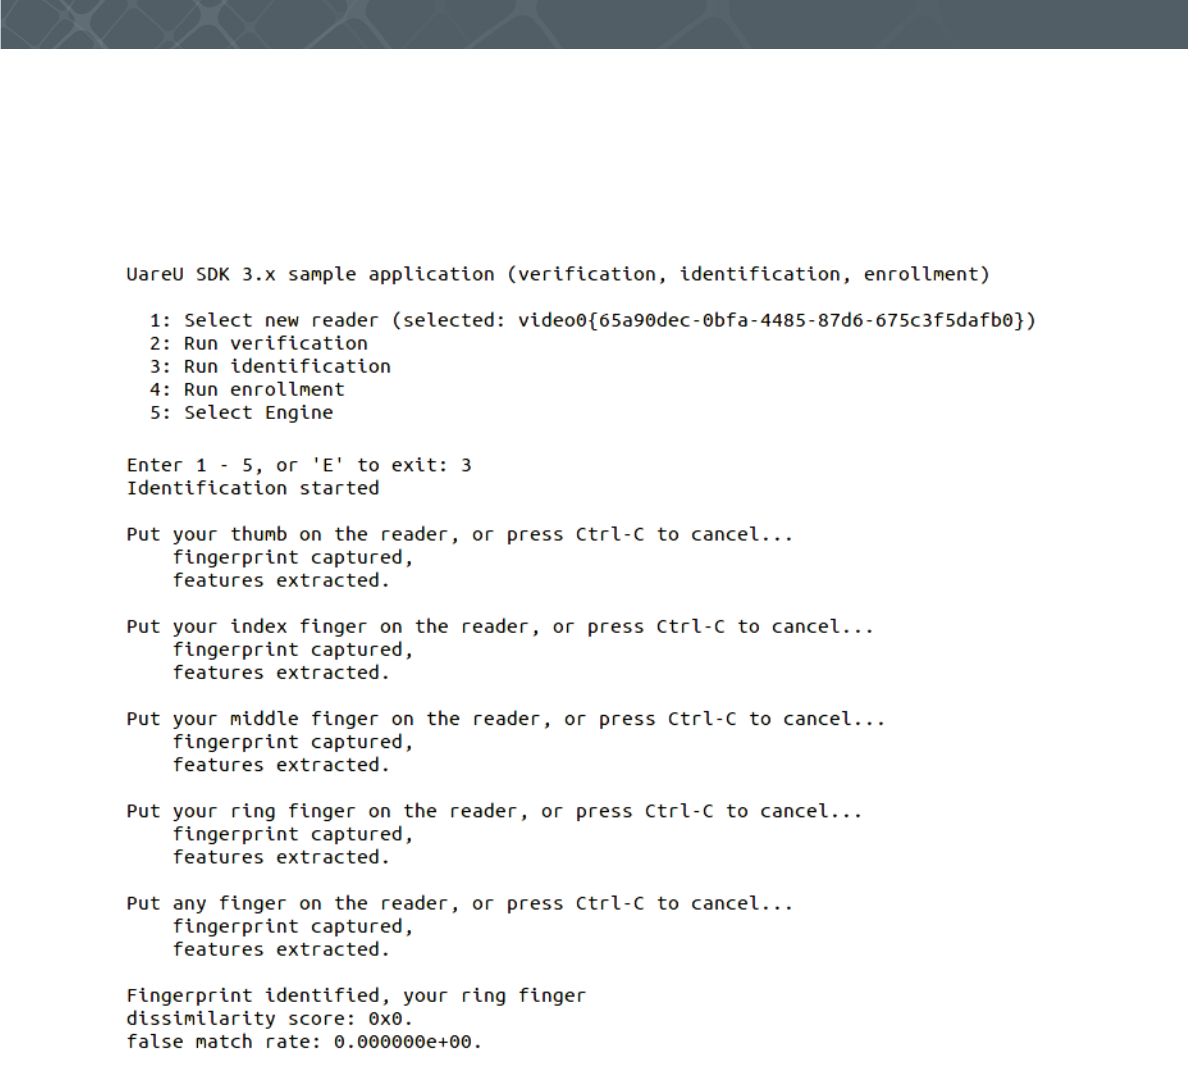
To test identification, press 3 and Enter to start.
Remember that identification matches a single fingerprint against a set of fingerprints. You will be prompted to place
each of your fingers on the reader in turn, as shown below. When you have entered all of your fingerprints, you will be
prompted to place any finger on the reader. Place one of your fingers on the reader to ensure that the fingerprint
matches. Touch the reader with a finger from your other hand and ensure that it does NOT match.
Press Ctrl-C to return to the main menu.
U.are.U SDK - Platform Guide for Android 12
Developing Applications with C/C++
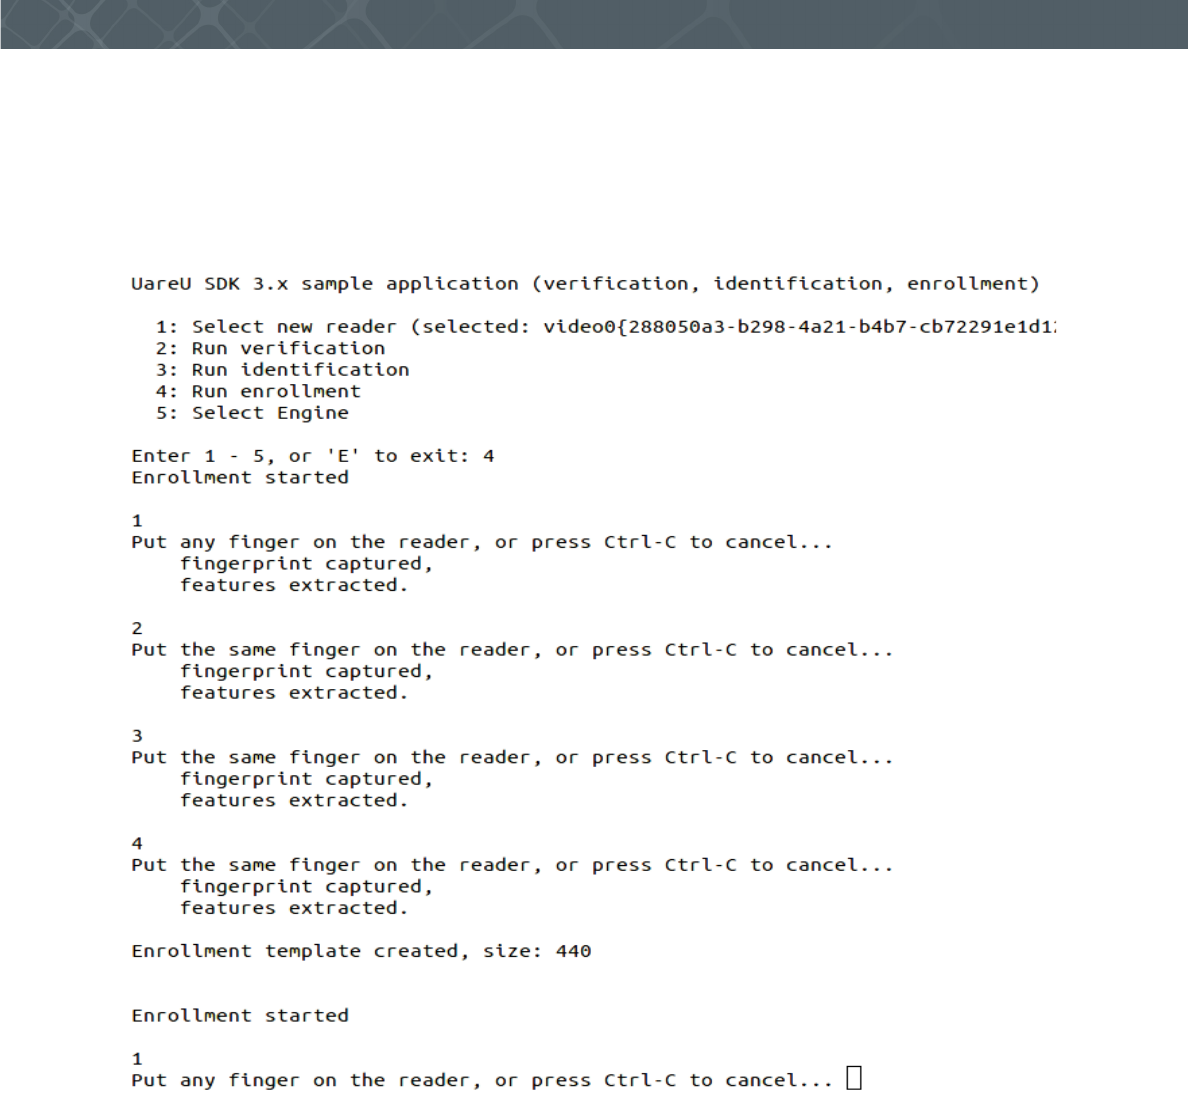
To test enrollment, press 4 and Enter to start.
The enrollment test is to enroll a single finger. Follow the prompts on the screen (as shown below) and place your
finger on the reader when prompted. Then when prompted, place the same finger on the reader again. It typically takes
four scans to get a good enrollment. If you place a different finger on the reader during enrollment, or if a scan is of
poor quality, that scan will be dropped and the application will request additional finger scans in order to do a complete
enrollment.
U.are.U SDK - Platform Guide for Android 13
Developing Applications with C/C++
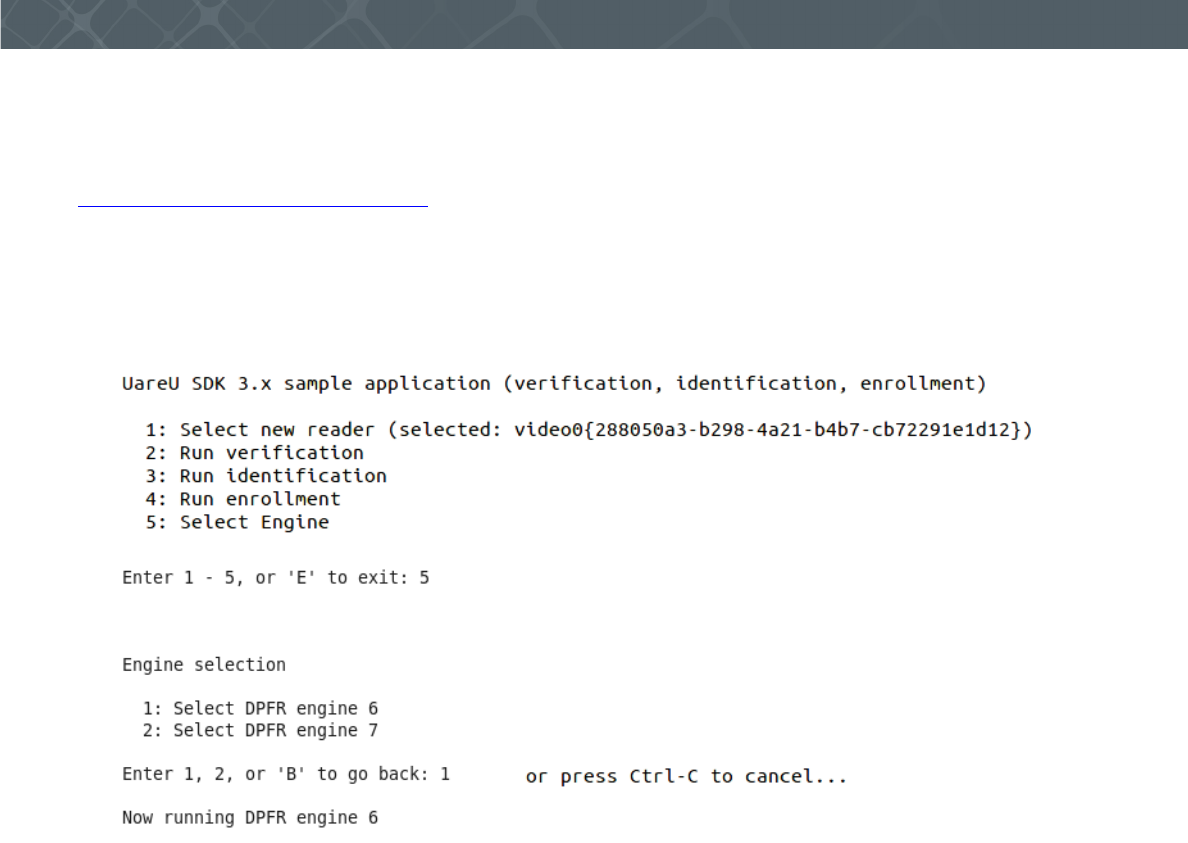
To test the Select Engine feature, select 5 and press Enter.
The SDK includes two versions of the FingerJet matching engine, versions 6 and 7.
Version 6 has a feature extractor certified by the National Institute of Standards and Technology’s Minex program
(http://www.nist.gov/itl/iad/ig/minex.cfm), as interoperable with other Minex-certified feature extractors and matchers.
Version 7 has both the feature extractor and matcher certified by the Minex program. However, the Minex-certified
matcher is slower than the non-certified matcher in the version 6 FingerJet engine.
For customers who do not have a requirement to use a Minex-certified matcher, we recommend using the version 6
FingerJet engine. Specifically, for customers who use DigitalPersona legacy template formats, the version 7 FingerJet
engine does not provide any improvements in matching performance over version 6.
This completes the demonstration of the
UareUSample
application. Press E to exit from the main menu.
U.are.U SDK - Platform Guide for Android 14
Developing Applications with C/C++
Running the UareUCaptureOnly Application
The
UareUCaptureOnly
application demonstrates the Capture API alone (no dependencies on the FingerJet Engine
library). It is a console application - it does not require any graphic libraries. However it requires root privileges in
order to access
/dev/videoX
devices, and it requires
adb
shell or an
ssh
connection to run.
To run the
UareUCaptureOnly
application:
1. Establish an
adb
shell connection with the device:
•adb shell
2. Type
su
to grant permission to the device
3. Create the directory where the libraries and application executable will be copied:
•mkdir /data/dpsample
4. Exit root:
•exit
5. Exit the shell and copy the libraries and executable to the created directory:
•exit
•adb push <UareU SDK folder>/urusdk-android/Android/bin/android-14/arch-arm/
libdpfpdd5000.so /data/dpsample
•adb push <UareU SDK folder>/urusdk-android/Android/bin/android-14/arch-arm/
libdpfpdd.so /data/dpsample
•adb push <UareU SDK folder>/urusdk-android/Android/bin/android-14/arch-arm/
libdpuvc.so /data/dpsample
•adb push <UareU SDKfolder>/urusdk-android/Android/Samples/bin/UareUCaptureOnly /
data/dpsample
6. Reestablish the
adb
shell connection with the device and change access permissions on the reader device.
7. Make sure that LD_LIBRARY_PATH points to the directory with the SDK libraries:
•adb shell
•cd /data/dpsample
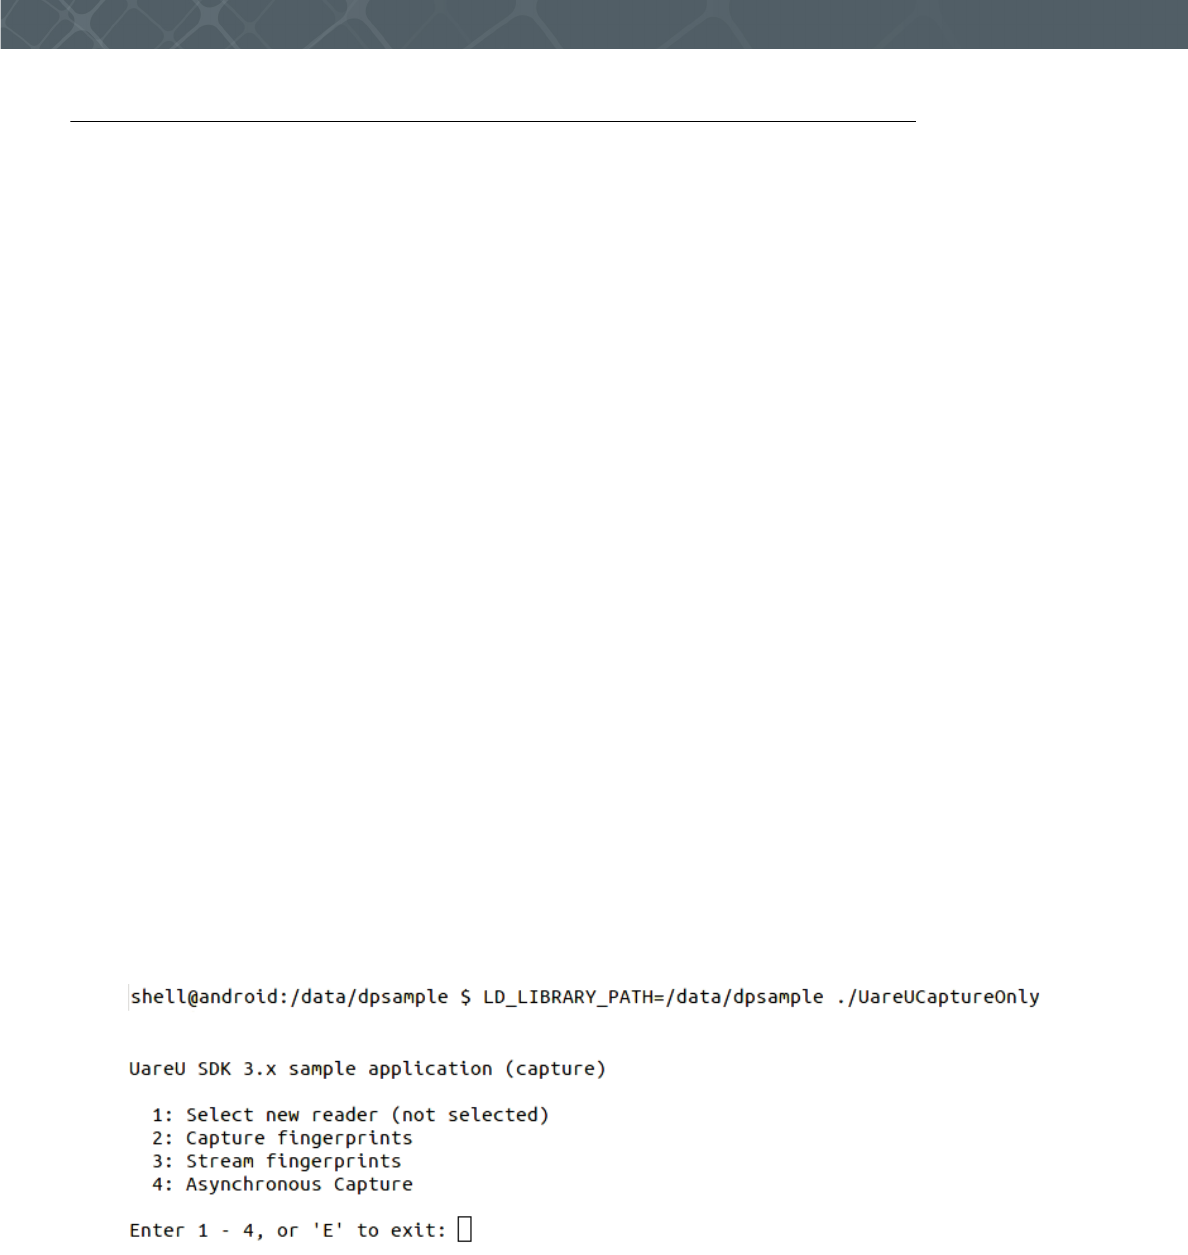
•LD_LIBRARY_PATH=/data/dpsample ./UareUCaptureOnly
When you launch the application you will see the main menu, as shown below:
U.are.U SDK - Platform Guide for Android 15
Developing Applications with C/C++
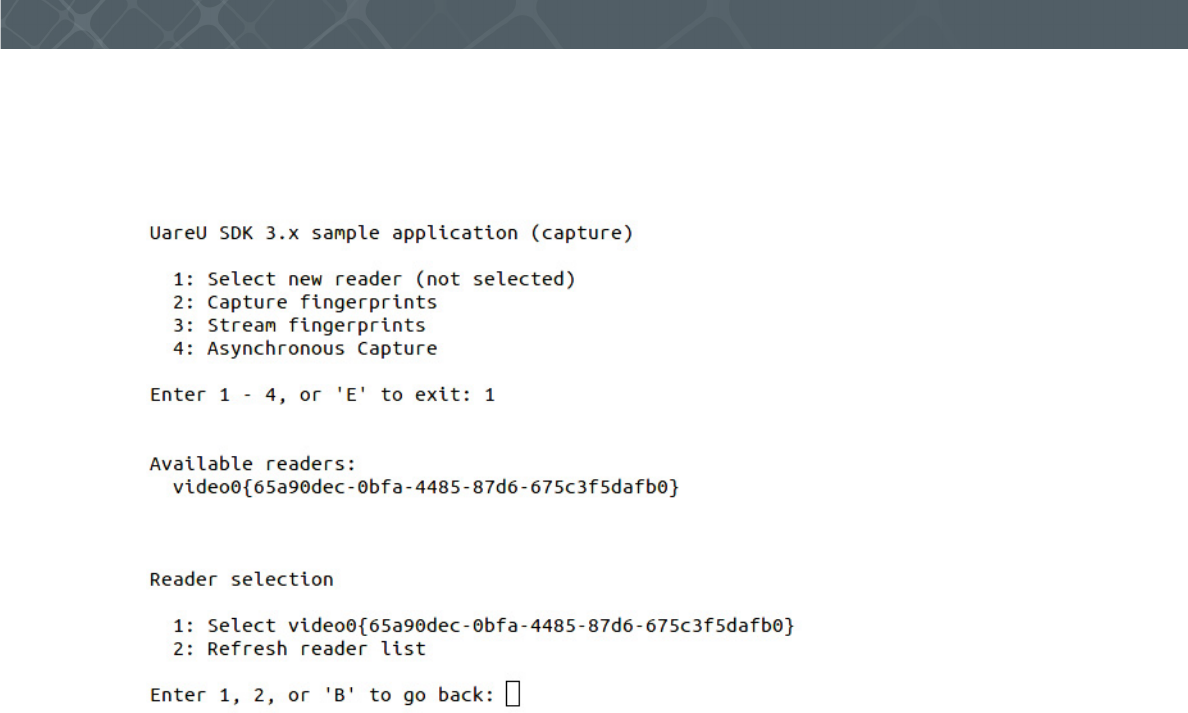
Select a reader
You must begin by selecting a fingerprint reader device to use with the application. After you press 1 to select the
reader, the application will search for any readers and will display a list of any readers it finds, as shown below. Choose
the desired reader and press Enter to continue.
U.are.U SDK - Platform Guide for Android 16
Developing Applications with C/C++
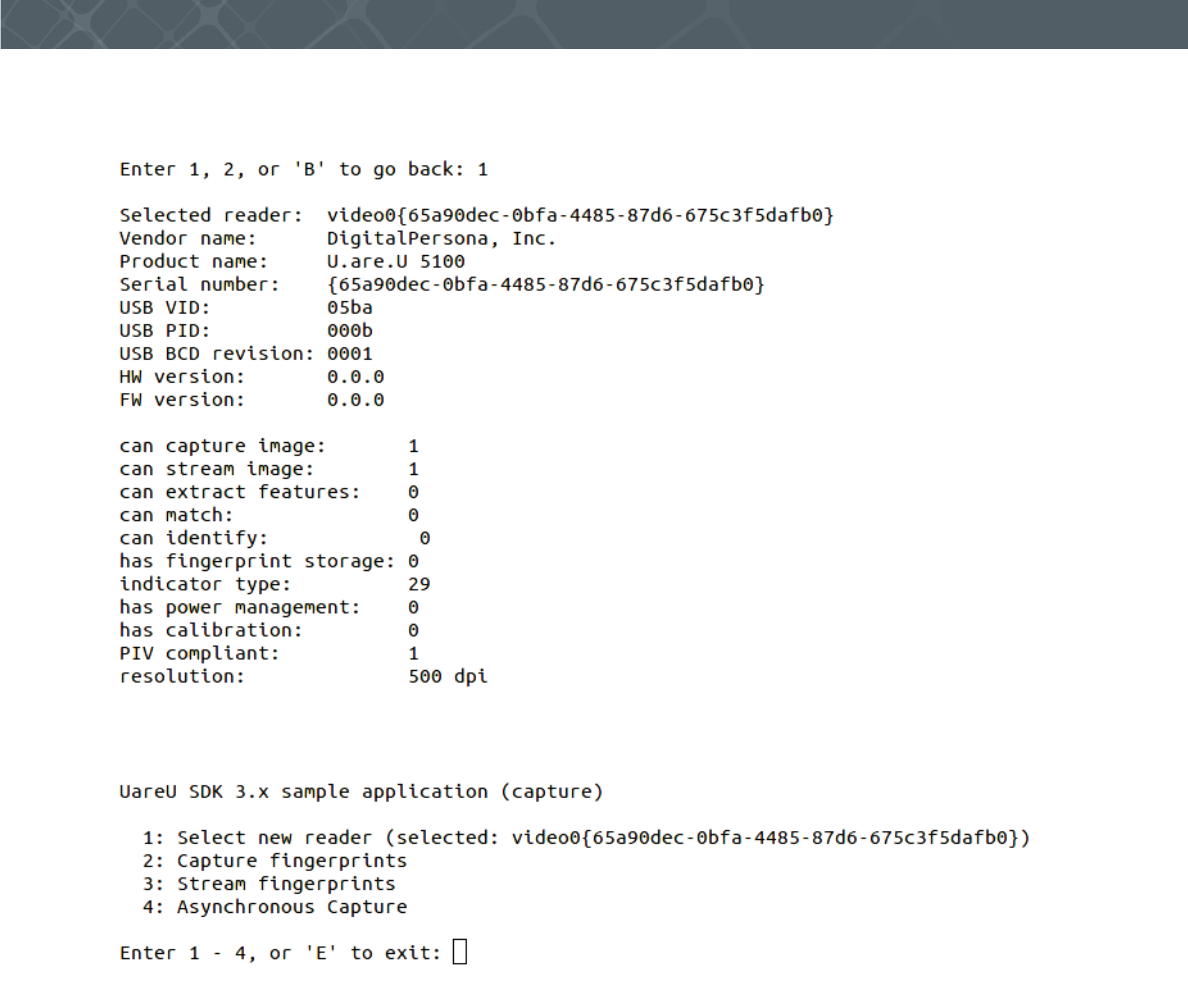
Once a reader is selected, you will see a screen that shows information about the reader and its capabilities, as shown
below.
U.are.U SDK - Platform Guide for Android 17
Developing Applications with C/C++
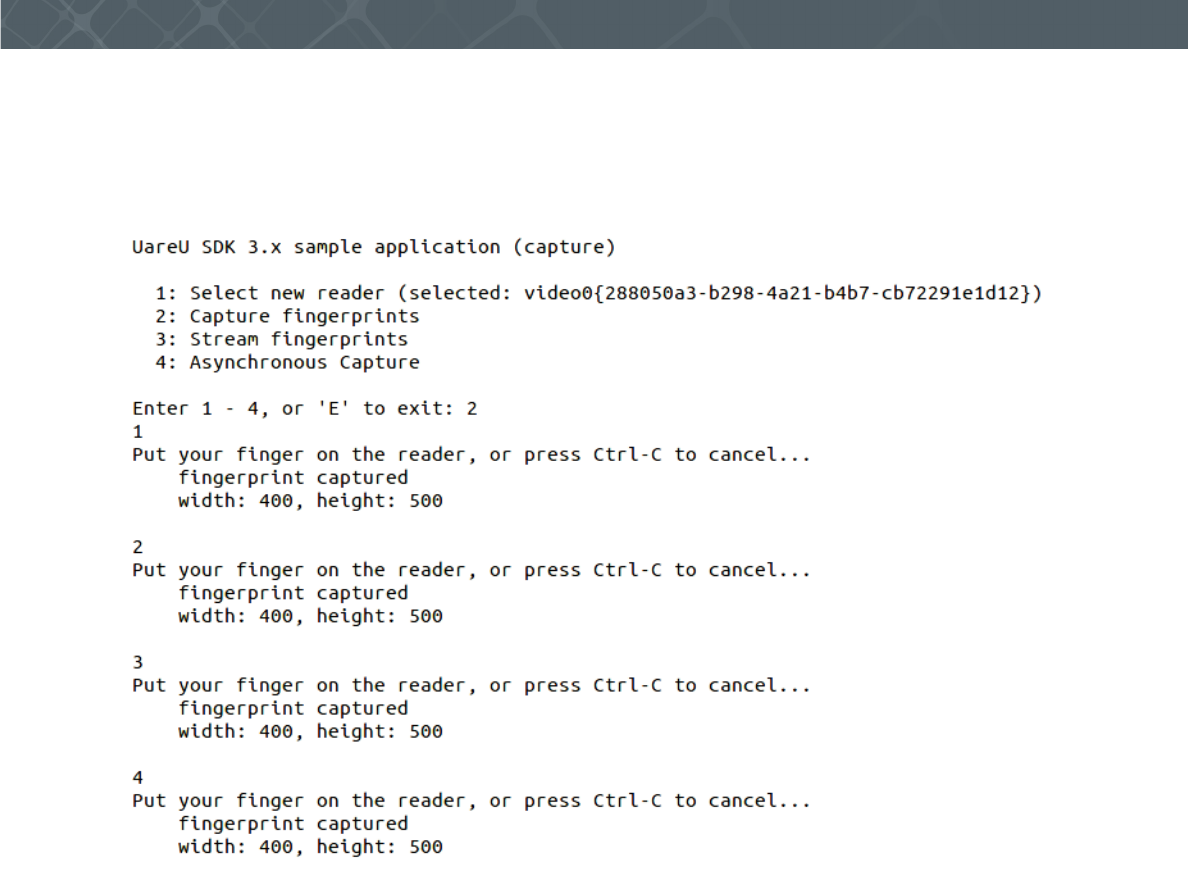
Capture fingerprints
Select 2 and press Enter to test the capture function of the sample application.
The capture function simply puts the reader into fingerprint capture mode and waits until a fingerprint is detected, as
shown in the picture below.
Once you have finished testing the capture feature of the sample application, press Ctrl-C to return to the main menu.
U.are.U SDK - Platform Guide for Android 18
Developing Applications with C/C++
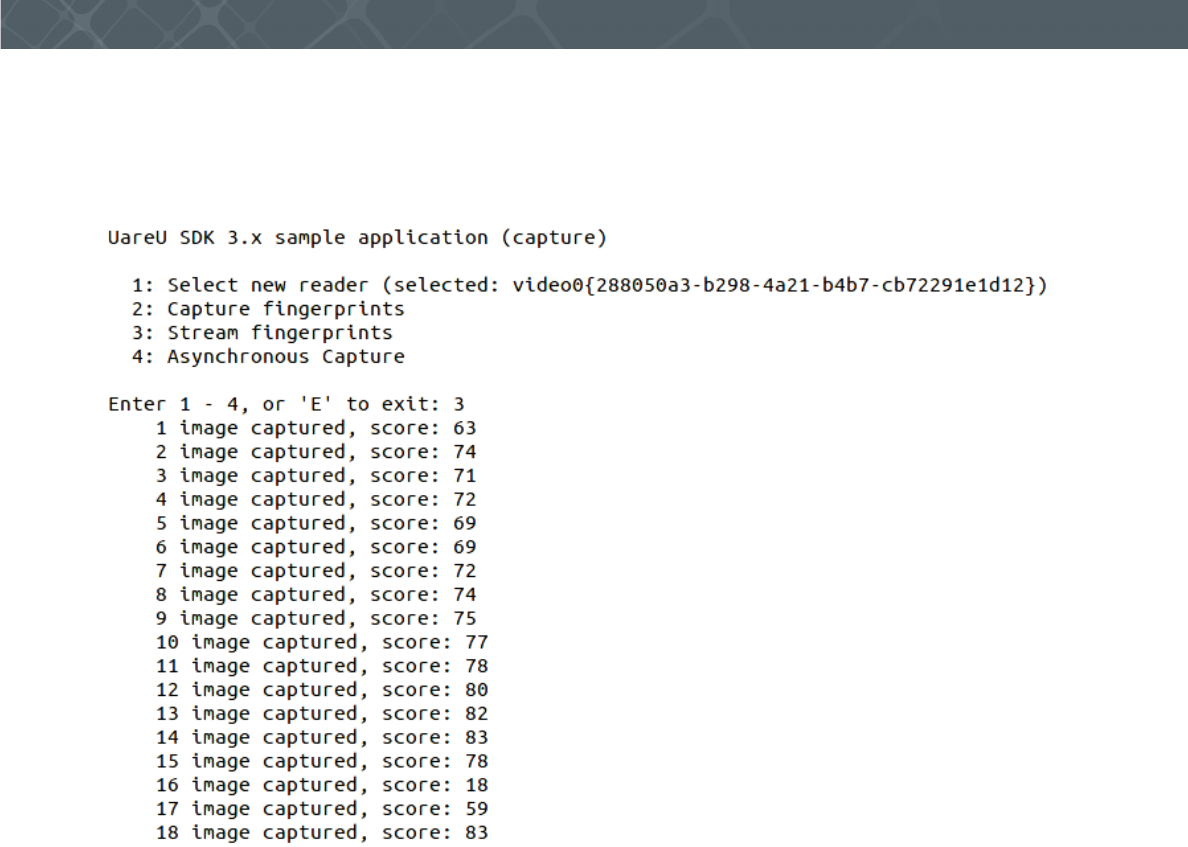
Stream fingerprints
To test the streaming feature (not available on all fingerprint readers), select 3 and press Enter. The streaming function
simply puts the reader into fingerprint stream mode and waits until a fingerprint is detected, as shown in the picture
below.
As you place your finger on the reader, images will be captured and their quality score displayed. Press E to exit
streaming mode.
U.are.U SDK - Platform Guide for Android 19
Developing Applications with C/C++
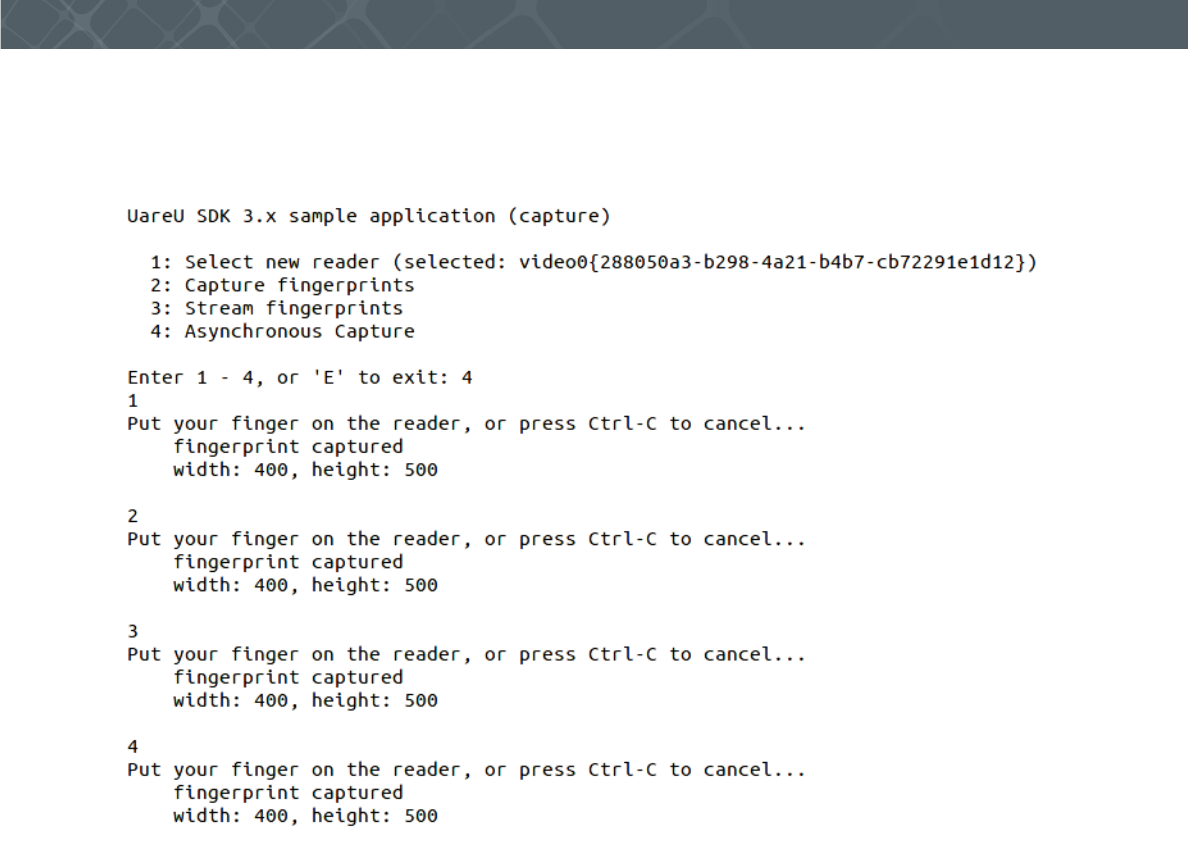
Asynchronous Capture
To test the Asynchronous Capture feature, select 4 and press Enter. This feature starts asynchronous capture on the
opened reader device. It signals the device that a fingerprint is expected and then exits.
This completes the demonstration of the
UareUCaptureOnly
application. Press E to exit from the main menu.
U.are.U SDK - Platform Guide for Android 20
Developing Applications with Java
THIS CHAPTER PROVIDES INFORMATION NECESSARY FOR DEVELOPING ANDROID APPLICATIONS IN JAVA WITH THE U.ARE.U SDK.
Pre-Requisites
This chapter assumes that you have a working knowledge of Java and that you know how to develop for Linux readers.
System Requirements
Development System
The development system may be a Windows or Linux system. The Android SDK is required to develop for Android.
We also recommend that you download and use the Eclipse version that is included with the Android SDK.
Target Hardware (Android-Based Device)
The Android-based device must have Android 4.4 or better installed and the UVC (also known as Video4Linux) kernel
driver enabled. A USB port in host mode is required. You don't have to have root privileges on the Android device.
The SDK works on a variety of hardware and is intended to have a small footprint so that it can run even on minimal
hardware. Less capable hardware will work, but response time may not be optimal.
Installing on the Target Hardware
To install the run-time environment on the target hardware platform:
Note: If you are installing the U.are.U SDK for Android with TouchChip Support on a device where the edition without
TouchChip Support was previously installed, remove the Java sample (DigitalPersona U are U SDK Sample) from the
device before the new installation.
1. Enable USB debugging mode by navigating on your device’s display to Settings->DeveloperOptions->Enable
USB debugging.
2. Connect the target hardware platform to the development system.
3. Establish an
adb
connection with the device.
•
adb install
<
UareU SDK folder>/urusdk-android/Android/Samples/bin/
UareUSampleJava.apk
Installing the .apk file will install the following into its own application zone:
• Driver and engine libraries
• Java SDK wrapper
• Java Sample Application
If you install any of those components elsewhere on the target, you will have duplicate files installed. The intended
architecture of Android is for all applications to have all dependencies secured within their own application zones. All
dependencies, UIs and services are installed and started automatically.
The Java Sample Application
U.are.U SDK includes a sample application to demonstrate the features of the SDK when using the Java API. The
sample application is located in the
Samples
folder.
U.are.U SDK - Platform Guide for Android 21
Developing Applications with Java
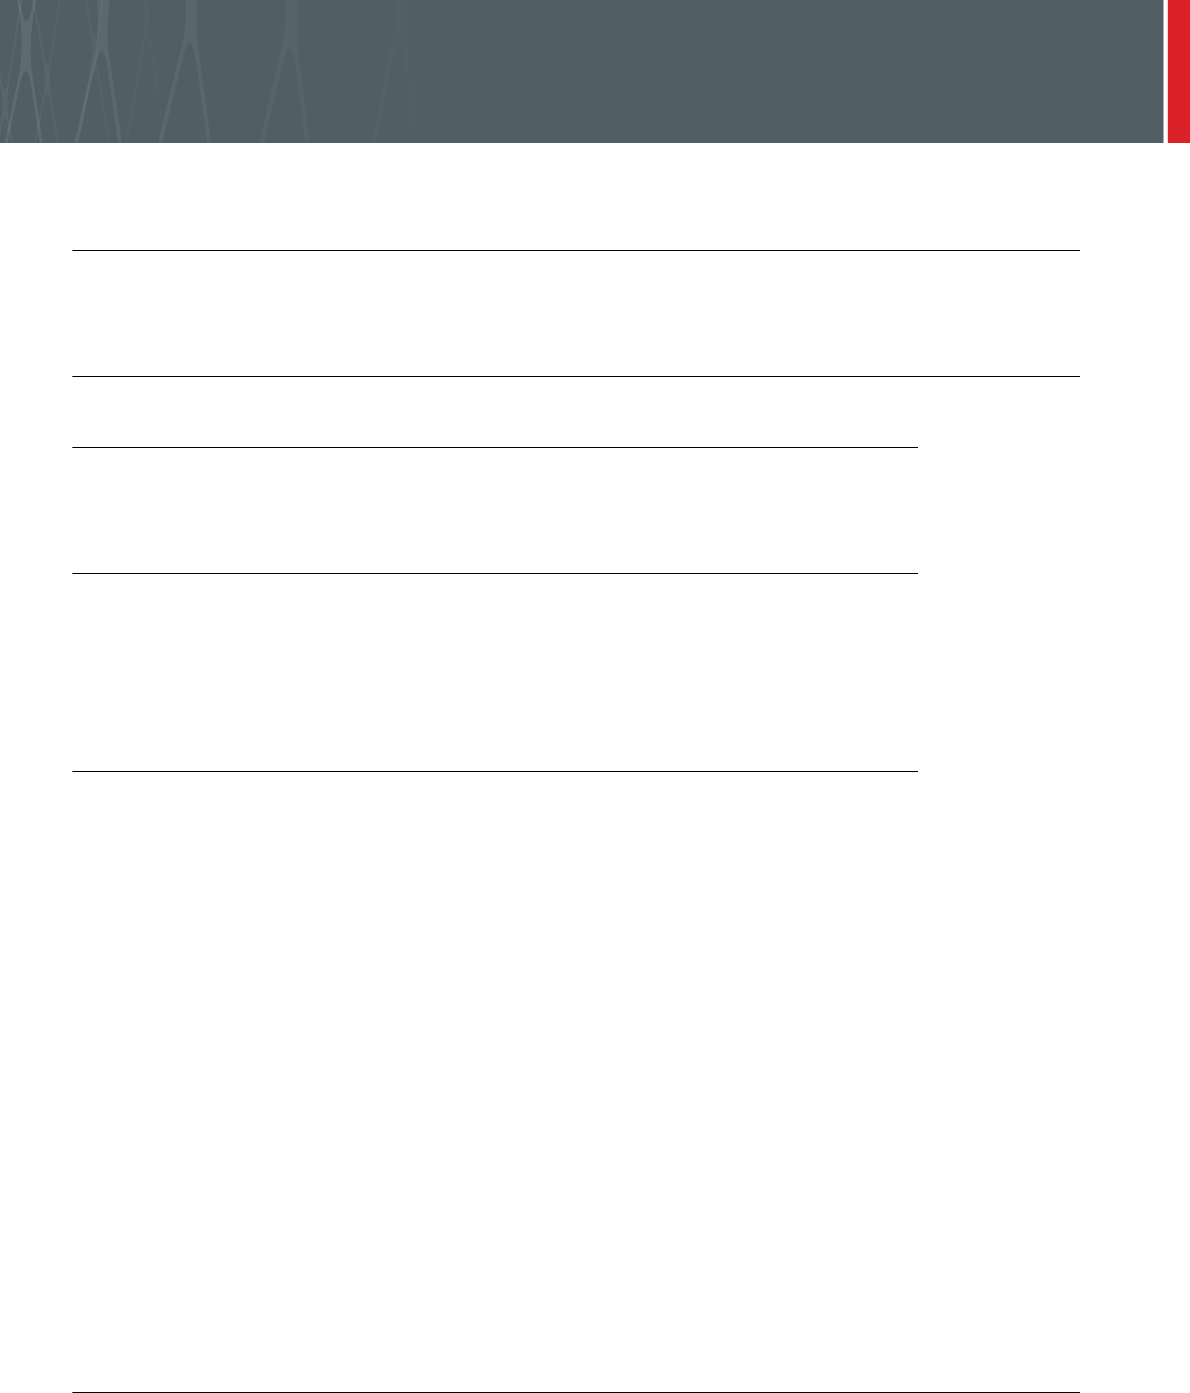
The application demonstrates the features of the SDK. When you launch the application, you see the main screen as
shown below.
The sample program demonstrates:
• How to enroll a finger
• How to identify a fingerprint
• How to verify a fingerprint
• The built-in control for enrollment
• The built-in control for identification
• How to use the streaming feature to display live fingerprint data on the screen
U.are.U SDK - Platform Guide for Android 22
Developing Applications with Java
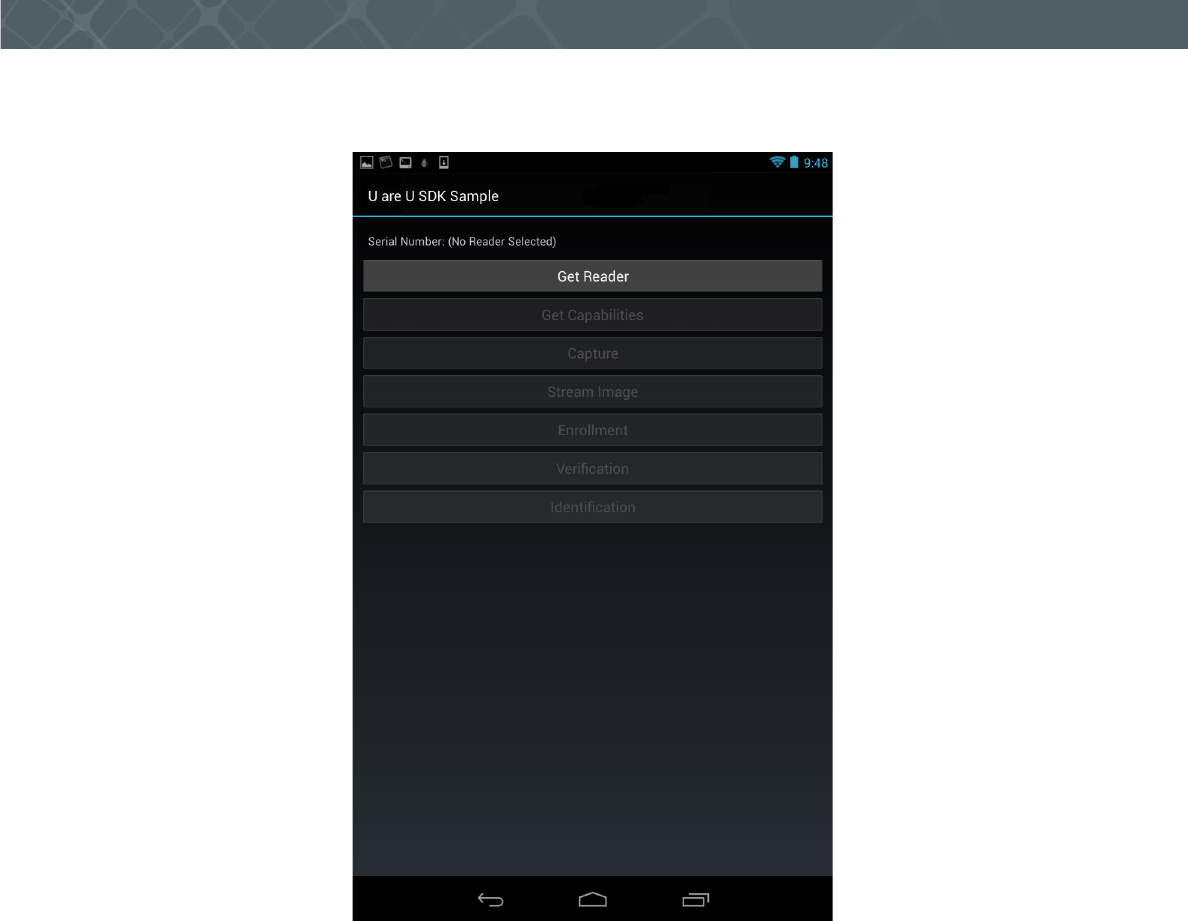
Selecting a Reader
To choose the reader, click on the Get Reader button. If there is only one reader attached, that reader will be selected
automatically. If there are multiple readers, you will see a list of available readers and you can choose the desired
device, as shown below. Click on the desired device and click on the Back button.
To see the reader capabilities, click on the Get reader capabilities button.
U.are.U SDK - Platform Guide for Android 23
Developing Applications with Java
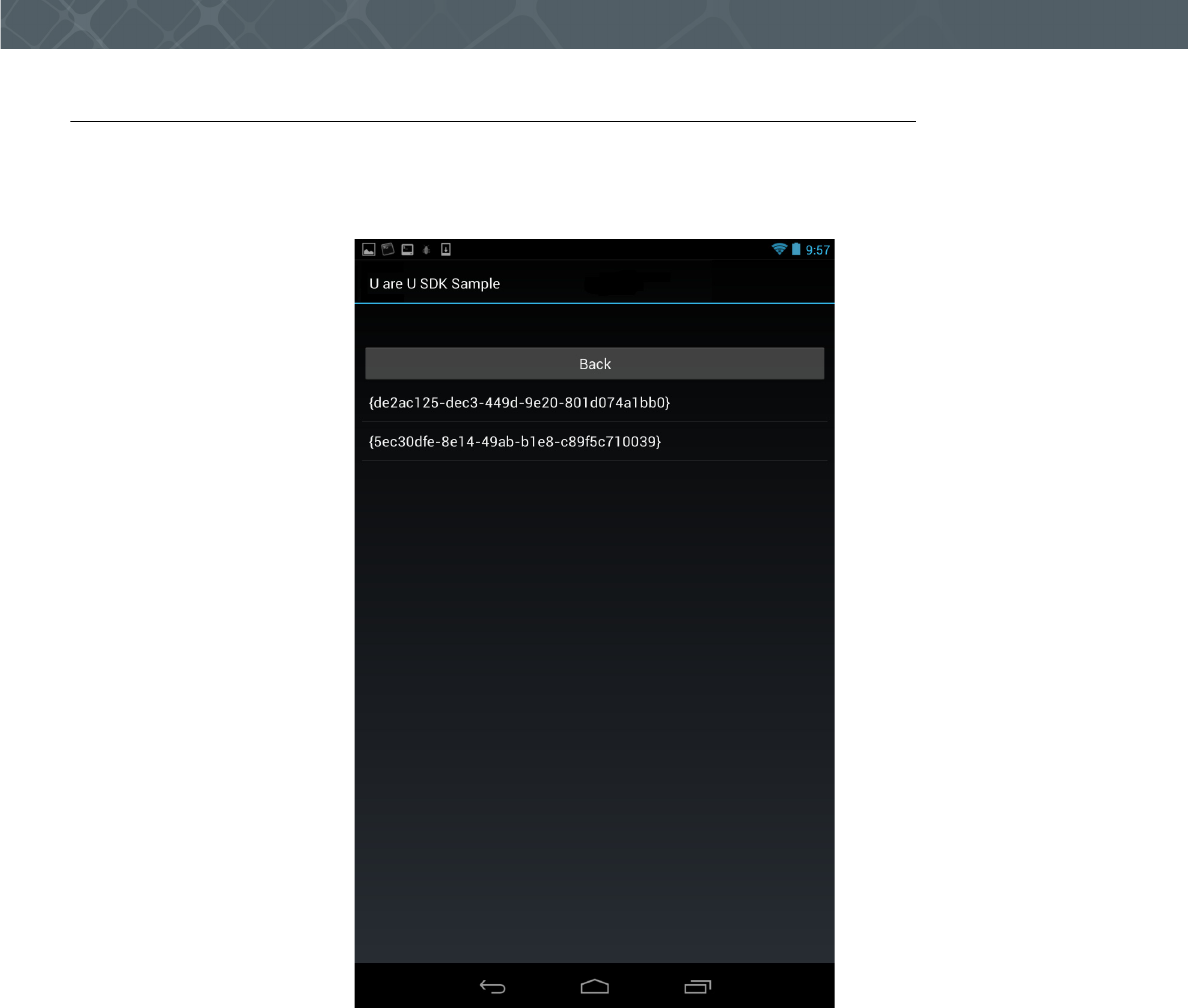
The capabilities will be displayed, as shown in the image below.
Click on the Back button to return to the main screen.
U.are.U SDK - Platform Guide for Android 24
Developing Applications with Java
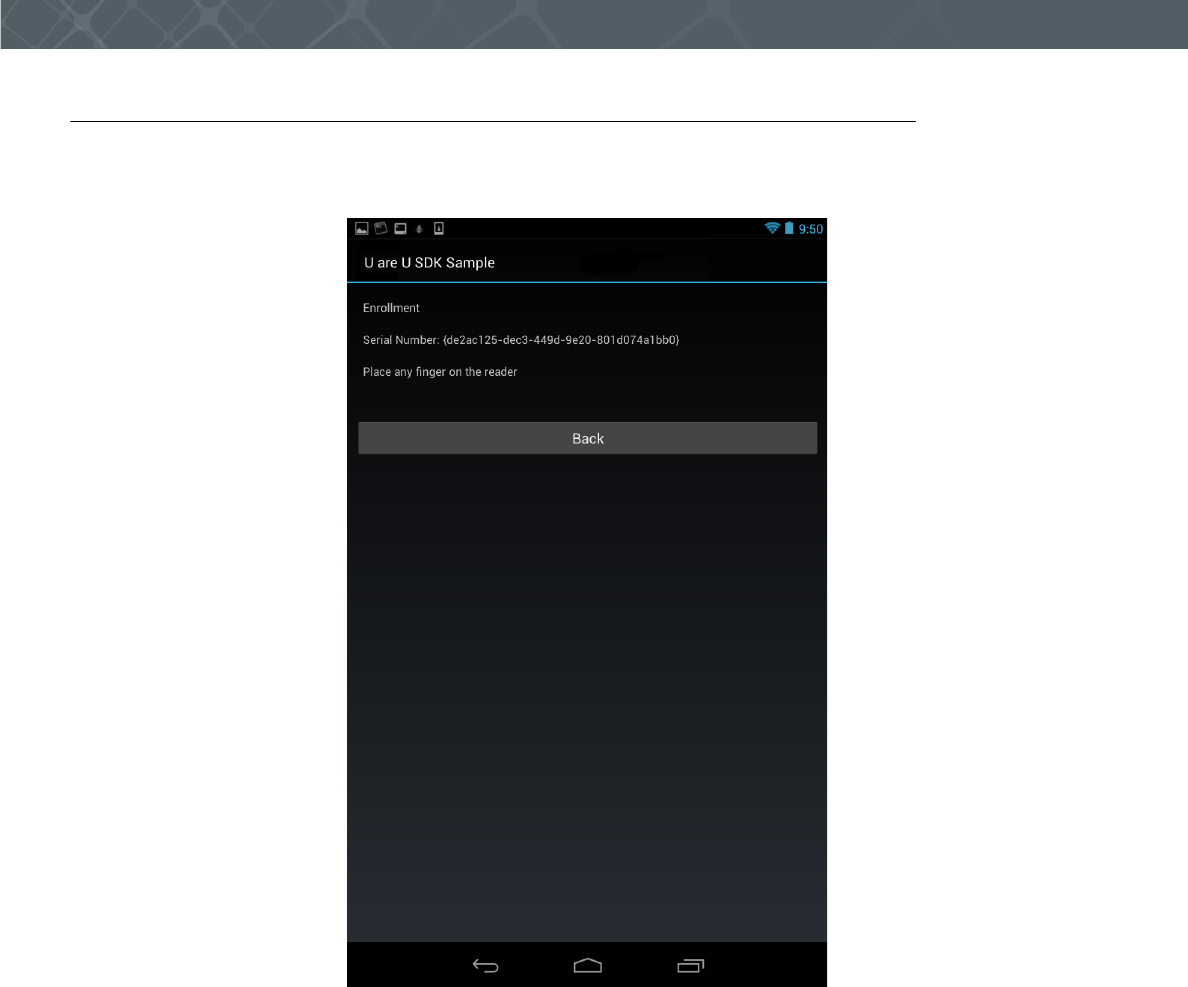
Enrolling a Finger
Click on Enrollment to begin enrolling a test subject.
You will see a series of prompts to scan fingers for enrollment, as shown below.
After the first finger is successfully scanned, you will be prompted to scan additional fingers until a sufficient number
of high quality scans are complete. The number of fingers requested will vary depending on the image scans - the
enrollment function will continue to request scans until an acceptable enrollment record has been created.
When enrollment is complete, click Back to return to the main screen.
U.are.U SDK - Platform Guide for Android 25
Developing Applications with Java
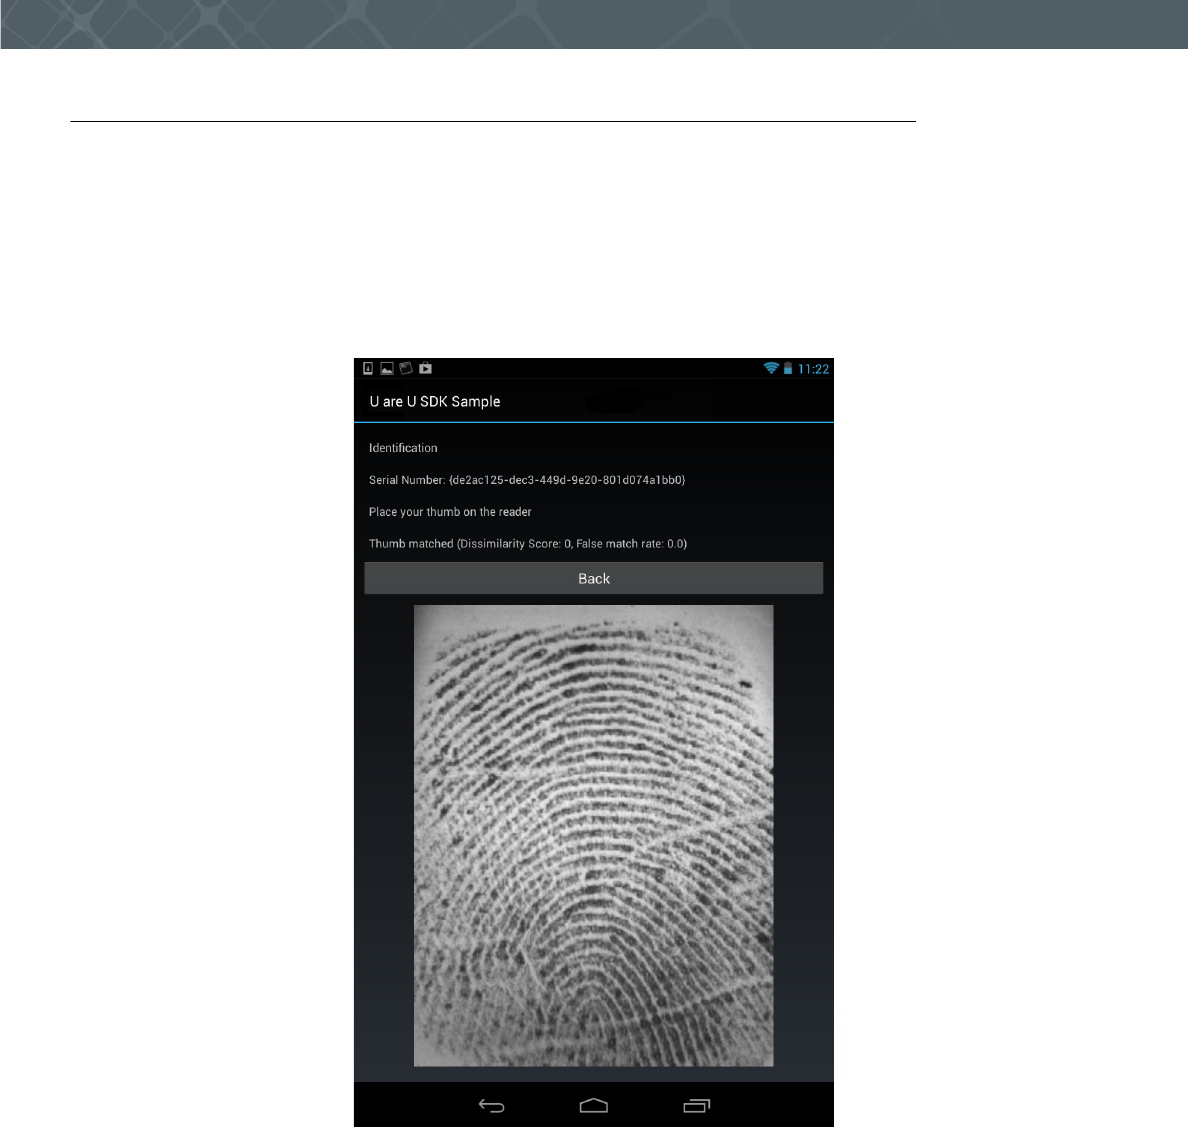
Identifying a Fingerprint
To test the identification feature, click on the Identification button. Recall that identification is a 1-to-many
comparison where the application searches through all of the enrolled fingers to find a match. For this example, we do
not have a stored database, so the sample application first prompts you to place your finger on the reader so that it can
create a FMD. After a FMD is created, you will be prompted to place any finger on the reader to identify against the
FMD that was just created.
When you click the Identification button, you will be prompted to place your fingers on the reader. If you place an
enrolled finger on the reader, you will see that a match was found. In the screen image below, we successfully
identified a user.
To exit identification mode, click on the Back button.
U.are.U SDK - Platform Guide for Android 26
Developing Applications with Java
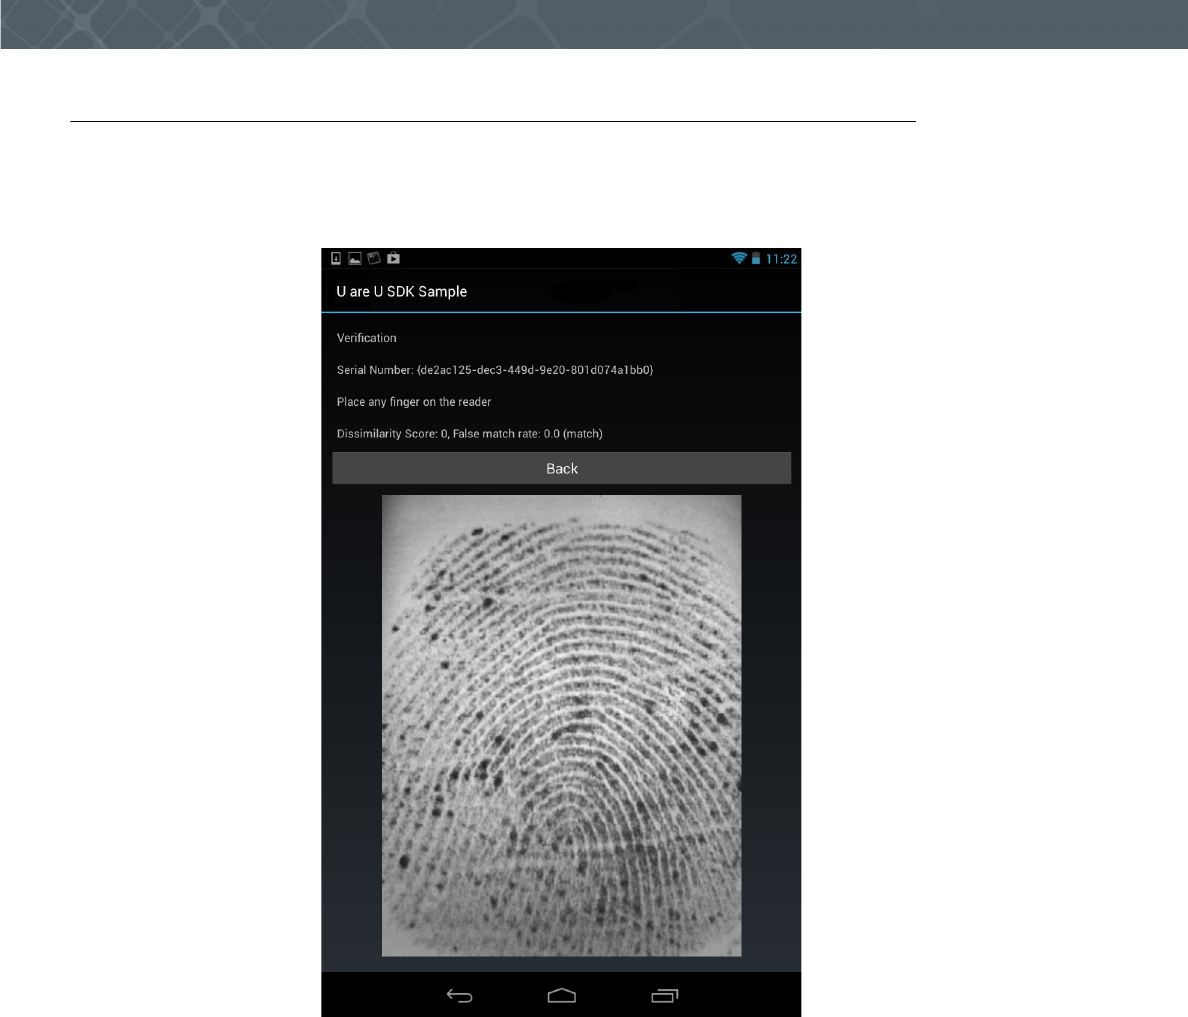
Verifying a Fingerprint
To test the verification feature, click on the Verification button. Recall that verification is a 1-to-1 comparison where
the application matches against a specified fingerprint. When you click the Verification button, you will be prompted
to place your finger on the reader. As with the identification example above, in the screen below, we have successfully
verified a user.
To exit verification mode, click on the Back button.
U.are.U SDK - Platform Guide for Android 27
Developing Applications with Java
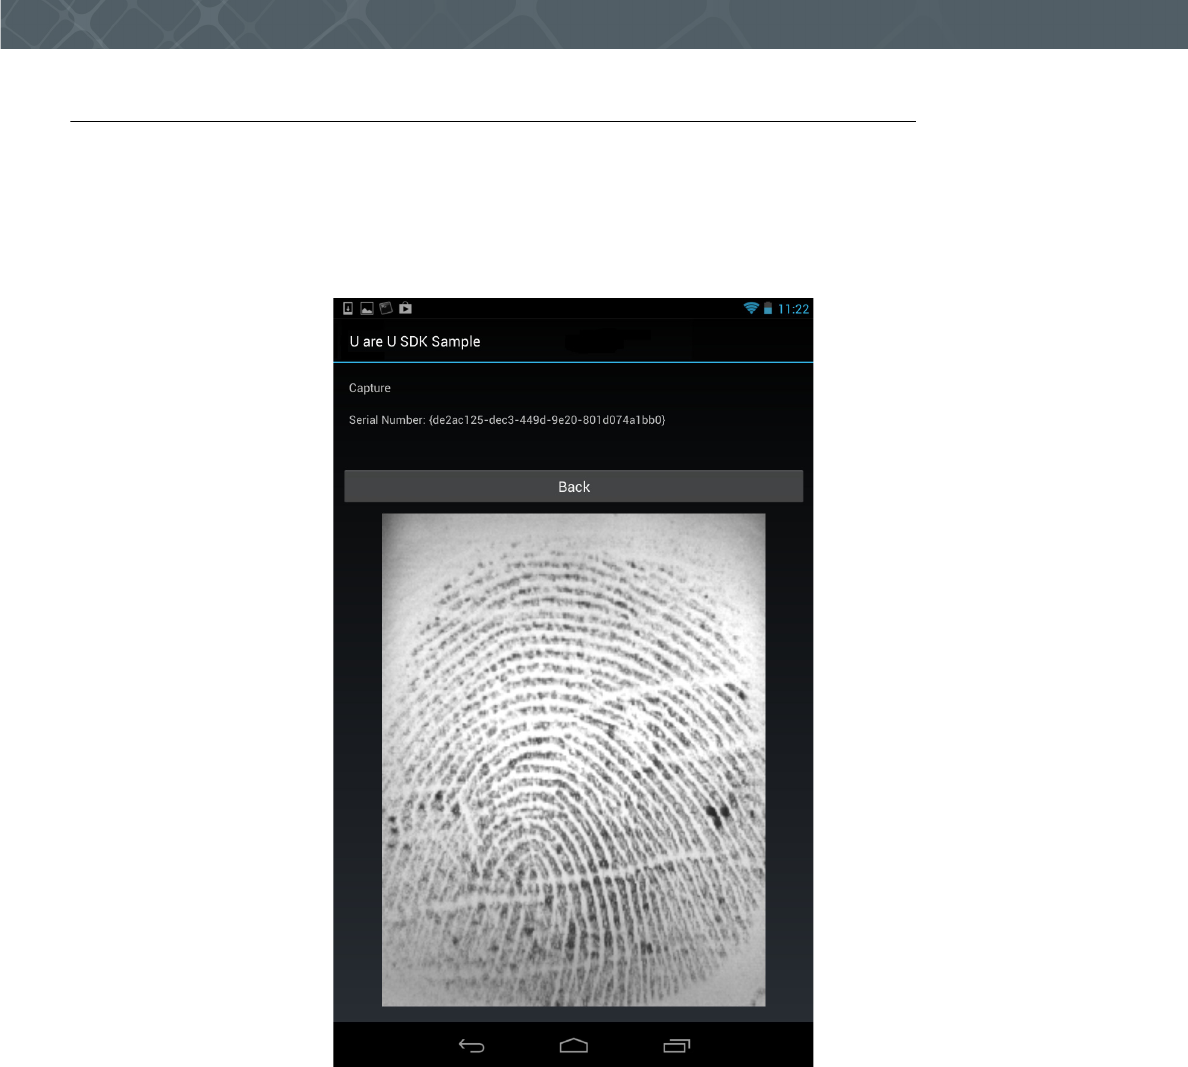
Using the Capture and Streaming Feature
The sample application also demonstrates the streaming feature (on fingerprint readers that support that feature). To
test capturing or streaming, from the main window, click on the Capture or Stream Image button.
This puts the reader into capture/streaming mode and immediately the results are displayed in the window. For
streaming mode, the window then becomes like a live window on the reader as it streams results. Placing a finger on
the reader displays the streamed fingerprint, as shown below.
For streaming, removing the finger shows a blank stream.
To exit capture / streaming mode, click on Back.