User Guide
User Manual:
Open the PDF directly: View PDF ![]() .
.
Page Count: 31

Hire_From_Us Car Hire System
User Guide
Author: Aaron Edge (113612)
Date: 16/05/2018

Contents
Contents 1
Overview of the system 3
Requirements 3
Installation 3
Guides 4
Logging into the system 4
View who is currently logged in 4
Navigation 6
Button Design 6
Options bar 7
Admin functions 8
Managing users 8
Adding users 8
Permission levels 9
Removing users 9
Modifying users 9
Managing cars 9
Adding cars 10
Removing cars 11
Modifying cars 11
Data Analysis 11
Viewing sales assistant commission 11
View Sales graph 12
Hiring out a car 13
Selecting a customer 13
Searching for a customer 14
Adding a customer 15
Selecting a date and time 16
Selecting a car 18
Searching for a car 19
Filtering cars list 19
Finalising the hire 20
Printing a rental agreement 20
Returning a car 22
Searching for a car 22
Filtering cars list 22
Managing existing hires 24
1


Overview of the system
This software is designed for sales assistants working at Hire_From_Us. With this
software you can quickly store customers data, create car hires and invoices.
Requirements
Minimum hardware requirements:
1-Gigahertz (GHz) 32-bit (x86) processor or 1-GHz 64-bit (x64) processor
1 GB of system memory
128 MB of graphics memory (minimum)
1 GB of free hard disk space
Software requirements:
Operating System: Windows vista and above
Java Runtime environment 8 and above
Other requirements:
Network connection
Mouse
Keyboard
Installation
Copy all of the files from the installation disk to a suitable folder.
To run the application double click on the file called Hire_From_Us.jar.
For convenience a shortcut to this file can be made on the desktop.
3
Guides
Logging into the system
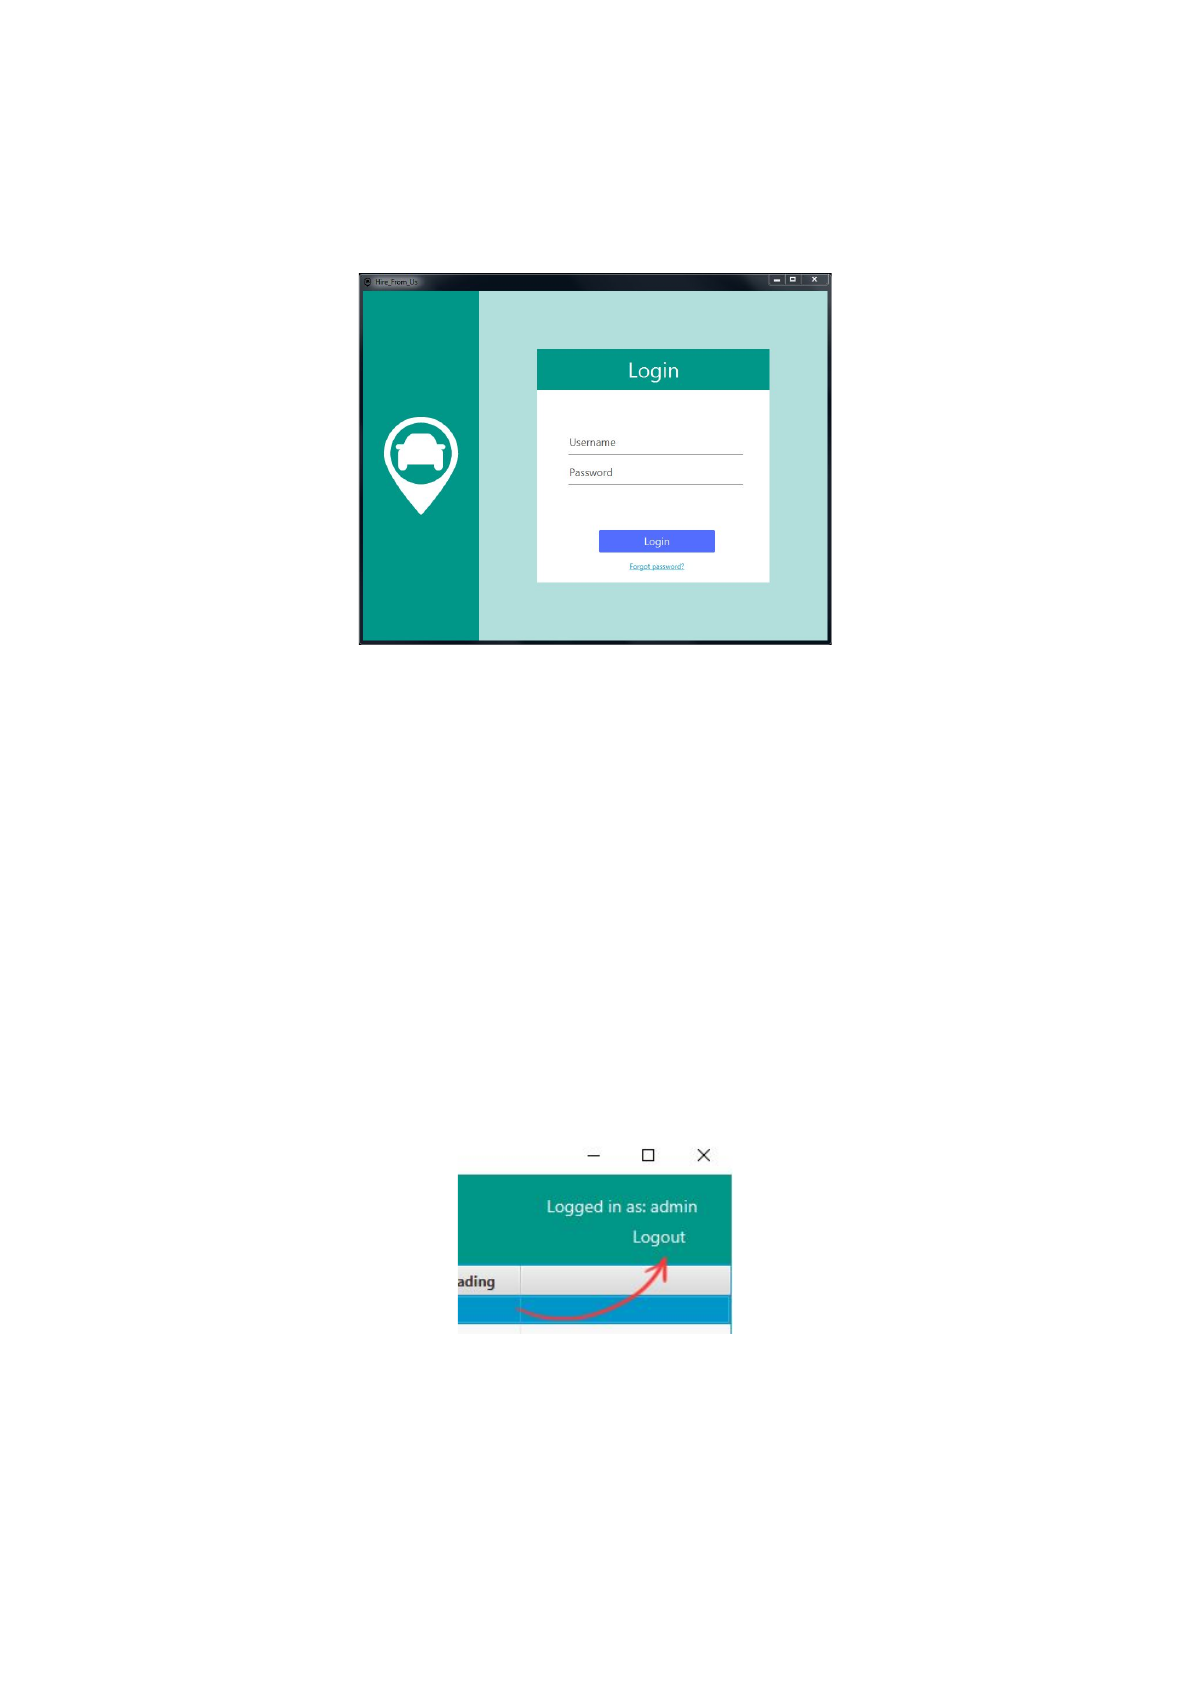
(fig 1)
The first screen you will encounter when you open the application will be the login
screen (fig 1).
Enter your username in the first input field labeled “Username” then enter you
password into the field labeled “Password”. Once you have filled in both fields click
on the blue button labeled “Login”. This should allow you to enter the system.
If you have entered your username or password incorrect the system will notify you
with an explanation in red text above the input fields.
If you have forgotten your username or password or you do not currently have a
username and password please contact the system manager.
To log out of the system or login as a different user you can press the logout button
found in the top right corner of the screen.
This button will be available at any time while using the system.
View who is currently logged in
The system will use the currently signed in user to sign off hire and returns contracts
and to track commission. To ensure that you are the person currently logged in you
4

can check the logged in user display text found at the top right corner of the screen.
It will display the text “Logged in as:” followed by the currently logged in user. If the
user name displayed does not match your own you can simply log the user out and
login using your login details.
5
Navigation
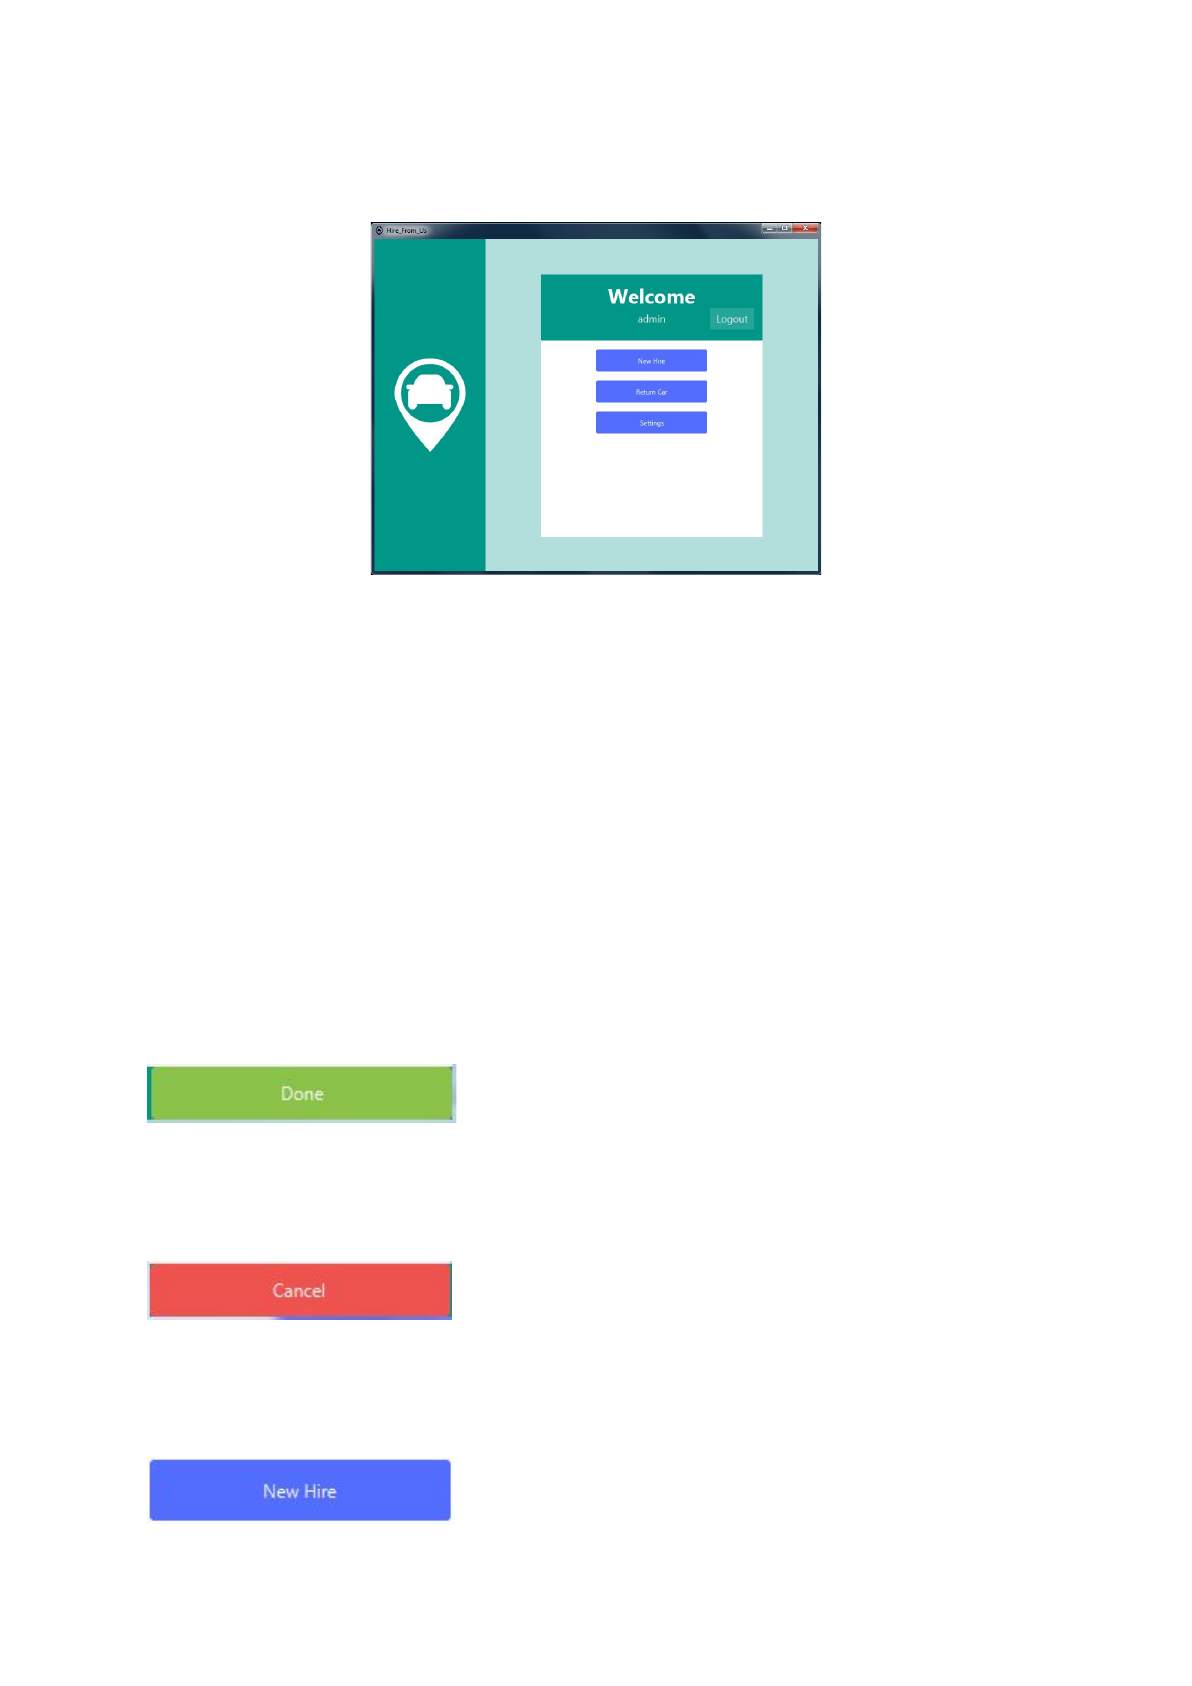
(fig 2)
After logging in the main menu screen is the main way you will be navigating around
the application. From this screen you can start common processes like hiring out a
car and returning a car. Other tasks like managing customer details or editing
existing hires can be managed from the settings menu, which can be accessed by
clicking the blue button labeled “Settings”.
Button Design
The man interface you will be using to interact with the system will be buttons. The
button found within this application have been color coded to indicate their function.
Bright Green button - Indicated a positive action, like adding data to the database
running a process or continuing to the next part of the process.
(fig 3)
Red button - Indicates a negative action, like canceling the current process or
deleting data from the database.
(fig 4)
Blue button - Indicates an option, the label on the button indicates what process will
be started when clicked.
6
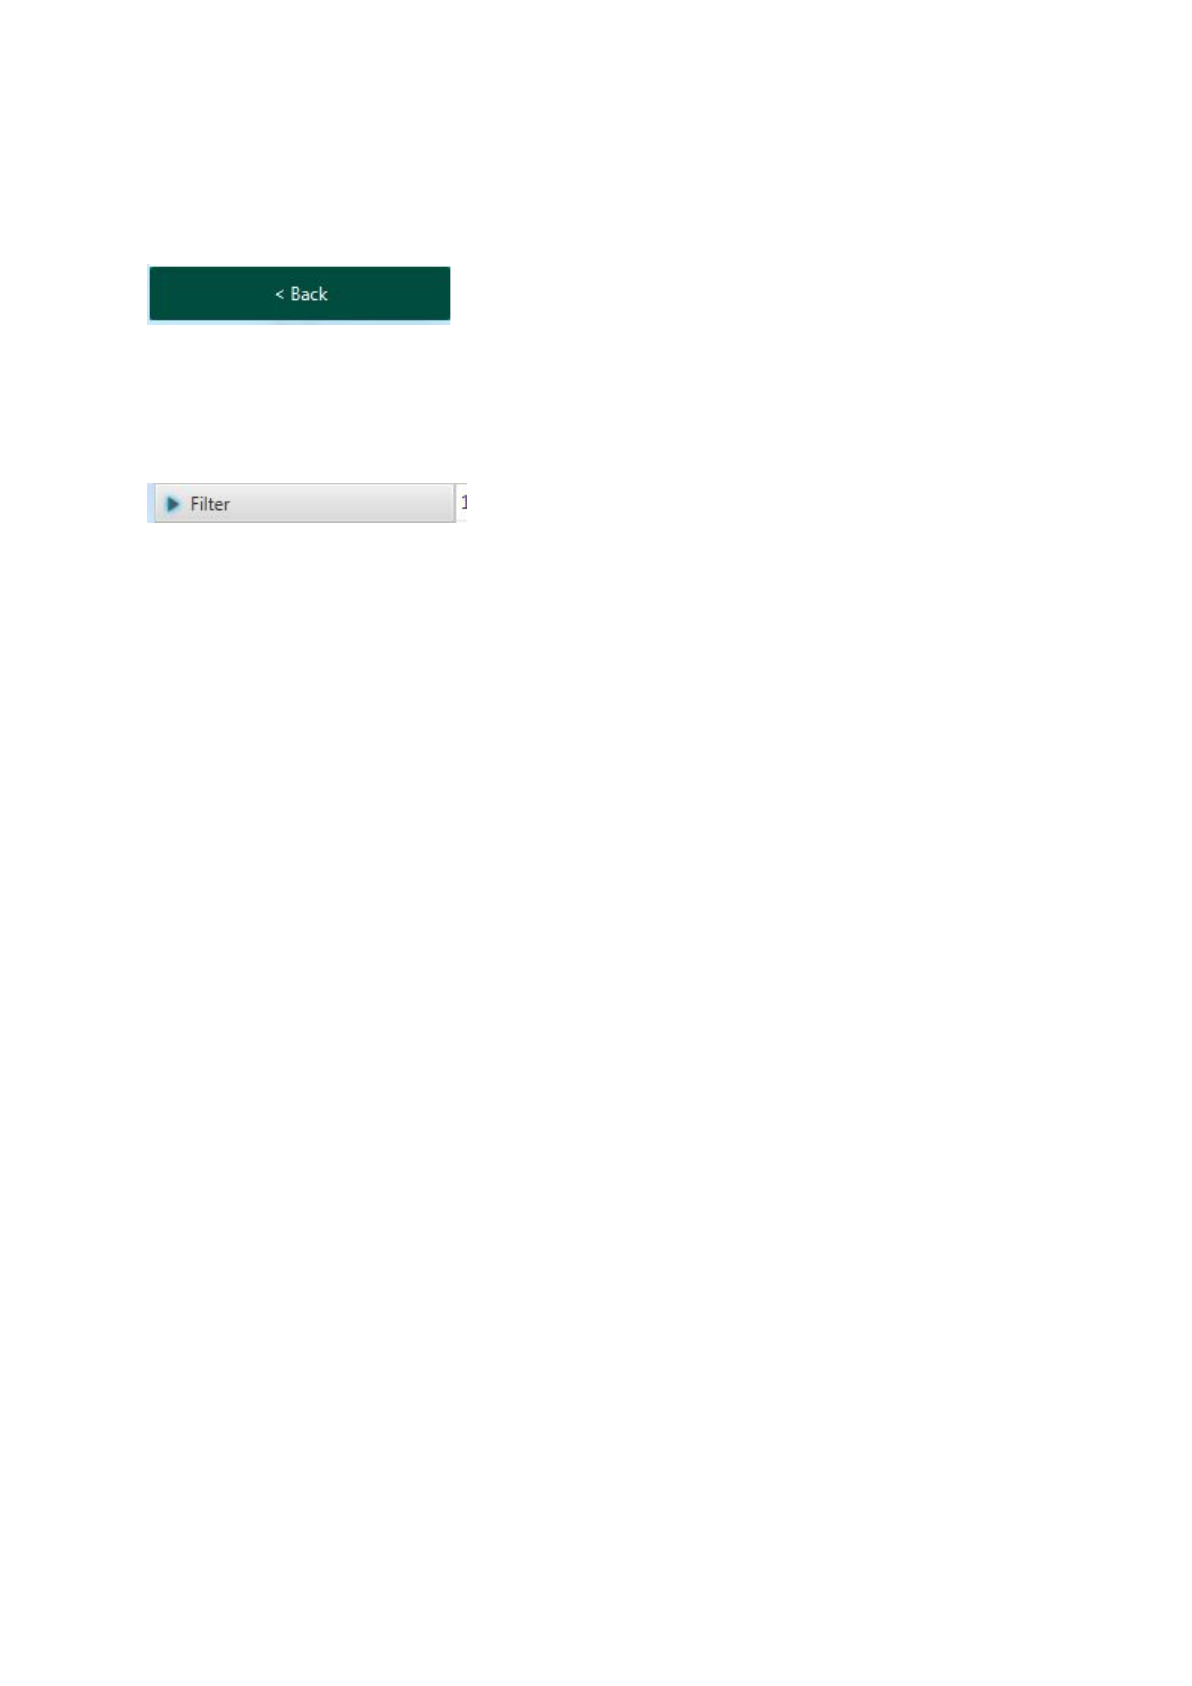
(fig 5)
Dark Green button - Indicates a negative navigation option like going back to the
previous screen.
(fig 6)
Options bar
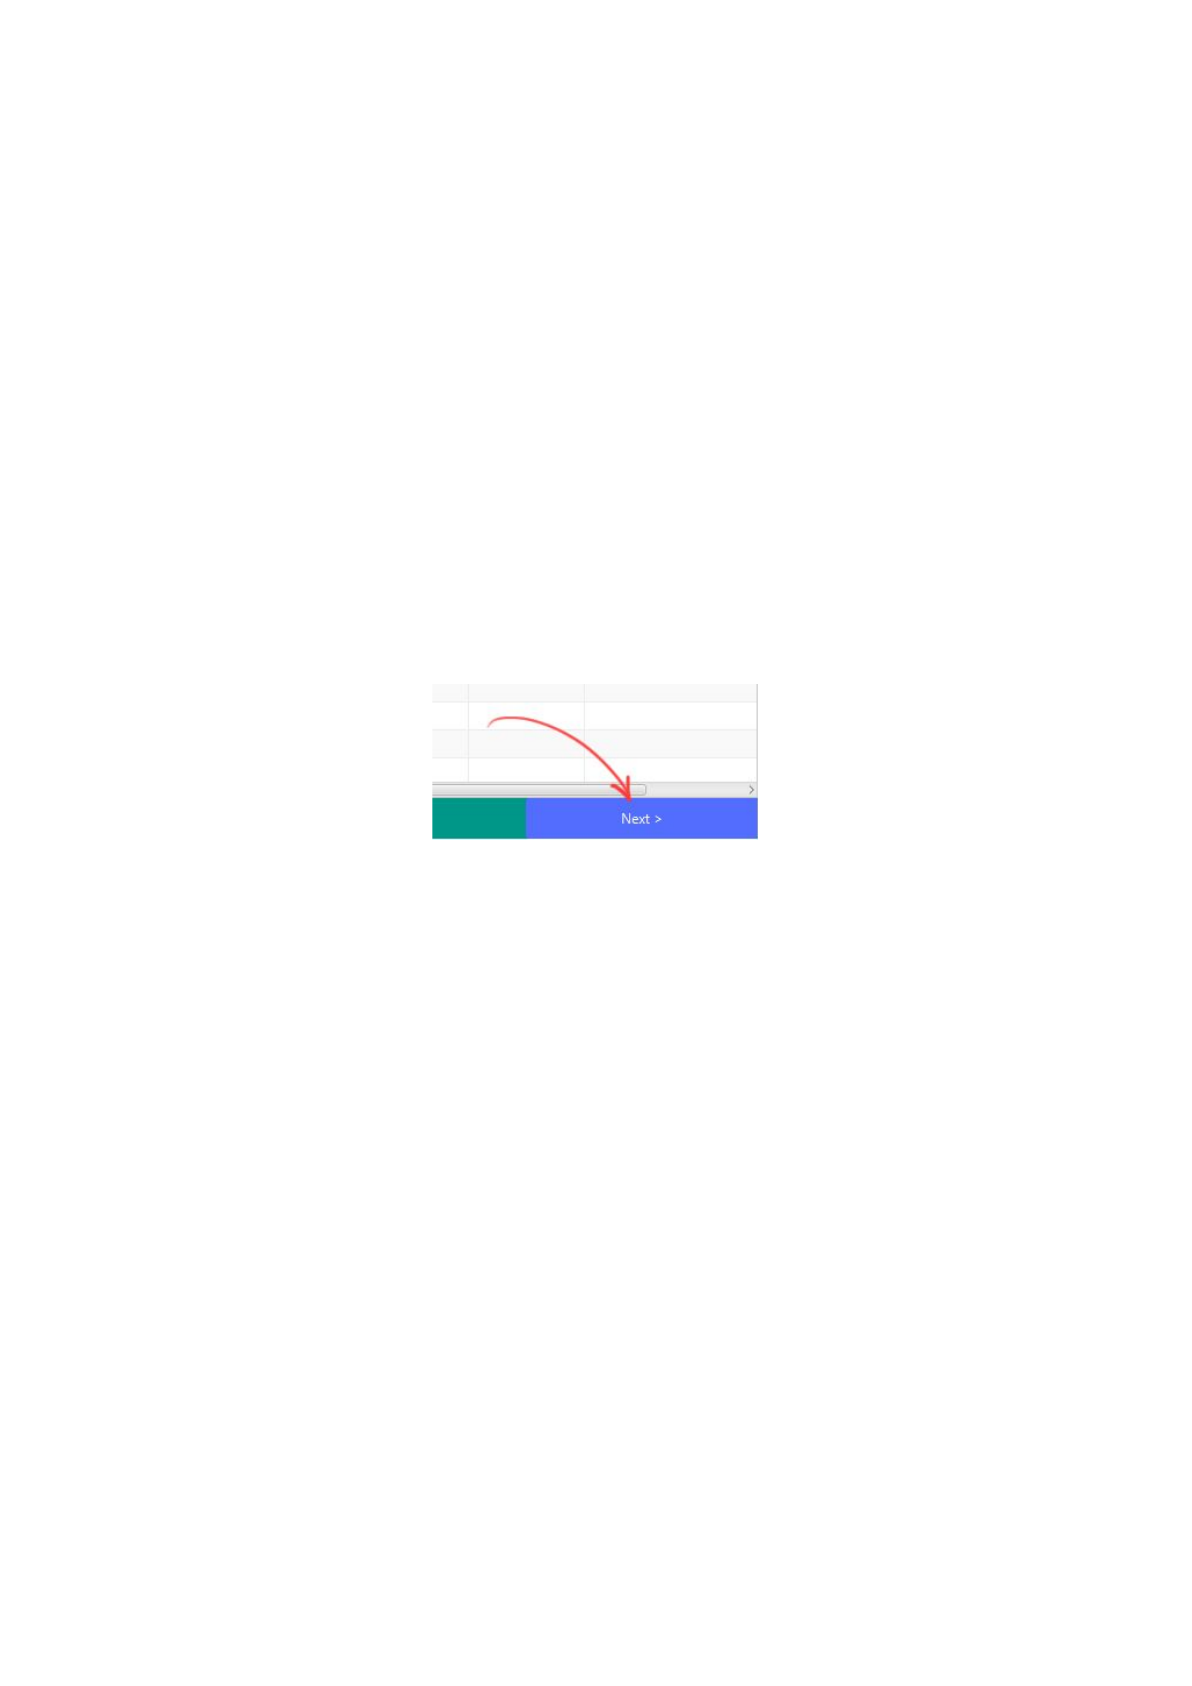
Additional options are sometimes hidden underneath options bars (fig 7).
(fig 7)
The arrow to the left of the bar indicates that there are extra options hidden, left click
the bar to reveal the hidden options.
7
Admin functions
The following section contains guides to features that are only available to a user
with a permission level of admin and above.
Managing users
User management is done from the user management screen, to get to this screen
select the “Settings” option from the main menu then select the “Manage users”
option from the settings menu, this should take you to the user management screen
(fig 8).
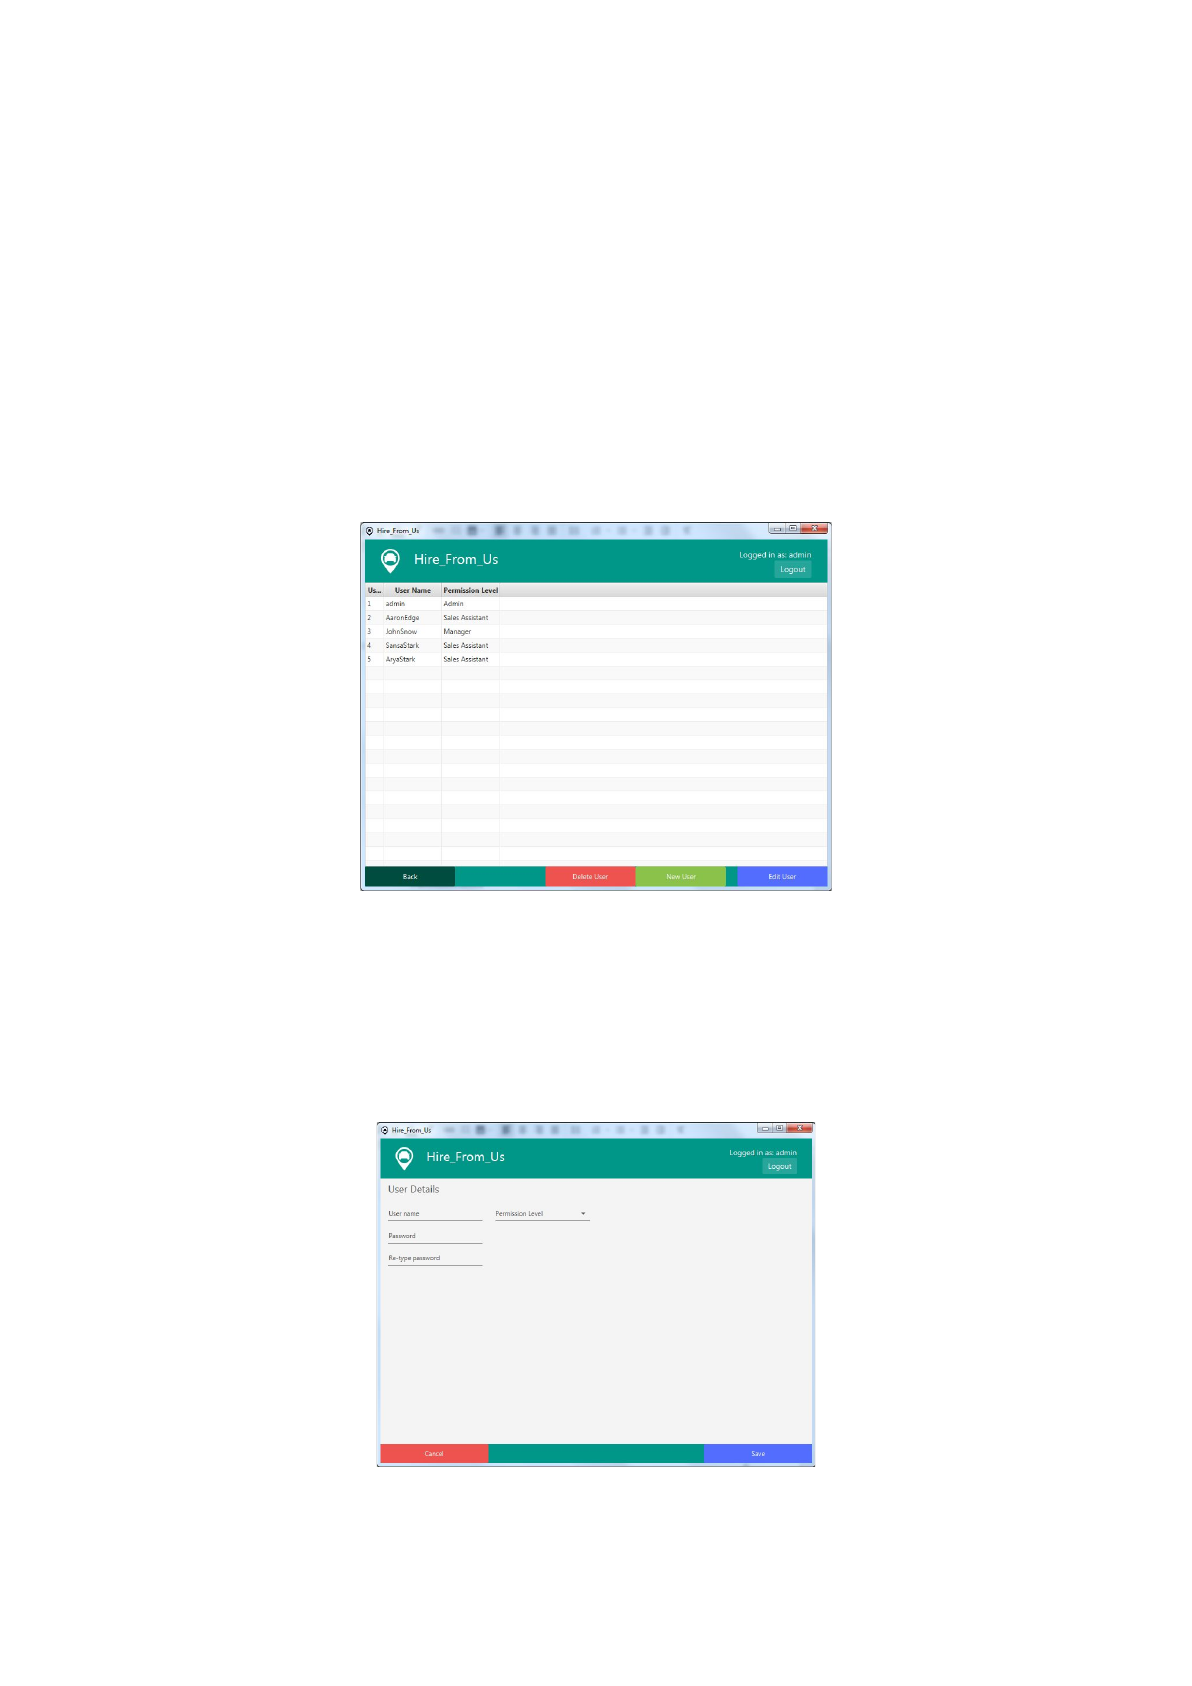
(fig 8)
Adding users
To add users navigate to the user management screen (fig 8). From the user
management screen click the “New user” button found at the bottom of the screen.
This will take you to the user detail entry screen (fig 9).
(fig 9)
From this screen you can fill in the users username, password and permission level.
8

The user’s name must be unique and you must enter the users password twice,
once in the password field and once in the re-type password field. The password
must be exactly the same or the system will show an error.
Permission levels
On the User details screen you can set the users permission level using the
dropdown box. There are three permission levels to choose from:
Sales Assistant
The sales assistant permission level is the lowest permission level.
They have the ability to make hires, edit hires, add customers and
edit customers.
Manager
The manager permission level has all the abilities of the sales
assistant but with the added ability to add and edit cars and view
sales data.
Admin
The admin permission level is the highest permission level. A user
with this permission level has access to all of the operations
available in the application. They can do everything the other
permission levels can do and also have the permission to manage
users.
Removing users
To remove a user navigate to the user management screen (fig 8). From the user
management screen, select the user you would like to delete from the user table in
the middle of the screen, the selected user’s row will turn blue to indicate that it has
been selected. Once you have selected the target user click the “Delete user” button
found at the bottom of the screen. A confirmation pop-up will appear in the center of
the screen. If you are sure that you would like to delete the user click the “Yes”
button when prompted.
Modifying users
To modify a user navigate to the user management screen (fig 8). From the user
management screen, select the user you would like to modify from the user table in
the middle of the screen, the selected user’s row will turn blue to indicate that it has
been selected. Once you have selected the target user click the “Edit user” button
found at the bottom of the screen.
Managing cars
9
Car management is done from the car management screen, to get to this screen
select the “Settings” option from the main menu then select the “Manage cars” option
from the settings menu, this should take you to the car management screen
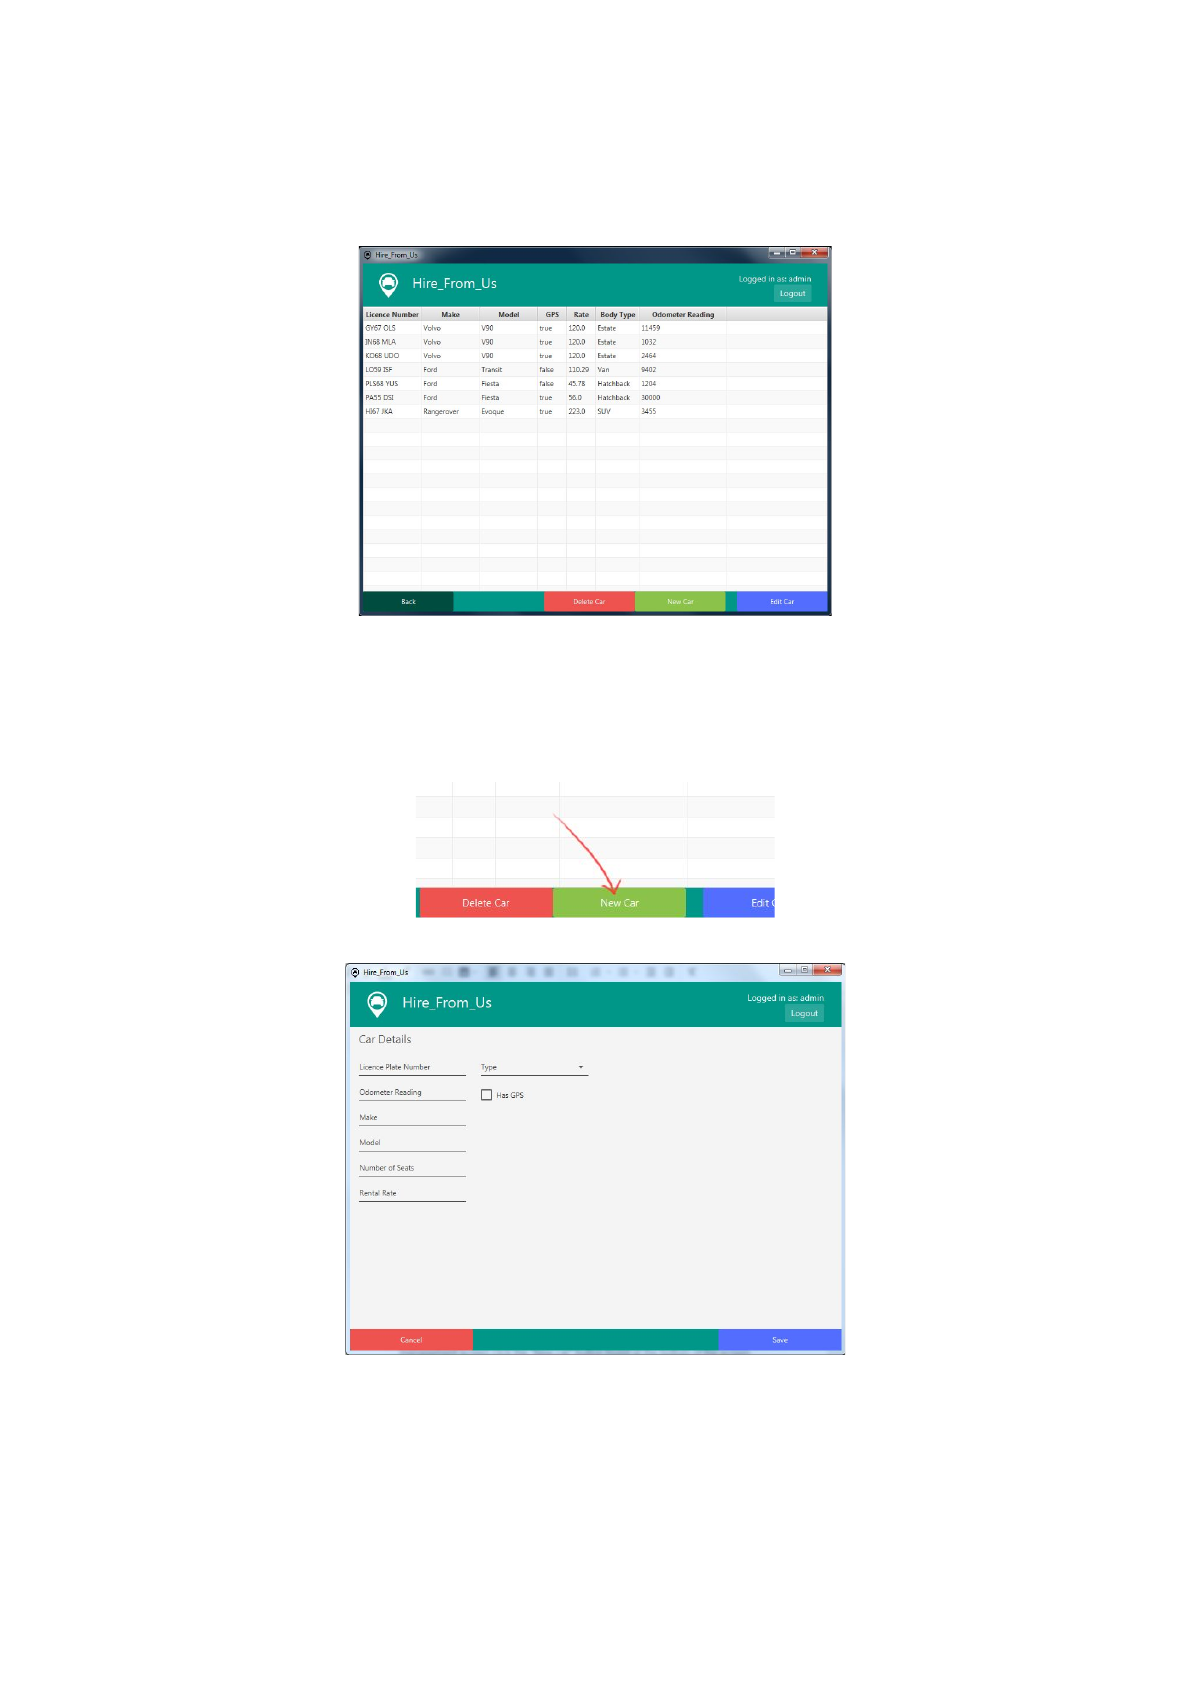
(fig 10)
Adding cars
To add a car navigate to the car management screen (fig 10). From the car
management screen click the “New car” button found at the bottom of the screen.
This will take you to the car detail entry screen (fig 11).
(fig 11)
From this screen you can enter all of the details about the car in the provided fields.
Once you have entered all of the information about the car click on the “Save” button
found in the bottom right hand corner of the screen. If you have missed any of the
10
required information or have entered invalid data the system will notify you with a
description of the error in a pop-up box.
Removing cars
To remove a ca navigate to the car management screen (fig 10). From the car
management screen, select the car you would like to delete from the cars table in the
middle of the screen, the selected car’s row will turn blue to indicate that it has been
selected. Once you have selected the target user click the “Delete car” button found
at the bottom of the screen. A confirmation pop-up will appear in the center of the
screen. If you are sure that you would like to delete the car click the “Yes” button
when prompted.
Modifying cars
To modify a car’s details navigate to the car management screen (fig 8). From the car
management screen, select the car you would like to modify from the cars table in
the middle of the screen, the selected car’s row will turn blue to indicate that it has
been selected. Once you have selected the target user click the “Edit car” button
found at the bottom of the screen.
Data Analysis
To view data collected by the system you can go to the data analysis screen, to get
to this screen select the “Settings” option from the main menu then select the “Data
analysis” option from the settings menu, this should take you to the data analysis
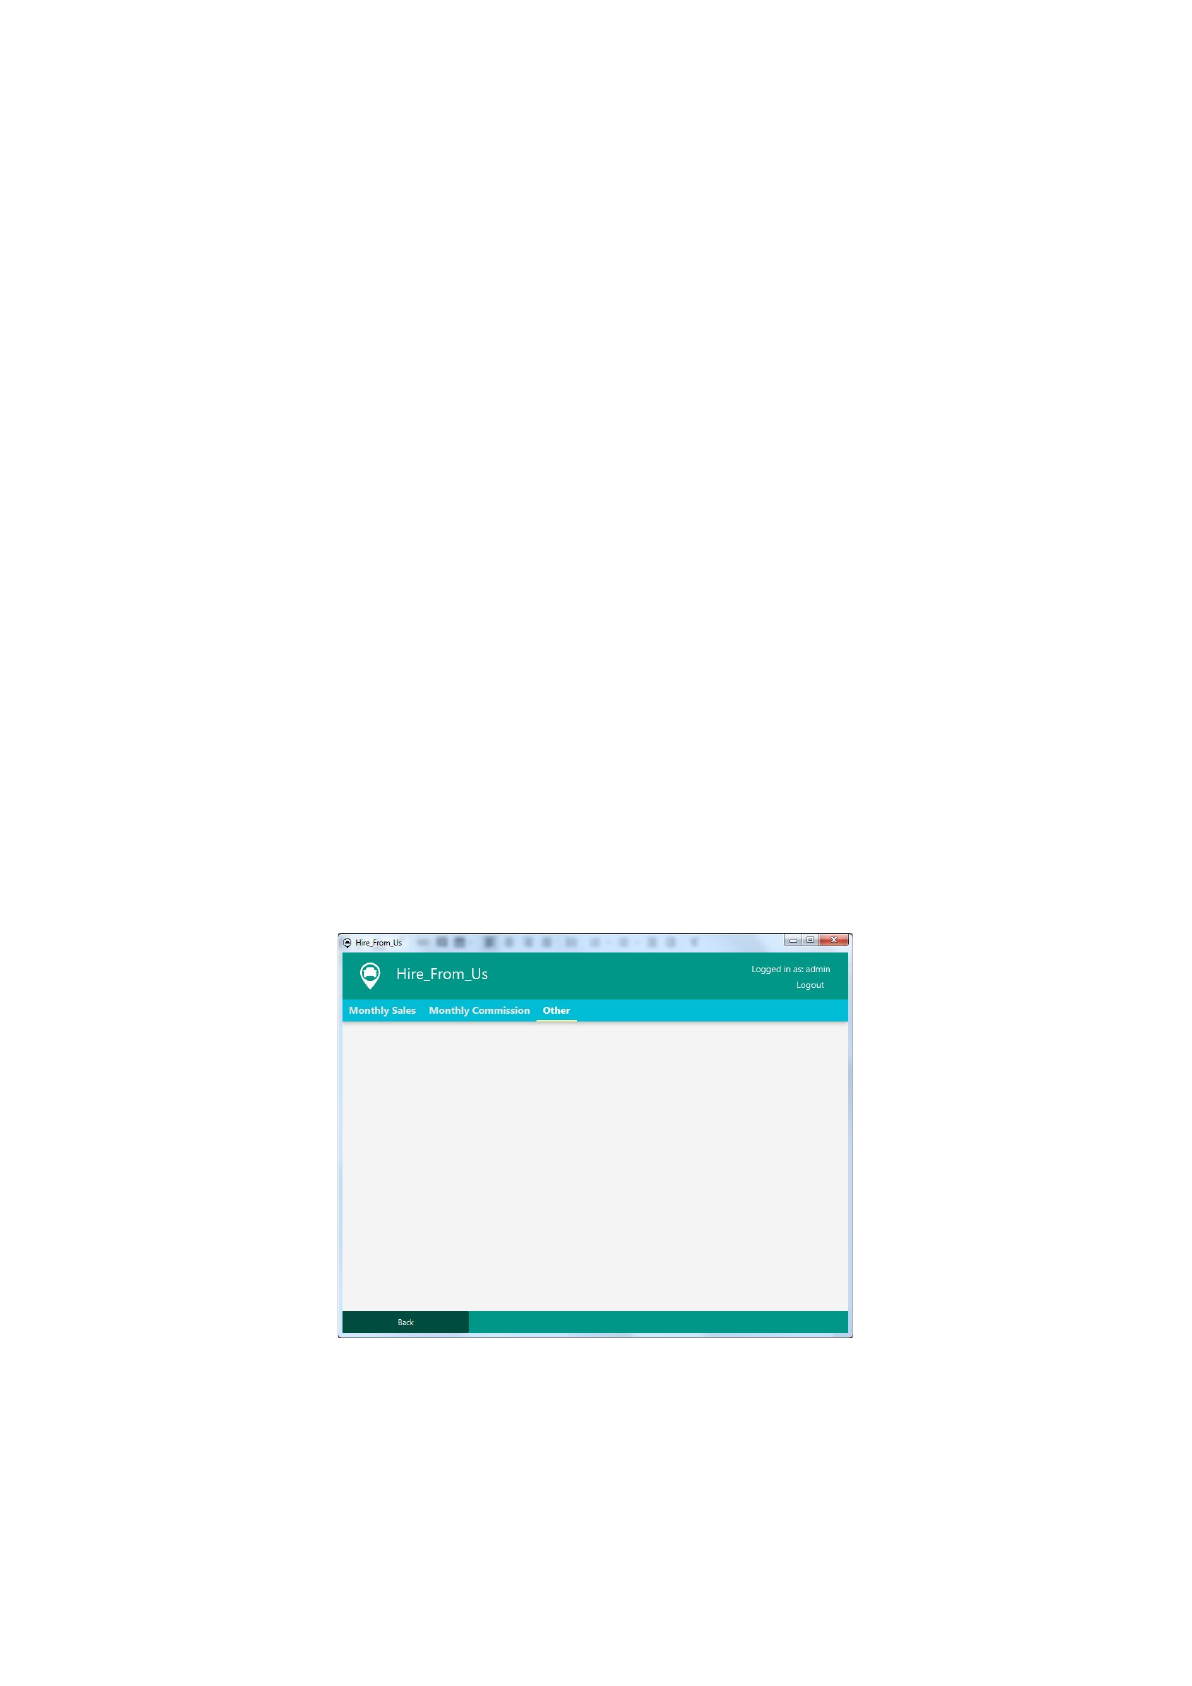
screen (fig 12).
(fig 12)
Viewing sales assistant commission
From the data analysis screen you can view all sales assistants commission earned
this month by clicking on the tab labeled “Monthly Commission”, this will take you to
a screen displaying the name of the sales assistant on the left with the commission
11

they have earned this month just to the right.
View Sales graph
To view the monthly sales figures click on the tab labeled “Monthly Sales” this will
take you to a screen displaying a graph with the current month's sales figures.
You can view different months data by selecting the month from the dropdown box in
the top right corner of the screen.
12
Hiring out a car
The car hiring process can be started by any user with valid login details. The hire
will be tied to the user that is currently logged in.
To start the hire process select the “New Hire” option from the main menu. Once the
process has started you can cancel at any time by pressing the cancel button in the
bottom left corner of the screen. The cancel button may not be visible the further
through the hire process you are, to get back to the first stage in the process and
cancel the hire simply press the back button to backtrack through the process until
you are back to the first step in the hire process, where the cancel button is clearly
visible.
On each of the sections of the process, you will be asked to fill in the required details
for that specific section.Once you have finished entering all the details you can
proceed to the next section by clicking the button labeled “Next”.
If you have not filled in all of the required information, the system will not let you
proceed. It will instead give you a prompt to fill in the required information.
The following sections will guide you through each stage of the car hire process.
1. Selecting a customer (adding a customer)
2. Selecting a pickup and return date
3. Selecting a car
4. Finalising the rental agreement
Selecting a customer
13
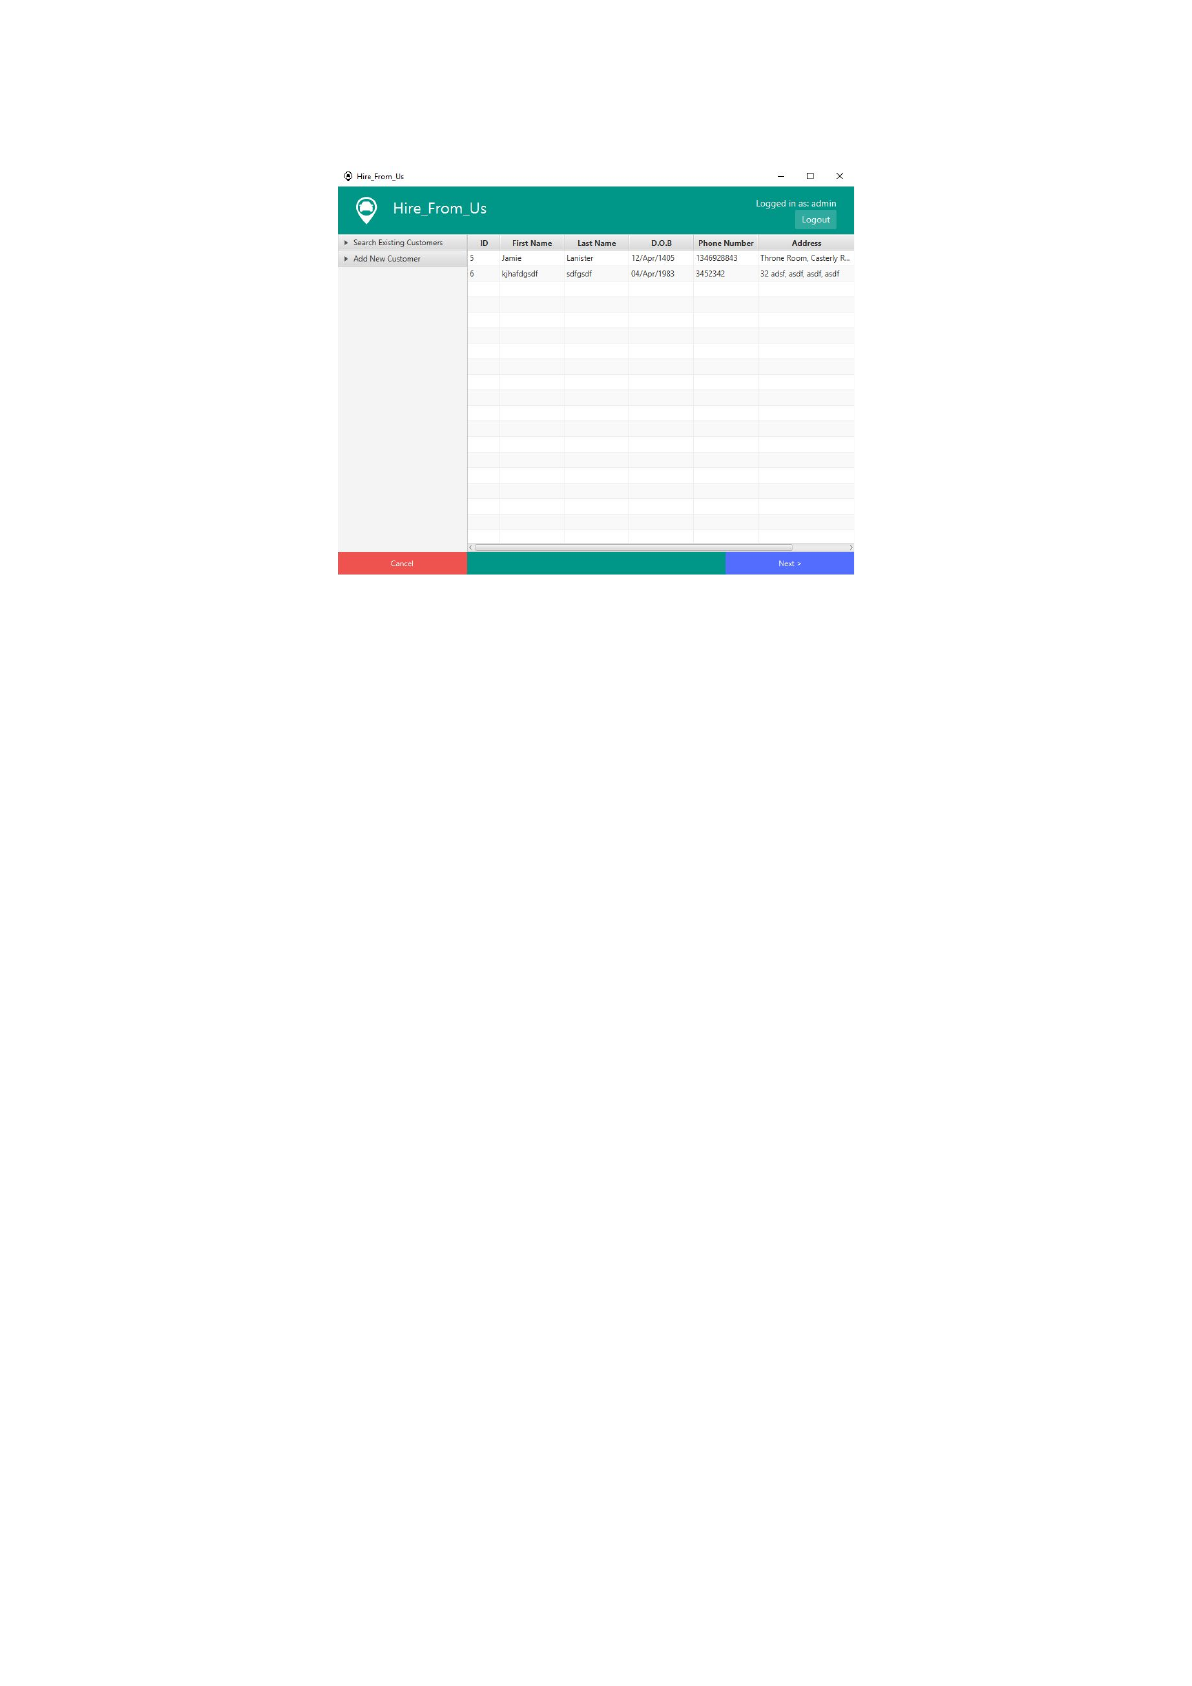
(fig 13)
The first screen you will encounter during the hire process is the customer selection
screen (fig 13). From this screen you can see all of the customers that have previously
been entered into the database and select one to carry out the hire. You also have
the option to add new customers from this screen.
The right hand table is where all of the relevant customers information will be
displayed. The column titles can be found in the top bar above the table.
You have the ability to sort the data in the table by clicking on the column title, further
clicks on the column title will toggle between ascending and descending sort.
Once you have found the correct customer, you can select them by clicking on the
row that they appear in. The row will turn a light blue color to indicate that they have
been selected.
Once you have selected a customer you can move on to the next stage in the
process by clicking the button labeled “Next >”
Searching for a customer
You have the ability to search for the desired customer by any of the stored fields. To
perform a search find the roll out labeled “Search Existing Customers” in the menu
bar on the left side of the screen. Click this bar to reveal the search options.
14
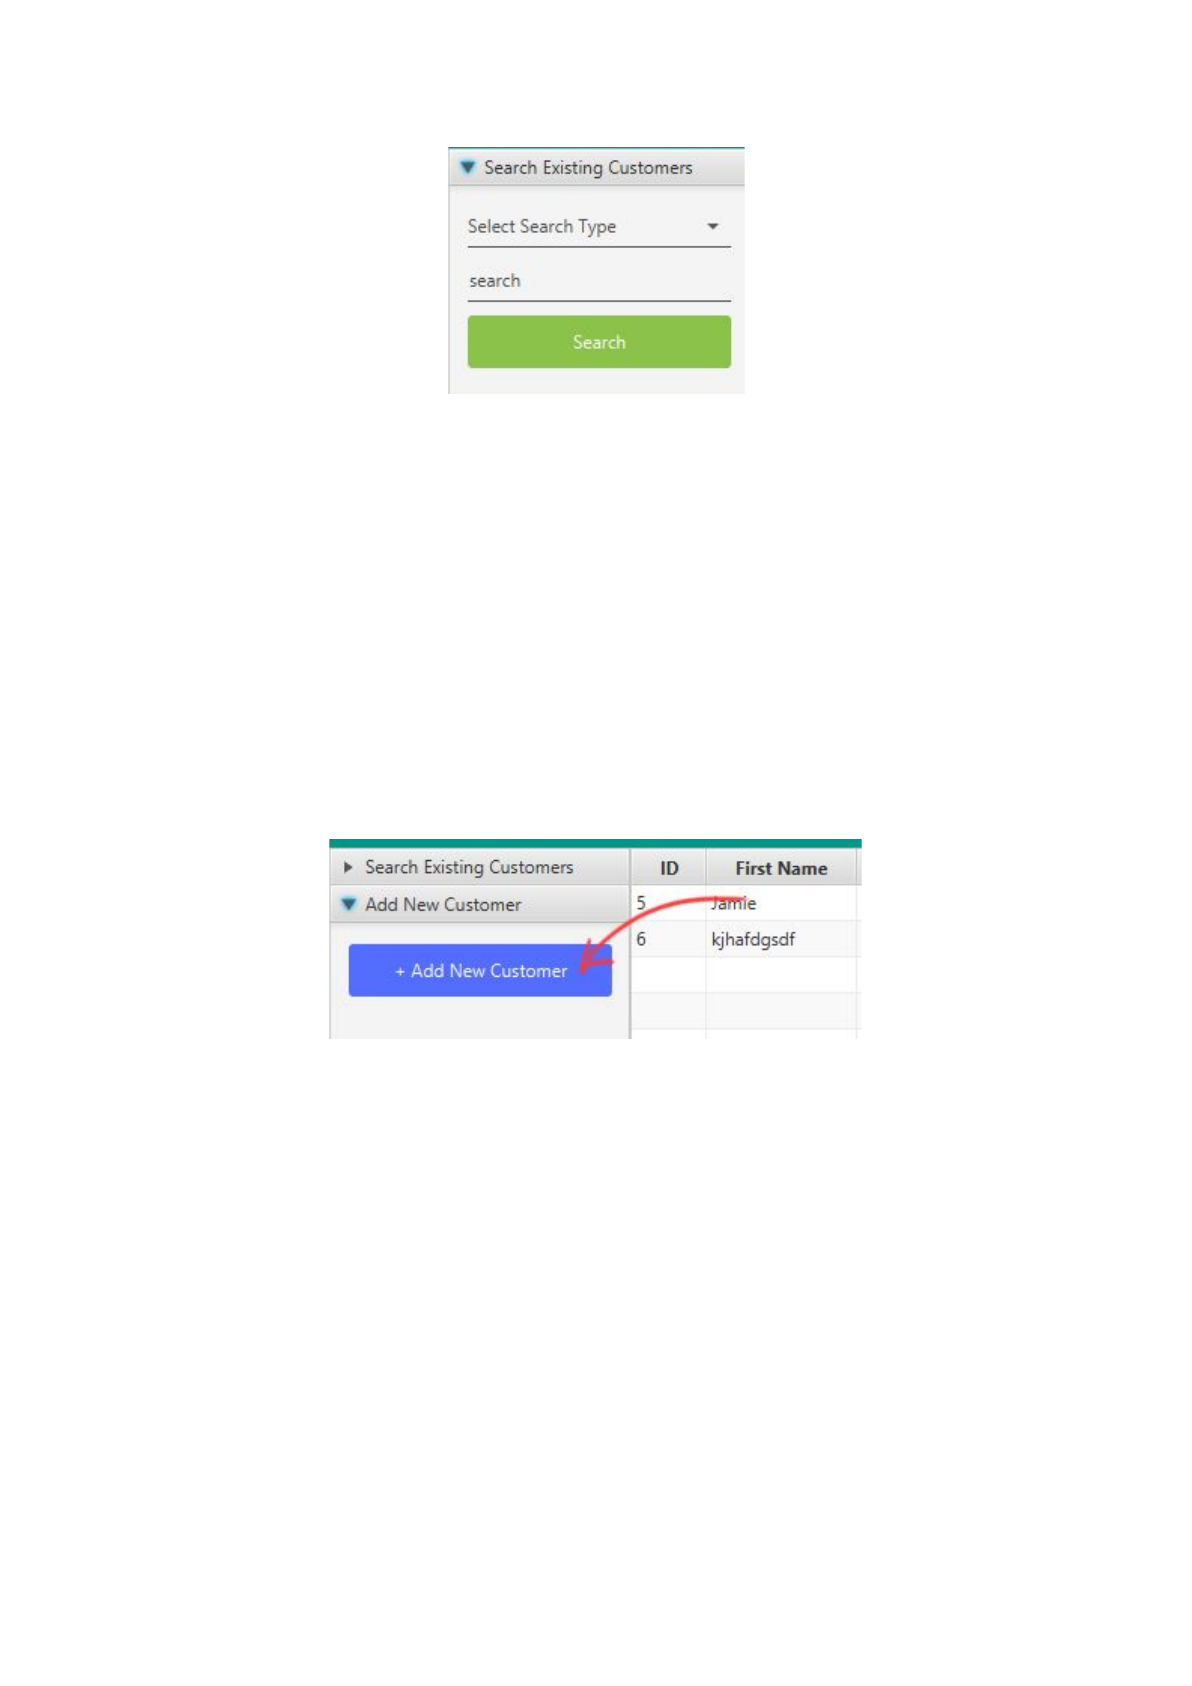
To perform a search you must first select what field you would like to search. To do
this select a field from the dropdown list above the search field.
Once you have selected a search field you can fill in the search field text box with the
information you are looking for. Click the button labeled “Search”, the system will
then search the customer database for the specified item. If the system found any
customers relating to your search it will display them in the table to the right of the
screen.
Adding a customer
(fig 14)
If you would like to create a hire for a new customer, you must first add them to the
database.
To add a new customer to the database find the roll out menu item (fig 14) labeled
“Add New Customer” click it to reveal a button labeled “+ Add New Customer” click
this button to be taken to the add new customer screen (fig 15).
15
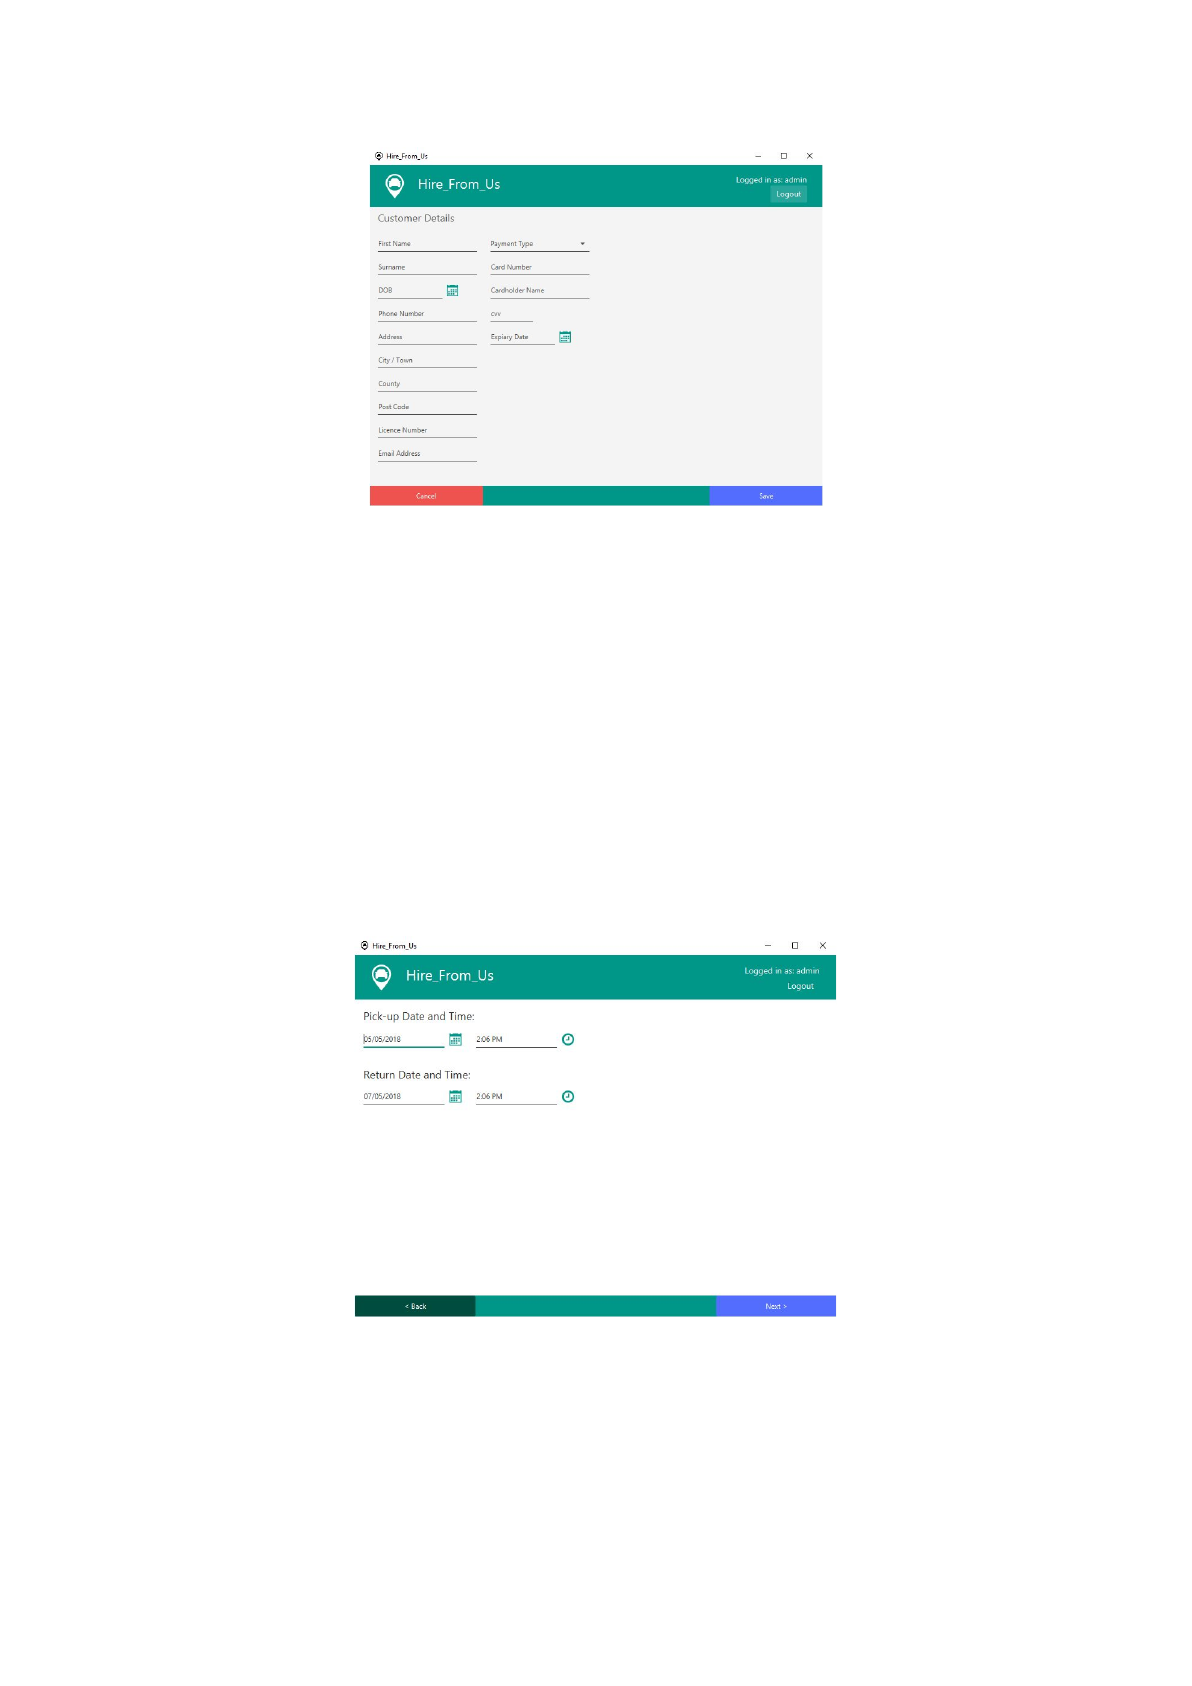
(fig 15)
Use the provided input fields to add all of the required data about the customer.
Once you have filled in all the required fields press the button labeled “Save” to add
the customer to the database.
If you have missed any required fields the system will not let you save the customer,
it will instead prompt you to fill in the missing fields.
Once you have added the customer to the database you will be returned to the
customer selection screen where you can use the search tools provided to select the
customer and move on to the next stage.
Selecting a date and time
(fig 16)
You can set the pickup and return date of the hire using the date selection screen (fig
15).
By default the system sets the pickup date to today's date. To manually enter the
pickup date you have two options:
16
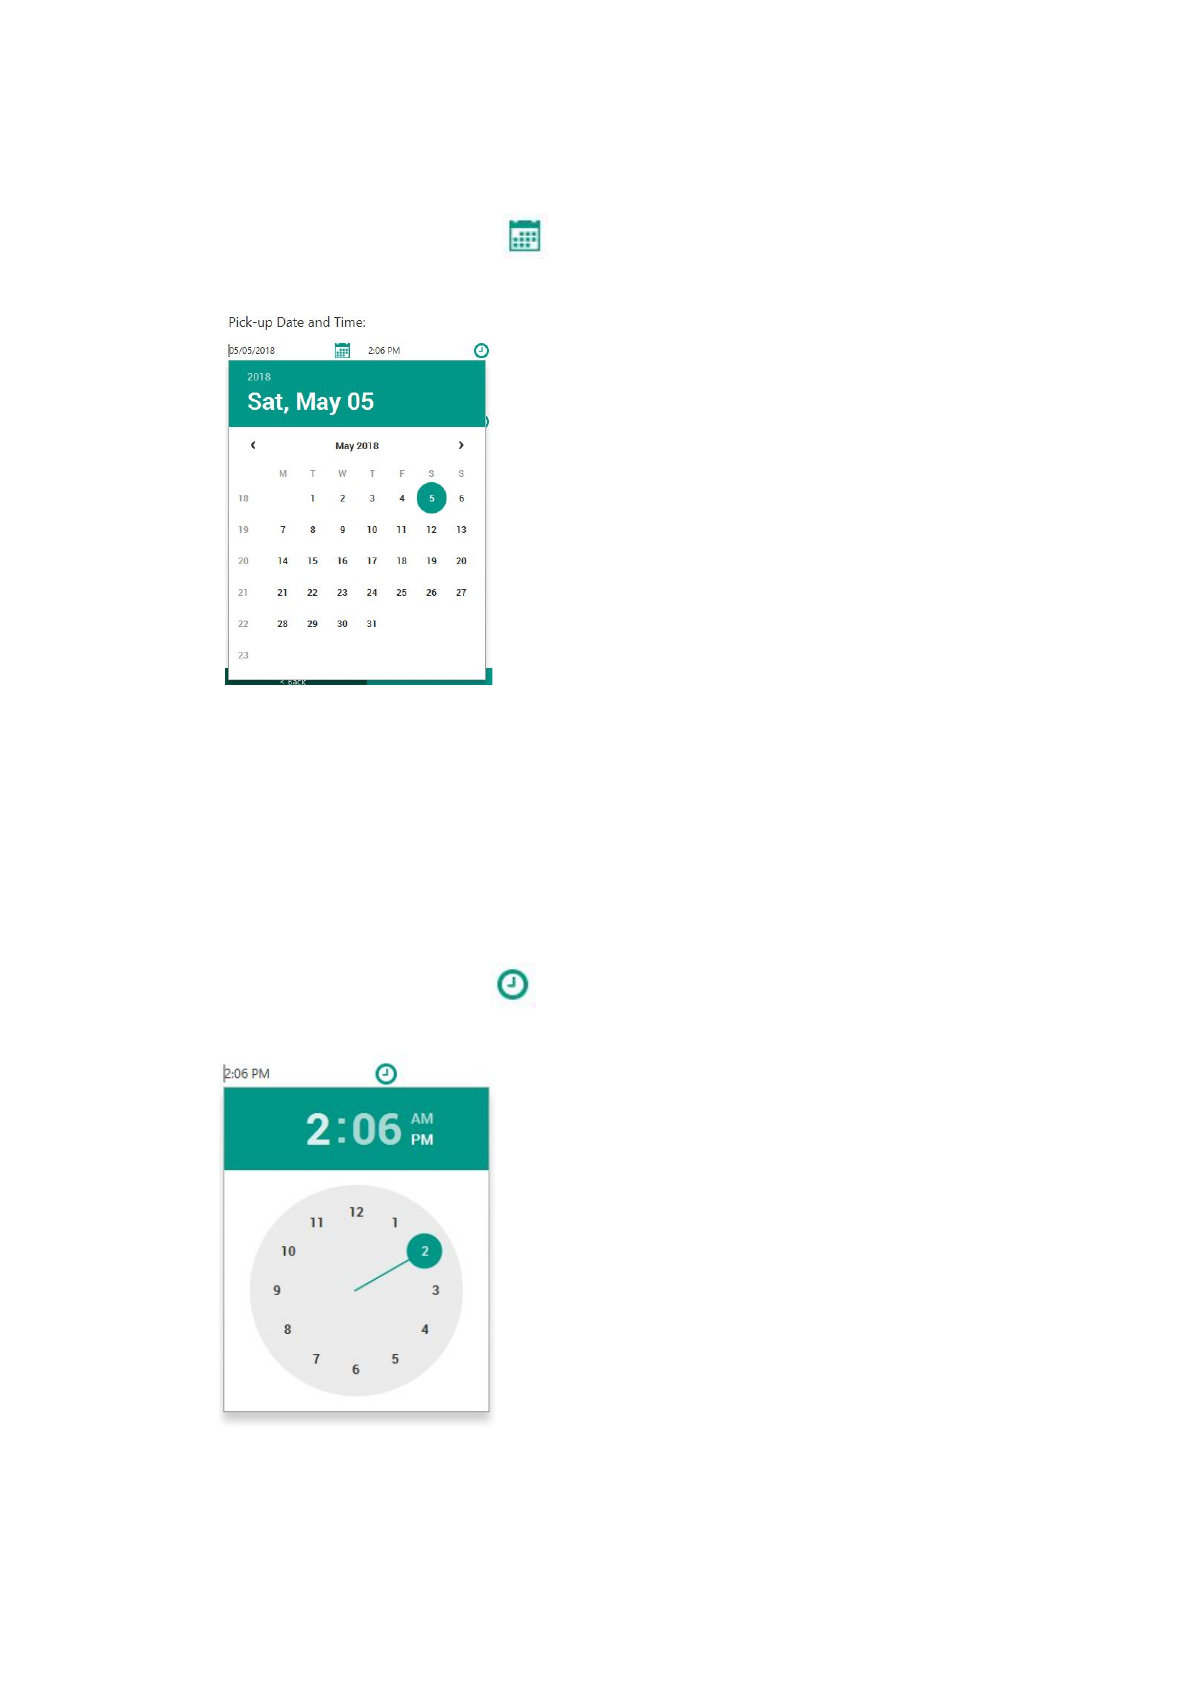
1. Edit the date using the text entry field found under the “Pick-up Date and
Time” title.
2. Or click the calendar icon found to the right of the date text entry field, to
reveal the calendar.
Use the arrows either side of the month to select the month, then click on the
date to select the day. The selected day will have a green circle around it to
indicate it has been selected.
To manually enter the time you also have two options:
1. Edit the time using the text entry field found under the “Pick-up Date and
Time” title.
2. Or click on the clock icon found to the right of the time text entry field to
reveal the time picker.
To select a time click on the number on the clock or drag the green circle to
the correct time.
17
Select the correct drop off date using the same methods on the fields below.
Once you have set the correct pickup and drop off date and time click on the button
labeled “Next >” found in the bottom right of the screen, to take you to the next
section of the hire process.
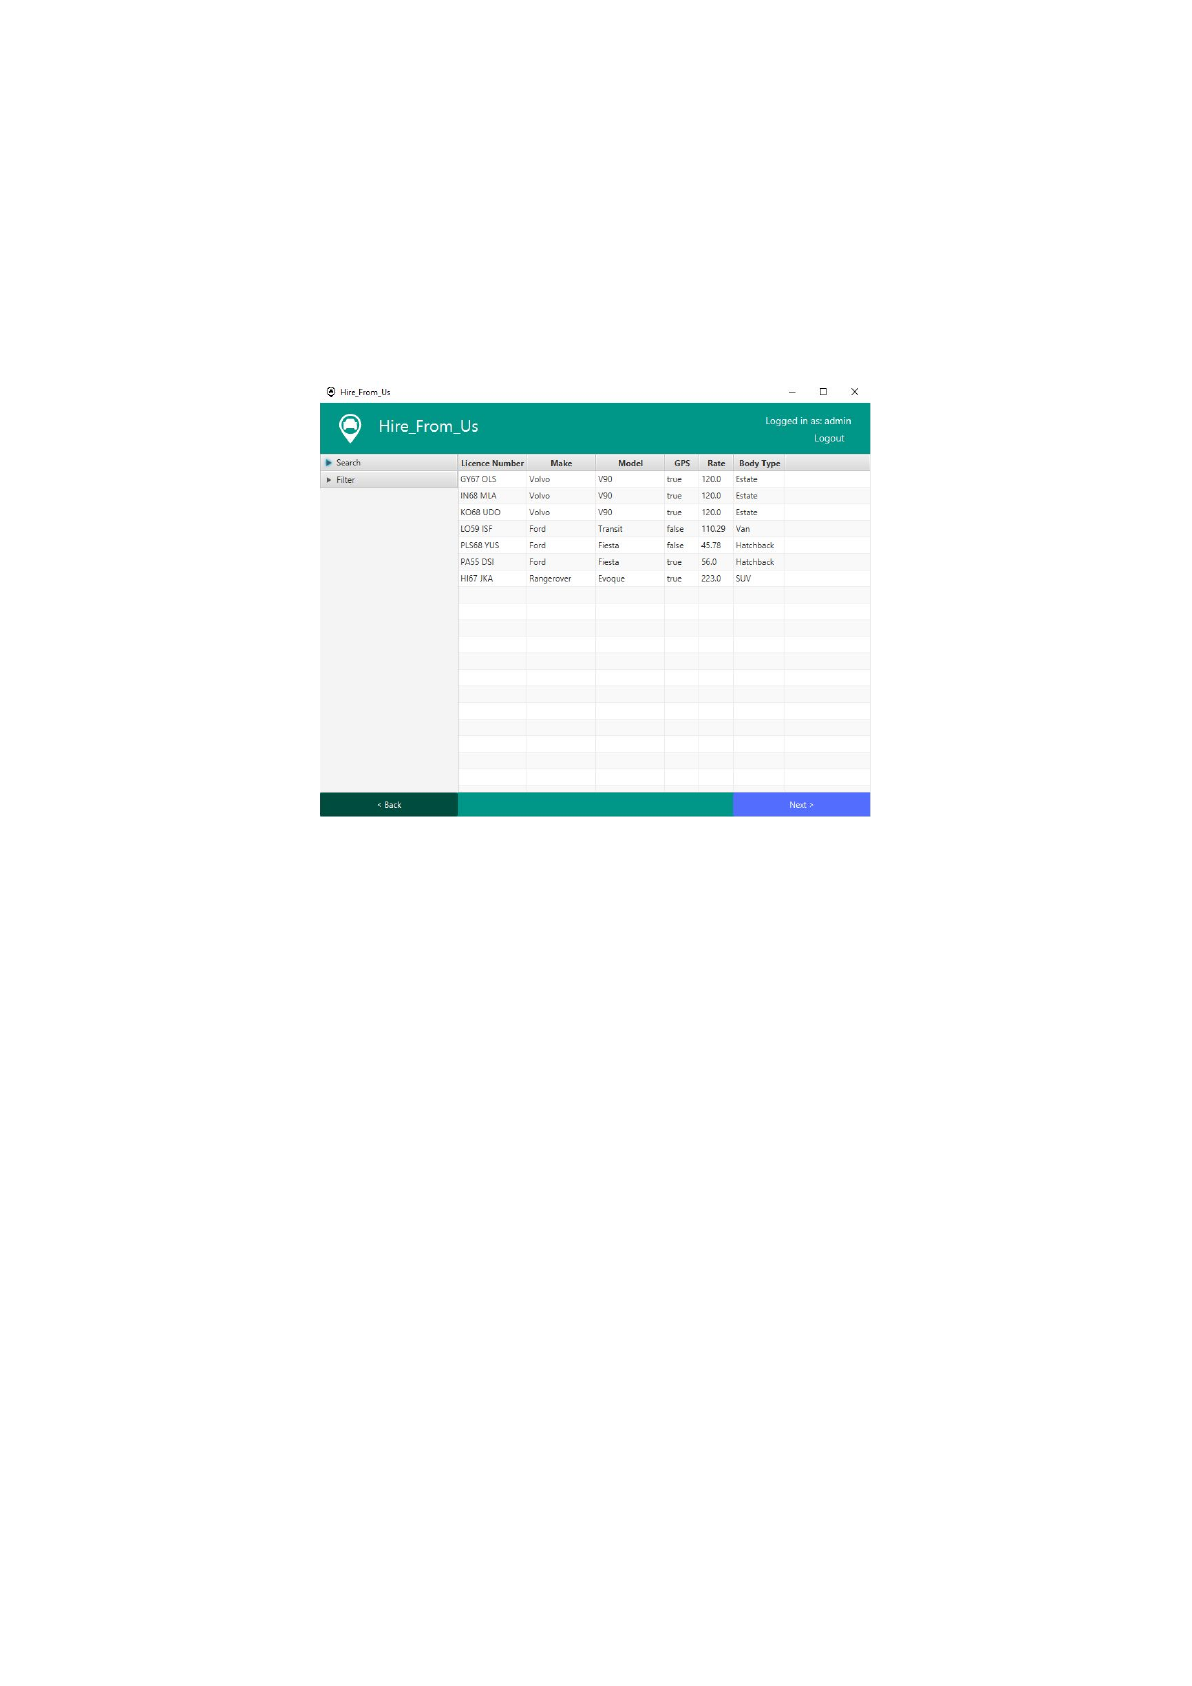
Selecting a car
(fig 17)
Note: Adding cars to the database is an operation that can only
be carried out by an account with manager or higher access
permission. See the managing cars section of this document for
more information (page 9).
From the car selection screen you can see all of the cars in the database that are
available for the date specified and select the right one for the customer.
The right hand table is where all of the relevant car’s information will be displayed.
The column titles can be found in the top bar above the table.
You have the ability to sort the data in the table by clicking on the column title, further
clicks on the column title will toggle between ascending and descending sort.
Once you have found the correct car, you can select them by clicking on the row that
they appear in. The row will turn a light blue color to indicate that they have been
selected.
Once you have selected a car you can move on to the next stage in the process by
clicking the button labeled “Next >”
18
Searching for a car
You have the ability to search for the desired car by the licence plate. To perform a
search find the roll out labeled “Search” in the menu bar on the left side of the
screen. Click this bar to reveal the search text field.
Enter the licence plate of the car you would like to find in the text box.
Click the button labeled “Search” and the system will display the car in the table on
the right if it can be found in the database.
To get back the list of all the available cars in the database simply leave the search
text box empty and press the search button.
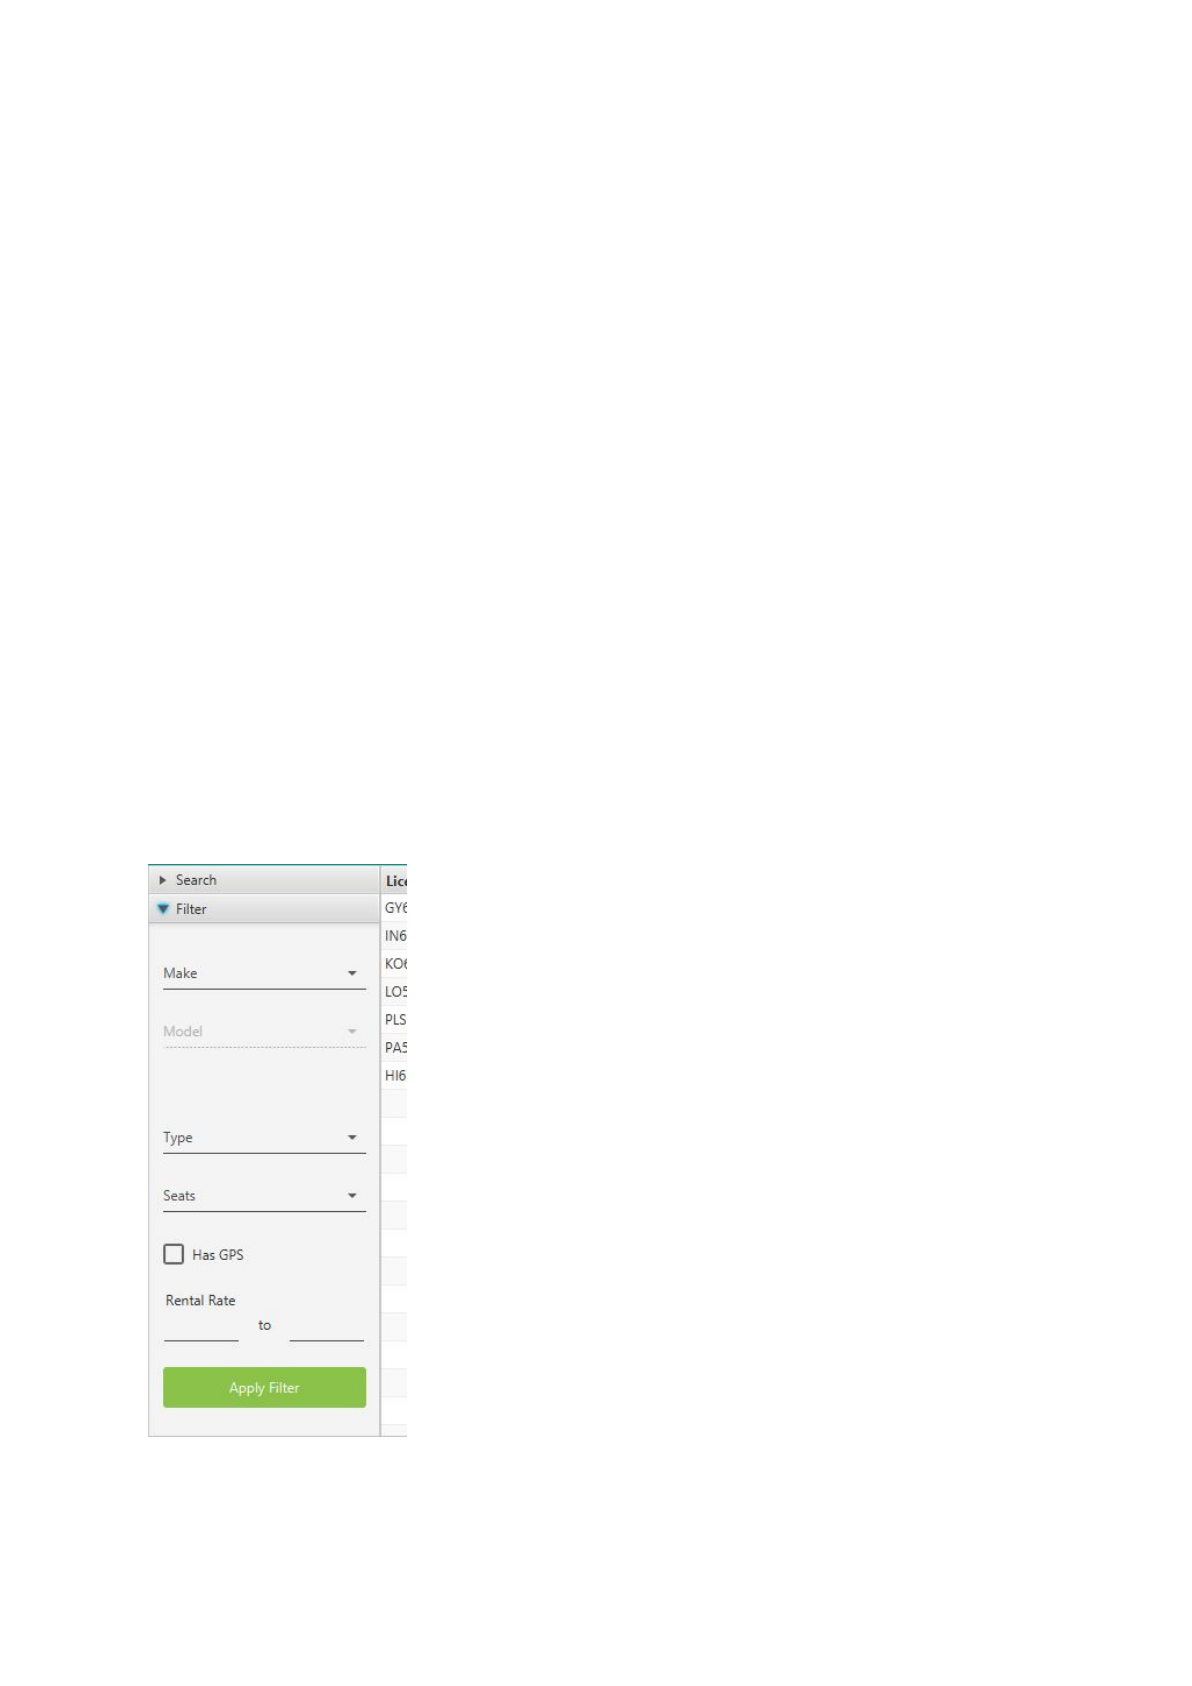
Filtering cars list
With this system you also have the ability to filter the list of available cars with
specified fields.
To filter the list find the menu rollout labeled “Filter” click on it to reveal filtering
options.
From this menu bar you can fill in the customer’s requirements to find the right car to
19

suit their needs.
Note: The model selection will only become available when you
select a make.
Once you have filled in the requirements click the button labeled “Apply Filter”. The
system will then select the available cars in the database that fit these requirements
and display them in the table to the right.
Finalising the hire
(fig 18)
The final step in the care hire process is finalising the rental agreement. From this
screen you can view and review the terms of the rental agreement. The system will
have generated an invoice with all of the selected customer, car, time and date
information filled in and added the terms and conditions.
Once the customer has signed the rental agreement you can confirm that the
agreement has been signed by clicking the checkbox labeled “Agreement Signed”.
When you have finalised the hire and the contract is signed you can save the hire to
the database by clicking the “Done” button.
Printing a rental agreement
Once you have reviewed the invoice to ensure that all of the details are correct and
present, you have the ability to print off a physical copy of the rental agreement for
the customer.
20

To print off a rental agreement simple press the button labeled “Print Rental
Agreement” the system will then add the rental agreement to the printer queue and
give you a confirmation popup box.
21
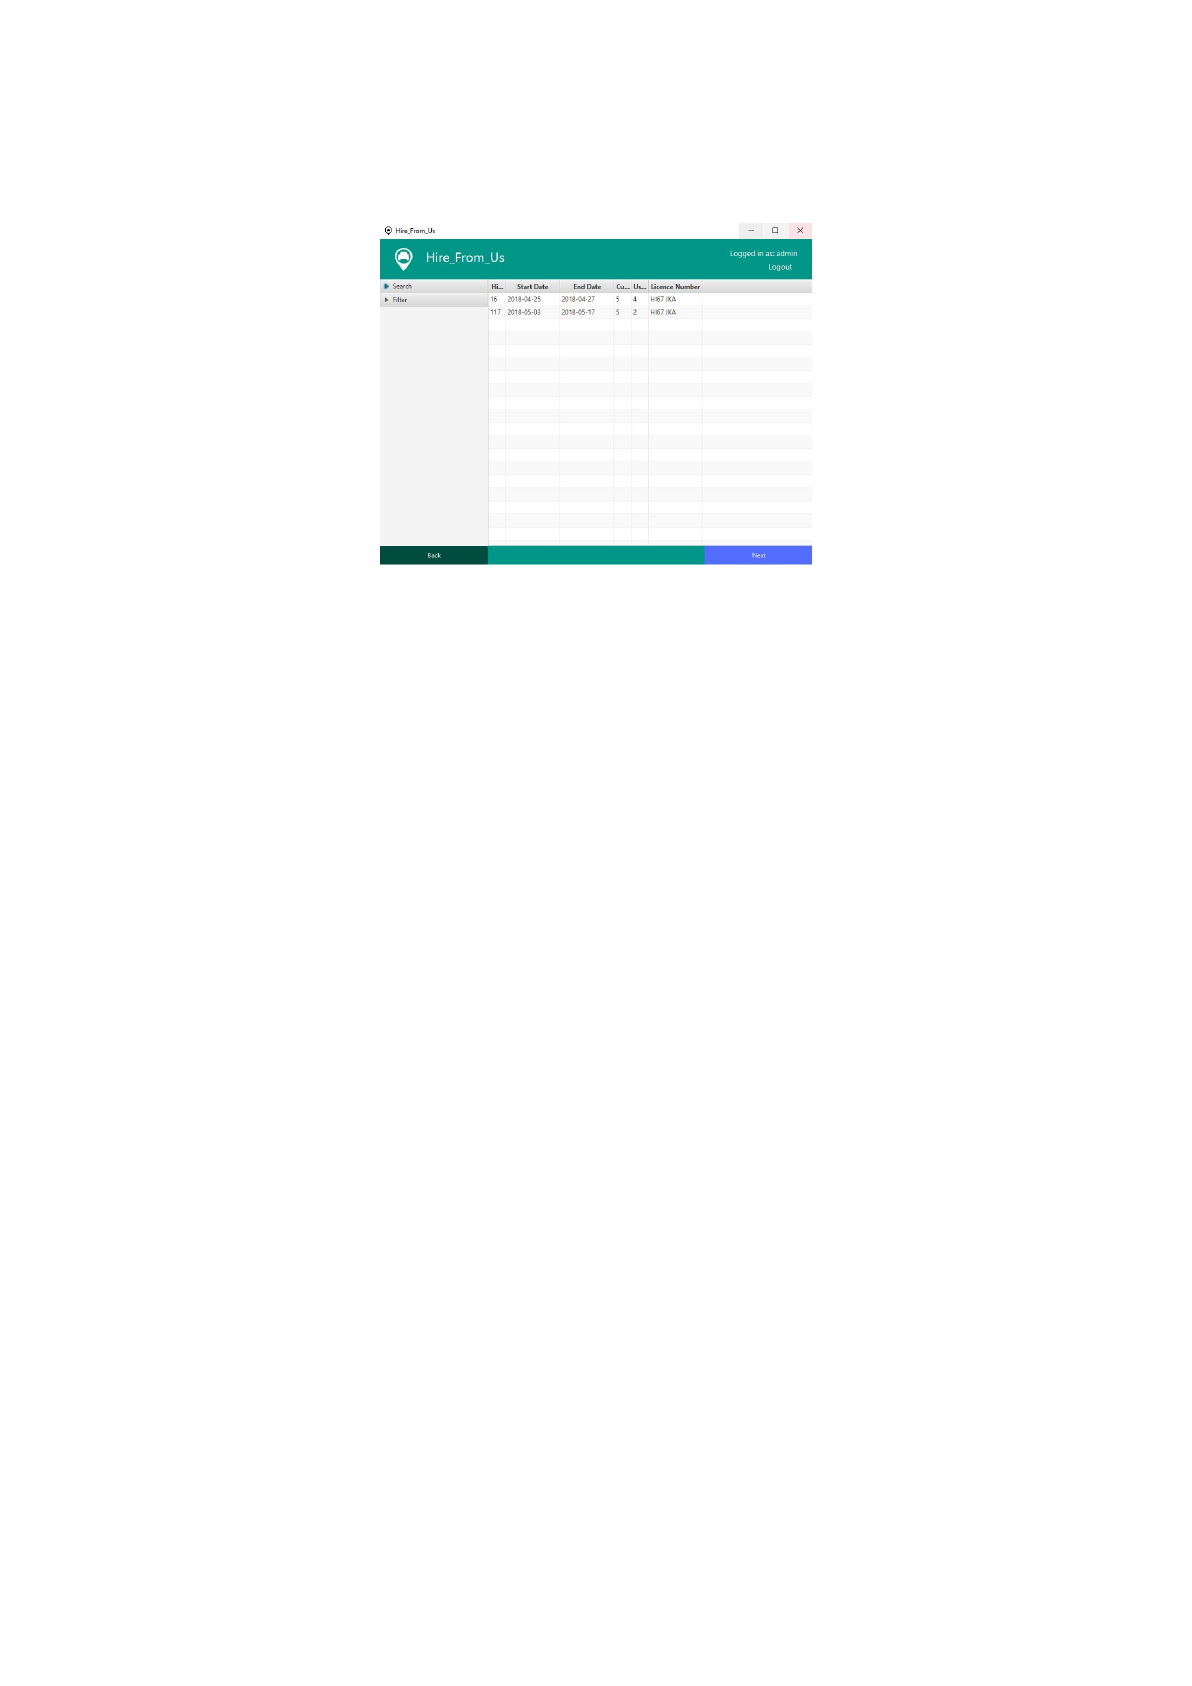
Returning a car
(fig 19)
To return a car simple click on the button labeled “Return Car” from the main menu
screen. This will start the car return process. The first screen you will see is the hire
selection screen (fig 19). From this screen you can select the car that you would like to
process.
You can find the car you are looking from from the table of currently hired out cars on
the right. Or you can use the search or filter features.
Searching for a car
To perform a search find the roll out labeled “Search” in the menu bar on the left side
of the screen. Click this bar to reveal the search text field.
Enter the licence plate of the car you would like to find in the text box.
Click the button labeled “Search” and the system will display the car in the table on
the right if it can be found in the database.
To get back the list of all the available cars in the database simply leave the search
text box empty and press the search button.
Filtering cars list
To filter the list find the menu rollout labeled “Filter” click on it to reveal filtering
options.
Once you have found the hire you would like to process click on the “Next” button
found in the bottom right on the screen. This will take you to the next step in the
returns process.
22
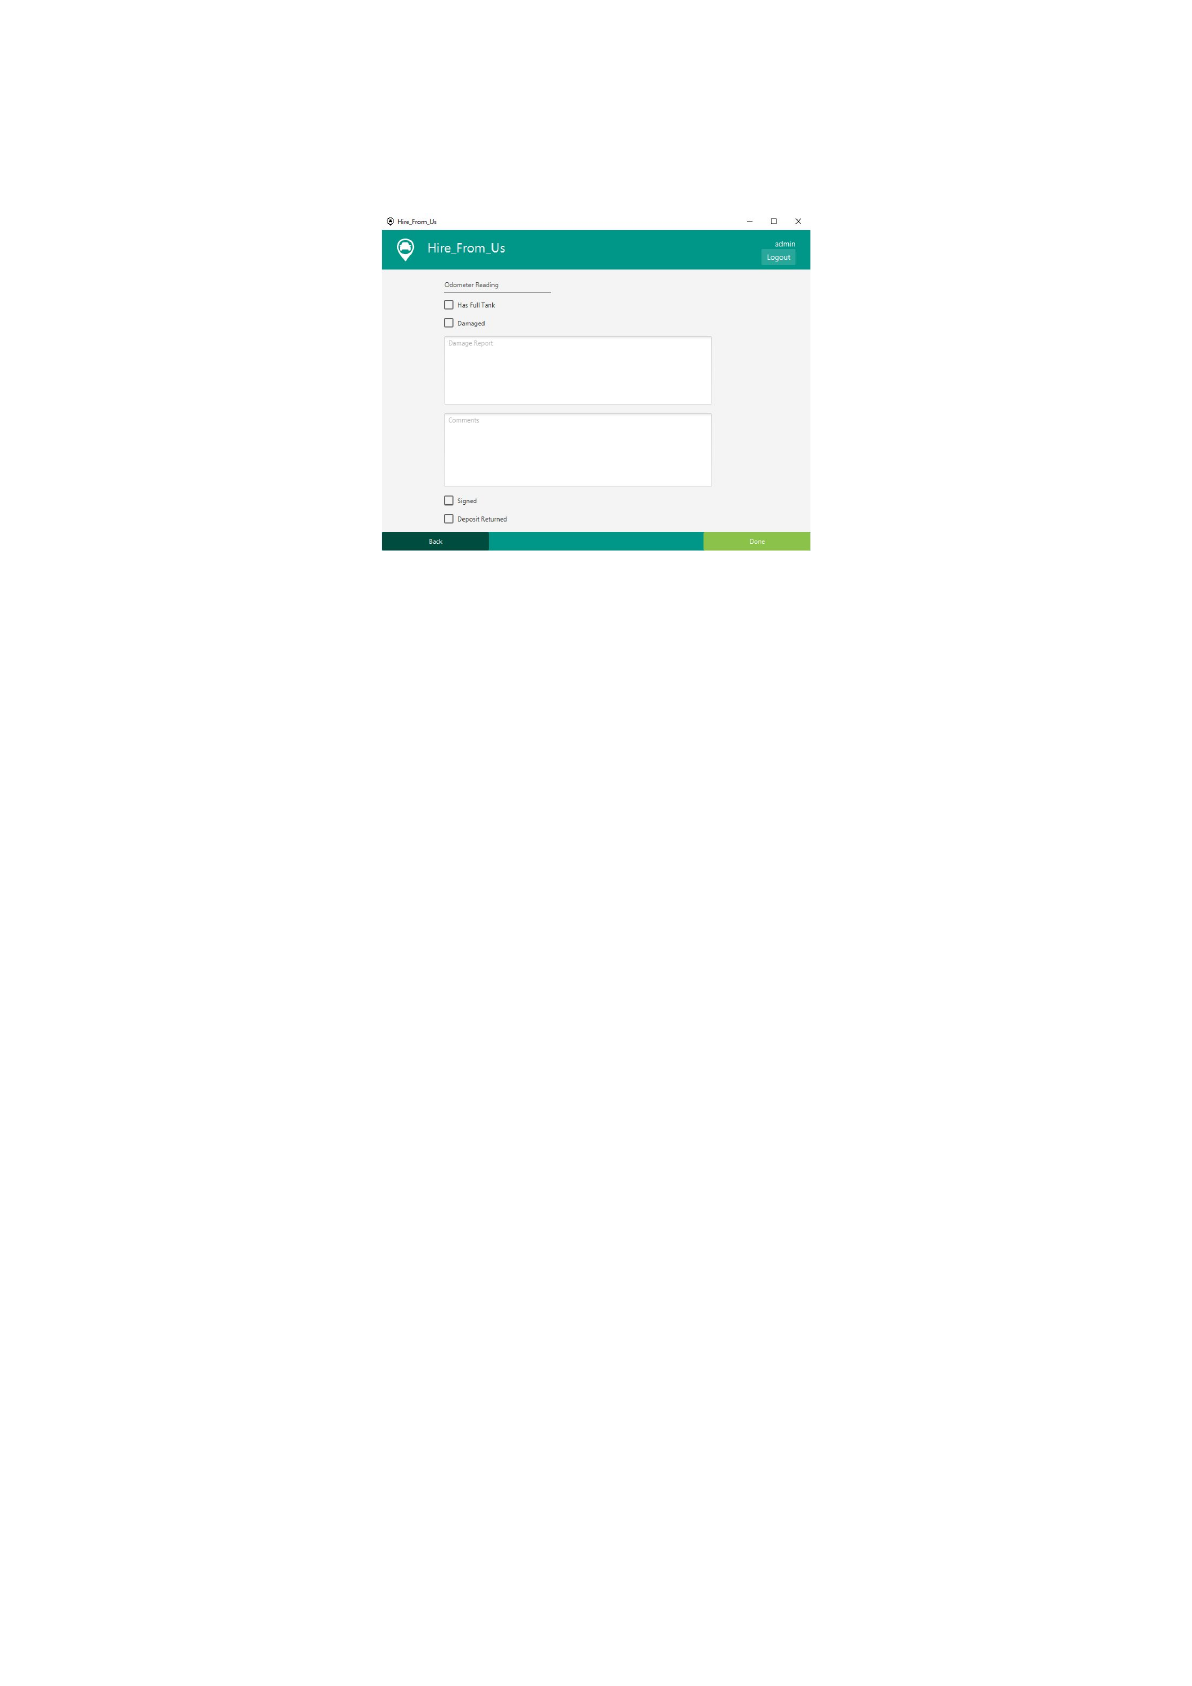
(fig 20)
The next stage of the returns process is to fill in the returns form.
Steps to return a car:
1. Check current mileage on the car and enter into the text field labeled
“Odometer reading”.
2. Check the amount of petrol left in the car, If the tank is full click the “Has Full
Tank” checkbox.
3. Perform a visual inspection on the condition of the car. If there is any damage
to the car click the checkbox labeled “Damaged” and provide a detailed
description of the location, severity and type of damage.
4. If there is any further charges incurred by the customers a description of these
charges should be included in the text area labeled “Comments”.
5. If the customer has incurred no extra charges and is entitled to their deposit
check the “Deposit Returned” checkbox and return the deposit to the
customer.
6. Once you are happy that all criteria have been met and the hire contract is
complete you can click the checkbox labeled “Signed” to sign off the hire
contract. (The contract will be signed off by the user currently signed in. To
ensure that you are signed into the correct user check the top right corner of
the screen that your username follows the text “Logged in as: ----”)
7. Click the button labeled “Done” to save the returns form to the database and
complete the hire contract.
23
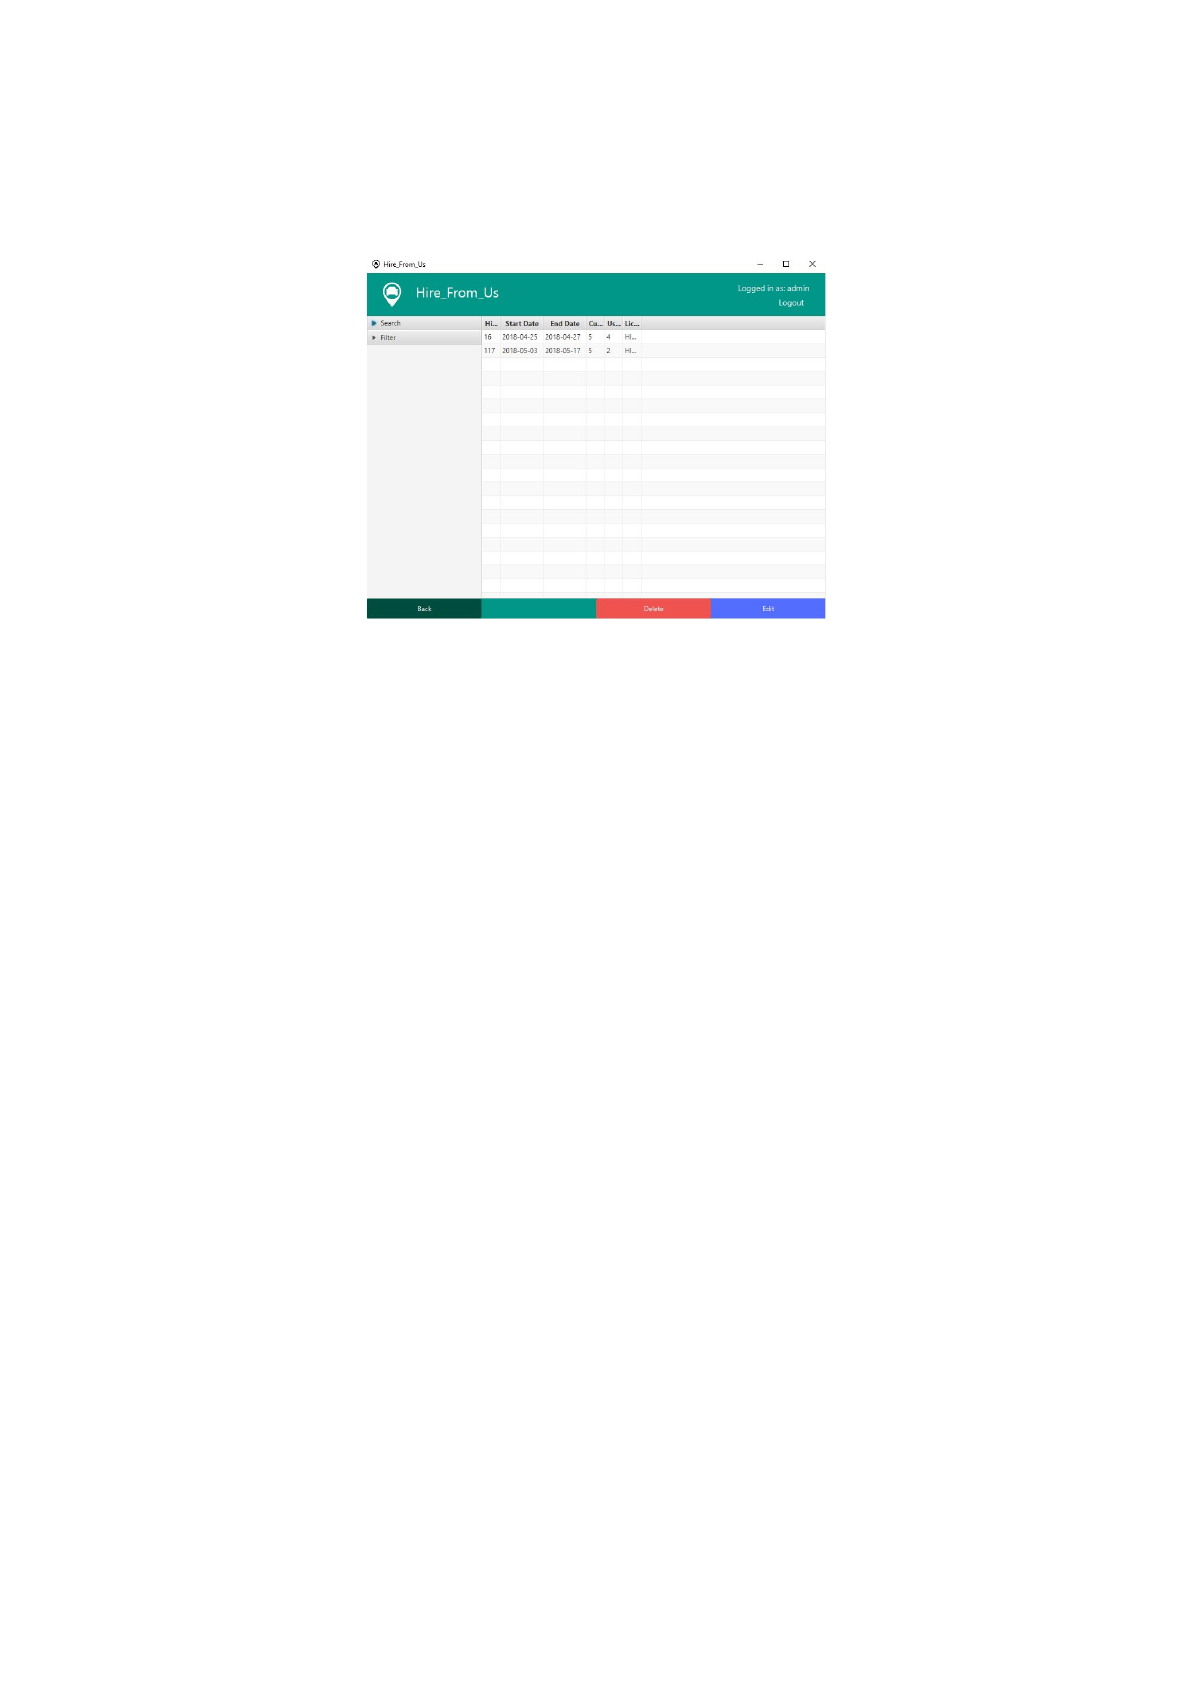
Managing existing hires
(fig 21)
From time to time you may need to view and amend existing hires. This can be done
from the hire management screen (fig 21).
To get to the hire management screen, click the button labeled “Settings” found on
the main menu screen to get to the settings screen. From the settings screen click
the button labeled “Edit Existing Hires” this will take you to the hire management
screen (fig 21).
From the hire management screen you can view all of the outstanding hires in the
table on the right. You can search for a specific hire using the options roll out labeled
“Search” simply click to reveal the search options. Or you have the option to filter the
hires using the filter options found in the “Filter” menu roll out, click the bar to reveal
the filter options.
Edit existing hire
To edit an existing hire select the hire that you would like to edit, the row will turn
blue to indicate that it is the currently selected row. Once you have selected a hire
click on the button labeled “Edit” this will take you to the hire edit screen where you
should see all of the data in editable text fields.
Once you have finished editing the data using the provided data entry fields click on
the button labeled “Save” to save your changes to the database and return to the
hire management screen.
Delete existing hire
To delete an existing hire select the hire that you would like to delete, the row will
24

turn blue to indicate that it is the currently selected row. Once you have selected the
hire to delete click the button labeled “Delete” to remove the hire form the database.
The system will provide a confirmation popup to make sure that you really want to
delete this hire, press the “Yes” button if you are sure you want to deleted the
selected hire.
25
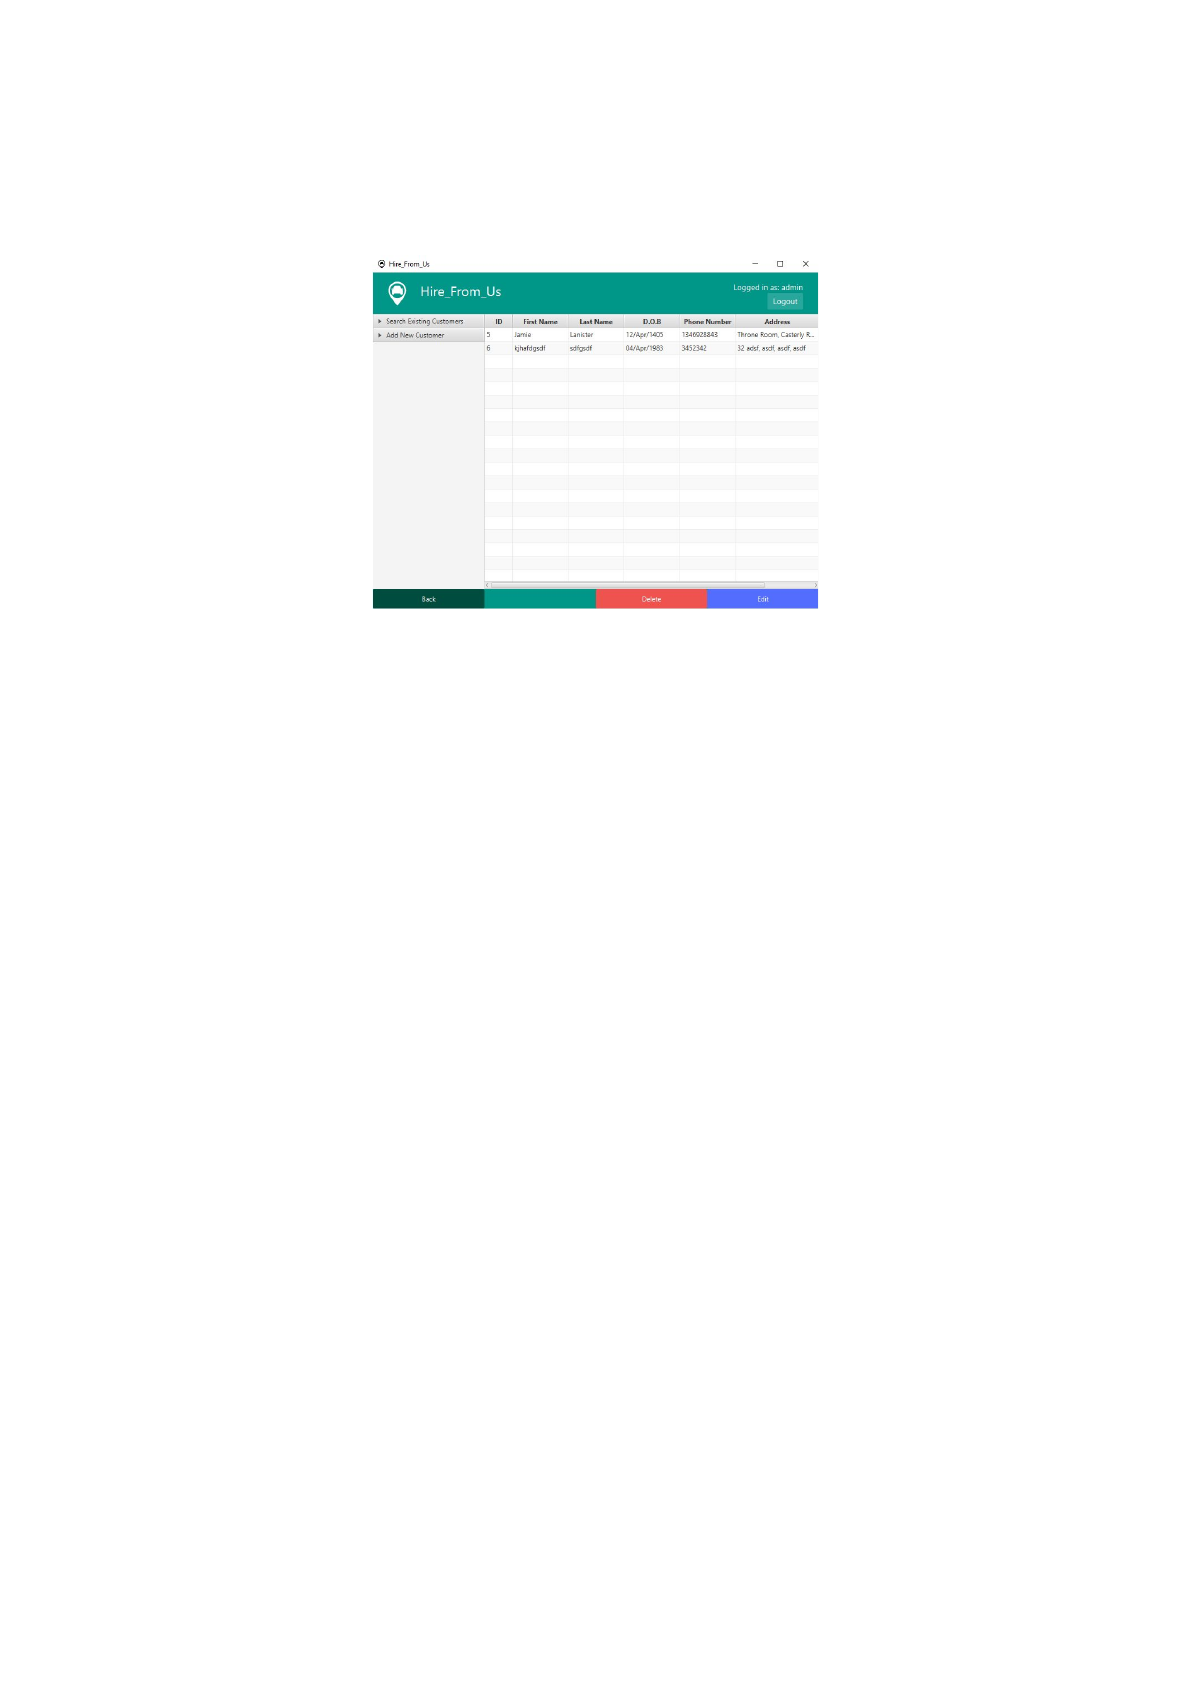
Managing existing customers
(fig 22)
From time to time you may need to view and amend existing customers. This can be
done from the customer management screen (fig 22).
To get to the customer management screen, click the button labeled “Settings” found
on the main menu screen to get to the settings screen. From the settings screen
click the button labeled “Edit Existing Customers” this will take you to the customer
management screen (fig 22).
Adding a new customer
From the customer management screen you have the ability to add new customers.
To add a new customer find the roll out menu labeled “Add new customer” clicking
the menu bar will reveal the add new customer button. Click the button to be taken to
the add new customer screen. The process for adding a new customer to the
database is documented in the “Hiring Out a Car” > “Adding a New Customer”
section (Page 15).
Edit existing customer
To edit an existing customer select the customer that you would like to edit, the row
will turn blue to indicate that it is the currently selected row. Once you have selected
a customer click on the button labeled “Edit” this will take you to the customer edit
screen where you should see all of the data in editable text fields.
Once you have finished editing the data using the provided data entry fields click on
the button labeled “Save” to save your changes to the database and return to the
customer management screen.
26

Delete existing customer
To delete an existing customer select the customer that you would like to delete, the
row will turn blue to indicate that it is the currently selected row. Once you have
selected the customer to delete click the button labeled “Delete” to remove the
customer form the database. The system will provide a confirmation popup to make
sure that you really want to delete this customer, press the “Yes” button if you are
sure you want to deleted the selected customer.
27

Troubleshooting
Problem:
Cause:
Solution:
Problem:
You receive the error message “Unable to connect to the server”
Cause:
There are multiple causes of this problem most commonly it is caused by loss of
connection to the network.
Solution:
Check that the network cable is plugged into the workstation. Then reset the network
adaptor.
If the workstation is connected to the network, it is possible that the server has failed.
In this case contact the systems administrator for further help.
Problem:
Application is running slow or has frozen.
Cause:
The system may have run into an error it is unable to recover from or there are
applications using resources in the background.
Solution:
By pressing the key combination ctrl+alt+delete you can bring up the windows task
manager. From the task manager you can examine what resources are being used
by the computer and what applications are slowing it down.
Closing the background processes that are using high amounts of resources my help
to increase the speed of the hire application. If the application has frozen entirely, it
is best to end the application and restart it.
28
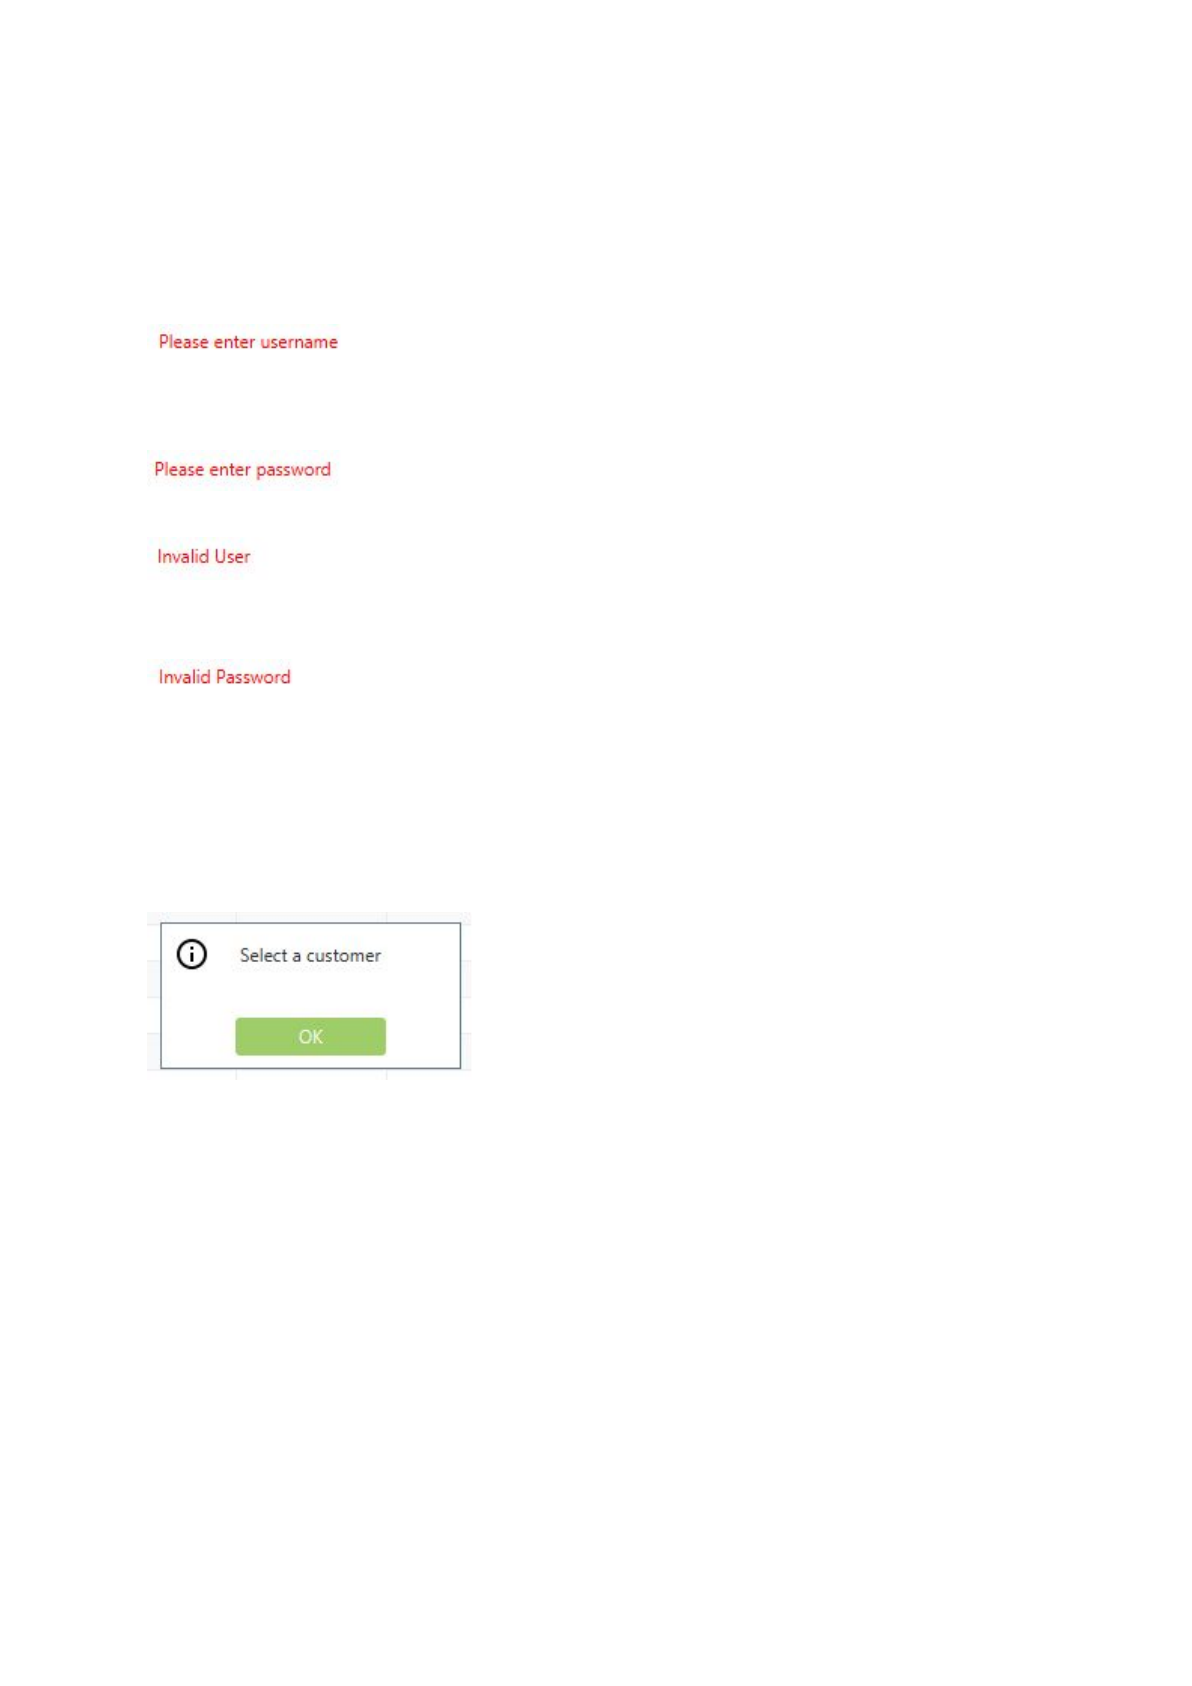
Error messages
Login Errors:
Fill in username field.
Fill in password field.
Username not found in the database, enter a valid username.
Password does not match password stored in the database for that username. Enter
a valid password username combination.
Pop up error windows:
The system performs validation checks on various data entry fields, if the data is not
valid the system will tell you what needs to be corrected. Follow the instructions in
the pop up to solve the error.
29