User Manual
User Manual:
Open the PDF directly: View PDF ![]() .
.
Page Count: 16
USER MANUAL
WILDLIFE DRONES AND FLIGHT PLANS
Team DR BAM
drbam301@gmail.com
Stakeholders
Matthew Evans
Reinhardt Eiselen
Brayan Jansen van Vuuren
Andreas Louw
Deane Roos

User Manual 1 2019/05/17
TABLE OF CONTENTS
1. System Overview ....................................................................................................................... 3
2. System Configuration................................................................................................................. 3
1. Installation ............................................................................................................................. 3
2. Install NodeJS ........................................................................................................................ 3
3. Installing/running server ........................................................................................................ 3
4. Installing/running client ......................................................................................................... 4
2. Getting started .......................................................................................................................... 4
3. Using the system ....................................................................................................................... 4
1. Logging in .............................................................................................................................. 4
2. Map features ......................................................................................................................... 6
3. Choosing reserve ................................................................................................................... 8
4. Viewing the map .................................................................................................................. 11
5. Plotting points of interest .................................................................................................... 12
6. Adding animal tracking data to database ............................................................................. 15
4. Troubleshooting ...................................................................................................................... 15
1. No data received .................................................................................................................. 15
User Manual 2 2019/05/17
Figure 1 Login .................................................................................................................................... 5
Figure 2 Login with details ................................................................................................................. 5
Figure 3 Roads, dams and boarder ..................................................................................................... 6
Figure 4 Rivers and residential areas .................................................................................................. 7
Figure 5 Rivers ................................................................................................................................... 7
Figure 6 Home view ........................................................................................................................... 8
Figure 7 Select Button ....................................................................................................................... 9
Figure 8 Draw box over map area ...................................................................................................... 9
Figure 9 Reserves to choose from .................................................................................................... 10
Figure 10 Reserve selected .............................................................................................................. 10
Figure 11 Features on map .............................................................................................................. 11
Figure 12 Map ................................................................................................................................. 11
Figure 13 Interest point button ........................................................................................................ 12
Figure 14 Place point of interest ...................................................................................................... 13
Figure 15 First point of interest........................................................................................................ 13
Figure 16 Second point of interest ................................................................................................... 14
Figure 17 Third point of interest ...................................................................................................... 14

User Manual 3 2019/05/17
1. SYSTEM OVERVIEW
The primary use of the system is to aid wildlife rangers in protecting wildlife. The system is used to be
able to use tracking data of animals so that the animal movements can be predicted, where the animal
will most likely be in the next 2 hours. This will allow optimal flight plans to be created for drones to
be piloted on to increase conservation of animal. Rangers will also be able to receive patrol routes
that will have the most optimal route for conservation.
Pilots and rangers will be able to add point of interest marker on the map, to indicate a point of
possible interest that may have to be taken into account when plotting flight/ patrol routs.
The administrator of the system will be able to add new users, delete existing users, specify/update
the reserve properties,
Jargon
-Node JS is an open-source, cross-platform JavaScript run-time environment that executes
JavaScript code server-side.
-Point of interest is a point or points that the user deems as important this could be because
of a poaching incident, fence that needs repairs, dead animal or other suspicious activities.
2. SYSTEM CONFIGURATION
1. Installation
Required software: Node JS for server.
2. Install NodeJS
2.1. Download https://nodejs.org/en/
2.2. Run the installer.
2.3. Follow the prompts in the installer.
2.4. Restart your computer.
The software will be available on the following GitHub link : https://github.com/cos301-2019-
se/Wildlife-Drones-and-Flight-Plans.git.
On the GitHub page click on Clone or download, then select Download ZIP. Once the zip file has been
downloaded unzip the folder.
3. Installing/running server
3.1. In the extracted folder go into the server folder.
3.2. Open a command prompt in the server folder.
3.3. In the command prompt type: npm install.
3.4. After the download and installation is complete, in the command prompt type: npm run start.

User Manual 4 2019/05/17
4. Installing/running client
4.1. In the extracted folder go into the client folder.
4.2. Open a command prompt in the client folder.
4.3. In the command prompt type: npm install.
4.4. After the download and installation is complete, in the command prompt type: npm run start.
2. GETTING STARTED
Users can only be added to the system via the administrator, the administrator can only be added by
the system administrator when setting up the database.
A user (Ranger/Pilot) can access the system by entering their given user id and password on the log in
page further described at Figure 1Logging in on page 4.
After a user has logged-in to the system, the following can be done depending on the role of the user:
• The Pilot will be able to generate a flight plan for his/her shift via the client application on the
provided computer that has the software installed.
• The Ranger will be able to generate patrol routes via the client application that will be on the
provided smartphone.
• The user will be able to toggle features on the map such as routs used, locations of drones
and rangers, points of interest and hotspots.
3. USING THE SYSTEM
Pre-condition:
-The user (pilot/ranger/administrator) is logged into the system
-The user has basic skills to work with computers and
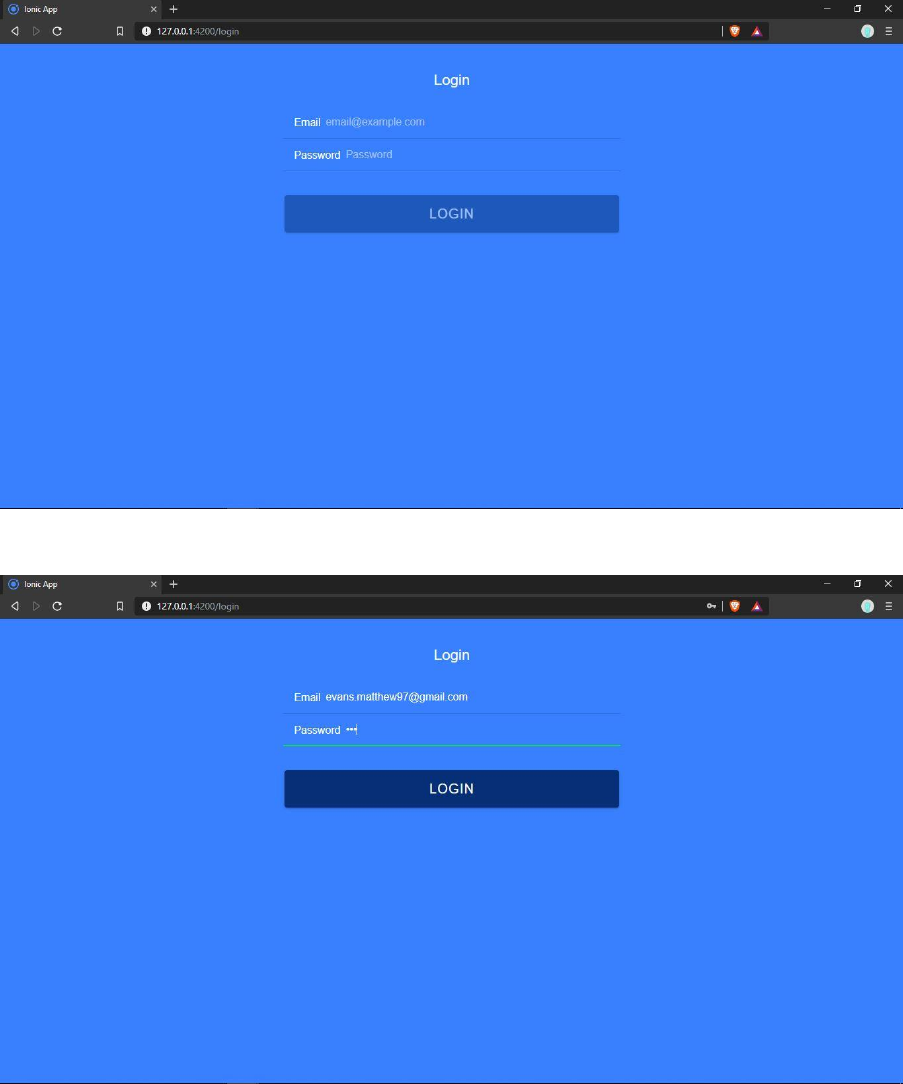
1. Logging in
1.1. The user starts the application on the platform used.
1.2. Start the mobile/desktop application with the name Wildlife Drones and Flight Plans.
1.3. The user will be presented with a login screen with the following fields: username and
password. After the application has loaded and opened. Shown in Figure 1.
1.4. The user has to fill in the username and password in the corresponding fields. Shown in Figure
2.
1.5. The user will have to click the login button underneath the password box at the bottom
centre of the screen. Shown in Figure 2
1.6. The user will be notified of successful or unsuccessful login
1.6.1. If login was successful, the user will be shown the map and related features. Shown in
Figure 6.
1.6.2. If the login was unsuccessful the user will be notified of an unsuccessful login and will
be able to repeat step 1.1.1.3.
User Manual 5 2019/05/17
Figure 1 Login
Figure 2 Login with details
User Manual 6 2019/05/17
Pre-condition:
The user (pilot/ranger/administrator) is logged into the system.
2. Map features
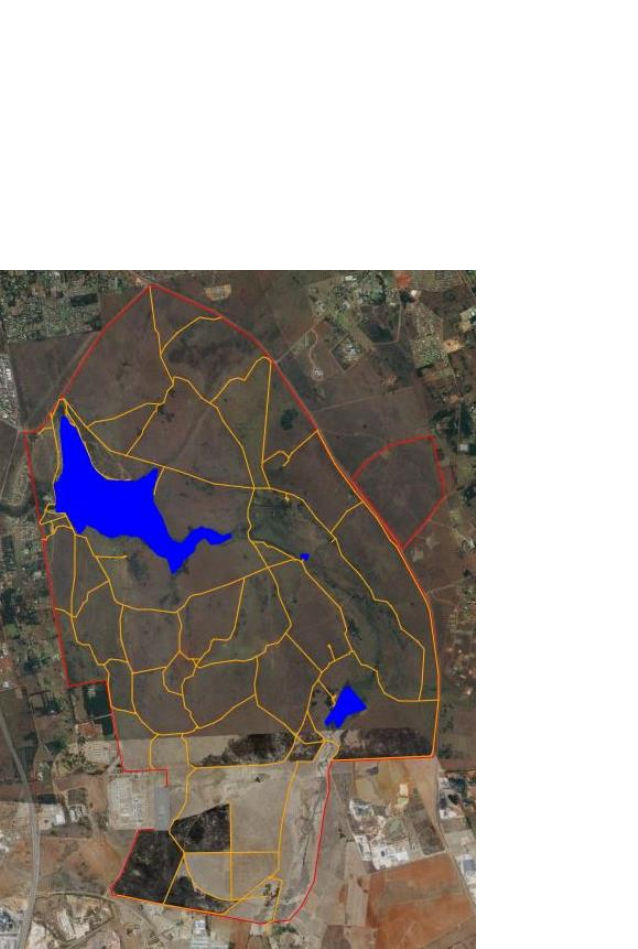
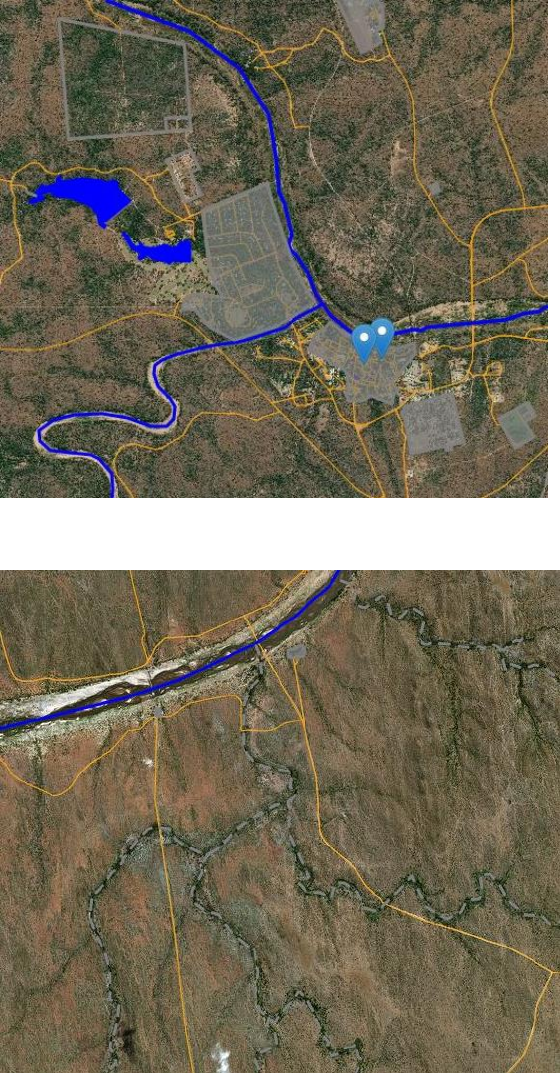
2.1. Roads shown with orange lines (Figure 3), reserve boarder shown with red lines (Figure 3),
dams shown with blue blobs (Figure 3), residential area in reserve shown with grey blocks
(Figure 4), rivers shown with blue lines (Figure 4), volatile shown with dashed grey lines
(Figure 5).
Figure 3 Roads, dams and boarder
User Manual 7 2019/05/17
Figure 4 Rivers and residential areas
Figure 5 Rivers
User Manual 8 2019/05/17
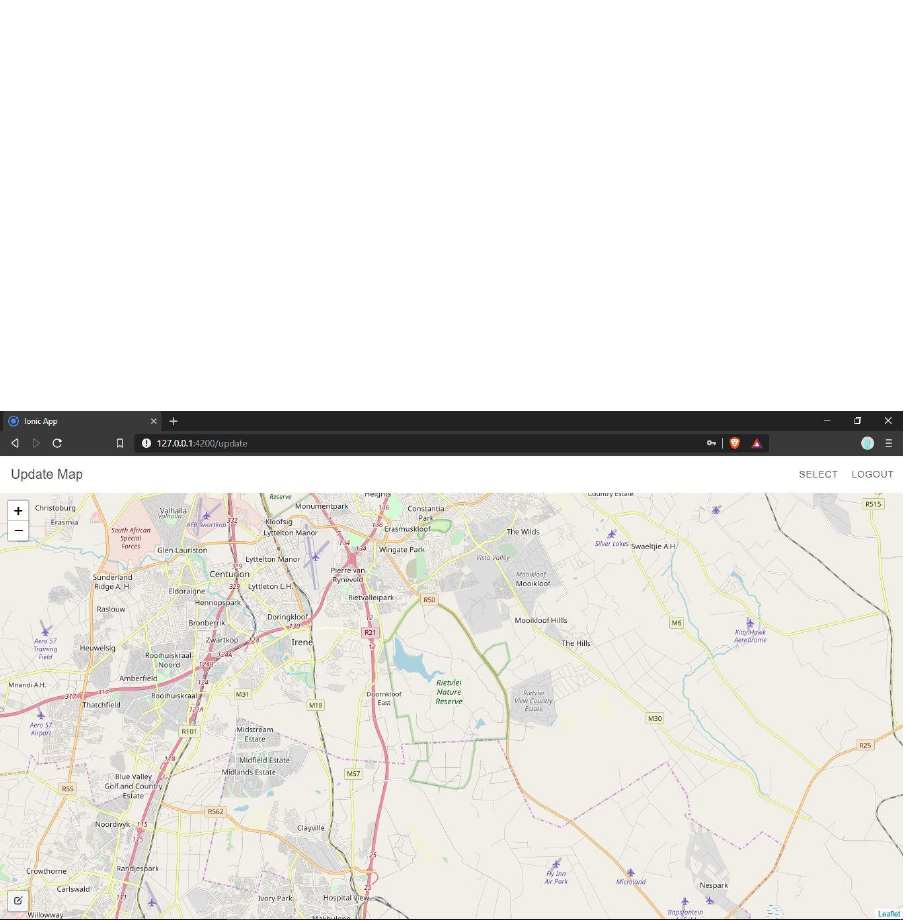
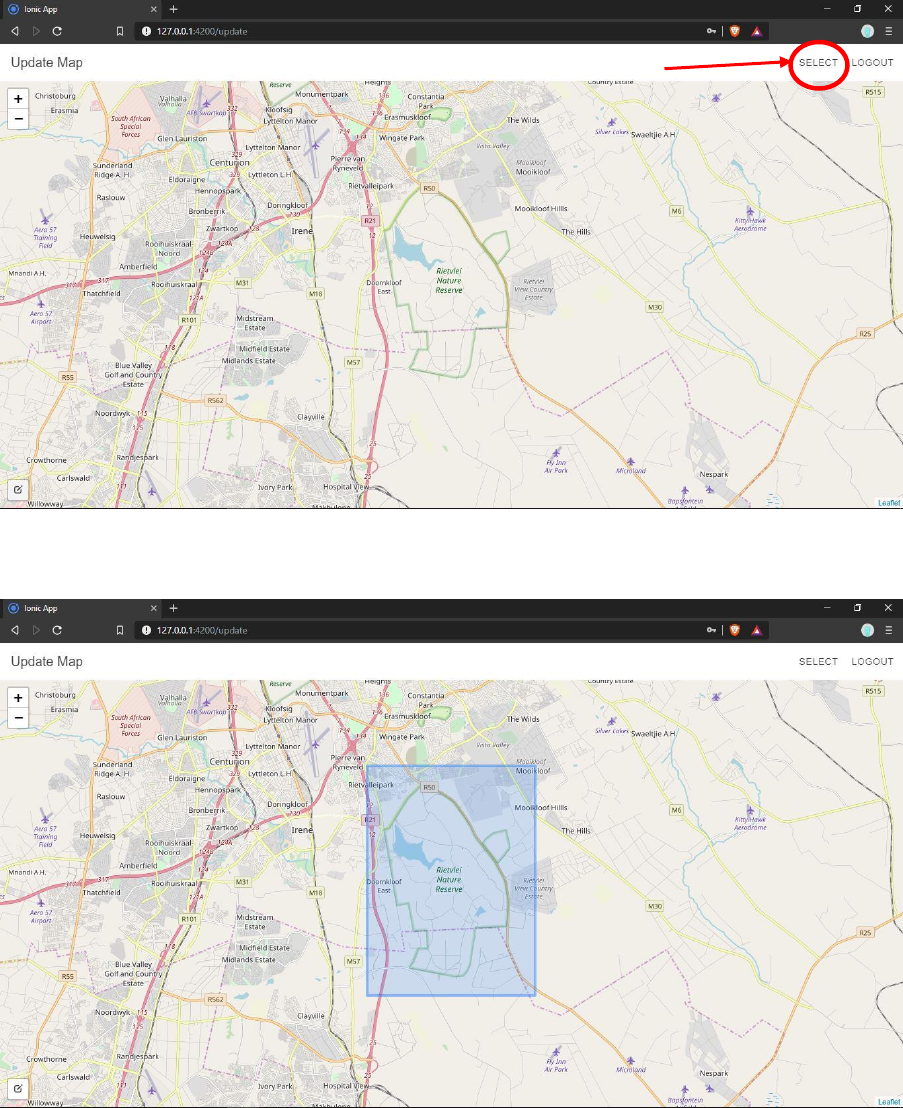
3. Choosing reserve
3.1. The administrator logs into the client server system. Shown by Figure 1, Figure 2 and Figure
6Figure 6.
3.2. The administrator then clicks on the select area button, on the top right-hand corner of the
screen. Shown with red arrow and circle in Figure 7.
3.3. The administrator then draws a box over the reserve that will be used. Shown in Figure 8.
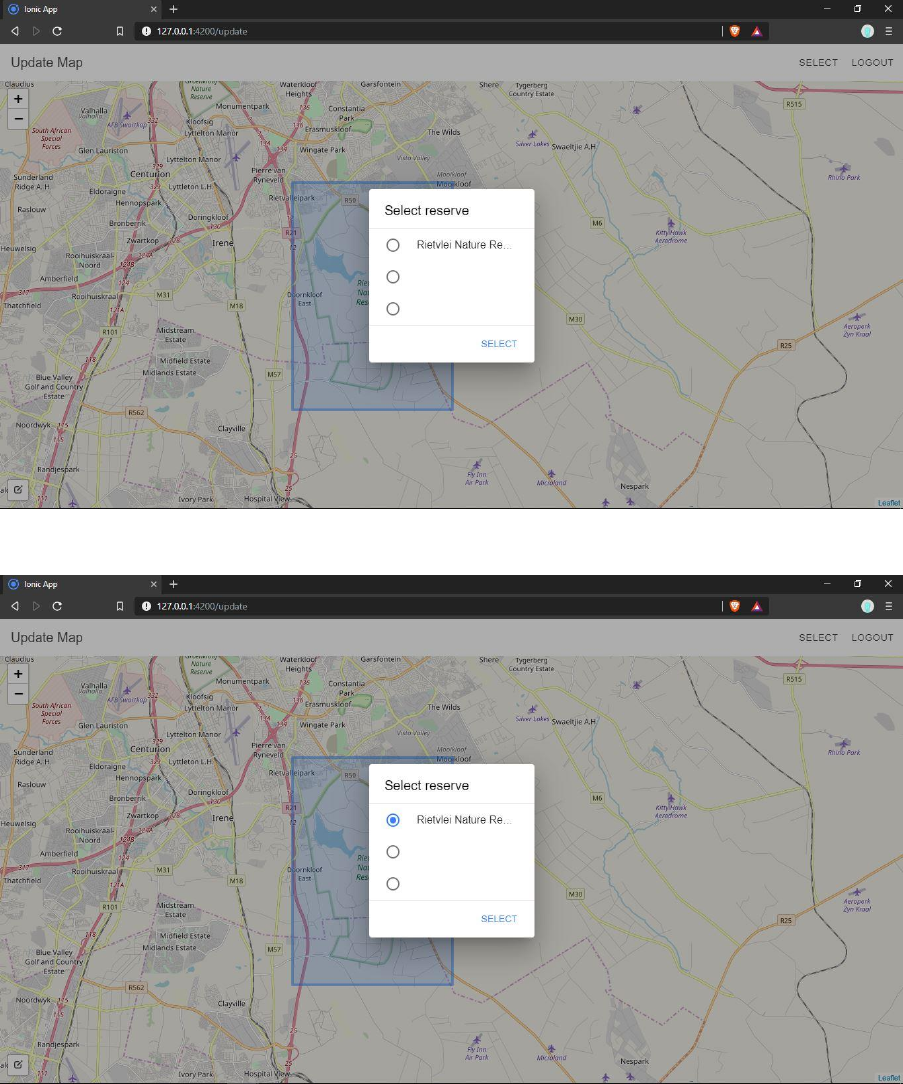
3.4. A notification box will appear that show all the reserves that are in the selected area. Shown
in Figure 9.
3.5. The administrator will then select the appropriate reserve if it appears in the list. Shown in
Figure 10
3.5.1. If the reserve does not appear ….
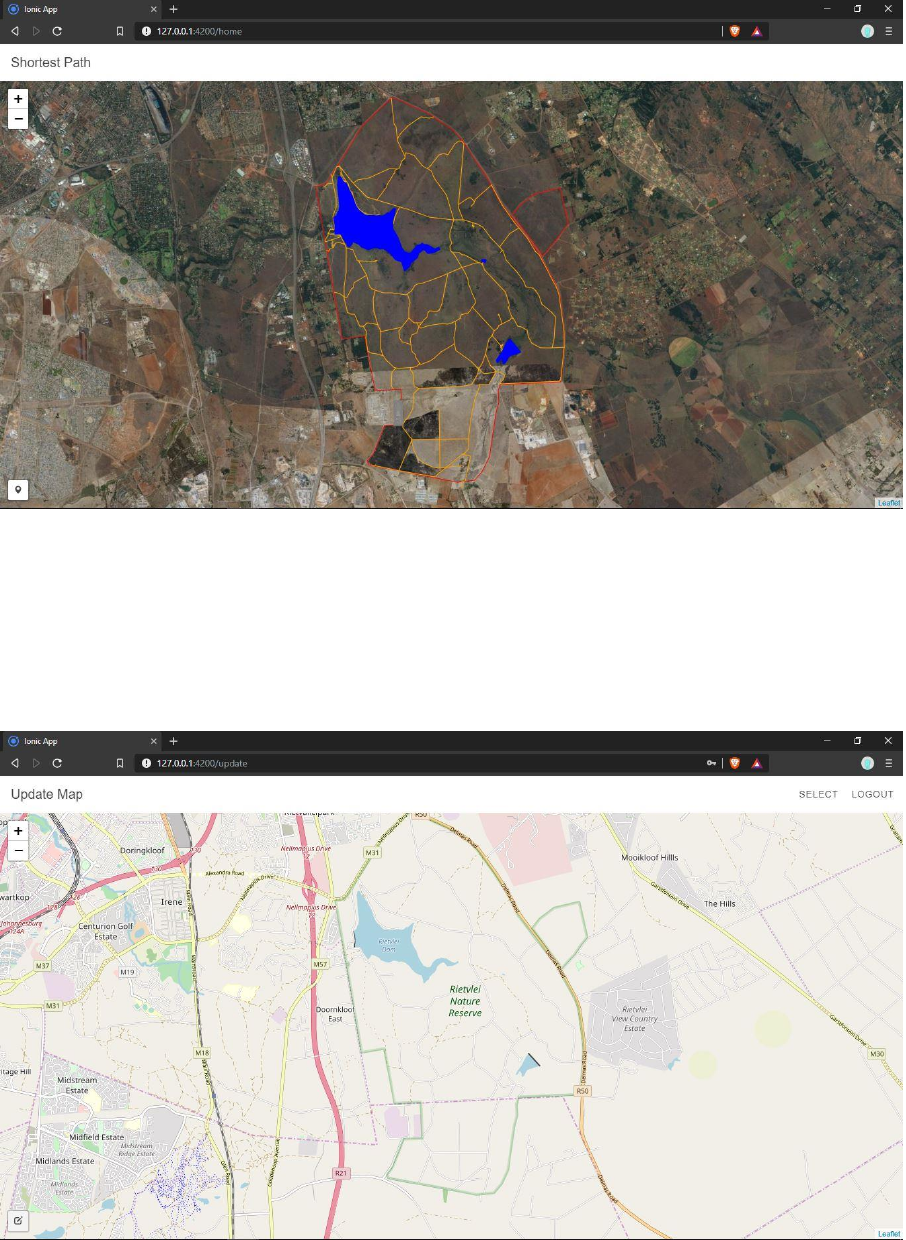
3.6. The system will then map the following features on the map: dams, rivers, residential areas
and roads. Shown in Figure 11
Figure 6 Home view
User Manual 9 2019/05/17
Figure 7 Select Button
Figure 8 Draw box over map area
User Manual 10 2019/05/17
Figure 9 Reserves to choose from
Figure 10 Reserve selected
User Manual 12 2019/05/17
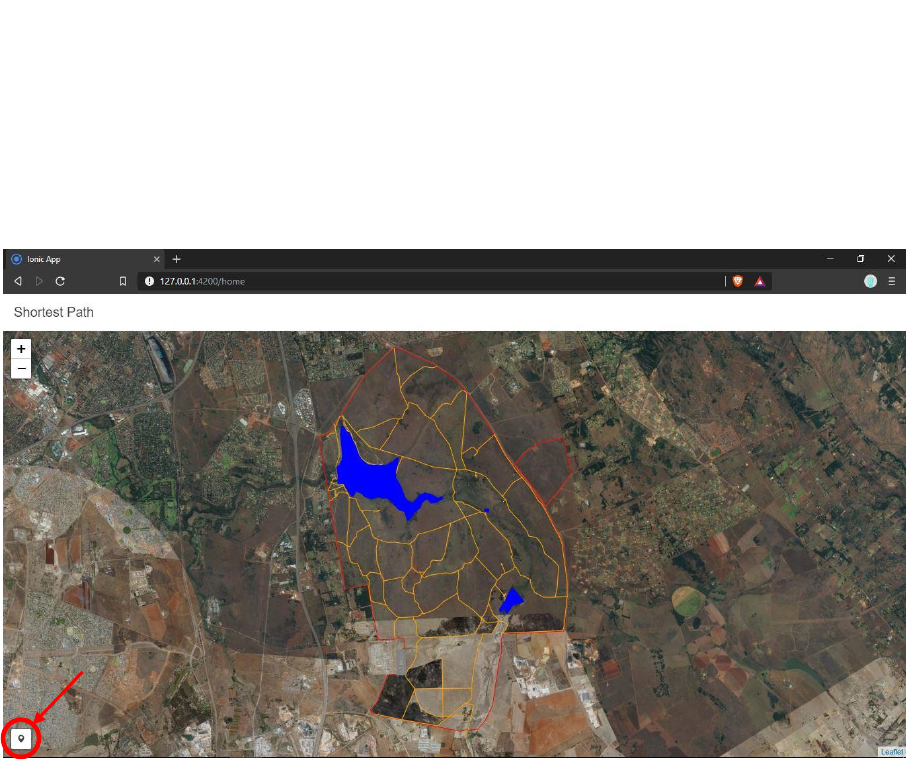
5. Plotting points of interest
5.1. A user (pilot/ranger) logs into the client system (desktop for pilot and mobile for ranger).
5.2. The user clicks on the point of interest button on the bottom left corner of screen. Indicated
with red circle and arrow in Figure 13.
5.3. The user clicks on the map where the point of interest is. Shown in Figure 14 and Figure 14.
5.4. The system will then provide the user will the shortest path (strait path, not currently
following roads), if multiple points were plotted, that will visit all the points indicated by the
user. Shown in Figure 15-Figure 17.
Figure 13 Interest point button
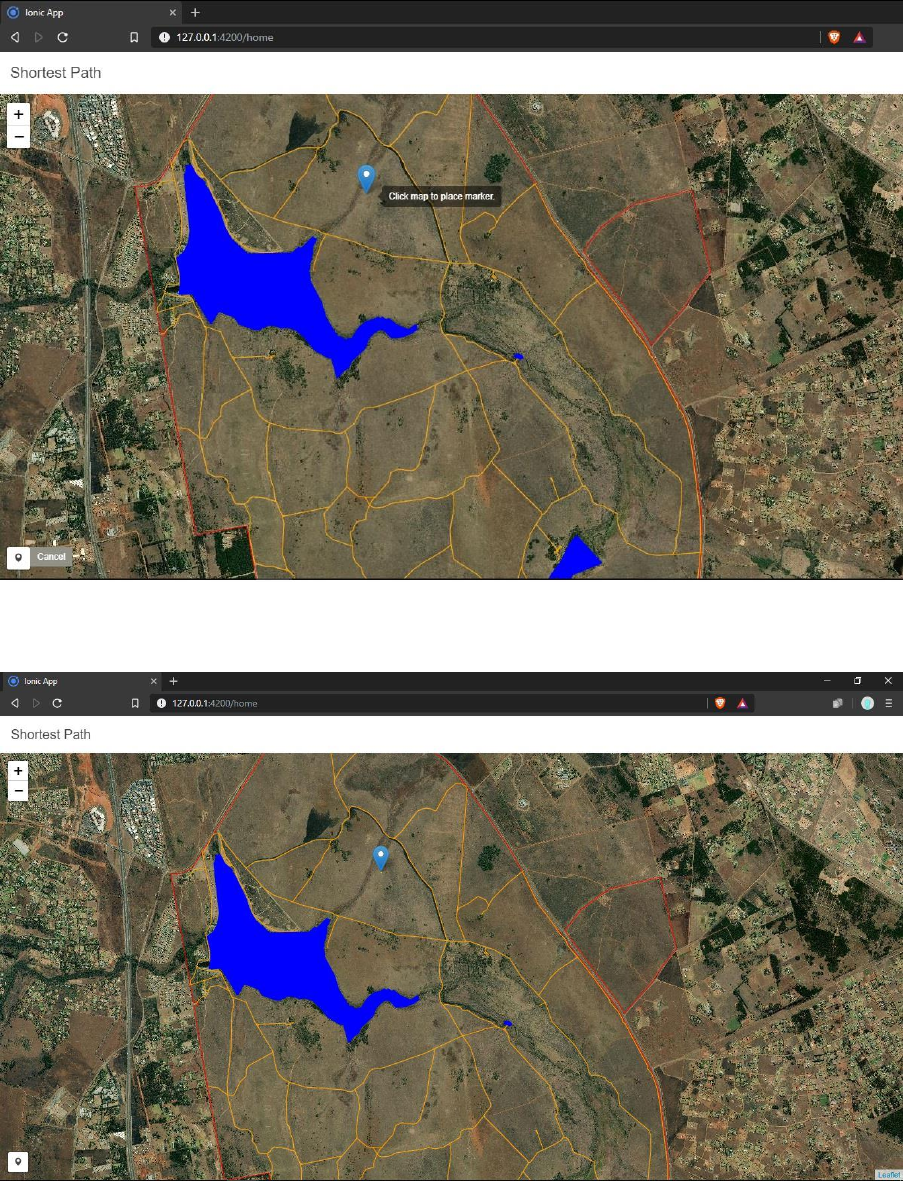
User Manual 13 2019/05/17
Figure 14 Place point of interest
Figure 15 First point of interest
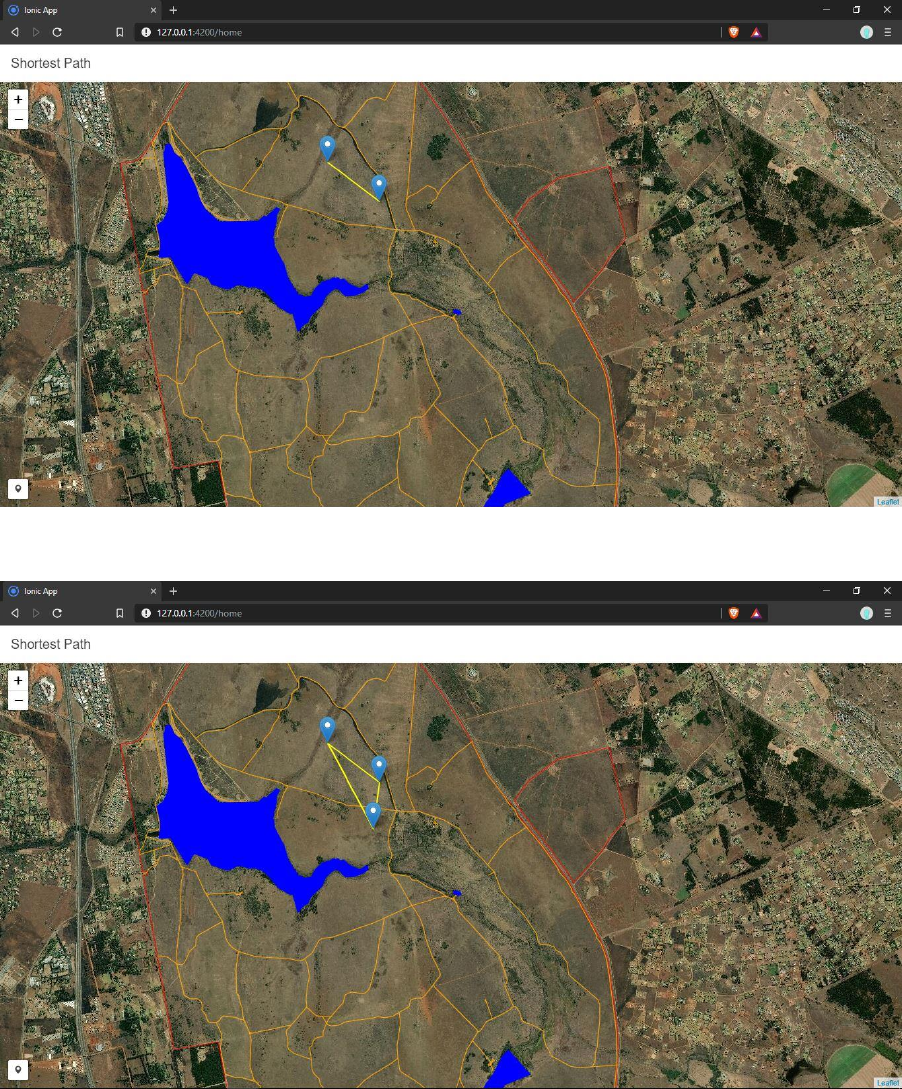
User Manual 14 2019/05/17
Figure 16 Second point of interest
Figure 17 Third point of interest

User Manual 15 2019/05/17
6. Adding animal tracking data to database
6.1. The administrator will use the admin interface.
6.2. The administrator selects add data via csv file button.
6.3. The administrator clicks the upload csv file button.
6.4. The administrator selects the file to be upload.
6.5. The administrator selects the upload to database button.
The csv file has have to be comma (‘,’) separated data with the following headers in the following
format: event-id,visible,timestamp,location-long,location-lat,external-temperature,habitat,sensor-
type,individual-taxon-canonical-name,tag-local-identifier,individual-local-identifier,study-name.
4. TROUBLESHOOTING
1. No data received
1.1. If no map data is being downloaded/ received.
Make sure device is connected to internet.
1.2. If login fails with correct authentication details (email and password)
Make sure device is connected to internet.
