Wifi Strandbeest Instructions
Wifi%20Strandbeest%20Instructions%20V1-0
User Manual:
Open the PDF directly: View PDF ![]() .
.
Page Count: 4
Wifi Strandbeest 1.0 Instructions Page 1/4
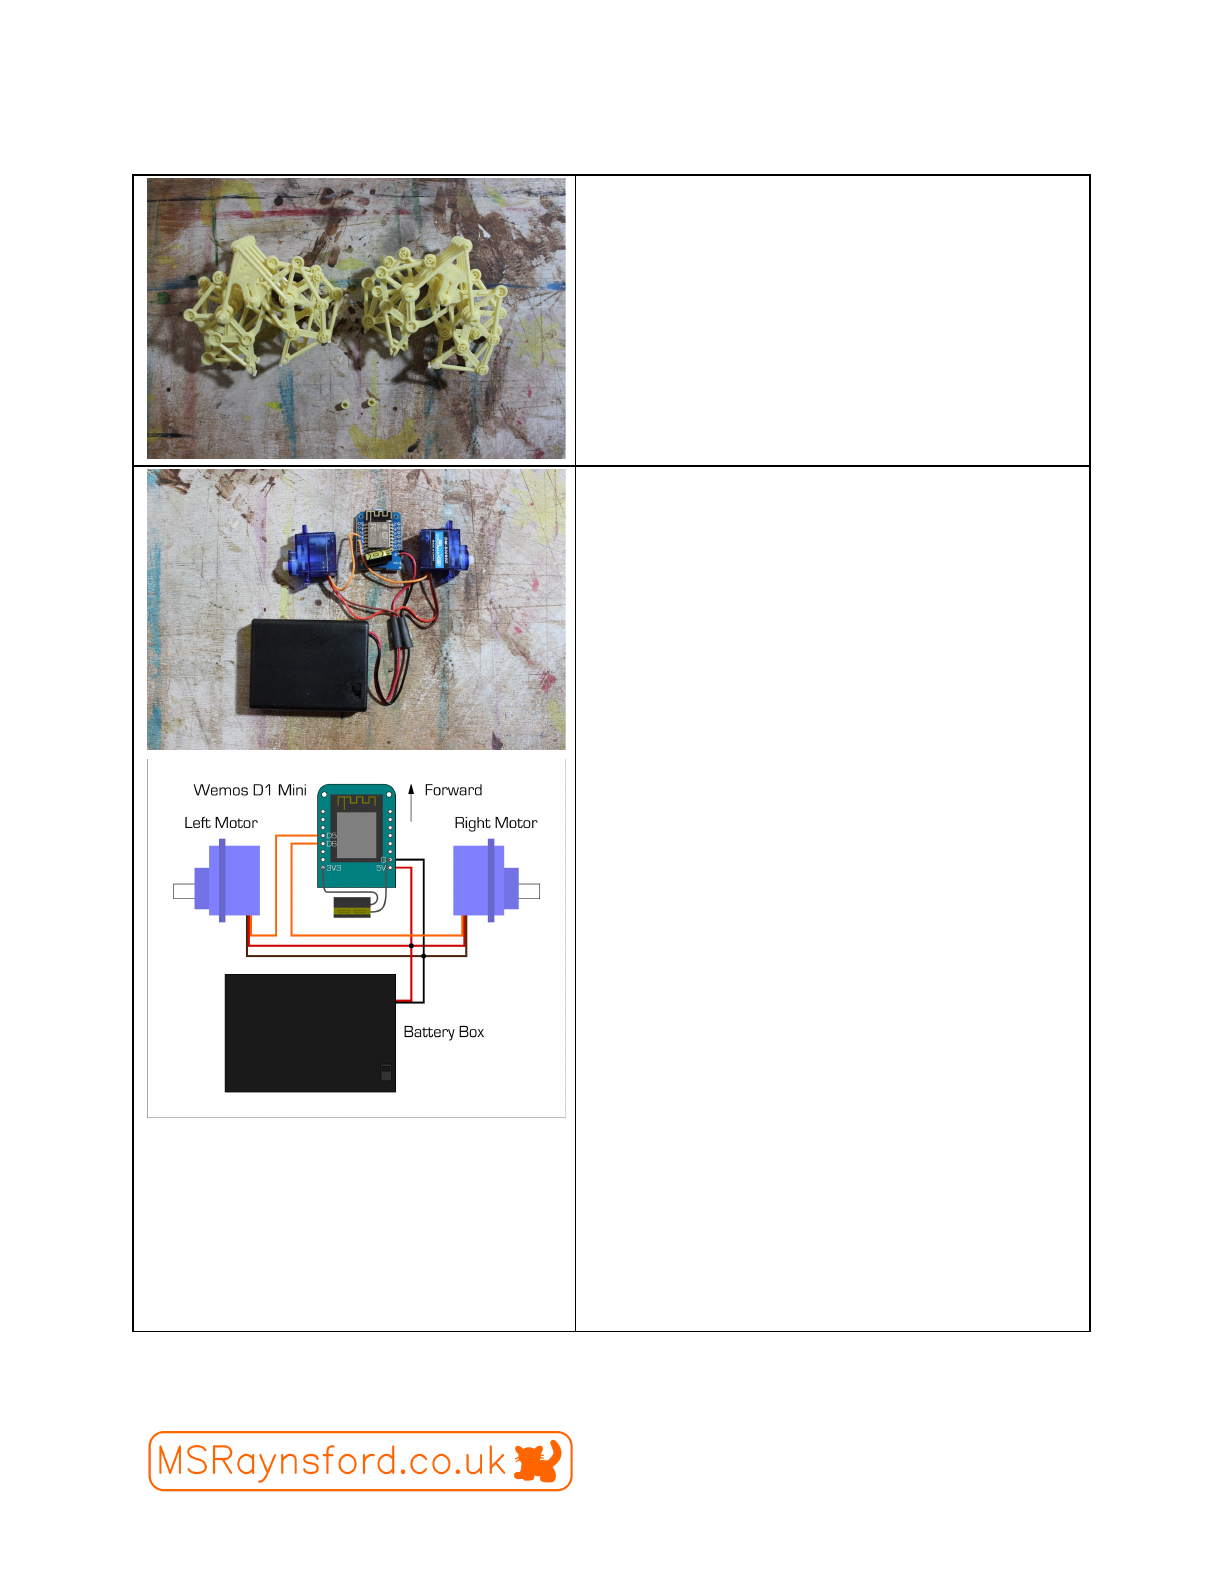
Step 1: Make the legs
Assemble the strandbeest kit, according to their
instructions, into two identical sections each
containing 6 legs. You will not need to add the
gears or the windmill blades for this kit.
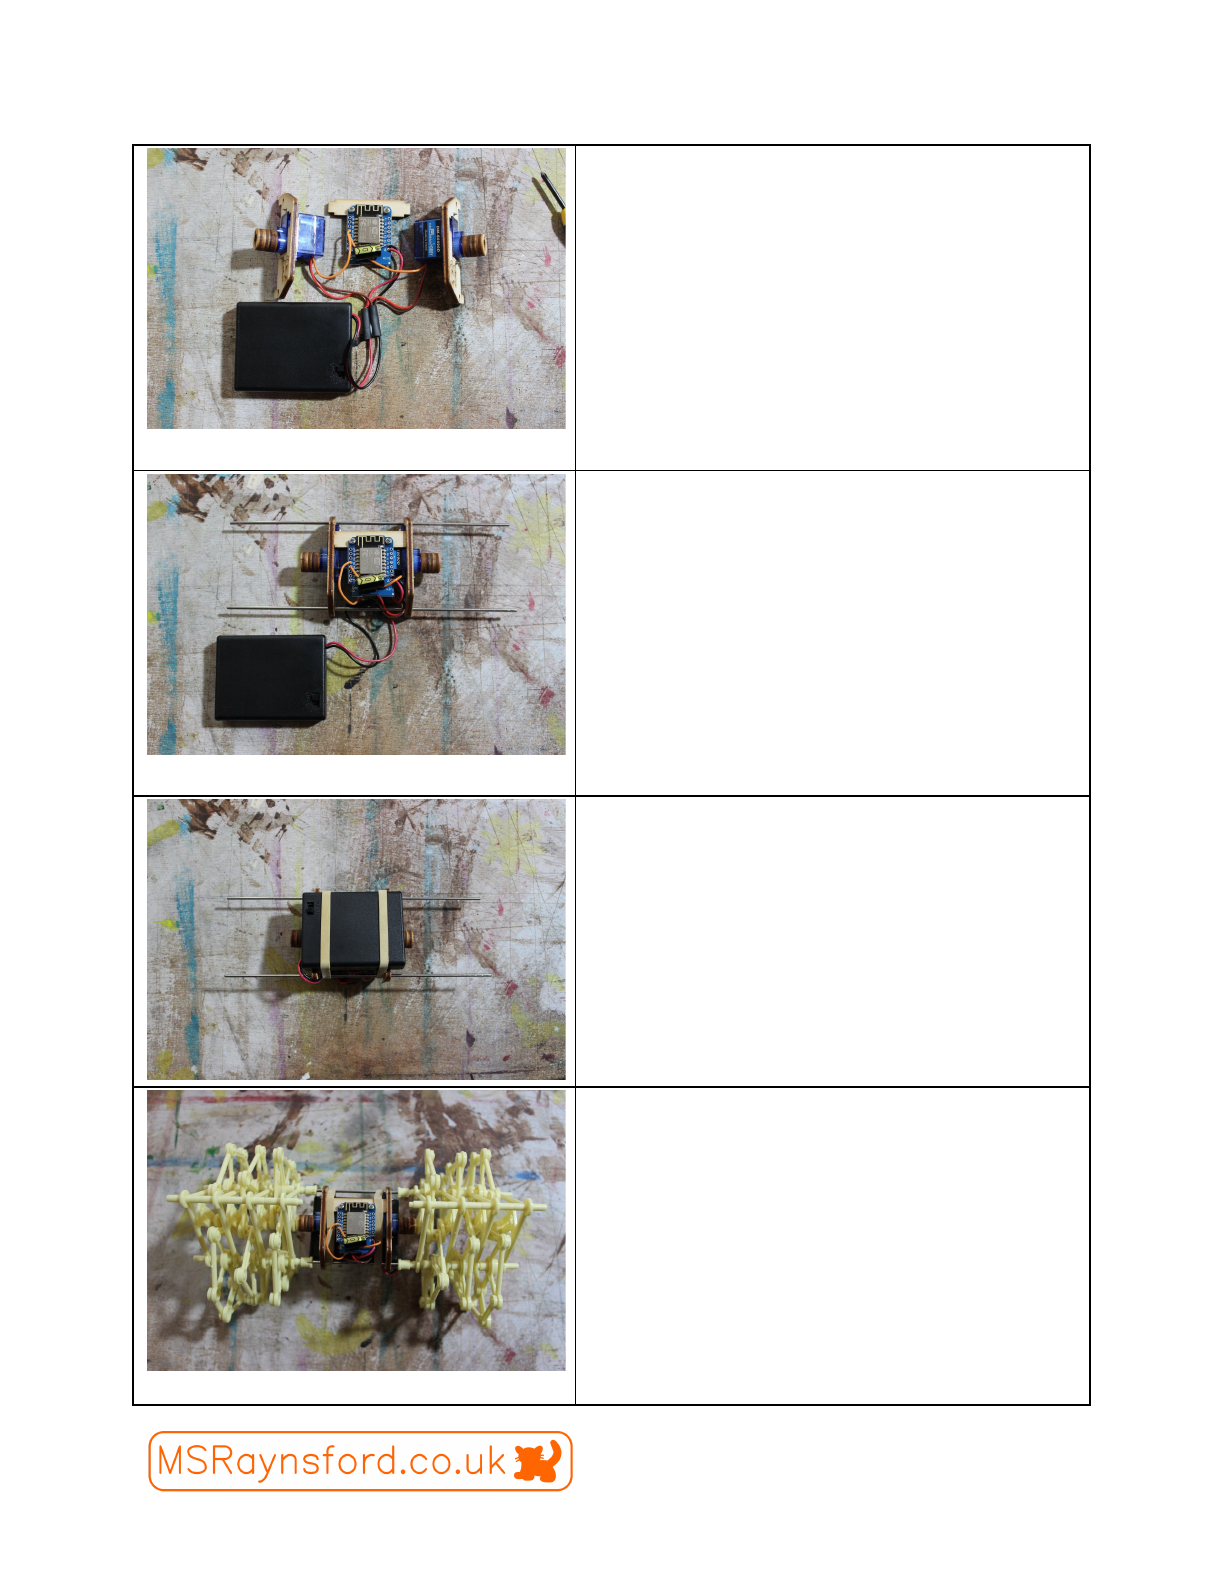
Step 2: Wire the electronics
Cut the motor wires down to half the size, the
vehicle is small and you don’t need the
connectors. Cut the battery wires in half too but
keep the off cut.
Bend the wires of the capacitor, fold the long leg
right back against the capacitor and put a little
bend in the end. Add a small curve to the negative
leg.
Solder the long leg into the ‘3V3’ hole on the
Wemos D1. Solder the negative leg of the
capacitor and the black offcut wire into the hole
marked ‘G’.
Solder the red offcut wire into the hole marked 5V,
these black and red wires will provide power to
the Wemos board.
Connect the orange wire from the left motor and
solder it into ‘D5’ on the wemos board, connect
the orange wire from the right motor into ‘D6’ on
the wemos board.
Finally connect all three black and red wires
together, and solder those to the battery box
wires. Cover the join with the heat shrink tubing
provided.
Page 1/4
Wifi Strandbeest 1.0 Instructions Page 2/4
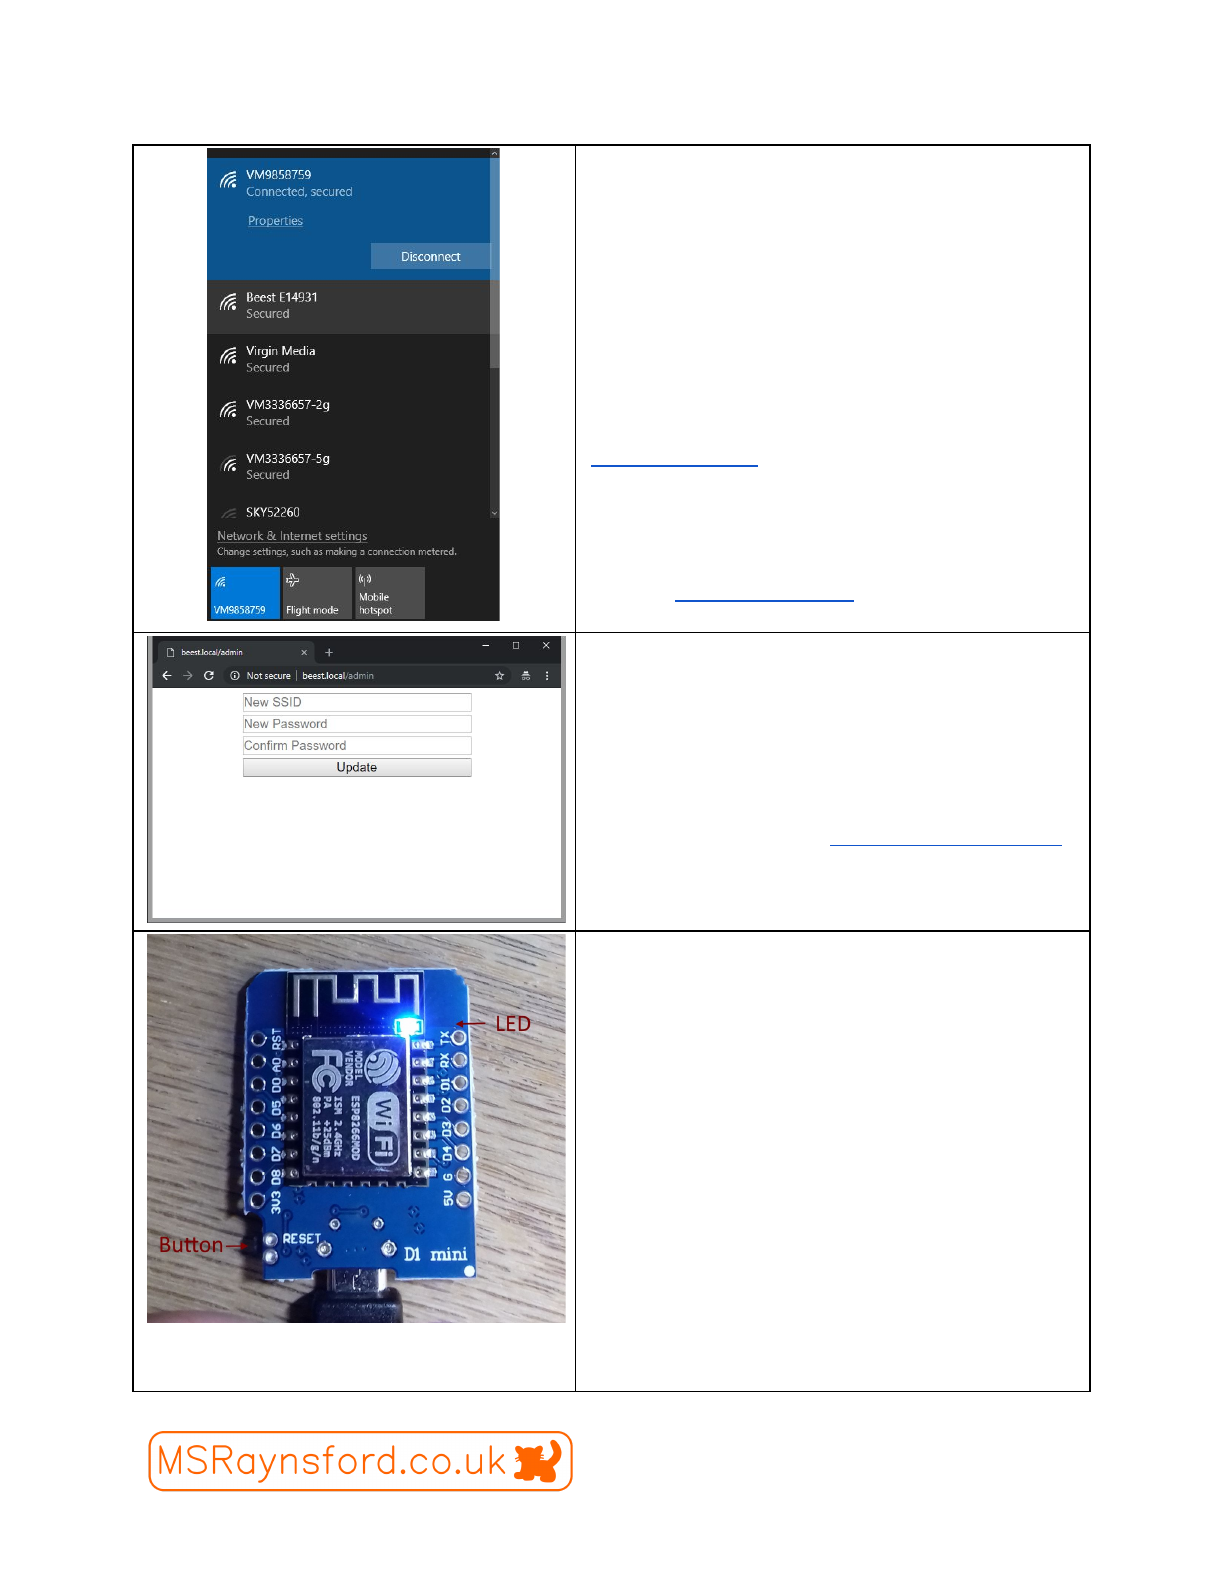
Step 3: Assembling the motor unit
Screw the Wemos D1 onto the small bar using the
M2x6mm screws.
Screw the motors onto the motor plates using the
flanged self tapping screws.
Screw the hubs onto the motor shafts using the
tiny No2 gauge screws.
Step 4: Add metal bars
Use the two long metal bars from the strandbeest
kit to hold the motor panels in place. This is a
friction fit and should be tight on the bar. They
may need some gentle persuasion.
Once the two mounts are close enough to each
other, fit the control board in between the mounts
and slides the sides up tight to hold it in place.
Step 5: Secure the battery box
Use the two rubber bands to wrap around the
motor unit and secure the battery box into place
underneath. The bands should avoid the power
switch on the box.
Step 6: Fit the motor unit to the legs
The two metal bars from the motor unit should
now slide into the strandbeest legs. Take care to
align the motor hubs with the strandbeest
camshaft when closing it all up.
Page 2/4
Wifi Strandbeest 1.0 Instructions Page 3/4
Step 7: Connect to the WiFi
Once powered up the ESP8266 device will start
it’s own WiFi access point. Connect to the kit
using your mobile device. The default password is
‘password’ the SSID should be “Beest xxxxxx”
Once connected the device should hijack your
browser and steer you to the correct page but if it
doesn’t, open your browser and navigate to
‘http://beest.local/’. This page will present you with
a joystick control to drive the vehicle.
If your device is unable to resolve the DNS name
for the strandbeest you can go direct to the IP
address ‘http://192.168.4.1/’
Step 8: Changing the WiFi
It is possible to change the WiFi name and
password of the device and it is recommended to
do so (‘password’ is a terrible password).
Navigate the browser to ‘http://beest.local/admin/’
and you will be presented with a page that allows
you to change the SSID and the password.
Step 9: Reset the WiFi values
If you ever forget the WiFi details it is possible to
connect to the device without knowing them.
There is a blue LED on the ESP device which
flashes for 2 seconds upon start up. If you push
the reset button, or cycle the power while this LED
is lit the strandbeest will create a new network
with the name ‘AP Config’. This network is
unsecured allow you access to the admin page
without any password.
If you restart the device normally it will return to
the stored SSID and password (or any new one
that you set)
Page 3/4
Wifi Strandbeest 1.0 Instructions Page 4/4
Step 10: Driving the strandbeest
The main page for the strandbeest is a simple
joystick control. The red dot represents the
position of the joystick and this can be dragged
around on a touch screen or by mouse. Simply
move the joystick upwards and the strandbeest
will drive forward.
Step 11: Adjusting the strandbeest
There is a chance that the strandbeest will not
drive forwards immediately, it appears some of
the motors are wired in the wrong direction. If this
occurs on your device then simply visit
‘http://beest.local/setup’.
The checkboxes will allow you to reverse the
direction each of the motors can turn in. The
changes will not take effect until you press the
update button.
Page 4/4
