Windows Install Instructions
User Manual:
Open the PDF directly: View PDF ![]() .
.
Page Count: 13
Installation of Python – Windows
If you already have Python installed on your computer, please check its version.
We will be teaching Python3. There are many major differences between Python2.x and
Python3.x. For the purpose of learning Python, feel free to use whatever version your
heart desires. However, it is best to get Python3.7 working so we can work with
PyGame. This is the version we will be using.
1) Visit https://www.python.org/downloads/release/python-373/ to download
Python 3.7. The latest version (as of June 10th, 2019) is Python 3.7.3, which is the
version you will probably want to use. Follow this link to download the 64-bit
Python installer - https://www.python.org/ftp/python/3.7.3/python-3.7.3-
amd64.exe.
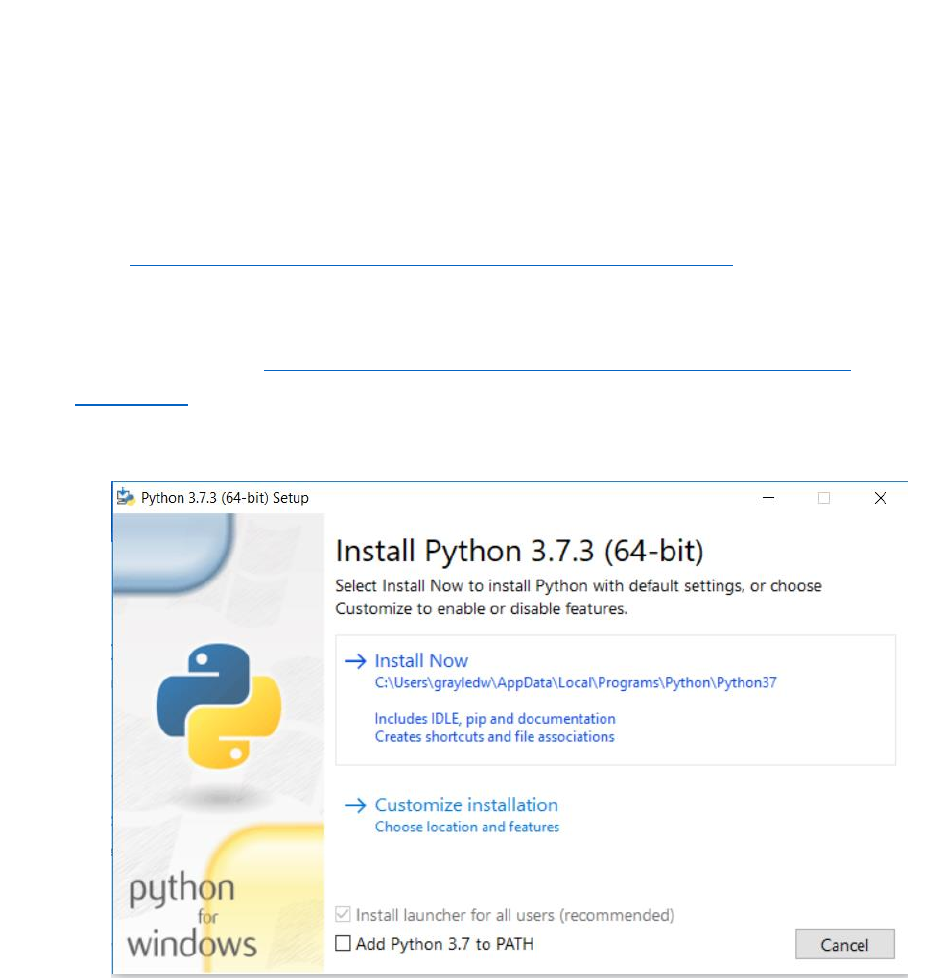
2) Run the Python installer you downloaded by double-clicking it.
a) You should see a screen that looks like this:
b) Select install now. Make note of the location where Python is being installed
on your machine (this is the C:\Users\.... business you see in the screenshot
from 2a). We may need this later if we need to add Python to your
Environment Variables.
c) Once you’ve selected install now you should see a screen like this:
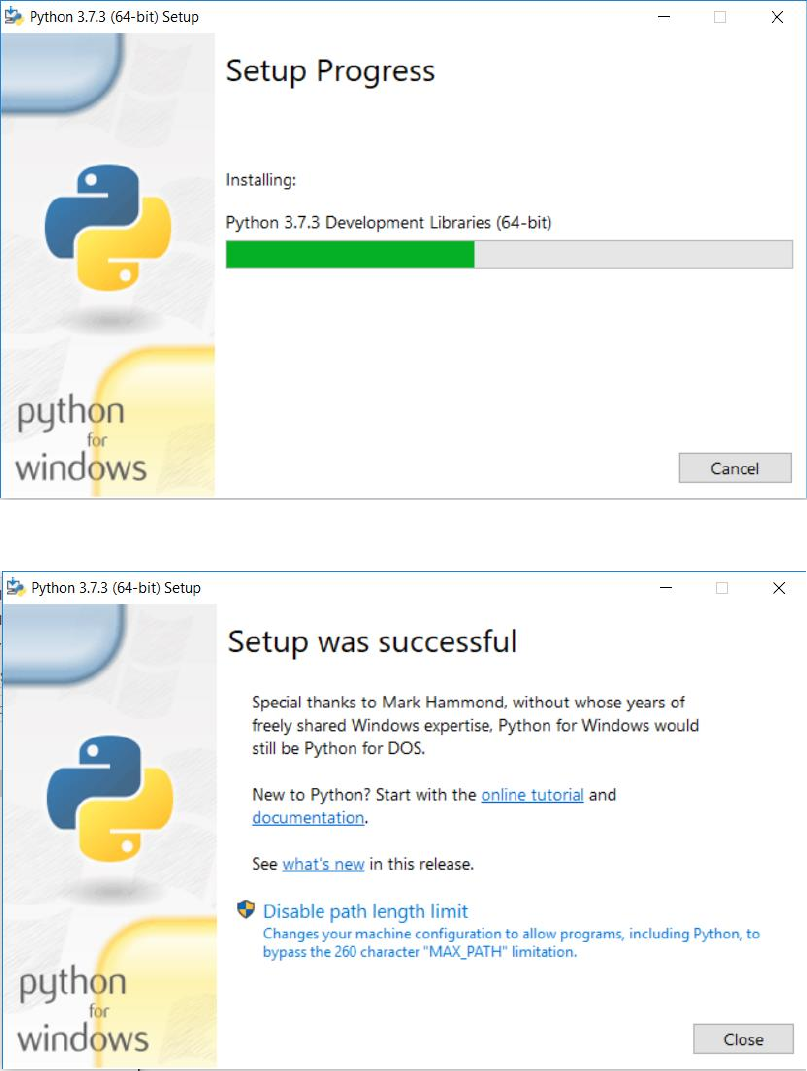
d) If everything goes as planned, once installation is completed a screen like this
should appear to you:
e) If you encountered any issues going through this process, don’t hesitate to get
ahold of one of your teaching assistants to get some help. ‘
Testing your Python Installation
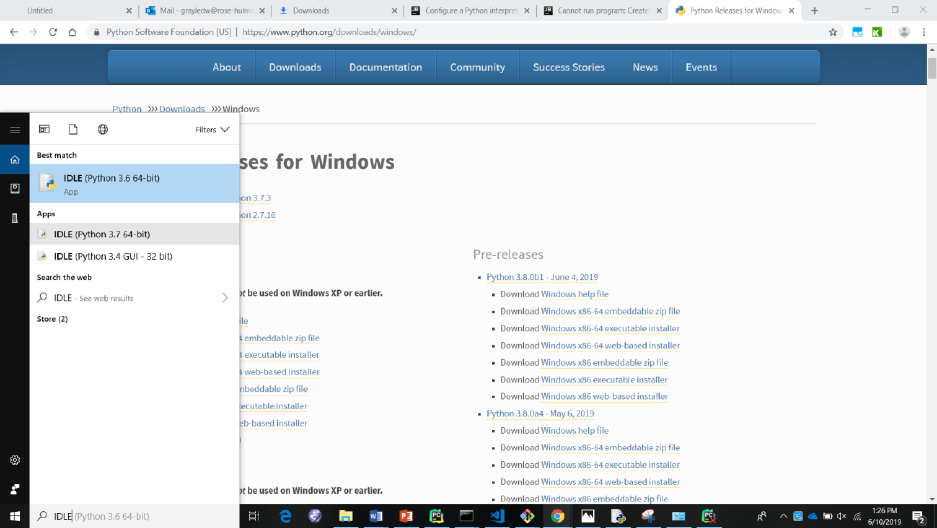
1) Let’s make sure that our Python installation works. First, click on your search
button in the bottom left hand corner of your screen.
2) Type “Idle”. You should see IDLE (Python 3.7 64-bit) as one of your results. You
should open this now.
3) IDLE should look like this:
4) On the first line type, “print(‘I’ve successfully installed Python!’)”, and you
should see this result:
5) You’re good to go! Keep this open, we’ll use it again later.
Installation of PyCharm and PyGame – Windows
PyCharm is the development environment we will be using throughout the course of
Operation Catapult. This is where all the magic will happen, and you will begin to write
your very own Python programs!
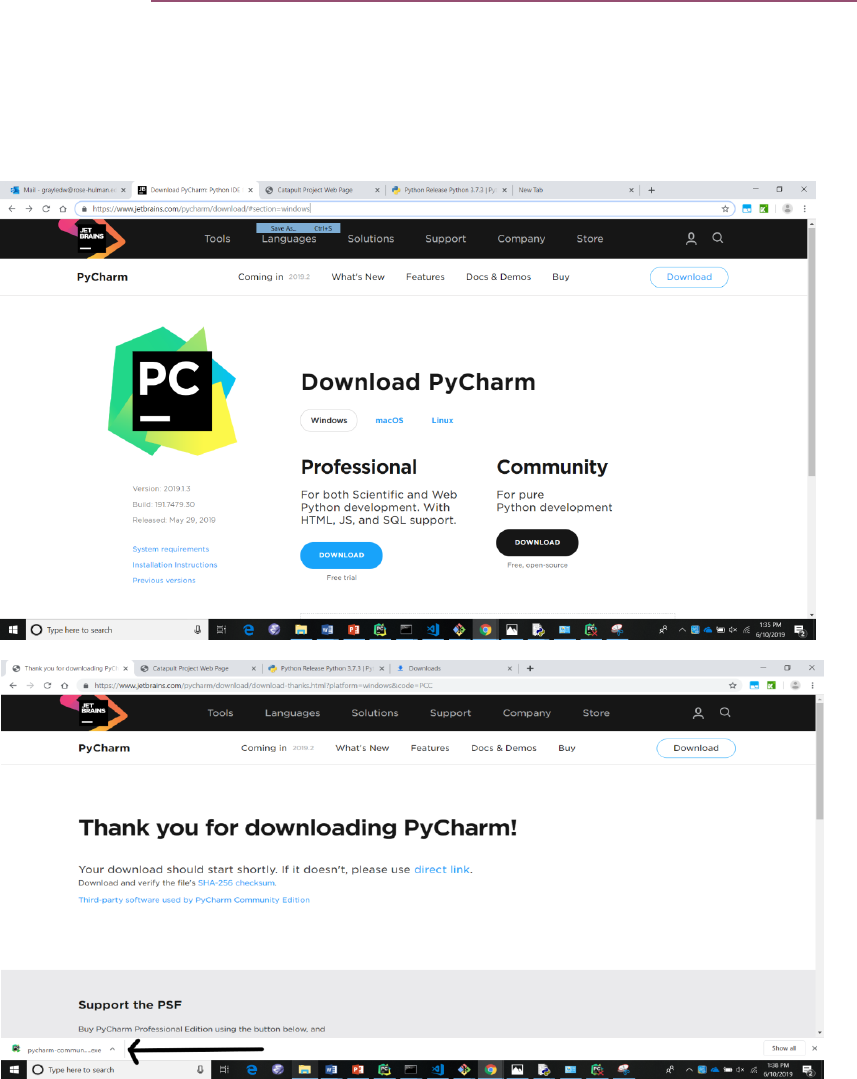
1) Visit this link https://www.jetbrains.com/pycharm/download/#section=windows.
2) We are going to want to install the free, open-source Community version of
PyCharm. Click on the Download button under Community. Upon doing so you
should be redirected to a Thank You screen, and your installer should appear in
the lower left hand corner of your screen. If not check under “Downloads” in
your browser, and you should be able to find it there.
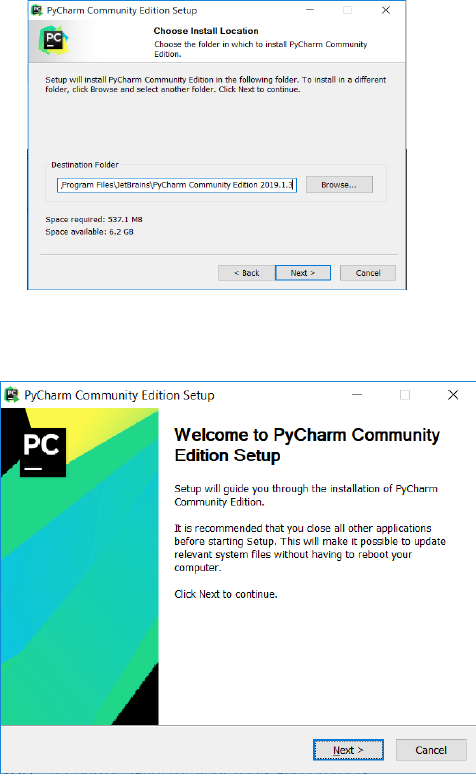
3) Click on the installer to get started. You should see this screen. Click ‘Next’.
4) On the following screen it will ask where you would like to keep your PyCharm
installation. Accept the default. Click ‘Next’.
5) Next you’ll be asked to configure your installation. Check the checkboxes next to
“64-bit launcher”, “Add “Open Folder as Project””, and “.py” text. Click “Next”.
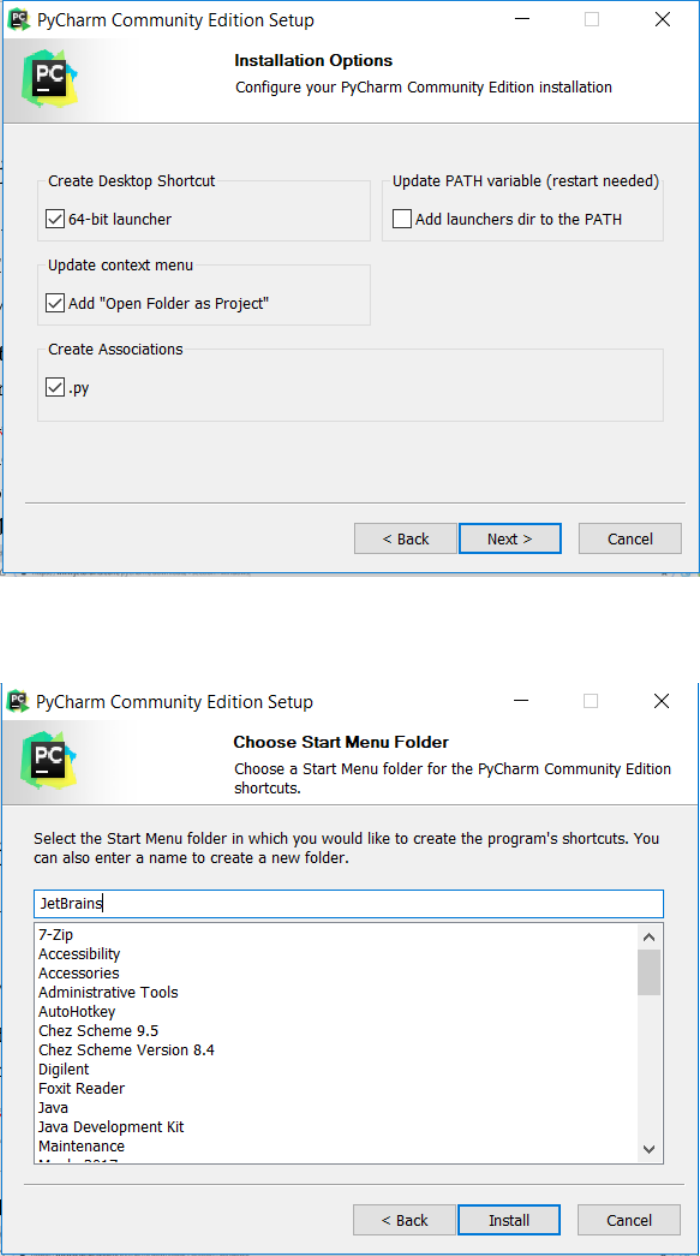
6) The next screen you will see will be “Choose Start Menu Folder”. Accept the
default of “JetBrains” and click Install.
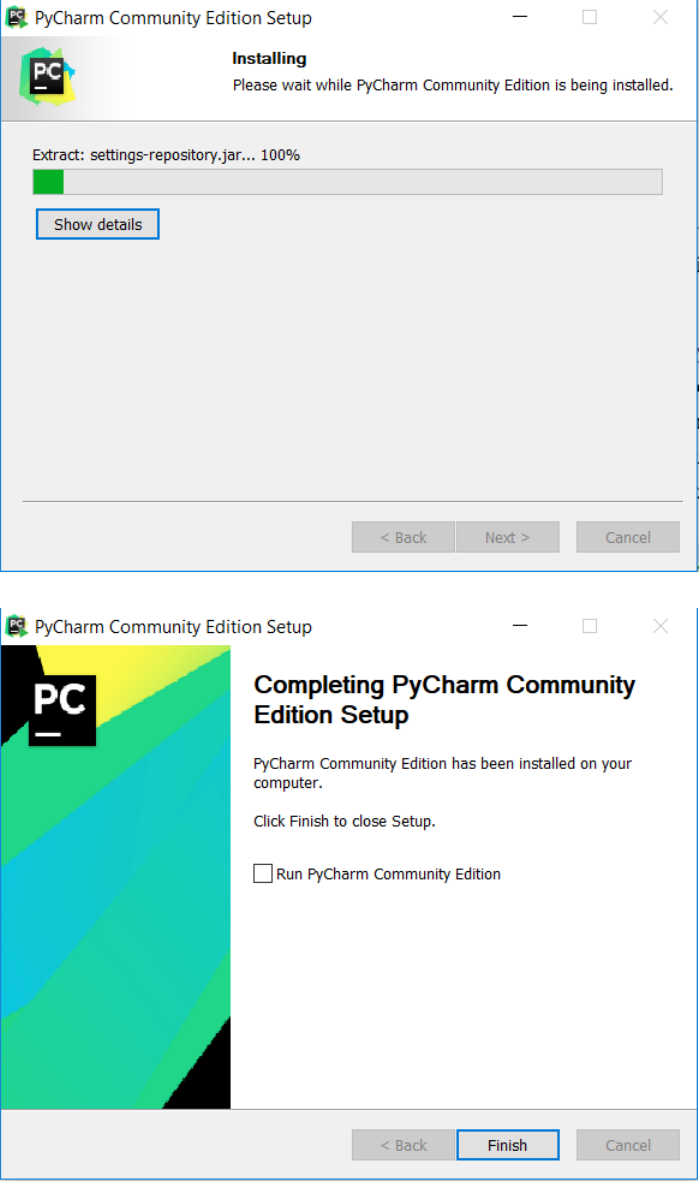
7) Your installation is now in progress. You should see a screen with a green bar
that looks like this:
8) Upon completing installation, you should see the following screen:
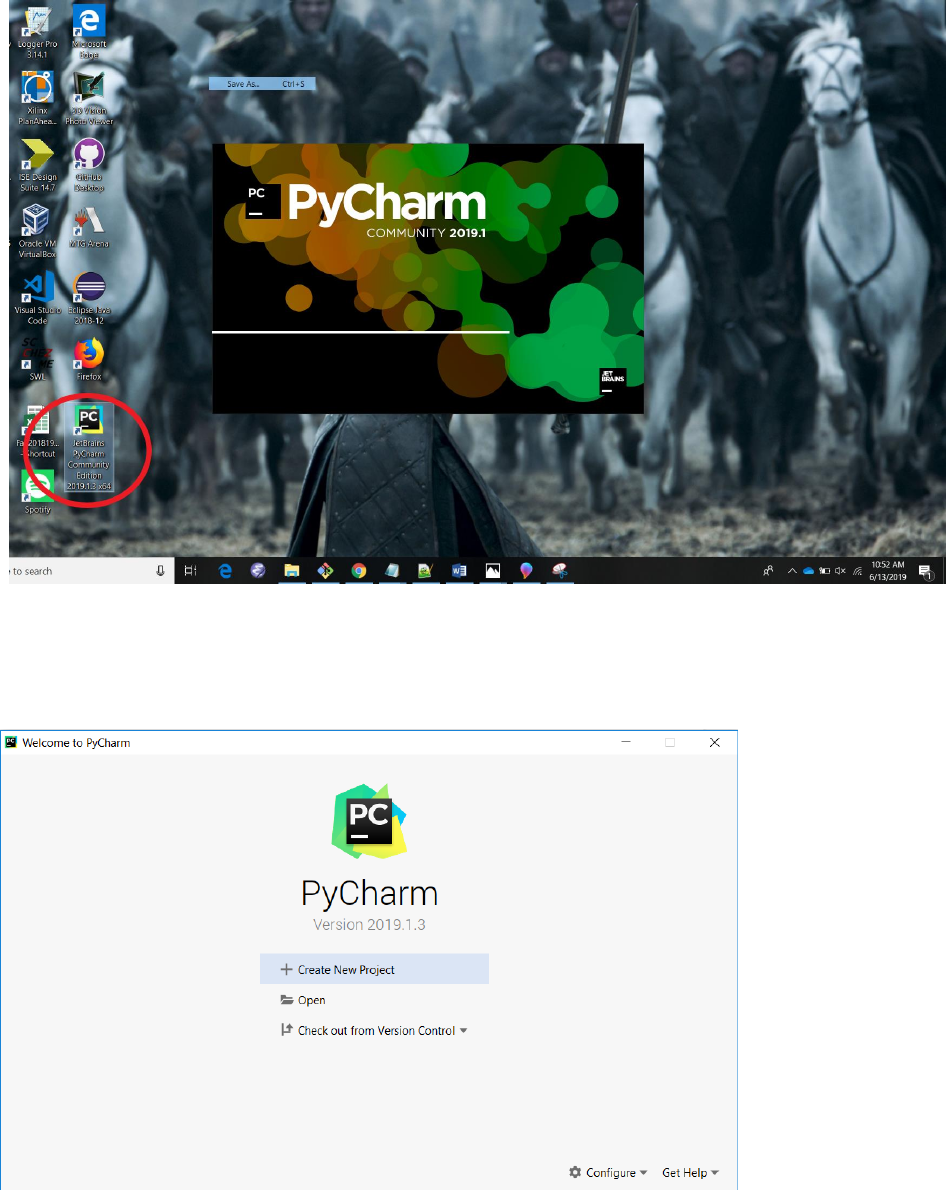
9) Now let’s open up PyCharm. From your desktop’s home screen, look for the
PyCharm shortcut. Click on the shortcut and PyCharm should begin to open.
You’ll see something like this:
10) When PyCharm opens, you’ll see a start screen that looks like the first picture
below. Select the “Check out from Version Control” option. In the drop-down
menu that appears, select Git. Once doing this, a menu titled “Clone Repository”
should appear that looks like the second picture below.
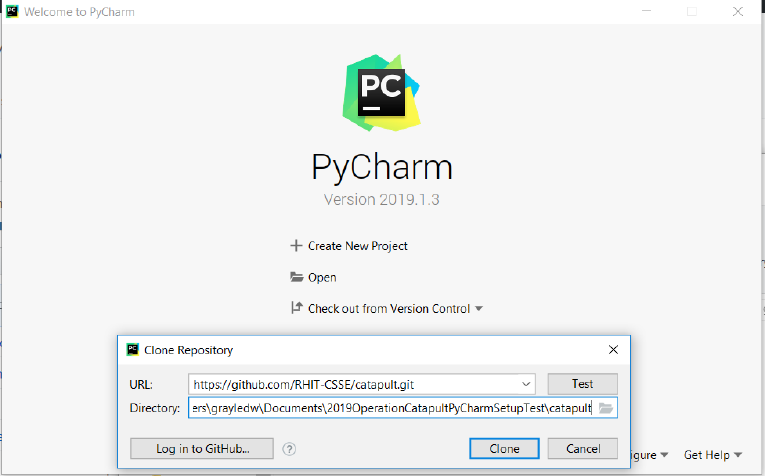
11) In the “Clone Repository” window, as seen above”, you’ll now be asked where
you want to clone the repository you’re checking out. The repository is full of all
of the code you’ll need throughout Operation Catapult. First, make a folder
where you want to store all of your code throughout the course of Catapult. Then
enter that folder’s path in the “Directory” text box. For example in the image
below, the path to my folder is
“C:\Users\grayledw\Documents\2019OperationCatapultPyCharmSetupTest\c
atapult”. Next, copy this link and paste it into the “URL” textbox -
https://github.com/RHIT-CSSE/catapult.git. Once you’ve done all of these
things, click “Clone”.
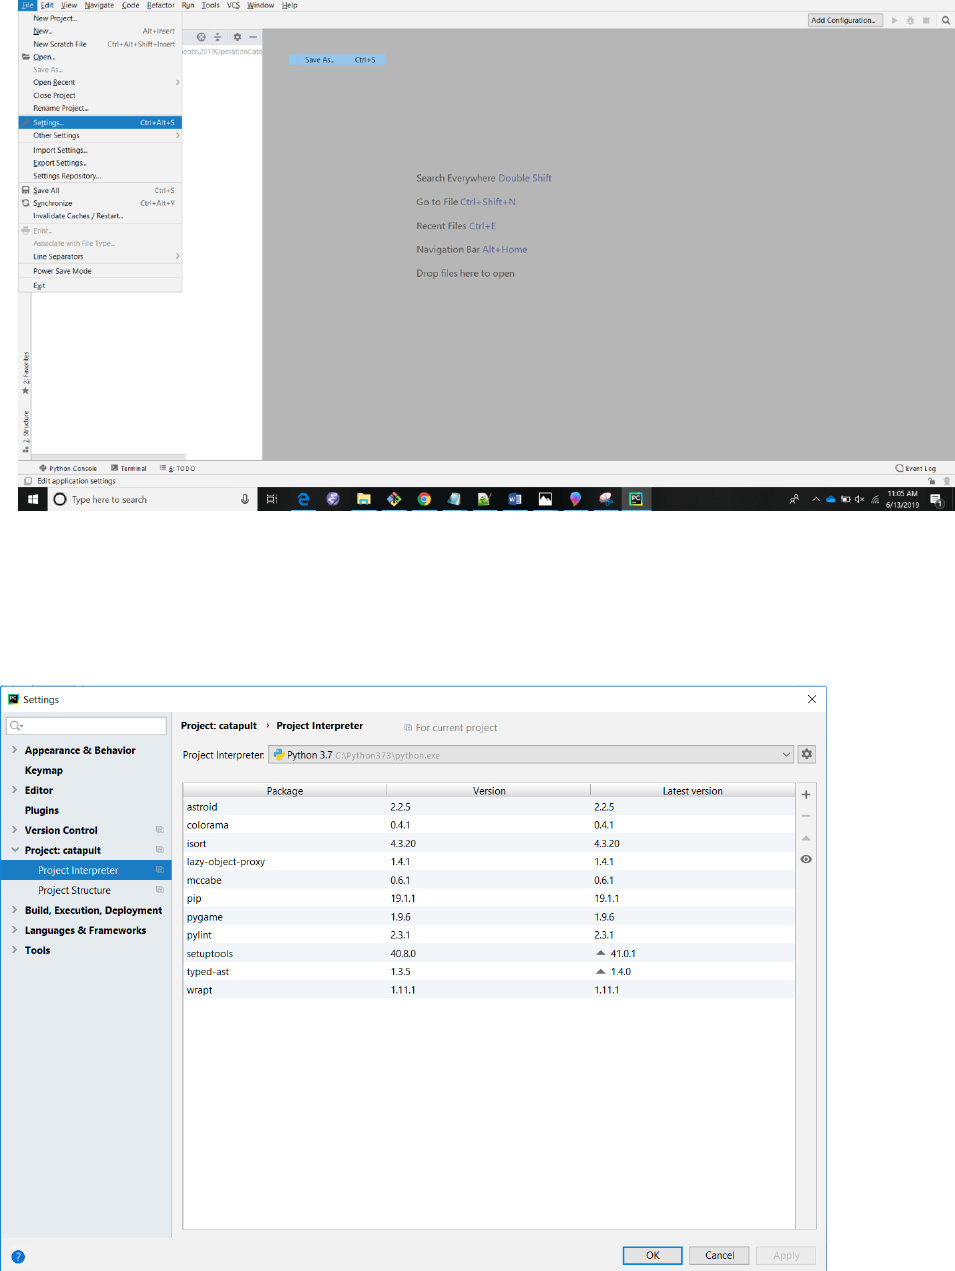
12) You should now be inside of PyCharm. On the left of your screen, you should
see a folder. Expand the folder and take a peek inside. We’ll tell you more about
finding what you need later. Next go to “File -> Settings”:
13) You should now be on the settings page. On the left side, expand the section
titled – Project: (YOUR PROJECT NAME HERE), and select “Project Interpreter”.
You should see a screen that looks like this:
14) Make sure the drop-down menu next to “Python Interpreter” is set to Python 3.7.
If not select the drop-down arrow, and select Python 3.7. If Python 3.7 is not one
of the available options, please call over a TA and we’ll come help you out.
Things should look like the image under step 13) if everything is done correctly.
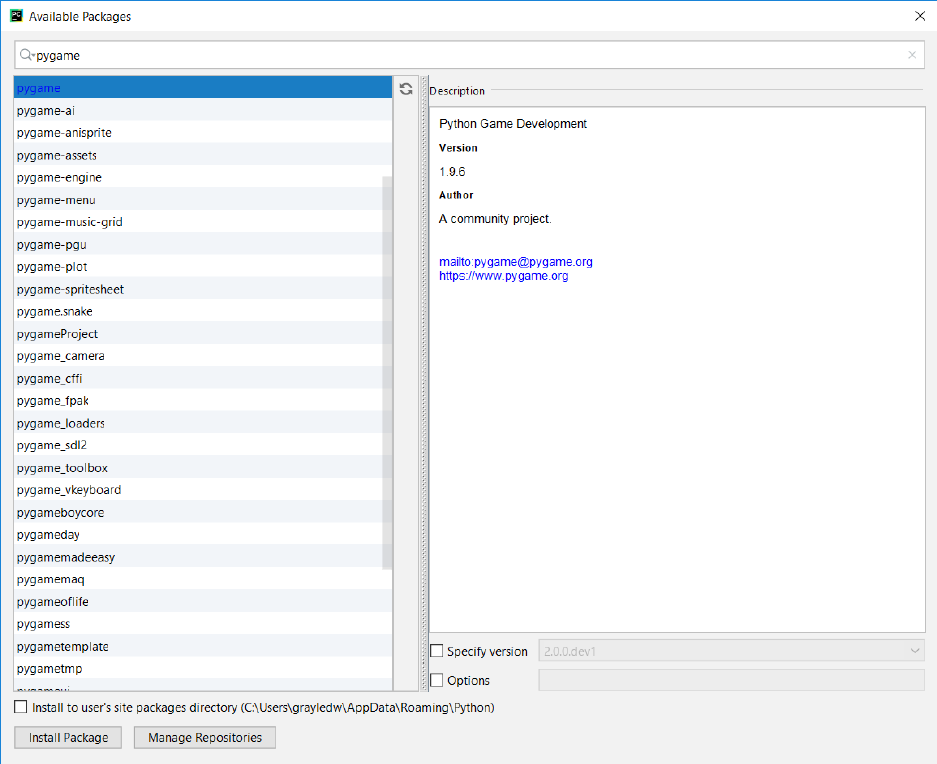
15) Next click the “+” on the right side of your screen, next to the toolbar “Latest
version”. A window titled “Available Packages” should appear. In the search bar
at the top of the screen, type “pygame”. The top result should be “pygame”.
Click on it, and verify on the “Description” that it is “Version” 1.9.6. If so, at the
bottom of your screen click “Install Package”. Your “Available Packages” screen
should look something like this:
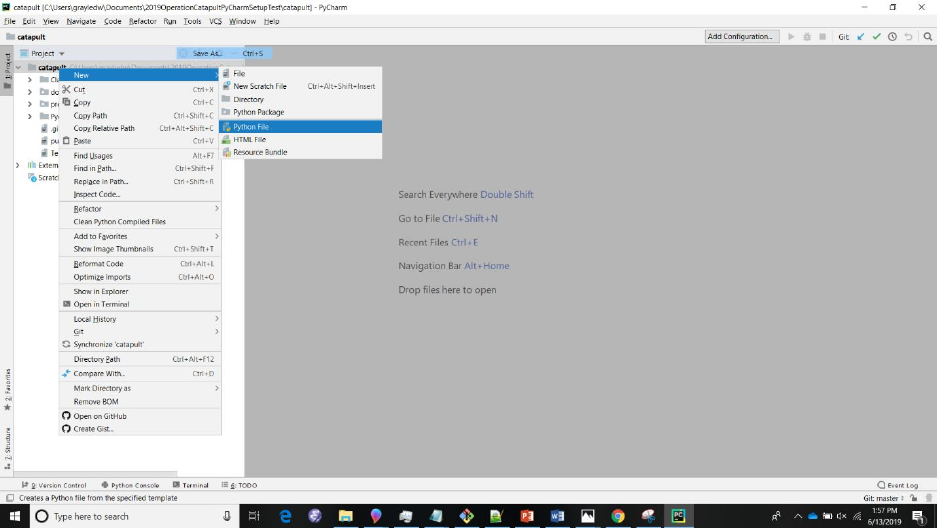
16) You should now be back at the same screen from step 12). Right click on the
repository you checkout out earlier, and select “New -> Python File”. Things
should look like this:
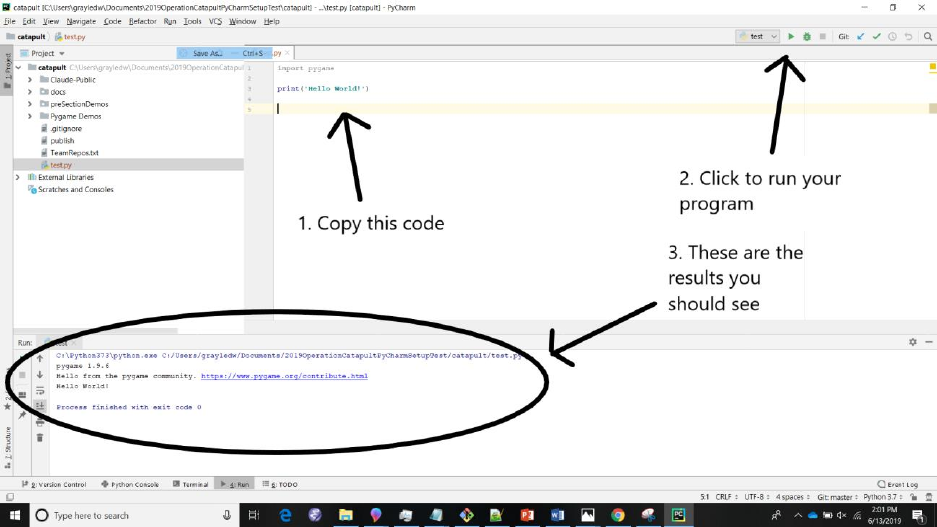
17) When asked what you want to name your file, name it something like “test.py”.
In the window that appears, copy the code (import pygame and print(‘Hello
World!)) you see in the image below. In the upper right hand corner of the screen
there is a green play button. Select it once you have finished typing in the code. If
your results in the console at the bottom of your screen match what you see in
the image below, you’ve successfully installed your software successfully! Sit
tight while everyone else finishes, but feel free to play around some more in the
Python file you created and see what you can get to happen. If you’ve run into
any issues, call over one of the TAs and we’ll come and help you out.