ZSDOS 1.0 Manual
ZSDOS%20Manual
User Manual:
Open the PDF directly: View PDF ![]() .
.
Page Count: 119 [warning: Documents this large are best viewed by clicking the View PDF Link!]
- 1 Introduction
- 2 Features
- 2.1 Automatic Disk Relog
- 2.2 Improved Error Handling
- 2.3 Archive Attribute Support
- 2.4 Larger File and Disk Sizes
- 2.5 Fast Fixed Disk Relog
- 2.6 Backgrounder II Support
- 2.7 Wheel Protection
- 2.8 File Access Modes
- 2.9 Enhanced Write Protection
- 2.10 Re-entrancy Potential
- 2.11 FCB User Number Support
- 2.12 File Datestamping Support
- 2.13 Run-time Configuration
- 2.14 Other Significant Enhancements
- 3 Installing ZSDOS
- 3.1 Installing the Operating System
- 3.2 Clock and File Stamp Installation
- 3.3 Installing BackGrounder II for ZSDOS
- 3.4 Advanced Installation Techniques
- 4 ZSDOS Utilities
- 4.1 COPY -- Copy Files
- 4.2 DATSWEEP -- Directory Tool
- 4.3 FILEATTR -- Set or Display Attributes
- 4.4 FILEDATE -- Display File Dates
- 4.5 RELOG -- Reset Disk System
- 4.6 TD -- Read and Set Clock
- 4.7 ZCAL -- Display Month
- 4.8 ZCNFG - Configuration Utility
- 4.9 ZPATH - Set ZSDOS Path
- 4.10 ZSCONFIG -- Configure a Running ZSDOS System
- 4.10.1 ZSCONFIG Interactive Mode
- 4.10.2 ZSCONFIG Expert Mode
- 4.10.3 ZSCONFIG Options
- 4.10.3.1 Public Files (ZSDOS and ZDDOS)
- 4.10.3.2 Public/Path Write Enable (ZSDOS and ZDDOS)
- 4.10.3.3 Read-Only Vector Sustain (ZSDOS and ZDDOS)
- 4.10.3.4 Fast Fixed Disk Relog (ZSDOS and ZDDOS)
- 4.10.3.5 Disk Change Warning (ZSDOS and ZDDOS)
- 4.10.3.6 Path Without System Attribute (ZSDOS only)
- 4.10.3.7 DOS Search Path (ZSDOS only)
- 4.10.3.8 Wheel Byte Write Protect (ZSDOS and ZDDOS)
- 4.10.3.9 Time Routine (Clock Driver) (ZSDOS and ZDDOS)
- 4.10.3.10 Stamp Last Accessed Time (ZSDOS and ZDDOS)
- 4.10.3.11 Stamp Create Time (ZSDOS only)
- 4.10.3.12 Stamp Modify Time (ZSDOS and ZDDOS)
- 4.10.3.13 Get Date/Time Stamp (ZSDOS only)
- 4.10.3.14 Set Date/Time Stamp (ZSDOS only)
- 4.10.4 ZSCONFIG Error Messages
- 4.11 ZXD - Extended Directory Utility
- A ZSDOS Functions Quick Reference
- B BIOS Functions Quick Reference
- C Datespec and File Stamp Formats
- D ZSDOS Memory Allocation & Usage
- E File Attributes
- F Clock Driver Descriptions

ZSDOS 1.0
A CP/M 2.2 BDOS Replacement
by
Harold F. Bower
Cameron W. Cotrill
Carson Wilson
PDF conversion by
David Griffith 2009 (rev 3)
Copyright c
1986, 1987, 1988
by:
Harold F. Bower and Cameron W. Cotrill
This program is free software; you can redistribute it and/or modify it under the terms of the GNU General
Public License as published by the Free Software Foundation; either version 2 of the License, or (at your
option) any later version.
This program is distributed in the hope that it will be useful, but WITHOUT ANY WARRANTY; without
even the implied warranty of MERCHANTABILITY or FITNESS FOR A PARTICULAR PURPOSE. See
the GNU General Public License (file LICENSE.TXT) for more details.
You should have received a copy of the GNU General Public License along with this program; if not, write
to the Free Software Foundation, Inc., 675 Mass Ave, Cambridge, MA 02139, USA.
1
ZSDOS, its documentation and its utility programs are copyright (C) 1987,88 by Harold F. Bower, Cameron
W. Cotrill, and Carson Wilson.
The primary authors hereby release this document and product (ZSDOS) under the GNU General Public
License effective 30 December 1998. Current addresses as of this date are:
Harold F. Bower
7914 Redglobe Ct.
Severn, MD 21144-1048
USA
<HalBower@worldnet.att.net>
Cameron W. Cotrill
2160 N.W. 159th Place
Beaverton, OR 97006
USA
<ccotrill@symantec.com>
Carson Wilson
(unknown)
ZSDOS is now original code, but is based on P2DOS 2.1 (C) 1985 by H.A.J. Brugge - All Rights Reserved.
INITDIR.COM is derived from a program of the same name which is copyright (C) 1985 by HAJ Ten Brugge
- All rights reserved. Portions of code to implement P2DOS file date stamping were derived from DATE.ASM
also by HAJ Ten Brugge.
ZCNFG.COM is copyright (C) 1988 by Al Hawley. We thank him for allowing us to include ZCNFG in the
ZSDOS release.
The ZDS DateStamper, the ZDDOS DateStamper, DateStamper drivers in DS2BOTH and P22BOTH, and
a vast majority of the clock drivers were developed in co-operation with Plu*Perfect Systems and use licensed
Plu*Perfect technology.
DateSweep, DsConfig, SetTerm, and PutDS are copyright c
1987 by Plu*Perfect Systems - All rights re-
served. They are included under an agreement with Plu*Perfect Systems. Section 4.10 was extracted from
the Plu*Perfect Date-Stamper Manual which is copyright c
1987 by Plu*Perfect Systems - All rights re-
served.
Clock drivers for the Apple ][ PCPI and CardZ180 were provided by Steven Hirsch.
ZSVSTAMP is included with the ZSDOS release package thanks to Howard Goldstein. Source to ZSVSTAMP
is available on Z-Nodes.
Trademarks:
Little Board, Ampro Computers;
Z80, Z180, Z280, Zilog;
DDT, CP/M, Digital Research Inc.;
ZCPR3, ZCPR33, ZRDOS, ZDH, Alpha Systems;
WordStar, NewWord, MicroPro Int’l;
Dbase II, Ashton-Tate, BackGrounder ii, DateStamper, Plu*Perfect Systems;
DosDisk, Z3PLUS, Bridger Mitchell;
Turborom, Advent;
NSC800, National Semiconductor;
SB180, MicroMint;
HD64180, Hitachi;
2
XBIOS, Malcom Kemp;
ZSDOS, ZDDOS, ZDS, Harold F. Bower - Cameron W. Cotrill - Carson Wilson.
Acknowledgments:
Hearty thanks to Rick Charnes, Steve Gold, Frank Gaude’, Howard Goldstein, Al Hawley, Steven Hirsch,
Richard Jacobson, Bridger Mitchell, Bruce Morgen, Tony Parker, Jay Sage, and Joe Wright for aiding us
with their insights and putting ZSDOS through its paces prior to release.
3
This page is intentionally left blank
4
Contents
1 Introduction 12
1.1 About This Manual ......................................... 12
1.2 What is ZSDOS? ........................................... 12
1.3 The History of ZSDOS ........................................ 13
1.4 Differences Between ZSDOS and ZDDOS ............................. 14
1.5 Differences Between CP/M 2.2, ZRDOS and ZSDOS ....................... 14
1.6 Program Summaries and Usage ................................... 15
1.6.1 Program Summary Conventions .............................. 15
1.6.2 Built-in Help ......................................... 16
1.6.3 Command Line Options ................................... 17
2 Features 18
2.1 Automatic Disk Relog ........................................ 18
2.2 Improved Error Handling ...................................... 18
2.3 Archive Attribute Support ...................................... 19
2.4 Larger File and Disk Sizes ...................................... 19
2.5 Fast Fixed Disk Relog ........................................ 19
2.6 Backgrounder II Support ...................................... 20
2.7 Wheel Protection ........................................... 20
2.8 File Access Modes .......................................... 20
2.8.1 Normal Access ........................................ 21
2.8.2 Path Access (ZSDOS only) ................................. 21
2.8.2.1 Path Directory Access (ZSDOS only) ...................... 21
2.8.2.2 Path File Access (ZSDOS only) ......................... 21
2.8.3 Public Access ......................................... 22
2.8.4 Combined Access (ZSDOS only) .............................. 22
2.9 Enhanced Write Protection ..................................... 24
2.10 Re-entrancy Potential ........................................ 24
2.11 FCB User Number Support ..................................... 24
2.12 File Datestamping Support ..................................... 25
2.13 Run-time Configuration ....................................... 25
2.14 Other Significant Enhancements .................................. 26
5
3 Installing ZSDOS 28
3.1 Installing the Operating System ................................... 28
3.1.1 Installing ZSDOS with INSTALOS ............................. 28
3.1.1.1 Using INSTALOS ................................. 29
3.1.1.2 Creating a Boot Disk ............................... 32
3.1.1.3 INSTALOS Error Messages ............................ 32
3.1.2 Installing ZSDOS with NZCOM .............................. 34
3.1.3 Installing ZSDOS with JetLDR ............................... 35
3.1.4 Installing with XBIOS .................................... 35
3.2 Clock and File Stamp Installation ................................. 35
3.2.1 Selecting a Clock Driver ................................... 36
3.2.2 Installing Clock and/or Stamp Method .......................... 37
3.2.3 The LDTIM Program .................................... 40
3.2.4 Preparing Disks for DateStamper (PUTDS) ........................ 41
3.2.4.1 PUTDS Interactive Mode ............................. 41
3.2.4.2 PUTDS Expert Mode ............................... 41
3.2.5 Preparing Disks for P2DOS Stamps (INITDIR) ...................... 42
3.2.5.1 INITDIR Interactive Mode ............................ 42
3.2.5.2 INITDIR Expert Mode .............................. 42
3.2.5.3 INITDIR Error Messages ............................. 42
3.3 Installing BackGrounder II for ZSDOS ............................... 43
3.3.1 BackGrounder Installation using MLOAD.COM ..................... 43
3.3.2 Installation using DDT.COM ................................ 43
3.4 Advanced Installation Techniques .................................. 44
3.4.1 Replacing CCP and BIOS with INSTALOS ........................ 44
3.4.1.1 Replacing the CCP ................................ 44
3.4.1.2 Replacing the BIOS ................................ 45
3.4.2 User-Developed Clock Drivers ................................ 45
3.4.3 Customizing Stamp Installation with SETUPZST .................... 45
3.4.3.1 The Different Stamp Modules .......................... 45
3.4.3.2 Installing a Stamp Module in High Memory ................... 46
3.4.3.3 Installing Stamp Module in NZCOM User Space ................ 47
3.4.3.4 Changing an existing LDTIM.COM program .................. 48
6
3.4.4 Tips on Using ZSCONFIG with Clocks/Stamps ...................... 48
3.4.4.1 Patching in an Existing Clock .......................... 48
3.4.4.2 Speed Tip ..................................... 48
4 ZSDOS Utilities 49
4.1 COPY – Copy Files ......................................... 49
4.1.1 Using COPY ......................................... 50
4.1.2 COPY Options ........................................ 51
4.1.2.1 Archive Option ................................... 52
4.1.2.2 File Existence Option ............................... 52
4.1.2.3 Inspect Files Option ................................ 52
4.1.2.4 Multiple Copy Option ............................... 52
4.1.2.5 No Replacement Option .............................. 52
4.1.2.6 Quiet Option .................................... 53
4.1.2.7 System Files Option ................................ 53
4.1.2.8 Verify Option .................................... 53
4.1.2.9 Archive if Only if File Exists Option ....................... 53
4.2 DATSWEEP – Directory Tool ................................... 53
4.2.1 Overview ........................................... 53
4.2.1.1 The Six Windows ................................. 54
4.2.1.2 Logging In and Selecting Filesets ......................... 55
4.2.1.3 Filespecs and Datespecs .............................. 55
4.2.1.4 Flags (attributes) ................................. 56
4.2.2 Using DATSWEEP ..................................... 57
4.2.2.1 Tagging Examples ................................. 58
4.2.3 DATSWEEP Command Summary ............................. 58
4.2.3.1 File Operation Commands ............................ 58
4.2.3.2 Tagging Commands ................................ 59
4.2.3.3 Miscellaneous Commands ............................. 59
4.2.3.4 Viewing a File ................................... 61
4.2.3.5 Viewing Squeezed Files .............................. 62
4.2.4 Command Line Options ................................... 62
4.2.4.1 Special Characters ................................. 62
7

4.2.4.2 OSPrompt Level .................................. 62
4.2.4.3 SUBMIT or ZEX Scripts ............................. 63
4.2.4.4 Passing Parameters ................................ 63
4.2.4.5 The C Switch ................................... 63
4.2.4.6 Limitations of the Command Line Option .................... 63
4.2.5 Installation and Configuration ............................... 63
4.2.5.1 Installation ..................................... 63
4.2.5.2 Configuration .................................... 66
4.2.6 Technical Information .................................... 67
4.2.6.1 Filesizes and Disk Space ............................. 67
4.2.6.2 Error Procedures .................................. 67
4.2.6.3 Very Large Directories ............................... 67
4.3 FILEATTR – Set or Display Attributes .............................. 68
4.3.1 Using FILEATTR ...................................... 68
4.3.1.1 FILEATTR Display Commands ......................... 68
4.3.1.2 FILEATTR Set Commands ............................ 68
4.3.1.3 FILEATTR Options ................................ 68
4.3.1.4 FILEATTR Output ................................ 69
4.3.2 FILEATTR Error Messages ................................. 70
4.4 FILEDATE – Display File Dates .................................. 71
4.4.1 FILEDATE Syntax ...................................... 71
4.4.1.1 FILEDATE Syntax Summary .......................... 72
4.4.1.2 The File Specification Field ............................ 72
4.4.1.3 The Option Field ................................. 72
4.4.1.3.1 Sorting by Date ............................. 73
4.4.1.3.2 Using Access and Create Stamps .................... 74
4.4.1.3.3 Displaying All Stamps .......................... 74
4.4.1.3.4 No Pause ................................. 74
4.4.1.3.5 Showing System Files .......................... 74
4.4.1.3.6 Showing All User Areas ......................... 74
4.4.1.4 The Date Specification Field ........................... 74
4.4.1.4.1 Date Signifiers .............................. 75
4.4.1.4.2 Dates ................................... 75
8
4.4.1.4.3 Date Specifications ........................... 76
4.4.1.5 The Complete FILEDATE Syntax ........................ 76
4.4.2 FILEDATE Output ..................................... 77
4.4.2.1 Default Display .................................. 77
4.4.2.2 Display Sorted by Access Date .......................... 77
4.4.2.3 Display Selected by Modify Date ......................... 78
4.4.2.4 Note on Relative Times .............................. 78
4.4.2.5 Notes on Missing Stamps ............................. 78
4.4.3 FILEDATE Error Messages ................................. 79
4.5 RELOG – Reset Disk System .................................... 80
4.6 TD – Read and Set Clock ...................................... 80
4.6.1 Using TD ........................................... 80
4.6.2 TD Error Messages ...................................... 81
4.7 ZCAL – Display Month ....................................... 82
4.7.1 Using ZCAL ......................................... 82
4.7.1.1 ZCAL System Requirements ........................... 82
4.7.1.2 ZCAL Syntax ................................... 83
4.7.2 ZCAL Error Messages .................................... 83
4.8 ZCNFG - Configuration Utility ................................... 83
4.8.1 Using ZCNFG ........................................ 83
4.8.1.1 ZCNFG Toggle Displays ............................. 84
4.8.1.2 ZCNFG Value Displays .............................. 84
4.8.1.3 Note on COPY ................................... 85
4.9 ZPATH - Set ZSDOS Path ..................................... 85
4.9.1 Using ZPAT .......................................... 85
4.9.1.1 ZPATH Option Characters ............................ 85
4.9.1.2 ZPATH Examples ................................. 86
4.9.2 ZPATH Error and Warning Messages ........................... 87
4.10 ZSCONFIG – Configure a Running ZSDOS System ........................ 88
4.10.1 ZSCONFIG Interactive Mode ................................ 88
4.10.2 ZSCONFIG Expert Mode .................................. 89
4.10.3 ZSCONFIG Options ..................................... 91
4.10.3.1 Public Files (ZSDOS and ZDDOS) ........................ 91
9
4.10.3.2 Public/Path Write Enable (ZSDOS and ZDDOS) ............... 91
4.10.3.3 Read-Only Vector Sustain (ZSDOS and ZDDOS) ................ 92
4.10.3.4 Fast Fixed Disk Relog (ZSDOS and ZDDOS) .................. 92
4.10.3.5 Disk Change Warning (ZSDOS and ZDDOS) .................. 92
4.10.3.6 Path Without System Attribute (ZSDOS only) ................. 93
4.10.3.7 DOS Search Path (ZSDOS only) ......................... 93
4.10.3.8 Wheel Byte Write Protect (ZSDOS and ZDDOS) ............... 94
4.10.3.9 Time Routine (Clock Driver) (ZSDOS and ZDDOS) .............. 95
4.10.3.10 Stamp Last Accessed Time (ZSDOS and ZDDOS) ............... 95
4.10.3.11 Stamp Create Time (ZSDOS only) ........................ 96
4.10.3.12 Stamp Modify Time (ZSDOS and ZDDOS) ................... 97
4.10.3.13 Get Date/Time Stamp (ZSDOS only) ...................... 98
4.10.3.14 Set Date/Time Stamp (ZSDOS only) ...................... 98
4.10.4 ZSCONFIG Error Messages ................................. 99
4.11 ZXD - Extended Directory Utility ................................. 99
4.11.1 Using ZXD .......................................... 99
4.11.2 ZXD Options ......................................... 100
4.11.2.1 Select Files by Attribute .............................100
4.11.2.2 Date Display Format ...............................100
4.11.2.3 Disable Date (NoDate) Display ..........................101
4.11.2.4 Output Control Option ..............................101
4.11.2.5 Output to Printer .................................101
4.11.2.6 Sort by Name or Type ...............................101
4.11.2.7 Primary DateStamp ................................ 101
4.11.2.8 All User Areas ................................... 101
4.11.2.9 Wide Display .................................... 102
A ZSDOS Functions Quick Reference 104
A.1 Summary of BDOS Return Codes .................................. 106
B BIOS Functions Quick Reference 107
C Datespec and File Stamp Formats 108
D ZSDOS Memory Allocation & Usage 109
10
E File Attributes 112
E.1 What are file attributes? .......................................112
E.2 File Attribute Meanings ....................................... 113
E.2.1 Public file attribute (f2) ................................... 113
E.2.2 No access stamp attribute (f3) ............................... 113
E.2.3 Wheel protect attribute (f8) .................................114
E.2.4 Read-only attribute (t1) ................................... 114
E.2.5 System attribute (t2) ....................................114
E.2.6 Archive attribute (t3) ....................................114
F Clock Driver Descriptions 115
11
1 Introduction
Z-System Disk Operating System, or ZSDOS, is an enhanced replacement for the Basic Disk Operating
System segment of CP/M 2.2 or ZRDOS 1.x systems. It fits in the normal 3.5k system segment allocated
to the BDOS segment of CP/M by Digital Research. Optional ZSDOS segments may be placed outside of
the BDOS segment for clock and file time and date stamping support.
1.1 About This Manual
This ZSDOS User’s Guide consists of this introduction plus the following:
•Getting Started, a brief outline to help you get the flavor of ZSDOS initially. Getting Started is
contained in the file named README.2ND on your distribution disk
•The Features of ZSDOS, which details the differences between ZSDOS and previous systems.
•Installing ZSDOS, a complete, detailed description of how to configure and install ZSDOS for any
CP/M system.
•The ZSDOS Utilities, describing the purpose, operation, and customization of all of the ZSDOS utilities.
•Several appendices containing summaries of various technical information.
•A glossary giving the meanings of technical terms used in this Guide.
•An index of key words and phrases used in this Guide.
A ZSDOS Programmer’s Manual containing descriptions of all ZSDOS function calls with Z80 assembly
language code examples is also available for a modest additional fee.
1.2 What is ZSDOS?
ZSDOS is completely replaces the Basic Disk Operating System portion of CP/M 2.2 or ZRDOS 1.x systems.
The following explanation is included in case you are unfamiliar with the functions of an Operating System.
Any computer requires an operating system to do useful work. The operating system is responsible for
reading input devices (such as the keyboard), outputting information (to the CRT and printer), and loading
and saving programs and information on storage devices such as floppy disks. These tasks are separate and
distinct from application programs (such as word processors and spreadsheets) which run under control of
the operating system.
The CP/M operating system, designed by Gary Kildall (who formed Digital Research), is divided into three
separate system segments. One such segment is the Basic Disk Operating System, or BDOS, which controls
the system resources (such as the console, disk drives, and printer) at a general level. The BDOS does not
know (or need to know) what type of terminal, disk controller, printer, etc. is connected to the computer.
These hardware details are the responsibility of a second system segment, the Basic Input Output System,
or BIOS.
The BIOS is written by computer manufacturers specifically for their type of computer. The BIOS performs
all hardware-specific tasks for BDOS. Consequently, a BIOS written for one type of computer can’t be used
on a computer of another type. For example, a BIOS written for an Ampro Little Board can’t be used on a
Kaypro. For a few computers, third party add-on BIOS’s are available that provide more capabilities than
12
those originally supplied with the computer. Examples of these include XBIOS for the MicroMint SB180,
written by Malcom Kemp, and the Advent TurboROM BIOS for Kaypro computers, written by Bridger
Mitchell.
Just as BDOS knows nothing about the disk controller or other hardware-specific items, BIOS knows nothing
of the disk directory or files. The interface between the BDOS and BIOS is well defined, and does not vary
between computers which use CP/M 2.2- compatible operating systems. Though these two segments act
together to form the heart of the operating system, they are discrete, and each of them may be upgraded or
replaced independently as long as CP/M’s interface standards are followed. This principle of discrete system
segments allows ZSDOS to replace CP/M’s original BDOS system segment with no other changes in the
computer’s system software.
The final CP/M system segment is the Console Command Processor, or CCP. The CCP is responsible
for interpreting a user’s commands when no application programs are running. The CCP loads and runs
programs requested by the user. Several utility commands (such as DIR to list the files on a disk) are resident
within the CCP. Like the BDOS, the same CCP operates on all CP/M computers, regardless of hardware
differences.
As with the BDOS, the CCP may be replaced independently of the other two system segments. The
most popular CCP replacement to date for Z80 microcomputers is the ZCPR series originated by Richard
Conn, and later upgraded by Jay Sage. As the primary interface with the user, CCP upgrades are most
noticeable. Though ZSDOS does not require the ZCPR command processor in order to operate, ZSDOS
does takes advantage of some ZCPR features, and we highly recommend ZCPR. More information on the
ZCPR command processor may be obtained from Sage Microsystems East (see appendix 7).
1.3 The History of ZSDOS
Many BDOS replacements for Z80 microcomputers have been created and released since Digital Research
dropped the development of CP/M 2.2. Most have been freeware and were based on various versions of
P2DOS by HAJ Ten Brugge of the Netherlands. These derivatives include Z80DOS by Carson Wilson,
DOS+25 by C.B. Falconer, SuperBDOS by Benjamin Ho, P2DOS+ by Harold F. Bower, and P2DOS 2.11
by Cameron W. Cotrill.
The most notable commercial BDOS replacement to date is the ZRDOS series of replacement BDOS’s written
by Dennis Wright and distributed by Alpha Systems Corporation (with the exception of Warm Boot Trap,
all ZRDOS 1.7 features are fully supported by ZSDOS).
ZSDOS was born of a desire to make P2DOS compatible with Plu*Perfect Systems’ BackGrounder ii and
DateStamper. Bridger Mitchell of Plu*Perfect Systems suggested that the authors combine forces to write
ZSDOS, since each of us had previously modified P2DOS separately. The result is that ZSDOS is a tighter,
faster, and safer BDOS than any of us could have created on his own.
As ZSDOS evolved, the overall philosophy of the BDOS system segment was questioned and refined. Every
function was analyzed and every line of code carefully optimized, checked and rechecked for compatibility
with existing applications. ZSDOS support programs such as INSTALOS, ZSCONFIG, and SETUPZST
were developed and refined throughout the development cycle.
ZSDOS is not an attempt to further fragment the CP/M compatible marketplace. Rather, we aim to push the
current limits of CP/M compatible BDOS’s forward and to provide many features most of us have wanted
for years. We feel we have achieved all this while retaining compatibility with existing CP/M programs
and accepted conventions. Where differences exist (particularly in terms of file datestamping), the ZSDOS
package provides the framework whereby existing non-standard BDOS modifications can be incorporated
smoothly with a standard user/application level interface.
13

1.4 Differences Between ZSDOS and ZDDOS
The size constraints imposed by the original design of CP/M made memory usage a primary consideration in
developing ZSDOS. This constraint engendered two basic approaches to the redesign of the BDOS segment.
The first approach held that it was impossible to include all of the features demanded of a modern Z80 DOS
in the 3.5 kilobytes allowed by Digital Research, and sought efficient ways to increase the size of this system
segment. The second approach valued simplicity over versatility and attempted to include as many features
as possible while respecting CP/M’s size restrictions.
The two competing approaches resulted in two DOS’s, one named Z-System DOS, or ZSDOS, and the other
named Z-DateStamper DOS, or ZDDOS. ZSDOS largely rejects the memory constraints imposed by CP/M,
and requires external modules to do file date stamping. ZDDOS accomplishes date stamping largely within
the confines of 3.5 kilobytes, but lacks several features of ZSDOS. Thus, ZSDOS is typically more complicated
to install and requires more memory than ZDDOS, but is more versatile once installed. Rather than force
you to choose between these two alternatives when purchasing ZSDOS or ZDDOS, we have included both
ZSDOS and ZDDOS in the same “ZSDOS” package; it is up to you to decide which system best suits your
needs.
We are happy to report that other than their contrasting approaches to datestamping, ZSDOS and ZDDOS
are quite similar. The chart below summarizes the differences between the two DOS’s.
Feature ZDDOS ZSDOS
DOS Path No Yes
Retype Line (ˆR) in Fuction 10 No Yes
DateStamperTMFile Stamp Support Internal External *
P2DOS File Stamp Support No External *
(compatible with CP/M Plus)
* External modules may be placed in high protected memory or below the CCP in the Transient Program
Area (RSX mode).
Unless otherwise stated, all references in this manual to ZSDOS apply to both ZSDOS and ZDDOS.
1.5 Differences Between CP/M 2.2, ZRDOS and ZSDOS
Compatibility with existing applications was one of the primary goals of ZSDOS. Most programs that run
under CP/M 2.2 or ZRDOS 1.x should also run under ZSDOS without any problems. The few programs
that won’t run under ZSDOS depend on specific (unpublished) addresses in BDOS.
A quick summary of the features of ZSDOS compared to ZRDOS and CP/M 2.2 is given below:
14

FEATURE CP/M 2.2 ZRDOS 1.7 ZSDOS
Direct get next console character No No Yes
Error-free interleave of direct No No Yes
and buffered console input calls
Control-R supported Yes No Yes+
Auto disk relog No Yes Yes
Warning message on auto disk relog No Yes Selectable
Fast fixed disk relog No Yes Selectable
Return fixed disk login No Yes Yes
Return DMA address No Yes Yes
Re-entrancy No Yes Yes
Set BDOS error mode No No Yes
Error messages Cryptic Numeric English
Filename displayed in error message No No Yes
1 gigabyte disk size No No Yes
32 megabyte file size No No Yes
Public directories No Yes Selectable+
Public files No No Selectable
Path from DOS No No Selectable+
Read Only Path/Public No No Selectable
Read Only Drive Vector No Yes Selectable
Wheel protected files No Yes Yes
Function 37 relogs default if needed No No Yes
User number in FCB No No Yes
DOS ID function call # 12 48 48
Get file stamp No No Yes*
Set file stamp No No Yes*
Get time No No Yes*
Set time No No Yes*
Stamp create time/date No# No# Yes*
Stamp update time/date No# No# Yes*
Stamp access time/date No# No# Yes*
* Internal DateStamper (ZDDOS) or ZSDOS with External Stamp Routine.
+ ZSDOS version only.
# No internal support for these functions, though DateStamper can be installed on these systems.
1.6 Program Summaries and Usage
1.6.1 Program Summary Conventions
We use several established symbolic conventions in this manual to describe the way ZSDOS programs interact
with users. For example, here is a symbolic representation of the syntax for CP/M’s built-in DIR command:
DIR [d:][afn]
Though the symbols seem cryptic at first, they are a consistent way of briefly summarizing program syntax.
Once you learn to read them you can tell at a glance how to enter even the most complicated commands.
Often you will see mixed upper and lower case within a command description.
15

By convention, if items appear in lower case, you may substitute any of a range of values for that item.
Items appearing in UPPER CASE normally must be entered exactly as shown, though upper or lower case
will do.
Several common abbreviations are used for items such as disk drives, file names, or date items. Some
abbreviations are:
Abbreviation Meaning
d The CP/M disk drive letters A through P.
u or uu CP/M user numbers 0 through 31.
dir A ZCPR directory name, from one to eight characters in length.
ufn An Unambiguous File Name
(no “wildcard characters” such as “?” and “*” are allowed).
afn An Ambiguous File Name (may contain wildcards).
yy The last two digits of a year.
mm A month expressed as a number from 1 to 12, or minutes
expressed as a number from 0 to 59.
dd A day of the month expressed as a number from 1 to 31.
hh Hours expressed as a number from 0 to 23.
ss Seconds expressed as a number from 0 to 59.
Several special symbols are also used in program syntax descriptions. By convention, square brackets ([ and
]) indicate optional command line items. You may or may not include items shown between brackets in your
command, but if you do not, programs usually substitute a default value of their own. If items between
brackets are used in a command, all other items between the brackets must also be used, unless these items
are themselves bracketed.
Using the three conventions of mixed upper and lower case, abbreviations, and special symbols, we can fully
explain the above description of CP/M’s DIR command:
Component Meaning
DIR This portion appears in capitals, so it must be entered
exactly as shown. Also, there are no brackets, so the DIR
command is required.
[d:] The d: stands for a legal drive letter, followed by a colon.
Brackets indicate that a drive need not be specified.
[afn] An Ambiguous File Name may also be entered, but must follow
the drive letter if a drive letter was also given.
1.6.2 Built-in Help
All of the ZSDOS programs contain built-in help screens which use the above conventions to display helpful
syntax summaries. Help is always invoked by following the command with two slashes (//). So for example,
ZXD //
invokes help for ZXD, the ZSDOS extended directory program. Interactive ZSDOS programs such as IN-
STALOS also contain more detailed help messages which appear as a session progresses.
16
1.6.3 Command Line Options
Many ZSDOS programs may be invoked from the command line with options which command the programs
to behave in slightly different ways. By convention, options are given after other command parameters. For
example, the P option in the command
ZXD *.* P
causes the ZXD directory utility to list all files (*.*) and send its output to the printer (P). For convenience,
a single slash character (/) can often be used in place of leading parameters to signify that the rest of the
command line consists of option characters. Therefore, the command
ZXD /P
is identical in meaning to the previous example (see Section 4.11 for more on ZXD).
17
2 Features
ZSDOS is a complete replacement for BDOS in CP/M 2.2 Z80, HD64180, Z180, Z280, or NSC800 based
systems as well as ZRDOS 1.x systems. ZSDOS has several new and numerous enhanced features not
provided in other BDOS replacements. ZSDOS is not compatible with BDOS patches, but in most cases the
functions provided by these patches already exist in ZSDOS. An overlay for Plu*Perfect’s BackGrounder ii
(which does patch ZSDOS) is included.
This section gives a brief overview of the enhanced features of ZSDOS and tells how these features affect
both you, the user of ZSDOS, and the applications programmer writing for ZSDOS. Some knowledge of the
CP/M operating system is assumed by this section. If you are unfamiliar with some of the concepts used,
you may wish to consult one or more of the resources given in the bibliography. Our glossary may also be
of use in explaining unknown terms.
2.1 Automatic Disk Relog
ZSDOS automatically logs in changed diskettes, rather than aborting with a “drive R/O” error as does
CP/M 2.2. This means that there is no need ever to relog disks with a Control-C at the command prompt
– ZSDOS takes care of this for you. In addition, programs no longer need to reset disks before creating or
writing to files. This enhances operation, as disk resets are only performed when floppy diskettes are actually
changed, instead of every time a program writes to disk.
This relogging process occurs automatically by default, and is normally completely safe. However, as with
CP/M, in the rare event that floppy diskettes are changed while a file is being written to, data loss may
occur. This is BIOS deblocking-dependent, and no totally safe way to prevent it has yet been found. For this
reason, be sure you never change a disk that has any write files open. To be safe, this means only changing
disks at the operating system prompt (for example A>).
For even greater security, you may configure ZSDOS to print an error message whenever diskettes are changed.
If you respond to this message with a Control-C, no write operations will be performed, and ZSDOS returns
you to the operating system prompt where diskettes may always be exchanged safely.
2.2 Improved Error Handling
ZSDOS contains enhanced error handling features that are more flexible and less cryptic than those of prior
BDOS replacements. First, ZSDOS has plain English error messages. If ZSDOS has a problem completing
a disk function, a message of the following form is shown on the system console:
ZSDOS error on D: Bad Sector
No drive
File W/P (File Write Protected)
W/P (Write Protected)
Changed
Call: XXX (File: FILENAME.TYP)
The type of error is displayed with the ZSDOS function call number that caused the error. The message
(File: FILENAME.TYP) appears only if the ZSDOS function refers to a file.
Read or Write errors (Bad Sector errors) are recoverable if the program supports retries. ZSDOS will not
warm boot after a Bad Sector or Changed error unless you respond to the error by pressing Control-C. After
18
all other errors a warm boot occurs if ZSDOS is in its default error mode. The Changed error message may
be enabled or disabled at any time with the ZSCONFIG utility.
ZSDOS will also allow an application to take over error handling from ZSDOS by calling function 45. This
function sets the ZSDOS error mode, causing all errors including Write Protect, No Drive, and Bad Sector
errors to return control to application programs. Applications can then take action as necessary to prevent
data loss.
For compatibility with existing programs, function 45 in ZSDOS is implemented as a proper subset of
function 45 in CP/M+. It is important that application programs using this function 45 reset the error
mode to the default conditions before exiting. A complete description of this function is contained in the
ZSDOS Programmer’s Manual, available separately.
The normal error return codes from ZSDOS disk operations are more extensive than those of most BDOS
replacements and are also a subset of CP/M+ return codes. Details of these return codes are given in
Appendix A.1.
2.3 Archive Attribute Support
The File Archive bit (see Appendix E.2.6) has been formally implemented in ZSDOS. This bit is normally
reset, but unlike CP/M ZSDOS forces the File Archive bit to that state when the file is modified. Several
programs are available that use the Archive bit to perform “backup” operations where programs and files
are copied to other disks for safety, or redundancy. Such programs can be set to copy only files that have the
Archive bit cleared, indicating they have changed since the last backup. Programs in this category include
ZFILER, BU, PPIP, and the ZSDOS utility COPY.COM included in this package (see Section 4.1).
2.4 Larger File and Disk Sizes
ZSDOS supports larger disk and file sizes than ZRDOS (prior to version 1.9). Disk size can be as large as
1,048,576 kbyte (1 gigabyte). File size can be as large as 32,768 kbyte (32 megabytes). Random access files
can be as large as 262,144 logical records in length.
2.5 Fast Fixed Disk Relog
A fixed disk is a disk drive from which the media can’t be removed, typically a hard disk or RAM disk. By
contrast, floppy disks are known as “removable” disks because they may be changed by the user. CP/M
rereads the disk directories of all disks on a system, fixed and removable, every time a reset command is
issued. This is CP/M’s way of protecting against data loss when the user changes a floppy disk. However,
this aspect of CP/M also entails a performance loss since it takes time for BDOS to read a disk directory,
especially if the disk is very large.
Since fixed disks by definition cannot be changed, ZSDOS can enhance performance on systems with fixed
disks by distinguishing between fixed and removable disks and rereading the directories of removable disks
only during a reset command. This “Fast Fixed Disk Relog” feature may be enabled or disabled at any time
using the ZSCONFIG utility, or may be permanently enabled with INSTALOS.
A possible drawback to Fast Fixed Disk Relog occurs if the BIOS supports the swapping of logical drives
(e.g., TurboROM BIOS for Kaypro and Ampro BIOS). If logical drives are swapped and a write file is opened,
it is probable (given Murphy’s Law) that the disk will be corrupted if what ZSDOS thinks is a fixed disk
is actually a floppy. ZSDOS copes with this by always checking fixed disks to see if they change. If what
19
ZSDOS thought was a fixed disk suddenly becomes a floppy, ZSDOS clears the fixed disk vector, forcing all
drives to be re-logged. This should make clear the following warning: If you have a BIOS that allows you to
swap disk drive logical names, never swap one fixed drive with another!!!!
Some BIOS’s reload the DOS on warm boot. If your system does this, the “Fast Fixed Disk Relog” feature
of ZSDOS will have no effect. Furthermore, other parameters changed by applications programs or utilities
will revert to default conditions on each Warm Boot.
Occasionally programs must reset a drive regardless of whether it is fixed or removable. ZSDOS function 37
therefore provides a means of overriding Fast Fixed Disk Relog. Calling function 37 with a vector of disks to
reset causes ZSDOS to reset all drives contained in the vector, both fixed and removable. For safety, function
37 must be used by those few programs that swap logical drives or access the disk via BIOS (this is also
required by ZRDOS versions 1.5 and later). If an application fails to do this, the ZSDOS RELOG utility
may be used following the program to manually reset all system drives. The ZRDOS DISKRST utility will
also work.
2.6 Backgrounder II Support
Unlike most other BDOS replacements, ZSDOS has software “hooks” which allow it to run with Plu*Perfect’s
BackGrounder ii (BGii). BGii is an operating system extension which allows users of hard or RAM disks
to switch back and fourth between two applications and the command line. Data can be cut and pasted
between applications (for example, a section of a spreadsheet can be copied into a document), printer output
can be sent to a file, and much more. For those who haven’t tried it, BGii is a “must have” piece of software.
Try it - you’ll like it! See Section 3.3 for details on installing ZSDOS for BackGrounder ii.
2.7 Wheel Protection
Wheel protection is an enhancement to CP/M first offered by ZRDOS, and it is also provided in ZSDOS. If
the Wheel Protect bit (f8) of a file is set, the file can’t be written to, erased, or renamed, and its attributes
cannot be altered unless the Wheel byte (see Glossary) is on. The Wheel byte is normally a part of ZCPR3
systems. If you don’t have a Wheel byte in your system, ZSDOS will assume Wheel is always TRUE, giving
you full privileges.
2.8 File Access Modes
ZSDOS allows files to be located in five different ways when the Open File function is called. The ZSDOS
access modes are completely under your control, and may be changed at any time with the ZSDOS utility
programs. The five access modes are:
1. Normal Access
2. Path Directory access *
3. Path File access *
4. Public Access
5. Combined access *
* Not available under ZDDOS
20

These access capabilities differ from those of all previous BDOS replacements, including ZRDOS. First,
ZSDOS file access may be set to Read Only or Read/Write in all five modes. Second, access modes 3, 4,
and 5 may be set individually be for each file, allowing the benefits of faster access to some files without
exposing all files in a directory to extended access. Finally, both Public and Path files are treated as normal
files when you are logged into the Drive/User Area in which they reside, so directory and file manipulation
utilities function as you would expect.
Please note that both Public and Path are designed primarily to locate and load application programs and
their overlays. Attempting to use Path and/or Public to find data files will work with some applications but
not with others. For best results, we suggest that you log into the directory your data files are in and use
the Path and/or Public features only to find applications and their overlays. See Section 2.8.4 for more on
this.
2.8.1 Normal Access
Normal access to files means that if the file is not present in the Drive/User area specified by you or
application program, the system will report the file as not found. This mode is identical to CP/M 2.2, and
is the default access mode for all files.
2.8.2 Path Access (ZSDOS only)
A ZCPR3-style search path is available which will find files on other drives and in other user areas from
within ZSDOS. This differs from ZCPR’s command search path, as programs such as WordStar will now
find their overlays along the ZSDOS Path! Path files must be referenced by exact name. Either a small
internal DOS path or an existing ZCPR3 path may be used by to find files. Path Access can be globally
disabled at any time with ZSCONFIG. The Path itself can be changed at any time with the ZPATH utility
(see Section 4.9). See Section 4for additional details on the ZSDOS Path.
Two types of ZSDOS Path access are available. The first, Path Directory Access, will find any file in any
directory on the Path. No special file attributes are used to control access in this mode. The second option,
Path File Access, requires the files accessed using the path to be System files (see Appendix Efor more on
file attributes).
2.8.2.1 Path Directory Access (ZSDOS only) Path Directory Access mode most closely corresponds
to the ZRDOS Public directory mode. To prevent any problems with accidental file erasure, we highly
recommend that you set ZSDOS Path/Public access to Read-Only when operating in this mode.
WARNING
If ZSDOS is set to allow writes down the Path (especially if Path
Directory Access is used) it is possible to erase or overwrite files
unintentionally in Drive/User areas along the Path. This can be
prevented by setting any files you don’t want changed to Read
Only. (see Section 4.3, FILEATTR)
2.8.2.2 Path File Access (ZSDOS only) This mode differs from the Path Directory Access mode in
requiring that any files found must be System files (System attribute set). This allows you to select which
files in a directory will be accessed using the Path.
21

While this may at first seem less efficient than Path Directory Access mode, Path File Access becomes
important when Path Access is set to Read/Write. Path File Access gives you exacting control over which
files are affected, reducing the risk of accidentally erasing or overwriting files (see Section 2.8.4).
2.8.3 Public Access
Public Access was originated by Bridger Mitchell and Derek McKay of Plu*Perfect Systems, and gives
programs access to Public files from any user area on the same disk. This allows you to make often used files
(e.g., word processor overlays, boilerplate files, etc.) Public and then access those files from other user areas
on the same disk. A Public file is a file with bit f2 (bit 7 of filename letter 2) set to one. See Appendix E
for more on file attributes.
Since Public Access can only find files in different user areas of a single disk while Path can find files on
other disks, Public is more limited than Path Access. However, Public has advantages over Path for some
purposes. First, only Public Access is available under ZDDOS as well as ZSDOS. Second, since Public Access
is controlled by a file attribute on disk rather than the Path in memory, only Public access is permanently
associated with a given disk file.
Finally, when used with caution Public can greatly improve file search speeds. This is due to the fact that the
Public attribute is stored directly in the disk directory. Whereas Path must search each directory element
serially even if the elements are on the same disk drive, all Public files on a disk are found immediately.
Therefore, Public is more efficient than Path when moving between user areas of the same drive. See
Section 2.8.4 for more on this.
An important drawback to Public Access which is not true of Path Access is that if a file is set to Public, no
other files with the same name are allowed on the same disk. Otherwise, ZSDOS will be unable to distinguish
between separate files, resulting in data loss. To ensure against this we supply the FILEATTR utility along
with ZSDOS. FILEATTR checks for duplicate filenames when setting files to Public, and should always be
used when creating Public files.
As with Path, ZSDOS requires that Public files be referred to by unambiguous file names unless the files are
in the current directory. Unlike Path, Public is active on all file operations, including Search First/Search
Next and Erase File. Public Access can be globally disabled at any time with the ZSCONFIG utility.
WARNING
If ZSDOS is set to allow writes to Public files, it is possible to erase
or overwrite Public files unintentionally. This is best prevented by
setting any Public files you don’t want changed to Read Only files.
2.8.4 Combined Access (ZSDOS only)
ZSDOS allows you to combine Path and Public Access for maximum flexibility and performance. By using
the ZSDOS Path feature to find different drives and the Public feature to find files in user areas of individual
drives, you can access files from any directory of a hard disk from any other directory. In addition, the
combination of Path and Public often results in faster file access times than Path alone can provide. However,
the greater versatility achieved by combining Path and Public comes at the expense of increased complexity.
For this reason, we recommend that only experienced ZSDOS users attempt combined Path and Public
access.
The key to combining Path and Public Access is to remember that since Public files can be found from
22
any user area on their drive, Path can find Public files from other user areas on drives along the path.
For example, suppose you keep your WordStar overlays as Public files in directory A1:. This allows you to
use WordStar from any directory on drive A, but when you log into other drives, you find that WordStar
complains that it can no longer find its overlays. This is because you are no longer logged into the drive
containing the Public files.
Realizing that the Path must be used to search other disks, suppose that you now decide to employ the
Path as follows. First you turn on Path Directory Access and Public/Path write enable with the following
command:
ZSCONFIG S,W
This tells ZSDOS to find all files in directories along the Path and allow programs to both read and write
to files found by Path or Public. Then you forget that WordStar’s files are in directory A1: and mistakenly
enter
ZPATH /D=A0
which sets the ZSDOS Path to “A0:”. Strangely, you now discover that WordStar finds its overlays and
operates perfectly from all drives, even though the Path does not go to directory A1:. Do you understand
why? If not, you may want to try answering this question for yourself before reading further.
In this example, WordStar can find its overlays at directory A1: even though the Path is set to A0: because
the overlays are set to Public. Since Public files can be found from any user area on their drive, the ZSDOS
Path finds Public files in directory A1: when it searches directory A0:.
Once you have mastered the subtle relationship between the ZSDOS Public and Path capabilities, you will
be able to make your computer find almost any file from anywhere on the system by using Path to search
different drives and Public to bridge user areas. These are very powerful capabilities which, when used
properly, can greatly enhance system performance. There are hazards involved, though.
For example, let’s say that in the above example you now log into B0: and issue the command
WS MYFILE.TXT
instructing WordStar to begin editing MYFILE.TXT. WordStar loads properly from directory B0:, using
the Path and Public to find its overlays at A1:. It then loads MYFILE.TXT and you begin editing. But
when you are through and exit WordStar you cannot find your file at directory B0:. After much search- ing
and some panic, you finally discover an identical file named MYFILE.TXT at directory A0:!
What happened? The file MYFILE.TXT did not exist at the logged directory (B0:), so ZSDOS automatically
searched the Path (consisting of A0:) for MYFILE.TXT. It so happened that you had left a file named
MYFILE.TXT at directory A0: when you backed up drive B earlier, so ZSDOS found that file and loaded
it for WordStar. Later when you saved the file, ZSDOS recognized it as a file found with Path and saved it
to its original directory, A0:.
A better solution to the above problem would have been to use Path File Access rather than Path Directory
Access, and set the System as well as the Public attribute of the WordStar overlays in directory A1:. This
would have prevented WordStar from finding MYFILE.TXT at directory A0: (unless MYFILE.TXT was a
System file), causing WordStar to create a new MYFILE.TXT at directory B0:. A further precaution would
have been to leave Public/Path access set to Read Only. This would have prevented WordStar from writing
to MYFILE.TXT in A0: even if MYFILE.TXT was a System file.
23
Admittedly, this example is somewhat contrived, but it illustrates several rules to follow when combining
Path and Public:
1. Make sure that Public files along the Path are protected from being overwritten.
2. Unless it is necessary to write to Path files, leave Public/Path Access set to Read Only.
3. Whenever possible, set the System attribute of Path files and use Path File Access to find them.
We mentioned that the combination of Path and Public often results in greater performance than can be
achieved with Path alone. Due to the way Public is implemented, it is faster than Path when searching
different user areas of the same drive (see Section 2.8.3). Therefore where multiple user areas on the same
drive must be checked, use Path to get to the drive and Public to move across user areas on the drive for
optimal speed.
2.9 Enhanced Write Protection
As mentioned above, you may limit access to files located by Public and Path to Read Only. ZSDOS uses
one of the reserved attributes (F7) in the file control block to “remember” if the file was accessed via Path
or Public. If Public/Path write has been disabled with ZSCONFIG or INSTALOS, attempts to write to or
erase Path or Public files result in W/P errors. As an additional safeguard, Public and Path accept only
unambiguous file names.
Enhanced disk write protection adds another level of security to ZSDOS systems. If Read Only Vector
Sustain is enabled with INSTALOS or ZSCONFIG, disks declared Read Only with function 28 retain this
status until ZSDOS is reloaded from disk (usually by depressing a reset switch or turning the system off).
While Sustain is on, functions 13 and 37 will not reset drives to Read Write as with CP/M.
If your system reloads BDOS every time it warm boots, the Read Only Vector Sustain will be of no use.
In summary, a File W/P error message will occur if you attempt to write, rename or erase files under any
of the following conditions:
•File (t1) or disk set to Read Only, always.
•File Wheel Protected (f8) and the Wheel is off.
•Path or Public files and Public/Path Access set to R/O.
2.10 Re-entrancy Potential
Re-entrancy allows special programs such as screen-trapping and print scrolling packages to interrupt BDOS
calls by other programs with BDOS calls of their own. ZRDOS Plus was the first CP/M replacement to
offer a standardized means of BDOS re-entrancy. For compatibility with existing ZRDOS IOP’s, ZSDOS
supports the same re-entrancy interface as ZRDOS Plus. More detailed information on recursive ZSDOS
calls is contained in the ZSDOS Programmer’s Manual, available separately.
2.11 FCB User Number Support
What ZCPR started, ZSDOS now extends! ZCPR has long used File Control Block byte 13 (also known as
the S1 byte) to store the User number for a file. To date, no DOS has used this byte at all. ZSDOS uses
24
the S1 byte to store the User number when a file is opened. Subsequently, reads and writes to this file can
be made without calling Set User (function 32) first. After opening a file, the S1 byte it its FCB will be set
to the file’s User number OR’d with 80H.
ZSDOS applications may take advantage of this new capability to eliminate most Get User and Set User
calls. Load FCB+13 with the User number OR’d with 80H, then call ZSDOS for the file operation. The
load of FCB+13 need be done only once per file, because ZSDOS FCB User numbers are retained during
subsequent calls.
Unfortunately, a large number of CP/M applications “reuse” FCB’s without bothering to clear the S1 and S2
bytes (Digital Research didn’t require this). For backward compatibility with these programs, some ZSDOS
functions only respect the FCB User byte when the ZSDOS error mode has been set. If the error mode is
not set, ZSDOS ignores FCB User numbers during Open File, Make File, Rename File, Erase File, Change
Attributes, and Search First function calls. ZSDOS always respects the FCB User number during other
function calls. See Function 45 in the Programmer’s Manual for full details.
2.12 File Datestamping Support
Both ZSDOS an ZDDOS add full file time and datestamping support to CP/M. This is immensely helpful in
keeping track of large numbers of files. The ZSDOS datestamping feature allows the user to take advantage
of a full range of datestamp-oriented programs, including directory utilities, disk cataloging systems, and file
compare utilities, which use datestamps to help organize information.
For maximum flexibility, ZSDOS and ZDDOS offer two basic approaches to file datestamping. ZSDOS pro-
vides DOS-level ties to implement time and date stamping routines, while ZDDOS provides all datestamping
routines (except clock driver) within the DOS. Unlike ZDDOS, ZSDOS does no actual date stamping - this
is left to a set of routines located outside of the BDOS memory segment. Because datestamping routines
are located externally, ZSDOS is able to support both CP/M Plus and DateStamper-style file datestamping.
ZDDOS, on the other hand, provides only one datestamping format (the Plu*Perfect DateStamper), but is
easier to install and takes less memory because datestamping is contained entirely within the 3.5 kilobyte
BDOS segment size specified by Digital Research. See Section 3.2 for more on ZSDOS datestamping and
clock modules.
The different datestamping methods used by ZSDOS and ZDDOS are effectively hidden from the application
program, since both DOS’s provide programs with the same datestamping function calls. Get File Stamp
(Function 102) returns the datestamp of a specified file, while Set File Stamp (Function 103) sets a specified
file’s stamp. For applications running under ZSDOS and ZDDOS, the stamps returned or written by these
functions are in the same “universal” 15-byte packed BCD format used by Plu*Perfect’s DateStamper, no
matter what type of stamping is actually present on disk. Appendix Cdetails the DateStamper format.
The Stamp copy method (Get Stamp, Set Stamp), function numbers, and the datestamp formats of ZSDOS
are compatible with Bridger Mitchell’s DosDiskTM , which allows CP/M machines to use files on MS-DOS
disks directly. We encourage others to take advantage of this standard to easily implement features such as
preserving date stamps across file copies, crunched files, telecommunicated files, and library files.
2.13 Run-time Configuration
Unlike earlier BDOS replacements, ZSDOS allows you to enable and disable many features “on the fly” with
the ZSCONFIG program. ZSCONFIG can be used in either an interactive fashion or in a command driven
mode that allows reconfiguration of the system from command scripts.
Features under control of ZSCONFIG are:
25

•Public file mode.
•Use of an external path.
•Path access mode (directory or file).
•Set Path or Public Access to Read/Write or Read Only.
•Fast fixed disk relogging.
•Read Only Vector sustain.
•File datestamping.
ZSDOS also instantly responds to changes in the Path or changes in Wheel status. More detailed information
on ZSCONFIG usage is provided in Section 4.10 of this manual. Application programs may also alter these
features operations of ZSDOS using the techniques described in the ZSDOS Programmer’s Manual, available
separately.
2.14 Other Significant Enhancements
Reset Drive (Function 37) corrects the bugs contained in CP/M and ZRDOS. Most programmers assumed
(incorrectly) that under CP/M and ZRDOS, Function 37 would relog the default disk if it was logged out.
CP/M and ZRDOS didn’t, but ZSDOS’ Read Console Buffer (Function 10) contains several changes from
CP/M 2.2. Control-E is no longer supported. This was a teletype-oriented function that is unnecessary in
our world of CRT’s that wrap lines. Control-U is the same as Control-X. The delete key has been fixed so
that Rubout acts like Backspace instead of echoing the deleted character. This was done in a transparent
manner that does not require patching of programs such as WordStar. Programs that communicate with
the console through BIOS or through Functions 1 or 6 (e.g. MBasic) will not benefit from this change.
Control-R (retype line) is implemented in ZSDOS only. It could not be included in ZDDOS due to space
restrictions.
Direct Console I/O (Function 6), now includes the CP/M Plus enhancement of Get Console Character if
0FDH is passed in the E register. Get Console Character causes ZSDOS to wait until a console character is
entered before returning the character. Get Console Character differs from normal Console Input (Function
1) in that no character checking (such as Control-C Warm Boot) is performed by ZSDOS. Unlike CP/M and
ZRDOS, ZSDOS’ Direct Console I/O function allows mixing function 6 calls and Get Console Character
calls in a totally reliable manner. Thanks to Bridger Mitchell for suggesting this enhancement.
Ten new function calls have been added to ZSDOS. The first six are immediately available to all ZS-
DOS/ZDDOS users. They are:
Function 39 Return the Fixed Disk Login Vector
Function 45 Set the ZSDOS error mode
Function 47 Return the current DMA pointer
Function 48 Return the ZSDOS Version Number
Function 100 Get ZSDOS flags
Function 101 Set ZSDOS flags
The last four new routines are only available if a Time Stamp Module is installed (see Section 3.2) or ZDDOS
with a clock module is present. These four additional functions are:
Function 98 Get Clock Time and Date
Function 99 Set Clock time and Date
Function 102 Get a File Date Stamp
Function 103 Write a File Date Stamp
26
Functions 102 and 103 offer programmers an efficient means of preserving file time and date stamps. These
functions return unique status codes for efficient use with programs. The new functions have been carefully
designed to be compatible with other BDOS’s (favoring ZRDOS where conflicts arise).
ZSDOS supports all ZRDOS 1.7 functions calls. Therefore all programs designed for ZRDOS versions 1.7
and before are also usable under ZSDOS, though many of these programs have been superseded by more
recent innovations. Warm Boot Trap and Reset Warm Boot Trap aren’t implemented in ZRDOS 1.7, and
this is also the case with ZSDOS.
27
3 Installing ZSDOS
ZSDOS can be installed on almost any computer that currently runs CP/M 2.2 or ZRDOS 1.x. In general,
installing ZSDOS consists of two steps. First you must replace your system’s current Basic Disk Operating
System (BDOS) with ZSDOS or ZDDOS. After successfully replacing the BDOS, you must also install a
ZDDOS clock driver or ZSDOS datestamper module and initialize your disks if you desire file datestamping.
Finally, users of BackGrounder ii must also install BackGrounder for use with ZSDOS.
Each of these operations is presented separately in the following sections of this guide:
3.1 Installing the Operating System
3.2 Clock and File Stamp Installation
3.3 Installing BackGrounder ii for ZSDOS
For best results, complete each phase of the installation process before proceeding to the following step.
Once you have a working ZSDOS system, you may also wish to consult Section 3.4, Advanced Installation
Techniques, which describes optional ways of making ZSDOS more efficient.
Before installing ZSDOS, prepare two freshly-formatted diskettes in accordance with the instructions for your
computer. Copy all programs and files from the ZSDOS distribution disks onto these work diskettes, then
remove the ZSDOS distribution disks and store them in a safe location. Work only on copies of the master
diskettes, using the masters only when it is necessary to regain unmodified, original copies of programs and
data.
3.1 Installing the Operating System
This section consists of the following subsections:
3.1.1 Installing ZSDOS with INSTALOS
3.1.2 Installing ZSDOS with NZ-COM
3.1.3 Installing ZSDOS with JetLDR
3.1.4 Installing ZSDOS with XBIOS
Most readers need refer only to Section 3.1.1 to add ZSDOS capabilities to their existing System Generation
facility. Users of NZ-COM, JetLDR, and XBIOS should consult Sections 3.1.2,3.1.3, and 3.1.4, respectively
for instructions on installing ZSDOS with these advanced tools.
3.1.1 Installing ZSDOS with INSTALOS
The ZSDOS INSTALOS program automatically overlays your computer’s System Image file, such as MOVCPM.COM
(CP/M) or MOVZSYS.COM (ZRDOS) program, or Absolute System Model file (e.g., CPM64.COM) with
ZSDOS or ZDDOS to produce a new file containing ZSDOS/ZDDOS instead of your original Basic Disk
Operating System. INSTALOS also allows you to set the defaults of various ZSDOS parameters during the
installation process (these parameters may also be changed later with the ZSCONFIG program).
28
INSTALOS is designed to make the installation process as easy as possible. With INSTALOS you may load
files from all drives and user areas from A0: to P31:. Error detection is extensive, and Section 3.1.1.3 of this
manual fully explains all INSTALOS error messages. Finally, you may safely abort INSTALOS at nearly all
points by pressing Control-C.
Before using INSTALOS, ensure that the following files from your ZSDOS Distribution Disk are present:
•ZSDOS.ZRL (or ZDDOS.ZRL if embedded DateStamper is desired)
•INSTALOS.COM
The following files from your CP/M or ZRDOS System Disk must also be accessible:
•MOVCPM.COM (CP/M), MOVZSYS.COM (ZRDOS), or System Image file for systems such as the
Oneac ON!
•SYSGEN.COM
3.1.1.1 Using INSTALOS To run INSTALOS, most users should simply enter
INSTALOS
at the CP/M command prompt. This tells INSTALOS that you are installing ZSDOS over a System Image
file, such as MOVCPM.COM or MOVZSYS.COM. If you need to install ZSDOS over an Absolute System
Model file such as a CPM59.COM, ZSYSTEM.MDL, or Oneac ON! file, you should enter
INSTALOS /A
to run INSTALOS in Absolute mode. INSTALOS now displays its opening banner and requests the name
of a file as:
System Image file to patch (Default=MOVCPM.COM) :
in Relocatable mode, or
Absolute System Model (Default=SYSTEM.MDL) :
in Absolute mode.
You need not enter all of the information; INSTALOS will fill in any missing items with the default disk,
user, or filename. If you simply hit RETURN, INSTALOS searches the current directory for the default
System Image or Absolute System Model file (MOVCPM.COM or SYSTEM.MDL). Here are some sample
responses:
System Image file to patch (Default=MOVCPM.COM) : B3:
Selects MOVCPM.COM on drive “B” in user area 3.
29
System Image file to patch (Default=MOVCPM.COM) : 10:MOVZSYS
Selects MOVZSYS.COM on the current drive, user 10.
System Image file to patch (Default=MOVCPM.COM) : C:MOV.OLD
Selects MOV.OLD on drive “C”, current user area.
Once INSTALOS finds the requested file, it validates your operating system image. If the CCP, BDOS or
BIOS portions of the System Image or Absolute System Model file are invalid, INSTALOS prints an error
message and quits at this point. This may occur if an Absolute System Image was loaded but INSTALOS was
invoked without the /A suffix. If both methods of calling INSTALOS fail, first ensure that your system image
or generation program is operating properly. If you are sure that you have a working MOVCPM, MOVZSYS,
or Absolute Model file that INSTALOS cannot validate, you will need to contact your distributor who will
initiate actions to correct your problem.
If all values in your operating system file match expected parameters, a summary of those values is displayed.
If you specified a System Image file (e.g., MOVCPM.COM), the display should be similar to:
Addresses in system image (as seen under DDT) :
CCP : 0980H Map @ 3610H
BDOS: 1180H Map @ 3710H
BIOS: 1F80H Map @ 38D0H
The addresses shown will probably differ from these, but if both columns display values other than 0000H,
INSTALOS will correctly overlay the BDOS portion of the image with ZSDOS or ZDDOS.
If you specified an Absolute System Model, the display will be similar to:
Addresses in system image (as seen under DDT) :
CCP : BC00H
BDOS: C400H
BIOS: D200H
As above, the addresses will probably differ from those in the example, which are for a 54K system.
If no error message appears, INSTALOS has properly validated your file. Next, a menu of choices appears:
1 - Replace CCP
2 - Replace DOS
3 - Replace BIOS
4 - Save and Exit
Enter Selection (^C Quits) : _
Options 1 and 3 are for more advanced installations not directly connected to ZSDOS. See Section 3.4 of
this manual for more on these options. For ZSDOS installation, enter a 2. You will be asked for the name
of a Disk Operating System file as:
Name of DOS file (Default=ZSDOS.ZRL) : _
30
The default file type at this point is ZRL, but operating systems in MicroSoft REL format such as distribution
versions of ZRDOS are also accepted. As above, you may respond with a full or partial file specification and
INSTALOS will fill in any missing items with the default disk, user, or filename.
Once the Disk Operating System file is found the following prompt appears:
ZSDOS.ZRL Size OK...overlaying BDOS..
Examine/Change ZSDOS parameters ([Y]/N)? : _
At this point, INSTALOS allows you to change the startup settings of all ZSDOS options. If this is your
initial installation of ZSDOS, we recommend that you press N for “No” to bypass this step, and skip the
following paragraph.
If you enter any character other than N or n, the default option in brackets ([Y] for “Yes”) is assumed, and
INSTALOS displays the current ZSDOS defaults as:
1 - PUBlic Files : YES
2 - Pub/Path Write Enable : NO
3 - Read-Only Vector : YES
4 - Fast Fixed Disk Log : YES
5 - Disk Change Warning : NO
6 - Path w/o System Attr : YES
7 - DOS Search Path : Disabled
8 - Wheel Byte Protect : Disabled..Assumed ON
T - Time Routine (Clock) : Disabled
A - Stamp Last Access Time : Disabled
C - Stamp Create Time : Disabled
M - Stamp Modify Time : Disabled
G - Get Date/Time Stamp : Disabled
S - Set Date/Time Stamp : Disabled
Entry to Change ("X" if Finished) : _
These options are presented in the same manner by ZSCONFIG, and are fully described in Section 4.10 of
this manual.
Once you bypass the configuration step or exit by pressing X, one of the following prompts appears depending
on whether you are installing an Image or Absolute Model file:
Name to save new system (Default=MOVZSDOS.COM) : _
or
Name to save new system (Default=ZSSYS.MDL) : _
Again, you may respond with a full or partial file specification and INSTALOS will fill in any missing items
with the default disk, user, or filename. If a file with the same name exists, INSTALOS prompts you for a
new name. When INSTALOS has a valid name, it creates your new system file and exits, displaying one of
the following messages:
..Saving MOVZSDOS.COM - relocatable
31
or
..Saving ZSSYS.MDL - absolute
3.1.1.2 Creating a Boot Disk Once INSTALOS has saved a relocatable or absolute file, you are ready
to create a boot disk containing ZSDOS. If you used the command INSTALOS /A to install ZSDOS over
a System Image file, use SYSGEN.COM or the equivalent to write ZSDOS directly to the system tracks of
your boot disk. Normally, the proper command is
SYSGEN filename
where filename is the name of the file you just created with INSTALOS.
If you used the command INSTALOS to install ZSDOS over a MOVCPM or MOVZSYS program, you must
first create an Absolute System Model file with the MOVZSDOS program just created. Since the functional
portion of your new program is identical to the original, use the method explained in your original MOVCPM
or MOVZSYS documentation to generate a new system. Typically, the command is:
MOVZSYS nn *
followed by
SAVE xx CPMnn.COM
Where nn is the size of the system (typically 64 for 64 kilobyte systems) and xx is the size of the System
Model file in pages and is typically given by the MOVCPM program. Once you have created an Absolute
System Model (CPMnn.COM in the above example), use SYSGEN as above to write ZSDOS to the system
tracks of your boot diskette.
After creating a ZSDOS boot disk with SYSGEN, insert it in drive A: and press the reset button, or turn
your computer off for a few seconds then back on to bring up ZSDOS.
3.1.1.3 INSTALOS Error Messages Occasionally INSTALOS may issue error messages. Most errors
result when the files you specified do not conform to INSTALOS’ expectations. Often the solution is to run
INSTALOS again, specifying relocatable mode instead of absolute mode or vice-versa (see Section 3.1.1.1).
Many INSTALOS errors will also result from damaged files. If INSTALOS gives errors in both absolute and
relocatable modes, try recopying the CP/M or ZSDOS file causing the error from your distribution disk and
running INSTALOS again.
If all of the above fail, your CP/M operating system files may contain information which INSTALOS cannot
recognize. If you have NZCOM, JetLDR, or XBIOS, try one of the alternative installation methods described
in the following sections. If you do not have any of these programs, contact your ZSDOS distributor for
assistance.
The following is a summary of all INSTALOS error messages, their meanings, and some possible remedies.
*** SORRY! ZSDOS will only run on Z80 type computers!
ZSDOS and its utilities will only operate on processors which execute the Z80 instruction set such as the
Z80, NSC-800, Z180 or HD64180. There is no fix for this condition other than to run it on another system.
32

*** Unable to open [filename.typ]
INSTALOS cannot locate or open the system file you specified. First, ensure that the file is at the default
or specified drive/user location. If you have specified the file correctly but this error persists, obtain a fresh
copy of your system file and try again.
*** Can’t find CCP/BDOS/BIOS at standard locations !!!
The operating system contained in your system file is not a standard CP/M system. It contains a CCP which
is not exactly 2 kilobytes long, a BDOS which is not exactly 3.5 kilobytes long, or both. If this message
appears, first ensure that your system file has not been damaged. If you still receive this message, either use
one of the alternative installation methods listed in Sections 3.1.2 to 3.1.4 or contact your distributor.
++ Image Vector does not match Calculations ++
INSTALOS found an internal error in the image file while installing a MOVCPM-type file. If you did not
use the /A option when running INSTALOS, you may be trying to perform a relative installation on an
absolute file. Try running INSTALOS again with the command INSTALOS /A.
*** Cannot find legal Relocation Bit Map
INSTALOS was unable to locate a valid relocation bit map pattern in the MOVCPM-type file when installing
in Relocatable mode. Non-standard relocatable image files are the general cause for this error. A workaround
is to generate an Absolute Model with MOVCPM first, then use INSTALOS in Absolute (/A) mode on the
Absolute Model file.
---Can’t find [filename.typ].. reenter (Y/[N]) :
The replacement file (CCP, BDOS or BIOS) specified cannot be located. Ensure that the drive, user and
file name are correct.
*** Error in .REL sizing [filename.typ]
Err Code : nn
An error occurred during the sizing operation of INSTALOS on the REL or ZRL file. The REL or ZRL must
be in MicroSoft relocatable format. Named Common segments other than CCP , BDOS , and BIOS are
not allowed, and code and data segments (if any) must not overlap.
*** file too large to fit...
The size of the relocatable CCP or BDOS is greater than the available space in the image file (2048 bytes for
the CCP, 3584 bytes for the BDOS). This error may result if the relocatable file is not in proper MicroSoft
REL format, or if a customized file is used. This error should never occur with the distribution ZSDOS.ZRL
file, which is exactly 3584 bytes (3.5k) long.
*** Error opening : [filename.typ]
33
INSTALOS could not open the specified relocatable file. Ensure that you selected a valid REL file.
*** Error reading : [filename.typ]
INSTALOS detected an error when reading the specified relocatable file. Try recopying the file.
*** Error in .REL file : nn
An error was found in a relocatable input file while attempting to replace the CCP, BDOS or BIOS portions
of your operating system. nn is a hexadecimal code which may assist in locating the cause of the error.
Contact your distributor if you need help in resolving an error of this nature with the code in the error
message.
--- That file already exists. Overwrite it (Y/[N])?
The file you told INSTALOS to write to already exists. If you enter “Y” here, INSTALOS will erase the
previous copy and create a fresh file with this name. Enter N to select a new name.
*** No Directory Space for [filename.typ]
There was not enough directory space for the output file on the selected disk. Send the output file to a
different drive by preceding the filename with a drive specifier, or change the disk in the output drive.
*** Error writing file. Try again with another disk (Y/[N])? :
This message usually results from a lack of disk space on the drive you specified for output. Change disks
and enter Y to try again.
3.1.2 Installing ZSDOS with NZCOM
Thanks to NZCOM’s ability to load operating system segments dynamically, installing ZSDOS with NZCOM
is greatly simplified. You will need either ZSDOS.ZRL or ZDDOS.ZRL and NZCOMPAT.HEX from the
ZSDOS disk and the following files from your NZCOM system disk:
NZCOM.COM
NZCOM.LBR
Installation consists simply of renaming ZSDOS.ZRL (or ZDDOS.ZRL) to NZDOS.ZRL and then replacing
NZDOS.ZRL in NZCOM.LBR with this file. Thereafter, the default version of ZSDOS will automatically
load in place of ZRDOS when you boot up NZCOM. You will probably want to set some of the ZSDOS
options right after loading NZCOM; this is most easily accomplished by calling ZSCONFIG in expert mode
from the NZCOM startup alias (see Section 4.10 for ZSCONFIG details).
To release the full potential of ZSDOS under NZCOM, overlay NZCOM.COM with the file NZCOM-
PAT.HEX. The easiest way to do this is with Ron Fowler’s program MLOAD (available on most bulletin
boards):
34
MLOAD NZCOM.COM,NZCOMPAT.HEX
This adds some code to NZCOM that supervises Stamp and Clock Drivers which have been loaded into
NZCOM’s User Memory Area. NZCOMPAT.HEX causes any ZSDOS or ZDDOS modules in the user
memory area to follow ZSDOS or ZDDOS as it moves during system changes, provided that the user memory
area does not change size, and that the DOS type does not change (e.g. from ZSDOS to ZDDOS). Thus,
NZCOMPAT.HEX eliminates the need to run LDTIM when you load a new operating system with NZCOM
(see Section 3.2 for more on LDTIM.COM).
3.1.3 Installing ZSDOS with JetLDR
Bridger Mitchell’s JetLDR utility for ZCPR may be used to temporarily load ZSDOS or ZDDOS on any
ZCPR system. To run ZSDOS, simply enter
JETLDR ZSDOS.ZRL
ZSCONFIG and LDTIM may then be used to select ZSDOS options and load a ZSDOS clock module. This
does not create a bootable system disk as does INSTALOS; rather, this command must be entered each time
you start your computer, either as part of your ZCPR STARTUP alias or from the command line. You may,
if you wish, combine several steps in a multiple command line. For example, the ZCPR multiple command
JETLDR ZSDOS.ZRL;LDTIM;ZSCONFIG
first loads ZSDOS and its datestamper module and then runs ZSCONFIG in interactive mode. You may
also pass parameters to ZSCONFIG from the command line by using ZSCONFIG in expert mode (see
Section 4.10).
3.1.4 Installing with XBIOS
ZSDOS may be easily installed in the Xsystems Software XBIOS (tm) on the MicroMint SB-180 or FX-180
computer without use of any tools other than the XBIOS SYSBLD program. Only two steps are required:
1. Copy ZSDOS.ZRL and ZDDOS.ZRL to the drive and user where XBIOS segments are located.
2. Execute SYSBLD and change the DOS name to ZSDOS.ZRL or ZDDOS.ZRL as desired.
SYSBLD will create a new system image containing ZSDOS or ZDDOS. To load, simply “XBOOT” the new
image. ZSDOS parameters may be tailored as desired with ZSCONFIG as part of the startup script, or from
within a SUBmit file.
3.2 Clock and File Stamp Installation
Once you have a working ZSDOS system, you will probably wish to install ZSDOS for file datestamping.
Two types of file datestamping are supported by the ZSDOS system; each conforms to a widely recognized
standard for CP/M file datestamping. DateStamper-type datestamping follows the standard set by The
DateStamper from Plu*Perfect Systems. This method is the more versatile of the two, and stores stamps
in a disk file named !!!TIME&.DAT. Only DateStamper-type stamping stores full time and date stamps for
35

file Creation, Last Modification, and Last Access, and may be used with any CP/M diskette format. In
addition, the DateStamper protocol is supported by a mature set of compatible utilities.
CP/M Plus-type datestamping is also widely used due to the popularity of Digital Research’s CP/M Plus
operating system. CP/M Plus-type file datestamping uses the directory sectors to store file datestamps. As
a consequence, CP/M Plus-type datestamps may be accessed more quickly by programs, but there is no
Last File Access stamp. Finally, the range of utilities for this type of stamps is more limited than for the
DateStamper protocol. Before installing file datestamping in your system, you should decide which method
suits you best.
Unless you are using ZDDOS and already have a ZSDOS clock driver in memory (e.g., in your BIOS), you
will need to generate either a file stamping module (for ZSDOS) or a clock driver module (for ZDDOS), and
load that module to memory to enable file datestamping.
This is where the ZSDOS programs TESTCLOK and SETUPZST come in. TESTCLOK allows you to test
the various clock drivers included with ZSDOS for compatibility with your computer’s hardware. Once you
have found a compatible clock driver, use SETUPZST to permanently select the driver. SETUPZST is a
very special program which does nothing but create a program of its own, named LDTIM (which stands
for LoaD TIMe). You then run the LDTIM utility at startup time to load your ZSDOS clock driver and
activate file datestamping.
The final step required before file datestamping actually occurs is disk initialization. Depending on what
style of file stamping you have selected, you will need to initialize your disks with either PUTDS.COM or
INITDIR.COM before ZSDOS will put file datestamps on them.
In addition to PUTDS.COM or INITDIR.COM, this clock and file stamp installation section requires four
other files. They need not be on the same disk or in the same user area, since TESTCLOK and SETUPZST
also allow the same drive/user (DU:) specifications described in Section 3.1.1. The four additional files are:
TESTCLOK.COM Clock test program
SETUPZST.COM The installation program
STAMPS.DAT Library of Stamping routines
CLOCKS.DAT Library of Clock drivers
If this is your initial installation, run TESTCLOK first to identify and test the appropriate clock driver from
the CLOCKS.DAT library. Once you have identified the clock driver for your computer, proceed with the
complete installation covered in Section 3.2.2.
3.2.1 Selecting a Clock Driver
To test a clock from the ZSDOS library, type
TESTCLOK
The program will sign on with a banner, and ask a series of questions until it knows what to do. The first
question is
Extract Clock from Library ([Y]/N) : _
The default selection at this point is “Yes”; the “No” response is for testing of user-developed clocks and is
described in Section 3.4 under Advanced Installation Techniques. To test one of the clocks in the library,
enter a Y. The location of CLOCKS.DAT will be requested:
36

Enter Clock Driver Selection : _
At this point, you may select a clock driver by entering a number and pressing RETURN. If the number
corresponds to one of the entries, TESTCLOK loads the driver and displays descriptive information.
WARNING
Do not experiment with unknown clocks, since very unpredictable
results can occur; the least damaging of which can be “locking up”
of the system requiring use of the reset button.
For example, if 41 is entered for the MicroMint SB180 “Heartbeat” clock, the following information is shown:
SB180 Heartbeat 0.3
SB180 BIOS heartbeat clock
(BIOS v 2.1-2.7, Joe Wright/Hal Bower)
For certain clocks, TESTCLOK requests additional information. In this example, a default date for startup
is needed:
This year (Default=01H) : 88
This month (Default=01H) : 09
This day (Default=01H) : 11
This date will be effective when the Heartbeat clock module is first loaded, and may then be set to the
current date with TD.COM as described in Section 4.6 of this manual.
When all values have been entered, TESTCLOK tests the clock driver. If the clock driver is not compatible
with your computer, a pause will occur as TESTCLOK attempts to detect a variance in the sampled time. If
no change in the time is detected, TESTCLOK exits with an error message. The following display indicates
a successful clock test:
Press any key to quit...
11 Sep 1988 14:50:18
The clock will be updated each second and will continue to display the current time until you strike a key,
which causes TESTCLOK to exit. Once you find a functioning clock driver with TESTCLOK, record its
menu number and proceed to Section 3.2.2 below.
3.2.2 Installing Clock and/or Stamp Method
To begin installation of a clock and time stamping method, call up SETUPZST by entering:
SETUPZST
37
SETUPZST responds with its initial menu as:
1 - Generate New Time Stamp Program
2 - Examine/Modify Existing Time Stamp Program
X - Exit to DOS
Enter Selection : _
For an initial installation, to install a different type of datestamping, or to install a different clock, select
option 1. Option 2 is self-explanatory, and only changes parameters in existing programs, and is described
in Section 3.4.3.4.
Entering a 1 causes the following sub-menu to appear:
Select type of Date/Time Stamping :
1 - DateStamper (tm)
2 - P2DOS (CP/M Plus compatible)
3 - Read DateStamper (tm), Write Both DateStamper & P2DOS
4 - Read P2DOS, Write Both DateStamper & P2DOS
5 - ZDDOS Clock interface
Choice (^C Exits) : _
If you are already using DateStamper or P2DOS (CP/M Plus) types of stamps, you will probably want
to continue using your current method by selecting option 1 or 2. Options 3 and 4 provide the ability to
convert between the two stamping methods for compatibility with both systems at once. Because of their
increased capability, however, options 3 and 4 require more memory space than the options 1 and 2. Option
5 generates a small module which links a clock driver to ZDDOS if a suitable driver is not already present
in the system BIOS (see Section 3.4.2 for clock specifications).
After you have selected your type of date/time stamping, SETUPZST asks several more questions. The first
is:
Load as an RSX below the CCP? (Y/[N]) : _
As with INSTALOS and TESTCLOK, a Y (yes) or N (no) answer is expected, and the answer in brackets is
the default response. For an initial installation, respond with Y for Yes. This generates a LDTIM.COM which
loads your datestamping routine below the Console Command Processor, reducing the available Transient
Program Area (TPA) by about three thousand bytes. While costly in terms of memory use, this method
requires less knowledge on your part than more sophisticated installations, and will operate without changes
on different sized systems. After you gain experience with ZSDOS and its capabilities, refer to Section 3.4
for tips on installing datestamping modules in high memory to regain TPA space.
Assuming that you entered a Y above, SETUPZST now prompts you for the location of the STAMPS.DAT
file:
Location of STAMPS.DAT file [B0:] : _
A single carriage return tells SETUPZST to look for STAMPS.DAT in the current user area and drive.
You may also enter a drive letter, user number or both in du: form, followed by a colon. Once it finds
STAMPS.DAT, SETUPZST says:
38
..Extracting files from STAMPS.DAT..
Extract Clock from Library ([Y]/N) : _
At this point, SETUPZST has created two temporary files in preparation for building LDTIM.COM, and is
requesting a clock driver with which to complete the program. First-time users should enter any character
other than an N to extract a clock driver from the library file, CLOCKS.DAT. This results in a menu of
over 40 drivers from which to choose. This menu is identical to the one displayed by TESTCLOK.COM
(Appendix Fgives a brief description of each clock driver). Following the list, SETUPZST asks you to:
Enter Clock Driver Selection : _
If you have not yet run TESTCLOK, exit here with a Control-C, turn to the beginning of Section 3.2.2, and
follow the procedures for running the TESTCLOK program. TESTCLOK will assist you in locating a clock
which will work on your computer.
If you have successfully run TESTCLOK, enter the same number you gave TESTCLOK here. When SE-
TUPZST recognizes a number corresponding to one of the entries, the clock is extracted from CLOCKS.DAT
and written to a third temporary file. You are kept informed with the message:
..Loading : <clock name> ...
Where <clock name>corresponds to the entry selected from the above menu of clock drivers. SETUPZST
now links your clock module to two other files. As each file is linked, a descriptive message is shown. If no
difficulties occur, the following messages appear:
Linking Loader Module.. OK
Linking Time Module ... OK
Linking Clock Module... OK
Following a successful linkage operation, more detailed data on your clock is printed. Using the same example
driver we tested with TESTCLOK, the display is:
SB180 Heartbeat 0.3
SB180 BIOS heartbeat clock
(BIOS v 2.1-2.7, Joe Wright/Hal Bower)
Following this, other messages may appear depending on the selections you made for the LDTIM program.
If you chose the recommended initial RSX form for LDTIM, the following message appears:
Other messages for installation under NZCOM and in fixed high- memory are covered in Section 3.4. Since
an RSX module may not overwrite any portion of the Console Command Processor, SETUPZST must now
determine your CCP’s starting address in memory. Since normal ZCPR3 and CP/M 2.2 CCPs are both
800H (2k) bytes long, this is established as the default value for installation, and normally need not be
changed. Consult the documentation on your system if you think that your CCP may be larger than this.
For most CCP’s, respond to the prompt with:
CCP Size is : 0800H. Change it (Y/[N])? :N
39

You may now enter a message of up to 40 characters to be displayed when LDTIM is operated. Suggestions
for text include the time when the module was made, the type of stamp and or clock, or the name of the
system for which the module was made, but any message will do. The prompt is:
Opening Message : ________________________________________\
The usual CP/M line editing commands are active, and hitting RETURN terminates entry. If you fill the
line to its end, entry is terminated automatically.
Finally, SETUPZST asks for a name under which to save the module on disk:
Name of output file [Default = B0:LDTIM .COM] : _
As with other prompts, enter as much information as you wish; SETUPZST fills in missing information with
its own defaults. If the file you specified already exists, SETUPZST allows you to either replace the existing
file or save your file under a different name. When a suitable name has been entered, SETUPZST says:
..Saving : B0: LDTIM .COM
..Erasing Work Files..
<< System Saved. Good Bye >>
Congratulations – you have just created a file datestamping program customized for your system! Its
operation is described in the next section.
3.2.3 The LDTIM Program
LDTIM.COM is the default name of the “LoaD TIMe” program created by SETUPZST. Its principal purpose
is to install and optionally remove clock drivers and file stamp routines in ZSDOS and ZDDOS. You install
clock and stamp drivers by simply entering the program’s name as:
LDTIM
If no clock (ZSDOS and ZDDOS) or stamp driver (ZSDOS only) is already present, LDTIM will check various
operating system parameters depending on the installation method selected when building the module with
SETUPZST. If all checks pass, LDTIM loads its stamp and clock drivers to memory and your extended
ZSDOS functions are activated.
If LDTIM finds that another stamp module is already active, a message asking if you wish to replace the
current module appears. Responding with a “Yes” causes the existing stamp module to be removed and the
new one installed. Answering with a “No” simply aborts LDTIM and leaves the existing clock and stamp
modules in place and active.
You can also use an existing LDTIM module to list the name of any installed stamp module, and optionally
remove it. The options recognized by LDTIM are:
// Print a brief Help message and the Stamp Module name
/L List the name of any installed Stamp Module
/R Remove any installed Stamp and Clock Module
The options are specified as described in Section 1.8. The List and Remove options are general functions, and
may be used on installed Clock and Stamp modules from other loader modules. This means, for example,
that a LDTIM module made to add P2DOS stamps may be used to List or Remove Stamps added by a
DateStamper module version and vice versa.
40

3.2.4 Preparing Disks for DateStamper (PUTDS)
PUTDS prepares floppy diskettes (or logical drives on hard disk systems) for the DateStamper type of file
stamps. Without this preparation, no DateStamper information can be recorded. The preparation consists
of adding the special file !!!TIME&.DAT to the disk in user area 0. Time and date information for all files
on the disk is stored in this file.
WARNING
Running PUTDS on a disk containing valid P2DOS file stamps will
cause loss of P2DOS file stamp information for the first physical
file on the disk. To avoid loss of P2DOS file stamp information,
run PUTDS only on disks which have no P2DOS filestamps on
them, or which have no files. We recommend running PUTDS and
INITDIR on freshly formatted and blank disks only, where they
may be safely prepared for either or both types of file stamps.
PUTDS Version 1.9 is included with the ZSDOS package. Do
not use older versions of PUTDS with ZSDOS. They may erase
!!!TIME&.DAT files without warning.
3.2.4.1 PUTDS Interactive Mode The interactive mode is entered by typing:
PUTDS will ask for a drive letter. Enter a valid drive letter (e.g., B). PUTDS will then ask if you want the
special !!!TIME&.DAT file to be a System file (one that will not be displayed by a normal DIR command).
We suggest that you respond with an N (for No) at first so that you may easily see which disks have been
prepared for DateStamping. If you wish to change this later, the FILEATTR utility described in Section 4.3
of this manual can easily make !!!TIME&.DAT a System file.
PUTDS now creates !!!TIME&.DAT as the first file on the disk, moving existing files and names as necessary
to free the first disk location. The !!!TIME&.DAT file requires half as much disk space as your directory.
For example, the directory on an AMPRO or SB180 40-track double-sided disk requires 4K of space for 128
directory entries. To such disks, PUTDS adds a !!!TIME&.DAT file which uses one directory entry and 2K
of data area to hold Create, Last Accessed, and Last Modified dates and times for the remaining 127 possible
files.
As it works, PUTDS notifies you of any directory entries or file data it relocates. When one disk has been
prepared for datestamping, PUTDS will give you the chance to do another one, allowing you to do a stack
of disks at one time.
3.2.4.2 PUTDS Expert Mode PUTDS may also be run in command line mode. The usage is shown
by typing
PUTDS //
There are three options: -D for Drive, -V for a Verbose onscreen listing of statistics, and -S to make
!!!TIME&.DAT a System file. Command line mode is most useful when you want to run PUTDS from
within command scripts such as SUBMIT files or when preparing only a single disk for DateStamper use.
41

3.2.5 Preparing Disks for P2DOS Stamps (INITDIR)
INITDIR prepares disks for P2DOS-type file stamping. It does this by replacing every fourth entry in the
disk’s directory tracks with a time and date entry which is prefixed with a special character (hexadecimal
21). Existing directory entries in the fourth position are then shifted to the first entry in the next logical
sector and the initialized directory sectors are written back to the disk.
WARNING
INITDIR should not be run on disks containing valid DateStamper
file stamps since it rearranges directory data. To install both Dat-
eStamper and P2DOS stamping on one disk, start with a blank
disk, or one with no datestamps of either type and run both
PUTDS and INITDIR on the disk before using it. Doing other-
wise will invalidate any existing stamp data.
3.2.5.1 INITDIR Interactive Mode Interactive mode is entered by typing
INITDIR
Like PUTDS, INITDIR will ask for a drive letter. Type the letter of the drive containing the disk to initialize
for P2DOS file stamping. If the DateStamper !!!TIME&.DAT file is detected on the disk, INITDIR issues a
warning and asks if you want to proceed or not (see Initdir Error Messages, below).
3.2.5.2 INITDIR Expert Mode INITDIR may also be run in command line mode by entering INIT-
DIR followed by a space and a letter corresponding to the drive you want to initialize for P2DOS stamping.
A brief usage description for INITDIR is shown by typing
INITDIR //
3.2.5.3 INITDIR Error Messages
Directory already initialized
The selected disk is already prepared for P2DOS stamps.
Illegal drive name
The character entered was not in the range of “A” thru “P”.
Not enough directory space on disk
The directory on the selected disk is more than three-fourths full, so not enough space is available to support
P2DOS file stamping.
Directory read error
42

An error was encountered in reading the disk directory.
Directory write error
An error occurred while writing the initialized directory. It will probably result in loss of file data.
--> DateStamper !!!TIME&.DAT File Found <--
Proceed anyway (Y/[N]) :
The special DateStamper !!!TIME&.DAT file exists on the disk. If other files are also on the disk, most of the
DateStamper time and date information will be lost. On freshly-formatted or empty disks, no DateStamper
file stamp data exists, so it is safe to answer with a Y and initialize the disk.
3.3 Installing BackGrounder II for ZSDOS
Please note the Version number of BGii you are installing. Cur-
rently, ZSDOS provides an overlay for LOADBG V1.03, which is
distributed with BGii V1.13. If you have a different version of BGii,
please check with Plu*Perfect Systems before using this overlay.
Newer versions of LOADBG will already have the data for ZSDOS
installed, so this section should be skipped.
ZSDOS and ZDDOS may be used with Plu*Perfect Systems’ BackGrounder ii with the simple addition of
a patch provided in hexadecimal form as BGPATCH.HEX. This file will add the necessary data to permit
BGii to identify ZSDOS and ZDDOS by replacing the values originally used for Versions 1.3 and 1.2(HEX)
of ZRDOS. After applying BGPATCH to LOADBG, ZRDOS Versions 1.1, 1.2(BCD) and 1.7, as well as
CP/M 2.2 will still be recognized, along with ZSDOS and ZDDOS.
The patch may be applied in one of two ways. The first way is by using Ron Fowler’s MLOAD.COM and is
by far the easiest of the two methods. MLOAD.COM is available on numerous bulletin boards. The second
method uses DDT or comparable debugger to patch the file.
Please replace your PUTBG.COM with the version supplied with
ZSDOS. Older versions of PUTBG may not work properly on hard
disks or RAM disks under ZSDOS or ZRDOS.
3.3.1 BackGrounder Installation using MLOAD.COM
The first step is to copy the file BGPATCH.HEX from your working copies of the distribution into the same
user area and drive as LOADBG.COM. With MLOAD.COM accessible, enter the command:
MLOAD LOADBGZ.COM=LOADBG.COM,BGPATCH.HEX
3.3.2 Installation using DDT.COM
As above, make sure LOADBG.COM and BGPATCH.HEX are in the same disk and user area. Then invoke
DDT as
43
DDT LOADBG.COM
DDT will now display some memory statistics:
DDT VERS 2.2
NEXT PC
3C00 0100
-
Now, tell DDT to read in BGPATCH.HEX as follows:
-IBGPATCH.HEX
-R
DDT will read in BGPATCH.HEX, adding the data necessary for LOADBG to recognize ZSDOS and ZD-
DOS. Next, exit DDT with:
-G0
Finally, save the resulting image to a file with the command:
\begin{verbatim}
SAVE 59 LOADBGZ.COM
From now on, you should use LOADBGZ instead of the original LOADBG to start BackGrounder ii.
3.4 Advanced Installation Techniques
3.4.1 Replacing CCP and BIOS with INSTALOS
In addition to replacing the BDOS portion of a system file, INSTALOS can replace the file’s Console Com-
mand Processor (CCP) and Basic Input Output System (BIOS) portions. To replace these segments, first use
INSTALOS to load your system file as described in Section 3.1.1.1, then choose option 1 from INSTALOS’
main menu to replace your CCP or option 3 to replace your BIOS.
3.4.1.1 Replacing the CCP At this writing, INSTALOS is not able to install the new ZCPR 3.4 CCP
due to the extensive use of Named Common addressing in ZCPR 3.4. Other CCP replacements such as
previous versions of ZCPR are handled nicely provided that the replacement CCP is:
•No larger than 2048 (2K) bytes combined CSEG and DSEG.
•In standard MicroSoft REL form ORGed at 0.
Error messages will be displayed and the operation aborted if any of these tests fails (see Section 3.1.1.3).
44
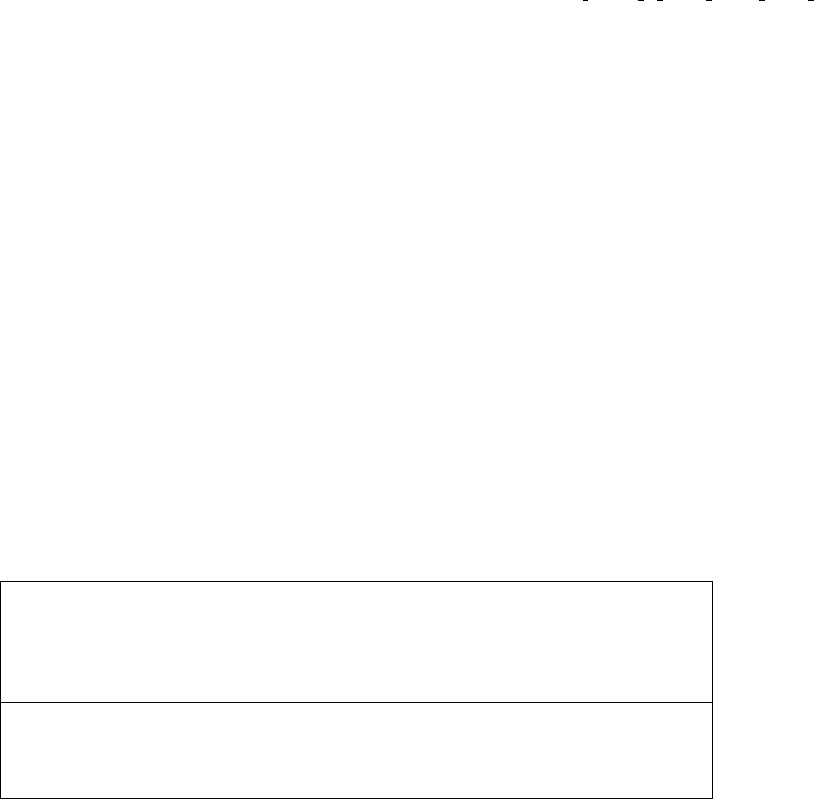
3.4.1.2 Replacing the BIOS Option 3 of INSTALOS’ main menu allows you to replace the BIOS
segment of a system file. The only known limitations on the use of INSTALOS to replace the BIOS segment
are:
•The image with the new BIOS (combined CSEG and DSEG) must fit in available memory.
•The image cannot contain any Named Commons other than BIOS , CCP and DOS .
•The BIOS file must be in standard MicroSoft REL form ORGed at 0.
If you are replacing the BIOS of a relocatable image file such as the original CP/M 2.2 MOVCPM.COM, a
message may be issued that the BIOS Bit Map is being relocated up or down. If the relocation is in a positive
direction, the new BIOS requires more space than available in the original image. If relocation occurs in
a negative direction, the replacement BIOS is smaller than the available space in the image, and is being
relocated to minimize the storage space required on disk for the output file. In both cases, the message is
strictly informative and does not represent a problem.
3.4.2 User-Developed Clock Drivers
If none of the clock drivers supplied with ZSDOS works with your system and you have experience with
assembly language programming, you may wish to write your own custom clock driver. In addition to testing
and using clock modules from CLOCKS.DAT, both TESTCLOK and SETUPZST can read Microsoft format
relocatable files containing user-developed clock drivers. You may command either program to load a user-
developed clock driver by entering an N at the prompt which asks if a library clock is to be used. TESTCLOK
or SETUPZST will request your clock driver file’s full name and type, preceded by an optional drive/user
specification (e.g., C6:NEWCLK.REL), and will then test or install your user-developed clock in the same
manner as the library clocks described in Sections 3.2.1 and 3.2.2.
ZSDOS clock drivers may use registers BC and D without restoring them, but must preserve the Z80’s
alternate and index registers. Other registers must be used exactly as follows:
Enter: C = 00H to Read the Clock, 01H to Set the Clock
DE = Address of a 6-byte field to Receive or
from which to Set time in DateStamper format
(BCD digits as: YY MM DD HH MM SS).
24-hour operation is assumed.
Exit: A = 01H for a successful operation,
0FFH for a failure of any sort (Can’t set, etc.)
When Reading the Clock: E = Original contents of Entry value of DE plus 5
HL = Entry value of DE plus 5 (Seconds field)
Please note that the above clock driver specifications are unique to ZSDOS and differ from drivers used by
The DateStamper and CP/M Plus systems. A template file, USERCLOK.TEM, is included on the ZSDOS
distribution disk as an aid for users who wish to write their own ZSDOS clock drivers.
3.4.3 Customizing Stamp Installation with SETUPZST
3.4.3.1 The Different Stamp Modules When you selected Generate New Time Stamp Program from
SETUPZST’s initial menu (see Section 3.2.2), you were presented with the following options:
Select type of Date/Time Stamping :
45
1 - DateStamper (tm)
2 - P2DOS (CP/M Plus compatible)
3 - Read DateStamper (tm), Write Both DateStamper & P2DOS
4 - Read P2DOS, Write Both DateStamper & P2DOS
5 - ZDDOS Clock interface
Choice (^C Exits) : _
We recommended choosing option 1 or 2 for your initial ZSDOS installation. The memory space required by
options 1 and 2 depends on the specific clock selected, but is typically about 768 bytes (300H) when installed
in high memory.
Options 3 and 4 will read a single type of stamp data, but will write the stamp data to disk in both
DateStamper and P2DOS methods if the target disk is prepared for both. These options should be used
in systems where a single primary Date/Time stamping method is used, but where output disks must be
produced for systems using the other stamping method.
Choosing option 3 or 4 adds capabilities to your system, but at the cost of increased memory usage. Typ-
ical stamp module sizes, depending on the type of clock in your computer, are 1 to 1.25K for the “Read
DateStamper, Write Both” capability, and 1.25 to 1.5K for “Read P2DOS, Write Both”. If you only need
this capability occasionally, we recommend building your LDTIM program as an RSX which loads below the
CCP (see Section 3.2.2). For permanent or long-term use, you will probably want to install the module in
high-memory to regain the TPA space lost in an RSX installation.
Option 5, the ZDDOS clock interface, typically requires 348 to 512 (180-200H) bytes. Again, the exact
size depends on your computer’s clock. See the following section for a way of determining exact memory
requirements for stamp and clock modules.
3.4.3.2 Installing a Stamp Module in High Memory The basic requirement for high-memory instal-
lations of stamping modules is a protected space which is not affected by programs or parts of the operating
system. If you are using NZCOM, please skip to Section 3.4.3.3. If you are not using NZCOM, there are
three basic ways of freeing space in protected memory. Which of these methods are available depends in
part on what type of system software you presently use. Scan the following options to decide which is most
appropriate for you:
A “Vanilla” CP/M 2.2. Systems. Use the modified MOVCPM program generated by INSTALOS (see
Section 3.1.1) to create a system one or two K smaller than your current CP/M system. The additional
free space at the top of memory will then be available for use by the time module produced by
SETUPZST.
B ZCPR 3.x. Systems. If you have IOP space defined in your ZCPR Environment but are not loading
anything other than a dummy IOP jump table, use the free space to host ZSDOS’s stamping module.
Examine your system documentation to determine available IOP space, and deduct the space actually
used by the dummy IOP. Many ZCPR installations allocate 1.5K to the IOP, but use fewer than
128 bytes (1/8K) for the dummy IOP. The remaining IOP space is available for file stamping. Just
remember to execute the LDTIM program produced by SETUPZST after loading your dummy IOP.
C ZCPR 3.x. Systems. Determine the lowest memory required by the ZCPR3 dedicated modules from
your system documentation. Use the system generation program produced by INSTALOS to generate
a system one or two K smaller, and place your stamping module in the vacated space just below the
base of the lowest dedicated ZCPR3 module.
When you have selected a method of using or reserving high memory, run SETUPZST as described in
Section 3.2.2, selecting option 1, Generate New Time Stamp Program. Select the type of Stamping method
46
you wish to install, and answer “No” to the prompt Load as an RSX below the CCP?. Since the installation
will now place the module in high memory, SETUPZST asks a new question:
Install in NZ-COM User Space? ([Y]/N) : _
You are not installing for NZCOM, so respond with an N. Installation will proceed as in Section 3.2.2 with
clock selection and linkage of the three modules. Instead of printing the message that the module will be
loaded below the CCP, however, SETUPZST displays the addresses at which the Stamp Routine and Clock
Driver will load:
Stamp Routine : E200-E44FH
Clock Driver : E450-E4DFH
Change Load Address (Y/[N])? : _
If these addresses do not correspond with the range available in your system, respond with a Y and enter
your own starting address. You may reenter this address as many times as necessary to “fine tune” the
location. For example, if you are placing the module in your IOP space, you will want to move the location
as close as possible to the high end of available IOP memory just in case some other program alters your
IOP. So if your IOP space extends from EC00H to F1FFH, stamp module addresses should be adjusted so
that the ending address for the Clock Driver is F1FFH, for example:
Stamp Routine : EF20-F16FH
Clock Driver : F170-F1FFH
When satisfied with your addresses, answer N to the prompt. Installation now continues as described in
Section 3.2.2.
3.4.3.3 Installing Stamp Module in NZCOM User Space NZCOM features a user-defined memory
space in protected memory which is ideal for adding a stamp module. To use this feature, you must define
the necessary space requirements with the NZCOM program MKZCM. If you intend to use only the ZDDOS
clock driver, four records (512 bytes) should be adequate. Six records (768 bytes) should be sufficient for the
single stamping methods (DateStamper only or P2DOS only), while the larger mixed methods will probably
need nine to fourteen records (1.12 to 1.5K). If too few records are allocated, your ZSDOS LDTIM program
will alert you and tell you how much space to allocate. Now execute SETUPZST and answer the menu
questions as described in Section 3.2.2 until you see the following prompt:
Install in NZ-COM User Space? ([Y]/N) : _
Enter a Y since you have chosen to install the stamps for NZCOM. Installation will proceed as described in
Section 3.2.2 with clock selection and linkage of the three modules. Instead of printing the message that the
module will be loaded below the CCP, however, SETUPZST will say:
Module will load NZ-COM User Space. Change? (Y/[N])
If you answer “Yes” (meaning you no longer desire to install for NZCOM) SETUPZST reverts to a normal
high-memory installation. A “No” response here causes SETUPZST to show how much NZCOM User space
is required by your LDTIM program. The following display was produced on an SB180 using the Read
DateStamper, Write both DateStamper and P2DOS option and the ETS180IO+ clock driver:
47

NZCOM user area size (in bytes) must be 042FH
In order to properly load this module with NZCOM a user space of at least nine 128-byte records (480H)
would be required.
3.4.3.4 Changing an existing LDTIM.COM program Option 2 in the initial SETUPZST menu
allows you to examine or modify an existing LDTIM program. Selecting this option causes SETUPZST to
ask you for the name of a program to load. After loading your program, SETUPZST displays prompts based
on its type. For RSX loaders, only the opening text banner can be changed. For NZCOM and high-memory
loaders, additional choices are available:
NZCOM a) Change to normal high-memory module
(fall through to high-memory choices)
b) Change opening text banner
high-memory a) Change load addresses
b) Change opening text banner
When the changes are complete, you may save the modified program as described in Section 3.2.2.
3.4.4 Tips on Using ZSCONFIG with Clocks/Stamps
3.4.4.1 Patching in an Existing Clock ZSCONFIG, described fully in Section 4.10, can be used to
link a clock driver already in memory (e.g., a BIOS driver routine) to ZSDOS. The only item of information
necessary is the starting address of the routine. Once you have done this, however, normal installation of a
Stamp routine with LDTIM.COM will not be possible, so this method of installing a clock driver is best used
with ZDDOS, which needs no Stamp support code, or with ZSDOS if no Date/Time stamps are installed.
3.4.4.2 Speed Tip Several methods may be employed by users of the DateStamper type of file stamping
to speed disk performance. DateStamper-type file stamping maintains a Last File Access record. This is
often very useful in determining which files were used during a given period. Last File Access stamping
does, however, incur a slight performance penalty since ZSDOS must write the time and date to its special
!!!TIME&.DAT file each time a file is used. Under ZSDOS, you have two basic ways of reducing the Last
File Access penalty.
First, you may use FILEATTR or DATSWEEP to turn on the No Access Stamp attributes of frequently
used files, such as utility programs. The programs will load from disk slightly faster, and since they are
frequently used, a Last Access record for these files is usually of little interest. See Section 4for more on
FILEATTR and DATSWEEP. This method of disabling the Last Access record, however, cannot be used
for files created within a running program such as temporary files created within a word processor.
It is also possible to disable Last Access stamping altogether to speed up disk accesses when performance
is at a premium. Disabling may be accomplished during installation of ZDDOS with INSTALOS, or at any
time on a running ZSDOS or ZDDOS system with ZSCONFIG. This procedure allows all files to be loaded
more rapidly since the DOS no longer needs to maintain Last File Access records. See Section 4.10 for details
on using ZSCONFIG.
48
4 ZSDOS Utilities
This section of your ZSDOS User’s Manual describes the various programs distributed with ZSDOS which
are not directly concerned with installation. The programs range from fairly simple command-line driven
utilities to sophisticated file and environment management applications. All of the programs interact closely
with features of the ZSDOS operating system to provide services not available under straight CP/M. Eleven
subsections detail the utilities in alphabetical order. They are:
•COPY, a file copying utility which copies file dates, displays temporal file relationships, and supports
file archiving.
•DATSWEEP, a full-screen file manager which displays, prints, copies, erases, and renames files and
groups of files, and displays and acts on file datestamps and attributes.
•FILEATTR, a utility which allows the user to quickly and safely set or reset any or all file attributes
on specified groups of files.
•FILEDATE, a disk directory program with a rich command syntax which allows sorting and selecting
files by date as well as name
•RELOG, a custodial utility for use after programs which bypass theBDOS during disk function calls.
•TD, a small utility to set and read your system’s clock.
•ZCAL, another small program which displays a calendar of the current or selected month.
•ZCFG, a menu-driven configuration utility which allows you to set the default options and other
characteristics of many ZSDOS utilities.
•ZPATH, which sets your BDOS Search Path and/or ZCPR Command Path, if present.
•ZSCONFIG, an interactive or command-line driven program which dynamically regulates many of
the features of a running ZSDOS system.
•ZXD, an extended directory utility which lists three popular forms of file datestamps to screen or
printer.
Many of the above ZSDOS programs may be customized to suit your tastes with ZCNFG which is described
in Section 4.8. With the exception of DATSWEEP, all are ready to use as distributed. DATSWEEP must
be installed for your terminal using the special SETTERM utility before use.
4.1 COPY – Copy Files
COPY.COM is a file copy program derived from the ZCPR3 MCOPY tool written by Richard Conn. It
blends the many modifications by Bruce Morgen and others in MCOPY48 with further enhancements in the
spirit of the ZSDOS environment. File date stamping is supported for the full range of stamping capabilities
provided by ZSDOS. A user-definable “Exclusion list” is now supported to prevent copying of specific files
or file groups, and two options to ease file backups with the Archive bit have been added. COPY is also
more user-friendly than MCOPY, and provides increased error checking and user feedback.
COPY only operates in the Command Line Driven or Expert mode. As with the other utilities provided
with ZSDOS, COPY displays a short Help message when invoked with a double-slash argument as explained
in Section 1.6. The Help message also includes a list of available options along with the effect of each when
included as command line arguments.
49
While COPY is ready to run without special installation procedures, you may wish to change the default
parameters to customize it to your operating style. In this manner, you can minimize the number of
keystrokes required to perform routine operations by avoiding passing many options on the command line.
To set default conditions, insure that COPY.COM, COPY.CFG and ZCNFG.COM and available to the
system, and execute ZCNFG as described in Section 4.8.
4.1.1 Using COPY
The basic syntax for COPY follows the original CP/M format by listing the destination drive/user, an equal
sign, then the source drive/user and file name. An alternate syntax added by Bruce Morgen in MCOPY48
permits specifying transfers in the “Source-Destination” form popularized in MS-DOS. In this alternate form,
you first enter the source drive/user and filename, a space, and then the destination drive/user and optional
filename. Using the symbology discussed in Section 1.6, the syntax is summarized as:
COPY dir:[fn.ft]=[dir:]fn.ft,... [/]options
or
COPY [dir:]fn.ft dir:,... [/]options
If no destination filename is specified, a number of unique files may be copied to a specified directory by
catenating source files separated with commas. Where a destination file name is specified, both source and
destination file names and types must be free of wildcard characters. This popular “Rename” feature in a
copy was a much requested addition to the ZSDOS copy utility. Options to tailor the actions of COPY may
be appended after the source file list.
Yet another method of transferring files was retained from the original MCOPY roots. If no destination
drive/user is recognized in the command line argu-ments, all referenced files will be copied to a default
drive/user location which is contained in the header portion of COPY. The default location is Drive B, User
0 in the distribution program, but may be changed by the Configuration program described in Section 4.1.3
below. If options are desired with this syntax, the slash option delimiter is Mandatory. The syntax for this
method is summarized as:
COPY [dir:]fn.ft,... /options
Various configuration options detailed later allow you to customize COPY to suit your operating style. For
example, status displays of each operation may be suppressed for a “Quiet” mode, verification that copied
files match the original (or at least produce the same error check code) may be enabled or disabled, etc. If
a method of Date and Time Stamping is active under ZSDOS or ZDDOS, the original Stamp information
will be transferred to the destination file. The following examples in the “Verbose” method of operation will
serve to illustrate by copying a file from the current Drive and User area to the same drive, User 10.
COPY ZXD.COM 10:
COPY Version 1.0 (for ZSDOS)
Copying C2:ZXD .COM to C10:
-> ZXD .COM..Ok (Dated) Verify..Ok
0 Errors
50
In this case, no file of the same name existed in the destination area, but some form of File Stamping was
active, so the source Stamp information was successfully transferred to the destination. Performing the same
activity with the other syntax now produces:
COPY 10:=ZXD.COM
COPY Version 1.0 (for ZSDOS)
Copying C2:ZXD .COM to C10:
-> ZXD .COM Replace Same (Y/N)? Y..Ok (Dated) Verify..Ok
0 Errors
Since COPY now detected a destination file of the same name, and File Stamping as well as duplicate
checking (another option flag) were in effect, COPY compared the Last Modified dates for both source and
destination files. Finding a match, the prompt “Replace Same” was issued, and received a (Y)es response to
copy the file anyway. Other responses, depending on the results of the date comparison are “Replace Older”,
which means that an older file exists on the destination, and “Replace Newer” which means that you are
trying to replace a newer file on the destination with an older version.
A similar error check is made if a duplicate file is found to determine if the file was found with the PUBlic
Attribute bit. If a Public file is detected on the destination drive, a warning to the effect is printed. Answering
Yes to replacement at this point will result in a Read-Only error unless ZSDOS has been set to permit writes
to Public Files (See Section 2.8.3).
As stated earlier, COPY has no Interactive mode of operation per se, but the “Inspect” option provides a
means to select files for transfer in a somewhat interactive manner. In this mode, all files selected by the
file specification in the command line are displayed, one at a time, and you may enter “Y” to copy the file,
“N” to Not copy the file, or “S” to forget the rest of the selected files. An example copying all files from the
current Drive and User to User 10 is:
COPY *.* 10: /I
COPY Version 1.0 (for ZSDOS)
Copying C2:????????.??? to C10:
Inspect -- Yes, No (def), Skip Rest
BU16 .COM - (Y/N/S)? Y
BU16 .MZC - (Y/N/S)? N
COPY .COM - (Y/N/S)? Y
COPY .Z80 - (Y/N/S)? S
If operating in the Verbose mode, status on each file will be printed as the copies progress.
4.1.2 COPY Options
Several option characters are available to customize COPY operations. Most of these options may be set
as default conditions using the Configuration Utility described in Section 4.1.3 below. Alternatively, you
may enter any of them on the command line to alter the functions of a single operation. The command line
option characters are as follows:
51

A Archive
E Test for File Existence
I Inspect Files
M Multiple Copy
N No replacement if File exists
Q Quiet
S exclude System Files
V Verify
X Archive Only if File exists
From the brief syntax summaries listed above in Section 4.1.1, you will note that the standard option
delimiter, a slash, is optional if both source and destination specifications are listed on the command line.
If only one specification is listed, is when copying to the default drive, the delimiter is Mandatory. Each
option is described in the following paragraphs.
4.1.2.1 Archive Option When this option is active either by specifying in the command line or as a
default, only files which do Not have their Archive Attribute set (See Appendix E) will be selected. After
the selected files are copied, the Archive Attribute on the Source file will be Set to indicate that the file has
been “Archived”. When used in conjunction with the default drive and user settings, the A option provides
a simple method of archiving files in a single user area. The default for this option is Off, for No control
of selection by the Archive Attribute. Adding the A option to the command line reverses the configured
setting.
It should be noted that this option is incompatible with the “M” (Multiple Copy) option. The first copy
operation will set the Archive bits on selected files, and they will not appear in subsequent copies.
4.1.2.2 File Existence Option This option controls the test for an already-existing file on the desti-
nation drive by the same name. Adding the E option to the command line argument reverses the configured
setting. The default in the ZSDOS distribution version is On, or Check for Existing files. This option does
not affect the check for PUBlic files on the destination drive, which is always active.
4.1.2.3 Inspect Files Option As illustrated in Section 4.1.1 above, the I option provides a means of
selectively copying files, without entering the name of each file. The distribution default for this option is
Off, or do Not inspect the selected file list. Specifying this option on the command line argument list reverses
the configured setting.
4.1.2.4 Multiple Copy Option This option may be used to copy a file, or group of files to the same
drive several times, as when making several copies of the same file group on different disks. A prompt is
given before each copy operation begins, and you may abort at the prompt, or change disks before beginning
the copy. The distribution default for this option is Off, for No Multiple copying. Adding the M option to
the command line argument list reverses the configured setting for this option.
4.1.2.5 No Replacement Option When added as a command line argument, the N option will not
allow replacement of a file which already exists on the destination Drive/User. This option cannot be
configured, and always assumes the same initial state when COPY is called. The default initial state for this
option is Off to permit replacement of existing files.
52
4.1.2.6 Quiet Option When used on a system with ZCPR3, this option causes a reversal in operation
of the ZCPR3 Quiet flag. If the ZCPR3 Quiet flag is active, COPY with the Q option operates in a Verbose
mode. If you do not use ZCPR3, or the ZCPR3 Environment defines the Quiet flag as inactive, this option
will disable unnecessary console messages for a Quiet mode of operation. There is no default condition for
this option, and it is only effective for a single call of COPY.
4.1.2.7 System Files Option This option controls whether or not files with the SYStem Attribute set
will be located by COPY. The distribution default is Off to include SYStem files in COPY file lists and
permit copying of such files. The default may be configured as described below, and the default may be
reversed by adding an S in the command line option list.
4.1.2.8 Verify Option To add a measure of confidence that no errors occurred in a COPY operation,
the Verify option may be activated. When active, the destination file is read in order to compute a Cyclic
Redundancy Check (CRC) word. This word is then compared to a value calculated when reading the source
file. If the two values match, you can be reasonably sure that the destination file is a true copy of the source
file. The distribution default for this option is True to verify each file copied. This option may be changed
by configuration, or reversed by adding a V to the command line option list.
4.1.2.9 Archive if Only if File Exists Option Occasionally, you may wish to update frequently
archived files to the same destinations in a simpler manner than naming each file, or by using the Inspect
option. The X option was created for just this purpose. When this option is added, COPY first searches the
source directory for files which have not been archived, then checks the destination directory for each file. If
a match is found, the file is copied, and the Archive bit is set on the source file. There is No configurable
setting for this option which is always assumed to to be OFF when beginning COPY.
4.2 DATSWEEP – Directory Tool
4.2.1 Overview
DATSWEEP is a comprehensive file management utility. This single program can copy, , rename, unsqueeze,
change attributes, and change the user number – either for a single file or, with just one command, for an
easily-specified set of files.
DATSWEEP also has the unique capability, when used with Plu*Perfect Systems’ DateStamper or compat-
ible systems, to select files by temporal (date and time) relations, enabling you to selectively “back up” files
according to the date (and time) they were most recently changed. The back-up copy will be an identical
copy, with the same date, time, and attributes of the original file.
If DosDisk is running, DATSWEEP will use the MS-DOS file stamp as the modify stamp. Temporal
relationships are therefore also available when working with MS-DOS disks, and the modify stamps are
copied with files. MS-DOS subdirectories may also be changed from within DATSWEEP.
DATSWEEP does not support P2DOS (CP/M Plus) stamps or the ZSDOS P2DOS stamper.
A set of files (fileset) can be specified by:
•Any wild-card usernumber/filename/type or its negation.
•A date/time relation (before, at, after) with wild-cards.
53
•Individually “tagged” or “untagged” files within a fileset.
•A file attribute bit.
All operations that modify files (copy, date, flags, move, rename) preserve original file attributes, such as
read-only protection. Operations on Public files are also fully supported (see Appendix Efor more on file
attributes).
DATSWEEP includes a convenient View mode for reading text files both forward and backward. Files with
wide lines and files in WordStar document format may also be viewed. A handy search command enables
you to quickly locate any pattern or phrase. You can similarly read squeezed files, but only forwards.
The (O)ptions command allows you to select date formats, suppress listing of system and read-only files, set
tab size, etc.
DATSWEEP is designed for friendly, interactive use, though it can also be accessed from the command line.
It incorporates comprehensive error checking and will request confirmation before deleting or overwriting
files (unless you turn off these options). At any time you may change your mind by typing CTRL-C to
terminate the current command.
NOTE: DATSWEEP must be installed before using it on your system! Please refer to Section 4.2.5 for
details on installing DATSWEEP.
4.2.1.1 The Six Windows DATSWEEP uses six separate windows to keep track of the user’s com-
mands, file statistics, disk space, and directory displays:
________________________________________________________________________________
| Again ^Cancel Copy Date Erase Flag Goto Kbytes Log Move \ |
| uNsqze Options Print ^Reset Rename Select Tag Untag View Wind eXit |
|-------------------DateSweep v4.2 command ==> ? ----------------------14:12---|
| free: total:| |
| A: 900 1024 | |
| 1588K 2768K |-------------------------------------------------------------|
| | file noDate ReadOnly |
| | stats |
|-------------------------------------------------------------------------------|
|--> 1. A 0:!!!TIME&.dAT 16K |
| 2. A 0:!!bG .sWP 92K 03/16/86 22:27 |
| 3. A 0:ASM .COM 8K 01/04/86 23:27 |
| 4. A 0:BG .COM 8K 11/05/85 2:41 |
| 5. A 0:BGCALC .COM 8K 01/13/86 23:55 |
| 6. A 0:BGCONFIG.COH 8K 11/01/85 23:41 |
| 7. A 0:BGCONFIG.COM 8K 11/01/85 23:41 |
| 8. A 0:BGCPM .COH 10K 11/01/85 23:41 |
| 9. A 0:BGCSIZE .COM 2K 11/01/85 23:41 |
| 10. A 0:BGUSIZE .COM 2K 11/01/85 23:41 |
| 11. A 0:BLANK .COU 2K 11/01/85 23:41 |
| 12. A 0:CALC .COM 2K 01/13/86 23:55 |
| 13. A 0:CLK .COM 8K 06/16/85 15:42 |
| 14. A 0:CPM .COH 12K 11/01/85 23:41 |
| 15. A 0:CRC .COM 4K |
|_______________________________________________________________________________|
54
The Command Window, at the top of the screen, shows the primary DATSWEEP commands. Each is
executed by typing the corresponding single capitalized let- ter. When the program is waiting for your
command, the cursor rests at the prompt command ==>?. Then, while a command is being executed, the
command name is capitalized and highlighted (if your computer has an inverse video feature).
The wide window immediately below the list of commands is the Message/Query Window. When a command
requires additional input, the message appears here, followed by the prompt ==>?. This window is also
used to report warnings and any errors.
Between these two windows, in the horizontal divider near the right edge of the screen, is the Clock Window.
It shows the current time.
Below that is the File Status Window. It shows the attributes of the current file (e.g. Read Only) and the
date and time it was created and last accessed.
The taller window to the left is the Disk Statistics Window. It contains disk statistics for the logged-in drive
and, when specified, for the destination drive. The number of directory entries, amount of space remaining,
and disk capacities are shown for wach drive.
The Directory Window occupies the remainder of the screen and displays alphabetically-sorted entries from
the currently selected fileset. Each entry shows a sequence number, the drive, user number, filename, and
filetype, followed by the size in Kbytes that the file occupies on the logged drive. If the file has been date-
stamped, its last-modified date and time follow. A file attribute is indicated by a highlighted, lower-case
letter in the filename or type (if your terminal supports highlighting).
You can quickly scroll the directory window to files of interest. And, because the complete disk directory is
loaded (unless there is insufficient memory) new filesets can be rapidly re-selected.
4.2.1.2 Logging In and Selecting Filesets The command DATSWEEP<CR>starts DATSWEEP
and logs in the complete fileset in the current user number – i.e. all files on the default drive in the current
user number. This is equivalent to DATSWEEP *.* <CR>. Or, you can start with a subset of all files by
using a wildcard filespec:
e.g. DATSWEEP *.TXT
Once DATSWEEP is running you can select a different fileset on the same disk with the (S)elect command
followed by a “filespec”, “datespec”, and flag (see below). The (L)og command will also select a new set
of files, but more slowly; it is only needed when you change disks or switch to a different drive (or when
memory is insufficient to hold the entire directory).
4.2.1.3 Filespecs and Datespecs Filespec stands for “File Specification” and Datespec stands for
“Date Specification.” There are some very simple rules to follow when using them.
Filespecs use the standard DRIVE USER:NAME.TYPE fields:
1. DRIVE is only needed when logging in a different drive.
2. USER is needed if changing user number.
3. If drive or user is specified or prompted, a colon “:” must follow, for example:
A0:*.TXT
3:*.*
55

4. A semi-colon “negates” and selects all non-matching files. For example:
A0;*.COM
will select all files that do not have .COM extensions.
5. NAME and TYPE are optional. As usual, a period must precede the TYPE (e.g., MYFILE.TXT). If
you type <CR>instead of specifying a particular filespec, all files in the directory will be entered.
6. The standard wild-cards also work:
? matches any character, e.g. mar??ltr.txt
* matches all characters in the rest of the field, e.g. *.MSS
7. USER may be wild to match all user numbers (0-31). For example,
B*;*.COM
selects all files on B and all users that do not have .COM extensions.
After you type a filespec and <CR>(S)elect (but not (L)og) will prompt for a “datespec” (date specification),
if the logged disk has been prepared for datestamping. The datespec selects files according to the last-modified
date/time. You cannot (S)elect files by the “create” or “access” date.
Datespecs have a RELATION, a DATE, and a TIME field:
1. The RELATION can be:
<Before the specified date/time
= At (on) the specified date/time
>After the specified date/time
(More accurately, <means “before or at”, and >means “at or after”. Only if you specify a particular
time in addition to the date (hour:minute) will the exact datespecs you’re looking for be matched.)
2. The DATE is entered numerically: “month/day/year”. (An option switches to the “day.month.year”
format.)
3. The TIME is entered as “hour:minute”. Exact dates and times need a leading 0 if the numbers involved
are less than 10 (e.g. 03/09/85 02:05).
4. Any of the datespec fields may be wild (* or ?). Again, a press of the <CR>key will achieve this.
4.2.1.4 Flags (attributes) The (S)elect command has one final field following the datespec: the flag
field (e.g., Read Only). Enter a single digit or letter to select only files with that flag. A <CR>or <SPACE>
causes (S)elect to include all files – flagged or unflagged – that match the file and datespecs.
The possible digits and letters to mark flags are as follows:
1 or L noLoad – omit loading Backgrounder definitions
2 or P Public file
3 or D noDate – don’t datestamp file
4, 9 or R Read Only file
S System file (not usually displayed in the directory)
A Archive file
56

Note that S and A represent the 10th and 11th bits. As you can’t type in any numbers over 9 to mark the
flags, you must use only the letters in these two cases.
Note also that you can only choose one flag at a time in your filespecs.
Examples of (L)og and (S)elect Commands:
chap?.txt<CR> > 03/15/88 10:00 <CR>
all CHAP?.TXT files after 10:00 Mar. 15 1988
b:*.com<CR> * **/**/** *:* <CR>
all COM files on drive B:
1:*.*<CR> = **/03/88 **** <CR>
all user 1 Readonly files in March 1988
4.2.2 Using DATSWEEP
The basic means of operating DATSWEEP is simple: Move the pointer to the file of interest and give a
command.
The pointer (−− >) in the left margin points to the currently active file, which is also highlighted (on screens
capable of doing so). All operations take place at the marked file.
Use the following keys to move the active file pointer:
. or <SPACE>Down 1 line
, Up 1 line
>or <CR>Down 1 page
<or <TAB>Up 1 page
The down-page and up-page commands operate slightly differently when the entire fileset fits within the
window, causing the pointer to move to the last file and first file, respectively.
To move to a specific file, use the (G)oto command followed by the filename (wildcards are ok). G<CR>
will pull the current file to the top of the window. You can also use a specific filename or the first letter(s)
of a filename with the (G)oto command, e.g. Gfilename<CR>. This again pulls the specified file to the top
of the window.
DATSWEEP can operate either on single files, or on groups. To operate on a single file, move the pointer
to the desired file, then type the single letter (either upper or lower case) for the primary command (e.g. C
for (C)opy).
Type Y (or <CR>) to execute the command (e.g., copy the file the pointer is next to). Type N to abort this
command. For most file operations DATSWEEP will use the message/query window to request some further
input, such as the destination drive and filename for the copy. After you have supplied this, DATSWEEP
gives you four choices:
Yes or <CR> / Tagged / Untagged / No
57
If you type T, the command is automatically repeated for all files currently “tagged” with a *. Typing U does
an auto-repeat on all files not tagged with * (see below for how to tag files). If you select T, DATSWEEP
will carry out the command at the tagged file, convert its tag to an “inactive” tag #, and then go on to the
next tagged file.
4.2.2.1 Tagging Examples Tagging provides a very convenient and powerful method of reorganizing
your files. Initially, for example, you may want to set a nominal “create” date for all files on an old disk
recently prepared for datestamping. Just enter the (D)ate command, the date, and U for all untagged files.
Or, to make backup copies of today’s changes, (S)elect all files (*.*) at today’s date (= 03/15/88 *:* or
whatever), then use the (C)opy (U)ntagged command sequence. Here is an example of tagged files:
_________________________________________________________________________________
| Again ^Cancel Copy Date Erase Flag Goto Kbytes Log Move \ |
| uNsqze Options Print ^Reset Rename Select Tag Untag View Wind eXit |
|-------------------DateSweep v4.2 command ==> ? ----------------------14:14---|
| free: total:| |
| A: 900 1024 | |
| 1588K 2768K |-------------------------------------------------------------|
| | file 10/21/84 +0125 created |
| *= 66K( 62K)| stats 02/09/86 18:17 accessed |
|-------------------------------------------------------------------------------|
| 11. A 0:BLANK .COU 2K 11/01/85 23:41 |
| 12. *A 0:CALC .COM 2K 01/13/86 23:55 |
| 13. *A 0:CLK .COM 8K 06/16/85 15:42 |
| 14. *A 0:CPM .COH 12K 11/01/85 23:41 |
| 15. *A 0:CRC .COM 4K |
| 16. A 0:DATE .COM 2K 07/02/85 0:45 |
| 17. A 0:DATSWEEP.COM 32K 12/18/85 9:34 |
| 18. *A 0:DDT .COM 6K |
| 19. *A 0:DEFAULT .COC 2K 11/01/85 23:41 |
| 20. A 0:DISK7P .COM 6K 11/12/84 +0239 |
| 21. *A 0:DISK7P .DOC 2K 11/12/84 +0163 |
| 22. *A 0:DSCONFIG.COM 16K 10/30/85 0:53 |
| 23. A 0:DSKSTAT .COM 14K 07/18/85 0:29 |
|--> 24. *A 0:DU86 .COH 14K 10/21/84 +0126 |
| 25. A 0:DU86 .COM 8K 10/21/84 +0124 |
|_______________________________________________________________________________|
4.2.3 DATSWEEP Command Summary
4.2.3.1 File Operation Commands The file operation commands appearing in the top window are as
follows, and can be accessed by typing the first letter of the command.
(C)opy – copy files, renaming the destination (for single files), if desired. Wild-card characters are permitted.
Add V to verify if auto-verify is not in effect (see Options, below). Multi-file copies can be interrupted by
any keypress and aborted (confirmation is requested). For example, to copy the current file to Drive B with
verification and name the new file XPIP.COM, first type C and then enter
B: XPIP.COM V<CR>
58

at the prompt. As shipped, DATSWEEP will not copy if files with the same name which were modified at or
after the same time are found on the destination drive. You can disable this feature from the (O)ptions menu
within DATSWEEP. (Note that DATSWEEP will always back up a file that is larger than 512K regardless
of whether or not it is up-to-date.)
(D)ate – set dates and times. Specify “Create”, “Access”, or “Modify” date. The <SPACE>key or
wildcard characters use the current field value (month, day, or year) of the file the arrow was pointing to
when the command was given, and the <CR>key uses the current field values for all or remaining fields.
Obviously this option won’t work if your disk is not initialized for datestamping (i.e., does not have the
!!!TIME&.DAT file).
(E)rase – erase files. Asks for confirmation for single files only, or if requested for multi-file erasures (unless
auto-confirm is in effect). Requires confirmation to erase a read-only file.
(F)lag – set attributes. Enter a single letter or number, optionally separated by spaces, for each flag to be
set. When flags are set, they are added to the currently set flags.
1 or L noLoad – omit loading Backgrounder definitions
2 or P PUBlic file
3 or D noDate – don’t datestamp file
4, 9 or R ReadOnly file
S System file
A Archive file
You can also set several flags at once. For example,
RDS<CR>
makes a file read-only, non-datestamped and set to “System”. Flags can be cleared with a <CR>.
(M)ove – change user number (0-31) of files.
(R)ename – change file names. Wildcards are fine. Requires confirmation. For example,
R *.txt
renames all tagged/untagged files to an extension of .TXT.
U(N)squeeze – Unsqueezes tagged, untagged or single files. You can also specify a different destination
drive and user for the unsqueezed files.
4.2.3.2 Tagging Commands (A)gain – Retag files after multi-file operation, converting inactive (#)
tags to active tags(*). The inactive tags will stay in place until the next (L)og or (S)elect, or until more tags
(followed by inactive tags) are placed.
As an example, this command may be used to retag files after one back-up, for backing up onto a second
disk.
(T)ag – Tag a file (*) for multi-file operations.
(U)ntag – Untag a tagged (*) file. Files are automatically untagged on (S)elect and (L)og of a new fileset.
4.2.3.3 Miscellaneous Commands (G)oto – Pulls the marked file to the top of the directory window.
You may also specify the name of a file you want pulled to the top of the window, using the full filename or
its first few letters.
59

(K)bytes – Show space remaining on specified drive. The information appears in the disk statistics window.
ˆR (control-R) – Reset all drives. Only needed when changing disk formats (e.g. double- to single-sided)
if your BIOS doesn’t support format determination on disk-select. This is not a problem with XBIOS.
(L)og – Read in directory for new disk. Only necessary when changing drives or disks or when displaying
a set of files from a directory too big to be completely stored in memory. (Otherwise use (S)elect to display
a new file set on the current drive.) Clears all tags. The format of the Log command is:
drive user:filename.type<CR>
(S)elect – Select specified files for directory window. Clears all tags. Select only works on files that have
first been (L)ogged (or loaded with DATSWEEP) into memory. The format of the Select command is:
user:filename.type<CR> relation date time flag
(O)ptions – Display/change DATSWEEP’s options:
Y/N auto-verify when copying
Y/N copy only if not up-to-date
Y/N always confirm erasures
Y/N sort directory by filetype
Y/N exclude System files
Y/N exclude ReadOnly files
Y/N exclude PUBlic files
Y/N use real (hr:mi) time format
Y/N use mo/da/yr format (not da.mo.yr)
Y/N suppress high bit in view mode (necessary to read
WordStar text files)
Y/N clear screen on exit
nn tab size (useful in view mode to match the tabs in
the original document)
nn horizontal scroll size
nn vertical directory scroll size
These options can be changed while using DATSWEEP and take effect immediately. Once you exit DATSWEEP,
however, your changes will not be retained for future use. You can make permanent changes in the default
values for these options by using DSCONFIG (see Section 4.2.5).
(P)rint – Prints tagged, untagged or single files on your LST: device.
(W)indows – Look at all tagged files, all untagged files, or both if you want to return to the whole directory
display. All of DATSWEEP’s commands are available to you when in any of the windows.
e(X)it – exit DATSWEEP.
(\)– Change DosDisk subdirectory (DosDisk systems only). Prompts you to enter the name of a subdirectory
in the currently logged-in directory. If the logged drive is the MS-DOS drive and the current directory
contains the requested subdirectory, the subdirectory is logged in and displayed.
Subdirectories appear in the directory list as ReadOnly subdir files. To change to the parent directory, enter
the subdirectory name “..”. Due to the way DosDisk represents subdirectories, zero-length Read Only files
on the MS-DOS drive are also shown as ReadOnly subdir files.
60

4.2.3.4 Viewing a File In addition to moving and displaying files, DATSWEEP allows you to view text
files. The command for doing this is:
(V)iew – display a text file in the view window.
When viewing files, there are just three windows (including the current time). The top (command) window
then shows the commands for moving the large view window below it over a text file:
_________________________________________________________________________________
| . or SP => + line > or CR => + page 1 |
| , => - line < or TAB => - page B = beg. E = end L = left R = right|
|-----------------------------------------------------------------------14:14---|
| |
| DU-V86.DOC |
| ---------- |
| |
| By Ward Christensen (revised 10/18/83) |
| additional notes by Ron Fowler, Irv Hoff, and Jeffrey Nonken |
| |
| |
|; This version of DU is compatible with CP/M 1.4, 2.x and 3.x and does |
|; not require alteration for various hardware configurations. It ad- |
|; justs itself automatically to the correct number of sectors, tracks, |
|; directory size, etc. |
|; |
| |
| INDEX |
| |
| 1.0 INSTALLATION: |
| 2.0 USE: |
| 2.1 COMMANDS, BY FUNCTION |
| 2.2 ALPHABETIC COMMAND SUMMARY |
|_______________________________________________________________________________|
Use these secondary view commands to move and search:
. or <SPACE>forward 1 line (require terminals with
insert and delete line capability)
, backward 1 line
>or <CR>forward 1 page
<or <TAB>backward 1 page
B beginning
E end
L scroll left
R scroll right
G (G)oto command to locate a word or phrase
Gstring searches forward for a “string” (up to 16 characters). If found, the line with the string is moved to
the top of the window. For example,
GOnce upon<CR>
searches for the string Once upon. To search forward again for the same string simply enter:
61

(G)oto<CR>
The rules for a string match are:
•Lower case matches either lower or upper case.
•Upper case matches uppercase.
•“?” matches any character.
When entering a string to search for, you may:
•Use <DEL>or <BS>to edit.
•Type ˆQ<CR>to include a <CR><LF>in your string
•Use CTRL-C to cancel and return to DATSWEEP’s directory level
One thing to beware of: if you attempt to view a non-text file, some strange characters will be put on the
screen. CTRL-C will return you to DATSWEEP but it may take a while for the computer to work off the
garbage characters you tried to display.
4.2.3.5 Viewing Squeezed Files The (V)iew command automatically unsqueezes Huffman-encoded
files when the second letter of the filetype is “Q”. In this case only forward-motion secondary commands can
be used. The second line of the view-command menu shows the original name of the unsqueezed file.
For squeezed files the (G)oto command searches from the start of the file, or from the top of the last “page-
forward” command. Thus, scrolling the window forward a line at a time leaves this point set; and a (G)oto
string will start the search from a point before the now-showing top of screen.
4.2.4 Command Line Options
Besides running interactively, DATSWEEP also takes options on the command line. This lets you run
DATSWEEP from ZEX or SUBMIT.
4.2.4.1 Special Characters A number of special characters have been added for this option. A brief
description of each is given below:
$ (dollar sign) tells DATSWEEP that there is a command line
$$ (double dollar sign) same as above, except necessary
when used in a submit script
‘ (accent grave) generates a carriage return
C (underscore Cap C) generates a Control-C
4.2.4.2 OSPrompt Level The ‘$’ character tells DATSWEEP that it should take the following char-
acters as a script and act upon them first. For example:
DATSWEEP $S‘=100188‘‘
will Select all files on the logged-in drive that have been modified on 10/01/88. Note that you do not have
to include the ‘/’ delimiter for the date and that upper and lower case makes no difference.
62

4.2.4.3 SUBMIT or ZEX Scripts The command below is the same as the one above except that it is
used by a batch processor such as SUBMIT or ZEX (remember that in a script the first dollar sign must be
given twice):
DATSWEEP $$s‘=100188‘‘
4.2.4.4 Passing Parameters You can also pass parameters to DATSWEEP with the command line
option. Say you have created a submit file called BACKUP with the DATSWEEP command line given
below:
DATSWEEP $$S‘$1‘‘CC0:‘UNX
If you then type
SUBMIT BACKUP =100188<CR>
DATSWEEP will Select all files that have been modified on 10/01/88, copy them to drive C, user 0, and
exit when it is finished. Note in the example above that, while it was necessary to use two dollar signs at
the beginning of the script, passing the parameter to DATSWEEP required only one dollar sign.
4.2.4.5 The C Switch If you want to change any of the options from their default, you can do so. For
instance, if you normally have verification on when copying files, but wish to turn it off, you should precede
your other commands with the following:
DATSWEEP $ON_C
The O is the options command, one N turns off automatic verification when copying, and the C will act as
a Control-C and return you to the directory.
4.2.4.6 Limitations of the Command Line Option
1. You cannot interrupt DATSWEEP when it is using a script. You must wait until it is finished before
it will accept any input from the keyboard. This is true even if DATSWEEP asks you for some input,
e.g. if you run out of space on a disk when you are backing up.
2. Since you cannot usually know ahead of time where files will be, you cannot predictably use the
(T)ag command – you may end up tagging the wrong files! The only exception to this is that when
DATSWEEP first logs onto a DateStamper disk, it always points to the !!!TIME&.DAT file. Conse-
quently, you can (T)ag the !!!TIME&.DAT file and then copy all untagged files.
4.2.5 Installation and Configuration
4.2.5.1 Installation Terminals come in about as many different flavors as printers, each with its own
idea of “standard” control sequences for positioning and moving the cursor, clearing the screen, and deleting
regions. The DateStamper utilities (DATSWEEP and DSCONFIG) require direct cursor addressing and
also make good use of character highlighting if it is available. The SETTERM program lets you install your
63
terminal’s particular control codes into each of the DateStamper utilities. This installation must be done
for all systems - DATSWEEP knows nothing about ZSystem TCAPS.
SETTERM obtains its information for most popular terminals from the terminal database file, TERMBASE.DAT.
Most likely, yours is already on the list (or emulates one that’s there). If so, just select that terminal number
and tell SETTERM to configure DATSWEEP and DSCONFIG.
There are utilities listed in the SETTERM menu that are not used with the ZSDOS and ZDDOS versions
of DateStamper. Just ignore them.
Configuring Terminals in DateStamper’s Library.
To load SETTERM, simply type SETTERM<CR>. SETTERM will first load TERMBASE.DAT and
display a menu of the configurable terminals. The following example (taken from screen displays) explains
what to do if your terminal is in our database library:
Enter the number of the terminal you wish to use.
To define a new terminal, enter just a <CR> ==> __
enter number & <CR>. ˆC will exit to ZSDOS.
Review or edit the terminal definition (y/n)
enter N
Install the definition for: [terminal name] into utilities (y/n)
enter Y
Select one:
A - all DateStamper utilities (SDD,DATSWEEP,DSCONFIG,SETUPCLK)
S - SDD
D - DATSWEEP
C - DSCONFIG
U - SETUPCLK
O - other
Q - quit
==>?
enter D
If necessary, change disks before replying.
Get DATSWEEP.COM from drive ?:
enter drive
... Ok to update (y/n) ?
64
enter Y
Select one:
A - all DateStamper utilities (SDD,DATSWEEP,DSCONFIG,SETUPCLK)
S - SDD
D - DATSWEEP
C - DSCONFIG
U - SETUPCLK
O - other
Q - quit
==>?
enter C
If necessary, change disks before replying.
Get DSCONFIG.COM from drive ?:
enter drive
... Ok to update (y/n) ?
enter Y
When the menu appears for the third time, choose the “Quit” option. DATSWEEP and DSCONFIG are
now permanently configured to run with your terminal. Unless you’ve made a mistake, and wish to go back
to repeat the above procedure, respond with N to the following question
Do another terminal (y/n)?
to finally exit.
Editing an Existing Terminal Entry.
If your terminal emulates closely - but not completely - a terminal in the library, you may wish to edit the
terminal in the library to your exact requirements rather than define a new terminal. In this case you would
answer Y to the Review or edit the terminal definition? question asked just after you load SETTERM. The
contents of the database for that terminal will then be displayed, and you will be given the opportunity to
change any entries.
After editing them to your requirements, you will be asked whether you wish to install the new terminal
characteristics into the utilities. If you answer Y, SETTERM will proceed as in the above example.
Defining a New Terminal Entry. If your terminal isn’t like one of those on the list, you’ve probably had
experience in configuring it. If so, SETTERM lets you define a new terminal entry to enter your terminal
characteristics. Just type SETTERM<CR>and answer Y to the Review or edit the terminal definition?
question. You should then give appropriate answers to the on-screen prompts. Two editing screens will be
displayed - one for cursor addressing data, and the other for terminal control strings. After filling in all the
relevant information (this should be in the user’s guide for your terminal), you can go on to install your
characteristics into DATSWEEP and DSCONFIG as described above.
65
If you’re not familiar with terminal configuration, we suggest you copy the CONTROL and ESCAPE codes
for your terminal from your user’s manual, and send them to us with your ZSDOS disk. We’ll then put your
terminal into our library, so that you - and other owners of such terminals - will be able to carry out the
semi-automatic installation outlined in the first section above.
If you’ve done your own configuration for your terminal, you may find, on testing DATSWEEP, that a
sequence or two was mis-entered. SETTERM can be easily reused to edit and update the definitions. Rerun
SETTERM, select the number of the terminal you defined, and edit as necessary.
We and future ZSDOS users will appreciate it if you would also send us any terminal definitions you work
out. We can then include them in the database for future releases.
4.2.5.2 Configuration The DSCONFIG utility allows you to choose default settings for the options
that are shown when you choose the (O)ption command while in DATSWEEP. The present default settings
are:
____________________________________________________________________________
|DSCONFIG - v. 4.2 for [Terminal name] |
| |
| Enter: Y = yes, N = No, nn = value, . or <CR> = no change, ^C = quit|
| |
| |
|Y/N -- DATSWEEP option -- |
|Y - auto-verify when copying |
|N - always confirm erasures |
|N - sort by file-type |
|N - exclude System files |
|N - exclude ReadOnly files |
|N - exclude PUBlic files |
|N - use real (hr:mi) time |
|Y - use mo/da/yr (not da.mo.yr) |
|Y - suppress hi bit in view |
|N - clear screen on eXit |
|08 - tab size |
|10 - horiz. scroll size |
|05 - vert. scroll size |
|__________________________________________________________________________|
To use DSCONFIG, just type DSCONFIG<CR>and follow the on-screen prompts.
In a DATSWEEP filespec - <drive><user>:<filename>.<type>- the colon can be replaced by the negation
character to exclude files matching the spec. As shipped, that character is the semicolon. However, the
default negation character (semicolon) cannot be used from the command line in a BackGrounder ii or
ZCPR3 system, as it is used to separate multiple commands on the same line.
Users may patch DATSWEEP at the following location to use a different negation character. The patch
location is defined as:
095AH db ’;’ ;negation character
66
4.2.6 Technical Information
4.2.6.1 Filesizes and Disk Space ZSDOS allocates disk space in units, called blocks, of 1K to 16K
bytes, depending on the size of the disk and choices made by the system programmer for your computer.
Thus a file of just a single byte must occupy at least 1K; on a large disk that could be 4K or even 16K.
In the directory window, DATSWEEP shows a file’s size in terms of the space allocated to it on the logged-
in disk. Similarly, the disk statistics window reports the free space on that disk in terms of available
(unallocated) blocks.
When you copy this file to another disk with a different block size (e.g., from single-sided to double-sided
floppy) the space required on the destination disk depends on its minimum block size. The same file can
require the same, more, or less space on the new disk. If insufficient space is available, DATSWEEP will not
attempt to copy the file, but instead prints a warning message.
As files are tagged (*) DATSWEEP displays running totals of the tagged files in the disksize window in the
format:
* = mmmK( nnnK)
The first value is the total space allocated to the tagged files on the logged-in (source) disk. The value in
parentheses is the amount of space those files will require on the destination disk. The (K)byte or (C)opy
command designates the destination disk; until one of those commands is given DATSWEEP calculates the
second (parenthetical) value in units of 1K.
A fine point: files written in CP/M’s random access mode can have “holes” (they’re quite rare). Directory
utilities, such as SDD and STAT count the holes and cause such files to appear bigger that they really are.
DATSWEEP reports the amount of space actually allocated to the file (not counting “holes”); if the value
is different, the size value is flagged with a lower case r, e.g. 48Kr. DATSWEEP cannot correctly copy files
with holes.
4.2.6.2 Error Procedures DATSWEEP attempts to trap all errors, provide a short informative mes-
sage, and await your next command. Rarely, a bad disk or hardware malfunction can cause ZSDOS to report
a ZSDOS Error on X: Bad Sector drive message. If this occurs, you should exit DATSWEEP and reformat
the disk or lock out bad sectors (using FINDBAD or BD).
DATSWEEP verifies a copied file by reading it back to a different area of memory (to test for possible
memory as well as disk errors), computing a cyclic redundancy check, and compares that value to the source
check value.
Public file conflicts are not completely checked when the directory is too large to fit in memory (see Ap-
pendix Efor more on Public files).
4.2.6.3 Very Large Directories DATSWEEP normally loads the entire disk directory (for all user
numbers) into memory. However, on hard disk systems with several hundred files (or when there is only
limited memory left for user programs) the directory can be too large to fit. In that case DATSWEEP loads
all it can, and then gives a full memory message. The (S)elect command will then clearly not find files whose
names weren’t loaded. When this happens (No entries matching spec) just (L)og in a smaller set of files.
67
4.3 FILEATTR – Set or Display Attributes
FILEATTR.COM is a program which allows the user to rapidly set or display the attributes of selected groups
of files under CP/M 2.2 or any of its replacements. Groups of files are specified by name, drive and (under
ZCPR) user number or directory. If a ZCPR Terminal CAPabilities (TCAP) facility is active, FILEATTR
displays use dim or reverse video for enhanced clarity. See Appendix Efor a complete explanation of file
attributes.
While no installation is necessary, the default values of FILEATTR’s command options may be altered for
your convenience. To customize FILEATTR, make sure the files FILEATTR.COM, FILEATTR.CFG, and
ZCNFG.COM are present and execute ZCNFG as described in Section 4.8.
4.3.1 Using FILEATTR
FILEATTR uses the standard syntax adopted for Z-System utility programs. Help is available by entering
the program name followed by two slashes. Command specifications are consistent with the other Z-System
utility programs as summarized in Section 1.6.
4.3.1.1 FILEATTR Display Commands FILEATTR displays all eight attributes of a file or group
of files specified by an ambiguous or unambiguous filename. A CP/M drive or ZCPR directory may also be
specified on the command line. Files are displayed in unsorted order (i.e., in the order in which they appear
on a disk’s directory tracks). Unlike many directory programs, the FILEATTR display always includes
System files. If no directory specification is given, files at the current directory are displayed. If no file
specification is given, all files are matched.
The general form of FILEATTR’s display command is:
FILEATTR [d: or dir:][afn]
4.3.1.2 FILEATTR Set Commands The commands which set file attributes are identical to the
commands which display attributes, except that at least one attribute option must be given in addition to a
file specification or leading slash. Only the specified attributes of matching files are affected by FILEATTR–
other attributes remain unchanged.
The general form of FILEATTR’s set attributes command is:
FILEATTR [d: or dir:][afn] [/][options]
where items in brackets are optional and [/][options] indicates one or more option characters in any order or
combination, introduced by a slash if no files were specified.
4.3.1.3 FILEATTR Options FILEATTR’S option character set is rather extensive, as it controls
screen output as well as the setting or resetting of up to eight file attributes at once. Here are FILEATTR’s
options, the functions they provide, and the file attribute bits affected, if any:
68

Opt Function Opt Function Bit
1 F1 on N1 F1 off (f1)
P Public NP Private (f2)
D Datestamp ND No Datestamp (f3)
4 F4 on N4 F4 off (f4)
W Wheel protect NW Wheel unprotect (f8)
R Read/Only NR Read/Write (t1)
S System NS Directory (t2)
A Archive NA Modified (t3)
Q Quiet
For example, if the R option character is used, all files included in the specification are set to Read Only by
setting bit seven of file type character 1 (t1). The command
FILEATTR B:*.COM R
therefore sets all files ending in “.COM” (command files) on drive B to Read-Only. Options can be combined
in any order. Thus,
FILEATTR MY.TXT NP,A,W
sets the file MY.TXT in the current directory to Private, Archive, and Wheel Protect. All other attributes
are unaffected, so if MY.TXT was a Read-Only file it remains Read-Only. Since spaces or commas between
options are not required, the above command may be condensed to:
FILEATTR MY.TXT NPAW
If specified, the Q option suppresses all screen output other than error messages. This allows FILEATTR to
operate transparently from within command scripts or on secure systems such as bulletin boards.
4.3.1.4 FILEATTR Output The screen output of FILEATTR is nearly identical in both the set and
display file attribute modes. An unsorted list of matching files is shown, followed by a summary line. Each
line describes the drive, user area, name, and current attribute settings of one file:
B00:DATSCR13.Z80> f1off privt stamp f4off nowhl r/w dir mod
B00:RCPTESTR.NOT> f1off PUBLC stamp f4off nowhl r/w dir ARC
B00:COMMEN20.MAC> F1-ON PUBLC NOSTP F4-ON WHEEL R/O SYS ARC
3 files matched, 0 attributes altered.
In the example above, DATSCR13.Z80 has all of its attributes turned off (bits set to zero). These are the
default settings for new files. COMMEN20.MAC has all of its attributes turned on (bits set to one), while
RCPTESTR.NOT has a combination of off and on attributes. FILEATTR always shows attributes which
are set to the on (non-default) state in upper case. Under ZCPR, attributes set to the off (default) state are
shown in reverse or dim video, if available.
FILEATTR’s summary line gives total files matched and total changes just made. Files matched is the
number of files displayed by FILEATTR. Attributes altered is the number of file attributes just changed by
FILEATTR. This does not necessarily equal the number of file attributes specified in the command. For
example, if a command to set all three of the above files to Archive is issued, only the archive status of
DATSCR13.Z80 will be changed. The other two files are already Archived, so they are not affected.
69
4.3.2 FILEATTR Error Messages
Occasionally, FILEATTR may encounter conditions which prevent it from performing its normal function.
In these cases, FILEATTR presents one of the following error messages:
Not wheel
FILEATTR can not be operated under ZCPR unless the Wheel byte is on.
Conflicting entry ... can’t set Public attribute!
There are additional copies of the file you are trying to set to Public at another user area on the same drive.
You must remove or rename these files before proceeding.
No files on disk
You are trying to display or set file attributes on an empty disk.
BIOS write error near directory sector ....
A write error occurred at or near the indicated directory sector. The number given is the offset in decimal
sectors from the beginning of the directory tracks.
CP/M version 2.0 or higher required
FILEATTR requires an operating system which is compatible with CP/M version 2.0. CP/M 2.2, ZRDOS,
ZSDOS, and ZDDOS all fulfill this requirement, but CP/M 1.4 does not.
Bad option: /x
You entered a command line option which FILEATTR does not recognize.
Drive R/O
The disk drive specified in your command has been set to Read Only by the operating system. Attributes
cannot be set on read-only drives.
BIOS set track detected - FA aborting
FILEATTR has detected a background program, such as a screen-trapping program, which is attempting to
change the current BIOS track setting. The background program must be removed before using FILEATTR
to alter file attributes.
70
4.4 FILEDATE – Display File Dates
FILEDATE is a disk directory display program for computers with DateStamperTM or equivalent file time
and date stamping capabilities. FILEDATE displays the dates and times files were created, last accessed,
and last modified. Using an extended command line syntax, FILEDATE can select and sort its display by file
time and date stamp as well as by file name. Taking advantage of this additional information, FILEDATE
often simplifies the task of locating files.
FILEDATE runs on Zilog Z80-compatible computers under CP/M 2.2 or equivalent operating systems with
The DateStamper (by Plu*Perfect Systems), or under ZSDOS or ZDDOS if a clock driver is installed.
FILEDATE is a command-line driven utility, rather than an interactive program. It processes a single
command from the user and returns immediately to the operating system. This is the most efficient program
design for experienced users, since program size is minimized, output is generated almost as soon as the
program has loaded, and control of the computer is returned immediately after output is generated. Such
programs allow command scripts to perform custom functions by bringing the services of several programs
under the control of one command.
By the same token though, command-line driven utilities are often more difficult to learn to use. Gone are
menus, prompts, and pop-up help screens. Generally, the more versatile a command-line driven program,
the more complicated its command-line syntax. Options are usually controlled by a single character each
which when combined form seemingly cryptic commands.
This is typical of many utilities of the UNIX operating system, and is also the true of FILEDATE. In addition
to the file specifications traditionally associated with CP/M directory programs, FILEDATE accepts eight
command line option characters, three date signifiers, and optional date and time specifications. But by
combining options, file specifications, and date and time specifications, FILEDATE offers a broad range of
commands for a variety of purposes.
While no installation is necessary, the default values of FILEDATE’s command options and the characteristics
of FILEDATE’s displays may be customized in a wide variety of ways. To customize FILEDATE, make sure
the files FILEDATE.COM, FILEDATE.CFG, and ZCNFG.COM are present and execute ZCNFG by entering
is name followed by “FILEDATE”. More information on the ZCNFG customization utility is contained in
Section 4.8.
4.4.1 FILEDATE Syntax
The command line syntax of FILEDATE has the virtue of making very powerful commands concise, with
the drawback of making command entry somewhat cryptic for beginners. As an example, the command
FILEDATE B:*.Z80 -AU=
instructs FILEDATE to
Display all files on all user areas of drive B with the file type ".Z80"
which were accessed today, in order from the most recently accessed file
to the least recently accessed.
As you can see, the natural language command is much clearer, but also considerably longer than FILE-
DATE’s command!
71

4.4.1.1 FILEDATE Syntax Summary Using the rules given in Section 1.6, a symbolic summary of
FILEDATE’s command line syntax appears as:
FILEDATE [dir:][afn] [/][options][<,=,or >[dd.mm.yy time]]
This rather daunting expression may be mastered by breaking it up into its five components. All FILEDATE
command lines consist of the FILEDATE program name followed by three optional fields and the option
signifier, in the following order:
[dir:][afn] File specification field.
[/] Option signifier.
[options] Option field.
[<, =, or >[dd.mm.yy time]] Date specification field.
The option signifier serves only to introduce the option and/or date specification fields when no files are
specified. The following sections explain each of the three fields in detail.
4.4.1.2 The File Specification Field FILEDATE (“FD” for short) accepts standard CP/M file speci-
fications or filespecs, including wildcard characters and CP/M drive or ZCPR directory specifications. If no
filename is given, all files are matched, and if no drive or directory is given the current directory is assumed.
The general form of FILEDATE’s filespec is:
FILEDATE [d: or dir:][afn]
Examples:
FD NOVEL.*
Match all files beginning with the name “NOVEL” at the current directory.
FD 4:
Match all files on the current drive at user 4 (ZCPR).
4.4.1.3 The Option Field The second field of a FILEDATE command is the option field. Command
line options tell FILEDATE to select, sort, and display files in various ways. The general form of the option
specification is
FILEDATE [/][options]
where options indicates one or more of the following option characters:
72

Option Meaning
/ Display built-in help
+ Sort the output by date in ascending order
- Sort the output by date in descending order
A Sort or select files by Last Access time and date
C Sort or select files by Create time and date
D Display all dates
N Do not pause the display at each screen
S Display System files
U Display files from all user areas on the selected drive
As mentioned above, all command line options may be introduced either following a file specification or with
the option signifier (/). If a file specification is given, options must follow the filespec. Multiple options may
be given at one time with the exception of Help, which must be specified alone.
Examples:
FD //
Display built-in help message.
FD /N
Display files without pausing.
FD /+AU
Display files from all user areas, sorted in ascending order by access date.
4.4.1.3.1 Sorting by Date Normally, files displayed by FILEDATE are sorted alphabetically by name.
The “+” and “-” options instruct FILEDATE to sort by date instead. “+” causes files to be displayed
in ascending order, with the earliest files first, while “-” displays the latest files first. This is useful in
determining which files on a disk are oldest or newest.
Sort by date is a very useful feature, as it reveals temporal relationships between files. For example, callers
to a bulletin board system can use the “-” option to list files most recently uploaded to the board. The
command FILEDATE *.COM A+ (list command files by access date, starting with the oldest) can be used to
sort through and eliminate unused command files when disk space is at a premium.
Examples:
FD *.DOC +
\end{verbatim]
Display files at the current drive and user ending with ‘‘.DOC’’, sorted
from earliest to latest.
\begin{verbatim}
FD B: -
(Note space before “-”) display files on drive B:, sorted from latest to earliest.
73
4.4.1.3.2 Using Access and Create Stamps The A and C options are only effective when combined
with other options. When sorting files by datestamp under the “+” or “-” options or selecting files by
specified dates (see below), FILEDATE normally uses the Last Modification stamp. If the A or C option
is given, FILEDATE uses the Last Access or Create stamps (respectively) instead of the Last Modification
stamp to sort and/or match files.
Examples:
FD /+A
Display files at the current directory in the order in which they were last accessed.
FD /C=
Display all files at the current directory which were created today.
4.4.1.3.3 Displaying All Stamps Normally, FILEDATE displays file date fields which match the cur-
rent or specified date as null fields (“...” by default–see samples below). This simplifies the task of identifying
file stamps which match a given day, month, or year. Sometimes, though, it is useful to have all date fields
displayed literally, so the D option forces FILEDATE to display all datestamps unconditionally.
4.4.1.3.4 No Pause Normally, if there is more than one screenful of output to display, FILEDATE will
pause, print the message [more], and await a keystroke from the user at the end of each screen. The N option
tells FILEDATE to display files nonstop until the list of matching files is exhausted.
4.4.1.3.5 Showing System Files Normally, FILEDATE does not display files whose System attribute
(t2) is set. The S option causes such files to be included in the display. Under ZCPR, the S option is invalid
when the Wheel byte is off (reset).
4.4.1.3.6 Showing All User Areas Normally, FILEDATE lists files from only one user area at a time.
The U option can be used to display files from all user areas on the current or specified drive. If a file and/or
date specification is given, only files matching the specification(s) are shown. Files are sorted first by user
area, then by filename unless the “+” or “-” options are used. Under ZCPR, the U option is invalid when
the Wheel byte is off.
4.4.1.4 The Date Specification Field The third and final field of a FILEDATE command is the date
specification field. Most directory programs match files by drive, user area, and filename only. A powerful
feature of FILEDATE is its additional ability to match files by date and time. A date and time specification
can be given instead of or in addition to drive, user area, and filename specifications. The general form of
the date specification is
FILEDATE [/][<, =, or >[dd.mm.yy time]]
The date specification field must be the final field of the command, and is entered following all file or option
specifications. As with file specifications, only one date specification per command may be used. Unless files
or options were already specified, the date specification must be introduced with the option signifier (/). <,
= and >are date signifiers, one of which must always be used to introduce a date specification...
74

4.4.1.4.1 Date Signifiers FILEDATE processes date specifications in much the same way it processes
file specifications–date specifications select a subset of files. However, in addition to the ability to select files
equal to a given date, FILEDATE adds the ability to select files from before or after a given date.
Because FILEDATE can use date specifications in these three ways, whenever you give a date specification
you must tell FILEDATE how to use it. Three unique date signifier characters serve this purpose. The
signifiers are as follows:
<Select files from before the specified date.
= Select files which match the specified date.
>Select files from after the specified date.
Date signifiers must immediately precede the date specification (no intervening spaces).
4.4.1.4.2 Dates A date takes the form,
[day[.month[.year[ hour[:minute]]]]]
or
[day[.month[.year[ +relative time]]]]
where the items in brackets are optional, and the dots, colons, spaces, and plus signs are required if they
precede other items.
Year, month, day, hour, and minute are entered either as one or two decimal digits or as wildcard characters.
Hours are assumed to be in 24-hour (“military”) time. Years 50 through 99 assume the current century,
while years 00 through 49 assume the next century. For example,
3.2.88 9:01
specifies
February Third, 1988, at 9:01 AM
DateStamper systems without real time clocks use a relative time to mark files instead of hours and minutes.
This is a decimal value which is incremented each time a disk access is done, allowing sequential tracking
of a day’s file activities. Relative times are entered and displayed as a “+” sign followed by one or more
decimal digits. For example,
4.10.87 +43
specifies
October Fourth, 1987, at Relative Time +0043
The wildcard character “*” may be used to match any value for any date or time item. For example,
75

*.2.88 9:*
specifies
ANY day during February, 1988, from 9:00 to 9:59 AM
Finally, one or more date items may be omitted, in which case FILEDATE substitutes the current date for
that item. Not specifying a time has the same effect as specifying a time of *:*, causing FILEDATE to
match all times. As with dates, if only a partial time is given, FILEDATE substitutes current time items
for missing ones. Here are some further examples:
Date Meaning
(blank) Current day, month, and year, any time.
22.12.87 : December 22, 1987, current time.
22.12.87 December 22, 1987, any time.
.12.87 Current day in December, 1987, any time.
.*.87 Any day in 1987, any time.
.3 Any day in March of the current year, any time.
1 First day in the current month and year, any time.
.. 14:* Today between 2:00 and 2:59 PM
4.4.1.4.3 Date Specifications Combining date signifiers with dates, many date specifications (or date-
specs) are possible. Here are some examples:
Datespec Meaning
= Select files matching today’s date.
<11.9.88 Select files created before September 11, 1988.
>.. 11:59 Select files created after 11:59 AM today.
4.4.1.5 The Complete FILEDATE Syntax Once you have mastered the command syntax of FILE-
DATE, you can combine file specifications, options, and date specifications to form an almost unlimited
variety of search commands. Here are some examples:
COMMAND
FD WORK:*.Z80 -= List all .Z80 files at WORK: last modified
today, most recent first.
Components
WORK:*.Z80 Find .Z80 files at the WORK: directory.
- List most recent files first.
= Match only files modified today.
COMMAND
FD B: +U<1.1 List by modification date all files at all user areas
of drive B: which were created during previous years.
Components
B: Match all files on drive B:
+ List files by modification date.
U List files at all user areas.
<1.1 List files from previous years only (less than the
first of the current year).
76

4.4.2 FILEDATE Output
In default mode (no options selected), FILEDATE displays the current date and time and an alphabetized
listing of all files at the current drive and user area, along with the dates and times when the files were
created, last accessed, and last modified, individual and total file sizes, and space remaining on the selected
drive. File attributes are shown in alternate video (if available) under ZCPR3. If a file attribute falls on a
space (“ ”) character, the character is shown as an underline (“ ”) character in alternate video under ZCPR3.
Normally, FILEDATE only displays date information if it differs from the current values, and fields matching
the current date are displayed as “...”. For example, the year and month of a file created yesterday will
not be shown (unless today is the first of the month or year). This unclutters the display and allows
experienced users to quickly distinguish between today/previous days, this month/previous months, and
this year/previous years (the D option overrides this feature).
4.4.2.1 Default Display Here is a display of all files on drive B, user 1 generated on November 12th,
1988 at 9:50 AM. The command used was simply
FILEDATE B1:
Current date and time
|
12.Nov.88..9:50 Create Access Modify Size
================ --------------- --------------- --------------- ----
B01:-READ .ME .3.Oct.....7:56 28.Oct....10:16 .3.Oct.....7:57 4k
B01:CHECKWS .ZEX .6.........5:58p ...........9:45 .6.........5:58p 4k
B01:SAMPLE .DOC .9.Jan.87..9:42 11.Jan.87..1:07p 11.Jan.87..1:07p 4k
B01:ZSDOCS .CRW 24.Jul.....7:41p 28.Oct....11:09 24.Jul.....7:41p 8k
|| | 20k in 4 files 292k free
|| Filenames |
|+- User areas Summary
+-- Drive
Parts of filestamps matching the current date are displayed as “...”. Thus, -READ.ME was created on
October 3, 1988 at 7:56 AM, and CHECKWS.ZEX was created on November 6, 1988 at 5:58 PM. To the
trained eye it is immediately apparent that SAMPLE.DOC is the only file of the four which was created
during a previous year.
4.4.2.2 Display Sorted by Access Date Whenever FILEDATE matches or sorts by file dates, the
word “Create”, “Access”, or “Modify” in the header is capitalized to indicate which stamp was used in the
match or sort. Here are the same four files sorted by access date. The command used was
FILEDATE B1: A-
or
Display all files at directory B1 in order from the most recently
accessed file to the least recently accessed.
12.Nov.88..9:50 Create ACCESS Modify Size
77
---------------- --------------- --------------- --------------- ----
B01:CHECKWS .ZEX .6.........5:58p ...........9:45 .6.........5:58p 4k
B01:ZSDOCS .CRW 24.Jul.....7:41p 28.Oct....11:09 24.Jul.....7:41p 8k
B01:-READ .ME .3.Oct.....7:56 28.Oct....10:16 .3.Oct.....7:57 4k
B01:SAMPLE .DOC .9.Jan.87..9:42 11.Jan.87..1:07p 11.Jan.87..1:07p 4k
20k in 4 files 292k free
The same files are displayed, but in reverse access order. In addition, the line of =s under the current date
has changed to a line of -s to indicate that the display is sorted in descending order by date, and ACCESS
indicates that the Access rather than Create or Modify dates of the files were used in the sort.
4.4.2.3 Display Selected by Modify Date If a date is specified, it is displayed in place of the current
time and date at the upper left hand corner of the output. The time, if also specified, is shown along with
the specified date. Otherwise, no time is displayed, indicating that all times for the given date are matched.
Here are the same files selected by last modify date. The command used was
FILEDATE b1: >*.1
or
Display all files at directory B1 which were last modified after January
of the current year.
Date signifier
|Date specification
||
>**.Jan.88. Create Access MODIFY Size
================ --------------- --------------- --------------- ----
B01:-READ .ME .3.Oct.....7:56 28.Oct....10:16 .3.Oct.....7:57 4k
B01:CHECKWS .ZEX .6.Nov.....5:58p 12.Nov.....9:45 .6.Nov.....5:58p 4k
B01:ZSDOCS .CRW 24.Jul.....7:41p 28.Oct....11:09 24.Jul.....7:41p 8k
16k in 3 files 292k free
This time only three of the files matched the specification–the other one was last modified during January,
and is not shown. Since a date was specified, the date signifier followed by the specified date appears instead
of the current date and time in the upper left hand corner. The time is not shown in the upper left hand
corner since no time was given. The word Modify has changed to MODIFY, indicating that Last Modify
rather than Access or Create dates were used to select the files. Finally, since neither of the sort by date
(“+” or “-”) options was used, the files are sorted alphabetically and a line of =s again appears under the
specified date.
4.4.2.4 Note on Relative Times FILEDATE displays relative time stamps in the same locations as
real-time stamps, but the relative time is displayed as +nnnn instead of hh:mm. If the display is sorted
and/or selected by date and time, files with relative time stamps are displayed as more recent than all files
with real-time stamps for a given day.
4.4.2.5 Notes on Missing Stamps When files are created under ZSDOS or DateStamper, their Access
and Modify stamps are erased (zeroed out) on disk. These fields remain blank until the first time the newly
78
created file is “opened” with BDOS function 15 (Access stamp), or “closed” with BDOS function 16 (Modify
stamp).
FILEDATE deals with undefined Access or Last Modify fields by copying information implied by other fields
of the datestamp whenever possible as follows:
1. If a file has no Last Modify record, its time of most recent modification is implied by that file’s Create
record.
2. If a file has no Last Access record, its most recent access time is implied by that file’s Last Modify
record or its Create record, in that order.
3. If a file has no Create record, its create time cannot be determined from either of the other two records.
All of this happens before FILEDATE sorts, selects, or displays datestamp information, so files whose Access
or Modify fields are technically blank may be sorted and selected on information implied by other fields in
the file’s stamp, and FILEDATE reports datestamp information copied from other fields in the same manner
as it reports datestamps read directly from the disk tracks.
4.4.3 FILEDATE Error Messages
Occasionally, FILEDATE will encounter conditions which prevent it from carrying out a function, and will
display one of the following messages:
Bad Option: /x
FILEDATE detected an invalid option character after the slash. Either the option does not exist, or a
non-wheel user tried to use a wheel-protected option, such as S or U.
!!!TIME&.DAT file missing
FILEDATE cannot find the special file containing file datestamp information at user area 0 of your disk.
bad system
FILEDATE requires a CP/M 2.2 or equivalent operating system and Date-Stamper support. ZSDOS and
ZDDOS can both provide adequate system facilities.
TPA overflow
FILEDATE ran out of space while reading in file names. Select a smaller set of files to display and/or remove
any RAM-resident utilities which may be taking up Transient Program Area (TPA).
!!!TIME&.DAT file error, offset nn
As it reads datestamps from the !!!TIME&.DAT file, FILEDATE tests the file for checksum errors. This
report indicates that a sector of the file has become corrupted, preventing further datestamping. The offset
given is the decimal record number of the first corrupt sector (starting with 0) found.
79
!!!TIME&.DAT checksum errors should not occur during normal use of ZSDOS, and generally indicate
a serious hardware or software problem. After finding the source of the problem, you may restore the
!!!TIME&.DAT file for further use either by zeroing out the affected sector(s) with a disk utility, or by
reinitializing your disk with PUTDS.
4.5 RELOG – Reset Disk System
RELOG clears the fixed disk login vector in ZSDOS, forcing the directory to be re-scanned and the allocation
vectors re-built. RELOG is normally used after running a bad sector lockout program, when changing the
media in removeable-media hard drives, or after using any program that alters the disk allocation bit map
in any way.
As with many utilities in this package, RELOG is closely tied to ZSDOS and will issue an error message if
an attempt is made to run it under a different operating system.
RELOG is invoked from the command line, and has no arguments. All fixed disks are reset by this utility
forcing a relog on the next selection. RELOG is enacted by entering:
RELOG
Execution is very fast and results in the following display on your console:
RELOG V1.0
Clearing Hard Disk Login Vector
4.6 TD – Read and Set Clock
TD obtains the system Time and Date with a DOS Function 98 and displays the information on your console.
Your system Must have an installed clock driver to use this utility. If the clock driver supports a set function,
TD can set the Date and Time using DOS Function 99. When setting the clock, TD will allow you to operate
in either an Interactive or Command Line driven mode.
TD can be configured to present the time in either the US format of month, day, year as: Sep 18, 1988, or
the European and military style as: 18 Sep 1988. Likewise, the set function accepts the US MM/DD/YY
or the European DD.MM.YY. To set the default, insure that TD.COM, TD.CFG and ZCNFG.COM are
available to the system, then refer to Section 4.8;5A for details on using ZCNFG.
4.6.1 Using TD
TD responds to the standard Help request and other program syntax conventions described in Section 1.6.
In it’s simplest form, you may obtain the current Date and Time from the system clock by simply entering
the program name as:
TD
A continuous display may be obtained which will update every second until any key is depressed by entering:
TD C
80
The system clock may be set in the Interactive mode by entering the program name followed by the “S”
parameter as:
TD S
You will then be asked to enter the date. The prompt will display the format in which the date will be
accepted (US or European) as either:
Enter today’s date (MM/DD/YY): - US
or
Enter today’s date (DD.MM.YY): - European
Date fields (month, day, and year) may be either one or two digits in each position. Invalid entries such as
an invalid day for the entered month will cause the prompt to be re-displayed for a new entry.
When a valid date has been entered, you will be prompted for the current time. The prompt will vary
depending on whether you are using a Real Time Clock, or the Relative counter substitute for a clock. The
two prompts are:
Enter the time (HH:MM:SS): - Real Time Clock
Enter the relative time (+XXXX): - Relative Counter
Time is assumed to be in 24 hour format when a Real Time Clock is being used, and Seconds may be
omitted. When the relative clock is used, a ‘+’ must prefix the count to which you wish to set the relative
Counter. Counts from +0 to +9999 are permitted.
When you end the time entry with a carriage return, you will be prompted to press any key. At this point,
the next key depression (other than shift and control) will set the clock. This procedure allows you to
accurately synchro nize the time with one of the many accurate time sources.
You may set the clock from the Command Line by entering the program name followed by the date and
optional time. The date must be in the correct form (US or European) for the configured TD. If an error is
detected, TD switches to the interactive mode and prompts for date and time as described above.
4.6.2 TD Error Messages
Error messages for TD are simple and are mostly self-explanatory. For clarity, however, they are covered
here.
SORRY! ZSDOS or ZDDOS is required to run this program!
You tried to run this with someone else’s DOS. Use ZSDOS or ZDDOS. This error aborts to the Command
Processor.
*** NO Clock Driver installed!!!
81
You tried to read a clock which does not exist. Install a clock with SETUPZST and try again. This error
aborts to the Command Processor.
*** Clock does NOT Support SET!!!
The clock driver on your computer will not permit you to set the time with TD. This error aborts to the
Command Processor.
*** Error in Data Input
An invalid character or number was entered when trying to set the date and time. This error will cause the
Interactive mode to be entered and issue a prompt to re-enter correct date/time.
*** Must be wheel to set clock!
An attempt was made to set the clock without Wheel access. Use ZSCONFIG to set a valid Wheel byte, or
disable it (see Section 4.11.4.8). This error aborts to the Command Processor.
4.7 ZCAL – Display Month
ZCAL is a small program written in Z80 assembler language which performs a simple but very useful function,
that of quickly drawing a small one-month calendar to the screen. Here is a sample of ZCAL’s output:
APRIL 1988
Sun Mon Tue Wed Thu Fri Sat
1 2
3456789
10 11 12 13 14 15 16
17 18 19 20 21 22 23
24 25 26 27 28 29 30
4.7.1 Using ZCAL
ZCAL operates in either “automatic” or “manual” mode – it can be commanded either to draw the current
month automatically or to draw a manually entered month from January 1766 through December 2499.
4.7.1.1 ZCAL System Requirements In order to draw the current month automatically, ZCAL must
be used under the ZSDOS operating system with a clock module installed. Either a real-time hardware clock
or a relative software clock may be used. ZCAL can also be used under other CP/M compatible, Z80 based
systems, but cannot draw the current month automatically in this case.
If ZCAL is used under ZCPR, screen highlighting as defined in the current ZCPR Terminal Capability
(TCAP) segment is used in automatic mode to indicate the current day of the month.
82
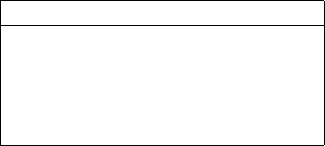
4.7.1.2 ZCAL Syntax The syntax for ZCAL is very simple. If no parameters are given, ZCAL draws
the current month on the screen, highlighting the current day of the month under ZCPR.
If a month followed by a year are given, ZCAL draws the specified month. The month may be given as either
a number from 1 to 12 or as three or more alphabetic characters in upper or lower case. For example, April
may be specified as either 4, Apr, APR or April.
The year may be given as either a two or a four-digit number. If two digits are used, the current century is
assumed. Four digit numbers may also be used to indicate any year between 1766 A.D. and 2499 A.D.
If a question mark or one or more slashes ( ) are given as parameters, ZCAL displays a short help message.
Combining ZCAL’s syntax rules, the following are examples of valid commands:
Command Result
ZCAL current month
ZCAL ? help screen
ZCAL June 22 June, 1922
ZCAL 1 1790 January, 1790
ZCAL FEB 2020 February, 2020
Note that when a month is specified, both month and year are required.
4.7.2 ZCAL Error Messages
ZCAL may print one of two error messages if it is unable to execute properly:
(help screen)
Parameters other than a valid month followed by a valid year were given on the command line.
No clock followed by help screen
An attempt was made to automatically display the current month without ZSDOS or without a clock module
installed.
4.8 ZCNFG - Configuration Utility
While none of the ZSDOS programs (other than DATSWEEP) require installation before use, the charac-
teristics of many ZSDOS programs can be customized in various ways. Once you have used the ZSDOS
programs for a while, you may wish to change their default options and settings to match your needs and
preferences. ZCNFG, the Z-System Configuration Utility, provides an easy, menu-driven means of achieving
this. ZSDOS program (.COM) files which are configurable with ZCNFG are accompanied by special con-
figuration files of the same name but with the file type “.CFG”. So for example, the configuration file for
COPY.COM is named COPY.CFG.
4.8.1 Using ZCNFG
ZCNFG syntax follows the standard conventions summarized in Section 1.6, and responds to the stan-
dard help option sequence of two slash characters. If you have renamed one of your ZSDOS utilities (e.g.,
ZXD.COM to D.COM), ZCNFG may still be used by adding the name of the CFG file to the command line.
Both the utility being configured and the CFG file may be located in other Drive/User Areas, and explicitly
addressed on the command line. ZCNFG’s syntax is summarized by:
83
ZCNFG [du:]filename [du:][cfgfilename]
ZCNFG first loads your configuration file, then loads your program file and displays the settings currently
in effect.
4.8.1.1 ZCNFG Toggle Displays ZCNFG configuration displays may take one of two forms. The
first type is one in which each of the options is a simple ON/OFF toggle or reversible setting. When you
select one of the menu options by pressing the letter preceding it, its status is toggled between the condition
displayed and an alternate function, and your screen depicts the new condition. For example, configuration
of the ZXD directory listing utility is presented as:
ZXD Configuration Options
A) Display Non-SYStem files
B) Don’t display SYStem files
U) List only files in logged User area
H) List in Vertical file sequence
F) No FormFeed at end of Printer List
S) Sort by File Name then Type
N) Print WITH Dates Per WIDE flag
W) List only "Last Modified" Date/Times
T) List DateStamper File Stamps
D) Display Dates in European (DD.MM.YY)
Y) Always print Year digits
ZCNFG INSTALLATION CONTROL
X,^[ = Save changes & eXit | Q,^C= Quit, no changes saved
/,? = Explain Menu Options | > = Next Menu, < = Previous
Which choice?
Characters shown at the bottom of the screen may be used to obtain more information about the menu
options or to exit ZCNFG with or without saving the new settings to your program file.
4.8.1.2 ZCNFG Value Displays The other type of configuration screen is for programs containing
configurable values such as drive or filename specifications. For example, configuration of COPY appears as:
_______________COPY Configuration_______________
A) Archive Bit Control of Select and Copy NO
E) Existence Test of File on Destination YES
I) Inspect Files Before Copy NO
M) Multiple Disk Copy NO
S) System Files Excluded NO
V) Verify After Copying YES
D) Default Destination Drive/User B0
B) Directory Name BACKUP
84
0) Excluded Files.................... !!?????????
1) .................................. [??????]???
2) ..................................
3) ..................................
4) ..................................
5) ..................................
6) ..................................
7) ..................................
ZCNFG INSTALLATION CONTROL
X,^[ = Save changes & eXit | Q,^C= Quit, no changes saved
/,? = Explain Menu Options | > = Next Menu, < = Previous
Which choice?
In this type of configuration, simple ON/OFF toggles are followed by a YES or NO status message, and
selecting a toggle option simply reverses the YES or NO message. If you select any of the other options,
ZCNFG prompts you for additional information, displaying changes as they are made. As above, the
characters at the bottom of the screen generate help or exit ZCNFG with or without saving the new settings
permanently.
4.8.1.3 Note on COPY The two default files shown in the above list are Excluded Files which should
not be copied. The first one identifies special files required by DateStamper-type file stamping and Back-
Grounder ii. The second matches special files commonly used in bad sector lockout programs to identify
defective disk sectors. Do not delete these entries from COPY! The utility programs PUTDS and PUTBG
must be used to write the special DateStamper and BackGrounder files to disk.
4.9 ZPATH - Set ZSDOS Path
ZPATH is derived from the ZCPR3 utility PATH originally written by Richard Conn. In addition to setting
and displaying the ZCPR3 Search Path, ZPATH adds the same capabilities for the ZSDOS Internal Search
Path. This utility only operates with ZSDOS, Not ZDDOS which has no Search Path (see Section 1.4).
Since the purpose of ZPATH is to dynamically alter system parameters, no interactive mode is provided.
Search path parameters are passed on the com mand line, and may be embedded in a STARTUP alias, or
SUBMIT file.
4.9.1 Using ZPAT
ZPATH follows the syntax and usage conventions covered in Section 1.6 and is activated by entering its name
followed by optional parameters. If you simply enter the name with no parameters, ZPATH will display
existing ZCPR3 and ZSDOS paths. Command option parameters and the built-in Help are identified in the
standard method by preceding them with a slash character.
4.9.1.1 ZPATH Option Characters Entering Path elements immediately after the program name will
set the ZCPR3 path, if one is present. This retains compatibility with the ZCPR3 PATH utility syntax,
allowing ZPATH to completely replace it. The ZSDOS path is set by entering the slash option character
followed by the command parameter for a DOS path set. Other command parameters enable a “Quiet”
85

mode, and explicitly set the ZCPR3 path. The complete list of command parameters recognized by ZPATH
is:
Parameter Meaning
C Set the ZCPR3 Search Path.
D Set the ZSDOS Internal Search Path.
Q Operate in a “Quiet” mode. Do not print
Path values after setting them.
Path elements are defined as a Drive Letter, a User Number, both Drive Letter and User Number, or a special
character which may be used in place of either the drive, user or both, signifying that the currently-logged
parameter should be used. The path element for the current drive and user would therefore be represented
as “$$”.
4.9.1.2 ZPATH Examples Assuming you are logged onto Drive C, User area 2 with a ZCPR3 Path is
already set to Drive A, User 0 to the Current Drive, Current user, you would enter the following to set a
DOS path to Drive A, User 15 to Drive B, user 1
ZPATH /D=A15 B1
ZPATH will respond by displaying
ZPATH v1.0 (ZSDOS)
- ZCPR3 Path...
Symbolic : A0: --> $$:
DU : A0: --> C2:
Named : BASE: --> Noname:
- ZSDOS Path...
Symbolic : A15: --> B1:
DU : A15: --> B1:
Named : ROOT: --> ZSDOS
Either of the following will accomplish the same action in a “Quiet” mode:
ZPATH /QD=A15 B1
or
ZPATH /D=A15 B1 /Q
ZPATH responds by displaying only
ZPATH v1.0 (ZSDOS)
To disable the DOS path or the ZCPR3 path, if using ZCPR3, simply enter the Command Option prefix for
the desired path with no options as
86
ZPATH /D=
ZPATH then responds with
ZPATH v1.0 (ZSDOS)
- ZCPR3 Path...
Symbolic : A0: --> $$:
DU : A0: --> C2:
Named : BASE: --> Noname:
- ZSDOS Path...
- Nil -
If you are Not running ZCPR3 and check the status of the default DOS path by simply entering
ZPATH
ZPATH responds with:
ZPATH v1.0 (ZSDOS)
- ZCPR3 Path...
- None -
- ZSDOS Path...
Symbolic : A0:
DU : A0:
Named : Noname
4.9.2 ZPATH Error and Warning Messages
Under certain conditions, ZPATH may issue error or informational messages. The most common cause of
error messages is an error in path specifications, such as an invalid letter or number, or attempting to set an
invalid path. Informational messages generally show the state of a path, such as disabled or non-existent.
The complete list is:
Bad Expression at xx
A character, sequence of characters, or Command Parameter was in error. The character(s) causing the
error will be shown as xx.
- None -
This message will be displayed for either the ZCPR3 or DOS path when no path is defined.
- Disabled -
87
The ZSDOS Internal path has been disabled
- Nil -
The path is defined, but has no elements defined (Zero length).
- No Wheel
An attempt was made to set a path without “Wheel” privileges. (See Section 2.7 and Appendix Efor more
on the Wheel byte)
- No ZCPR3 Path
An attempt was made to set the ZCPR3 path when it does not exist.
- No DOS Path
An attempt was made to set the ZSDOS path when it was disabled
4.10 ZSCONFIG – Configure a Running ZSDOS System
ZSCONFIG configures the option byte, addresses and pointers in an installed ZSDOS operating system.
It operates in either an interactive (novice) or command line (expert) mode for maximum convenience.
ZSCONFIG help and general usage follows the standards described in Section 1.6.
ZSCONFIG automatically tailors itself to the type of ZSDOS and ZCPR system in use. Messages displayed
reflect the options and status for ZSDOS or ZDDOS, and if your computer is running ZCPR3, ZSCONFIG
offers an enhanced display using video attributes such as reverse video and cursor addressing.
4.10.1 ZSCONFIG Interactive Mode
To start ZSCONFIG in the interactive mode, simply enter the program name as:
ZSCONFIG
You will see a screen containing needed ZCPR addresses (if present) and a tabular display of the current
settings within the operating ZSDOS system. For example, under with a stamp and clock module and
ZCPR3 a display similar to the following appears:
...Configuring ZSDOS Ver 1.0 Z3 Environment at : FE00H
ZCPR Path Address : FDF4H
Wheel Byte at : FDFFH
1 - Public Files : YES
2 - Pub/Path Write Enable : NO
3 - Read-Only Vector : YES
4 - Fast Fixed Disk Log : YES
88
5 - Disk Change Warning : NO
6 - Path w/o System Attr : YES
7 - DOS Search Path : Enabled - Internal
8 - Wheel Byte Protect : Enabled Addr = FDFFH
T - Time Routine (Clock) : F168H
A - Stamp Last Access Time : Disabled
C - Stamp Create Time : EEB2H
M - Stamp Modify Time : EEBCH
G - Get Date/Time Stamp : EEE9H
S - Set Date/Time Stamp : EEF1H
Entry to Change ("X" to EXIT) : _
The type of Operating system and version number are shown at the top of the screen, followed by any ZCPR3
Environment information needed. If no ZCPR Environment is found, a message appears to that effect and
certain options are restricted (see detailed descriptions below).
Under ZDDOS and ZCPR, the display changes to:
...Configuring ZDDOS Ver 1.0 Z3 Environment at : FE00H
ZCPR Path Address : FDF4H
Wheel Byte at : FDFFH
1 - Public Files : YES
2 - Public Write Enable : NO
3 - Read-Only Vector : YES
4 - Fast Fixed Disk Log : YES
5 - Disk Change Warning : NO
8 - Wheel Byte Protect : Disabled..Assumed ON
T - Time Routine (Clock) : F168H
A - Stamp Last Access Time : Enabled
M - Stamp Modify Time : Enabled
Entry to Change ("X" to EXIT) : _
Note the differences. For example, under ZSDOS the choice for item is Pub/Path Write Enable. Under
ZDDOS this item changes to Public Write Enable, reflecting the fact that no DOS Search Path is available
under ZDDOS. Note also that some of the Time Stamp- related items such as Get and Put Stamps are
excluded. Since ZDDOS contains an integral DateStamper, no entry points for external routines are required,
and the two datestamping items displayed, Stamp Last Access Time and Stamp Modify Time, can only be
Enabled and Disabled under ZDDOS.
Interactive operation consists simply of entering the number or letter to the left of each line to select a
function. If you select numbers between one and six, the option is changed from YES to NO or vice versa,
and the menu is redisplayed. Other items cause ZSCONFIG to prompt you for additional information (see
Section 4.10.4 below).
4.10.2 ZSCONFIG Expert Mode
Expert Mode provides the ability to dynamically set ZSDOS options directly from your console or from within
command scripts such as ZCPR STARTUP or Alias files or CP/M Submit files. Command scripts may even
89
tailor ZSDOS for use with specific applications by calling ZSCONFIG before and after the application is
run.
Settings are passed to ZSCONFIG as groups of characters separated by one or more tabs, spaces or commas.
Each group of characters begins with a Identifier which identifies the setting to be changed. In the case
of items related to time and date, a two- character sequence is used: A “+” sign identifies the Command
as a Clock or Time Stamp-related function and the following character tells which of the six parameters to
change.
For ZSDOS, the Expert mode Command Identifiers are:
P Public File Support
W Public/Path Write Enable
R Read-Only Drive Sustain
F Fast Hard Disk Relog
! Disk Change Warning
S Path without SYStem Attribute
>ZSDOS Search Path
* Wheel Byte Write Protect
C Clock Routine Address
+A Stamp Access Time Address
+C Stamp Create Time Address
+M Stamp Modify Time Address
+G Get File Stamp Address
+S Set File Stamp Address
For ZDDOS, the Identifiers are:
P Public File Support
W Public Write Enable
R Read-Only Drive Sustain
F Fast Hard Disk Relog
! Disk Change Warning
* Wheel Byte Write Protect
C Clock Routine Address
+A Stamp Access Time Enable/Disable
+M Stamp Modify Time Enable/Disable
90
Options which are simply On/Off toggles are enabled by the character alone and are disabled by following
the character with a minus sign (“-”). For example, to turn Public File Support on, enable Fast Hard Disk
Relog, and disable Disk Change warnings, the command is:
ZSCONFIG P,F,!-
Certain options require additional parameters which are handled by a secondary prompt in the interactive
mode. Since no prompt is issued in expert mode, the additional parameters are passed by appending them
to their Command Identifiers. For example, to set the address of the Write Protect Wheel byte to ZCPR’s
Wheel byte address, activate the Internal Search Path (if using ZSDOS), and set the Clock address to 0050H
the command is:
ZSCONFIG *Z,>I,C50
Please remember that no spaces or other delimiters (tabs, commas, etc.) are permitted between Command
Identifiers and their arguments. An Invalid error will generally occur if you forget. All addresses are entered
as Hexadecimal (base 16) numbers with optional leading zeros. The algorithm used to interpret the number
entered only retains the final four hex digits, so if you enter the sequence 0036C921045 it is interpreted as
1045H.
The following section describes the various settings for each option.
4.10.3 ZSCONFIG Options
The two tools which permit tailoring of a ZSDOS system to your specific needs, INSTALOS and ZSCONFIG,
both present the same interactive display. This section is therefore applicable to installation as well as “on the
fly” customization with ZSCONFIG. Below, both command line and interactive entries for eash ZSCONFIG
option are discussed. The options are covered in the order of their appearance in the INSTALOS and
ZSCONFIG interactive menus.
4.10.3.1 Public Files (ZSDOS and ZDDOS)
Interactive Toggle : 1 - Public Files
Command Line Character: P
Enable : P
Disable: D-
Default Setting : YES (enabled)
When set to YES or enabled, this option makes Public files accessible from any user area on the disk (see
Appendix Efor more on Public files). This means that a search for the file will locate it on the first try,
regardless of which User Area is currently selected (see Section 2.8.3, Public Access). If set to NO or disabled,
all files are private and can only be found if the user area matches that of the file.
4.10.3.2 Public/Path Write Enable (ZSDOS and ZDDOS)
91
Interactive Toggle : 2 - Pub/Path Write Enable (ZSDOS)
: 2 - Public Write Enable (ZDDOS)
Command Line Character: W
Enable : W
Disable: W-
Default Setting : NO (disabled)
When this option is set to YES or enabled, both ZSDOS and ZDDOS permit write operations to Public files,
and ZSDOS allows writing to files located along the Path. When Public/Path Write is disabled, attempts
to write to the Public or Path files result in Read-Only errors.
4.10.3.3 Read-Only Vector Sustain (ZSDOS and ZDDOS)
Interactive Toggle : 3 - Read-Only Vector
Command Line Character: R
Enable : R
Disable: R-
Default Setting : YES (enabled)
When this option is set to YES or enabled, the normal Write Protect vector set by ZSDOS function call 28
will not be cleared on a warm boot as with CP/M and ZRDOS. If set to NO or disabled, the Write Protect
vector will function as in CP/M and ZRDOS.
4.10.3.4 Fast Fixed Disk Relog (ZSDOS and ZDDOS)
Interactive Toggle : 4 - Fast Fixed Disk Log
Command Line Character: F
Enable : F
Disable: F-
Default Setting : YES (enabled)
When this option is set to YES or enabled, the allocation bit map for a fixed drive (one in which the WACD
buffer is zero) will not be rebuilt after the initial drive logon. This results in much faster operation for
systems with Hard Disks and RAM disks. If Fast Fixed Disk Relog is set to NO or disabled, the allocation
map will be rebuilt each time fixed disk drives are initially selected after a warm boot.
4.10.3.5 Disk Change Warning (ZSDOS and ZDDOS)
Interactive Toggle : 5 - Disk Change Warning
Command Line Character: !
Enable : !
92
Disable: !-
Default Setting : NO (disabled)
When this option is set to YES or enabled, a warning will be printed whenever ZSDOS detects that a disk
in a removable-media drive (normally floppy disk drives) has been changed. If you press any key other than
Control-C, ZSDOS automatically logs in the new disk and continues. If Disk Change Warning is set to NO
or disabled, no warning is given, disks are automatically logged, and the operation in progress continues.
4.10.3.6 Path Without System Attribute (ZSDOS only)
Interactive Toggle : 6 - Path w/o System Attr
Command Line Character: S
Enable : S
Disable: S-
Default Setting : NO (disabled)
When this option is set to YES or enabled, files at directories along the Path will be found without the
System Attribute being set (see Section 2.8.2.1, Path Directory Access mode). If Path Without System
Attribute is set to NO or disabled, files at directories along the Path will not be found unless the System
Attribute Bit (bit 7 of the second character in the filetype) is set (see Section 2.8.2.2, Path File Access
mode).
4.10.3.7 DOS Search Path (ZSDOS only)
Interactive Prompt : 7 - DOS Search Path
Options: (D)isable, (S)et addr, (I)nternal
(Z)CPR3 (ZCPR3 only)
Command Line Character: >
Enable : >addr, >I
>Z (only if running ZCPR3)
Disable: >-
Default Setting : NO (disabled)
Selecting this option from Interactive mode causes ZSCONFIG to prompt you for one of three additional
options (four if running ZCPR3). One of the following will be displayed depending on whether a ZCPR3
Environment is present:
DOS Path [(D)isable, (S)et, (I)nternal, (Z)CPR3] :
DOS Path [(D)isable, (S)et, (I)nternal] :
Operating ZSCONFIG in the Command Line mode permits you to select the same options directly from the
command line as summarized above. No additional characters are required for Disable, Internal or ZCPR3
path selection. If you choose the ( )et option, ZSCONFIG prompts you for a Hexidecimal address with:
93
Enter PATH Address :
If you Disable the DOS Path option, ZSDOS functions just as CP/M 2.2 and ZRDOS. Requests for files
access only the currently logged disk and user, modified only by the Public capability, if active. This results
in the familiar requirement to install utilities such as compilers, word processors and data base management
systems to tell them where to go to find their overlays.
Proper use of the DOS Path overcomes the limitation in finding program overlays and other files by simply
setting the DOS Path to the drive and user area where the relevant overlays and other files are stored. The
Path may be set in three ways.
The first way is to assign a fixed address using the (S)et option from the Interactive Mode, or to append the
address to the Command Character in Command Line mode. You will be responsible for insuring that any
path at that address conforms to proper ZCPR2/3 path definitions.
The second way to set a DOS Path is to use ZSDOS’s three-element Internal path by selecting the (I)nternal
option in Interactive Mode, or adding an I after the Command Character in Command Line mode. As
distributed, ZSDOS’s Internal Path consists of the entry A0:, which directs path searches to User Area 0
on Drive A. An alternative way to activate the Internal Path is with the ZPATH.COM utility described in
Section 4.9. ZPATH allows you to define an Internal Path of up to three drive/user search elements.
The final method of setting a DOS Path is only available if you are operating a ZCPR3 system. By selecting
the (Z)CPR3 option from Interactive Mode, or following the Command Character with a Z in Command
Line mode, you use ZCPR3’s Command Search Path as your ZSDOS Search Path.
This Path mode will probably see little use, but it is available for systems which need more than three
elements in a path. The principal disadvantage of using the ZCPR3 path is that requests from the command
prompt (e.g. A0>) may result in n-squared searches where n is the number of elements in the path. This is
bacause ZCPR3 will select the first path element, and ZSDOS will sequentially search along the entire path
if the command file is not found, returning to ZCPR3 with a file not found error. ZCPR3 will then select
the second element and ZSDOS will again search along the entire path for the command file. This situation
does not occur from within application programs since the ZCPR3 Command Processor is no longer active
at this point.
4.10.3.8 Wheel Byte Write Protect (ZSDOS and ZDDOS)
Interactive Prompt : 8 - Wheel Byte Protect
Options: (D)isable, (S)et addr
(Z)CPR3 (ZCPR3 only)
Command Line Character: *
Enable : *addr
*Z (ZCPR3 only)
Disable: *-
Default Setting : NO (disabled)
When you select this option in Interactive mode, ZSCONFIG presents you with one of two additional
prompts. Which prompt you see depends on whether or not you are running ZCPR3. The lines are:
Wheel [(D)isable, (S)et, (Z)CPR3] : - ZCPR3
Wheel [(D)isable, (S)et] : - Non ZCPR3
94

Selecting the (D)isable option by entering a D or disabling the Wheel Byte with the *- string in Command
Line mode causes ZSDOS to assume that the Wheel byte is always ON, giving all users full privileges in file
control (Writes, Renames and Erasures). Selecting the (S)et option in Interactive mode allows you to enter
the Hexidecimal address of your Wheel Byte. It is your responsibility to ensure that the byte is protected
as necessary from unintentional alteration. Setting a Wheel Byte address from the Command line simply
requires appending a Hexidecimal address after the Wheel Command Character.
As with the DOS Path entry, the (Z)CPR3 option is only available under ZCPR3. If available, entering a Z
in Interactive mode or a *Z parameter string from the Command Line sets the address to the address of the
Wheel byte in the current ZCPR3 environment.
4.10.3.9 Time Routine (Clock Driver) (ZSDOS and ZDDOS)
WARNING
Only Set this option is you have a clock driver conforming to the
interface specifications listed in Section 3.4.2. A system crash may
result if specifications are not met.
Interactive Prompt : T - Time Routine (Clock)
Options: (D)isable, (S)et addr
Command Line Character: C
Enable : C addr
Disable: C-
Default Setting : Disabled
This option allows the user to enter the address of a clock driver routine conforming to ZSDOS standards, or
disable an existing clock routine. Entering a T in Interactive mode causes the following prompt to appear:
Time (Clock) Routine [(D)isable, (S)et] :
Responding with a D or entering the Command Line sequence C- disables any existing clock. This causes an
error return to DOS function calls 104 and 105, and disables File Date/Time Stamping. If you respond with
an S at this point in Interactive mode, you will be further prompted for the Hexadecimal address of a clock
driver. A Clock Driver address may be set from the command line by following the C Command Identifier
with a valid Hexidecimal address. Do NOT enter unknown values since unpredictable results can occur!
4.10.3.10 Stamp Last Accessed Time (ZSDOS and ZDDOS)
WARNING
Do NOT set this option unless you are certain that the inter-
face specifications for this type of stamp exist at the specified ad-
dress. This address will always be displayed as disabled when a
valid P2DOS-only Stamp method is used. Interface specifications
are contained in the ZSDOS Programmer’s Manual available sepa-
rately.
95

Interactive Prompt : A - Stamp Last Access Time
Options: (D)isable, (S)et addr (ZSDOS)
(D)isable, (E)nable (ZDDOS)
Command Line Character: +A
Enable : +A addr (ZSDOS)
+A (ZDDOS)
Disable: +A-
Default Setting : Disabled
This option is only available with DateStamper type of Date/ Time Stamps. For P2DOS, the function is not
defined and is disabled by the Loader generated under SETUPZST. As stated in Section 3.4.4 unless you
have a definite need to retain a record of the last time files are accessed, we recommend that you disable this
option to reduce unnecessary overhead. To Select the Last Access Time option, enter an at the Interactive
main prompt. This will cause one of two prompts to be displayed, depending on whether ZSDOS or ZDDOS
is active:
Stamp Last Access Time Routine [(D)isable, (S)et] :
For ZSDOS
Stamp Last Access Time Routine [(D)isable, (E)nable] :
For ZDDOS
If you enter a D at this point in the Interactive mode or disable the function with the sequence +A- in the
Command Line mode, no times will be entered in the Last Accessed field in the DateStamper file.
If you are running ZDDOS with the built-in DateStamper support, this option may be re-enabled by selecting
the E option in the Interactive mode from this secondary prompt, or the sequence +A from the Command
Line mode. With ZSDOS, a simple “Enable;; command cannot be used since the DOS does not know where
the Date/Time Stamp code has been placed in memory. For ZSDOS, you must use the Set command with
a Hexidecimal address. In the Interactive mode, entering an S from the secondary prompt mode causes
ZSCONFIG to query you for the hexadecimal address of a Stamp Last Access routine. The same function
in the Command Line mode requires the Command sequence +A followed by a Hexadecimal address. Do
NOT enter unknown values since unpredictable results can occur!
4.10.3.11 Stamp Create Time (ZSDOS only)
WARNING
Do Not SET this option unless you are certain that code meeting
interface specifications for this type of stamp exist at the speci-
fied address. Interface specifications are contained in the ZSDOS
Programmer’s Manual available separately.
Interactive Prompt : C - Stamp Create Time
96

Command Line Character: +C
Enable : +C addr
Disable: +C-
Default Setting : Disabled
Entering a C from the menu in interactive mode allows you to change the Stamp Create routine address if
you are running ZSDOS. A secondary prompt appears:
Stamp Create Time Routine [(D)isable, (S)et] :
To disable Create time stamping, respond with a D, or enter the sequence +C- in Command Line mode.
You will probably never want to exercise this option, but it was made available to brave system developers
who may want to experiment. Unless you are an experienced system developer, we urge you to leave this
option alone.
To set the address of a Stamp Create Time routine, enter an S from the secondary prompt of Interactive
mode, causing ZSCONFIG to ask for a Hexidecimal address. The same action is accomplished in Command
Line mode by entering the Command Sequence +C followed by a Hexidecimal address. Do NOT enter
unknown values since unpredictable results can occur!
4.10.3.12 Stamp Modify Time (ZSDOS and ZDDOS)
WARNING
Do Not SET this option unless you are certain that code meeting
interface specifications for this type of stamp exist at the speci-
fied address. Interface specifications are contained in the ZSDOS
Programmer’s Manual available separately.
Interactive Prompt : C - Stamp Modify Tim
Options: (D)isable, (S)et addr (ZSDOS)
(D)isable, (E)nable (ZDDOS)
Command Line Character: +M
Enable : +M addr (ZSDOS)
+M (ZDDOS)
Disable: +M-
Default Setting : Disabled
The time of last Modification of a file is probably the most valuable of the times offered in a ZSDOS system.
As such, you will probably never have a need to alter this parameter. If, however, you are an experienced
system developer, this feature is available. To Select the Modify Time option, enter an “M” at the Interactive
main prompt. This will cause one of two prompts to be displayed, depending on whether ZSDOS or ZDDOS
is active:
Stamp Modify Time Routine [(D)isable, (S)et] :
For ZSDOS
97

Stamp Modify Time Routine [(D)isable, (E)nable] :
For ZDDOS
If you enter a D at this point in Interactive mode or disable the function with the sequence +M- in Command
Line mode, no times will be stored in the “Modify” field of whatever Stamp method you are using.
If you are running ZDDOS with the built-in DateStamper support, this option may be re-enabled by selecting
the E option in Interactive mode from this secondary prompt, or the sequence +M from the command line.
As with the Last Access Stamp, a simple “Enable” command cannot be used with ZSDOS since the DOS
does not know the address of the Date/Time Stamp code. For ZSDOS, you must use the Set command with a
Hexidecimal address. In the Interactive mode, entering an S from the secondary prompt causes ZSCONFIG
to query you for a hexadecimal address for the Stamp Modify routine. The same function in the Command
Line mode requires the Command sequence +M followed by a Hexidecimal address. Do NOT enter unknown
values since unpredictable results can occur!
4.10.3.13 Get Date/Time Stamp (ZSDOS only)
WARNING
Do Not SET this option unless you are certain that code at the
specified address meets the ZSDOS interface specifications. In-
terface specifications are contained in the ZSDOS Programmer’s
Manual available separately.
Interactive Prompt : G - Get Date/Time Stamp
Command Line Character: +G
Enable : +G addr
Disable: +G-
Default Setting : NO (disabled)
To change the Get Date/Time Stamp parameters, enter a G from the main Interactive menu, or use the Com-
mand sequence +G followed by a hexadecimal address. If operating Interactively, you will see a secondary
prompt as:
Get Time Stamp Routine [(D)isable, (S)et] :
Entering a D disables any existing address and causes an error return from DOS Function 102. Disabling
from the Command Line mode is accomplished by entering the sequence +G-.
Unless you are an experienced system developer, you should never need to set an address for this option.
However, if you do wish to change it, enter an S at the secondary prompt in the Interactive mode. You
will be asked for a Hexidecimal address for the routine. Do NOT enter unknown values since unpredictable
results can occur!
4.10.3.14 Set Date/Time Stamp (ZSDOS only)
98

WARNING
Do Not SET this option unless you are certain that code at the
specified address meets the ZSDOS interface specifications. In-
terface specifications are contained in the ZSDOS Programmer’s
Manual available separately.
Interactive Prompt : S - Set Date/Time Stamp
Command Line Character: +S
Enable : +S addr
Disable: +S-
Default Setting : Disabled
To change the Set Date/Time Stamp parameters, enter an S from the main Interactive menu, or use the
Command sequence +S. If operating Interactively, you will see a secondary prompt as:
Set Time Stamp Routine [(D)isable, (S)et] :
Entering a D disables any existing address and cause an error return from DOS Function 103. Disabling
from the Command Line mode is accomplished by entering the sequence +S-.
Unless you are an experienced system developer, you should never need to set an address for this option.
However, if you do wish to change it, enter an S at the secondary prompt in Interactive mode. You will
be asked for a Hexidecimal address for the routine. To set this option from the Command Line mode,
enter the Command sequence +S followed by a Hexidecimal address. Do NOT enter unknown values since
unpredictable results can occur!
4.10.4 ZSCONFIG Error Messages
ZSCONFIG issues only two error messages. For the most part, any error you see will deal with invalid
parameters or entry mistakes. The two error messages are:
-- Invalid --
An invalid address was entered or an invalid address or character was detected in a parameter, or (for
ZDDOS), an invalid address was detected for a parameter requiring a specific address.
*** ERROR: DOS is not ZSDOS or ZDDOS!
An attempt was made to run ZSCONFIG on an Operating system which was neither ZSDOS nor ZDDOS.
This program cannot function under any other operating system.
4.11 ZXD - Extended Directory Utility
4.11.1 Using ZXD
ZXD is the ZSDOS EXtended Directory listing program and was derived from the ZCPR3 tool XD III
written by Richard Conn. Many additional capabilities were added, not the least of which is the ability
99
to display time stamps for each file in a variety of formats. ZXD can display file Dates and times from
DateStamper, P2DOS, and Plu*Perfect Systems’ DosDisk stamp methods. In ZCPR3 systems, the Wheel
byte is used to disable some functions as a security precaution in remote access systems.
ZXD is activated by entering its name at the command prompt, and may be followed by optional drive and
user specifications to obtain the directory of another drive or user area. It may also be followed by various
parameters which alter the format and/or content of the display. You may obtain a brief Help message
summarizing the syntax, or pass options to ZXD in the standard format using the conventions described in
Section 1.6. ZXD’s syntax is summarized by:
ZXD [dir:][afn] [/][options]
If ZXD is called with no arguments, a display of only those files satisfying built-in default conditions will be
displayed. These defaults may be temporarily changed by command line arguments, or permanently changed
with the ZCNFG customization utility program. After deciding which parameters you use most by using the
command line options, we recommend configuring ZXD to reflect those parameters as defaults. The results
will be the requirement to enter fewer keystrokes, and consequently faster operation when a directory scan
is required. To permanently set defaults, insure that ZXD.COM, ZXD.CFG and ZCNFG.COM are available
and call ZCNFG. Further details on program customization are contained in Section 4.8.
4.11.2 ZXD Options
Option parameters, consisting of one or two characters, allow you to obtain selected information from files on
a disk, or to tailor the display to your particular needs. The option characters are described in alphabetical
order in the following sections.
4.11.2.1 Select Files by Attribute In order to avoid cluttering a directory display with unwanted file
names, ZXD features a flag which controls addition of those files marked with the SYStem Attribute Bit
(see Appendix E). The A Option controls this feature. It requires a second character of S, N, or A. Control
offered by these characters is:
S Include Only Files marked with the SYStem Attribute.
N Include Only Files Not marked with the SYStem Attribute (this is the default condition).
A Include All Files
Since listing of all Non-SYStem files is the default condition, you will probably not use the N option very
often. The A option, on the other hand, offers a simple way of viewing All files within the current directory,
including SYStem files which are normally invisible due to the Attribute bit.
In a ZCPR3 system where Wheel access has not been granted (Wheel byte is Off), this option is forced to
Non-SYStem files only and the A option chatacter is not permitted.
4.11.2.2 Date Display Format The Dates for a ZXD display may be displayed in either US form of
MM/DD/YY or European form of DD.MM.YY. You may override the default form with the D option. Here
is an example of the two types of date displays:
US Form:
100
ZXD Ver 1.0 17 Sep 1988 15:43:17
Filename.Typ Size Modified Filename.Typ Size Modified
-------- --- ---- -------- -------- --- ---- --------
INITDIR .COM 4k 07:01-09/17/88 ZPATH .COM 4k 07:50-09/17/88
ZXD .COM 8k 08:01-09/17/88
C2: -- 3 Files Using 16K (324K Free)
European Form:
ZXD Ver 1.0 17 Sep 1988 15:43:11
Filename.Typ Size Modified Filename.Typ Size Modified
-------- --- ---- -------- -------- --- ---- --------
INITDIR .COM 4k 07:01-17.09.88 ZPATH .COM 4k 07:50-17.09.88
ZXD .COM 8k 08:01-17.09.88
C2: -- 3 Files Using 16K (324K Free)
4.11.2.3 Disable Date (NoDate) Display While the display of date and time information is the
default mode of ZXD, this may be disabled with the N option to display more file names on a screen.
4.11.2.4 Output Control Option The O option controls ZXD’s printer or screen output, and requires
a second character which adds additional control to output formats. The second characters recognized are:
F Send a Form Feed character at the end of the list.
H Toggle Horizontal/Vertical display of sorted listing.
4.11.2.5 Output to Printer Option P controls output to the printer. When this option is given, the
sorted directory listing is sent to both the console screen and the printer. This option is disabled and not
available in a ZCPR3 system where Wheel access has not been granted (Wheel byte is Off).
4.11.2.6 Sort by Name or Type The default sort condition for ZXD is to first sort by File Name,
then by File Type within matching Names. Option S reverses the sequence.
4.11.2.7 Primary DateStamp ZXD features an algorithm which will attempt to find one of several
types of Date/Time Stamps for each file. The default conditions tell ZXD to first attempt to locate Dat-
eStamper type of Stamps. If that fails, a search is made for DosDisk stamps from MS/PC-DOS disks, and
finally to check for P2DOS type stamps. The T option causes the DateStamper checks to be bypassed,
thereby speeding response if DateStamper type stamping is never used.
4.11.2.8 All User Areas The distribution version of ZXD will only search a single User area, either the
currently logged or the explicitly stated area, for files. The U option will locate files in all user areas on the
disk. Combining the U with the AA options will list all files in all user areas, both system and non-system,
on a disk. This option is disabled and not available in a ZCPR3 system where Wheel access has not been
granted (Wheel byte is Off).
101
4.11.2.9 Wide Display ZXD only displays the “Last Modified” Date/Time Stamp. This may be re-
versed by appending the W option to the Command Line, which generates a Wide of all available Stamps.
Only DateStamper has provisions for all three stamp catego ries; P2DOS contains only Created and Modified
stamps, while the single MS/PC-DOS stamp accessed through DosDisk best corresponds to “Modified”. A
display created with this option is:
Filename.Typ Size Created Last Access Modified
-------- --- ---- ------- ---- ------ --------
BU16 .COm 8k 17:26-06/12/88 08:42-08/21/88 17:26-06/12/88
COPY .COM 8k 15:06-09/17/88 15:06-09/17/88
ZPATH .COM 4k 07:50-09/17/88 15:02-09/17/88 07:50-09/17/88
ZXD .COM 8k 08:00-09/17/88 08:01-09/17/88
102
This page is intentionally left blank
103

A ZSDOS Functions Quick Reference
Number Function name Input Parameters Returned Values
0 Boot None None
1 Console Input None A=Character
2 Console Output E=Character A=00H
3 Reader Input None A=Character
4 Punch Output E=Character A=00H
5 List Output E=Character A=00H
6 Direct Console I/O E=0FFH (In) A=Input Character
E=0FEH (In) A=Console Status
E=0FDH (In) A=Input Character
E=00H..0FCH (Out) A=00H
7 Get I/O Byte None A=I/O Byte (0003H)
8 Set I/O Byte E=I/O Byte A=00H
9 Print String DE=Address String A=00H
10 Read Console Buffer DE=Address Buffer A=00H
11 Get Console Status None A=00H = No character
A=01H = Char. present
12 Get Version Number None A=Version Number (22H)
13 Reset Disk System None A=00H No $*.* on A
A=FFH $*.* on A
14 Select Disk E=Disk Number A=00H No $*.* File
A=FFH $*.* File
15 Open File DE=Address of FCB A=Directory Code
16 Close File DE=Address of FCB A=Directory Code
17 Search for First DE=Address of FCB A=Directory Code
18 Search for Next DE=Address of FCB A=Directory Code
19 Delete File DE=Address of FCB A=Error Code
20 Read Sequential DE=Address of FCB A=Read/Write Code
21 Write Sequential DE=Address of FCB A=Read/Write Code
22 Make File DE=Address of FCB A=Directory Code
23 Rename File DE=Address of FCB A=Error Code
24 Get Login Vector None HL=Login Vector
25 Get Current Disk None A=Current Disk
26 Set DMA Address DE=DMA Address A=00H
27 Get Alloc. Address None HL=Addr Alloc Vector
28 Write Protect Disk None A=00H
29 Get R/O Vector None HL=R/O Vector
30 Set File Attributes DE=Address FCB A=Error Code
31 Get DPB Address None HL=Address of DPB
32 Set/Get User Code E=FFH (Get) A=User Number
E=User Number (Set) A=00H
104
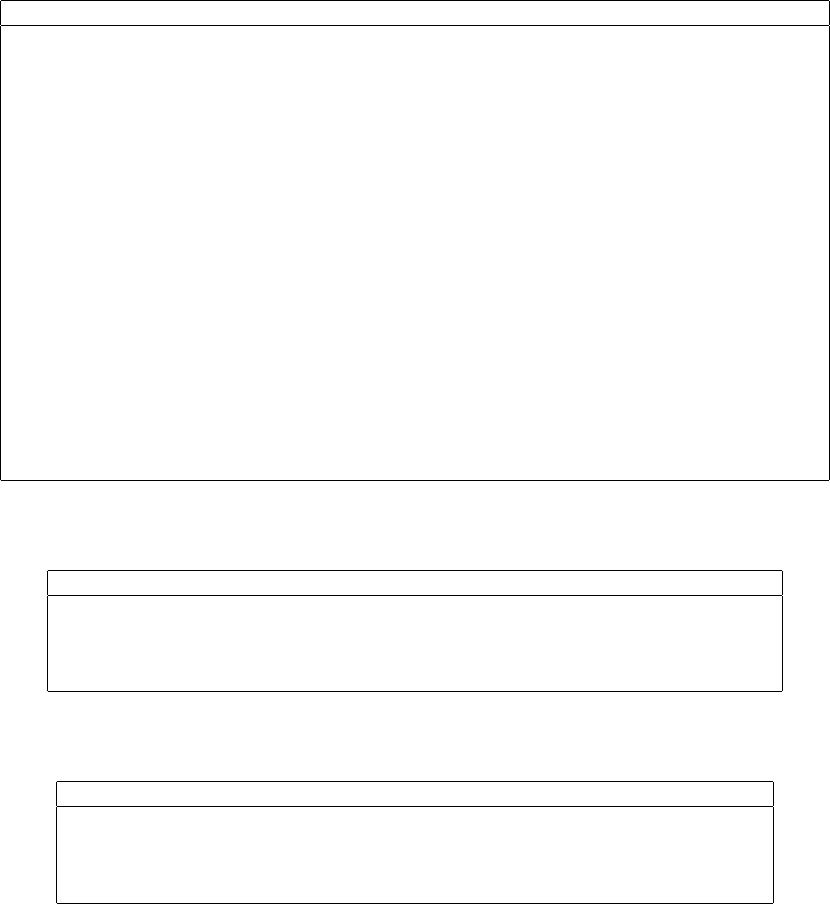
Number Function name Input Parameters Returned Values
33 Read Random DE=Address of FCB A=Read/Write Code
34 Write Random DE=Address of FCB A=Read/Write Code
35 Compute File Size DE=Address of FCB A=Error Code
36 Set Random Record DE=Address of FCB A=00H
37 Reset Mult Drive DE=Mask A=00H
38 Not implemented
39 Get fixed disk vector None HL=Fixed Disk Vector
40 Write random, 00 fill DE=Addr of FCB A=Read/Write Code
41-44 No implemented
45 Set error mode E=FFH (Get) A=00H
E=FEH (Get Err/Disp) A=00H
E=01H (Set ZSDOS) A=00H
E=00H (Set CP/M) A=00H
46 Not implemented
47 Get DMA address None HL=Current DMA Address
48 Get DOS & version None H=DOS type: “S”=ZSDOS
“D”=ZDDOS
L=BCD Version Number
49-97 Not implemented
Functions 98 and 99 are only available if a clock driver module is installed.
Number Function name Input Parameters Returned Values
98 Get time DE=Address to Put Time A=Time/Date Code
99 Set time DE=Address of Time A=Time/Date Code
100 Get flags None HL=Flags
101 Set flags DE=Flags None
Functions 102 and 103 are only available in ZSDOS if datestamping module is installed.
Number Function name Input Parameters Returned Values
102 Get file stamp DE=Addr of FCB A=Time/Date Code,
Stamp in DMA Buffer
103 Set file stamp DE=FCB Address, A=Time/Date Code
Stamp in DMA Buffer
105

A.1 Summary of BDOS Return Codes
Directory Codes: A=00H, 01H, 02H, 03H if No Error
A=FFH if Error
Error Codes: A=00H if No error
A=FFH if error
Time/Date Codes: A=01H if No error
A=FFH if error
Read/Write Codes: A=00H if No error
A=01H Read →End of File
Write →Directory Full
A=02H Disk Full
A=03H Close Error in Random Record Read/Write
A=04H Read Empty Record during Random Record Read
A=05H Directory Full during Random Record Write
A=06H Record too big during Random Record Read/Write
Extended Error codes A=FFH Extended Error Flag
in Return Error Mode H=01H Disk I/O Error (Bad Sector)
H=02H Read Only Disk
H=03H Write Protected File
H=04H Invalid Drive (Select)
106

B BIOS Functions Quick Reference
Number Function name Input Parameters Returned Values
0 BOOT None None
1 WBOOT None None
2 CONST None A=FFH If Ready
A=00H If Not Ready
3 CONIN None A=Console Character
4 CONOUT C=Console Character None
5 LIST C=List Character None
6 PUNCH C=Punch Character None
7 READER None A=Reader Character
8 HOME None None
9 SELDSK C=Drive Number (0..15) HL=Disk Param Header Addr
E=Init Select Flag HL=0000H If Invalid Drive
10 SETTRK BC=Track Number None
11 SETSEC BC=Sector Number None
12 SETDMA BC=DMA Address None
13 READ None A=00H If No Error
A=01H If Error
14 WRITE C=00H Write Data A=00H If No Error
C=01H Write Directory A=01H If Error
C=02H Write New Data
15 LISTST None A=00H If Ready
A=FFH If Not Ready
16 SECTRN BC=Logical Sector HL=Physical Sector
Number Number
DE=Translation Table
Address
NOTE: BIOS routines must not alter the IX register!
107

C Datespec and File Stamp Formats
The universal stamp and time formats used by ZSDOS are based on packed BCD digits. It was decided
that these were the easiest format for Z80 applications programs to work with, and were compatible with
most real time clocks. The format for the stamps and for the clock functions are identical to the Plu*Perfect
DateStamper’s formats for these functions.
Some file stamping formats (for example CP/M Plus type) do not store all the information present in the
universal format to disk. In the case of CP/M Plus type stamps, there is no provision for stamping the Last
Access time. The ZSDOS interface routines fill unimplemented fields in the stamp with 0 when the Get
Stamp function is used, and ignore the contents of the unused fields when the Put Stamp function is used.
Depending on the stamping method selected, the format of the stamps on the disk may differ from the
universal format. These differences are effectively hidden from users by ZSDOS and the Stamp routines so
long as ZSDOS’s functions are used to get or manipulate the stamps.
Time format (6 bytes packed BCD)
TIME+0 last 2 digits of year (prefix 19 assumed for 78 to 99, else 20 assumed)
TIME+1 month [1..12]
TIME+2 day [1..31]
TIME+3 hour [0..23]
TIME+4 minute [0..59]
TIME+5 second [0..59]
File Stamp format (15 bytes packed BCD)
DMA+0 Create field (first 5 bytes of time format)
DMA+5 Access field (first 5 bytes of time format)
DMA+10 Modify field (first 5 bytes of time format)
108
D ZSDOS Memory Allocation & Usage
The normal memory map for ZSDOS is identical to CP/M 2.2 and ZRDOS 1.x systems. Starting at absolute
memory address 0, the first 256 bytes (0 - 0FFH) are reserved for the system base page. Starting at 100H
and continuing to the bottom of the lowest system segment is the Transient Program Area (TPA). This is
where all applications programs (such as word processors, database managers, assemblers, etc.) execute.
ZSDOS does not specify a fixed address for the lowest system segment.
System segments under ZSDOS are defined as any program that remains present following a warm boot of
the system. Classically, these segments are the CCP (which handles user interface to the system when no
transient applications are running), the BDOS (which handles all hardware-independent system operations),
and the BIOS (which handles all hardware-dependent system functions). The separation of hardware-
independent routines and hardware dependent routines was one of the most significant advances that CP/M
made in operating system design for microcomputers.
In addition to the segments already mentioned, numerous other system segments may exist in a ZSDOS
system. Unlike the segments mentioned previously, these segments are not required for ZSDOS to function.
Examples include; RSX’s such as BackGrounder ii and DosDisk, ZCPR3 system segments (RCP, FCP, ENV,
IOP), utility programs such as DateStamper, and finally ZSDOS extensions for time and filestamp support.
109
RSX’s are normally located immediately below CCP in memory. All other optional system segments are
normally located above BIOS in memory. In all, the system memory map appears something like this:
FFFFH +--------------------------+
| optional system segments |
XXXXH +--------------------------+
| BIOS |
BIOS +--------------------------+
| ZSDOS |
BIOS-0E00H +--------------------------+
| CCP |
BIOS-1600H +--------------------------+
| optional RSX’s |
XXXXH +--------------------------+
| |
| Transient Program |
| Area |
| |
| |
0100H +--------------------------+
| Base Page |
0000H +--------------------------+
As depicted in the diagram, only addresses in the Base Page and the address of the start of TPA are fixed in
a ZSDOS system. All other system address are calculated relative to BIOS. The sizes of ZSDOS, the Base
Page, and the CCP are fixed. All other system segments may be sized as needed.
Base Page. The Base Page (addresses 0 - FFH) is used by ZSDOS for important system information.
Definitions for Base Page are the same as CP/M 2.2. ZSDOS depends on the Base Page being at absolute
address 0 in the system memory map.
BASE+00H - Jump to BIOS Warm Boot routine (BIOS+03H).
This address must be altered by any program. It provides the only dependable method of finding the
locations of ZSDOS system segments in memory. Here is an example which uses the Warm Boot vector to
test for the presence of an RSX:
FINDZS: LD HL,(0001H) ; Get BIOS warm boot address
LD DE,0DFAH ; ZSDOS entry is this far below
AND A ; Clear carry
SBC HL,DE ; HL now points to ZSDOS entry
EX DE,HL
LD HL,(0006H) ; Get BDOS vector
SBC HL,DE ; See if addresses same
JR Z,NORSX ; They are - no RSX’s present
...
BASE+03H - IOBYTE
The IOBYTE is a BIOS-related structure that may be used at the option of the BIOS author to allow for
limited redirection of byte-oriented I/O. The byte itself consists of 4 fields which correspond to the Console
(CON:), Reader (RDR:), Punch (PUN:) and List (LST:) logical devices. Each logical device may be assigned
to one of up to 4 different physical devices.
110
Since implementation of IOBYTE is optional and system-dependent, consult the system manuals that came
with your computer for the definitions provided on your system.
BASE+04H - Current Command Processor default drive and user
This byte is where CCP stores the current default drive and user. The drive is located in bits 0-3, with 0
being the A drive. The user number mod 16 is stored in bits 4-7.
BASE+05H - Jump to BDOS
A call to address 5 is used to command ZSDOS to perform a function. However, you can’t rely on the
address stored at location 6 to point directly to ZSDOS!
The MSB of the address at location 6 always points to the top page of the Transient Program Area. This
may or may not be the address of ZSDOS, depending on whether any RSX’s are present. Any program that
needs to check the size of the available TPA should use the MSB of the address pointed to by location 6 to
determine the amount of available memory. The following code fragment demonstrates the proper method:
GETSIZ: LD HL,(0006H) ; Get address of top of TPA
DEC H ; One page less for Application
LD L,0FFH ; Proper top address now in HL
...
111
E File Attributes
E.1 What are file attributes?
File attributes are a generalized means of providing information about files to the operating system and to
programs which operate on files. Under CP/M 2.2, only two file attributes were used, the Read-Only and
SYStem attributes. If a file is set to Read-Only under CP/M 2.2, the operating system and CP/M programs
provide an additional level of file security by either refusing to erase these files or prompting the user before
erasure. Files which are not accessed by the user may be set to SYStem under CP/M so that their names
are not included in directory displays.
A file attribute can only be turned on or off: there are no intermediate settings. For instance, the Read-Only
attribute can either be set to Read-Only or Read-Write. This is because each file attribute is controlled by
a single binary bit associated with a particular file’s name. The Read-Only and Read-Write (or R/O and
R/W) attribute is controlled by setting the Most Significant Bit, or MSB, of the first character of a file’s
type to binary one (R/O) or binary zero (R/W).
For example, here are the directory entry values of a file named FILEATTR.CRC which has been set to R/O
shown in ASCII, hex, and binary:
ASCII Hex Binary
---------------------
F 46 01000110
I 49 01001001
L 4C 01001100
File Name E 45 01000101
A 41 01000001
T 54 01010100
T 54 01010100
R 52 01010010
C C3 11000011
File Type R 52 01010010
C 43 01000011
|
Most Significant Bits (MSBs)
In this example, the file type is “CRC”. Notice that the first and third characters of “CRC” are both “C” in
ASCII, but their values differ in hex and binary. This is due to the fact that while file name characters take
up one byte, or eight bits each in memory, the ASCII character set uses only the seven least significant bits
of each byte. The most significant bit can therefore be altered without changing the byte’s character value.
In the above example, the seventh bit has been set on the first “C”, changing its Hex value from 43 to C3.
Because the seventh bit of the first file type character is the Read-Only bit, FILEATTR.CRC now has the
attribute of being a Read-Only file. If the Read-Only bit is now set back to zero, FILEATTR.CRC loses its
special status and becomes once again a lowly Read-Write file. Other attributes are set and reset using the
same technique on other filename characters.
112

E.2 File Attribute Meanings
As mentioned above, only two attributes were originally implemented under CP/M 2.2. Improvements in
CP/M programs and operating system enhancements since CP/M 2.2 have greatly expanded the amount of
information which may be conveyed through a file’s attributes. Under ZSDOS, up to eight file attributes
may be associated with each file. Over the years, meanings for most of these attributes have evolved by
consensus.
All file attribute bits are set to zero by the operating system when files are created. When a bit is turned
on (set to 1) by a program its meaning is reversed. Here are the file attributes available under ZSDOS and
the meanings typically associated with them:
Character Default Meaning Meaning When Set
F1 (File name-1)
F2 (File name-2) Private file Public file
F3 (File name-3) Access stamp No access stamp
F4 (File name-4)
F8 (File name-8) Wheel unprotect Wheel protect
T1 (file Type-1) Read write Read only
T2 (file Type-2) Directory System
T3 (file Type-3) Not archived Archived
File name characters five, six, and seven are reserved for use by ZSDOS and may not be used by programs.
File name characters one and four may be used by programs but do not yet have widely accepted meanings.
E.2.1 Public file attribute (f2)
The Public File attribute is controlled by the seventh bit of the second character in a file’s name. Normally,
this bit is set to zero, and the file is only available from the user area associated with it. When the Public
File attribute bit is set to one, the file becomes Public under ZSDOS, meaning that it may be accessed from
any user area on the same disk drive.
If program files are set to Public, they may be used from any other user area on the same disk drive,
eliminating the need for multiple copies of a program. This both saves disk space and eliminates the task of
installing and updating multiple copies of a programs.
When a file is set to Public it is essential to ensure that no other files with the same name exist on the drive.
Otherwise, the operating system may confuse the public file with other files, possibly causing data to be lost
and/or programs to malfunction.
E.2.2 No access stamp attribute (f3)
The No Access Stamp attribute is controlled by bit seven of the third character of a file’s name. Normally, if
a clock is installed ZSDOS keeps a record of the time and date a file was last accessed. Setting the No Access
Stamp attribute bit to one instructs ZSDOS not to keep a last access record for that file. This reduces the
time required to access the file somewhat, and prevents errors when reading files from diskettes whose write
protect notch has been covered.
113
E.2.3 Wheel protect attribute (f8)
ZSDOS allows files to be Wheel Protected by setting bit seven of the eighth character of a file’s name. When
this bit is set, the file becomes Read-Only while the wheel byte is off, and cannot be erased or overwritten
by most programs. When the wheel byte is on, the file again becomes read-write, unless the Read-Only
attribute has also been set.
By using the Wheel Protect byte, operators of remote-access or network systems can easily prevent files from
being erased by non-privileged users, while retaining Read-Write control for privileged users.
E.2.4 Read-only attribute (t1)
The Read Only attribute is controlled by the seventh bit of the first character of a file’s type. Setting a
file to Read Only instructs the operating system and most programs not to allow the file to be erased or
overwritten.
E.2.5 System attribute (t2)
The System attribute is controlled by the seventh bit of the second character of a file’s type. Setting the
System attribute to one instructs the operating system and most directory programs not to include the file
in directory listings. This attribute is used by system operators to hide files from nonprivileged users, and by
some programs to hide work files from the user. When the System attribute is set to zero, the file becomes
a Directory file, and is again displayed by directory commands.
E.2.6 Archive attribute (t3)
The archive attribute is controlled by the seventh bit of the third character of a file’s type, and is used by
the operating system to inform programs when a file has been altered. As with all attributes, the Archive
bit is set to zero when a file is created. If the Archive bit is then set to one by a program, it remains set
until the file is modified or overwritten, at which time it is again set to zero by the operating system.
File backup programs can use the Archive attribute to enhance performance. The Archive attribute is set
to one the first time a file is backed up to another disk. From then on, backup programs check the Archive
attribute when backing up files. If the attribute is still set, the file was not altered. In this case no physical
copying is performed and disk backups proceed much more rapidly.
114
F Clock Driver Descriptions
This is the currently-supported list of clock drivers for ZSDOS and ZDDOS. To the maximum extent possible,
the name was selected to provide a cue to the system and type of clock supported. The order listed here is
the same as that presented by TESTCLOK.COM and SETUPZST.
1. ACTRIX
(Unknown Computer) Clock driver for Actrix.
2. ALSPA
(Unknown Computer) ALSPA Computer Inc clock driver accessed from Console port with IOBYTE=00000011B.
The clock returns an ASCII string of MMDDYYWHHMMSS$<sp><cr>. It uses an Oki MSM 5832
Clock/Calendar chip.
3. AMPRO-LB
(Ampro Little Board 100) Interrupt-driven “Heartbeat” clock driver provided by BIOSes greater than
or equal to Version 3.3.
4. ANLYTCL-PRD
(Heath-89) TIM2 Left-side board by Analytical Products. The Clock uses the MM 58167 Clock Cal-
endar with the Year digit held in the latch at the chip’s base address + 9.
5. AP2-CDZ180
(Apple 2e or 2+) Clock driver for use with PCPI Applicard, MicroPro StarCard, or Seven League
Systems’ CardZ180. Driver is device independent and relies on standard 6502 drivers. NOTE: This
interface requires BIOS version 1.2 or later since earlier implementations such as the Franklin Z80 card
do not support the input status call.
6. AP2-THND/MT
(Apple 2e or 2+) Clock driver using Thunder or Mountain Hardware Clock with Premium Softcard or
Softcard II. Check hardware and clock software for this configuration.
7. AP2-TIMASTR
(Apple 2e or 2+) Clock driver using Timemaster H.O. Clock board in Timemaster mode, Premium
Softcard or Softcard II. Check hardware and clock software for this configuration.
8. AP2E+PCP-TM
(Apple 2, 2e or 2+) Clock driver using Thunder or Mountain Hardware clock with PCPI Z80 Appli-
card. Check hardware and clock software for this configuration.
9. AP2E+PCPI
(Apple 2, 2e or 2+) Clock driver for TimeMaster H.O. Clock in TimeMaster mode with PCPI Z80
Appli-card. Check hardware and clock software for this configuration.
10. AP2E-THUNDR
(Apple ii) Clock Driver for Thunder or Mountain Hardware Clock board with Microsoft Z80 Softcard.
Check hardware and clock software for this configuration.
11. AP2E-TMASTR
(Apple //) Driver for Timemaster H.O. Clock board in Timemaster mode with Microsoft Softcard.
Check hardware and clock software for this configuration.
12. BIG-BD-II
(Big Board II) Driver for BIOS 60 Hz “Heartbeat” clock. Requires knowledge of RAM time string set
by BIOS.
115
13. CCS-WALLCLK
(California Computer Systems 2805) Driver for Wall Clock/Terminator clock based on Oki MM 5832
Clock/Calendar chip. Adjustable parameters include CPU speed, Data and Control port addresses
and 8255 mode command byte values.
14. CPUPRO-SSB1
(S100 / IEEE 696) Driver for CompuPro System Support Board #1 using the Oki MM 5832 Clock/Calendar
chip. The base address for the SSB1 board IO port space may be set during installation.
15. ELECTR-MFIO
(S100) This driver is for the Electralogics MFIO card using the MM58167 Clock/Calendar chip. It was
derived from an 8080 driver with the year being held in the .1 and .01 seconds latch.
16. EPSON-QX10
(Epson QX-10) Driver for Epson’s QX-10 using the 46818 Clock chip. Configurable items are: the
Processor (CPU) Clock Speed, Clock Address Port, and Clock Data Port.
17. ETS-180IO+
(MicroMint SB180/FX180) Driver for Electronic Technical Services’ ETS 180IO+ expansion board
clock for MicroMint’s SB180 and FX180 computers. The board uses the Epson 62421 Clock-Calendar
chip.
18. H19-SUPER19
(Heath/Zenith 19, 89 or 90) Driver for clock functions provided by the Extended Technology Sys-
tems/Accusonics Super19 ROM. The clock is accessed through the Console routines. Only the Proces-
sor (CPU) speed needs to be set for the clock validation part of a clock load.
19. H19-ULTRA
(Heath/Zenith 19, 89 or 90) Driver for clock functions provided by the Software Wizardry UltraRom.
This clock is accessed through the Console routines. Since the Clock returns only the time, not date,
configuration requires setting a Starting Year, Month, and Day as well as the Processor (CPU) Speed.
20. H19-WATZMAN
(Heath/Zenith 19, 89 or 90) Driver for clock functions provided by the Watzman/Heath User’s Group
(HUG) ROM. The clock is accessed through the Console routines and returns only a 7-character time
string. As a result, configuration requires setting a Starting Year, Month and Day as well as the
Processor (CPU) Speed.
21. H89-BITZERO
(Heath/Zenith 89 or 90) Driver for QuickData BITZERO clock using the Oki MM 5832 Clock/Calendar
chip. The CPU speed, data and control port addresses may be adjusted for your system.
22. H89-PC12
(Heath/Zenith 89 with Heath PC12) Driver for Heath PC12 parallel connection. The PC12 appears
to be manufactured by Environmental Control Systems for Heath. Configurable parameters are: Com-
puter CPU speed, Input Data Port, Output Data Port, and Command Word Port.
23. H89-WIDGET
(Heath/Zenith 8 or 89) Driver for MicroWidget Works’ clock on the H891-A Multi-Function Utility
Board. The board appears to use the 5832 Clock/Calendar chip driven from an 8255 PPI. Only the
Processor (CPU) Speed needs to be configured during installation.
24. H89-WISE
(Heath-89) Driver for Wisconsin Intelligent Systems Engineering (WISE) 2+2+RTC board. The clock
uses the MM 58167 Clock-Calendar chip, with a static year byte.
116
25. H89UTI
(Heath-89) Driver for the FBE Research H89UTI board clock. It uses the MM58167 Clock/Calendar
with the year held in the 0.1 seconds latch.
26. HEATH-BIOS
(Heath 19/89) This Driver interfaces a HeartBeat clock provided by Heath CP/M BIOS Version 2.2.03.
Parameters set at installation time are the CPU clock rate and the address of the BIOS time string in
memory.
27. HOUSEMASTER
(Unknown Computer) Driver for the Housemaster 24 hour clock calendar using the Oki MM 5832 chip
accessed via an AY-3-8910.
28. K83-HOLMES
(Kaypro 83) Driver for the Holmes board clock for the Kaypro 83.
29. KAYPRO-84
(Kaypro 4-84) Kaypro Corporations built-in clock for the Model 4-84. The Clock is a MM 58167
Clock-Calendar chip with the Year Digit held in the Tenth-seconds latch.
30. KENMOR-ZTIM
(Kaypro) This Driver is for the Kenmore Computer Technologies’ ZTIME-I clock for Kaypro computers
using the MM58167 Clock/Calendar chip. The base address of the board can be set during installation.
31. KPRO-ADVENT
(Kaypro) Driver for Advent Turbo Clock, by Advent Products. Uses MM58167 Clock-calendar with
Year value held in Unit-Seconds latch.
32. KPRO-LEGACY
(Kaypro) Driver for the Legacy clock using the Oki MM 5832 Clock/Calendar chip. The clock is driven
by a PIO and the addresses of the Data and Command Ports can be set during installation. For the
Kaypro 10, set the Data Port to 79H and the Command Port to 7BH.
33. MD3-MACK
(Morrow MD3) Driver for Mike Allen’s Clock Kit (MACK) which uses an Oki MM 5832 Clock-Calendar
chip driven by an 8255 PPI.
34. MTN100K-DAY
(Unknown Computer) Driver for Mountain Hardware 100,000 Julian Day Clock/Calendar. Config-
urable parameters are: Computer processor (CPU) speed, Base address of clock port, address of an
available 17-byte RAM area, and the Binary date corresponding to 31 Dec 1977.
35. ONEAC-ON!
(Oneac ON!) Driver for the ON! system clock.
36. OTRANA-ATCH
(Otrana Attache) Built-in Attache clock read from the Console port in response to Escape sequence
sent to console.
37. P&T-HEARTBT
(Unknown Computer) Driver for the Pickles & Trout BIOS Heartbeat clock for Z80 processors. The
system calls a special routine whose vector is contained at 0040H.
38. QTSYS-S100
(S100) Driver for QT Systems/Suntronics/Computime S-100 Clock/Calendar board using the Oki MM
5832 chip. Configurable parameters are the Processor (CPU) clock speed, and Base Port Address for
the board.
117
39. RELATIVE
(Any Computer) This driver may be used in lieu of an actual clock driver, and increments a counter
for each disk file Open and Close. The Date must be set manually with utility tools provided, and are
maintained within the driver code memory.
40. S100-5832
(S100 / IEEE 696) Clock using Oki MM 5832 Clock-Calendar chip driven by an 8255 PPI. Circuit was
described in 7/8 1981 and 3/4 1982 issues.
41. SB180-HRTBT
(MicroMint SB180) Interrupt-based Time Clock in MicroMint BIOSes since Version 2.1 written by Joe
Wright. Date information is stored within driver code and must be set by utility routines provided.
42. SB180-XBIOS
(MicroMint SB180/FX180) Driver for use with the Xsystems XBIOS banked-BIOS system. XBIOS
will accept either the ETS 180IO+ clock or an Interrupt-driven counter equivalent to that provided in
SB180-HRTBT.
43. XEROX-820
(Xerox 820-I and 820-II) Accesses Time and Date string controlled by ROM BIOS code.
44. ZSDOS-BIOS
For Any system having a BIOS entry jump featuring a clock interface in accordance with ZSDOS clock
parameters.
118
Index
Absolute System Model, 33
Access Modes, 22
Advanced Installation, 53
Alias, 105
Archive, 60,63,64
Archive Attribute Bit, 20,138
ASCII, 135
Attributes, 65,69,136
BackGrounder ii, 22,51
BDOS, 13,14,34
BIOS, 34
CCP, 13,34,38,47,53
CLOCKS.DAT, 42,43,46
Combined Access, 25
Configuration, 29,102
Conventions, 17
Copy, 65
CP/M Plus, 42,44
DATSWEEP, 65
erase, 65
Error Handling, 19
FILEATTR, 24
FILEATTR.COM, 83
FILEDATE, 87
Get Date/Time, 120
Hard Disk, 113
Help, 18
INITDIR, 50
Installing ZSDOS, 32
INSTALOS, 33
IOBYTE, 134
IOP, 56,57
JetLDR, 41
Last Access, 58
LDTIM, 40–42,47,55,56
MS-DOS, 29,60,65
Ram Disk, 113
Re-entrancy, 28
Real Time Clock, 92
REL, 35,53
Relog, 19,21,98
Rename, 65
Unsqueeze, 65
ZCAL, 101
ZCPR, 13,28,108
ZCPR3, 132
ZDDOS, 14,15,28,109,118,120
ZEX, 77
ZPATH, 23,105,115
ZRL, 35
ZSCONFIG, 23,25,29,36,40,41,58,108
ZSDOS, 35,108
ZSDOS error mode, 20,28
ZSDOS/ZDDOS Differences, 15
ZSYSTEM.MDL, 33
ZXD, 123
119
