Advanced Guide From AFA
User Manual:
Open the PDF directly: View PDF ![]() .
.
Page Count: 382 [warning: Documents this large are best viewed by clicking the View PDF Link!]
1501 Lee Hwy, Arlington, VA | www.uscyberpatriot.org | info@uscyberpatriot.org | 877-885-5716
CYBERPATRIOT
AFA’s National Youth Cyber Education Program
CyberPatriot is the Air Force Association’s National Youth Cyber Education Program, created to motivate students
toward careers in cybersecurity and other science, technology, engineering, and mathematics (STEM) disciplines.
The program features the National Youth Cyber Defense Competition for high school and middle school students,
AFA CyberCamps, an Elementary School Cyber Education Initiative, the Cyber Education Literature Series, and
CyberGenerations – the Senior Citizen’s Guide to Cyber Safety.
The National Youth Cyber Defense Competition
The national youth cyber defense competition is an online, tournament-structured event in which teams of 2-6
students are scored how well they identify and secure known vulnerabilities on a virtual network. Through a
partnership with Cisco, they are also tested on a networking curriculum and are required to build secure, virtual
networks.
Students compete in three divisions:
•Open Division: Open to all high schools, scouting units, boys and girls clubs, home school programs, and other
approved youth organizations
•All Service High School Division: JROTC programs / Civil Air Patrol / Naval Sea Cadet Corps
•Middle School Division: Open to teams of middle school students
Program Overview
AFA CyberCamps
Held during the summer months, AFA CyberCamps emphasize fun, hands-on learning
of cybersecurity principles that are relevant and applicable to everyday life.
Through this 20-hour, 5-day camp, students will learn the importance of
cyber safety and how to protect their personal devices and information
from outside threats. Camps are designed for high school or middle school
students (at the discretion of the hosting organization).
For more information on AFA CyberCamps, visit the “Special Initiatives” section
of www.uscyberpatriot.org.
After a series of online qualification rounds, the top teams advance to the National Finals
Competition, an in-person event held in Baltimore, Md., each spring. Winners are
awarded scholarships, and all registered competitors are eligible to apply for internship
opportunities. Not only is the competition fun and exciting, it also creates a career path
for today’s students, fostering continued education from middle school through college
and into the beginning of their careers.
Registration for CyberPatriot XI (2018-2019 school year) is open until October 3, 2018.
1501 Lee Hwy, Arlington, VA | www.uscyberpatriot.org | info@uscyberpatriot.org | 877-885-5716
Presented by:
CYBERPATRIOT
AFA’s National Youth Cyber Education Program
Elementary School Cyber Education Initiative
Using game-like computer training software, the Elementary School Cyber Education Initiative is designed to:
•Excite students about education in cybersecurity and other STEM disciplines.
•Help students understand the widespread importance of cybersecurity in their everyday lives and equip them
with skills to better protect themselves on the Internet
•Encourage students to apply cyber ethics principles in their online interactions
•FREE downloads available online
Cyber Education Literature Series
The Cyber Education Literature Series introduces cybersecurity principles to our youngest
audience in storybook format. The first book in the series Sarah the Cyber Hero was
published in December of 2017 and is available for purchase through BookBaby.com,
Amazon, and Barnes & Noble.
Sarah the Cyber Hero features a female protagonist living in a town full of superheroes. She
must earn her superhero cape using the cyber skills she has learned in her school’s cyber
education program to protect the town from a virus downloaded to a computer.
CyberGenerations
CyberGenerations -- the Senior Citizen’s Guide to Cyber Safety -- is designed to encourage and
equip more seniors to practice cyber safety. The program covers topics such as password
hygiene, malware and ransomware, marketing and fraud scams, and social media awareness.
The program also provides resources for individuals who may have been a victim of a
cybercrime.
1501 Lee Hwy, Arlington, VA | www.uscyberpatriot.org | info@uscyberpatriot.org | 877-885-5716
Who is on a team?
Coach: The team coach is typically a teacher or adult leader of a team-sponsoring school or youth organization. Coaches
need no special technical background. Any individual with the desire to help students learn something new and relevant
can be a great CyberPatriot coach!
Competitors: The team roster must have between two and six competitors (five active, one substitute who are
registered with the CyberPatriot Program Office and enrolled with the school or organization they are competing with.
All cyber teaching materials are provided and no prior cybersecurity knowledge is required for a competitor to be
successful.
Technical Mentor (Optional): In cases where a team desires help with the provided online training or with specific
topics, the coach may request assistance from the CyberPatriot Program Office in finding qualified technical mentors
from our program. Technical mentors are registered volunteers who possess appropriate IT knowledge and skills.
Background checks are performed on all technical mentors in our network.
Teams compete in three divisions:
•Open Division: High schools, scouting units, boys and girls clubs, home school programs, and other youth
organizations upon approval from CyberPatriot Program Office
•All Service Division: High school JROTC / Civil Air Patrol / Naval Sea Cadet Corps
•Middle School Division: Open to teams of middle school students (typically grades 6-8)
Team registration for CyberPatriot XI (2018-2019) ends on October 3, 2018
What are the technical requirements?
Two to three computers and an Internet connection are required for occasional weekend use during the online portions
of the competition. A full list of hardware and software requirements is available on www.uscyberpatriot.org.For teams
needing alternate Internet connection, CyberPatriot provides a limited number of AT&T 3G Air Cards on needs/first
come-first serve basis.
What does it cost to participate?
There is a $205 registration fee for each high school team and a $165 fee for each middle school team registered for the
competition, with the exception of the following fee waiver opportunities:
•All-Girl teams: In an effort to attract more girls to STEM, all-female teams may request a fee waiver
•Title I Schools: Teams from Title I schools and other schools with inadequate funding may request fee waivers
•All Service Division: JROTC/CAP/NSCC team fees are automatically waived (agreement with service HQs)
The fee covers access to the Microsoft Imagine store as well as to Cisco’s Networking Academy. These programs allows
the team to download a number of operating systems and productivity tools that can be used to prepare for the
competition. Additionally, participants are sent a CyberPatriot t-shirt during the season.
NATIONAL YOUTH CYBER
DEFENSE COMPETITION
CyberPatriot – AFA’s National Youth Cyber Education Program
1501 Lee Hwy, Arlington, VA | www.uscyberpatriot.org | info@uscyberpatriot.org | 877-885-5716
Presented by:
What training materials are needed?
Although coaches are welcome to supplement the provided teaching materials as they wish, all materials necessary for
a successful competition are provided on the CyberPatriot website. Teachers (and other coaches) are encouraged to
use the provided materials not solely for use in preparing their team for competition, but also to educate all students
in their school or organization about good cybersecurity practices and safe computer and Internet use.
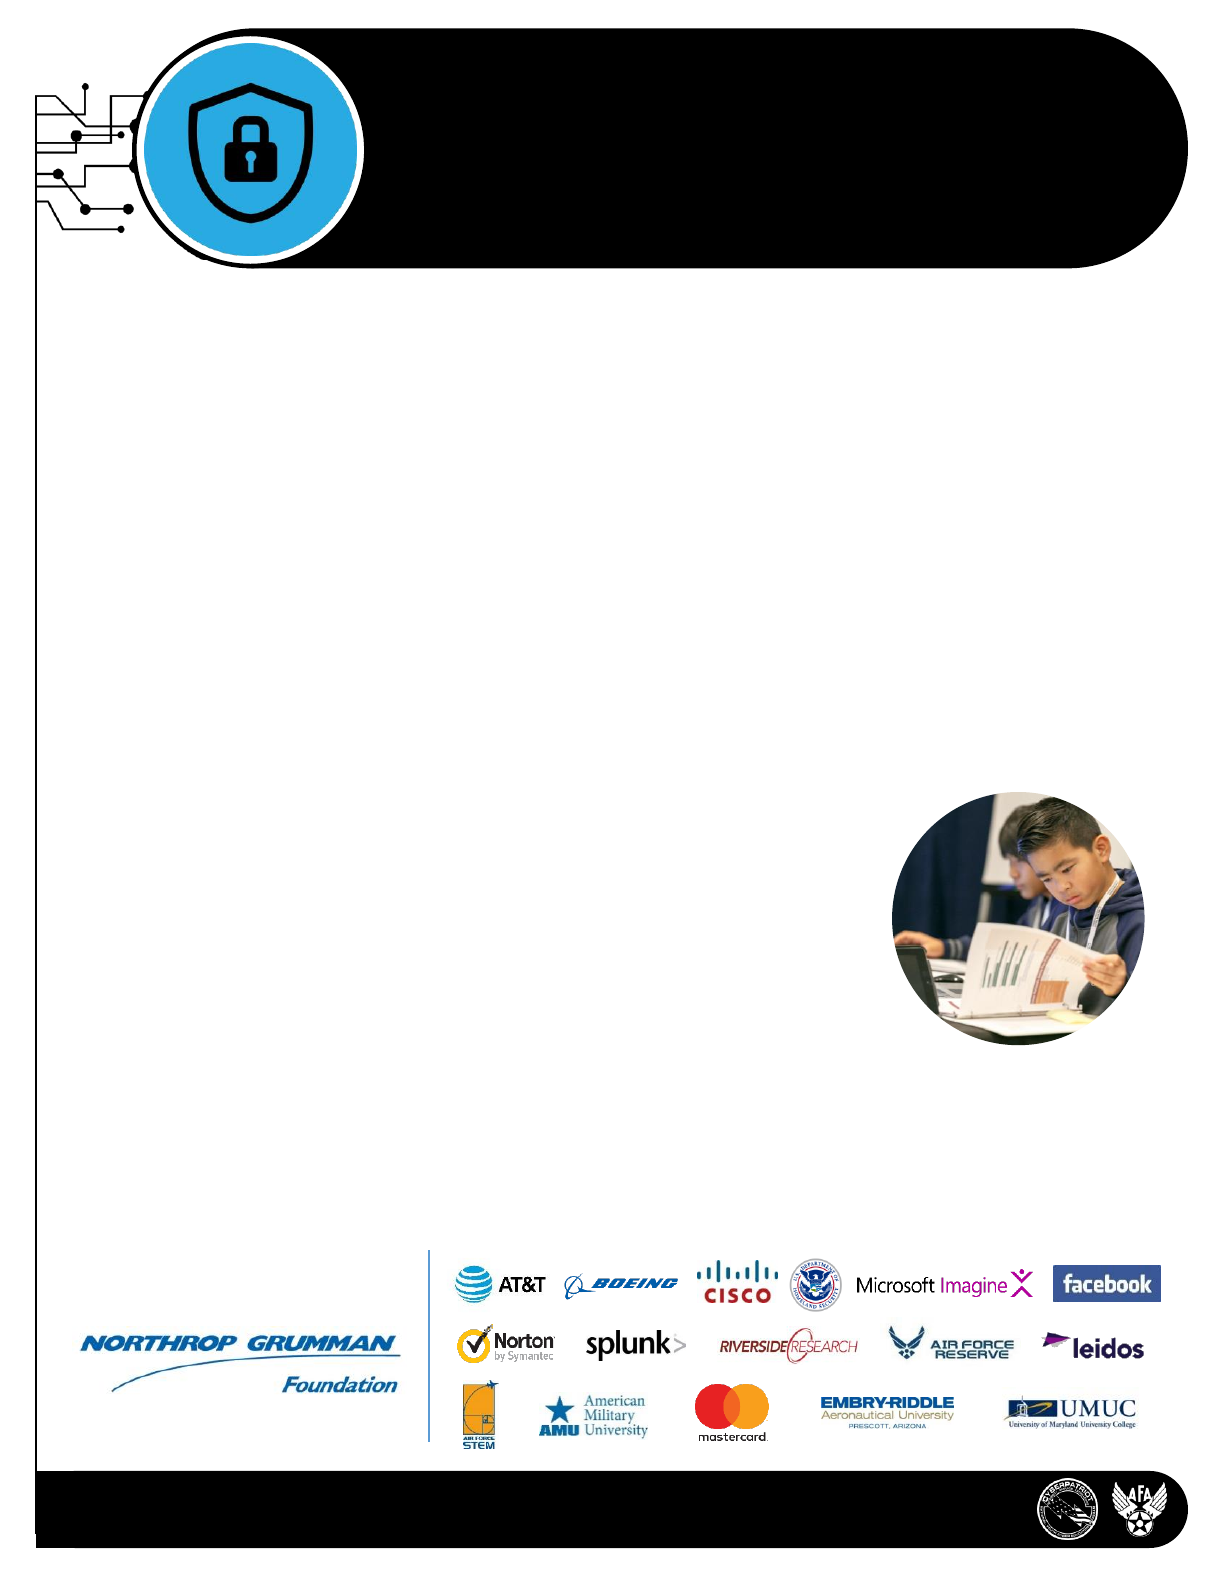
How does the competition work?
The early rounds of the competition are done online during weekends from teams’ home locations (schools, homes,
libraries, etc.).
Prior to the rounds, teams download “virtual image” representations of operating systems with known cybersecurity
“vulnerabilities.” At the beginning of the round, a password to unlock the virtual image is sent out. Teams then choose
any 6-hour period during the designated round to compete, finding and fixing the cybersecurity vulnerabilities while
keeping critical computer functions working. Additionally, students are tested and scored on networking knowledge
and building virtual, secure networks. Team progress is recorded by a central CyberPatriot scoring system.
For the Open and All Service divisions, the scores from two online qualification rounds are
added together to determine team placement into one of three tiers for the State Round:
Platinum, Gold, or Silver. These tiers have cybersecurity challenges of different degrees of
complexity, with the Platinum Tier having the highest degree of difficulty and being the
only tier where teams have the opportunity to advance to the National Finals competition.
The top 12 Open Division teams and the top two teams from each All Service Division
category (Air Force/Army/Marine Corps/Navy JROTC, CAP, NSCC, and one wildcard team)
advance, all-expenses paid, to the in-person National Finals Competition held in Baltimore,
Md. There, the Finalists compete face-to-face against other teams in their division to defend
virtual networks from a professional aggressor team. Winners are awarded scholarship grants.
The competition is slightly different at the middle school level. There are no skill tiers in the Middle School Division,
and all teams compete against each other for the full duration of the season. After three qualifying rounds, the top
50% of teams advance to the Semifinals. From there, the top three teams advance to the National Finals Competition.
NATIONAL YOUTH CYBER
DEFENSE COMPETITION
CyberPatriot – AFA’s National Youth Cyber Education Program
1501 Lee Hwy, Arlington, VA | www.uscyberpatriot.org | info@uscyberpatriot.org | 877-885-5716
AFA CYBERCAMPS
CyberPatriot – AFA’s National Youth Cyber Education Program
The AFA CyberCamp curriculum is designed to instruct students, both novice and advanced, about cyber
ethics, online safety, and the fundamental principles of cybersecurity.
How does an AFA CyberCamp work?
Through the AFA CyberCamp program, schools and educational organizations can purchase a curriculum kit consisting
of five, four-hour instruction modules, as well as accompanying instructor guide, student workbooks, demonstration
software, and competition software that will teach students important skills in cybersecurity. Local organizations and
volunteer instructors can execute the 20-hour curriculum as a week-long summer program supplemented by guest
speakers and additional group activities.
The camp’s 20-hour curriculum is designed for completion over five days (must be Monday-Friday), with the final day
serving as a “miniature cyber competition day.”
Topics covered during a camp include:
Standard Camp:
•Introduction: Cybersecurity career opportunities, cyber ethics, online safety, how computers work, cyber threats,
cybersecurity principles, virtual machines
•Windows 10: Basic security policies and tools, account management, file protections, auditing and monitoring
Linux/Ubuntu 16: Introduction to Linux, Ubuntu 16 terminology and concepts, basic graphical user interface
security, basic command line security, intermediate Ubuntu security.
Advanced Camp:
•Windows 10 Module: Graphical utilities, command line, optional sysinternals suite
•Ubuntu 16 Module: Init systems, advanced command line, processes and scheduled tasks, optional security policies
and PAM, optional networking
•Cisco: NetAcad Networking
Who can host a camp?
Public/private middle schools and high schools, home schools, universities and other
higher education or career technical education institutes, Civil Air Patrol squadrons,
Naval Sea Cadet units, scouting units, boys and girls clubs, and other non-profit
organizations. AFA CyberCamps cannot be conducted as a for-profit activity. All
applying entities are subject to approval by the CyberPatriot National
Commissioner.
Host organizations are responsible for providing instructors. Standard camp
instructors should have experience working with computers, basic knowledge of
cybersecurity, and some familiarity with virtual machines. Advanced camp instructors
should be advanced subject matter experts. It is highly desired that instructors have
advanced knowledge of networking and intermediate Windows 10 and Ubuntu 16 subject
matter. We recommend two or more instructors for advanced camps.
1501 Lee Hwy, Arlington, VA | www.uscyberpatriot.org | info@uscyberpatriot.org | 877-885-5716
Presented by:
AFA CYBERCAMPS
CyberPatriot – AFA’s National Youth Cyber Education Program
What technical resources are required?
The AFA CyberCamp curriculum and activities are largely computer based. To maximize student engagement, the hosting
school or organization should provide one computer for every 1-3 participating students. The camp instructor(s) will need
a projector and presentation computer with Microsoft PowerPoint.
The campers' computers, as well as the presentation computer, must have internet access and must be capable of
running VMWare Player, WinMD5, and 7-Zip, all of which are free software programs. Full technical specifications are
available on the CyberPatriot website.
What is the cost of an AFA CyberCamp?
Standard Camp: $1,150 –Includes access to two demonstration images, two competition images, and digital copies of the
Instructor Guide and Student Workbook
Advanced Camp: $1,450 –Includes access to two demonstration images, two advanced competition images, Cisco
Network Academy curriculum, and digital copies of the Instructor Guide and Student Workbook.
For an additional cost, host organizations can request hard-copy workbooks and instructor guides, as well as t-shirts and
sunglasses.
2018
AFA Advanced CyberCamp
Instructor’s Guide
© Air Force Association

Authored and edited by Emily Rauer and the Center of Infrastructure Assurance and Security (CIAS)

Advanced CyberCamp Administrative Items
Icon Key
Note to instructor: Text that follows is a note to the instructor and should not be read aloud.
Animation: Indicates that a mouse click is required to activate a text or picture animation on the slide.
Timing Note: Indicates the estimated duration of a set of instruction slides or an activity.
•Suggested script or question for the students: Identifies suggested comments and questions for
instructor to say. To keep students engaged, we recommend asking questions frequently.
-Example: Identifies examples supporting the content in the proceeding bulleted script or question item.
Setup and Materials
Before your Camp: Make sure all of the student computers and the presentation computer have access
to the Internet. Install VMWare 6, 7-zip, and WinMD5 to all of the student computers*, as well as to the
presentation computer. Next, download the supplied demonstration images and competition images to
student computers and the presentation computer.
*When resources allow, one computer should be provided for each team of 2-3 students.
Demo Image log-in info for Quick Reference:
- Windows 10: User Name cyberpatriot Password: CyberPatriot!
- Ubuntu 16: User Name cyberpatriot Password: CyberPatriot!
Module Materials:
–3.5 hours Monday: Cyber Ethics & Windows 10
•Student Workbook
•Demonstration Image
–4.5 hours Tuesday: Ubuntu
•Student Workbook
•Demonstration Image
–4.5 hours Wednesday: Cisco (Module 1/Begin Module 2)
•Student Workbook
•Demonstration Image
–4.5 hours Thursday: Cisco (Finish Module 2/Module 3)
•Student Workbook
•Demonstration Image
–4.5 hours Friday: Final Activity Packet Tracer, Windows 10, Ubuntu 16 - Competition Day!
•Competition Images
In the Camp Space: Check the sound system to ensure students can hear audio from clips and music you
will be playing. Have students sit together in the same teams of 2-3 for the duration of the CyberCamp.
AFA Advanced CyberCamp Instructor’s Guide

Instructor Pre-Survey
Dear Camp Coordinator & Instructors,
Thank you for hosting an AFA CyberCamp for summer 2018!
Before or on Day 1 of your camp, please take a moment to fill out our Camp
Coordinator/Instructor Pre-survey. Your feedback helps us improve our CyberCamp experience
for you and your students. On Day 5 we will have another reminder in this Instructor Guide
letting you know about a post-survey opportunity (page iii). Each survey takes about 5-10
minutes.
We have also included in theStudent Workbook a student focused Pre-survey for students to fill
out on Day 1 (Monday) of their camp session as well as a Post-survey to be filled out on Day 5
(Friday) after their Competition. Each survey takes about 5-10 minutes.
Thank you again for taking the time to give us your valuable feedback for our AFA CyberCamp
program. The CyberPatriot Program Office wishes you a wonderful summer of cyber!
2018 Instructor Pre-Survey
https://www.surveymonkey.com/r/MBT7BQJ

Advanced CyberCamp Instructor’s Guide Table of Contents
Cyber Ethics
Module Overview (1 min) ………………………….………………………………………………………………..…..Page 1
10 Commandments of Computers (10 mins) ………………………………………………………….………..Page 2
Cyber Bullying (10 mins) ………………………….………………………………………..…………….……..…..Pages 3-4
Student Code of Conduct (10 mins)……………………………………………..……………………….…………Pages 5
Student Workbook Activities
Student Code of Conduct (5 mins) ..……………………………………..………………………………..……..….Page 5
–Student Workbook page: i
AFA Advanced CyberCamp Instructor’s Guide
© 2018 Air Force Association
AFA Advanced CyberCamp Instructor’s Guide
Page 1
Slide 0
Module 1
•This module will cover Cyber Ethics topics: Commandments of Cyber
Ethics, Cyberbullying and the CyberPatriot Code of Conduct.
✰Slides 1-4 should take 25-30 minutes, to include two-minute video on
slide 3.
✰Slide 4 students will sign their individual Code of Conduct page in their
student workbook (page i).
© 2018 Air Force Association
AFA Advanced CyberCamp Instructor’s Guide
Page 2
Slide 1
Cyber Ethics
•Overall, computers have improved our lives dramatically, but they can also
cause serious harm. Cyber ethics means acting responsibly and ethically when
using computers.
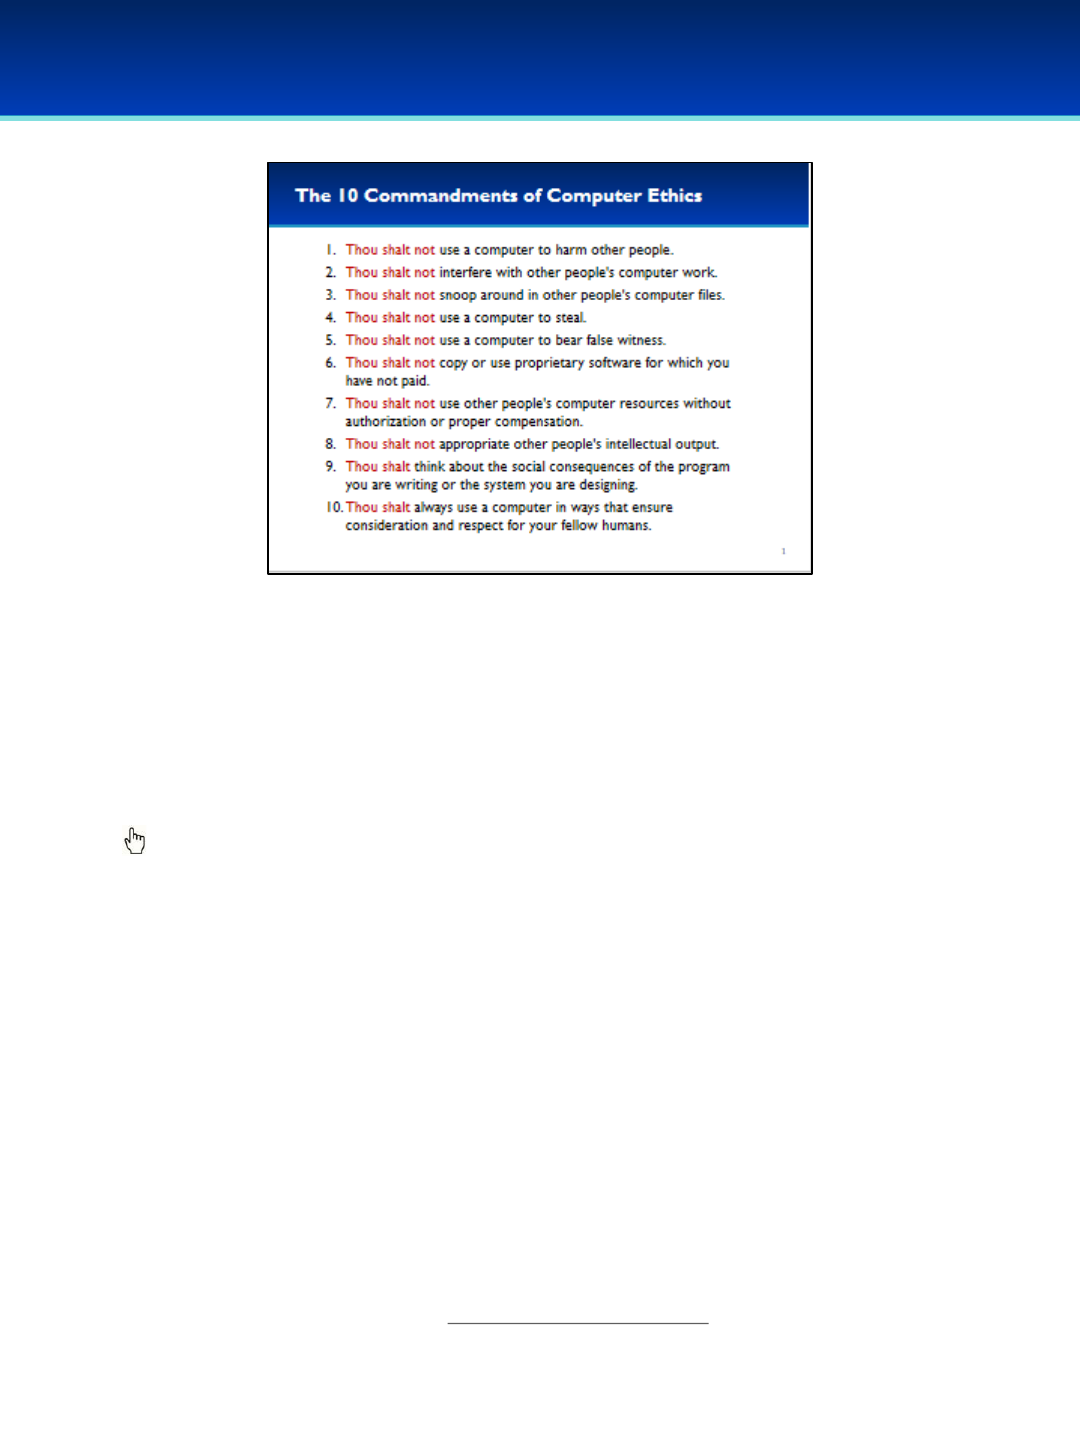
•In 1992, when computers and the Internet were first becoming popular, the
Computer Ethics Institute in D.C. created a list of the 10 Commandments of
Computer Ethics.
Click to reveal each of the 10 commandments.
Read through the list asking students to describe or give examples of to what kind
of behavior the commandment is referring.
-e.g. “Thou shalt not use a computer to bear false witness:” You should not
use a computer to spread rumors, impersonate someone, or launch a smear
campaign.
•Who knows what etiquette means? What do you think the term “netiquette”
means?
•Netiquette refers to the commonly accepted rules of how to behave online. It’s
a term commonly used to refer to the general concepts outlined by these 10
Commandments of Computer Ethics.
Source: http://computerethicsinstitute.org/
© 2018 Air Force Association
AFA Advanced CyberCamp Instructor’s Guide
Page 3
Slide 2
Cyber Ethics
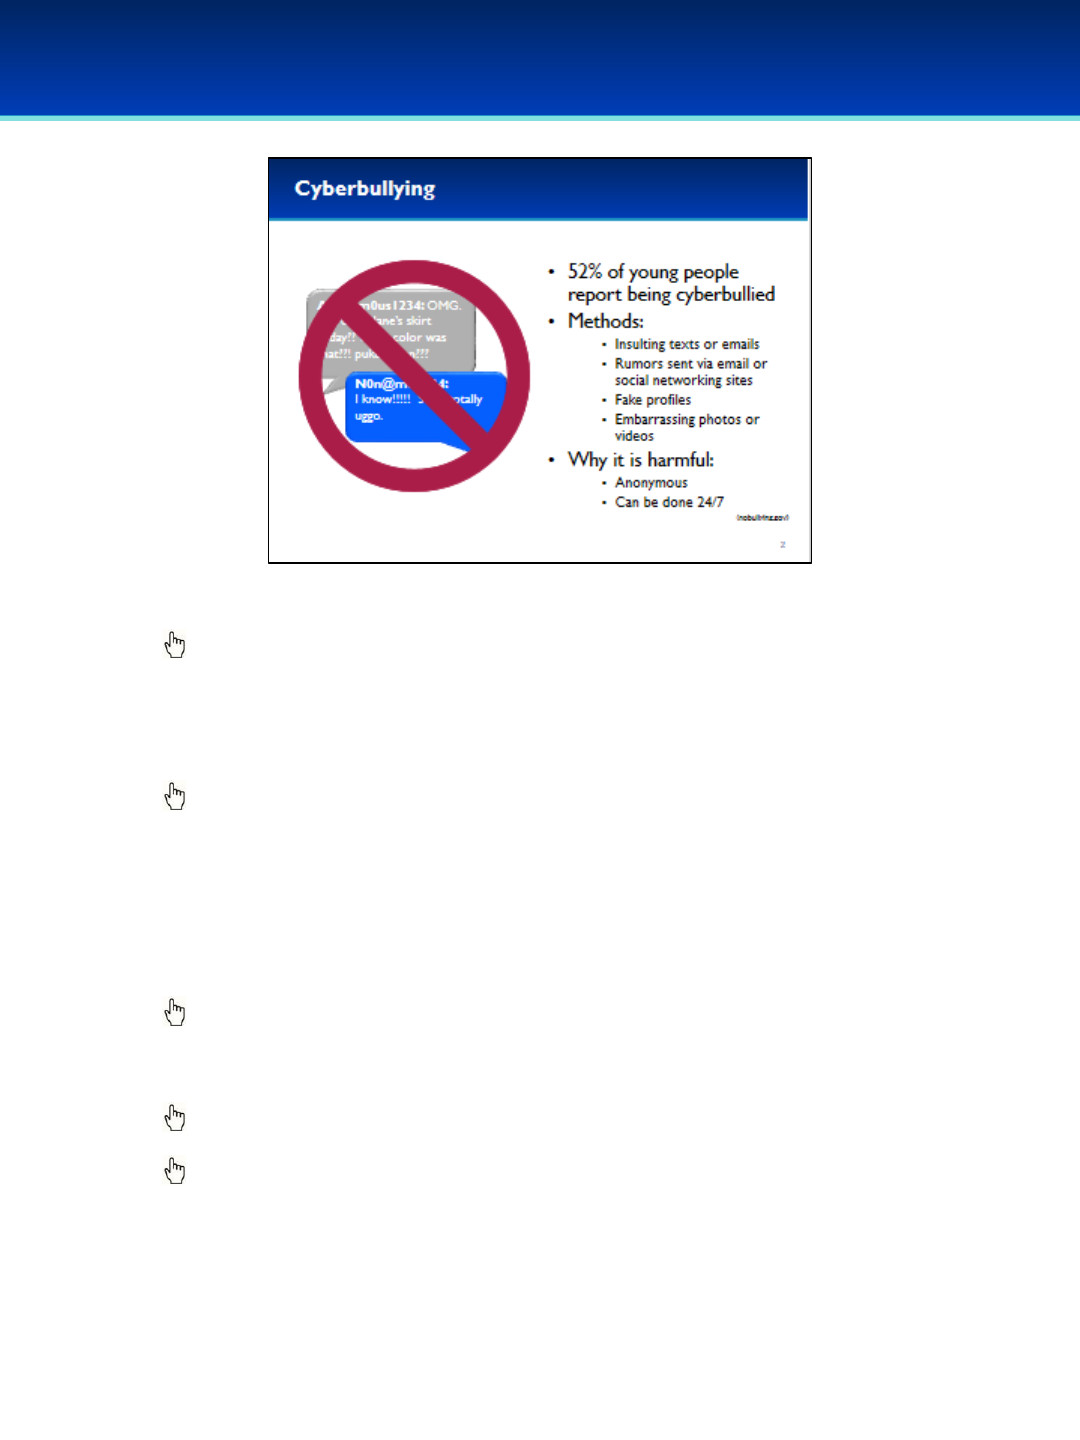
•Bad netiquette often translates or escalates into cyberbullying.
Click to reveal sample chat.
•Maybe this doesn’t seem too mean, but we don’t know the context. What
if “Jane” gets bullied all the time for the way she dresses? What if this chat
gets spread around school?
Click to reveal the first bullet.
•According to the latest government statistics, nearly one in two students is
a victim of cyberbullying each year, and that number is growing.
•Besides through instant messaging, like in the example here, what other
means do cyberbullies use?
Click to reveal list of methods.
•Why do you think cyberbullying is so harmful?
Click to reveal answer.
Click to reveal a red cross-out symbol over the chat text.
© 2018 Air Force Association
AFA Advanced CyberCamp Instructor’s Guide
Page 4
Slide 3
Cyber Ethics
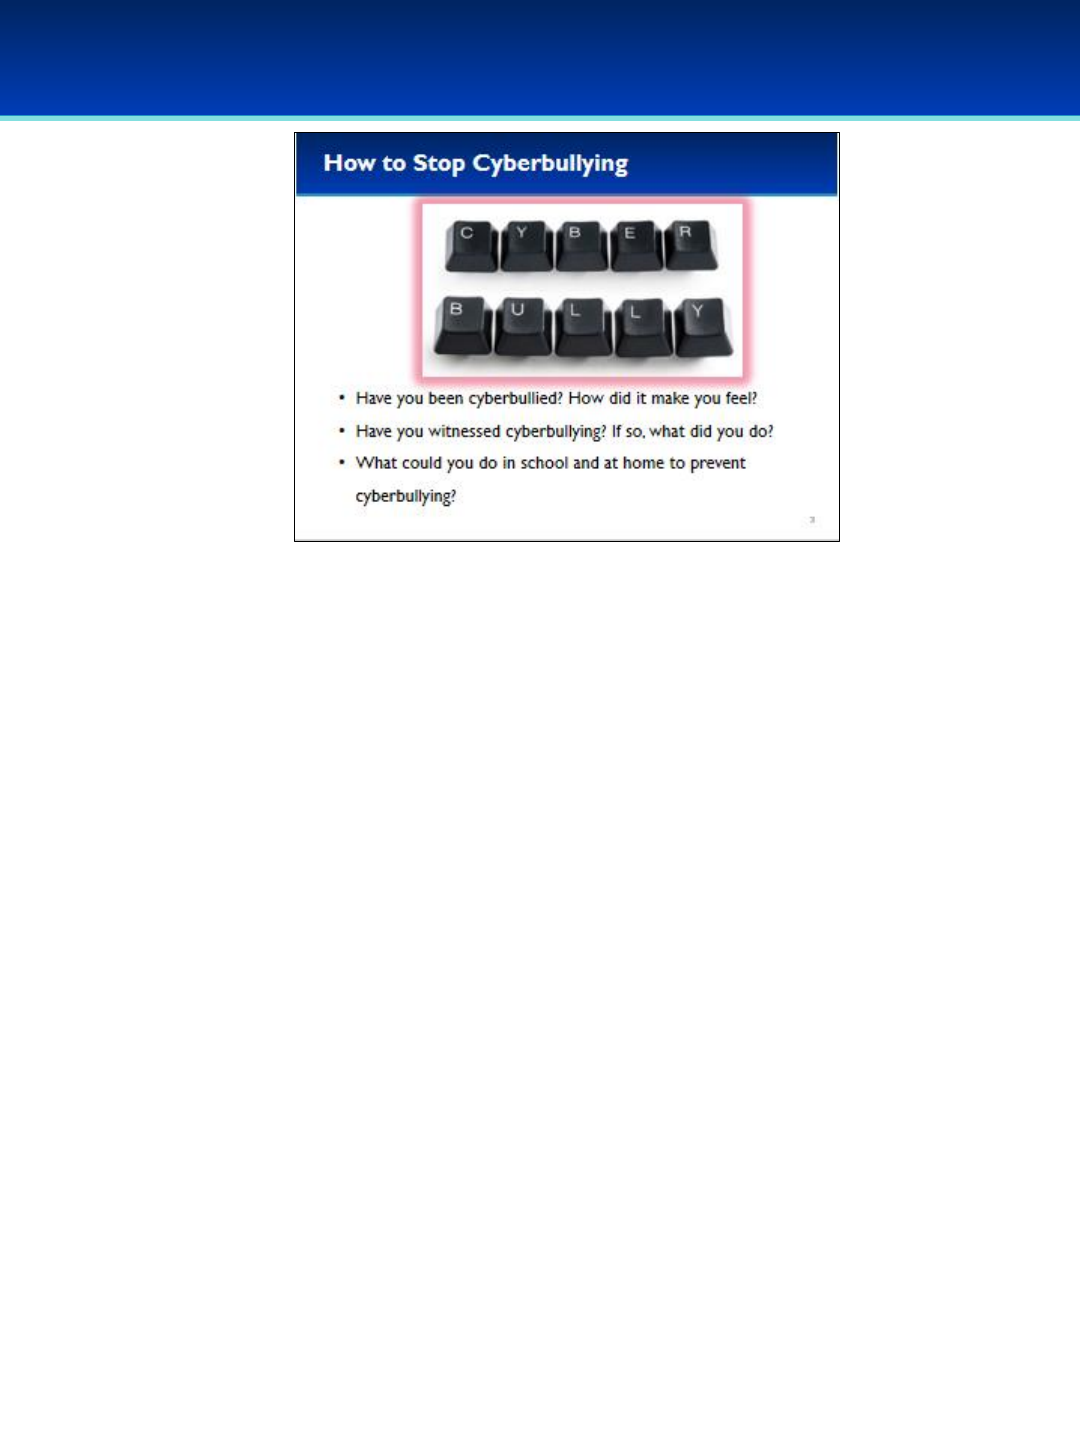
👆Click on the photo to see video about How to Stop Cyber-bullying. If an
advertisement starts, click the “Skip Ad > “ button in bottom-right corner of
video. (2:32 minutes)
✰Return to the slide. The next three clicks will be for group discussion or
you can have students share amongst themselves in small groups.
👆Click 1: Have you been cyberbullied? How did it make you feel?
👆Click 2: Have you witnessed cyberbullying, if so what did you do?
👆Click 3: What could you do in school and at home to prevent
cyberbullying?
Sources: https://www.youtube.com/watch?v=WegCMoQ-UNs
© 2018 Air Force Association
AFA Advanced CyberCamp Instructor’s Guide
Page 5
Slide 4
Cyber Ethics
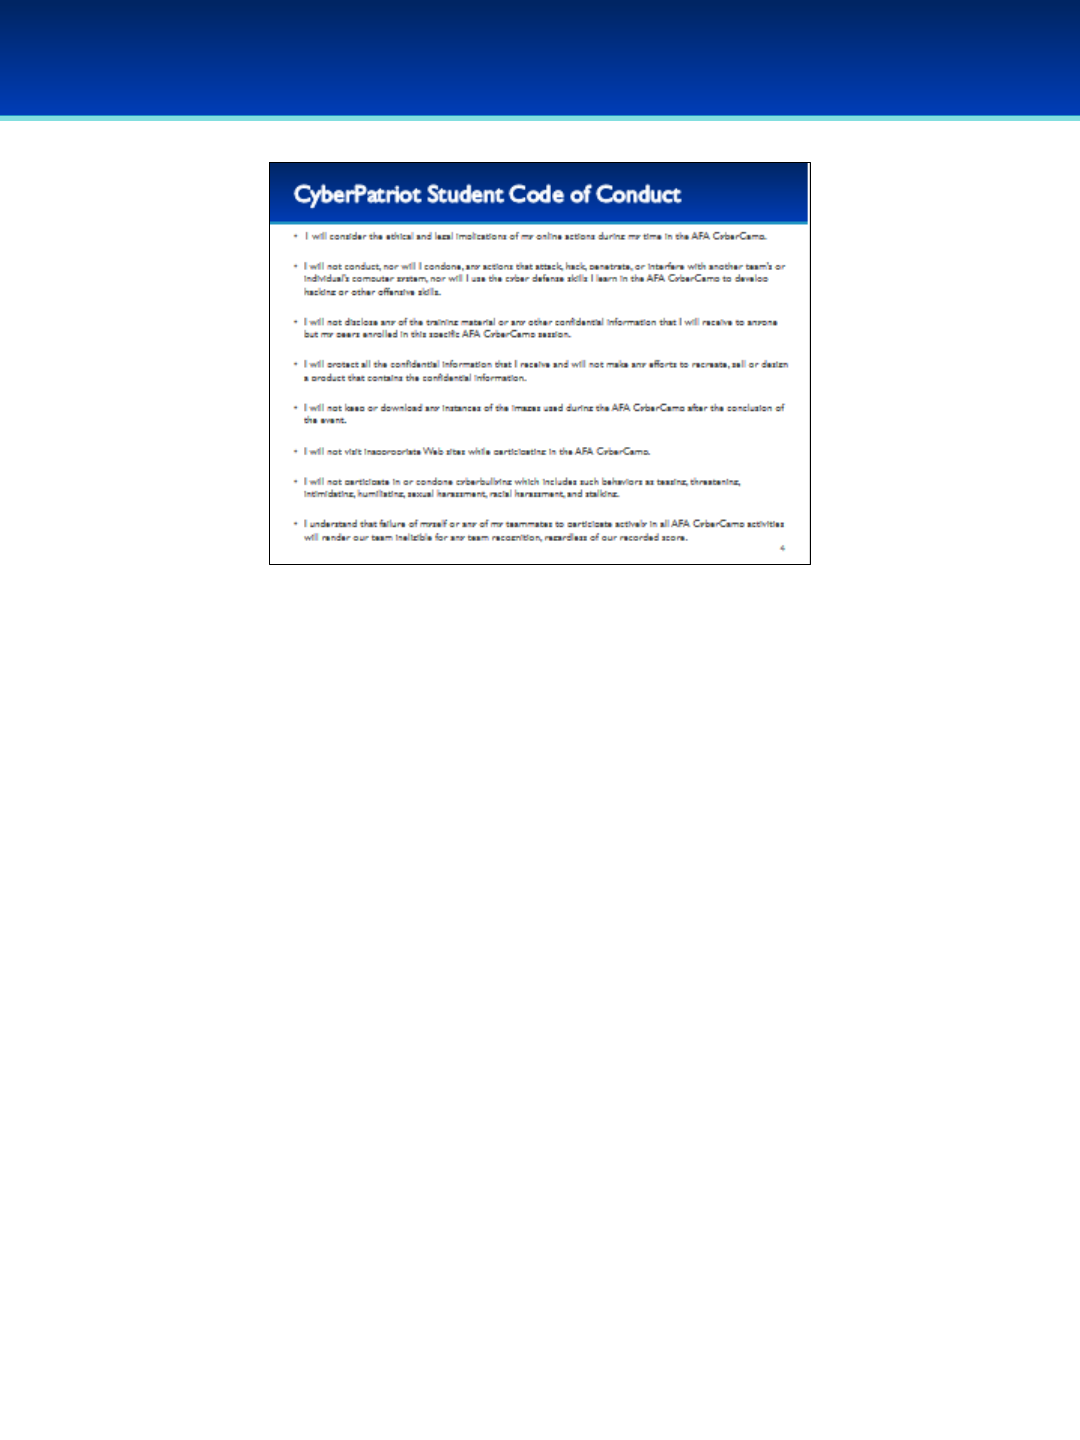
•All participants of the CyberPatriot National Youth Defense Competition are
expected to abide by the CP Student Code of Conduct.
•In preparation to learn and compete this week, all students will sign the Code
of Conduct pledging to behave responsibly and ethically throughout the
duration of the AFA CyberCamp.
👆Click the eight bullets individually, reading them out loud or choosing a
student to read the bullet.
✰Once all bullets have been reviewed, have students turn to page i in their
student workbooks and sign their individual Code of Conduct.
✰Students will keep this page inside their Student Workbook for the entirety of
the CyberCamp.

Instructor’s Guide Table of Contents
Windows 10
Module Overview (5 mins) ………………………….…………………………………………………….………..Pages 6-7
Windows Review (20 mins) ………………………….………………………………………..……………..…..Pages 8-24
Windows Graphical Utilities (30 mins) …………………………………………………………..………..Pages 25-55
Windows Command Line (30 mins)……………………………………………..……………………………Pages 56-96
Optional Advanced: Sysinternals Suite (30 mins) ………………………………………….……….Pages 97-127
Student Workbook Activities
Activity 1-1: Windows Graphical Utilities (20 mins) ..…………………………………………..……..….Page 55
–Student Workbook page: 1-3
Activity 1-2: Windows Command Line (20 mins) …………………………………………………....………Page 96
–Student Workbook pages: 4-5
Optional Advanced: Activity 1-3: Sysinternals Suite (20 mins)……………………………….……...Page 127
–Student Workbook pages: 6-7
AFA Advanced CyberCamp Instructor’s Guide
© 2018 Air Force Association
AFA Advanced CyberCamp Instructor’s Guide
Page 6
Slide 0
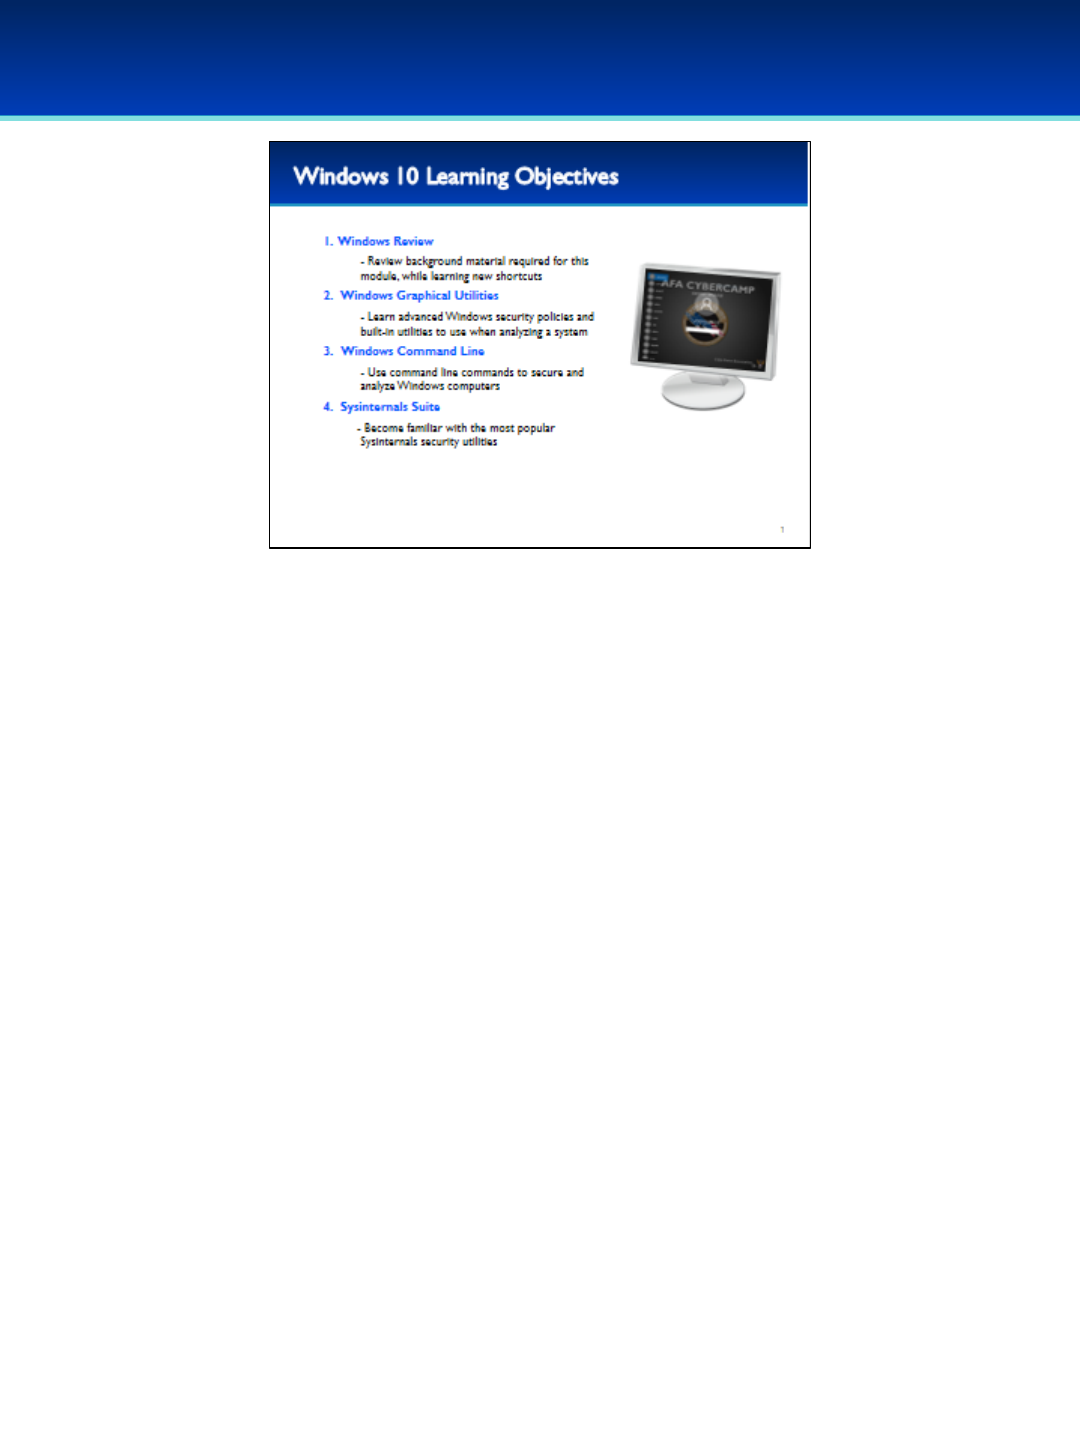
Windows 10
•This module will cover advanced topics on Windows 10.
Section 1 Windows Review is intended for the Instructor to go through the
Demo with students, instead of having the students using the Demo in order
to save time.
Students should follow along on their Advanced CyberCamp Demo Windows
10 image for Sections 2 Windows Graphical Utilities and 3 Windows
Command Line (Section 4 Sysinternals Suite is optional if time permits).
© 2018 Air Force Association
AFA Advanced CyberCamp Instructor’s Guide
Page 7
Slide 1
Windows 10
•First, we will briefly cover material from the basic CyberCamp, while learning
some new shortcuts to help navigate Windows faster. We are going to cover
this material quickly, so do not follow along on your demo images in order to
help save time.
•Next, we are going to cover some additional built-in graphical Windows
utilities to help analyze and improve your security posture.
•After that, we are going to cover some useful command line utilities that are
built into Windows.
•Lastly, we are going to cover some of the security utilities in the Sysinternals
Suite to help you detect and analyze malware.
•For sections 2 and 3 (and 4 if time allows), students should follow along on
their Windows Demo image.
•At the end of sections 2, 3, and 4 there will be a lab that will ask you to
perform tasks and answer questions related to the Windows Demo image.
© 2018 Air Force Association
AFA Advanced CyberCamp Instructor’s Guide
Page 8
Slide 2
Windows 10
Devote about 20 minutes for slides 3-18. There is no activity
after this section.
Section 1 Windows Review is intended to be done without
students following along on their Demo to save time.
© 2018 Air Force Association
AFA Advanced CyberCamp Instructor’s Guide
Page 9
Slide 3
Windows 10
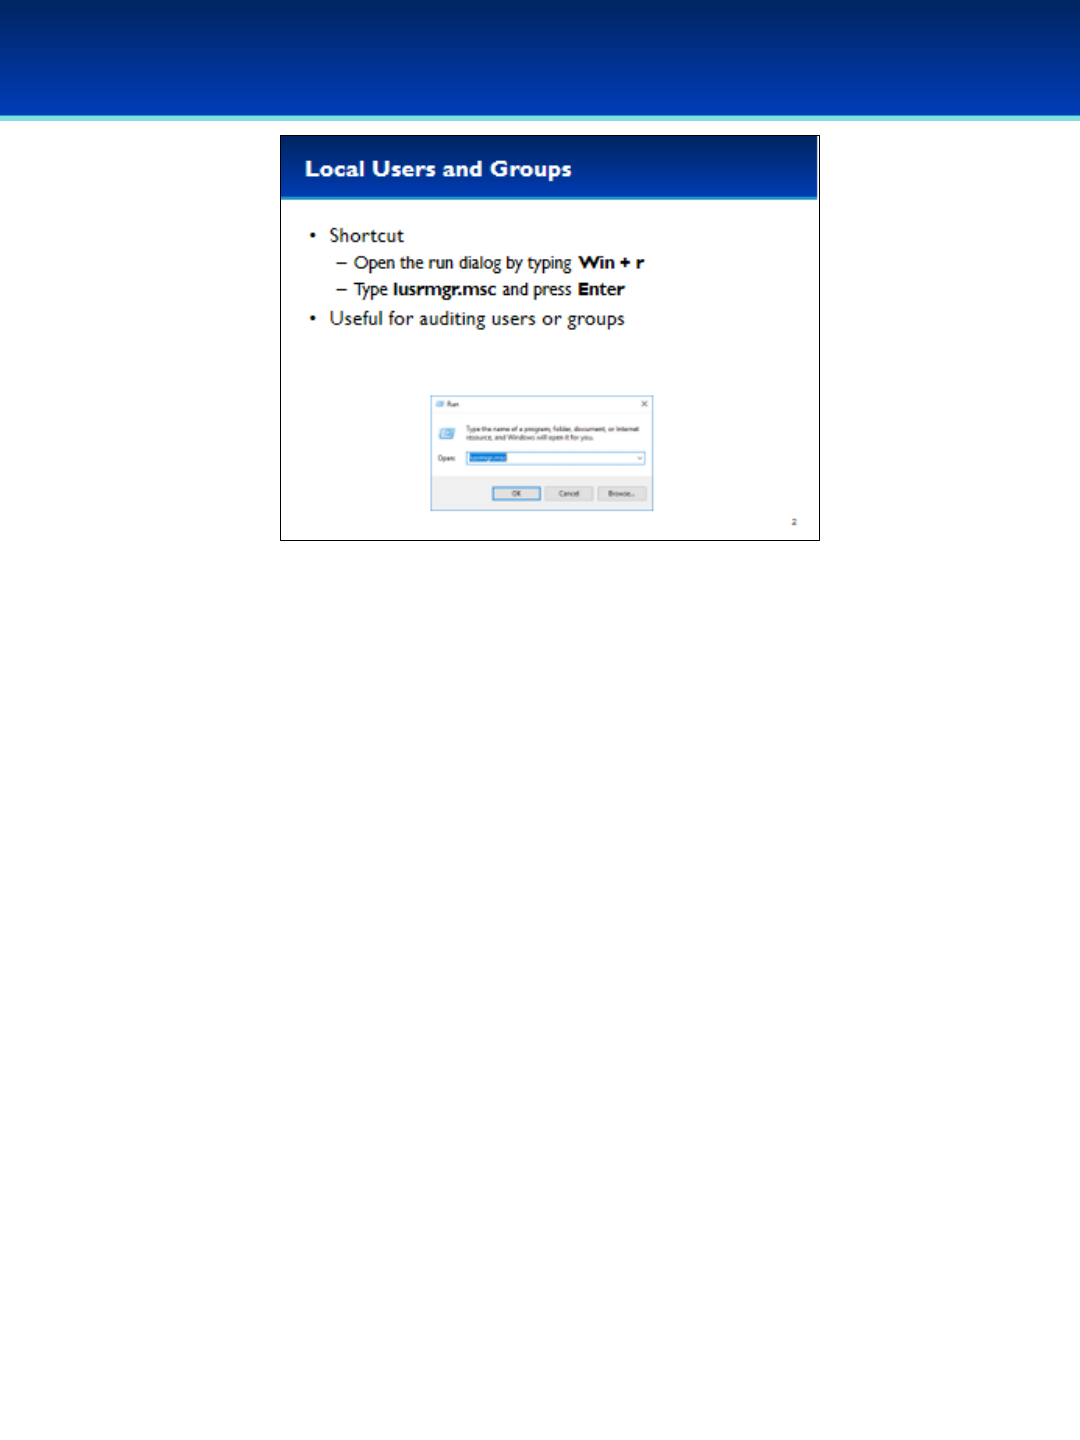
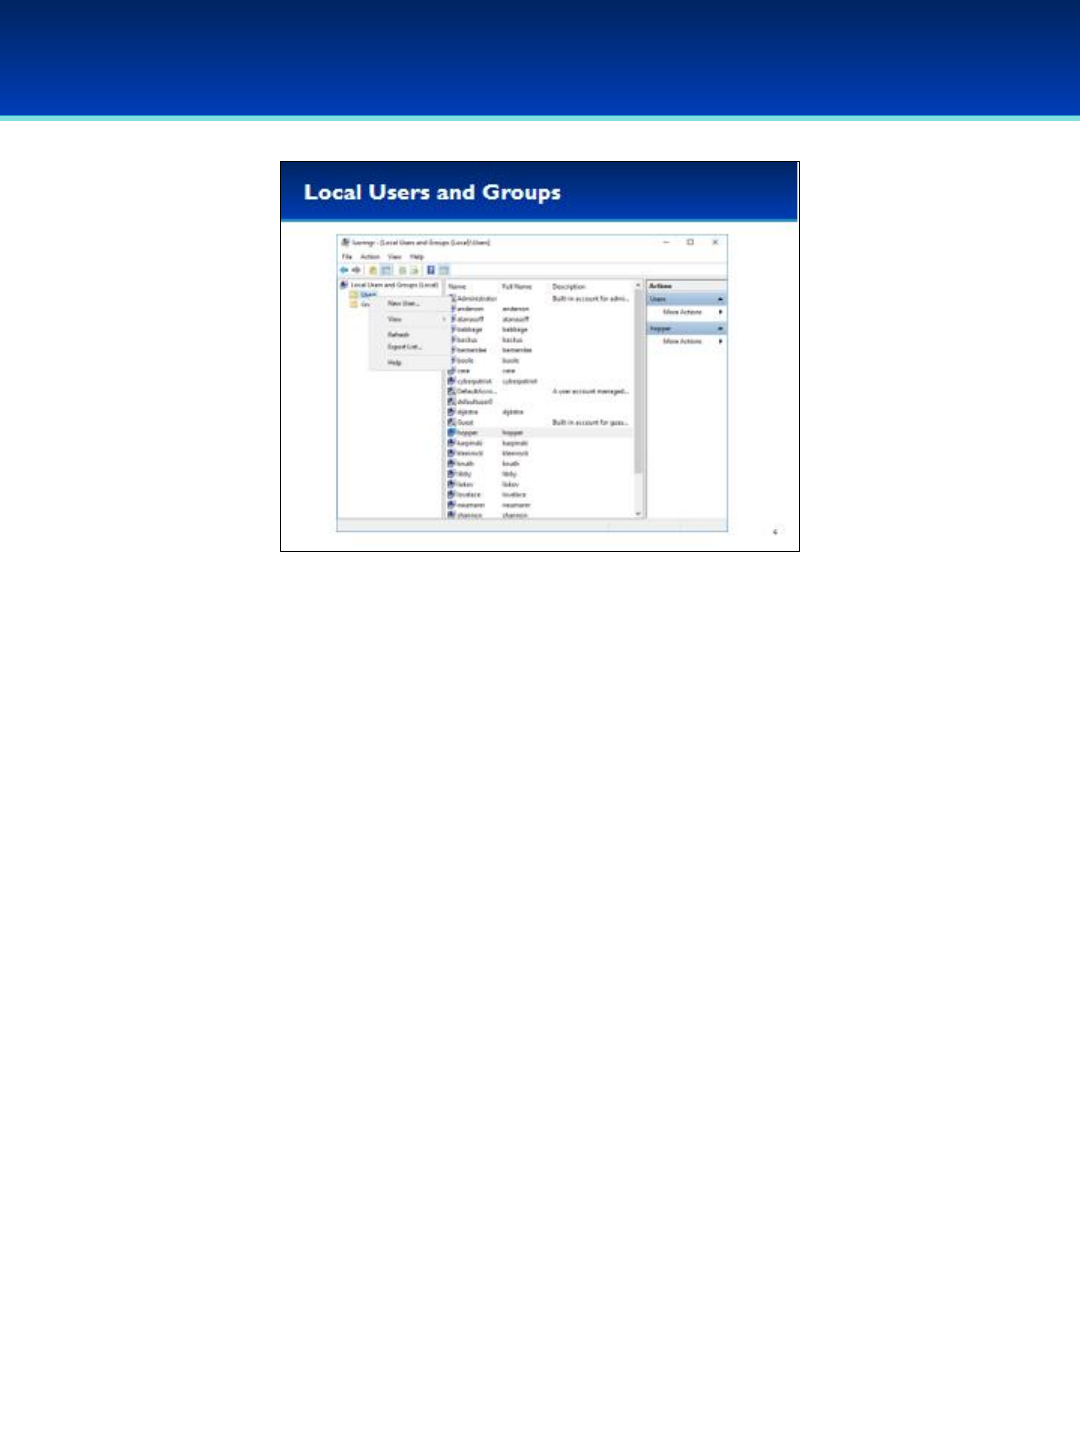
•The Local Users and Groups Microsoft Management Console snap-in
is useful for auditing users and groups on the system, and can display
hidden users in the Control Panel Users tool.
•Using MMC to add snap-ins can be tedious, but you can start them
easily if you know the run command.
•Open the run dialog box by holding down the Windows key and
pressing the letter r(lowercase).
•Next to Open, type lusrmgr.msc (you can remember this as an
abbreviation for Local User Manager).
•MMC plugins end with the .msc extension.
•Press Enter or click OK.
© 2018 Air Force Association
AFA Advanced CyberCamp Instructor’s Guide
Page 10
Slide 4
Windows 10
•In Local Users and Groups, you can easily add new users or
groups by right-clicking on the corresponding folders.
© 2018 Air Force Association
AFA Advanced CyberCamp Instructor’s Guide
Page 11
Slide 5
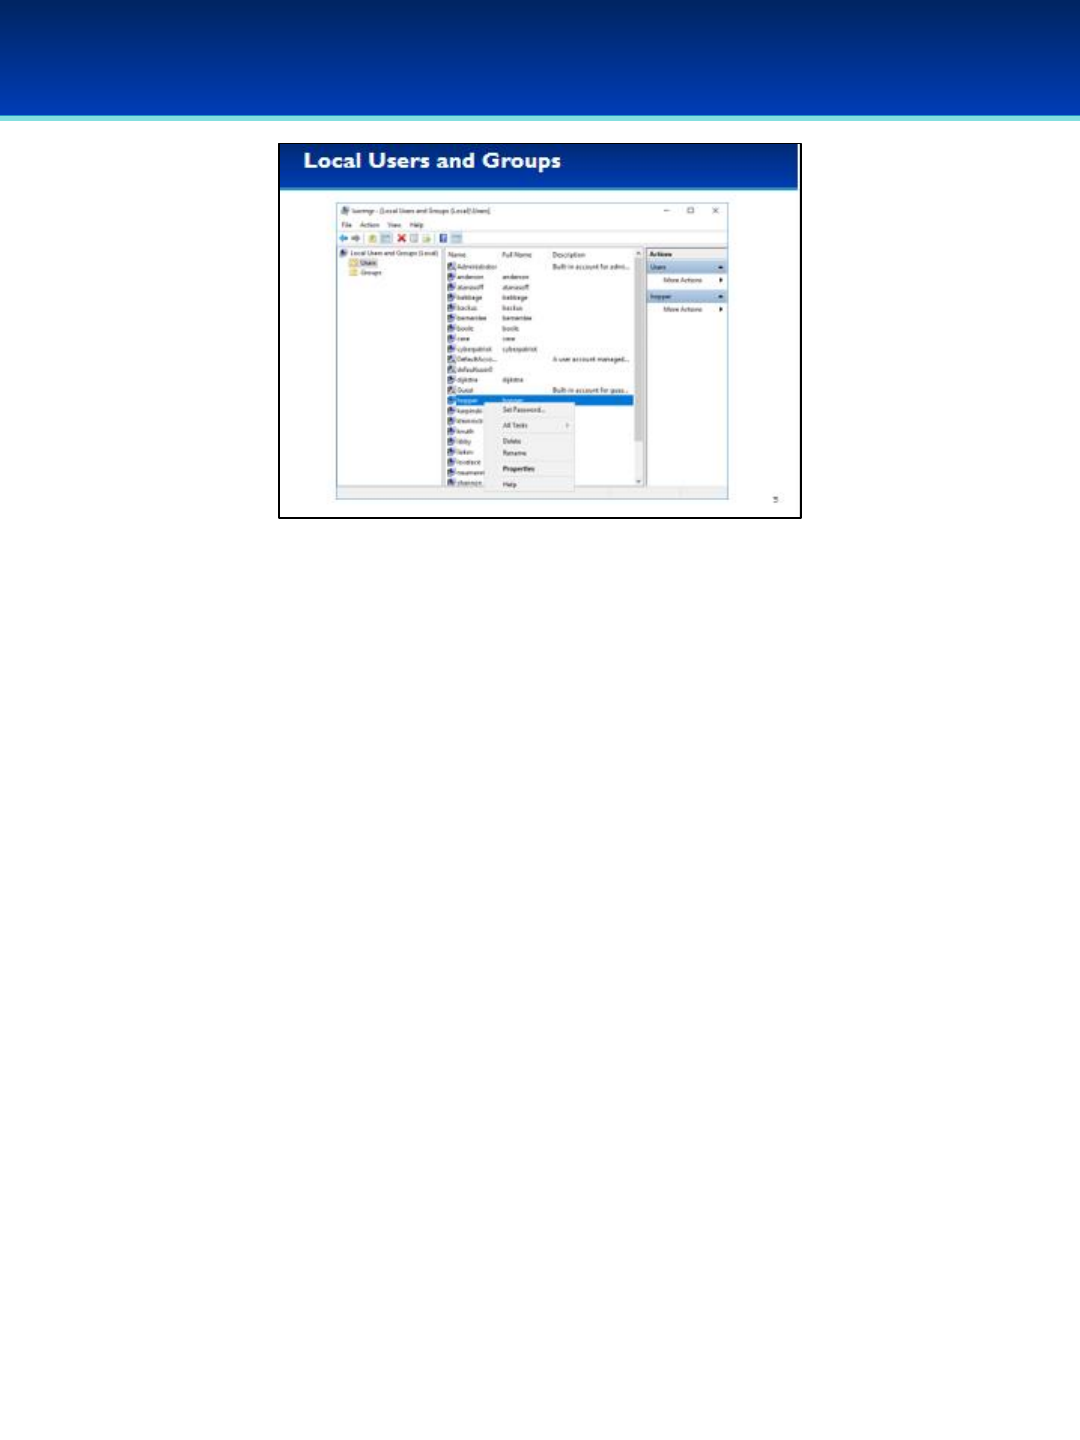
•You can delete, rename, or change the password of a user by right-
clicking that user.
•You can also delete a user by selecting that user and pressing the
delete key.
•In the user Properties, you can perform additional tasks such as
setting the user’s password to never expire, disable the account,
unlock the account, and manage group memberships.
•You can also open the user Properties by double-clicking on that user.
Windows 10

© 2018 Air Force Association
AFA Advanced CyberCamp Instructor’s Guide
Page 12
Slide 6
•By right-clicking on a group you can easily delete or rename it.
•You can also delete a group by selecting it and pressing the delete
key.
•In the group Properties, or by clicking Add to Group, you can view all
members of a group and easily add or remove users from it.
•You can also open the Properties for a group by double-clicking on it.
Windows 10
© 2018 Air Force Association
AFA Advanced CyberCamp Instructor’s Guide
Page 13
Slide 7
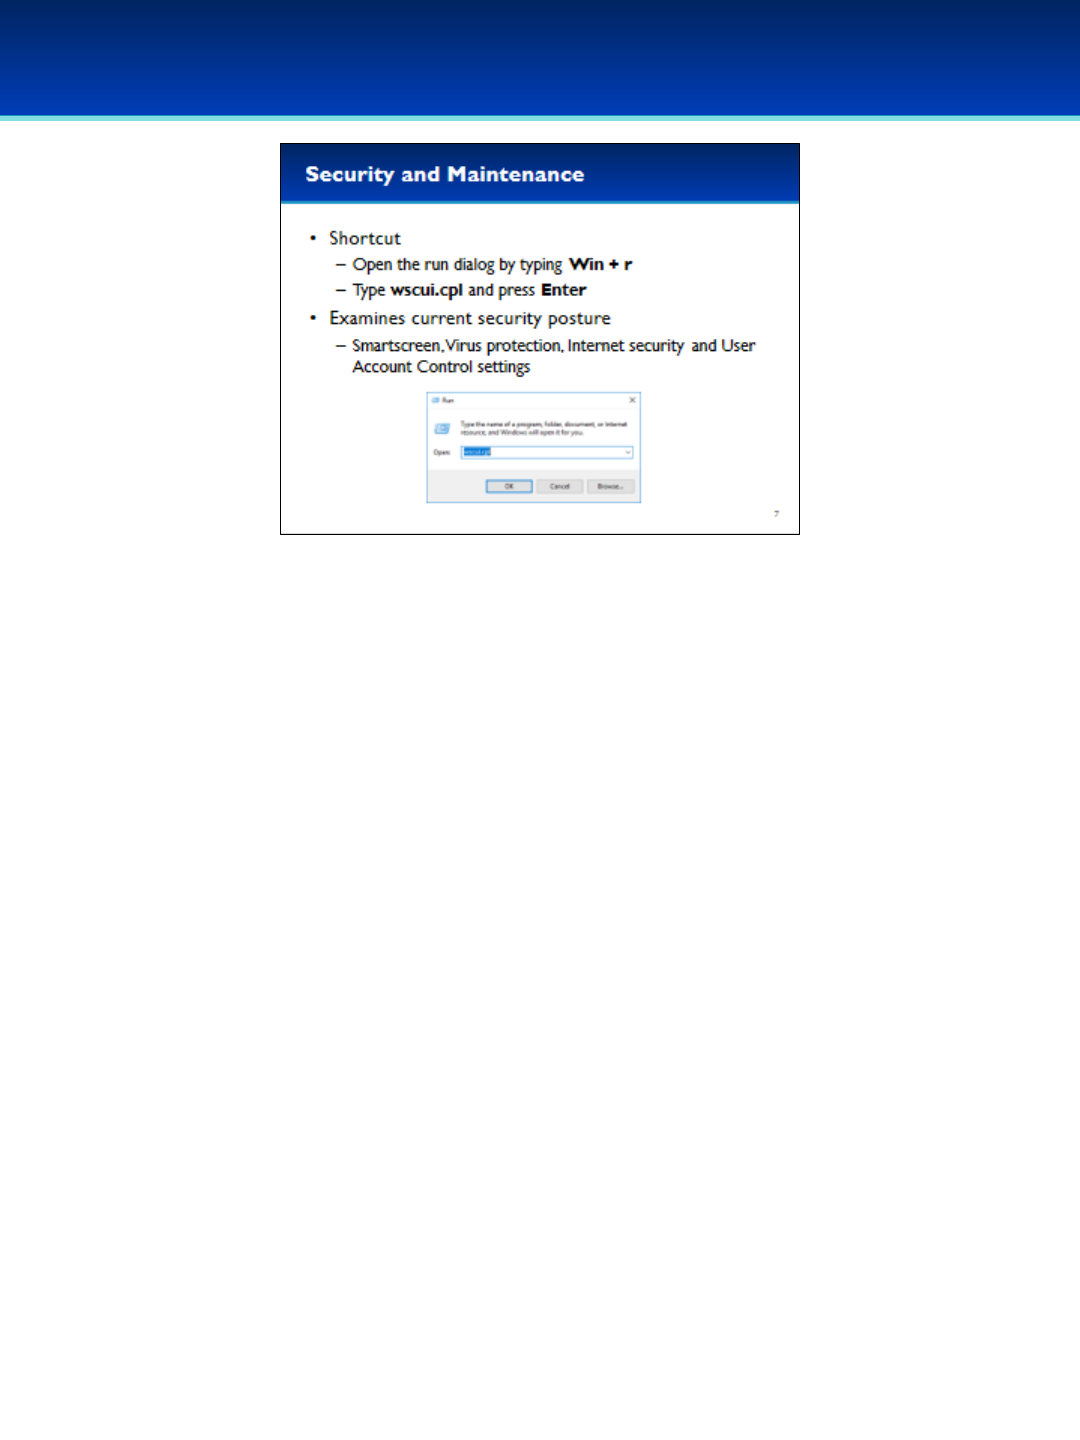
•Security and Maintenance monitors your computer’s security status.
•Security and Maintenance can be found in the Control Panel in Windows
10. It was previously named Action Center, and Security Center before that.
•The Security Center is a great place to start when determining your
computer’s security status.
•To save time, you can navigate to it directly without having to go through
the Control Panel.
•Open the run dialog box by holding down the Windows key and pressing
the letter r.
•Next to Open, type wscui.cpl (you can remember this as an abbreviation
for Windows Security Center User Interface).
•Control Panel Windows end with the .cpl extension.
•Press Enter or click OK.
Windows 10
© 2018 Air Force Association
AFA Advanced CyberCamp Instructor’s Guide
Page 14
Slide 8
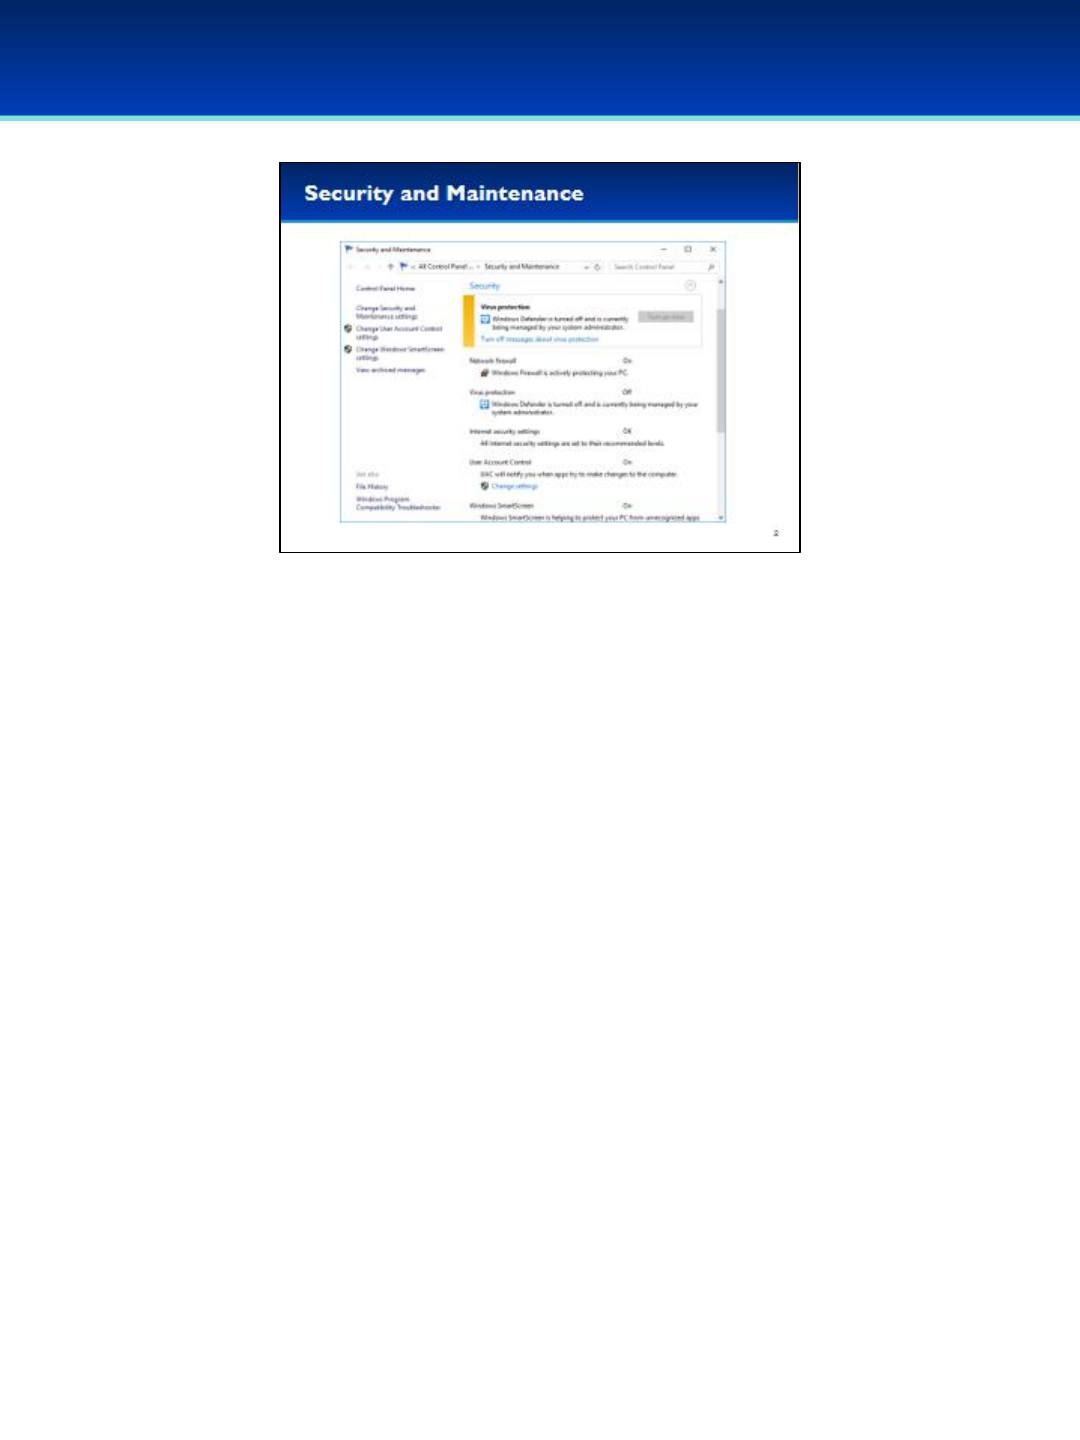
•Click the arrow across from Security to see the Firewall and other
settings. Security and Maintenance monitors several aspects of a
computer security, including Virus protection, Network firewall,
Internet security settings, User Account Control, and Window
SmartScreen.
•Below this there is an additional Maintenance section that can
handle regular maintenance of your computer, including performing
tasks such as backups. Remember, making sure you have backups of
your data is critical to computer security.
Windows 10
© 2018 Air Force Association
AFA Advanced CyberCamp Instructor’s Guide
Page 15
Slide 9
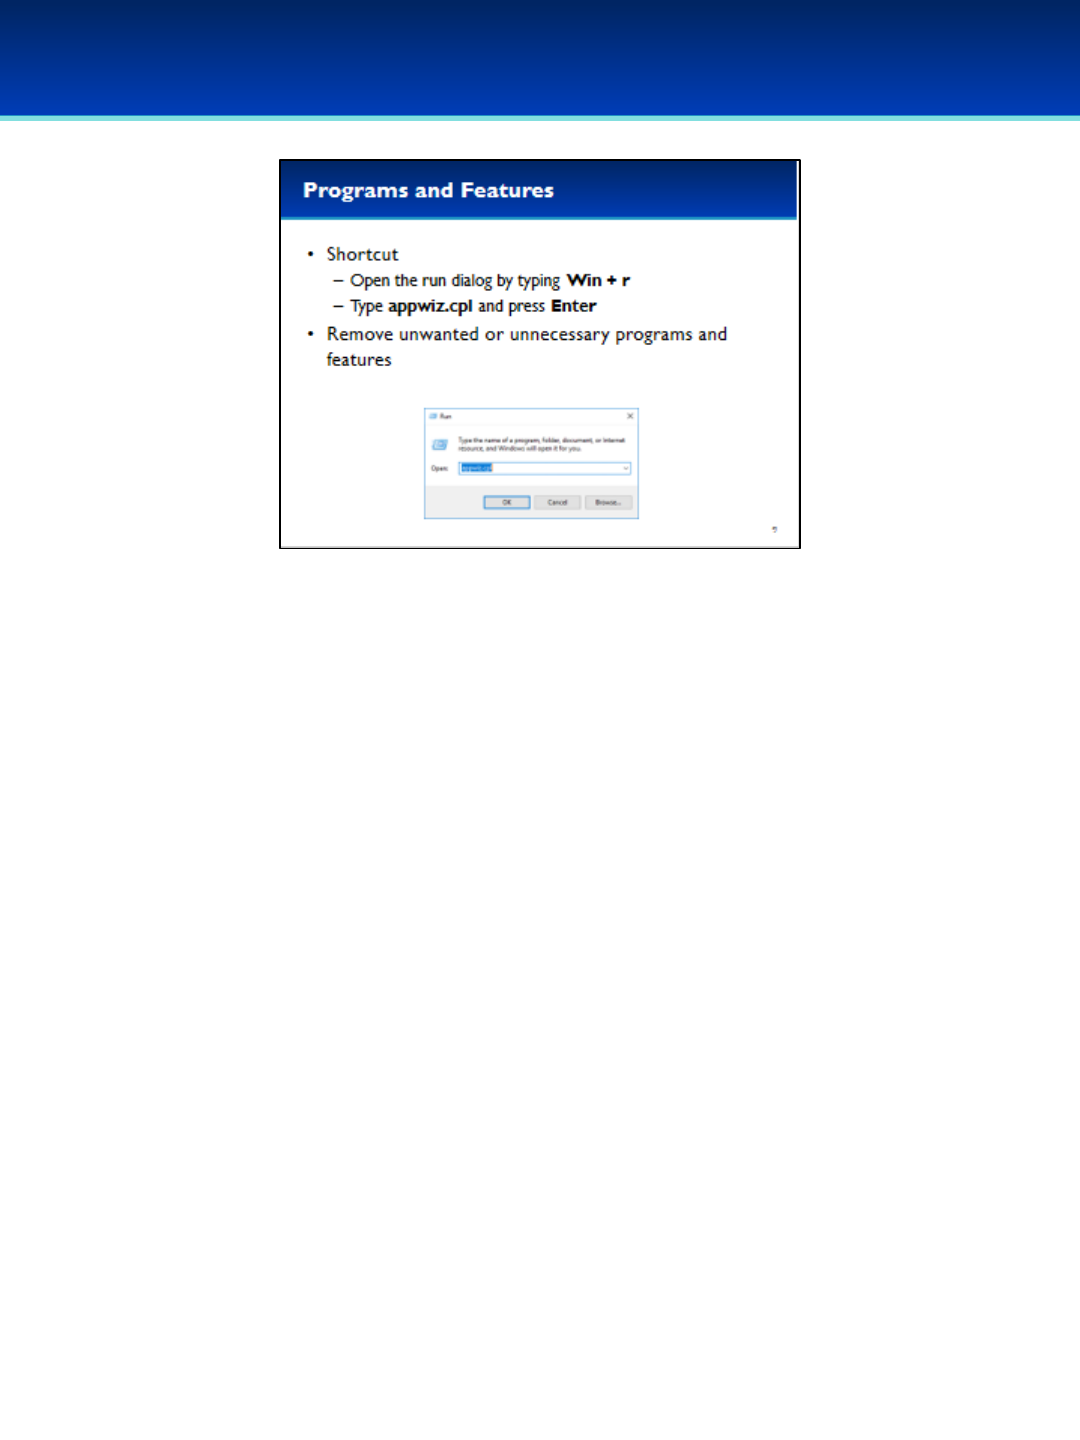
•You can easily add and remove many programs using Programs and
Features under the Control Panel.
•To save time, you can navigate to it directly without having to go through
the Control Panel.
•Open the run dialog box by holding down the Windows key and pressing
the letter r.
•Next to Open, type appwiz.cpl (you can remember this as an
abbreviation for Application Wizard).
•Press Enter or click OK.
Windows 10
© 2018 Air Force Association
AFA Advanced CyberCamp Instructor’s Guide
Page 16
Slide 10
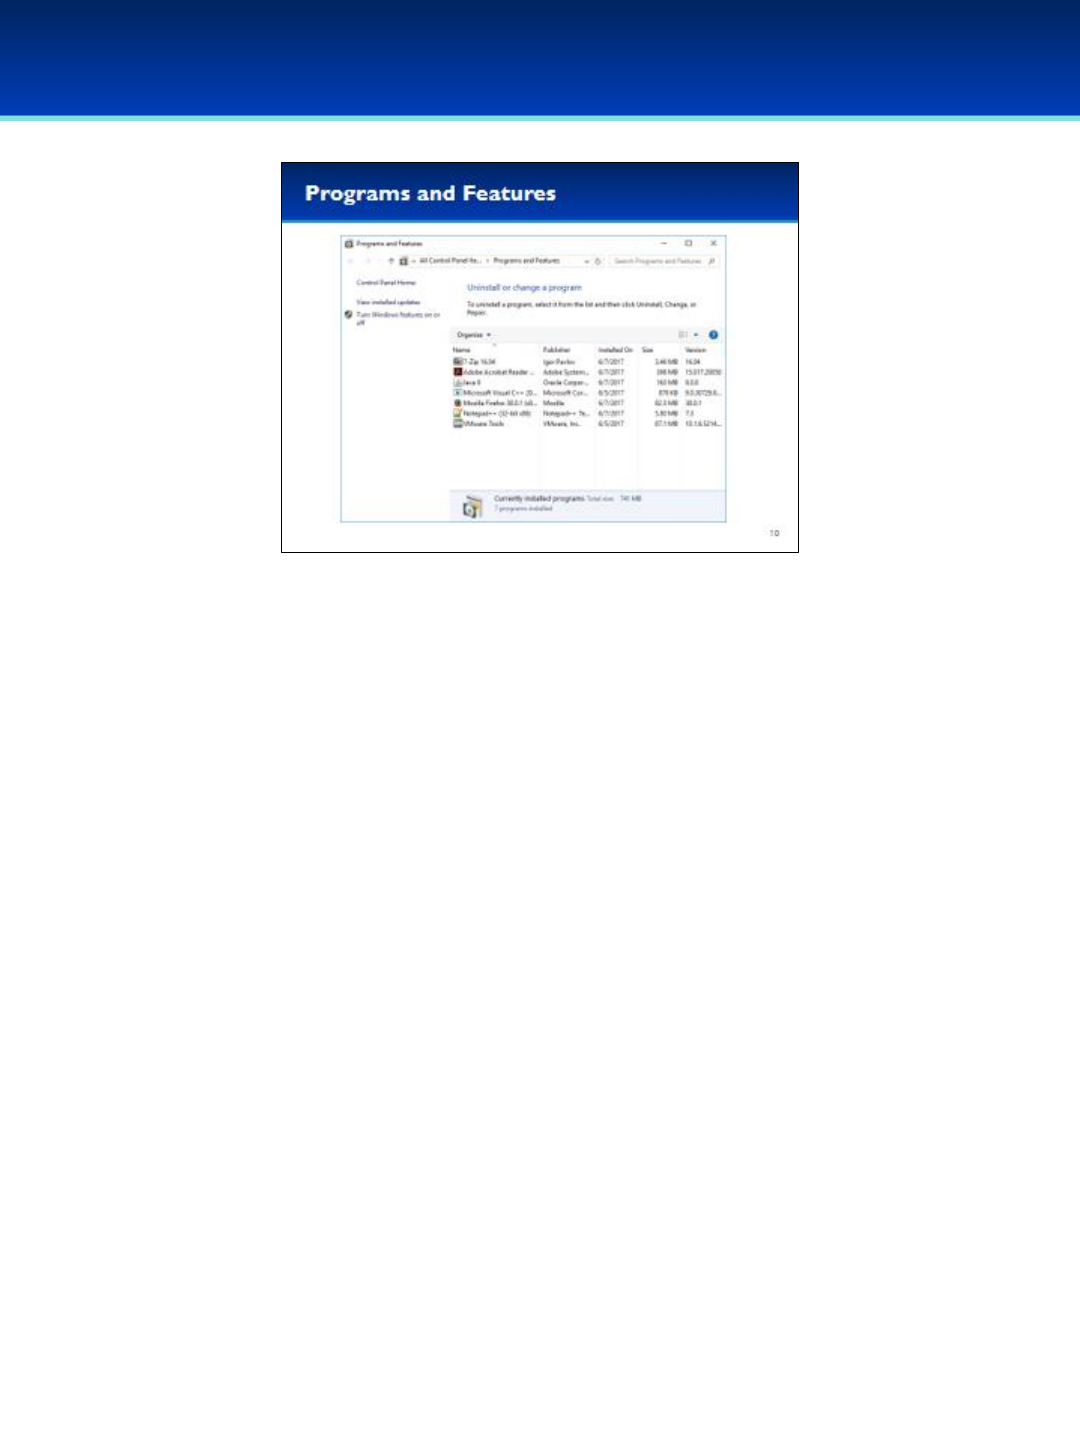
•Here you can view the applications currently installed on your computer.
•Often, additional information is available which can be very helpful.
- Looking at the version of the application installed can help you
determine if it needs to be updated.
- Looking at when a program was installed can help you track down old
or unwanted programs.
- Looking at the size of an installed application can help you when
trying to free up disk space.
Windows 10
© 2018 Air Force Association
AFA Advanced CyberCamp Instructor’s Guide
Page 17
Slide 11
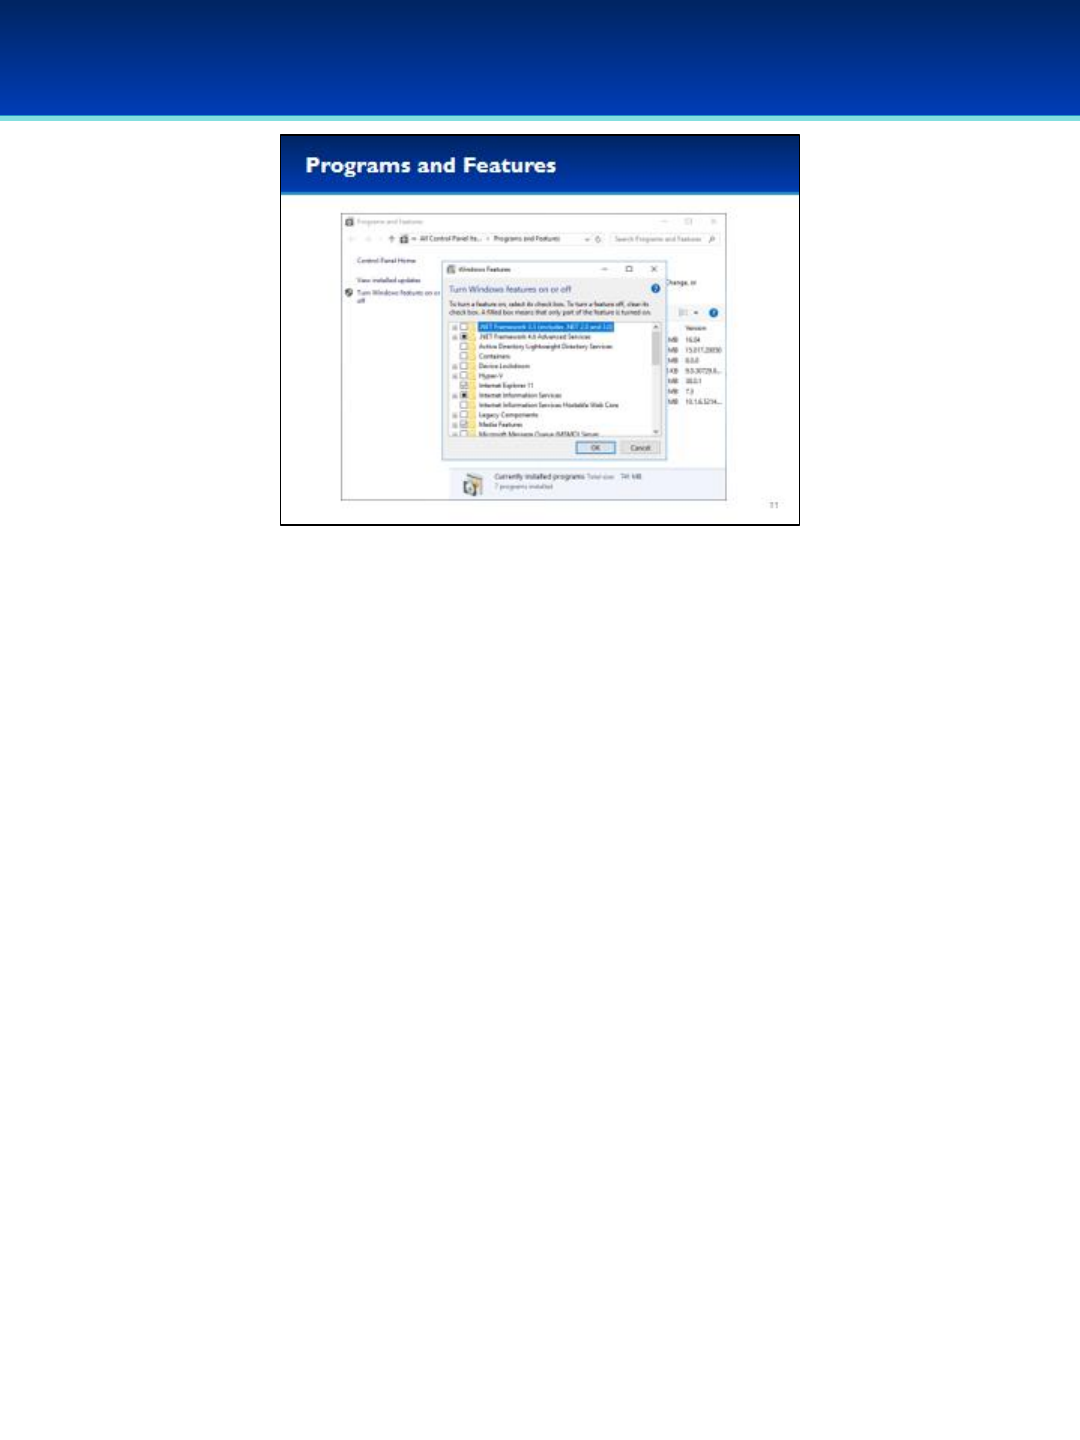
•Under Programs and Features, you can click on Turn Windows
features on or off. Windows generally comes with a good set of
enabled features, but sometimes you may want to modify this.
•For example, you may need to install .NET framework 3.5 in order to
run applications that require it.
•Notice that a portion of Internet Information Services (IIS) is
installed. This generally means the computer is running an FTP or
HTTP server. If this isn’t a service that is supposed to be running on
your computer, it’s probably a good idea to remove it.
Windows 10
© 2018 Air Force Association
AFA Advanced CyberCamp Instructor’s Guide
Page 18
Slide 12
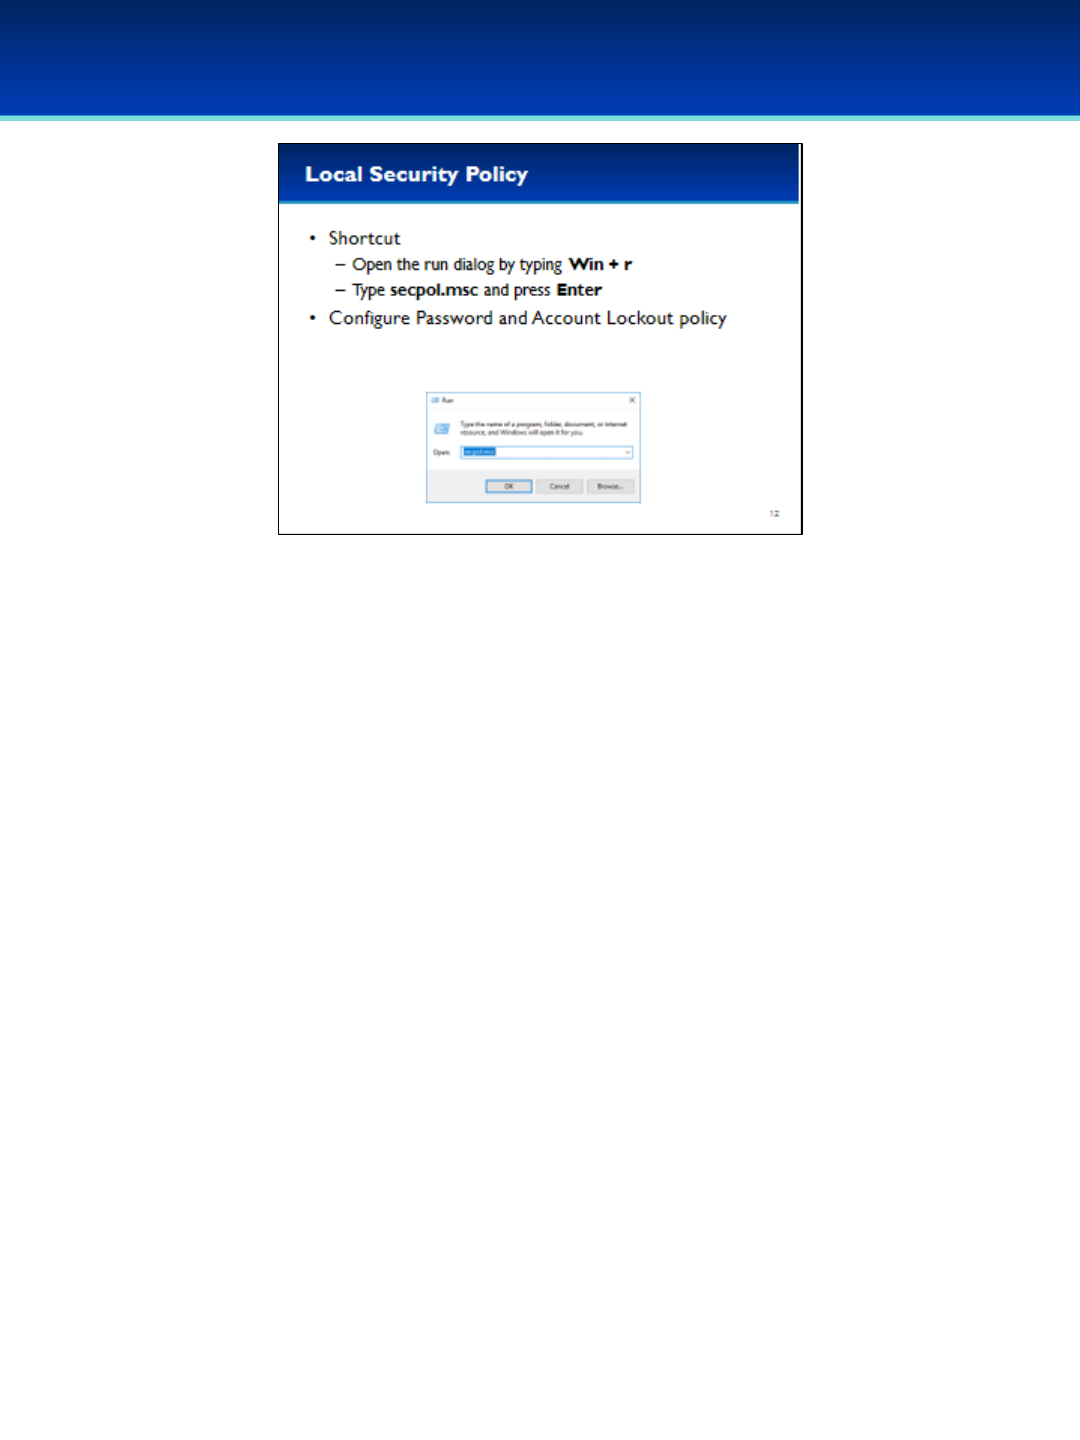
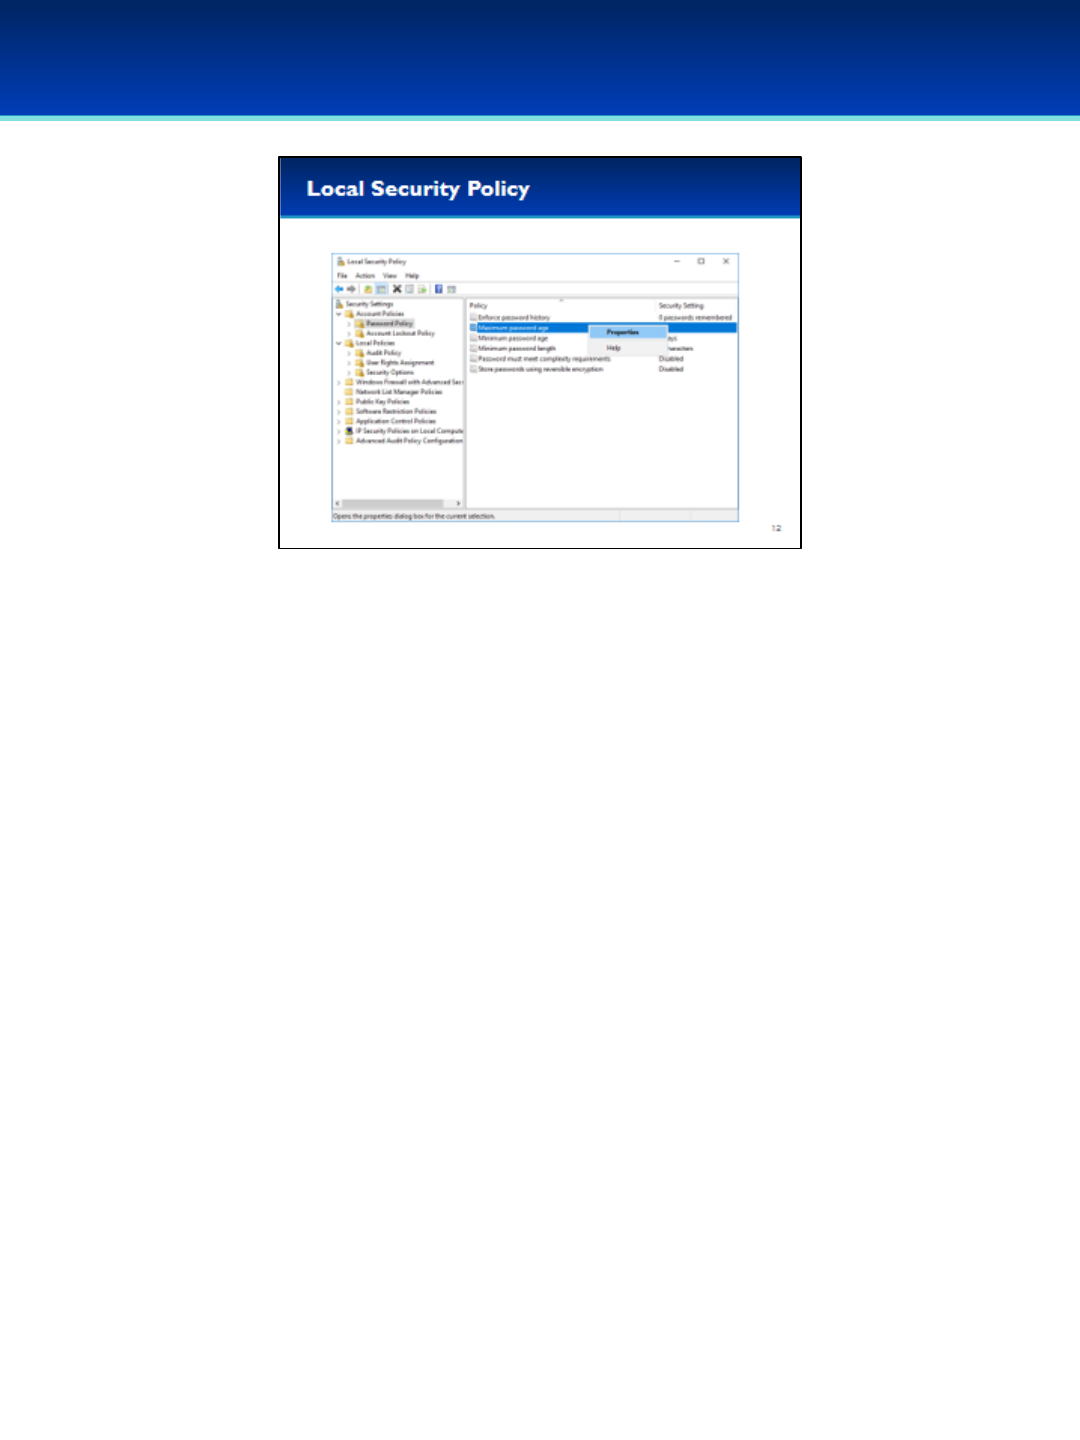
•The Local Security Policy is very important, and allows you to set
secure system policies for passwords, account lockout, and auditing.
•Using MMC to add snap-ins can be tedious, but you can start them
easily if you know the run command.
•Open the run dialog box by holding down the Windows key and
pressing the letter r.
•Next to Open, type secpol.msc (you can remember this as an
abbreviation for Security Policy).
•Press Enter or click OK.
Windows 10
© 2018 Air Force Association
AFA Advanced CyberCamp Instructor’s Guide
Page 19
Slide 13
•Password Policy and Account Lockout Policy are under Account
Policies.
•In order to change a setting, just double-click on it, or right-click and
select Properties.
•We’re going to be using the Local Security Policy in the next section to
modify User Rights Assignments and Security Options.
Windows 10
© 2018 Air Force Association
AFA Advanced CyberCamp Instructor’s Guide
Page 20
Slide 14
Windows 10
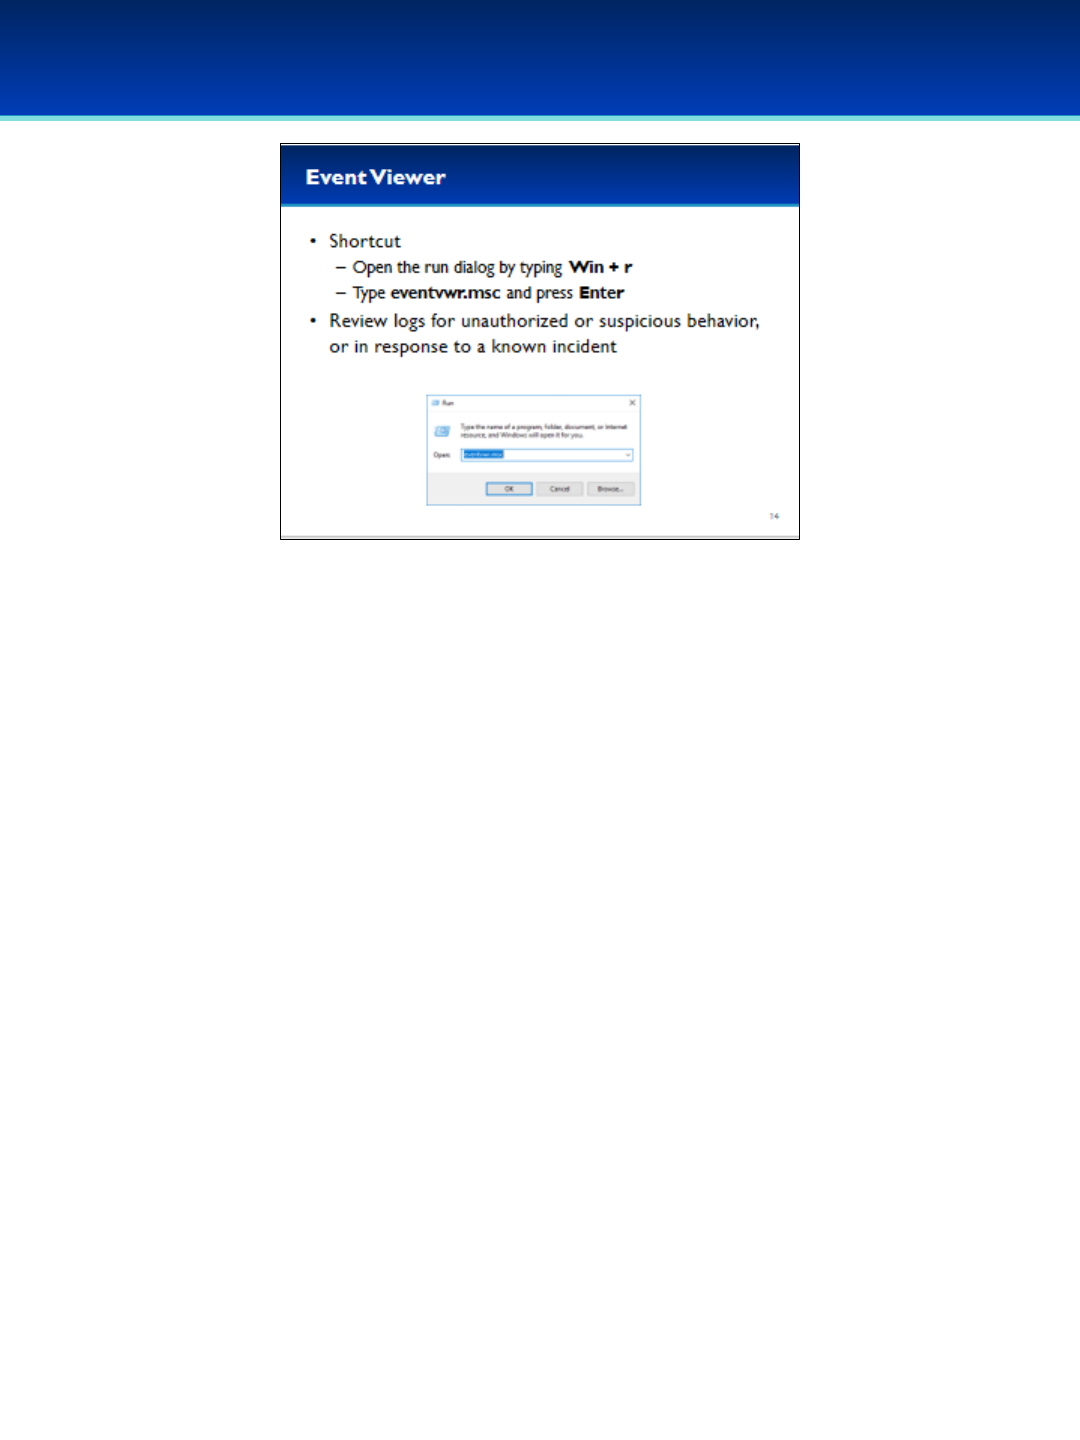
•Logs are a critical part of computer security, development, and
general maintenance.
•Event Viewer is another MMC plugin.
•Using MMC to add snap-ins can be tedious, but you can start them
easily if you know the run command.
•Open the run dialog box by holding down the Windows key and
pressing the letter r.
•Next to Open, type eventvwr.msc (you can remember this as an
abbreviation for Event Viewer).
•Press Enter or click OK.
© 2018 Air Force Association
AFA Advanced CyberCamp Instructor’s Guide
Page 21
Slide 15
Windows 10
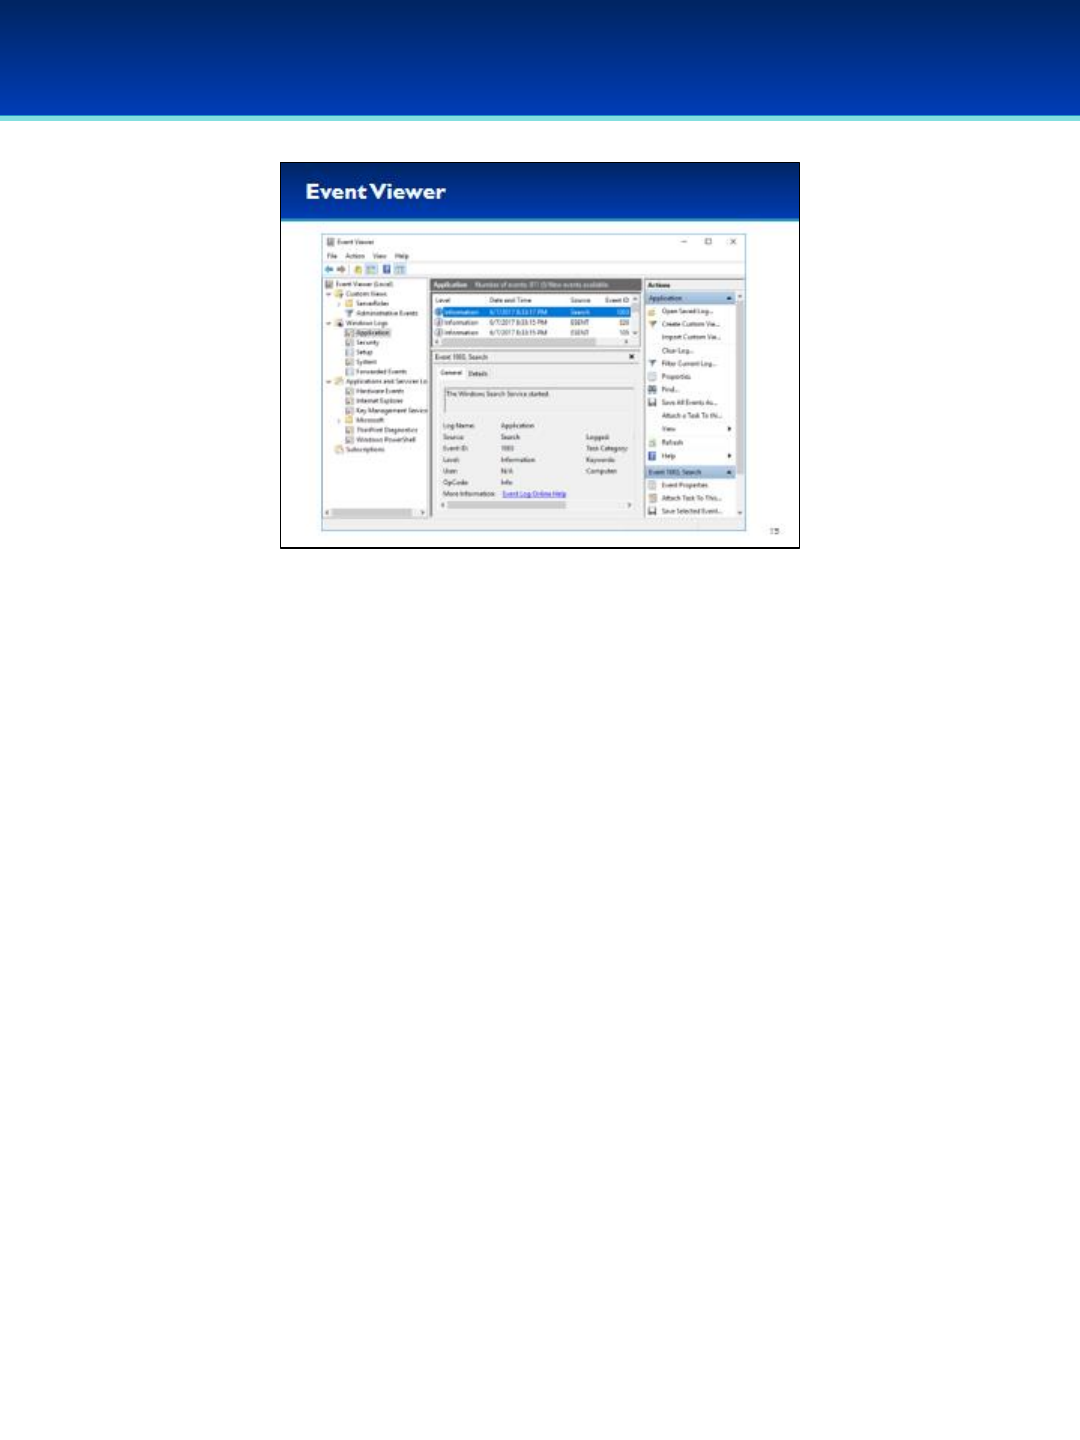
•Event Viewer contains a vast amount of information including application
logs, security logs, and system logs.
•Application logs include data from many Microsoft applications, Windows
services, and third-party applications.
•Security logs include auditing events. If auditing is enabled in Local Security
Policy, this is where those events would be logged.
•System logs include logs for drivers, or functionality built into the Windows
OS, such as DHCP, DNS, file system drivers, time service, power
management, and modifications to Windows Service configurations.
© 2018 Air Force Association
AFA Advanced CyberCamp Instructor’s Guide
Page 22
Slide 16
Windows 10
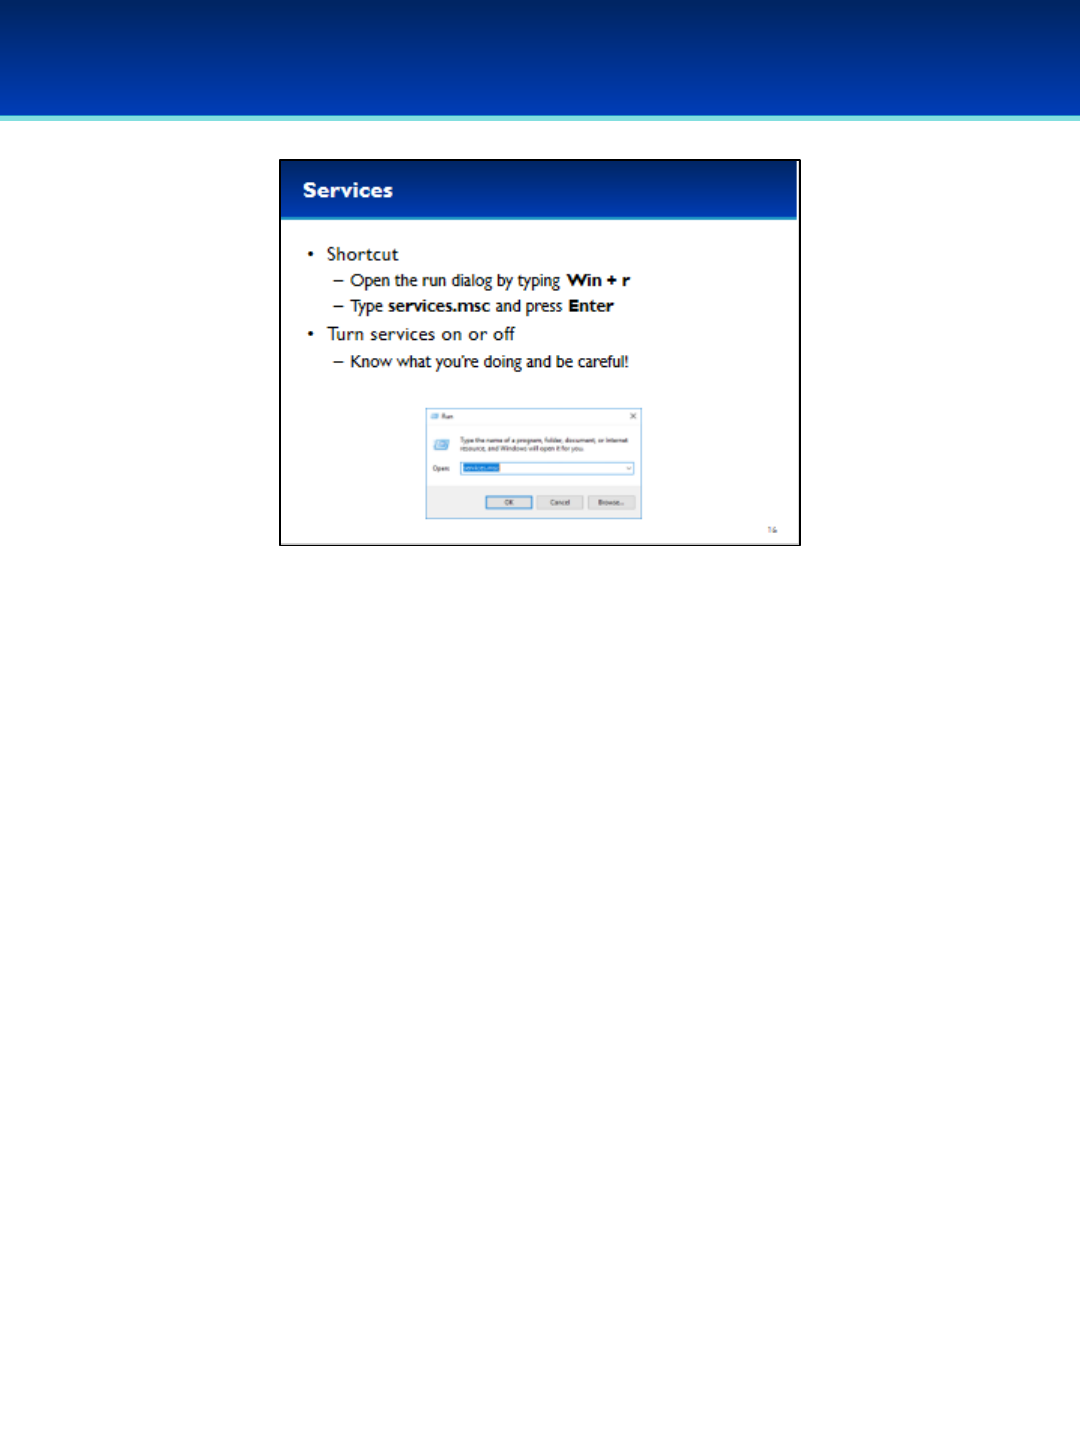
•Viewing and making changes to Windows Services can be done
through the Services MMC plugin.
•In some versions of Windows there is a Services.exe executable which
is exactly the same.
•Open the run dialog box by holding down the Windows key and
pressing the letter r.
•Next to Open, type services.msc.
•Press Enter or click OK.
© 2018 Air Force Association
AFA Advanced CyberCamp Instructor’s Guide
Page 23
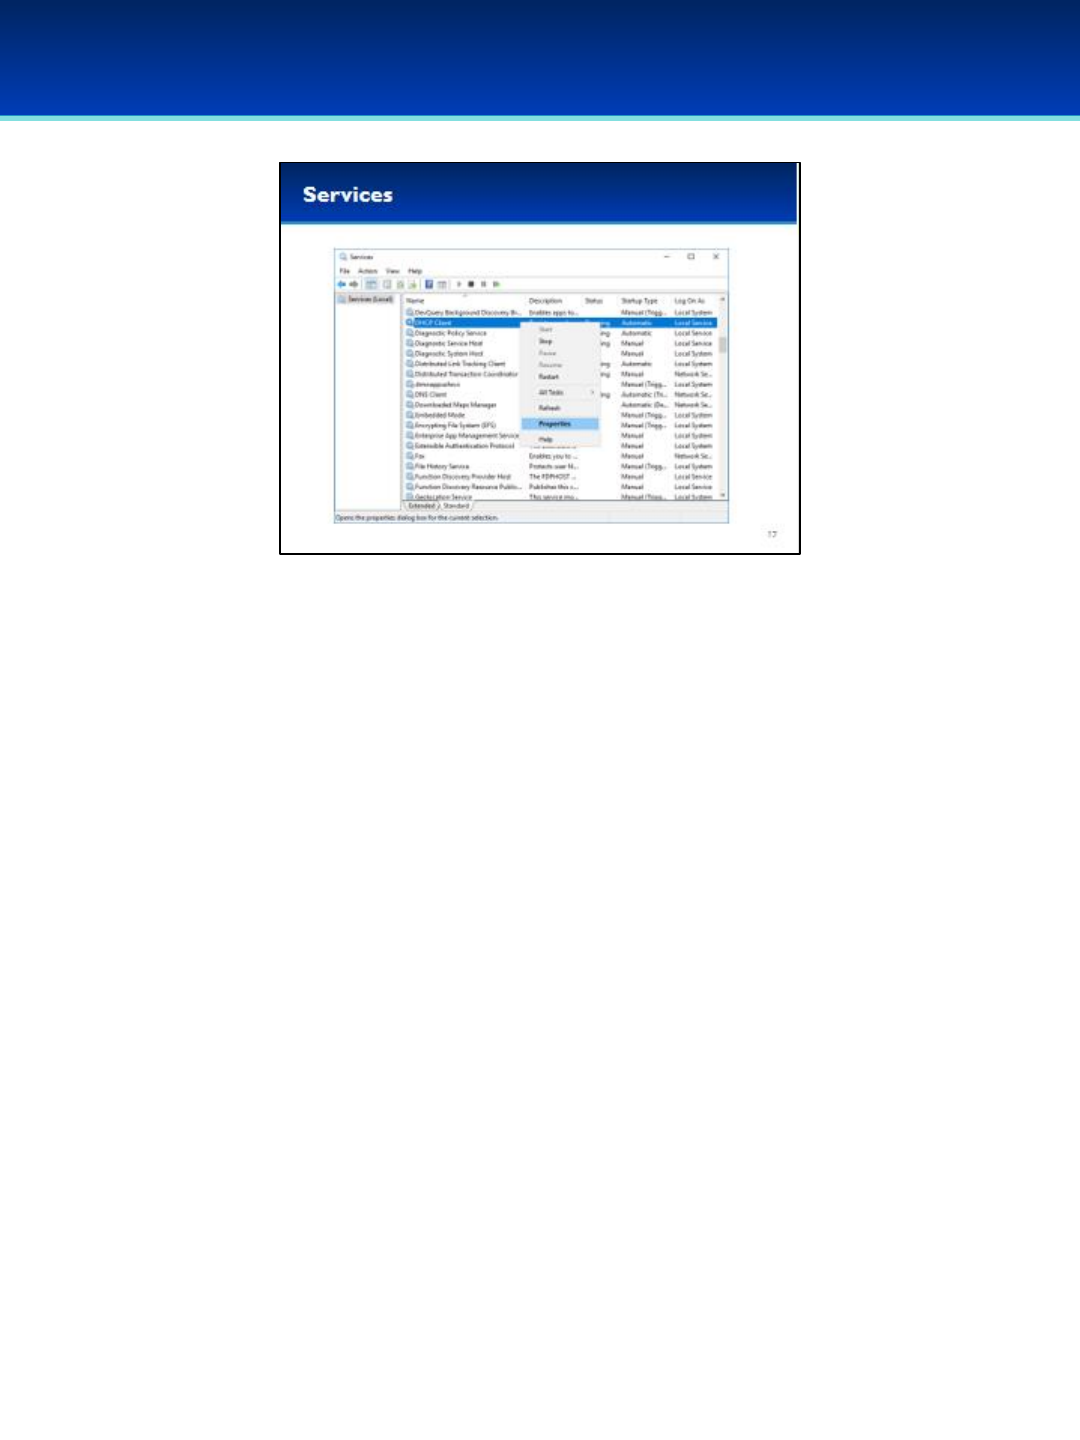
Slide 17
Windows 10
•Services display all the services available, their current Status, and their
Startup Type.
•Remember you can sort by columns by clicking on the column header.
This can make auditing your services configuration much easier.
•You can easily start or stop a service by right-clicking on the service and
selecting Start or Stop.
•Starting and stopping services is a good first step when testing and
troubleshooting, but it’s important to also configure the Startup Type.
•In order to change the Startup Type, double-click the service, or right-
click the service and select Properties.
© 2018 Air Force Association
AFA Advanced CyberCamp Instructor’s Guide
Page 24
Slide 18
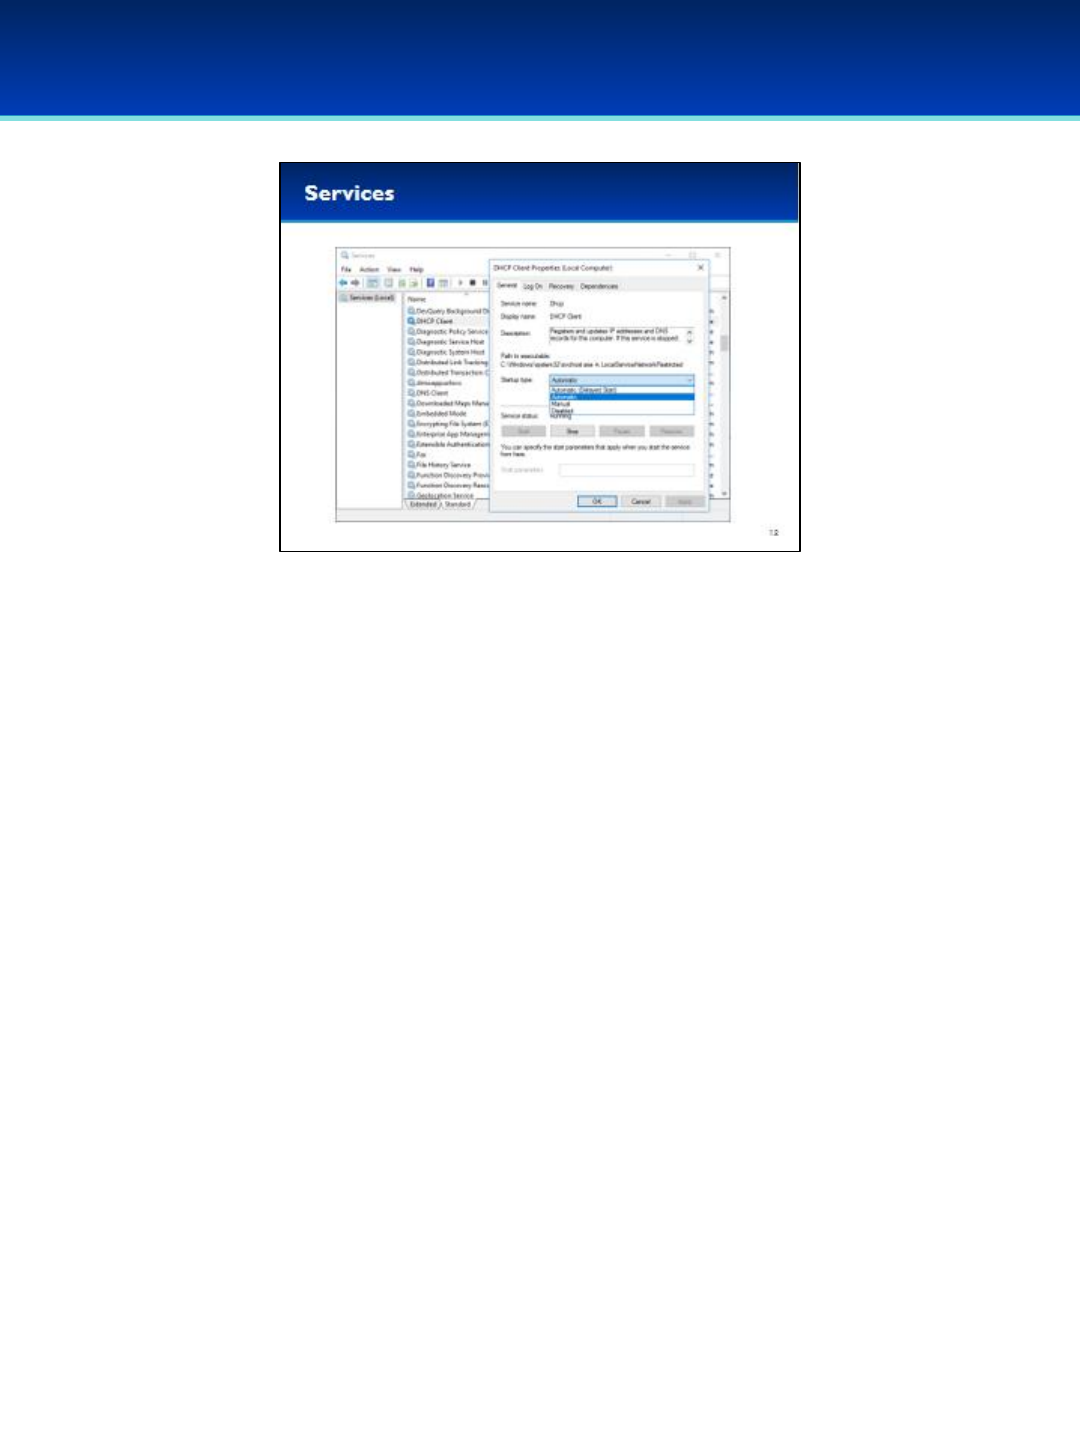
Windows 10
•Inside the service Properties you can configure the service to start
Automatically, Manually, or Disabled.
•If a service is set to start Automatically, it will always start when the
system boots up. Manually means that it can be started by a user, or if
needed by another service or application. If a service is set to Disabled,
it will never start.
•Be very, very careful when changing services, many of these services
are important to the correct functionality of your computer. If you Stop
or Disable the wrong services, your computer will be unusable.
•Make sure and do your research first before making changes to
services.
•The Windows defaults are a good place to start, with several resources
available online from Microsoft or other websites.
© 2018 Air Force Association
AFA Advanced CyberCamp Instructor’s Guide
Page 25
Slide 19
Windows 10
Devote 30 minutes to slides 20-48. Allow the students 20 minutes
to complete the activity on slide 49.
Throughout this section, students should follow along in the
Advanced Windows 10 Demo Image.
Actions the students are supposed to take are highlighted in blue
and purple.
Purple indicates the exact text they are supposed to type or GUI
elements they should interact with.
© 2018 Air Force Association
AFA Advanced CyberCamp Instructor’s Guide
Page 26
Slide 20
Windows 10
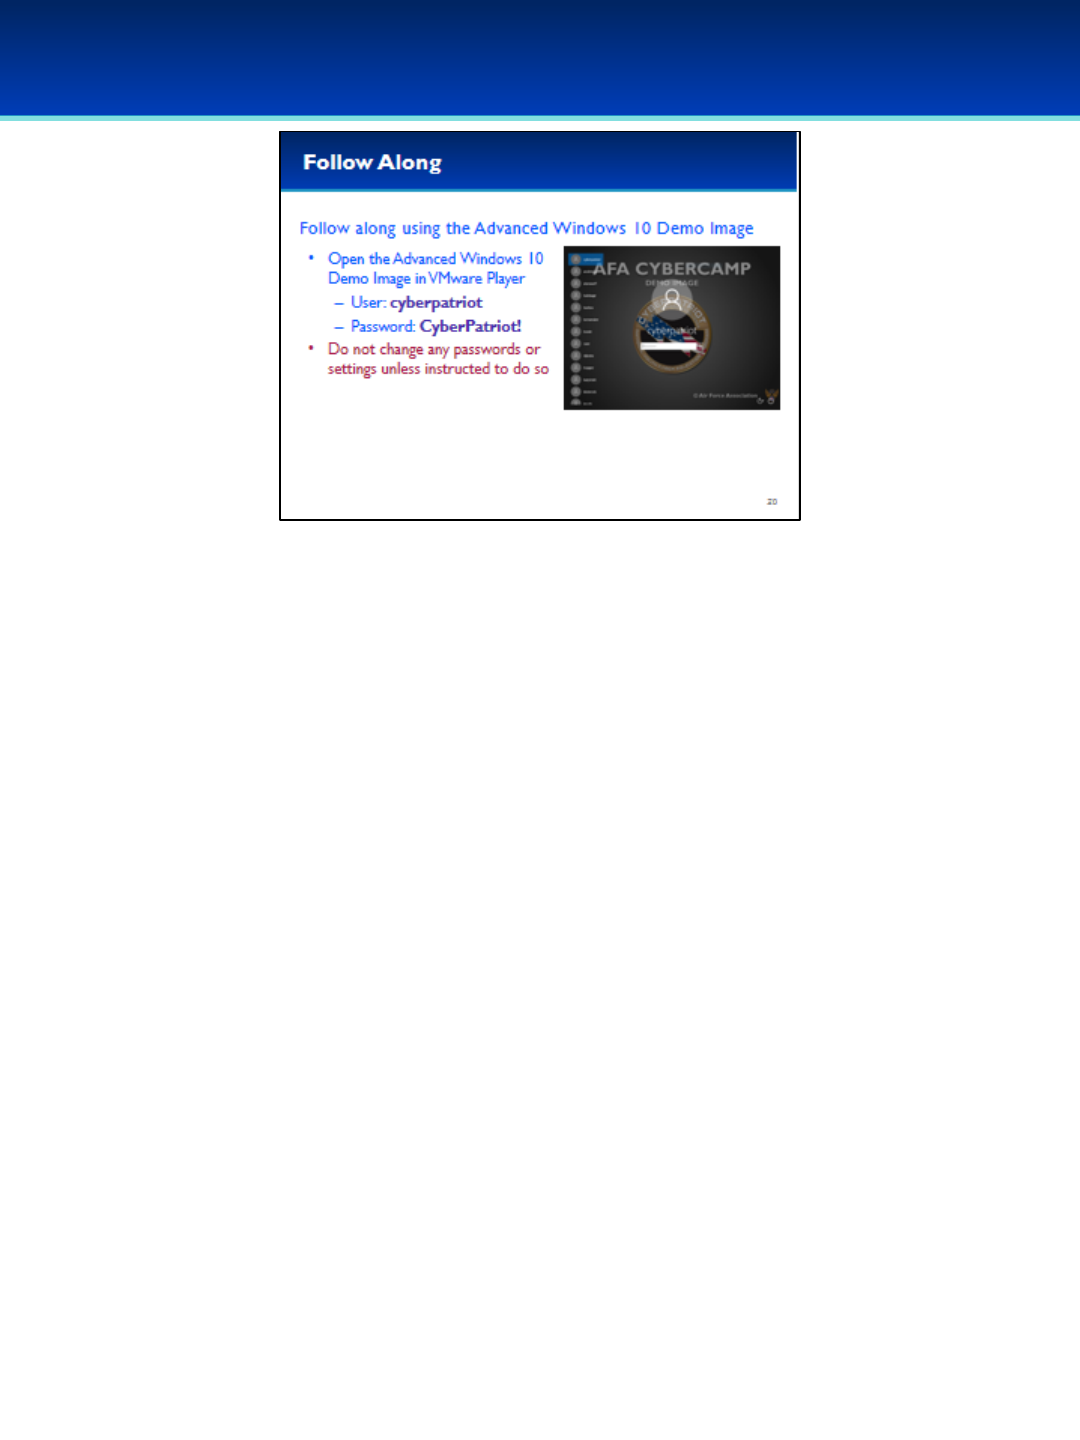
Have the students follow along as time permits.
Stress that the students should not change any passwords or
settings unless they are expressly directed to do so.
Users are NOT automatically logged in, they should log in as the
user cyberpatriot with the password CyberPatriot!
© 2018 Air Force Association
AFA Advanced CyberCamp Instructor’s Guide
Page 27
Slide 21
Windows 10
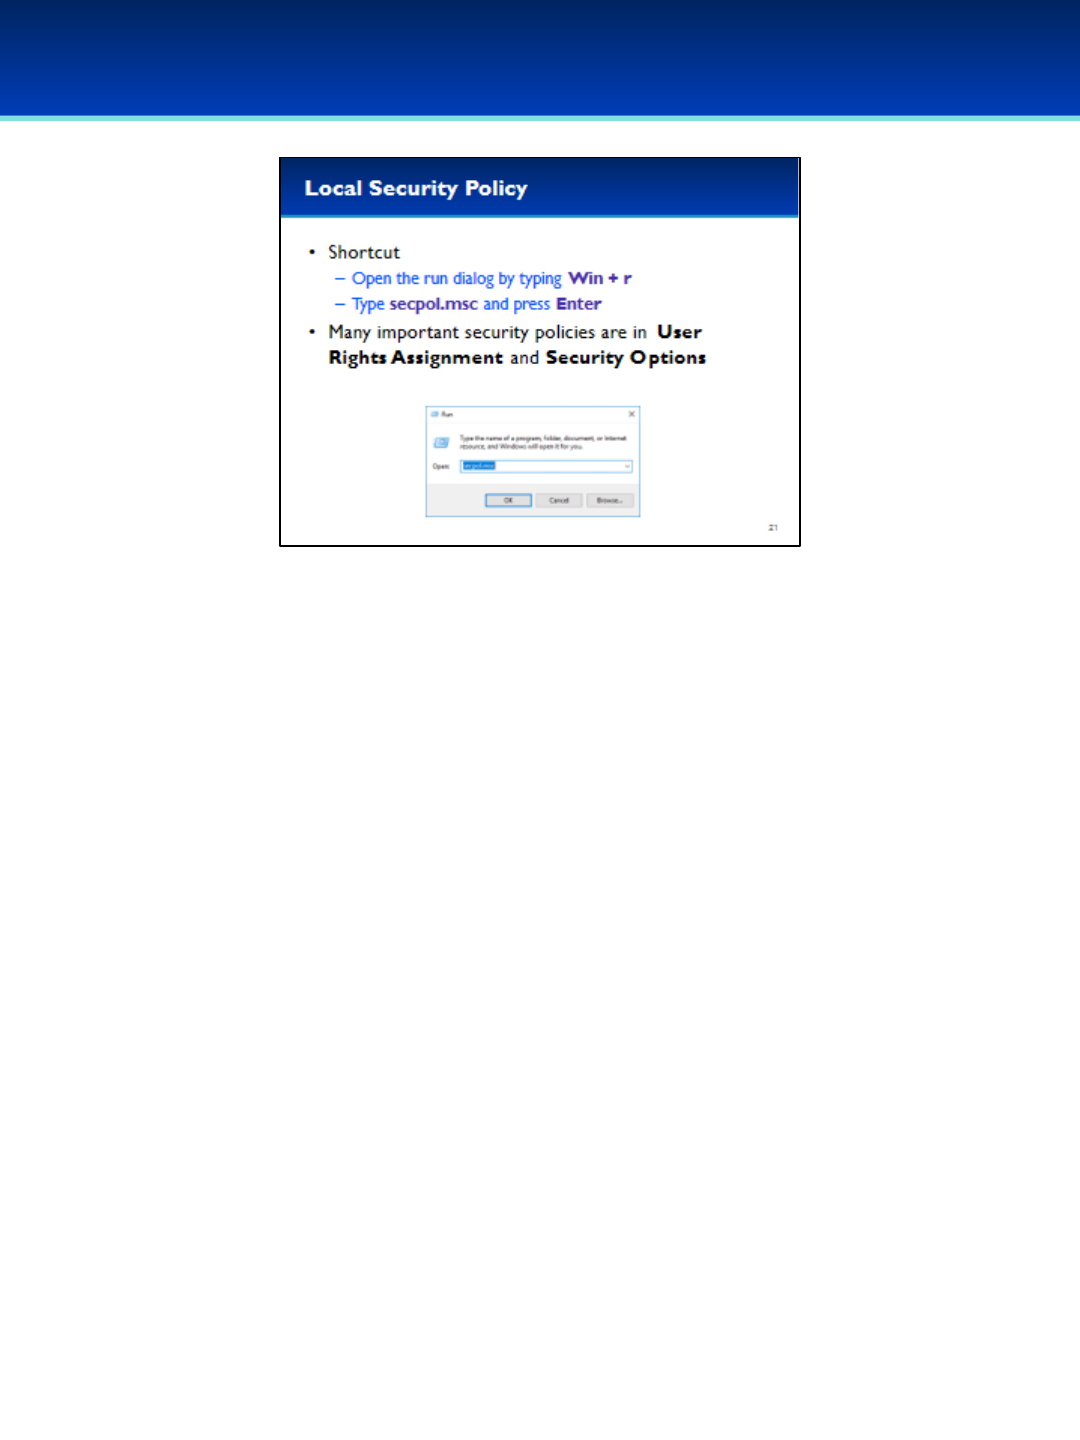
•In addition to Password Policy, Account Lockout Policy, and
Auditing, there are many more important security policies in the
Local Security Policy such as User Rights Assignments and Security
Options.
•Open the run dialog box by holding down the Windows key and
pressing the letter r.
•Next to Open, type secpol.msc.
•Press Enter or click OK.
© 2018 Air Force Association
AFA Advanced CyberCamp Instructor’s Guide
Page 28
Slide 22
Windows 10
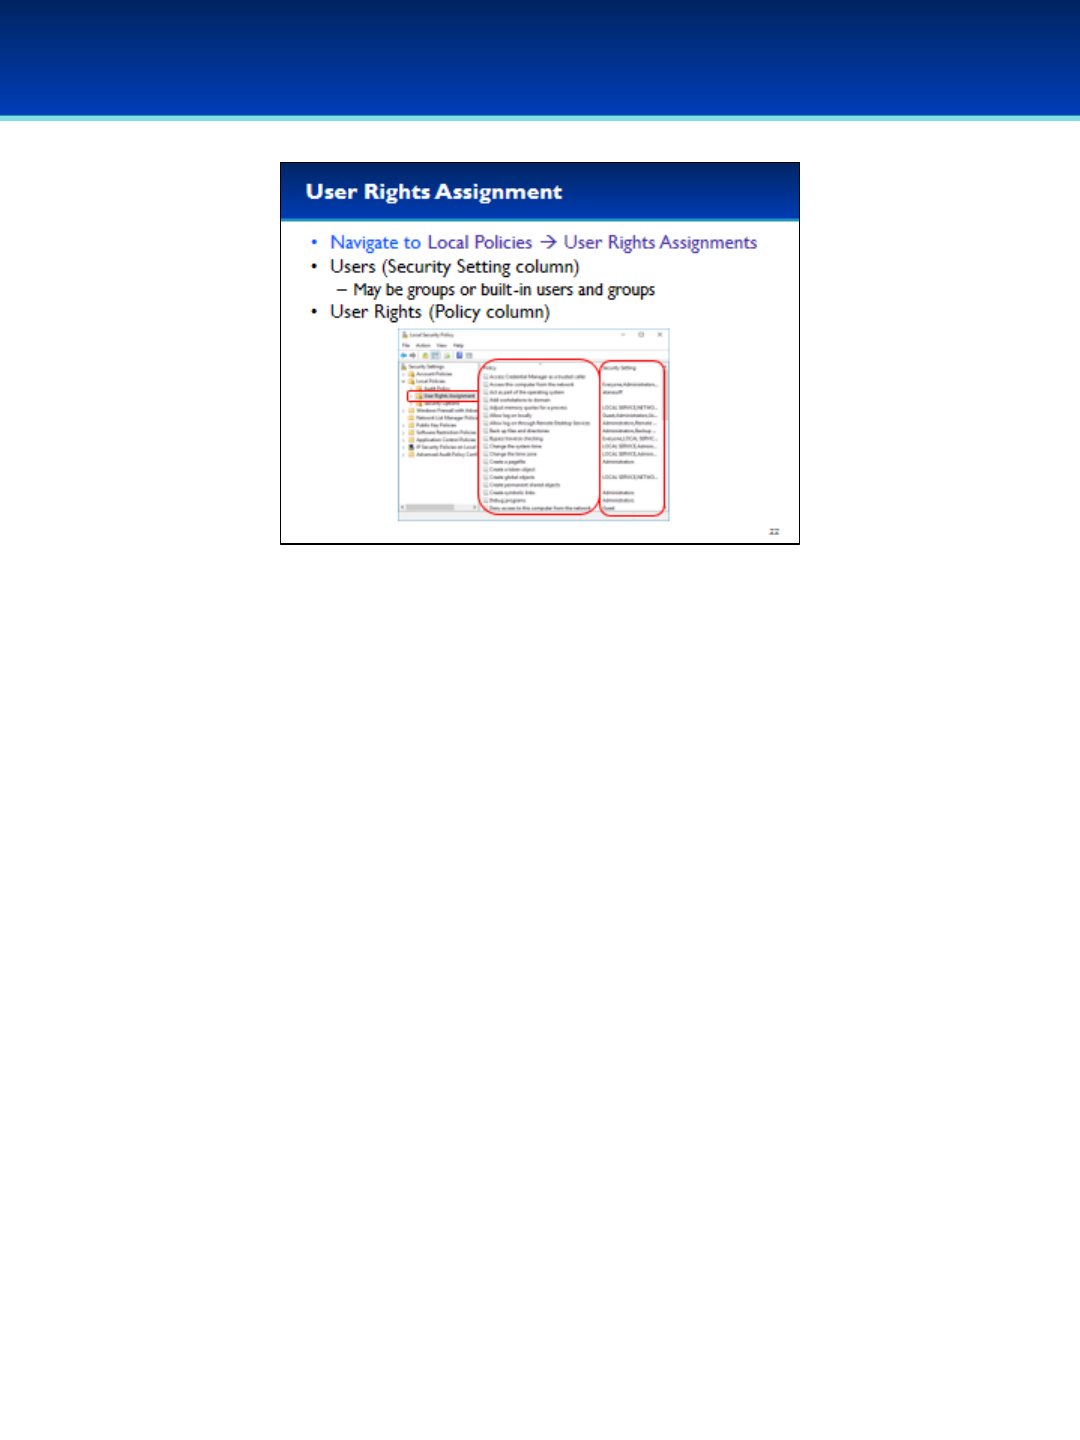
•Navigate to Local Policies User Rights Assignments.
•To expand items on the left you can double-click the item, or click the
arrow on the left side of the item.
•The Policy column contains the User Rights.
•The Security Setting column contains the users or groups that have
been granted that right.
- Some of the users and groups are built-in and are not visible in the
Local User and Groups Manager.
© 2018 Air Force Association
AFA Advanced CyberCamp Instructor’s Guide
Page 29
Slide 23
Windows 10
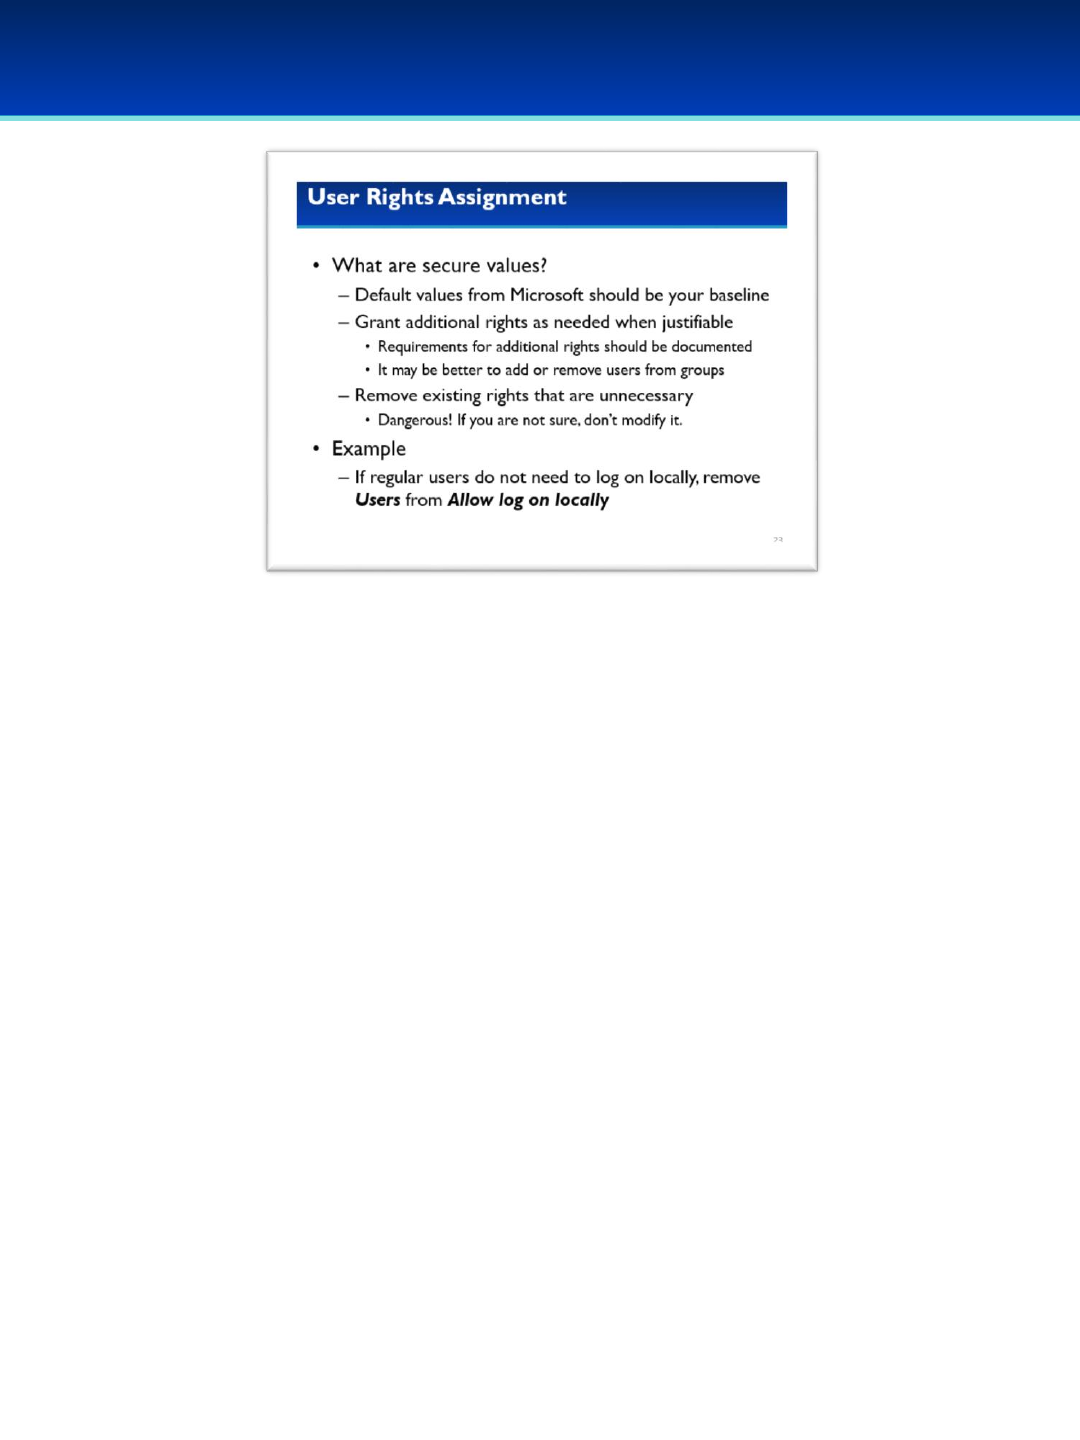
•How do you know what secure settings are?
- The default values from Microsoft are a good starting point.
- You may need to grant additional rights to users depending on your
business needs, but there should be a justifiable and documented
reason for this.
- Normally, it is more appropriate to add and remove users from groups
that have already been granted rights, such as Backup Operators.
- Remove existing rights that are unnecessary; typically these are rights
that have been granted above and beyond the default.
-Modifying rights can be dangerous so make sure you’ve done your
research before making any changes.
•For example, server systems in an access restricted area are typically
meant to be only accessible locally by administrators.
- In this case it would be a good idea to remove users from the Allow
log on locally, while ensuring that Administrators are still granted that
right.
© 2018 Air Force Association
AFA Advanced CyberCamp Instructor’s Guide
Page 30
Slide 24
Windows 10
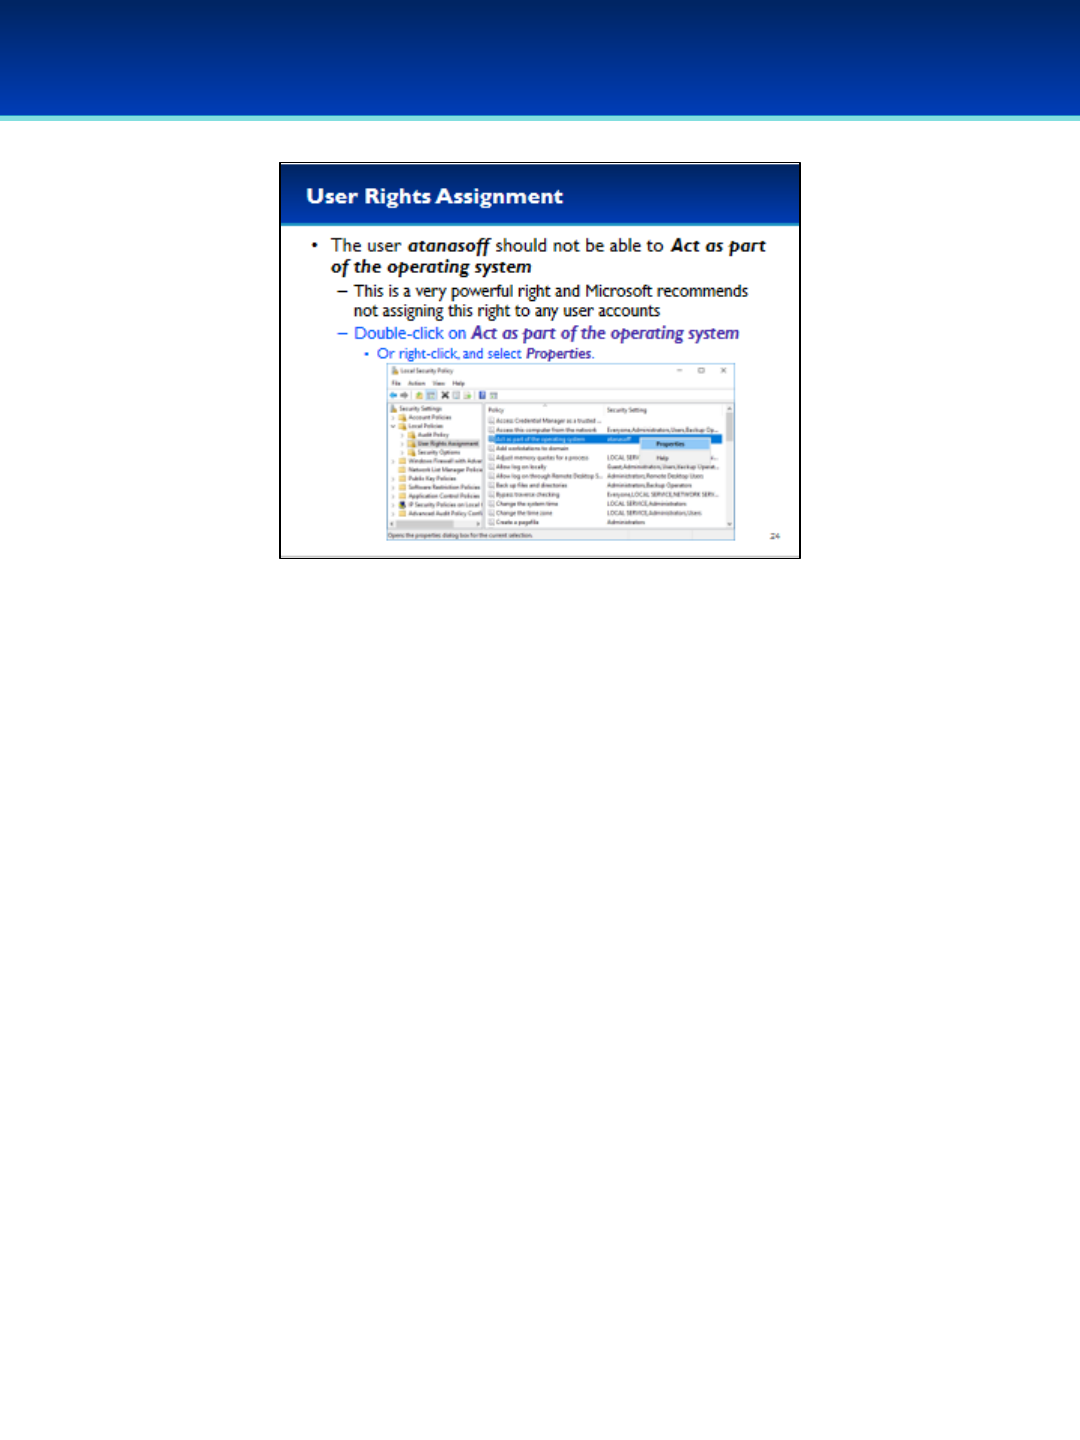
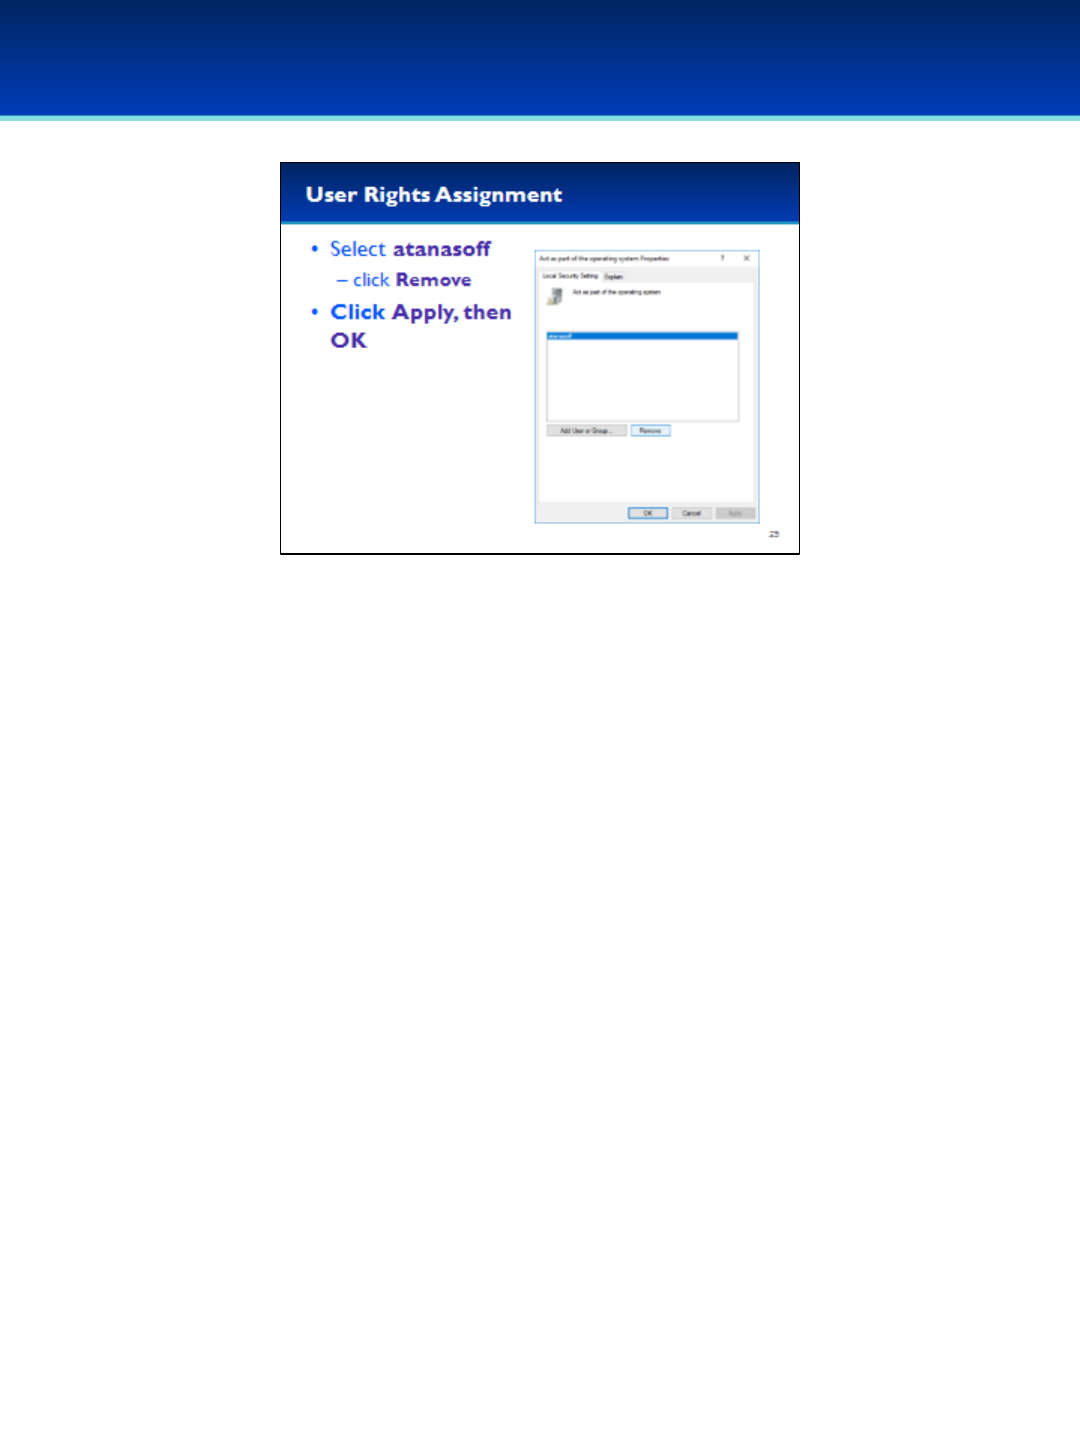
•On your demo image, the user atanasoff should not have privileges that
allow him to Act as part of the operating system.
- This is a very powerful right that Microsoft strongly recommends not
assigning to any users or groups.
•Double-click on the Policy Act as part of the operating system.
- Alternatively, you could right-click on the Policy and select Properties.
© 2018 Air Force Association
AFA Advanced CyberCamp Instructor’s Guide
Page 31
Slide 25
Windows 10
•To remove atanasoff, select the user and click Remove.
•Click Apply, then OK to apply the changes and close the
Properties window.
© 2018 Air Force Association
AFA Advanced CyberCamp Instructor’s Guide
Page 32
Slide 26
Windows 10
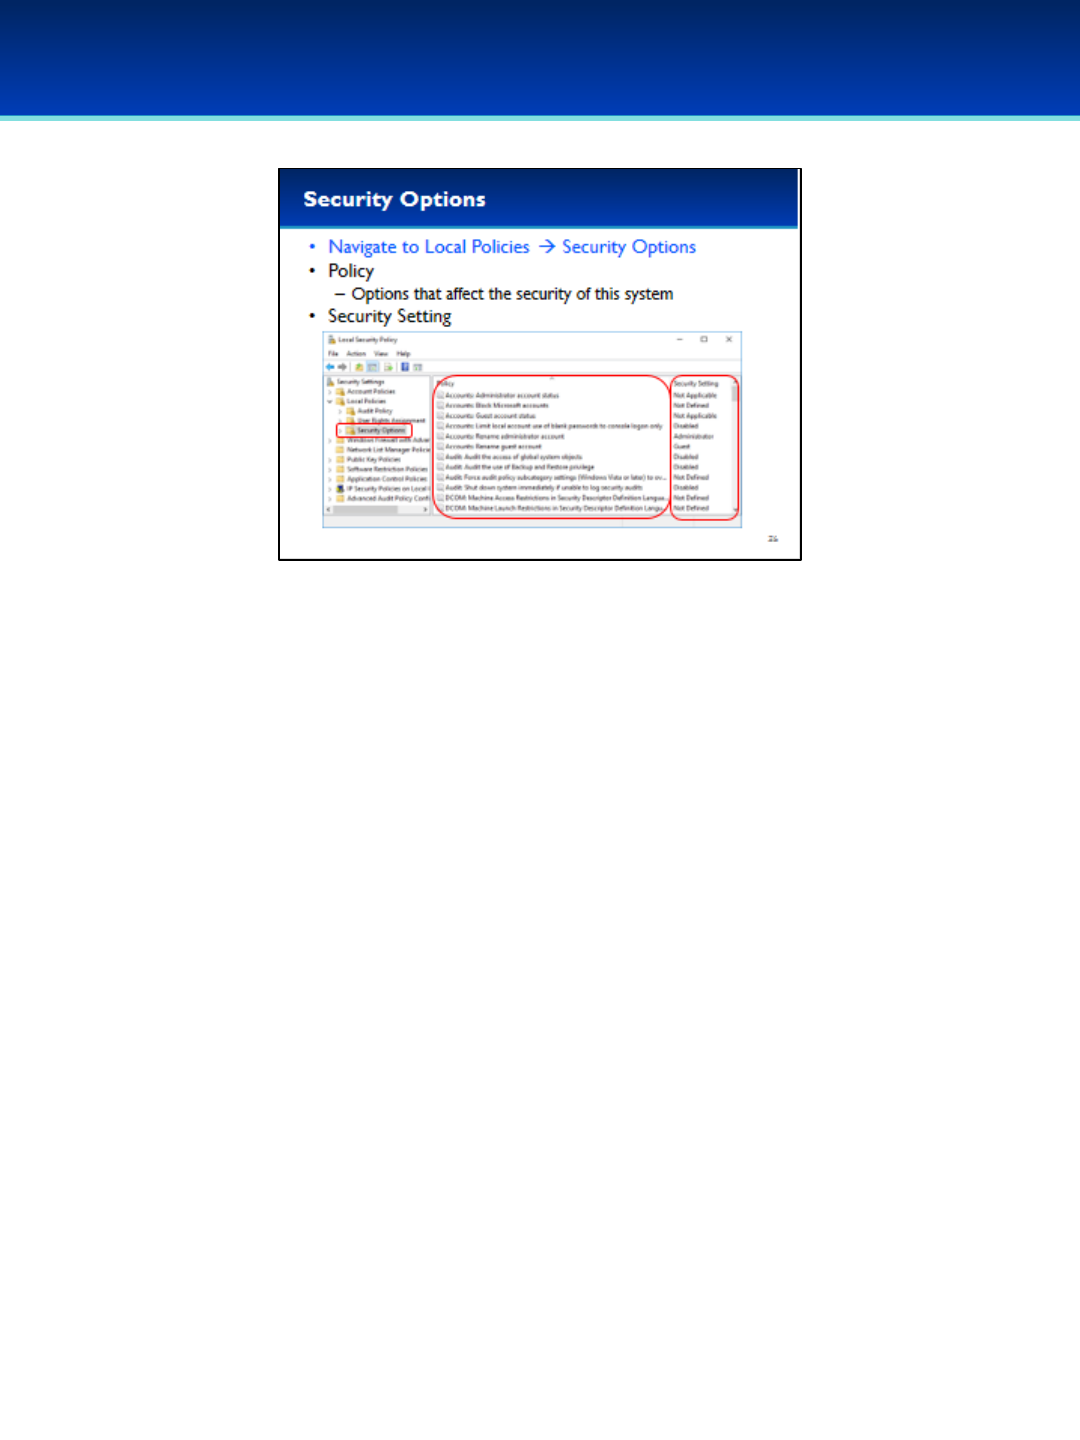
•Navigate to Local Policies Security Options.
•In the Policy column, there are settings that affect the security of
the system.
•In the Security Settings column is the current value of the
corresponding setting.
- Typically values may be Not Defined, Enabled, or Disabled, but
many options have settings that are specific to the
corresponding setting.
© 2018 Air Force Association
AFA Advanced CyberCamp Instructor’s Guide
Page 33
Slide 27
Windows 10
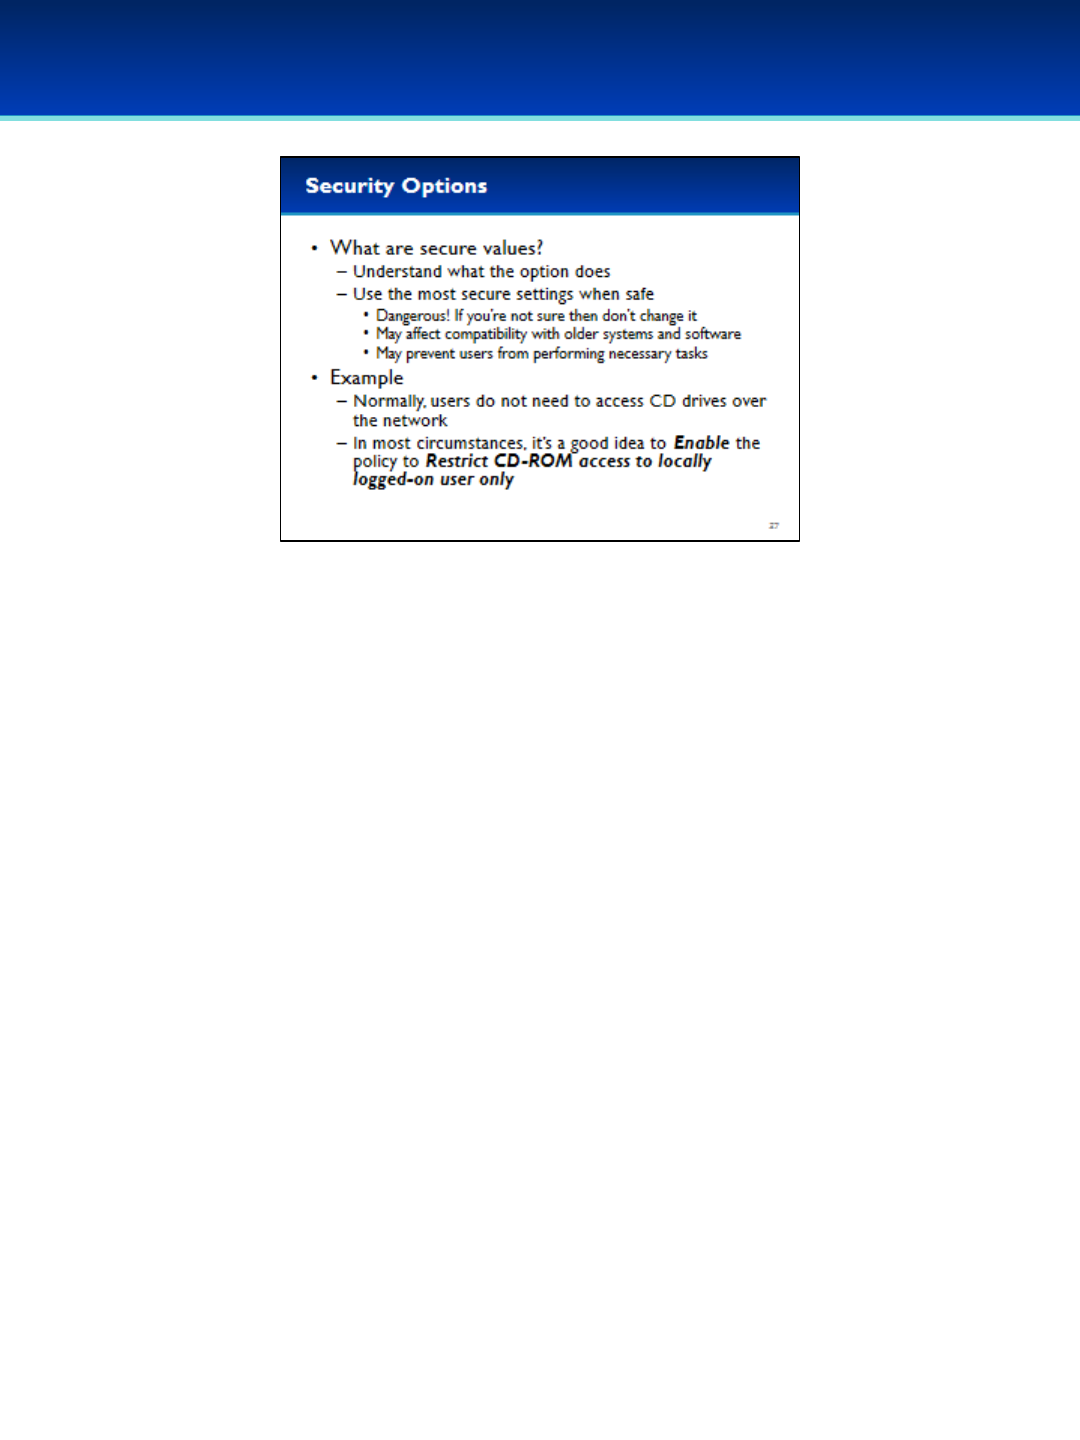
•How do you know what secure values are?
- Before you try to determine the correct setting, understand what the option
does.
- Again, the default values provided by Microsoft are a good starting point.
-Modifying these values can be dangerous, and if you don’t know what you
are doing you could accidentally make your system less secure, unusable, or
affect compatibility with applications or network services.
•For example, there may be justified documented reasons to allow users to log
in remotely on some computers.
- However, remote users typically do not need to access CD-ROM drives
remotely.
- If there is no reason for users to do this in your environment, you should
Enable the policy to Devices: Restrict CD-ROM access to locally logged-on
user only.
© 2018 Air Force Association
AFA Advanced CyberCamp Instructor’s Guide
Page 34
Slide 28
Windows 10
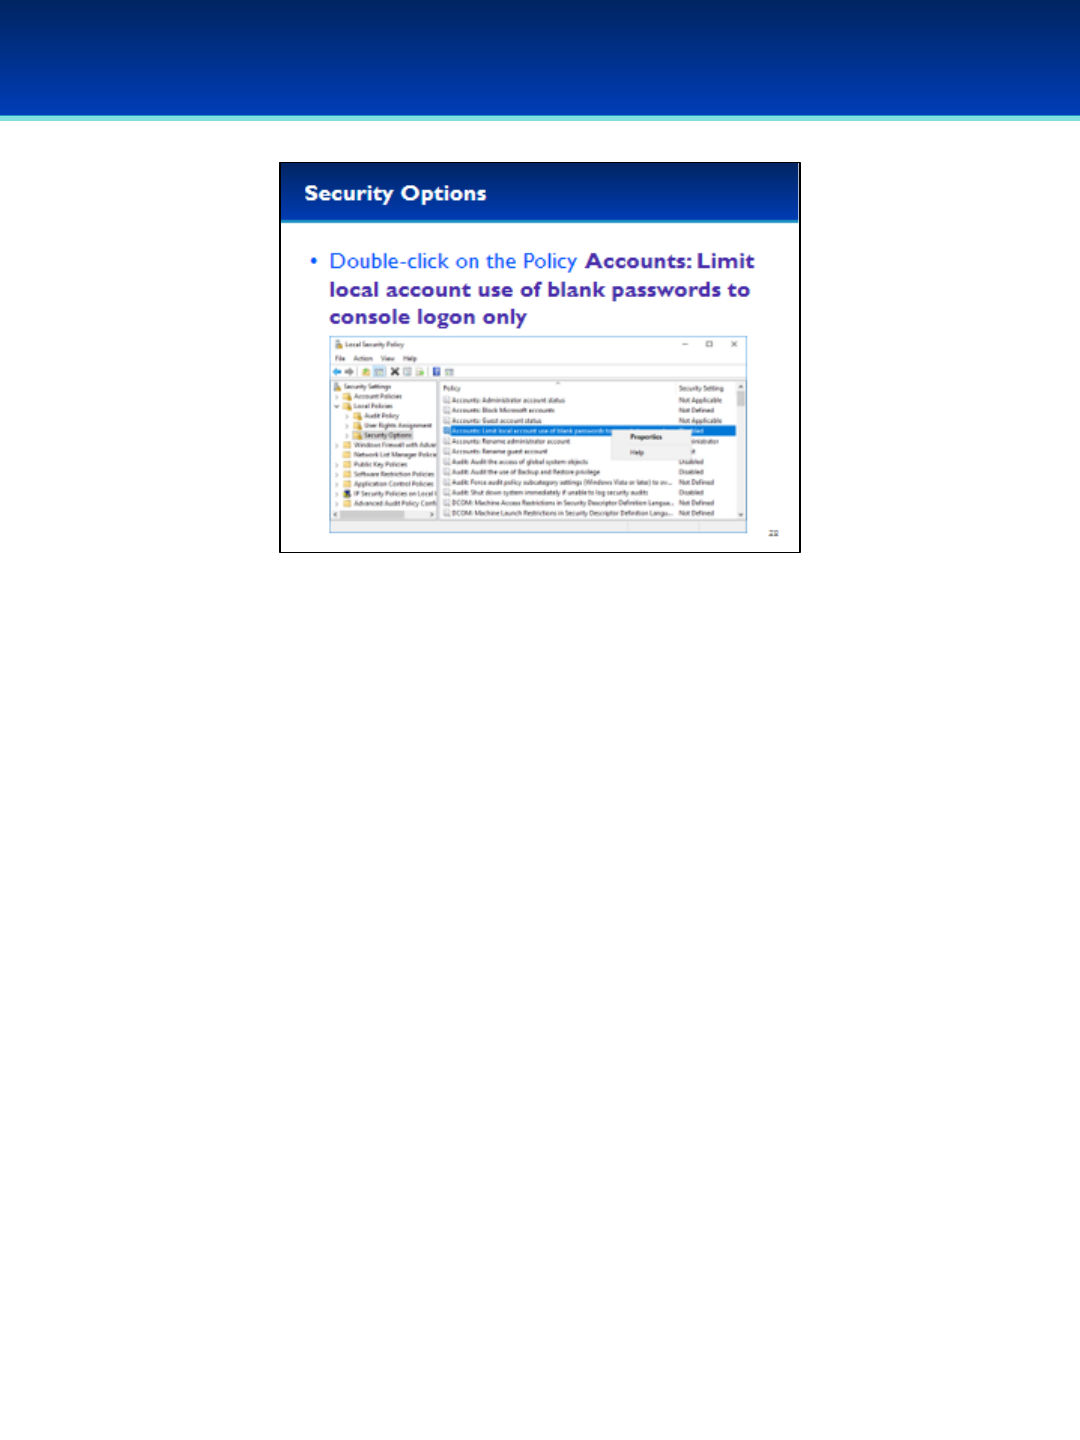
•Double-click on the Policy Accounts: Limit local account
use of blank passwords to console logon only.
•Alternatively you can right-click on the Policy and select
Properties.
© 2018 Air Force Association
AFA Advanced CyberCamp Instructor’s Guide
Page 35
Slide 29
Windows 10
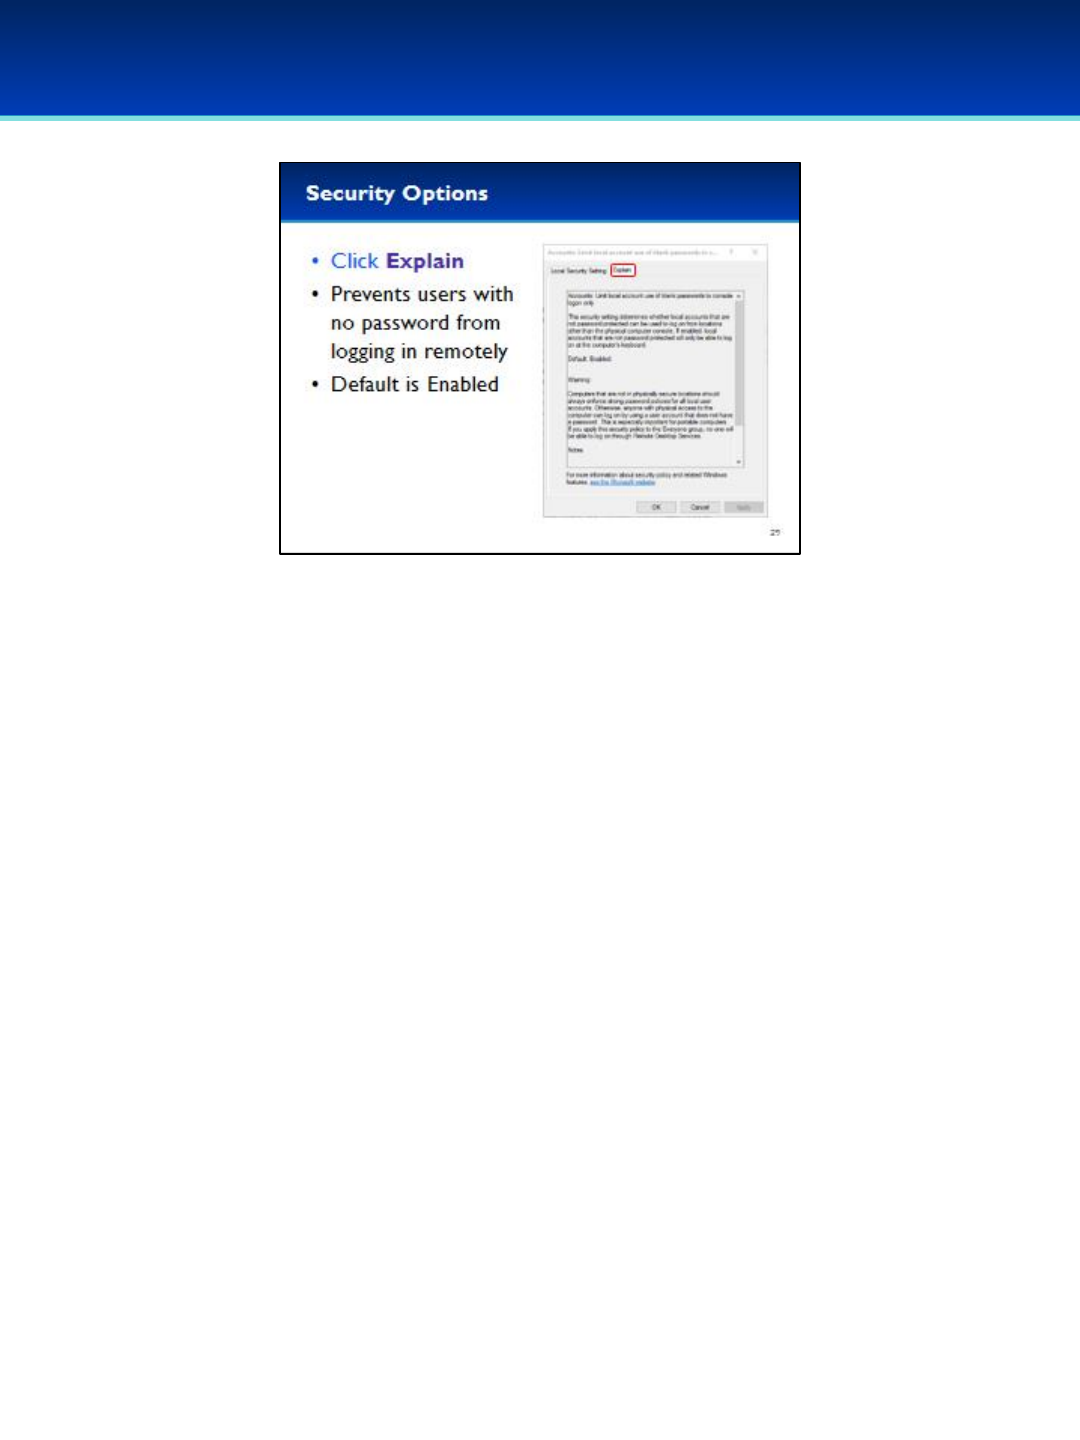
•In the Properties window, click the tab Explain.
•Reading the description, you can see this Security Setting prevents users
without a password from logging in remotely. The Default value is
Enabled. However, in the Demo the value is set to Disabled.
•This seems like a very good security policy to enable, which we will do in
the next slide.
•There is also a warning advising you of common pitfalls.
- You still should have a secure password policy even with this enabled.
- You could affect the ability of all users to log in remotely if you
computer is misconfigured.
© 2018 Air Force Association
AFA Advanced CyberCamp Instructor’s Guide
Page 36
Slide 30
Windows 10
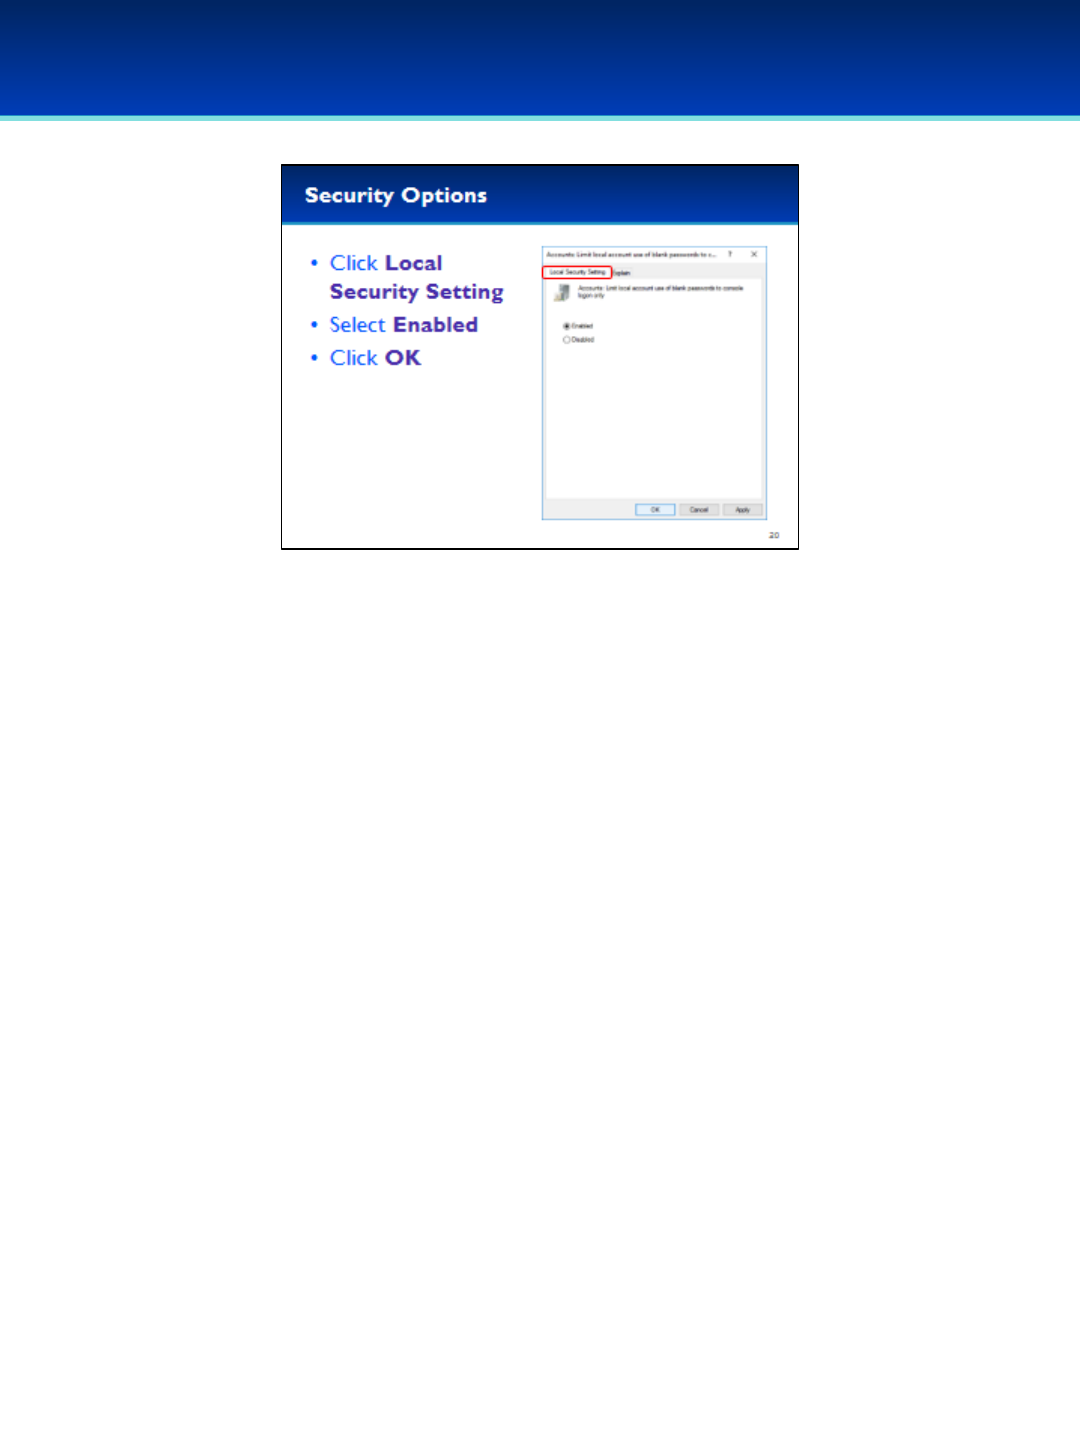
•Based on this information we should enable this security option.
•Click the Local Security Setting tab.
•Select Enabled.
•Click OK to apply the changes and close the Properties window.
© 2018 Air Force Association
AFA Advanced CyberCamp Instructor’s Guide
Page 37
Slide 31
Windows 10
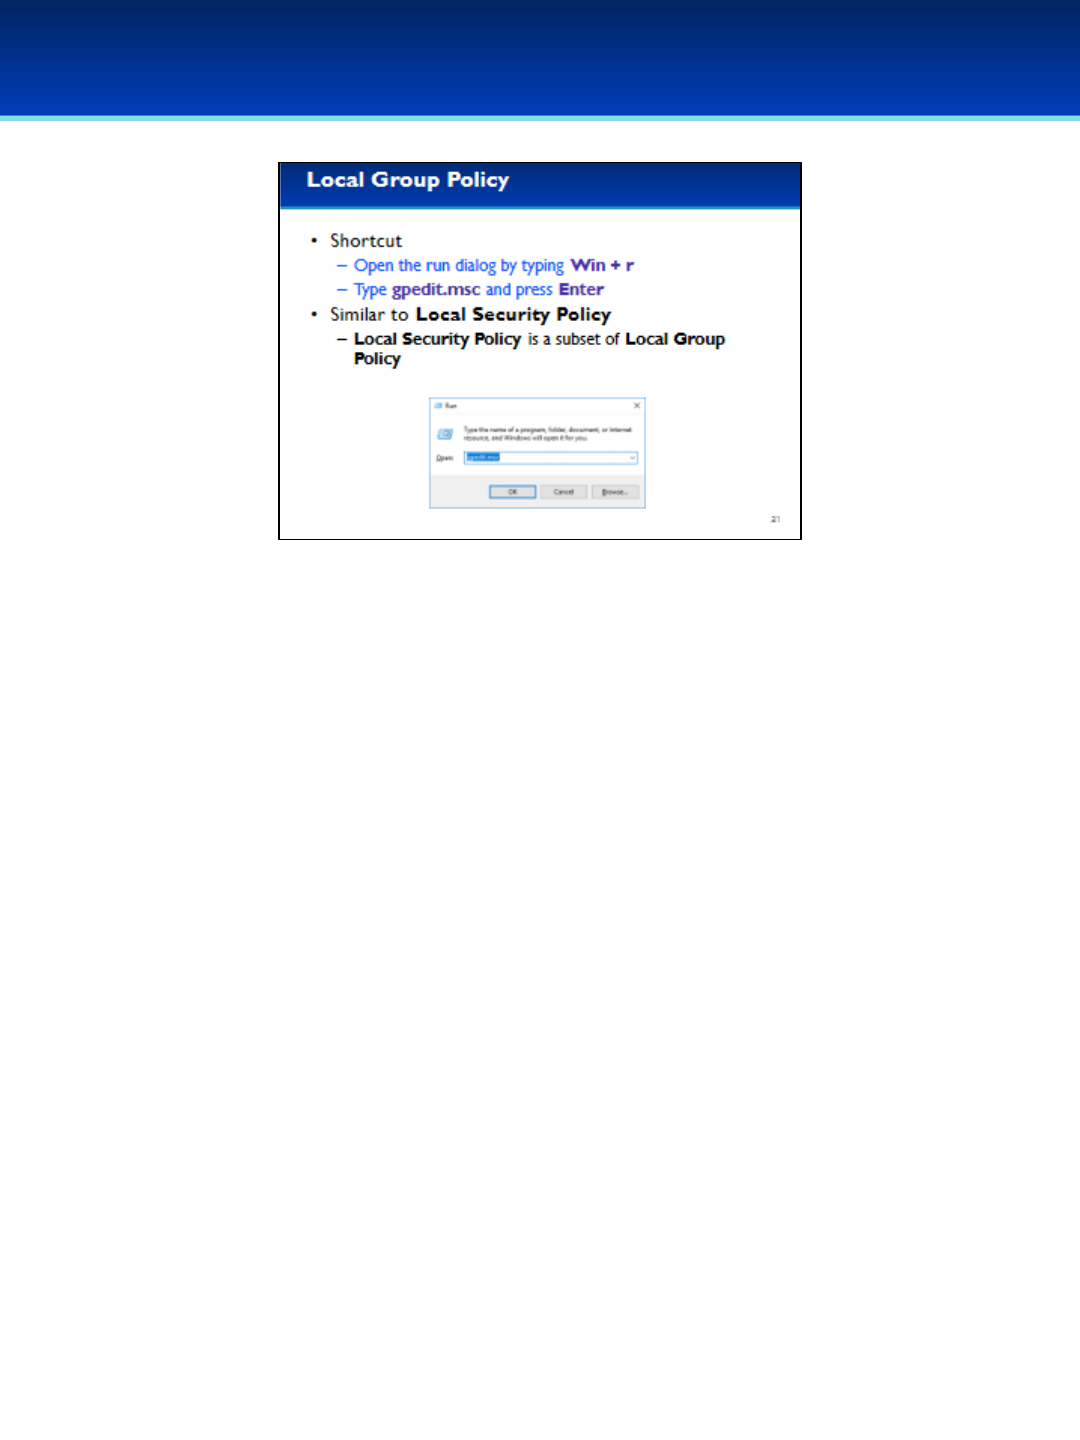
•The Local Group Policy is similar to the Local Security Policy.
•In fact, the Local Security Policy is contained within the Local
Group Policy.
•Open the run dialog box by holding down the Windows key and
pressing the letter r(lower case).
•Next to Open, type gpedit.msc.
•Press Enter or click OK.
© 2018 Air Force Association
AFA Advanced CyberCamp Instructor’s Guide
Page 38
Slide 32
Windows 10
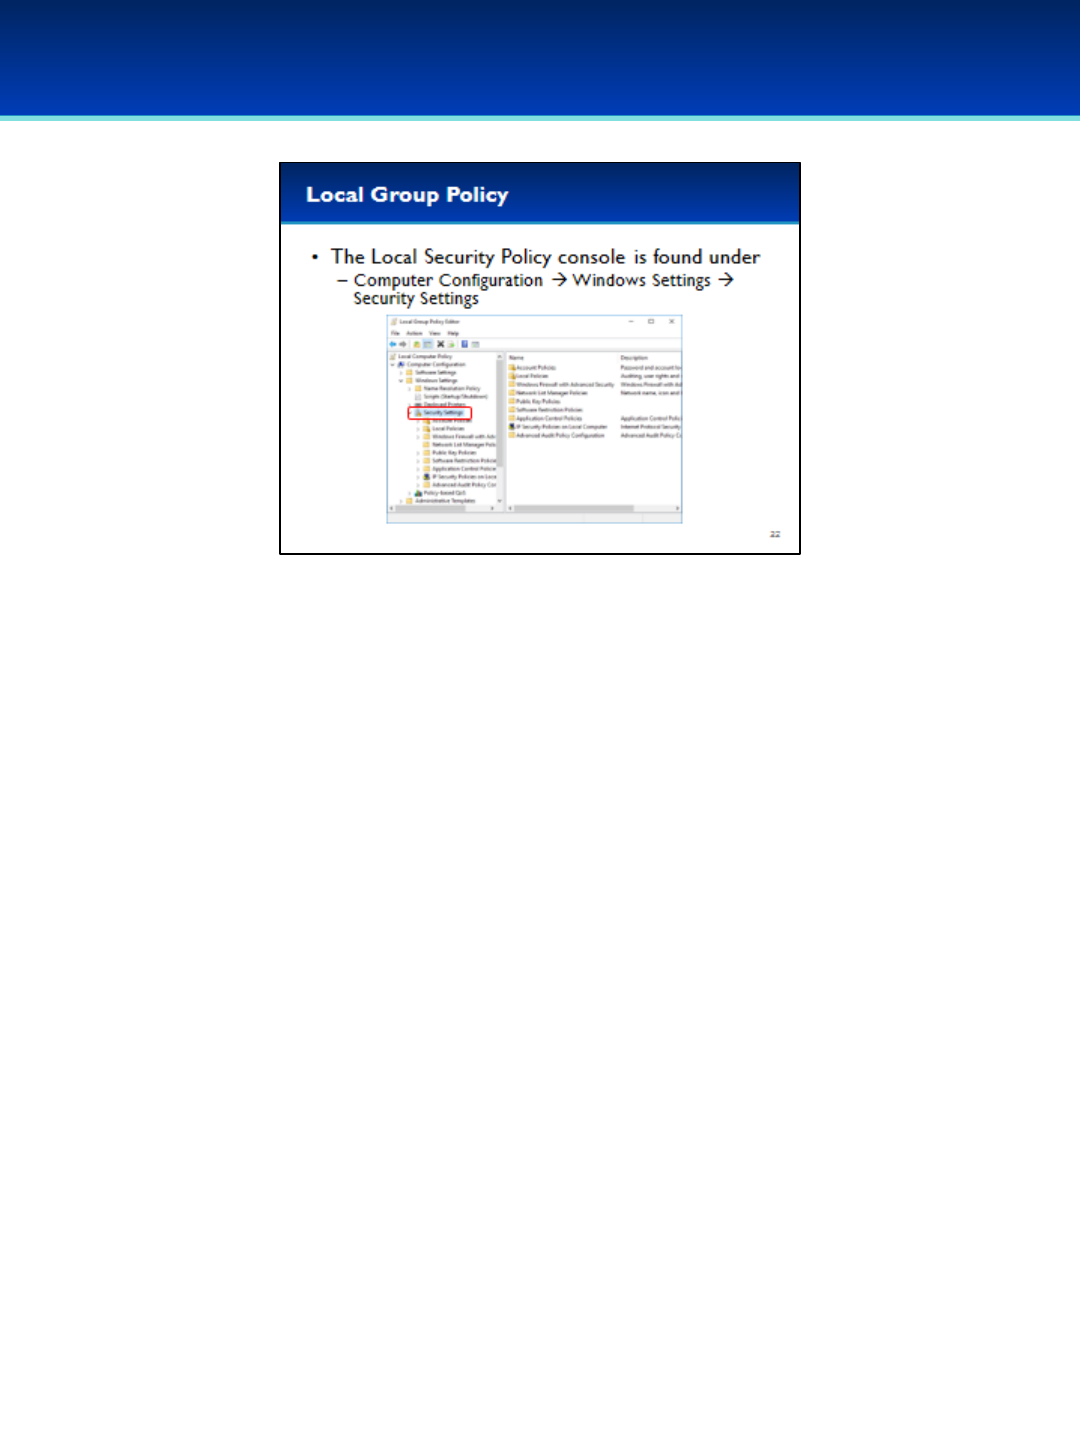
•In the Local Group Policy Editor, you can find the Local
Security Policy settings under Computer Configuration
Windows Settings Security Settings.
© 2018 Air Force Association
AFA Advanced CyberCamp Instructor’s Guide
Page 39
Slide 33
Windows 10
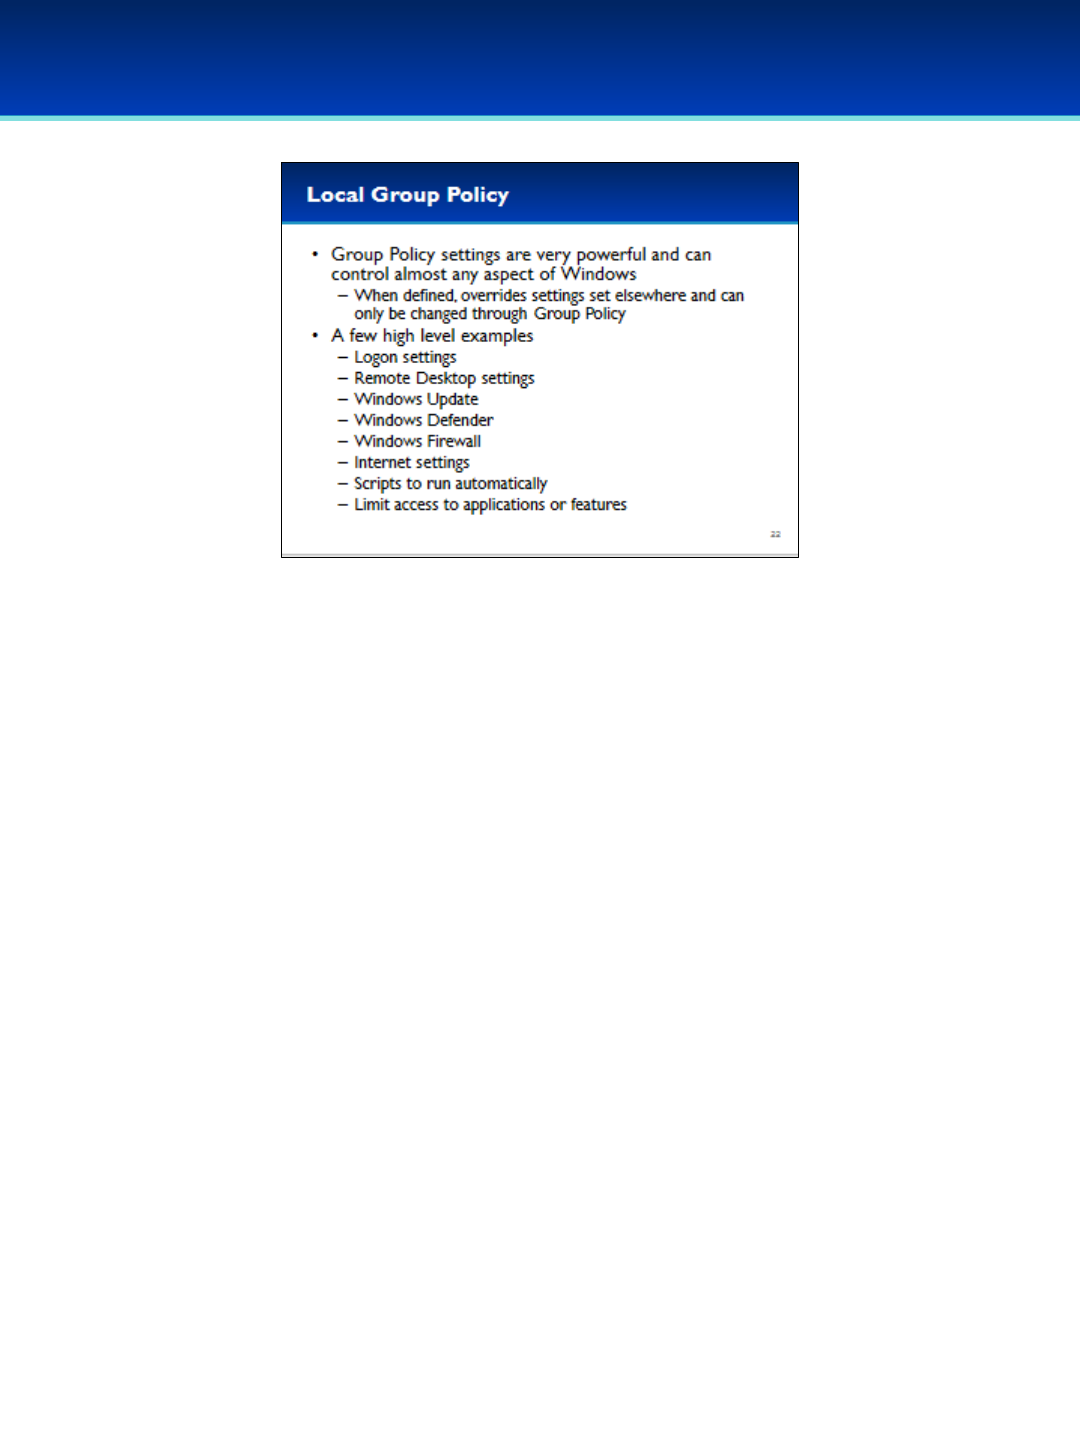
•Group Policy settings are very powerful and can control almost any aspect
of Windows, Windows services, and even some applications.
- By default many Group Policy settings are not defined. If you define
them, they will override other settings in Windows, and prevent you
from changing them in other locations.
•Group Policy contains far too many settings to list, but a few high level
examples include Logon settings, Remote Desktop settings, Windows
Update, Windows Defender, Windows Firewall, Internet settings, and
scripts that run automatically.
•Group Policy settings are also used to lock down a computer by limiting
access to applications and features, or installing unapproved software.
- This is typically done when setting kiosks or other specific purposes
when the users may not be entirely trustworthy.
© 2018 Air Force Association
AFA Advanced CyberCamp Instructor’s Guide
Page 40
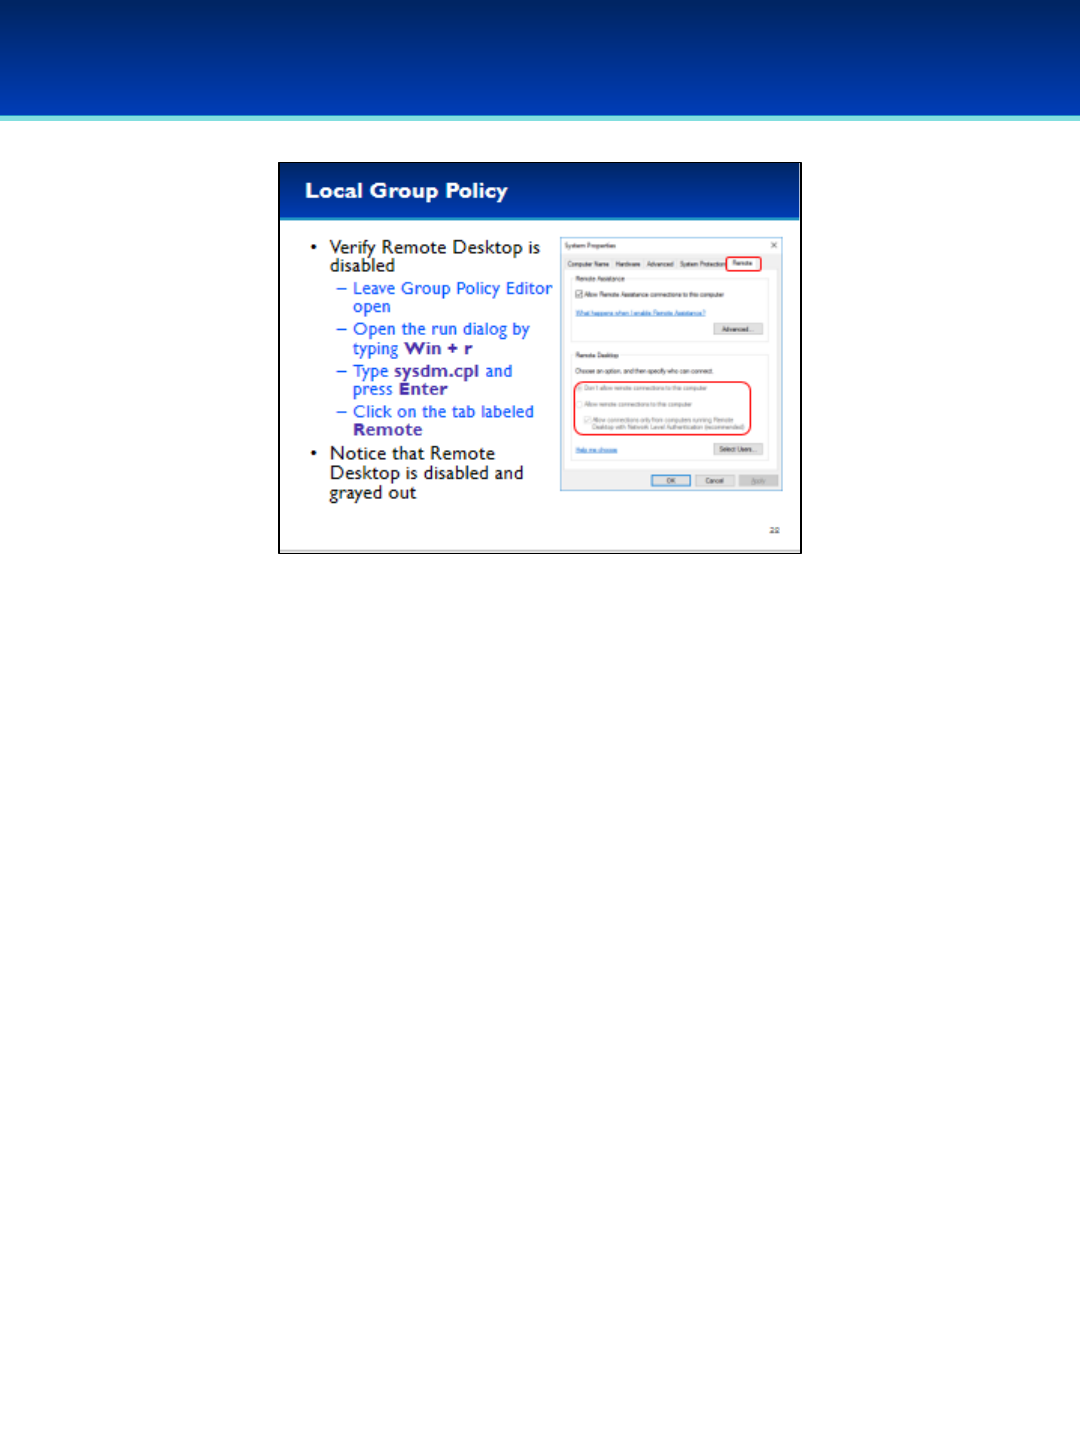
Slide 34
Windows 10
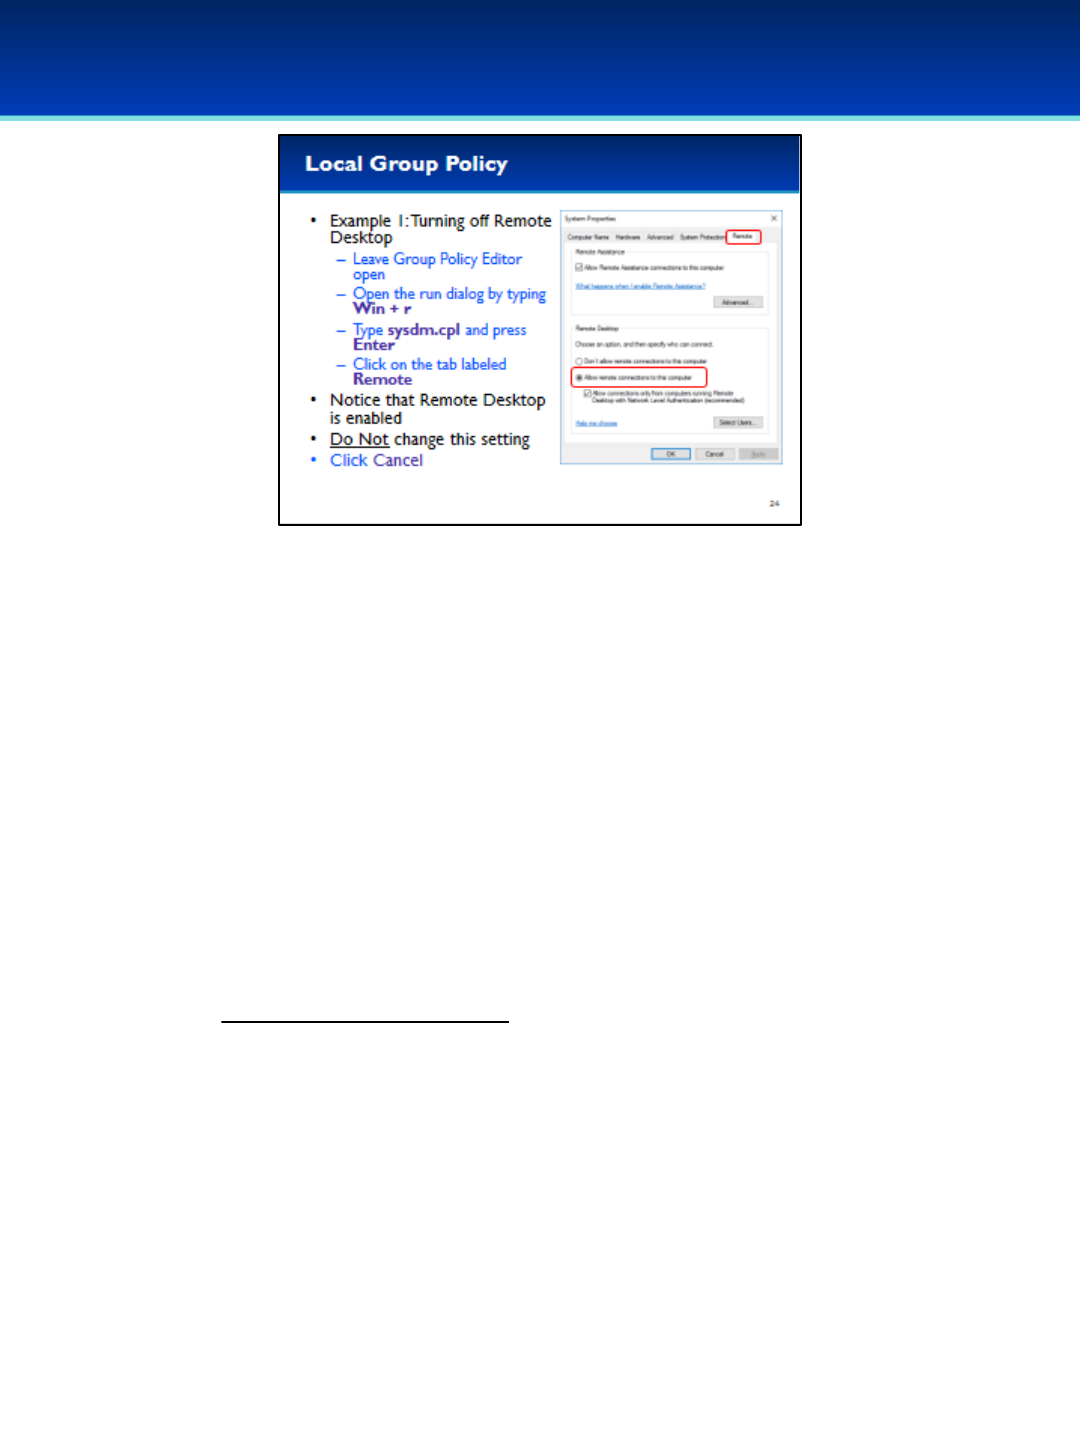
•Let’s demonstrate this by turning off Remote Desktop via the Local
Group Policy.
•But first, we will verify that remote desktop is on from the System
Properties window.
•Leave the Local Group Policy Editor open since we will go back to it on
the next slide.
•Open the run dialog box by holding down the Windows key and pressing
the letter r.
•To open, type sysdm.cpl.
•Press Enter or click OK.
•Notice that Remote desktop is enabled.
•Don’t make any changes here, and click Cancel to close the System
Properties window.
© 2018 Air Force Association
AFA Advanced CyberCamp Instructor’s Guide
Page 41
Slide 35
Windows 10
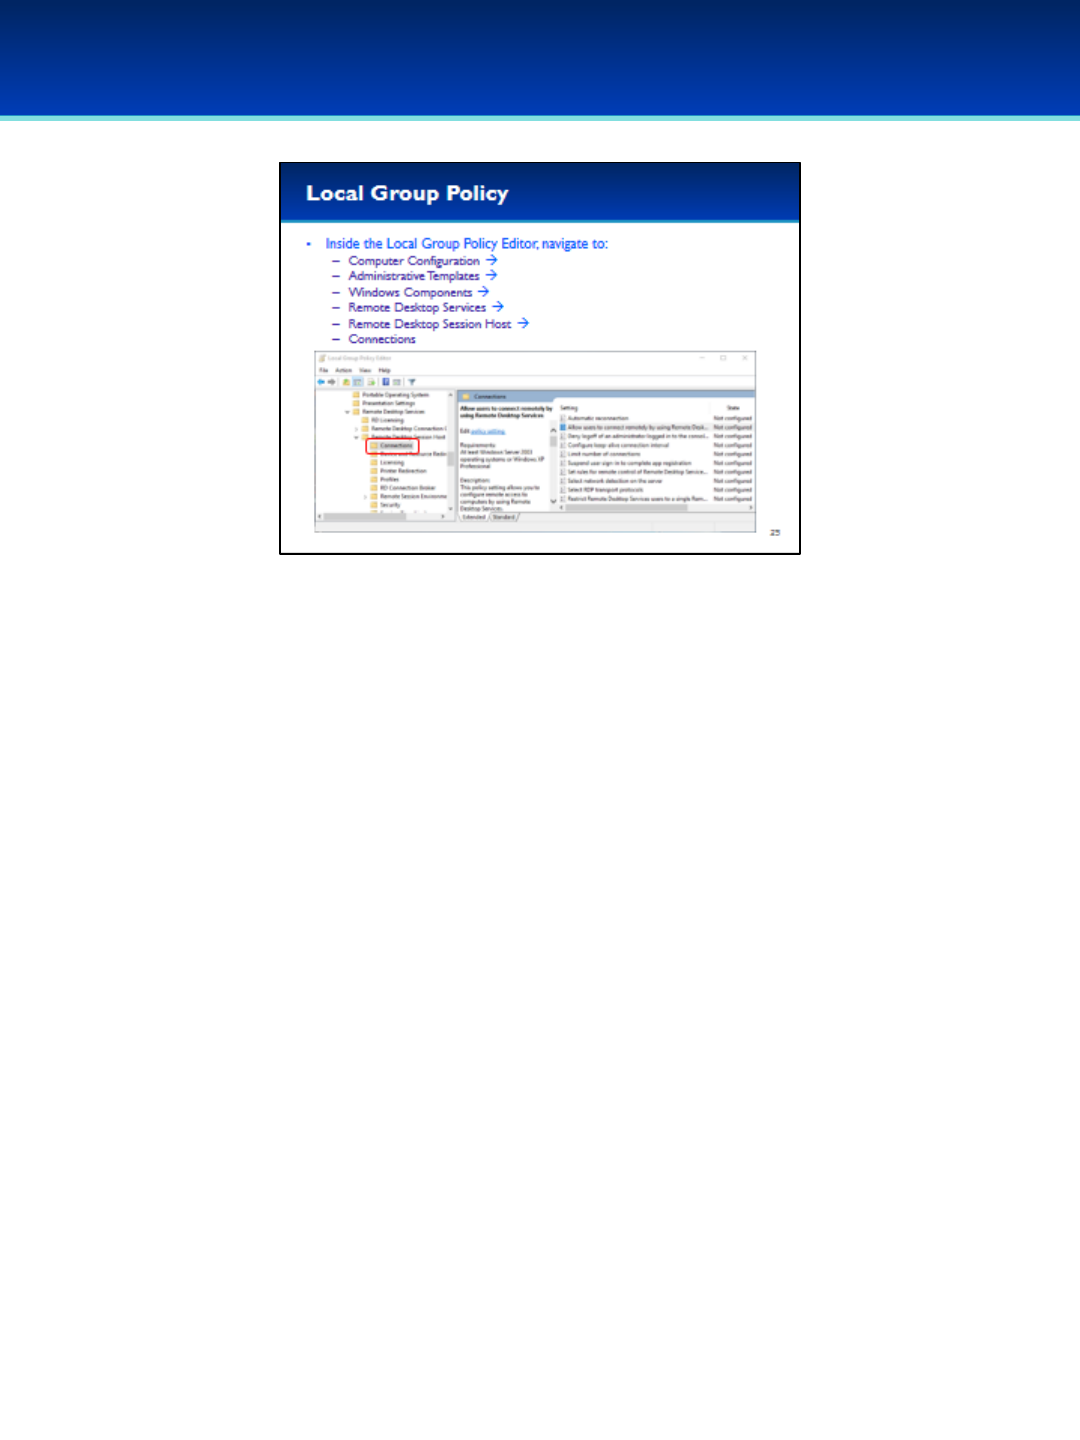
•Navigate to Computer Configuration Administrative Templates
Windows Components Remote Desktop Services Remote
Desktop Session Host Connections.
Give the students a few seconds to navigate to this location.

© 2018 Air Force Association
AFA Advanced CyberCamp Instructor’s Guide
Page 42
Slide 36
Windows 10
•Double-click the Setting Allow users to connect remotely by
using Remote Desktop Services.
© 2018 Air Force Association
AFA Advanced CyberCamp Instructor’s Guide
Page 43
Slide 37
Windows 10
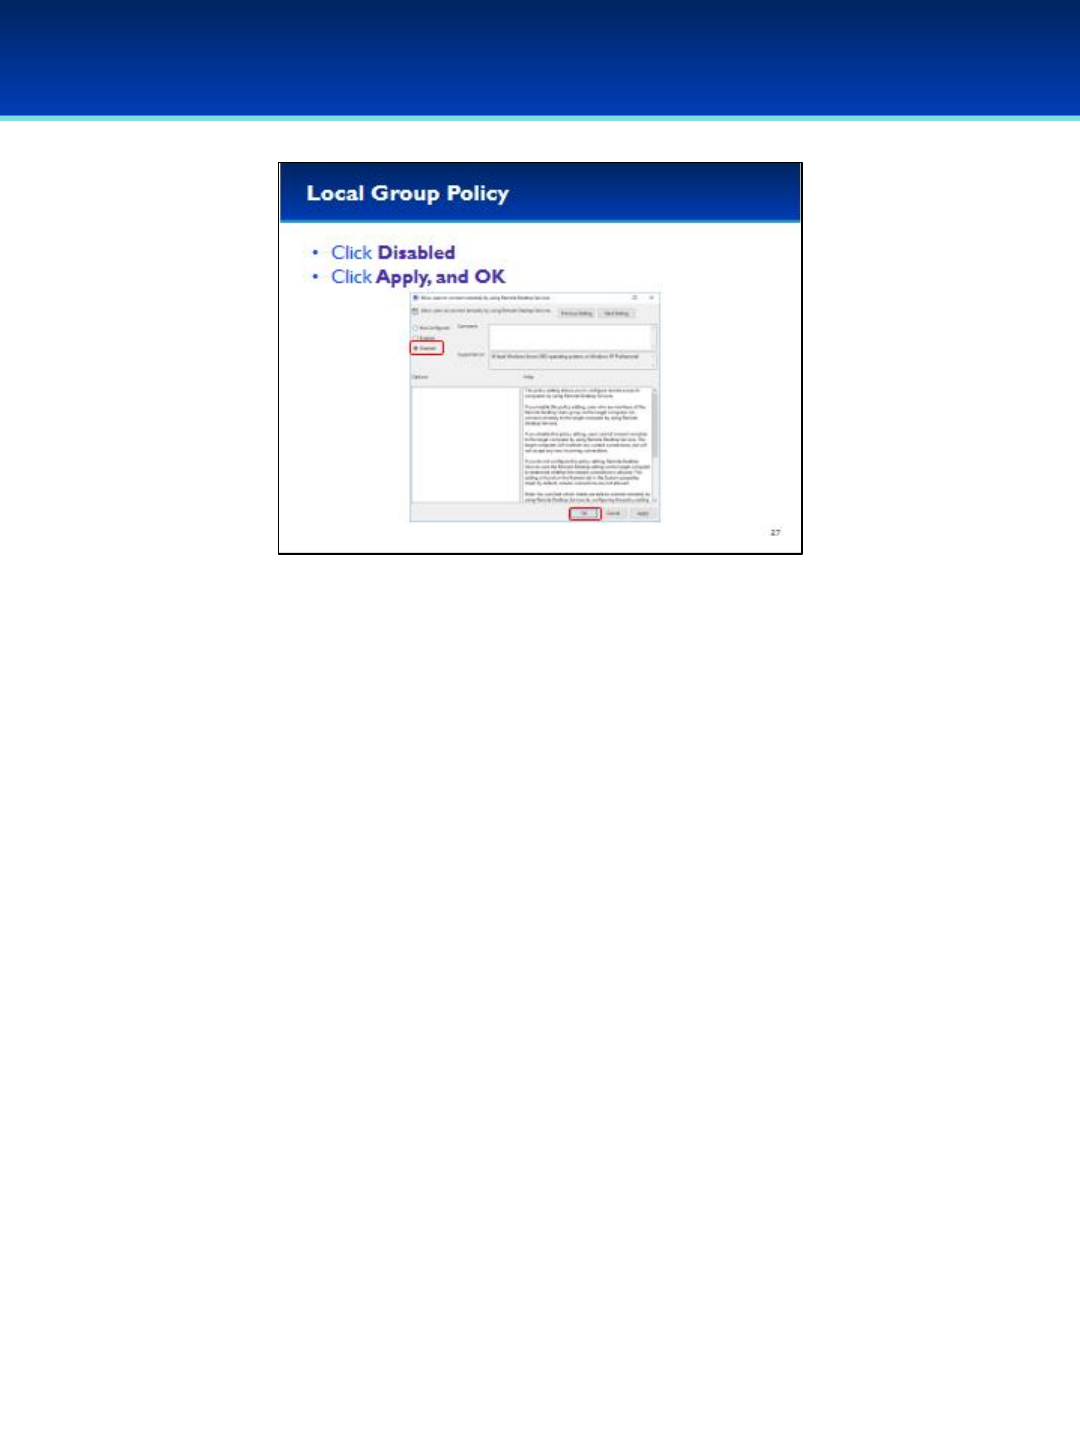
•Under Help there is a description of this policy:
- Enabling this policy lets members of the Remote Desktop Users
group log on remotely.
- Disabling this policy prevents users from connecting remotely.
- Not Configured allows this setting to be configured using the
Remote tab in the System Properties window.
•Select Disabled.
•Click OK to apply the changes and close the Properties window.
© 2018 Air Force Association
AFA Advanced CyberCamp Instructor’s Guide
Page 44
Slide 38
Windows 10
•Leave the Group Policy Editor open and open the System
Properties window.
•Make sure you open a new System Properties window, if you
left the old window open, the changes may not be visible.
•Under the Remote tab, we can see that Remote Desktop is
disabled. Additionally, the settings are greyed out and cannot
be changed.
© 2018 Air Force Association
AFA Advanced CyberCamp Instructor’s Guide
Page 45
Slide 39
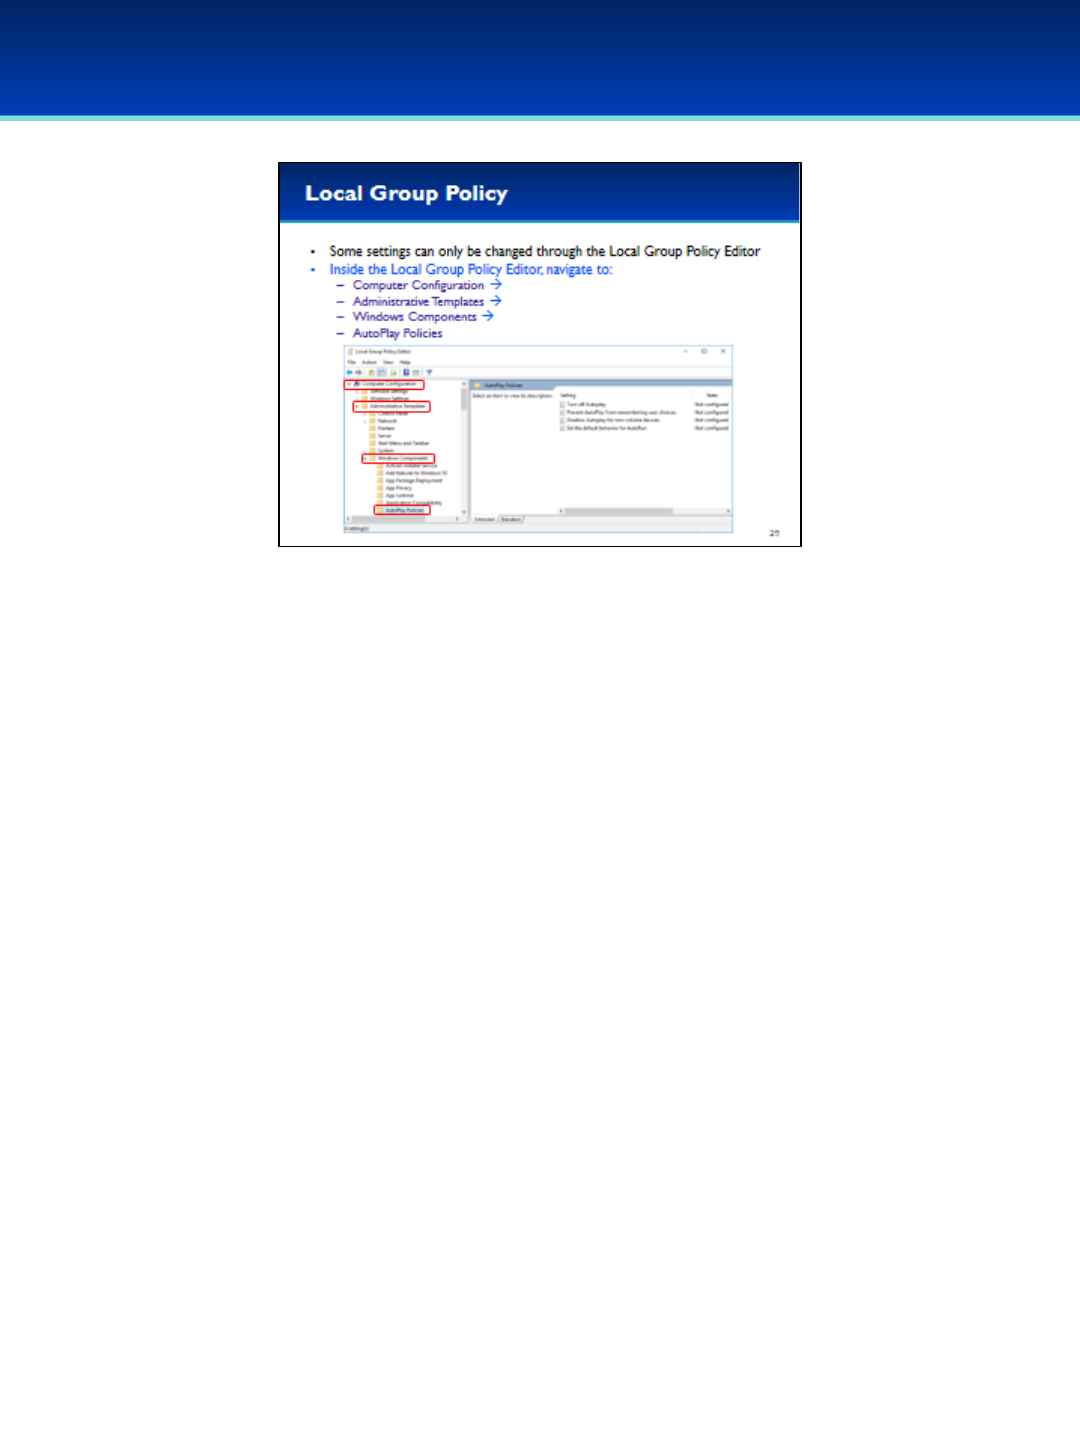
Windows 10
•Some settings can only be changed using the Local Group Policy
Editor.
•For example, navigate to Computer Configuration
Administrative Templates Windows Components AutoPlay
Policies.
© 2018 Air Force Association
AFA Advanced CyberCamp Instructor’s Guide
Page 46
Slide 40
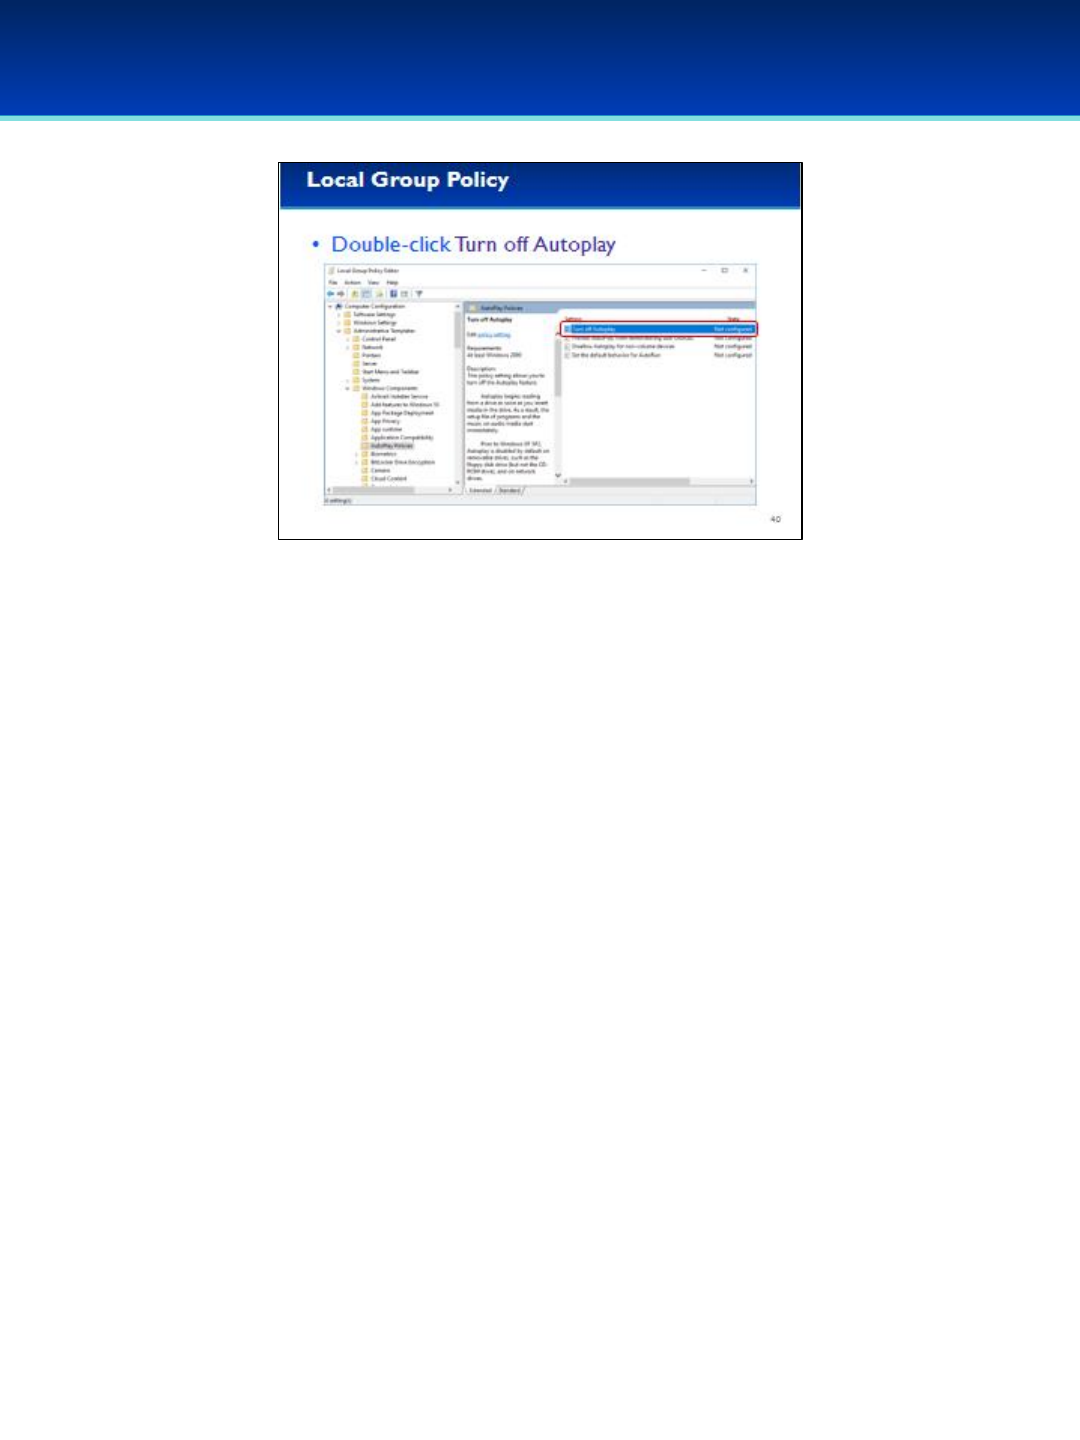
Windows 10
•AutoPlay can be a security risk, and our company has no
documented business need for it, so we should turn it off.
•Double-click the Setting Turn off Autoplay.
© 2018 Air Force Association
AFA Advanced CyberCamp Instructor’s Guide
Page 47
Slide 41
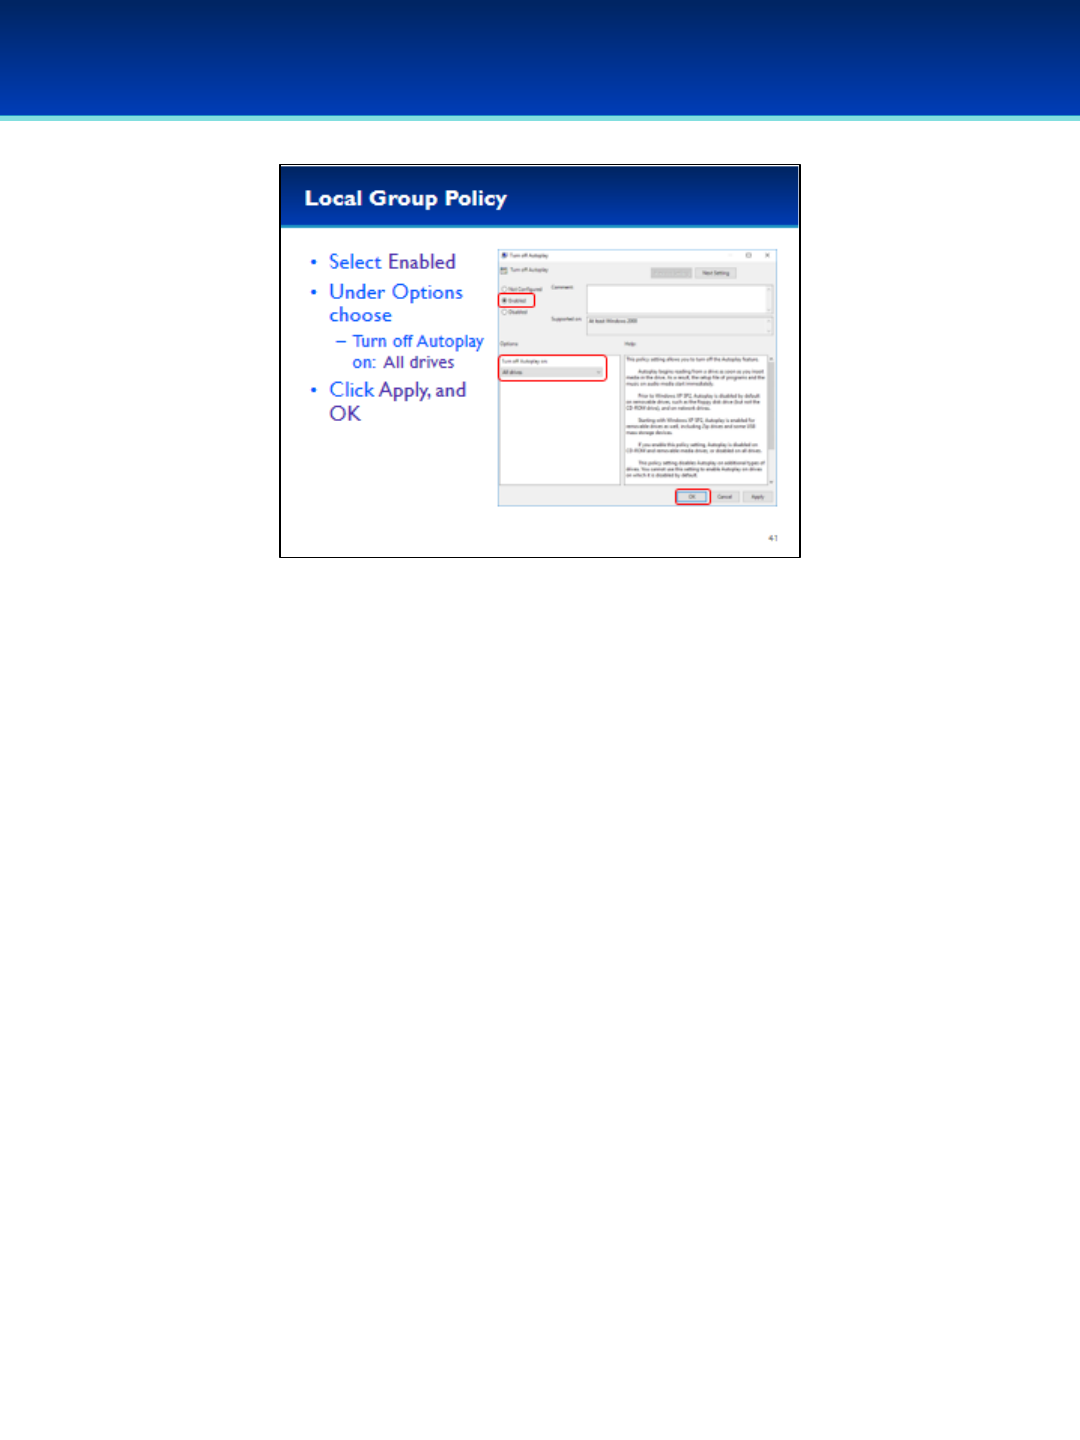
Windows 10
•Briefly read the Help section.
Give the students a few seconds:
•Select Enabled.
•Under Options ensure that Turn off Autoplay is set to
All drives.
•Click Apply and OK to apply the settings and close the
Properties window.
© 2018 Air Force Association
AFA Advanced CyberCamp Instructor’s Guide
Page 48
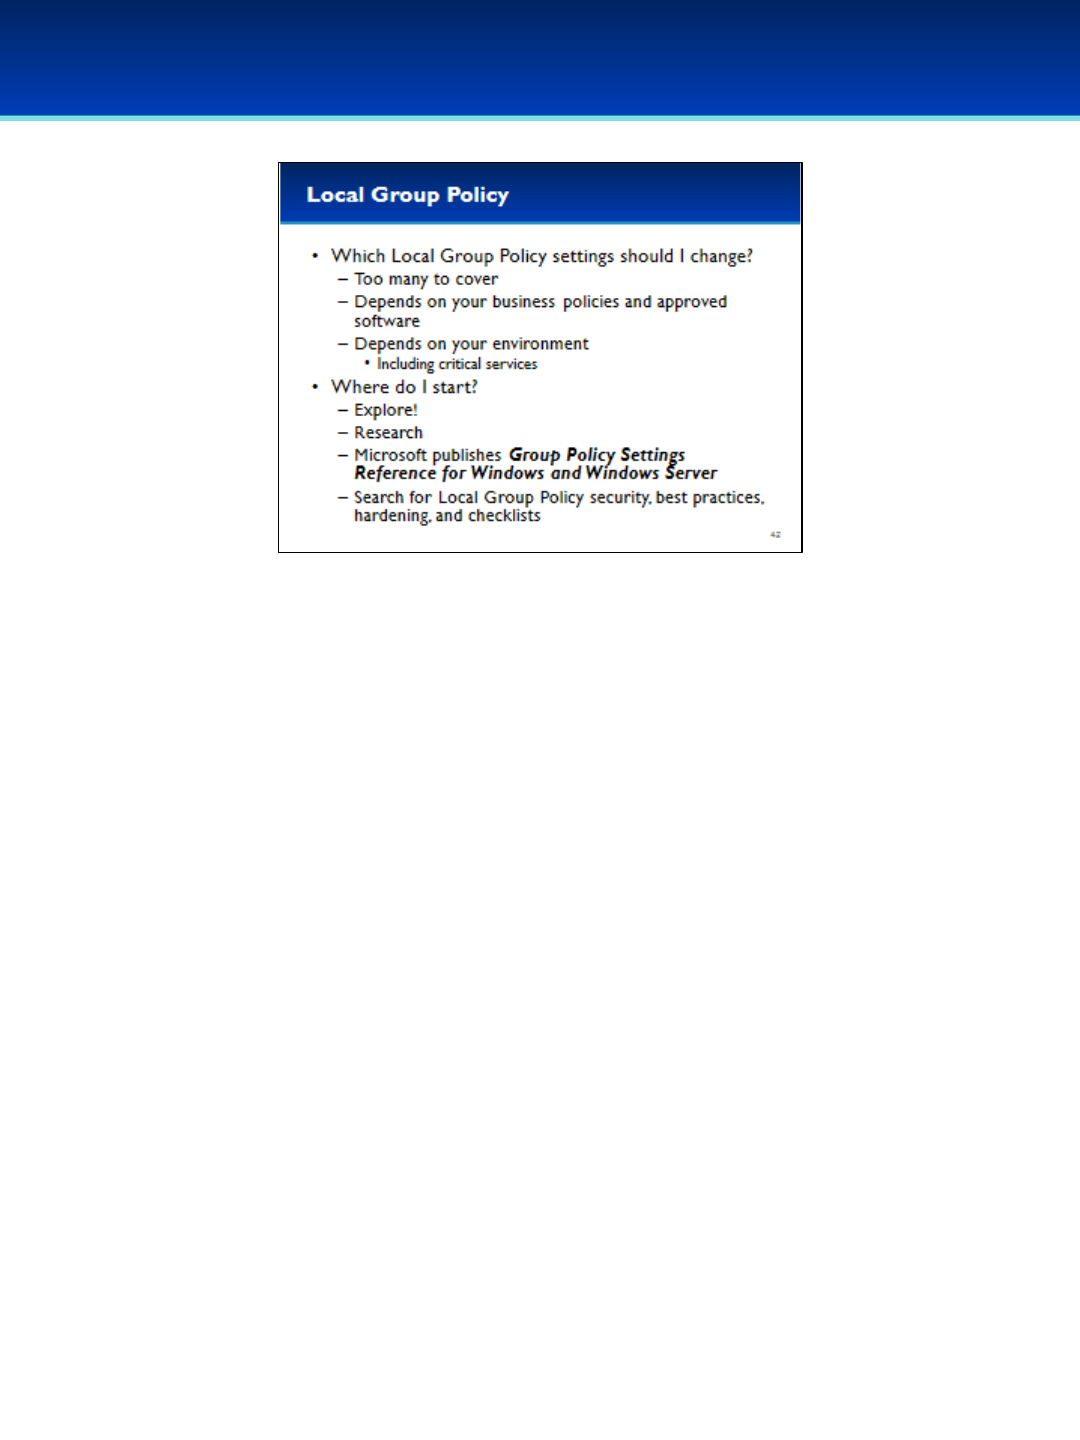
Slide 42
Windows 10
•There are so many Group Policy settings, you may be wondering which
ones you should change.
•The answer really depends on your business policies and your
environment, including any critical services.
•There are too many settings to cover here, so it’s up to you explore
and research.
•Read the help sections for the different policies.
•Microsoft publishes a reference Excel spreadsheet online. You can
search for “Group Policy Settings Reference for Windows and Windows
Server.”
•Research online and look for Group Policy best practices, hardening,
and checklists.
© 2018 Air Force Association
AFA Advanced CyberCamp Instructor’s Guide
Page 49
Slide 43
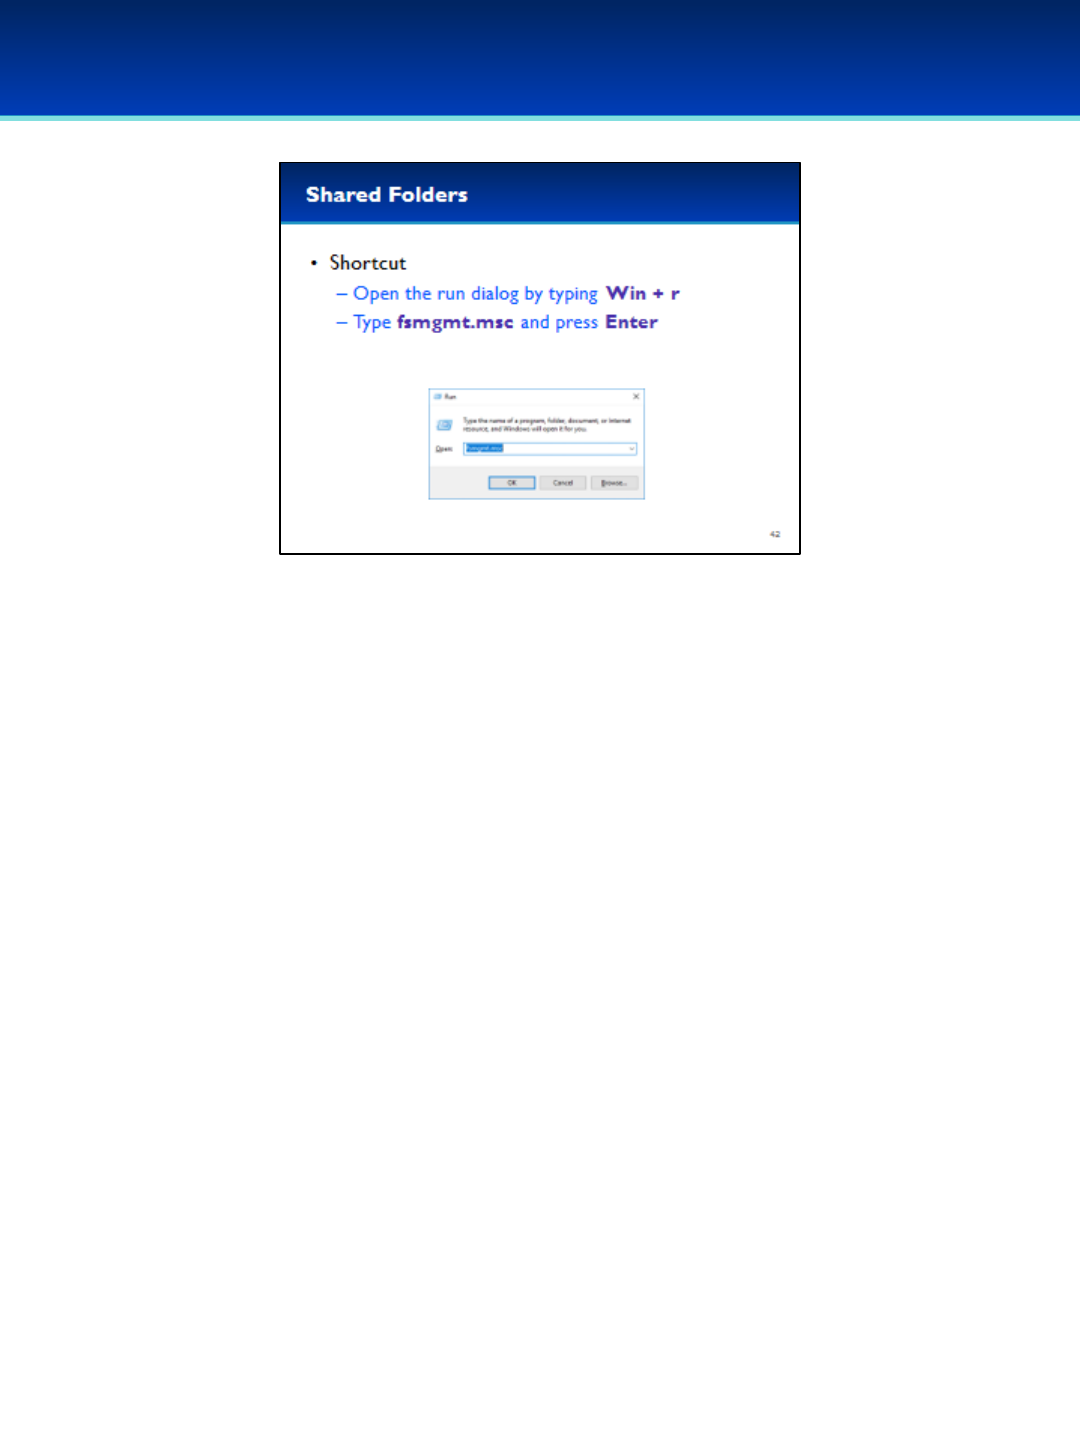
Module 1
•Undocumented or unauthorized shares can be a security
vulnerability.
•The Shared folders MMC plugin can help us analyze the current
shares on the system.
•Open the run dialog box by holding down the Windows key and
pressing the letter r.
•To open, type fsmgmt.msc.
•Press Enter or click OK.
© 2018 Air Force Association
AFA Advanced CyberCamp Instructor’s Guide
Page 50
Slide 44
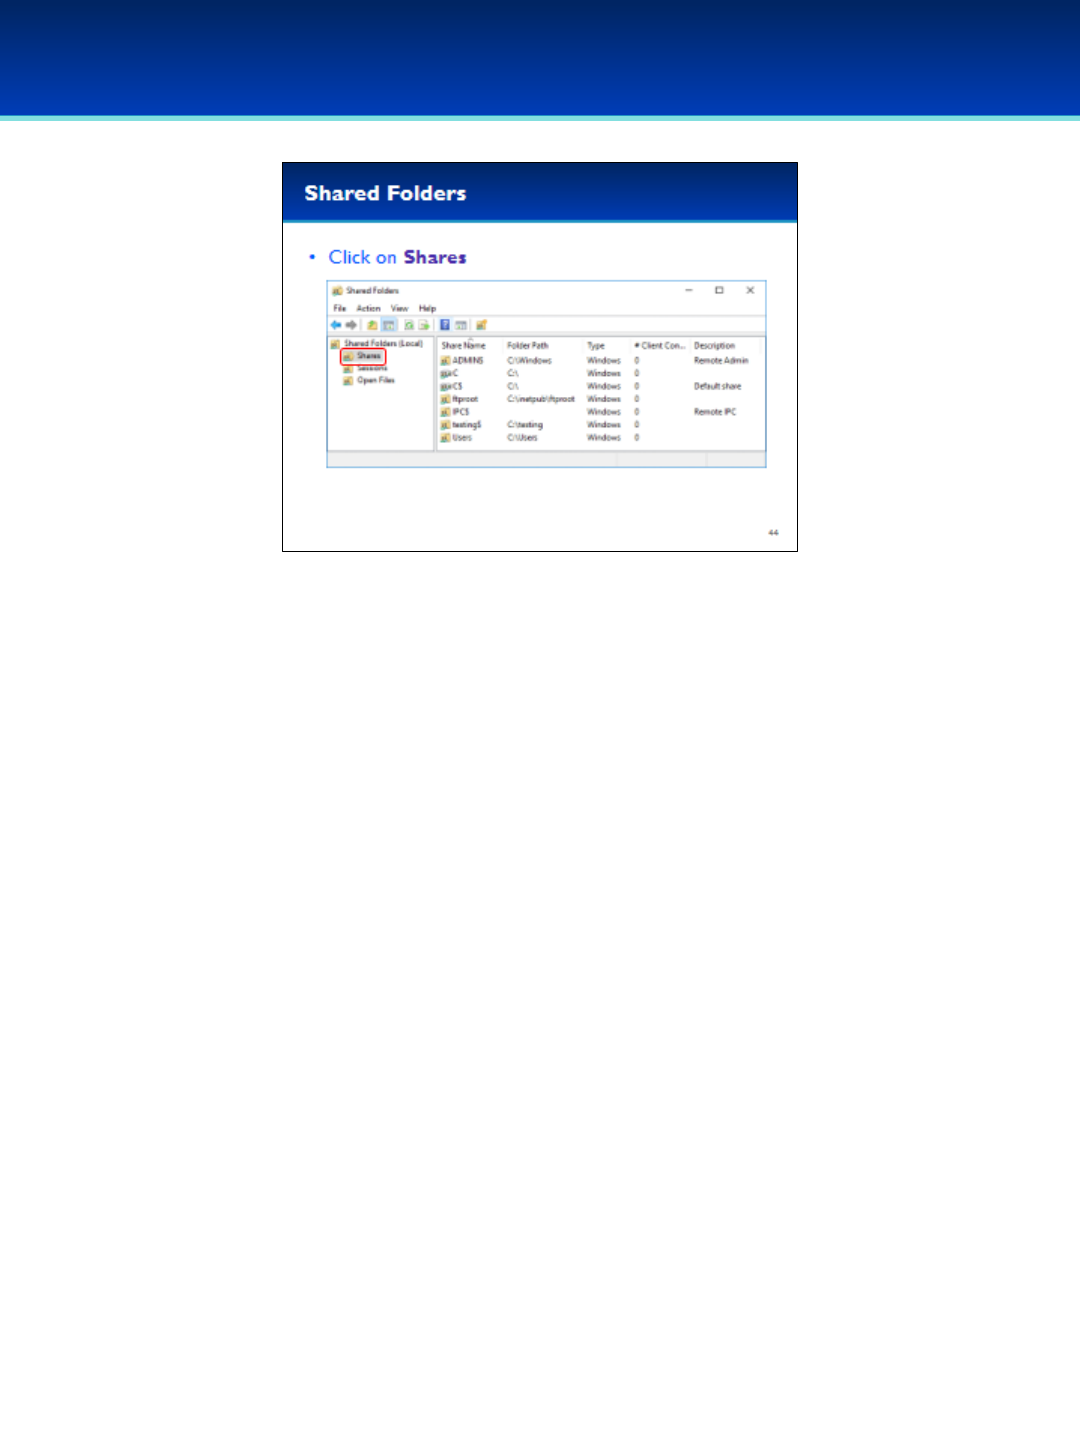
Windows 10
•Click on Shares.
•The Share Name is the name you would use when accessing the
share over the network.
•The Folder Path is the path of the folder that is being shared.
•Additionally, Shared Folders displays the type of share, number of
client connections, and an optional description of the share.
© 2018 Air Force Association
AFA Advanced CyberCamp Instructor’s Guide
Page 51
Slide 45
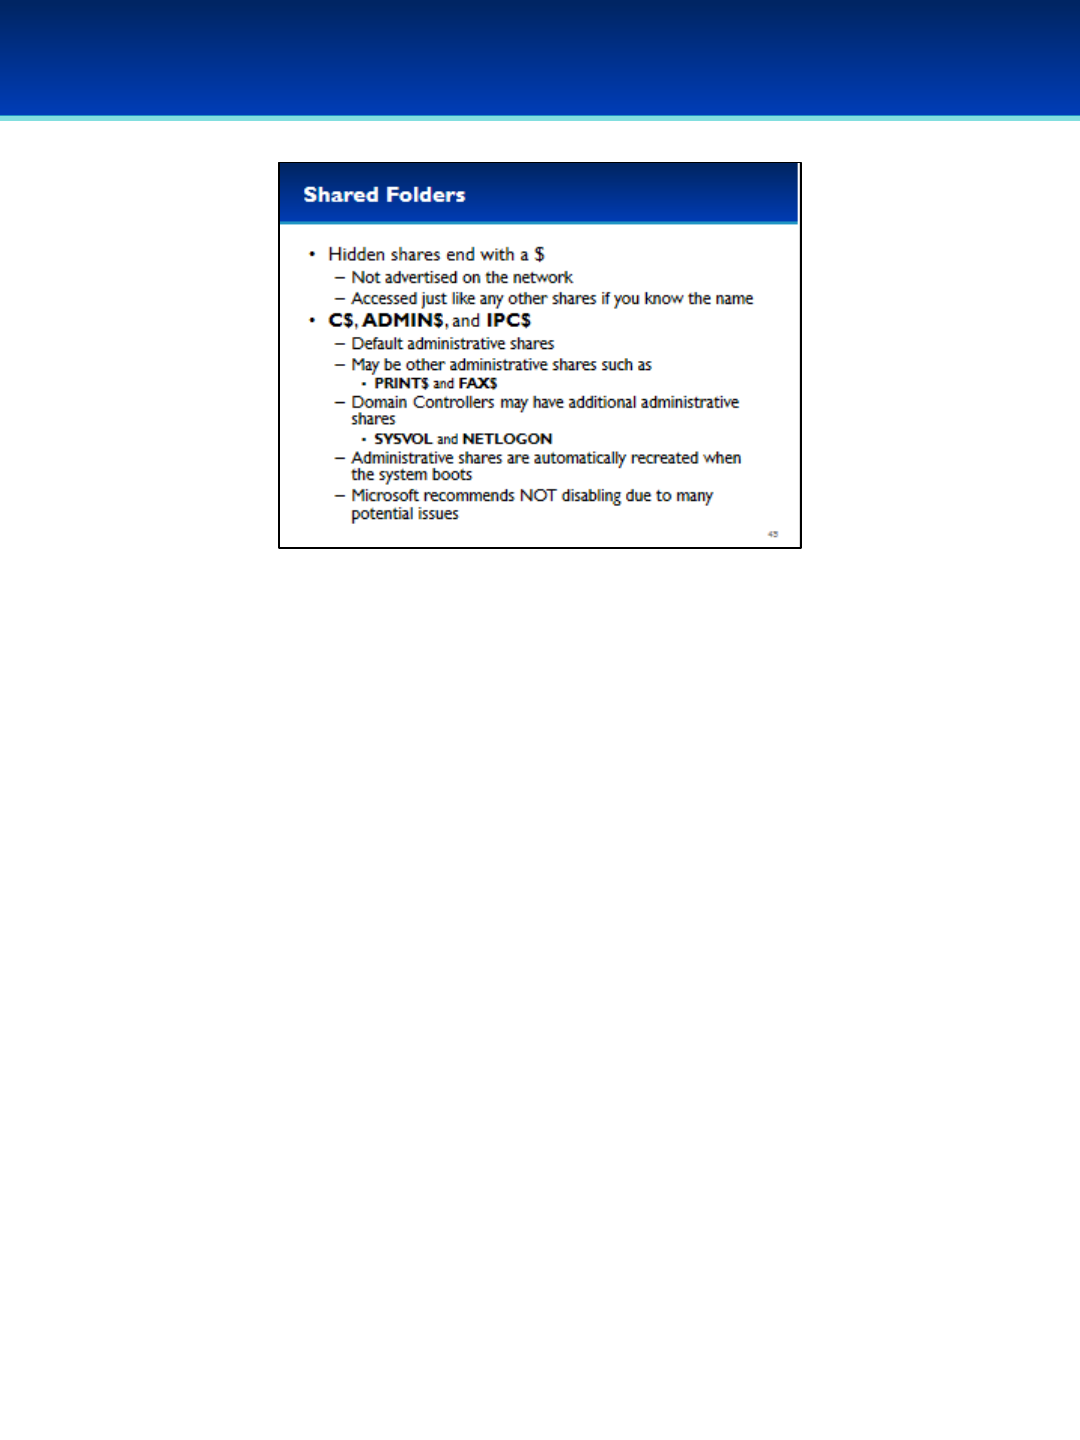
Windows 10
•You are probably wondering what all these shares are.
•Hidden shares end with a $.
- Hidden shares can be accessed just like a regular share, but they are
not advertised on the network.
•The C$, ADMIN$, and IPC$ shares are default administrative shares
created automatically by Windows.
•On some computers there may be additional default administrative
shares such as PRINT$ or FAX$, and Domain Controllers may have even
more default administrative shares such as SYSVOL and NETLOGON.
- Notice that these default administrative shares do not end with $,
and are not hidden.
•While it is possible to delete the default administrative shares, Windows
automatically recreates the shares when the system boots.
•It is possible to prevent the creation of default administrative shares, but
this is not covered here since Microsoft very strongly recommends
against this.
- https://support.microsoft.com/en-us/help/842715/overview-of-
problems-that-may-occur-when-administrative-shares-are-missing
© 2018 Air Force Association
AFA Advanced CyberCamp Instructor’s Guide
Page 52
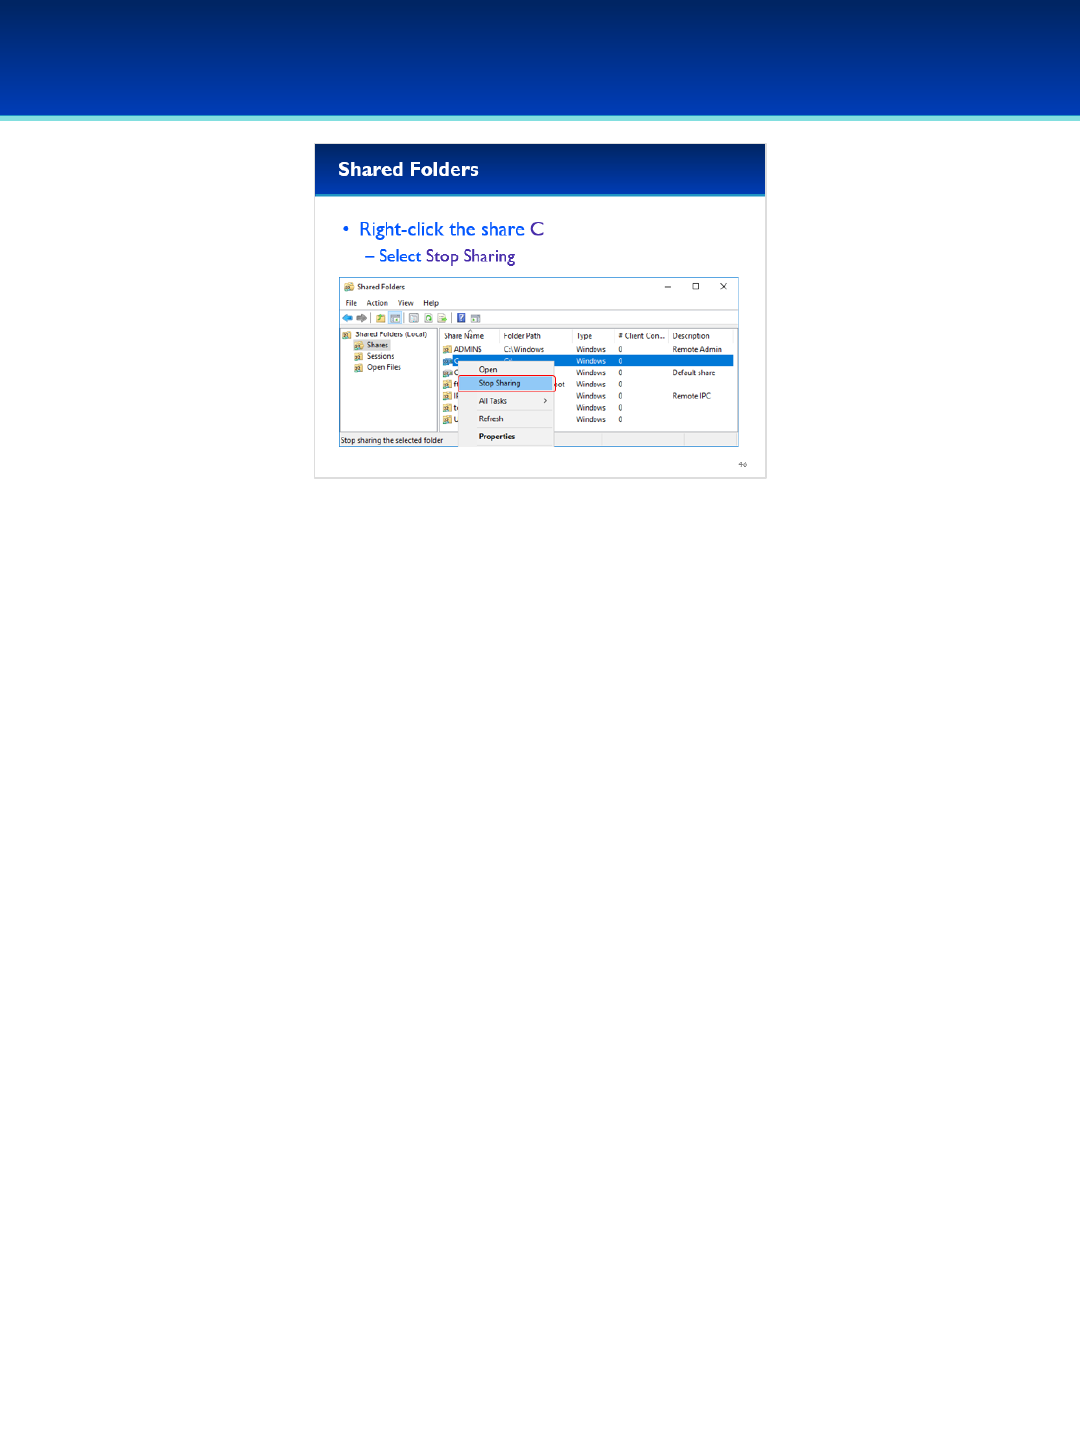
Slide 46
Windows 10
•Using Shared folders it is relatively simple to Stop Sharing the C
drive.
•Right-click the C share and select Stop Sharing.
- Make sure not to stop sharing the default administrative
share C$.
© 2018 Air Force Association
AFA Advanced CyberCamp Instructor’s Guide
Page 53
Slide 47
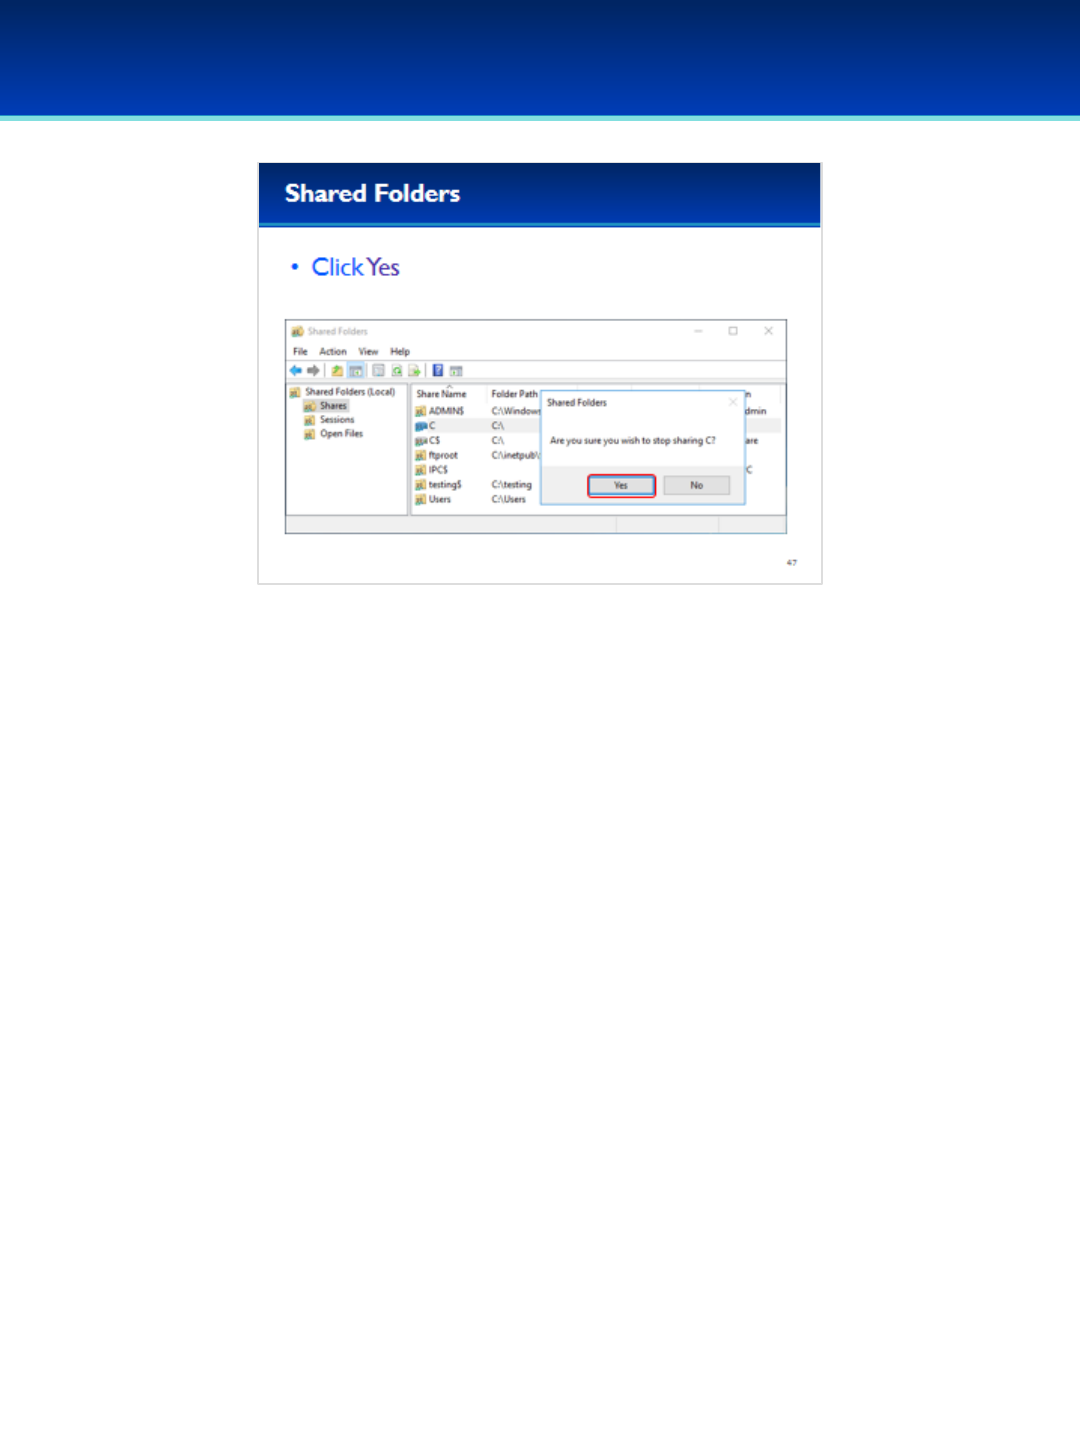
Windows 10
•Windows will prompt you to confirm. Click Yes.

© 2018 Air Force Association
AFA Advanced CyberCamp Instructor’s Guide
Page 54
Slide 48
Windows 10
•After confirming, The C share has been deleted.
- Notice that the default administrative share C$ is still
present.
© 2018 Air Force Association
AFA Advanced CyberCamp Instructor’s Guide
Page 55
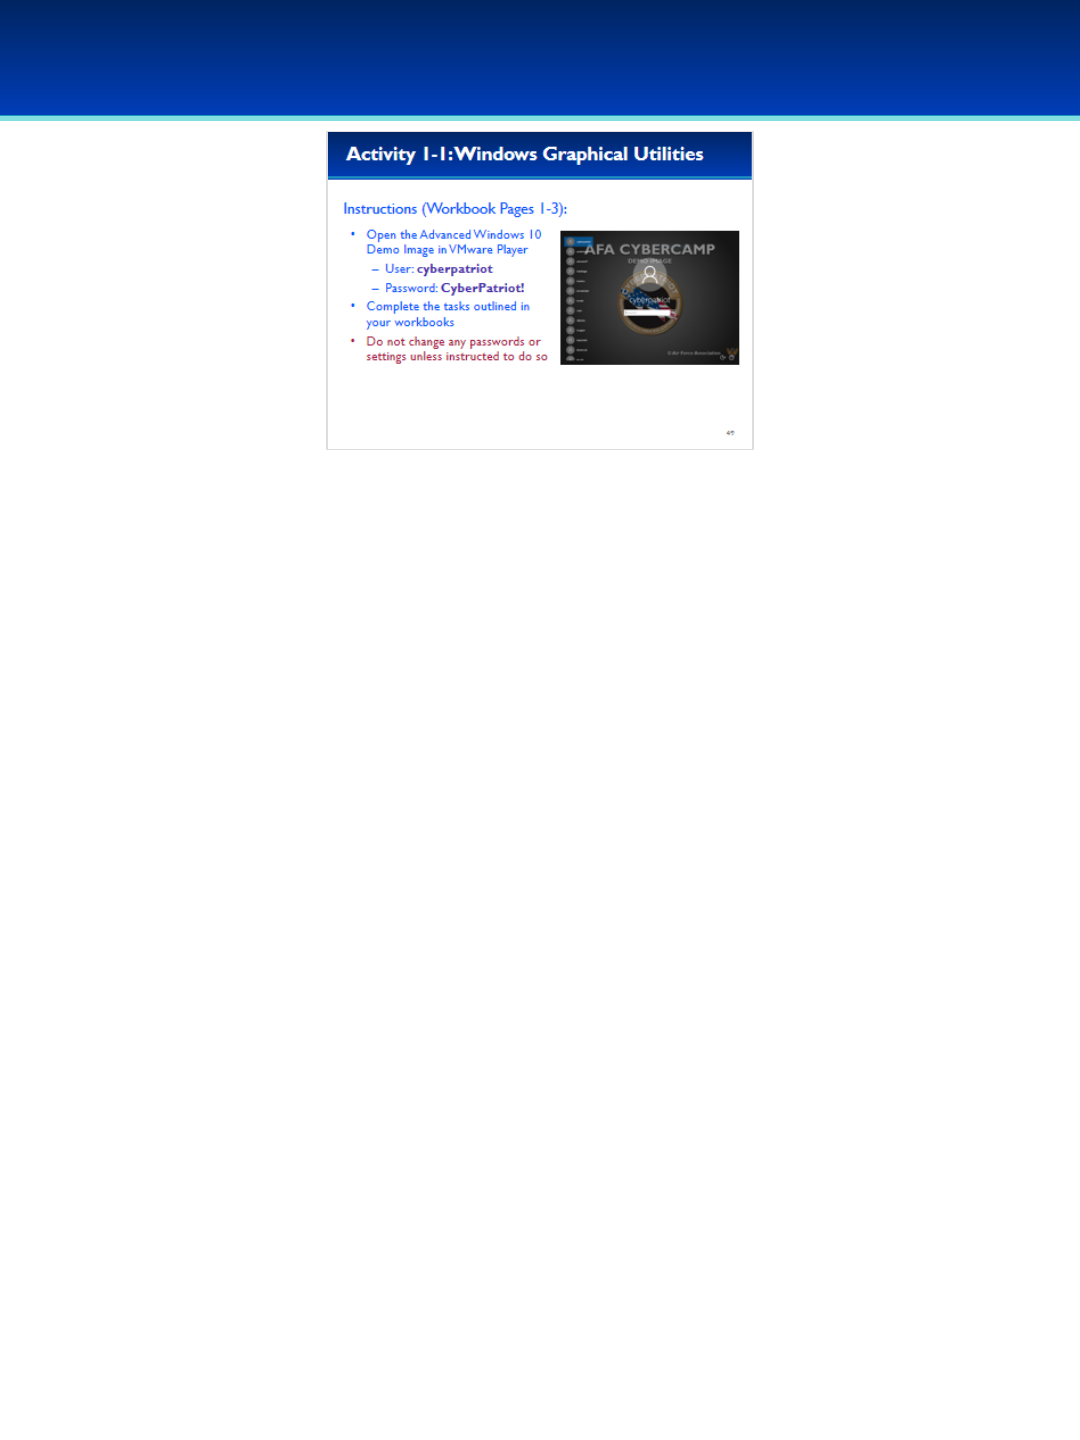
Slide 49
Windows 10
Give students about 20 minutes to complete the tasks listed on pages 1-3 of their Workbooks.
This lab will review the Local Security Policy, Local Group Policy Editor, and Shared Folders.
Stress that the students should not change any passwords or settings unless they are expressly directed
to do so in the activity.
The students should not need to use any other user names or passwords to complete the activities. Here
are the passwords to some administrative accounts just in case they get locked out.
Username: neumann
Password: vN_@rchit3cture
Username: hopper
Password: ENIAC.TurC0mp
Answers:
1. Secpol.msc
2. Babbage
3. -
4. Administrators
5. -
6. Enabled
7. -
8. Gpedit.msc
9. Under Administrative Templates, System, Logon, Show first sign-in animation is Disabled. Under
Adminstrative Templates, Windows Components, Windows Update, Configure Automatic Updates is Disabled
10. 1) Administrative Templates, System, Logon, Do not display network selection UI is Enabled;
2) Administrative Templates, Windows Components, Delivery Optimization, Download Mode is Enabled;
3) Administrative Templates, Control Panel, Personalization, Force a specific default lock screen and logon
image is Enabled;
4) Administrative Templates, Windows Components, OneDrive, Prevent the usage of OneDrive for file
storage is Enabled;
5) Administrative Templates, Windows Components, Windows Defender, Turn off Windows Defender is
Enabled
11. fsmgmt.msc
12. ADMIN$, C$, IPC$
13. testing$
14. -
© 2018 Air Force Association
AFA Advanced CyberCamp Instructor’s Guide
Page 56
Slide 50
Windows 10
Devote 30 minutes to Slides 51-89. Allow the students 20 minutes
to complete the activity on Slide 90.
Throughout this section, students should follow along in the
Advanced Windows 10 Demo Image.
Actions the students are supposed to take are highlighted in blue
and purple.
Purple indicates exact text they are supposed to type or GUI
elements they should interact with.
© 2018 Air Force Association
AFA Advanced CyberCamp Instructor’s Guide
Page 57
Slide 51
Windows 10
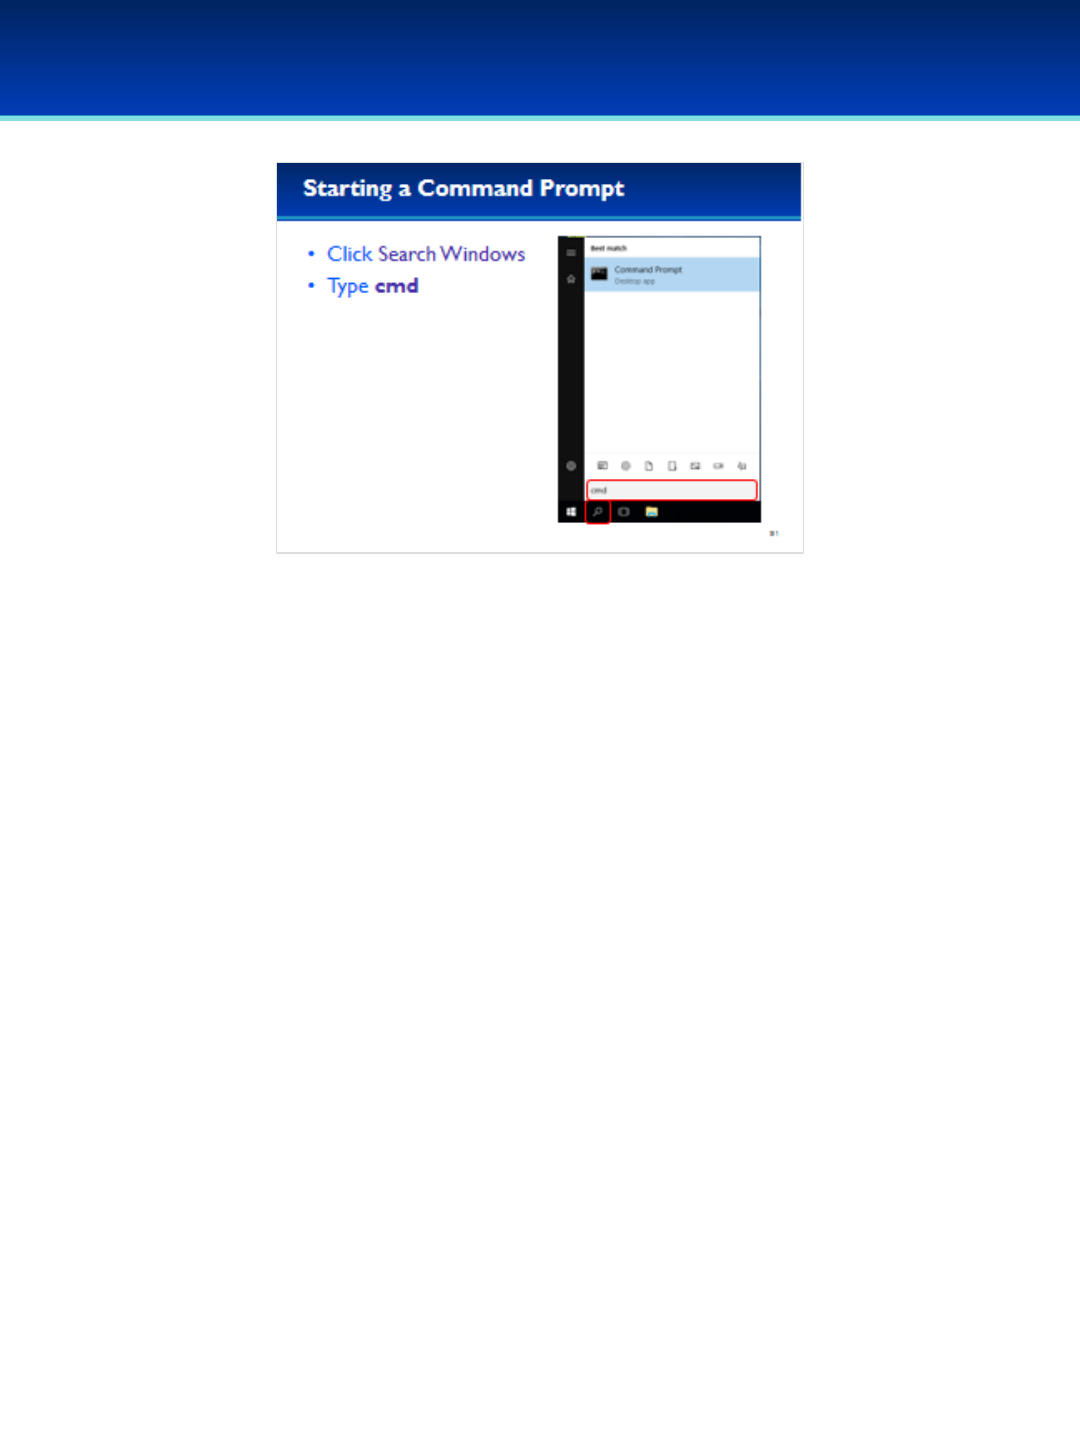
•For this section we will need to open a command prompt as
administrator in order to make full use of the commands we
will be learning about.
•Click Search Windows (the magnifying glass next to the Start
button).
•Type cmd but don’t press Enter.
© 2018 Air Force Association
AFA Advanced CyberCamp Instructor’s Guide
Page 58
Slide 52
Windows 10
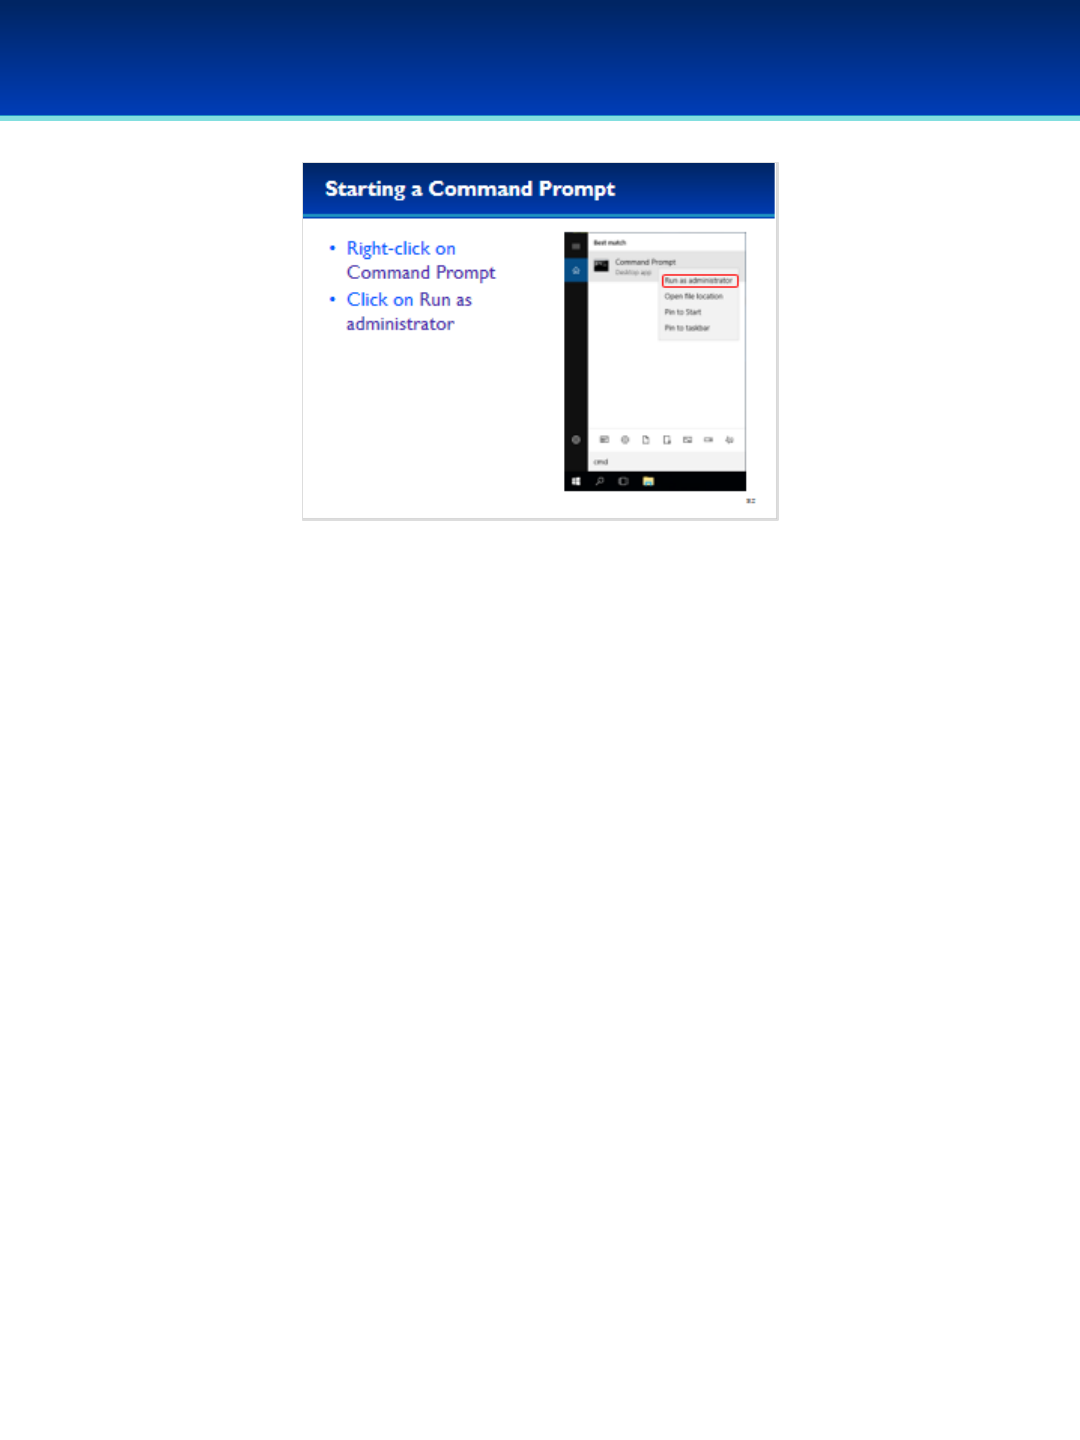
•Right-click on Command Prompt and select Run as
administrator.
•UAC will ask you if you want to allow this app to make
changes to your device.
•Click Yes to continue.
© 2018 Air Force Association
AFA Advanced CyberCamp Instructor’s Guide
Page 59
Slide 53
Windows 10
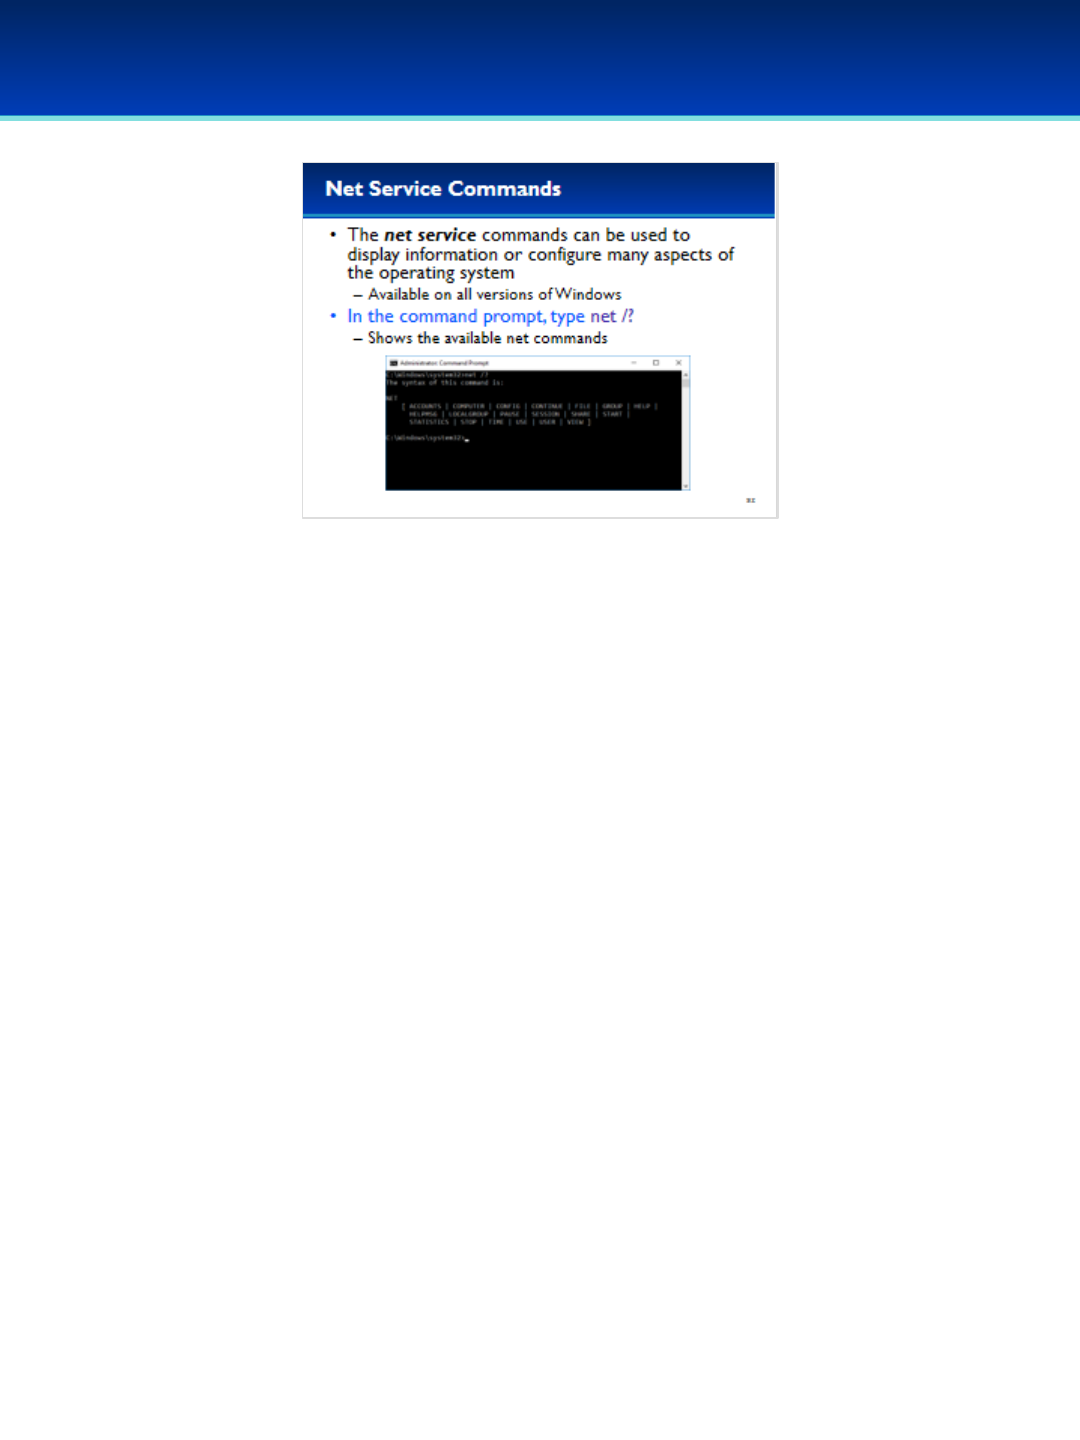
•The Net Service suite of commands can be used to configure or
display information about the current configuration of the
operating system.
•In the command prompt type: net /?
•As you can see, there are many different net commands available.
We will only be covering a few of the most important ones today.
•Remember, in Windows, capitalization usually does not matter.
The net commands can be typed as uppercase or lowercase, it
makes no difference.
© 2018 Air Force Association
AFA Advanced CyberCamp Instructor’s Guide
Page 60
Slide 54
Windows 10
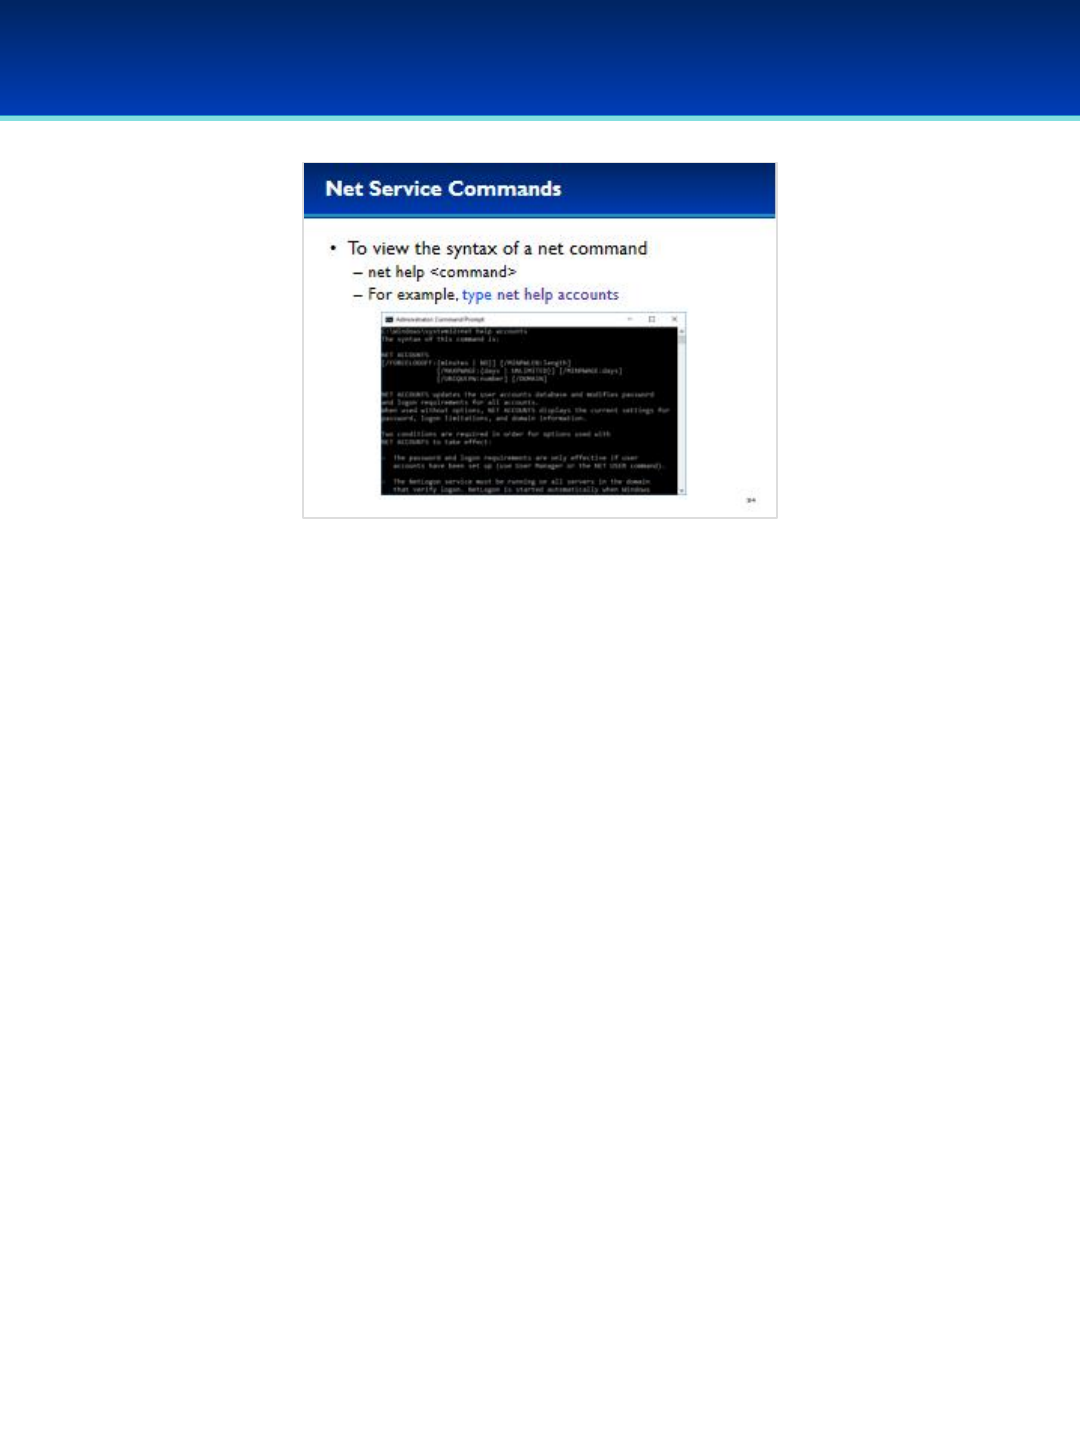
•The first command we are going to cover is net accounts.
•To display the syntax of the different net commands you can
use the help command.
•Type net help accounts now to display the syntax for the
accounts command.
•Take a minute to scroll up and down examining the output.
© 2018 Air Force Association
AFA Advanced CyberCamp Instructor’s Guide
Page 61
Slide 55
Windows 10
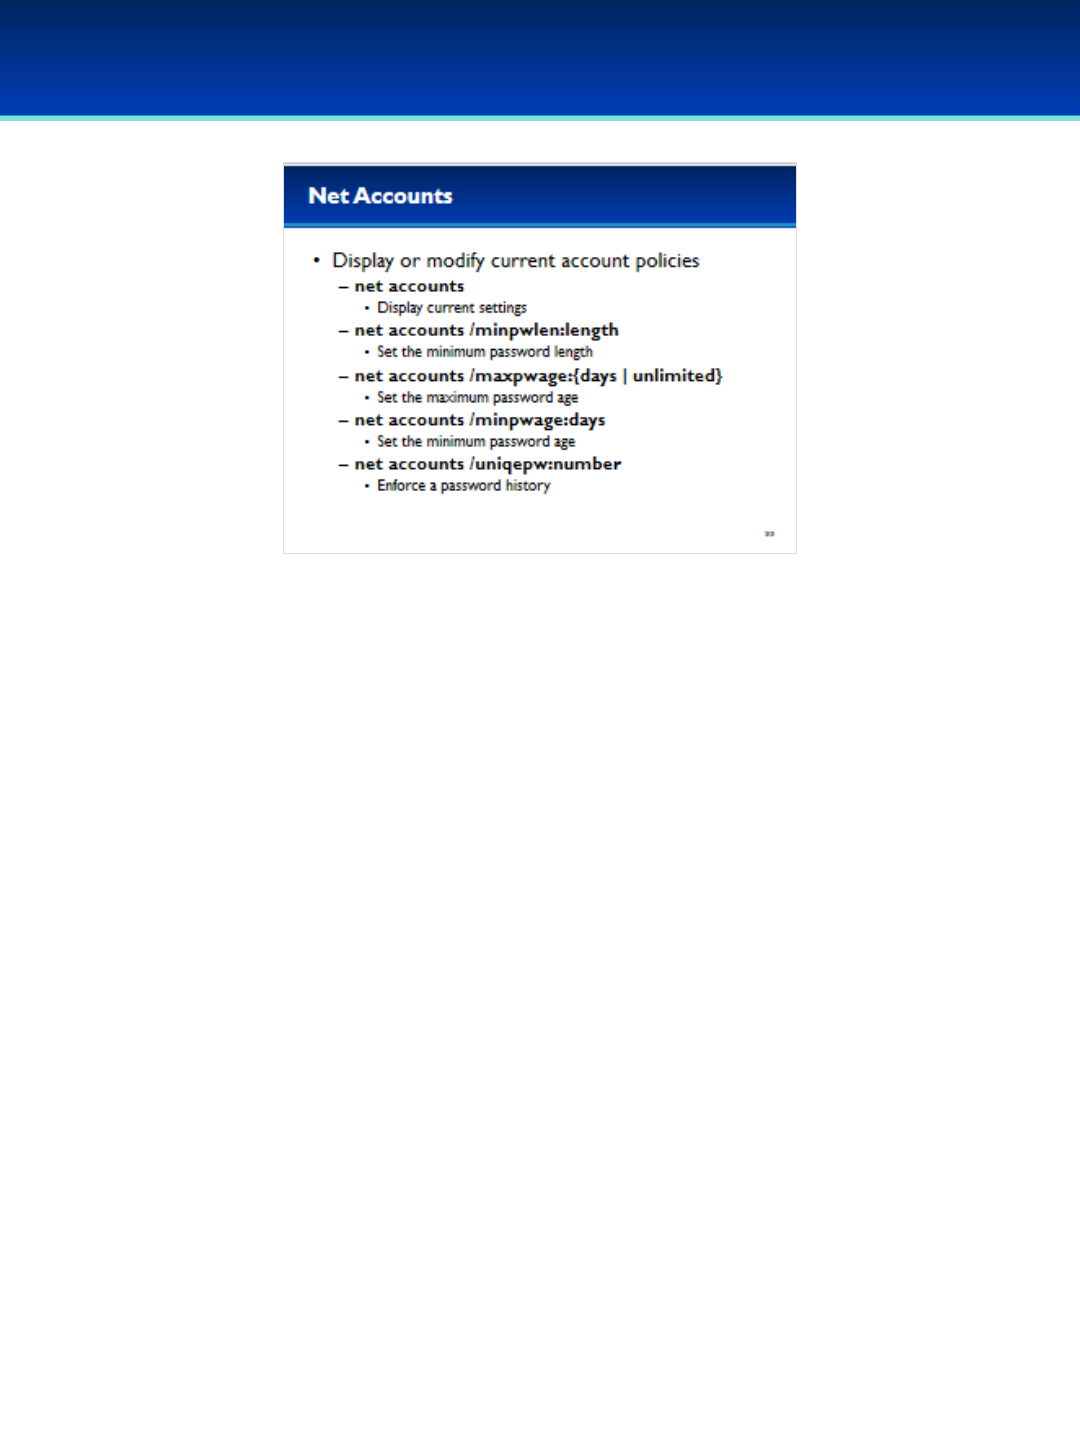
•We’re not going to cover everything the net accounts command
can do, but here are is the syntax of some of the important
operations.
•Running net accounts with no additional parameters will display
the current settings.
•Net accounts can also be used to set the minimum password
length, the maximum password age, and the minimum password
age.
•Additionally, net accounts can be used to enforce a password
history, preventing users from using the same password for a
number of password changes.
© 2018 Air Force Association
AFA Advanced CyberCamp Instructor’s Guide
Page 62
Slide 56
Windows 10
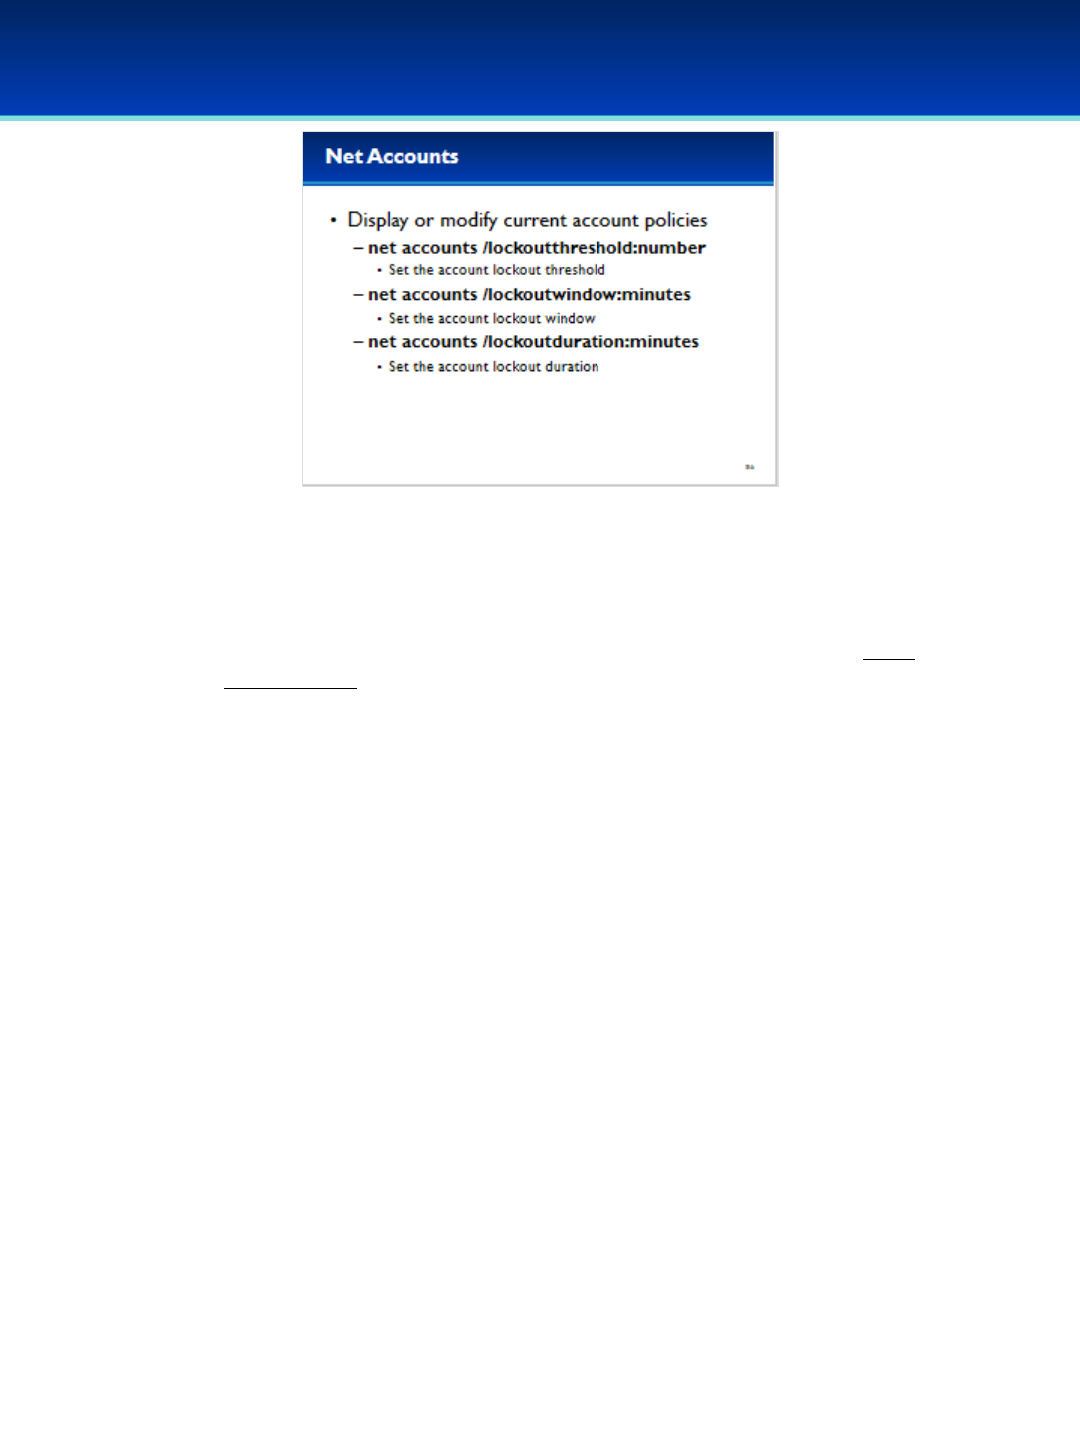
•Although it is not described in the help, net accounts can also set
account lockout settings including the lockout threshold, lockout
duration, and lockout window.
Stress that the students should not set the lockout threshold to a value
less than five when participating in the competition on Friday to
prevent locking themselves out while competing.
These settings were described in the basic class, but we will provide a
brief description in case more elaboration is needed.
Lockout threshold is the number of invalid login attempts before the
account is locked out; Microsoft recommends setting this to between
5-50 inclusive ( https://technet.microsoft.com/en-
us/library/hh994574(v=ws.11).aspx )
Lockout window is the amount of time after a failed login attempt
before the lockout threshold counter is reset; Microsoft recommends
setting this to approximately 30 (https://technet.microsoft.com/en-
us/library/hh994568(v=ws.11).aspx )
Lockout duration is the amount of time that the account remains
locked out; Microsoft recommends setting this to approximately 30
(https://technet.microsoft.com/enus/library/hh994569(v=ws.11).aspx )

© 2018 Air Force Association
AFA Advanced CyberCamp Instructor’s Guide
Page 63
Slide 57
Windows 10
•Type net accounts to view the current settings.
•This computer currently has no password policy or account
lockout policy.
© 2018 Air Force Association
AFA Advanced CyberCamp Instructor’s Guide
Page 64
Slide 58
Windows 10
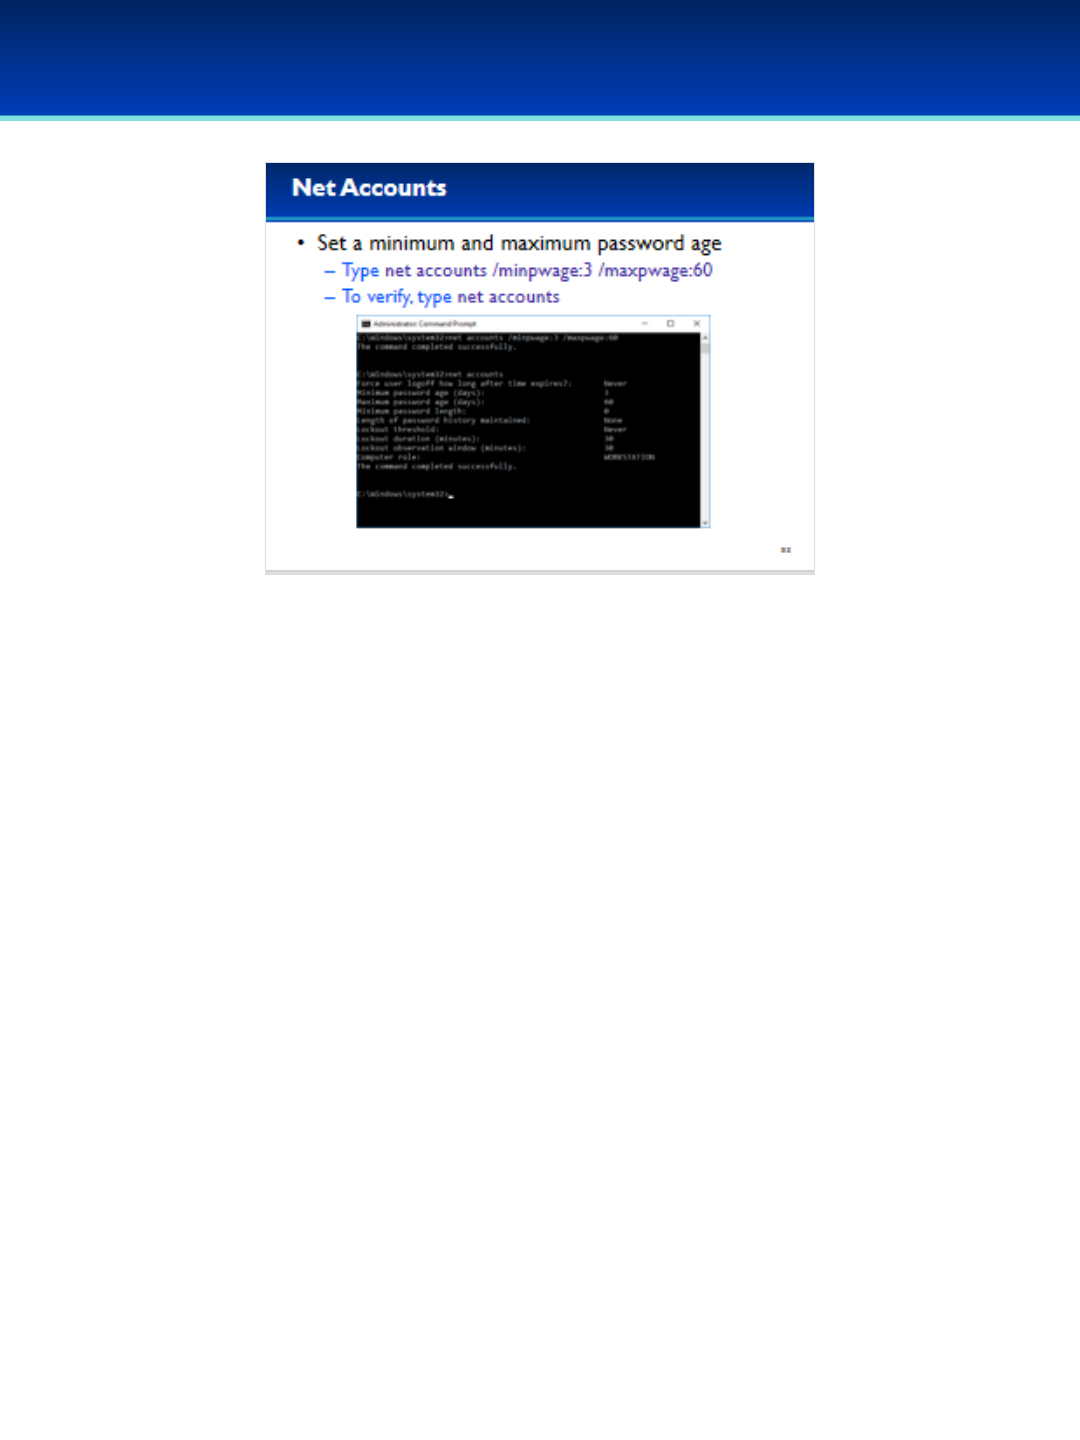
•This computer needs a more secure password policy.
•Type net accounts /minpwage:3 /maxpwage:60 and press
Enter.
•This sets a minimum password age of three and a maximum
password age of 60.
•Type net accounts again to verify the settings.
© 2018 Air Force Association
AFA Advanced CyberCamp Instructor’s Guide
Page 65
Slide 59
Windows 10
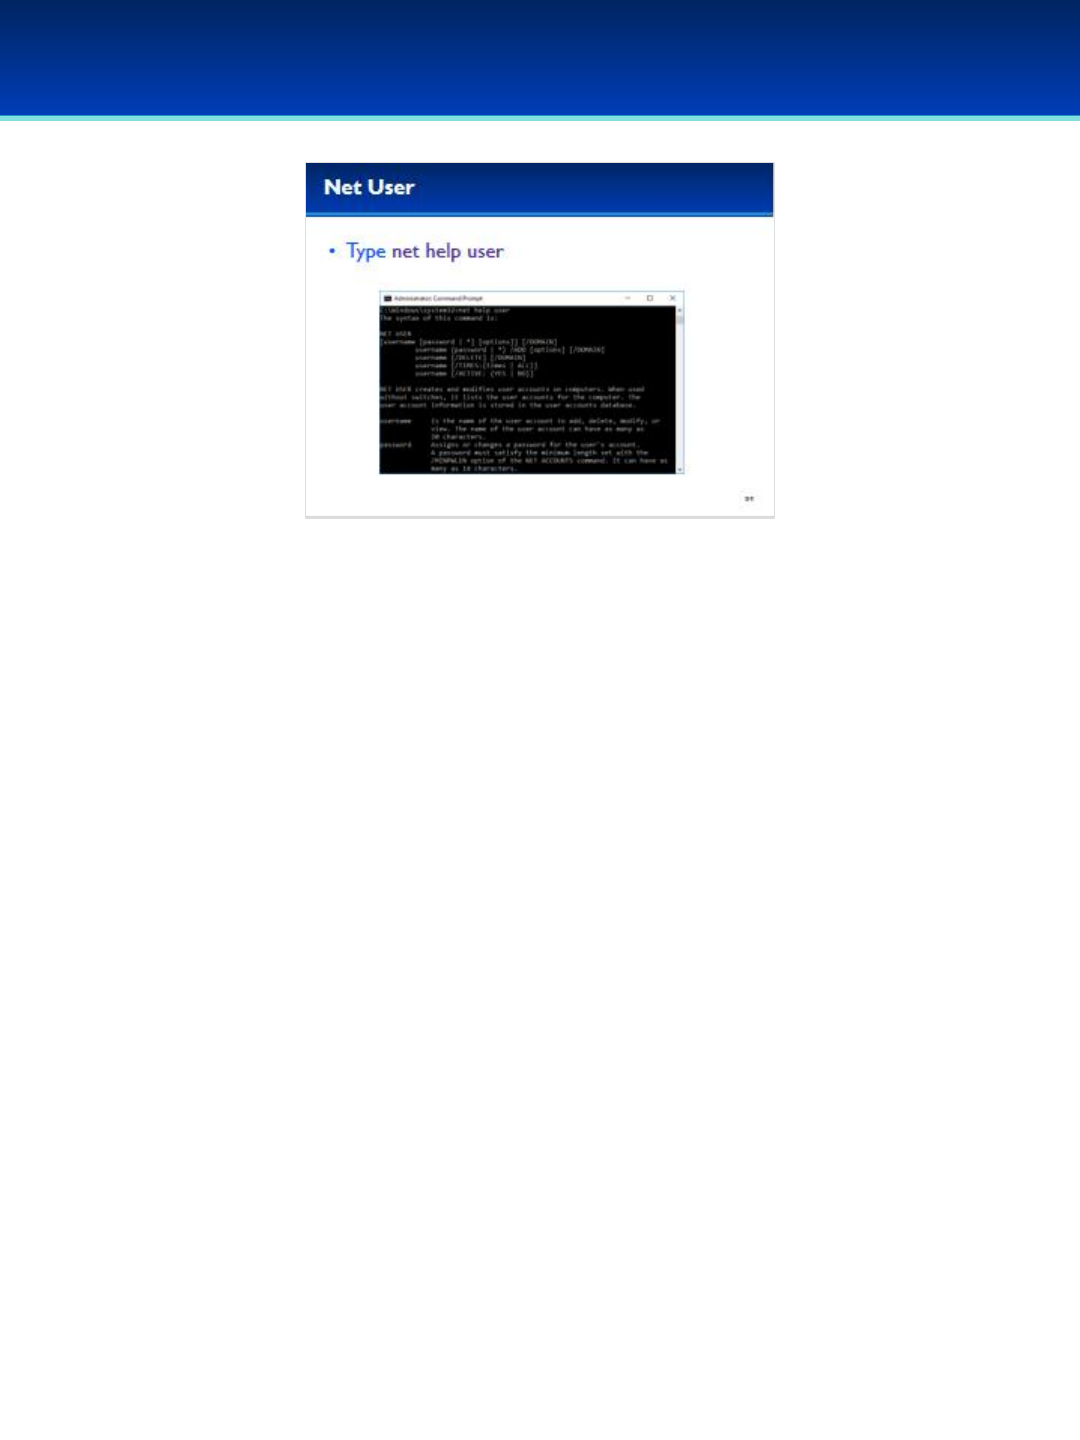
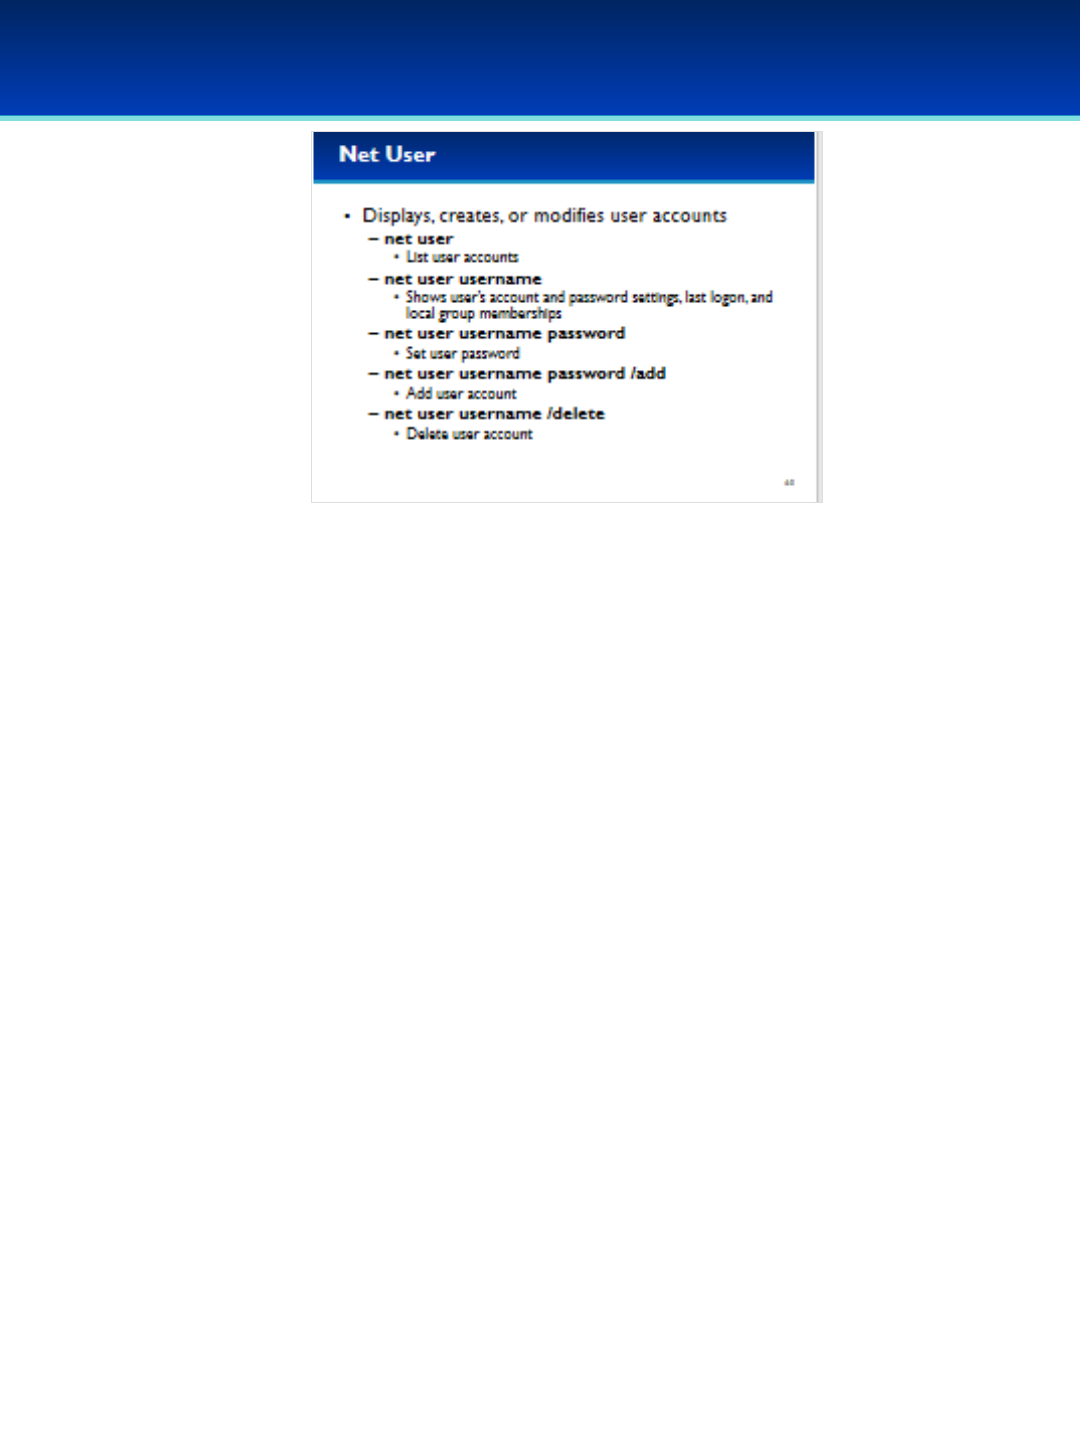
•Now we are going to cover the net user command.
•Type net help user to display the help for the net user
command.
© 2018 Air Force Association
AFA Advanced CyberCamp Instructor’s Guide
Page 66
Slide 60
Windows 10
•Net user will list the current user accounts on the system,
including accounts that may be hidden from Control Panel
User Management.
- These are the same users shown on the Local Users
and Groups MMC plugin.
•Net user can be used to add or remove users, change
user passwords, and see the last logon date and time as
well as account and password settings.
© 2018 Air Force Association
AFA Advanced CyberCamp Instructor’s Guide
Page 67
Slide 61
Windows 10
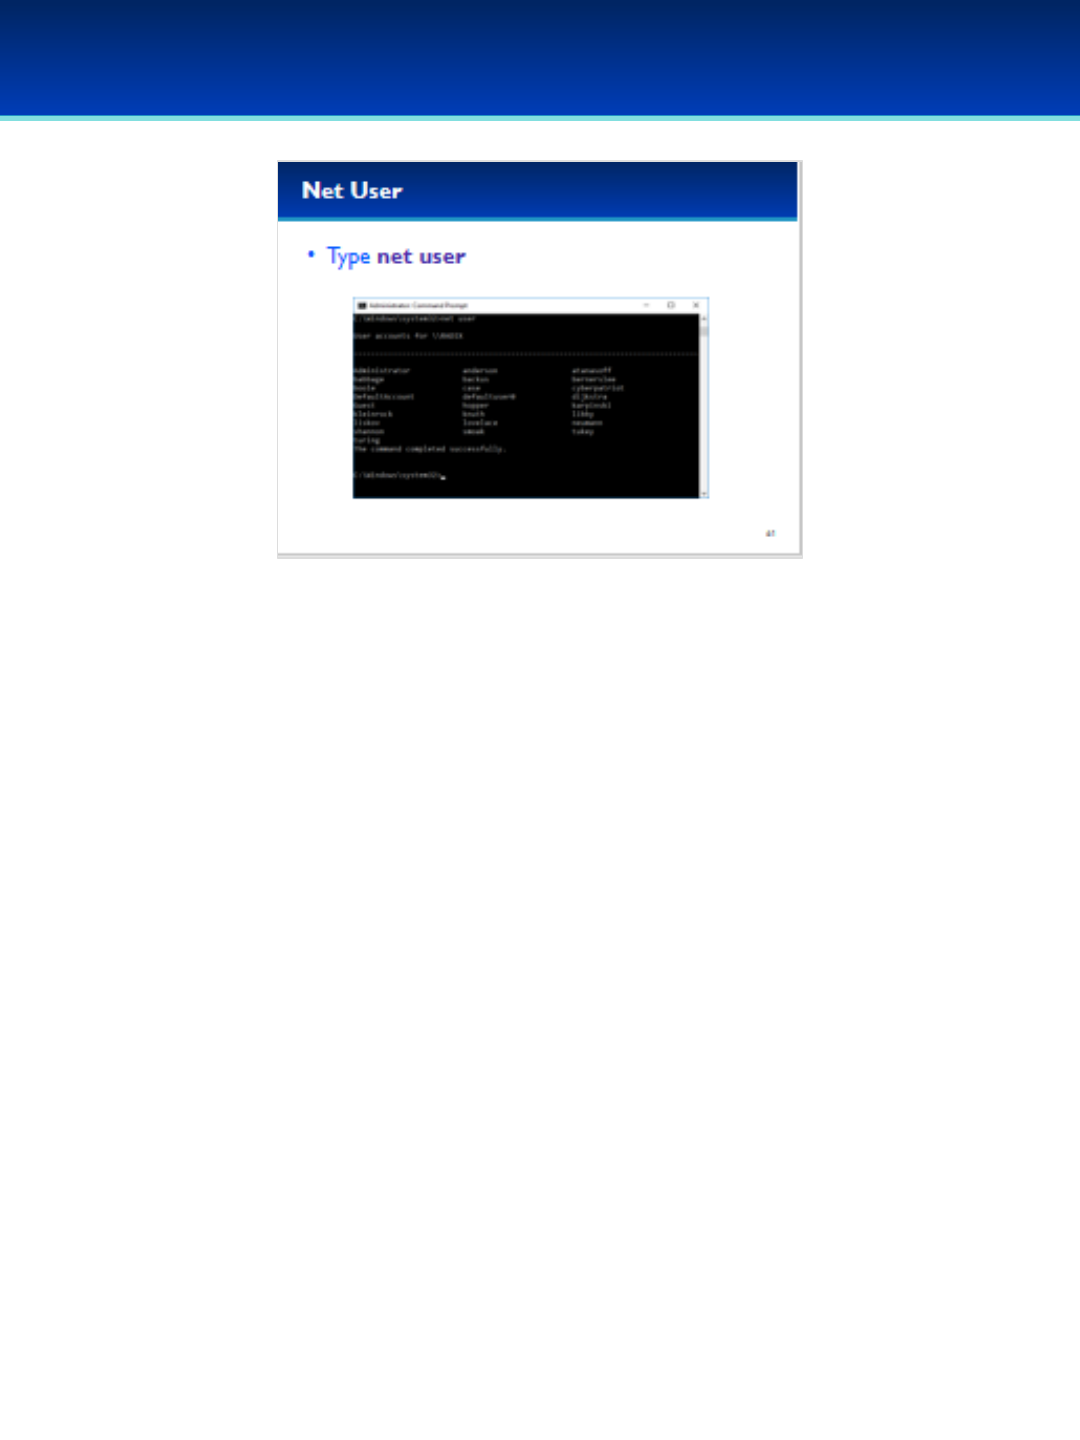
•Type net user to display current user accounts.
© 2018 Air Force Association
AFA Advanced CyberCamp Instructor’s Guide
Page 68
Slide 62
Windows 10
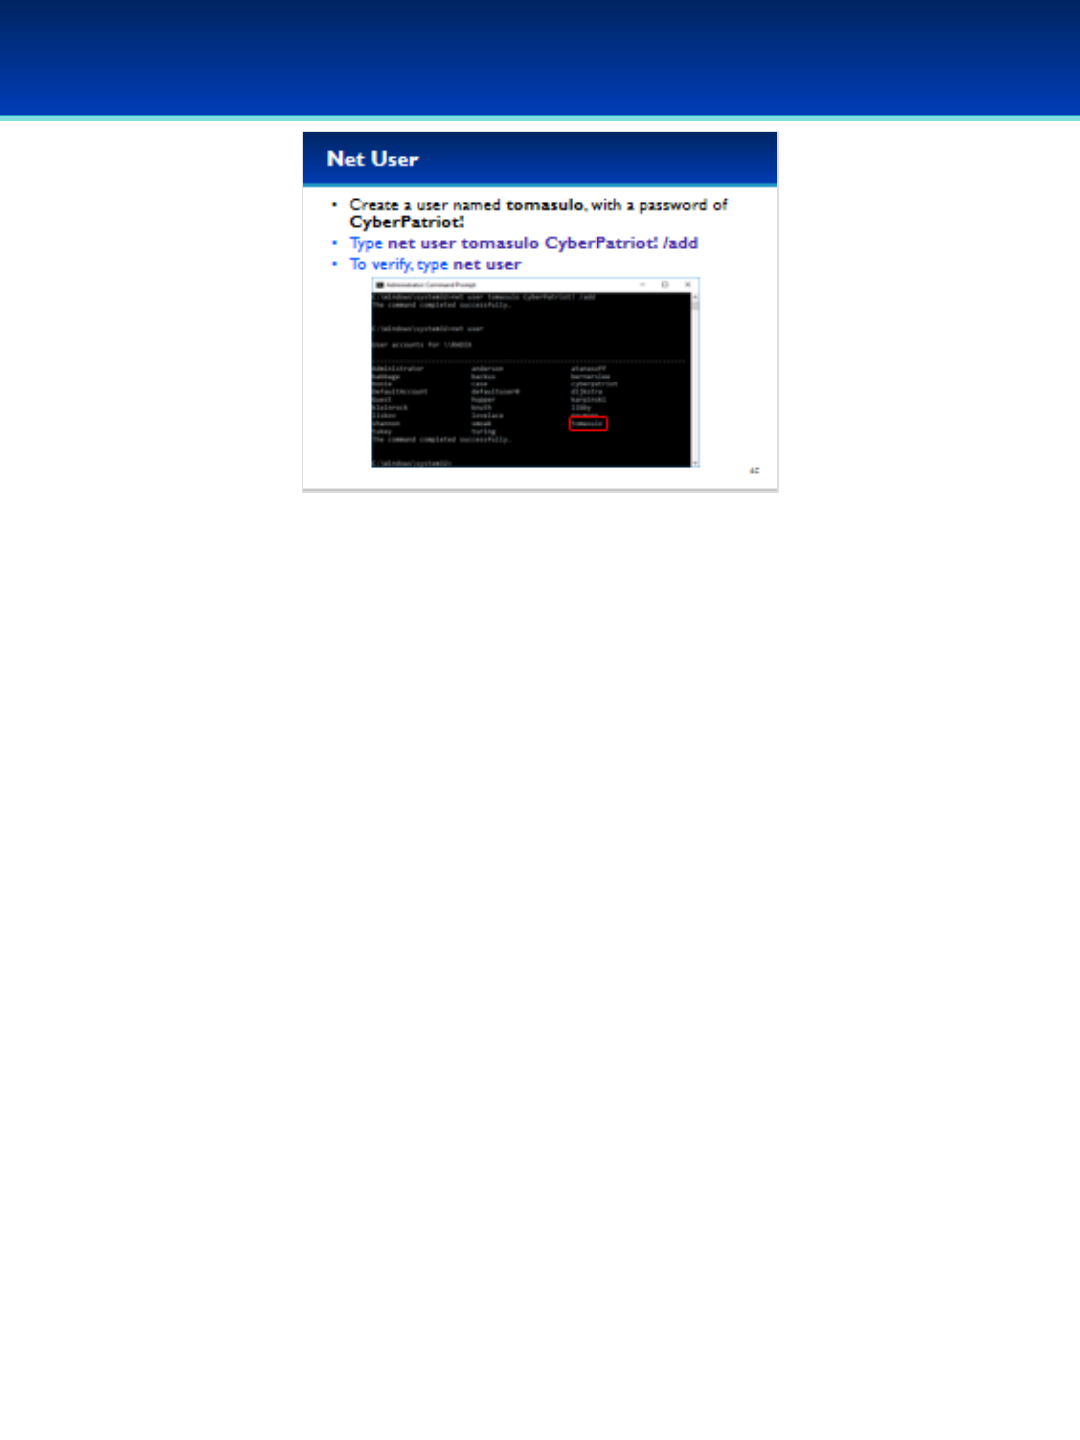
•Let’s create a new user named tomasulo with a password of
CyberPatriot!
•Type: net user tomasulo CyberPatriot! /add
•Next, type net user in order to verify that we created the
account.
Robert Tomasulo created a hardware algorithm allowing for dynamic
out of order execution of computer commands, derivatives of this
algorithm are present in most modern processers, this algorithm is
commonly referred to as Tomasulo’s algorithm.
© 2018 Air Force Association
AFA Advanced CyberCamp Instructor’s Guide
Page 69
Slide 63
Windows 10
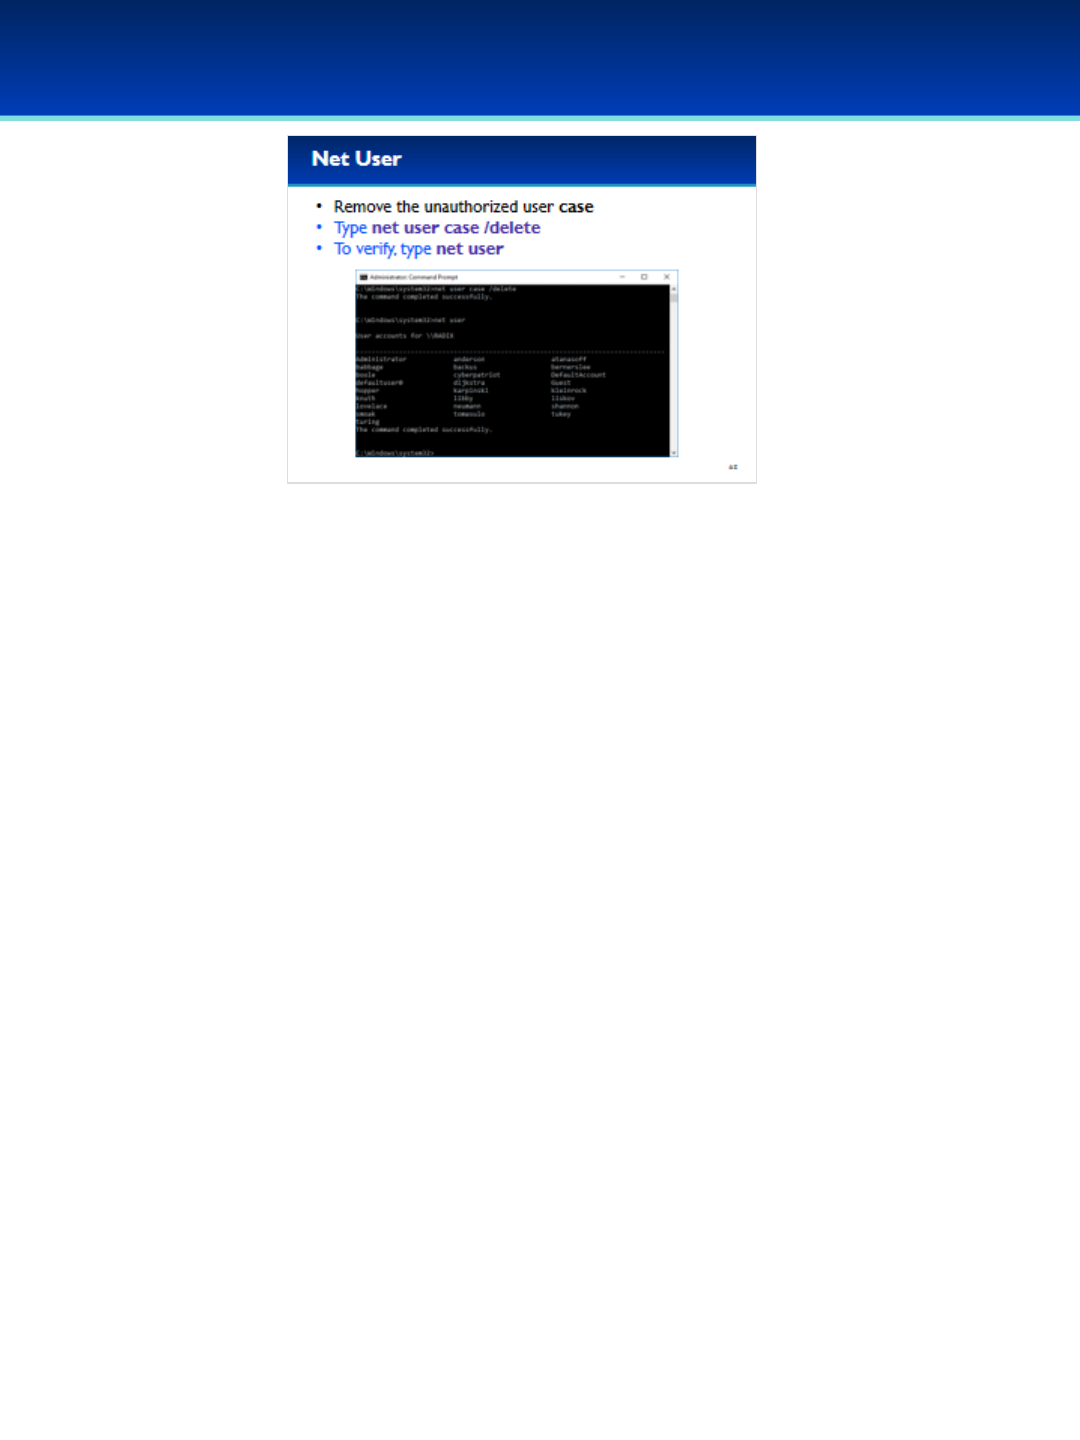
•The user case is unauthorized.
•Type: net user case /delete
•To verify the user was deleted, type: net user
© 2018 Air Force Association
AFA Advanced CyberCamp Instructor’s Guide
Page 70
Slide 64
Windows 10
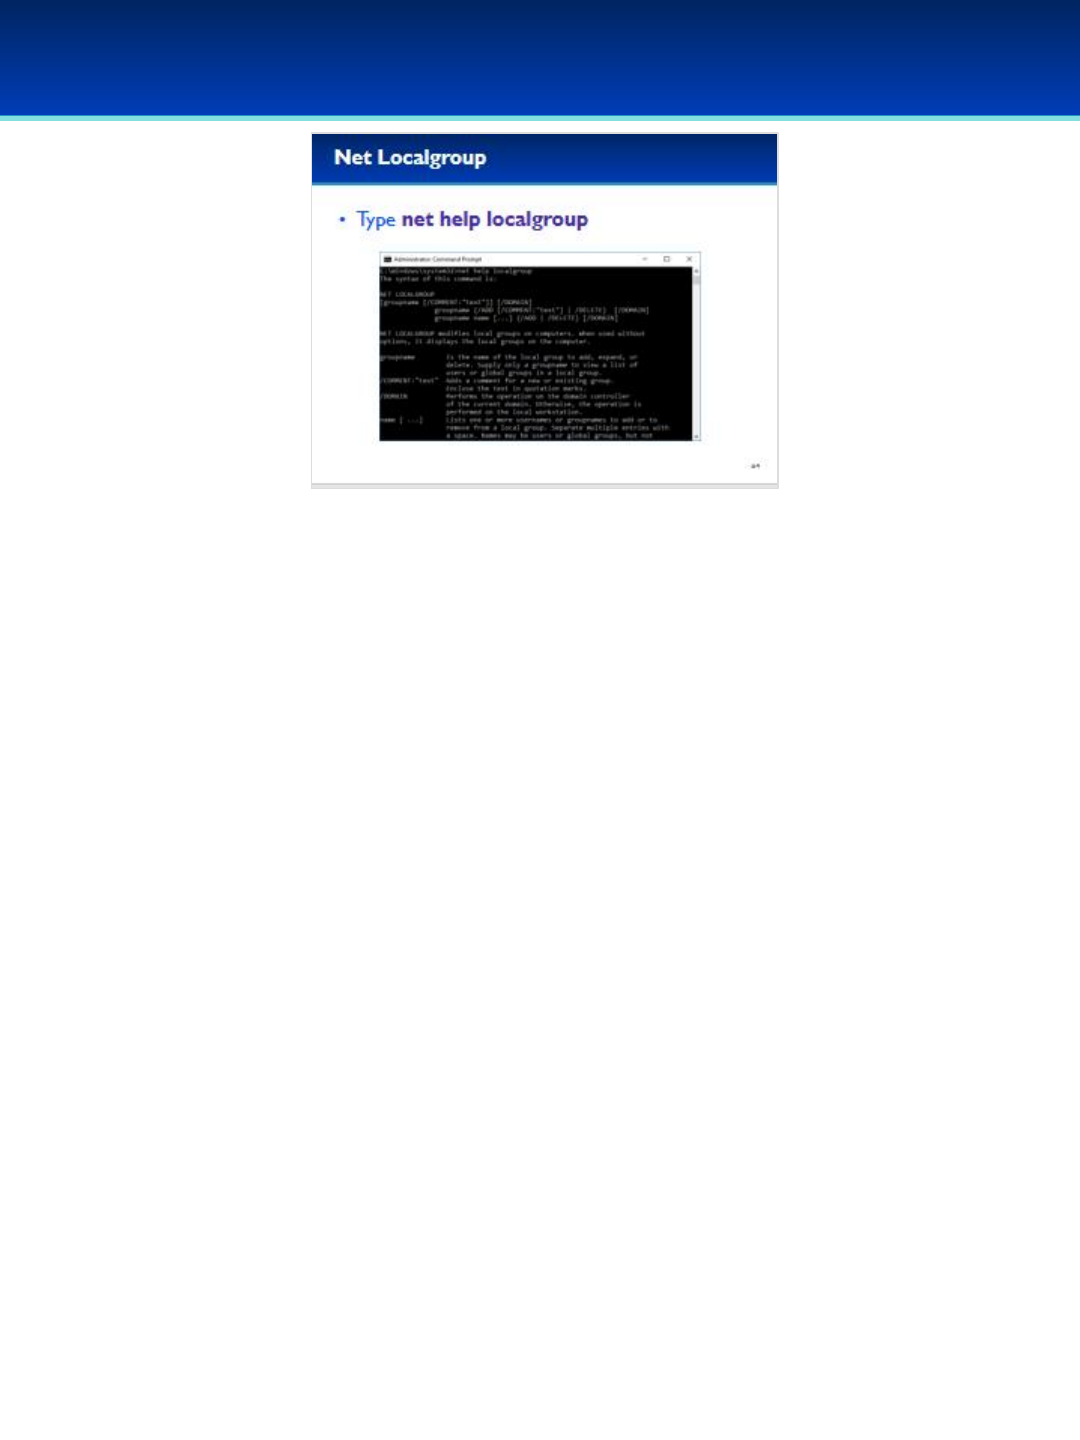
•The next command we are going to cover is the net
localgroup command.
•Type net help localgroup to view the command syntax for
the net localgroup command.
© 2018 Air Force Association
AFA Advanced CyberCamp Instructor’s Guide
Page 71
Slide 65
Windows 10
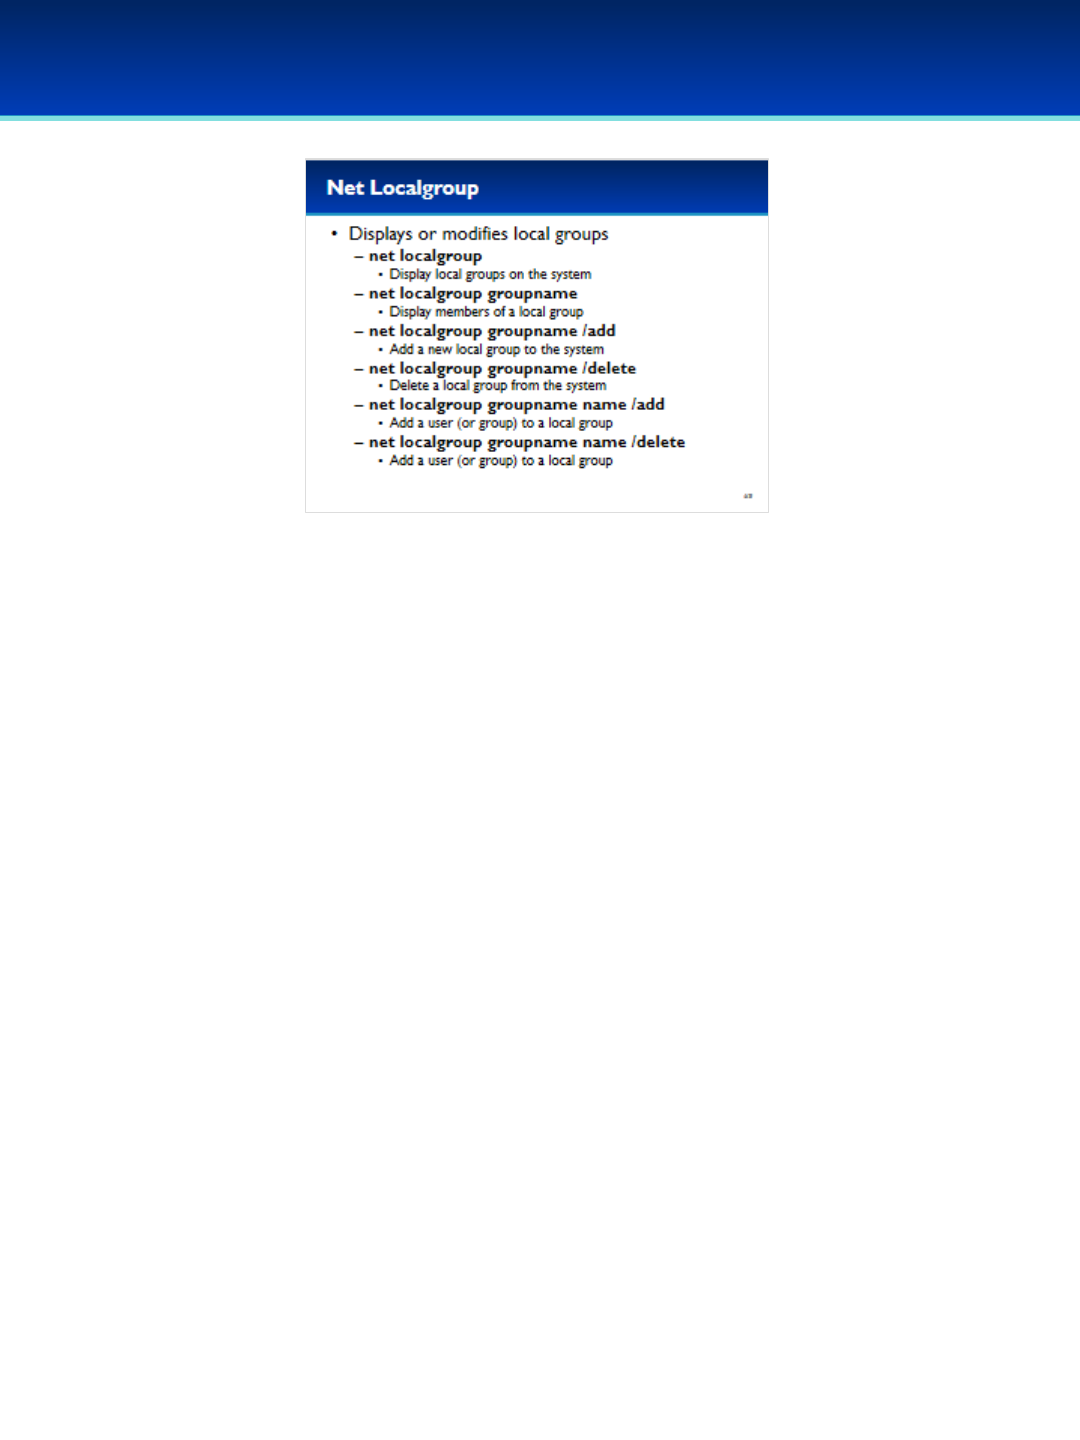
•Just like net user, net localgroup can display or modify local
groups.
- These are the same users shown on the Local Users and
Groups MMC plugin.
•Net localgroup with no options will display the current local
groups on the system.
•Net localgroup can add or delete groups.
•Additionally, net localgroup can add or remove users or
groups from existing groups.
© 2018 Air Force Association
AFA Advanced CyberCamp Instructor’s Guide
Page 72
Slide 66
Windows 10
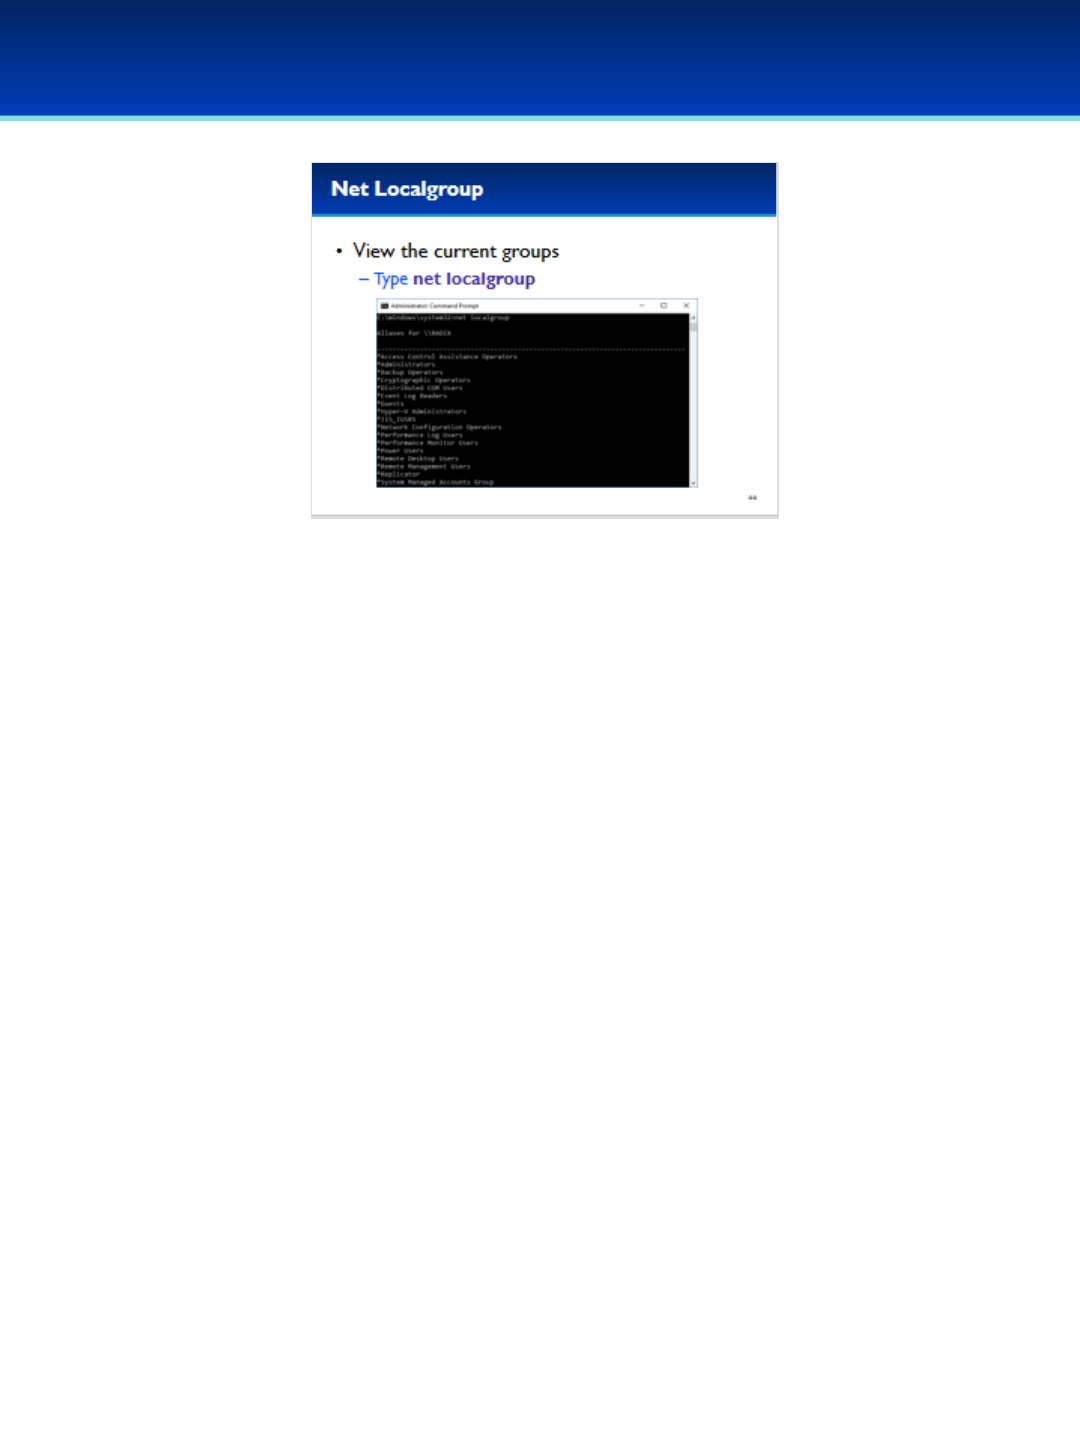
•View the current groups on the system by typing: net
localgroup
© 2018 Air Force Association
AFA Advanced CyberCamp Instructor’s Guide
Page 73
Slide 67
Windows 10
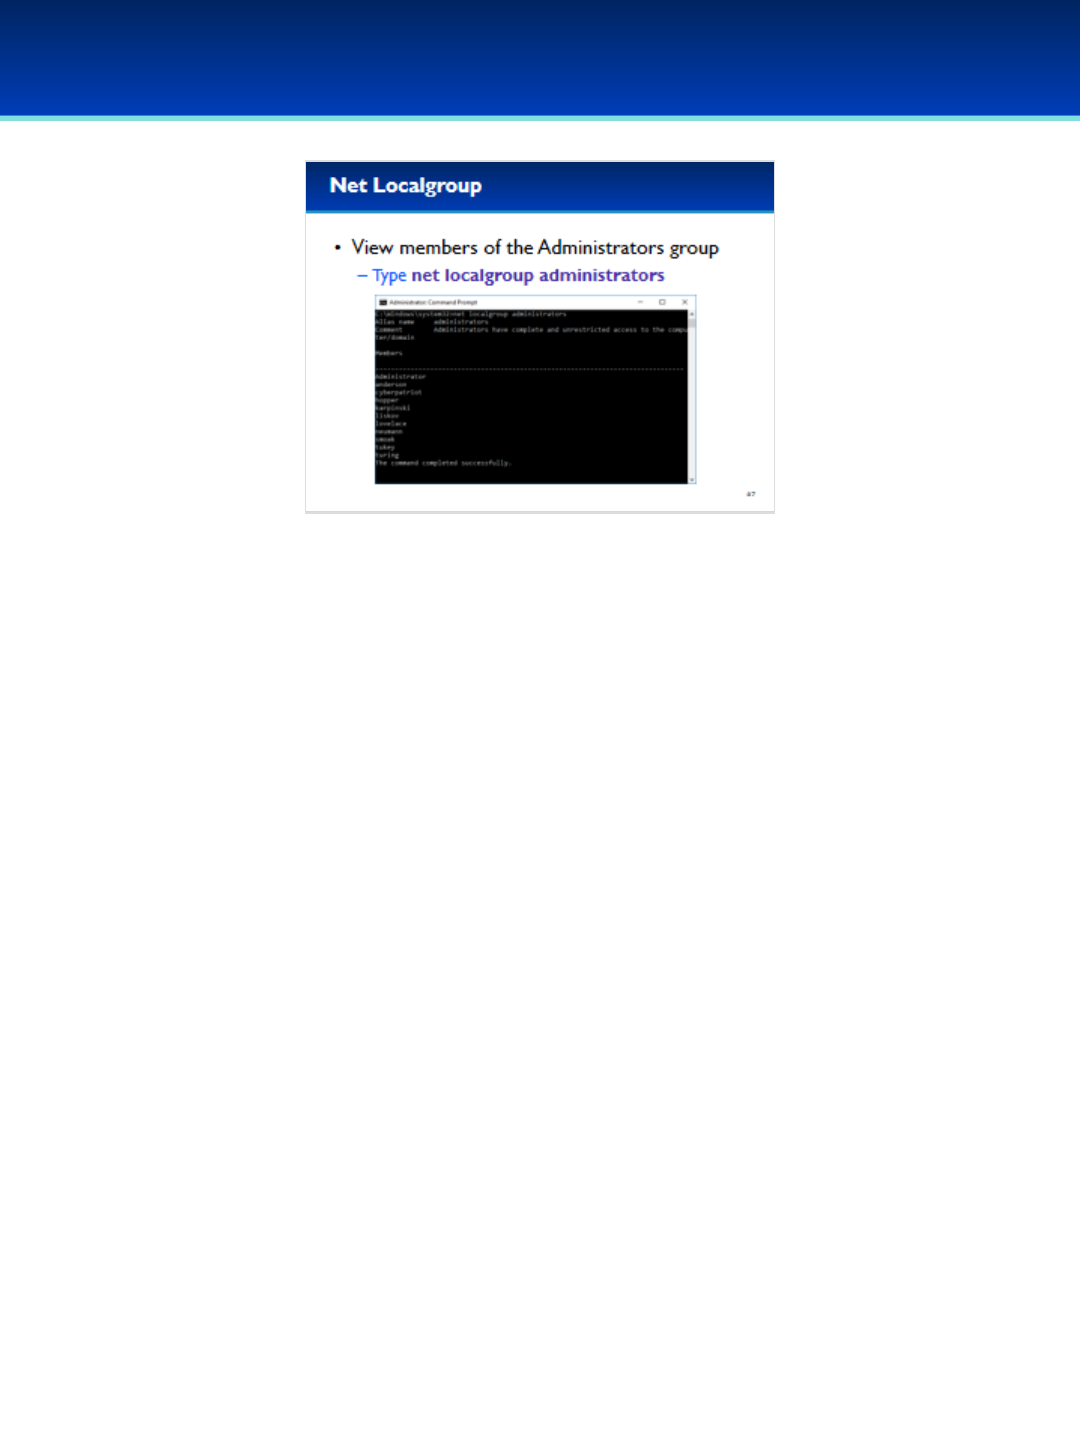
•View the members of the Administrators group by typing:
net localgroup administrators
© 2018 Air Force Association
AFA Advanced CyberCamp Instructor’s Guide
Page 74
Slide 68
Windows 10
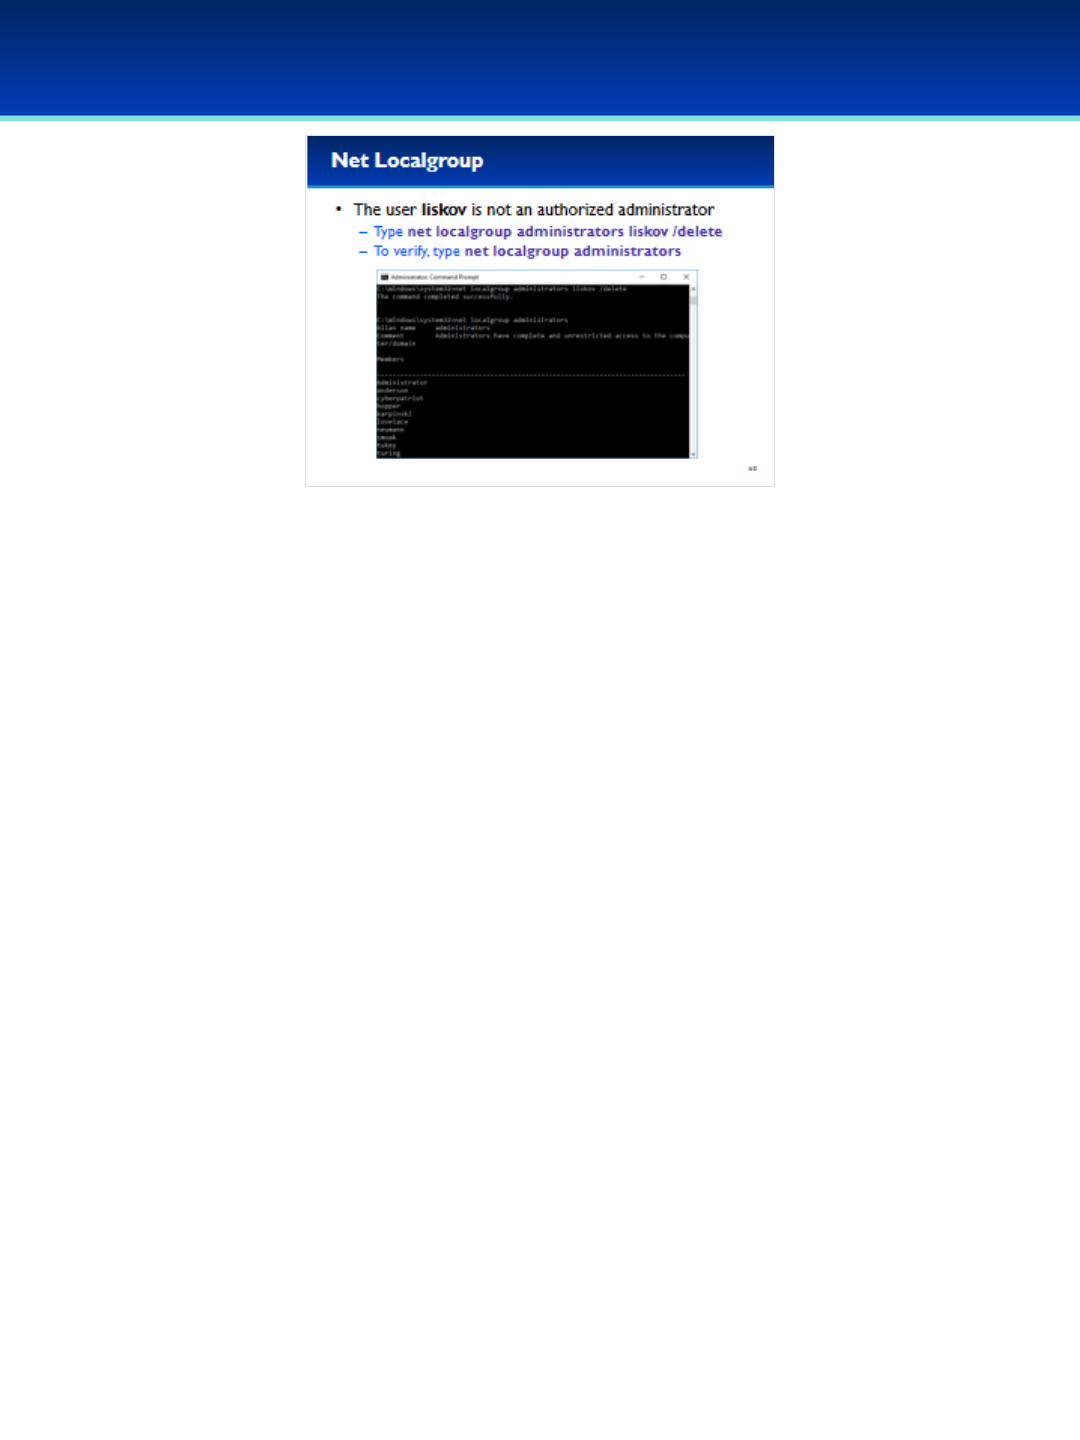
•The user liskov is not an authorized administrator and should be
removed from the Administrators group.
•Type net localgroup administrators liskov /delete and press
Enter.
•Next, type net localgroup administrators to verify that liskov is
no longer in the Administrators group.
Barbara Liskov created the Argus programming language at MIT, a
groundbreaking high-level programming language designed to
support the development of distributed programs (She became one
of the first women to receive a Ph.D. in computer science in 1968
from Stanford University).
© 2018 Air Force Association
AFA Advanced CyberCamp Instructor’s Guide
Page 75
Slide 69
Windows 10
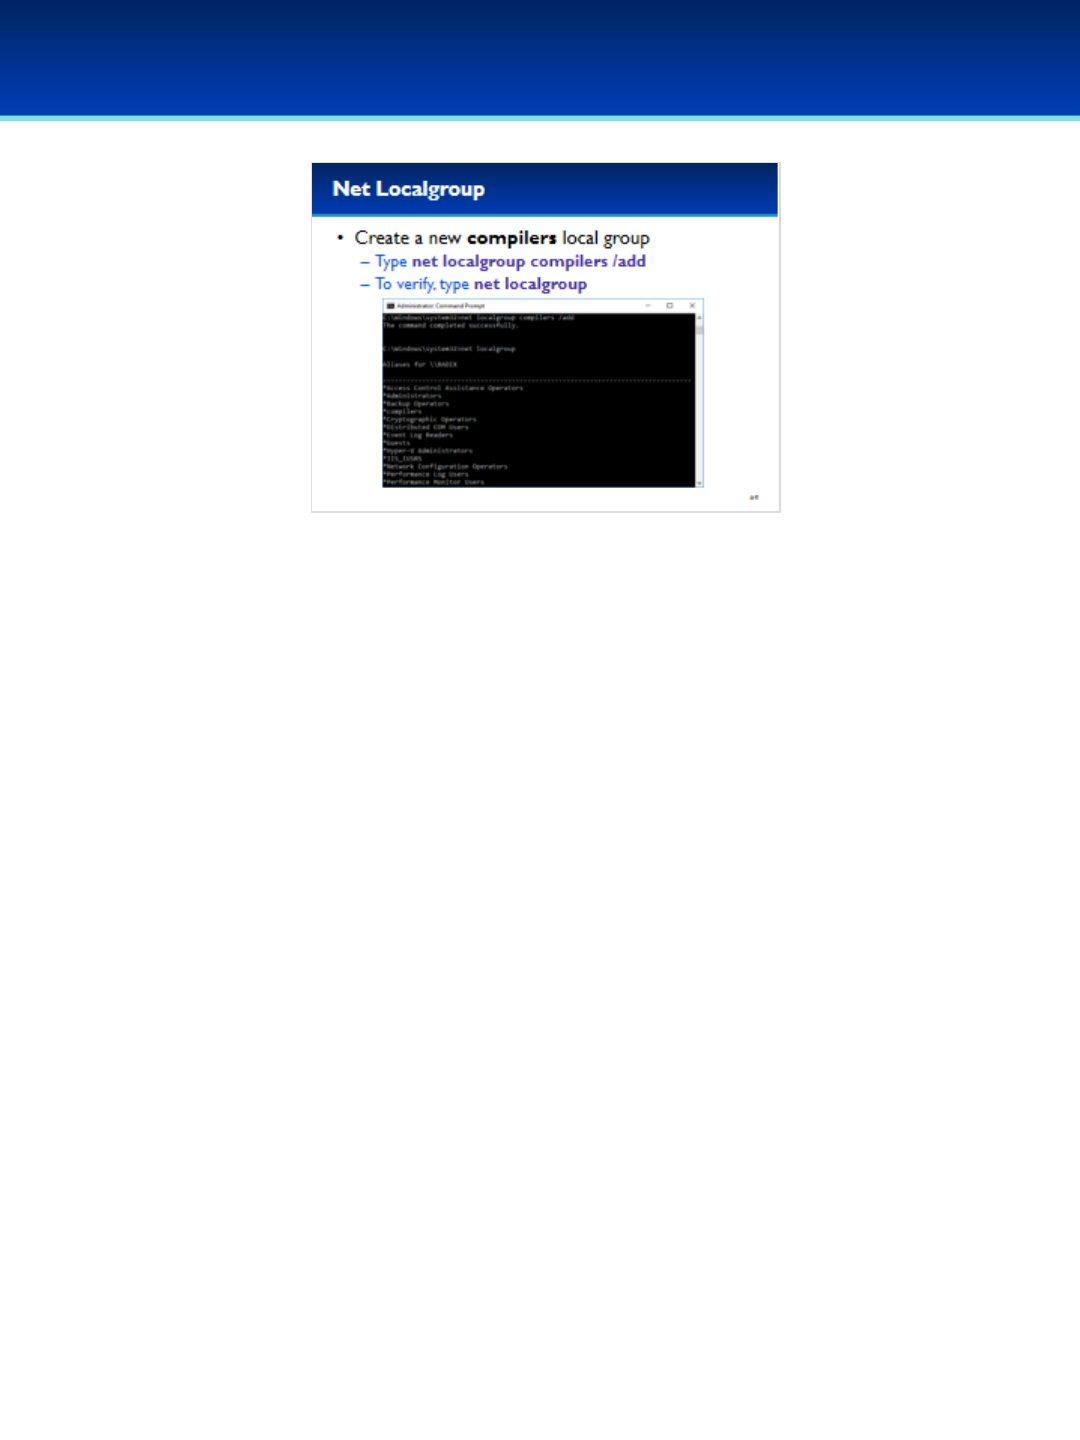
•Use net localgroup to create a new compilers group.
•Type: net localgroup compilers /add
•To verify the new group has been created, type: net
localgroup
© 2018 Air Force Association
AFA Advanced CyberCamp Instructor’s Guide
Page 76
Slide 70
Windows 10
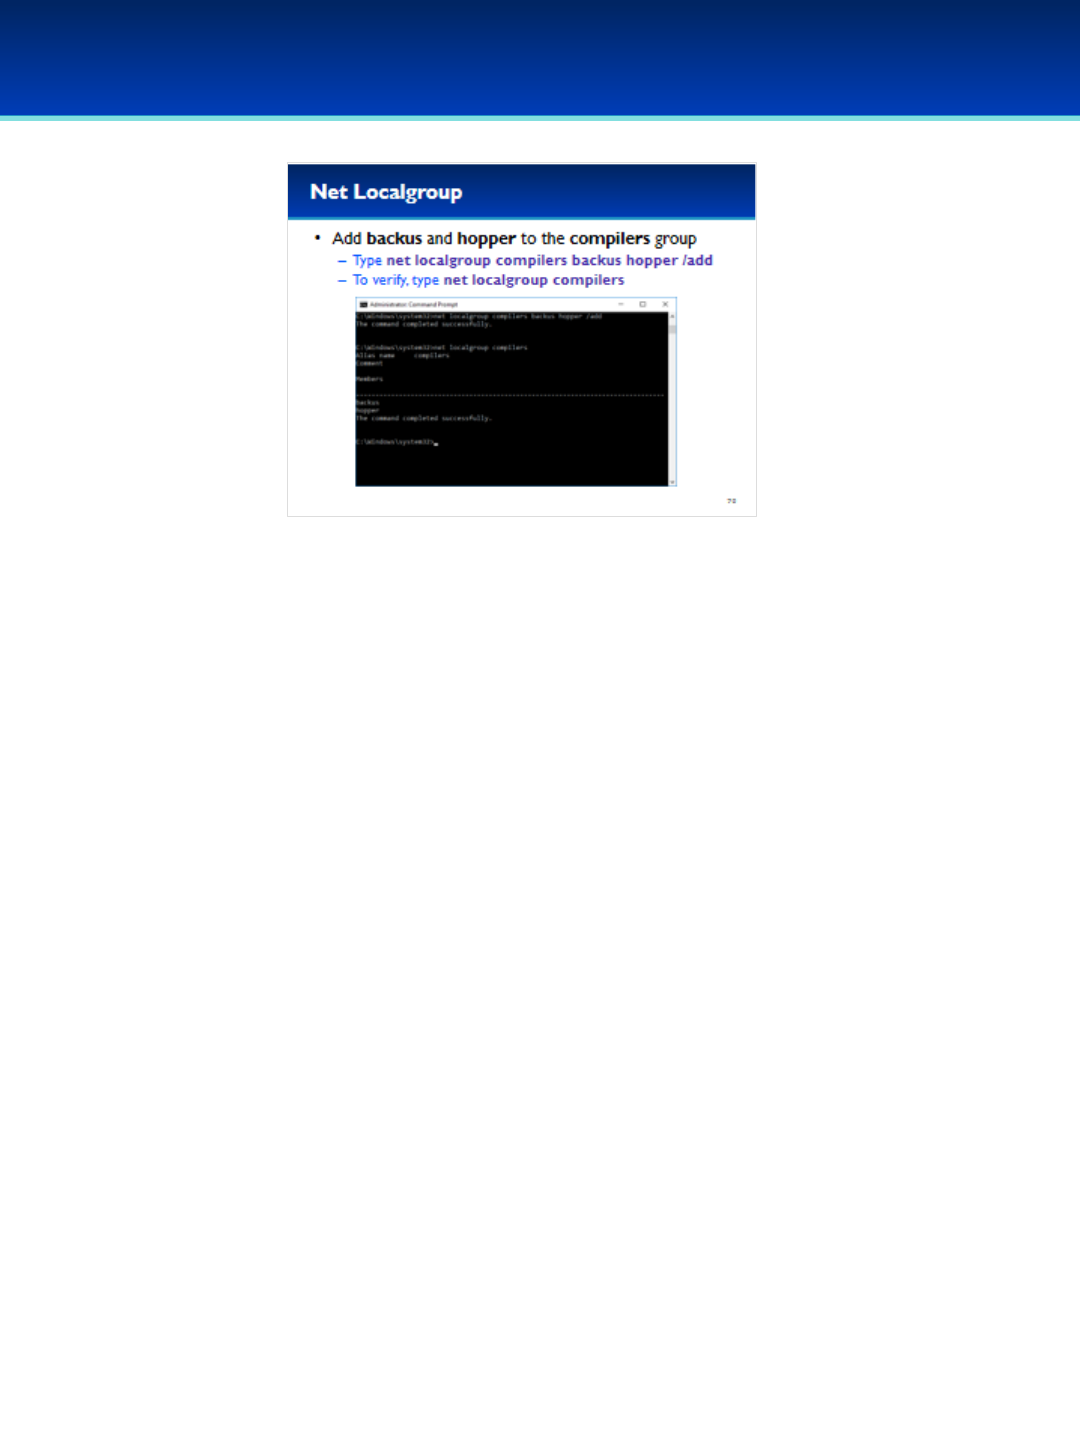
•Now that the compilers group has been created, add
the users backus and hopper.
•Type: net localgroup compilers backus hopper /add
•To verify that backus and hopper are in the compilers
group, type: net localgroup compilers
© 2018 Air Force Association
AFA Advanced CyberCamp Instructor’s Guide
Page 77
Slide 71
Windows 10
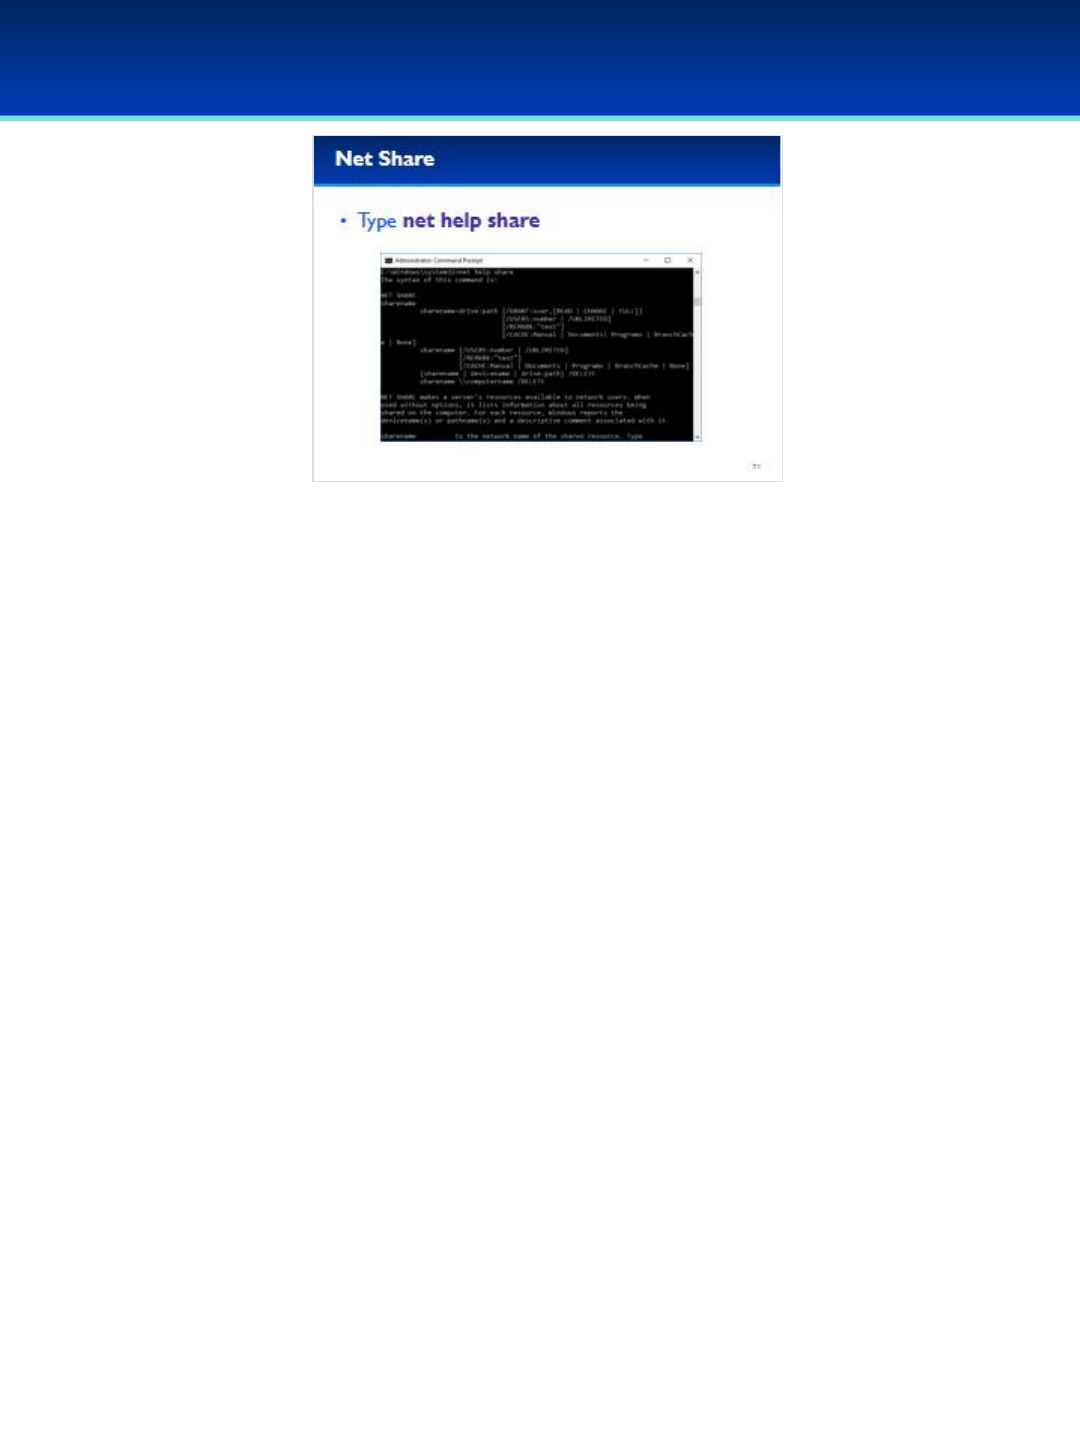
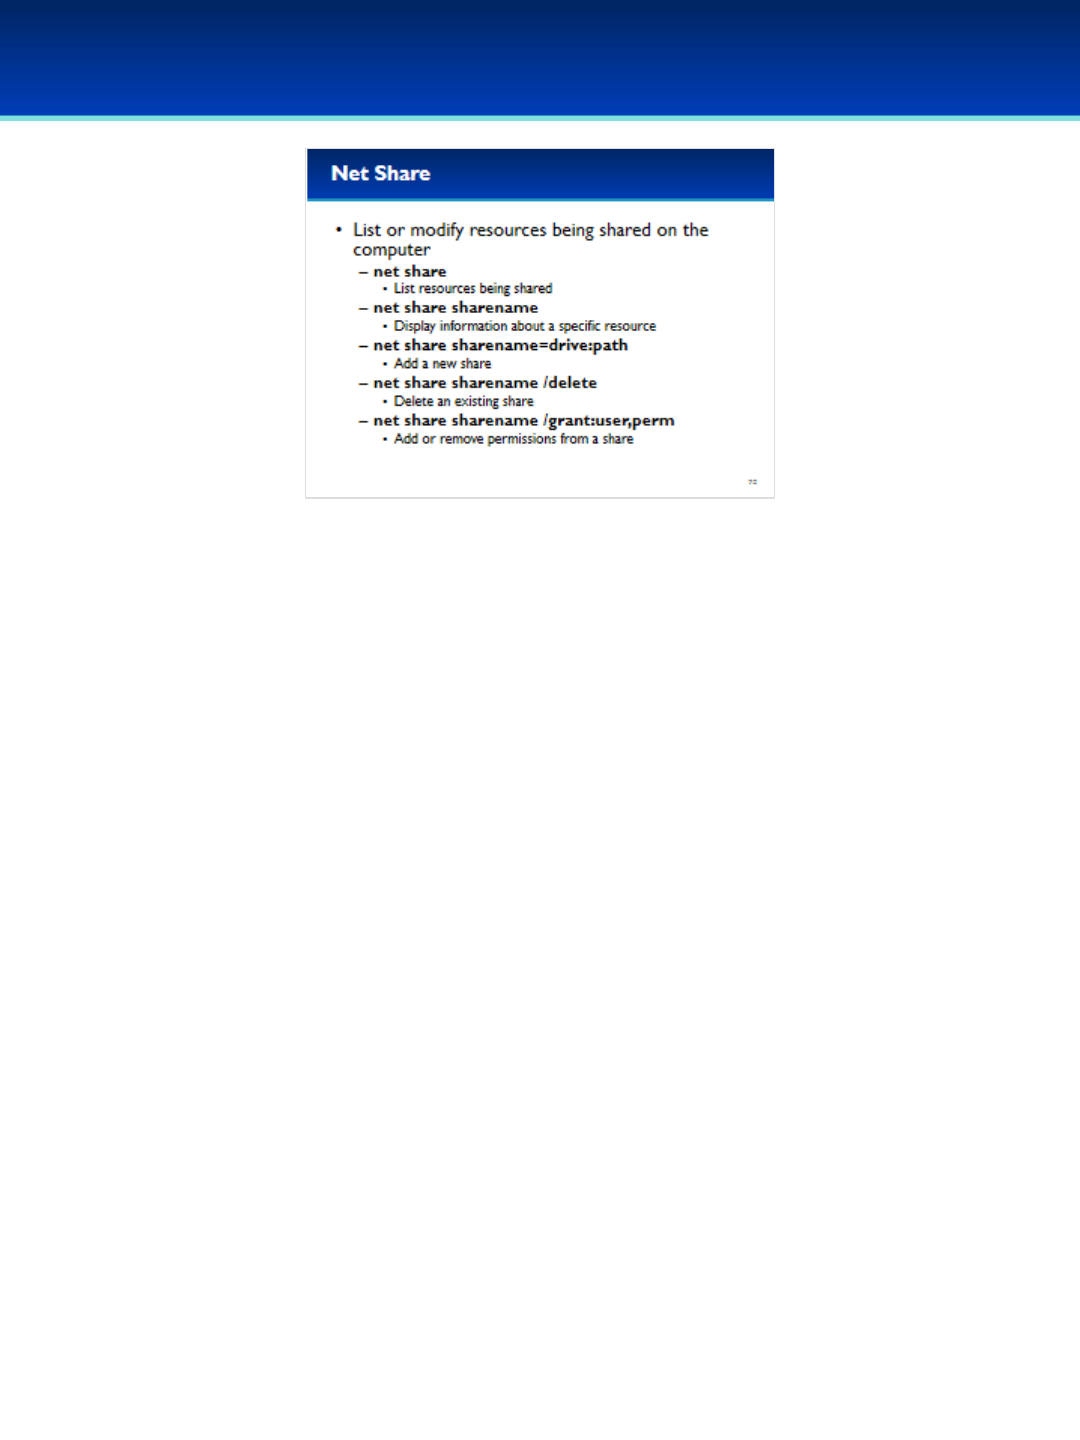
•The next command we are going to cover is the net share
command.
•The net share command is similar to the Shared Folders
MMC plugin covered in the last section.
•Type net help share to see the command syntax for net
share.
© 2018 Air Force Association
AFA Advanced CyberCamp Instructor’s Guide
Page 78
Slide 72
Windows 10
•Net share without any arguments lists the current resources
being shared.
•Net share can also display information about a specific
resource.
•It’s also very simple to add or delete shares using net share.
•Share permissions can also be modified using the grant option.
© 2018 Air Force Association
AFA Advanced CyberCamp Instructor’s Guide
Page 79
Slide 73
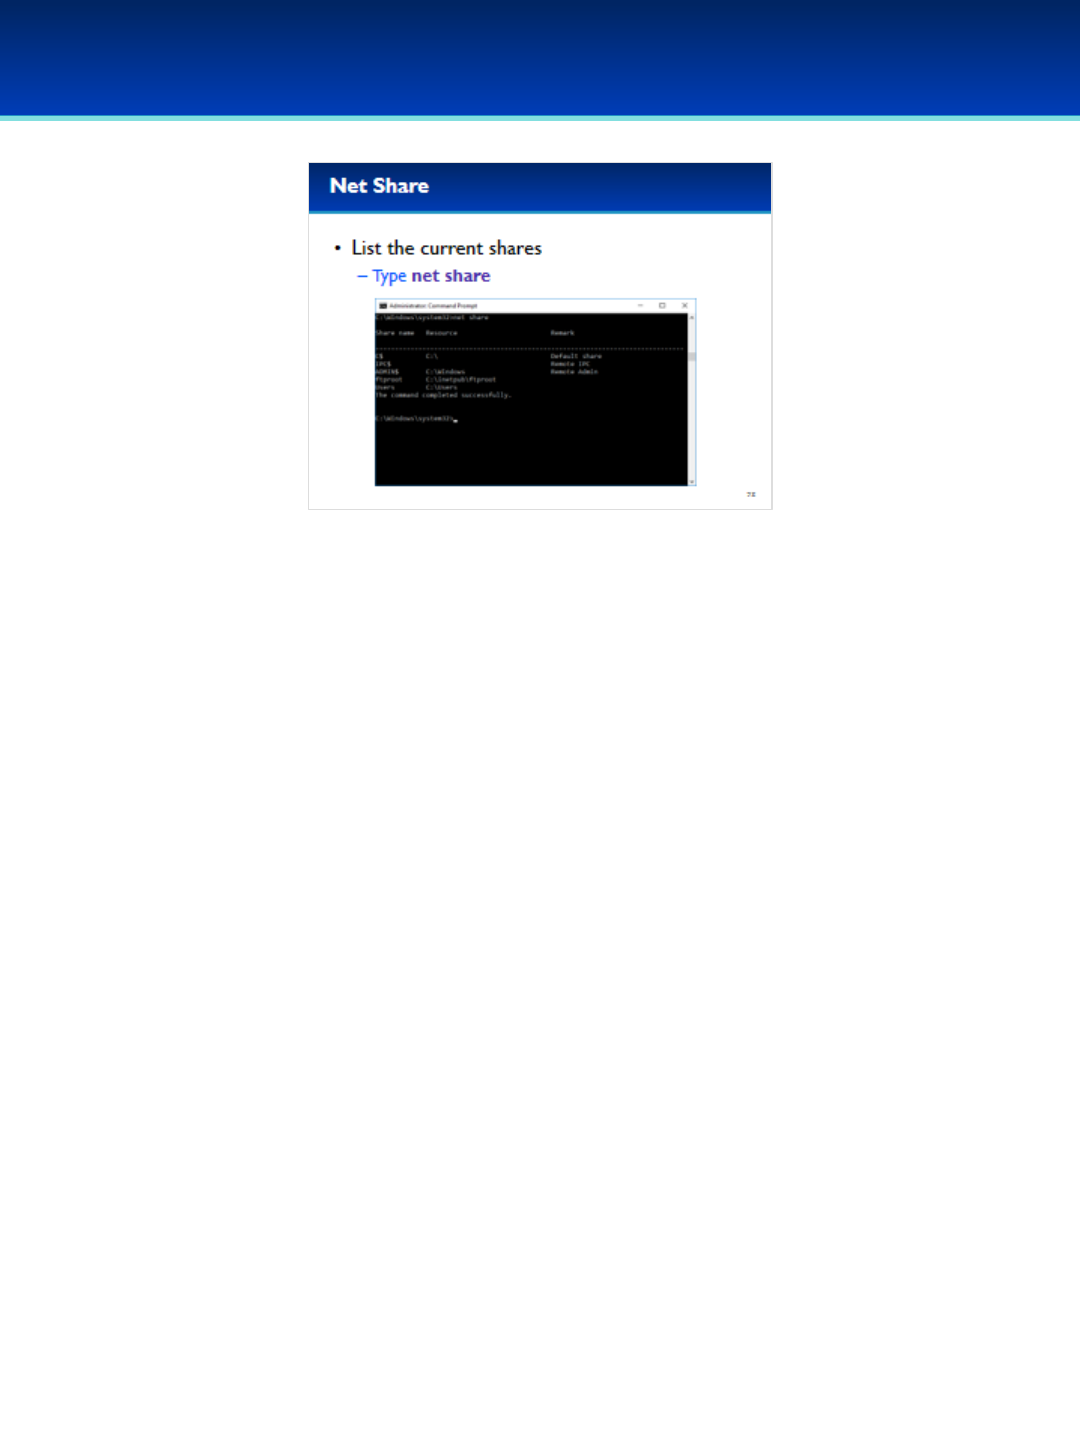
Windows 10
•List the current shares by typing: net share
•Notice that this displays the same information as the Shared
Folders MMC plugin.
© 2018 Air Force Association
AFA Advanced CyberCamp Instructor’s Guide
Page 80
Slide 74
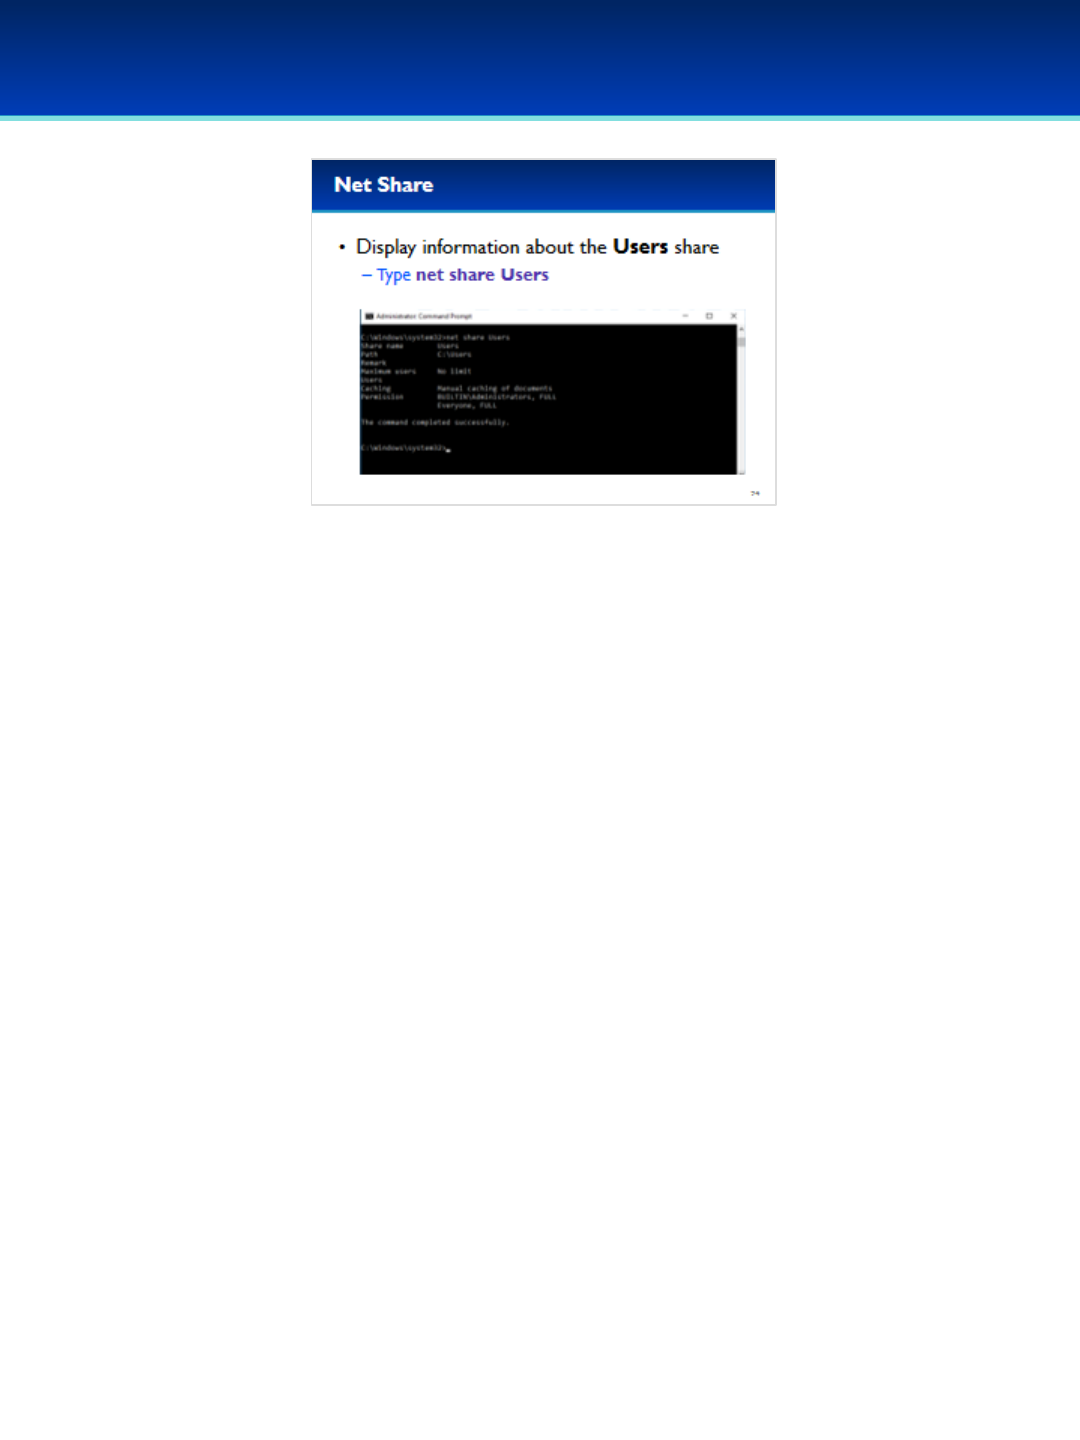
Windows 10
•Display information about the users share by typing: net
share Users
- Both Administrators and Everyone have full permission
to access this share.
- However, it is important to note that permissions are
also dependent on the NTFS permissions of the C:\Users
directory which are separate and not displayed by the
net share command.
© 2018 Air Force Association
AFA Advanced CyberCamp Instructor’s Guide
Page 81
Slide 75
Windows 10
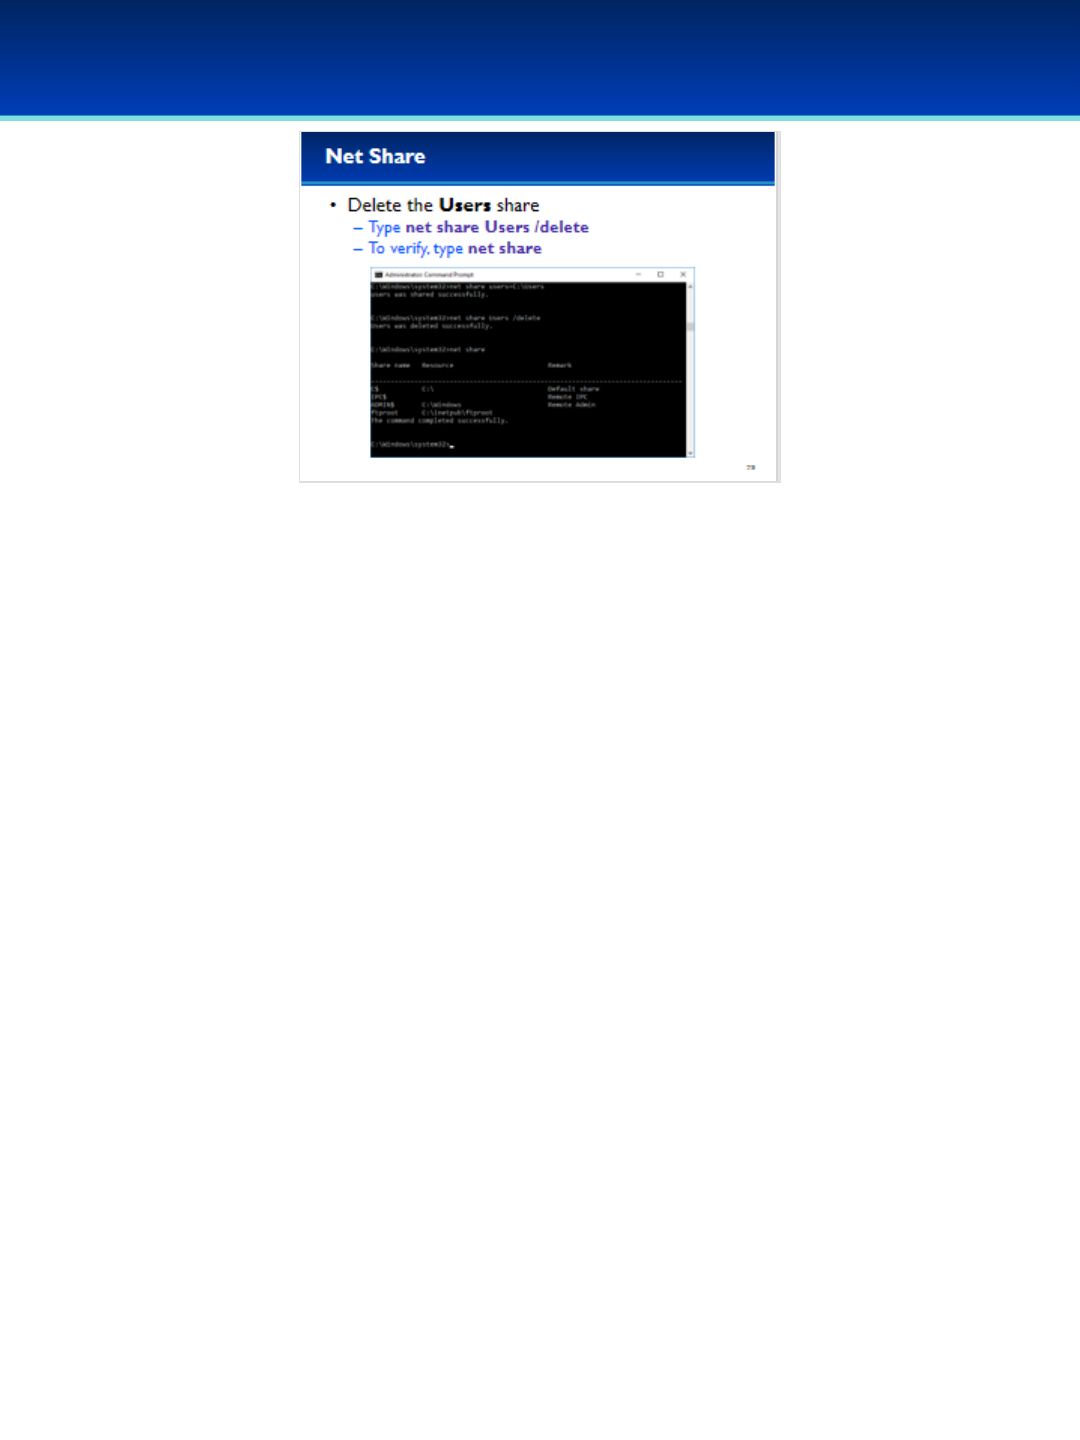
•We don’t want to share the C:\Users directory on this
computer.
•Delete the share by typing: net share User /delete
•Verify that the Users directory is no longer being shared
by typing: net share
© 2018 Air Force Association
AFA Advanced CyberCamp Instructor’s Guide
Page 82
Slide 76
Windows 10
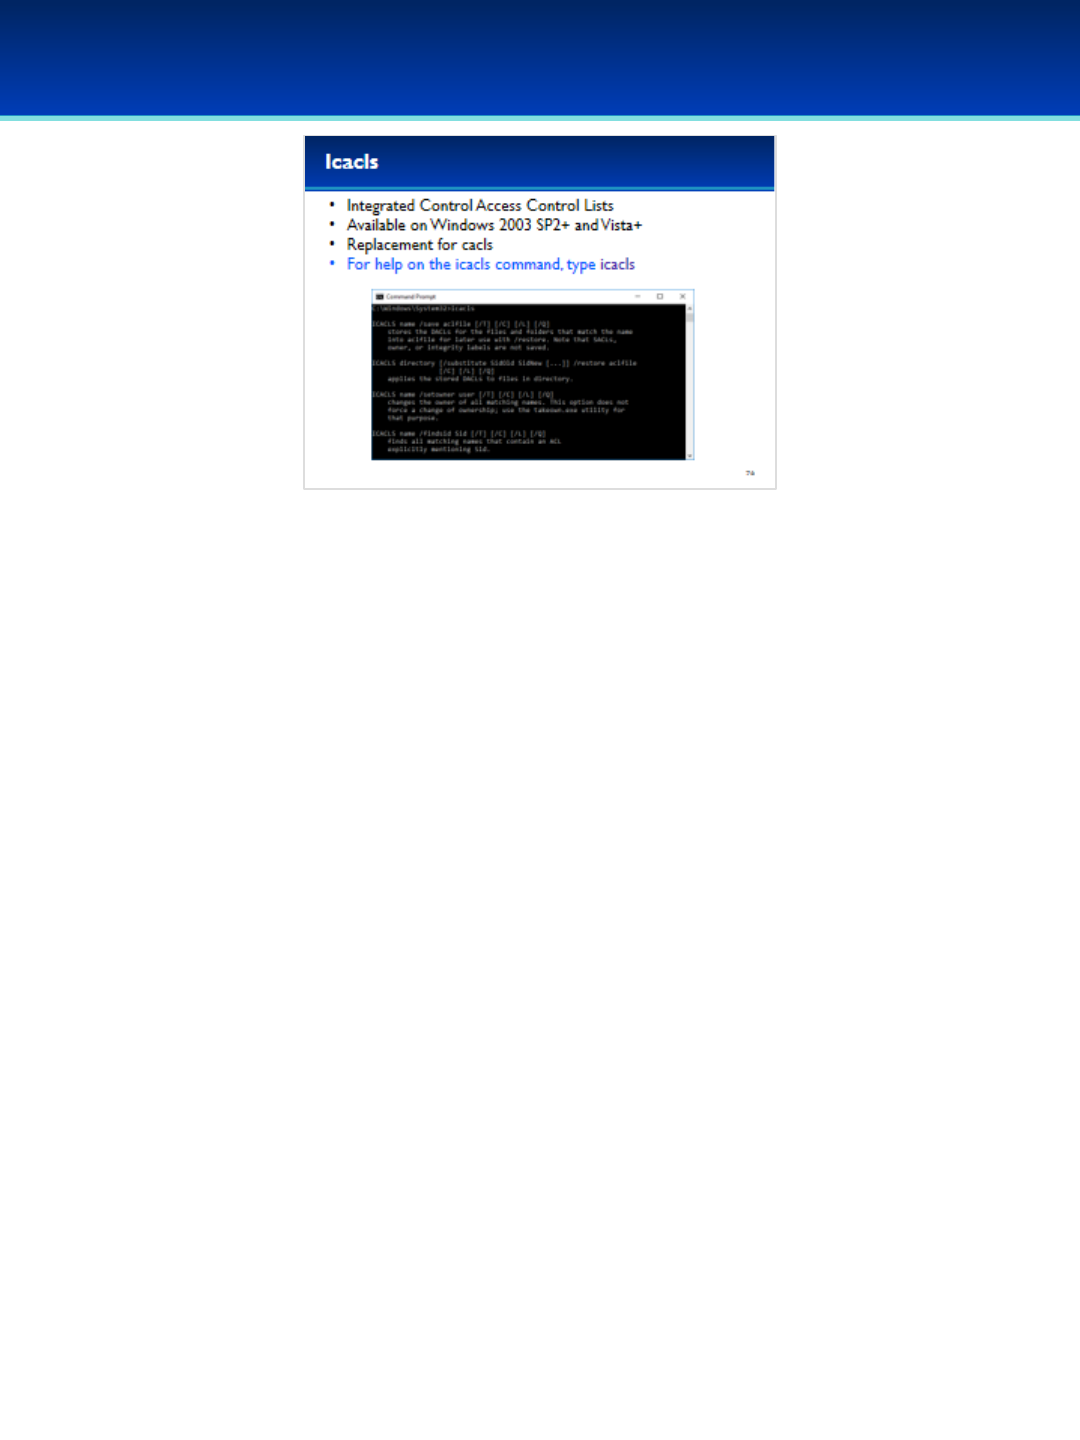
•The icacls command stands for Integrated Control Access Control
Lists and is available on Windows Server 2003 SP2 and later, and
Windows Vista and later.
•This is a replacement for the cacls command, but still allows you to
add, remove, grant, or deny permissions.
•Checking for and maintaining proper permissions is important for
computer security.
•If you have trouble viewing, modifying, or deleting a file because
of permissions issues, icacls can help resolve those issues.
•To view the command syntax for icacls, type icacls and press Enter.
© 2018 Air Force Association
AFA Advanced CyberCamp Instructor’s Guide
Page 83
Slide 77
Windows 10
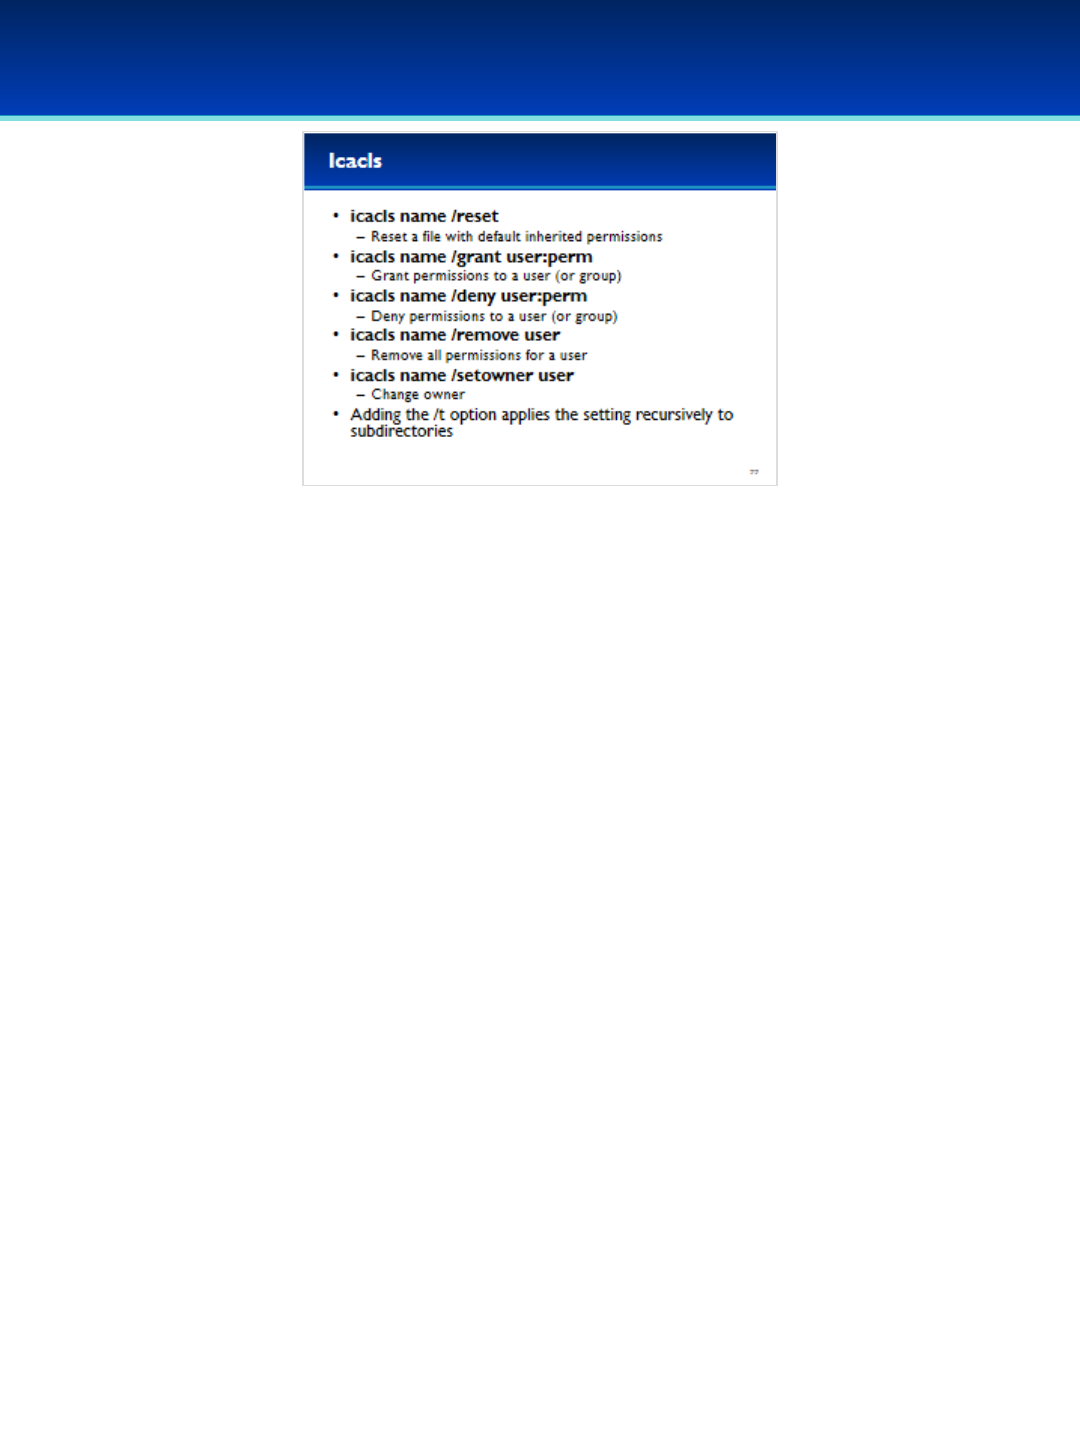
•Icacls can reset the permissions for a file to the default
inherited permissions.
•Icacls can also grant or deny permissions to a specific user or
group.
- Remember, deny takes precedence over grant.
•Icacls can remove all references to a user or group
•The owner can also be changed using the icacls command.
•With the /t (forward-slash t) option, icacls will apply the
operation recursively to all files and directories under the
specified directory.
© 2018 Air Force Association
AFA Advanced CyberCamp Instructor’s Guide
Page 84
Slide 78
Windows 10
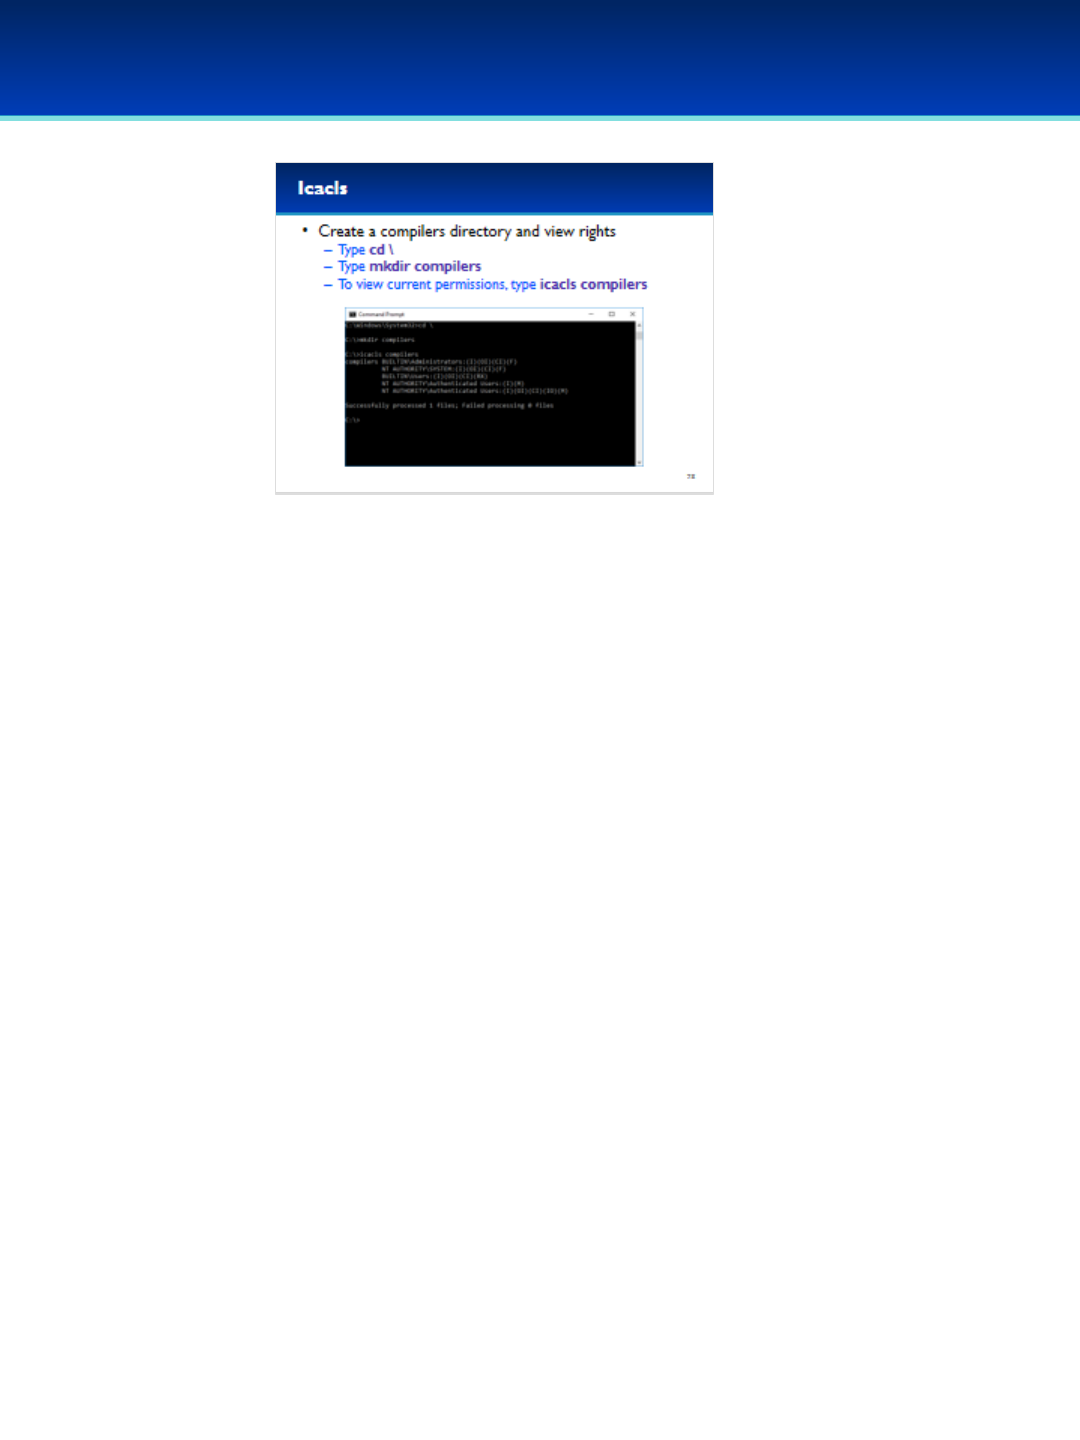
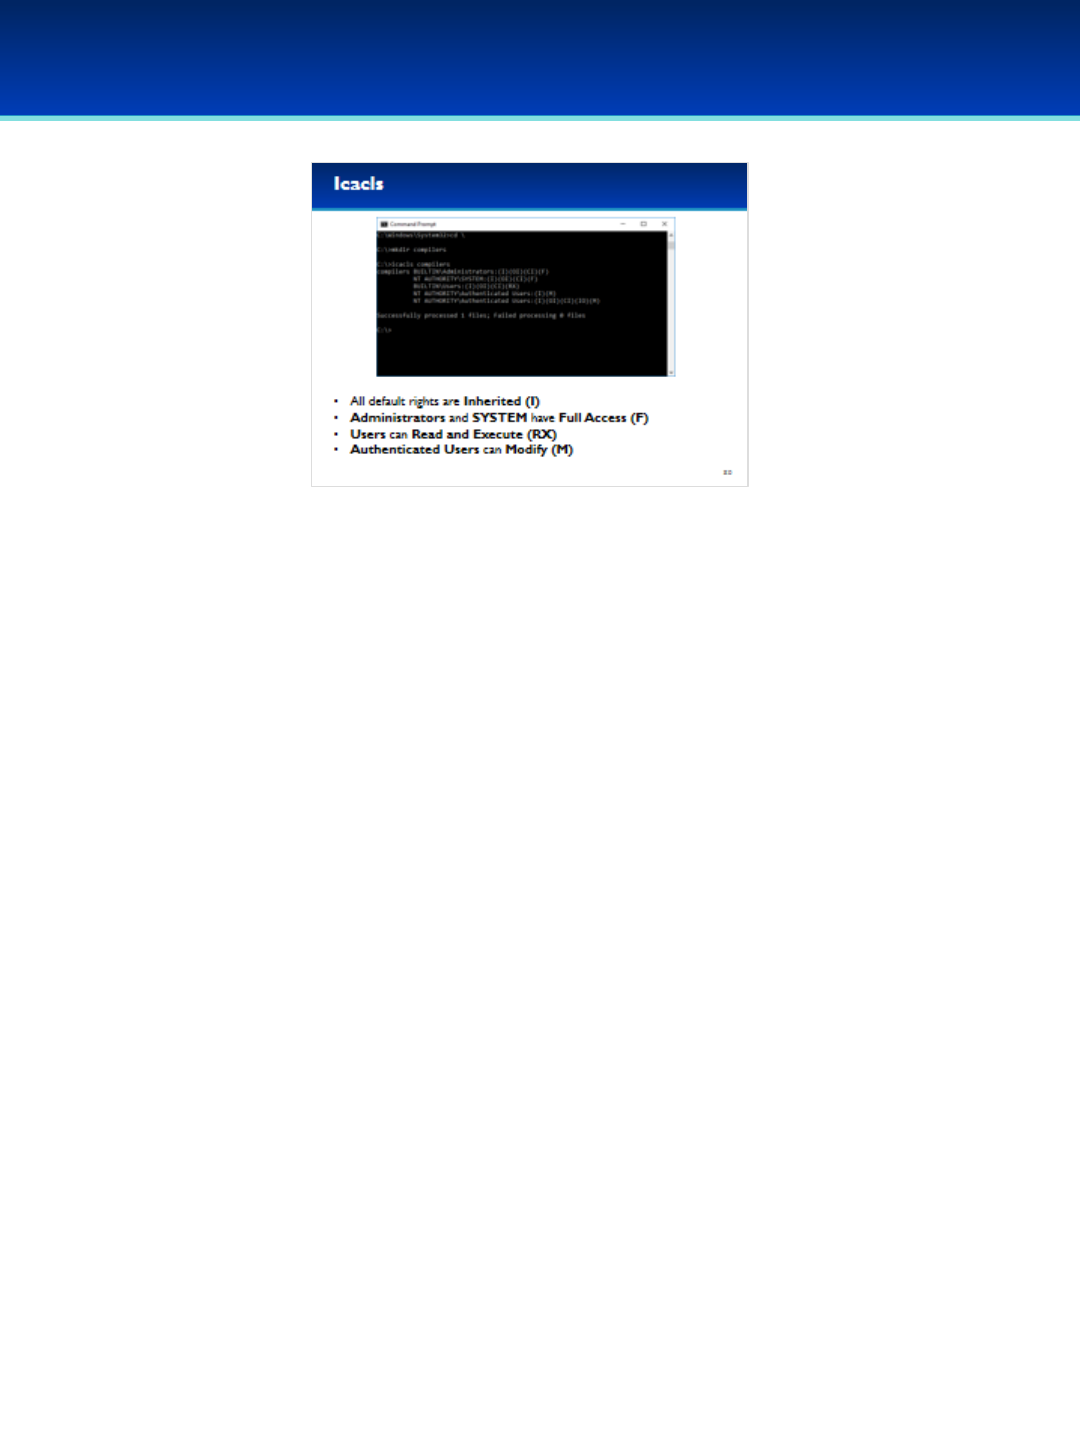
•Change to the root directory by typing cd \(backslash).
•Create a new compilers directory by typing: mkdir compilers
•View the default permissions of the compilers directory by
typing: icacls compilers
© 2018 Air Force Association
AFA Advanced CyberCamp Instructor’s Guide
Page 85
Slide 79
Windows 10
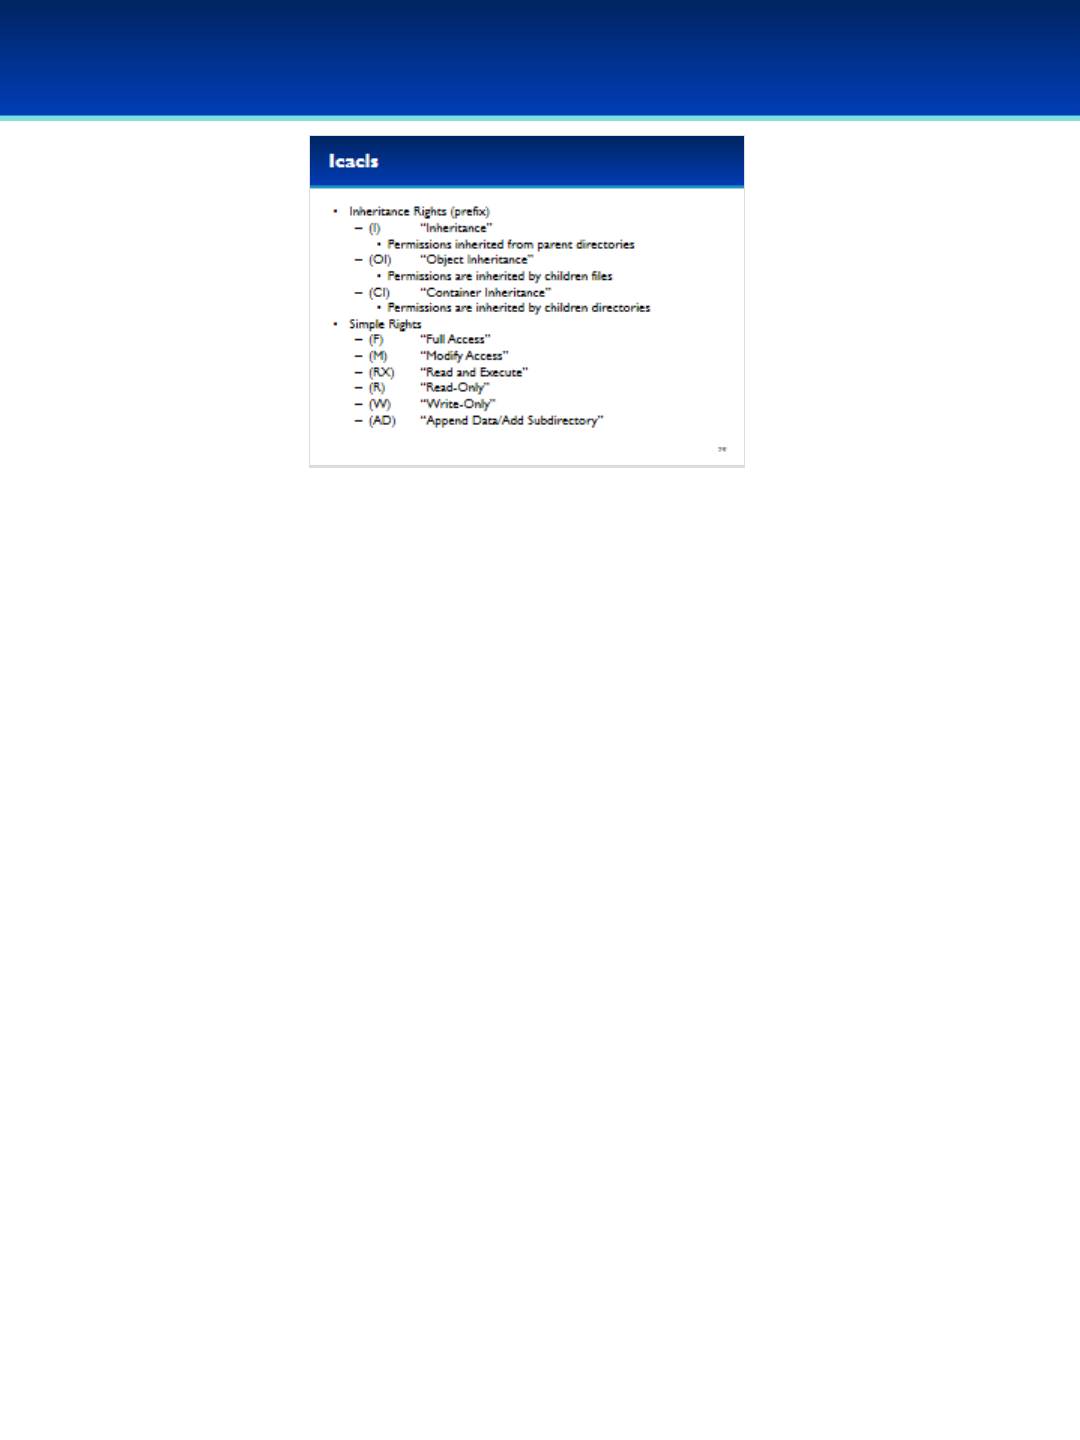
•What does all this mean?
- An I in parentheses indicates the permission is inherited from the
parent directory, in this case: C:\
-OI indicates files inside this directory will inherit these permissions.
-CI indicates directories inside this directory will inherit these
permissions.
•These Simple Rights indicate what permissions are granted or denied.
•There are more rights that give you much more control over what
permissions you can grant or deny.
© 2018 Air Force Association
AFA Advanced CyberCamp Instructor’s Guide
Page 86
Slide 80
Windows 10
•Going back to our compilers directory, we can see the default
permissions for the directory.
•All permissions have been inherited from the parent directory as
indicated by the (I).
•Administrators and SYSTEM have Full Access indicated by the (F).
•Users have Read and Execute permissions.
•Authenticated users have been granted Modify rights. Modify allows
users to read and write files and subfolders, as well as delete of the
directory.
© 2018 Air Force Association
AFA Advanced CyberCamp Instructor’s Guide
Page 87
Slide 81
Windows 10
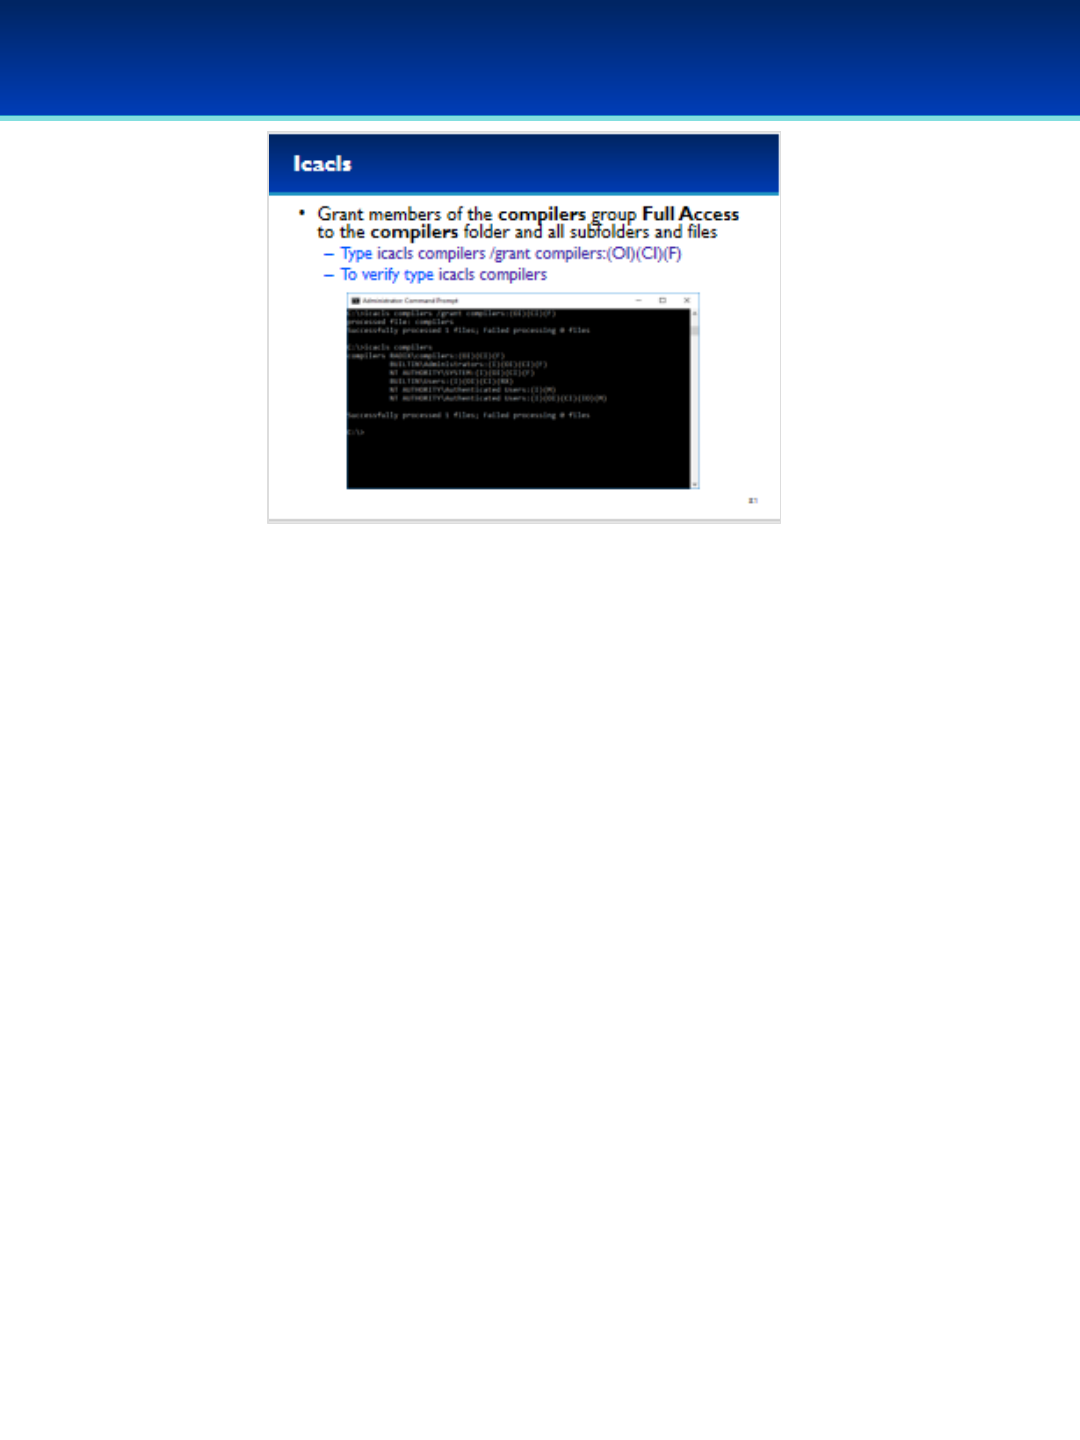
•Grant full access to the compilers folder using icacls.
•Type: icacls compilers /grant compilers:(OI)(CI)(F)
•This grants full access to the compilers group.
•OI and CI indicate that children files and directories will
inherit these permissions.
•Verify that the rights were granted by typing: icacls
compilers
© 2018 Air Force Association
AFA Advanced CyberCamp Instructor’s Guide
Page 88
Slide 82
Windows 10
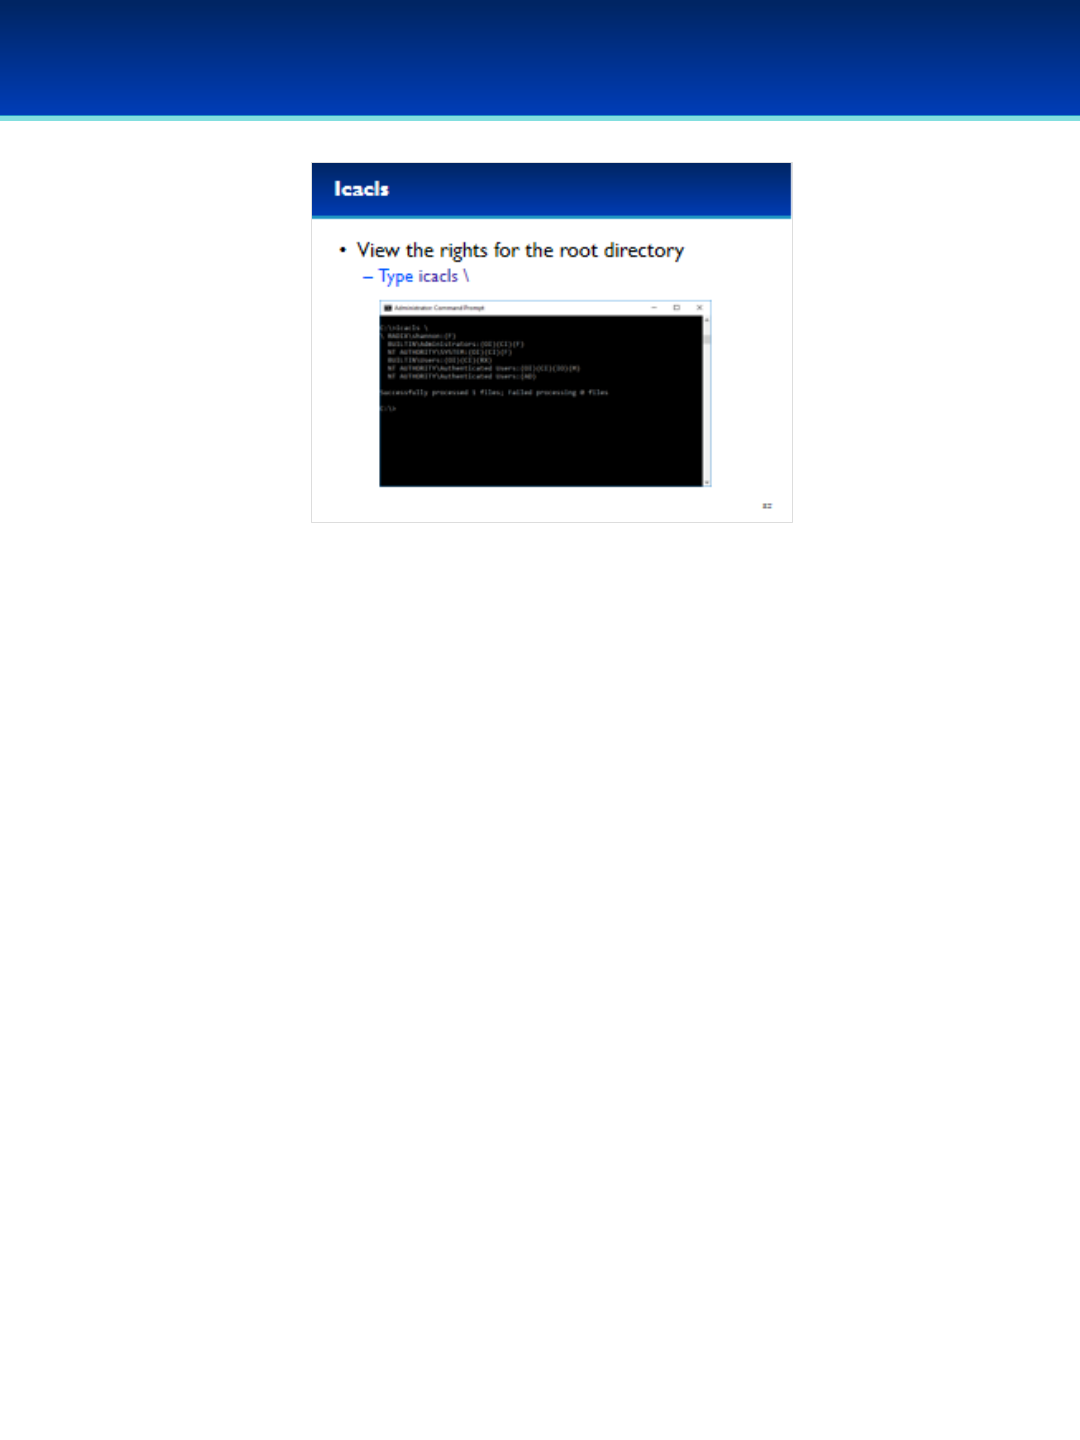
•View the rights for the root directory by typing: icacls \
•It looks like the user Shannon has full control over the
root directory.
© 2018 Air Force Association
AFA Advanced CyberCamp Instructor’s Guide
Page 89
Slide 83
Windows 10
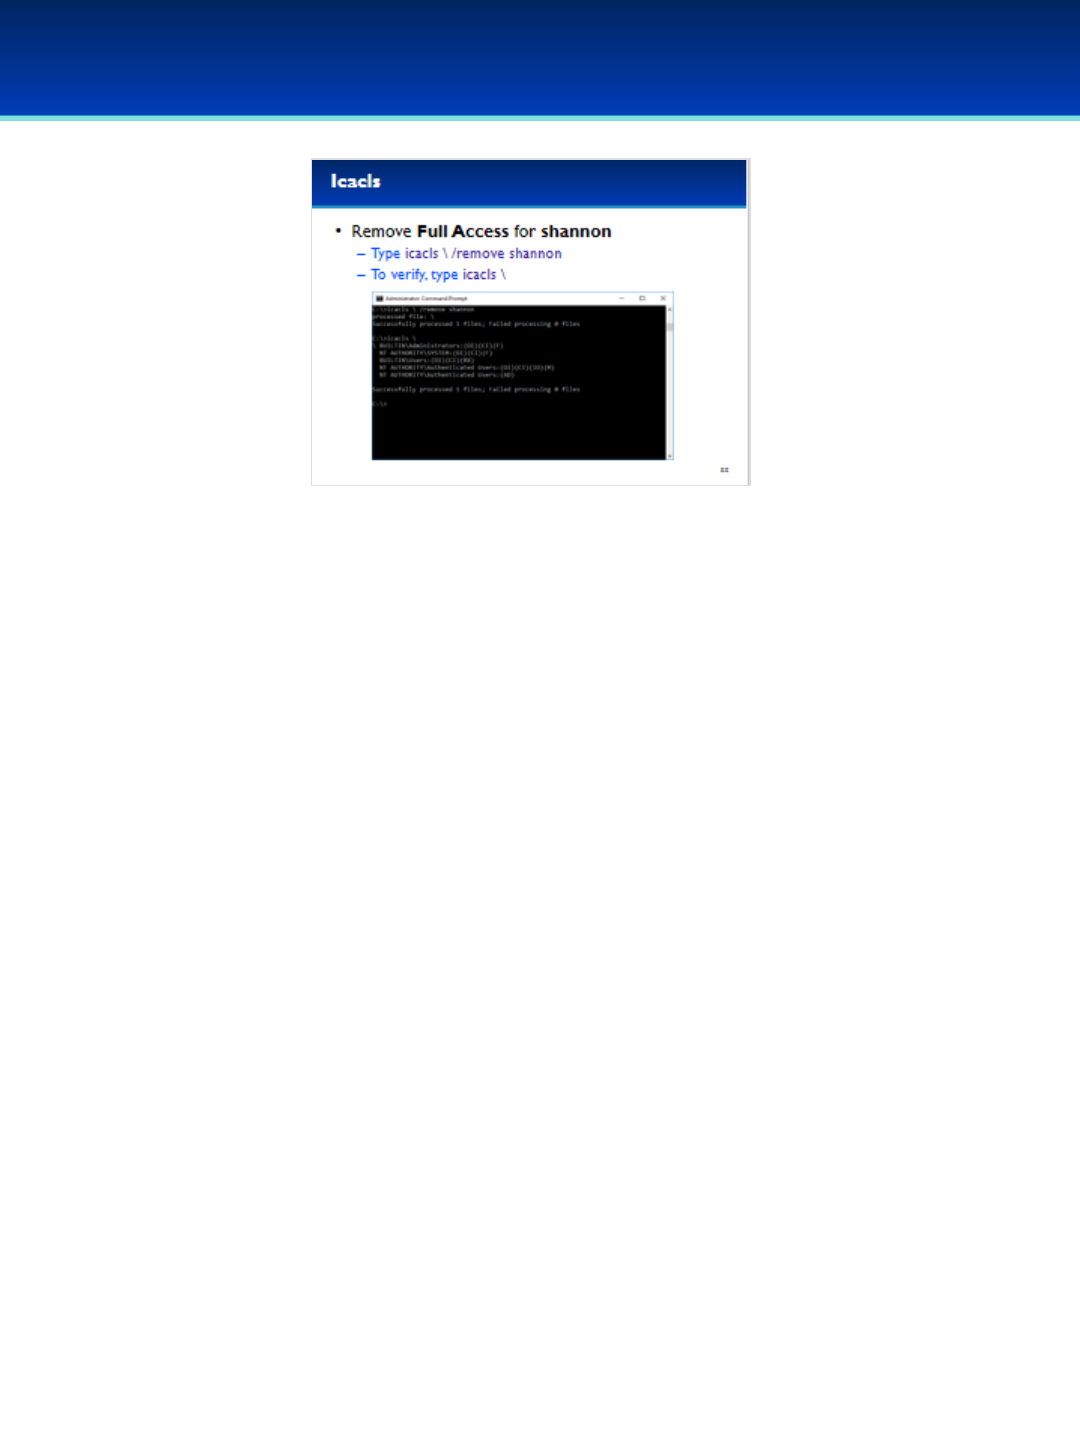
•Remove shannon from the root directory ACLs by typing
icacls \ /remove shannon (there is a space between the \
and /).
•Verify that shannon has been removed by typing: icacls \
© 2018 Air Force Association
AFA Advanced CyberCamp Instructor’s Guide
Page 90
Slide 84
Windows 10
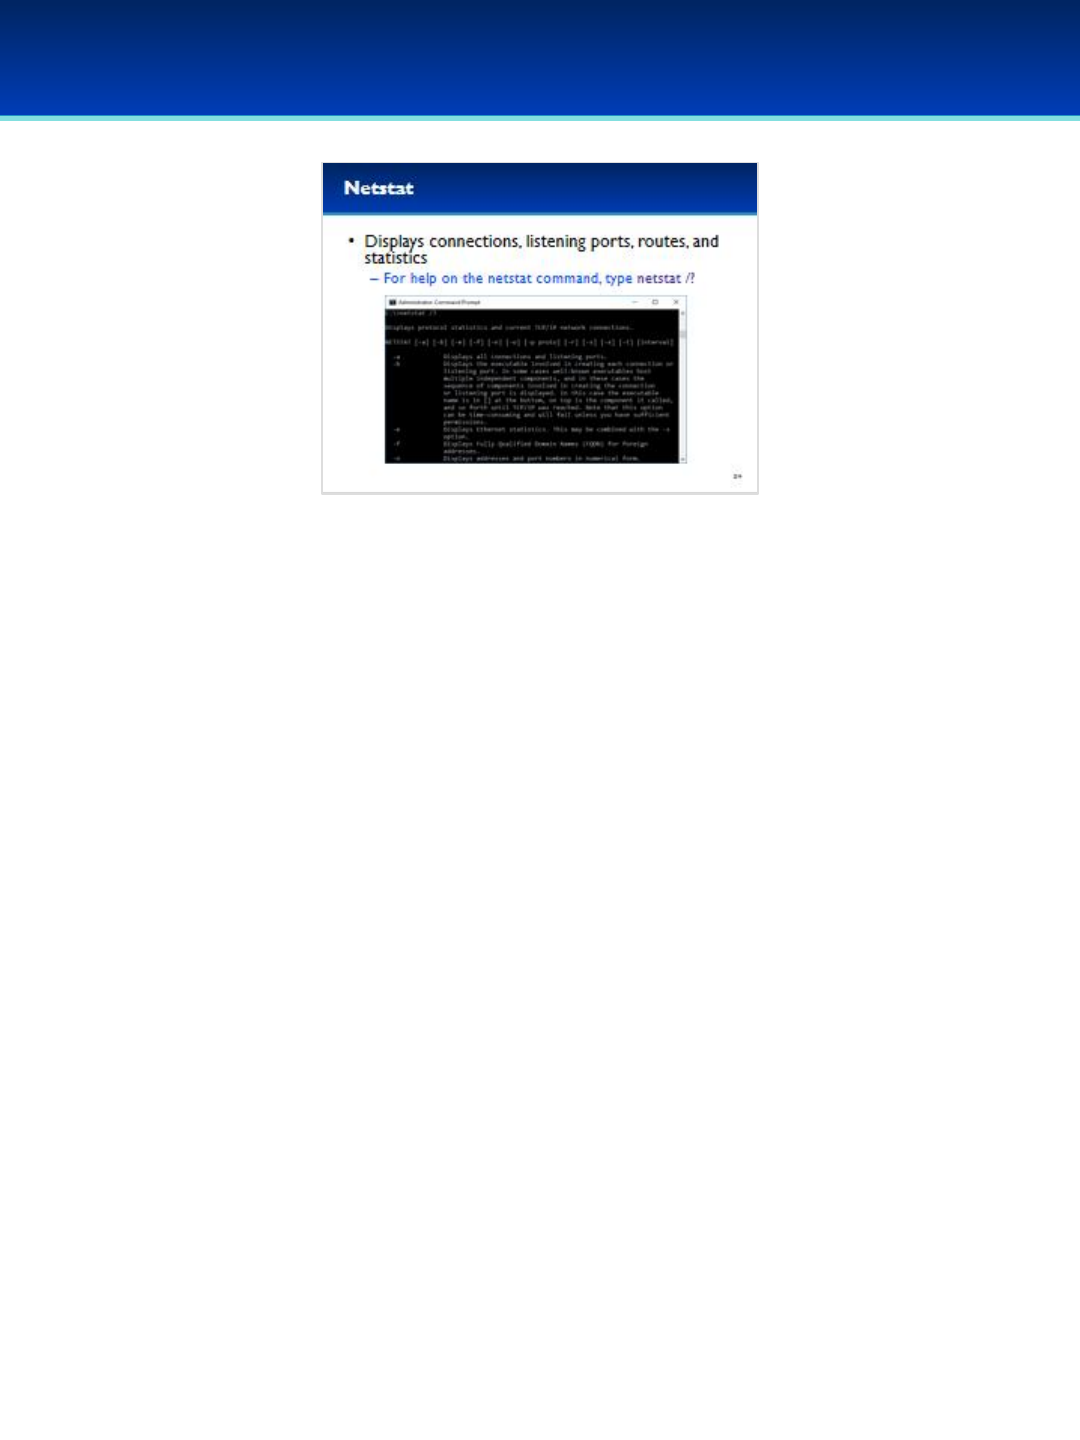
•The next command line command we are going to cover is
netstat
•Netstat is a very useful tool for displaying information about
current routes, connections, open ports, and statistics
•Type netstat /? To view the syntax for the netstat command.
© 2018 Air Force Association
AFA Advanced CyberCamp Instructor’s Guide
Page 91
Slide 85
Windows 10
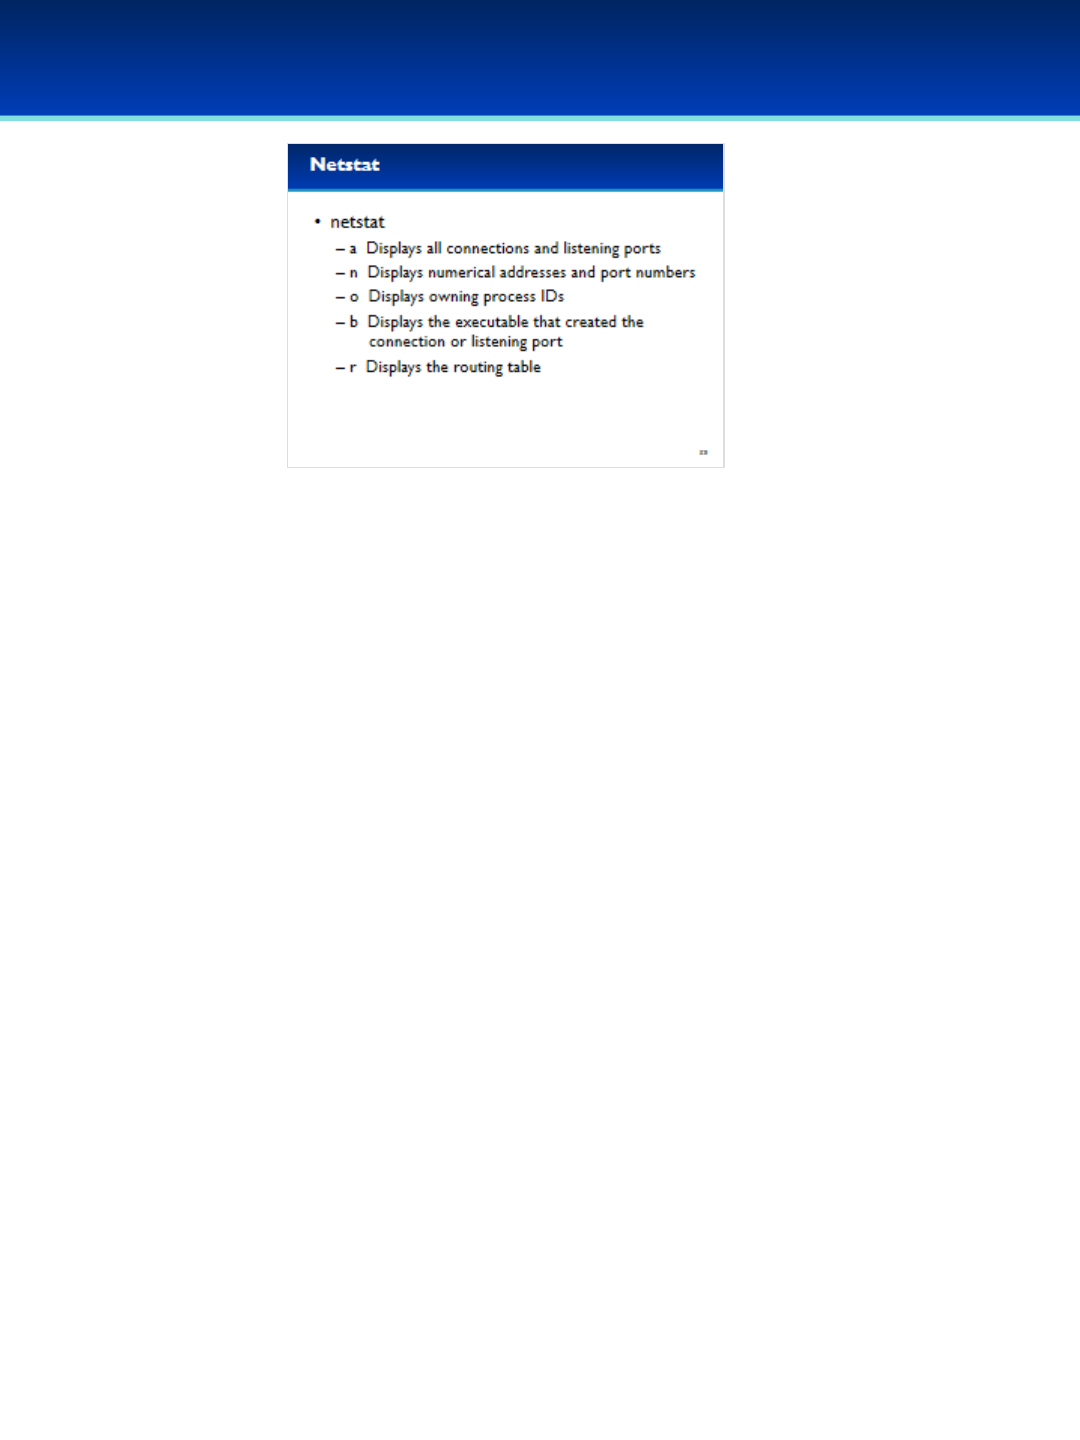
•Netstat options are often combined, here is what each switch does:
•The aoption displays all connections and listening ports, instead of just
established connections.
•The noption displays numerical addresses and port numbers. Without
this option, netstat will try to resolve IP addresses to DNS names which
can sometimes cause the program to take a long time to run.
•The ooption displays the owning process IDs.
•The boption displays the executable associated with the connection or
listening port.
- You may think the boption is more useful than the ooption, however
the output of the o option is much easier to read, so you may want to
use ofirst and then switch to bif you really need it.
•The roption displays the current routing table and is very useful for
troubleshooting network issues.
© 2018 Air Force Association
AFA Advanced CyberCamp Instructor’s Guide
Page 92
Slide 86
Windows 10
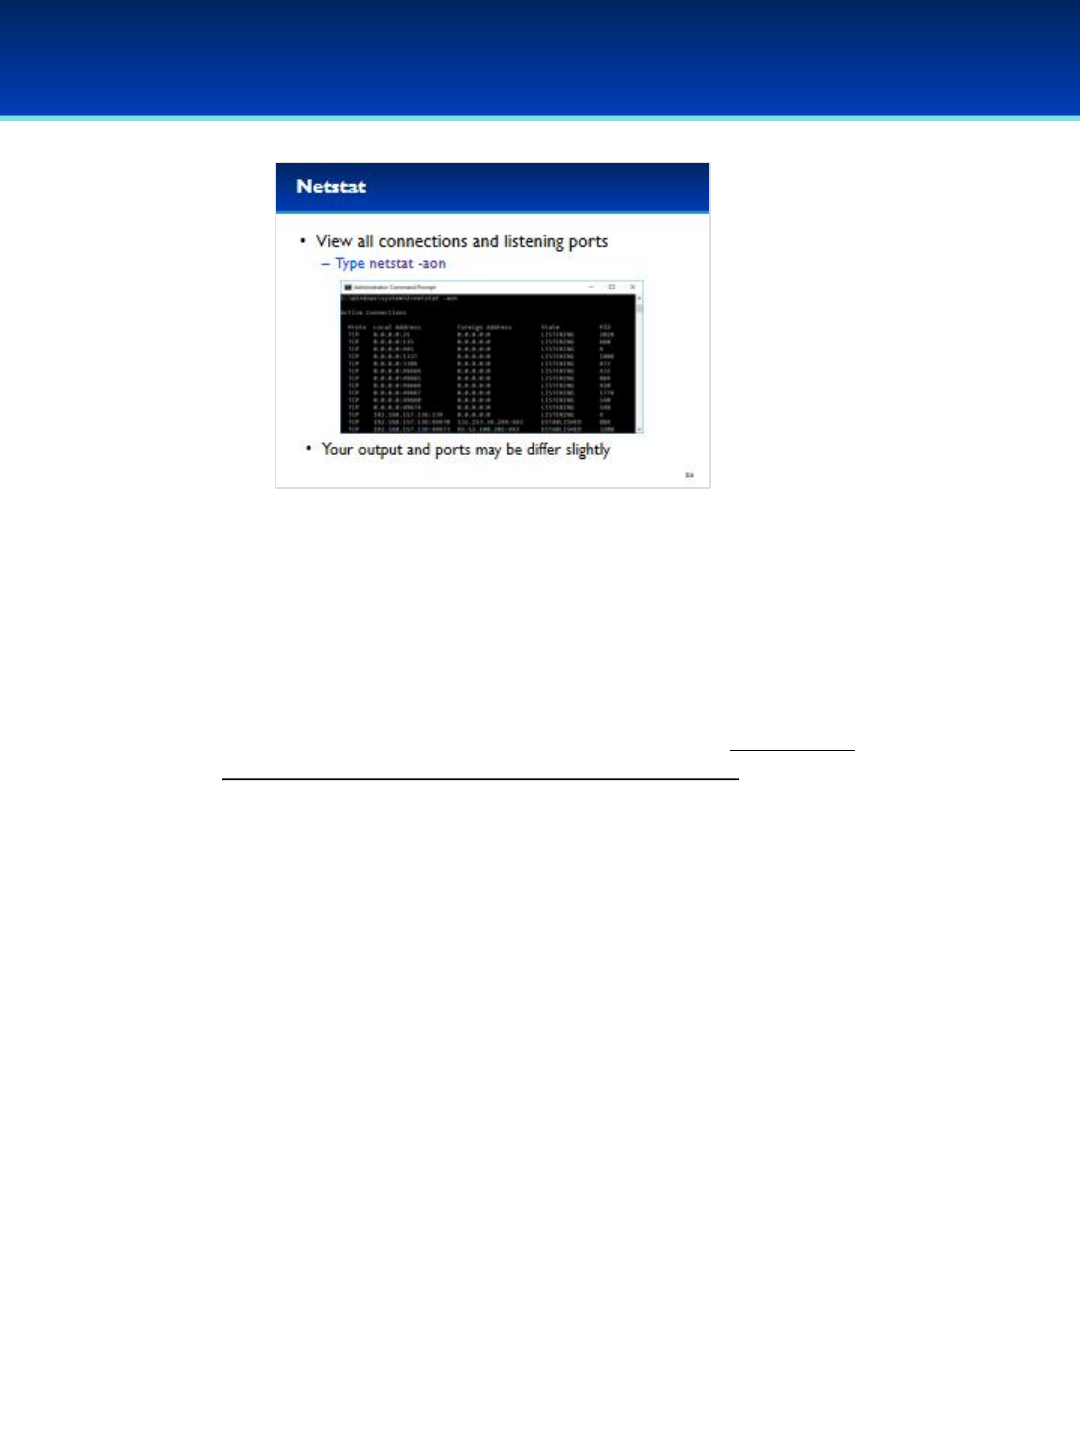
•View all connections and listening ports by typing: netstat –aon
- This also displays numeric IPs and ports as well as printing out
the PID.
•Scroll up to the top of the output from this command.
•Since some ports and connections change regularly, parts of your
output will differ from what is shown on these slides.
© 2018 Air Force Association
AFA Advanced CyberCamp Instructor’s Guide
Page 93
Slide 87
Windows 10
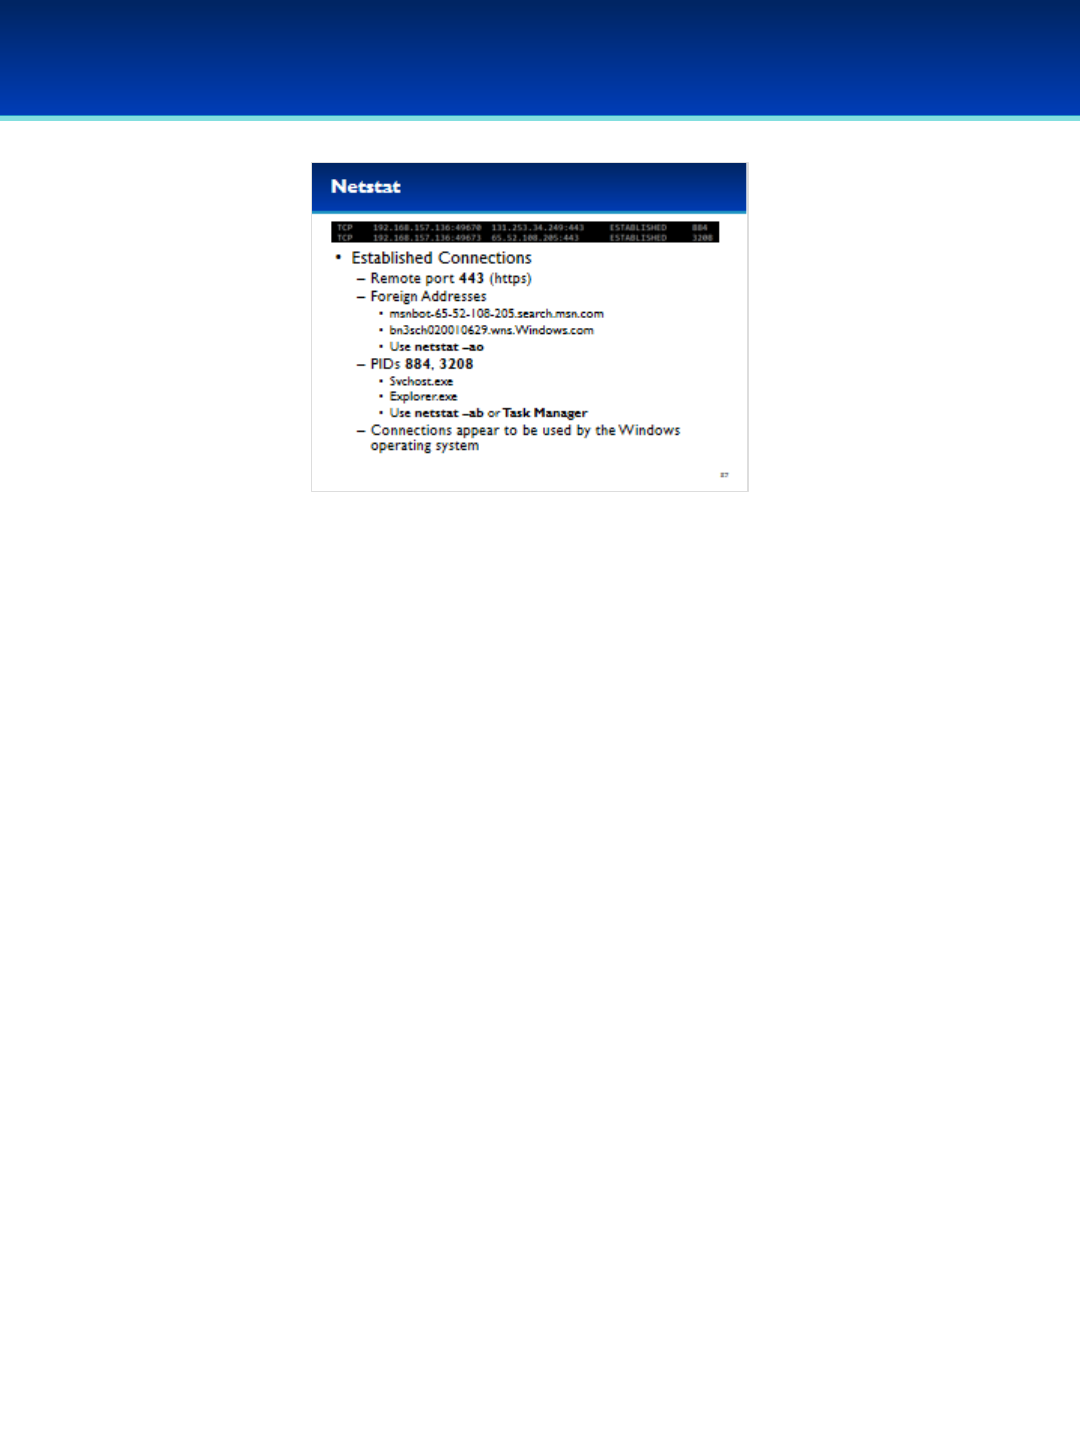
•In this case there are two active connections from this computer to
port 443 which is used by https (you may see only one active
connection to port 443). Output may vary from the information of
these slides.
•The two foreign IP addresses resolve to MSN and Windows names.
- You can see this by running the same command without the n
option.
•The two Process IDs (PIDs) associated with these connections belong
to Svchost.exe and Explorer.exe.
- You can see this information by using the boption instead of the o
option, or with Task Manager.
•These connections appear to be used by the Windows operating
system for sending and receiving information to and from different
cloud-based services.
© 2018 Air Force Association
AFA Advanced CyberCamp Instructor’s Guide
Page 94
Slide 88
Windows 10
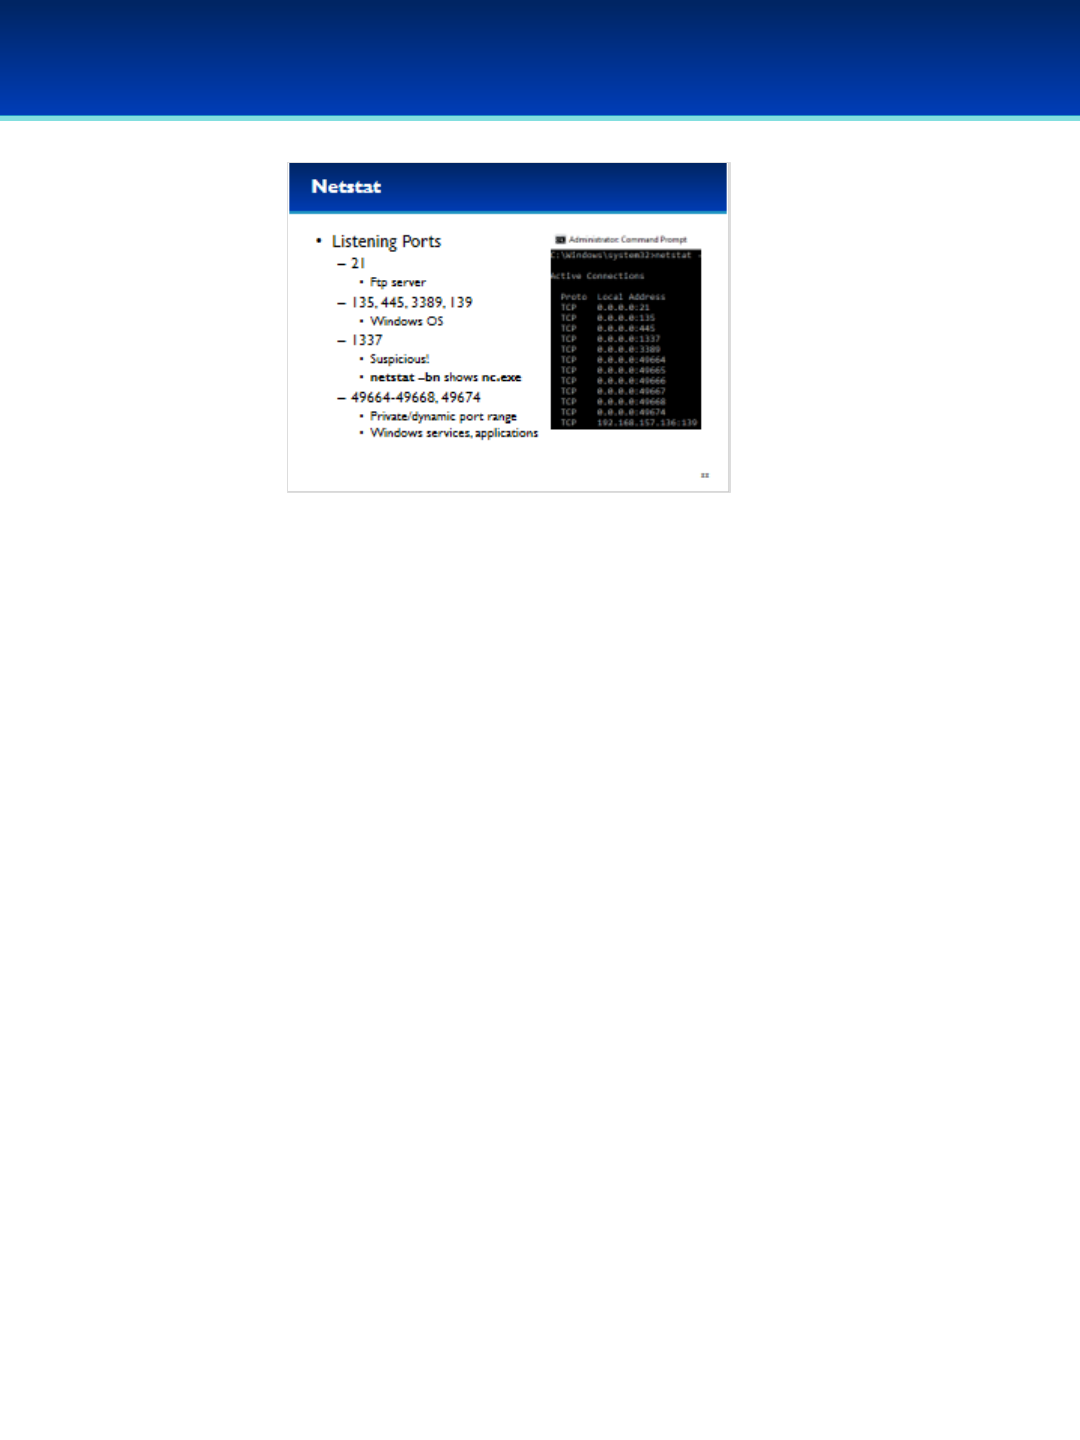
•There are several ports open and listening on this computer.
- A Local Address of 0.0.0.0 means that the program is listening
on all available interfaces and is accepting connections from the
internet.
- Port 21 is commonly used by the FTP service, so it seems likely
that this computer is running a FTP server.
- Ports 135, 445, 3389, and 139 are used by the Windows
operating system for different network services such as
Windows File Sharing and Remote Desktop Services.
-Port 1337 looks really suspicious and we’ll have to check that
out next!
- Ports 49152 through 65535 are dynamic/private port numbers
and appear to be in use by Windows Services and components
such as EventLog, Task Scheduler, the Local Security Authority
Subsystem Service, and Spooler Subsystem App, which manages
printing and fax services.
© 2018 Air Force Association
AFA Advanced CyberCamp Instructor’s Guide
Page 95
Slide 89
Windows 10
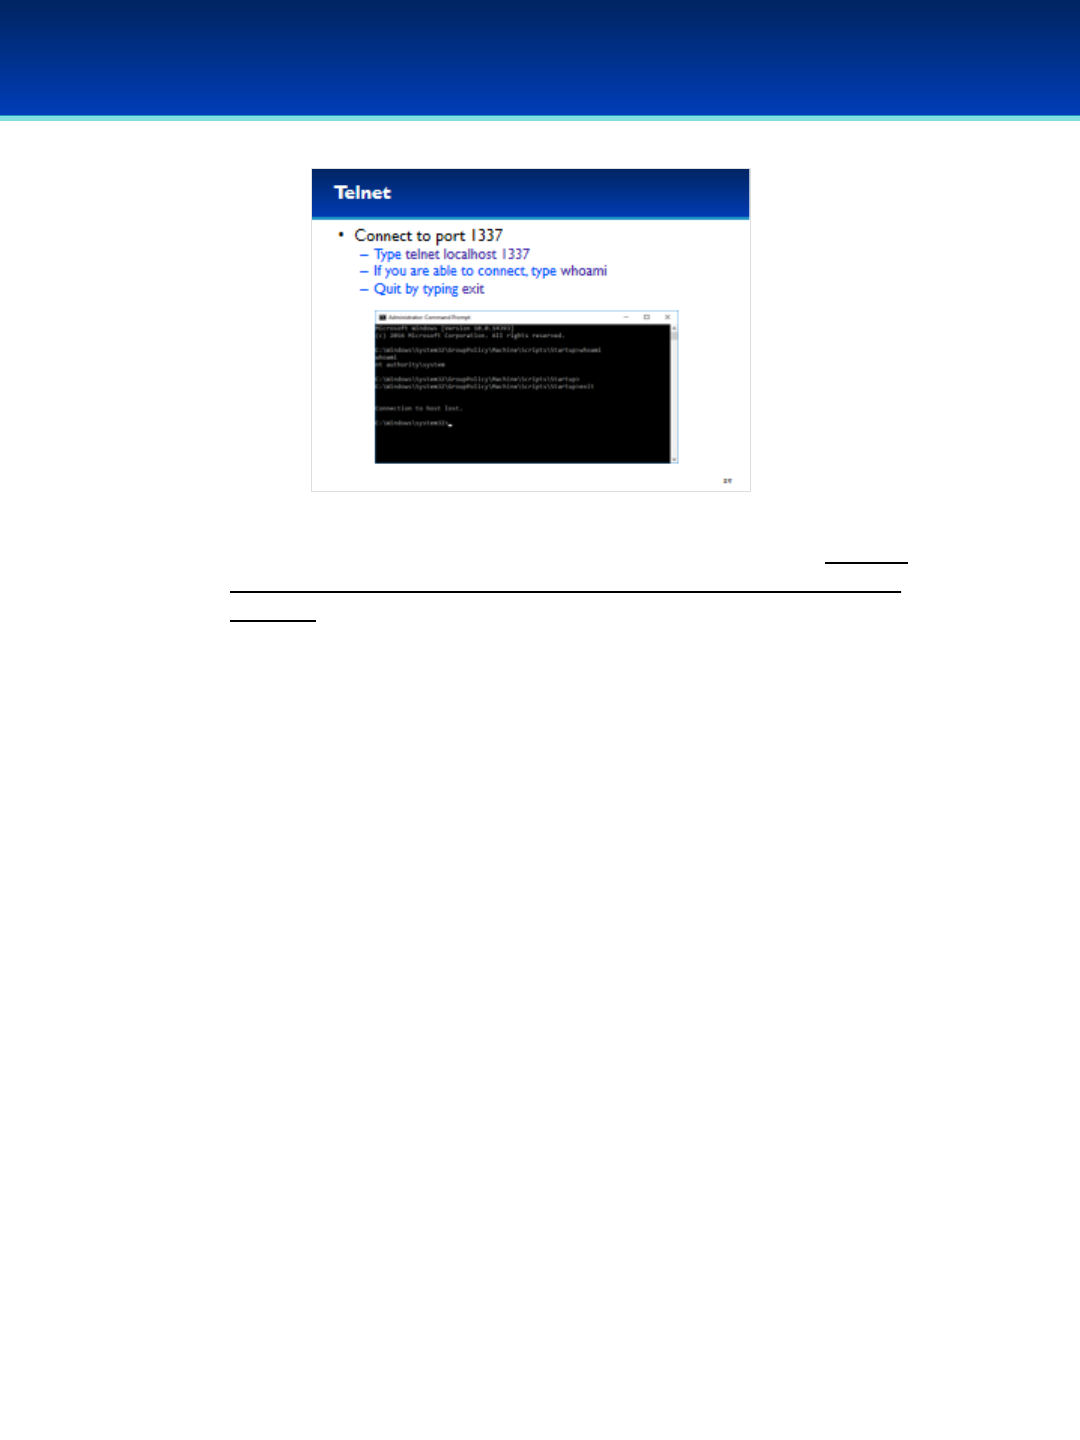
•Let’s see what’s running on port 1337 using the telnet client (you may
not be able to make a connection to port 1337 if it is blocked by your
firewall).
•Type telnet localhost 1337 to connect to port 1337 on your local
computer.
•It looks like we got a new prompt in a different directory. This looks like
a backdoor.
•Type whoami to see what user you are currently logged in as.
•It looks like you are logged in as the SYSTEM user which is even more
powerful than administrator.
•Type exit to get out of the backdoor.
•Don’t remove the backdoor yet, we’re going to do more analysis on it
in the next section.

© 2018 Air Force Association
AFA Advanced CyberCamp Instructor’s Guide
Page 96
Slide 90
Windows 10
Give students about 20 minutes to complete the tasks listed on Pages 4-5 of their Workbooks.
This lab will review the Windows Command Line including the net commands, netstat, and
icacls.
Stress that the students should not change any passwords or settings unless they are expressly
directed to do so in the activity.
The students should not need to use any other user names or passwords to complete the
activities. Here are the passwords to some administrative accounts just in case.
Username: neumann
Password: vN_@rchit3cture
Username: hopper
Password: ENIAC.TurC0mp
Answers:
1. Never, 30, 30
2. net accounts /minpwlen:__
3. net user smoak /delete, net user anderson /delete
4. net user Johnson putinpassword /add
5. net user lovelace putinpassword
6. net user knuth Answer: 6/11/2017 5:21:57 AM
7. net localgroup administrators tukey /delete, net localgroup administrators karpinski /delete
8. net localgroup administrators Johnson /add
9. net localgroup “Backup Operators” Answer: boole, kleinrock
10. net localgroup Replicator Answer: Supports file replication in a domain
11. net share ftproot Answer: C:\inetpub\ftproot
12. net share ftproot Answer: Administrators, IIS_IUSRS
13. net share ftproot /delete
14. icacls c:\inetpub\ftproot Answer: Cyberpatriot, SYSTEM, Everyone, TrustedInstaller,
Administrators
15. icacls c:\inetpub\ftproot /remove Everyone
16. netstat –ab Answer: RpcSs
17. netstat –ab Answer: 5353, UDP (although you may see a second one: 5355, UDP)
© 2018 Air Force Association
AFA Advanced CyberCamp Instructor’s Guide
Page 97
Slide 91
Windows 10
This section is an optional Advanced portion, if time permits.
Devote 30 minutes to Slides 92-120. Allow the students 20
minutes to complete the activity on Slide 121.
Throughout this section, students should follow along in the
Advanced Windows 10 Demo Image.
Actions the students are supposed to take are highlighted in blue
and purple.
Purple indicates exact text they are supposed to type or GUI
elements they should interact with.
© 2018 Air Force Association
AFA Advanced CyberCamp Instructor’s Guide
Page 98
Slide 92
Windows 10
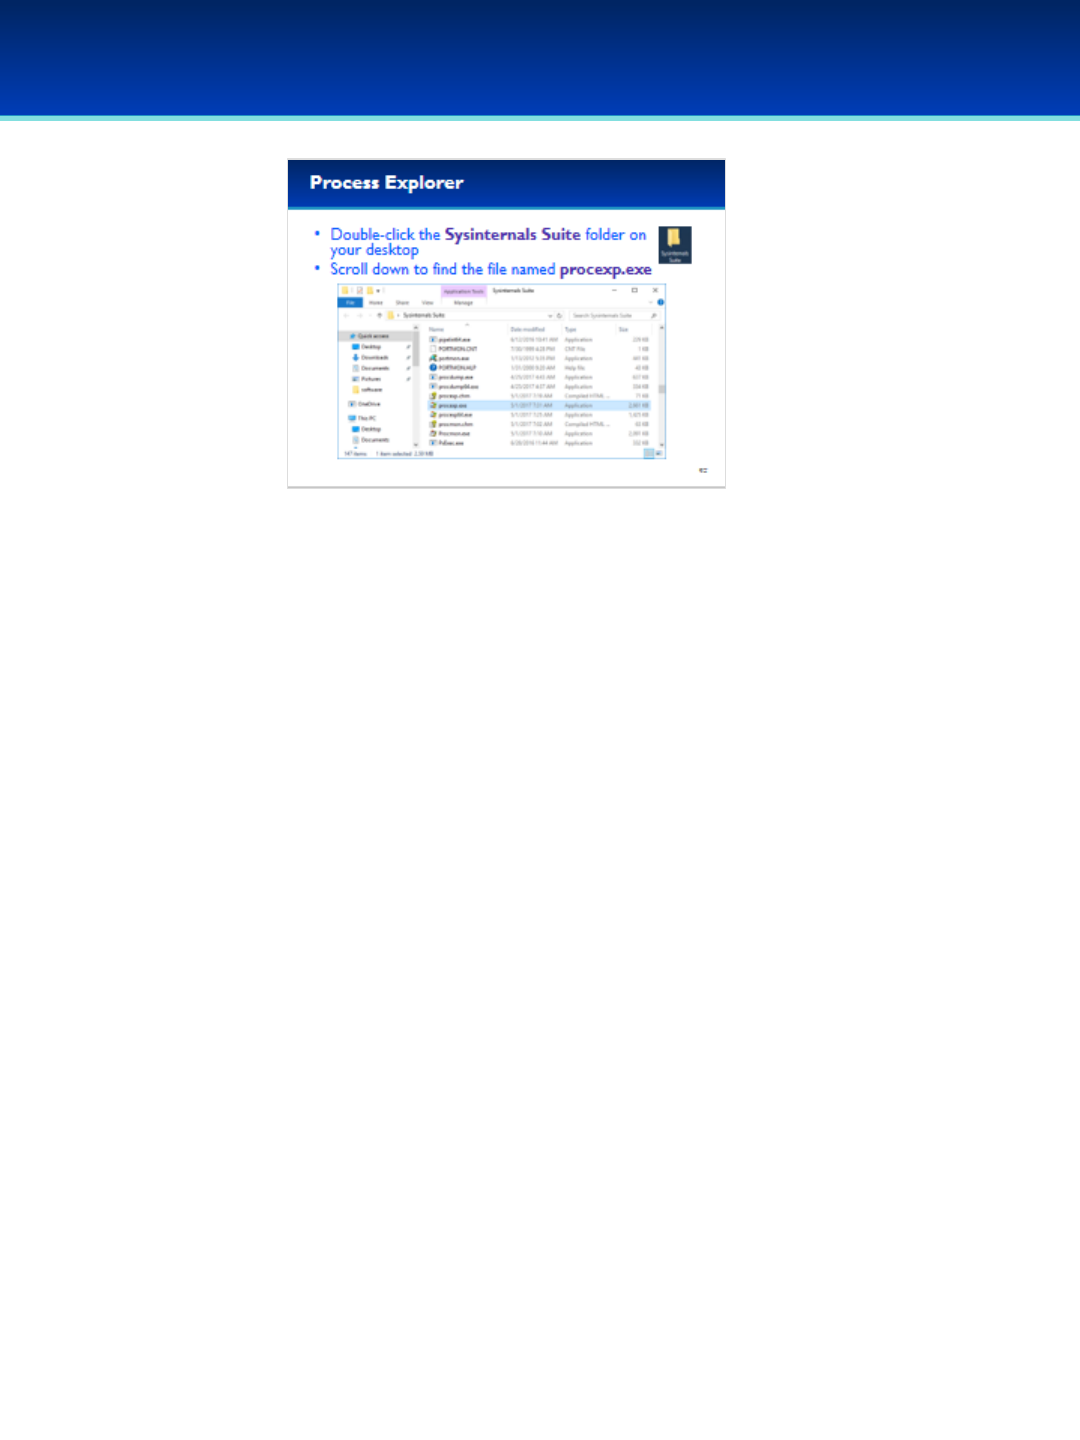
•The Sysinternals Suite of utilities are available to download for
free from technet.Microsoft.com.
•The suite has already been downloaded to your Demo image
and extracted to the desktop.
•Double-click the Sysinternals Suite folder on your desktop and
scroll down until you find the file named procexp.exe.

© 2018 Air Force Association
AFA Advanced CyberCamp Instructor’s Guide
Page 99
Slide 93
Windows 10
•Right-click procexp.exe and Run as administrator, so that you
can use its full capabilities.
•User Account Control may ask you if you want to allow this
app to make changes to your device. We trust this application,
so click Yes.

© 2018 Air Force Association
AFA Advanced CyberCamp Instructor’s Guide
Page 100
Slide 94
Windows 10
•Process Explorer is similar to Task Manager, but because of the way
Process Explorer gets its information, it is much harder to hide
processes from Process Explorer.
•The first thing you will notice about Process Explorer is that it shows
the hierarchical parent-child relationship of processes.
- When a process creates another process, the original process is
referred to as the parent process, and the processes it creates is
referred to as the child process.
•Process Explorer has some really helpful features such as being able to
verify image signatures and integration of VirusTotal, a cloud based
malware detection service.
•Lots of other useful information can be displayed by Process Explorer,
including Threads, Loaded DLL’s, Handles, Network Connections, The
command line used to start the application, and the location
responsible for automatically starting the application.

© 2018 Air Force Association
AFA Advanced CyberCamp Instructor’s Guide
Page 101
Slide 95
Windows 10
•First, lets enable verification of image signatures.
•Click Options, and select Verify Image Signatures.
•You should see a new column on your screen, don’t worry if it’s blank
for now.
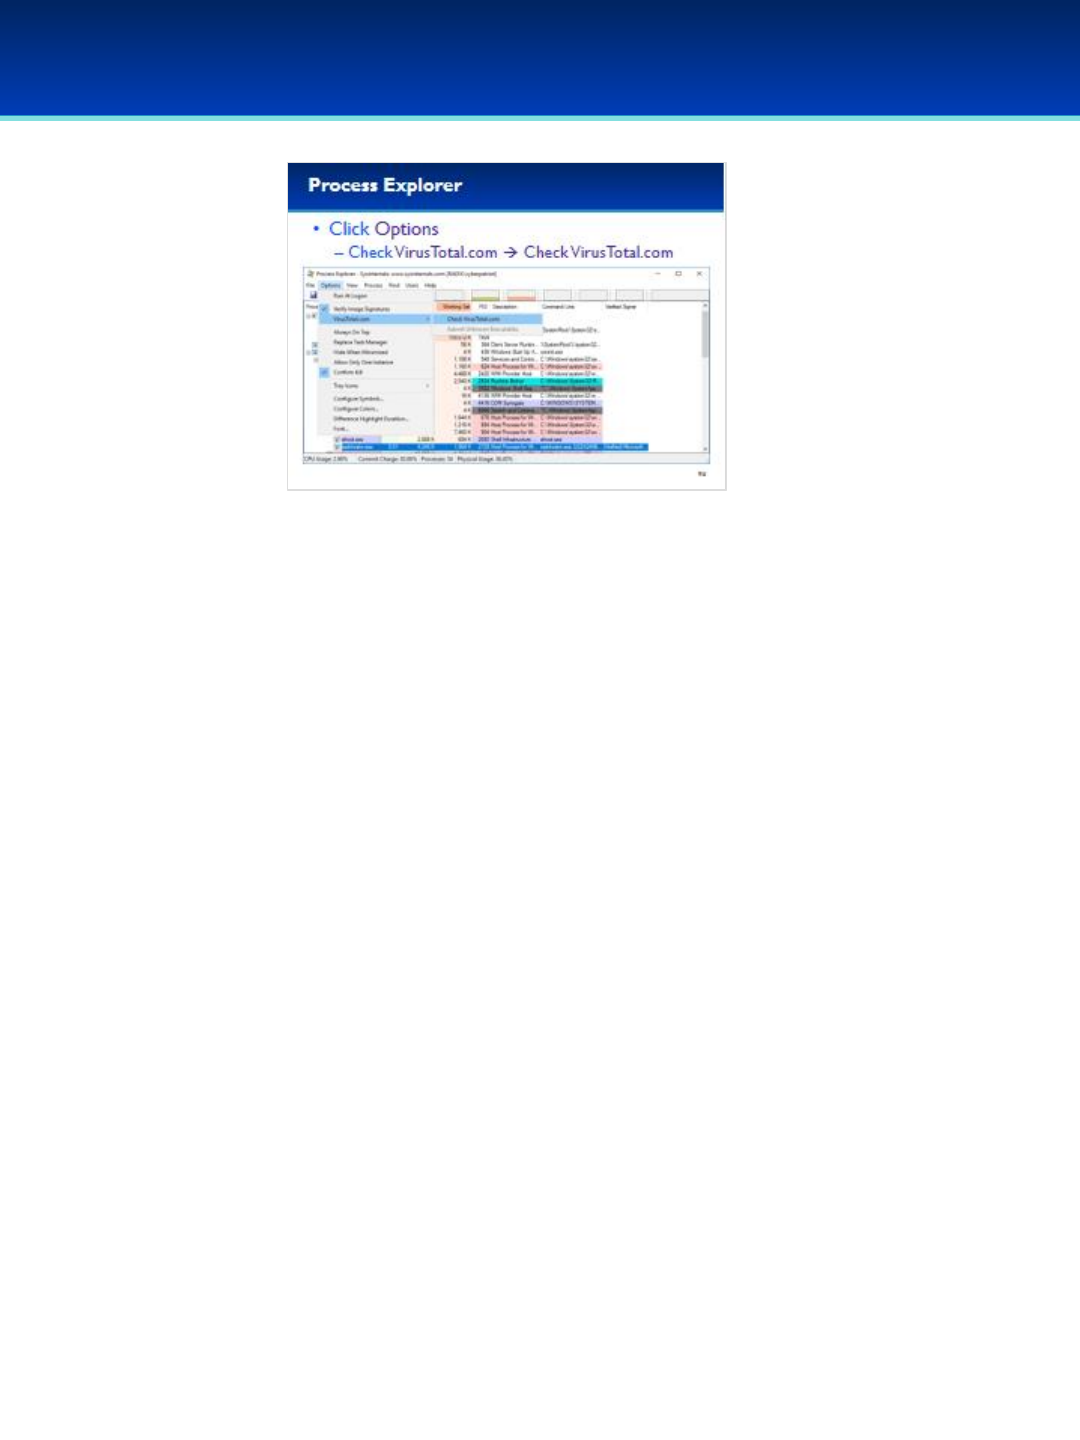
© 2018 Air Force Association
AFA Advanced CyberCamp Instructor’s Guide
Page 102
Slide 96
Windows 10
•Next, let’s enable VirusTotal.com integration.
•Click Options, and Check VirusTotal.comCheck VirusTotal.com.
•You should see a new VirusTotal column on the right.
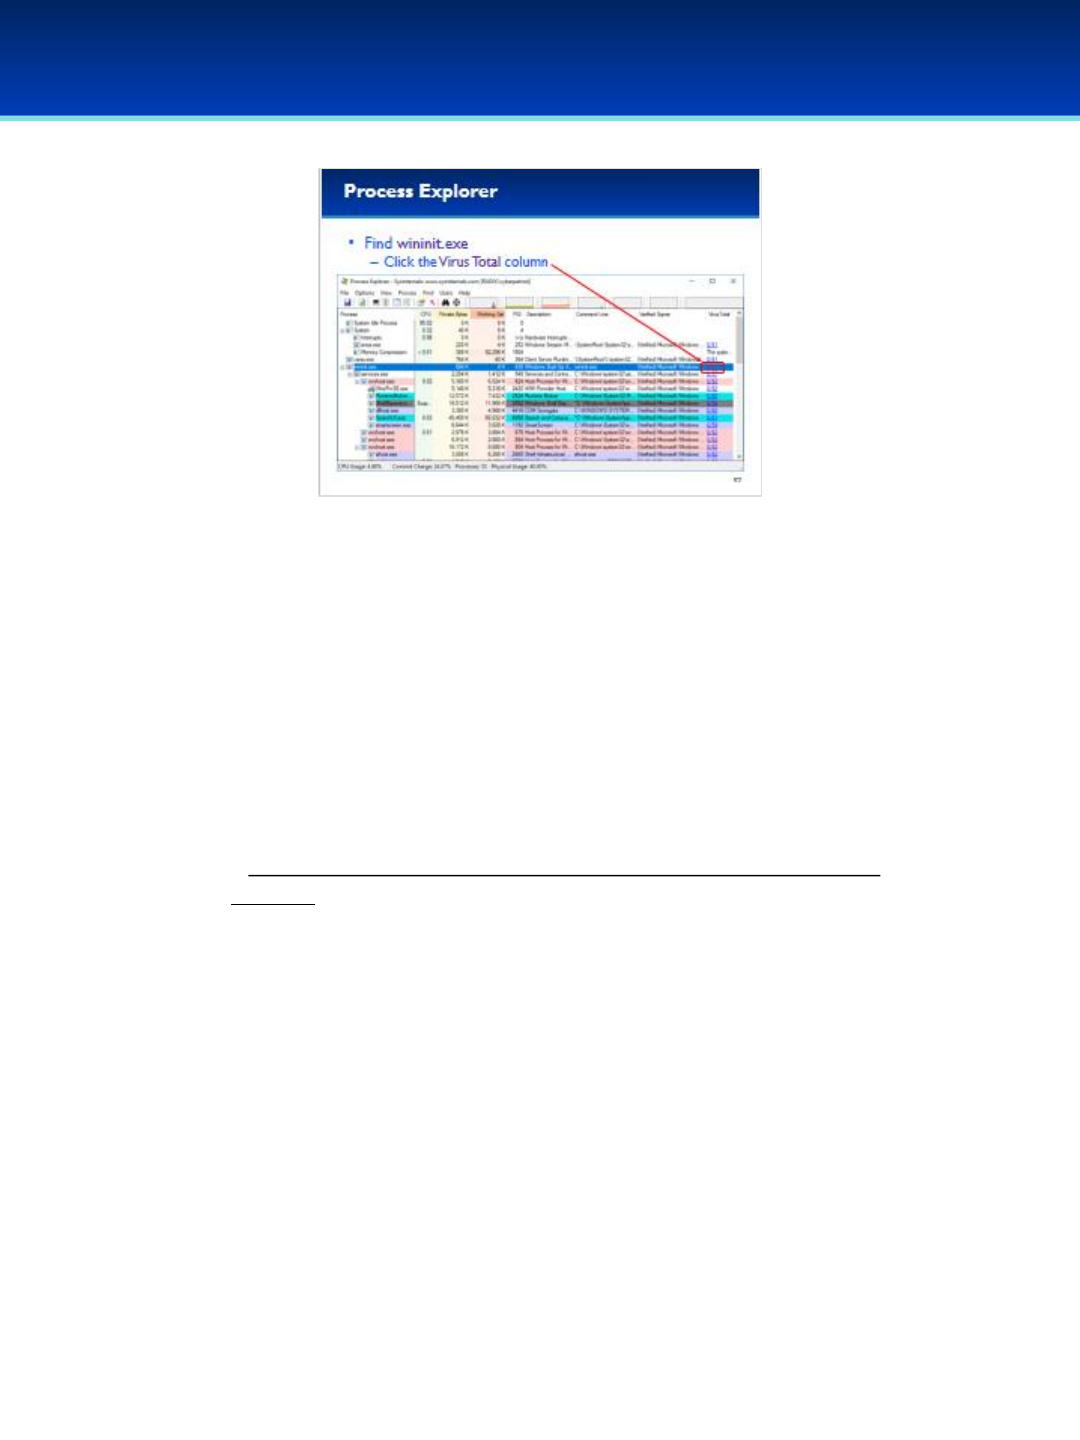
© 2018 Air Force Association
AFA Advanced CyberCamp Instructor’s Guide
Page 103
Slide 97
Windows 10
•Let’s examine wininit.exe.
- Wininit.exe is responsible for starting the services.exe process,
therefore wininit.exe is the parent of services.exe.
- The services.exe process in turn is responsible for starting the services
on your system, which is why the svchost.exe processes are children of
services.exe.
•Back to the wininit.exe row, we can see that VirusTotal reports 1/61 in
red.
- Since VirusTotal.com is constantly changing your results might be
different.
•Click the VirusTotal column for wininit.exe.
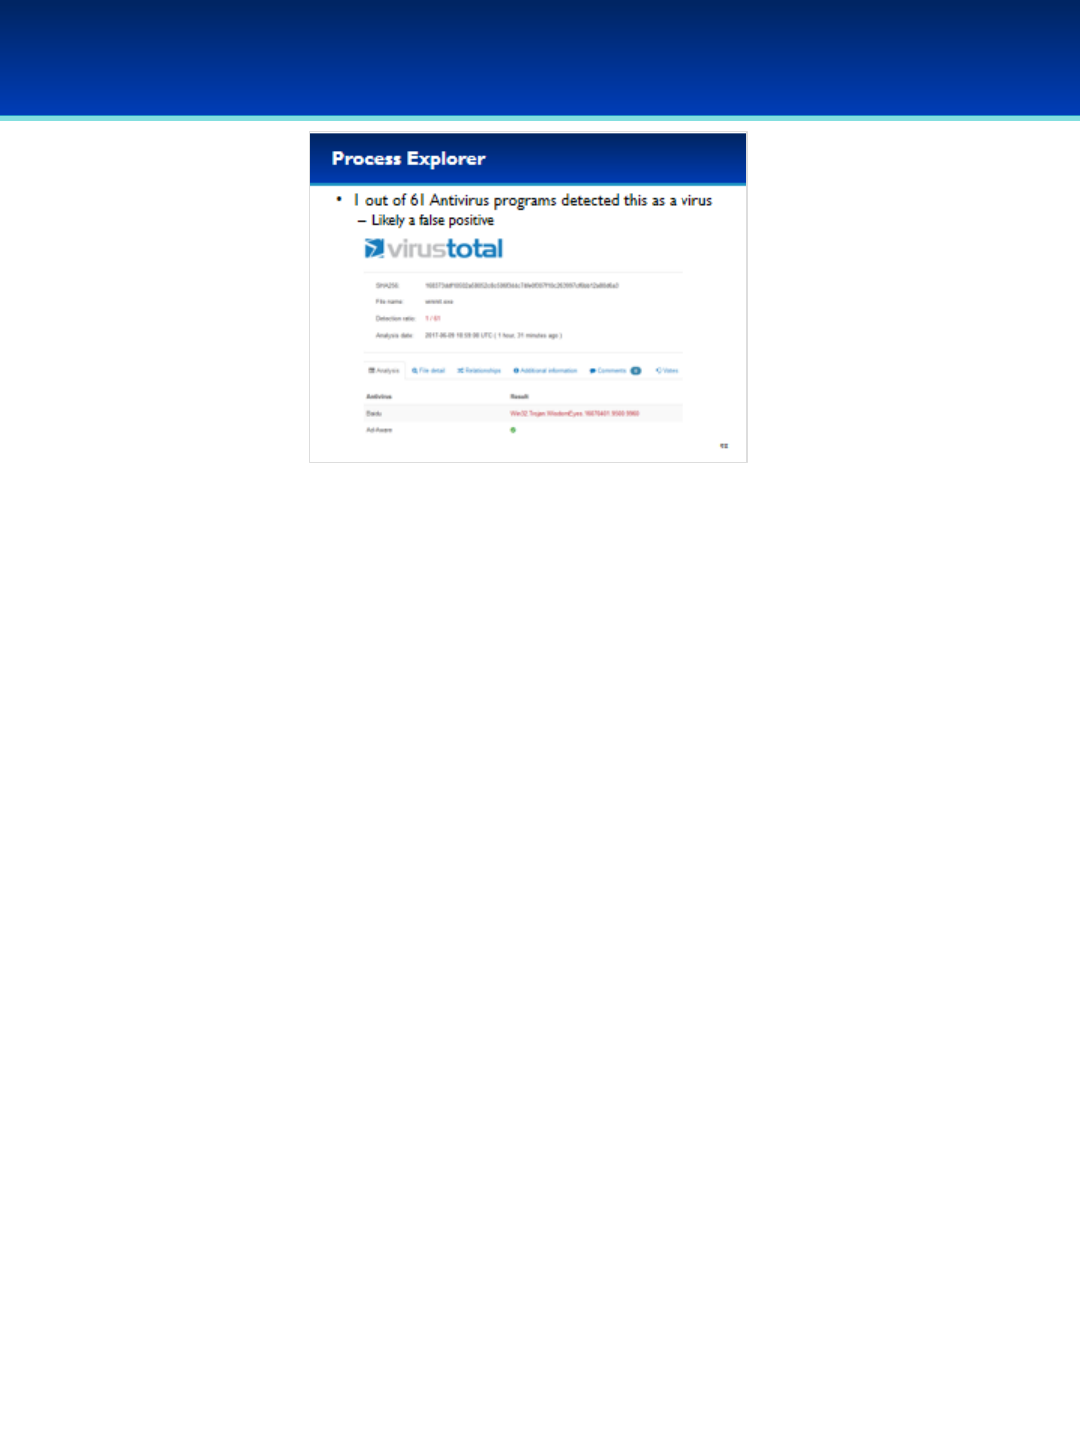
© 2018 Air Force Association
AFA Advanced CyberCamp Instructor’s Guide
Page 104
Slide 98
Windows 10
•Clicking the VirusTotal column brings up a web page displaying
information about the process (since VirusTotal is constantly
changing, you may see a different number).
- According to this web page, the file wininit.exe with this
particular SHA256 was scanned by 61 different
antivirus/antimalware products and one of them (Baidu)
reported it as a Trojan.
- I find the other antivirus products here much more
trustworthy than Baidu, so this is likely a single false positive
and nothing to worry about.
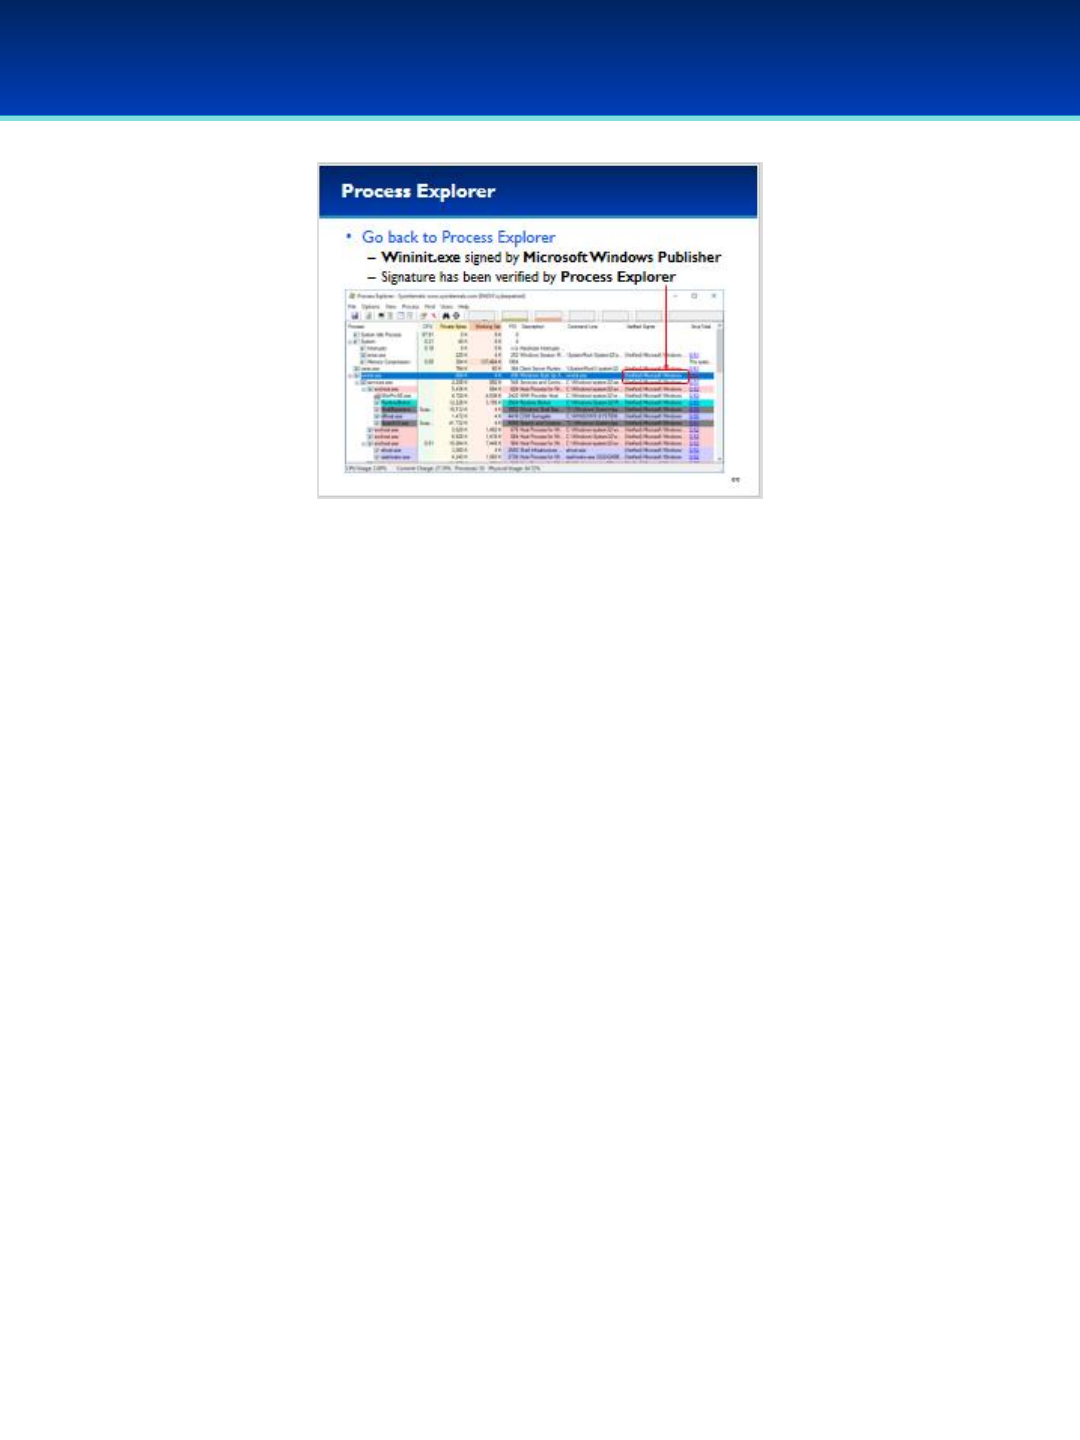
© 2018 Air Force Association
AFA Advanced CyberCamp Instructor’s Guide
Page 105
Slide 99
Windows 10
•Close out of the VirusTotal web page and look at the Verified Signer
column for wininit.exe in Process Explorer.
•It looks like this executable has been verified as signed by Microsoft
Windows Publisher.
- Signatures use cryptographic constructs such as file hashes and
public key encryption that allow us to verify that the person who
“signed” this executable is actually that person and not someone
trying to forge the signature.
- Since this has been signed by Microsoft, this gives more validity to
our assumption that the VirusTotal.com result was a false positive.
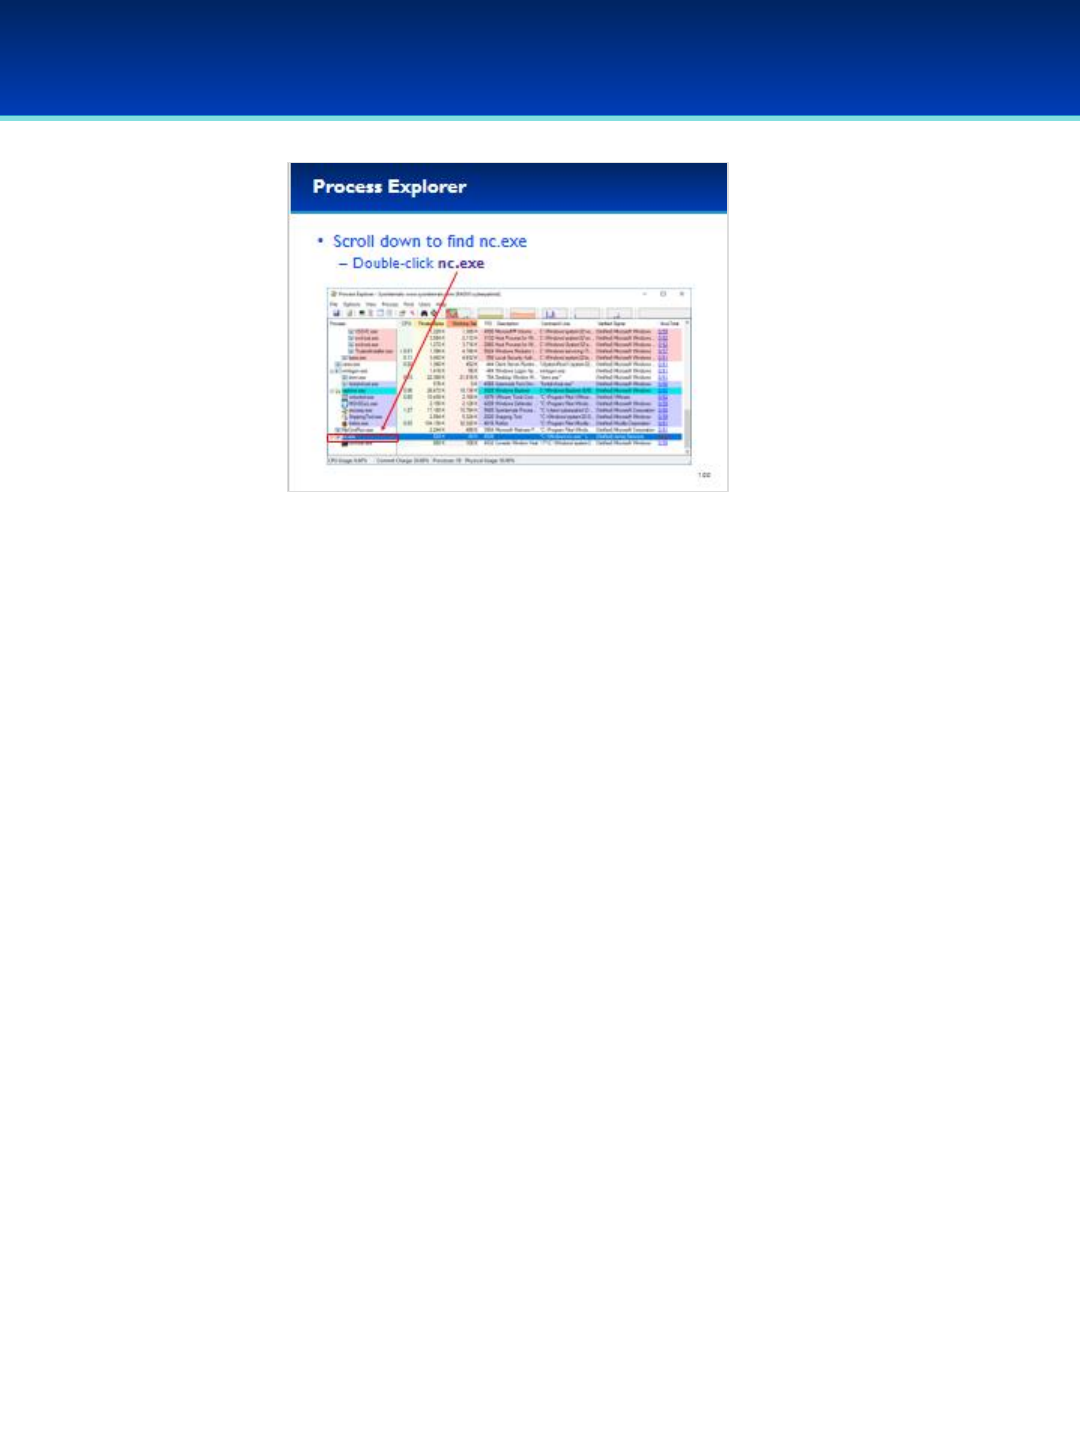
© 2018 Air Force Association
AFA Advanced CyberCamp Instructor’s Guide
Page 106
Slide 100
Windows 10
•Next, let’s examine the backdoor listening on our computer.
•Scroll down to find nc.exe.
- nc.exe has one child process, conhost.exe.
•The description for conhost.exe describes it as a Console Window Host.
-This is part of Windows and it’s the command shell that is being run
by nc.exe.
•Double-click nc.exe to view more information.
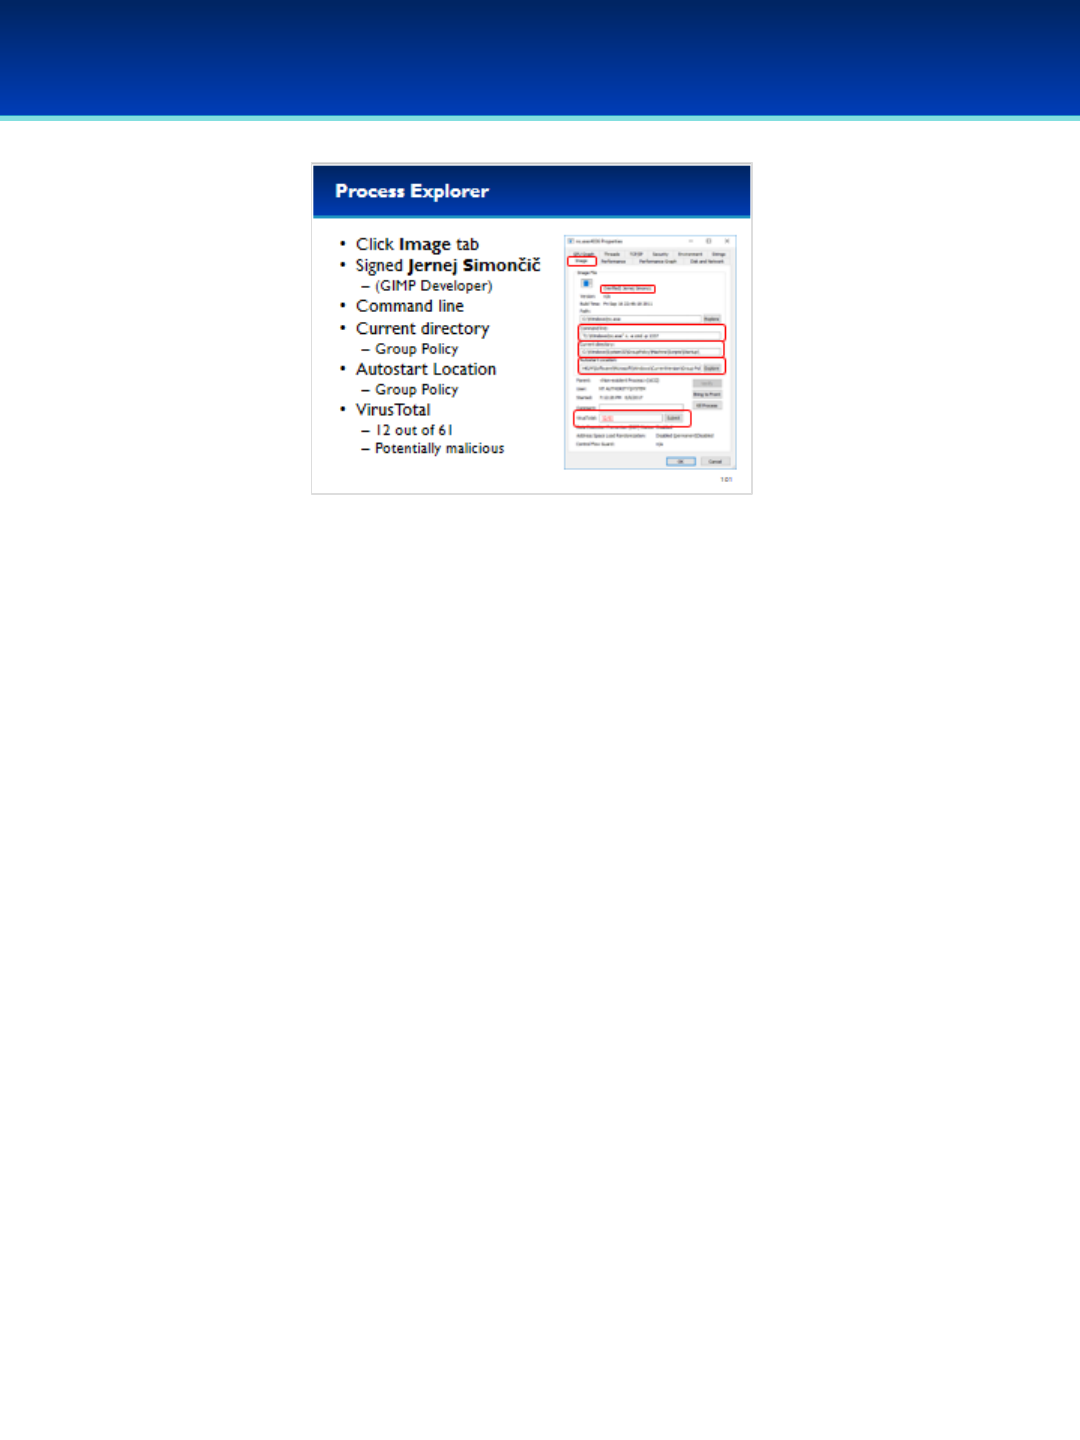
© 2018 Air Force Association
AFA Advanced CyberCamp Instructor’s Guide
Page 107
Slide 101
Windows 10
•Click on the Image tab.
•This executable has been signed by Jernej Simončič.
-Just because a file is signed, doesn’t mean it’s trusted.
-I don’t trust Jernej nearly as much as I trust Microsoft.
•We can see the command line used to start the program, it appears
that netcat is running a Command Prompt on port 1337.
•We can also see the Current Directory and Autostart Location, both of
which point to this being a Group Policy setting that is responsible for
starting this netcat backdoor.
•Also VirusTotal reports 12/61 Antivirus products report this as a virus
(your VirusTotal result may be a little different).
- Netcat is a useful program with many legitimate uses, but can also
be used for nefarious purposes, which is probably why we see mixed
results from VirusTotal.
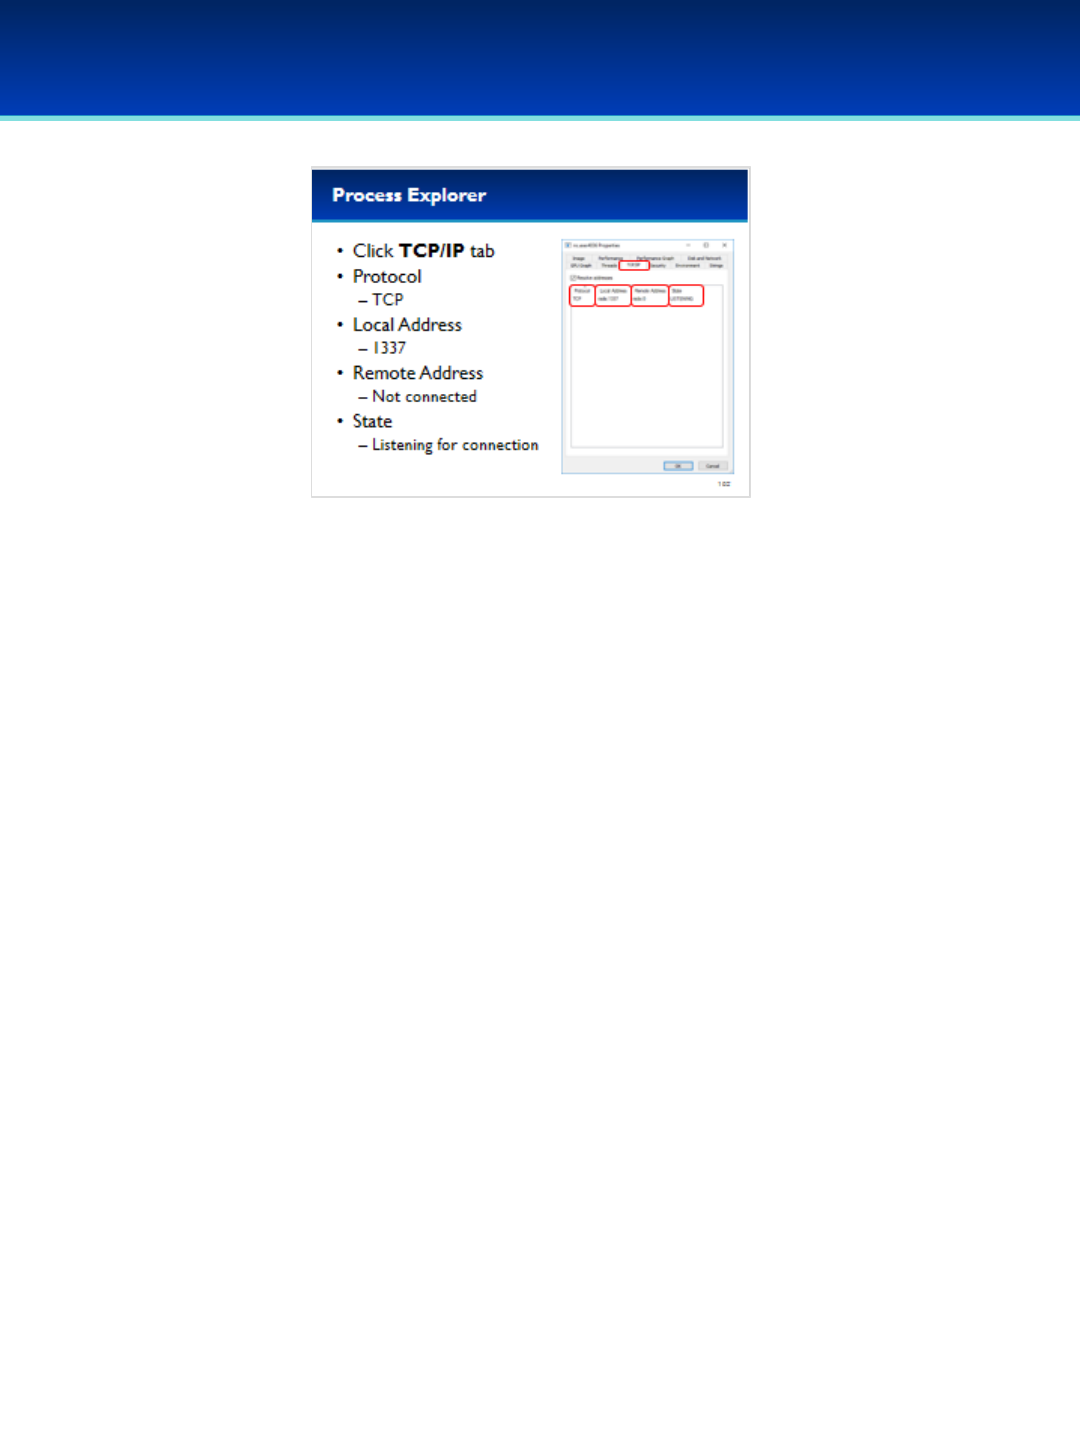
© 2018 Air Force Association
AFA Advanced CyberCamp Instructor’s Guide
Page 108
Slide 102
Windows 10
•Click on the TCP/IP tab of process explorer.
- This process is listening on TCP port 1337.
-It’s currently not connected which is why there is a remote
address of 0 and a state of LISTENING.
- Close by selecting Cancel.
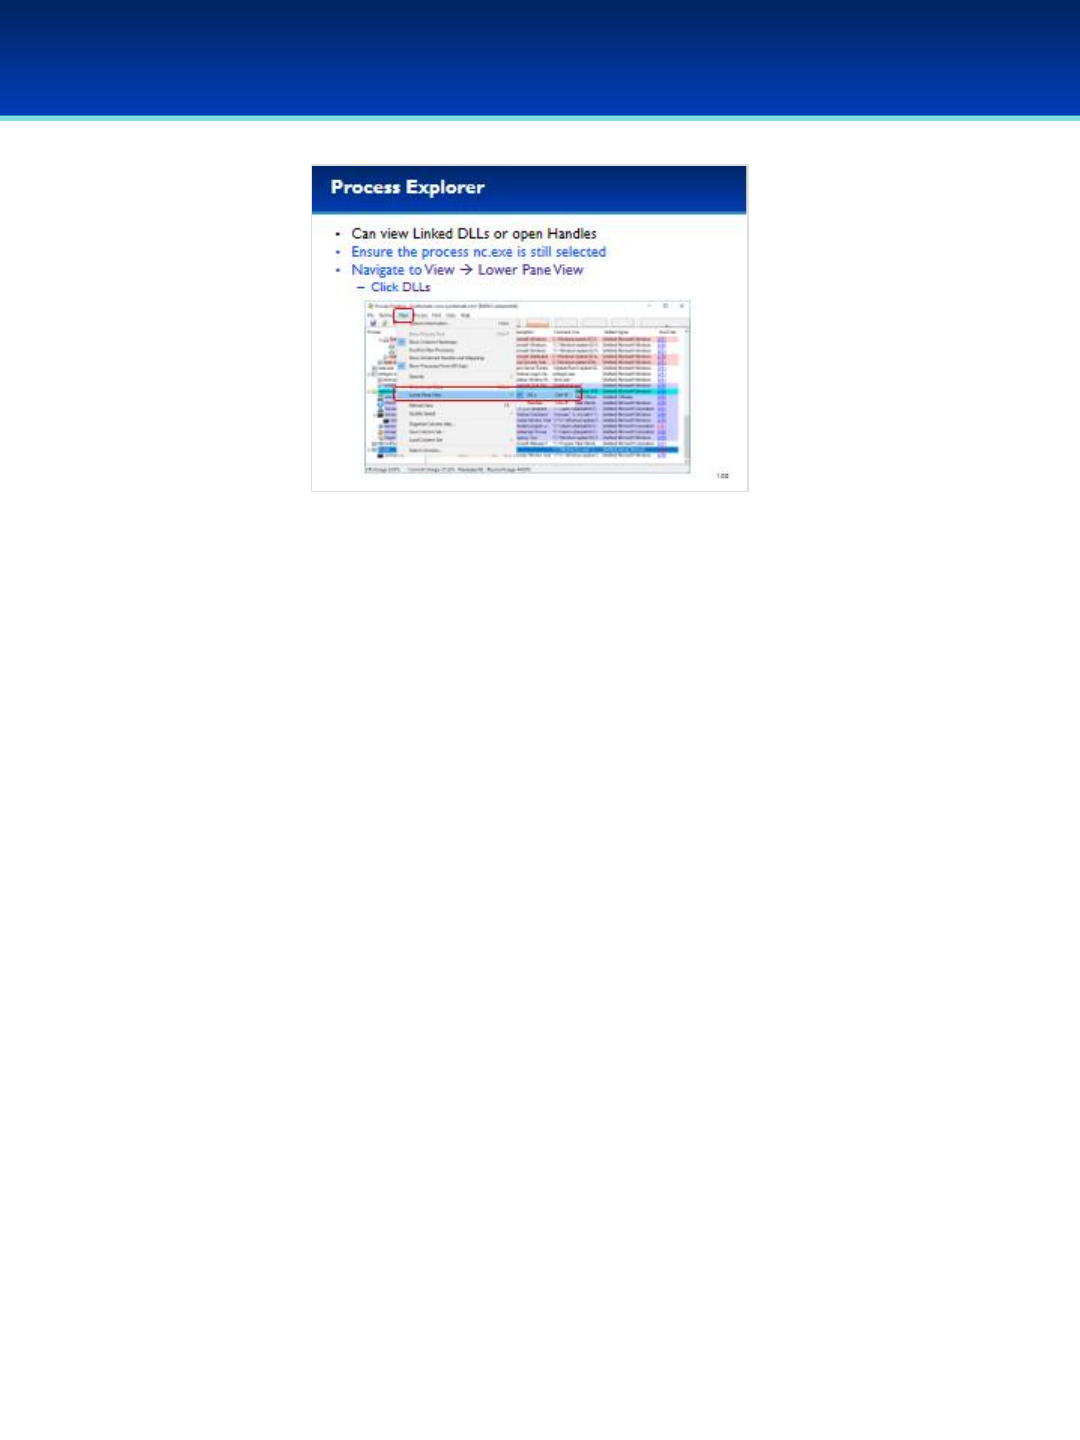
© 2018 Air Force Association
AFA Advanced CyberCamp Instructor’s Guide
Page 109
Slide 103
Windows 10
•Malware may exist in more than just executables however.
•Let’s check out the DLLs linked to nc.exe.
•Click View and select Lower Pane View DLLs.
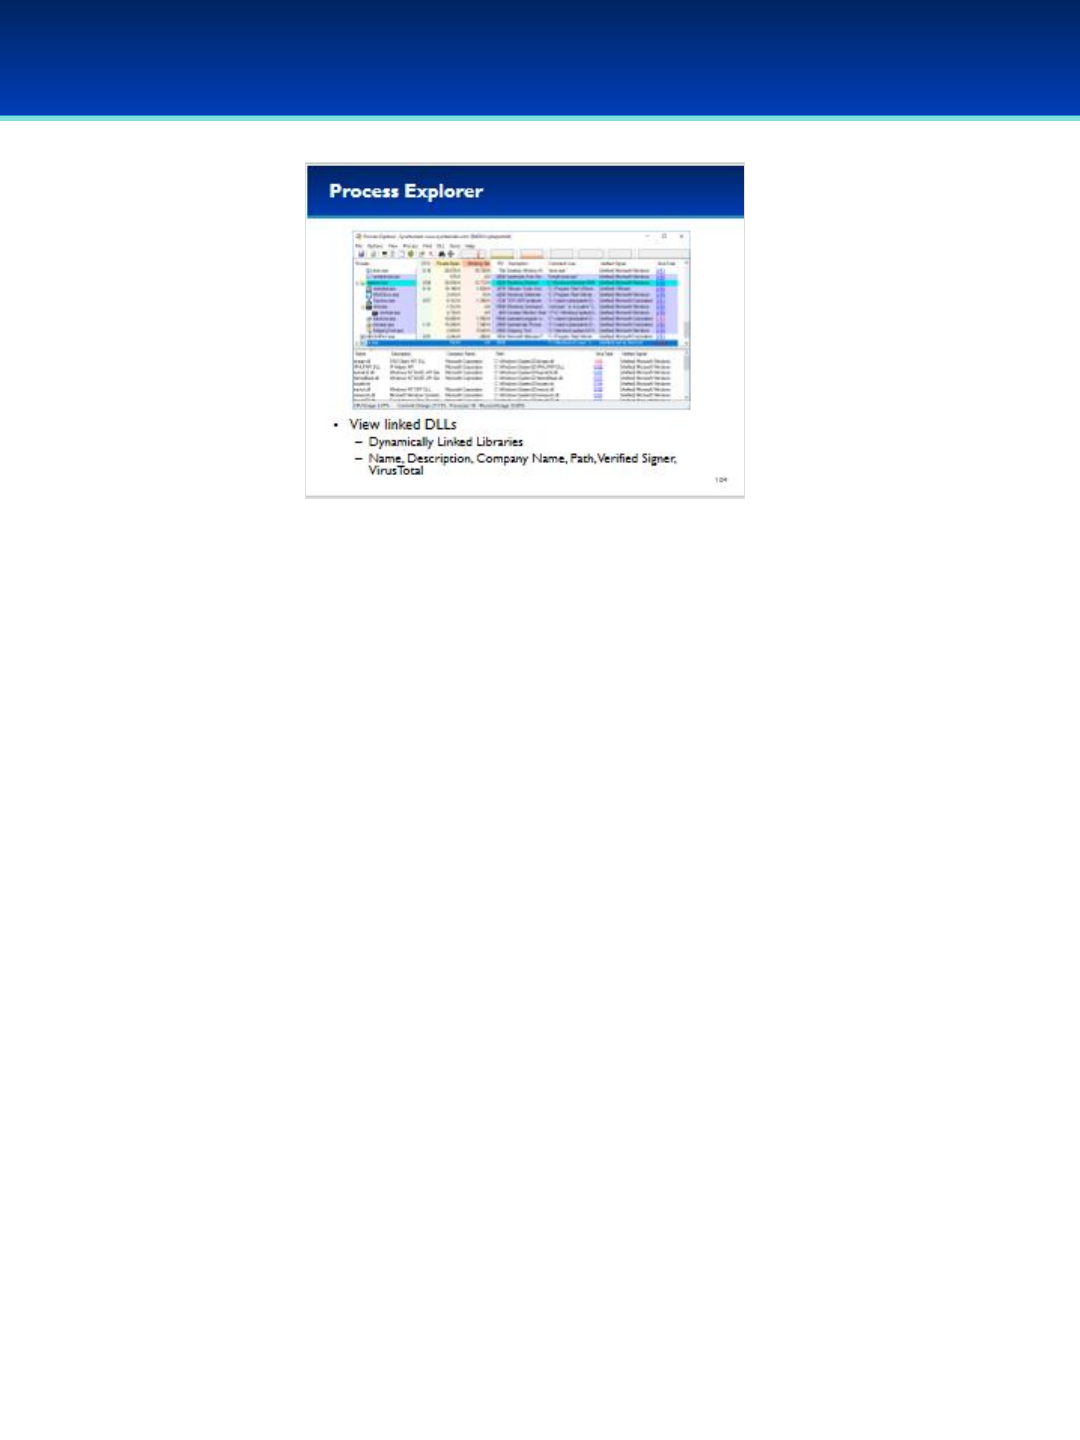
© 2018 Air Force Association
AFA Advanced CyberCamp Instructor’s Guide
Page 110
Slide 104
Windows 10
•It looks like there is nothing obviously bad here. All the DLLs
loaded appear to be official, signed DLLs in the
C:\Windows\System32 directory.
•The dnsapi.dll 1/60 result above appears to be another false
positive (your result may vary slightly).
•Close out of Process Explorer.
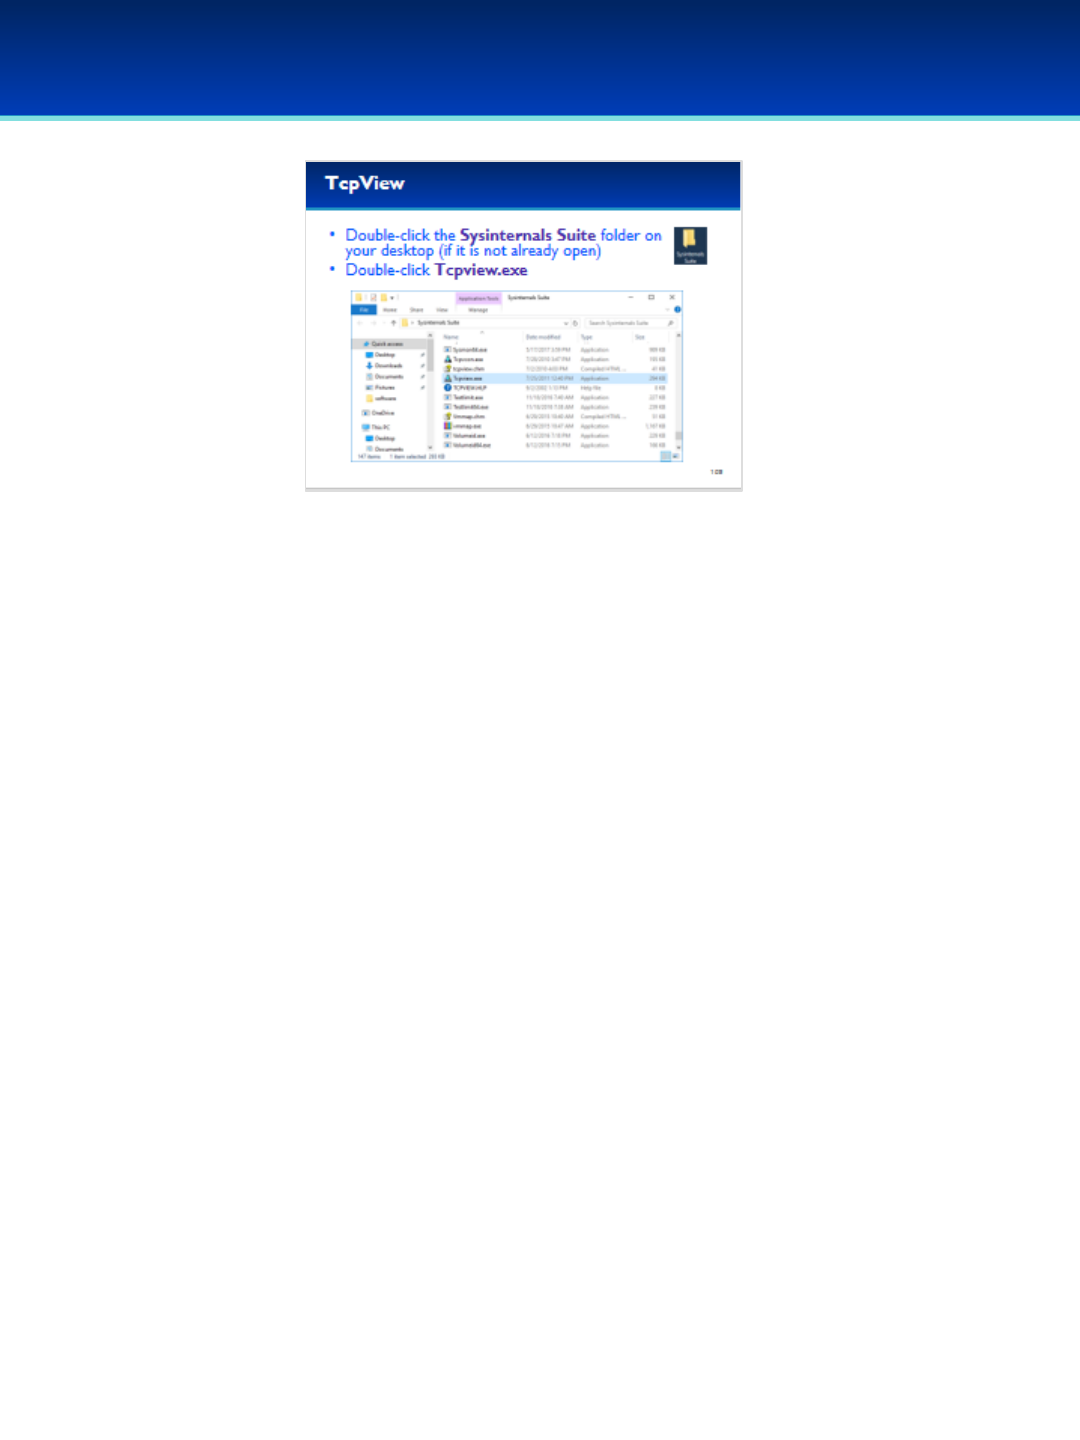
© 2018 Air Force Association
AFA Advanced CyberCamp Instructor’s Guide
Page 111
Slide 105
Windows 10
•Next, let’s examine another extremely useful Sysinternals
program called TcpView.
•Scroll down in the Sysinternals Suite directory to find
Tcpview.exe.
- Double-clicking Tcpview.exe will automatically start it as an
administrator.
•User Account Control may ask you if you want to allow this app
to make changes to your device. We trust this application, so
click Yes.
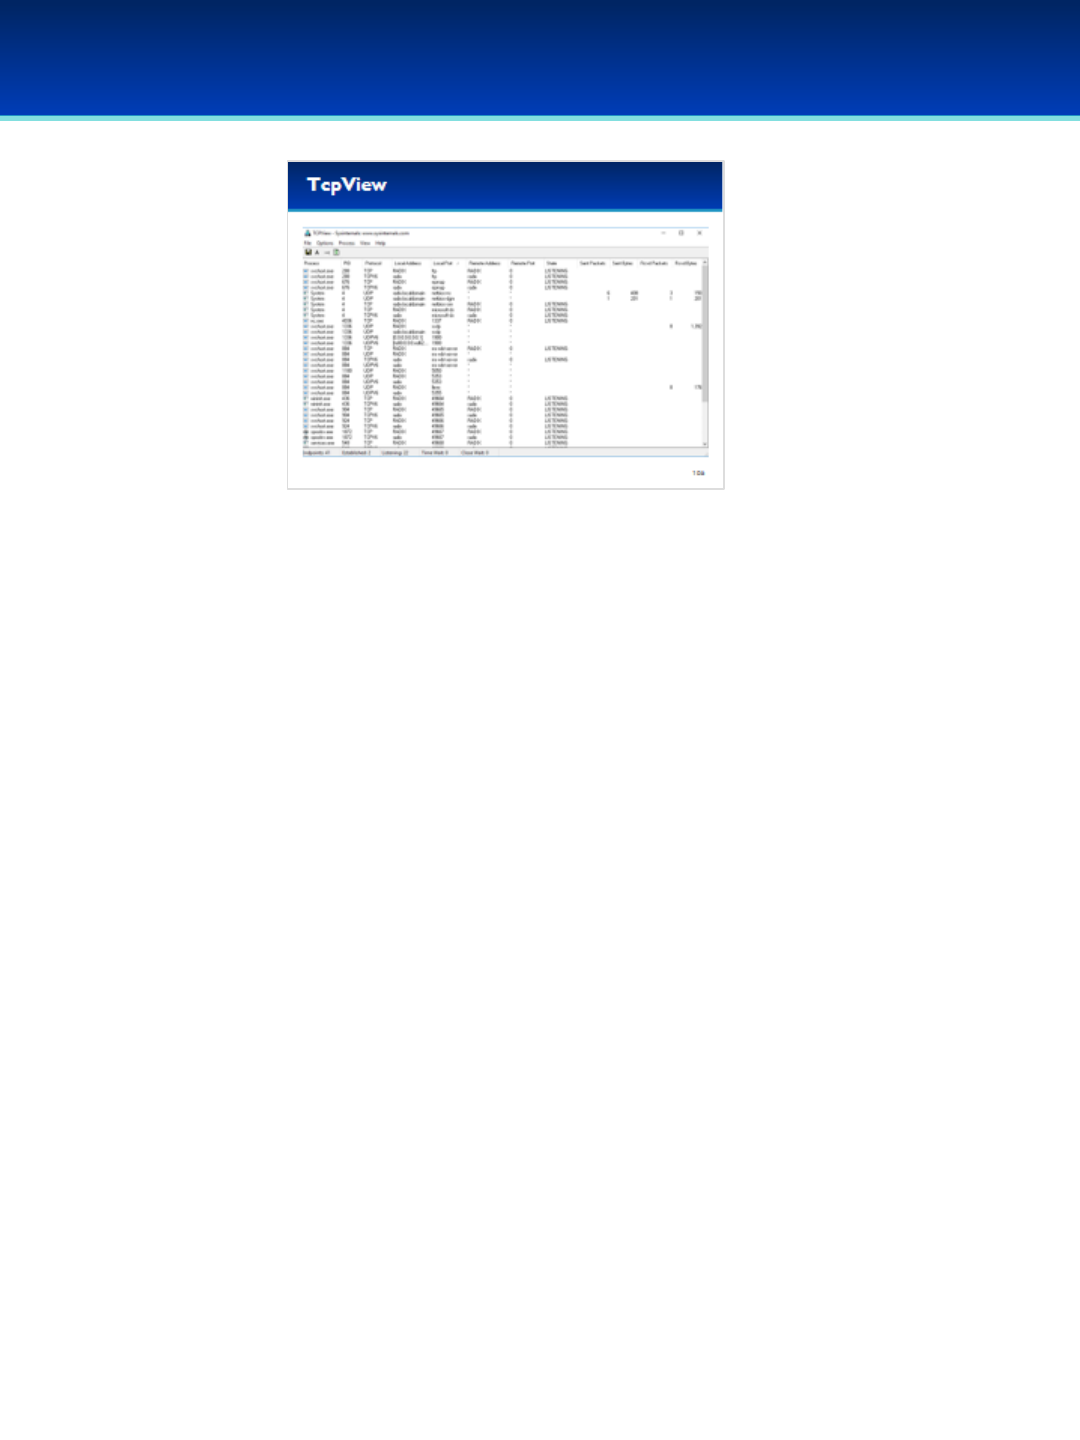
© 2018 Air Force Association
AFA Advanced CyberCamp Instructor’s Guide
Page 112
Slide 106
Windows 10
•As you can see, TcpView shows a lot of the same
information as netstat, but one big difference that is already
visible is the ability to sort by columns.
© 2018 Air Force Association
AFA Advanced CyberCamp Instructor’s Guide
Page 113
Slide 107
Windows 10
•TcpView has a row for each network connection or listening port.
•For each network connection, you can see:
- The executable that created that connection.
- The PID (Process ID).
- The local address and port.
- The remote address and port (if a connection has been
established).
- The State of the connection, such as LISTENING or ESTABLISHED.
- The number of packets and bytes sent and received.

© 2018 Air Force Association
AFA Advanced CyberCamp Instructor’s Guide
Page 114
Slide 108
Windows 10
•Let’s examine one of the established connections on your
computer.
- These change regularly, so what is on your computer will be
slightly different.
•Select Options and click on Resolve Addresses.
•It looks like Explorer.exe opened up a connection to a computer at
search.msn.com on port 443 which is used by https.
•Right-click on Explorer.exe (if you have more than one Explorer.exe
shown, click anyone that has an ESTABLISHED connection).
- Process Explorer will let you manually end the process or kill the
connection.
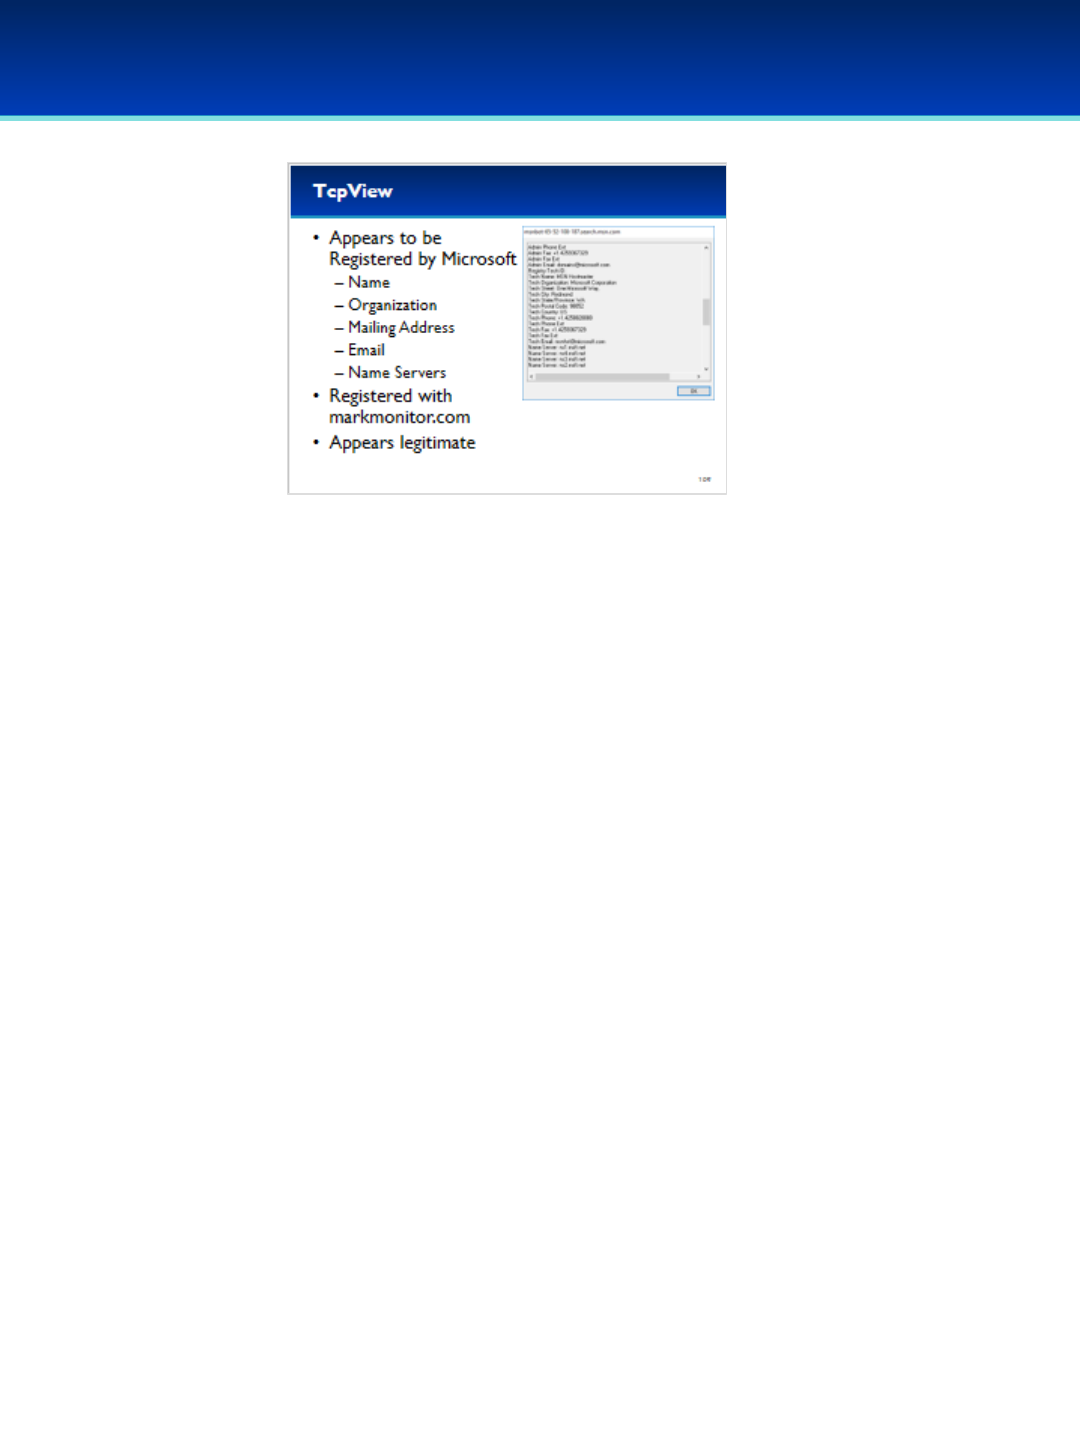
© 2018 Air Force Association
AFA Advanced CyberCamp Instructor’s Guide
Page 115
Slide 109
Windows 10
•Right-click on Explorer.exe and select Whois, which is a protocol
used for querying information about domain names.
•Firewall may prevent you from using whois.
•Examining the dialog box that pops up, we can see that this domain
is registered to Microsoft; we can make that assumption by looking
at the Name, Organization, Mailing Address, Email, and Name
Servers.
•This domain has been registered with markmonitor.com.
•We can’t be 100% certain, but the this appears to be legitimately
owned by Microsoft.
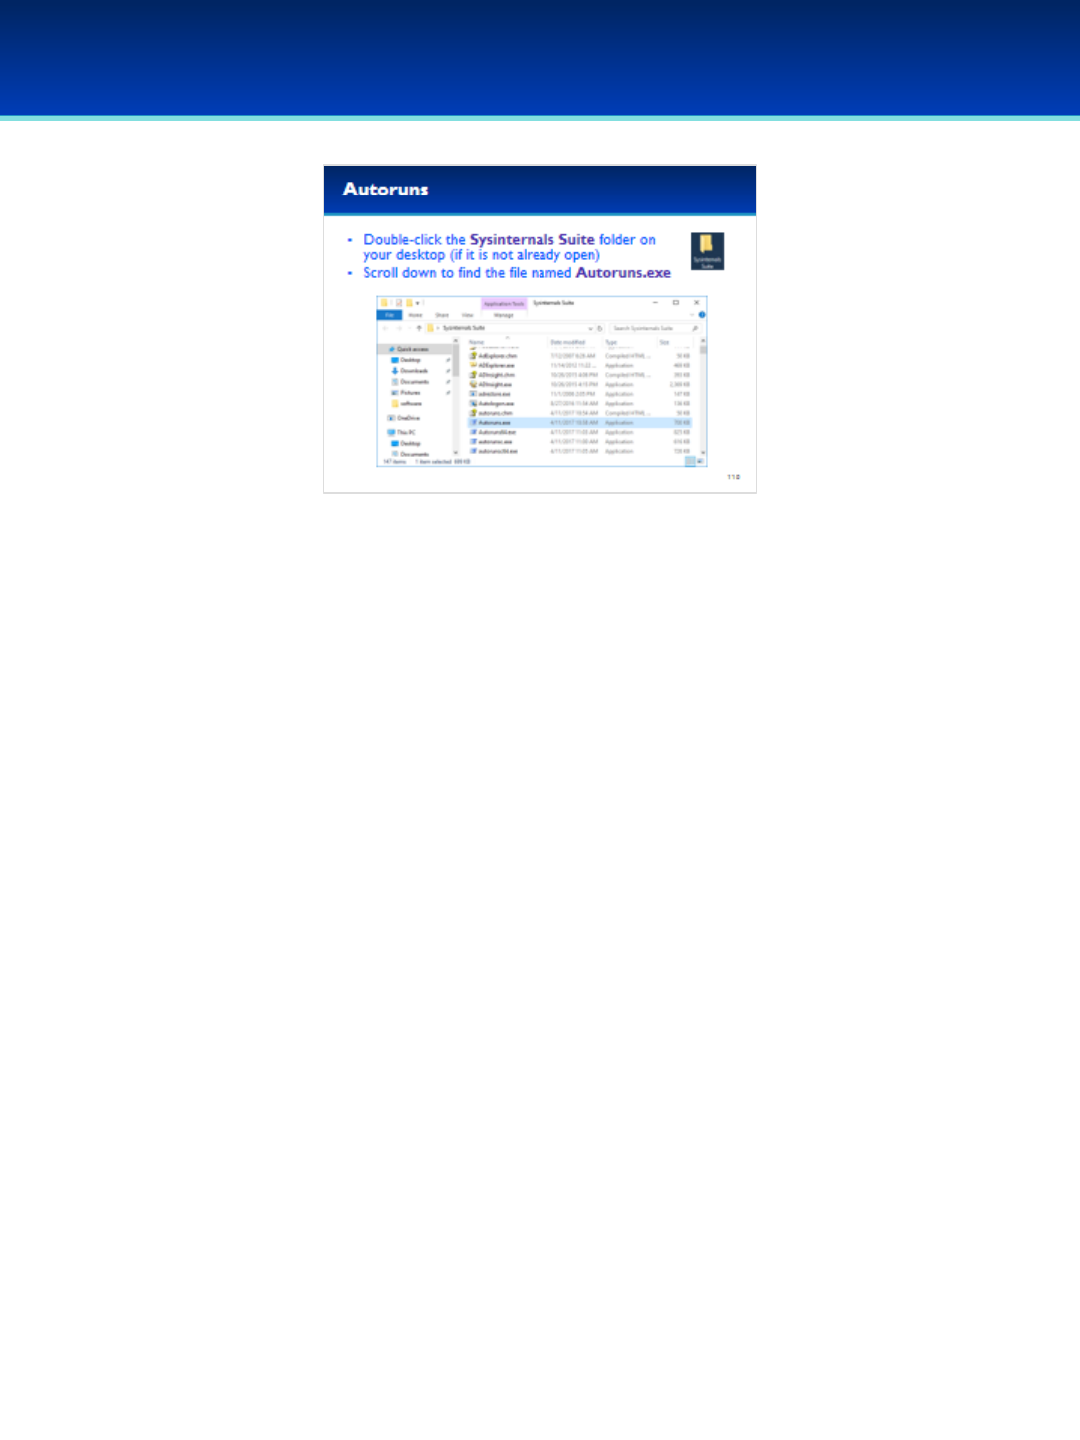
© 2018 Air Force Association
AFA Advanced CyberCamp Instructor’s Guide
Page 116
Slide 110
Windows 10
•Close TcpView and go back to the Sysinternals Suite
folder.
•Scroll up and find the executable Autoruns.exe.
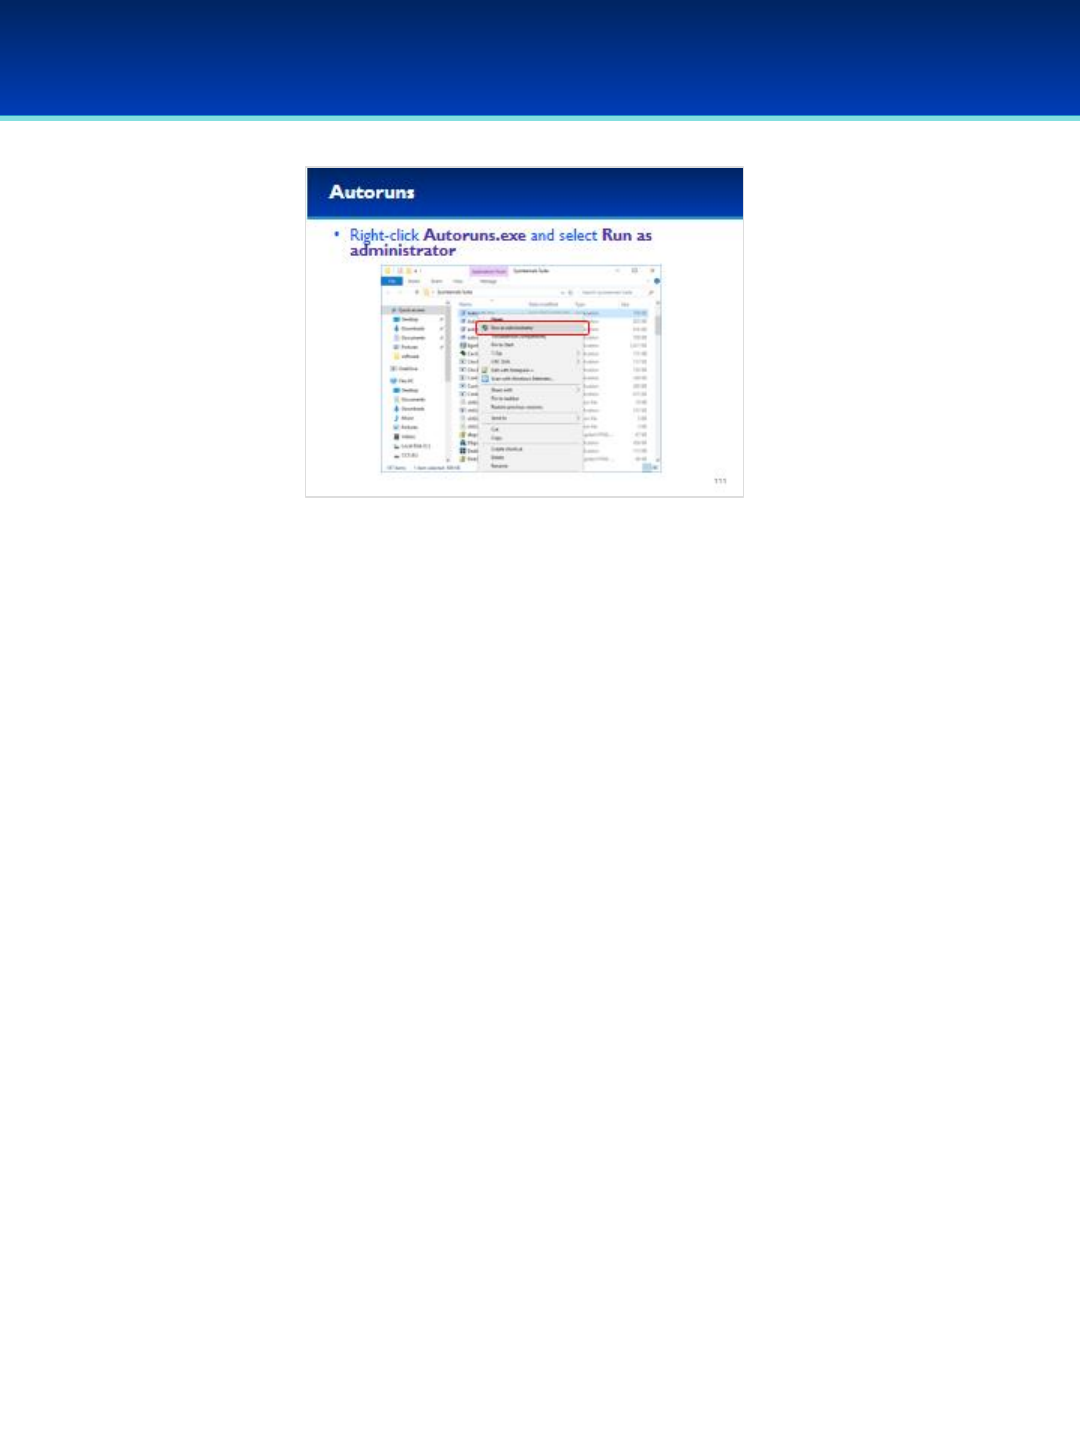
© 2018 Air Force Association
AFA Advanced CyberCamp Instructor’s Guide
Page 117
Slide 111
Windows 10
•Right-click on autoruns.exe and select Run as administrator.
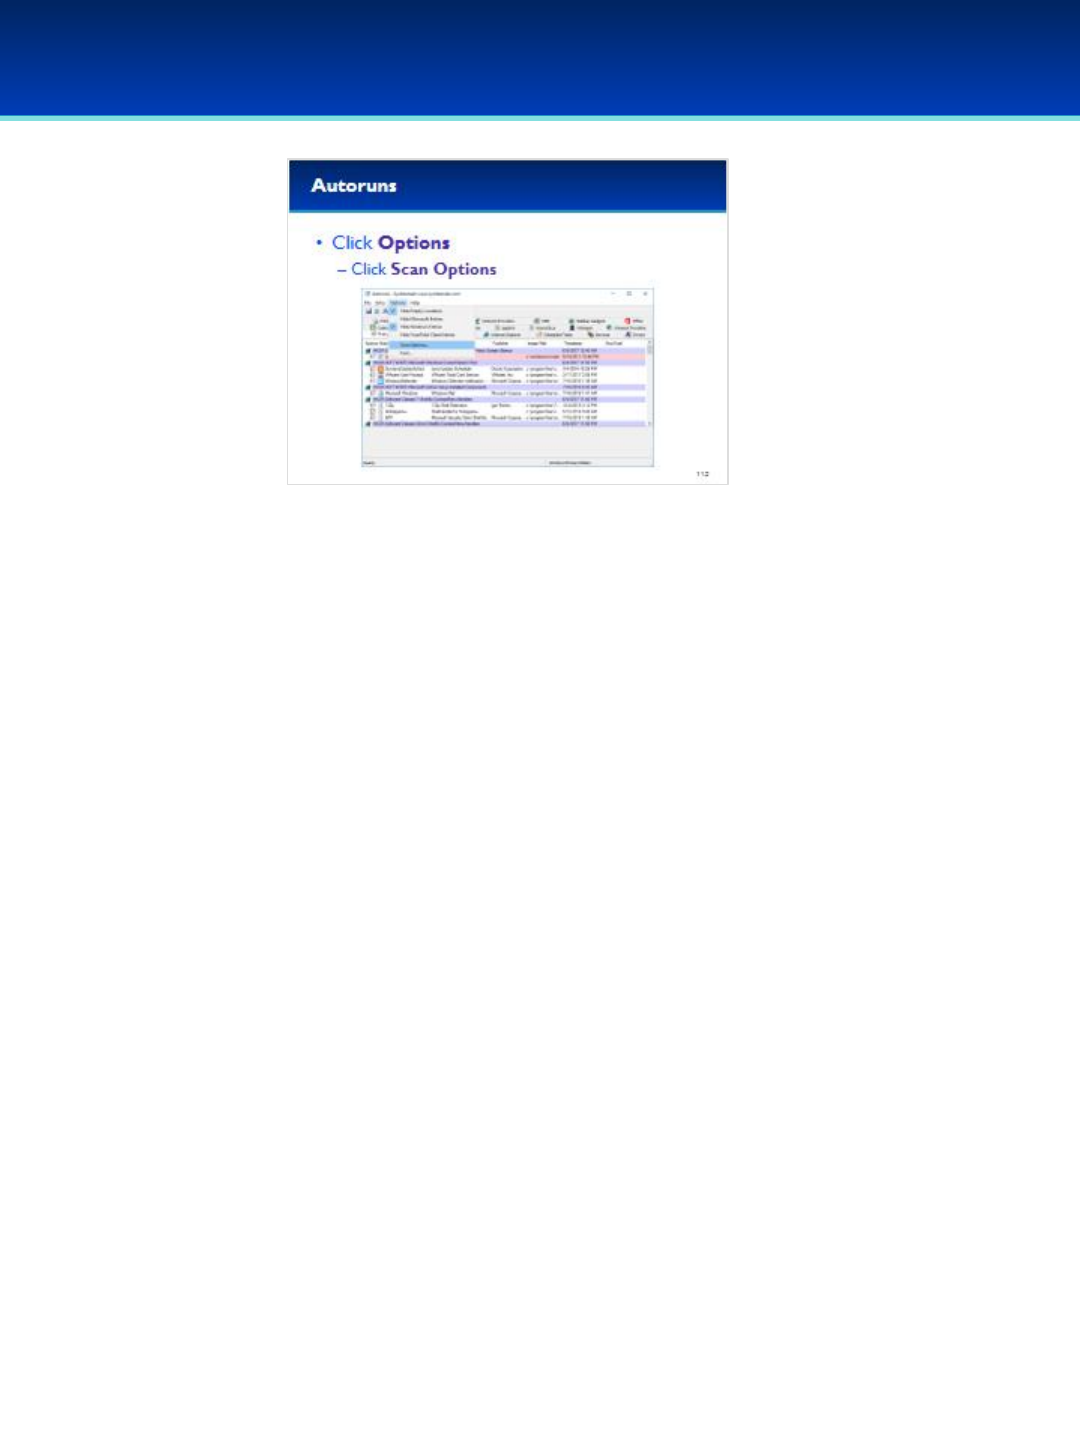
© 2018 Air Force Association
AFA Advanced CyberCamp Instructor’s Guide
Page 118
Slide 112
Windows 10
•First, let’s enable checking VirusTotal.com and signatures.
•Go to Options and select Scan Options.
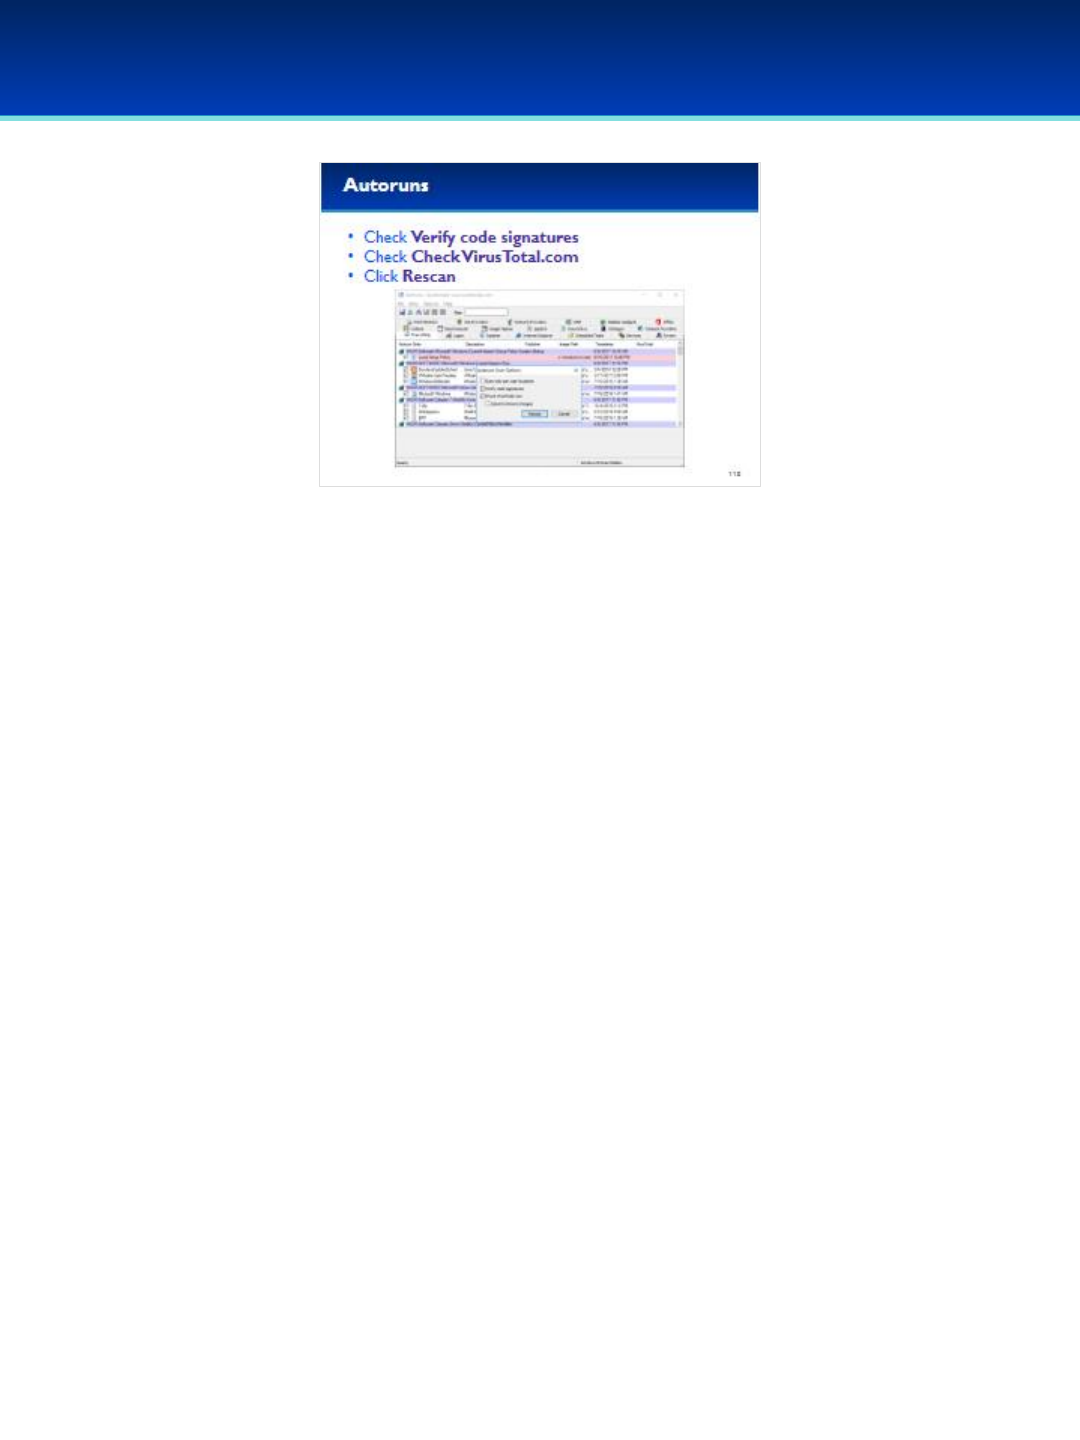
© 2018 Air Force Association
AFA Advanced CyberCamp Instructor’s Guide
Page 119
Slide 113
Windows 10
•Check Verify code signatures and Check VirusTotal.com.
•Do not select Submit Unknown Images.
•Click Rescan.
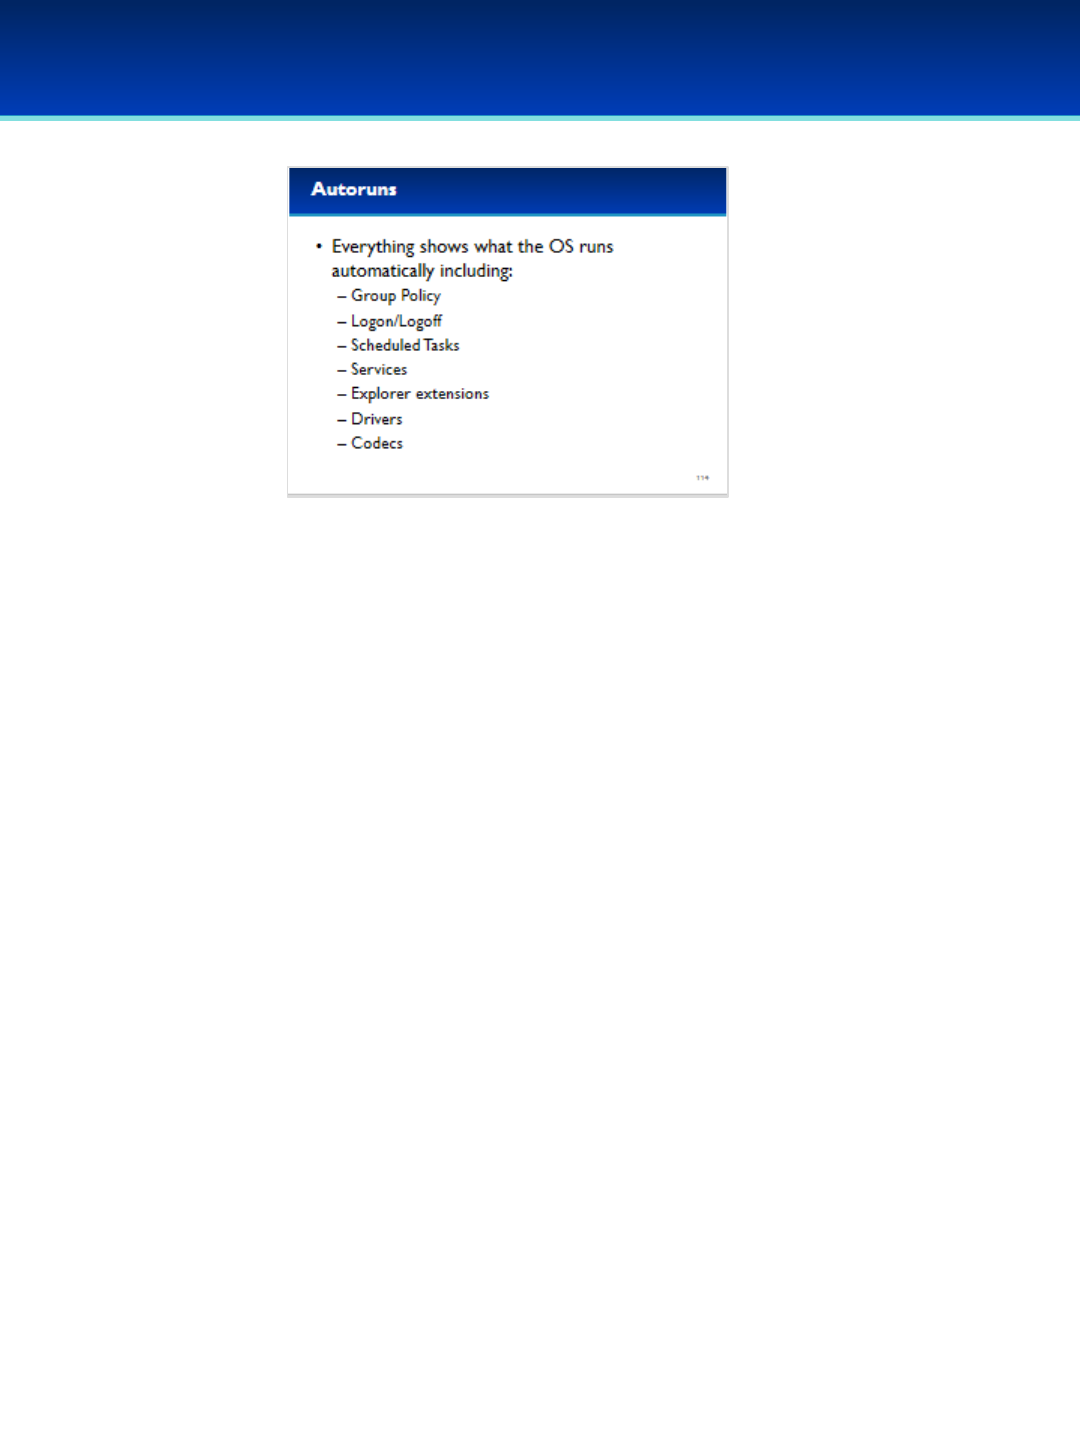
© 2018 Air Force Association
AFA Advanced CyberCamp Instructor’s Guide
Page 120
Slide 114
Windows 10
•The Everything tab shows what the OS runs automatically including:
- Programs started by Group Policy settings.
- Logon/Logoff and Startup scripts stored via registry entries.
- Programs started by the Task Scheduler.
- Services.
•Malware may also exist and be automatically loaded as Explorer
extensions, drivers, or even media codecs.
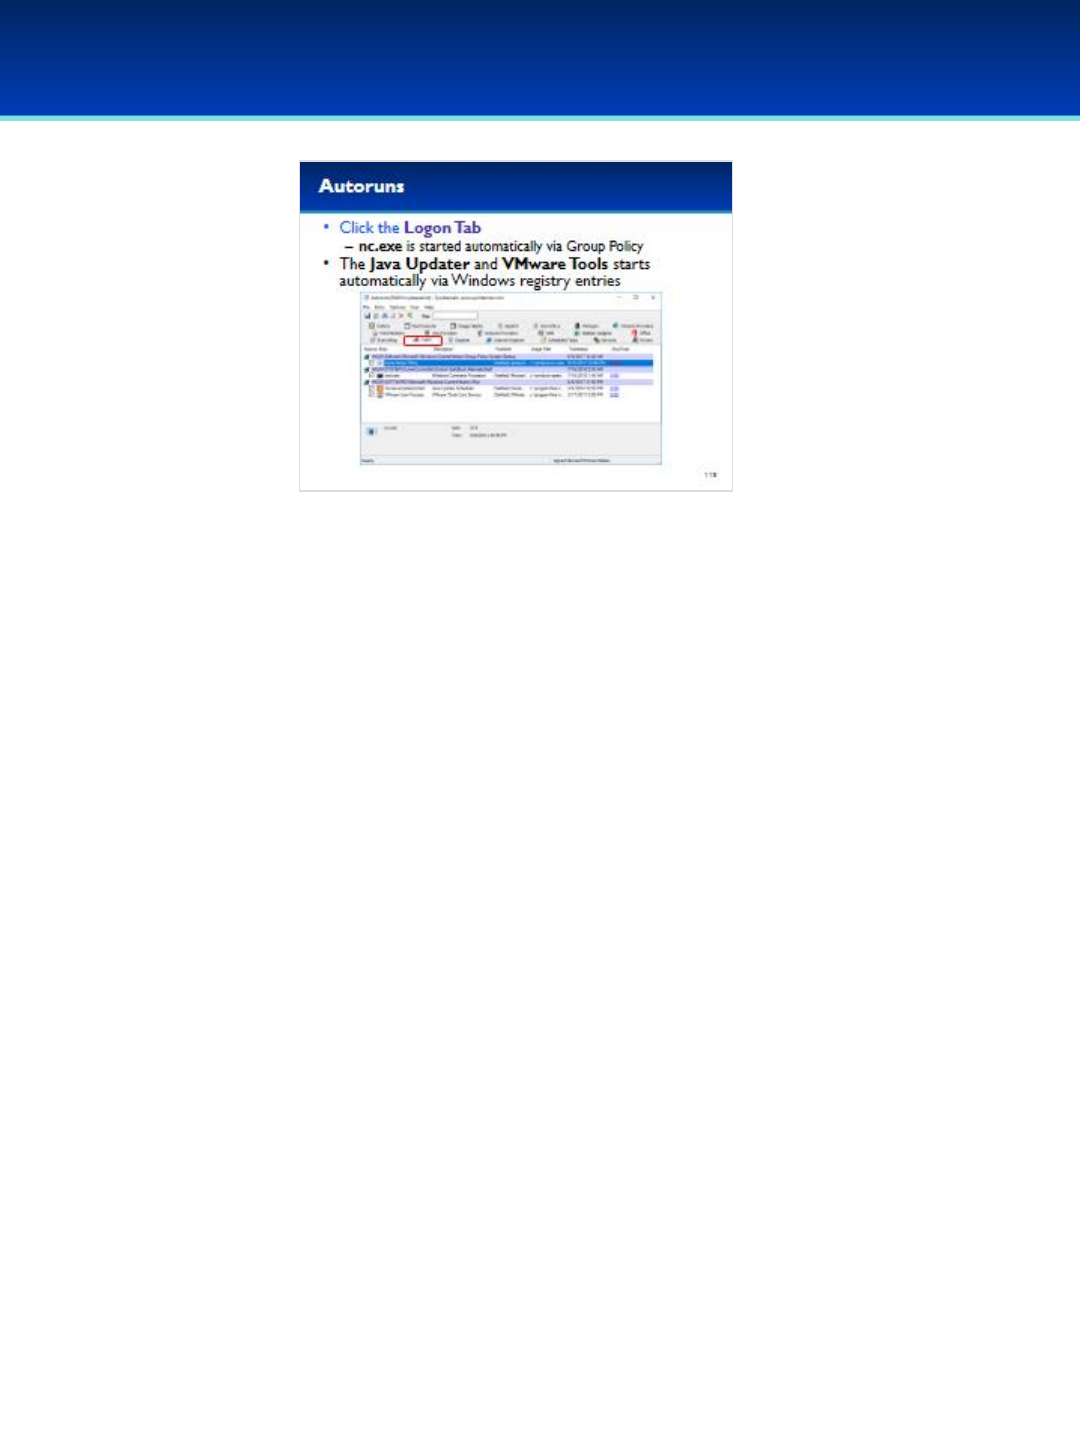
© 2018 Air Force Association
AFA Advanced CyberCamp Instructor’s Guide
Page 121
Slide 115
Windows 10
•To see the programs at logon/startup, click on the Logon Tab.
- Here you can see the netcat backdoor is automatically started by
the Local Group Policy.
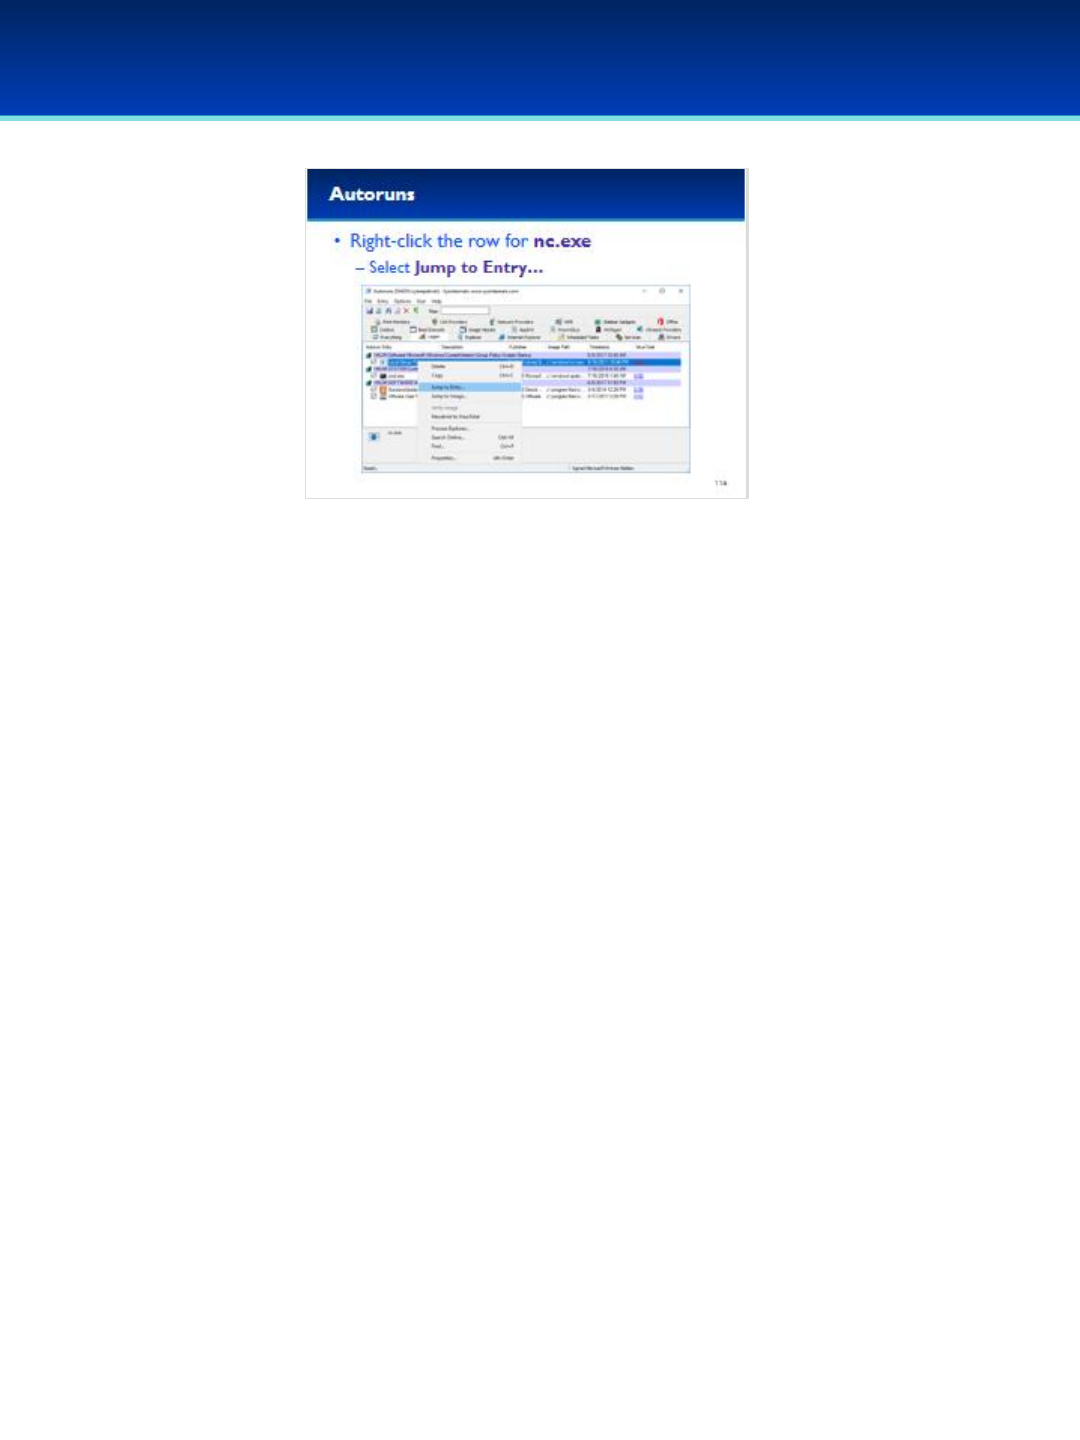
© 2018 Air Force Association
AFA Advanced CyberCamp Instructor’s Guide
Page 122
Slide 116
Windows 10
•Right-click on the row for nc.exe and select Jump to Entry…
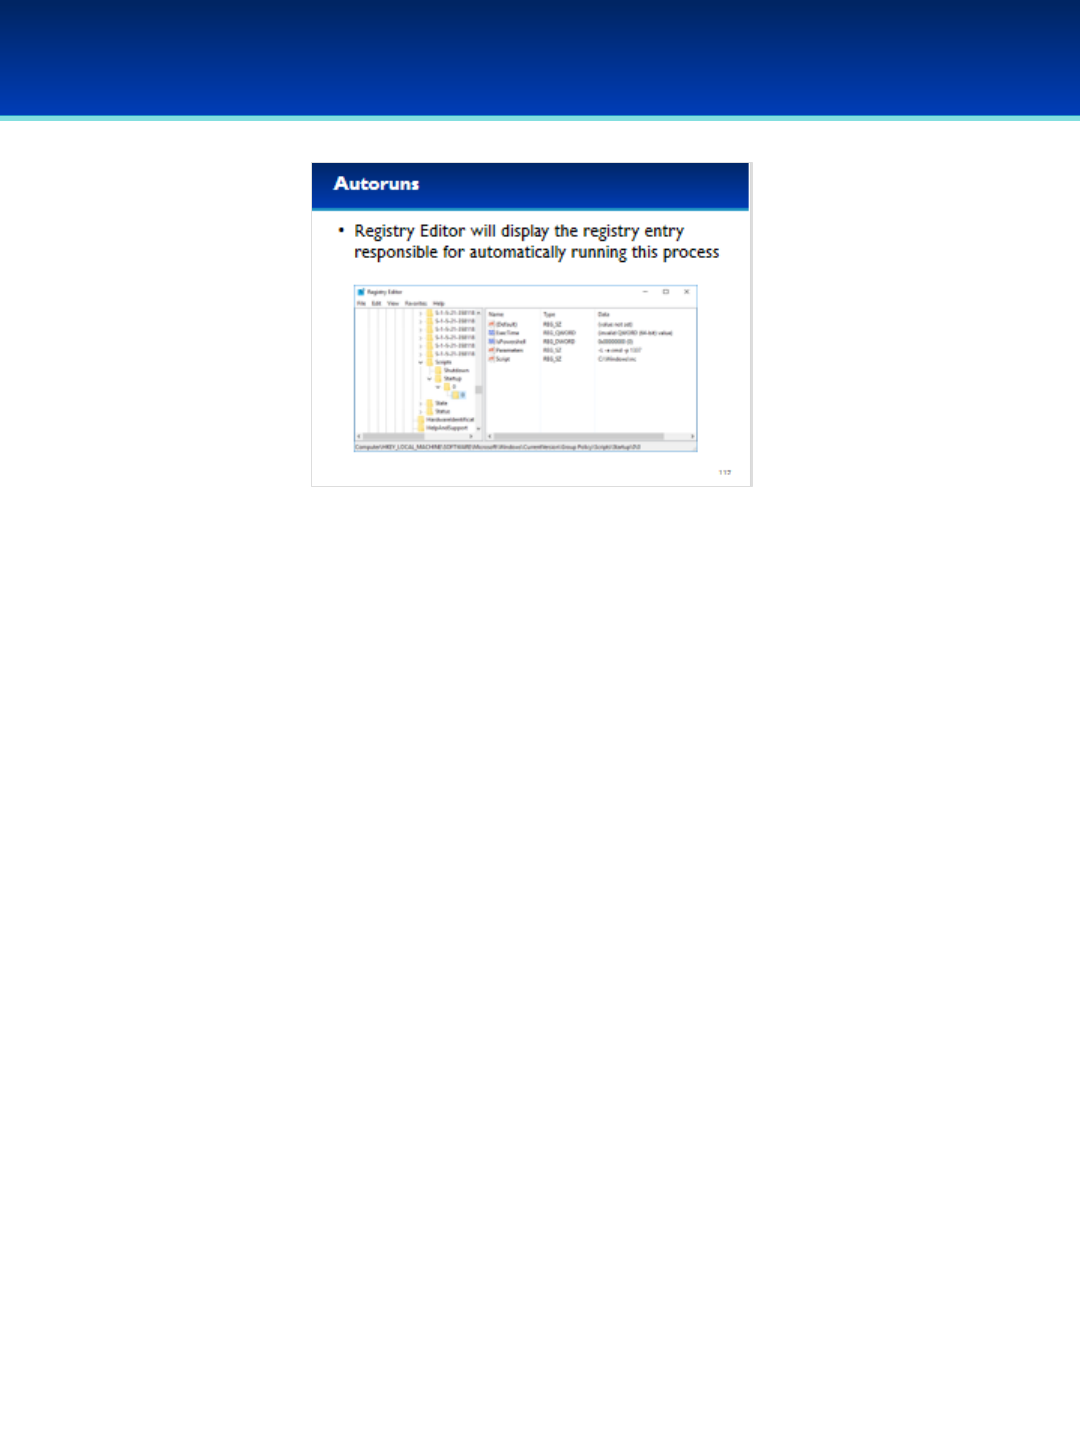
© 2018 Air Force Association
AFA Advanced CyberCamp Instructor’s Guide
Page 123
Slide 117
Windows 10
•This brings you directly to the Registry.
- Here we can see the executable started at boot, and the parameters
passed to it.
•Close the Registry Editor and go back to Autoruns.
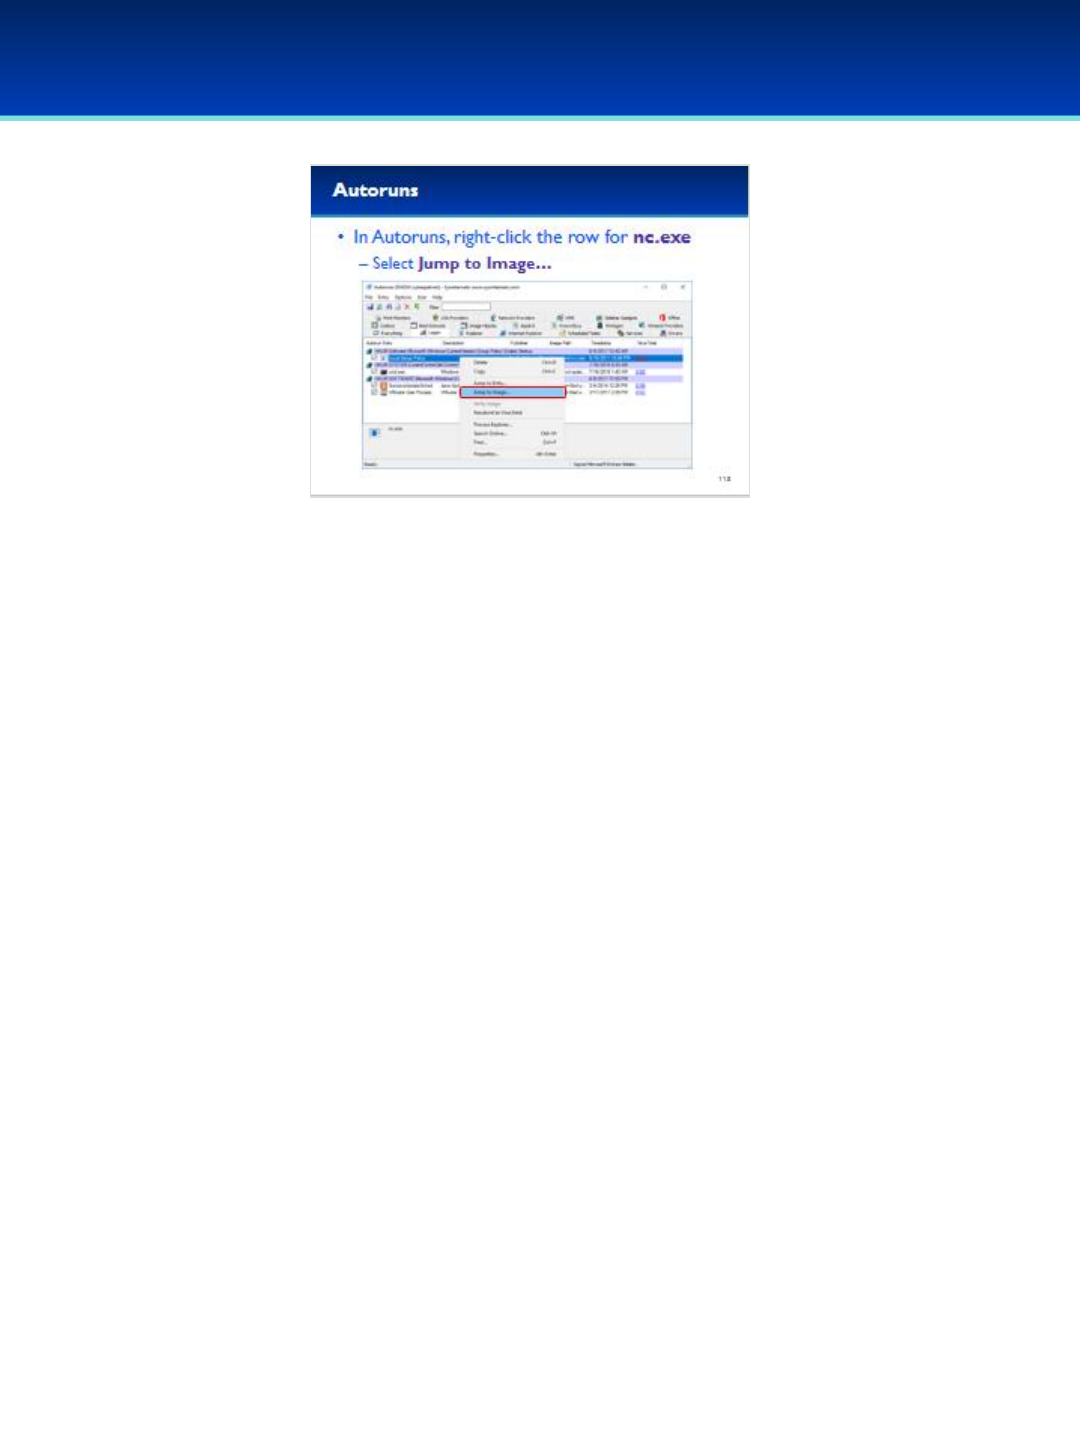
© 2018 Air Force Association
AFA Advanced CyberCamp Instructor’s Guide
Page 124
Slide 118
Windows 10
•Next, right-click the row for nc.exe again, but this time select
Jump to Image…

© 2018 Air Force Association
AFA Advanced CyberCamp Instructor’s Guide
Page 125
Slide 119
Windows 10
•A Windows Explorer window is automatically opened with the
executable that is referenced already selected.
•Close out of Windows Explorer and Autoruns.

© 2018 Air Force Association
AFA Advanced CyberCamp Instructor’s Guide
Page 126
Slide 120
Windows 10
•Other very useful programs in the Sysinternals suite are Handle,
Procmon, and PsExec.
•Handle lets you find out what processes have a file open, or what files
a process has open.
- This can be very useful when trying to remove or analyze malware,
(or even when Windows won’t let you safely eject your USB drive).
•Procmon (short for Process Monitor) can monitor the activity of all the
processes on your system by monitoring various system calls.
- For example, it can tell you what registry entries or files are
accessed or modified by an executable.
•PsExec can be used to run programs as other users, including the
System user.
- This can also be useful to the bad guys, so it might be something
you want to watch.
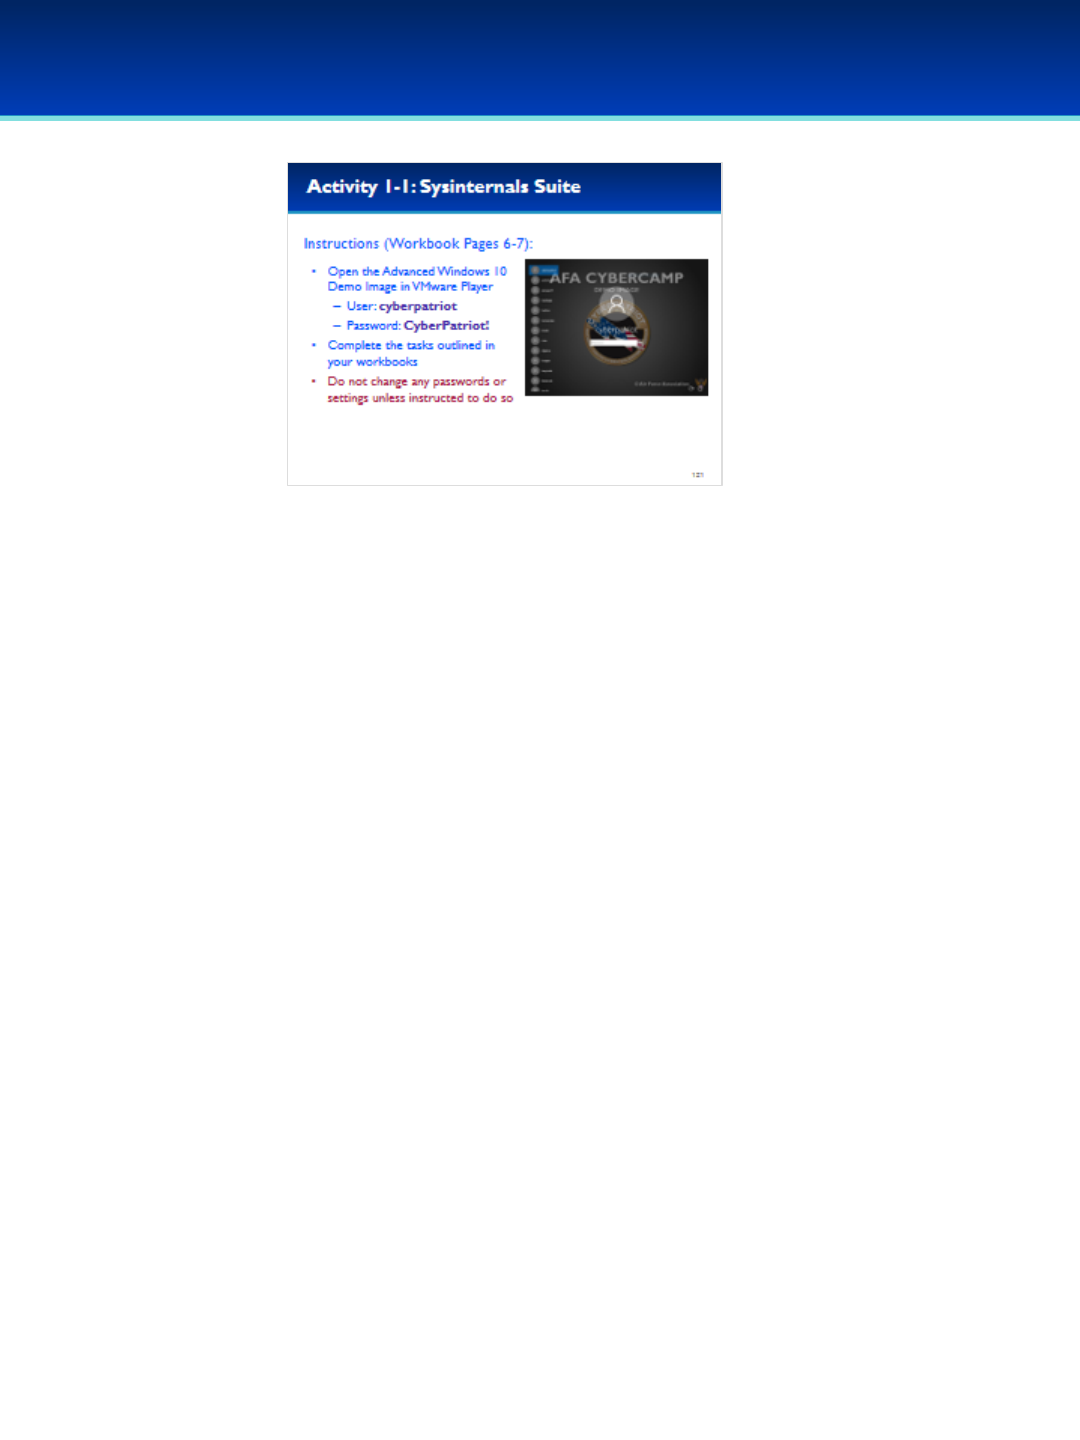
© 2018 Air Force Association
AFA Advanced CyberCamp Instructor’s Guide
Page 127
Slide 121
Windows 10
Give students about 20 minutes to complete the tasks listed on Pages 6-7 of their
Workbooks.
This lab will review the Sysinternals Suite.
Stress that the students should not change any passwords or settings unless they are
expressly directed to do so in the activity.
The students should not need to use any other user names or passwords to complete the
activities. Here are the passwords to some administrative accounts just in case.
Username: neumann
Password: vN_@rchit3cture
Username: hopper
Password: ENIAC.TurC0mp
Answers:
1. winlogon.exe
2. 4
3. Right-click on csrss.exe, select Properties, Image tab, look at the Command Line, and scroll all
the way to the end. Answer: 16
4. Find the right svchost.exe, right-click, select Properties, select the Services tab. Answer: Base
Filtering Engine, CoreMessaging, Diagnostic Policy Service, Windows Firewall
5. RiskWare.RemoteAdmin
6. 38db
7. 4
8. 21, 135, 137, 138, 139, 445
9. -
10. AdobeARM.exe
11. Yes
12. Adobe Systems (or Adobe Systems, Incorporated)
13. Igor Pavlov
14. C:\program files\7-zip\7-zip.dll
15. HKEY_LOCAL_MACHINE\SOFTWARE\Microsoft\Windows\CurrentVersion\Run

Instructor’s Guide Table of Contents
Ubuntu 16
Module Overview (5 mins) ………………………….………………………………………….…………..Pages 126-127
Ubuntu Review (20 mins) ………………………….………………………………………………………...Pages 128-147
Init Systems (30 mins) …………………………………………………………..……………………………..Pages 148-171
Advanced Command Line (30 mins)……………………………………………..………………………Pages 172-205
Processes and Scheduled Tasks (30 mins) ………………………………………………………..….Pages 206-234
Security Polices and PAM (40 mins) …………………………………………………….……………….Pages 235-275
Networking (30 mins) ………………………………………………………………………………………….Pages 276-293
Student Workbook Activities
Activity 2-1: Init Systems (20 mins) ..……………………………………………………………………..….…Page 171
–Student Workbook page: 8
Activity 2-2: Advanced Command Line (20 mins) ………………………………………………....………Page 205
–Student Workbook page: 9
Activity 2-3: Processes and Scheduled Tasks (20 mins)…………………………………..….………....Page 234
–Student Workbook page: 10
Activity 2-4: Security Policies and PAM (20 mins)……………………………………………..…………..Page 275
–Student Workbook page: 11
Activity 2-5: Networking (20 mins)……………………………………………..……………………….………..Page 293
–Student Workbook pages: 12
AFA Advanced CyberCamp Instructor’s Guide
© 2018 Air Force Association
AFA Advanced CyberCamp Instructor’s Guide
Page 128
Slide 0
Ubuntu 16
In this module, after the review, students should follow along on
the Advanced Ubuntu 16 Demo Image you have downloaded to
their machines.
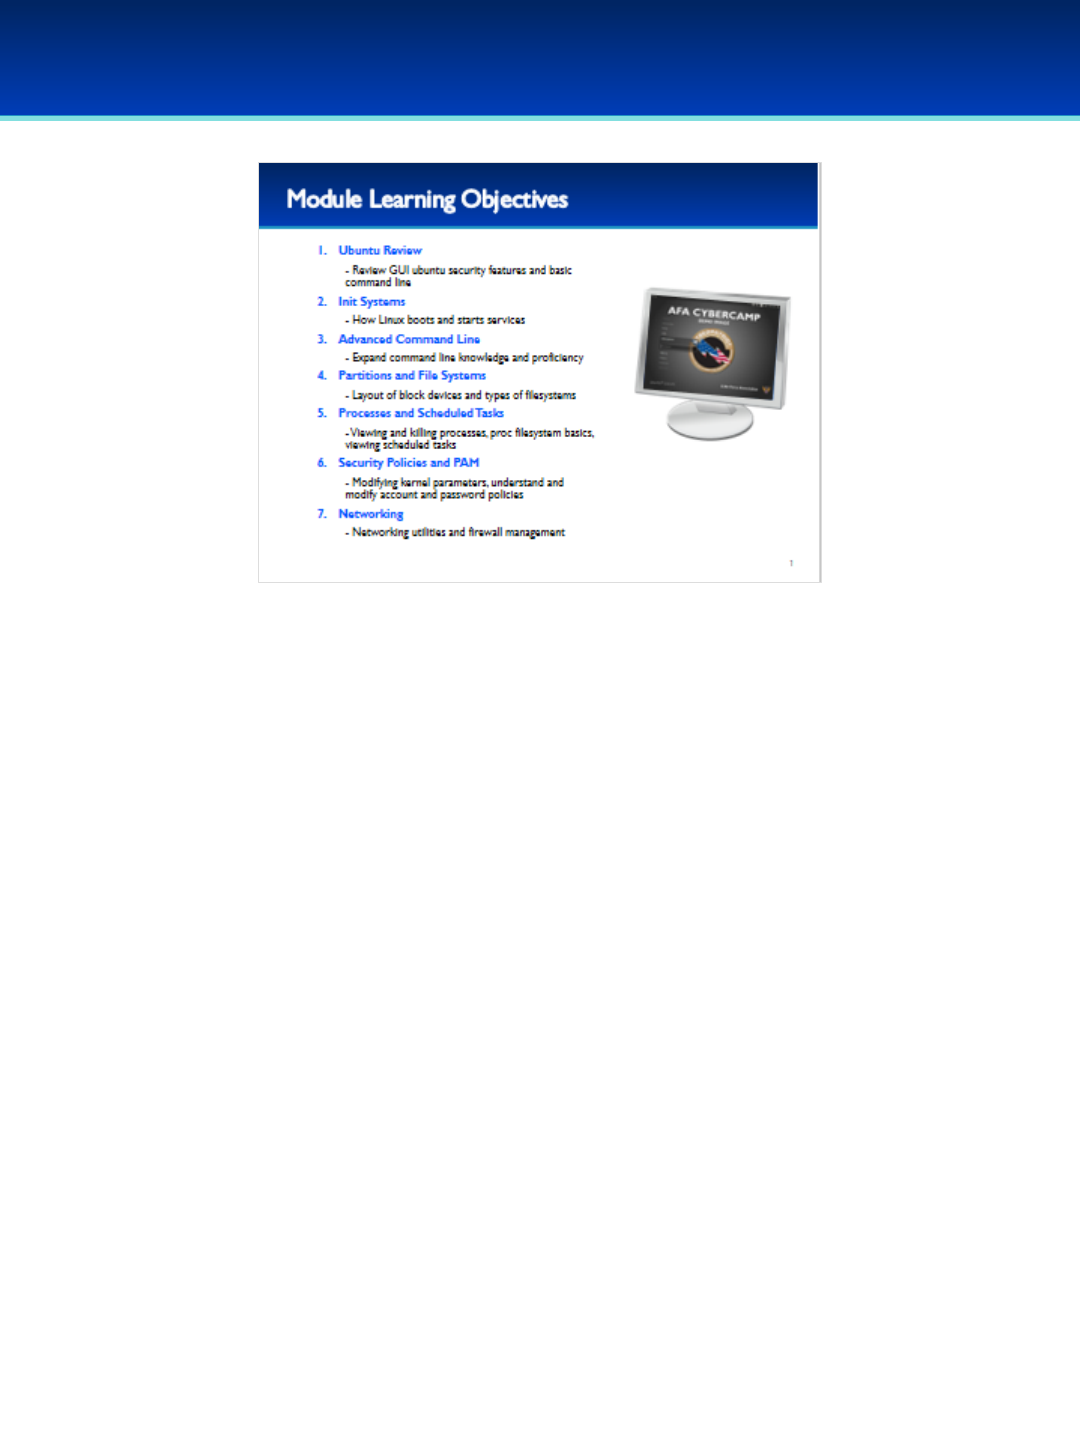
© 2018 Air Force Association
AFA Advanced CyberCamp Instructor’s Guide
Page 129
Slide 1
Ubuntu 16
•Today, we are going to spend the majority of the time on the command line.
•We’ll start off with an Ubuntu review and give you a quick refresh of some of the
things you learned in the last CyberCamp.
•After the review, we will cover advanced init systems, going into detail about how
Linux boots and starts services. You’ll learn the many places to look to identify
unwanted services and know how to disable them.
•Next, we’ll cover advanced command line. After this section you should be
comfortable on the command line, and know how to perform complex tasks such as
finding files or redirecting input and output streams.
•Next, we’ll cover the basis of block devices, partitions, and filesystems. Being able to
manage a healthy filesystem is an important security task, and what you will learn
forms the basis for advanced filesystem forensics.
•After that, you will learn multiple methods to determine what processes are being
run on your system, how to kill unwanted processes, and methods for bypassing
rootkits on a compromised machine.
•Then, we’ll take a long look at a few of the many kernel parameters that can affect
the security of your system, and the best way to modify them. In the second part of
this section, we will break down PAM and explain how it works step-by-step so you
know how to enable secure account and password policies.
•Finally, we’ll wrap things up by looking at two different sets of networking utilities
available on most modern Linux systems, and discuss how to easily enable the
firewall and modify firewall rules from the command line.
© 2018 Air Force Association
AFA Advanced CyberCamp Instructor’s Guide
Page 130
Slide 2
Ubuntu 16
Devote 20 minutes to slides 3-21. There is no activity at the end of
this section.
To save time, this section was designed to be a quick review
without having students follow along on their demo images, or
going into too much detail.
We’ll start off with an Ubuntu review and give you a quick refresh
of some of the things that are taught in the standard CyberCamp.
© 2018 Air Force Association
AFA Advanced CyberCamp Instructor’s Guide
Page 131
Slide 3
Ubuntu 16
•User account management can be performed through the GUI
using User Accounts under System Settings.
- Here you can create or delete accounts, change account type,
or change users passwords.
© 2018 Air Force Association
AFA Advanced CyberCamp Instructor’s Guide
Page 132
Slide 4
Ubuntu 16
•Automatic updates can be configured through Software and
Updates in System Settings.
- Here you can configure software sources, as well as automatic
update frequency.
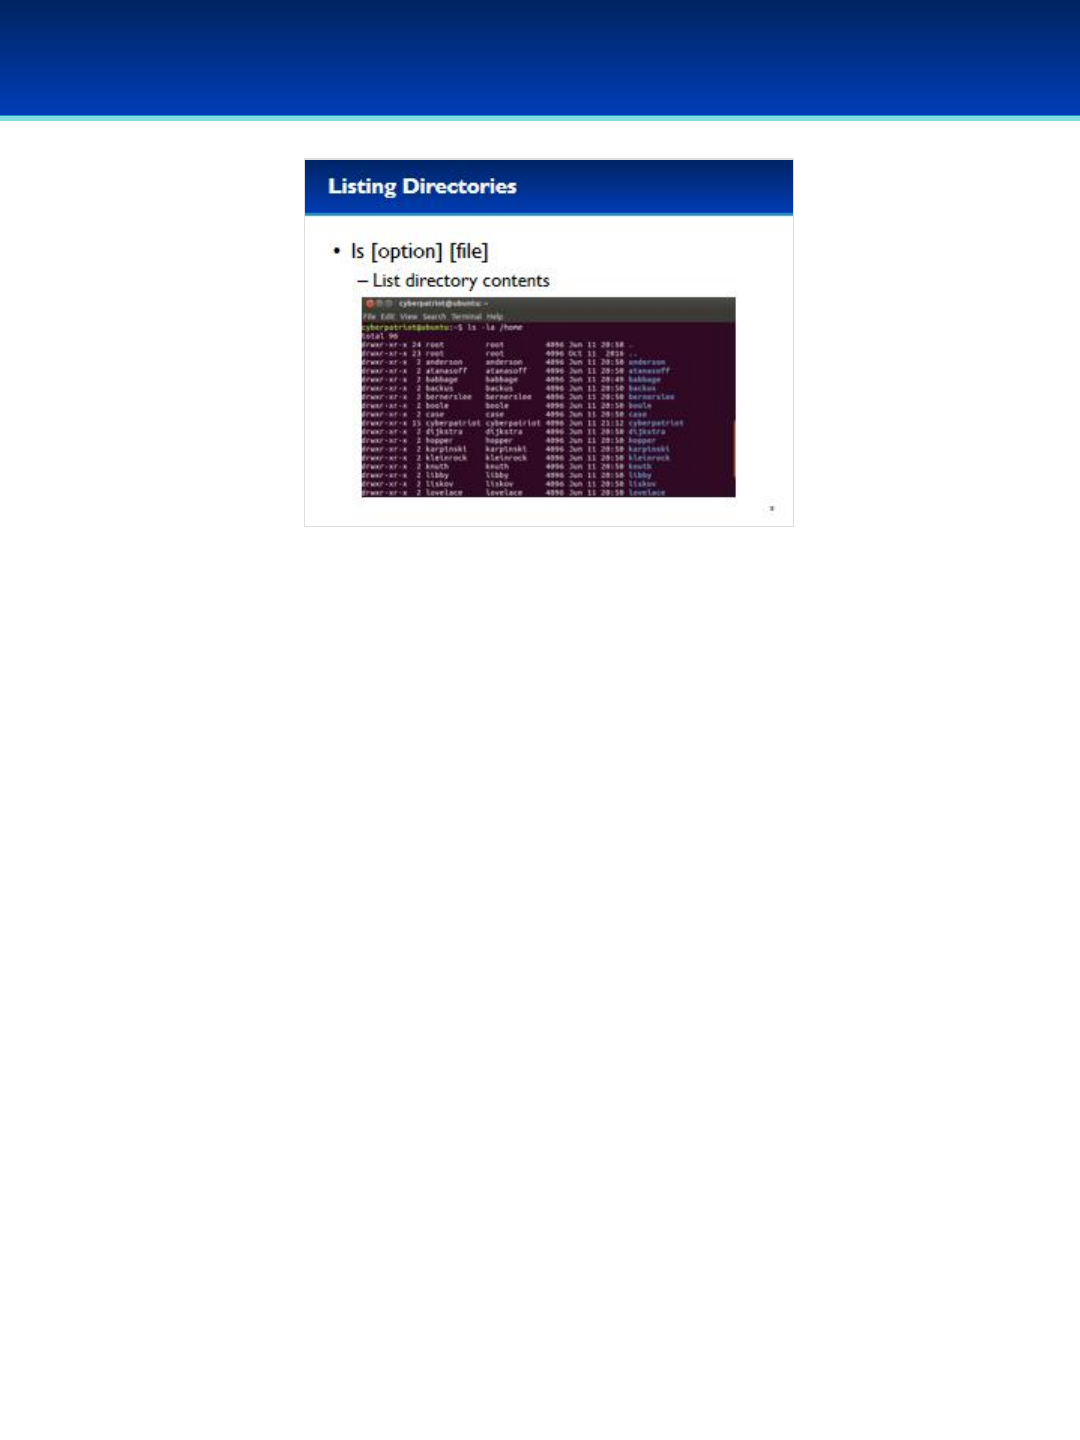
© 2018 Air Force Association
AFA Advanced CyberCamp Instructor’s Guide
Page 133
Slide 5
Ubuntu 16
•Navigate to Applications System Tools Click on Terminal.
•ls lists information about a file or contents of a directory.
- The loption outputs the “long” listing, which prints a lot of useful
information such as file permissions, ownership, and modification time.
- The aoption outputs hidden files.
- Hidden files in Linux begin with a dot.
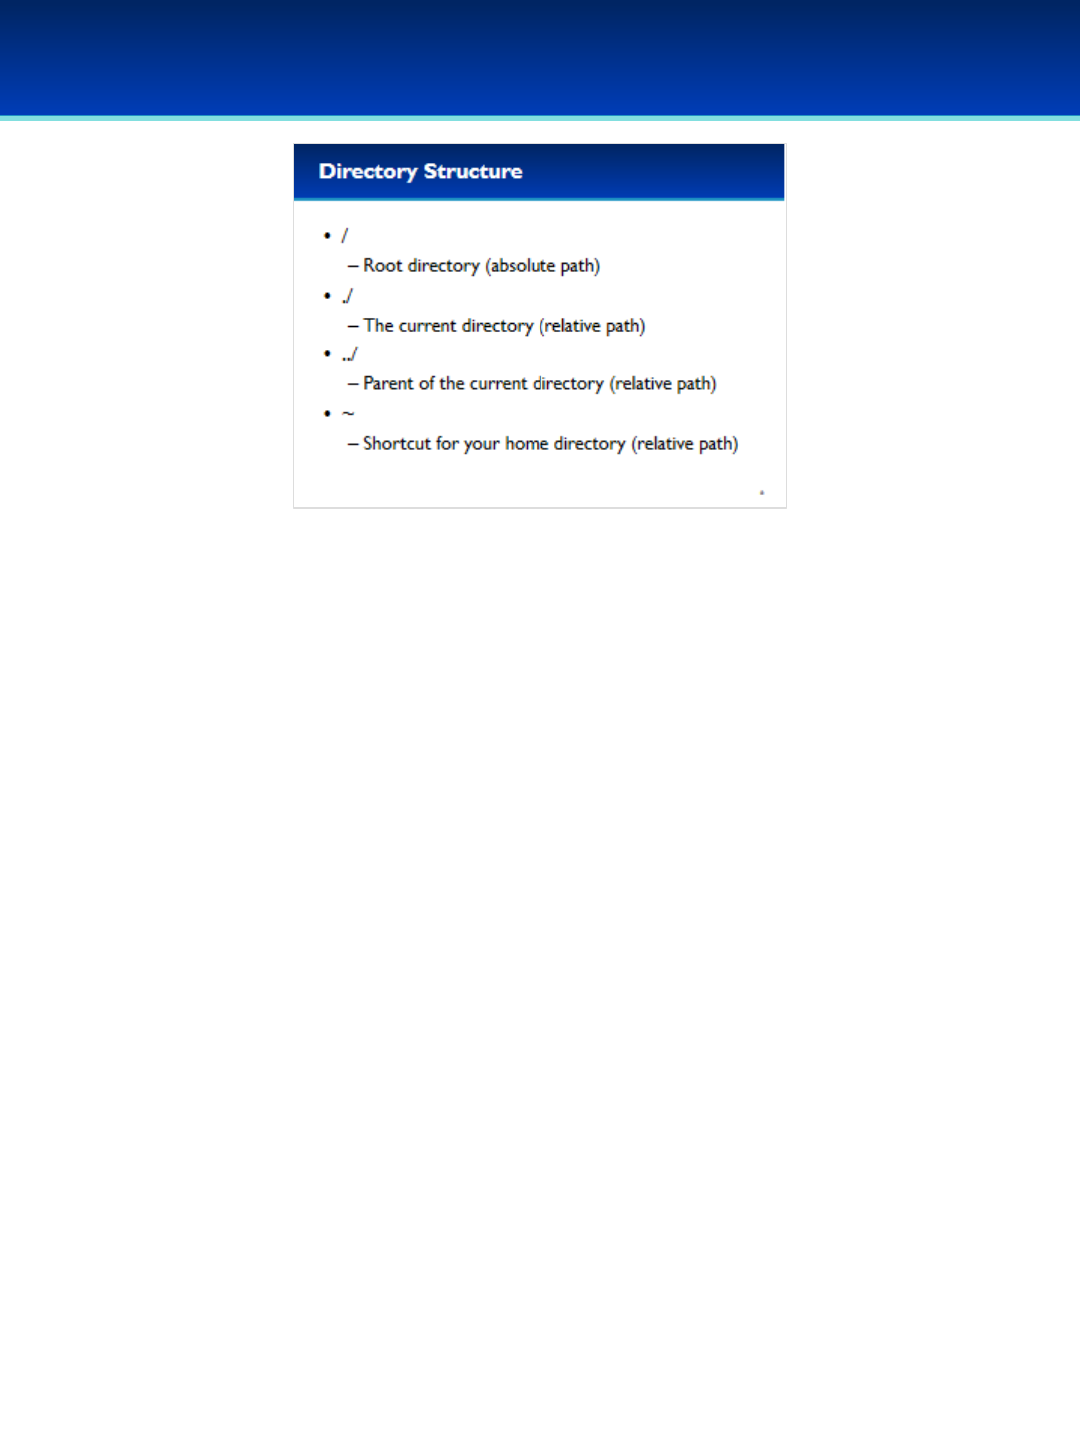
© 2018 Air Force Association
AFA Advanced CyberCamp Instructor’s Guide
Page 134
Slide 6
Ubuntu 16
•Directory structures are like trees.
- In Linux, everything is under the root directory which is represented as a
single forward slash.
- You can think of directories as branches of the tree, and files as the leaves.
•Paths can be either absolute or relative.
- Absolute paths begin with the root directory.
- Relative paths begin in the current working directory.
•Every directory has two special directories.
- The dot directory points to itself, if you begin a path with a dot-slash, you are
specifying the current working directory.
- The dot-dot directory points it’s parent, for example the parent of /home is
the root directory, if you begin a path with a dot-dot you are specifying the
parent of the current working directory.
- Although they are not directories, some shells have built-in shortcuts,
allowing you to use the tilde as a shortcut to your home directory.
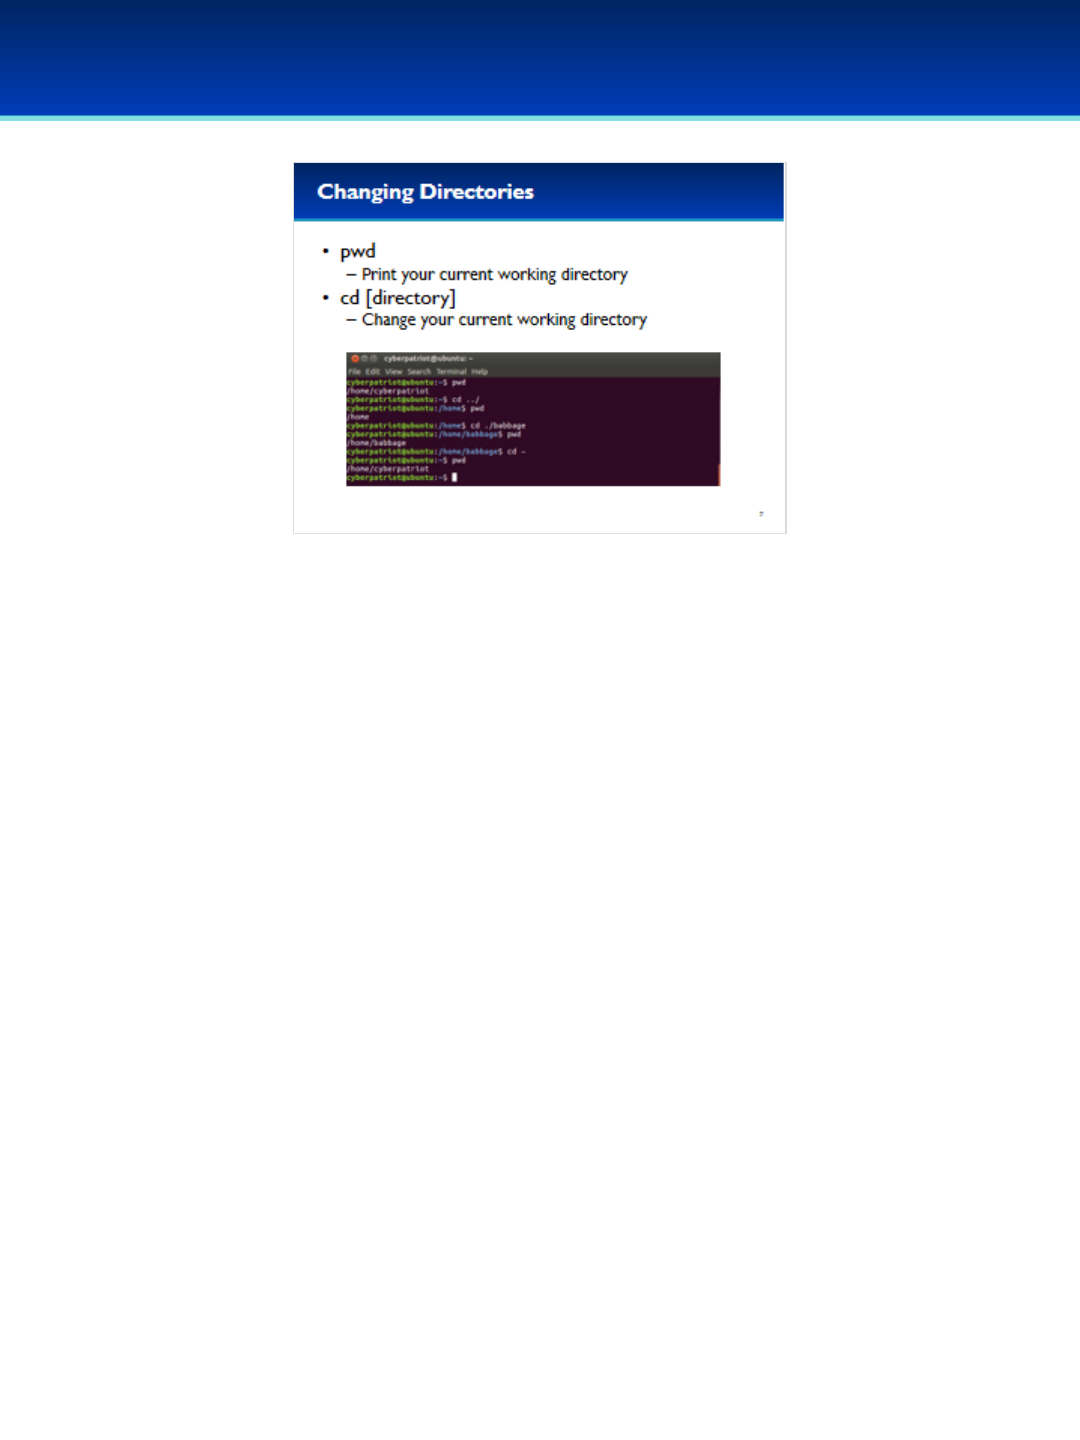
© 2018 Air Force Association
AFA Advanced CyberCamp Instructor’s Guide
Page 135
Slide 7
Ubuntu 16
•You can print your current working directory using the command pwd.
On Ubuntu your current working directory is also shown on the right-
hand side of your prompt.
•You can change your current working directory by using the cd
command.
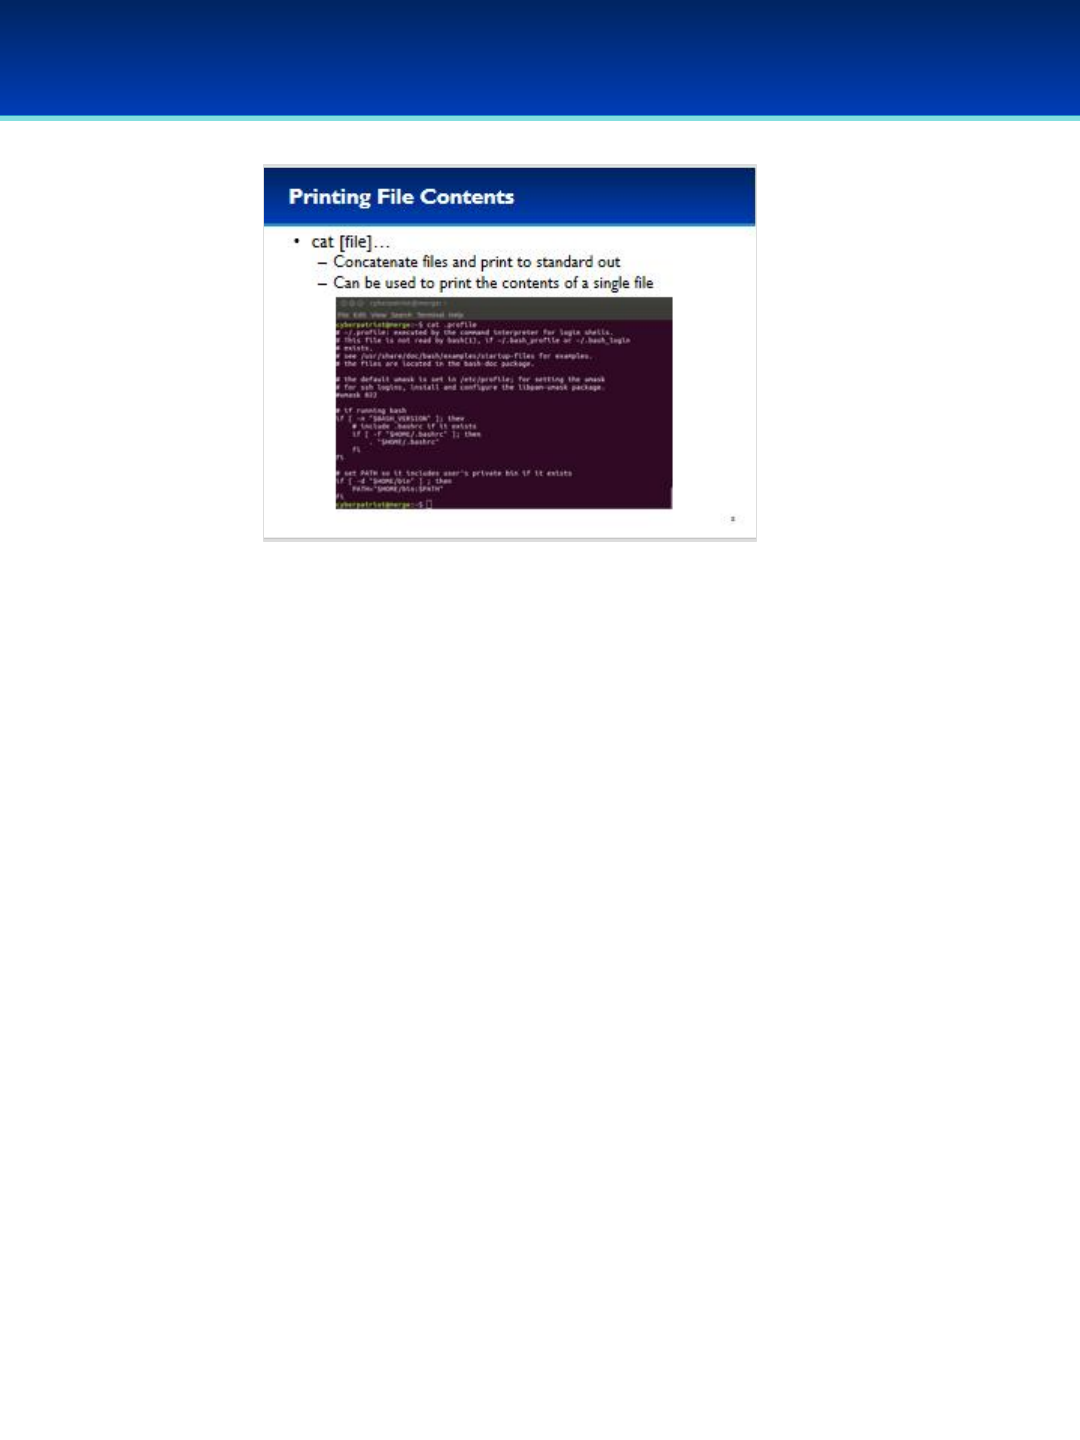
© 2018 Air Force Association
AFA Advanced CyberCamp Instructor’s Guide
Page 136
Slide 8
Ubuntu 16
•The cat command is used for concatenating files specified as
arguments.
•It is commonly used to print out the contents of a single file.

© 2018 Air Force Association
AFA Advanced CyberCamp Instructor’s Guide
Page 137
Slide 9
Ubuntu 16
•All Linux systems have a superuser named root.
•Root has access to everything, with no restrictions.
- Be careful what you do as root, you can permanently destroy your OS
with a small typo.
•There are many system commands that can only be run by root, and
many system configuration files that must be edited as root.
•Root always has a User ID of 0.
•While technically possible, please don’t change the name of the root
account; this is not a recommended security practice and will likely
break a great many things on your computer.
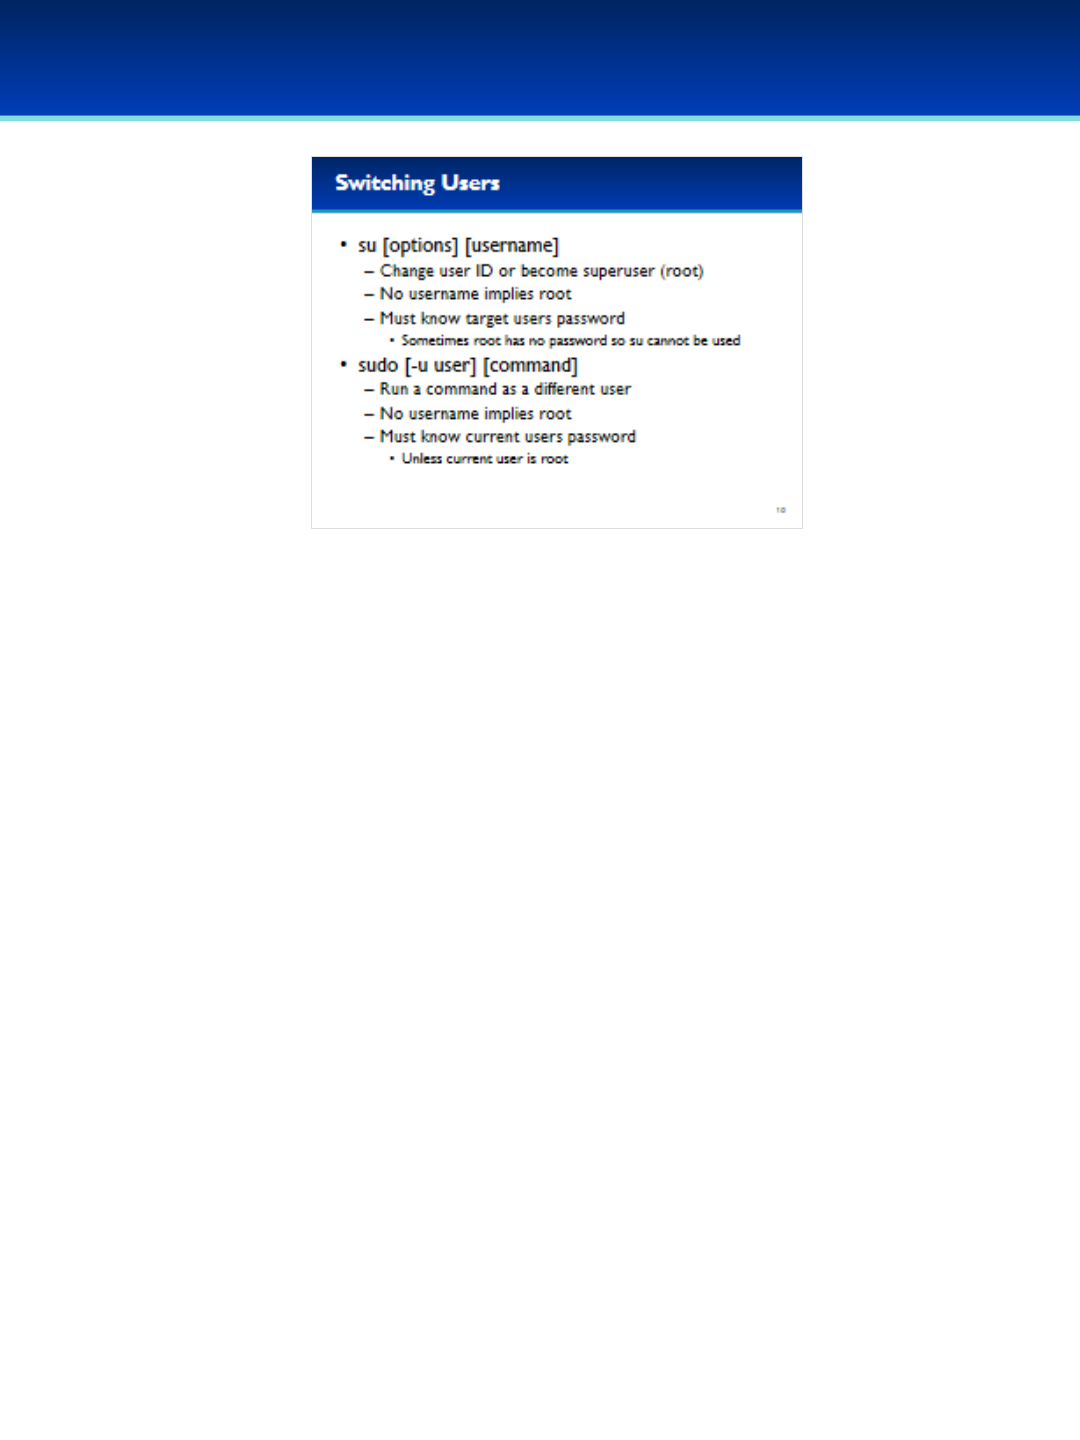
© 2018 Air Force Association
AFA Advanced CyberCamp Instructor’s Guide
Page 138
Slide 10
Ubuntu 16
•When you need to run a command or edit a file as root, or any other user, there
are two commands you can use.
•The su command allows you to switch to another user, if you don’t specify a
username, su will assume you want to be root.
- The su command requires you to know the password of the user you are
switching to.
- Ubuntu does not assign a root password by default as a security feature to
prevent anyone from logging in as root, unfortunately this means you can’t use
su by itself to become root.
•The sudo command will allow you to run a specific command as a different user.
-Again, if you don’t specify a user, sudo will assume you want to be root.
- The sudo command however, only requires you to know your own password
(and that you are an administrator).
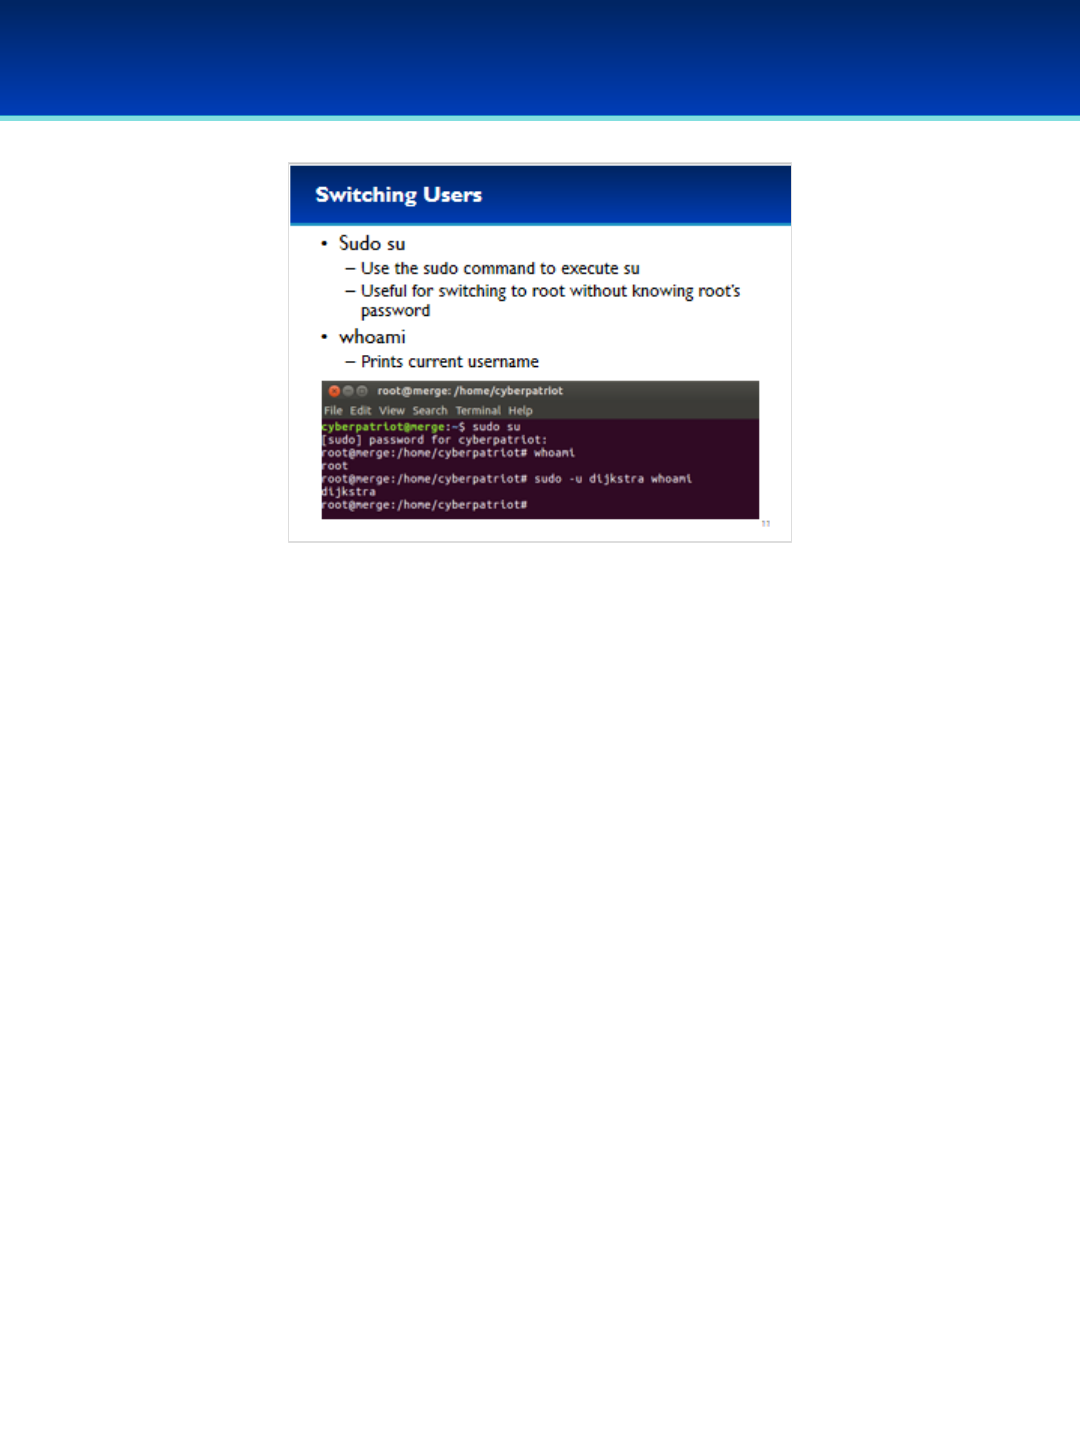
© 2018 Air Force Association
AFA Advanced CyberCamp Instructor’s Guide
Page 139
Slide 11
Ubuntu 16
•If you want to become root, but are unable to use su because root has
no password, you can use sudo su.
•This works because sudo requires you to know your own password to
run su as root, and if you run su as root, su doesn’t ask you for a
password.
•If you want to see your current username you can use the whoami
command. Ubuntu also prints your username on the left hand side of
your prompt.

© 2018 Air Force Association
AFA Advanced CyberCamp Instructor’s Guide
Page 140
Slide 12
Ubuntu 16
•The /etc/password file contains the list of user accounts.
- Many of these user accounts are used exclusively by system
services.
•The password file format is defined as username, password, User ID,
Primary Group ID, comment, home directory, and login shell.
•However, since this file needs to be readable by everyone, passwords
are usually stored in the shadow file instead.
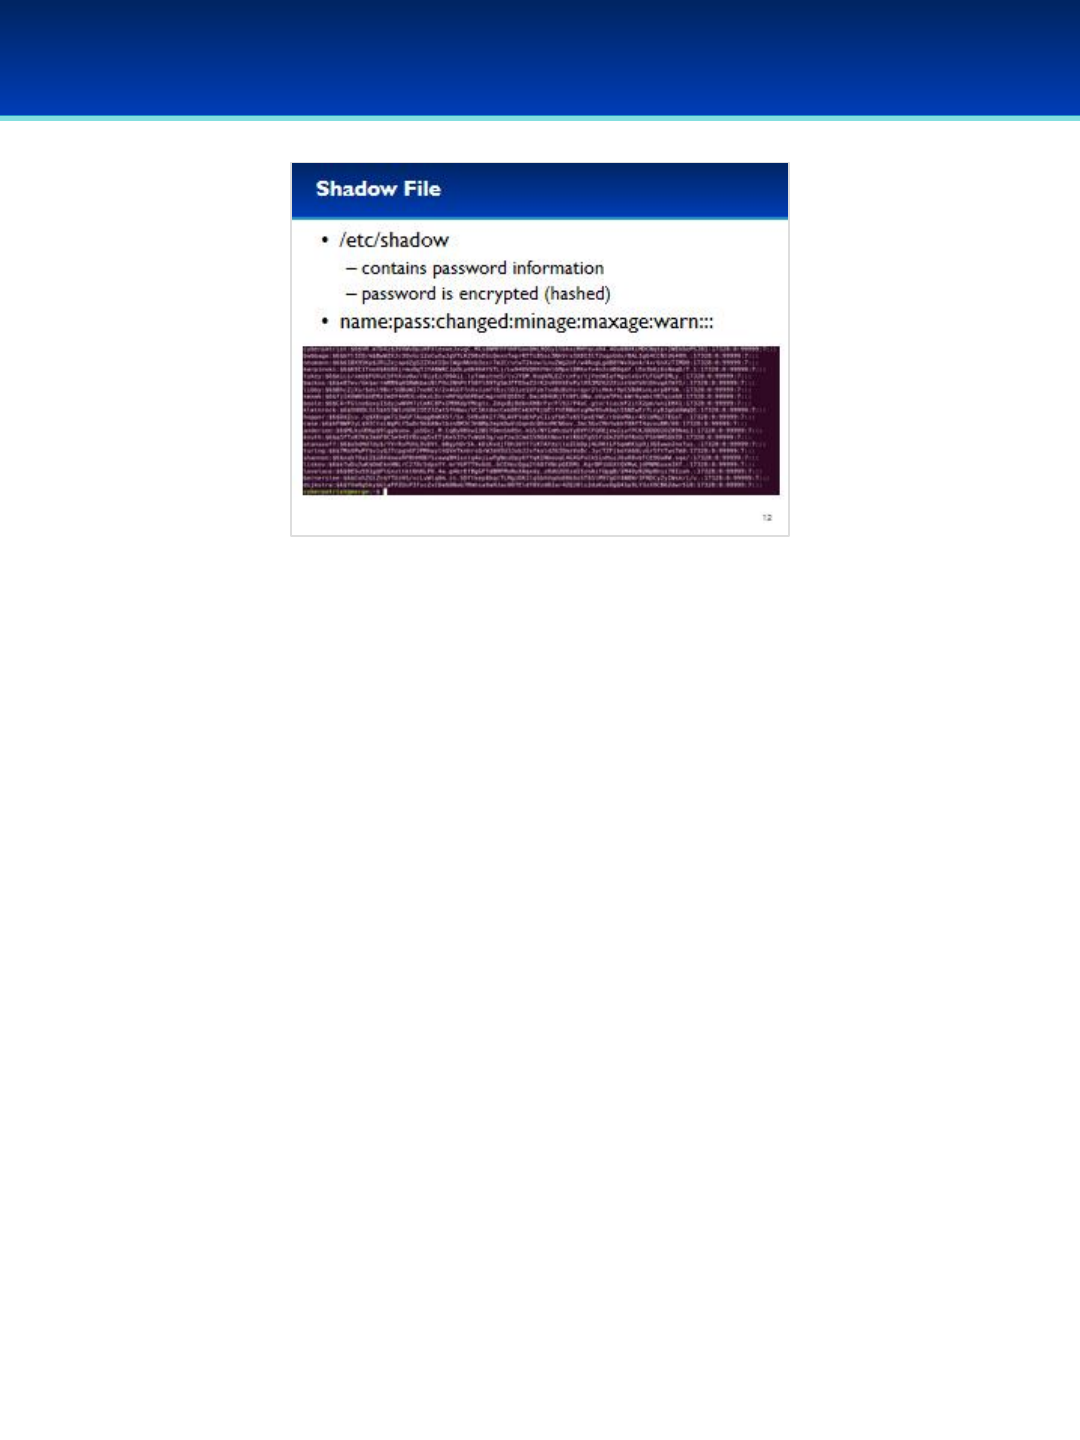
© 2018 Air Force Association
AFA Advanced CyberCamp Instructor’s Guide
Page 141
Slide 13
Ubuntu 16
•The shadow file contains the user’s name, encrypted password,
when the password was last changed, the user’s minimum
password age, the maximum password age, and the number of
days before an expiring password generates a warning.

© 2018 Air Force Association
AFA Advanced CyberCamp Instructor’s Guide
Page 142
Slide 14
Ubuntu 16
•The login.defs file is a configuration file for the shadow password suite.
•Inside this file are many configuration options, including the default
maximum and minimum password age for new users.
•Changing these values however does not modify existing user accounts.
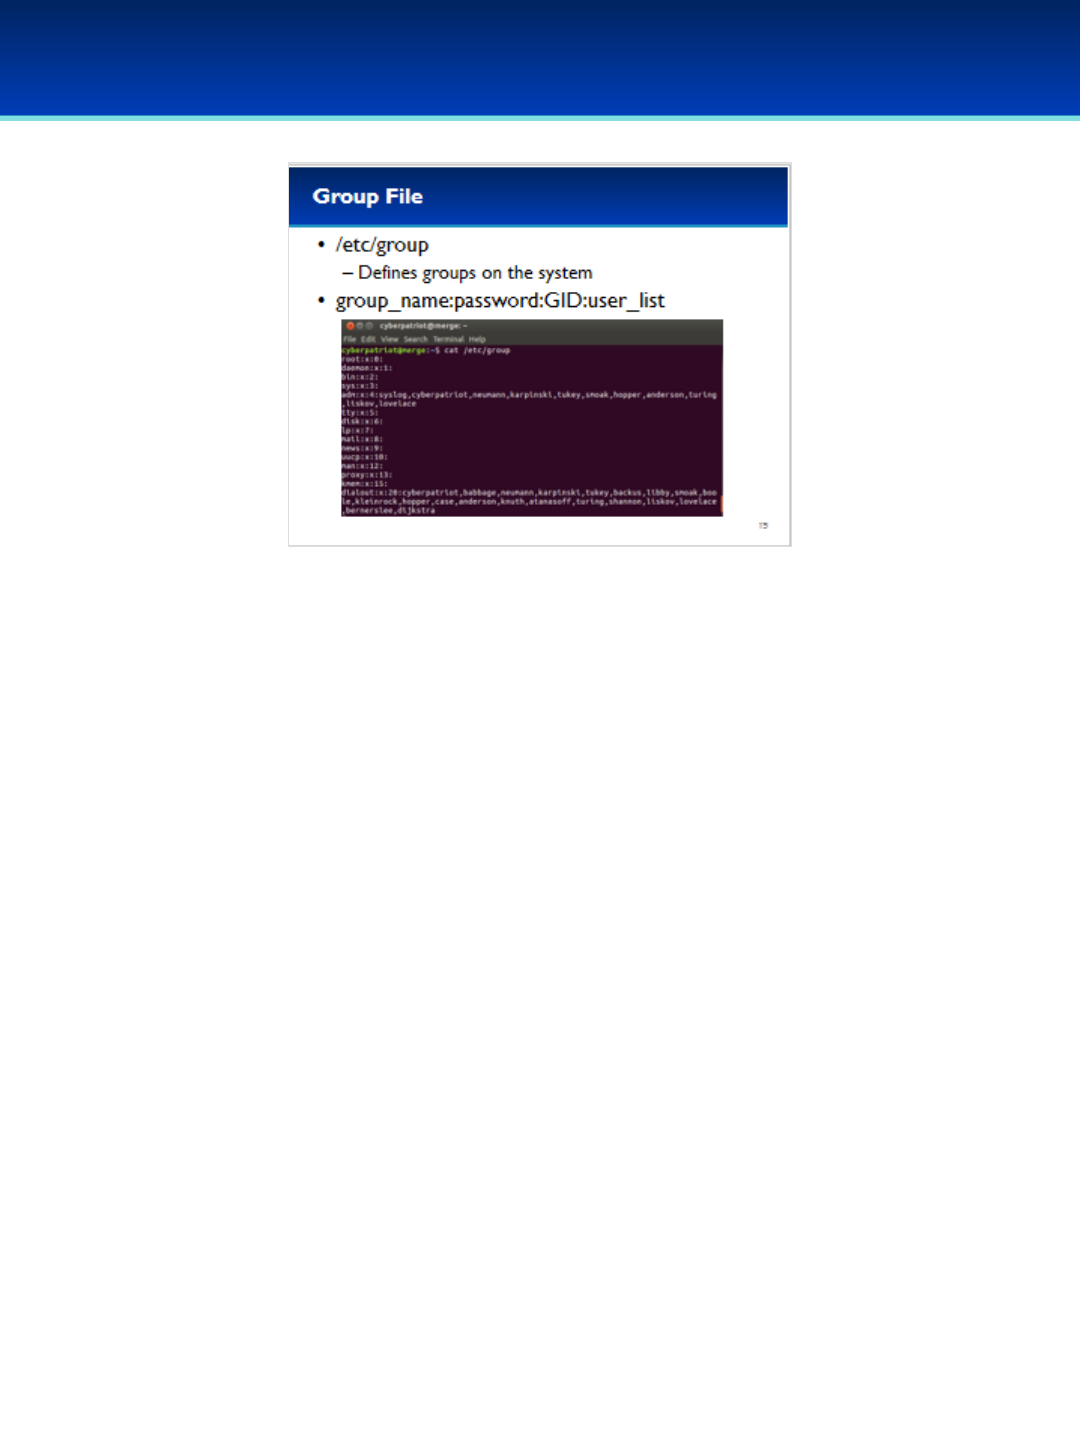
© 2018 Air Force Association
AFA Advanced CyberCamp Instructor’s Guide
Page 143
Slide 15
Ubuntu 16
•The group file defines the user groups on the system.
•The format for the groups file is the group name, password, Group
ID, and a list of users in that group.
•Although it is possible to add a password to a group, this feature is
generally not used.
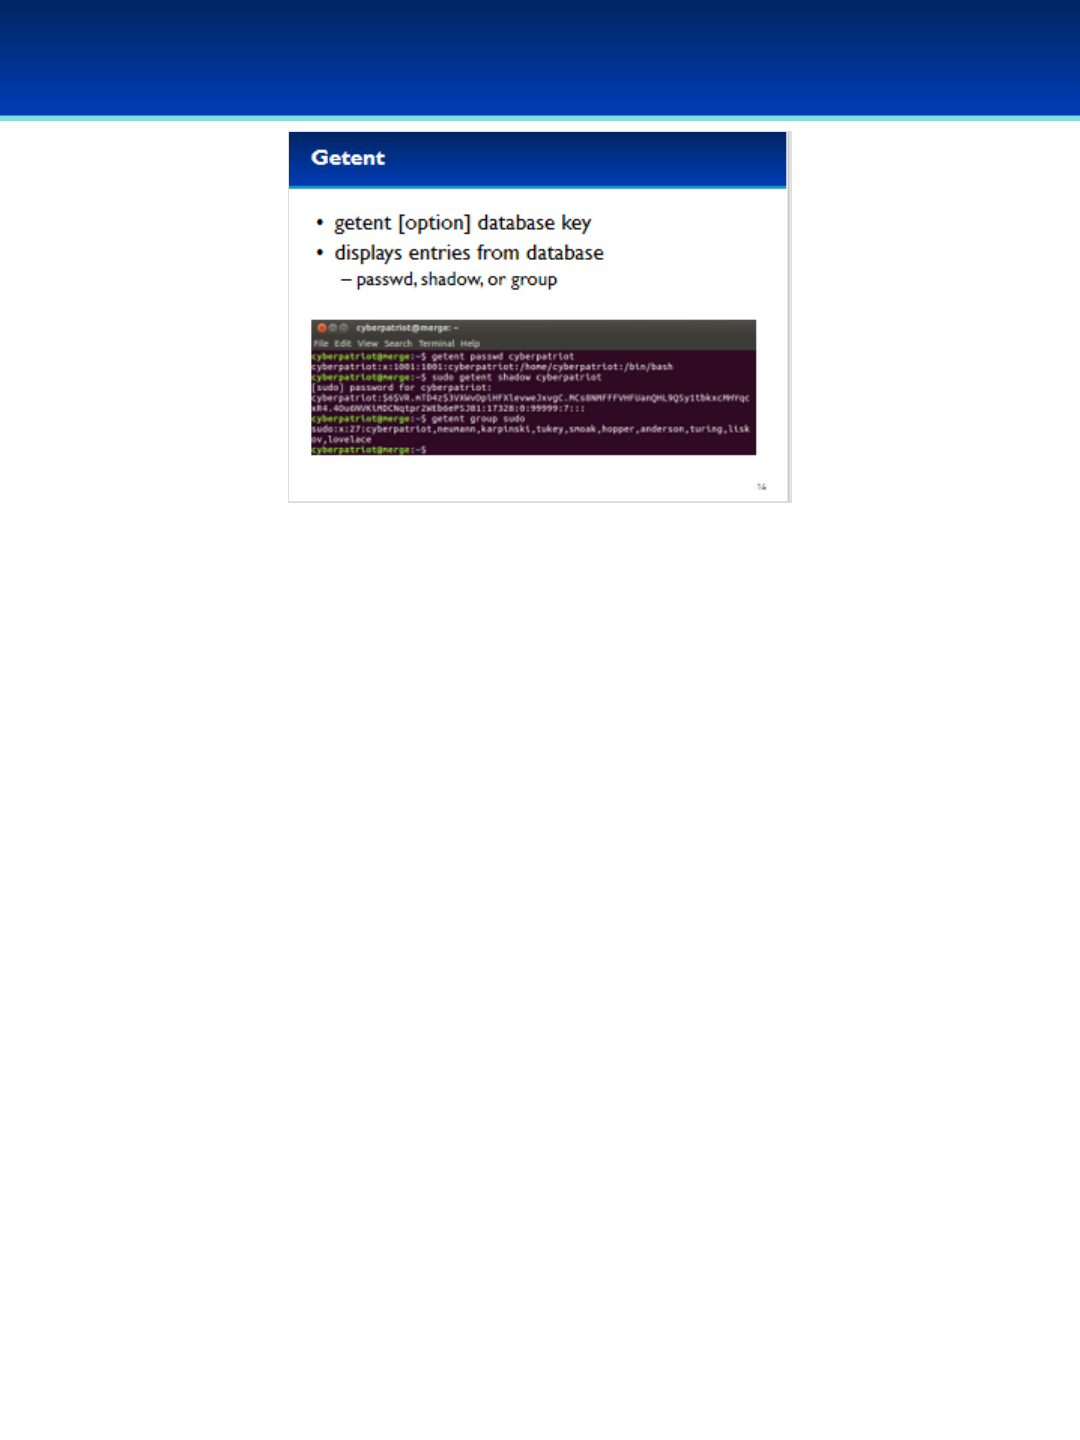
© 2018 Air Force Association
AFA Advanced CyberCamp Instructor’s Guide
Page 144
Slide 16
Ubuntu 16
•If you want to get a line from the password, shadow, or group file
you can use the getent command.
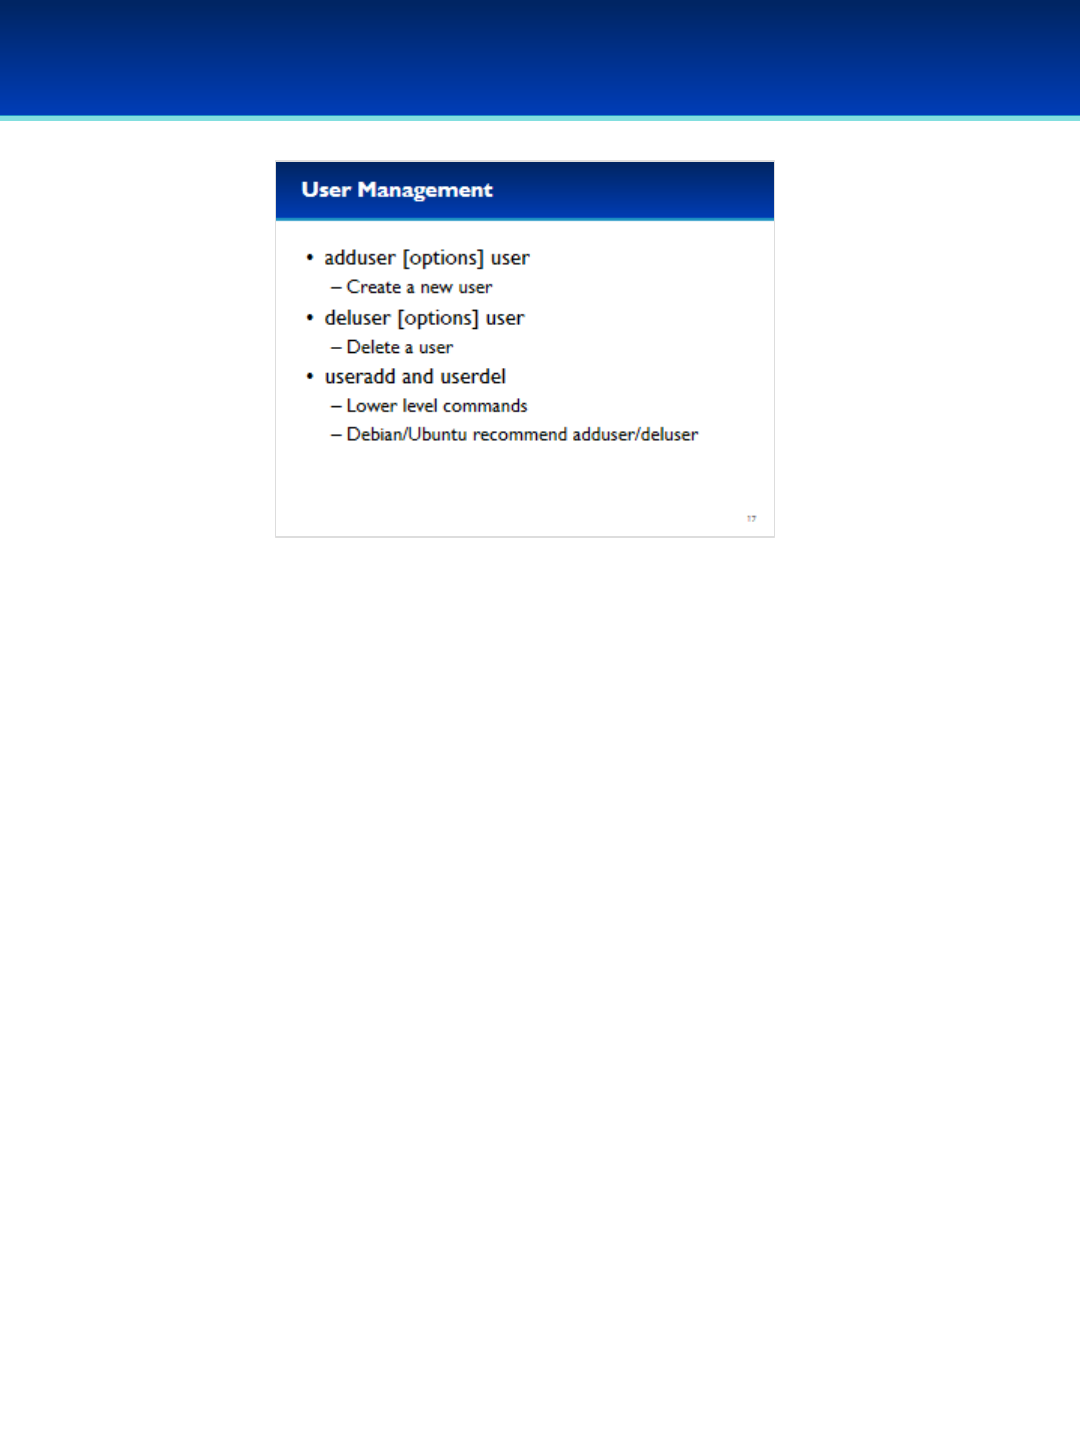
© 2018 Air Force Association
AFA Advanced CyberCamp Instructor’s Guide
Page 145
Slide 17
Ubuntu 16
•User management from the command line should be performed
with the adduser and deluser commands.
- These are the recommended commands for Debian and Ubuntu,
however they don’t exist on all Linux distributions.
•The useradd and userdel commands are lower-level commands that
are more difficult to use, but they exist on all Linux distributions.
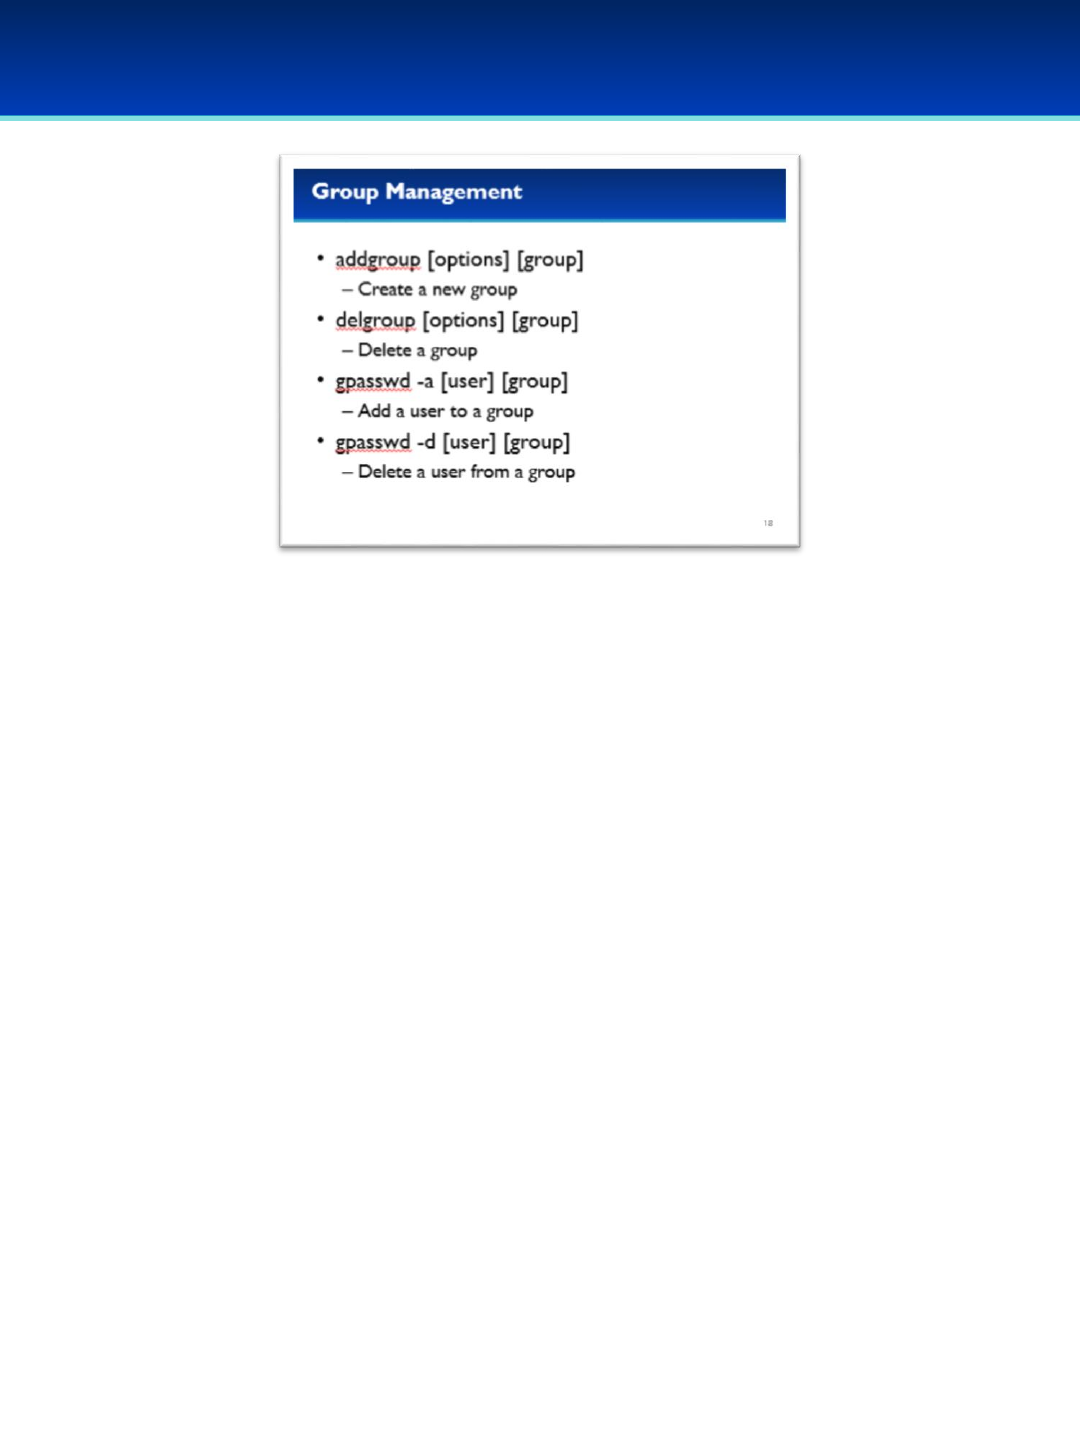
© 2018 Air Force Association
AFA Advanced CyberCamp Instructor’s Guide
Page 144
Slide 18
Ubuntu 16
•Similarly, you can create and delete groups with the addgroup and
delgroup commands.
•Group membership can be modified using the gpasswd command.
- The -a option adds the specified user to the group.
- The -d option removes the specified user from the group.

© 2018 Air Force Association
AFA Advanced CyberCamp Instructor’s Guide
Page 145
Slide 19
Ubuntu 16
•Software updates from the command line are easy.
•You first run apt-get update to get the list of latest packages
available.
•Then you run apt-get dist-upgrade to update the packages on your
system to the latest version.
•However, this assumes that your sources.list file is correctly
configured.
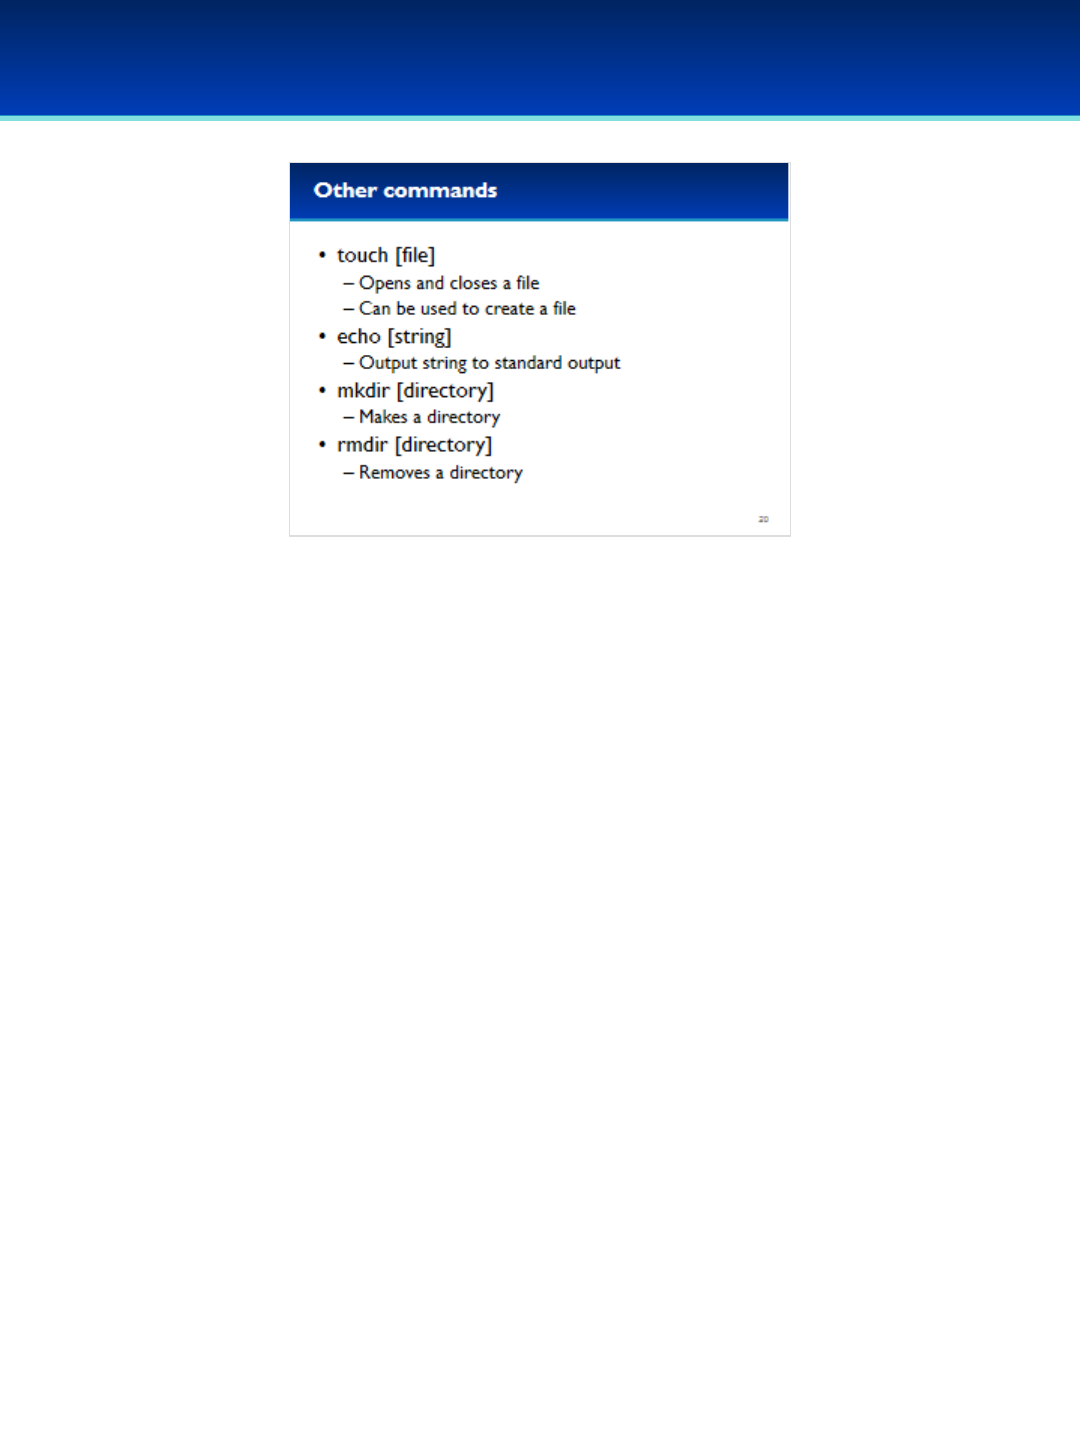
© 2018 Air Force Association
AFA Advanced CyberCamp Instructor’s Guide
Page 146
Slide 20
Ubuntu 16
•The touch command opens and closes a file, but this command
is mostly used create a new, empty file.
•The echo command prints out its arguments to standard
output, we will discuss this more later, but standard output
goes to the terminal by default.
•The mkdir command can be used to make directories, and the
rmdir command can be used to delete empty directories.
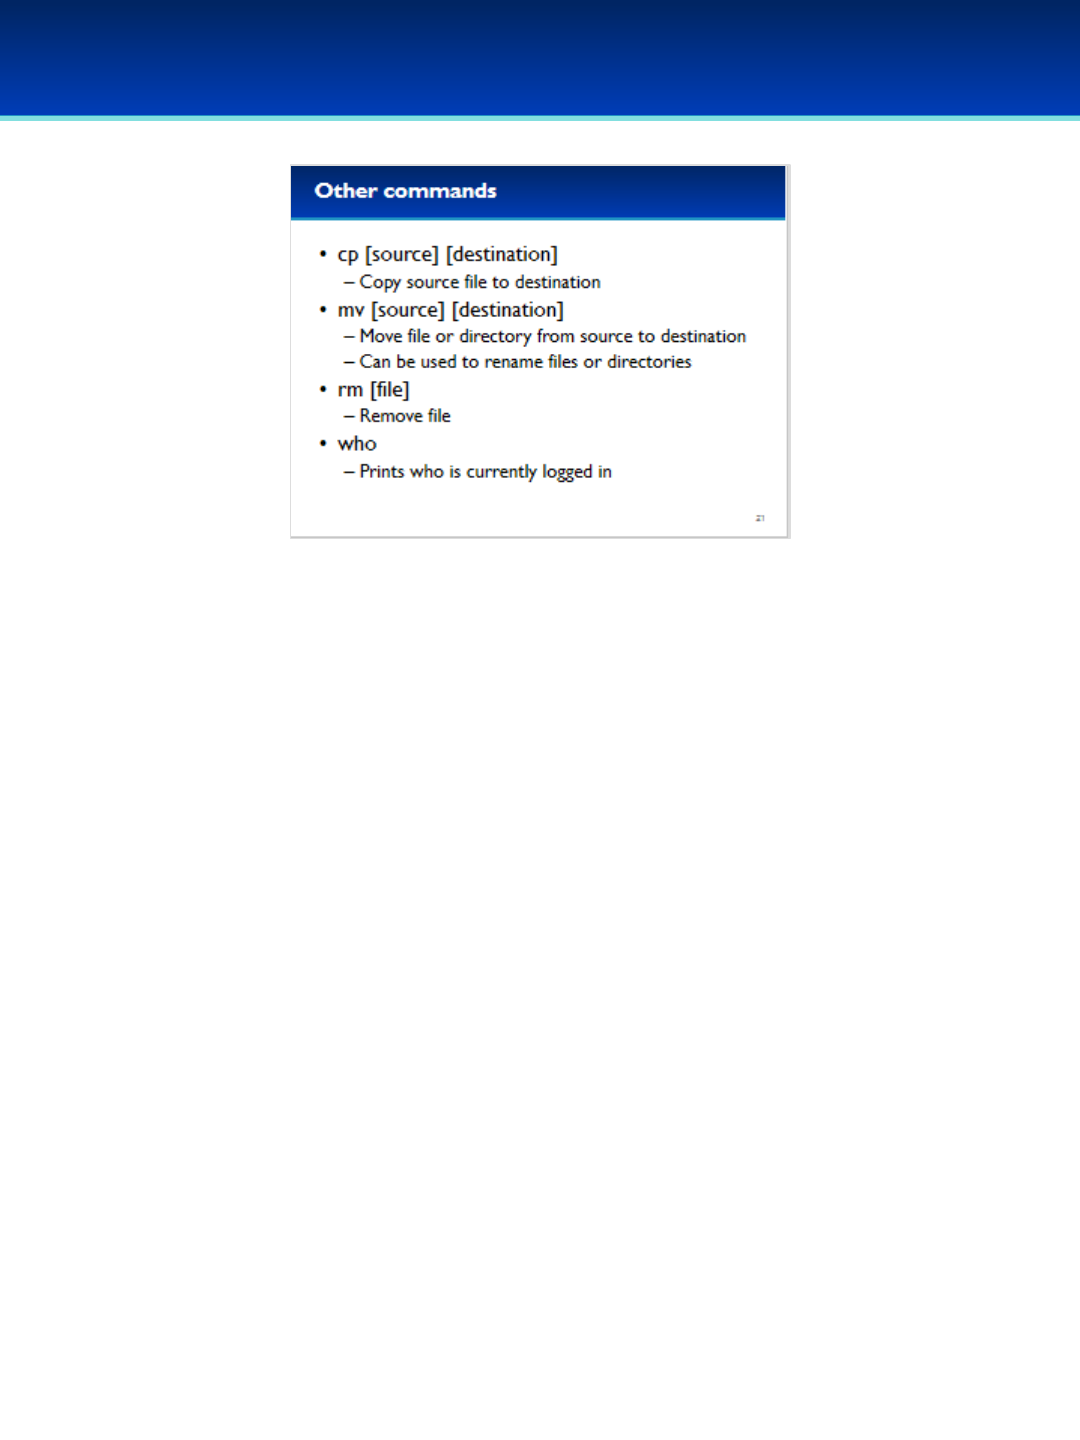
© 2018 Air Force Association
AFA Advanced CyberCamp Instructor’s Guide
Page 147
Slide 21
Ubuntu 16
•cp stands for copy, and is used to copy files, you can specify a new
name for the copied file, or if the destination is a directory, the file
will be copied to that directory with the same name.
•mv is used to move files, similar to the cp command, you can
specify a new name for the file, or if the destination is a directory,
the file will be moved into that directory with the same name.
•The rm command is used to remove a file.

© 2018 Air Force Association
AFA Advanced CyberCamp Instructor’s Guide
Page 148
Slide 22
Ubuntu 16
Devote 30 minutes to slides 23-45. Allow the students 20 minutes
to complete the activity on slide 45.
Throughout this section, students should follow along in the
Advanced Ubuntu 16 Demo Image.
In this section, we will cover advanced init systems, going into
detail about how Linux boots and starts services. You’ll learn the
many places to look to identify unwanted services and know how
to disable them.

© 2018 Air Force Association
AFA Advanced CyberCamp Instructor’s Guide
Page 149
Slide 23
Ubuntu 16
Have the students follow along if possible and time permits.
Stress that the students should not change any passwords or
settings unless they are expressly directed to do so.
Users are NOT automatically logged in, they should log in as the
user cyberpatriot with the password CyberPatriot!
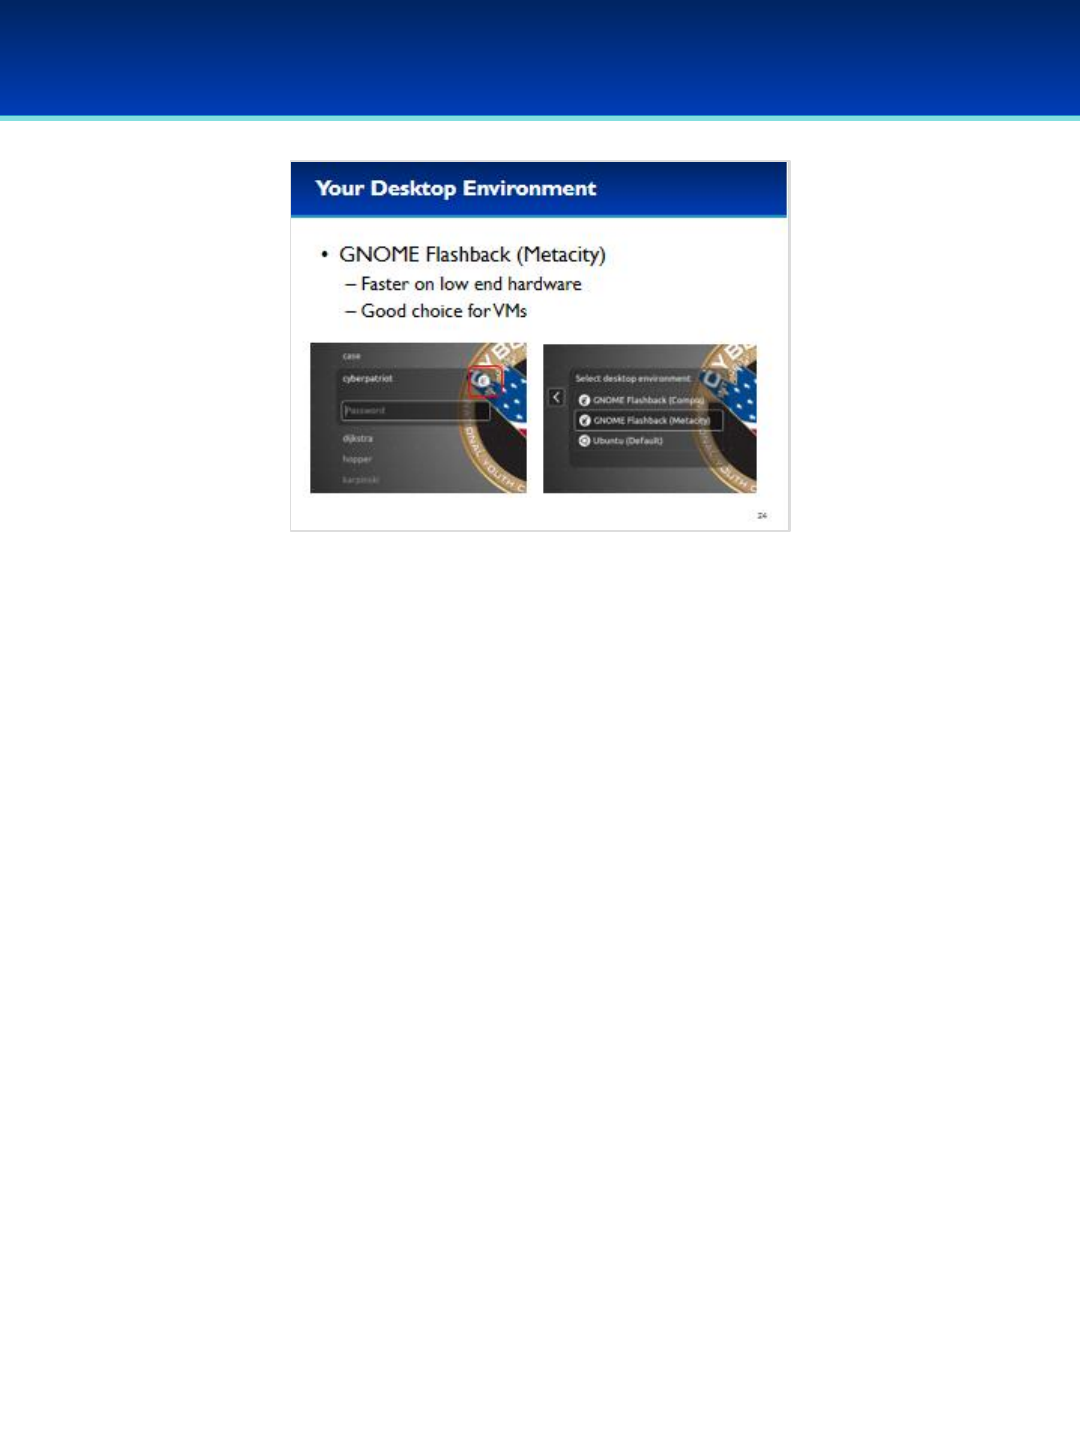
© 2018 Air Force Association
AFA Advanced CyberCamp Instructor’s Guide
Page 150
Slide 24
Ubuntu 16
•Before we begin, it’s worth noting that your default desktop
environment is GNOME Flashback (Metacity).
- This looks similar to the traditional GNOME 2 desktop environment.
- This desktop environment is a good choice for virtual machines since
it doesn’t have fancy 3D effects and has low system requirements.
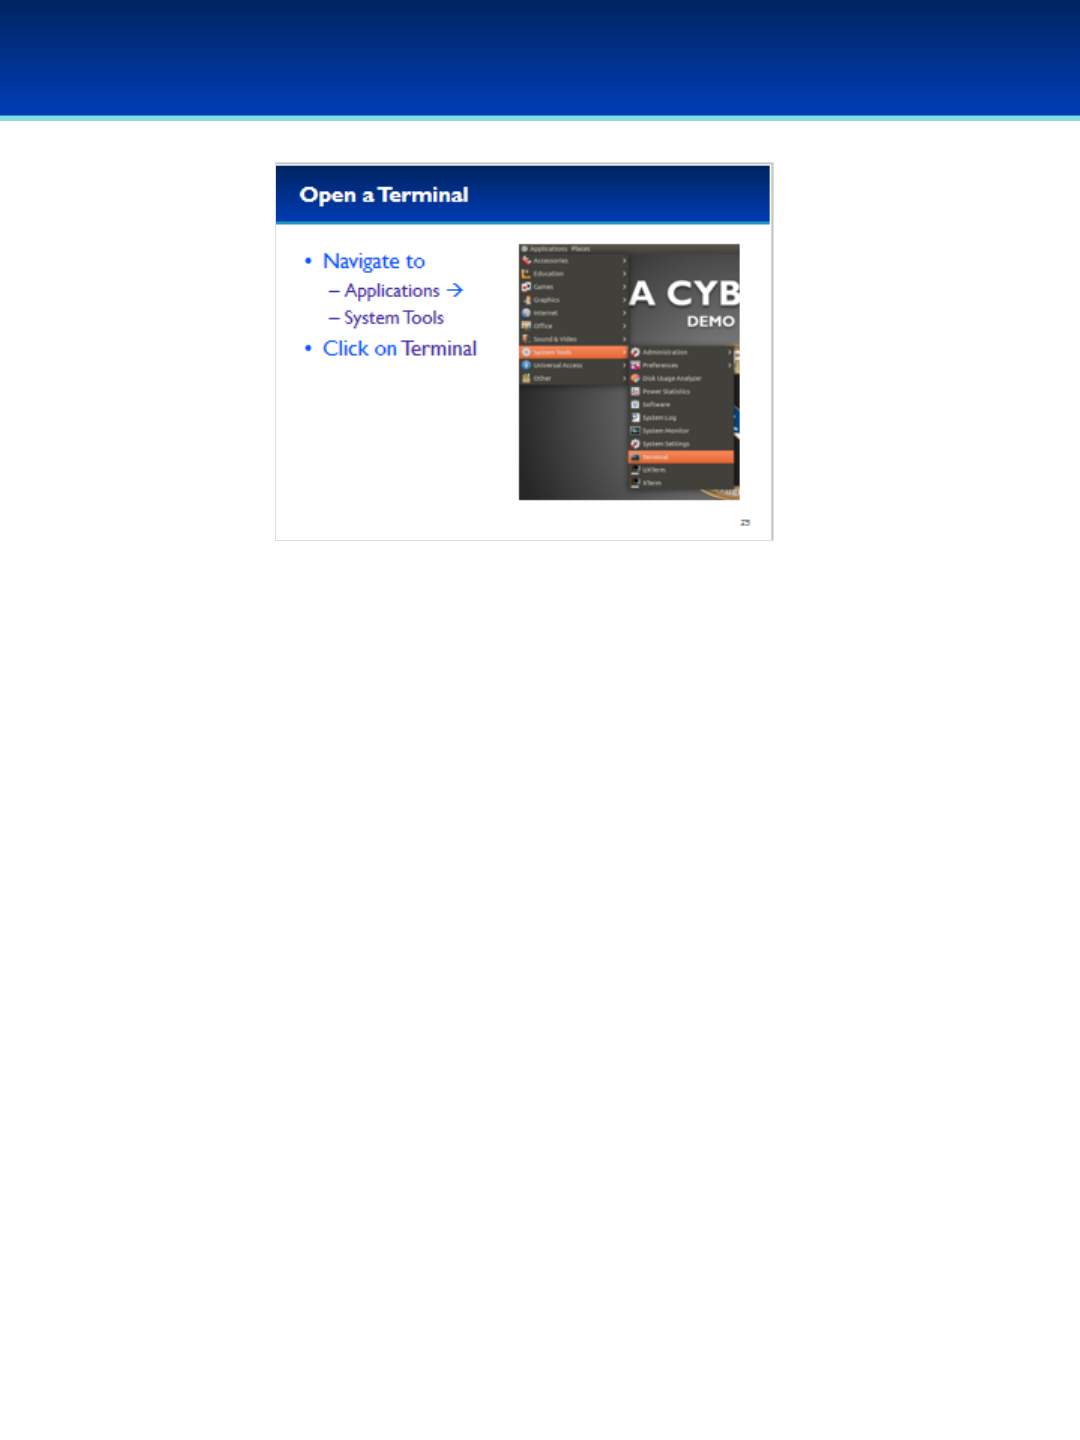
© 2018 Air Force Association
AFA Advanced CyberCamp Instructor’s Guide
Page 151
Slide 25
Ubuntu 16
•Notice this desktop environment is different from the default Unity
desktop environment.
•Open a Terminal now by navigating to Applications System Tools
and clicking on terminal.
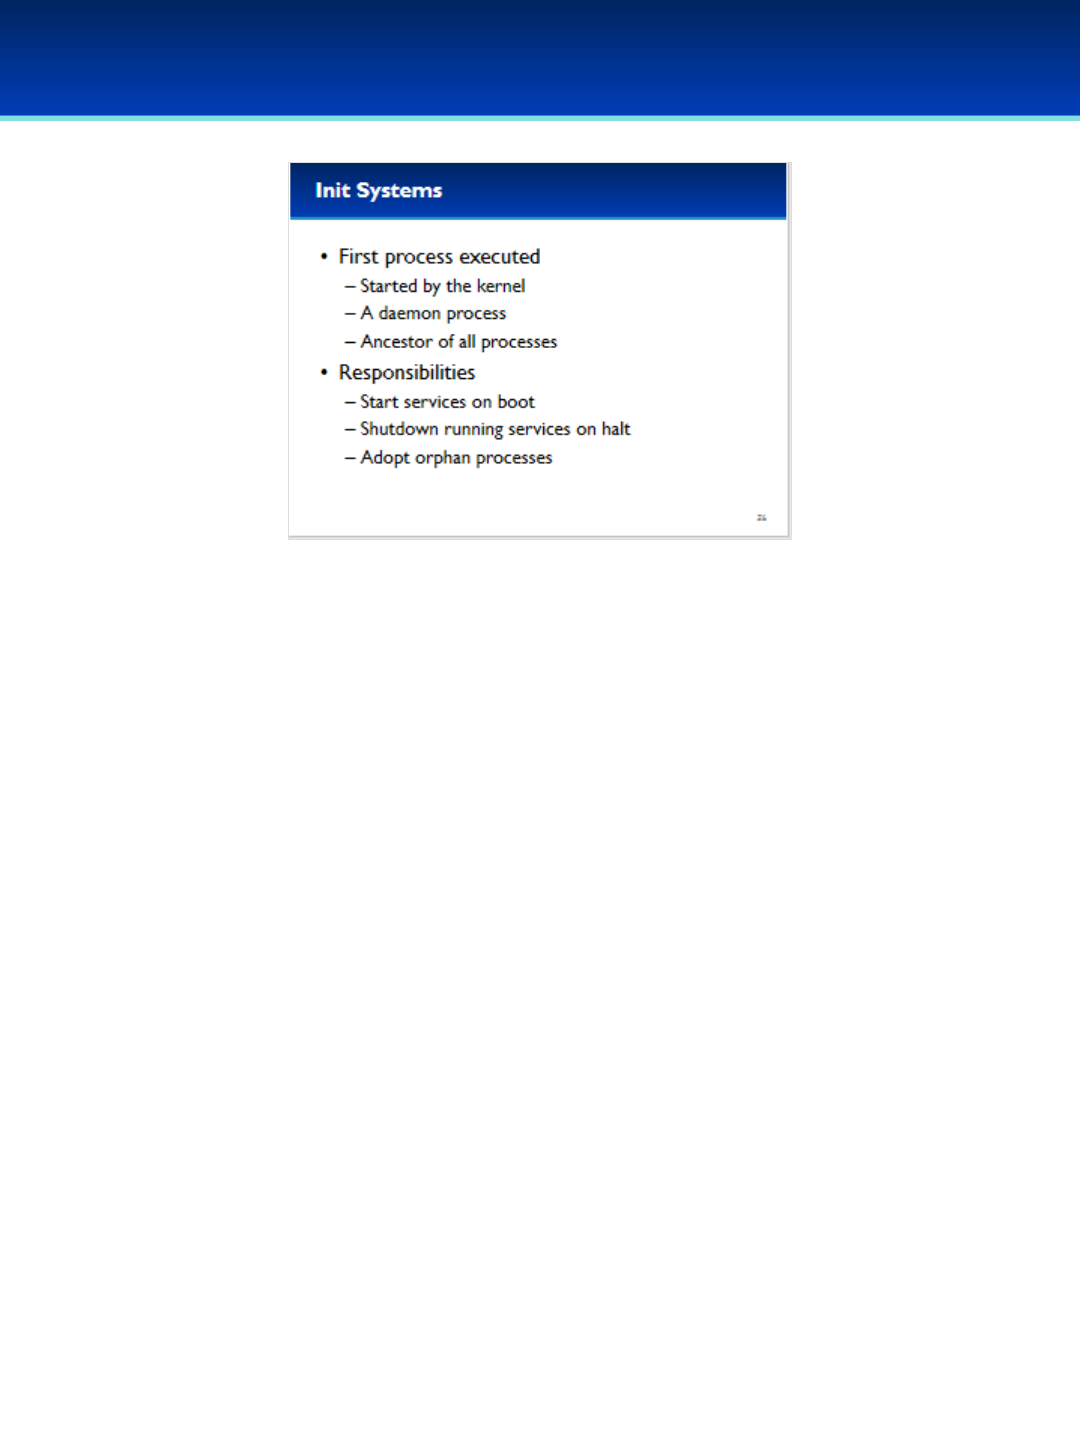
© 2018 Air Force Association
AFA Advanced CyberCamp Instructor’s Guide
Page 152
Slide 26
Ubuntu 16
•Linux starts with the boot process.
•Init is the first process executed by the kernel.
•It is sometimes referred to as a daemon process because it is running all
the time in the background.
•All new processes are created by existing processes, therefore Init is the
ancestor of all processes.
•Init traditionally has only a few responsibilities that include starting
services on boot, shutting down services on halt, and the adoption of
orphaned processes.
-Although it’s not really relevant to our discussion today, when a
process’ parent dies that process is known as an orphan process, and
init becomes the parent of that process.
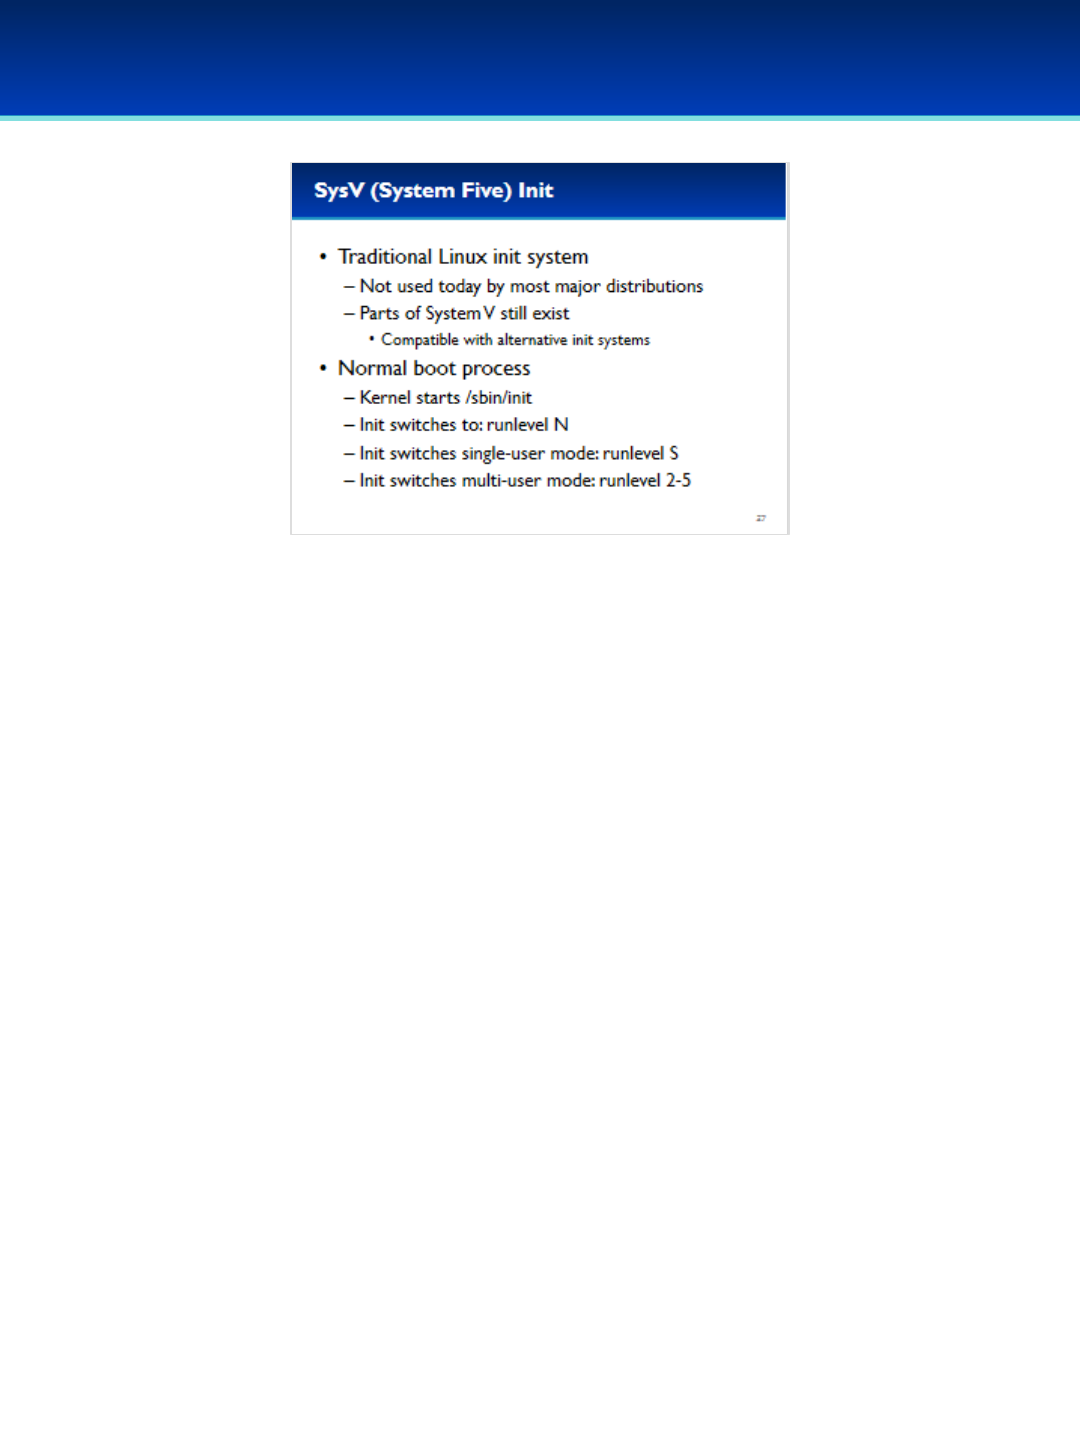
© 2018 Air Force Association
AFA Advanced CyberCamp Instructor’s Guide
Page 153
Slide 27
Ubuntu 16
•System V init is the traditional Unix and Linux init system.
-It’s no longer used today by most major distributions, however a large
amount of the System V init system still exists on some Linux distributions.
- Alternatively, init systems are also compatible with System Five, and are
therefore still used by many services.
•In the normal System V boot process of Debian and Ubuntu, the kernel starts
init.
•Init then immediately switches to runlevel N and initializes the system.
•Then, init switches to runlevel S to initialize the system in single-user mode to
complete tasks such as hardware initialization
•After runlevel S, the init switches to a specific multi-user mode; runlevel 2-5.
The default is runlevel 3.

© 2018 Air Force Association
AFA Advanced CyberCamp Instructor’s Guide
Page 154
Slide 28
Ubuntu 16
•Here is a description of the different runlevels:
- Runlevel 0 is used to halt the system.
- Runlevel S is the single-user mode, used to boot the system.
- Runlevel 1 is the single user mode that can be used to switch from multi-
user mode.
- Runlevels 2 through 5 are multi-user mode runlevels, with 3 being the
default. However, on Debian and Ubuntu all these runlevels are the same
by default so it doesn’t much matter.
- Runlevel 6 is used for rebooting the system.
- Finally, Runlevels 7-9 are technically valid, but not used.
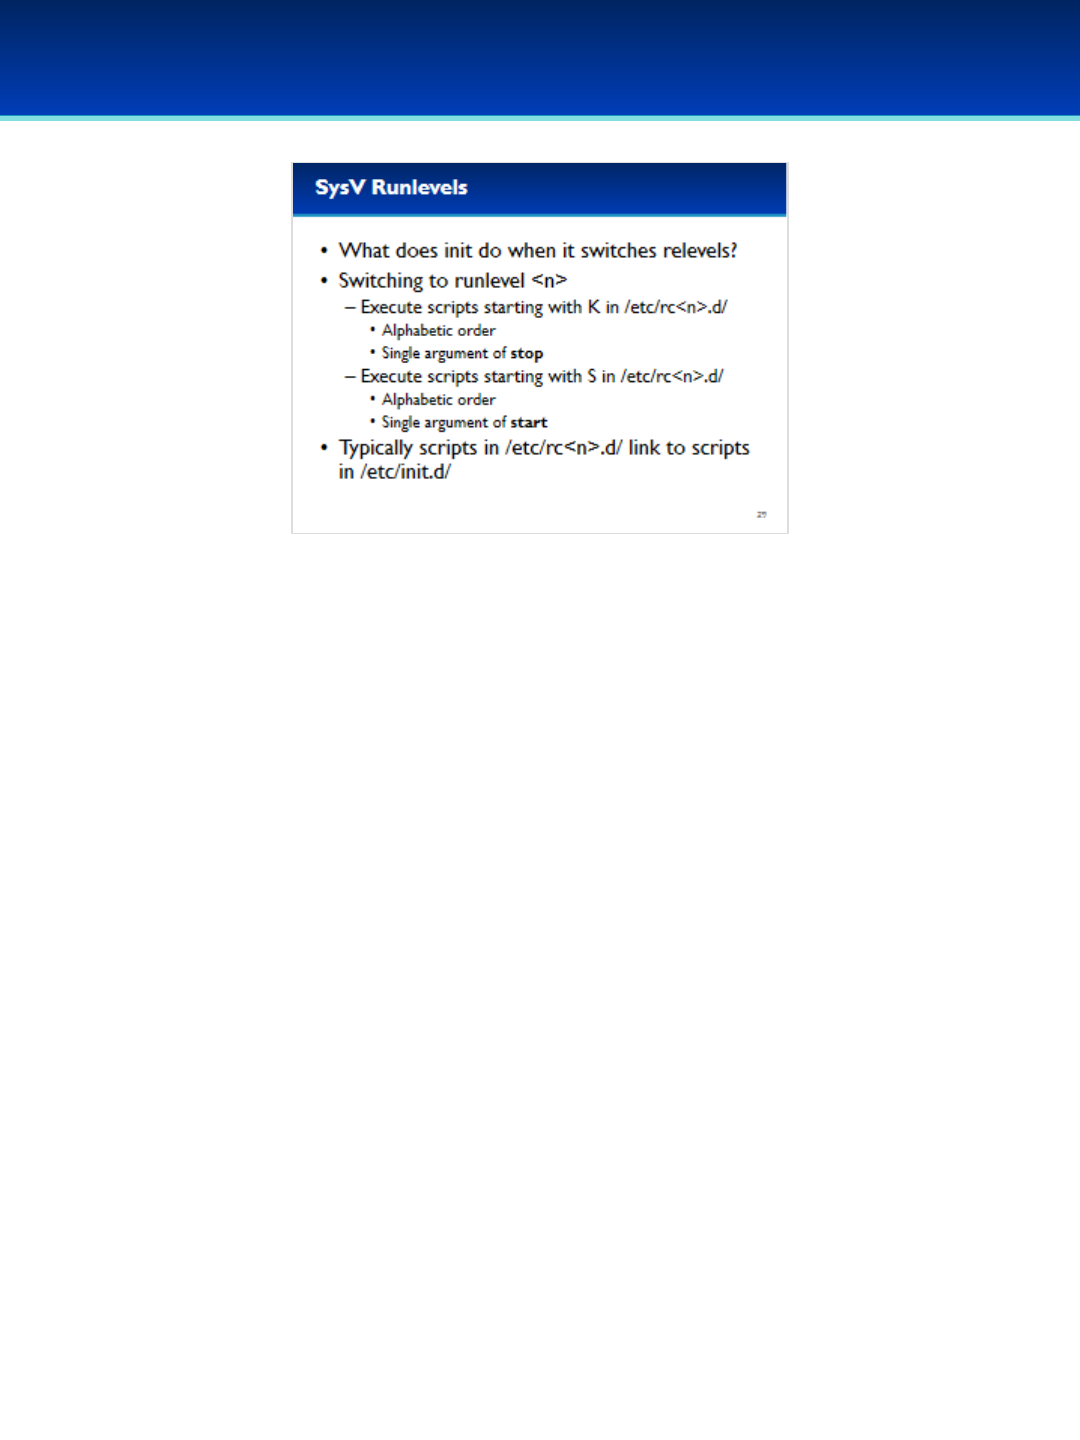
© 2018 Air Force Association
AFA Advanced CyberCamp Instructor’s Guide
Page 155
Slide 29
Ubuntu 16
•I’m sure you are wondering what init does when switching to and from these
runlevels.
•It’s easy to see for yourself.
•When init switches to runlevel n, it first stops services in it’s directory that start
with a K, and it does this in alphabetic order.
- Here, K stands for kill.
- Init does this by running all the K scripts in /etc/rc<n>.d/ with a single
argument of stop
•Then, it starts processes in the same directory that start with an S.
- S stands for start.
- Similarly, init accomplishes this by running all the S scripts in /etc/rc<n>.d
with a single argument of start.
•We’ll talk more about links later, but typically all of the scripts in /etc/rc<n>.d/
are actually just links to scripts in: /etc/init.d/
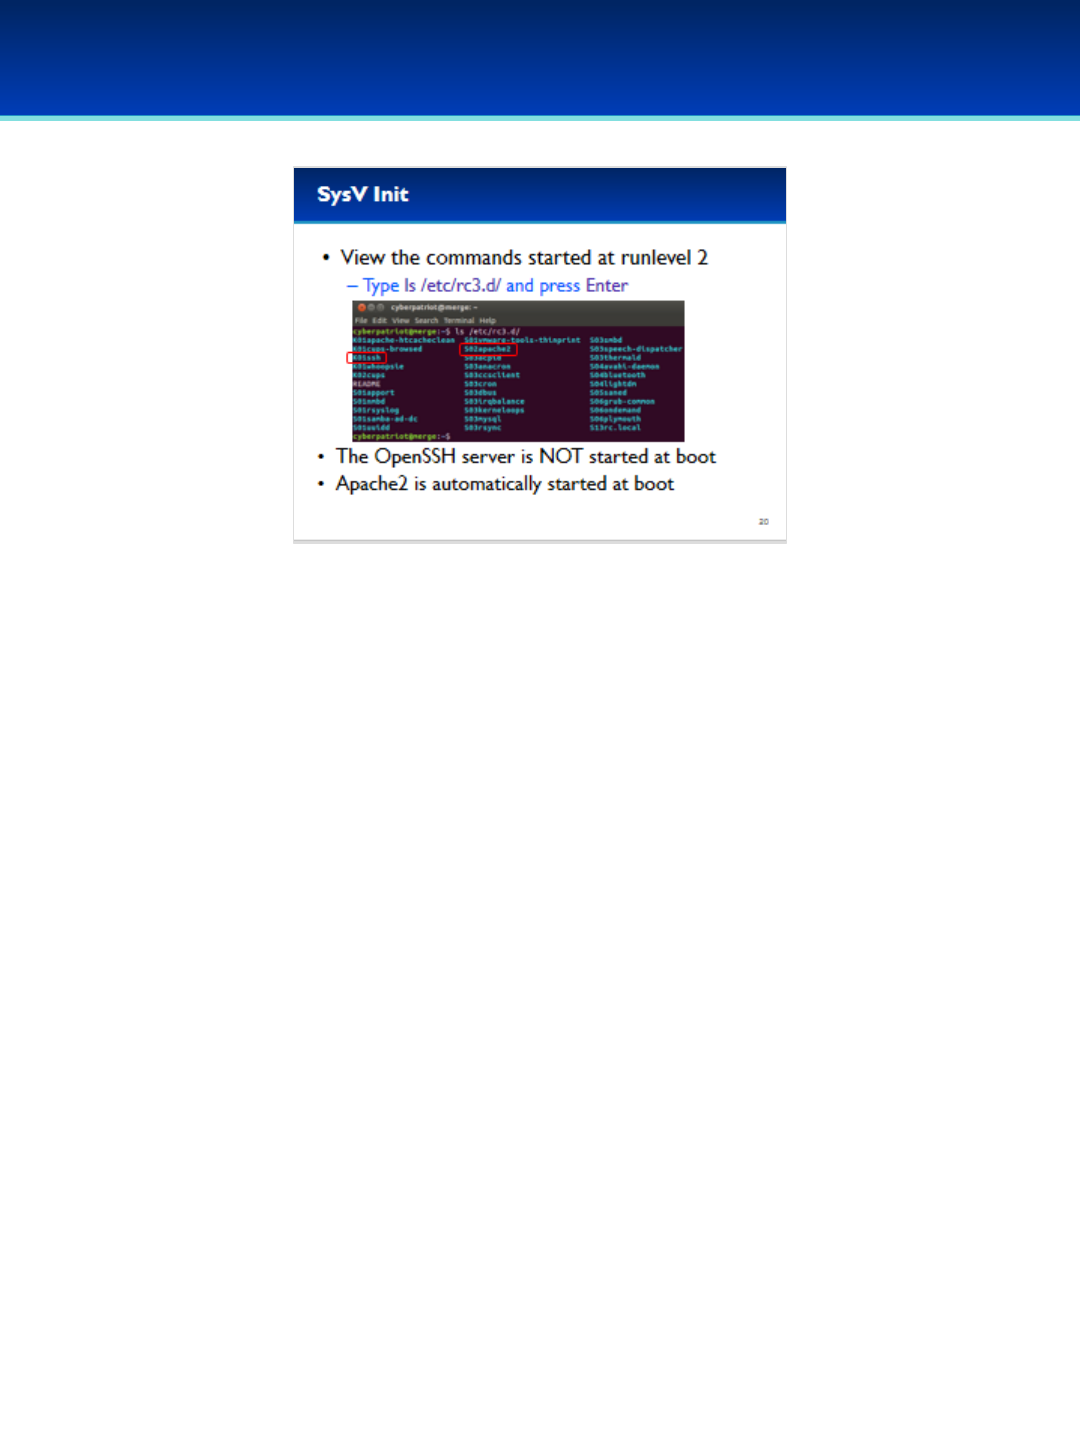
© 2018 Air Force Association
AFA Advanced CyberCamp Instructor’s Guide
Page 156
Slide 30
Ubuntu 16
•To view the scripts that get started and stopped at runlevel 3,
type: ls /etc/rc3.d/
- Here we can see that the OpenSSH server is not configured to
start at boot since the link in this directory starts with a K.
- However, it looks like the Apache2 service is starting at boot
since it’s link starts with an S.
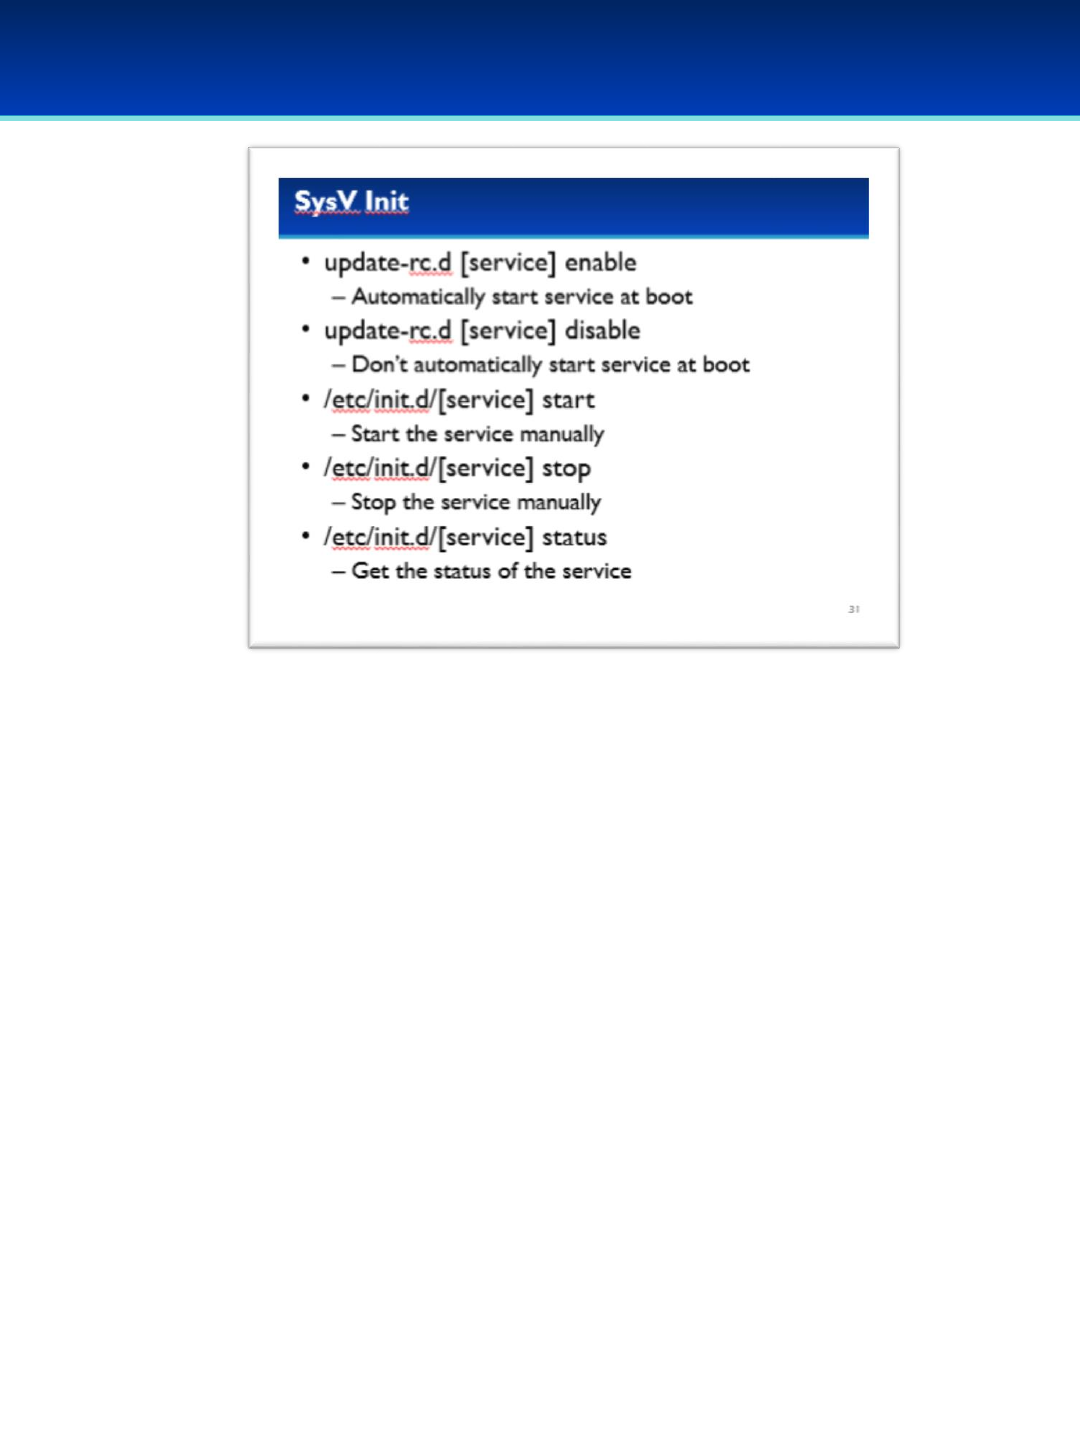
© 2018 Air Force Association
AFA Advanced CyberCamp Instructor’s Guide
Page 157
Slide 31
Ubuntu 16
•To define if a service starts at boot, you can use the update-rc.d
command.
- The first argument to update-rc.d is the name of the service, followed
by either enable or disable.
•You can start or stop a service manually by using the init scripts in:
/etc/init.d/
- Just run the script that you want and pass it a single command line
argument, either start or stop.
- You can also use the status argument to print out the status of a
service.
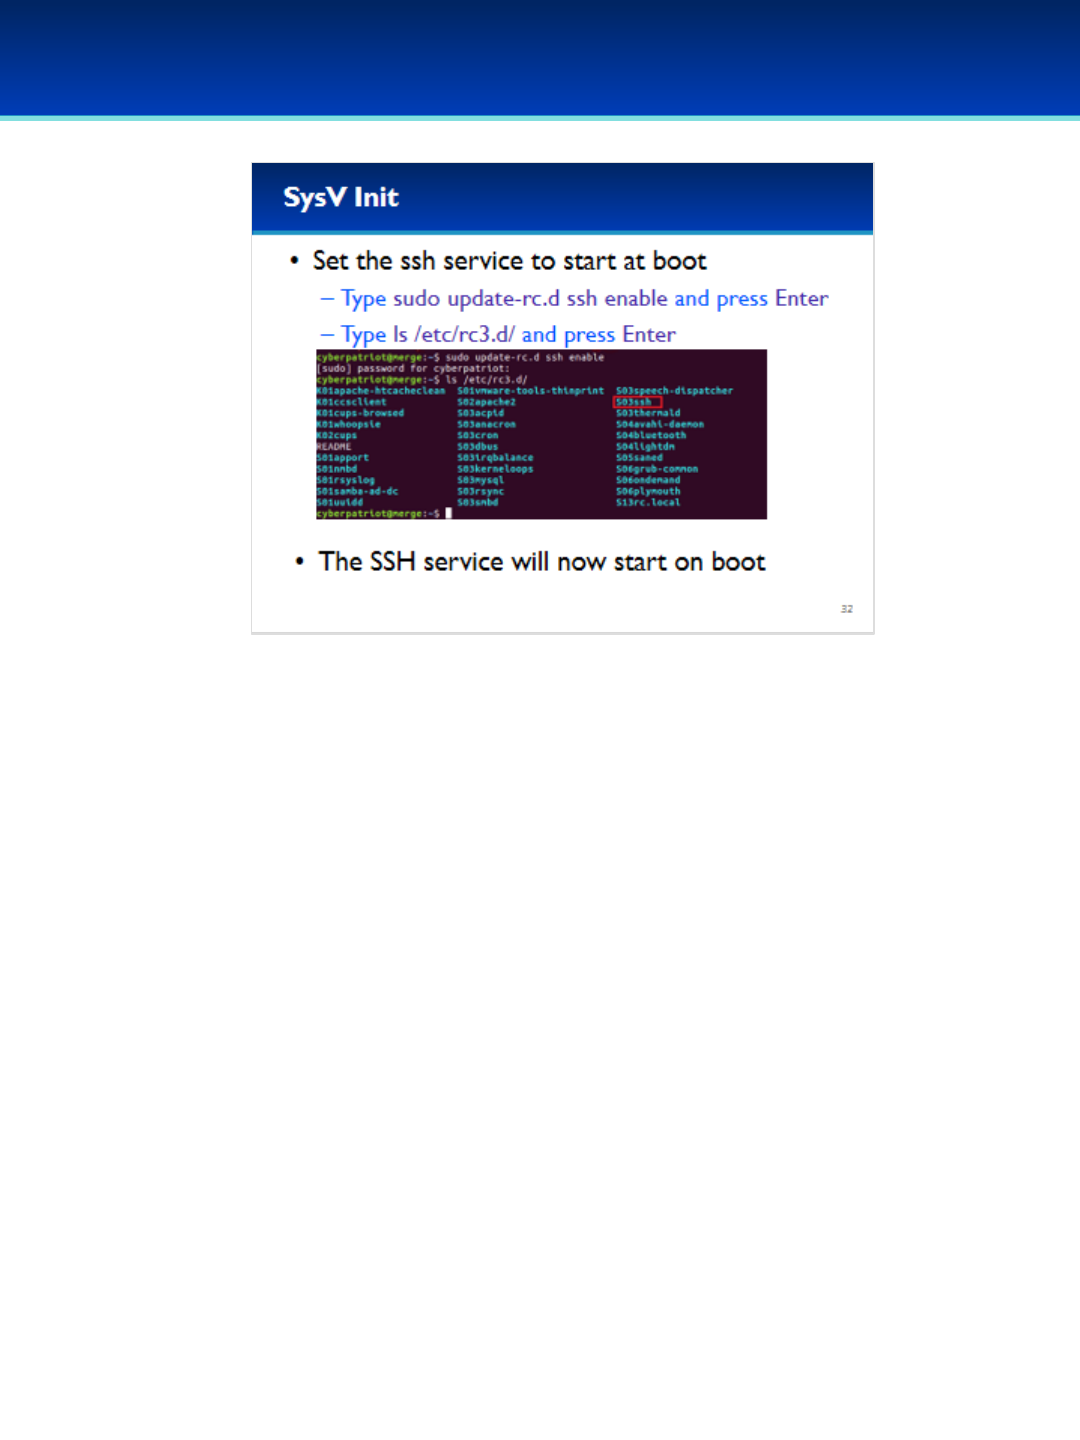
© 2018 Air Force Association
AFA Advanced CyberCamp Instructor’s Guide
Page 158
Slide 32
Ubuntu 16
•We want the SSH service to automatically start at boot.
Have the students run the commands on the screen.
•After running the commands, notice that the ssh link in /etc/rc3.d/ now
starts with an S.
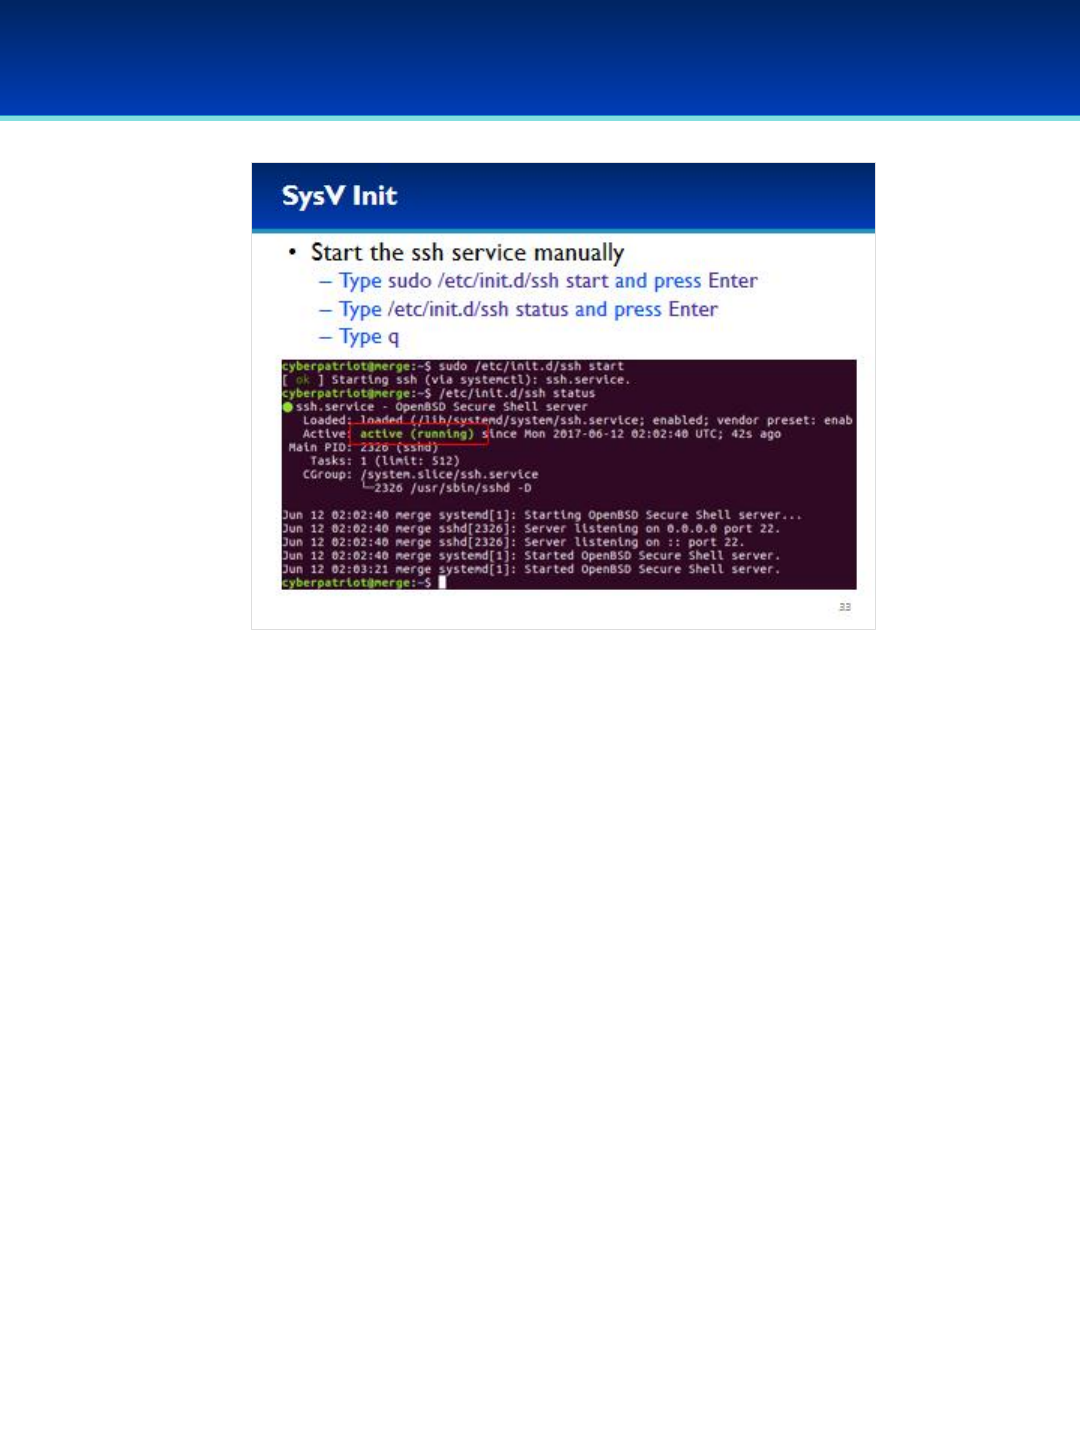
© 2018 Air Force Association
AFA Advanced CyberCamp Instructor’s Guide
Page 159
Slide 33
Ubuntu 16
•Although we told the ssh service to start at boot, it is not running at the
moment.
- We are going to start the ssh service manually.
Have the students run the commands on the screen.
•After starting the ssh service, the status now shows active (running).
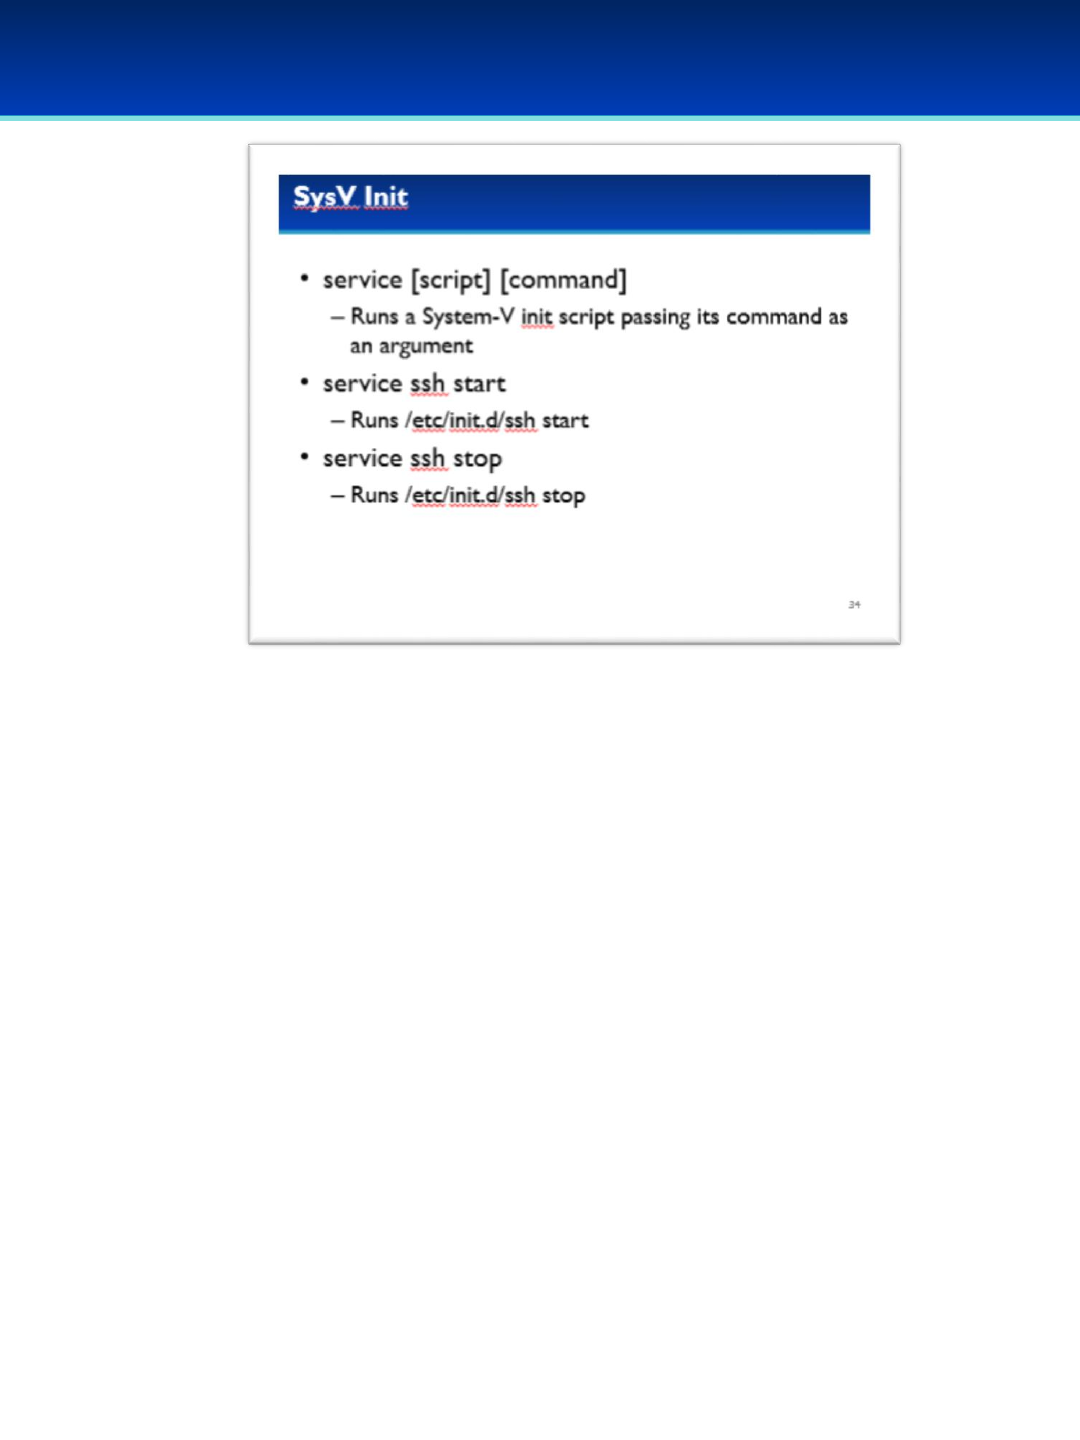
© 2018 Air Force Association
AFA Advanced CyberCamp Instructor’s Guide
Page 160
Slide 34
Ubuntu 16
•The service command can also be used to start and stop
services manually, it simply runs the init script with the
specified argument.
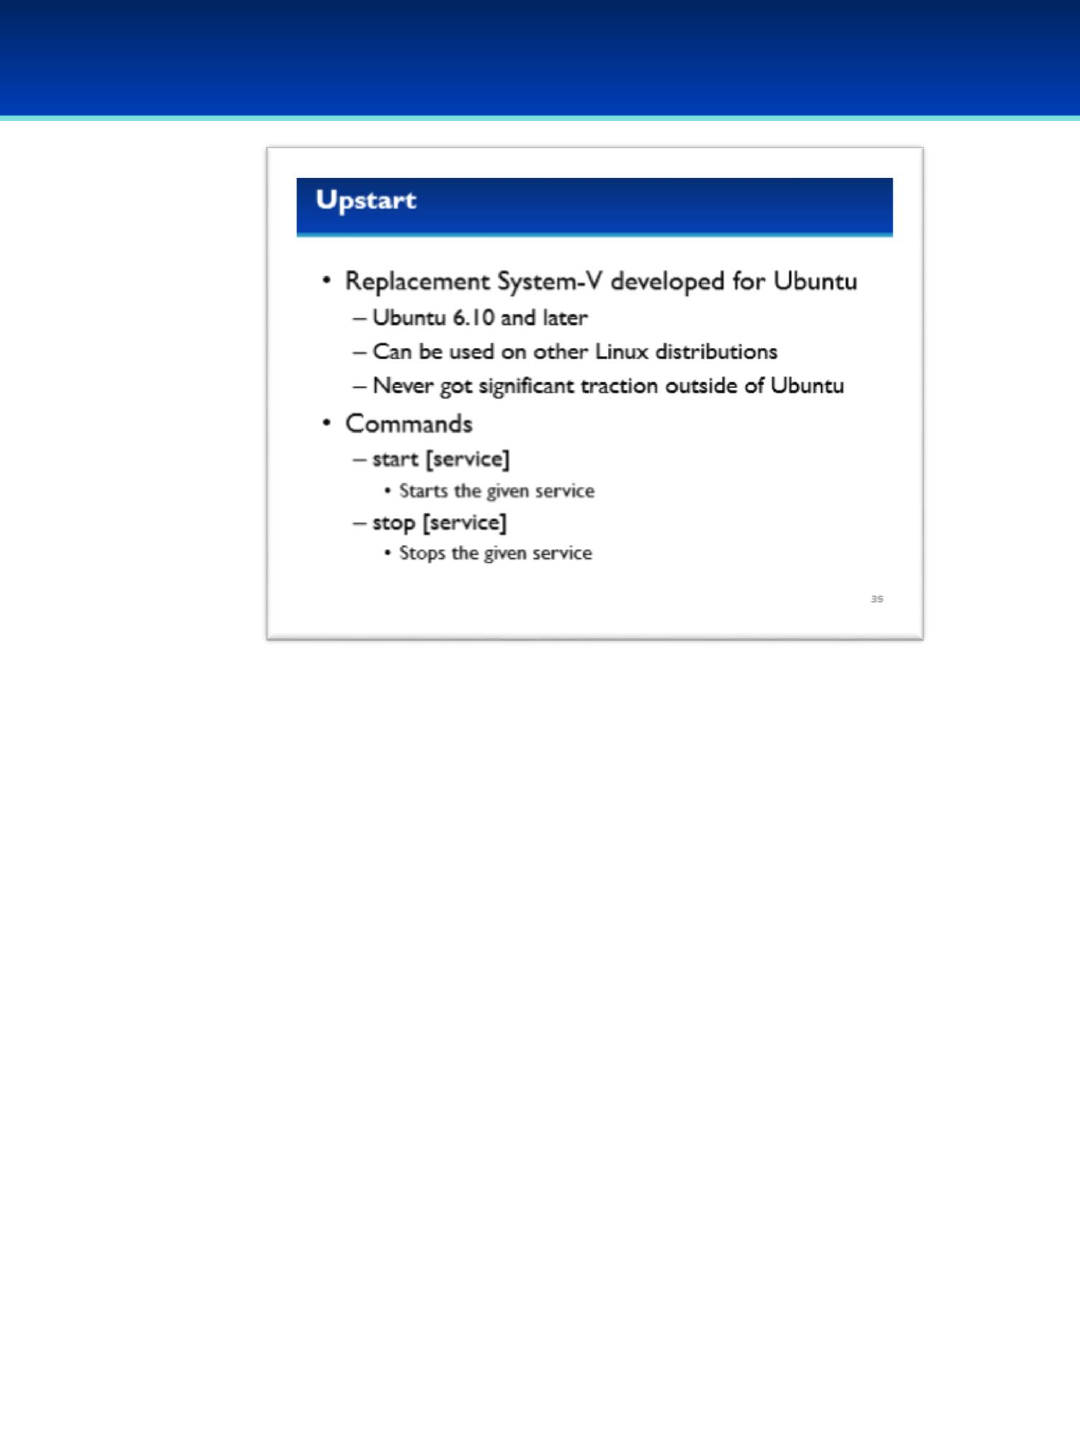
© 2018 Air Force Association
AFA Advanced CyberCamp Instructor’s Guide
Page 161
Slide 35
Ubuntu 16
•Upstart was an alternative init system initially developed for Ubuntu and
works with Ubuntu 6.10 and later.
•It can be used on other Linux distributions but it really never got
significant traction outside of Ubuntu.
- Upstart was made to be backwards-compatible with System-V by
being able to run System-V init scripts.

© 2018 Air Force Association
AFA Advanced CyberCamp Instructor’s Guide
Page 162
Slide 36
Ubuntu 16
•Upstart services are specified in the /etc/init directory.
•Each service has its own configuration file ending with .conf.
•Under upstart, every service starts at boot, unless there exists a
service.override file containing the text “manual.”
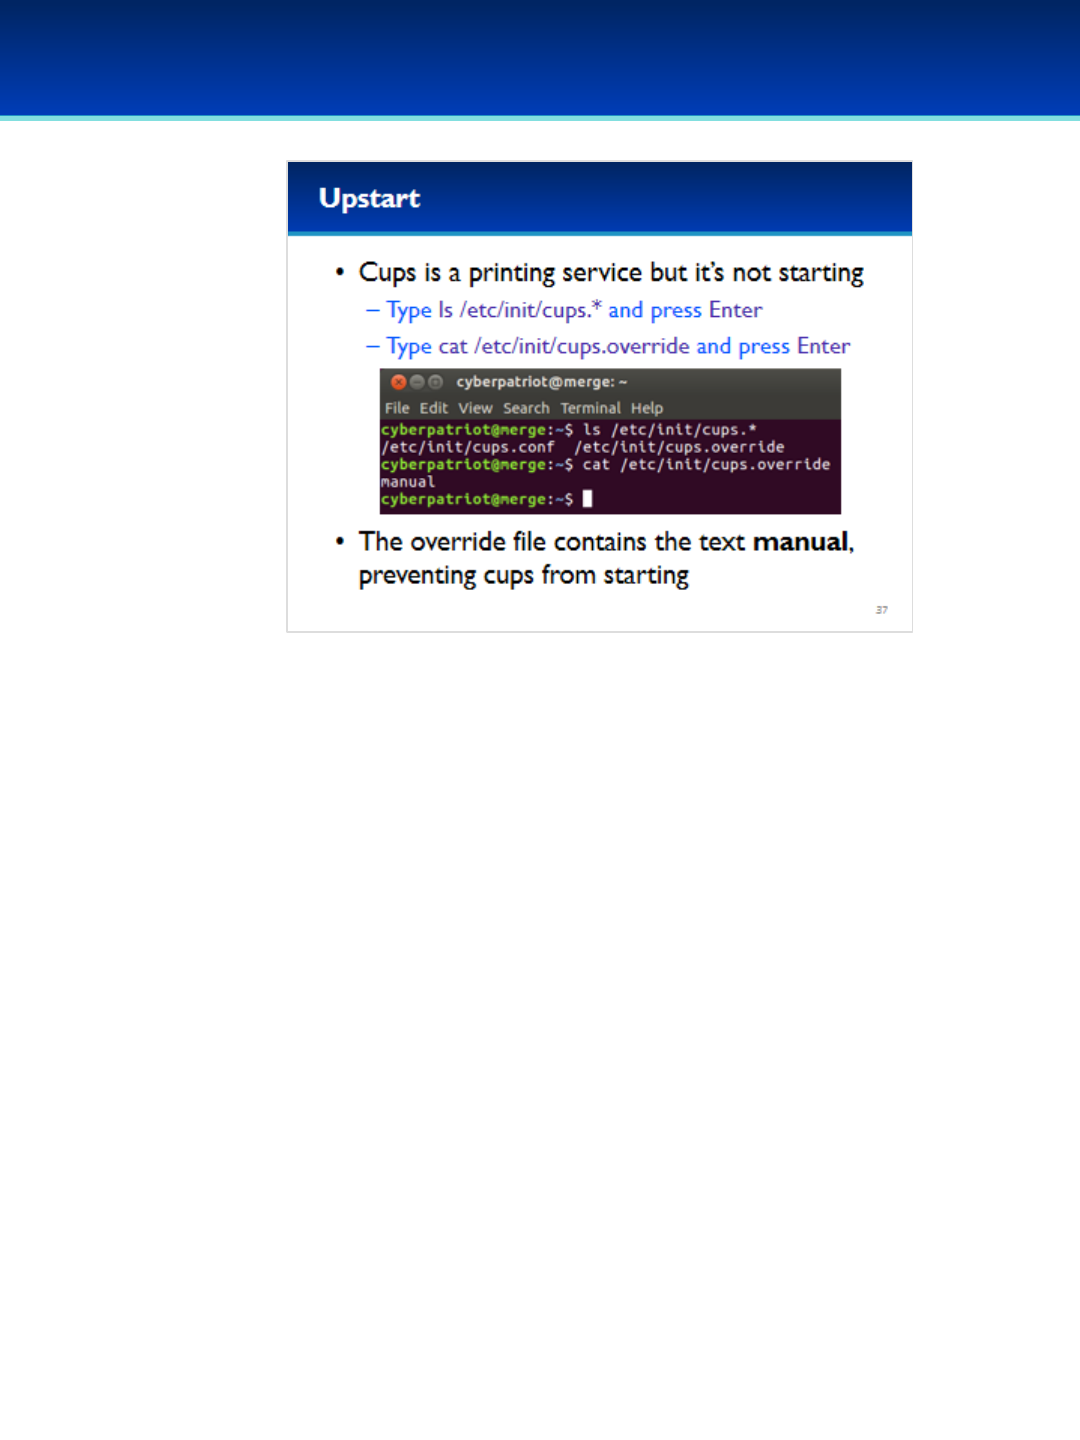
© 2018 Air Force Association
AFA Advanced CyberCamp Instructor’s Guide
Page 163
Slide 37
Ubuntu 16
•CUPS is a printing service for Linux but it’s not currently starting.
Have the students run the commands on the screen.
•As you can see, Upstart won’t start CUPS because of the override file.
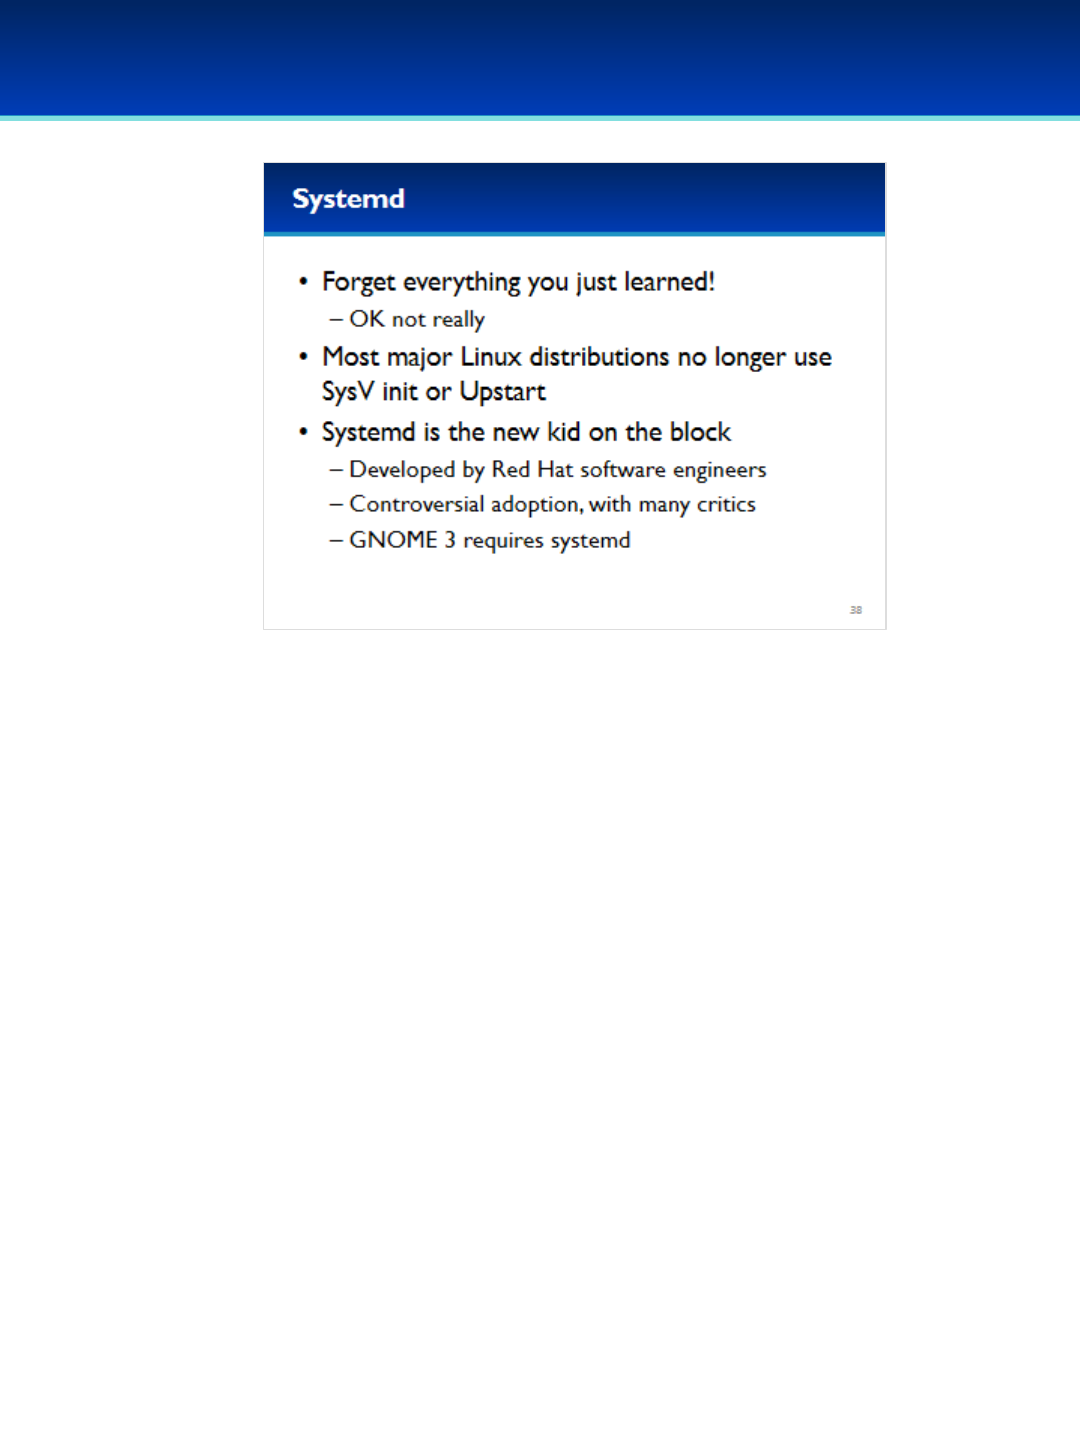
© 2018 Air Force Association
AFA Advanced CyberCamp Instructor’s Guide
Page 164
Slide 38
Ubuntu 16
•Ok now forget everything you just learned (just kidding, everything you
just learned is still relevant and used).
•However as we mentioned before, most major Linux distributions no
longer use System V or Upstart as their init systems.
•Currently almost all major Linux distributions, including Ubuntu and
Debian now use system.
•Systemd was developed by Red Hat software engineers but it has had a
very controversial adoption for many reasons, due in part to the fact
that GNOME 3 requires sytemd.
•GNOME 3 is the most widely used Linux desktop environment.

© 2018 Air Force Association
AFA Advanced CyberCamp Instructor’s Guide
Page 165
Slide 39
Ubuntu 16
•None of this really matters since systemd looks like it is here to stay, and has seen
widespread adoption as the default init system in all Red Hat and Debian-based
Linux distributions (this encompasses the overwhelming majority of Linux
distributions).
•So how come we just saw all that System-V and Upstart files on our systems if we
are now using systemd?
-update-rc.d now configures services for all three init systems.
- When you run the init scripts manually, most of them actually detect that
systemd is being used and instead use systemd to start and stop services.
- Upstart is not actually currently installed as the default init system either, but
it is installed and running on your system for compatibility.
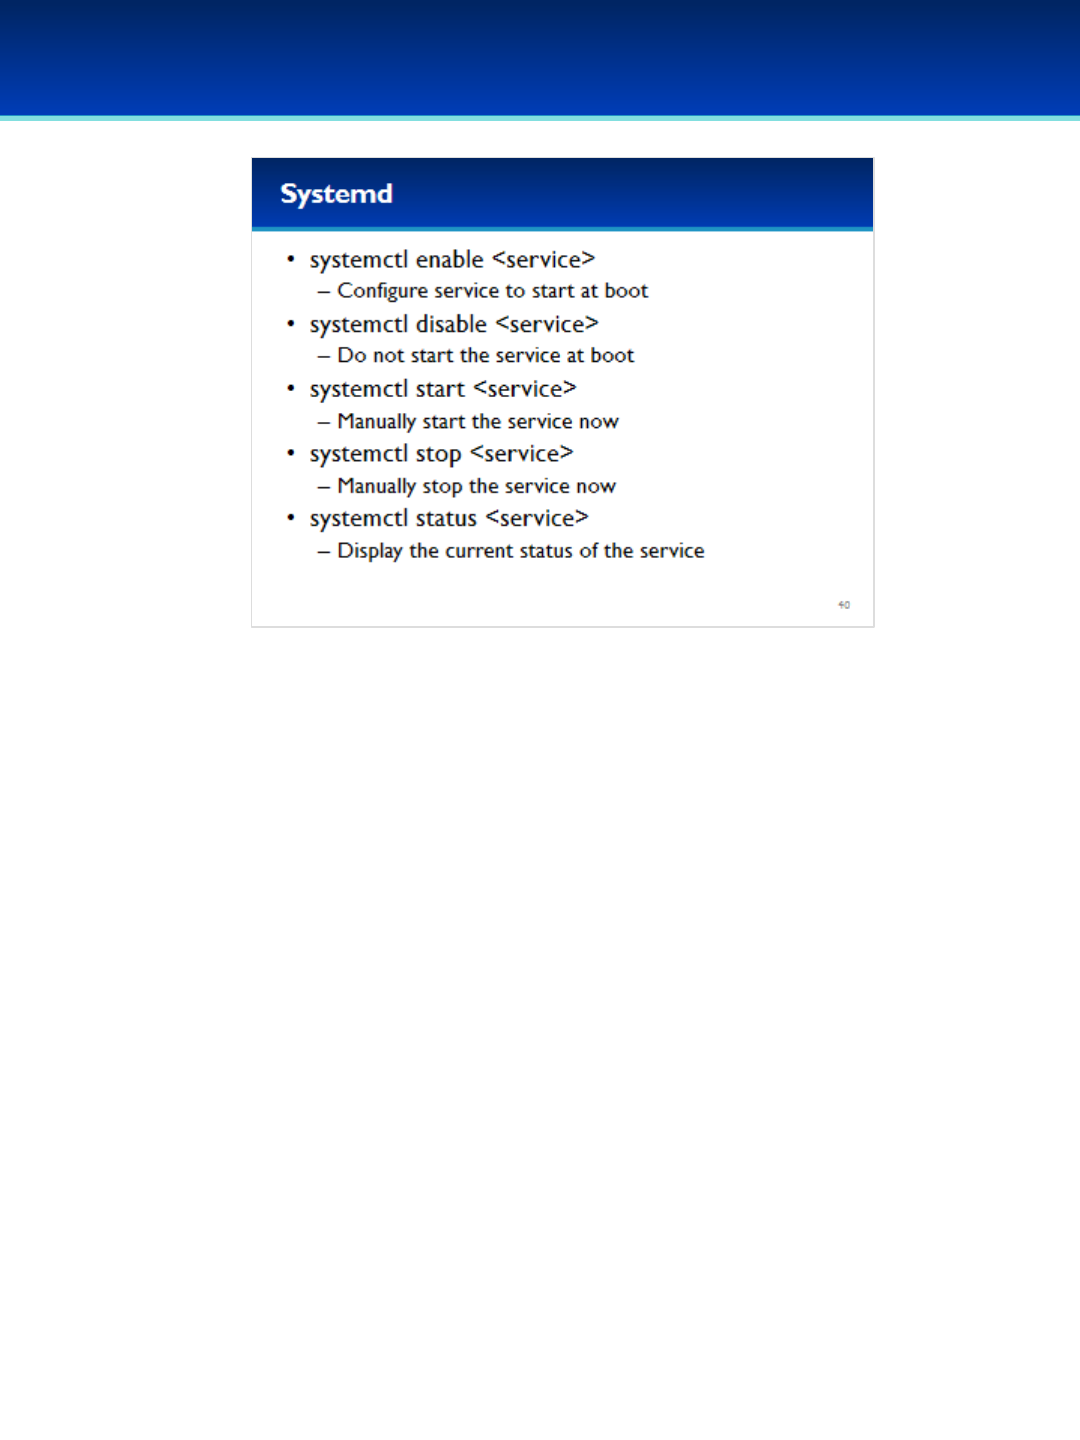
© 2018 Air Force Association
AFA Advanced CyberCamp Instructor’s Guide
Page 166
Slide 40
Ubuntu 16
•The systemctl command is the systemd command for managing
services.
•With it, you can configure services to automatically start at boot with
the enable argument.
•You can stop a service from automatically starting at boot with the
disable argument.
•If you want to manually start a service, you would use the start
argument.
•Similarly, the stop argument manually stops a service.
•The status argument will display the current status of the service.
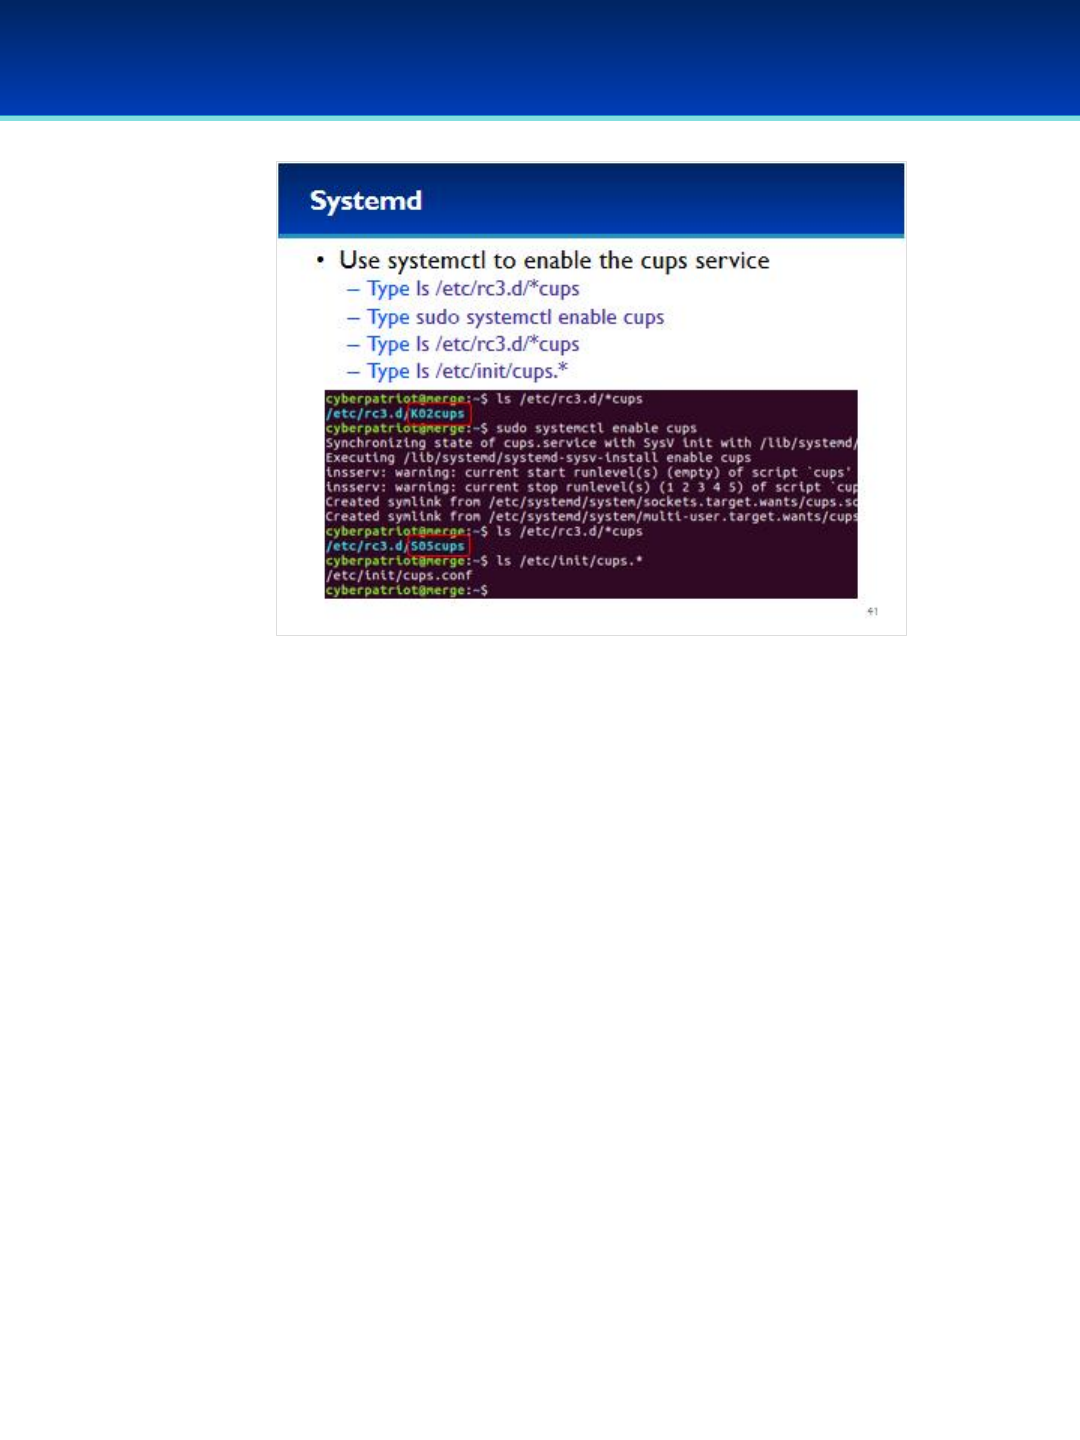
© 2018 Air Force Association
AFA Advanced CyberCamp Instructor’s Guide
Page 167
Slide 41
Ubuntu 16
•As we saw earlier, the CUPS service was disabled.
Have the students run the commands on the screen.
Mention that * is a special character that matches any characters (or
none).
•After enabling the CUPS service with system, you can see that the
System-V and Upstart init systems have been updated as well.

© 2018 Air Force Association
AFA Advanced CyberCamp Instructor’s Guide
Page 168
Slide 42
Ubuntu 16
•You can find the systemd service in /lib/systemd/system.
Have the students run the commands on the screen.
•Most of the services end in .service, however some end in .target or
.path, and there are some additional service management files
present as well such as sockets.
•The .wants directories specify dependencies of that service.
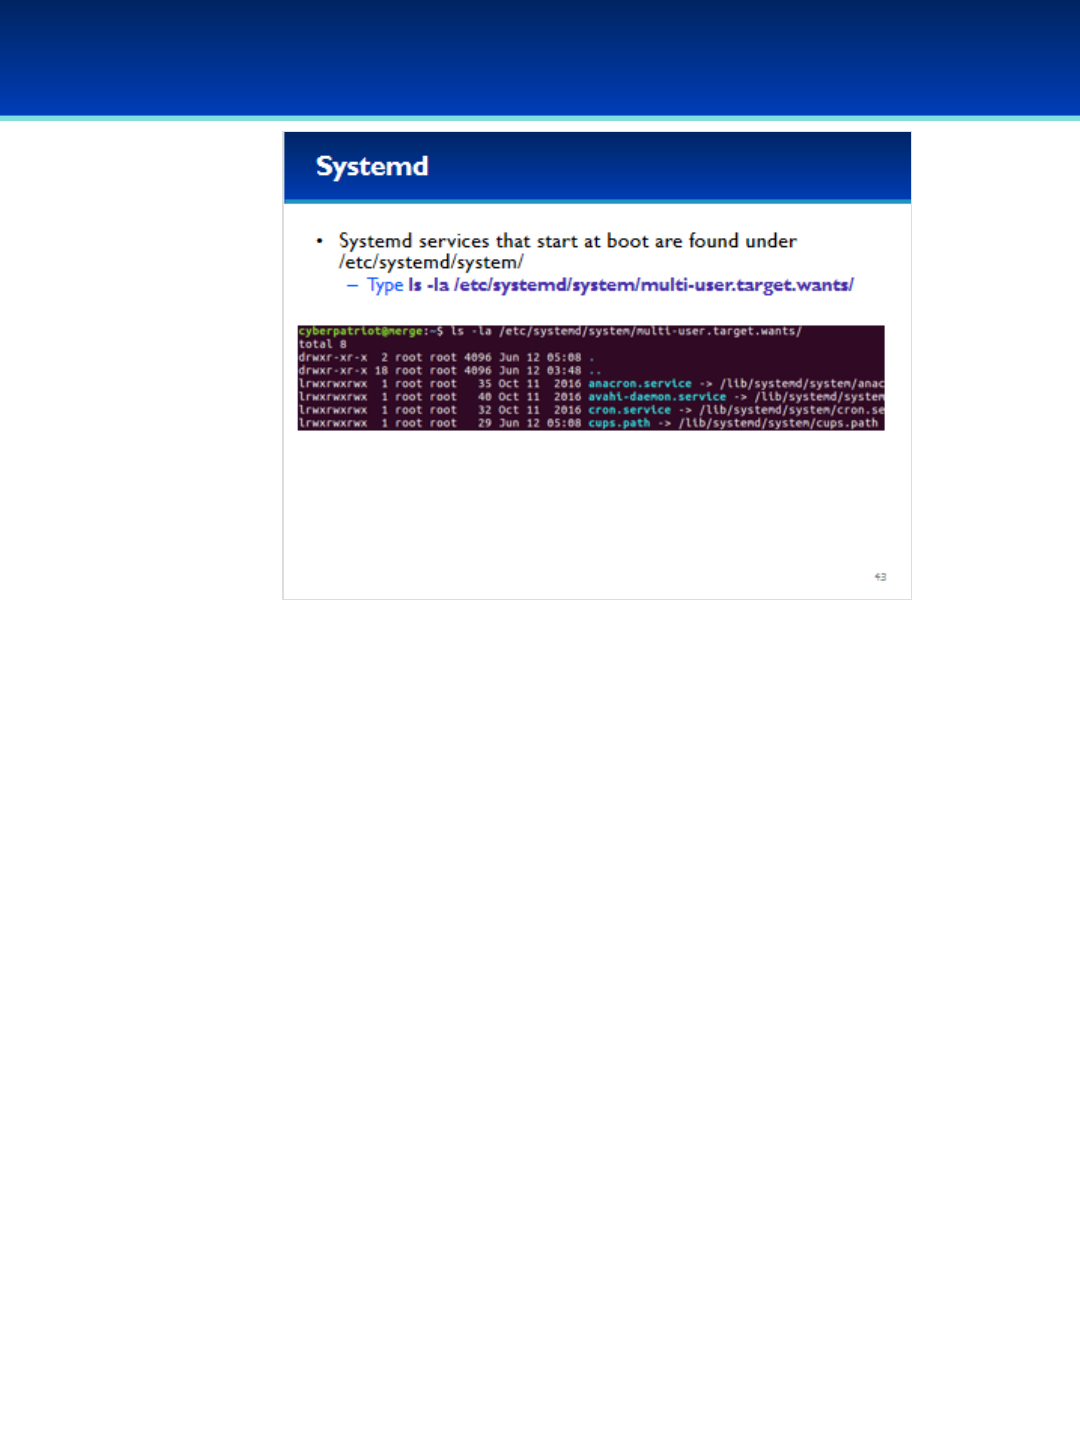
© 2018 Air Force Association
AFA Advanced CyberCamp Instructor’s Guide
Page 169
Slide 43
Ubuntu 16
•We just saw the list of services available, but what about the list of
services started at boot?
- The services automatically started at boot are found in
/etc/systemd/system and are typically symlinks to the
/lib/systemd/system directory.
Have the students run the commands on the screen.
•The multi-user.target.wants directory is just one of several directories in
/etc/systemd/system/ that specify services to start on boot.

© 2018 Air Force Association
AFA Advanced CyberCamp Instructor’s Guide
Page 170
Slide 44
Ubuntu 16
•For the most part it seems like a lot of effort has been put into
making all these init systems work with each other.
•So which commands should you use?
•Well, systemd is the default now, so you should use systemctl when
possible.
•However a few services do not (yet) work with systemd, so use
whatever works for those.
•Since systemd doesn’t yet manage everything, make sure to also
check System V and Upstart for the presence of unwanted services.
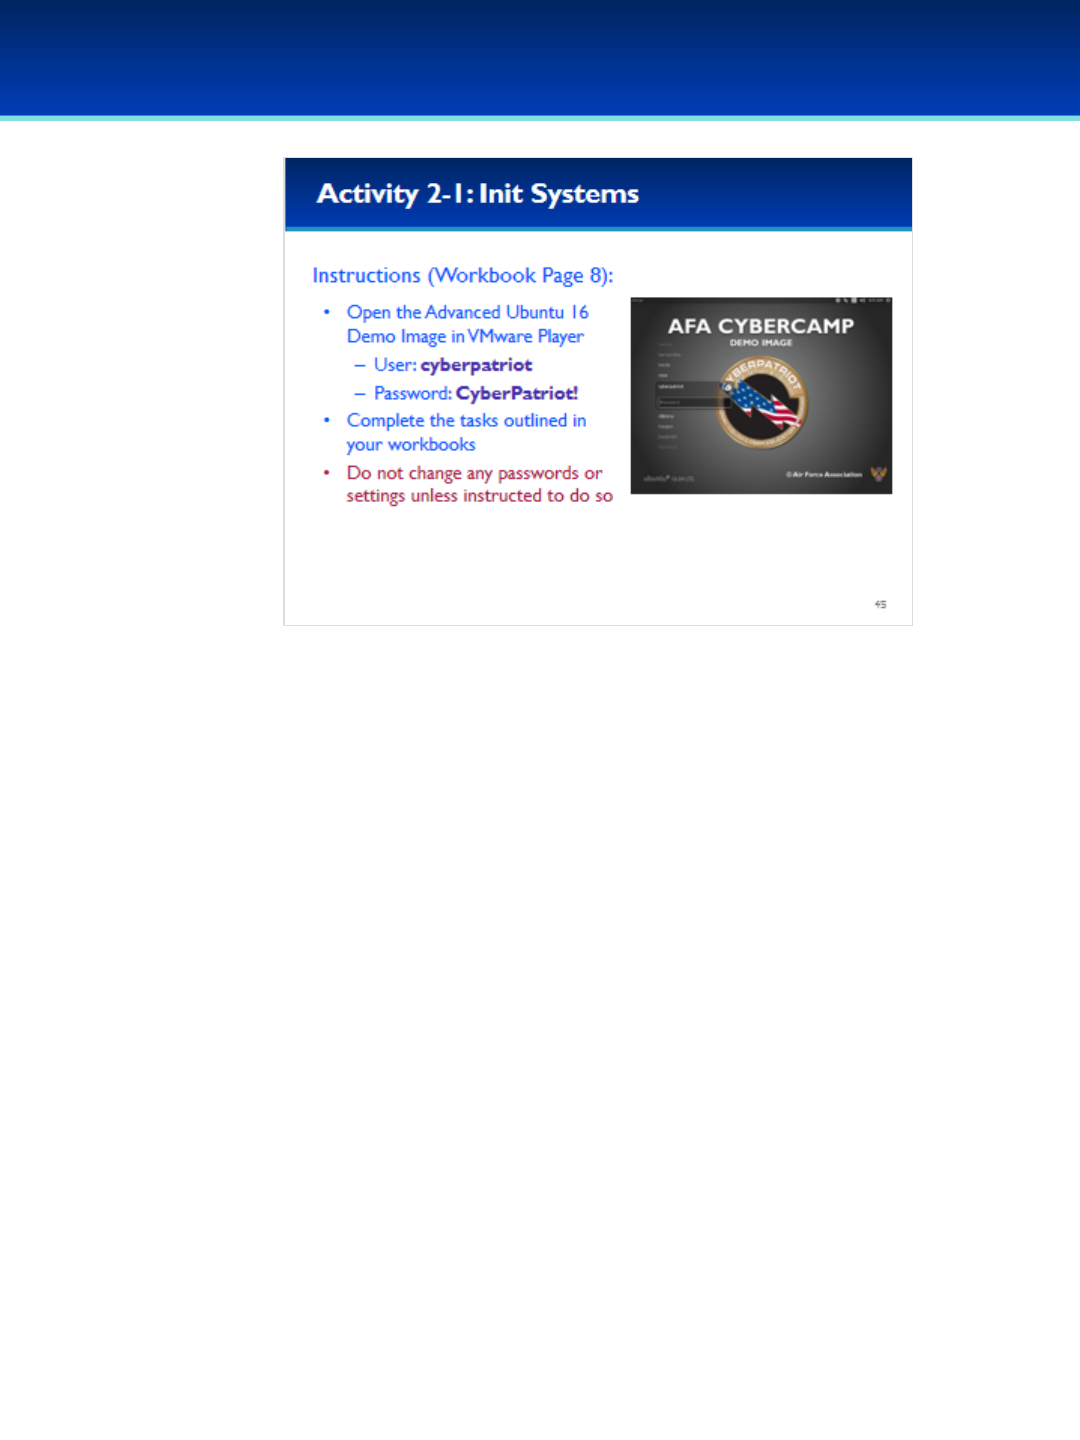
© 2018 Air Force Association
AFA Advanced CyberCamp Instructor’s Guide
Page 171
Slide 45
Ubuntu 16
Give students about 20 minutes to complete the tasks listed on Page 8 of their workbooks.
This lab will review the init systems SysV, Upstart, and Systemd.
Stress that the students should not change any passwords or settings unless they are
expressly directed to do so in the activity.
The students should not need to use any other user names or passwords to complete the
activities. Here are the passwords to some administrative accounts just in case.
Username: neumann
Password: vN_@rchit3cture
Username: hopper
Password: ENIAC.TurC0mp
Answers:
1. -
2. rc.local (or S13rc.local)
3. single (or S02single)
4. cups-browsed, whoopsie
5. -
6. reload
7. Linux 4.4.0-21-generic
8. en_US.UTF-8 (or LANG=en_US.UTF-8)
© 2018 Air Force Association
AFA Advanced CyberCamp Instructor’s Guide
Page 172
Slide 46
Ubuntu 16
Devote 30 minutes to slides 47-79. Allow the students 20 minutes
to complete the activity on slide 79.
Throughout this section, students should follow along in the
Advanced Ubuntu Demo Image.
In this section, we’ll cover advanced command line. After this
section you should be comfortable on the command line, and know
how to preform complex tasks such as finding files or redirecting
input and output streams.
© 2018 Air Force Association
AFA Advanced CyberCamp Instructor’s Guide
Page 173
Slide 47
Ubuntu 16
•When you type commands into the command prompt, you are using
your default shell, which is Bash.
•Bash has some features to help make your life easier, and one of
them is Tab-Completion.
•If there is only a single possible file or directory name based on what
you have already typed, pressing Tab will automatically complete the
name of the file or directory.
•If there are no possible paths, Tab will do nothing.
•If there are more than one possible path, a single tab will do nothing,
but pressing Tab twice will display the possibilities based on what
you’ve already typed.
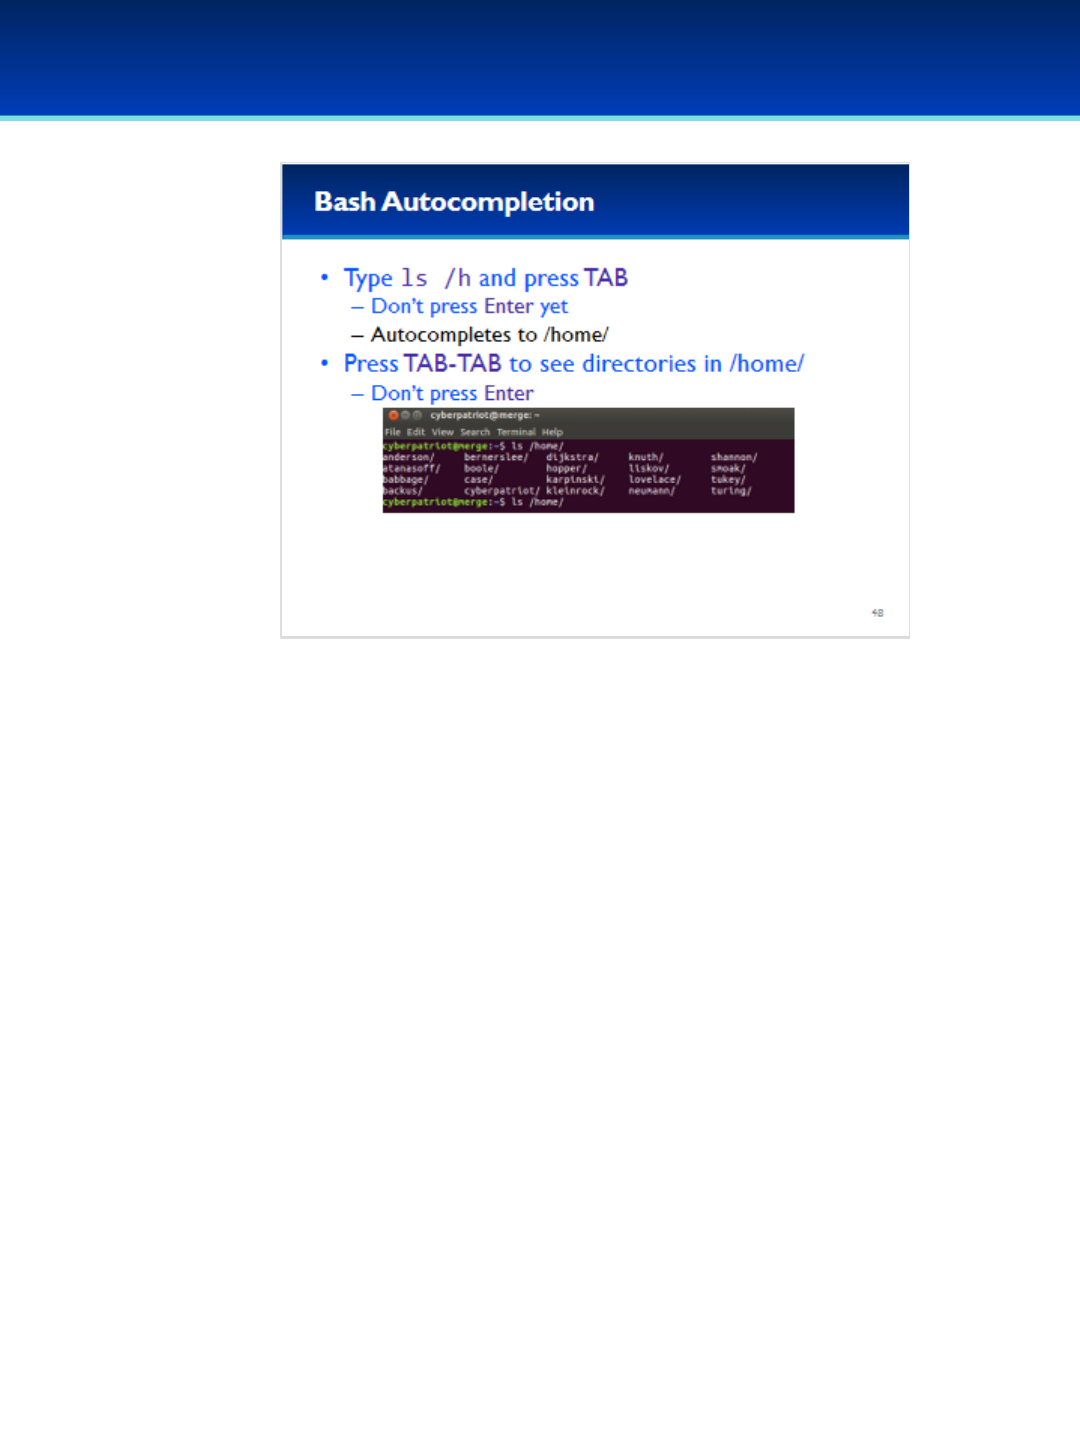
© 2018 Air Force Association
AFA Advanced CyberCamp Instructor’s Guide
Page 174
Slide 48
Ubuntu 16
•For example, type ls /h and press Tab.
•You can see that bash automatically types the rest of the directory
/home/
•If you then press Tab-Tab, bash will show you all of the directories
in /home/
- Tab-Tab means pressing Tab twice.
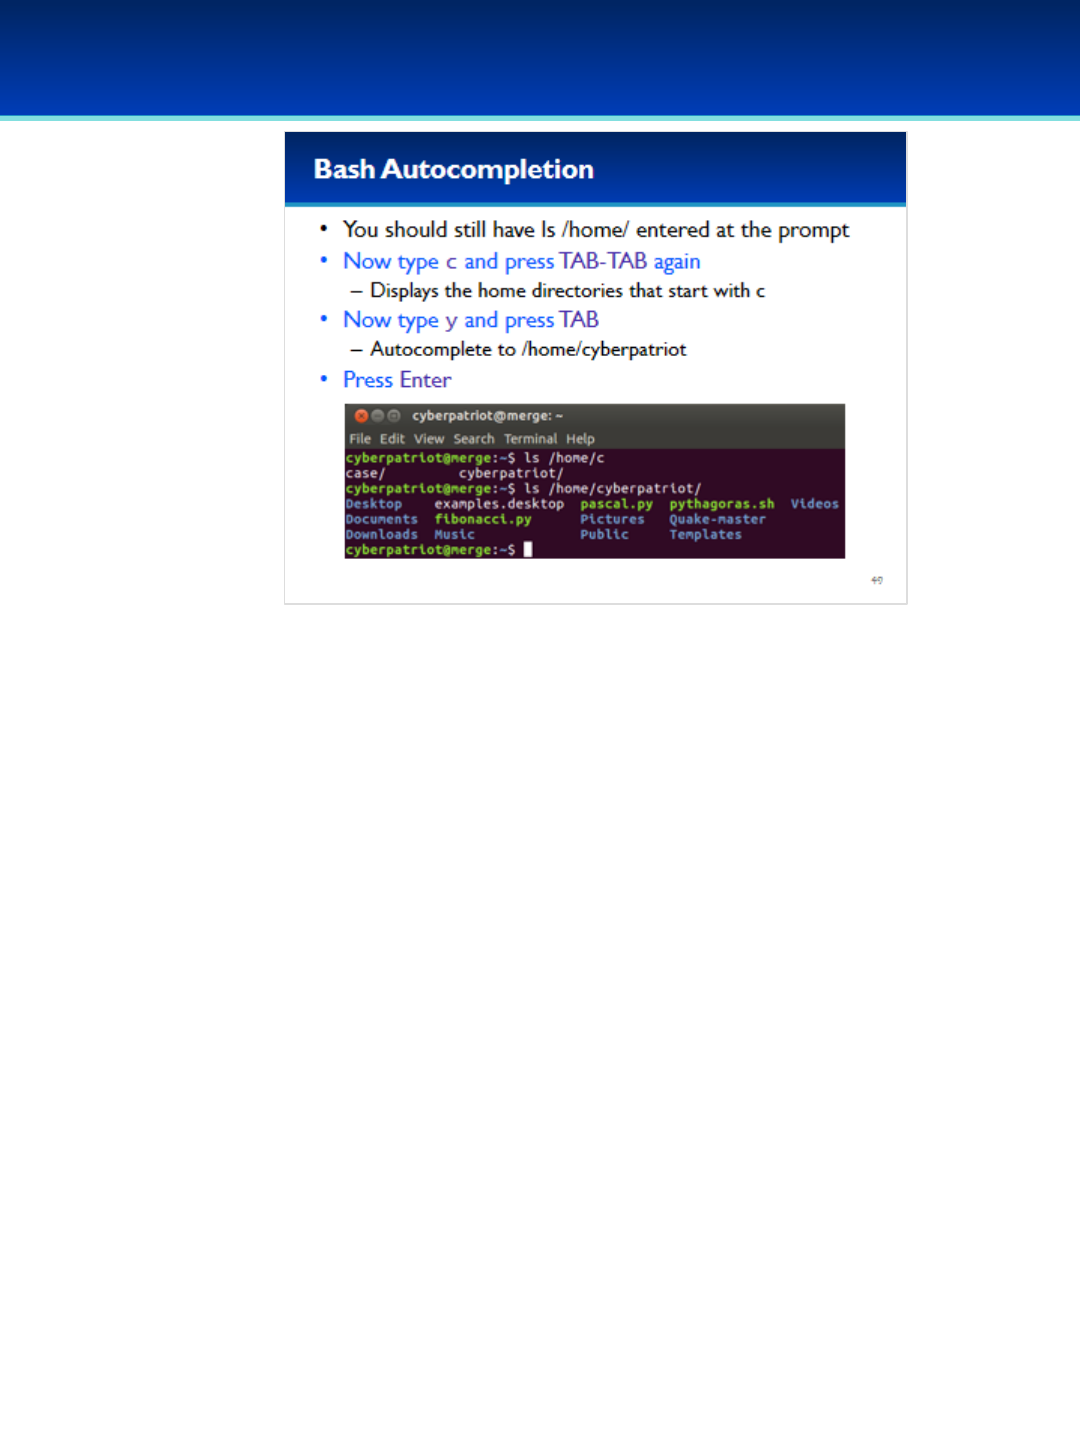
© 2018 Air Force Association
AFA Advanced CyberCamp Instructor’s Guide
Page 175
Slide 49
Ubuntu 16
•With ls /home/ still on the prompt, type c and then press Tab-Tab.
•Bash knows the only two directories that start with a c are case
and cyberpatriot, so it displays those options.
•Now type y and press TAB to have bash automatically complete
the rest of cyberpatriot.
•Now press Enter to list the contents of your home directory.

© 2018 Air Force Association
AFA Advanced CyberCamp Instructor’s Guide
Page 176
Slide 50
Ubuntu 16
•A terminal pager allows you to view text files on the console.
•It doesn’t allow you to edit the files by design, but it’s excellent for log
files or large configuration files.
•You can scroll up or down using keys on your keyboard.
•The old Linux terminal pager is called more. It displayed the contents of
a file on the screen.
•Using more you can scroll up or down using s, d, f, or b.

© 2018 Air Force Association
AFA Advanced CyberCamp Instructor’s Guide
Page 177
Slide 51
Ubuntu 16
•More can be a real pain to use sometimes, but there is a much
better system pager called less.
•The name of less is a play on words, but you can remember it
by remembering “less is more.”
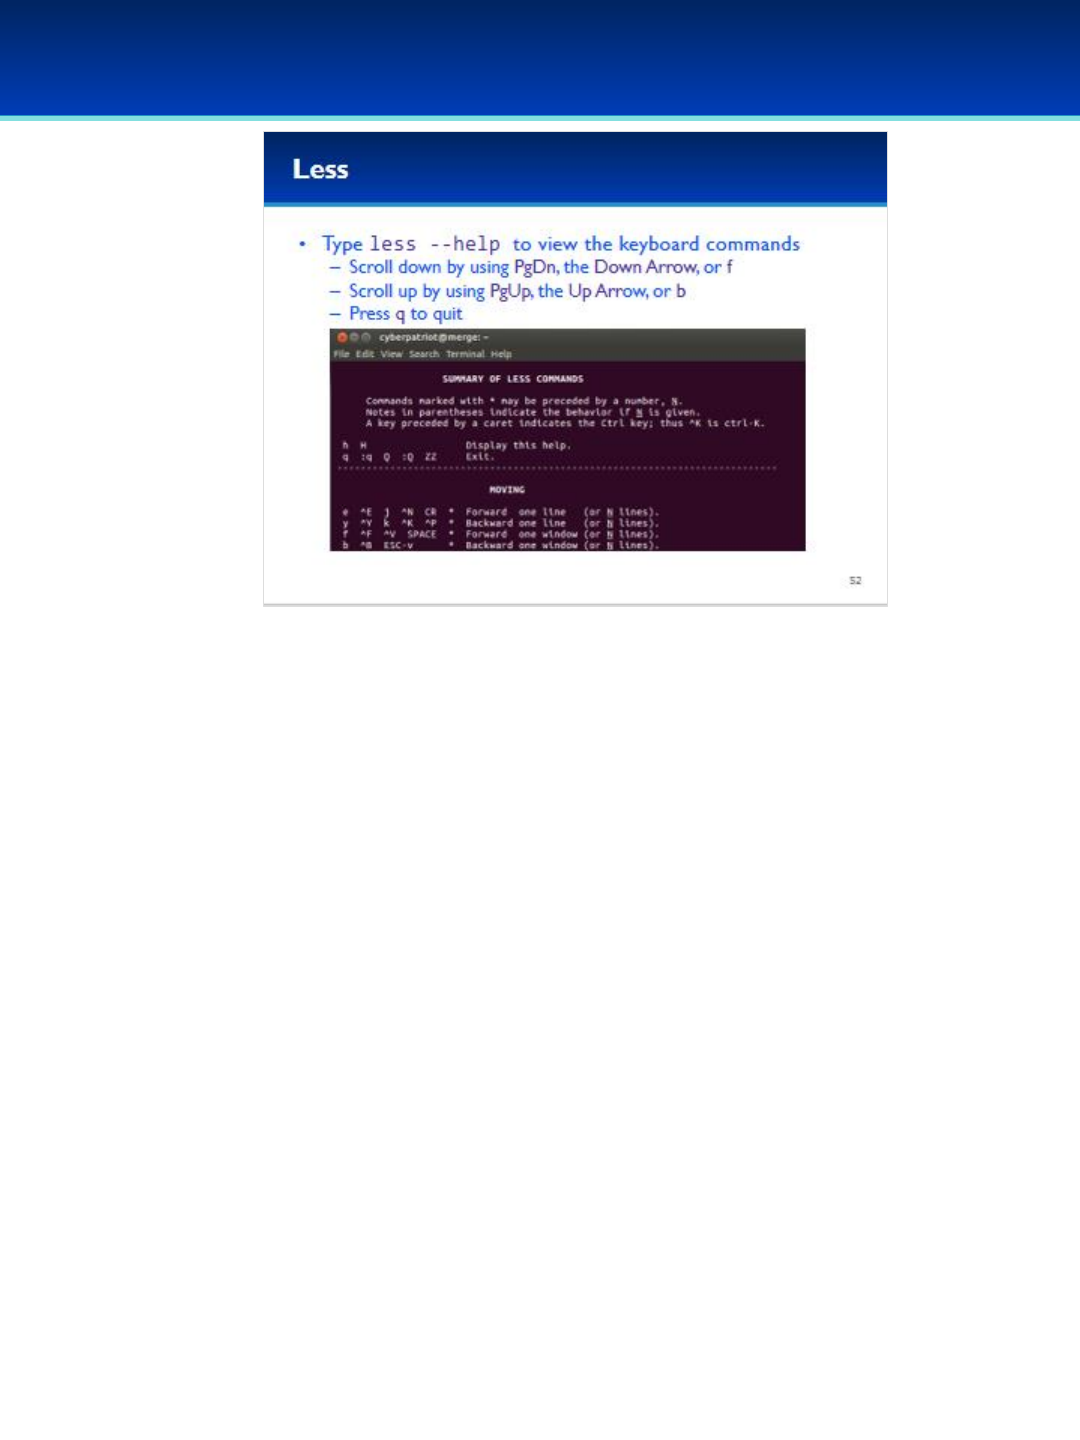
© 2018 Air Force Association
AFA Advanced CyberCamp Instructor’s Guide
Page 178
Slide 52
Ubuntu 16
Have the students run the commands on the screen.
•Less is used by the man command for displaying manual pages.
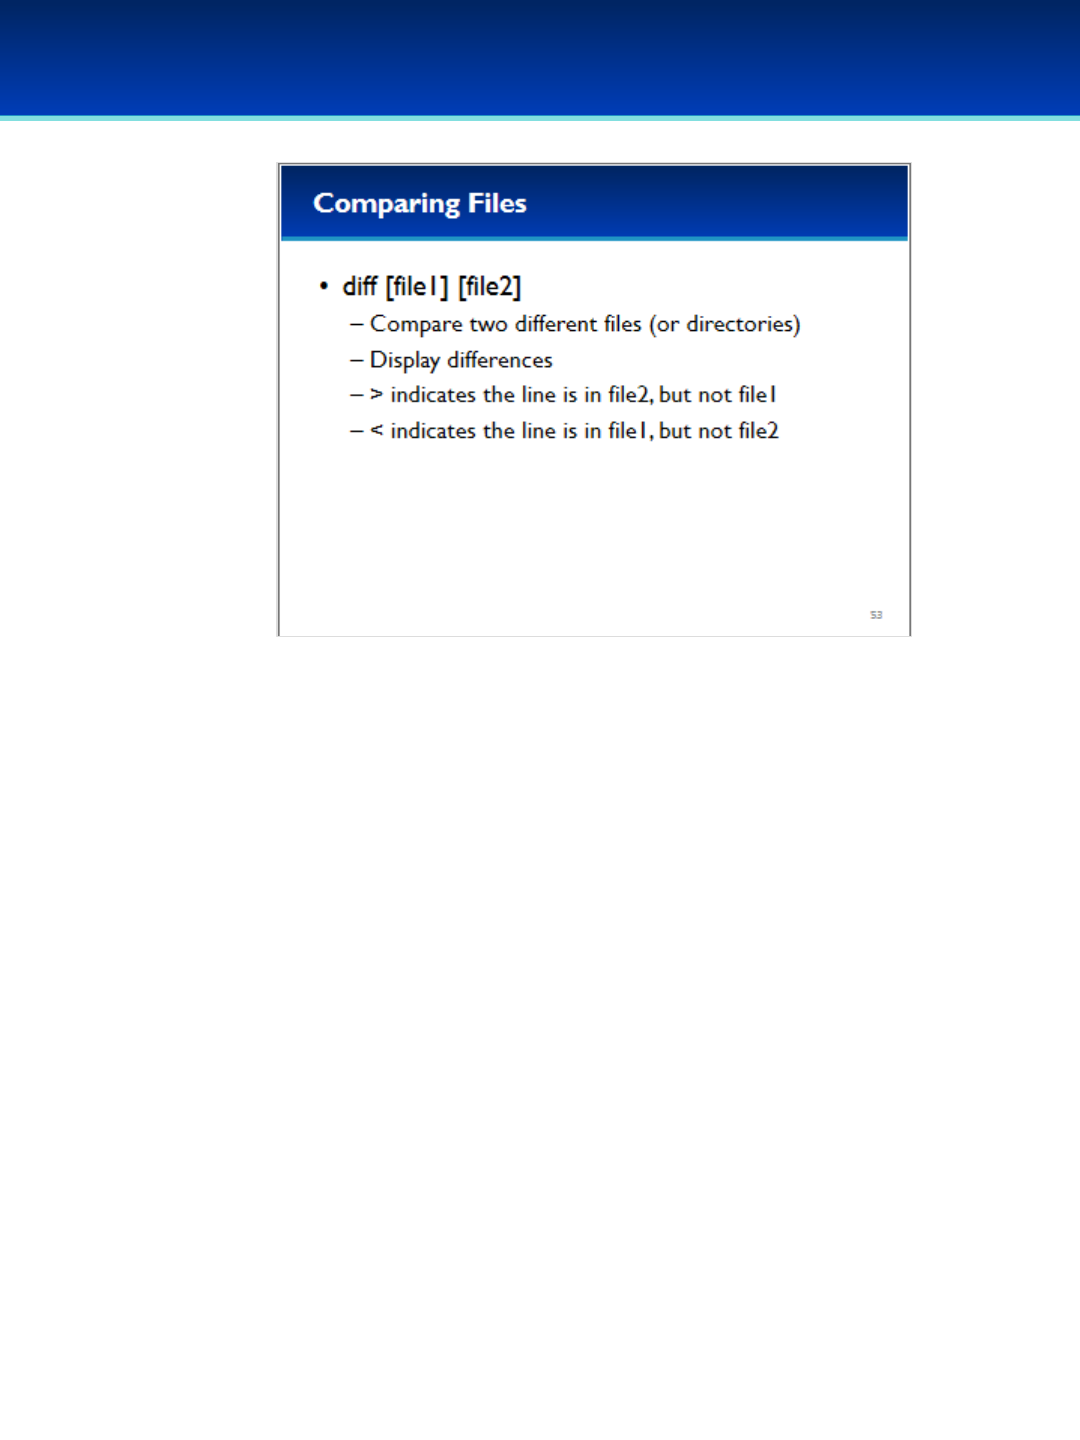
© 2018 Air Force Association
AFA Advanced CyberCamp Instructor’s Guide
Page 179
Slide 53
Ubuntu 16
•The diff command can compare two different files or directories.
-It’s mostly useful for comparing files that are similar but may differ
slightly.
-It’s also sometimes helpful to know if two files are exactly the same.
•It displays the differences between the two files by using the greater
than (<) or less than (>) sign.
•Greater-than indicates the line is in file2, but not file1.
•Less-than indicates the line is in file1, but not file2.
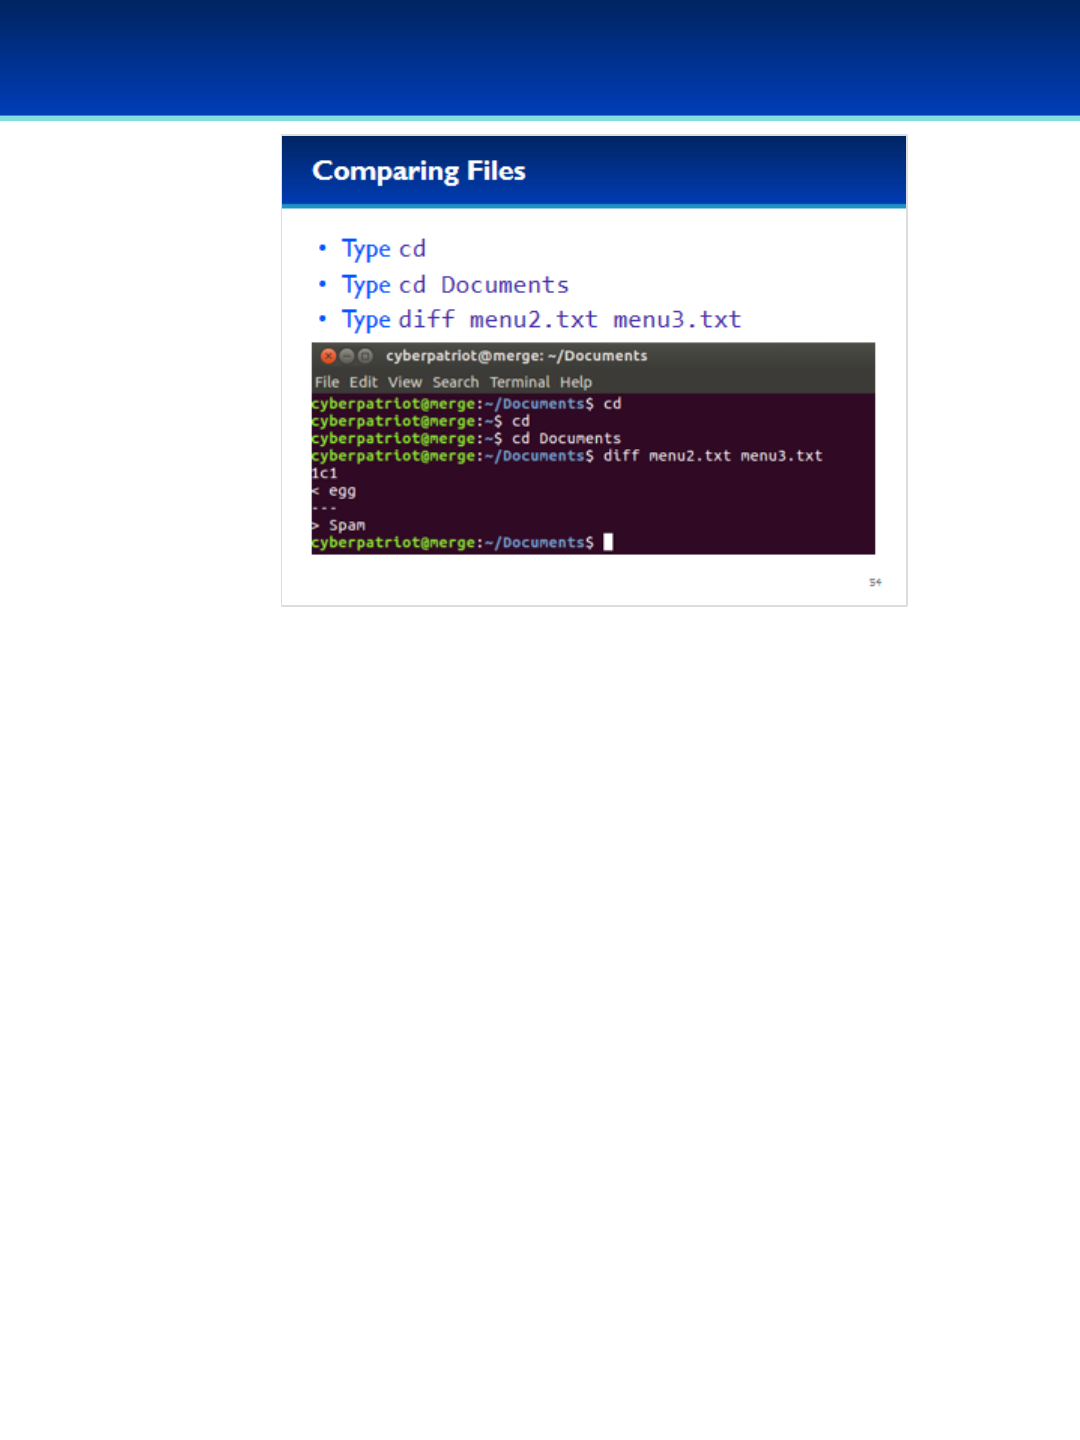
© 2018 Air Force Association
AFA Advanced CyberCamp Instructor’s Guide
Page 180
Slide 54
Ubuntu 16
Have the students run the commands on the screen.
•As you can see, menu2.txt and menu3.txt are the same,
except menu3.txt contains spam instead of egg.
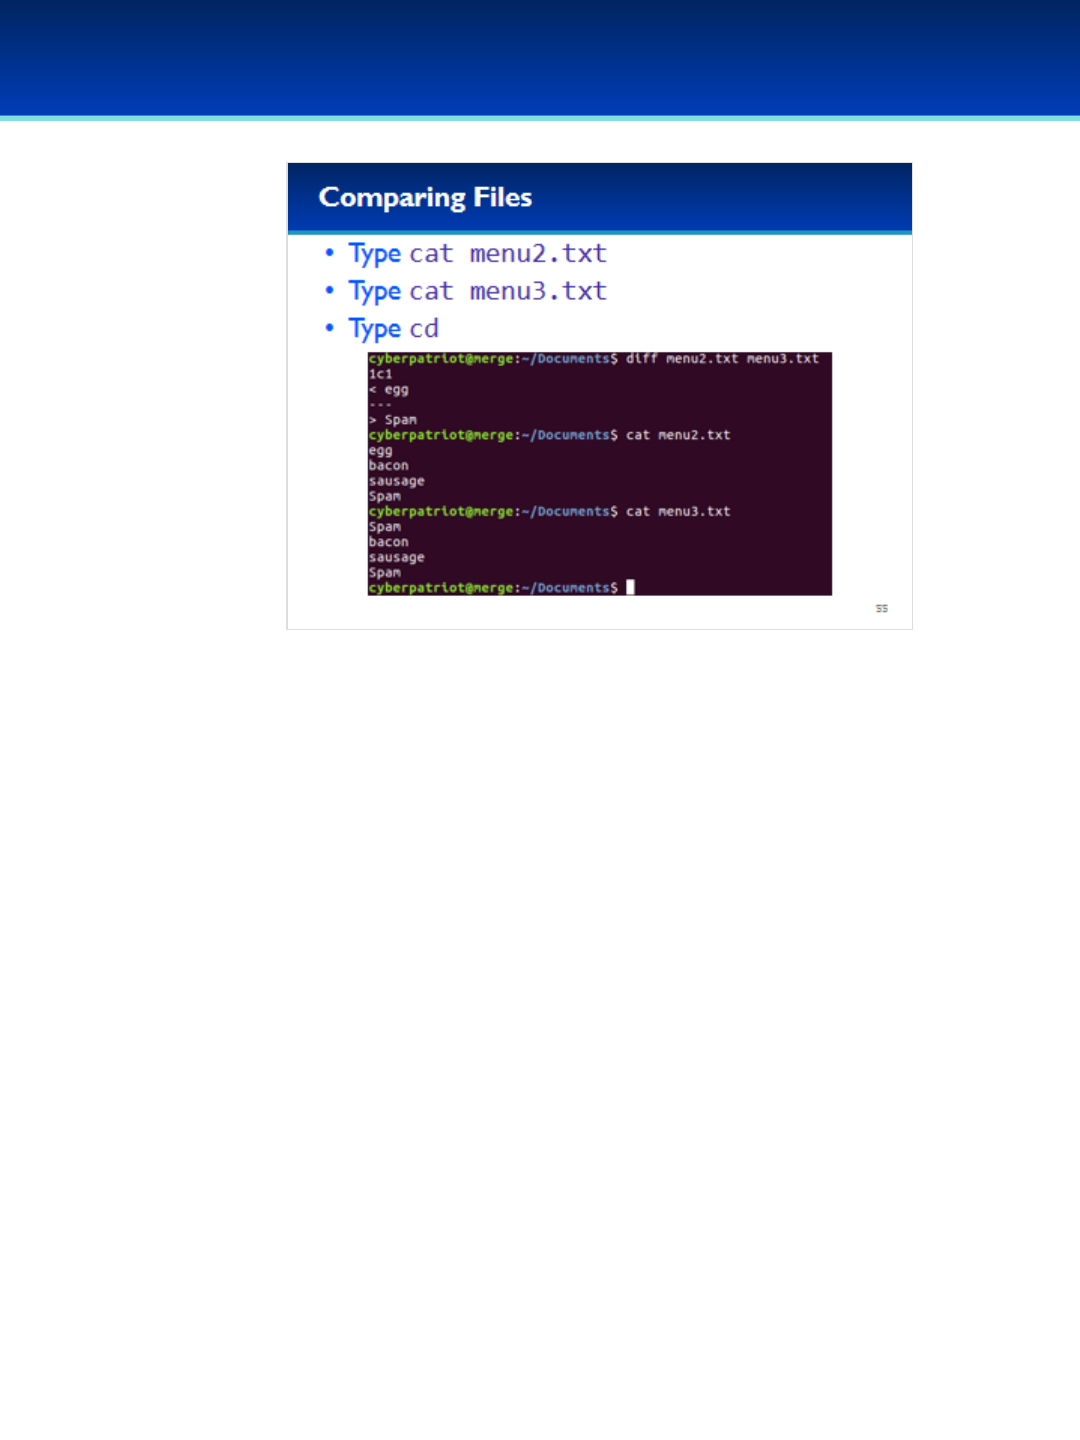
© 2018 Air Force Association
AFA Advanced CyberCamp Instructor’s Guide
Page 181
Slide 55
Ubuntu 16
Have the students run the commands on the screen.
•Cat-ing out the files confirm that the two files are in fact identical
except for the first line.
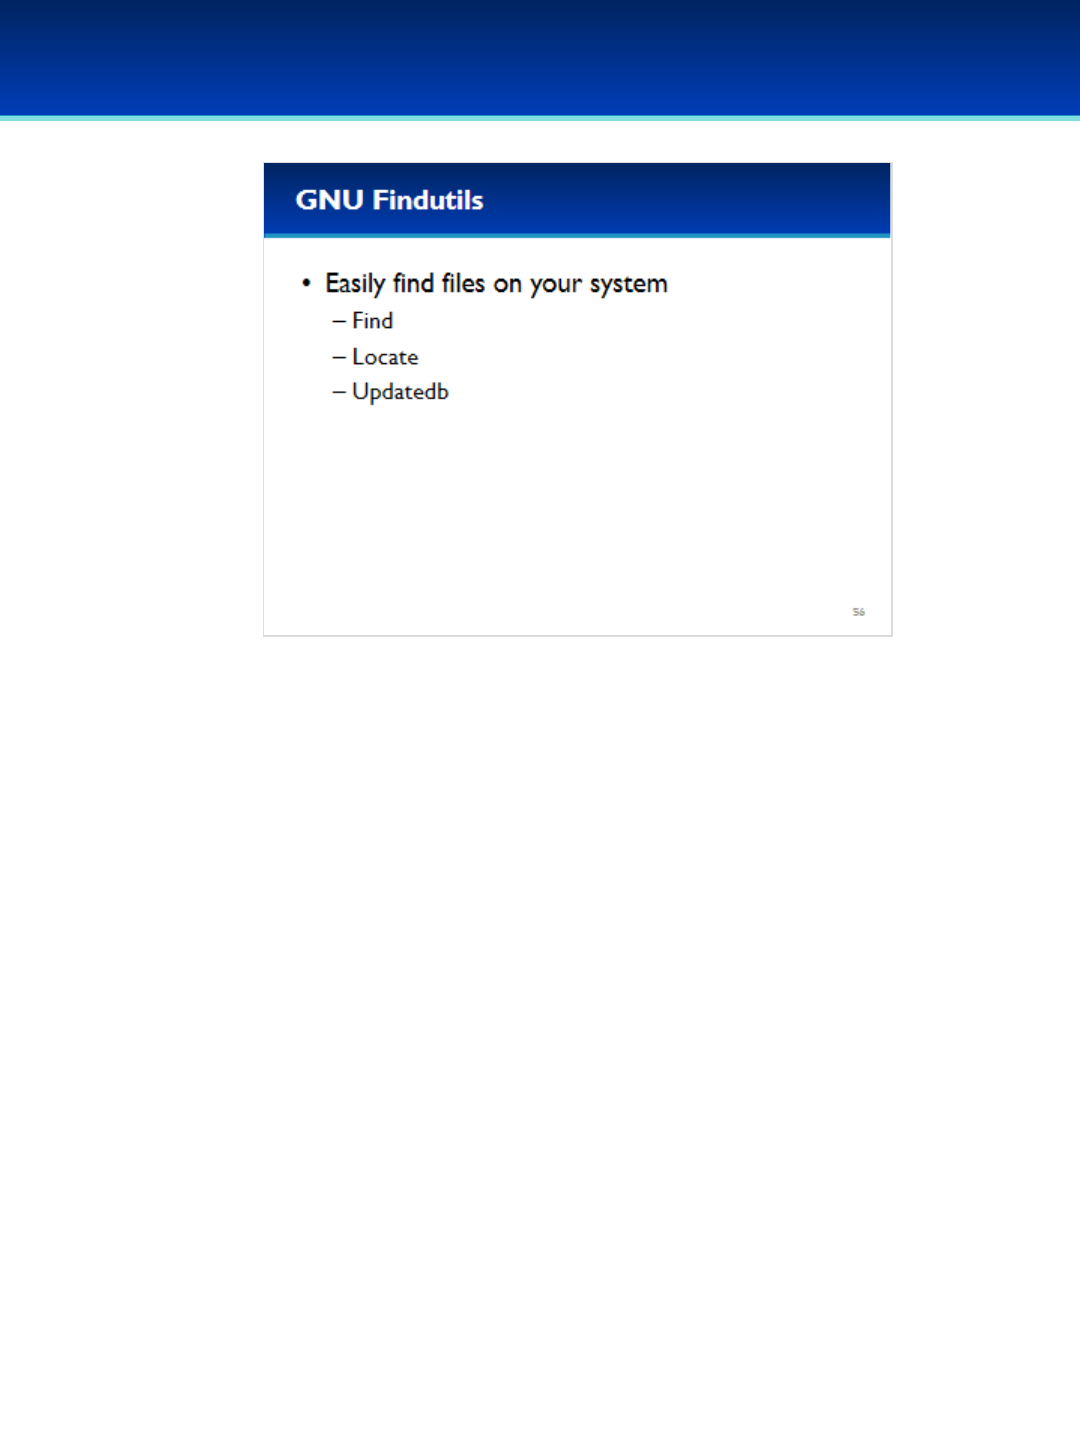
© 2018 Air Force Association
AFA Advanced CyberCamp Instructor’s Guide
Page 182
Slide 56
Ubuntu 16
•(GNU is officially pronounced like “grew” except with an “n”
instead of an “r”, however many people pronounce it like
“new”).
•The GNU Findutils is a set of programs to help make it easy to
find files on your system, but it lets you do a lot more than
that.
- The three main programs we will cover are find, locate,
and updateb.

© 2018 Air Force Association
AFA Advanced CyberCamp Instructor’s Guide
Page 183
Slide 57
Ubuntu 16
•Find is one of the most powerful commands in Linux. The syntax for
it can seem rather daunting at first, but most practical operations
and examples are easy to understand.
•Expressions may be either tests or actions, both return a truth value;
but actions may have additional side effects.
•Find, finds every file in a directory and evaluates a list of expressions
from left to right.
-These expressions are evaluated like a logical “and” of the
returned values, but the expressions stop being evaluated when the
truth value is known.
•This may be confusing at first, so let’s look at some real life
examples.
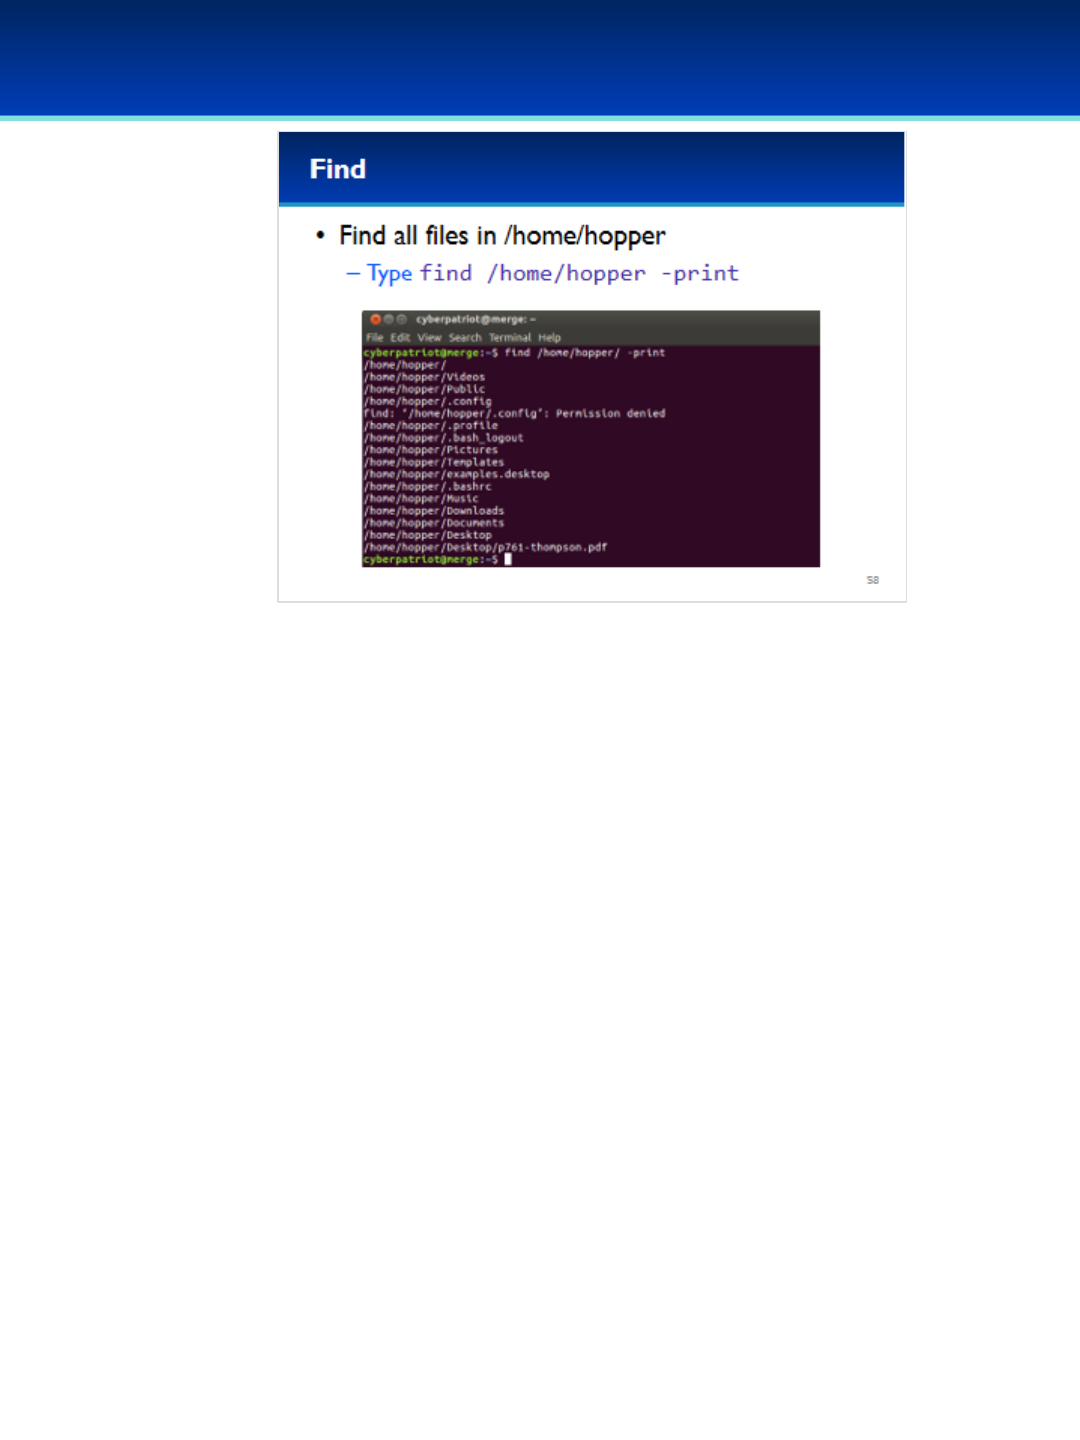
© 2018 Air Force Association
AFA Advanced CyberCamp Instructor’s Guide
Page 184
Slide 58
Ubuntu 16
Have the students run the commands on the screen.
•This command simply prints out all the files inside the
specified directory.
•Here, -print is an Action.
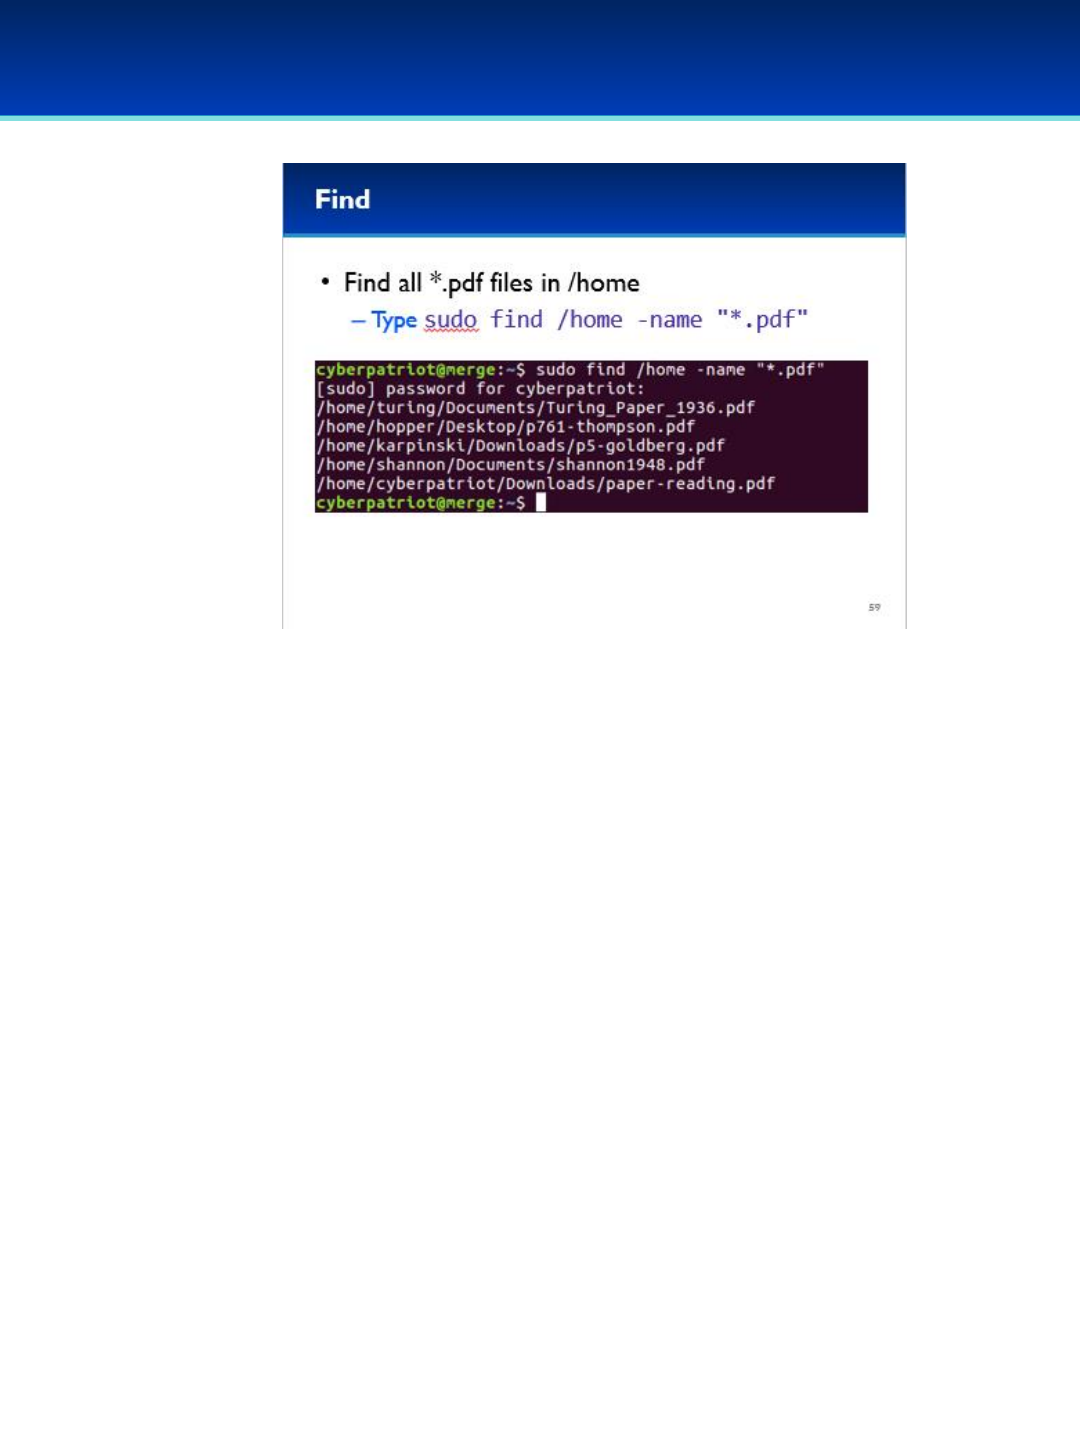
© 2018 Air Force Association
AFA Advanced CyberCamp Instructor’s Guide
Page 185
Slide 59
Ubuntu 16
•Say you want to find all the files ending in .pdf.
Have the students run the commands on the screen.
•The –name expression returns true if the filename matches.
•If –name returns false, the expression evaluation is terminated
and nothing happens.
•If –name returns true, it continues on to the next expression.
•Since we didn’t specify an Action, find automatically applies the
default Action, which is –print.
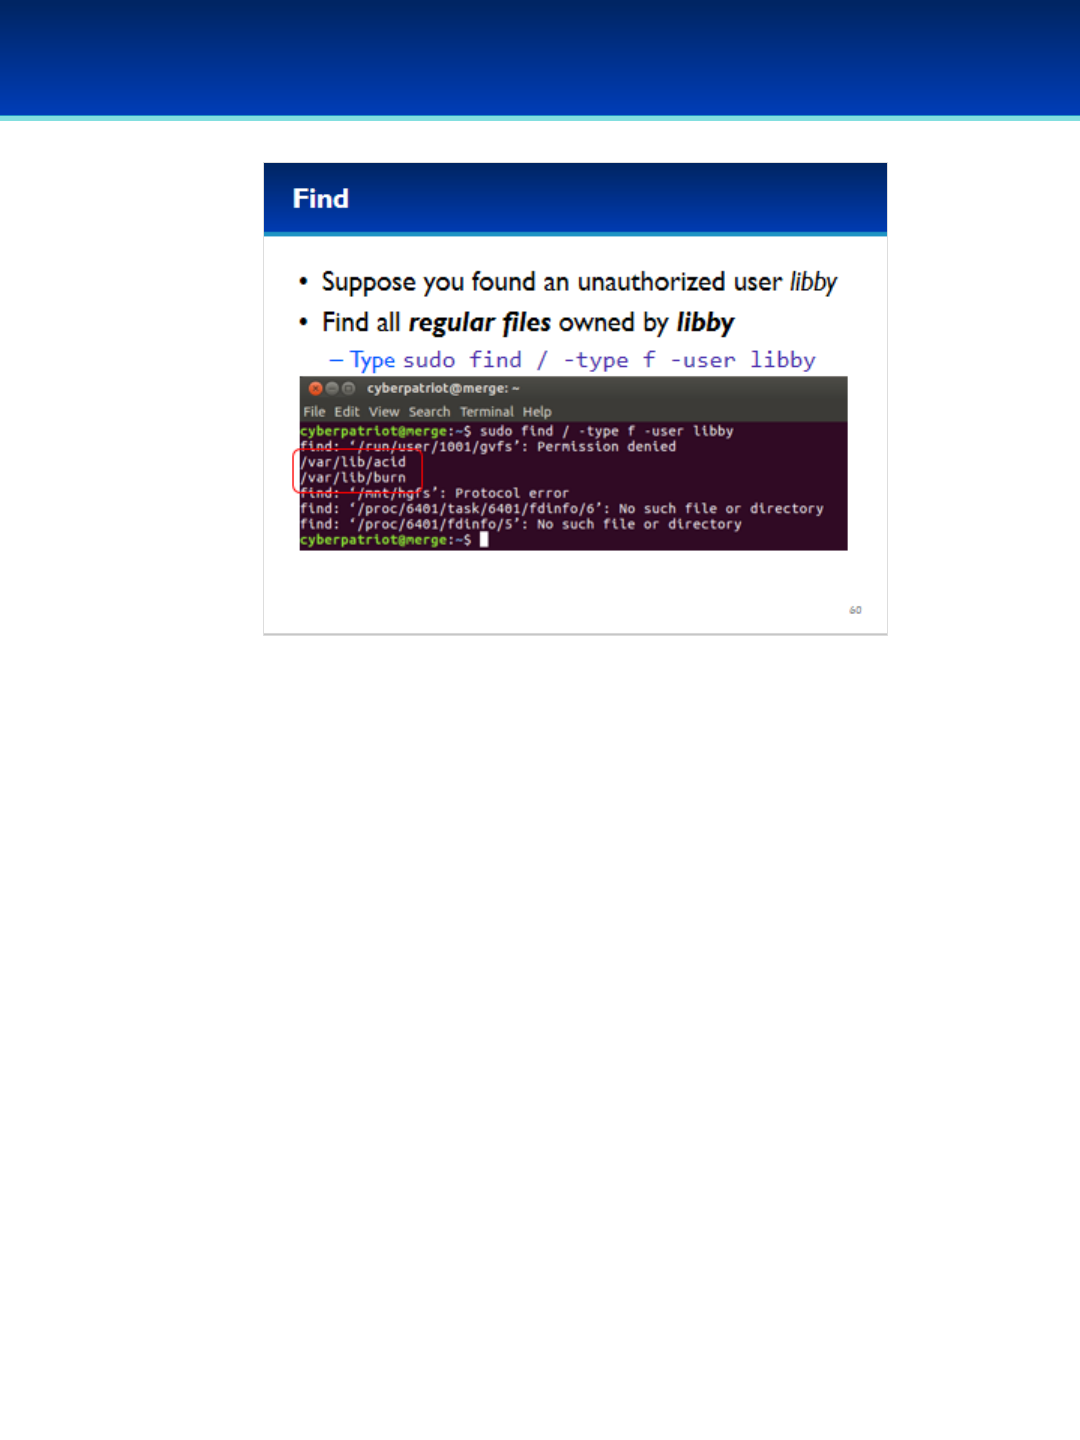
© 2018 Air Force Association
AFA Advanced CyberCamp Instructor’s Guide
Page 186
Slide 60
Ubuntu 16
•Suppose you found an unauthorized user on your computer
named Libby, you can use the find command to find all files on the
system owned by Libby.
•The –type f expression returns true for regular files, and false for
everything else.
•The –user expression returns true if the file is owned by the user,
and false otherwise.
Have the students run the commands on the screen.
•Here you can see Libby owns two files on the filesystem.
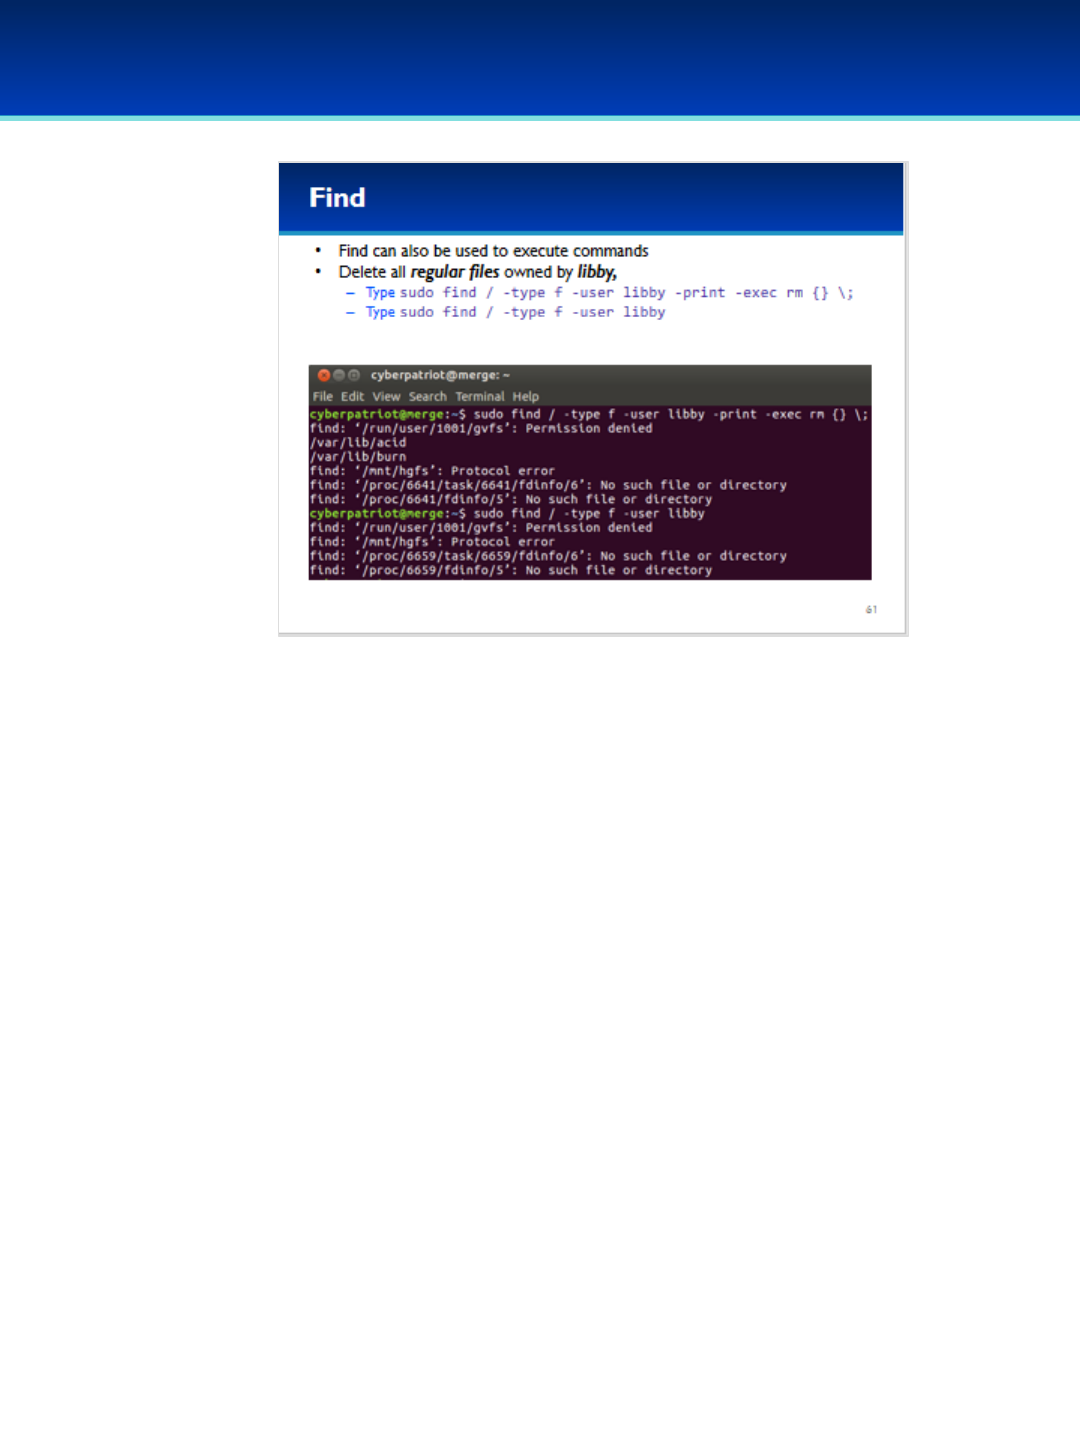
© 2018 Air Force Association
AFA Advanced CyberCamp Instructor’s Guide
Page 187
Slide 61
Ubuntu 16
•Find can also be used to execute commands, and will replace open-
close-curly-brackets ({}) with the name of the file.
•When using find to execute commands, you have to end the command
with \; (so that find knows when the command ends).
Have the students run the commands on the screen.
•The –type f expression returns true for regular files, the –user Libby
expression returns true for files owned by Libby, -print is an Action that
prints out the filename and returns true, and –exec executes the given
command substituting the name of the file with {}.
•The rm command removes all matching files.
•Searching again for files owned by Libby, you can see that they have
indeed been deleted.

© 2018 Air Force Association
AFA Advanced CyberCamp Instructor’s Guide
Page 188
Slide 62
Ubuntu 16
•Find is very useful, but can take a while to run, which isn’t really
necessary when only searching for files by their names.
•For this purpose, findutils provides the locate and updatedb
commands.
•Locate looks in a database of files on the system to see if it finds a
match.
•Updatedb updates the database that is used by locate.
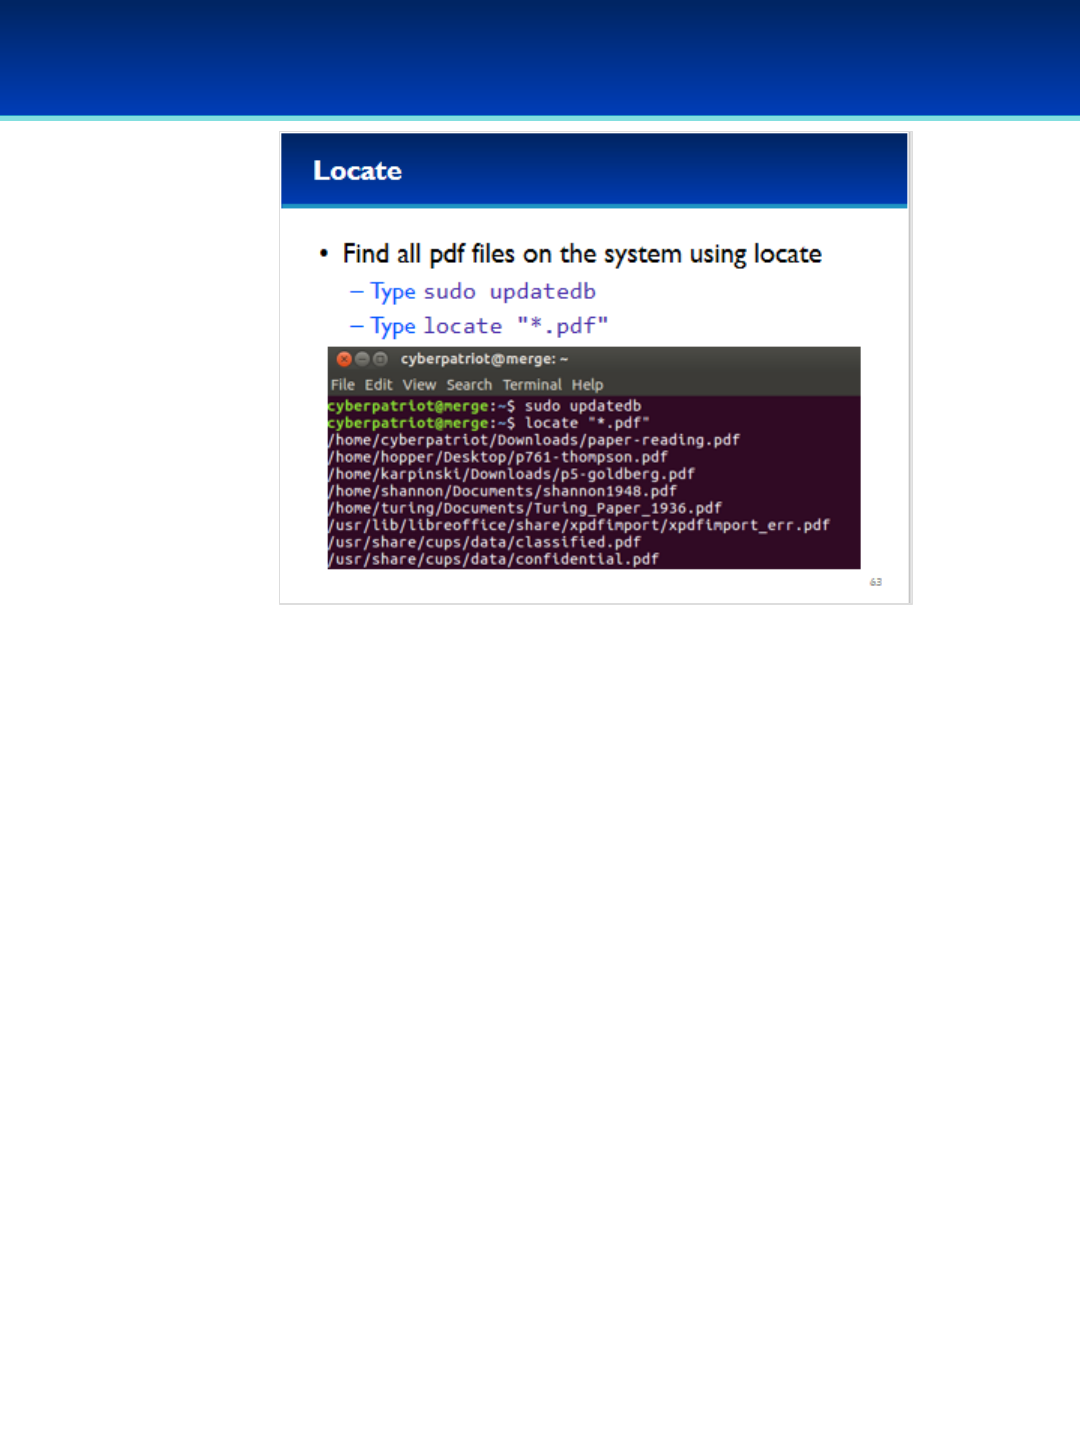
© 2018 Air Force Association
AFA Advanced CyberCamp Instructor’s Guide
Page 189
Slide 63
Ubuntu 16
•Use locate to find all the files on the system ending with .pdf.
Have the students run the commands on the screen.
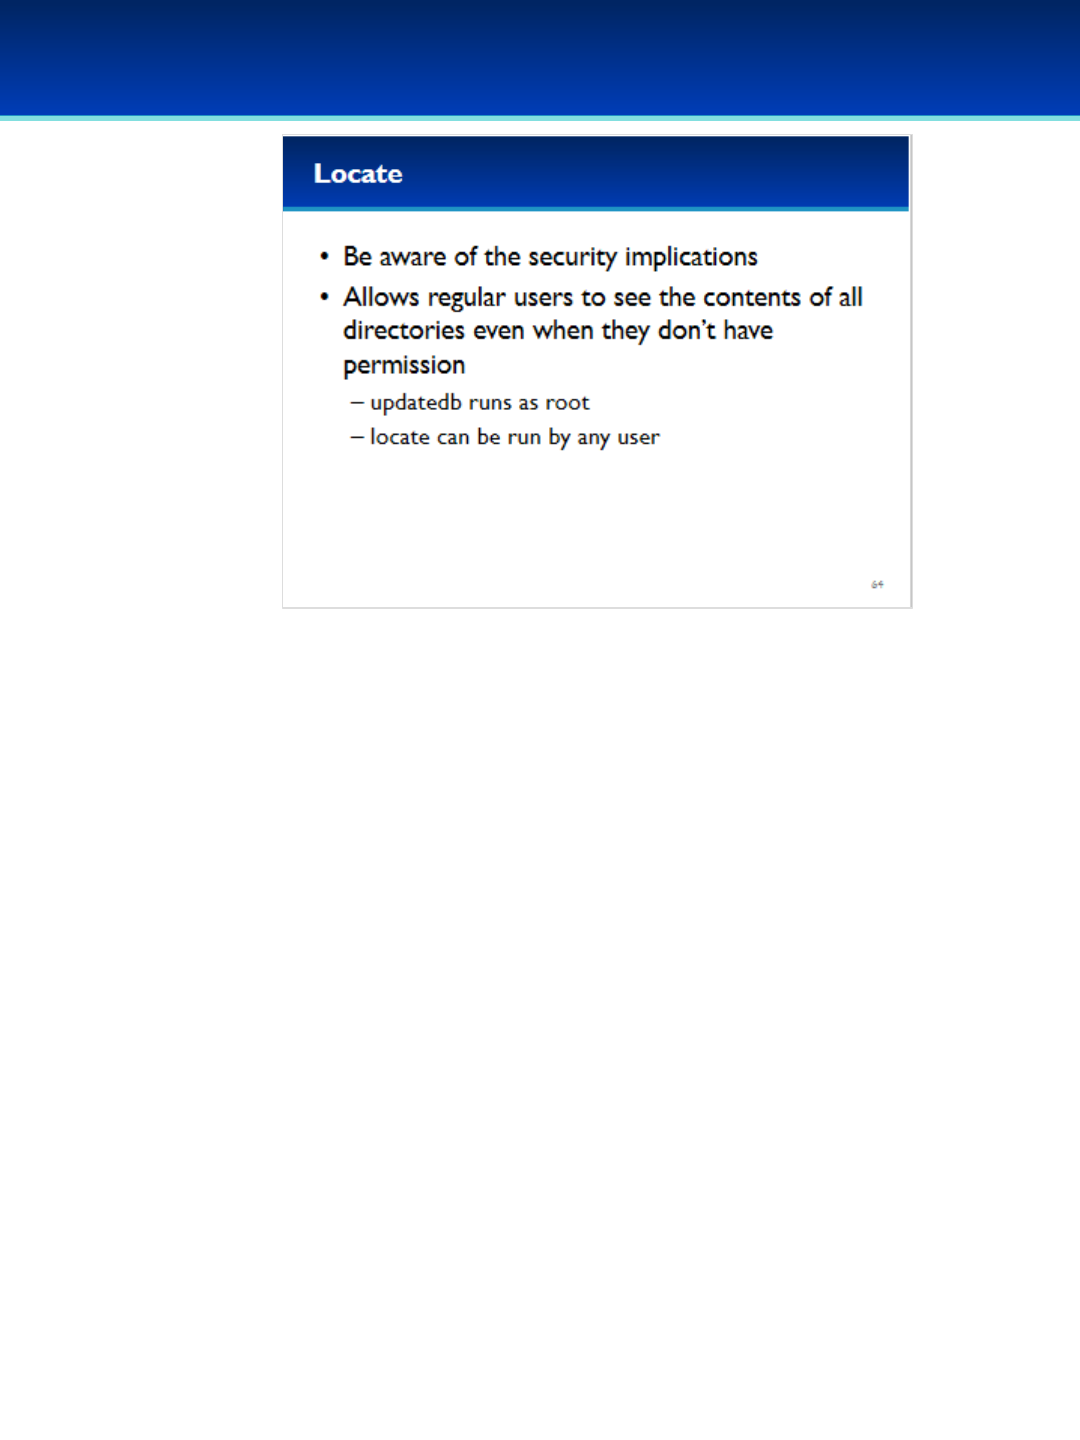
© 2018 Air Force Association
AFA Advanced CyberCamp Instructor’s Guide
Page 190
Slide 64
Ubuntu 16
•Locate and updatedb have security implications that you should be
aware of.
•Updatedb is usually run automatically as root, so that it can index all
of the files on the system.
•However, because updatedb runs as root, it is possible that users can
use locate to learn of the existence of files that may not be
otherwise visible to them.
-This isn’t a critical security vulnerability on its own, but it is
something you should be aware of.
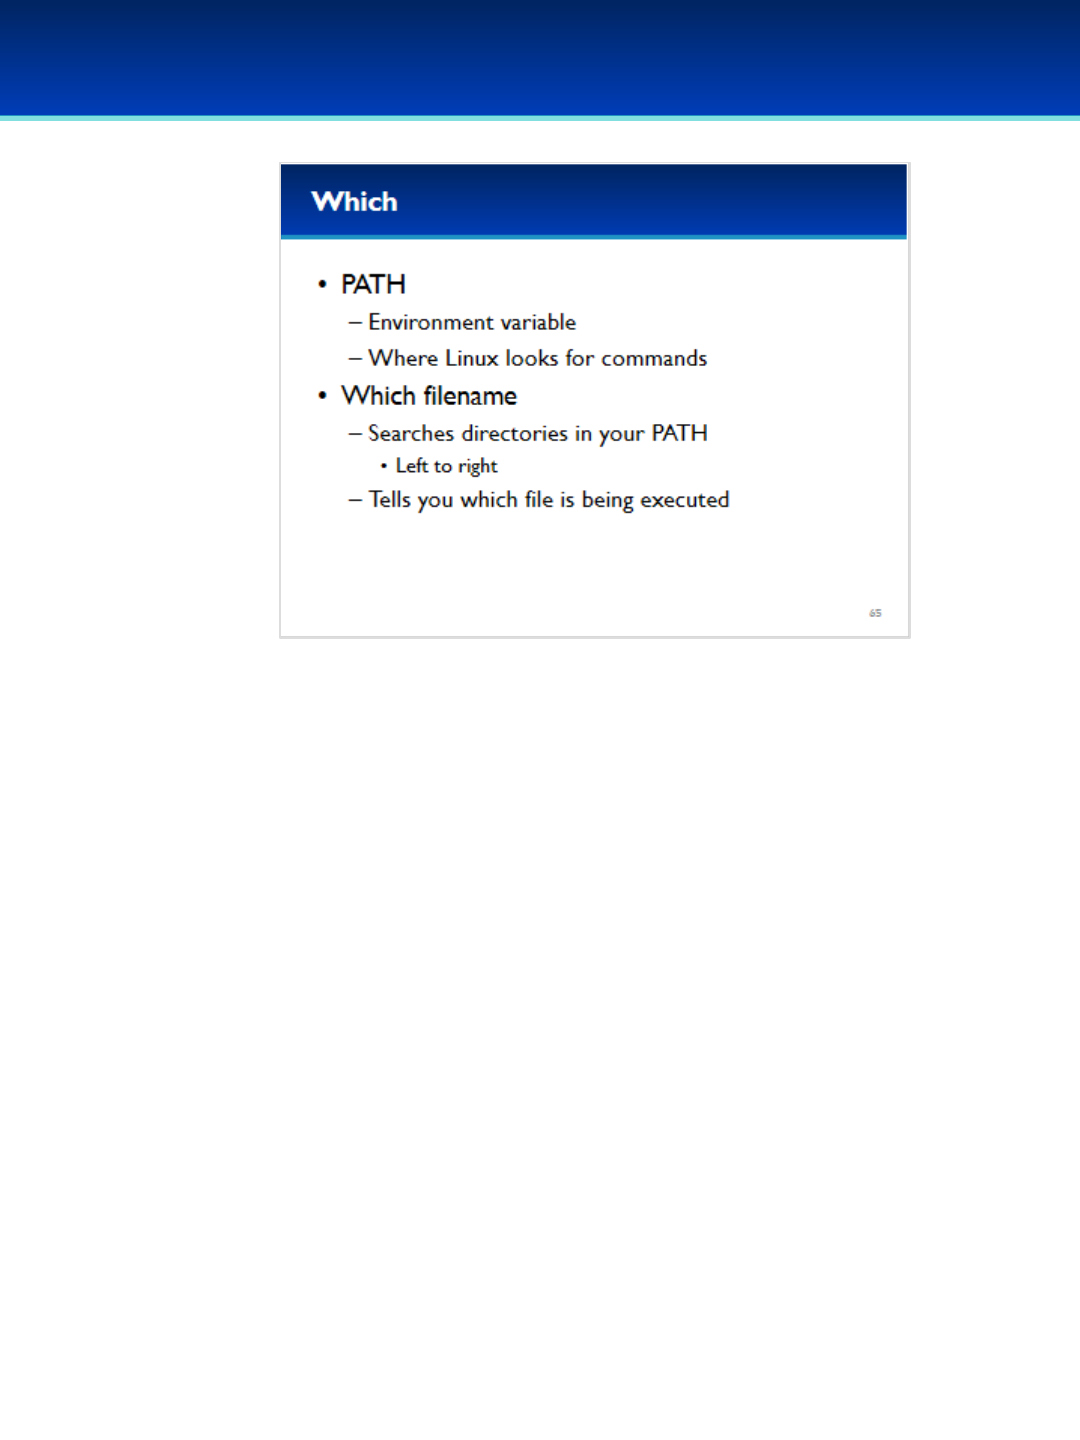
© 2018 Air Force Association
AFA Advanced CyberCamp Instructor’s Guide
Page 191
Slide 65
Ubuntu 16
•When you run a command in Linux, that command exists
somewhere on your filesystem, but you don’t have to know where
because Bash automatically searches directories in your PATH.
•The which command searches the directories in your PATH, from
left to right, looking for the filename you specified and prints out
the first match.
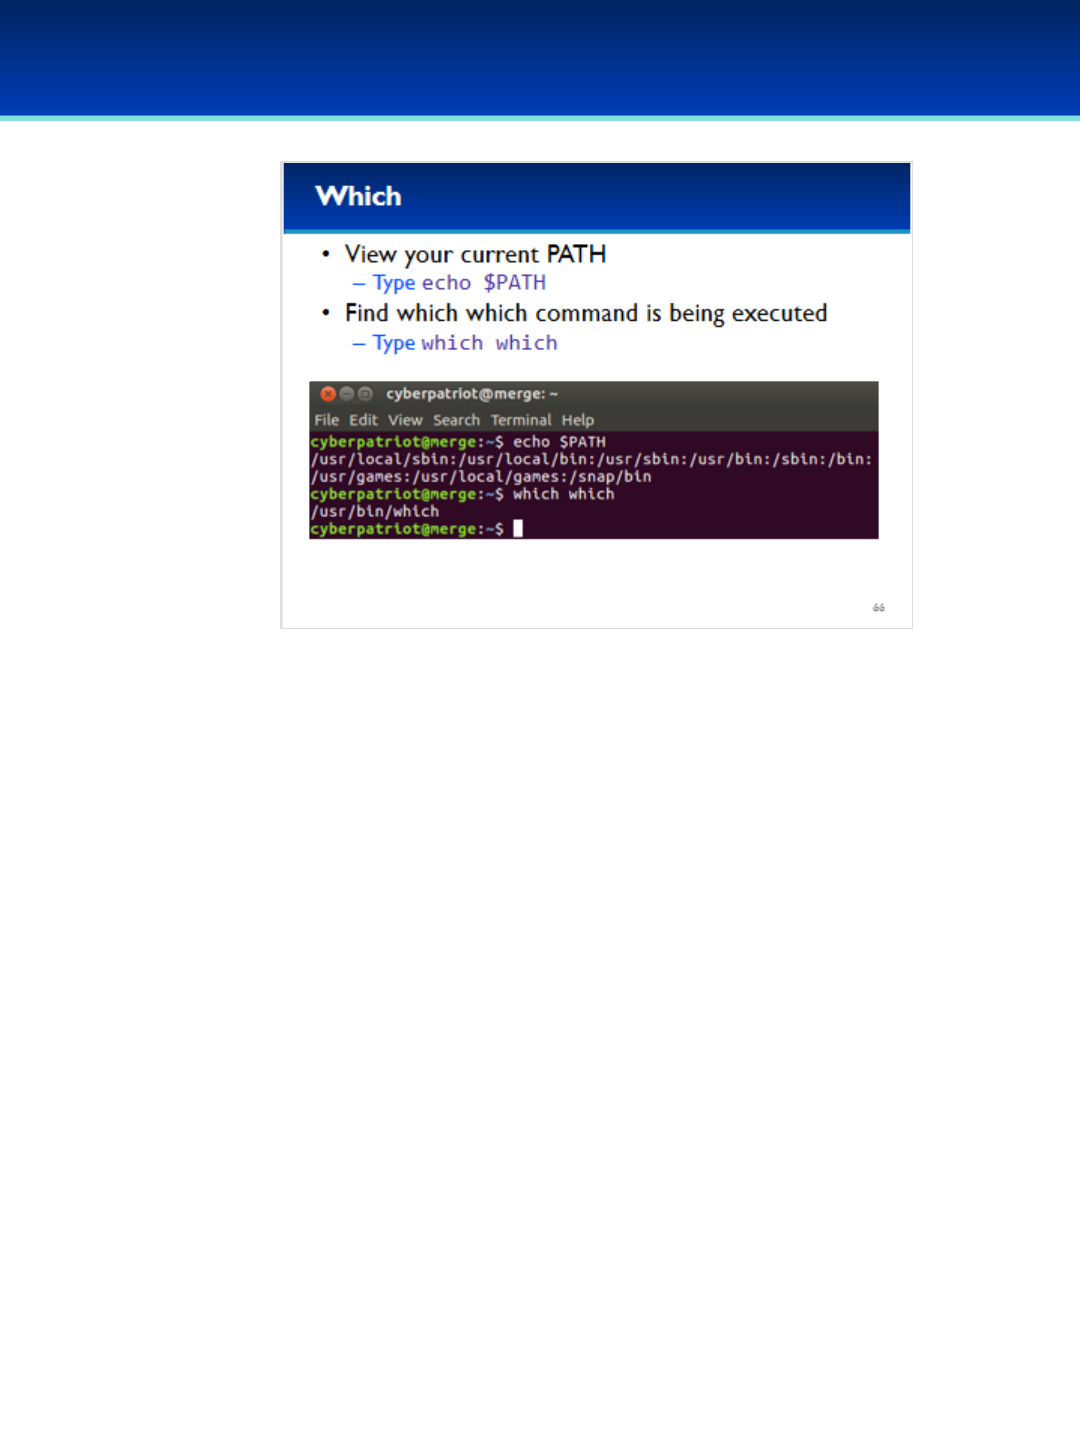
© 2018 Air Force Association
AFA Advanced CyberCamp Instructor’s Guide
Page 192
Slide 66
Ubuntu 16
•PATH is an environment variable.
•To view your current path type echo $PATH.
•These are the directories that Bash searches when looking for a command
to execute.
•To find the which command is executed when you type which, type which
which.
•You can see the which command that is executed is inside the /usr/bin/
directory.
•It’s important to know what your path is, and which commands are
executing. If your path is set to an insecure value, an adversary could trick
you into executing commands!
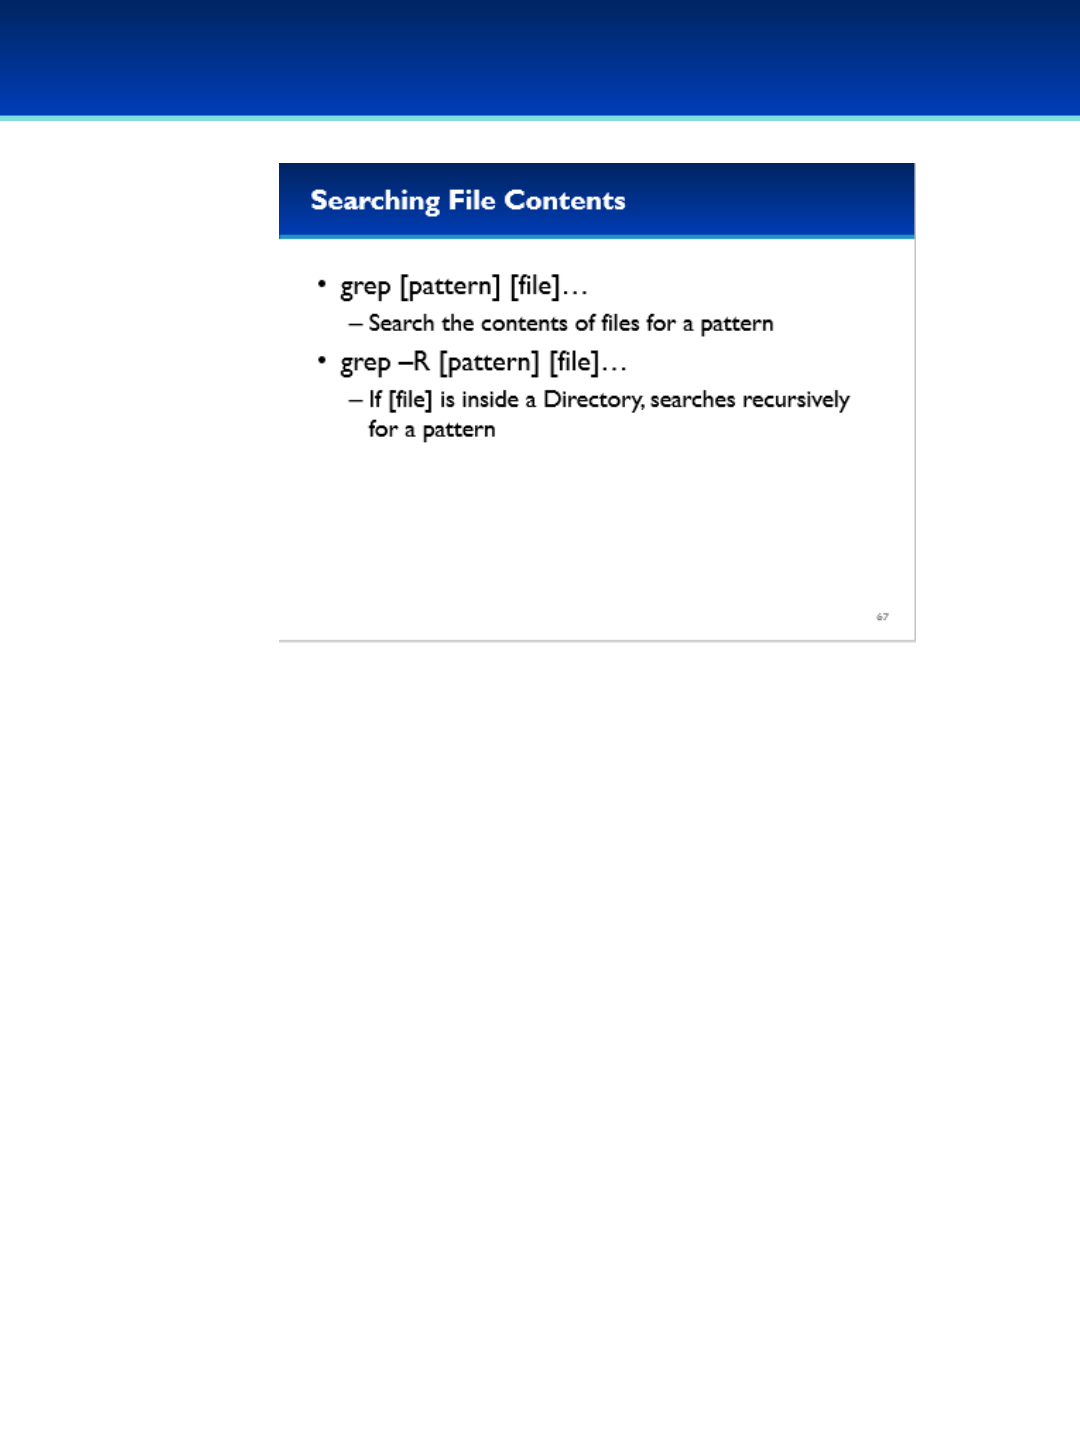
© 2018 Air Force Association
AFA Advanced CyberCamp Instructor’s Guide
Page 193
Slide 67
Ubuntu 16
•The grep command is used to search for a pattern
inside files.
•Grep can search recursively inside a directory by using
the –R option.
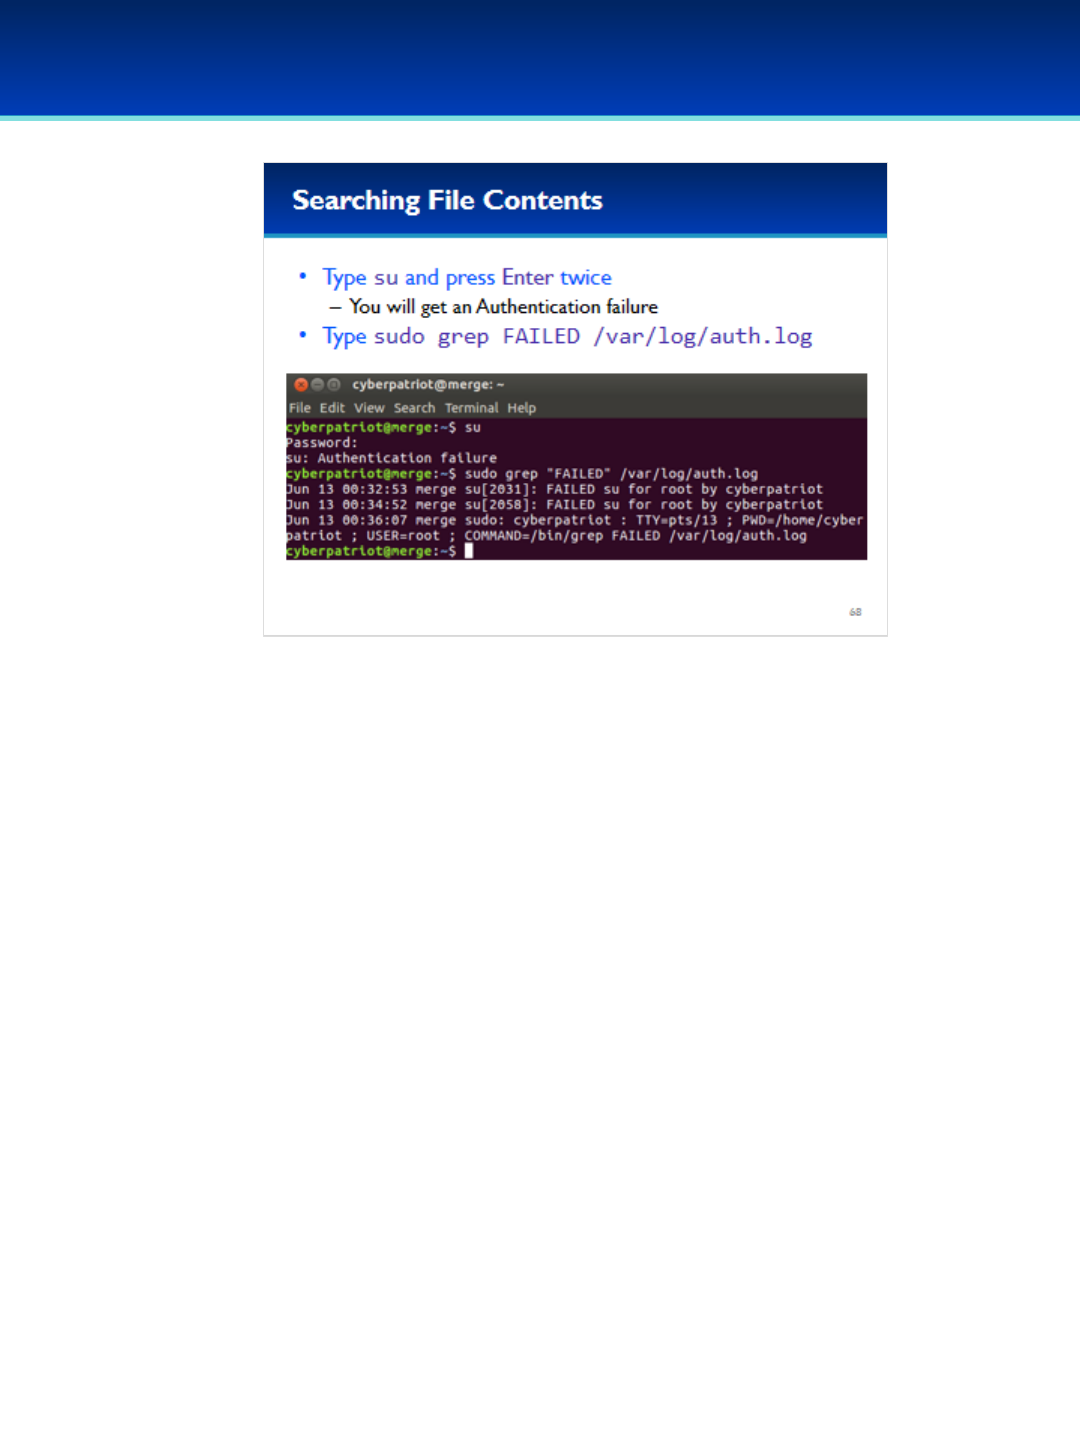
© 2018 Air Force Association
AFA Advanced CyberCamp Instructor’s Guide
Page 194
Slide 68
Ubuntu 16
Have the students run the commands on the screen.
•This grep command searches for FAILED authentication attempts
inside the system authorization log.
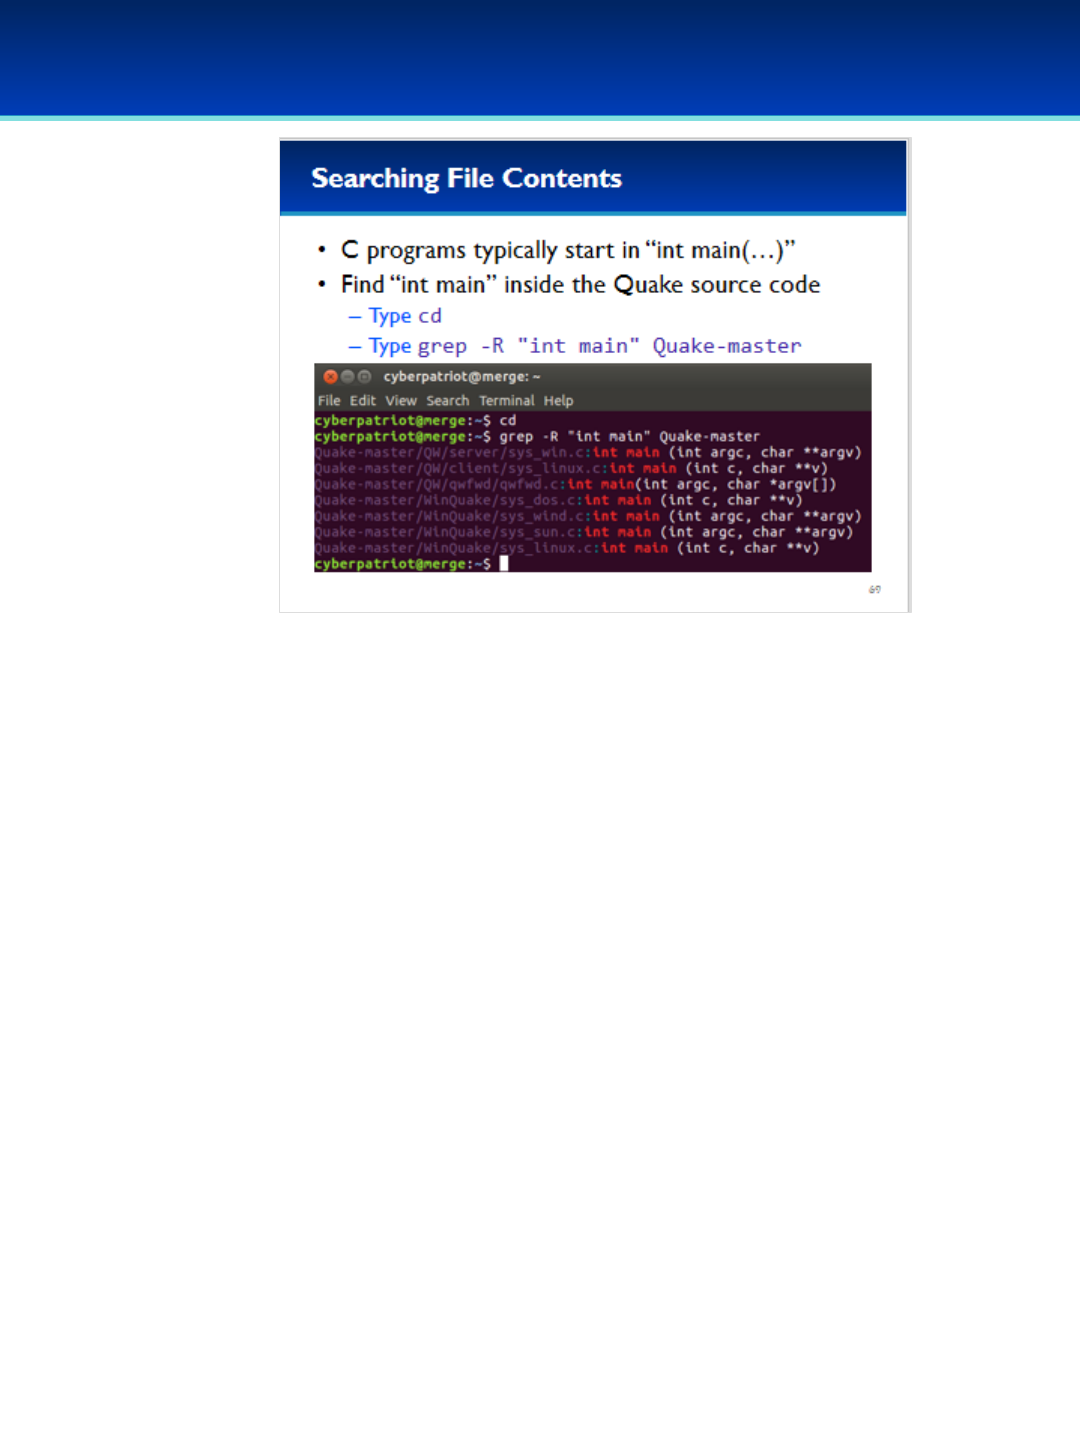
© 2018 Air Force Association
AFA Advanced CyberCamp Instructor’s Guide
Page 195
Slide 69
Ubuntu 16
•C programs typically begin in the main function.
•Say you downloaded the Quake source code and wanted to know
where it starts.
•You can use grep to search recursively for the main function with the
following commands.
Have the students run the commands on the screen.

© 2018 Air Force Association
AFA Advanced CyberCamp Instructor’s Guide
Page 196
Slide 70
Ubuntu 16
•Head and tail are surprisingly useful commands.
•Head prints out the first 10 lines of a file, or you can specify the
number of lines to print with the –noption.
•Similarly, tail prints out the last 10 lines of a file, and again you
can specify the number of lines to print with the –n option.
•Tail can also output lines appended to a file in real time, as the
file grows, by specifying the –foption.
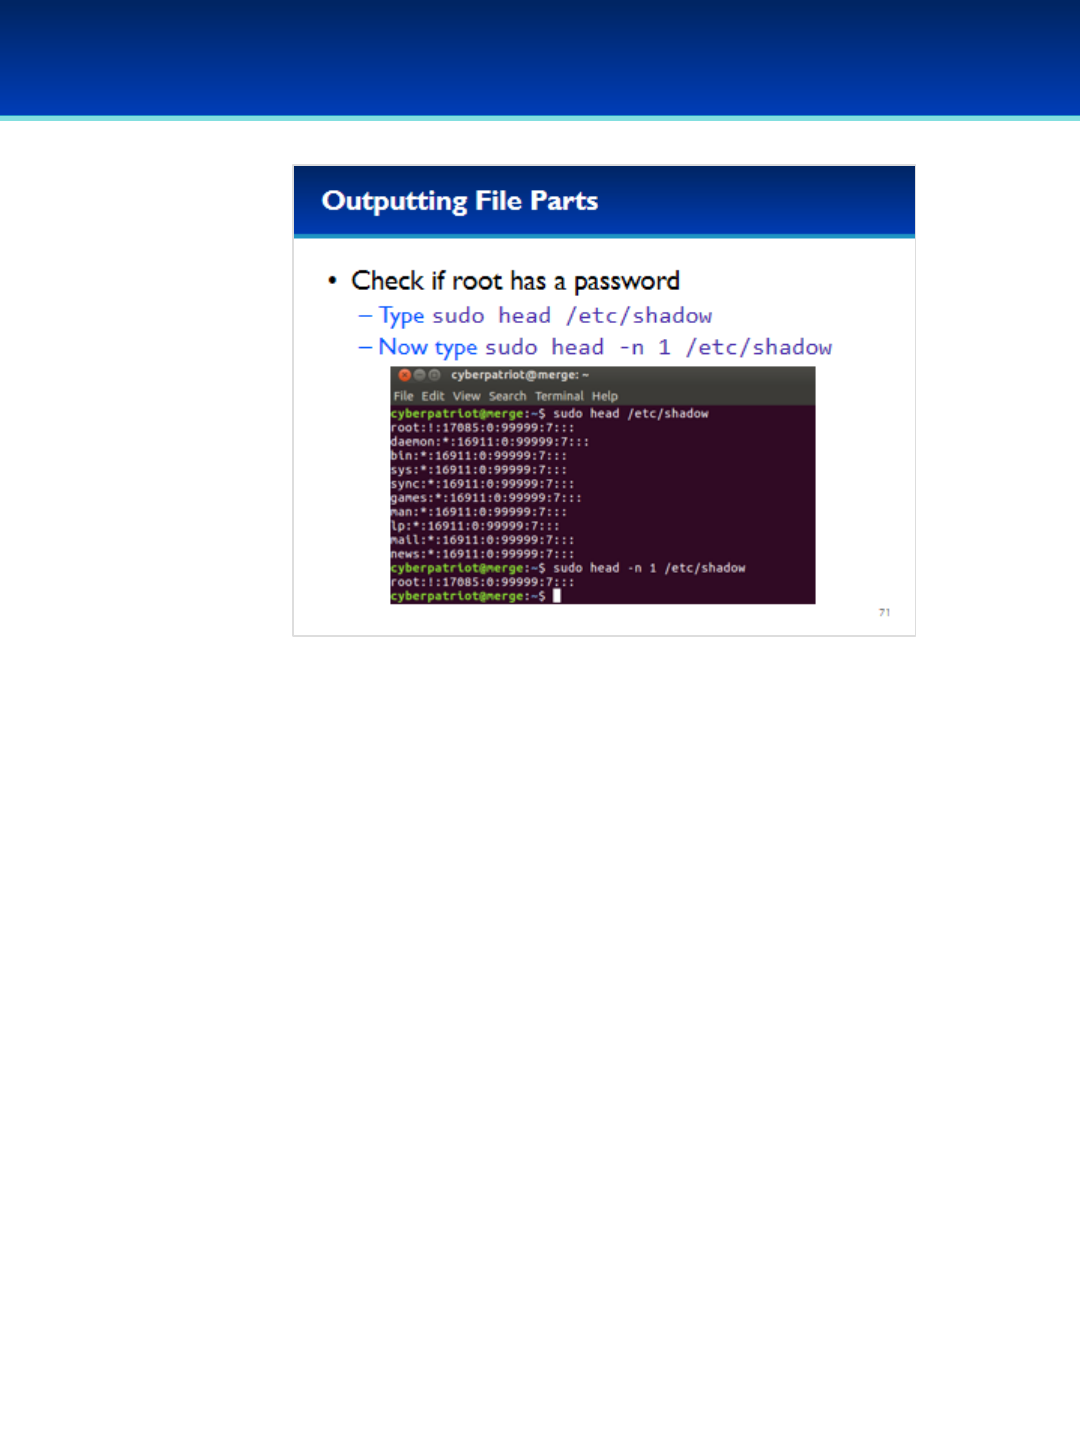
© 2018 Air Force Association
AFA Advanced CyberCamp Instructor’s Guide
Page 197
Slide 71
Ubuntu 16
•Let’s use head to check if the root user has a password.
Have the students run the commands on the screen.
•Root doesn’t have a password, or you would see the encrypted
password where the ! Is.
•As you can see, the –n 1 option prints out only the first line of
the file.
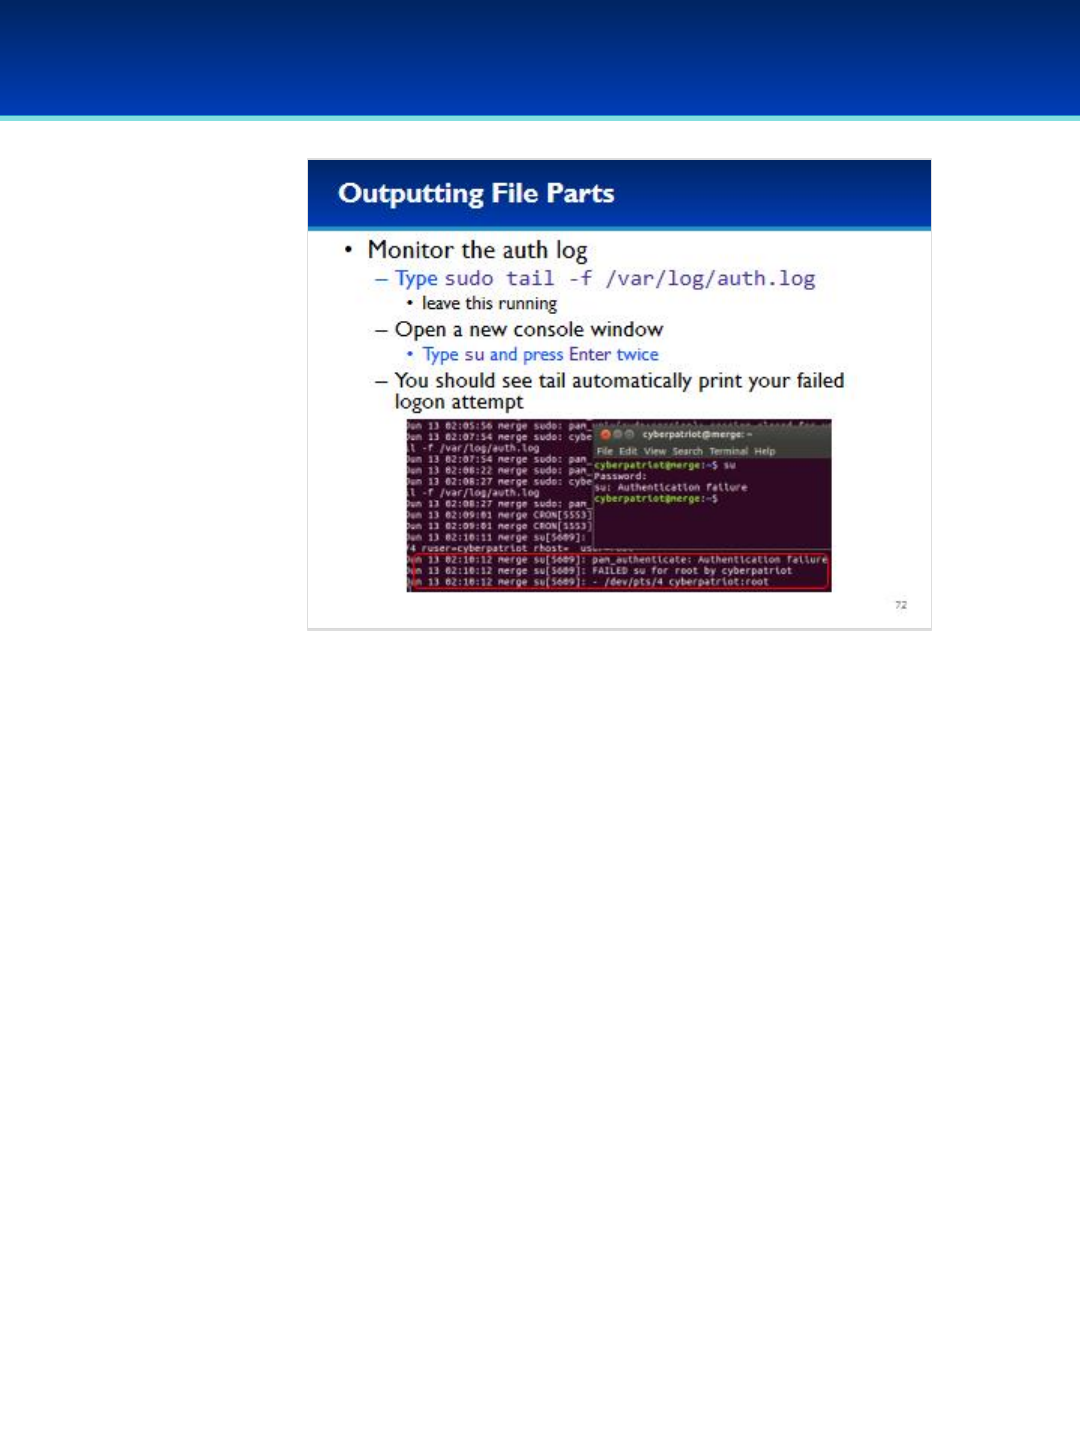
© 2018 Air Force Association
AFA Advanced CyberCamp Instructor’s Guide
Page 198
Slide 72
Ubuntu 16
•Tail is useful for monitoring log files.
•Type: sudo tail -f /var/log/auth.log
•In a new console window, type su, but fail the authentication on
purpose by pressing Enter twice.
•You should see tail automatically print out your failed logon
attempt.
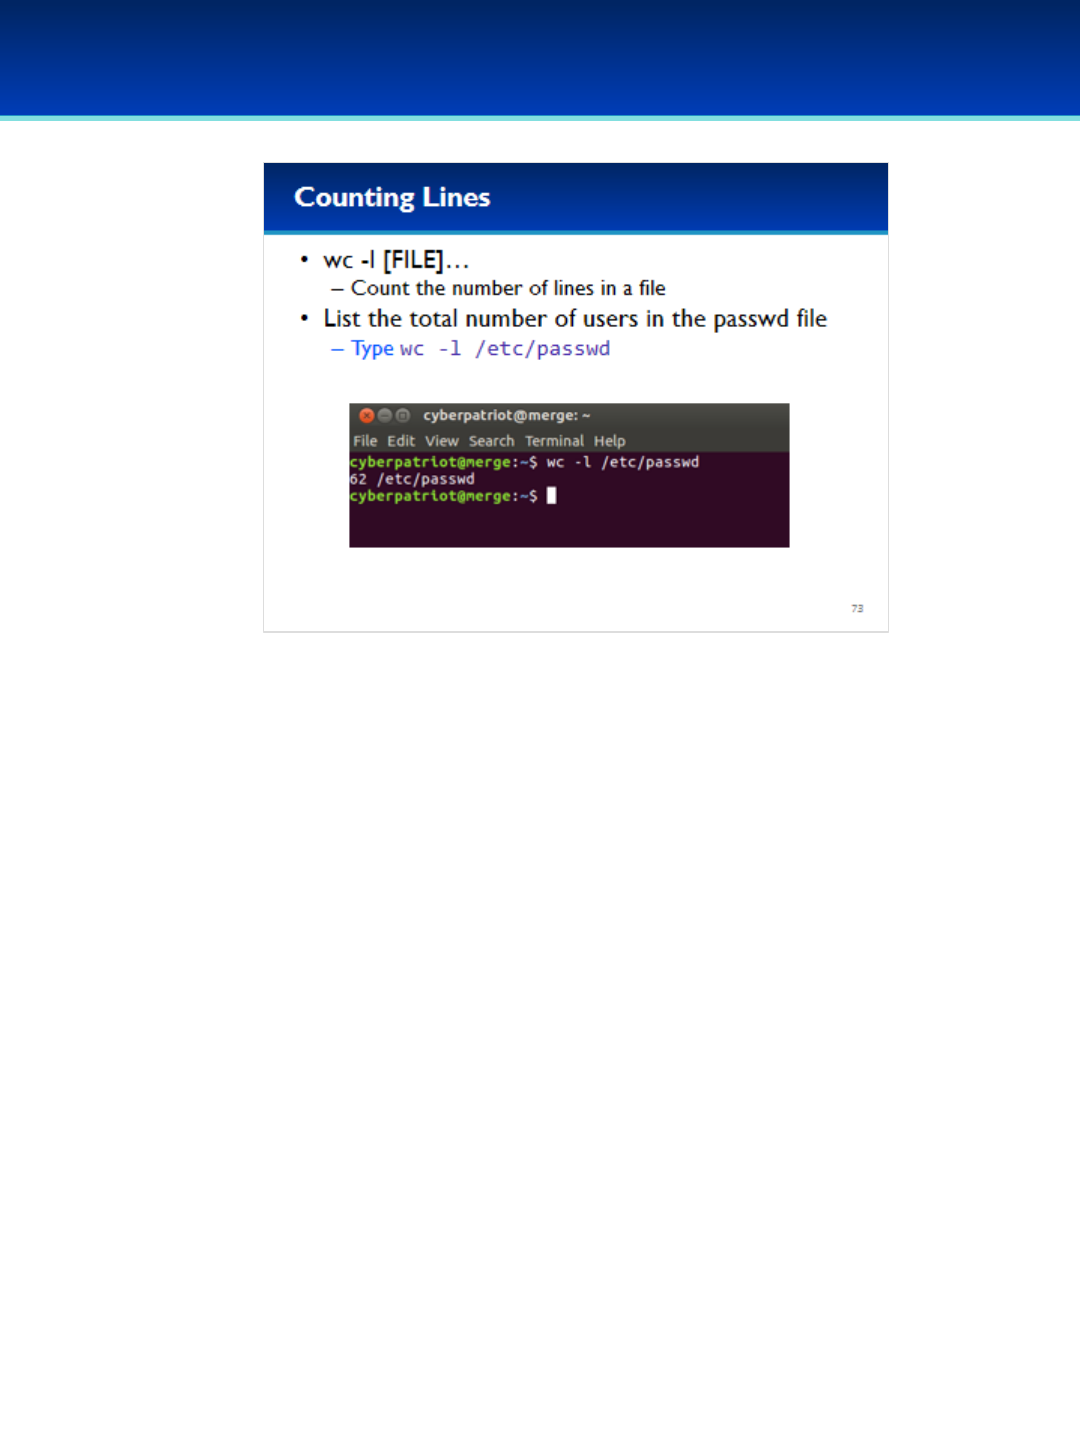
© 2018 Air Force Association
AFA Advanced CyberCamp Instructor’s Guide
Page 199
Slide 73
Ubuntu 16
•The wc command stands for “word count” but can also be
used for counting lines in a file with the –loption.
•Say you wanted to list total number of user accounts on the
system. You can do this by counting the number of lines in the
password file.
•There are 62 user accounts on the system.

© 2018 Air Force Association
AFA Advanced CyberCamp Instructor’s Guide
Page 200
Slide 74
Ubuntu 16
•Let’s take a moment to talk about program input and output. All
processes are given three open “character streams”, one for input,
and two for output.
•When a program prompts you for input on the terminal, it is reading
from “standard input.”
•When a program prints regular information to the terminal it is
printing to “standard output.”
•When a program prints error information to the terminal is printing
to “standard error.”
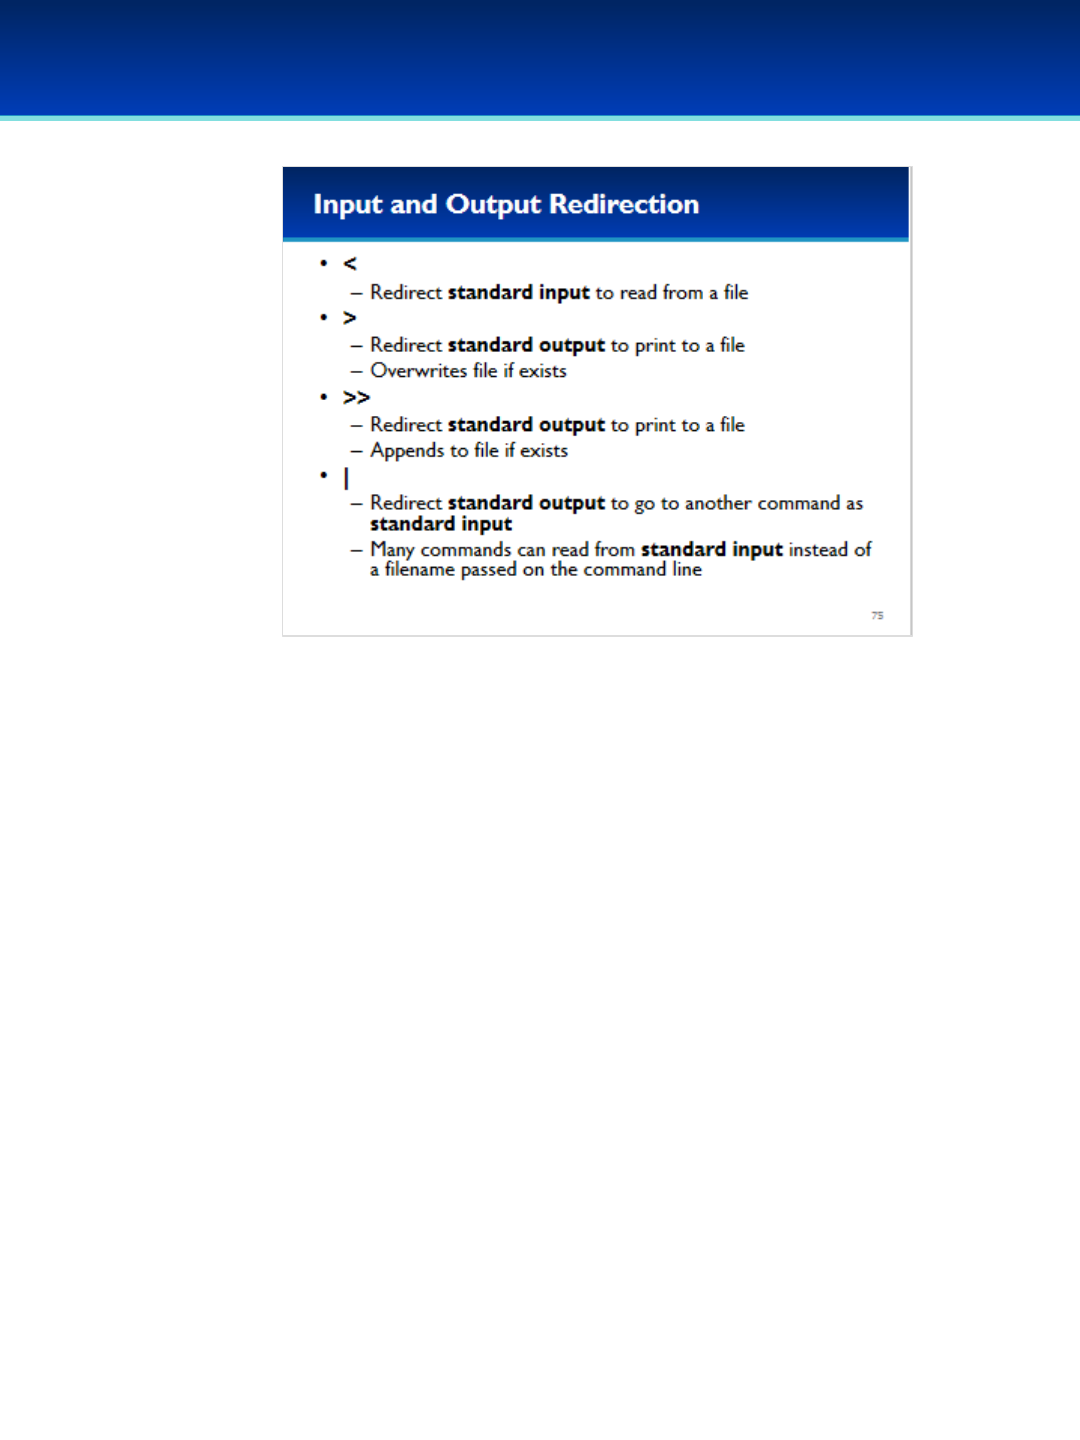
© 2018 Air Force Association
AFA Advanced CyberCamp Instructor’s Guide
Page 201
Slide 75
Ubuntu 16
•These input and output streams can be redirected to and from different
locations using the following operators.
•The less-than operator redirects standard input to read from a file
(instead of the keyboard).
•The greater-than operator redirects standard output to print to a file
(instead of the screen).
- Be careful using this because it will Truncate/Overwrite the file if it
exists, deleting any existing data.
•The greater-than greater-than operator redirects standard output to
append to a file (instead of the screen).
•The pipe operator is named thusly because it pipes output from the
standard output of one command, to the standard input of another
command.
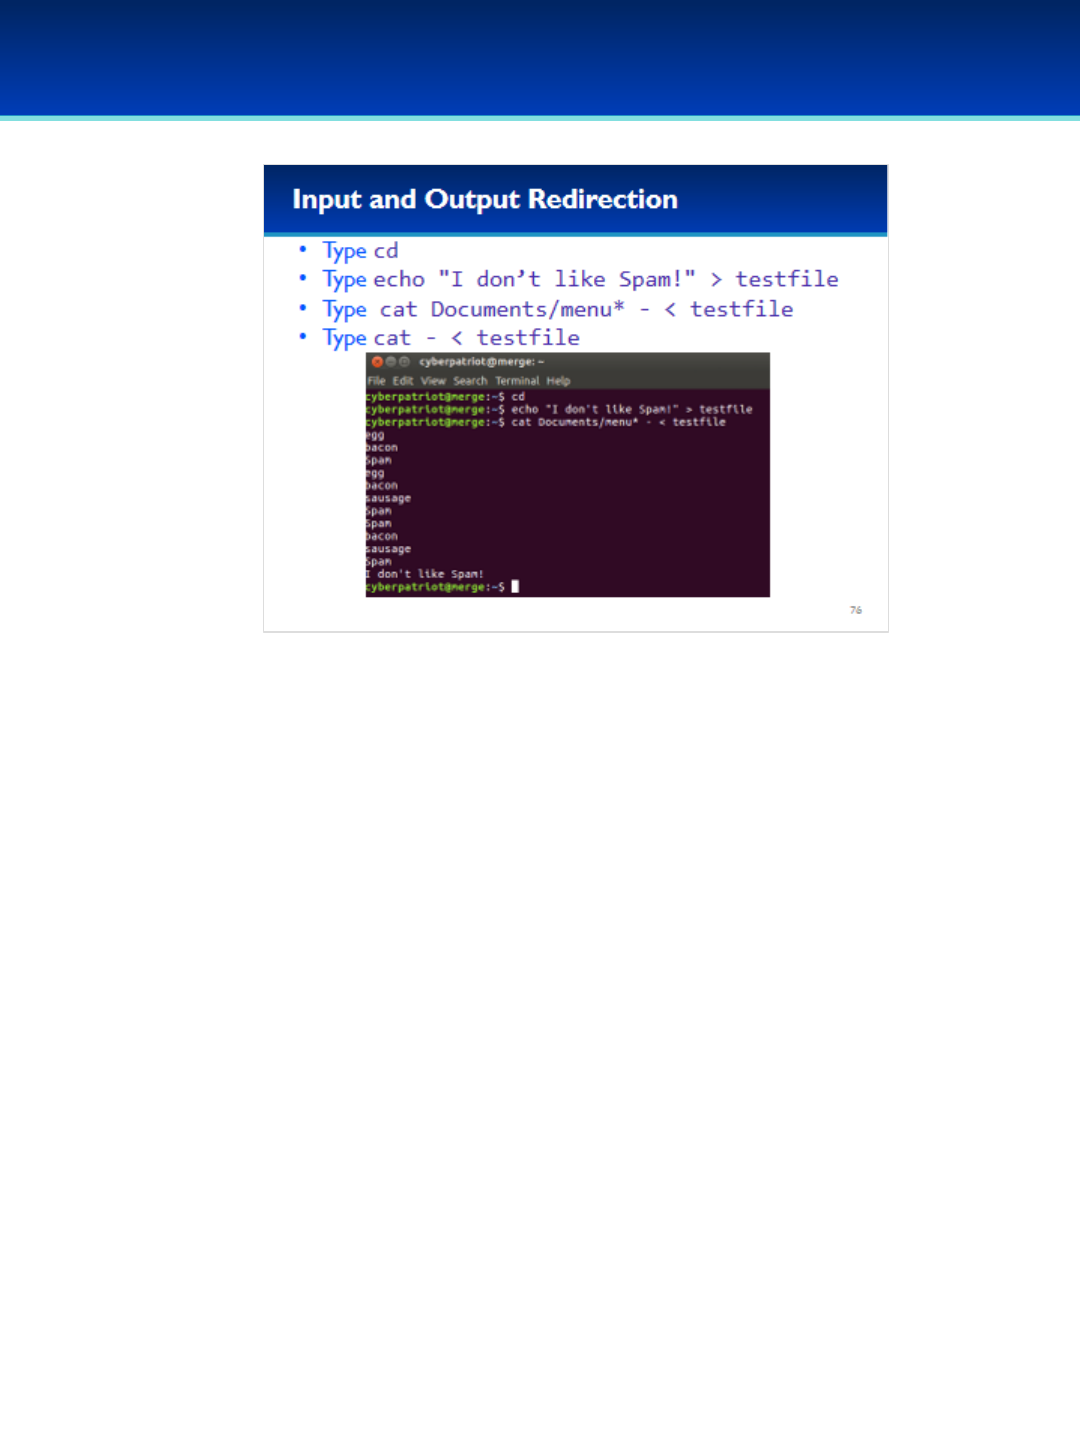
© 2018 Air Force Association
AFA Advanced CyberCamp Instructor’s Guide
Page 202
Slide 76
Ubuntu 16
•Let’s look at some examples.
Have the students run the commands on the screen.
•The echo command prints “I don’t like Spam!” to standard output, but
standard output has been redirected to “testfile” so the text ends up
there instead of the screen.
•The –argument to the cat command tells cat to read from standard
input.
•Therefore, cat concatenates the contents of all files name
Documents/menu* and standard input, because standard input has
been redirected to come from testfile, it reads from there instead of
the keyboard.
•You can see that the contents of testfile are printed to the screen last.
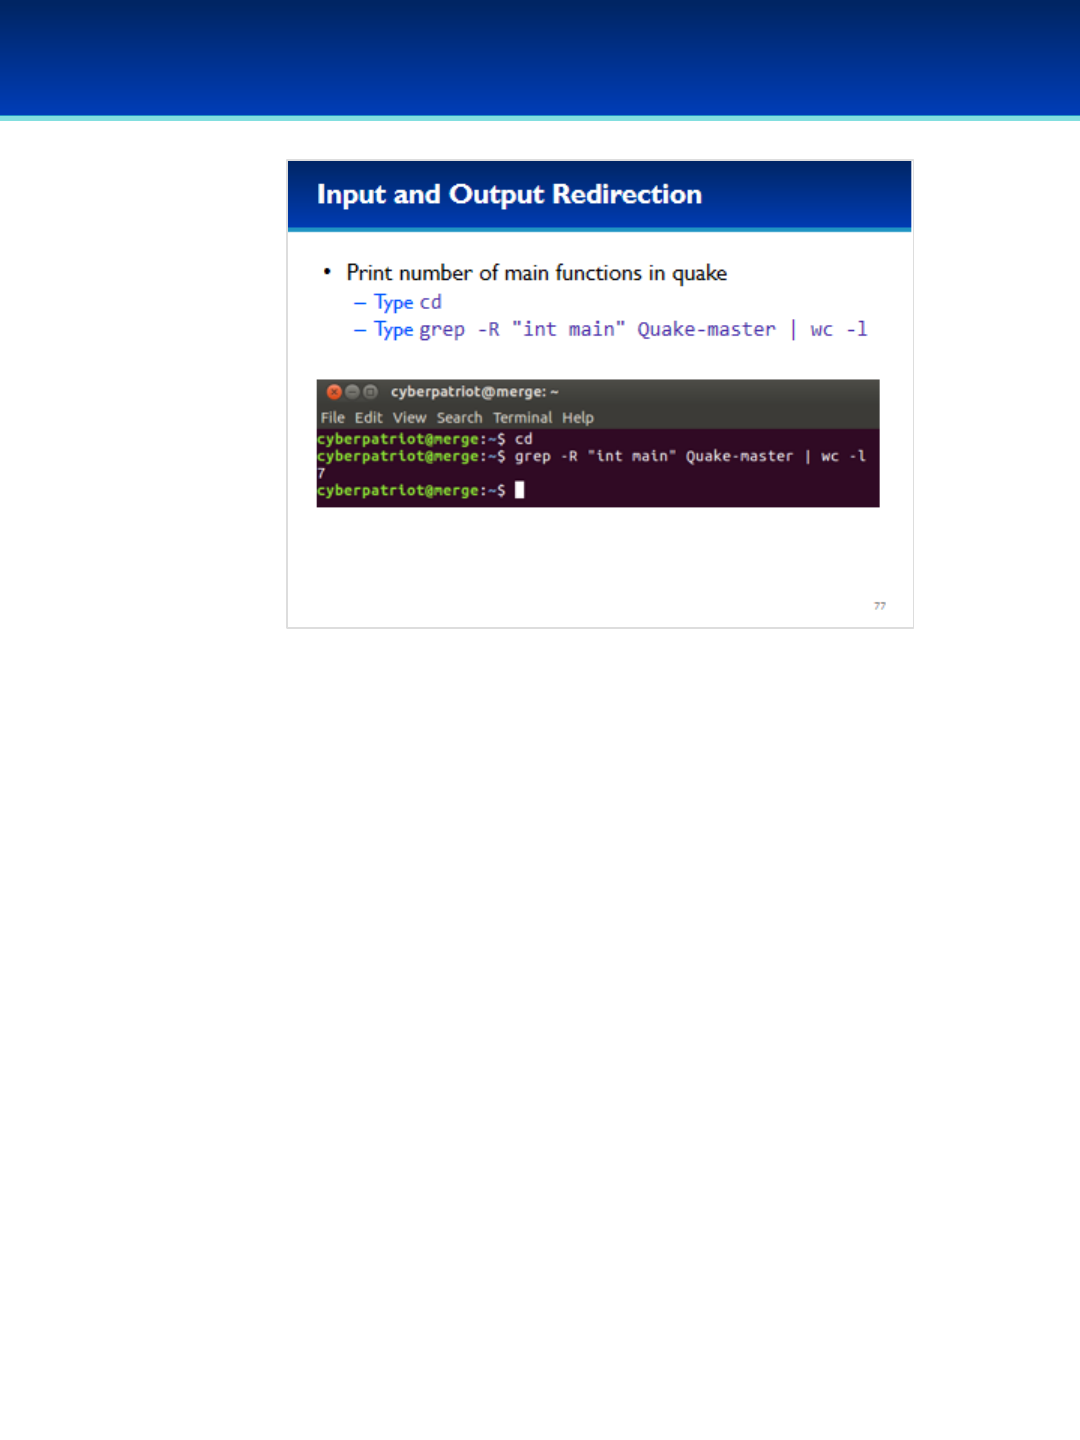
© 2018 Air Force Association
AFA Advanced CyberCamp Instructor’s Guide
Page 203
Slide 77
Ubuntu 16
•Many commands will automatically read from standard input if you
don’t specify a file argument.
•For example, say you wanted to count the total number of main
functions in the Quake source code.
Have the students run the commands on the screen.
•The Quake source code has seven different main functions because
there are several different programs in the code including clients and
servers.
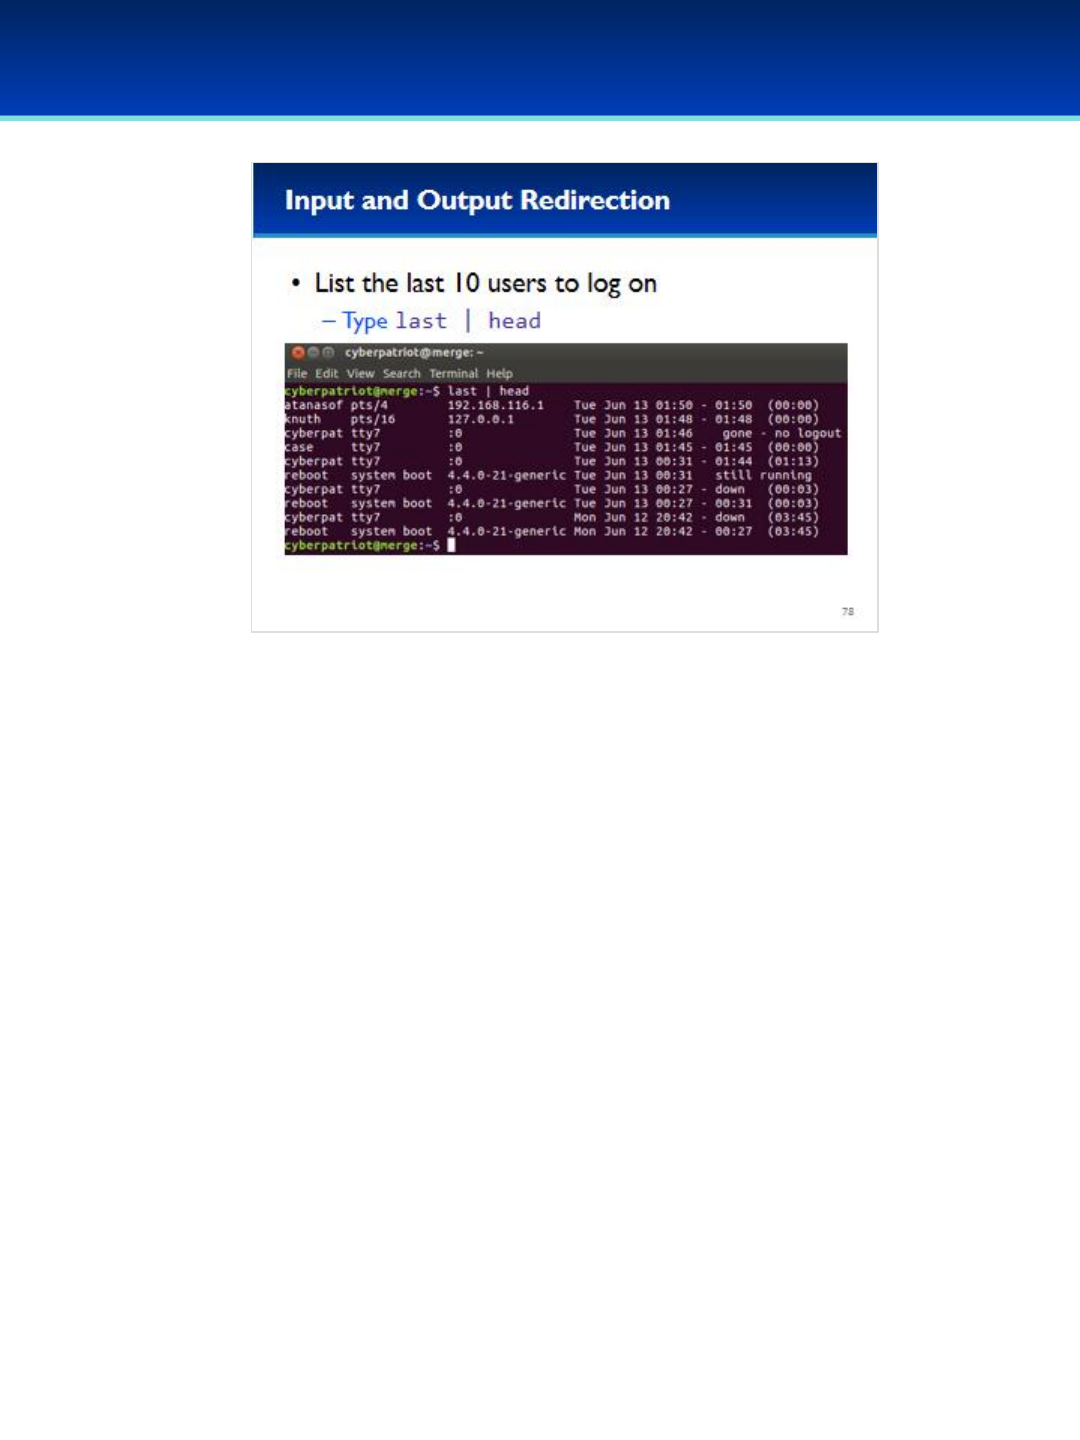
© 2018 Air Force Association
AFA Advanced CyberCamp Instructor’s Guide
Page 204
Slide 78
Ubuntu 16
•A useful command to view the last ten users to log on is: last-
pipe-head
Have the students run the commands on the screen.
The result of the command will not match the screenshot because it is
based on the log on activity of each image.
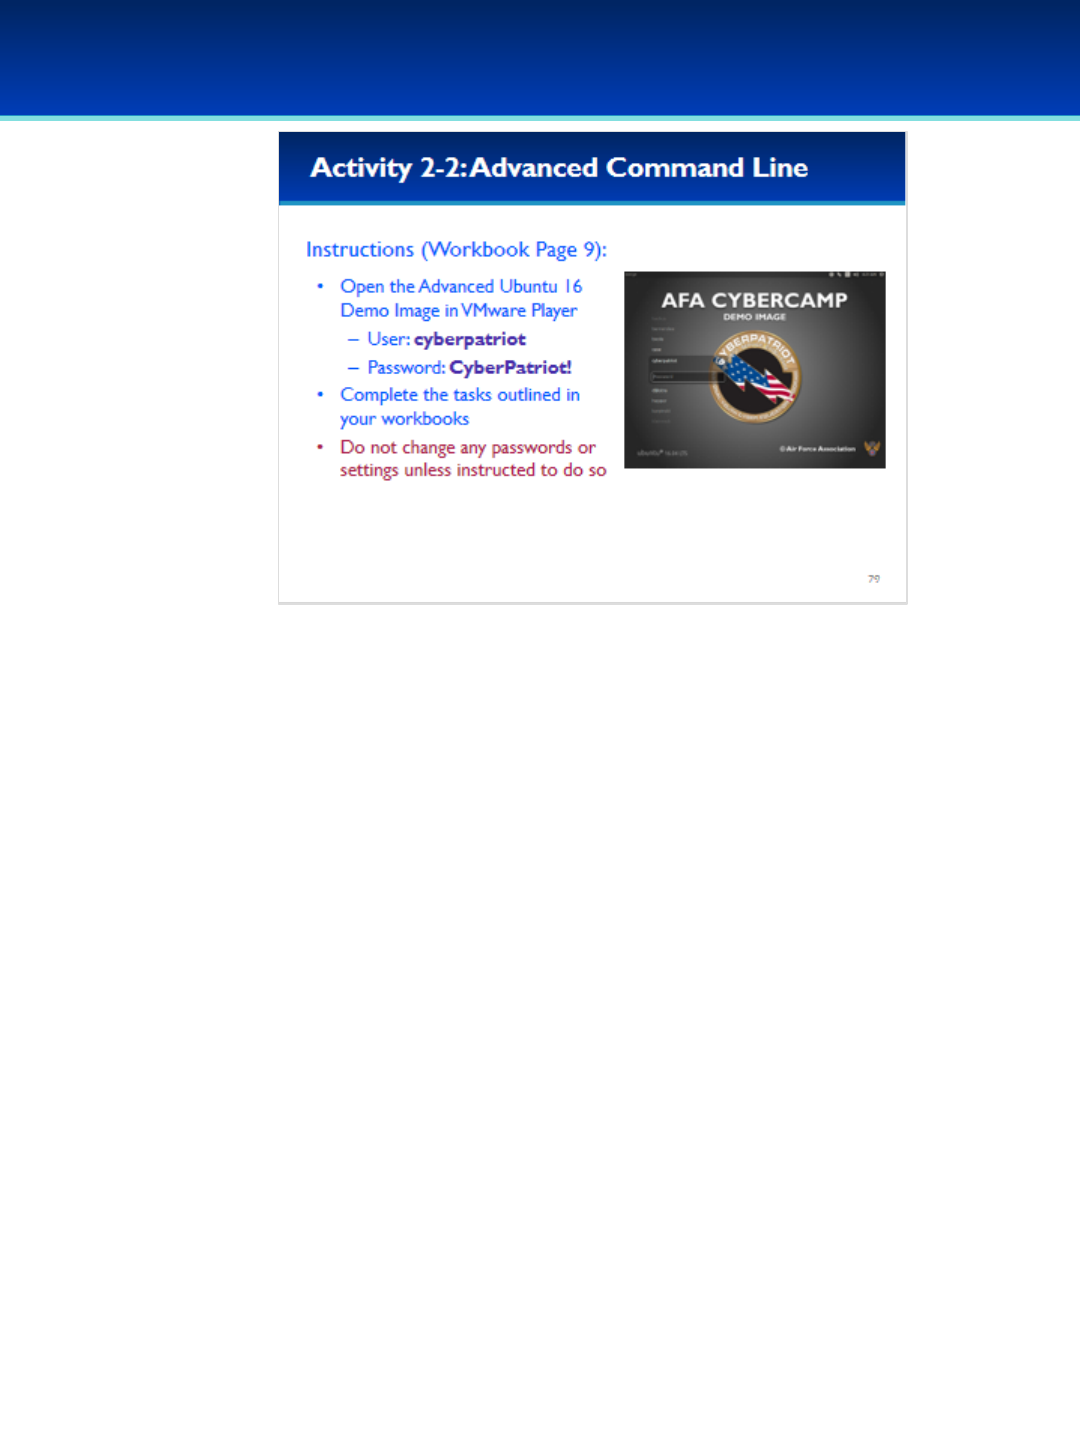
© 2018 Air Force Association
AFA Advanced CyberCamp Instructor’s Guide
Page 205
Slide 79
Ubuntu 16
Give students about 20 minutes to complete the tasks listed on Pages 9 of their
workbooks.
This lab will review the advanced command line commands covered in this section.
Stress that the students should not change any passwords or settings unless they are
expressly directed to do so in the activity.
The students should not need to use any other user names or passwords to complete
the activities. Here are the passwords to some administrative accounts just in case.
Username: neumann
Password: vN_@rchit3cture
Username: hopper
Password: ENIAC.TurC0mp
Answers:
1. G
2. sausage
3. /home/cyberpatriot/Music/Nutcracker.mp3, /home/kleinrock/Desktop/4.mp3,
/home/knuth/Music/1812.mp3
4. /var/spool/
5. /usr/bin/find/
6. 21
7. print the character counts

© 2018 Air Force Association
AFA Advanced CyberCamp Instructor’s Guide
Page 206
Slide 80
Ubuntu 16
Devote 30 minutes to slides 81-108. Allow the students 20 minutes
to complete the activity on slide 108.
Throughout this section, students should follow along in the
Advanced Ubuntu Demo Image.
In this section, you will learn multiple methods to determine what
processes are being run on your system, how to kill unwanted
processes, and methods for bypassing rootkits on a compromised
machine.
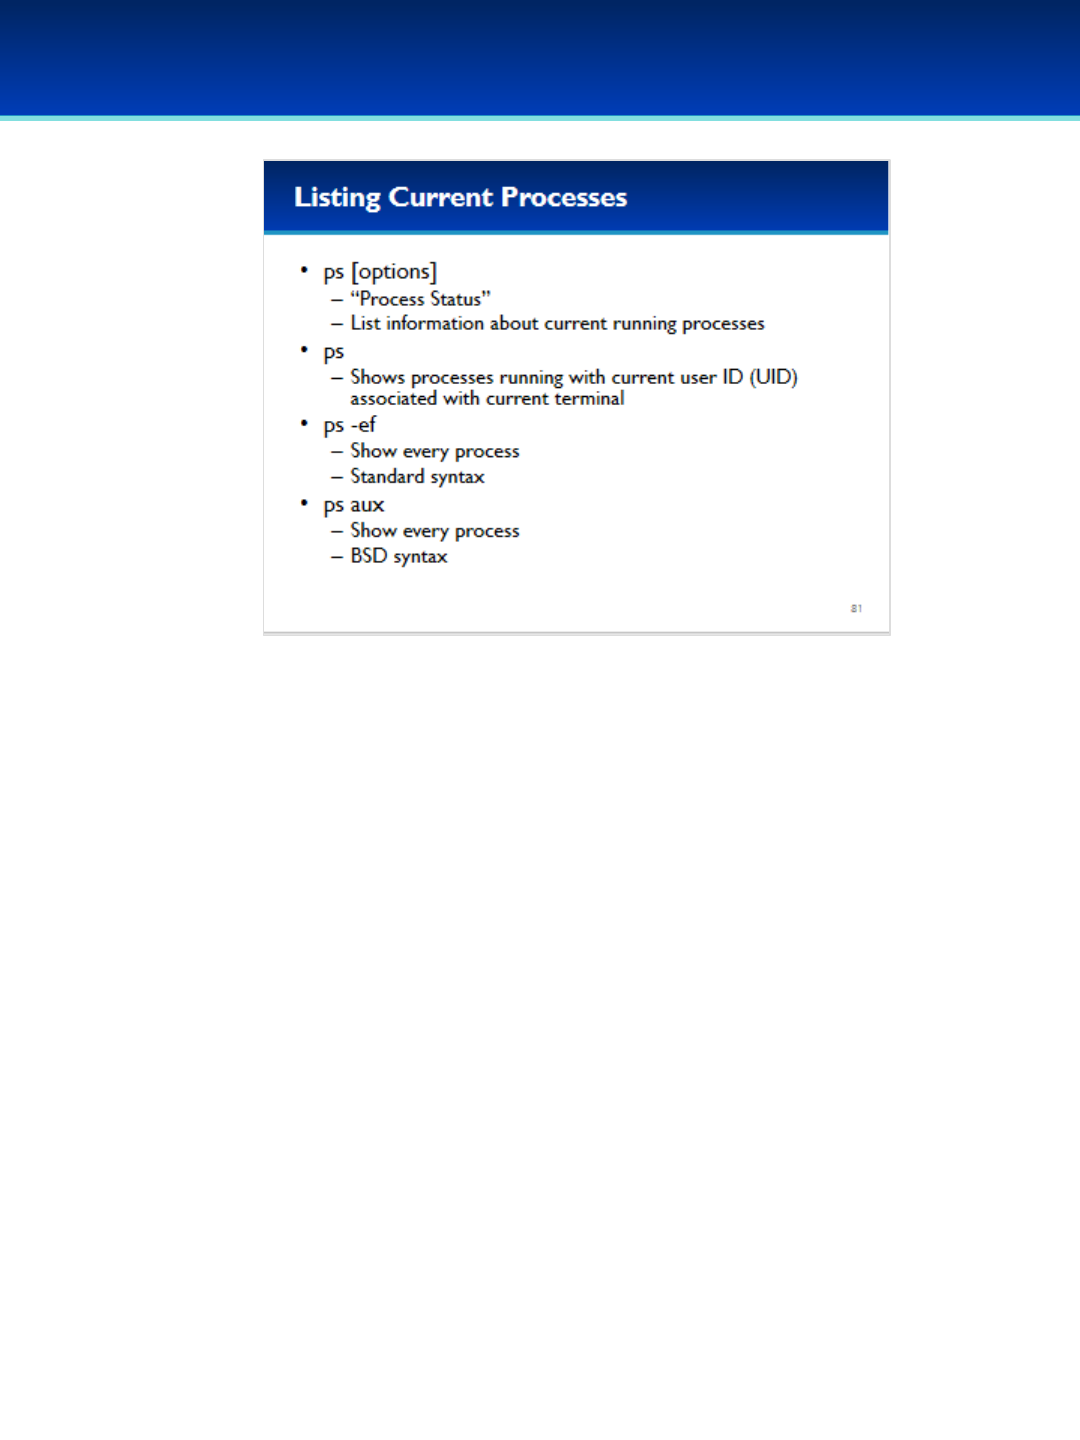
© 2018 Air Force Association
AFA Advanced CyberCamp Instructor’s Guide
Page 207
Slide 81
Ubuntu 16
•The current processes running on your system can be listed using the ps
command.
•Ps by itself with no options is probably not what you want.
- By default, it shows only process running as your current user ID and
associated with your current terminal.
•There are two ways to list all processes with ps, and we’re going to cover
them here because you may run into a Linux or Unix distribution that is
less friendly and only supports one of these methods.
•ps –ef is the standard Linux syntax, elists “every process” and ftells it to
do a “full-format” listing (which displays more information on each
process).
•pa aux is the traditional “BSD” style syntax. It displays mostly same thing
as ps –ef but does display a little bit more information on memory
statistics.

© 2018 Air Force Association
AFA Advanced CyberCamp Instructor’s Guide
Page 208
Slide 82
Ubuntu 16
•ps orders the processes on your computer by PID.
•To view the first 10 lines output by ps, type ps -ef and pipe it
through head.
Have the students run the commands on the screen.
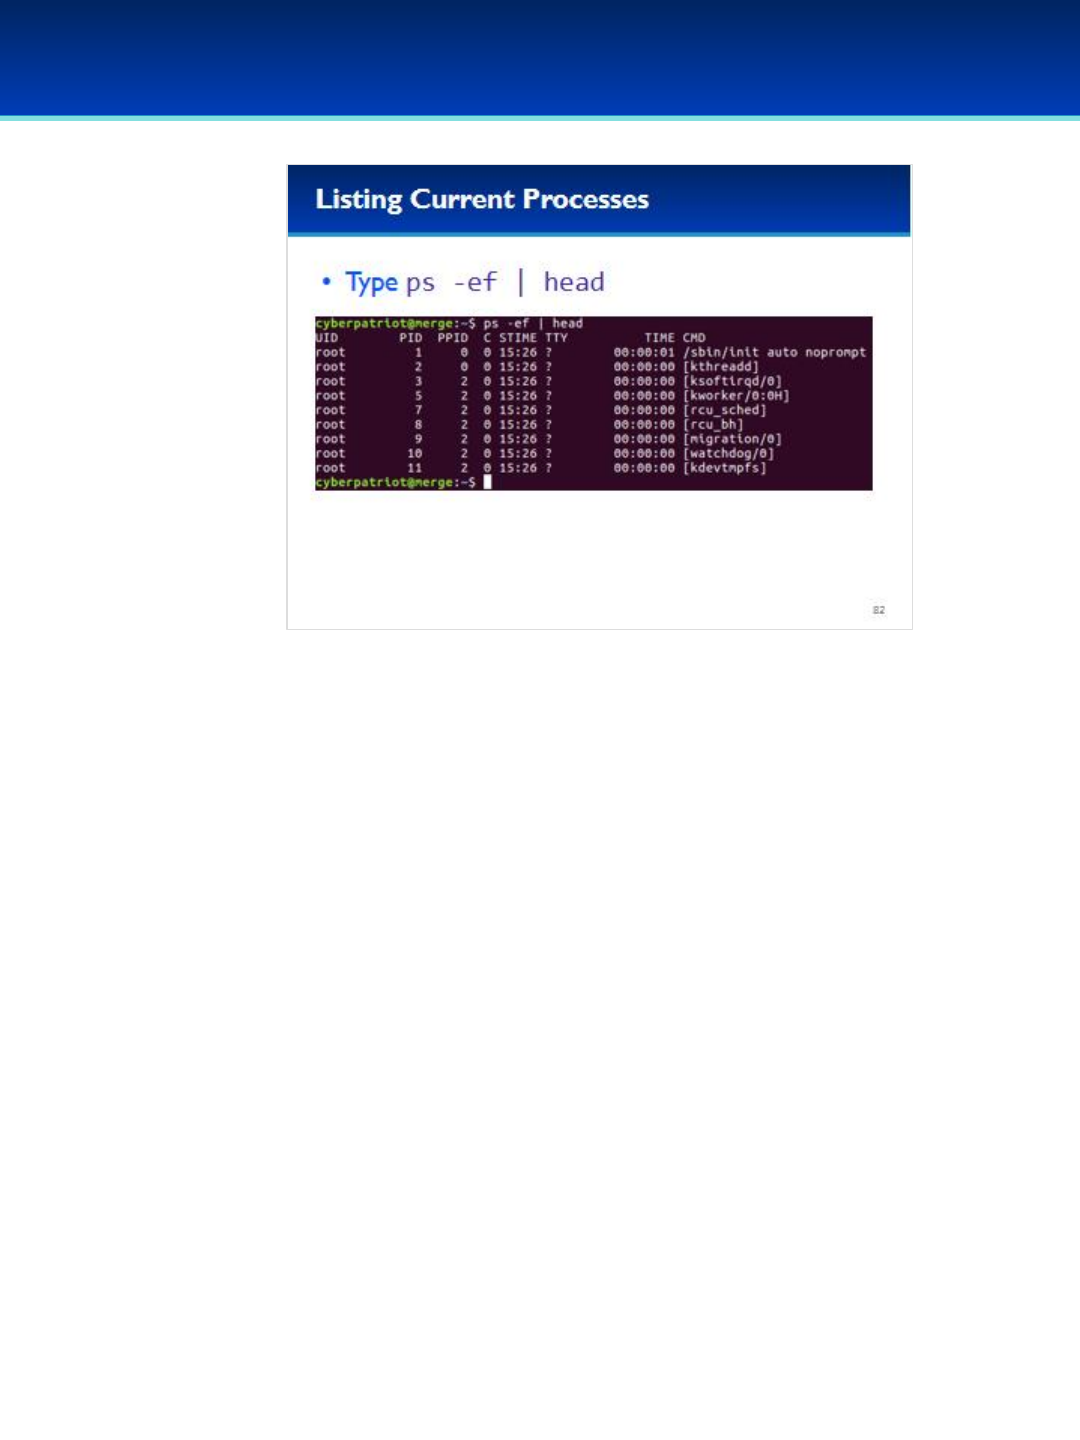
© 2018 Air Force Association
AFA Advanced CyberCamp Instructor’s Guide
Page 209
Slide 82
Ubuntu 16
•Ps orders the processes on your computer by PID.
•To view the first 10 lines output by ps, type ps -ef and pipe it
through head.
Have the students run the commands on the screen.
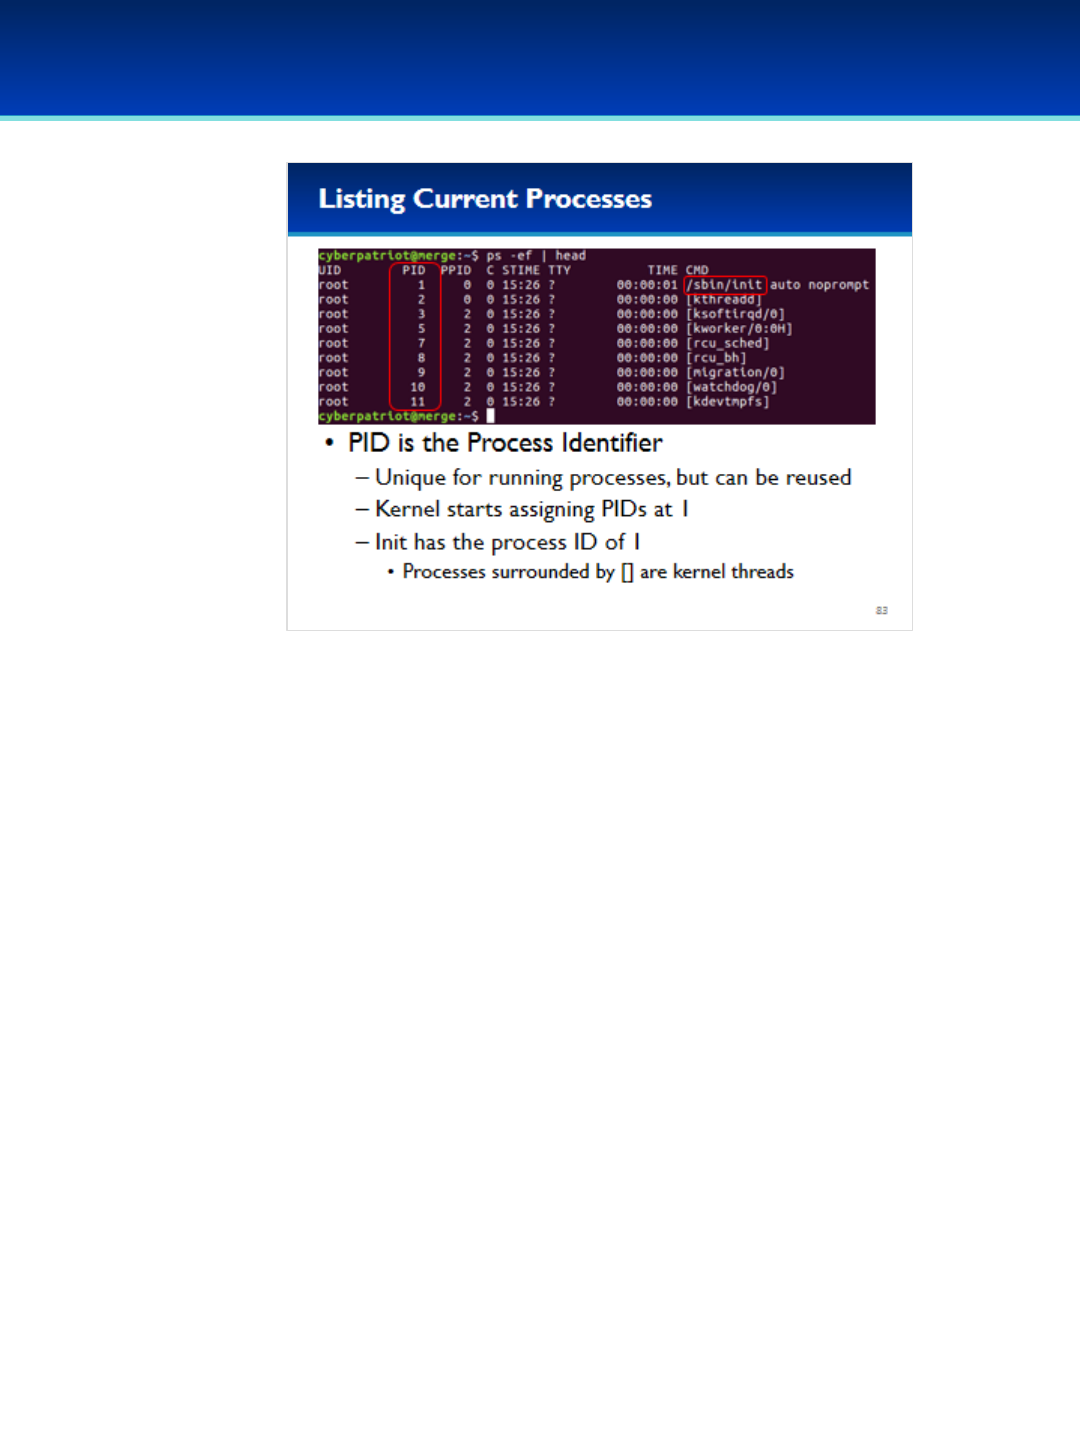
© 2018 Air Force Association
AFA Advanced CyberCamp Instructor’s Guide
Page 210
Slide 83
Ubuntu 16
•The PID column is where the process identifier or PID is displayed for
that process.
•A PID is unique for running processes, but can be reused after a
process dies.
•The Kernel starts assigning PID’s starting at 1.
•You can see the first process that was created by the Kernel is init
with a PID of 1.
•Ps prints out Kernel threads surrounded by square brackets [].
- These threads are part of the kernel and have different
responsibilities such as managing different pieces of hardware.

© 2018 Air Force Association
AFA Advanced CyberCamp Instructor’s Guide
Page 211
Slide 84
Ubuntu 16
•The PPID is the parent PID. This is the PID of the process that
created this process.
•The PPID of init and [kthreadd] is 0, indicating that the kernel
created this process on it’s own.
•kthreadd is the kernel thread daemon that manages the kernel
threads.
•UID is the user the process is running as, this determines what
the process is allowed to do.

© 2018 Air Force Association
AFA Advanced CyberCamp Instructor’s Guide
Page 212
Slide 85
Ubuntu 16
•STIME is the starting time of the process, in this example the
virtual machine was booted at 3:26, hence init and all the kernel
threads were started at 3:26 as well.
•TIME is the cpu time that this process has used, this is not the
time that the process has been alive, but rather the total time that
the process has been actively using the CPU.
- You can see that most of these processes are fairly lightweight
and in this example the init thread has used about one second of
CPU time since we powered on the system.
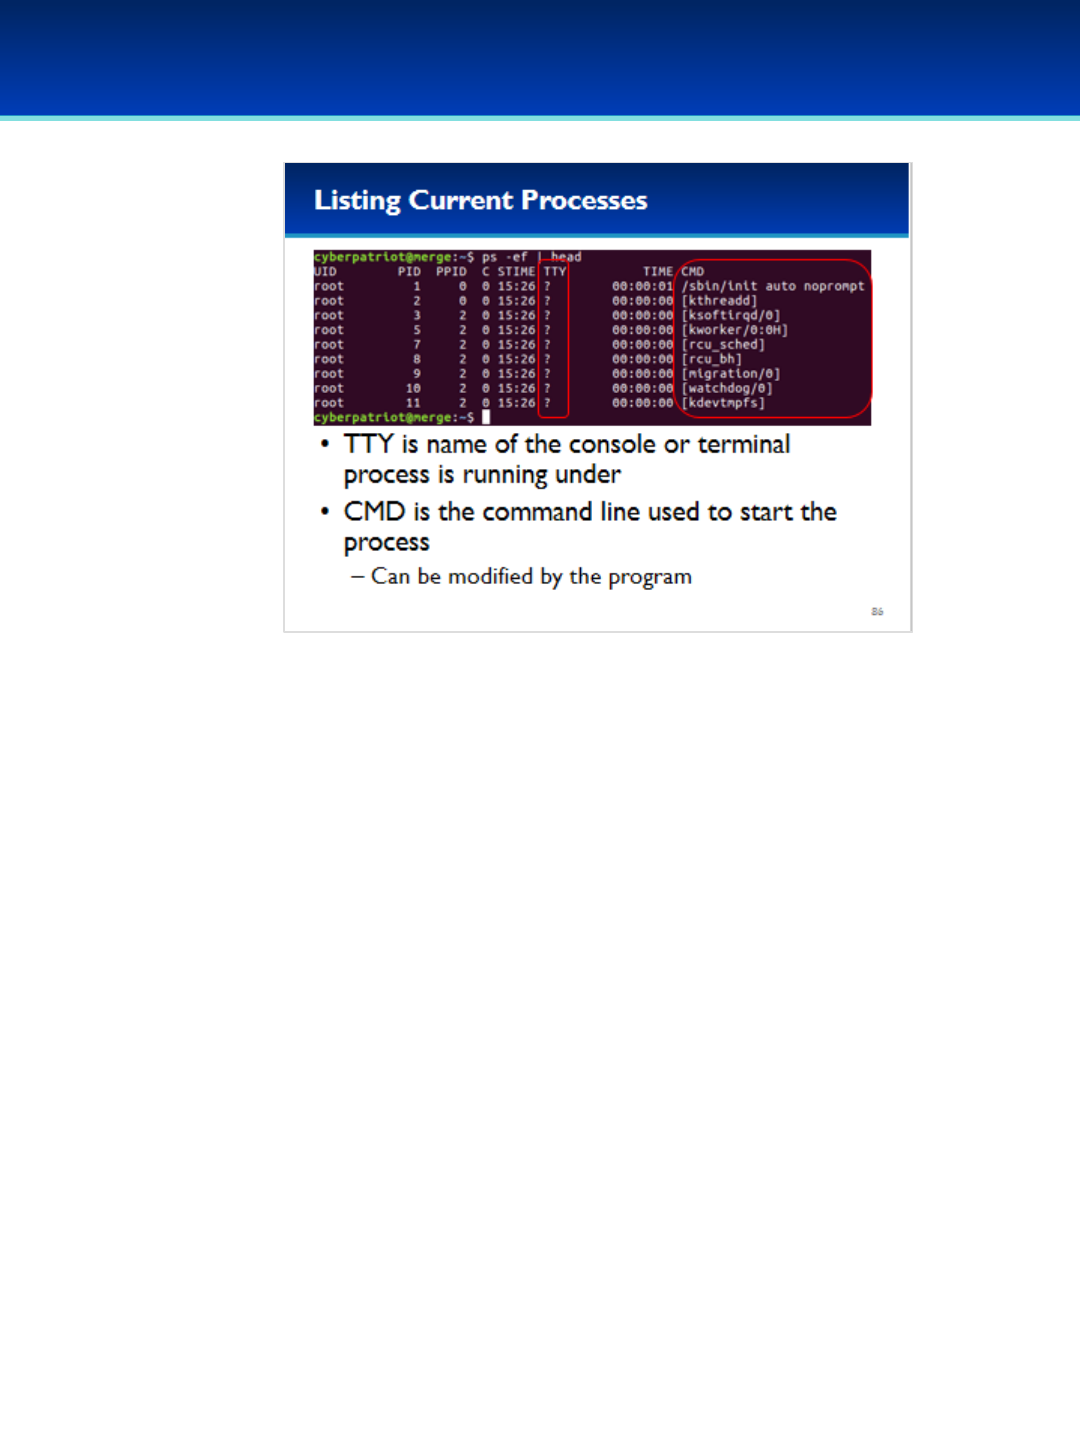
© 2018 Air Force Association
AFA Advanced CyberCamp Instructor’s Guide
Page 213
Slide 86
Ubuntu 16
•TTY is the name of the console or terminal the process is running
under, in this case these processes have no associated terminal.
•CMD is the command line used to start the process.
- However, this can be changed by programs for various reasons –
some . For example, you might want to prevent users from seeing
potentially sensitive command line options that were passed to
your program.

© 2018 Air Force Association
AFA Advanced CyberCamp Instructor’s Guide
Page 214
Slide 87
Ubuntu 16
•How do you kill a process?
•If a process is running in the foreground, you can often kill it by
typing Ctrl+C.
-Ctrl is often represented by a caret (^).
•The kill command does more than just kill processes, it will send
the signal to every PID you specify on the command line.
- It defaults to SIGTERM, but you could specify SIGKILL as the
signal if the program isn’t dying with SIGTERM.
•Kill can be tedious to use because you must specify the PID on the
command line.
- The killall command can help with that by killing all processes
that match a specific name.

© 2018 Air Force Association
AFA Advanced CyberCamp Instructor’s Guide
Page 215
Slide 88
Ubuntu 16
•So how do you kill a process?
•If a process is running in the foreground, you can often kill it by
typing Ctrl+C (lowercase c).
- Ctrl is often represented by a caret.
•The kill command does more than just kill processes, it will send
the specified signal to every PID you specify on the command line.
- It defaults to -SIGTERM, but you could specify –SIGKILL as the
signal if the program isn’t dying with SIGTERM.
•Kill can be tedious to use sometimes because you have to specify
the PID on the command line.
- The killall command can help with that by killing ALL processes
that match a specific name.

© 2018 Air Force Association
AFA Advanced CyberCamp Instructor’s Guide
Page 216
Slide 89
Ubuntu 16
•Here’s an example of how to use Ctrl+C to kill a program in the
foreground.
•The sleep infinity command will do nothing forever.
Have the students run the commands on the screen.
•You can see that the command will hang forever until you kill it.
- In this case, we killed it with Ctrl+C.
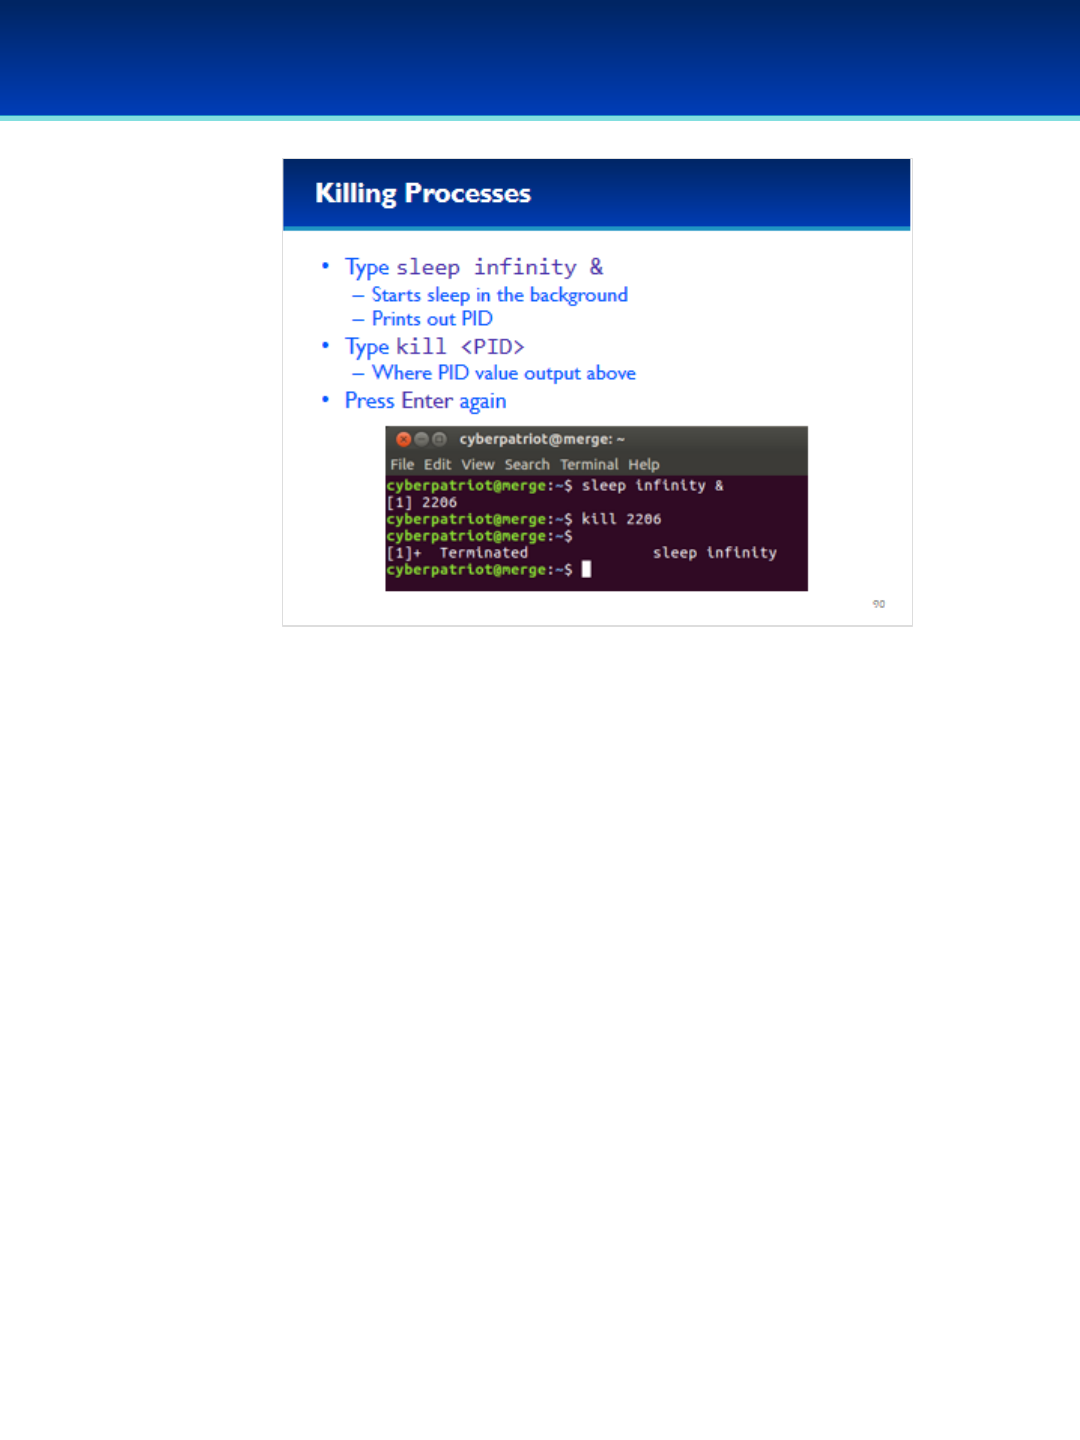
© 2018 Air Force Association
AFA Advanced CyberCamp Instructor’s Guide
Page 217
Slide 90
Ubuntu 16
•If you want to start a program, but you don’t want your console
to wait for it to die, you can start that process in the background
with an &.
•When you start a process in the background, the PID of that
process is printed on the screen.
Have the students run the commands on the screen.
•In this example, the PID of sleep is 2206.
•By typing kill 2206, we are killing the sleep process we just
started.
•We don’t get a notification that the process died right away
because our shell doesn’t want to interrupt us while we type a
command, so we have to press Enter again before we are
notified.
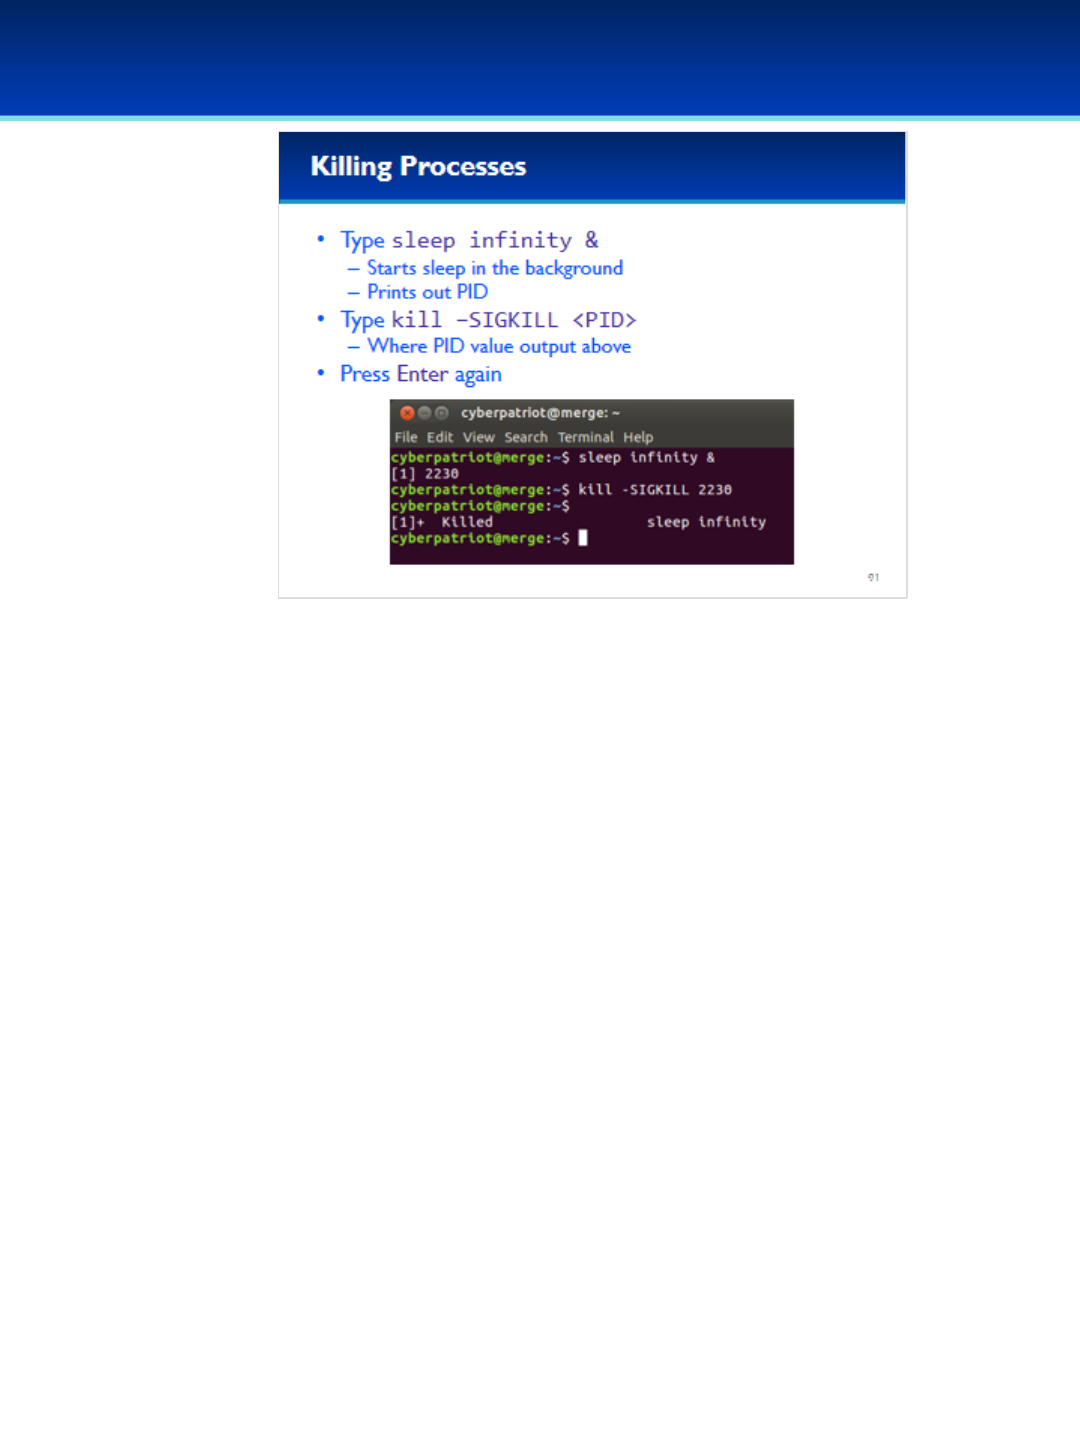
© 2018 Air Force Association
AFA Advanced CyberCamp Instructor’s Guide
Page 218
Slide 91
Ubuntu 16
•Sometimes a process won’t die with the default SIGTERM.
•In this case you need to specify a signal of SIGKILL.
Have the students run the commands on the screen.
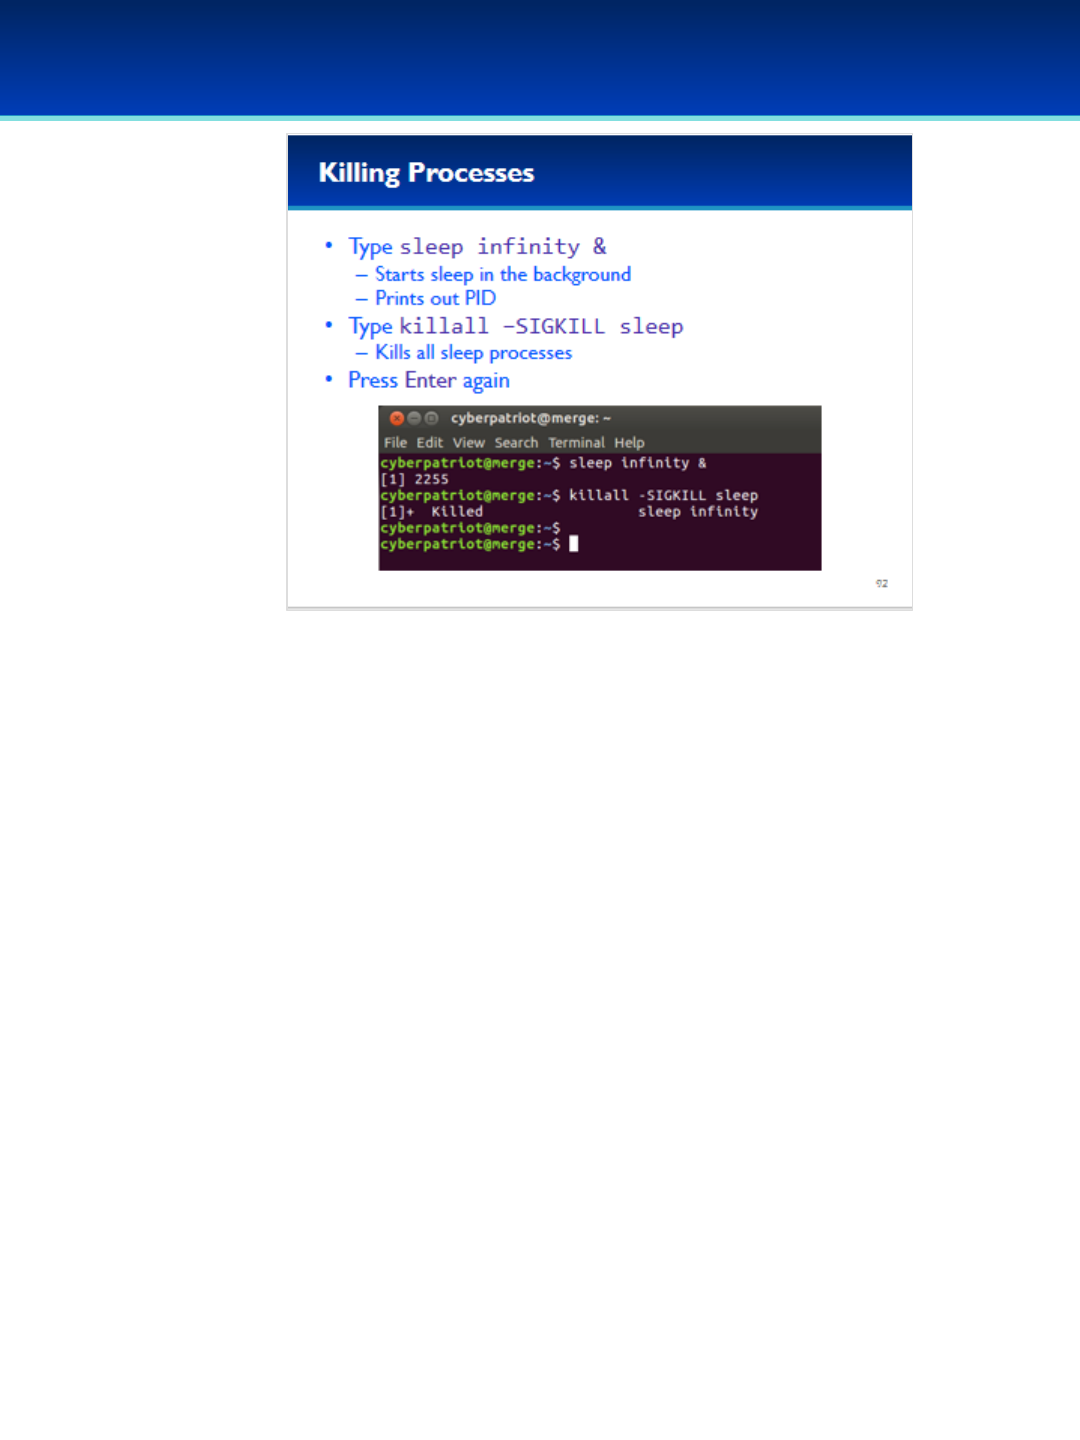
© 2018 Air Force Association
AFA Advanced CyberCamp Instructor’s Guide
Page 219
Slide 92
Ubuntu 16
•The killall command works just like kill, except you specify a
process name instead of PID.
•Killall is very useful, but be careful when running it because it
is possible to unintentionally kill important processes.
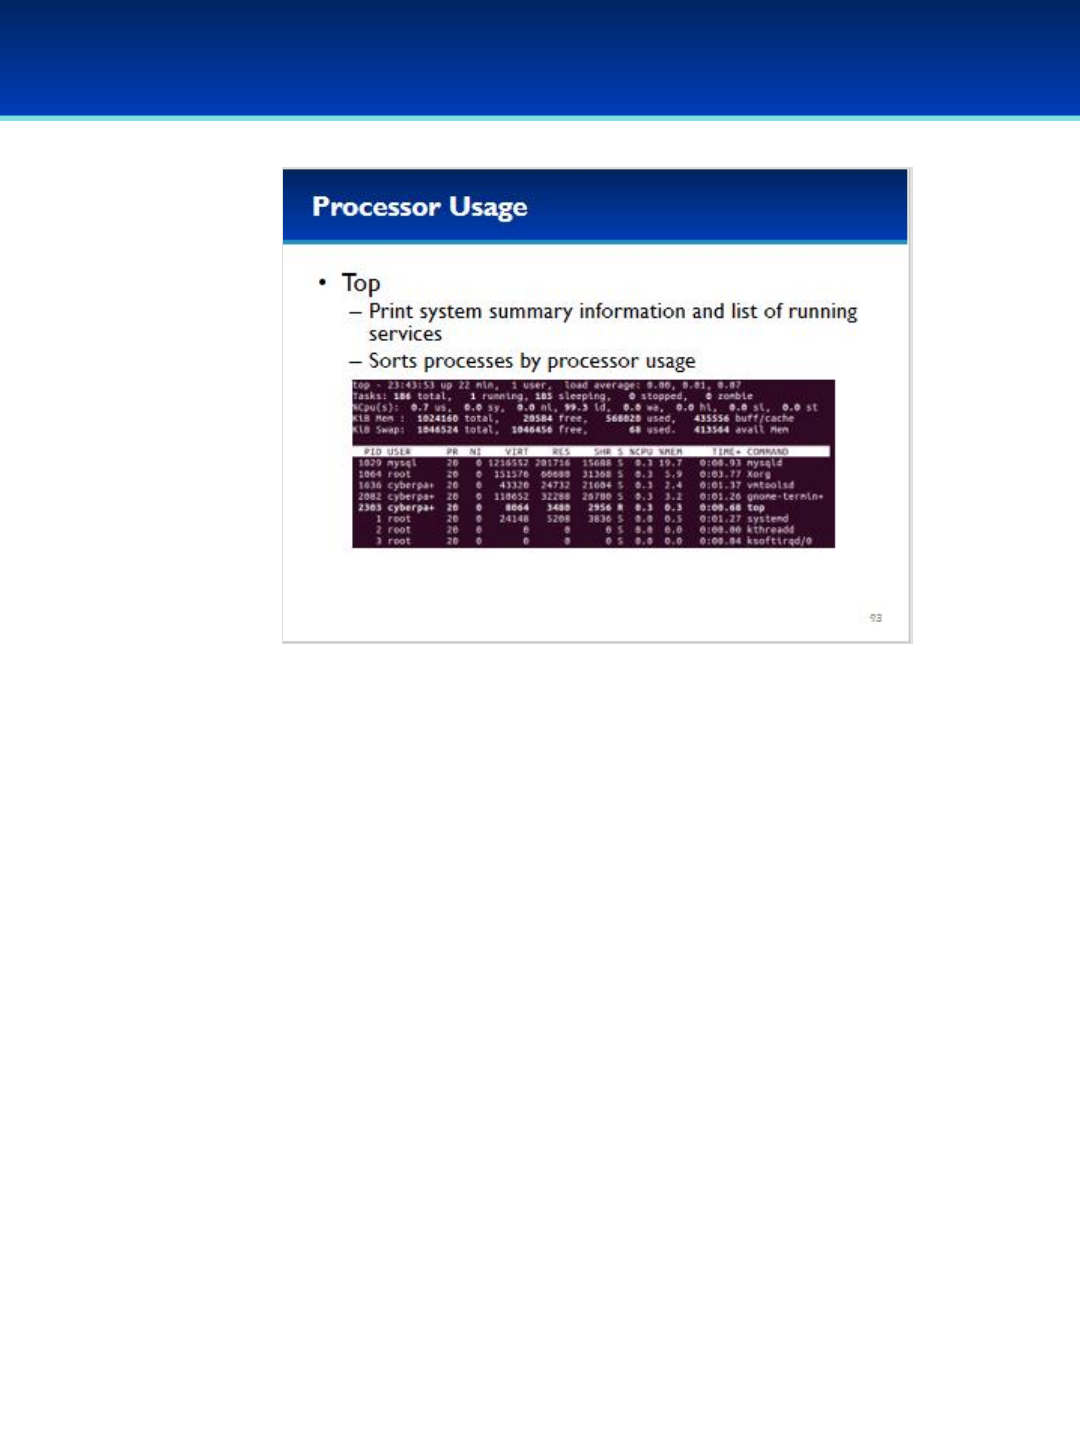
© 2018 Air Force Association
AFA Advanced CyberCamp Instructor’s Guide
Page 220
Slide 93
Ubuntu 16
•Sometimes you want a real-time view of resource utilization and
what processes are running on your system.
•In that case, the top command is what you need.
•By default, top sorts processes by CPU usage, so you can easily see
which processes might be hung, slowing down your system, or
where any bottlenecks might be.
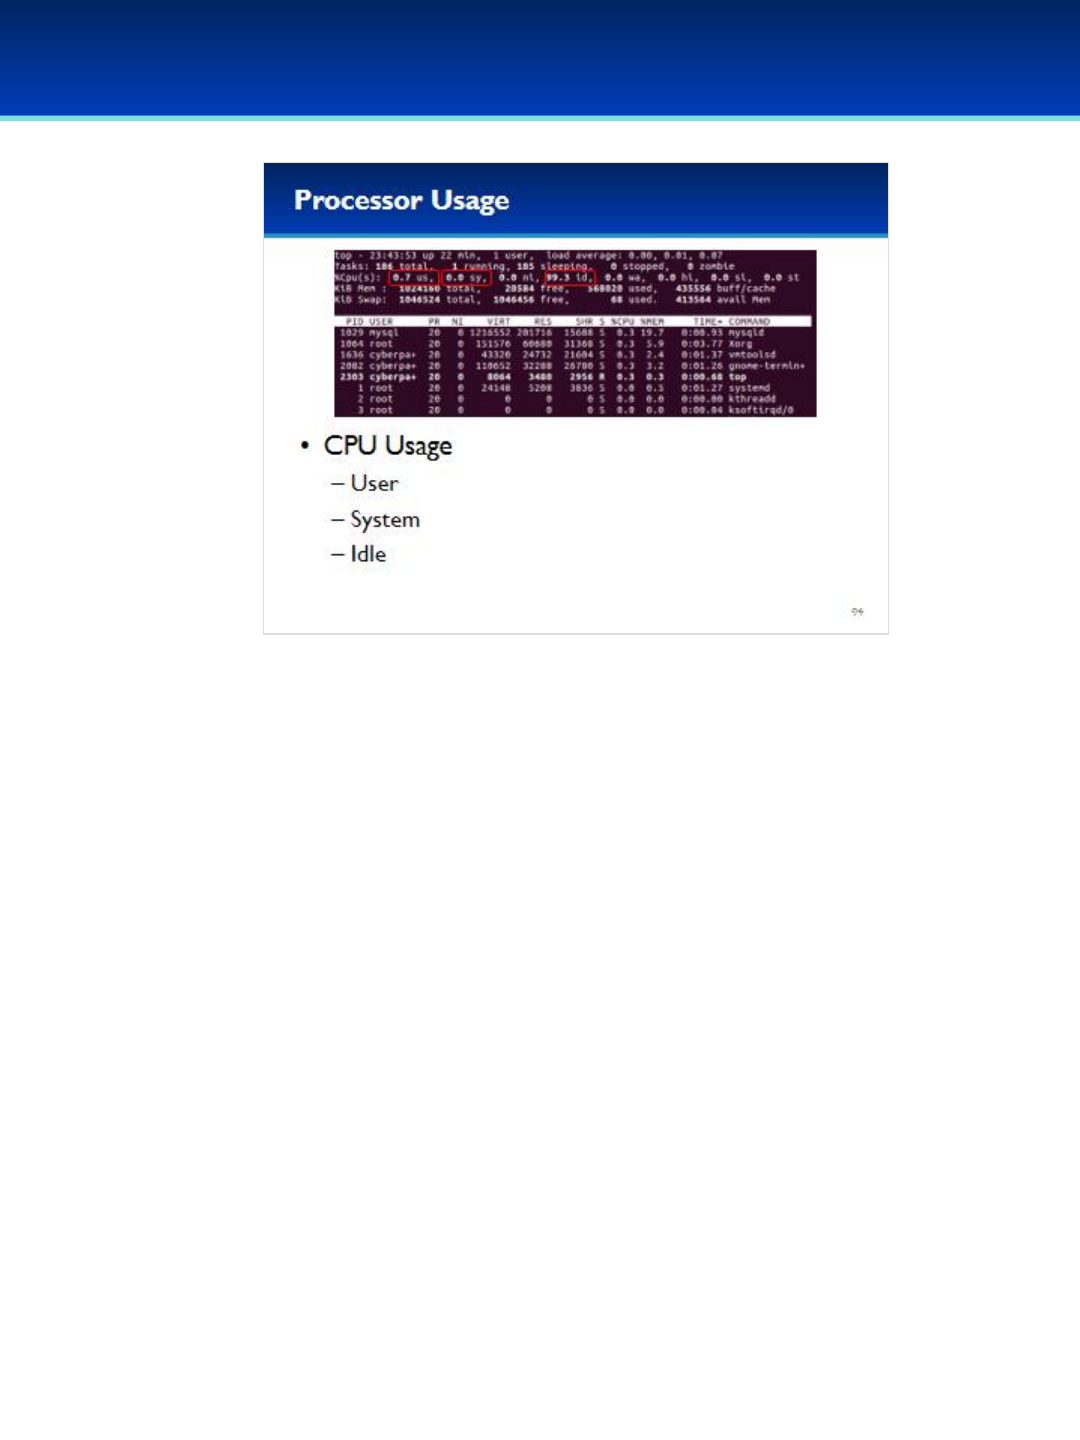
© 2018 Air Force Association
AFA Advanced CyberCamp Instructor’s Guide
Page 221
Slide 94
Ubuntu 16
•The overall CPU usage is displayed here and is divided into three main
parts.
•The user usage is the % of CPU cycles spent on “user space”
applications.
•The system usage is the % of CPU usage spent on “kernel space.”
-A lot of the actions that applications take are performed in “kernel
space” such as file input and output.
•The idle CPU usage is the % that is not being used; this is probably the
first number you want to look at when determining if your CPU is under
heavy load.
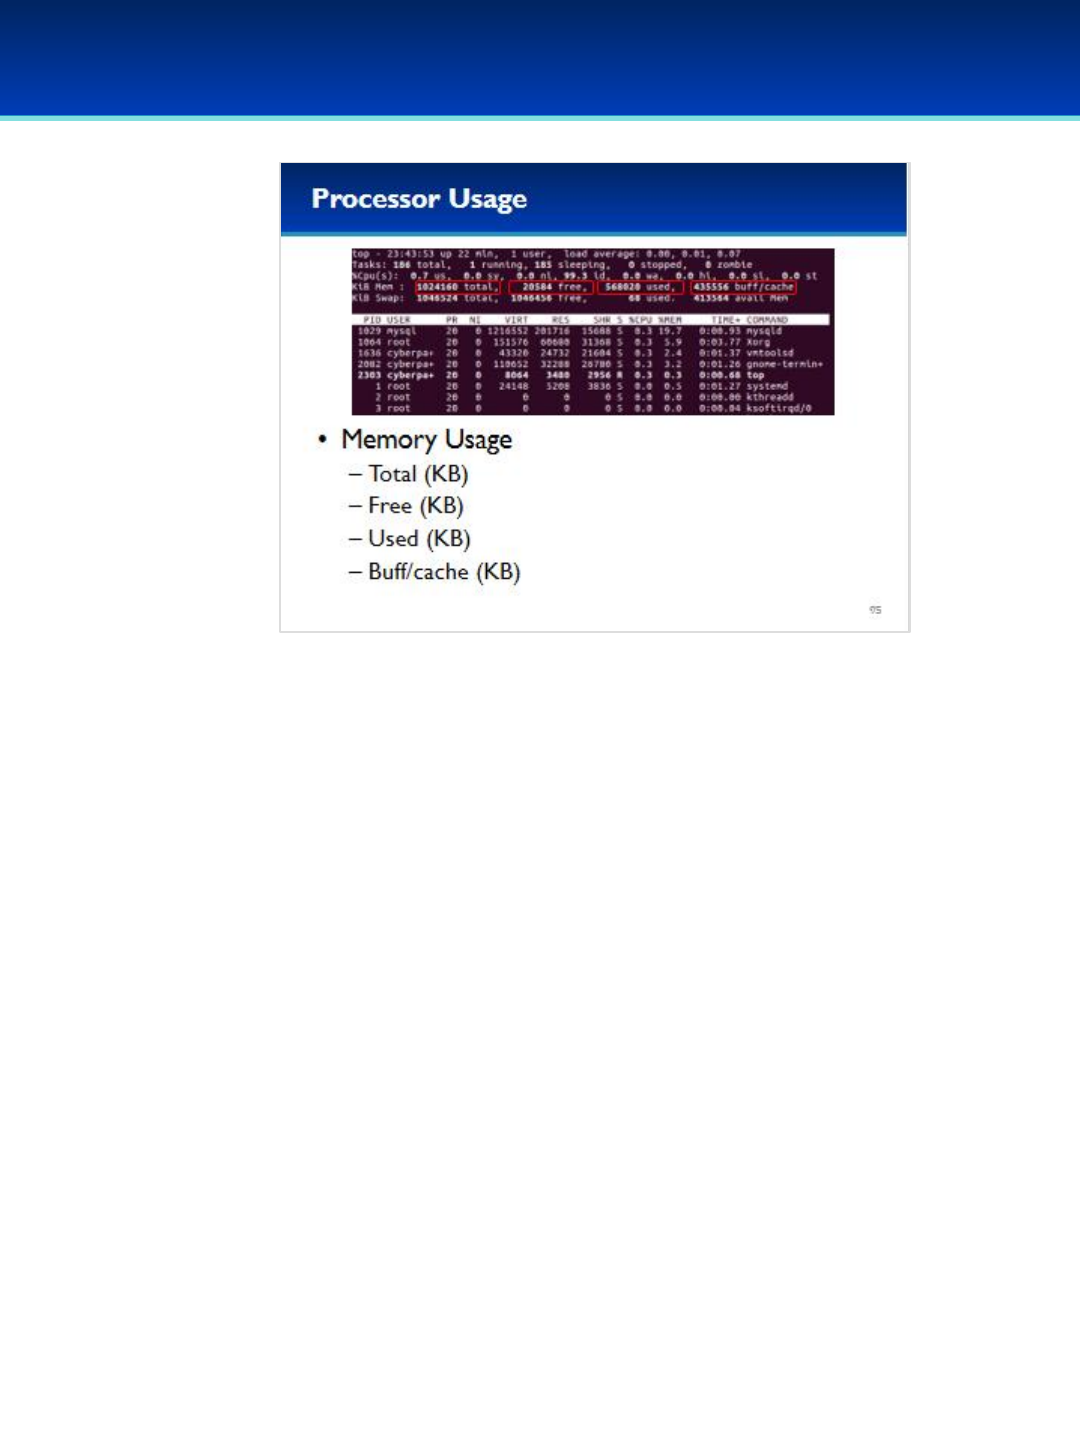
© 2018 Air Force Association
AFA Advanced CyberCamp Instructor’s Guide
Page 222
Slide 95
Ubuntu 16
•System memory usage information is shown as well.
•The total amount of memory in kilobytes is shown on the left; here we have
one gigabyte of system memory.
•Next the amount of free memory is shown; but here it says we only have 20
megabytes free.
•After that, the amount of memory that is used by applications is shown.
Here we are using about 560 megabytes of memory.
•Those numbers don’t exactly add up, so where is the rest of the memory
going?
•The rest of the memory is being used by the kernel to cache recently used
files on the filesystem, so if we need to use those files again, they will be
readily available.
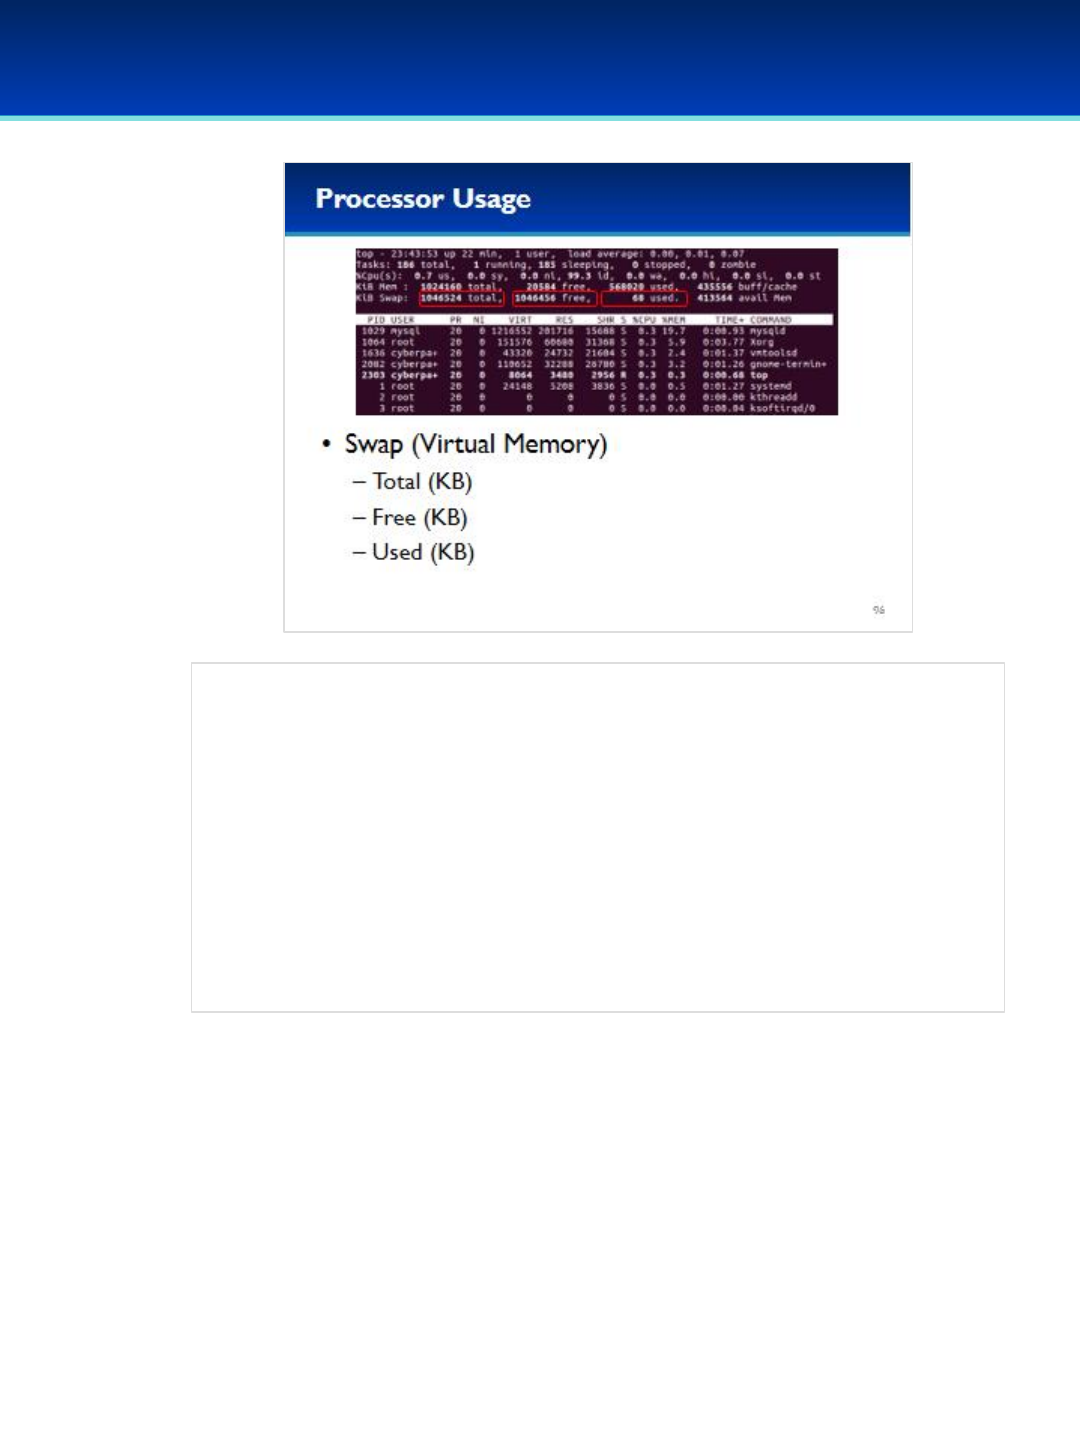
© 2018 Air Force Association
AFA Advanced CyberCamp Instructor’s Guide
Page 223
Slide 96
Ubuntu 16
•The next line of top shows the swap space.
•Swap space is virtual memory, and the kernel will move infrequently
accessed memory there to free up more memory in case we need it.
•Here we can see swap statistics including the total amount of swap
space, the amount of swap space free, and the amount of used swap
space.
-We’re not using much swap space since we have plenty of memory
available to be used (even though that memory is currently allocated to
caching files).
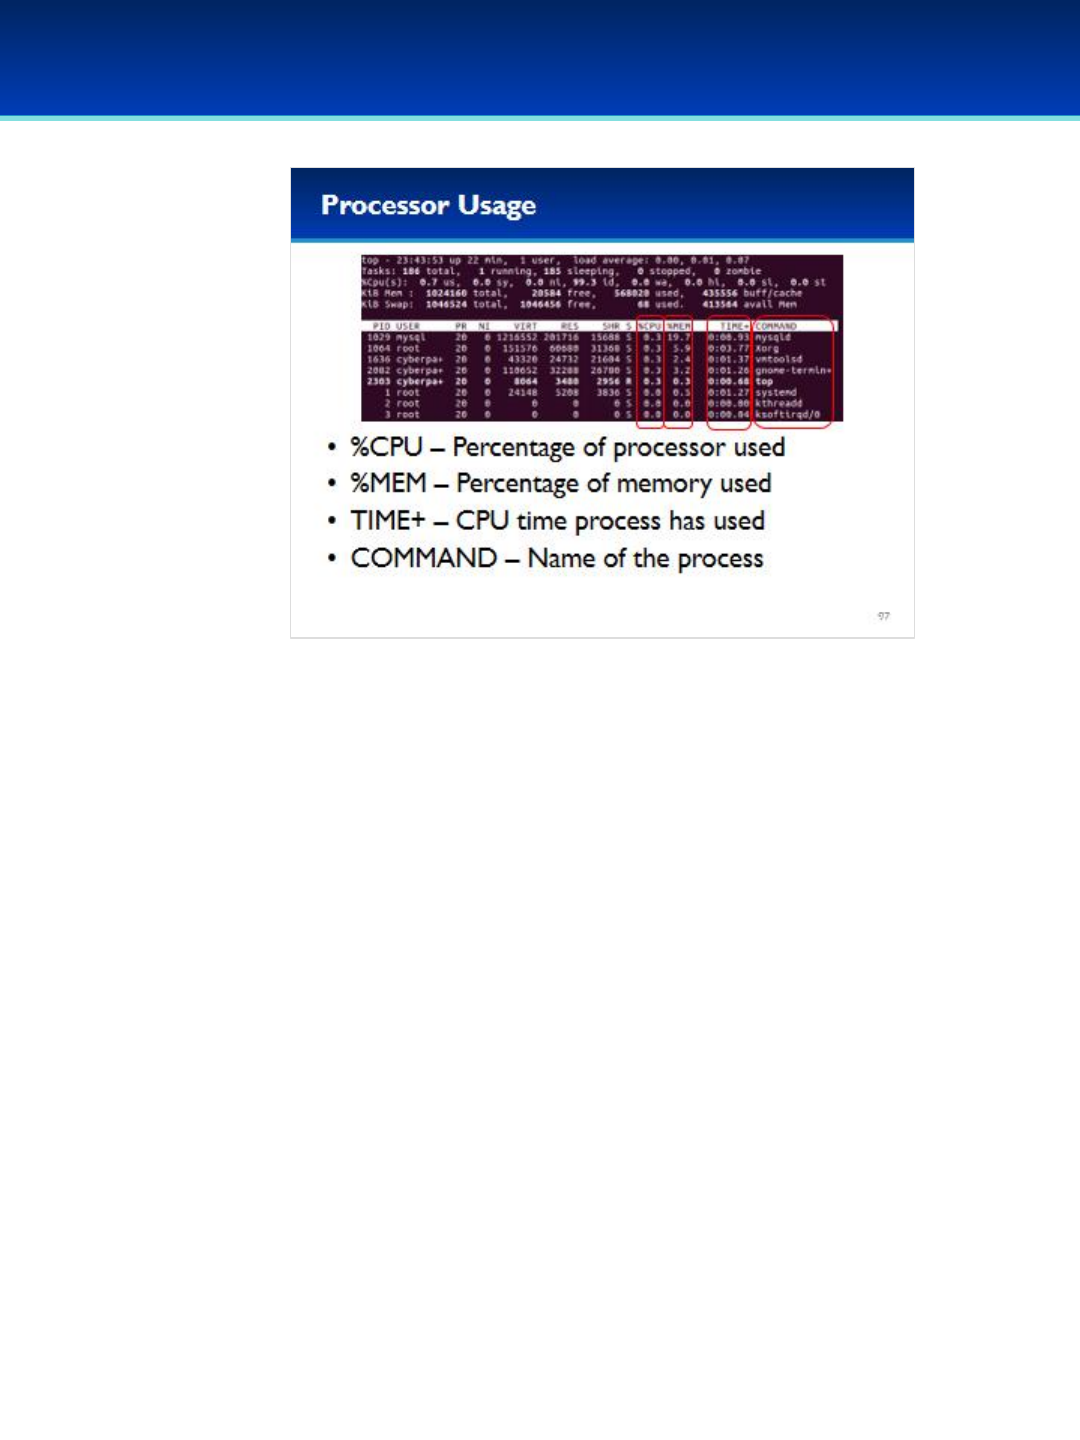
© 2018 Air Force Association
AFA Advanced CyberCamp Instructor’s Guide
Page 224
Slide 97
Ubuntu 16
•Top also shows the percentages of CPU capacity and memory that
a process is using, and the amount of CPU time it has used.
- Remember CPU time is the total amount of time that the
process has been actively running on the CPU.
- Each logical core of a CPU can only run one process at a time,
so it needs to quickly switch between processes to make it
appear like they are all running simultaneously.
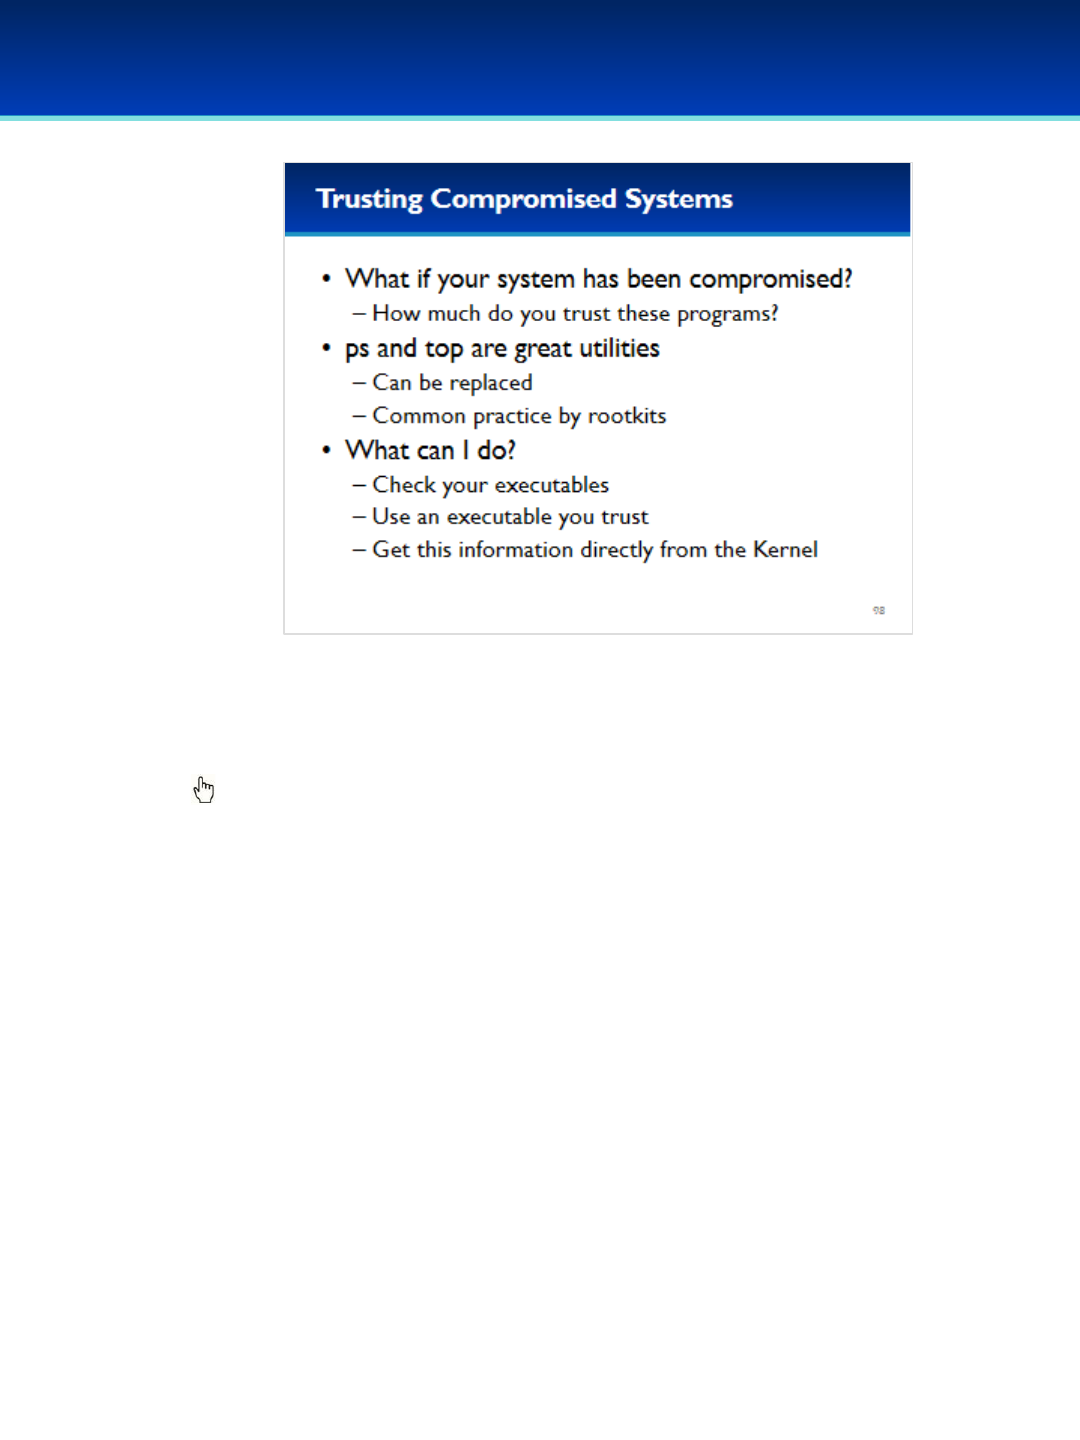
© 2018 Air Force Association
AFA Advanced CyberCamp Instructor’s Guide
Page 225
Slide 98
Ubuntu 16
•What if your system has been compromised?
•Can you trust these programs?
Click to reveal answer.
•ps and top are extremely useful programs, but an adversary that has
compromised your computer can easily replace these (and other)
programs.
•What can you do about it?
- You can check your executables to see if they match the
executables on a trusted computer.
- You can run trusted executables from a removable drive that is
preferably read-only.
- You could get this information directly from the kernel.
•These are all good starting strategies; however, it’s important to note
that you cannot fully trust anything on a system that has been
compromised, so an offline analysis using a trusted computer is
sometimes required.
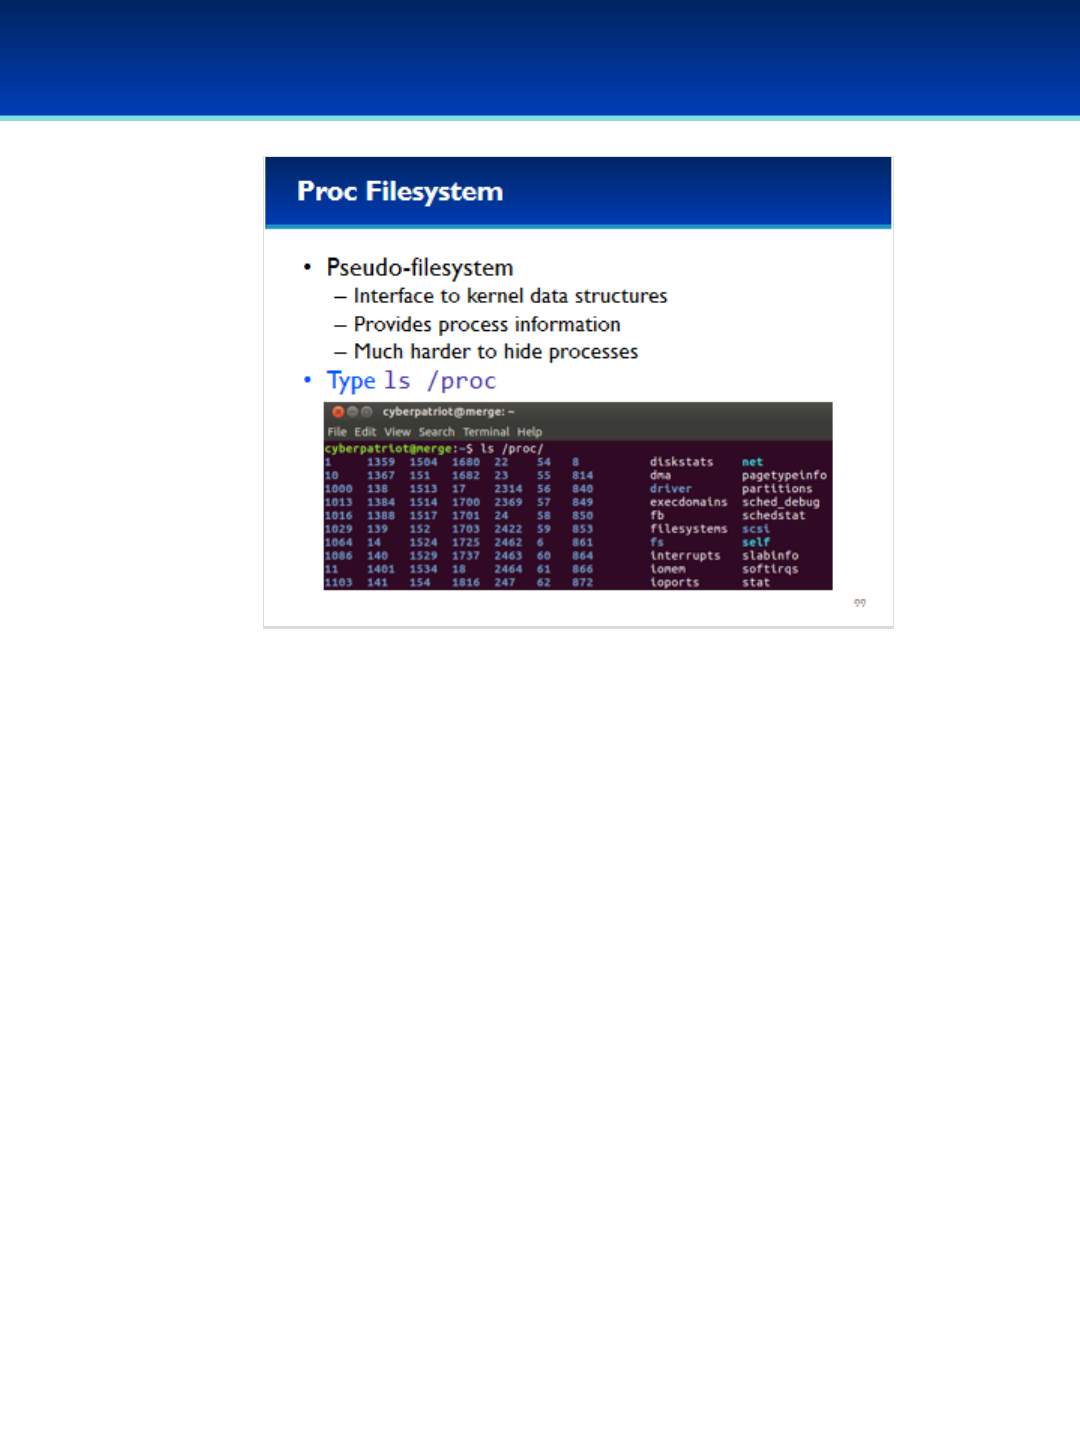
© 2018 Air Force Association
AFA Advanced CyberCamp Instructor’s Guide
Page 226
Slide 99
Ubuntu 16
•How do we get this information directly from the kernel?
•The kernel provides the proc filesystem for this purpose.
•Let’s take a look at the proc filesystem.
Have the students run the commands on the screen.
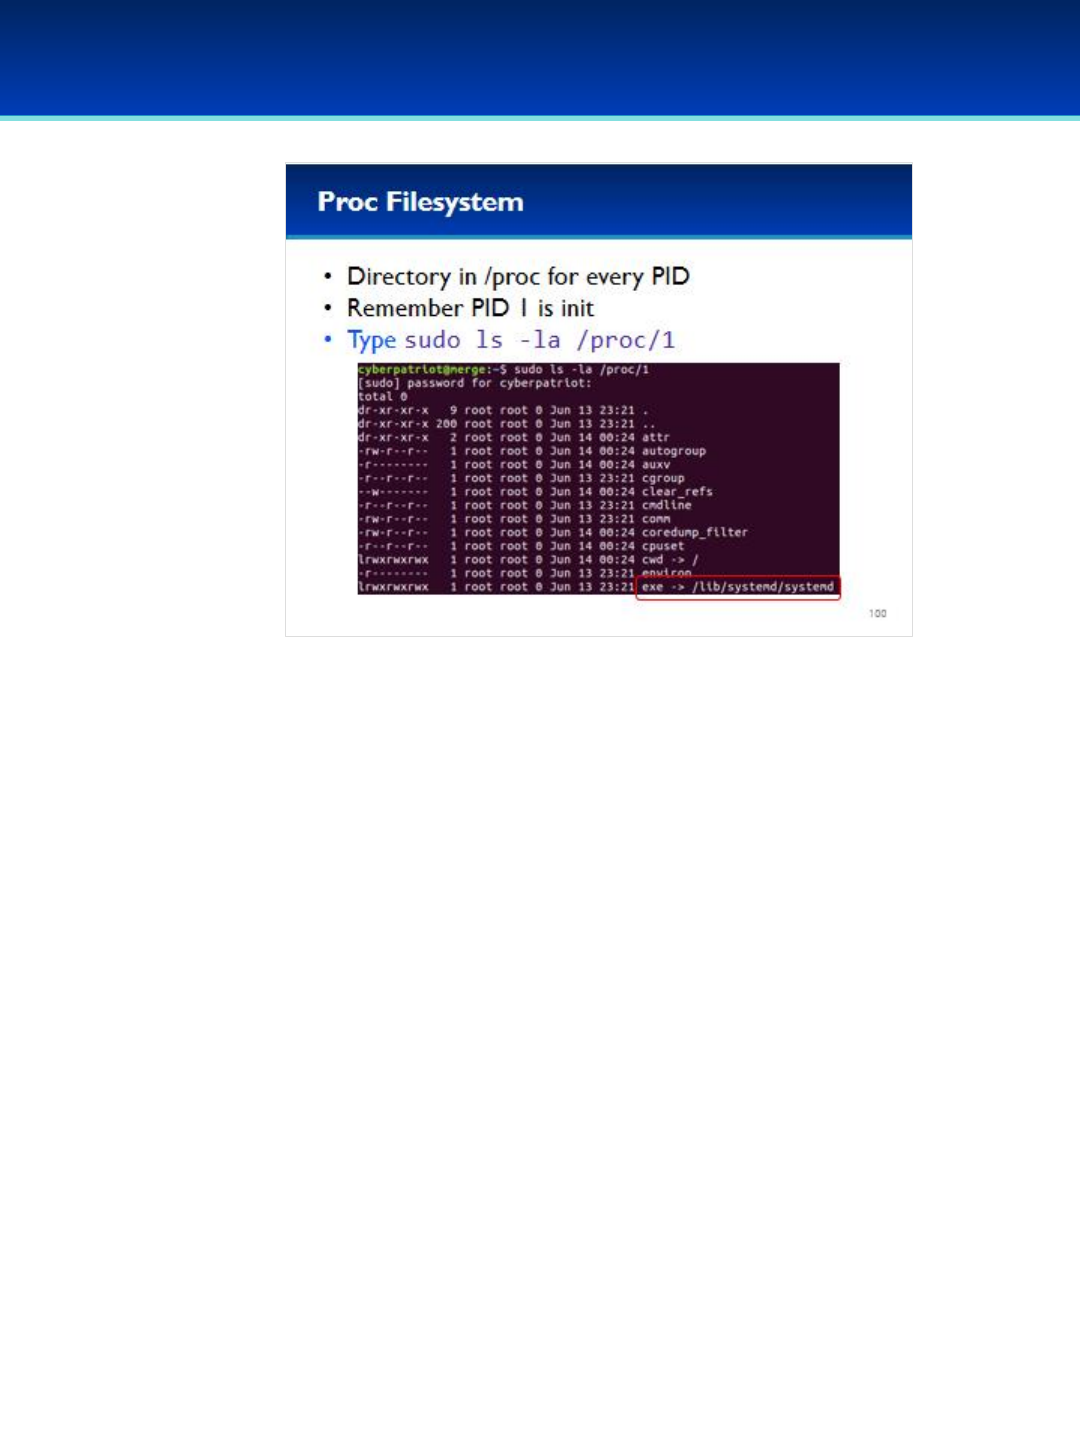
© 2018 Air Force Association
AFA Advanced CyberCamp Instructor’s Guide
Page 227
Slide 100
Ubuntu 16
•Inside the proc filesystem, there are many numbered directories.
•There is a numbered directory for every PID running on the system.
•We know that PID 1 is init, so let’s look inside that directory.
Have the students run the commands on the screen.
•You can see there are lots of files in this directory that represent parts of
the process that you can view or even modify if you have permissions.
•For example, the exe file in this directory points to the actual process
executable which is: /lib/systemd/systemd
•Remember how ps said that PID 1 was: /sbin/init
- /sbin/init is actually just a symlink to /lib/systemd/systemd
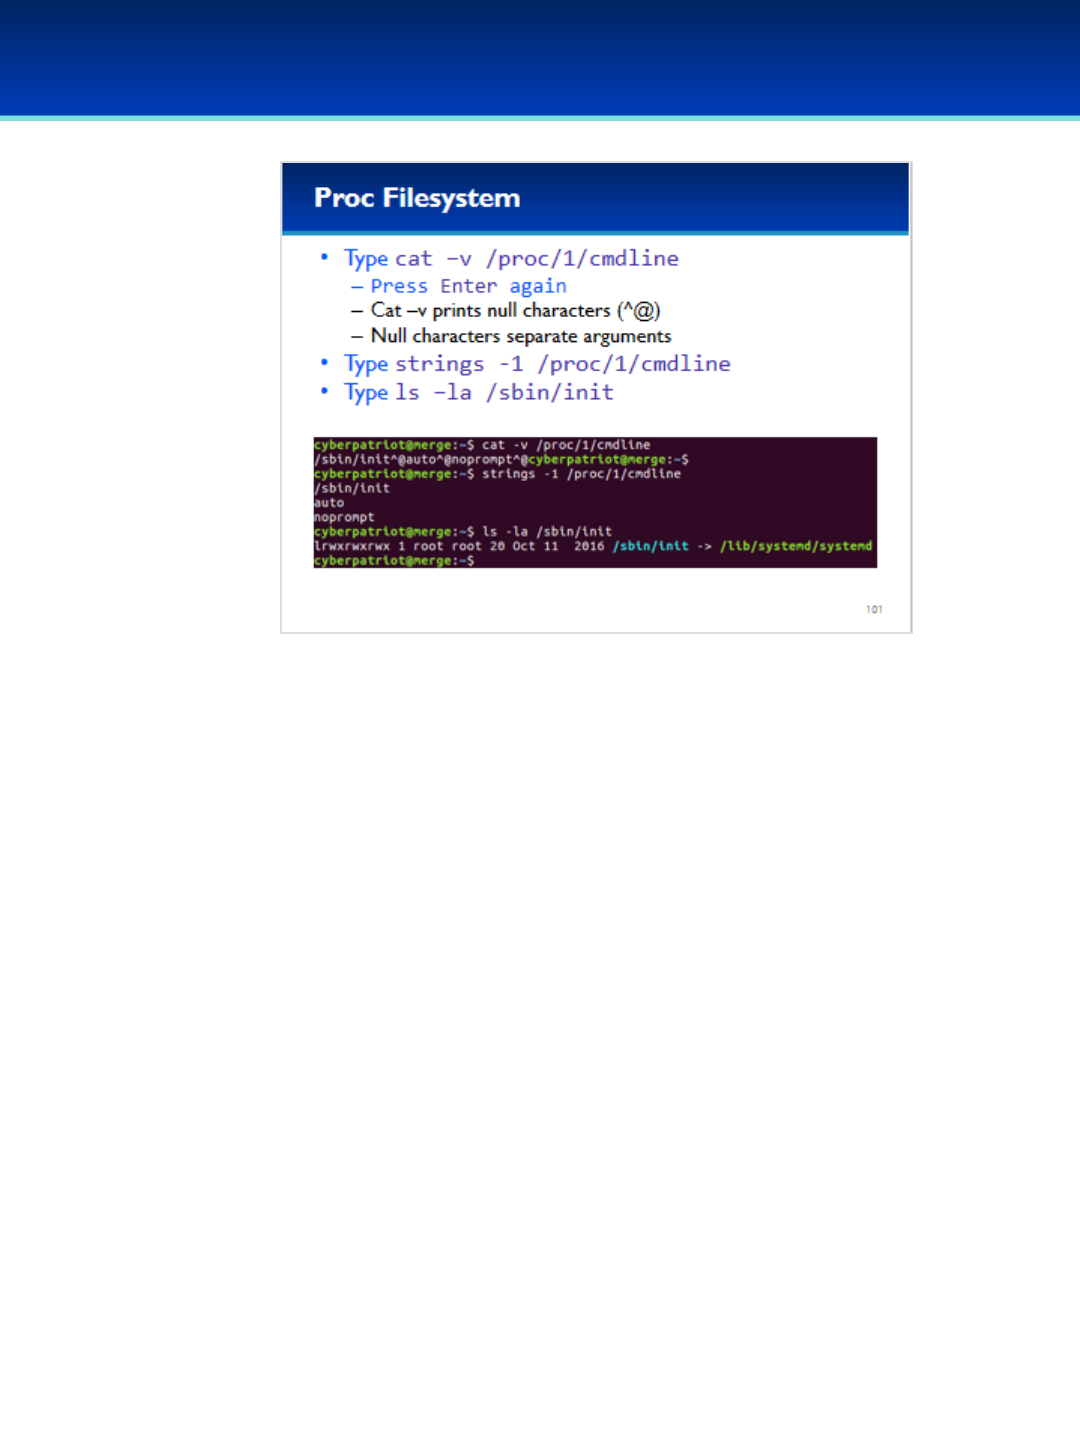
© 2018 Air Force Association
AFA Advanced CyberCamp Instructor’s Guide
Page 228
Slide 101
Ubuntu 16
•Exploring the proc filesystem more, the cmdline file contains the
command line that was used to execute the program.
•However, the command line arguments are separated by null
characters which don’t print to the screen, making the output hard
to read.
•To get around this you can use cat –vto print the null characters as
^@
•Or you can use strings -1 to print each argument on a different line.
Have the students run the commands on the screen.
•You can see systemd was started as /sbin/init with the auto and
noprompt command line arguments.
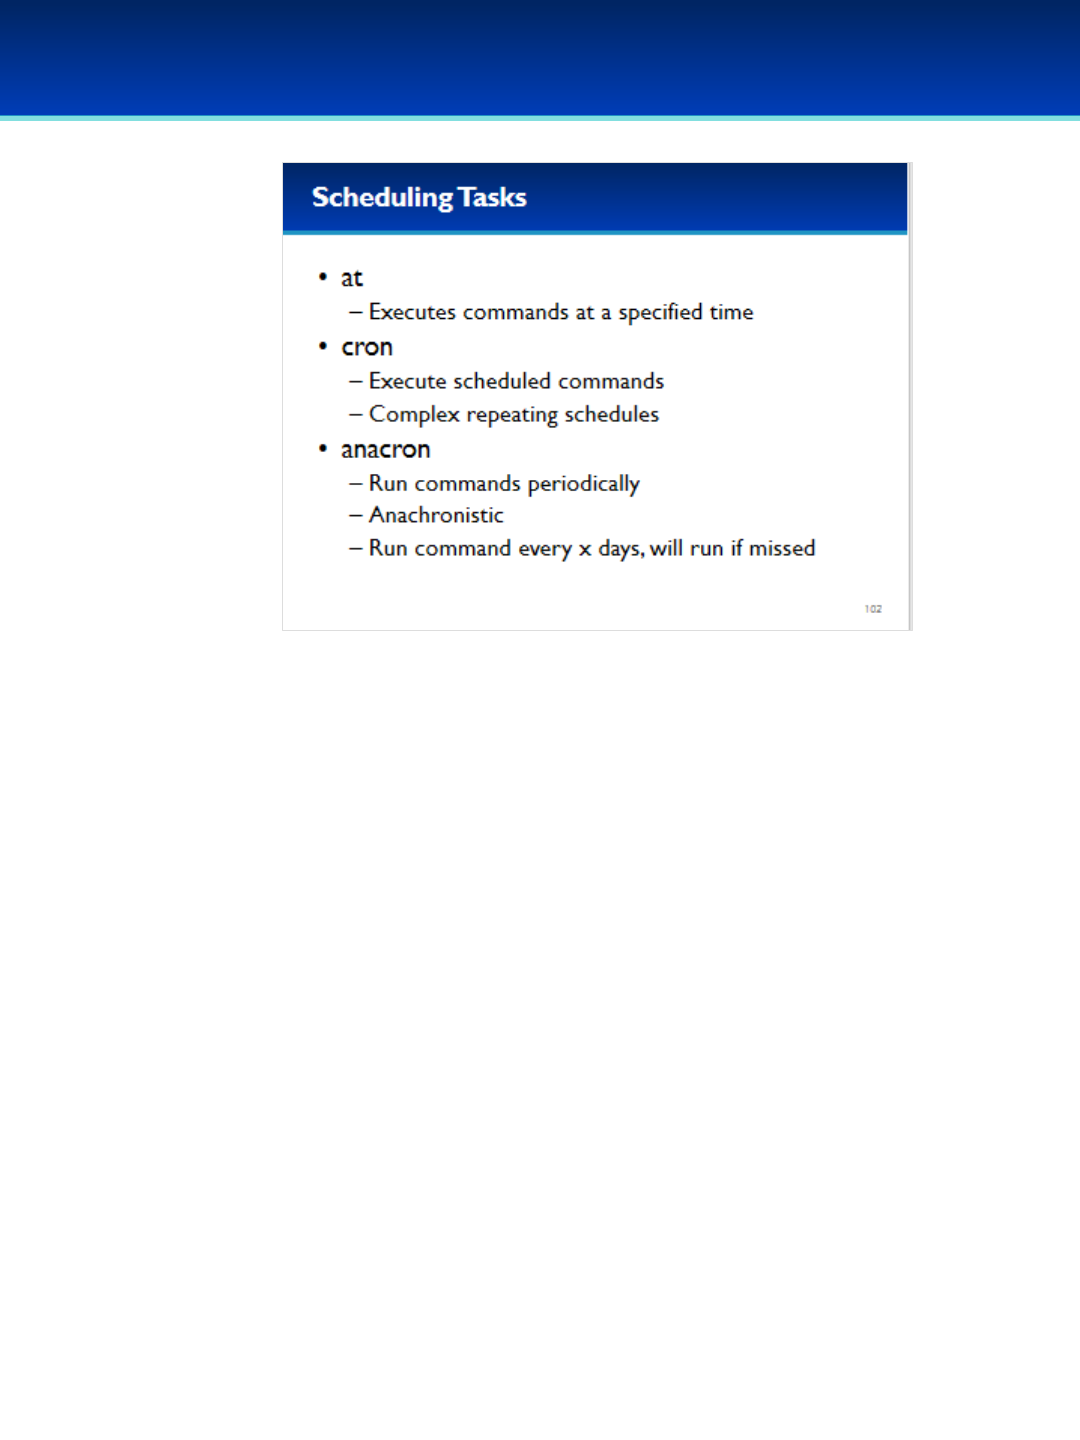
© 2018 Air Force Association
AFA Advanced CyberCamp Instructor’s Guide
Page 229
Slide 102
Ubuntu 16
•How do scheduled tasks get executed in Linux?
•All processes get spawned by an existing process, and scheduled tasks are
no different. These are started by services such as at, cron, and anacron.
•At is no longer installed on most Linux distributions by default, but it can
be used to execute a program at a specified time.
•Cron is designed for running tasks on a regularly repeating schedule, and is
very configurable allowing you to specify complex schedules to fit most
needs.
•Cron is an important system service, so it’s usually not a good idea to
remove it.
•Anacron is another system service that can work in conjunction with cron.
- Designed to run programs on a schedule that is specified in days. Unlike
cron you can’t specify times.
- What makes anacron special is that it will run tasks if they were
previously missed, which often happens when a system is powered off.
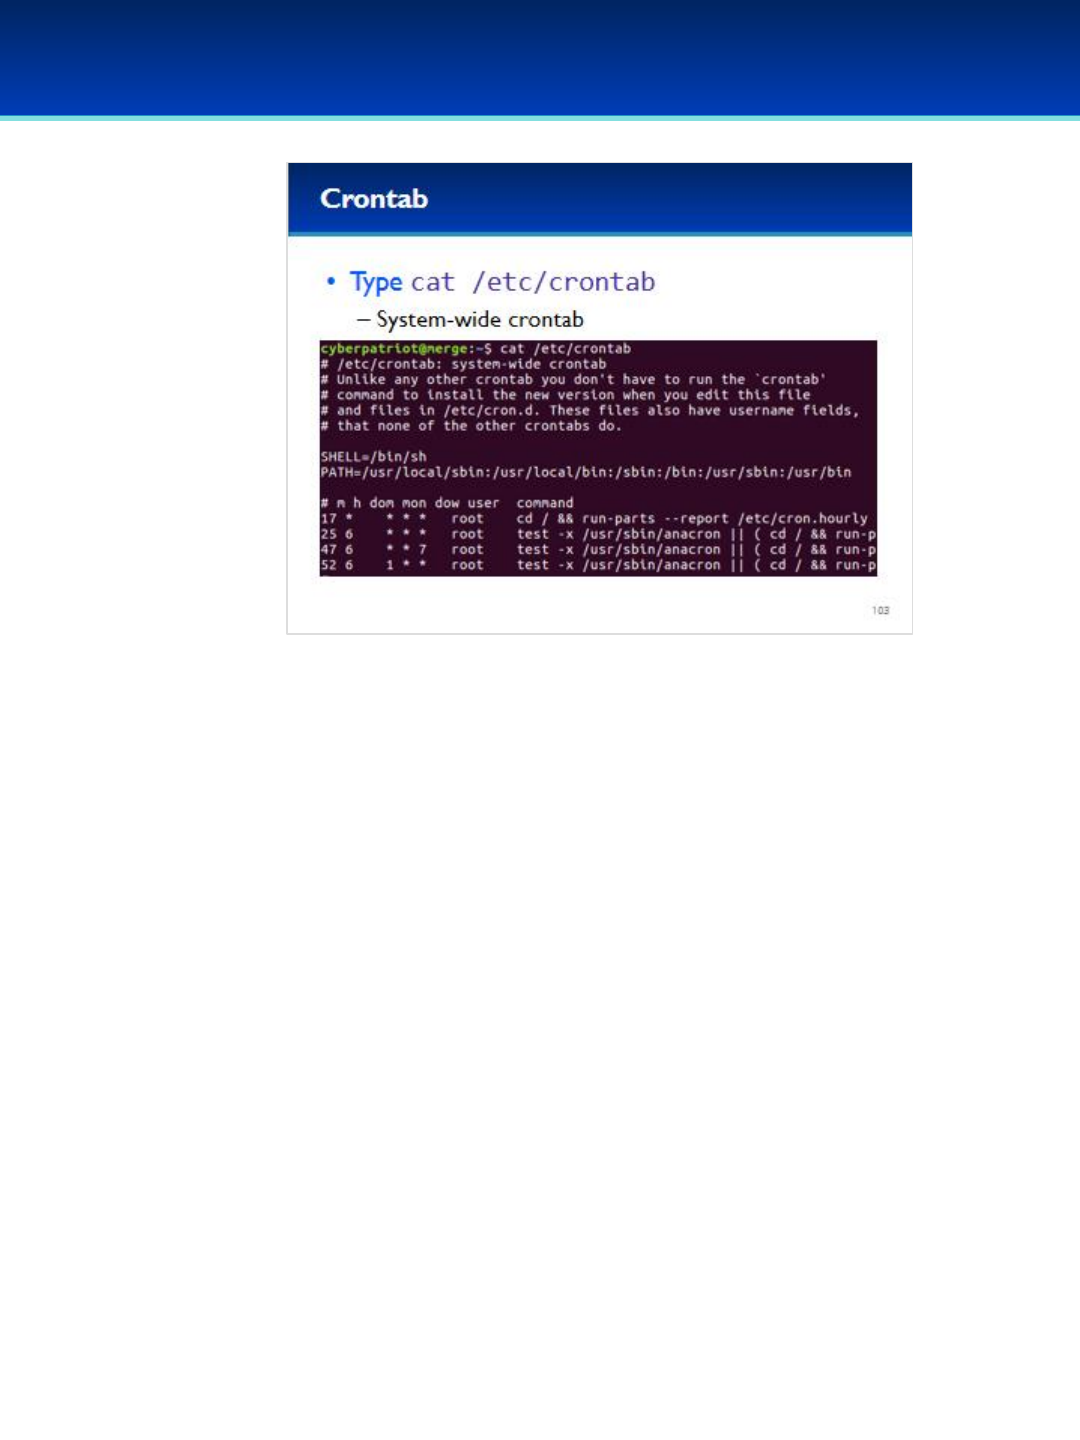
© 2018 Air Force Association
AFA Advanced CyberCamp Instructor’s Guide
Page 230
Slide 103
Ubuntu 16
•The primary cron configuration file that tells cron what to run is
located at: /etc/crontab
•Lines that begin with # are comments and are ignored by cron.
•Let’s examine this file more closely on the next slides.
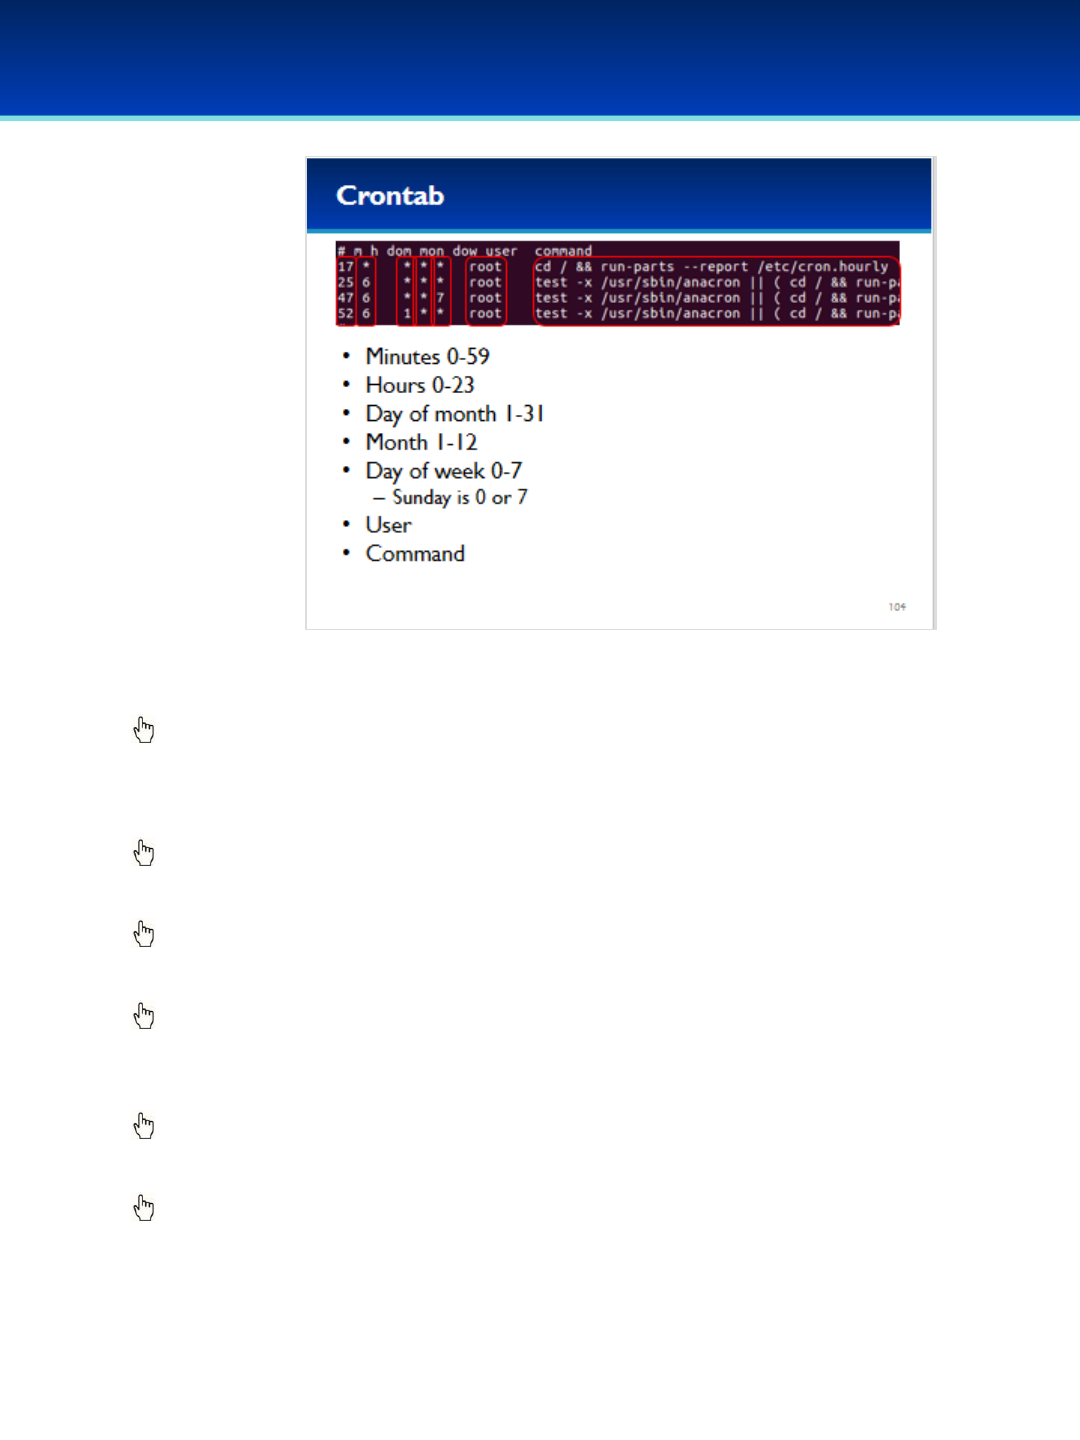
© 2018 Air Force Association
AFA Advanced CyberCamp Instructor’s Guide
Page 231
Slide 104
Ubuntu 16
•The first column is minutes; specifies the minutes portion of the day and time that
the command will be run.
Click to reveal Hours.
•The second column is hours, and specifies the hours portion.
•A star means the command will be executed for any value.
Click to reveal day of month.
•The next column is the day of the month, as a number, from 1-31.
Click to reveal month.
•The next column is the month, specified as a number, from 1-12.
Click to reveal day of week.
•The next column is the day of week, specified as a number from 0-7; Sunday is
represented by either 0 or 7.
Click to reveal user.
•User displays name of user that initiated a process.
Click to reveal Command.
•Finally, the last column is the command that is run.
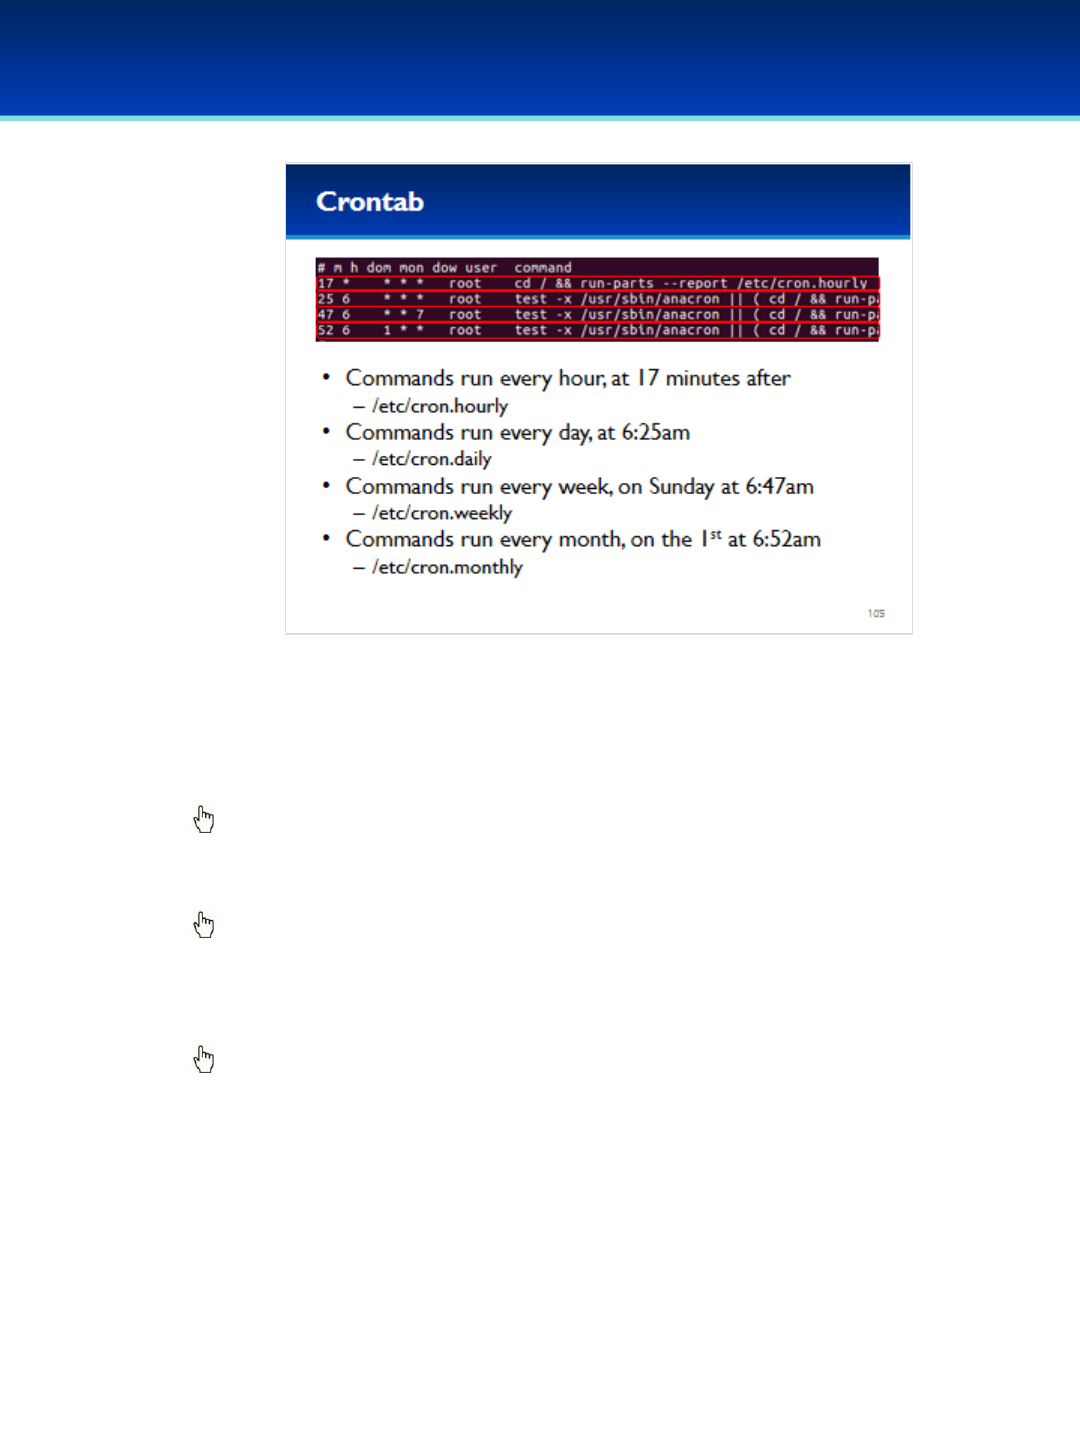
© 2018 Air Force Association
AFA Advanced CyberCamp Instructor’s Guide
Page 232
Slide 105
Ubuntu 16
•The first line runs the specified command every hour of every day at 17
minutes after the top of the hour.
•This command runs all of the commands in: /etc/cron.hourly
Click to reveal cron.daily.
•The next line runs all commands in /etc/cron.daily everyday at 6:25 a.m.
Click to reveal cron.weekly.
•The next line runs all commands in /etc/cron.weekly every Sunday at
6:47 a.m.
Click to reveal cron.monthly.
•The last line runs all commands in /etc/cron.monthly on the first of
every month at 6:52 a.m.

© 2018 Air Force Association
AFA Advanced CyberCamp Instructor’s Guide
Page 233
Slide 106
Ubuntu 16
•Additional cron files are located in: /etc/cron.d/
Have the students run the commands on the screen.
•Here, the php sessionclean command is run twice every hour, at nine
minutes after, and 39 minutes after.
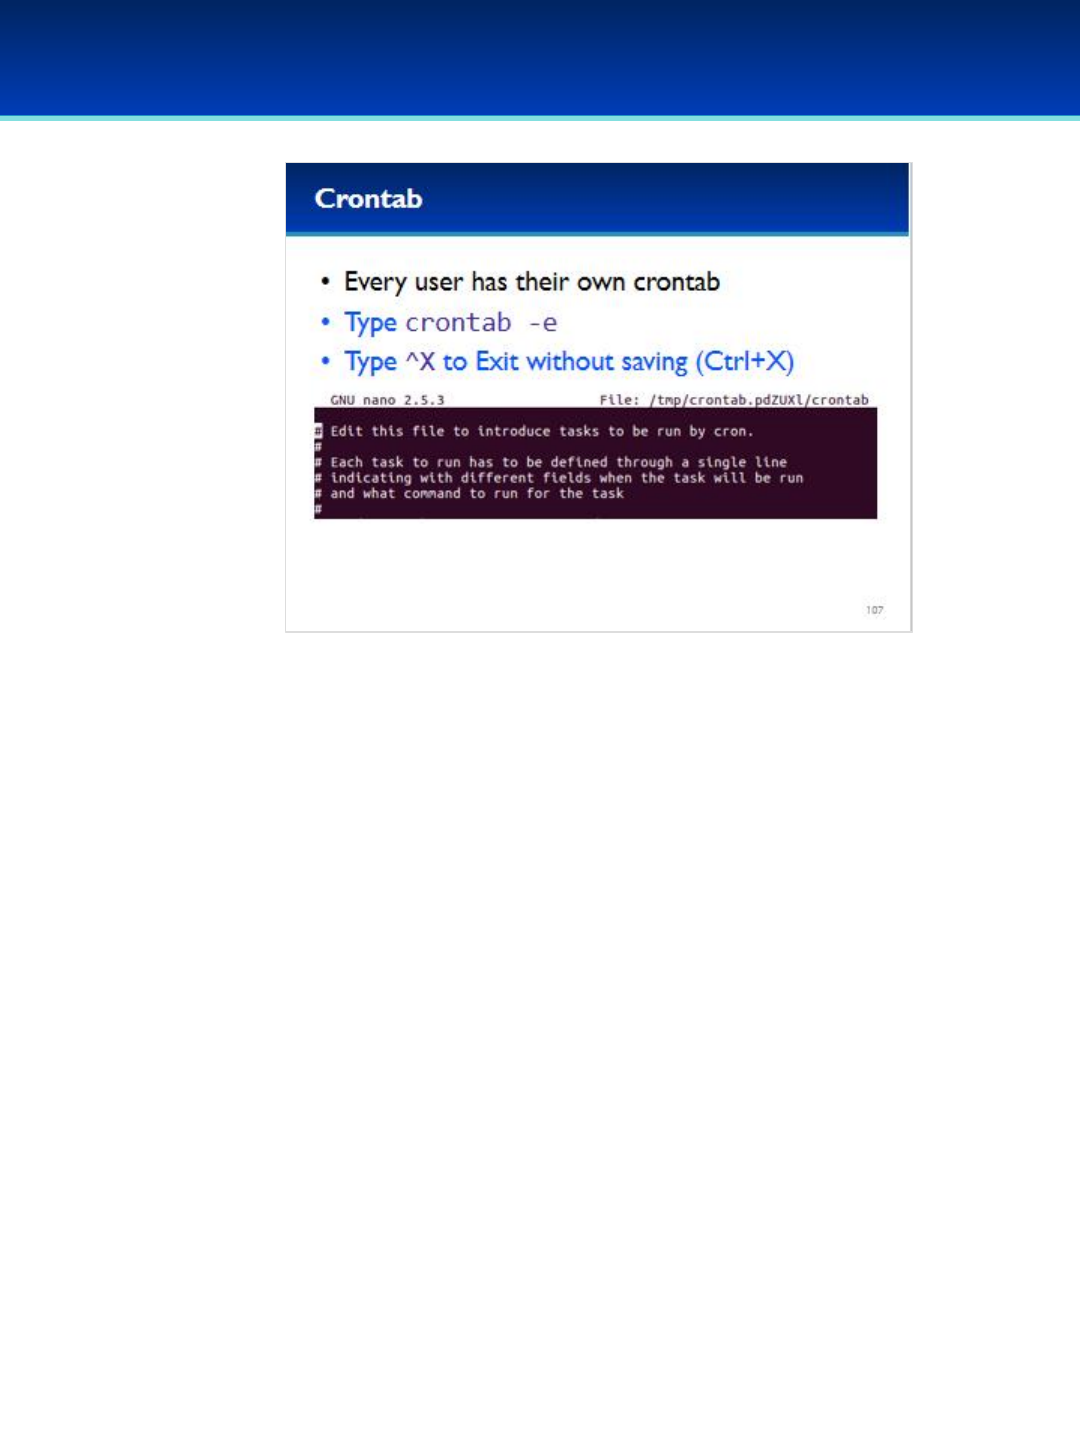
© 2018 Air Force Association
AFA Advanced CyberCamp Instructor’s Guide
Page 234
Slide 107
Ubuntu 16
•Additionally, every user has their own crontab that can be edited by
typing the command: crontab –e
- User crontab files don’t specify a user to run the command, since
they will always run as the user that the crontab belongs to.
Have the students run the commands on the screen.
•This is a default blank crontab that does nothing. Note: All the lines that
begin with # are comments and are ignored.

© 2018 Air Force Association
AFA Advanced CyberCamp Instructor’s Guide
Page 235
Slide 108
Ubuntu 16
Give students about 20 minutes to complete the tasks listed on page 10 of their
workbooks.
This lab will review processes and scheduled tasks.
Stress that the students should not change any passwords or settings unless they are
expressly directed to do so in the activity.
The students should not need to use any other user names or passwords to complete
the activities. Here are the passwords to some administrative accounts just in case.
Username: neumann
Password: vN_@rchit3cture
Username: hopper
Password: ENIAC.TurC0mp
Answers:
1. -r
2. /usr/bin/nc -k -l -p 1337 -w 300 -e /bin/bash
3. Every minute
4. -
5. -
6. 3
7. --no-debug
8. /bin/ls

© 2018 Air Force Association
AFA Advanced CyberCamp Instructor’s Guide
Page 236
Slide 109
Ubuntu 16
Devote 40 minutes to slides 110-149. Allow the students 20
minutes to complete the activity on slide 149.
Throughout this section, students should follow along in the
Advanced Ubuntu 16 Demo Image.
In this section we’ll take a long look at a few of the many Kernel
parameters that can affect the security of your system, and the
best way to modify them. In the second part of this section we will
break down PAM and explain how it works step-by-step so you
know how to enable secure account and password policies.
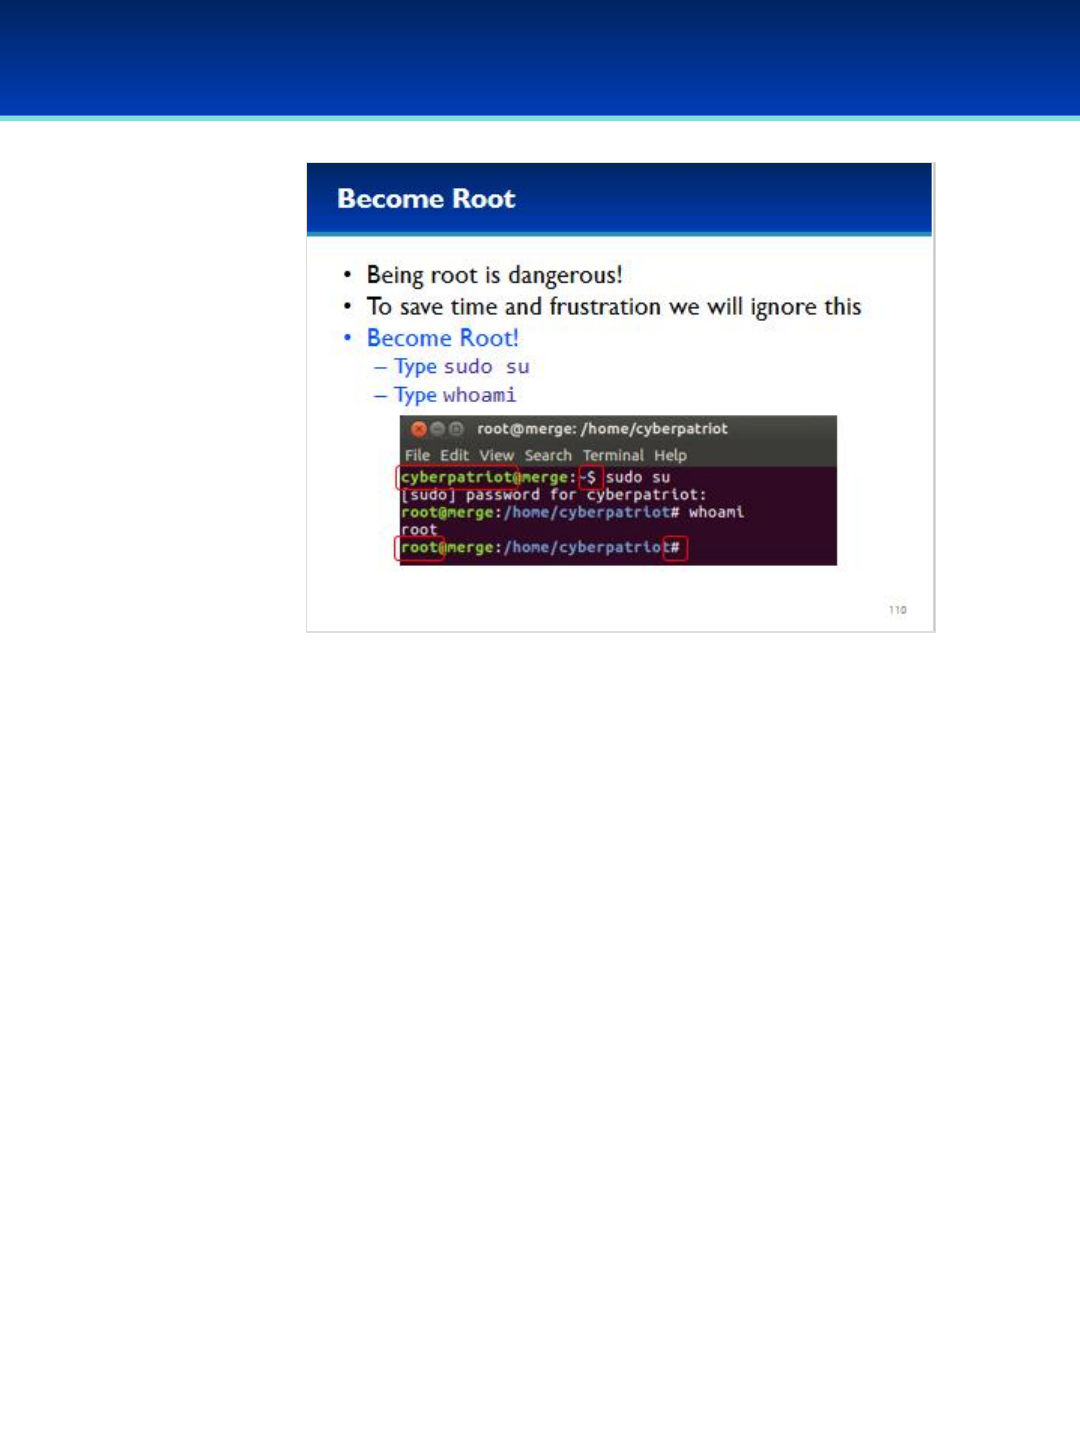
© 2018 Air Force Association
AFA Advanced CyberCamp Instructor’s Guide
Page 237
Slide 110
Ubuntu 16
•Some of the commands in this section are harder to execute if you’re not
root; in particular, output redirection is more complicated using sudo.
•For this purpose we are going to be root for the remaining sections.
•In order to become root, type sudo su and type your password if prompted.
Have the students run the commands on the screen.
•When you’re root, you can see that your username to the left side of your
prompt changes to root, and the symbol on the right side if your prompt
changes to a #.
•This is done to help you know if you’re root or not.

© 2018 Air Force Association
AFA Advanced CyberCamp Instructor’s Guide
Page 238
Slide 111
Ubuntu 16
•Kernel parameters are options that affect many parts Linux,
including kernel modules.
•The parameters are accessible in: /proc/sys
- Many parameters can be directly changed through the /proc/
filesystem.
•These values are loaded on boot from the file /etc/sysctl.conf,
and all of the files in the directory: /etc/sysctl.d/
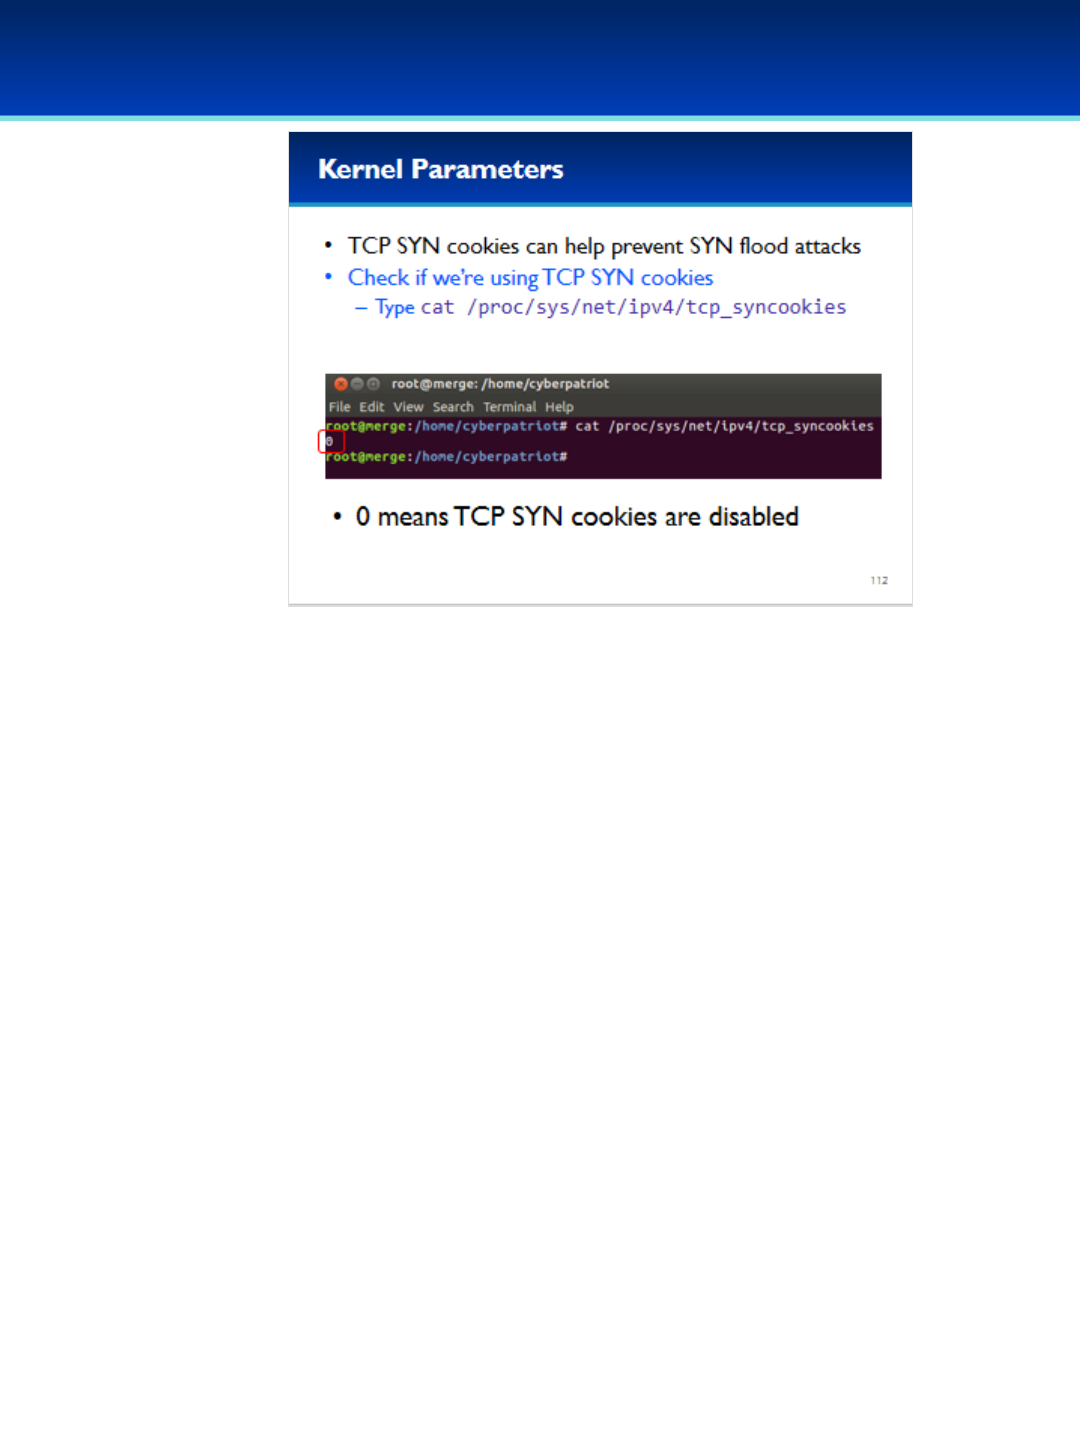
© 2018 Air Force Association
AFA Advanced CyberCamp Instructor’s Guide
Page 239
Slide 112
Ubuntu 16
•There are many security-related kernel parameters, and we can’t
cover them all. That’s up to you to research on your own, but we will
cover a few prominent examples.
•TCP Syncookies is a technique that can help prevent SYN flood
attacks.
•To check if we are using TCP SYN cookies, enter: cat
/proc/sys/net/ipv4/tcp_syncookies
•This isn’t a “real” file on the hard drive, but rather an interface to the
Linux kernel that can be accessed the same way as a file.
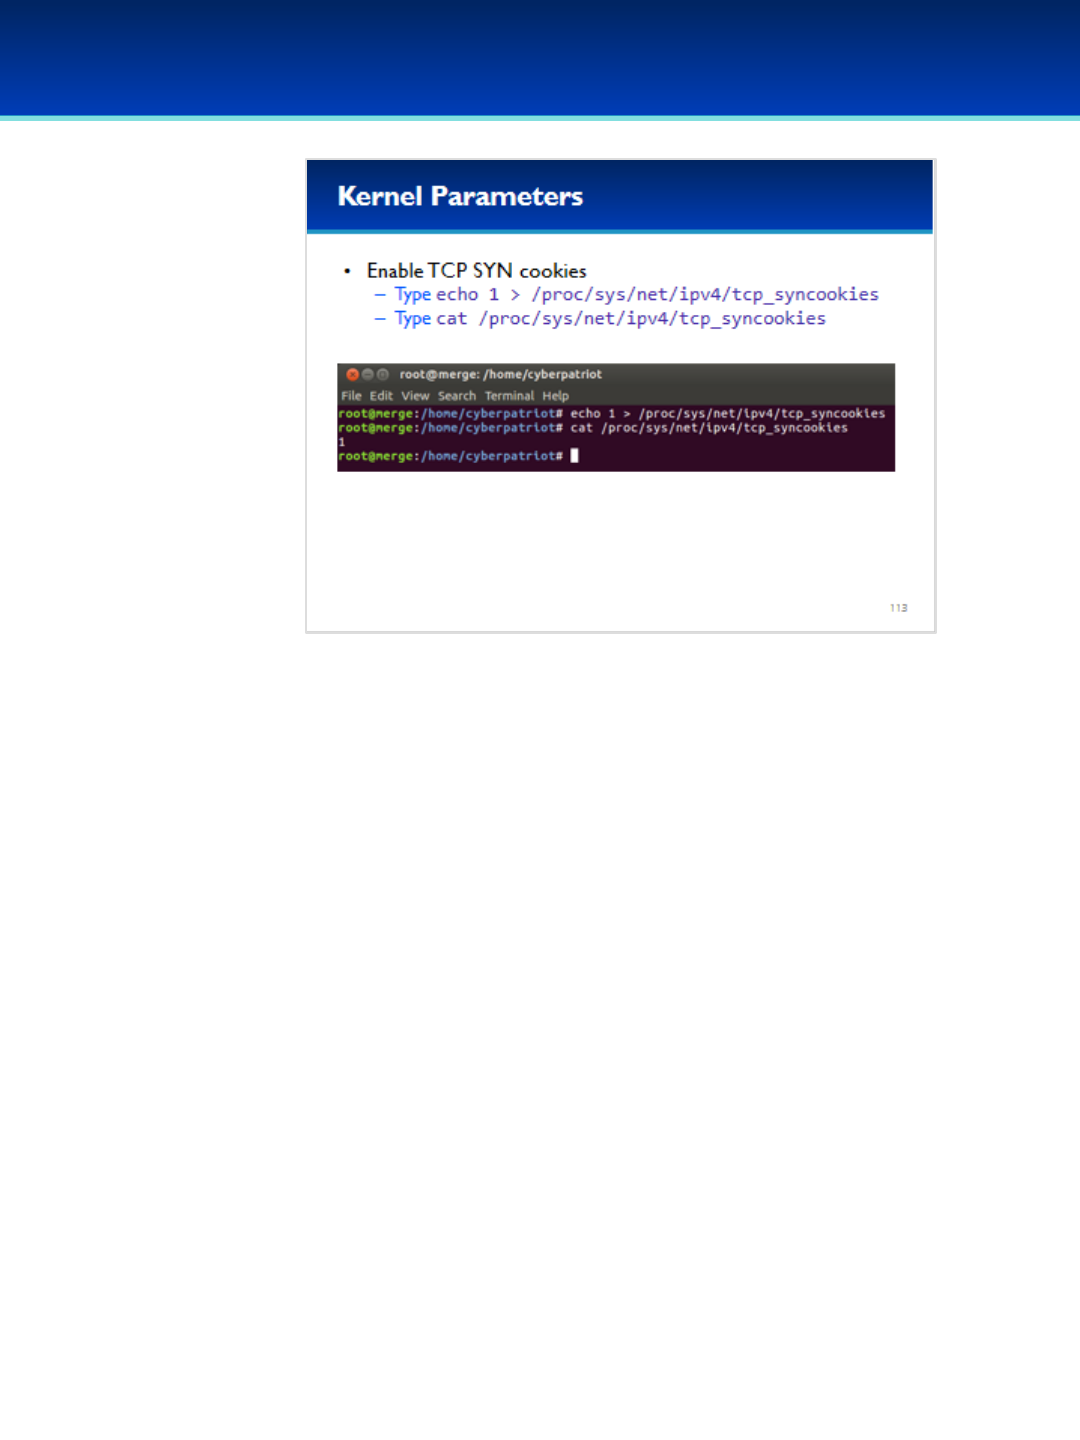
© 2018 Air Force Association
AFA Advanced CyberCamp Instructor’s Guide
Page 240
Slide 113
Ubuntu 16
•In order to enable TCP SYN cookies, all we have to do is write 1 to
the tcp_syncookies file.
Have the students run the commands on the screen.
•You can see that now the file contains a 1 and the Linux kernel is
now using TCP SYN cookies to protect your computer against SYN
flood attacks.
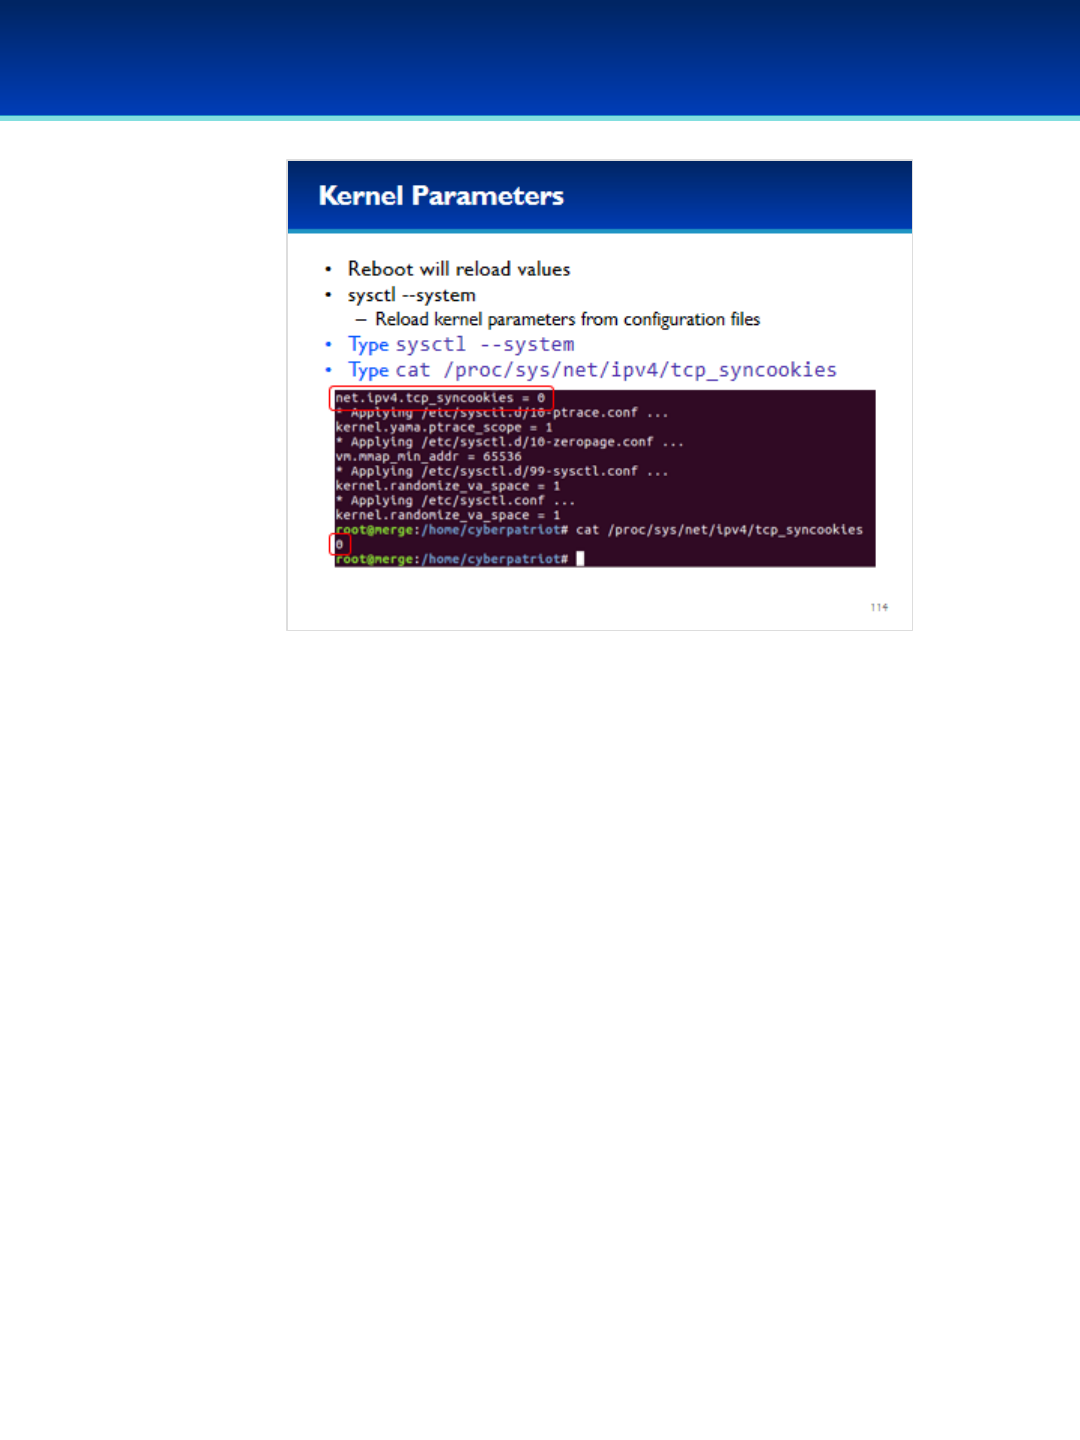
© 2018 Air Force Association
AFA Advanced CyberCamp Instructor’s Guide
Page 241
Slide 114
Ubuntu 16
•Unfortunately, our changes are not persistent. The next time the
computer is shut off or rebooted, tcp_syncookies will go back to its
default value.
•To simulate this, we can use the sysctl command, which reloads the
values stored in the sysctl configuration files.
•Side note: the sysctl command is completely unrelated to systemctl
and systemd.
Have the students run the commands on the screen.
•After running sysctl --system we can see that the tcp_syncookies
value was restored to 0.
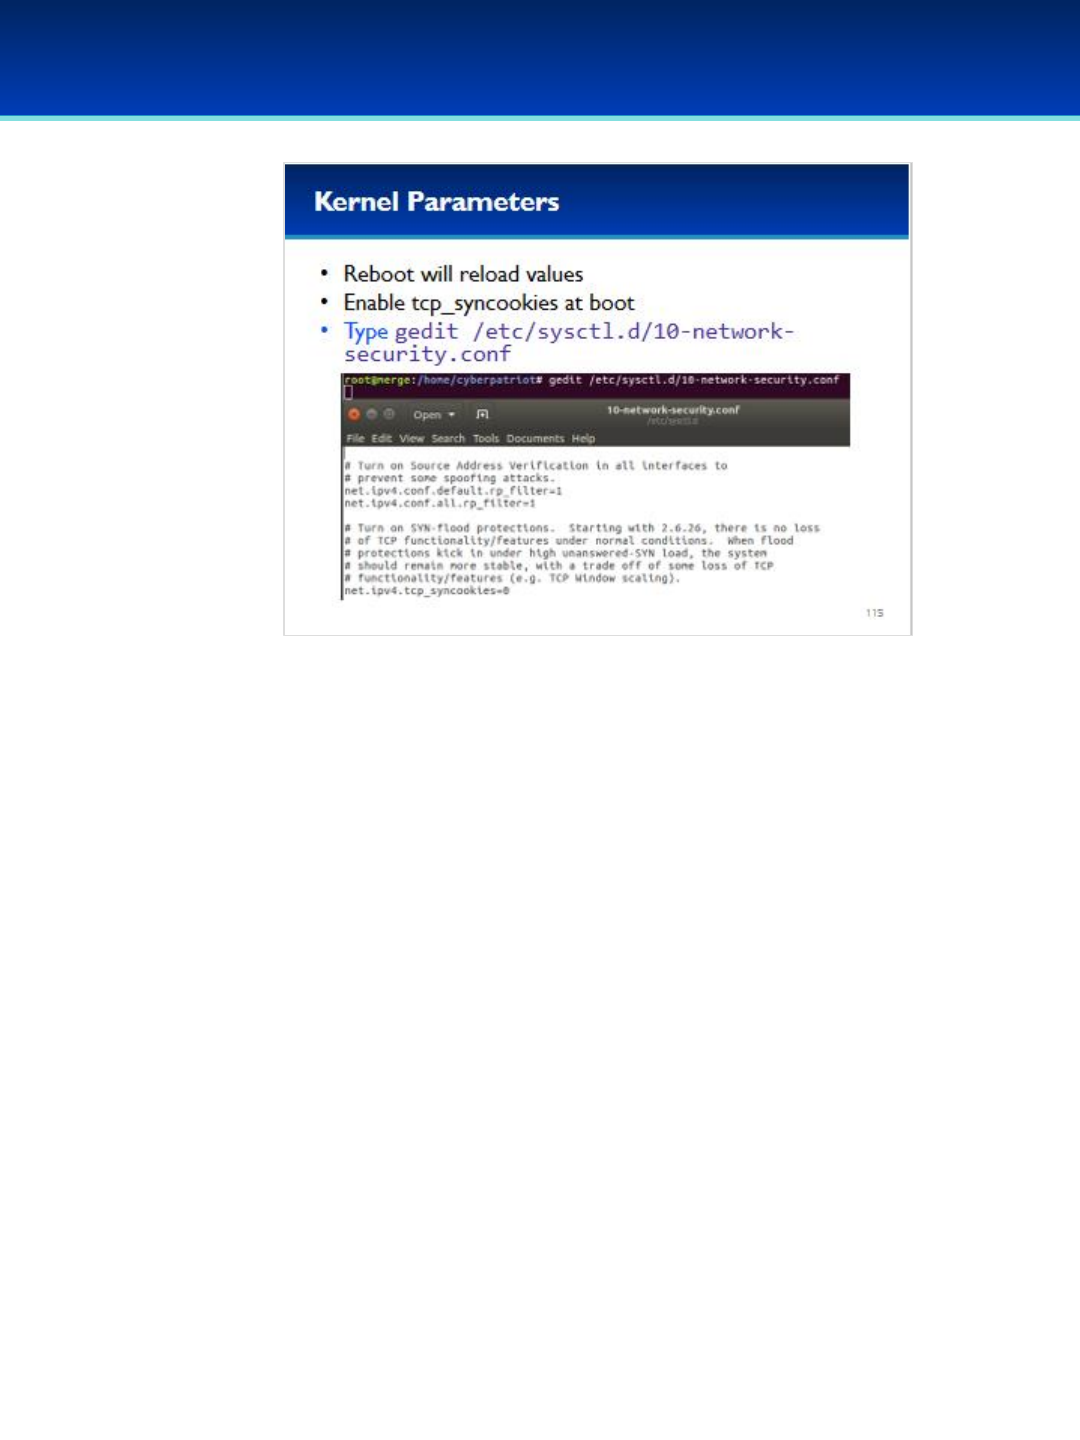
© 2018 Air Force Association
AFA Advanced CyberCamp Instructor’s Guide
Page 242
Slide 115
Ubuntu 16
•All we have to do is set this parameter in the sysctl configuration files.
•Before setting a kernel parameter, you should check if and where it is
currently being set in /etc/sysctl.conf or /etc/sysctl.d/
- Using grep –Rcan help with this.
•In this case, tcp_syncookies is being set in the file /etc/sysctl.d/10-
network-security.conf
•As root, use gedit to edit this file.
Have the students run the commands on the screen.

© 2018 Air Force Association
AFA Advanced CyberCamp Instructor’s Guide
Page 243
Slide 116
Ubuntu 16
•Change the last line in the file to set tcp_syncookies to 1
instead of 0.
•Now save the file and exit.
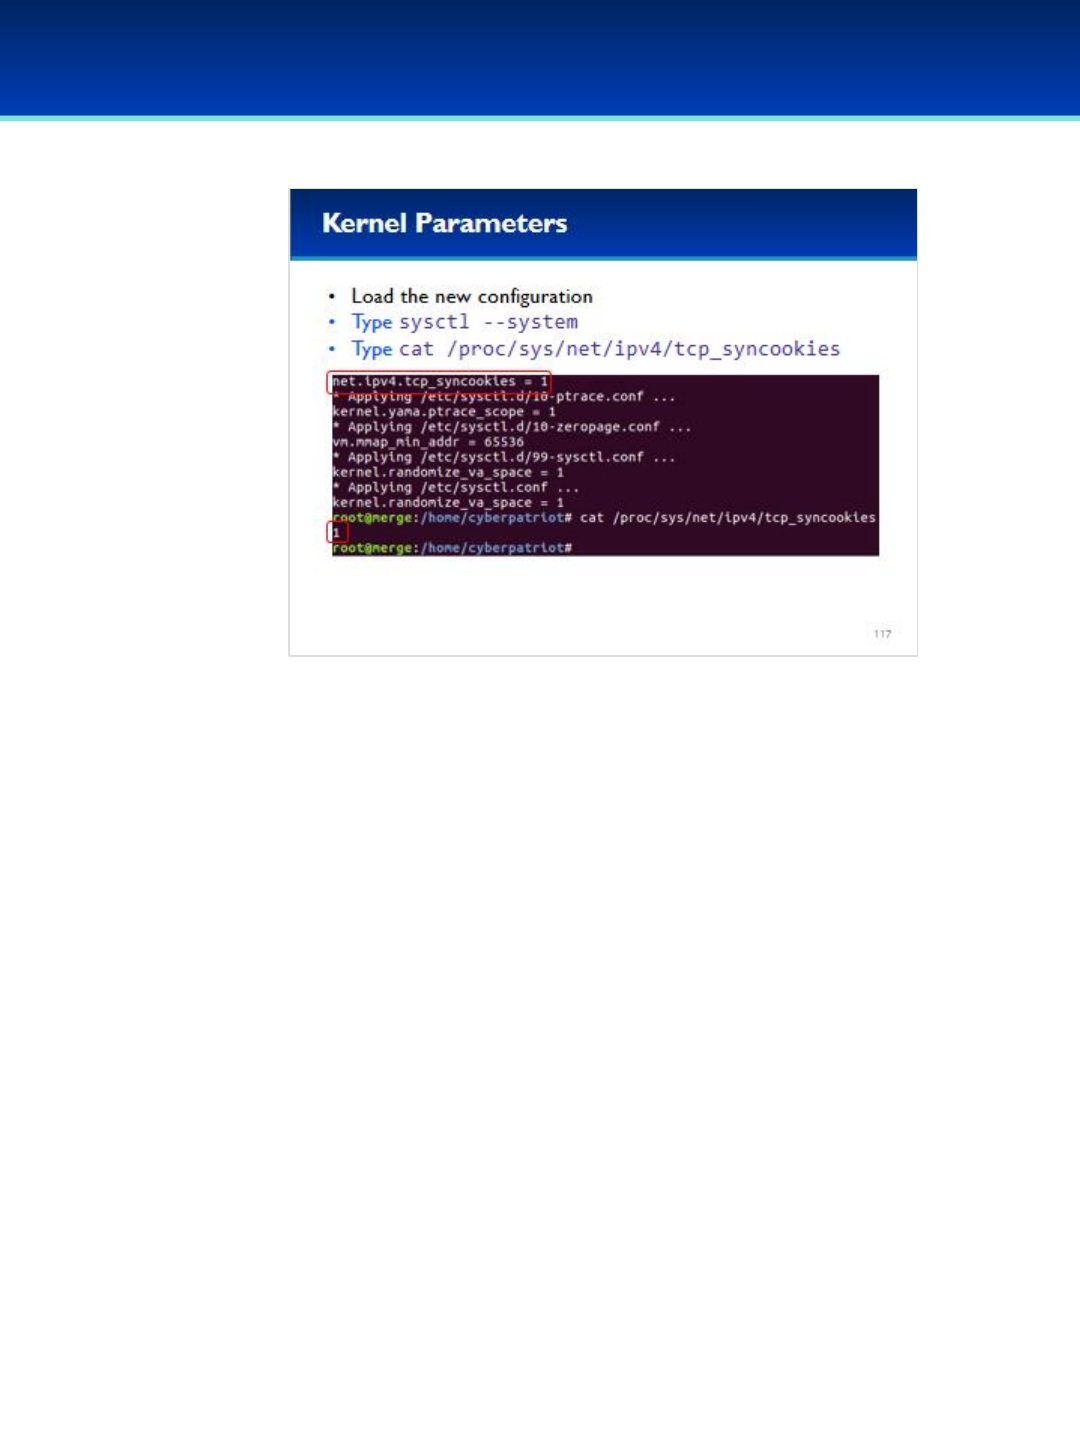
© 2018 Air Force Association
AFA Advanced CyberCamp Instructor’s Guide
Page 244
Slide 117
Ubuntu 16
•Reload the sysctl settings again using the sysctl --system
command.
Have the students run the commands on the screen.
•You can see that tcp_syncookies is set to 1 by sysctl, which
tells the kernel to use TCP SYN cookies.
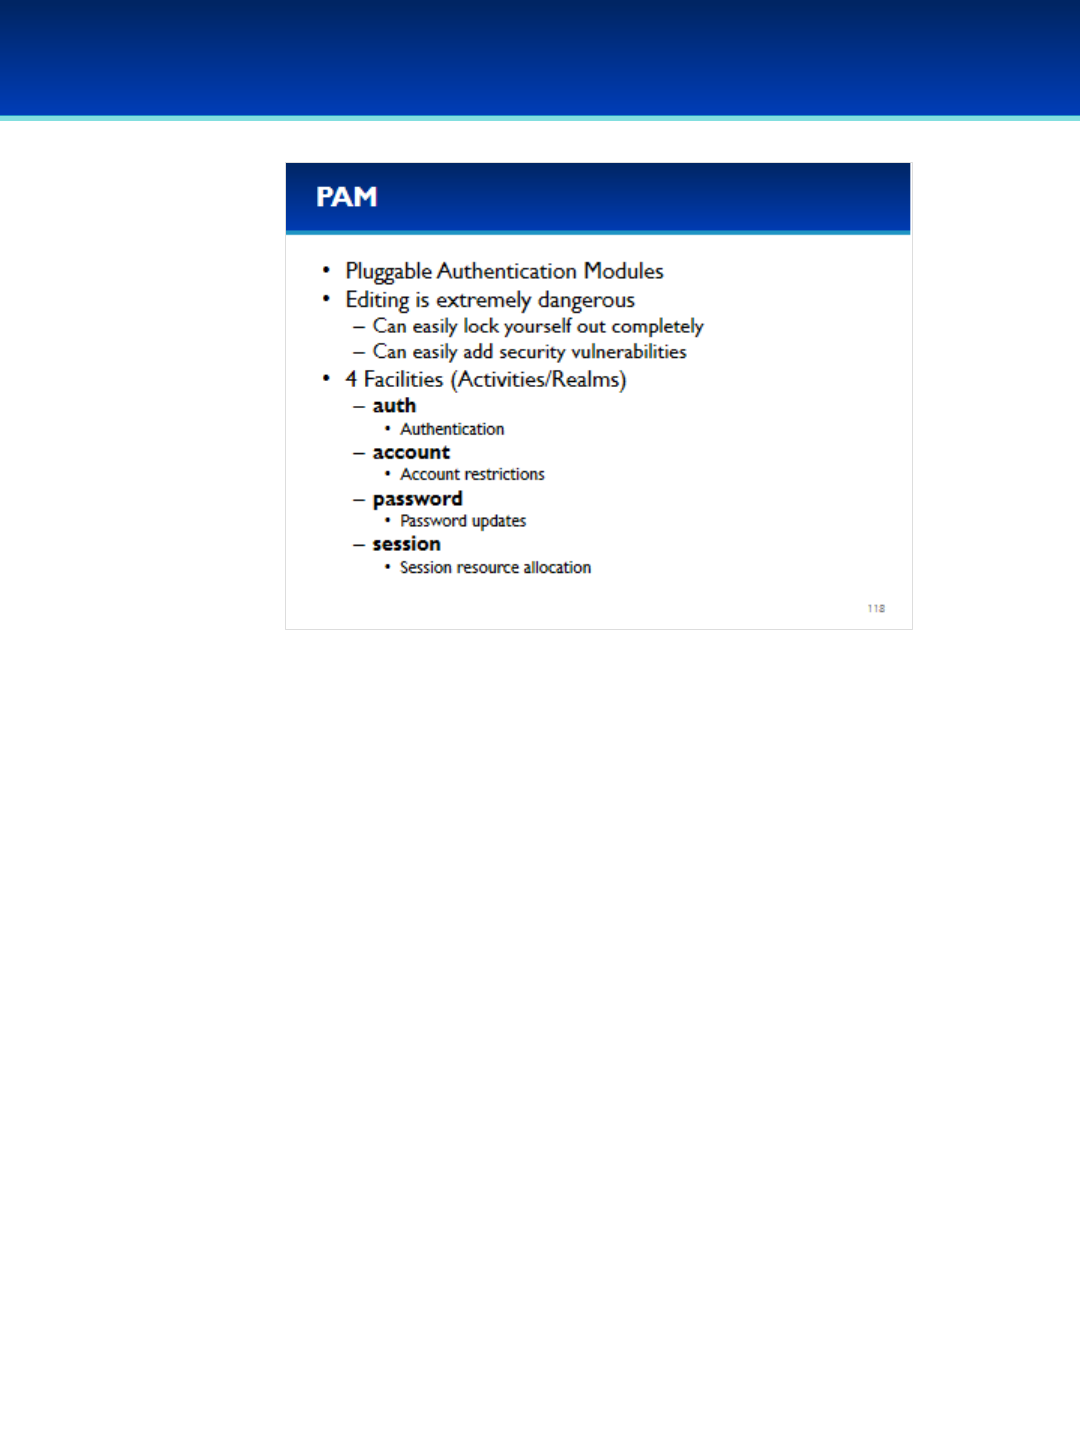
© 2018 Air Force Association
AFA Advanced CyberCamp Instructor’s Guide
Page 245
Slide 118
Ubuntu 16
•PAM stands for Pluggable Authentication Modules, and is used for
authentication by almost all Linux distributions.
- The only notable Linux distribution that does not currently use
PAM is Slackware.
•PAM is extremely complicated and any typo, no matter how small,
can lock you out of your system permanently.
•It’s also very easy to accidentally make your computer less secure if
you don’t know precisely what you are doing.
•Pam defines four facilities for managing four different activities (or
realms).
•The auth facility handles authentication.
•The account facility handles account restrictions, such as time of day
a user is allowed to be logged in.
•The password facility handles password updates.
•And the session facility handles various session resources that need
to be allocated when a user logs on.
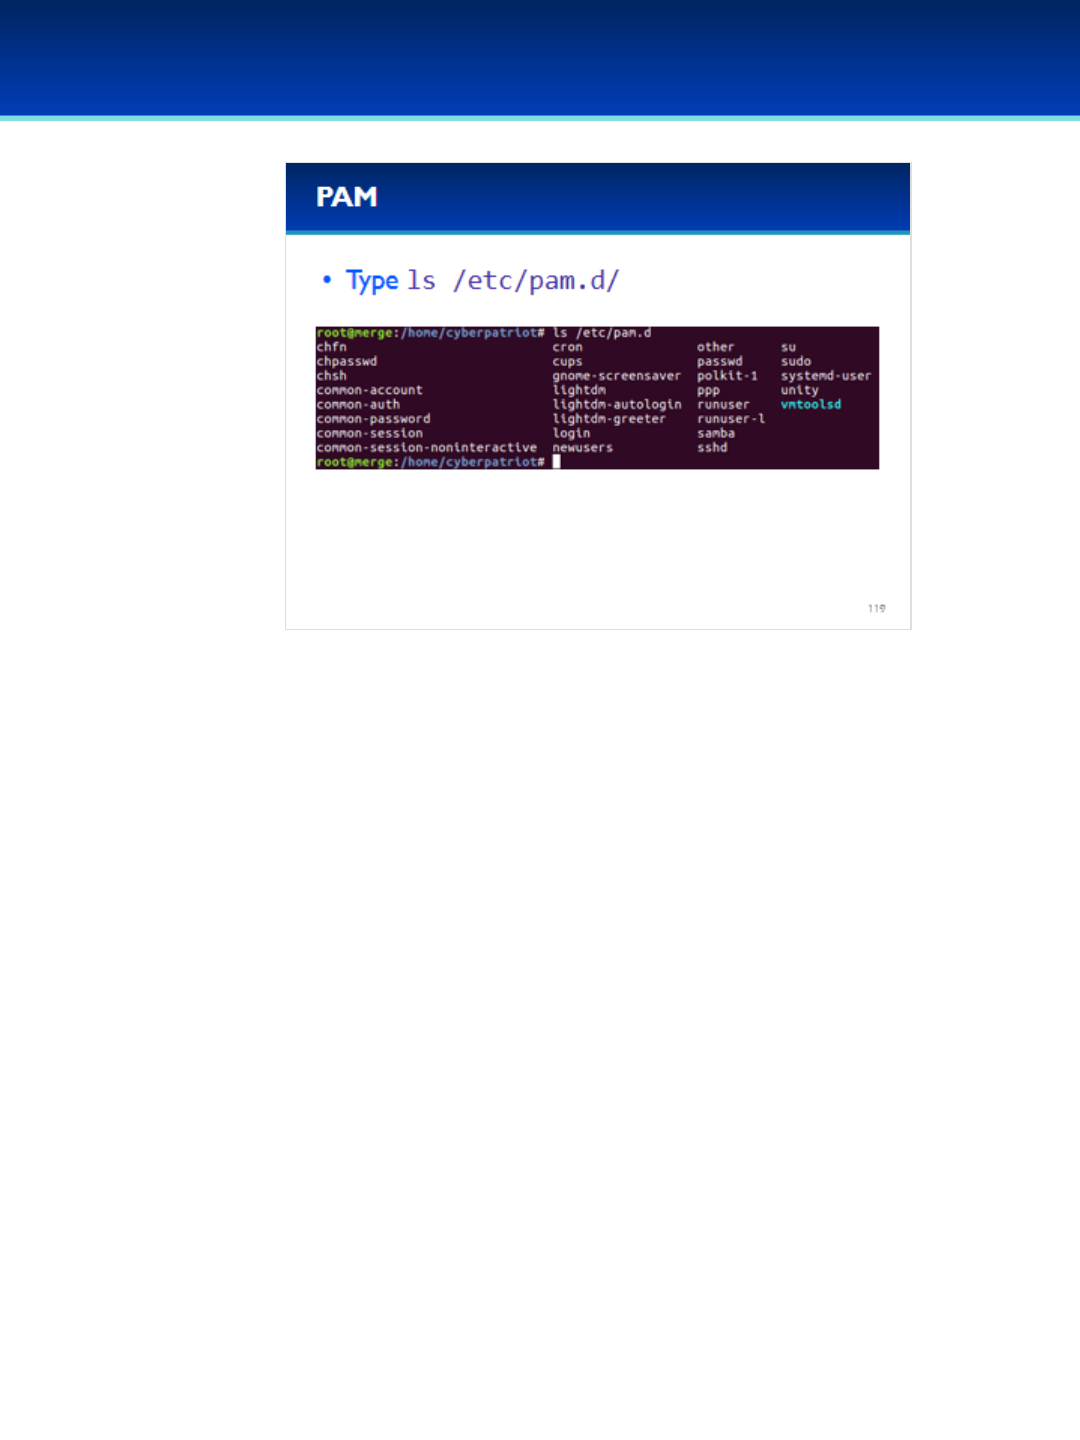
© 2018 Air Force Association
AFA Advanced CyberCamp Instructor’s Guide
Page 246
Slide 119
Ubuntu 16
•Before we go on, let’s look at the different PAM
configuration files.
Have the students run the commands on the screen.

© 2018 Air Force Association
AFA Advanced CyberCamp Instructor’s Guide
Page 247
Slide 120
Ubuntu 16
•You probably recognize some of the file names in the pam.d
directory as program names.
- This is because every program that makes use of PAM, has its own
configuration file in: /etc/pam.d/
•What if a program doesn’t have a configuration file?
- In that case, it uses the configuration file named other.
- Other is also a fallback for programs that have a configuration file,
but don’t define the requested facility.
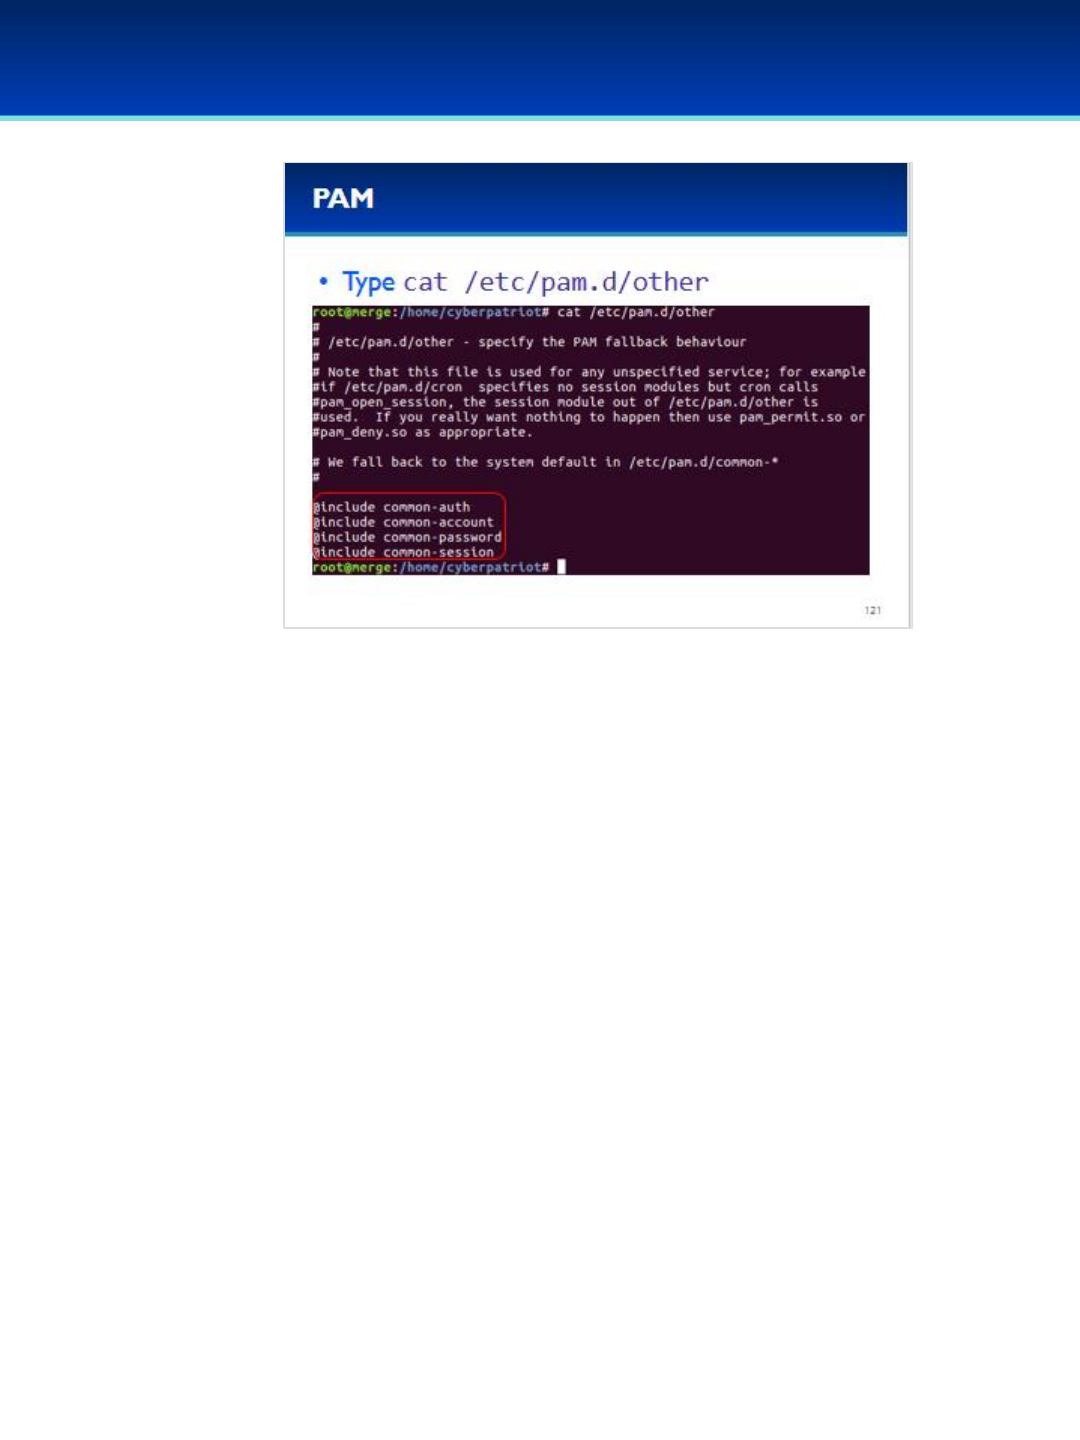
© 2018 Air Force Association
AFA Advanced CyberCamp Instructor’s Guide
Page 248
Slide 121
Ubuntu 16
Have the students run the commands on the screen.
•Lines beginning with # are comments and are ignored.
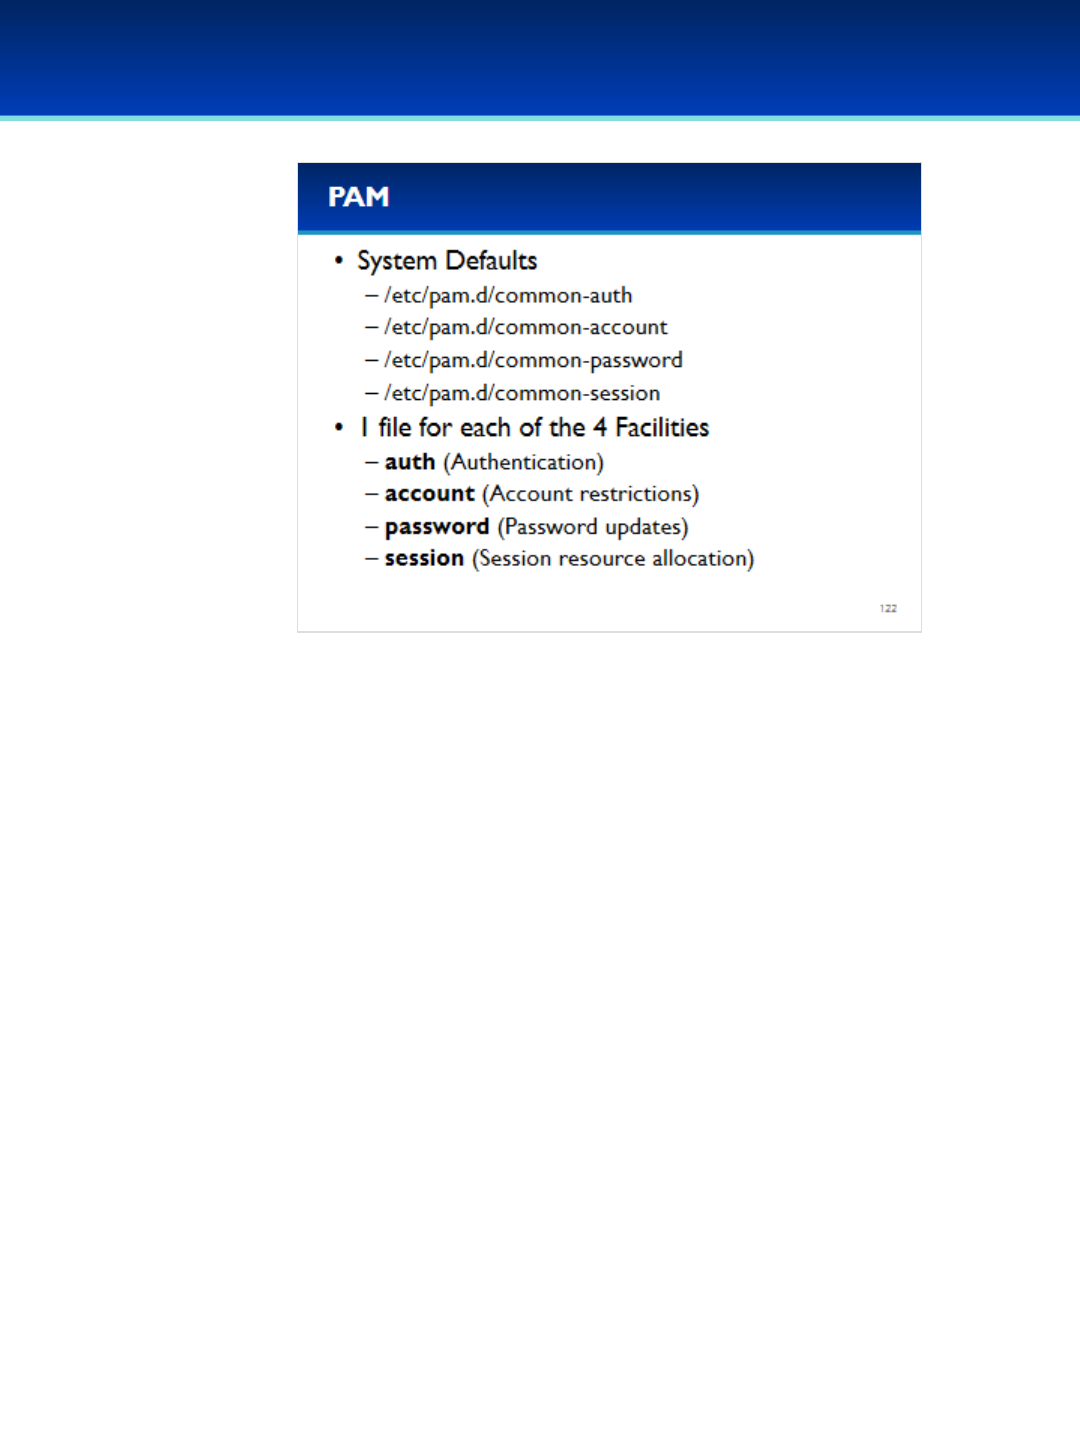
© 2018 Air Force Association
AFA Advanced CyberCamp Instructor’s Guide
Page 249
Slide 122
Ubuntu 16
•Looking at the “other” PAM configuration file, you can
see that it includes four different configuration files,
one for each facility.
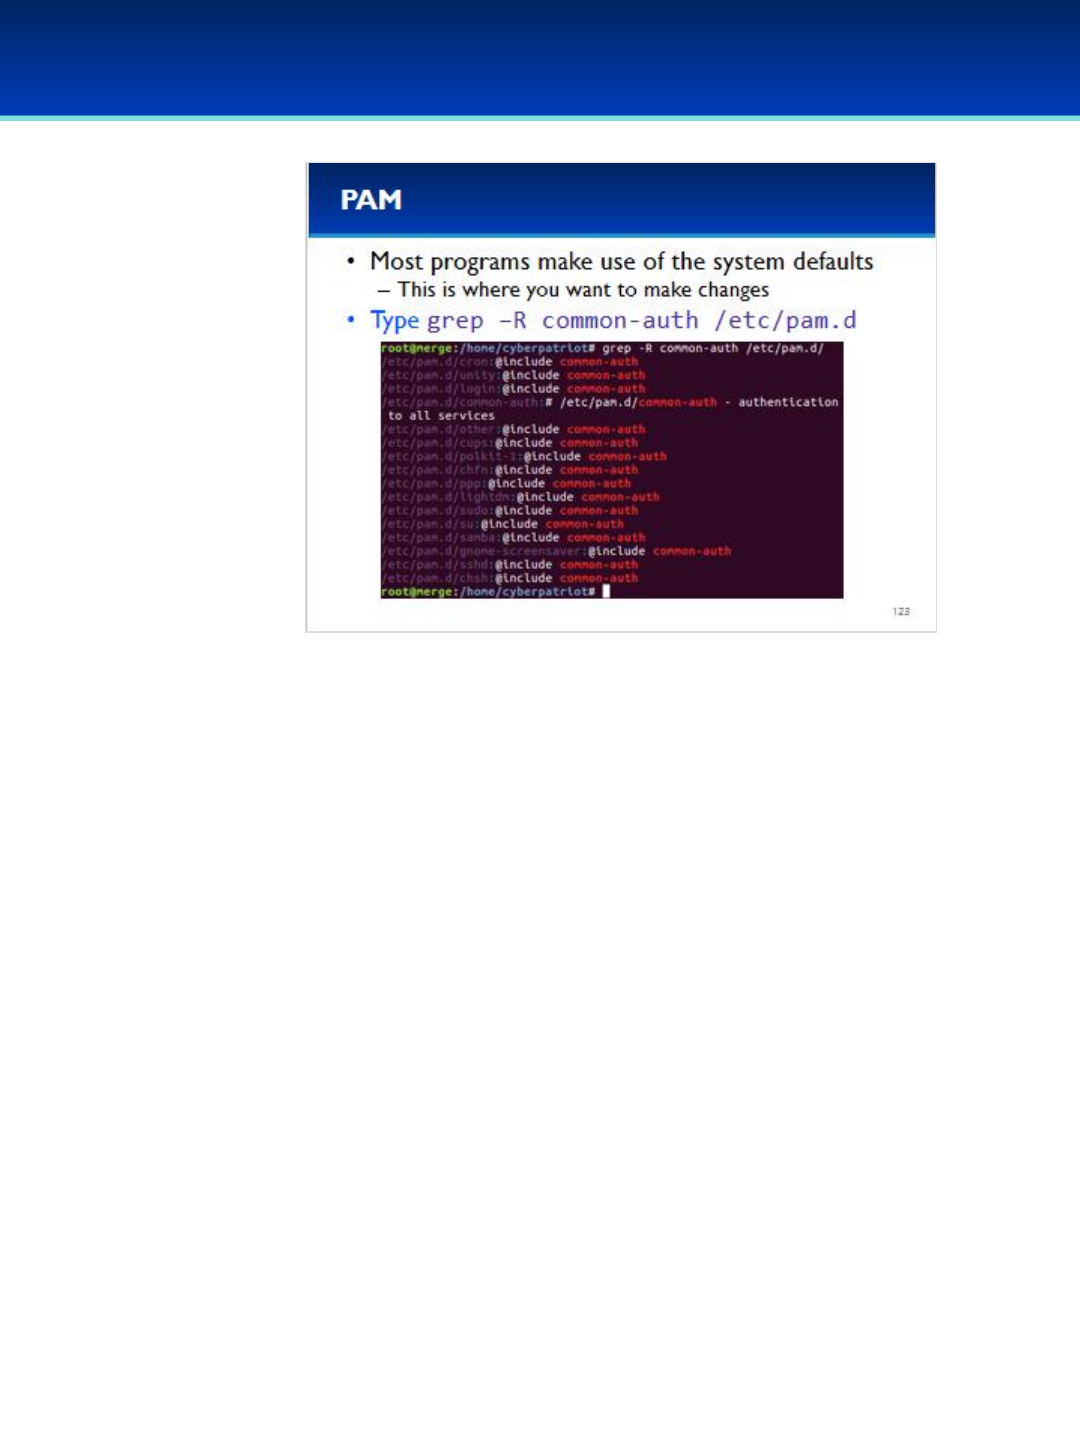
© 2018 Air Force Association
AFA Advanced CyberCamp Instructor’s Guide
Page 250
Slide 123
Ubuntu 16
•These included files aren’t just used by programs without a
configuration file.
•In fact, these included files are also used by most programs in their
configuration files.
Have the students run the commands on the screen.
•You can see that common-auth appears in many configuration files
including sudo, su, and sshd.
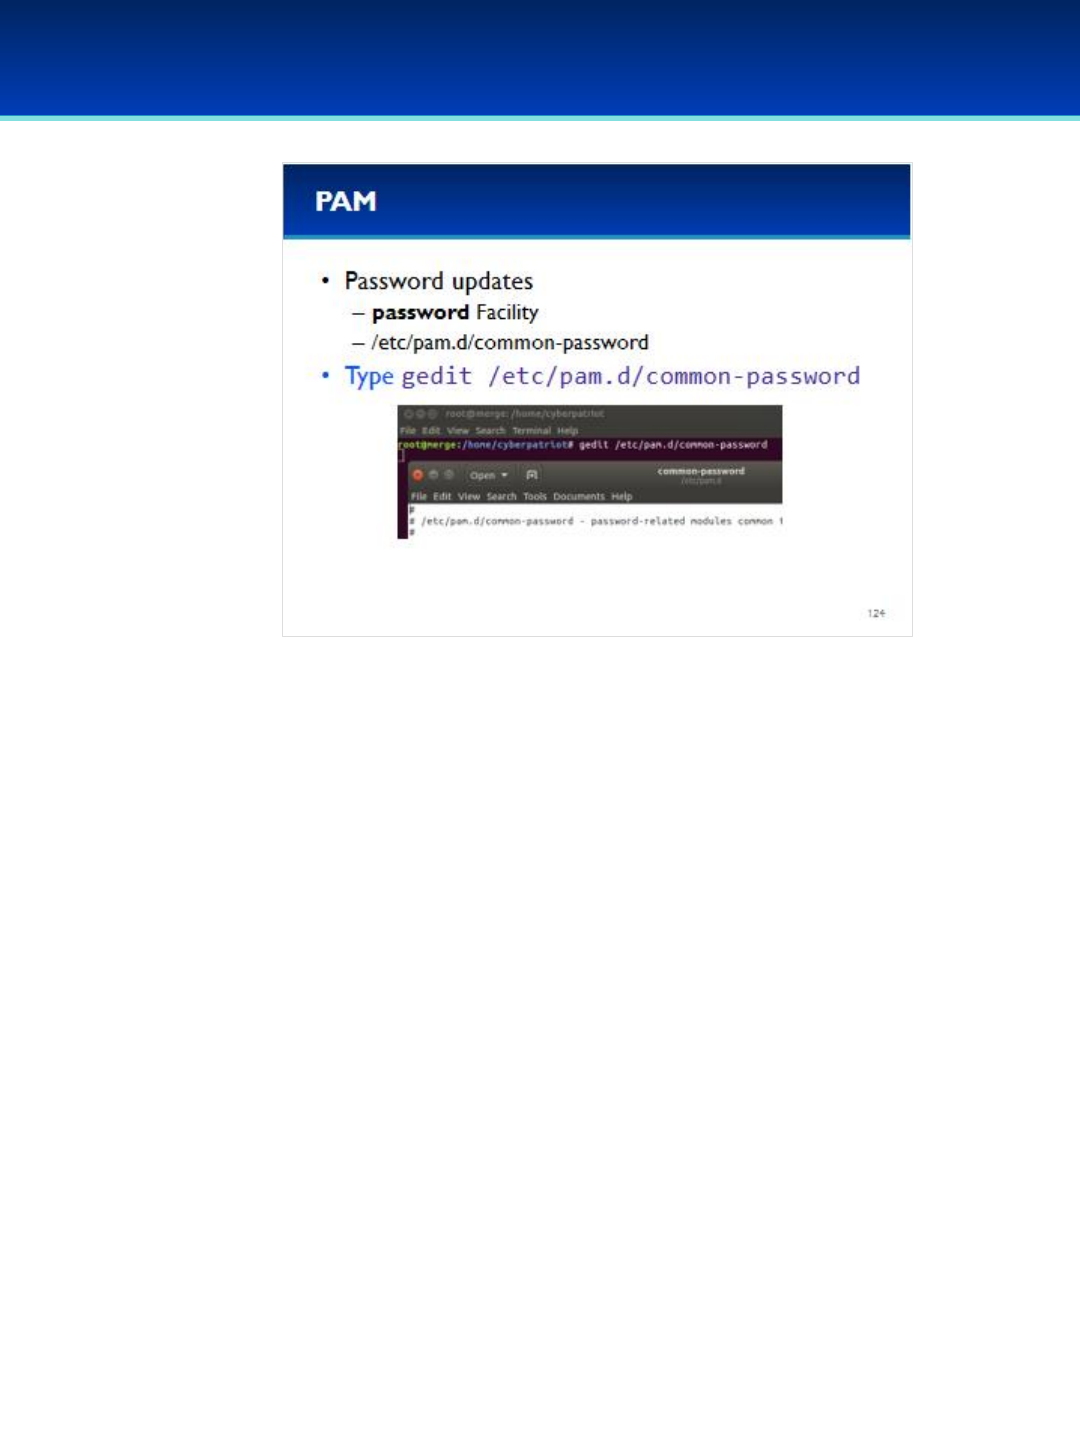
© 2018 Air Force Association
AFA Advanced CyberCamp Instructor’s Guide
Page 251
Slide 124
Ubuntu 16
•Password updates are performed by the password facility.
•To see how password updates are handled, open the common-
password file.
Have the students run the commands on the screen.
•Be careful not to make any changes to this file unless directed to.
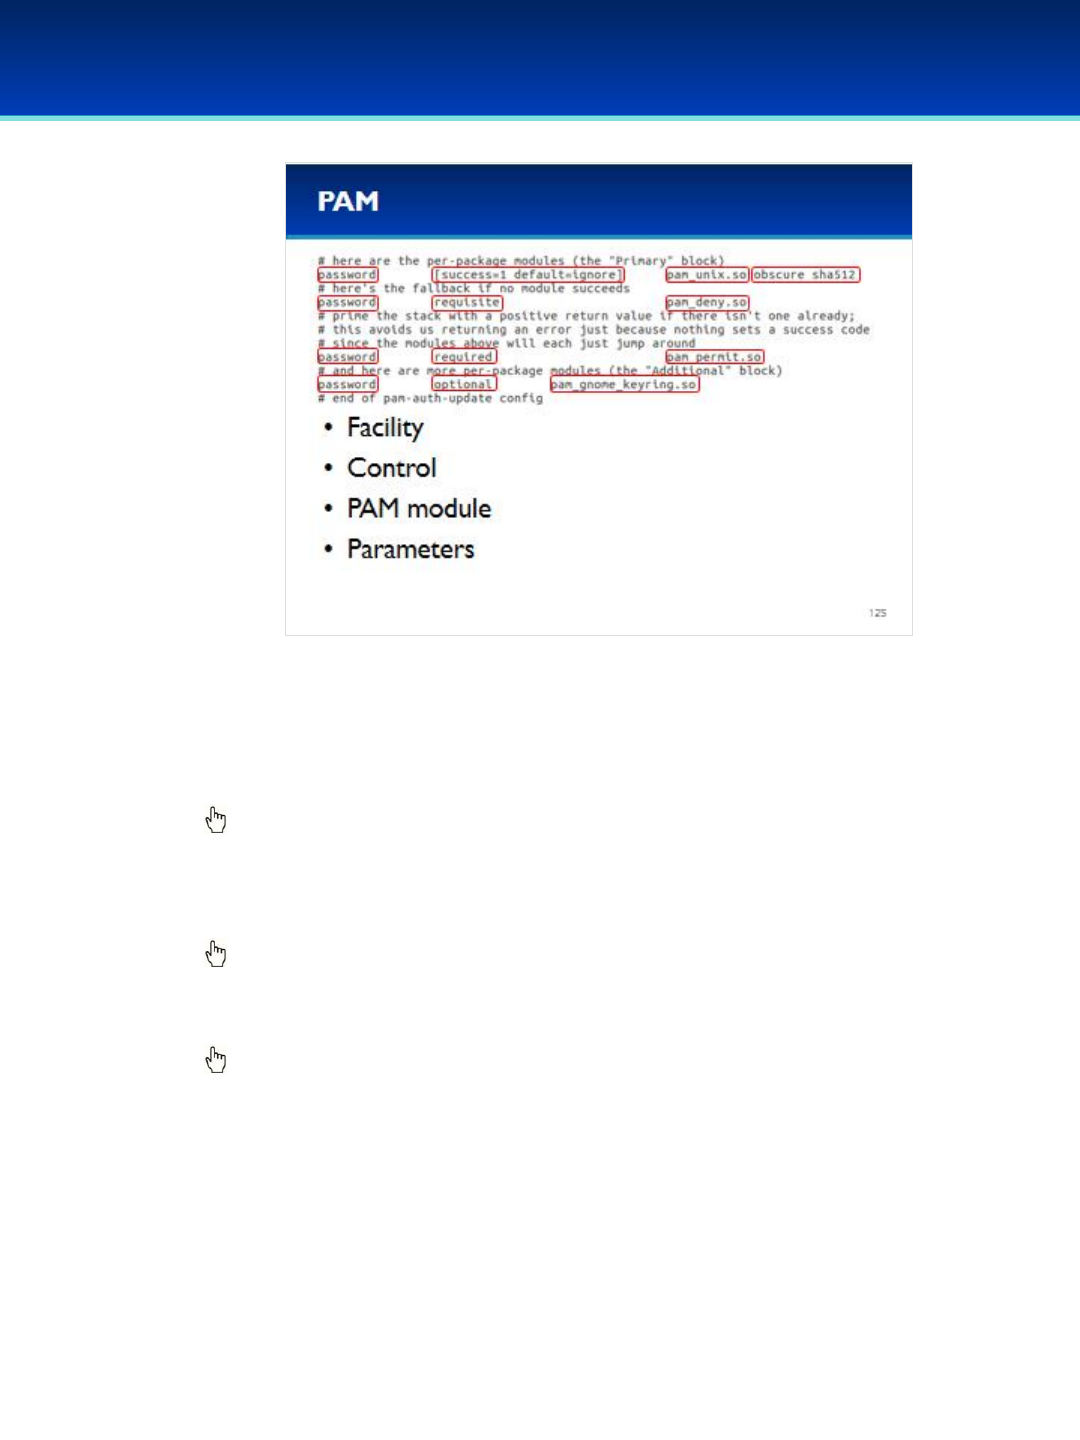
© 2018 Air Force Association
AFA Advanced CyberCamp Instructor’s Guide
Page 252
Slide 125
Ubuntu 16
•Again, all the lines beginning with # are comments and are ignored.
•The first column is the facility; this defines the facility that the rule
applies to.
Click to reveal Control.
•The second column is the control. Control determines what to do based
on the return value of the PAM module.
Click to reveal PAM module.
•The PAM module is the shared object (.so) file that executes code.
Click to reveal Parameters.
•The last column, if it exists, specifies parameters to pass to the PAM
module.
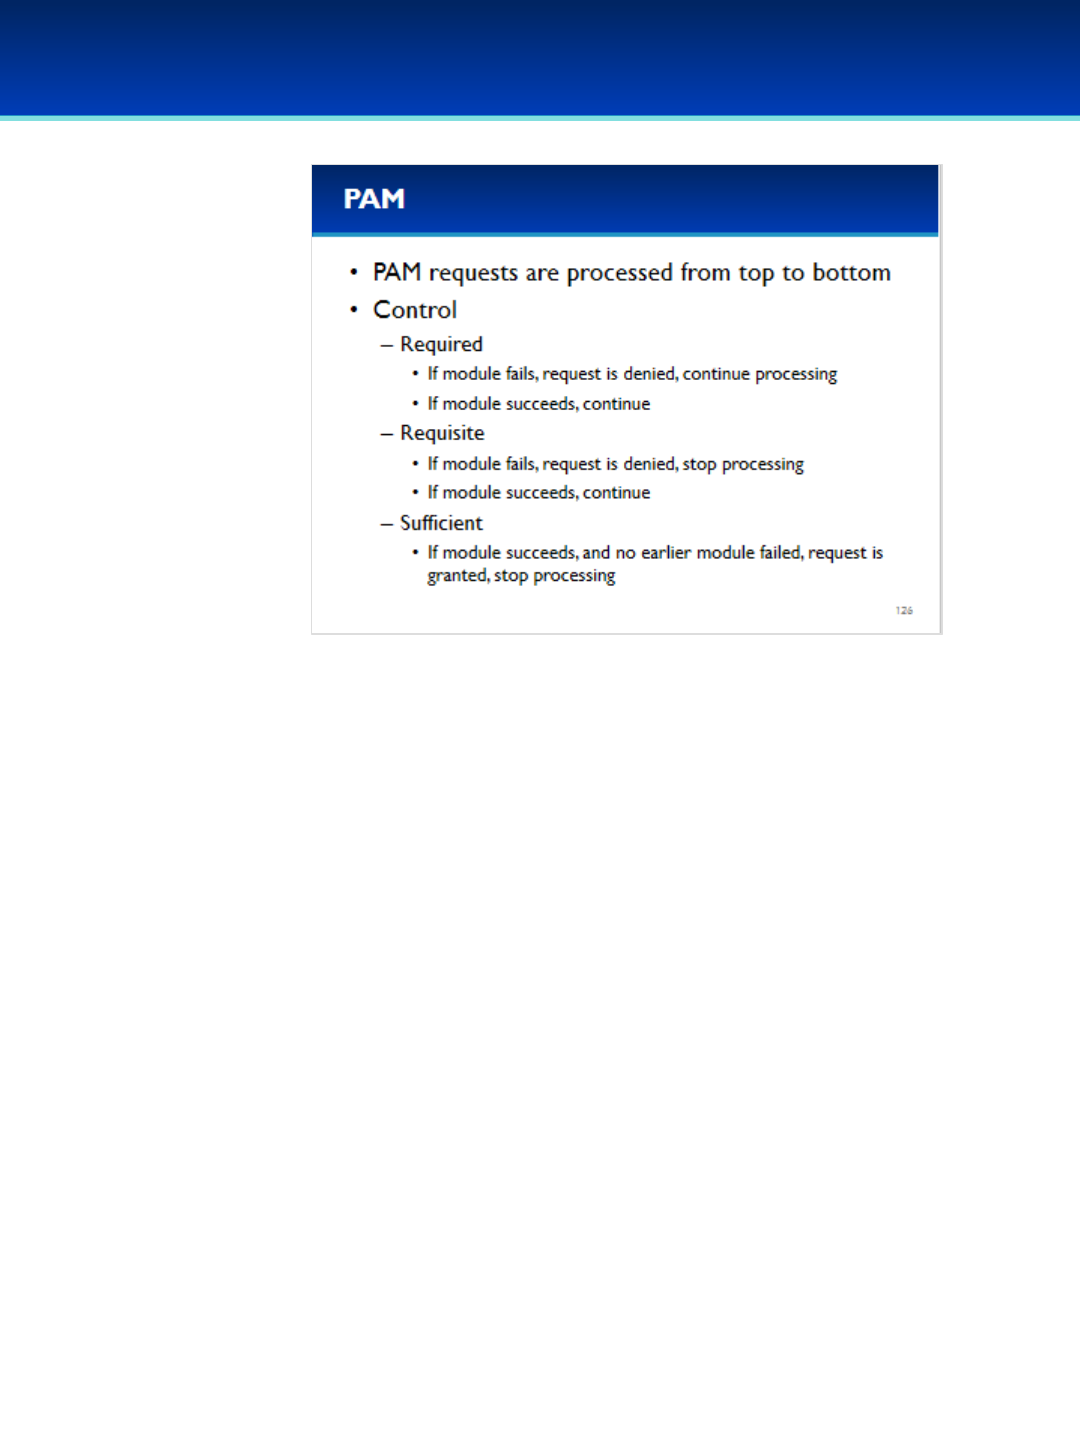
© 2018 Air Force Association
AFA Advanced CyberCamp Instructor’s Guide
Page 253
Slide 126
Ubuntu 16
•PAM requests are processed from top to bottom in their
respective configuration files.
•The Control column may have different values, and we will cover
the five main ones
•If control is set to required, and the PAM module returns “failure,”
then the request will ultimately be denied, but the request is
allowed to continue processing in case more work needs to be
done.
•If control is set to requisite, and the PAM module returns “failure,”
then the request is immediately denied and stops processing.
•If control is set to sufficient and the module succeeds, and no
earlier module failed, then the request is granted and immediately
stops processing.
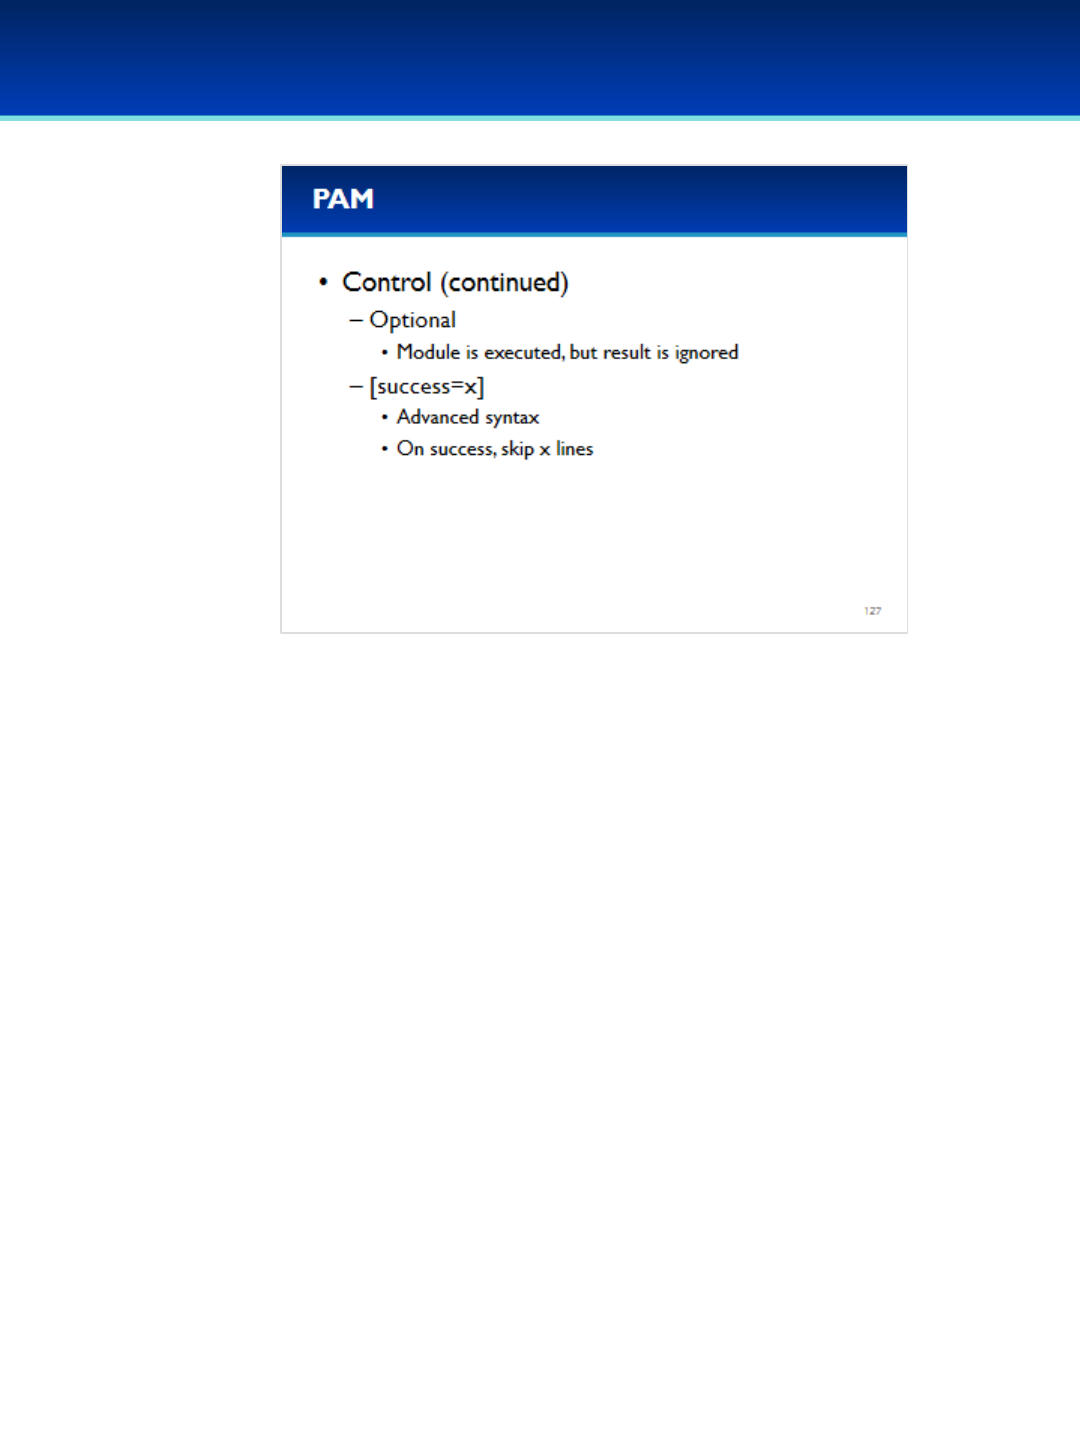
© 2018 Air Force Association
AFA Advanced CyberCamp Instructor’s Guide
Page 254
Slide 127
Ubuntu 16
•If control is set to option, then the module is executed, but the
return value is ignore.
•If control is surrounded by square brackets [], then this is the
advanced syntax, and it is commonly used to tell PAM to skip x
number of lines when the module returns success.
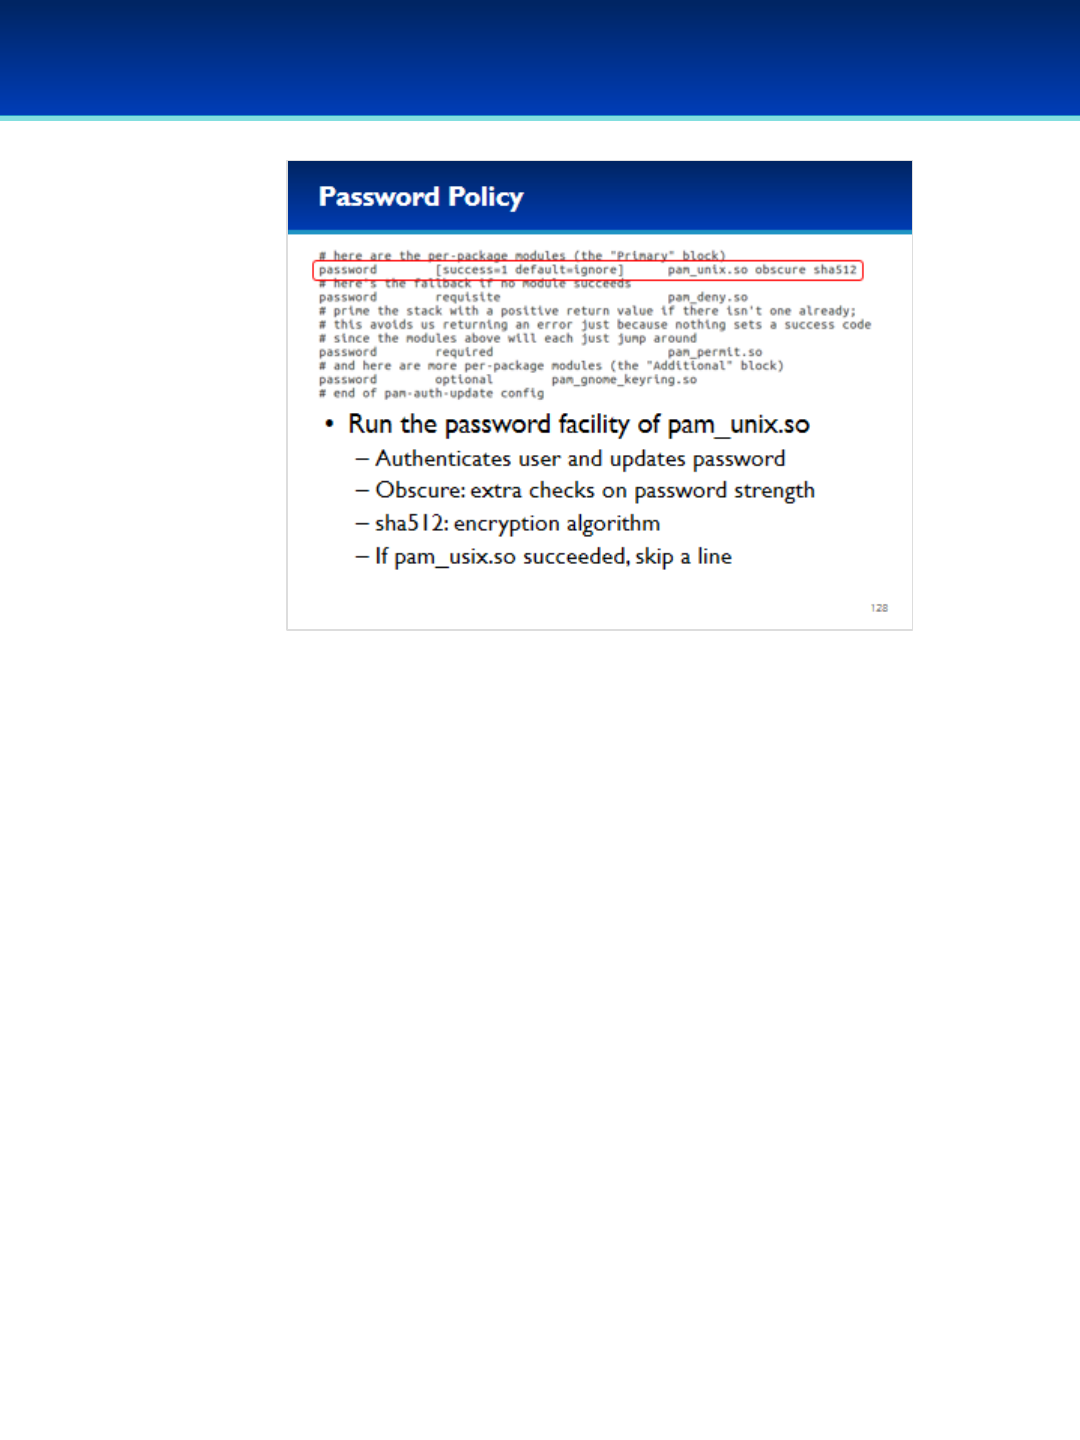
© 2018 Air Force Association
AFA Advanced CyberCamp Instructor’s Guide
Page 255
Slide 128
Ubuntu 16
•Let’s go through the password policy PAM file line by line.
•The first line runs the password facility of pam_unix.so.
- Authenticates user by asking for their current password, and asks
them enter a new password.
- The obscure option tells pam_unix to apply some additional checks to
improve the password strength.
- The sha512 option specifies the encryption (or hash) algorithm used
to encrypt passwords
•The control of success=1 specifies, that if pam_unix succeeds, then skip
the next (1) line

© 2018 Air Force Association
AFA Advanced CyberCamp Instructor’s Guide
Page 256
Slide 129
Ubuntu 16
•This line skipped if pam_unix succeded.
•Therefore, we know if this line is executed, then pam_unix failed.
•Pam_deny always returns failure.
•Since the control is set to requisite, the request is immediately
denied, and processing immediately stops.
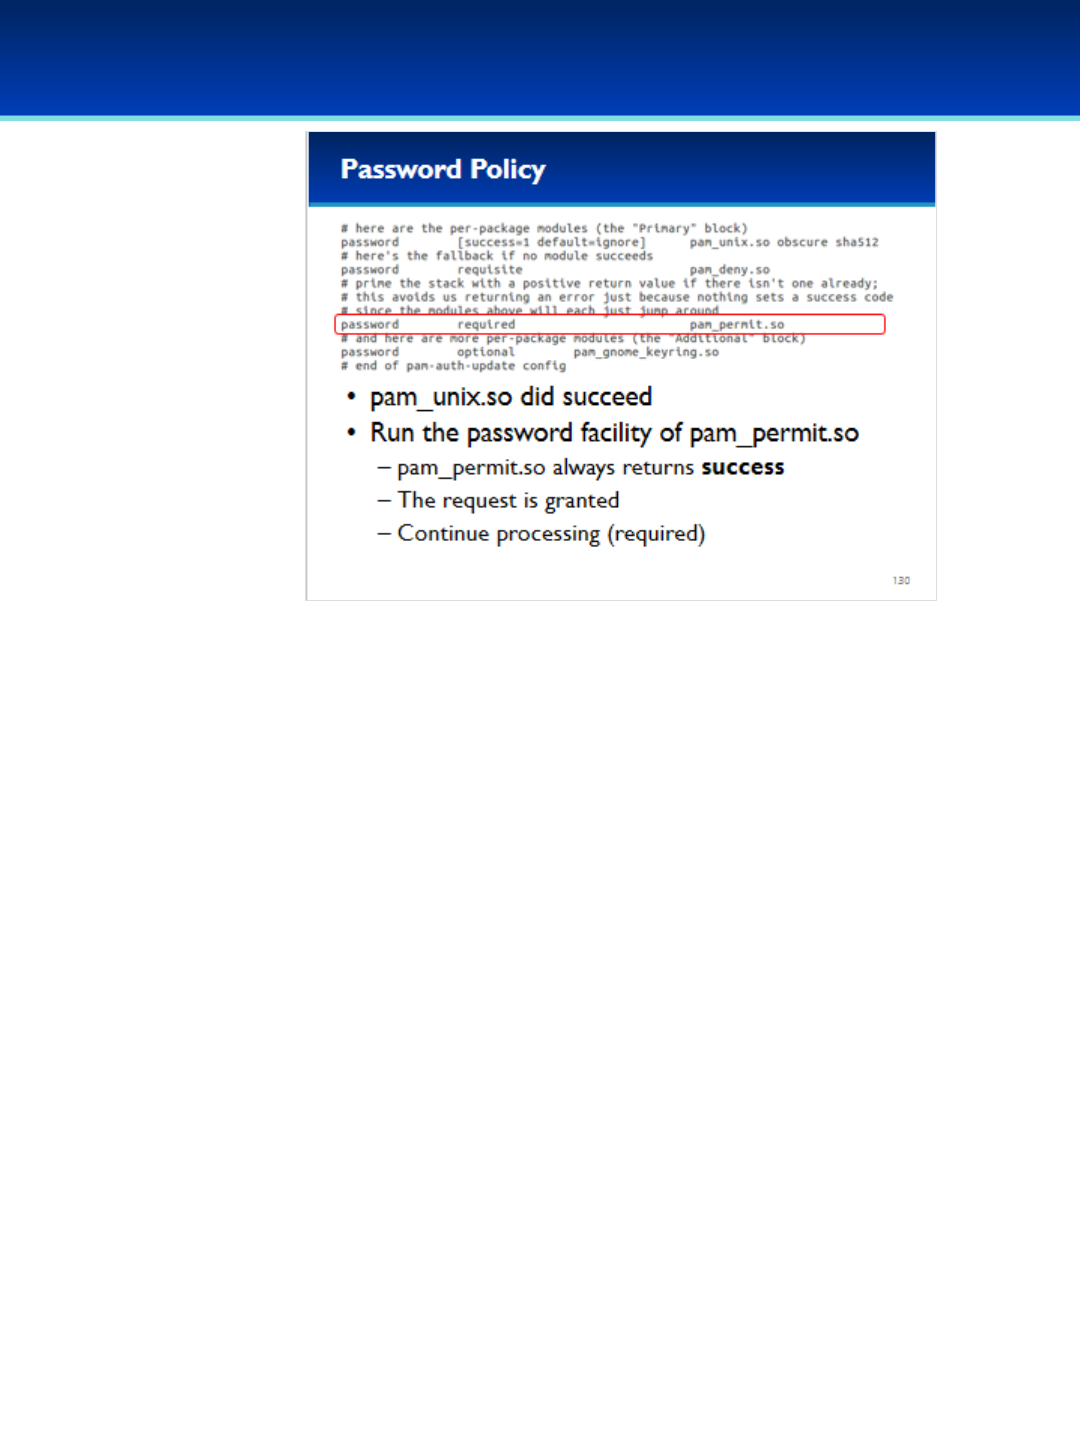
© 2018 Air Force Association
AFA Advanced CyberCamp Instructor’s Guide
Page 257
Slide 130
Ubuntu 16
•If we get to this line, then we know that pam_unix succeeded,
since the line above this (pam_deny) stops processing.
•This line runs the password facility of the pam_permit module,
which always returns success.
•Since the control is listed as required the request will eventually
be granted, but we continue processing in case more work
needs to be done.

© 2018 Air Force Association
AFA Advanced CyberCamp Instructor’s Guide
Page 258
Slide 131
Ubuntu 16
•The last line uses a control of optional, which means the return of
pam_gnome_keyring module is ignored.
•The purpose of this line is to notify the GNOME keyring that a
password has been updated.

© 2018 Air Force Association
AFA Advanced CyberCamp Instructor’s Guide
Page 259
Slide 132
Ubuntu 16
•As you can see, the majority of the work in common-
password is done by the pam_unix module.
•In order to learn more about the pam_unix module.
Have the students run the commands on the screen.

© 2018 Air Force Association
AFA Advanced CyberCamp Instructor’s Guide
Page 260
Slide 133
Ubuntu 16
•The man page states that obscure enables some extra checks on
password strength, which ensure that the password:
- Is at least six characters in length.
- Is not a palindrome (or reversal) of the old password.
- Is not a rotated version of the old password.
- Is not just a case change of the previous password.
- Has at least three of four of the following character types:
lower-case, upper-case, number, and symbol.
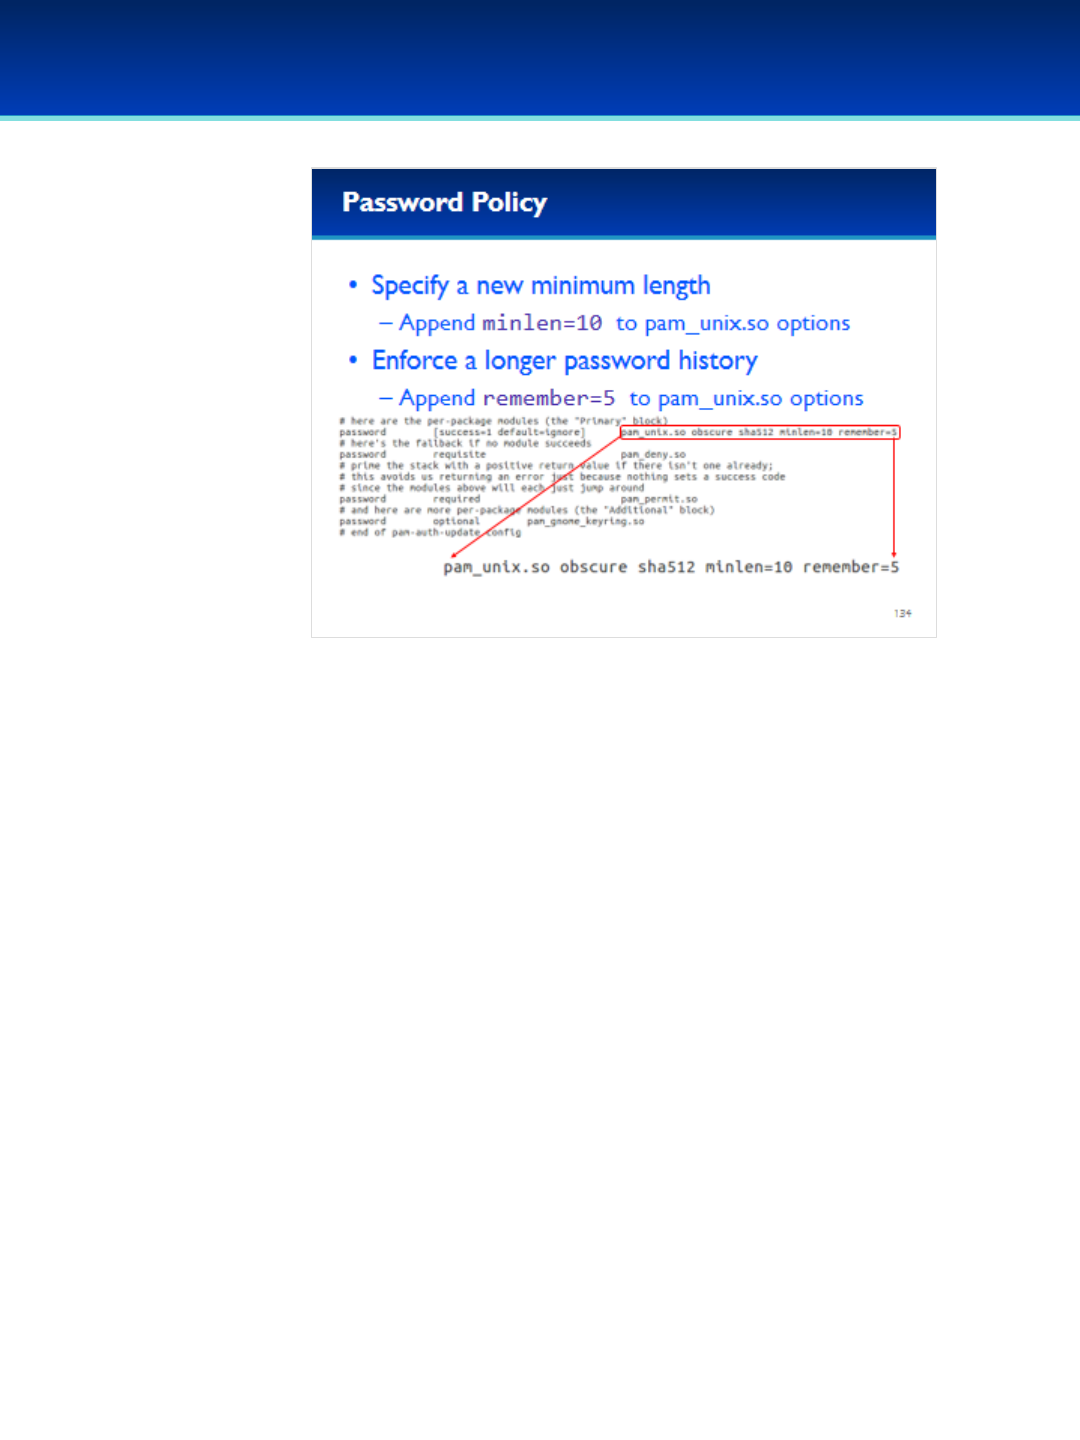
© 2018 Air Force Association
AFA Advanced CyberCamp Instructor’s Guide
Page 261
Slide 134
Ubuntu 16
•Don’t close gedit until you are instructed to.
•A minimum password length of six isn’t very good, let’s change it to
10.
- Append minlen=10 to the pam_unix option.
•There is currently no password history being enforced, let’s institute
one now.
- Append remember=5 to the pam_unix option.
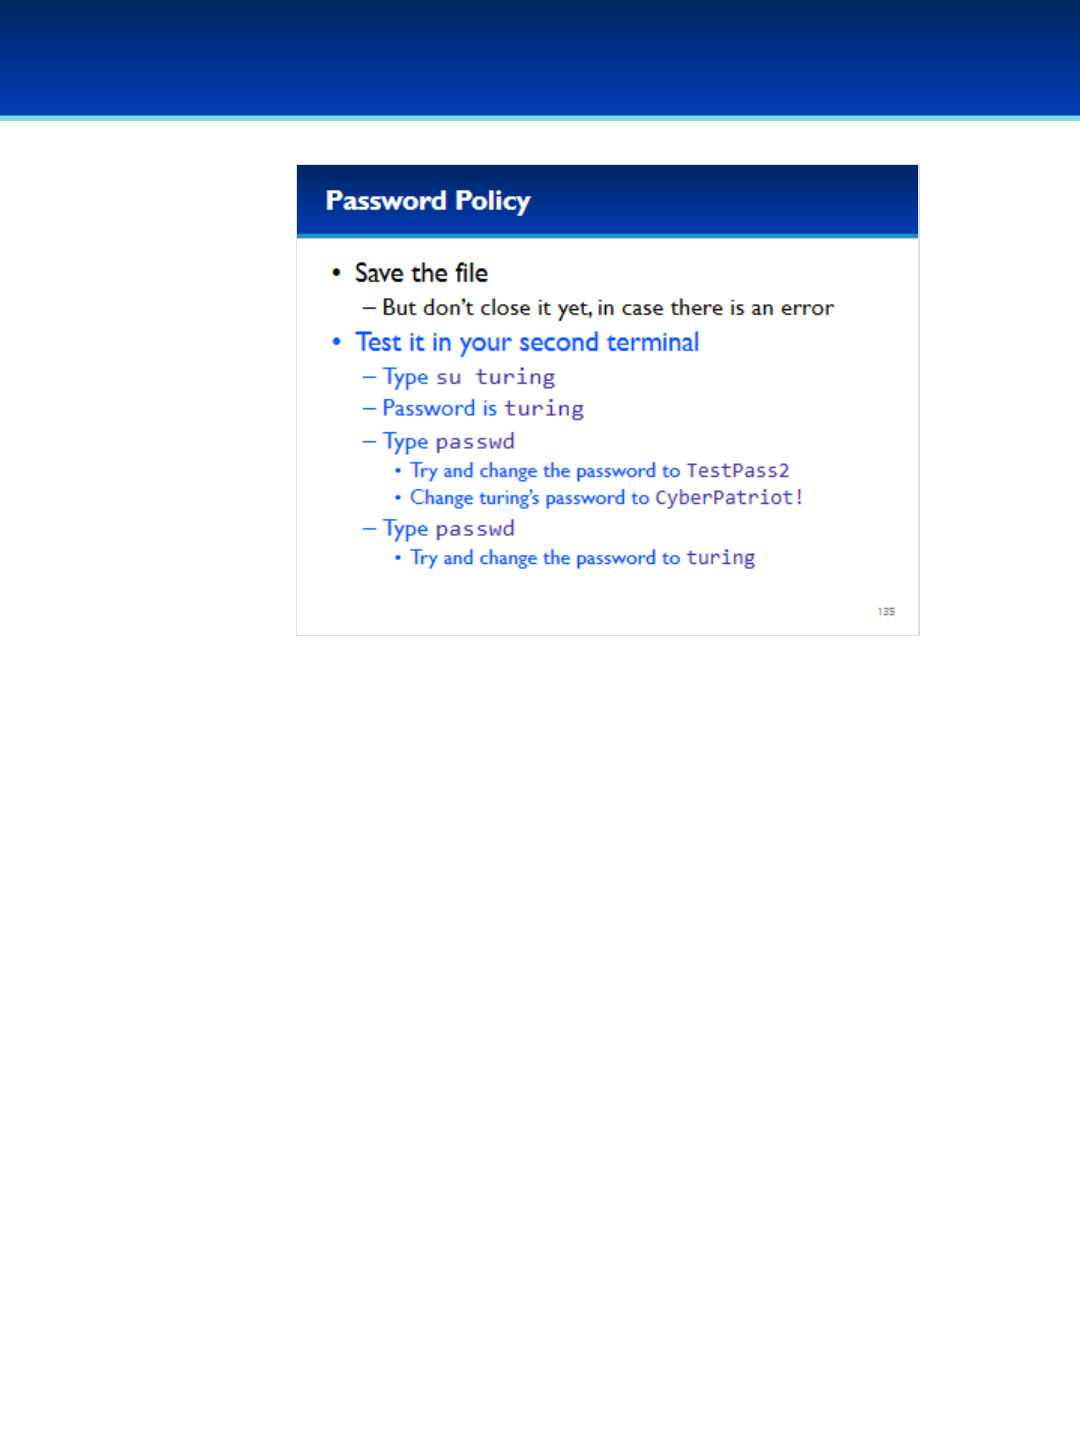
© 2018 Air Force Association
AFA Advanced CyberCamp Instructor’s Guide
Page 262
Slide 135
Ubuntu 16
•Now save the file, but don’t close gedit yet.
- We need to test it first to make sure there is not an error.
-Testing it before we close the file will ensure we don’t lock
ourselves out.
Have the students run the commands on the screen.
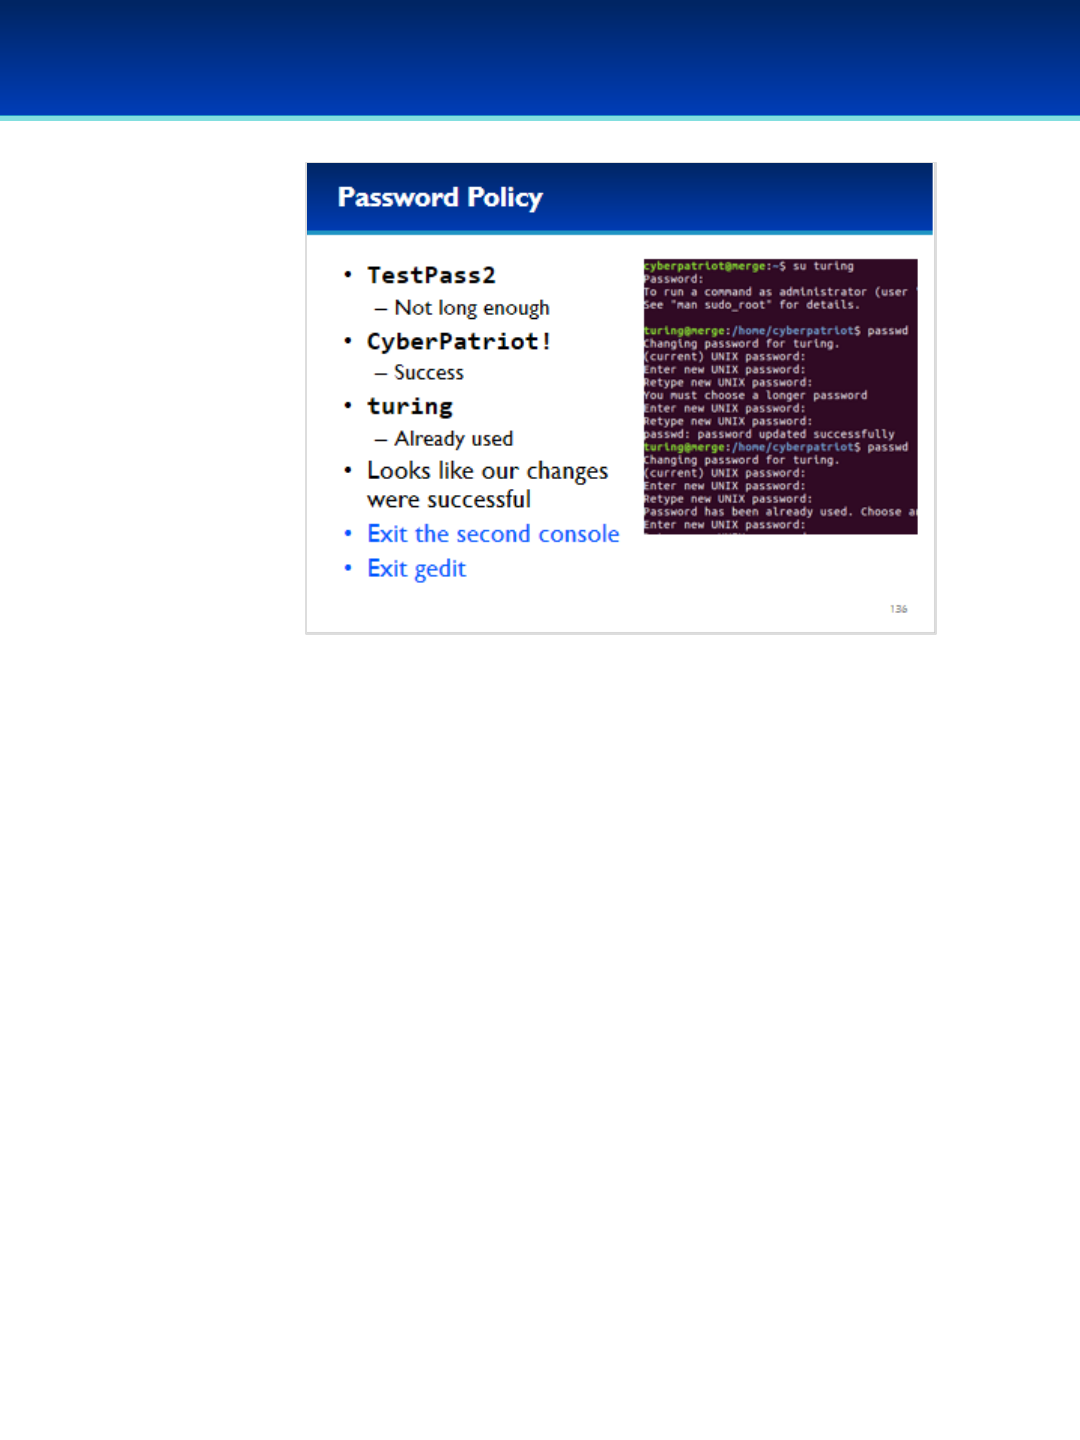
© 2018 Air Force Association
AFA Advanced CyberCamp Instructor’s Guide
Page 263
Slide 136
Ubuntu 16
•As you can see, passwd wouldn’t let us change our password to
TesPass2 because it is not long enough.
•However, the password CyberPatriot! was acceptable.
•Trying to change turing’s password back to turing results in the
request denial because a password history is being enforced.
•Close the second terminal instance.
•It’s also now safe to exit gedit.
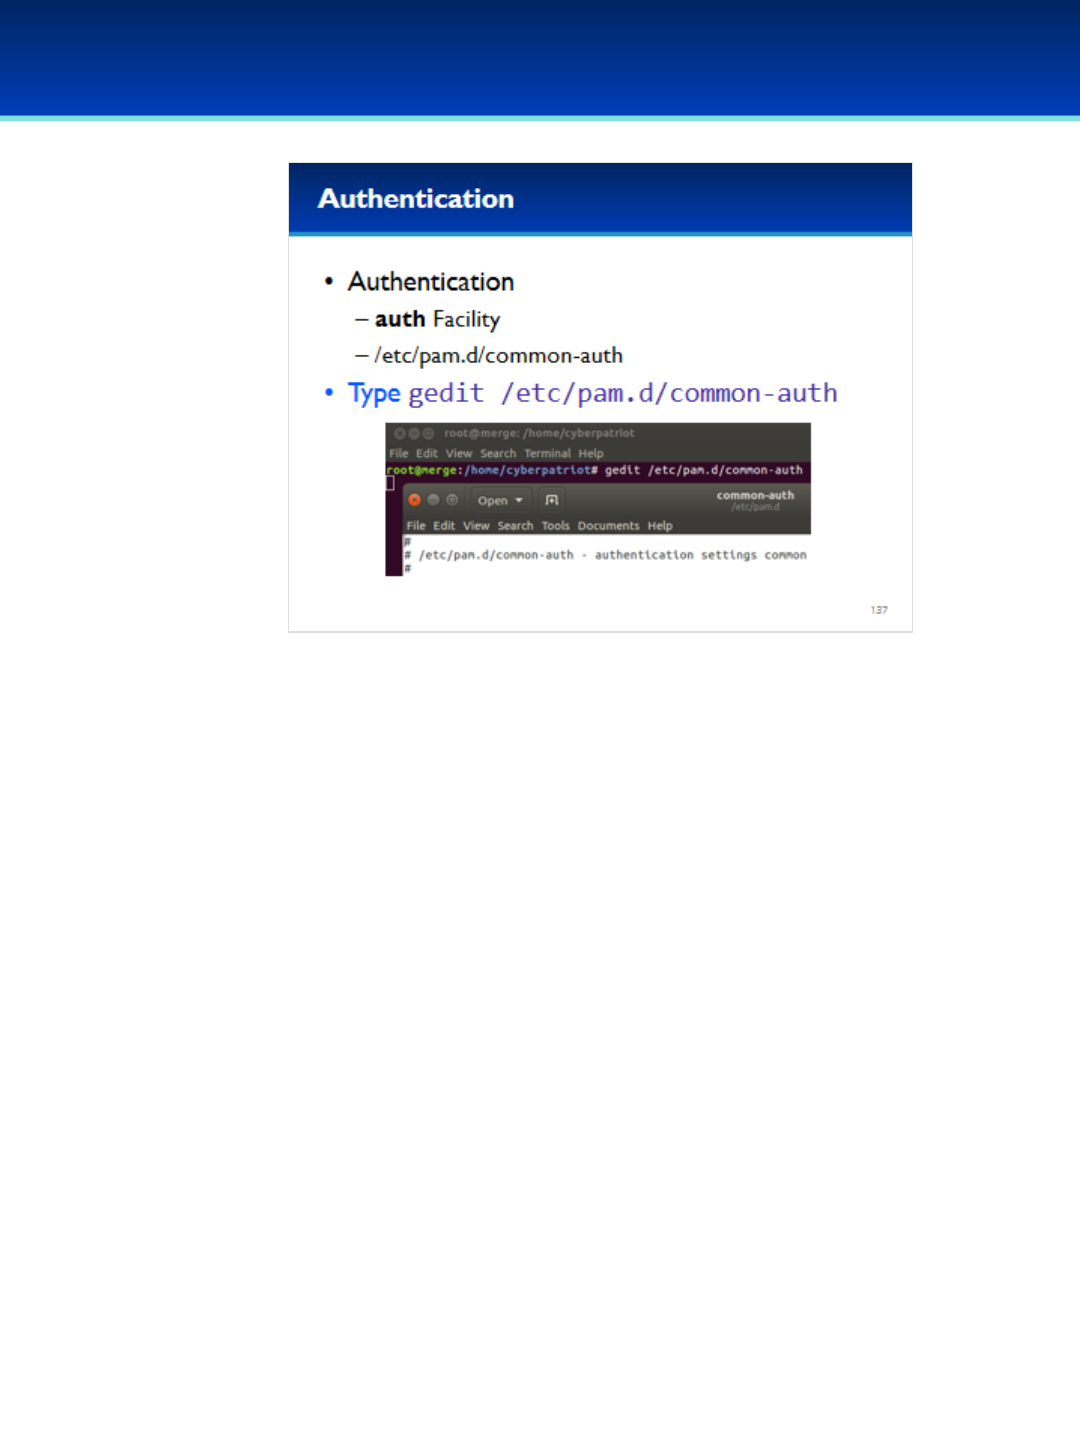
© 2018 Air Force Association
AFA Advanced CyberCamp Instructor’s Guide
Page 264
Slide 137
Ubuntu 16
•Authentication is handled by the auth facility.
•The default configuration for this facility is in the common-auth
file.
•Open the common-auth file with gedit.
Have the students run the commands on the screen.
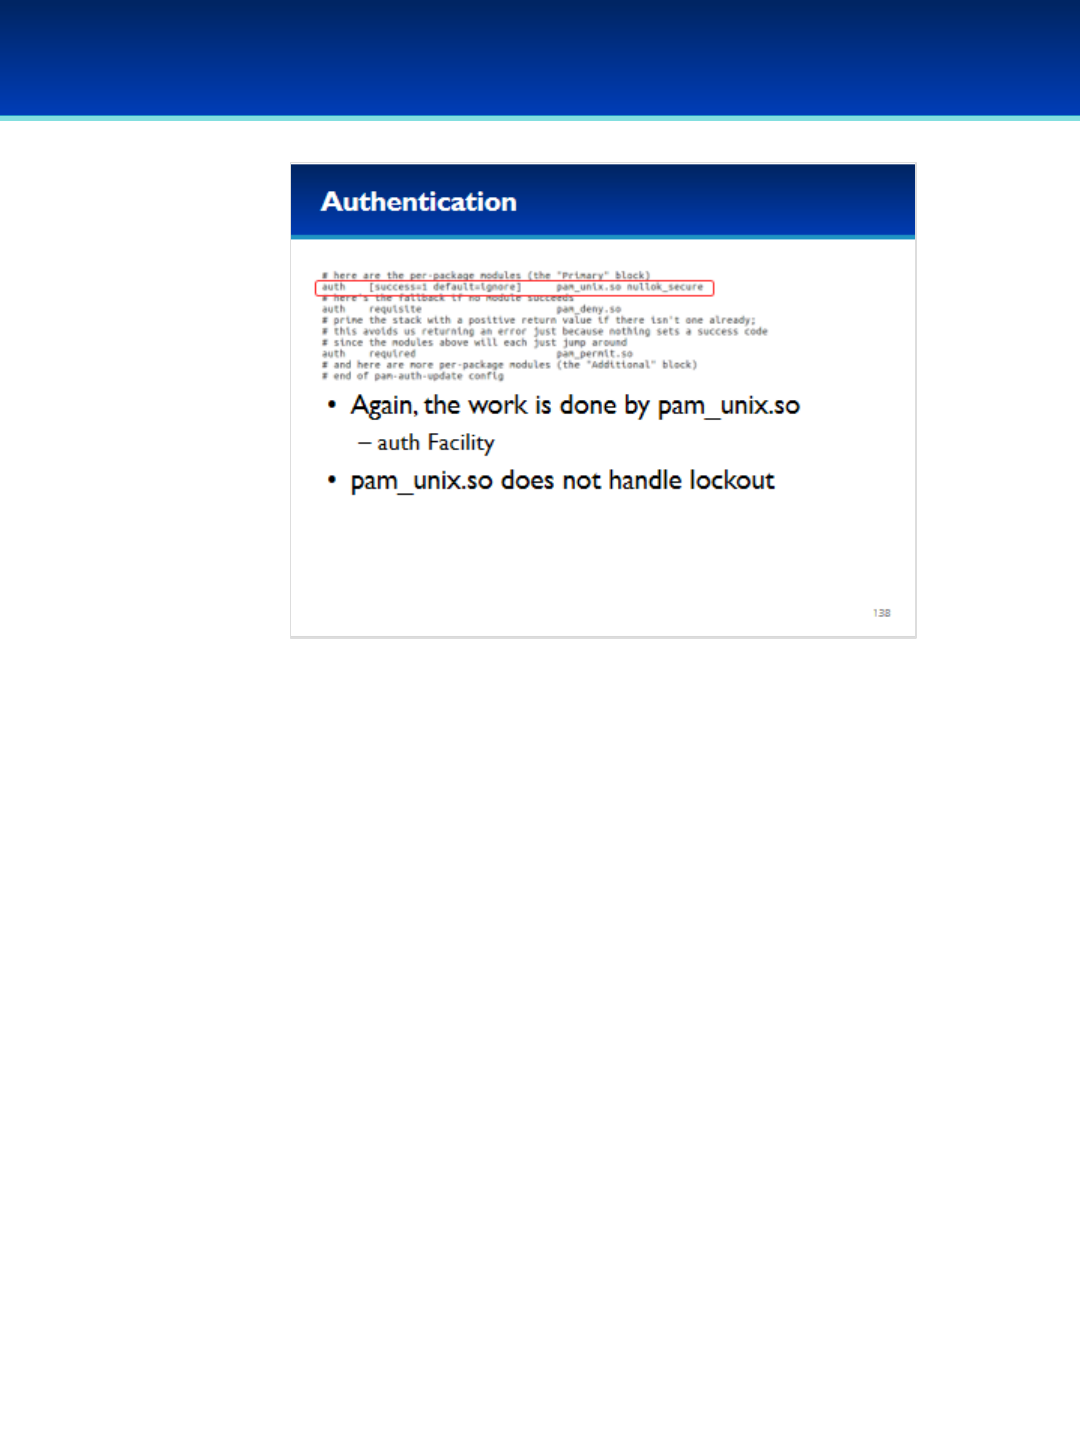
© 2018 Air Force Association
AFA Advanced CyberCamp Instructor’s Guide
Page 265
Slide 138
Ubuntu 16
•In common-auth you can see that all of the work is again
done by using the auth facility of the the pam_unix
module.
•However, the pam_unix module is not capable of handling
account lockout functions.

© 2018 Air Force Association
AFA Advanced CyberCamp Instructor’s Guide
Page 266
Slide 139
Ubuntu 16
•In order to handle account lockout functionality we are
going to use the pam_tally2 module.
•First, read the manual page of pam_tally2.
Have the students run the commands on the screen.
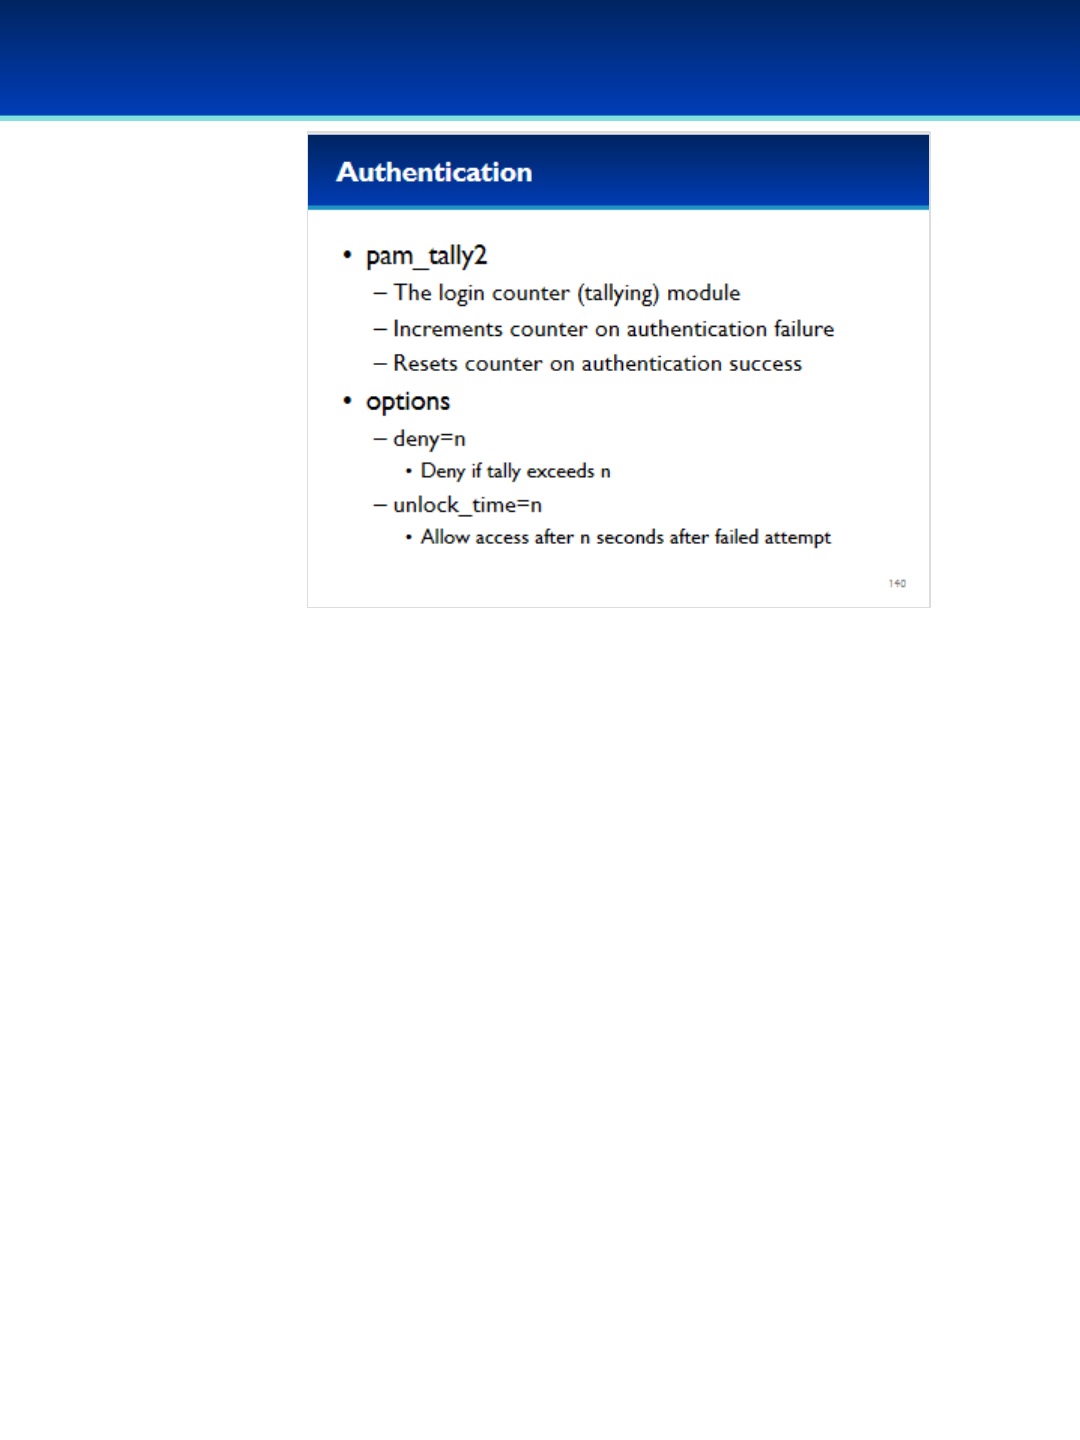
© 2018 Air Force Association
AFA Advanced CyberCamp Instructor’s Guide
Page 267
Slide 140
Ubuntu 16
•Pam_tally2 is described as a login counter module.
•When a request is denied, the counter is incremented.
•When a request is granted, the counter is reset to 0.
•Looking at the pam_tally2 manual, there are also some
important options.
•The deny option will automatically deny the authentication
request if the counter exceeds n.
•The unlock time option will allow a single additional
authentication attempt after a specified number of seconds.
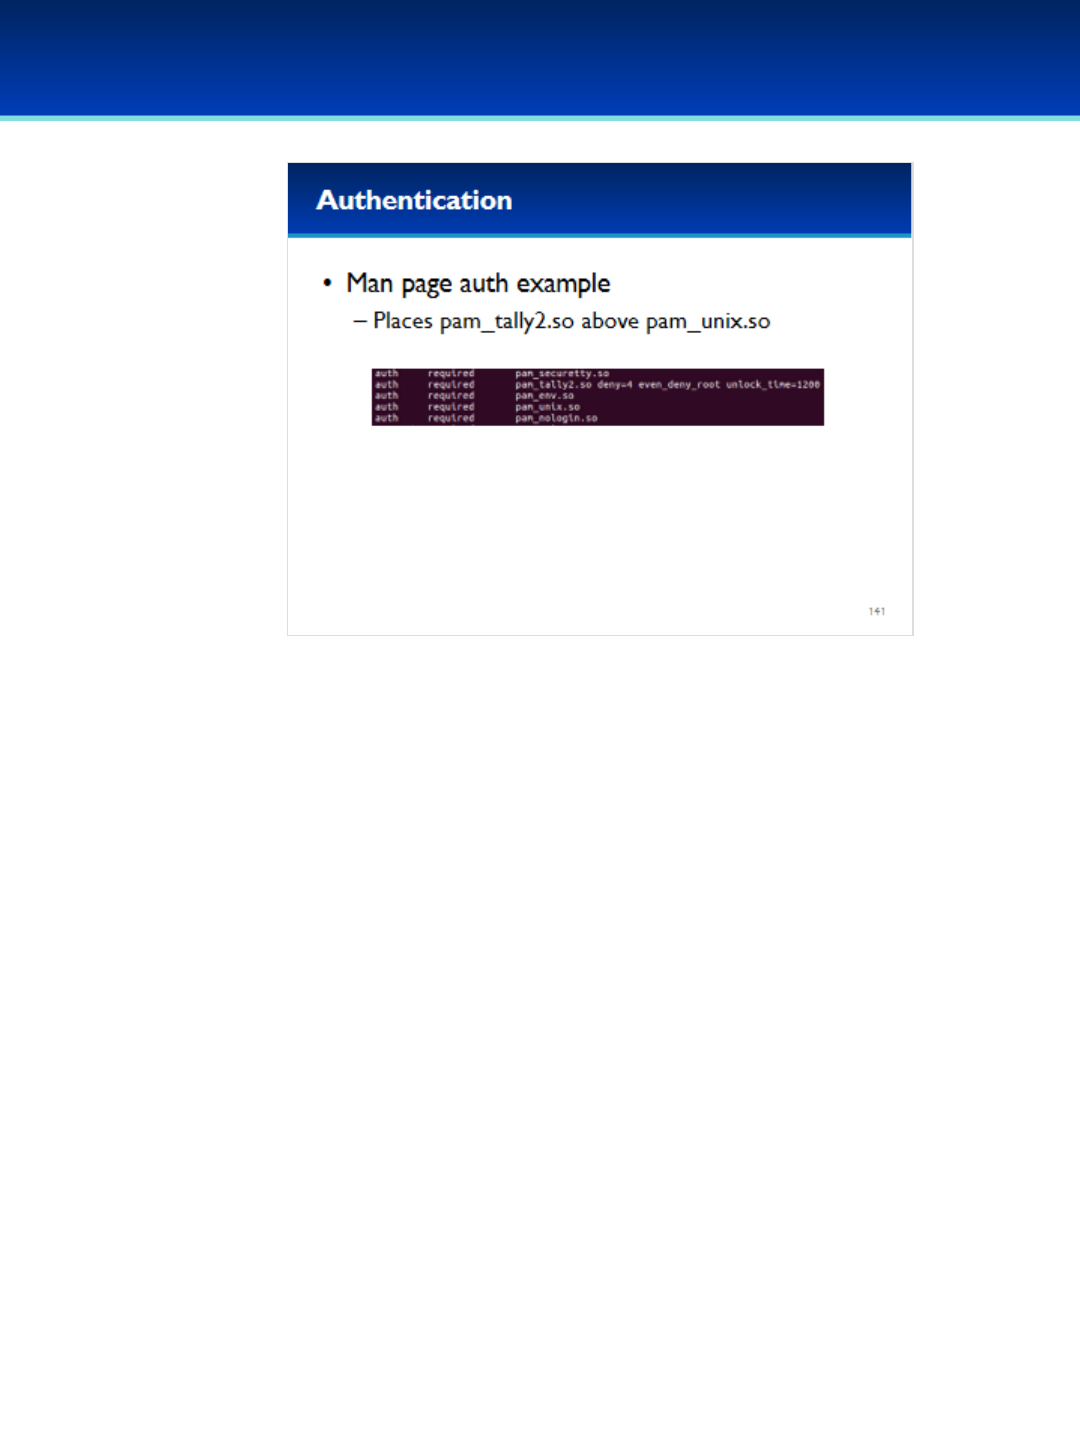
© 2018 Air Force Association
AFA Advanced CyberCamp Instructor’s Guide
Page 268
Slide 141
Ubuntu 16
•Further down on the pam_tally2 manual page, it shows
an example implementation which places pam_tally2
module above the pam_unix module.

© 2018 Air Force Association
AFA Advanced CyberCamp Instructor’s Guide
Page 269
Slide 142
Ubuntu 16
•Add the pam_tally2 module directly above the pam_unix
module.
- Using the auth facility.
- And a control of: required
•A deny value of four is a little low, but it will allow us to test
our configuration more easily.
•An unlock_time of 60 is generally acceptable since it will only
allow 1 additional logon attempt every minute, but a more
secure value would be a little higher.
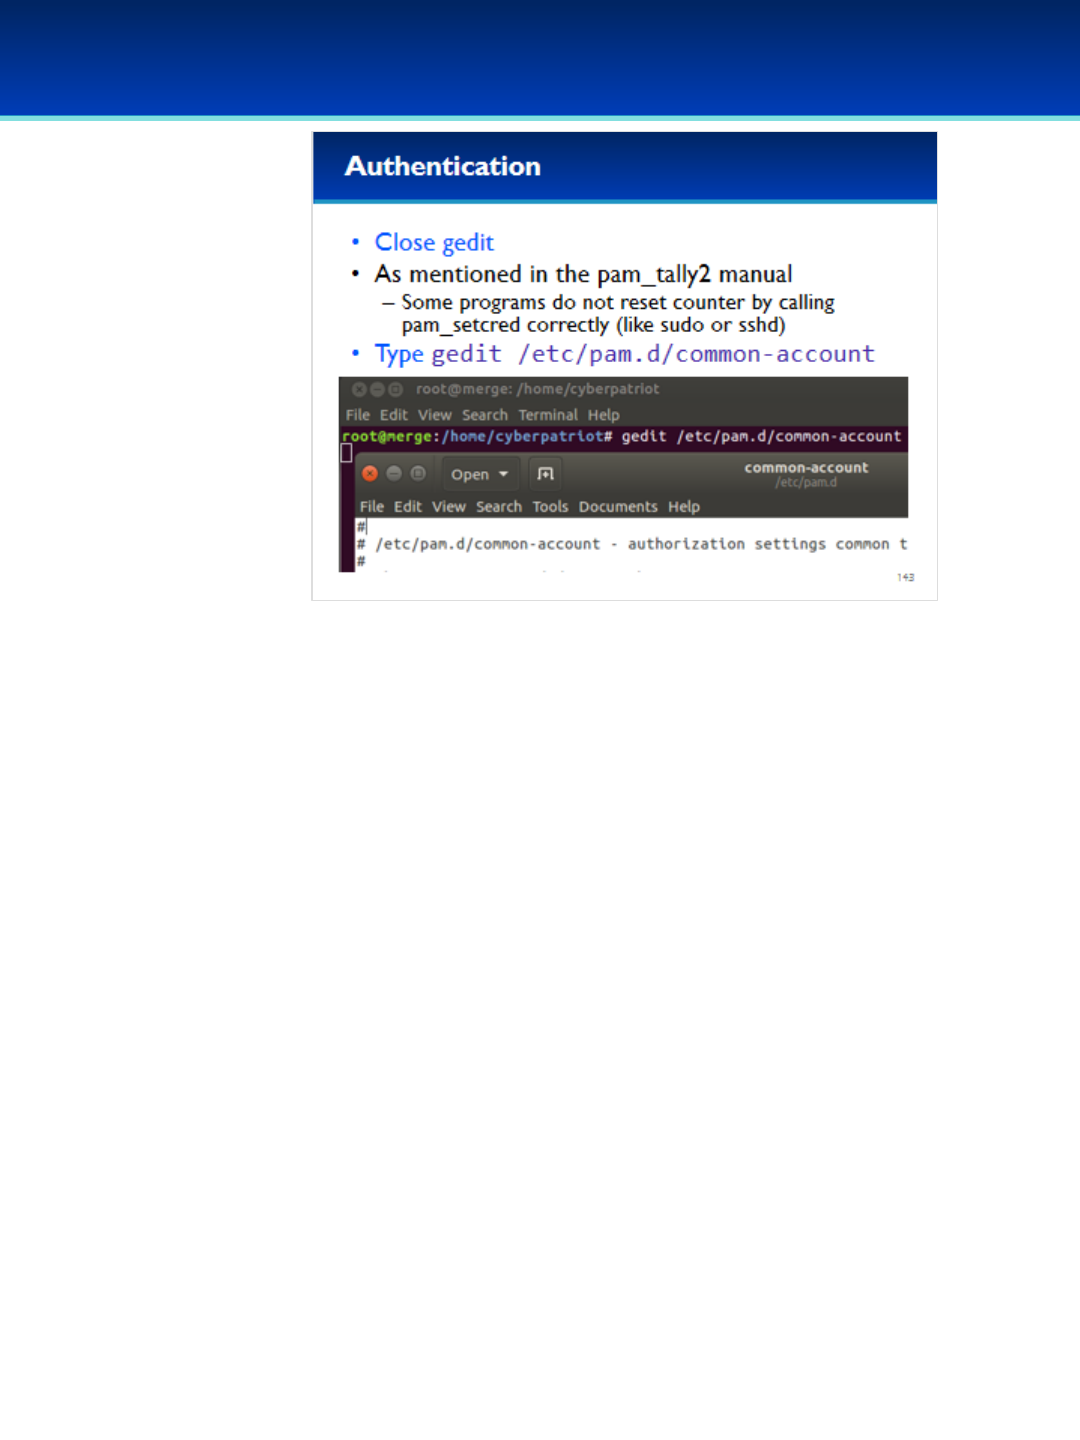
© 2018 Air Force Association
AFA Advanced CyberCamp Instructor’s Guide
Page 270
Slide 143
Ubuntu 16
•Unfortunately, as mentioned in the pam_tally2 module, some
programs do not call pam_setcred correctly, thus resetting the
lockout counter.
- Some of these programs include sudo and sshd.
•In order to prevent these programs from locking you out, we have to
edit the common-account file.
Have the students run the commands on the screen.
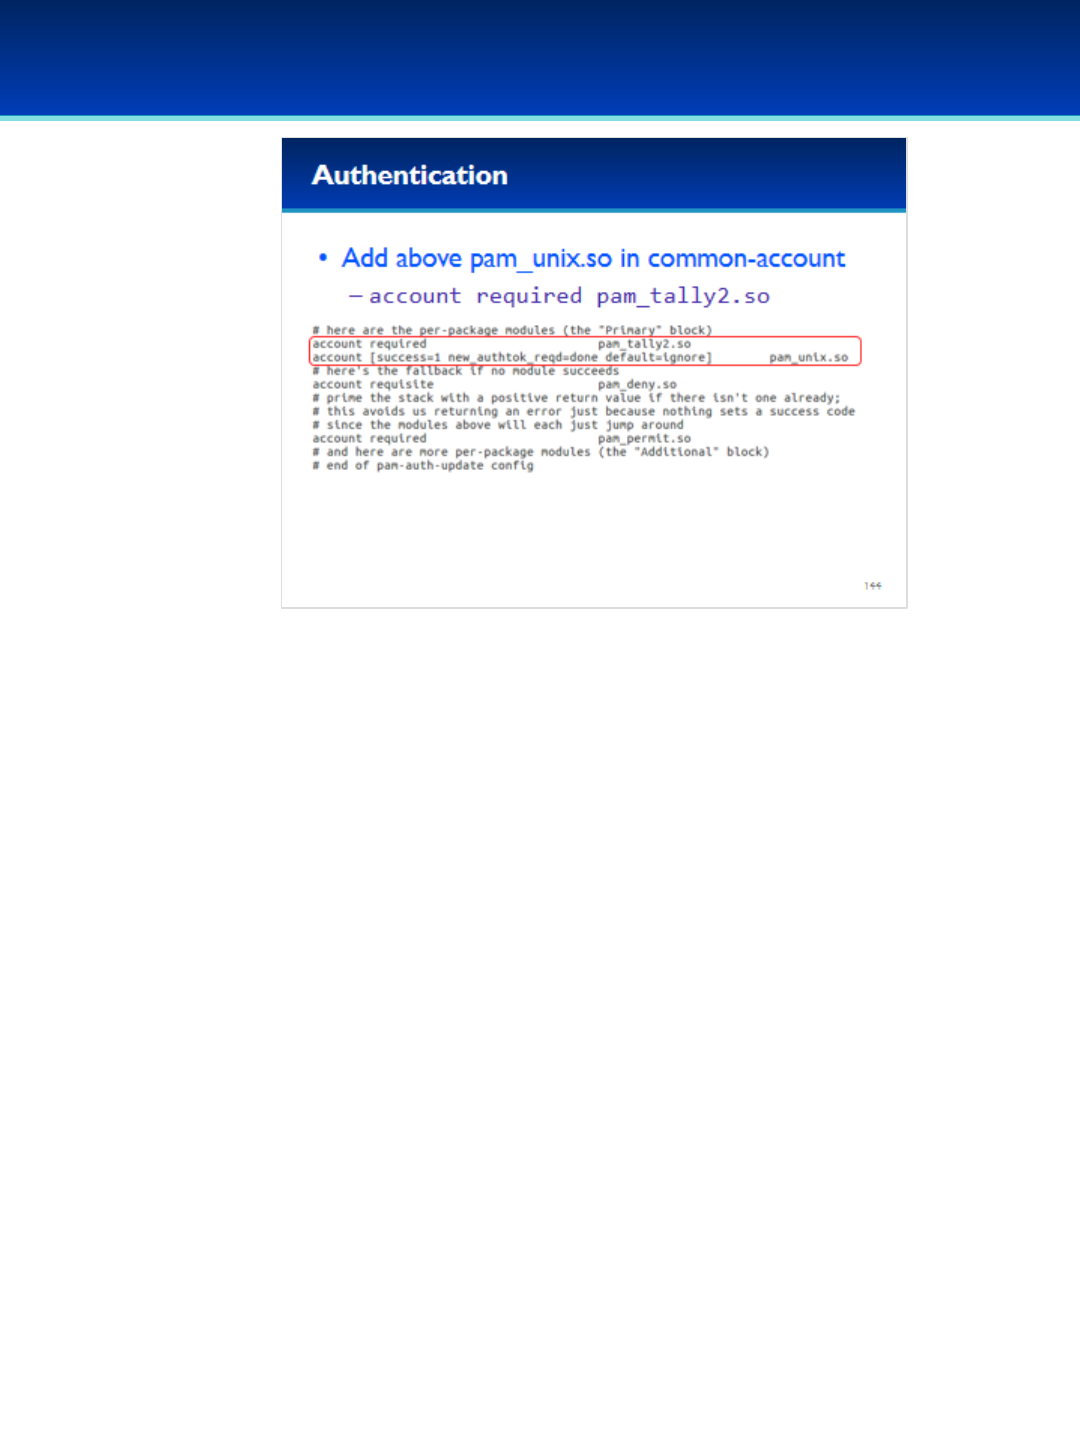
© 2018 Air Force Association
AFA Advanced CyberCamp Instructor’s Guide
Page 271
Slide 144
Ubuntu 16
•Add the pam_tally2 module directly above the pam_unix
module.
- Using the account facility and a control of required.
•No options are necessary this time.
•This will ensure the lockout counter is reset after a successful
authentication.
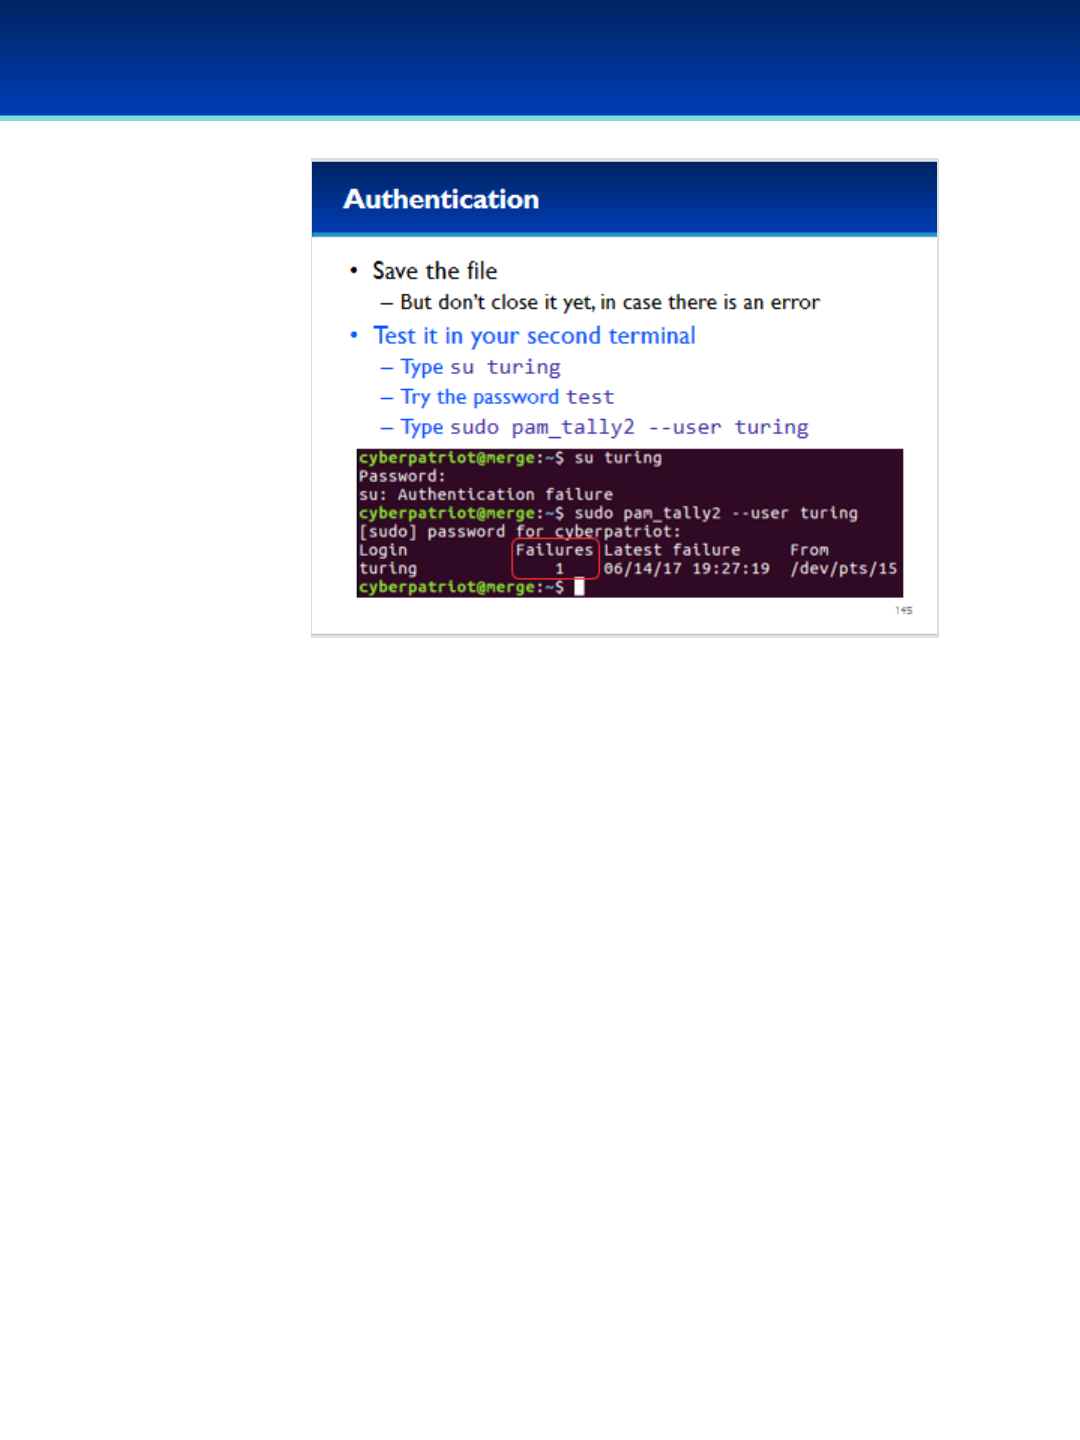
© 2018 Air Force Association
AFA Advanced CyberCamp Instructor’s Guide
Page 272
Slide 145
Ubuntu 16
•Save the file in gedit, but don’t close it in case there is
an error.
Have the students run the commands on the screen.
•The pam_tally2 command tells us that the user turing
has 1 failed login.
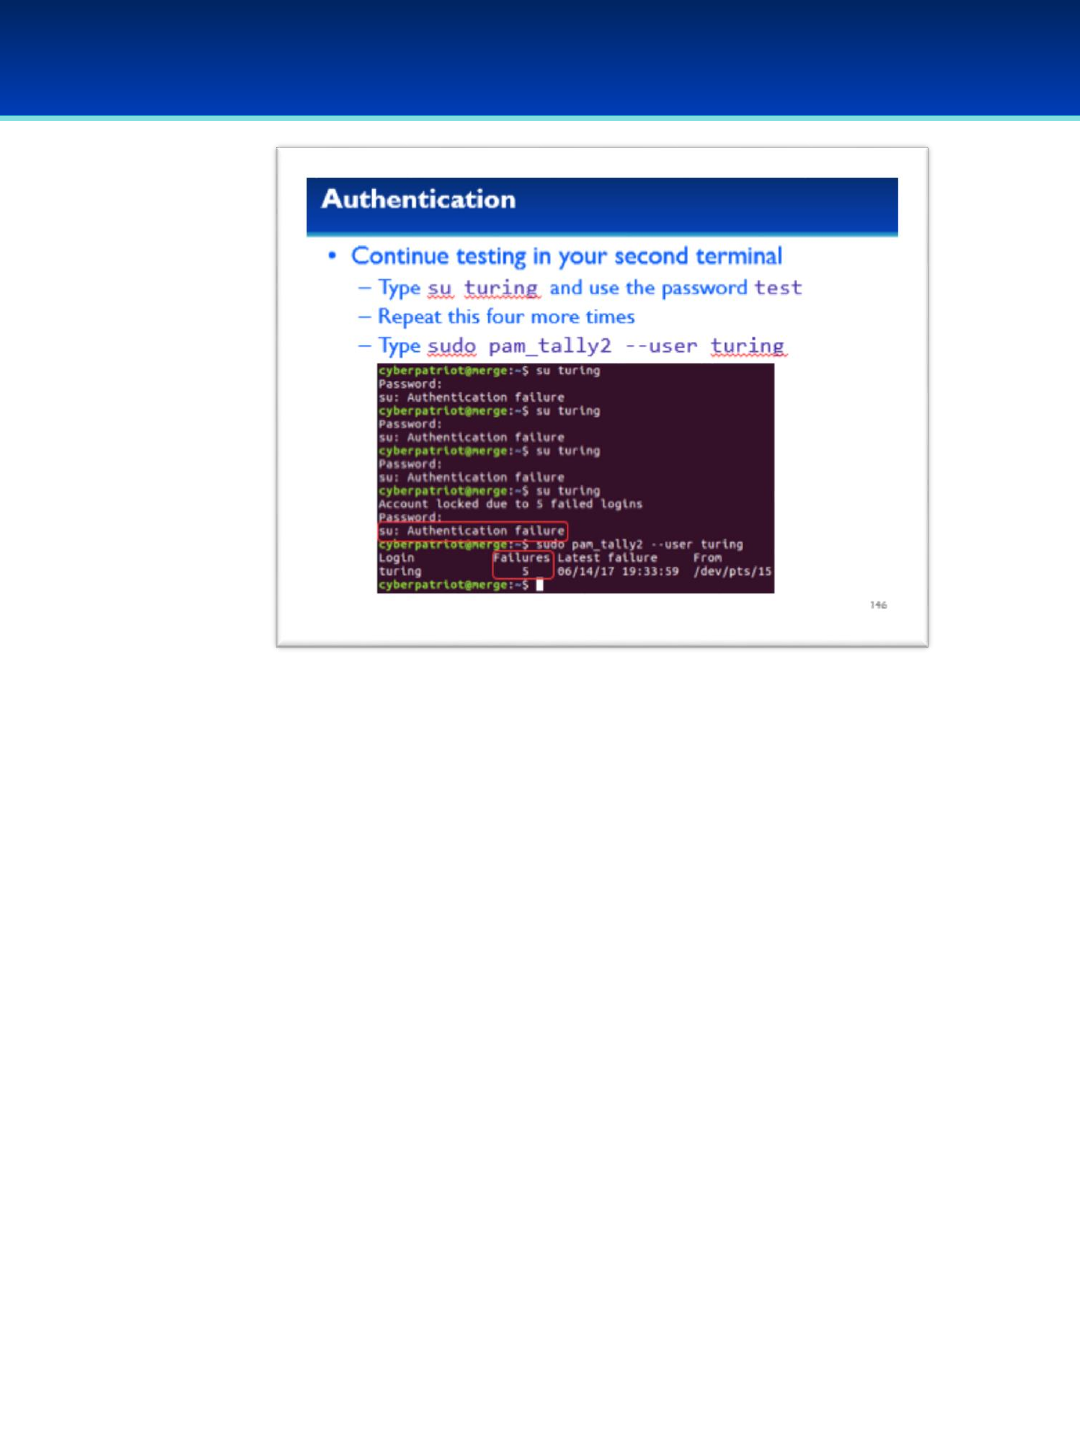
© 2018 Air Force Association
AFA Advanced CyberCamp Instructor’s Guide
Page 273
Slide 146
Ubuntu 16
•Go ahead and fail authentication four more times.
Have the students run the commands on the screen.
•Your last authentication attempt should give you an account
lockout warning message.
•The pam_tally2 command now shows that we have five failed
login attempts.
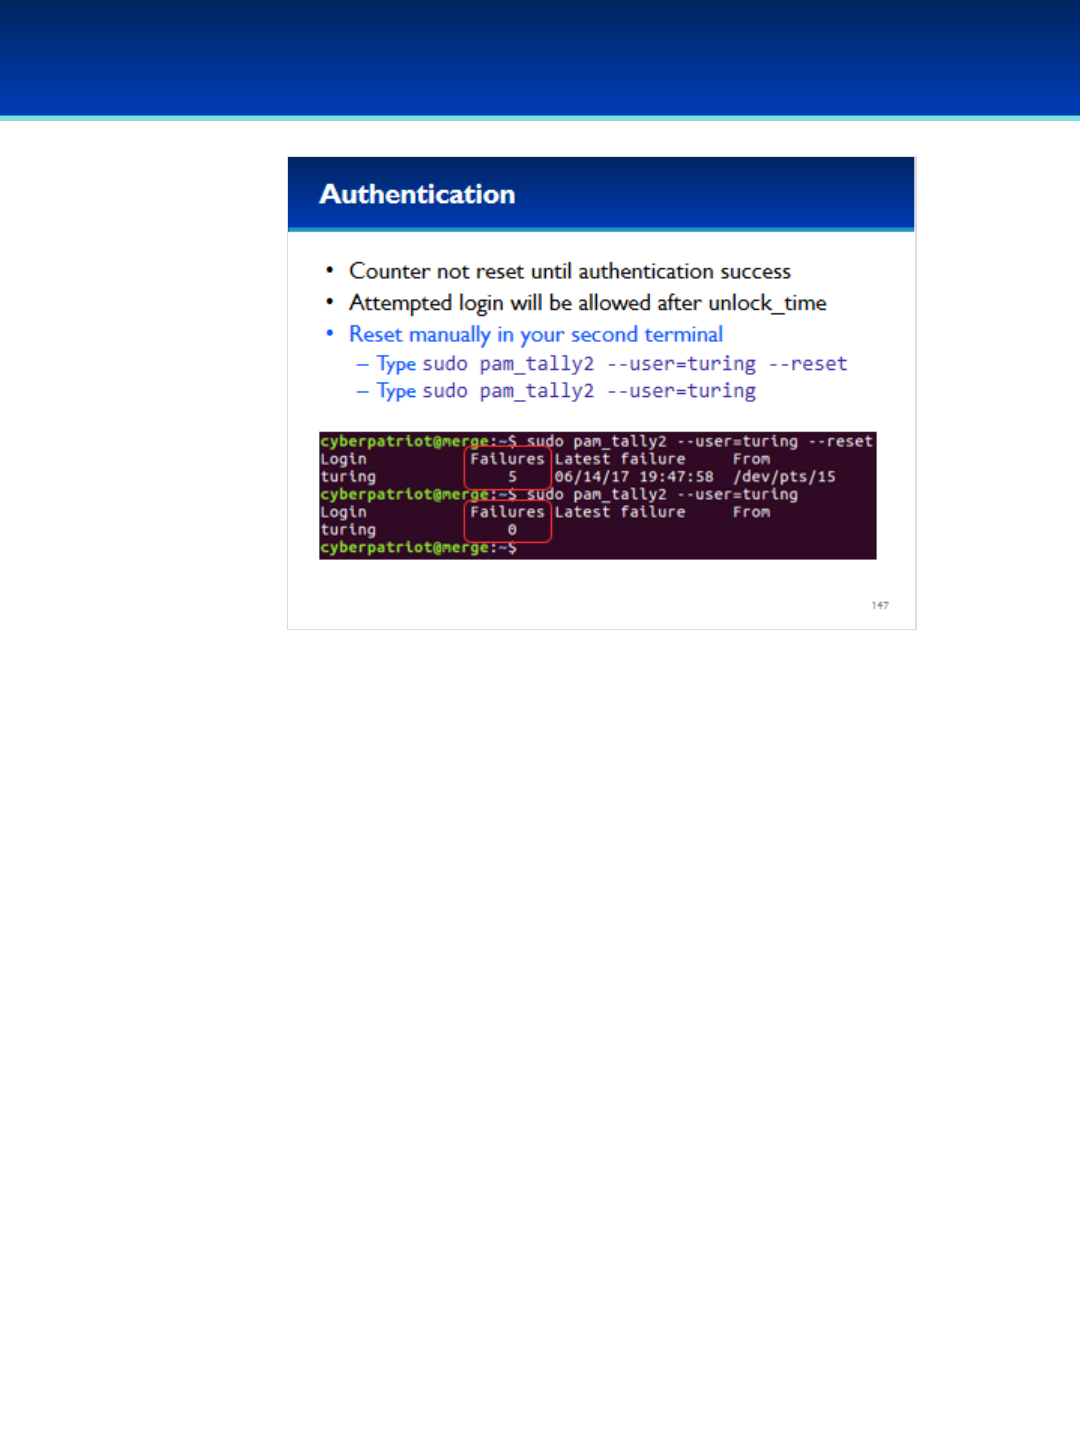
© 2018 Air Force Association
AFA Advanced CyberCamp Instructor’s Guide
Page 274
Slide 147
Ubuntu 16
•The counter will not be reset for that user until a successful
authentication, but a single authentication attempt will be
allowed after unlock_time.
•You can manually reset the account lockout counters (as
root) with the pam_tally2 module.
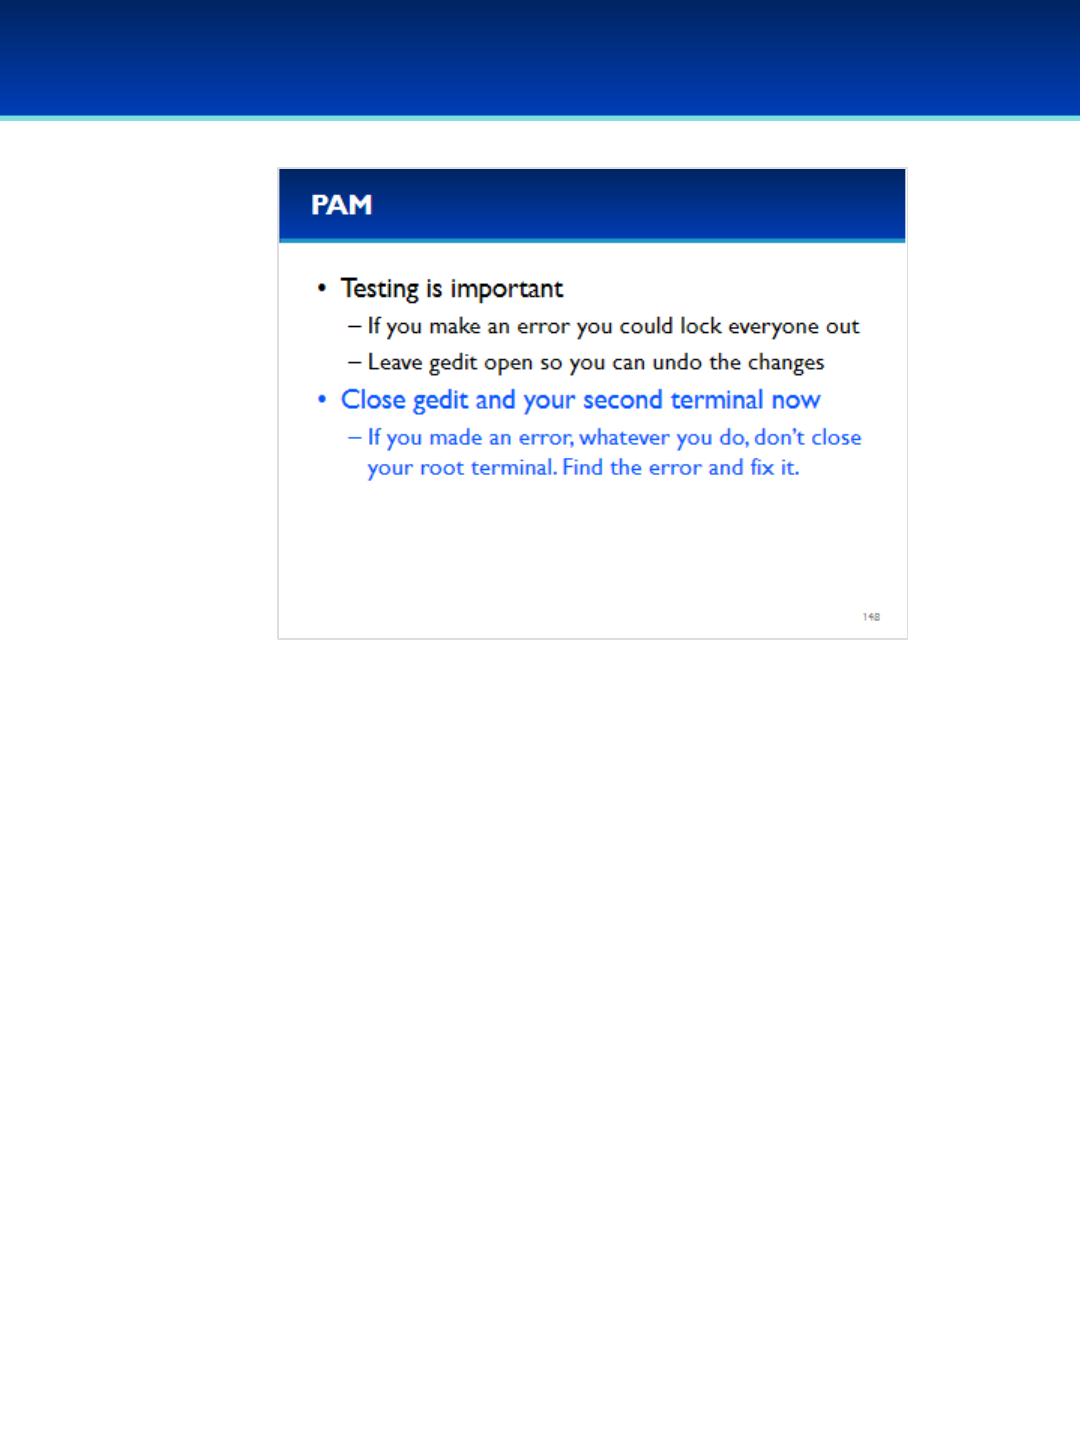
© 2018 Air Force Association
AFA Advanced CyberCamp Instructor’s Guide
Page 275
Slide 148
Ubuntu 16
•It is extremely important that you always test your
changes before closing your editor. That way, if you
made an error, you can quickly undo all the changes
you made and easily restore your system to a working
state.
•It looks like we didn’t break anything so go ahead and
close gedit and your second terminal now.
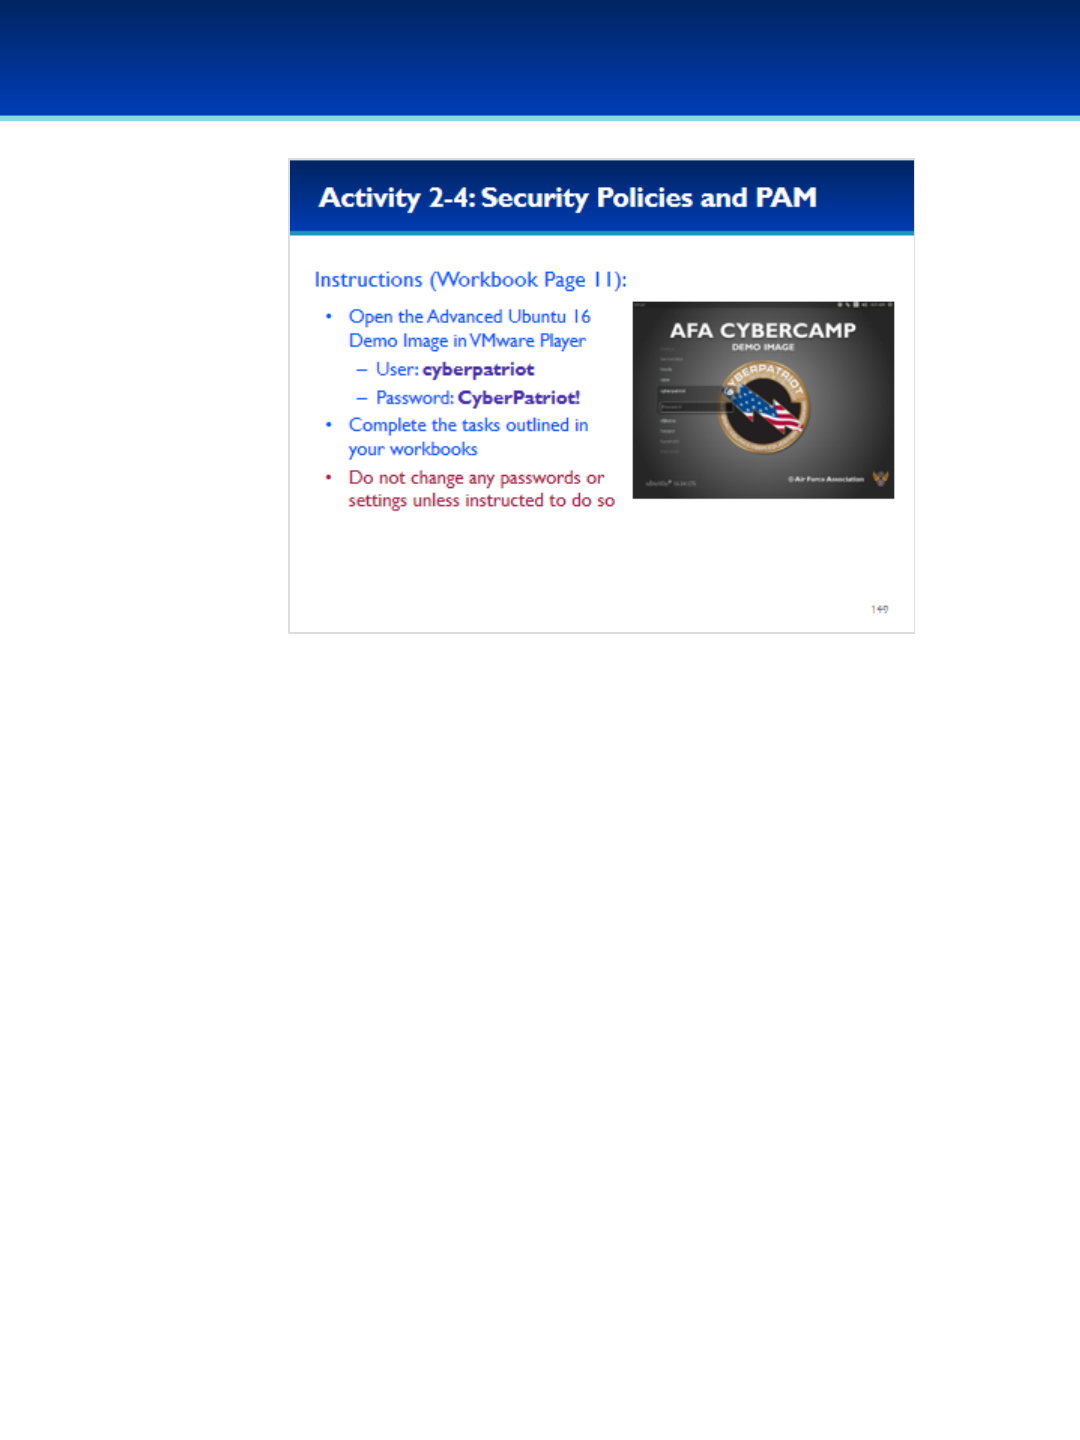
© 2018 Air Force Association
AFA Advanced CyberCamp Instructor’s Guide
Page 276
Slide 149
Ubuntu 16
Give students about 20 minutes to complete the tasks listed on page 11 of their
workbooks.
This lab will review security policies and PAM.
Stress that the students should not change any passwords or settings unless they
are expressly directed to do so in the activity.
The students should not need to use any other user names or passwords to
complete the activities. Here are the passwords to some administrative accounts
just in case.
Username: neumann
Password: vN_@rchit3cture
Username: hopper
Password: ENIAC.TurC0mp
Answers:
1. 1
2. /etc/sysctl.conf
3. -
4. 4.4.0-21-generic
5. /etc/security/opasswd
6. pam_wheel (or pam_wheel.so)
7. Even_deny_root
8. -
9. -

© 2018 Air Force Association
AFA Advanced CyberCamp Instructor’s Guide
Page 277
Slide 150
Ubuntu 16
Devote 30 minutes to slides 151-167. Allow the students 20
minutes to complete the activity on slide 167.
Throughout this section, students should follow along in the
Advanced Ubuntu Demo Image.
In this section, we’ll wrap things up by looking at two different
sets of networking utilities available on most modern Linux
systems, and discuss how to easily enable the firewall and
modify firewall rules from the command line.

© 2018 Air Force Association
AFA Advanced CyberCamp Instructor’s Guide
Page 278
Slide 151
Ubuntu 16
•The traditional Linux command for configuring your network
interface is the ifconfig command.
- Any changes made with ifconfig are not persistent and will
be reset to their default configured values upon reboot.
•The ifconfig command with no arguments will show the status
of active network interfaces.
•Ifconfig –awill show the status of all network interfaces, not
just active ones.
•Ifconfig can show the status of a specific network interface by
using the interface name as an argument.
•Ifconfig can also activate a network interface by specifying the
interface name followed by up.
•Similarly, specifying the interface name followed by down will
shut down the network interface.
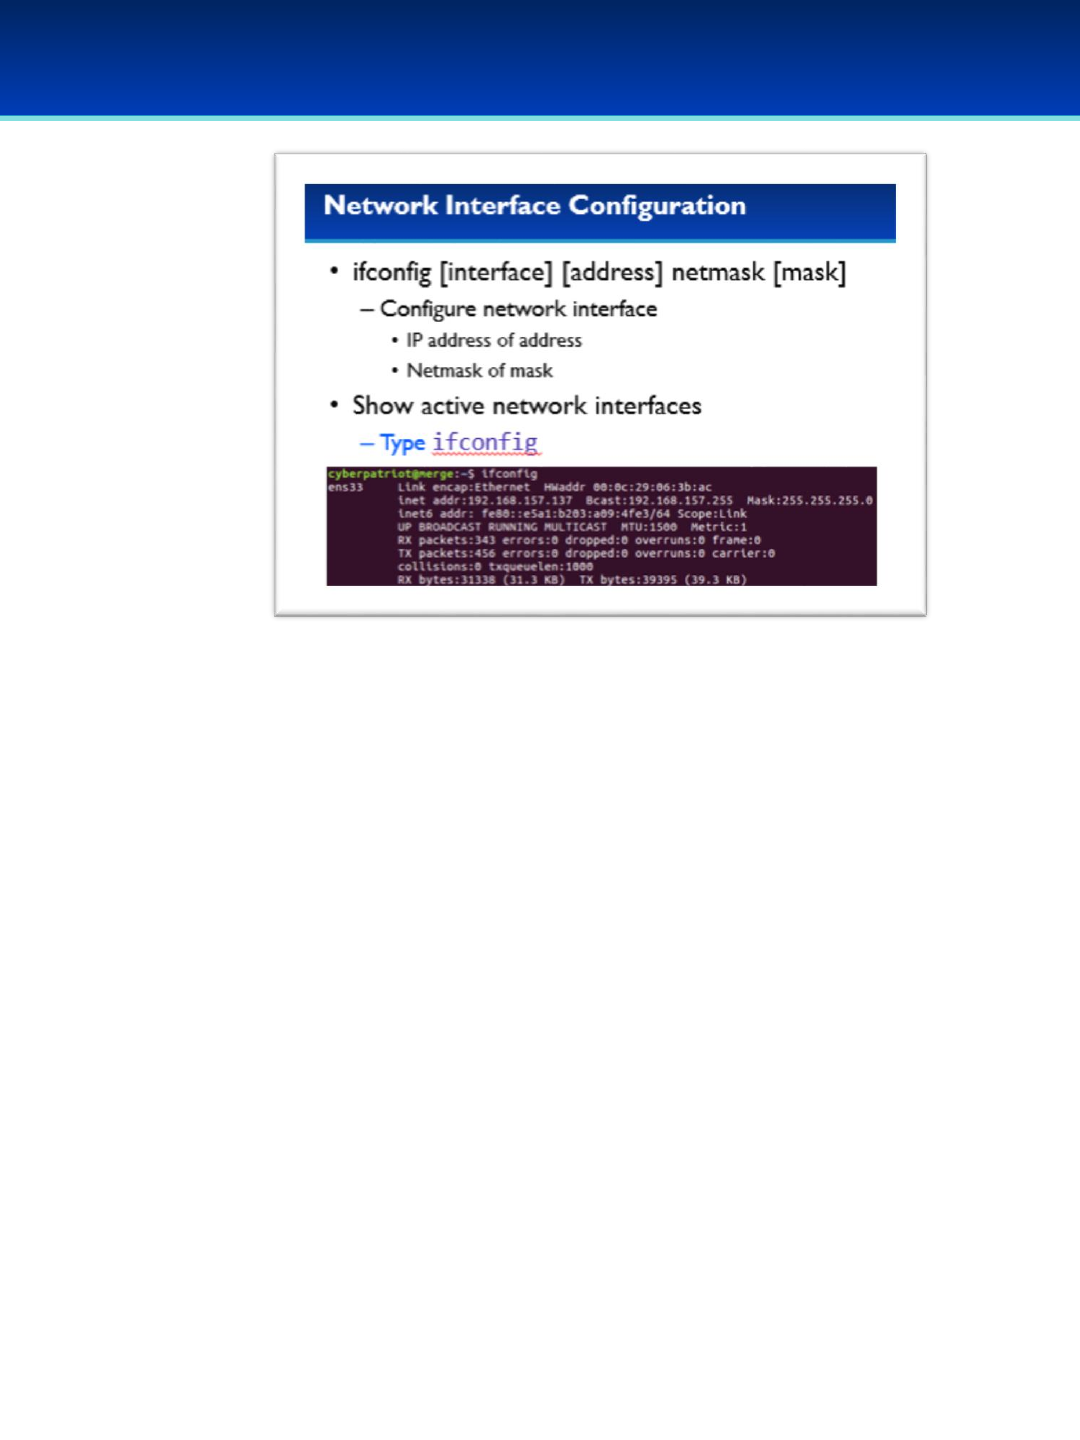
© 2018 Air Force Association
AFA Advanced CyberCamp Instructor’s Guide
Page 279
Slide 152
Ubuntu 16
•You can configure network interface by first specifying the
interface name, followed by the desired IP address, then the
word netmask followed by the desired netmask.
•Show the active connections now by typing ifconfig.
Have the students run the commands on the screen.
•The first interface in this example is named “ens33” and is our
physical network interface.
•The second interface labeled “lo” is your “loopback” device.
- This is a virtual network interface that is used by your
computer to communicate with itself.
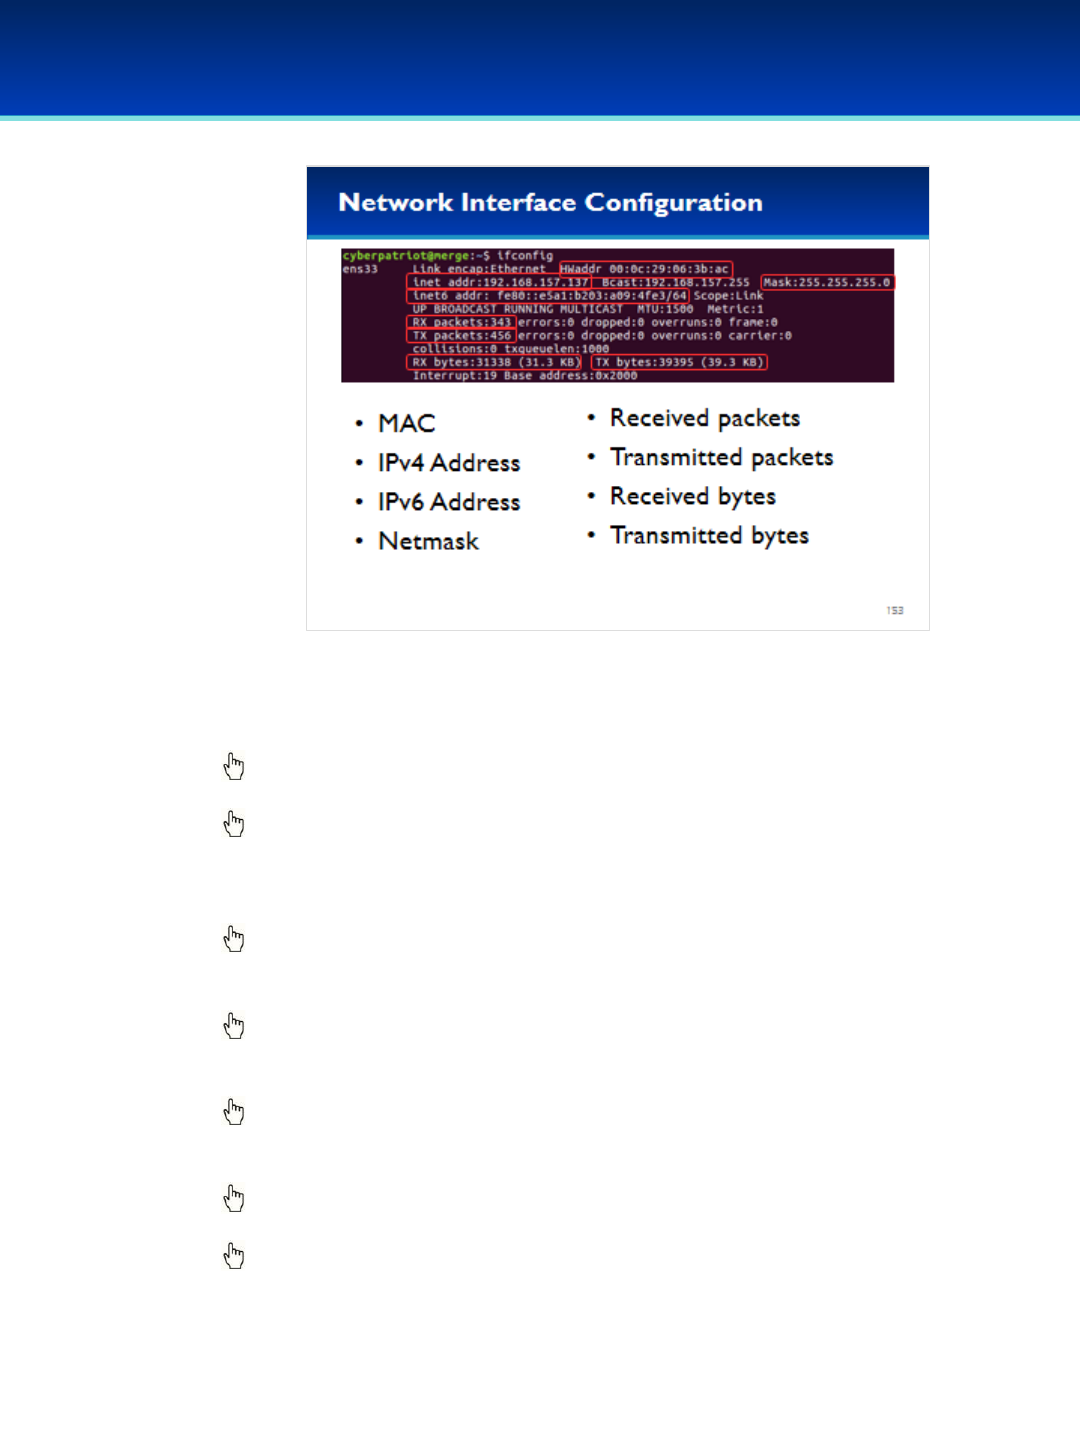
© 2018 Air Force Association
AFA Advanced CyberCamp Instructor’s Guide
Page 280
Slide 153
Ubuntu 16
•Let’s take a closer look at the output of ifconfig.
•Ifconfig displays the MAC address, which is hardcoded into the device
and not normally intended to be changed.
Click to reveal IPv4 Address.
•Your IPv4 address is shown by the label inet addr.
Click to reveal IPv6 Address.
•The IPv6 address is shown by the label inet6 addr.
•IPv6 is a replacement for IPv4 that does not yet have widespread
adoption.
Click to reveal Netmask.
•Netmask is shown by the mask label, and specifies the range of IP
addresses you can (and can’t) talk to directly.
Click to reveal Received packets.
•Ifconfig also shows the number of received packets; RX is an abbreviation
for received.
Click to reveal Transmitted packets.
•The number of transmitted packets; TX is an abbreviation for
transmitted.
Click to reveal Received bytes.
•The number of received bytes is shown.
Click to reveal Transmitted bytes.
•Displays the number of transmitted bytes.
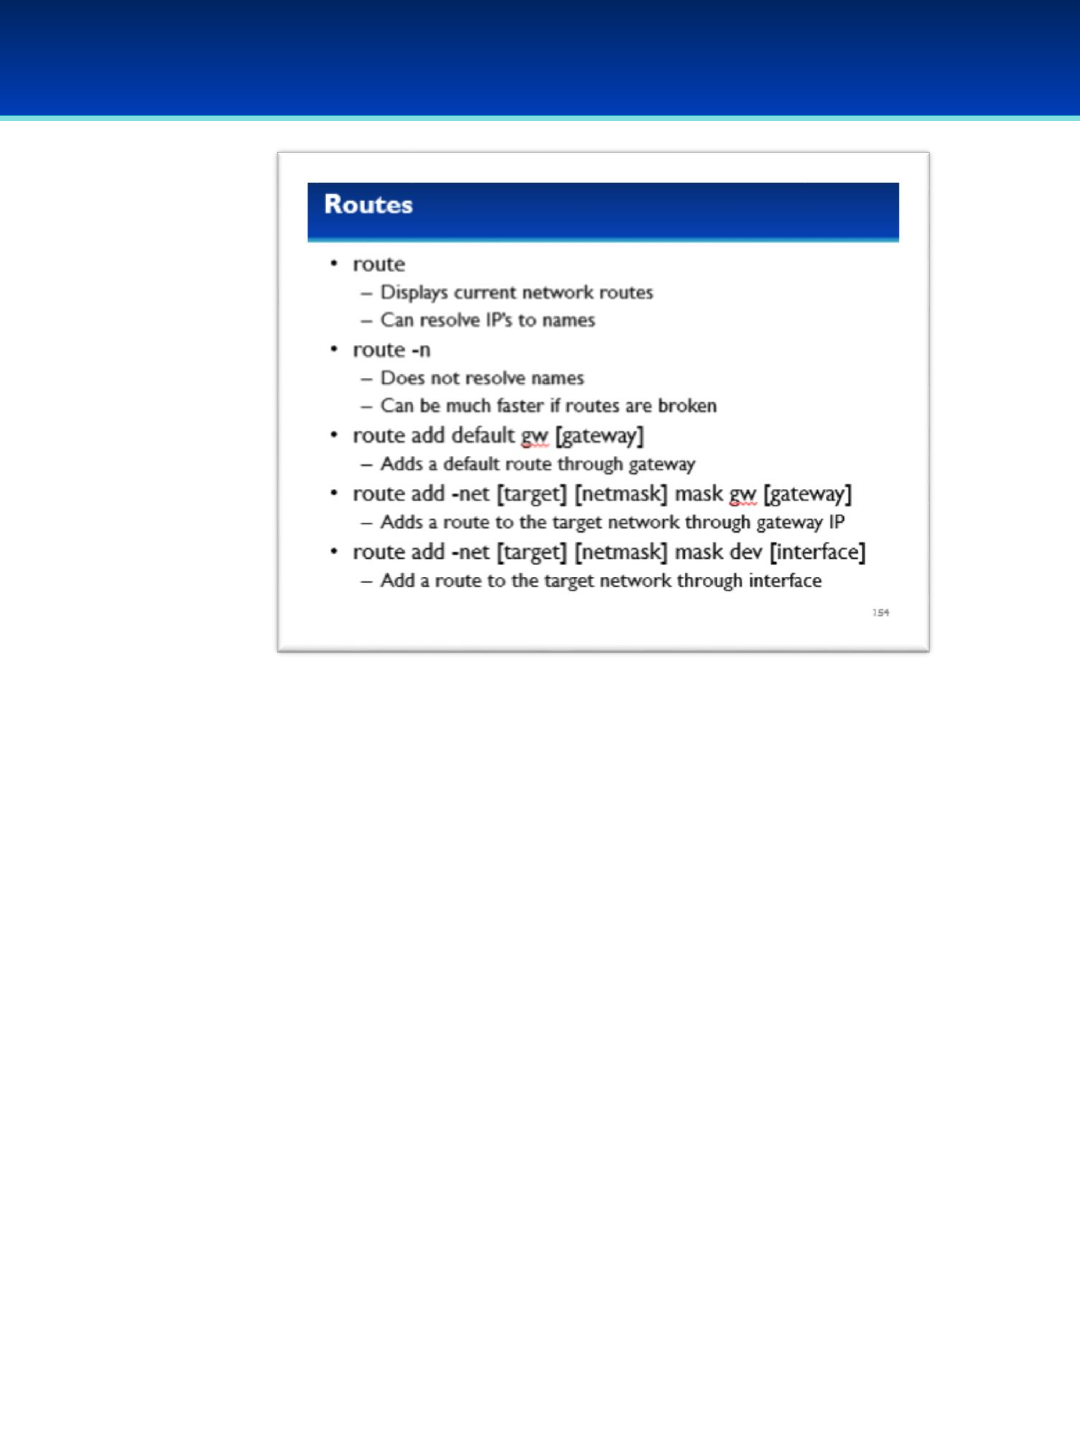
© 2018 Air Force Association
AFA Advanced CyberCamp Instructor’s Guide
Page 281
Slide 154
Ubuntu 16
•The route command is used to display or modify routes.
•Route without any options will display the current routes.
•The –noption tells route to not resolve IP addresses to names, which
can significantly speed up route if you have incorrect routes.
•You can use route to set a default gateway by running the command
route add default gw followed by the IP address of the default
gateway you want to use.
•You can also set routes to networks by using route add –net.
- Here the target is the network you want to add a route to, and
mask is the netmask of the target network.
- You can specify the route by specifying an IP address with gw or a
network interface with dev.
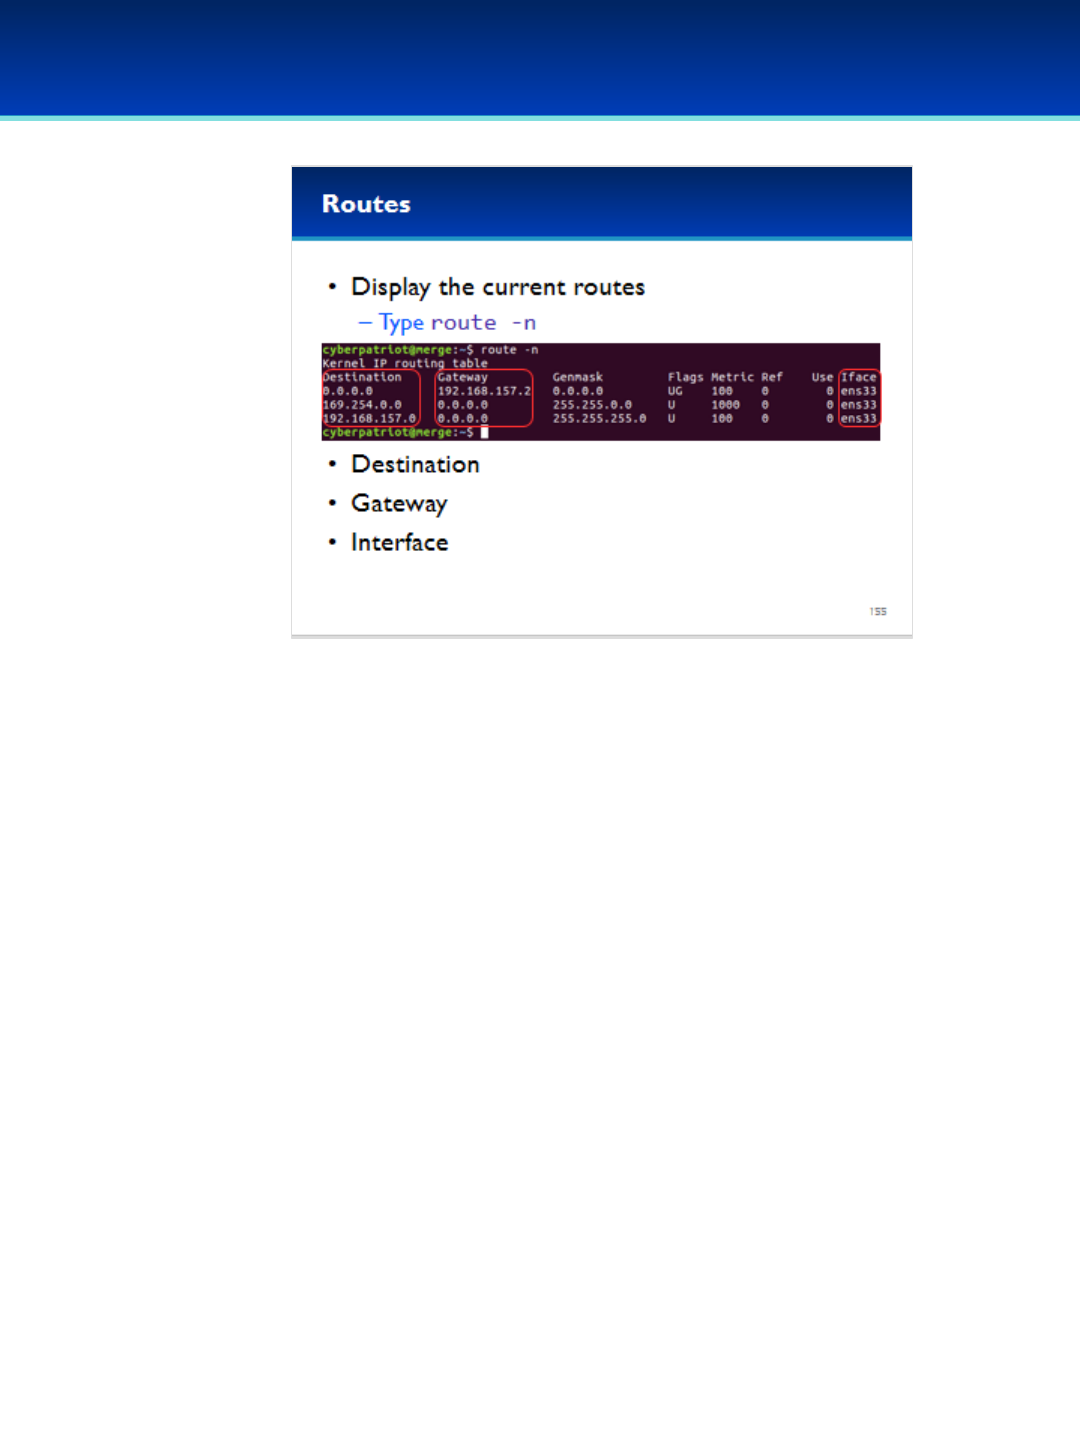
© 2018 Air Force Association
AFA Advanced CyberCamp Instructor’s Guide
Page 282
Slide 155
Ubuntu 16
•Let’s look at your current routes.
Have the students run the commands on the screen.
•Your values will be different, since VMware uses different IP address ranges
on different computers.
•The destination is the network that is the destination of this route.
•A value of 0.0.0.0 indicates this is the default route.
Have the students run the commands on the screen.
•The gateway is the IP that our packets must go through to get to the
destination network.
•A gateway of 0.0.0.0 indicates that the network is directly reachable
without going through a gateway.
•The interface is the network interface used to reach the destination
network.

© 2018 Air Force Association
AFA Advanced CyberCamp Instructor’s Guide
Page 283
Slide 156
Ubuntu 16
•Routes are processed from most specific to least specific.
•In this example, the bottom line is evaluated first and
specifies that we do not need to go through a gateway to
get to our local network.
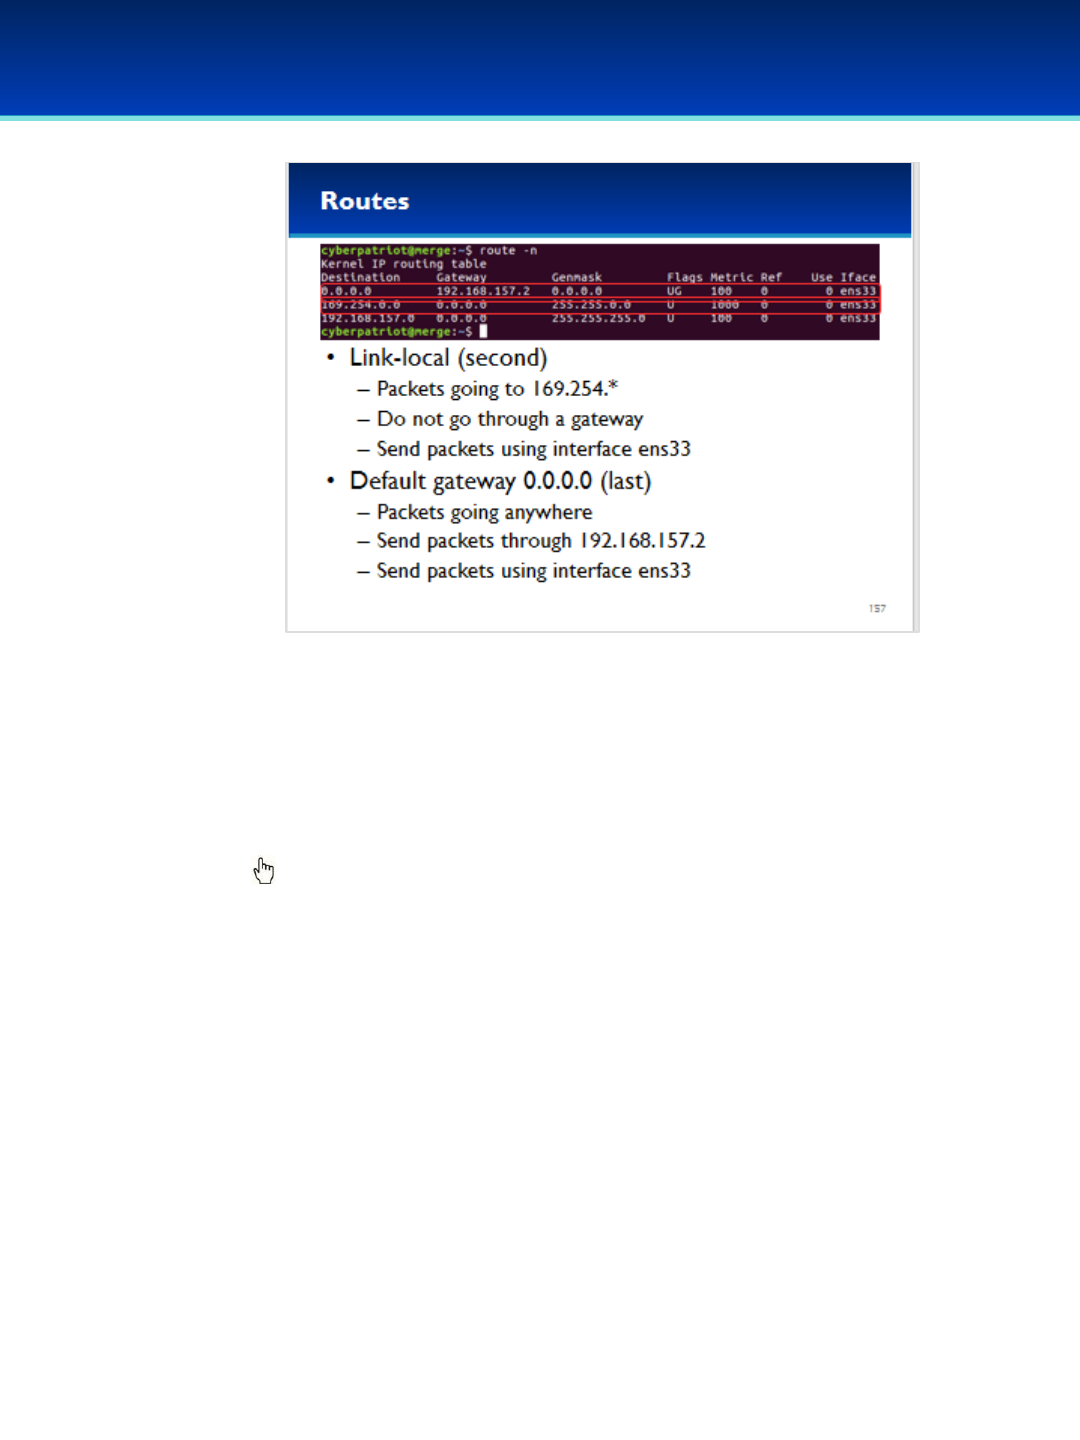
© 2018 Air Force Association
AFA Advanced CyberCamp Instructor’s Guide
Page 284
Slide 157
Ubuntu 16
•The next line is the link-local address, which is used to
communicate with any devices that did not receive a DHCP
address.
•This defines another local network with a different IP address
range.
Click to reveal default gateway.
•The default gateway says that all remaining packets must go
through our default gateway (192.168.157.2) in order to go
anywhere (0.0.0.0).

© 2018 Air Force Association
AFA Advanced CyberCamp Instructor’s Guide
Page 285
Slide 158
Ubuntu 16
•The netstat command can be used to display open sockets or
current routes.
•The netstat command by itself prints all open sockets. This
contains a lot of information you may not be interested in, such
as UNIX domain sockets.
•An example set of netstat options: –A inet,inet6 –anp
- This shows all IPv4 and IPv6 sockets, including established
connections and listening ports.
- Does not resolve addresses to names.
- Prints out the PID/process name associated with this socket.
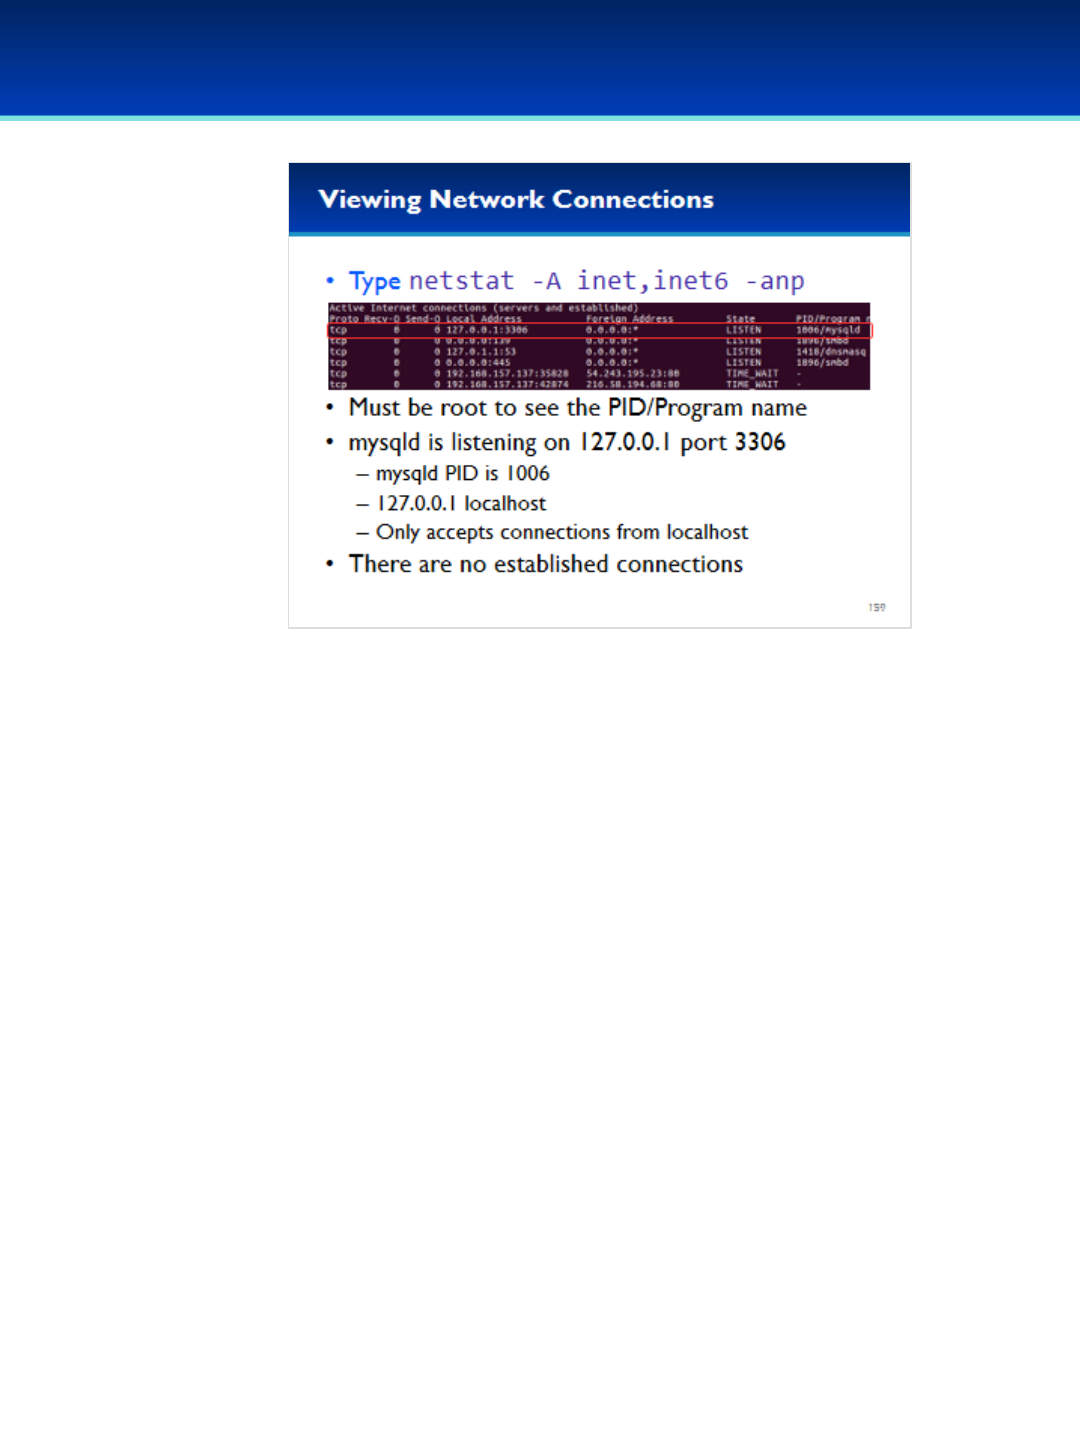
© 2018 Air Force Association
AFA Advanced CyberCamp Instructor’s Guide
Page 286
Slide 159
Ubuntu 16
Have the students run the commands on the screen.
•In this example you can see that the mysqld process, with a
PID of 1006 is listening on port 3306 on the local address:
127.0.0.1
•Since it is listening on localhost, only programs running on
this computer can connect to it.
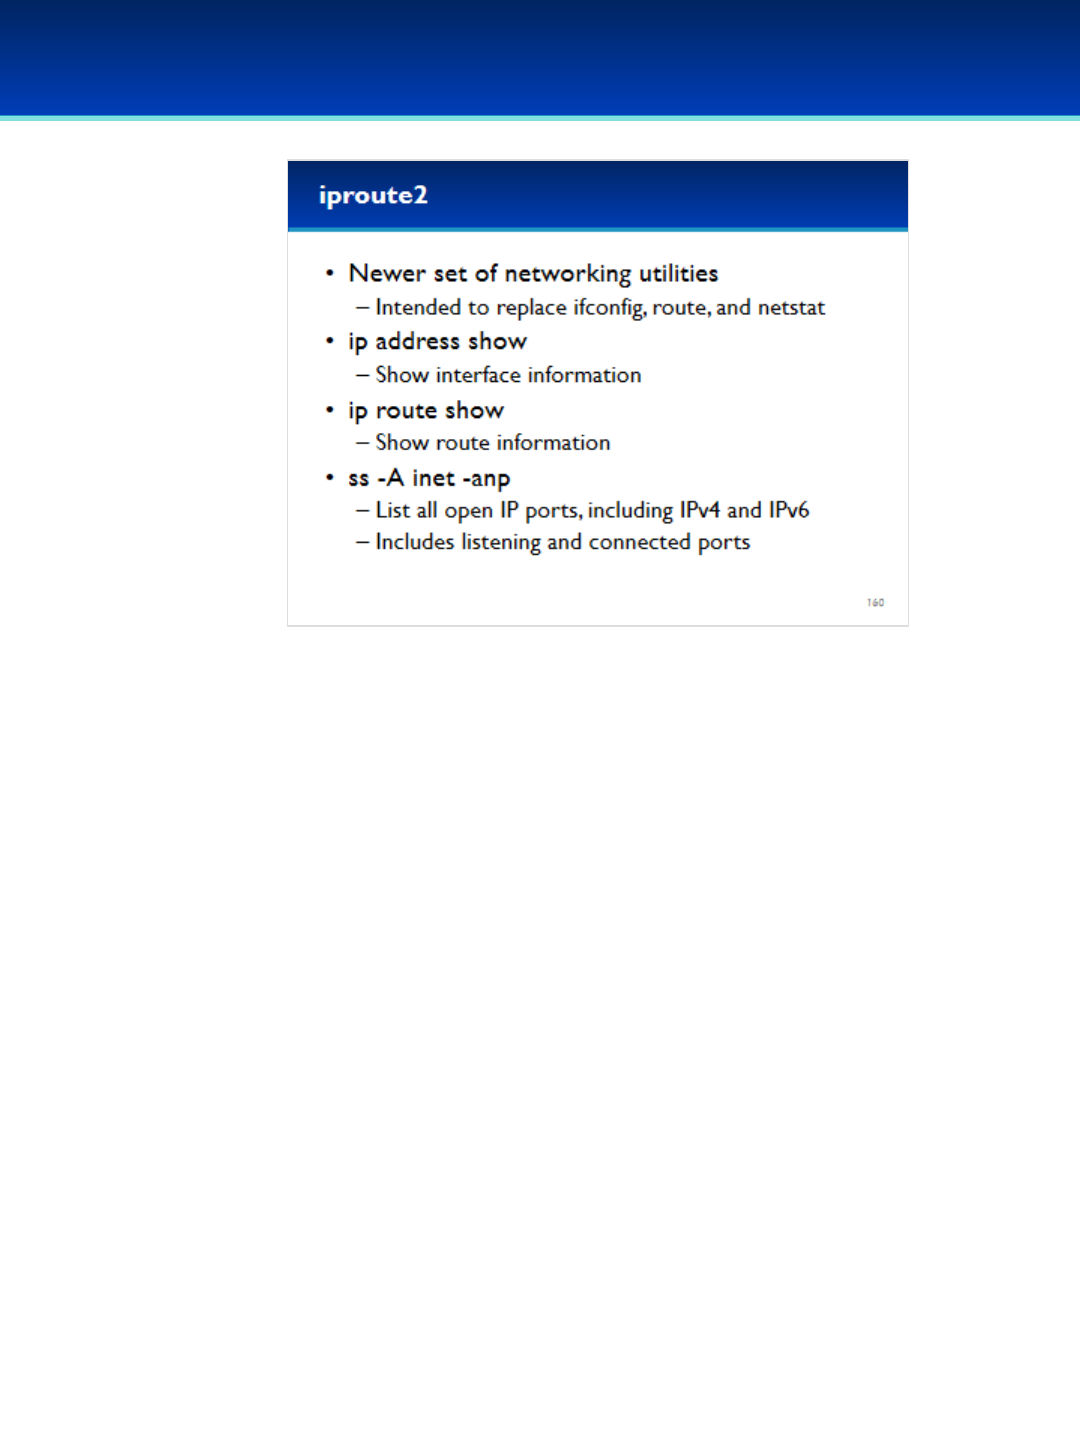
© 2018 Air Force Association
AFA Advanced CyberCamp Instructor’s Guide
Page 287
Slide 160
Ubuntu 16
•The ifconfig and netstat commands are a bit older and don’t
incorporate some newer functionality and features.
•There is a newer set of commands intended to replace ifconfig
and netstat called the iproute2 utility suite.
•The ip command can be used to show interface or route
configuration, or configure network interfaces.
•The ss command is similar to netstat.
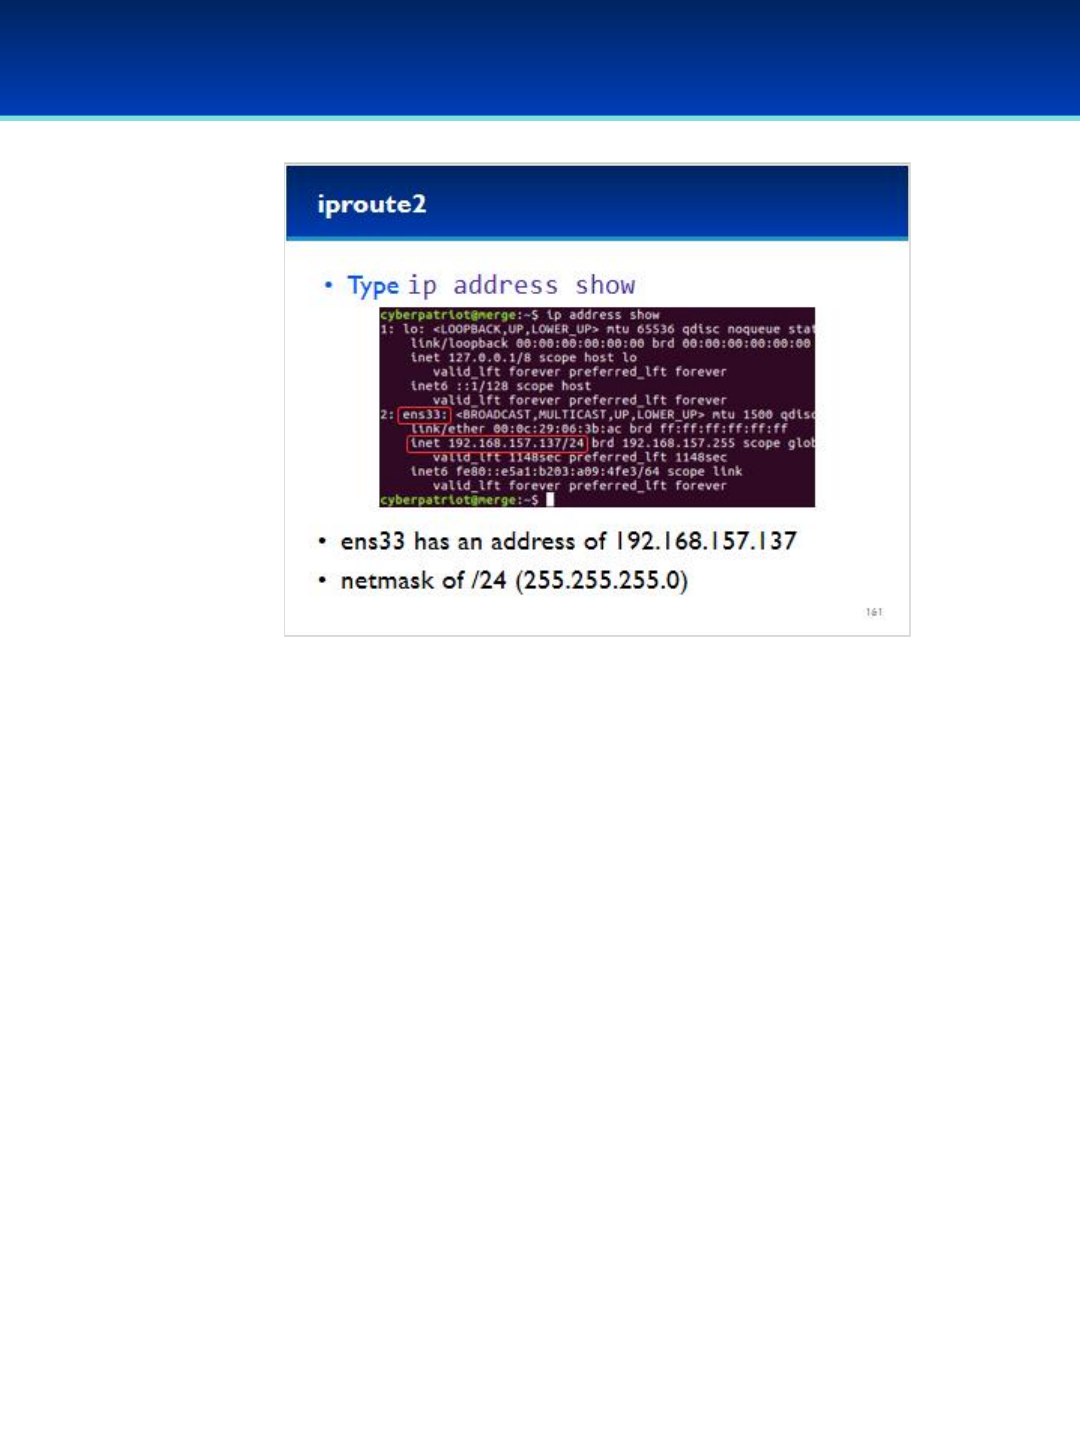
© 2018 Air Force Association
AFA Advanced CyberCamp Instructor’s Guide
Page 288
Slide 161
Ubuntu 16
Have the students run the commands on the screen.
•Here you can see the IP address and netmask of the
interface ens33, as well as a lot of the same information
printed out by ifconfig.
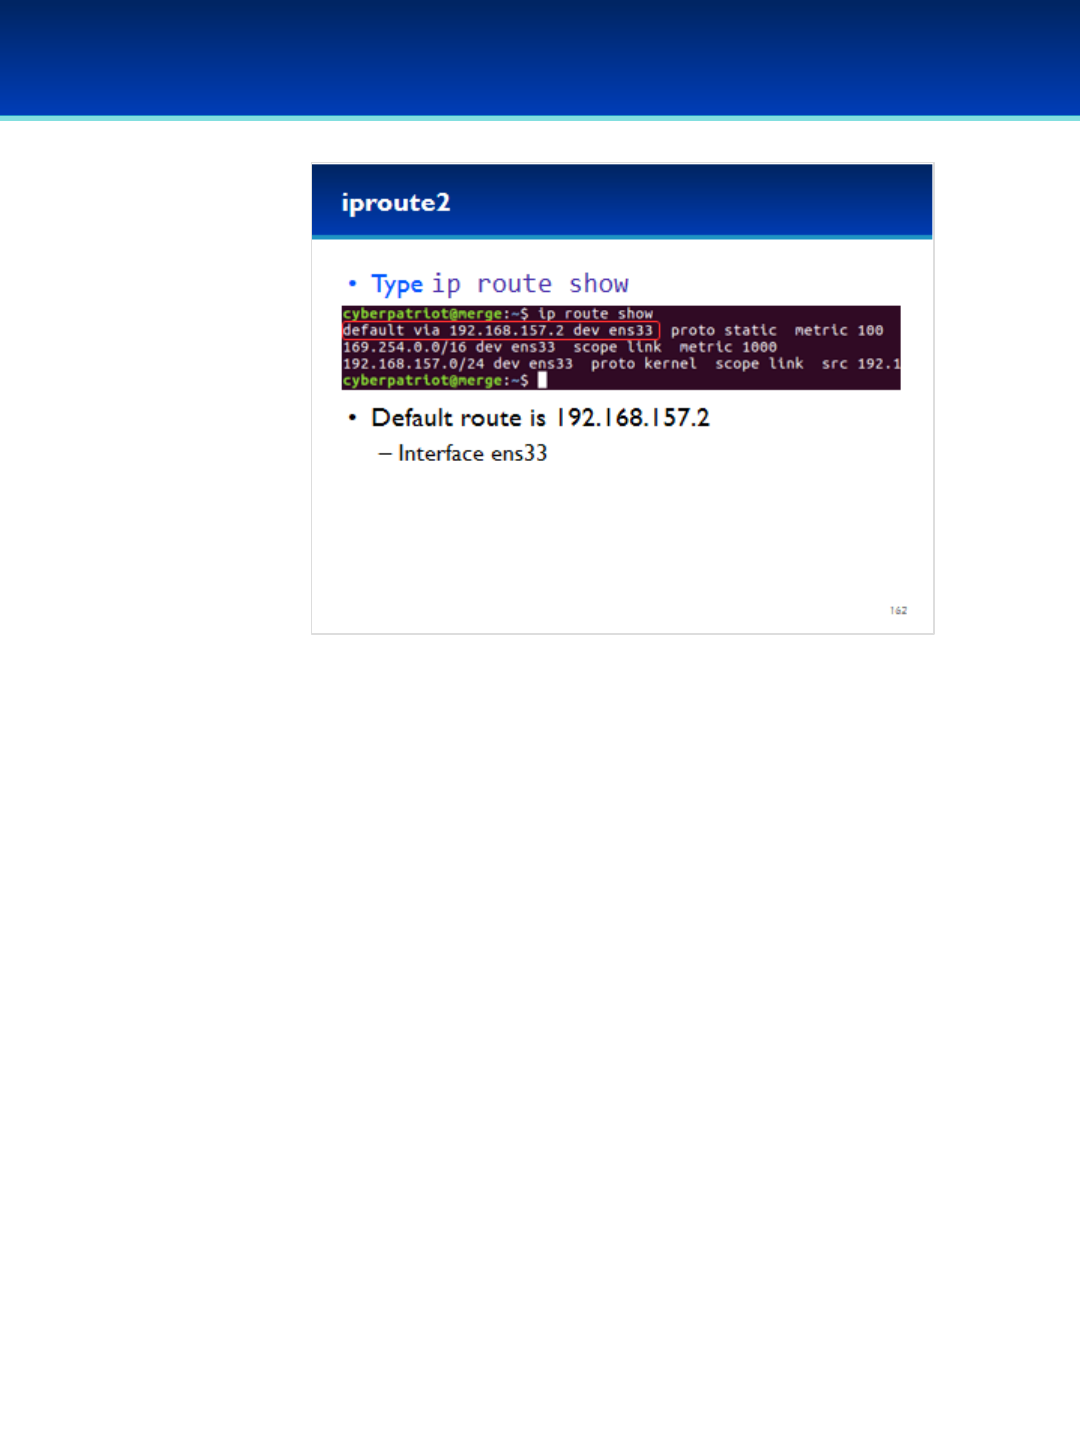
© 2018 Air Force Association
AFA Advanced CyberCamp Instructor’s Guide
Page 289
Slide 162
Ubuntu 16
Have the students run the commands on the screen.
•Here we can see network routes, which is basically the same
information printed by the route command.

© 2018 Air Force Association
AFA Advanced CyberCamp Instructor’s Guide
Page 290
Slide 163
Ubuntu 16
Have the students run the commands on the screen.
•The ss command for printing network connections is a
little simpler than netstat, but the output is harder to
read if you include the -p option.
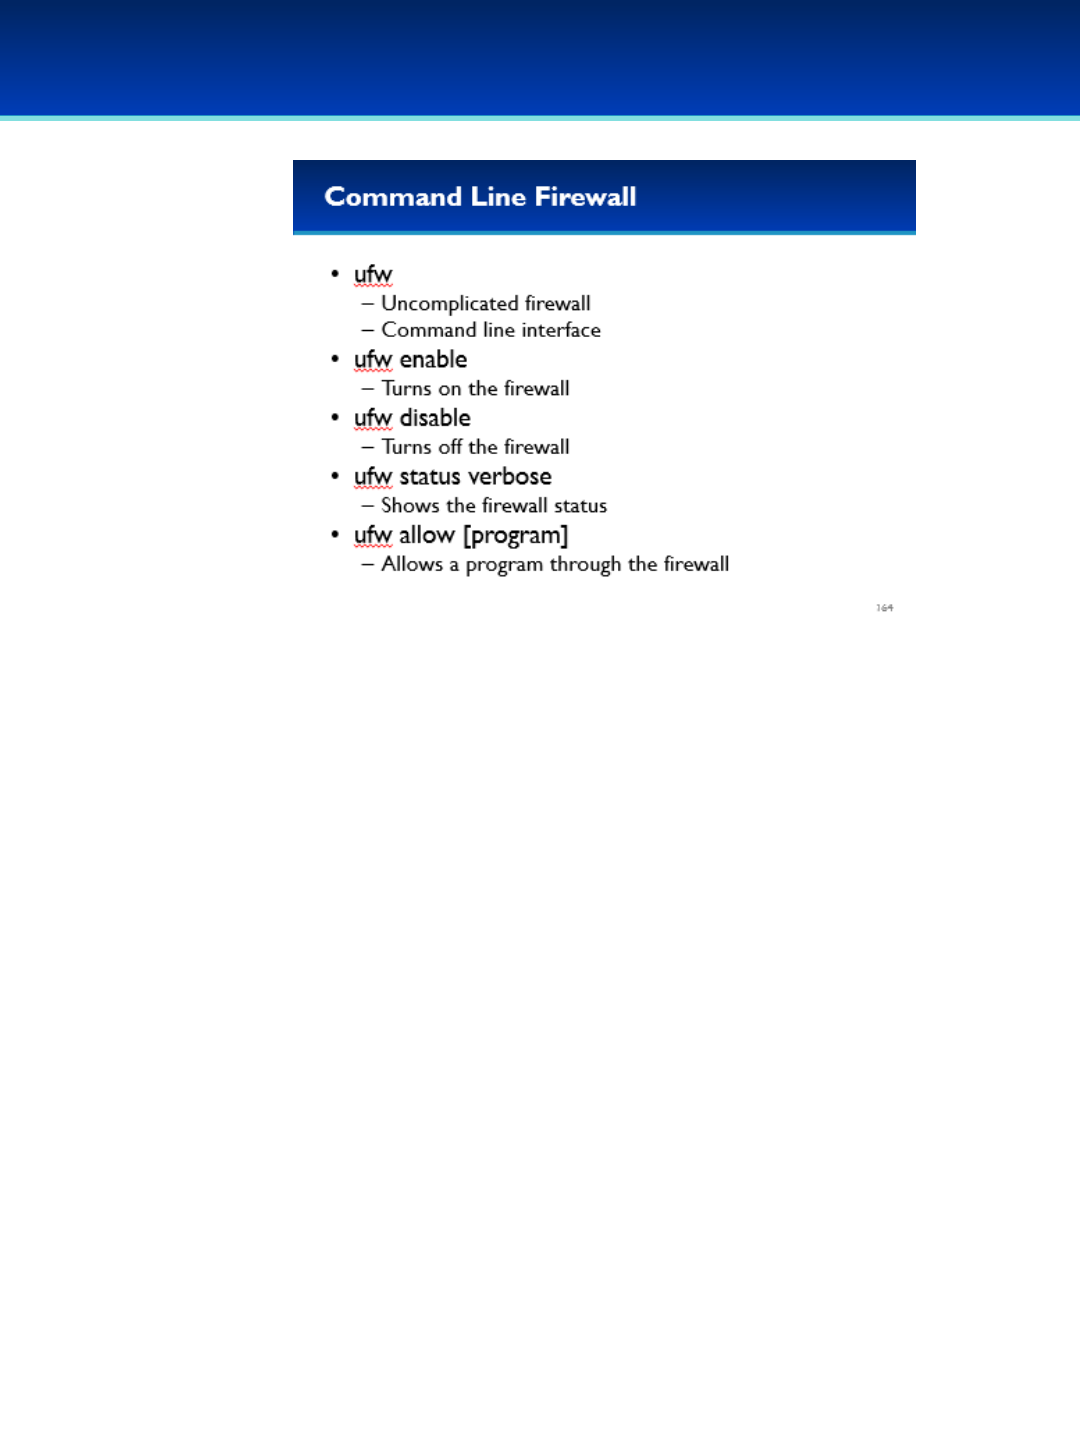
© 2018 Air Force Association
AFA Advanced CyberCamp Instructor’s Guide
Page 291
Slide 164
Ubuntu 16
•Ubuntu comes with the uncomplicated firewall which is
easily configurable from the command line.
•To turn on the firewall, type: ufw enable
•To turn off the firewall, type: ufw disable
•Ufw status shows the status of the firewall. Can be
configured to allow programs or ports through the firewall
using ufw allow.
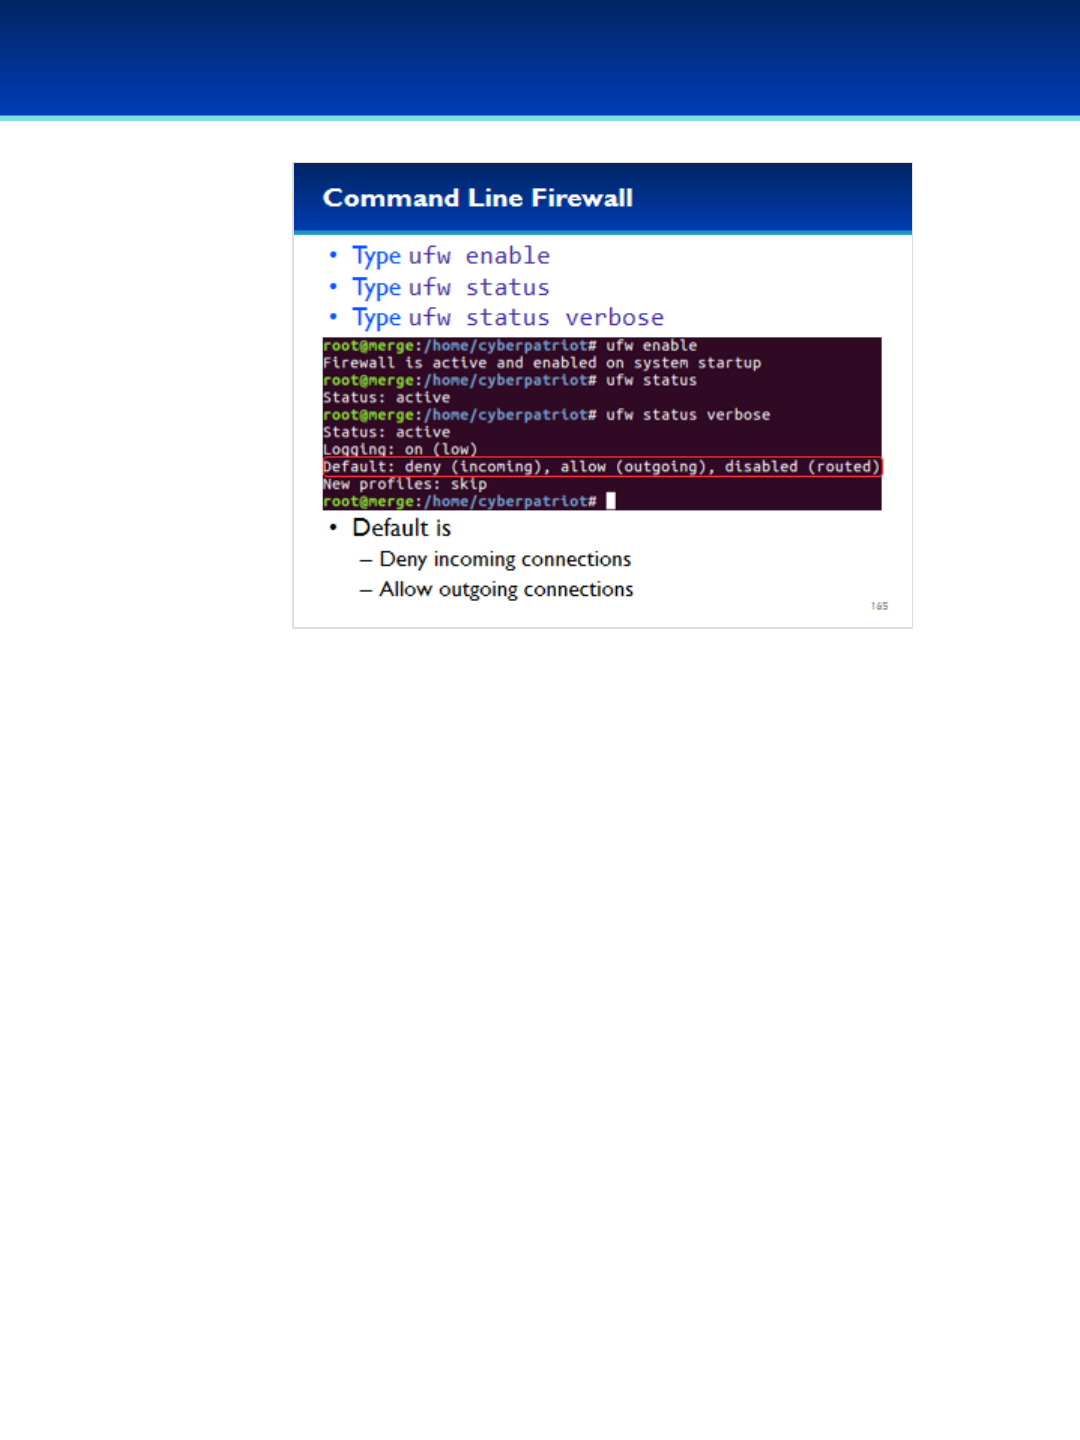
© 2018 Air Force Association
AFA Advanced CyberCamp Instructor’s Guide
Page 292
Slide 165
Ubuntu 16
Have the students run the commands on the screen.
•After enabling the firewall you can see that the default
rule is to deny all incoming connections and allow all
outgoing connections.
•This is a good default rule for workstations.

© 2018 Air Force Association
AFA Advanced CyberCamp Instructor’s Guide
Page 293
Slide 166
Ubuntu 16
•We enabled the ssh service at the beginning of this module, let’s
make sure let it through the firewall.
Have the students run the commands on the screen.
•Now you can see that port 22 is allowed through the firewall.
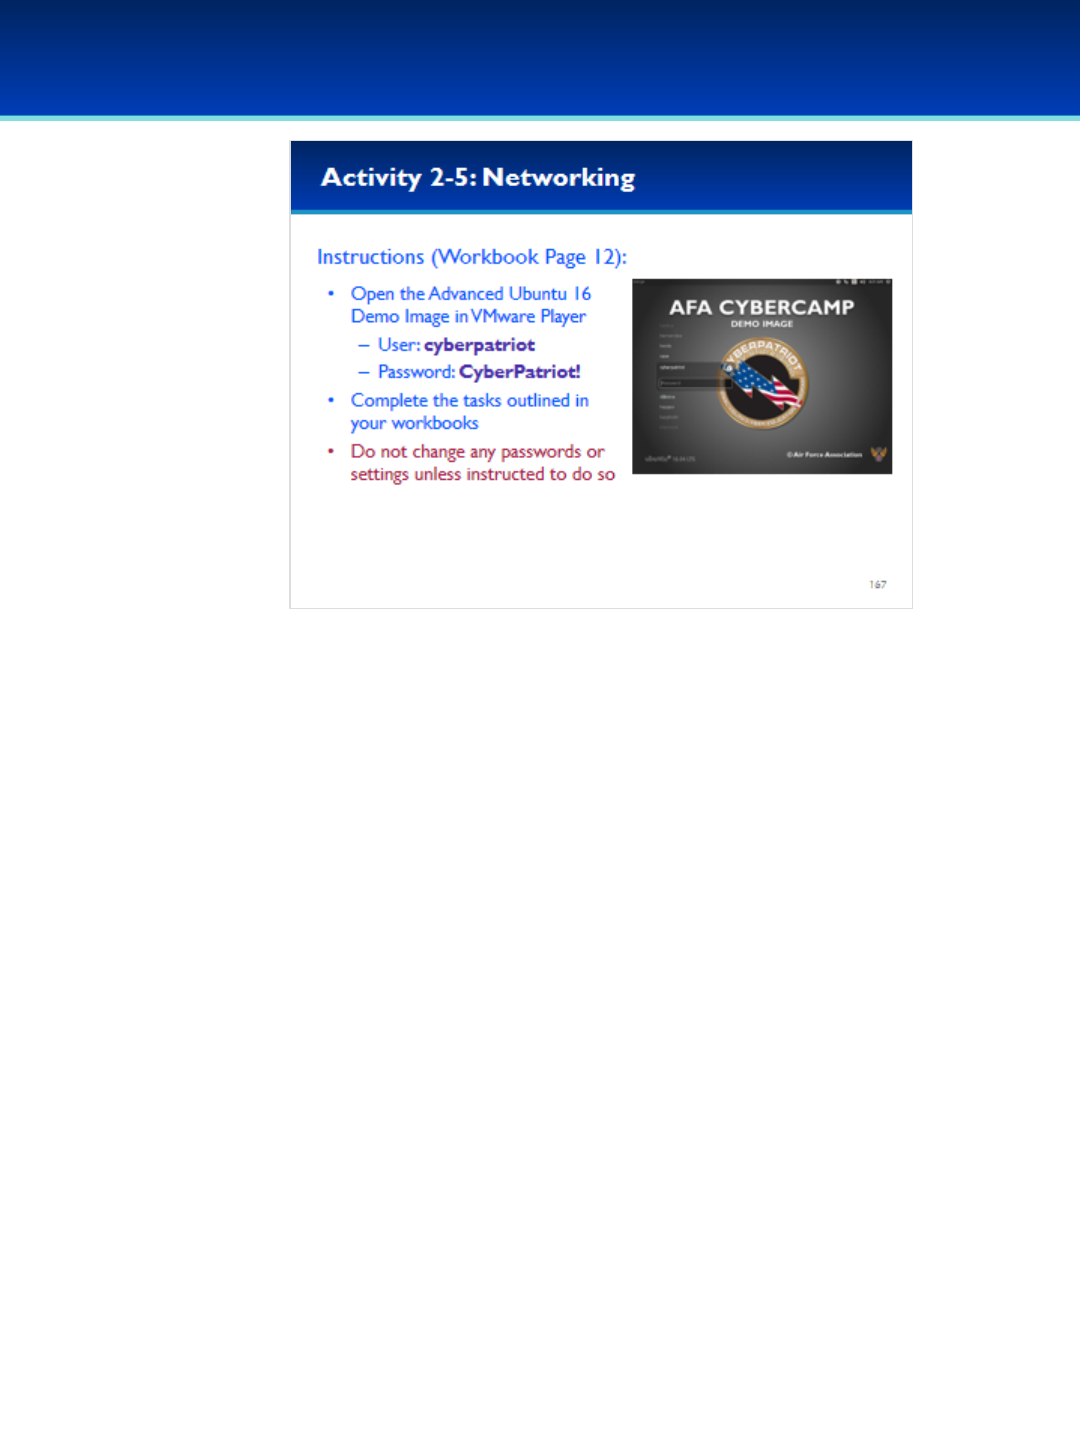
© 2018 Air Force Association
AFA Advanced CyberCamp Instructor’s Guide
Page 294
Slide 167
Ubuntu 16
Give students about 20 minutes to complete the tasks listed on page 12 of
their workbooks.
This lab will review networking and firewalls.
Stress that the students should not change any passwords or settings unless they are
expressly directed to do so in the activity.
The students should not need to use any other user names or passwords to
complete the activities. Here are the passwords to some administrative accounts just
in case.
Username: neumann
Password: vN_@rchit3cture
Username: hopper
Password: ENIAC.TurC0mp
Answers:
1. 127.0.0.1, 255.0.0.0 (or 8)
2. 139, 445
3. 68
4. 127.0.1.1
5. ufw logging on
6. -
7. 139, 145
8. 137, 138

Instructor’s Guide Table of Contents
Cisco Networking
Content Overview (5 mins) ………………………….…………………………….…………...Pages 295-297
Module 1: “What is this thing called the Internet?” (45 mins) ………………...Pages 298-321
Module 2: The TCP/IP Stack! (75 mins) ………………………….………………………..Pages 322-347
Module 3: The Link Layer(75 mins)……………………………………………..……………Pages 348-364
Student Workbook Activities
Activity 3-1: Cisco Baseline Knowledge Quiz (10 mins) ..……………………..……..….…Page 299
–Student Workbook page: 13
Activity 3-2: Draw the Internet (15 mins) ………………..……………………………....………Page 300
–Student Workbook page: 14
AFA Advanced CyberCamp Instructor’s Guide
AFA Advanced CyberCamp Instructor’s Guide
Slide 0
Cisco Networking
Three modules
•Hyperlinks connect Instructor to NetAcademy diagrams and
example.
•Separate files to be downloaded to student computers
beforehand:
•Packet Tracer file
https://www.netacad.com/group/offerings/packet-tracer
•Packet Tracer Wireless Configuration
•Packet Tracer Final Competition
Instructors should be logged into Cisco NetAcad before
starting Module 1.
Cisco Networking
Page 295
© 2018 Air Force Association
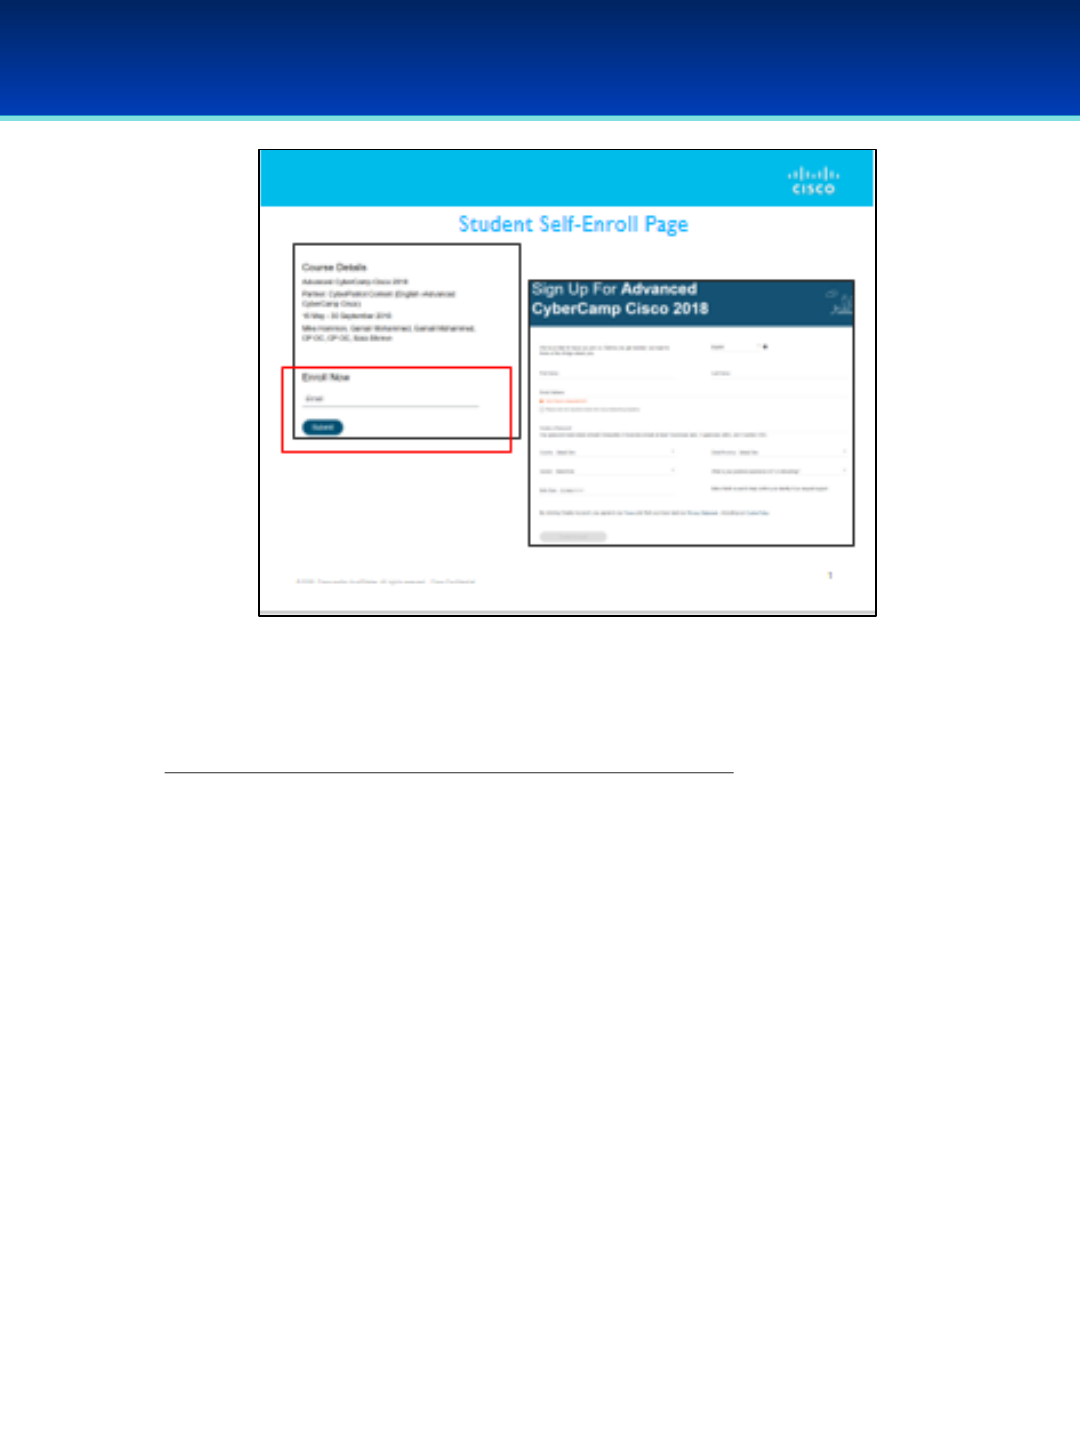
AFA Advanced CyberCamp Instructor’s Guide
Slide 1
•Instructors should be logged into Cisco NetAcad before starting Module 1.
•Instructors will need to send each student attending the advanced camp a link to
the self-enroll page found at the following link. Link:
https://www.netacad.com/web/self-enroll/course-671717
•Ideally, students should be sent this self-enroll page before the first day of the
camp session. Students should have their parent or guardian sign and return the
Parental Permission form (which can be found on the Camp Coordinator
dashboard) when they arrive for the first day of camp and ideally students
should self-enroll before the first day to save time.
•The Parental Permission form can be found on the Camp Coordinator dashboard
and should be emailed or passed along in a hard copy to students before utilizing
the Cisco Networking portion of the AFA Advanced CyberCamps.
•Parental Permission forms are to be kept on file with the camp instructor for the
site and DO NOT get returned to CyberPatriot.
•Students can follow the diagrams and examples on their individual computers as
instructors lead OR the instructor can utilize the NetAcad portions as a teaching
tool only.
Cisco Networking
Page 296
© 2018 Air Force Association
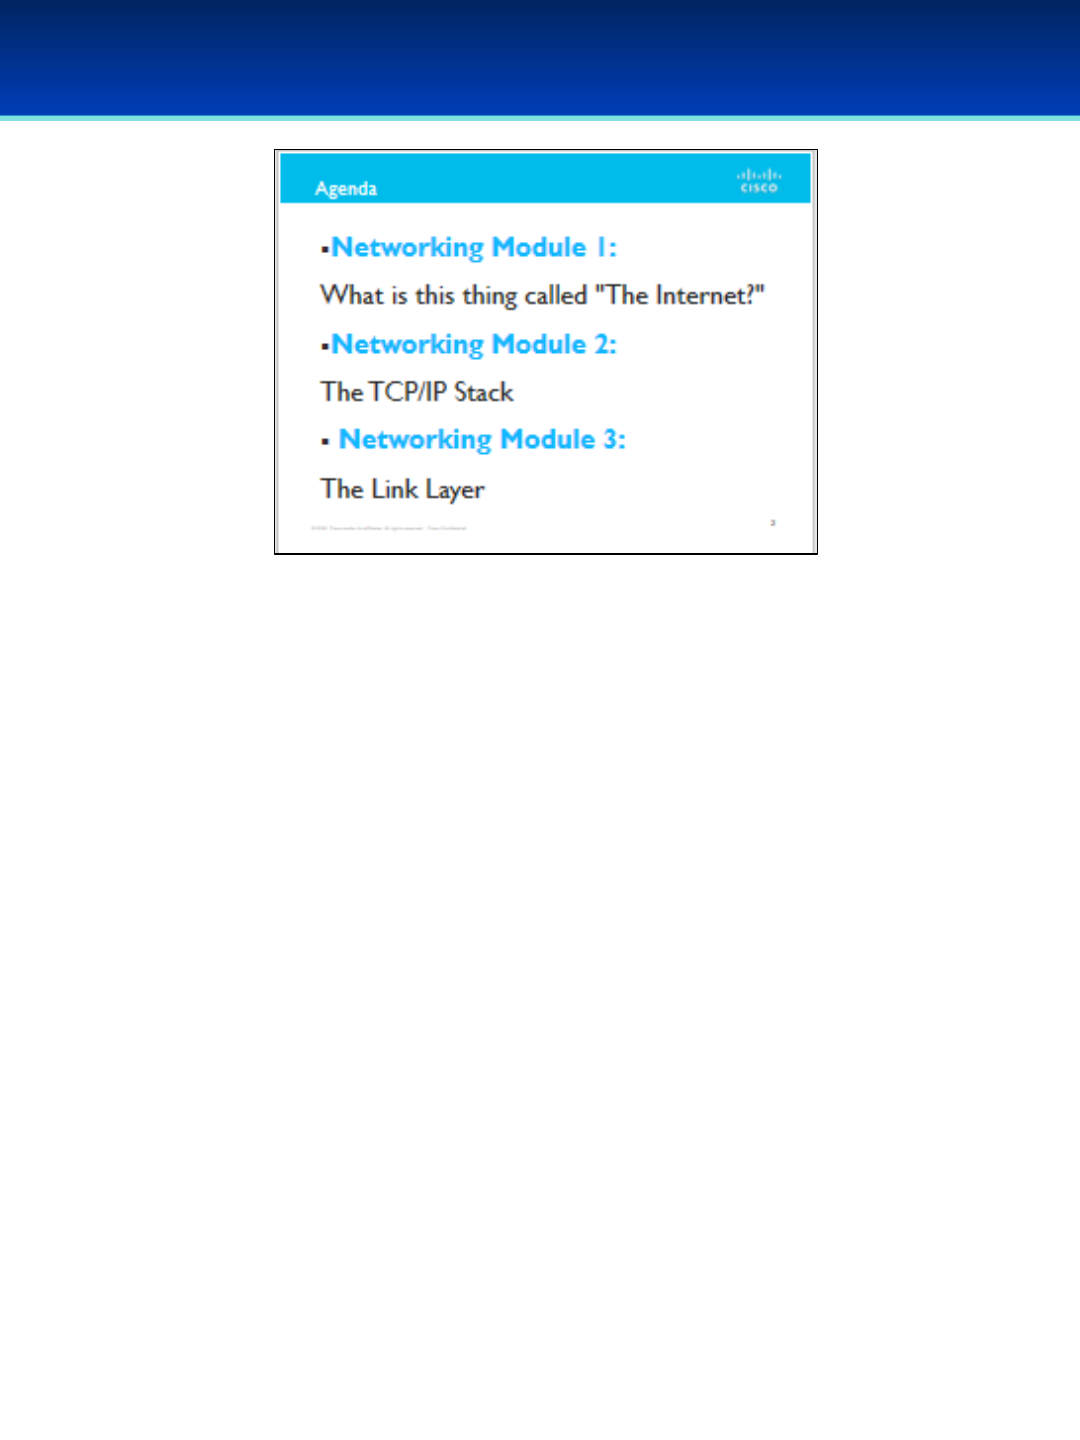
AFA Advanced CyberCamp Instructor’s Guide
Slide 2
•There are three modules in the Cisco Networking portion of AFA
Advanced CyberCamps:
•Networking Module 1: What is this thing called “The Internet”
•Networking Module 2: The TCP/IP Stack
•Networking Module 3: The Link Layer
Cisco Networking
Page 297
© 2018 Air Force Association
AFA Advanced CyberCamp Instructor’s Guide
Slide 3
Module 1: What is this thing called “The Internet?”
Cisco Networking
Page 298
© 2018 Air Force Association
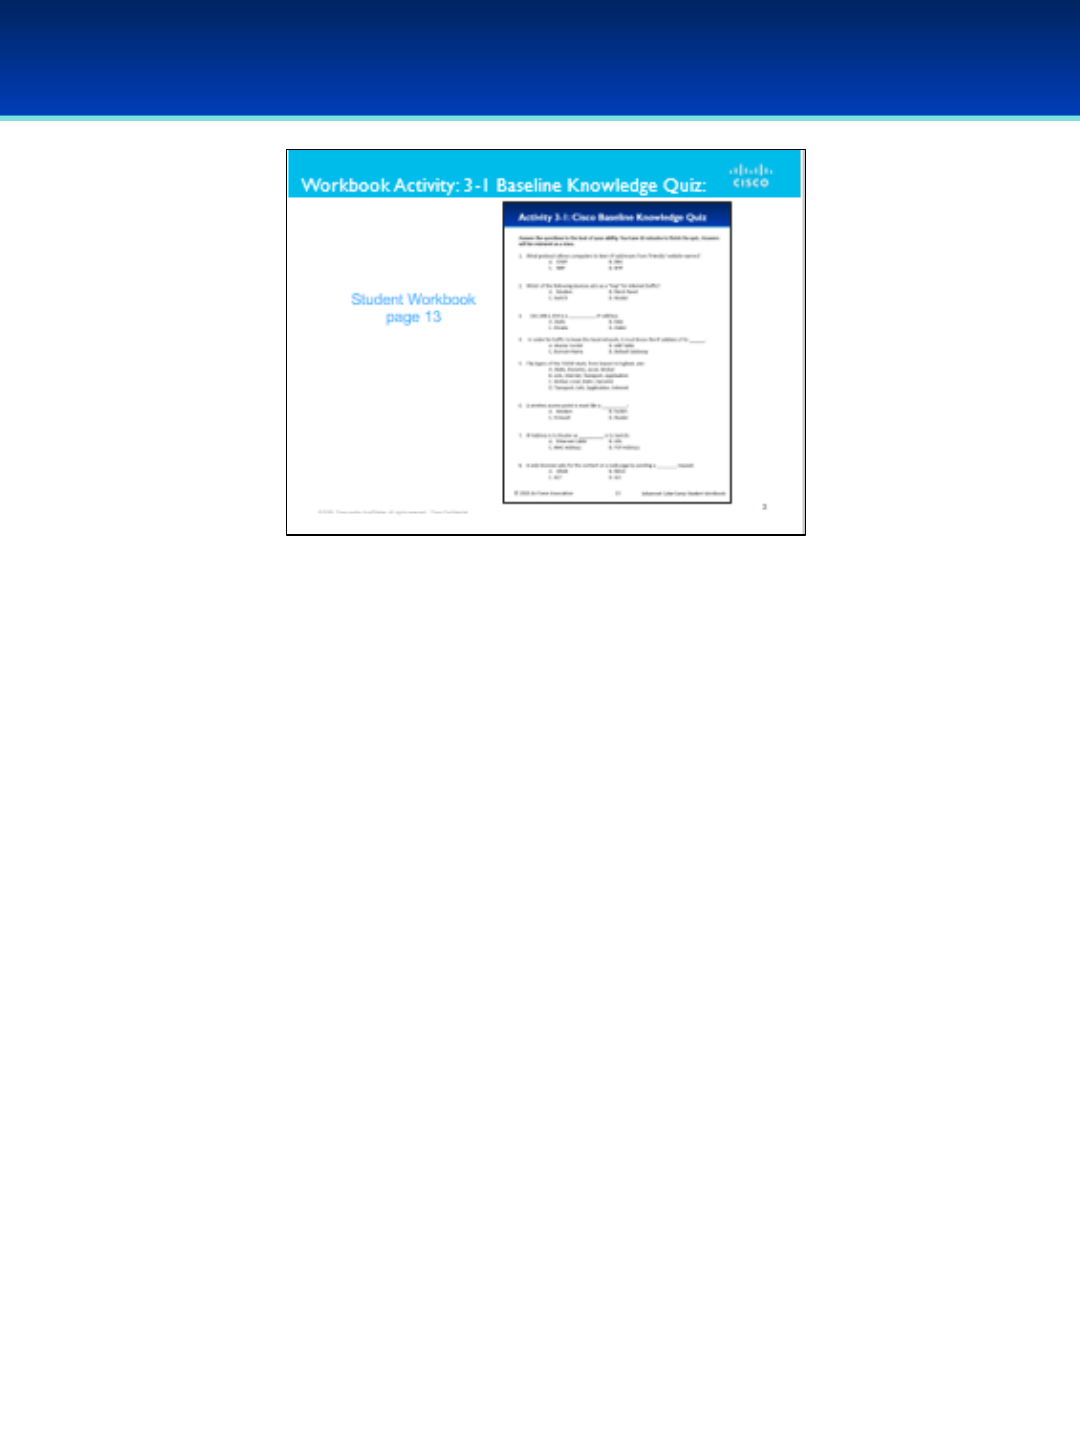
AFA Advanced CyberCamp Instructor’s Guide
Slide 4
•On page 13 of your Student Workbook answer each question to the best of your abilities.
You will have 10 minutes to answer the baseline quiz. After everyone has finished, we will go
over the answers as a group.
Answer Key:
1. What protocol allows computers to learn IP addresses from ‘friendly’ website names?
b. DNS
2. Which of the following devices acts as a “hop” for internet traffic?
d. Router
3. 192.168.1.254 is a ___________ IP address.
c. Private
4. In order for traffic to leave the local network, it must know the IP address of its ______.
d. Default Gateway
5. The layers of the TCP/IP stack, from lowest to highest, are:
b. Link, Internet, Transport, Application
6. A wireless access point is most like a __________:
b. Switch
7. IP Address is to Router as __________ is to Switch:
c. MAC Address
8. A web browser asks for the content on a web page by sending a ________ request.
c. GET
Cisco Networking
Page 299
© 2018 Air Force Association

AFA Advanced CyberCamp Instructor’s Guide
Slide 5
Cisco Networking
Page 300
© 2018 Air Force Association
•On page 14 of the Student Workbook, students will draw their
idea of the Internet in as much detail as possible.
•Items should include: devices, equipment, media (cabling), link
addresses or names, sources and destinations, and Internet
service providers.
•Students should be prepared to explain some of the reasoning
they used. A few students should be selected to share their
drawings.
•The goal of today is for every student to gain a detailed
understanding of what the Internet is and how it works.
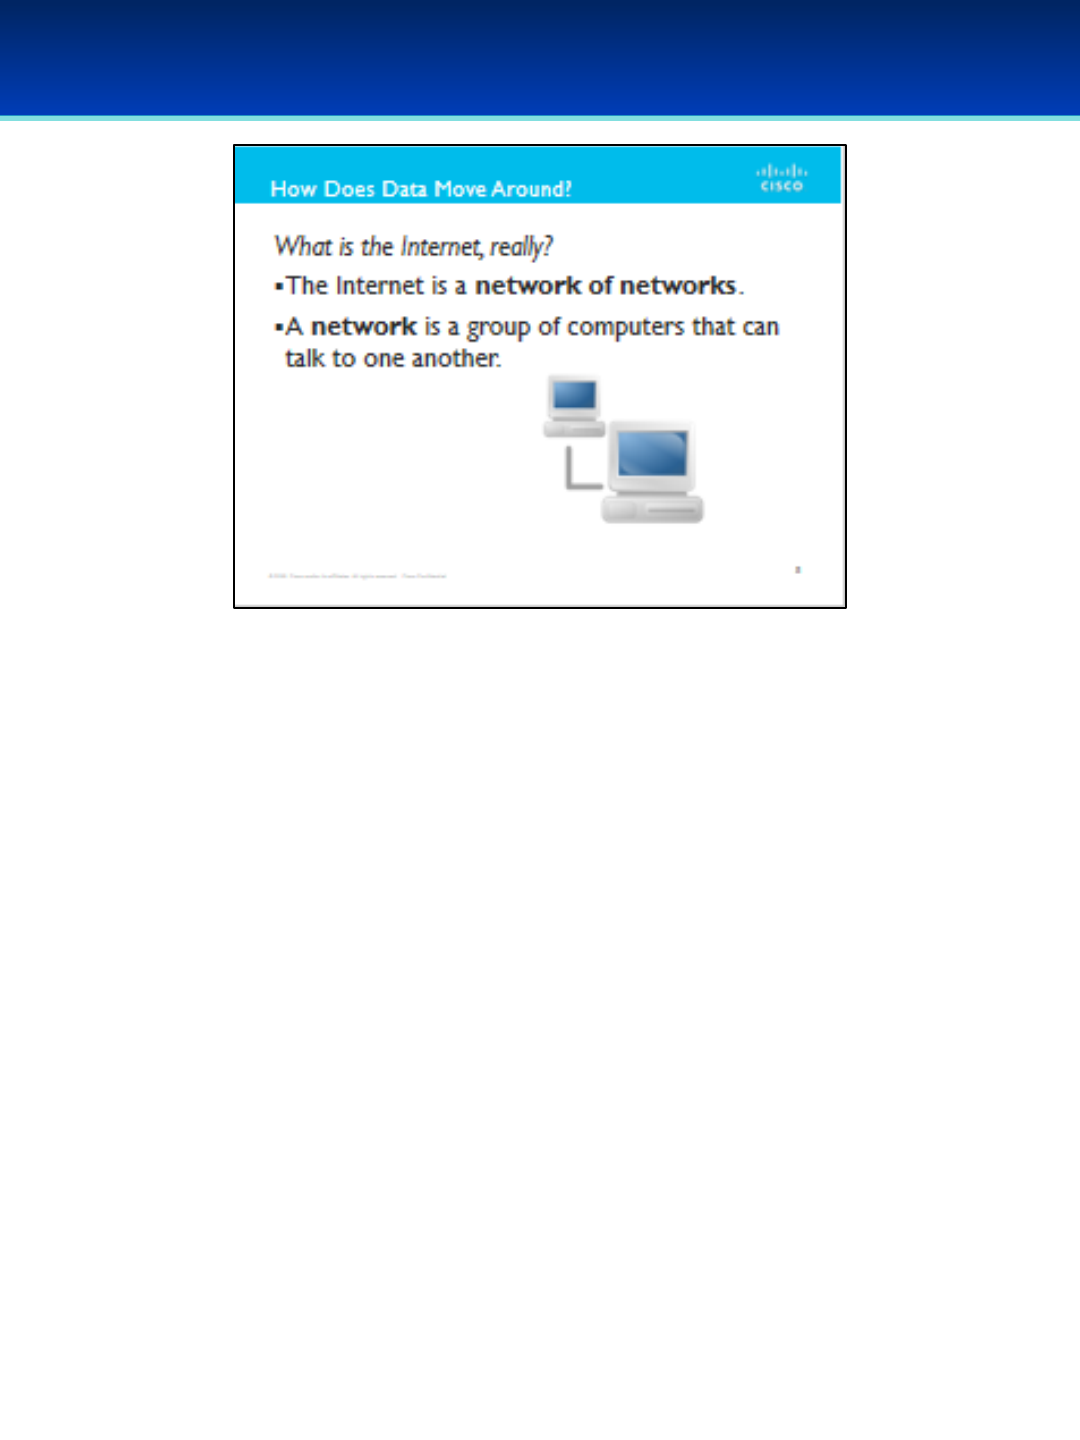
AFA Advanced CyberCamp Instructor’s Guide
Slide 6
Cisco Networking
Page 301
© 2018 Air Force Association
•The Internet is a network or networks. Simply put, a network is
a group of computers that can talk to one another.
•But how does data get from one computer to another?
•On a local network?
•On the Internet?
AFA Advanced CyberCamp Instructor’s Guide
Slide 7
Cisco Networking
Page 302
© 2018 Air Force Association
•Click on the screenshot to launch video: 3:29 minutes
https://www.youtube.com/watch?v=ewrBalT_eBM

AFA Advanced CyberCamp Instructor’s Guide
Slide 8
Cisco Networking
Page 303
© 2018 Air Force Association
•"Host" is a general term for any kind of computer on a network.
• Clients and servers are both called “hosts,” “end hosts,”
or “endpoints.”
•Hosts are computers that use the network.
•Laptops, desktops, smartphones, servers where websites
live—these are all hosts.
•”Client” and “server” are jobs that a host can have.
•Clients are devices that ask for content.
•Servers are hosts that provide content.

AFA Advanced CyberCamp Instructor’s Guide
Slide 9
Cisco Networking
Page 304
© 2018 Air Force Association
•In order for hosts to communicate across the networks, it’s important that
they have unique addresses.
•Similar to how you send and receive mail; you need a unique address
yourself, and you must know the address of the recipient.
•IP stands for Internet Protocol.
•You’ll sometimes see IP addresses referred to as “IPv4 Addresses.”
•IPv4 (Internet Protocol version 4) is the most common system of so-called
“logical addressing,” and is currently the de facto standard.
•Other systems such as IPX and AppleTalk used to be major competitors to
IPv4, but are no longer in widespread use.
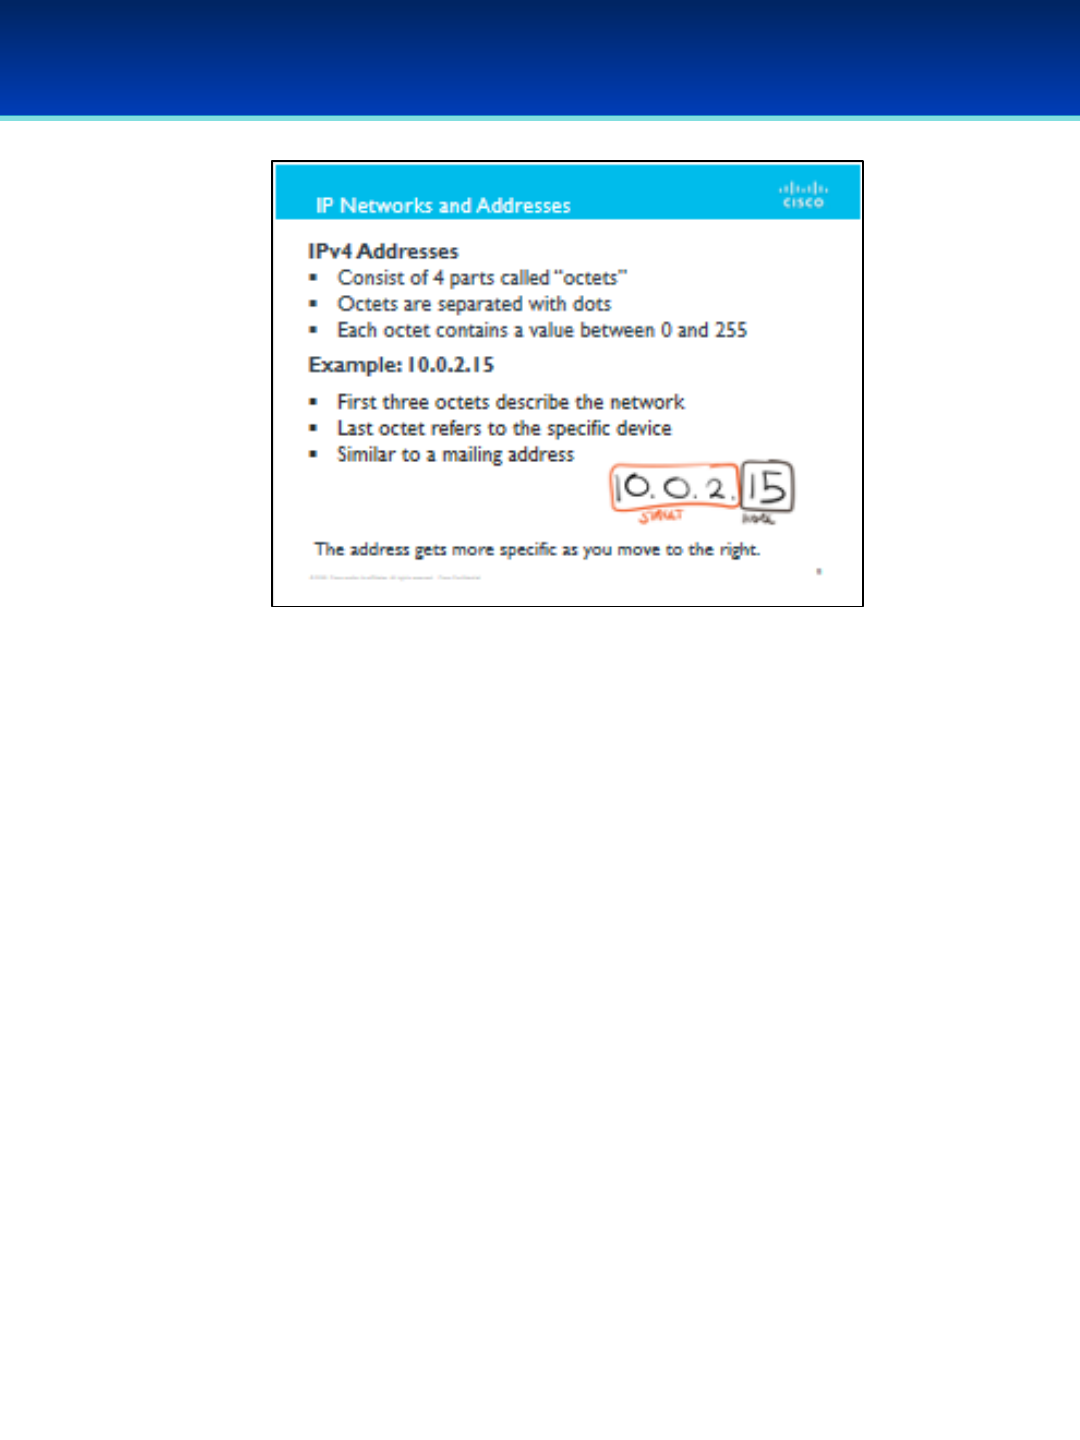
AFA Advanced CyberCamp Instructor’s Guide
Slide 10
Cisco Networking
Page 305
© 2018 Air Force Association
•In the future, IPv4 will be replaced by IPv6 because we have started to
run out of free IPv4 addresses!
•An IPv4 address consists of four parts called “octets.” Octets are
separated by dots and each can contain a value between 0 and 255.
•Example: 10.0.2.15
•First three octets describe the network.
•Last octet refers to the specific device.
•Similar to a mailing address.
•On most networks, the first three octets describe the network,
and the last octet refers to the specific device.
•Like a home address, The IP address is kind of like a home address
(where the first three octets are like a street, followed by the last
octet, which is like a house number).
•The address gets more specific as you move to the right.
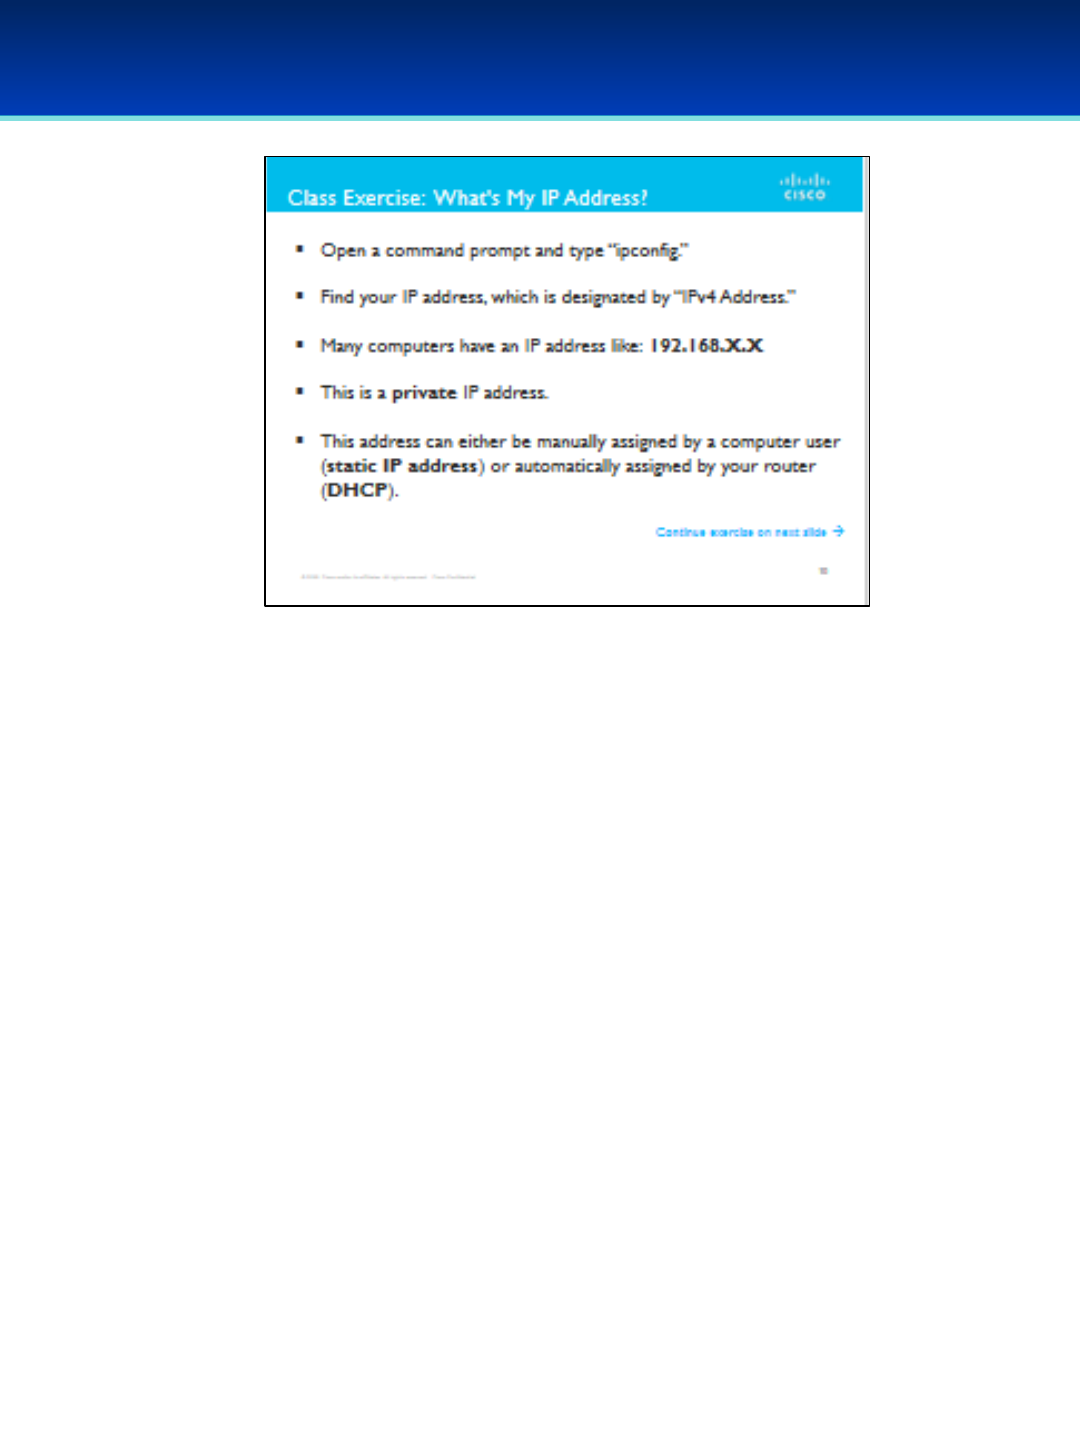
AFA Advanced CyberCamp Instructor’s Guide
Slide 11
Cisco Networking
Page 306
© 2018 Air Force Association
•Students: open a command prompt and type: ipconfig
•Find your IP address, which is designated by “IPv4 Address.”
•This might look familiar—you’ll see a lot of computers with IP
addresses like 192.168.X.X. This is a private IP address.
•This address can either be manually assigned by a computer user
(static IP address) or automatically assigned by your router (DHCP).
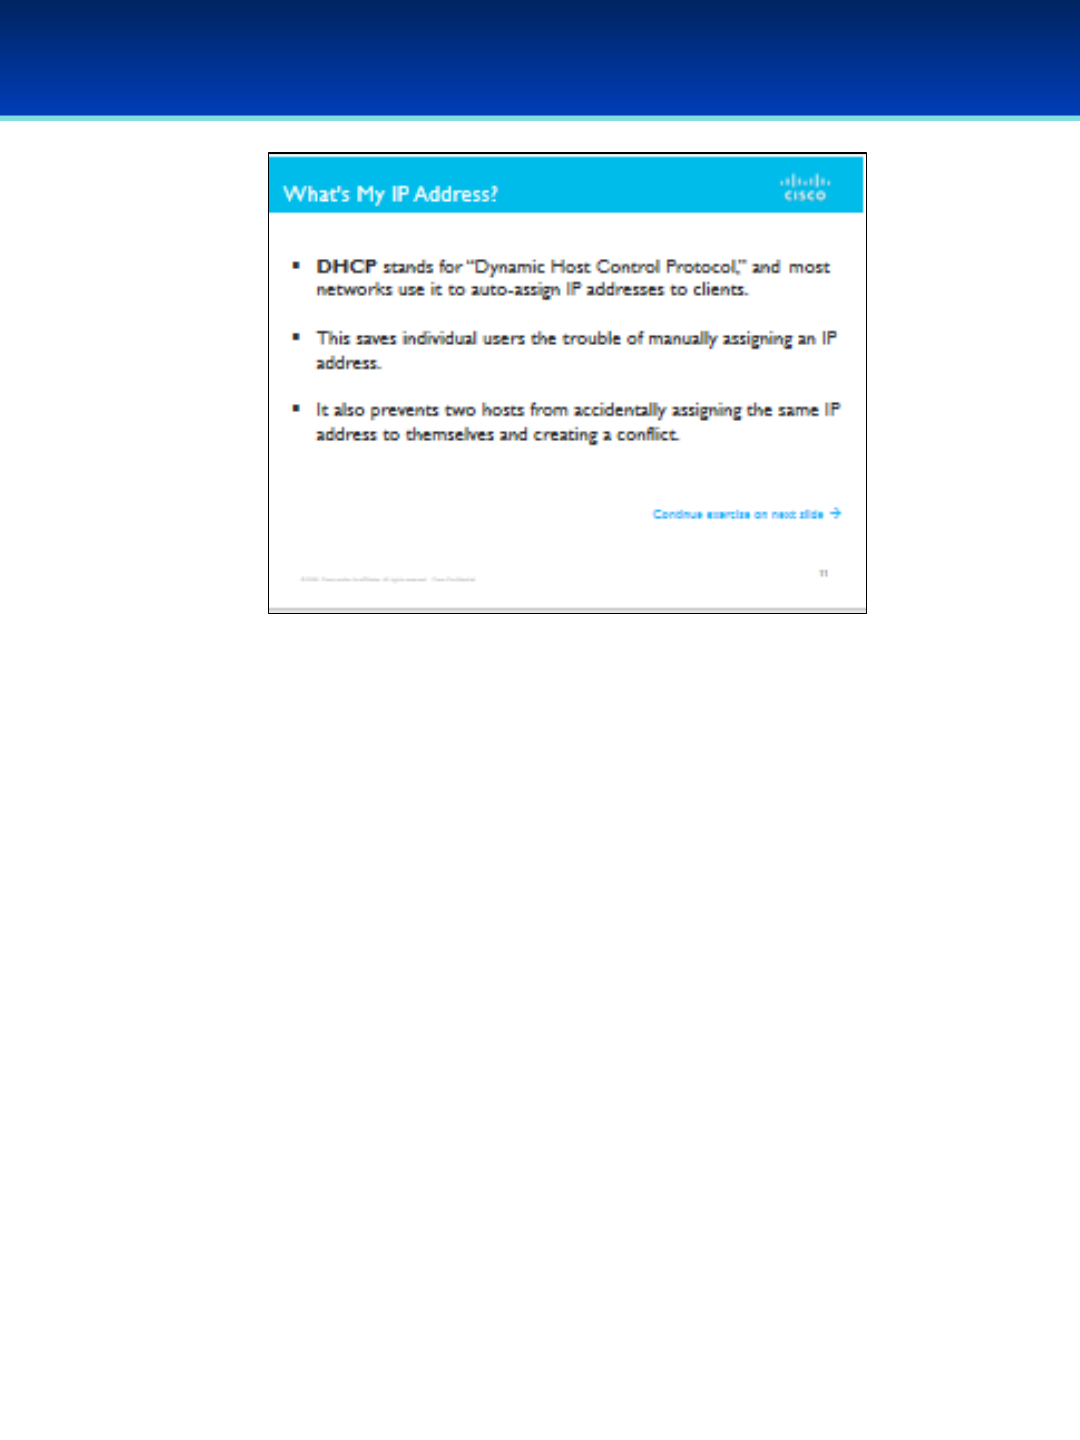
AFA Advanced CyberCamp Instructor’s Guide
Slide 12
Cisco Networking
Page 307
© 2018 Air Force Association
•DHCP stands for “Dynamic Host Control Protocol,” and most networks use
DHCP to auto-assign IP addresses to clients.
•This saves individual users the trouble of manually assigning an IP
address.
•It also prevents two hosts from accidentally assigning the same IP address
to themselves and creating a conflict.
AFA Advanced CyberCamp Instructor’s Guide
Slide 13
Cisco Networking
Page 308
© 2018 Air Force Association
•Open up a web browser and navigate to WhatIsMyIP.com or click the
hyperlink in the slide to launch the site directly.
•You’ll notice that the IP address you get from this web service is
different from the address given in your command prompt.
•The address you see displayed on this webpage is your public IP
address.
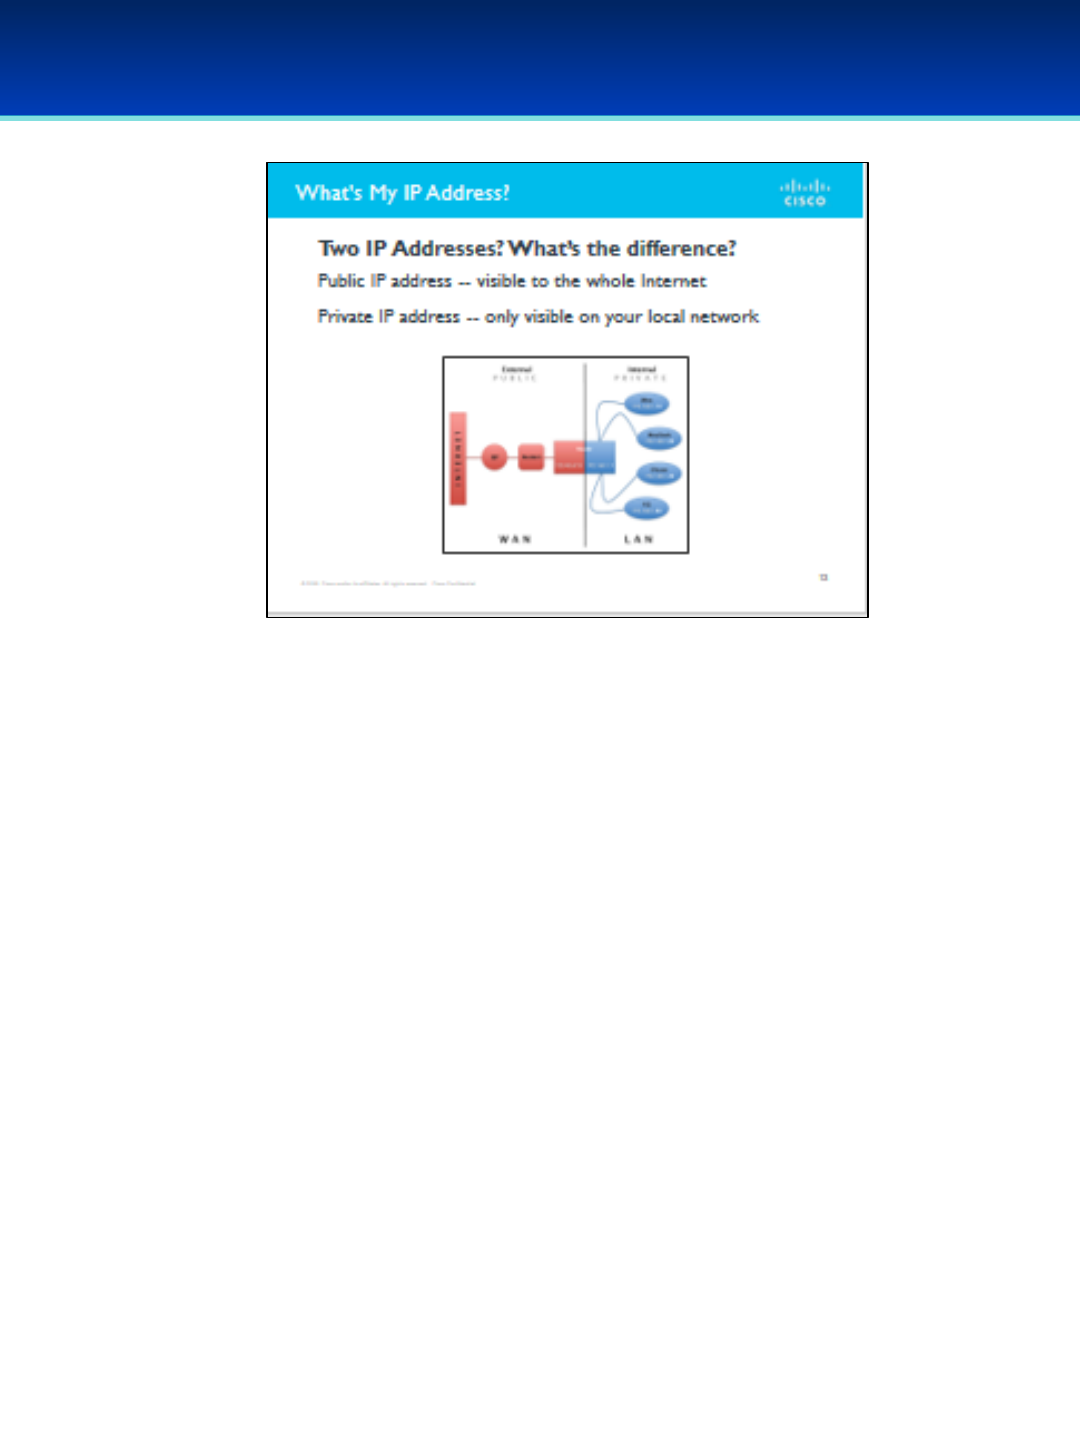
AFA Advanced CyberCamp Instructor’s Guide
Slide 14
Cisco Networking
Page 309
© 2018 Air Force Association
•Public IP address -- visible to the whole Internet.
•Private IP address -- only visible on your local
network.
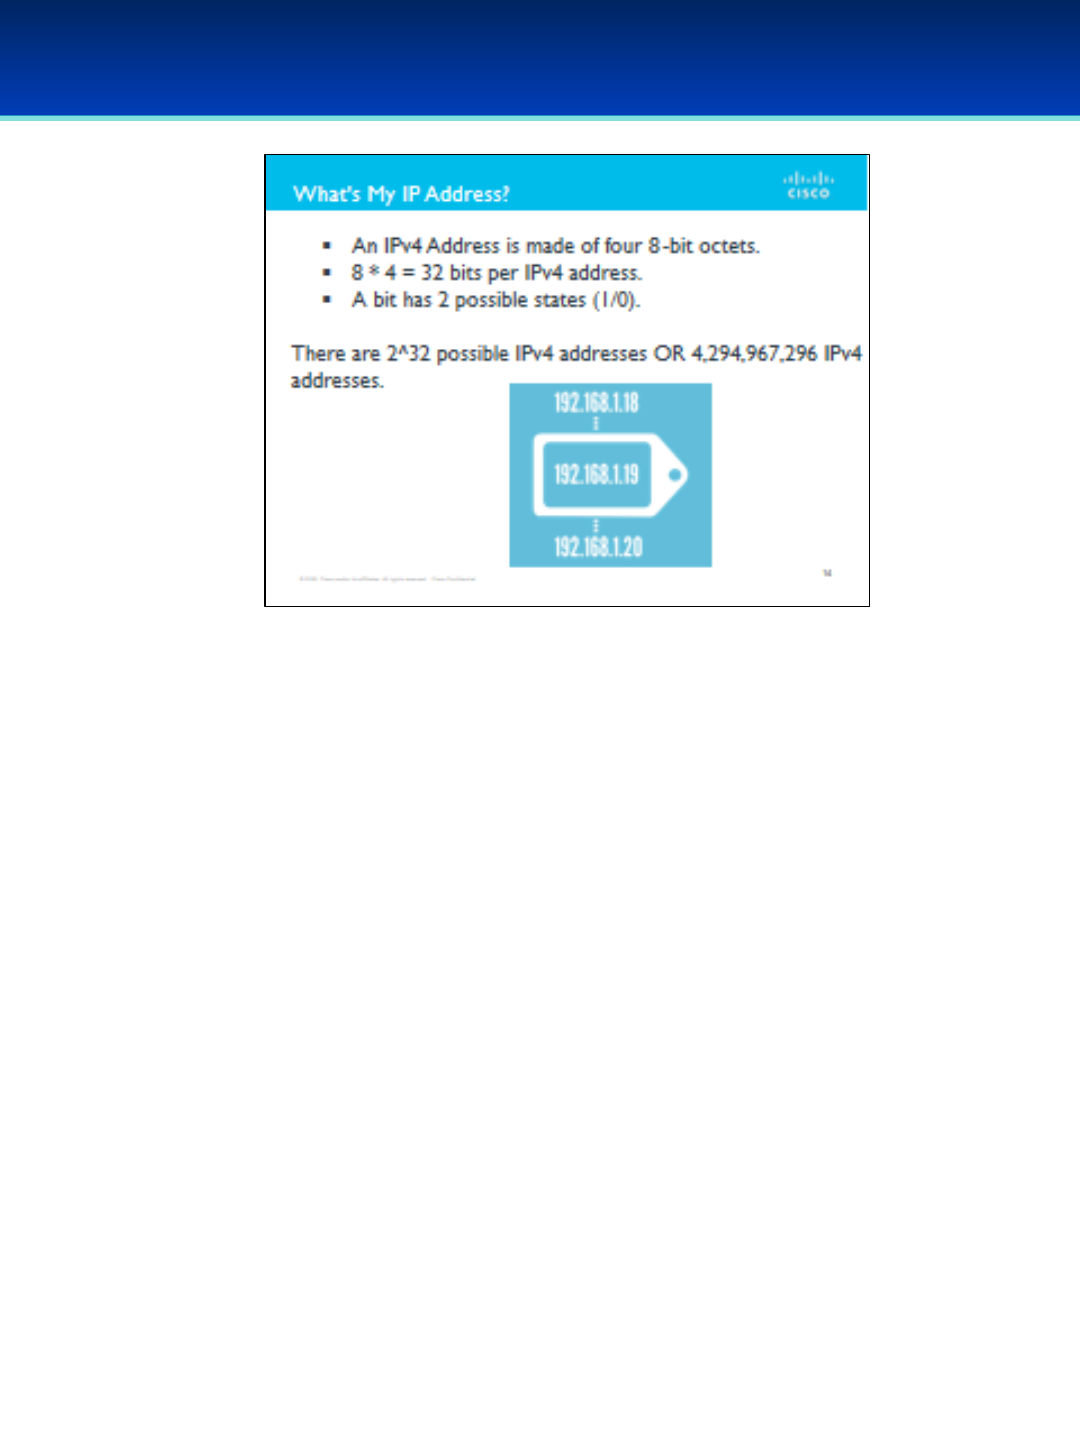
AFA Advanced CyberCamp Instructor’s Guide
Slide 15
Cisco Networking
Page 310
© 2018 Air Force Association
•An IPv4 Address is made of four 8-bit octets.
•8*4=32 bits per IPv4 address.
•A bit has 2 possible states (1/0).
•There are 2^32 possible Ipv$ addresses or 4,294,967,296 IPv4
addresses.
•Did you know?
•IPv4 was deployed in 1981.
•Not enough unique IPv4 addresses for all of the devices in the
world. The United States IP Address Registry exhausted on
September 24, 2015.
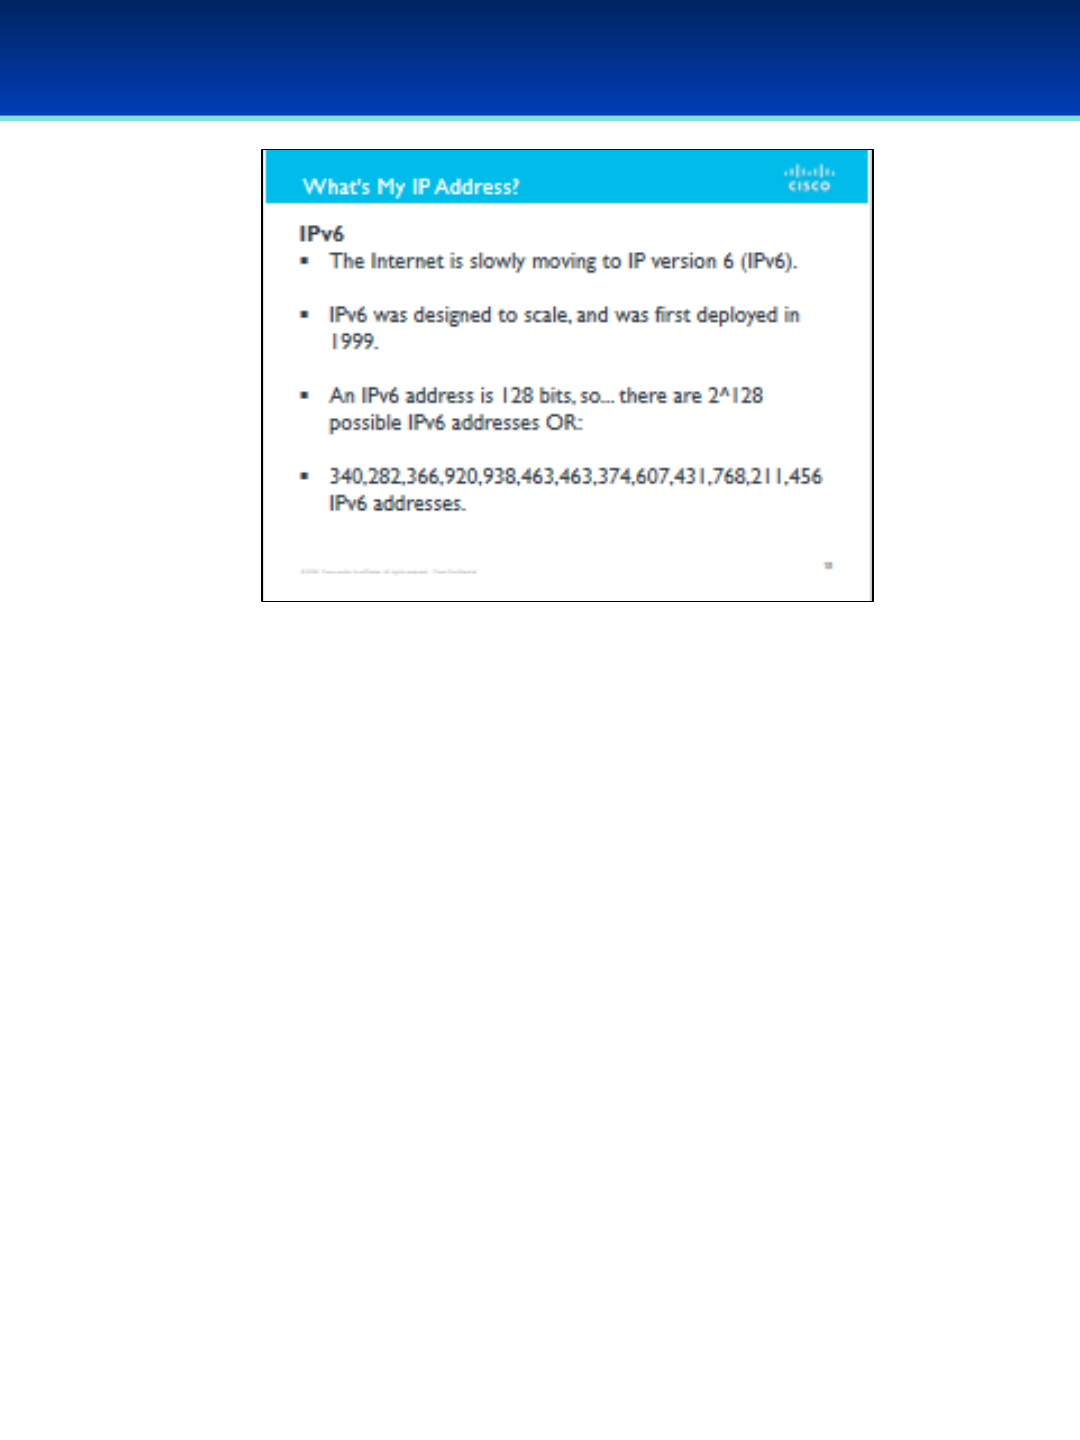
AFA Advanced CyberCamp Instructor’s Guide
Slide 16
Cisco Networking
Page 311
© 2018 Air Force Association
•Slowly, the internet moving to IP version 6 (IPv6).
•IPv6 was designed to scale, and was first deployed in 1999.
•An IPv6 address is 128 bits, so... there are 2^128 possible IPv6
addresses.
OR 340,282,366,920,938,463,463,374,607,431,768,211,456 IPv6
addresses.
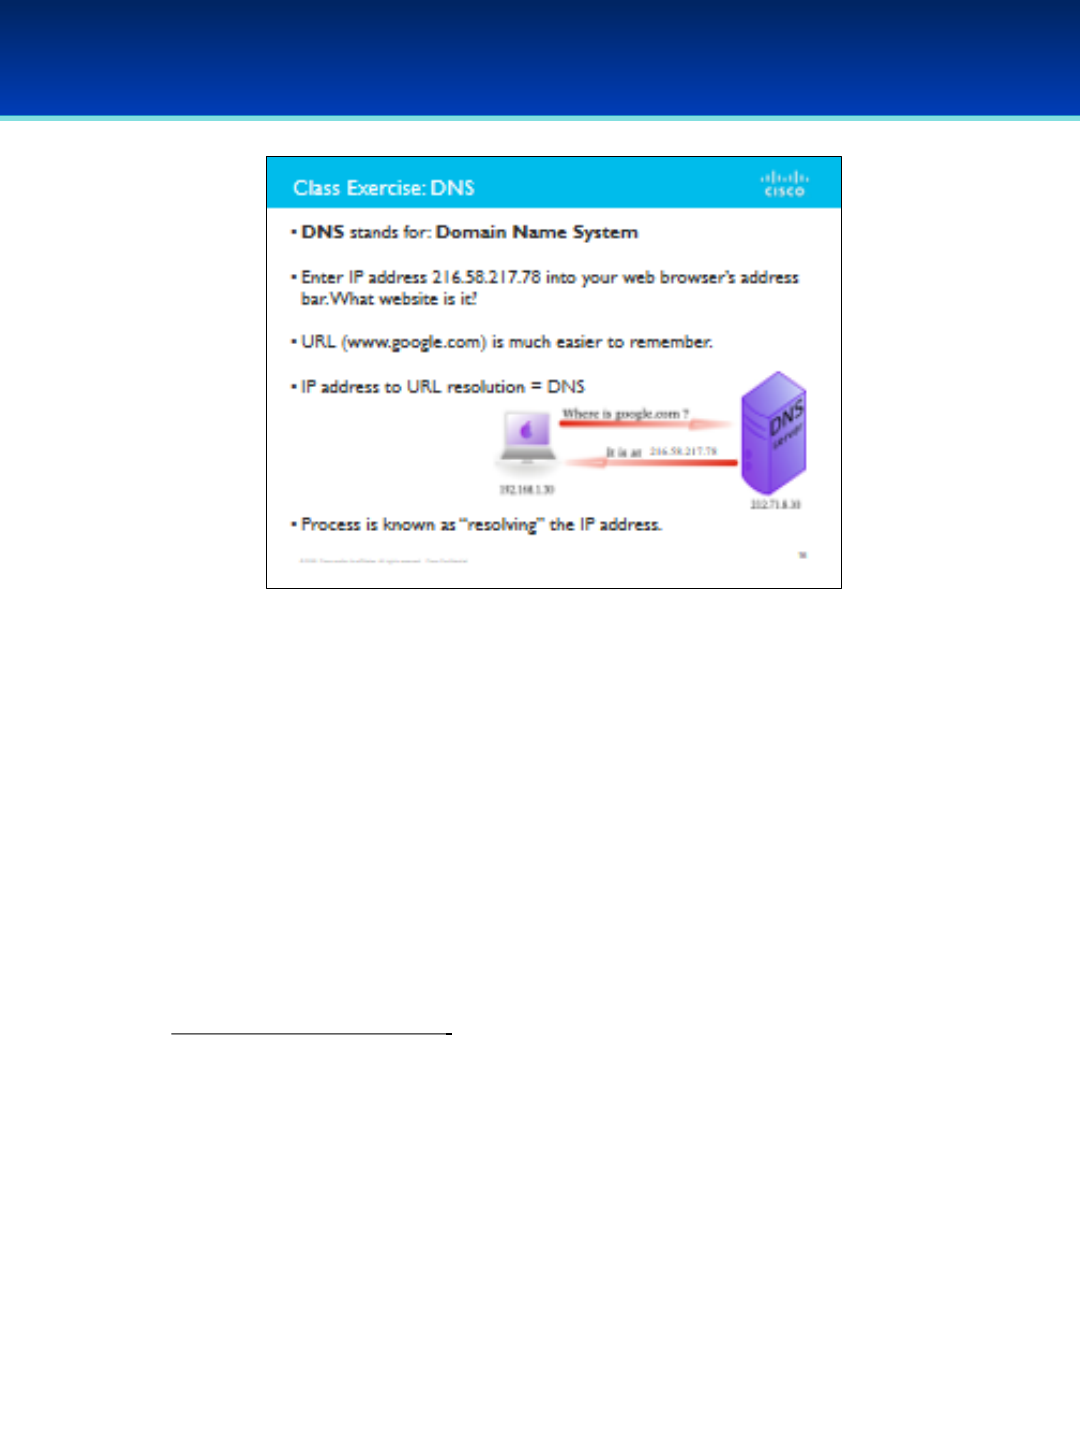
AFA Advanced CyberCamp Instructor’s Guide
Slide 17
Cisco Networking
Page 312
© 2018 Air Force Association
•As we just discussed, IP addresses are used to indicate where something is
located on the Internet so we can send traffic to it.
•[Mini-exercise]: You can get to a website just by entering its IP address into
your web browser’s address bar.
•Open a browser and type in: 216.58.217.78
•What site did it bring you to?
•Answer: www.google.com.
•But we hardly ever type IP addresses into web browsers; it’s much more
common to type a website’s URL, because a URL is much easier to
remember.
•How does my laptop know to go to 216.58.217.78 when I
put http://www.google.com in my browser?
•Your computer needs an IP address for its destination—there’s no getting
around this requirement.
•The solution is Domain Name System or DNS.
•DNS servers store mappings of IP addresses to “friendly” web addresses.
•Anytime you navigate to a URL in your browser’s address bar, your
computer automatically sends a DNS request to a DNS server to get the IP
address for that URL.
•Even when you enter a “friendly” name, your computer gets the IP address
of the destination—this process is known as “resolving” the IP address.

AFA Advanced CyberCamp Instructor’s Guide
Slide 18
Cisco Networking
Page 313
© 2018 Air Force Association
•When you send request for the data that makes up a website, where
does that request go?
•Ultimately, it ends up at the destination web server.
•But how does it get there?
•When you request a web page from your house, your computer first
sends that request to your home router.
•Reminder: Your router is the device in your home which “owns”
your public IP address. To the Internet, you “are” your router.
•Your router then forwards that packet on to another router in your
Internet Service Provider's (ISP’s) local data center.
•Take a look at this visualization: 1.2.4.2 (Links to an external site)
NetAcad example.
•That router forwards your request to another router, and another,
and another after that, until the packet eventually arrives at the
web server.
•Link: https://static-course-
assets.s3.amazonaws.com/ITN51/en/index.html#1.2.4.2
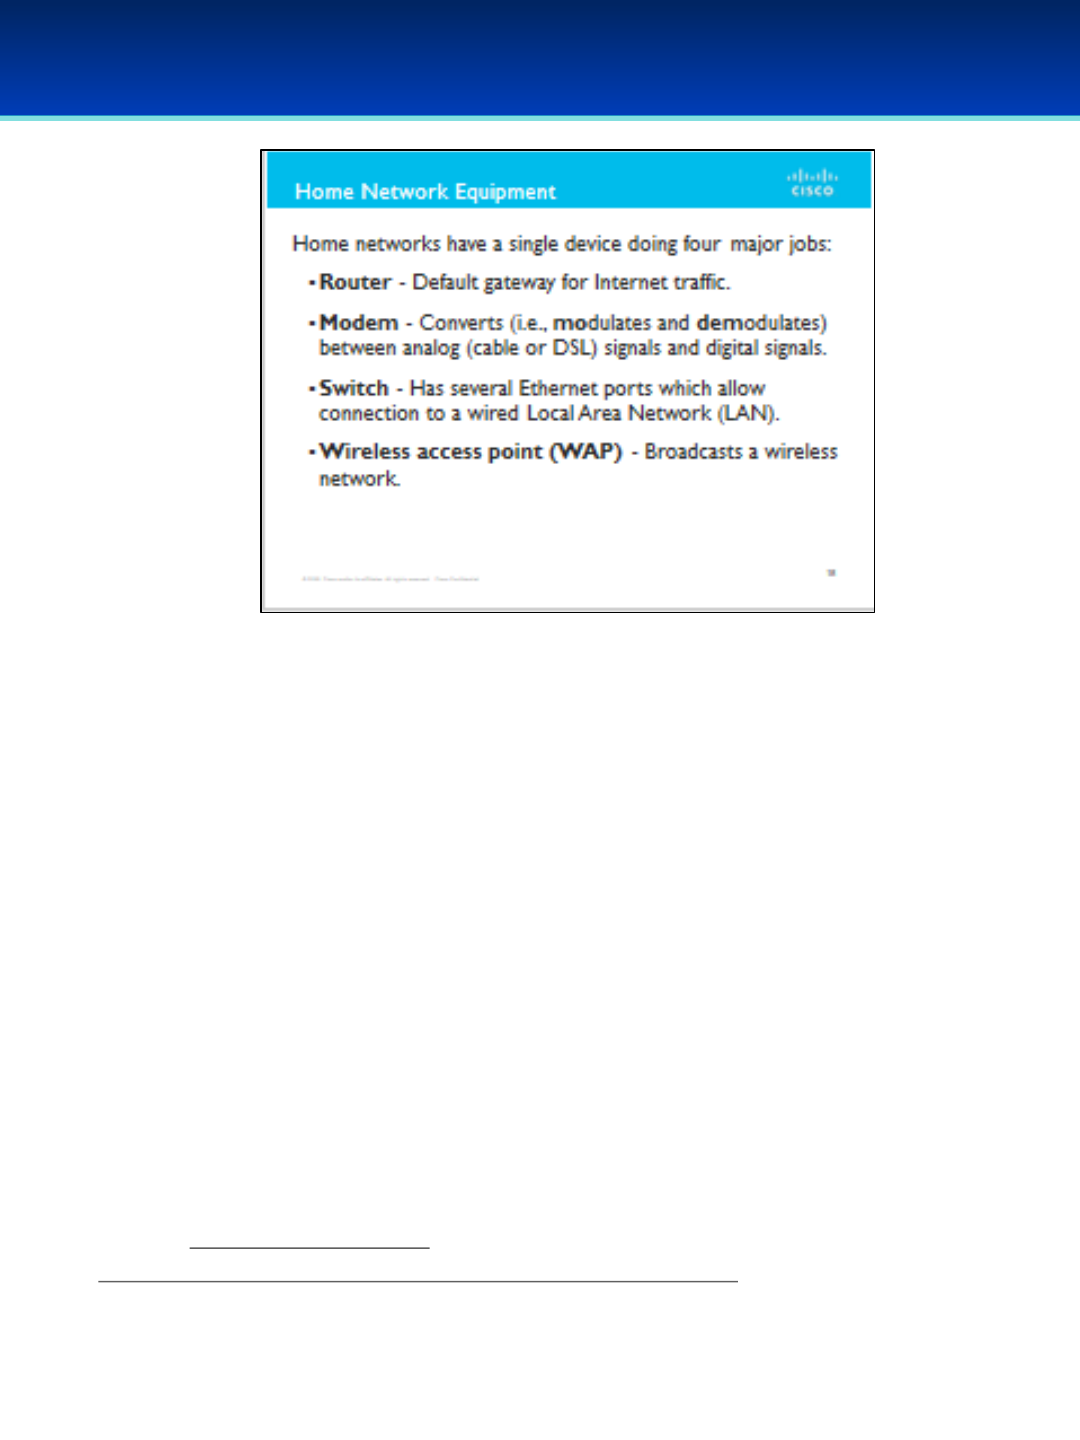
AFA Advanced CyberCamp Instructor’s Guide
Slide 19
Cisco Networking
Page 314
© 2018 Air Force Association
•Most homes have a single device doing four major jobs for the home
network.
•This device, usually provided by your ISP, is acting as a modem, a router,
aswitch, and a wireless access point.
•This device is a router in that it serves as the default gateway for
traffic on the home network and forwards that traffic over the
Internet.
•This device is a modem in that it does conversion (i.e., modulates
and demodulates) between analog (cable or DSL) signal and digital
signal (0’s and 1’s, the language packets are written in).
•This device is a switch in that it has several ethernet ports which
allow connection to a wired Local Area Network (LAN).
•This device is a wireless access point (WAP) in that it broadcasts a
wireless network which clients can connect to.
Source: https://static-course-
assets.s3.amazonaws.com/ITN51/en/index.html#4.1.1.1
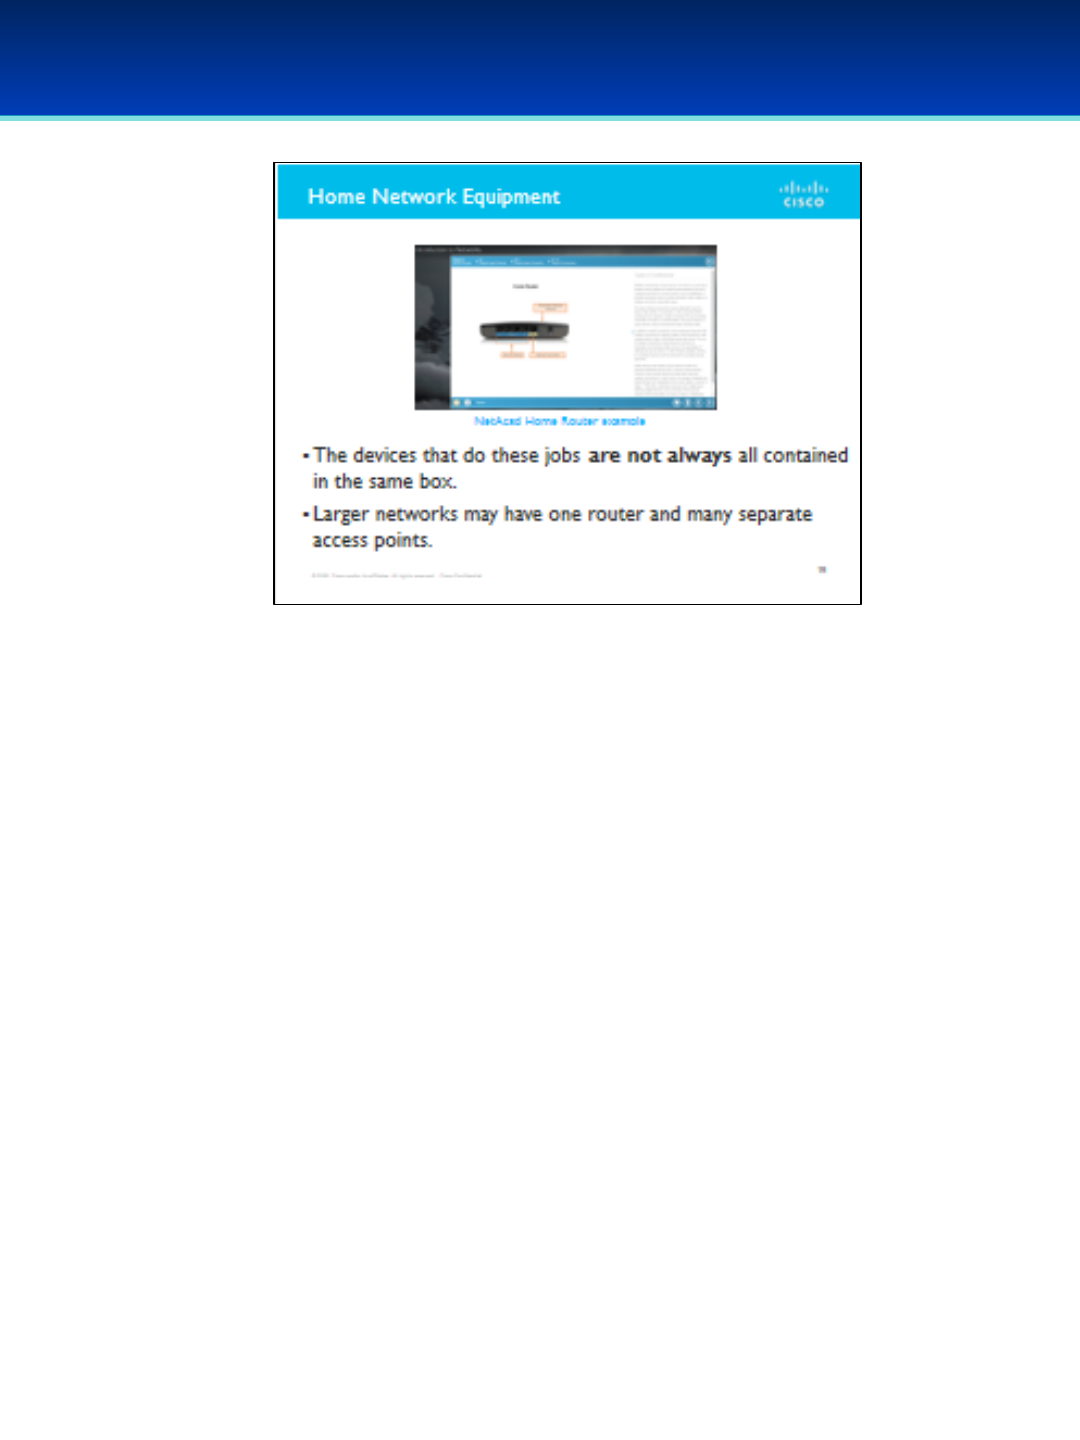
AFA Advanced CyberCamp Instructor’s Guide
Slide 20
Cisco Networking
Page 315
© 2018 Air Force Association
Click on the screenshot to launch the NetAcad Home Router example or
copy and paste:
https://www.netacad.com/?p_p_id=58&p_p_lifecycle=0&p_p_state=norma
l&saveLastPath=false&_58_struts_action=%2Flogin%2Flogin&redirect=%2F
c%2Fportal%2Fsaml%2Fsso
•Home networking devices are not always all contained in the same piece
of hardware.
•Example: In a large office building with dozens of employees spread
across many floors, there may be one router and multiple wireless access
points.
•Why do you think this is?
AFA Advanced CyberCamp Instructor’s Guide
Slide 21
Cisco Networking
Page 316
© 2018 Air Force Association
•If the class needs additional background on Packet Tracer, cover the
following course, which will take about 60 minutes to complete.
•Click on the phrase Packet Tracer to go directly to the site or cut and
paste the following URL: https://www.netacad.com/courses/packet-
tracer
•NOTE: NetAcad login required.
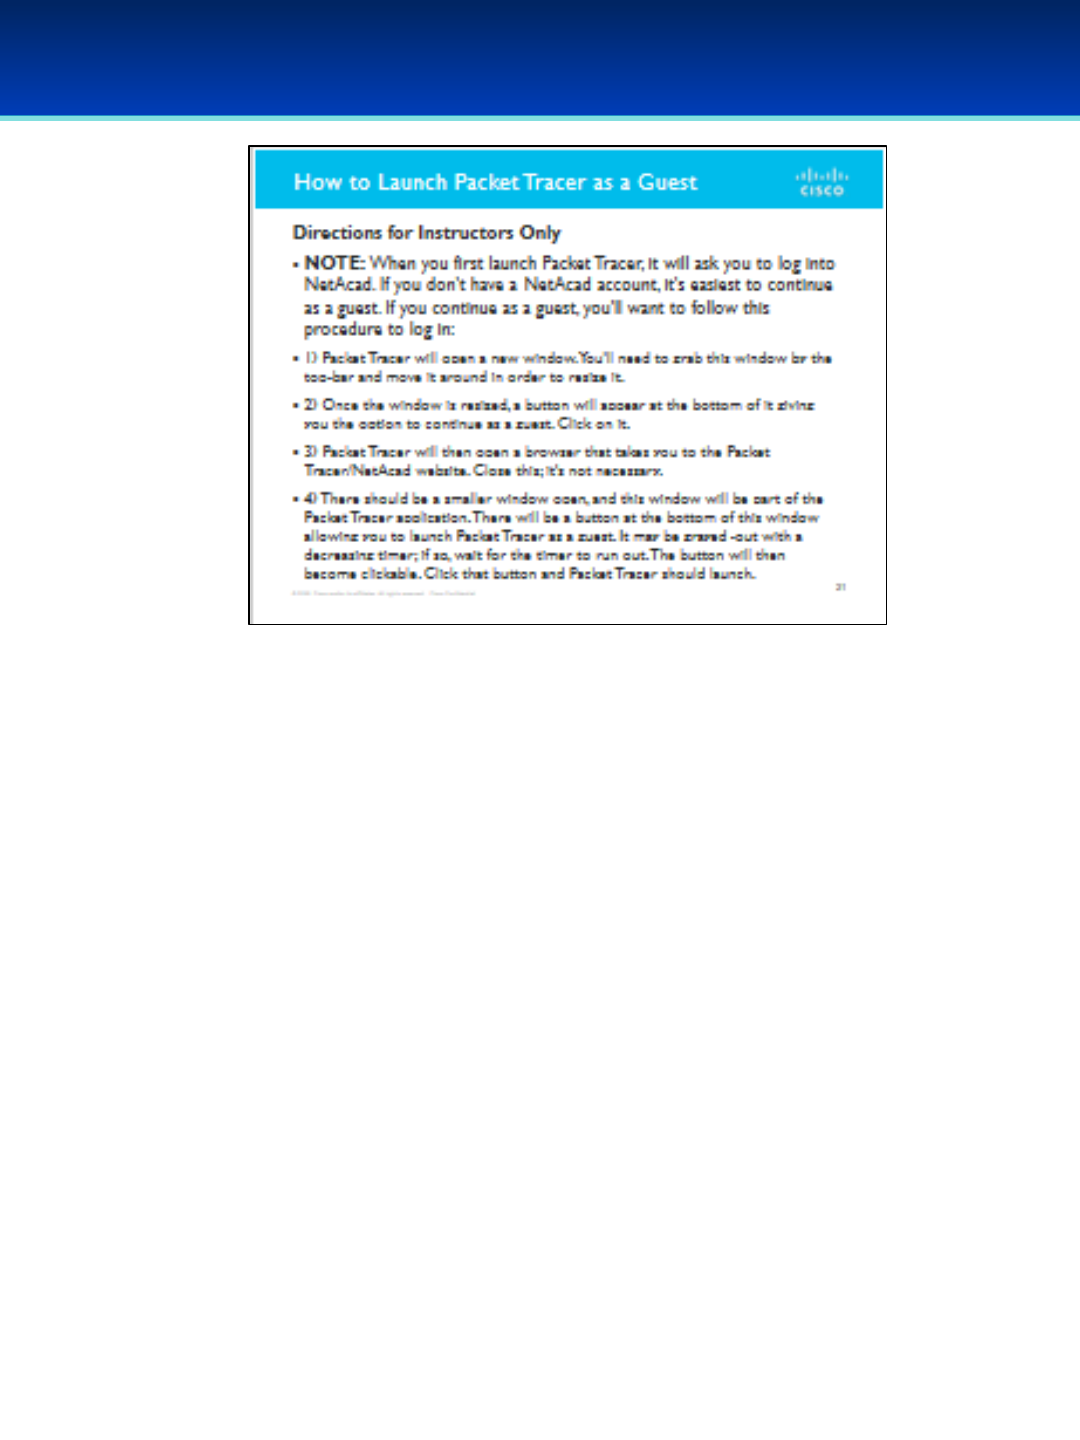
AFA Advanced CyberCamp Instructor’s Guide
Slide 22
Cisco Networking
Page 317
© 2018 Air Force Association
Directions for Instructors Only
NOTE: When you first launch Packet Tracer, it will ask you to log into
NetAcad. If you don't have a NetAcad account, it's easiest to continue as a
guest. If you continue as a guest, you'll want to follow this procedure to log
in:
1) Packet Tracer will open a new window. You'll need to grab this window by
the top-bar and move it around in order to resize it.
2) Once the window is resized, a button will appear at the bottom of it
giving you the option to continue as a guest. Click on it.
3) Packet Tracer will then open a browser that takes you to the Packet
Tracer/Netacad website. Close this; it's not necessary.
4) There should be a smaller window open, and this window will be part of
the Packet Tracer application. There will be a button at the bottom of this
window allowing you to launch Packet Tracer as a guest. It may be grayed-
out with a decreasing timer; if so, wait for the timer to run out. The button
will then become clickable. Click that button and Packet Tracer should
launch.
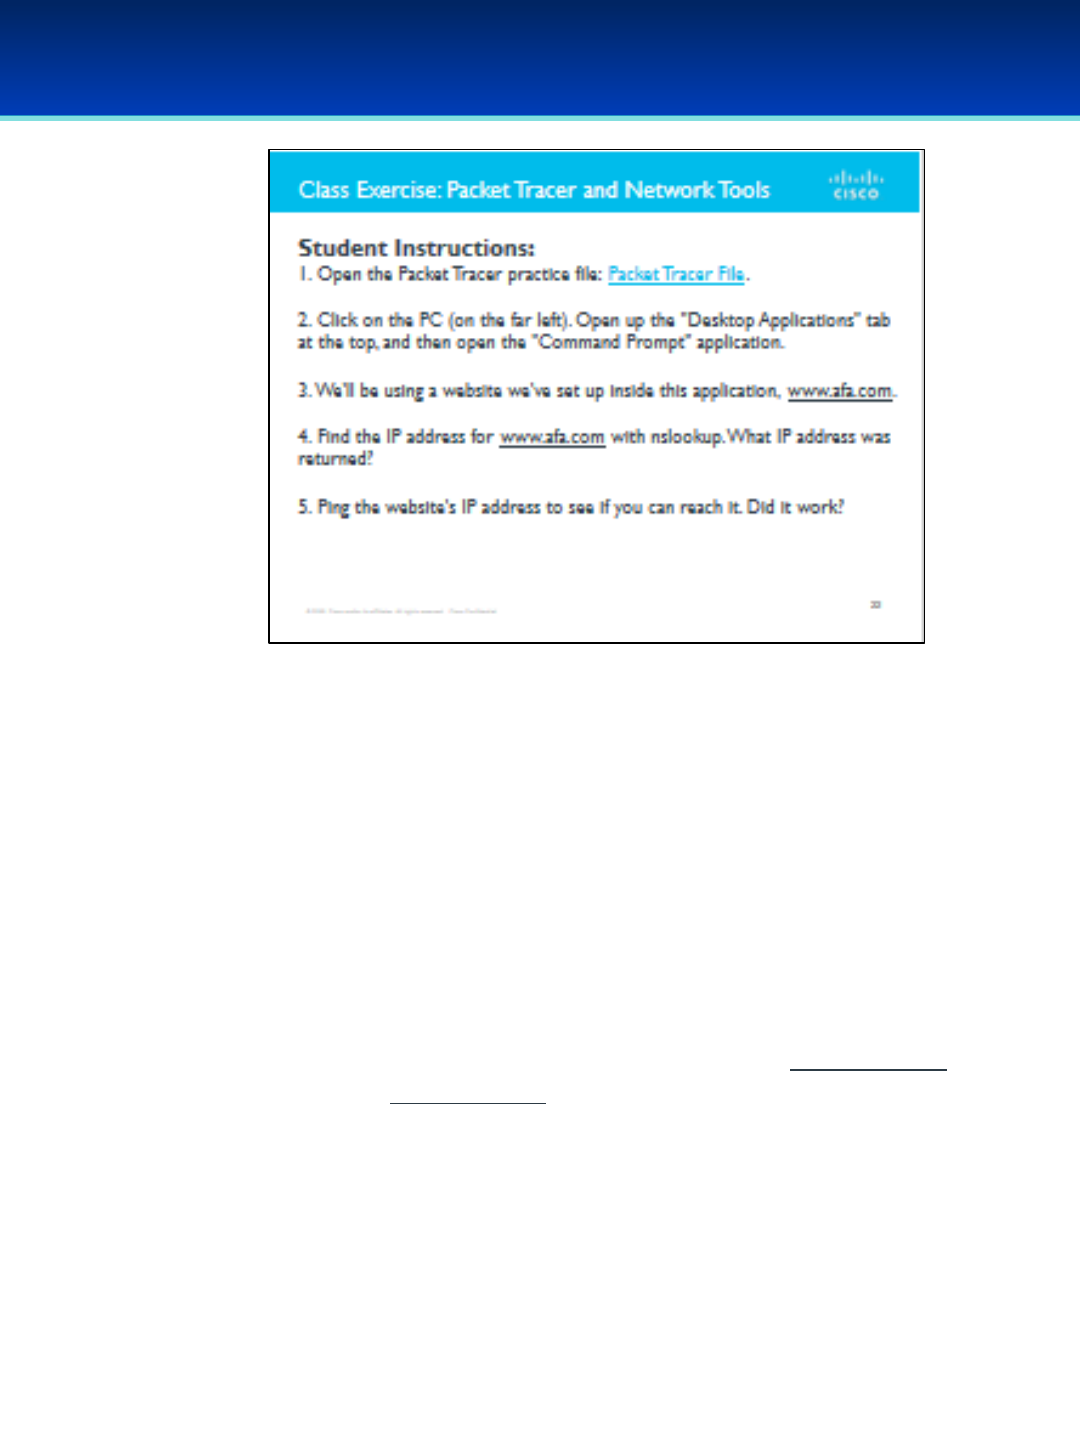
AFA Advanced CyberCamp Instructor’s Guide
Slide 23
Cisco Networking
Page 318
© 2018 Air Force Association
To download the Packet Tracer practice file, click on the hyperlink on the slide,
or cut and paste the following URL into your browser’s address bar:
https://150566673.netacad.com/courses/487683/files/46796296/download?
wrap=1
Instructions:
1. Open the Packet Tracer practice file on your laptop.
2. Click on the PC (on the far left). Open the "Desktop Applications" tab at the
top, and then open the "Command Prompt" application.
3. We will use a website we've set up inside this application, www.afa.com.
4. Find the IP address for www.afa.com with nslookup. What IP address was
returned?
5. Ping the website's IP address to see if you can reach it. Did it work?
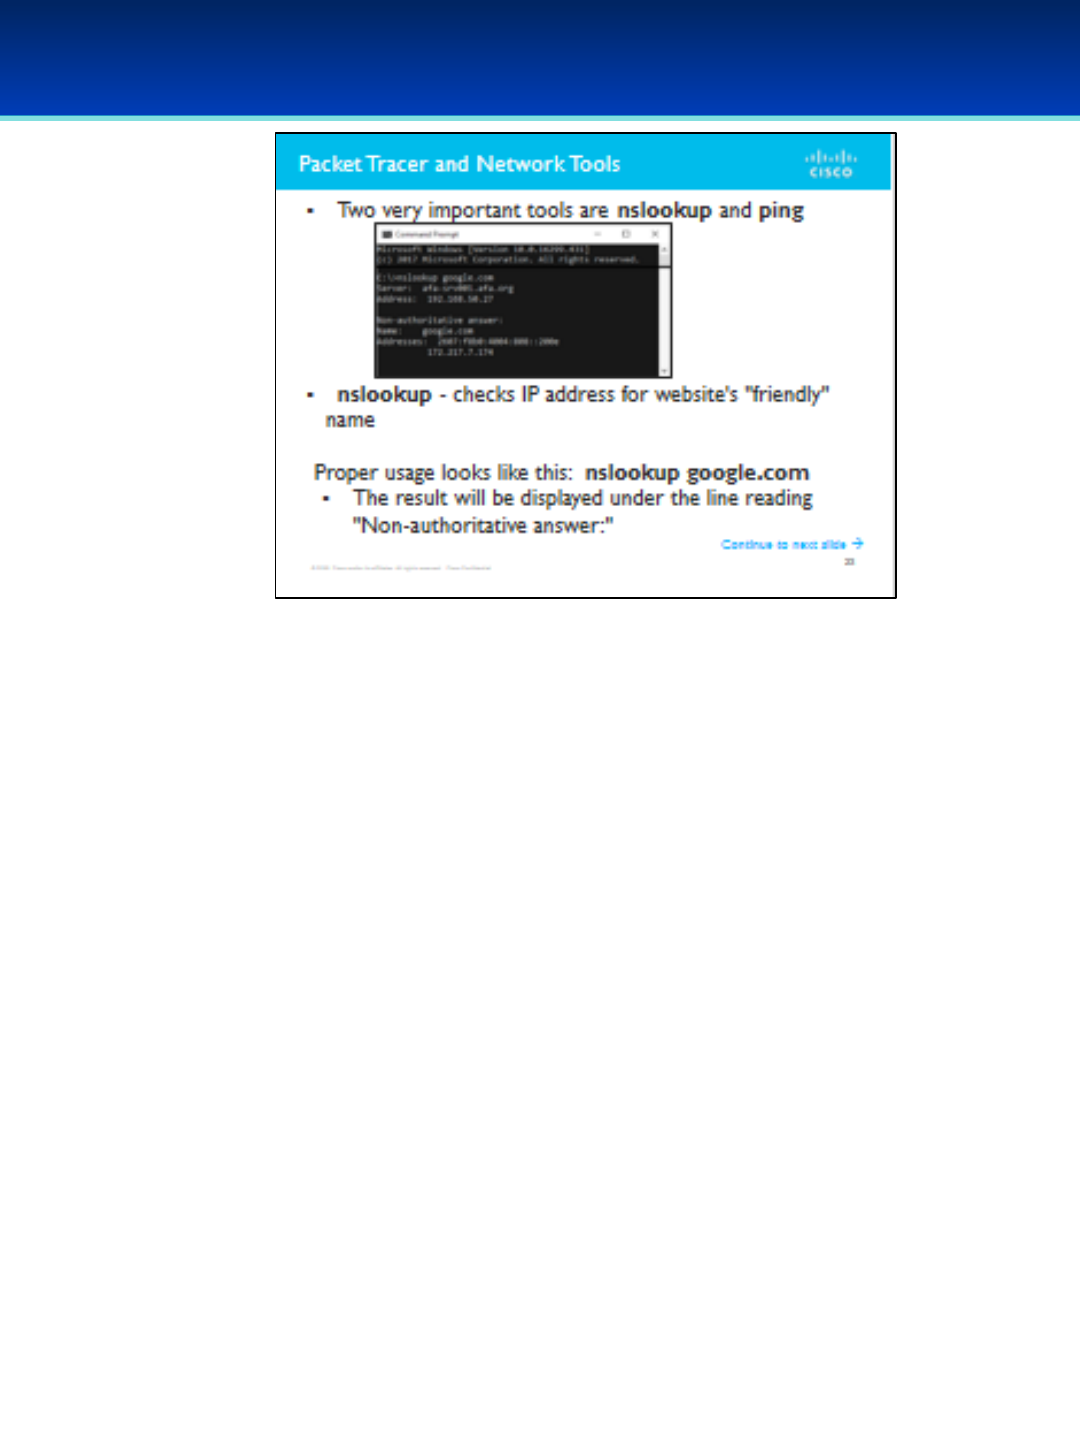
AFA Advanced CyberCamp Instructor’s Guide
Slide 24
Cisco Networking
Page 319
© 2018 Air Force Association
•Two very important tools for network engineers are nslookup and ping.
•nslookup is used to check what the IP address is for a website's
"friendly" name.
•Proper usage looks like this: nslookup google.com
•The result will be displayed under the line reading "Non-
authoritative answer:"
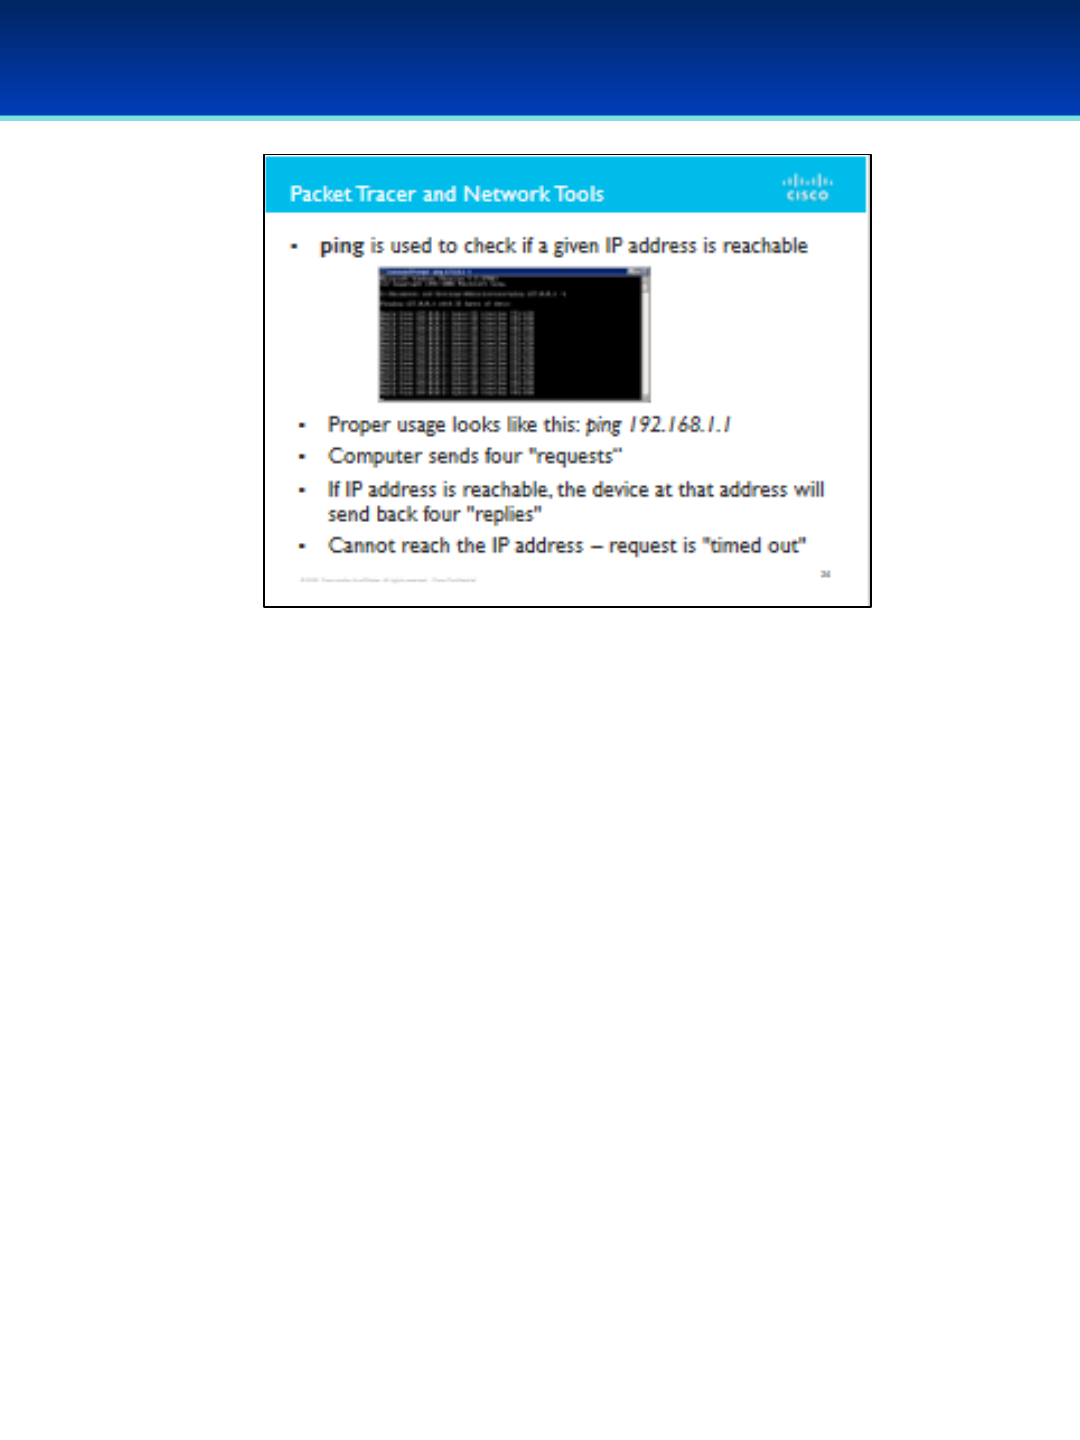
AFA Advanced CyberCamp Instructor’s Guide
Slide 25
Cisco Networking
Page 320
© 2018 Air Force Association
•ping is used to check if a given IP address is reachable.
•Proper usage looks like this: ping 192.168.1.1
•Your computer will send four "requests." If the IP address is
reachable, the device at the destination address will send back four
"replies."
•If your computer cannot reach the IP address you ping, then you will
usually see that the requests "timed out."

AFA Advanced CyberCamp Instructor’s Guide
Slide 26
Cisco Networking
Page 321
© 2018 Air Force Association
Click on the logo to go directly to the site or cut and paste the following
URL:
https://goo.gl/g2R3F4
•When you click on the logo a start screen will appear.
•Instructor will have the option to choose 1:1 playing where students use
their individual devices or shared devices for small groups.
For more information on how to play Kahoot! visit:
https://files.getkahoot.com/academy/Kahoot_Academy_Getting_Started_
Guide_2nd_Ed_-_June_2016.pdf
AFA Advanced CyberCamp Instructor’s Guide
Slide 27
Cisco Networking
Page 322
© 2018 Air Force Association
Module 2: The TCP/IP Stack
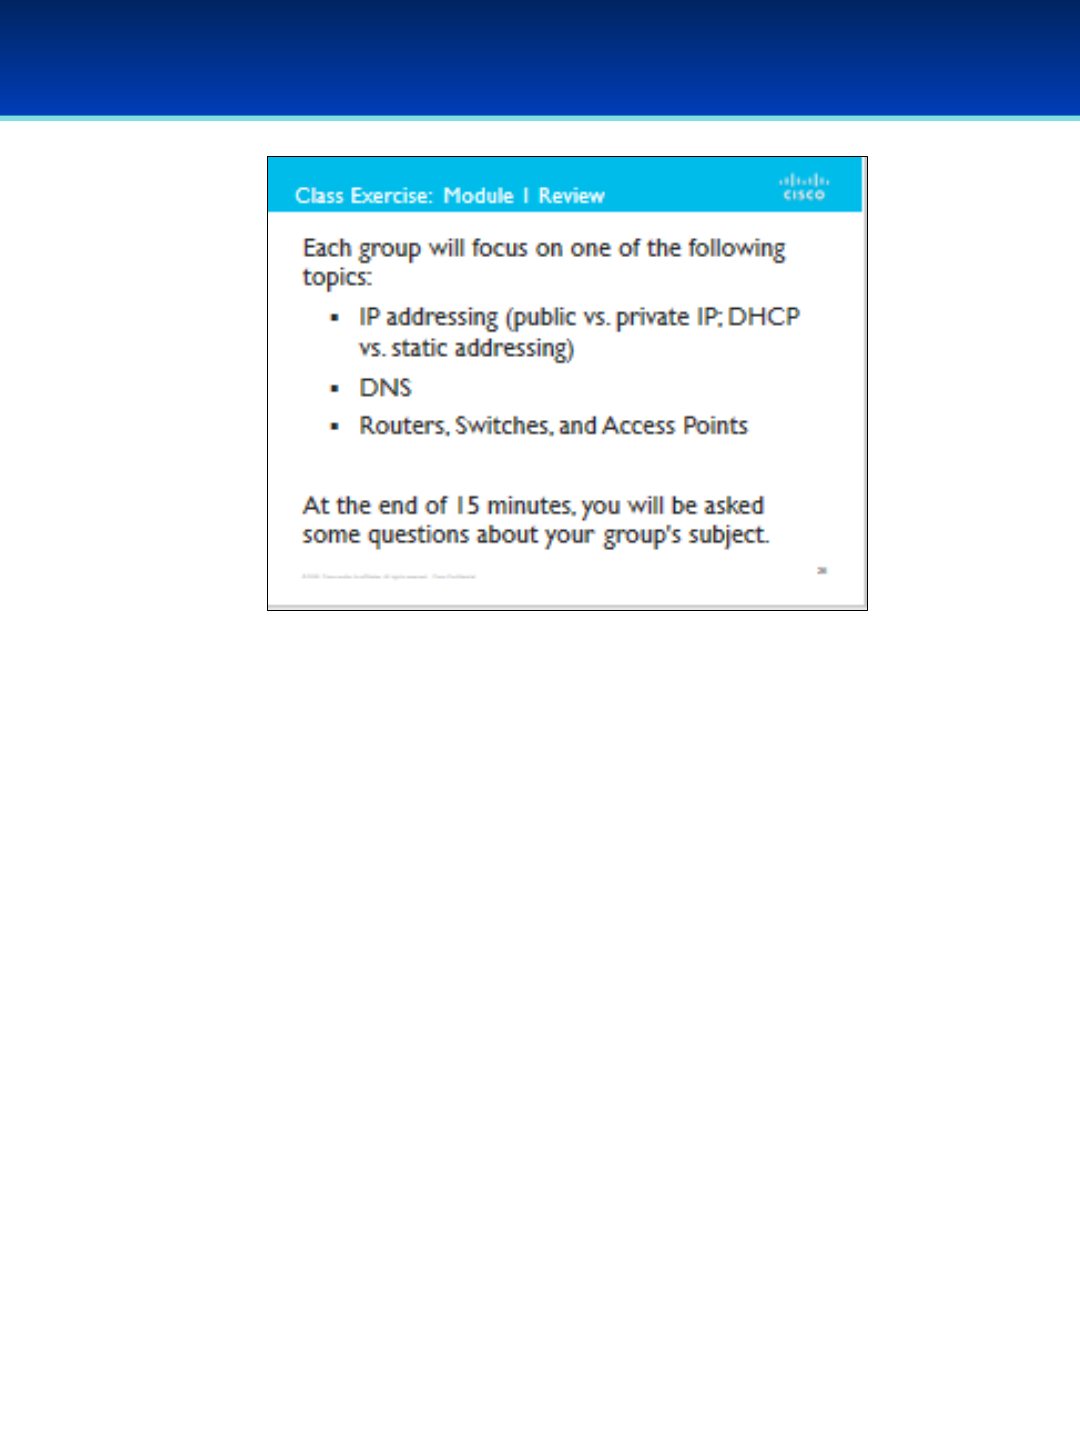
AFA Advanced CyberCamp Instructor’s Guide
Slide 28
Cisco Networking
Page 323
© 2018 Air Force Association
•Break into three even groups.
•Take 15 minutes to review yesterday's material. Each group will focus
on one of the following topics:
•IP addressing (public/private IP addresses, DHCP vs. static
addressing)
•Domain Name System (DNS)
•Routers, Switches, and Access Points
•At the end of 15 minutes, you will be asked some questions about
your group's subject. Don't be afraid to ask questions if you're having
a hard time remembering things.
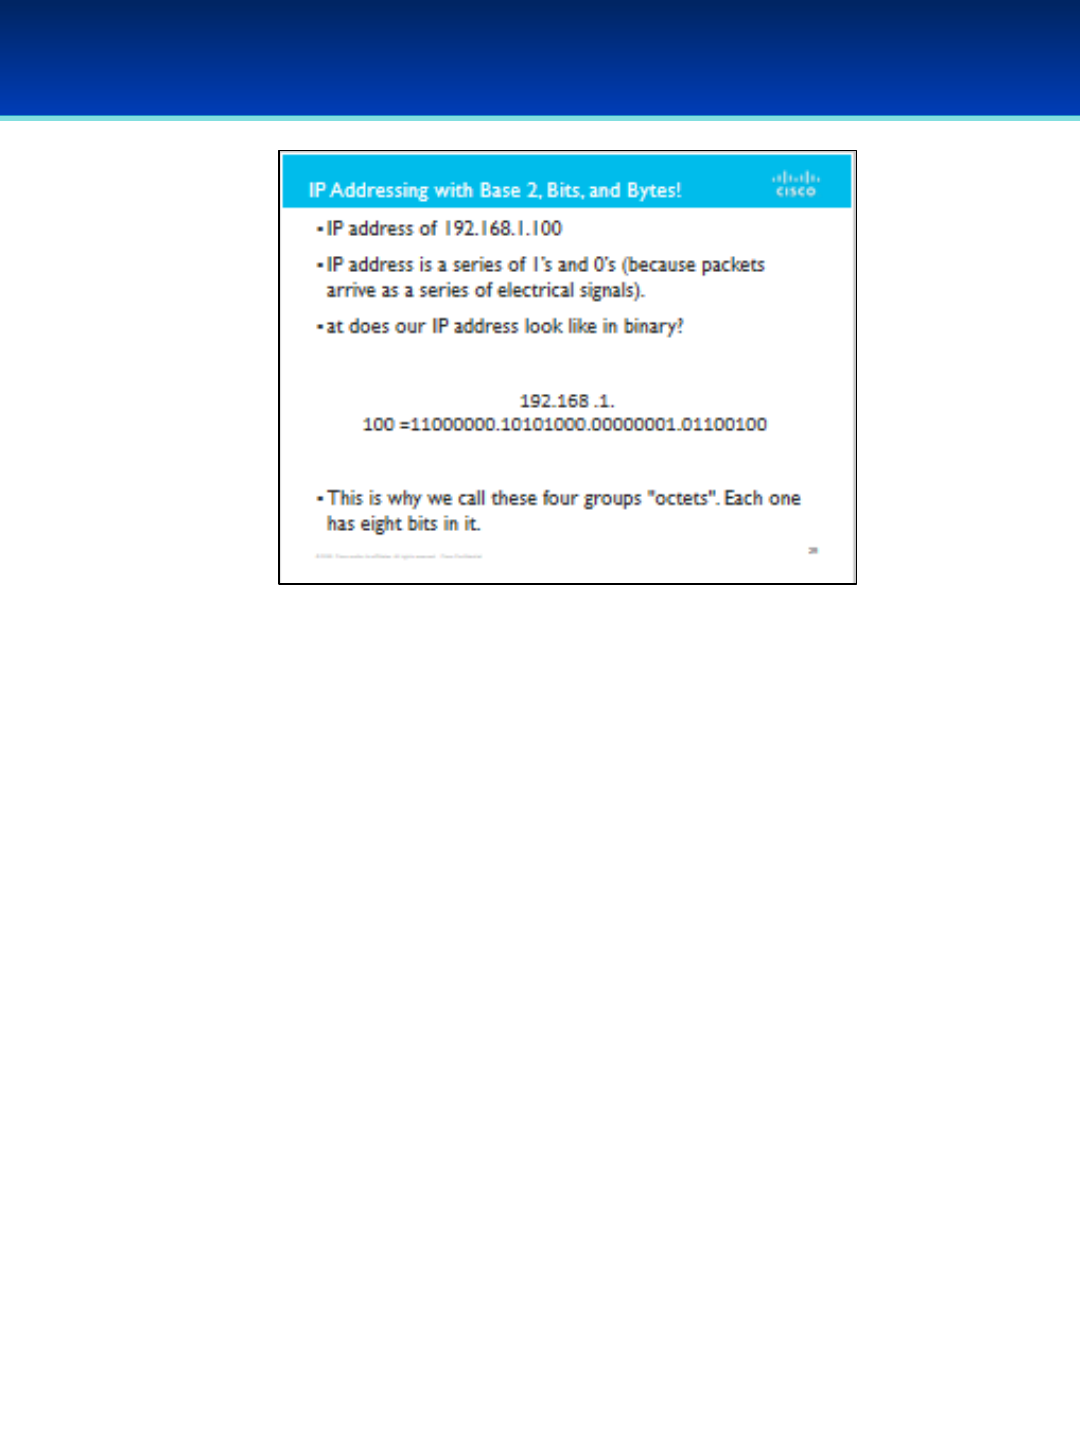
AFA Advanced CyberCamp Instructor’s Guide
Slide 31
Cisco Networking
Page 326
© 2018 Air Force Association
•Say we have an IP address of: 192.168.1.100
•As we saw in some of the review videos, computers and routers read
an IP address as a series of 1’s and 0’s (because a packet arrives as a
series of electrical signals).
•What does our IP address look like in binary? Work it out for yourself.
Did you get it right?
•192.168.1.100 = 11000000.10101000.00000001.01100100
•This is why we call these four groups "octets." Each one has eight bits
in it.
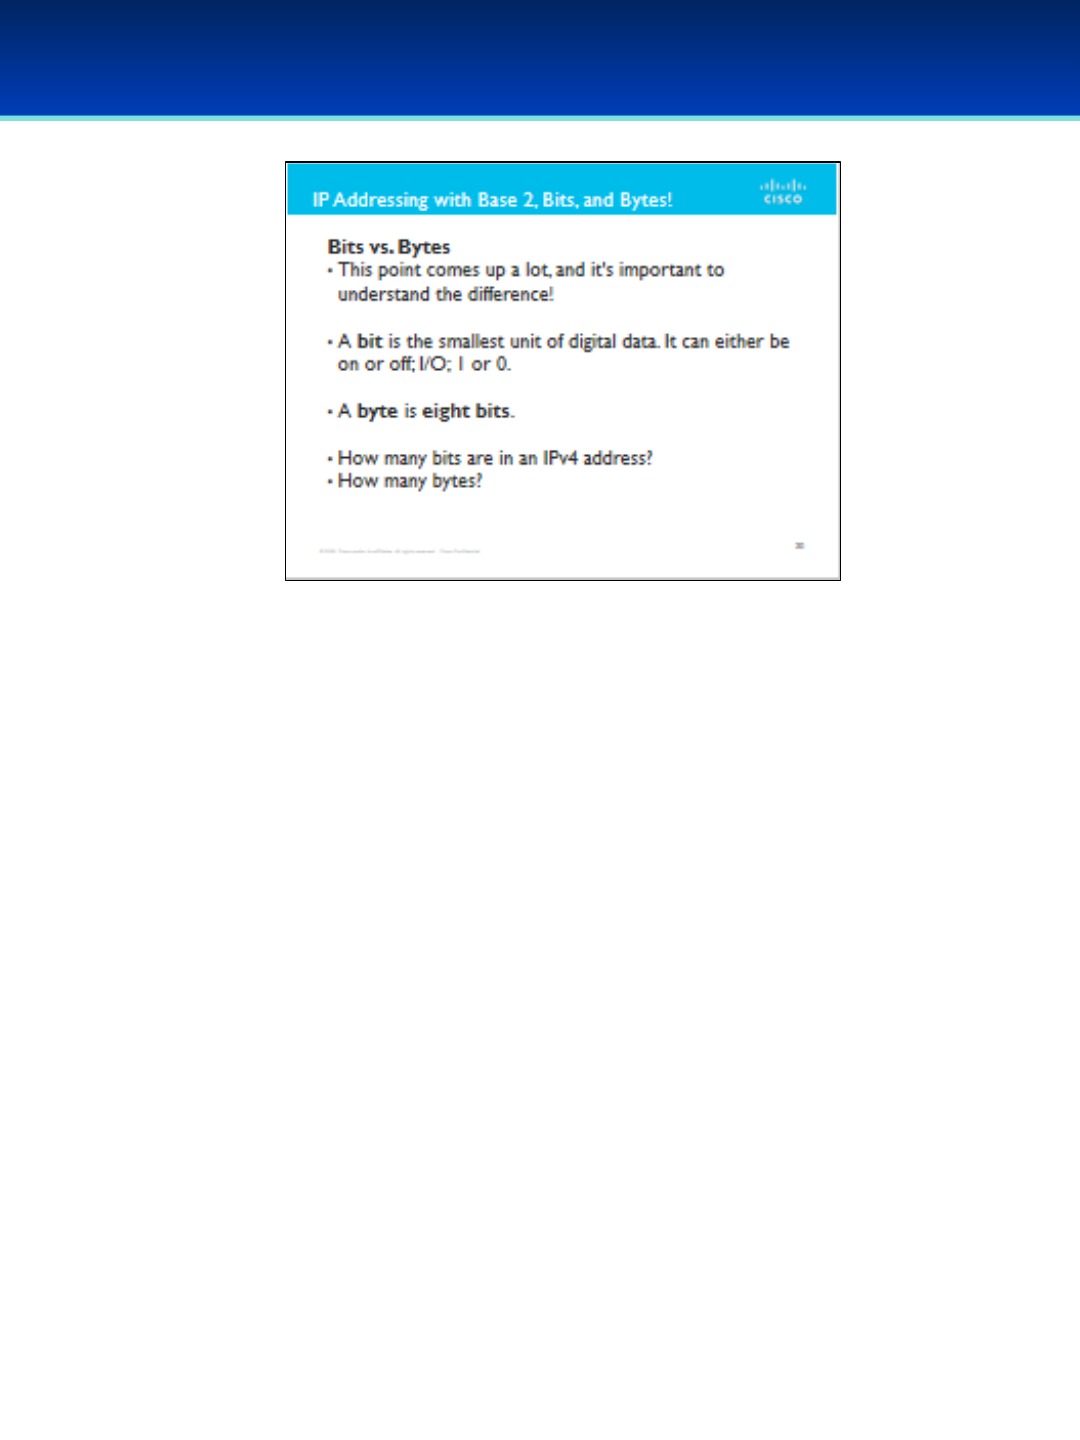
AFA Advanced CyberCamp Instructor’s Guide
Slide 32
Cisco Networking
Page 327
© 2018 Air Force Association
Bits vs. Bytes
•This point comes up a lot, and it's important to understand the difference!
•Abit is the smallest unit of digital data. It can either be on or off; I/O; 1 or 0.
•Abyte is eight bits.
•How many bits in an IPv4 address?
•How many bytes?

AFA Advanced CyberCamp Instructor’s Guide
Slide 33
Cisco Networking
Page 328
© 2018 Air Force Association
•Now, let's look at an example subnet mask: 255.255.255.0
•11111111.11111111.11111111.00000000
•The first three octets are Network bits.
•What does that mean?
•It means that only the last octet (the fourth number, in base 10) is
used to differentiate hosts. The first three octets, taken together,
describe the network.
•This network can fit 2^8 (or 254) hosts on it.
•Another example subnet mask: 255.255.0.0. In binary, that is:
•11111111.11111111.00000000.00000000
•This means that there are 2^16 (or 65,536) host addresses available in a
network with this mask.
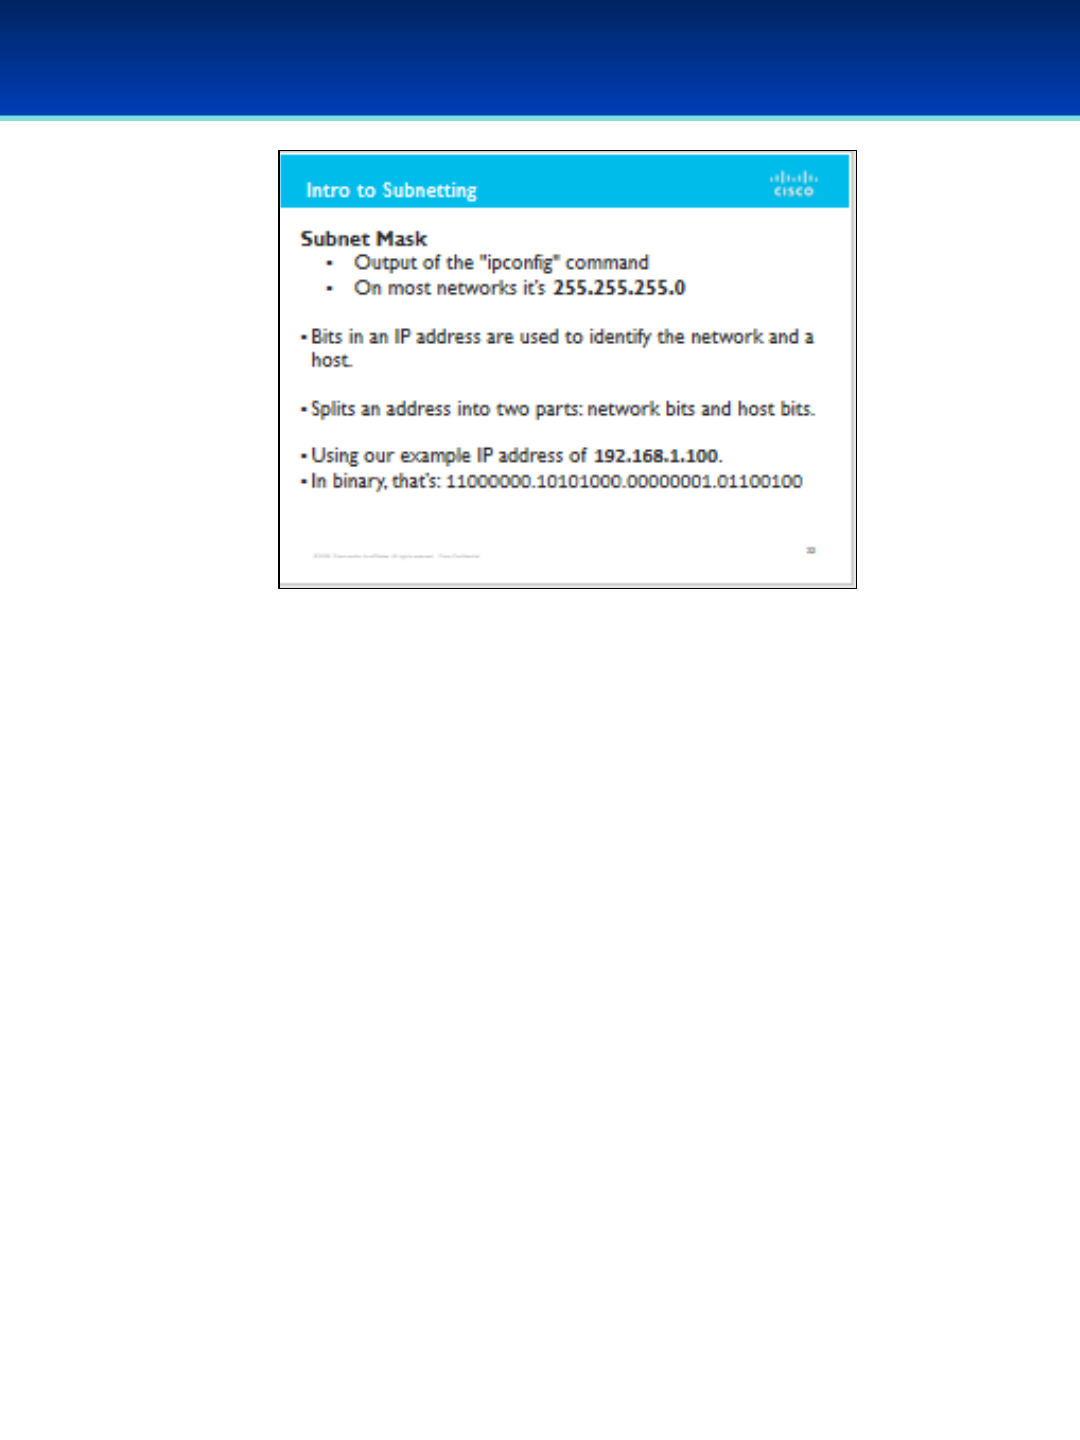
AFA Advanced CyberCamp Instructor’s Guide
Slide 34
Cisco Networking
Page 329
© 2018 Air Force Association
•You've probably noticed the “subnet mask" in the output of the
ipconfig command, or seen it elsewhere.
•On most networks you've probably been on, it's likely: 255.255.255.0
•What does this mean?
•A Subnet Mask tells us which bits in an IP address are used to identify
the Network, and which bits are used to identify a Host.
•It splits an address into two parts: the Network bits and the Host bits.
•Using our example IP address of 192.168.1.100. In binary, that’s:
•11000000.10101000.00000001.01100100
AFA Advanced CyberCamp Instructor’s Guide
Slide 35
Cisco Networking
Page 330
© 2018 Air Force Association
https://play.kahoot.it/#/k/28e548e1-62ba-46de-992c-f972235377a1
•When you click on the logo a start screen will appear.
•Instructor will have the option to choose 1:1 playing where students use
their individual devices or shared devices for small groups.
For more information on how to play Kahoot! visit:
https://files.getkahoot.com/academy/Kahoot_Academy_Getting_Started_
Guide_2nd_Ed_-_June_2016.pdf
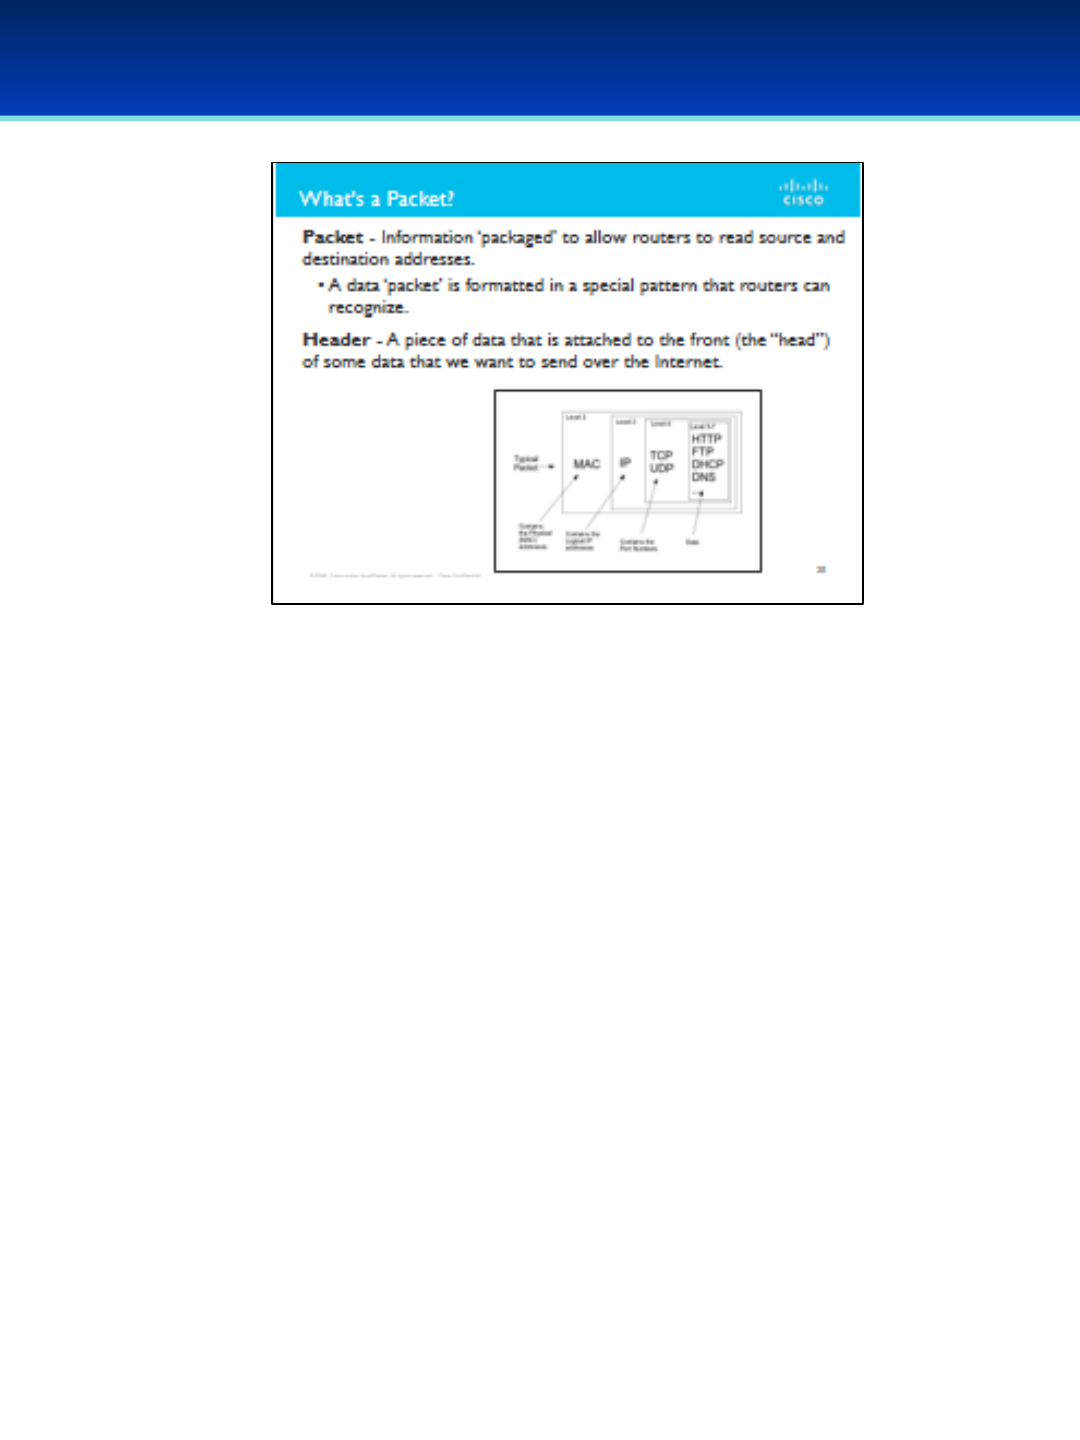
AFA Advanced CyberCamp Instructor’s Guide
Slide 37
Cisco Networking
Page 332
© 2018 Air Force Association
•Have you heard the term “packet” before? What do you think it means?
•When we send information across a network (including the Internet), it must
be ‘packaged’ into a format that allows routers to read its source and
destination addresses along the way.
•Remember: Every time your request gets sent to a new ‘hop’ in the
route, that hop needs to read the source and destination addresses.
•Similar to mailing a letter: You ‘package’ the letter in an envelope which
displays the destination and return addresses so the Post Office knows
where to send it and where to return it if necessary.
•Routers are just specialized computers:
•Computers are good at recognizing predefined patterns.
•To say that data is in a ‘packet’ means that it’s been formatted in a
special pattern that routers recognize.
•This formatting is in the form of a “header,” a piece of data that is attached
to the front (the “head”) of some data that we want to send over the
internet.

AFA Advanced CyberCamp Instructor’s Guide
Slide 38
Cisco Networking
Page 333
© 2018 Air Force Association
•Any time we send a packet over a network, it’s wrapped (or “encapsulated”) in
several layers; from inside to outside, these are:
•Application
•Transport
•Internet (aka Network)
•Link
•Each layer serves a specific purpose.
•The following example compares sending a data packet to shipping a valuable,
fragile vase through the mail.
•The vase is the core data which necessitates packaging. In this example, the
application layer; the substantive data being transmitted in the packet.
•Since the vase is fragile, you would likely want to protect it with bubble-wrap.
The protection provided is the transport layer, which protects the sensitive
contents of the packet.
•The Post Office needs to know where the vase is going and where it came
from, so you affix a shipping label with the destination and return addresses.
This is how the Internet (network) layer tells a router where to direct a
packet.
•To contain the vase and its packing materials, you put everything in a box.
This is like the link layer that contains and protects the preceding three
layers.
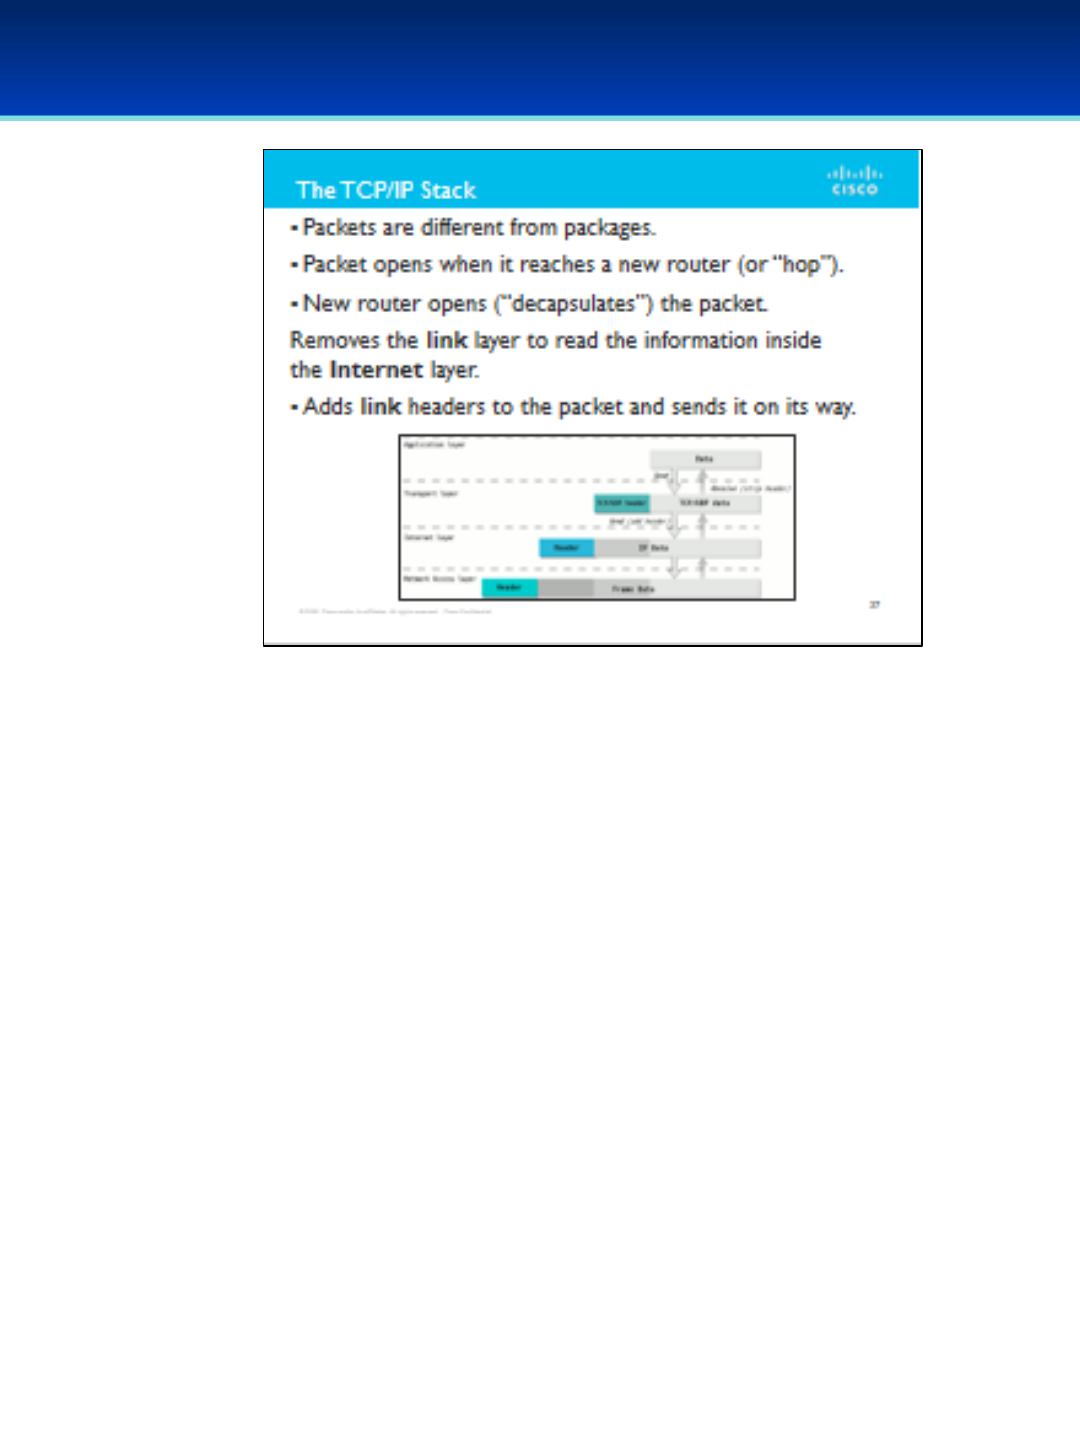
AFA Advanced CyberCamp Instructor’s Guide
Slide 39
Cisco Networking
Page 334
© 2018 Air Force Association
•One way that packets are different from packages: whenever your packet
reaches a new router (or “hop”) on its journey, that router has to open up
(“decapsulate”) the packet.
•It needs to remove the link layer so that it can read the information
inside the Internet layer. It then adds link headers to the packet again
and sends it on its way.
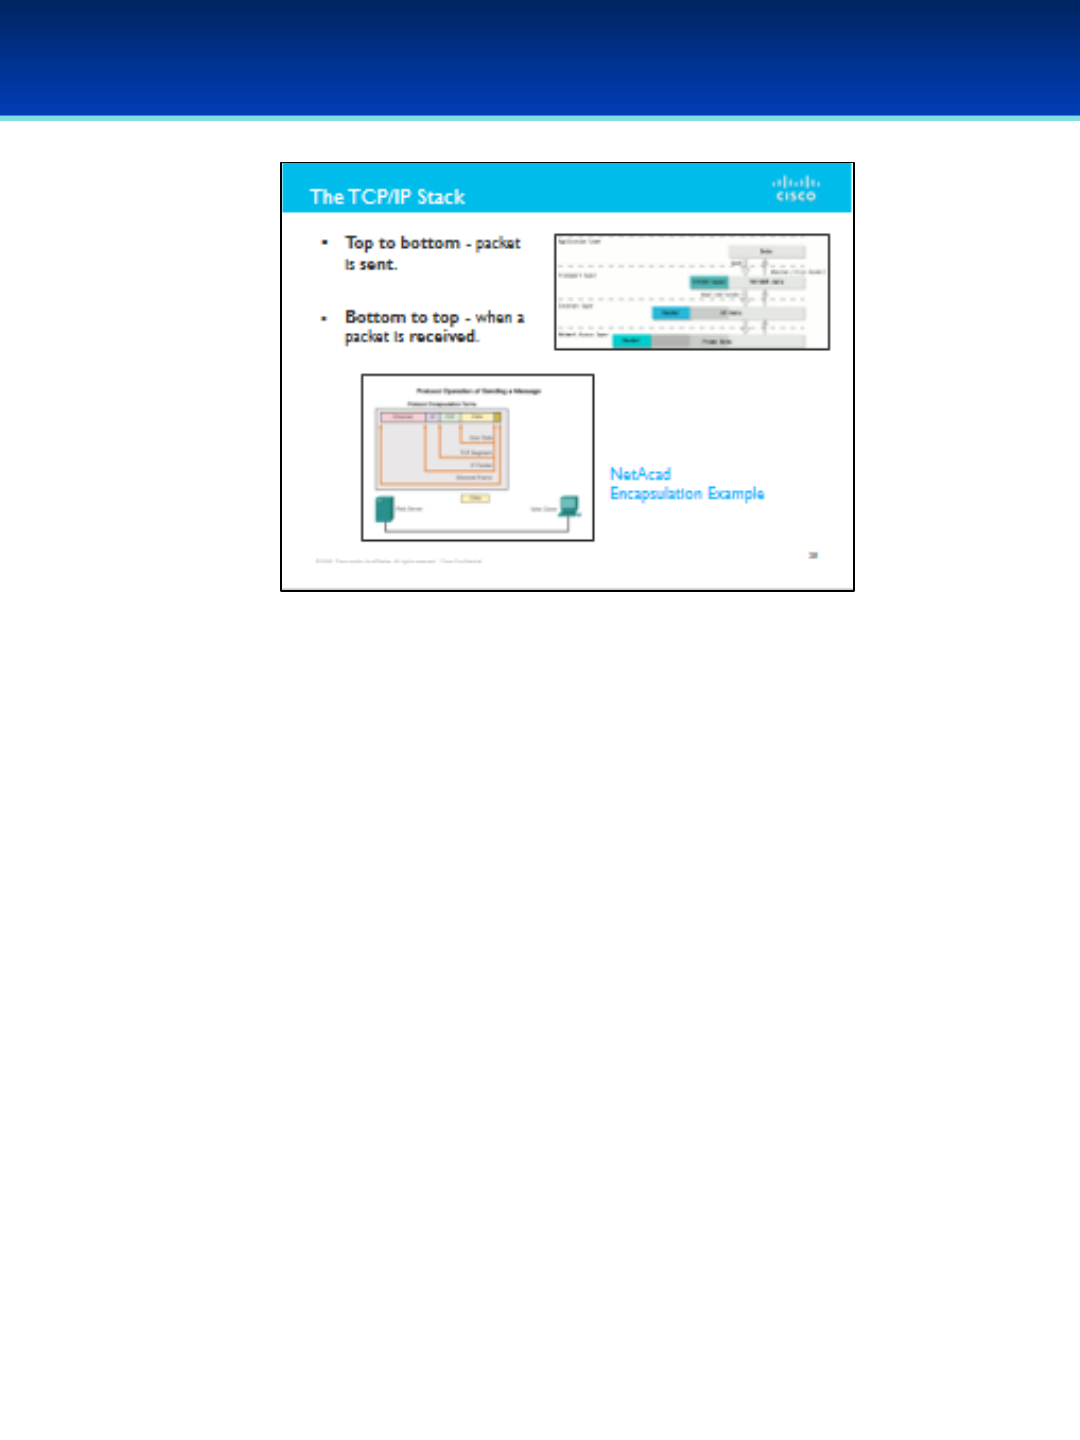
AFA Advanced CyberCamp Instructor’s Guide
Slide 40
Cisco Networking
Page 335
© 2018 Air Force Association
•Packets are different from packages: whenever your packet reaches a new
router (or “hop”) on its journey, that router has to open up (“decapsulate”) the
packet. It needs to remove the link layer so that it can read the information
inside the Internet layer. It then adds link headers to the packet again and
sends it on its way.
•From top to bottom, this diagram shows what it looks like when a packet
is sent.
•From bottom to top, this diagram shows what it looks like when a packet
is received.
Click on the bottom screenshot to launch the website directly or copy and paste:
https://static-course-assets.s3.amazonaws.com/ITN51/en/index.html#3.3.1.3
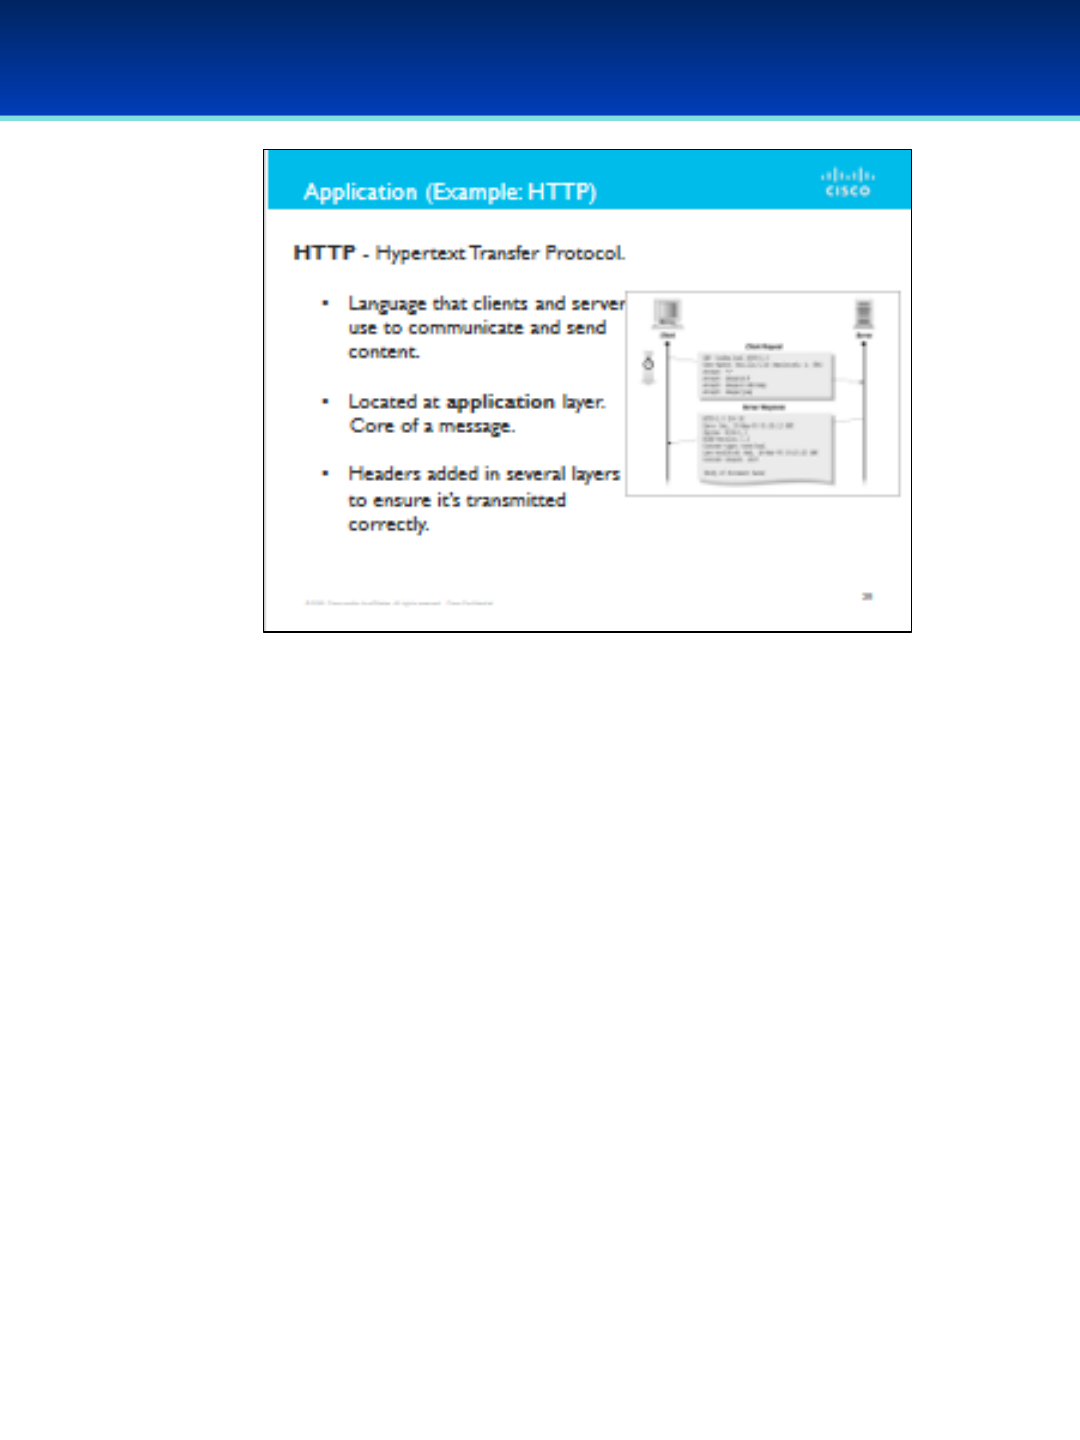
AFA Advanced CyberCamp Instructor’s Guide
Slide 41
Cisco Networking
Page 336
© 2018 Air Force Association
•HTTP stands for Hypertext Transfer Protocol.
•HTTP is a sort of language that clients and servers can use to
communicate with each other and to send content back and forth.
•HTTP communication is at the Application layer.
•This is the core of a message sent over a network.
•Headers will be added to it in several layers to ensure that it is
transmitted correctly.
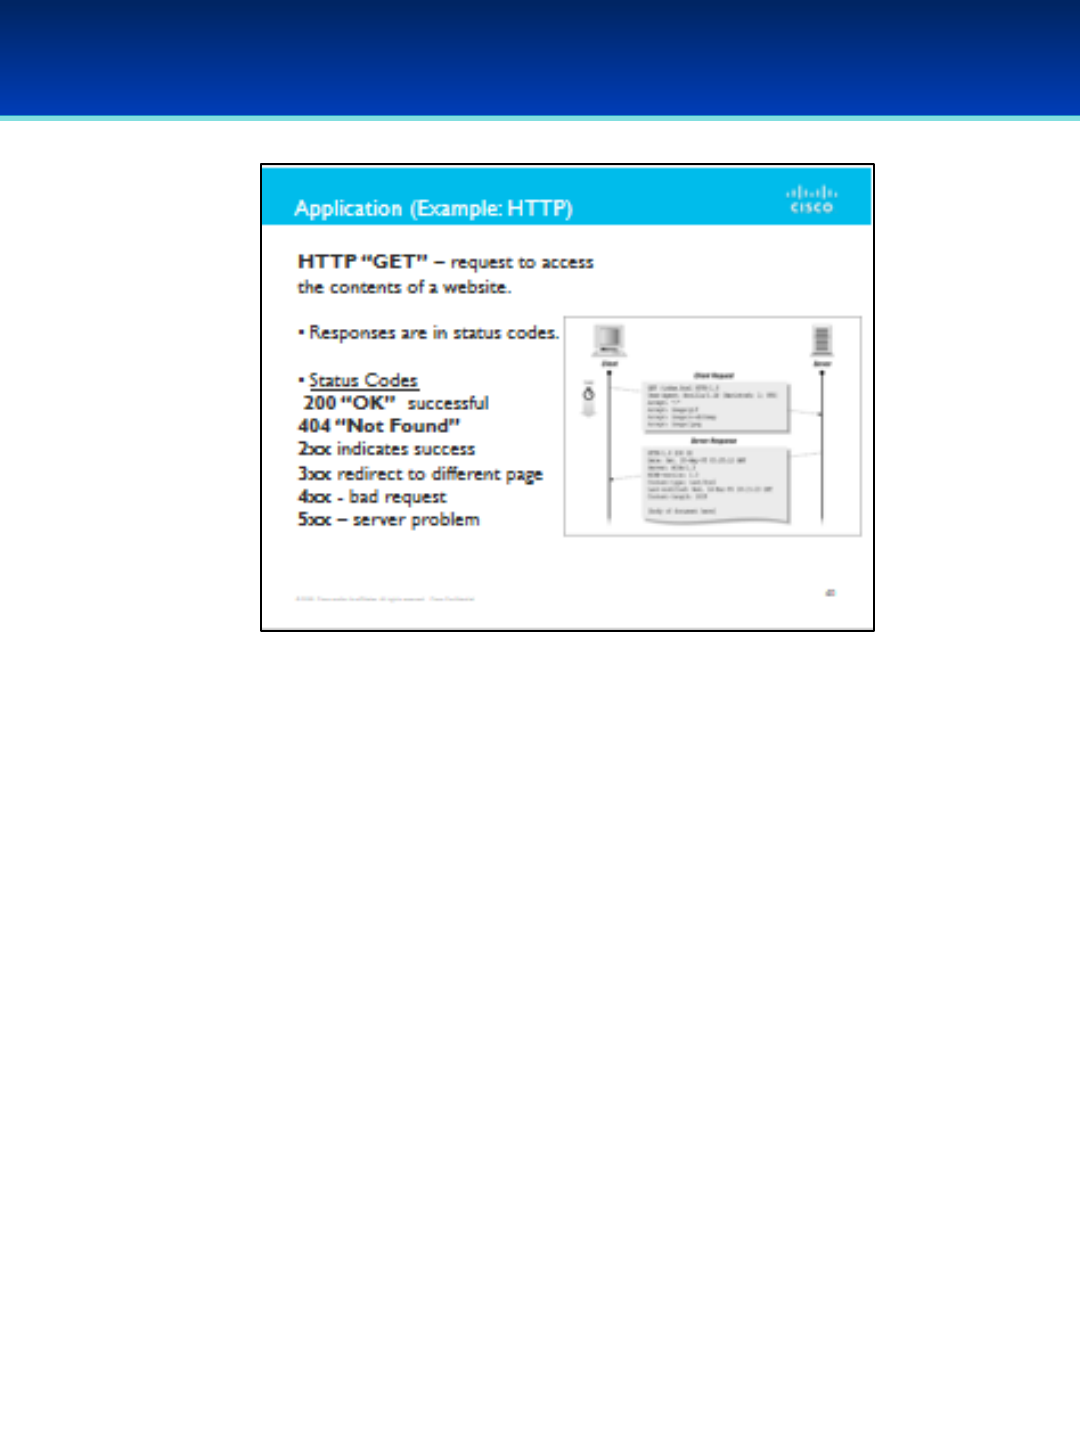
AFA Advanced CyberCamp Instructor’s Guide
Slide 42
Cisco Networking
Page 337
© 2018 Air Force Association
•To access the contents of a website, your computer sends an HTTP
“GET” request.
•If the server has the web page the client is asking for, it sends back a
status code of 200 “OK,” along with the content of the web page.
•If the server doesn’t have the page that the client is requesting, it can
respond with a code of 404 “Not Found.”
•There are other status codes too:
•Codes starting with 2xx indicate success.
•3xx codes redirect the client to a different page.
•4xx codes indicate that the client has sent a bad request of some
kind.
•5xx codes indicate a problem with the server.

AFA Advanced CyberCamp Instructor’s Guide
Slide 43
Cisco Networking
Page 339
© 2018 Air Force Association
•The application content is the core of a message that gets sent over the
network.
•It is then wrapped in transport-layer headers.
•There are two main kinds of transport-layer headers for our purposes:
•TCP traffic is slower but more reliable.
•UDP traffic is faster but less reliable (more prone to packet loss).
•HTTP traffic uses TCP.
•VoIP phone calls and streaming videos use UDP.
•Why do you think this is?
•For the sake of our example, we would wrap our HTTP GET message in a
TCP header, because HTTP traffic uses TCP at the Transport layer.
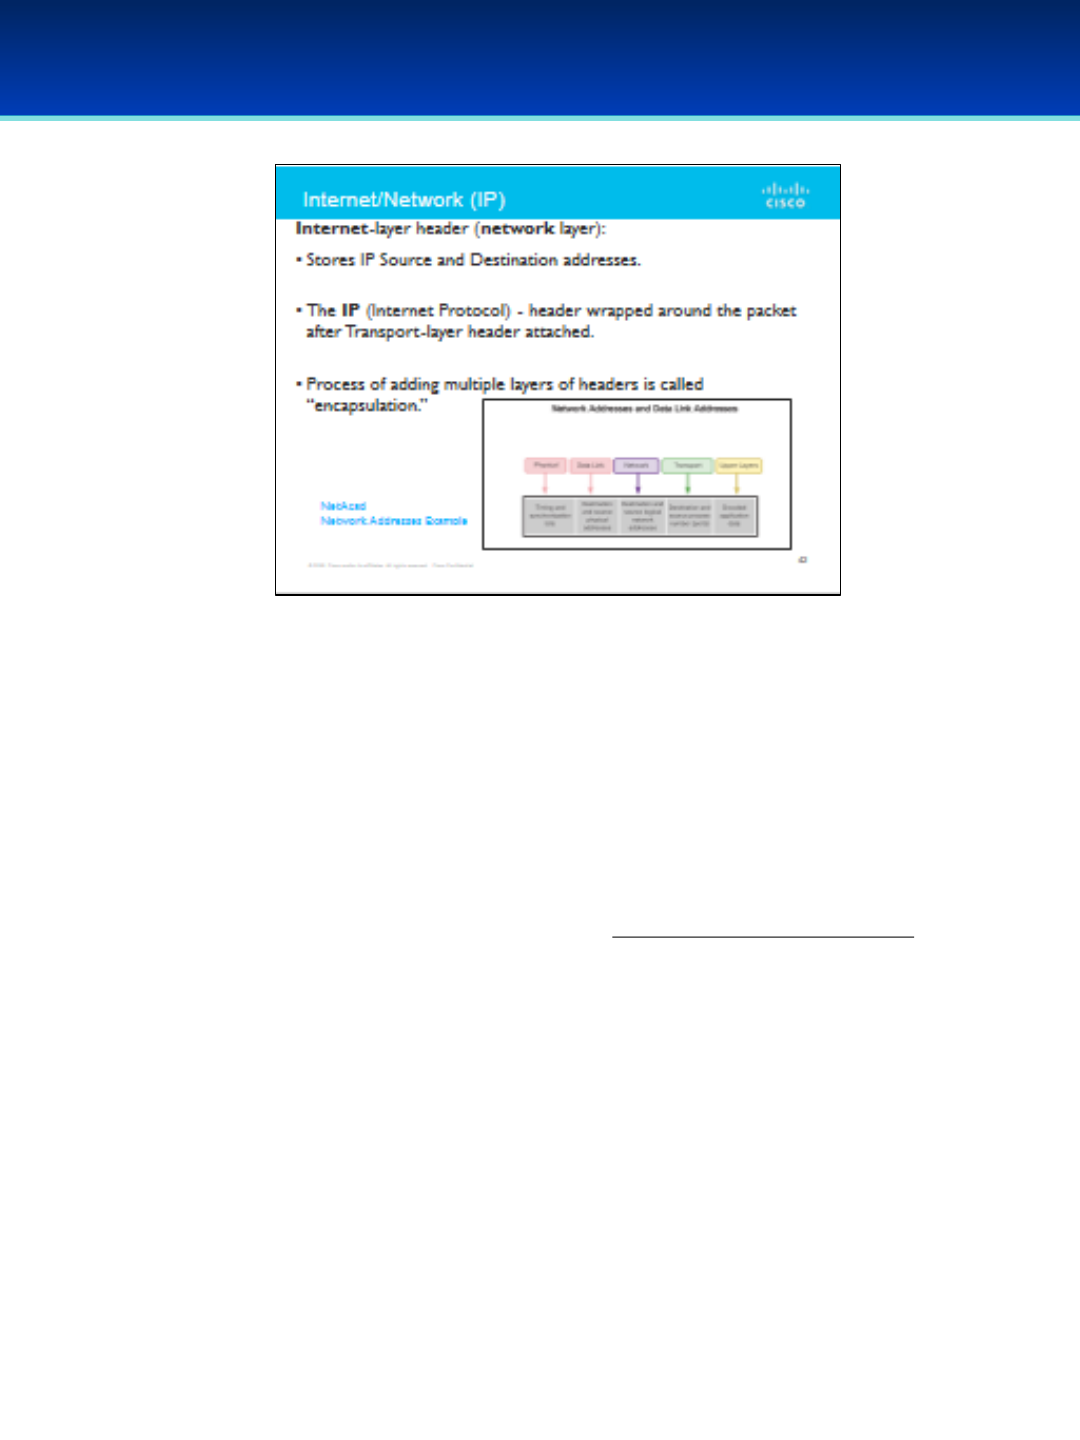
AFA Advanced CyberCamp Instructor’s Guide
Slide 44
Cisco Networking
Page 340
© 2018 Air Force Association
https://static-course-assets.s3.amazonaws.com/ITN51/en/index.html#3.3.2.1
•IP Source and Destination addresses are stored in the Internet-layer header. This
is also called the network layer.
•The IP-header (Internet Protocol) is wrapped around the packet after the
transport-layer header is attached—the process of adding multiple layers of
headers is called “encapsulation.”
•For another visualization of how this works, check out this illustration!
•To follow along with the example, our Network-layer IP header for this packet
would have our computer’s IP address as the source address and the web
server’s IP address as the destination address.
Click on the bottom screenshot to launch the website directly or copy and paste:
https://static-course-assets.s3.amazonaws.com/ITN51/en/index.html#3.3.2.1

AFA Advanced CyberCamp Instructor’s Guide
Slide 45
Cisco Networking
Page 341
© 2018 Air Force Association
https://static-course-assets.s3.amazonaws.com/ITN51/en/index.html#3.3.2.2
•How do we know what physical device “owns” the IP address of your
computer? Of your router?
•Physical addresses are also called MAC Addresses.
•Every network device has a unique physical address, a MAC address that no
other device in the world has.
•When we send a packet over a network connection, whether it is wireless or
wired, we need to address that packet to the MAC address of our default
gateway, the router.
•The source and destination MAC addresses for a packet are stored in
the link layer header for traffic. The specific name for this header format is
Ethernet (when we're using a wired connection).
•Just like we use TCP or UDP at the transport layer, or IP at the Internet
layer, we use Ethernet at the link layer.
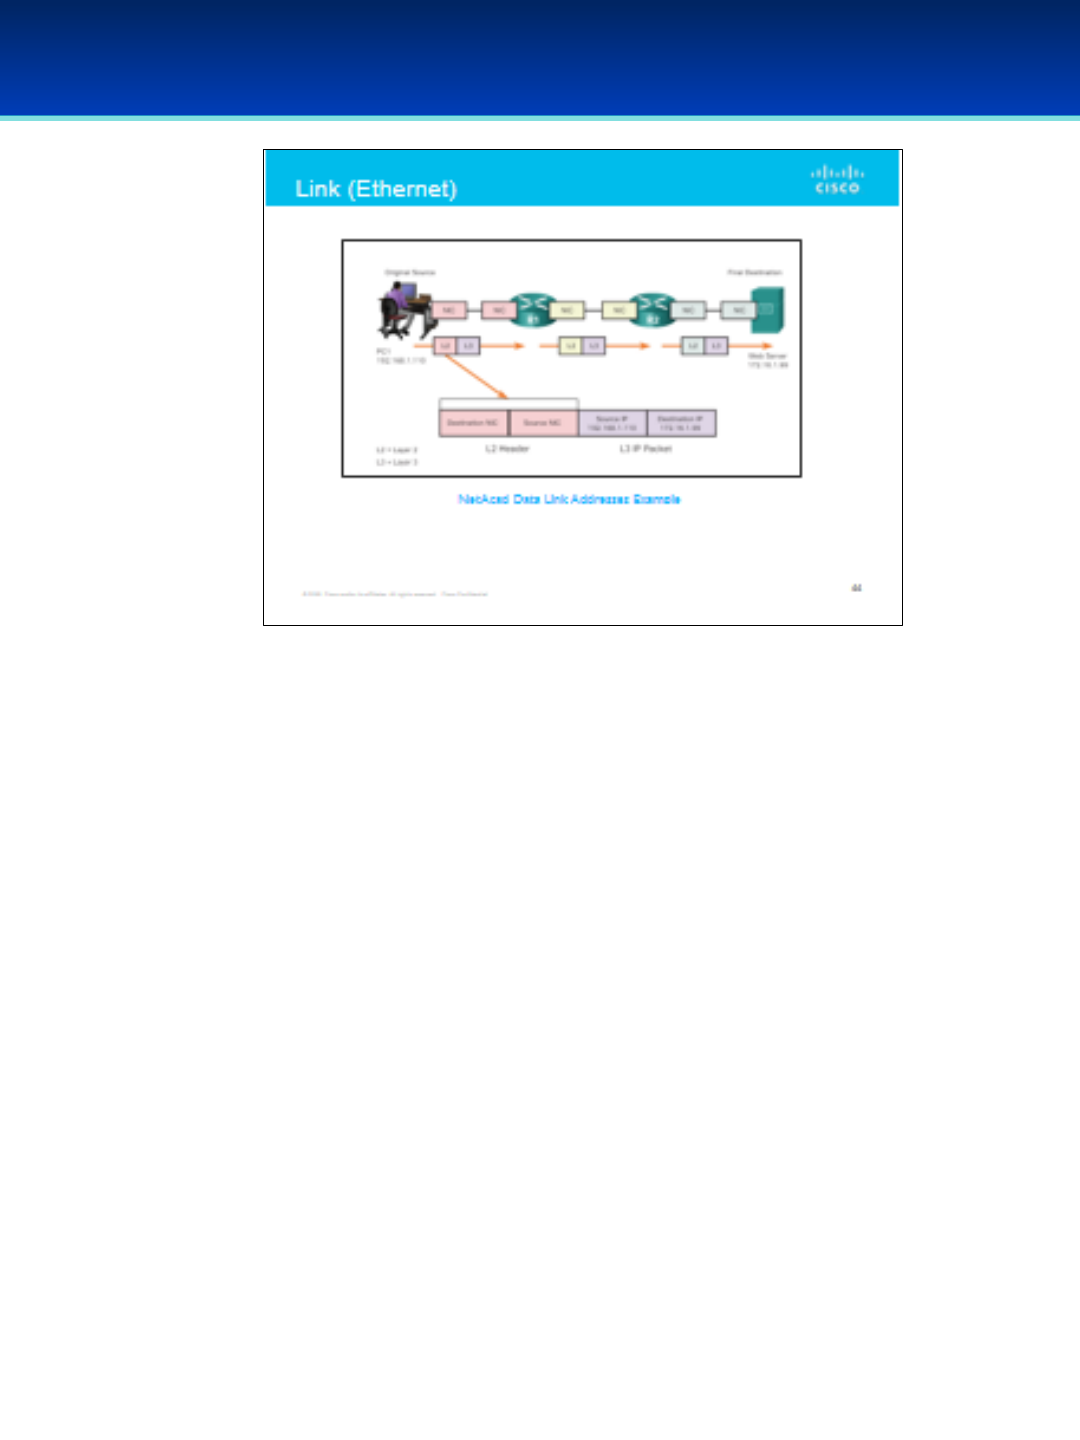
AFA Advanced CyberCamp Instructor’s Guide
Slide 46
Cisco Networking
Page 342
© 2018 Air Force Association
•Every time we transmit a packet across a network, we need to rewrite the
source and destination MAC addresses, because the packet will be transiting
between new physical devices.
•Click on the screenshot to launch the website directly or copy and paste for
an illustration of how this works:
https://static-course-assets.s3.amazonaws.com/ITN51/en/index.html#3.3.2.2
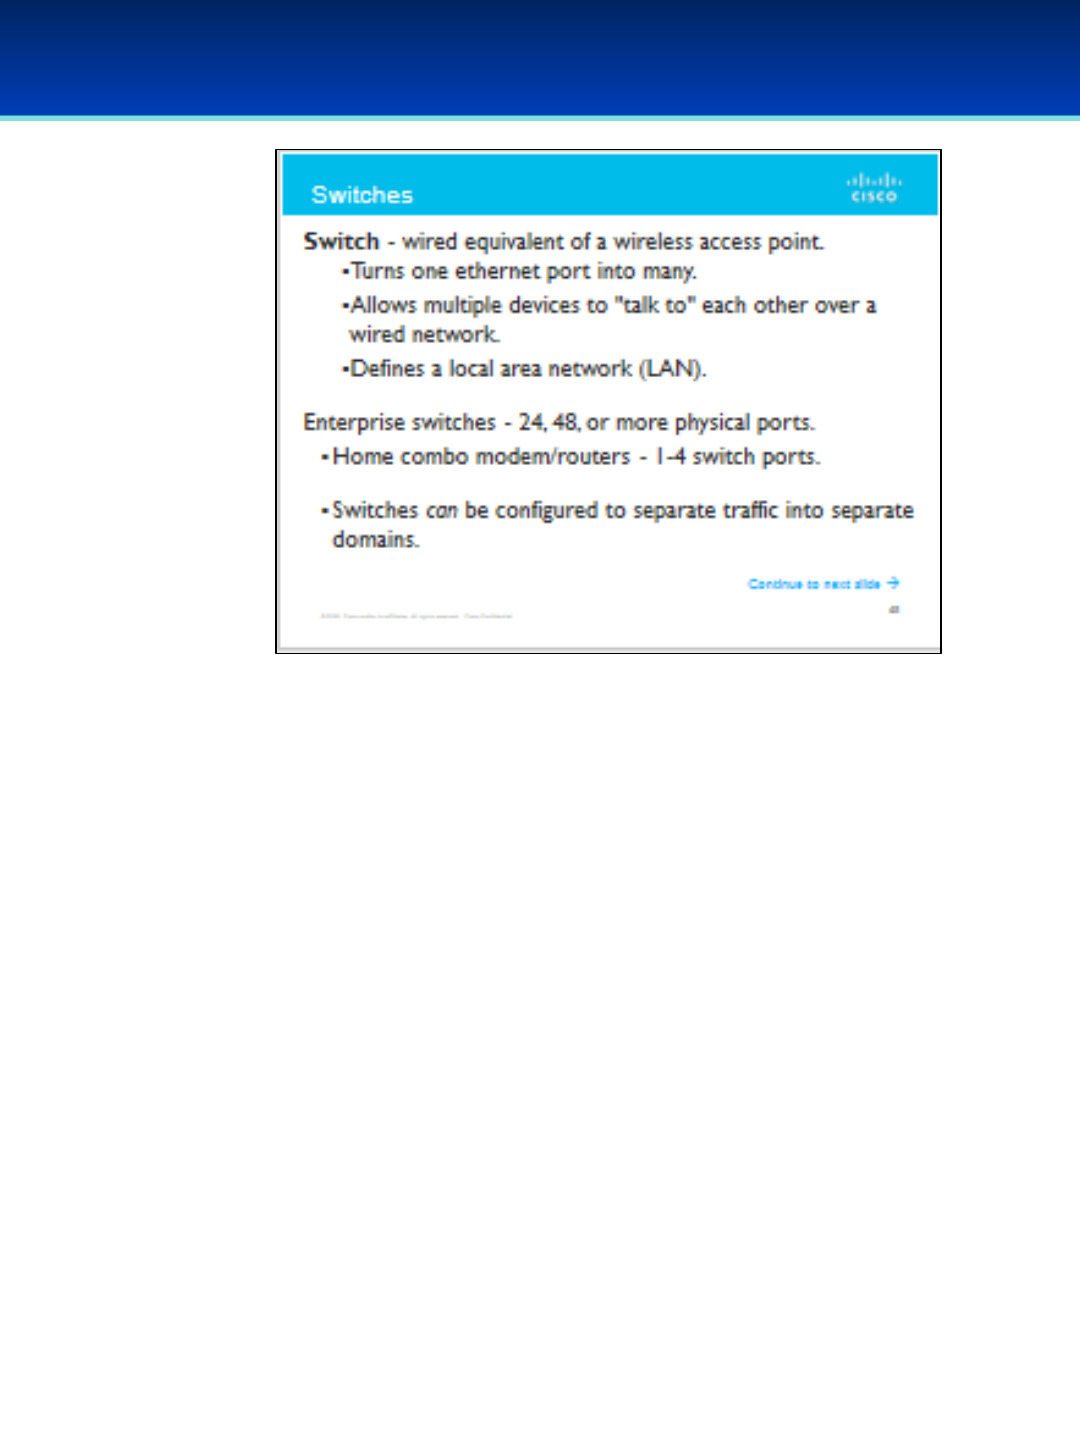
AFA Advanced CyberCamp Instructor’s Guide
Slide 47
Cisco Networking
Page 343
© 2018 Air Force Association
https://static-course-assets.s3.amazonaws.com/ITN51/en/index.html#3.3.1.3
https://static-course-assets.s3.amazonaws.com/ITN51/en/index.html#3.3.1.4
•A switch is the wired equivalent of a wireless access point.
•You can think of a switch's job in the following ways:
•It turns one Ethernet port into many.
•It allows multiple devices to "talk to" each other over a wired network.
•A switch defines a local area network (LAN).
•Enterprise switches can have 24 ports, 48 ports, or even more ports.
•Smaller switches exist too. Most home combo modem/routers have 1-4
switch ports available for wired clients.
•By default, hosts connected to the Ethernet ports on a switch can communicate
with one another.
•Switches can be configured to separate traffic into separate domains.
•How does this work? It involves MAC addresses (the address for the link layer on
the TCP/IP stack).

AFA Advanced CyberCamp Instructor’s Guide
Slide 48
Cisco Networking
Page 344
© 2018 Air Force Association
https://static-course-assets.s3.amazonaws.com/ITN51/en/index.html#3.3.1.3
https://static-course-assets.s3.amazonaws.com/ITN51/en/index.html#3.3.1.4
Review:
•When you send a packet to your router, recall that you wrap it up
(“encapsulate” it) in various layers to help it get where it needs to go.
•Your home router opens that packet up (i.e., “decapsulate” it) as far as
the Internet layer on the TCP/IP stack so that it can read the destination IP
address.
•To recap with an animation, check out these two slides: Click on the individual
screen shots or click 3.3.1.3 (Links to an external site.) &3.3.1.4 (Links to an
external site.)
•A switch does something similar, but it only decapsulates a packet up to
the link layer, that is, just enough to read the MAC address.
•Recall how, with IP routing, several hops are necessary to get from a
source to a destination.
•A switch acts as an extra hop between your computer and your router,
but at the link layer instead of the Internet layer.
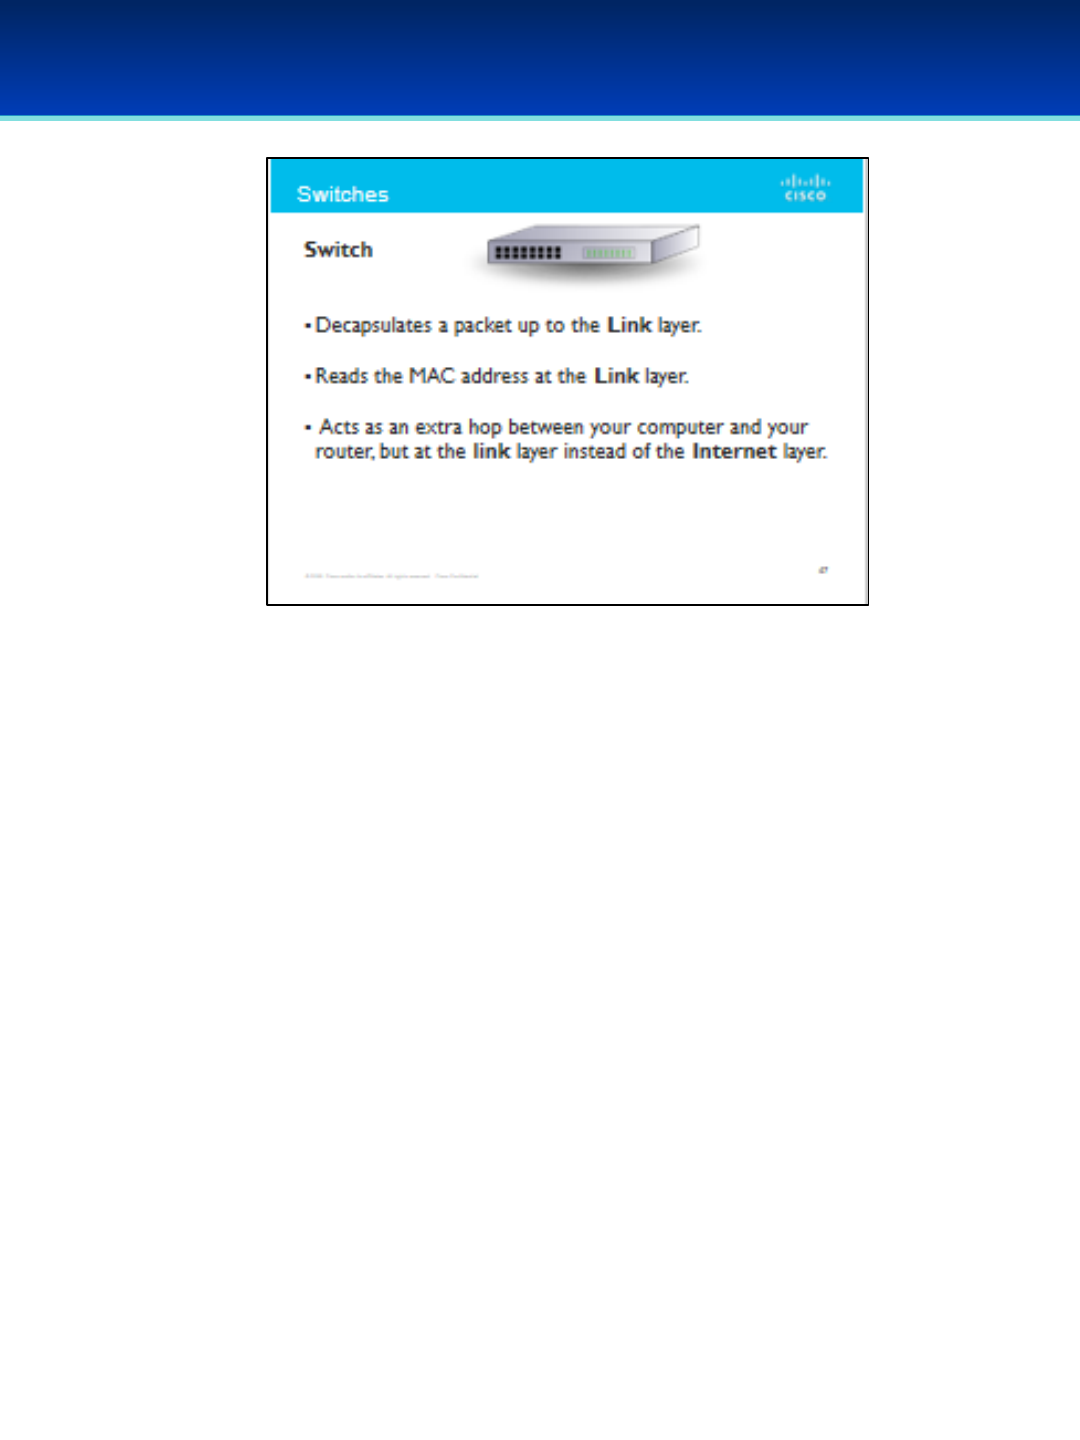
AFA Advanced CyberCamp Instructor’s Guide
Slide 49
Cisco Networking
Page 345
© 2018 Air Force Association
•A switch does something similar to a router, but it only
decapsulates a packet up to the link layer, that is, just enough to
read the MAC address.
•Recall how, with IP routing, several hops are necessary to get
from a source to a destination.
•A switch acts as an extra hop between your computer and
your router, but at the link layer instead of the Internet layer.
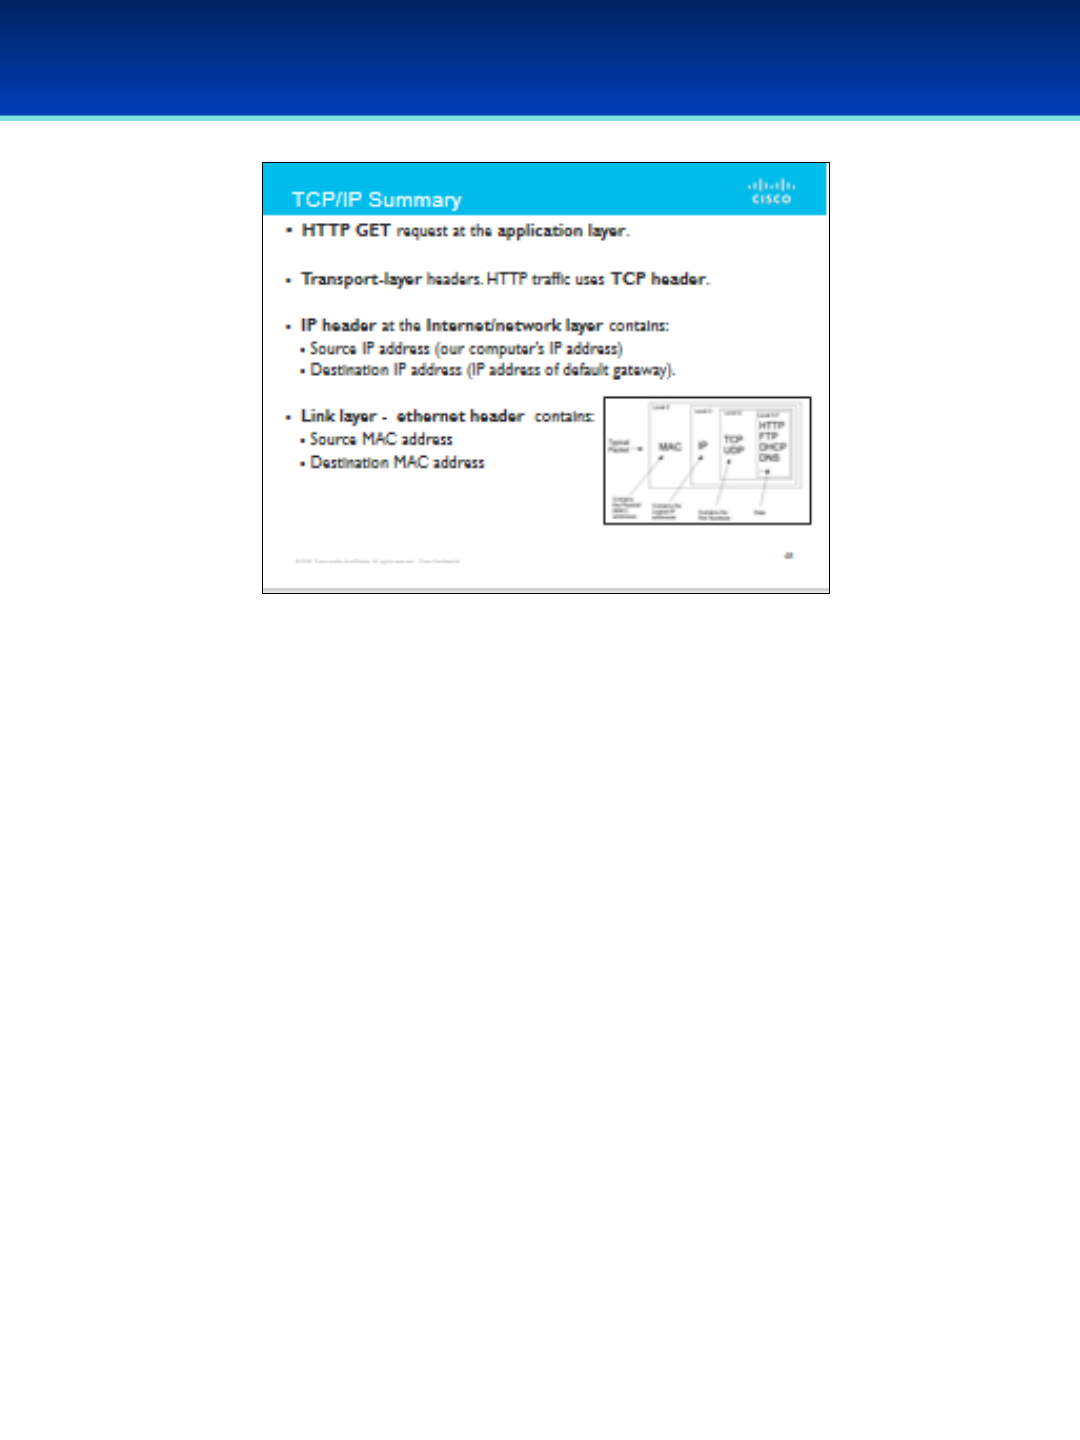
AFA Advanced CyberCamp Instructor’s Guide
Slide 50
Cisco Networking
Page 346
© 2018 Air Force Association
•We start with the actual message we want to send to the web server.
This is an HTTP GET request, and is at the application layer.
•We then add transport-layer headers. For our HTTP traffic, we use a TCP
header.
•Then, we wrap an IP header around that. This header has the Source IP
address (our computer’s IP address), and the Destination IP address (the
IP address of our default gateway). This is at the Internet/network layer.
•Finally, at the link layer, we wrap the packet in an ethernet header by
encoding our Source MAC address (the physical address of our
computer) and Destination MAC address (the physical address of our
default gateway).

AFA Advanced CyberCamp Instructor’s Guide
Slide 51
Cisco Networking
Page 347
© 2018 Air Force Association
•Divide students into four even groups.
•Take 15 minutes to review the TCP/IP stack among each group.
•Assign one of the four layers of the TCP/IP stack to each group:
•Application
•Transport
•Internet
•Link
•Each group will be responsible for explaining the role of their layer in the stack.
•We will then walk through the process of encapsulating an HTTP GET request,
sending it off, and decapsulating the reply. Each group will explain what their
layer does when the packet hits their layer of the stack.
AFA Advanced CyberCamp Instructor’s Guide
Slide 52
Cisco Networking
Page 348
© 2018 Air Force Association
Module 3: The Link Layer
AFA Advanced CyberCamp Instructor’s Guide
Slide 53
Cisco Networking
Page 349
© 2018 Air Force Association
https://play.kahoot.it/#/k/0ecf4263-b94e-47dc-9a80-521d8b2b4bc6
When you click on the logo a start screen will appear. Instructor will have the
option to choose 1:1 play where students use their individual devices or shared
devices for small groups.
For more information on how to play Kahoot! visit:
https://files.getkahoot.com/academy/Kahoot_Academy_Getting_Started_Guide
_2nd_Ed_-_June_2016.pdf

AFA Advanced CyberCamp Instructor’s Guide
Slide 54
Cisco Networking
Page 350
© 2018 Air Force Association
•There are two primary methods of connecting hosts to a LAN:
Wired and Wireless.
Wired Connections
•Wired connections generally occur over Ethernet cables.
•Ethernet cables look like landline phone cables, except the
connector is wider.
•Inside an Ethernet cable, there are eight individual wires, each of
which connects to a separate “pin” at both ends of the cable.
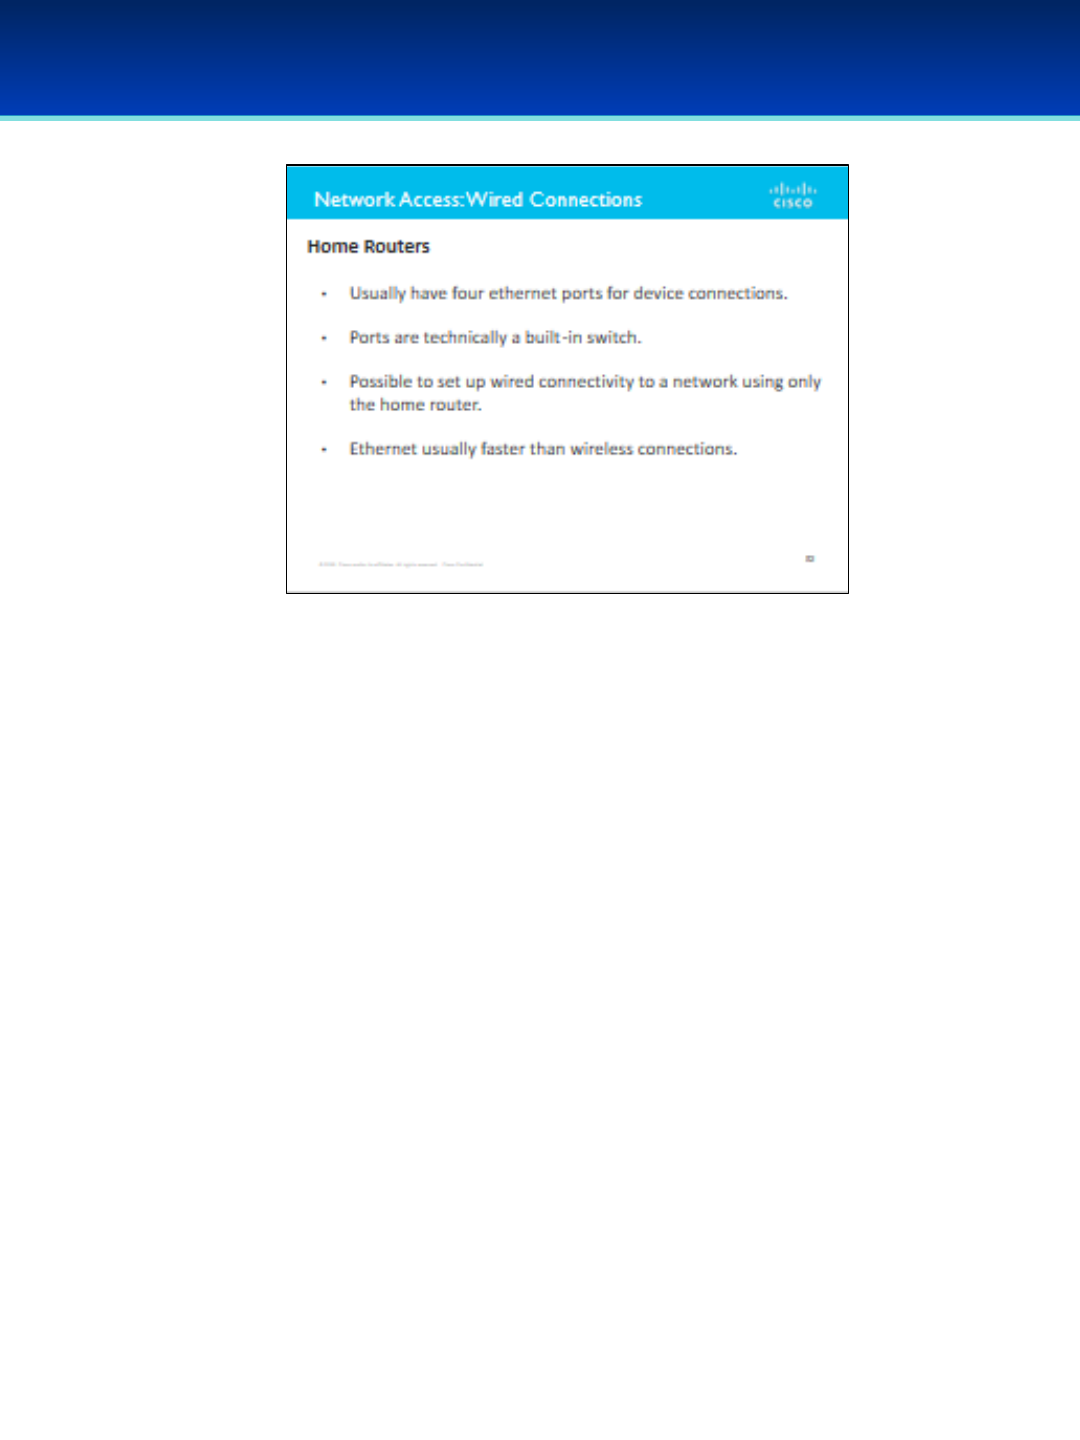
AFA Advanced CyberCamp Instructor’s Guide
Slide 55
Cisco Networking
Page 351
© 2018 Air Force Association
•Most home routers have about four Ethernet ports available for
device connections.
•These ports are technically a built-in switch.
•It is generally possible to set up wired connectivity to a network
using only the home router.
•Ethernet tends to be considerably faster than wireless connections.
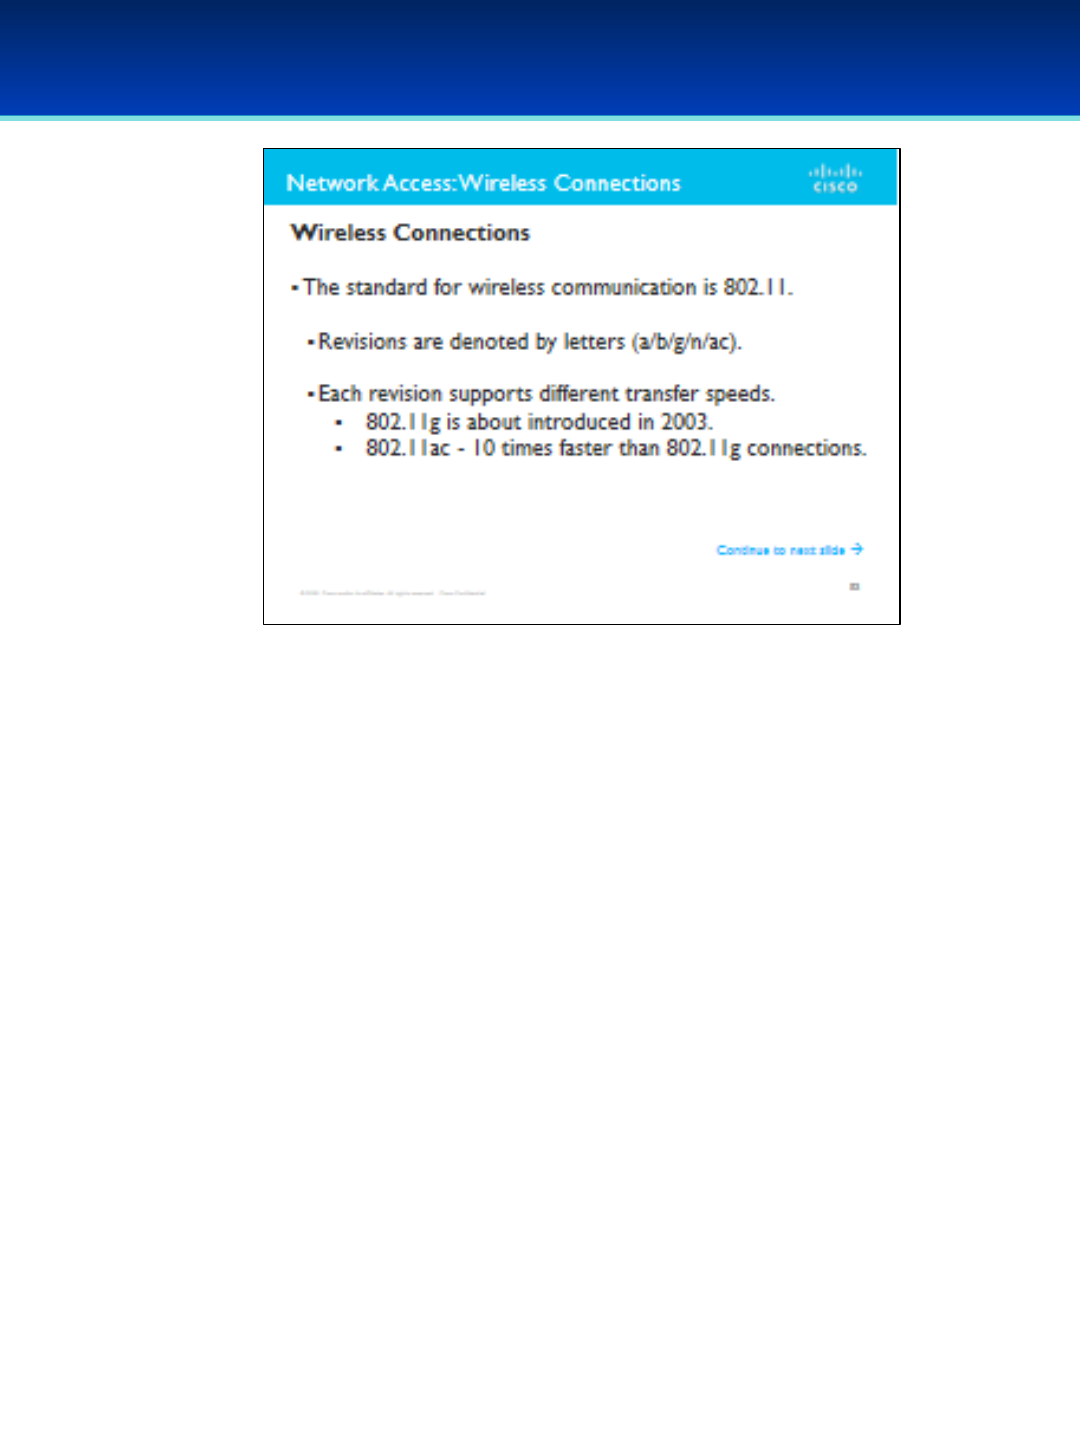
AFA Advanced CyberCamp Instructor’s Guide
Slide 56
Cisco Networking
Page 352
© 2018 Air Force Association
Wireless Connections
•Wireless connections occur over the air.
•The standard for wireless communication is 802.11, and there are several
revisions to this standard.
•These revisions are denoted by letters (a/b/g/n/ac).
•Each revision supports different transfer speeds.
•802.11g is about 14 years old (it was introduced in 2003).
•802.11ac is relatively new.
•802.11ac connections can be over 10 times faster than 802.11g connections.
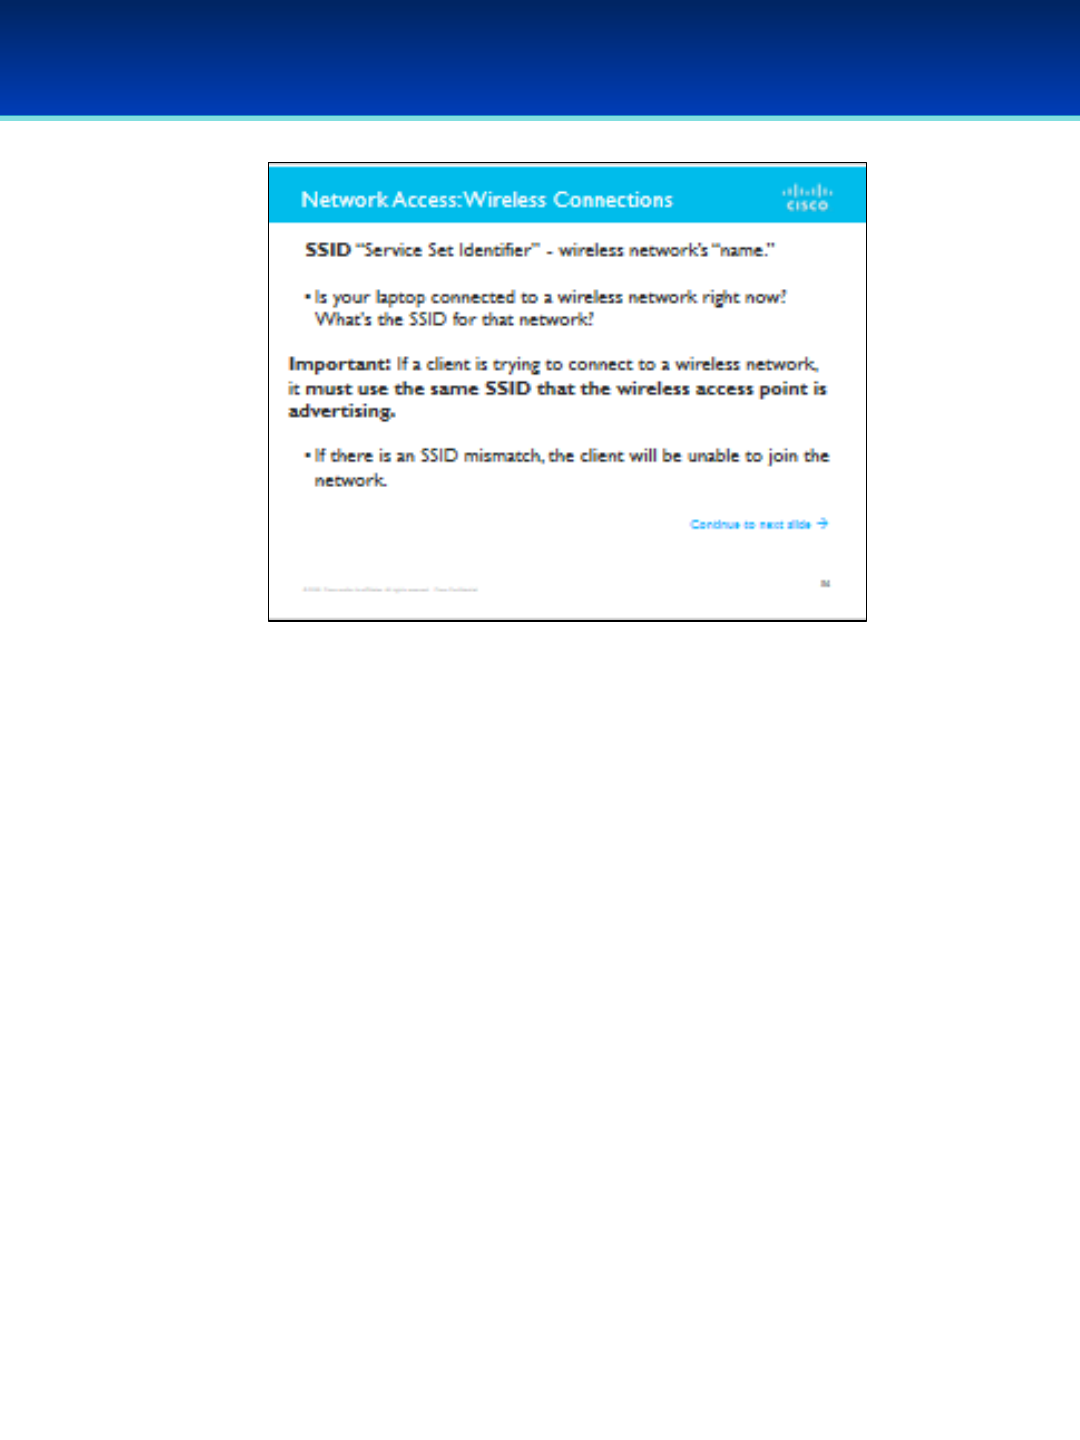
AFA Advanced CyberCamp Instructor’s Guide
Slide 57
Cisco Networking
Page 353
© 2018 Air Force Association
Wireless Connections
•A wireless network is identified by an SSID, “Service Set Identifier.” You can
think of this as being the wireless network’s “name.”
•Is your laptop connected to a wireless network right now? What's the
SSID for that network?
•Important: If a client is trying to connect to a wireless network, it must use
the same SSID that the wireless access point is broadcasting.
•If there is a mismatch, the client will be unable to join the network.
•Wireless networks may be unsecured. Any host can join an unsecured
network.
•If you can avoid it, do not join a wireless network which is not secured
by a password!
•Your traffic will be visible to anyone connected to the network—and
on an unsecured network, that could be anyone at all.
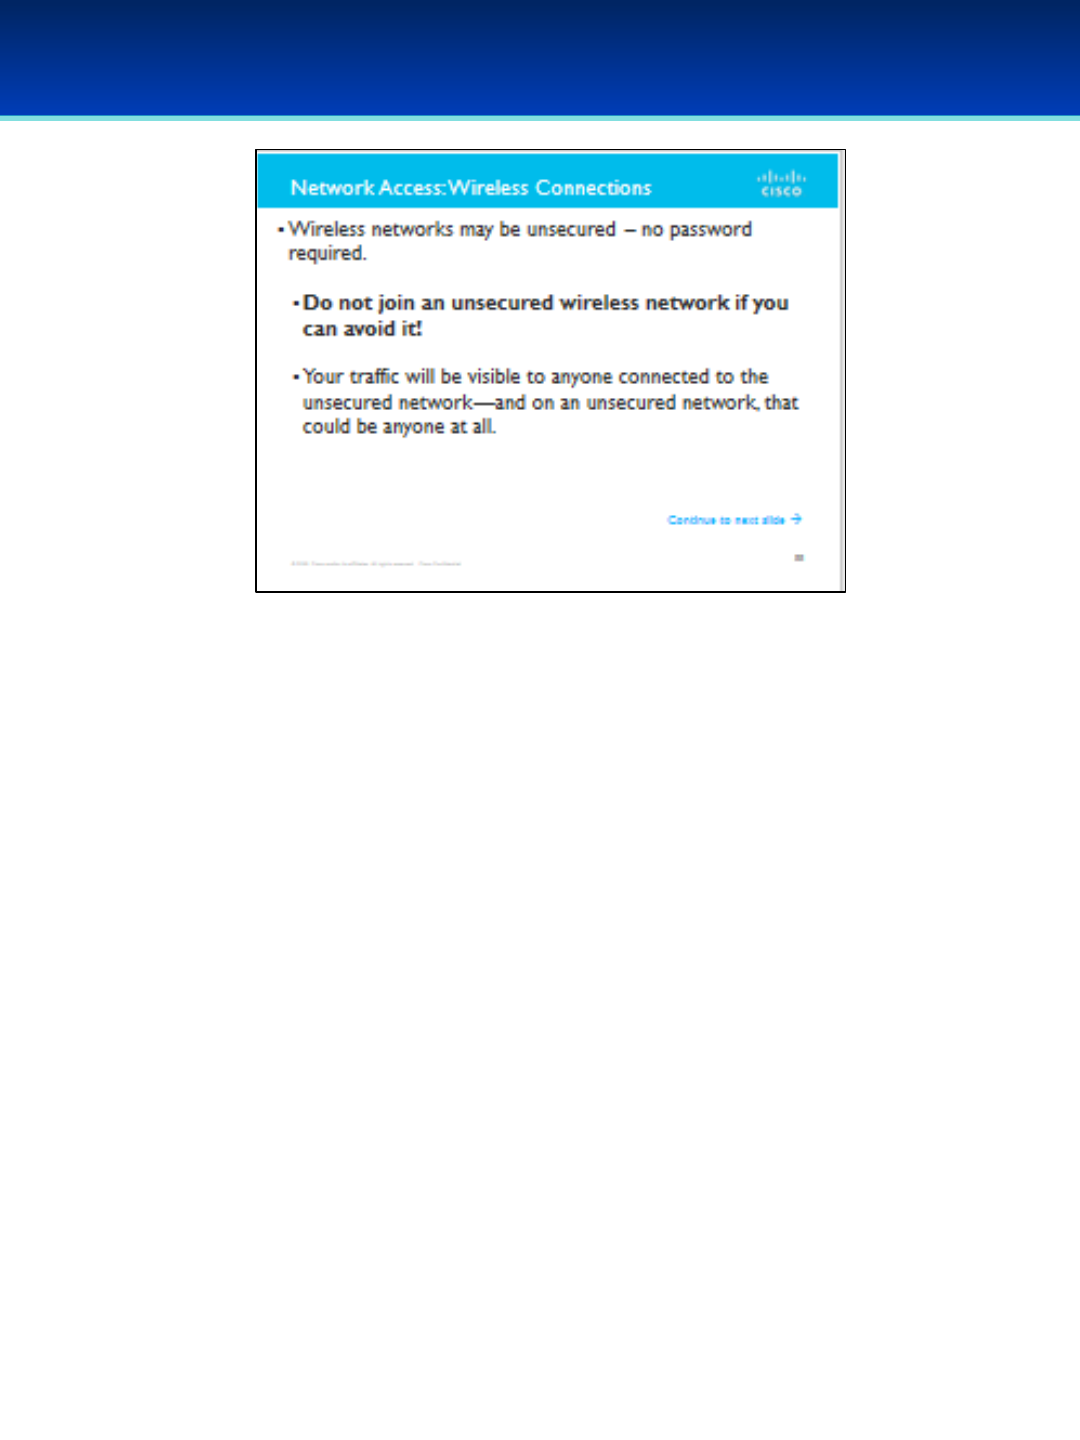
AFA Advanced CyberCamp Instructor’s Guide
Slide 58
Cisco Networking
Page 354
© 2018 Air Force Association
•Wireless networks may be unsecured. Any host can join an unsecured
network.
•If you can avoid it, do not join a wireless network which is not
secured by a password!
•Your traffic will be visible to anyone connected to the network—and
on an unsecured network, that could be anyone at all!
•Wireless networks may also be secured, and there are a few different types
of security.
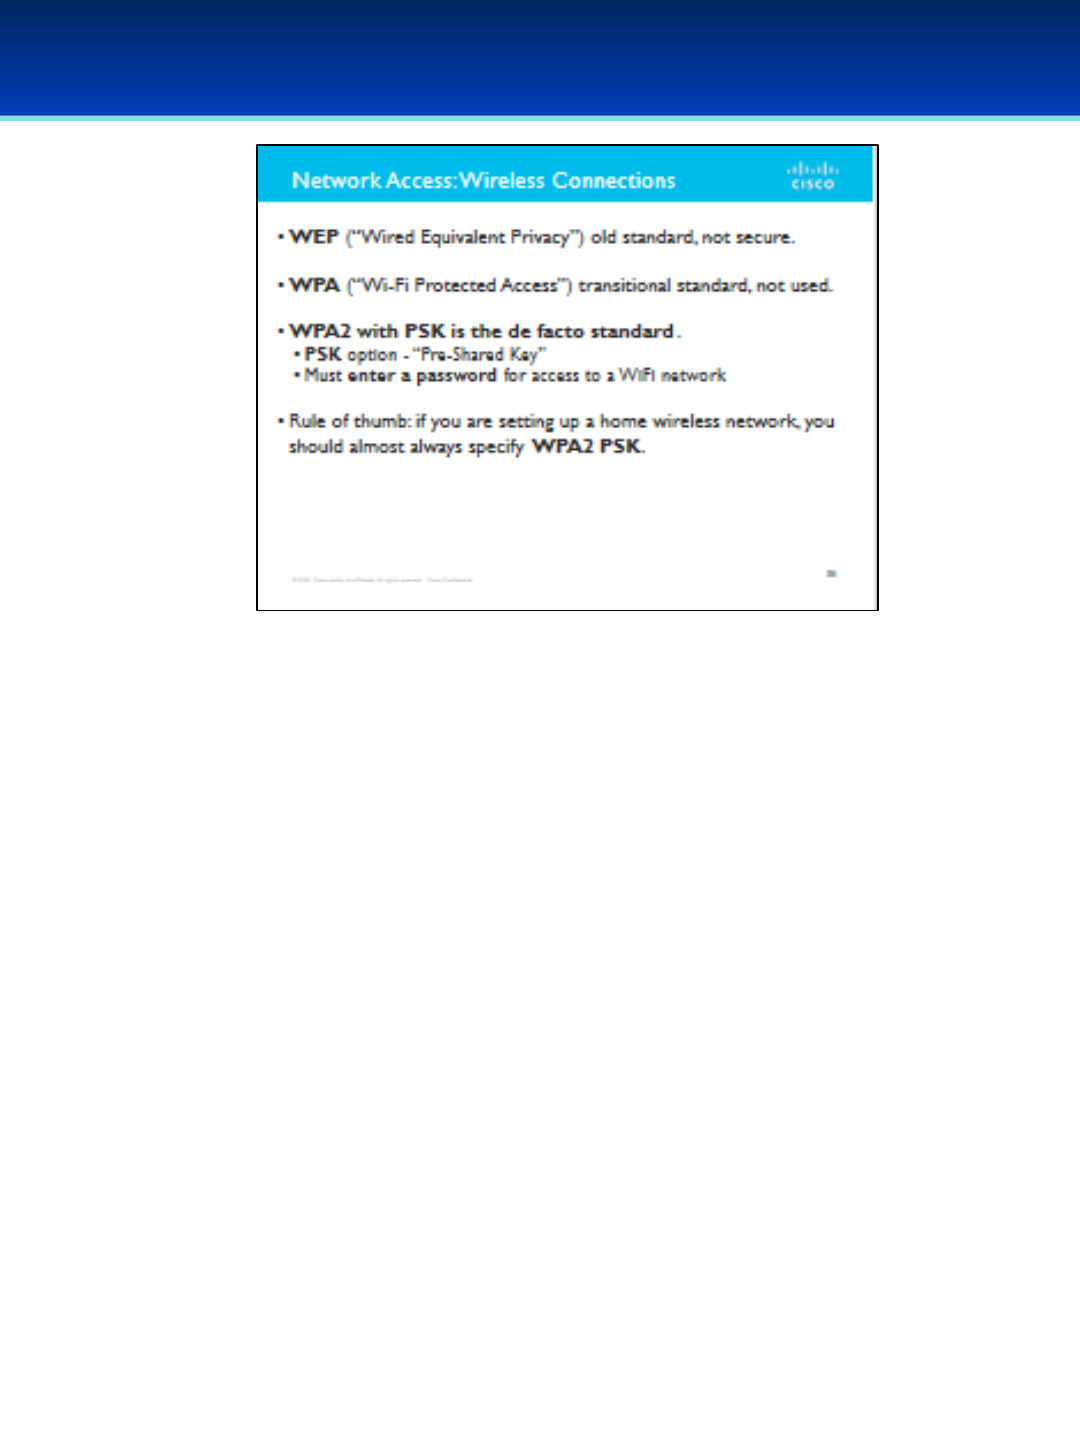
AFA Advanced CyberCamp Instructor’s Guide
Slide 59
Cisco Networking
Page 355
© 2018 Air Force Association
•The WEP (“Wired Equivalent Privacy”) standard was introduced about 20 years
ago.
•WEP is not considered secure anymore.
•A WEP password can be broken by an attacker in less than three seconds.
•The replacement for WEP is called WPA2.
•Why “2”?
•WPA (“WiFi Protected Access”) was introduced as a transitional standard,
compatible with older hardware that had previously only been used for
WEP. Once older hardware was transitioned out of the marketplace, WPA
was replaced with WPA2.
•Today, WPA2 is the de facto standard.
•WPA2 is most often specified with the PSK option. PSK stands for “Pre-Shared
Key,” and this just means that you must enter a password for access to a Wi-Fi
network secured in this way.
•Rule of thumb: if you are setting up a home wireless network, you should almost
always specify WPA2 PSK.

AFA Advanced CyberCamp Instructor’s Guide
Slide 60
Cisco Networking
Page 356
© 2018 Air Force Association
•In this exercise, we will configure a simple wireless network with Packet Tracer using the
best practices we discussed in the last module.
•Open the PT_WirelessPractice file.
•Click on the Wireless Router.
•Click on the tab at the top marked "GUI."
•This page is pretty similar to what you'll find on most home wireless access points.
•Give the wireless access point an internal IP address of: 192.168.0.254
•The subnet mask should be set to: 255.255.255.0
•Set the static DNS server to: 60.50.40.100
•Make sure that DHCP Server is enabled.
•This will allow the wireless access point to automatically hand out IP addresses to
devices that connect to the wireless network.
•Remember: Automatic address assignment is normal for many networks, but it is
also possible to set IP addresses manually (called static addressing).
•The DHCP server should start handing out addresses with: 192.168.0.5
•When you're finished making those settings changes, scroll to the bottom of the GUI page
and click "Save Settings."
•At the top of the GUI, you should see a link labeled "Wireless.“ Click here to modify
wireless settings.
•Configure an SSID for the network. It can be anything you like.
•Make sure to scroll down and save when you're done adding an SSID.
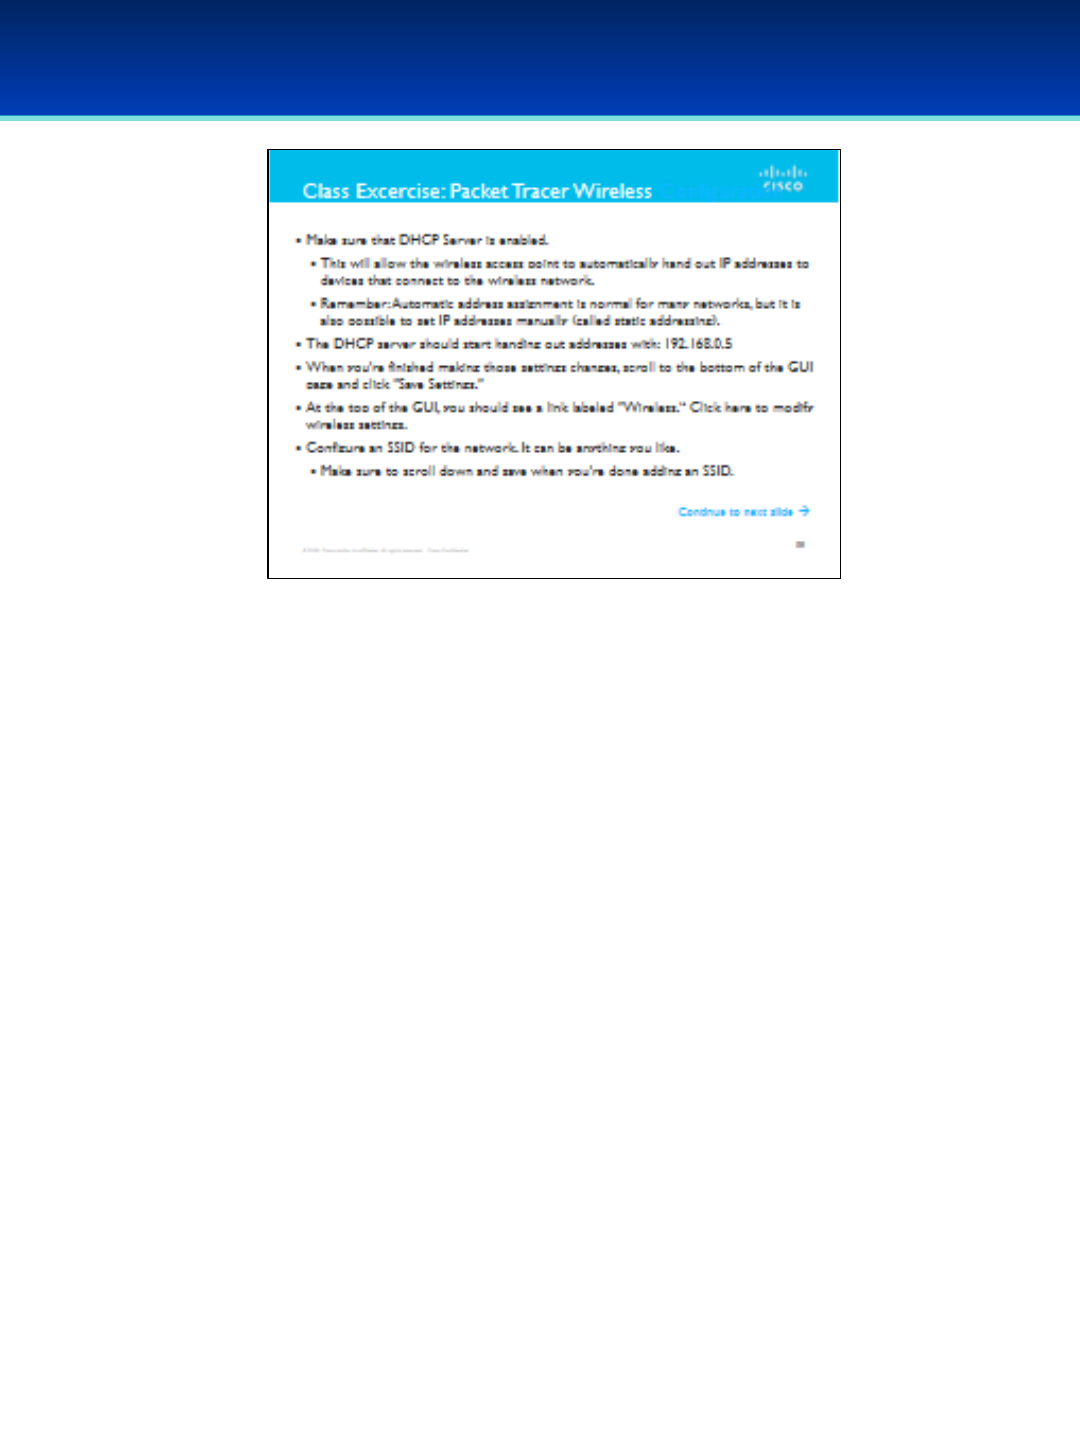
AFA Advanced CyberCamp Instructor’s Guide
Slide 61
Cisco Networking
Page 357
© 2018 Air Force Association
•Make sure that DHCP Server is enabled.
•This will allow the wireless access point to automatically hand out IP
addresses to devices that connect to the wireless network.
•Remember: Automatic address assignment is normal for many
networks, but it is also possible to set IP addresses manually (and
this is called static addressing).
•The DHCP server should start handing out addresses with 192.168.0.5.
•When you're finished making those settings changes, scroll to the bottom
of the GUI page and click "Save Settings."
•At the top of the GUI, you should see a link labeled "Wireless". Click here
to modify wireless settings.
•Configure an SSID for the network. It can be anything you like.
•Make sure to scroll down and save when you're done adding an
SSID.
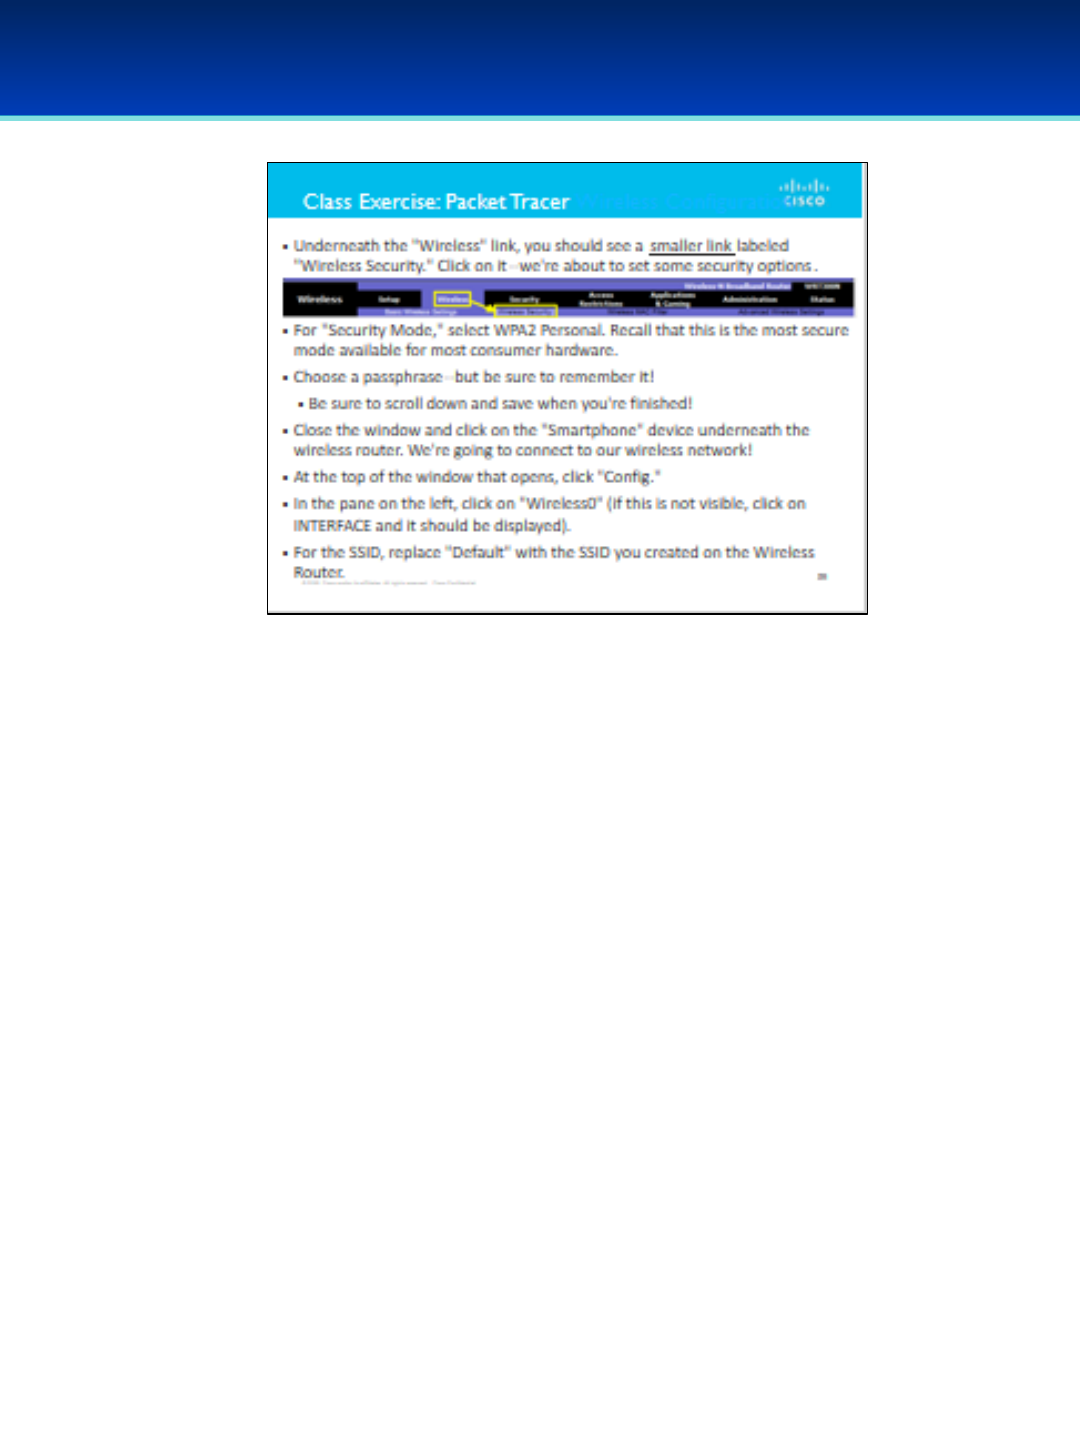
AFA Advanced CyberCamp Instructor’s Guide
Slide 62
Cisco Networking
Page 358
© 2018 Air Force Association
https://150566673.netacad.com/courses/487683/files/46796301/download?
wrap=1
•Underneath the "Wireless" link, you should see a smaller link labeled
"Wireless Security." Click on it--we're about to set some security options.
•For "Security Mode", select WPA2 Personal. Recall that this is the most
secure mode available for most consumer hardware.
•Choose a passphrase--but be sure to remember it!
•Be sure to scroll down and save when you're finished.
•Close the window and click on the "Smartphone" device underneath the
wireless router. We're going to connect to our wireless network.
•At the top of the window that opens, click "Config."
•In the pane on the left, click on "Wireless0." If this is not visible, click on
INTERFACE and it should be displayed.
•For the SSID, replace "Default" with the SSID you created on the Wireless
Router.

AFA Advanced CyberCamp Instructor’s Guide
Slide 63
Cisco Networking
Page 359
© 2018 Air Force Association
https://150566673.netacad.com/courses/487683/files/46796301/download?wrap=1
•For Authentication, select WPA2-PSK (recall that "PSK" stands for "Pre-Shared Key",
which is appropriate here because you are authenticating with a key that you came
up with earlier).
•On the right, enter the password you created in the "PSK Pass Phrase" box.
•Your wireless network should be all set to go.
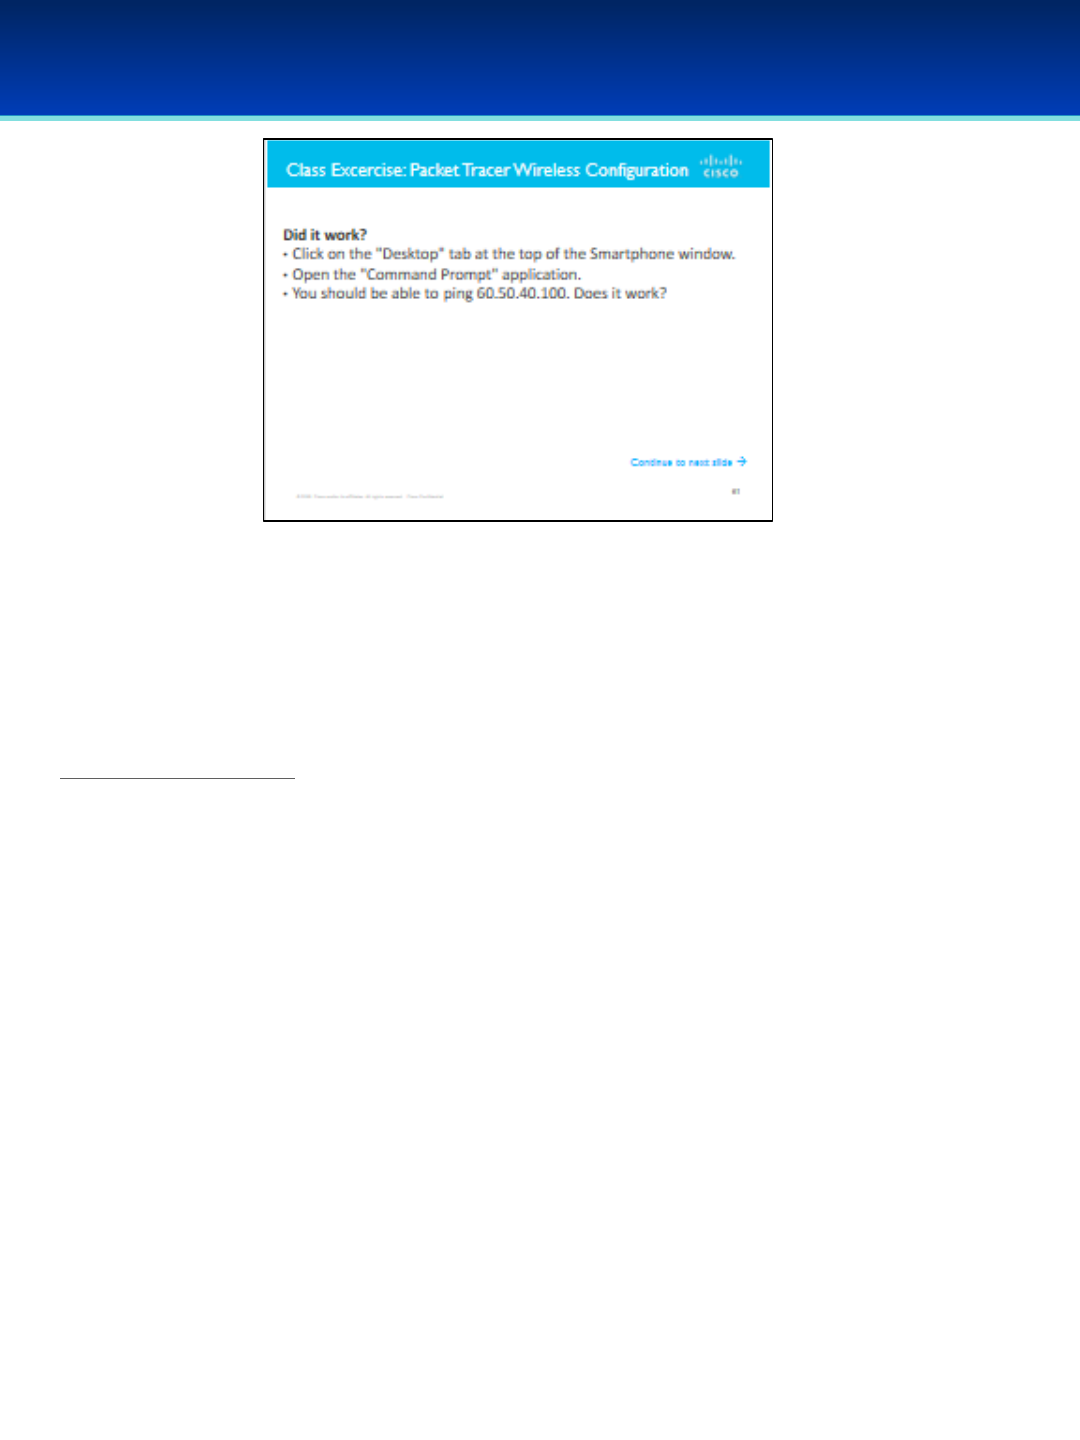
AFA Advanced CyberCamp Instructor’s Guide
Slide 64
Cisco Networking
Page 360
© 2018 Air Force Association
https://150566673.netacad.com/courses/487683/files/46796301/download?wrap=1
•Click on the "Desktop" tab at the top of the Smartphone window.
•Open the "Command Prompt" application.
•You should be able to ping 60.50.40.100. Does it work?
PT_WirelessPractice.pkt
•Underneath the "Wireless" link, you should see a smaller link labeled "Wireless Security." Click
on it--we're about to set some security options.
•For "Security Mode", select WPA2 Personal. Recall that this is the most secure mode available
for most consumer hardware.
•Choose a passphrase--but be sure to remember it!
•Be sure to scroll down and save when you're finished!
•Close the window and click on the "Smartphone" device underneath the wireless router. We're
going to connect to our wireless network!
•At the top of the window that opens, click "Config".
•In the pane on the left, click on "Wireless0". (If this is not visible, click on INTERFACE and it
should be displayed).
•For the SSID, replace "Default" with the SSID you created on the Wireless Router.
•For Authentication, select WPA2-PSK (recall that "PSK" stands for "Pre-Shared Key", which is
appropriate here because you are authenticating with a key that you came up with earlier).
•On the right, enter the password you created in the "PSK Pass Phrase" box.
•Your wireless network should be all set to go!

AFA Advanced CyberCamp Instructor’s Guide
Slide 65
Cisco Networking
Page 361
© 2018 Air Force Association
Https://play.kahoot.it/#/k/e781e168-5e89-42d0-939c-303dbdded245
When you click on the logo a Start screen will appear.
Instructor will have the option to choose 1:1 playing where students use their
individual devices or Shared devices for small groups.
Need more information on how to play Kahoot? Visit:
https://files.getkahoot.com/academy/Kahoot_Academy_Getting_Started_Guide_
2nd_Ed_-_June_2016.pdf
AFA Advanced CyberCamp Instructor’s Guide
Slide 66
Cisco Networking
Page 362
© 2018 Air Force Association
https://150566673.netacad.com/courses/487683/files/46885892/download?wrap=1
https://150566673.netacad.com/courses/487683/files/46676792/download
Open the Packet Tracer Final file on your computer and follow the on-screen instructions
to proceed. The instructor will provide guidance on how to get started.
---------------------------------------------------------------------
Read instructions and test software before the activity.
Overview: Instructors must download required software on to computers before activity.
Ensure students have correct peer assignments with . Open the Packet Tracer server .pka
software. Have students open client .pka files for their peer. When connected to the
Packet Tracer server the Peer icon will turn blue. Start game on provided Packet Tracer
server .pka file. Students begin the exercise. Stop game when the time is up. Check
scores.
Note: To function correctly, the Packet Tracer server and clients must be on the same
network. Because all networks are different, in some cases the scoring server could have
issues connecting to the students’ clients and not show scores. If so, the instructors will
check each student client for the individual scores.
There are three pages dedicated to Cisco Slide 66

AFA Advanced CyberCamp Instructor’s Guide
Slide 66 Continued
Cisco Networking
Page 363
© 2018 Air Force Association
Instructions for the Instructor:
Pre-work:
1- Download the latest version of Packet Tracer on each computer at
https://www.netacad.com/group/offerings/packet-tracer
2- Assign each laptop a peer number e.g., peer 1, 2, 3, 4, 5,...29, etc.
3- Download the client .zip file below and put the client .pka file on the laptops, or make
available for each team to download. There are 30 .pka files (0-29), one for each team.
Each laptop needs to have a unique file (e.g. P1, P2, P3... P29) that aligns with the peer
assignment give in the step above.
4- Load the server .pka file on the instructor’s laptop (below).
Advanced Camp 2017 client v19 Clients.zip
Advanced Camp 2017 Server v2.pka
5- All laptops need to be on the same network.
https://www.netacad.com/group/offerings/packet-tracer/
Instructor launches the server on this computer.
Students launch client.
•Locate the cloud icon that reads “Peer followed by a number (e.g., Peer33 -- with
NO space between Peer and number)” and double click on it.
•Connection Type: don’t change, should be “Outgoing”
•Enter the IP address of the Packet Tracer server (on server host computer, type
“ipconfig” to find IP address)
•Peer port number remains the same (38000)
•Enter in the Peer Network Name = the peer number you assigned to each
laptop. “Peer1”, “Peer2”, “Peer3”, etc, The peer number will also be the same as
the peer cloud in the packet tracer when it is open as well as in the .pka file
name (...P1.pka)
•Password = “cisco”
•Click “connect” The cloud will turn blue on both the client and the server. If the
information is entered wrong, it will show as red. If red, check that all the above
is correct.

AFA Advanced CyberCamp Instructor’s Guide
Slide 66 Continued
Cisco Networking
Page 364
© 2018 Air Force Association
Once all clients are connected (blue on the server), then click the “Start Game” button on the
server (a separate little window that opens up).
The instructions will pop up on the client and the students and now click on the
“Game” cloud to open the scenario.
NOTE: A timer is not built in. You can start a timer on your own, so the
students know how long they have to complete the task. It is recommended
you give at least 1 hour. You will be able to track the progress of the players.
Once the time has passed, click the “Stop Game” button.
During the competition, you will see progress bars for each user. It may not
start at 0 and that is OK because everyone should start at the same
place. Everyone can see each other students progress so keep in mind that
scoring is not instantaneous.
The last task is to have each student save the file with a new name (File -->Save As -->name it
with their name and peer number –no space.).
The winner is determined by who completed the most tasks in the time given. The
scoreboard should give the percentage for each student, but it does take time for the scores
to become available. The team with the highest percentage wins. If there is a scoring
problem, you can open the Packet Tracer in question on the student’s laptop (or copy the file
to another laptop) and grade it manually.
If no scores show up on the scoreboard you will need to grade each Packet Tracer manually.
Extensions -->Activity Wizard -->password “Cyb3rCamp2017” --> check activity, check activity
(again) -- > Check Results (on smaller window) -- > Assessment Items and Connectivity
tests. This will tell you what the students did or did not get right based on the grading. Some
of the activities they do will not be graded command-by-command but rather by a
connectivity test.
NOTE: Chat is enabled. This allows players to chat with each other as well as the server. It
is recommended that they do not use the chat.

Instructor Post-Survey
Dear Camp Coordinators & Instructors,
Thank you again for taking the time to give us your valuable feedback on our AFA
CyberCamp program. The Camp Coordinator/Instructor Post-survey should take 5-
10 minutes.
See you all next Summer!
2018 Instructor Post-Survey
https://www.surveymonkey.com/r/MZ7MBJH

For more information on how to
participate in the CyberPatriot
National Youth Cyber Defense Competition,
visit www.uscyberpatriot.org
or contact info@uscyberpatriot.org Scan to join our
mailing list.
SECURING NETWORKS,
SECURING FUTURES
