Aws Signup Instructions
User Manual:
Open the PDF directly: View PDF ![]() .
.
Page Count: 6
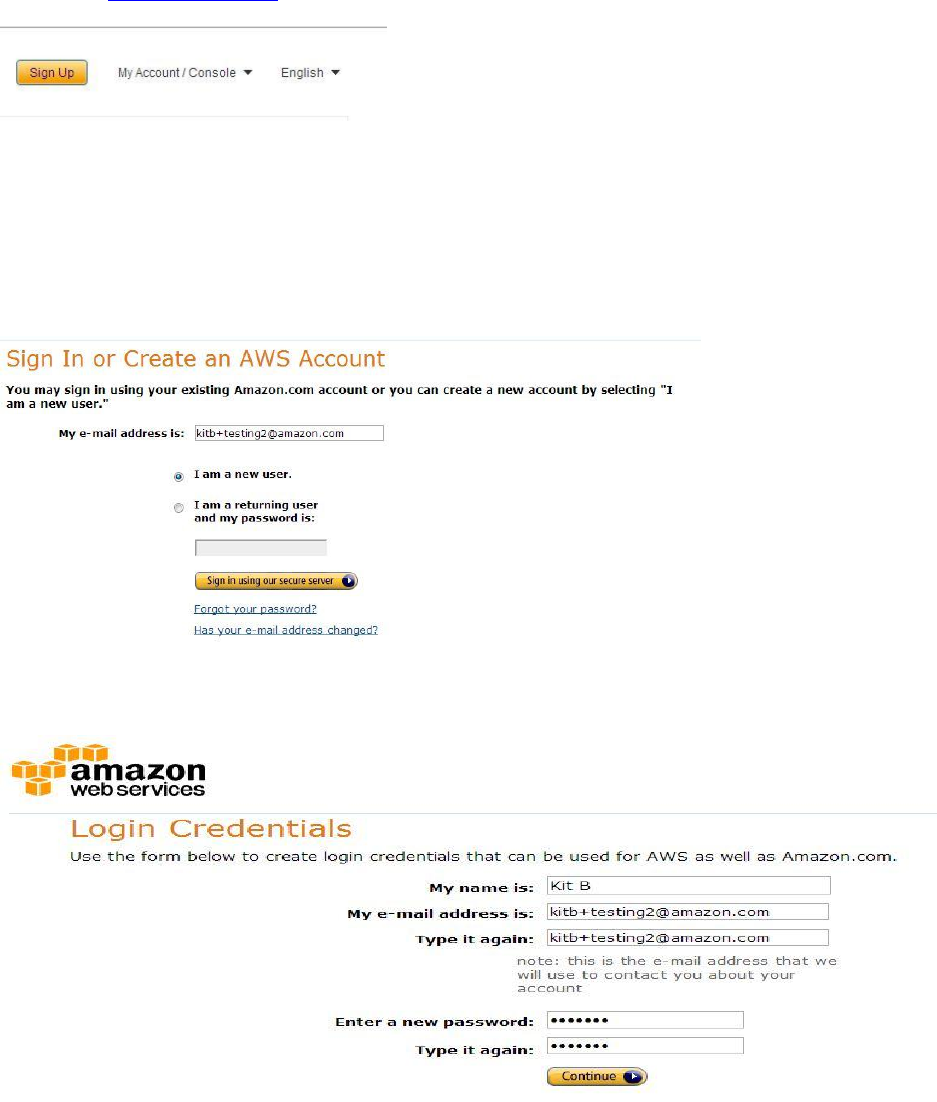
STEP 1: Go to: www.aws.amazon.com and click the Orange “Sign Up” Button.
STEP 2: Put in an ORIGINAL email address. IE. It cannot have been used with Amazon.com previously. If you’re creating an
account that coincides with an email that does have an Amazon.com account then click the radial button for “I am a returning
user and my password is:”
*Note that AWS and Amazon.com accounts cannot be separated out. So if in the future you want to hand over your AWS
Account to another team mate or root account holder- your historical purchases for Amazon.com with that login will be
available to them as well. We recommend that you use a separate account for your professional vs. personal use.
STEP 3: Fill out the form.
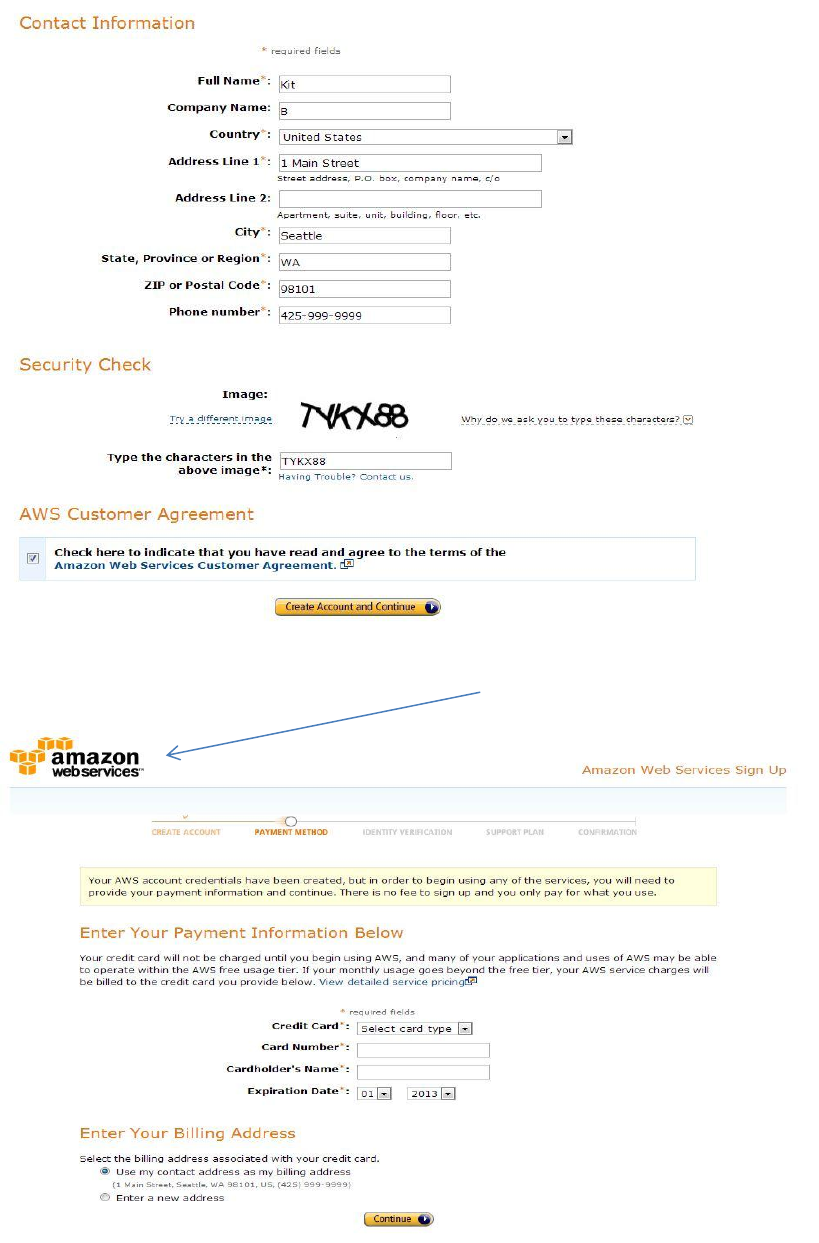
STEP 4: Continue filling out the form. Please make sure to check the box to indicate you’re accepting the Customer Agreement.
STEP 5: You’ll be taken to the payments screen. DO NOT enter CC Information. Click on the Amazon Web Services logo on the
top left of the screen.
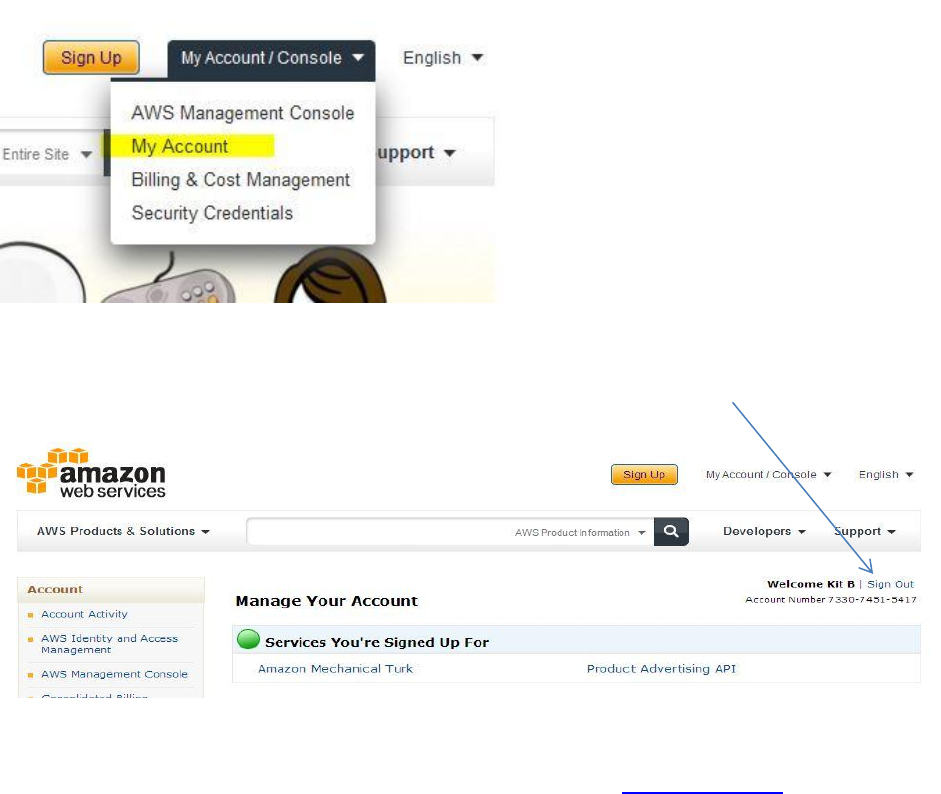
STEP 6: Please login and retrieve your new account number. Create a requisition in CruzBuy including your twelve digit AWS
Account number as an external note. To login select: My/Account / Console- then the My Account option:
Once logged in you will be taken to the Manage Your Account screen. Your account number is a 12 digit number located
beneath the Sign Out link.
STEP 7: Once you have received confirmation from your AWS Account Manager that invoicing for your account has been set up,
you will then be able to activate your services. To do so you will need to login via the Management Console:
Select- “My Account/ Console” (above pic next to Sign Up) and select Management Console. Please login to your account
You’ll be taken to the services screen, select EC2- then click Sign Up- this will activate all AWS services.
*AWS Services work together across the platform. When signing up for services we activate a “Unified Sign Up” meaning all
services activate together. So triggering 1 signup (On EC2 as shown below) activates all the others. (Support plans are separate.)
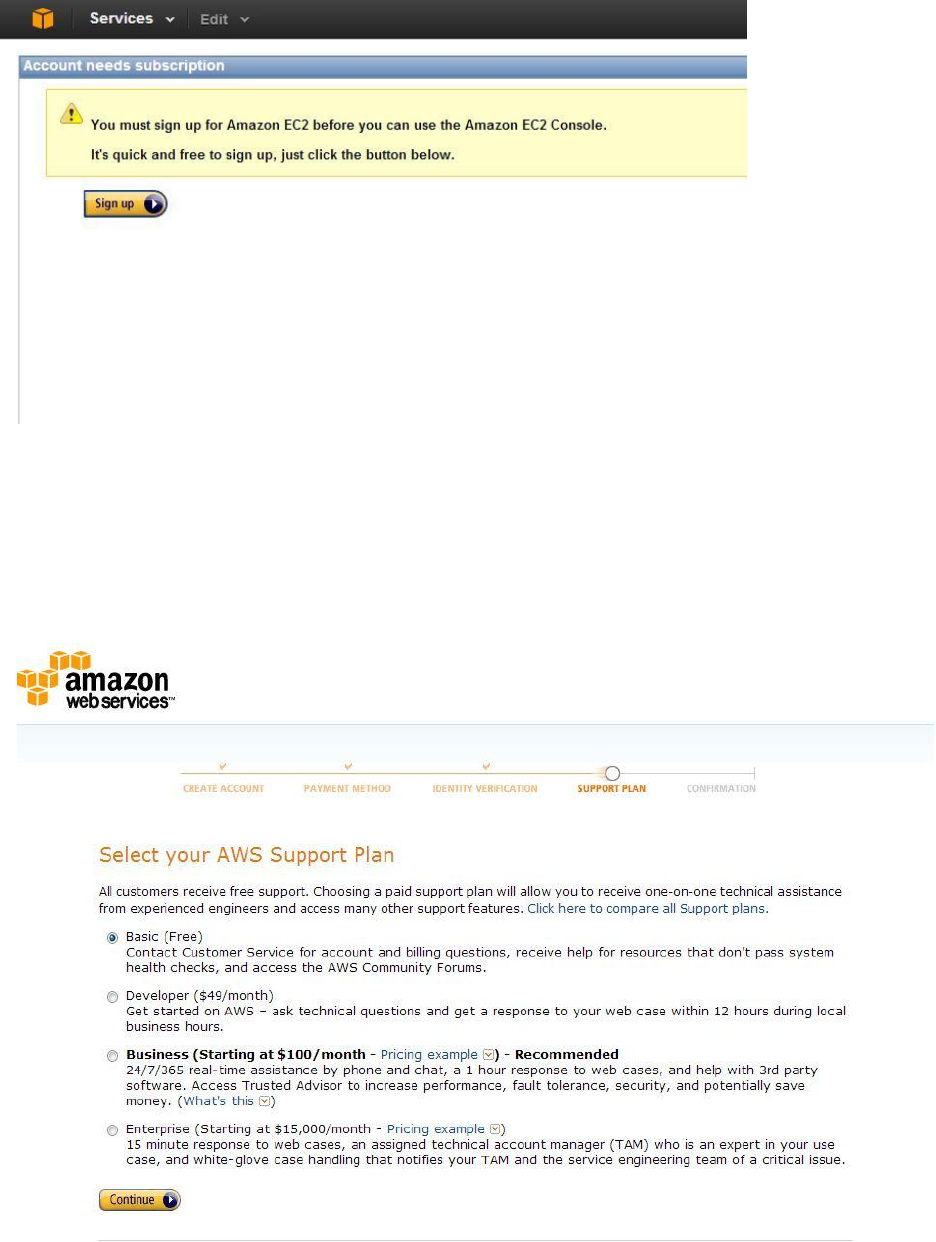
*Note- If the Invoicing has not happened yet- then you will be taken back to the screen asking for payment information. Please
DO NOT enter payment information. Once the payment method has been setup you should immediately be able to proceed so
wait for our confirmation.
Step 8: After Signing up for services the system will ask you to select an AWS Support Plan. We do offer paid support, or the
Basic (Free) Support is the default.
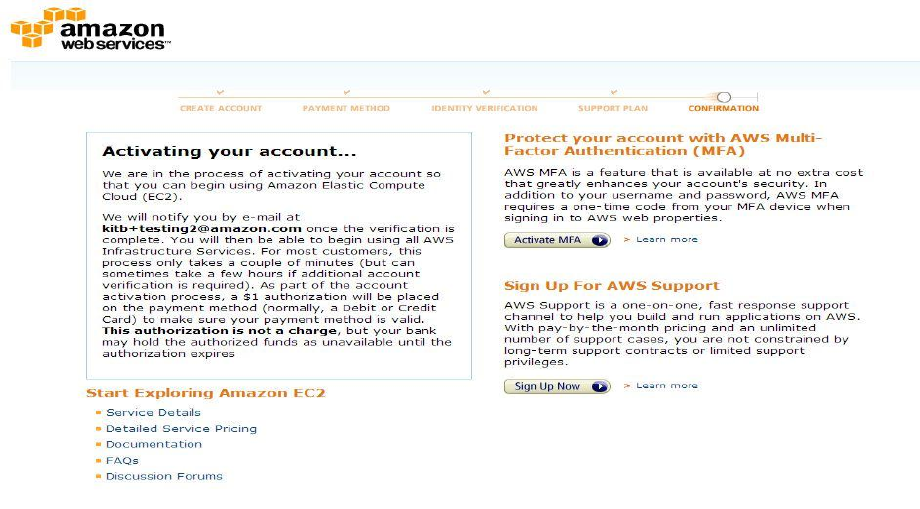
STEP 9: You’ll be taken to the Confirmation page advising you that once everything activates, (Normally instantly but can take
up to 24 hours) you will be able to use the platform.
STEP 10: You will receive another email from AWS stating services have activated fully. At this point you’re ready to go!
Account Removal
If you need to remove an account from the Consolidated Billing account for any reason;
- User left the Institution
- Departmental changes
- Account conversion to personal usage
- Student Graduates Etc.
There are a few steps that we need to take. Since the payer account has a special coding on it that allows accounts to link
without a default payment method- you won’t be able to “de-link” and account until the sub account has a valid payment listed
for their individual account.
To do this we will need the individual user to login to the root account and add a Credit Card under the “Payment Methods”
section.
Alternatively, AWS account reps can set up individual invoicing terms. The individual account will then be responsible for
charges incurred from the date of removal going forward.
Please notify your AWS account representative for any accounts that are de-linked whether on your end, or if you need
assistance on our end with the process.
When setting accounts up- please let the individual users know that should you need to de-link them for any reason that they
will be financially responsible for any usage after de-linkage. The Account Address that they enter will be the default address for
billing purposes should we need that to occur.

If an employee/student/user should leave your Institution and you’re not able to request them to shut down resources/cancel
accounts or provide login details and you want to stop charges from accruing we will need to do one of 3 things:
1. Email Intercept:
If it is part of your school/corporate email domain you can have IT re-route emails coming into the account in
questions Inbox. We can then request a password reset be sent to it which will allow you to access the Root Account
to then regain access to resources or cancel the account to prevent further charges.
2. Account Take-Over: This process can take up to 10 business days and requires us to reach out to the original account
holder. Once permissions are received we change the email address on the account to one of your choosing to allow
you to regain access to the account to cancel or retrieve resources.
3. Invoicing Conversion: AWS will convert the individual account to its own invoicing terms utilizing the account address
they listed upon setup. If the account goes unpaid it will go through the natural AWS Suspension/Termination
process.
The AWS Customer Agreement section 6.1: outlines that “We may suspend your or any End User’s right to access or
use any portion or all of the Service Offerings immediately upon notice to you if we determine: (b) you are, or any End
User is, in breach of this Agreement, including if you are delinquent on your payment obligations for more than 15
days;” This could lead to eventual termination if it goes unpaid. AWS Customer Agreement section 7.2b (ii)A “ for
cause, if any act or omission by you or any End User results in a suspension described in Section 6.1”.
