The Fighter Collection / Eagle Dynamics Basic Guide
User Manual:
Open the PDF directly: View PDF ![]() .
.
Page Count: 7
The Fighter Collection / Eagle Dynamics
Page | 1
Basic Modeling Guide
Digital Combat Simulator
Written by Zach/ Luckybob9
In Collaboration with The Fighter Collection and Eagle Dynamics
Mandatory Requirements:
3D Studio Max 2008, 2010, 2011, or 2012 (32 or 64bit): http://usa.autodesk.com/3ds-max/
3D Studio Max Plugins from Eagle Dynamics: ftp://ftp1.files.eagle.ru/mods/edm_plugins/
Secondary/ Optional Requirements:
Adobe Photoshop for creation of Normal Maps: http://www.photoshop.com/
NVIDIA Texture Tools for Adobe Photoshop: http://developer.nvidia.com/nvidia-texture-tools-adobe-
photoshop
Preparation:
1. Install 3D Studio Max as usual
2. Download and install the plugins from Eagle Dynamics
Now we will prepare 3D Studio Max.
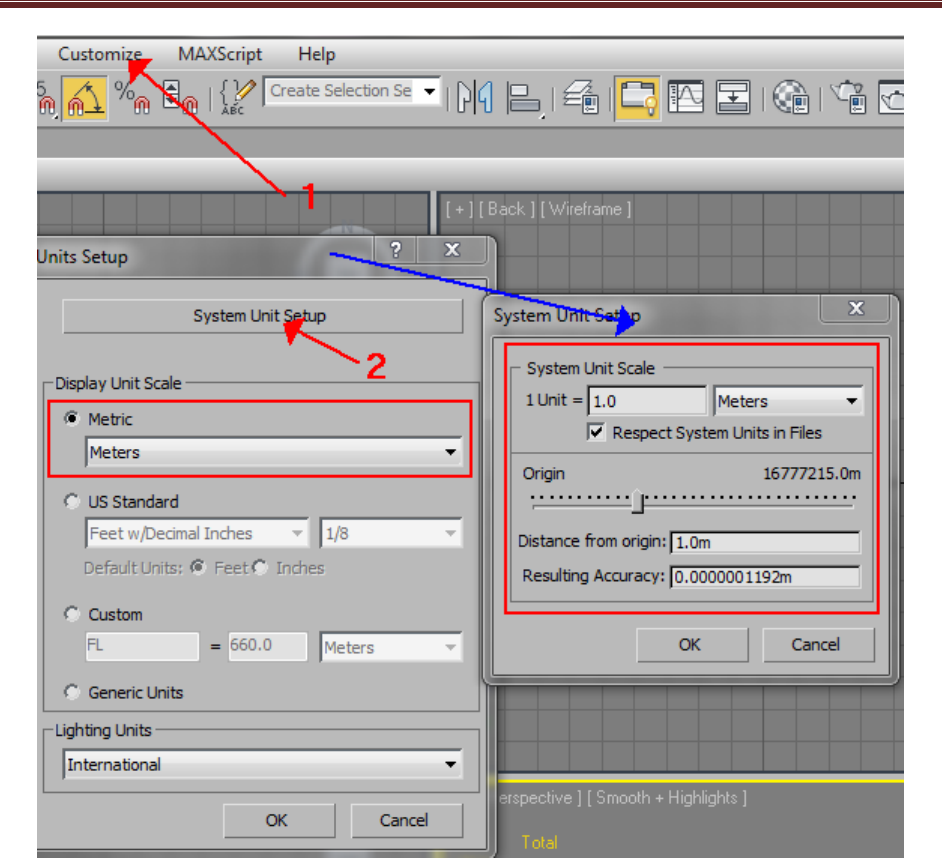
Open 3ds Max and verify that the units are set to Meters. This is done by clicking “Customize” on the
toolbar, then clicking “Units Setup…” If not selected, change the “Display Unit Scale” to “Metric” and to
“Meters” in the pull down selection. Next click “System Unit Setup” and verify the following to the
image below:
The Fighter Collection / Eagle Dynamics
Page | 2
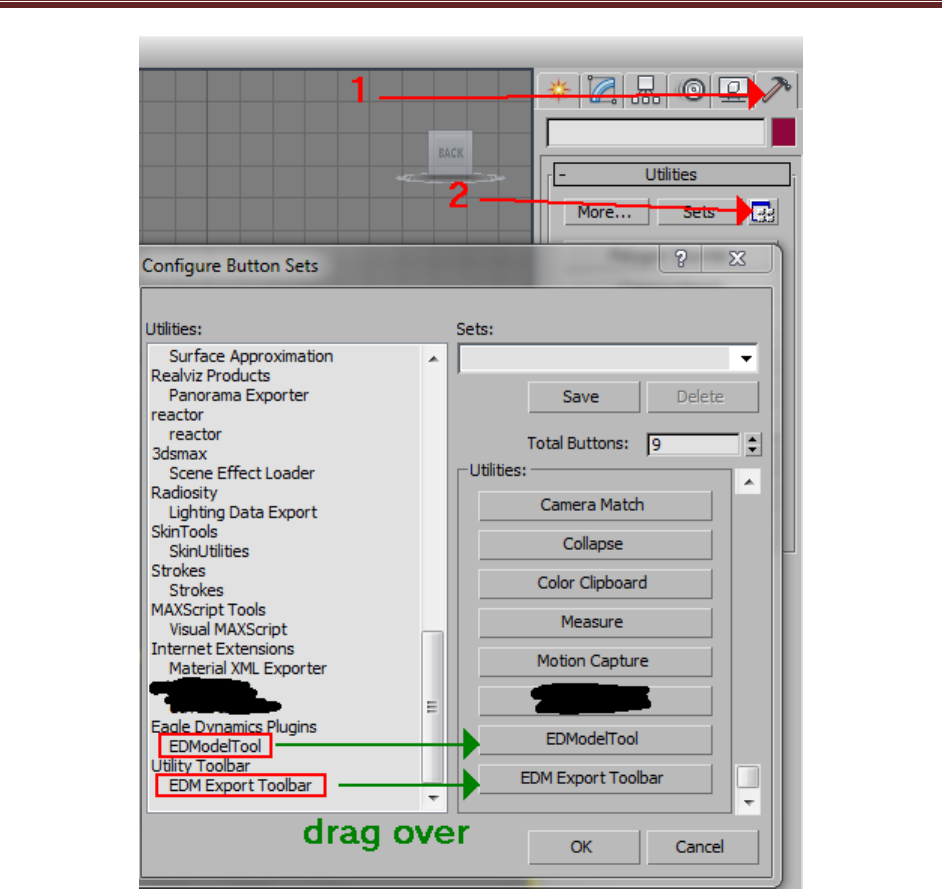
Next we must make sure the Eagle Dynamics plugins are installed correctly. Click the Utilities tab in the
top right, (the hammer), and then click the small square next to the button “Sets”. Scroll down and
verify that you have two sets of EDM plugins. EDModelTool and EDM Export Toolbar. Drag both of
them into a separate slot in the area to the right.
The Fighter Collection / Eagle Dynamics
Page | 3
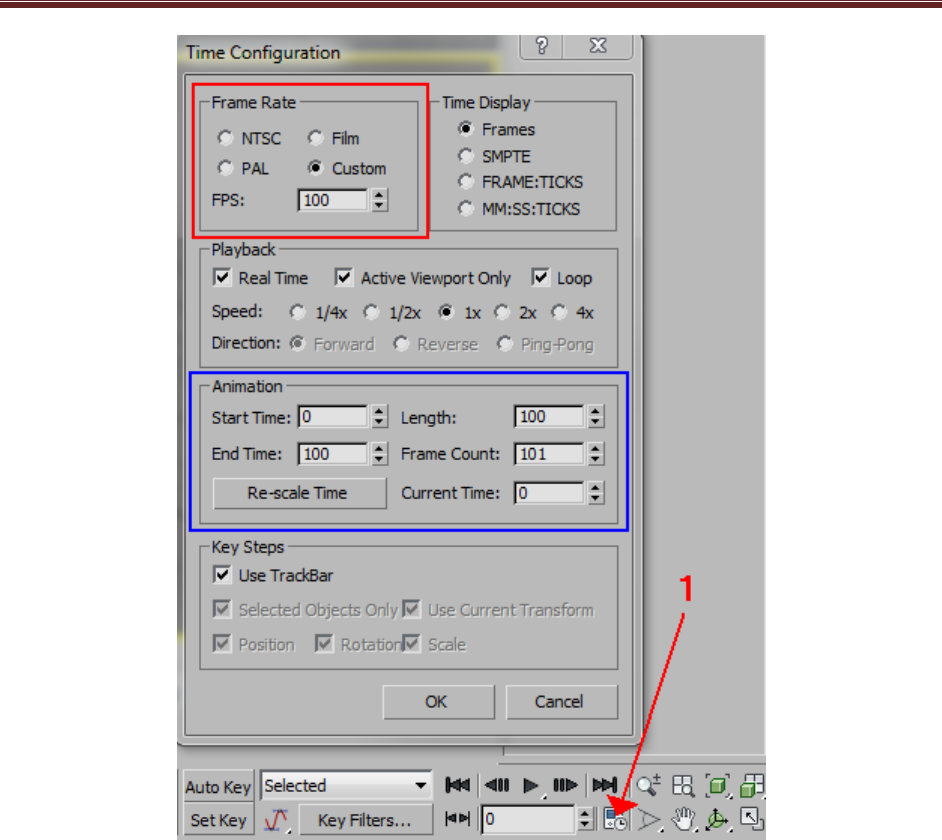
If you want to do animations, you must now properly set the time scale up. Click “Time Configuration”
near the lower right. Change the Frame Rate to “Custom” and FPS: to “100”. You will notice that your
time bar has automatically adjusted itself to the new settings, but this is not what we want. Under
Animation, set the following:
Start Time: 0, Length: 100, End Time: 100, Frame Count: 101
The Fighter Collection / Eagle Dynamics
Page | 4
Procedure:
Part 1: 3D Studio Max
Open 3D Studio Max. I will be using 3D Studio Max 2010 in this document.
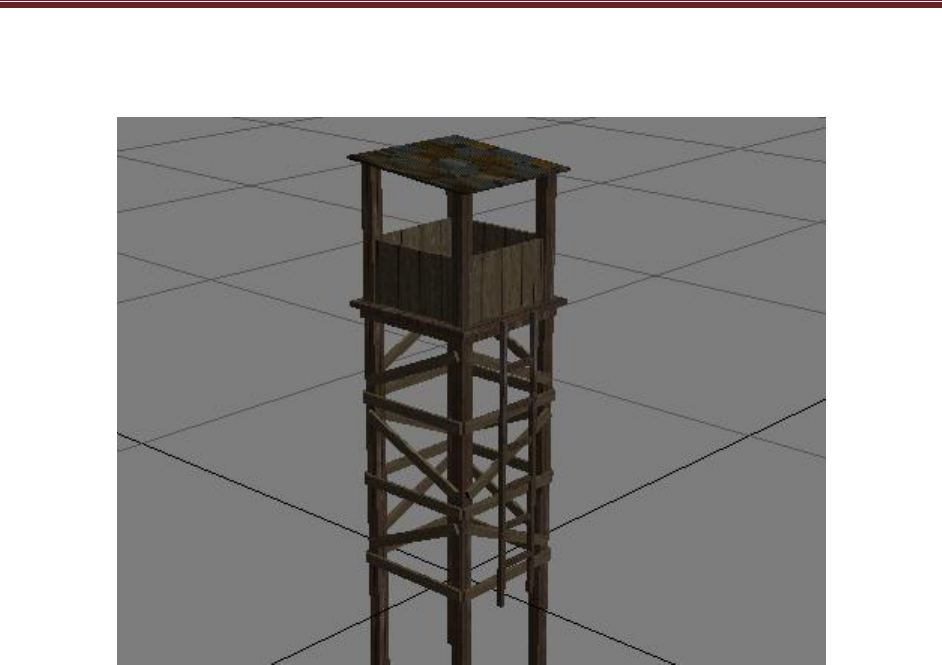
Create your model as you usually would. If you are going to release a model to the public, remember
that not everyone will have the same type of computer as you do. Some will be more powerful, some
will be less powerful. For this tutorial, I will be using a watchtower model that I made.
The Fighter Collection / Eagle Dynamics
Page | 5
Once you have finished creating the mesh of your model, create textures and apply as normal. Here is
my completed model with the material assigned to it:
Now we need to assign the custom material type using the ED Plugins. Open the Material Editor by
pressing the “M” key on the keyboard. Once this is open, click “Utilities” (hammer icon) in the upper
right, then click on “EDModelTool”, then click “Make Cool”. You will notice that a new area has
appeared in the Material Editor.

The Fighter Collection / Eagle Dynamics
Page | 6
In the pull down selection, select “Default”.
If you have multiple textures, repeat these steps for each texture sphere that you are using.
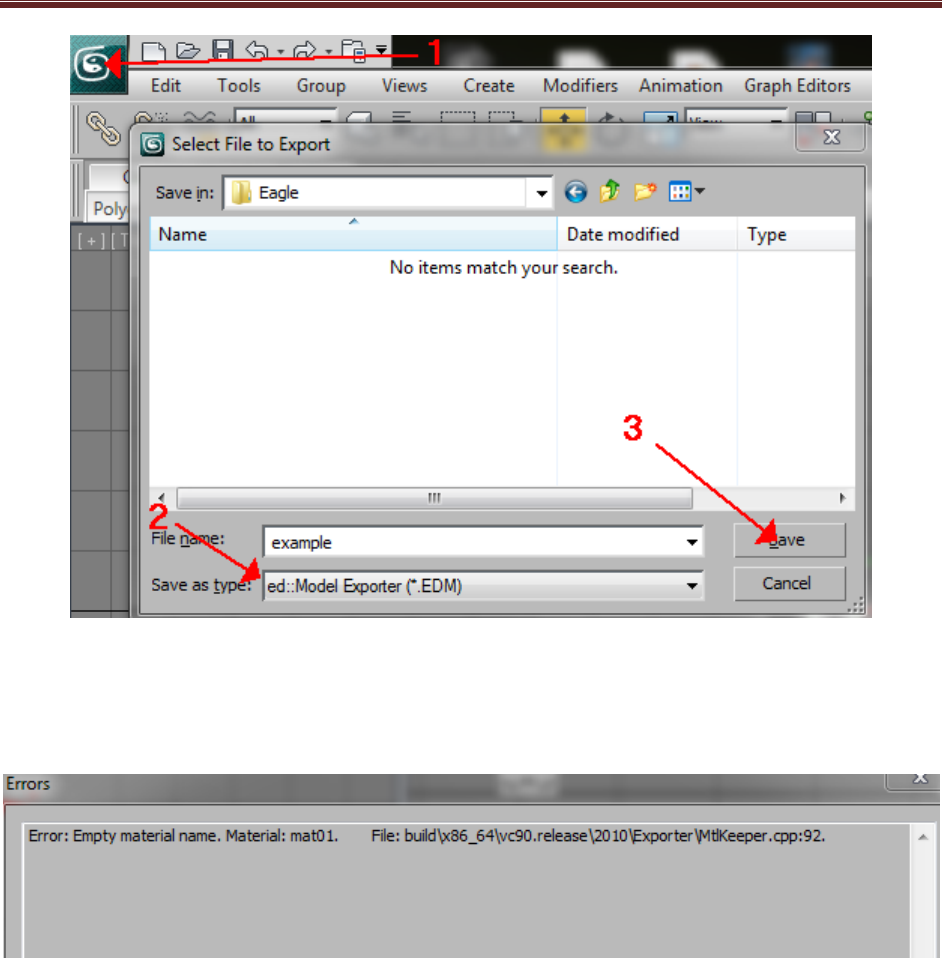
You can now close the Material Editor and we are ready for exporting. To export your model, click
“File”, (green logo), in the top let of 3DS Max and click “Export”. In the pull down menu for file type,
select “ed::Model Exporter (*.EDM)”. Name your file accordingly and click “Save”.
The Fighter Collection / Eagle Dynamics
Page | 7
If you receive the following error below, it means that you missed assigning the custom ED material type
to one of your textures.
