Cinde R Manual
User Manual:
Open the PDF directly: View PDF ![]() .
.
Page Count: 8

CindeR User Guide
Florian Seefried (florian.seefried@tum.de)
https://github.com/kusterlab/cindeR
September 11, 2018
Contents
1 General Information 2
1.1 Software overview . . . . . . . . . . . . . . . . . . . . 2
1.2 Organization of the Manual . . . . . . . . . . . . . . . 2
2 Software Summary 3
2.1 User Access Levels . . . . . . . . . . . . . . . . . . . . 3
2.2 Notices .......................... 3
3 Getting Started 4
3.1 Accessing the Software . . . . . . . . . . . . . . . . . 4
3.2 SoftwareMenu...................... 4
3.2.1 Plot function . . . . . . . . . . . . . . . . . . . 4
3.2.2 Evaluation .................... 4
4 Using the Software 6
4.1 Upload Plot function . . . . . . . . . . . . . . . . . . . 6
4.1.1 data........................ 6
4.1.2 selected...................... 6
4.1.3 called ....................... 6
4.2 Evaluation......................... 6
5 Video tutorial 8
1 General Information
General information section explains general terms and the purpose
for which the CindeR tool is intended.
1.1 Software overview
CindeR is a shiny application, which allows the classification of ob-
servations. The application provides a user interface to manually clas-
sify observations that are visualized with a corresponding plot. The
classification can be performed with the left and right arrow on the
keyboard for FALSE and TRUE, respectively. Furthermore, it is pos-
sible to swipe left and right for the same classification which is realized
through the shinysense
https://github.com/nstrayer/shinysense
package. Moreover, the whole code is available on github under
https://github.com/kusterlab/cindeR
and could be run locally us-
ing R.
1.2 Organization of the Manual
The user’s manual consists of five sections: General information, Soft-
ware Summary, Getting Started, Using the Software and Video tuto-
rial.
General information section explains general terms and the purpose
for which the CindeR tool is intended.
Software Summary section provides a general overview of the software.
The summary outlines the user’s access levels and the corresponding
limitations or requirements according to the access level.
Getting Started section explains how to access CindeR. Furthermore,
the software menu is briefly explained.
Using the Software section provides a detailed description of soft-
ware functions.
The Video tutorial section provides a link to a video tutorial that
shows with an example dataset, how to use this tool.
2
2 Software Summary
Software Summary section provides a general overview of the software.
The summary outlines the user’s access levels and the corresponding
limitations or requirements according to the access level.
2.1 User Access Levels
The code of the application is available under
https://github.com/
kusterlab/cindeR
and could be implemented on local computers
or severs. The versions of the packages that were used to build the
software are specified in the packrat file.
2.2 Notices
CindeR is open source software and comes with absolutely no war-
ranty.
3
3 Getting Started
Getting Started section explains how to access CindeR. Furthermore,
the software menu is briefly explained.
3.1 Accessing the Software
The newest version currently available can be accessed under the git
repository https://github.com/kusterlab/cindeR.
3.2 Software Menu
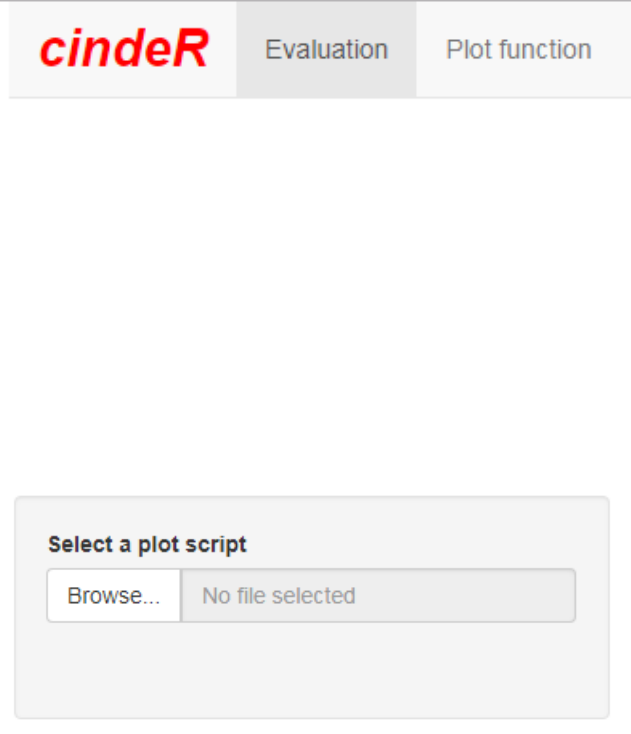
CindeR is a tabbed application, which consists of 2 tabs (1). One
tab contains file input and observation judgment, whereas the other
contains the input of the plot function.
Figure 1: Main menu of the CindeR shiny application
3.2.1 Plot function
To visualize the observations that are to be judged a plot function
is required. Since the CindeR interface is generic and the variety of
plots is high, no default plot methods are available. Therefore, a plot
function is to be uploaded 2. An example plot function can be found
in "ref". Also in this section the requirements such a plot function
has to full fill are specified. However, for the test dataset there is also
a corresponding plot function available. This plot function has to be
defined within an R script and needs to be named starting with "plot_".
Figure 2: Plot upload of the CindeR shiny application
3.2.2 Evaluation
Here the dataset that is to be judged can be uploaded. Accepted are
.csv files in different occurrences. The selection of the properties of the
4
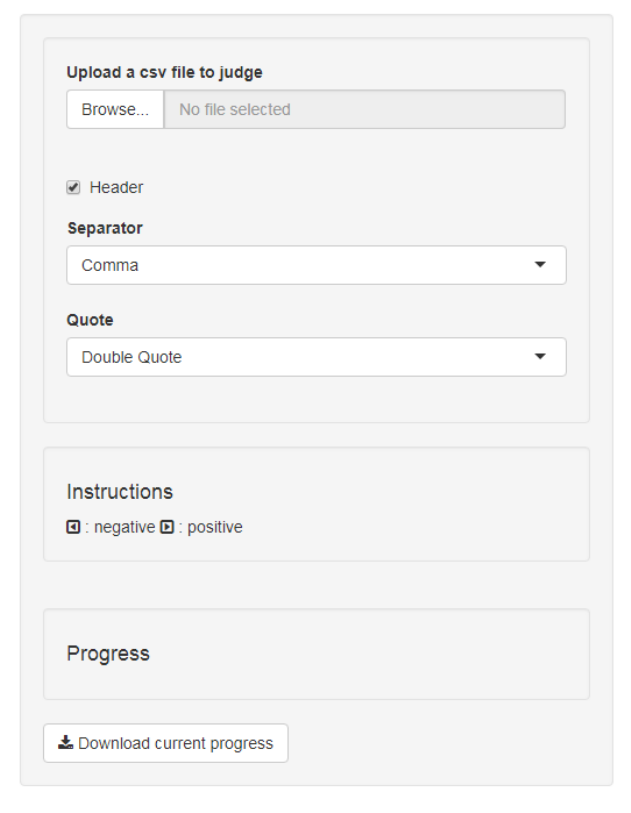
uploaded .csv has to be done before the dataset is uploaded 3.
Figure 3: Evaluation tab of the CindeR shiny application
Once the dataset and the plot function is uploaded one can start to
judge. Pressing the left arrow key or swiping to the left classifies the
visualized observation as negative while pressing the right arrow key
or swiping to the right classifies the visualized observation as positive.
The Progress field indicates how many observations are currently judged
from all observations that were in the uploaded dataset. Furthermore,
the current progress could be downloaded using the corresponding
button.
Furthermore, the back button allows the user to step ten observations
back and change the decision. The number ten is chosen due to the
fact that the user should stay focused, while judging.
5
4 Using the Software
4.1 Upload Plot function
This tab controls the upload of the plot function. Here a .R script
has to be applied that contains all functions and variables that were
required to generate the plot. The function that creates the final plot
has to be named starting with "plot_". This plot function has to have
at least three parameters: data ,selected and called. Those are explained
below in more detail.
After uploading the .R script all functions and variables appear under
Plot function to ensure that the right plot function was uploaded.
4.1.1 data
data represents the uploaded dataset and is passed to the plot function.
Therefore, not only plots that require information from a single ob-
servation can be plotted. Moreover, also plots from columns over the
whole dataset can be generated like, for example, a histogram of a
certain intensity measure.
4.1.2 selected
selected represents the row that is selected by CindeR to judge at a time.
Therefore, data could be subsetted with selected for the specific row
that is to be judged, and therefore, visualized.
4.1.3 called
called represents a counter of how many times the plot function has
been called so far. This can be useful if a plot needs a time demanding
processing function of data which is in principle the same every time a
plot is generated. The called parameter gives than the possibility with
a simple if case to perform this operation only once and assign a result
variable with "«-". This "global" variable can be subsequently used
to generate each plot. Therefore, the generation of the plots is quick
after the first one, since only during this step the time demanding
operations that are similar for all plots, are performed.
4.2 Evaluation
Here the data set that is to be judged can be uploaded. Before uploading
the dataset the user has to specify the properties of the .csv file. This
includes whether there is a header or not, which separator is used
and how character strings are quoted. After the upload of the dataset
the app adds a new column onto it called "JTarget". This column is
initialized with NA at a beginning and if the observation is selected by
the app to be judged it is assigned with TRUE or FALSE according to
the user action. The app allows one to go ten plots back and change
the decision on one of those ten plots. After switching the decision on
6
one plot the app returns a currently unjudged plot to continue with
the judgment. The order of the observations how they are displayed
for judging is random.
The progress indicator displays the progress and shows also the total
number of observations to judge.
The download current progress button allows the download of the
current progress. This downloaded dataset could be uploaded again
and the judgment can be continued.
7
