Classic Ford Weber Dgv Rebuild Instructions
User Manual:
Open the PDF directly: View PDF ![]() .
.
Page Count: 3
120 November 2008
Rebuild Your
Weber DGAV Carb
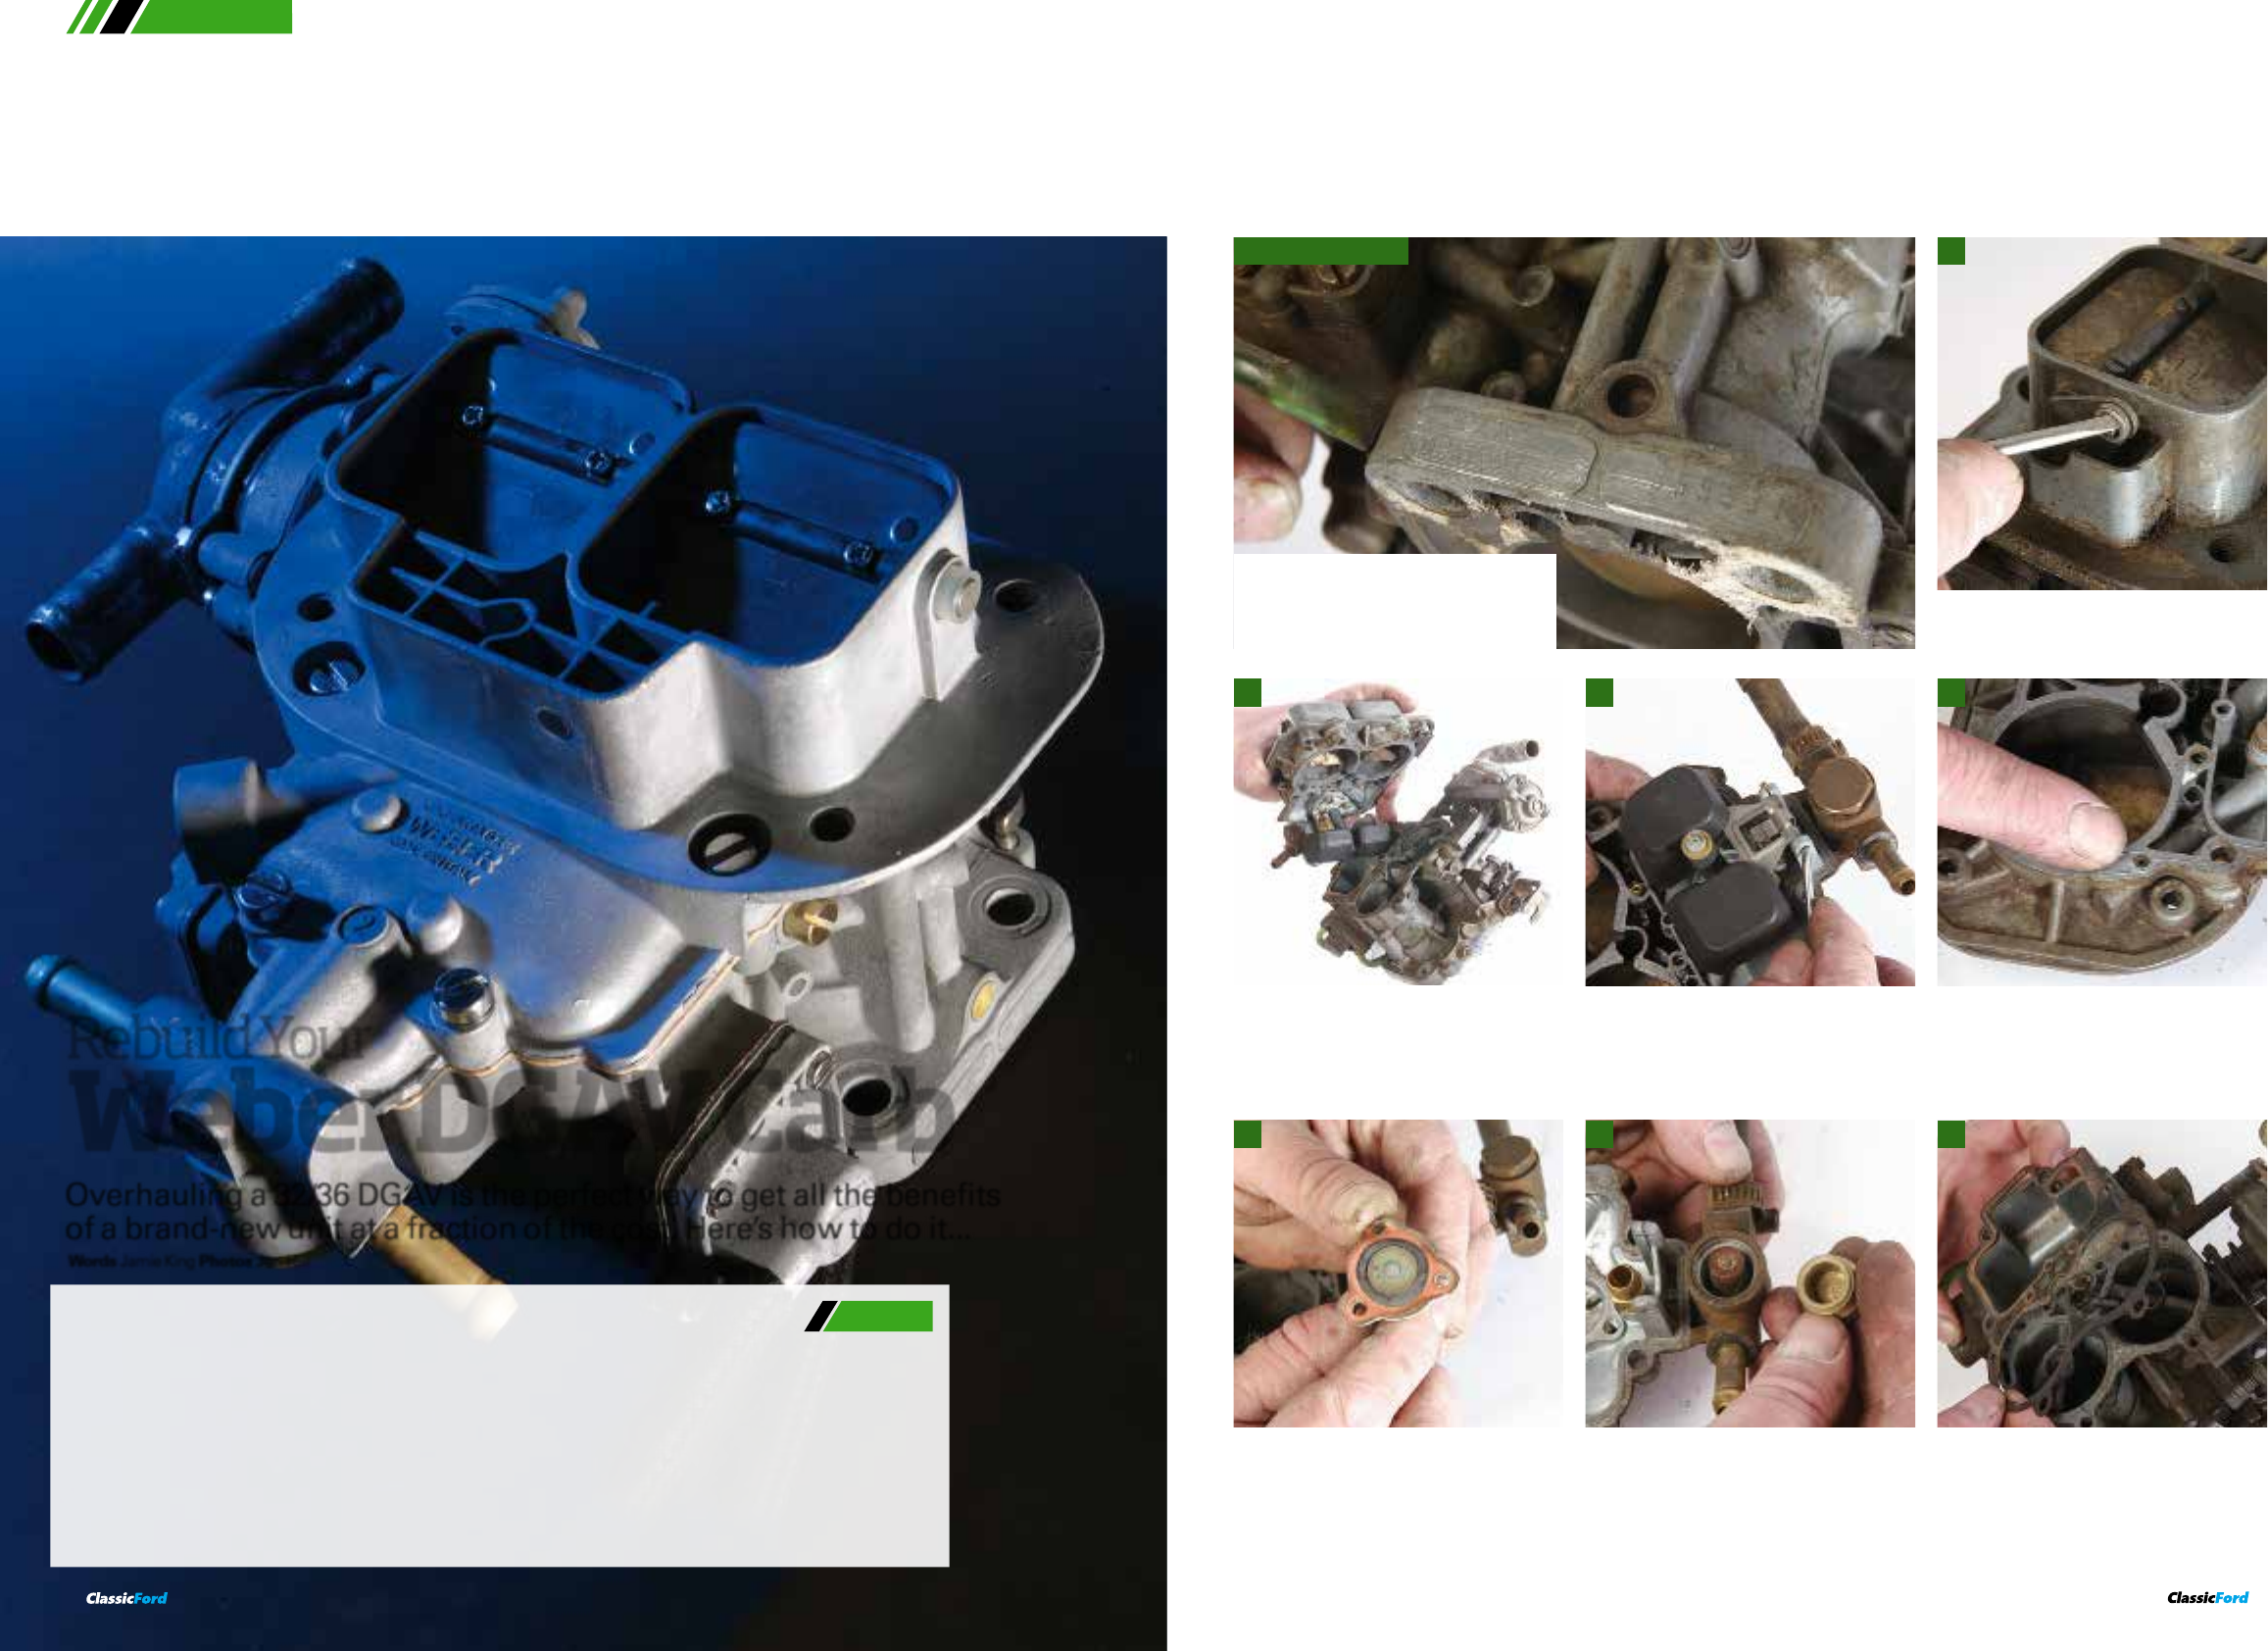
1
Remove the float pin with a small screwdriver, or if
tight gently tap a small punch with a hammer.
Then remove floats and float needle valve.
4
Now you can start stripping. Firstly remove the
circlip for the choke butterflies with a small flathead
screwdriver. Take care not to slip.
2
Test the power valve diaphragm by pushing down
on the spring and blocking the small airway on the
face surface. If the diaphragm is good the vacuum
created will mean the spring will stay compressed,
if it doesn’t the power valve will need replacing.
5
Then undo the six screws that hold the top on, and
remove the top of the carb from the main body. Be
careful as the screw heads are fairly soft metal.
3
Remove the power valve diaphragm by undoing
the three flathead screws that hold it in position,
and take a closer inspection. This one’s really had it.
November 2008 121
6 7 8
Then undo the 19 mm filter plug and remove the
old filter. Remove the 10 mm float needle valve
seat and the top half is ready for cleaning.
Now move on to stripping the main body of the
carb. The first thing to go is the old gasket.
Overhauling a 32/36 DGAV is the perfect way to get all the benefits
of a brand-new unit at a fraction of the cost. Here’s how to do it...
Words Jamie King Photos Jon Hill
he Weber 32/36 DGV and
DGAV carburettors were fitted to
a whole host of classic Fords, and
many have since been retrospectively
fitted as a useful performance upgrade.
The carbs are easy to set-up and
maintain, however like most things in life
they do benefit from some tlc from time
to time – either a service or a full rebuild.
Fortunately, service kits and replacement
parts such as jets, diaphragms and valves
are all still readily available from the likes
of Webcon direct and Weber dealers.
You may be lucky enough to only need
the service kit which can be fitted without
too much fuss, but for a ‘proper job’ you
will need to do a complete overhaul.
We took our 32/36 DGAV to
carburettor specialists and Weber dealers,
Northampton Motorsport in, er,
Northampton for the guys in the know to
show us exactly what’s involved with
turning a gunked-up, 30-year old
carburettor into a nice, shiny, all-singing
all-dancing, overhauled unit.
Here’s how we did it...
TCosts:
Service kit £41
Power valve
diaphragm £18
Choke pull-off
diaphragm £13
Teflon bearings
(fitted) £30
Complete overhaul
incl service kit £152
Info
CONTACTS
Northampton
Motorsport
01604-766624
www.northampton
motorsport.com
Webcon
01932 787100
www.webcon.co.uk
Strip-down
Before stripping wire bush the base of the
carburettor to reveal the part numbers stamped.
These identify the carb and are needed to order
the correct replacement parts. In this case it is a
32/36 DGAV ‘3D1’.
CFTECH carb rebuild
122 November 2008
CFTECH
November 2008 123
Remove the air corrector jets from the top surface
and the main jets from the float bowl. Also remove
the emulsifying tubes from under the air jets. It’s
worth writing down which size jets came from
which place to ensure fitting them correctly later.
9
Remove the idle jet and progression jet from the
sides of the float bowl.
10
Now remove the accelerator pump jet and
delivery valve from the centre of the main body.
Remove the power valve from the float bowl. Now remove the accelerator diaphragm and
enrichment device from the sides of the float
bowl, and remove the mixer screw from the side
of the main body. (Some DGAVs do not have the
enrichment device).
Remove the automatic choke housing (on the
DGAV). If the unit works leave it alone as trying to
repair them usually ends up with the centre bolt
shearing off. If that happens the only way forward is
to convert to manual choke as replacement auto
choke parts are not available.
Then remove the three screws that hold the choke
pull-off diaphragm in place and remove the
diaphragm itself. Check it is in good condition, if
not a replacement will be needed. Then remove
the choke unit from the main body by undoing the
three retaining screws at the side.
Turn the carb over to see the throttle butterflies.
Remove the locking tab and 12 mm locking nut that
holds the throttle shaft in position. Before removing
the linkages and springs either write down or take a
photograph of the order they come off in to help you
remember how it all goes back together.
Undo the two screws that hold the butterfly in
place and remove the butterfly. If they are tight
gently tap with a hammer to loosen.
11
12 13 14
15 16 17
Then remove the throttle shaft from the main body
and check for wear. Repeat steps 16 and 17 for the
secondary shaft, remove and then check for wear.
Finally remove the auxiliary venturis by hand or
gently persuade with a pair of pliers.
19 Rebuilding18
Before reassembling the carb Northampton
Motorsport carry out a couple of trick mods. Firstly
the base of the carb is machined totally flat to ensure
a perfect seal with the spacer block. Also the body is
reamed to accept Teflon bushes between the body
and throttle shafts.
The next step is to fit the bushes. Patience is
needed as they can be very tricky.
Now refit the throttle and secondary shafts into the
main body. A drop of oil helps lubricate the shafts and
makes life a little easier.
Refit the throttle butterflies and reassemble the
throttle shaft linkages and springs in the reverse
order to the way it was disassembled.
Next refit the auxiliary venturis. If they are loose they
will rattle and will not work, so gentle tap the body
with a hammer and punch to secure them in place.
Before refitting the jets and emulsifying tubes
replace the old O-rings with new ones from the
service kit. Refit the jets in the same position you
marked down earlier in step 9.
20 21 22
23 24 25
One stripped carb ready for thorough cleaning
before reassembly. To clean the carb you can use
carb cleaner but for a better finish professionals
like Northampton Motorsport have all the parts
chemically cleaned.
carb rebuild
124 November 2008
CFTECH
Refit the accelerator pump jet and delivery valve in
the centre of the main body.
Next refit the enrichment device and accelerator
pump, replacing both diaphragms with new items
from the service kit.
Refit the auto choke unit replacing the small green
O-ring for the new one from the service kit...
...then screw the choke unit to the main body, refit
the choke pull-off diaphragm, and refit choke
housing. If the old diaphragm was perished new
items are available from Northampton Motorsport.
Next refit the mixture screw in the side of the
main body, replacing the O-ring with a new item.
To roughly get the right mixture wind the screw in
all the way then unscrew by two turns.
Refit the power valve diaphragm and float needle
valve into the top of the carb then the filter with the
new item from the service kit and replace 19mm
filter nut. Once again new diaphragms are available.
The next job is to refit and set-up the floats. Plastic
floats need to be 35 mm from the surface and
brass ones need to be set-up at 41 mm.
To adjust the distance between the float and the top
of the carb gently push on the float tab with a
screwdriver to bend it to the correct position
Fit the new gasket and refit the top of the carb to
the main body. Be careful to make sure the floats
stay as you just set them.
26
29
32
36
33 34
30 31
27 28
The final job is to refit
the choke linkage and
circlip, and set up the
automatic choke unit
– to do this loosen the
three screws that hold
the choke housing and
rotate until the choke
butterflies are set
correctly. This can be
tricky as locating the
housing correctly after
rotating it means
loosening the centre
bolt, which often snaps.
One finished carb,
ready for action and a
lot cheaper than the
price of a brand new
unit. Lovely.
35
