Debug Devpack User Guide
User Manual:
Open the PDF directly: View PDF ![]() .
.
Page Count: 5

Debug DevPack User Guide
This is the User Guide for the Debugger DevPack for the SensorTag.
The Debugger DevPack is based on the XDS-110 emulator and unlocks a free license to Code
Composer Studio. Please remember to change the debug target configuration to XDS-110 before
debugging the Sensor Tag. Most projects come with XDS-100v3 set as default.
Please note that on SensorTag version 1.3 and earlier of the PCB, it will be necessary to keep the
battery plugged in to power the SensorTag from the Debugger DevPack.
Potential Overheating of Debug DevPack
We have observed high temperatures on the TM4C1294 chip on a limited number of Debug
DevPack (revison 1.2) when hot-plugging the USB cable. If you encounter this problem, please stop
using your Debug DevPack and contact TI sales support line TI sales support to get a replacement
debug DevPack.
Debug DevPack resources
[Debug DevPack Schematic and Assembly Drawing]
[BLE Device Monitor including latest hex files for all DevPacks]
Plug the Debug DevPack into the SensorTag
Plug the USB cable into the Debug DevPack and then carefully fit it onto the SensorTag. Note that
the debug DevPack will only fit in one direction on to the SensorTag, and that to ensure correct boot-
up sequence, the Debugger DevPack should not be plugged into the SensorTag when powering on.
Note that both the 20-pin DevPack connector and 10-pin JTAG connector must fit in place on
the SensorTag If you are using the SensorTag with the inner casing, cut or press out the plastic
spacer over the JTAG connector
A green LED with be lit on the Debug DevPack when the DevPack is ready.
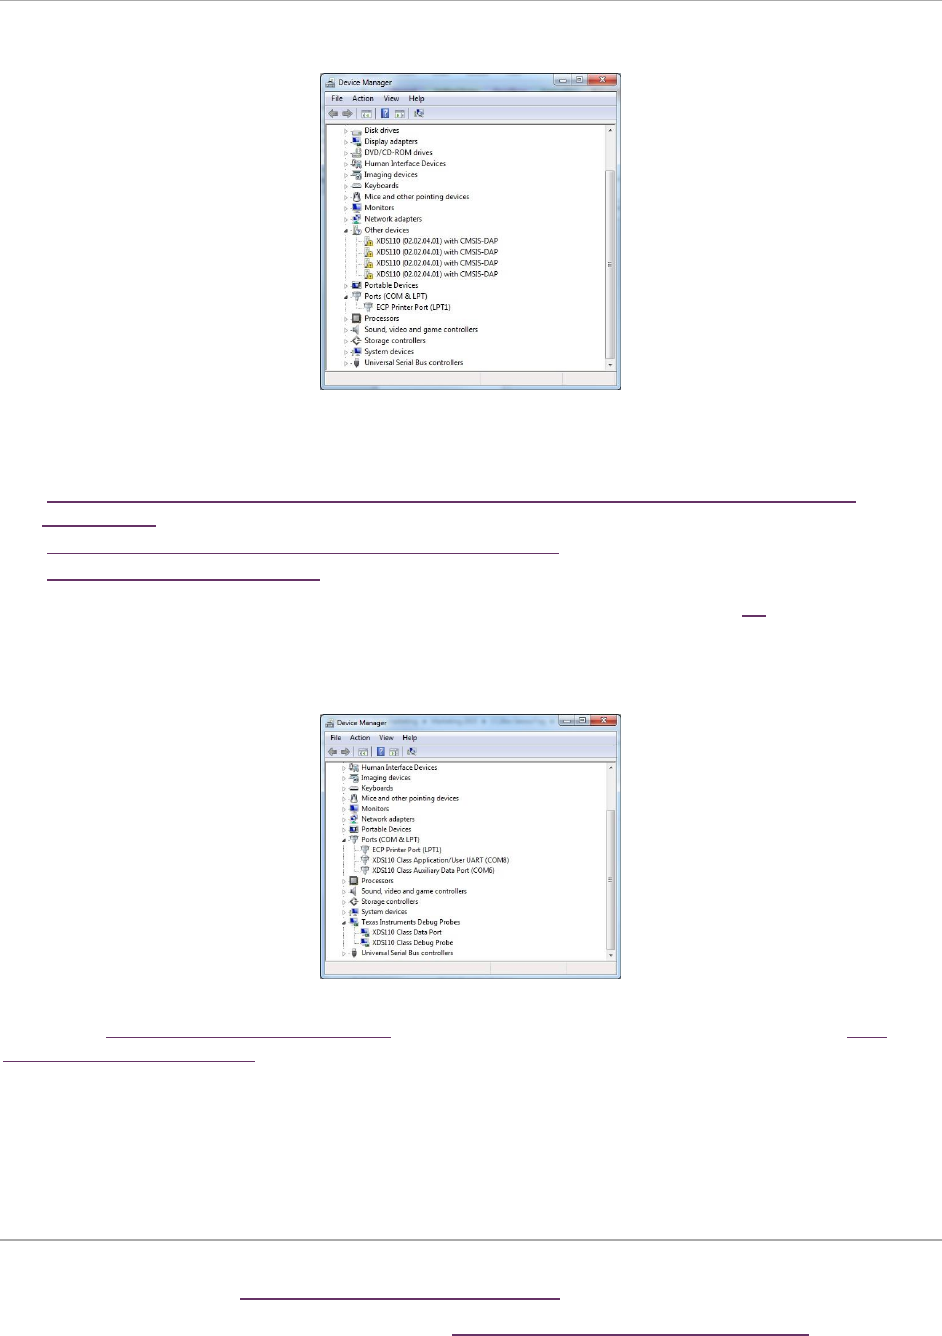
Install XDS110 drivers and tools
Before installation of drivers the XDS110 will be listed in the Windows Device Manager as an
unknown device
The Debug DevPack is using the XDS110 debug probe. This debugger is supported by a number of
tools.
[Code Composer Studio (CCS) Integrated Development Environment (IDE) for Wireless
Connectivity]
[TI Cloud Tools Including Code Composer Studio Cloud]
[SmartRF flash programmer 2]
(Official IAR IDE support is coming, meanwhile please follow these instruction: [[1]]
All of these tools include drivers for the XDS110 on the debug DevPack. When you install one of the
tools the drivers will be installed. After installing the drivers, the XDS110 will be listed in the Windows
Device Manager with 2xCOM ports and Debug/Data probes.
In addition to these tools the BLE Device Monitor is a useful tool for testing and development with
Windows: [BLE Device Monitor Download], documentation for this tool can be found here: [BLE
Device Monitor User Guide]. An added feature of the BLE device monitor is that after installation it
includes the latest hex files for the SensorTag and DevPacks at: C:\Program Files (x86)\Texas
Instruments\SmartRF Tools\BLE Device Monitor\firmware
Using the Debug DevPack with TI Cloud Tools
The TI Cloud tools are the quickest and easiest way to get started with developing and compiling
code for the SensorTag. [Here is a blog post with inspiration]
This video shows how to get started in no time: [Using the CC2650 with TI Cloud Tools]
Using the Debug DevPack with Code Composer Studio
IDE
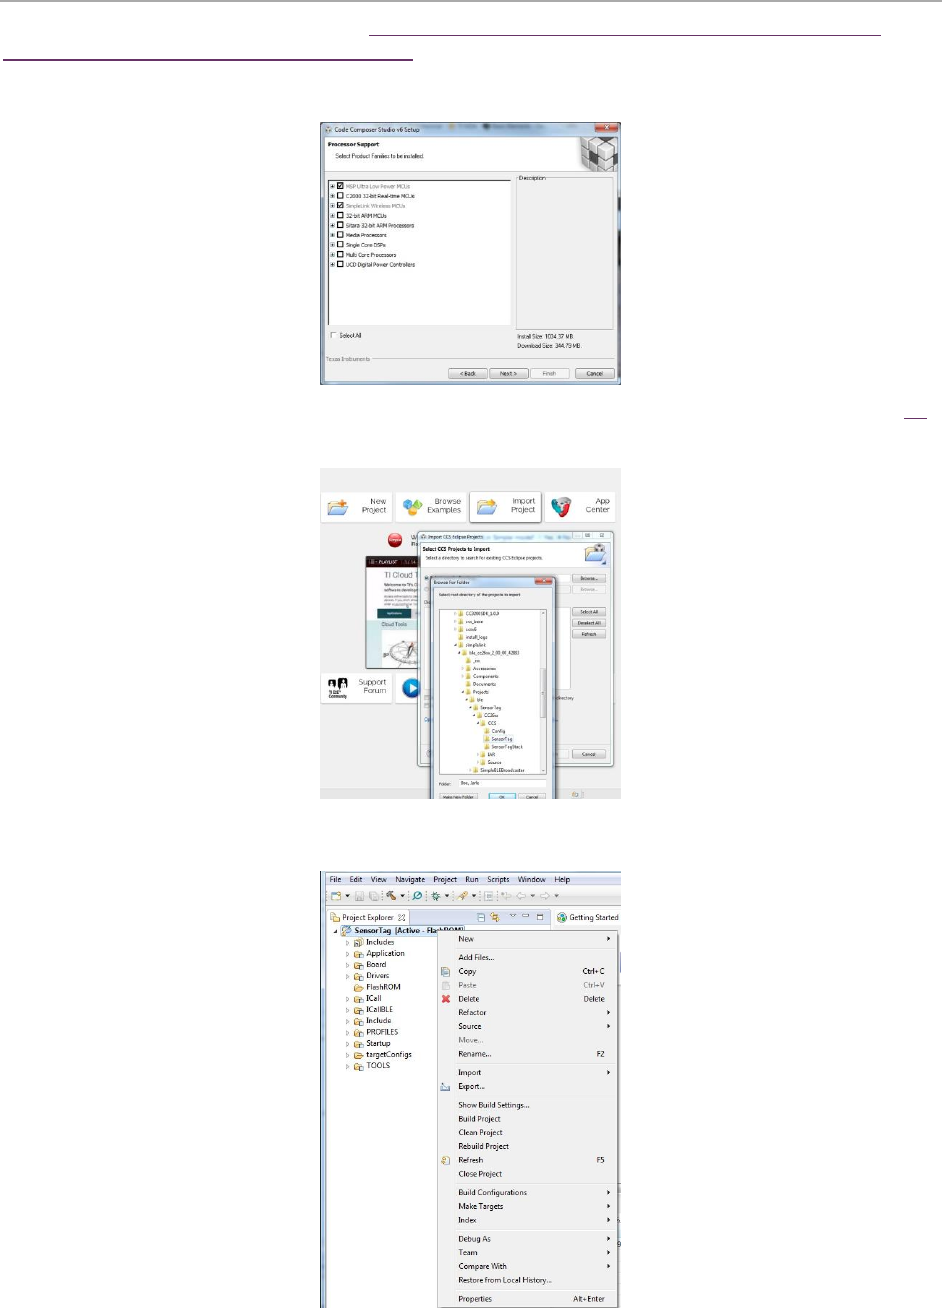
Download and Install Code Composer [Code Composer Studio (CCS) Integrated Development
Environment (IDE) for Wireless Connectivity]. During installation make sure you include support for
Simplelink Wireless MCU processor support and TI XDS Debug Probe support. Make sure you have
the latest version of CCS installed, the Debug DevPack is supported in CCS v 6.1.0 and newer.
Next download and install the BLE-stack for the SensorTag. The stack can be downloaded from [[2]].
Open Code Composer Studio, choose Import Project and open the SensorTag project.
The project explorer will now have all the SensorTag project files listed on the left side of the screen.
Right click on the SensorTag project(or press Alt+Enter)
From the General - Main - Connection pull-down menu - Select 'Texas Instruments XDS110 USB
Debug Probe'

Using the Debug DevPack with the SmartRF Flash
programmer 2
The SmartRF flash programmer 2 is the gives a quick and easy way to flash the SensorTag using
the Debug DevPack. [Download the Flash Programmer 2]. Install it and connect the SensorTag with
the Debug DevPack.
The XDS110 debugger with CC2650 will be listed on Connected Devices on the left side of the
screen.
'Important: Click once on the CC2650 text in the Connected Devices list before proceeding'
If you have installed the [BLE Device Monitor], the latest hex files for the SensorTag is located at
the
C:/Program Files (x86)/Texas Instruments/SmartRF Tools/BLE Device
Monitor/firmware/cc26xx/ folder.
From the 'Action' settings, select to program 'Pages in image' and press the blue/white arrow to
start programming.
Tips and tricks
Connections
It is not recommended to use the Debug DevPack without the USB power atteched due to the risk of
powering the Debugger from the coin cell battery on the SensorTag. The SensorTag battery voltage
will be disconnected from the Debug DevPack power supply but there is a risk that the I/O lines from
the CC2650 will power the MCU on the debugger. The following I/O DevPack signals are connected
to the MCU on the DevPack
Pin number
Name
5
DP12/AUDIO_FS/TDO

10
DP5/UART_TX
12
DP4/UART_RX
15
DP8/SCLK/TDI
Device Firmware Upgrade
In some cases when the Debugger DevPack is powered on through USB, the XDS110 may enter
Device Firmware Upgrade mode if the SensorTag is connected during power-up. The DevPack will
then identify as a "TIVA Device Firmware Upgrade" rather than an XDS110. In that case, please
unplug the DevPack from the SensorTag and from USB. Plug-in the USB connector, wait for the
green LED to power on and then plug the DevPack into the SensorTag.
JTAG and SPI Flash
The CC2650 on the SensorTag uses the same I/O pin for SPI SCLK signal and JTAG TDI signal.
The current firmware version of the XDS110 does not support the 2-pin c-JTAG standard, so it
needs to use TDI and TDO in addition to TCK and TMS (full 4-pin JTAG). Due to this shared
resource, it is not possible to access the external serial flash while debugging the SensorTag with
the Debug DevPack. An alternative can be to use the XDS100v3 on the SmartRF06EB board for
example. It supports c-JTAG.
