Flash CS6 The Missing Manual
User Manual: manual pdf -FilePursuit
Open the PDF directly: View PDF ![]() .
.
Page Count: 850 [warning: Documents this large are best viewed by clicking the View PDF Link!]
- The Missing Credits
- Introduction
- Part One: Creating a Flash Animation
- Part Two: Advanced Drawing and Animation
- Chapter 4: Organizing Frames and Layers
- Chapter 5: Advanced Drawing and Coloring
- Chapter 6: Choosing and Formatting Text
- Chapter 7: Reusable Flash: Symbols and Templates
- Chapter 8: Advanced Tweens with the Motion Editor
- Chapter 9: Realistic Animation with IK Bones
- Chapter 10: Incorporating Non-Flash Media Files
- Chapter 11: Incorporating Sound and Video
- Part Three: Adding Interactivity
- Chapter 12: Introduction to ActionScript 3.0
- Chapter 13: Controlling Actions with Events
- Chapter 14: Organizing Objects with the Display List
- Chapter 15: Controlling the Timeline and Animation
- Chapter 16: Components for Interactivity
- Chapter 17: Choosing, Using, and Animating Text
- Chapter 18: Drawing with ActionScript
- Part Four: Debugging and Delivering Your Animation
- Part Five: Appendixes
- Index
Flash CS6: The Missing Manual
by Chris Grover
Copyright © 2012 Chris Grover. All rights reserved.
Printed in the United States of America.
Published by O’Reilly Media, Inc.,
1005 Gravenstein Highway North, Sebastopol, CA 95472.
O’Reilly books may be purchased for educational, business, or sales promotional use.
Online editions are also available for most titles (
http://my.safaribooksonline.com
).
For more information, contact our corporate/institutional sales department: (800)
998-9938 or
corporate@oreilly.com
.
June 2012: First Edition.
Revision History for the 1st Edition:
2012-06-11 First release
See
http://oreilly.com/catalog/errata.csp?isbn=0636920022787
for release details.
The Missing Manual is a registered trademark of O’Reilly Media, Inc. Flash CS6: The
Missing Manual, the Missing Manual logo, and “The book that should have been in
the box” are trademarks of O’Reilly Media, Inc. Many of the designations used by
manufacturers and sellers to distinguish their products are claimed as trademarks.
Where those designations appear in this book, and O’Reilly Media is aware of a
trademark claim, the designations are capitalized.
While every precaution has been taken in the preparation of this book, the publisher
assumes no responsibility for errors or omissions, or for damages resulting from the
use of the information contained in it.
ISBN-13: 978-1-449-31625-9
[M]
www.it-ebooks.info

III
Contents
The Missing Credits ........................................ ix
Introduction ................................................ 1
Part One: Creating a Flash Animation
CHAPTER 1:
Getting Around Flash ......................................15
Starting Flash .....................................................15
A Tour of the Flash Workspace ......................................20
Panels and Toolbars ................................................25
The Flash CS6 Test Drive. . . . . . . . . . . . . . . . . . . . . . . . . . . . . . . . . . . . . . . . . . . . 35
CHAPTER 2:
Creating Simple Drawings ................................ 43
Plan Before You Draw ..............................................43
Preparing to Draw .................................................47
Drawing a Shape ...................................................53
Choosing a Drawing Mode ..........................................55
Creating Original Artwork ...........................................65
Copying and Pasting Drawn Objects .................................82
Adding Color ......................................................84
CHAPTER 3:
Animate Your Art ......................................... 91
Frame-by-Frame Animation ......................................... 91
Editing Your Frame-by-Frame Animation .............................99
Making It Move with Motion Tweens .................................103
Editing the Motion Path ............................................ 110
Copying and Pasting Properties .....................................115
Shape Tweening (Morphing) ........................................117
Par t Two: Advanced Drawing and Animation
CHAPTER 4:
Organizing Frames and Layers ........................... 127
Working with Frames ..............................................127
Working with Multiple Layers ....................................... 135
Organizing Layers .................................................148
Spotlight Eect Using Mask Layers ...................................151
www.it-ebooks.info

CONTENTS
IV
CHAPTER 5:
Advanced Drawing and Coloring ......................... 157
Selecting Graphic Elements ........................................157
Manipulating Graphic Elements .....................................170
Spray Painting Symbols ............................................195
Drawing with the Deco Tool ........................................196
Advanced Color and Fills ..........................................198
CHAPTER 6:
Choosing and Formatting Text ........................... 215
Text Questions ...................................................216
Choosing TLF or Classic Text .......................................216
About Typefaces and Fonts ........................................219
Adding Text to Your Document .................................... 220
Choosing and Using Text Containers ................................228
Animating Text Without ActionScript ...............................233
Text Properties by Subpanel .......................................239
CHAPTER 7:
Reusable Flash: Symbols and Templates ................. 247
Symbols and Instances ............................................248
Templates ....................................................... 280
CHAPTER 8:
Advanced Tweens with the Motion Editor ................ 295
Applying Motion Presets ...........................................295
Modifying a Motion Preset .........................................299
Editing a Tween Span. . . . . . . . . . . . . . . . . . . . . . . . . . . . . . . . . . . . . . . . . . . . . .307
A Tour of the Motion Editor .........................................311
Easing Tweens ....................................................320
CHAPTER 9:
Realistic Animation with IK Bones ....................... 325
Linking Symbols with Bones ........................................326
Perfect Posing with Control Handles ................................339
Baby Steps with Pins ..............................................341
Making Shapes Move with Bones ...................................342
Apply Spring to a Motion ......................................... 346
Animating an Armature with ActionScript .......................... 349
CHAPTER 10:
Incorporating Non-Flash Media Files..................... 351
Importing Graphics ...............................................351
Importing Illustrator Graphics Files .................................354
Importing Photoshop Graphic Files .................................359
Importing Fireworks Graphics ......................................361
Editing Bitmaps .................................................. 364
Editing Bitmaps with Photoshop ....................................366
Importing a Series of Graphics Files .................................368
Exporting Graphics from Flash .....................................370
www.it-ebooks.info

CONTENTS V
CHAPTER 11:
Incorporating Sound and Video .......................... 373
Incorporating Sound ..............................................374
Incorporating Video .............................................. 384
Importing Video Files .............................................396
Part Three: Adding Interactivity
CHAPTER 12:
Introduction to ActionScript 3.0 .........................407
Getting to Know ActionScript 3.0 .................................. 408
Beginning Your ActionScript Project ................................413
Object-Oriented Thinking ..........................................419
Using Data Types, Variables, and Constants ..........................429
Conditionals and Loops ............................................436
Combining ActionScript’s Building Blocks ..........................440
CHAPTER 13:
Controlling Actions with Events..........................443
How Events Work ................................................ 443
Mouse Events ................................................... 445
Getting Help for Events and Event Listeners ........................ 448
Keyboard Events and Text Events ...................................471
Keeping Time with TimerEvent .....................................476
Removing Event Listeners .........................................477
In Case of Other Events ............................................478
CHAPTER 14:
Organizing Objects with the Display List ................. 481
The Display List: Everything in Its Place ..............................481
Adding Objects to the Display List ................................. 483
Managing the Stacking Order .....................................500
Summary of Properties and Methods ................................507
CHAPTER 15:
Controlling the Timeline and Animation ................. 513
Slowing Down (or Speeding Up) Animation ..........................514
Timeline Stop and Go .............................................519
Organizing Your Animation ........................................522
Looping a Series of Frames ........................................536
Reversing a Series of Frames .......................................541
CHAPTER 16:
Components for Interactivity ............................543
Adding Components ............................................. 544
The Built-In Components ..........................................558
Finding Additional Components ....................................579
www.it-ebooks.info

CONTENTS
VI
CHAPTER 17:
Choosing, Using, and Animating Text .................... 581
What Font Does Your Audience Have? ..............................581
Controlling Text with ActionScript ..................................585
Creating Text Fields with ActionScript ...............................591
Formatting Characters and Paragraphs ..............................596
Formatting with HTML and CSS ...................................600
Choosing the Right Text Formatting System ........................ 608
CHAPTER 18:
Drawing with ActionScript ................................611
What’s the Point? ................................................. 611
Beginning with the Graphics Class ..................................615
Drawing Lines ....................................................616
Drawing Curves ...................................................619
Drawing Built-In Shapes ...........................................622
Drawing Irregular Shapes ..........................................625
Making Drawings Move ............................................626
Removing Lines and Shapes .......................................632
Part Four: Debugging and Delivering Your
Animation
CHAPTER 19:
Testing and Debugging Your Animation ................. 637
Testing Strategies .................................................637
Testing on the Stage ..............................................641
Using the Test Movie Commands ...................................642
Testing Inside a Web Page ........................................644
Testing Download Time ...........................................646
The Art of Debugging .............................................652
Analyzing Code with the Debugger .................................662
CHAPTER 20:
Publishing and Exporting ................................669
Optimizing Flash Documents ...................................... 669
Publishing Your Animations ........................................677
Exporting Flash to Other Formats ................................. 699
CHAPTER 21:
Introducing Adobe AIR ..................................705
Meet Adobe AIR ..................................................705
Creating Your First AIR Application .................................707
Create a Code Signing Certificate ...................................710
Convert a Flash Animation to AIR ...................................713
Publish Your AIR Application .......................................715
Manually Install Adobe AIR Runtime ................................720
www.it-ebooks.info

CONTENTS VII
CHAPTER 22:
Making iPhone Apps ..................................... 721
Your First “Hello iPad” App ........................................722
Joining the iOS Developer Program .................................723
Air for iOS App Settings ...........................................738
Building a Tap-Ready App .........................................745
Tips for iOS App Development .....................................749
CHAPTER 23:
Building Android Apps ................................... 751
Meet AIR for Android ..............................................752
Building Apps for Both iOS and Android ............................ 760
Tips for Android App Development .................................763
Part Five: Appendixes
APPENDIX A:
Installation and Help ..................................... 767
Flash CS6 Minimum System Requirements ...........................767
Getting Help from Flash ...........................................770
Getting Help from Adobe ..........................................771
More Flash Books .................................................772
Finding Flash Gurus ...............................................773
APPENDIX B:
Flash ProfessionalCS6, Menu by Menu ................... 775
File ..............................................................775
Edit .............................................................779
View ............................................................784
Insert ............................................................788
Modify .......................................................... 790
Text .............................................................798
Commands .......................................................799
Control .........................................................800
Debug .......................................................... 802
Window ........................................................ 804
Help ............................................................ 809
Index..................................................... 813
www.it-ebooks.info

THE MISSING CREDITS IX
The Missing Credits
ABOUT THE AUTHOR
Chris Grover is a veteran of the San Francisco Bay Area advertising
and design community, having worked for over 25 years in print,
video, and electronic media. He has been using and writing about
computers from the day he first fired up his Kaypro II. Chris is the
owner of Bolinas Road Creative (
www.BolinasRoad.com
), an agency
that helps small businesses promote their products and services. His
writing has appeared in a range of media from
Fine Homebuilding
to
Macworld.com
.
He’s also the author of
Oce 2011 for Macintosh: The Missing Manual
,
Adobe Edge
Preview 5: The Missing Manual
, and several other books in the Missing Manual series.
ABOUT THE CREATIVE TEAM
Nan Barber (editor) has been working on the Missing Manual series since its incep-
tion. She lives in Massachusetts with her husband and various Apple products. Email:
nanbarber@oreilly.com
.
Rachel Steely (production editor) is an avid lover of books in all their forms, and can
typeset, illustrate, and bind a book by hand. She enjoys traveling and speaks fluent
Spanish. In her spare time, she draws Celtic knotwork, reads, and plays the violin.
Julie Van Keuren (proofreader) quit her newspaper job in 2006 to move to Montana
and live the freelancing dream. She and her husband, M.H. (who is living the novel-
writing dream), have two sons, Dexter and Michael. Email:
little_media@yahoo.com
.
Ron Strauss (indexer) specializes in the indexing of information technology publica-
tions of all kinds. Ron is also an accomplished classical violist and lives in northern
California with his wife and fellow indexer, Annie, and his miniature pinscher, Kanga.
Email:
rstrauss@mchsi.com
.
Chris Deely (tech reviewer) is a software developer living in Philadelphia with his
wife, Nichole, and their son, Christopher Jr. He has been working with the Flash
platform since 2004, building applications with ActionScript, Flex, and AIR. Chris
currently leads a User Interface development team responsible for building enter-
prise application front-ends.
Tina Spargo (technical reviewer), her husband (and professional musician) Ed,
their children, Max and Lorelei, and their two silly Spaniels, Parker (Clumber) and
Piper (Sussex), all share time and space in their suburban Boston home. Tina jug-
gles being an at-home mom with promoting and marketing Ed’s musical projects
and freelancing as a virtual assistant. Tina has over 20 years’ experience support-
ing top-level executives in a variety of industries. Website:
www.tinaspargo.com
.
www.it-ebooks.info

THE MISSING CREDITS
X
ACKNOWLEDGMENTS
I’m always amazed at the number of pros it takes to create a book like Flash CS6:
The Missing Manual. My thanks go out to everyone who worked on this book. Nan
Barber has worked with me on several books and her skill and grace under fire is
always appreciated. I’d also like to thank Rachel Steely for coordinating the produc-
tion and Ron Strauss for writing the index. Rebecca Demarest managed to take my
screenshots and crude charts and make them suitable for publication. A special
thanks to the people who catch the errors that always try to sneak onto the pages:
technical reviewers Chris Deely and Tina Spargo and proofreader Julie Van Keuren.
And of course, thanks to Joyce, my wife, who helps me in everything I do.
—
Chris Grover
THE MISSING MANUAL SERIES
Missing Manuals are witty, superbly written guides to computer products that don’t
come with printed manuals (which is just about all of them). Each book features
a handcrafted index; cross-references to specific pages (not just chapters); and
RepKover, a detached-spine binding that lets the book lie perfectly flat without the
assistance of weights or cinder blocks.
Recent and upcoming titles include:
•
Access 2010: The Missing Manual
by Matthew MacDonald
•
Buying a Home: The Missing Manual
by Nancy Conner
•
CSS: The Missing Manual, Second Edition
, by David Sawyer McFarland
•
Creating a Website: The Missing Manual, Third Edition
, by Matthew MacDonald
•
David Pogue’s Digital Photography: The Missing Manual
by David Pogue
•
Dreamweaver CS5.5: The Missing Manual
by David Sawyer McFarland
•
Dreamweaver CS6: The Missing Manual
by David Sawyer McFarland
•
Droid X: The Missing Manual
by Preston Gralla
•
Droid 2: The Missing Manual
by Preston Gralla
•
Droid X2: The Missing Manual
by Preston Gralla
•
Excel 2010: The Missing Manual
by Matthew MacDonald
•
Facebook: The Missing Manual
, Third Edition by E.A. Vander Veer
•
FileMaker Pro 11: The Missing Manual
by Susan Prosser and Stuart Gripman
•
Flash CS5.5: The Missing Manual
by Chris Grover
•
Galaxy S II: The Missing Manual
by Preston Gralla
www.it-ebooks.info

THE MISSING CREDITS XI
•
Galaxy Tab: The Missing Manual
by Preston Gralla
•
Google+: The Missing Manual
by Kevin Purdy
•
Google Apps: The Missing Manual
by Nancy Conner
•
Google SketchUp: The Missing Manual
by Chris Grover
•
HTML5: The Missing Manual
by Matthew MacDonald
•
iMovie ’11 & iDVD: The Missing Manual
by David Pogue and Aaron Miller
•
iPad 2: The Missing Manual, Third Edition
by J.D. Biersdorfer
•
iPhone: The Missing Manual, Fifth Edition
by David Pogue
•
iPhone App Development: The Missing Manual
by Craig Hockenberry
•
iPhoto ’11: The Missing Manual
by David Pogue and Lesa Snider
•
iPod: The Missing Manual, Tenth Edition
by J.D. Biersdorfer and David Pogue
•
JavaScript & jQuery: The Missing Manual, Second Edition
by David Sawyer
McFarland
•
Kindle Fire: The Missing Manual
by Peter Meyers
•
Living Green: The Missing Manual
by Nancy Conner
•
Mac OS X Lion: The Missing Manual
by David Pogue
•
Mac OS X Mountain Lion: The Missing Manual
by David Pogue
•
Microsoft Project 2010: The Missing Manual
by Bonnie Biafore
•
Motorola Xoom: The Missing Manual
by Preston Gralla
•
Netbooks: The Missing Manual
by J.D. Biersdorfer
•
NOOK Tablet: The Missing Manual
by Preston Gralla
•
Oce 2010: The Missing Manual
by Nancy Connor, Chris Grover, and Matthew
MacDonald
•
Oce 2011 for Macintosh: The Missing Manual
by Chris Grover
•
Palm Pre: The Missing Manual
by Ed Baig
•
Personal Investing: The Missing Manual
by Bonnie Biafore
•
Photoshop CS5: The Missing Manual
by Lesa Snider
•
Photoshop CS6: The Missing Manual
by Lesa Snider
•
Photoshop Elements 10: The Missing Manual
by Barbara Brundage
•
PHP & MySQL: The Missing Manual
by Brett McLaughlin
•
PowerPoint 2007: The Missing Manual
by E.A. Vander Veer
www.it-ebooks.info

THE MISSING CREDITS
XII
•
Premiere Elements 8: The Missing Manual
by Chris Grover
•
QuickBase: The Missing Manual
by Nancy Conner
•
QuickBooks 2012: The Missing Manual
by Bonnie Biafore
•
QuickBooks 2013: The Missing Manual
by Bonnie Biafore
•
Quicken 2009: The Missing Manual
by Bonnie Biafore
•
Switching to the Mac: The Missing Manual, Lion Edition
by David Pogue
•
Switching to the Mac: The Missing Manual, Mountain Lion Edition
by David Pogue
•
Wikipedia: The Missing Manual
by John Broughton
•
Windows XP Home Edition: The Missing Manual, Second Edition
, by David Pogue
•
Windows XP Pro: The Missing Manual, Second Edition
, by David Pogue, Craig
Zacker, and Linda Zacker
•
Windows Vista: The Missing Manual
by David Pogue
•
Windows 7: The Missing Manual
by David Pogue
•
Word 2007: The Missing Manual
by Chris Grover
•
Your Body: The Missing Manual
by Matthew MacDonald
•
Your Brain: The Missing Manual
by Matthew MacDonald
•
Your Money: The Missing Manual
by J.D. Roth
For a full list of all Missing Manuals in print, go to
www.missingmanuals.com/library
.html
.
www.it-ebooks.info

1
Flash’s evolution is unique, even for the fast-changing computer software world.
First released in 1996 under the name FutureSplash, it was a tool for creating
web-based animations. It’s still the go-to application for that job; however,
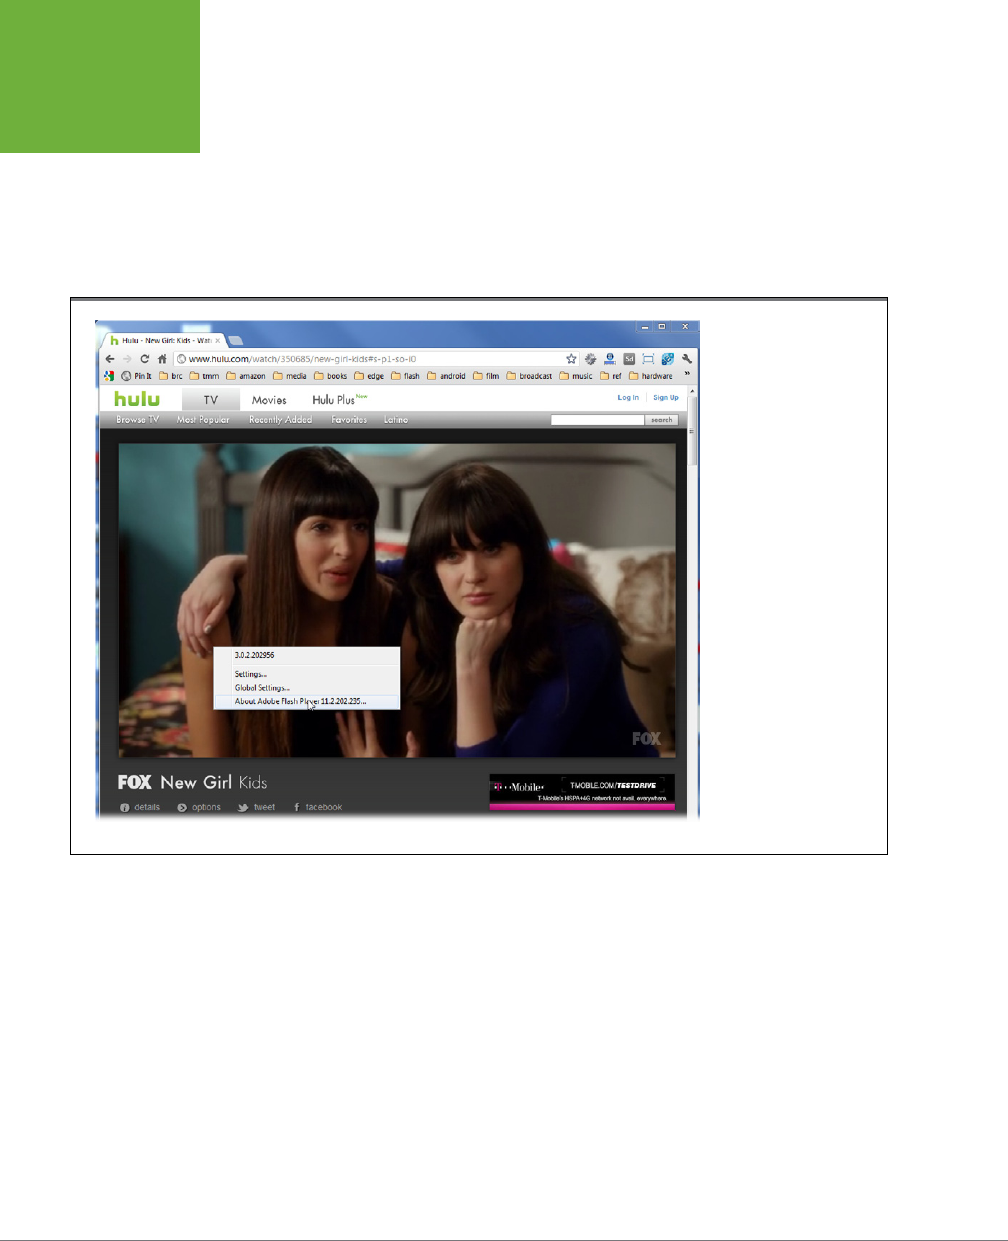
along the way it’s acquired new capabilities. Today, Flash powers video websites
like YouTube and Hulu (Figure I-1). It’s used to develop desktop applications like
eBay Desktop. As you read this, Flash/ActionScript pros are developing the next
generation of apps for handheld devices like the Droid RAZR and the iPhone. Flash
has grown up with the World Wide Web and managed to carve out an important
niche. In fact, there are a whole slew of programs that make use of Flash technol-
ogy. They include Flex, Flash Builder, and Flash Catalyst. Still, if you want to learn
Flash’s design and animation features as well as its programming and development
features, then Flash Professional CS6 is the place to start.
Here are just some of the things you can do with Flash:
• Animate. You can create original artwork using Flash’s tools, or you can add
images from your other favorite programs. Flash recognizes the most common
image, video, and sound file formats. Once your artwork is in Flash, you can
add motion, sound, and dazzling eects. Surely you’ve spent some quality time
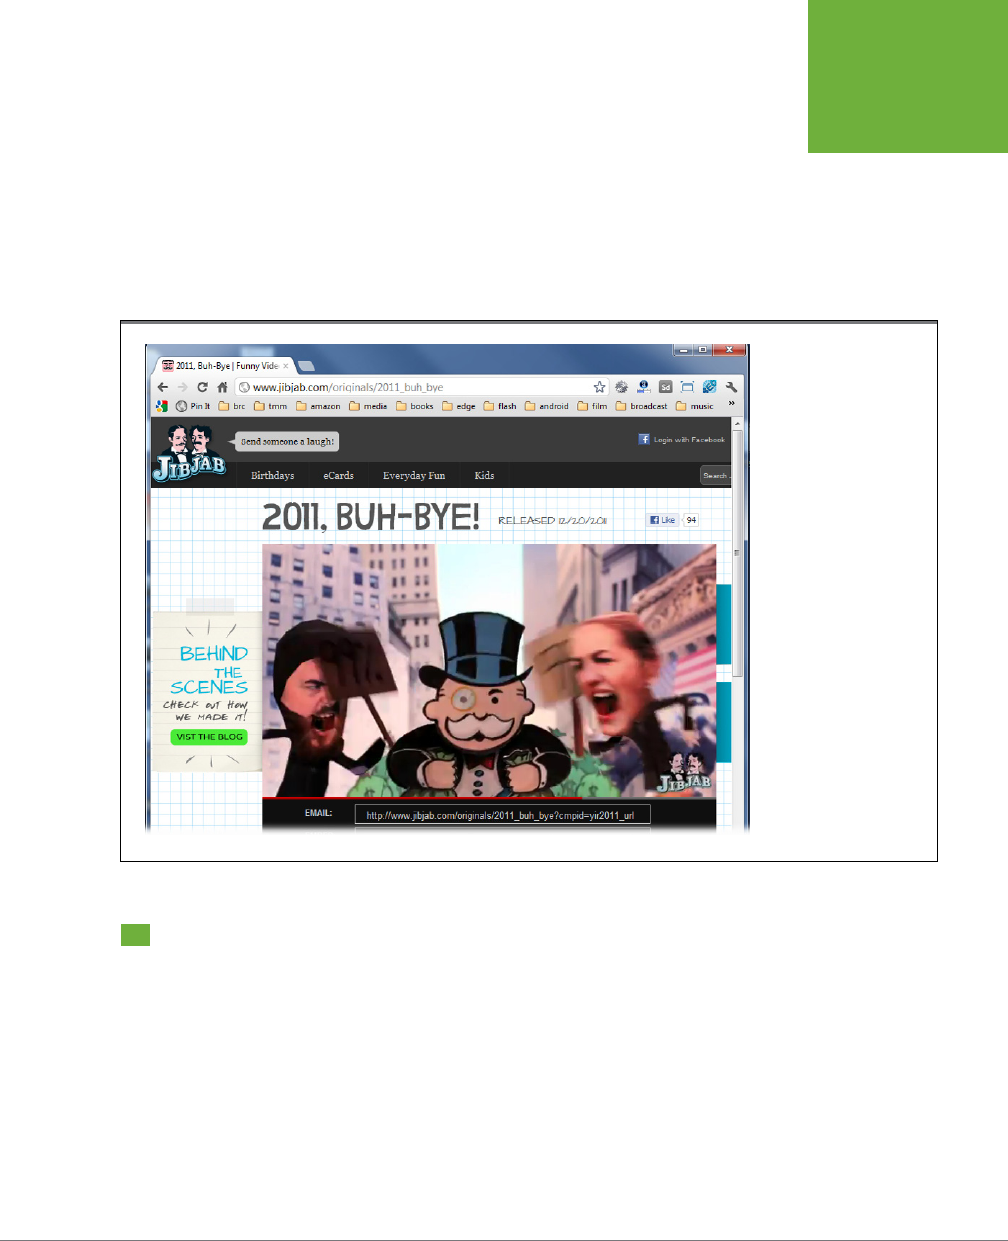
watching JibJab cartoons (Figure I-2).
• Multimedia websites. Today’s websites include motion, video, background
music, and above all, interactive objects. Flash’s built-in programming language,
ActionScript, was designed to create interactive objects. You can create eye-
catching, attention-grabbing websites with Flash. It’s your choice whether
you sprinkle Flash bits on various pages or go whole-hog and develop a 100
percent Flash site.
Introduction
www.it-ebooks.info
FLASH CS6: THE MISSING MANUAL
2
WHAT’S NEW
IN FLASH
PROFESSIONAL
CS6
• Tutorials. Web-based training courses, which often include a combination of
text, drawings, animations, video clips, and voice-overs, are a natural fit for
Flash. By hooking Flash up to a server on the back end, you can even present
your audience with graded tests and up-to-the-minute product information. You
don’t have to deliver your tutorials over the web, though; you can publish them
as standalone projector files (Chapter 20) or AIR applications (Chapter21) and
deliver them to your students via CDs, DVDs, or mobile apps.
FIGURE I-1
Sites like Hulu and
YouTube have made
great use of Flash’s video
abilities. You can check
any site to see whether
it’s using Flash behind the
scenes. Just right-click (or
Control-click) an image
that you think might be
Flash. If it says “About
Flash Player” at the bot-
tom of the pop-up menu,
you guessed right.
• Presentations. PowerPoint presentations are fine…up to a point. With Flash,
you can create self-running presentations that are more creative and have a
higher degree of interactivity.
• Customer service kiosks. Many of the kiosks you see in stores and building
lobbies use Flash to help customers find what they need. For example, photo
kiosks walk customers through the process of transferring images from their
digital cameras and ordering prints; kiosks in banks let customers withdraw
funds, check interest rates, and make deposits.
• Television and film eects. The Hollywood set has been known to use Flash
to create visual eects for TV shows and even small feature films. But where
the TV and film industry is seriously adopting Flash is on promotional websites,
where designers can wed Flash graphics to scenes taken from their movies and
www.it-ebooks.info
INTRODUCTION 3
WHAT’S NEW
IN FLASH
PROFESSIONAL
CS6
shows to present powerful trailers, interactive tours of movie and show sets,
and teasers.
• Games and other programs. With support for runtime scripting, back-end data
transfers, and interactive controls like buttons and text boxes, Flash has every-
thing a programmer needs to create entertaining, professional-looking games.
• Mobile apps. With Flash CS6, the biggest change is the ease with which you
can develop apps for mobile devices, from iPads to Androids.
FIGURE I-2
With a little creativity,
your Flash animations
can capture the public’s
attention. Just ask the
folks at JibJab.
What’s New in Flash Professional CS6
Flash has been evolving and adding features at a breakneck pace since Adobe
acquired Macromedia at the end of 2005. There are many benefits to being part
of Adobe’s Creative Suite, primarily the smooth interaction with applications such
as Photoshop, Illustrator, and Dreamweaver. If you’ve used other Adobe programs,
you’ll also welcome the consistency in drawing, text, and color-choosing tools. By
the same token, if you’re new to the Adobe family, the skills you learn in Flash will
come in handy if you move on to other Adobe products.
The last few versions of Flash Professional introduced a slew of new features. For
example, CS4 added a more powerful, yet easy-to-use motion tween, complete
www.it-ebooks.info

FLASH CS6: THE MISSING MANUAL
4
WHAT’S NEW
IN FLASH
PROFESSIONAL
CS6
with Motion Editor. New 3-D capabilities opened up the world of motion, and IK
Bones (inverse kinematics) made it easy for animators to link objects for realistic
movement. Flash CS5 added a new text engine called Text Layout Framework
(TLF), which provides the kind of text control that you’d find in Adobe Illustrator
or InDesign, and Adobe simplified the mysterious process of font embedding. IK
bones were enhanced with a new Spring property. ActionScript coding was made
easier with code snippets—cut and paste bits of code that are easy to drop into your
document.
Code hinting
provides an instant reference and tips on what to do next.
Flash CS5 also made it easier to build Adobe AIR projects that run as standalone
programs on Windows, Mac, and Linux computers. An interim release, Flash CS5.5
added the ability to develop apps for iOS (iPhones and iPads) and Android devices.
Of course, all those features are covered in this book, along with the latest batch
of enhancements. Flash CS6 comes quickly on the heels of the incremental release
CS5.5 and refines many of the features added then. The development of mobile
apps heads the list:
• App development for multiple devices. It’s easier than ever to develop an
application that works on desktops (Windows, Mac, and Linux) and mobile
devices like smartphones and tablets. Flash enhancements make it easier to
share files and scale projects for a variety of screen sizes.
• Built-in iPhone and iPad App Packager. The much-publicized squabble be-
tween Apple and Adobe is at least partially resolved. Using Flash, you can build
apps for all of Apple’s iDevices.
• Built-in Android app packager. Use your Flash skills to build apps for Android
smartphones and tablets. Test your apps immediately on devices connected
by USB cables.
• The Simulator is a new tool used when you’re debugging mobile apps. It gives
you the ability to test mobile features, such as touchscreen gestures, on your
desktop computer.
• Bundle AIR runtime with apps. If you’re publishing apps, now you can include
the AIR runtime with your apps, saving your audience the extra step of down-
loading the runtime.
• Templates and code snippets for mobile devices. Adobe has added to the
library of templates and code snippets, making it easier to develop apps for
iPhones, iPads, and Android mobile devices. You’ll find snippets that show how
to interact with touchscreen gestures such as swipes and pinches. Templates
show how to use built-in accelerometers and geo-location features.
• Pin IK bones.
Pinning
locks IK bones to a specific position on the stage, making
it much easier to create poses and control your models.
• Copying layers. Flash preserves structure and other details when copying lay-
ers between files and projects.
www.it-ebooks.info

INTRODUCTION 5
ANIMATION
ABCS
• Symbol rasterization. The
cache as bitmap
feature converts vector art to
bitmaps, increasing mobile device performance, CPU eciency, and improving
battery life.
• Auto-save and file recovery. Like your favorite word processor, Flash now
has a feature that automatically saves your documents. Should disaster strike,
you’re less likely to lose your work.
• Incremental compilation. Flash is smarter when compiling (publishing) your
document for testing. As a result, there’s a shorter wait when you repeatedly
make changes and test your work.
• Conversion to HTML and JavaScript. Some web animation features that were
almost exclusively the domain of Flash are now possible with HTML (hypertext
markup language), JavaScript, and jQuery. Flash CS6 has the ability to export
part or all of an animation for use in HTML or JavaScript projects.
Animation ABCs
Animators used to draw each and every frame by hand. Sure, they developed some
shortcuts, but that’s still hundreds or thousands of images depending on the length
of the animation. Major animation houses employed whole armies of graphic art-
ists, each charged with producing hundreds of drawings that represented a mere
fraction of the finished work. What we chuckled at for a scant few minutes took
weeks and dozens of tired, cramped hands to produce. One mistake, one spilled
drop of coee, and these patient-as-Job types would have to grab fresh paper and
start all over again. When everything was done, the animation would have to be put
together—much like one of those flip books where you flip pages real fast to see a
story play out—while it was being filmed by special cameras.
With Flash on your computer, you have the equivalent of a design studio at your
fingertips. You provide the inspiration, and Flash can help you generate pro-quality
animations and full-blown interactive applications.
An Animation by Any Other Name
You may occasionally hear Flash animations referred to (by
books, websites, and even Flash’s own documentation) as
movies
. Perhaps that’s technically accurate, but it sure can
be confusing.
QuickTime’s .mov files are also called movies, and some people
refer to video clips as movies; but to Flash, these are two very
different animals. In addition, Flash lets you create and work
with movie clips, which are something else entirely. And
movie
,
with its connotations of quietly sitting in a theater balcony
eating popcorn, doesn’t convey one of the most important
features Flash offers: interactivity.
Here’s the most accurate way to describe what you create using
Flash: a website, program, or app with a really cool, animated
interface. Unfortunately, that description is a bit long and
unwieldy, so in this book, what you create using Flash is called
an
animation
or an
app
.
UP TO SPEED
www.it-ebooks.info

FLASH CS6: THE MISSING MANUAL
6
FLASH IN A
NUTSHELL
It’s pretty incredible, when you think about it. A few hundred bucks and a few hours
spent working with Flash, and you’ve got an animation that, just a few years ago,
you’d have had to pay a swarm of professionals union scale to produce. Sweet!
Naturally, if you’re new to animation, it will go easier if you learn the basic terms,
tricks, and techniques used by Flash animators.
Flash in a Nutshell
Say you work for a company that does custom auto refinishing. First assignment:
Design an intro page for the company’s new website. You have the following idea
for an animation:
The first thing you want your audience to see is a beat-up jalopy limping along a
city street toward the center of the screen, where it stops and morphs into a shiny,
like-new car as your company’s jingle plays in the background. A voice-over informs
your audience that your company has been in business for 20 years and oers the
best prices in town.
Across the top of the screen, you’d like to display the company logo, as well as a
navigation bar with buttons—labeled Location, Services, Prices, and Contact—that
your audience can click to get more information about your company. But you also
want each part of the car to be a clickable hotspot. That way, when someone clicks
one of the car’s tires, he’s whisked o to a page describing custom wheels and
hubcaps; when he clicks the car’s body, he sees prices for dent repair and repaint-
ing; and so on.
Here’s how you might go about creating this animation in Flash:
• Using Flash’s drawing tools, you draw the artwork for every
keyframe
of the
animation—that is, every important image. For example, you’ll need to create
a keyframe showing the beat-up junker and a second keyframe showing the
gleaming, expertly refurbished result. (Chapter 2 shows you how to draw artwork
in Flash; Chapter 3 tells you everything you need to know about keyframes.)
• Within each keyframe, you might choose to separate your artwork into dierent
layers
. Like the see-through plastic cels that professional animators used in the
old days, layers let you create images separately and then stack them on top of
one another to make a single composite image. For example, you might choose
to put the car on one layer, your company logo on a second layer, and your
city-street background on a third layer. That way, you can edit and animate each
layer independently, but when the animation plays, all three elements appear
to be on one seamless layer. (Chapter 4 shows you how to work with layers.)
• Through a process called
tweening
, you tell Flash to fill in each and every frame
between
the keyframes to create the illusion of the junker turning slowly into
a brand-new car. Flash carefully analyzes all the dierences between the key-
frames and does its best to build the interim frames, which you can then tweak
www.it-ebooks.info

INTRODUCTION 7
THE VERY
BASICS
or—if Flash gets it all wrong—redraw yourself. (Chapter 3 introduces tweens,
and Chapter 8 gives you the lowdown on advanced techniques.)
• As you go along, you might decide to save a few of the elements you create
(for example, your company logo) so you can reuse them later. There’s no sense
in reinventing the wheel, and in addition to saving you time, reusing elements
actually helps keep your animation files as small and ecient as possible. (See
Chapter 7 for details on creating and managing reusable elements.)
• Add the background music and voice-over audio clips, which you’ve created in
other programs (Chapter 11).
• Create the navigation bar buttons, hotspots, and other ways for your audience
to interact with your animation (Chapters 12–18).
• Test your animation (Chapter 19) and tweak it to perfection.
• Finally, when your animation is just the way you want it, you’re ready to
publish
it. Without leaving the comfort of Flash, you can convert the editable
.fla
file
you’ve been working with into a noneditable
.swf
file and either embed it into
an HTML file or create a standalone
projector
file that your audience can run
without having to use a browser. Chapter 20 tells you everything you need to
know about publishing.
The scenario described above is pretty simple, but it covers the basic steps you need
to take when creating any Flash animation.
The Very Basics
You’ll find very little jargon or nerd terminology in this book. You will, however, en-
counter a few terms and concepts that you’ll use frequently in your computing life:
• Clicking. This book gives you three kinds of instructions that require you to
use your computer’s mouse or trackpad. To
click
means to point the arrow cur-
sor at something on the screen and then—without moving the cursor at all—to
press and release the left clicker button on the mouse (or laptop trackpad). To
double-click
, of course, means to click twice in rapid succession, again without
moving the cursor at all. And to
drag
means to move the cursor while pressing
the left button continuously.
• Keyboard shortcuts. Every time you take your hand o the keyboard to move
the mouse, you lose time and potentially disrupt your creative flow. That’s why
many experienced computer fans use keystroke combinations instead of menu
commands wherever possible. Ctrl+B (⌘-B), for example, is a keyboard shortcut
for boldface type in Flash (and most other programs).
When you see a shortcut like Ctrl+S (⌘-S) (which saves changes to the current
document), it’s telling you to hold down the Ctrl or ⌘ key, and, while it’s down,
type the letter S, and then release both keys.
www.it-ebooks.info

FLASH CS6: THE MISSING MANUAL
8
ABOUT THIS
BOOK
• Choice is good. Flash frequently gives you several ways to trigger a particular
command—by choosing a menu command,
or
by clicking a toolbar button,
or
by pressing a key combination, for example. Some people prefer the speed of
keyboard shortcuts; others like the satisfaction of a visual command array avail-
able in menus or toolbars. This book lists all the alternatives, but by no means
are you expected to memorize all of them.
About This Book
Despite the many improvements in software over the years, one feature has grown
consistently worse: documentation. With the purchase of most software programs
these days, you don’t get a single page of printed instructions. To learn about the
hundreds of features in a program, you’re expected to use online electronic help.
But even if you’re comfortable reading a help screen in one window as you try
to work in another, something is still missing. At times, the terse electronic help
screens assume you already understand the discussion at hand and hurriedly skip
over important topics that require an in-depth presentation. In addition, you don’t
always get an objective evaluation of the program’s features. (Engineers often add
technically sophisticated features to a program because they
can
, not because you
need them.) You shouldn’t have to waste your time learning features that don’t help
you get your work done.
The purpose of this book, then, is to serve as the manual that should have been in the
box. In this book’s pages, you’ll find step-by-step instructions for using every Flash
feature, including those you may not have quite understood, let alone mastered,
such as working with video or drawing objects with ActionScript. In addition, you’ll
find clear evaluations of each feature that help you determine which ones are useful
to you, as well as how and when to use them.
NOTE This book periodically recommends
other
books, covering topics that might interest Flash designers
and developers. Careful readers may notice that not every one of these titles is published by Missing Manual
parent company O’Reilly Media. While we’re happy to mention other Missing Manuals and books in the O’Reilly
family, if there’s a great book out there that doesn’t happen to be published by O’Reilly, we’ll still let you know
about it.
Flash CS6: The Missing Manual
is designed for readers of every skill level, except the
super-advanced programmer. If Flash is the first image creation or animation program
you’ve ever used, you’ll be able to dive right in using the explanations and examples
in this book. If you come from an animation or multimedia background, you’ll find
this book a useful reference for unique Flash topics such as the motion tweens
and the Motion Editor. The primary discussions are written for advanced-beginner
or intermediate computer users. But if you’re a first-timer, special sidebar articles
called Up to Speed provide the introductory information you need to understand
the topic at hand. If you’re an advanced user, on the other hand, keep your eye out
for similar shaded boxes called Power Users’ Clinic. They oer more technical tips,
www.it-ebooks.info

INTRODUCTION 9
ABOUT THIS
BOOK
tricks, and shortcuts for the experienced Flash fan. The Design Time boxes explain
the art of eective multimedia design.
The ActionScript programming language is a broad, complex subject. This book isn’t
an exhaustive reference manual, but it gives you a great introduction to ActionScript
programming, providing working examples and clear explanations of ActionScript
principles.
Macintosh and Windows
Flash Professional CS6 works almost precisely the same in its Macintosh and Windows
versions. You’ll find the same buttons in almost every dialog box. Occasionally, they’ll
be dressed up dierently. In this book, the illustrations have been given even-handed
treatment, rotating between Windows 7 and Mac OS X.
Shortcut keys are probably the area where the Mac and Windows versions dier the
most. Often where Windows uses the Ctrl key, Macs use the ⌘ key. You’ll find some
other relatively minor dierences, too.
Whenever this book refers to a key combination, you’ll see the Windows keystroke
listed first (with + symbols, as is customary in Windows documentation); the
Macintosh keystroke follows in parentheses (with - symbols, in time-honored Mac
fashion). In other words, you might read, “The keyboard shortcut for saving a file
is Ctrl+S (⌘-S).”
About the Outline
Flash CS6: The Missing Manual
is divided into five parts, each containing several
chapters:
• Part 1, Creating a Flash Animation guides you through the creation of your
very first Flash animation, from the first glimmer of an idea to drawing images,
animating those images, and testing your work.
• Part 2, Advanced Drawing and Animation is the designer’s feast. Here you’ll
see how to manipulate your drawings by rotating, skewing, stacking, and align-
ing them; how to add color, special eects, and multimedia files like audio and
video clips; how to slash file size by turning bits and pieces of your drawings
into special elements called symbols; and how to create composite drawings
using layers. Text is an increasingly important part of Flash animations and
applications, so this section introduces important text topics. In Part 3, you’ll
learn how ActionScript works with text. In this section, you’ll learn about the
Motion Editor and how to use the IK Bones feature (Chapter 9).
• Part 3, Adding Interactivity shows you how to add ActionScript 3.0 actions to
your animations, creating on-the-fly special eects and giving your audience the
power to control your animations. An entire chapter is devoted to predesigned
components, like buttons, checkboxes, sliders, and scrolling lists. Powerful but
easy to use, these components give your animation professional functions and
style. This section includes lots of examples and ActionScript code. You can
www.it-ebooks.info
FLASH CS6: THE MISSING MANUAL
10
ABOUT THE
ONLINE
RESOURCES
copy and modify some of the practical examples for your own projects. You’ll
see how to loop frames and how to let your audience choose which section of
an animation to play, and how to customize the prebuilt interactive components
that come with Flash. You’ll find specific chapters on using ActionScript with
text and using ActionScript to draw.
• Part 4, Debugging and Delivering Your Animation focuses on testing, de-
bugging, and optimizing your animation. You’ll also find out how to publish
your animation so that your audience can see and enjoy it, and how to export
an editable version of your animation so that you can rework it using another
graphics, video editing, or web development program. The last three chapters
focus on Adobe AIR, a system for creating standalone apps using Flash. You’ll
learn how to deliver these apps to Windows, Mac, and Linux desktops, as well
as iPhones, iPads, and Android mobile devices.
• Part 5 has two Appendixes: Appendix A: Installation and Help, explains how
to install Flash and where to turn for help. Appendix B: Flash Professional CS6,
Menu by Menu, provides a menu-by-menu description of the commands you’ll
find in Flash CS6.
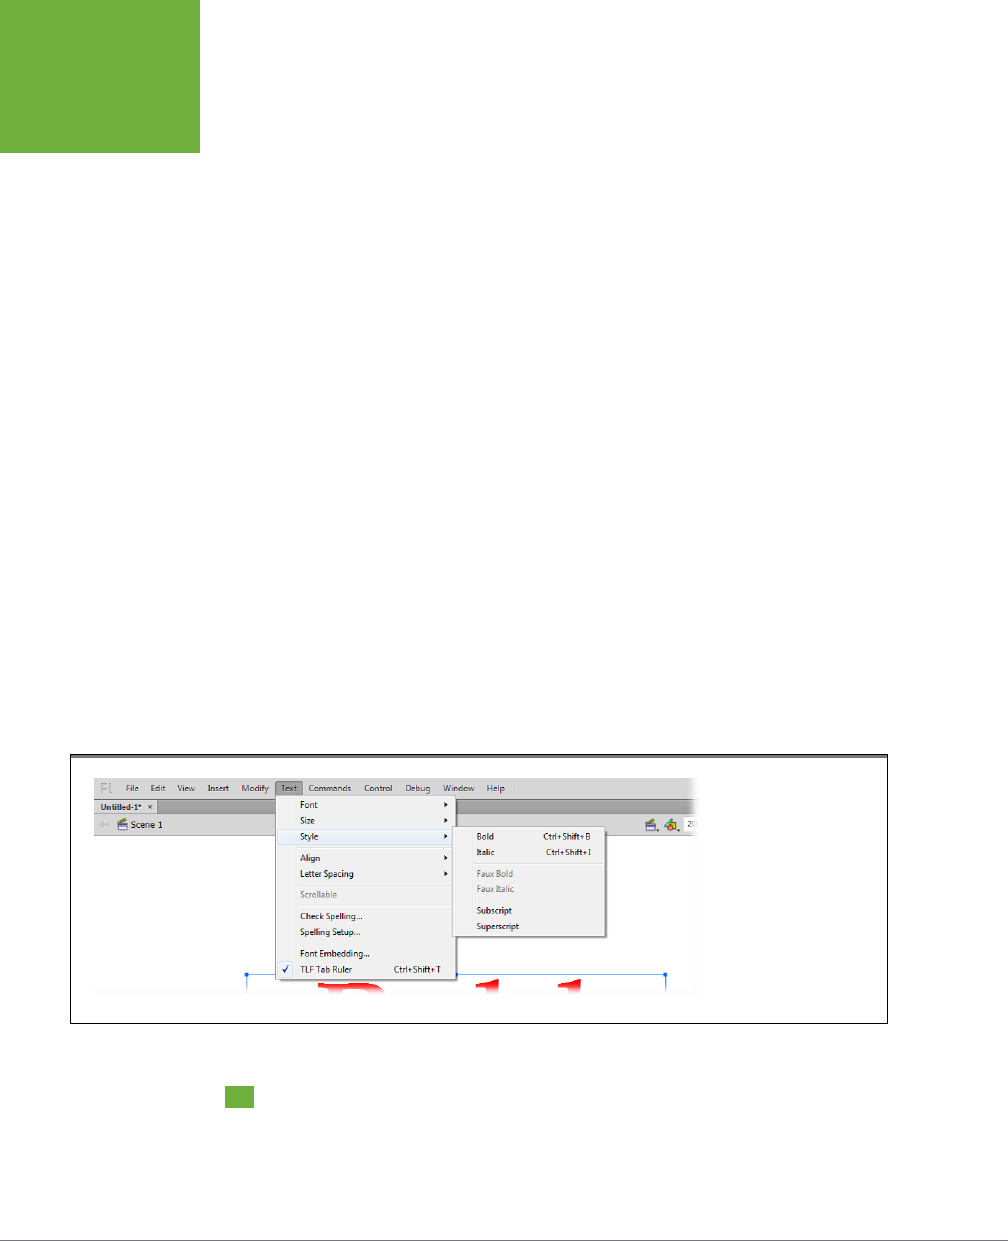
About→These→Arrows
Throughout this book, you’ll find instructions like, “Open your Program Files→Adobe→
Adobe Flash CS6 folder.” That’s Missing Manual shorthand for much longer sentences
like “Double-click your Program Files folder to open it. Inside, you’ll find a folder
called Adobe; double-click to open it. Inside that folder is a folder called Adobe Flash
CS6; open it, too.” This arrow shorthand also simplifies the business of choosing
menu commands, as you can see in Figure I-3.
FIGURE I-3
When you see
instructions like “Choose
Text→Style→Italic,”
think, “Click to pull down
the Text menu, and then
move your mouse down
to the Style command.
When its submenu opens,
choose the Italic option.”
About the Online Resources
As the owner of a Missing Manual, you’ve got more than just a book to read. On-
line, you’ll find example files so you can get some hands-on experience, as well as
tips, articles, and maybe even a video or two. You can also communicate with the
www.it-ebooks.info

INTRODUCTION 11
SAFARI®BOOKS
ONLINE
MissingManual team and tell us what you love (or hate) about the book. Head over
to
www.missingmanuals.com
, or go directly to one of the following sections.
Missing CD
This book doesn’t have a CD pasted inside the back cover, but you’re not missing
out on anything. Go to
www.missingmanuals.com/cds/flashcs6tmm
to download.
And so you don’t wear down your fingers typing long web addresses, the Missing
CD page also oers a list of clickable links to the websites mentioned in this book.
Registration
If you register this book at
www.oreilly.com
, you’ll be eligible for special oers—like
discounts on future editions of
Flash CS6: The Missing Manual
. If you buy an ebook
from
oreilly.com
and register your purchase,you get free lifetime updates for that
edition of the ebook; we’ll notify you by email when updates become available.
Registering takes only a few clicks. Type
www.oreilly.com/register
into your browser
to hop directly to the registration page.
Feedback
Got questions? Need more information? Fancy yourself a book reviewer? On our
Feedback page, you can get expert answers to questions that come to you while read-
ing, share your thoughts on this Missing Manual, and find groups for folks who share
your interest in Flash. To have your say, go to
www.missingmanuals.com/feedback
.
Errata
To keep this book as up to date and accurate as possible, each time we print more
copies, we’ll make any confirmed corrections you suggest in both the print book and
the ebook. We note such changes on the book’s website so you can mark important
corrections into your own copy of the book, if you like. And if you bought the ebook
from us and registered your purchase, you’ll get an email notifying you that you can
download an updated version of that edition of the ebook. Go to
http://tinyurl.com/
flashcs6-mm
to report an error and view existing corrections.
Safari®Books Online
is an on-demand digital library that lets you easily search over 7,500
technology and creative reference books and videos to find the
answers you need quickly.
With a subscription, you can read any page and watch any video from our library
online. Read books on your cellphone and mobile devices. Access new titles before
they’re available for print, and get exclusive access to manuscripts in development
and post feedback for the authors. Copy and paste code samples, organize your
favorites, download chapters, bookmark key sections, create notes, print out pages,
and benefit from tons of other time-saving features.
www.it-ebooks.info

FLASH CS6: THE MISSING MANUAL
12
SAFARI®BOOKS
ONLINE
O’Reilly Media has uploaded this book to the Safari Books Online service. To have
full digital access to this book and others on similar topics from O’Reilly and other
publishers, sign up for free at
http://my.safaribooksonline.com
.
www.it-ebooks.info

15
CHAPTER
1
As mentioned in this book’s introduction, Flash performs several feats of audio-
visual magic. You use it to create animations, to display video on a website,
to create handheld apps, or to build a complete web-based application. So
it’s not surprising that the Flash workspace is crammed full of tools, panels, and
windows (Figure 1-1). But don’t be intimidated—you don’t have to conquer these
tools all at once. This chapter introduces you to Flash’s main work areas and often-
used toolbars and panels, so you can start creating Flash projects right away. You’ll
experiment with Flash’s stage and timeline, and see how Flash lets you animate
graphics so that they move along a path and change shape.
TIP To get further acquainted with Flash, you can check out the built-in help screens by selecting Help→Flash
Help. Once the help panel opens, click Using Flash Professional. It’s on the left side of the somewhat busy window.
You can read more about Flash’s help system in Appendix A.
Starting Flash
You start Flash just as you would any other program—which means you can do it in
a few dierent ways, depending on whether you have a PC or a Mac. Installing the
program puts Flash CS6 and its related files in the folder with your other programs,
and you can start it by double-clicking its icon. Here’s where it’s usually installed:
• Windows. Go to
C:\Program Files\Adobe\Adobe Flash CS6\Flash.exe
. You can
create a shortcut or drag the file to the taskbar for quicker starting.
Getting Around Flash
www.it-ebooks.info
FLASH CS6: THE MISSING MANUAL
16
STARTING
FLASH
• Mac. Go to
Macintosh HD\Applications\Adobe Flash CS6\Adobe Flash CS6
. You
can make an alias or drag the file to the Dock for quicker starting.
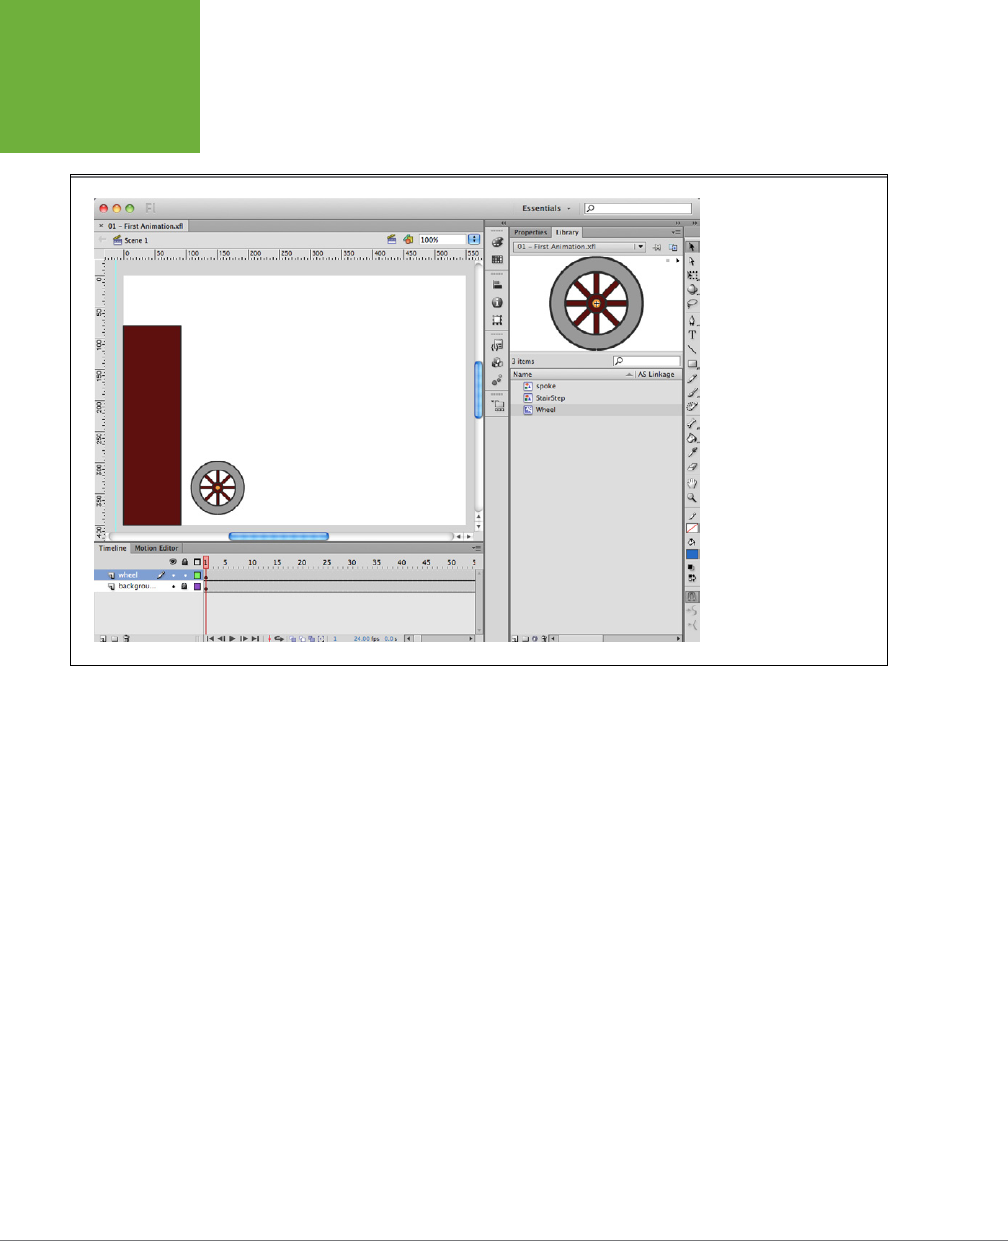
FIGURE 1-1
The Flash Professional
workspace is divided
into three main areas:
the stage, the timeline,
and the Panels dock.
This entire window, to-
gether with the timeline,
toolbars, and panels, is
sometimes called the
Flash desktop, the Flash
interface, or the Flash
authoring environment.
Here are some other Windows ways to start the program:
• From the Vista or Windows 7 Start menu, choose All Programs
→
Adobe Flash
Professional CS6.
• For Windows XP, go to Start→All Programs→Adobe→Adobe Flash Professional
CS6.
• If you’re a keyboard enthusiast, press the Windows key and begin to type
flash
.
As you type, Windows searches for a match and displays a list with programs
at the top. Most likely, the Flash program is at the top of the list and already
selected, so just press Enter. Otherwise, use your mouse or arrow keys to select
and start the program.
Here are some Mac launching options:
• Even if you haven’t added the Flash icon to the Dock, you can still find it in
the Dock’s Applications folder. Click and hold the Applications folder icon and
choose Adobe Flash CS6→Adobe Flash CS6.
• Want to hunt down Flash in the Finder? Most of the time, it’s installed in
Macintosh HD→Applications→Adobe Flash CS6→Adobe Flash CS6.
www.it-ebooks.info
CHAPTER 1: GETTING AROUND FLASH 17
STARTING
FLASH
• If you’d rather type than hunt, use Spotlight. Press ⌘-space and then begin to
type
flash
. As you type, Spotlight displays a list of programs and files that match.
Most likely, the Flash program is at the top of the list and already selected, so
just press Return. Otherwise, use the mouse or arrow keys to select and start
the program.
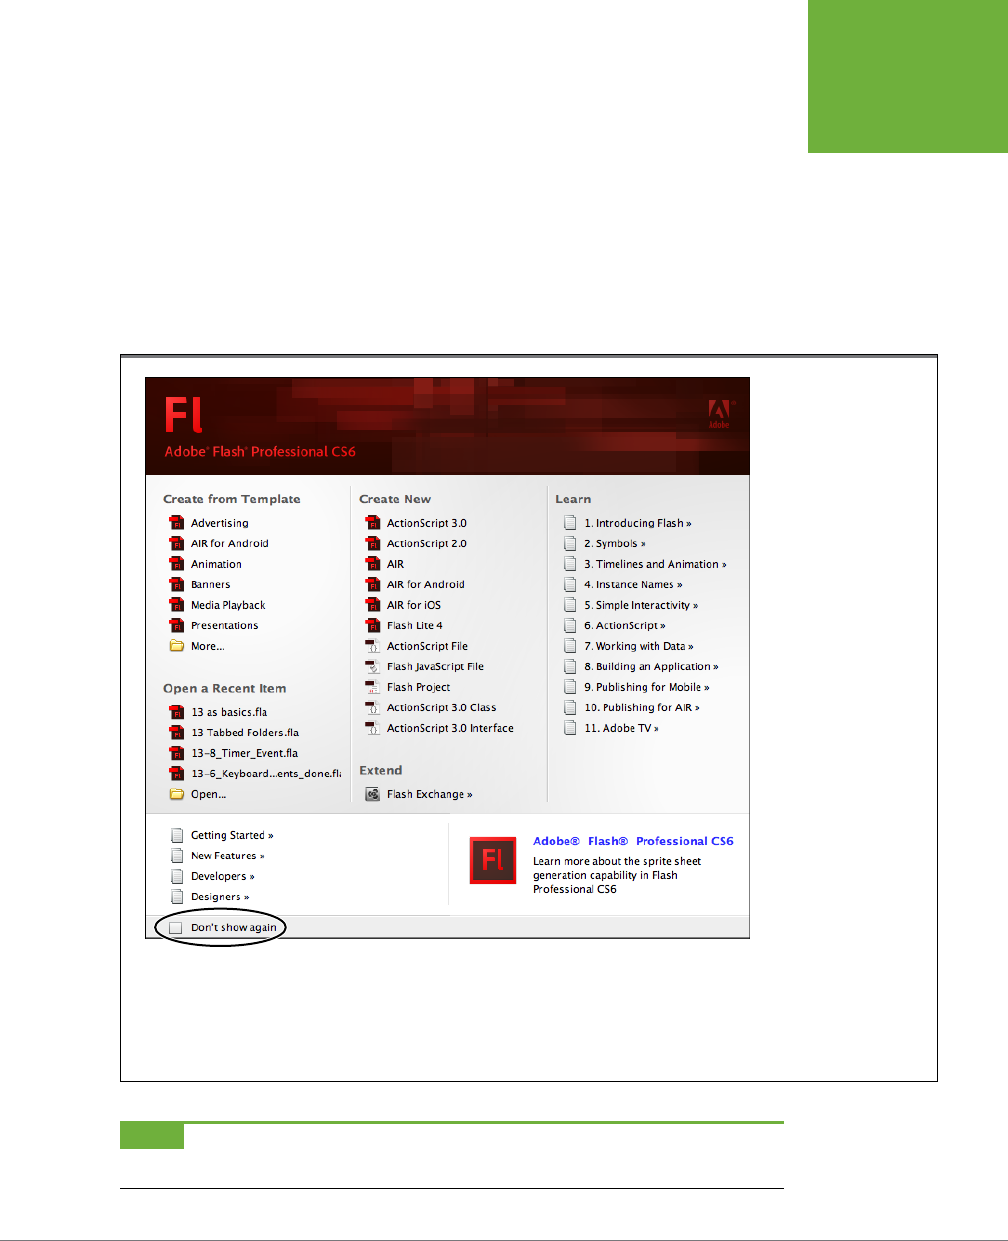
When you first start Flash, up pops the Welcome screen, shown in Figure 1-2. This
screen puts all your options—like starting a new document or returning to a work
in progress—in one handy place. For good measure, Adobe includes some links to
help references and resources on its website.
FIGURE 1-2
This Welcome screen
appears the first time
you launch Flash—and
every subsequent time,
too, unless you turn on
the “Don’t show again”
checkbox (pull down the
bottom of the window if
you don’t see it). If you
ever miss the convenience
of seeing all your
recent Flash documents,
built-in templates, and
other options in one
place, then you can turn
it back on by choosing
Edit→Preferences
(Windows) or
Flash→Preferences (Mac).
On the General panel,
choose Welcome Screen
from the On Launch
pop-up menu.
NOTE If Flash seems to take forever to open—or if the Flash desktop ignores your mouse clicks or responds
sluggishly—you may not have enough memory installed on your computer. See page 767 for more advice.
www.it-ebooks.info
FLASH CS6: THE MISSING MANUAL
18
STARTING
FLASH
When you choose one of the options, the Welcome screen disappears and your
document takes its place. Here are your choices:
• Create from Template. Clicking one of the little icons under this option lets
you create a Flash document using a predesigned form called a
template
. A
template helps you create an animation more quickly, since a Flash developer
has already done part of the work for you. You can find out more about tem-
plates in Chapter 7.
• Open a Recent Item. As you create new documents, Flash adds them to this list.
Clicking one of the filenames listed here tells Flash to open that file. Clicking the
folder icon lets you browse for and open any other Flash file on your computer.
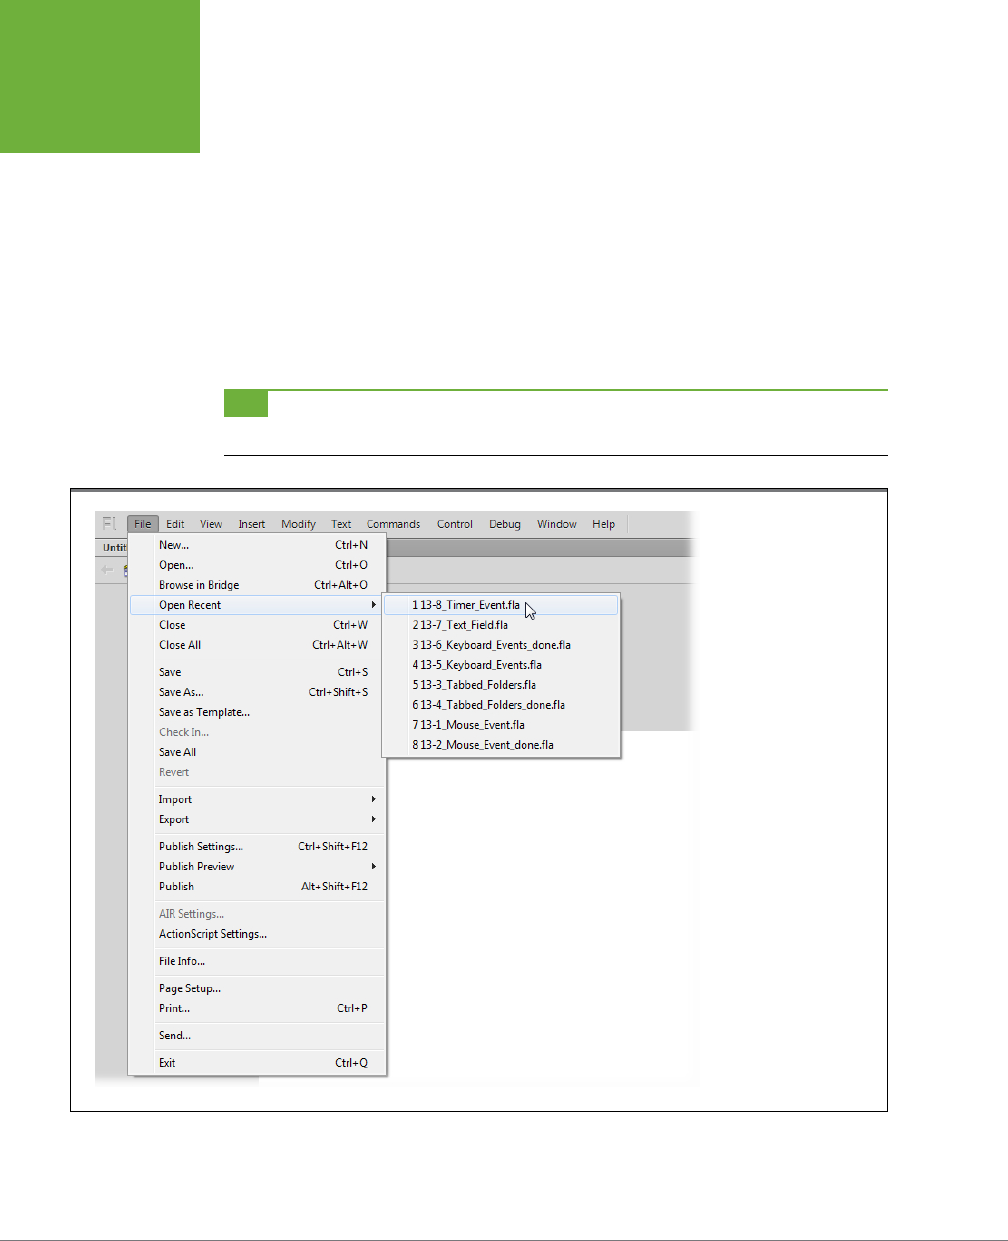
TIP The options for creating new Flash documents and opening recent documents also appear on the File
menu, as shown in Figure 1-3.
FIGURE 1-3
Several of the options
on each menu include
keystroke shortcuts
that let you perform an
action without having to
mouse all the way up to
the menu. For example,
instead of selecting
File→Save As, you can
press Ctrl+Shift+S to
tell Flash to save your
Flashdocument. On the
Mac, the keystroke is
Shift-⌘-S.
• Create New. Clicking one of the options listed here lets you create a brand-new
Flash file. Most of the time, you want to choose the first option, ActionScript3.0,
www.it-ebooks.info

CHAPTER 1: GETTING AROUND FLASH 19
STARTING
FLASH
which is a garden-variety animation file. ActionScript is the underlying pro-
gramming language for Flash animations. The current version of ActionScript
is 3.0, and it’s the version used for the projects in this book. You can use the
ActionScript 2.0 option if you need to work with a Flash project that was created
several years ago. For details on the file formats for dierent Flash projects,
see the box below.
NOTE Old programming pros—you know who you are—may have reasons to prefer ActionScript 2.0. For
example, you might choose this option if you’re continuing work on a project created using ActionScript 2.0, or
if you’re working with a team using ActionScript 2.0.
Understanding Flash File Formats
Why are there so many different options under Create New on
the Welcome screen? What are they all for
?
There seem to be a bewildering number of options when you
create a new Flash document. As explained above, if you’re
just learning Flash, you probably want to use the first option:
ActionScript 3.0. The other options are for special Flash projects
targeted to specific devices, like iPhones, iPads, or Android
devices. Some options are for specific programming needs, like
creating an ActionScript class. The details are in the appropriate
sections of this book, but here’s a quick rundown:
• Use
AIR
to create desktop applications using the Adobe
Integrated Runtime tools (page 705). Instead of using
Flash Player, these applications use AIR.
• Use
AIR for Android
if you’re creating apps for Android
handhelds like the Droid Razr or Samsung Galaxy.
• Creating an iPhone or iPad app? Use the
Air for iOS
option.
Flash creates a document that’s just the right size and
has the programming options and support for making
iOS apps.
•
Flash Lite 4
is similar to the iPhone format but works for
several other handheld devices.
• You can also create an
ActionScript File
(a file containing
nothing but ActionScript, for use with a Flash animation);
a
Flash JavaScript File
(used to create custom tools, panels,
commands, and other features that extend Flash); or
a
Flash Project
(useful if you’re planning a complex,
multifile, multideveloper Flash production and need
version control).
• The last two options,
ActionScript 3.0 Class
and
ActionScript
3.0 Interface
, help programmers create reusable objects
that can be used in multiple Flash projects.
FREQUENTLY ASKED QUESTION
• Extend. Clicking the Flash Exchange link under this option tells Flash to open
your web browser and load the Flash Exchange website. There,you can down-
load Flash components, sound files, and other goodies that you can add to
your Flash animations. Some are free, some are fee-based, and all of them are
created by Flashionados just like you.
• Learn. As you might guess, these links lead to materials Adobe designed to
help you get up and running. Click an option, and your web browser opens to a
page on the Adobe website. The first few topics introduce basic Flash concepts
like symbols, instances, and timelines. Farther down the list, you find specific
topics for building applications for mobile devices or websites (AIR). At the
www.it-ebooks.info

FLASH CS6: THE MISSING MANUAL
20
A TOUR OF
THE FLASH
WORKSPACE
bottom of the Welcome screen, “Getting Started” covers the very, very basics.
“New Features” explains (and celebrates) some of Flash CS6’s new bells and
whistles. “Developers” leads to an online magazine with articles and videos with
an ActionScript programming slant. “Designers” leads to a similar resource for
the Flash graphics and design community.
A Tour of the Flash Workspace
The best way to master the Flash CS6 Professional workspace is to divide and
conquer. First, focus on the three main work areas: the stage, the timeline, and the
Panels dock. Then you can gradually learn how to use all the tools in those areas.
One big source of confusion for Flash newbies is that the workspace is so easy to
customize. You can open bunches of panels, windows, and toolbars. You can move
the timeline above the stage, or you can have it floating in a window all its own.
Once you’re a seasoned Flash veteran, you’ll have strong opinions about how you
want to set up your workspace so the tools you use most are at hand. If you’re just
learning Flash with the help of this book, though, it’s probably best if you set up
your workspace so that it matches the pictures in these pages.
Fortunately, there’s an easy way to do that. Adobe, in its wisdom, created the Work-
space Switcher—a tool that lets you rearrange the entire workspace with the click of
a menu. The thinking is that an ideal workspace for a cartoon animator is dierent
from the ideal workspace for, say, a rich internet application (RIA) developer. The
Workspace Switcher is a menu in the upper-right corner of the Flash window, next
to the search box. The menu displays the name of the currently selected workspace;
when you first start Flash, it probably says
Essentials
. That’s a great workspace that
displays some of the most frequently used tools. In fact, it’s the workspace used
throughout most of this book.
Here’s a quick little exercise that shows you how to switch among the dierent
workspaces and how to reset a workspace after you’ve mangled it by dragging
panels out of place and opening new windows.
1. Start Flash.
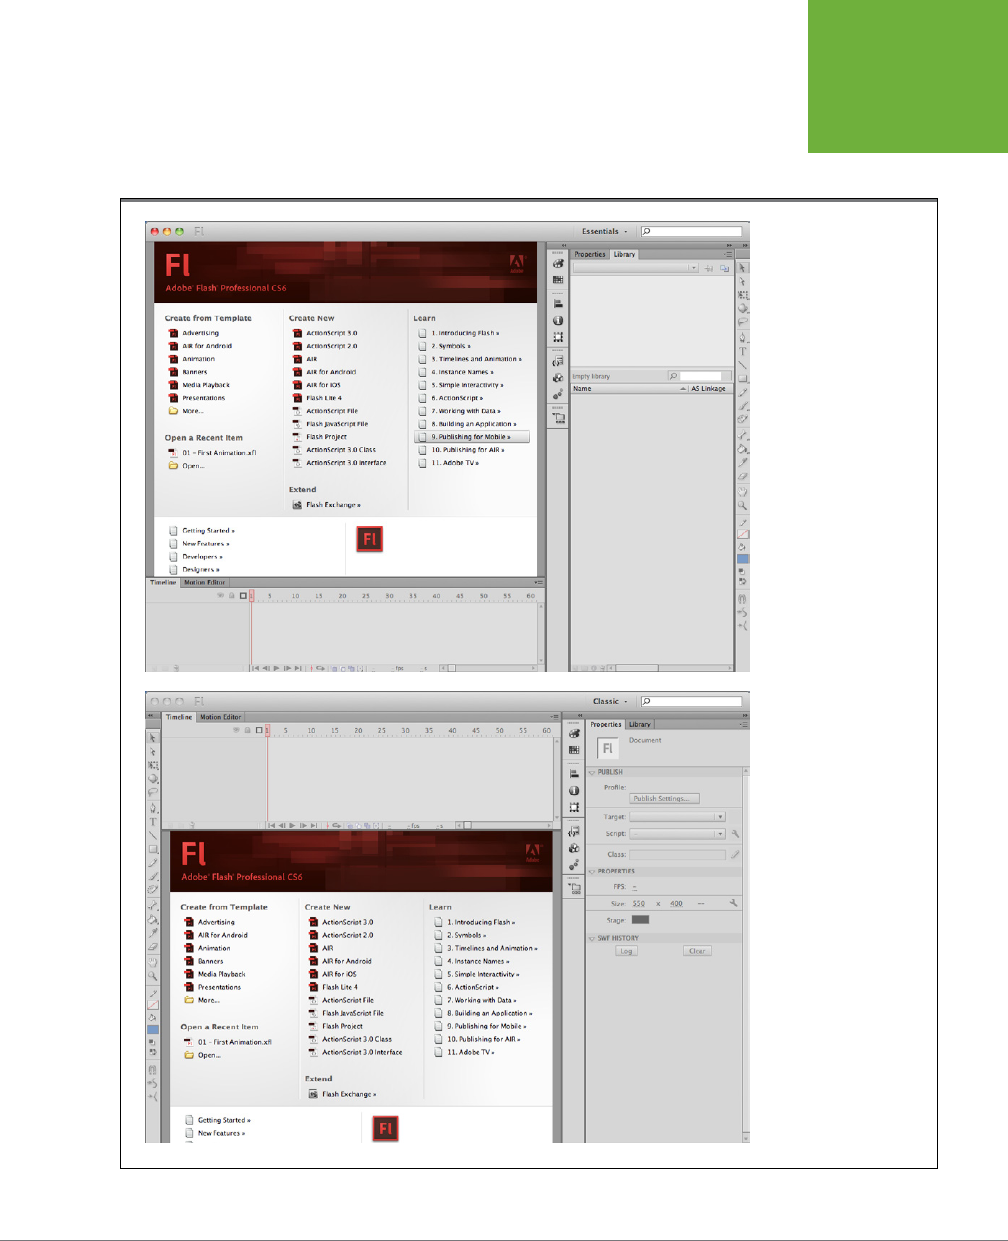
Flash opens, displaying the Welcome screen. Unless you’ve made changes, the
Essentials workspace is used. See Figure 1-4, top.
2. From the Workspace menu near the upper-right corner of the Flash window,
choose Classic.
The Classic arrangement harkens back to earlier versions of Flash, when the
timeline resided above the stage (Figure 1-4, bottom). If you wish, go ahead
and check out some of the other layouts.
3. Choose the Essentials workspace again.
www.it-ebooks.info
CHAPTER 1: GETTING AROUND FLASH 21
A TOUR OF
THE FLASH
WORKSPACE
Back where you began, the Essentials workspace shows the timeline at the
bottom. The stage takes up most of the main window. On the right, the Panels
dock holds toolbars and panels. Now’s the time to cause a little havoc.
FIGURE 1-4
Top: The Essentials work-
space is the one used
throughout this book.
Bottom: The Classic
workspace shows the
timeline above the stage,
a look familiar to Flash
Pro veterans.
www.it-ebooks.info

FLASH CS6: THE MISSING MANUAL
22
A TOUR OF
THE FLASH
WORKSPACE
4. In the Panels dock, click the Properties tab and drag it to a new location
on the screen.
Panels can float, or they can dock to one of the edges of the window. For this
experiment, it doesn’t matter what you choose to do.
5. Drag the Color and Swatches toolbars to new locations.
The Color toolbar has an icon that looks like an artist’s palette at the top. Like
the larger panels, toolbars can either dock or float. You can drag them anywhere
on your monitor, and you can expand and collapse them by clicking the double-
triangle button in their top-right corners.
6. Go to Window→Other Panels→History.
Flash has dozens of windows. Only a few are available now, because you haven’t
even created a document yet.
TIP As you work on a project, the History panel keeps track of all your commands, operations, and changes.
It’s a great tool for undoing mistakes. For more details, see page 34.
7. From the Workspace menu, choose Reset Essentials.
The workspace changes back to the original Essentials layout, even though you
did your best to mess it up.
Anytime you want your workspace to match the one used throughout most of
this book, do the “Essentials two-step”: Choose Essentials from the Workspace
Switcher (if you’re not already there), and then choose Reset Essentials. As shown
in Figure1-4, when you use the Essentials workspace, the Flash window is divvied
up into three main work areas: the stage (upper left), the timeline (lower left), and
the panels dock (right). Before exploring each of these areas in detail, here are a
few words about Flash’s menu bar.
Menu Bar
Like most computer programs, Flash gives you menus to interact with your docu-
ments. In traditional fashion, Windows menus appear at the top of the program
window, while Mac menus are always at the very top of the screen. The commands
on these menus list every way you can interact with your Flash file, from creating a
new file—as shown on page 18—to editing it, saving it, and controlling how it appears
on your screen.
Some of the menu names—File, Edit, View, Window, and Help—are familiar to anyone
who’s used a PC or a Mac. Using these menu choices, you can perform basic tasks
like opening, saving, and printing your Flash files; cutting and pasting artwork or
text; viewing your project in dierent ways; choosing which toolbars to view; get-
ting help; and more.
www.it-ebooks.info
CHAPTER 1: GETTING AROUND FLASH 23
A TOUR OF
THE FLASH
WORKSPACE
To view a menu, simply click the menu’s name to open it, and then click a menu
option. If you prefer, you can also drag down to the option you want. Let go of the
mouse button to activate the option. Figure 1-3 shows you what the File menu looks
like. Most of the time, you see the same menus at the top of the screen, but oc-
casionally they change. For example, when you use the Debugger to troubleshoot
ActionScript programs, Flash hides some of the menus not related to debugging.
TIP You’ll learn about specific commands and menu options in their related chapters. For a quick reference
to all the menu options, see Appendix B.
The Stage
As the name implies, the
stage
is usually the center of attention. It’s your virtual
canvas. Here’s where you draw the pictures, display text, and make objects move
across the screen. The stage is also your playback arena; when you run a com-
pleted animation—to see if it needs tweaking—the animation appears on the stage.
Figure1-5 shows a project with an animation under construction.
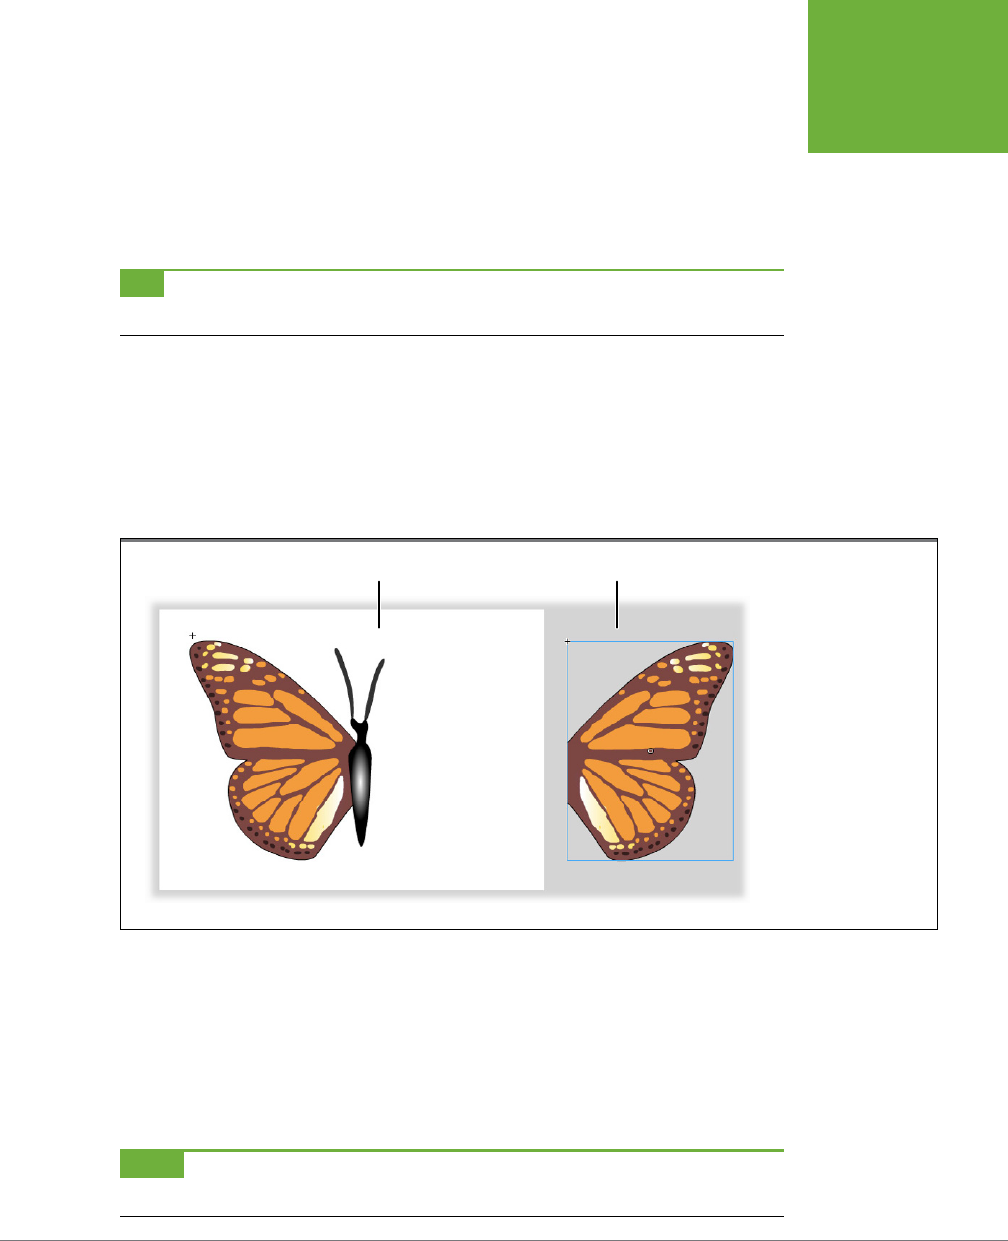
FIGURE 1-5
The stage is where you
draw the pictures that
will eventually become
your animation. The work
area (light gray) gives
you a handy place to put
graphic elements while
you figure out how you
want to arrange them on
the stage. Here a text box
is being dragged from the
work area back to center
stage.
Stage Work area (backstage)
The
work area
is the technical name for the gray area surrounding the stage, al-
though many Flashionados call it the
backstage
. This work area serves as a prep
zone where you can place graphic elements before you move them to the stage,
and as a temporary holding pen for elements you want to move o the stage briefly
as you reposition things. For example, let’s say you draw three circles and one box
containing text on your stage. If you decide you need to rearrange these elements,
you can temporarily drag one of the circles o the stage.
NOTE The stage always starts out with a white background, which becomes the background color for your
animation. Changing it to any color imaginable is easy, as you’ll learn in the next chapter.
www.it-ebooks.info
FLASH CS6: THE MISSING MANUAL
24
A TOUR OF
THE FLASH
WORKSPACE
You’ll almost always change the starting size and shape of the stage depending on
where people will see your finished animation—in other words, your
target platform
.
If your target platform is a smartphone, for example, you’re going to want a smaller
stage. If, on the other hand, you’re creating an animation for a ballpark’s JumboTron,
you’re going to want a giant stage. You’ll get to try your hand at modifying the size
and background color of the stage later in this chapter.
The Timeline
When you go to the theater, the stage changes over time—actors come and go,
songs are sung, scenery changes, and the lights shine and fade. In Flash, you’re the
director, and you get to control what appears on the stage at any given moment.
The timeline is the tool used to specify what’s seen or heard at a particular moment.
The concept is pretty simple, and if you’ve ever used video editing software, it will
be familiar. Flash animations (or movies) are organized into chunks of time called
frames
. Each little box in the timeline represents a frame or a point in time. You use
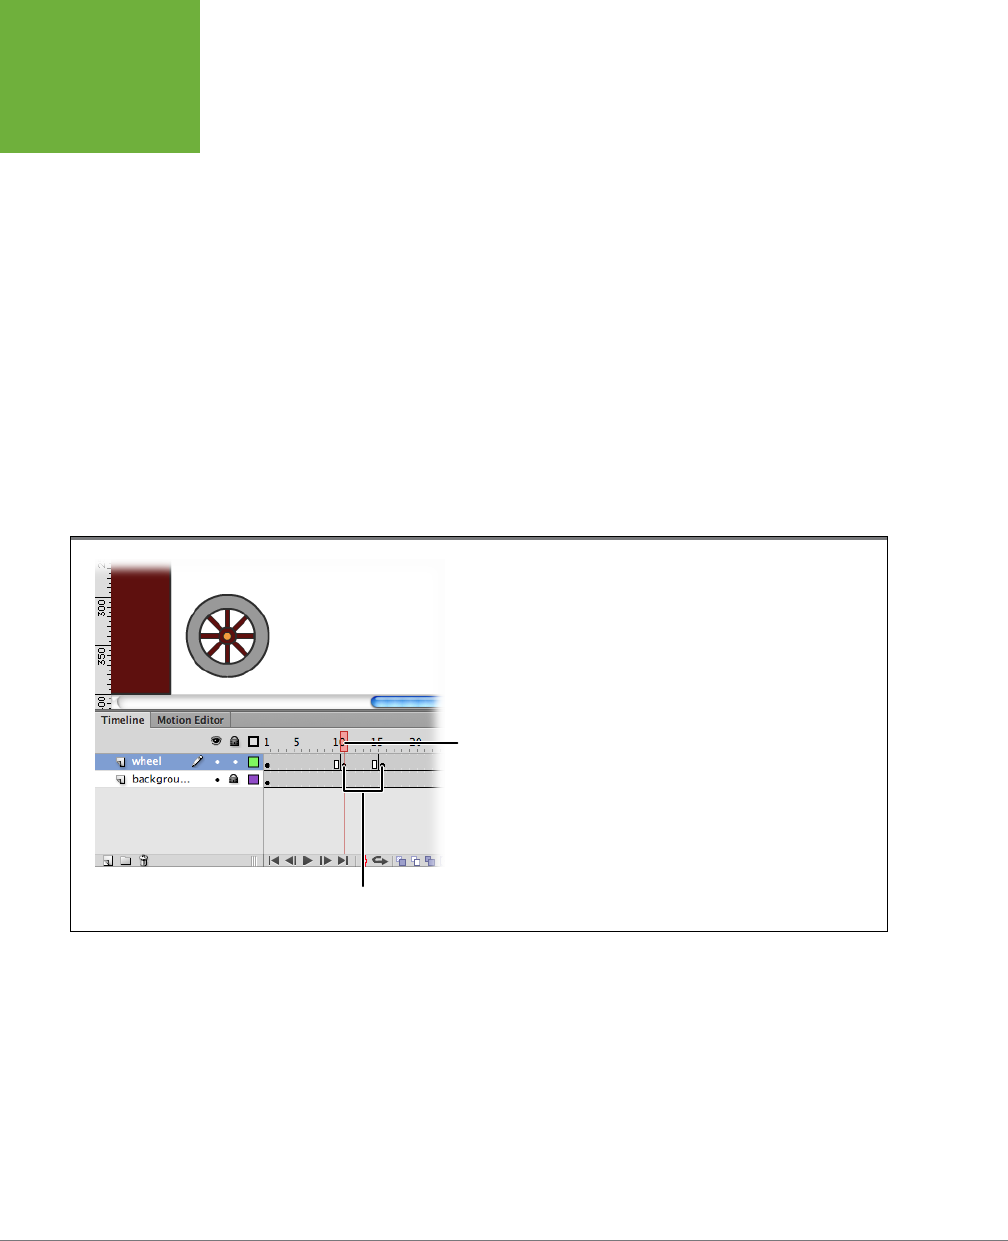
the
playhead
, shown in Figure 1-6, to select a specific frame. So when the playhead is
positioned at Frame 10, the stage shows what the audience sees at that point in time.
FIGURE 1-6
The playhead is a red box that appears in the timeline; here
the playhead is set to Frame 10. You can drag the playhead
to any point in the timeline to select a single frame. The
Flash stage shows exactly what’s in your animation at that
point in time.
Playhead
Keyframes
The timeline is laid out from left to right, starting with Frame 1. Simply put, you build
Flash animations by choosing a frame with the playhead and then arranging the
objects on the stage the way you want them. The timeline uses a special tool called
a
keyframe
(see Figure 1-6) to remember exactly what’s on stage at that moment.
You’ll learn more about the keyframes and other timeline tools in Chapter 3. Most
simple animations play from Frame 1 through to the end of the movie, but Flash
gives you ways to start and stop the animation and control how fast it runs—that is,
how many frames per second (fps) are displayed. Using some ActionScript magic,
you can control the order in which the frames are displayed. You’ll learn how to do
that on page 522.
www.it-ebooks.info

CHAPTER 1: GETTING AROUND FLASH 25
PANELS AND
TOOLBARS
TIP The first time you run Flash, the timeline appears automatically, but occasionally you want to hide the
timeline—perhaps to reduce screen clutter while you concentrate on your artwork. You can show and hide the
timeline by selecting Window→Timeline or pressing Ctrl+Alt+T (or for the Mac, Option-⌘-T).
Panels and Toolbars
If you followed the little exercise on page 20, you know you can put panels and
toolbars almost anywhere onscreen. However, if you use the Essentials workspace,
you start o with a few frequently used panels and toolbars docked neatly on the
right side of the program window.
It’s easy to get confused by the Flash nomenclature. Flash has toolbars, panels,
palettes, and windows. Sometimes collapsed panels look like toolbars and open up
when clicked—like the frequently used Tools panel. Toolbars and panels pack the
most commonly used options together in a nice compact space, so you don’t have to
do a hunt-and-peck through the main menu every time you want to do something.
Panels are great, but they take up precious real estate. As you work, you can hide
certain tools to get a better view of your artwork. (You can always get them back
by choosing their names from the Window menu.)
Toolbars and panels are such an integral part of working with Flash that it’s helpful
to learn some of their tricks early on:
• Move a panel. Just click and drag the tab or top of the panel to a new location.
Panels can float anywhere on your monitor, or dock on an edge of the Flash
program window (as in the Essentials workspace). For more details on docking
and floating, see the box on page 26.
• Expand or collapse a panel. Click the double-triangle button at the top of a
panel to expand or collapse it. Collapsed panels look like toolbars, showing a
few icons that hint at the tools’ purposes. Expanded panels take up more real
estate, but they also give you more details and often have word labels for the
tools and settings.
• Show or hide a panel. Use the Window menu to show and hide individual
panels. Checkmarks appear next to the panels that are shown.
• Close a floating panel. In Windows, click the small X in the panel’s upper-right
corner. On the Mac, click the X in the upper-left corner.
• Show or hide all panels. The F4 key works like a toggle, hiding or showing all
the panels and toolbars. Use it when you want to quickly reduce screen clutter
and focus on your artwork.
• Separate or combine tabbed panels. Click and drag the name on a tab to
separate it from a group of tabbed panels. To add a tab to a group, just drag
it into place.
www.it-ebooks.info
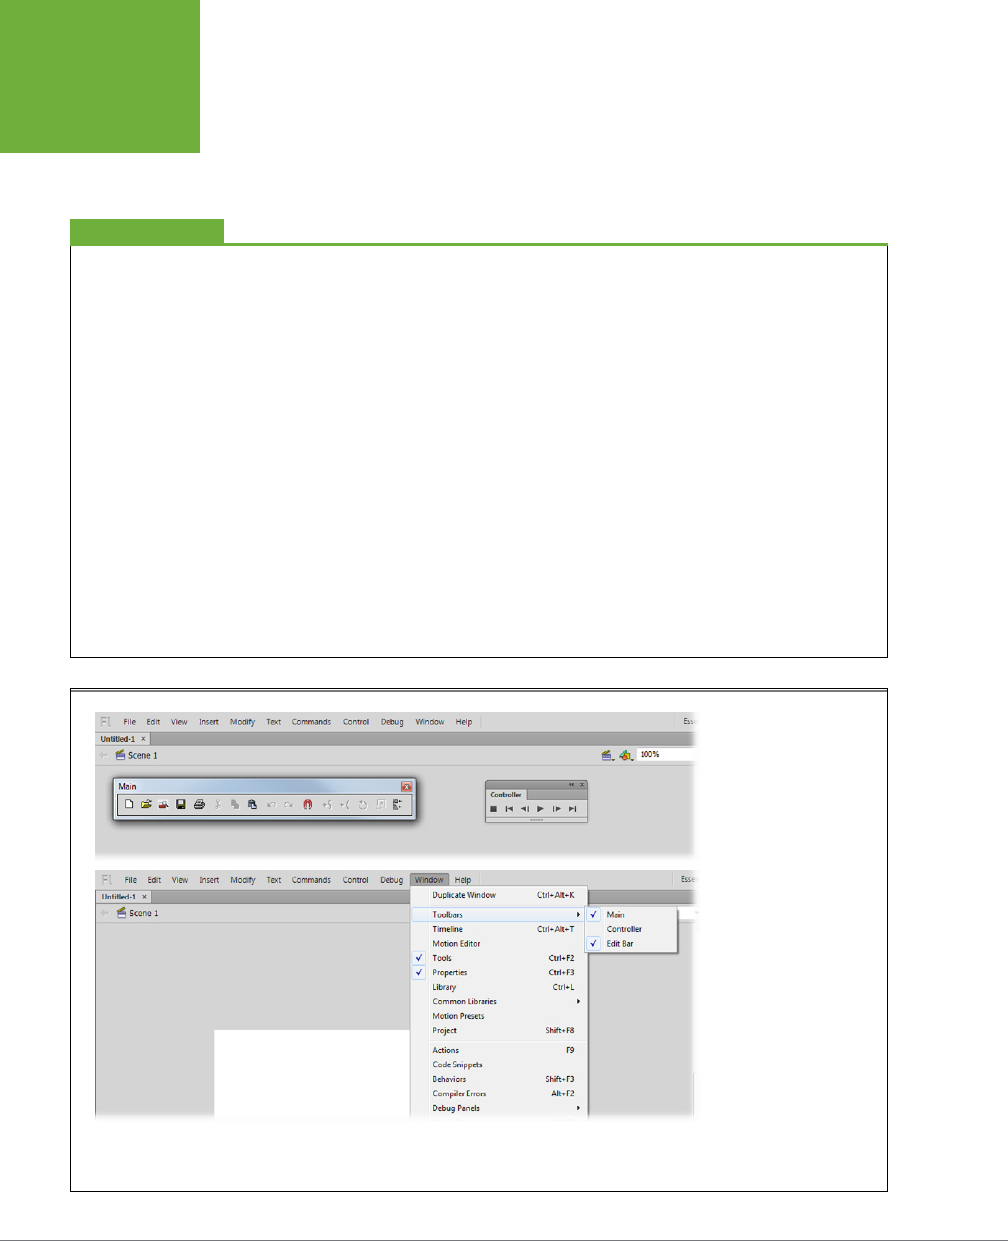
FLASH CS6: THE MISSING MANUAL
26
PANELS AND
TOOLBARS
• Reset the panel workspace. Choose
Reset <workspace name>
from the Work-
space Switcher. Instead of <workspace name>, you see the name of the current
workspace—something like
Essentials
or
Classic
. You can also do a reset using
the menus; choose Window→Workspace→Reset <workspace name>.
Docked vs. Floating
A
docked
toolbar or panel appears attached to some part of
the workspace window, while a
floating
toolbar or panel is one
you can reposition by dragging.
Whether you want to display toolbars and panels as docked or
floating is a matter of personal choice. If you constantly need
to click something on a toolbar—which means it needs to be
in full view at all times—docked works best. But if you usually
just need a toolbar or a panel for a brief time and want to be
able to move it around on the screen (so it doesn’t cover up
something else), then floating is the ticket.
To turn a docked panel into a floating panel:
1. Click any blank spot on the panel’s top bar and hold
down the mouse button. You may notice a color change
(Figure1-7), especially as you begin to move the panel.
The actual visual effect is different on Mac and Windows
computers, but the mechanics work the same.
2. Drag the panel away from the edge of the workspace
window and release the mouse button. Flash displays
the panel where you dropped it. You can reposition it
anywhere you like simply by dragging it again.
To dock a floating panel, simply reverse the procedure: Drag
the floating panel to the edge of the workspace window and
let go of the mouse button. You see a line or a shadow when
the panel is ready to dock. When you let go, Flash docks the
panel automatically.
UP TO SPEED
FIGURE 1-7
Top: To conserve space
on Flash’s jam-packed
desktop, only one
toolbar—the Edit bar—
appears automatically.
It’s positioned directly
above the stage. To dis-
play the other two, select
Window→Toolbars→Main
(to display the Main tool-
bar, Windows only) and
Window→Toolbars→
Controller (to display the
Controller window).
Bottom: The checkmarks
on the menu show when
a toolbar is turned on.
Choose the toolbar’s
name again to remove
the checkmark and hide
the toolbar.
www.it-ebooks.info

CHAPTER 1: GETTING AROUND FLASH 27
PANELS AND
TOOLBARS
NOTE When you reposition a floating toolbar, Flash remembers where you put it. If, later on, you hide the
toolbar—or exit Flash and run it again—your toolbars appear exactly as you left them. If this isn’t what you want,
use the Workspace Switcher to choose a new workspace layout or to reset the current workspace.
Toolbars
Strictly speaking, Flash has only three toolbars: Main, Controller, and Edit. (Every-
thing else is a panel, even if it looks suspiciously like a toolbar.) Figure 1-7 shows all
three toolbars.
• Main (Windows only). The Main toolbar gives you one-click basic operations,
like opening an existing Flash file, creating a new file, and cutting and pasting
sections of your drawing.
• Controller. If you’ve ever used a DVD player or an iPod, you’ll recognize the Stop,
Rewind, and Play buttons on the Controller toolbar, which lets you control how
you want Flash to run your finished animation. (Not surprisingly, the Controller
options appear
grayed out
—meaning you can’t select them—if you haven’t yet
constructed an animation.) With Flash Professional CS6, the Controller is a little
obsolete, because now the same buttons appear below the timeline.
• Edit bar. Using the options here, you can change your view of the stage, zoom-
ing in and out, as well as edit
scenes
(named groups of
frames
) and
symbols
(reusable drawings).
NOTE The Edit bar is a little different from the other toolbars in that it remains fixed to the stage. You can’t
reposition it.
Tools Panel
The Tools panel is unique. For designers, it’s probably the most used of all the panels
and toolbars. In the Essentials workspace, the Tools panel appears along the right
side of the Flash program window. There are no text labels, just a series of icons.
However, if you need a hint, just hold your mouse over one of the tools, and a tooltip
shows the name of the tool. So, for example, mouse over the arrow at the top of the
Tools panel, and the tooltip says “Selection tool (V).” The letter in parentheses is
the shortcut key for that tool. Press the letter V while you’re working in Flash, and
your cursor changes to the Selection tool.
Most animations start with a single drawing. And to draw something in Flash, you
need drawing tools: pens, pencils, brushes, colors, erasers, and so on. The Tools
panel shown in Figure 1-8 is where you find Flash’s drawing tools. Chapter 2 shows
you how to use these tools to create a simple drawing; this section gives you a quick
overview of the six sections of the Tools panel, each of which focuses on a slightly
dierent kind of drawing tool or optional feature.
www.it-ebooks.info

FLASH CS6: THE MISSING MANUAL
28
PANELS AND
TOOLBARS
SELECTION AND DRAWING TOOLS
At the top of the Tools panel are the tools you need to create and modify a Flash
drawing. For example, you might use the Pen tool to start a sketch, the Paint Bucket
or Ink Bottle to apply color, and the Eraser to clean up mistakes.
FIGURE 1-8
The Tools panel groups tools by different drawing chores. Selection and Transform tools are at the
top, followed by Drawing tools. Next are the IK Bones tool and the Color tools. The View tools are
for zooming and panning. The Color tools include two swatches, one for strokes and one for fills.
At the bottom you find the Options buttons, which change depending on the drawing tool you’ve
selected. If you like, you can drag the docked Tools panel away from the edge of the workspace and
turn it into a floating panel.
Selection tools
Drawing and
painting tools
Color and IK Bones
Zooming and panning
Stroke and fill
Tool options
VIEW TOOLS
At times, you’ll find yourself drawing a picture so enormous you can’t see it all on
the stage at one time. Or perhaps you’ll find yourself drawing something you want
to take a super-close look at so you can modify it pixel by pixel. In either of these
situations, you can use the tools Flash displays in the View section of the Tools panel
to zoom in, zoom out, and pan around the stage. (You’ll get to try your hand at using
these tools later in this chapter; see page 35.)
www.it-ebooks.info

CHAPTER 1: GETTING AROUND FLASH 29
PANELS AND
TOOLBARS
NOTE The term
pixel
is short for “picture element.” Images on a computer screen are made up of lots of
tiny dots emitting different colors. Each dot is a pixel.
COLOR TOOLS
When you’re creating in Flash, you’re drawing one of two things: a
stroke
, which is
a plain line or outline, or a
fill
, which is the area within an outline. You can use these
tools to choose a color from the Color palette before you click one of the drawing
icons to begin drawing (or afterward to change the colors, as discussed in Chapter2).
Flash applies that color to the stage as you draw.
OPTIONS TOOLS
Which icons appear in the Options section at any given time depends on which tool
you’ve selected. For example, when you select the Zoom tool from the View section
of the Tools panel, the Options section displays an Enlarge icon and a Reduce icon
that you can use to change the way the Zoom tool works (Figure 1-9).
FIGURE 1-9
On the Tools panel, when you click each tool, the Options section shows you buttons that let you modify that
particular tool. In the Tools panel’s View section, for example, when you click the Zoom tool, the Options
section changes to show you only zooming options: Enlarge (with the + sign) and Reduce (with the – sign).
Zoom tool
Zoom in option
Zoom out option
Properties Panel
In many ways, the Properties panel is Command Central as you work with your
animation, because it gathers all the pertinent details for the objects you work with
and displays them in one place. Select an object, and the Properties panel displays
all of its properties and settings. It’s not just an information provider; you also use
the Properties panel to change settings and tweak the elements in your animation.
When there’s fine-tuning to be done, select an object and adjust the settings in
the Properties panel. (You can learn more in the “Test Drive” section on page 35.)
The Properties panel usually appears when you open a new document. Initially, it
shows information about your Flash document, like the stage dimensions and the
animation’s frame rate. Whenever you select an individual object in your animation,
the Properties panel shows that object’s details. For example, if you select a text
field, the Properties panel lists the typeface, font size, and text color. You also see
www.it-ebooks.info
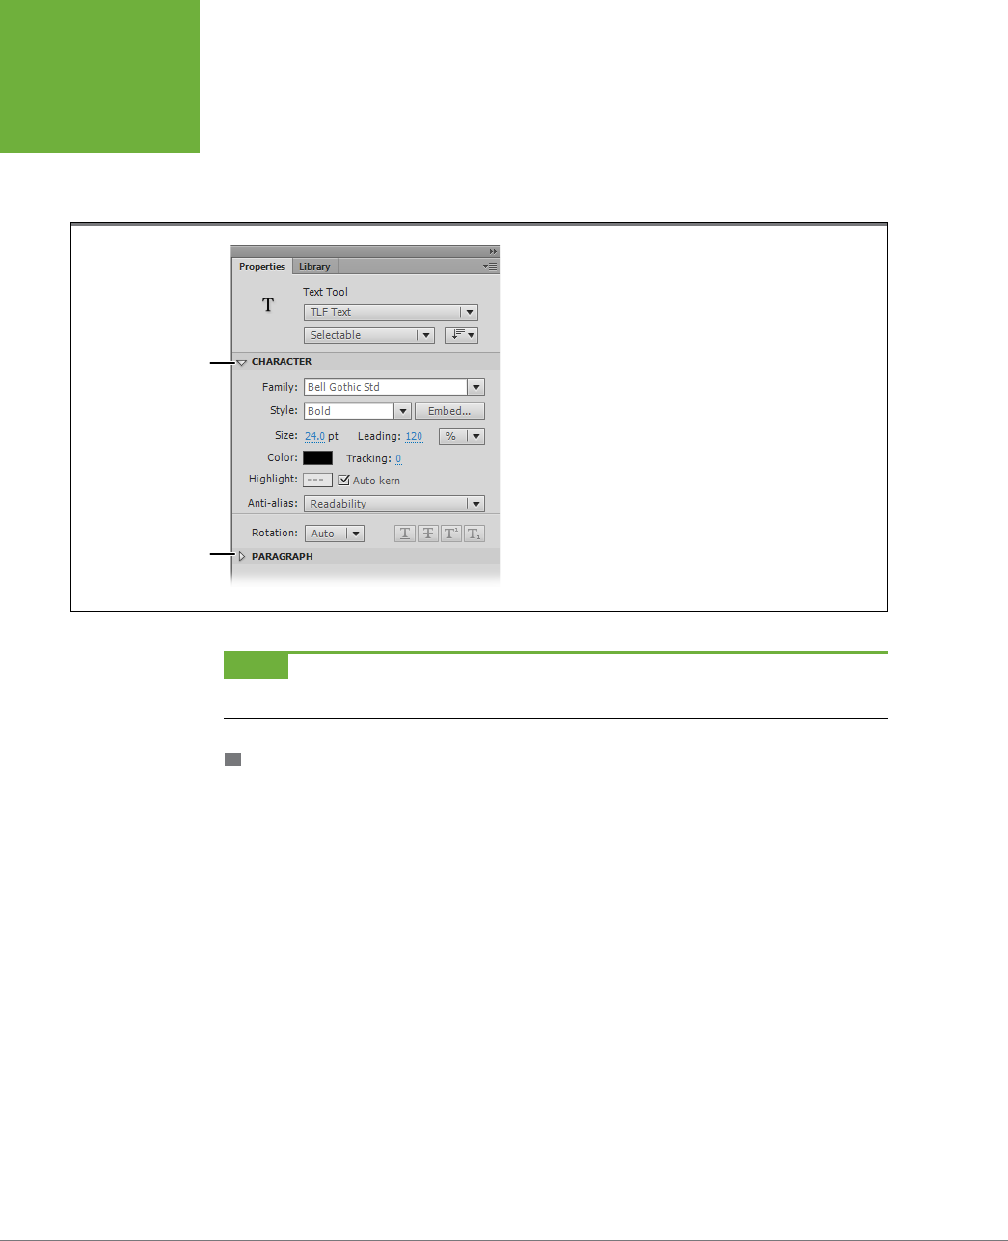
FLASH CS6: THE MISSING MANUAL
30
PANELS AND
TOOLBARS
information on the paragraph settings, like the margins and line spacing. Because
the Properties panel crams so many details into one place, you’ll find yourself using
the collapse and expand buttons to show and hide some of the information in its
subpanels, as shown in Figure 1-10.
FIGURE 1-10
The Properties panel shows only those properties associated
with the object you’ve selected on the stage. Here, because a
text field is selected, the Properties panel gives you options
you can use to change the typeface, font size, font color, and
paragraph settings. Click the triangular expand and collapse
buttons to show and hide details in the Properties panel.
Subpanel open
Subpanel closed
NOTE If you don’t see the Properties panel, you can display it by selecting Window→Properties or by
pressing Ctrl+F3 (⌘-F3 on a Mac).
PROPERTIES SUBPANELS
On the Properties panel, you see dierent subpanels depending on the object you’ve
selected. Some objects have a lot of settings, and subpanels are Flash’s way of giving
you access to all of them. Fortunately, the various panels and tools work consistently.
For example, many objects have settings that determine their onscreen positions and
define their width and height dimensions. These common settings usually appear
at the top of the Properties panel, and you set them the same way for most kinds
of objects. If you want to change colors or add special eects like filters or blends,
you’ll find that the tools work the same way throughout Flash.
Library Panel
The Library panel (Figure 1-11) is a place to store objects you want to use more
than once. Let’s say, for example, that you create a picture-perfect bubble, sun,
or snowflake in one frame of your animation. (You’ll learn more about frames on
page 91.) Now, if you want that bubble, sun, or snowflake to appear in 15 additional
frames, you
could
draw it again and again, but it really makes more sense to store
a copy in the current project library and then just drag it to where it’s needed on
those other 15 frames. This trick saves time and ensures consistency to boot. The
Library panel has quite a few other important tricks, and you’ll learn more about
www.it-ebooks.info
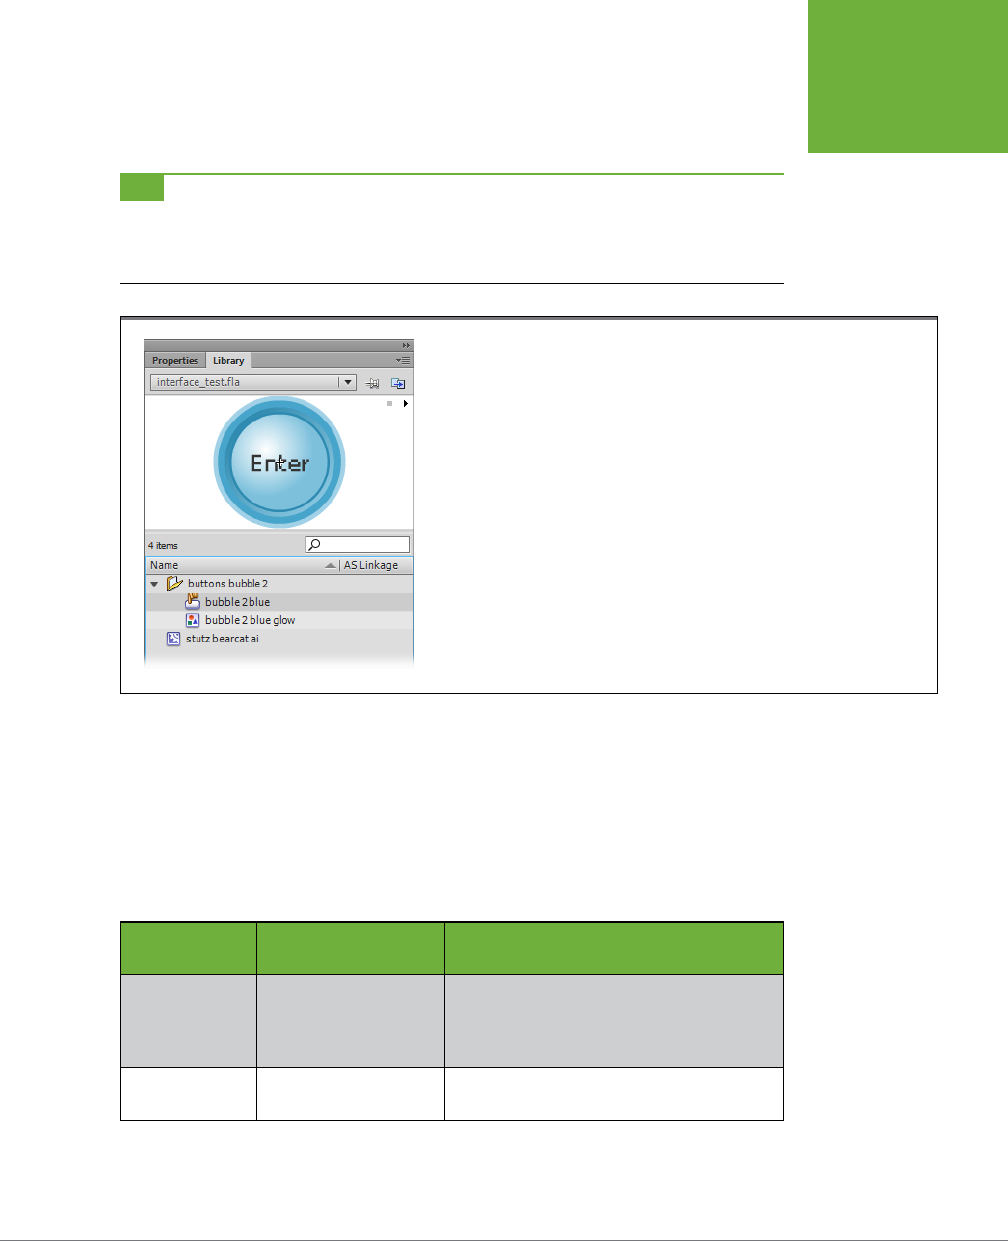
CHAPTER 1: GETTING AROUND FLASH 31
PANELS AND
TOOLBARS
it on page 248. To show the Library panel, click Window→Library, or press Ctrl+L
(Windows) or ⌘-L (Mac).
TIP In the upper-right corner of most panels is an Options menu button. When you click this button, a menu
of options appears—different options for each panel. For example, the Color Swatch panel lets you add and delete
color swatches. You’ll find many indispensable tools and commands on the Options menus, so it’s worth checking
them out. You’ll learn about different options throughout this book.
FIGURE 1-11
Storing simple images as reusable symbols in the Library panel does more than just save
you time: It saves you file size, too. (You’ll learn a lot more about symbols and file size in
Chapter 7.) Using the Library panel you see here, you can preview symbols, add them to
the stage, and easily add symbols you created in one Flash document to another.
Other Flash Panels
As you can see from the examples on the preceding pages, each Flash panel performs
specific functions, and most of them deserve several pages to describe them fully, as
you’ll find throughout this book. For now, Table 1-1 gives a thumbnail description and
notes the page where the panel is described in detail. If you’re eager to get started
actually using Flash, jump to page 35 to start the Flash CS6 Test Drive.
TABLE 1-1
Flash Panels and their uses (in order as they appear on the Window menu)
PANEL NAME
KEYBOARD
SHORTCUT PURPOSE
Timeline Windows: Ctrl+Alt+K
Mac: Option-⌘-T
Technically, the timeline is just another panel.
You can move, hide, expand, and collapse the
timeline just as you would any other panel.
See page 91 for more.
Motion Editor none A powerful tool used to create and control
animation effects. See page 311 for more.
www.it-ebooks.info
FLASH CS6: THE MISSING MANUAL
32
PANELS AND
TOOLBARS
PANEL NAME
KEYBOARD
SHORTCUT PURPOSE
Tools Windows: Ctrl+F2
Mac: ⌘-F2
Perhaps the most frequently used panel of
all—it holds drawing, selecting, and coloring
tools. The Tools panel also includes special-
ized tools like the IK Bones tools and the 3D
Rotation tool. See page 60 for more.
Properties Windows: Ctrl+F3
Mac: ⌘-F3
Everything that appears on the stage has
properties that define its appearance or char-
acteristics. Even the stage has properties, like
width, height, and background color. You can
review and edit an object’s properties in the
Properties panel. See page 29 for more.
Library Windows: Ctrl+L
Mac: ⌘-L
Holds graphics, symbols, and entire mov-
ies that you want to reuse. See page 248 for
more.
Common
Libraries
none When you want to share buttons, classes, or
sounds among several different Flash docu-
ments, use the common libraries. That way,
they’ll be available to all your projects. See the
tip on page 274 for more.
Motion Presets none Serves up dozens of predesigned animations.
See page 295 for more.
Actions Windows: F9
Mac: Option-F9
You use this panel to write ActionScript code.
The Actions panel provides a window for
code, a reference tool for the programming
language, and a visual display for the object-
oriented nature of the code. See page 415 for
more.
Code Snippets none Contains predesigned chunks of code—some-
one else sweated the details so you don’t
have to. Specific bits of code perform timeline
tricks, load or unload graphics, handle audio-
visual tasks, and program buttons. See the
box on page 445 for more.
Behaviors Windows: Shift+F3
Mac: Shift-F3
The earlier version of ActionScript (version
2.0) uses this panel to provide predesigned
bits of code.
Compiler Errors Windows: Alt-F2
Mac: Option-F2
Here’s where you troubleshoot ActionScript
code. Messages explain the location of an
error and provide hints as to what went
wrong. See page 665 for more.
Debug Panels none Additional panels to help you find errors in
your ActionScript programs. See page 662 for
more.
www.it-ebooks.info
CHAPTER 1: GETTING AROUND FLASH 33
PANELS AND
TOOLBARS
PANEL NAME
KEYBOARD
SHORTCUT PURPOSE
Movie Explorer Windows: Alt+F3
Mac: Option-F3
Helps you examine the elements in your Flash
animation, including separate scenes if you’ve
created them. The display uses a tree struc-
ture to show the relationship of the elements.
Output Windows: F2
Mac: F2
Another place to debug ActionScript pro-
grams. The Output panel is used to display
text messages at certain points as a program
runs. See page 657 for more.
Align Windows: Ctrl+K
Mac: ⌘-K
Lets you align and arrange graphic elements
on the stage. See page 78 for more.
Color Windows: Shift+F9
Mac: Shift-⌘-F9
Lets you select and apply colors to graphic
elements. See page 198 for more.
Info Windows: Ctrl+I
Mac: ⌘-I
Provides details about objects, like their loca-
tion and dimensions. The Info panel also keeps
track of the cursor location and the color
immediately under the cursor. See page 104
for more.
Swatches Windows: Ctrl+F9
Mac: ⌘-F9
Colors and gradients that you can apply to
graphic elements. You can create your own
swatches for colors you want to reuse. See
page 203 for more.
Transform Windows: Ctrl+T
Mac: ⌘-T
Lets you change the size, shape, and position
of graphic elements on the stage. You can
even use the Transform panel to reposition or
rotate objects in 3-D space. See page 174 for
more.
Components Windows: Ctrl+F7
Mac: ⌘-F7
Holds predesigned components you can use
in your Flash projects. You’ll find user interface
components like buttons and checkboxes,
components that can be used to create data
tables, and components used to control movie
and sound players. See page 543 for more.
Component
Inspector
Windows: Shift+F7
Mac: Shift-F7
Provides compatibility with older animations.
(Flash CS6 displays component properties in
the Properties panel. Earlier versions of Flash
used the Component Inspector. See the box
on page 560 for more.)
Accessibility
(under Other
Panels)
Windows: Alt+Shift+F11
Mac: Shift-⌘-F11
Tools that help you ensure that vision- and
hearing-impaired folks can enjoy the anima-
tions you create using Flash. See the box on
page 34.
www.it-ebooks.info

FLASH CS6: THE MISSING MANUAL
34
PANELS AND
TOOLBARS
PANEL NAME
KEYBOARD
SHORTCUT PURPOSE
History (under
Other Panels)
Windows: Ctrl+F10
Mac: ⌘-F10
Lets you backtrack or undo specific steps in
your work. Flash keeps track of every little
thing you do to a file, starting with the time
you created it (or the last time you opened it).
You can also use this panel to save a series of
commands you want to reuse later.
Scene (under
Other Panels)
Windows: Shift+F2
Mac: Shift-F2
Helps you organize and manage your scenes.
(You can break long Flash animations into
separate scenes, as described on page 529.)
Strings (under
Other Panels)
Windows: Ctrl+F11
Mac: ⌘-F11
Need to create an animation or application
that works in different languages? Using the
Strings panel, you can create and manage
multi-language versions of the text. (This
book doesn’t cover multi-language Flash.)
Web Services
(under Other
Panels)
Windows:
Ctrl+Shift+F10
Mac: Shift-⌘-F10
Used only with ActionScript 2.0 projects that
connect to the Internet. (This book doesn’t
cover ActionScript 2.0.)
Why Accessibility Matters
The term
accessibility
refers to how easy it is for folks with
physical or developmental challenges (like low or no vision)
to understand or interact with your animation.
As you can imagine, a Flash animation—which often includes
audio in addition to video and still images—isn’t going to be
experienced the same way by someone who’s blind or deaf as
it is by someone who isn’t impaired. But there is help. One of
the features that conscientious Flashionados build into their
animations is alternative information for those who can’t see
or hear. Often, sight-and hearing- impaired folks use assistive
devices to “report back” on what they otherwise can’t access,
so Flash animators build content into their animations that
these assistive devices can access and translate.
Thanks to U.S. legislation referred to as Section 508, local,
state, and federal websites absolutely have to be accessible
and useable to the public. But if you’re a private individual
planning to incorporate your animation into a website, you
shouldn’t ignore the issue of accessibility just because no-
body’s looking over your shoulder. If you ignore accessibility,
you eliminate a whole audience who might otherwise benefit
from your content.
For more information on accessibility, check out these websites:
•
www.adobe.com/accessibility/products/flash/
•
www.Section508.gov
•
www.paciellogroup.com
•
www.WebAIM.org
•
www.w3.org/wai
WORD TO THE WISE
www.it-ebooks.info
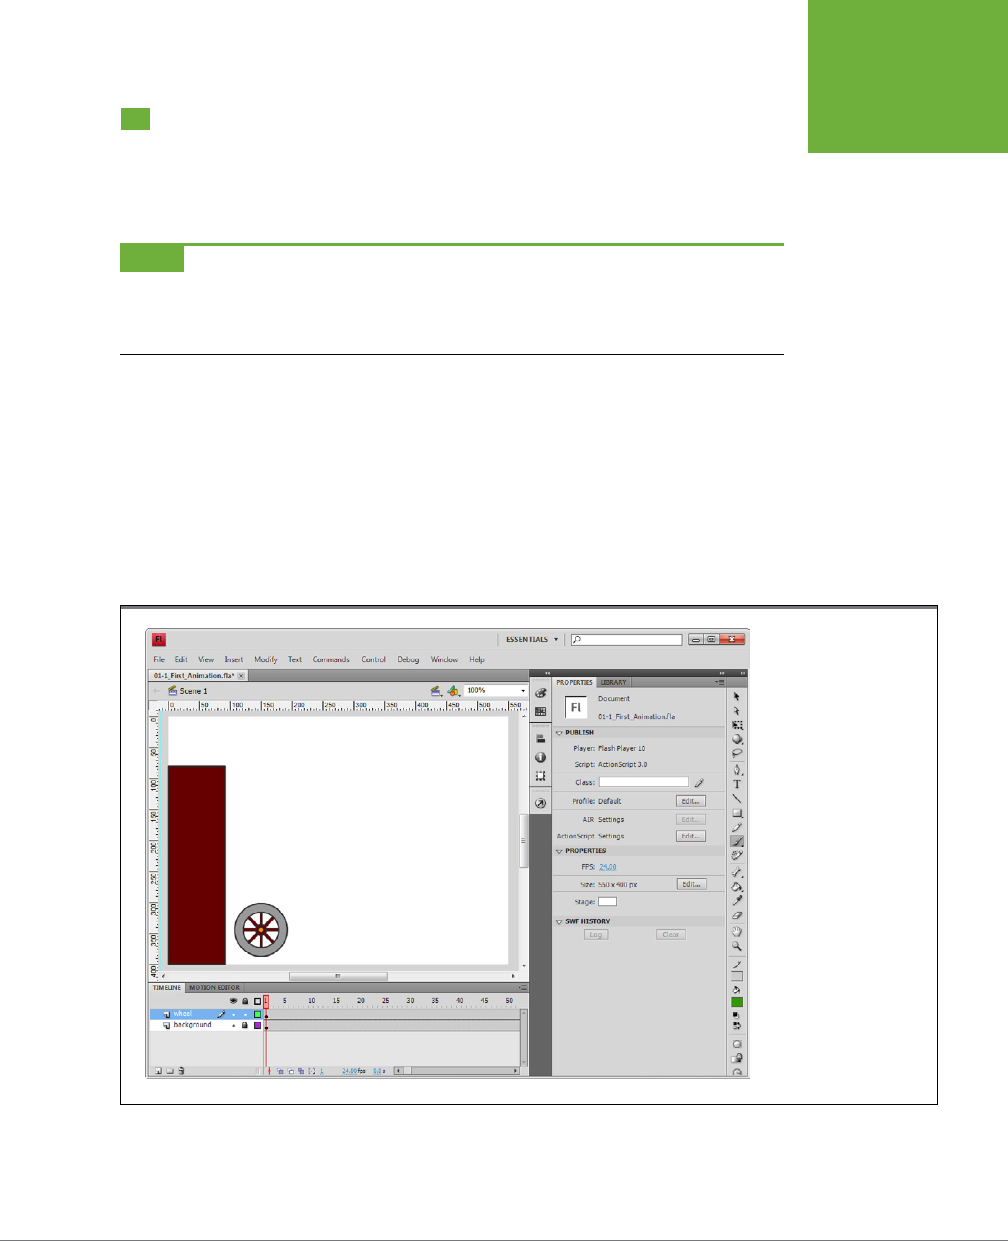
CHAPTER 1: GETTING AROUND FLASH 35
THE FLASH CS6
TEST DRIVE
The Flash CS6 Test Drive
For the tutorials in this section, you need a Flash animation to practice on. There’s
one ready and waiting for you on the Missing CD page at
www.missingmanuals.
com/cds/flashcs6mm
. The file is named
01-1_First_Animation.fla
.
NOTE In case you’re wondering, the number
01
at the beginning stands for Chapter 1, and the
-1
indicates it’s
the first exercise in the chapter. Other Missing CD files for this book are named the same way. You can download
all the exercise files in a single ZIP file or you can grab them chapter by chapter. The Missing CD also includes
links to all the web-based resources mentioned in this book.
Open a Flash File
Get the file
01-1_First_Animation.fla
and save it on your computer. You may want
to create a FlashMM folder in your My Documents or Documents folder to hold your
Missing Manual exercises. Launch Flash, and then choose File
→
Open. When the Open
dialog box appears, navigate to the file you just downloaded, and then click Open.
When you open a document, the Welcome screen disappears. Flash shows you the
animation on the stage, surrounded by the usual timeline, toolbars, and panels. If
you’re using the Essentials workspace, it should look like Figure 1-12.
FIGURE 1-12
After you open the exer-
cise in Flash, your screen
should look like this. At
the bottom, the timeline
shows two layers—one
named
background
and
the other,
wheel.
The
stage shows (surprise,
surprise) a background
and a wheel. To the right,
the Properties panel
displays the properties for
the document.
www.it-ebooks.info
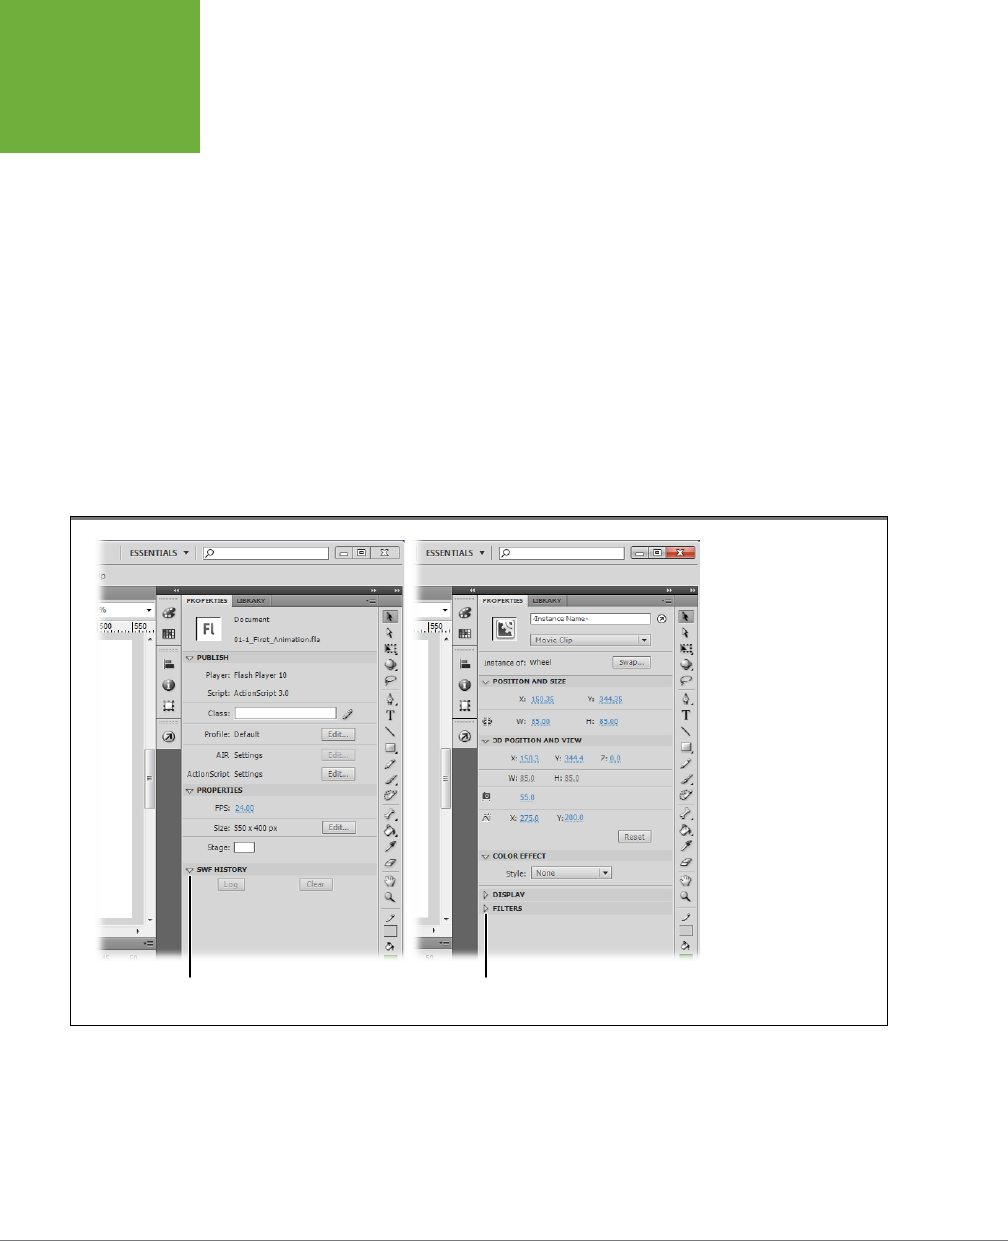
FLASH CS6: THE MISSING MANUAL
36
THE FLASH CS6
TEST DRIVE
Explore the Properties Panel
The Properties panel appears docked to the right side of the stage when you open
a new document. As shown in Figure 1-13, it shows the Property settings for objects.
Initially, it shows the properties for the Flash document itself. Click another object,
such as the wheel, and you see its properties. Why are properties so important?
They give you an extremely accurate description of objects. If you need to precisely
define a color or the dimensions of an object, the Properties panel is the tool to use.
It not only reports the details, but it also gives you the tools to make changes, as
shown in this little exercise:
1. At the top of the Tools panel, click the Selection tool (solid arrow).
As an alternative, press V, the keyboard shortcut for the Selection tool.
2. Click the white part of the stage.
The Properties panel shows the properties for your Flash document. At the top,
you see the word “Document,” and underneath, you see the filename.
FIGURE 1-13
Left: When you first
open a document, the
Properties panel shows
property settings for the
document.
Right: Select the wheel in
the document, and you
see its properties. Click
the triangle buttons to
expand and collapse the
subpanels.
Subpanel closedSubpanel open
3. Click the triangle button to open the Properties subpanel.
The button works like a toggle to open and close the subpanel. The subpanel
displays three settings: FPS (frames per second), Size, and Stage.
4. Click the white rectangle next to Stage.
A panel opens with color swatches.
www.it-ebooks.info
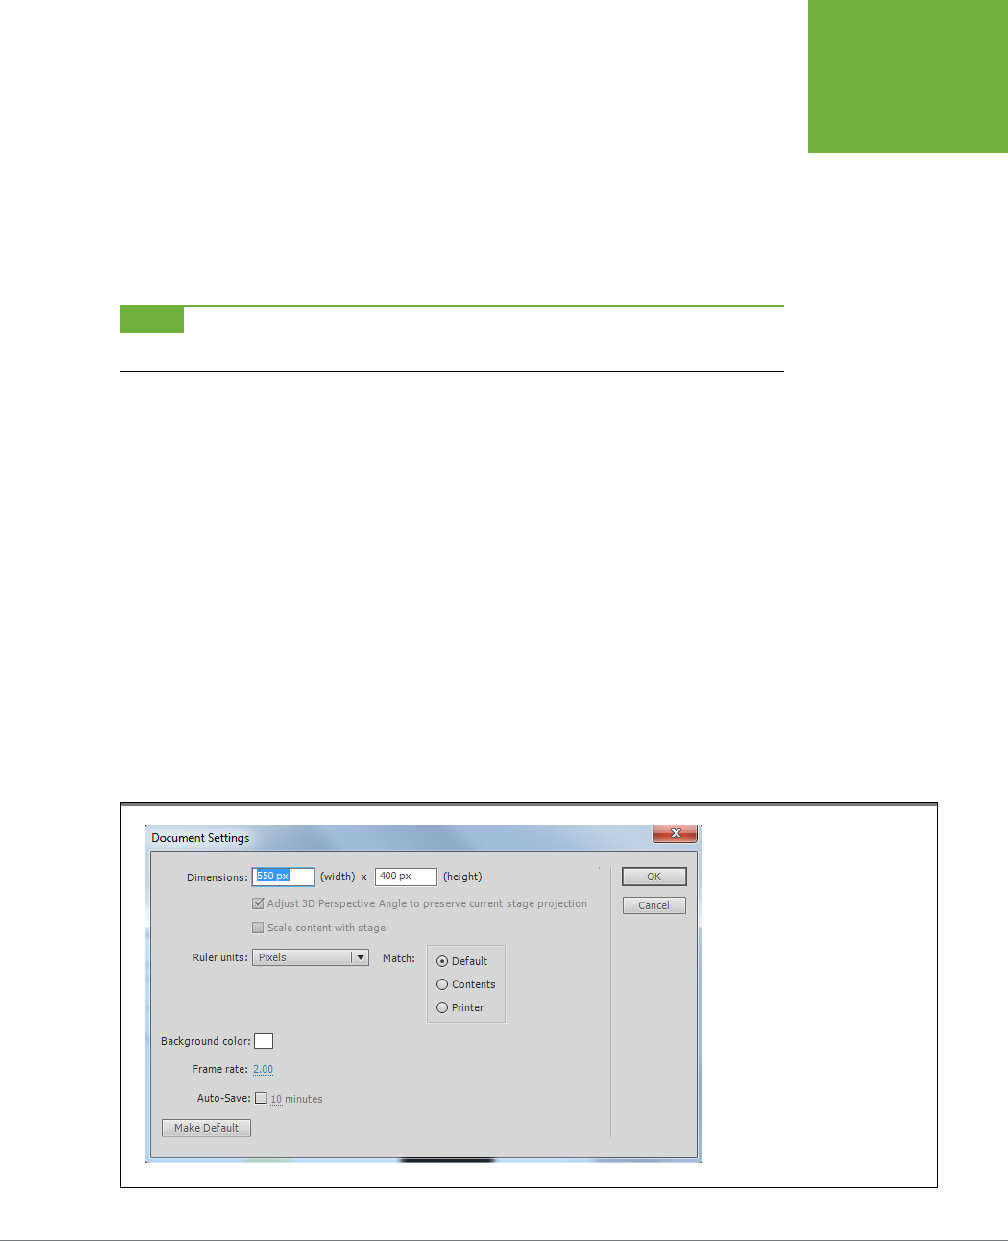
CHAPTER 1: GETTING AROUND FLASH 37
THE FLASH CS6
TEST DRIVE
5. Click a color swatch—any color will do.
The background color of the stage changes to the color you chose.
6. Click the wheel.
Information about the wheel fills the Properties panel. The wheel is a special
type of object called a
Movie Clip symbol
. You’ll learn much more about Movie
Clips and other reusable symbols in Chapter 7.
NOTE You may notice that you can’t select anything else in this document. That’s because the other objects
are in the background layer, which is locked. (For more details on locking layers, see page 148.)
Resize the Stage
In Flash, the size of your stage is the actual finished size of your animation, so setting
its exact dimensions is one of the first things you do when you create an animation,
as you’ll see in the next chapter. But you can resize the stage at any time.
Here’s how to change the size of your stage:
1. With the Selection tool, click on a blank area of the stage (to make sure
nothing on the stage is selected).
Alternatively, you can click the Selection tool and then choose Edit
→
Deselect All.
2. In the Properties panel, open the Properties subpanel, and then click the
Edit button.
The Document Settings window appears, as shown in Figure 1-14. At the top of
the window are boxes labeled Dimensions. That’s where you’re going to work
your magic.
FIGURE 1-14
The Document Settings dialog
box puts several related settings
in one place. At the top are the
document’s dimensions. In the
lower-left corner are settings
for the stage’s background color
and the frame rate. Click “Ruler
units” to choose among Inches,
Points, Centimeters, Millimeters,
and Pixels.
www.it-ebooks.info
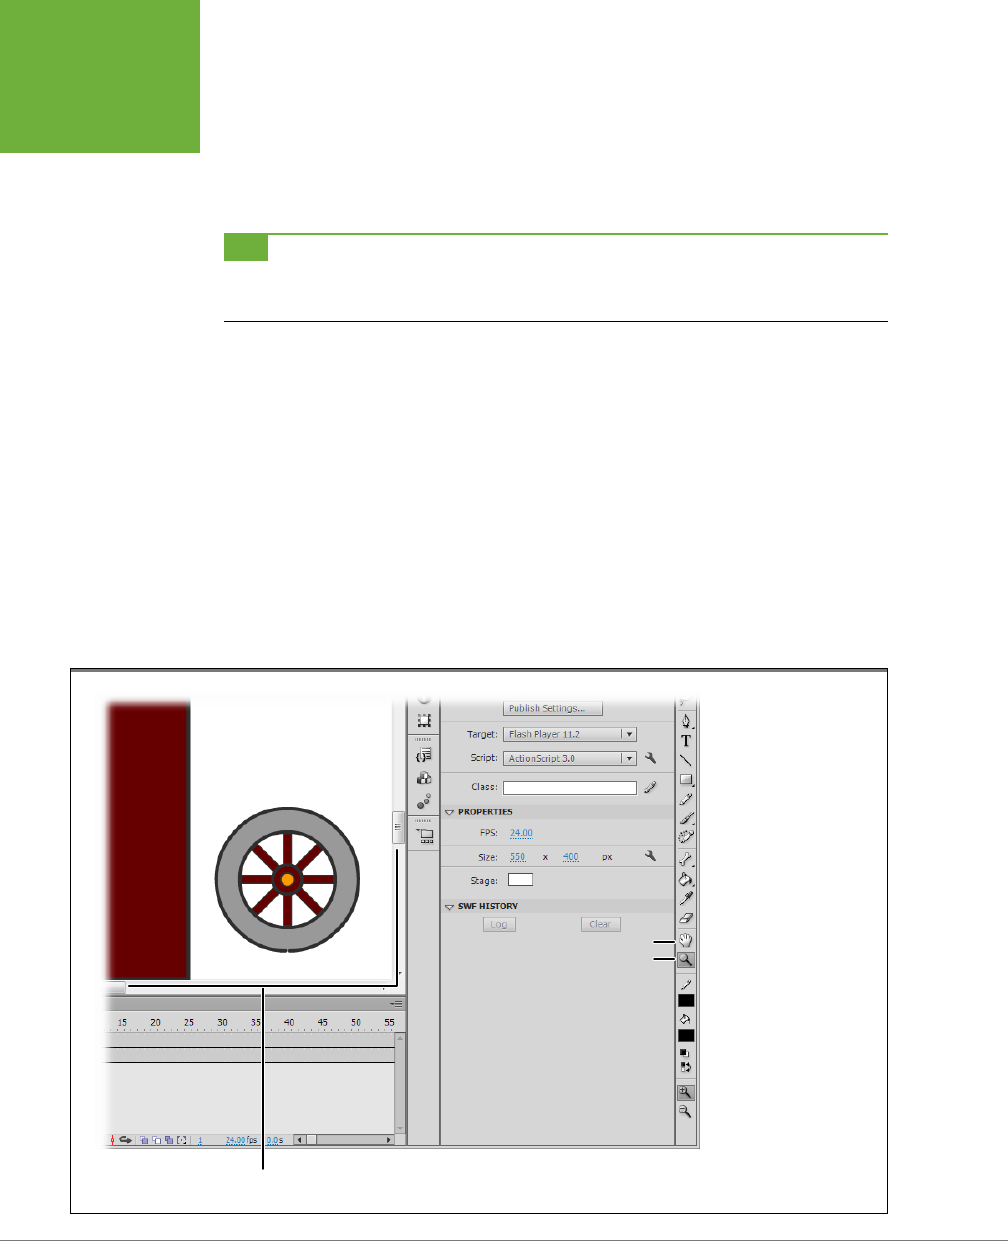
FLASH CS6: THE MISSING MANUAL
38
THE FLASH CS6
TEST DRIVE
3. Click in the width box (which currently reads “550 px”), and then type
600
.
You can change both the width and the height. The changes won’t take place
until you click OK. So if you have second thoughts and don’t want to make any
changes, then just click Cancel.
TIP If you want to change the stage back to its original dimensions after you’ve clicked OK, you can do that
by choosing Edit→Undo or pressing Ctrl+Z (⌘-Z on a Mac). Undo works like it does in most programs, undoing
your last action, and you can press it multiple times to work your way back through your recent actions.
4. Click OK when you’re done.
The stage resizes according to your instructions.
Zoom In and Out
When your Flash project gets big or complicated, you may want to focus on just a
portion of the stage. If you’ve used other graphics programs—from Windows Paint
to iPhoto or Photoshop—there’s not much mystery to the process. In the Tools panel,
click the Zoom tool, which looks like a magnifying glass (Figure 1-15). Initially, the
Zoom tool shows a + sign, meaning it’s all set to zoom in. Click any spot you want
to zoom in on, and you get a closer view. As an alternative, you can click and drag
over an area to zoom in with more precision. As you drag, a rectangle appears to
mark the area of interest.
FIGURE 1-15
Choose the Zoom tool
and then click the stage
to zoom in on your Flash
document. Hold the Alt
(Option) key down to
zoom out. Once you’re
zoomed in, you can move
around using either the
scrollbars or the Hand
tool (H).
Zoom tool
Hand tool
Scrollbars
www.it-ebooks.info
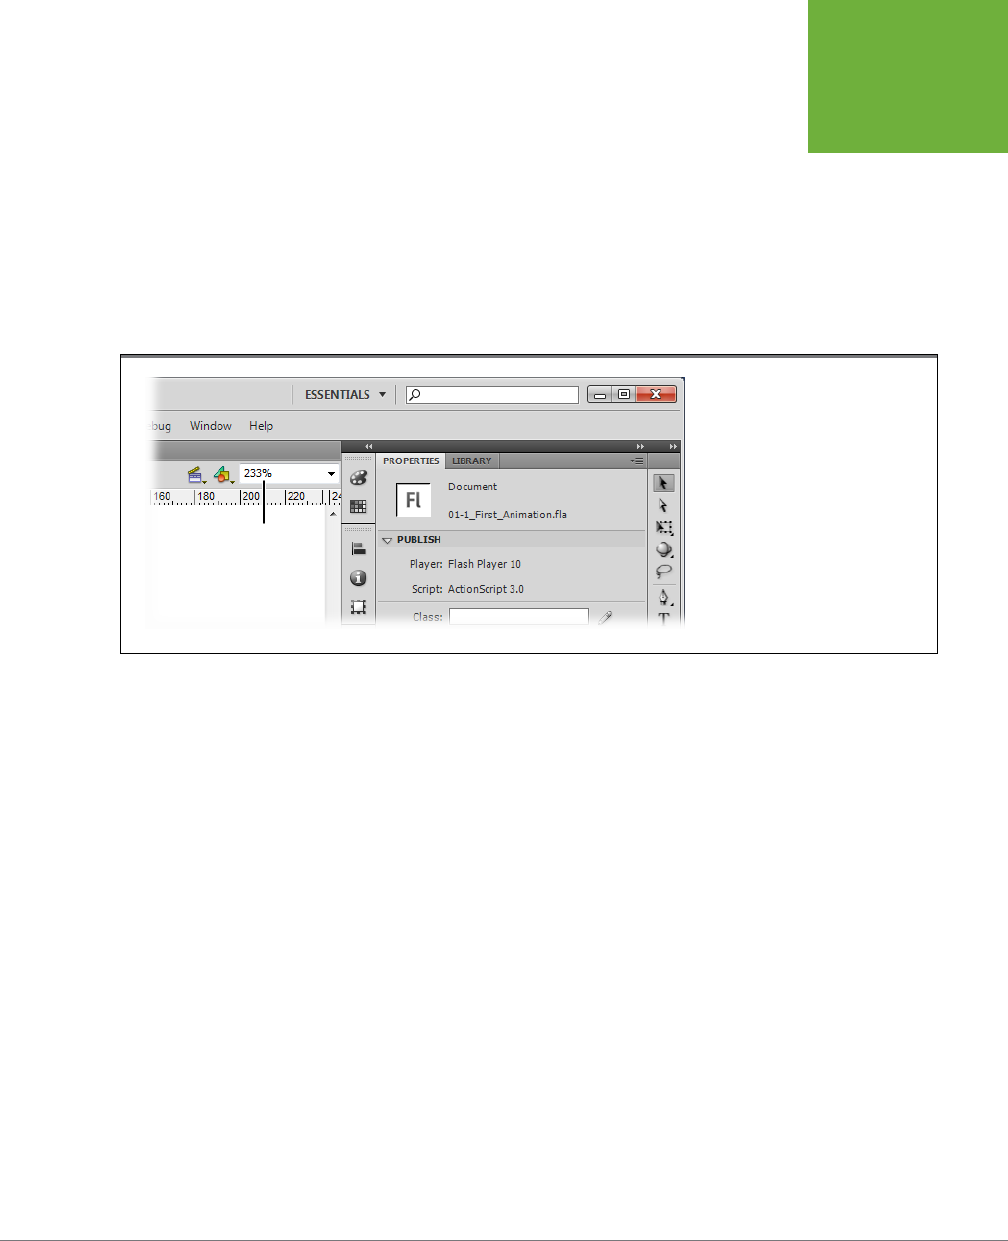
CHAPTER 1: GETTING AROUND FLASH 39
THE FLASH CS6
TEST DRIVE
Using the Zoom tool, you can get so close that you see individual pixels in your
artwork. Very handy for some operations. Once you’re zoomed in, you can use the
scroll bars at the right and bottom of the stage to reposition the stage in the view-
ing area. Even easier, choose the Hand tool (H) and then click and drag the stage
within the viewing area.
Want to zoom out? Hold down the Alt (Option) key as you use the Zoom tool. Each
time you click, you see more and more of the stage. Directly above the stage is the
Edit bar. (If you don’t see it, select Window→Toolbars→Edit Bar.) A menu on the Edit
bar sets the Magnification or Zoom property as a percentage, as shown in Figure 1-16.
FIGURE 1-16
The Magnification menu in the Edit
bar gives you a quick readout on the
Zoom factor. Click the menu to choose
from several presets, including “Fit
in Window,” which shows the entire
stage, or Show All, which zooms in or
out to show all the objects drawn on
the stage.
Zoom menu
Make It Move
If you’ve followed along in the exercises up to this point, you deserve a taste of
the Flash magic to come. Enough studying panels and tools—Flash is an animation
program. It’s time to make something move, or more precisely, to make something
bounce. With the help of a little feature called Motion Presets, it’s easier than you
think:
1. In the Magnification menu, choose “Fit in Window.”
This gives you a view of the entire stage.
2. With the Selection tool (V), drag the wheel to the top of the stage.
All the parts of the wheel (tire, spokes, hub) move as a single unit because
they’re grouped within a Flash symbol, called a Movie Clip.
3. Choose Window→Motion Presets.
A floating panel appears, as shown in Figure 1-17. Motion Presets are covered in
detail on page 295, but for this exercise, you just need a couple of basic steps.
4. Click the triangle next to Default Presets.
The Default Presets folder opens, showing many predesigned motions.
www.it-ebooks.info
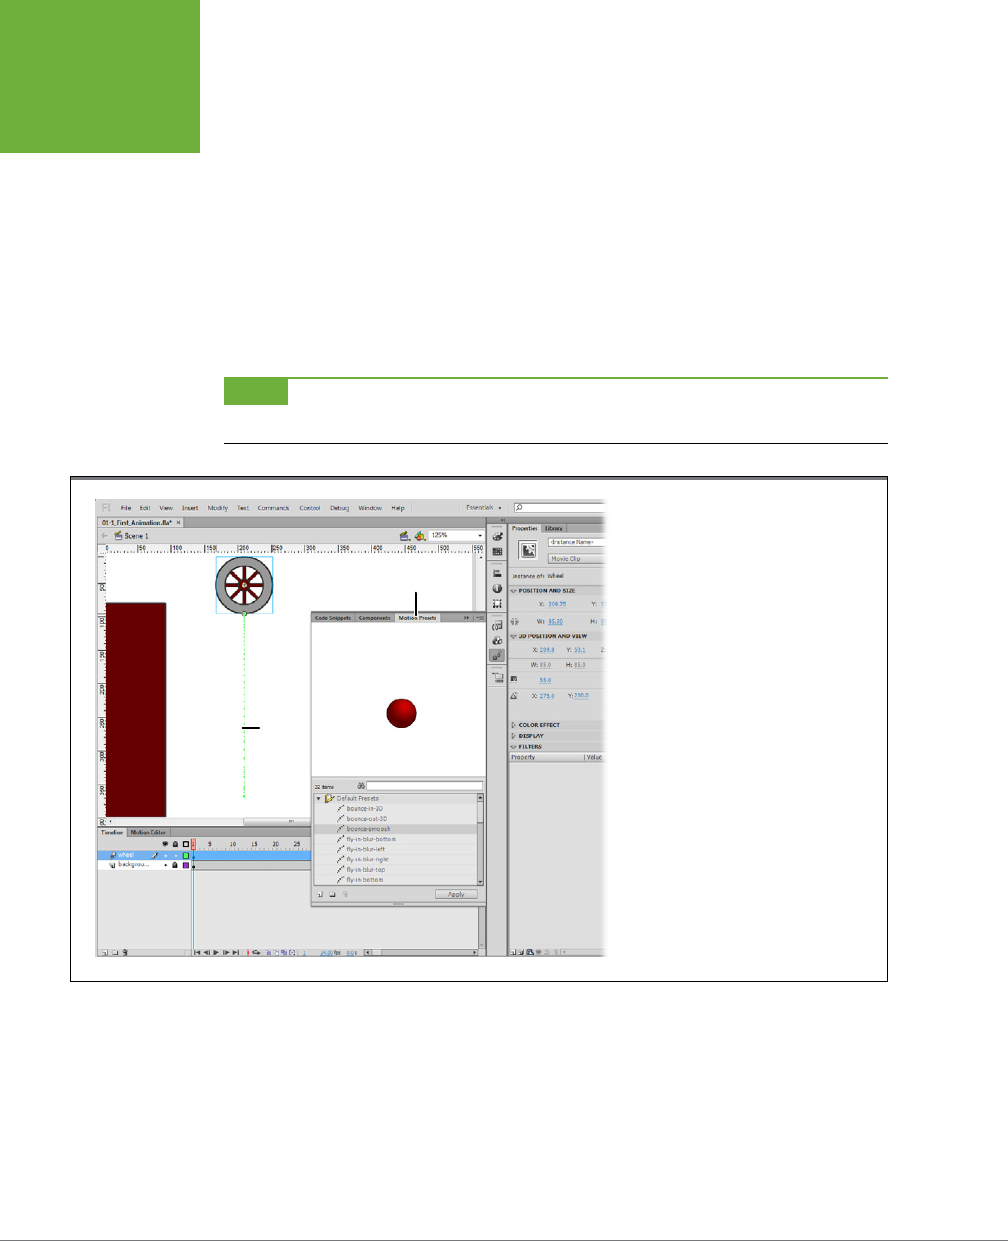
FLASH CS6: THE MISSING MANUAL
40
THE FLASH CS6
TEST DRIVE
5. Click the words “bounce-smoosh.”
At the top of the panel, the preview window gives you an idea of how the
bounce-smoosh preset works.
6. Make sure the wheel is selected on the stage and that “bounce-smoosh”
is selected in the Motion Presets panel, and then click the Apply button.
A green line appears hanging from the bottom of the wheel. This line is called
the
motion path
, and it shows you how the wheel will move over the course of
the animation. In the timeline, the wheel layer turns to blue to indicate that it’s
now a
motion tween
.
NOTE
Tween
is an animation term that comes from all those in-between frames that animators have to
draw to create a smooth animated motion.
FIGURE 1-17
The Motion Presets window has two fold-
ers. The one called Default Presets (shown
open here) holds presets designed by
Adobe. The other folder holds presets that
you design and save. The “tail” hanging
down from the wheel is the motion path.
Motion Presets panel
Motion
Path
7. Close the Motion Presets panel.
That’s all it takes to animate the wheel, so you might as well close the Motion
Presets window. You can always bring it back later if you want to try out some
of the other presets on the wheel.
www.it-ebooks.info
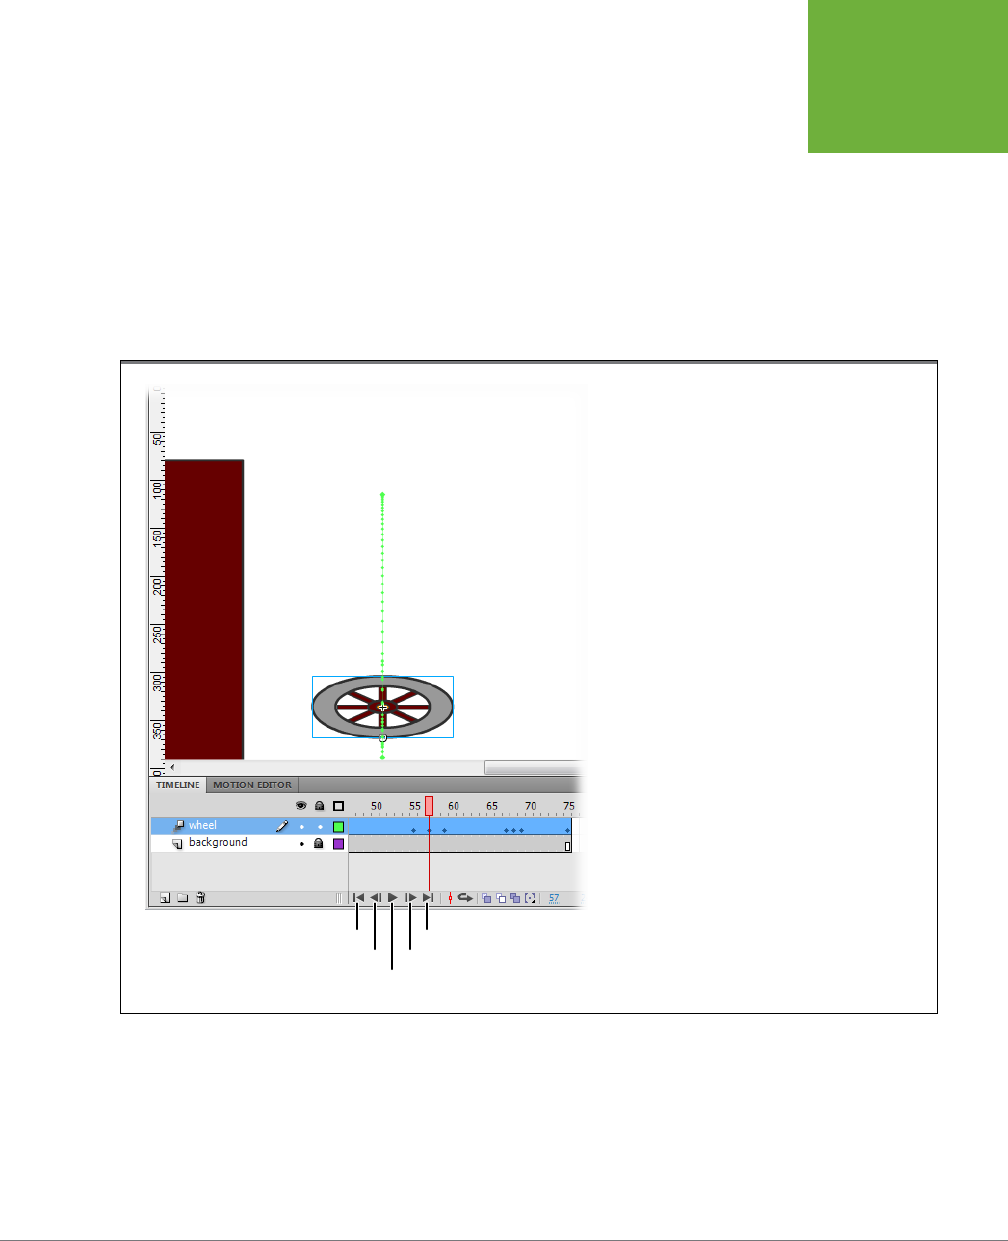
CHAPTER 1: GETTING AROUND FLASH 41
THE FLASH CS6
TEST DRIVE
Play an Animation
Naturally, after you’ve animated an object in Flash, you want to see the results. You’ll
be checking your work frequently, so Adobe makes it easy to play an animation. Just
press Enter (Return), and your animation bounces and smooshes as advertised. In
the timeline, notice how the playhead moves along frame by frame as your anima-
tion plays. You can see your animation at all the dierent stages by dragging the
playhead up and down the timeline—a process sometimes called
scrubbing
.
New in Flash CS6, the animation controller is fixed to the bottom of the timeline
(Figure 1-18). That’s the perfect place because it’s always available.
FIGURE 1-18
If you’ve ever used a DVD player or an iPod, the
animation play icons at the bottom of the timeline look
comfortingly familiar. You can move one frame at a time
or jump to the beginning or end of an animation.
Go to first frame Go to last frame
Step back one frame Step forward one frame
Stop/Play
Save a File
Saving your work frequently is important in any program, and Flash is no exception.
You don’t want to have to go back and recreate that perfect animated sequence
because the power went out. The minute you finish a sizable chunk of work, save your
www.it-ebooks.info

FLASH CS6: THE MISSING MANUAL
42
THE FLASH CS6
TEST DRIVE
Flash file by pressing Ctrl+S (⌘-S). The Save command also appears on the menu
bar: File
→
Save. Both maneuvers save the animation with the current name. So, if
after following the exercises in this chapter, you use the Save command, you end up
with a single Flash document using the original filename:
01-1_First_Animation.fla
.
If you want to save the file under a dierent name, use Save As or Ctrl+Shift+S
(Shift-⌘-S). A standard window opens where you can choose a folder and give your
document a name. When you use Save As, you end up with two documents, the
original and one saved with the new name. The newly named document is the one
that remains open in the Flash workspace.
If you close a document (File→Close) after you’ve made changes, Flash automatically
asks if you want to save it. You’re given three options. Choose
Save
to save your
work and close the document. Choose
Don’t Save
to close the document without
saving your work. Choose
Cancel
if you don’t want to save and don’t want to close
the document.
NOTE Flash Professional CS6 provides a new life-saving feature for files. When you create a new document
you can turn on Auto-Save. This feature saves your document periodically even if you forget. You even get to
choose the period. Initially, the Auto-Save period is set to every 10 minutes. To change that, click the number and
type a new value.
Don’t Be Afraid to Play
This first chapter introduced some important basics to help you
get started working in Flash. Here’s the most valuable Flash tip
of all: Don’t be afraid to play. This book is full of exercises that
carefully show you how to build animations, but that doesn’t
mean you shouldn’t head off the beaten path from time to
time. The more you experiment and say, “What happens if
I try this?” the faster you’ll learn. It’s true of all computer
programs, but it’s especially true with a graphics program
like Flash. So download some of the animations from
www.
missingmanuals.com/cds/flashcs6mm
. Open them in Flash,
and then disassemble them. Alter the artwork. Mess with the
tweens. Add new parts. You won’t break anything. You can
always make copies or download the originals again. For a
start, why not go back and check out how some of the other
motion tweens work with that wheel?
UP TO SPEED
www.it-ebooks.info

43
CHAPTER
2
Over the years, Flash has acquired many new features, but at heart it’s still an
animation tool. The best way to learn Flash is to jump in and start drawing.
So that’s exactly what you’ll do in this chapter. It starts with tips for plan-
ning your animation and then moves on to specific tools like the Pen, the Pencil,
the shape tools, the Line tool, and the Brush. You’ll draw a simple picture and see
how to use Flash to draw in dierent styles, from cartoons to mechanical drawings.
Once you’ve created some drawings, you’ll learn more about moving and arranging
objects on the stage.
In the next chapter, you’ll add a few more drawings and string them together to
create a simple animation.
Plan Before You Draw
If you’re just creating a simple banner ad, you probably already have a concept in
mind and are itching to start drawing and animating. On the other hand, if you’re
creating a new feature for the Cartoon Network, then you need to think like a movie
director. If you’re creating a tablet or smartphone app or a rich Internet application
(RIA), then you need to think like a graphic user interface (GUI) designer. Whatever
you’re producing, it pays to plan. In the case of an ad, what do you want your audi-
ence to do? What sales message will motivate it? If your goal is to entertain, then
you need to think about how to tickle people’s funny bones or how to move them
emotionally. If the story is complicated, then you need to break it down into scenes
and use the entire storyteller’s toolkit to be eective. To learn some of the tricks
of the storytelling trade, try the techniques animators and graphic novelists use. If
Creating Simple
Drawings
www.it-ebooks.info

FLASH CS6: THE MISSING MANUAL
44
PLAN BEFORE
YOU DRAW
you’re designing an application, whether it’s for a handheld device or a full-size web
page, you need to think about the needs of the app’s users. What do they want to
do? What tools do they expect to use?
Drawing a single picture is relatively easy. But creating an eective animation—one
that gets your message across, entertains people, or persuades them to take an
action—takes a bit more up-front work. And not just because you have to generate
dozens or even hundreds of pictures: You also have to decide how to order them,
how to make them flow together, when (or if) to add text and audio, and so on. With
its myriad controls, windows, and panels, Flash gives you all the tools you need to
create a complex, professional animation, but the creativity comes from you. You
can avoid pitfalls and wasted time by planning before you draw.
Creating a Storyboard
Say you want to produce a short animation to promote your company’s great new
gourmet coee called Lotta Caeina. You decide your animation would be perfect
as a banner ad. Now, maybe you’re not exactly the best artist since Leonardo da
Vinci, so you want to keep it simple. Still, you need to get your point across—BUY
OUR COFFEE!
Before you even turn on your computer (much less fire up Flash), pull out a sketch
pad and a pencil and think about what you want your animation to look like.
For your very first drawing, you might imagine a closeup of a silly-looking face on a
pillow, belonging to a guy obviously deep in slumber, eyes scrunched tight, mouth
slack. Next to him is a basic bedside table, empty except for what appears to be a
jangling alarm clock.
OK, now you’ve made a start. After you pat yourself on the back—and perhaps refuel
your creativity with a grande-sized cup of your own product—it’s time to plan and
execute the frame-by-frame action. You do this by whipping out six quick pencil-
and-paper sketches. When you finish, your sketch pad may look something like this:
• The first sketch shows your initial idea—Mr. Comatose and his jangling alarm
clock.
• Sketch #2 is identical to the first, except for the conversation balloon on the left
side of the frame, where capped text indicates that someone is yelling to your
unconscious hero (who remains dead to the world).
• In sketch #3, a disembodied hand appears at the left side of the drawing, placing
a cup bearing the Lotta Caeina logo on the bedside table next to Mr. Comatose.
• Sketch #4 is almost identical to the second, except that the disembodied hand
is now gone, and Mr. Comatose’s nose has come to attention as he gets a whi
of the potent brew.
• Sketch #5 shows a single eye open. Mr. Comatose’s mouth has lost its slackness.
www.it-ebooks.info

CHAPTER 2: CREATING SIMPLE DRAWINGS 45
PLAN BEFORE
YOU DRAW
• The last sketch shows a closeup of the man sipping from the cup, his eyes wide
and sparkling, a smile on his lips, while a “thought bubble” tells viewers, “Now,
that’s
worth getting up for!”
Tips from the Trenches
Starting out on a learning curve as steep as Flash’s can be
daunting. Sometimes it’s helpful to hear what the pros
think—to get advice from folks who’ve been there, done that,
and want you to know that you can, too.
Here are the top 10 recommendations from Flash experts:
1. Analyze other people’s animations. As you begin to
explore Flash content on other websites, think about it
critically. Don’t just focus on whether the result is dazzling
or colorful, but also consider whether it’s effective. Does it
do what it was designed to do: Help you keep track of the
baseball pool? Provide advice and recipes for Thai cuisine?
Get you to buy something? Did it work? If not, why not?
What detracts from the overall effect? Keep a notebook
so you can apply what you learn to your own efforts.
2. Don’t sell yourself short. Don’t think you can’t create
great animations just because you’re not a professional
artist with a background in design. You’ll find that Flash
helps you through lots of tough spots (like correcting your
shaky lines), and frankly, you’re probably not shooting
for a Picasso- or Tarantino-level result anyway. You get
better at everything with practice; Flash is no exception.
3. Start with a storyboard. When you’re working with
anything but the simplest design (anything more than a
couple of frames), create a storyboard (page 44). It can
be as rough or as detailed as you want; some folks just
jot notes to themselves. Every minute you spend planning
saves you hours of hair-pulling.
4. Practice, practice, practice. There are many programs
out there that you can sit down and nail in 20 minutes.
Flash isn’t one of them. And while reading is a great way
to begin learning Flash, no amount of book learning is a
substitute for rolling up your sleeves and producing an
animation or two. (That’s why this book includes hands-
on examples.)
5. Join an online Flash community. Real-time help from
knowledgeable Flashionados is a beautiful thing. Use
the online resources outlined in Appendix A to join a
Flash community where you can ask questions, get help,
and share ideas.
6. Don’t throw anything away. You might be tempted to
discard your mistakes. But if the “mistake” is interesting
or useful, save it; you may be able to use it later for a
different project. (While you’re at it, write down a few
quick notes about how you achieved the result so you
can recreate it if you want to.)
7. Spread yourself thin. Many Flash pros have several
projects of various types going at once. They can switch
around when they get stuck on one. Keeping a lot of balls
in the air can be an excellent way to help you think about
things from different angles, which will help develop your
skills. Often the best way to solve a problem is to give
yourself a break and not think about it for a while. The next
time you tackle the problem, the solution is right there.
8. Always test your work in a live environment. Don’t rely
on Flash’s testing environment. If you’re creating a
Flash animation to display on a smartphone, test it on
a smartphone before you go live. If you’re targeting a
website, upload your animation to a web server and test
it in a browser, or better yet, several different browsers,
like Internet Explorer, Firefox, Safari, and Chrome.
9. Solicit (and incorporate) viewer feedback. When you
finish an animation, ask for feedback. Choose people you
know will take the time to look at your work carefully and
give you an honest evaluation.
10. Never, ever sacrifice content for the sake of coolness. The
purpose of tools like Flash is to help you get your message
across, not to see how many special effects you can cram
into a 5-second spot. Pay more attention to whether you’re
creating an effective animation than to whether you’re
adding enough colors, shapes, or audio clips.
DESIGN TIME
www.it-ebooks.info
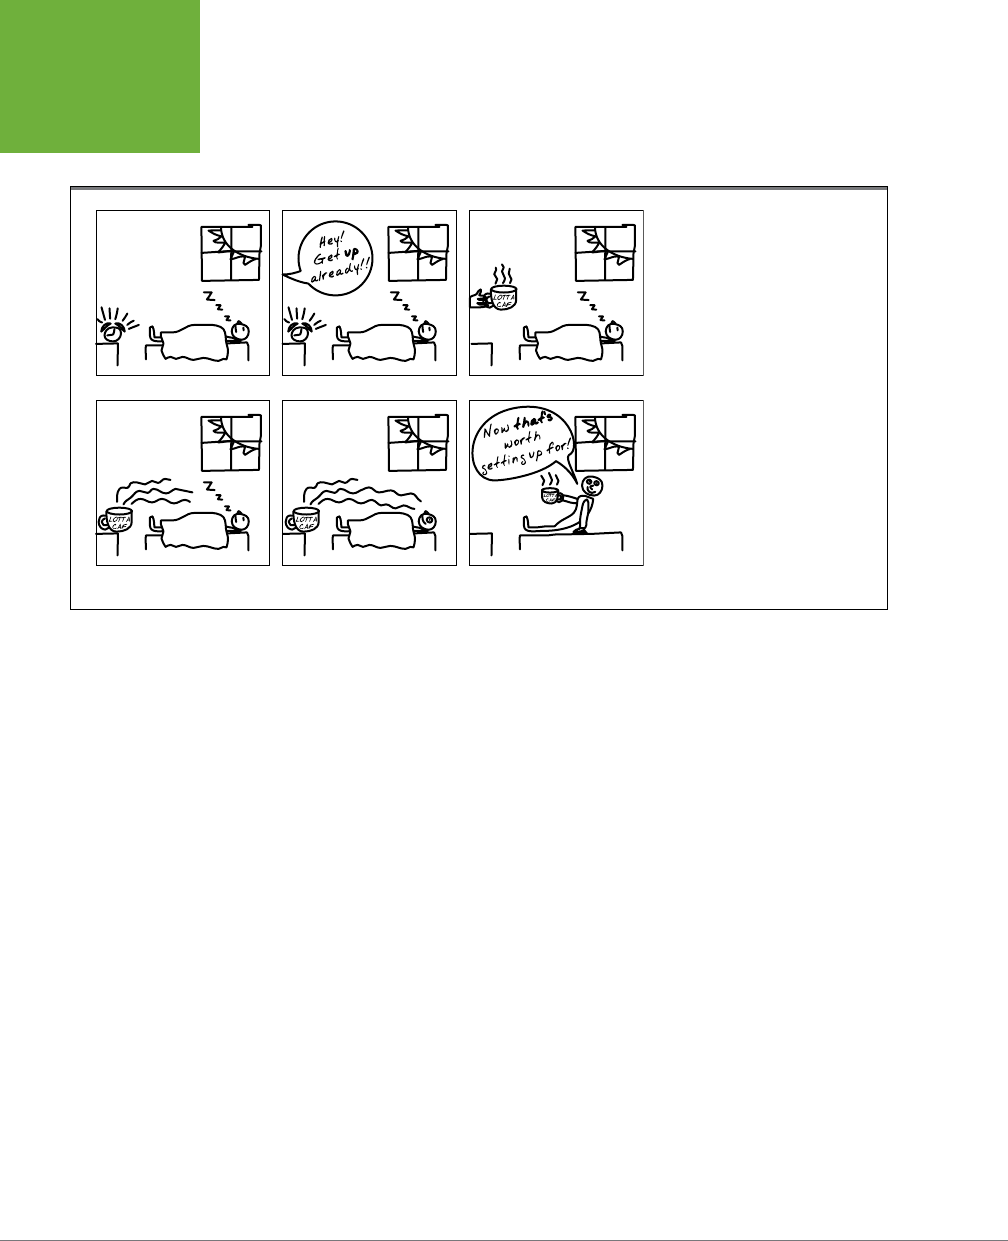
FLASH CS6: THE MISSING MANUAL
46
PLAN BEFORE
YOU DRAW
In the animation world, your series of quick sketches is called a
storyboard
.
Figure 2-1 shows a basic storyboard.
FIGURE 2-1
Spending time up front sketching
a storyboard lets you set up your
basic idea from start to finish. Don’t
worry about how sophisticated (or
unsophisticated) it looks; nobody
but you will see this rough working
model.
1 2 3
4 5 6
Five Questions for a Better Result
Creating your Flash animation will go more smoothly if you can answer these five
basic questions:
• What do you want to accomplish with this Flash creation? Give yourself a
mission statement, just as if you were in one of those tedious business meetings.
You want something like “Generate 1,000 hits for the Lotta Caeina website” or
“Create a 22-minute animation set on the planet Galactrix” or “Sell an iPhone
app to movie lovers.”
• Who’s your audience? Dierent types of people require dierent approaches.
For example, kids love all the snazzy eects you can throw at them; adults aren’t
nearly as impressed by animation for animation’s sake. The better sense you
have of the people most likely to view your Flash creation, the better you can
target your message and visual eects specifically to them.
• What third-party content (if any) do you want to include?
Content
is the stu
that makes up your Flash animation: the images, text, video, and audio clips.
Perhaps you want your animation to include only your own drawings, like the
ones you’ll learn how to create in this chapter. But if you want to add images
or audio or video clips from another source, then you need to figure out where
you’re going to get them and how to get permission to use them. (Virtually
anything you didn’t create—a music clip, for example, or a short scene from a
TV show or movie—is protected by copyright. Someone somewhere owns it,
www.it-ebooks.info

CHAPTER 2: CREATING SIMPLE DRAWINGS 47
PREPARING TO
DRAW
so you need to track down that someone, ask permission, and—depending on
the content—pay a fee to use it. Chapter 11 lists several royalty-free, dirt-cheap
sources of third-party content.)
• How many frames is it going to take to put your idea together, and how do
you want them to be ordered? For a simple banner ad, you’re looking at any-
where from a handful of frames to around 50. A tutorial or product demonstra-
tion, on the other hand, can easily require 100, 200, or more frames. Whether
you use storyboarding or just jot down a few notes to yourself, getting a feel
for how many frames you’ll need helps you estimate the time it’s going to take
to put your animation together.
TIP Try to get your message across as succinctly as possible. Fewer frames (and therefore images) typically
mean a smaller file size, which is important if you plan to put your Flash animation up on the Web. (Folks surfing
with dial-up or on a smartphone often have trouble viewing large files.)
• How will you distribute it? In other words, what’s your target platform? If you
plan to put your animation up on a website, then you need to keep file size to
a minimum so people with slow connections can see it; if you plan to make it
available to hearing-impaired folks, then you need to include an alternative way
to communicate the audio portion; if you’re creating an animation you know will
be played on a 100-inch monitor, then you need to draw large, bold graphics.
Your
target platform
—the computer (or device) and audience most likely to view
your project—always aects the way you develop your animation.
NOTE Page 762 provides advice for designing a single animation that works with several different target
devices such as web pages, smartphones, and tablets.
Preparing to Draw
Even if you’re familiar with animation software (but especially if you aren’t), you need
to know a few quick things before you roll up your sleeves and dive into Flash—sort
of like the quick where’s-the-turn-signal once-over you do when you jump into a
rental car for the first time.
In this section, you’ll find out how to get around the stage and how to customize
your Flash document’s properties. You’ll also learn a couple of basic Flash terms
you need to understand before you use the drawing tools (which you’ll see how to
do on page 65).
But first you need to open a new Flash document page so you can follow along at
home. To do so, launch Flash. Unless you’ve turned it o (page 17), the first thing
you see is Flash’s Welcome screen. Under Create New, choose ActionScript 3.0. If
you’ve turned o the Welcome screen, you can create a new file using the Flash
main menu. Here’s how:
www.it-ebooks.info
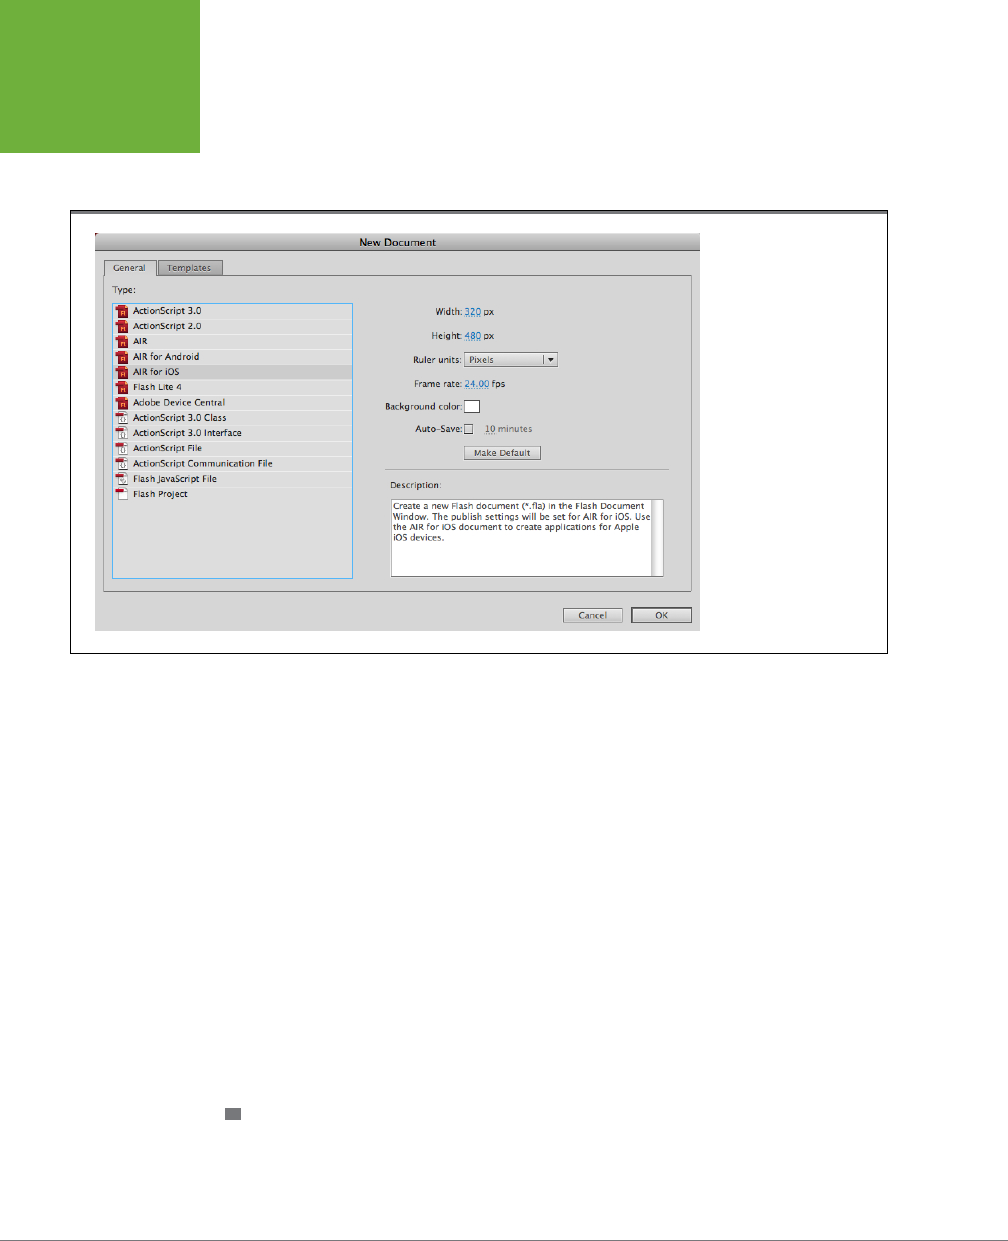
FLASH CS6: THE MISSING MANUAL
48
PREPARING TO
DRAW
1. From the main menu, choose File→New.
The New Document window opens. If the window doesn’t show the General
tab, as in Figure 2-2, then click that tab to make it active.
FIGURE 2-2
In every case but one
(Flash Project), selecting a
document type and then
clicking OK tells Flash
to create a crisp, new
document for you. (Flash
projects are really nothing
more than lists of other
files with version control
added so that multiple
designers can work on
the same Flash project
without overwriting one
another’s changes.)
2. In the Type list, select the type of new file you want to create, and then
click OK.
(If you’re not sure what file type you want, choose ActionScript 3.0; see the box
on page 19 for the reason why.) The New Document window disappears, and
Flash displays a brand-new blank document. You can tell it’s a new document
by the name Flash gives it—for example,
Untitled-1
.
Setting Document Properties
The stage, as you may recall from Chapter 1, is your electronic canvas: It’s where
you draw your lines and shapes and add your text. Figure 1-1 shows what the stage
looks like the first time you create a new document in Flash. There’s certainly noth-
ing wrong with it, but you may want to change the size or color. Or, as described
on page 50, you might want to make other changes to the stage to help you draw.
For example, you can tell Flash to display guidelines that help you align objects and
draw accurately. These guides show while you’re creating, but your audience won’t
see them in the final animation. This section shows you how.
CHANGING THE SIZE OF THE STAGE
The size of your stage is also the size of your finished animation. The standard
550x400 pixel Flash stage, which worked well in the past, is pretty small by today’s
web standards. You may want to bump it up to 800 x 600 or even larger, depending
www.it-ebooks.info
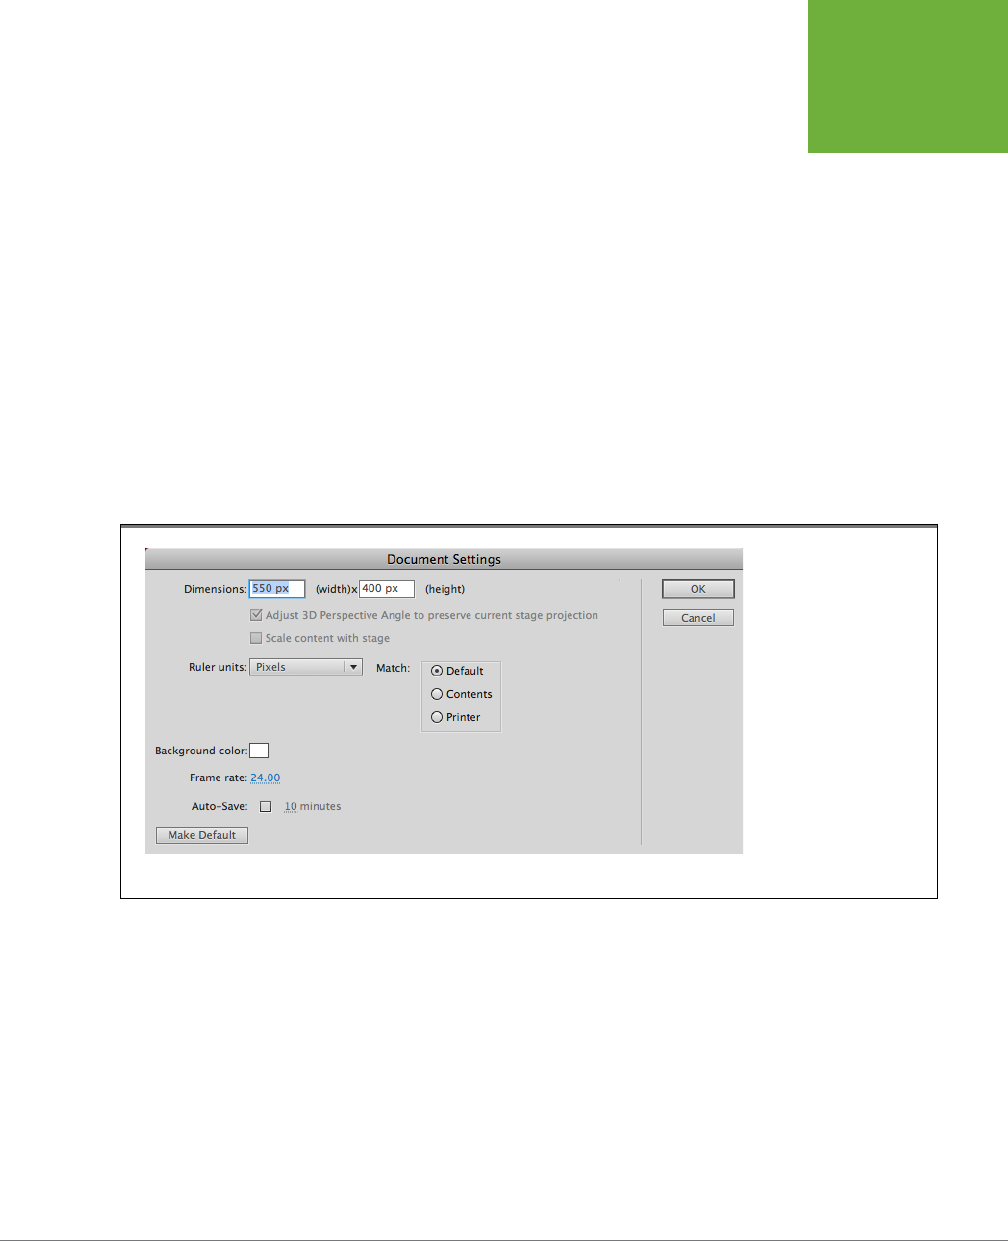
CHAPTER 2: CREATING SIMPLE DRAWINGS 49
PREPARING TO
DRAW
on your target audience. If you’re creating something for a smartphone or a tablet,
you need to shrink the stage accordingly. In the case of the Lotta Caeina banner
ad, you want a wide, short stage (typically somewhere around 729 x 90).
The best way to ensure that your finished animation is the right size is to start with
the right size stage out of the gate. Figure 2-3 shows how to change the stage di-
mensions using the Document Settings dialog box. There are several ways to open
this box, which contains settings related to the stage and your animation:
• Press Ctrl+J (⌘-J).
• Right-click the stage. From the shortcut menu that appears, choose Document
Properties.
• In the menu bar, choose Modify→Document.
• Press Ctrl+Shift+A (Shift-⌘-A) to make sure nothing is selected—that way, the
Properties panel shows the document settings. If necessary, open the Properties
subpanel. (Yep, there’s a Properties subpanel in the Properties panel.) Click Edit.
FIGURE 2-3
You use the Document
Settings window to set
the size and color of your
stage (which will also be
the size and background
color of your finished
animation). When you type
the dimensions, you can
type the units of measure-
ment (px, or even pixels,
for example). But it’s not
necessary: The value in the
Ruler units menu tells Flash
which unit of measurement
you’re using.
Once the Document Settings window is open, you can type new height and width
numbers in the Dimensions box. The Match radio buttons let you automatically set
the stage size. By selecting Default, you can change the stage size by typing new
values. Choose Contents, and Flash automatically sizes the stage to fit the elements
on it—a nice snug fit, no more, no less. If you know you’re going to be printing your
work, choose the Printer option, and the stage will fit nicely on a single sheet of paper.
In the center of the Document Settings box, there’s a menu where you set the units
used to measure the stage. These units are used for rulers, guidelines, and grids—all
of which are covered later in this chapter. Out of the box, Ruler units is set to pixels,
which is good for animations that your audience will view on a computer screen or
a handheld device. In other cases, you may prefer points, inches, or metric units.
www.it-ebooks.info
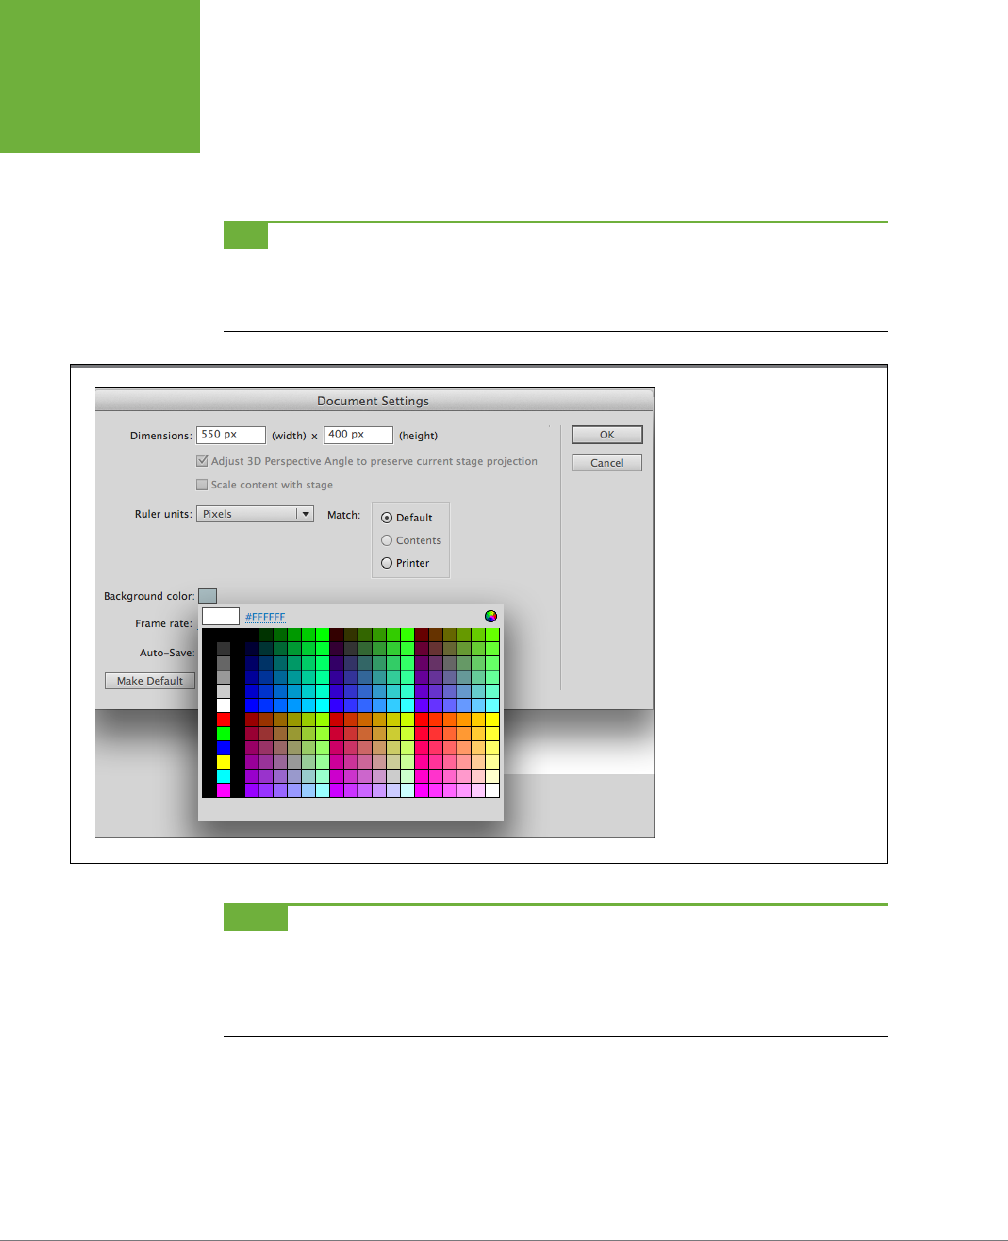
FLASH CS6: THE MISSING MANUAL
50
PREPARING TO
DRAW
This dialog box is also where you change the stage color by clicking the Background
color box and selecting a new color, as shown in Figure 2-4. (You’ll learn more about
frame rates in Chapter 15, but for now, just note that this is one of the places where
you can change that setting. For now, leave it at 24.00 frames per second.)
TIP If you save your work frequently, you’re less likely to have to recreate animations that get lost due to
lightning strikes or wild dog attacks. If you need help remembering to save, click the Auto-Save checkbox in the
Document Settings window (Figure 2-3) and type a time period. Flash starts you off with a 10-minute interval,
which works well for many Flash designers.
FIGURE 2-4
Changing the color of the stage
is an easy way to change the
way your drawing looks. It can
also make constructing your
drawing easier. For example, if
you’re working with light-colored
shapes, a nice dark background
will help you see what you’re do-
ing—even if you end up changing
the stage back to a lighter color
when your design is finished.
NOTE Because the background color changes the way foreground objects appear, you may want to experi-
ment with the color of the stage, beginning with one color and changing it as you add objects to the stage until
you get the effect you want. (You can change the color of the stage at any time, even after you’ve completed
your drawing.) When you’re working on your animation, it may be easier to change the stage background color
in the Properties panel. Go to Properties→Properties→Stage, and then choose a color from the color picker.
Adding Measurement Guides
Even professional artists can’t always draw a straight line or estimate 3 inches cor-
rectly. Fortunately, with Flash, they don’t have to, and neither do you. Flash has
several tools that help you spot precisely where your objects are on the stage and
www.it-ebooks.info
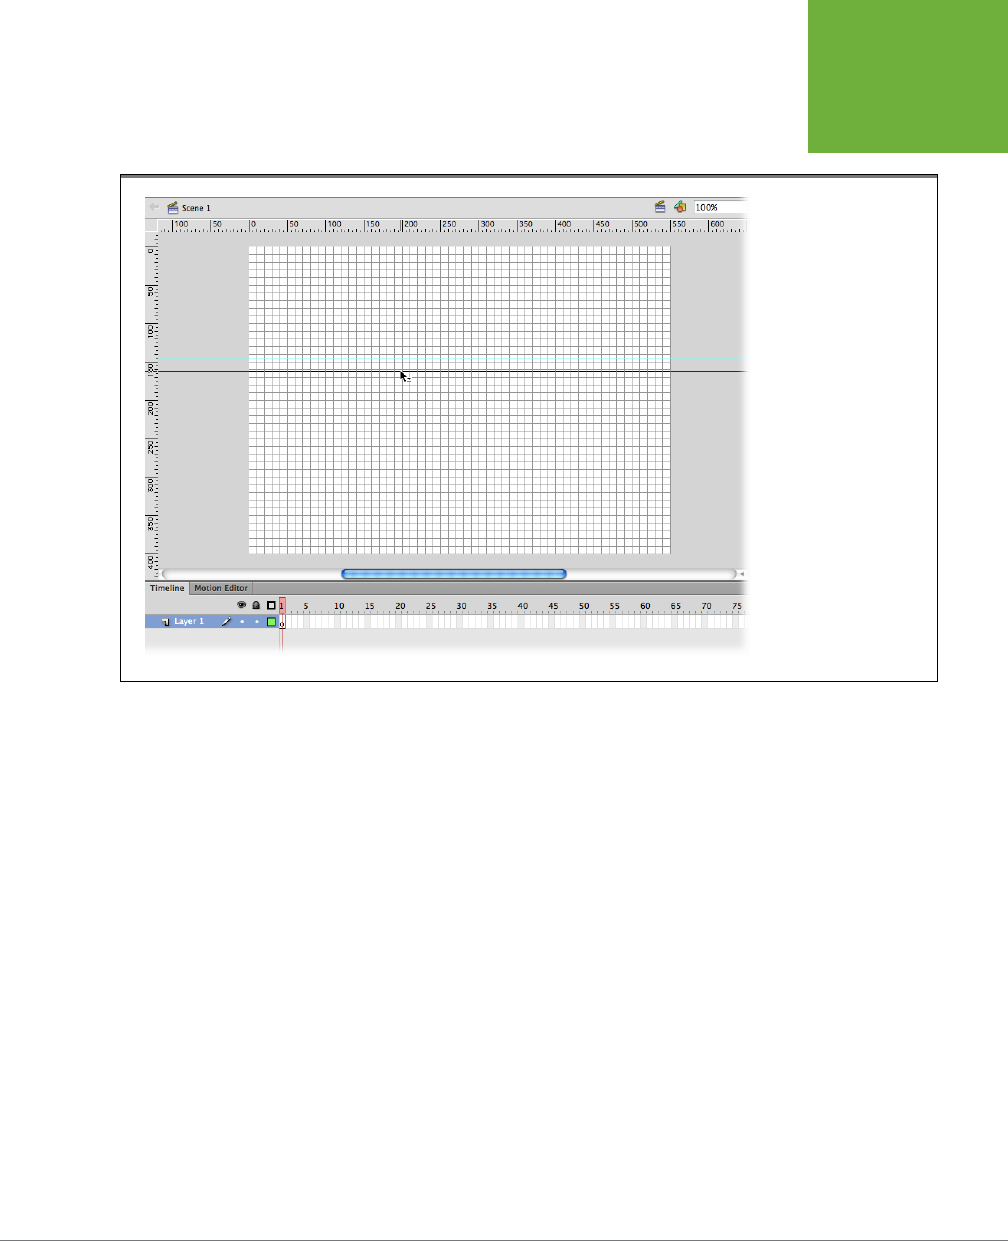
CHAPTER 2: CREATING SIMPLE DRAWINGS 51
PREPARING TO
DRAW
how much space they take up: rulers, a grid, and guides. You can see an example
of these tools as they appear on the stage in Figure 2-5.
FIGURE 2-5
Grids, guides, and rulers
are Flash’s answers
to graph paper and a
Tsquare. To change the
unit of measurement for
the ruler, press Ctrl+J
(⌘-J) to open the Docu-
ment Settings box. From
the “Ruler units” menu,
select whatever measure-
ment unit you want. You
can also change the unit
of measurement for the
guides and the grid. To do
so, right-click (Control-
click) the stage, and then
choose Guides→Edit
Guides or Grid→Edit Grid.
You can fine-tune your ruler, grid, and guides using the View menu or the shortcut
menu that pops up when you right-click (or, on a Mac, Control-click) the stage. Here’s
what each tool does and how to display each of them:
• Rulers. This tool displays a ruled edge along the left and top of the stage to help
you determine the location and position of your objects. To turn on rulers, right-
click (or Control-click) the stage. Then, from the shortcut menu, choose Rulers.
• Grid. This tool divides the stage into evenly sized rectangles, which is great for
helping you to position objects with precision. To turn on the grid, right-click
(Control-click) the stage. Then, from the shortcut menu, choose Grid→Show
Grid. You can fine-tune the grid to your taste; right-click the stage, and choose
Edit Grid. Among your options: You can set the width and height of the grid
rectangles; you can have the grid appear over or under graphics on the stage;
and you can have lines and shapes automatically “snap to” the grid as you draw.
• Guides. If you want a tool that helps with straight-edge alignment—like the
grid—but if you want more control over where the straight edges appear on
the stage, then you want guides. To add guides, you first have to turn on rulers
(see the first item in this list). Then, right-click (Control-click) the stage and,
from the shortcut menu, choose Guides→Show Guides. A checkmark appears
next to Show Guides to indicate that they’re turned on, but you don’t actually
www.it-ebooks.info

FLASH CS6: THE MISSING MANUAL
52
PREPARING TO
DRAW
see any guide lines until you drag them onto the stage. You can drag as many
guides as you want down from the top ruler or over from the left ruler. To add
a guide, click a ruler (don’t let go of the mouse) and then drag your cursor to
the stage. Release the button when you get to the spot where you want your
guide to appear.
TIP Grids and guides would be helpful enough if all they did was help you eyeball stuff, but Flash takes them
one step further. If you turn on
snapping
and then drag, say, a circle around the stage, Flash helps you to align
the circle precisely with either a grid or a guide mark. When the circle is close to a grid or guide line, it snaps into
position. To turn on snapping, simply right-click (Control-click) the stage, and then choose Snapping→“Snap to
Guides” (or Snapping→“Snap to Grid”). For more on the joys of snapping, see page 190.
Taking Advantage of Templates
How can some template designers I’ve never even met possibly
know what kind of drawings I want to put in my animation, or
how long I want my animation to be, or what kinds of sounds I
want to add? They can’t—so how on earth can Flash templates
save me time?
The predesigned templates that come with Flash can save you
time on the grunt work associated with several commonplace
kinds of animations. For example, the Interactive Advertising
Bureau (
www.iab.net
) recommends certain dimensions for
certain types of web ads, including pop-up windows and
banner ads. When you open a template for a pop-up ad, for
example, the stage is already preset to the dimensions for a
standard-sized pop-up in a standard-sized browser window.
You don’t have to research the issue, and you don’t have to
customize the stage yourself.
Or say you want to create a slideshow in Flash, complete with
buttons that let folks click forward and backward through your
pictures. Putting an interactive animation like this together
from scratch would require a fair bit of work, but if you use a
photo album template, all you have to do is add your images
and captions. The template takes care of the rest.
Over the years, different templates have come and gone in
Flash. One of the complaints in Flash Professional CS4 was that
many templates, like the ones for photo albums, mysteriously
disappeared. Well, they’re back in Flash Professional CS6, along
with other truly useful templates. Now you’ll find more time-
saving templates for lots of different projects. In particular,
the Sample Files templates offer great examples for common
or complicated tasks.
To see the templates Flash has, select File→New to display the
New Document window, and then click the Templates tab. Here
are the main categories:
• Advertising. Pop-up, skyscraper (skinny vertical), banner
(skinny horizontal), and full-page ads.
• AIR for Android. These templates set the stage to the
correct dimensions for Android devices, as well as get you
started with techniques for using Android’s accelerometer
and swipe gestures.
• Animation. Predesigned buttons, masks, and animated
effects like candle glow, rain, and snow.
• Banners. Standard-sized ads for the tops and sides of
web pages.
• Media Playback. Photo albums and standard-sized
documents for TV displays.
• Presentations. Predesigned presentation documents—
think PowerPoint meets Flash.
• Sample Files. Perhaps the most interesting templates
of them all. These templates show you how to tackle
specific Flash projects, from creating menus to making a
stick figure walk naturally. You can learn a lot by opening
these templates and dissecting the elements to see how
they work.
FREQUENTLY ASKED QUESTION
www.it-ebooks.info
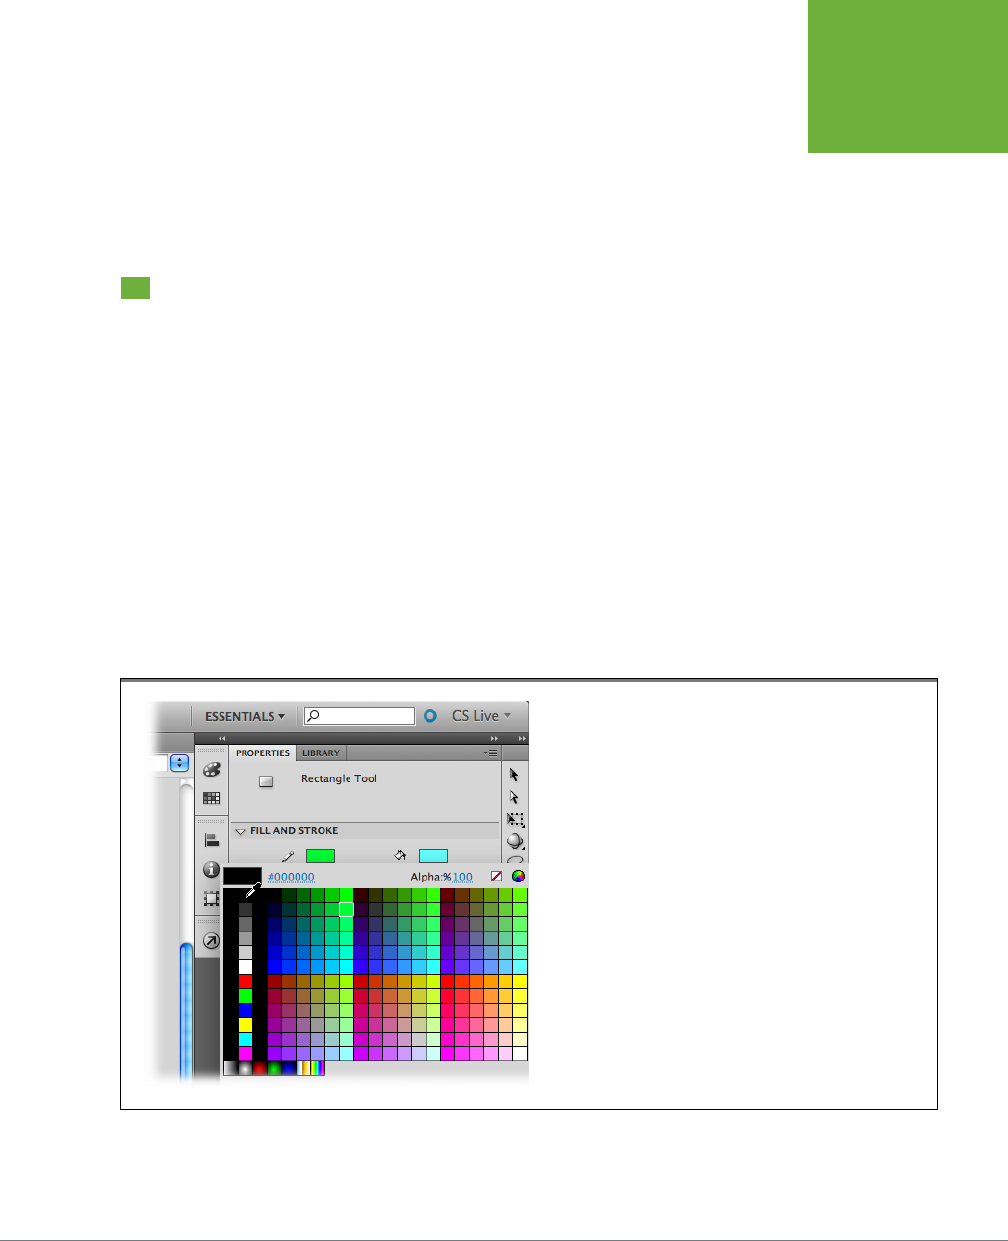
CHAPTER 2: CREATING SIMPLE DRAWINGS 53
DRAWING A
SHAPE
To lock the guides so you don’t accidentally move them as you’re drawing,
right-click (Control-click) the stage and choose Guides→Lock Guides. When
Lock Guides is set, you can’t move any existing guides, but you can still add
new ones. To remove a guide, make sure Lock→Guides is turned o, and then
just drag the doomed guide back to the ruler. Poof, it’s gone.
Drawing a Shape
Flash graphics are made up of two primary elements:
strokes
and
fills
. Strokes may
vary in thickness, but they look like lines. A stroke may be a single straight line, a
curved line, or a complex series of connected lines. Strokes can also be dotted or
dashed lines. Fills are colored shapes or surface areas. A fill may take on a common
shape, such as a rectangle or an oval, or a fill may be a complex shape, such as a
cartoon character’s head. When you’re drawing, you can create strokes and fills
independently or together. For example, using the Rectangle tool, you can create a
rectangle that has a stroke outline and a fill that colors the surface. Here’s how to do it:
1. With a new Flash document open, click the Rectangle tool in the Tools panel,
or just press the shortcut key, R.
When a tool is selected, the button in the Tools panel has a distinctive pushed-
in look. The Properties panel changes to display Rectangle Tool properties, as
shown in Figure 2-6. A subpanel displays fill and stroke properties.
FIGURE 2-6
When you choose the Rectangle tool (R), the label at the top of
the Properties panel says “Rectangle Tool,” and the panel displays
properties related to a rectangle, such as the color of the stroke and
fill. Here the color for the rectangle’s stroke is being changed.
www.it-ebooks.info

FLASH CS6: THE MISSING MANUAL
54
DRAWING A
SHAPE
2. Click the color swatch next to the pencil.
When you click the color swatch, a panel filled with dierent colors appears,
and the cursor changes into an eyedropper—your signal that it’s time to pick a
color. The colors in the leftmost column are standard hues and shades of gray.
3. In the upper-left corner, click the black swatch.
The color picker panel closes, and the color for the rectangle’s stroke is set to
black.
4. Click the color swatch next to the Paint Bucket, and choose blue from the
color picker panel.
The color for the rectangle’s fill is set to blue.
TIP Sometimes as you work in the Properties panel, you may wonder what property a particular color swatch,
text box, slider, or menu controls. If you move your cursor over the mystery setting, a tooltip appears with its
name, such as “Stroke color,” “Fill color,” or “Stroke height.”
5. In the “Fill and Stroke” subpanel, drag the slider next to the word “Stroke”
until the number in the “Stroke height” box is about 3 or 4.
As you drag the slider, the number in the box to the right changes to show
the
stroke height
(you may prefer to think of it as thickness). The Stroke slider
goes from 0.10 pixels to 200 pixels, a huge range that makes the slider a little
touchy. If you have trouble getting the number you want, you can just type a
number in the text box.
6. Click a spot on the stage and then, holding down the mouse button, drag
to create a rectangle.
As you drag, you see an outline that indicates the size and shape of the object
you’re drawing. As long as you hold the mouse button down, you can continue
to change the size and shape.
7. Release the mouse button.
The finished rectangle appears on the stage, as shown in Figure 2-7. The stroke
is black and about 3 or 4 pixels thick. It forms the outline for the rectangle. The
fill is blue and appears inside the stroke.
As advertised, your rectangle is made up of two graphic elements, a stroke and a
fill. You could have just as easily made a rectangle that was only a stroke outline or
a solid fill. When you’re drawing a shape, you can eliminate the stroke or the fill by
choosing a “no color” option in the color picker. The no color option appears in the
upper-right corner of the color picker as a white box with a red diagonal line drawn
through it, as shown in Figure 2-6.
Flash gives you several tools to draw shapes. You’ll find them all in the Tools panel
(Figure 2-10). Just click the Rectangle tool and continue to hold the mouse button
www.it-ebooks.info
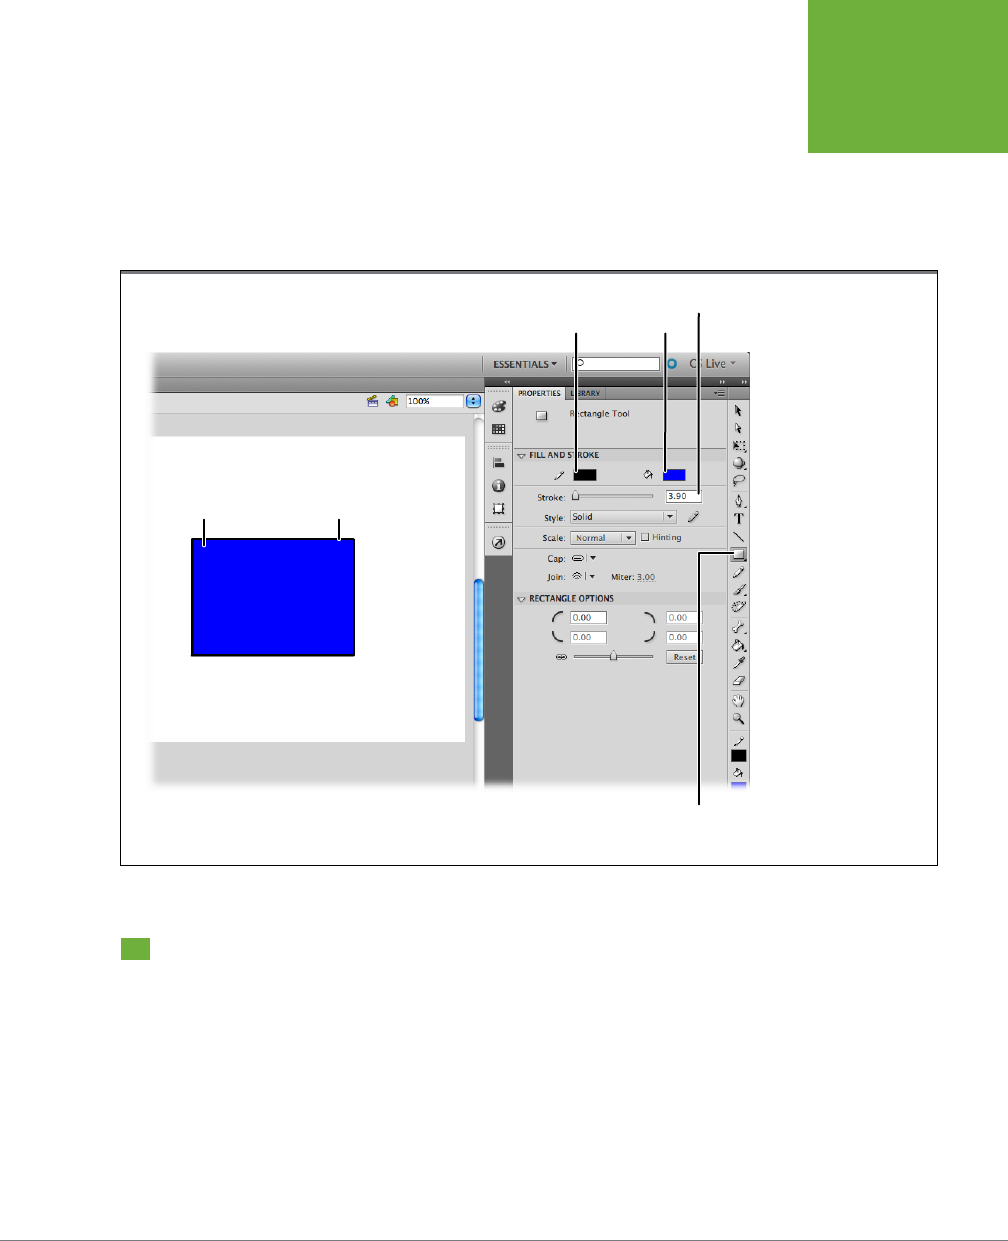
CHAPTER 2: CREATING SIMPLE DRAWINGS 55
CHOOSING
A DRAWING
MODE
down. A fly-out menu shows Rectangle tools, Oval tools, and the PolyStar tool. You’ll
learn all the ins and outs of these tools throughout this book, but if you want to
experiment, go right ahead. Just like the Rectangle tool, the other shape tools can
create both strokes and fills. Other drawing tools create
either
strokes or fills. For
example, the Line (L), Pencil (Y), and Pen (P) tools create strokes, while the Brush
(B) and the Deco (U) tools create fills.
FIGURE 2-7
Here’s how Flash depicts
a rectangle with a black
stroke and a blue fill.
You draw it with the
Rectangle tool (selected
in the Tools panel); the
rectangle’s properties
appear in the Properties
panel.
Blue fill Black 3.9 pixel stroke
Stroke color Fill color
Rectangle tool
selected
Stroke height
Choosing a Drawing Mode
If you’re new to Flash, here’s a tip that will save you hours of frustration. Write these
words on a sticky note on your monitor:
Flash has two drawing modes
—merge
mode
and
object mode.
When drawings don’t behave as expected, I’m suering
from mode confusion
.
Lines and shapes drawn in merge mode behave dierently from those drawn in
object mode. This phenomenon becomes apparent when you try to move drawings
around the screen or arrange them in front of or behind other graphics. You use a
simple toggle button or shortcut key to change from one mode to the other. Keep in
mind that you can use both drawing modes in a single Flash document, and there’s
www.it-ebooks.info

FLASH CS6: THE MISSING MANUAL
56
CHOOSING
A DRAWING
MODE
a good chance you’ll want to work that way. You can even have graphics drawn in
merge mode in the same layer and frame as graphics drawn in object mode. Both
types of graphics retain their native characteristics and eccentricities unless you
purposely convert them to the other format.
NOTE Want to check out the differences between the two modes? The Missing CD (www.missingmanuals.
com/cds/flashcs6mm
) has two example files.
02-1_Merge_Drawing_Mode.fla
shows an oval and a rectangle
drawn in merge drawing mode.
02-2_Object_Drawing_Mode.fla
shows a similar oval and rectangle drawn in
object mode.
Merge Drawing Mode
Originally, Flash oered only merge mode. It’s unlike drawing tools you find in most
programs, but merge mode works great for web and smartphone animations because
it keeps file sizes small and animations fast. Flash assumes you want to use the merge
drawing mode unless you tell it otherwise. Graphics drawn in merge mode are called
shapes
. In this mode, if one shape overlaps another shape, Flash erases the hidden
portion of the bottom shape underneath—a fact you discover when you move the
overlapping shape, as shown in Figure 2-8 (bottom). Many Flash veterans love merge
mode, because they can draw quickly, using overlapping shapes like cookie cutters.
Out of the box, Flash assumes you want to work in merge drawing mode, so you don’t
have to do anything special to activate it the first time you use Flash. But if you (or
someone you share your copy of Flash with) have activated object drawing mode,
then you need to toggle it back to merge mode. In the following steps, you’ll learn
how to make sure you’re in merge mode and discover some of its idiosyncrasies.
1. In the Tools panel, click the Rectangle tool (or press the R key).
When the Rectangle tool is selected, the Options section at the bottom of the
Tools panel displays the Object Drawing icon (Figure 2-9, left). If the icon (a
circle in a square) appears pressed down, then you’re in object drawing mode
and need to switch back to merge drawing mode.
2. If necessary, click the Object Drawing button (or press J) to deselect object
mode.
When the Object Drawing button is deselected, you’re in merge mode.
3. Draw a rectangle on the stage.
You can set the stroke and fill however you want before you draw the rectangle.
4. Select the Oval tool (O) and then change the fill and stroke color. Set the
stroke height to about 3 or 4 pixels.
If you need a refresher on setting the stroke and fill properties, see page 53.
www.it-ebooks.info
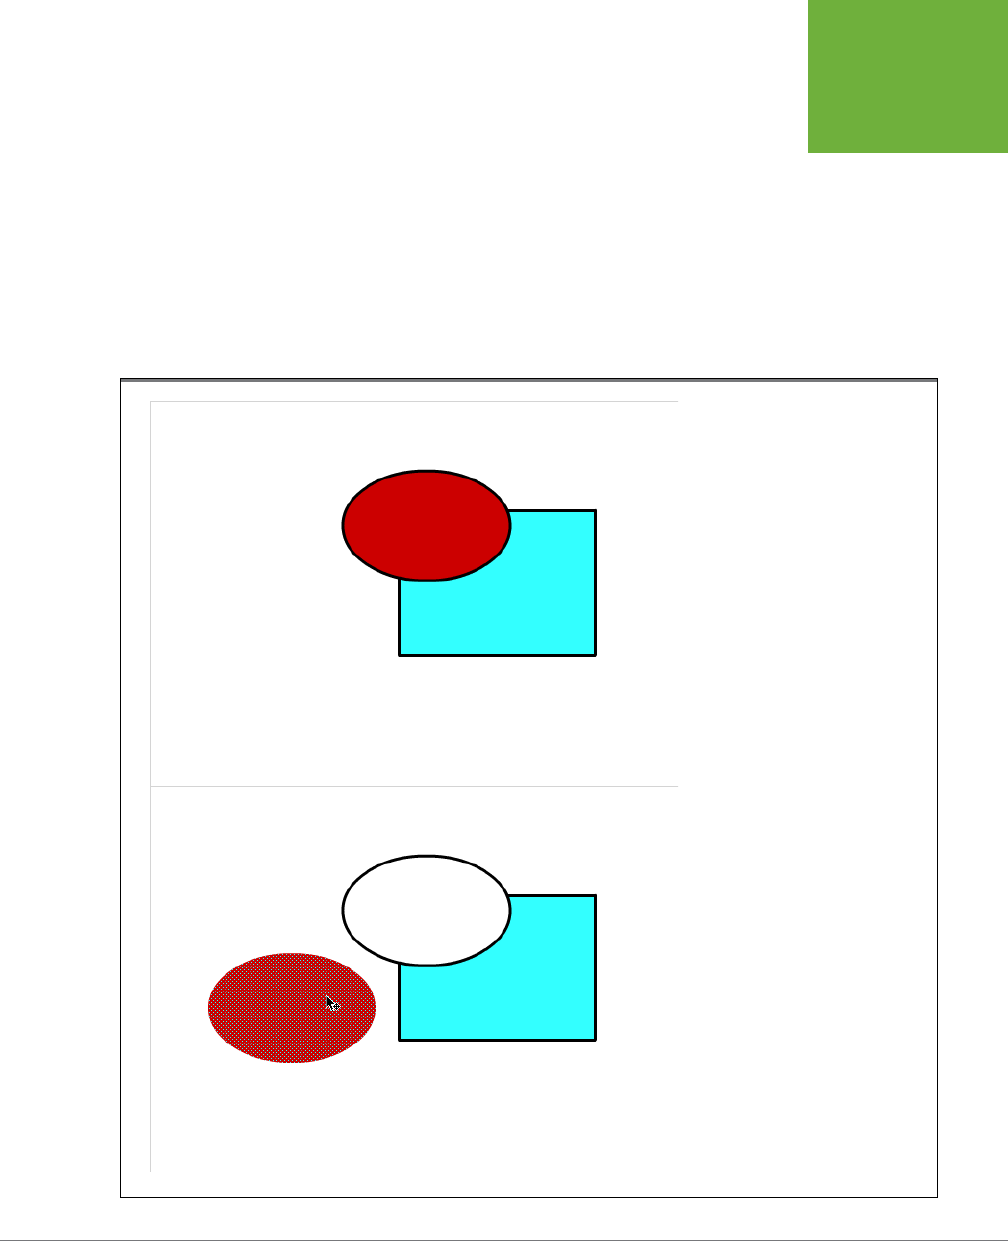
CHAPTER 2: CREATING SIMPLE DRAWINGS 57
CHOOSING
A DRAWING
MODE
5. Draw an oval that partially overlaps the rectangle, as shown at the top of
Figure2-8.
The oval is drawn on top of the rectangle. In general, Flash places the most
recently drawn graphic on top of previous graphics; however, there are some
gotchas when you mix and match merge and object graphics.
6. With the Selection tool (V), click the middle of the oval.
The fill portion of the oval displays a dotted highlight. When you see a dotted
highlight like this, it’s a signal that the graphic was drawn in merge mode. And,
sure enough, the Properties panel identifies the selection as a Shape.
FIGURE 2-8
Top: Say you’re in merge mode and
you draw a rectangle and then an oval
that overlaps it. At first, it looks and
behaves like any old graphic element.
Bottom: That changes when you
select the shape and it sports a dotted
pattern, as shown on the oval. Drag the
selected oval away, and you’ll see that
Flash has erased the overlapped por-
tion of the rectangle. Notice that Flash
repositioned the oval’s fill but left the
outline in place. That’s typical in merge
drawing mode, where Flash treats
shapes not as complete objects, but as
a collection of disparate elements.
www.it-ebooks.info

FLASH CS6: THE MISSING MANUAL
58
CHOOSING
A DRAWING
MODE
7. Drag the oval away from the rectangle.
As you drag, the fill moves away from the rectangle, leaving the empty stage
beneath. When shapes drawn in merge mode overlap, the bottom shape is
erased. Notice that the stroke portion of the oval remains behind. A single
click on the fill selects
only
the fill portion of the oval. If you want to select the
fill and the stroke, then double-click the fill. There are more tips on using the
Selection tool on page 61.
WHEN TO USE MERGE DRAWING MODE
As shown in Figure 2-8 (bottom), when you overlap objects in merge drawing mode,
Flash erases the hidden portions of the objects underneath. You’ll probably want to
use merge mode if you fall into one of the following three categories:
• You want to be able to select portions of objects or create a deliberate “cutout”
eect by overlapping objects and letting Flash do the cutting for you.
• You plan to create no more than one shape or object per timeline layer, so
overlapping isn’t an issue. For more details on layers, see page 135.
• You’re familiar (and comfortable) with an older (
really
older) version of Flash.
Merge was the
only
drawing mode before Flash 8.
Object Drawing Mode
The object drawing mode tells Flash to think of shapes the way most humans natu-
rally think of them: as individual, coherent objects. Overlapping shapes in object
mode doesn’t erase anything, and when you select a shape, you select the
entire
shape—not just the fill, or line, or portion of the shape you selected. If you’ve used
Adobe Illustrator or the drawing tools in Microsoft Oce, this drawing mode will
seem familiar. To get a feeling for object mode characteristics, repeat the steps that
begin on page 56. In step 2, toggle object drawing mode on by making sure the
Object Drawing button is depressed, as shown at left in Figure 2-9. As you draw,
your shapes look similar to the ones drawn in merge mode. However, when you
select the oval in step 6, you won’t notice the dotted selection pattern. Instead, you
see a rectangular outline around the oval, as shown at bottom right in Figure 2-9.
That’s the object mode’s way to show that an object is selected. The words “Draw-
ing object” at the top of the Properties panel are another clue that you selected an
object mode graphic.
TIP The selection box for graphics drawn in object mode is rectangular. That makes it a little difficult to spot
when the selected object is a rectangle or a straight line. In those cases, if you need to double-check, look for the
words “Drawing object” in the Properties panel.
WHEN TO USE OBJECT DRAWING MODE
If you want to overlap objects and move them around with impunity—without putting
them on separate layers—simply activate object drawing mode. Bingo—Flash lets you
stack and overlap your objects on a single layer as easily as a deck of playing cards.
www.it-ebooks.info
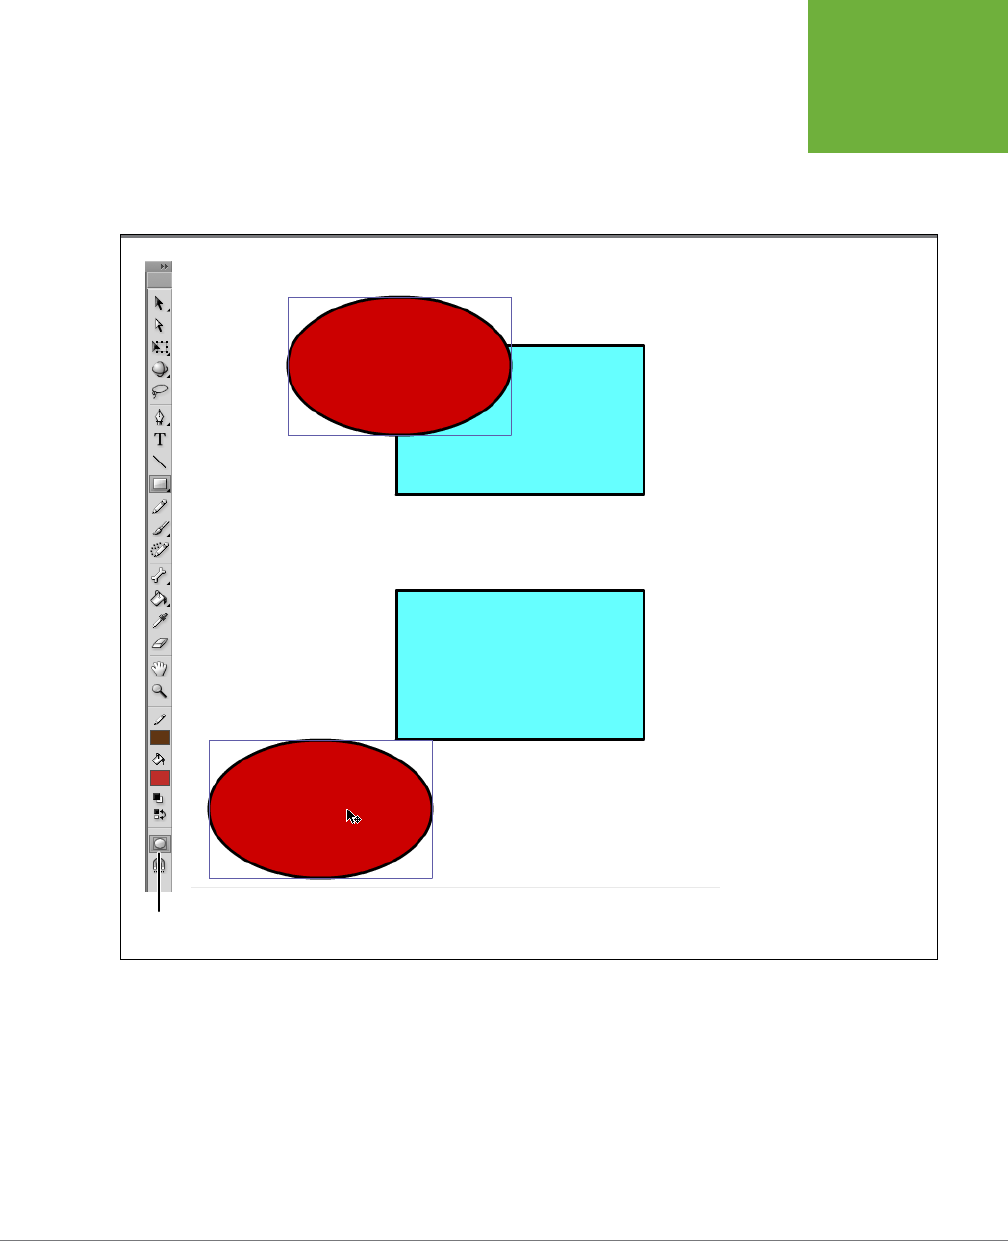
CHAPTER 2: CREATING SIMPLE DRAWINGS 59
CHOOSING
A DRAWING
MODE
• Choose object mode if you want to work with entire objects (as opposed to
portions of them).
• Choose object mode if you’re used to working in programs like Adobe Illustrator
and want a familiar graphics editing environment.
FIGURE 2-9
Left: To activate Flash’s object
drawing mode, first click the
Pencil, Pen, Line, Brush, or any
of the shape tools, and then
click the Object Drawing icon
that appears in the Options
section of the Tools panel.
Top right: After you’ve acti-
vated the object drawing mode,
you draw your lines, fills, and
shapes as normal—with one
difference. When you select (V)
an object, it’s all or nothing:
Flash highlights the entire
selection with a selection box
(like around the oval selected
here).
Bottom right: Unlike the shapes
you create using the merge
drawing mode, the shapes you
create in object mode retain
their integrity—even when you
overlap them and move them
around.
Object Drawing Mode
Merge drawing mode, is unlike most other programs’ drawing tools, while the object
drawing mode will seem familiar if you’re coming from other programs, like Adobe
Illustrator. Even if this is your first adventure with a computer-based drawing pro-
gram, you may find the object drawing mode easier to learn and use. Each exercise
in this book will clearly explain which drawing mode is used.
www.it-ebooks.info
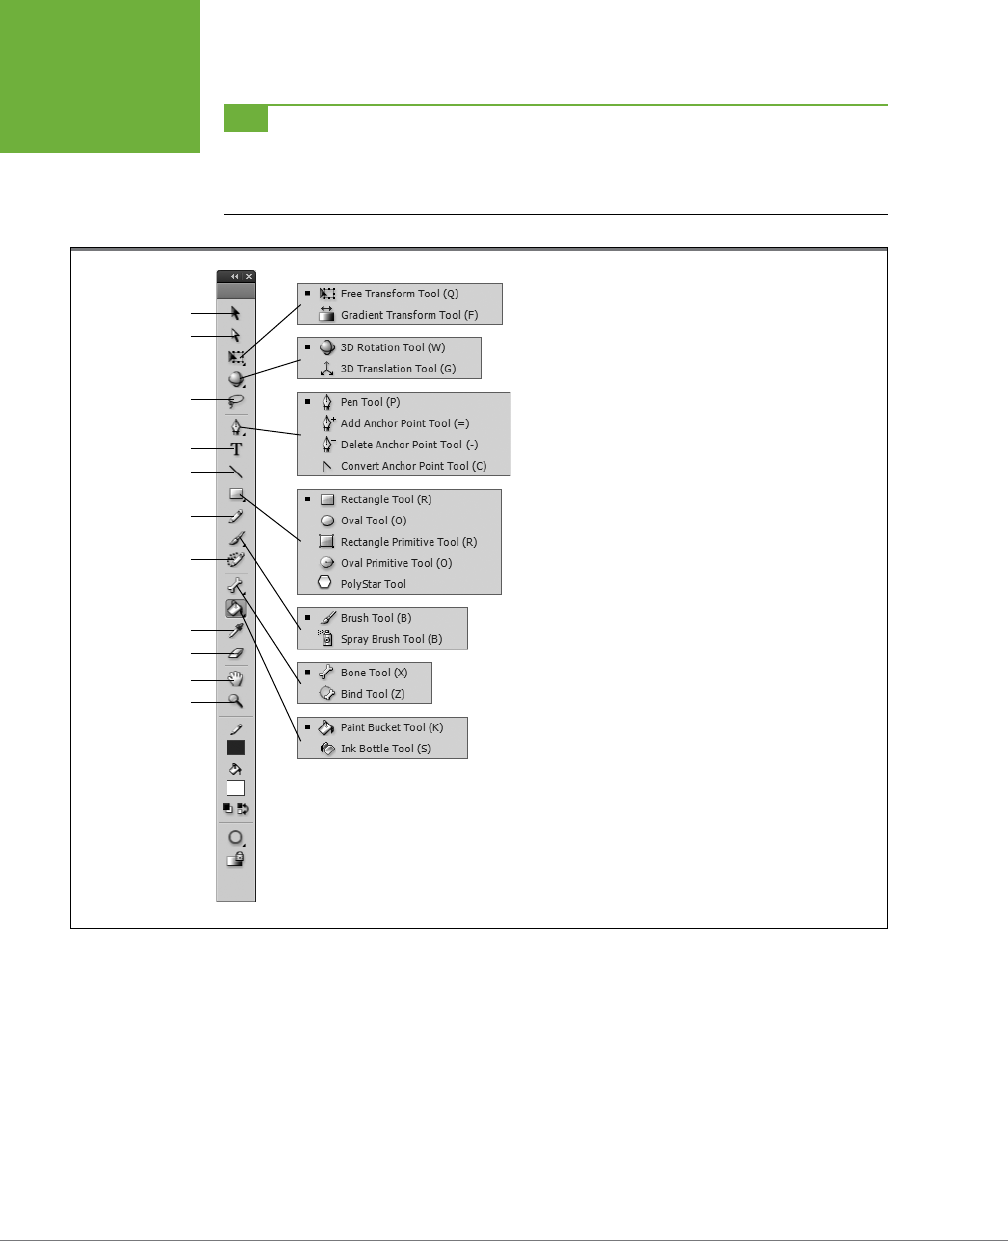
FLASH CS6: THE MISSING MANUAL
60
CHOOSING
A DRAWING
MODE
TIP You can mix and match modes in a single document. For example, you can use object drawing mode for
some shapes and merge drawing mode for others. The drawing mode button on the Tools panel is a toggle, so
the mode you choose remains in effect until you change it. Flash even remembers the setting from one document
to another. So if you decide to use only object drawing mode, you can set it once and forget it.
FIGURE 2-10
Each tool in the Tools panel (except the PolyStar tool) has a
single-letter shortcut key. Just press the key to activate that
tool. Some tools, such as the Brush tool and the Spray Brush
tool, share the same shortcut key, so pressing the key toggles
between the two tools. Learning the shortcuts for the tools
you use most often lets you work much faster.
Select - V
Subselect - A
Lasso - L
Text - T
Line - N
Pencil - Y
Deco - U
Eyedropper - I
Eraser - E
Pan - H
Zoom - Space
Using Merge Mode and Object Mode Together
You can use merge mode shapes and object mode graphics together in the same
Flash document. Here are a few tips that will make life with mixed graphics a little
easier:
• Merge mode shapes always appear underneath object mode graphics if they’re
on the same timeline layer. To make merge mode shapes appear on top of object
graphics, place them on a separate timeline layer, as described on page 135.
www.it-ebooks.info
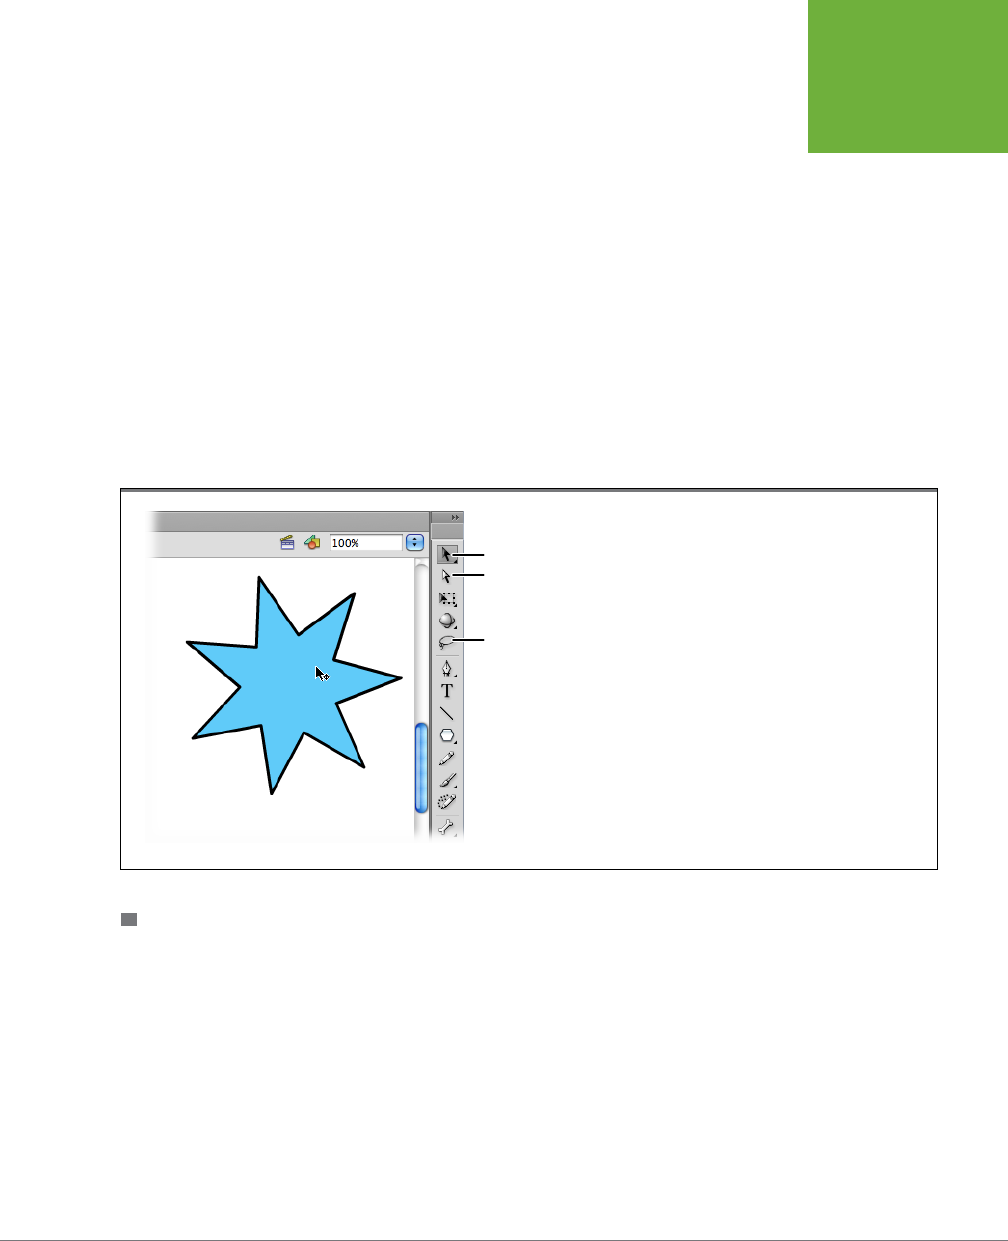
CHAPTER 2: CREATING SIMPLE DRAWINGS 61
CHOOSING
A DRAWING
MODE
• If you’ve already created a drawing object using the object mode, you can
convert it to a shape by selecting it and then choosing Modify→Break Apart.
• If you’ve already created a shape in merge drawing mode and want to convert
it to a drawing object, select the shape and then choose Modify→Combine
Objects→Union. The entire selection becomes an object.
Selecting Objects on the Stage
Once you draw a line or a shape on your stage, you need to select it to do anything
else to it—for example, if you want to change its color, make it bigger, move it, or
delete it.
As you can see in Figure 2-11, the Tools panel has three tools that let you select an
object on the stage—Selection, Subselection, and Lasso. How these tools behave
depends on whether you’ve created your drawings in merge or object drawing mode
(see the previous section).
FIGURE 2-11
Selecting an object on the stage to work with should be
easy—and most of the time, it is; all you have to do is
click the Selection tool and then either click your object
or click near it and drag a selection box around it. But if
your stage is crowded and you’re trying to pick out just
one little tiny angle of a line or a portion of a drawing to
manipulate, you may need to use either the Subselection
tool or the Lasso tool.
Selection
Sub-selection
Lasso
SELECTION TOOL (SHORTCUT KEY: V)
This tool lets you select entire shapes, strokes, and fills, as well as symbols and
bitmaps. (If you’ve created objects in merge mode, the Selection tool also lets you
select rectangular portions of those objects.) After you’ve made your selection, you
can then work with it—move the object around the stage by dragging, for example.
• Using the Selection tool in merge mode. To select a symbol, a bitmap, or one
element of a shape (just the fill portion of a rectangle, for example), simply click
the symbol, bitmap, or element. To show that an object is selected, Flash covers
the selected merge mode graphic with a dotted pattern. To select both the fill
and
stroke of a merge mode graphic, double-click the fill. In merge mode, a
www.it-ebooks.info

FLASH CS6: THE MISSING MANUAL
62
CHOOSING
A DRAWING
MODE
single click on the stroke portion of a shape selects one line segment. Double-
clicking selects the entire stroke.
To select a rectangular portion of a shape you’ve drawn in merge mode, click
near (but not on) the shape and drag your cursor to create a selection box
around just the portion you want to select. To select an entire shape, create a
selection box around the whole shape, or double-click the shape.
• Using the Selection tool in object mode. To select an object created in object
mode, click it. A rectangular outline appears around the selected object.
SUBSELECTION TOOL (SHORTCUT KEY: A)
The Subselection tool lets you reposition the individual points that define and control
your strokes and fills. These points are called
anchor points
, and the connecting
lines are called
segments
.
• Using the Subselection tool in merge mode. To select a stroke or a fill created
in merge mode, click the Subselection tool, and then click the stroke or edge
of the fill you want to move or change. Flash automatically redisplays that line
as a bunch of individual anchor points and segments. As you move your cursor
over the selection, the arrow cursor displays either a black or a white box. To
move the entire stroke or fill, click and drag when a black
move box
appears
on the cursor. To change the shape of an object, click and drag when a white
edit box
appears on the cursor. (See page 164 for details on editing graphics
with anchor points.)
• Using the Subselection tool in object mode. The Subselection tool works in a
similar way on objects drawn in object mode. You can use it to move or change
the shape of an object. Move the cursor over the stroke or edge of an object,
and you see the black move box or the white edit box.
TIP You can’t select an object’s fill with the Subselection tool; however, you can “open up” an object graphic
and edit it as if it were a merge shape. Double-click the object with the Selection (V) tool. When you do, other
graphics on the stage fade, and the drawing object opens in edit mode. At this point, it behaves like a merge
shape. When you’re finished editing, close the graphic by clicking the left-pointing arrow in the upper-left corner
of the work window.
LASSO TOOL
The Lasso tool is the one to use when you want to select a weirdly shaped portion of
an object—say, you want to create a hand-shaped hotspot in the middle of a square
bitmap—or when you need to select a weirdly shaped object that’s super-close to
another object.
• Using the Lasso tool in merge mode. To select a nonrectangular portion of
an object drawn in merge mode, first click the Lasso tool; then click near (or
on) the object and drag your cursor (as if you were drawing with a pencil) to
create a nonrectangular shape.
www.it-ebooks.info
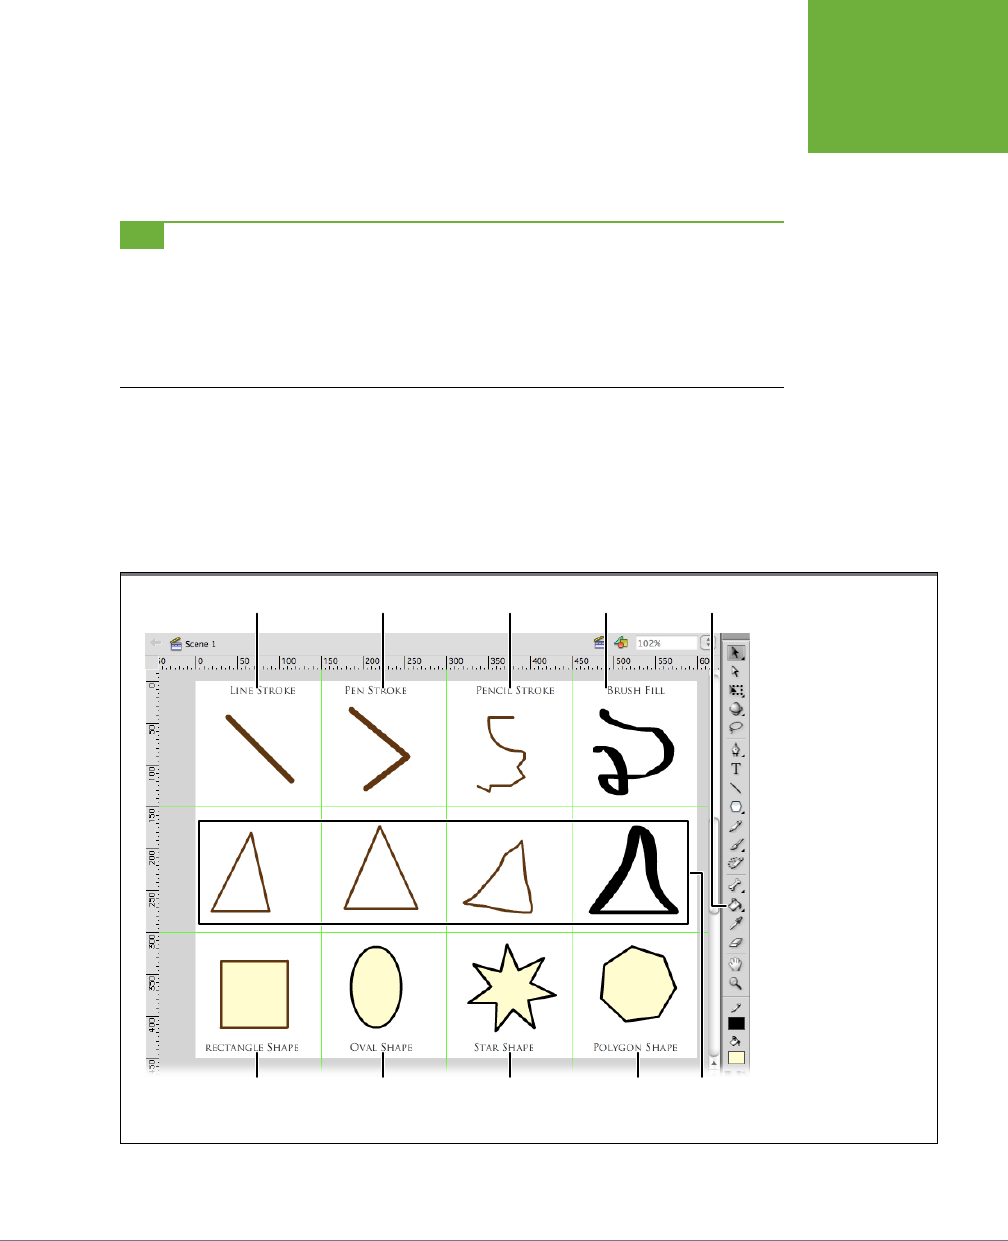
CHAPTER 2: CREATING SIMPLE DRAWINGS 63
CHOOSING
A DRAWING
MODE
• Using the Lasso tool in object mode. To select an entire object drawn in object
mode, select the Lasso tool, click near the object, and then drag your cursor
over the edge of the object. In object mode, dragging over a portion of the
object selects the whole object.
TIP If you need to deselect an object after you’ve selected it (say, you changed your mind and don’t want
to change the object’s color after all), you have several choices. You can press Esc, you can press Ctrl+Shift+A
(Shift-⌘-A), you can click an empty spot on the stage, or you can select Edit→Deselect All.
Special note to Photoshop fans Ctrl+D (⌘-D on the Mac) works differently in Flash than it does in other Adobe
programs. In Photoshop or Photoshop Elements, Ctrl+D (⌘-D) is the keyboard shortcut that deselects an object.
In Flash, the same keystroke creates a duplicate of the selected object.
Essential Drawing Terms
In Flash, a cigar isn’t just a cigar. A circle isn’t even just a circle. As explained earlier,
every drawing you create using Flash’s drawing and painting tools is composed of
strokes and fills. As shown in Figure 2-12, you create strokes and fills with a variety
of drawing tools:
FIGURE 2-12
Here you see examples
of strokes and fills. The
strokes appear dark,
while the fills show
as light. Flash doesn’t
automatically create fills
when you create shapes
with the Line, Pencil, and
Brush tools, so as you see
in the triangle shapes, the
center remains the same
color as the stage. Later
you’ll see how to manu-
ally create a fill or change
a fill color with the Paint
Bucket tool (page 87).
Line stroke Pen stroke Pencil stroke Brush fill
Triangle
shapes
Polygon
shape
Paint bucket
Star
shape
Oval
shape
Rectangle
shape
www.it-ebooks.info

FLASH CS6: THE MISSING MANUAL
64
CHOOSING
A DRAWING
MODE
• Strokes. A
stroke
in Flash looks just like the stroke you make when you write
your name on a piece of paper. It can either be a plain line or the outline of a
shape. Strokes can be dotted or dashed lines. You draw strokes in Flash using the
Pen, Pencil, and Line tools. When you use one of the shape tools (for example,
to create a square or polygon), Flash includes a stroke outline free of charge.
TIP You can quickly add a stroke to outline a shape that doesn’t have a stroke. Choose the Ink Bottle tool (S),
and then click the shape. If you don’t see the Ink Bottle on the Tools panel, click the Paint Bucket and continue
to hold down the mouse button. The Ink Bottle appears on a pop-out menu.
• Fills. Flash recognizes two kinds of
fills
: the marks you make with the Brush
tool, and the interior of a shape (in other words, everything inside the strokes
that form the outline of a shape).
In a lot of cases, your shapes comprise both strokes and fills. You can create fill-
and stroke-containing shapes in one fell swoop using Flash’s shape tools—Oval,
Rectangle, and PolyStar. If you draw a shape by hand using the Pen, Pencil, or Line
tools, then you need to manually add a fill if you want one using the Paint Bucket
tool. That process is described on page 87.
Why the emphasis on the technical terms “stroke” and “fill” when all you want to
do is draw a smiley face? For one very important reason: Flash treats strokes and
fills dierently. You use dierent tools to create them and dierent tools to modify
them. If you don’t know the dierence between a stroke and a fill, you won’t be
able to do a whole lot with the drawing and painting tools described in this chapter.
To Thine Own Self Be True
When asked about her artistic process, a celebrated 20th
century painter said that in order to create, she had to toss
aside everything she knew about matching colors, standard
techniques, and even the way she held her pencil and her
paintbrush. As a right-handed person with a strongly ana-
lytical mind, she discovered her ability to create only after
she started drawing with her
left
hand. She learned to ignore
what everyone else told her about how she
should
be working.
There’s a moral to this story: Just because one person finds the
Pencil or Brush the easiest tool to use and sticks to it almost
exclusively, that doesn’t mean you should do the same. Experi-
ment and find what works best for
you
!
To help get your juices flowing, the stick figure you see in this
chapter shows several ways you can use Flash’s painting and
drawing tools. Each of these tools has its pros and cons, so try
them all out for yourself. After all, the Flash police aren’t going
to arrest you if you sketch a beard and moustache on your stick
figure using the Brush tool instead of the Pencil.
DESIGN TIME
www.it-ebooks.info

CHAPTER 2: CREATING SIMPLE DRAWINGS 65
CREATING
ORIGINAL
ARTWORK
Creating Original Artwork
Before you can create an animation, you have to have something to animate. You
start with one drawing and then create a bunch more (often by altering the first
drawing slightly). For example, if you want to create an animation showing a raccoon
marching in place, you need to draw a picture of a raccoon standing still; another
picture of the same raccoon lifting its left foot; and still more pictures showing
the raccoon putting its left foot down, lifting its right foot, and so on. Put them all
together using Flash’s timeline (Chapter 3), and you’ve got yourself an animation.
NOTE You’re not limited to using your own drawings. Flash lets you
import
, or pull in, existing drawings
and photos—and even sound and video clips. Page 351 shows you how to import files.
This section shows you how to use basic Flash tools to create a simple stick person
drawing. You’ll see the Line, Pencil, Pen, Brush, and shape tools (Oval, Rectangle,
and PolyStar) in action and learn the dierences among them (some are better for
creating certain eects than others). You’ll also find out how to add color to a Flash
drawing and how to erase your mistakes.
Drawing and Painting with Tools
One of the true beauties of creating digital artwork—besides not having to clean up
a mess of paint spatters and pencil shavings—is that you don’t have to track down
your art supplies—the one pen that feels good in your hand, the right kind of paper,
the sable brush that smells like paint thinner. Instead, all you need to do is display
Flash’s Tools panel.
In this section, you’ll see Flash’s drawing and painting tools in action: the Line, Pen,
Pencil, Brush, and shape tools. You’ll have a chance to use the Selection, Subselection,
and Lasso tools. And finally, you’ll get a quickie introduction to color—specifically,
how to change the colors of strokes and fills.
LINE TOOL
You use the Line tool in Flash to draw nice, straight lines—perfect all by themselves
or for creating fancy shapes like exploding suns and spiky fur.
Make sure you’re in object drawing mode, and then follow these steps to start draw-
ing your stick figure using the Line tool:
1. In the Tools panel, click the Line tool, as shown in Figure 2-13.
Flash highlights the Line tool in the Tools panel to let you know you’ve suc-
cessfully selected it. When you move your cursor over the stage, you see it’s
turned into crosshairs.
2. Click anywhere on the stage and drag to create a short horizontal line. To
end your line, let go of the mouse.
Your line (technically called a
stroke
) appears on the stage.
www.it-ebooks.info
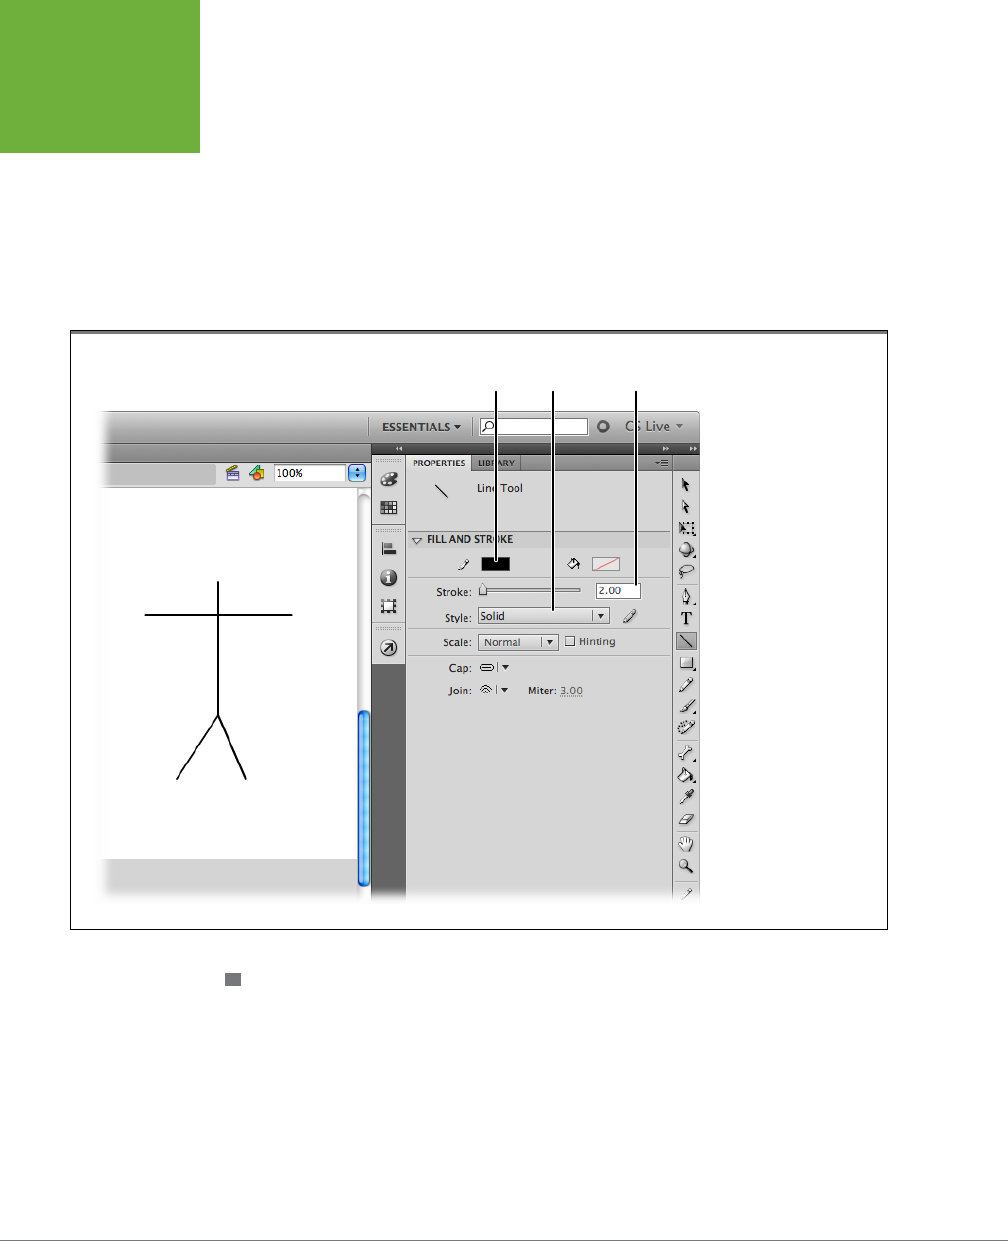
FLASH CS6: THE MISSING MANUAL
66
CREATING
ORIGINAL
ARTWORK
3. Click above the horizontal line, and drag down to create a vertical line.
The result is a cross. Next, you’ll add legs by drawing diagonal lines.
4. Click the bottom of the vertical line and drag down and to the left; then
click the bottom of the vertical line again and drag down and to the right.
Figure 2-13 shows the result. It doesn’t look like much yet, but it’s actually the
basis for a stick figure you’ll create as you experiment with Flash’s drawing and
painting tools in the following sections.
FIGURE 2-13
The Line tool is the
easiest, quickest way
to create straight lines
in Flash (like the four
straight lines you see
here). If you’d like to
customize the way your
lines look, head to the
Properties panel. There
you find options that let
you make a line thicker,
change it to a different
color—even turn it into
a dashed or dotted line,
instead of a plain solid
line. (If you don’t see the
Properties panel, choose
Window→Properties to
display it.)
Stroke
color
Stroke
style
Stroke
height
PENCIL TOOL
The Pencil tool lets you draw free-form strokes on the stage, similar to the way you
draw using a regular pencil on a regular sheet of paper. Unlike the Line tool, the
Pencil tool doesn’t make you stick to the straight and narrow, so it lends itself to
curving lines and fine details, like hands and faces. Here’s how to use the Pencil tool:
1. In the Tools panel, click the Pencil tool.
Flash outlines the Pencil tool to let you know you’ve successfully selected it,
and Pencil-related options appear in the Options section at the bottom of the
www.it-ebooks.info

CHAPTER 2: CREATING SIMPLE DRAWINGS 67
CREATING
ORIGINAL
ARTWORK
Tools panel. When you move your cursor over the stage, you see it’s turned
into a miniature pencil.
2. In the Options section at the bottom of the Tools panel, click the Pencil
Mode button.
A fly-out menu appears.
3. In the fly-out menu, turn on the checkbox next to Smooth.
The
Smooth
option gently corrects any jiggles you make as you draw with the
pencil—essential when you’re trying to draw small lines, like this stick figure’s
face and hands.
4. Click the stage and drag to draw a little face, hands, and feet similar to the
ones in Figure 2-14.
While you’re on the Options section, there are other ways you can modify how
the Pencil tool works: The
Straighten
option emphasizes the corners you draw
with the Pencil (for example, turning squarish circles into squares or roundish
squares into circles—definitely
not
what you want when you’re trying to draw
the feet you see in Figure 2-14), and the
Ink
option leaves your Pencil strokes
just as they are, jiggles and all.
Mouse vs. Graphics Tablet
If you expect to do a lot of Flash work, do yourself a favor: Ditch
your mouse and get yourself a
graphics tablet
(sometimes
referred to as a
digitizing tablet, graphics pad
, or
drawing
tablet
). A graphics tablet is basically an electronic sketch board
with a stylus that doubles as a pen, pencil, and brush. Today’s
graphics tablets connect through the Universal Serial Bus (USB)
port, typically located at the front or back of your computer,
so they’re a snap to connect and remove.
With a graphics tablet, drawing and painting feels a whole lot
more natural. Your results will look a lot better, too.
When you use a graphics tablet, Flash recognizes and records
subtle changes, like when you change the pressure or slant of
the stylus—something you don’t get with a plain old mouse. (In
fact, if you install your graphics tablet correctly, Flash displays
extra icons on the Tools panel that relate only to graphics
tablets. For example, you can adjust how the tablet behaves
when more or less pressure is applied.)
Expect to spend anywhere from $100 to $500 on a good
graphics tablet.
UP TO SPEED
Here are some tips for drawing with the Pencil tool:
• If the object you’re drawing with the Pencil is small, press Ctrl+= (⌘-=) to get
a better view. You can use the Hand tool (H) to position the stage where you
want it. When you’re ready to zoom out, press Ctrl+hyphen (⌘-hyphen). For
more tips on changing the view, zoom over to page 38.
• Don’t do the same work twice. For example, in Figure 2-14, a hand and shoe
were drawn once, then duplicated (Ctrl+D or ⌘-D). While still selected, they
were flipped horizontally using Modify→Transform→Flip Horizontal.
www.it-ebooks.info
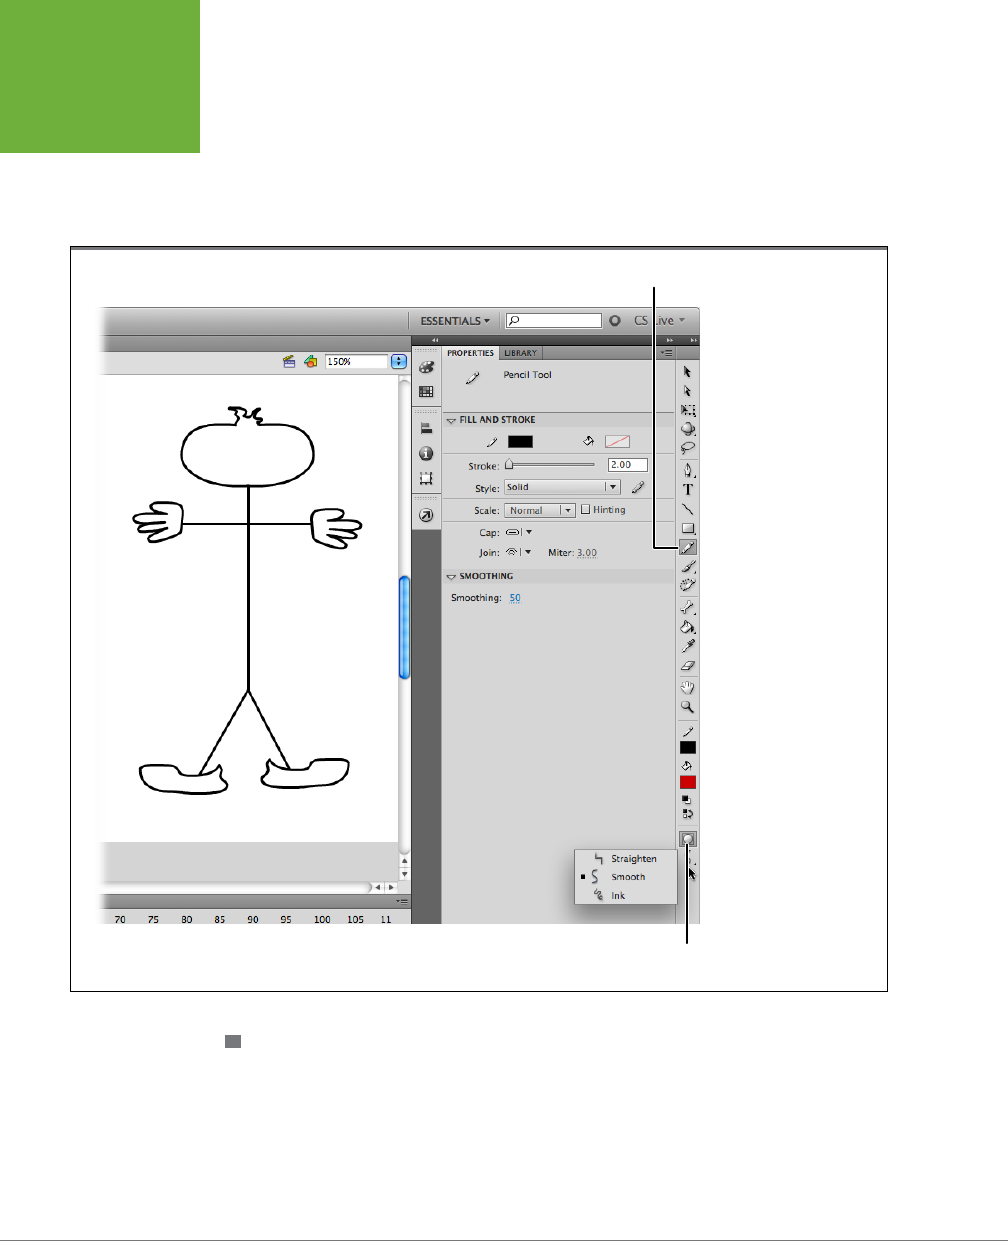
FLASH CS6: THE MISSING MANUAL
68
CREATING
ORIGINAL
ARTWORK
• You can also straighten or smooth a line you’ve already drawn. To do so, select
the line you want to modify using any selection tool—the Lasso tool (page 62)
works great. When a line is selected, buttons for the Straighten and Smooth
commands also appear in the Options section of the Tools panel. You can click
multiple times to increase the eect.
FIGURE 2-14
Don’t be surprised if
your results look a bit
shakier than you might
expect. If you’ve got
an extra hundred bucks
lying around, you can
buy a graphics tablet (see
the box on the previous
page) to make drawing
in Flash a bit easier,
but most people start
out using a computer
mouse to draw—and it’s
a lot harder than it looks.
Fortunately, Flash has
Pencil options you can
use to help you control
your drawing results.
Pencil tool
Pencil mode
PEN TOOL
If you want to create a complex shape consisting of a lot of perfect arcs and a lot
of perfectly straight lines, then the Pen tool is your best choice.
To create straight lines with the Pen tool, click the stage to create
anchor points
,
which Flash automatically connects using perfectly straight
segments
. The more
times you click, the more segments Flash creates—and the more precisely you can
www.it-ebooks.info
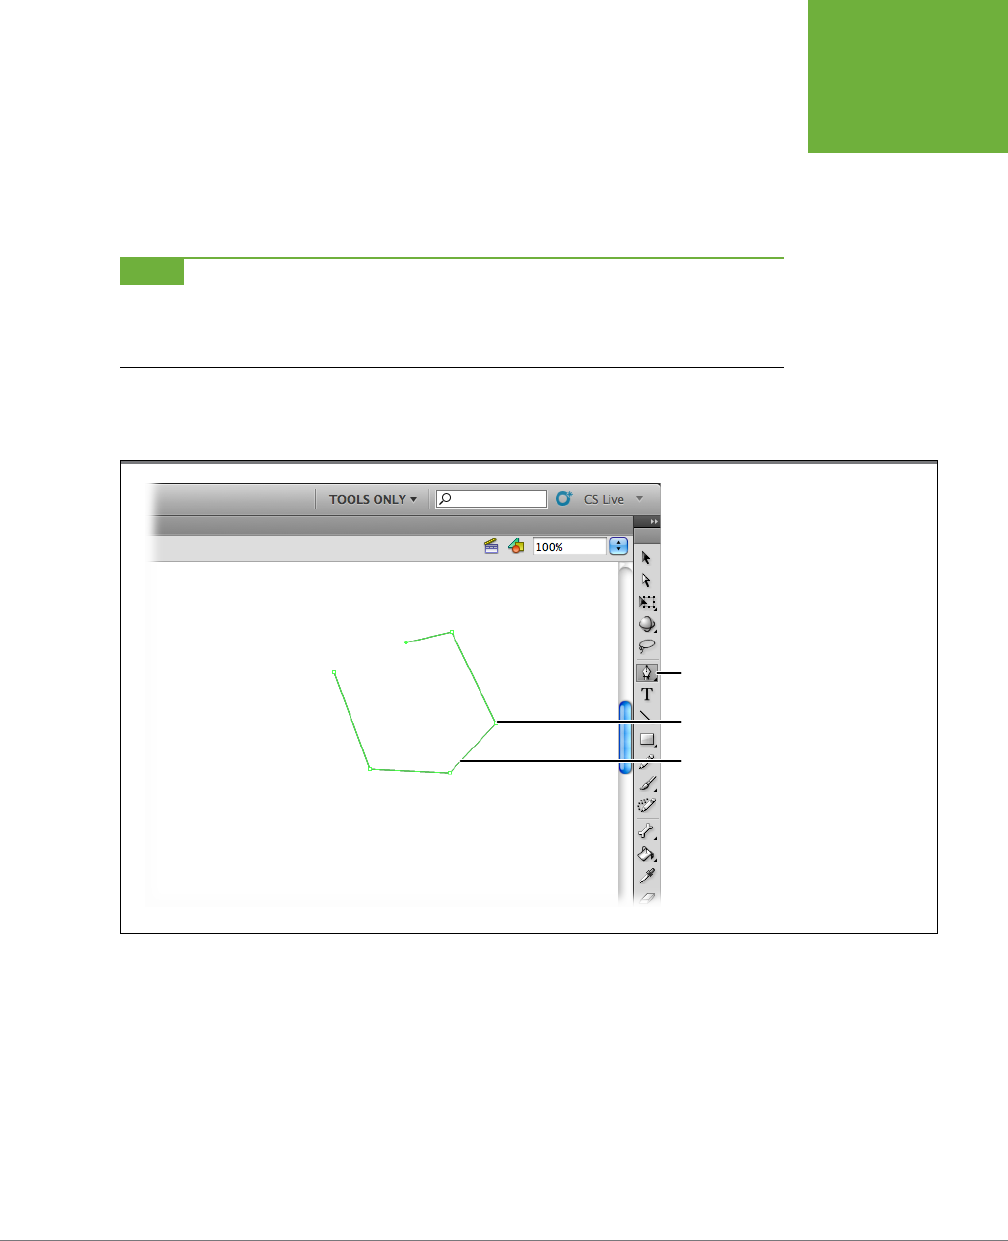
CHAPTER 2: CREATING SIMPLE DRAWINGS 69
CREATING
ORIGINAL
ARTWORK
modify the shape you draw, since you can change each point and segment individu-
ally (see Chapter 5). When you want to stop creating anchor points, double-click
the mouse or press the Esc key.
If you drag the Pen tool (instead of just clicking), the Pen lets you create perfectly
curved arcs.
NOTE Working with the Pen tool is a lot (a
whole
lot) less intuitive than working with the other Flash
drawing tools. Because you can easily whip out a triangle with the Line tool or a perfect circle with the Oval tool,
save the Pen tool for when you’re trying to draw a more complex shape—like a baby grand piano—and need
more control and precision than you can get freehanding it with the Pencil or Brush.
As you can see in the Tools panel in Figure 2-15, the Pen tool icon looks like the nib
of an old-fashioned fountain pen.
FIGURE 2-15
After you select the Pen
tool, click the stage once,
move your mouse a couple
of inches, and then click
again. Each time you click,
Flash creates an anchor
point. As soon as you
have two or more anchor
points, Flash automati-
cally connects them with
straight-line segments.
Pen tool
Anchor
point
Segment
To draw a straight line with the Pen tool:
1. Select the Pen tool.
Your cursor changes into a miniature pen nib.
2. Click the stage, move your cursor an inch or so to the right, and then click
again.
Two anchor points appear, connected by a straight segment.
www.it-ebooks.info

FLASH CS6: THE MISSING MANUAL
70
CREATING
ORIGINAL
ARTWORK
3. Move the cursor again, stopping where you want to anchor the line, and
then change direction again.
Figure 2-15 shows the results of several clicks. Flash keeps connecting each
anchor point every time you click the stage. To break a line and start a new
one, double-click where you want the first line to end.
To draw a curve with the Pen tool:
1. Select the Pen tool.
Your cursor changes into a miniature pen nib.
2. Click the stage once, and then move your cursor an inch or so to the right.
A single anchor point appears.
NOTE Flash lets you change the way it displays anchor points, as well as the way your cursor appears, when
you’re using the Pen tool. You can even tell Flash to preview line segments for you, much as it previews curves.
To change any of these preferences, select Edit→Preferences (Flash→Preferences for the Mac). Then, in the
Preferences window, select the Drawing category. The Pen tool preferences appear at the top of the Preferences
window.
3. Click again, but this time, without letting go of the mouse button, drag the
cursor around.
As you drag, the anchor point you create sprouts two control lines, and your
cursor turns into an arrow. As you can see in Figure 2-16, something dierent
is happening. Flash displays a preview curve and a control line that lets you
adjust the angle of the curve. Drag the end of the control line, and the shape
of the curve changes.
4. Release the mouse button.
When you let go of the mouse button, Flash draws the curve on the stage. The
control lines disappear when you choose another tool. Using the Pen tool, you
can create both straight lines and curves, as shown in Figure 2-17.
5. Continue drawing connected lines by clicking other points on the stage.
Click, move, and click to draw straight lines. Click, move, and drag to create
curves. Adjust the curves using the handles on the end of the curve control
lines. If you’ve never used tools like these before, don’t worry; you’ll get better
with a little practice.
6. Create a closed loop shape by clicking the first point you created in step 2.
When the cursor is over a point that closes the loop, you see a small circle to
the right of the Pen tool cursor.
www.it-ebooks.info
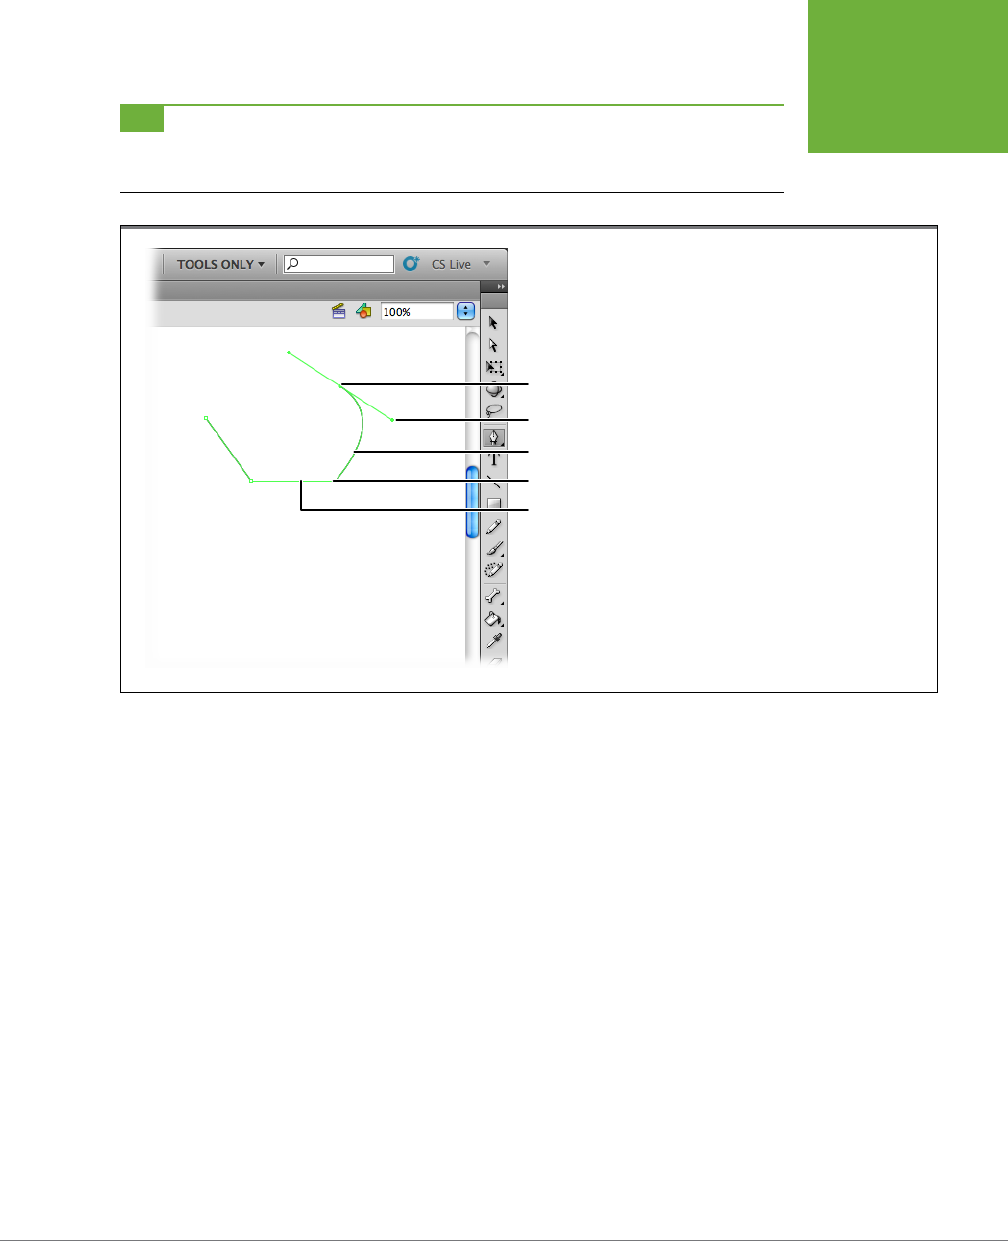
CHAPTER 2: CREATING SIMPLE DRAWINGS 71
CREATING
ORIGINAL
ARTWORK
TIP If you want to adjust a curve after the fact, choose the Subselection tool and then click an anchor point
adjacent to the curve. The control lines appear, and you can change the shape of the curve by dragging the control
points.
FIGURE 2-16
To create a curve using the Pen, click
the stage to begin the curve. Then move
your cursor an inch or so, click again,
and then drag. While you’re dragging,
Flash displays a temporary line with two
small handles. These control lines don’t
show in your document; you use them
to shape your curve. Drag the handles
on the ends of the control lines. As
you adjust the control lines, the curve
changes shape.
Anchor point
Curve control handle
Curved line preview
Anchor point
Straight line
7. Once you feel comfortable drawing straight lines and curved lines, use
curves to create a cartoon head, similar to the one in Figure 2-17. Then use
straight lines to make a hat for your creation.
Drawing curves can be a bit tough until you get the hang of controlling the shape of
the curves as you draw. One of the great things about the Pen tool is that you can
make adjustments after the fact. Here are some tips for working with the Pen tool:
• You can change the path of a line or the shape of an object by moving anchor
points with the Subselection tool (A).
• To change the arc of a curve, click an adjacent anchor point with the Subselec-
tion tool. The anchor point sprouts control lines, and you can adjust the curve
by dragging the points on the end of the control lines.
• Use the Convert Anchor Point tool (C) to turn hard angles into curves and vice
versa.
• Use the Add Anchor Point tool (=) to—you guessed it—add anchor points to a
line segment. The Delete Anchor Point tool (-) removes anchor points but leaves
a line segment between the remaining anchor points.
www.it-ebooks.info
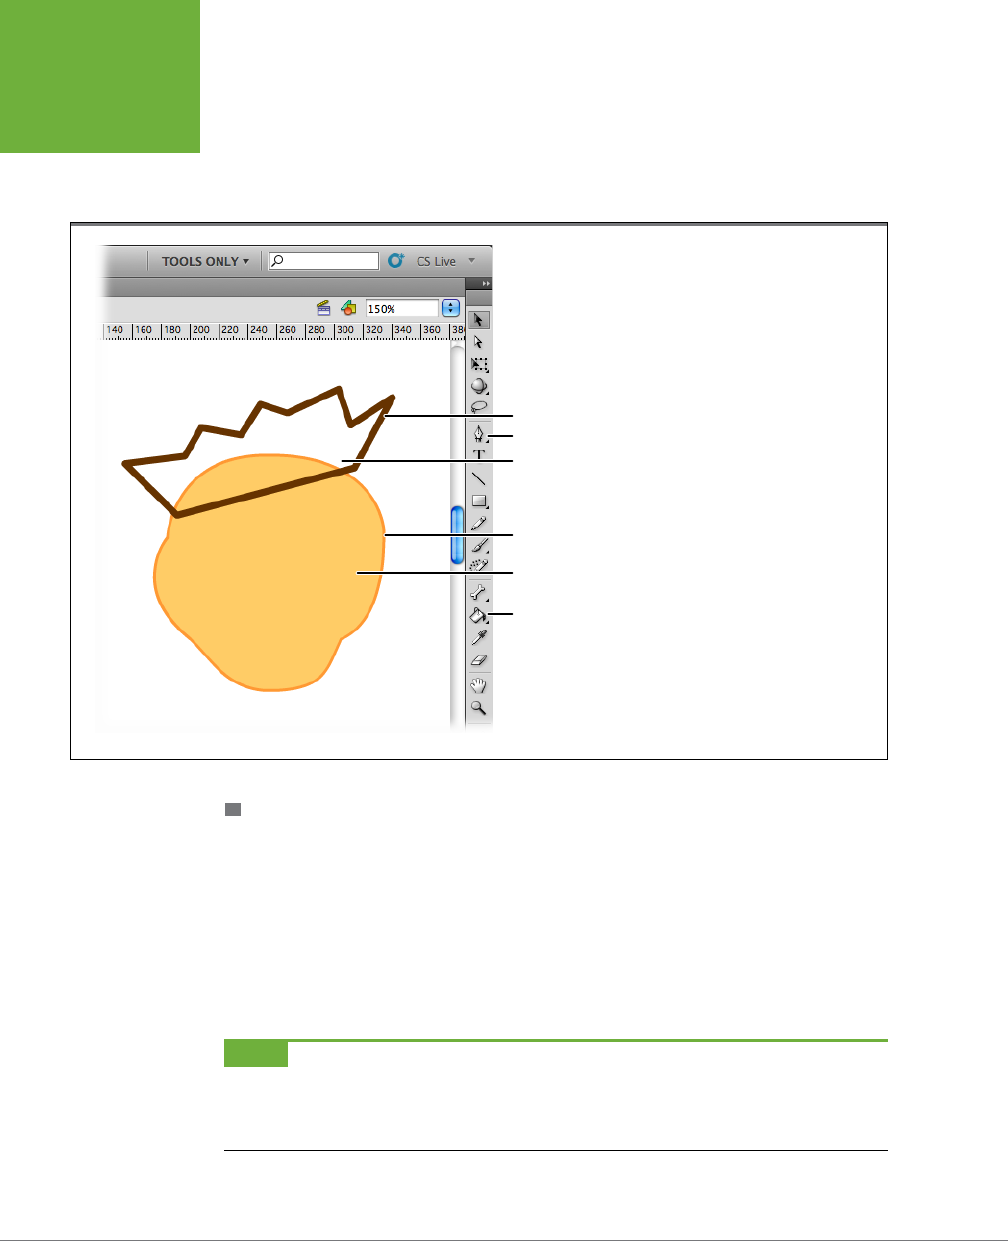
FLASH CS6: THE MISSING MANUAL
72
CREATING
ORIGINAL
ARTWORK
Once you get used to the Pen tool’s drawing system, you’ll find that you can draw
very precise shapes. (Plus, all your practice with the Pen tool will pay o if you ever
use Adobe Illustrator or similar programs that use the same
Bezier curves
to draw
complex shapes.)
FIGURE 2-17
Here’s an example of two
finished shapes drawn
with the Pen tool. The
head shape is made from
curves that create a closed
loop. The fill color was cre-
ated with the Paint Bucket
tool, as described on page
88. The hat is made of
connected straight lines
with the stroke thickness
set to 5 pixels.
Straight lines from pen tool
No fill color
Pen tool
Curved lines from pen tool
Fill color from paint bucket
Paint bucket
BRUSH TOOL
You use the Brush tool to create free-form drawings, much like the Pencil tool de-
scribed on page 66. The dierences between the two include the following:
• You can change the shape and size of the Brush tool. You can choose a brush
tip that’s fat, skinny, round, rectangular, or even slanted.
• The Brush tool creates fills, while the Pencil tool creates strokes. This distinction
becomes important when it comes time to change the color of your drawings
(see page 84).
NOTE The Brush tool really shows its stuff when you use it with a graphics tablet, as described in the box
on page 67. That’s because the Brush tool makes great use of the tablet’s ability to sense pressure. Press hard
for thick, bold lines. Lessen the pressure for thin, delicate lines. With practice, you can create great calligraphic
effects.
www.it-ebooks.info
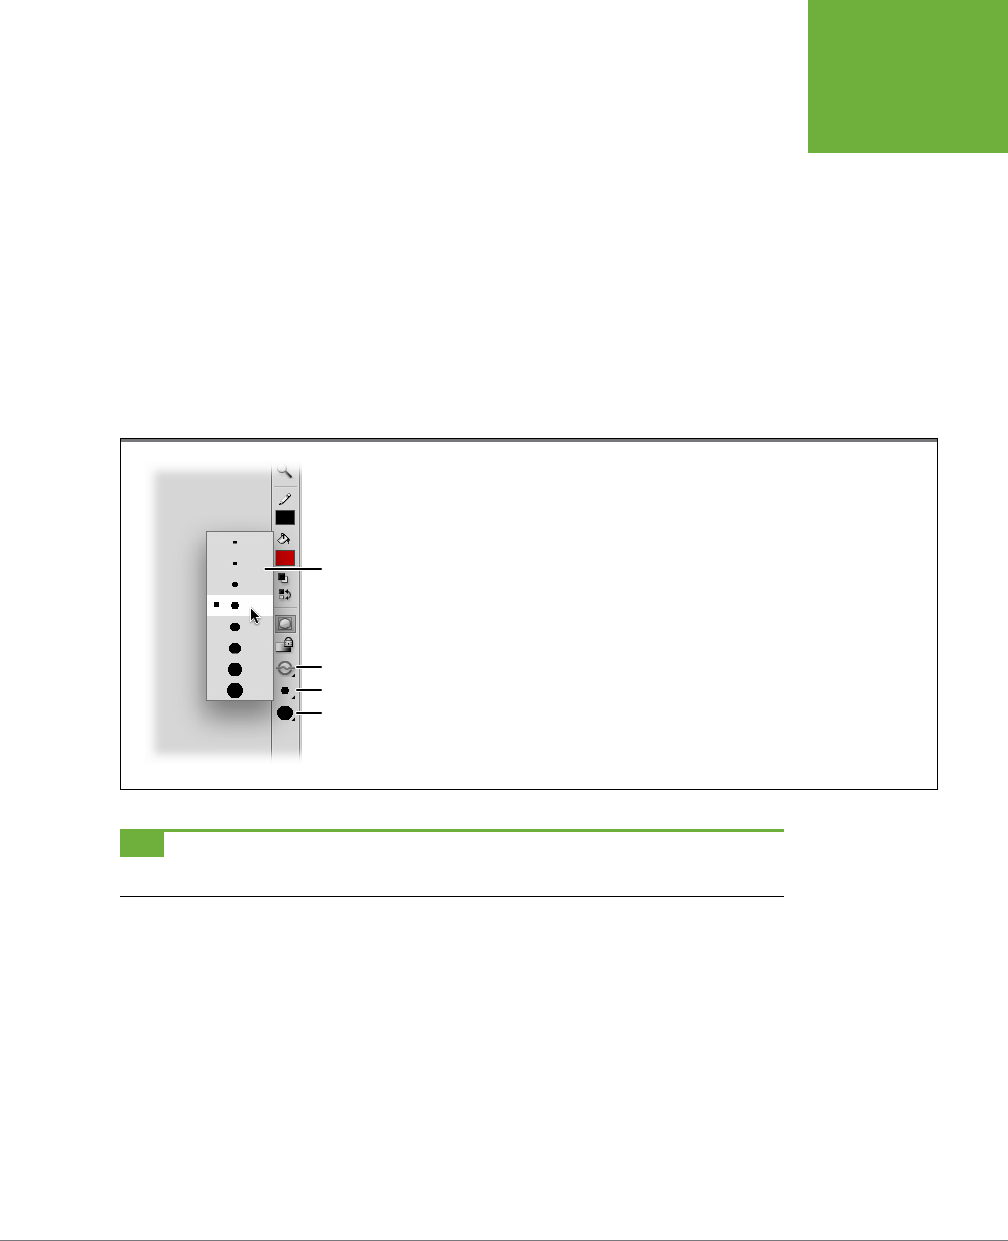
CHAPTER 2: CREATING SIMPLE DRAWINGS 73
CREATING
ORIGINAL
ARTWORK
To use the Brush tool:
1. On the Tools panel, click the Brush tool (the little paintbrush icon).
Flash displays your Brush options—including Brush Mode, Brush Size, and Brush
Shape—in the Options section of the Tools panel. If you have a graphics tablet,
you also see Brush Pressure and Use Tilt buttons.
2. From the Brush Size drop-down menu (Figure 2-18), select the third- or
fourth-smallest brush size.
The larger brushes let you paint great, sweeping strokes on the stage. But in
this example, you’ll be drawing hairs on your fellow’s head, so a modest brush
size is more appropriate. Your cursor changes to reflect your choice (you can
see this change if you mouse over the stage).
FIGURE 2-18
The options for controlling the brush size, shape, and mode appear at the bottom of
the Tools panel after you choose the Brush tool. To make a size adjustment, click the
Brush Size button and then select the size you want from the pop-up menu.
Brush Size menu
Brush Mode
Brush Size
Brush Shape
TIP Whenever you make a mistake, or simply want to wipe out the very last thing you did in Flash, Press
Ctrl+Z (⌘-Z) or select Edit→Undo.
3. From the Brush Shape drop-down menu, choose the round brush shape.
Each brush shape gives you a dramatically dierent look. To draw hair, as in
this example, you may choose round because it most closely approximates the
results you get with a real brush. Once again, your cursor changes to reflect
your choice.
4. Click the Brush Mode button and then, from the pop-up menu that appears,
choose Paint Normal.
Brush modes change the way the Brush tool paints over or under strokes and
fills already in your drawing. Figure 2-19 shows the dierent eects. Here you
www.it-ebooks.info
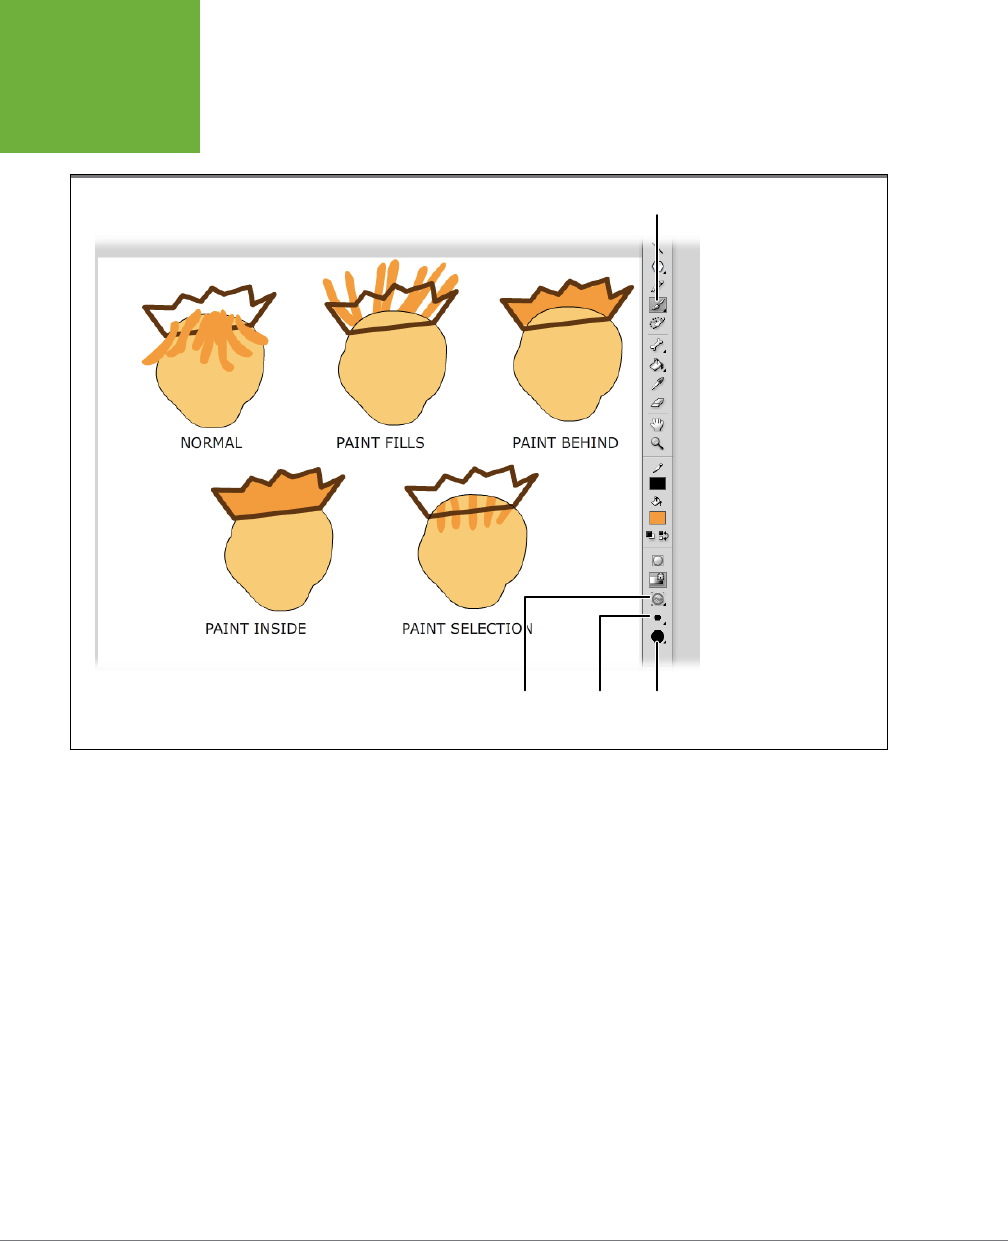
FLASH CS6: THE MISSING MANUAL
74
CREATING
ORIGINAL
ARTWORK
choose Paint Normal to draw hair that shows over the head shape and the hat.
Later, you’ll see how to tuck that hair under the hat.
FIGURE 2-19
Here you get an idea of
how the different brush
modes work. The hair was
brushed into this picture
using the five different
brush modes.
Brush tool
Brush
shape
Brush
size
Brush mode
button
Here’s a rundown of all the brush modes you can choose from:
• Paint Normal. Flash uses this mode unless you tell it otherwise. If you brush
over an existing object on the stage using Paint Normal, your brush stroke
appears on top of the shape.
• Paint Fill. When you brush over an existing object on the stage using Paint
Fill, your brush stroke appears on top of the fill portion of the object, behind
the stroke, and on the stage.
• Paint Behind. When you brush over an existing object on the stage using
Paint Behind, your brush stroke always appears behind the object.
• Paint Selection. When you brush over an existing object on the stage using
Paint Selection, your brush stroke appears only on the parts of the shape
that are both filled and that you’ve previously selected.
• Paint Inside. If you brush over an existing object on the stage using Paint
Inside and begin
inside
the stroke outline, your brush stroke appears only
inside the lines of an object (even if you color outside the lines). If you begin
www.it-ebooks.info

CHAPTER 2: CREATING SIMPLE DRAWINGS 75
CREATING
ORIGINAL
ARTWORK
outside
the lines, then your brush stroke appears only outside (even if you
try to color inside them).
5. Click the stage just about where your stick person’s hair should be and drag
your mouse upward; release the mouse button when the hair is the length
you want it.
Your paintbrush stroke appears on the stage.
6. Repeat to create additional locks of hair.
You should see a result similar to the one shown in Figure 2-19.
ARRANGING DRAWN OBJECTS FORWARD AND BACKWARD
When you draw in object mode, each part of your drawing (the head, the hat, the
hair) is an object, and you can place it in front of or behind the other objects. Imag-
ine that the head, hat, and hair are each cardboard cutouts that you’re placing on
your desktop. You set them down so that the head is at the bottom, the hair cutout
covers the top of the head, and the hat covers part of the hair. Perfect! Flash works
the same way. When you draw objects, Flash places each new object in front of the
last. But what if you don’t draw them in the proper order? Suppose, in the cartoon
face example, that you drew the hair on top of the hat? Flash can help. Follow these
steps to move the hat to the front.
NOTE If you don’t have a drawing handy for this exercise, you can download
02-3_Arrange_Objects.fla
from the Missing CD page at
www.missingmanuals.com/cds/flashcs6mm
.
1. With the Selection tool, click the hat’s outline.
Before you can rearrange the stacking order, you need to select an object to
move.
2. Go to Modify→Arrange→“Bring to Front” or press Shift+Ctrl+up arrow
(Windows) or Shift-Option-up arrow (Mac) to move the hat to the front.
The hat moves in front of both the head shape and the hair, as shown in
Figure2-20. You can still move the hat, hair, or head around the stage with the
Selection tool. They stay in the same stacking order (head on bottom, hair in
middle, hat on top) until you make another change using the Modify→Arrange
commands.
There are four commands that help you arrange the stacking order of the objects
you’ve drawn:
• Bring to Front. Moves the selected object to the very front of the stack.
• Bring Forward. Moves the selected object forward one level in the stack.
• Send to Back. Moves the selected object to the very back of the stack.
• Send Backward. Moves the selected object back one level in the stack.
www.it-ebooks.info
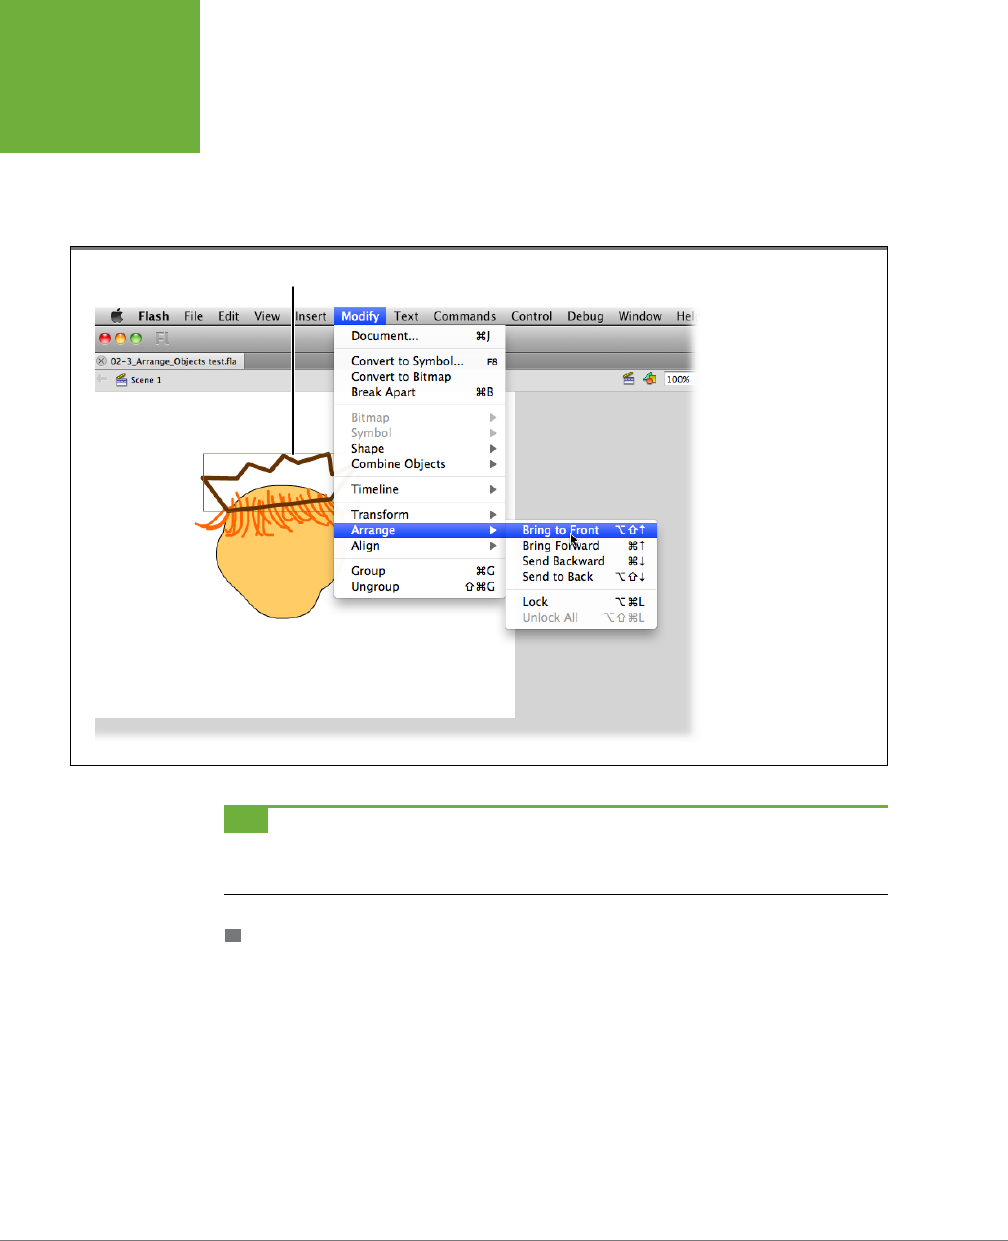
FLASH CS6: THE MISSING MANUAL
76
CREATING
ORIGINAL
ARTWORK
As an alternative to using menu commands, you can select an object and then use
Ctrl+up arrow or Ctrl+down arrow (⌘-up arrow or ⌘-down arrow) to move the
selected object forward or backward. Add the Shift key (Shift+Ctrl+up arrow or
Shift+Ctrl+down arrow for PCs; Shift-⌘-up arrow or Shift-⌘-down arrow for Macs)
to move all the way to the front or all the way to the back.
FIGURE 2-20
Use the Modify→Arrange
commands to position
parts of your drawing in
front of or behind other
objects. Here the hat is
brought to the front so
that it partially covers the
head and the hair. You
can find a copy of this
02-3_Arrange_Objects.
fla on the Missing CD page
(www.missingmanuals.
com/cds/flashcs6mm).
Hat selected and brought to front
TIP Remember, shapes drawn in merge drawing mode always appear behind objects drawn in object draw-
ing mode. If you want to rearrange mixed graphics, then you need to use the timeline layers, as explained in
Chapter
4.
SHAPE TOOLS: OVAL, RECTANGLE, AND POLYSTAR
Flash gives you quick ways to create basic shapes: the Oval tool, which lets you
draw everything from a narrow cigar shape to a perfect circle; the Rectangle tool,
which lets you draw rectangles, from long and skinny to perfectly square; and the
PolyStar tool, which you can use to create multisided polygons (the standard five-
sided polygon, angled correctly, creates a not-too-horrible side view of a house)
and star shapes.
You can see the Oval, Rectangle, and PolyStar tools in Figure 2-21; Figure 2-22 shows
you how to configure the PolyStar tool.
www.it-ebooks.info
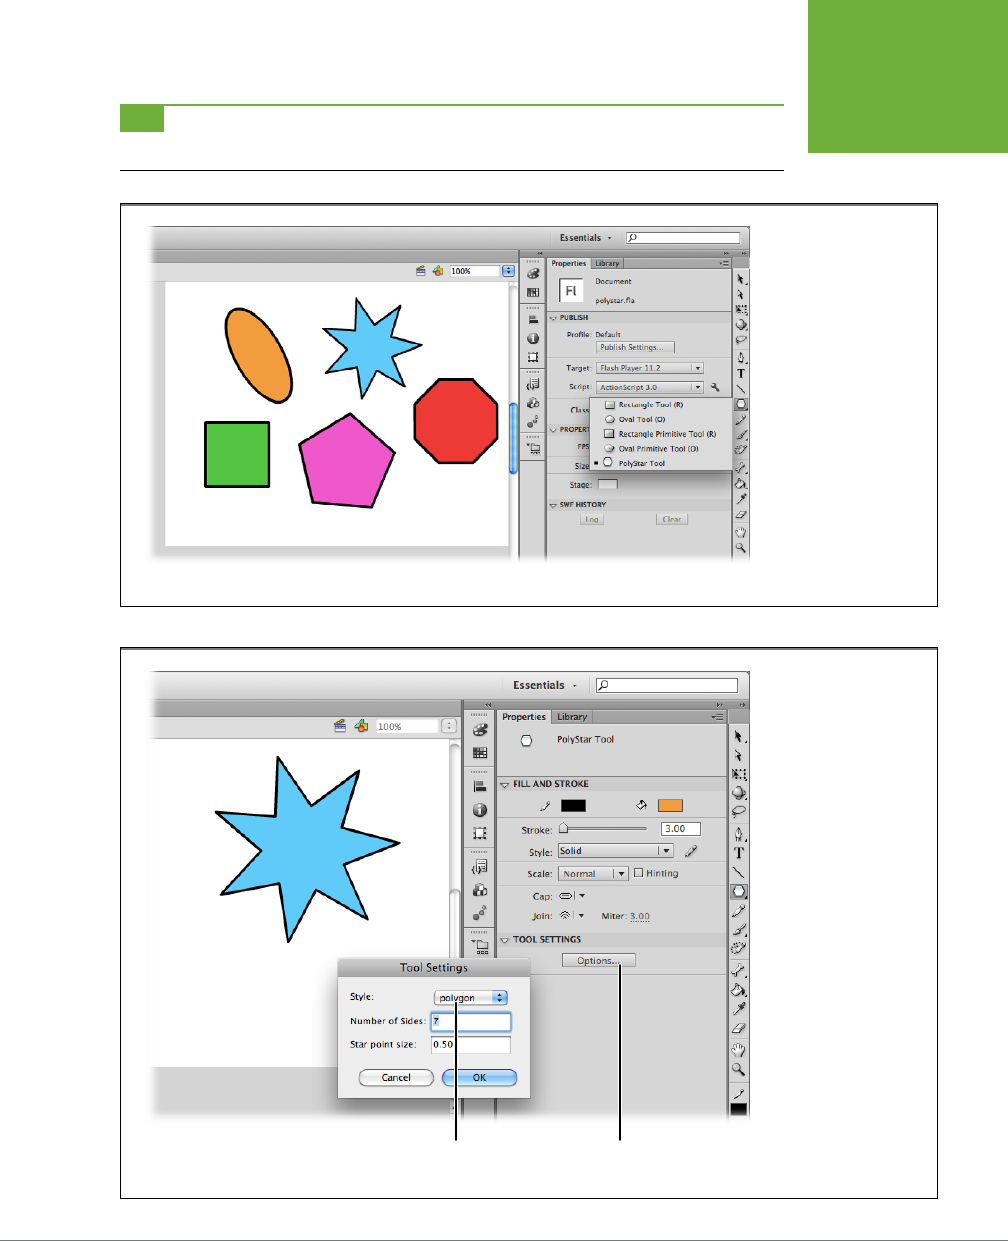
CHAPTER 2: CREATING SIMPLE DRAWINGS 77
CREATING
ORIGINAL
ARTWORK
TIP You can always create a circle, a square, or a star using one of the other drawing tools, like the Pencil
or the Line tool. But most people find the shape tools quicker and easier.
FIGURE 2-21
The Oval, Rectangle, and
PolyStar tools are all
tucked under the same
button on the Tools panel.
The icon and related
tooltip for the last-used
shape appear on the
button. The small triangle
in the lower-right corner
of the button is your
clue that there are more
options. To see the other
shape options, click and
hold down the button.
A small menu appears
showing all the options.
FIGURE 2-22
One of the shape tools is
called PolyStar because
it creates polygons and
stars. After choosing
PolyStar on the Tools
panel, click the Options
button in the Properties
panel. Then, in the Tool
Settings box, choose
either “polygon” or “star”
from the drop-down
menu.
Choose star
or polygon Options button
opens tool Settings
www.it-ebooks.info

FLASH CS6: THE MISSING MANUAL
78
CREATING
ORIGINAL
ARTWORK
To create a shape:
1. Click the shape tool you want (choose from Oval, Rectangle, or PolyStar,
as shown in Figure 2-21).
Your cursor changes into a cross.
2. Click the stage where you want to start your shape, and then drag your cur-
sor to form the shape. When you’re satisfied with the way your shape looks,
release your mouse button.
Flash displays your shape on the stage.
Rectangle and Oval Primitives
Flash has two special shapes: the rectangle and oval
primitives
.
What makes these guys so primitive, and where and how
should you use them? When you draw a rectangle or an oval
using the standard tools, Flash just considers them shapes. You
see one as having corners and the other curves, but to Flash
they’re pretty much the same. When you draw them in merge
mode, you can chop standard ovals and rectangles into little
irregularly shaped pieces.
Primitives behave like graphics drawn in object mode. And
as with the shapes drawn in object mode, you can adjust the
width and height of the objects by typing measurements in the
Properties panel. When they’re in the hands of an ActionScript
programmer, these primitives can really jump through hoops.
Primitives are different in that you can’t erase part of a primi-
tive or break it into parts. It’s all or nothing. In spite of their
object-drawn nature, primitives have some special features
that you also find in merge-mode graphics. For example, using
the Properties panel, you can add rounded or beveled corners
to your rectangle primitives. With the Oval primitive, you can
create pie slices by defining the arc angles. You can perform
these feats with merge-mode shapes and primitives, but not
with object-mode shapes.
Draw a rectangle, and then select it. Look in the Properties
panel. If you drew it in object mode, then the Properties
panel lists it as a drawing object. Otherwise, it describes it
as a shape. Now draw a rectangle using the Rectangle Primi-
tive tool. Sure enough, the Properties panel describes it as a
rectangle primitive.
POWER USERS’ CLINIC
TIP To create a perfectly round circle or a perfectly square square, simply hold down the Shift key while you
drag to create your shape. If you want to create beveled or rounded corners, then before you release the mouse
button, press the up or down arrow keys.
Aligning Objects with the Align Tools
Sometimes dragging stu around the stage and eyeballing the result works just
fine. Other times, you want to position your graphic elements with pinpoint preci-
sion. Using the Align panel, you can align graphic elements based on their edges
(top, bottom, right, left) or by their centers. And you can base this alignment on
the objects themselves (for example, you can line up the tops of all your objects)
or relative to the stage (useful if you want to position, say, several Freddy Flash
www.it-ebooks.info
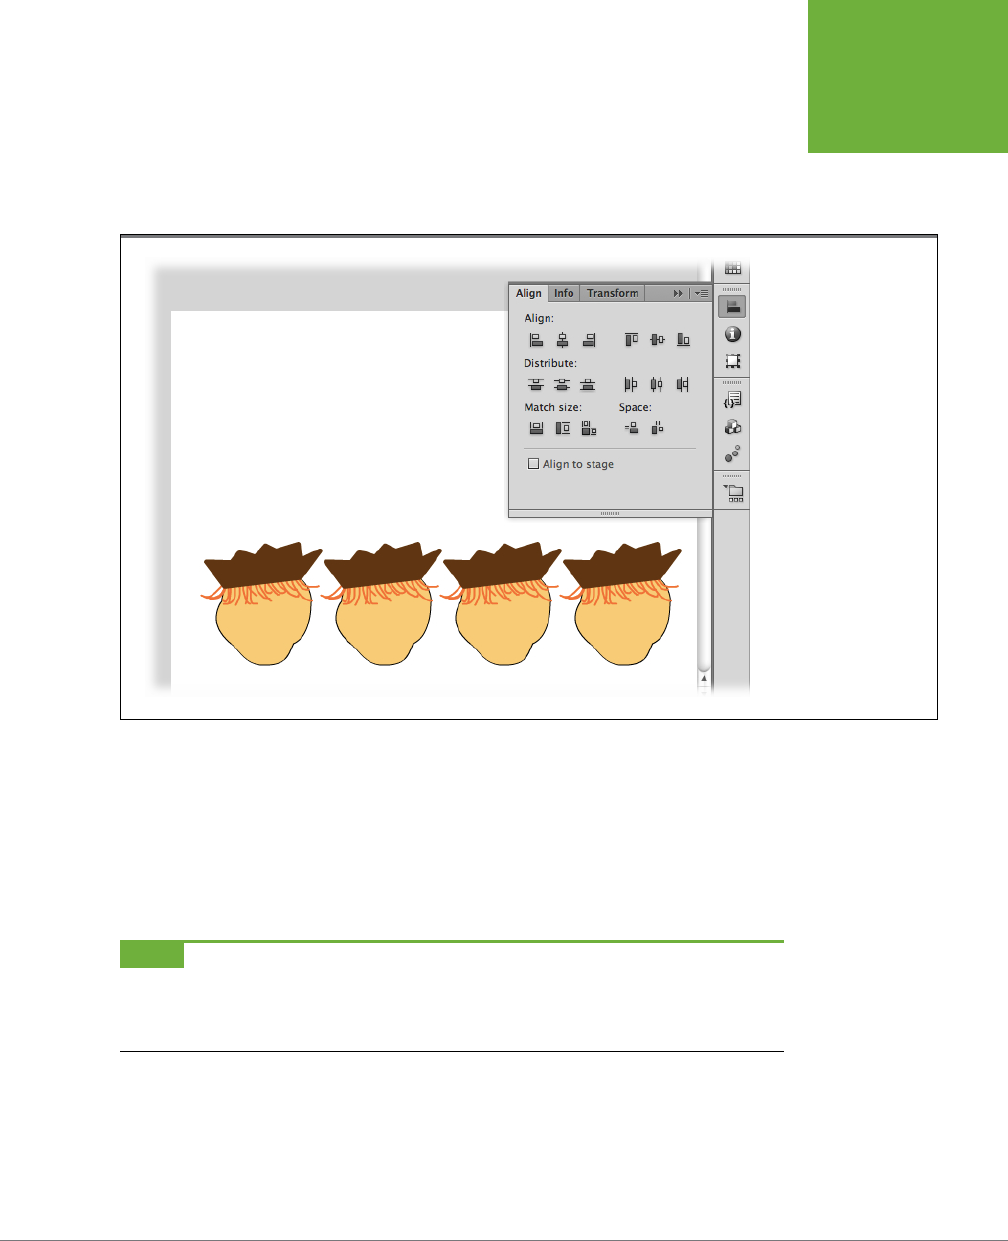
CHAPTER 2: CREATING SIMPLE DRAWINGS 79
CREATING
ORIGINAL
ARTWORK
heads precisely at the bottom of the stage, as shown in Figure 2-23). You can even
distribute individual objects evenly with respect to one another.
To display the Align panel, select Window→Align or press Ctrl+K (Windows) or ⌘-K
(Mac).
FIGURE 2-23
The Align panel gives
you the opportunity to
align a single object (or
whole groups of selected
objects) along the left
side, right side, top, or
bottom of the stage,
and more. First select
Modify→Align→To
Stage. Select the objects
you want to align, and
then click the alignment
icon from the Align panel.
Erasing Mistakes with the Eraser Tool
Only in the digital realm does an eraser work so eectively. Try erasing a goof on
paper or canvas, and you not only have shredded eraser everywhere, but you’re
also left with ghostly streaks of paint, lead, or charcoal.
Not so in Flash. Using the Eraser tool (Figure 2-24), you can eectively wipe anything
o the stage, from a little speck to your entire drawing.
NOTE Using the Eraser tool is similar to selecting Edit→Undo only in the sense that they both remove
objects from your drawing. The difference: Edit→Undo tells Flash to work sequentially backward to undo your
last actions or changes, the most recent one first. The Eraser tool, on the other hand, lets you wipe stuff off the
stage regardless of the order in which you added it.
To use the Eraser tool:
1. In the Tools section of the Tools panel, click the Eraser tool to select it.
Your cursor changes to the size and shape of eraser Flash assumes you want. To
make your eraser larger or smaller, head to the Options section at the bottom of
www.it-ebooks.info
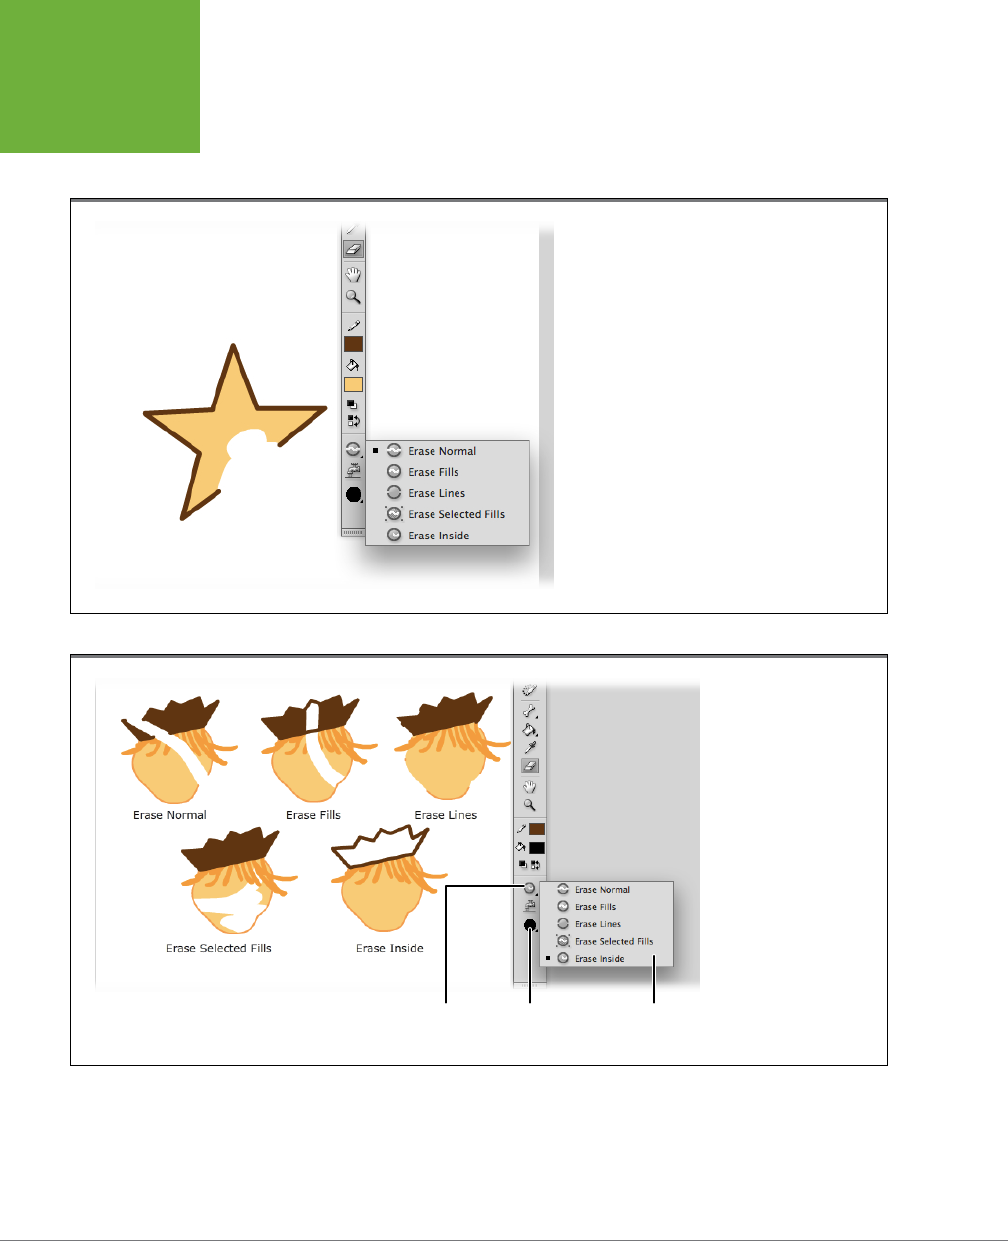
FLASH CS6: THE MISSING MANUAL
80
CREATING
ORIGINAL
ARTWORK
the Tools panel and, from the Eraser Shape pop-up menu (Figure 2-25), select
the eraser size and shape you want. (You want a nice fat eraser if you have a
lot to erase, or a skinny one if you’re just touching up the edges of a drawing.)
FIGURE 2-24
Here the Eraser tool is rubbing out the PolyStar
shape. Erasing in Flash isn’t useful just for fixing
mistakes; you can create cool effects (like patterns)
by erasing, too. If you happen to start erasing the
wrong thing, no problem; just press Ctrl+Z (⌘-Z).
FIGURE 2-25
How your Eraser works
depends on which Eraser
mode you’ve selected.
Here you see the effects
of each of the modes on
the fills and strokes of the
same shape.
Erase
shape
Erase
Mode button Erase
Mode menu
2. On the stage, click where you want to begin erasing, and drag your cursor
back and forth.
Flash erases everything your cursor touches (or not, depending on the Eraser
mode you’ve chosen—see the following section for details).
www.it-ebooks.info

CHAPTER 2: CREATING SIMPLE DRAWINGS 81
CREATING
ORIGINAL
ARTWORK
TIP To erase a line or a fill in one fell swoop, click the Faucet option, and then click the line or fill you want
to erase. To erase everything on the stage and the Pasteboard (the area surrounding the stage), double-click the
Eraser icon on the Tools panel.
CONFIGURING THE ERASER
Flash has a ton of Eraser modes you can use to control how the Eraser tool works
(and what it erases).
NOTE The Eraser tool works only on editable objects. It doesn’t work on closed groups or symbols. To remove
grouped objects and symbols, click them with the Selection tool and then press Delete.
To see them, click the Erase Mode button in the Options area (Figure 2-25), and then,
from the fly-out menu that appears, select one of the following modes:
• Erase Normal. Flash uses this mode unless you tell it otherwise. When you
erase over an existing object on the stage using Erase Normal, Flash erases
everything, fill and stroke included.
• Erase Fill. When you erase over an existing object on the stage using Erase Fill,
only the fill portion of the object disappears.
• Erase Lines. When you erase over an existing object on the stage using Erase
Lines, only the stroke portion of the object disappears.
• Erase Selected Fills. When you erase over an existing object on the stage
using Erase Selected Fills, you erase only those parts of the object that are
both fills and that you’ve previously selected (using one of the selection tools
described on page 61).
NOTE Oddly enough, if you configure your eraser to Erase Selected Fills and then rub your virtual eraser
over
non
-selected fills, Flash pretends to erase them—until you let up on your mouse, when they pop right back
onto the stage.
• Erase Inside. If you erase over an existing object on the stage using Erase Inside,
Flash erases the inside (fill) of the object as long as you begin erasing inside the
stroke outline; if you begin erasing outside the line, it erases only outside the line.
CUTTING OUT AN IRREGULAR SHAPE FROM ANOTHER OBJECT
You can cut an irregular shape out of the middle of an object using the Eraser tool.
If you’re going for precision, for example, then you can use an eraser with a small
head to outline the area you’re erasing and then use the Faucet tool to quickly erase
the rest. For example, say you want to draw a donut. Here’s how:
www.it-ebooks.info

FLASH CS6: THE MISSING MANUAL
82
COPYING
AND PASTING
DRAWN
OBJECTS
1. Select the Oval tool on the Tools panel.
If you don’t see the Oval tool, it’s probably hiding under the Rectangle tool or
the PolyStar tool. Notice the little triangle that indicates that there are more
options on the menu? Make sure you choose the Oval tool and not the Oval
Primitive tool. The Oval Primitive tool has a dot in the center.
2. Drag out a decent-sized oval on the stage.
You’re drawing a donut, so there’s no need to make a perfect circle, but do make
it large enough so that you can cut out a donut hole.
3. On the Tools panel, click the Eraser tool.
When you move the cursor over the stage, you see that it’s changed to a black
dot. That’s the Eraser, and the dot cursor shows how big the eraser head is.
4. In the Options section at the bottom of the Tools panel, choose a small
eraser head.
At the bottom of the Tools panel is the drop-down menu that sets the size and
shape of the Eraser.
5. Using the Eraser, draw a circle within your oval to outline the donut hole.
As you drag, the fill color disappears, and you see the stage color beneath.
(Make sure you complete the circle, or the Faucet will erase the entire fill color
in your donut.)
6. On the Tools panel, click the Faucet, and then click the donut hole.
The rest of the donut hole disappears as the Faucet tool erases all the fill color
from inside the cutout.
Copying and Pasting Drawn Objects
Copying graphic elements and pasting them—into the same frame, into another
frame, or even into another document—is much faster than drawing new objects from
scratch. It’s also the most familiar. If you’ve ever copied text in a word processing
or spreadsheet document and pasted it somewhere else, then you know the drill.
A simple copy-and-paste is the best way to go when you’re experimenting—for
example, when you want to see whether the blue-eyed wallaby you drew for one
animation looks good in another. But if you’re trying to keep your animation’s fin-
ished file size as small as possible, or if you plan to include more than one copy of
that wallaby, copying and pasting
isn’t
the best way to go. Instead, you’ll want to
look into symbols (page 248).
To copy and paste an image:
www.it-ebooks.info
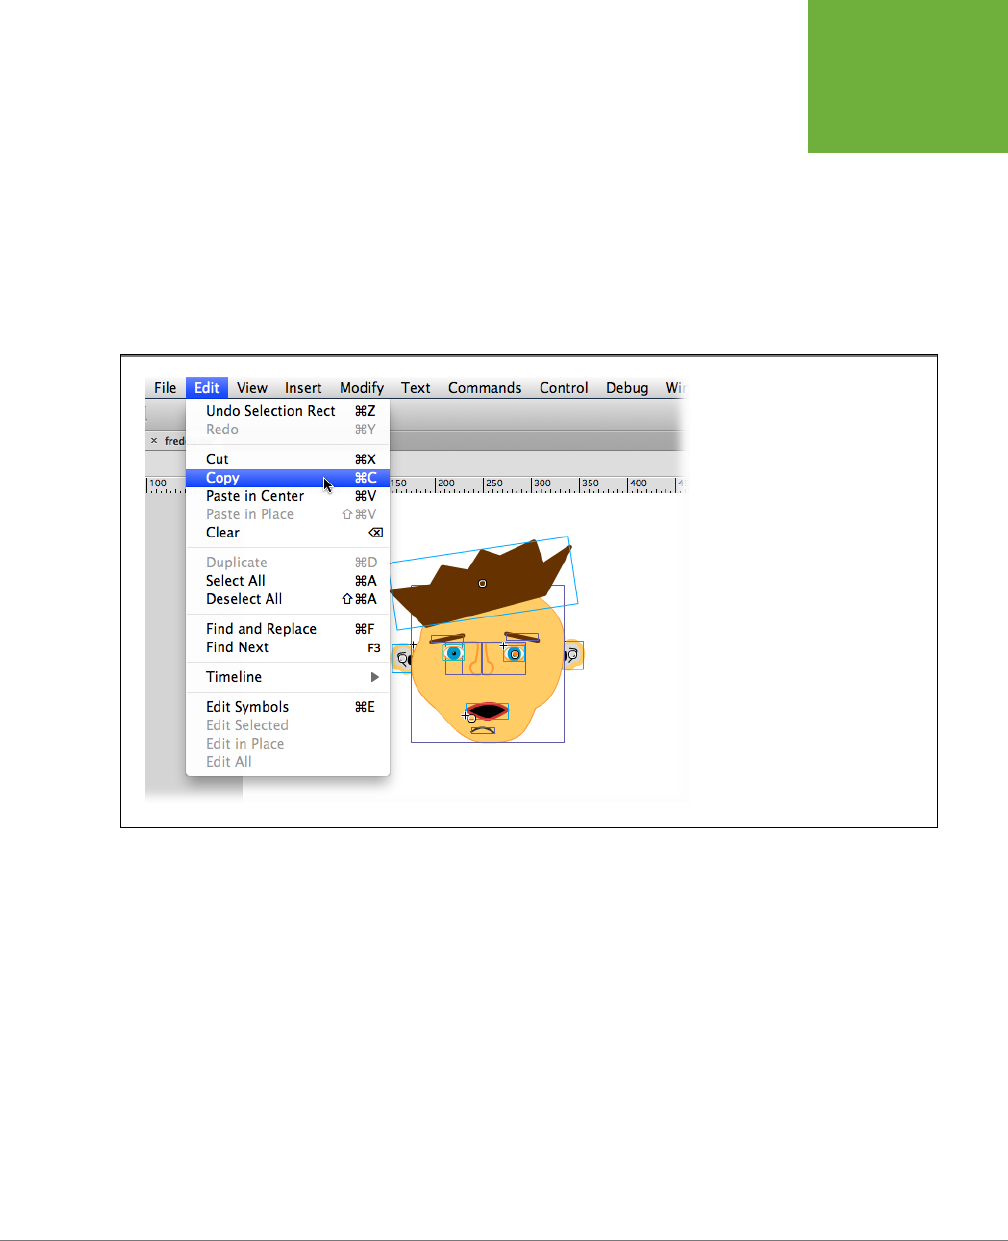
CHAPTER 2: CREATING SIMPLE DRAWINGS 83
COPYING
AND PASTING
DRAWN
OBJECTS
1. On the stage, select the image you want to copy.
Page 61 gives you an overview of the selection tools. In Figure 2-26, Freddy
Flash is selected.
2. Choose Edit→Copy (or press Ctrl+C in Windows, ⌘-C on the Mac). Then select
the keyframe into which you want to paste the image.
You can paste the image in the keyframe you’re in, or you can select another
one. Flash doesn’t restrict you to the document you currently have open; you
can open another document to paste the image into.
FIGURE 2-26
Copying and pasting is the easiest
way to try out a look. If you’re
copying a complex image, as shown
here, you may want to group the
selected image first by choosing
Modify→Group. (There’s much
more detail on grouping objects on
page188.) For additional copies,
simply choose Edit→“Paste in Center”
or Edit→“Paste in Place” again.
3. Choose one of the Paste commands. Here are your options:
• Edit→Paste in Center. Tells Flash to paste the image in the center of the
viewing area.
• Edit→Paste in Place. Tells Flash to paste the image in the same spot it
was on the original stage. (If you choose this option to paste an image to
the same stage as the original, then you need to drag the pasted copy o
the original to see it.)
• Edit→Paste Special (Windows only). Displays a Paste Special dialog box
that lets you paste an image as a device-independent bitmap (an unedit-
able version of your image with a fixed background the size and shape of
the selection box).
Flash pastes your image based on your selection, leaving your original copy intact.
www.it-ebooks.info
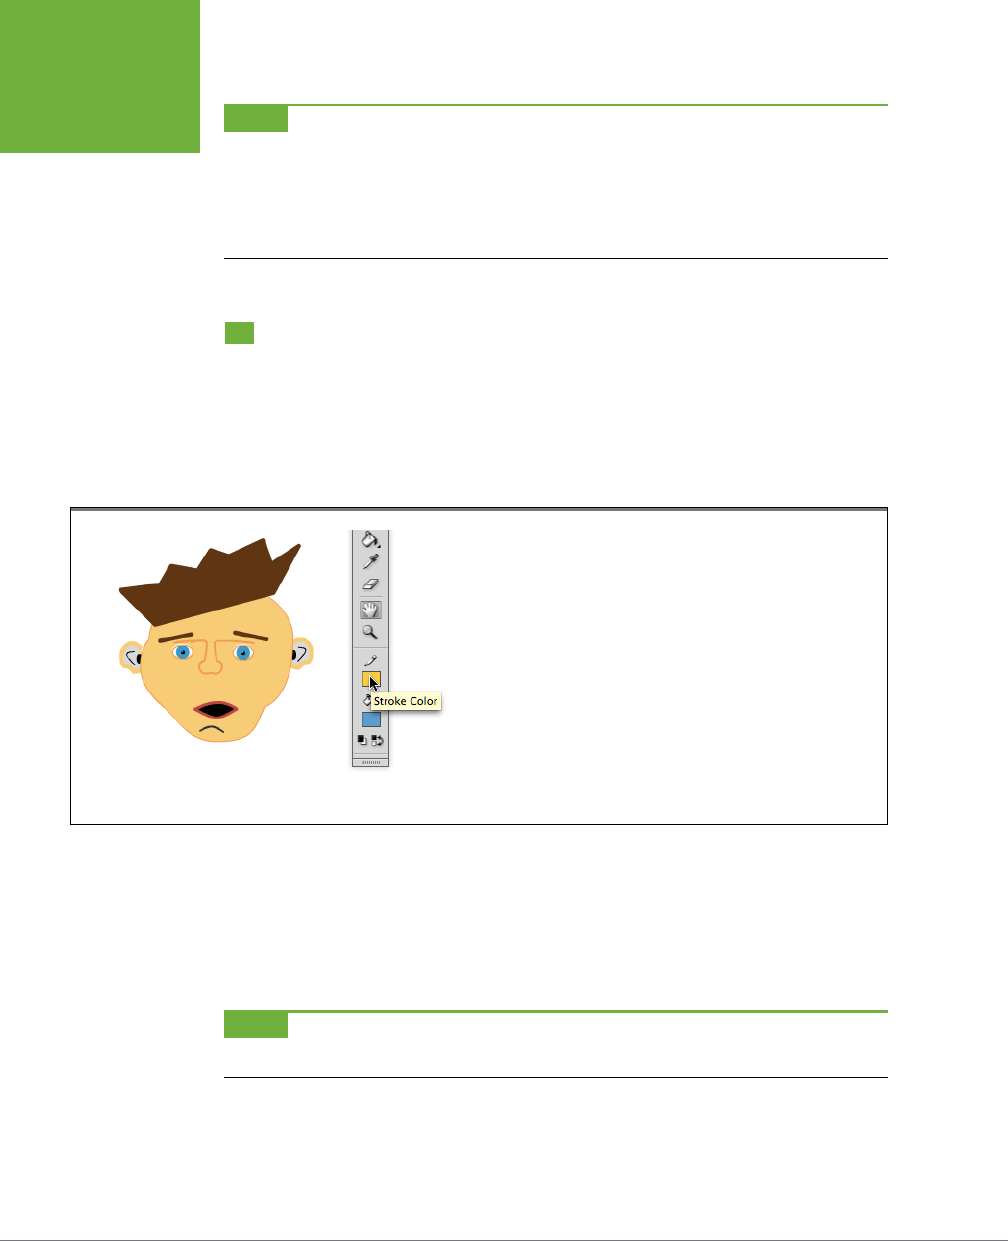
FLASH CS6: THE MISSING MANUAL
84
ADDING COLOR
NOTE If all you want to do is make a quick copy of an image on the same stage as the original, then Flash
gives you an easier way than copying and pasting. Select Edit→Duplicate (or press Ctrl+D in Windows, ⌘-D on
the Mac). When you do, Flash pastes a copy of the image just a little below and to the right of your original image,
ready for you to reposition as you see fit. For the fastest duplication method of all, with the Selection tool, just
Alt-drag (Option-drag) the item you want to copy. The original stays put, and you have a duplicate attached to
your cursor. You can then drag the duplicate wherever you want on the stage.
Adding Color
The Colors section of the Tools panel lets you choose the colors for your strokes and
fills. Before you click one of the drawing icons to begin drawing (or afterward, to
change existing colors), you can click either of the Stroke or Fill icons in the Colors
section to bring up a color palette, as shown in Figure 2-27. Choose a color from the
color palette, and Flash applies that color to the objects you draw.
FIGURE 2-27
Before you begin drawing with the Pen or Pencil tools (both of
which let you create strokes), you can choose the color of the Pen
or Pencil by clicking the Stroke Color icon and then selecting a
color from the palette that appears. If you want to change that
color when you use the Brush tool (which creates fills), then you
need to click the Fill Color icon (and select a color) before you click
the Brush tool and begin to draw.
Changing the Color of a Stroke (Line)
One of the best things about drawing in Flash is how easy it is to change things
around. If you draw a bright orange line using the Pencil tool, for example, you can
change that line an instant later to spruce, chartreuse, or puce (and then back to
orange again) with just a few simple mouse clicks.
NOTE In Flash, all lines are made up of strokes. The Flash drawing tools that produce strokes include the
Pencil, the Pen, the Line, and the shape tools (Oval, Rectangle, and PolyStar).
Flash gives you two dierent ways to change the color of a stroke: the Properties
panel and the Ink Bottle tool.
www.it-ebooks.info
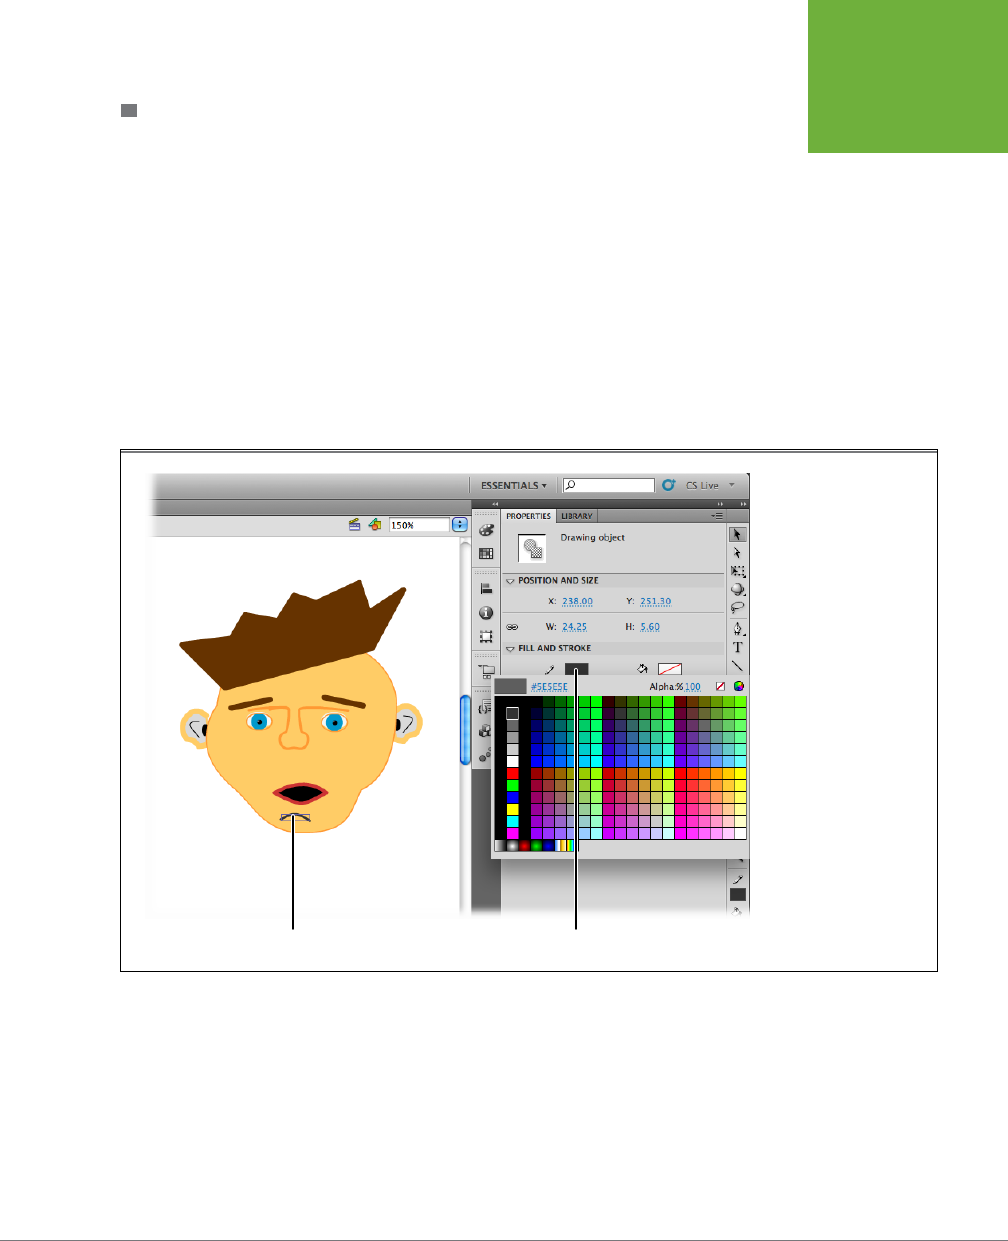
CHAPTER 2: CREATING SIMPLE DRAWINGS 85
ADDING COLOR
COLORING STROKES WITH THE PROPERTIES PANEL
Changing the color of a stroke using the Properties panel is best for situations when
you want to change the color of a single stroke or when you want to change more
than just the color of a stroke (for example, you want to change the stroke thickness
or the color of the fill inside the stroke).
To change the color of a stroke using the Properties panel:
1. On the stage, select the stroke you want to change.
A highlight appears around or on the selected stroke.
2. If the Properties panel isn’t open, press Ctrl+F3 (⌘-F3).
The Properties panel shows settings related to the stroke, as shown in
Figure2-28.
FIGURE 2-28
Using the Properties
panel is a quick and easy
way to change the color
of a single stroke. First,
select the stroke you want
to recolor; then, in the
Properties panel, click
the Stroke Color icon.
When you do, the color
picker appears, complete
with any custom color
swatches you’ve added to
it (if any). The instant you
choose a color, the color
picker disappears and the
selected stroke changes
to the new color. Here the
Fill Color icon has a slash
through it, meaning that
no fill color is currently
selected.
Stroke selected Stroke color picker
3. In the Properties panel, click the Stroke Color icon.
The color picker appears.
4. Click a new color for your selected stroke.
The color picker disappears, and Flash displays your stroke using the new color
you chose.
www.it-ebooks.info
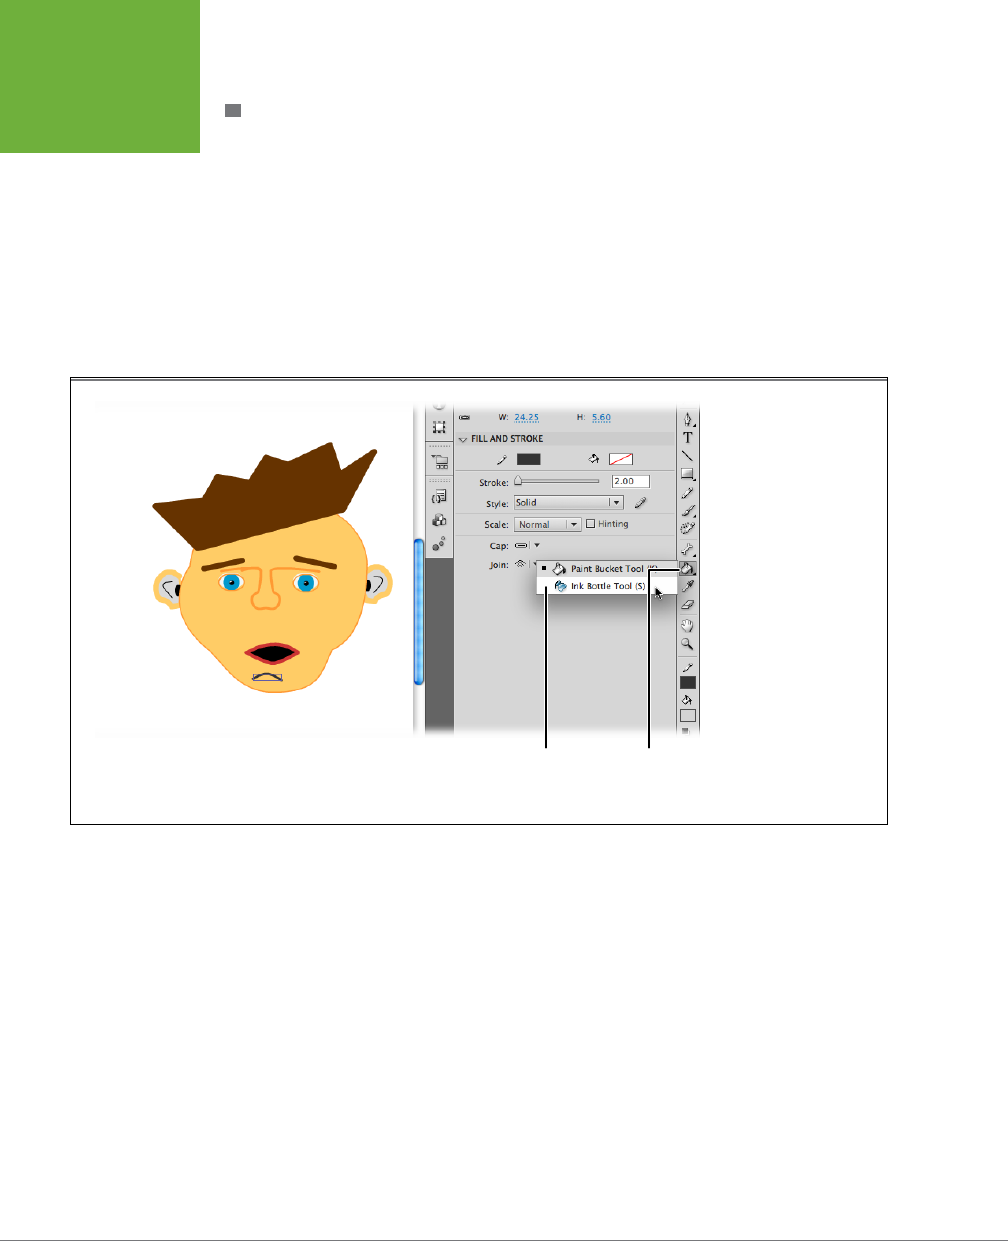
FLASH CS6: THE MISSING MANUAL
86
ADDING COLOR
COLORING STROKES WITH THE INK BOTTLE TOOL
The Ink Bottle tool is great for situations when you want to apply the same color to
a bunch of dierent strokes in one fell swoop.
To change the color of a stroke (or several strokes) using the Ink Bottle tool:
1. In the Tools panel, click the Ink Bottle or press S.
The Ink Bottle and the Paint Bucket share the same Tools panel button. If the
Ink Bottle isn’t showing, click and hold the Paint Bucket until you see the fly-out
menu, as shown in Figure 2-29, and then select the Ink Bottle tool. Now, as you
mouse over the stage, you notice that your cursor looks like a little ink bottle.
FIGURE 2-29
Use the Ink Bottle tool to
change the color strokes.
To change the color of
strokes one by one, you
don’t need to select them
first; simply click them
with the Ink Bottle tool.
If you want to change
several strokes at once,
preselect the bunch, and
then click on any one with
the Ink Bottle.
Paint Bucket
and Ink
Bottle tool
Ink Bottle
menu item
2. In the Properties panel, click the Stroke Color swatch (Figure 2-30).
The color picker appears, and as you mouse over the dierent colors, you notice
that your cursor looks like a tiny eyedropper.
3. Click a color to choose it.
The color picker disappears, and Flash changes the Stroke Color swatch to
match your selection.
4. Click the strokes you want to recolor.
Flash changes the color of the strokes to match the stroke color in the Proper-
ties panel.
www.it-ebooks.info
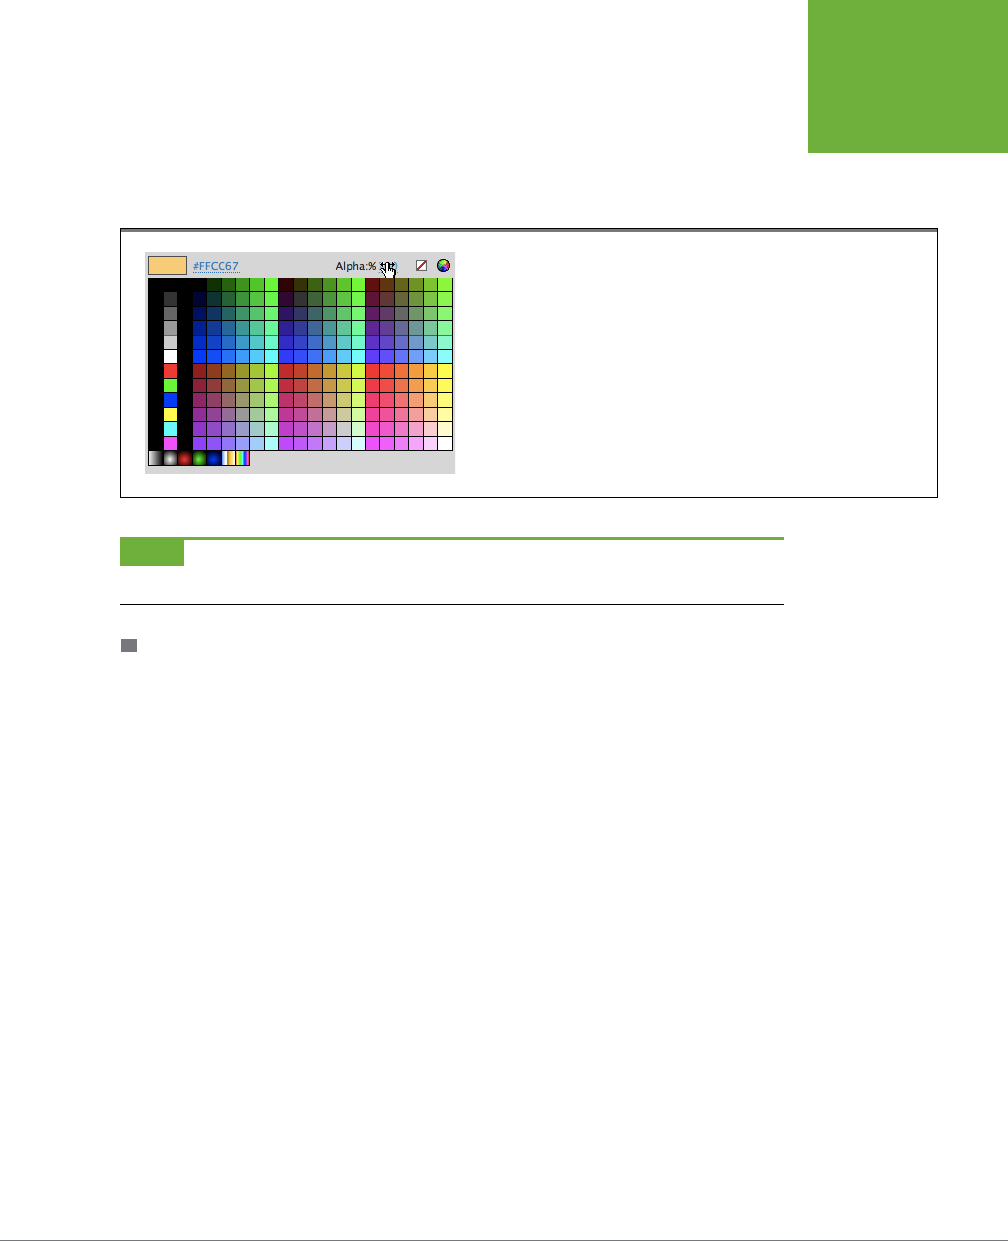
CHAPTER 2: CREATING SIMPLE DRAWINGS 87
ADDING COLOR
Changing the Color of a Fill
If you change your mind about the color of any of the fills you add to the stage, no
problem. Flash gives you several ways to change the color of a fill, including the
Properties panel and the Paint Bucket tool.
FIGURE 2-30
Clicking the Stroke Color icon displays the color picker. All of Flash’s color pickers
work the same. Here you can change not just the hue, but also the transpar-
ency of the color. To do so, click the number in the Alpha box and type in a new
percentage or drag right or left to “scrub” in a new value. Numbers from 0%,
(completely transparent) to 100% (completely opaque) are valid.
NOTE The Flash drawing tools that produce fills include the Brush tool and all the shape tools (Oval, Oval
Primitive, Rectangle, Rectangle Primitive, and PolyStar).
COLORING FILLS WITH THE PROPERTIES PANEL
Using the Properties panel to change the color of a fill is great for situations when
you want to change more than just fill color—for example, you want to change both
the fill color and the color of the stroke outline surrounding the fill.
To change the color of a fill using the Properties panel:
1. On the stage, select the object you want to change.
The selected object is highlighted.
2. If the Properties panel isn’t open, go to Window→Properties to open it.
The Properties panel, similar to the one in Figure 2-31, appears.
3. In the Properties panel, click the Fill Color icon.
The color picker appears.
4. Click to choose a new color for your selected fill.
As soon as you let go of your mouse button, the color picker disappears, and
Flash displays your fill using the color you chose.
www.it-ebooks.info
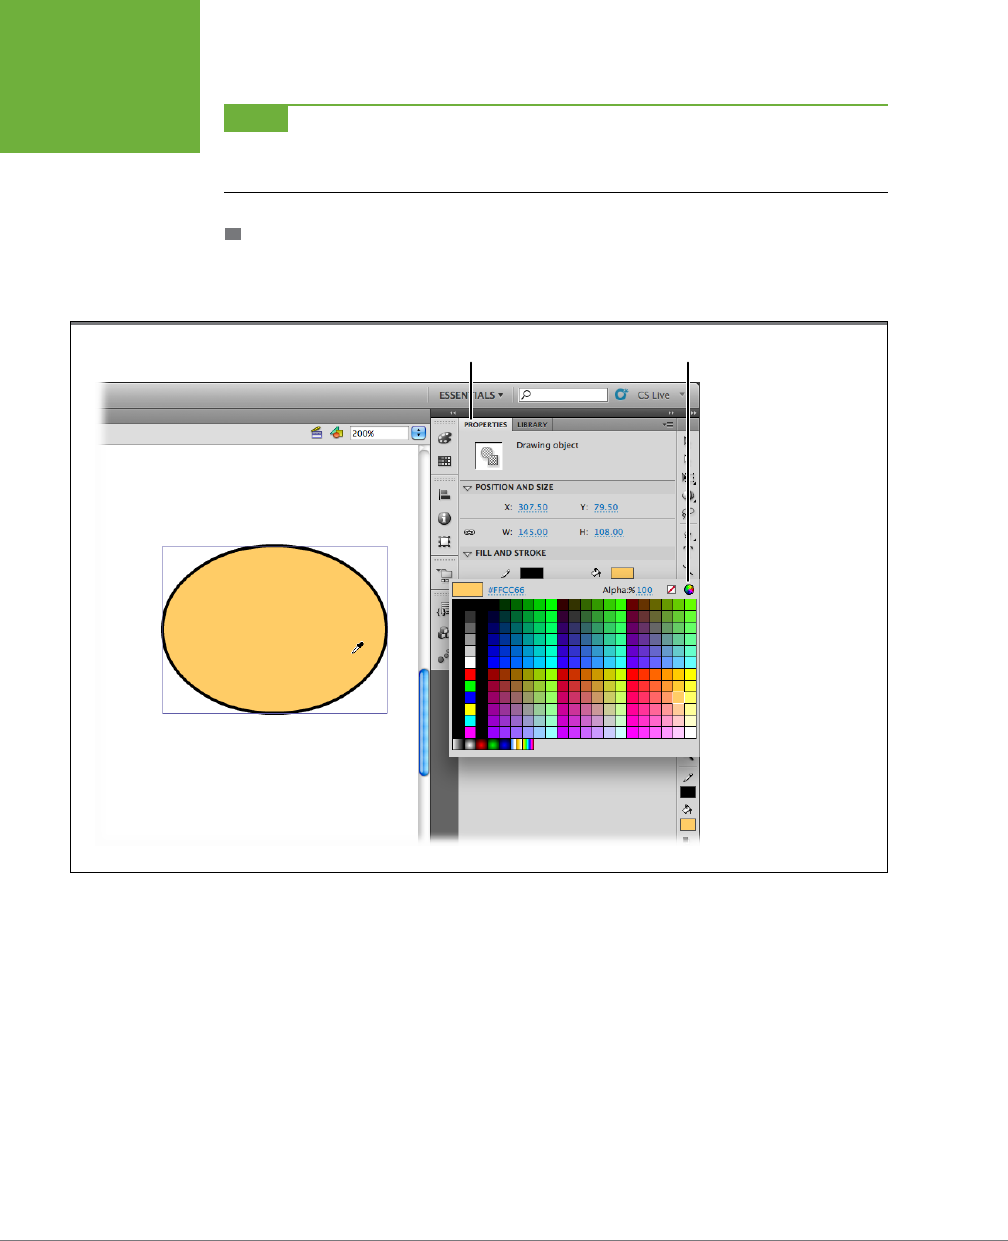
FLASH CS6: THE MISSING MANUAL
88
ADDING COLOR
NOTE To change the color of a bunch of fills quickly, select the fills you want to recolor, and then select
the Fill Color icon and choose a new color. When you do, Flash automatically displays all your selected fills using
your new color.
COLORING FILLS WITH THE PAINT BUCKET TOOL
The Paint Bucket tool is great for situations when you want to apply the same color
to one or more fills on the stage, either one fill at a time or all at once.
FIGURE 2-31
Select a fill-containing
object (here, the inside of
an oval). In the Properties
panel, click the Fill Color
icon to display the color
picker, and then click
to choose a new color
for your fill. If you don’t
see the exact color you
want, then you can click
the Custom Color icon to
blend your own custom
shade. And while you’re
here in the Properties
panel, you can also
change the stroke outline
of the object, if you like.
Properties Panel Custom color picker
To change the color of a fill using the Paint Bucket tool:
1. In the Tools panel, select the Fill Color icon (Figure 2-32).
The color picker appears, and as you mouse over the dierent colors, you notice
that your cursor looks like a tiny eyedropper.
www.it-ebooks.info
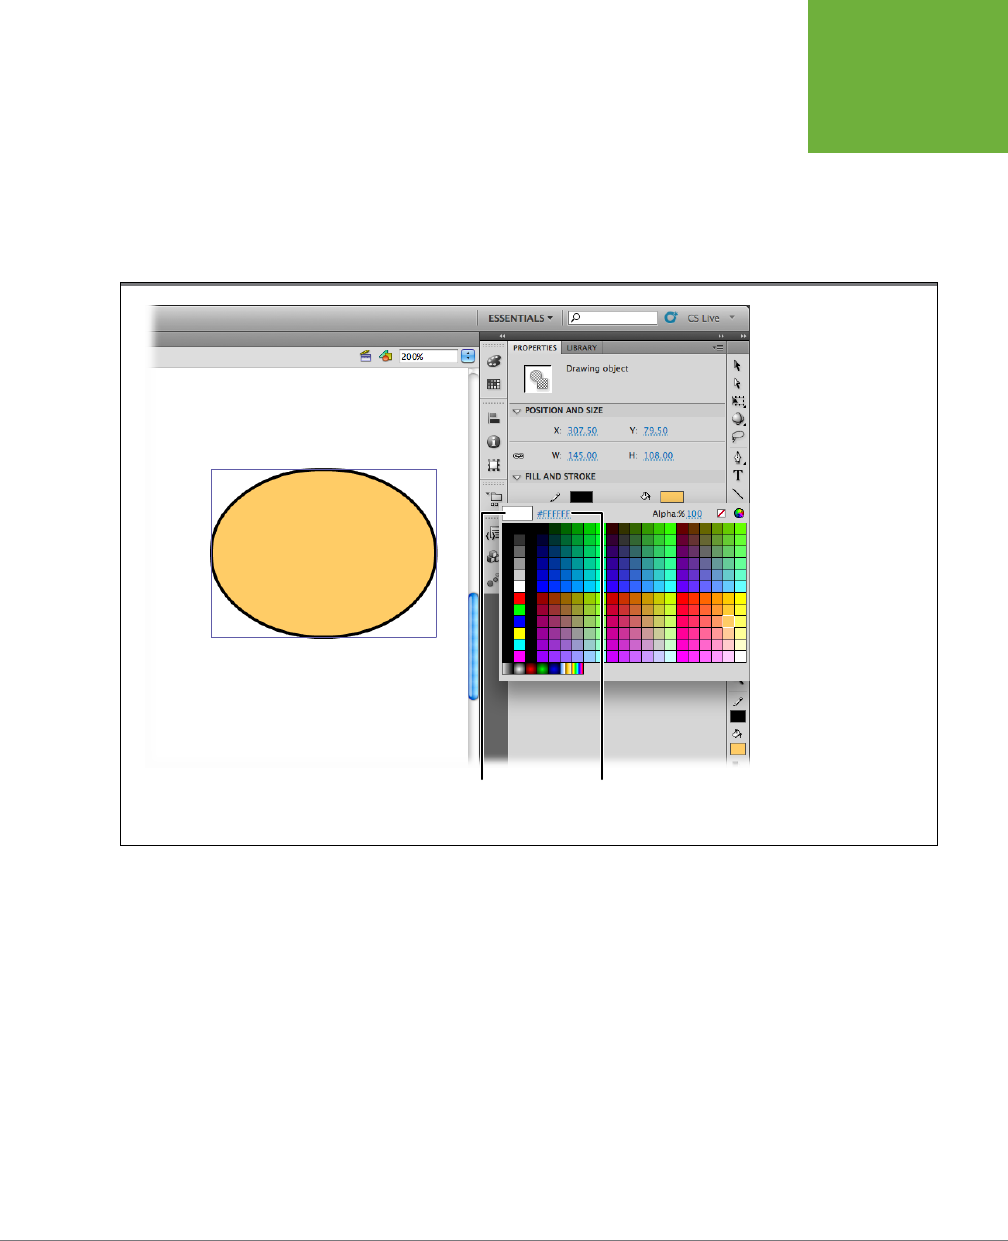
CHAPTER 2: CREATING SIMPLE DRAWINGS 89
ADDING COLOR
2. Click a color to choose it.
The color picker disappears, and Flash redisplays the Fill Color icon using the
color you just selected.
3. On the stage, click the fill(s) you want to recolor.
Flash recolors each fill you click, as shown in Figure 2-32.
FIGURE 2-32
Click the Fill Color icon to
choose a new color for
your fills. As you move
your cursor around the
color picker, you notice
that the Preview window
displays the color your
cursor happens to be over
at any given time.
Hexadecimal
color number
Selected
fill color
www.it-ebooks.info
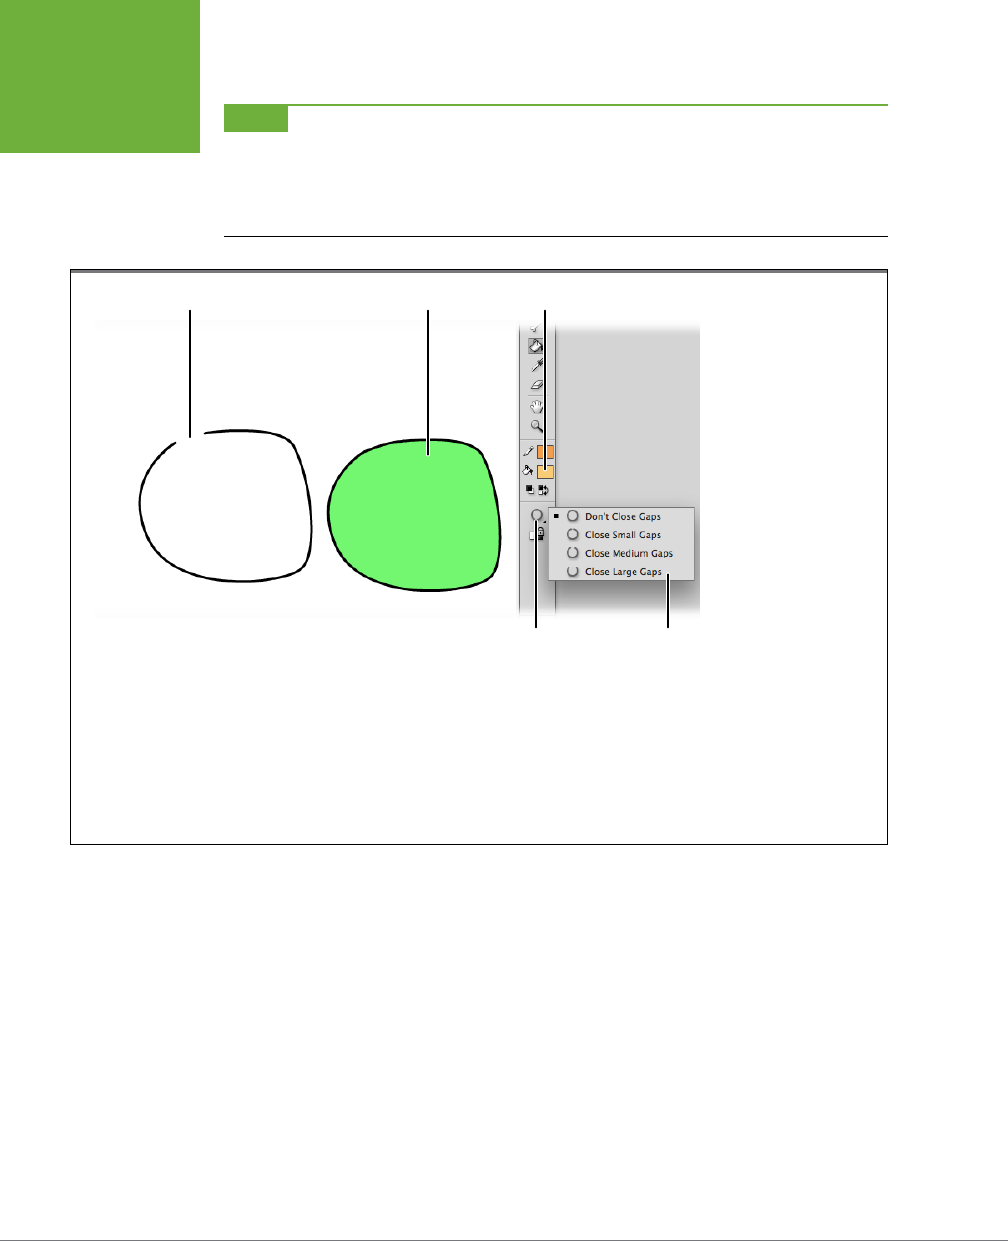
FLASH CS6: THE MISSING MANUAL
90
ADDING COLOR
NOTE If you don’t have a completely closed outline around your fill, Flash might not let you apply a fill
color. To tell Flash to ignore small gaps (or medium or even relatively large gaps) surrounding your fill, in the
Options section of the Tools panel (Figure 2-33), click Gap Size. Then, from the pop-up menu that appears, turn
on the checkbox next to Close Small Gaps, Close Medium Gaps, or Close Large Gaps. Then try to modify your fill
again. (You may also want to consider closing the gap yourself using one of Flash’s drawing tools.)
FIGURE 2-33
After you select a new fill
color, apply it to the fills
on the stage by clicking
the Paint Bucket and
clicking each fill. If you’re
adding a fill for the first
time and you find that
Flash doesn’t add your fill
color, make sure your fill
is perfectly enclosed. If it
isn’t—if there’s a gap in
the outline surrounding
it—Flash may not be
able to tell where your
fill stops and the stage
begins. Fortunately, you
can tell Flash to ignore
the gap and change your
fill color as best it can. To
do so, click the Gap Size
option. On the fly-out
menu that appears,
choose Close Small (or
Medium, or Large) Gaps.
Gap size
button Gap size
menu
No gap Fill colorGap, no fill
www.it-ebooks.info

91
CHAPTER
3
In the olden days of animation, artists had to create a drawing for each frame of a
movie by hand. Sure, they had their shortcuts, but since most movie frames click
by at 24 frames per second, that’s a labor-intensive endeavor. To keep costs down,
animation production companies had their best, highest-paid artists draw the most
important images, where major changes took place, and then had lesser talents and
beginners draw the in-between images. Those most important images are known
as
keyframes
. The in-betweeners are called
tweens
.
This chapter is your introduction to keyframes and tweens from Flash’s point of
view. In this case, you’re the high-paid artist who gets to create the keyframes, while
your computer does the grunt work of drawing all the tweens. You’ll learn about
two types of tweens—the motion tween and the shape tween. But first, you need
to understand the various types of frames you see in Flash’s timeline.
NOTE “Tween” is one of those words that makes you smile—it just sounds funny. It’s even funnier when
you realize that it’s used as both a noun and a verb. Not only can you create a tween, but you can also tween a
drawn object, such as a car: “I tweened the car to make it drive down the road.”
Frame-by-Frame Animation
An
animation
is nothing more than a series of framed images displayed one after
the other to create the illusion of motion. If you want to, you can use Flash to make
your animation the old-fashioned way, by drawing each frame individually. Whether
you animate frame by frame or use computer-generated tweens, you need to be
Animate Your Art
www.it-ebooks.info
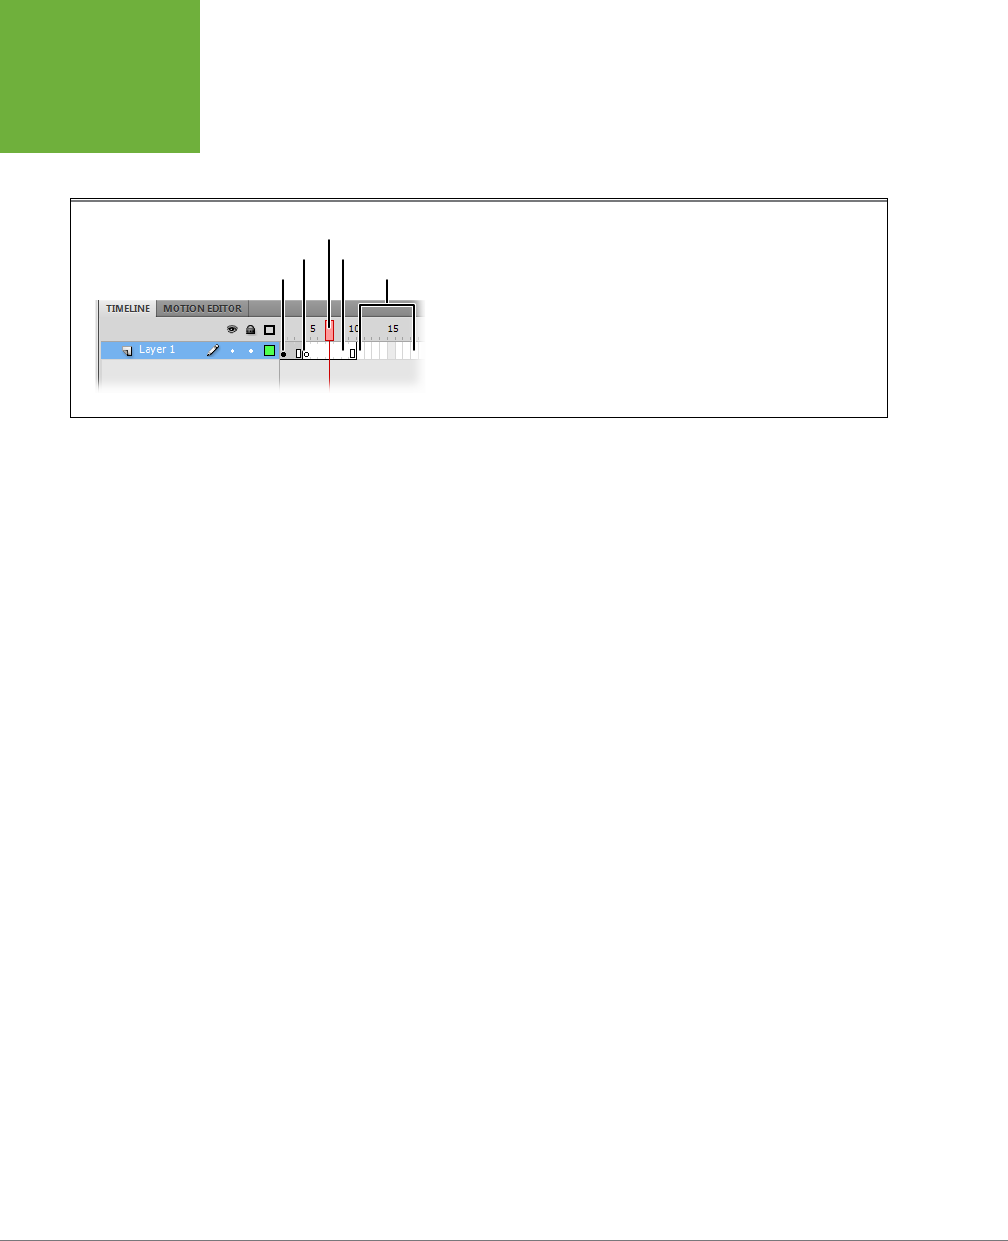
FLASH CS6: THE MISSING MANUAL
92
FRAME-
BY-FRAME
ANIMATION
able to decode the timeline symbols to understand how your animation works.
Figure 3-1 shows some of the hieroglyphics you’ll find on the timeline. Here are
some more details:
FIGURE 3-1
From left to right on this little strip of timeline you see several
frames. Frame 1 is a keyframe with a solid circle. Frame 4 is an empty
keyframe, shown as a hollow circle. The playhead is positioned at
Frame 7, and the entire animation ends at Frame 10. The rectangles
from Frame 11 on are not part of this animation, even though they’re
visible in the timeline.
Keyframe Not in animation
Static FramesEmpty keyframe
Playhead
• Static frames represent a unit of time. If your animation runs at 24 frames per
second, then that unit is one twenty-fourth of a second. You control the timing
in your animation by adding or removing frames. For example, if you want an
image to remain on screen for a longer period of time, then you insert frames
into the timeline. Static frames appear to be empty in the timeline—that is, they
don’t display any special symbol, as keyframes do.
• Keyframes are the important frames—the frames you designate to hold distinct
images. Keyframes mark changes in your animation. For example, if you want to
add text to your animation at a certain point in time, you create a keyframe in
the timeline and then add the text to the stage at that point of the timeline. On
the timeline, keyframes are shown as a solid circle. If there’s no visible content
on the stage, then you see a blank keyframe, as explained next.
• Blank keyframes are keyframes with no visible graphics or text in the frame.
As soon as you add text or graphics to a blank keyframe, it becomes a plain
old keyframe. On the timeline, a blank keyframe is shown as a hollow circle.
• Property keyframes come into play when you create a
motion tween
, as de-
scribed on page 103. Motion tweens change the appearance of a graphic or
movie clip symbol. Property keyframes are shaped like small diamonds, and they
mark a change to one of the symbol’s properties. On the timeline, the frames
devoted to a motion tween are tinted light blue.
• Frames not in animation. You can’t move the playhead beyond the last frame
in your animation. Beyond that point, you see rectangles that represent frames
not in your animation. If you want to make your animation run longer, you can
add or insert frames, as explained on page 101.
As you work with your animation, you use the playhead to manage time and build
your animation. Drag the playhead to Frame 15, and you see the contents of the
stage at that moment in time.
www.it-ebooks.info
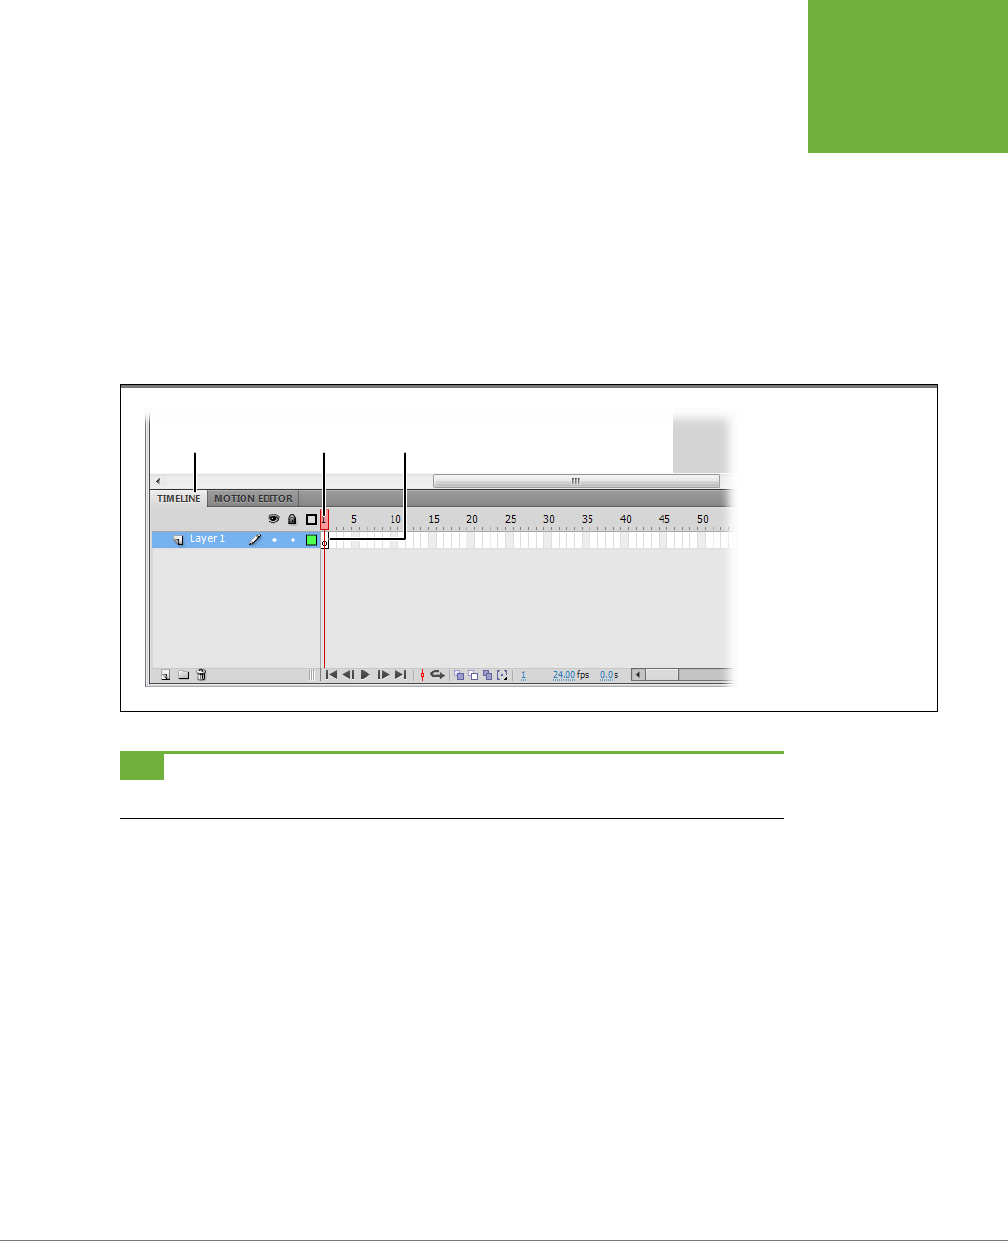
CHAPTER 3: ANIMATE YOUR ART 93
FRAME-
BY-FRAME
ANIMATION
Creating a Frame-by-Frame Animation
Flash lets you animate virtually any visible object you place on the stage. You can
animate cartoon-style drawings, photos, videos, or even text.
Follow these steps to see how frame-by-frame animation works:
1. Open a blank Flash document by choosing File→New and then selecting
ActionScript 3.0 and pressing OK.
You have a spanking new Flash document. As the timeline in Figure 3-2 shows,
Flash starts you out in Layer 1, Frame 1, because initially, a Flash document has
only one frame, a keyframe at Layer 1, Frame 1.
FIGURE 3-2
When you create a new
Flash document, Flash auto-
matically designates Frame
1 as a blank keyframe. You
can tell that Frame 1 con-
tains a blank keyframe by
the hollow circle in Frame
1 and the fact that nothing
appears on the stage when
the playhead is at Frame 1.
PlayheadTimeline tab Frame 1
TIP If you don’t see the timeline, then select Window→Timeline or use the shortcut Ctrl+Alt+T
(Option-⌘-T).
The red rectangle over Frame 1 is the
playhead
. It marks the current frame—the
one displayed on the stage. When you begin a new document, you can’t move
the playhead until you add more frames, as described in step 3.
2. Using Flash’s painting and drawing tools, draw an image on the stage.
Figure 3-3 shows an example drawing of a frog with a tempting fly overhead,
but you can use any drawing or shape for this exercise. As soon as you add a
drawing or any visual content to a keyframe, the hollow circle fills in, becoming
a solid circle. The hollow circle marks an empty keyframe (no content). The
solid circle marks a keyframe with content—in other words, there are graphics
displayed on the stage.
www.it-ebooks.info
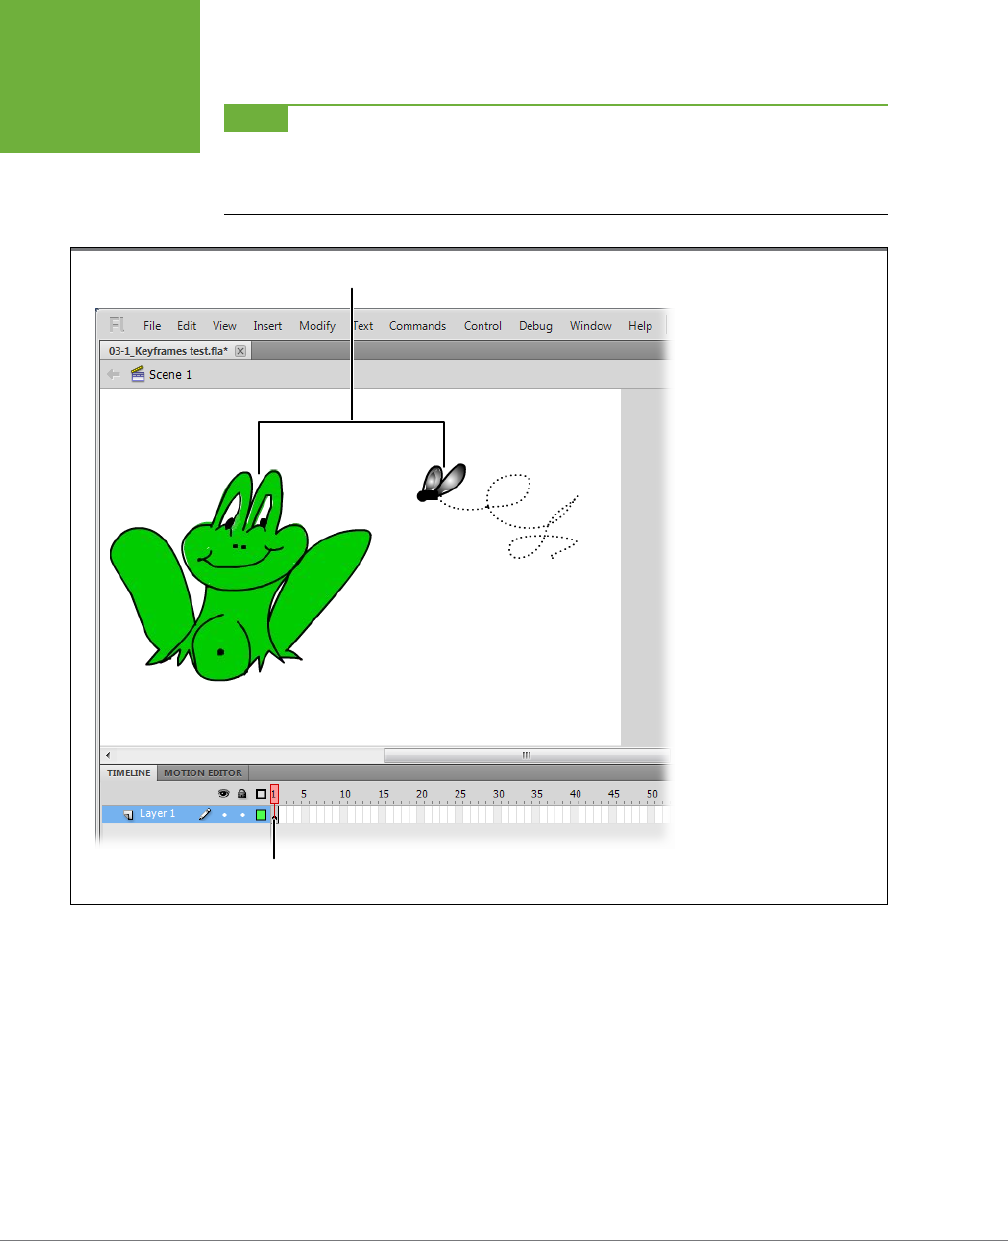
FLASH CS6: THE MISSING MANUAL
94
FRAME-
BY-FRAME
ANIMATION
NOTE If you have an existing image stored on your computer, you can bring it onto the stage. Select
File→Import→“Import to Stage,” and then, in the Import window that appears, type in (or browse to) the name
of the file you want to pull in. When you finish, click Open (Import on a Mac). (Chapter 10 covers importing files
in more detail.)
FIGURE 3-3
Flash associates the selected
keyframe with all the im-
ages you place on the stage—
whether you draw them
directly on the stage using the
drawing and painting tools,
drag them from the Library,
or import them from previ-
ously created files. Here Flash
associates the frog-and-fly
drawing with the keyframe in
Frame 1.
Drawings in keyframe
Keyframe with content
3. In the timeline, click the rectangle under the number 20.
Flash highlights the rectangle, as shown in Figure 3-4. Notice that the playhead
doesn’t move, because at this point your animation contains only one frame.
4. Turn the selected frame into a blank keyframe by pressing F7.
Flash moves the playhead to the selected frame (Frame 20 in Figure 3-4), inserts
a keyframe icon, and clears the stage.
www.it-ebooks.info
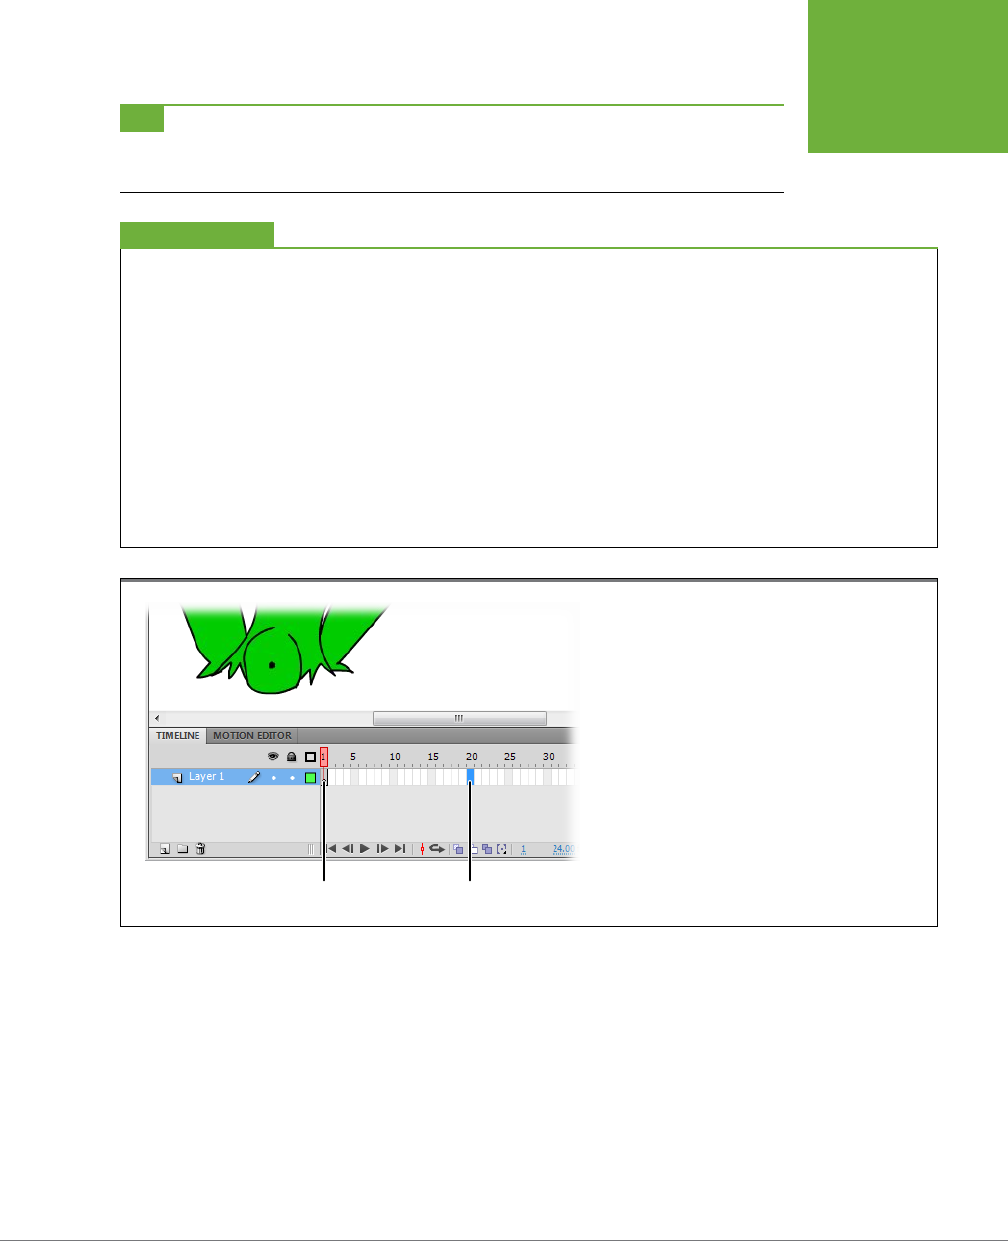
CHAPTER 3: ANIMATE YOUR ART 95
FRAME-
BY-FRAME
ANIMATION
TIP In Flash, you often have several ways to do the same thing, and that’s true with inserting frames and
keyframes. You can use the menu: Select Insert→Timeline and then choose Frame, Keyframe, or Blank Keyframe.
Or you can right-click (Control-click) a frame in the timeline and choose one of the options from the pop-up menu.
To Tween or Not to Tween
The great thing about creating an animation frame by frame
is that it gives you the most control over the finished product.
If you’re looking for a super-realistic effect, for example, you
may not be satisfied with the frames Flash generates when you
tell it to tween (page 103). Instead, you may prefer to lovingly
handcraft every single frame, making slight adjustments to
lots of different objects as you go.
Say, for instance, you’re creating an animation showing an
outdoor barbecue. Over the course of your animation, the sun
will move across the sky, which is going to change the way
your characters’ shadows appear. Bugs are going to fly across
the scene. When one character opens his mouth to speak, the
other characters won’t remain static: Their hair might ripple in
the breeze, they’ll start conversations of their own, and they’ll
drop pieces of steak (which the host’s dog will streak over to
wolf down). You can’t leave realistic, director-level details like
this to Flash; you’ve got to create them yourself.
UP TO SPEED
FIGURE 3-4
When you click a frame in the timeline, Flash highlights
it, as shown in Frame 20. At this point, the animation
consists of a single frame, and it’s not possible to move
the playhead beyond Frame 1.
Keyframe with content Selected frame
5. Draw a second image on the stage.
The second keyframe in Figure 3-5 shows the frog drawn again, with a thought
balloon instead of a fly. But if your two images are fairly similar, then you can
avoid having to completely redraw the image for your second keyframe, as
you’ll see in the next step.
www.it-ebooks.info
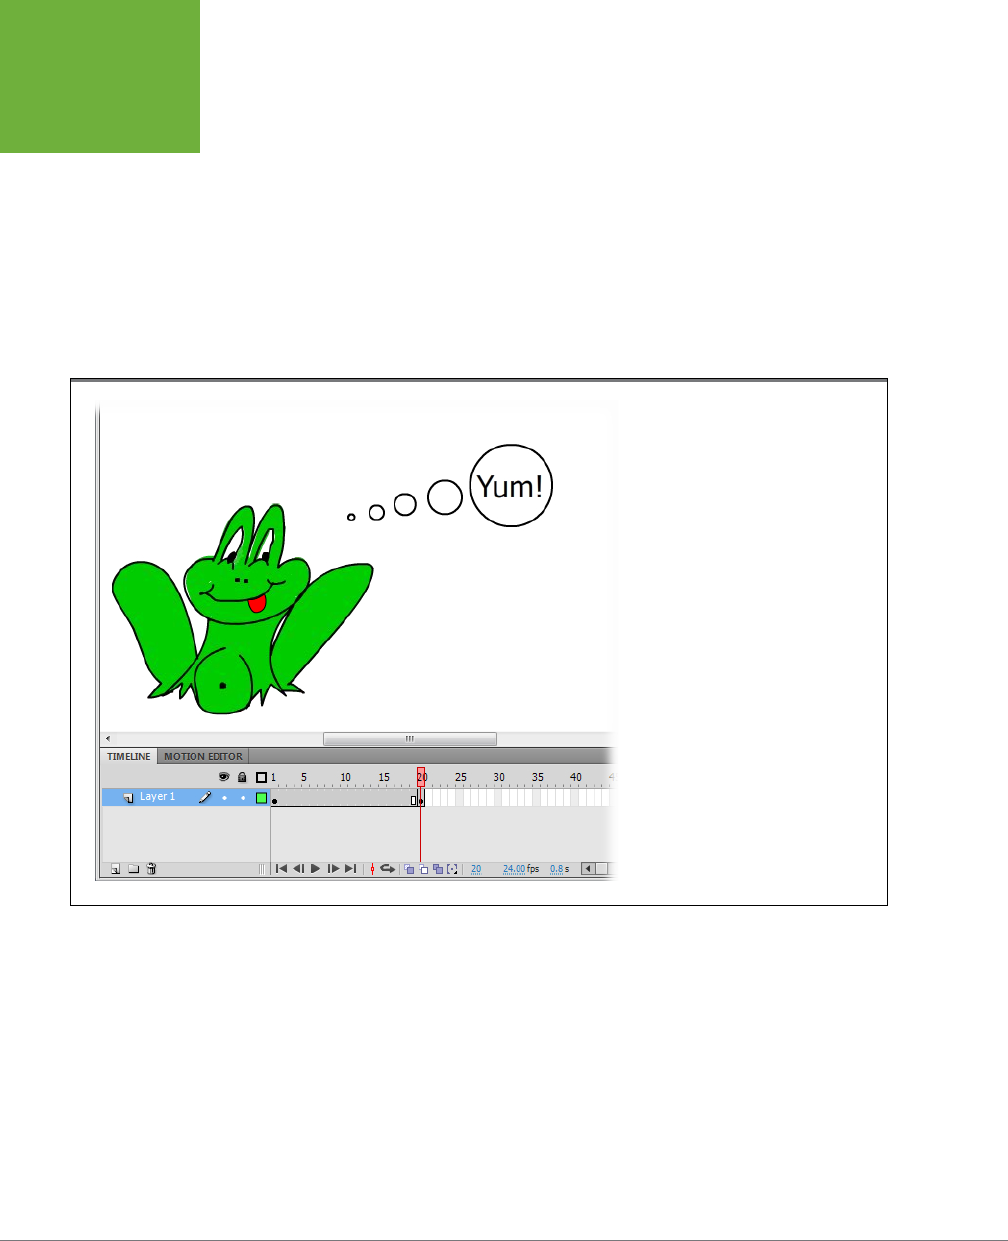
FLASH CS6: THE MISSING MANUAL
96
FRAME-
BY-FRAME
ANIMATION
6. Click further out in the timeline (Frame 40, say), and press F6.
Just as when you inserted the blank keyframe, Flash moves the playhead and
inserts a keyframe icon; but instead of clearing the stage, Flash carries over
the content from the previous keyframe, all ready for you to tweak and edit.
7. Repeat the previous step to create as many keyframes as you want.
To get the hang of frame-by-frame animation, adding two or three keyframes
is plenty. But when you’re building an actual animation, you’ll likely need to add
dozens or even hundreds of keyframes (or even more, depending on the length
and complexity you’re shooting for).
FIGURE 3-5
Here the playhead is over the second
keyframe, which tells Flash to place
the content on the stage in the second
keyframe (Frame 20). When it detects a
new keyframe, Flash displays only the
new contents, so Frames 2–19 carry for-
ward the content from Frame 1 (the first
keyframe). You can verify this behavior
by dragging the playhead from Frame 20
back to Frame 1.
Adding frames, keyframes, and blank keyframes is a recurring activity as you work
in Flash. As explained in the tip on page 95, you can use menus to do the job, but
it’s faster and easier to remember the three function keys that do the job:
• F5: Insert a frame.
• F6: Insert a keyframe.
• F7: Insert a blank keyframe.
www.it-ebooks.info
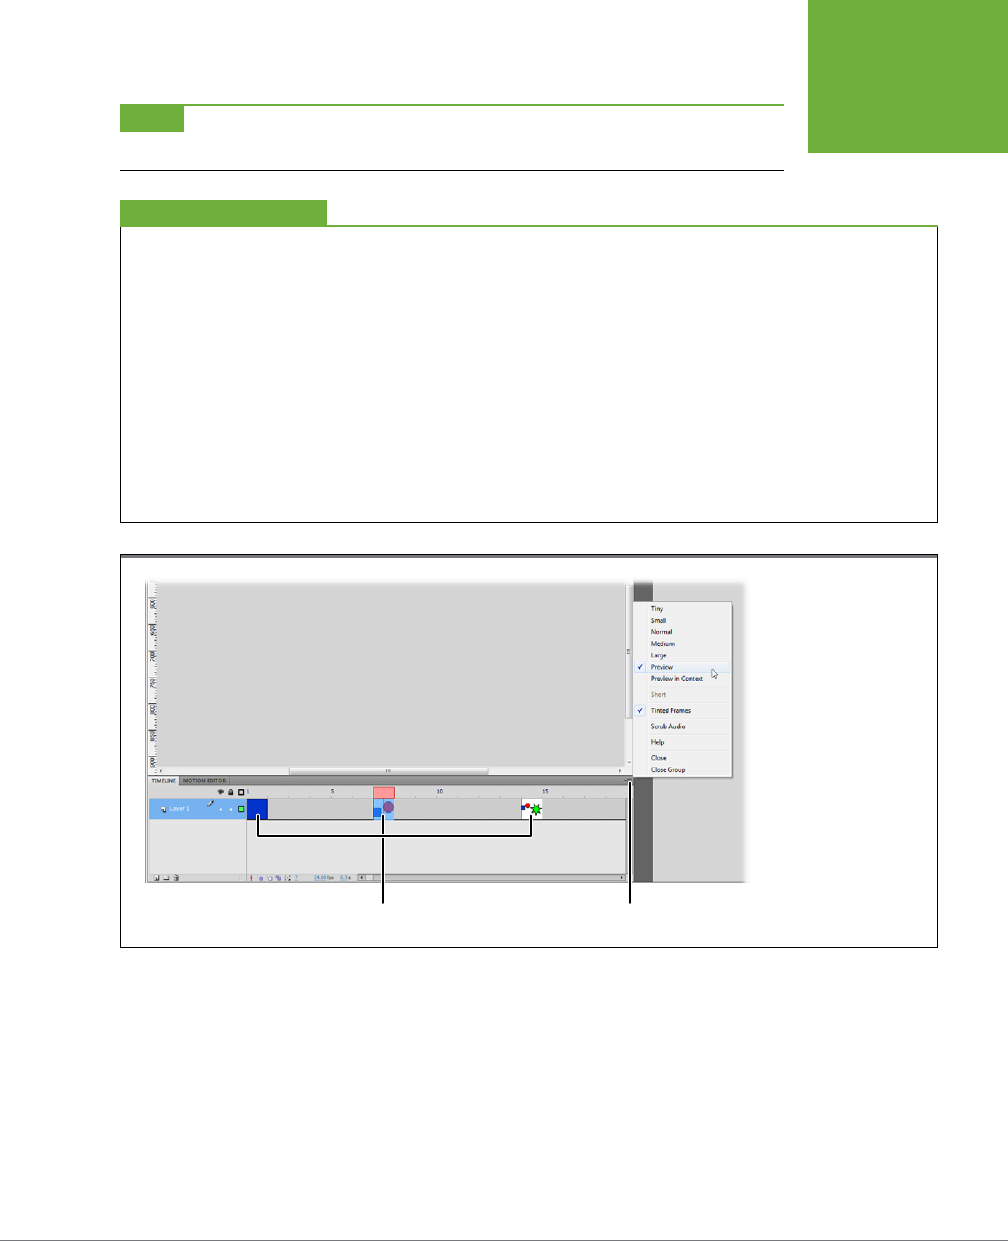
CHAPTER 3: ANIMATE YOUR ART 97
FRAME-
BY-FRAME
ANIMATION
NOTE You can review the sample frog-and-fly frame-by-frame animation. Simply download
03-1_ Frame-by-Frame.fla
.
Make the Timeline Easier to Read
The timeline serves as a kind of indispensable thumbnail sketch
of your animation, showing you at a glance which frames
contain unique content (the keyframes) and which don’t (the
static frames), how many layers your animation contains
(page135), which sections of your animation contain tweens
(page 103), and so on.
If you find it hard to read the timeline because everything’s
too small, or if you have trouble remembering what graph-
ics are controlled by certain keyframes, there’s a solution.
In the timeline’s upper-right corner, click the Options menu
(Figure
3-6) and experiment with some of the different op-
tions. You can make the timeline’s frames larger or smaller, for
example. Using the Preview options, you can set keyframes to
display miniature images of the stage contents. The “Preview
in Context” option shows the entire frame, while the Preview
option zooms in on the visual content, sometimes making it
a little larger.
GEM IN THE ROUGH
FIGURE 3-6
Click the Options menu
button to see the menu
shown here. Use the
Tiny through Large
options to change the
timeline’s frame size.
Use the Preview options
to display thumbnail
images in the keyframes,
as shown here.
Preview in Timeline Options menu button
Test Your Frame-by-Frame Animation
Sooner or later you’ll want to test your animation. Sometimes you’ll want to take a
quick peek at a few frames to see if the mechanics are in order. Other times you’ll
want to review the entire animation exactly the way your audience will see it. Flash
has options for both situations:
• Press Enter (Return on a Mac) for a quick view of your animation action. The
animation plays out on the same stage where you built it. The playback begins
at the playhead’s position, so you don’t have to watch the entire animation
www.it-ebooks.info
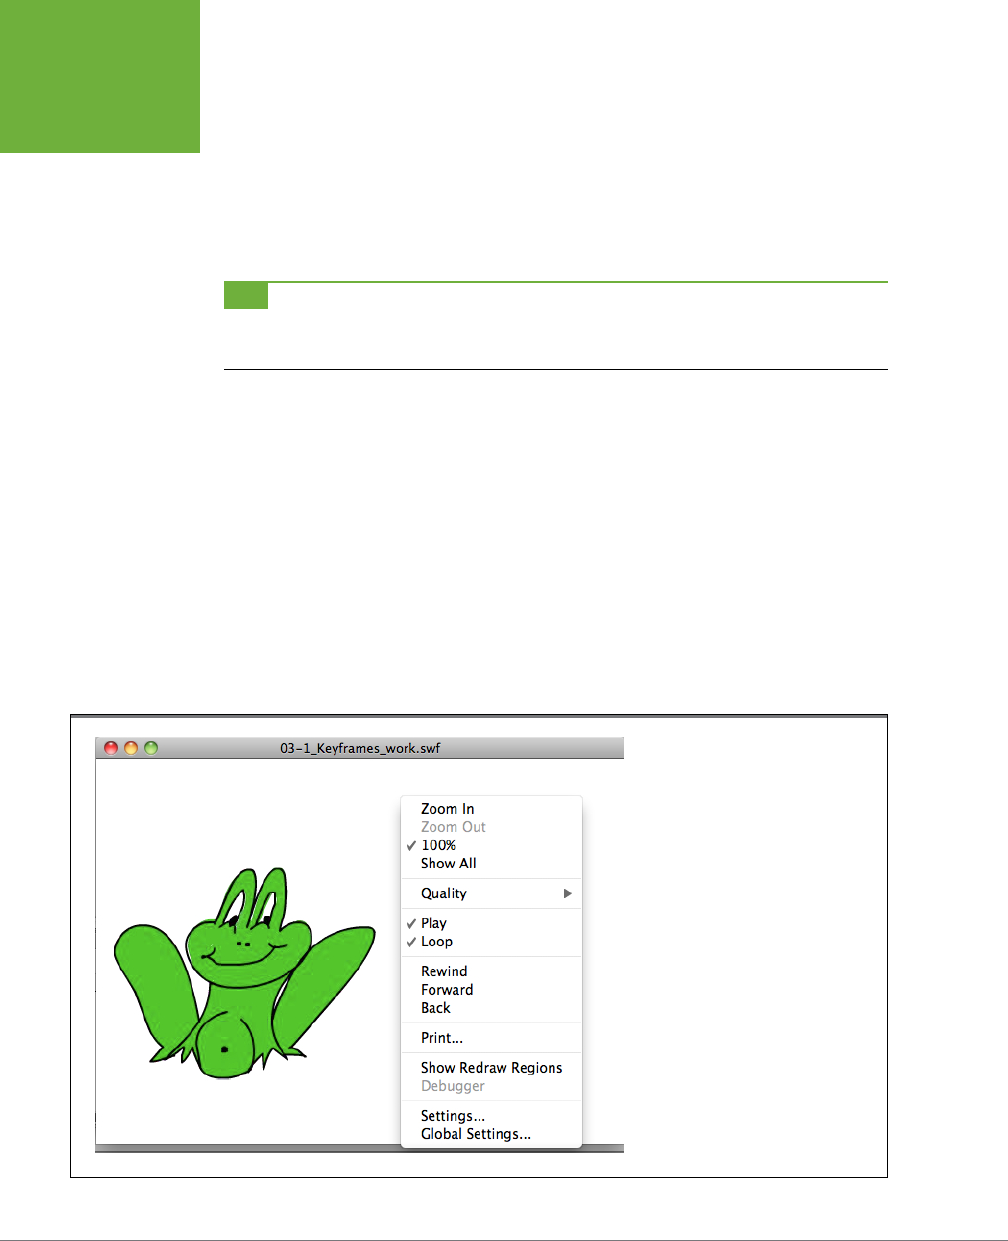
FLASH CS6: THE MISSING MANUAL
98
FRAME-
BY-FRAME
ANIMATION
when you want to review only a few frames. If you prefer, you can use the menu
option Control→Play.
This view doesn’t always give you the same view your audience will see. For
example, selected objects still appear selected, ruler guides remain visible, and
objects on the backstage are still visible. If you want a more accurate view of
your finished animation, then use the next viewing option.
TIP Flash CS6 adds another quick way to view your animation on the stage. Click the Play button below the
timeline to begin playing your animation starting from the playhead’s position. In addition to the other DVD-like
controls, you can use the Loop button to repeat a selected group of frames.
• Press Ctrl+Enter (⌘-Return) to view your animation from beginning to end
for the most accurate preview. Or you can use the menu option Control→Test
Movie→“in Flash Professional.” Your animation opens in a window that uses
Flash Player
to display the images. This “display engine” is called a
runtime
,
and it’s similar to the engine that your audience’s computers use to show your
animation. Your animation starts playing at the first frame and plays all the way
through to the end. When it reaches the last frame, it starts over again. This is
called
looping
, and you can turn it o in the Flash Player window by choosing
Control→Loop (Figure 3-7) or right-clicking (Control-clicking) the animation.
This viewing method takes a little longer, but it’s the most accurate way to view
your animation. You’re actually seeing what your audience will eventually see,
from beginning to end.
FIGURE 3-7
The first time you run your animation
in Flash Player, Flash assumes that you
want to run it over and over (and over
and over). Fortunately, you can rid Flash
of this annoying assumption. Right-click
(Control-click) your animation, and then
click Loop to remove the checkmark.
Other useful options include stopping
your animation, rewinding it, and even
stepping through it frame by frame.
Chapter 19 covers animation testing in
depth.
www.it-ebooks.info
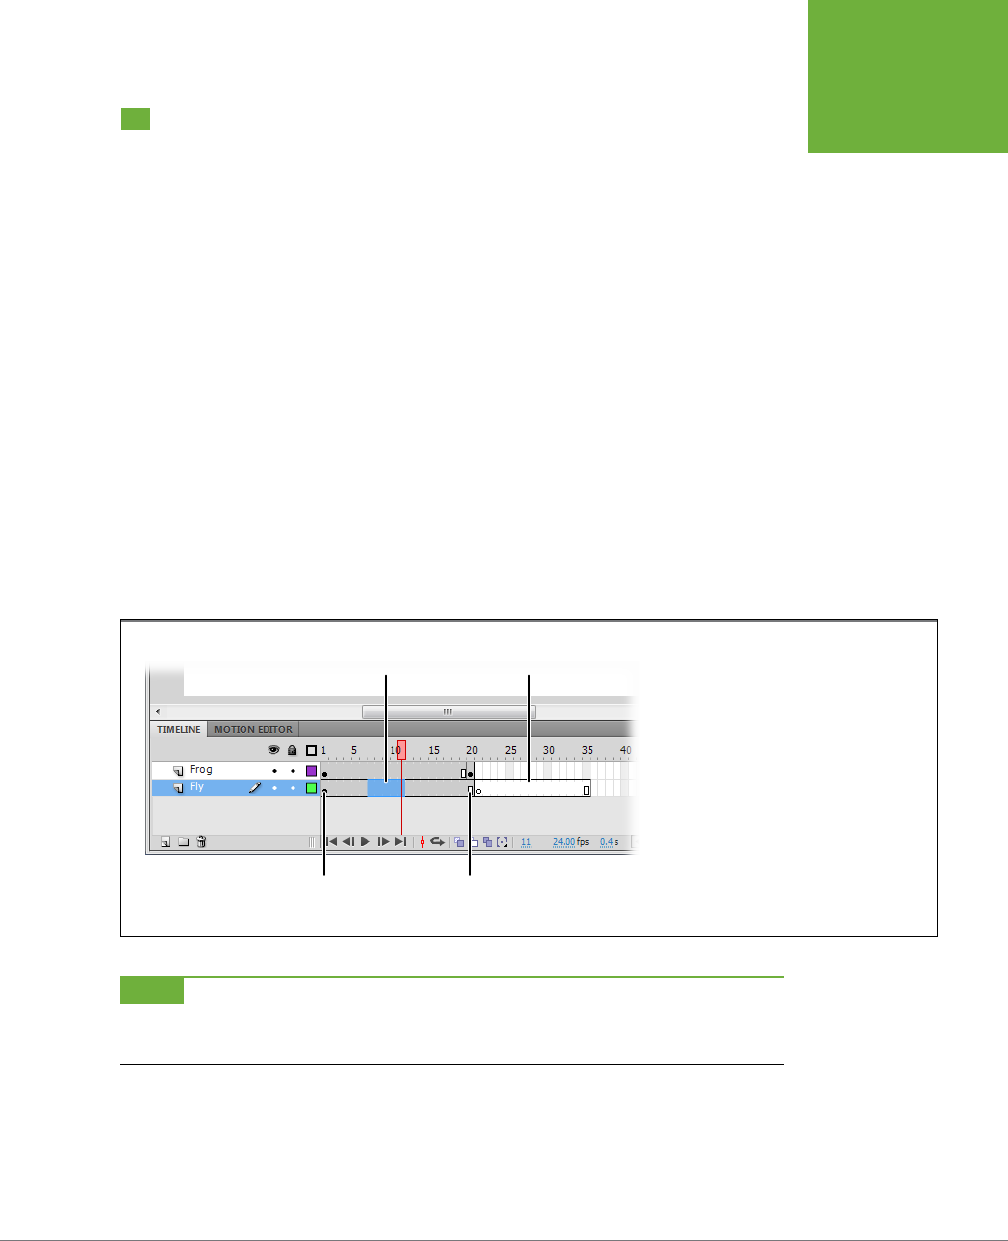
CHAPTER 3: ANIMATE YOUR ART 99
EDITING
YOUR FRAME-
BY-FRAME
ANIMATION
Editing Your Frame-by-Frame Animation
It’s rare that your first crack at any given animation will be your last. Typically, you’ll
start with a few keyframes, test the result, add a few frames, delete a few frames,
and so on until you get precisely the look you’re after.
This section shows you how to perform the basic frame-level edits you need to take
your animation from rough sketch to finished production: inserting, copying, pasting,
moving, and deleting frames.
Selecting Frames and Keyframes
Selecting a single frame or keyframe is as easy as zipping down to the timeline and
clicking the frame or keyframe you want to select.
But if you want to select multiple frames, Flash gives you four additional selection
alternatives:
• To select multiple contiguous frames. Drag your mouse over a group of frames
you want to select. The selected frames show a highlight, as shown in Figure3-8.
Be careful though: If the first frame you click is already selected, you may move
that frame instead of selecting multiples. Alternatively, click the first frame you
want to select, and then Shift-click the last frame.
FIGURE 3-8
To select a single frame (including a
keyframe), simply click the frame. To select
multiple frames, drag or choose one of Flash’s
other two multiple-frame-selection options.
A frame span comprises a keyframe, an end
frame, and all the frames in between. If you’ve
added multiple layers to your animation, then
make sure you select frames from the correct
layer.
Keyframe
with content End frame Frame span
Selected
frames Keyframe with
no content
NOTE Sometimes dragging to select frames can be hazardous to your animation’s health. You can move
frames in the timeline by clicking and dragging. If you’re not careful, you may end up moving frames when you
simply meant to select them.
• To select multiple noncontiguous frames. Ctrl-click (⌘-click) each frame you
want to select.
www.it-ebooks.info

FLASH CS6: THE MISSING MANUAL
100
EDITING
YOUR FRAME-
BY-FRAME
ANIMATION
• To select an entire frame span. Double-click any frame in the
frame span
.
A frame span starts with a keyframe and ends with the end frame marker, as
shown in Figure 3-8.
• To select all the frames on a layer. Click the name of the layer. In the example
in Figure 3-8, clicking Fly automatically selects all the frames in the Fly layer.
No matter which method you use, Flash highlights the frames to let you know you’ve
successfully selected them.
Inserting and Deleting Keyframes and Frames
The smoothness of your finished animation depends on timing, and timing is con-
trolled by the number of keyframes and regular frames you’ve included. This section
shows you how to add and delete both.
INSERTING KEYFRAMES
Typically, you’ll start with a handful of keyframes and need to insert additional
keyframes to smooth out the animation and make it appear more realistic (less
herky-jerky).
For example, say you’re working on an animation showing a dog wagging its tail.
You’ve got a keyframe showing the tail to the left of the dog, one showing the tail
straight behind the dog, and a final keyframe showing the tail to the right of the
dog. You test the animation and it looks okay, but a little primitive.
Inserting additional keyframes showing the dog’s tail in additional positions (just
a bit to the left of the dog’s rump, a little bit further to the left, a little further, and
then all the way to the left) will make the finished sequence look much more detailed
and realistic.
NOTE Technically speaking, you don’t actually
insert
a keyframe even though the Flash menus call it that.
In most cases, you turn a regular frame into a keyframe. If you actually inserted a new keyframe, you’d be making
your timeline longer and changing the timing of your animation.
To insert a keyframe into an existing animation:
1. In the timeline, select the regular frame you want to turn into a keyframe.
If you want to add a keyframe midway between Frame 1 and Frame 20 on Layer
1, for example, then click in Layer 1 to select Frame 10, as shown in Figure 3-9.
Flash moves the playhead to the frame you selected.
2. Press F6 (or choose Insert→
Timeline→Keyframe) to tell Flash to carry over
the content from the previous keyframe so you can edit it. As an alterna-
tive, press F7 or (or choose Insert→Timeline→Blank Keyframe) to tell Flash to
clear the stage.
On the stage, Flash either displays the image associated with the previous
keyframe or, if you inserted a blank keyframe, displays nothing at all.
www.it-ebooks.info
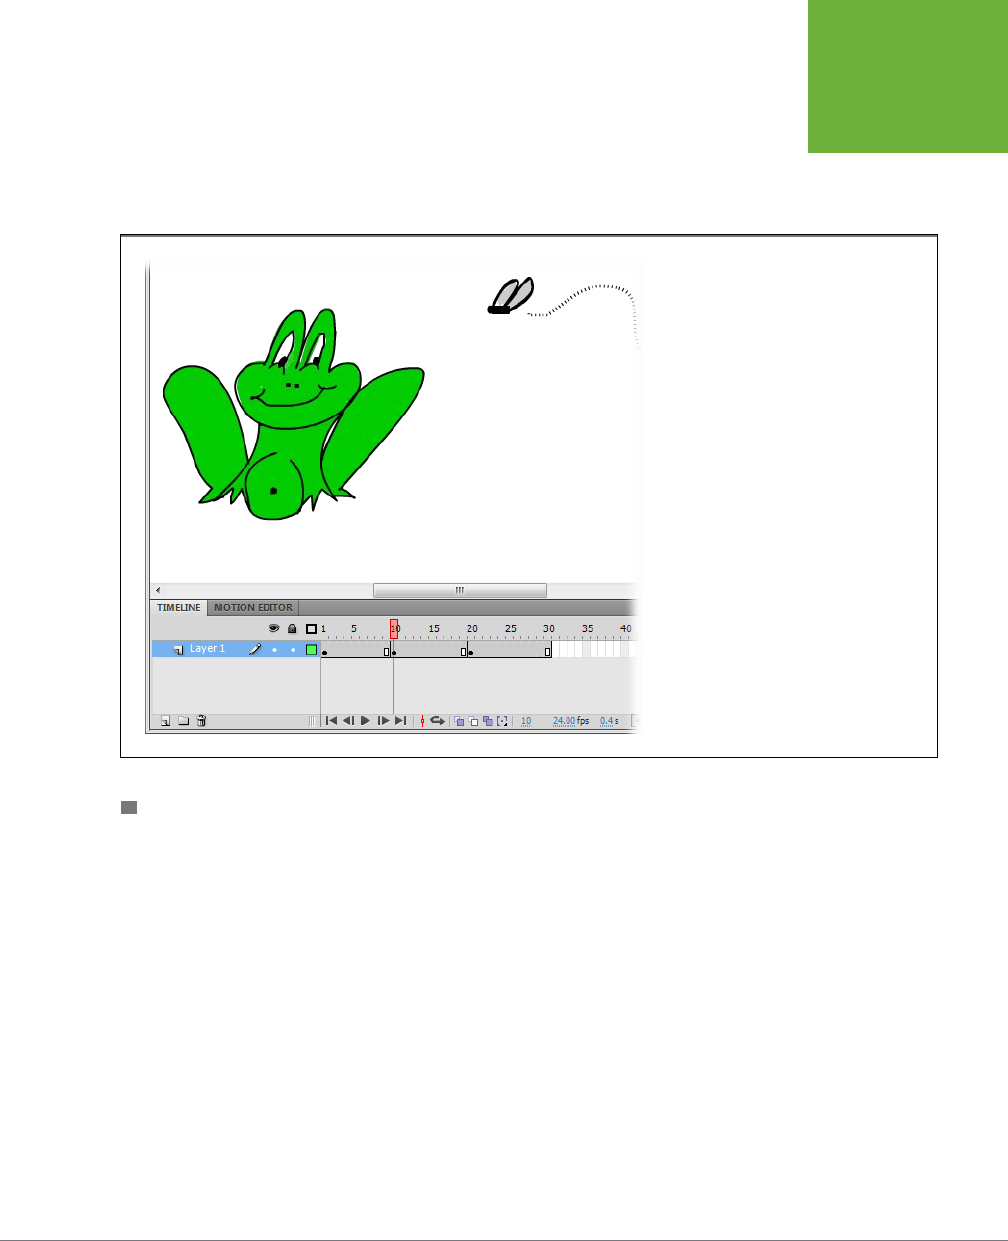
CHAPTER 3: ANIMATE YOUR ART 101
EDITING
YOUR FRAME-
BY-FRAME
ANIMATION
3. Using the drawing and painting tools, add content for your new keyframe
to the stage.
If you’ve already created drawings in another program, you can import them,
as described on page 351.
FIGURE 3-9
Here Frame 10 was converted from a
static frame to a keyframe. The playhead was
moved to Frame 10, and then the F6 key was
pressed. When you convert a static frame to a
keyframe, it doesn’t affect the length of your
animation.
INSERTING STATIC FRAMES
Regular frames in Flash act as placeholders; they mark time while the contents of
the previous keyframe are displayed. Without regular frames to stretch it out, your
audience would have only a twenty-fourth of a second to see the image! Insert
additional frames when you want to slow down the action a little. In fact, inserting
frames is sort of like having a director yell, “Hold camera!” with the contents of the
last keyframe remaining onscreen.
To insert a frame into an existing animation:
1. In the timeline, click to select the frame after which you want to add a frame.
Flash moves the playhead to the frame you selected. Make sure the stage shows
the graphics you want to hold onscreen.
2. Choose Insert→
Timeline→Frame (or press F5).
Flash inserts a new frame
after
the frame you selected, bumping up the total
number of frames in your animation by one.
www.it-ebooks.info

FLASH CS6: THE MISSING MANUAL
102
EDITING
YOUR FRAME-
BY-FRAME
ANIMATION
If your animation runs at the standard 24 frames per second, then inserting a single
frame doesn’t change the timing all that much. Often you want to insert several
static frames. If you want to insert five static frames, select any five regular frames
and then press F5. (When you insert multiple frames, they’re always inserted at the
beginning point of your selection.)
CLEARING A KEYFRAME
As explained on page 93, keyframes mark the points in your animation where you’ve
added unique content to the stage. If you want to remove that unique content, you
clear
the keyframe. Once cleared, the frame and the following frame span show the
content from the previous keyframe. Clearing a keyframe doesn’t change the length
of the animation—that is, you aren’t removing any frames.
To clear a keyframe and turn it back into a static frame:
1. Right-click (Control-click) the keyframe you want to clear.
The playhead moves to that keyframe, and the frame is highlighted. A pop-up
menu appears with several frame-related options.
2. Choose Clear Keyframe.
Flash demotes the frame from a keyframe to a plain old static frame. Any special
content the frame had is relegated to the bit bucket.
TIP Clearing a keyframe means you lose anything you’ve drawn or imported to the stage for that keyframe.
If your immediate reaction after clearing a keyframe is “Oops!” then press Ctrl+Z (⌘-Z) to undo the action. Then
you can save that worthy drawing or graphic to a symbol (page 248) or a separate file (page 699).
DELETING FRAMES
Deleting frames—like inserting them—lets you control the pace of your animation.
But instead of making your animation run longer, the way inserting frames does,
deleting frames shrinks the timeline and makes your animation run shorter.
For example, say you’re working on the animation showing a frog catching a fly.
You’ve created three keyframes: one showing the frog noticing the fly, one showing
the frog actually catching the fly, and one showing the frog enjoying the fly. If you
space out these three keyframes evenly (say, at Frame 1, Frame 15, and Frame 30),
then all three images spend the same amount of time onscreen. That’s perfectly
serviceable—but you can create a much more realistic eect by shortening the num-
ber of frames between the second and third keyframes (in other words, by deleting
a bunch of frames between Frame 15 and Frame 30 to speed up the portion of the
animation where the frog’s tongue snags the fly).
To delete frames:
1. In the timeline, select the frame (or frames) you want to delete.
Flash highlights the selected frame(s) and moves the playhead to the last
selected frame.
www.it-ebooks.info

CHAPTER 3: ANIMATE YOUR ART 103
MAKING IT
MOVE WITH
MOTION
TWEENS
2. Right-click (Control-click) the selection, and choose Remove Frames from
the pop-up menu.
Flash deletes the selected frames and shortens the timeline by the number of
deleted frames.
Making It Move with Motion Tweens
There are a lot of fun things you can do in Flash, but one that’s sure to put a smile
on your face is the
motion tween
. Using the motion tween, it’s surprisingly easy to
make the objects in your animation move, change shape, change color, or fade to
nothingness. The first step is to convert the graphics you want to tween to Flash
symbols; then you can change the properties of the symbols at any given point in
time—or more specifically, at any point along the timeline. For example, if you have
a redwood tree and you want to make it grow, you’d change the height (H) property.
Next, in Frame 12 you might set the H property to, say, 100 (pixels), and then set it
to 150 in Frame 24, 200 in Frame 36, and so on. The tree appears to grow before
your audience’s eyes. Want to move a car across the stage? Just change the X and
Y properties, which set the position on the stage, to create the illusion of movement.
(For a rundown on the X/Y coordinate system, see the box below.)
Chapter 1 showed you how to apply the bounce-smoosh motion preset to a wheel
symbol. Motion presets are motion tweens that are predesigned to create certain
eects. In the case of bounce-smoosh, it made the wheel drop from the top of the
stage to the bottom. When it hit ground, it squashed like a cartoon character and
then bounced a couple of times until it came to rest. In the next few exercises, you
will create your own version of the bounce-smoosh tween.
Use X/Y Coordinates to Set Stage Position
In the computer world, it’s a common practice to use the letters
X and Y to locate a point in two-dimensional space. X marks
the horizontal position, while Y marks the vertical position.
It’s exactly like the graphs you learned about in algebra class.
Every point on the Flash stage has a specific X/Y coordinate, as
shown in Figure 3-10, and the unit of measurement is pixels.
The numbering starts in the upper-left corner, where X = 0
and Y = 0. That’s usually expressed as
0,0
with the X coor-
dinate coming first. So, if your stage is 550 x 400 pixels, the
upper-right corner is 550,0. Dead center is 275,200. Anything
displayed on the stage, whether it’s an image, symbol, or text
block, has a
registration point
, which looks like a tiny cross (+)
and positions the object on the stage. When you set the X and
Y properties for a line, shape, symbol, or text block, you’re
positioning that registration point. Page 253 has more details
on registration points.
UP TO SPEED
1. Open
03-2_Motion_Tween.fla
.
The new document opens, and you see an empty stage.
www.it-ebooks.info
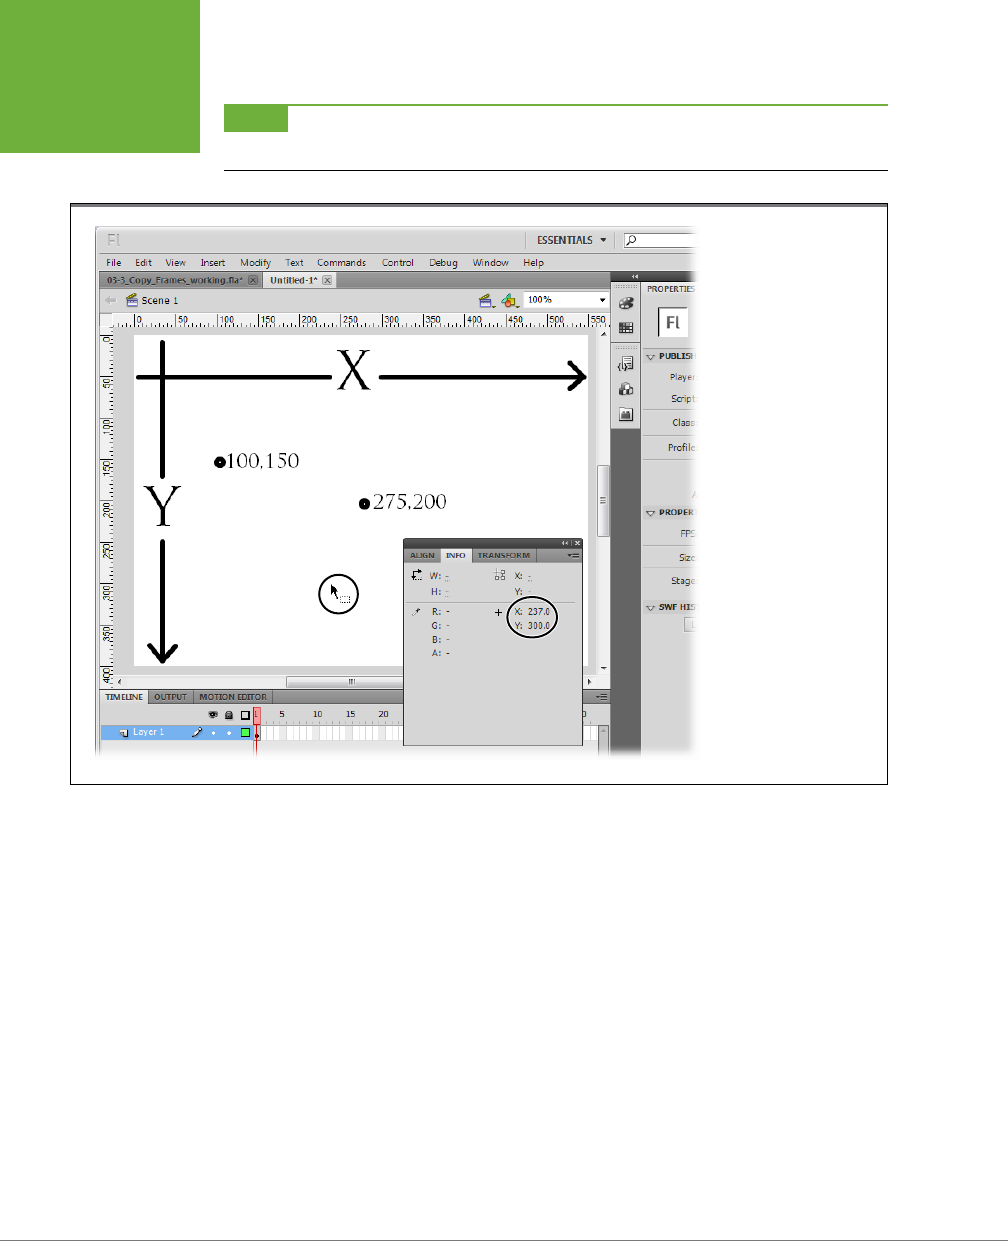
FLASH CS6: THE MISSING MANUAL
104
MAKING IT
MOVE WITH
MOTION
TWEENS
NOTE As always, you can find the sample file on the Missing CD page:
www.missingmanuals.com/cds/
flashcs6mm
.
FIGURE 3-10
Choose View→Rulers to
display the handy hori-
zontal and vertical rulers
shown here. The rulers
mark off the X/Y coordi-
nates of the Flash stage.
Want to see the X/Y coor-
dinates for your cursor?
Go to Window→Info. The
cursor position (circled)
shows in the lower-right
corner of the Info panel.
2. In the Panels dock, click the Library tab.
As shown in Figure 3-11, the Library is your warehouse for graphics you want
to reuse. There are three items in this Library. For now, focus your attention on
the Wheel symbol.
3. In the Library, click the word “Wheel.”
The wheel appears in the Library’s preview window. Notice that images in the
Library have dierent icons next to their names. The gear icon indicates that
the wheel is a movie clip symbol. The icon for StairStep shows three dierent
shapes, indicating that it’s a graphic icon. You’ll learn about the subtle dier-
ences between symbols on page 248.
4. Drag the wheel to the top of the stage.
When you drag a symbol from the Library to the stage, you’re creating an
instance
of the symbol. The original remains safe in the Library, where it can be
www.it-ebooks.info
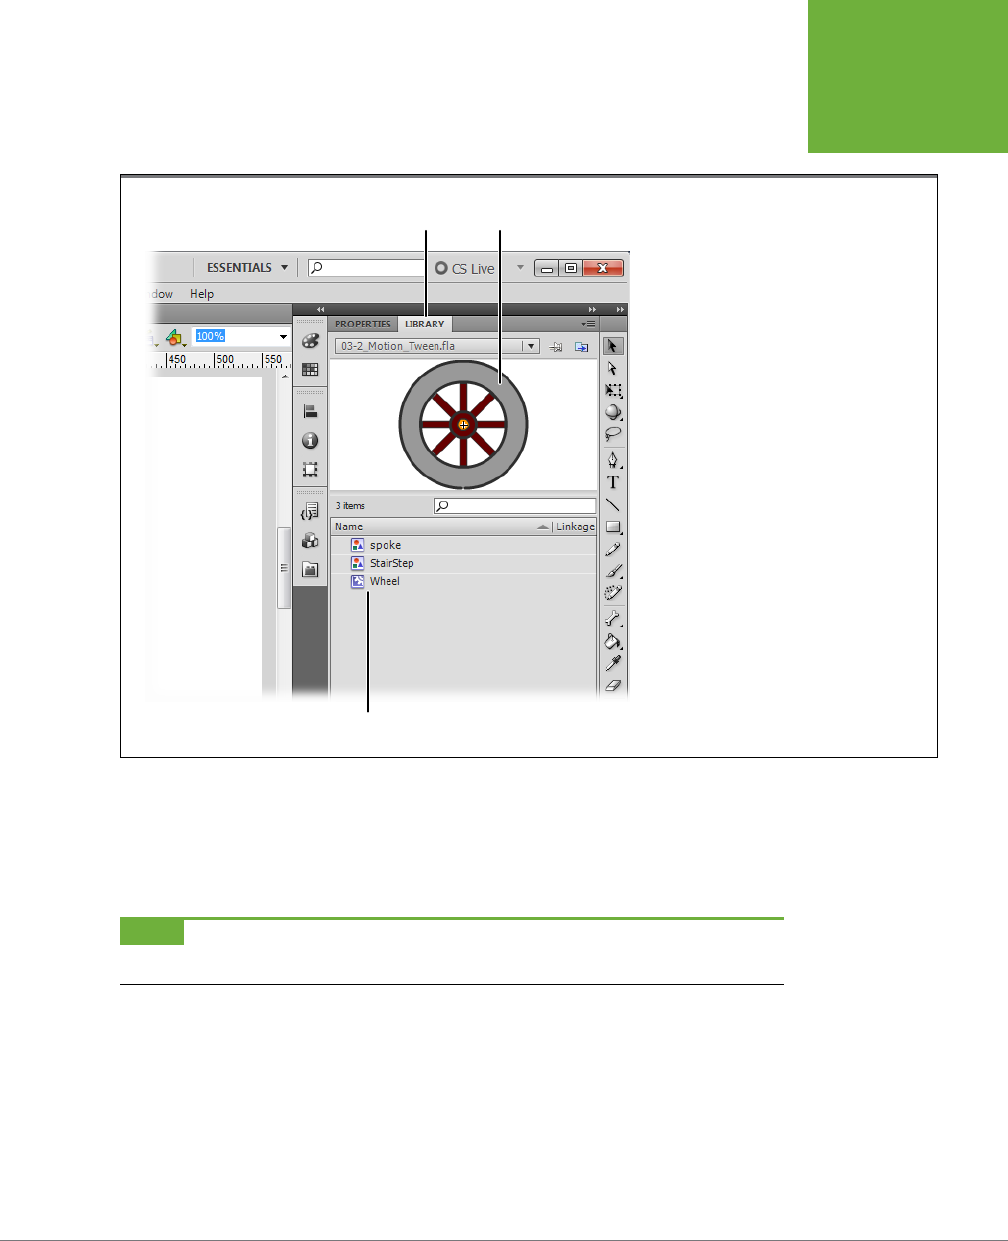
CHAPTER 3: ANIMATE YOUR ART 105
MAKING IT
MOVE WITH
MOTION
TWEENS
used again. You can change the size, color, and other properties of your wheel
instance without aecting the original.
FIGURE 3-11
Click the Library tab to see the symbols stored
in your Flash document. Click a symbol’s name
to see it previewed at the top of the panel. In
Flash, symbols can be movie clips, graphics, or
buttons. They have a number of special abilities,
one of which is the ability to work with the
motion tween.
Library
tab Preview
Wheel Movie Clip symbol
5. With the wheel on the stage selected, choose Insert→Motion Tween.
In the timeline, several frames are added to Layer 1, and the background color
for the span changes to blue, the color for a motion tween. The playhead au-
tomatically moves to the last frame in the tween.
NOTE Flash can’t tween an image unless it’s a symbol (page 248). If you try to apply a tween to an object
that’s not a symbol, Flash asks if you want it converted to a symbol.
6. Drag the wheel to the bottom of the stage.
After you drag the wheel to a new position, a dotted line marks the path from
the first position to the last (Figure 3-12). This is the motion path, and each dot
represents a frame in the animation. A small diamond appears in the last frame
of the timeline. The diamond marks the point for a
property keyframe
, indicating
that one of the wheel’s properties changed.
www.it-ebooks.info
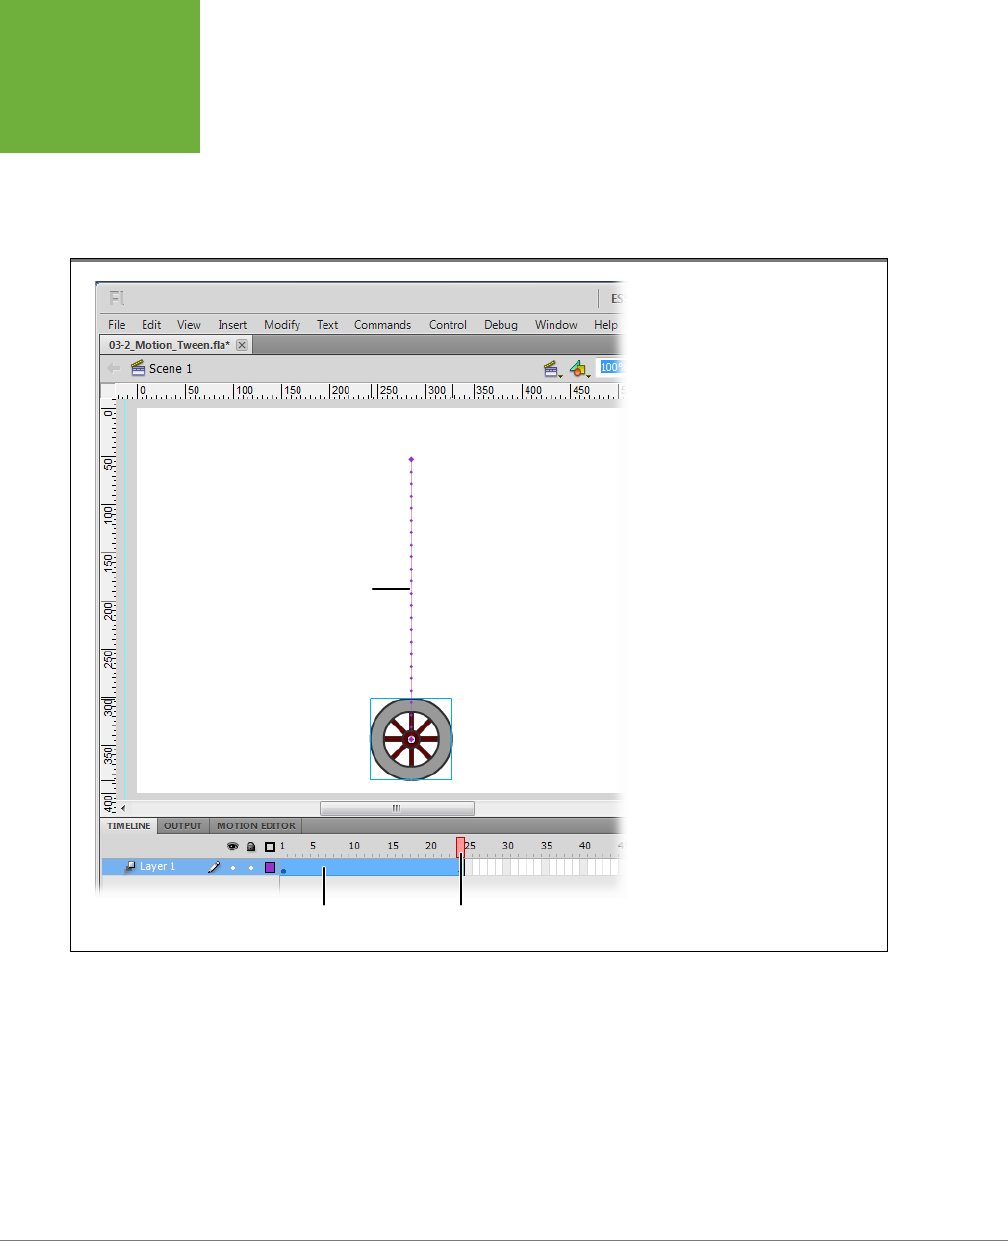
FLASH CS6: THE MISSING MANUAL
106
MAKING IT
MOVE WITH
MOTION
TWEENS
7. Press Enter (Return).
You see the result of your first motion tween as the wheel moves along the
motion path. You can drag the playhead along the timeline to see the position
of the wheel at any frame—or in other words, at any point in time. Animators
and filmmakers call dragging the playhead manually
scrubbing
.
FIGURE 3-12
After you choose Insert→Motion
Tween, Flash adds a blue highlight to
the timeline that denotes a motion
tween. When you move the wheel, a
new property keyframe is created at
the playhead, and a motion path is
displayed to show the wheel’s position
at various points in time.
Motion Tween
Motion path
Property Keyframe
For another way to grasp how the motion tween works, examine your symbol’s prop-
erties. Click the Properties tab and then click the wheel on the stage. In the Properties
panel, the Y property (under Position and Size) marks the vertical position of the
wheel on the stage. Drag the playhead to a new position, and then select the wheel
again. The value of the Y property changes to show the wheel’s current position.
The motion tween uses property keyframes, which are similar to standard keyframes
except that they track all the individual properties of an object during a tween. For
example, property keyframes keep track of the wheel symbol’s X and Y coordinates.
You animate the symbol by making adjustments to these properties in dierent
www.it-ebooks.info

CHAPTER 3: ANIMATE YOUR ART 107
MAKING IT
MOVE WITH
MOTION
TWEENS
frames. It’s a two-step process: Move the playhead to mark the point in time, and then
change the property. When you change the property, Flash automatically creates
a property keyframe in the timeline. In the previous example, Flash automatically
moved the playhead when you created the motion tween. You manually changed
the Y (position) property when you moved the wheel. In the next example, you’ll
change the shape of the wheel by adjusting the W (width) and H (height) properties
in the Properties panel.
Tweening a Symbol’s Dimension Properties
The steps on page 103 showed how to animate the beginning of the bounce-smoosh—
the drop. The next step is to add some smoosh. To do so, you need to make the
wheel wider and shorter at the moment of impact. To begin, you want to extend the
tween and the timeline beyond the bottommost point of the bounce.
NOTE This exercise continues the exercise begun on page 103.
1. Click the frame that’s four frames beyond the end frame of the tween.
The tween ends where the blue highlight ends.
2. Choose Insert→
Timeline→Frame or press F5.
Frames are added to the end of the animation, and the blue highlight of a mo-
tion tween extends to the new end point.
3. Drag the playhead to the last frame in the tween.
On the stage, the wheel looks like it did in the previous frame. That won’t last
long as you begin to fiddle with the properties in the next step.
4. Click the Properties tab, and then click the wheel on the stage.
The Properties panel displays the wheel’s properties, as shown in Figure 3-13.
Note that the H and W properties for the perfectly round wheel are 85 pixels—
you’ll use this number later.
TIP Don’t forget to click the wheel if you want to examine the wheel properties. Otherwise, you may be
looking at the properties for the document, the frame, or even the tween itself.
5. In the Properties panel, under Position and Size, change the W property to
150
. Then change the H property to
60
.
You can change properties by clicking and typing in a new number, or you can
click and drag to scrub in a new value.
6. Press Enter (Return) to test the animation.
The wheel gradually changes shape from a perfect circle to an oval (Figure 3-14);
however, it begins changing shape at the very beginning of the animation. For
www.it-ebooks.info
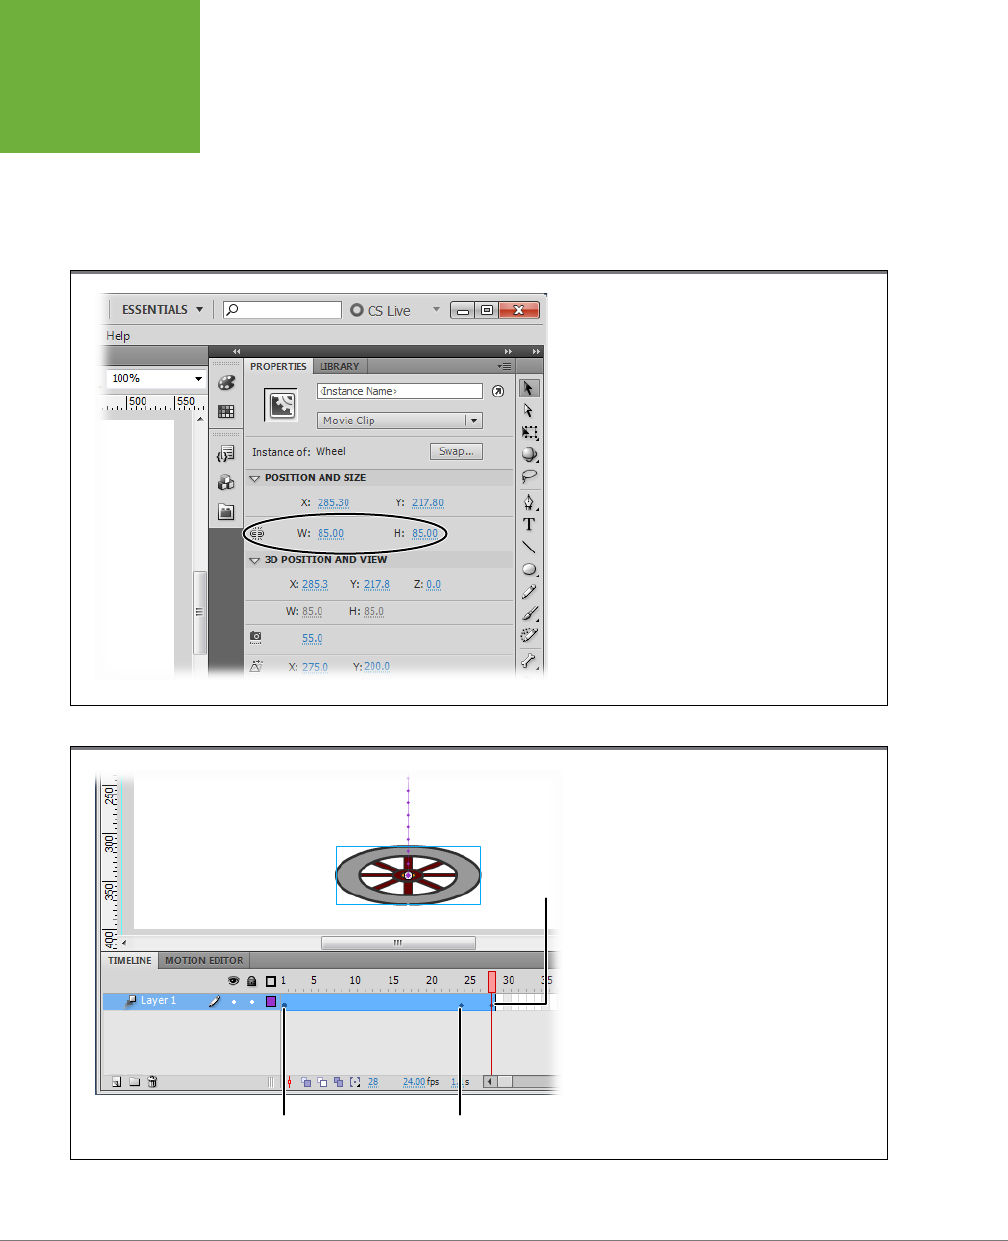
FLASH CS6: THE MISSING MANUAL
108
MAKING IT
MOVE WITH
MOTION
TWEENS
a proper smoosh, it should change shape on impact with the ground. You can
accomplish that with a couple of property tweaks.
7. Drag the playhead back to the first diamond-shaped property keyframe.
Select the wheel and change the W and H properties to 85 by 85 pixels.
The wheel returns to its pristine, perfectly round shape.
FIGURE 3-13
Select an object on the stage, and you see the W
(width) and H (height) properties in the Properties
panel. Here the wheel X and Y properties (circled) are
set to 85 pixels. When the chain link icon to the left
is broken, you can change the W and H properties
independently; otherwise, changing one dimension
automatically changes the other, keeping an object’s
proportions. Click the chain link to toggle it on or off.
FIGURE 3-14
Every animation begins with a
keyframe (round icon). This mo-
tion tween also has two property
keyframes (diamond icon) that
hold values for the position
and shape of the wheel. With
the playhead positioned at the
second property keyframe, you
see the wheel smooshed because
the W (width) property is set to
150 and the H (height) property
is set to 60.
Keyframe First property keyframe
Second property keyframe
www.it-ebooks.info
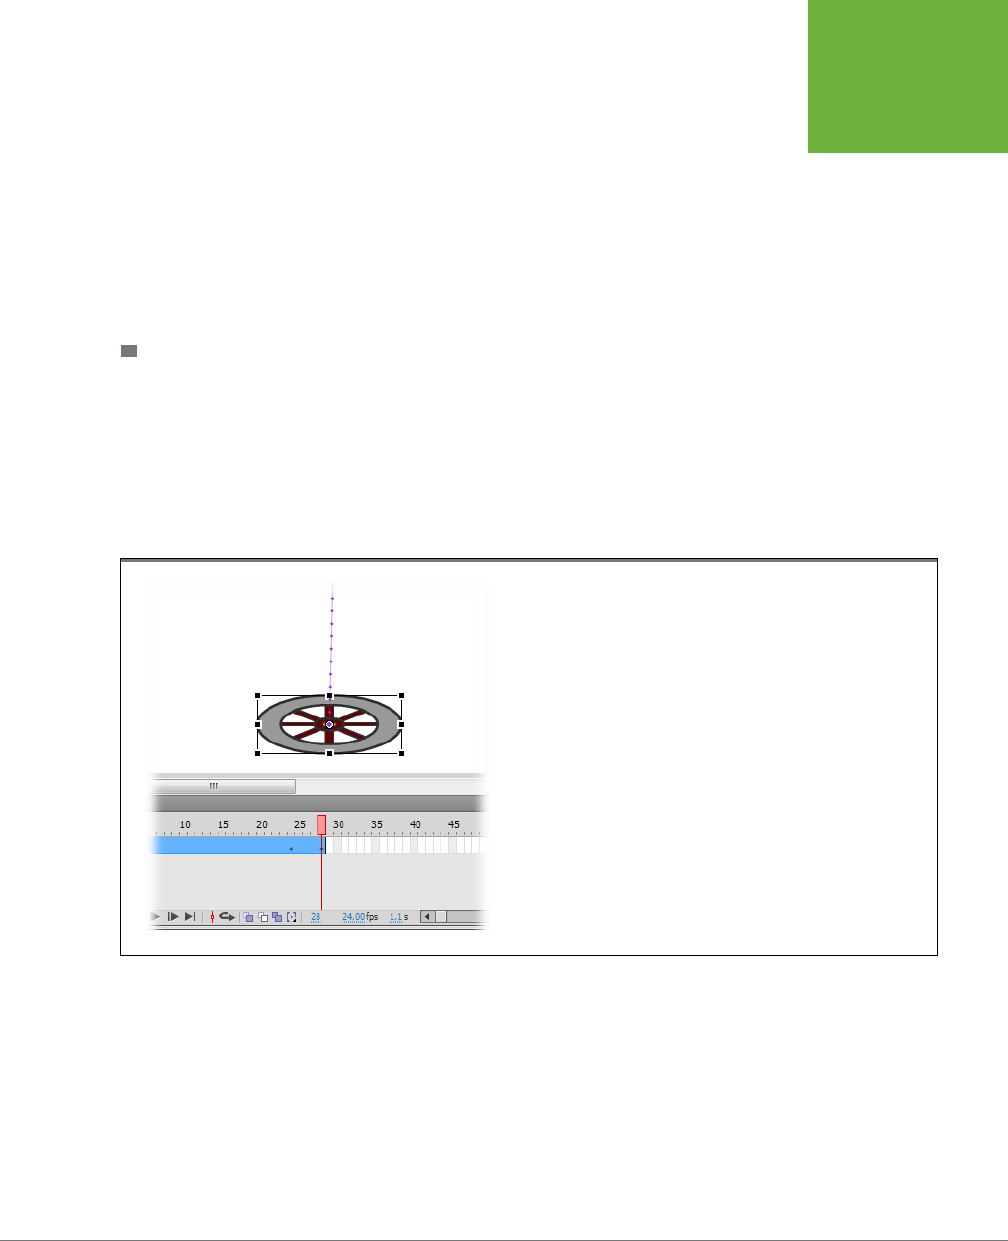
CHAPTER 3: ANIMATE YOUR ART 109
MAKING IT
MOVE WITH
MOTION
TWEENS
8. Press Enter (Return) to test the animation.
Now, when the animation plays, the wheel retains its roundness until it reaches
the bottom of the motion. Then it appears to flatten as it hits the ground.
Flash automatically makes the height and width changes occur smoothly and evenly.
Originally, that transition started in Frame 1 and continued through the final frame
of the tween. By making the H and W properties identical in Frame 1 and the first
property keyframe, the height and width remain the same at the beginning, and the
shape change at the end of the animation is faster and more dramatic.
CHANGING DIMENSIONS WITH THE TRANSFORM TOOL
The steps on page 107 show how to change an object’s dimensions using the H and
W properties, which are accurate down to the pixel. But what if you prefer to eyeball
it? In that case, you can change a symbol’s dimensions using the Transform tool.
Just make sure the playhead is at the right frame, and then press Q to choose the
Transform tool. Click the symbol you want to reshape, and it sprouts handles like
the ones shown in Figure 3-15. Drag the handles to modify your symbol, and Flash
stores the dimensions with the property keyframe.
FIGURE 3-15
Flash doesn’t care if you make dimension changes using the Properties
panel or the Transform tool. Either way, it remembers the H and W values
in a property keyframe.
Not only can you work faster and get the benefit of visual feedback with Transform,
but it’s also the Swiss Army knife of Flash tools. It does a lot more than just change
dimensions. You can use it to skew and rotate an object, too. Go ahead and make
those changes in your motion tween, and the changes are stored in the property
keyframe.
Copying and Pasting Frames
As any school kid can tell you, for every action there’s a reaction. Your wheel needs
to bounce back from its precarious state. In a word, it needs to de-smoosh. Ideally,
www.it-ebooks.info

FLASH CS6: THE MISSING MANUAL
110
EDITING THE
MOTION PATH
you want the next five frames in the animation to be the reverse actions of the last
five frames of the tween. You could do that manually, but why reinvent the wheel?
(Sorry about the pun.) Instead, you can copy the last five frames, paste them back
in at the end of the tween, and then reverse their order. This may sound more com-
plicated than it really is.
NOTE The next exercise follows from the steps begun on page 103. You can use the same Flash document,
or download
03-3_Copy_Frames.fla
from
www.missingmanuals.com/cds/flashcs6mm
.
Here’s how to copy and paste frames:
1. Ctrl-click (⌘-click) the first property keyframe, and then drag to the last
frame in the timeline.
The selected frames at the end of the tween show a dark blue highlight.
2. Right-click (Control-click) the selected frames, and then choose Copy
Frames from the shortcut menu.
There’s no visual response when you copy frames in the timeline, but rest as-
sured that the selected frames are copied and stored so you can paste them
somewhere else on the timeline.
3. Right-click (Control-click) the first frame after the tween, and then choose
Paste Frames from the shortcut menu (Figure 3-16).
The copied frames are pasted on the end of the timeline. If you press Enter
(Return) to preview your animation now, you see that the squashing frames
are repeated at the end of the animation.
When you paste the frames on the end of the timeline, Flash creates a second motion
tween in Layer 1. You can tell by the solid vertical line followed by a circle keyframe
symbol. If you click any frames in either motion tween, you can see the dark blue
highlight. The unselected tween has a light blue highlight.
Reversing Frames in a Frame Span
Swapping the order of keyframes in a motion tween lets you do cool things like make
a smooshed wheel round again. Simply right-click (Control-click) any frame in the
tween and then choose Reverse Keyframes, as shown in Figure 3-17. In the case of
your bouncing wheel, the keyframes at the beginning and end of the tween trade
places. Preview your animation, and it looks pretty good: The wheel drops down,
smooshes, and then recovers its round shape.
Editing the Motion Path
When it comes to moving objects around the stage, the motion path rules. That
means you need to know how to change the path. As explained back on page 103,
www.it-ebooks.info
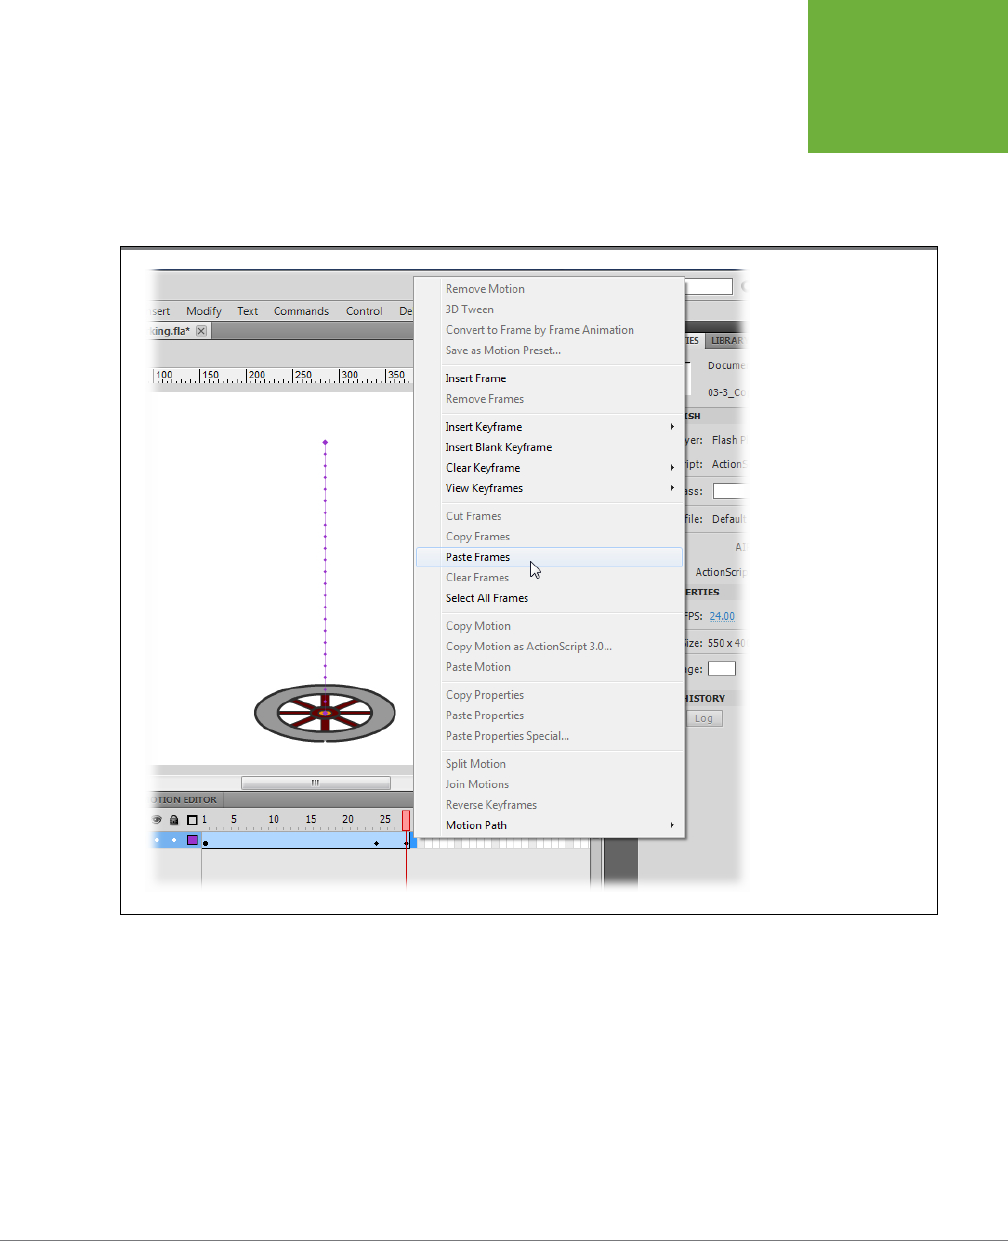
CHAPTER 3: ANIMATE YOUR ART 111
EDITING THE
MOTION PATH
you make symbols move on the stage using the X and Y position properties. If the
values change from one property keyframe to the next, then the symbol moves.
You set the X and Y properties by moving the playhead to a frame and then moving
the object or changing the X and Y properties in the Properties panel. Either way,
your symbol moves, and it sprouts a motion path, like the one shown in Figure 3-18.
FIGURE 3-16
After you’ve copied
frames from the timeline,
you can right-click any
frame in the timeline
to paste those frames
to a new location. Here
the first frame after
the motion tween was
right-clicked. The Paste
Frames command is near
the center of a lengthy
shortcut menu.
Moving the Motion Path
Suppose you’ve got the perfect motion, and everything’s working just the way you
want. The only problem is that it’s on the wrong place on the stage. You can move
the entire motion path and the symbol that’s being animated in one fell swoop.
Here are the steps:
1. With the Selection tool (solid arrow), click anywhere on the motion path.
The path becomes slightly thicker—that’s its version of a selection highlight.
www.it-ebooks.info
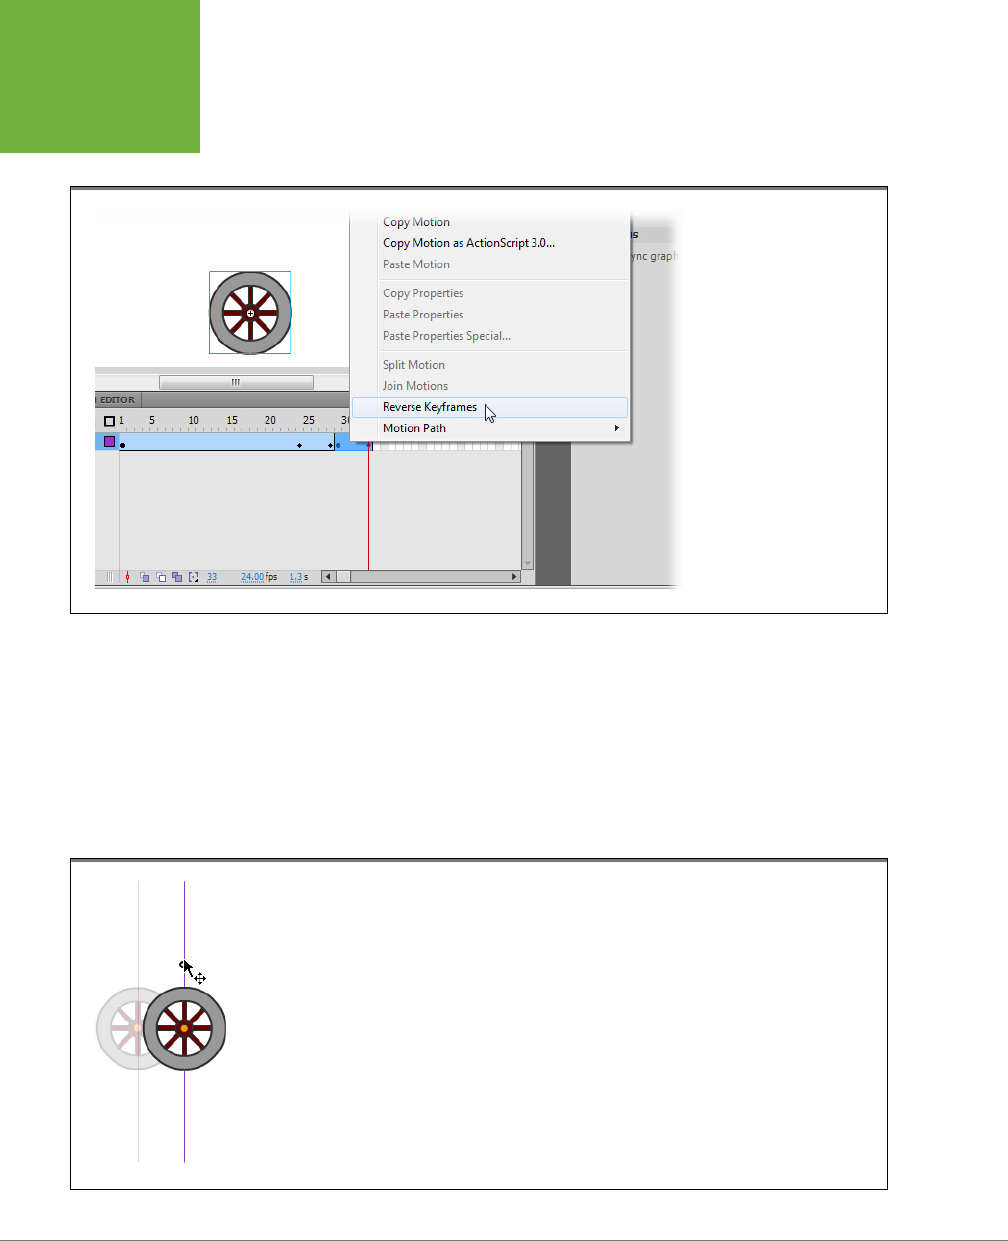
FLASH CS6: THE MISSING MANUAL
112
EDITING THE
MOTION PATH
2. Move the cursor over any point on the path.
The cursor shows the move icon—a cross with four arrows.
FIGURE 3-17
When you right-click
( Control-click) a motion
tween, you see a lengthy
shortcut menu. The Reverse
Keyframes command is
near the bottom. Reverse
Keyframes is a handy
command when you’re
developing repetitive,
pendulum-like motions. Here
reversing the pasted frames
at the end of the animation
makes the smooshed wheel
round again.
3. Click, drag, and then release the mouse button.
The motion path and the symbol move as a single unit. Once you release the
mouse button, the path is in a new location, but everything else about the tween
(the timing and the property changes) is the same.
Moving an entire motion path is easy for you, but Flash is working hard behind the
scenes. It’s changing all the X and Y properties for every property keyframe and
calculating the new values for the tween.
FIGURE 3-18
Use the Selection tool to select a motion path before you move it to a new location. The cross with four arrows is
Flash’s Move icon.
www.it-ebooks.info
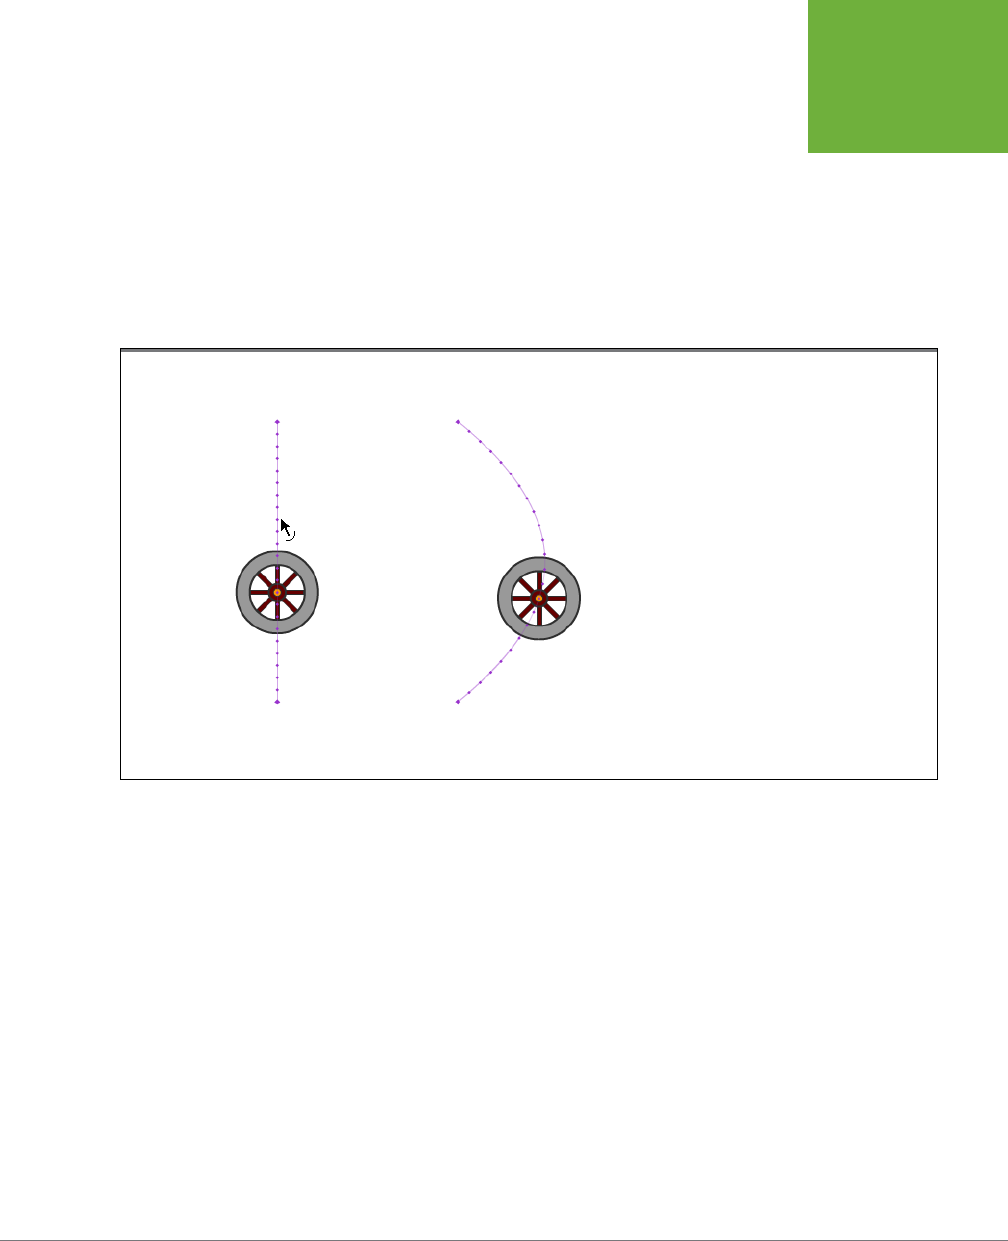
CHAPTER 3: ANIMATE YOUR ART 113
EDITING THE
MOTION PATH
Adding Curves to the Motion Path
The shortest distance between two points is a straight line, and that’s exactly what
Flash uses when you first make a symbol move. You’re not stuck with that choice,
though—it’s easy to make the line curve.
1. With the Selection tool, move the cursor to an
unselected
motion path.
If the path is unselected, you see the curve cursor shown in Figure 3-19. The
key here is that the path must not be selected. If it’s selected, Flash shows the
move cursor (the cross with four arrows).
FIGURE 3-19
Left: Move the Selection cursor near a motion path,
and you see the curve icon appear.
Right: Click and drag to create a curved path.
2. Click, drag, and then release the mouse button.
As you drag, you see a preview of the new curved motion path. When you
release the mouse button, the path is set.
This method for creating curves works well, but it takes some practice to create just
the path you want. You can also combine the curve technique with fixed property
keyframes along the motion path. For example, to create a double curve, start with
a straight path and pull it into a curve, as shown at right in Figure 3-19. Move the
playhead to a frame so that the wheel is centered on the path. Then, drag the wheel
in the opposite direction of the curve. Moving the wheel creates a new property
keyframe on the path and creates a motion path similar to the one in Figure 3-20.
Moving End Points on the Motion Path
If you want to reposition one of the end points without moving the rest of the motion
path, use the Subselection tool (A), which looks like a hollow arrow. Click the motion
www.it-ebooks.info
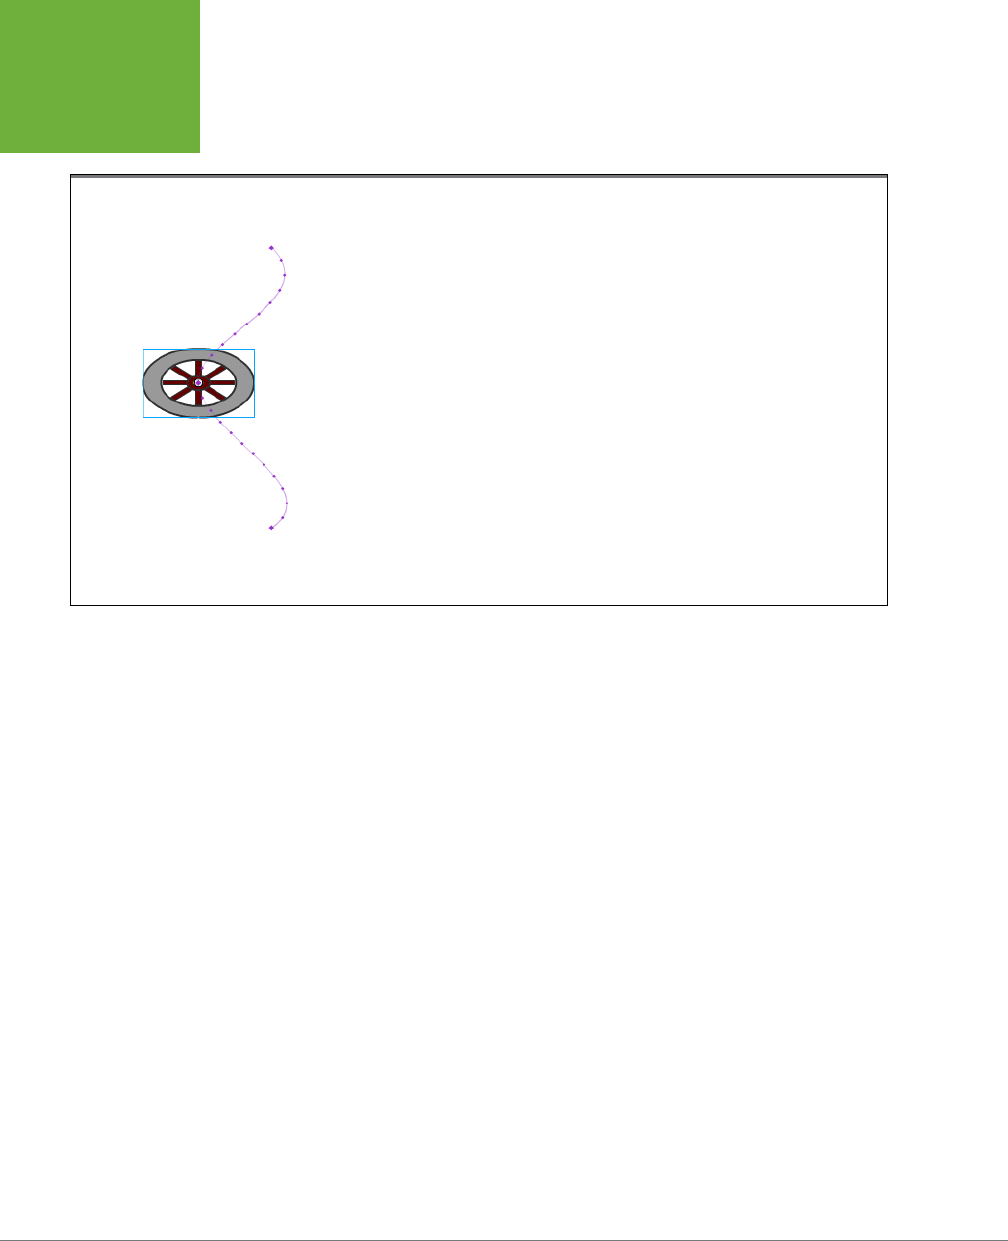
FLASH CS6: THE MISSING MANUAL
114
EDITING THE
MOTION PATH
path with the Subselection tool, and the path end points appear as hollow squares.
With the Subselection tool, you can click and drag these points to a new location.
FIGURE 3-20
Moving the tweened symbol (in this case, the wheel) at any point along the motion
path creates a new property keyframe that stores the X and Y position values. This
double curve is formed by three property keyframes—one at each end of the path
and one in the middle.
Copying and Pasting a Motion Path
Here’s one last motion path trick to learn. Suppose you want to create a complex
motion path with lots of curves or lots of sharp angles. You can do that manually,
using the techniques already described in this chapter, but there’s a faster method.
You can draw a line and then paste it into your tween. You can’t draw directly in
the tween, so you need to draw the path in a separate layer or even in a separate
Flash document.
1. Draw a line using either the Pencil, Pen, or Line tool.
The Pencil is best for freehand paths. The Pen works best for paths where you
need precise control. The line must be simple, with a clear starting and ending
point. For example, an X will not work as a motion path, and a line that crosses
over itself may not work as expected.
2. Select the entire path, and then press Ctrl+C (⌘-C).
Flash copies the line to the Clipboard. If you’ve got a long, twisty, curvy line,
then you may have to double-click to select the entire line.
3. Select the path in your tween, and press Ctrl+V (⌘-V).
The new path replaces the old path. It uses the same starting point as the
original, so you may need to move the entire path (as described on page 110)
to position it properly on the stage.
www.it-ebooks.info
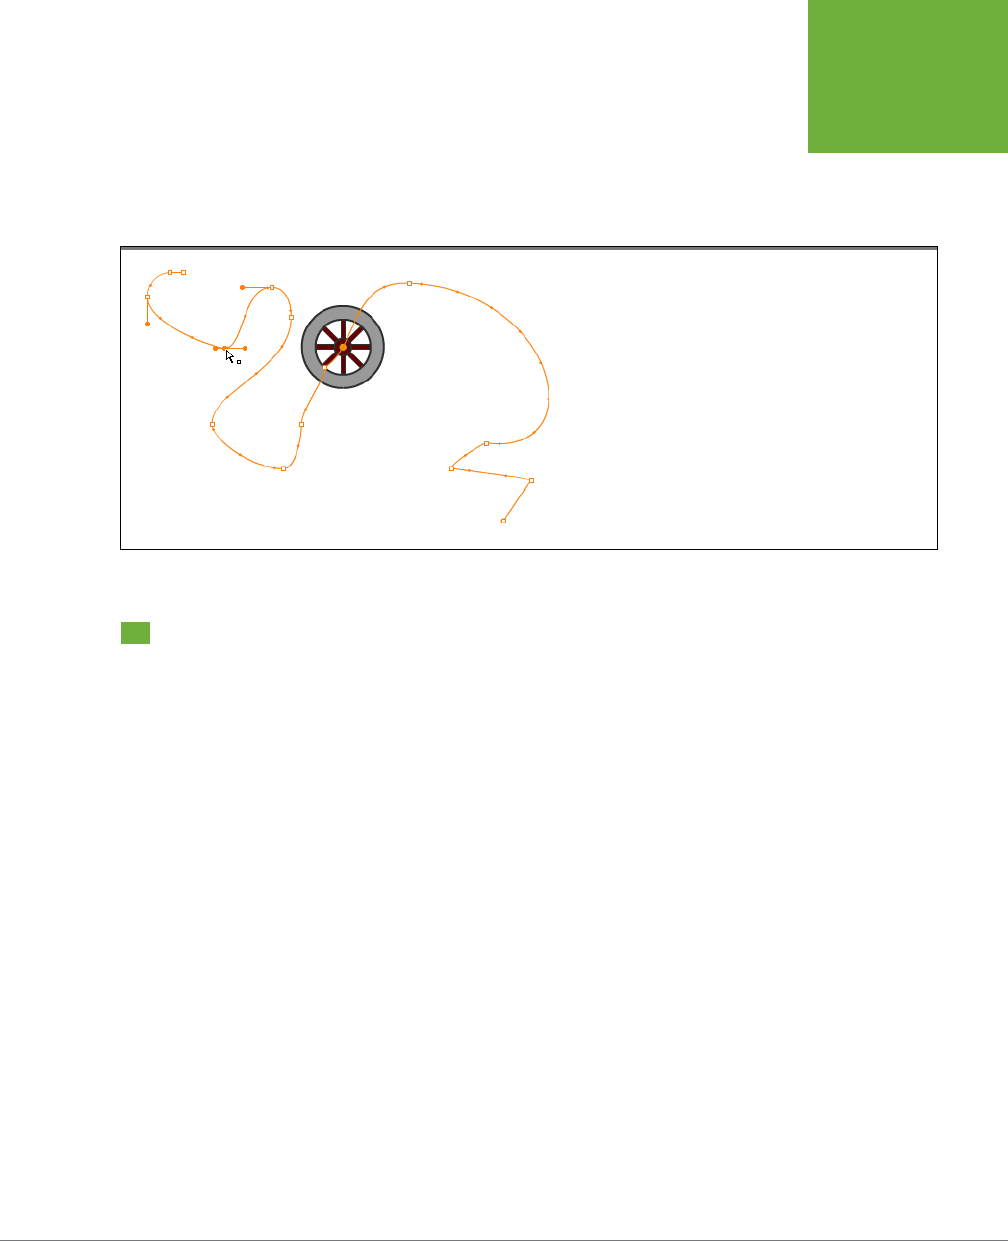
CHAPTER 3: ANIMATE YOUR ART 115
COPYING
AND PASTING
PROPERTIES
You can also paste a hand-drawn path into a motion tween that doesn’t yet have a
path. Just select the symbol you want to move, and then press Ctrl+V (⌘-V). There’s
an extra benefit to drawing a path with the Pencil or Pen tool. As shown in Figure
3-21, drawn paths have anchor points within the line. You can use these points to
accurately reshape the line.
FIGURE 3-21
One advantage of drawn lines for motion paths is that they
have anchor points you can use to fine-tune the path. Click the
path with the Subselection tool, and you can reshape the line as
you would any other line drawn with the Pen.
Copying and Pasting Properties
Sometimes you want to copy the properties from one property keyframe to another.
For example, in the exercise on page 107, you used identical W and H properties to
keep the wheel the same size and shape. The first keyframe and the first property
keyframe had the same values. Anytime you want dierent keyframes to have the
same properties, you can copy and paste property settings, just as you copy and
paste words in a word processor. Follow these steps:
1. Ctrl-click (⌘-click) the property keyframe with the properties you want
to copy.
The selected cell shows a dark blue highlight.
2. Right-click (Control-click) the selected frame.
A shortcut menu appears—the copy and paste properties commands are near
the bottom.
3. Choose Copy Properties from the shortcut menu.
All the properties related to the property keyframe are stored, so you can paste
them into another frame.
4. Ctrl-click (⌘-click) the frame where you want to paste the properties.
A shortcut menu appears (Figure 3-22). You can paste the properties to any
frame; it doesn’t have to be a property keyframe.
www.it-ebooks.info
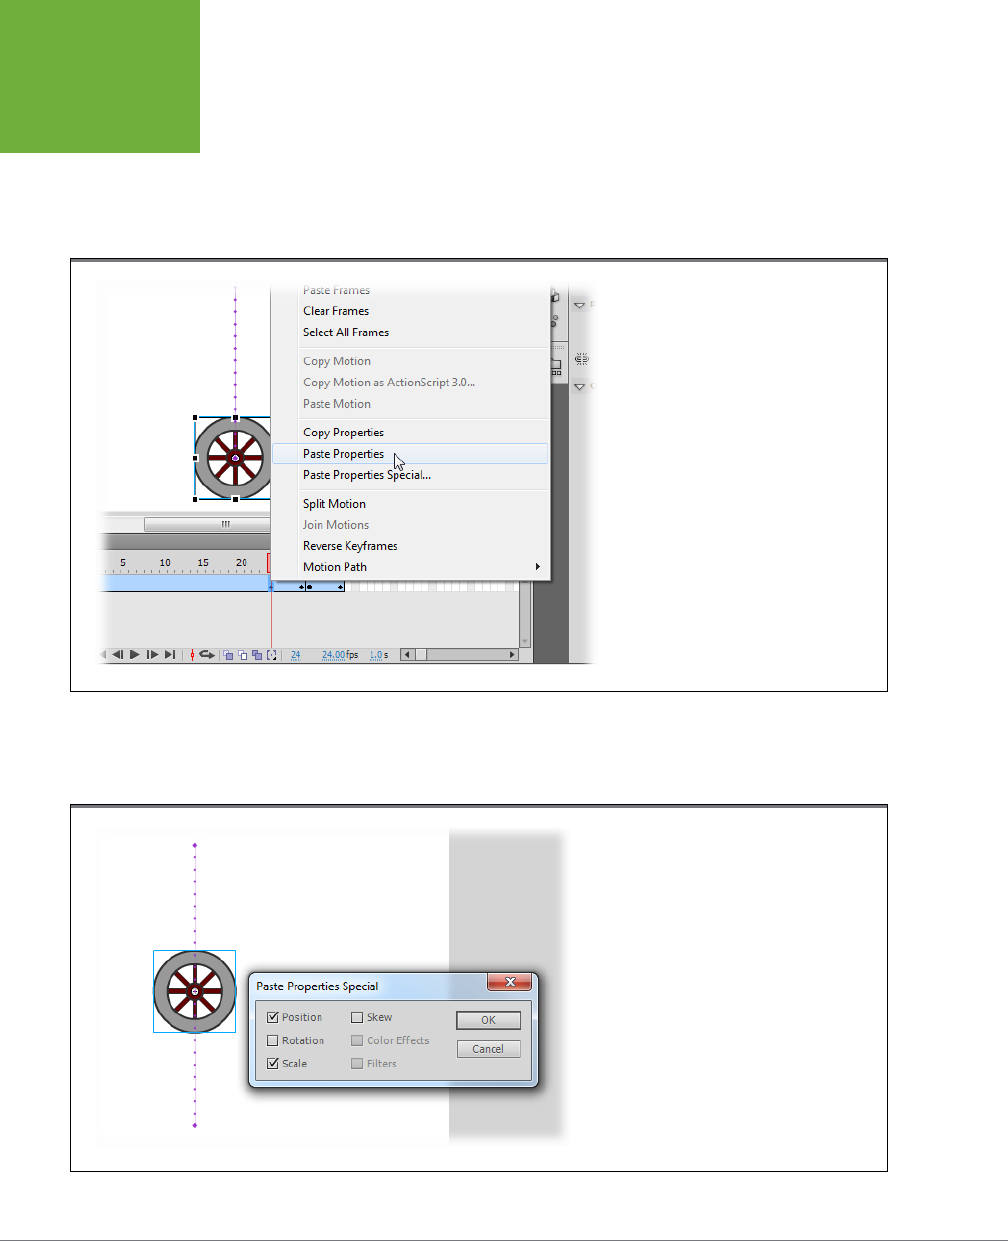
FLASH CS6: THE MISSING MANUAL
116
COPYING
AND PASTING
PROPERTIES
5. Choose Paste Properties to paste all the properties to the new property
keyframe.
If necessary, a new keyframe is created, and all the properties are transferred
to the new keyframe. Your work is done. If you want to paste only some of the
properties, then see the next steps.
FIGURE 3-22
The quickest way to copy and paste proper-
ties is through the use of the shortcut menu.
Select a frame and right-click (Control-click)
to see this menu.
6. Or choose Paste Properties Special to select a few of the properties to paste.
The Paste Properties Special dialog box appears, as shown in Figure 3-23.
FIGURE 3-23
Using the Paste Properties Special dialog box, you
can pick and choose which properties you want
to paste. This is especially handy if you’re pasting
position properties to align symbols on the stage.
www.it-ebooks.info

CHAPTER 3: ANIMATE YOUR ART 117
SHAPE
TWEENING
(MORPHING)
7. Check the properties you want to copy, and then press OK.
The selected properties are copied to the frame. If necessary, a new keyframe
is added to the timeline.
Shape Tweening (Morphing)
Shape tweening
—sometimes referred to as
morphing
—lets you create an eect that
makes one object appear as though it’s slowly turning into another object. Often,
shape tweening is one job that can’t be done easily by simply changing properties
with the motion tween, so Flash has a special tween tool for the job.
To make a shape tween, you draw the beginning object and the ending object, and
Flash does all the rest. For example, say you create a keyframe containing a yellow
ball. Then, 24 frames along the timeline, you create another keyframe containing a
green star. You then apply a shape tween to the frame span, and Flash generates
all the incremental frames necessary to show the ball slowly—frame by frame—
transforming itself into a star when you run the animation.
TIP
Shape tweens
work only on editable graphics. If you want to tween a symbol (page 103), then you need
to use a
motion tween
. If you want to tween a group of objects or reshape characters of text, then you need to
ungroup the objects (page 161) or break apart the text (Modify→Break Apart) and then apply the shape tweens
to the individual elements.
Shape tweening lets you change more than just an object’s shape over a series of
frames. Using a shape tween, you can also change an object’s size, color, transpar-
ency, position, scale, and rotation.
To create a shape tween:
1. Select the frame where you want your tween to begin (for example, Frame 1).
Flash highlights the selected frame.
2. If the selected frame isn’t a keyframe (if you don’t see a dot in the frame),
then turn it into a keyframe by selecting Insert→
Timeline→Keyframe (or
pressing F6).
Flash displays a dot in the frame to let you know it’s a keyframe.
NOTE Shape tweens use the standard keyframe (circle icon). They don’t use property keyframes (diamond
icons). Property keyframes are used exclusively with motion tweens (page 103).
3. On the stage, draw the shape you want to begin your tween.
In Figure 3-24, the beginning shape is a ball—a yellow fill with a black stroke.
www.it-ebooks.info
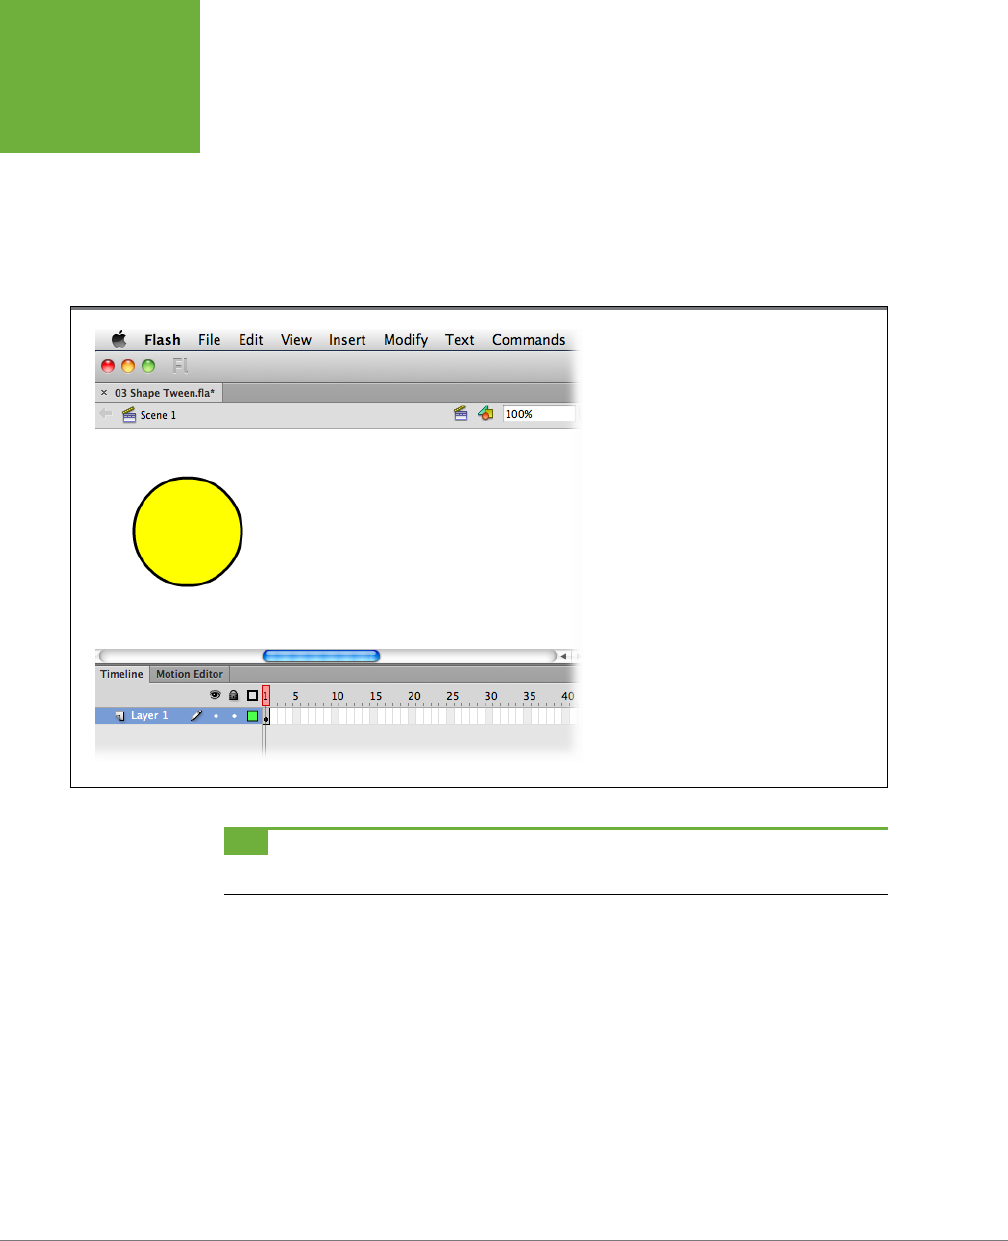
FLASH CS6: THE MISSING MANUAL
118
SHAPE
TWEENING
(MORPHING)
4. Select the frame where you want your tween to end (for example, Frame 24).
Flash highlights the selected frame.
5. Insert an ending point for your tween (and a clean, fresh stage on which to
draw your ending shape) by selecting Insert→
Timeline→Blank Keyframe.
The stage clears, the playhead moves to the selected frame, and Flash displays
a hollow dot in the selected frame to let you know it’s a keyframe.
FIGURE 3-24
You can use any or all of Flash’s drawing
and painting tools to create your first image.
Just make sure you don’t group objects
(Modify→Group) or convert your object into a
symbol (page 250); shape tweening works only
on ungrouped, editable objects in a single layer.
TIP As explained on page 96, you can carry over your beginning image from the first keyframe and make
changes to it by choosing Insert→Timeline→Keyframe (instead of Insert→Timeline→Blank Keyframe).
6. On the stage, use Flash’s drawing and painting tools to draw the shape you
want to end your tween.
Your ending shape can dier from your first shape in terms of position, color,
transparency, rotation, skew, and size—so feel free to go wild. In Figure 3-25,
the ending shape is a green, five-pointed star.
7. On the timeline, right-click (Control-click) any frame in the middle of the
frame span, and then choose Create Shape Tween from the shortcut menu.
When you right-click, Flash moves the playhead and highlights the frame you
clicked. When you choose Shape Tween, the frame span changes to a nice lime
color and inserts an arrow to let you know that you’ve successfully added a
www.it-ebooks.info
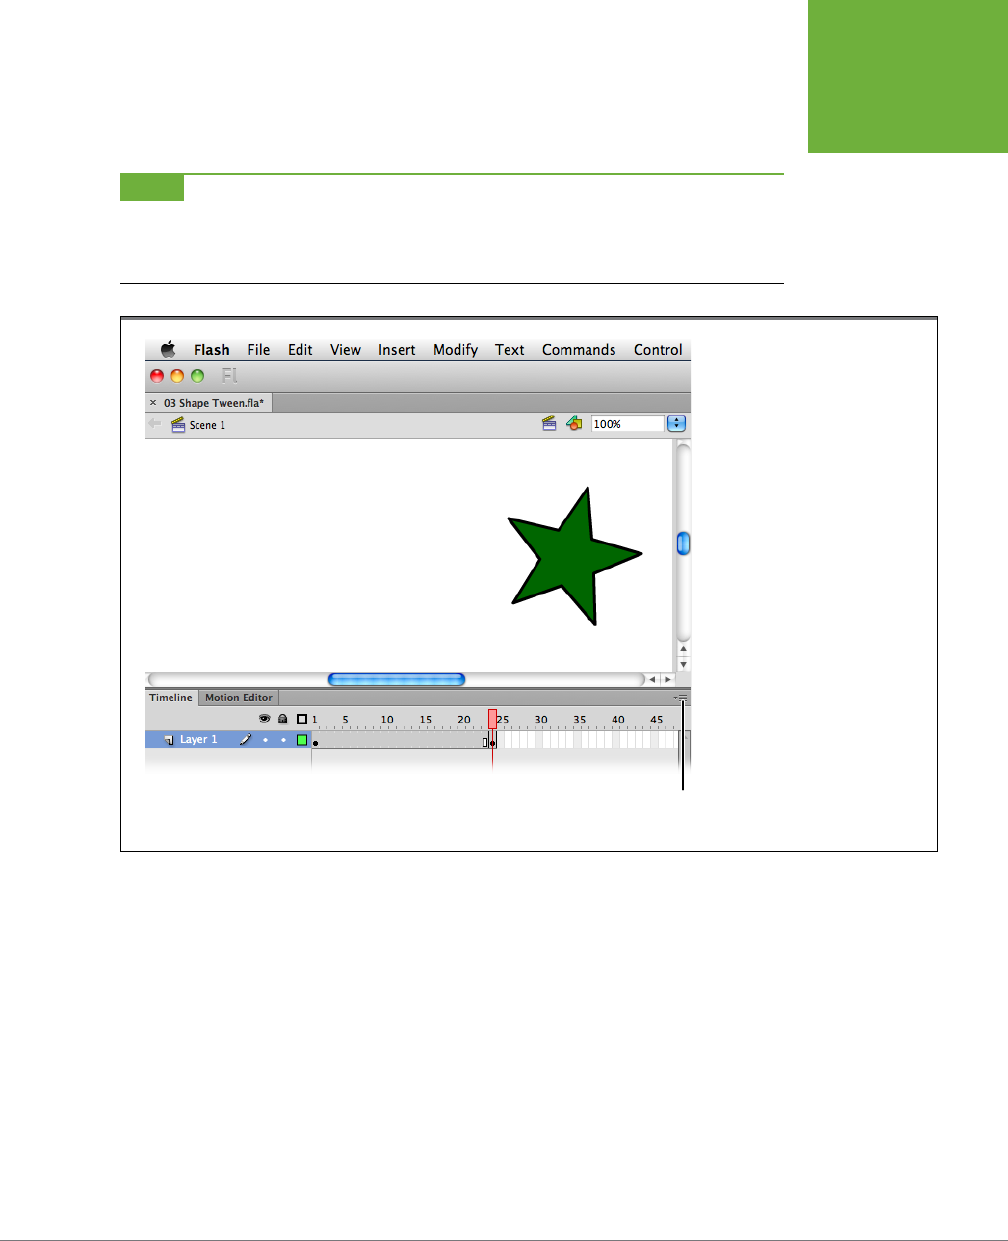
CHAPTER 3: ANIMATE YOUR ART 119
SHAPE
TWEENING
(MORPHING)
shape tween (Figure 3-26). A new tweening section appears in the Properties
panel. (If the Properties panel isn’t showing, choose Window
→
Properties.)
NOTE If you have Tinted Frames turned off, then Flash doesn’t change the color behind the tweened frames.
To turn on Tinted Frames, click the Options menu (the tiny, striped icon on the far right of the timeline, just above
the frame numbers, as shown in Figure 3-25) and then select the Tinted Frames option. A checkmark indicates
that the option is turned on.
FIGURE 3-25
Flash grays out all the frames in
a frame span—in other words,
all the frames beginning with
one keyframe up to (but not
including) the next keyframe—so
you can spot them easily. As
you can see here, each frame
span ends with the end frame
symbol, which looks like a hollow
rectangle.
Options
menu
8. If you like, set the Ease and Blend shape tween options (Figure 3-27).
Here’s what the options do:
•
Ease
tells Flash to speed up (or slow down) the tween. To change the Ease
value, type a number or drag to change the number. If you want your tween
to start out normally but speed up at the end, then set the Ease value to a
negative number. To tell Flash to start your tween normally but slow down
at the end, use a positive number. (Zero means that when you play your
animation, the tween appears to be the same speed throughout.)
•
Blend
tells Flash how picky you want it to be when it draws its in-between
frames. If you want to preserve the hard angles of your original shape,
click the Blend drop-down box and then select
Angular
; if you want Flash
www.it-ebooks.info
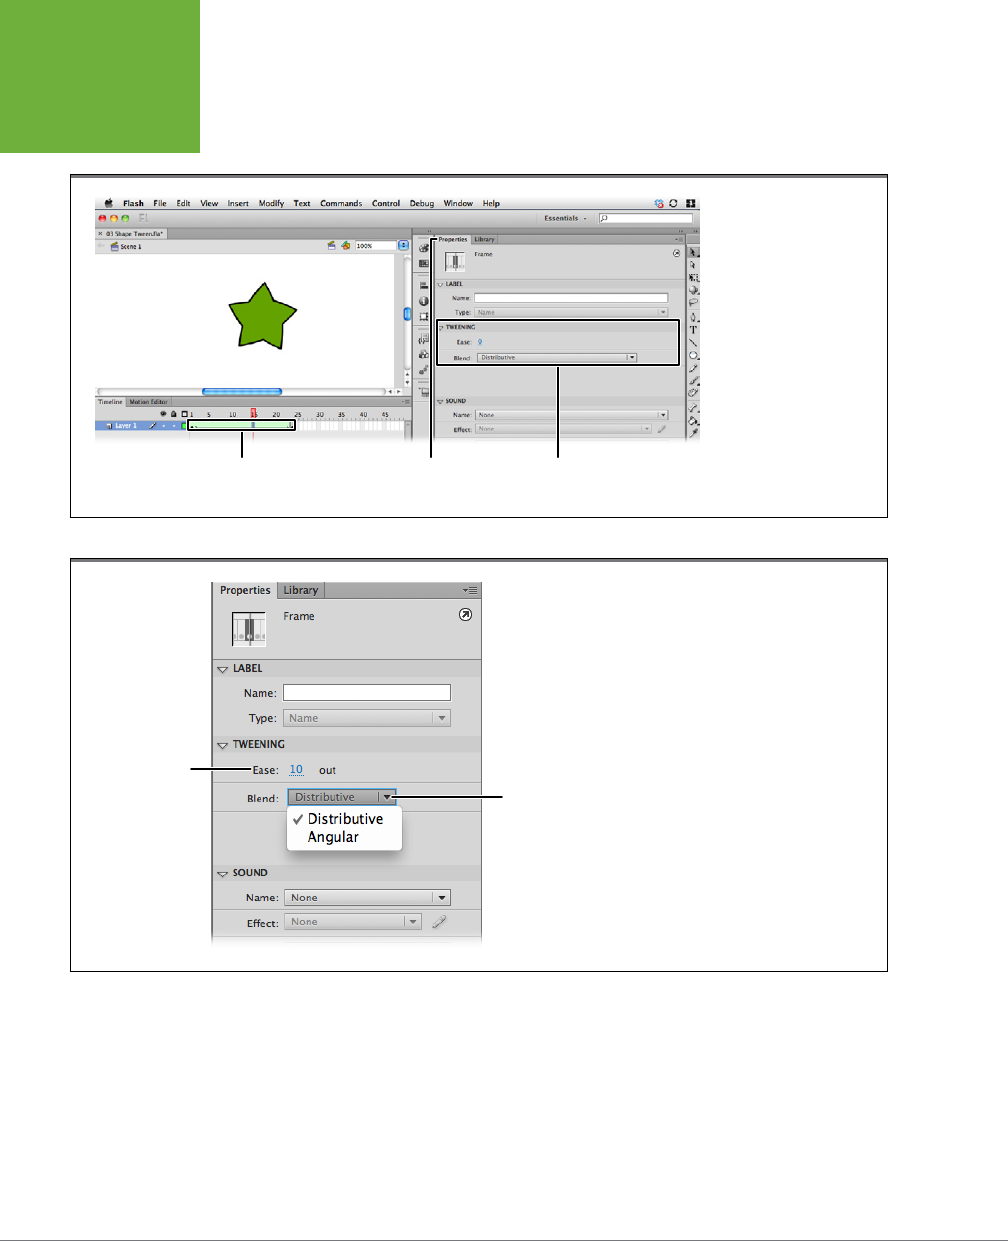
FLASH CS6: THE MISSING MANUAL
120
SHAPE
TWEENING
(MORPHING)
to smooth out the hard edges so that the tween appears softer, select
Distributive
.
FIGURE 3-26
As soon as you create
a tween, Flash displays
an arrow spanning the
frames that make the
tween. A new Tweening
section appears in the
Properties panel.
Tween arrow Tweening
section
Properties panel
FIGURE 3-27
Shape-related tweening options appear in the
Properties panel: namely, Ease (to speed up or
slow down your tween) and Blend (to tell Flash
whether to preserve hard corners and angles
from frame to frame or to smooth them out). To
preview the in-between frames Flash generated
for you, just select any frame in the frame span.
Blend type
Ease scrubber
9. Test your shape by selecting Control→Play.
Flash plays your shape tween on the stage (Figure 3-28).
Want to see the finished example of the ball-morph-to-star shape tween? Go to
www.missingmanuals.com/cds/flashcs6mm
and download
03-4_Shape_Tween.fla
.
www.it-ebooks.info
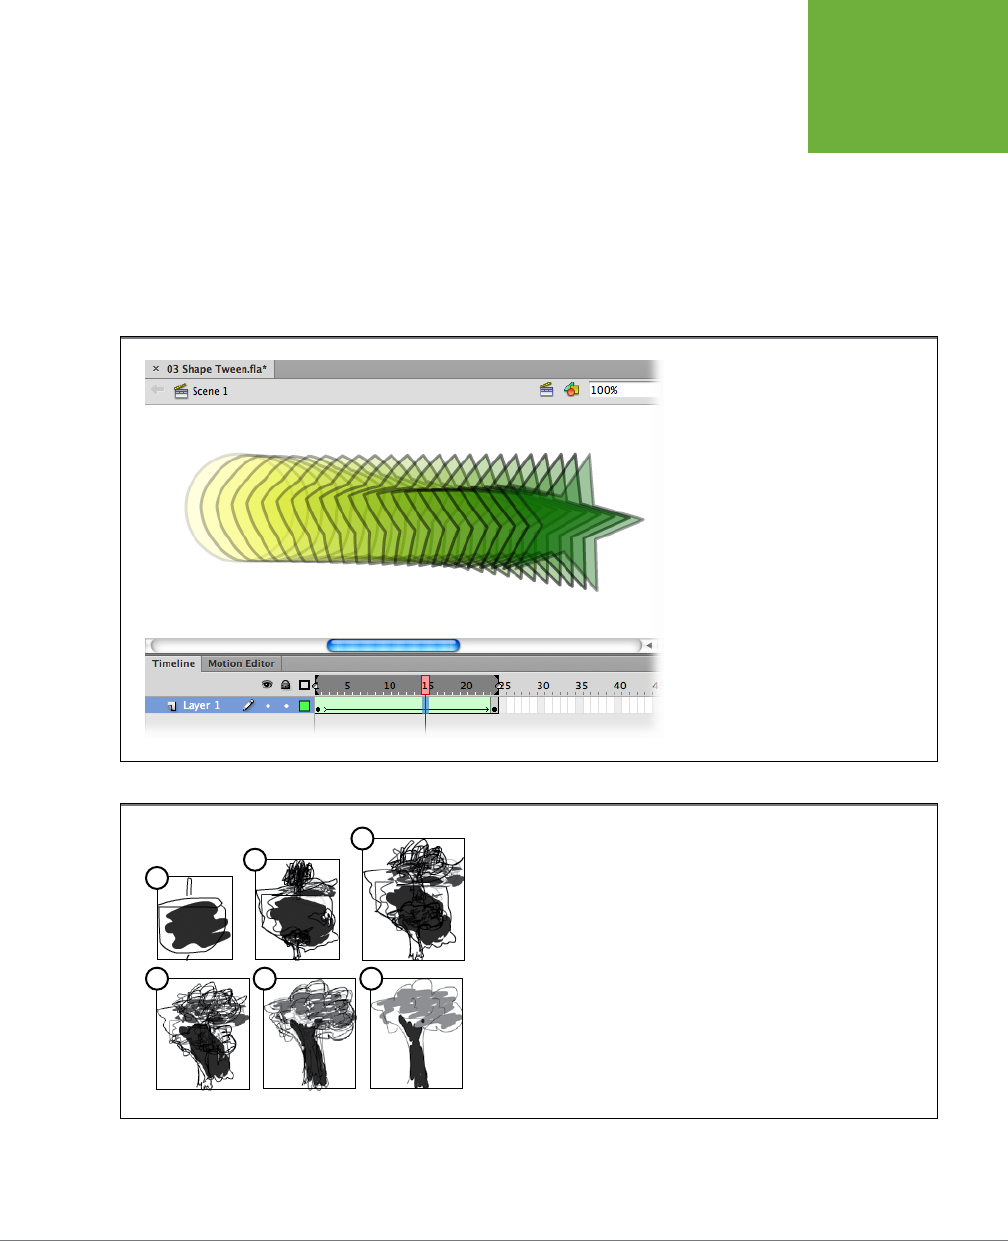
CHAPTER 3: ANIMATE YOUR ART 121
SHAPE
TWEENING
(MORPHING)
Shape Hints
Flash does a bang-up job when it comes to tweening simple shapes: circles, squares,
stars, raindrops. But the more complicated the images you want to tween, the harder
Flash has to work to calculate how to generate the in-between images.
And if you think about it, that diculty makes sense. Because complex beginning
and ending images like a stylized acorn and tree (Figure 3-29) contain a bunch of
editable lines, shapes, and colors, Flash has to guess at which elements are most im-
portant and how you want the morph to progress from the first keyframe to the last.
FIGURE 3-28
When you run your animation, your be-
ginning image appears to morph into your
ending image, thanks to the in-between
frames Flash generates when you create
your shape tween. Because the pages of a
book can’t show motion, here, onionskin
outlines (page 132) represent the ani-
mated tween you’d see on the stage.
FIGURE 3-29
1. The original acorn drawing: so far, so good.
2. Flash’s first attempt at generating an in-between frame is a little scary.
3. Clearly, the acorn is changing and growing, but that’s about all you can say
for this generated image.
4. You can almost make out the outline of a tree now.
5. This one’s getting there.
6. And finally, at the end of the tween, Flash makes it to your original image.
1
2
3
654
Sometimes Flash guesses correctly; other times, you need to give it a few hints.
Adding
shape hints
to your tweens tells Flash how you want it to create each in-
www.it-ebooks.info

FLASH CS6: THE MISSING MANUAL
122
SHAPE
TWEENING
(MORPHING)
between frame. This makes your finished tween appear more realistic—more how
you
want it to be.
FIGURE 3-30
Top: When you add a shape hint, Flash places it at the center of your object. All you have to do is drag it to the edge of your
object.
Bottom: The more shape hints you use (and the more accurately you place them around the edge of your object), the more
closely Flash attempts to preserve your shape as it generates the tween frames. Make sure you place the hints in alphabeti-
cal order as you outline your shape. If you find after several tries that Flash doesn’t seem to be taking your hints, your
shapes might be too complex or too dissimilar to tween effectively. In that case, you’ll want to create additional keyframes
or even consider replacing your tween with a frame-by-frame animation.
In short, shape hints give you more (but not complete, by any means) control over
the shape-tweened sections of your animation.
NOTE Shape hints are especially valuable when you’re working on an animation that moves at a relatively
slow frame rate—in other words, in situations when each separate frame will be visible to your audience’s naked
eye.
To add shape hints to a shape tween:
1. Select the first frame of your tween.
Flash highlights the selected frame.
2. Choose Modify→Shape→Add Shape Hint, or press Ctrl+Shift+H (Shift-⌘-H).
Flash displays a hint (a red circle containing a letter from A to Z) in the center
of your shape, as shown in Figure 3-30 (top).
3. Drag the hint to the edge of your shape.
Figure 3-30 (bottom) shows the result of dragging several hints to the edge
of your shape.
4. Repeat as many times as necessary, placing hints around the outline of the
object in alphabetical order.
The bigger or more oddly shaped your object, the more hints you need. Placing
a hint at each peak and valley of your object tells Flash to preserve the shape
of your beginning object as much as possible as it morphs toward the shape
of your ending object.
www.it-ebooks.info
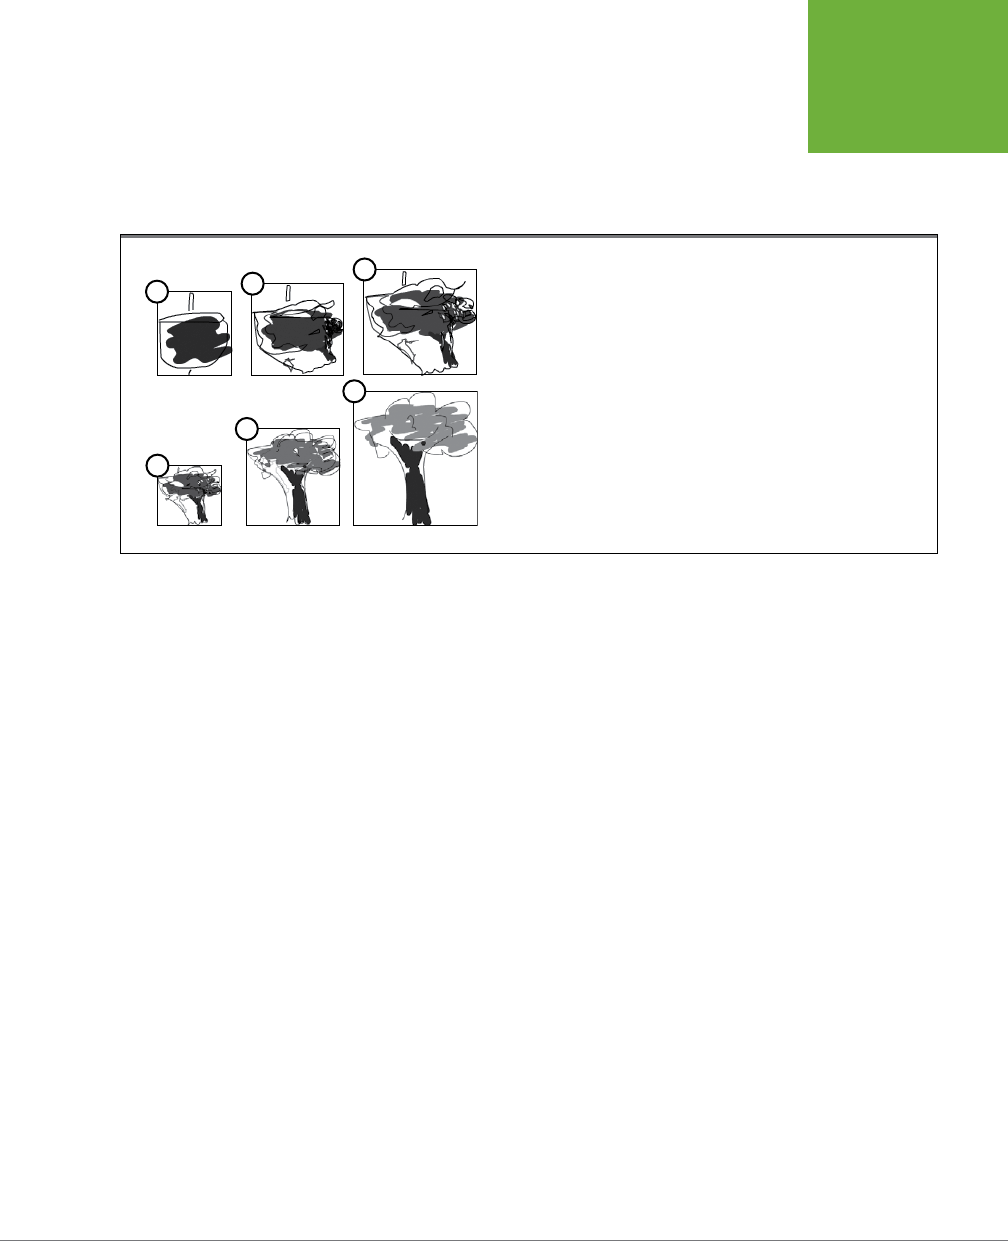
CHAPTER 3: ANIMATE YOUR ART 123
SHAPE
TWEENING
(MORPHING)
5. Go to the last frame of the shape tween and adjust the shape hints to match
the final shape.
When the animation runs, Flash uses the hints in both the beginning and the
ending keyframe to control the shape of the morphing object.
FIGURE 3-31
1. The original acorn is the same here as it was in Figure 3-29.
2. Using hints, this attempt at generating a first in-between frame is better
than the one in Figure 2-39. It’s not exactly a prize pig, but it’s better.
3. Already you can see the form of the tree taking shape.
4. Here the already-pretty-well-shaped tree looks as thought it’s about to
burst out of the acorn outline.
5. Compared to tweening without hints (see Figure 3-29) this tween appears
much smoother; you don’t see the Flash generated squiggly lines.
6. The final frame of any tween appears the same whether or not you use
hints.
123
4
5
6
6. Test your animation by clicking Control→Play.
The tweened frames of your animation conform, more or less, to the hints you
provided. Figure 3-31 show you an example.
Using Multiple Layers for Shape Tweens
It’s easier for Flash to morph two simple shapes than one complex shape. So if
shape hints don’t help Flash solve shape tween confusion, then try tweening parts
of yourdrawing separately. For example, put the cap of an acorn on a layer by
itself, and put the bottom shell in a separate layer. Then you can shape tween the
cap into the leaves of the tree and shape tween the shell into the trunk of the tree,
with resultsas shown in Figure 3-32. There’s an example of this technique on the
Missing CD page(
www.missingmanuals.com/cds/flashcs6mm
). The file is called
03-5_Shape_Acorn.fla
. You’ll learn more about creating timeline layers in the next
chapter.
www.it-ebooks.info

FLASH CS6: THE MISSING MANUAL
124
SHAPE
TWEENING
(MORPHING)
Classic Tween
You may have noticed that Flash has a third type of tween listed on the Insert menu—
Classic Tween. In the olden days, before Adobe developed the new and improved
motion tween with its control of individual properties, the Classic tween was called
Motion tween, and it was used to tween symbols. The new Motion tween is so much
better and powerful that there aren’t many reasons to use Classic tween on a new
project. Here are the main two reasons you might want to use Classic tween:
• You need to work on a project developed with an earlier version of Flash.
• You’re a Flash veteran and aren’t ready to learn the newfangled motion tween.
In any case, Adobe wisely kept the Classic tween as part of Flash so you can use
it if you need it. This book doesn’t cover the Classic tween, but it was covered in
Chapter 3 of
Flash CS4: The Missing Manual
. If you want, you can download a PDF
of the chapter at
www.missingmanuals.com/cds/flashcs6mm
.
FIGURE 3-32
If you add a shape tween to a layer with more
than one object, the results usually aren’t
pretty. It’s best to place objects on separate
layers. Here the cap of the acorn tweens into
the leaves of the tree, and the shell tweens
into the trunk and branches. Using tweens on
multiple layers gives you more control over
your animation.
www.it-ebooks.info

Advanced Drawing and
Animation
PART
2
CHAPTER 4:
Organizing Frames and Layers
CHAPTER 5:
Advanced Drawing and Coloring
CHAPTER 6:
Choosing and Formatting Text
CHAPTER 7:
Reusable Flash: Symbols and Templates
CHAPTER 8:
Advanced Tweens with the Motion Editor
CHAPTER 9:
Realistic Animation with IK Bones
CHAPTER 10:
Incorporating Non-Flash Media Files
CHAPTER 11:
Incorporating Sound and Video
www.it-ebooks.info

127
CHAPTER
4
Part 1 of this book gets you started launching Flash, creating your own draw-
ings, and transforming them into moving animations. Most animation work,
though, takes place after you’ve got all the frames and layers in place. Like a
film director slaving away in the cutting room, as an animator you spend most of
your time testing, editing, and retesting your movie.
This chapter is your crash course in Flash animation editing. Here you’ll learn how
to reorganize your animation horizontally (over time) by cutting, pasting, and rear-
ranging frames in the timeline. You’ll also see how to reorganize your animation
vertically by shuing and restacking the layers you’ve added to it.
Working with Frames
When you create an animation, you build it from frames and keyframes. Editing
your document is a simple matter of moving, cutting, and pasting those frames
until they look good and work well. You can perform these operations on individual
frames or on multiple frames by combining them into groups, as you’ll see at the
end of this section.
Copying and Pasting Frames
Copy and Paste are the world’s favorite computer commands for good reason. These
functions let you create a piece of work once (a word, line, shape, drawing, or what
have you) and then quickly recreate it to build something even more complex with
a minimum of eort. Well, Flash lets you cut, copy, and paste not just the content
Organizing Frames
and Layers
www.it-ebooks.info
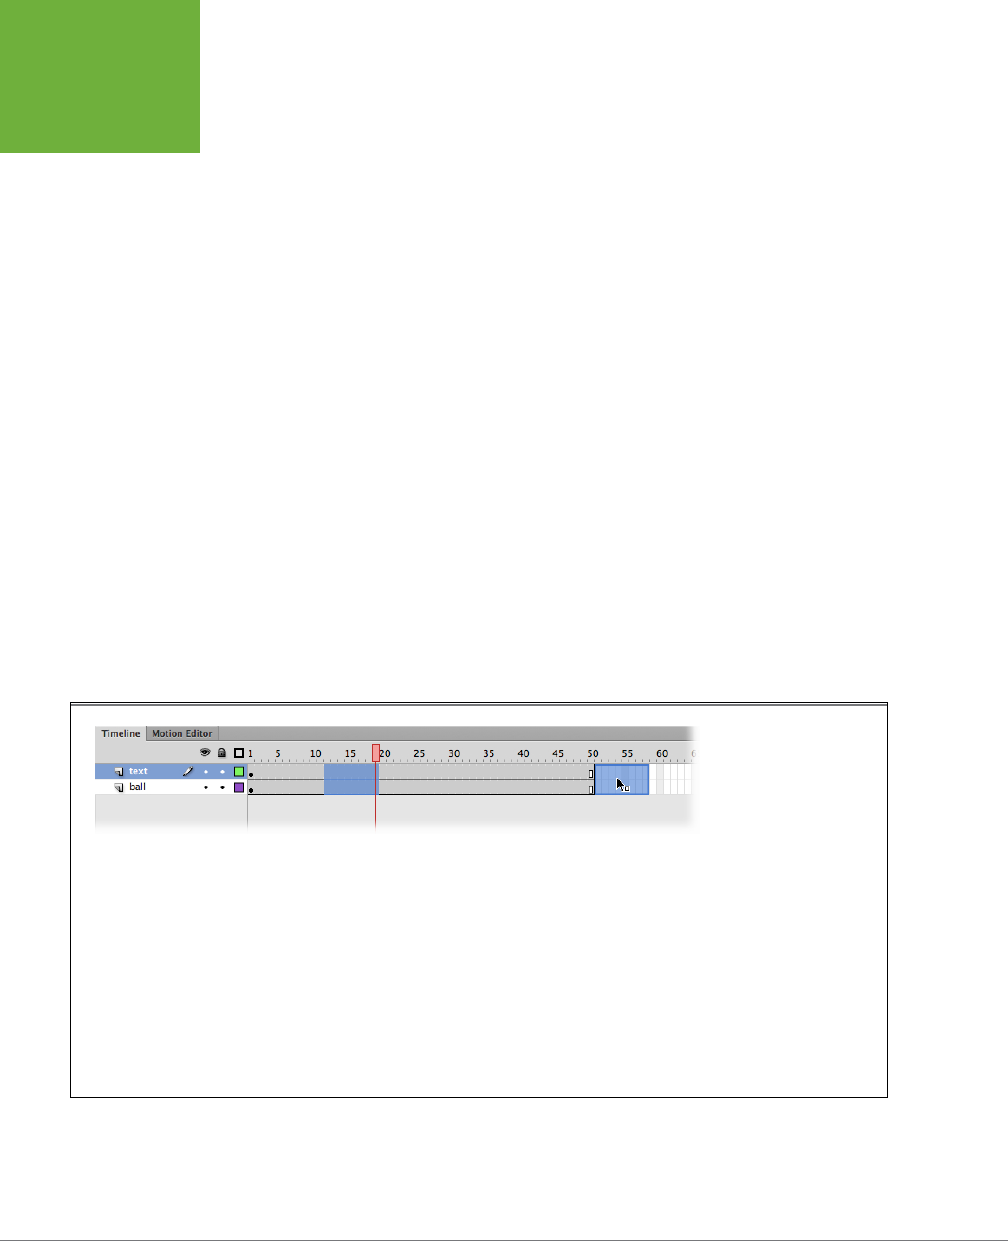
FLASH CS6: THE MISSING MANUAL
128
WORKING
WITH FRAMES
of your frames but also your frames themselves from one part of your timeline to
another.
Copying and pasting frames is a great way to cut down on your development time.
Here’s how it works. Say you have a series of frames showing a weasel unwrap-
ping a stick of chewing gum. It’s a gag scene, one you want to repeat throughout
your animation for comic eect. Instead of having to insert all the keyframes and
regular frames every time you want to slip in the weasel gag, all you need to do is
copy the weasel frames once and then paste them into your timeline wherever you
want them to go.
Furthermore, copying and pasting isn’t just useful for those times when you want a
carbon copy of a scene. If you want to change something in each pasted scene—the
brand of chewing gum the weasel is unwrapping, for example—you can do that, too,
after you’ve pasted the frames. Copying and pasting frames works almost exactly
like copying and pasting words or drawn objects—with a few twists. Here are some
points to keep in mind:
• As usual, you have to select what you’re going to copy before you set o the
command. See page 99 for a refresher on selecting frames in the timeline.
• If the frames you’re selecting span more than one layer, then make sure you
select all the layers for each frame, as shown in Figure 4-1. (If the frames you’re
selecting are part of a motion tween, then you need to use a dierent technique,
as explained on page 109. Ctrl-click [⌘-click] to select the first frame, and then
drag to select adjacent frames.)
FIGURE 4-1
To select multiple frames,
click the first frame of the
series you want to select,
and then Shift-click
the last frame. Flash
automatically selects the
beginning and ending
frames and all the frames
in between. To copy
and paste frames in the
same document, press
the Altkey (Windows)
or the Option key (Mac)
while you drag a copy of
the selected frames to a
new spot.
• Copying and pasting tweened frames varies depending on the type of tween—
motion or shape. While tweened frames are displayed as separate, distinct
images, they’re not; only keyframes contain distinct images. If you want to
www.it-ebooks.info

CHAPTER 4: ORGANIZING FRAMES AND LAYERS 129
WORKING
WITH FRAMES
copy and paste an entire shape tween, then you have to select the beginning
and end keyframes. The motion tween is much easier-going when it comes to
copying and pasting frames. You can select any frames from the middle of a
motion tween and paste them (as a tween) into another layer.
NOTE Classic tweens (page 124) work more like shape tweens. You have to select the beginning and ending
keyframes of what you want to copy and paste. You can’t take a chunk of frames from the middle.
• Flash doesn’t limit you to pasting within the same document. After you copy,
you can open any other Flash animation and paste the frames right in.
NOTE Although Cut, Copy, and Paste usually travel as a threesome, things work a little differently in Flash.
The Cut Frames command on the Edit→Timeline submenu doesn’t actually cut
frames
; instead, it cuts the
contents
of the selected frame. To get rid of the frame itself, you need to use Edit→Timeline→Remove Frames, as described
in the box on page 131.
The process of copying and pasting frames follows the same basic steps every time:
1. In the timeline, select the frames you want to copy.
You probably want to make sure that the set of frames you choose begins
with a keyframe, as described in the third bullet point above. Either way, Flash
highlights the selected frames and moves the playhead to the last selected
frame. You can select frames on more than one layer, as long as the layers are
adjacent to each other.
2. Press Ctrl+Alt+C (Option-⌘-C).
Flash stores the frames so you can paste them at another spot on the timeline
or even to a dierent Flash document. Keep in mind, the timeline copy and
paste commands are dierent from the standard Copy (Ctrl+C or ⌘-C) and
paste (Ctrl+V or ⌘-V).
TIP There are three ways to use the Copy Frames and Paste Frames commands. For most Flash folk, the
shortcut keys shown in these steps are the fastest method. You’ll use the commands often enough that they’ll
become second nature. As an alternative, you can right-click (Control-click) the timeline to see a shortcut menu
with the commands. Probably the least convenient method is the main menu (Edit→Timeline→Copy Frames).
3. Select the keyframe where you want to begin pasting the copied frames.
In other words, select the frame after which you want to add the copied frames.
4. Press Ctrl+Alt+V (Option-⌘-V on the Mac).
Flash pastes the copied frames, replacing the currently selected keyframe with
the first copied frame. If you pasted frames into the middle of a timeline, Flash
repositions your existing frames
after
the last pasted frame. If your selection
in step 1 included more than one layer, then Flash adds extra layers as needed.
www.it-ebooks.info

FLASH CS6: THE MISSING MANUAL
130
WORKING
WITH FRAMES
Moving Frames and Keyframes
The timeline is serial: When you run your animation, Flash displays the content in
Frame 1, followed by the content in Frame 2, followed by the content in Frame 3,
and so on. If you change your mind about the order in which you want frames to
appear, all you need to do is move them.
Simple in theory—but moving frames in Flash isn’t quite as cut and dried as you
might think. As you may recall if you’ve had a chance to read through Chapter 3,
only keyframes can contain actual images; regular frames, technically called static
frames, contain either tweened or “held over” copies of the images placed in the
previous keyframe. So whether you move a frame or a keyframe, you end up with
a keyframe. Here’s how it works:
• Moving a keyframe. When you move a keyframe, what Flash actually moves is
the keyframe’s content and keyframe designation; Flash leaves behind a static
frame in the original keyframe’s place. (And that static frame may or may not
be empty, depending on what precedes it.)
• Moving a static frame. Flash moves the static frame but turns the moved frame
into a keyframe. (If you move a series of regular frames, then Flash turns just
the first moved frame into a keyframe.)
TIP There’s another way to change the order in which Flash plays frames: by creating an ActionScript action,
as described in Chapter 15. Creating an action lets you tell Flash how to play your frames: backward, for example,
or by rerunning the first 10 frames three times and then moving on. You want to use ActionScript (as opposed to
moving frames) to give your audience the choice of viewing your animation in different ways.
Here are the steps in detail:
1. In the timeline, select the frame(s) you want to move.
Flash highlights the selected frame (or frames) and moves the playhead to the
last selected frame.
2. Drag the selected frame(s) to the frame after which you want to place the
selected frames.
As you drag the selected frames, Flash highlights the frames you’re moving to
help you position them (Figure 4-2). If your selection includes a keyframe, then
Flash clears the selected frames from their original position and then inserts
them in their new location. If your selection doesn’t include a keyframe, then
Flash copies the content and creates a new keyframe at the point of insertion.
TIP To select multiple frames, drag in the timeline. You have to release the mouse button to complete the
selection. Then you can drag the selected frames to move the whole bunch of highlighted frames to a new location.
If dragging your frames isn’t working, you can always copy and paste the frames you want to move (page115).
Then use Edit→Timeline→Remove Frames to delete them from their original location (see the box on page 131).
www.it-ebooks.info
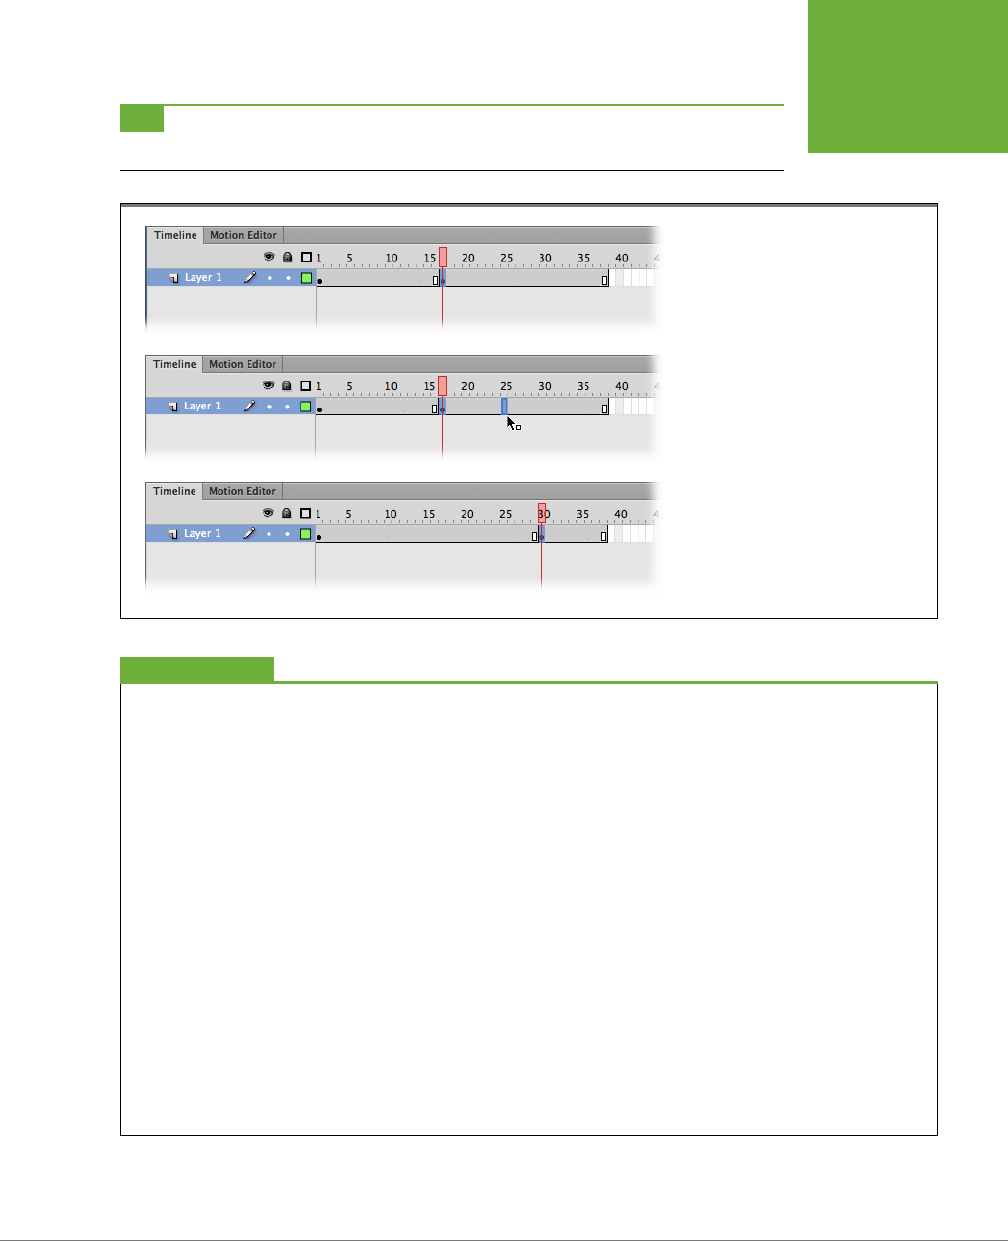
CHAPTER 4: ORGANIZING FRAMES AND LAYERS 131
WORKING
WITH FRAMES
TIP It’s worth remembering that the magic Undo command (Ctrl+Z or ⌘-Z) will reverse any of the remove,
cut, or clear commands. Helpful when something unexpected happens.
FIGURE 4-2
Top: Click to select the frame you want
to move, and then let go of your mouse.
Then drag to move the frame.
Middle: As you make the move, Flash
displays a highlighted frame, or a group
of frames if you selected more than one.
Bottom: Here you can tell the frame
moved to Frame 30 because the
keyframe and end frame indicators have
disappeared from their original locations
(Frames 16 and 17) and reappeared in their
new locations (Frames 29 and 30).
Remove vs. Cut vs. Clear
Flash has three commands you can use to get rid of your frames
(and the content associated with those frames): Remove, Cut,
and Clear. When you’re new to Flash, it may not be immediately
clear which command does what. Here’s what these commands
do to selected frames:
• Edit→Timeline→Remove Frames (Shift+F5). Removing
a frame deletes that frame or group of frames from the
timeline, as if you’d reached into the timeline and yanked
them out. When a keyframe is involved, the result is a little
different. If you attempt to remove a keyframe followed
by a regular frame, Flash deletes the frame immediately
to the right of the keyframe instead (go figure). To be safe,
if you want to remove a keyframe—in other words, if you
want to delete a keyframe from the timeline—then you
first want to clear the keyframe with Shift-F6. That strips
the frame of its keyframe status. Then you can remove
the frame itself.
• Edit→Timeline→Cut Frames (Ctrl+Alt+X or Option-
⌘-X). Cutting a frame deletes the content on the
stage associated with that frame (in other words, turns
the frame into a blank keyframe). If the immediately
succeeding frame is a regular frame, then Flash turns
that succeeding frame into a keyframe. Flash stores the
contents of the cut frames on the Clipboard, so you can
restore them by choosing Edit→Timeline→Paste Frames.
• Edit→Timeline→Clear Frames (Alt+Delete or Option-
Delete). Clearing frames is just like cutting them, but
with one difference: Flash doesn’t store the contents of
the cleared frames (so you can’t restore them).
UP TO SPEED
www.it-ebooks.info

FLASH CS6: THE MISSING MANUAL
132
WORKING
WITH FRAMES
Editing Multiple Frames
Imagine you’ve just completed a 250-frame animation showing a character in a
red T-shirt demonstrating your company’s latest product, an electronic egg slicer.
Suddenly, your boss comes in and declares that red is out. (Red is the color your
competitor is using for
its
egg slicer launch.) You have, your boss declares, until the
end of the day to change all 250 frames.
Now, if you had to change all 250 frames one at a time, you’d never be able to meet
your deadline, and even if you did, you’d probably make a few mistakes along the
way, like accidentally repositioning the T-shirt in a couple of frames or missing a few
frames altogether. But it’s precisely this kind of en masse editing job that Flash’s
multiple-frame editing capability was designed to handle. (By the way, you can
also edit multiple frames using Flash’s Find and Replace commands. See the box
below for more.)
Using a technique called
onion skinning
, you can see the contents of several frames
at once. There are three modes for onion skinning: Onion Skin, Onion Skin Outlines,
and Edit Multiple Frames. Each is helpful for a dierent type of task. Use the buttons
at the bottom of the timeline to choose an onion skin mode, as shown in Figure 4-3;
use the
onion markers
in the timeline to choose which frames are displayed.
Editing Multiple Frames with Find and Replace
Another way to edit the content of multiple frames is to use
Flash’s Find and Replace function. Similar to the Find and Re-
place you’ve undoubtedly used in word processing programs,
this function lets you search every frame of your animation
for a specific bit of text (or even a certain color or bitmap file)
and either replace the occurrences yourself or tell Flash to
replace them for you using the text (or color or bitmap file)
you tell it to use.
To use this function, select Edit→“Find and Replace.” Then,
in the “Find and Replace” window that appears, head to the
For
drop-down menu and select the item you want to find.
Your choices include Text, Font, Color, Symbol, Sound, Video,
and Bitmap.
To change the occurrences yourself, click Find Next or Find
All (and then make your changes on the stage). To tell Flash
to change the occurrences, add a Replace With option (for
example, the color or text you want to insert), and then click
Replace or Replace All.
GEM IN THE ROUGH
The Edit Multiple Frames mode makes it easy to deal with that red T-shirt issue,
because you can quickly identify (and change) the frames containing red T-shirts.
Onion skinning is also useful for those times when you want to hand-draw an “in-
between” frame, because you can see both the preceding and succeeding frames
on the stage at the same time.
NOTE Technically speaking, when you edit multiple frames in Flash, you’re actually editing multiple
keyframes
. Keyframes are the only frames that contain unique, editable art. (Regular frames just “hold over”
the contents of the previous keyframe, and Flash stores tweened frames not as editable images, but as a bunch
of calculations.)
www.it-ebooks.info
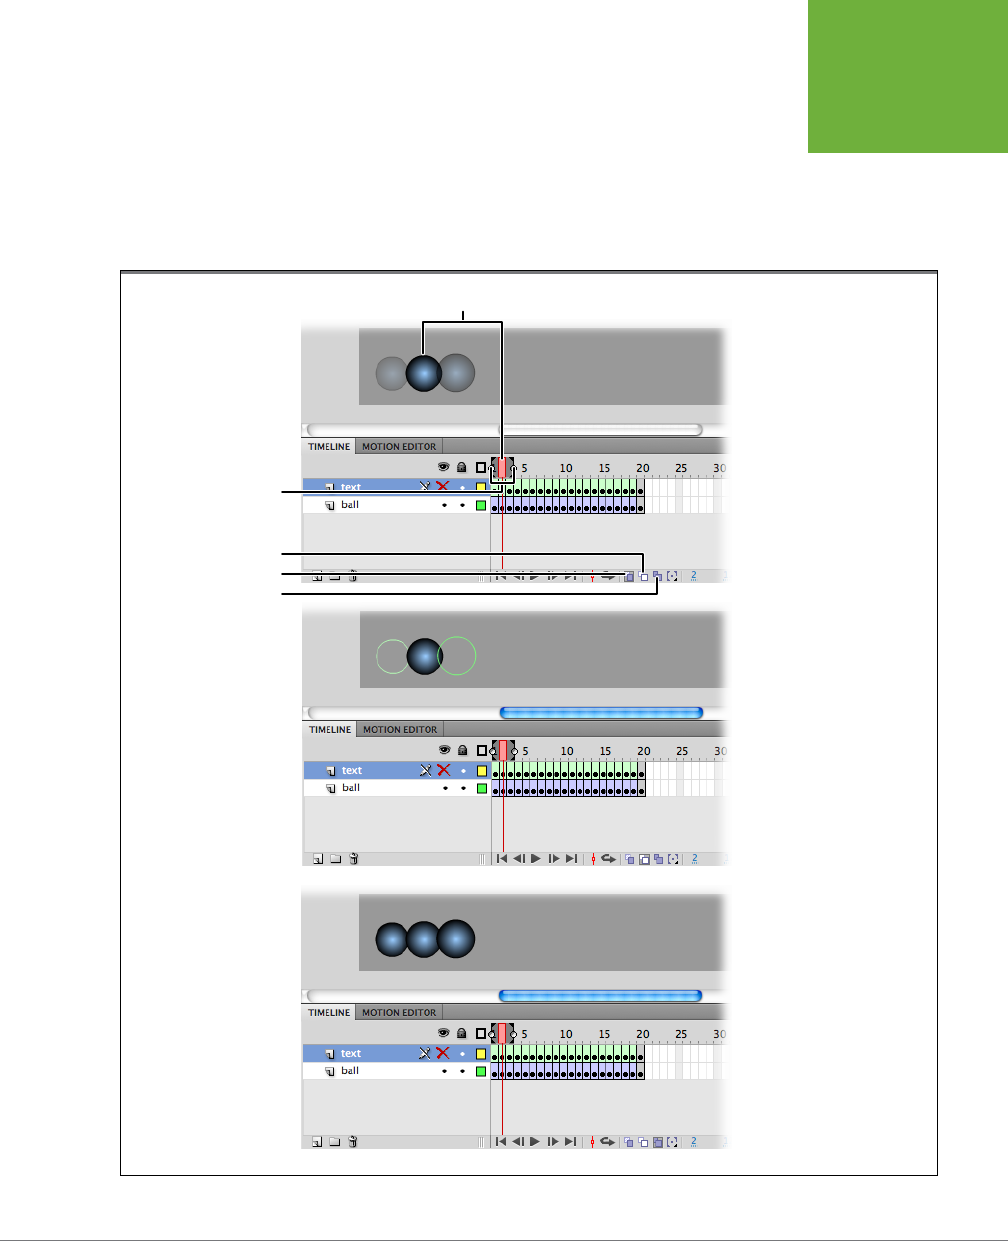
CHAPTER 4: ORGANIZING FRAMES AND LAYERS 133
WORKING
WITH FRAMES
To edit multiple frames using onion skinning:
1. In the timeline, click the Edit Multiple Frames icon.
Flash displays multiple frames on the stage and adds onion markers to the frame
display (Figure 4-3, bottom). These beginning and ending onion markers tell
Flash which frames you want it to display on the stage.
FIGURE 4-3
Top: Click the Onion Skin but-
ton, and the image for the
selected frame appears bold.
The images on the adjacent
frames appear faded out.
Middle: Click Onion Skin
Outlines, and images on the
unselected frames appear as
outlines.
Bottom: Click the Edit Mul-
tiple Frames button, and all
the images within the onion
markers appear 100 percent
opaque.
Selected frame
Onion markers
Onion skin outlines
Onion skin
Edit multiple frames
www.it-ebooks.info
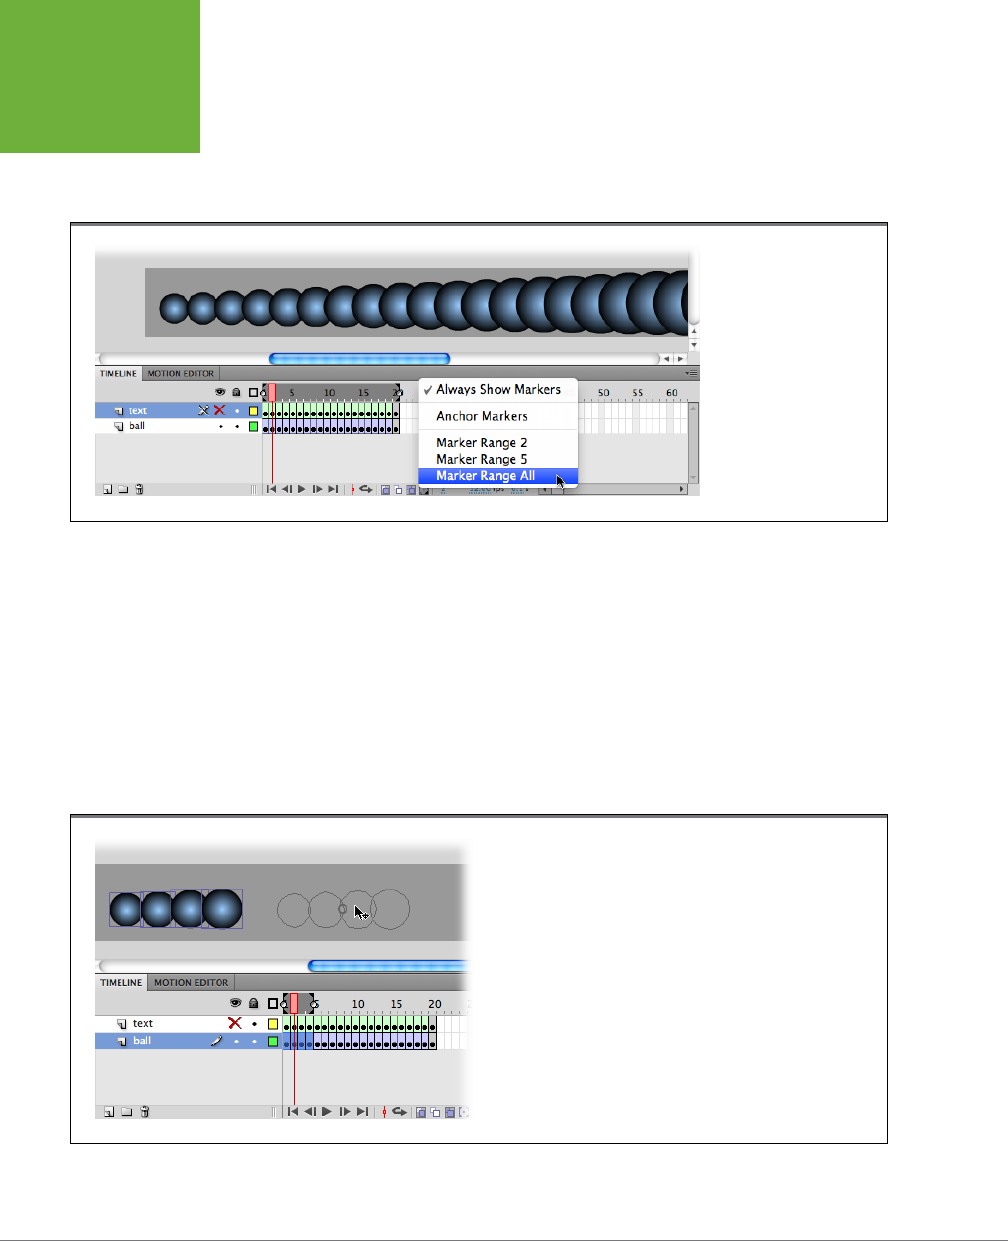
FLASH CS6: THE MISSING MANUAL
134
WORKING
WITH FRAMES
2. Click the Modify Markers icon.
Flash displays a pop-up menu.
3. From the pop-up menu, select Marker Range All (Figure 4-4).
FIGURE 4-4
Here you see the result of
selecting Marker Range
All. The onion markers
surround the entire frame
span (Frame 1 through
Frame 20), and all 20
images appear on the
same stage, ready for you
to edit en masse.
Flash displays onion markers from the beginning of your timeline’s frame span
to the end and shows the contents of each of your frames on the stage. (If you
don’t want to edit all the frames in your animation, you can drag the onion
markers independently to surround whatever subset frames you want.)
4. Edit the frames.
Because you can see and select all the content on a single stage, you can make
your edits more easily than having to hunt and peck individually through every
frame in your animation. In Figure 4-5, four frames are selected with the onion
markers.
FIGURE 4-5
You can work with multiple images just as easily as single images.
For example, you can select several (or all of them) and apply
whatever edits you like—moving them, coloring them, reshaping
them, and so on.
www.it-ebooks.info
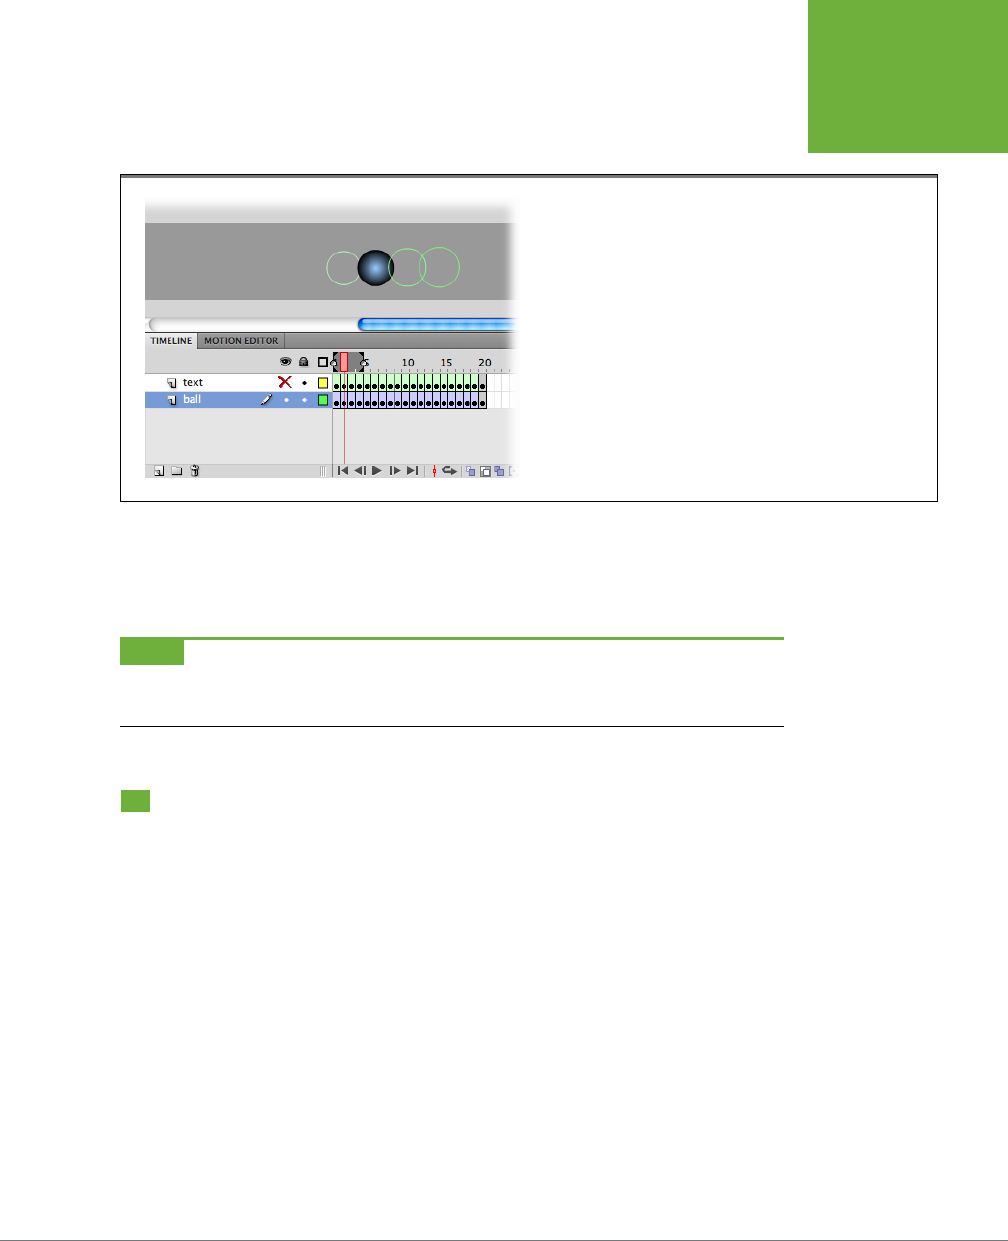
CHAPTER 4: ORGANIZING FRAMES AND LAYERS 135
WORKING
WITH MULTIPLE
LAYERS
The contents are first recolored and then moved in one fell swoop. When the
move is complete, your stage looks like Figure 4-6.
FIGURE 4-6
With onion skinning turned on, you can see multiple frames, but you
can edit only the content of the selected frame. Use the Edit Multiple
Frames mode when you want to see and edit several frames at once.
5. Click Edit Multiple Frames again.
Flash returns to regular one-frame-at-a-time editing mode and displays only
the contents of the current frame on the stage.
NOTE You can’t edit multiple frames on a locked layer (page 148). In fact, when you click Edit Multiple
Frames on a locked layer, Flash doesn’t even show you the content of the frames in the locked layer (not even in
onion skin form).
Working with Multiple Layers
A layer is a named sequence of frames in the timeline. When you work with a single
layer, adding content to frames is easy: You just click a keyframe and use Flash’s
drawing, painting, and text tools to create an image on the stage. But when you work
with multiple layers, you need to keep track of the layers’ order and what objects
are on each layer. For example, suppose you’re creating a composite drawing with
mountains in the background, a car driving by in the foreground, and a separate
layer for your sound clips. You may find adding content a bit trickier, because you
have to be aware of the layer to which you’re adding your content. Fortunately, as
you’ll see in the steps below, the timeline’s Show/Hide icon helps you keep track of
which content you’ve placed on which layer.
www.it-ebooks.info
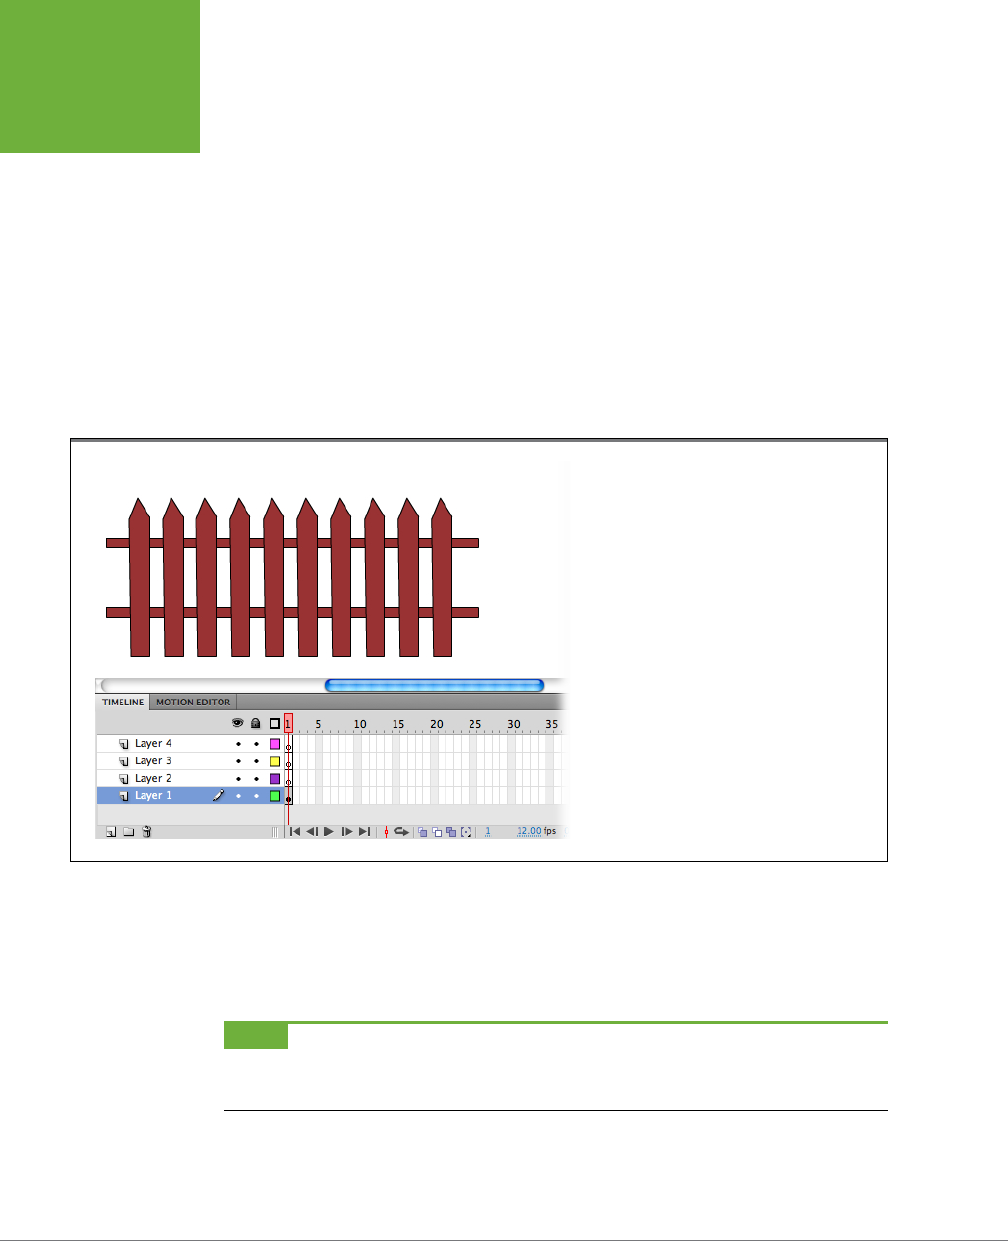
FLASH CS6: THE MISSING MANUAL
136
WORKING
WITH MULTIPLE
LAYERS
To add content to multiple layers:
1. Open the file
04-1_Multiple_Layers.fla
.
You can find this file (and all the other example files) on this book’s Missing CD
page at
www.missingmanuals.com/cds/flashcs6mm
.
2. Click the first keyframe in Layer 1.
Flash highlights the selected frame, as well as the layer name. You also see a
little pencil icon that lets you know this frame is now ready for editing.
3. Use Flash’s drawing and painting tools to draw a fence on the stage.
Your fence doesn’t have to be fancy; a quick “wooden” fence like the one in
Figure 4-7 is fine.
FIGURE 4-7
You can tell at a glance which layer is active (edit-
able) by looking for the pencil icon next to the
layer’s name. Here, Layer 1 is active.
4. Hide Layer 1 by clicking the Show/Hide button next to Layer 1.
The content on the stage temporarily disappears. Flash replaces the Show/Hide
icon with an X and draws a slash through the pencil icon next to Layer 1 to let
you know this layer is no longer editable.
NOTE Technically, you don’t
have
to hide the contents of one layer while you’re working with another; in
fact, in some cases, you want to see the contents of both layers on the stage at the same time (page 138). But for
this example, hiding is the best way to go.
www.it-ebooks.info
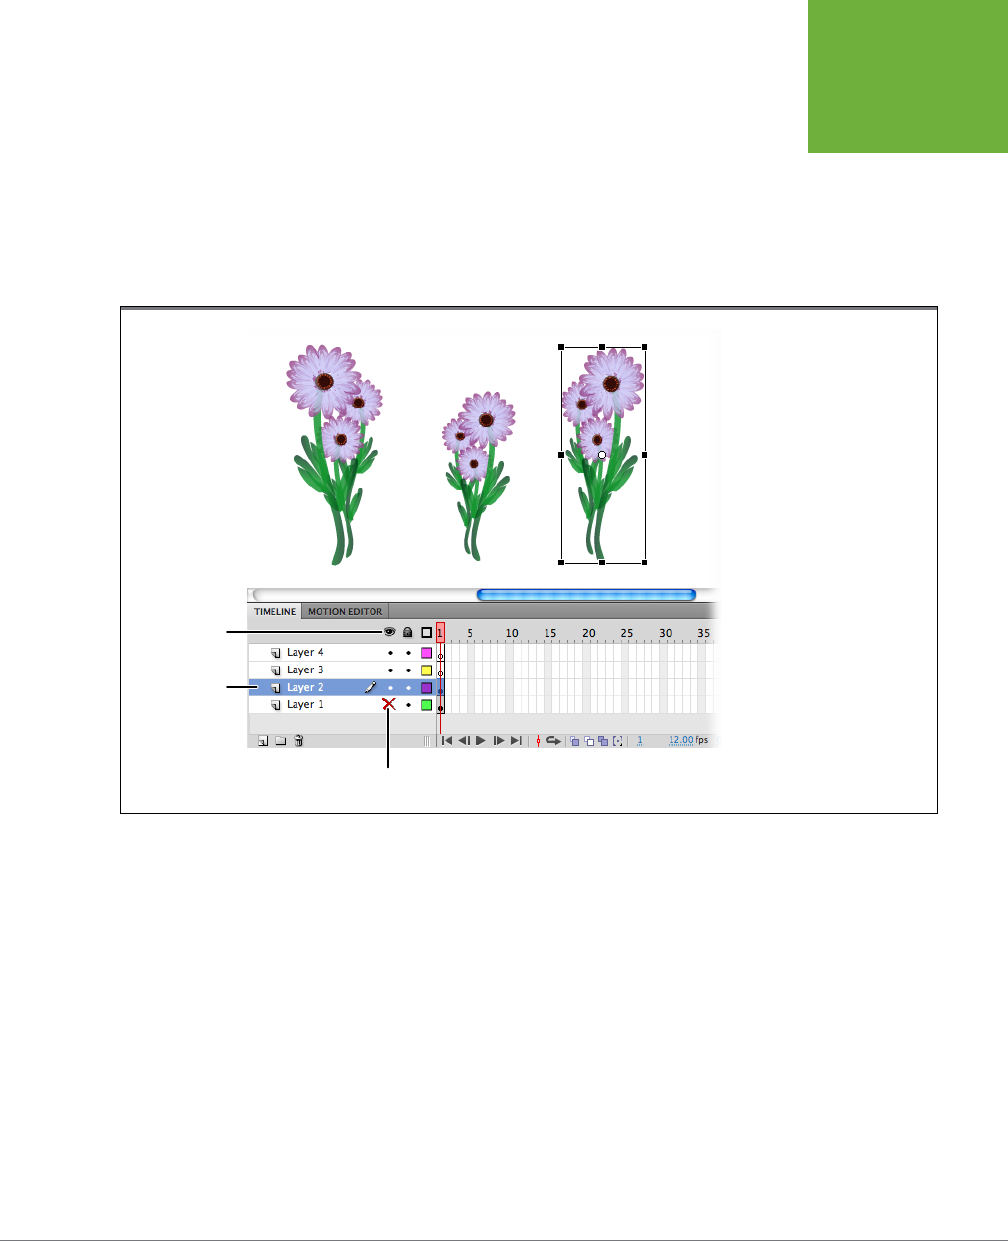
CHAPTER 4: ORGANIZING FRAMES AND LAYERS 137
WORKING
WITH MULTIPLE
LAYERS
5. Click the first keyframe in Layer 2.
Flash highlights the selected frame, as well as the layer name (Layer 2). Now
the pencil icon is next to Layer 2.
6. Use Flash’s drawing and painting tools to draw a few flowers on the stage.
Your workspace should now look like the one in Figure 4-8. You can make
multiple flowers by copying and pasting a single flower.
FIGURE 4-8
Sometimes you want to see
the frame contents of two or
more layers at the same time,
like when you’re trying to line
up objects in multiple layers.
But sometimes seeing all those
different objects on the same
stage is just plain confus-
ing—partly because Flash lets
you edit only one layer at a
time. Here, the fence in the
first frame of Layer 1 is hidden
(you can tell by the big X in the
Show/Hide column) so you can
focus on the contents of Layer
2 (the flowers).
Show/hide
all layers
Visible layer
Hidden layer
7. Hide Layer 2 by clicking the Show/Hide icon next to Layer 2.
The content on the stage temporarily disappears. Flash replaces the Show/Hide
icon with an X and draws a slash through the pencil icon next to Layer 2 to let
you know that this layer is no longer editable.
8. Repeat steps 4–6 for Layers 3 and 4, adding some gray clouds to Layer 3
( Figure4-9) and some flying birds to Layer 4 (Figure 4-10).
9. To see the content for all four layers, click to remove the Show/Hide X icon
next to Layer 3, Layer 2, and Layer 1, as shown in Figure 4-11.
Flash displays the content for all four layers on the same stage.
www.it-ebooks.info
FLASH CS6: THE MISSING MANUAL
138
WORKING
WITH MULTIPLE
LAYERS
Showing and Hiding Layers
This section shows you how to use Flash’s layer tools (including locking/unlock-
ing and hiding/showing) to keep from going crazy when you’re editing content in
multiple layers (Figure 4-12). Two layers aren’t so bad, but if you need to add 6, 8,
10, or even more layers, it’s pretty easy to lose track of which layer you’re working
in. Then in the following section you’ll see how to edit the content in your layers.
FIGURE 4-9
Creating separate layers for different
graphic elements gives you more
control over how each element appears
in your finished animation.
Whether or not you want Flash to show the contents of your layered frames on the
stage depends on the situation. Typically, when you’re creating the content for a new
layer, you want to hide all the other layers so you can focus on what you’re drawing
without any distractions. But after you’ve created a bunch of layers, you want to
see them all at once so you have an idea of what your finished animation looks like
and make adjustments as necessary.
Flash shows all layers until you tell it otherwise.
www.it-ebooks.info
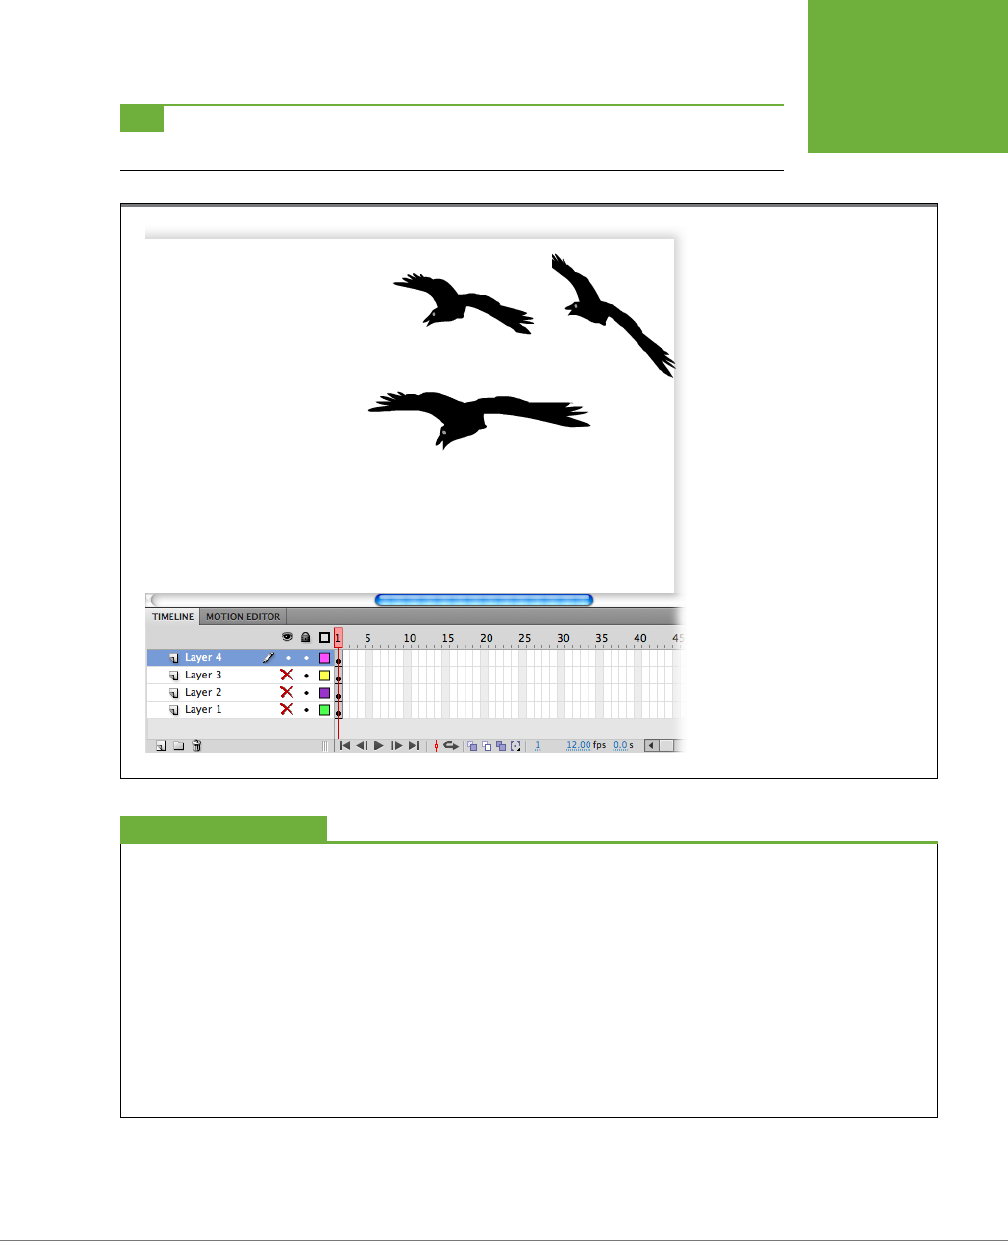
CHAPTER 4: ORGANIZING FRAMES AND LAYERS 139
WORKING
WITH MULTIPLE
LAYERS
TIP You can tell Flash to show (or hide)
all
your layers by clicking the Show/Hide All Layers icon you see in
Figure 4-8. Click the icon again to turn off showing (or hiding).
FIGURE 4-10
In this example, the images are
static, but you can place everything
from motion and shape tweens to
movie clips, backgrounds, actions,
and sounds on their own layers.
Hiding layers affects only what you
see on the stage; when you select
Control→Test Movie to test your
animation, Flash displays all the
layers, whether or not you’ve checked
them as Hidden.
Distribute to Layers
If you have a bunch of graphic elements on one layer that you
want to put on separate layers (perhaps you want to tween
them individually), you can save time by telling Flash to do
the work for you. First, select the objects you want to put on
different layers and then select Modify→Timeline→Distribute
to Layers.
Unfortunately, like any automatic process, this approach may
not create the precise results you want. Flash can’t possibly
know that you want both an eye and an eyebrow to go on the
same layer, for example. And this trick doesn’t break apart
bitmaps, symbols, or grouped objects.
If you want to distribute the elements of a bitmap or symbol
to individual layers, you first need to break up that bitmap,
symbol, or grouped object by selecting it and then choosing
Modify→Break Apart or Modify→Ungroup.
GEM IN THE ROUGH
www.it-ebooks.info
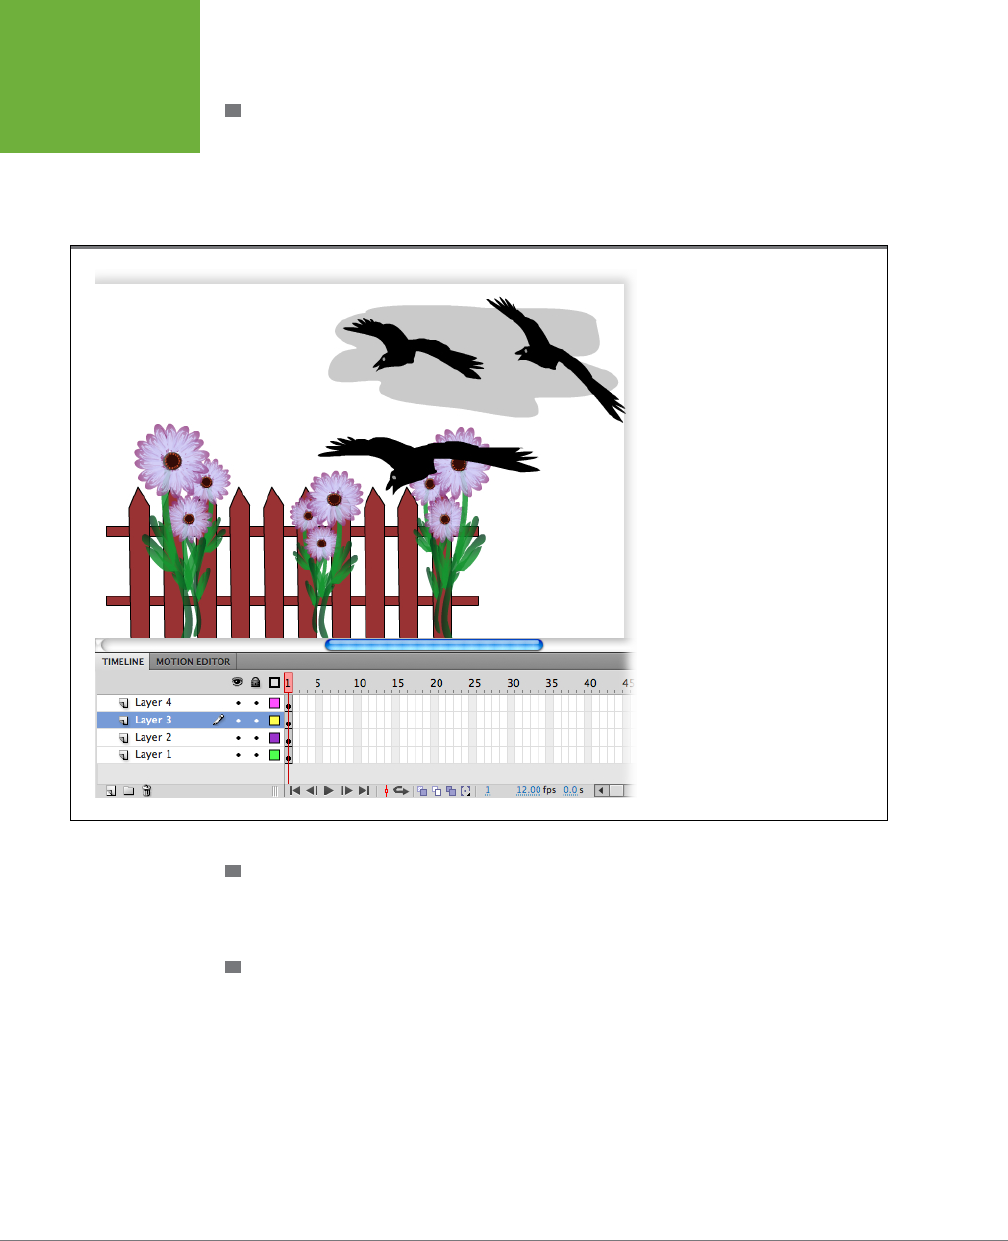
FLASH CS6: THE MISSING MANUAL
140
WORKING
WITH MULTIPLE
LAYERS
HIDING A LAYER
The eyeball in the timeline is the Show or Hide All Layers button. It works like a
toggle. Beneath that eye are buttons to show or hide layers individually. So to hide
a single layer, click the dot in that layer. When you do, Flash replaces the dot with a
red X and temporarily hides the contents of the layer (Figure 4-13).
FIGURE 4-11
Here’s what the composite drawing
for Frame 1 looks like: the fence, the
flowers, the cloud, and the birds, all
together on one stage. Notice the
display order: The flowers (Layer 2)
appear in front of the fence (Layer
1), and the birds (Layer 4) in front of
the cloud (Layer 3). You can change
the way these images overlap by
rearranging the layers, as you’ll see
on page 146.
SHOWING A LAYER
In the timeline, click the X in the layer you want to show. When you do, Flash replaces
the X with a dot and displays the contents of the layer on the stage.
HIDING (OR SHOWING) ALL LAYERS EXCEPT THE ONE YOU’RE EDITING
In the timeline, Alt-click (Option-click) the Show/Hide button next to the layer
you’re editing. Flash immediately hides (or shows) all the layers, except the one
you’re editing.
www.it-ebooks.info
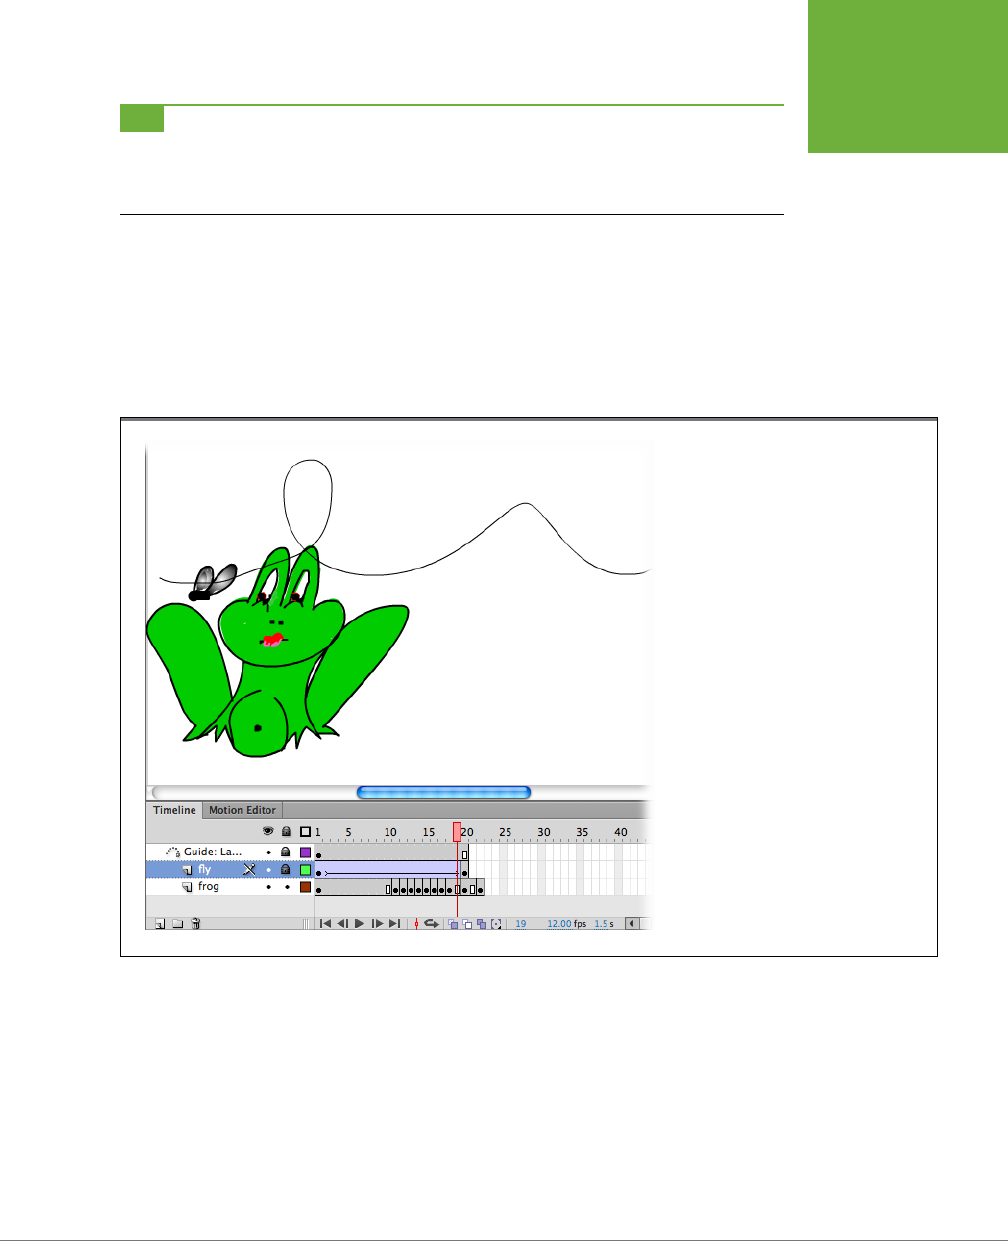
CHAPTER 4: ORGANIZING FRAMES AND LAYERS 141
WORKING
WITH MULTIPLE
LAYERS
TIP If you try to edit a hidden layer by drawing on the stage, Flash displays a warning dialog box that gives
you the opportunity to show (and then edit) the layer. Not so if you try to drag a symbol onto the stage—Flash
just refuses to let you drop the symbol on the stage. Oddly enough, however, Flash
does
let you add and remove
frames and keyframes in a locked layer.
Working with Layers
The more layers you have, the more important it is to keep them organized. In this
section, you’ll see how to give your layers meaningful names so you’ll know which
images, sounds, or actions they hold. You’ll learn how to arrange your layers so that
your images and objects overlap the way you want. And you’ll learn how to copy and
paste layers, an important skill that saves time and cuts down on repetitive tasks.
FIGURE 4-12
This animation contains three layers: one
containing a motion tween of a buzzing
fly, one containing the path the fly takes
as it buzzes around the frog’s head, and
one containing the highly interested frog.
In some situations, showing all layers is
fine, but here it’s confusing to see all those
images on the stage at the same time.
Renaming Layers
The names Flash gives the layers you create—Layer 1, Layer 2, Layer 3, and so on—
aren’t particularly useful when you’ve created 20 layers and can’t remember which
layer contains the ocean background you spent 10 hours drawing. Get into the habit
of renaming your layers as soon as you create them, and you’ll have an easier time
locating the specific elements you need when you need them.
www.it-ebooks.info

FLASH CS6: THE MISSING MANUAL
142
WORKING
WITH MULTIPLE
LAYERS
This section builds on the example you created earlier in this chapter. If you haven’t
had a chance to work through that section, you can download
04_2_Flowers.fla
from this book’s Missing CD page (
www.missingmanuals.com/cds/flashcs6mm
)
and use it instead.
Why Layer?
In addition to making it much, much easier for you to change
your animations, working with layers gives you the following
benefits:
• You can create multi-tweened animations. Often if you’re
tweening more than one object, it helps to put each of
those objects on a separate layer. Sometimes, it’s the only
way to get the job done. For example, if you want to show
two baseballs bonking a parked car—one ball sailing in
from the right and one from the left—then you need to
either draw the entire animated sequence for each ball
by hand or use separate layers for each tween.
• You can create more realistic eects. Since you can shuffle
layers, putting some layers behind others and even
adjusting the transparency of some layers, you can add
depth and perspective to your drawings. And because you
can distribute your drawings to layers at whatever level of
detail you want, you can create separate layers that give
you independent control over, say, your characters’ facial
expressions and arm and leg movements.
• You can split up the work. In the olden days, TV and movie
animators used layers (technically, they use transparent
sheets of plastic called cels, but it’s the same concept) to
divvy up their workload, and so can you. While you’re
crafting the dog layer, one of your teammates can be
working on the cloud layer, and another two can be
working on the two character layers. When you’re all
finished, all you need to do is copy everyone’s layers and
then paste them into a single timeline. Bingo—instant
animation.
• You can organize your animations. As you begin to create
more sophisticated animations, which may include not
just images and animated effects but also symbols
(Chapter 7), sounds (Chapter 11), and actions (Chapter
12), you’ll quickly realize that you need to organize your
work. Layers help you get organized. If you get into the
habit of putting all your animation’s ActionScript code
into a single layer (called “actions”), all the sounds into
a single layer (called “sounds” or “soundtrack”), all the
text into a single layer (called “text”), and so on, then you
can quickly spot the element you’re looking for when it
comes time to edit your animation.
UP TO SPEED
To rename a layer:
1. Open the file
04_2_Flowers.fla
.
If you created your own Flash document when you worked through “Working
with Multiple Layers” (page 135), you can use that document instead.
2. Double-click the name Layer 4.
Flash displays the layer name in an editable text box (Figure 4-15). On the stage,
you see the content for this layer (the birds) selected.
www.it-ebooks.info
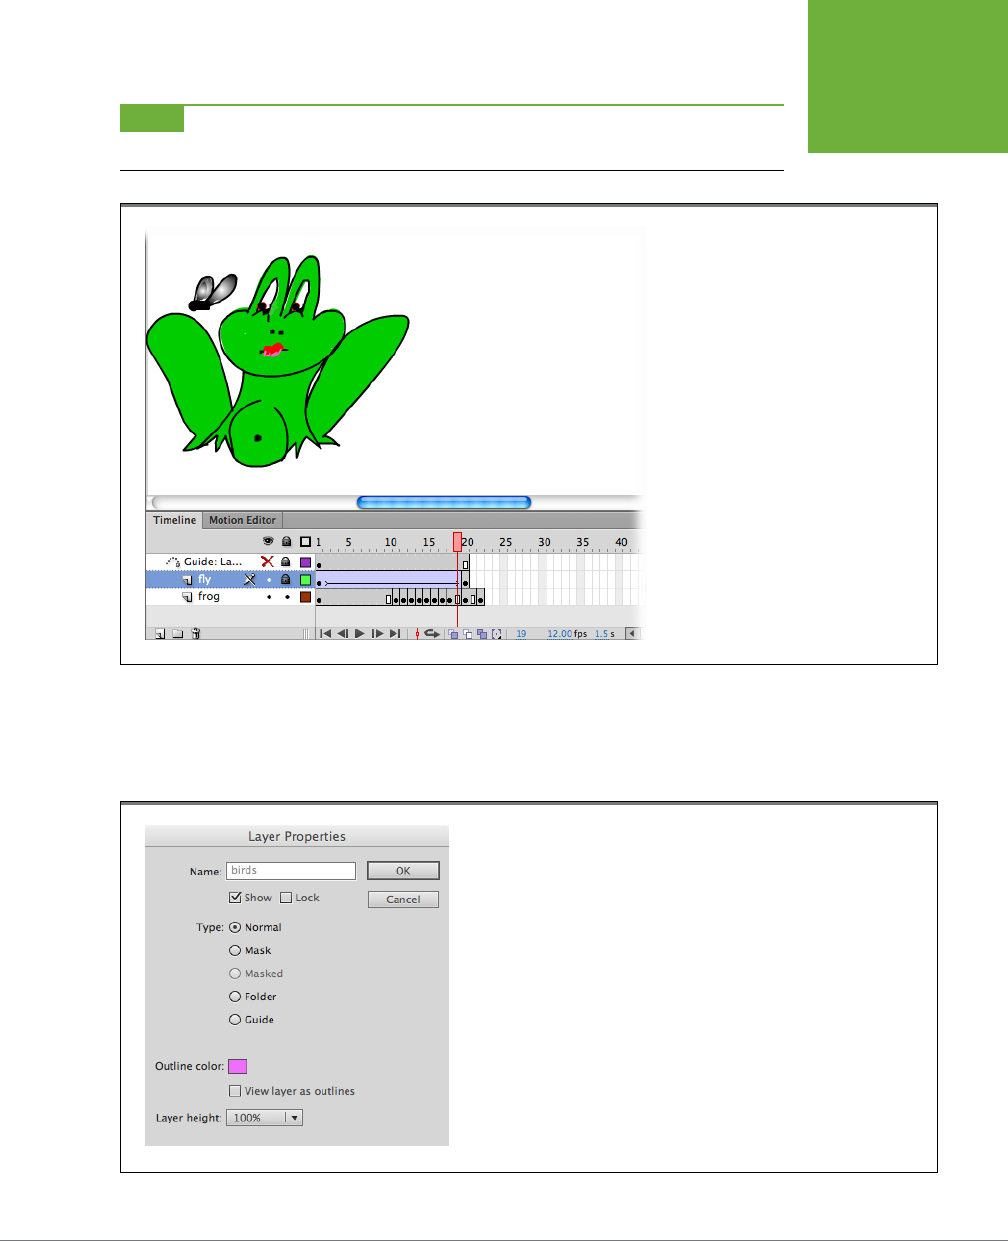
CHAPTER 4: ORGANIZING FRAMES AND LAYERS 143
WORKING
WITH MULTIPLE
LAYERS
NOTE Instead of double-clicking the layer name, you can use the Layer Properties dialog box to rename
your layer. Check out the box on page 144 for details.
FIGURE 4-13
Hiding the motion guide layer lets you focus
on the two main elements of this animation:
the frog and the fly.
3. Click inside the text box, type
birds
, and then click anywhere else in the
workspace.
Flash displays the new name for your layer.
FIGURE 4-14
When you open the Layer Properties dialog box, you’ve got all the layer settings
in one place. You can change the layer name; show, hide, or lock your layer; and
much more.
www.it-ebooks.info

FLASH CS6: THE MISSING MANUAL
144
WORKING
WITH MULTIPLE
LAYERS
4. Repeat steps 1 and 2 for Layers 3, 2, and 1, renaming them
cloud, flowers
,
and
fence
, respectively.
Layer Properties
Flash gives you two ways to change the properties associated
with your layers—for example, the name of your layer, whether
you want to show the content of a layer on the stage or hide it,
whether you want to lock a layer or leave it editable, and so on.
One way is clicking the Show/Hide button in the timeline.
(That’s the approach described in this chapter.) The other way is
by using the Layer Properties dialog box shown in Figure 4-14.
To display the Layer Properties dialog box, click to select a
layer, and then do one of the following:
• Double-click the layer icon you find just to the left of the
layer name. Right-click the layer name, and then choose
Properties from the shortcut menu that appears.
• Select Modify→Timeline→Layer Properties.
The Layer Properties dialog box lets you change several proper-
ties in the selected layer in one fell swoop:
• Name. Type a name in this text box to change the name
of your layer.
• Show. Turn on this checkbox to show the contents of
this layer on the stage; turn it off to hide the contents
of this layer.
• Lock. Turn on this checkbox to prevent yourself (or anyone
else) from editing any of the content in this layer; turn it
off to make the layer editable once again.
• Type. Click to choose one of the following layer types:
• Normal. The type of layer described in this chapter.
• Mask. A type of layer you use to carve out “portholes,”
through which the content on an underlying masked
layer appears (page 151).
• Masked. A regular layer that appears below a mask
layer (page 152).
• Folder. Not a layer at all, but a container you can
drag layers into to help you organize your animation
(page 150).
• Guide. A special type of layer that you use to position
objects on a guided layer, and which doesn’t appear
in the finished animation (page 192).
• Outline color. Click to choose the color you want Flash
to use when you turn on the “View layer as outlines”
checkbox.
• View layer as outlines. Turning on this checkbox tells
Flash to display the content for this layer on the stage as
wireframe outlines (instead of the way it actually looks
when you run the animation). Find out more on page 149.
• Layer height. Click the arrow next to this drop-down list
to choose a display height for your layer in the timeline:
100% (normal), 200% (twice as big), or 300% (three times
as big). You may find this option useful for visually setting
off one of your layers, making it easier to spot quickly.
After you make your changes, click OK to tell Flash to apply
your changes to the layer.
UP TO SPEED
FIGURE 4-15
If you can’t remember what a particular layer contains, then check the stage:
When you double-click a layer name to rename it, Flash automatically high-
lights the content associated with that layer.
www.it-ebooks.info
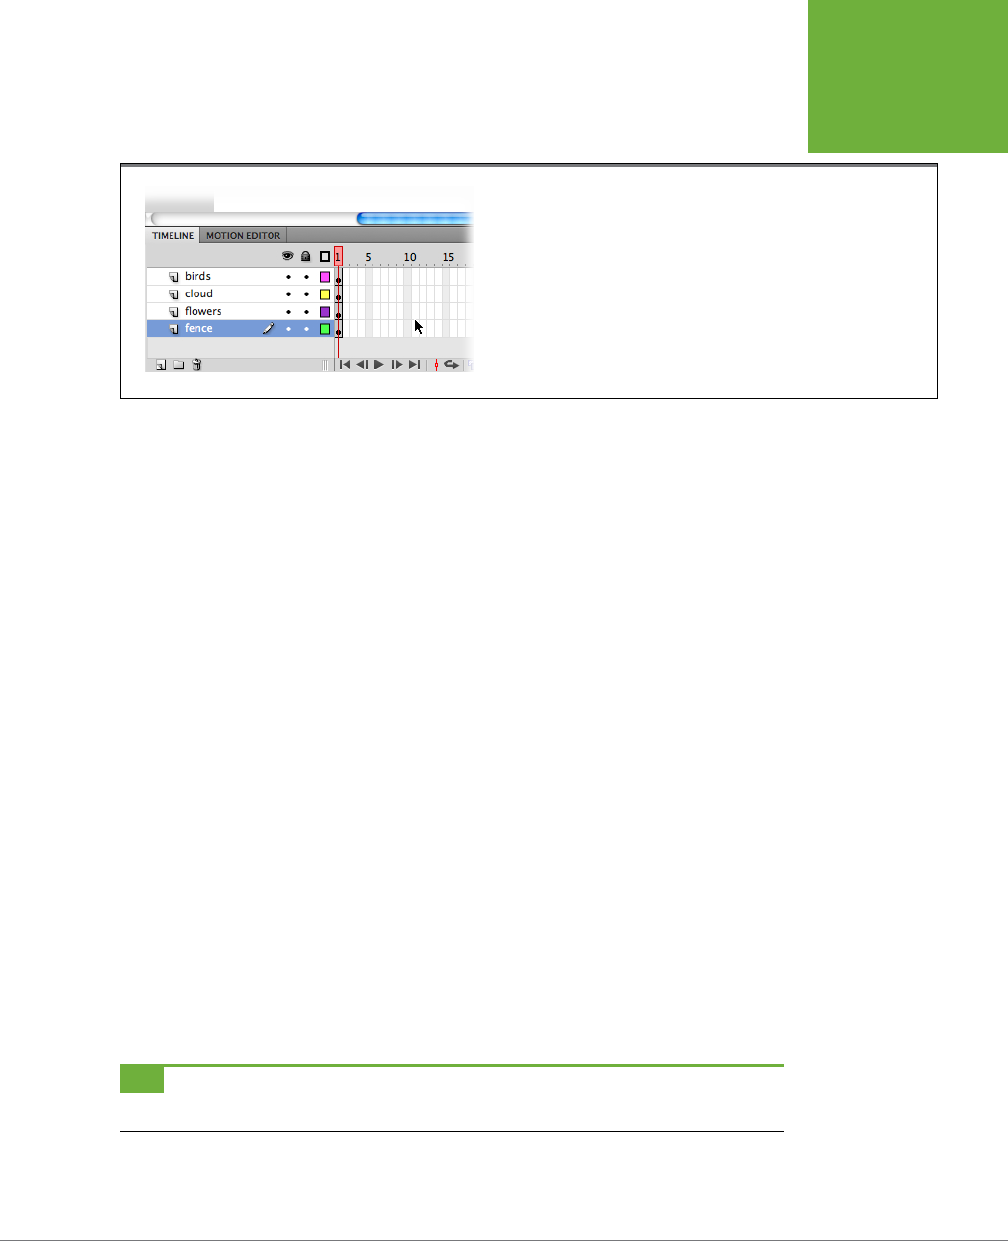
CHAPTER 4: ORGANIZING FRAMES AND LAYERS 145
WORKING
WITH MULTIPLE
LAYERS
When you’re done, your renamed layers should look like Figure 4-16.
FIGURE 4-16
The Layers area of the timeline isn’t particularly big, so it’s best to keep your
layer names short and sweet. If you need more room, just drag the bar that
separates the names from the frames.
Copying and Pasting Layers
Earlier in this chapter, you saw how to copy and paste individual series of frames.
But Flash also lets you copy and paste entire layers—useful when you want to create
a backup layer for safekeeping or when you want to create a duplicate layer you’ll
later change slightly from the original.
For example, if you want your animation to show an actor being pelted with toma-
toes from dierent angles, you can create a layer that shows a tomato coming in
from stage right—perhaps using a motion or shape tween (Chapter 3). Then you
can copy that layer, paste it back into the Layers window, rename it, and tweak it so
that the tomato comes from stage left. Maximum eect for minimum eort—that’s
what copying and pasting gives you.
To copy and paste a layer:
1. In the timeline, click the name of the layer you want to select.
Flash highlights the layer name, as well as all the frames in the layer.
2. Select Edit→
Timeline→Copy Frames.
If you don’t have a layer waiting to accept the copied frames, then create a new
layer now before going on to the next step.
3. In the Layers window, select the name of the destination layer. Then choose
Edit→Timeline→Paste Frames.
Flash pastes the copied frames into the new layer, beginning with the first frame.
It also pastes the name of the copied layer into the new layer.
TIP It’s also possible to copy and paste layers between Flash documents. That’s a process used on one of
the last exercises in the book (page 760), where layers from an iPhone app are pasted into an Android project.
www.it-ebooks.info
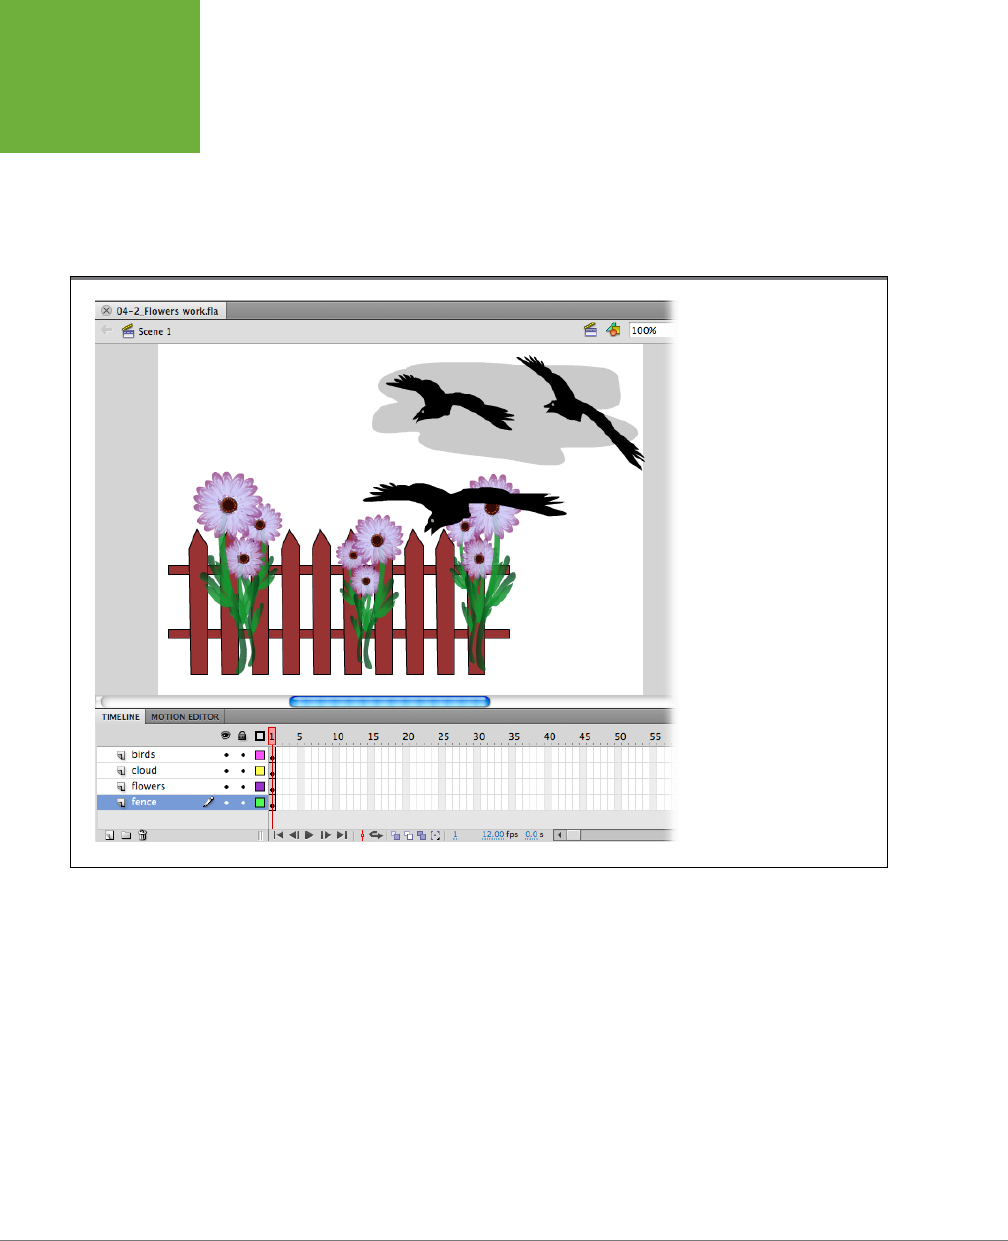
FLASH CS6: THE MISSING MANUAL
146
WORKING
WITH MULTIPLE
LAYERS
Reordering (Moving) Layers
You can change the way images, text fields, and other objects overlap on the stage
by rearranging the layers in the timeline. For example, in Figure 4-17, the fence seems
to be behind the flowers because, in the timeline, the fence layer is below the flowers
layer. If you’d rather have the flowers behind the fence, just drag the flowers layer
below the fence. Figure 4-18 shows you an example.
FIGURE 4-17
Flash treats layers the same
way you treat a stack of
transparencies: The image
on the bottom gets covered
by the image above it, which
gets covered by the image
above it, and so on. Stacking
isn’t an issue if none of your
images overlap. But when
they do, you need to decide
which layers you want in front
and which behind.
Deleting a Layer
Flash gives you three ways to delete a layer:
• In the timeline, right-click (Control-click) the layer you want to delete and then,
from the shortcut menu that appears, choose Delete Layers.
• Drag the layer you want to delete to the trash can (see Figure 4-19).
• Click the layer you want to delete to select it (or Shift-click to select several
layers), and then click the trash can.
Whichever method you choose, Flash immediately deletes the layer or layers (in-
cluding all the frames associated with that layer or layers) from the Layers window.
www.it-ebooks.info
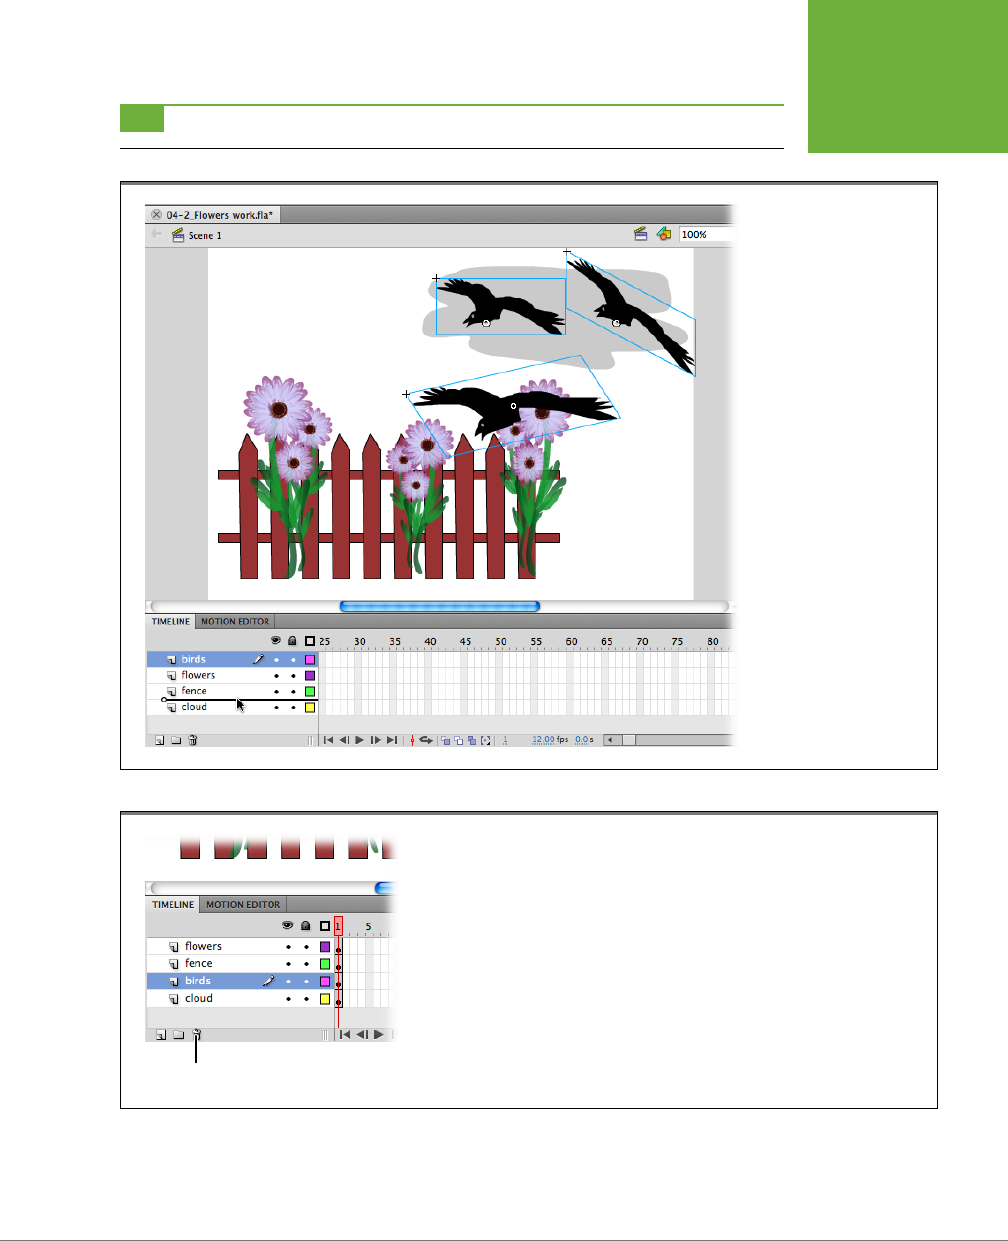
CHAPTER 4: ORGANIZING FRAMES AND LAYERS 147
WORKING
WITH MULTIPLE
LAYERS
TIP If you delete the wrong layer by mistake, choose Edit→Undo Delete Layer or press Ctrl+Z (⌘-Z).
FIGURE 4-18
Moving a layer is easy: Just
click to select a layer, and
then drag it to reposition
it (and change the order
in which Flash displays the
content of your frames).
Here the cloud layer has
been moved to the bottom
of the list, so it now appears
behind the other images.
The birds layer is in the
process of being moved;
you can tell by the thick
gray line you see beneath
the cursor.
FIGURE 4-19
The quickest way to dispose of a layer is to select it and then click the trash can. All Flash
animations have at least one layer, so you can’t delete the last layer. If you try, Flash doesn’t
display any error—it just quietly ignores you.
Trash Can
www.it-ebooks.info
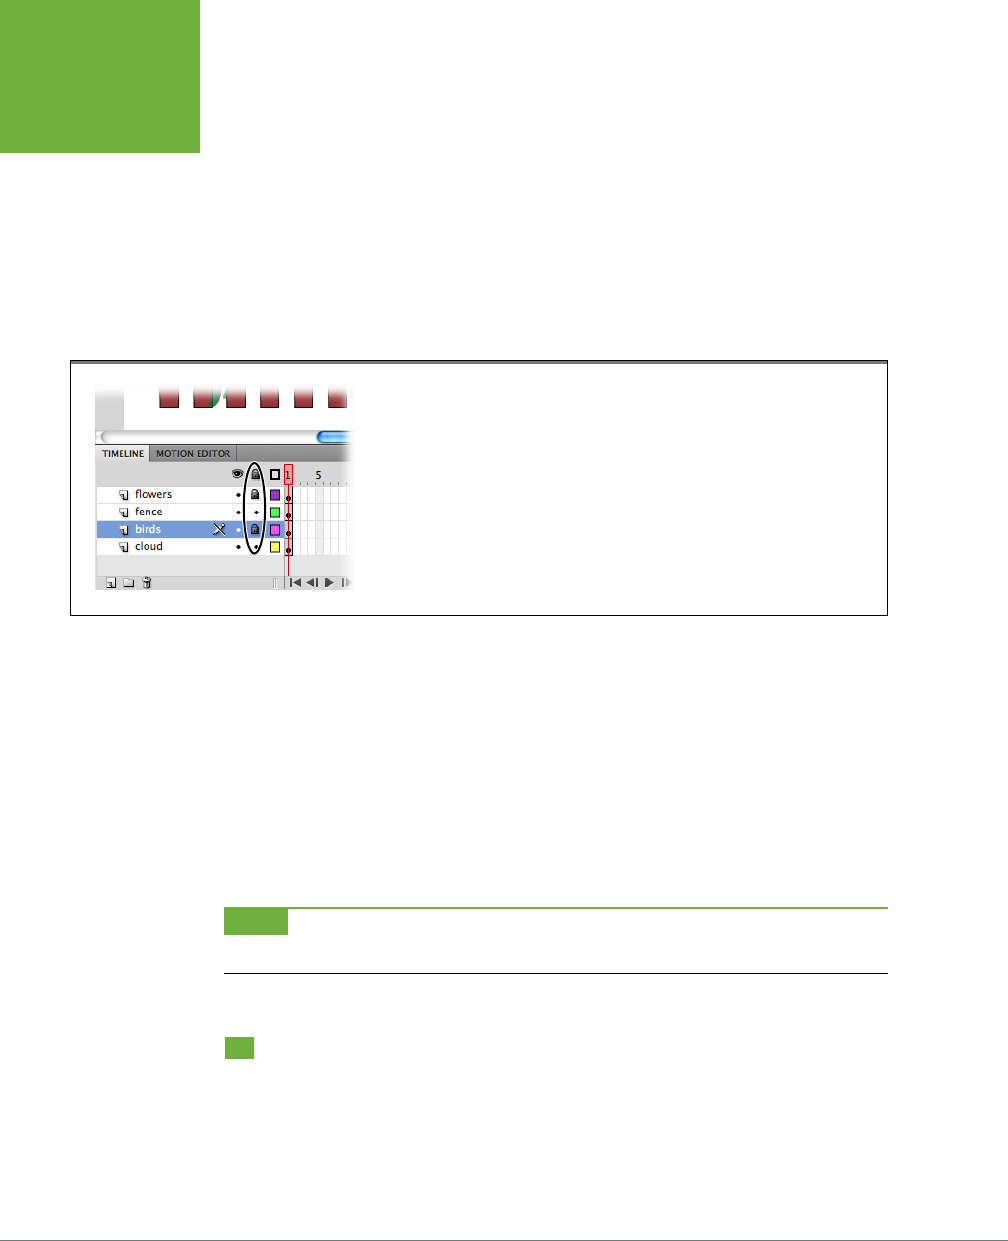
FLASH CS6: THE MISSING MANUAL
148
ORGANIZING
LAYERS
Locking and Unlocking Layers
Working with layers can be confusing, especially at first. So Flash lets you lock in-
dividual layers as a kind of safeguard, to keep yourself from accidentally changing
content you didn’t mean to change:
• To lock a layer, click the dot under the padlock, as shown in Figure 4-20. When
you do, the dot turns into a little padlock icon and deselects any objects that
you’d selected on the stage in that layer. If you locked the active layer, Flash
draws a slash through the pencil icon next to the layer’s name as a visual re-
minder that you can’t edit it.
FIGURE 4-20
Here the cloud and fence layers are unlocked, and the flowers layer (and the selected birds
layer) are locked. Some people get into the habit of locking all the layers they’re not cur-
rently editing. That way, they can’t possibly add a shape or a tween to the wrong layer.
• To unlock a layer, click the padlock (Figure 4-20). Instantly, the padlock turns
into a dot, Flash reselects your objects, and you can edit them once again on
the stage.
• To lock (or unlock) all your layers all at once, click the Lock or Unlock All
Layers icon (padlock at the top). Click the icon again to return to unlocked (or
locked) layers. Ctrl-clicking (⌘-clicking) on any Show/Hide button also locks
or unlocks all layers.
• To lock (or unlock) all layers except one, Alt-click (Option-click) the dot or
padlock in the layer you want to edit.
NOTE If you try to edit a locked layer, Flash displays a warning dialog box that gives you the opportunity
to unlock (and then edit) the layer.
Organizing Layers
Flash gives you a couple of options that help you organize your layers while you’re
working. The
Outline view
removes the fill from drawings, showing only a wireframe
outline. Outline view is helpful when you want to simplify the artwork on a clut-
tered screen.
Layer folders
help you organize your layers into a hierarchy, which is
www.it-ebooks.info
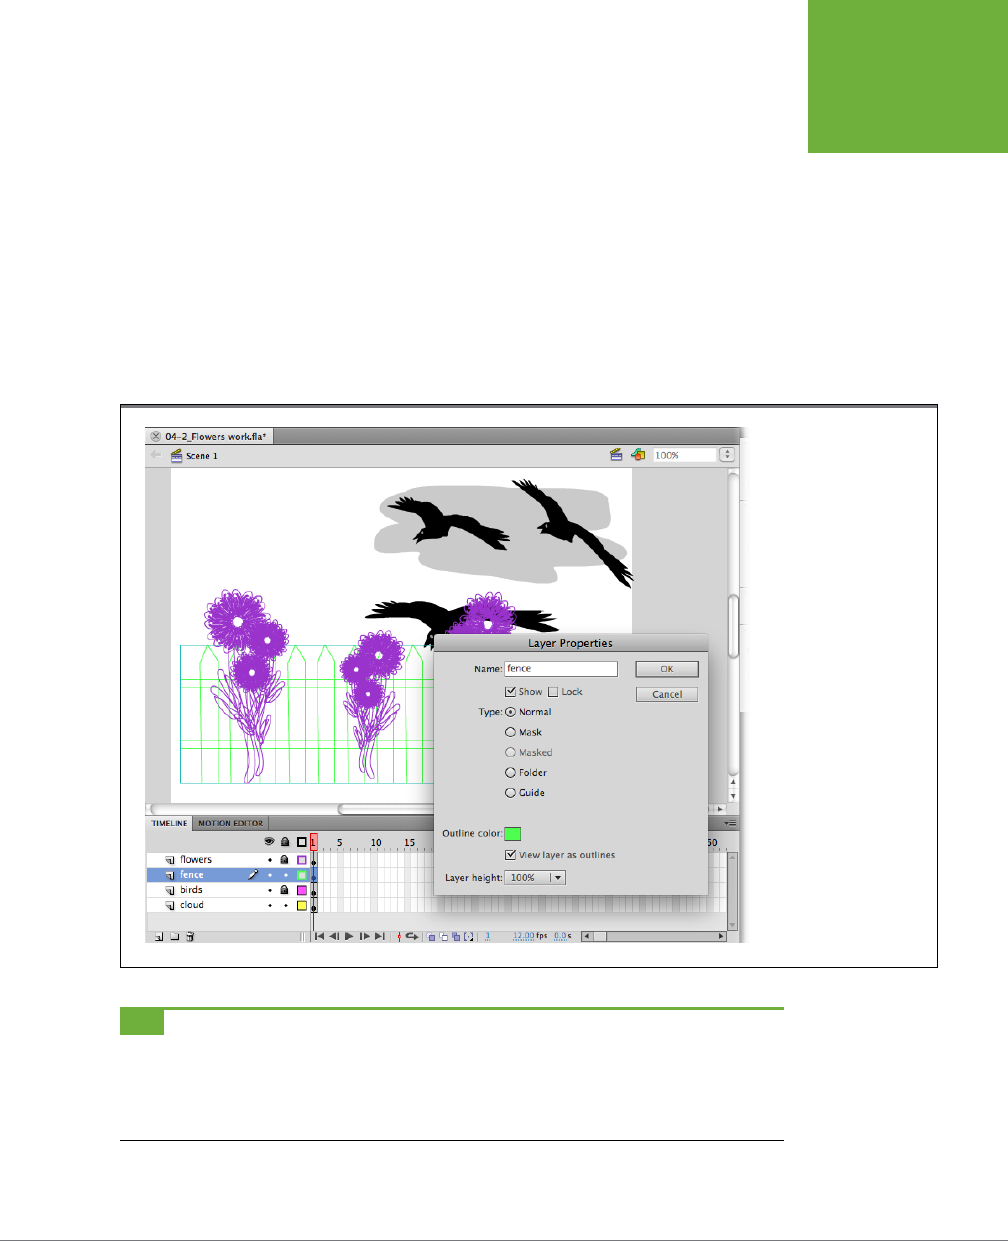
CHAPTER 4: ORGANIZING FRAMES AND LAYERS 149
ORGANIZING
LAYERS
helpful when you’re working with dozens of layers. The ability to put several layers
in a single folder makes it easier to lock and hide related materials.
Outline View
Flash lets you display the contents of your layers in outline form. Instead of seeing
solid pictures on the stage, you see wireframe images, as in Figure 4-21. Looking at
your layer content in outline form is useful in a variety of situations—for example,
when you want to align the content of one layer with respect to the content of another.
• To display the content of all your layers as outlines, click the Show All Lay-
ers As Outlines icon (next to the padlock). Clicking it again displays your layers
normally.
FIGURE 4-21
Depending on the visual
effect you’re going for,
you might want to align
the centers of your flow-
ers with the crosspieces
of your fence. But when
you look at the content
normally, it’s hard to see
the alignment, because
both your flowers and
your fence are opaque.
Here Flash displays the
flowers and fence layers
in outline form so you can
concentrate on shape and
placement without being
distracted by extraneous
details.
TIP You can change the color Flash uses to sketch your outlined content. For example, you can change the
color from light to dark so that you can more easily see the outline against a light background or so that there’s
more contrast between two overlapping outlines. To change the outline color for a layer, first select the layer,
and then select Modify→Timeline→Layer Properties. From the Layer Properties dialog box (Figure 4-21) that
appears, click the Outline Color swatch and then select a color from the color picker that appears.
www.it-ebooks.info
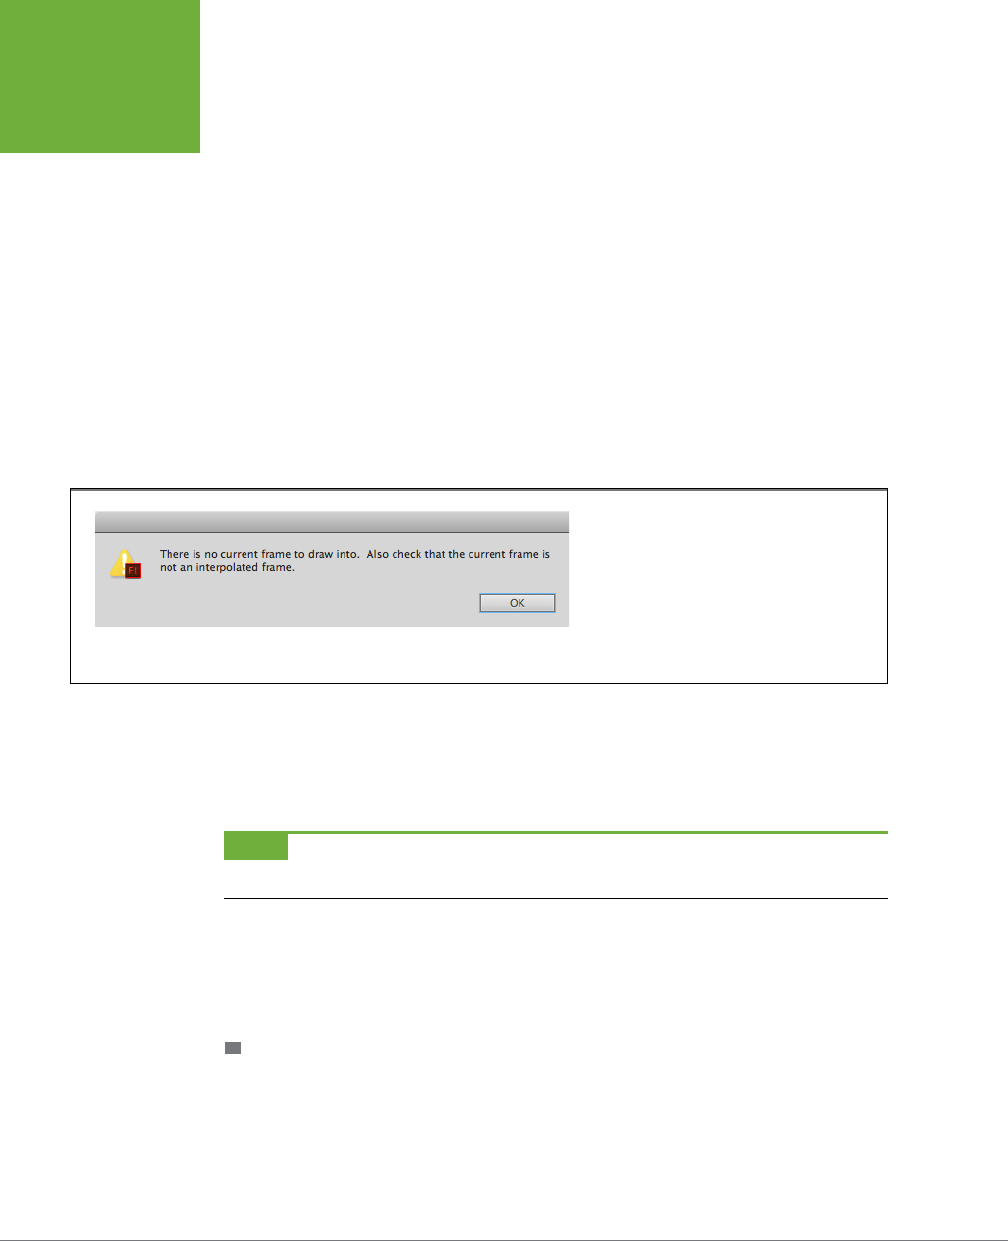
FLASH CS6: THE MISSING MANUAL
150
ORGANIZING
LAYERS
• To show a single layer’s content in outline form, click the filled square, as
shown in Figure 4-20. When you do, Flash changes the filled square to a hollow
square (the Outline icon) and displays your layer content in outline form on the
stage. To return your layer to normal, click the square again.
• To outline the contents of every layer except one, Alt-click (Option-click) the
outline icon for that layer.
Organizing Layers with Folders
When your animation has only a handful of layers, organization isn’t such a big deal.
But if you find yourself creating 10, 20, or even more layers, you’ll want to use layer
folders to keep your layers tidy (and yourself from going nuts).
A
layer folder
is simply a folder you can add to the Layers window. Layer folders
aren’t associated with frames; you can’t place images directly into them. (If you try,
you’ll see the error message shown in Figure 4-22.)
FIGURE 4-22
If you try to draw on the stage when you’ve
selected a folder instead of a layer, Flash lets you
know in no uncertain terms. (An interpolated
frame is a tweened frame; as you learned in
Chapter 3, you can’t place images in a tweened
frame, either.)
Instead, layer folders act as containers to organize your layers. For example, you
might want to put all the layers pertaining to a certain drawing (like a logo or a
character) into a single layer folder and name the folder
logo
or
Ralph
. That way you
don’t have to scroll through a bunch of layers to find the one image you’re looking for.
NOTE As you might expect, showing, hiding, locking, unlocking, and outlining a layer folder affects every
layer inside that folder.
Each folder you add takes up a line in the timeline, and eventually there’s not enough
room to display all the layers and folders in the panel. You can use the scroll bar on
the right side of the timeline to find your layers, or you can increase the height of
the timeline panel by dragging the panel’s top edge.
CREATING LAYER FOLDERS
To create a layer folder:
1. Click the name of a layer to select it.
When you create a folder, it appears above the selected layer; but you’ll be able
to drag your folder and its contents to a new location.
www.it-ebooks.info
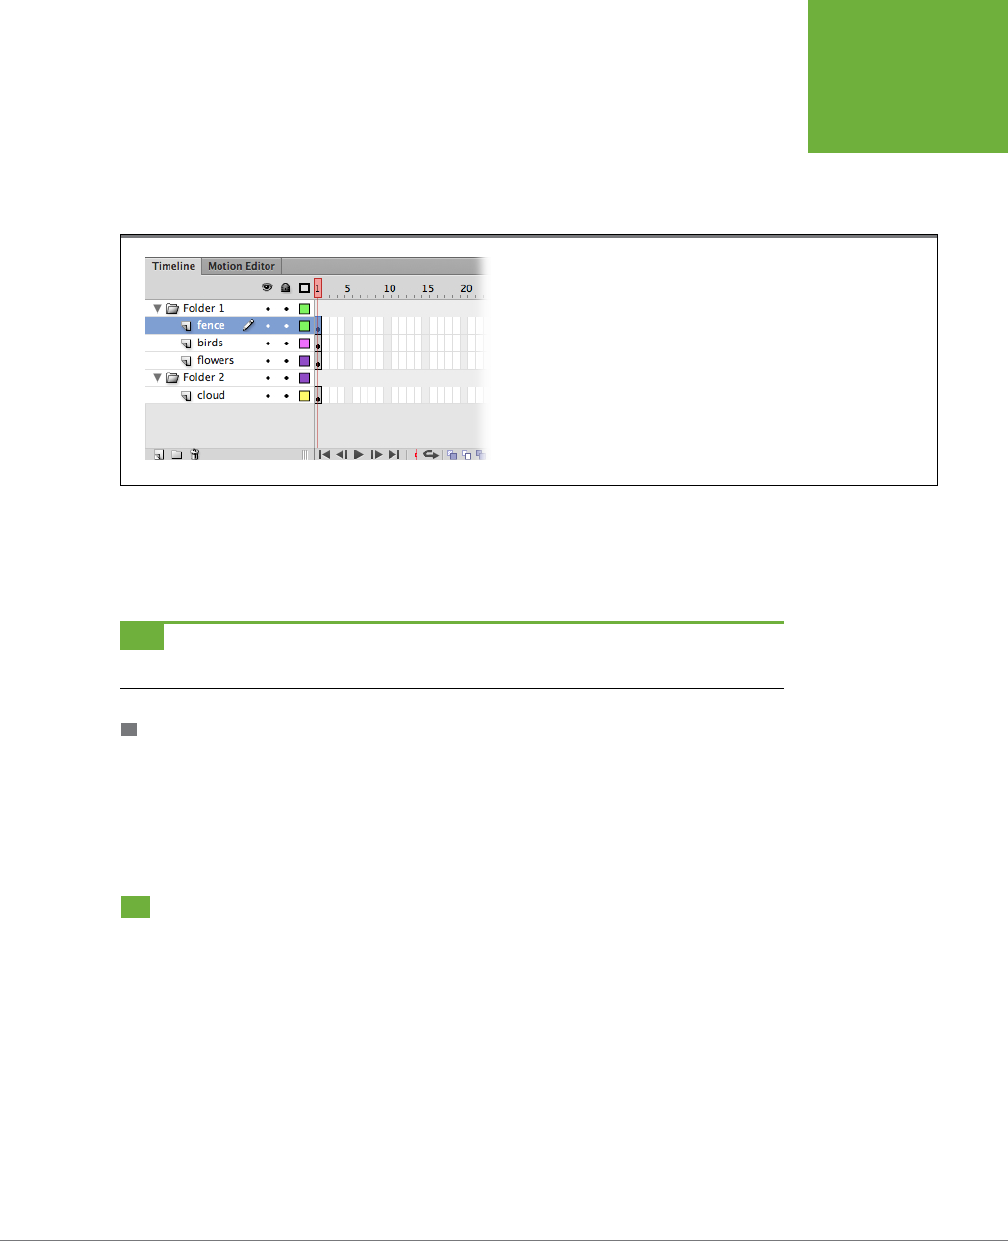
CHAPTER 4: ORGANIZING FRAMES AND LAYERS 151
SPOTLIGHT
EFFECT USING
MASK LAYERS
2. Click the Insert Layer Folder icon. (If you prefer, you can choose Insert→
Timeline→Layer Folder or right-click the layer, and then, from the shortcut menu
that appears, choose Insert Folder.)
Flash creates a new layer folder named Folder 1, as shown in Figure 4-23.
FIGURE 4-23
Newly created layer folders appear expanded, like Folder 1 here (note the
down arrow). Clicking the down arrow collapses the folder and changes
the down arrow to a right arrow. When you drag layers into an open folder
(or expand a collapsed folder), the layers appear beneath the folder. You
rename a layer folder the same way you rename a layer: by double-
clicking the existing name and then typing in one of your own. You can
move layer folders around the same way you move layers around, too: by
dragging.
3. Drag layers onto the layer folder.
If the folder is already expanded, you see the layers appear beneath it. If the
folder is closed, then click the triangle button to view the layers inside.
TIP You can place layer folders inside other layer folders, but don’t go wild; the point is to organize your
layers so that you can find them easily, not to see how few folders you can display in the Layers window.
DELETING A LAYER FOLDER
To delete a layer folder,
and all the layers and folders inside
, right-click the layer folder,
and then, from the shortcut menu that appears, select Delete Folder. Flash pops up
a warning message informing you that you’re about to delete not just the folder,
but also everything in it. If that’s what you want, then click Yes; otherwise, click No.
Spotlight Eect Using Mask Layers
Imagine placing a sheet of red construction paper containing a cutout of a star over
a piece of green construction paper. The result you see, when you look at the two
sheets stacked on top of each other, is a green star on a red background. That’s
the concept behind mask layers, a special type of layer that lets you create shaped
“portholes” through which an underlying (masked) layer appears.
At a masquerade ball, masks hide the important stu—your face. It’s a little dier-
ent in Flash and other graphic arts endeavors. Masks hide part of a picture in order
to reveal the important stu—the subject. You use masks to direct the eye of your
audience. And when you apply a classic tween to the porthole, you can create an
eect that looks like a spotlight playing over an image—mighty cool, indeed.
www.it-ebooks.info
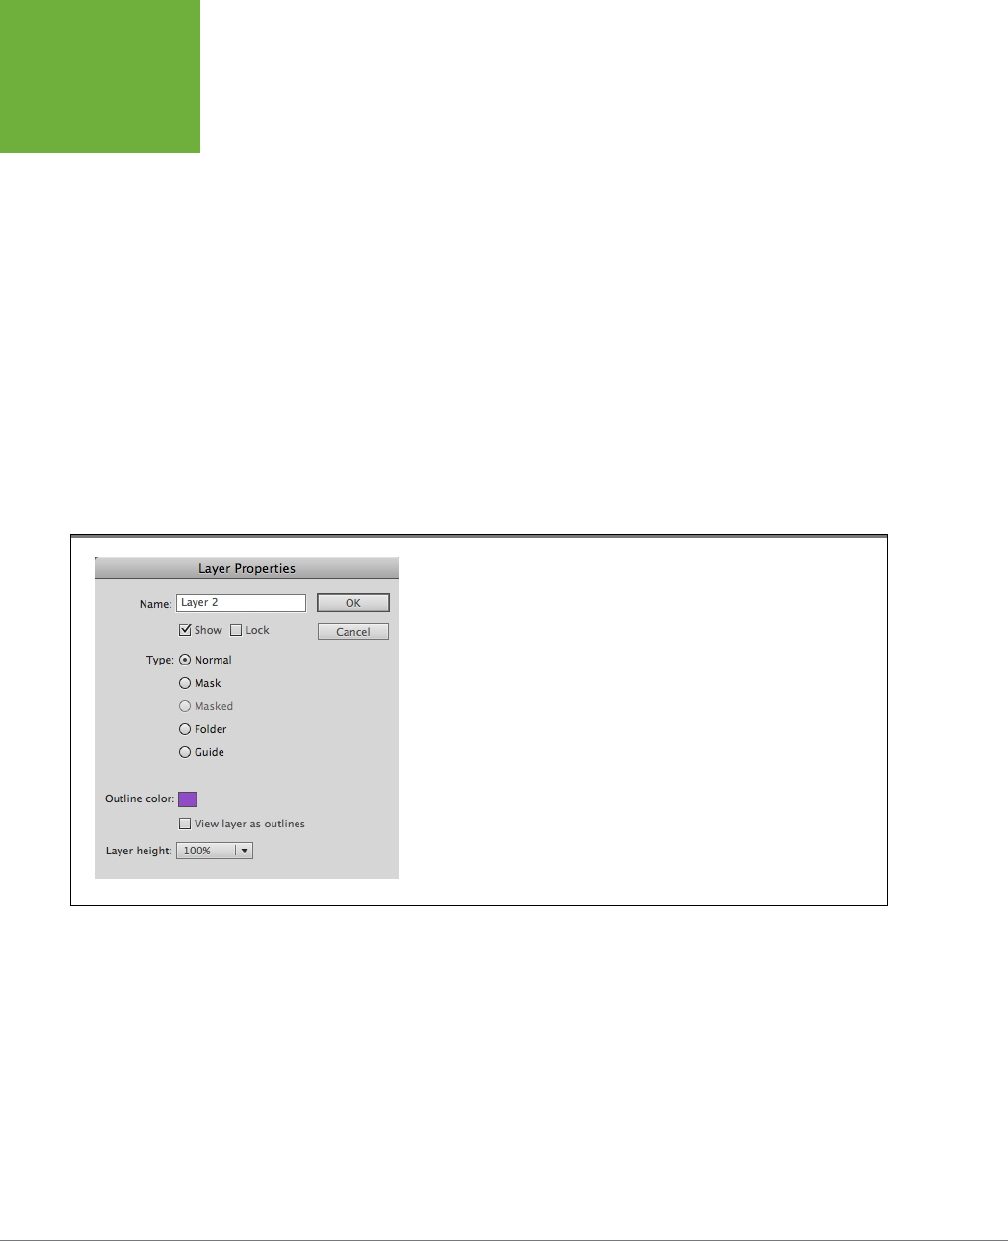
FLASH CS6: THE MISSING MANUAL
152
SPOTLIGHT
EFFECT USING
MASK LAYERS
Here’s how you go about it:
1. Open the file
04-3_Mask_Layer.fla
.
You can download this file, a working example of the file (
04-4_Mask_Layer
_ done.fla
), and all the other examples shown in this chapter from the Missing
CD page at
www.missingmanuals.com/cds/flashcs6mm
.
2. Click Layer 1 to select it.
In the example file for this section (
04-3_Mask_Layer.fla
), Layer 1 contains a
bitmap image.
3. Click the Insert Layer button. (The Insert Layer button is on the bar below the
layer names and looks like a folded-over page.)
Flash creates a new layer named Layer 2 and places it above Layer 1.
4. Double-click the layer icon next to Layer 2.
The Layer Properties window appears (Figure 4-24).
FIGURE 4-24
Use the Layer Properties window to change the layer from one type to another. In
this example, you create a mask layer and a masked layer.
5. In the Layer Properties window, turn on the Mask checkbox, and then click
OK.
Flash displays the mask icon next to Layer 2.
6. Double-click the layer icon next to Layer 1.
The Layer Properties window appears again.
7. This time, turn on the checkbox next to Masked, and then click OK.
Flash displays the masked icon next to Layer 1.
www.it-ebooks.info
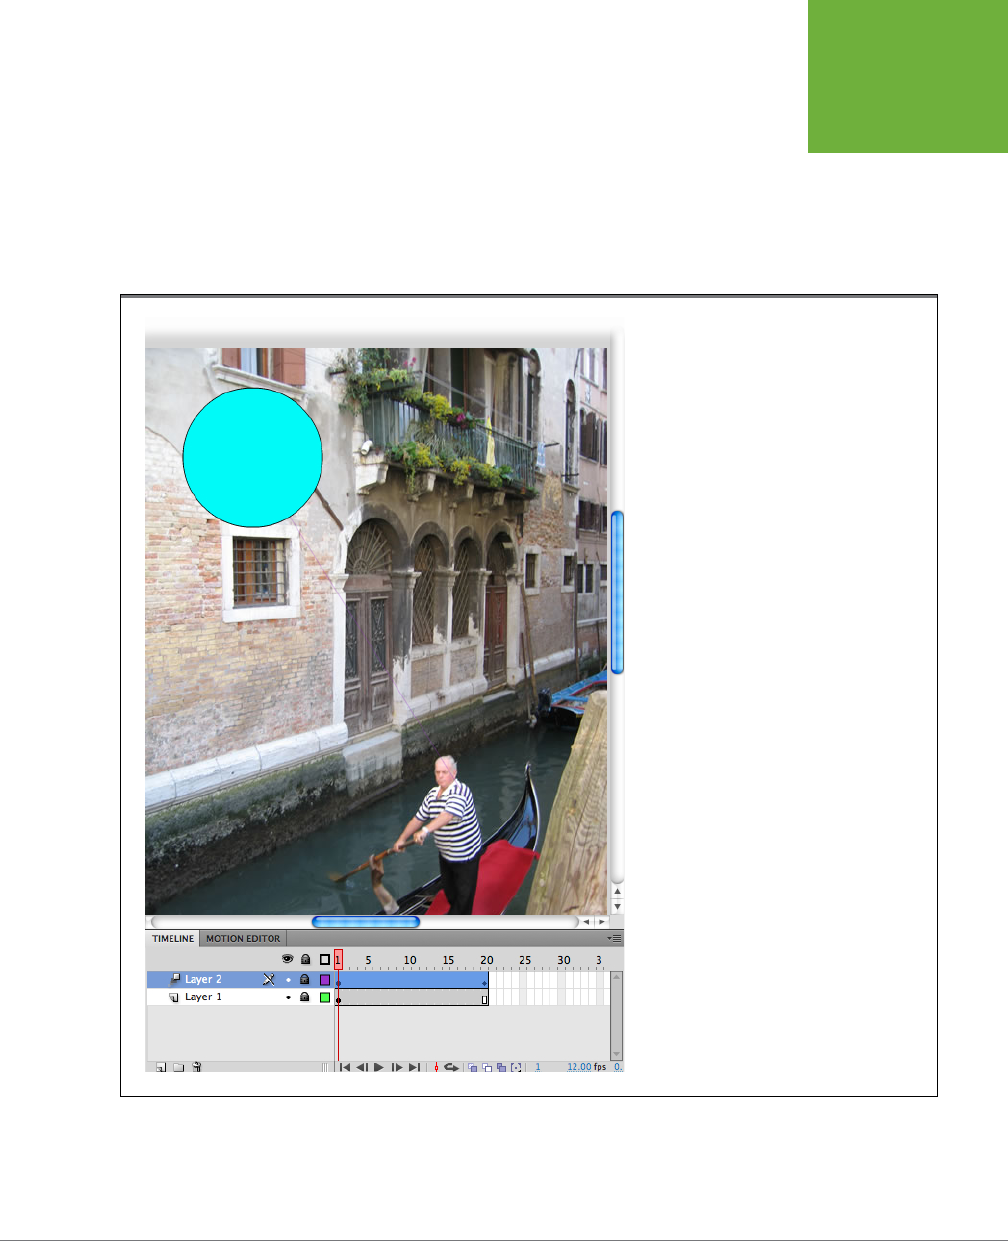
CHAPTER 4: ORGANIZING FRAMES AND LAYERS 153
SPOTLIGHT
EFFECT USING
MASK LAYERS
8. Select Frame 20 in both Layer 1 and Layer 2, and then select Insert→
Timeline→
Frame.
Flash extends both layers to Frame 20.
9. Click to select the first frame in Layer 2 (the mask layer). On the stage, click
the Oval tool, and then draw a circle in the upper-right corner of the stage
(Figure 4-25).
FIGURE 4-25
The shape you use as a portal has to be either
a fill (like the circle shown here) or a symbol.
Because the Brush tool creates fills, you can use
the Brush to draw a freehand portal. (Strokes on
the mask layer have no effect.)
The oval can be any color you choose, since it won’t appear in the finished ef-
fect; instead, it’ll act as a see-through portal.
www.it-ebooks.info
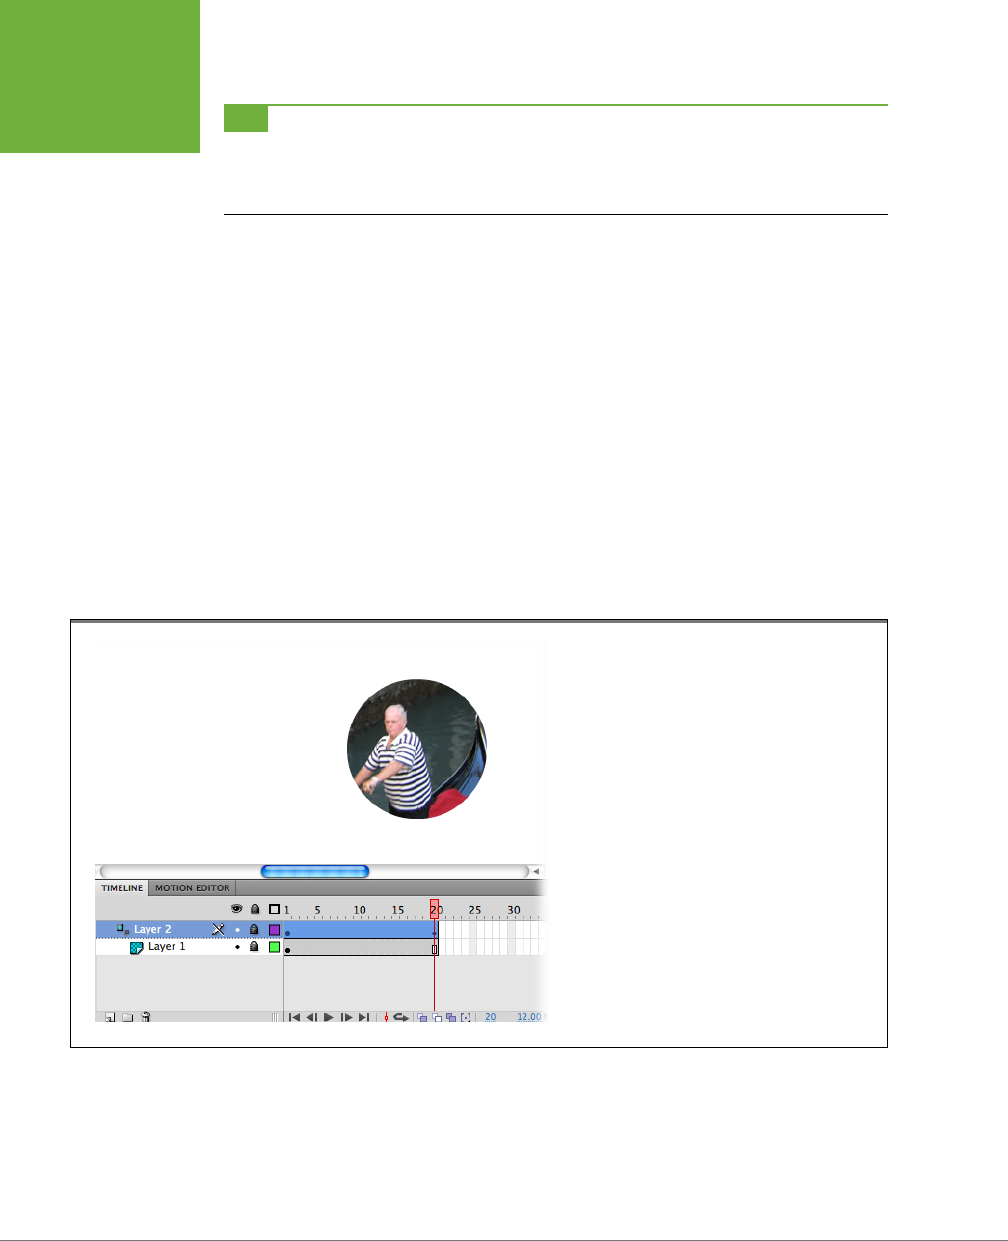
FLASH CS6: THE MISSING MANUAL
154
SPOTLIGHT
EFFECT USING
MASK LAYERS
TIP Flash gives you a bunch of ways to create masks and masked layers (by right-clicking an existing layer,
and then choosing Mask or Masked, for example), but one thing doesn’t change: Masked layers have to appear
directly below mask layers in the Layers window for the effect to work. If you create a mask layer and a masked
layer in the wrong order, just drag the mask layer above the masked layer.
10. With the circle still selected, choose Modify→“Convert to Symbol” or press
F8.
A “Convert to Symbol” box appears. If you want to animate a mask with a mo-
tion tween, you need to use a symbol.
11. In the Name box, type
Circle Mask
. Choose Movie Clip for type and then press
OK.
Now, the circle symbol on the stage is an instance of the Circle Mask movie
clip symbol.
12. Right-click Layer 2 and choose Create Motion Tween.
Layer 2 shows the blue motion tween highlight.
13. Move the playhead to Frame 20. Then, with the Select tool (V), drag the circle
to the lower-right corner of the stage (Figure 4-26).
FIGURE 4-26
In this example, you’re creating a simple tween in
Layer 2 so that the portal moves across the bitmap
image showing only a circle’s worth of image at any
one time (a spotlight effect). But you can create static
portals (masks), too. The simplest is a circle or a
square, but nice thick letters also make a compelling
effect.
www.it-ebooks.info

CHAPTER 4: ORGANIZING FRAMES AND LAYERS 155
SPOTLIGHT
EFFECT USING
MASK LAYERS
14. Right-click the layer name (Layer 2) and then choose Show Masking from
the shortcut menu.
With the mask in eect, everything in the photo is hidden except the portion
covered by the circle. Flash automatically locks both layers when you choose
Show Masking.
15. Press Return to test your animation.
The circle mask moves across the photo, revealing dierent portions of the
image, as shown in Figure 4-26.
You can animate your mask using the standard motion tween tricks described in
Chapter 3 and Chapter 8. For example, filmmakers sometimes use an iris eect,
where the visible part of an image shrinks down to a small circle. You can use the
X/Y properties to change the size of the mask symbol as it moves. Keep in mind
that before you can make changes to the mask’s properties, you need to unlock the
mask layer. When you click the padlock button to unlock the layer, Show Masking is
turned o, so you see the entire photo as well as the circle mask.
www.it-ebooks.info

157
CHAPTER
5
There’s a dierence between using a pencil to create stick drawings and using a pencil
to create a carefully shaded portrait. Chapter 2 covered drawing basics, explaining
exactly how the Pencil, Pen, Brush, Line, and shape tools work. This chapter explains
how to use the tools in a more creative and nuanced manner. In real life—whether
you’re pounding out Flash animations for your boss or for your own personal web-
site—you’re rarely going to be satisfied with a simple drawing. For each keyframe
of your animation, you’re going to want to start with a basic sketch and then play
with it, changing its color, moving a line here and there, adding a graphic element
or two, and repositioning it until it looks exactly the way you want it to look.
In this chapter, you’ll get more acquainted with Flash’s
selection
tools—the tools you
use to tell Flash which specific part of a drawing you want to change. Then you’ll
apply Flash’s editing tools from basic (copying, pasting, and moving) to advanced
(scaling, rotating, stacking, grouping, and more). You’ll also do more with color in
Flash drawings than you saw in Chapter 2. After a quick background in color theory,
this chapter covers applying color eects like brightness and transparency, and even
creating custom colors. The chapter wraps up with some special tools that let you
create complex patterns with a click of your mouse.
Selecting Graphic Elements
With few exceptions, before you can modify an object on the stage, you first have
to
select
the object. It’s the same in a word processor, where you have to highlight
a word with your cursor before you can edit or delete it. Since Flash deals with more
complex objects than words, it gives you a variety of selection tools for dierent
Advanced Drawing
and Coloring
www.it-ebooks.info

FLASH CS6: THE MISSING MANUAL
158
SELECTING
GRAPHIC
ELEMENTS
purposes. The Tools panel (Figure 5-1) has three dierent selection tools. Each is
good for selecting a dierent type of objects.
FIGURE 5-1
Flash gives you three different ways to select the strokes, fills, bitmaps, symbols, and other
graphic elements that make up your images: Selection, Subselection, and Lasso. By the way,
you can adjust the width of the Tools panel to your liking by dragging the panel’s edge to
resize it. Here two columns of tools are shown.
SubselectionSelection
Lasso
There are a couple of exceptions to this rule: specifically, modifying fill color using
the Paint Bucket tool (page 87) and reshaping lines and curves using the Selection
tool (next page). But in general, you need to select stu in Flash before you can
work with it.
TIP To select everything on the stage, choose Edit→Select All or use the shortcut key Ctrl+A (
⌘
-A).
• Selection. The black arrow selects entire strokes, fills, shapes, and objects
(like bitmaps and symbols), as well as individual portions of those strokes, fills,
shapes, and objects.
• Subselection. The white arrow lets you select the individual points that make
up lines and curves.
• Lasso. This tool, which looks like a miniature lasso, is great for selecting groups
of objects, oddly shaped objects, or portions of objects. When objects are close
together on the stage, you can use the lasso to carefully select around them.
The following sections describe each of these tools in detail.
www.it-ebooks.info
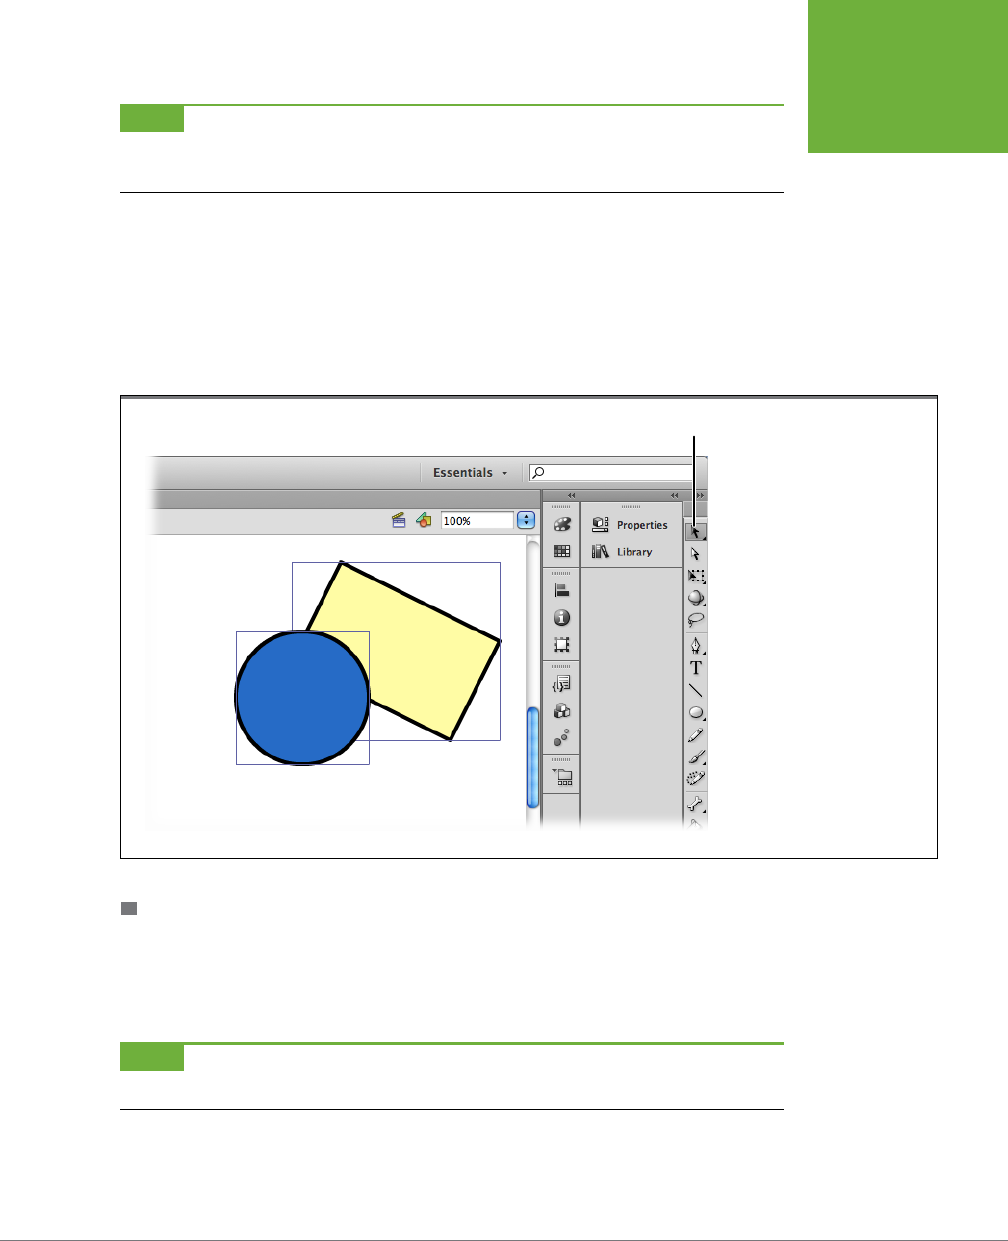
CHAPTER 5: ADVANCED DRAWING AND COLORING 159
SELECTING
GRAPHIC
ELEMENTS
NOTE The selection tools behave differently depending on whether you’ve drawn your objects on the stage
using object drawing mode or chosen to stick with merge drawing mode (which Flash assumes you want until
you tell it differently). See page 55 for a rundown on the two drawing modes.
The Selection Tool
The aptly named Selection tool (V) is the workhorse of Flash’s selection tools; with
it, you can select individual graphic elements like strokes, fills, shapes, symbols, text
blocks, and grouped objects. You can also use the Selection tool to select a portion
of any object, as shown in Figure 5-2, or to move or reshape an object (a process
sometimes referred to as
transforming
an object).
FIGURE 5-2
Using the Selection tool is the
easiest way to select just about
any object, whether it’s a shape,
a stroke, a bitmap, a fill, or a
text block. To use the Selection
tool: In the Tools panel, click the
tool; then, on the stage, click
the object you want to select. To
select groups of objects, you have
a choice: You can either Shift-click
each object, or click outside the
group and then drag until Flash
displays a selection box around
your group.
Selection tool
SELECTING A GRAPHIC ELEMENT
The most common thing you’re going to want to do with the Selection tool is select
an entire graphic element—a circle, a line, a block of text, a bitmap, a hand-drawn
kangaroo—so that you can apply color to it, copy it, skew it, or make some other
modification to it.
NOTE To deselect a selected object (regardless of which tool you used to select it), simply click any blank
spot on the stage or press Ctrl+Shift+A (Shift-⌘-A).
www.it-ebooks.info
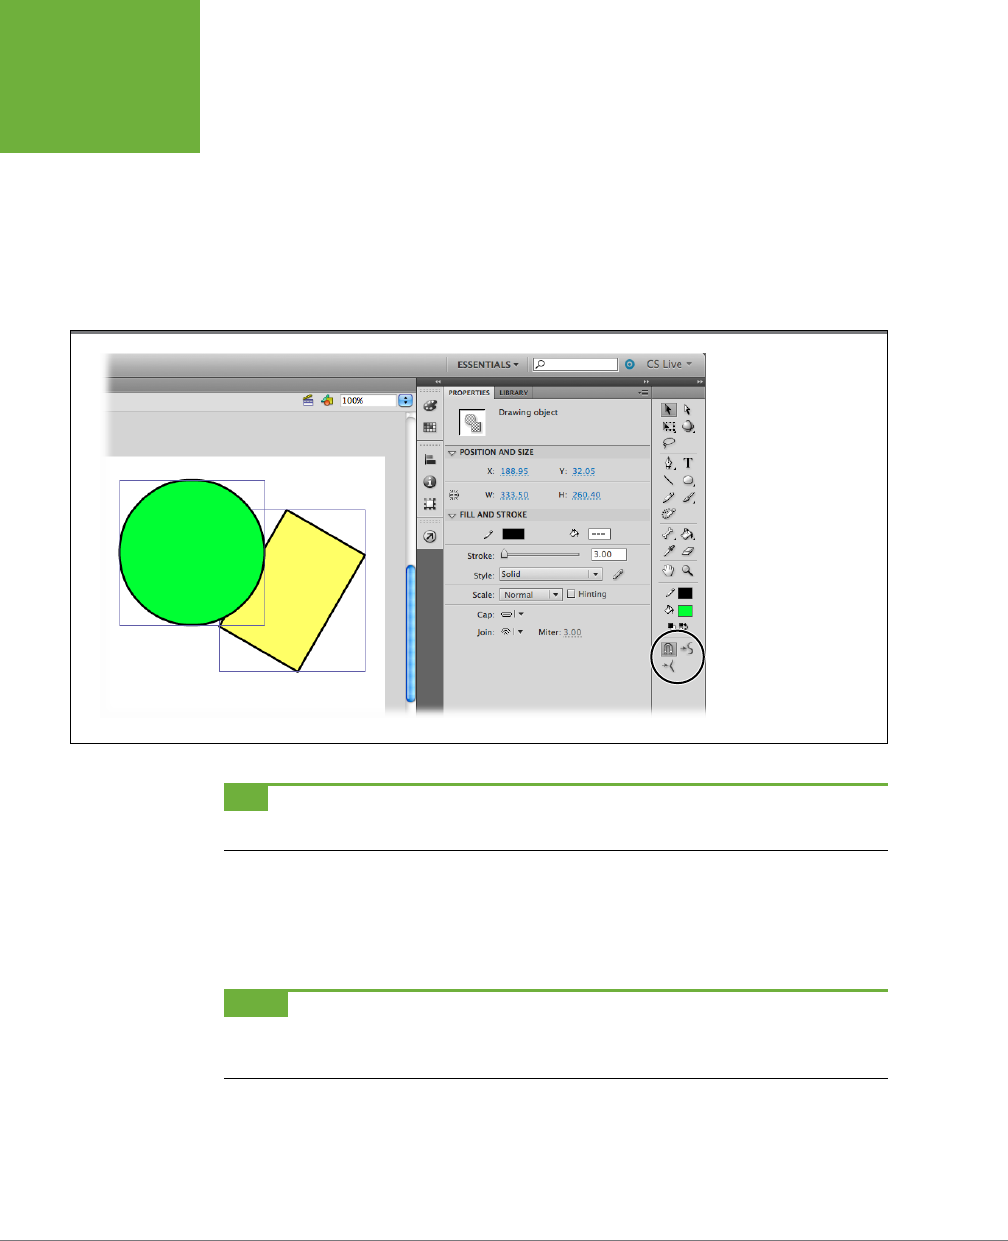
FLASH CS6: THE MISSING MANUAL
160
SELECTING
GRAPHIC
ELEMENTS
To select an entire graphic element (or group of elements) using the Selection tool:
1. In the Tools panel, click the Selection tool.
Flash highlights the Selection tool, and Selection tool–specific options appear
in the Options section at the bottom of the Tools panel (Figure 5-3).
2. Either click the object you want to select, or (best for lines and groups of
objects) click near the object, and then drag your cursor until the selection
box surrounds the object.
FIGURE 5-3
Flash displays a selection
box around selected
objects (like the circle
and rectangle shown
here), symbols, and text
blocks to let you know
you’ve successfully
selected them. When
you’re using the Selec-
tion tool, you see special
options at the bottom
of the Tools panel. For
example, the magnet
button toggles the
“Snap to Objects” option
described on page 192.
TIP You can also select more than one object with the Selection tool. Select the first object, and then Shift-
click each additional object you want to select.
Flash highlights the selected object—either by displaying a selection box around
the object as shown on the left in Figure 5-4 or by covering the selected area
with the selection pattern shown on the right. Either way, the Properties panel
changes to reflect the object you’ve selected.
NOTE When you select a straight line or a rectangular object, you may find it tough to see the selection
box because Flash draws it so closely around the line that it almost looks like part of the line itself. A quick look
at the Properties panel will tell you what is selected.
With the object selected, you can make any modifications you want to the object
using the main menu options, Flash’s Color or Transform tools (pages 84 and 109),
or any of the panels, like the Properties panel.
www.it-ebooks.info
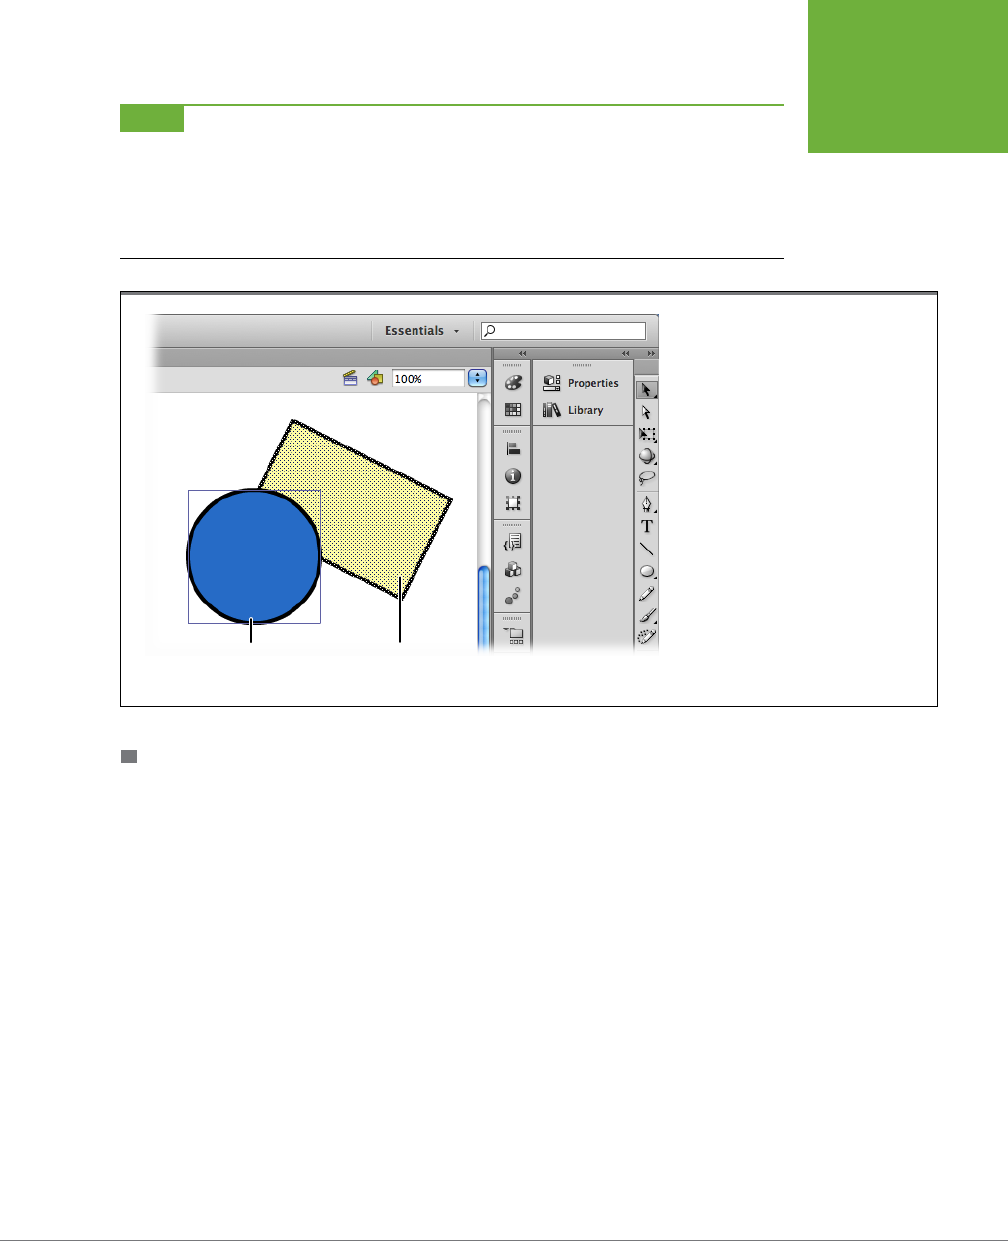
CHAPTER 5: ADVANCED DRAWING AND COLORING 161
SELECTING
GRAPHIC
ELEMENTS
NOTE If you use the Selection tool to select an ungrouped line or shape, Flash displays the Straighten and
Smooth options (check out the Options section of the Tools panel). These options let you tweak your lines and
shapes—useful if you’ve got a shape almost the way you want it, but not quite (and you don’t want to have to
start over and redraw the whole thing). To incrementally straighten a curved line, with the line selected, click
the Straighten option. To incrementally turn a series of straight-line angles into a curve, with the line selected,
click the Smooth option.
FIGURE 5-4
Grouped shapes and ungrouped shapes be-
have differently when it comes to selection
tools. They even look different when you
select them. The circle here is a selected
grouped shape; it shows a marquee. The
rectangle is a selected ungrouped shape; it
shows the dotted highlight pattern on the
selected portions.
Selected ungrouped
shape
Selected grouped
shape
SELECTING PART OF A SHAPE OR OBJECT
Here’s yet another case when shapes drawn in object drawing mode behave dier-
ently from shapes drawn in merge mode. Select a shape created in object drawing
mode and it’s an all-or-nothing deal. Flash thinks of those shapes as a unit. However,
if you create a shape in merge mode, it’s easy to select just a portion of the shape. A
single click selects the fill or the stroke—maybe just a segment of the stroke. That’s
why shapes drawn in merge mode are sometimes called
ungrouped
shapes. Because
they’re ungrouped, you can select or carve a chunk o the shape. Maybe you want
to apply a gradient eect to a portion of the shape. Or maybe you want to sculpt
a complex shape from a rectangle or oval by removing bits and pieces. Using the
Selection tool, you can drag a rectangle anywhere over an ungrouped shape to tell
Flash to select just a portion.
So is it impossible to edit parts of a shape drawn in object mode? No, not at all.
Double-click a
drawing object
, and it opens for editing as an ungrouped shape. Other
objects on the stage are dimmed and unselectable. The Edit bar above the stage
lists “Drawing Object” to indicate that you’re editing a drawing object. To close the
object, click the scene name or the blue Back arrow in the Edit bar. The drawing
object closes, and no matter how you’ve changed its appearance, it still behaves as
www.it-ebooks.info
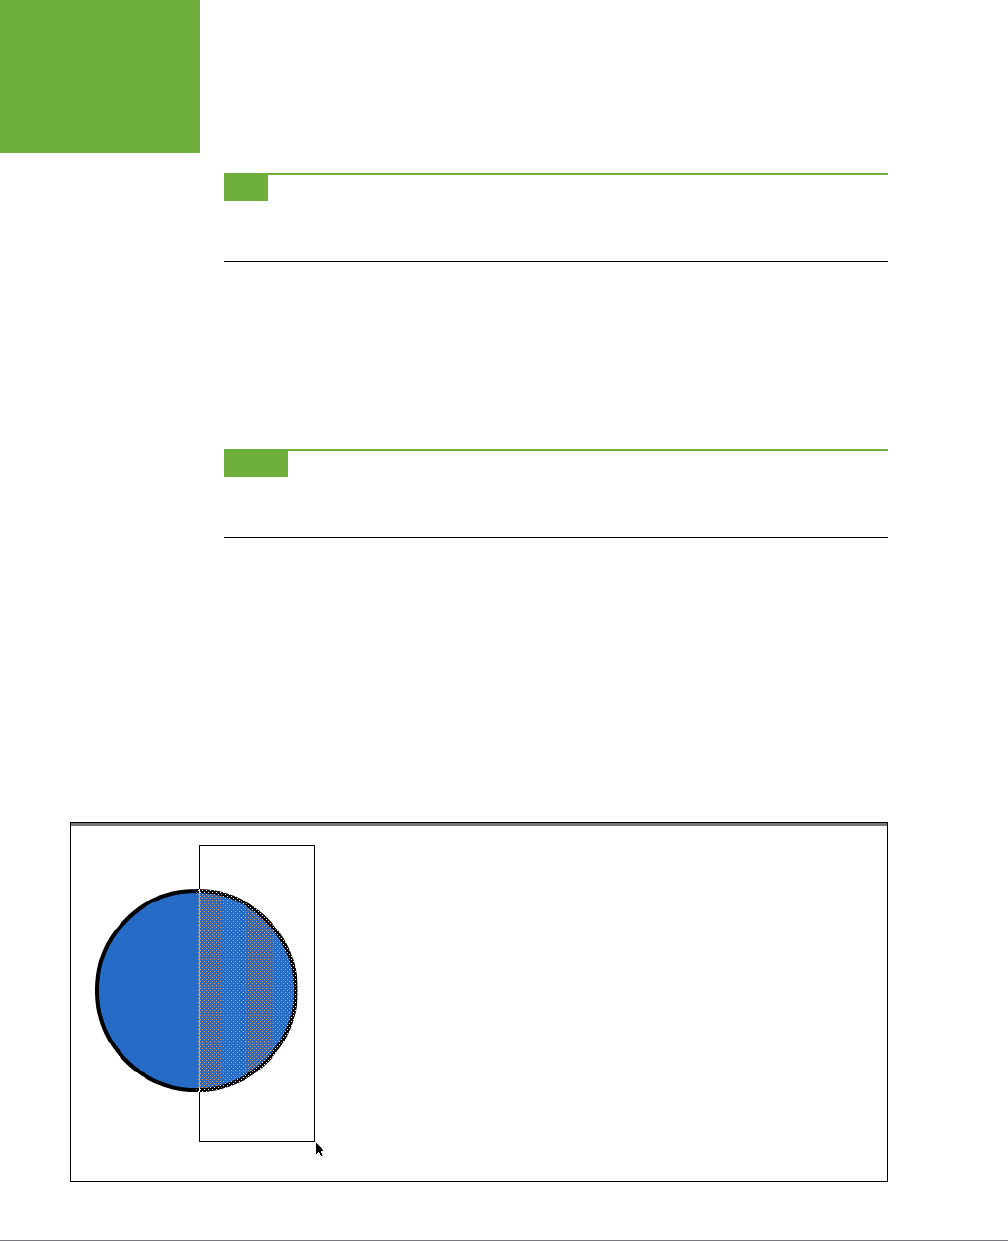
FLASH CS6: THE MISSING MANUAL
162
SELECTING
GRAPHIC
ELEMENTS
a drawing object. For example, a single click selects the object, and the Properties
panel describes it as a drawing object.
TIP While it’s open for editing, you can cut a drawing object into two or more parts. You can even add a
separate, unconnected shape to the drawing. Once you’re through editing and the object is closed, Flash still
treats it as a single drawing object.
If you want, you can convert a drawing object into an ungrouped shape. Select the
shape, and then choose Modify→Ungroup. Flash gives you visual clues so you can
tell a grouped shape from an ungrouped shape, as shown in Figure 5-4. Your object
drawing becomes an ungrouped shape, as if it had been drawn in merge mode. You
can confirm this by selecting the shape and checking the Properties panel, where
it’s listed as a Shape.
NOTE If you want to select a free-form portion of an object–for example, you’ve drawn a jungle scene and
you want to cut the shape of a baboon’s head out of it–you need the Lasso tool (page 62). The Selection tool lets
you select only a rectangular shape.
To select just a portion of an ungrouped shape using the Selection tool:
1. In the Tools panel, click the Selection tool.
Flash highlights the Selection tool.
2. Click near the object, and then drag your cursor until the selection box
surrounds just the portion of the ungrouped object you want to select
(Figure 5-5).
When you let go of the mouse, Flash highlights the selected portion of the
object, as shown in Figure 5-5.
FIGURE 5-5
The Selection tool lets you select using only a rectangular selection box. You can make it a large
rectangle or a small one, but it’s still a rectangle. If you need to select an irregular portion of an
object, then you need the Lasso tool. If Flash insists on selecting the entire shape (or bitmap)
when all you want to do is select a piece of it, then ungroup the shape (or break apart the
bitmap).
www.it-ebooks.info
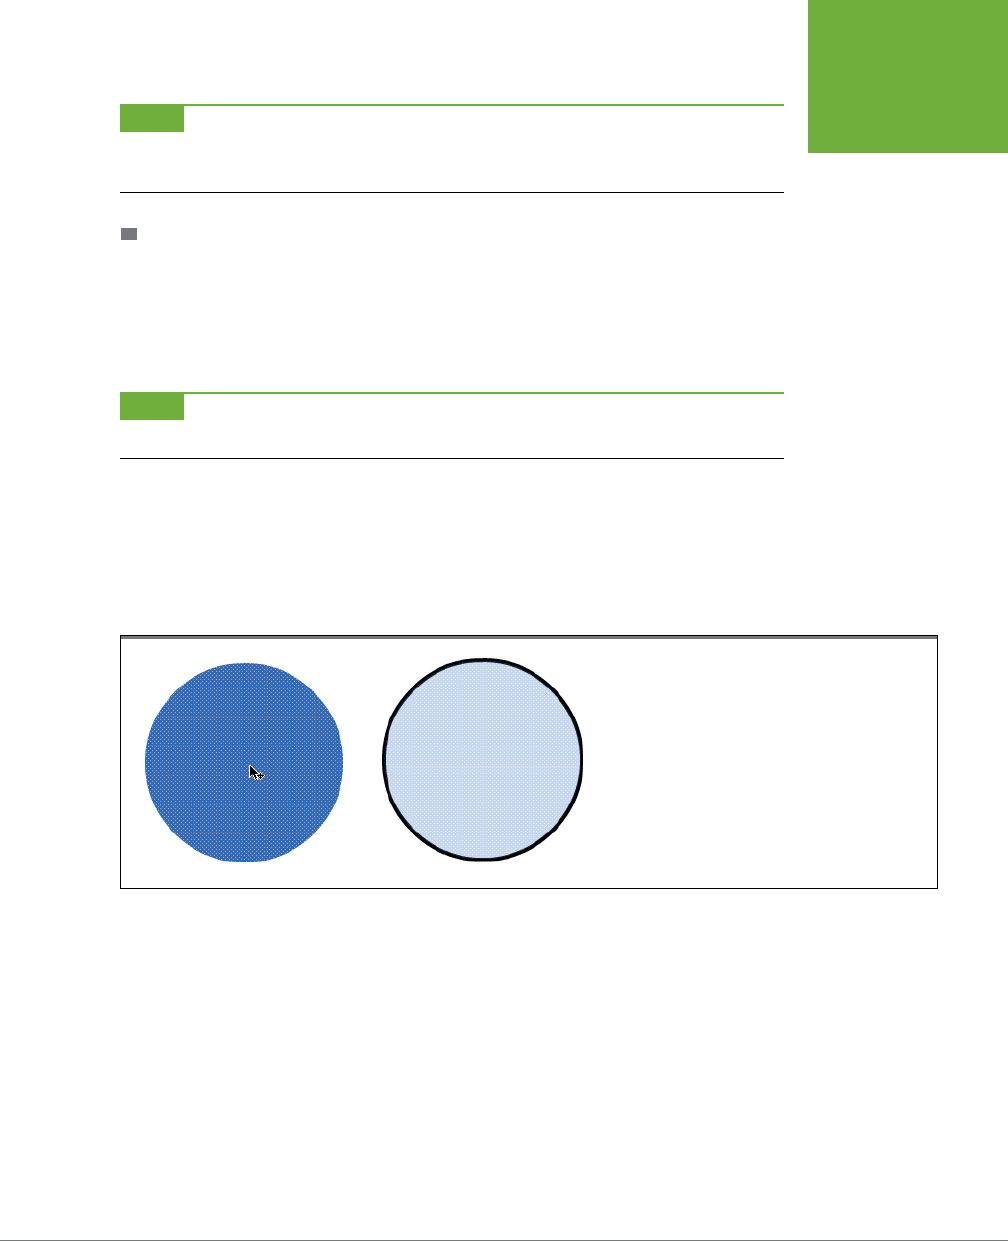
CHAPTER 5: ADVANCED DRAWING AND COLORING 163
SELECTING
GRAPHIC
ELEMENTS
NOTE To select a portion of a grouped shape or a drawing object, you need to ungroup it first
(Modify→Ungroup). To select a portion of a bitmap (like a photograph), you need to break it apart first
(Modify→Break Apart).
MOVING AND RESHAPING (TRANSFORMING) WITH THE SELECTION
TOOL
The Selection tool does more than just select objects. It also moves and reshapes,
or
transforms
, them. This is great—as long as you know what to expect. (Many’s the
budding Flashionado who’s sat down to select part of an image and been totally
dismayed when the object suddenly, inexplicably, developed a barnacle-like bulge.)
NOTE Whether or not Flash treats your shape as a single cohesive entity or independent elements depends
on whether you drew that shape in object or merge drawing mode, as explained on page 161.
Here’s how it works: If you click the Selection tool and then position your cursor
directly over an unselected fill or stroke, Flash displays, next to your cursor, one of
three icons: a cross with arrowheads, a curve, or an angle.
• Moving (cross with arrowheads). The cross with arrowheads (Figure 5-6) tells
you that you can drag the selected object to move it.
FIGURE 5-6
The cross with arrowheads shown here tells you that
if you drag this fill, you can move it across the stage.
Release the mouse when the object is where you want it.
• Reshaping (curve). When you see the curve icon shown in Figure 5-7, dragging
reshapes the stroke or edge beneath your cursor (in other words, it lets you
add or modify a curve).
• Reshaping (angle). Dragging the angle icon (Figure 5-8) lets you reshape one
of the corners of your object.
www.it-ebooks.info
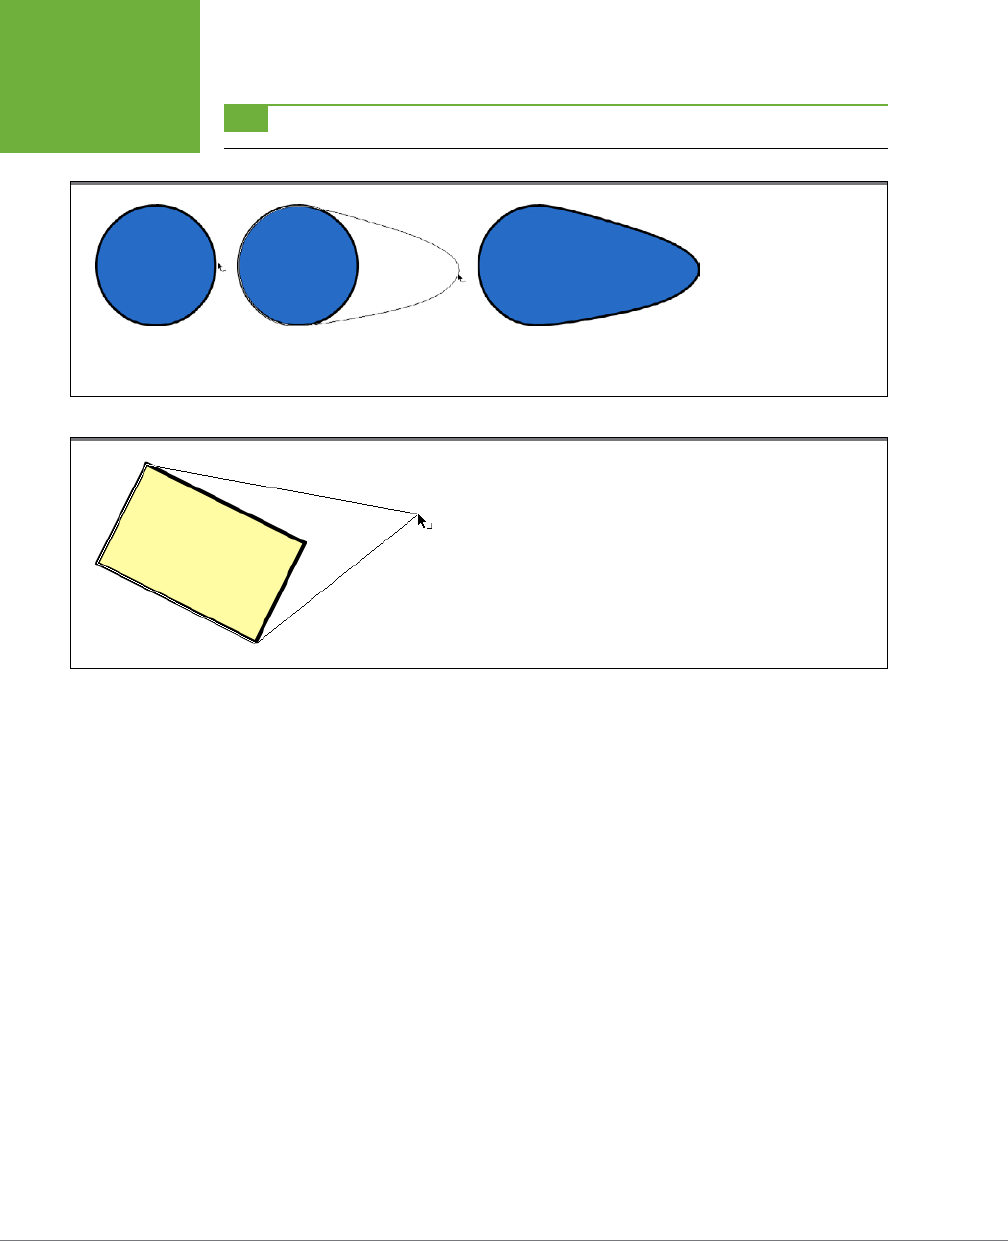
FLASH CS6: THE MISSING MANUAL
164
SELECTING
GRAPHIC
ELEMENTS
TIP To add an angle rather than a curve, when you see the curve icon, press Alt (Option) before dragging.
FIGURE 5-7
When you see the curve
icon (top), you can drag
to pull the line in any di-
rection you like (middle).
Releasing the mouse
finishes the modification
(bottom).
FIGURE 5-8
When you mouse over an object’s corner and see the angle icon shown here,
dragging lets you pull the corner in any direction to reshape it. Releas-
ing the mouse finishes the modification. Here the upper-right corner of a
rectangle is being reshaped.
The Subselection Tool
When you want to modify the individual points and segments that make up your
shapes, use the Subselection tool: the white arrow in the Tools panel.
Click a stroke or the edge of a fill with the Subselection tool, and you see the anchor
points that define the stroke or shape. To change the stroke or shape, drag one of
the anchor points. To adjust a curved line segment, click an anchor point adjacent
to the curve, and you see control handles connected to the anchor. These control
handles work like the ones used with the Pen tool (page 68). To change a curve,
drag a control handle, and the curve changes its path. You can move a fill or stroke
using the Subselection tool—just make sure you don’t click on an anchor point. The
cursor shows a hollow square when it’s over an anchor point and a solid square
when it’s over a line segment.
To use the Subselection tool to move an object:
1. In the Tools panel, click the Subselection tool (Figure 5-9).
Flash highlights the Subselection tool, and the cursor becomes a white arrow.
www.it-ebooks.info
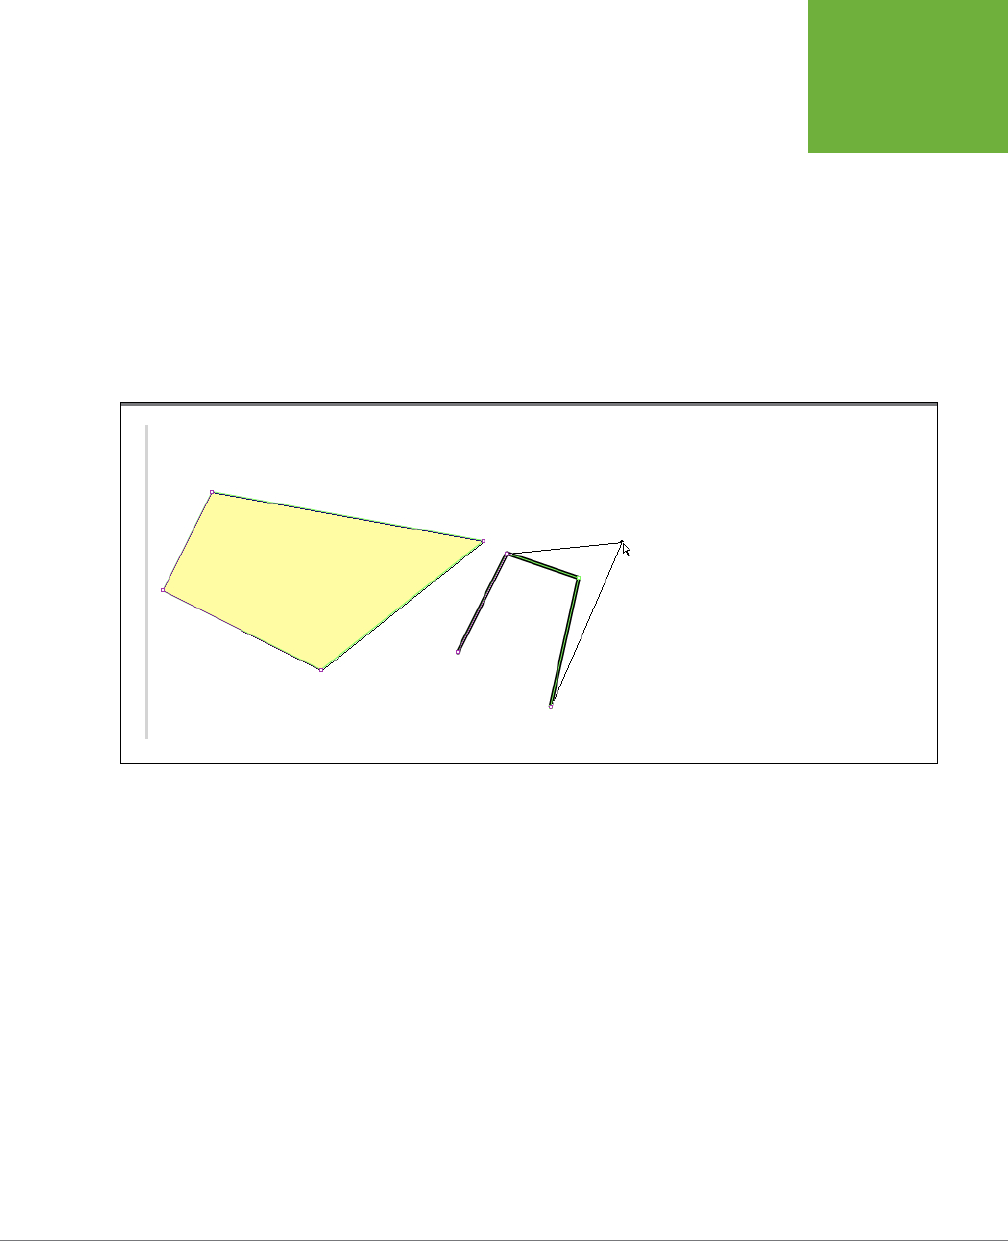
CHAPTER 5: ADVANCED DRAWING AND COLORING 165
SELECTING
GRAPHIC
ELEMENTS
2. Click the object you want to modify (or click near the object, and then drag
your cursor until the selection box surrounds the object).
Flash redisplays the object as a series of segments and selectable points.
3. Mouse over any of the line segments in the object.
The cursor displays a black square when it is over a line segment but displays
a hollow square when it is over an anchor point.
4. While the cursor displays a black square, click and drag to move the object.
When you’re satisfied, let go of the mouse.
Flash displays your moved object.
FIGURE 5-9
If you click the Subselection tool and then click
an object you’ve created using any drawing
tool (Pen, Pencil, Brush, Line, or shape), Flash
redisplays the line as a series of segments and
points. Click any segment (the cursor displays a
tiny black square as you mouse over a segment),
and Flash lets you move the entire object. Click
a point (a hollow square) instead, and Flash lets
you change the object’s shape.
To use the Subselection tool to move an anchor point (and, by association, the seg-
ments attached to that point):
1. In the Tools panel, click the Subselection tool.
Flash highlights the Subselection tool.
2. Click the object you want to work with (or click near the object, and then
drag your cursor until the selection box surrounds the object).
Flash redisplays the object as a series of segments and selectable points.
3. Mouse over the point you want to modify.
Flash displays a hollow square.
4. Drag the anchor point to reshape your object. When you’re satisfied, let go
of the mouse.
Flash displays your modified object. You can see an example in Figure 5-10.
www.it-ebooks.info
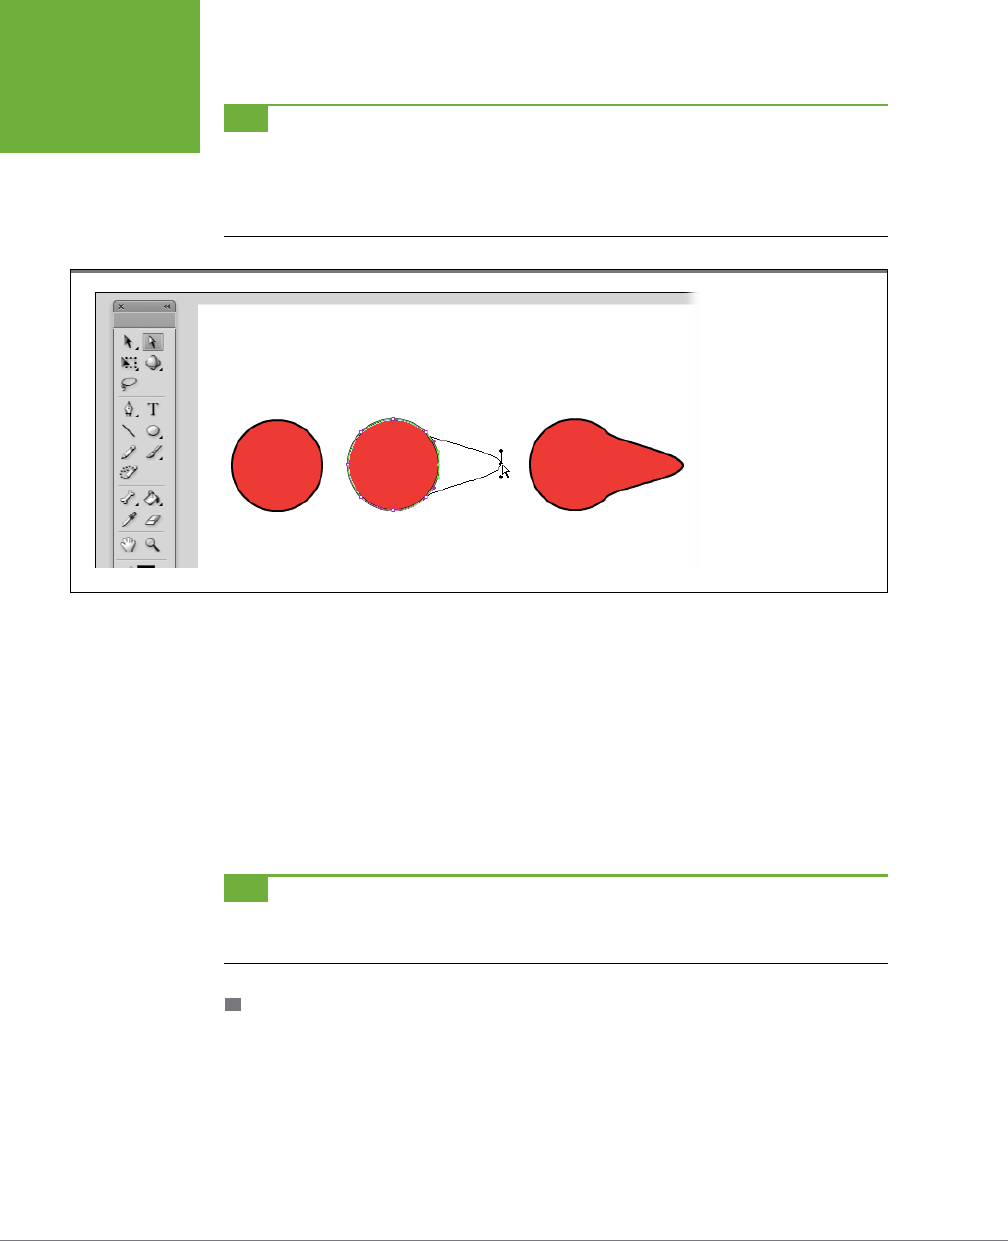
FLASH CS6: THE MISSING MANUAL
166
SELECTING
GRAPHIC
ELEMENTS
TIP If the anchor point defines a curve (in other words, if you see a hollow square at the end of a curved
line), clicking the point tells Flash to display
control handles
that define the curve. You can drag one of the control
handles to adjust the curve. To convert a straight line segment to a curve, hold the Subselection tool over an
anchor point and then press Alt (Option), and you can drag a control handle from the anchor point. Use the new
control handles to form the curve.
FIGURE 5-10
Left: You know your
mouse is over a selectable
point when you see the
hollow square next to
your cursor.
Middle: Drag the point in
any direction to reshape
your object.
Right: When you let go of
the mouse, Flash displays
your transformed object.
The Lasso Tool
Sometimes a rectangular selection just can’t encompass the objects you want to
select. Say you want to select an irregular shape inside an oval so you can recolor
it or remove it. Or perhaps your stage is so jam-packed with images that you can’t
select the image you want with the Selection tool without inadvertently selecting
parts of images you
don’t
want. Those situations call for the Lasso tool (L). Draw
a line around your selection with the Lasso tool and you can grab it, as shown in
Figure 5-11. The lasso has two modes—freehand mode and polygon mode. You’ll
learn how to use both here.
TIP As explained earlier in this chapter (page 161), you can only select portions of ungrouped shapes. If it’s
a drawing object, then double-click the object to open it for editing, or convert it to an ungrouped shape with
Modify→Ungroup.
FREEHAND SELECTING WITH THE LASSO
Depending on how steady your hands are, drawing a freehand lasso around an object
(or around the portion of an object you want to select) is the quickest way to select
what you want. Straight out of the box, this is how the Lasso works.
www.it-ebooks.info
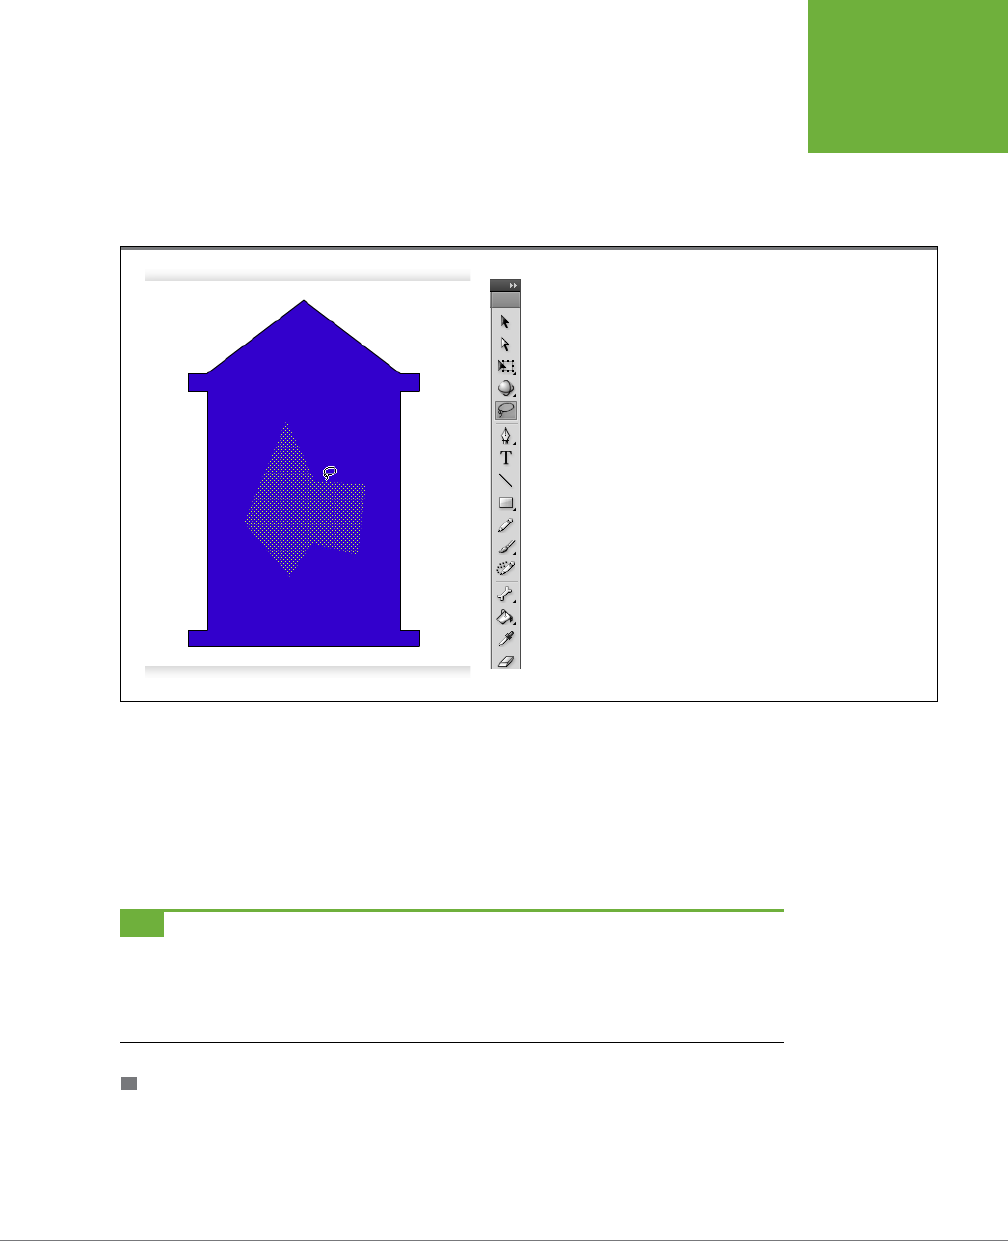
CHAPTER 5: ADVANCED DRAWING AND COLORING 167
SELECTING
GRAPHIC
ELEMENTS
To use the Lasso tool to select objects (and portions of objects) freehand:
1. In the Tools panel, click the Lasso tool (Figure 5-11, left).
Flash highlights the Lasso tool, and in the Options section of the Tools panel,
the Lasso-related options appear.
FIGURE 5-11
Use the Lasso tool when you want to select an irregular shape. With
the Lasso, you draw a line around the objects or parts that you want
to select. Then you can modify, move, or remove the selection.
2. Click near the object you want to select, and then drag your mouse to en-
circle the object.
Figure 5-12 (right) shows you an example.
3. When you’ve completely encircled your object, let go of the mouse button.
Flash selects everything inside the loop you drew with the Lasso tool.
TIP You can have a tricky time drawing a precise loop using the Lasso, especially if you’re using a mouse
instead of a graphics tablet. Fortunately, Flash has got your back; if you don’t completely close the loop, Flash
closes it for you, using a straight line. If this action isn’t what you want, just select Edit→Undo Lasso, and then
start over. If you’re still having trouble, try using the Zoom tool to enlarge the stage, or try the Lasso’s polygon
mode, described in the following section.
POLYGON SELECTING WITH THE LASSO
The Lasso is great for those irregular shapes, but sometimes you may want to outline
your selection with straight lines.
www.it-ebooks.info
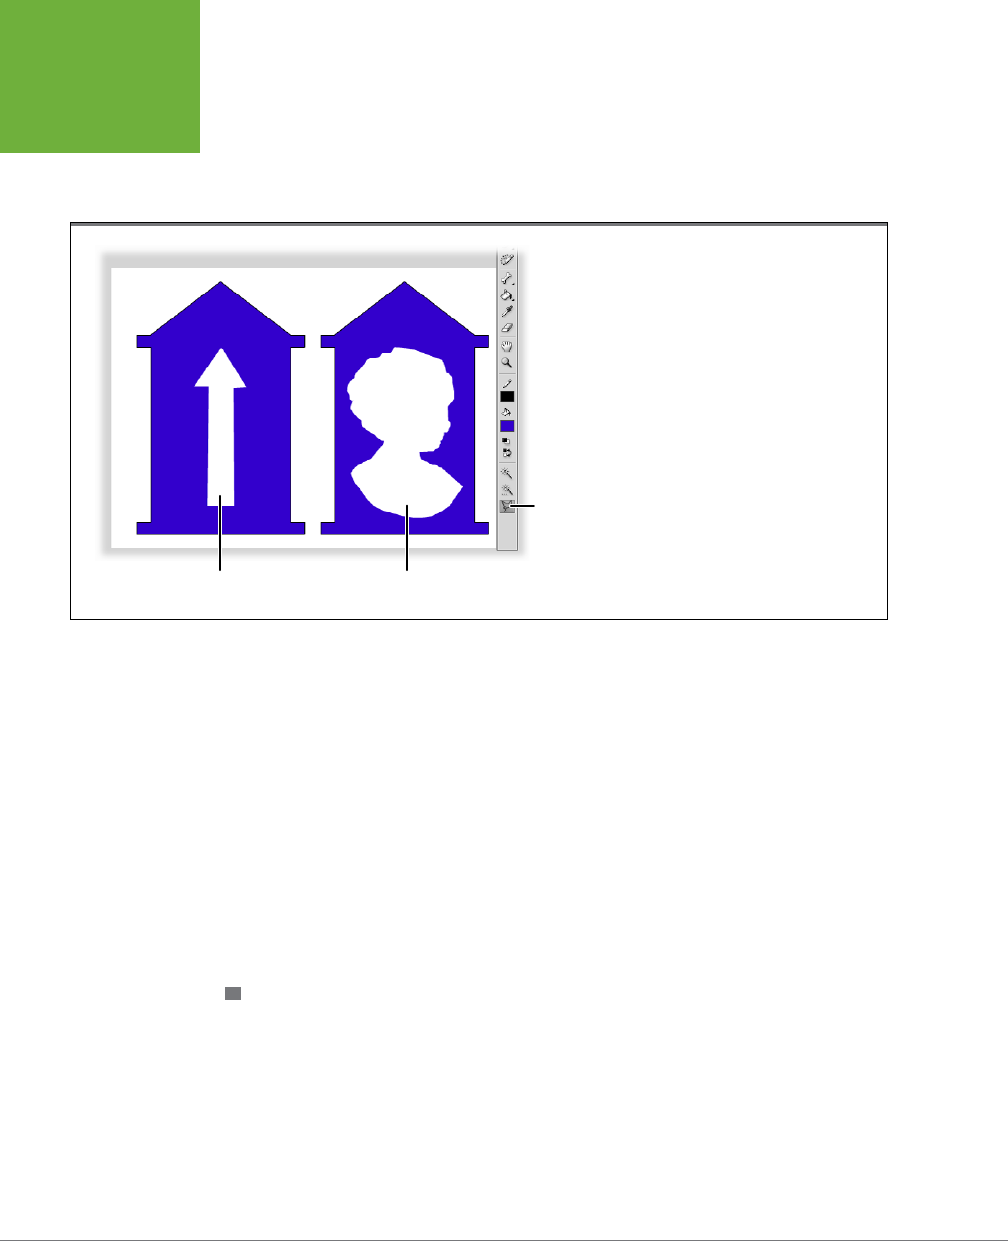
FLASH CS6: THE MISSING MANUAL
168
SELECTING
GRAPHIC
ELEMENTS
In these cases, freehand just doesn’t cut it; one slip, and you have to start over. You’re
better o taking advantage of the Lasso tool’s polygon mode, which lets you click
to surround an area. (Flash takes care of filling in the straight lines between your
clicks so you don’t have to.)
FIGURE 5-12
The Lasso tool has two modes,
polygon and freehand. To use polygon
mode with its straight lines, click the
polygon mode button in the options
section of the Tools panel.
Freehand modePolygon mode
Polygon Mode
option button
To use the Lasso tool to select objects (and portions of objects) by pointing and
clicking:
1. In the Tools panel, click the Lasso tool.
Flash highlights the Lasso tool. In the options section of the Tools panel, the
Lasso-related options appear.
2. Click the polygon mode option (Figure 5-12). Then, using a series of clicks,
enclose the object you want to select.
Flash automatically connects your clicks with straight-line segments.
3. Double-click to complete your selection.
Flash selects everything inside the loop you drew with the Lasso tool.
COMBINING FREEHAND AND POLYGON MODES
Just because you start out in freehand or polygon mode doesn’t mean you’re stuck
with it for the entire selection. For example, you can start o your selection in free-
hand mode by dragging the mouse to trace lines. Then, hold down the Alt (Option)
key to switch to polygon mode. Continue your selection by clicking on points to
create straight lines. Double-click when you’re ready to finish o your selection, and
Flash draws the last straight line to connect the beginning and end points.
www.it-ebooks.info
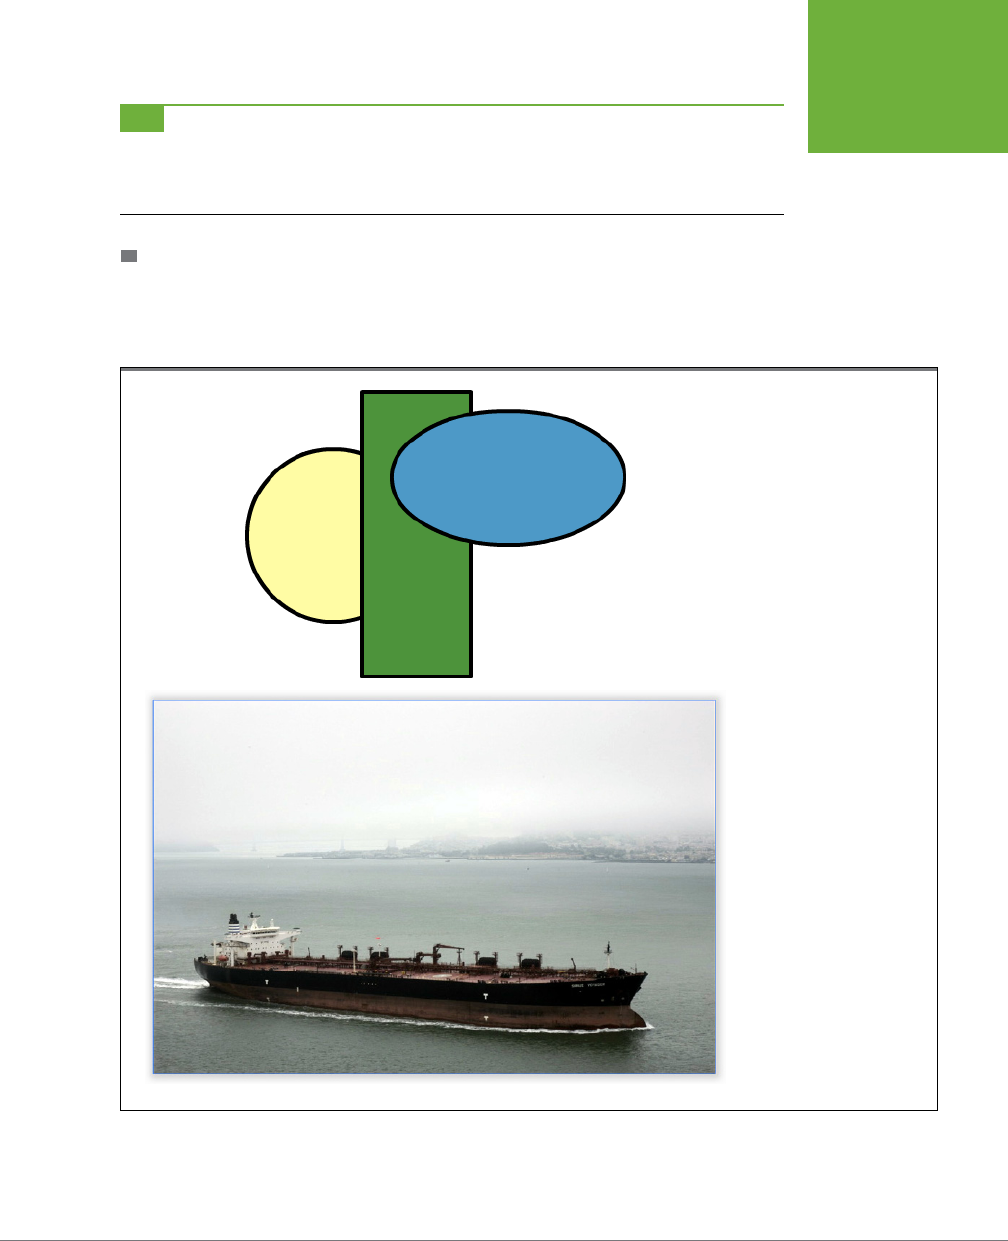
CHAPTER 5: ADVANCED DRAWING AND COLORING 169
SELECTING
GRAPHIC
ELEMENTS
TIP You may find that the Lasso—especially in polygon mode—doesn’t want to quit when you do. In other
words, when you go to use the main menu or a panel or another drawing tool, you find you can’t because Flash
keeps insisting that you need to keep lassoing. The best way to get rid of a sticky Lasso is to double-click and
then press Ctrl+Shift+A (Shift-⌘-A) to deselect all.
SELECTING RANGES OF COLOR IN BITMAPS WITH THE MAGIC WAND
Flash treats
bitmaps
—for example, photos in the JPEG format—dierently from the
way it treats the shapes you create using its drawing tools. And if you take a look
at Figure 5-13, you’ll see why.
FIGURE 5-13
Top: The drawing is clearly
composed of three shapes,
each of which you can click to
select separately.
Bottom: The bitmap image
is much more complex, with
no easily identifiable shape
outlines. When you click
to select the image on the
bottom, Flash highlights the
entire rectangular image; it
makes no distinction among
the colors and shapes inside.
While you can’t manipulate bitmaps in Flash anywhere near as easily or as completely
as you can manipulate the shapes and lines you draw directly onto the stage, Flash
www.it-ebooks.info

FLASH CS6: THE MISSING MANUAL
170
MANIPULATING
GRAPHIC
ELEMENTS
does have a special tool specifically for selecting ranges of colors in bitmaps: the
Magic Wand. After you select color ranges, you can then recolor them or cut them
out of the bitmap completely.
To select color ranges in a bitmap using the Magic Wand:
1. On the stage, select the bitmap you want to work with.
Flash displays a light-colored border around the selected bitmap.
2. Choose Modify→Break Apart.
Flash redisplays the bitmap as a selected fill.
3. From the Tools panel, select the Lasso. Then, in the Options section at the
bottom of the Tools panel, click the Magic Wand (Figure 5-14, top).
As you mouse over the bitmap, your cursor turns into a tiny magic wand.
4. Click the bitmap to select a color range.
Flash highlights bits of selected color.
5. Click the bitmap again (click a similarly colored area).
Flash highlights the bits of color that match your selection. You can modify
the highlighted bits of fill color as you go (cut them, recolor them using the
Eyedropper tool described on page 211, and so on), or continue to click the
bitmap as you did in step 4 to add to the selection.
In Figure 5-14 (bottom), the designer first selected, and then cut (Edit→Cut), the
pixels, the start of turning a foggy sky to blue.
Manipulating Graphic Elements
Flash gives you a gazillion tools to modify the drawings that make up your anima-
tions. You can stack, rearrange, and reposition each individual graphic element,
transform (shrink and squish) them, move them, apply color eects, and more until
you’re completely satisfied with the way they look. It’s a cliché, but it’s true: When it
comes to drawing in Flash, you’re pretty much limited only by your imagination. This
section acquaints you with the most powerful tools Flash has for modifying the lines,
shapes, bitmaps, symbols, and other graphic elements you add to your drawings.
Modifying Object Properties
Flash’s Properties panel is a beautiful thing. Select any element on the stage, and
the Properties panel responds by displaying all the characteristics, or
properties
,
that you can change about that element.
In Figure 5-15, for example, you see several graphic elements on the stage: a brush-
drawn squiggle (fill), a bitmap of a ship, a block of text, and a star. When you select
the star, the Properties panel shows all the properties associated with the star: the
www.it-ebooks.info

CHAPTER 5: ADVANCED DRAWING AND COLORING 171
MANIPULATING
GRAPHIC
ELEMENTS
color, width, and type of outline; the fill color; and so on. When you select the text,
the Properties panel changes to reflect only text properties.
FIGURE 5-14
Top: The first time you click the Magic Wand, Flash
notes the color you choose.
Middle: The second (and subsequent) times you
click the Magic Wand, Flash selects the bits of color
nearby that match your first selection. Selecting
colored areas of bitmaps with the Magic Wand can
be slow going. Don’t expect the precision you enjoy
when you’re working with primitive shapes, like
squares and circles. Still, depending on the effect
you’re after, the Magic Wand can be useful.
Bottom: Here most of the background was selected
with the Magic Wand tool and primed for repainting.
www.it-ebooks.info
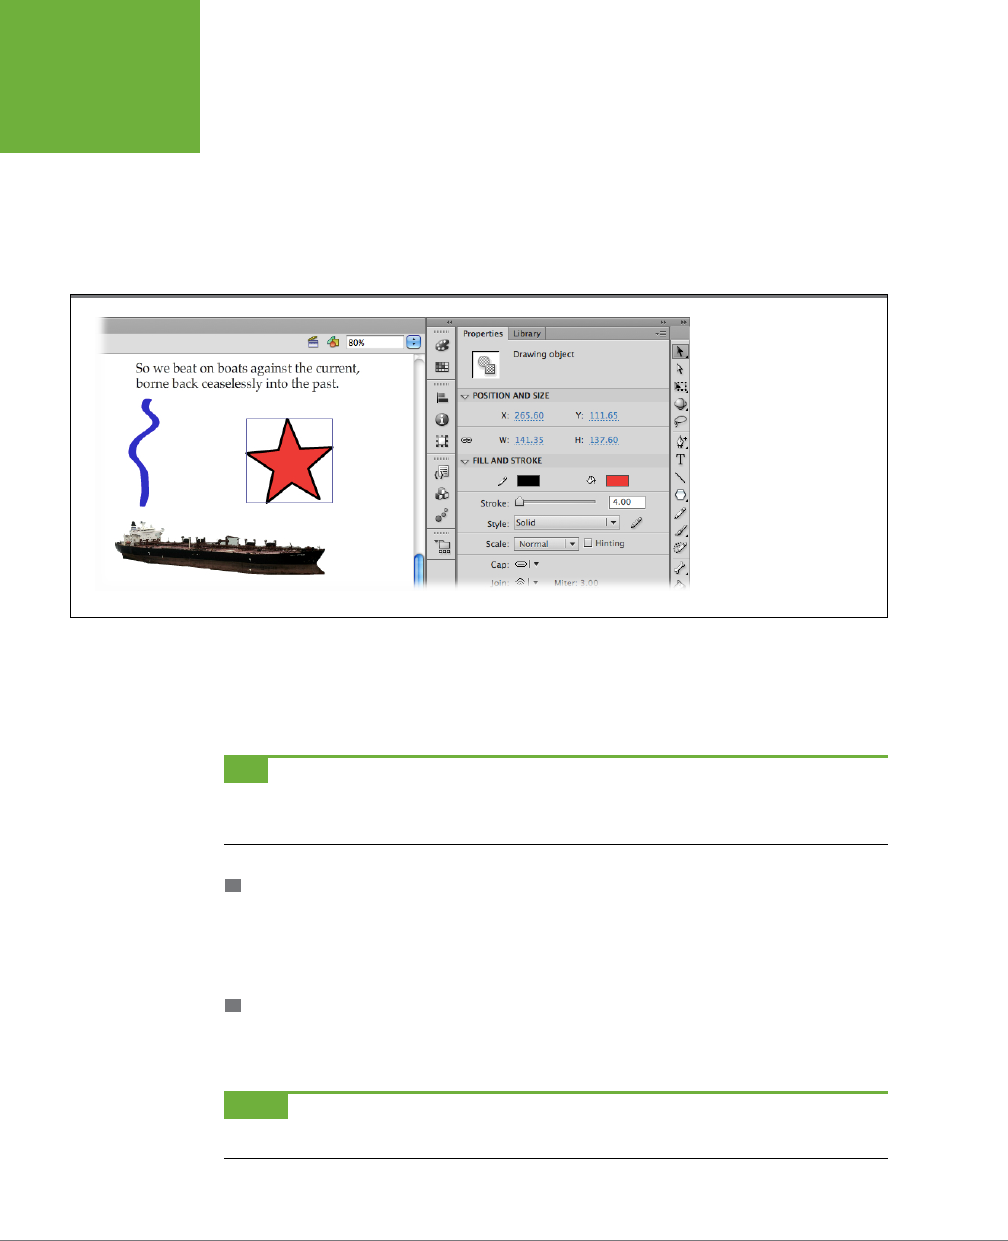
FLASH CS6: THE MISSING MANUAL
172
MANIPULATING
GRAPHIC
ELEMENTS
Select a shape, and you can change the properties for the fill and stroke. If it’s a
merge mode graphic, you can select the fill and stroke independently. If it’s an ob-
ject mode graphic, the fill and stroke are both selected with a single click. In either
case, the properties for the selection appear in the Properties panel. For example,
you can change the color, the thickness, and the style of a stroke. Select the fill, and
you can change the color, the opacity (alpha), or the gradient. These color options
are explained on pages 198 and 206.
FIGURE 5-15
Selecting an object tells
Flash to display that ob-
ject’s properties right there
in the Properties panel.
Here the star shape is
selected, so the properties
all relate to the star. As long
as the property isn’t grayed
out, you can change it in
the Properties panel.
Moving, Cutting, Pasting, and Copying
After you have an object on the stage, you can move it around, cut it (delete it),
paste it somewhere else, or make copies of it.
TIP All the things you can do to an object—cutting, pasting, copying, and moving—you can also do to a
piece of an object. Instead of selecting the entire object, just select whatever portion of the object you want to
work with, and then go from there.
MOVING GRAPHICS
To move an object, simply select it (page 61), and then drag it around the stage.
Figure 5-16 shows an example of using the Selection tool to select a group of objects,
and then move them together.
CUTTING GRAPHICS
To cut an object, select the object (page 61), and then choose Edit→Cut. Flash deletes
the object from the stage and turns on the Paste functions.
NOTE Choosing Edit→Clear deletes the selected object, too, but doesn’t turn on the Paste functions. In
other words, after you choose Edit→Clear, it’s gone, baby, gone (unless you quickly choose Edit→Undo Delete).
www.it-ebooks.info
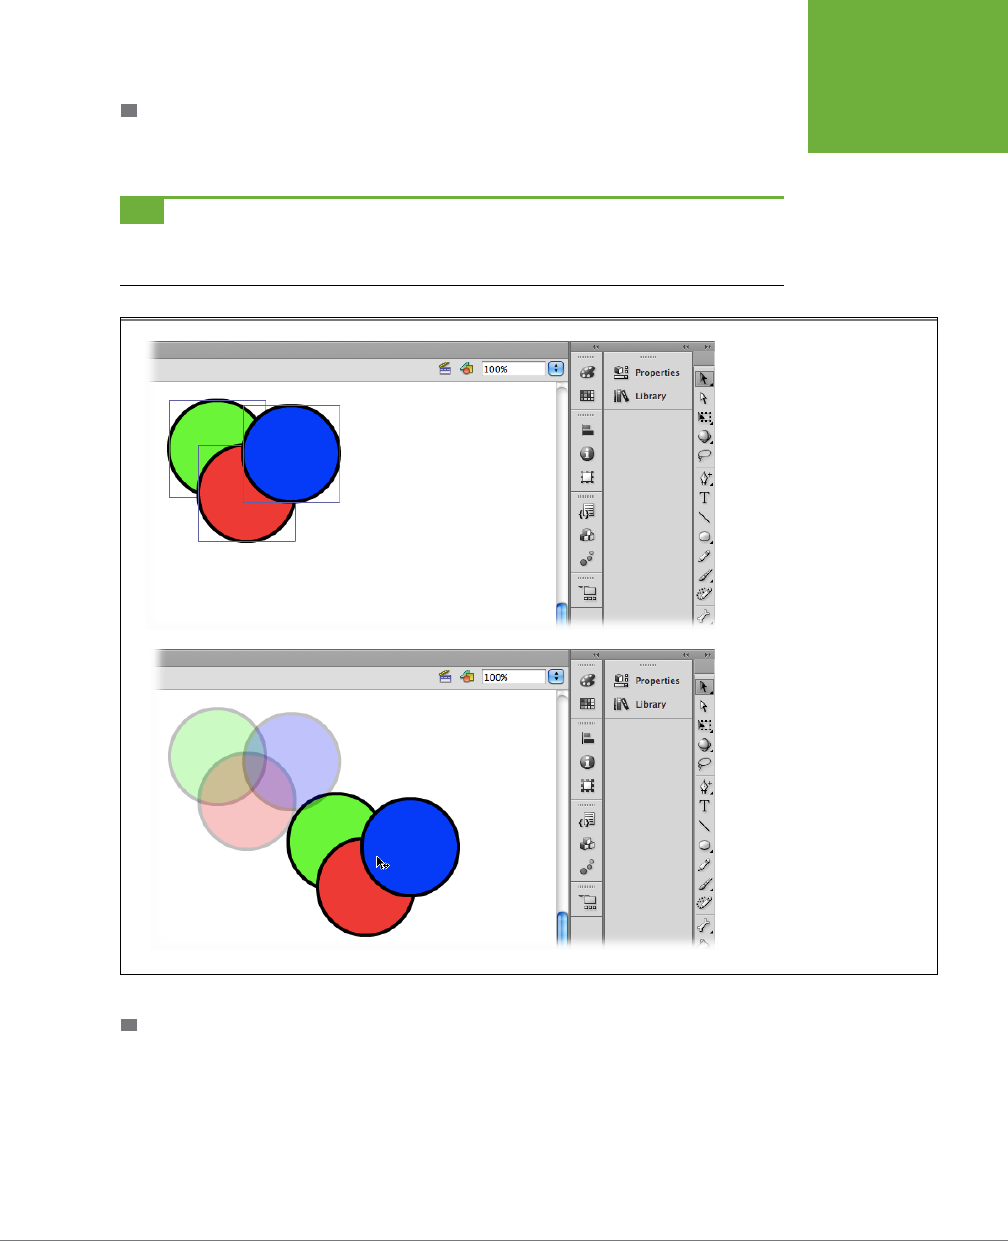
CHAPTER 5: ADVANCED DRAWING AND COLORING 173
MANIPULATING
GRAPHIC
ELEMENTS
COPYING GRAPHICS
To copy an object, select the object (page 61), and then choose Edit→Copy. Flash
leaves the object on the stage and turns on the Paste functions (see the next section).
TIP You can perform a quick copy-and-paste operation by selecting an object and then choosing
Edit→Duplicate. Flash displays a movable copy of the selected object just above the selected object. For even
faster duplication, press Alt (Option) as you drag the object.
FIGURE 5-16
Top: After you select an object or
a group of objects…
Bottom: …you can move your
selection simply by dragging
your cursor.
PASTING GRAPHICS
To paste an object that you’ve either cut or copied, choose one of the following:
• Edit→Paste in Center. This tells Flash to paste the cut (or copied) object smack
in the middle of the stage’s visible area, on top of any other image that hap-
pens to be there.
www.it-ebooks.info

FLASH CS6: THE MISSING MANUAL
174
MANIPULATING
GRAPHIC
ELEMENTS
• Edit→Paste in Place. This tells Flash to replace the cut object, or to put the
copied object square on top of the original. This command is especially useful
when you want to move an object from one frame to another and place it in
exactly the same position in the new frame.
TIP For many Flash designers, the quickest way to cut, copy, and paste objects is to right-click (Control-click)
the stage and then choose the command off the shortcut menu.
Transforming Objects
In the graphics world,
transforming
an object doesn’t just mean changing the object;
transforming means applying very specific shape and size changes to the object.
These changes—called
transforms
—include some fun tricks:
• Scaling. Among graphic designers, scaling means shrinking or enlarging a
selected shape based on its width, height, or both.
• Rotating. You can rotate (turn) an object as far as you want, in any direction.
• Skewing. A limited kind of distortion, skewing means slanting an object either
horizontally or vertically. For example,
italic text
appears skewed when com-
pared to regular text.
• Distorting and enveloping. You distort an object by pulling it out of shape—in
other words, by repositioning one or more of the object’s angles. The envelope
transform is similar, but it doesn’t preserve the lines of the shape the way dis-
tortion does; instead, it lets you pull any angle, line, or curve out of shape to
create fantastic eects.
• Flipping. Flipping an object creates a mirror image of the object. Flash has
commands for flipping both horizontally and vertically.
You have several choices when it comes to applying a transform to a selected object
(or group of objects):
• You can click the Free Transform tool (Figure 5-17), choose the appropriate
option from the Options section of the Tools panel, and then, on the stage,
drag your selection to apply the transform. This approach is described in the
following sections.
• You can open the Transform panel (Window→Transform) and then type informa-
tion (for example, the number of degrees you want to rotate an object) directly
into the Transform panel.
• You can choose Modify→Transform, and then, from the pop-up menu that
appears, turn on the checkbox next to the transformation you want to apply.
• You can right-click an object and choose Transform from the shortcut menu.
www.it-ebooks.info
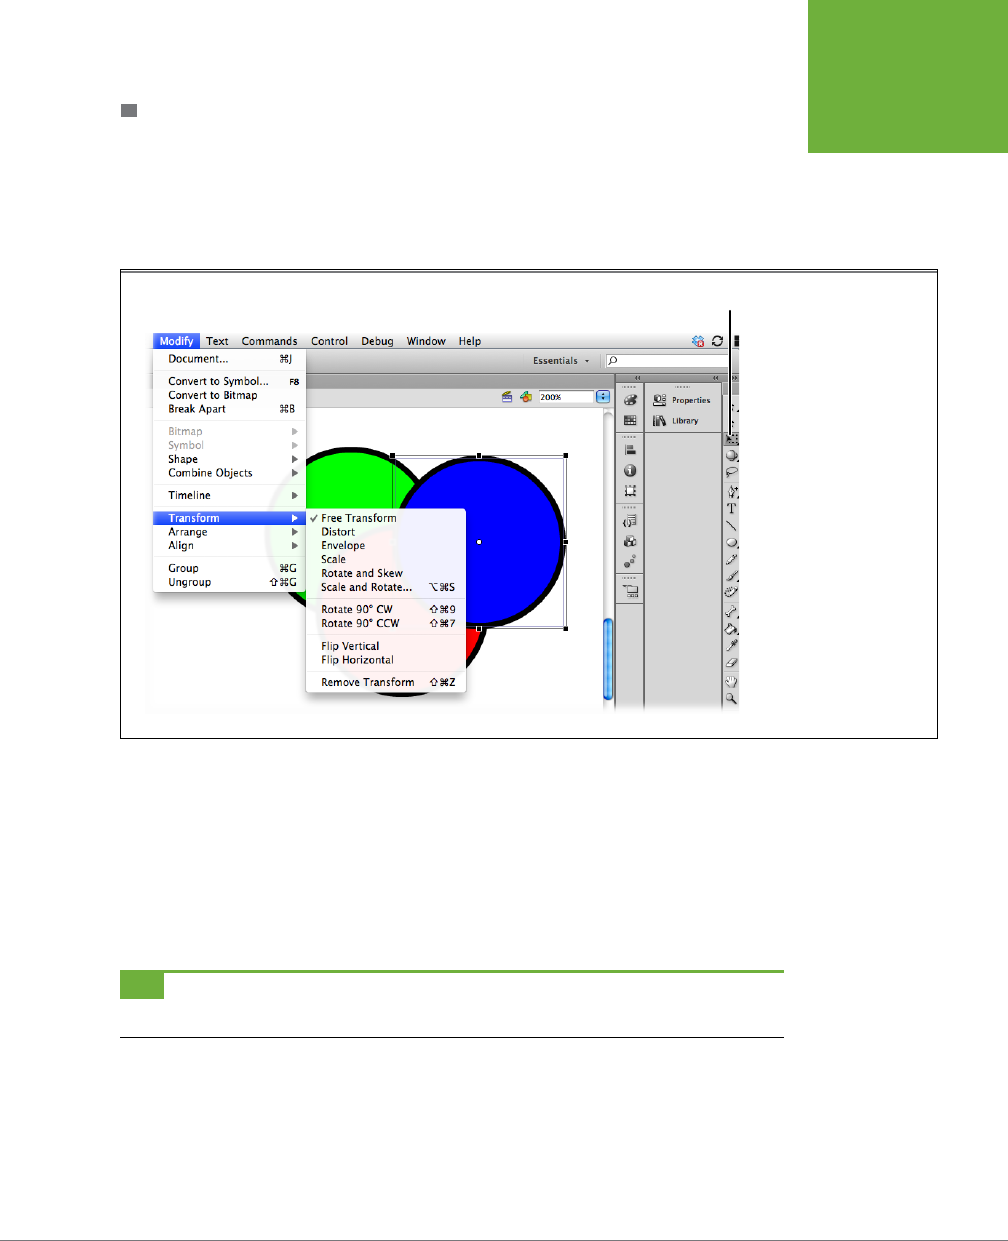
CHAPTER 5: ADVANCED DRAWING AND COLORING 175
MANIPULATING
GRAPHIC
ELEMENTS
SCALING OBJECTS
To resize a drawn object, first select the object on the stage, and then proceed as
follows:
1. Select the Free Transform tool’s Scale option.
Black squares appear at the corners and sides of your selection.
FIGURE 5-17
Flash gives you three
different ways to apply
transforms: using the main
menu, the Transform panel,
or the Free Transform
tool. In the sections that
follow, you’ll see the Free
Transform tool in action.
Free Transform tool
2. Position your cursor over one of the black squares.
Your cursor turns into the double-headed
scale arrow
(Figure 5-18, top).
3. Drag to scale the selection.
As you drag outward, the selection gets larger; as you drag inward, the selec-
tion gets smaller. You can see an example of a scaled object at the bottom of
Figure 5-18.
TIP You can use modifier keys to constrain objects as you scale them. For example, press Shift to lock the
proportions or press Alt (Option) to scale an object around its transformation point (indicated by a circle).
www.it-ebooks.info
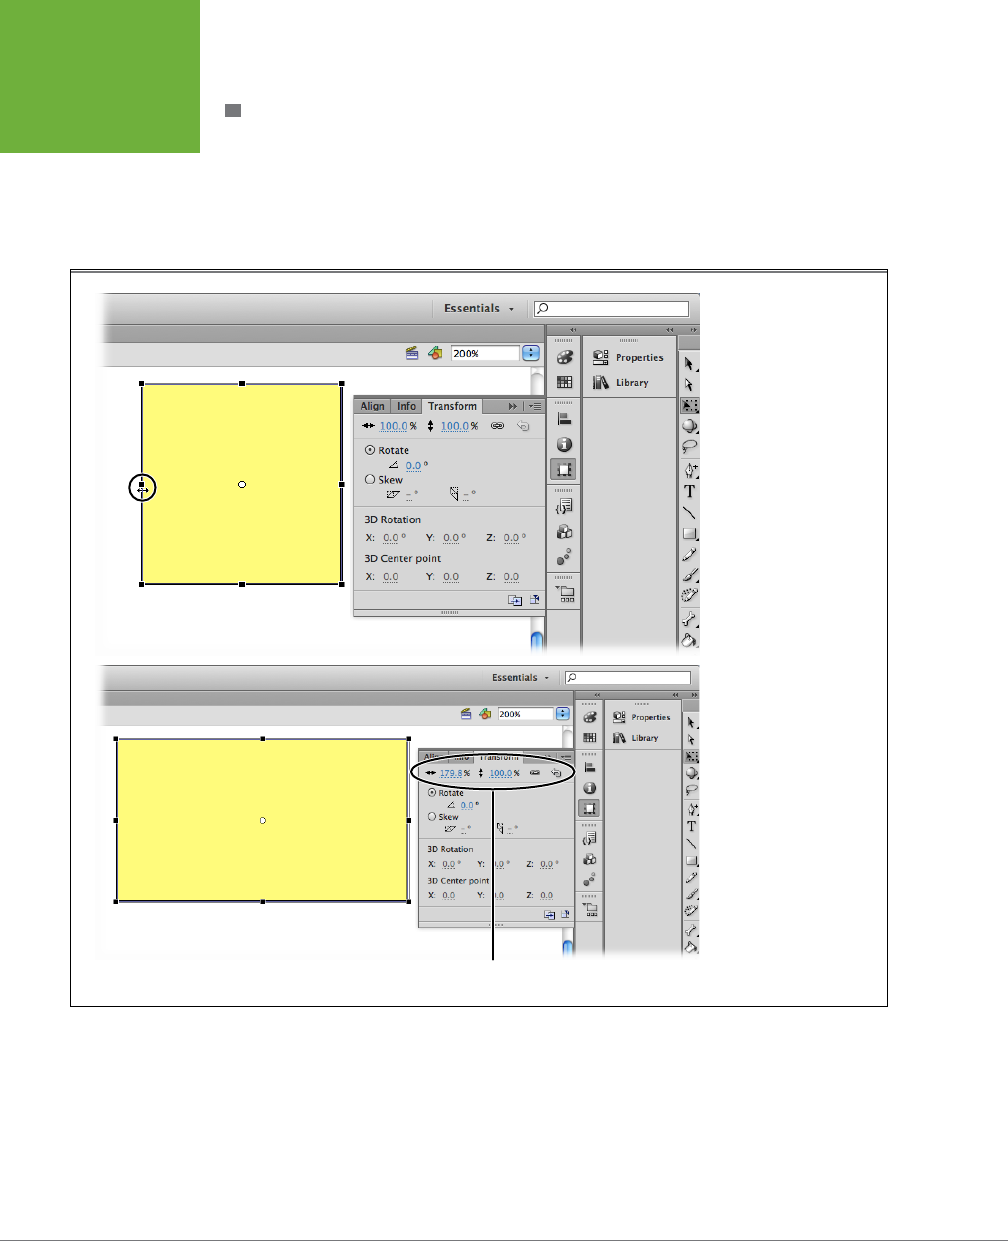
FLASH CS6: THE MISSING MANUAL
176
MANIPULATING
GRAPHIC
ELEMENTS
ROTATING OBJECTS
To rotate a drawn object around its axis, first select the object on the stage, and
then proceed as follows:
1. Select the Free Transform tool’s Rotate and Skew option.
Flash displays a black bounding box around your selection.
FIGURE 5-18
Top: Mousing over any
of the black squares
on the sides and at the
corners of your object
displays a scale arrow
(circled). By dragging a
square, you can scale an
object’s height, width, or
both. Notice that before
the scaling begins, the
Transform panel displays
the original width/height
dimensions as 100% and
100%.
Bottom: Flash auto-
matically plugs the new
dimensions into the
Transform panel on the
bottom. Instead of drag-
ging the object to scale it,
you can also type or scrub
the scale dimensions
into the Transform panel
yourself.
Scale Settings
2. Position your cursor over one of the black squares you see at the corners
of your selection.
Your cursor turns into a circular
rotation arrow
(Figure 5-19, top).
www.it-ebooks.info
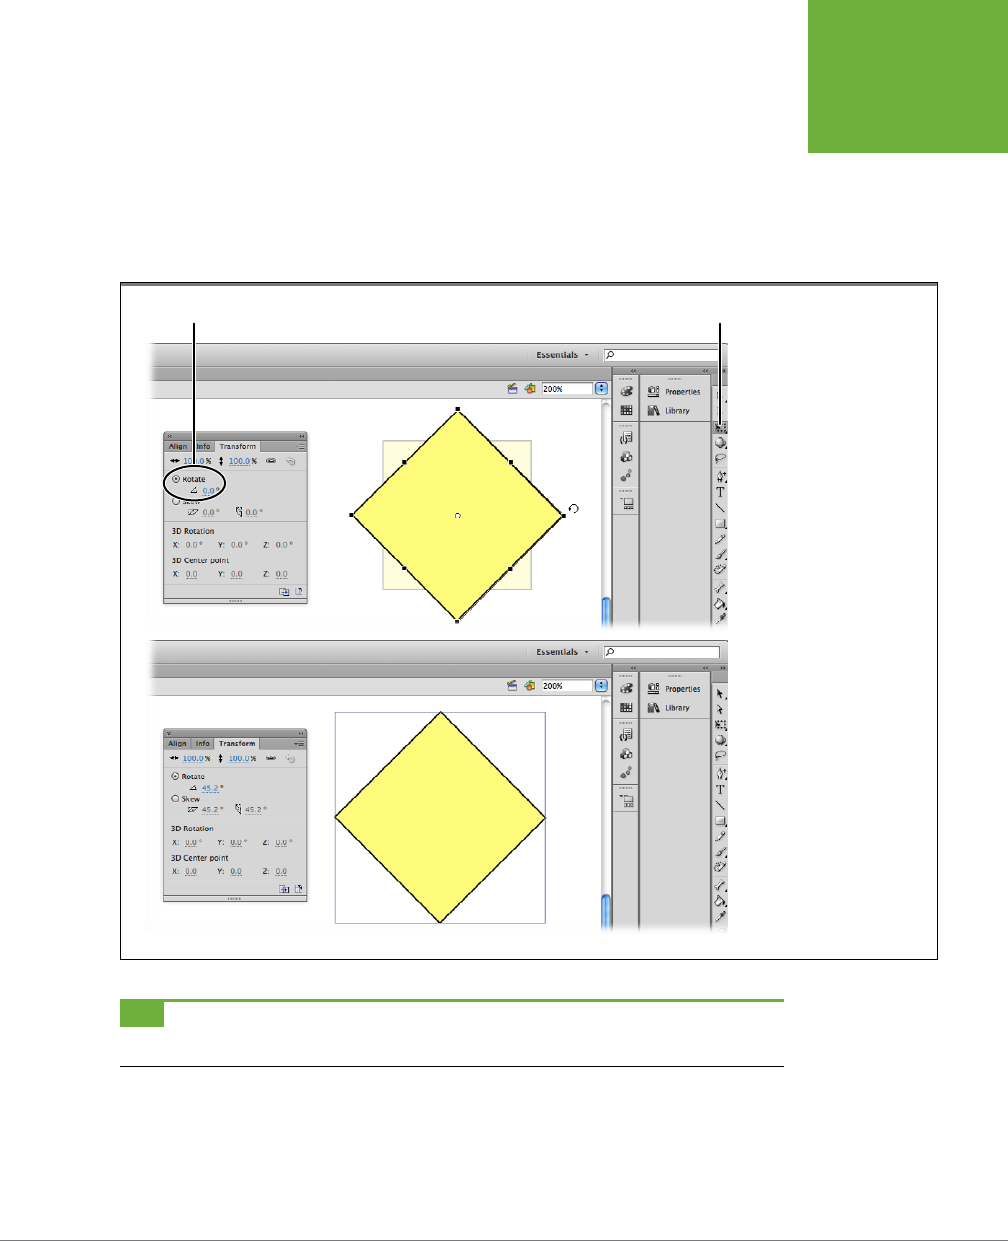
CHAPTER 5: ADVANCED DRAWING AND COLORING 177
MANIPULATING
GRAPHIC
ELEMENTS
3. Drag to rotate the selection.
If you drag your cursor to the right, the entire selection rotates right; if you drag
your cursor to the left, the selection rotates to the left. There’s a rotated object
in Figure 5-19 (bottom). Shift-drag to make an object rotate 45 degrees at a
time. Alt-drag (Option-drag) to make your selection rotate around the anchor
point on the opposite side from the cursor.
FIGURE 5-19
Top: After you select the
Rotate and Skew option,
mousing over any of the
black squares at the corners
of your object displays a
rotation arrow. Notice that
before the rotation begins,
the Transform panel displays
the original rotation as
0.0%. Drag to rotate the
object on its center axis (its
transformation point).
Bottom: After you let go of
your mouse, Flash automati-
cally records the rotation
degrees into the Transform
panel on the right. Instead
of dragging the object to
rotate it, you can also type
the degree of rotation into
the Transform panel yourself.
Rotate setting Transform tool
TIP You can flip your objects, too, by using Modify→Transform→Flip Vertical and Modify→Transform→Flip
Horizontal. The effects are a little different from rotating, as explained in Figure 5-20.
www.it-ebooks.info
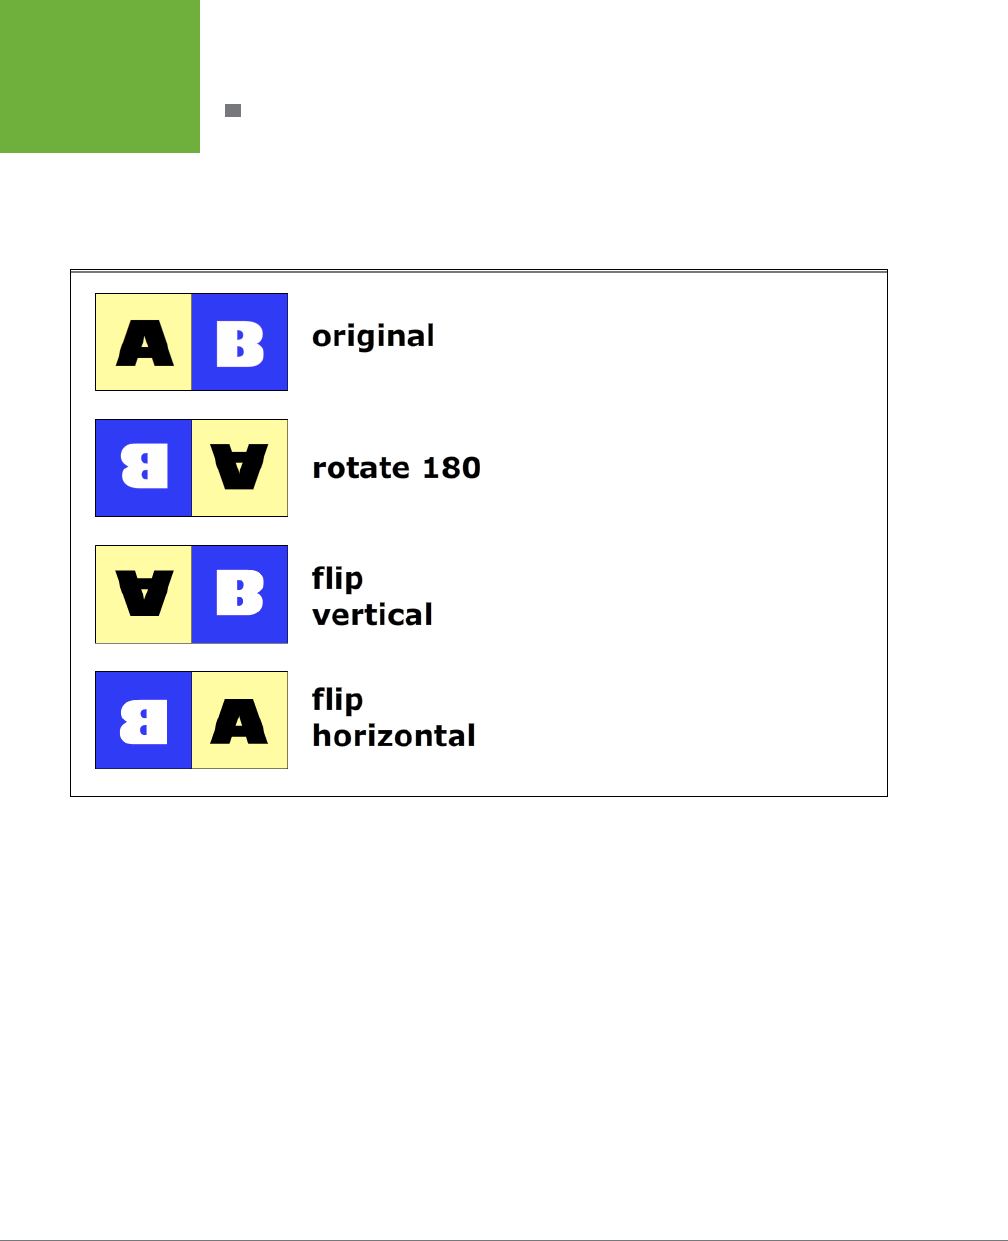
FLASH CS6: THE MISSING MANUAL
178
MANIPULATING
GRAPHIC
ELEMENTS
SKEWING OBJECTS
To give your drawing a slanted shape, first select the object on the stage, and then
proceed as follows:
1. Select the Free Transform tool’s Rotate and Skew option.
Flash displays a black bounding box around your selection.
FIGURE 5-20
At first glance, the effects of the Flip Vertical and Flip Horizontal
commands seem similar to rotating an object by 180 degrees. You
notice the difference if your object contains text. For example, here
you can see that Rotate 180 degrees actually spins the two blocks,
whereas Flip Horizontal creates a mirror image.
2. Position your cursor over one of the lines of the bounding box, but avoid
the square handles.
When the cursor is over the bounding box lines, you see the
skew arrow
( Figure5-21, top). If your cursor is over one of the bounding box handles, you
see the scale arrow.
3. Drag to skew the selection.
Dragging slants the selection along one of its axes (the one marked by the
skew arrow you clicked) in the direction you’re dragging. Figure 5-21 (bottom)
shows a skewed object. Alt-drag (Option-drag) to make the selected object
skew around the transformation point, which is usually the center.
www.it-ebooks.info
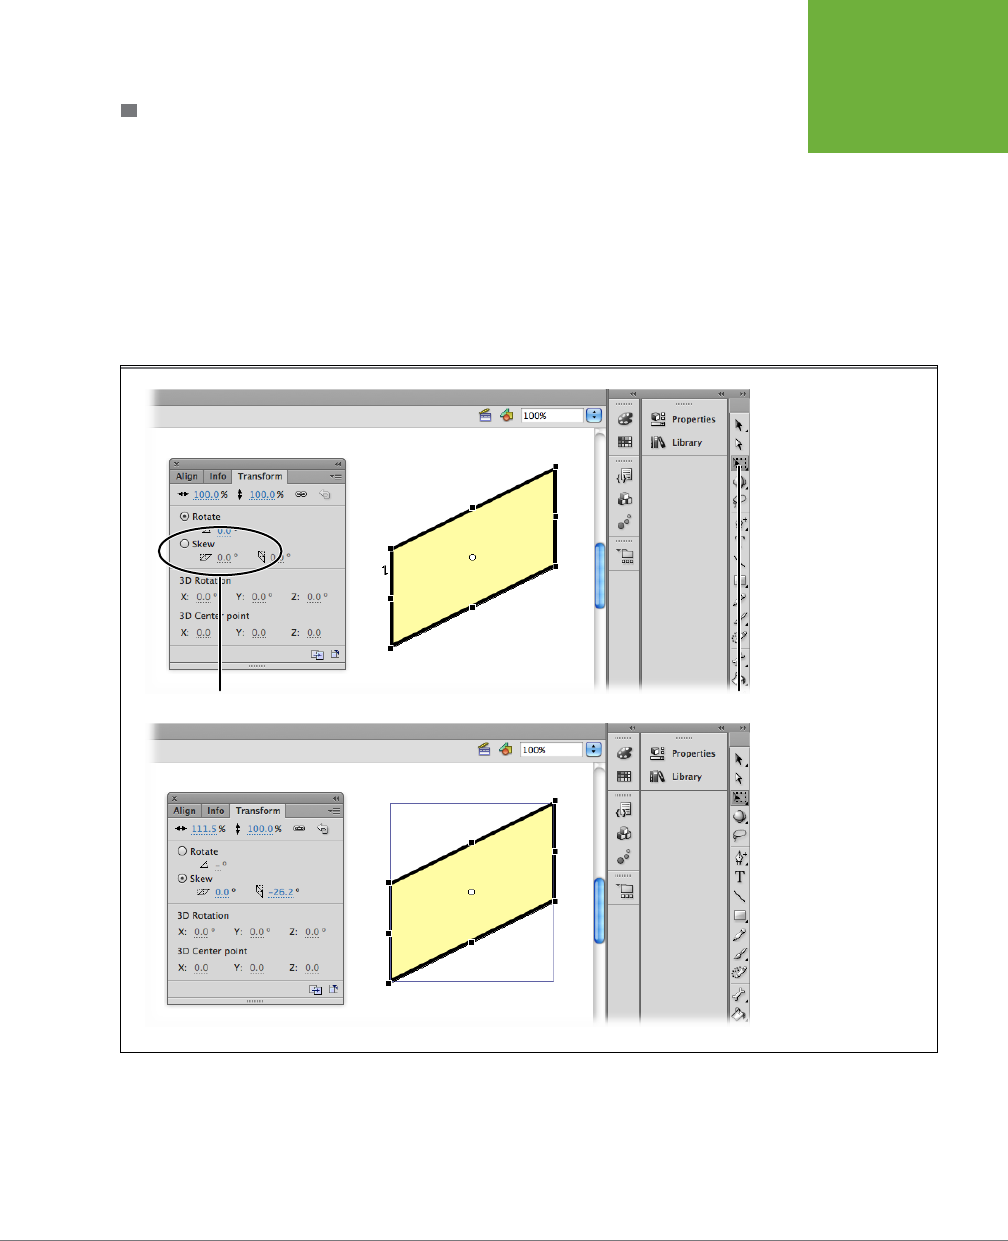
CHAPTER 5: ADVANCED DRAWING AND COLORING 179
MANIPULATING
GRAPHIC
ELEMENTS
DISTORTING OBJECTS
For more freedom than simple skewing, you can distort your drawn objects in any
way or direction:
1. First, select the object you want to distort, and then select the Free Trans-
form tool’s distort option (Figure 5-17).
Flash displays black squares around the sides and corners of your selection.
2. Position your cursor over one of the black squares.
Your cursor turns into a tailless
distortion arrow
(Figure 5-22, top).
FIGURE 5-21
Top: After you select the
Rotate and Skew option,
mousing over the bound-
ing box lines displays a
skew arrow. Notice that
before the skew begins,
the Transform panel
shows the Skew radio
button turned off. Drag to
skew the object.
Bottom: After you let go
of your mouse, check the
Transform panel: Flash
automatically turns on
the Skew button and logs
the horizontal and verti-
cal skew degrees. Instead
of dragging the object
to skew it, you can also
turn on the Skew button
and type the horizontal
and vertical skew degrees
into the Transform panel
yourself.
Skew settings Transform
www.it-ebooks.info
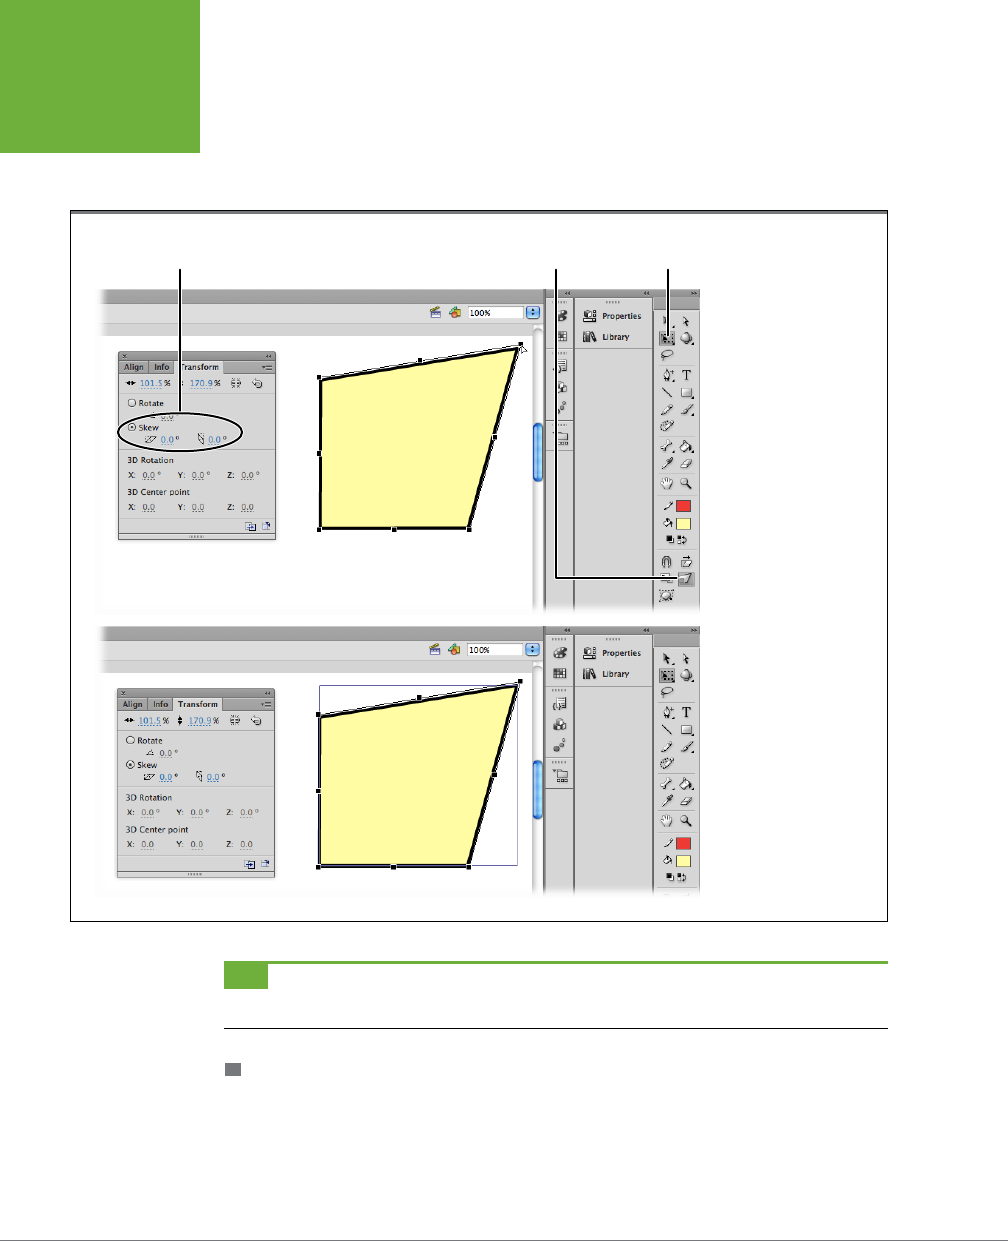
FLASH CS6: THE MISSING MANUAL
180
MANIPULATING
GRAPHIC
ELEMENTS
3. Drag to distort the selection.
As you drag outward, the shape bulges outward; drag inward, and the shape
dents inward. Figure 5-22 (bottom) shows a distorted object.
FIGURE 5-22
Top: After you select the
distort option, mousing
over any of the black
squares at the sides and
corners of your object dis-
plays a distortion arrow,
which you can drag to
distort the object. You can
drag as many distortion
points as you like.
Bottom: After you let
go of your mouse, Flash
displays the distorted
object.
Skew settings Transform
Rotate and
Skew option
TIP Shift-dragging a corner point lets you taper a shape; that is, move that corner and the adjoining corner
apart from each other an equal distance.
APPLYING AN ENVELOPE TRANSFORM
As discussed on page 174, an envelope transform is the most radical distortion. It
gives you more distortion points than the regular Distort option, and also gives you
www.it-ebooks.info
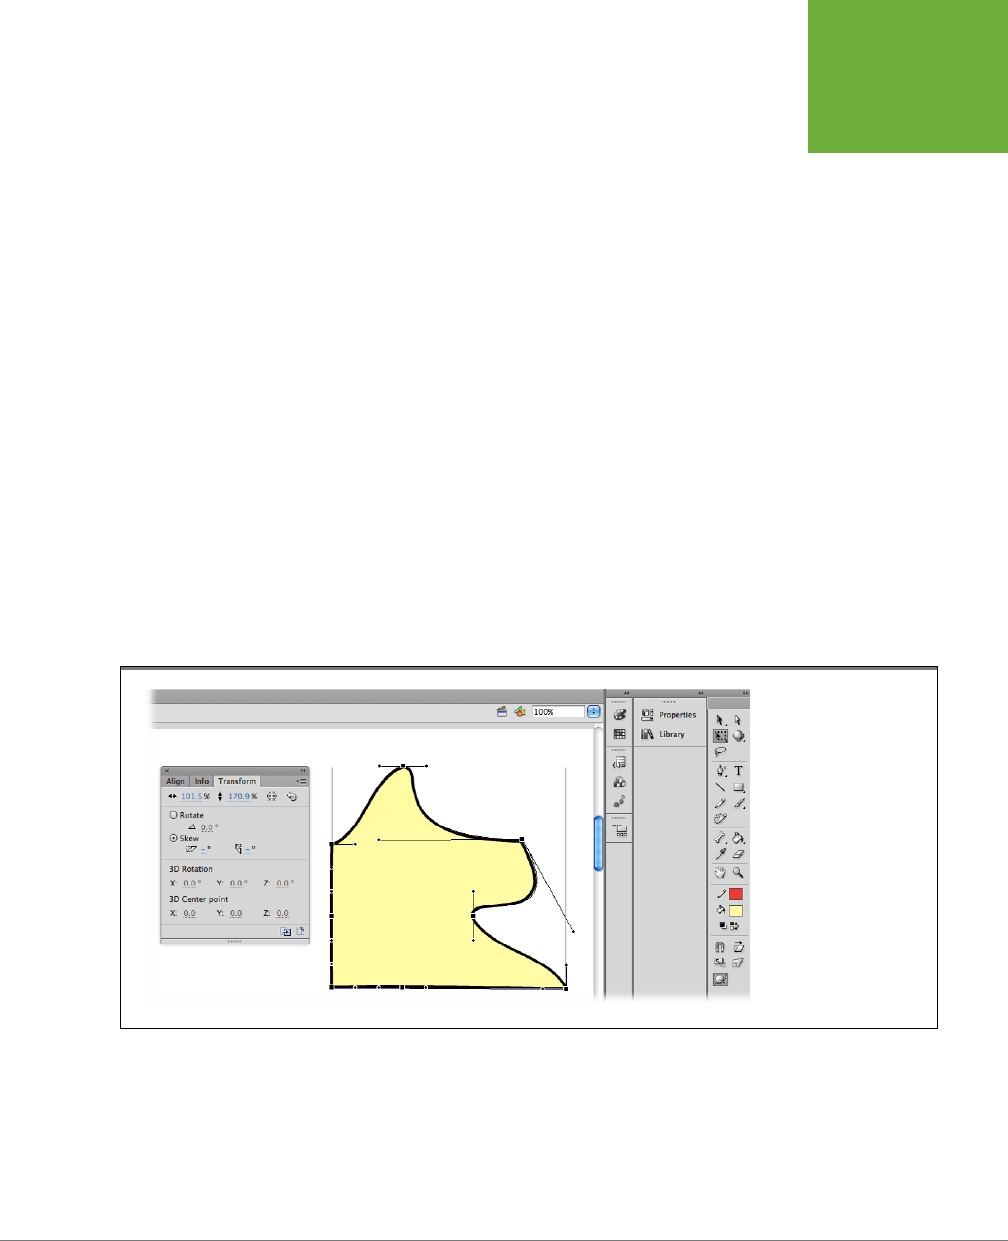
CHAPTER 5: ADVANCED DRAWING AND COLORING 181
MANIPULATING
GRAPHIC
ELEMENTS
finer control over the points by letting you drag inward or outward to create rounded
bulges or dents (not just pointy ones). Here’s how to use the envelope distortion:
1. Click the Free Transform tool.
The Free Transform options appear in the Options section of the Tools panel.
2. Select the object you want to distort.
Flash highlights the selected object with a black bounding box and tiny black
squares.
3. Click the envelope option.
The selected object appears surrounded by a series of black squares and circles.
4. Position your cursor over one of the black squares or circles (distortion
points).
Your cursor turns into a tailless
distortion arrow
.
5. Drag to pull the selection into a new shape (Figure 5-23).
You’ll notice that the envelope transform gives you a lot more distortion points
to choose from than the distort transform; it also gives you finer control over
the points you choose to distort (by dragging inward or outward).
You can see the results of modifying several distortion points in Figure 5-23.
FIGURE 5-23
This shape began life as a
square. The top and right
side were transformed us-
ing the Envelope option.
Mousing over any of the
black squares or circles
at the sides and corners
of your object displays a
distortion arrow. Drag to
reshape your object. The
squares remain attached
to the outline as you
drag. The circles are curve
control handles.
Moving and Rotating Objects in 3-D
Until Flash CS4 came along, it wasn’t easy to make an object look as if it were mov-
ing in three dimensions. For example, if you wanted to make an image look as if it
were traveling away from the viewer, about all you could do was move it slightly on
the stage and make it smaller. There was no real science to the eect; the best you
www.it-ebooks.info
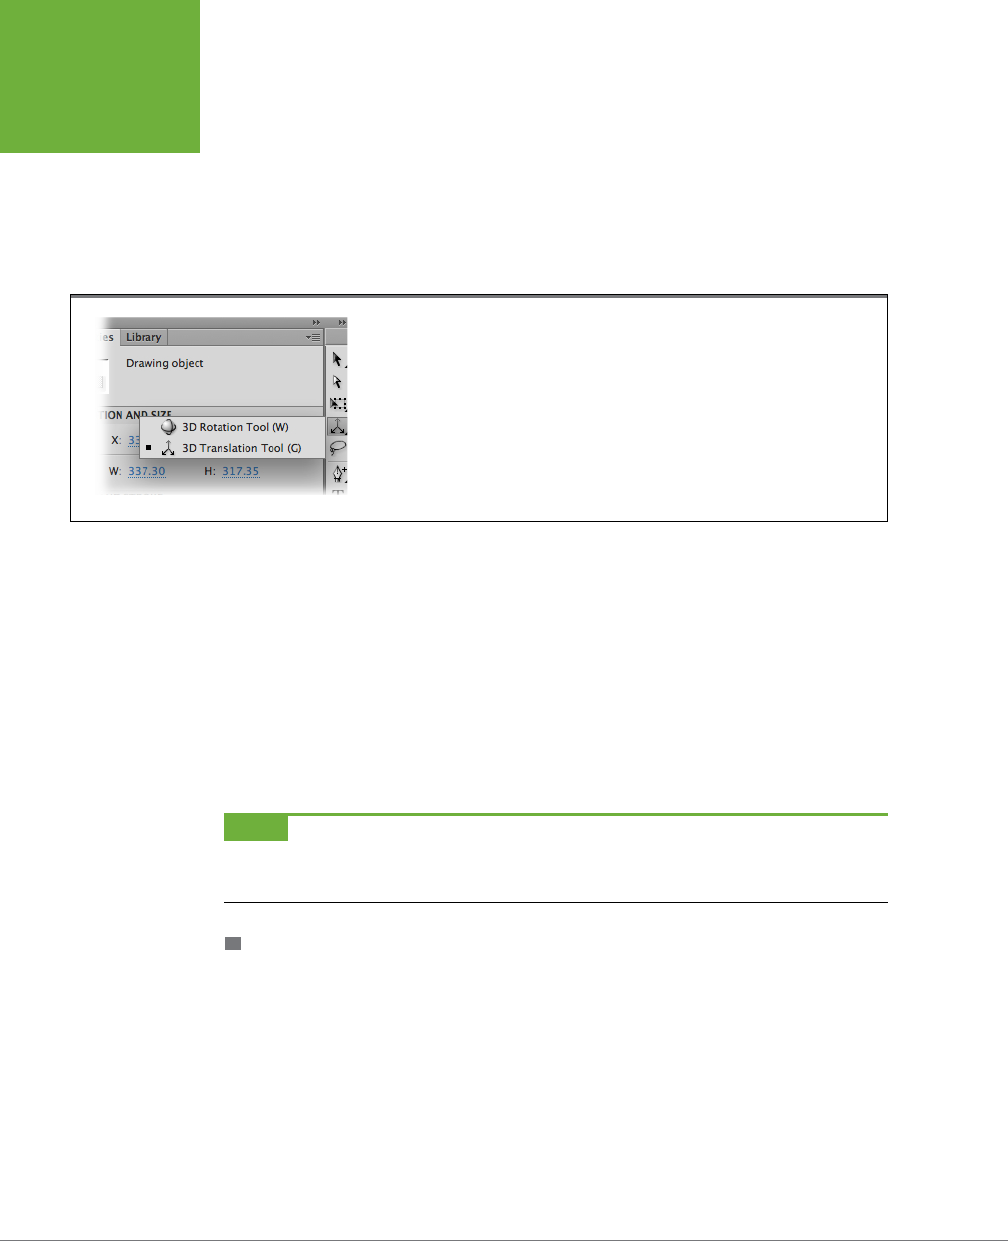
FLASH CS6: THE MISSING MANUAL
182
MANIPULATING
GRAPHIC
ELEMENTS
could do was eyeball it. Creating a 3-D rotation eect was even more dicult. But
no more. Flash now has tools that automatically create exactly these two eects.
Next to the selection tools, there’s another tool that looks like a globe with some
circles drawn around it, shown in Figure 5-24. Press and hold that button, and you
find the two tools that turn the stage into a 3-D world. The globe lets you rotate
an object three-dimensionally, while the tool with three arrows lets you move an
object around in 3-D space.
FIGURE 5-24
Flash has two tools that let you move movie clip symbols in three dimensions. The tool that
looks like a globe rotates movie clips. The tool with the three arrows lets you move movie
clips in three dimensions.
One catch is that the object has to be a movie clip or a TLF text field. (For details
on text fields, see page 215.) This isn’t too much of a catch, because you can put
any object inside a movie clip—like your logo or some text—and then make it fly
and spin in 3-D. The other catch is a bit more limiting, since Flash’s drawing tools
create only two-dimensional images. For example, you can create squares but not
cubes, and circles but not spheres. The text tool creates only two-dimensional type,
not 3-D letters. But once these objects are placed inside movie clips, you can move
those movie clips around in three dimensions. It’s sort of like moving a photo of a
car around in 3-D space as opposed to moving a model car around the same space.
But even with those limitations, you can create some pretty snazzy eects.
NOTE Because the 3-D tools are relative newcomers to Flash, they won’t work if you choose the
ActionScript2.0 option (page 18), and they rely on Flash Player 10 or greater—an option you choose when you
publish your animation (page 667).
ROTATING (TRANSFORMING) OBJECTS THREE-DIMENSIONALLY
The 3-D pros refer to rotating an object as
transforming
an object or a
transforma-
tion
. Here are the steps for rotating a movie clip in 3-D:
1. Select the object or group of objects you want to spin, and then press F8
to convert them into a movie clip symbol.
You can combine objects in a movie clip. For example, Figure 5-25 shows a
circle and text combined in one movie clip.
2. On the stage, select the movie clip, and then click the 3-D Rotation tool in
the Tools palette.
www.it-ebooks.info
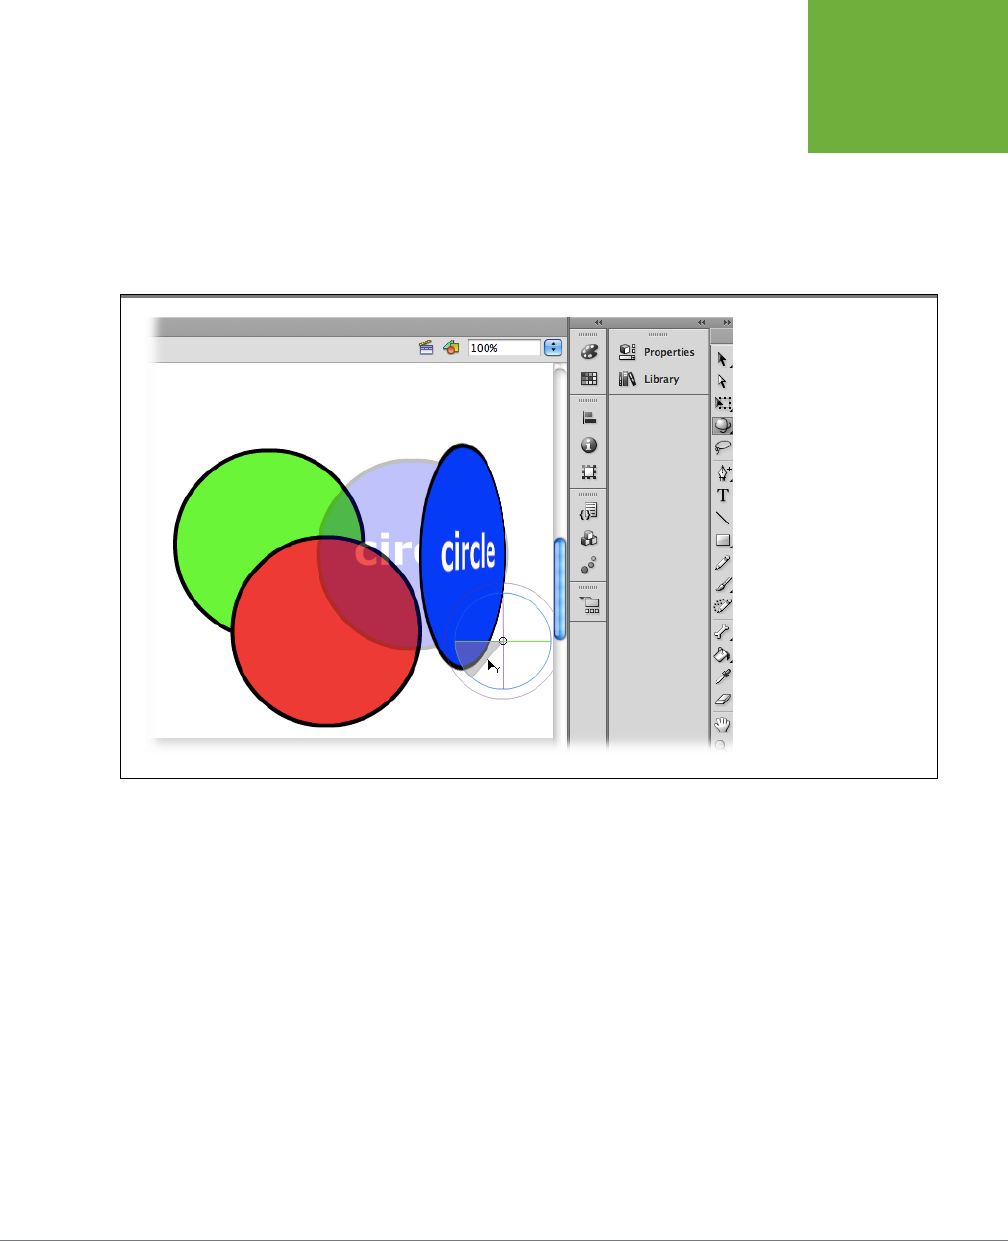
CHAPTER 5: ADVANCED DRAWING AND COLORING 183
MANIPULATING
GRAPHIC
ELEMENTS
A globe-like image appears near the movie clip, made up of colored circles.
Each color represents a 3-D axis. The small circle in the center marks the point
around which the rotation happens.
3. Drag the center point to change the point around which the rotation takes
place.
You can drag the center point to any location on the stage or even o the stage.
FIGURE 5-25
Use the transform tools to
rotate movie clip symbols in
three dimensions. The sphere
represents the directions you
can spin a selected object.
The object spins around
the transformation point
indicated by the small circle
at the center of the sphere.
4. Click one of the colored lines in the 3-D rotation tool to rotate the movie
clip along that axis.
As you hold the cursor over one of the colored axes, a tooltip appears indicat-
ing the axis around which the object will rotate. For example, move the cursor
near the green line and a Y appears on the cursor, meaning that the selected
object will rotate around the Y axis. You can think of the Y axis as a line that runs
from the top of the stage to the bottom. The red line in the sphere represents
the X axis, and the blue circle represents the Z axis, which you can think of as
a line running from the viewer back into the stage. The easiest way to get your
bearings is to experiment. Try the dierent options and click Undo (Ctrl+Z or
⌘-Z) if you don’t like the results. If you don’t want to be limited to spinning
along a standard XYZ axis, then drag the orange ring around the outside of
the other circles. That way, the object is free to follow your mouse movement
in any direction.
www.it-ebooks.info
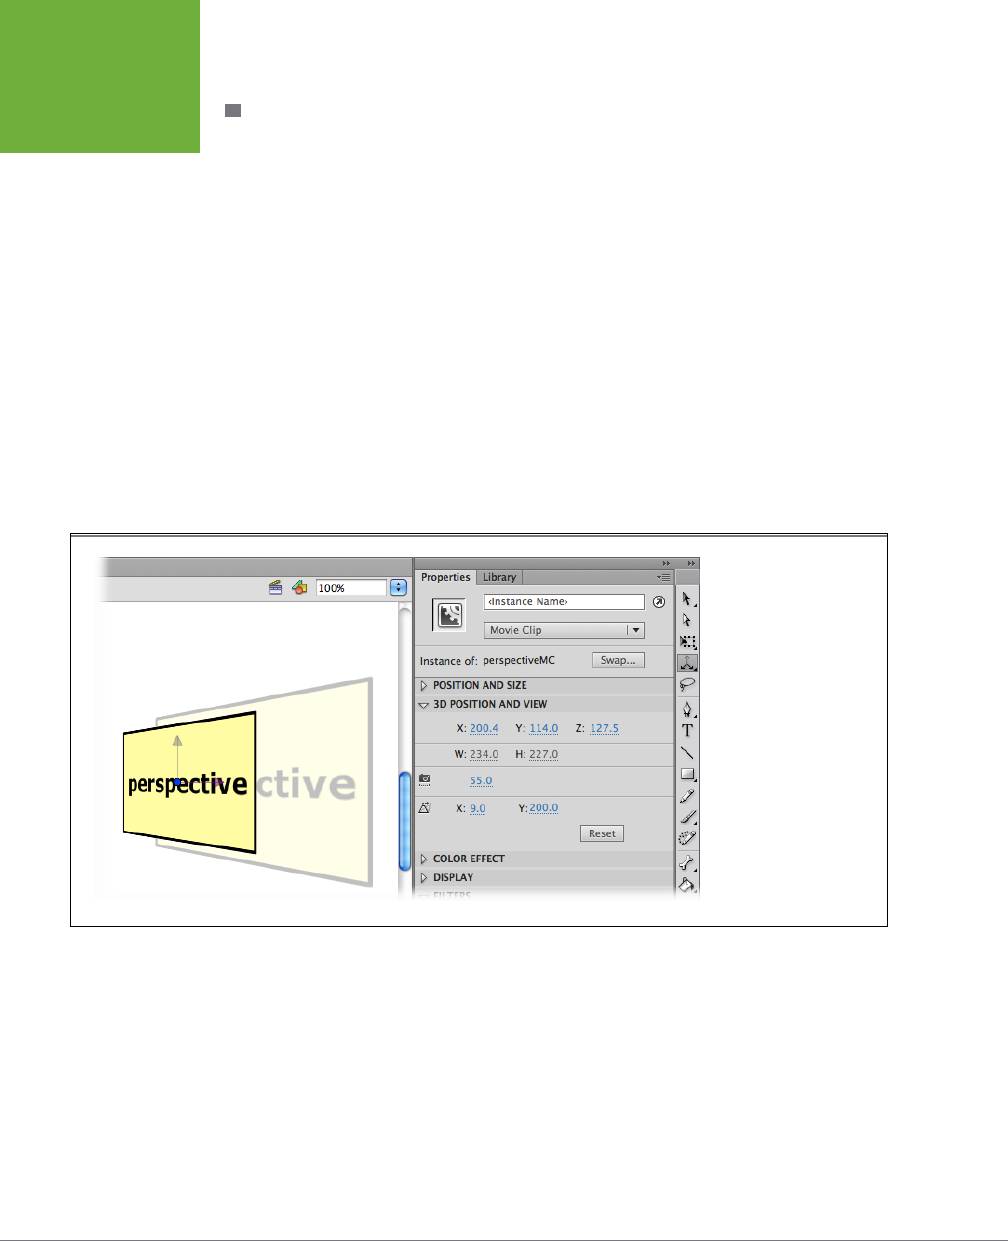
FLASH CS6: THE MISSING MANUAL
184
MANIPULATING
GRAPHIC
ELEMENTS
MOVING (TRANSLATING) OBJECTS IN THREE DIMENSIONS
The 3-D pros refer to moving an object in three dimensions as
translating
an object
or a
translation
. Here are the steps for moving a movie clip in 3-D:
1. On the stage, select the movie clip you want to move in 3-D.
Make sure the object you want to move is a movie clip symbol. If not, press F8
to make it into one.
2. In the Tools palette, click and hold the button for 3-D rotation tools, and
then choose the 3D Translation tool from the menu.
In the tools panel, the 3D Translation tool looks like three arrows pointing in
dierent directions. After you click the button, a 3-D translation icon appears
over the selected movie clip on the stage. The 3D Translation icon looks like a
red and green arrow protruding from a large dot. As shown in Figure 5-26, each
arrow is a dierent color to represent an axis along which the movie clip can be
moved. Green moves the object vertically (the Y axis). Red moves it horizontally
(the X axis). The big black dot represents the Z axis.
FIGURE 5-26
The 3D Translation tool
lets you move movie clips
along the X, Y, or Z axes
on the stage. Drag along
one of the colored arrows
representing each of the
axes. Here the object is
being dragged along the
Z axis, which makes it
smaller as it moves away
from the viewer.
3. Drag one of the colored arrowheads or the dot to move the movie clip along
that axis.
When you hold the cursor over one of the arrowheads or the dot, a tooltip ap-
pears indicating the direction of the axis: X, Y, or Z. In addition to using the 3D
Translation tool, you can also use the Properties panel to move objects along
the three axes (Figure 5-27). Select the movie clip you want to position, and
then use the "3D Position and View" X, Y, and Z settings to move it around the
stage. Click a setting and type a number, or drag to scrub in a number.
www.it-ebooks.info
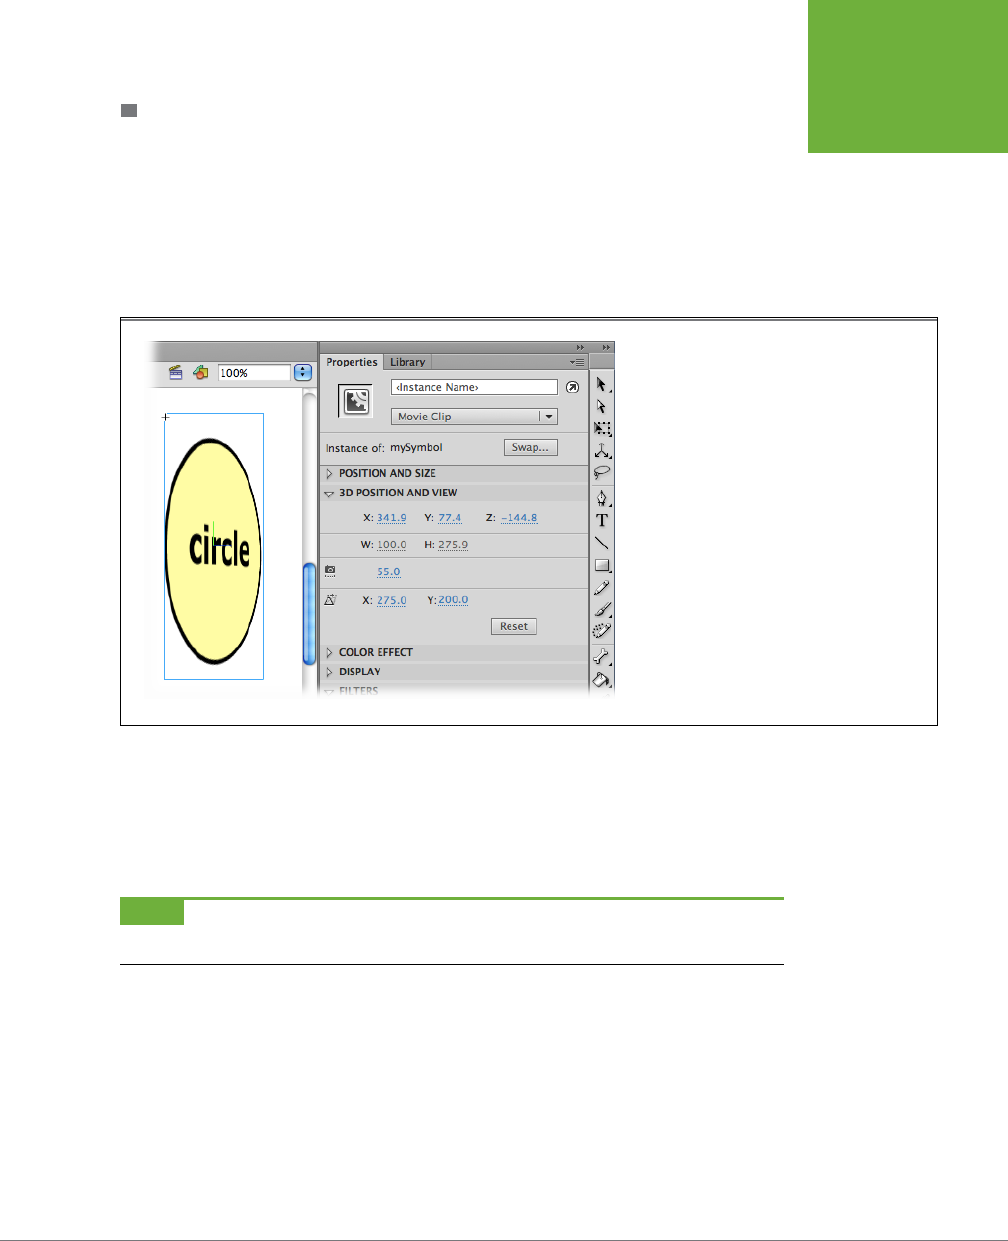
CHAPTER 5: ADVANCED DRAWING AND COLORING 185
MANIPULATING
GRAPHIC
ELEMENTS
ADJUSTING THE PERSPECTIVE AND VANISHING POINT IN 3-D
You can set two 3-D properties in the Properties panel: Perspective and Vanishing
Point (Figure 5-28). Choosing a perspective setting is similar to choosing a lens for
your camera. Flash starts you o at 55, a “normal” point of view similar to a 55 mm
lens on a camera. Set the number higher, and it’s like you’re zooming in or attaching
a telephoto lens. Choose a lower setting, and it’s as if you attached a wide-angle
lens. You can add some creative distortion to your images using the Perspective
setting, along with some of the other 3-D tools.
FIGURE 5-27
Use the “3D Position and View” panel to dial in
numbers for the perfect 3-D view. You can adjust
the position, the perspective, and the vanishing
point for objects on the stage.
Think back to your art class days when you learned how to add a vanishing point
to your drawings to help you draw in perspective. The vanishing point is that place
way o in the distance where all parallel lines seem to converge. In Flash, you can
move the vanishing point around in your animation using the X/Y settings in the
Properties panel (Figure 5-28).
NOTE You can add these same 3-D effects to your motion tweens when you use the Motion Editor. For the
details, see page 311.
Stacking Objects
In Chapter 4, you learned how to stack objects to create composite drawings using
layers. But you don’t need layers to place one item on top of another. You can over-
lap two or more objects on the same layer, but there are a few issues to consider:
• You can’t stack ungrouped shapes, which includes any lines and fills you’ve
created in merge mode, because the cookie cutter eect takes place. See the
box on page 188 for details.
www.it-ebooks.info
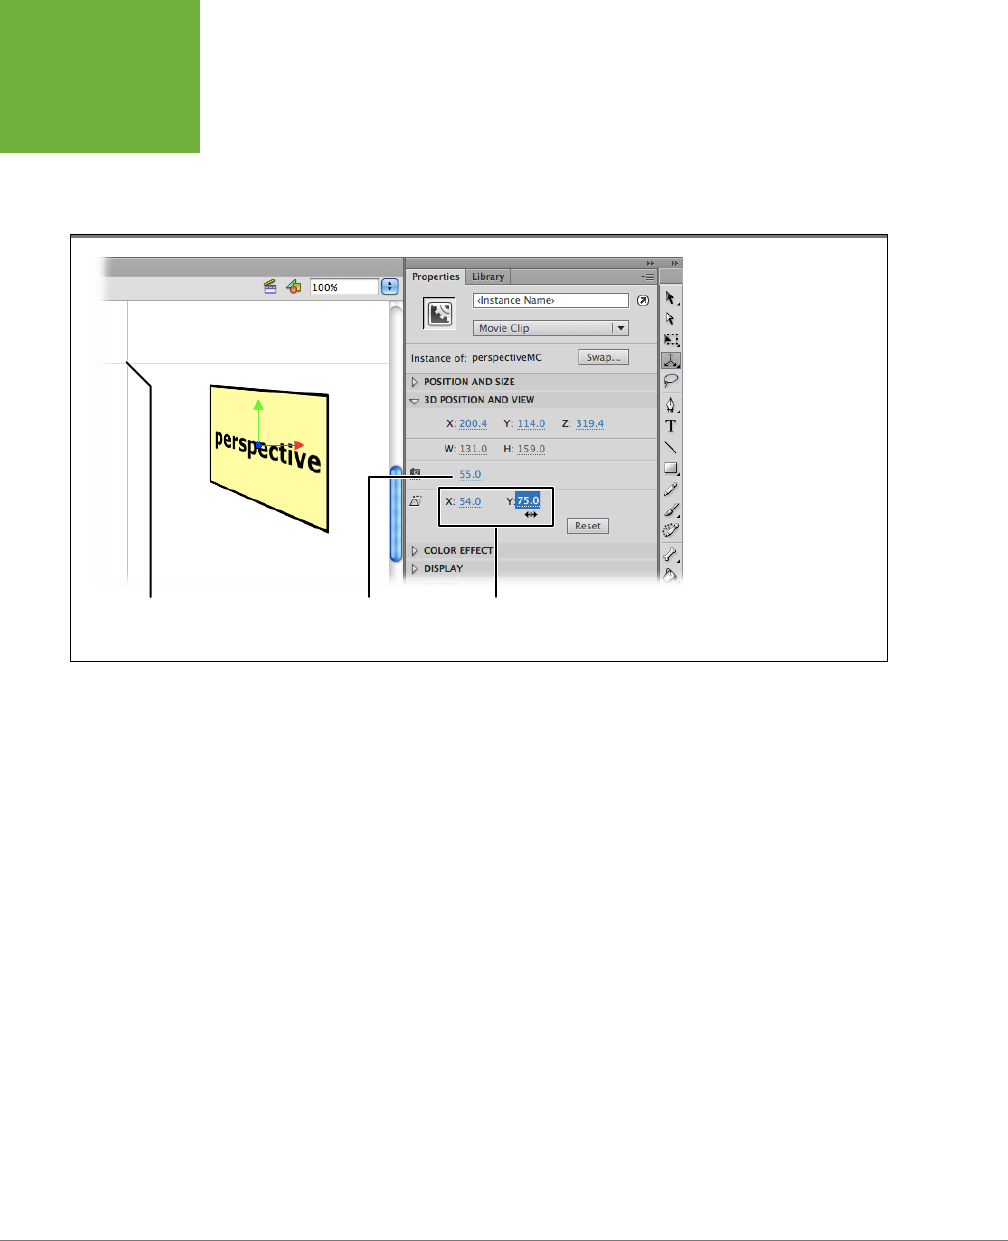
FLASH CS6: THE MISSING MANUAL
186
MANIPULATING
GRAPHIC
ELEMENTS
• Objects drawn in merge mode always appear below objects drawn in object
mode.
• If you try to tween two objects that aren’t grouped or enclosed in a single
symbol, you get unexpected results.
FIGURE 5-28
The icon for setting the
perspective looks like a
camera because it’s similar
to changing camera lenses
between normal, telephoto,
and wide angle. Use the X/Y
Vanishing Point settings to
position the vanishing point
in your animation.
Vanishing point
setting
Perspective
setting
Vanishing
point
The instant you create two or more overlapping object drawings on the stage,
though, you need to think about
stacking
, or arranging them. Stacking tells Flash
which object you want to appear in front of the other.
In Figure 5-29, for example, you see three object drawings: a rectangle, a circle, and
a star. They were drawn in object mode in that order, so Flash stacks them one on
top of the other with the rectangle first, then the circle on top of the rectangle, and
the star at the top of the stack. Flash keeps track of the stacking order even if the
shapes aren’t overlapping one another. So, when you drag the rectangle and drop
it on top of the star, Flash displays the rectangle
behind
the star. Then, when you
drag the circle and drop it on top of both the rectangle and the star, Flash displays
the circle behind the star, but in front of the rectangle, as shown in Figure 5-29. If
that’s the eect you want, great; if not, you can change the stacking order of all
three shapes.
To stack objects on the stage:
1. Select the object you want to rearrange (either to push behind or pull in
front of another object).
In Figure 5-30, the circle is selected.
www.it-ebooks.info
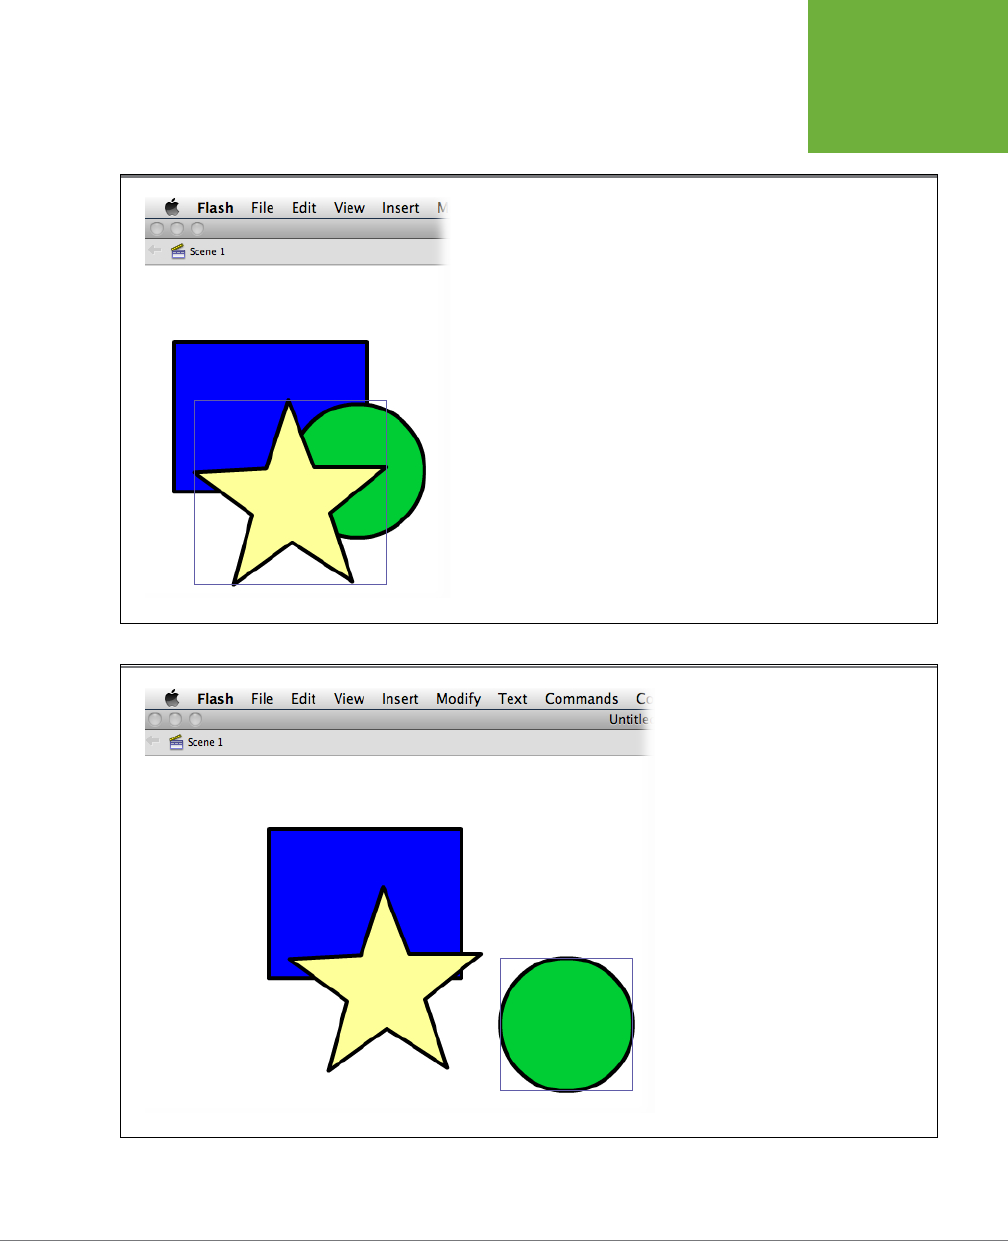
CHAPTER 5: ADVANCED DRAWING AND COLORING 187
MANIPULATING
GRAPHIC
ELEMENTS
2. Choose Modify→Arrange, and then, from the submenu, change the object’s
stacking order.
FIGURE 5-29
Stacking isn’t an issue when your objects don’t touch one another. The instant you
drag one object on top of another, though, you have to decide which object you
want to appear in front, and which behind.
FIGURE 5-30
When you create shapes in object mode,
Flash puts the first shape at the back of
the stack, and places each new shape at
the front of the stack. Ungrouped (merge
mode) objects are an exception to the
rule. Ungrouped objects are always placed
behind object drawings. See the box on
page 188 for more details.
www.it-ebooks.info

FLASH CS6: THE MISSING MANUAL
188
MANIPULATING
GRAPHIC
ELEMENTS
Here are your options:
• Bring to Front. Pulls the selected object all the way forward until it’s on
top of all the other objects.
• Bring Forward. Pulls the selected object forward one position, in front of
just one other object.
• Send Backward. Pushes the object back one position, behind just one
other object.
• Send to Back. Pushes the selected object all the way back, until it’s behind
all the other stacked objects.
TIP To quickly move a selected object forward and backward, use Ctrl+up arrow or Ctrl+down arrow ( ⌘-up
arrow and ⌘-down arrow). Ctrl+Shift+up arrow (Shift-Option-up arrow) brings the selected object all the way
to the front and Ctrl+Shift+down arrow (Shift-Option-down arrow) sends it all the way to the back.
Safety in Groups
If you plan to move your graphic elements around a lot—stack
them, unstack them, and reposition them on the stage—you
can make your life easier by putting them in
groups
. In general,
groups behave more like objects drawn in object mode. A group
can contain any number of objects, from a simple shape with a
stroke to complex shapes like a car or a city background scene
with buildings, trees, and fire hydrants. Groups can include
text fields and just about anything that’s visible on the stage.
If you want to edit the individual elements, you can open the
group with a double-click. When you’re done editing, close it
using the buttons on the Edit bar.
Suppose you’ve drawn a car made up of different parts: spin-
ning wheels, fenders, and a windshield. If you place all those
parts inside a group, you can move the car around the stage as
a single object. All the pieces of the car maintain their positions
relative to one another, and you don’t have to worry about
accidentally dragging a wheel or some other part away from
the group. As a bonus, you can arrange the stacking order of
groups on the stage using the Modify→Arrange commands
like “Bring Forward” or “Send to Back.” That way, the car can
drive behind some buildings and in front of others. Perhaps the
best thing about groups is that they give you a way to manage
fewer objects when your animation is filled with hundreds of
individual fills, strokes, and other elements.
WORKAROUND WORKSHOP
Figure 5-31 shows you an example of choosing Bring Forward with the circle selected.
If you've drawn shapes in merge mode, there's a way to make them behave like object
drawings when you stack them: The trick is to group them. Select the fill, stroke, and
anything else you want to include in a group. Then choose Modify→Group (Ctrl+G or
⌘-G). The selected objects are now part of a group that you can position using com-
mands like Bring Forward or “Send to Back.” For details, see the box on page 188.
www.it-ebooks.info
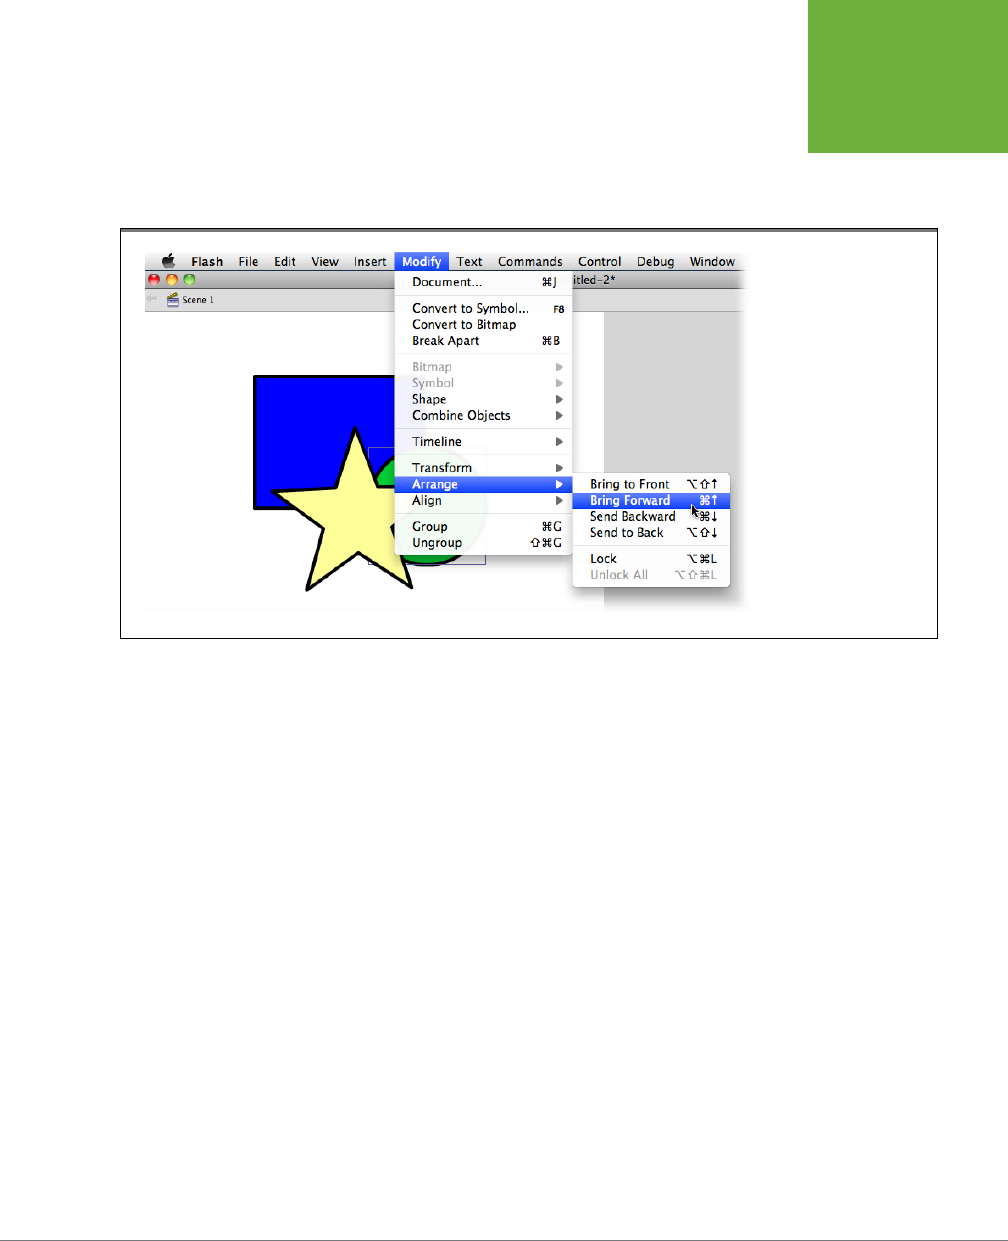
CHAPTER 5: ADVANCED DRAWING AND COLORING 189
MANIPULATING
GRAPHIC
ELEMENTS
Converting Strokes to Fills
As you saw in Chapter 2 (page 55), Flash treats lines and fills dierently when you’re
working in merge drawing mode. For example, take a look at Figure 5-32, which
shows a line drawn with the Pencil and a line drawn with the Brush.
FIGURE 5-31
To restack an object, you
first need to select it.
Here you see the circle
selected. Choosing Bring
Forward will bring
the circle forward one
position, placing it on top
of the star. The “Bring
to Front” and “Send to
Back” commands give
you a quick way to move
objects to the top or
bottom of the stack.
If you click the Selection tool and then click to select the Pencil-drawn line, Flash
highlights just one segment of the line. But performing the very same operation on
the similar-looking Brush-drawn line selects the
entire
line.
When you convert a line into a fill, Flash lets you interact with the line just as you
would with any other fill. This technique is especially useful when you’re working
with shapes, no matter which drawing mode you’re using. That’s because when you
create a shape using one of Flash’s shape tools—a star, say, or a circle—Flash actually
creates two separate elements: the inside of the shape (a fill), and the outline of the
shape (a stroke). If you want to change the color of the entire shape, you need to use
two tools: the Paint Bucket tool (which lets you change the color of fills), and the Ink
Bottle tool (which lets you change the color of strokes, or add a stroke to an existing
fill). When you convert the outline to a fill, Flash lets you manipulate both the outside
and the inside of the shape in the same way using the same tools. Converting also
lets you create scalable shapes (images that shrink evenly) and nice, straight corners
(thick strokes appear rounded at the corners; thick fills shaped like lines don’t).
To convert a line into a fill:
1. Select the line (or outline) you want to convert into a fill.
Flash highlights the selected line.
www.it-ebooks.info
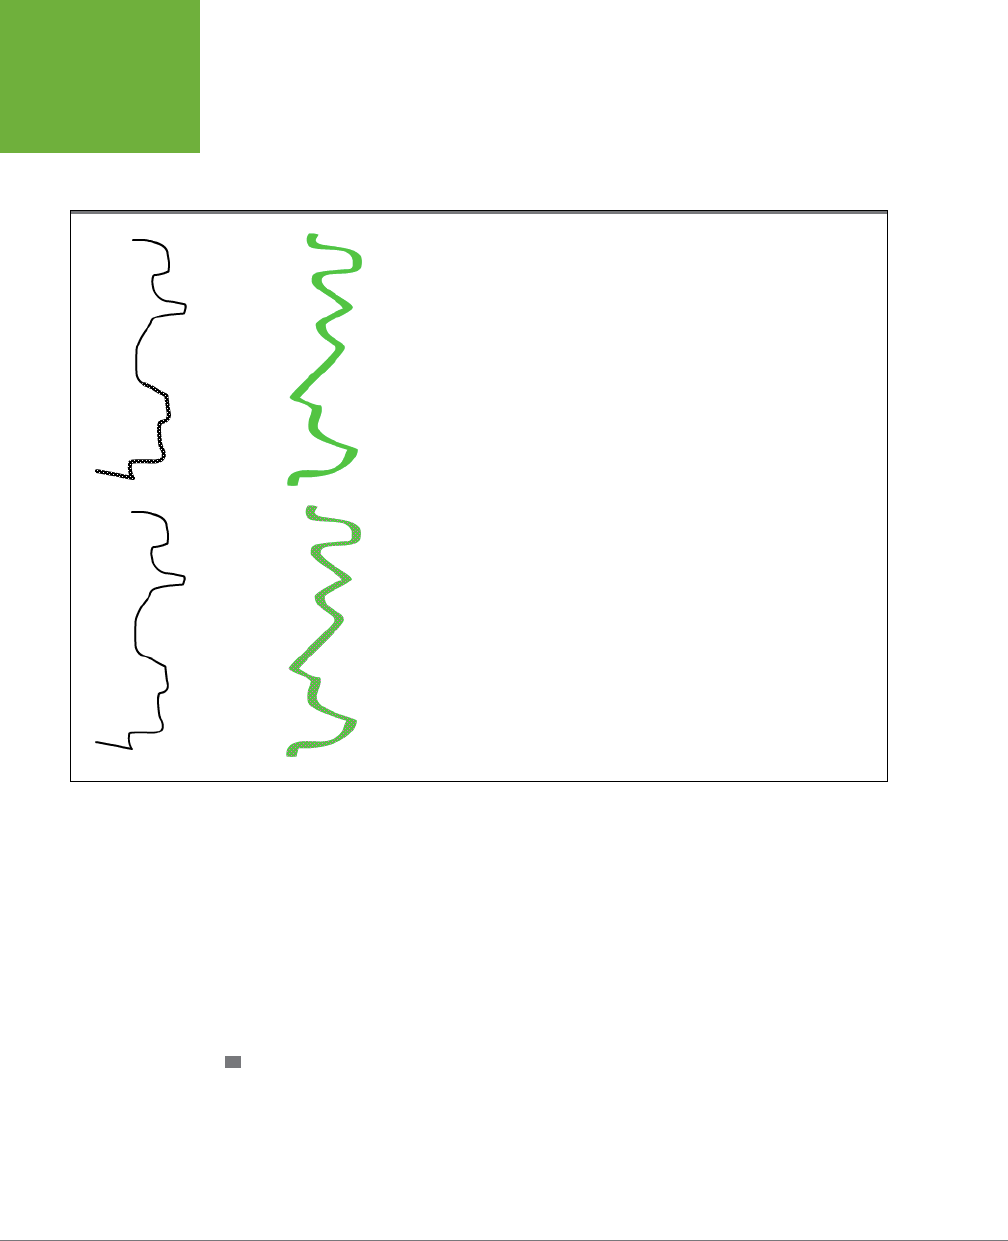
FLASH CS6: THE MISSING MANUAL
190
MANIPULATING
GRAPHIC
ELEMENTS
2. Choose Modify→Shape→“Convert Lines to Fills.”
Flash redisplays the line as a fill, and the Properties panel changes to display
fill-related properties (as opposed to line-related properties).
FIGURE 5-32
Top: When you’re working with ungrouped objects (which is what you create in merge
drawing mode), the Selection tool behaves differently. Here you see the results of clicking
the Pencil-drawn line: Flash selects only a portion of the line (a single stroke).
Bottom: Clicking the Brush-drawn line, on the other hand, selects the entire line. This
behavior is just one example of how Flash treats strokes and fills differently.
Aligning Objects
In Chapter 2 (page 50), you saw how to use Flash’s grid, guides, and rulers to help
you eyeball the position of objects as you drag them around on the stage. You also
saw how to use the Alignment panel to line up objects with respect to one another
or to one of the edges of the stage.
Both these approaches are useful—but Flash doesn’t stop there. Snapping and guide
layers give you even more control over where you place your objects with respect
to one another on the stage.
SNAPPING
Snapping
is one of those features people seem to love or hate. The key to snap-
ping is to turn it on when you need consistent alignment and to turn it o when it
cramps your style. Here’s how it works: When you turn snapping on, you tell Flash
to help you out when you’re positioning objects on the stage. Snapping helps in a
www.it-ebooks.info
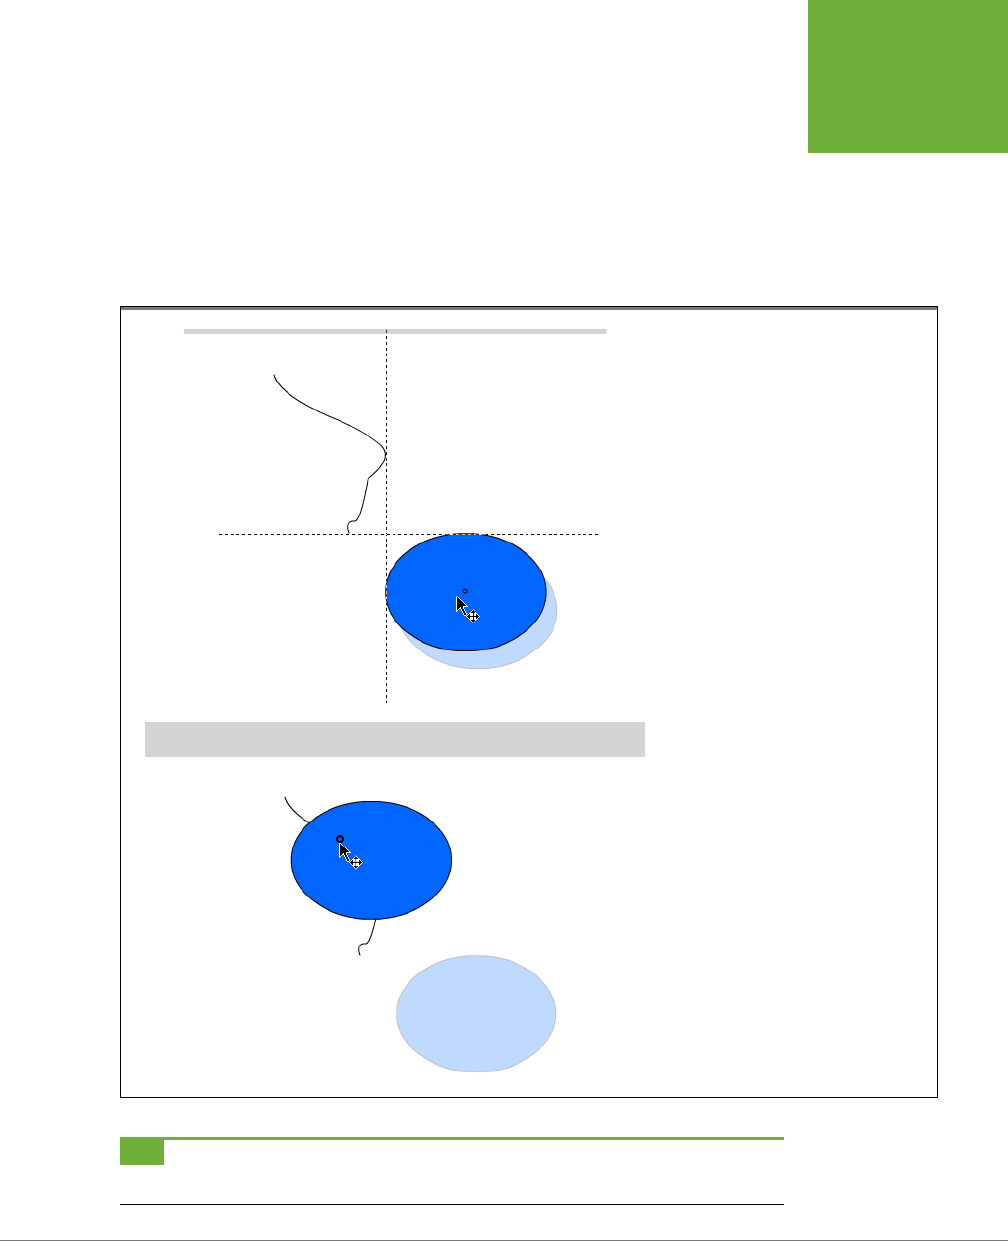
CHAPTER 5: ADVANCED DRAWING AND COLORING 191
MANIPULATING
GRAPHIC
ELEMENTS
few ways. For one, it provides guidelines when elements are aligned. And, it makes
items snap into place when they’re close. You don’t have to be a mouse marksman.
For example, in Figure 5-33, you see an oval being dragged across the stage. Because
Snap Align is turned on, Flash displays a dashed line (top) when the circle is dragged
so that one or more of its edges is aligned with another object in your animation.
Snapping also creates a
snapping point
at the point clicked or, if you click close to
the center of an object, in its center.
FIGURE 5-33
Top: When you turn on snapping, Flash gives
you a visual cue when you drag an object
close to alignment. Here Snap Align is turned
on, so Flash displays a dashed line when the
edges of the circle are aligned with the edges
of the stroke. You tell Flash how close is close
enough using the Horizontal and Vertical
Object Spacing fields of the Edit Snapping
window, which you display by choosing
View→Snapping→Edit Snapping, and then,
in the Edit Snapping window that appears,
clicking Advanced.
Bottom: In this example, “Snap to Objects”
is turned on, too. The point where the oval
is clicked shows a circle; when that point is
close to the stroke, the circle gets larger and
bolder. Let go of the mouse button and the
oval snaps into place.
TIP For snapping to work, you can’t speed around the stage; if you do, you’ll miss Flash’s cues. Instead, drag
your objects slowly.
www.it-ebooks.info

FLASH CS6: THE MISSING MANUAL
192
MANIPULATING
GRAPHIC
ELEMENTS
To turn on snapping, select View→Snapping, and then, from the shortcut menu that
appears, choose from the following:
• Snap Align. Displays a dashed line when you drag an object within a certain
number of pixels (you see how to change this number in the box on this page)
of another object or of any edge of the stage.
• Snap to Grid. Displays a small, thick circle where you select an object. This point
snaps to points in the grid. See page 51 for details about displaying a grid. If
you click near the center, Snap assumes you meant to select the center of the
object, so that’s where it places puts the circle snapping point.
• Snap to Guides. Works similarly to Snap to Grid except that the snapping action
works with guides that you drag out from the rulers and place individually. For
more on guides, see page 50.
• Snap to Pixels. Useful only if you want to work at the single-pixel level (your
stage has to be magnified to at least 400% for this option to work). This option
prevents you from moving an object in any increment less than a whole pixel.
(To magnify your stage by 400%, select View→Magnification→400%; when you
do this with “Snap to Pixels” selected, a single-pixel grid appears.)
Object Snapping: How Close Is Too Close?
Everybody says Snap Align is so great, but I’m not sure why I’d
use it or how close I should set the snapping range.
Whether or not you’ll find Snap Align useful depends entirely on
you (some folks prefer to freewheel it, while others appreciate
hints and advice) and what you’re trying to create on the stage.
Snap Align is most useful in situations where you’re trying to
custom-position objects down to the pixel. For example, say
you’ve drawn a row of different-sized flowers, and you’re
trying to position a row of bees, one bee at a time, exactly 25
pixels above the flowers. You can use the Align panel for a lot
of basic alignment tasks, but this kind of custom alignment
isn’t one of them: Snap Align is your best option.
Initially, Flash has all the Snap Align settings set to 0. To change
either of these buffer zones:
1. Choose View→Snapping→Edit Snapping. The Edit
Snapping window appears, as shown in Figure 5-34.
2. In the Edit Snapping window, click Advanced to display
expanded Edit Snapping options.
In the Object Spacing fields, type the buffer zone you want
in pixels (you can specify both horizontal and vertical). For
example, under Object Spacing, if you type 20 px in the Hori-
zontal and Vertical boxes, the edge of one object will snap to
the edge of another when they’re within 20 pixels of each other.
FREQUENTLY ASKED QUESTION
• Snap to Objects. Displays a small, thick circle on your object when you select
it. As you drag that object close to another object on the stage, Flash uses that
point for snapping. The actual location of the snapping circle depends on where
you click the object you’re moving. Flash does its best to guess whether you
want to select the center, the edge, or some other point.
GUIDE LAYERS
If you’ve ever traced a drawing onto a piece of onionskin paper, you understand the
usefulness of guide layers in Flash.
www.it-ebooks.info
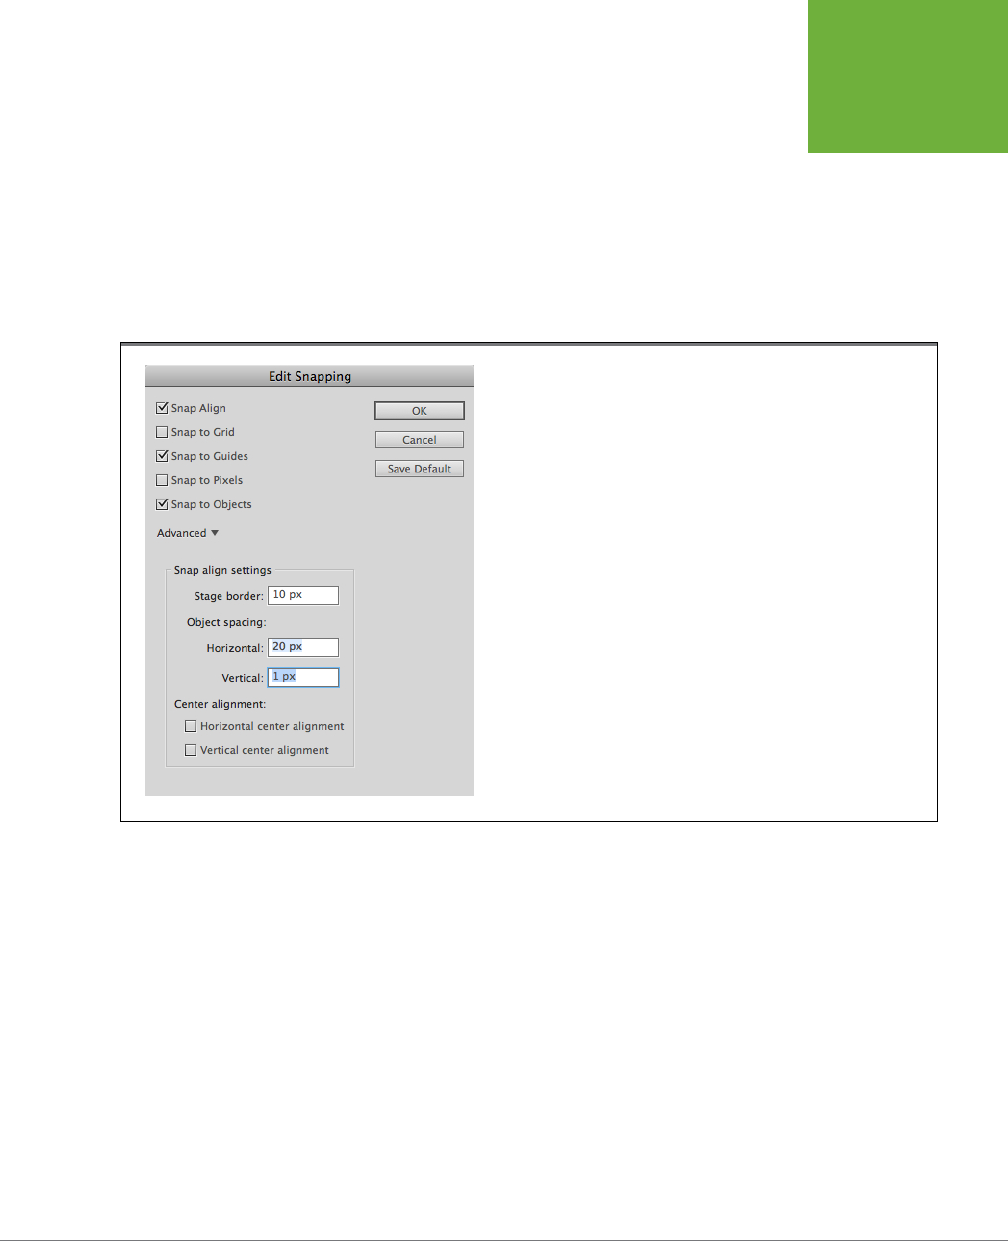
CHAPTER 5: ADVANCED DRAWING AND COLORING 193
MANIPULATING
GRAPHIC
ELEMENTS
A
guide layer
is a special kind of layer that doesn’t appear in your finished animation,
but that you can hold beneath your stage while you’re drawing to help you position
and trace objects. Say, for example, you want to align objects in a perfect circle, or
on a perfect diagonal, or you want to arrange them so that they match a specific
background (say, an ocean scene). You create a guide layer and, on it, draw your
circle or diagonal or ocean scene. Then, when you create your layer, your guide layer
shows through so you can position your objects the way you want them. When you
go to run your animation, though, you don’t see your guide layer at all; it appears
only when you’re editing in Flash.
FIGURE 5-34
Use the Edit Snapping settings to fine-tune the way Flash behaves when
you’re aligning objects on the stage. Use the checkboxes to choose the types
of objects that have snapping behaviors. And then use the Snap Align settings
to determine when the alignment cues kick in.
To create a guide layer:
1. On the stage, draw your guide shapes or lines, or add a tracing image, as
shown in Figure 5-35.
This first layer contains the “guide” material. Later, you’ll add one or more layers
with the images you want to appear in your animation.
2. Position your cursor over the name of the layer you want to turn into a guide
layer, and then right-click.
Flash displays a pop-up menu.
3. From the pop-up menu, select Guide.
Flash displays a little T-square just before the layer name, as in Figure 5-35.
www.it-ebooks.info
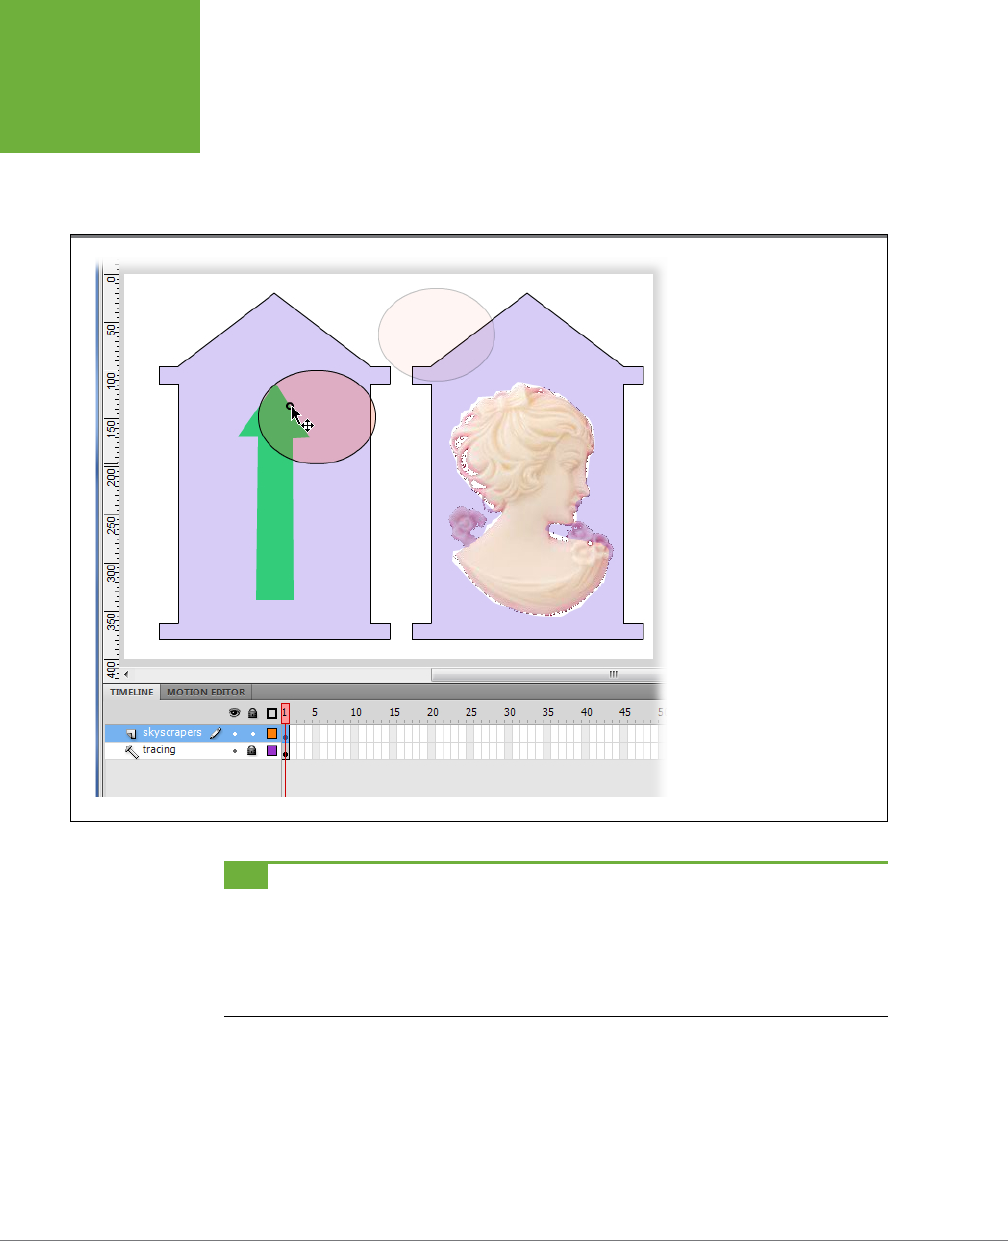
FLASH CS6: THE MISSING MANUAL
194
MANIPULATING
GRAPHIC
ELEMENTS
4. With the guide layer still selected, create a new, regular layer for your ob-
jects by choosing Insert→
Timeline→Layer.
Flash creates a new layer and places it above the guide layer, as shown in
Figure 5-35.
FIGURE 5-35
Here the guide layer is used in
two different ways: for align-
ment and as a tracing tool. The
arrow and the cameo profile are
both on the guide layer. On the
left, the oval is being dragged,
and it snaps to the edge of the
arrow. On the right, the cameo
was used to trace the shape
of the head with the freehand
Lasso.
TIP Working with layers—especially guide layers—can be confusing if you’re not used to it (and, frankly, it
can be confusing even if you are used to it, especially if you’re working with a lot of layers). To make sure you
don’t inadvertently modify your guide layer, you can
lock
it (tell Flash not to let you edit it temporarily). To lock
your guide layer, click the dot beneath the padlock icon. The dot changes to a padlock. Then, when you click to
select your regular layer, you can align away without worrying about accidentally changing your (locked) guide
layer.
5. Select View→Snapping, and then, in the context menu that appears, turn on
the checkbox next to “Snap to Objects.” You’ve turned snapping on.
Turning snapping on helps you position your objects on your guide layer. Both
“Snap to Objects” and Snap Align are helpful when you work with a guide layer.
www.it-ebooks.info

CHAPTER 5: ADVANCED DRAWING AND COLORING 195
SPRAY
PAINTING
SYMBOLS
6. With the regular layer selected, draw, trace, or move your objects.
You can then drag objects to your guideline (or guide object, or guide back-
ground) or use objects in the guide layer for tracing. When tracing a cutout, as
in Figure 5-35, temporarily adjust the alpha (transparency) setting of objects
you want to see through.
Spray Painting Symbols
Instead of simply spraying blobs of color, the Spray Brush tool can spray complex
images, by using emphasis symbols as its paint source. Symbols, as you’ll see in
Chapter 7, are reusable images and objects stored in the Library (Window→Library).
When you know you’re going to use a graphic, a movie clip, or a button more than
once, you save it as a symbol so you can reuse it to save time later.
The Spray Brush tool takes the concept of reusing a copy of something to an extreme.
Suppose you want a sky filled with flashing yellow stars. You can load the Spray Brush
tool with a movie clip of blinking stars, and then spray them across the horizon. In
the Tools panel, the Spray Brush tool is hidden underneath the Brush tool. (You can
use the B shortcut key to toggle between these two tools.)
NOTE For the following steps, you can download the file
05-01_Spray_Brush.fla
from the Missing CD page
at
www.missingmanuals.com/cds/flashcs6mm
.
1. Open the file
05-01_Spray_Brush.fla.
The background color of the stage is a nice midnight blue. There are two sym-
bols in the Library: a graphic called Star and a movie clip called BlinkingStar.
2. In the Tools panel, select the Spray Brush tool (it shares a fly-out menu with
the Brush tool), or press B until your cursor changes to the Spray Brush cur-
sor, as shown in Figure 5-36.
The Spray Brush tool looks like a spray paint can. When the Spray Brush tool
is selected, the Properties panel (Window→Properties) shows related settings.
3. Under Properties→Symbol, click the Edit button.
The Swap Symbol dialog box opens, displaying the symbols you can use with
the Spray Brush tool.
4. Select the BlinkingStar symbol, and then click OK.
The BlinkingStar symbol is loaded in the Spray Brush tool, and its name is dis-
played next to the “Spray:” label.
TIP If you plan to spray the same symbol frequently, then turn on the Default checkbox and it will load
automatically when you choose the Spray Brush tool.
www.it-ebooks.info
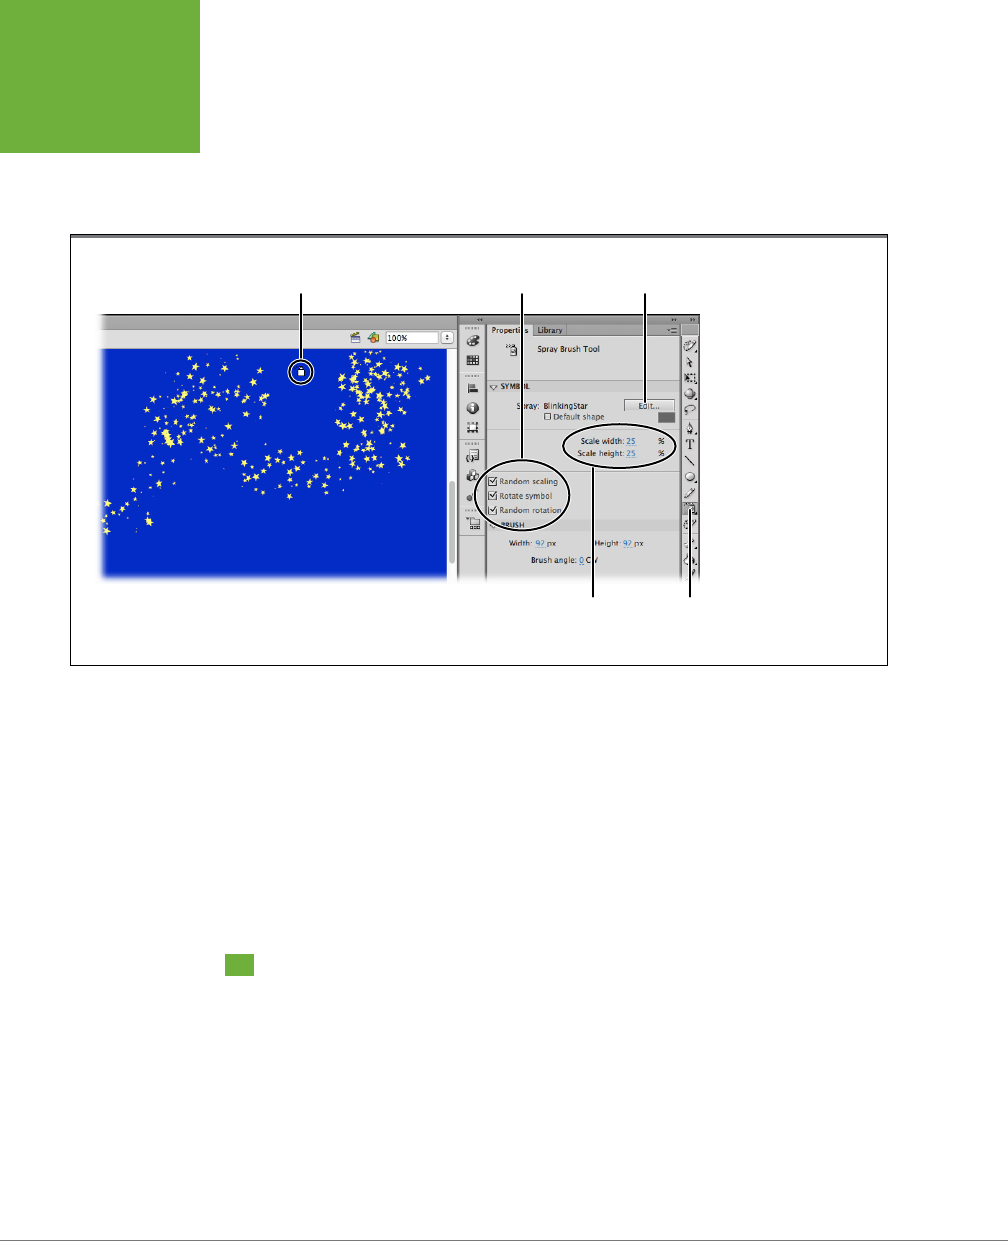
FLASH CS6: THE MISSING MANUAL
196
DRAWING WITH
THE DECO
TOOL
5. In the same Symbol subpanel, set both the “Scale width” and the “Scale
height” to 25%.
Use the “Scale width” and “Scale height” to adjust the size of the symbol as it’s
sprayed. Often symbols are drawn at a size larger than needed for spraying.
FIGURE 5-36
Once the Spray Brush tool
is selected, the cursor
(circled) changes into
a spray paint can. Use
the Edit button in the
Properties panel to load
the Spray Brush tool with
a symbol. Then use the
other property settings
to adjust the size and to
randomize the spray.
Random scaling
and rotation
Spray Brush
Tool cursor Edit button
Scale
settings
Spray
Brush Tool
6. Turn on the checkboxes for “Random scaling,” “Rotate symbol,” and “Ran-
dom rotation.”
Starry skies (and many other natural patterns) don’t have standard sizes. Using
random settings creates a much more natural eect for your starry sky.
7. Click the sky, and then spray in some stars.
Drag to spray stars across the sky. Hold the mouse button down for as long as
you want to create new stars.
Drawing with the Deco Tool
The Deco tool lets you draw multiple complex shapes easily. In that way, it’s similar
to the Spray Brush tool, described above (page 195). After you select the tool in
the Tools panel, the Properties panel shows you the settings and options for the
tool. Click the drop-down menu in the Drawing Eect subpanel (Figure 5-37), and
you see that the Deco tool is actually three dierent tools: Vine Fill, Grid Fill, and
Symmetry Brush. The designs created by each brush are dierent, but they all work
by creating repeating patterns. For example:
www.it-ebooks.info
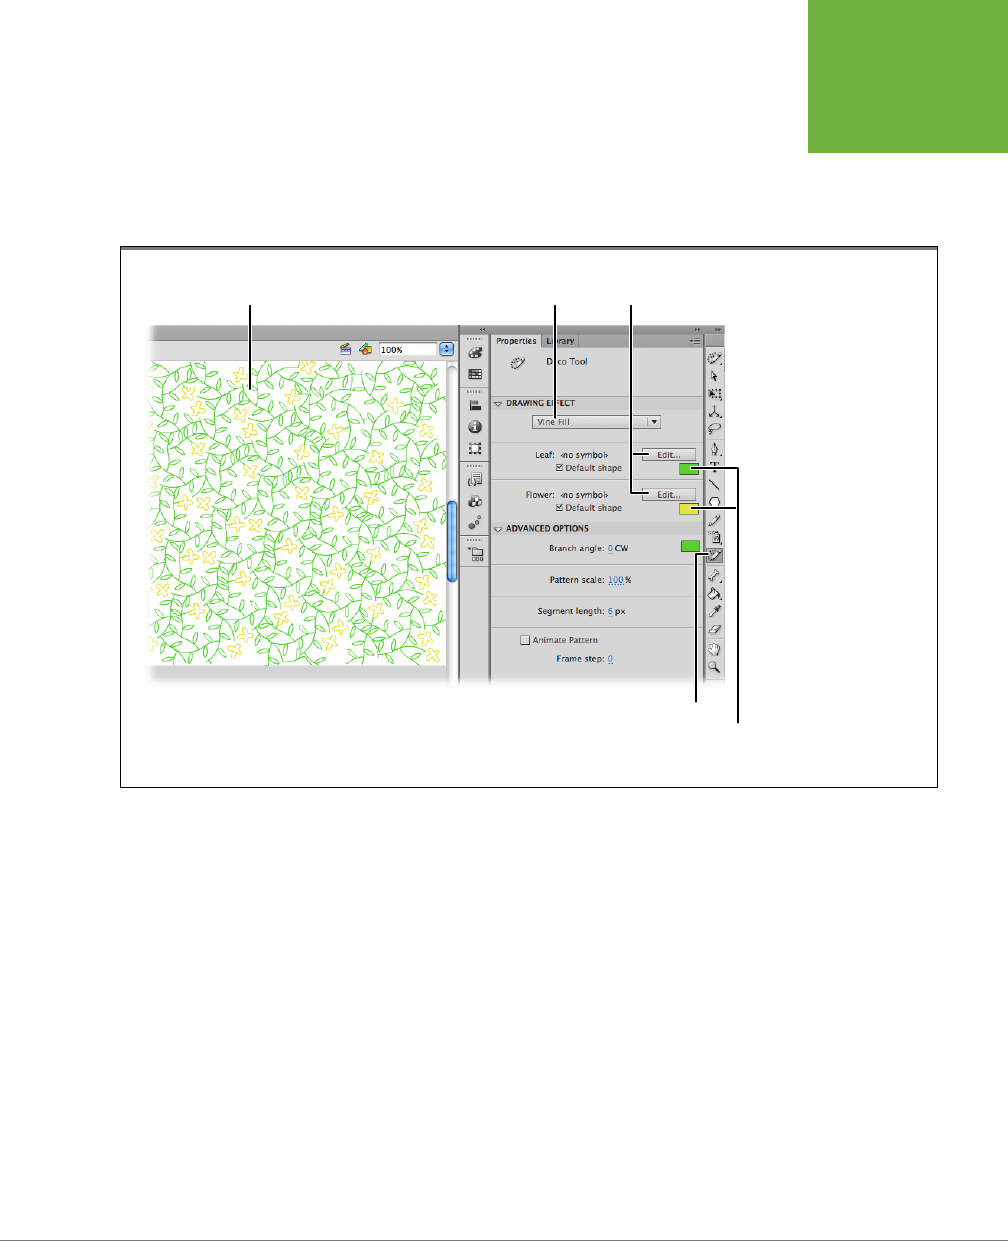
CHAPTER 5: ADVANCED DRAWING AND COLORING 197
DRAWING WITH
THE DECO
TOOL
• Use
Vine Fill
to create patterns on the stage or a selected symbol. Used on a
background, the Vine Fill tool could create wallpaper for an interior scene. Used
on a shape, Vine Fill could create the gift wrap for a present. Flash comes loaded
with a leafy vine that you can use, as shown in Figure 5-37. Or you can provide
your own symbols for the leaf and flower parts of the vine.
FIGURE 5-37
The Deco tool creates
three different drawing
effects chosen by the
drop-down menu in the
Properties panel. Here
you see the Vine Fill
effect and the options
that let you select symbol
patterns and colors to
create interconnected vine
patterns.
Select Drawing Effect
Select leaf and
flower symbolVine fill pattern
Deco Drawing Tool
Select leaf and
flower color
• Use the
Grid Fill
eect to create a repeating eect that’s more uniform than
the Vine Fill. For example, you could use your company logo as the symbol and
apply the Grid Fill eect to a background layer in your animation. Then you can
adjust the alpha (transparency) to soften its appearance and make the logo
fade into the background, giving text or images in other layers precedence.
• Use
Symmetry Brush
to arrange symbols symmetrically around a central point.
If you’ve ever seen a Busby Berkeley movie with all those symmetrical dancers,
you have an idea of the kaleidoscope eects you can create with symmetry. If
you’re not feeling quite so Hollywood, you can use the Symmetry Brush tool to
create clocks, speedometers, or other circular gauges. As with the Vine Fill and
Grid Fill tools, you can load the Symmetry Brush with any symbol. If you want
to experiment and don’t have a shape handy, use the preset rectangle to create
patterns. When you drag on the stage, the Symmetry Brush creates multiple
images using the loaded symbol. Use the drop-down menu in the Advanced
subpanel to select a pattern. You have several options: Rotate Around Point,
www.it-ebooks.info

FLASH CS6: THE MISSING MANUAL
198
ADVANCED
COLOR AND
FILLS
Reflect Across Line, Reflect Around Point, and Grid Translation. Select the Test
Collisions button to keep symbols from overlapping.
The best way to learn about the Deco tool is to create a new document and experi-
ment. Adobe continues to create new deco brushes. With some brushes, you can
tweak the colors by clicking on color swatches. With others, you can replace the
standard symbols with your own creations. So go ahead and play with the Deco
tool, and then the next time you need a repeating pattern, you’ll know where to turn.
Advanced Color and Fills
Color is one of the most primitive and powerful communicative devices at your dis-
posal. With color, a skillful animator can engender anxiety or peacefulness, hunger
or confusion. She can jar, confuse, delight, soothe, entertain, or inform—all without
saying a word.
Color theory is too large a topic to cover completely here. What you
will
find in
this chapter is a quick introduction to basic color theory, as well as tips on how to
work with color in Flash. You’ll see how to change the colors of the shapes, lines,
and images you create with Flash’s drawing tools; how to create and reuse custom
color palettes (especially useful if you’re trying to match the colors in your Flash
animation to those of a corporate logo, for example, or to a specific photo or piece
of art); and how to apply sophisticated color eects including gradients, transpar-
ency, and bitmap fills.
Color Basics
The red you see in a nice, juicy watermelon—or any other color, for that matter—is
actually made up of a bunch of dierent elements, each of which you can control
using Flash’s Color panel:
• Hue is what most people think of when someone says “color.” Red, orange,
yellow, green, blue, indigo, and violet are all hues. Out of the box, Flash has 216
dierent hues. These are sometimes called
web-safe
hues because, in the early
days of the Web, they were the colors most computers could display. You can
also blend your own custom hues by mixing any number of these basic 216 hues.
• Saturation refers to the amount of color (hue) you apply to something. A light
wash of red, for example, looks pink; pile on more of the same color and you
get a rich, vibrant red.
• Brightness determines how much of any given color you can actually see. A lot
of light washes out a color; too little light, and the color begins to look muddy.
At either end of the spectrum, you have pitch black (no light at all) and white
(so much light that light is all you can see). In between these two extremes,
adding light to a hue creates a tint. For example, if you add enough light to a
rich strawberry-ice-cream pink, you get a delicate pastel pink.
www.it-ebooks.info

CHAPTER 5: ADVANCED DRAWING AND COLORING 199
ADVANCED
COLOR AND
FILLS
• Transparency refers to how much background you can see through a color,
from all of it (in which case the color is completely transparent, or invisible) to
no background at all (in which case the color is opaque). In Flash, you set the
transparency (technically, the
opacity
) for a color using the Alpha field.
RGB and HSB
Color doesn’t exist in a vacuum. The colors you get when you mix pigments aren’t
the same as the colors you get when you mix dierent-colored lights (which is how
a computer monitor works). Artists working in oil paint or pastel use the red-yellow-
blue color model, for example, and commercial printers use the cyan-magenta-
yellow-black color model. In the world of computer graphics and animation, though,
the color model you use is
red-green-blue,
or
RGB
.
This model means you can tell Flash to display any color imaginable just by telling
it precisely how much red, green, and blue to display. But if you don’t happen to
know how much red, green, and blue make up, say, a certain shade of lilac, Flash
gives you three more ways to specify a particular color:
• HSB. You can tell Flash the hue, saturation, and brightness you want it to display.
• Hexadecimal. You can type the hexadecimal number (see page 203) for the
color you want Flash to display. Because hexadecimal notation is one of the
ways you specify colors in HTML, you can use hexadecimal numbers to match
a web page color precisely to a color in Flash.
• Selection. In the Color panel, you can drag your cursor around on the color
picker (Figure 5-38) until you find a color you like. This option is the easiest, of
course, and the best part is, after you decide on a color, Flash tells you the color’s
RGB, HSB, and hexadecimal numbers (all of which come in handy if you want
to recreate the color precisely, either in another Flash animation or in another
graphics program altogether).
In the next section, you’ll see how to specify a custom color using Flash’s Color panel.
Creating Custom Colors
Out of the box, Flash has 216 web-safe colors. But if you can’t find the precise shade
you want among those 216 colors, you’re free to mix and match your own custom
colors using Flash’s Color panel.
Here’s how:
1. Select Window→Color.
The Color panel shown in Figure 5-38 appears, with the Color tab selected.
2. On the Color tab, click either the Fill icon or the Stroke icon, depending on
whether you plan to apply your custom color to a fill or a stroke.
Page 53 gives you the lowdown on the dierences between the two.
www.it-ebooks.info
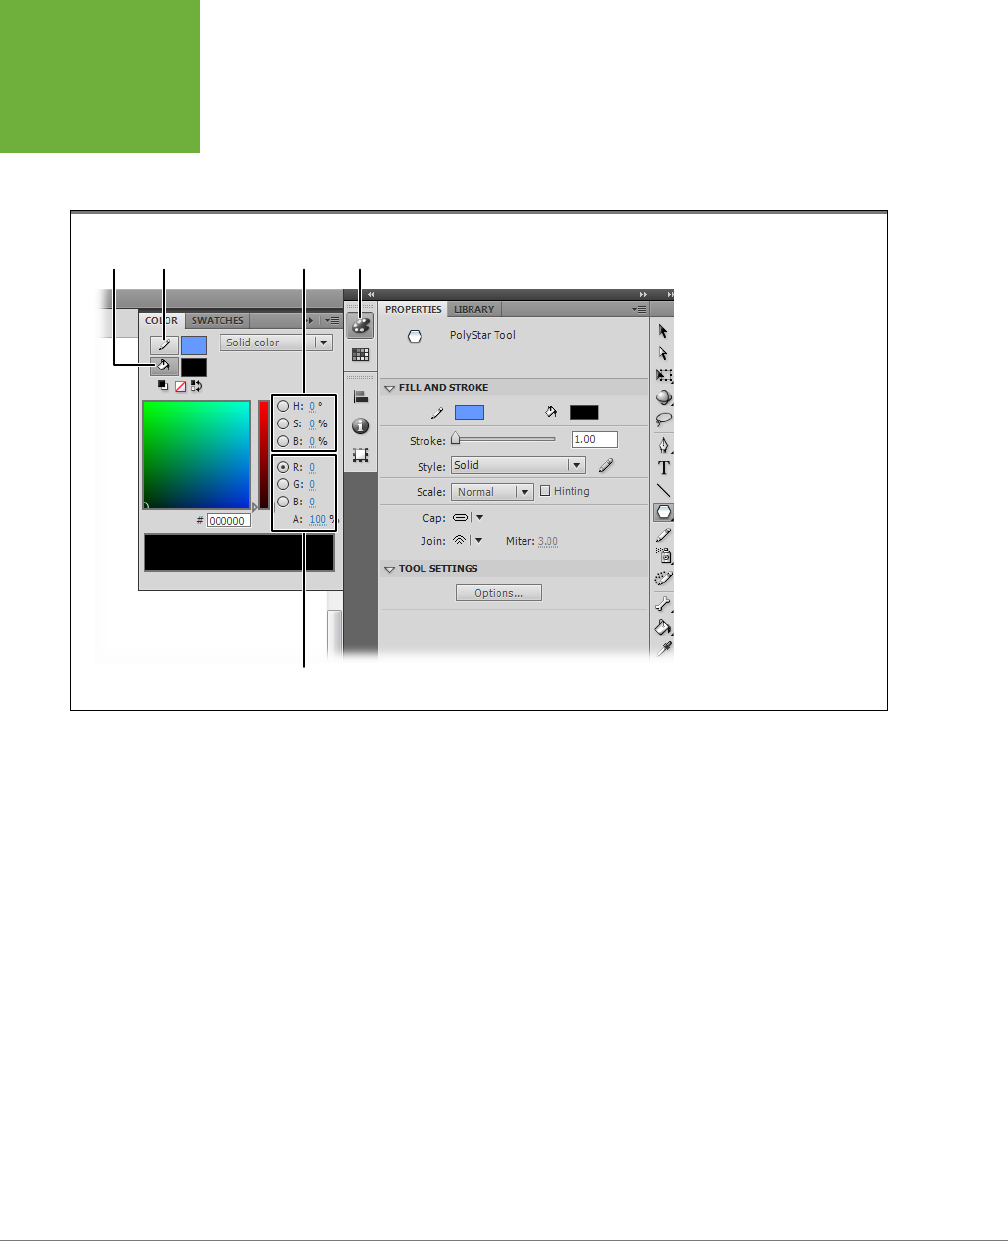
FLASH CS6: THE MISSING MANUAL
200
ADVANCED
COLOR AND
FILLS
3. Select a custom color. You can do this one of these ways:
• You can drag around on the color picker circle and slider until you see a
color you like in the Preview window (Figure 5-38).
FIGURE 5-38
You can choose
Window→Color to open this
panel, or you can click the
Color Panel button. Flash
packs a lot of power into the
tiny Color tab. But most of the
time, you can safely ignore
everything except the Stroke
and Fill icons (one of which
you need to choose before you
begin working with the Color
tab) and the Color and Bright-
ness windows, which you use
to select a custom color.
Color Panel
buttonStroke
RGB and Alpha setting
Hue, saturation,
brightness settingsFill
• If you know them, you can type values for the RGB (red, green, and blue)
or HSB (hue, saturation, brightness) colors next to their respective letters
in the Color panel. (See the box on page 201.)
• You can type a hexadecimal value in the Hexadecimal Color Designator
box. (Hexadecimal, or base 16, values can contain only the following digits:
0–9 and A–F. Folks who spend a lot of time writing HTML code are usually
comfortable with hex numbers; if you’re not one of them, you can safely
skip this option.)
4. To customize your color even further, you can use the drop-down menu to
specify its color type.
Choose from
Solid
(what you want most of the time),
Linear
(a type of gradient
eect described on page 206),
Radial
(another type of gradient also described
on page 206), and
Bitmap
(lets you color an object using an image rather than
a hue, as on page 204).
www.it-ebooks.info
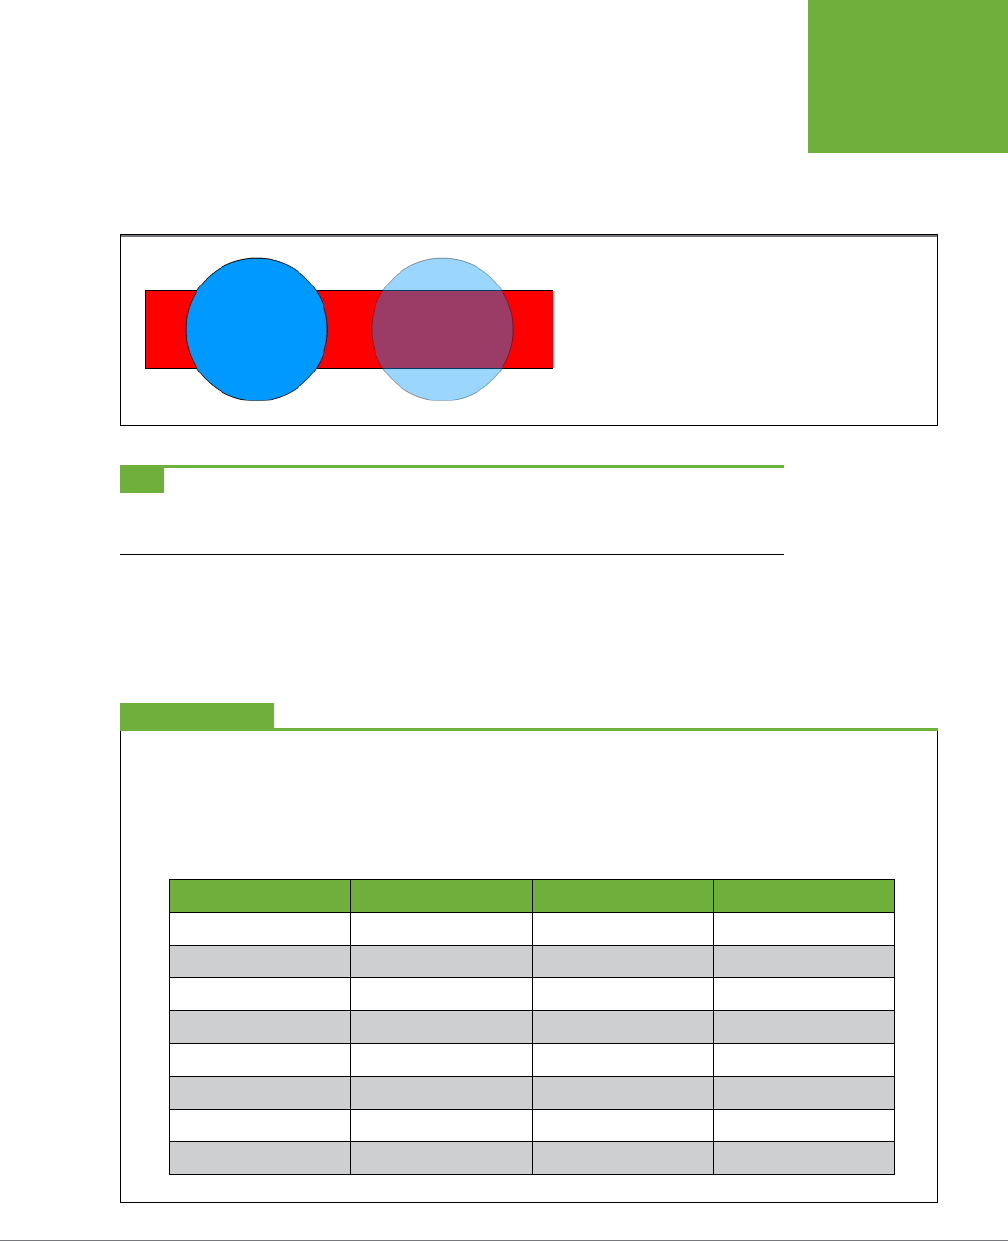
CHAPTER 5: ADVANCED DRAWING AND COLORING 201
ADVANCED
COLOR AND
FILLS
5. To change the opacity (transparency) of your color, change the percentage
in the A setting.
Zero percent tells Flash to make your color completely transparent (see-through);
100% tells Flash to make your color completely opaque (Figure 5-39).
FIGURE 5-39
When you use a transparent color, background objects and the
stage itself show through, giving the appearance of a different
color altogether. Here the two ovals are actually the same
color, but they don’t look like it: The selected oval on the right
is 50% opaque, while the oval on the left is 100% opaque.
TIP Invisible color sounds like an oxymoron, but zero percent opacity actually has a place in your bag of
Flash tricks. As you’ll see on page 318, you can create a nifty appearing/disappearing effect using see-through
color and a shape tween by changing Alpha settings.
6. In the Tools panel, select a drawing tool, and then begin drawing on the
stage.
Your strokes (or fills, depending on which icon you selected in step 1) appear
in your brand-new custom color.
Specifying RGB Colors
RGB is a funky system based not on the way humans think, but on
the way computers think. So the numbers you type in the Color Mixer
to describe the red, green, and blue components of a color aren’t in
percentages, as you might expect, but instead need to range from
0 (no color at all) to 255 (pure color).
This table shows a handful of common colors expressed in RGB terms:
RED GREEN BLUE RESULT
0 0 0 Black
255 255 255 White
255 00Red
0255 0 Green
00255 Blue
255 255 0 Yellow
0255 255 Cyan
255 0255 Magenta
UP TO SPEED
www.it-ebooks.info

FLASH CS6: THE MISSING MANUAL
202
ADVANCED
COLOR AND
FILLS
TIP You don’t have to create a custom color before you draw an object. You can draw an object first, select
it, and then create a custom color. When you create a color, Flash automatically changes the object’s color to your
new custom color.
The Six Commandments of Color
Whether you’re using Flash to create an interactive tutorial, an
animated art short, a slick advertisement, or something else
entirely, you need to be aware of color and how it supports (or
detracts from) the message you’re trying to get across. Color
is at least as important as any other design element, from the
fonts and shapes you choose to the placement of those shapes
and the frame-by-frame timing of your finished animation.
Although the psychology of color is still in its relative infancy,
a few color rules have stood the test of time. Break them at
your own risk.
1. Black text on a white background is popular for a reason.
Any other color combination produces eyestrain after as
little as one sentence.
2. Color is relative. The human eye perceives color in context,
so the same shade of pink looks completely different when
you place it next to, say, olive green than it does when
you place it next to red, white, or purple.
3. For most animations, there’s no such thing as a web-
safe color. Web-safe colors—the handful of colors that
supposedly appear the same on virtually all computers,
whether they’re Mac or Windows, laptop or desktop,
ancient or new—were an issue in the old days. If you
chose a non-web-safe color palette, your audiences might
have seen something different from what you intended
(or might have seen nothing at all, depending on how
their hardware and software were configured). But time
marches on, and any computer newer than a few years
old can display the entire range of colors that Flash lets
you create. Of course, if you know for a fact that your
target audience is running 15-year-old computers (as
a lot of folks in other countries and in schools are), or if
you suspect they might have configured their monitor
settings to display only a handful of colors (it happens),
then you should probably play it safe and stick to the web-
safe colors that Flash already has. (To display web-safe
colors, choose Window, and then, in the pop-up menu
that appears, turn on the checkbox next to Swatches. In
the Swatches panel, click the Options menu (upper-right
corner), and then, from the pop-up menu that appears,
select Web 216. The Swatches tab displays 216 web-safe
colors.)
4. Contrast is at least as important as color. Contrast—how
different or similar two colors look next to each other—
affects not just how your audiences see your animation,
but whether or not they can see it at all. Putting two
similar colors back-to-back (putting a blue circle on
a green flag, for instance, or red text on an orange
background) is unbearably hard on your audience’s eyes.
5. Color means different things in different cultures. In
Western cultures, black is the color of mourning; in
Eastern cultures, the color associated with death and
mourning is white. In some areas of the world, purple
signifies royalty; in others, a particular political party;
in still others, a specific football team. In color, as in all
things Flash, knowing your audience helps you create and
deliver an effective message.
6. You can never completely control the color your audience
sees. Hardware and software calibration, glare from office
lighting, the amount of dust on someone’s monitor—a lot
of factors affect the colors your audience sees. So unless
you’re creating a Flash animation for a very specific
audience and you know precisely what equipment and
lighting they’ll be using to watch your masterpiece,
don’t waste a lot of time trying to tune your colors to
the nth degree.
DESIGN TIME
www.it-ebooks.info

CHAPTER 5: ADVANCED DRAWING AND COLORING 203
ADVANCED
COLOR AND
FILLS
Specifying Colors for ActionScript
ActionScript is Flash’s programming language. As you’ll learn in later chapters,
you can use ActionScript to automatically perform the same tasks that you do by
hand—including specifying colors. Suppose your animation is selling cars. Using
ActionScript, you can let your audience change a car’s color with the click of a but-
ton. ActionScript uses the RGB color system described in the previous section but
identifies individual colors using hexadecimal numbers.
Hexadecimal
numbers are
base 16 instead of the base 10 numbers people use. (How’s that for a flashback to
math class?) The hexadecimal number system uses 16 symbols to represent numbers
instead of the usual 0–9. When the common numeric symbols run out, hexadecimal
uses letters. So, the complete set of number values looks like this: 0, 1, 2, 3, 4, 5, 6,
7, 8, 9, A, B, C, D, E, F.
Hexadecimal RGB numbers use six places to describe each color. The first two num-
bers represent shades of the color red, the second two numbers represent shades
of the color green, and the final two numbers represent shades of the color blue. So
a color specification might look like this: 0152A0. Or this: 33CCFF. At first, it seems
odd to see the letters in numbers, but after a while you get the hang of it. So, the
hexadecimal number FF0000 is a bright, pure red, while 0000FF is a bright blue.
When you choose a color from a color picker, or Flash’s Color panel (Window→Color)
as shown in Figure 5-40, you’re actually choosing an RGB color, whether you know
it or not. Select a color, and then find the hexadecimal number in the box below.
You usually use the hexadecimal notation to specify RGB colors in ActionScript.
Notice that the hexadecimal number in the color picker box is preceded by a pound
sign (#), which is one common way to indicate that this is a hexadecimal number.
(Not all hexadecimal numbers include letters, so this notation prevents hexadeci-
mal numbers from being confused with regular numbers.) ActionScript code uses
another method to indicate that a number is a hexadecimal number. In ActionScript,
you precede all color codes with two characters:
0x
. So, if you want to use the
color shown in Figure 5-40 in your ActionScript code, you’d specify the color as
0xFF0000
. You’ll see plenty of other examples of specifying colors in ActionScript,
starting with Chapter 12.
Saving Color Swatches
After you go to all the hard work of creating a custom color as described in the pre-
ceding section, you’re probably going to want to save that color as a virtual
swatch
so you can reuse it again without having to try to remember how you mixed it.
To save a custom color swatch, first create a custom color, as described in the pre-
ceding section. You see your custom color displayed in the rectangle at the bottom
of the Color panel. In the upper-right corner, click the panel’s Options menu and
choose Add Swatch. Your color is automatically added to the Swatches panel. Click
the Swatches tab and you see your new swatch at the bottom of the list next to the
gradients, as shown in Figure 5-41.
www.it-ebooks.info
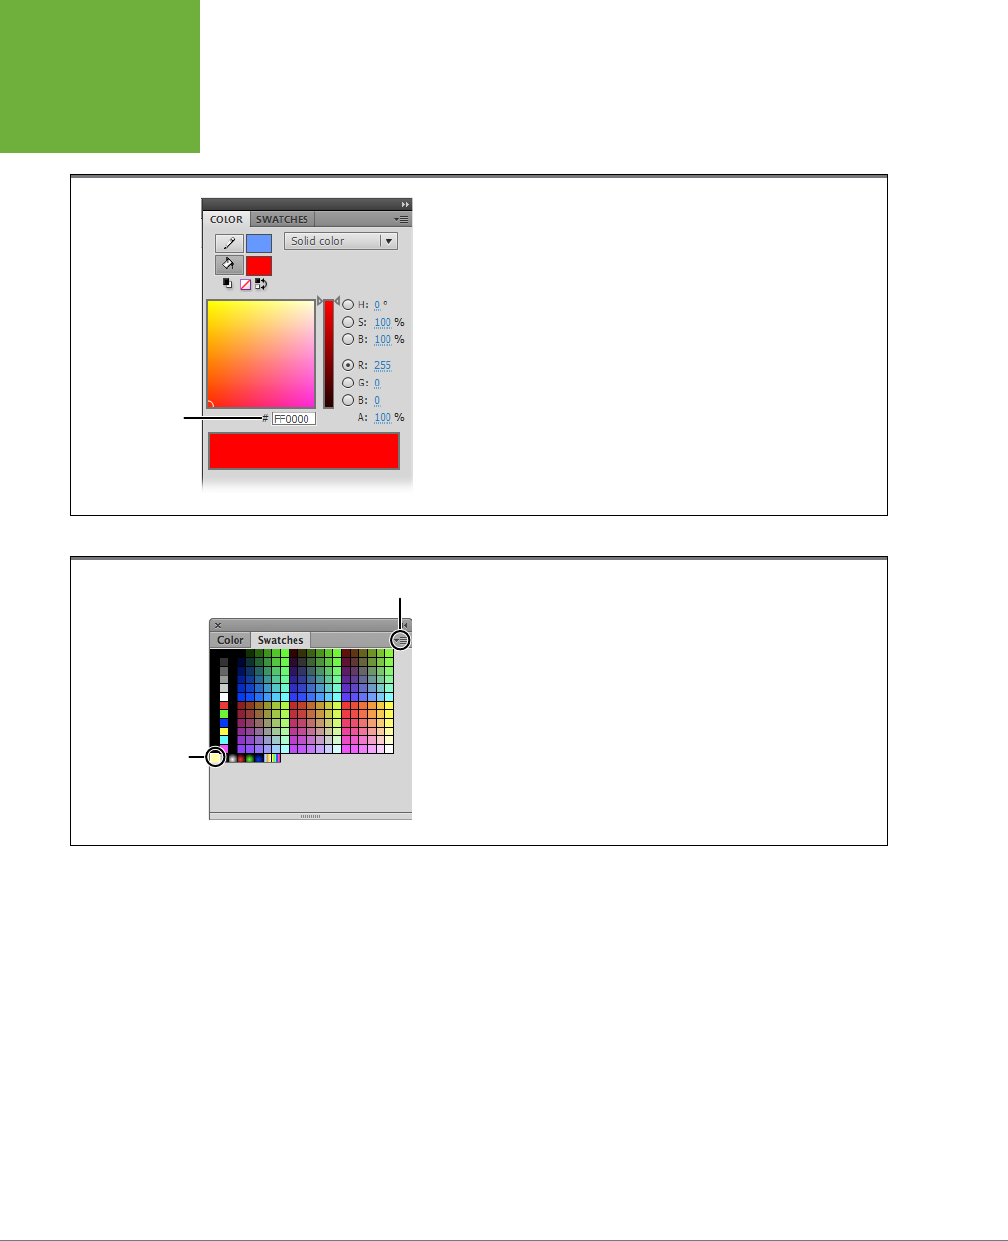
FLASH CS6: THE MISSING MANUAL
204
ADVANCED
COLOR AND
FILLS
After you’ve saved a custom swatch, you can use it to change the color of a stroke
or a fill, as you see in Figure 5-41.
FIGURE 5-40
Flash’s color pickers display the hexadecimal color value in the box marked with
the pound (#) sign. You can use any color picker to look up the hexadecimal
value for use in your ActionScript code.
Hexadecimal
color value
FIGURE 5-41
Saving a specific color as a color swatch—whether it’s one you custom-mixed or
a standard color you found on the palette and liked—is kind of like saving the
empty paint can after you paint your kitchen. The next time you want to use
that particular color, all you have to do is grab the swatch (instead of relying on
your memory or spending hours trying to recreate the exact shade). If you work
with color a lot, swatches can make your life a whole lot easier.
Saved swatch
Options menu
Using an Image as a Fill “Color”
Instead of choosing or blending a custom color, you can select an image to use as
a fill “color,” as shown in Figure 5-42. You can select any image in Flash’s Library
panel (page 30), or from anywhere on your computer and apply that image to any
size or shape of fill to create some pretty interesting eects.
As you can see in the following pages, the result depends on both the size and shape
of the fill and the image you choose.
To use an image as a fill color:
1. Select all the fills you want to “color.”
Figure 5-42 shows an example of two fills: a star, and a free-form fill created
using the Brush.
www.it-ebooks.info
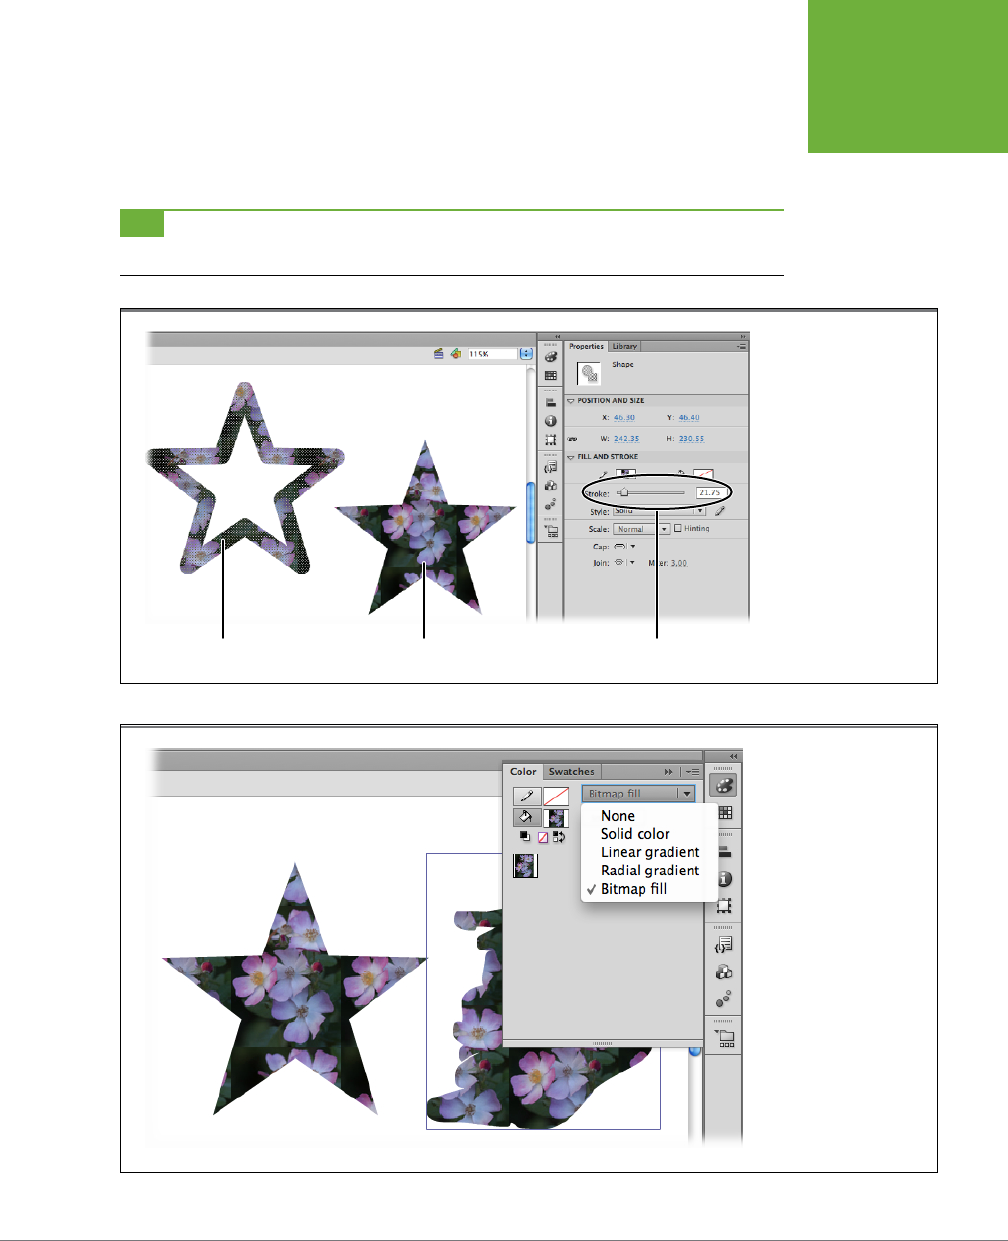
CHAPTER 5: ADVANCED DRAWING AND COLORING 205
ADVANCED
COLOR AND
FILLS
2. In the Color panel, click the arrow next to Type, and then, from the drop-
down list that appears, choose Bitmap fill (Figure 5-43).
Flash displays the “Import to Library” window (Figure 5-44).
TIP To import additional image files to use as fills, in the Color panel, click the button marked Import. Then,
with the fill on the stage selected, click the image you want to use.
FIGURE 5-42
You can apply your
bitmap swatch to any
shape or object that
accepts a fill or stroke. If
you’re using a bitmap on
a stroke, you’ll want to
set the stroke size to 30
or more.
Stroke sizeBitmap fillBitmap stroke
FIGURE 5-43
Click the Type drop-down
menu in the Color panel,
and then choose Bitmap to
see your bitmap swatches.
After you’ve added a bit-
map, it appears as a swatch
in your Color panel.
www.it-ebooks.info
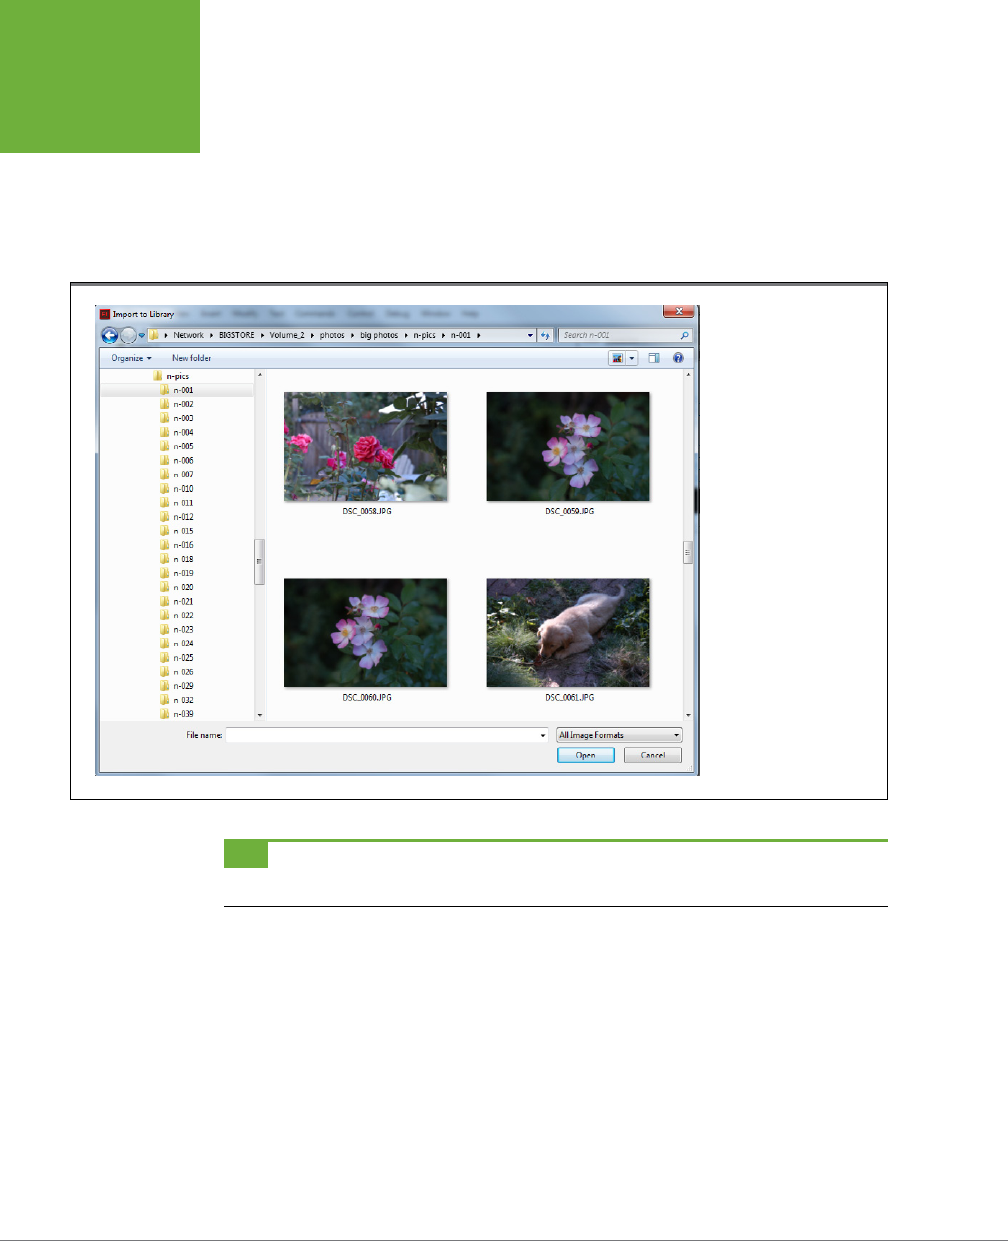
FLASH CS6: THE MISSING MANUAL
206
ADVANCED
COLOR AND
FILLS
3. In the “Import to Library” window, select the image file you want, and then
click Open.
Flash displays the image in the bottom of the Color panel, as well as next to the
Fill icon, and “paints” your image with the bitmap. You can apply the bitmap
to both fills and strokes, as shown in Figure 5-42. If your fill is larger than your
image, Flash tiles the image (Figure 5-45).
FIGURE 5-44
The first time you head
to the Color panel and
set the Type menu to
Bitmap, Flash pops open
this “Import to Library”
window. Despite the
name (Bitmap), Flash
lets you import JPEG and
other types of image
files; you’re not limited to
.bmp files. Browse your
computer for the image
file you want, and then
click Open.
TIP If you apply the new fill “color” to an image by clicking the Paint Bucket icon and then clicking the fill,
Flash tiles super-tiny versions of the image inside the fill to create a textured pattern effect.
Applying a Gradient
A
gradient
is a fill coloring eect that blends bands of color into one another. Flash
has
linear gradients
(straight up-and-down, left-to-right bands of color) and
radial
gradients
(bands of color that begin in the center of a circle and radiate outward).
By applying a gradient to your fills, you can create the illusion of depth and perspec-
tive. For example, you can make a circle that looks like a sphere, a line that looks
like it’s fading, and text that looks like it’s reflecting light (Figure 5-46). See the tip
on page 210 for applying gradients to text.
www.it-ebooks.info
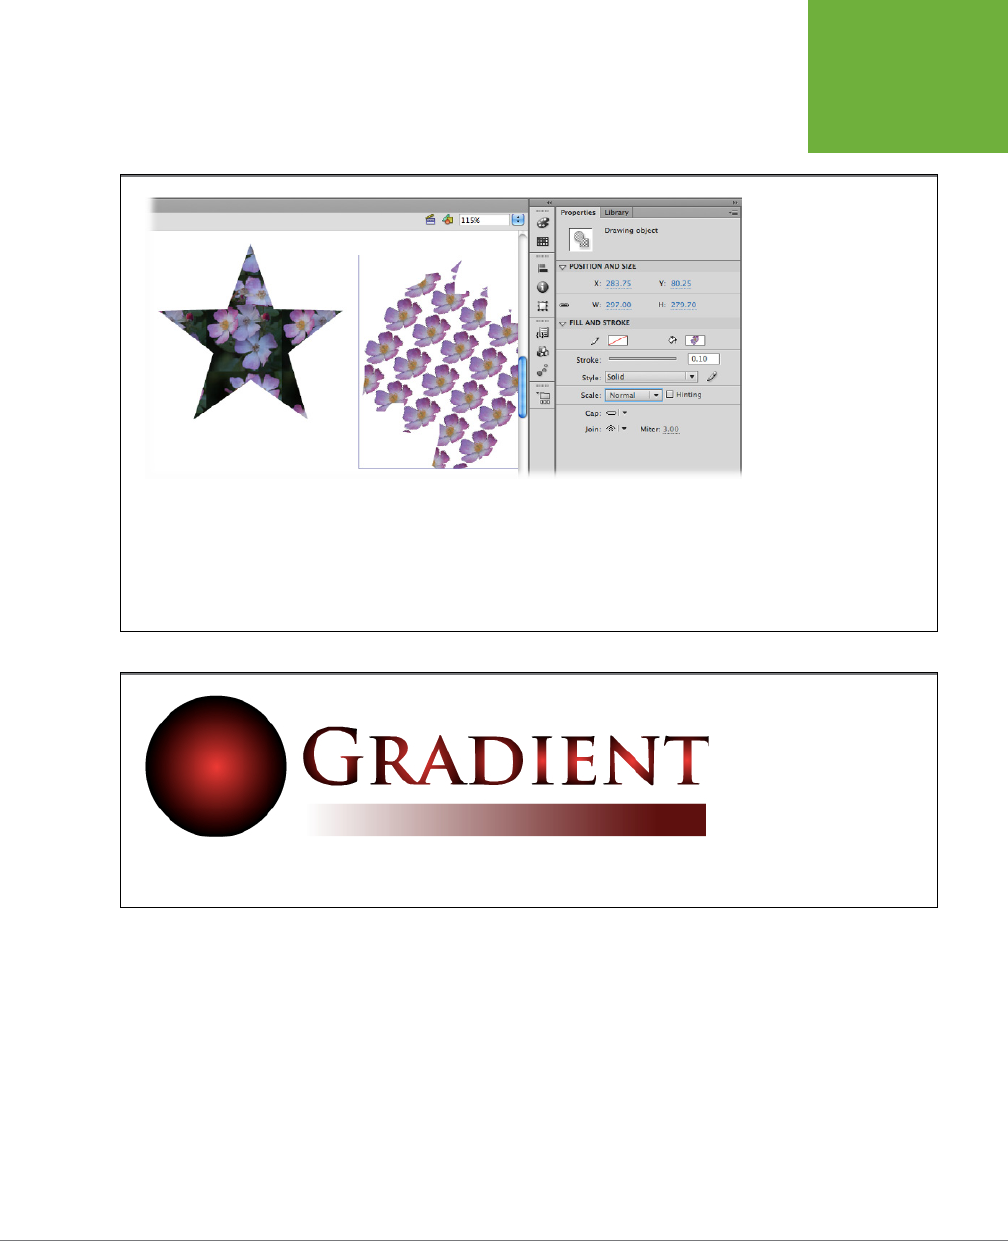
CHAPTER 5: ADVANCED DRAWING AND COLORING 207
ADVANCED
COLOR AND
FILLS
You can apply a gradient swatch to your fills, or you can create your own custom
gradients in Flash, much the same way you create your own custom colors (page 199).
FIGURE 5-45
How Flash applies your
image to your fill depends
on the size of your fill and
the size of your image (and
whether you select the
fill, and then change the
Style type to Bitmap, or
vice versa). Here the star
is smaller than the image
imported into Flash, so
Flash shows a single image
framed by the star’s out-
line. Because the freeform
fill is larger than the image,
Flash tiles the image inside
the freeform fill. Note, too,
that Flash sticks the image
you imported into the
Library panel.
FIGURE 5-46
Applying one of the preset radial
gradients that Flash provides
turns this circle into a ball, and
makes this text look shiny, like
it’s reflecting light. The thin rect-
angle beneath the text is sporting
a linear gradient; its bands of
color blend from left to right.
To apply a gradient swatch to an object:
1. On the stage, select the object to which you want to add a gradient.
Flash highlights the selected object.
2. Click the Fill Color icon.
Flash displays the color picker (Figure 5-47).
www.it-ebooks.info
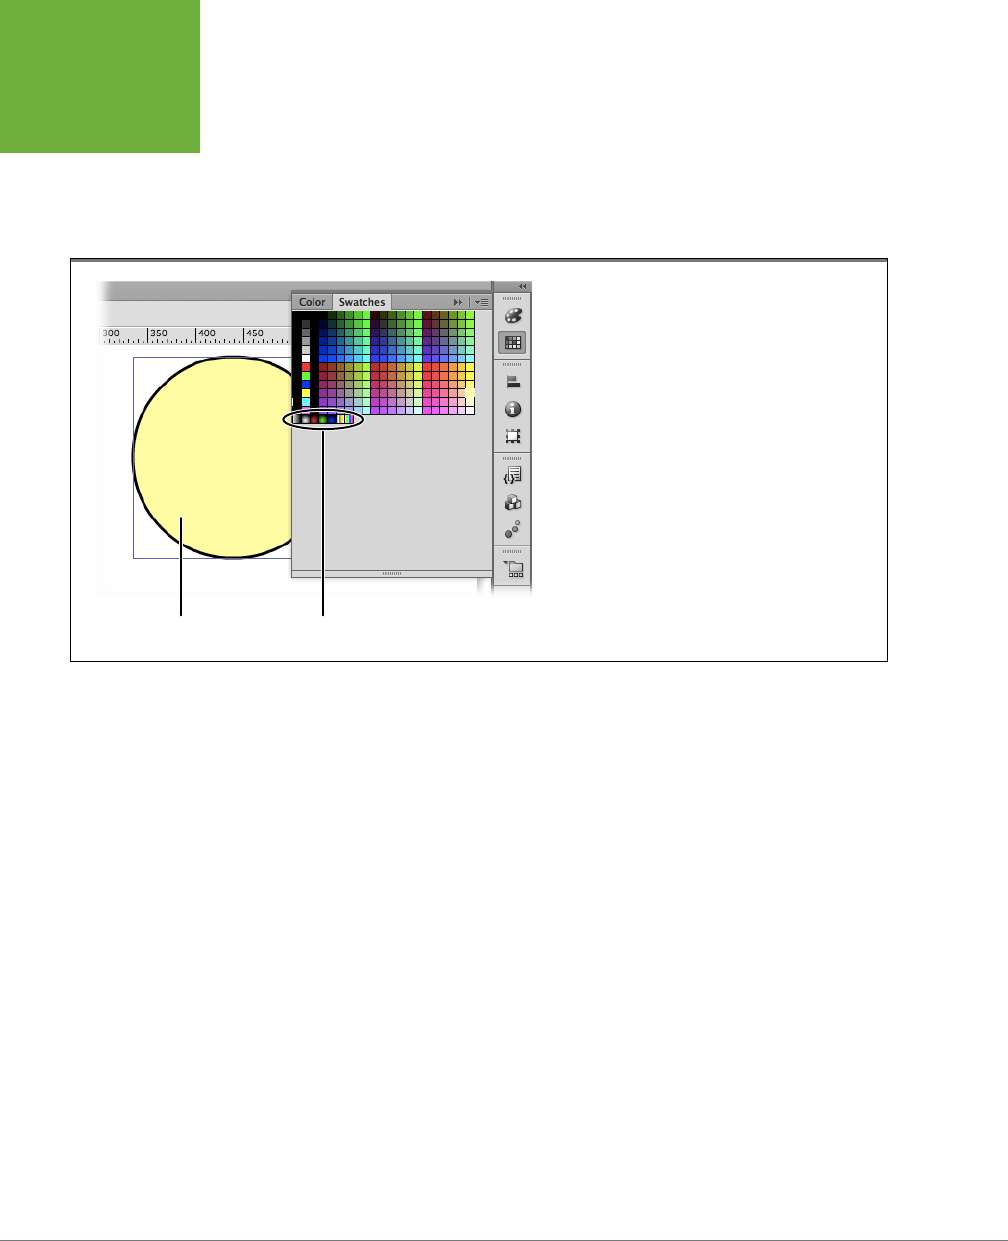
FLASH CS6: THE MISSING MANUAL
208
ADVANCED
COLOR AND
FILLS
3. From the color picker, choose one of the seven gradient swatches that come
with Flash.
Flash automatically displays your object using the gradient swatch you chose.
Figure 5-47 shows a red radial gradient applied to a plain circle to create a
simple 3-D eect.
FIGURE 5-47
Applying a gradient swatch is just as easy as applying
a color. Flash comes with four radial gradient swatches
(white, red, green, and blue) and three linear gradient
swatches (white/black, blue/yellow, and rainbow). If one
of these creates the effect you want, great. If not, you can
change any of them to create your own custom gradient
effects, as you see on page 210.
Gradient swatchesSelected object
To create a custom gradient:
1. On the stage, select the object to which you want to apply a custom gradient.
Flash highlights the selected object.
2. Apply a gradient swatch to the object (see page 206).
If you like, change the color of the gradient, as described next.
3. In the Color panel, double-click the first color pointer to select it.
Flash displays a color picker.
4. In the color picker, click to select a color.
In your selected object, Flash turns the color at the center (for a radial gradient)
or at the very left (for a linear gradient) to the color you chose. Repeat these
two steps for each color pointer to change the color of each band of color in
your gradient. If you like, change the thickness and definition of your gradient’s
color bands, as described next.
www.it-ebooks.info
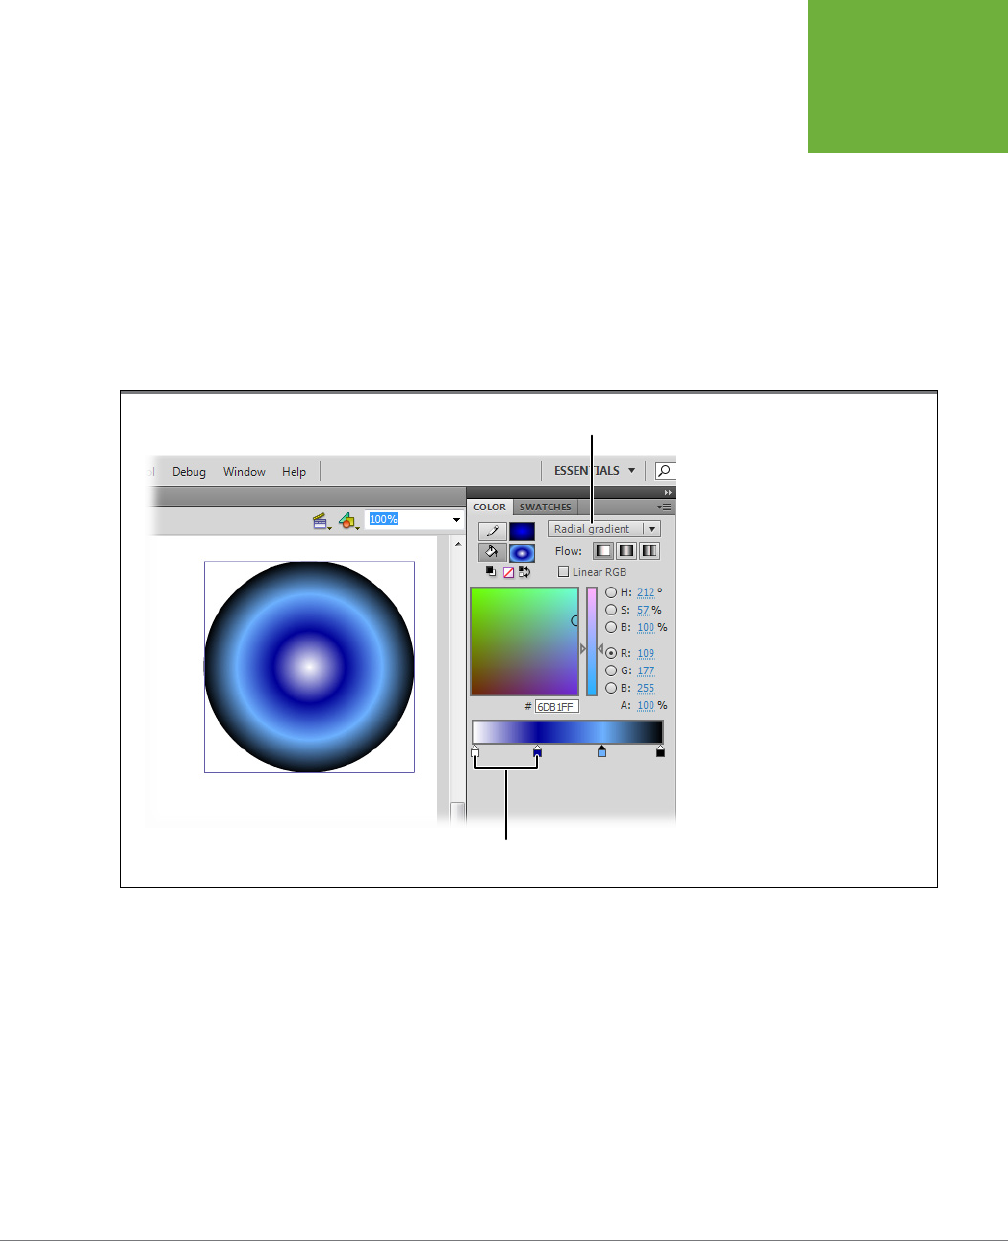
CHAPTER 5: ADVANCED DRAWING AND COLORING 209
ADVANCED
COLOR AND
FILLS
5. In the Color panel, drag the first color pointer to the right.
The farther to the right you drag it, the more of that color appears in your custom
gradient. The farther to the left you drag it, the less of that color appears in
your custom gradient. Repeat this step for each band of color in your gradient.
Next, if you like, you can add a new band of color to your custom gradient.
6. In the Color panel, click anywhere on the Gradient edit bar.
Flash creates a new color pointer (see Figure 5-48), which you can edit as
described in step 3. You can add as many as 15 color pointers (new bands of
color) to your gradient.
FIGURE 5-48
Creating a custom gradient is more art
than science. As you create new color
bands, adjust the colors, and widen
and narrow each band using the color
pointers, keep an eye on the gradient
preview window and on your selected
object, too; Flash updates both as you
edit your gradient, so you can see at
a glance whether you like the effects
you’re creating.
Gradient type
Color points
For even more excitement, apply one or more gradient transforms to your
object, as described next.
7. In the Tools panel, choose the Gradient Transform tool (F). It shares a fly-out
menu with the Free Transform tool.
Flash displays a rotation arrow, a stretch arrow, and a reposition point.
You can drag the rotation arrow to rotate the gradient; drag the stretch ar-
row to stretch the bands of color in your gradient, as shown in Figure 5-49; or
drag the reposition point to reposition the center of the gradient, also shown
in Figure 5-49.
www.it-ebooks.info
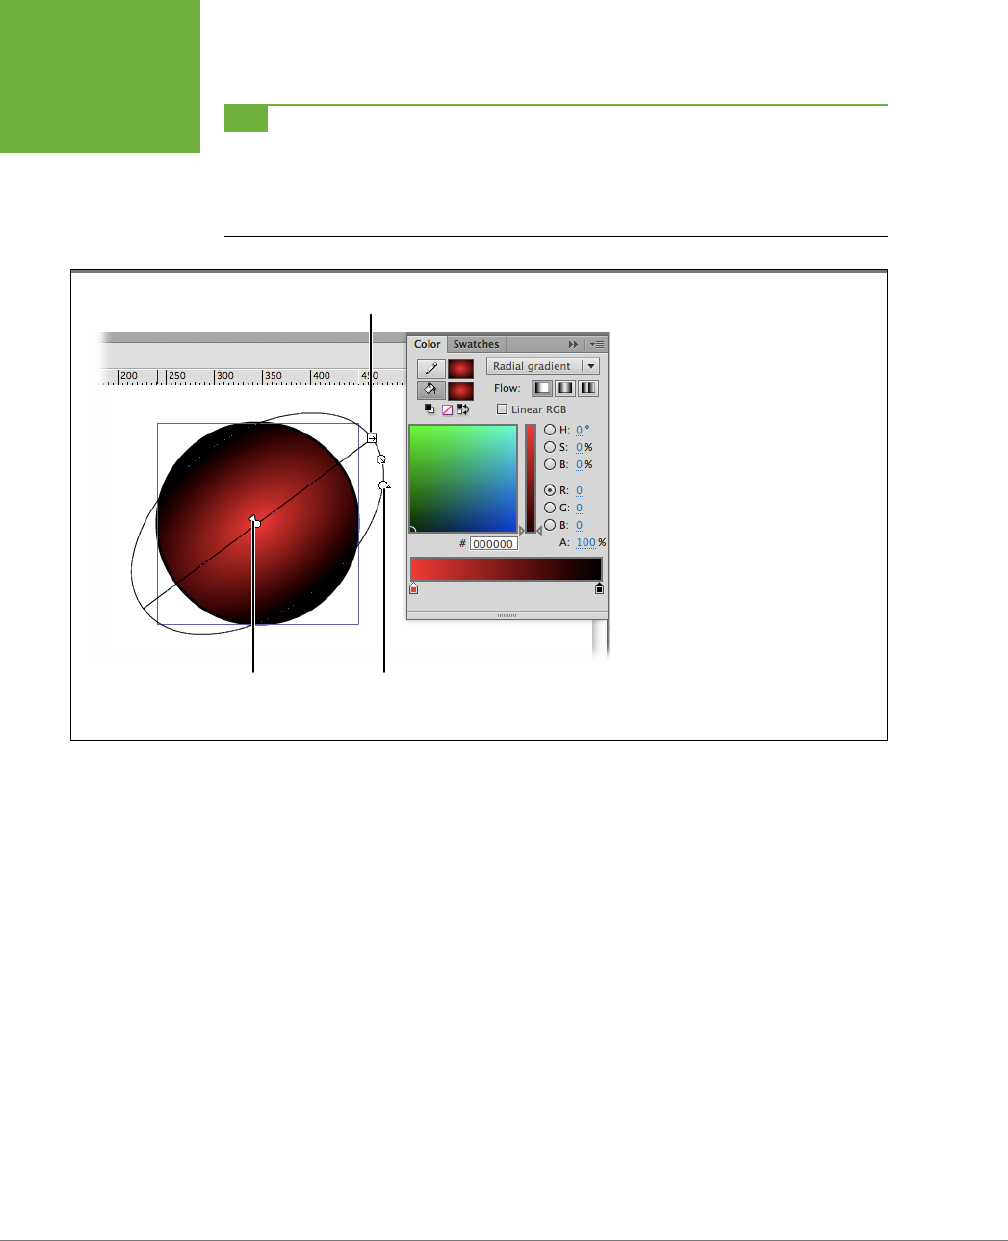
FLASH CS6: THE MISSING MANUAL
210
ADVANCED
COLOR AND
FILLS
TIP In Flash, text is usually a single color, so you need to take some extra steps to apply a gradient. If you
aren’t planning on editing the text or changing it on the fly using ActionScript, you can turn the text into an
image and
then
apply the gradient. Select the text and press Ctrl+B (⌘-B). That breaks strings of characters into
individual characters. Press Ctrl+B (⌘-B) a second time to turn those letters in to graphics. At this point you can
apply gradients to individual letters or groups of letters.
FIGURE 5-49
Just as regular transforms let you poke and
prod regular images to create interest-
ing effects, gradient transforms let you
manipulate gradients (with respect to the
shapes you originally applied them to) to
create interesting effects. Here dragging
the stretch arrow pulls the bands of color,
widening the bands at the center and
discarding the bands at the edges. Use
the circular rotate control to adjust the
gradient angle. Drag the reposition point
to move the center of the gradient away
from the center of the object. This effect is
especially useful for creating the illusion
that the object is reflecting light streaming
in from a different angle.
Adjust gradient angle
Reposition gradient
center point
Adjust
gradient bands
Importing a Custom Color Palette
Depending on the type of animation you’re creating in Flash, you might find it easier
to import a custom color palette than to try to recreate each color you need. For
example, say you’re working on a promotional piece for your company, and you want
the colors you use in each and every frame of your animation to match the colors
your company uses in all its other marketing materials (brochures, ads, and so on).
Rather than eyeball all the other materials or spend time contacting printers and
graphics teams to try and track down the RGB values for each color, all you need
to do is import a GIF file into Flash that contains all the colors you need: a GIF file
showing your company’s logo, for example, or some other image containing the
colors you need to match.
To import a custom color palette:
1. In the Swatches panel (Window→Swatches), click the Options menu.
A pop-up menu appears.
www.it-ebooks.info
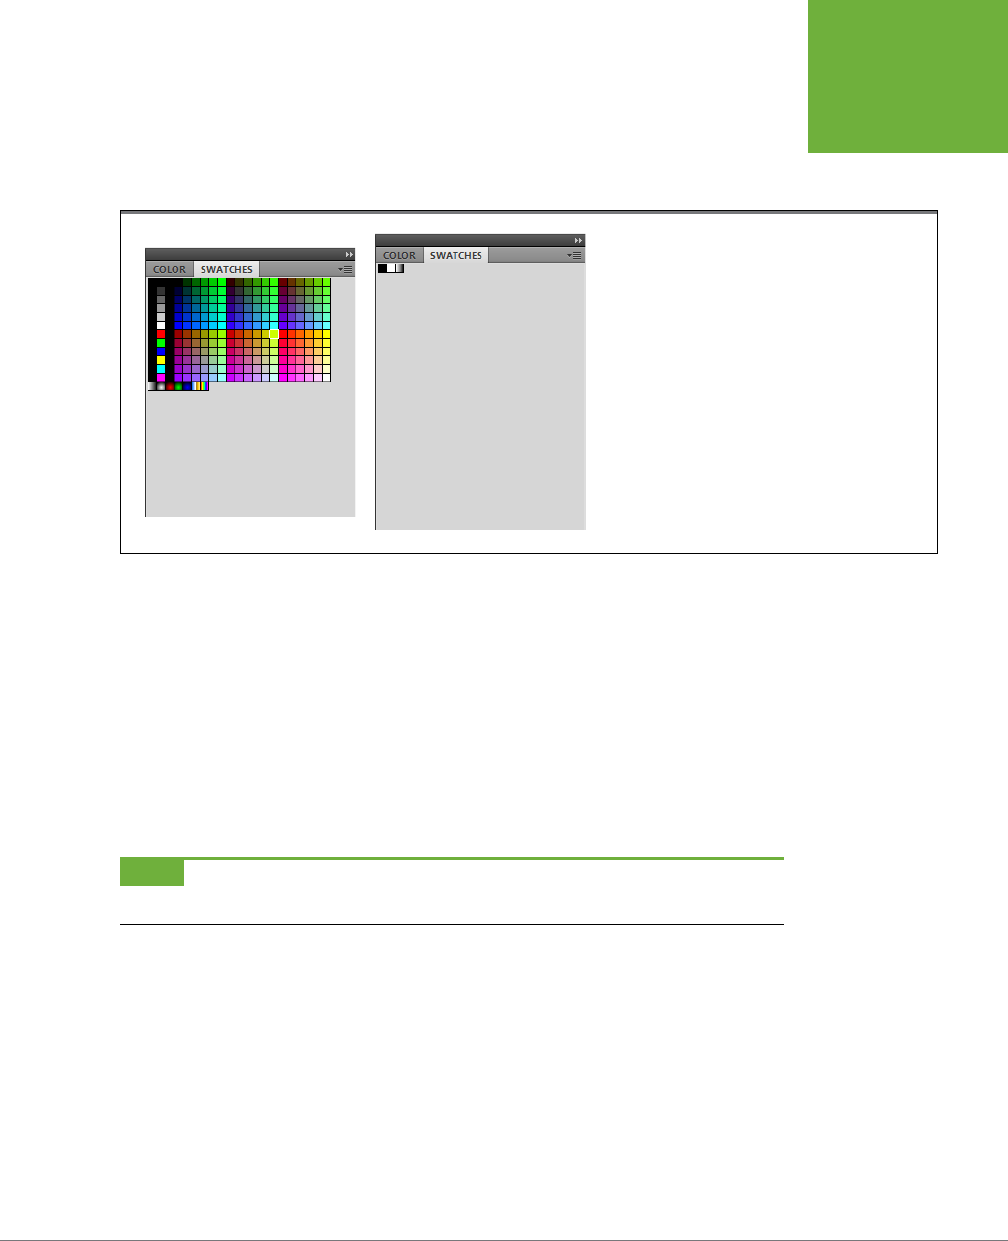
CHAPTER 5: ADVANCED DRAWING AND COLORING 211
ADVANCED
COLOR AND
FILLS
2. From the pop-up menu, select Clear Colors.
Flash clears out the entire color palette on the Color Swatches tab, leaving just
black, white, and a gradient (Figure 5-50, right).
FIGURE 5-50
Left: Here’s what the typical Swatches tab looks like
before you clear it (by clicking the Options menu and
then selecting Clear Colors). Think twice before you clear
the palette: You can get back Flash’s basic color palette,
but you lose any custom color swatches you’ve saved in
this document.
Right: After you clear the color palette, you’re left with
black, white, and a gradient.
3. Once again, click the Options menu.
The pop-up menu reappears.
4. From the pop-up menu, select Add Colors.
Flash displays the Import Color Swatch window.
5. In the Import Color Swatch window (Figure 5-51), click to choose a GIF file,
and then click Open.
Flash imports the custom color palette, placing each color in its own swatch in
the Swatches panel (Figure 5-50, left).
NOTE To restore the standard Flash color palette: From the Swatches panel, click the Options menu, and
then, from the pop-up menu that appears, select Load Default Colors.
Copying Color with the Eyedropper
Tying color elements together is a subtle—but important—element of good design. It’s
the same principle as accessorizing: Say you buy a white shirt with purple pinstripes.
Add a pink tie, and you’re a candidate for the Worst Dressed list. But a purple tie
that matches the pinstripes somehow pulls the look together.
In Flash, you may find you’ve created a sketch and colored it just the right shade of
green, and you want to use that color in another part of the same drawing. Sure,
you could slog through the Color panel, write down the hexadecimal notation for
the color and then recreate the color. Or, if you know you’re going to be working a
www.it-ebooks.info
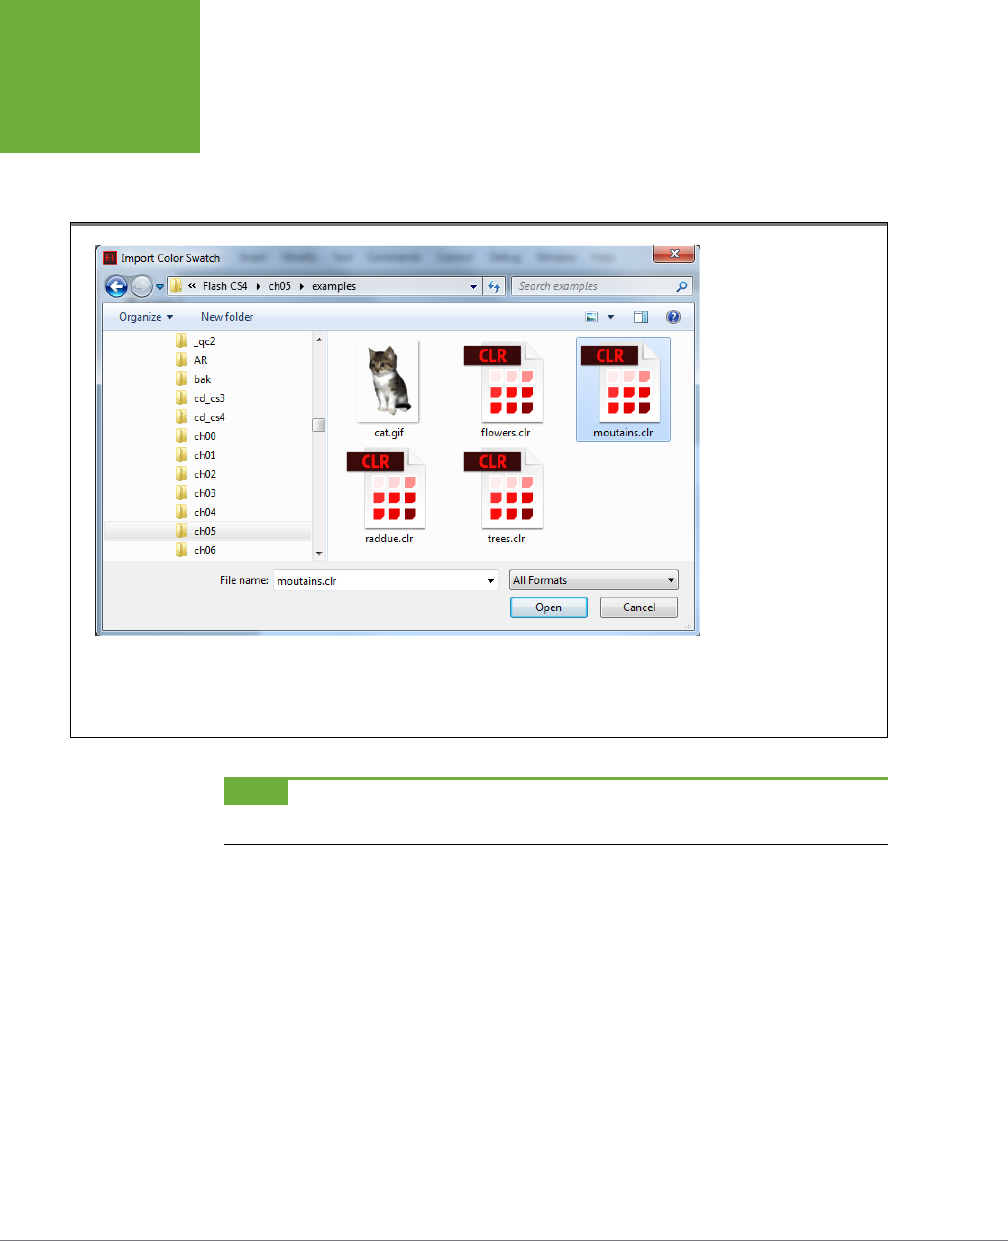
FLASH CS6: THE MISSING MANUAL
212
ADVANCED
COLOR AND
FILLS
lot with that particular color, you could create a custom color swatch (page 203).
But if you want to experiment with placing bits of the color here and there on the
fly, the Eyedropper tool is the way to go. The Eyedropper tool lets you click the color
on one image and apply it instantly to another color on another image.
FIGURE 5-51
When you head to the
Swatches panel, click
the Options menu, and
then choose Add Colors
to import a custom color
palette, Flash displays
an Import Color Swatch
window that should look
pretty familiar if you’ve
ever had occasion to open
a file on a computer. Here
you click to browse your
files. When you find the
.clr file containing your
custom color palette, click
Open. Flash brings you
back to your Color Mixer
panel, where you see that
Flash has pulled in each
separate color in your .clr
file as a separate swatch,
ready for you to use.
NOTE The Eyedropper tool lets you transfer color only from a bitmap or a fill to a fill, and from a stroke to
another stroke. If you want to transfer color to a bitmap, you need the Magic Wand (Lasso).
To copy color from one object to another:
1. Select Edit→Deselect All.
Alternatively, you can press Ctrl+Shift+A (Shift-⌘-A) or click an empty spot on
the stage.
2. From the Tools panel, click to select the Eyedropper (I) tool.
As you mouse over the stage, your cursor appears as an eyedropper while it’s
over a blank part of the stage; an eyedropper and a brush when it’s over a fill
(as shown in Figure 5-52, top); and an eyedropper and a pencil when it’s over
a stroke.
www.it-ebooks.info
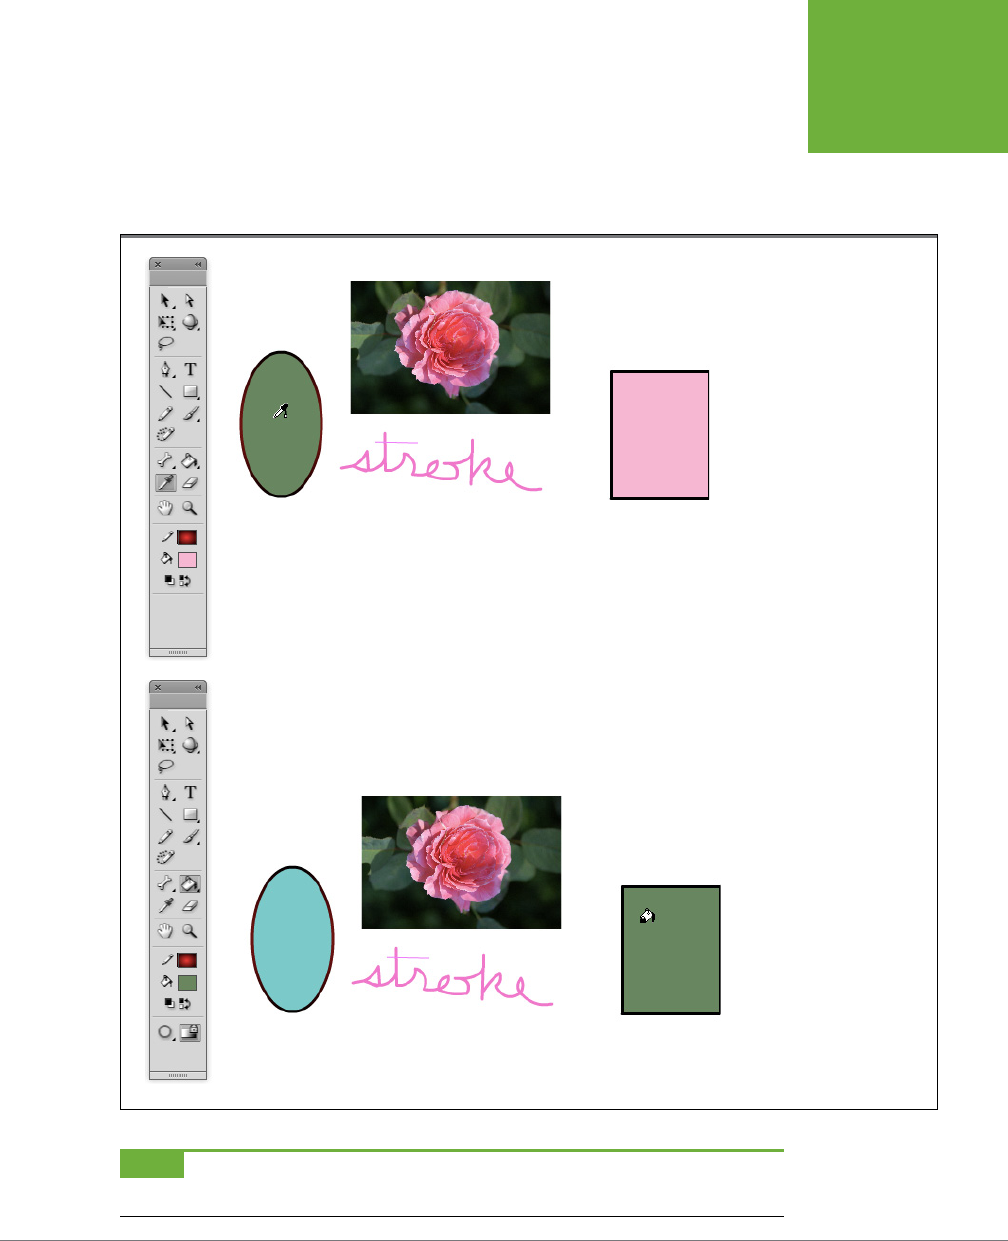
CHAPTER 5: ADVANCED DRAWING AND COLORING 213
ADVANCED
COLOR AND
FILLS
3. Click the bitmap, fill, or stroke color you want to copy from (imagine sucking
the color up into your eyedropper).
If you click to copy from a fill or a bitmap, your cursor turns immediately into a
paint bucket; if you click to copy from a stroke, the cursor turns into an ink bottle.
FIGURE 5-52
Top: After you click the
Eyedropper tool, your cursor
changes to remind you what
it’s passing over. If it’s over a
fill or a bitmap, you see a little
brush next to the eyedropper;
if it’s over a stroke, you see a
little pencil next to the eye-
dropper. Here the Eyedropper
tool is selecting a fill (the oval).
Bottom: Here the Paint Bucket
icon lets you know you need to
click a fill.
NOTE You can copy from a stroke, a fill, or a bitmap using the Eyedropper tool; you can’t copy from a symbol
or a grouped object without opening it or breaking it apart.
www.it-ebooks.info
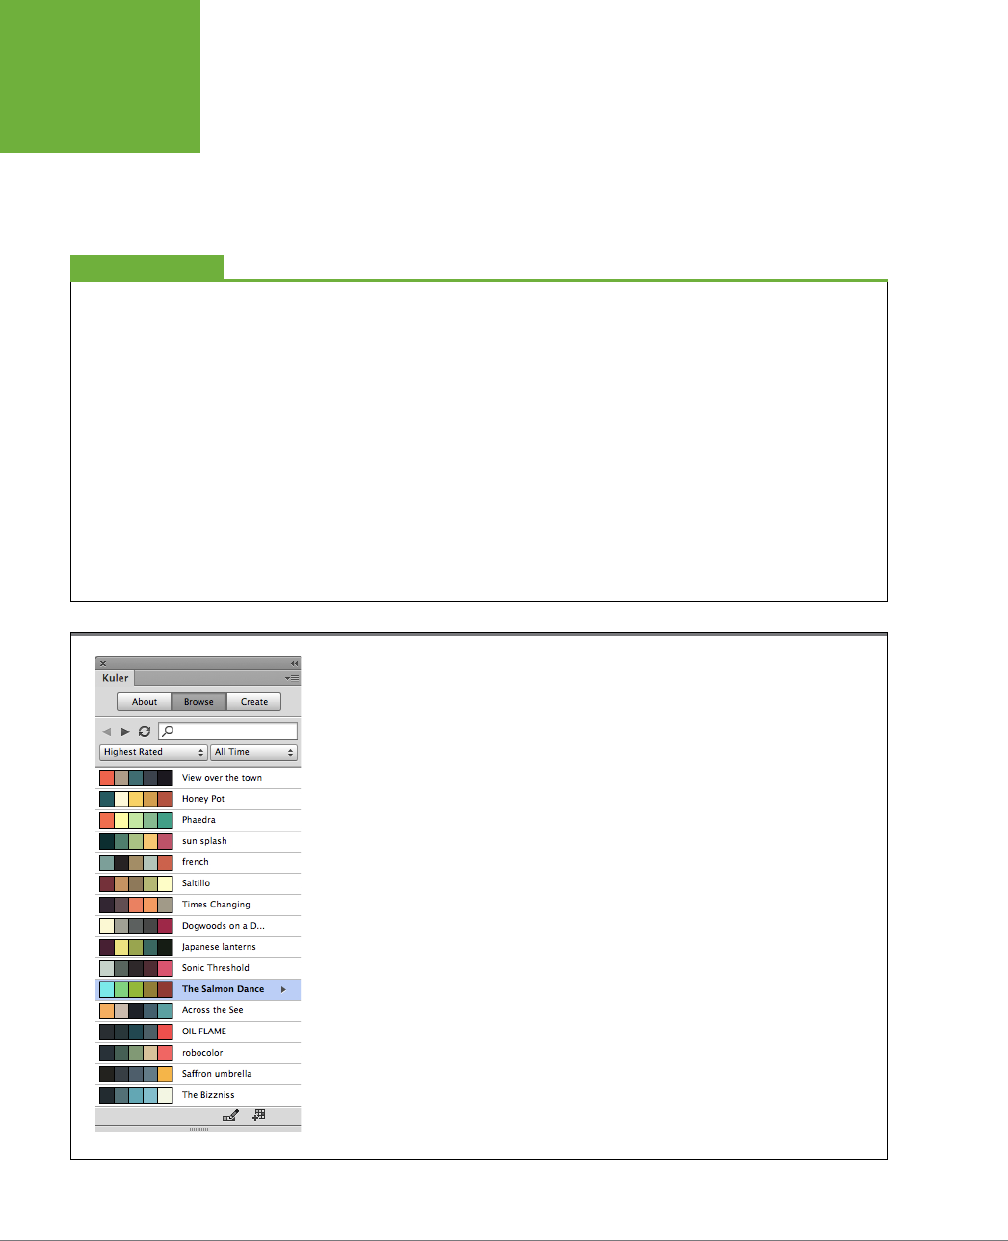
FLASH CS6: THE MISSING MANUAL
214
ADVANCED
COLOR AND
FILLS
4. Click the bitmap, fill, or stroke you want to copy to (imagine squeezing the
color out of your eyedropper). If you copied color from a bitmap or a fill, you
need to click a fill; if you copied color from a stroke, you need to click a stroke.
Flash recolors the stroke, fill, or bitmap you click, applying the
from
color to the
to
color, as shown in Figure 5-52, bottom.
Kuler: Color Help from the Community
In an office full of designers, water cooler discussion often
revolves around color palettes. What color combinations
best represent autumn, or the Rocky Mountains, or surfing in
Hawaii. Kuler is Adobe’s way of providing that kind of designer
know-how to everyone (Figure 5-53). To open Kuler, go to
Window→Extensions→Kuler. Simply put, Kuler is a panel that
shows named color combinations with five colors to a palette.
Anyone can provide a color palette, even you. All these color
combinations are stored online, so when you use Kuler, your
computer connects to the Web.
Using the buttons and menus on the Kuler panel, you can
browse through all the color combinations provided by the
Kuler community. You can choose a palette, edit the colors,
and then save it under a different name. You can create your
own color palettes and then upload them for others to review
and use. If you see the perfect color combination for your
project, you can add the palette to your Swatches panel by
clicking Add to Swatches.
UP TO SPEED
FIGURE 5-53
When you find a palette that you want to use in your Flash project, click the “Add to Swatches”
button, and those colors appear in your Swatches panel. If you want to create your own theme for
the Kuler community, click the button in the upper-right corner.
www.it-ebooks.info

215
CHAPTER
6
Flash isn’t just about moving pictures. Text is a big part of many projects, and
with Flash you can do remarkable things with text and type. You can label
buttons, boxes, and widgets with small, helpful text, and make page headlines
pop with big, bold type. When you use large blocks of text—as in newspaper articles
or how-to instructions—you can add scroll bars so your readers can see all the text
in one place, or you can create hyperlinks that lead to other pages. And of course,
Flash can do things to type that wouldn’t enter Microsoft Word’s wildest dreams:
morphing paragraphs as they move across the screen; exploding words and letters
into dozens of pieces. You can also create the same kind of eects that you see in
the opening credits of TV shows. To handle all this variety, Flash provides dierent
text tools. As with any craft, it’s important to choose the right tool for the job.
Text handling is another feature that has grown and evolved with new versions of
Flash. In fact, a couple of versions ago Flash Professional introduced a brand-new
and powerful way of handling text, ocially named
Text Layout Framework
, but
usually called
TLF text
. If you’re comfortable working with Flash’s tried-and-true
text tools, don’t panic. Flash provides backward compatibility with
Classic text
, too.
You can even mix and match text in the same document, layer, and frame. So, each
time you click the Text tool, you need to choose which text engine you want to use.
How do you know which to use? That’s what you’ll learn in this chapter. First, you’ll
get tips on choosing the right tools. Then you’ll learn how to work with text and
create special eects. Finally, at the end of the chapter (page 239), you’ll find a
subpanel-by-subpanel description of text properties, including which properties
work with which text engines and text types. (Interested in using ActionScript to
make text jump through hoops? Turn to Chapter 17.)
Choosing and
Formatting Text
www.it-ebooks.info

FLASH CS6: THE MISSING MANUAL
216
TEXT
QUESTIONS
Text Questions
When you add text to your Flash animation, you have a specific job in mind. You
may want to put a headline at the top of the page, label a widget on the screen, or
provide instructions. If you’re creating the next great eBook reader, your needs are
dierent than if you’re creating a splashy intro sequence like the ones on
The Daily
Show
or
American Idol
. Because these text jobs vary so much, ask yourself a few
questions before you click the Text tool:
• Is the text a single line or a paragraph?
• If the block of text is several lines, should it have scroll bars?
• Should the text be selectable by the audience, or is it read-only?
• Will the audience be able to change or add to the text?
• Do I want to animate the text?
• Do I want to make changes to the text using ActionScript?
• Do I need to provide text in multiple languages?
As you’ll see in the following section, the answers to these questions help you choose
the right text engine and text type. Flash designers have always had to consider
these questions, and even with a new way of handling text (TLF), the questions are
still valid. Read on to learn which text tools best accomplish these jobs.
Choosing TLF or Classic Text
Click the text tool—it looks like a big capital T in the Tools panel (Figure 6-1). The
Properties panel changes to show all the dierent text properties available to you, the
designer. Starting at the top, the first drop-down menu gives you a choice between
two text engines—TLF Text and Classic Text. These text-handling routines are called
engines
because they’re the mechanisms used to display text in Flash Player—the
tool your audience uses to watch your Flash animation. In previous versions of Flash,
the text options were much more limited than those provided by programs like
InDesign, Illustrator, and Photoshop. TLF text goes a long way toward closing that
gap.
Classic text
is still an option for a number of reasons, including compatibility.
Choose TLF text if:
• You’re new to Flash. It’s the text engine of the future, so you may as well start
learning it. It gives you the most control over your text. In spite of the many
options, it’s fairly easy to use.
• You want to animate your text in three dimensions. It’s much easier to spin and
rotate TLF text fields.
www.it-ebooks.info
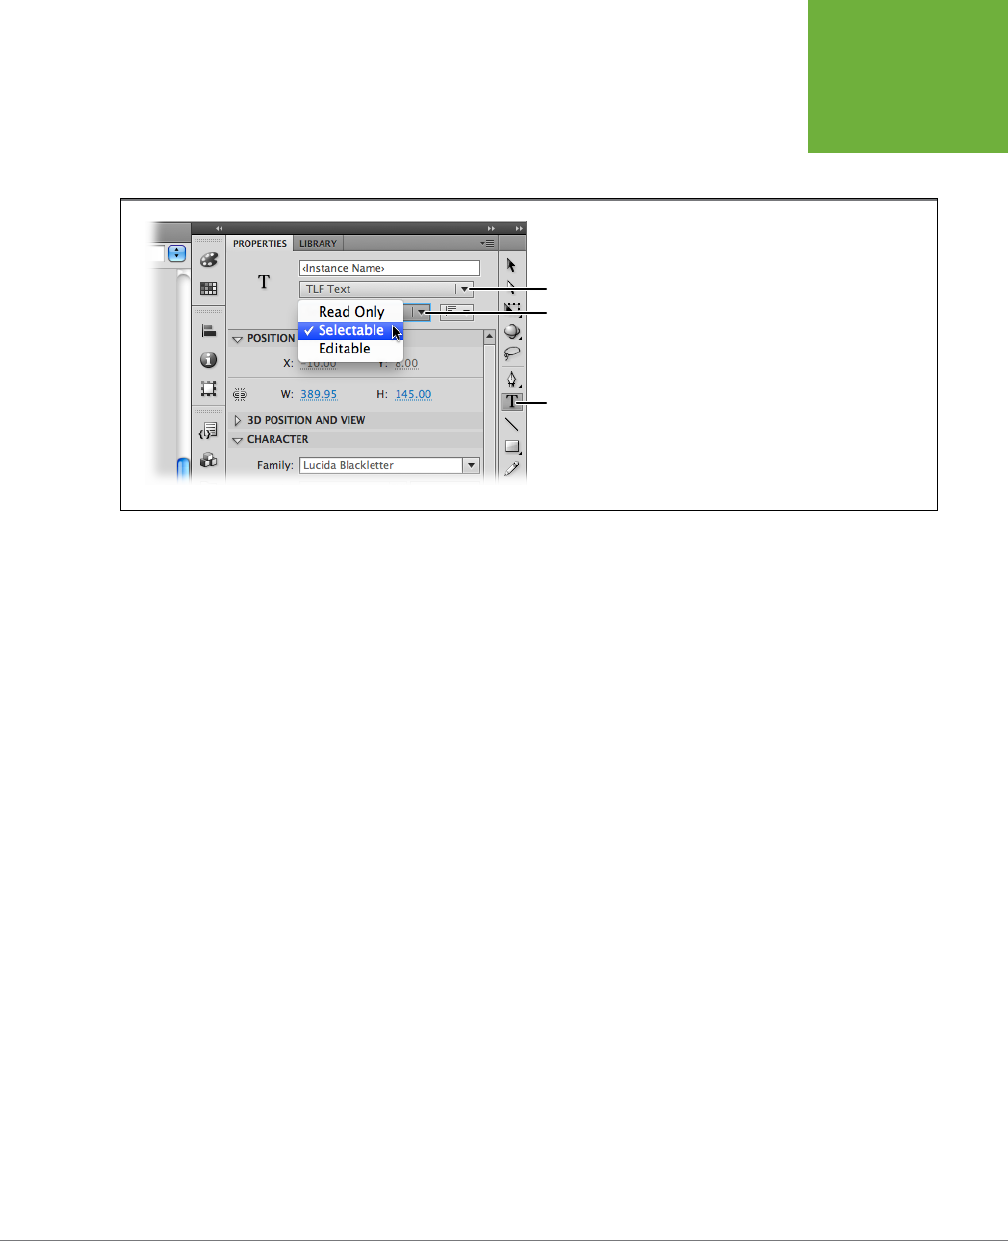
CHAPTER 6: CHOOSING AND FORMATTING TEXT 217
CHOOSING TLF
OR CLASSIC
TEXT
• You want to use fancy typographic features such as ligatures (special characters
that represent two letters). TLF text provides many more of the features that
print typographers expect.
FIGURE 6-1
After you choose the Text tool, you need
to use the drop-down menus to choose
the text engine and the text type. Your
choices determine how the text functions
in your animation. The menu shown here
lists the text types available when you’ve
chosen the TLF text engine.
Text Tool
Text type menu
Text engine menu
• You want to provide text in dierent languages, including those where text
doesn’t flow from left to right. TLF text is much more cosmopolitan than Classic.
Choose Classic text if:
• You need to be compatible with older versions of Flash. You can open and
work on older projects in Flash Professional CS6. You can even mix Classic and
TLFtext in the same project.
• It’s critically important to make your animation files (SWFs) as small as possible.
If you’re using text simply as labels on the stage and you aren’t changing it with
ActionScript or giving your audience a chance to add and edit, then Classic
static text takes up the least room in your SWF file.
• You’re a Flash veteran and the old ways are just fine, thank you very much.
There’s nothing wrong with sticking with what you know will work, especially
when there’s a deadline looming.
Choose a Text Type
Once you’ve chosen either TLF Text or Classic Text, the Properties panel changes to
display settings for that text engine. You notice right away that TLF includes many
more options. Immediately below the “Text engine” menu, the first setting is the
“Text type” menu. Below that, there are several subpanels filled with widgets to
help you manage your text. The choices you make at the top of the Properties panel
determine which properties are available as you work your way down. For example,
TLF has dierent text types from Classic.
www.it-ebooks.info
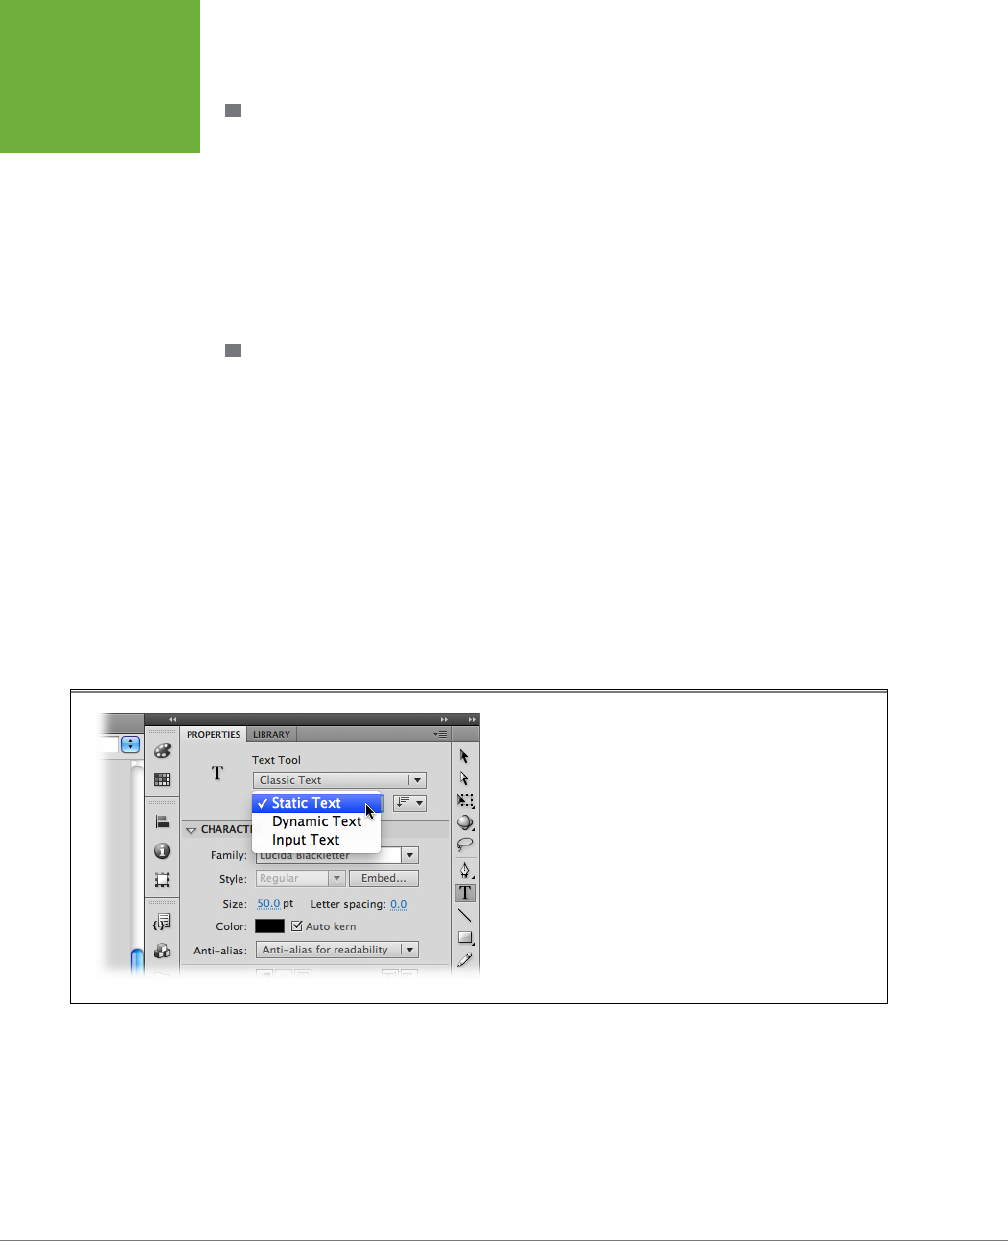
FLASH CS6: THE MISSING MANUAL
218
CHOOSING TLF
OR CLASSIC
TEXT
TLF TEXT TYPES
• Use Read Only when you want to display text on the stage, but you don’t want
the audience to edit the text.
• Use Selectable when you want to give your audience the ability to select and
perhaps copy and paste text.
• Use Editable when you want to give your audience the ability to change or add
their own text. For example, choose this option when you’re creating “fill-in”
forms.
CLASSIC TEXT TYPES
Classic text continues to oer the three options familiar to Flash veterans (Figure 6-2):
• Use Static Text when you want to display text on the stage for simple chores
like headlines and labels. Your audience can’t change static text, and you can’t
change it using ActionScript. Static text is actually converted to images when
it’s stored in your final SWF file.
• Use Dynamic Text when you want to make changes using ActionScript. Creat-
ing a program that continuously updates basketball scores? That’s a job for
dynamic text.
• Use Input Text when you want to give your audience the ability to change or
add their own text, perhaps through the use of a text input box or form. Input
text can also be used in conjunction with ActionScript.
FIGURE 6-2
If you’re a Flash veteran, you’ll recognize the Classic Text options.
As shown here, you can choose the following text types: Static Text,
Dynamic Text, and Input Text. Because static text is converted to an
image before your audience sees it, you can’t edit the text (change
the words or letters) when the animation is running.
Some options, such as your choice of typeface, size, and color, remain the same no
matter which text engine or text type you choose. Other options, such as highlight,
ligatures, and baseline shift, appear or disappear from the Properties panel based
on your choices. So, if a particular setting you need is unavailable, go back and
choose a dierent text engine or text type. In general, TLF text gives you more
typographic control. You can mix TLF and Classic text in the same document and
even in the same layer or frame.
www.it-ebooks.info
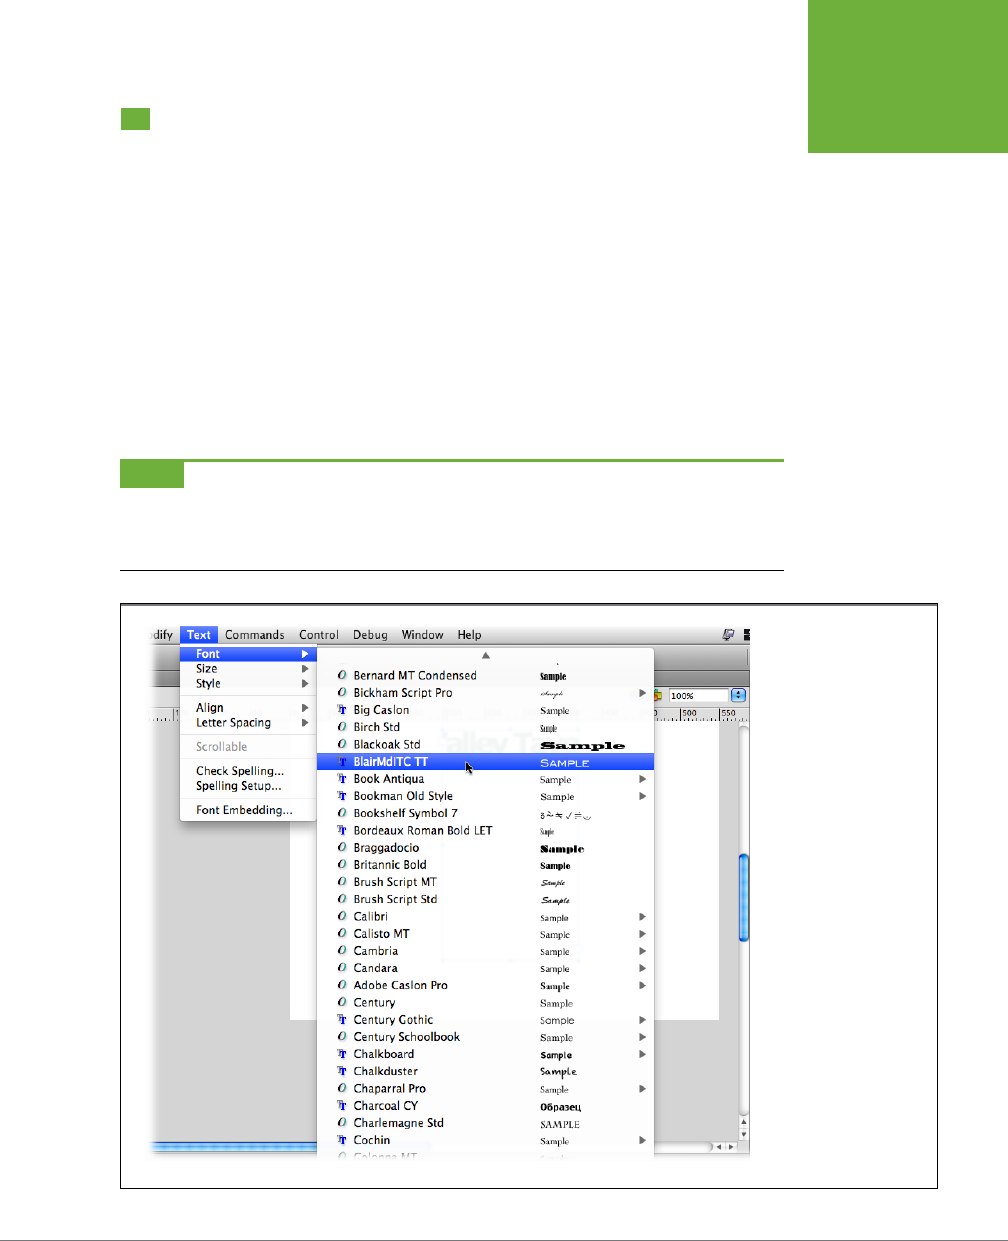
CHAPTER 6: CHOOSING AND FORMATTING TEXT 219
ABOUT
TYPEFACES
AND FONTS
About Typefaces and Fonts
Choosing a typeface for your project should be fun—just not too much fun. There are
two paths to the available typefaces installed on your computer. Using the menus,
go to Text→Font, or in the Properties panel, find the Character subpanel, and then
click the Family menu. Either way, you see a list like the one in Figure 6-3. Make your
typeface decisions based on the job at hand, and you can’t go wrong. Think about
what you expect your type to do, and then help it do that job by choosing the right
typeface, size, color, container, and background. Beginning designers often treat
text as yet another design element and let the desire for a cool look override more
practical concerns. Designers sometimes talk about a text block like just another
shape on the page. But cool type eects can torture your readers’ eyes with hard-
to-read backgrounds, weird letter spacing, or hopelessly small font sizes. (For more
advice on readability, see the box on page 220.)
NOTE If you want to be technical in a Gutenbergian fashion, typefaces are families of fonts. Times Roman
is a typeface, while “Times Roman, bold, 12 point” is a font. Somewhere along the line, as type moved from
traditional typesetters to computer desktops, the meaning of the word “font” came to be synonymous with
“typeface.” That’s okay, but knowing how the terms originated makes great cocktail party banter.
FIGURE 6-3
Most likely you’ve got
a bewildering number
of typefaces on your
computer. Many of the
typefaces include style
variations, like bold,
italic, and so on. Choose
carefully, making sure
that your text performs
its intended job—com-
munication.
www.it-ebooks.info

FLASH CS6: THE MISSING MANUAL
220
ADDING TEXT
TO YOUR
DOCUMENT
Adding Text to Your Document
Enough theory—it’s time to put some words on the stage. Just as Flash has tools for
adding shapes and lines to your drawings, it also has a tool specifically designed to
let you add text to your drawings—the Text tool (T). The following steps describe
the basic method for putting read-only text on the stage.
Small Is Beautiful
How can I use small type and make sure it stays readable?
For most people, reading text on a computer or smartphone
screen is more difficult than reading it off a piece of paper.
In fact, most people simply won’t read text if it’s too hard to
see. If your Flash project includes text with small font sizes (12
points or less), there are a few things that you can do to keep
your audience from straining their eyes:
• If possible, bump the type up to a larger size (Properties→
Character→Size). At small sizes, a point or even half a
point makes a big difference.
• Black text on a white background is the most readable
combination. If you want to use different colors, opt for
very dark text on a very light background. If you have
to use light text on a dark background, then make sure
there’s a great deal of contrast between the colors.
• Use sans-serif type, like Verdana, Helvetica, or Arial, for
small sizes. Sans-serif type looks like the text in this box;
it doesn’t have the tiny end bars (serifs) you find in type
like the body text in this book. Computer screens have a
hard time creating sharp serif type at very small sizes.
• Use both upper- and lowercase type for anything other
than a headline. Even though all-uppercase type looks
bigger, it’s actually less readable. The height differences
in lowercase type make it more readable. Besides, too
much uppercase type makes it look like you’re shouting.
• Avoid bold and italic type. Often bold and italic type
are hard to read at small font sizes. But this varies with
different typefaces, so it doesn’t hurt to experiment.
• If your text isn’t going to be animated, then turn on
“Anti-aliasing for readability” (Properties→Character→
Anti-alias→“Anti-alias for readability”). Antialiasing is
a bit of computer magic and fool-the-eye trickery that
gives type nice, smooth edges.
• Choose “Anti-aliasing for animation” (Properties→
Character→Anti-alias→“Anti-alias for animation”) if
you’re going to be pushing that text around the screen
with tweens or ActionScript.
It never hurts to get second and third opinions. If you’ve got
eyes like an eagle, you may want to get some opinions from
your less-gifted colleagues when it comes to readability. You
want your Flash project to be accessible to as wide an audi-
ence as possible.
FREQUENTLY ASKED QUESTION
To use the Text tool:
1. In the Tools panel, select the Text tool.
Flash highlights the Text tool; when you mouse over to the stage, your cur-
sor changes to crosshairs accompanied by a miniature letter T, as shown in
Figure6-4.
www.it-ebooks.info
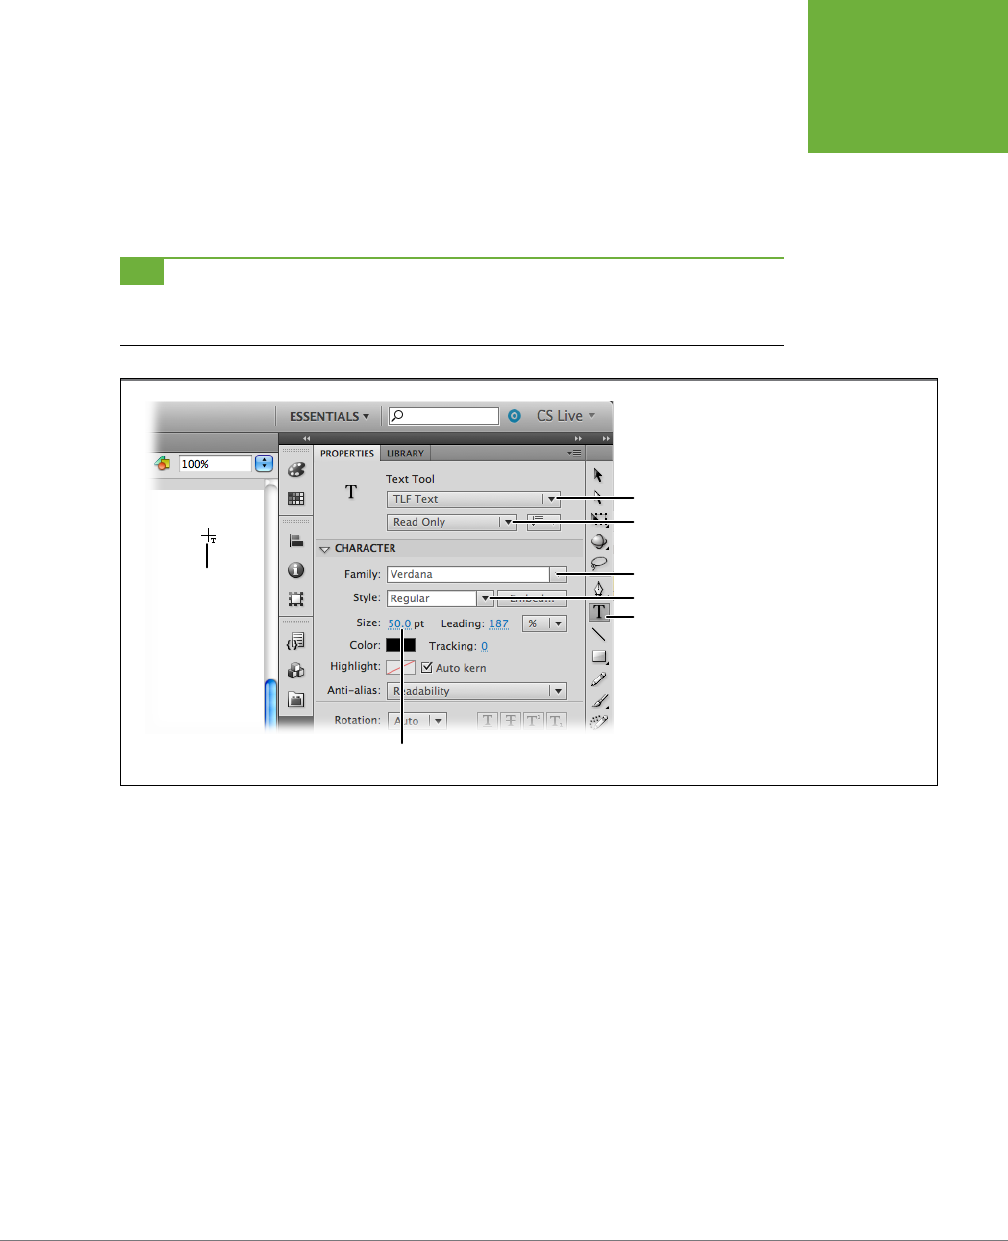
CHAPTER 6: CHOOSING AND FORMATTING TEXT 221
ADDING TEXT
TO YOUR
DOCUMENT
2. Using the two menus at the top of the Properties panel, choose TLF Text
and then, below, choose Read Only.
Armed with this information, Flash is ready to create a text field that meets
those specs. By choosing Read Only, you create text that can’t be changed by
your audience. It works well for simple labels or headlines.
TIP In the Properties panel, many of the text widgets, including the “Text engine” and “Text type” menus,
aren’t labeled. However, if you’re ever in doubt, move the cursor over a widget, and a tooltip appears with the
official name.
FIGURE 6-4
After you select the Text tool, the
cursor changes to crosshairs with
a T symbol, and the Proper-
ties panel shows the available
options. At the top, you choose
a text engine and text type.
Farther down, you can choose a
font family, style, and size.
Text cursor
Size
Text type
Text engine
Style
Family
Text Tool
3. In the Character subpanel, choose a family, style, and size.
These are the familiar settings that you use every time you create text. The
choices are similar to those you’d use in your word processor. In Figure 6-5, the
settings are for
Verdana
family,
bold
style, and
50-point
type size.
4. Click the stage and drag to create a text field.
If you simply click once, Flash displays a squished-up, empty text field. If you
drag, you create a rectangle. Either method works, because the box resizes as
you type your text, and you can resize the box at any time.
5. Type some headline text, like
Breaking News!
Your text appears on the stage, showing the specs you chose in step 3.
www.it-ebooks.info

FLASH CS6: THE MISSING MANUAL
222
ADDING TEXT
TO YOUR
DOCUMENT
TIP If the type you specified looks different on someone else’s computer, then you’ve got a font-embedding
problem. It most often happens when you let your audience add or edit text, or when you create text with
ActionScript. Font embedding is covered in the chapter on animating text with ActionScript, page 582.
FIGURE 6-5
You can modify text
using several different
subpanels in the Proper-
ties panel. The Position
and Size settings work
the same as they do
with other objects on the
stage. Using the Character
and Paragraph subpanels,
you can fine-tune your
type as you would in a
page layout program.
Changing Text Position, Height, and Width
Once you have a block of text on the stage, you can make changes as you would
with any other graphic element:
• To move the text field, use the Selection tool (V). Drag to reposition the text.
• To resize the text field, use the Selection tool (V) to drag one of the handles
around the edge of the box.
• To stretch or squash the type, use the Free Transform tool (Q) and drag one of
the handles, as shown in Figure 6-6.
When resizing the text field, you can drag the handles whether you’re using the Text
tool or the Selection tool (solid arrow). The container holds the text and changes
size, but the text itself remains the same size. Some text fields can be changed to
automatically expand to accommodate the text they hold. When you resize a text field
that’s set to automatically expand, Flash changes it to a fixed-width field. To change
a fixed-width text field to one that automatically resizes to fit the text, double-click
the hollow square handle. The handle changes to a hollow circle.
As with shapes and other graphics, you can make position and dimension changes
directly in the Properties panel. Want to change the height of the text field? Just
type a new number. TLF text and Classic text fields behave in the same way when
you move them or change their width and height.
Rotating, Skewing, and Moving in 3-D
Naturally, Flash lets you spin your type around in dierent directions—after all, it is
an animation program. To spin text in two dimensions, use the Transform tool (Q).
www.it-ebooks.info
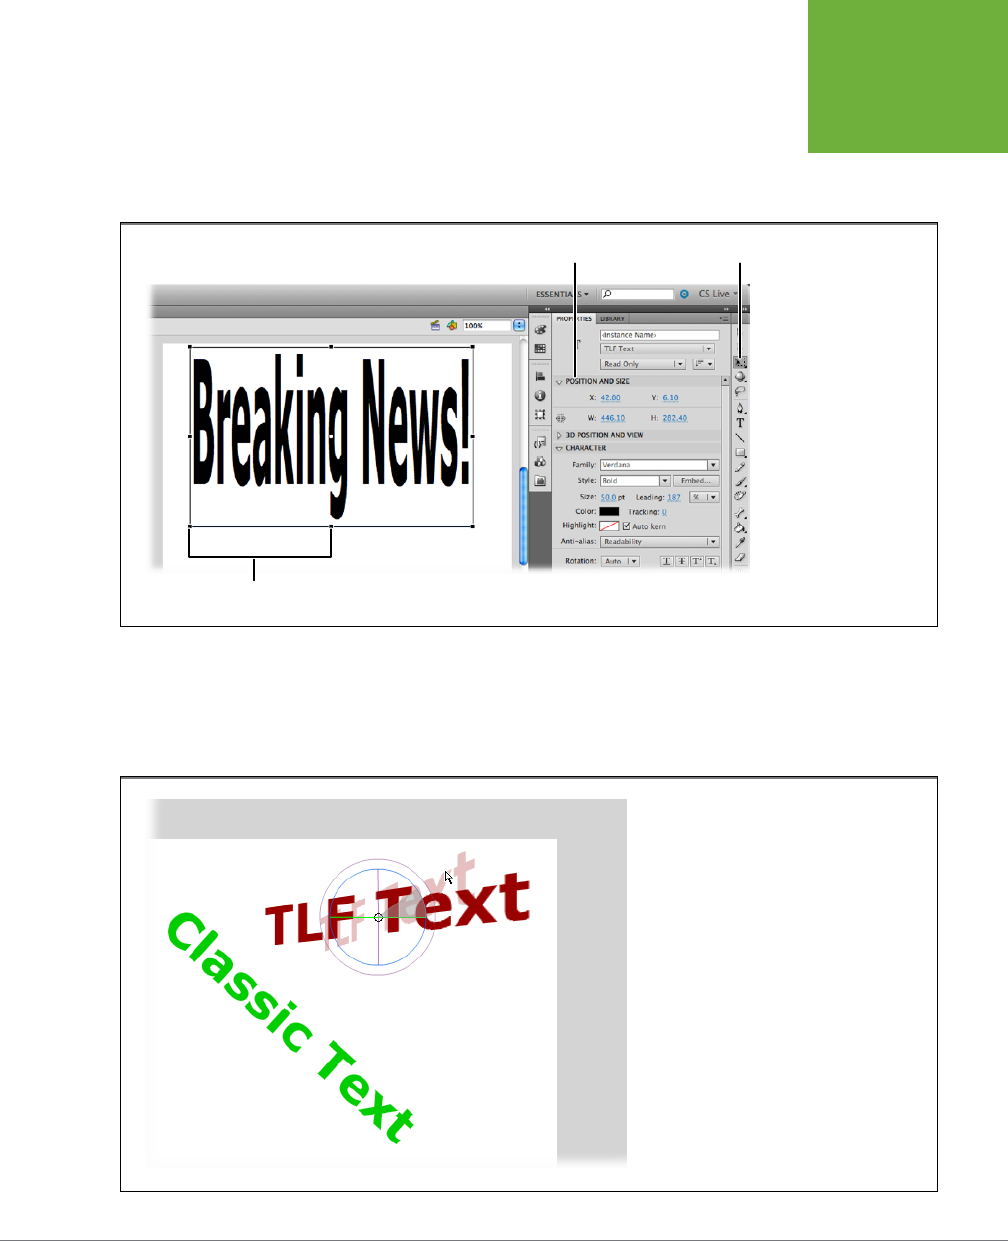
CHAPTER 6: CHOOSING AND FORMATTING TEXT 223
ADDING TEXT
TO YOUR
DOCUMENT
Select the text, and then move the cursor near one of the corners. When you see a
circular arrow, click and drag. The steps are similar for skewing text, except that you
position the cursor near one of the edges of the text field. A slanted double-arrow
appears when it’s time to click and drag.
FIGURE 6-6
You can use the same
tools to position and
transform blocks of text
that you use to work with
other graphics. Here the
headline was stretched
dramatically by increasing
the Height property
for the text field. Note,
however, that the font
size is still 50. Transform-
ing distorts the text
but doesn’t change the
underlying typographic
properties.
Text box handles
Position Properties Free Transform Tool
If you want to rotate a text field in 3-D, you need to use TLF text, as shown in
Figure6-7. Then, you can use the 3D Rotation tool (W) and the 3D Translation tool
(G), as you would with any other graphic. The 3D Translation tool lets you move the
text field in 3-D space, as in text zooming in at you from far away.
FIGURE 6-7
You can use the Transform tool (Q) to rotate text
in two dimensions. For 3-D rotation or motion,
use TLF text and the 3D Rotation tool (shown
here) or the 3D Translation tool.
www.it-ebooks.info

FLASH CS6: THE MISSING MANUAL
224
ADDING TEXT
TO YOUR
DOCUMENT
Changing Text Color
Colorful text puts pizzazz into your animation; just make sure you don’t sacrifice
readability. You can change the color of an entire block of text, or you can choose
certain characters and change their color, as shown in Figure 6-8:
• To change the color of an entire block of text, use the Selection tool (V) and
click the text. Once you see the familiar text box and handles, head over to the
Properties panel. In the Character subpanel, click the Color swatch. A color picker
opens, similar to the ones you use to specify colors for shapes. You won’t see
any gradient settings for text, but you can change its opacity using the Alpha
percentage in the upper-right corner.
FIGURE 6-8
You use Flash’s familiar color
picker to select a color for your
text. To change the color for
specific characters within a
block of text, select the charac-
ters before you make your color
selection.
• To change the color of individual characters, use the Text tool (T). Click the
text block, and you see a blinking line similar to ones used in word processors.
This line marks the insert position. So, if you start typing, new characters appear
in the text. Just as in a word processor, you drag to select text. Select the text
you want to change, and then choose a color in Properties→Character→Color.
• With text, you set the color for the entire character—unlike shapes, where
you choose separate stroke and fill colors. However, TLF text gives you an ex-
tra color option called Highlight. As the name implies, this gives you a way to
make your text stand out through the use of a background color, as if you had
highlighted the text with a marker.
www.it-ebooks.info

CHAPTER 6: CHOOSING AND FORMATTING TEXT 225
ADDING TEXT
TO YOUR
DOCUMENT
TIP You can create additional color effects using the Color Effect, Display, and Filters subpanels at the bottom
of the Properties panel. These settings work the same for shapes, objects, and text, and they’re described on
page245.
Applying a Color Gradient to Text
Flash lets you apply a gradient to graphics (page 206) but
not text. But if you insist, and promise to use this effect in
moderation, you have a couple of ways to get it.
The most obvious solution is to turn the text into a graphic and
then add a gradient. Start by selecting the text and pressing
Ctrl+B (⌘-B) to break blocks of text into separate letters; then
press Ctrl+B (⌘-B) a second time to break the letters into
graphic elements. The drawback with this technique is that
the text is, well, no longer text. It still looks like text, but you
can’t edit it like text.
Alternatively, you can adapt the masking technique described
on page 151: You create a block of Classic text on one layer
and then, on another layer beneath that, use the rectangle
tool to create a block with a gradient color, as shown at the
top of Figure 6-9. To turn the layer with the text into a mask,
right-click (Control-click) the layer’s name, and then choose
Mask from the shortcut menu. The block with the gradient
disappears, except for the color that shows through the text.
Flash automatically locks masked and masking layers. You’ll
find that this text is editable inside of Flash—just unlock the
layer and make your changes. You can also change the text
using some of the ActionScript techniques discussed in Chapter
17. Want to color your text with a photographic image? Simply
place a photo in the layer below the text.
WORKAROUND WORKSHOP
Creating a Text Hyperlink
You can add hyperlinks to your text with or without using ActionScript to generate
the code. Using TLF text, you can add a link to an entire text block, or you can add
the link to a few words or characters. Hyperlinks often open web pages or docu-
ments, but with some ActionScript code, they can perform other feats, too. To create
a link that opens a web page or document, you provide a
URL
address. URL stands
for Universal Resource Locator. You usually hear this term in relation to the Internet,
but a URL can just as well point to a file on your computer. The key is in the prefix:
Instead of beginning with
http://
, a link that points to a file on your computer begins
with
file://
. Keep in mind, this only works when the animation (SWF file) and the
linked file are on the viewer's computer. It won't work if the animation is on a web
page or stored on the Internet.
Here are the steps for creating a link when you’re using TLF text:
1. Use the Select tool (V) to select an entire text block, or use the Text tool
(T) to select text inside a text block.
Either method determines the clickable link text your audience clicks to open
a web page or a document.
www.it-ebooks.info
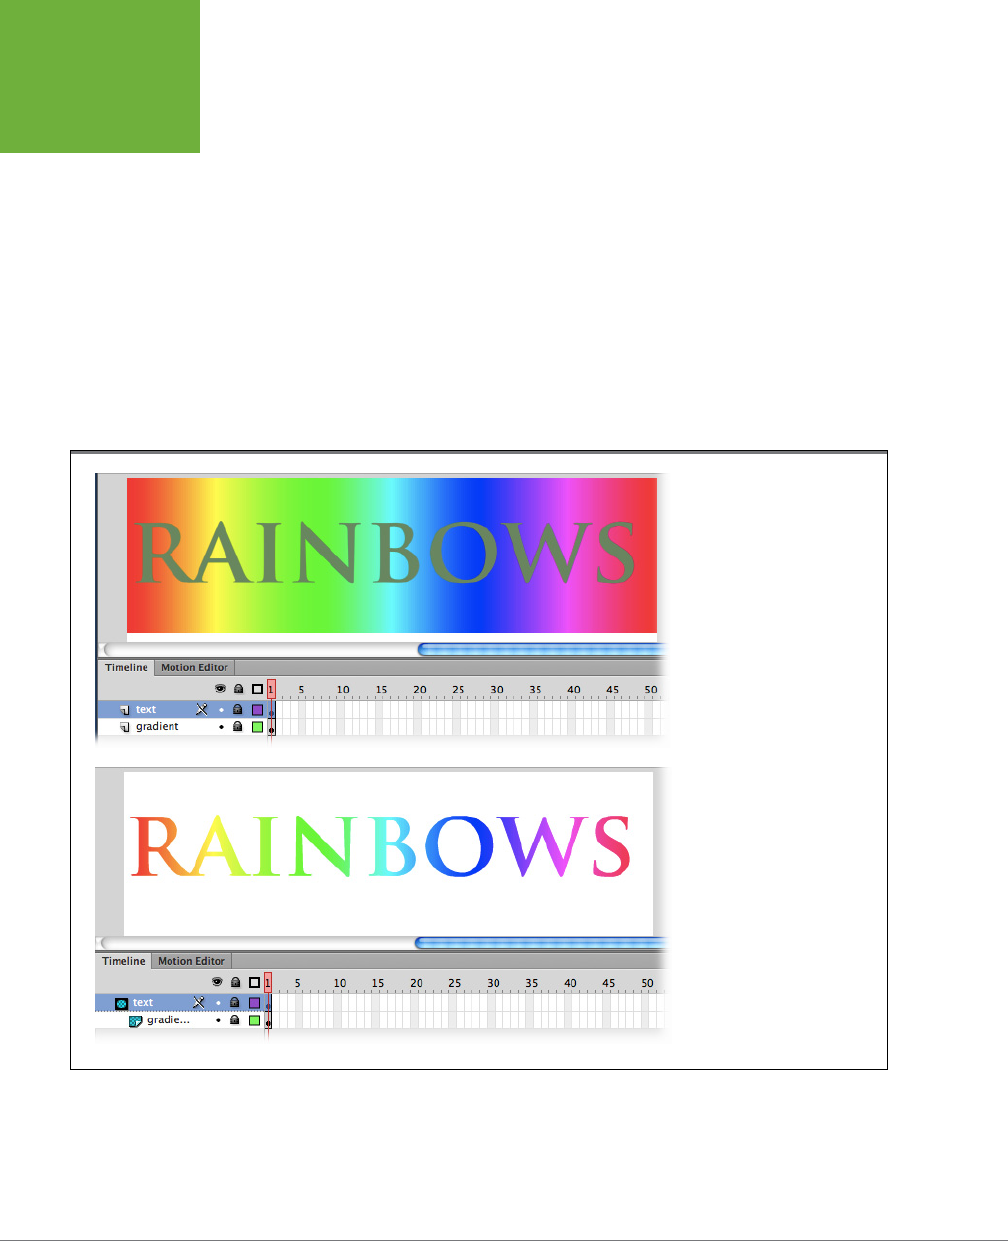
FLASH CS6: THE MISSING MANUAL
226
ADDING TEXT
TO YOUR
DOCUMENT
2. In Properties→Advanced Character→Link, type the complete URL, such as
www.missingmanuals.com
.
You can use other standard URLs to open files or to create emails such as
file:///documents/missingmanual.txt
or
mailto://george@washington.edu
.
3. Optional: In Properties→Advanced Character→
Target, choose an option.
Target options are used, as they are in HTML, to tell the browser how to open
the linked web page:
_self
(the standard option) opens the page in the current
browser window;
_blank
opens the page in a new window;
_parent
opens the
page in the parent of the current frame; and
_top
opens the page in the top-
level frame of the current window. If you don’t choose an option, the menu
remains set to None, and the standard behavior is to open the page in the
current browser window.
FIGURE 6-9
You can create a mask with
text so the color of the graphic
or photo underneath shows
through the letters.
Top: Here are the two layers
before the mask is turned
on. The rainbow rectangle is
beneath the text.
Bottom: When the mask is
turned on, the layers are locked
and the rectangle with the
gradient disappears except for
the color that shows through
the text.
4. Press Ctrl+Enter (⌘-Return) to test your movie.
Flash plays your movie. When you move your cursor over the linked text, it
changes to the pointing finger, indicating a link. Click the text, and your linked
web page, document, or addressed email message should appear.
www.it-ebooks.info
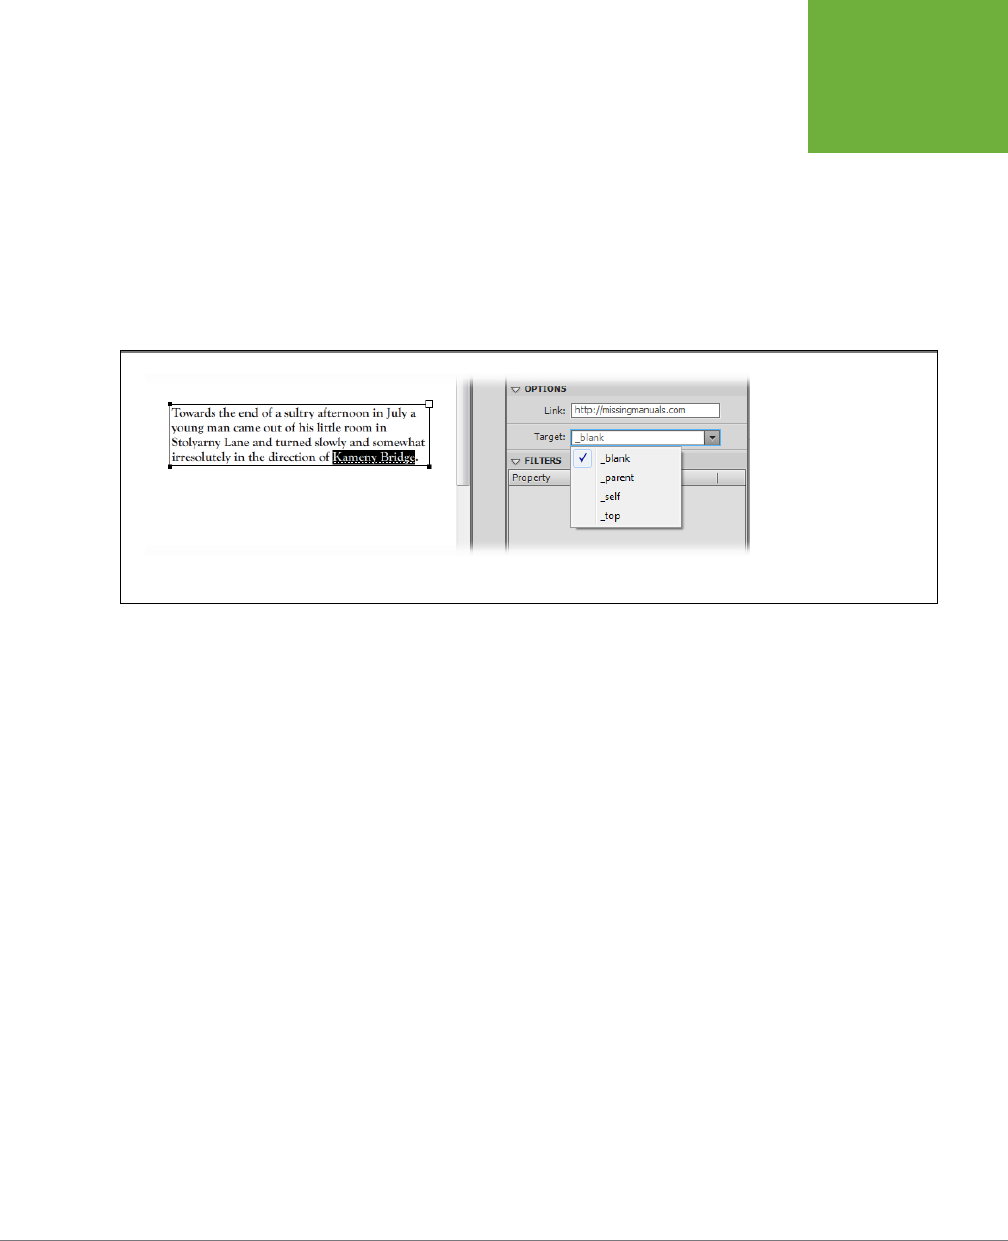
CHAPTER 6: CHOOSING AND FORMATTING TEXT 227
ADDING TEXT
TO YOUR
DOCUMENT
Creating a Hyperlink Using Classic Text
Creating a link using Classic text is a little more convoluted than with TLF text.
As is often the case with Classic text, static text behaves one way and non-static
text (dynamic text and input text) behaves dierently. If you want to highlight a
couple of words inside a paragraph of text, you need to use static text, as shown in
Figure6-10. When you add a hyperlink to dynamic text, Flash applies a link to the
entire text field. You can get around this behavior by selecting the text and then, in
the Properties→Character panel, clicking the “Render text as HTML” button. (There’s
no text label for the button, which looks like HTML angle brackets: < >.)
FIGURE 6-10
If you want to add a
hyperlink to a couple
of words within a block
of text, you need to use
static text. With dynamic
or input text, you need to
use ActionScript to create
a link within HTML text, as
explained on page 601.
Here are the steps for applying a link to Classic static text:
1. With the Text tool, drag to select the words within the static text you want
to link.
If you prefer to navigate by keyboard, you can use the Shift and arrow keys to
select text, too—just as in a word processor.
2. In Properties→Options→Link, type the link details.
You need to include the path for the file, unless you’re certain that it’s going to
be in the same folder as the .swf file when the animation runs. A complete link
to a file on the Internet might look like this:
www.missingmanuals.com/cds/flashcs6mm/text_scram_finished.fla
3. If you want your link to open in a new browser window or tab, select
Properties→Options→
Target→_blank.
If you don’t change the target setting, the new page replaces your animation
in your audience’s browser. The other target settings let you open documents
in dierent sections of an HTML page using
frames
—a web design technique
that’s fallen out of fashion.
4. Highlight the hyperlinked text so your audience knows it’s a link.
If you want the linked words to be highlighted so your audience will know
they’re a link, you’ll have to do it yourself by changing the text color. Don’t be
www.it-ebooks.info
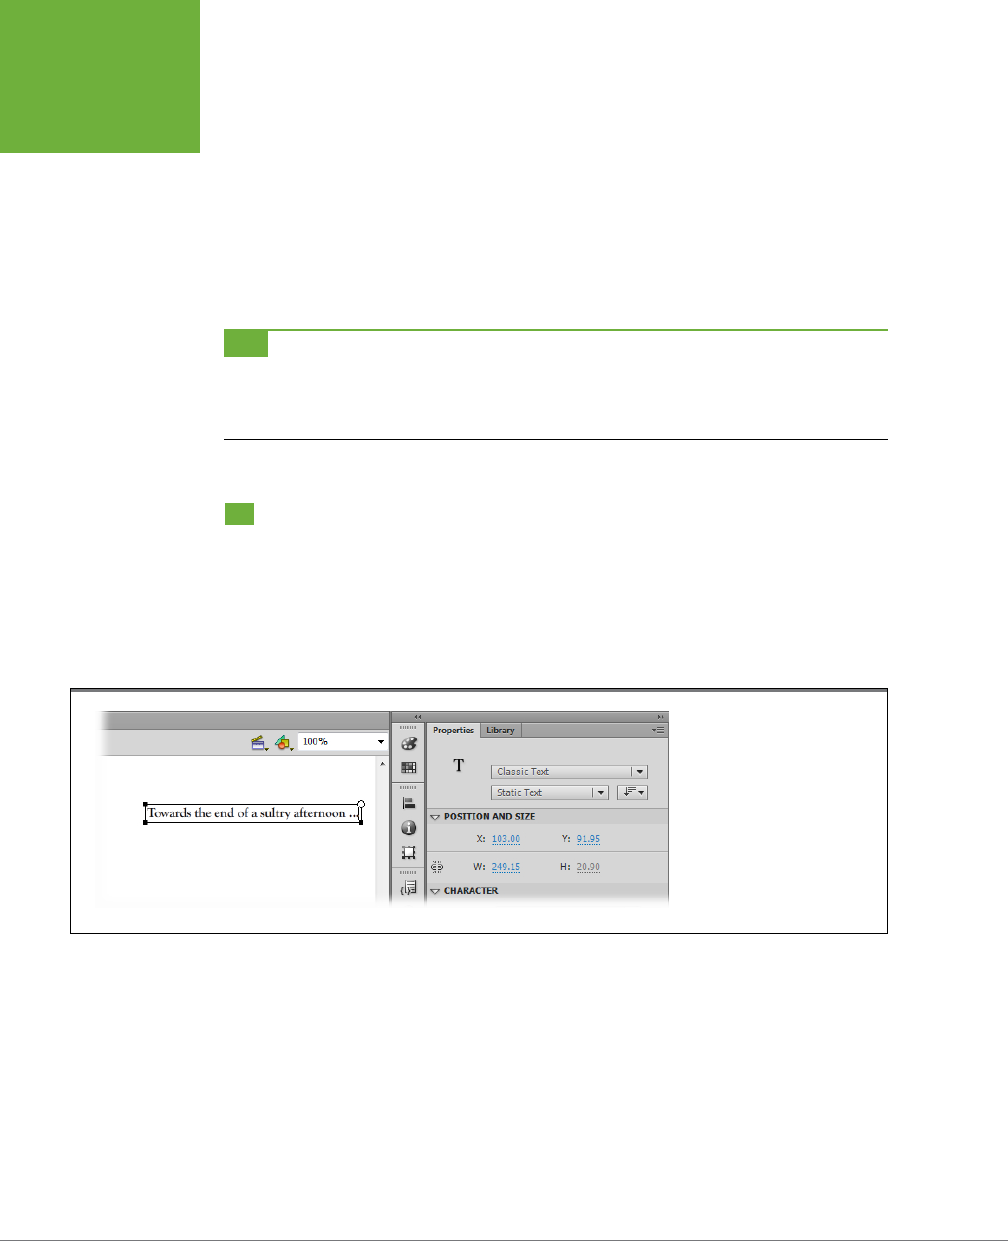
FLASH CS6: THE MISSING MANUAL
228
CHOOSING AND
USING TEXT
CONTAINERS
fooled; when you create a link, you see a line beneath the linked words in the
Flash authoring program, but when your animation runs in Flash Player, there’s
no line, no highlight, no indication that the words are linked. The only clue your
audience has that the words are linked is the changing cursor if they chance to
move the mouse over the words.
If you want to link an entire block of dynamic text, the technique is similar. You can
use the Selection tool (arrow) to select the text field, and then provide the link details
in the Properties→Options→Link box.
TIP You can create an email link—great for a “contact us” button. Instead of
http://
, type
mailto
:, and
thenaddyour email address to the end. For example, a complete address might look like this:
mailto:harry@
stutzmotors.com
. When your audience clicks the link, their email program of choice starts and creates an email
using that address in the link.
Choosing and Using Text Containers
At design time, when you click in a text field with the Text tool, you can select and edit
the existing text. You may also notice that the handles around the text box change.
One of the handles on the right or bottom of the text box appears larger than the
rest, as shown in Figure 6-11. This handle always provides some helpful information
about the text box’s characteristics and behavior.
FIGURE 6-11
The handles on a text box pro-
vide details about the type of
text field and the way it’s sized.
The hollow, round handle in the
upper-right corner of this text
field shows that it’s static text
that expands with the box.
Here’s your secret text field handle decoder ring for horizontal text:
• Handle at upper right means it’s Classic static text.
• Handle at lower right means it’s Classic dynamic or input text.
• Hollow circle means the text field expands as text is added.
www.it-ebooks.info
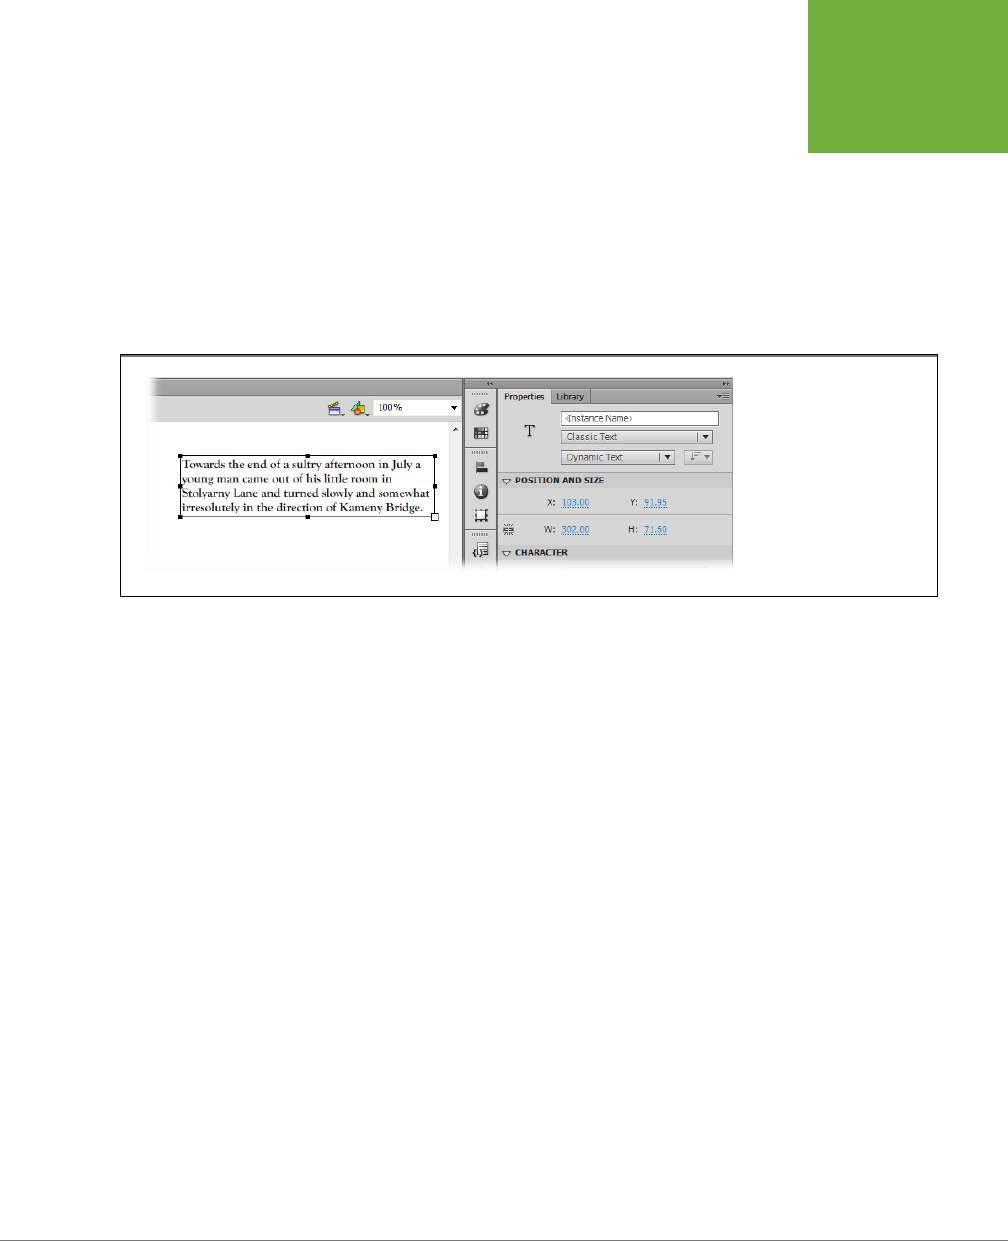
CHAPTER 6: CHOOSING AND FORMATTING TEXT 229
CHOOSING AND
USING TEXT
CONTAINERS
• Hollow square indicates that the text has a fixed width (as shown in Figure 6-12).
• Solid square means the dynamic text is scrollable.
The codes for vertical text are similar, except that the handle providing information
is always at the bottom of the text box. It appears at bottom left for static text and
at bottom right for dynamic and input text.
When you click inside a TLF text container, it displays square handles on the left
and right side. As described on page 232, you use these handles to flow text from
one container to another.
FIGURE 6-12
The handle shown in the
lower-right corner of this
text box indicates that this
dynamic text has a fixed
width.
Creating Vertical Text Containers
You can change the orientation of TLF text and Classic static text using the Properties
panel. As shown in Figure 6-13, the “Change orientation of text” menu is at the top,
next to the Text type menu. Your choices are “Horizontal,” “Vertical,” and “Vertical,
left to right.” You edit text that’s been turned with the orientation options as with
any other text. Choose the Text tool from the Tools panel, and click the text field. It
may take a moment or two for you to get your bearings if you’re not used to work-
ing with vertical text. But you’ll soon find it’s easy to drag to select text. The arrow
keys help you navigate back and forth. When you type, text appears vertically and
follows the paragraph’s orientation properties.
When you use TLF text, you can rotate characters within the lines of text. This tech-
nique is handy if you want, for example, to create vertical text like the neon signs
that attach to the sides of buildings. Set the “Change orientation of text” menu to
Vertical, and then change the Rotation to 270 degrees, as shown in Figure 6-14.
Multiline and Single-Line Text Containers
In Flash, text containers are either multiline or single line. Multiline containers are
great for big paragraphs of text, while single-line containers work well for headlines,
labels, and input text.
When you’re working with TLF text, go to Properties→“Container and Flow”→Behavior.
The menu gives you these choices: “Single line,” “Multiline,” “Multiline no wrap,” and
“Password.” The available options depend on the text type. For example, Password
www.it-ebooks.info
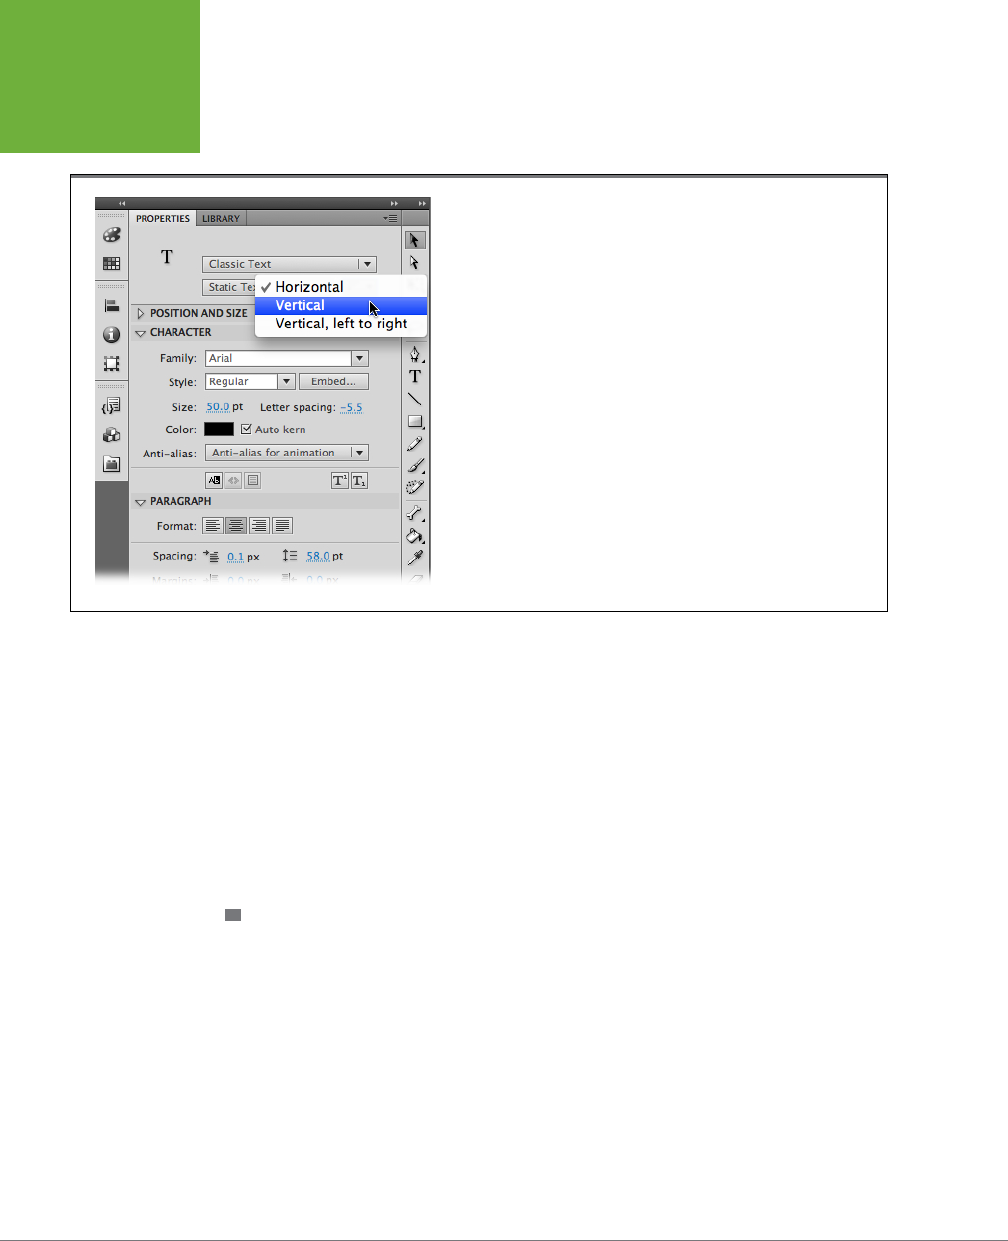
FLASH CS6: THE MISSING MANUAL
230
CHOOSING AND
USING TEXT
CONTAINERS
is available only with editable text. You use it to conceal the characters someone
types into a password box.
FIGURE 6-13
Use the “Change orientation of text” menu to create vertical text. Then, use
the Rotate button to change the direction the vertical text points.
When you’re working with Classic text, you have similar options, but the Properties
panel tools are slightly dierent. With Classic static text, you create multiline text
boxes by pressing Enter (Return). If you’re using dynamic or input text, you find the
single-line and multiline options in the Paragraph subpanel.
Applying Advanced Formatting to Text
Typographers and art directors are as particular about text as winemakers are about
wine. With Adobe, the Ministry of Fonts, as its publisher, Flash has lots of tools to
keep type connoisseurs smiling. You can delve into these features if you like, but
right out of the box, Flash has some pretty good settings:
TLF TEXT TYPOGRAPHY
• Tracking (Properties→Character→
Tracking). Tracking determines how much
space surrounds individual letters. In most cases, you can leave the tracking at
zero for the best readability. Enter a negative number for tighter tracking, where
letters can bump up against one another or even overlap. A positive number
creates larger spaces between letters, a style sometimes used for logos and
other artsy eects.
• Auto kern (Properties→Character→“Auto kern”). Kerning also aects the
space between characters, but its purpose is dierent. Some letters, like A
and V, look better when they’re tucked a little closer together, to eliminate
the awkward gaps that are especially noticeable at larger type sizes. Flash’s
www.it-ebooks.info
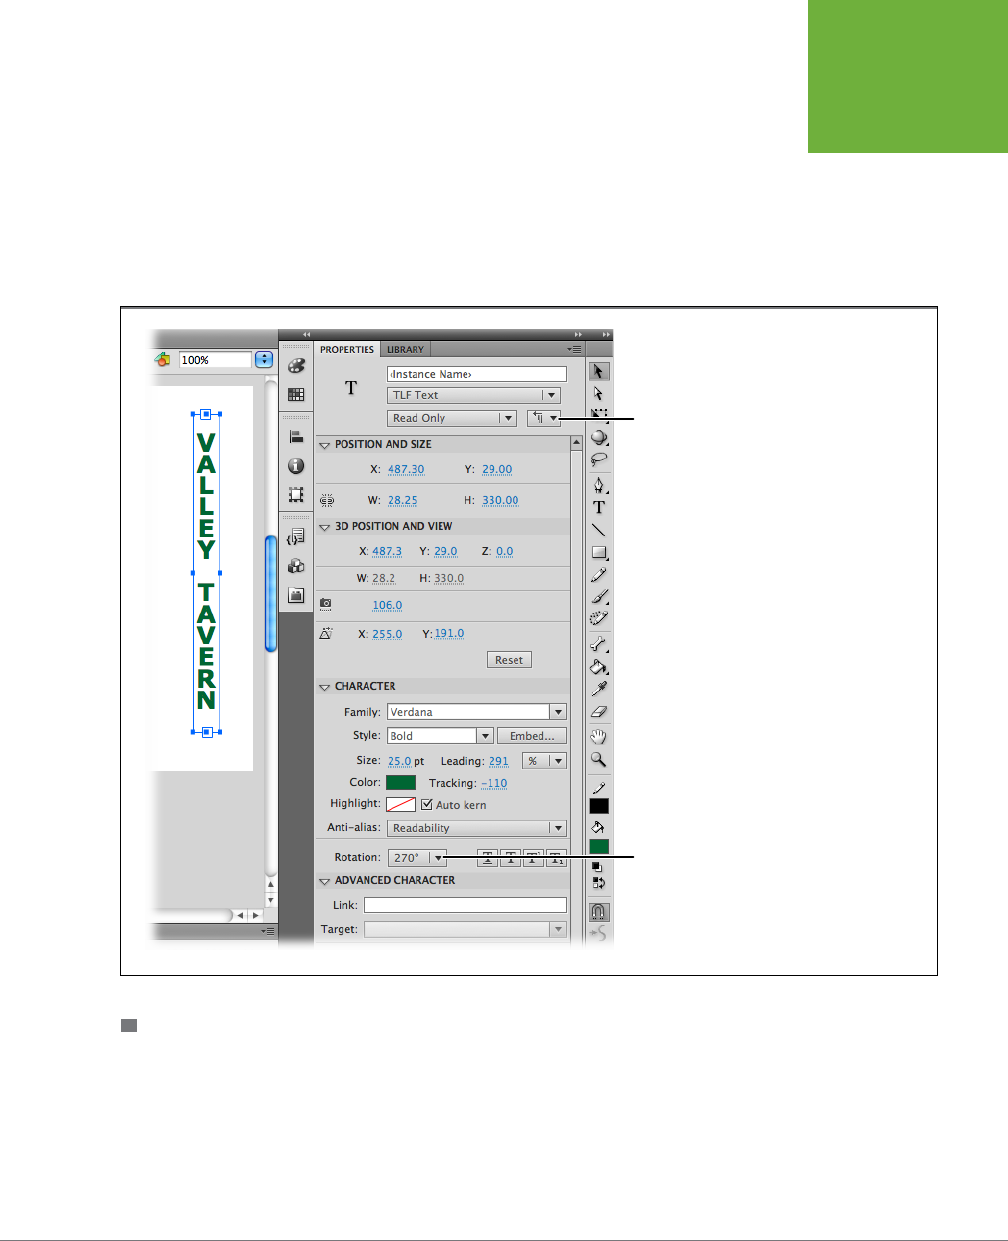
CHAPTER 6: CHOOSING AND FORMATTING TEXT 231
CHOOSING AND
USING TEXT
CONTAINERS
Auto-kern feature is on when you first begin using Flash. If you want to turn it
o, turn o the “Auto kern” checkbox.
• Leading (Properties→Character→Leading). Back in the days of metal type,
printers called the space between lines
leading
, because they actually used lead
slugs to set the space. The name is still used to set the space between lines.
With TLF text, you can set the leading as a percentage of the line height or as
a specific point size.
FIGURE 6-14
You can change your text’s
orientation, and you can rotate
the characters within lines of text.
Here the orientation is changed to
vertical and the rotation is set at
270 degrees.
Change
orientation
of text
Rotation
CLASSIC TEXT TYPOGRAPHY
• Letter spacing (Properties→Character→Letter spacing). Works the same as
TLF text tracking.
• Auto kern (Properties→Character→Auto kern). Works the same as TLF auto
kern.
• Line spacing (Properties→Paragraph→Line Spacing). Works the same as
TLF leading.
www.it-ebooks.info
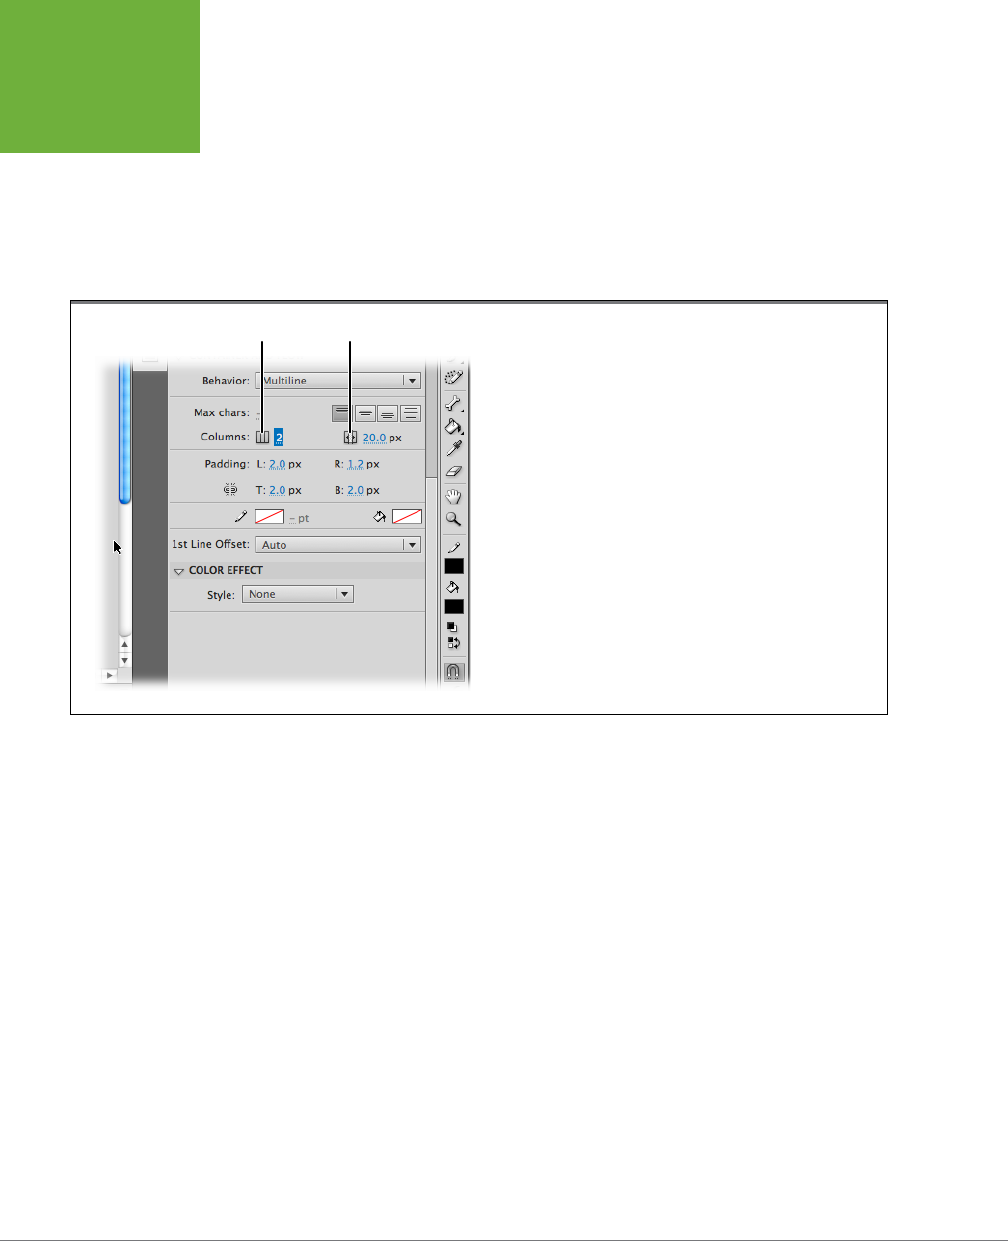
FLASH CS6: THE MISSING MANUAL
232
CHOOSING AND
USING TEXT
CONTAINERS
Create a Multicolumn Text Container
Before Adobe developed TLF text, you created multiple newspaper-style columns
of text by creating multiple containers and carefully putting the right amount of
text in each container. With TLF text, you can create up to 10 columns of text in any
container. Simply go to Properties→“Container and Flow” and type a number from 1
to 10 for the Columns setting, as shown in Figure 6-15. Then use the box at the right
to specify the distance between columns.
FIGURE 6-15
With TLF text, you can create up to 10 columns in a text container. Use
the box to the right to specify the gutter width—that is, the distance
between columns.
Columns Gutter width
Flow Text from One Container to Another
Another TLF text specialty is making text flow from one container to another. If you
know your text is always going to be seen at the same size or with the same typeface,
you might not worry about automatically flowing text. However, if you give your
audience the option to change the text size or font, the text may need more or less
space. That’s when automatically flowing text comes in handy.
The following steps demonstrate how flowing text works:
1. Using TLF text, create two text boxes on the stage.
You can use any text type: read only, selectable, or editable.
2. Copy and paste several paragraphs of text.
You can type directly into the text boxes, but it’s faster to copy and paste text
from a letter or other document.
3. In the lower-right corner of the first text container, click the red square.
The cursor changes—it looks like it has a paragraph of text attached.
www.it-ebooks.info
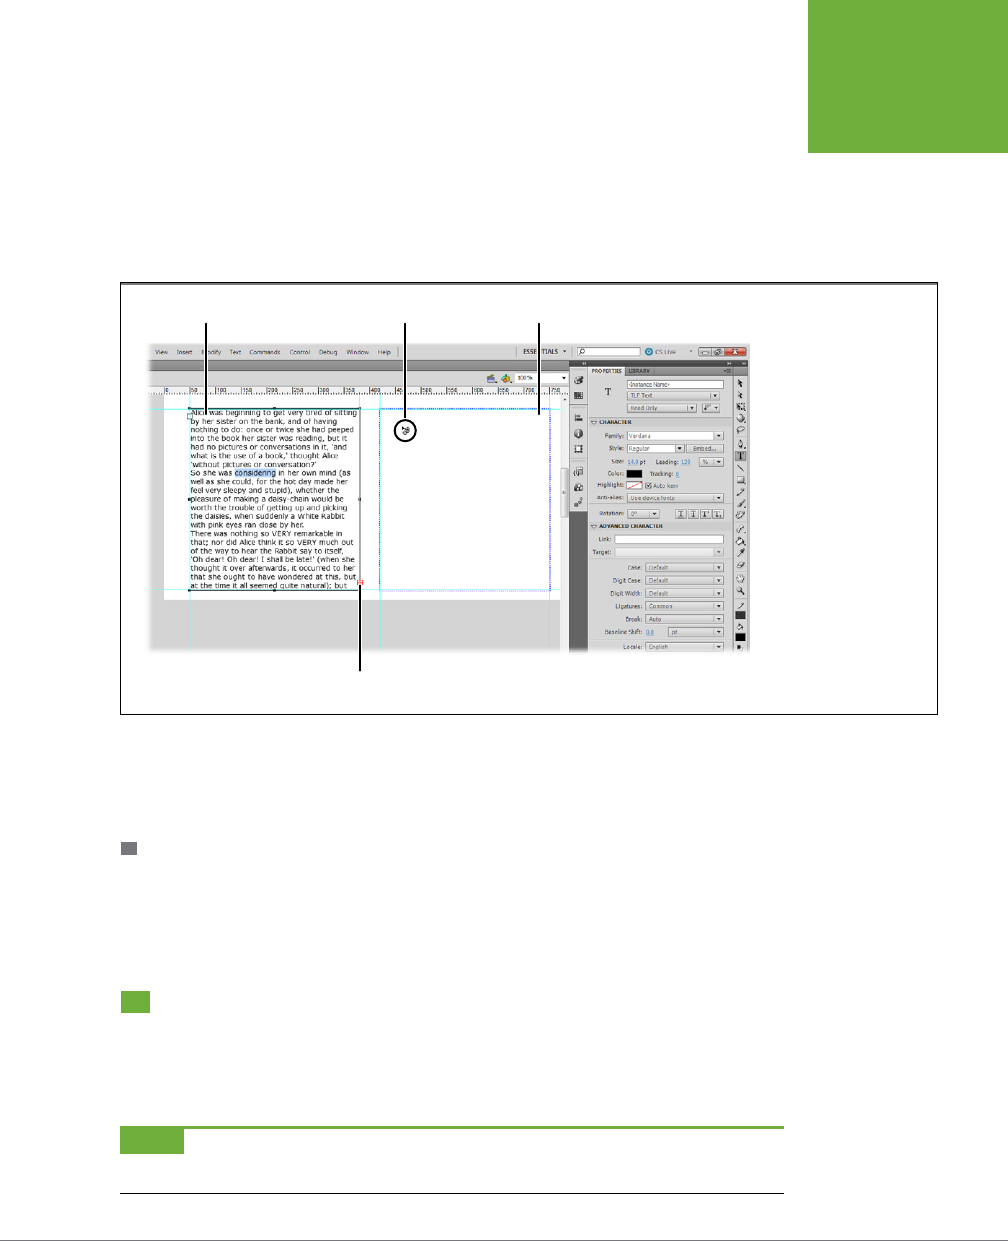
CHAPTER 6: CHOOSING AND FORMATTING TEXT 233
ANIMATING
TEXT WITHOUT
ACTIONSCRIPT
4. Move the cursor over the second text container.
When the cursor is over an empty text container, it changes to a chain link.
5. Click in the second container.
Text flows automatically from the first container to the second, as shown in Figure
6-16. A blue line connects the two text boxes, indicating how the text flows.
FIGURE 6-16
Here there are two TLF
text fields on the stage.
You can create a link so
that text flows automati-
cally from one field to the
other. Click the red square
in the lower-right corner
of the first text field and
then move the cursor over
the second. Click when
the cursor shows a link
icon (circled).
Text Link cursor
Click to link text fields
Second text fieldFirst text field
Not only does any extra text fill the second container, but it also makes automatic
adjustments if you change the size of the text containers or change the type speci-
fications.
DISCONNECT FLOWING TEXT
Sooner or later, you’ll want to break the link between two text containers. To do
that, just double-click the text flow button in either container where the connecting
line meets the box.
Animating Text Without ActionScript
You can animate text using the usual Flash tools, or you can use ActionScript. Which
technique you choose depends on your own skills and inclinations. This section
explains how to create some interesting animation eects for text using only Flash.
NOTE If you’d like to see the finished animation before you begin, you can download
06-1_Text_Scram.fla
from
www.missingmanuals.com/cds/flashcs6mm
.
www.it-ebooks.info

FLASH CS6: THE MISSING MANUAL
234
ANIMATING
TEXT WITHOUT
ACTIONSCRIPT
The following steps show you how to make text move using frames and Flash’s
Modify commands.
1. Select File→New→Flash File (ActionScript 3.0).
Make the document size 550 x 400 pixels, the frame rate 12 fps, and choose a
light-colored background.
2. Use the Text tool to create a line of Classic static text with a font size of about
36 in a darker color that complements the document background color.
You can use any word or phrase you want. “Make this text scram,” for example.
3. Click Frame 12 in the text layer, and then press F5 to insert a frame.
The text layer now has 12 frames. Equally important, when you create new lay-
ers, they’ll automatically be 12 frames long, saving you a click or two of work.
4. With the text selected, choose Modify→Break Apart.
The Break Apart command comes in very handy when you want to animate
text. It puts each letter in its own text field, which gives you an opportunity to
move the letters independently.
5. While the text is still selected, choose Modify→
Timeline→“Distribute to
Layers.”
Flash places each letter in its own layer in the timeline and thoughtfully names
each layer by the letter, saving you a lot of cut, paste, and layer creation work.
Layer 1 is empty at this point, and you can remove it if you want to tidy things up.
Click the layer, and then click the Delete icon (trash can) below the layer names.
6. Click the M layer (the capital M in “Make”), right-click the M layer in the
timeline, and then choose Create Motion Tween.
The 12 frames of the M layer take on the blue hue that indicates a motion tween.
7. Ctrl-click (⌘-click) Frame 12, and then drag the letter M o the right edge
of the stage.
Press the Shift key as you drag to create a perfectly straight motion path. The
letter M displays a motion path. If you scrub the playhead, you see that it moves
from the left side of the stage until it exits stage right.
8. With the letter M still selected and the playhead still at Frame 12, select
the Transform tool, and then scale the letter so it’s about five times its
original size.
If, after you resize it, part of the letter is still visible on the stage, pull it a little
more to the right.
TIP If you want to accurately resize the letter, use the Motion Editor to handle the scaling (Window→Motion
Editor→Transformation→Scale X). (Motion Editor details are on page 311.)
www.it-ebooks.info
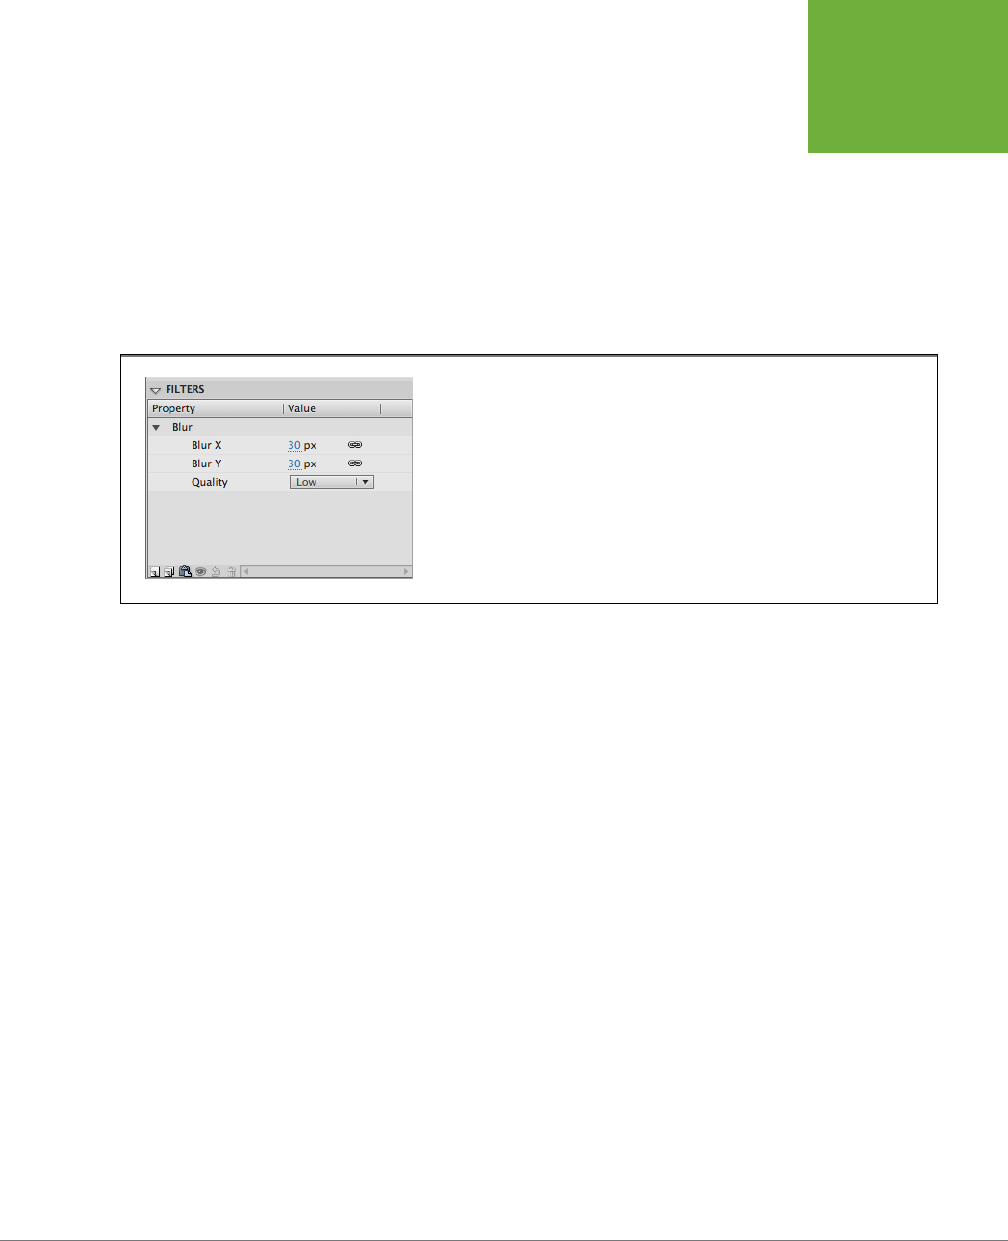
CHAPTER 6: CHOOSING AND FORMATTING TEXT 235
ANIMATING
TEXT WITHOUT
ACTIONSCRIPT
9. With the M still selected in Frame 12, open the Properties→Filters panel.
Click the small triangle next to the word “Filters” to open the panel. Initially
the panel is empty.
10. Click the “Add filter” button in the lower-left corner, and then choose Blur
from the pop-up menu.
The menu lists all the filters you can apply to the selected object—in this case,
the oversized letter M. When you click Blur, the properties for the filter appear
in the Filter panel, as shown in Figure 6-17.
FIGURE 6-17
You apply filters to selected objects. Each filter has different properties. Here the Blur
filter shows three different properties to control the direction and the quality of the
blurring effect.
11. Click the Blur X setting and type
30
.
Doing so changes both the Blur X and Blur Y settings, which initially are linked
together. Sometimes you can create a better speeding blur eect by limiting
the blur to one axis. If you want to unlink one of the settings, click the link icon
to the right of the setting; the icon changes to a broken link. Then you can enter
a separate value for each property.
12. Move the playhead to Frame 1, and then with the letter M selected, type
0
in the Blur X and Blur Y filter settings.
You need to re-select the letter M after scrubbing the Playhead. Setting the Blur
filter in Frame 12 also aects the letter in Frame 1. Setting Blur X and Blur Y to
0 creates a nice, sharp letter again.
13. Move the playhead to Frame 6, and with the letter M still selected, type
0
in the Blur X and Blur Y filter settings.
As explained on page 107, you can change just about any property, at any
point, along a motion path. In this case, you’re changing the Blur filter so that
the letter stays focused for the first part of its trip and then becomes blurry as
it leaves the stage.
You’re done with the motion tween eect. If you test your animation at this point
(Ctrl+Enter or ⌘-Return), you see the letter M move from left to right, becoming
larger and blurry as it makes its journey, as shown in Figure 6-18. In the next steps,
you’ll copy the motion tween from the letter M and paste that motion into the layers
www.it-ebooks.info
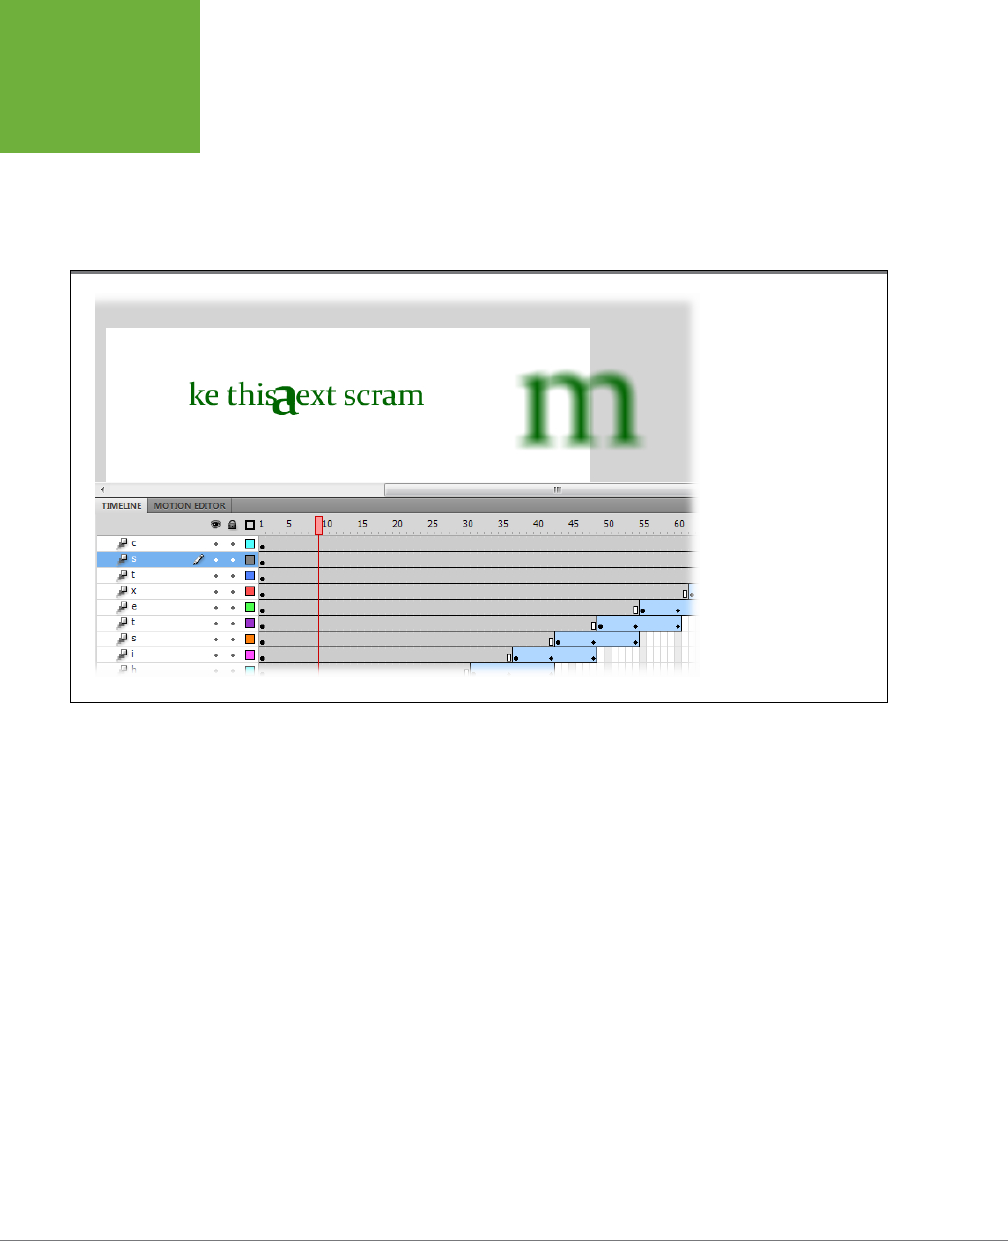
FLASH CS6: THE MISSING MANUAL
236
ANIMATING
TEXT WITHOUT
ACTIONSCRIPT
with the other letters. (Admit it—you were worried you were going to have to create
all those tweens by hand.)
1. Right-click the motion tween in the M layer, and then choose Copy Motion.
Flash stores a copy of the tween on the Clipboard. It includes that carefully
constructed motion and all its property changes.
FIGURE 6-18
In this animation, each
letter peels off and moves
to the right. As the letters
move, they grow and
become blurry.
2. Click the first frame of the “a” layer, and then Shift-click the first frame of
the “m” layer in the word “scram.”
The first frame of each layer (except for M in the word “Make”) is selected.
3. Right-click one of the selected frames, and then choose Paste Motion from
the shortcut menu.
Flash pastes the tween into the each of the selected layers. Obediently, the
letters now follow the same motion, scale, and blurring changes as dictated
by the tween.
4. Press Ctrl+Enter (⌘-Return) to test your animation.
The letters rush o the right side of the stage in a large blurry clump. Kinda
cool, but your audience will appreciate the eect even more if the letters peel
o one by one across the stage. You can do that by staggering the frames on
each layer, as detailed in the next steps.
5. In the “a” layer, click the motion tween, and then drag all 12 of the selected
frames down the timeline a distance of six frames.
www.it-ebooks.info
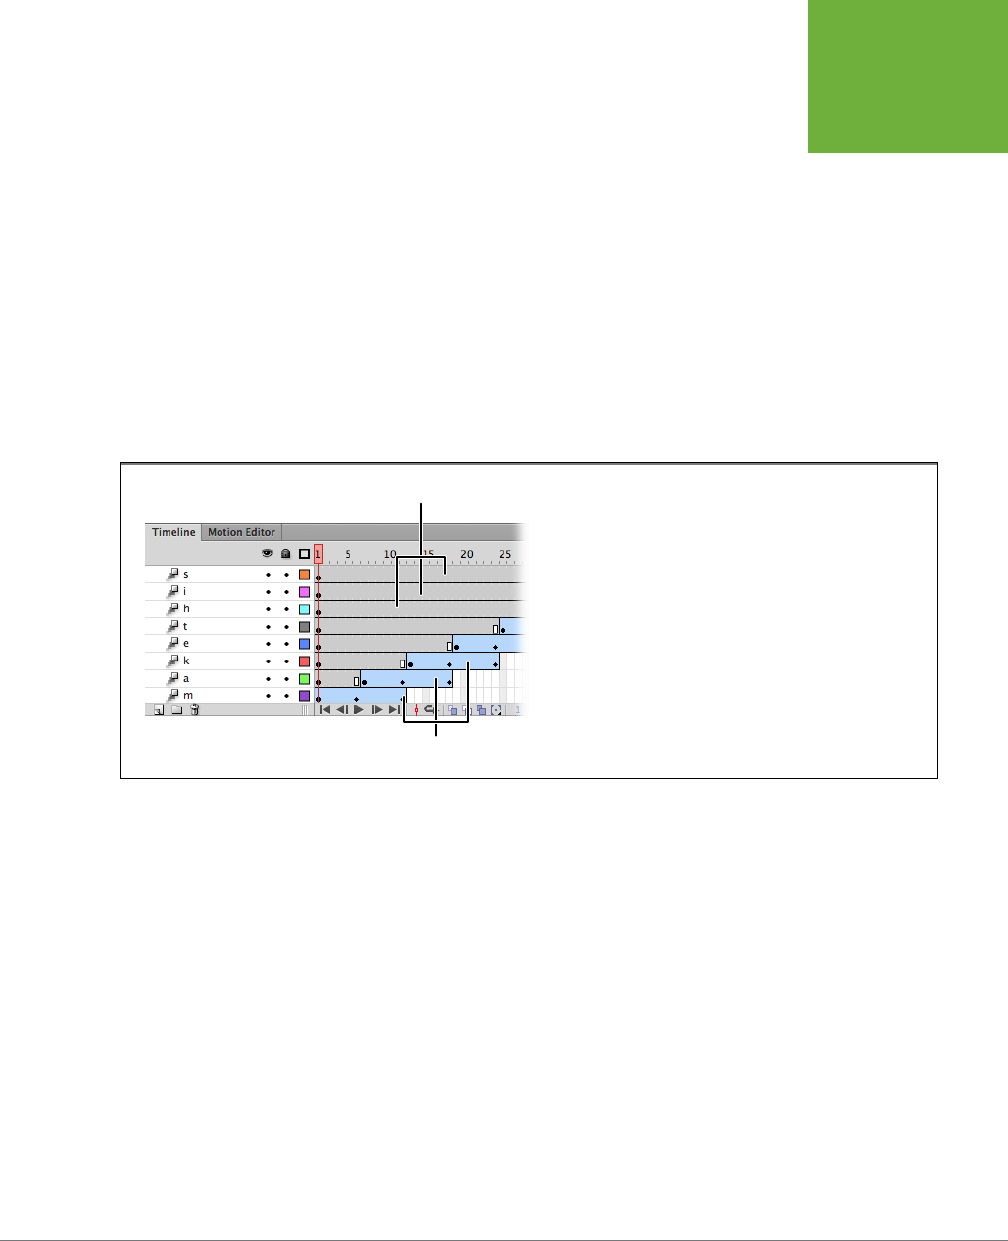
CHAPTER 6: CHOOSING AND FORMATTING TEXT 237
ANIMATING
TEXT WITHOUT
ACTIONSCRIPT
The motion tween for “a” begins its action on Frame 7. This creates about a
half-second gap between the time when the M starts moving and when the “a”
starts moving. After the move, there are six blank frames at the beginning of
the “a” layer.
6. Select the letter “a” in Frame 7, and then paste it into Frame 1 using Edit→
“Paste in Place” (Ctrl+Shift+V or ⌘-Shift-V).
After you move the tween, you need to put a copy of each letter back in the
first frame of the animation. Using “Paste in Place” displays the letter in the
right position in the frames before the tween takes eect.
7. Repeat steps 18 and 19 to create a six-frame oset between each of the
letters.
When you’re done, the timeline looks something like Figure 6-19.
FIGURE 6-19
Staggering the tween action in the timeline creates an interesting
effect as the letters make their move, one after the other.
Tweens
Static frames
Experimenting with Animated Text
Applying motion tweens to text can really capture your audience’s attention. It works
great for headlines, intros, and transitions, but like anything else, it’s possible to have
too much of a good thing. No one likes to wait these days, so be careful not to strain
your audience’s patience. That said, you can pack more eects into the previous
animation without making it run longer. You can add other moving objects to the
animation, like more text or shapes. If you turn each of the letters into a movie clip,
you can take advantage of Flash’s 3-D capabilities. Then your tweens can twist and
flip the letters as they move through three-dimensional space. Experiment—let your
imagination run wild! If you’re looking for inspiration, study the techniques used by
some of the network and cable news programs. They love to use moving text and
other visuals to make the news seem more exciting than it really is.
Store the techniques that work in your Flash toolkit and remember the lessons you
learn from the ones that flop. As with any craft, you’re likely to learn as much from
your mistakes as from your successes.
www.it-ebooks.info

FLASH CS6: THE MISSING MANUAL
238
ANIMATING
TEXT WITHOUT
ACTIONSCRIPT
Moving Text in Three Dimensions
Want to make a block of text spin in the air or float o into the distance the way it
does at the beginning of
Star Wars
movies? You can perform those feats of typo-
graphic magic with TLF text and the “3D Position” and View subpanels.
To create a spinning block of text, follow these steps:
1. Click the Text tool, and then in the Properties panel, choose TLF Text and
Read Only.
Read-only text works best here, because you wouldn’t want your audience to
select or edit spinning text. It would make them dizzy.
2. Click the stage and add text to the text container.
You can type in your own text or copy and paste it from some other source.
3. Click Frame 48 in the timeline, and then press F5.
The timeline for your movie is now 48 frames long.
4. Right-click the timeline, and then choose Create Motion Tween.
In the timeline, the frames show the light-blue highlight that indicates a motion
tween.
5. Move the playhead to the last frame in the tween.
That should be Frame 48.
6. Select the 3D Rotation tool (W), and then click the text box.
The 3D Rotation sphere appears on top of the text box.
7. Drag one of the sphere axes to rotate the text.
For complete details on the 3D Rotation tool, see page 222. If you want to
rotate the text with more precision, check out page 311, which explains how to
use the Motion Editor.
8. Press Enter to preview your animated text.
For the most part, you can manipulate TLF text just as you would a movie clip symbol.
That gives you lots of opportunities for spinning, distorting, and changing colors. As
shown in the previous steps, you use the 3D Rotation tool (W) to spin text around
a single point. If you want to move text forward or backward in 3-D space, use the
3D Translation tool (G). If you’re up for a challenge, try creating an animated
Star
Wars
–style block of text like the one shown in Figure 6-20. Here are some tips to
help you complete the project:
• Create a TLF text container.
• Use the 3D Rotation tool to spin the text so it’s leaning backward.
• Create a motion tween.
www.it-ebooks.info
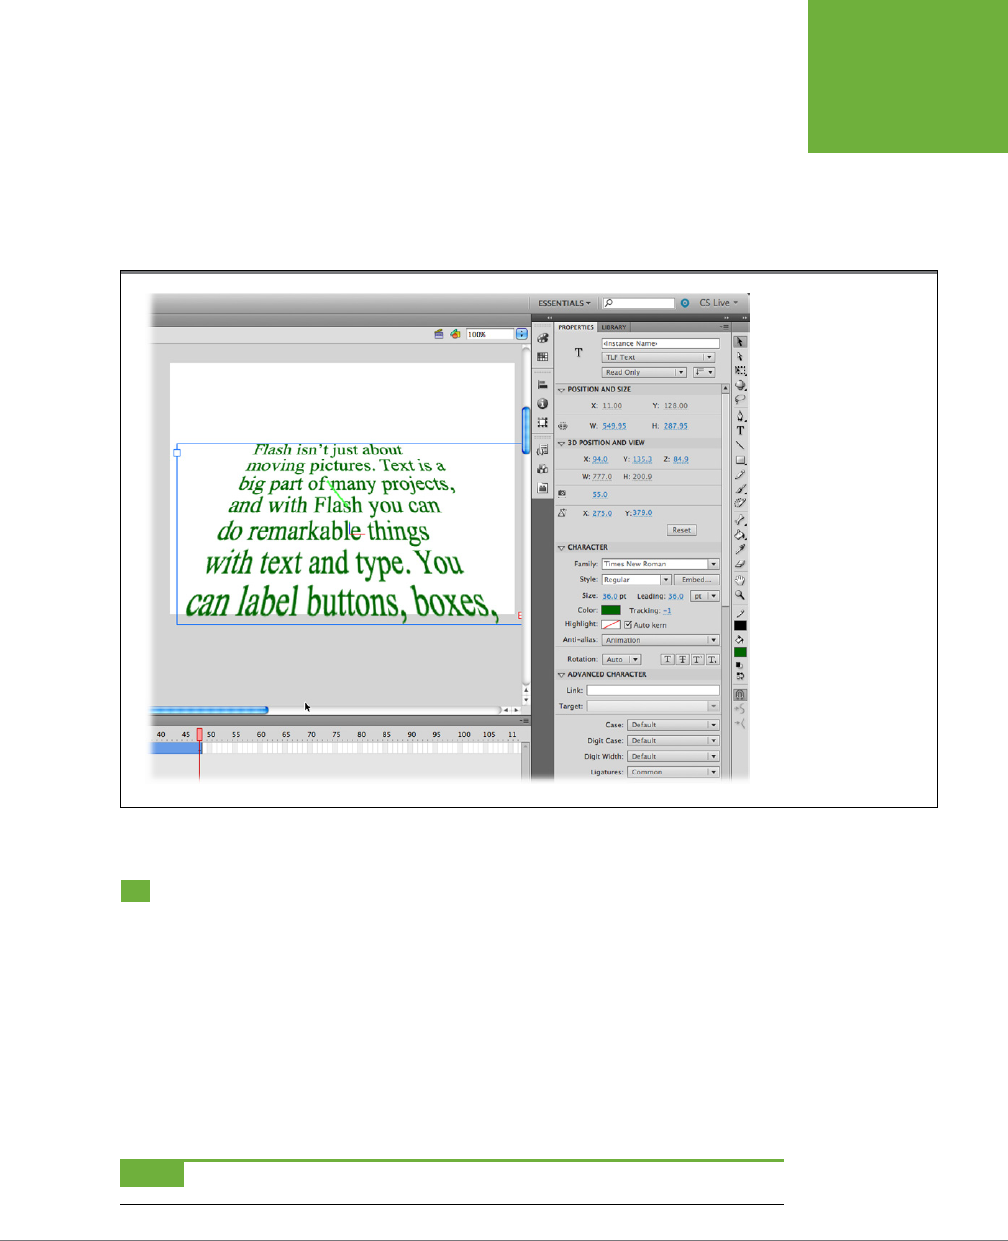
CHAPTER 6: CHOOSING AND FORMATTING TEXT 239
TEXT
PROPERTIES BY
SUBPANEL
• Use 3D Position Vanishing Point X and Vanishing Point Y settings to adjust the
vanishing point for your animation.
• Use the Perspective Angle setting to adjust the text angle.
• Create property keyframes and change the “3D Position and View”→Z property
to move the text block away from the audience.
FIGURE 6-20
Using TLF text and the “3D
Position and View” set-
tings, you can create text
in space that looks similar
to a popular science
fiction epic.
Text Properties by Subpanel
So far, this chapter has only scratched the surface when it comes to tweaking type.
Printers, graphic artists, and typographers have dozens of methods for arranging
and positioning type—and, with TLF text, so do you. These settings determine the
space between individual letters, between words, and between lines and paragraphs.
There are settings to set margins and to justify or center text. The possibilities may
boggle your mind if you’re not up to speed with printing jargon. And the fact is, you
may never use some of the text tools provided in Flash. Still when you need them,
it’s helpful to know where the tools are, so here’s a subpanel-by-subpanel descrip-
tion of the text properties.
NOTE Keep in mind, some properties are available to only a specific text engine or text type.
www.it-ebooks.info

FLASH CS6: THE MISSING MANUAL
240
TEXT
PROPERTIES BY
SUBPANEL
Text Engine Properties
As explained on page 216, the top of the Text Properties panel has menus for choos-
ing the text engine (TLF Text or Classic Text) and the text type (Figure 6-21). For
every text type except Classic static text, there’s an Instance Name box. Give your
text an instance name, and then you can refer to it in ActionScript code. This gives
you the opportunity to change text properties as your Flash animation runs. In the
lower-right corner, use the “Change orientation of text” box to change the direc-
tion the text flows when you’re working with dierent languages. This option is not
available for Classic dynamic text or Classic input text.
FIGURE 6-21
Menus to choose the text engine and text type appear at the top of the Properties panel
after you select the Text tool.
Position and Size
For Classic text, you use standard X and Y coordinates to position text on the stage.
(For TLF text, use the “3D Position and View” subpanel.) The upper-left corner of
the text box is the registration point (page 253). The W and H properties set the
width and height of the text block. Use the chain link to lock the values and maintain
proportions. Changing the width and height doesn’t change the font size specifica-
tion; it distorts the text.
3D Position and View (TLF Text Only)
With TLF text, you can control the position of your text blocks in three dimensions.
Use the “3D Position and View” subpanel (Figure 6-22), where you find controls
similar to those used with movie clip symbols. The X and Y properties represent
horizontal and vertical positioning. Use the Z property to move the text block to-
ward or away from your audience. As you use the 3D Rotation tool (W) to make
text blocks spin around, you automatically change the “3D Position and View’s”
W and H settings. The Perspective Angle setting (camera) changes the apparent
angle of the view. The Vanishing Point (X and Y) settings control the orientation of
the Z axis by relocating the vanishing point (the point where parallel lines appear
to merge in the distance).
Character
Use the Character subpanel (Figure 6-23) for the standard type specifications:
Family (font), Style, Size, and Color. With TLF text, you also have the option to set
the highlight (background) color. Leading sets the space between lines of text. Track-
ing sets the distance between individual characters (or
glyphs
, as the typographers
www.it-ebooks.info
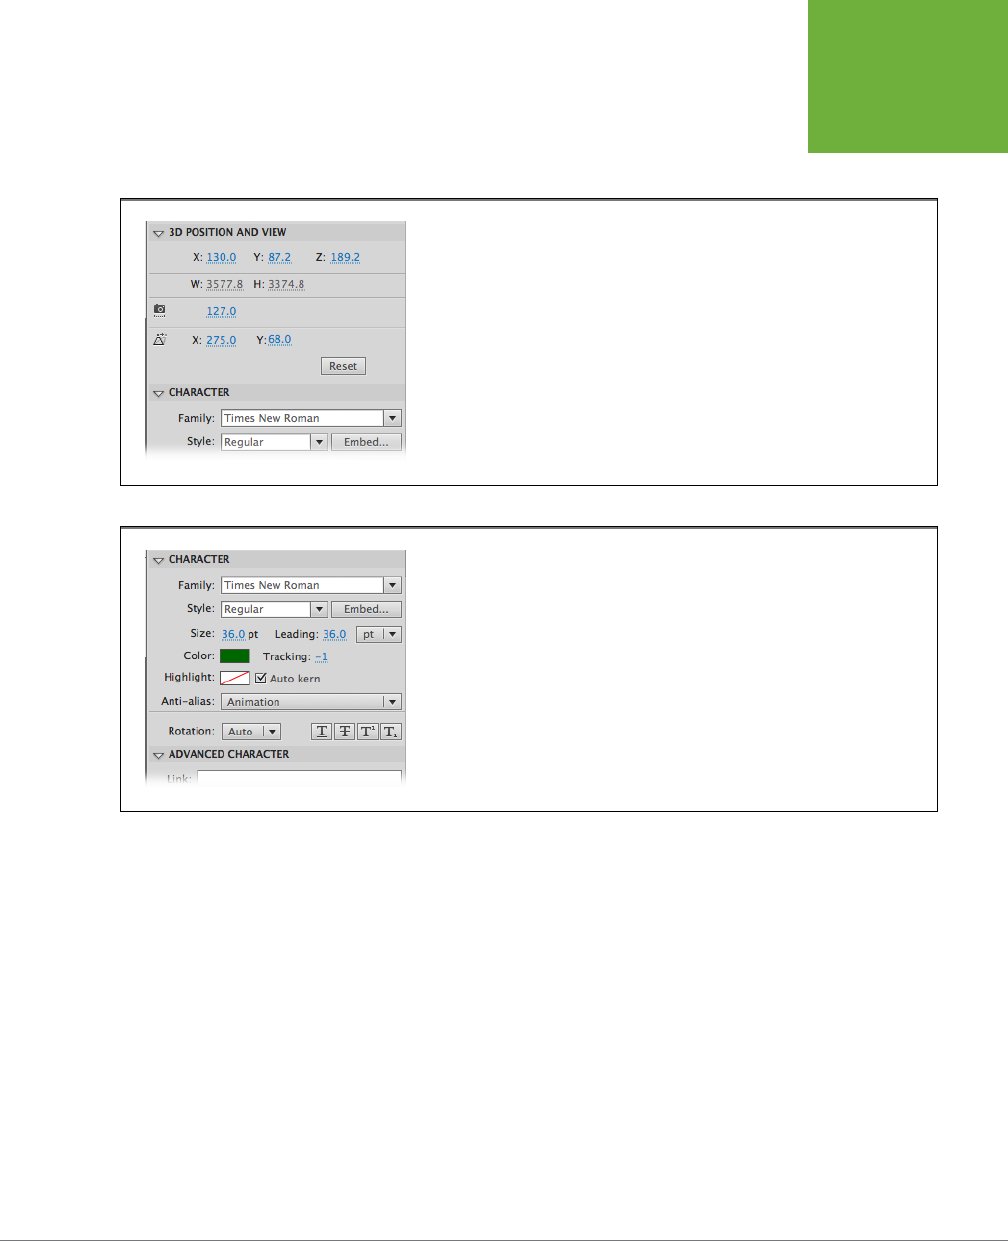
CHAPTER 6: CHOOSING AND FORMATTING TEXT 241
TEXT
PROPERTIES BY
SUBPANEL
say). Turn on the “Auto kern” checkbox to have Flash automatically adjust the space
between certain characters. For example, in some cases auto-kerning pushes the
letters A and V closer together to avoid an unsightly gap.
FIGURE 6-22
For TLF text, use the “3D Position and View” settings to display your text with 3-D effects.
FIGURE 6-23
Many of the settings on the Character subpanel are shared for both text engines and all
types of text. Here you can choose a font family, text size, color, and style.
The
Anti-alias
settings require a little explanation. It’s not always easy to make type
look good on a computer screen, especially when displaying a complex typeface
at a small size. Anti-aliasing is one of those fool-the-eye tricks used to make small
type look less jagged. Flash gives you a few options depending on the text type
you’ve selected:
• Device fonts. This option uses the fonts installed on the computer where the
Flash animation is viewed. Usually, these fonts will be readable at most sizes.
• Bitmap text [no anti-alias] (Classic text only). This option turns o anti-aliasing
because the fonts are converted to bitmap images. This increases the size of
the Flash file, and the text may appear jagged when it is resized.
• Anti-alias for animation (called Animation for TLF text). As the name implies,
this option is good for text that you want to reposition and resize on the fly.
www.it-ebooks.info

FLASH CS6: THE MISSING MANUAL
242
TEXT
PROPERTIES BY
SUBPANEL
Some typographic details, such as alignment and kerning, are ignored to create
smoother animation.
• Anti-alias for readability (called Readability for TLF text). The best option
for large blocks of small text. All the anti-aliasing tricks are used to make it
easier for your audience to read.
• Custom anti-alias (Classic text only). If you think you can do a better job than
Flash, you can use your own anti-alias settings, such as sharpness and smooth-
ness. Some additional text styles are available in the Character subpanel, such
as buttons that let you toggle superscript and subscript characters (like ™). As
usual, TLF text oers some extra features, like Underline and Strikethrough.
Using the Rotation menu, you can rotate characters within the text line. For
more details, see “Creating Vertical Text Containers” on page 229.
TLF text oers more advanced character options than Classic text. In fact, there are
enough new features that they get their own Advanced Character subpanel (see the
next section). The more modest Classic text features are placed in the Character
subpanel, where they’ve always been. They include these choices:
• Selectable. Click to let your audience select text at runtime. This option is
always on for input text.
• Render text as HTML (dynamic text and input text only). Tells Flash to inter-
pret any HTML code it encounters as dynamic text instead of just displaying it.
• Show Border Around Text (dynamic text and input text only). Select to place
a border around dynamic or input text to set it o from other text.
Advanced Character (TLF Text Only)
The Advanced Character options (Figure 6-24), which are available only with TLFtext,
change depending on the text type selected. The TLF text types include Read Only,
Selectable, and Editable. For example, settings used to create hyperlinks aren’t
available in editable text—it wouldn’t make sense.
The Link and Target options are used to create hyperlinks. Type a URL (like
http://www.missingmanuals.com
) to display text in your finished animation as a
clickable link. Target options are used, as they are in HTML, to tell the browser how
to open the linked web page:
_self
(the standard option) opens the page in the cur-
rent browser window;
_blank
opens the page in a new window;
_parent
opens the
page in the parent of the current frame; and
_top
opens the page in the top-level
frame of the current window.
The rest of the options in the Advanced Character panel are typographic features.
For example, use the Case options to change the text to uppercase, lowercase, or
small caps. The Digit Case options change the baseline positioning of numbers. Use
the Digit Width options to control the horizontal spacing of characters. This is useful
when you want numbers to line up vertically in columns. Printers sometimes use
special characters called
ligatures
in place of letter pairs, like œ and æ. You have a
www.it-ebooks.info
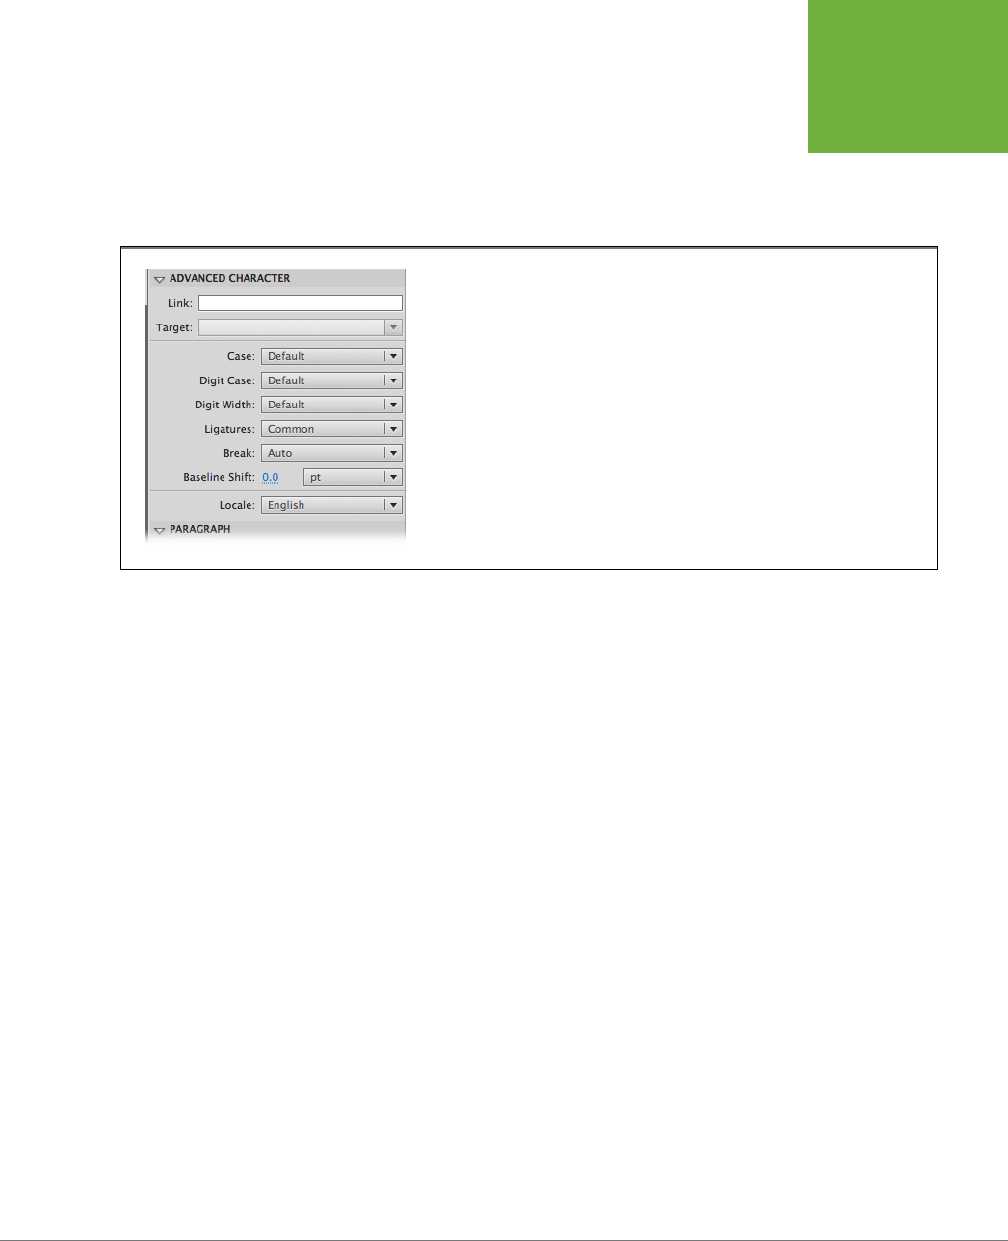
CHAPTER 6: CHOOSING AND FORMATTING TEXT 243
TEXT
PROPERTIES BY
SUBPANEL
few choices when it comes to ligatures: Minimum, Common, Uncommon, and Exotic.
Use Baseline Shift to change the vertical position of selected text. Positive numbers
move the text up above the natural baseline, while negative numbers move text
down. The Advanced Character Locale menu is used to choose dierent languages
and their dierent character sets.
FIGURE 6-24
The Advanced Character subpanel works exclusively with the TLF text engine. Using these
tools, you can create hypertext links and shape your text like a master printer.
Paragraph
For the most part, the Paragraph subpanel contains the usual suspects. Because
TLF text is designed to accommodate several dierent languages, the nomenclature
may seem a little unfamiliar. So, for English and other European languages, “Align
to start” lines up text on the left side, leaving the right side ragged. Other options
include “Align to center” and “Align to end,” which is ragged left and aligned to the
right side. There are four justify options, which force the text to fill the line, except for
the last line. The options are “Justify with last line aligned to start,” “Justify with last
line aligned to center,” “Justify with last line aligned to end,” and “Justify all lines.”
When you justify text, you can use the Text Justify menu to add spacing between
letters (letter spacing) or between words (word spacing).
Using the Paragraph properties, you can set the “Start margin,” “End margin,” and
“First line indent.” The two
Spacing
properties determine the space before and
after paragraphs.
Options (Classic Text Only)
The Options subpanel appears only when you’ve chosen the Classic text engine.
(These same hyperlink tools are available to TLF text in the Advanced Character
subpanel.) The
Link
and
Target
options are used to create hyperlinks. Type a URL
(like
http://www.missingmanuals.com
) to display text in your finished animation as
a clickable link. Target options are used, as they are in HTML, to tell the browser how
to open the linked web page: _self (the standard option) opens the page in the cur-
rent browser window; _blank opens the page in a new window; _parent opens the
www.it-ebooks.info
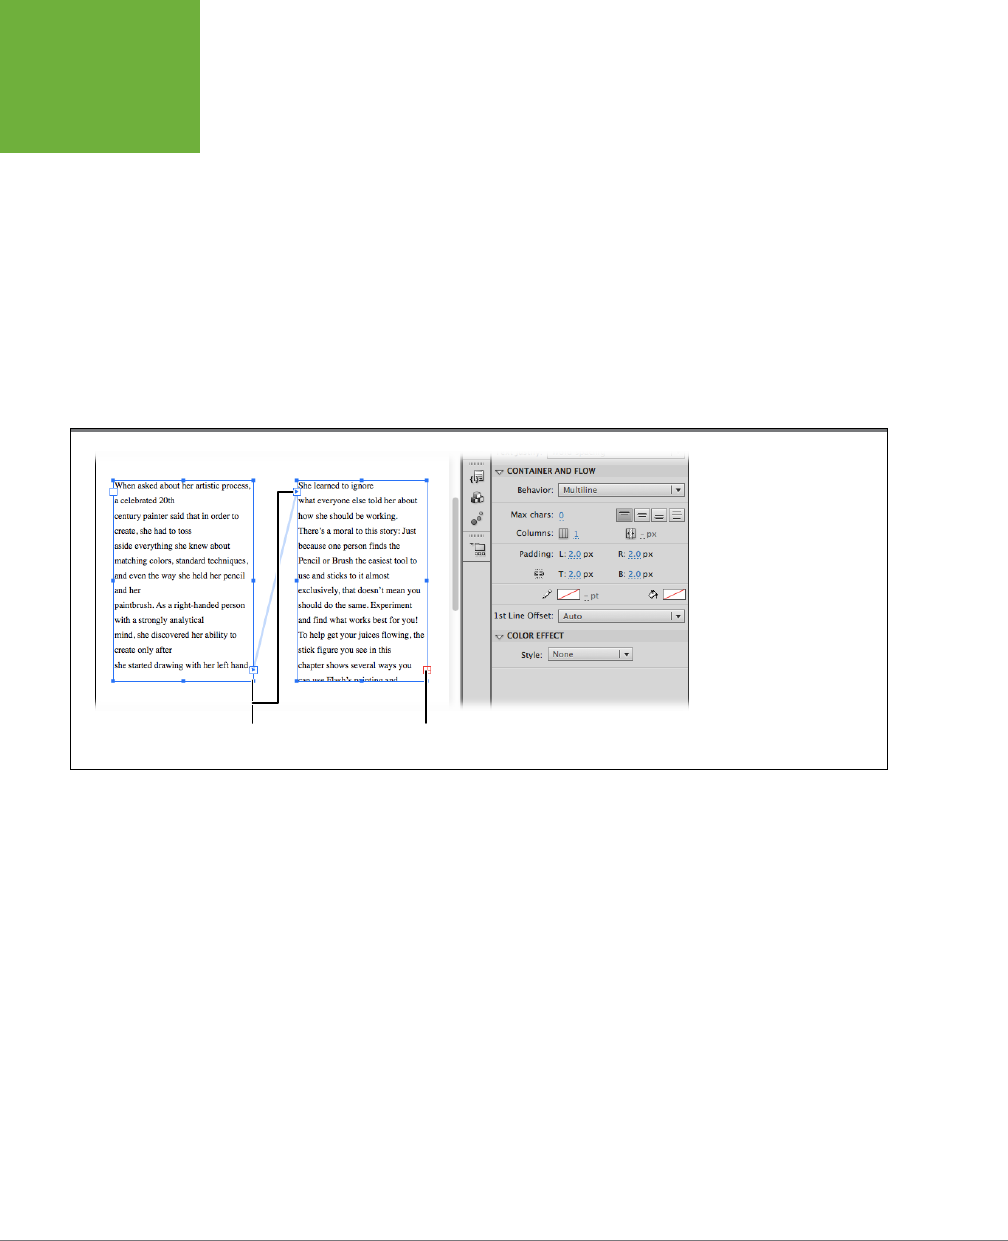
FLASH CS6: THE MISSING MANUAL
244
TEXT
PROPERTIES BY
SUBPANEL
page in the parent of the current frame; and _
top
opens the page in the top-level
frame of the current window.
Container and Flow (TLF Text Only)
The Container and Flow settings control some nifty new text features, such as the
ability to create multiple columns of text within a single container (text box) and the
ability to flow text from one container to another. Using the Behavior menu (Fig-
ure6-25), you can create text containers that are single-line, multiline, or “Customize
for Passwords.” (For details, see page 229.)
There are two color swatches at the bottom of the Container and Flow subpanel,
which you use to select the border and background colors for the text container. Use
the Padding settings to create space between text and the edge of the container.
FIGURE 6-25
The Container and Flow
subpanel, shown here,
controls several of the
advanced typographic
features that are available
when you use TLF text.
More text not shownText flow buttons
Color Eect (TLF Text Only)
The Color Eect subpanel appears when you choose TLF text. The settings here give
you control over the brightness, tint, and opacity of the text and the text container.
Choose the color eect you want to apply, and then use the sliders in the panel
to make your adjustments. As you’ll see in Chapter 17, you can control these same
features using ActionScript.
Display (TLF Text Only)
Use the Display subpanel to add and manage blends and other special eects.
Blends are created by overlapping images. Flash uses mathematical calculations to
create dierent eects with descriptive names like Darken, Lighten, Multiply, Dier-
ence, Add, Invert, Erase, and Alpha. The best way to get a handle on these special
eects is to use them. Create a shape or other graphic object with a color fill or a
pattern. Then create a text field over that shape. With the text container selected,
go to Properties→Display→Blending and choose an option such as Lighten, Screen,
or Erase.
www.it-ebooks.info

CHAPTER 6: CHOOSING AND FORMATTING TEXT 245
TEXT
PROPERTIES BY
SUBPANEL
Filters
Filters perform a number of color eect chores. They work with both TLF text
and Classic text. So, if you want to add a drop shadow to separate text from the
background, then go to the Filters subpanel. Other options include Drop Shadow,
Blur, Glow, Bevel, Gradient Glow, Gradient Bevel, and Adjust Color. You can apply
multiple filters to your text, so it would be possible to have bevel characters that
cast a shadow. As you pile on special eects, keep in mind that someone may want
to actually read the text.
In general, you apply filters to the entire text container. If you want to apply filters
to individual letters, choose Modify→Break Apart to break the text container into
multiple text containers. To turn an individual character into a shape so you can
tween it or distort it to the
n
th degree, select the individual character and then
choose Modify→Break Apart again. That turns the character into a shape, just like any
other Flash shape and it is no longer editable text. Once you’ve done that, you can
change the stroke and fill color independently. Use Modify→Transform→Envelope to
distort the character. And, of course, you can use the Shape Tween tool to animate
these changes.
TIP As a designer, the color effects like blends, filters and gradients give you an opportunity to add visual
drama to your project. However, if your work is destined for handheld devices like smartphones and tablets, it’s
best to use these effects sparingly because they gobble up CPU resources, memory, and battery life.
www.it-ebooks.info

247
CHAPTER
7
The secret to productivity is to work smarter, not harder. And the secret to smart
work is to avoid doing the same thing more than once. Flash understands. The
program gives you ways to reuse bits and pieces of your animations—every-
thing from simple shapes to complex drawings, multiframe sequences, and even
entire animations. Create something once; reuse it as many times as you like. Reus-
ing animation elements can save you more than just time and eort—Flash lets you
store pieces of animation as reusable master copies that can actually whittle the size
of your finished animation file. That’s great news if you plan to put your animation
up on a website or shoot it out to handhelds. The smaller your file size, the faster it
downloads, which makes
you
less likely to lose your audience to impatience.
Templates are another work- and time-saving feature in your Flash arsenal. You can
use these predesigned Flash documents as starting points for your own projects.
Even better, you can save documents as templates. You can also save templates
containing the pictures, logos, and other elements that appear in just about all your
documents. Then you don’t have to start from scratch next month when you have
a similar project.
TIP With Flash Professional CS6, Adobe has included several templates that serve as hands-on learning tools.
Want to learn how to create random movement? Check out the templates in the Animation category. You’ll find
several button examples, as well as techniques for creating rain and snow effects. In the Sample Files category,
some of the examples include handwriting simulations, menu navigation tools, and walking figures. Chapter
23 includes an exercise that shows how to use an “AIR for Android” template that senses the position of the
smartphone or tablet.
Reusable Flash: Symbols
and Templates
www.it-ebooks.info

FLASH CS6: THE MISSING MANUAL
248
SYMBOLS AND
INSTANCES
Symbols and Instances
Copying and pasting is the most obvious way to reuse something you’ve created,
but while that time-honored technique saves time, it doesn’t save
space
. Say, for
example, you need to show a swarm of cockroaches in the Flash advertisement you’re
creating for New and Improved Roach-B-Gone. You draw a single cockroach, then
copy and paste it 100 times. Congratulations: You’ve got yourself 101 cockroaches…
and one massive Flash document.
Instead, you should take that first cockroach and save it in Flash as a
symbol
. Symbols
give you a way to reuse your work and keep your animation’s finished file size down
to a bare minimum. When you create a symbol, Flash stores the information for the
symbol, or master copy, in your document as usual. But every time you create a copy
(an
instance
) of that symbol, all Flash adds to your file is the information it needs to
keep track of where you positioned that particular instance and any modifications
you make to it on the stage.
So, to create the illusion of a swarm of roaches, you drag instances of the symbol
onto the stage. Neither you nor Flash have to duplicate the work of drawing each
roach. You can even vary the roach instances a little for variety and realism (so im-
portant in a pesticide ad) by changing their color, position, size, and even their skew.
If symbols oered only file optimization, they’d be well worth using. But symbols
give you additional benefits:
• Consistency. By definition, all the instances of a symbol look pretty much the
same. You can change certain instance characteristics—color and position on the
stage, for example—but you can’t redraw them; Flash simply won’t let you. (You
can’t turn a roach into a ladybug, for example.) For situations where you really
need basic consistency among objects, symbols help save you from yourself.
• Instantaneous update. Suppose you want to change the roach color from
brown to black. Edit the “master” roach stored in your Library, and Flash au-
tomatically updates all the instances of that symbol. So, for example, say you
create a symbol showing the packaging for Roach-B-Gone. You use dozens and
dozens of instances of the symbol throughout your animation, and then your
boss tells you the marketing team has redesigned the packaging. If you’d used
Copy and Paste to create all those boxes of Roach-B-Gone, you’d have to find
and change each one manually. But with symbols, all you need to do is change
the symbol in the Library. Flash automatically takes care of updating all the
symbol’s instances for you.
Does that mean you can’t make changes to
one
of the roaches already on the
stage? No, not at all. You can change an instance without aecting any other
instances or the symbol itself. (You can turn one roach light brown, for example,
without aecting any of the dark-brown roaches.)
www.it-ebooks.info
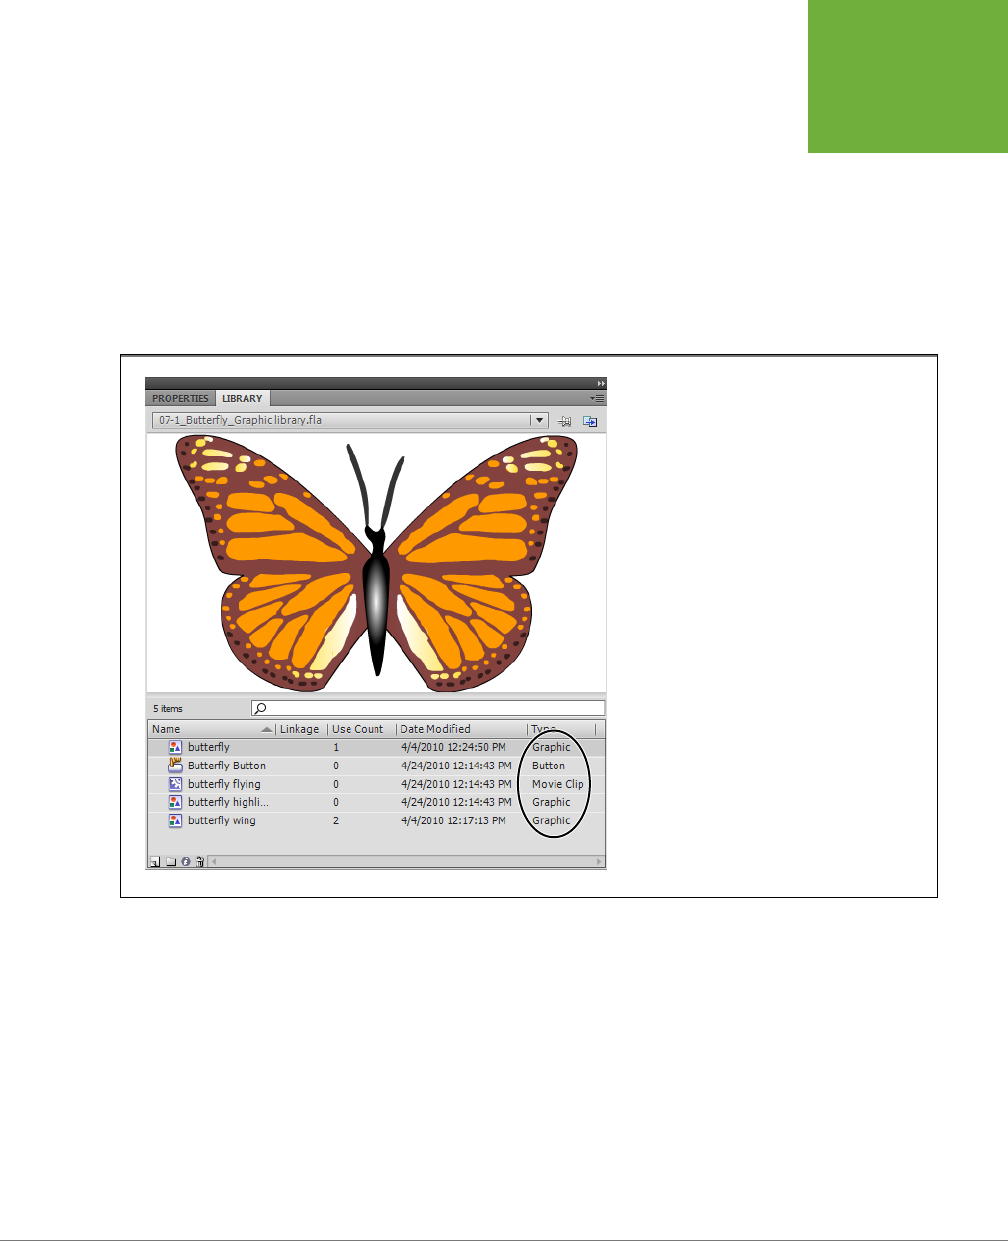
CHAPTER 7: REUSABLE FLASH: SYMBOLS AND TEMPLATES 249
SYMBOLS AND
INSTANCES
• Nesting. Symbols can contain other symbols. Sticking symbols inside other
symbols is called nesting symbols, and it’s a great way to create unique,
complex-looking images for a fraction of the file size you’d need to create them
individually. Suppose you’ve drawn the perfect bug eye. You can turn it into a
symbol and place it inside your symbols for roaches, ladybugs, and any other
insect you want.
Flash lets you create three types of symbols: graphic symbols, movie clip symbols,
and button symbols. As you see in Figure 7-1, Flash stores all three types of symbols
in the Library.
FIGURE 7-1
The Library is your one-stop shop for symbols. From
this panel, you can create symbols, edit them, and
drag instances of them onto the stage. Note the
icons and descriptions that tell you each symbol’s
type—graphic, button, or movie clip. If you don’t
see the Library panel, press Ctrl+L (⌘-L) or go to
Window→Library. To display all the information in
the Library panel, you may want to undock the panel
by dragging the tab away from the Properties dock.
Then, you can resize it.
Graphic Symbols
You can tell Flash to turn everything from a simple shape (like a circle or a line) to
a complex drawing (like a butterfly) into a symbol. You can also nest graphic sym-
bols. For example, you can nest butterfly wing symbols inside a butterfly symbol,
as shown in Figure 7-2.
A graphic symbol isn’t even limited to a static drawing. You can save a series of
frames as a
multiframe
graphic symbol that you can add to other animations.
www.it-ebooks.info
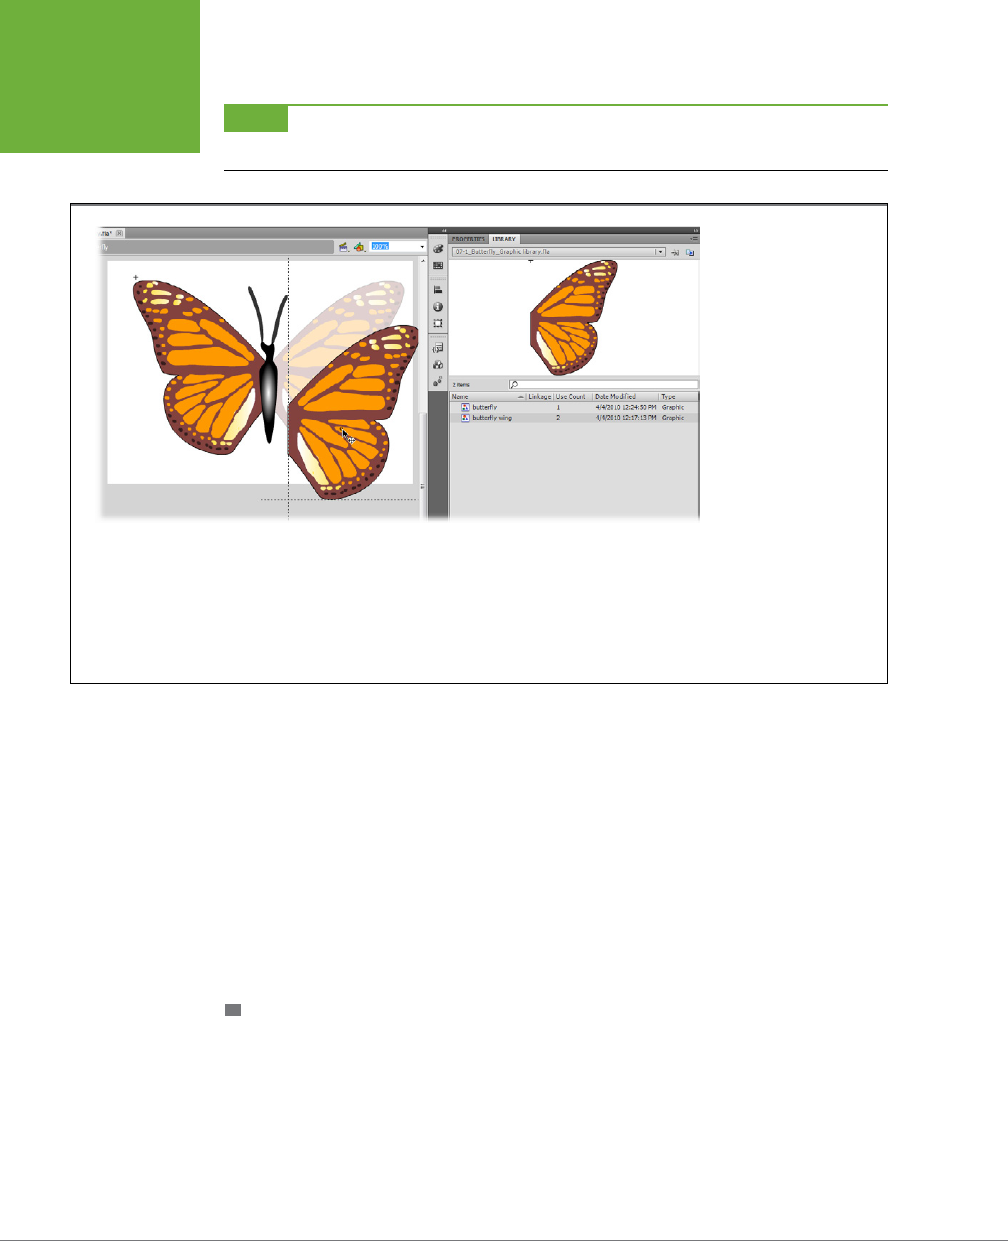
FLASH CS6: THE MISSING MANUAL
250
SYMBOLS AND
INSTANCES
NOTE Another kind of symbol that contains multiple frames is a movie clip symbol (page 267). But there
are big differences between the two, as described in the box on page 251.
FIGURE 7-2
If you’re really serious
about paring down the
size of your animation
file, consider nesting
your symbols. Here a
single wing symbol
is used for both the
butterfly’s wings. The
wing instance on the left
was flipped horizontally
(Modify→Transform→Flip
Horizontal). Flash lets you
flip, resize, and recolor
symbol instances, so you
can create surprisingly
different effects using just
a few basic shapes—all
while keeping your
animation’s file size as
small as possible.
Flash gives you two options for creating a graphic symbol:
• You can create a regular image on the stage and then convert it to a graphic
symbol. This is the best approach for those times when you’re drawing an im-
age (or a multiframe animated scene) and suddenly realize it’s so good that
you want to reuse it.
• You can create your symbol from scratch using Flash’s symbol editing mode. If
you know going in that you want to create a reusable image or series of frames,
it’s just as easy to create it in symbol editing mode as it is to create it on your
main animation’s stage and timeline—and you get to save the conversion step.
The following sections show you both approaches.
CONVERTING AN EXISTING IMAGE TO A GRAPHIC SYMBOL
If you’ve already got an image on the stage that you’d like to turn into a symbol,
you’re in luck: The process is quick and painless.
To convert an existing image on the stage to a graphic symbol:
www.it-ebooks.info
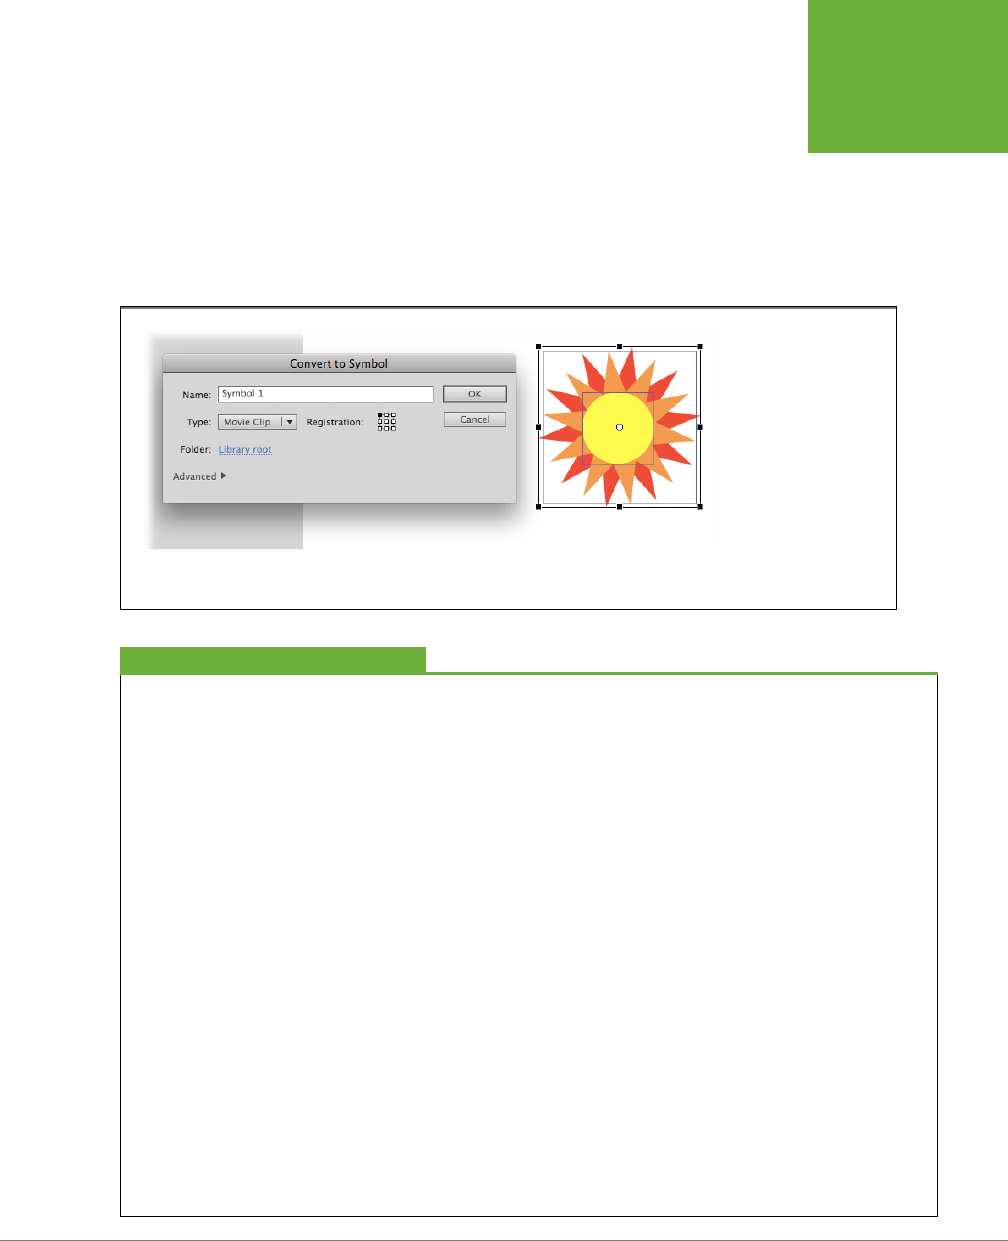
CHAPTER 7: REUSABLE FLASH: SYMBOLS AND TEMPLATES 251
SYMBOLS AND
INSTANCES
1. On the stage, select the image (or images) you want to convert.
Flash’s selection tools are described on page 61. Converting a grouped or ed-
itable image into a graphic symbol is quick and easy. Figure 7-3 shows three
separate images selected that, all together, form a star.
2. Select Modify→“Convert to Symbol.”
The “Convert to Symbol” dialog box appears.
FIGURE 7-3
You use the little grid
labeled Registration to
position the registration
point of your symbol.
Most of the time, it’s fine
to leave the registration
point in the upper-left
corner; see the box on
page 253 for the full story.
If necessary, you can re-
position it later by editing
your symbol (page 257).
Multiframe Graphic Symbol vs. Movie Clip
A movie clip symbol is a series of frames, but a graphic sym-
bol can have multiple frames, too. So what’s the difference
between the two
?
Leave it to the Flash development team (the people who let
you add motion to a shape tween and manipulate shapes with
a motion tween) to refer to a multiframe animation clip as a
graphic
symbol (instead of a movie clip symbol). The truth is,
there are some big differences between a multiframe graphic
symbol and a movie clip. For the programmer, the biggest
difference between multiframe graphics and movie clips is that
movie clips can be controlled in ActionScript while multiframe
graphics cannot. Here are two other differences:
• A multiframe graphic symbol has to match the animation
to which you add it, frame for frame. For example,
suppose your main timeline has 20 frames and you add
a 15-frame graphic symbol to Frame 1. Frame 1 in the main
timeline shows Frame 1 of your graphic symbol. Frame 2 in
the main timeline shows Frame 2 of the graphic symbol,
and so on. If your main timeline has only five frames,
you’d see only five frames of the graphic symbol. A movie
clip symbol, on the other hand, doesn’t have to match
the animation you add it to frame by frame because
movie clips have their own timelines. So, if you add a
15-frame movie clip symbol to a main timeline with only
a single frame, you still see all 15 frames of the movie clip
symbol. It loops unless it encounters a keyframe with an
ActionScript statement telling it to stop playing.
• A multiframe graphic symbol can’t include sound or
interactivity; a movie clip symbol can. Movie clip symbols
take up just one frame in the main timeline, so you can
drop instances of them into button symbols and other
movie clip symbols to create interactive nested symbols.
Because they’re not tied frame for frame to the animation
you drop them into, they’re able to hang fire while your
animation plays and spring into action only when an
audience member clicks them.
Chapter 11 and Chapter 12 show you how to add sounds and
ActionScript actions to your symbols, respectively.
FREQUENTLY ASKED QUESTION
www.it-ebooks.info
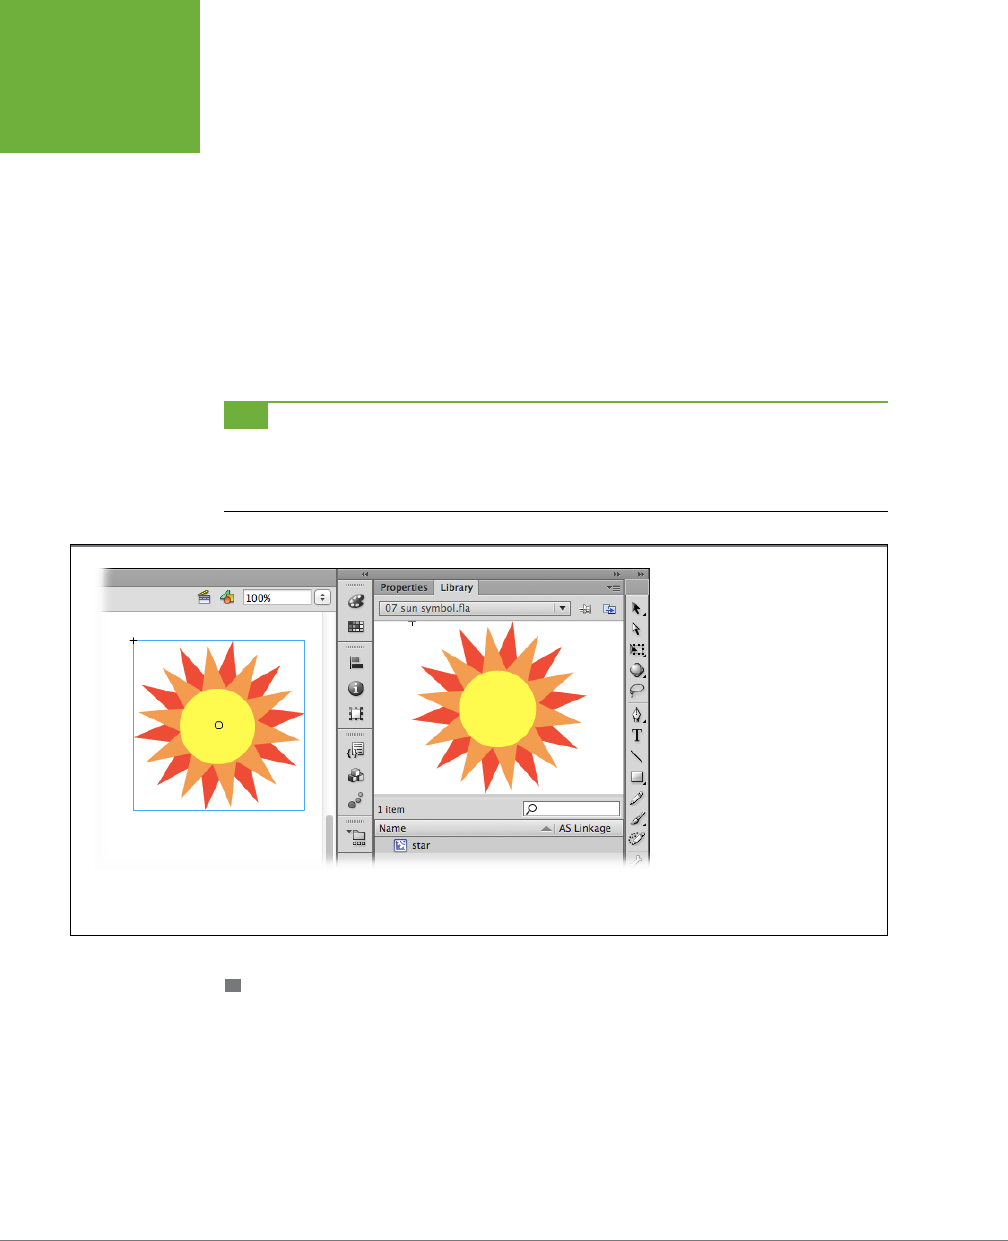
FLASH CS6: THE MISSING MANUAL
252
SYMBOLS AND
INSTANCES
3. In the Name text box, type a name for your symbol.
Because you’ll be creating a bunch of instances of this copy over the course
of the next several hours, days, or weeks (and because you may end up with
dozens of symbols before you’re finished with your animation), you want a
unique, short, descriptive name.
4. Set the Type drop-down menu next to Graphic, and then click OK.
Flash creates the new graphic symbol, places it into the Library, and automati-
cally replaces the selected image on the stage with a selected instance of the
symbol (Figure 7-4). Notice the instance’s single bounding box (the original
three images in this example had three).
TIP If you’re already poking around the Library panel, you can create a new graphic symbol quickly by
clicking the Library panel’s New Symbol button (at the bottom of the panel) or by clicking the Library panel’s
Options menu, and then, from the pop-up menu that appears, selecting New Symbol. Either way tells Flash to
display the Create New Symbol dialog box.
FIGURE 7-4
You get two clues that Flash has
converted your image on the stage
to an instance of the newly created
symbol: the cross in the upper-left
corner of the instance (the in-
stance’s registration point) and the
little round circle (the instance’s
transformation point). Flash uses
the transformation point if you
decide to transform the instance,
as described in Chapter 5. You’ll
learn more about these points in
the box on page 253.
CREATING A GRAPHIC SYMBOL IN SYMBOL EDITING MODE
If you want to create a symbol from scratch without going through the conversion
step described on page 250, you can use Flash’s symbol editor—the same symbol
editor you use to modify your symbols.
To create a graphic symbol in symbol editing mode:
1. Select Insert→New Symbol.
The Create New Symbol dialog box shown in Figure 7-6 (top) appears.
www.it-ebooks.info

CHAPTER 7: REUSABLE FLASH: SYMBOLS AND TEMPLATES 253
SYMBOLS AND
INSTANCES
2. In the Name text box, type a name for your symbol.
Shoot for something unique, short, and descriptive.
Registration Point vs. Transformation Point
Flash associates two different points with each symbol you
create: a transformation point and a registration point. Both
reference a specific point in the symbol, but you use them in
very different ways. Here’s the scoop:
• The symbol’s transformation point is the little circle Flash
displays in every symbol and graphic element. Flash uses
the symbol’s transformation point when you transform
a symbol—for example, when you rotate a symbol, it
spins around the transformation point. You can move
the transformation point to any spot in or even outside
of your symbol. The center of your symbol is a good
starting spot for the transformation point, until you have a
reason to place it elsewhere. If you want to reposition the
transformation point, select a symbol or graphic element,
and then click the Free Transform tool. The transformation
point appears as a circle, usually on or near the symbol.
Reposition the point by dragging it to a new location.
• The symbol’s registration point appears as a little
cross on the symbol. The registration point is the set of
coordinates Flash uses to position an instance of a symbol
on the stage. Often called X/Y coordinates, X equals the
distance from the left side of the stage, and Y is the
distance from the top. You can place a symbol precisely
on the stage by typing in the position coordinates in the
Properties panel, as shown in Figure 7-5. You also use
the position coordinates when you position and move
objects on the stage with ActionScript programming,
as explained in Chapter 12. When you create new visual
elements, like shapes and text, Flash automatically places
the registration point in the upper-left corner. That’s a
good place to have the registration points for the symbols
you create, unless you have a particular need to place
it elsewhere. For example, if you want to align several
symbols on their center point, you may prefer to have
the registration point in the center. To reposition the
registration point for a symbol, double-click the symbol
to edit it. The image opens in symbol edit mode, as
described on page 257, and the registration point appears
as shown on the bottom of Figure 7-6. If you want the
registration point centered, move your graphic element
over the registration point, so it’s centered. If you want
the registration point in the lower-right corner, position
your graphic above and to the left of the registration point.
In most cases, you don’t have to think twice about the reg-
istration point. Let Flash put it in the upper-left corner and
leave it there. If you’re planning to manipulate the symbol in
ActionScript, be aware that you can reposition the registration
point if that upper-left corner doesn’t work for your project,
as described on page 255.
UP TO SPEED
3. From the drop-down menu, choose Graphic, and then click OK.
Flash displays the symbol editing workspace shown in Figure 7-6 (bottom).
The symbol editing workspace looks very much like an animation workspace,
even down to the background color. Here are the key dierences that indicate
you’re in symbol editing mode:
• The name of the symbol you’re currently editing appears in the Edit bar. To
see the Edit bar, select Window→Toolbars, and then turn on the checkbox
next to Edit Bar. There’s no “stage” when you’re editing symbols, so you
won’t see any backstage work area either.
www.it-ebooks.info
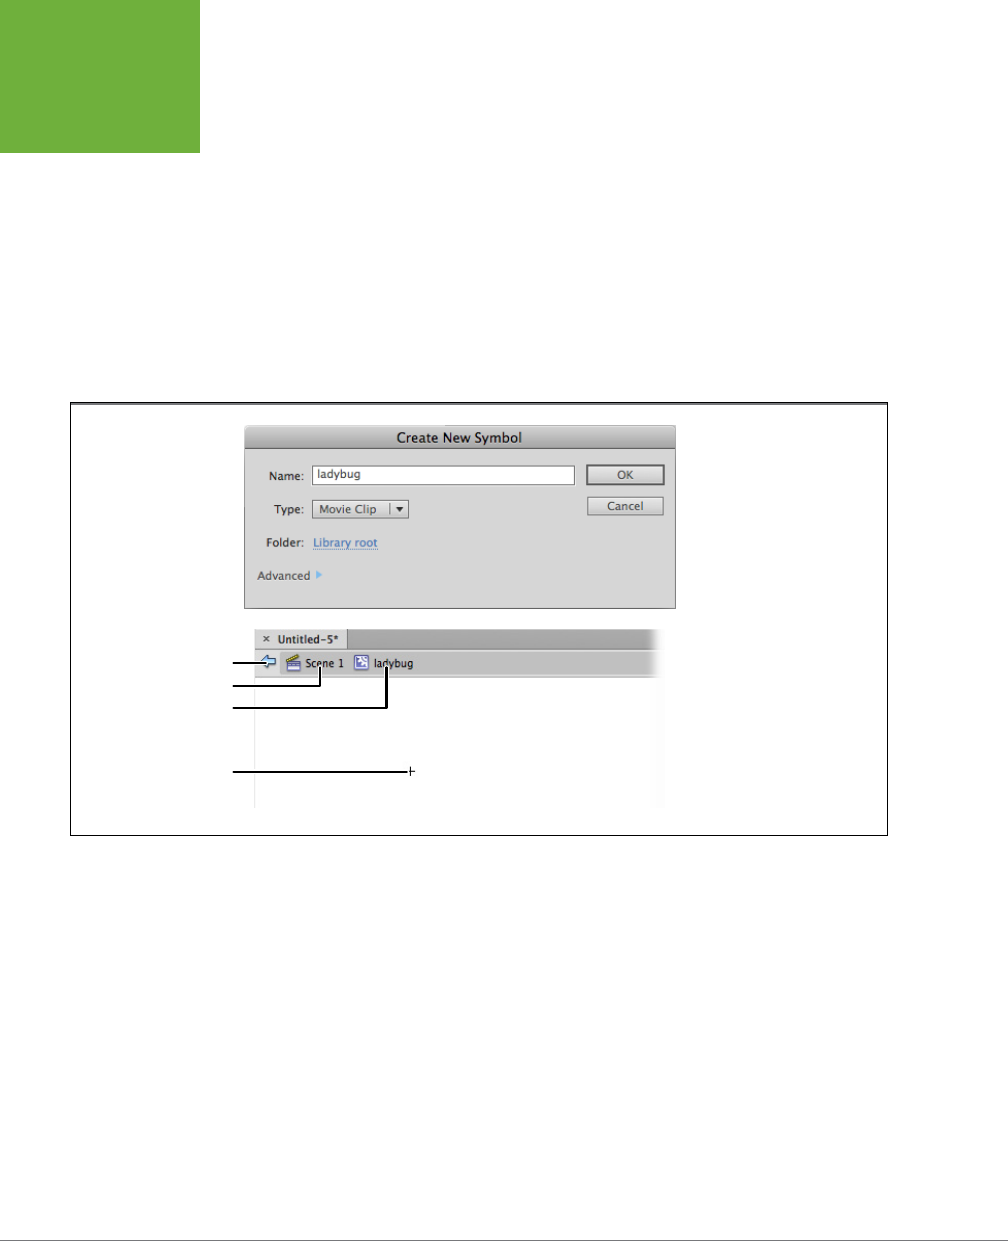
FLASH CS6: THE MISSING MANUAL
254
SYMBOLS AND
INSTANCES
• The Back arrow and Current Scene icons in the Edit bar appear clickable,
or active.
• A cross (the registration point for the symbol you’re about to create)
appears in the middle of the symbol editing workspace. The registration
point is the reference point Flash uses to position your symbol on the
stage, as explained in the box on page 253. Technically, you can position
your symbol anywhere you like with respect to the registration point; but
out of the box, Flash puts the registration point for most graphics in the
upper-left corner. For consistency’s sake, you may want to do the same
when you create symbols. Just create your artwork below and to the right
of the registration point.
FIGURE 7-5
Using the X, Y settings in
the Properties panel, both
of these rectangles are
positioned at 200, 200.
The difference? The small
rectangle (selected) has a
centered registration point,
while the larger rectangle has
its registration point in the
upper-left corner.
Back arrow
Current scene icon
Symbol name
Registration point
4. On the symbol editing workspace, create a graphic symbol.
You can use Flash’s drawing tools, instances of other symbols, or even an im-
ported image (Chapter 10), just as you can on the main stage. As you draw, Flash
displays a thumbnail version of your symbol in the Library preview window, as
shown in Figure 7-7. Note that the use count is zero, until you drag an instance
of the symbol onto the stage. The
use count
is the number of instances of this
symbol that have been dragged onto the main animation stage.
5. When you’re finished creating your symbol, head to the Edit bar, and then
click the Back arrow or click the current scene icon. (Or use the menu com-
mand Edit→Edit Document.)
Flash brings you back to your main animation workspace.
www.it-ebooks.info
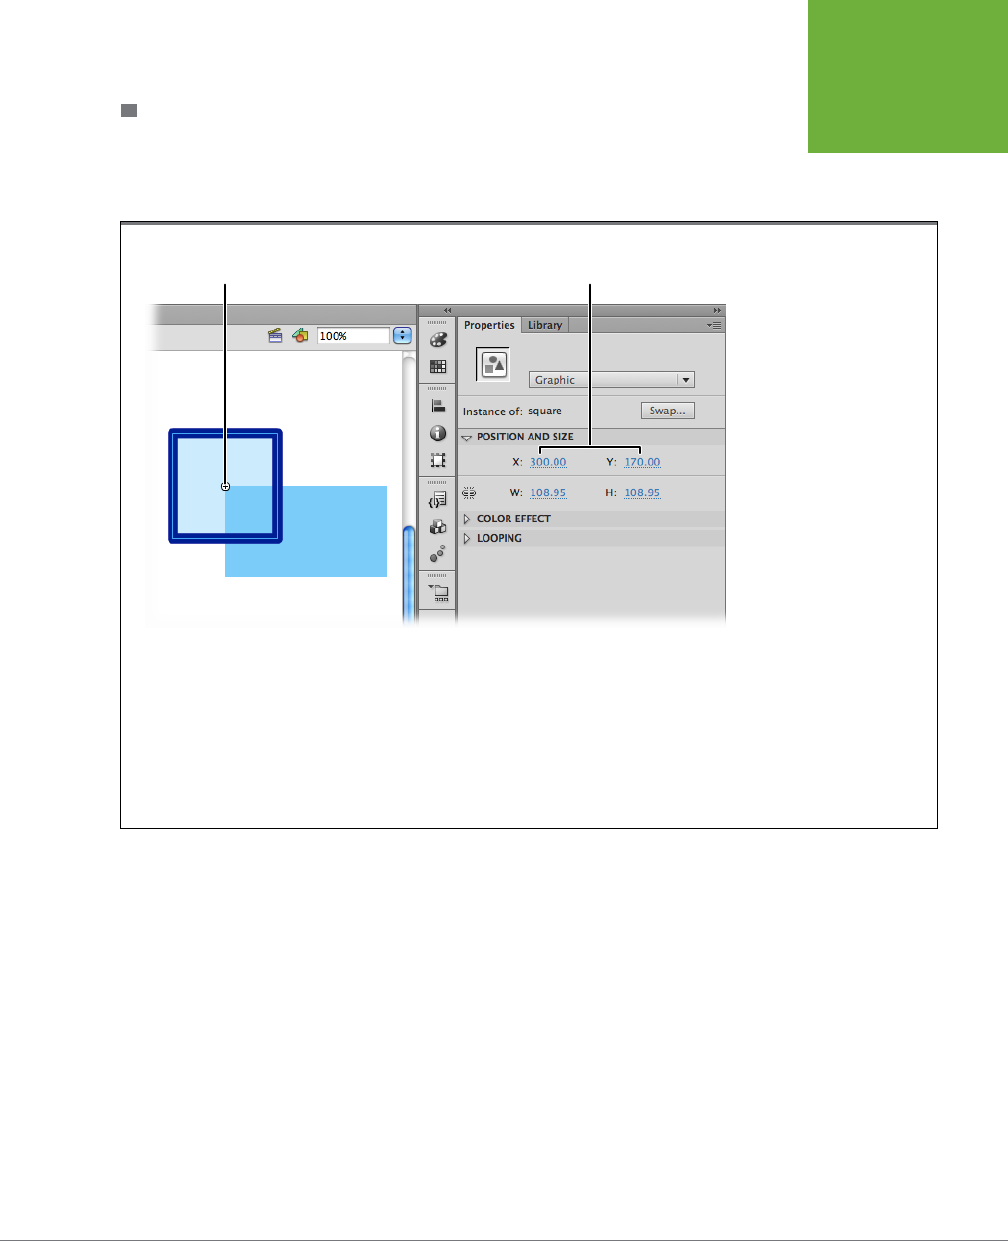
CHAPTER 7: REUSABLE FLASH: SYMBOLS AND TEMPLATES 255
SYMBOLS AND
INSTANCES
USING A GRAPHIC SYMBOL (CREATING AN INSTANCE OF A GRAPHIC
SYMBOL)
After you’ve created a symbol, you use it by creating an instance of that symbol and
then placing the instance somewhere in your animation.
FIGURE 7-6
Top: You use the same Create
New Symbol dialog box to cre-
ate a symbol from scratch as
you do to convert an existing
image to a symbol.
Bottom: Here you see the
symbol editing workspace,
which looks deceptively simi-
lar to the regular animation
workspace. The only way you
know you’re in symbol editing
mode is the graphic icon and
symbol name (ladybug) in the
Edit bar and the registration
point (cross) in the middle of
the symbol editing stage.
Registration point
for both rectangles
Position coordinate
settings
Follow these steps to add an instance of a graphic symbol to your animation:
1. Make sure the Library panel containing the graphic symbol you want is vis-
ible. If it isn’t, select Window, and then turn on the checkbox next to Library.
Flash displays the Library panel.
2. On the timeline, click to select the keyframe and layer where you want to
put the instance.
Flash highlights the selected keyframe.
3. In the Library panel, click the name of the symbol you want to use.
A thumbnail version of the symbol appears in the Library’s preview window.
www.it-ebooks.info
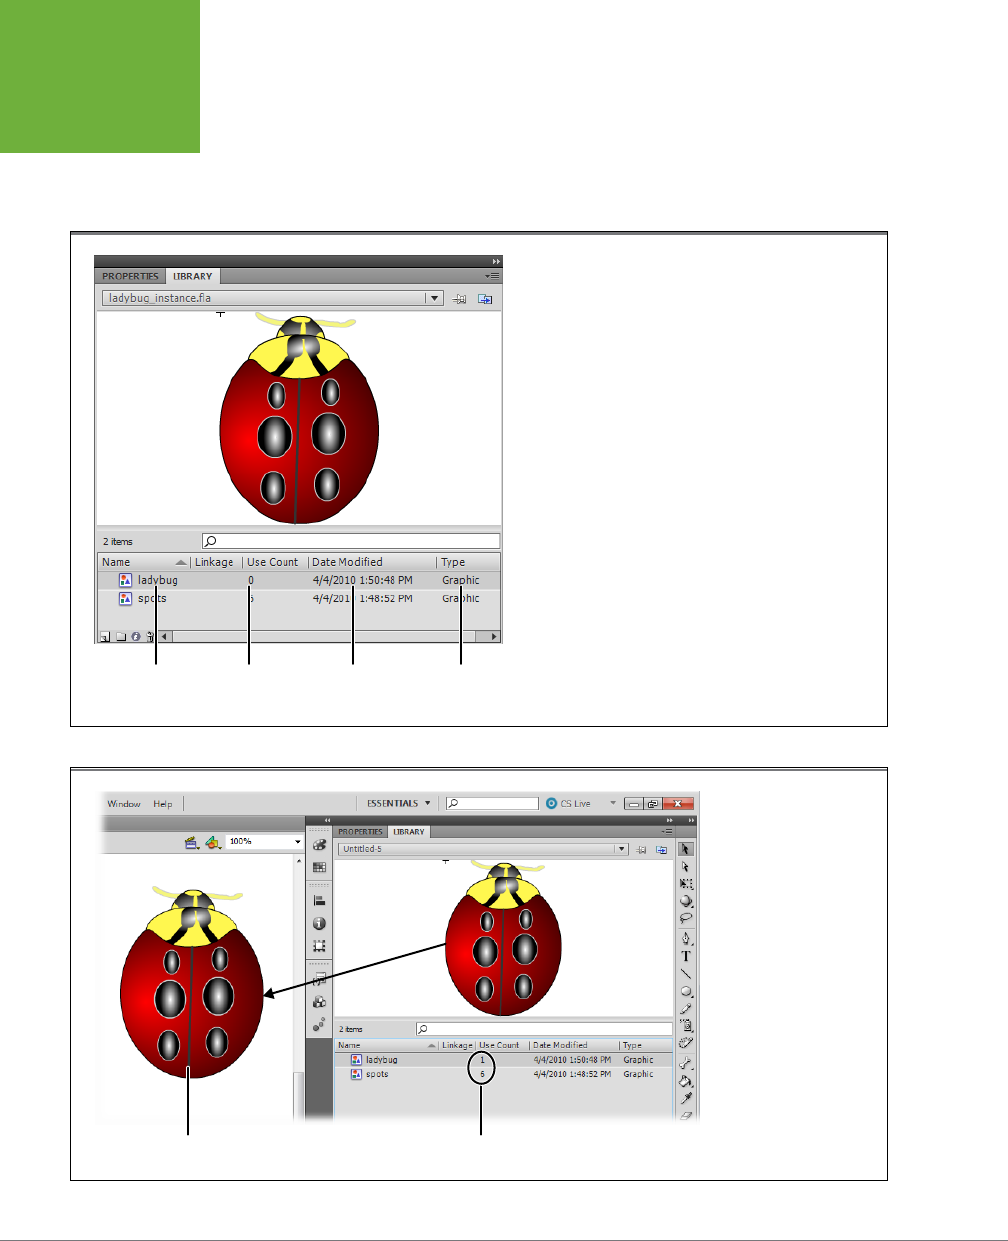
FLASH CS6: THE MISSING MANUAL
256
SYMBOLS AND
INSTANCES
4. Drag the thumbnail onto the stage (Figure 7-8).
Flash creates an instance of the symbol and places it on the stage. You can
transform or recolor this instance, as shown in the following section, without
aecting any other instances or the symbol itself.
FIGURE 7-7
The ladybug symbol here was just created, so the Library is
showing a use count of 0. The registration point appears in
the upper-left corner. The Library panel provides other details,
including when the symbol was last changed and how it’s
linked to other Flash and ActionScript documents.
Symbol
name
Use
Count
Date
Modified
Symbol
Type
FIGURE 7-8
Creating an instance of a
symbol is as easy as drag-
ging the symbol from the
Library and dropping it
onto the stage. Flash has
bumped up the use count
for the ladybug symbol
by 1. Because the ladybug
uses spots symbols,
the count for spots has
bumped up to 6.
Use CountNew Instance
www.it-ebooks.info

CHAPTER 7: REUSABLE FLASH: SYMBOLS AND TEMPLATES 257
SYMBOLS AND
INSTANCES
TIP You can always convert an instance of a graphic symbol back into an editable image—perhaps because
you want to use a symbol as a starting point for a brand-new image. To convert an instance of a graphic symbol
back into an editable image, first select the instance, and then choose Modify→Break Apart. If your instance
contains nested instances, you may want to choose Modify→Break Apart once for each nested instance to convert
the entire symbol into editable pixels.
EDITING AN INSTANCE OF A GRAPHIC SYMBOL
The whole point of graphic symbols is to help you reuse images (and to help Flash
keep down file size while you’re doing it). So it should come as no surprise that you
can’t completely rework the instances you create. You can’t, for example, create an
instance of a ladybug, erase it, draw a toad in its place, and expect Flash to consider
that toad an instance of the ladybug symbol.
In the Mode
It’s astonishingly easy to get confused about where you are
when you’re working in symbol editing mode. If you think
you’re in your main animation when you’re actually in symbol
mode, for example, you get frustratingly unexpected results
when you try to test your animation by selecting Control→Play
or Control→Test Movie→Test.
The easiest way to find your bearings is to check the Edit bar.
First, make sure it’s visible (Window→Toolbars→Edit Bar).
Then, if your symbol’s name appears in the Edit bar, you’re in
symbol editing mode; if it doesn’t, you’re not.
UP TO SPEED
But while you can’t use Flash’s drawing and painting tools to change your instance,
you
can
change certain characteristics of an instance, including color, transparency,
tint, and brightness using the Properties panel; and scale, rotation, and skew using
the Transform panel.
NOTE When you transform or recolor an instance, only that instance changes; the other instances you’ve
added to your animation aren’t affected, and neither is the symbol itself. If you want to change all instances en
masse, you need to edit the original symbol, as described below.
You can also edit an instance by swapping one instance of a graphic symbol for
another. Say, for example, that you’ve created a nature backdrop using multiple
instances of three symbols: a tree, a bush, and a flower. If you decide you’d rather
replace a few trees with bushes, Flash gives you a quick and easy way to do that,
as shown in the following steps:
1. On the stage, select the instance you want to replace.
Flash displays the Properties panel to show instance-related properties. (If
you don’t see the Properties panel, choose Window→Properties to display it.)
www.it-ebooks.info
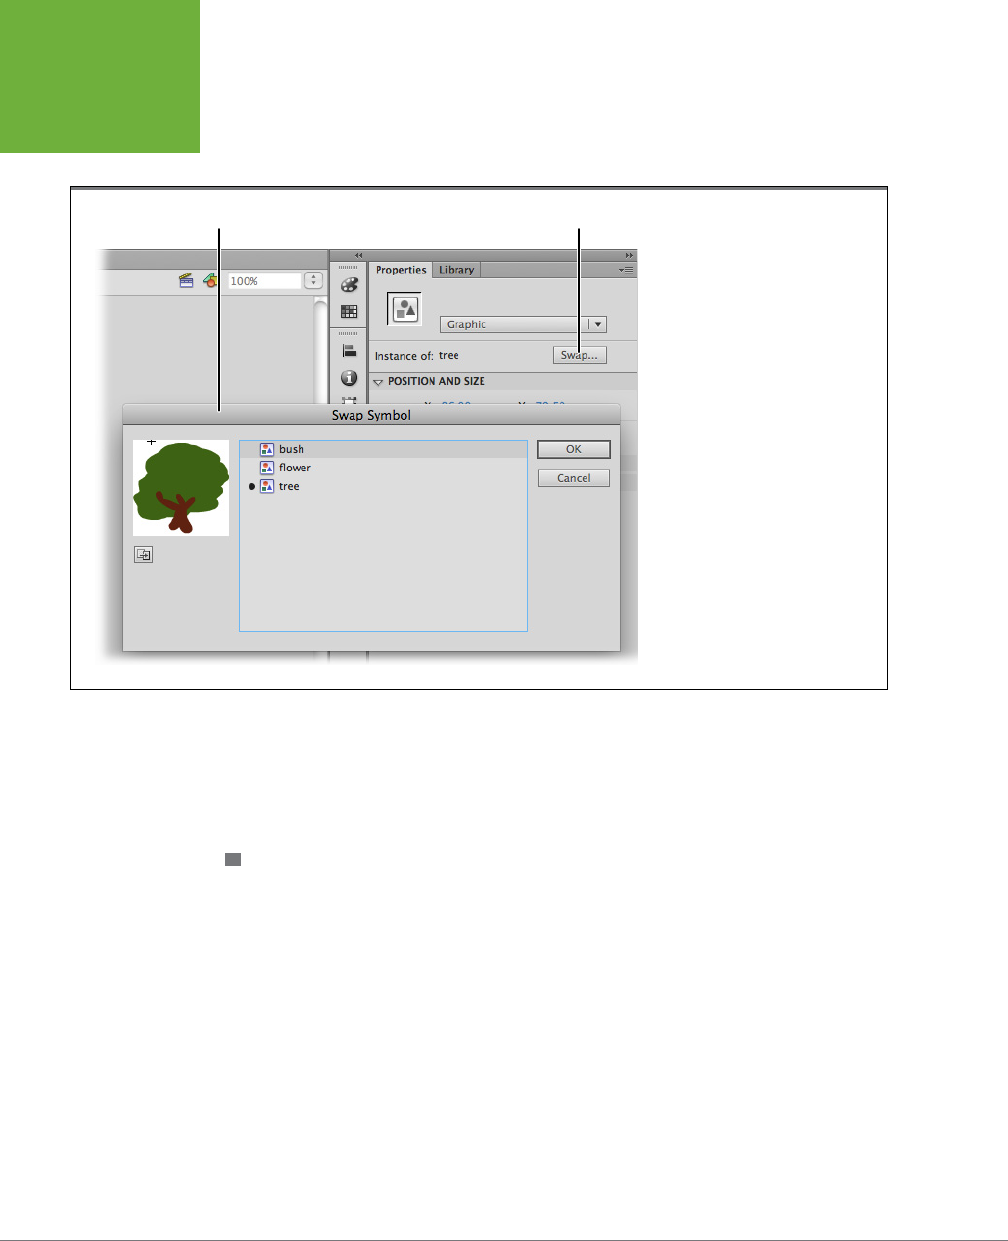
FLASH CS6: THE MISSING MANUAL
258
SYMBOLS AND
INSTANCES
2. In the Properties panel, click Swap (Figure 7-9).
The Swap Symbol dialog box appears.
FIGURE 7-9
The Swap button is active only when
you have a single instance selected
on the stage. The Swap Symbol dialog
box is misnamed; it should be called
the Swap Instance dialog box. That’s
because you use it to replace an
instance of one symbol with an
instance of another symbol; the
symbols themselves don’t change.
Swap Symbol dialog box Swap button
3. In the Swap Symbol dialog box, click to select the symbol with which you’d
like to replace the original. When you finish, click OK.
On the stage, Flash replaces the selected instance with an instance of the symbol
you chose in the Swap Symbol dialog box.
EDITING A GRAPHIC SYMBOL
Recoloring or transforming an instance changes only that instance, but editing a
symbol changes
every single instance
of that symbol, immediately, wherever you’ve
placed them in your animation.
The good news about editing symbols, of course, is that it can save you a boatload
of time. Say you’ve added hundreds of instances of your company’s logo to your
animation and the brass decides to redo the logo. Instead of the mind-numbing chore
of slogging through your animation finding and changing each instance by hand, all
you have to do is edit one little image—your logo symbol. The minute you do, Flash
automatically ripples your changes out to each and every instance of that symbol.
The bad news, of course, is that you might edit a symbol by mistake, thinking
you’re editing an instance (page 266). Editing a symbol is for keeps. You can select
Edit→Undo if you realize your mistake in time, but once you close your Flash docu-
www.it-ebooks.info

CHAPTER 7: REUSABLE FLASH: SYMBOLS AND TEMPLATES 259
SYMBOLS AND
INSTANCES
ment and Flash erases your Undo history, it’s all over but the crying: You’re stuck
with your edited symbol, for better or for worse.
TIP If the thought of editing a symbol makes you leery—say you’ve got 500 instances of your symbol scat-
tered around your animation and you don’t want to have to redraw it if you goof up the edit job—play it safe and
make a duplicate of the symbol before you edit it. In the Library panel, click the Options menu in the upper-right
corner. Then, from the pop-up menu that appears, select Duplicate. When you do, Flash displays the Duplicate
Symbol window, which lets you give your backup copy a unique, descriptive name (like
logo_backup
).
Exchanging Symbols Between Documents
Flash puts all the symbols you create in a Flash document—as
well as all the bitmaps, sound files, and other goodies you
import into that document—into the Library panel, which you
display by choosing Window→Library.
Technically speaking, the stuff you put in the Library is good
only for that Flash document or project (unlike the Common
Libraries, which you access by choosing Window→Common
Libraries, and which always list the same preinstalled files,
no matter which document you have open).
But you can pull a symbol from one document’s library and put
it into another by copying and pasting. To do so:
1. Open the two documents between which you want to
exchange symbols (File→Open).
2. Open the Library panel from which you want to copy
a symbol (Window→Library), and then choose the
document from the drop-down list in the Library panel.
3. In the Library panel, right-click the name of the symbol
you want to copy, and then, from the pop-up menu that
appears, choose Copy.
4. Above the stage, click the tab displaying the name of the
other document.
5. In the new document, click to select the keyframe where
you want to paste the symbol.
6. Choose Edit→Paste in Center. Flash pastes a copy of the
other document’s symbol on the stage.
To open a document’s Library without having to open the
document itself: Select File→Import→Open External Library,
choose the document whose symbols you want to copy, and
then click Open. When you do, Flash opens the document’s
Library (but not the document). With two libraries open, you
can drag symbols directly from one Library to another.
UP TO SPEED
Flash gives you three ways to edit symbols: Edit, Edit in Place, and Edit in New
Window.
• Edit is the most common way to edit symbols, and it’s the method Flash uses
when you right-click a symbol name in the Library and then choose Edit. You
can also use the menu command Edit→Edit Symbols or keyboard shortcut
Ctrl+E (⌘-E). The stage temporarily disappears, to be replaced by a window
showing only the contents of the symbol. If you have the Edit toolbar show-
ing (Windows→Toolbars→Edit Bar), you see the symbol’s name, as shown in
Figure7-10. After you finish your edits, click the Scene name or the Back button
to return to the stage.
• Editing in place lets you edit a symbol right there on the stage, surrounded by
any other objects you may have on the stage. (Flash grays out the other objects;
they’re just for reference. The only thing you can edit in this mode is the symbol.)
www.it-ebooks.info
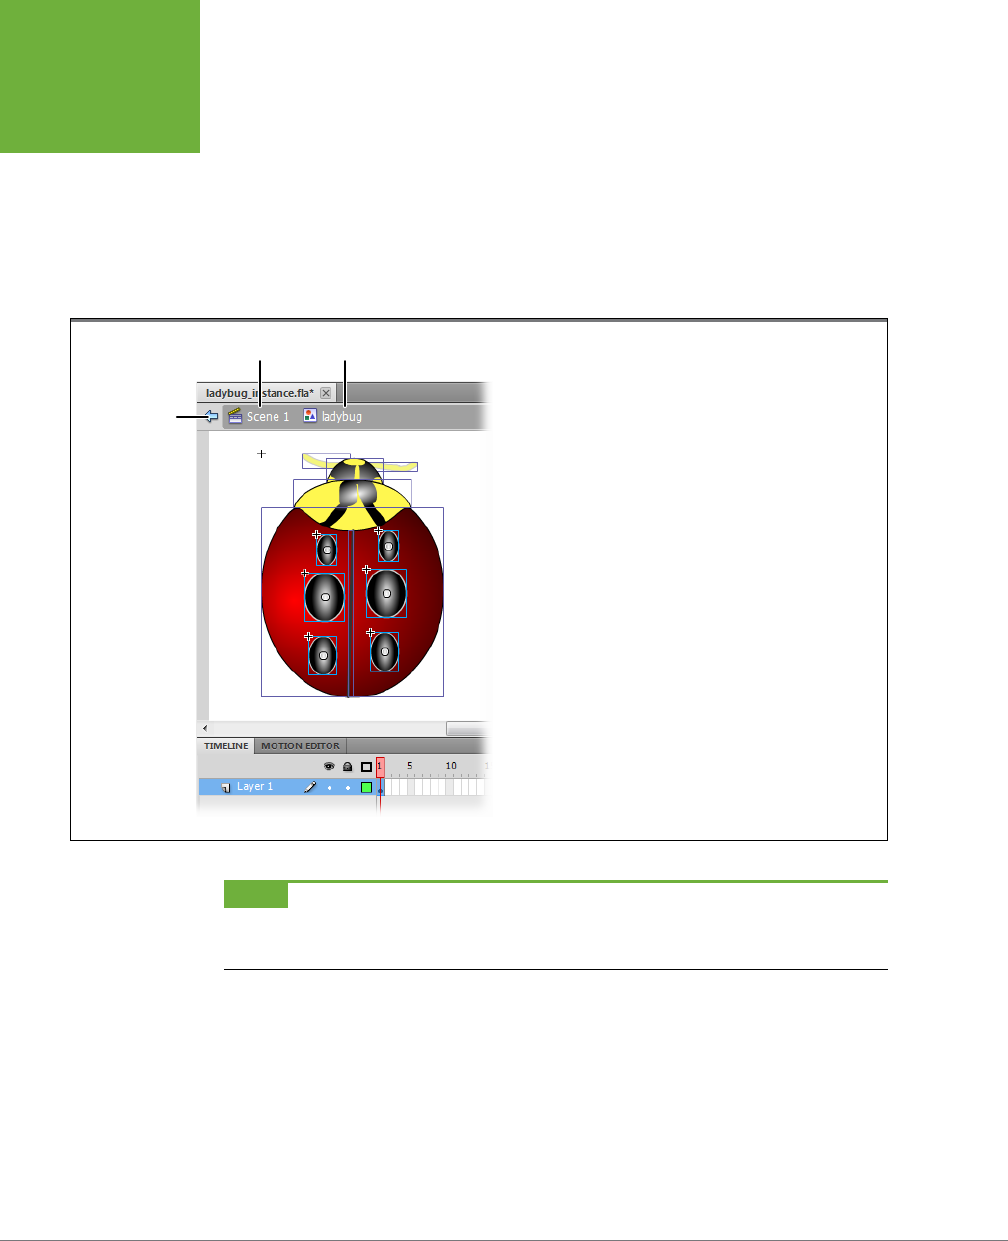
FLASH CS6: THE MISSING MANUAL
260
SYMBOLS AND
INSTANCES
If you’re not ready for it, this option is right up there with the more confusing fea-
tures the Flash design team has ever come up with. As you can see in Figure7-11,
mixing the symbol editing mode with the appearance of the main stage makes
it incredibly easy to assume you’re changing an
instance
of a symbol (instead
of the symbol itself), with frustrating results. Double-clicking a symbol on the
stage or selecting Edit→Edit in Place from the main menu or from the pop-up
menu that appears when you right-click an instance on the stage all tell Flash
that you want to edit in place.
FIGURE 7-10
When you edit your symbol in its very own window, there’s no
ambiguity: You know you’re editing a symbol (and not merely
an instance). You edit a symbol using the same tools and panels
you use to edit any other image. As you make your changes,
Flash automatically updates the symbol in the Library, as well as
all the instances of that symbol, wherever they may be in your
Flash document.
Scene
Back button
Symbol name
NOTE One man’s meat is another man’s poison. If you absolutely have to see your symbol in context
( surrounded by all the other stuff on the stage) to be able to edit it properly, then editing in place is just what
you want.
• Edit in New Window creates a new window tab where you edit your symbol,
as shown in Figure 7-12. Right-click (Control-click) a symbol on the stage, and
then choose Edit in New Window from the pop-up menu. Flash opens the sym-
bol under a new tab, and your work area looks similar to the basic Edit mode.
As you make changes, Flash updates all existing instances to match the newly
edited symbol. This makes it easy to jump back and forth between the symbol
editing workspace and the stage, so you can see how the edited symbol looks
in context. When you’re finished making changes, just click the Close button.
www.it-ebooks.info
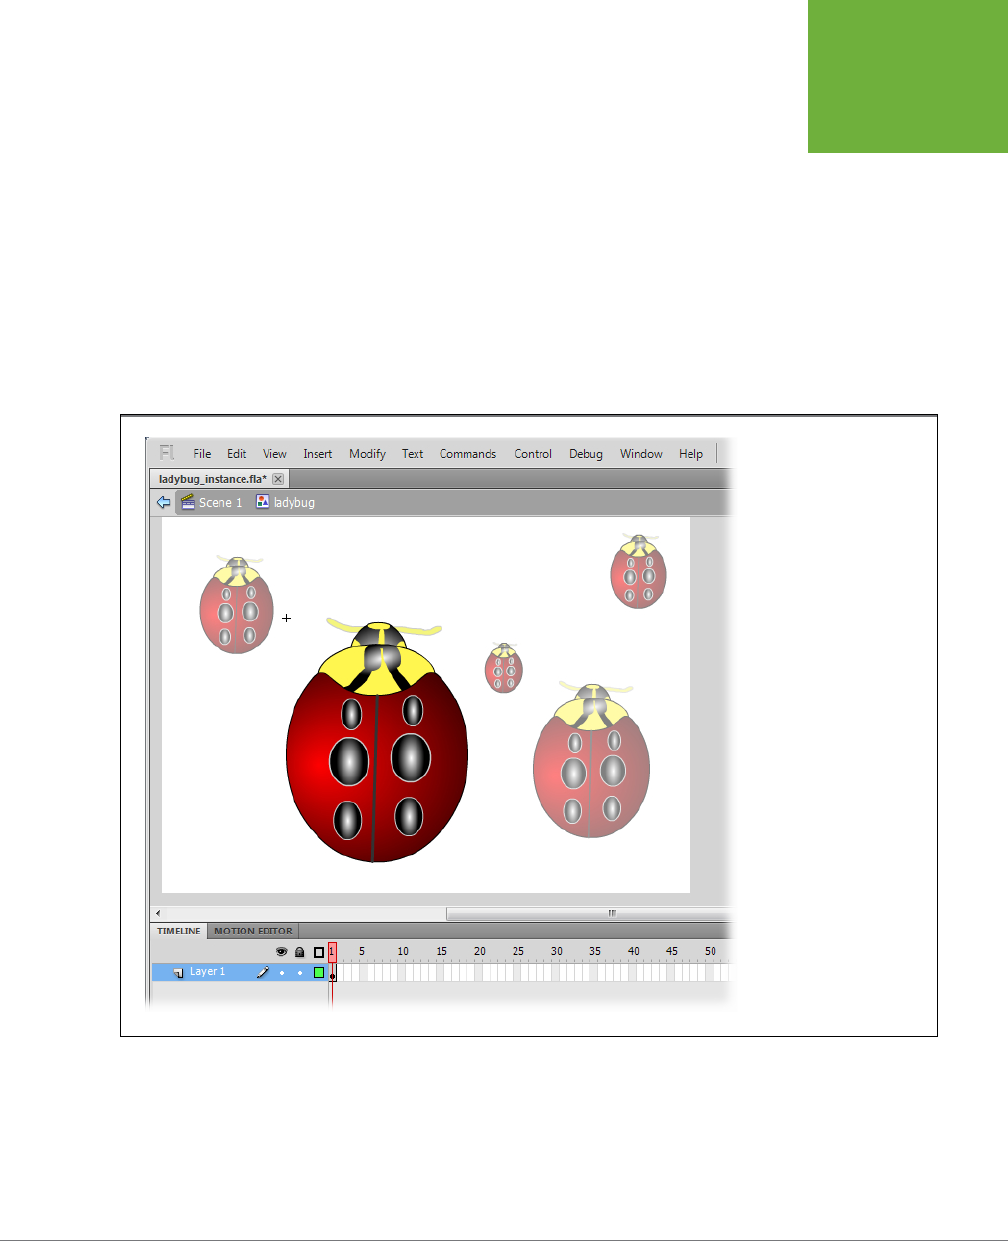
CHAPTER 7: REUSABLE FLASH: SYMBOLS AND TEMPLATES 261
SYMBOLS AND
INSTANCES
In a nutshell, to tell Flash you want to edit a symbol, do any of the following.
In the Library panel:
• Double-click the symbol, either in the list or in the preview window. The symbol
opens in Edit in Place mode.
• Select a symbol from the list, and then click the Options menu. From the pop-up
menu that appears, choose Edit. The symbol opens in Edit mode, where you
see the symbol by itself.
• Right-click a symbol in the list. From the pop-up menu that appears, choose
Edit, Edit in Place, or Edit in New Window. The pop-up menu lets you select
exactly how you’d like to view the symbol while editing.
FIGURE 7-11
It’s hard to tell that the
large ladybug (the one
that’s not grayed out)
is a symbol and not just
an instance of a symbol.
(Your one clue: the symbol
name “ladybug” that Flash
displays above the stage.)
Editing a symbol when you
mean to edit an instance
can have pretty serious
consequences, so if you find
yourself second-guessing,
then stick to editing in a
new window, as described
in Figure 7-10.
On the stage:
• Select Edit→Edit Symbols.
• Select an instance of the symbol, and then choose Edit→Edit Selected.
www.it-ebooks.info
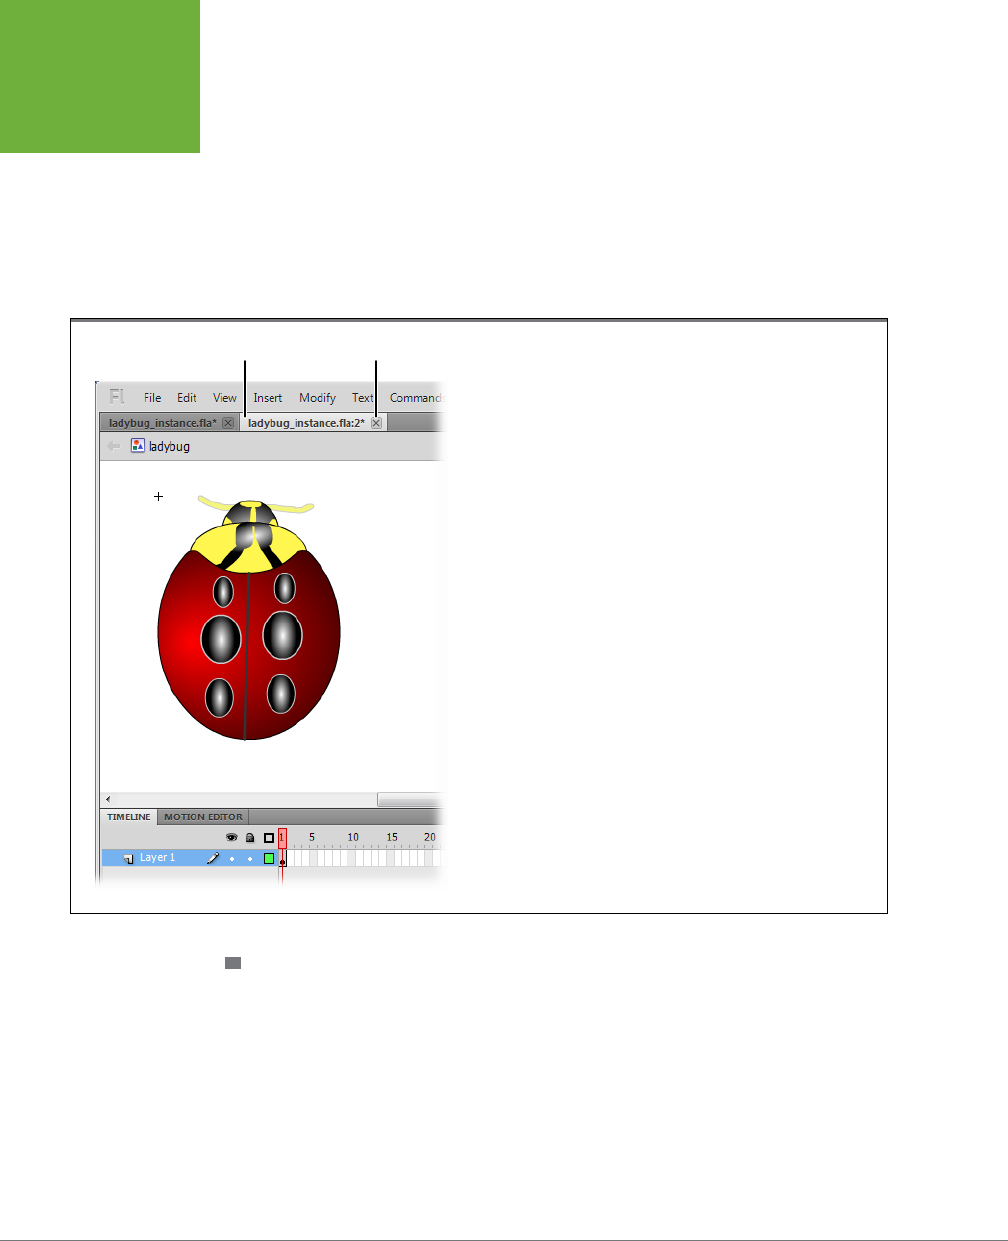
FLASH CS6: THE MISSING MANUAL
262
SYMBOLS AND
INSTANCES
• Right-click an instance of the symbol, and then, from the pop-up menu that
appears, choose Edit, Edit in Place, or Edit in New Window.
• In the Edit bar (Window→Toolbars→Edit Bar), click Edit Symbols (the icon on
the right that looks like a jumble of shapes).
No matter which method you choose—editing, editing in place, or editing in a new
window—you get out of symbol editing mode and return to the main stage the same
way: by selecting Edit→Edit Document (Ctrl+E on a PC or ⌘-E on a Mac).
FIGURE 7-12
Edit in New Window is one of three ways that Flash gives you to edit a
symbol. Both the Edit and Edit in New Window options give you a nice,
uncluttered view of your symbol.
New window tab Close window button
DELETING A GRAPHIC SYMBOL
You can delete the graphic symbols you create. Just remember that when you do,
Flash automatically deletes all the instances of that symbol
, wherever you’ve placed
them in that document.
To delete a graphic symbol:
1. In the Library panel, click to select the graphic symbol you want to delete.
Flash highlights the selected symbol’s name and type.
www.it-ebooks.info

CHAPTER 7: REUSABLE FLASH: SYMBOLS AND TEMPLATES 263
SYMBOLS AND
INSTANCES
2. Right-click the graphic symbol icon, and then, from the pop-up menu that
appears, choose Delete.
Flash removes the graphic symbol from the Library panel. It also removes all
the instances of that symbol from your animation. Another option is to click the
trash can icon at the bottom of the Library panel.
Multiframe Graphic Symbols
Multiframe graphic symbols are a kind of hybrid symbol, halfway between single
frame graphic symbols and movie clip symbols. Multiframe graphic symbols can’t
contain sounds or actions the way movie clip symbols can, but they
can
contain
multiple frames, which regular single-frame graphic symbols can’t. As explained in
the box on page 251, multiframe graphic symbols synchronize frame-for-frame to
the animation in which you place them.
TIP For many common Flash chores, it makes sense to use movie clips instead of multiframe graphics. As a
designer, you have more control over movie clips, and you don’t have to worry about the synchronization issues
that come with multiframe graphics. Movie clips are the symbols to choose if you want animate or control them
with ActionScript. However, one small advantage multiframe graphic symbols have over movie clips is that they
may take up slightly less space in the SWF file when you publish your animation.
CREATING A MULTIFRAME GRAPHIC SYMBOL
Flash gives you the same two options for creating multiframe graphics symbols as
it does for single-frame graphic symbols: You can create a series of frames as usual
and then convert it into a reusable symbol, or you can use Flash’s editing mode to
create a multiframe graphic symbol from scratch and save yourself the conversion
step. This section shows both approaches.
To convert a series of frames to a multiframe graphic symbol:
1. On the timeline, select the frames you want to convert.
You can easily select a series by clicking at one end of the series and then Shift-
clicking at the other end. Flash automatically selects all the frames in between.
2. Choose Edit→
Timeline→Copy Frames or press Ctrl+Alt+C (Option-⌘-C).
Then choose Insert→New Symbol.
The Create New Symbol dialog box appears.
3. In the Create New Symbol dialog box, turn on the Graphic radio button. Type
a short, descriptive name for your symbol, and then click OK.
The name of your symbol appears in the Library panel and in the Edit bar above
your stage to let you know you’re in symbol editing mode. In addition, Flash
replaces your animation stage with the symbol editing stage. You can recognize
the symbol editing stage by the cross (your symbol’s registration point) that
appears in the middle of the symbol editing stage.
www.it-ebooks.info
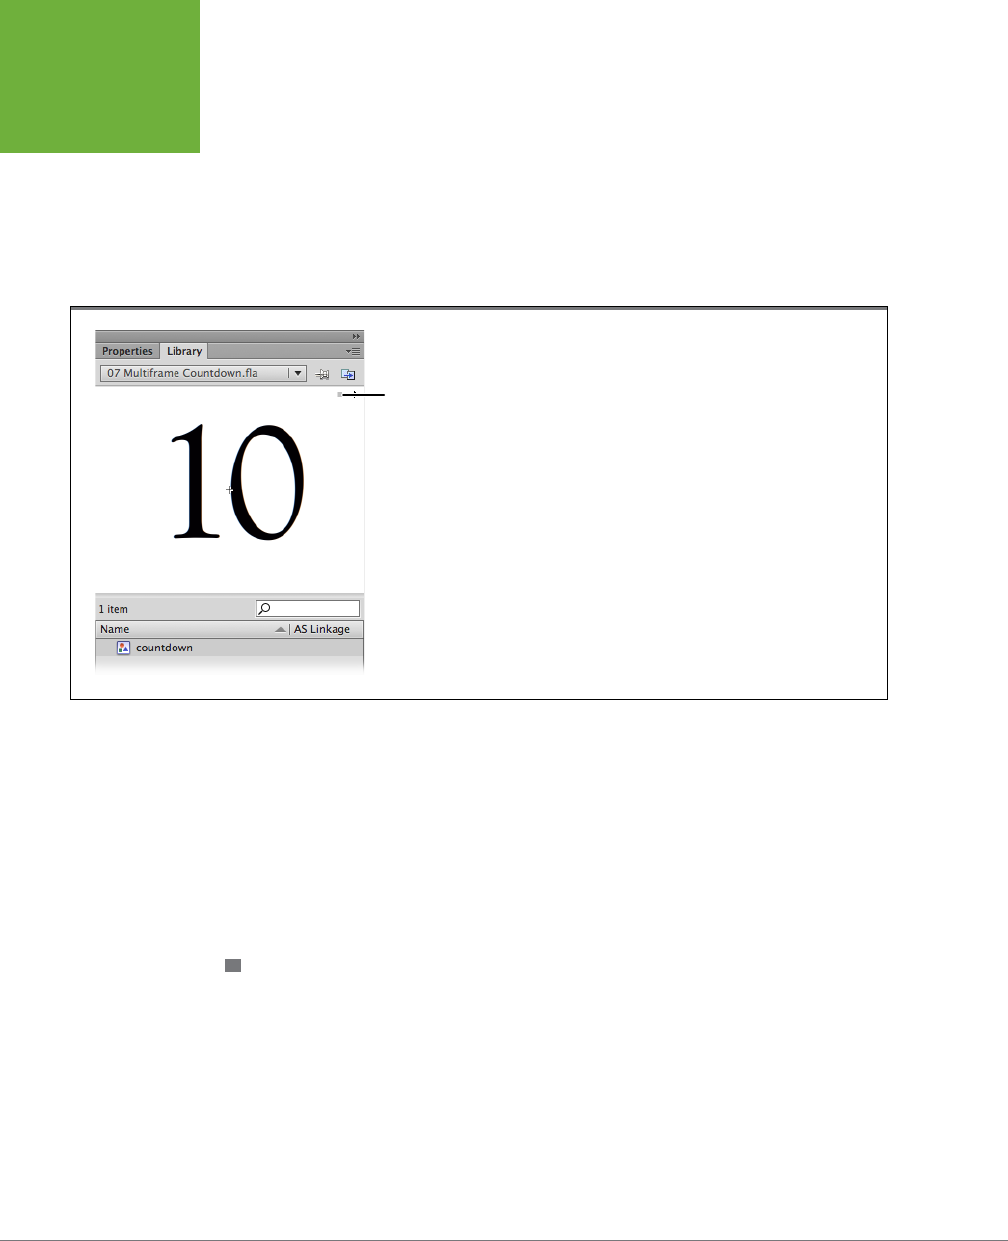
FLASH CS6: THE MISSING MANUAL
264
SYMBOLS AND
INSTANCES
4. In the symbol timeline, click to select the first keyframe (Frame 1).
Flash highlights the selected keyframe.
5. Select Edit→
Timeline→Paste Frames.
Flash pastes the copied frames in the symbol’s timeline. The Library panel’s
preview window shows you the contents of your new symbol’s first keyframe
(along with a minicontroller, as shown in Figure 7-13).
FIGURE 7-13
Get into the habit of previewing your multiframe graphic
symbols in the Library before you add instances of each symbol
to your animation. If you do, you’ll save yourself the hassle that
can result from incorporating instances of a symbol that doesn’t
run properly. To preview your symbol, click the Play button as
shown. Flash displays the contents of each frame of your symbol,
one after the other, in the Preview window.
Symbol preview
controls
6. Preview your symbol by clicking the minicontroller’s Play button.
Flash runs a thumbnail version of the symbol in the preview window.
7. Get out of symbol editing mode by choosing Edit→Edit Document.
Flash hides the symbol editing stage and brings you back to your main animation’s
stage and timeline. To create a multiframe graphic symbol from scratch in symbol
editing mode, follow the steps you see on page 252, adding the content for as many
frames as you need in step 5.
CREATING AN INSTANCE OF A MULTIFRAME GRAPHIC SYMBOL
Creating an instance of a multiframe graphic symbol is like creating an instance of a
movie clip symbol, but it’s not identical. When you insert a multiframe graphic symbol
into a timeline, the graphic synchronizes frame-for-frame with that timeline. If the
timeline doesn’t have enough frames, Flash lops o any frames of the graphic that
don’t fit. If the timeline has more frames than the graphic, Flash loops the graphic
frames unless you provide other instructions in the Properties panel. If it’s important
that every frame of the graphic plays, make sure the timeline has enough frames.
The following steps show you how.
www.it-ebooks.info

CHAPTER 7: REUSABLE FLASH: SYMBOLS AND TEMPLATES 265
SYMBOLS AND
INSTANCES
To create an instance of a multiframe graphic symbol:
1. In your main animation, click to select the keyframe where you want to place
an instance of a multiframe graphic symbol.
Only keyframes can contain new content (see page 99 for the skinny on key-
frames). So if you try to place a symbol in a regular frame, Flash “backs up”
and places your symbol in the keyframe immediately preceding the selected
frame anyway.
2. Make sure you have exactly as many frames after the selected keyframe as
you need for this instance.
If you’re creating an instance of a symbol that contains 10 frames, make sure 10
frames exist, including the selected keyframe. If the symbol contains 20 frames,
make sure 20 frames exist. To add frames after your selected keyframe, choose
Insert→Timeline→Frame (or press F5) once for each frame you want to add.
WARNING If you forget this step and add a multiframe graphic symbol to a timeline that doesn’t contain
exactly as many frames as the symbol, Flash doesn’t issue any warnings. Instead, it matches as many of the
instance frames to your timeline frames as it can. If you don’t have enough room on your timeline, Flash quietly
snips off the instance frames that don’t fit. If you have too much room, Flash repeats the instance frames until
all your main animation’s frames are filled.
3. In the Library, click to select the multiframe graphic symbol of which you
want to create an instance.
You can either click the symbol’s icon from the list or click the symbol’s thumbnail
in the preview window. The Library lists the type of both single and multiframe
graphics the same—Graphic—but you can always tell a multiframe graphic by
the minicontroller that appears along with the symbol’s content in the Library’s
preview window, as shown in Figure 7-13.
4. Drag the symbol to the stage.
Flash creates an instance of the symbol and places it in the keyframe you se-
lected in step 1. As you see in Figure 7-14, Flash colors your frames a nice solid
gray to let you know that they now contain content. But Flash
doesn’t
display
the individual keyframes of your instance in your main timeline. (By the same
token, if your symbol contains multiple layers, you don’t see those on your main
timeline, either. This visual simplification is one of the benefits of using symbols,
as opposed to just copying and pasting frames.) To preview your instance, select
Control→Test Movie→Test.
NOTE You can also test an instance of a multiframe graphic symbol by choosing Control→Play, or by drag-
ging the playhead on the main timeline.
www.it-ebooks.info
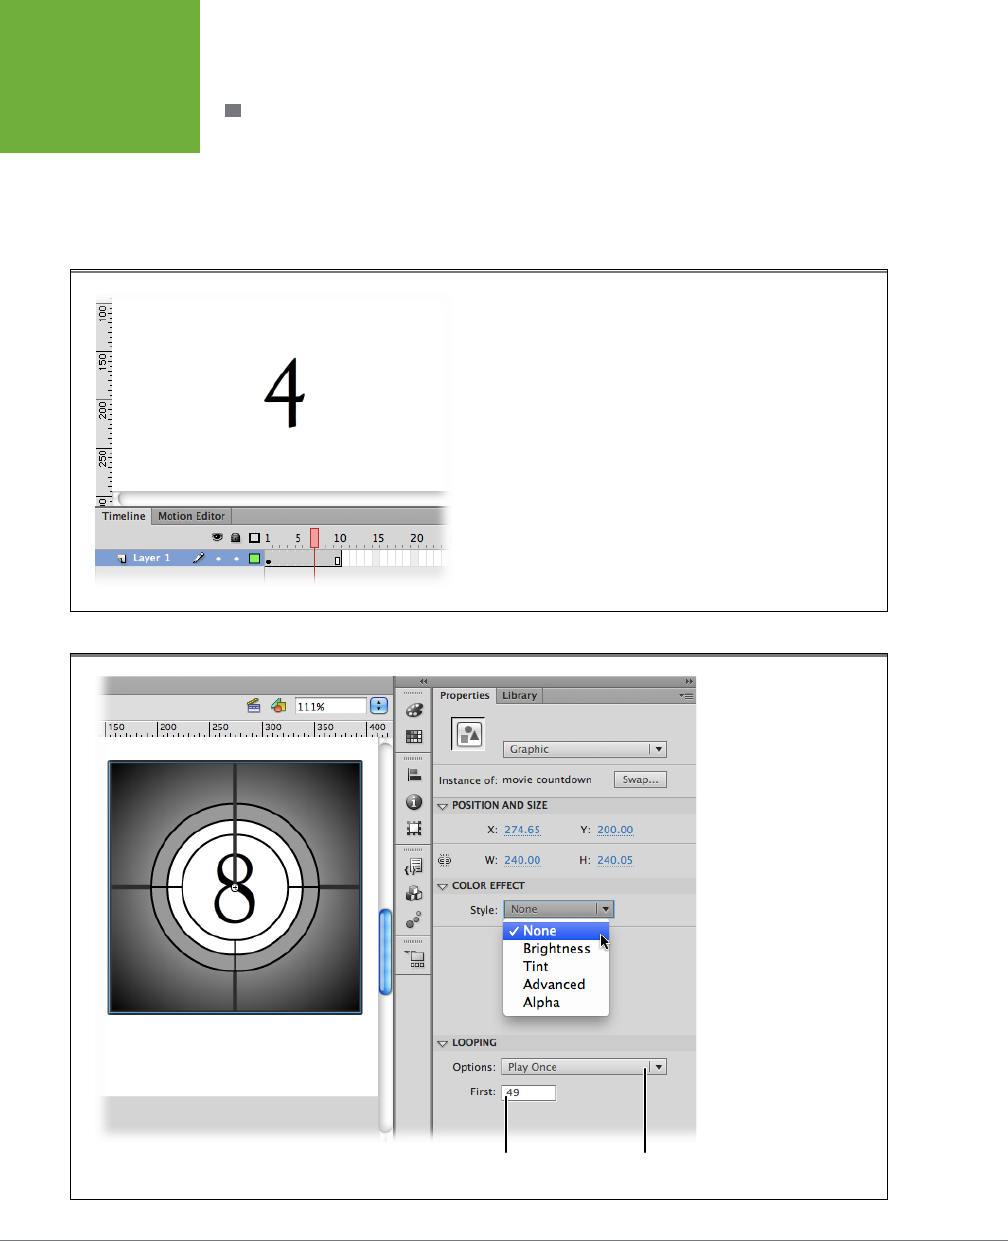
FLASH CS6: THE MISSING MANUAL
266
SYMBOLS AND
INSTANCES
EDITING AN INSTANCE OF A MULTIFRAME GRAPHIC SYMBOL
If you need the flexibility to individually change each keyframe of a multiframe graph-
ic instance, you’re out of luck, but you can use the Transform tool and the Properties
panel to make tweaks that aect every frame of your multiframe graphics. Use the
Properties panel to change the size, position, and color of your graphic, as shown in
Figure 7-15. Changes you make here aect every frame in the multiframe graphic.
FIGURE 7-14
The solid gray bar you see beginning with the keyframe (Frame 1) lets
you know that Frames 1–10 now contain content: in this case, an instance
of a multiframe graphic symbol. If testing your animation yields an
unexpected result, check to make sure that the frame span to which
you’ve added the symbol matches your symbol frame for frame.
FIGURE 7-15
This multiframe graphic
shows a countdown
similar to the ones that
appear before old movies.
In the Properties panel,
the Looping→First option
is set to Frame 49, so that
the countdown begins
with the number 8.
Start on Frame 49 Play Once
www.it-ebooks.info

CHAPTER 7: REUSABLE FLASH: SYMBOLS AND TEMPLATES 267
SYMBOLS AND
INSTANCES
Flash lets you change the contents of the first keyframe of your instance, just the way
you can an instance of a single-frame graphic (page 257). But Flash automatically
applies those changes to the contents of
every
keyframe in your instance. Skew the
frog in your first keyframe and turn it blue, for example, and every image in every
frame of your instance appears skewed and blue.
Using the Properties panel, you can tweak the playback settings for a multiframe
graphic. Under Looping→Options, you can choose between Loop, Play Once, and
Single Frame. In the First box, you can choose the first frame that Flash displays.
For example, suppose you have a nifty countdown multiframe graphic like the ones
at the beginning of old newsreels. Your graphic counts down from 10, but for this
project you’d like to start it at 8, like in the movies. Simply adjust the starting frame
so that it begins when the 8 is showing, as shown in Figure 7-15.
NOTE The file
07-1_Multiframe_Countdown.fla
, shown in Figure 7-15, is available at
www.missingmanuals.
com/cds/flashcs6mm
. It shows how multiframe graphic symbols can be made up of several different graphic
elements, layers, and symbols. A second file,
07-2_Movie_Clip_Countdown.fla
, shows the differences between
multiframe graphic symbols and movie clip symbols.
EDITING A MULTIFRAME GRAPHIC SYMBOL
You edit a multiframe graphic symbol the same way you edit a single-frame graphic
symbol: by switching to symbol editing mode (page 257). In both cases, Flash immedi-
ately applies the changes you make to the symbol to all the instances of that symbol.
DELETING A MULTIFRAME GRAPHIC SYMBOL
You delete a multiframe graphic symbol the same way you delete any other symbol in
Flash: through the Library panel. Just remember that when you delete a symbol,
Flash
automatically deletes all the instances of that symbol
, wherever you’ve placed them.
To delete a graphic symbol:
1. In the Library panel, click to select the graphic symbol you want to delete.
Flash highlights the selected symbol’s name and type.
2. Right-click the graphic symbol icon, and then, from the pop-up menu that
appears, choose Delete.
Flash removes the graphic symbol from the Library panel. It also removes all
the instances of that symbol from your animation.
Movie Clip Symbols
A
movie clip
symbol (Figure 7-16) is a reusable, self-contained chunk of animation,
which you can drop into a single frame in another animation.
Unlike multiframe graphic symbols, you can add sounds (Chapter 11) and actions
(Chapter 12) to movie clip symbols. Also unlike multiframe graphic symbols, movie
clip symbols run independently from the animations to which you add them.
www.it-ebooks.info
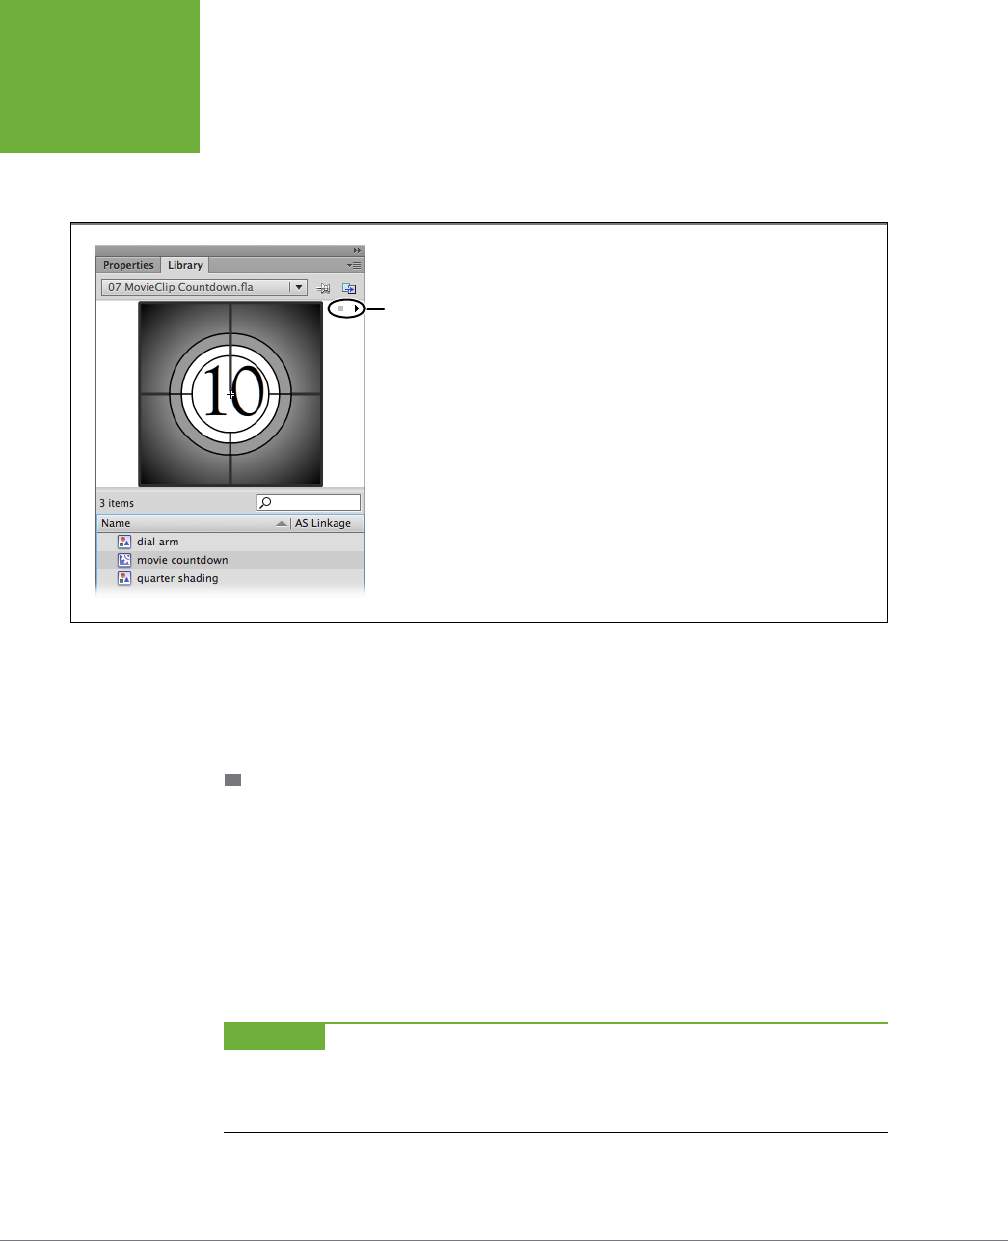
FLASH CS6: THE MISSING MANUAL
268
SYMBOLS AND
INSTANCES
So movie clips give you the opportunity to create nonsequential eects like repeating,
or
looping
, scenes, as well as interactive graphics—for example, buttons, checkboxes,
and clickable images that tell Flash to display something dierent, depending on
what your audience clicks.
FIGURE 7-16
When you select a movie clip symbol in the Library, the Library
panel’s preview window shows you the first frame of the
symbol, as well as a minicontroller you can use to play (and
stop) the movie clip right there in the Library before you go
to all the trouble of dragging an instance of the movie clip to
the stage. (You see this same minicontroller when you select a
multiframe graphic in the Library.)
Preview controller
As you’ll see in the following section, movie clip symbols have their very own time-
lines, so an instance of a movie clip symbol always takes up just one frame in the
animation to which you add it, no matter how many frames the movie clip symbol
actually contains.
CREATING A MOVIE CLIP SYMBOL
Creating a movie clip symbol in Flash is similar to creating a multiframe graphic
symbol (page 263). You can either create a series of frames (including sounds and
actions, if you like) and convert it into a movie clip symbol, or you can use Flash’s
editing mode to create a movie clip symbol from scratch and save yourself the
conversion step.
In fact, as the following steps show, only one minor but important dierence exists
between creating a multiframe graphic symbol and creating a movie clip symbol,
and that’s selecting the correct drop-down menu option in step 4.
WARNING Modify→Convert to Symbol works only when you’re converting an image to a single-frame
graphic symbol; it doesn’t let you convert a series of frames into a movie clip symbol. But if you try it, Flash won’t
give you an error. Instead, it’ll chug along happily, pretending it’s creating a movie clip symbol. But in reality, the
symbol you create this way contains just one frame.
www.it-ebooks.info

CHAPTER 7: REUSABLE FLASH: SYMBOLS AND TEMPLATES 269
SYMBOLS AND
INSTANCES
To convert a series of existing frames to a movie clip symbol:
1. On the timeline, select the frames you want to convert.
It’s easy to select a series of frames. Click at one end of the series, and then
Shift-click at the other end of the series. Flash automatically selects all the
frames in between. If your frames contain layers, make sure you select all the
layers in each frame.
2. Choose Edit→
Timeline→Copy Frames or press Ctrl+Alt+C (Option-⌘-C).
Flash copies the frames.
3. Choose Insert→New Symbol.
The Create New Symbol dialog box appears.
4. In the Create New Symbol dialog box, make sure to choose Movie Clip from
the drop-down menu.
If it’s not selected, click to select it.
5. Type a name for your movie clip symbol, and then click OK.
The name of your movie clip symbol appears in the Library panel, and in the Edit
bar above your stage, to let you know you’re in symbol editing mode. Another
tip-o that you’re in symbol editing mode is the cross, or registration point,
that appears in the middle of the symbol editing stage.
6. In the symbol timeline, click to select the first keyframe (Frame 1).
Flash highlights the selected keyframe.
7. Select Edit→
Timeline→Paste Frames.
Flash pastes the copied frames onto the symbol’s timeline and displays the
first keyframe of the new symbol (along with a minicontroller) in the Library
panel’s preview window.
8. In the Library panel, preview your symbol by clicking the minicontroller’s
Play button.
Flash runs a thumbnail version of the movie clip symbol in the preview window.
9. Get out of symbol editing mode by choosing Edit→Edit Document.
Flash brings you back to the workspace and your main animation.
To create a movie clip symbol from scratch in symbol editing mode, follow the steps
on page 252, adding the content for as many frames as you need.
CREATING AN INSTANCE OF A MOVIE CLIP SYMBOL
Because movie clip symbols have their own timelines, they’re completely self-con-
tained. You don’t have to worry about matching your movie clip symbol to your main
animation’s timeline the way you do with a multiframe graphic symbol (page263);
www.it-ebooks.info
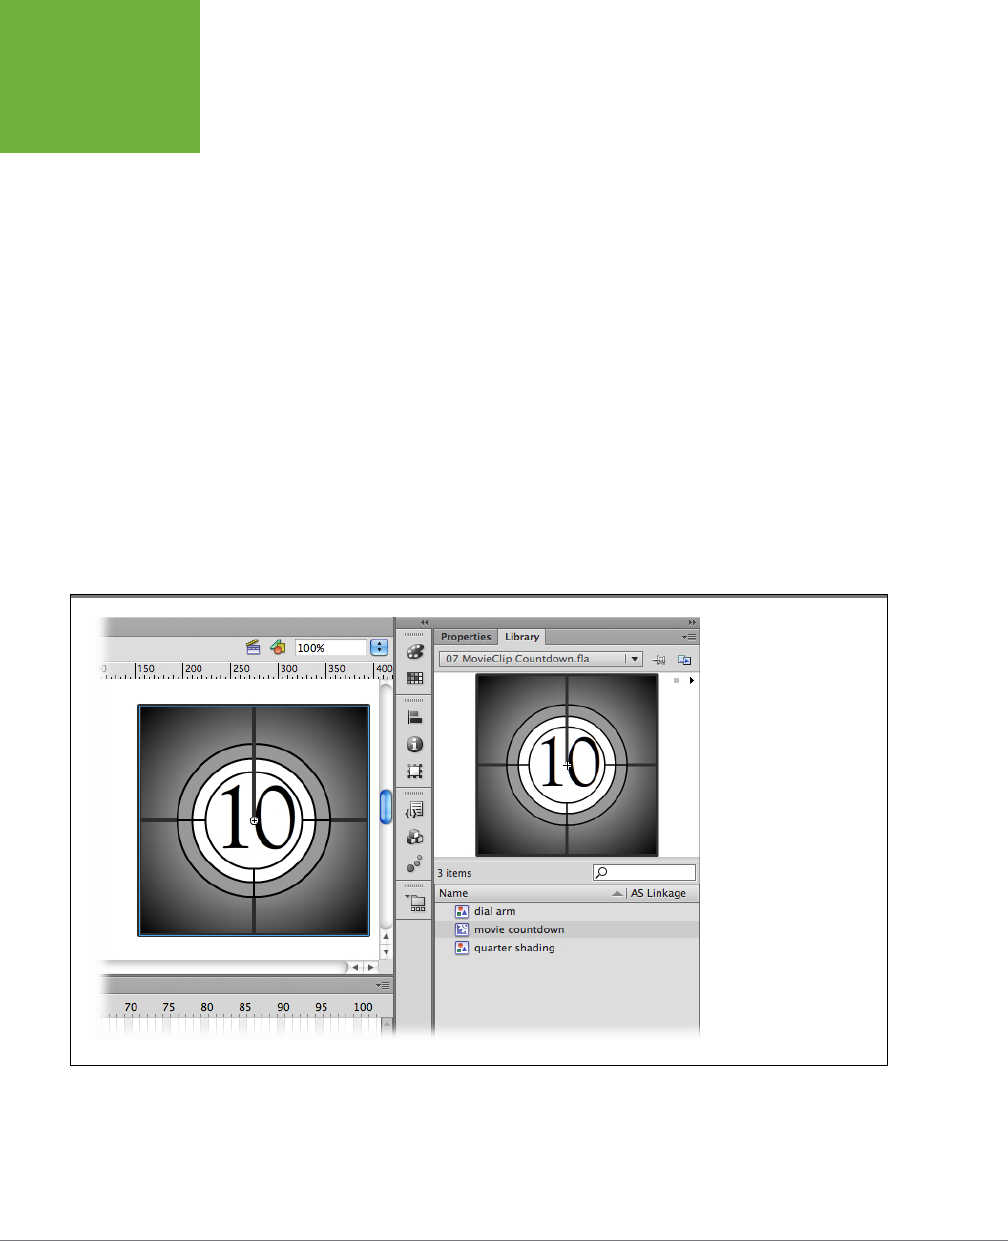
FLASH CS6: THE MISSING MANUAL
270
SYMBOLS AND
INSTANCES
movie clip instances live on a single frame in your main animation, no matter how
many frames the instances themselves contain. As a matter of fact, as you’ll see next,
creating an instance of a movie clip symbol is as easy as dragging and dropping.
To create an instance of a movie clip symbol:
1. In your main animation, click to select the keyframe where you want to place
an instance of a movie clip symbol.
Only keyframes can contain new content. So if you try to place a symbol in a
regular frame, Flash “backs up” and places your symbol in the keyframe im-
mediately preceding the selected frame anyway.
2. In the Library, click to select the movie clip symbol of which you want to
create an instance.
You can either click the symbol’s icon from the list or click the symbol’s thumb-
nail in the preview window.
3. Drag the symbol to the stage.
Flash creates an instance of the symbol and places it in the keyframe you se-
lected in step 1, as shown in Figure 7-17.
FIGURE 7-17
Dragging a movie clip
symbol from the Library
to the stage tells Flash to
create an instance of the
symbol. No matter how
many frames (or layers)
your movie clip instance
contains, it takes up
only one frame on your
animation (circled), which
makes movie clips perfect
for creating animated
buttons.
4. To preview your instance, select Control→
Test Movie→
Test.
You’ll notice that even if you turn looping o in the Control panel (which you do by
selecting Control, and then, from the pop-up menu that appears, turning o the
checkbox next to Loop) your movie clip instance continues to loop. The movie clip
www.it-ebooks.info

CHAPTER 7: REUSABLE FLASH: SYMBOLS AND TEMPLATES 271
SYMBOLS AND
INSTANCES
behaves this way because it’s running on its own timeline (not the timeline Flash
associates with your main animation). One way to tell Flash to stop looping your
movie clip instance is to add a keyframe to your timeline
after
the keyframe that
contains your movie clip instance. It can be a blank keyframe or a keyframe with
content other than the movie clip you intend to stop.
NOTE Flash automatically loops the movie clip instance (plays it over and over again) until it encounters a
keyframe that removes the movie clip, or until it encounters an ActionScript statement that tells it to stop (like
stop()
or
goToAndStop(), for example
). You can see an example of controlling playback with ActionScript in
Chapter15.
EDITING A MOVIE CLIP SYMBOL
You edit a movie clip symbol the same way you edit a single-frame graphic symbol:
by switching to symbol editing mode (page 258). In both cases, Flash immediately
applies your changes to all the instances of that symbol.
EDITING AN INSTANCE OF A MOVIE CLIP SYMBOL
Similar to multiframe graphic symbols, Flash lets you change the contents of the
first keyframe of your movie clip instance, just the way you can an instance of a
single-frame graphic (page 257). But Flash automatically applies those changes to
the contents of
every
frame in your instance. So, for example, if you apply a sepia
tint to the first keyframe, your entire movie clip instance looks old-timey. You can
also apply filters (page 276) and blending eects to movie clip instances.
Reuse Deluxe: Repurposing Symbols
When you think about it, it’s the simple, classic shapes you use
most often in drawing.
Sure, it’s great to have a sun, flower, or cockroach symbol
hanging around in the Library, but it’s the ovals, wedges, and
sweeps that you find yourself coming back to again and again.
And because Flash lets you resize, reposition, and recolor each
instance, you can create radically different drawings using the
same handful of simply shaped graphic symbols. Working this
way lets you optimize the size of your finished animation, and,
as a bonus, you get to focus on design at the graphic element
level. (Even accomplished animators can find fresh ideas by
limiting themselves to a handful of shapes.)
Expand and flip a raindrop symbol and then add a tail, for ex-
ample, and you’ve got yourself a whale, as shown in Figure 7-18.
DESIGN TIME
Button Symbols
The easiest way to make your animation interactive is to add a button someone can
click at runtime to perform a task, like replaying your entire animation, choosing
which of several scenes to play, loading a web page, and so on.
To make creating a button easy, Flash has button symbols (Figure 7-19). A
button
symbol
has four frames. Each frame has a specific function that helps you control
the appearance of the button as it’s being used by your audience:
www.it-ebooks.info
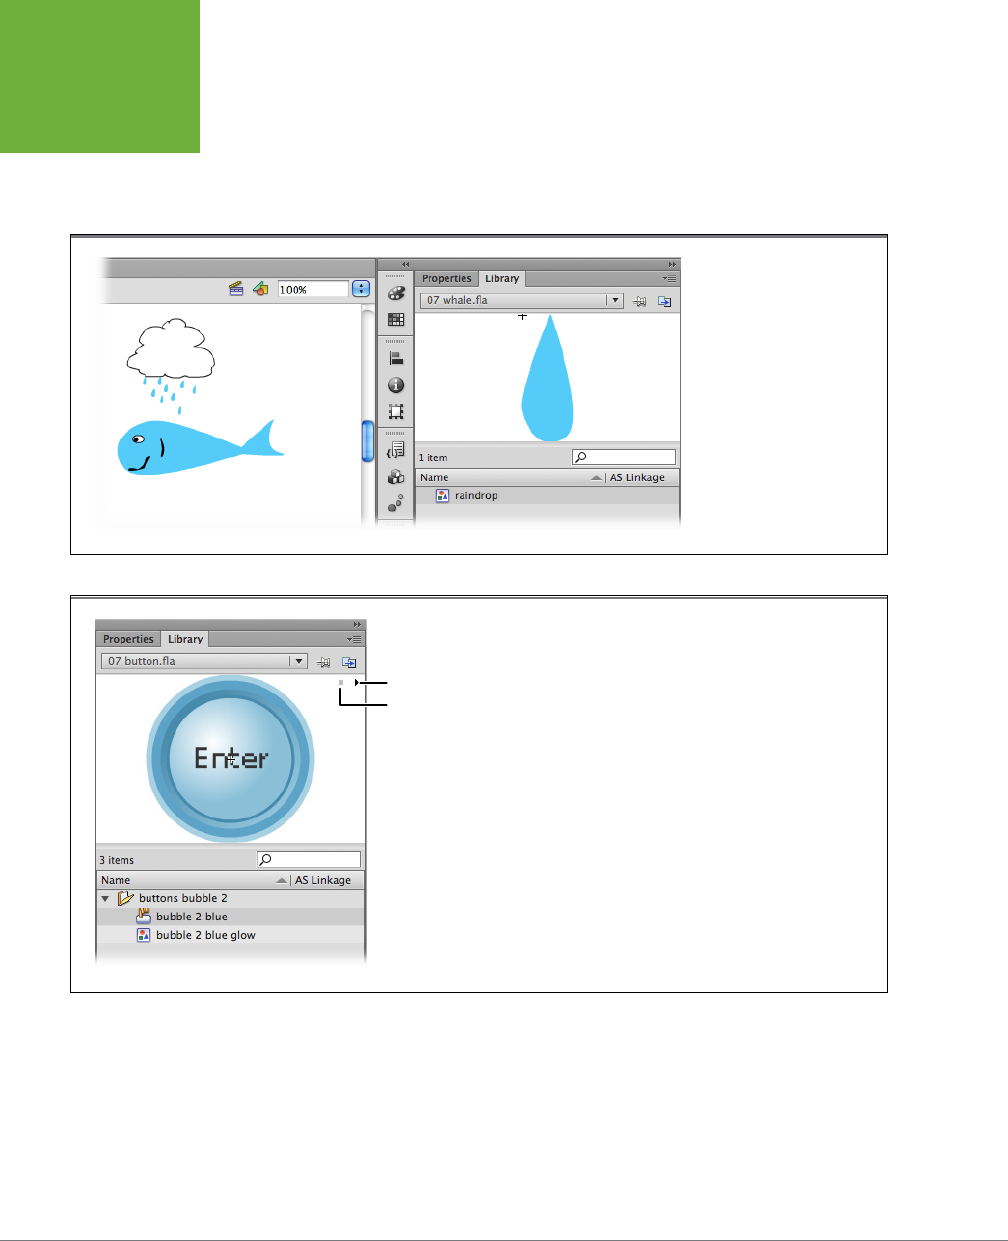
FLASH CS6: THE MISSING MANUAL
272
SYMBOLS AND
INSTANCES
• Up. In this frame, you draw the button as you want it to appear
before
your
audience mouses over it.
• Over. In this frame, you draw the button as you want it to appear
after
your
audience mouses over it.
FIGURE 7-18.
You’ll find that simple shapes
are the easiest to reuse
because they’re the most
adaptable. In this image, a
raindrop is resized and ro-
tated to become the body of
a whale. Creative repurposing
saves time and reduces the
size of your Flash files.
FIGURE 7-19
Because button symbols are like specialized movie clip symbols, you see
the same minicontroller in the Library’s preview window when you click a
button symbol as you see when you select a movie clip or multiframe graphic
symbol. Clicking Play cycles through the button symbol’s four frames, so you
get to see 1) how the button looks before the cursor mouses over it, 2) how it
looks after the cursor mouses over it, 3) how it looks when clicked, and 4) the
button’s clickable area. When you create a button symbol, Flash spots you the
four frames; all you have to do is customize them, as shown in the following
sections.
Play
Stop
• Down. In this frame, you draw the button as you want it to appear when your
audience clicks it.
• Hit. In this frame, you draw the active, or “clickable,” area of your button. In
most cases, you want the active area to be identical to the button itself. But in
other cases—for example, if you want to create a bullseye-shaped button that
responds only when your audience clicks the tiny red dot in the center—you
draw that center dot here, in the fourth frame (the Hit frame). You can also use
www.it-ebooks.info

CHAPTER 7: REUSABLE FLASH: SYMBOLS AND TEMPLATES 273
SYMBOLS AND
INSTANCES
this frame to create invisible buttons, as explained on page 277, or buttons that
are the shape of an image in your animation, like a car.
For the designer, button symbols are handy. Flash automatically gives you the four
Up, Over, Down, and Hit frames—all you have to do is plug in your drawings and
go. As you’ll see in the following section, Flash also gives you a handful of built-in
graphic eects, called
filters
, which you can apply to your buttons to get professional-
looking results. Button symbols aren’t the only way to provide clickable interactivity
to your projects. ActionScript coders often create their own buttons or use button
components (page 544).
NOTE To get your button to actually do something when someone clicks it—to display a different section of
the timeline, for example, or some dynamic text—you need to tie a snippet of ActionScript code to your button.
Chapter 13 shows you how.
CREATING A BUTTON SYMBOL
When you create a button symbol, you start out basically as if you’re creating any
graphic symbol from scratch (page 252), but since button symbols have those four
possible states, you can create up to four dierent graphics. When you choose But-
ton in the New Symbol dialog box, Flash gives you a separate frame to hold each
drawing so that you won’t get confused.
In this example, you’ll create a round, red button that turns yellow when your audi-
ence mouses over it and green when your audience clicks it.
1. Click Insert→New Symbol.
The Create New Symbol dialog box appears.
2. In the Name text box, type
bullseye
. Make sure the drop-down menu is set to
Button, and then click OK.
When you create a new button symbol, Flash gives you four named frames
(Figure 7-20). It’s up to you which frames you want to modify, but at the very
least, you need to add a drawing to the Up frame, to show the button before
it’s clicked or moused over. For a more sophisticated button, you’ll also add a
drawing to the Over frame (as shown below) to let someone know when his
mouse is over the button.
FIGURE 7-20
Flash pops you into symbol editing mode. In the symbol’s timeline, you see
four named frames: Up, Over, Down, and Hit.
www.it-ebooks.info
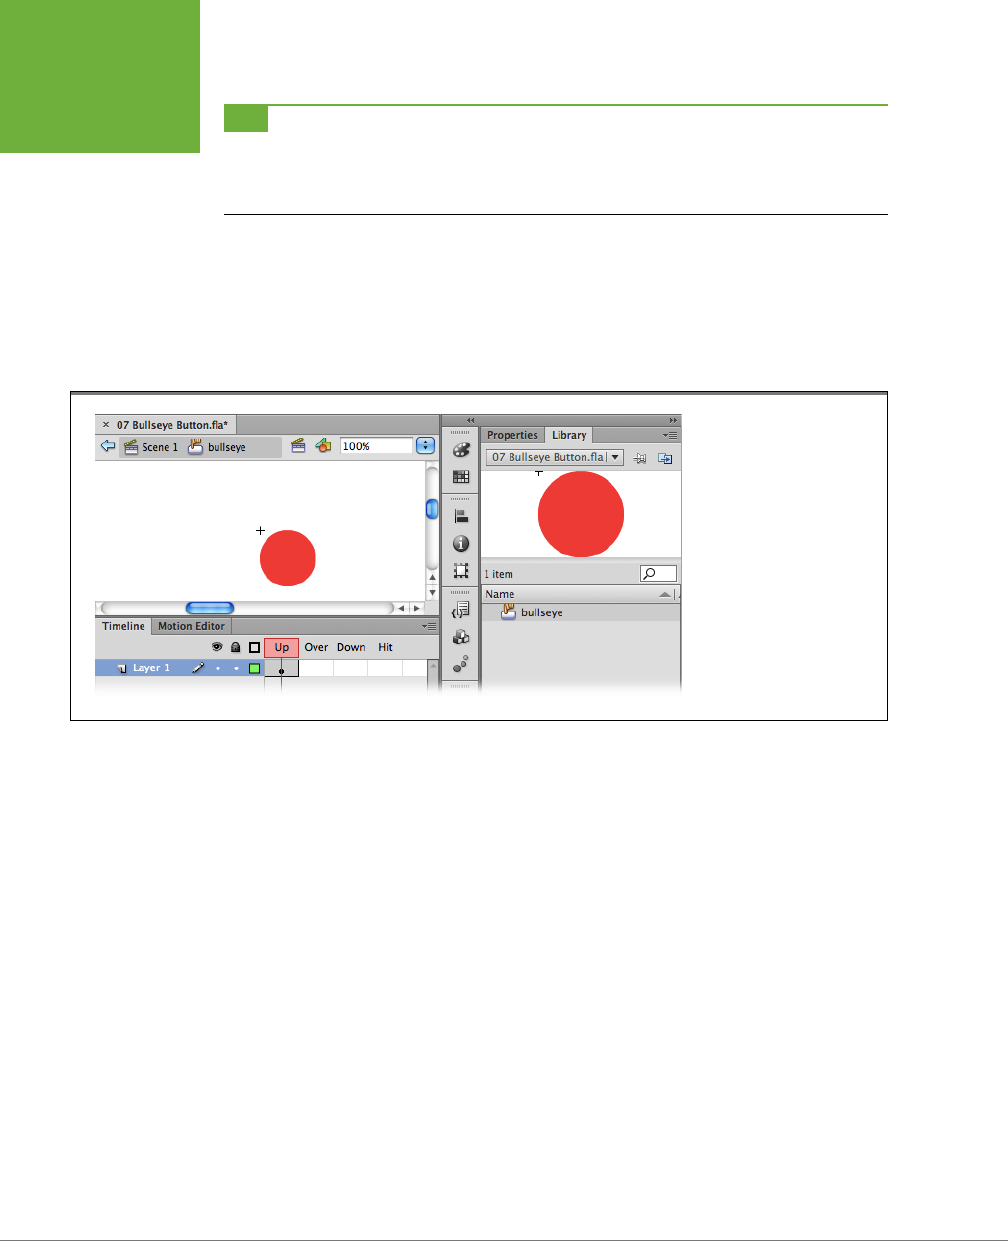
FLASH CS6: THE MISSING MANUAL
274
SYMBOLS AND
INSTANCES
TIP Flash comes with a blue million button symbols already spiffed up and ready for you to drop into
your animations. So before you get too carried away drawing your own button, choose Window→Common
Libraries→Buttons to see if Flash already has a button symbol that fits your bill. (You still have to write ActionScript
code to tell Flash what you want to do when your audience clicks your button. Find out how in Chapter 13.)
3. Draw your button as you want it to appear initially by using the Oval tool
to add a red circle to the first keyframe (the Up frame).
Keep the registration point (the cross) in the upper-left corner of your button
image as you draw. When you finish, your workspace should look similar to the
one in Figure 7-21.
FIGURE 7-21
Your button doesn’t have to
look like a button; it can be
an image, a shape, a line—
anything you like. But most
people are used to circular
buttons, so a circle’s a good
place to start. Notice that as
you create your image, Flash
automatically updates the
Library’s preview window.
4. Right-click Frame 2 (the Over frame), and then, from the pop-up menu that
appears, select Insert Keyframe.
Flash displays a circle in Frame 2 to let you know you’ve successfully added
a keyframe. On the stage, you see a copy of the button you drew in Frame 1.
5. Here’s how you make the button change when a cursor passes over it: On
the stage, select the circle. In the Properties panel, click the Fill Color icon, and
then, from the color picker that appears, choose a yellow swatch.
Flash recolors the circle yellow. If you don’t see the Properties panel, select
Window→Properties. If you still don’t see it, make sure you’ve selected the
circle on the stage.
6. Right-click Frame 3 (the Down frame), and then, from the pop-up menu that
appears, select Insert Keyframe.
Flash displays a circle in Frame 3 to let you know you’ve successfully added a
keyframe (and, therefore, can change the content of the frame).
www.it-ebooks.info
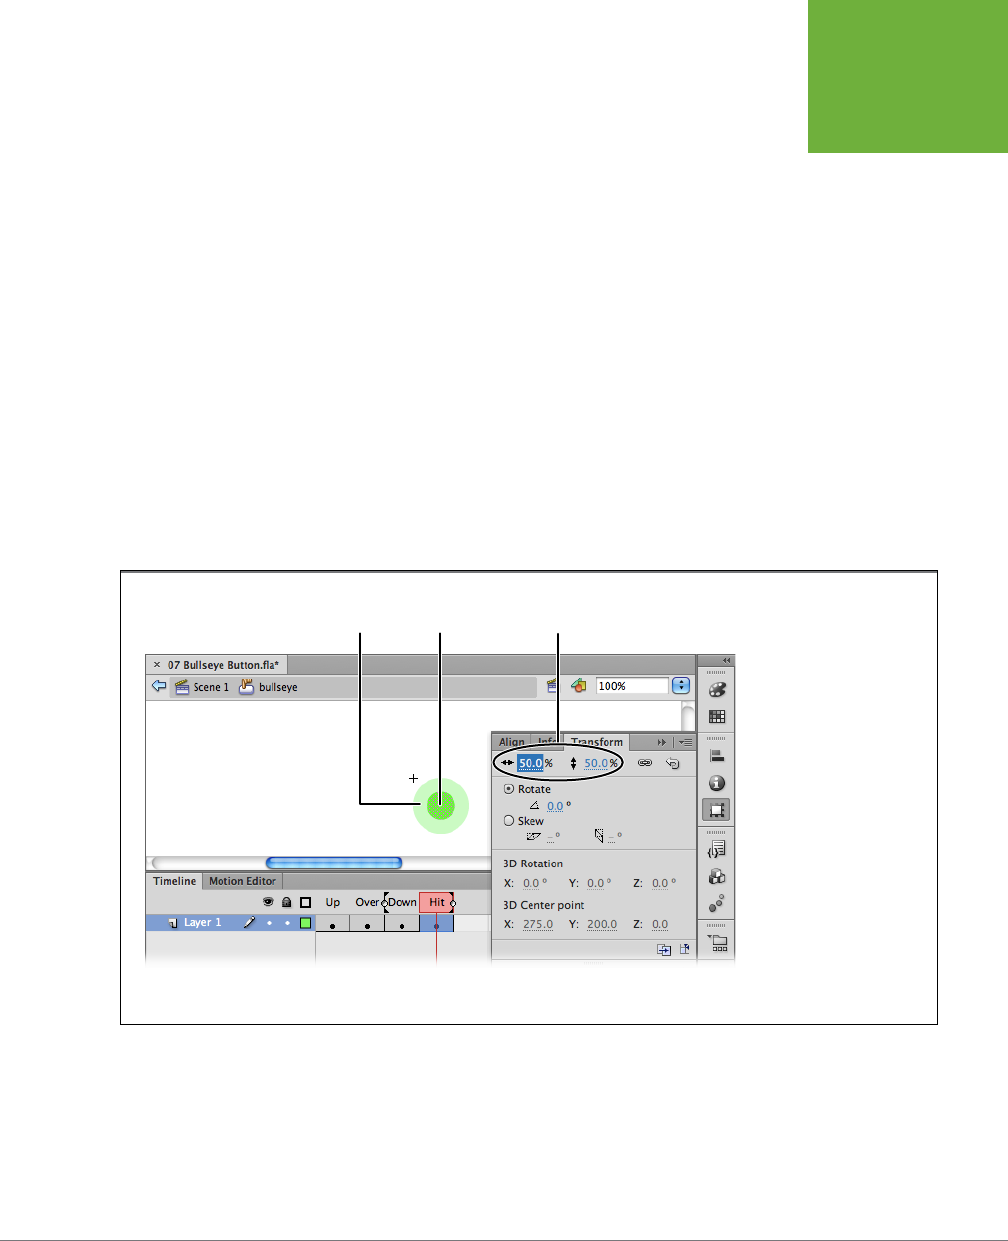
CHAPTER 7: REUSABLE FLASH: SYMBOLS AND TEMPLATES 275
SYMBOLS AND
INSTANCES
7. Here’s how you draw the button as you want it to appear when a cursor
clicks it: Select the button. In the Properties panel, click the Fill Color icon
once again, and then, from the color picker that appears, choose a green swatch.
Flash recolors the circle green.
8. Right-click Frame 4 (the Hit frame), and then, from the pop-up menu that
appears, select Insert Keyframe.
Flash displays a circle in Frame 4 to let you know you’ve successfully added
another keyframe. As you can see on the stage, Flash assumes you want the
entire button to respond to a mouse click—and in a lot of cases, that’s exactly
what you do want. But you can make the clickable portion of your button smaller
or larger. To do so:
9. On the stage, click the circle to select it. Then choose Window→Transform
to display the Transform panel.
In the Transform panel, type
50
into the Width and Height boxes, and then press
Enter or Return. Figure 7-22 shows you a scaled-down circle that should look
similar to the one you see on your workspace.
FIGURE 7-22
Normally, you want to draw
the same size shape in the
Hit frame as you do in the
other frames so that the
entire button responds to
mouse clicks. Drawing a
smaller (or even different-
shaped) image for the Hit
frame lets you create more
sophisticated buttons: click-
able images, for example, or
invisible buttons that let the
content of your frame itself
appear to respond to mouse
clicks (see the box on page
277). Here, the clickable por-
tion of the button is exactly
half the size of the visible
portion.
Transform scale
percentages
Clickable
area
Visible
image
10. Return to your animation by choosing Edit→Edit Document.
Flash hides your symbol editing workspace and displays your animation
workspace.
www.it-ebooks.info

FLASH CS6: THE MISSING MANUAL
276
SYMBOLS AND
INSTANCES
USING A BUTTON SYMBOL (CREATING AN INSTANCE OF A BUTTON
SYMBOL)
You can find the work file from the previous exercise
07-3_Bullseye_Button.fla
at
www.missingmanuals.com/cds/flashcs6mm
.
To create an instance of a button symbol:
1. Click to select the first keyframe (Frame 1) in your animation.
Flash highlights the selected frame.
2. In the Library panel’s preview window, drag your button symbol’s thumbnail
onto the stage.
On the stage, Flash creates an instance of the button symbol and surrounds it
with a selection box.
3. Test your button instance. To do so, choose Control→Test Movie→Test.
A red circle appears in the middle of the test window (Figure 7-23).
TIP To test your button instance on the stage, select Control→Enable Simple Buttons. When you do, your
button responds to mouse movement and clicking right there on the stage.
FIGURE 7-23
Whatever you drew in Frame 1 (the Up frame) appears first.
4. In the test window, drag your mouse over the red circle.
When your mouse nears the center of the red circle, your arrow cursor turns
into a pointing finger, and the red circle turns yellow.
5. With your pointing-finger cursor, click the yellow circle.
The yellow circle turns green.
NOTE Chapter 13 shows you how to add an action to your button so that clicking it does something useful.
EDITING AN INSTANCE OF A BUTTON SYMBOL
You can’t change the individual frames of your button instance individually. But
Flash does let you apply the same changes to
all
the frames of your button instance.
www.it-ebooks.info

CHAPTER 7: REUSABLE FLASH: SYMBOLS AND TEMPLATES 277
SYMBOLS AND
INSTANCES
Page273 shows you the steps you can take to apply color, transparency, and trans-
forms to your button instances. (The steps are identical to those you take to edit a
single-frame graphic instance.) But you can also apply
filters
, or visual eects, to
your buttons. Filters can turn even a plain oval button into something that looks like
you spent hours tweaking it.
Oddly Shaped (and Invisible) Buttons
Why would I want to make my Hit frame smaller than the but-
ton itself? Won’t that just make it harder for people to click
?
One popular situation when you might want to make the Hit
frame smaller than the button itself is when you’re creating
a hotspot. For example, say you’re creating an interactive
web-based game for kids. On the stage, you’ve drawn several
different animals: a pig, a duck, and a lamb.
The audio file you’ve attached to your animation tells the player
which specific part of each animal to click: the duck’s bill, for
instance, or the pig’s tail. In this case, you want to limit the
clickable portion of the image to the bill (or tail).
A situation when you might consider making the Hit frame
larger than the button is when you want to give your audience
a larger target. Instead of making someone center her cursor
precisely over a teeny-tiny button, for example, you can let her
click as soon as her cursor comes anywhere close to the button.
This option is great for text-only buttons, too.
Otherwise, only the actual letters are clickable. (Obviously, this
strategy works best when you have only a few buttons on the
stage and they’re not near one another.)
Finally, you can create invisible buttons by drawing a shape in
the Hit frame and leaving the rest of the button frames empty.
Suppose you have a picture and you want to make a car inside
that picture a clickable button, as shown in Figure 7-24. Bring
the entire picture into your button symbol. In the Hit frame,
trace and fill the portion you want to be clickable—say, the
car. Then delete the original picture, leaving only the filled
shape. Exit symbol editing mode, and then drag your invisible
button over the picture in the main timeline. To help you out
in placing an invisible button on the stage, Flash provides a
transparent blue hotspot shape. You can see this shape when
you’re working in Flash, but it doesn’t appear in your published
animation. For a working example of an invisible button,
download
07-4_Invisible_Button.fla
from the Missing CD at
www.missingmanuals.com/cds/flashcs6mm
.
FREQUENTLY ASKED QUESTION
NOTE Filters aren’t just for buttons. You can also apply filters to text blocks (Chapter 6) and movie clip
instances.
To apply a filter to a button instance:
1. On the stage, select the button instance.
Flash draws a blue selection box around the instance.
2. In the Properties panel, click the Filters subpanel.
If the Filters subpanel is closed, click the triangular button to expand it.
3. Click the Add Filter button (lower-left corner).
A pop-up menu appears (Figure 7-25), listing the following filter options:
www.it-ebooks.info
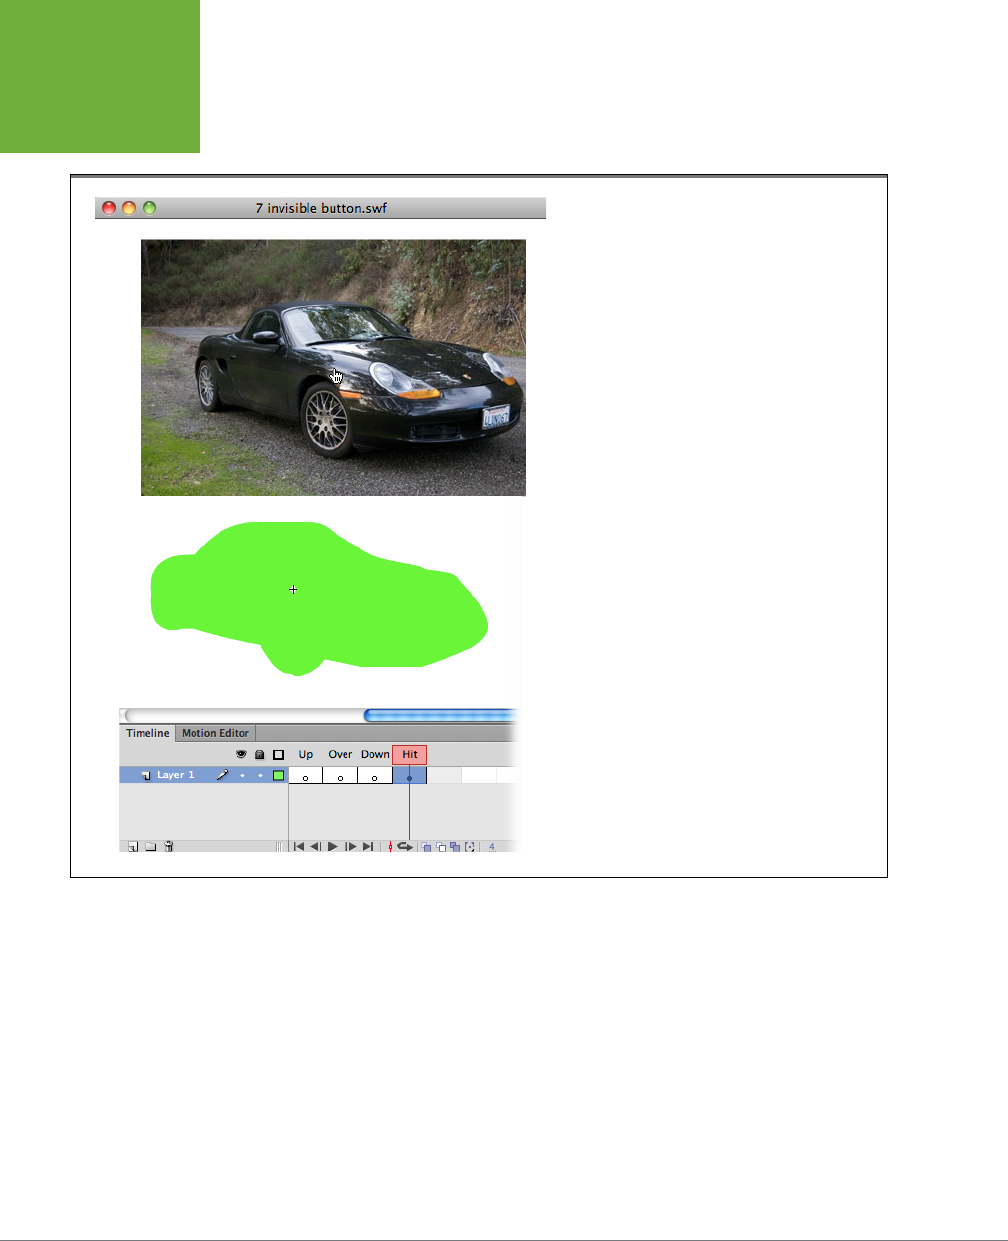
FLASH CS6: THE MISSING MANUAL
278
SYMBOLS AND
INSTANCES
• Drop Shadow. Displays a shadow on the right and bottom edges of the
button.
FIGURE 7-24
You can tell the car is a clickable button in this
Flash animation, because the cursor changes to the
well-known pointing finger. This clickable hotspot, or
invisible button, was created by placing a graphic the
shape of the car in the Hit frame of a button symbol.
• Blur. Redraws the surface of the button so that it appears soft and blurred.
• Glow. Similar to a drop shadow, creates a fuzzy aura in the color of your
choosing.
• Bevel. Applies brightness and shadow on opposite sides of the button to
create a 3-D eect.
• Gradient Glow. Similar to Glow (above), but lets you specify bands of dif-
ferent colors (instead of just one color).
• Gradient Bevel. Similar to Bevel (above), but lets you choose bands of
dierent colors for the brightness and shadow.
www.it-ebooks.info
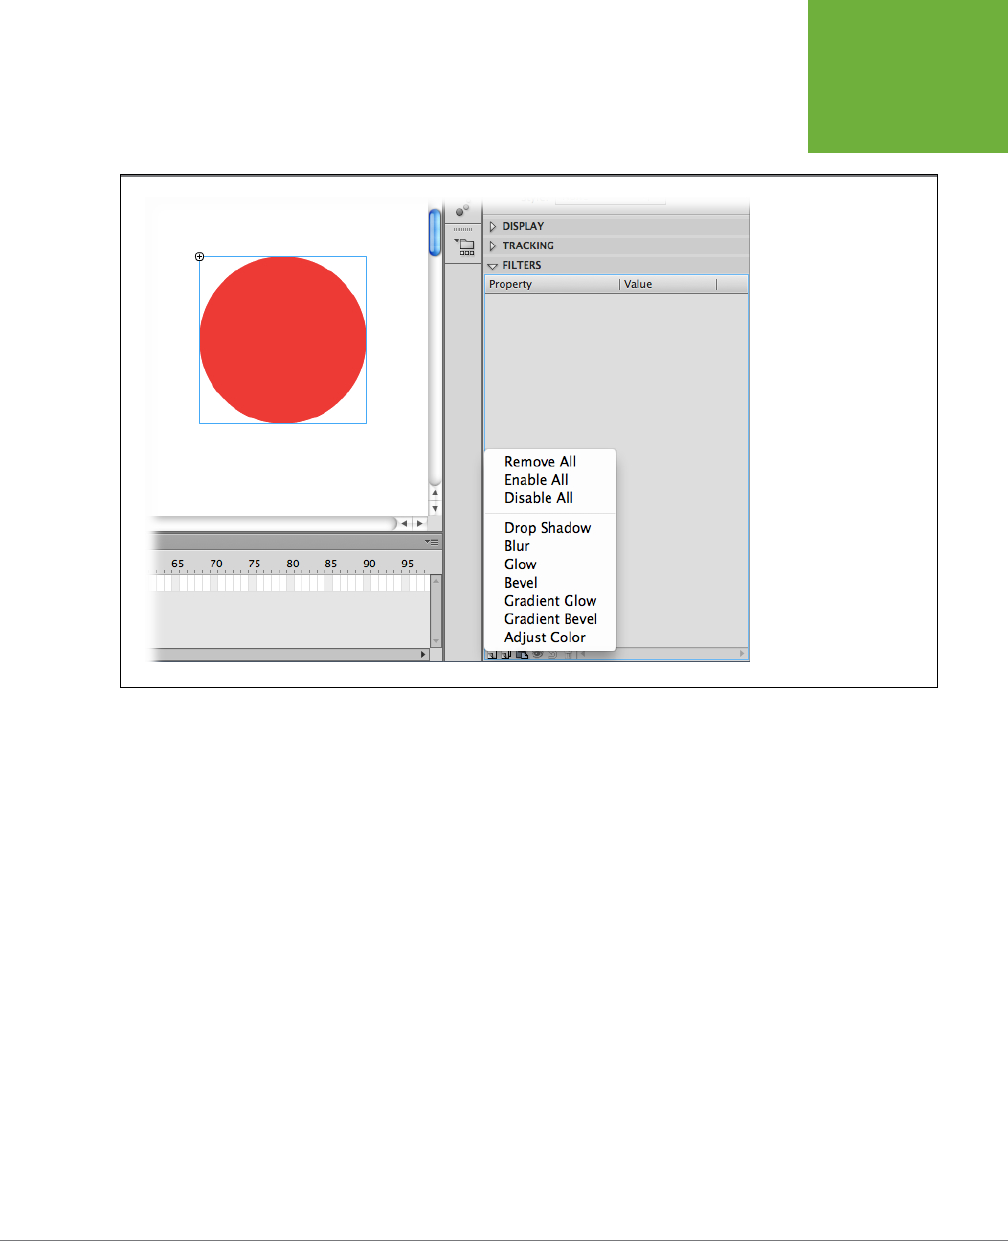
CHAPTER 7: REUSABLE FLASH: SYMBOLS AND TEMPLATES 279
SYMBOLS AND
INSTANCES
• Adjust Color. Lets you individually adjust the brightness, contrast, satura-
tion, and hue of your button.
FIGURE 7-25
When you click the Add
Filter icon in the Filters
panel, this pop-up menu
appears, showing you all
the effects you can add to
your button instance.
4. From the menu, select Glow.
A red, glowing eect appears around your button, and the Filter panel displays
the Glow properties.
5. Click the down arrow next to Blur X, and then drag the slider to 40.
On the stage, the glow diuses.
6. Click the Shadow Color icon, and then, from the color picker that appears,
click the black swatch.
On the stage, the glow turns from red to black, yielding a subtle 3-D eect
(Figure 7-26).
7. Test your newly edited button by selecting Control→
Test Movie→
Test.
In the test window that appears, you see your button with the Glow eect
applied.
8. In the test window, move your mouse over your button.
Flash applies filters to the entire instance (not just the contents of the keyframe
to which you apply them), so the Glow eect remains even when you mouse
over the button.
www.it-ebooks.info
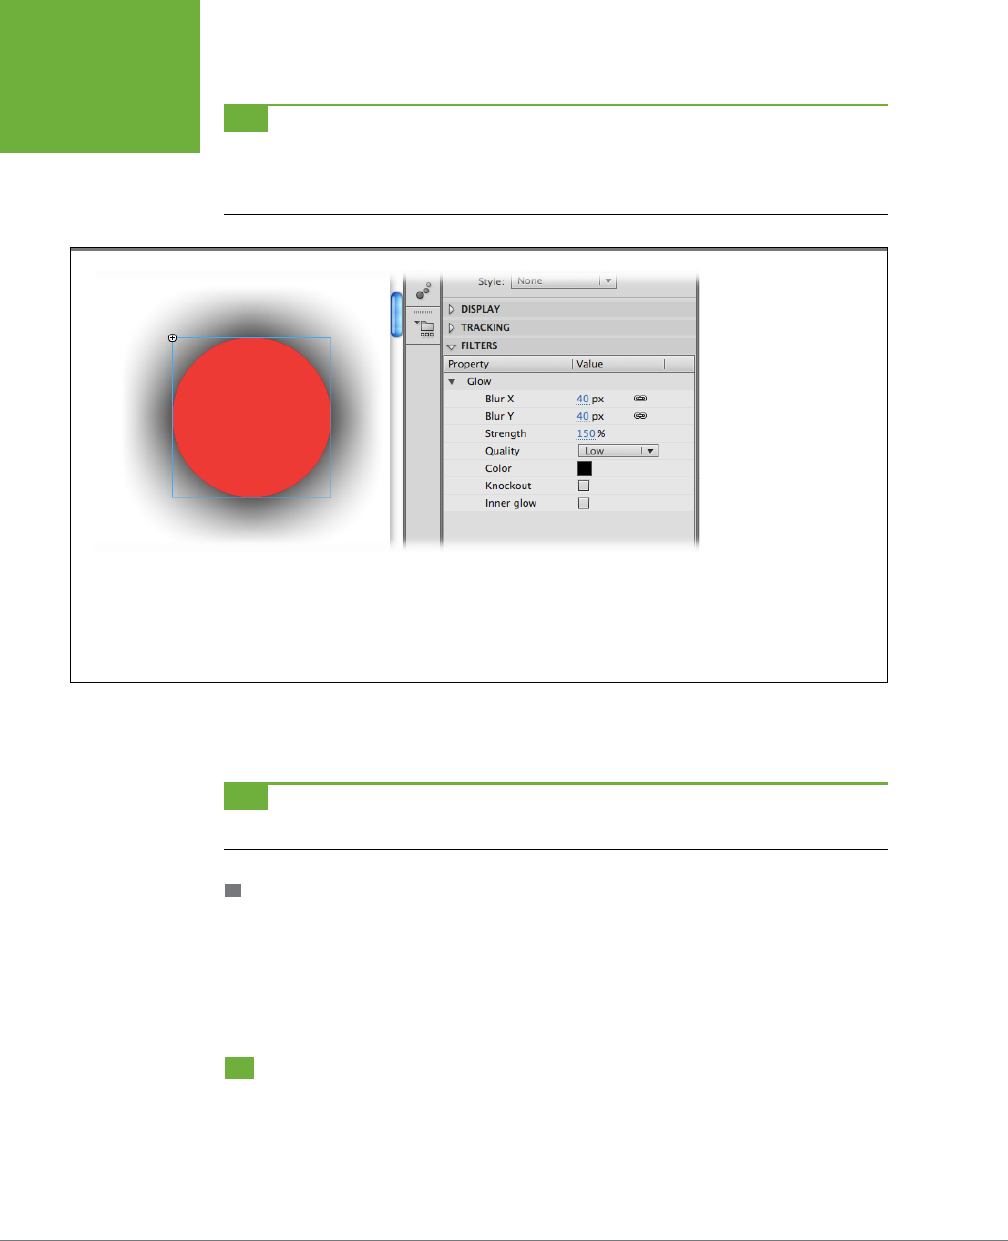
FLASH CS6: THE MISSING MANUAL
280
TEMPLATES
TIP With filters, you can quickly make a button instance look both unique and spiffy. Flash lets you change
the properties of your filters—for example, you can change the size of a blur or the color of a drop shadow—so the
drop shadow you apply to one instance doesn’t have to look the same as the drop shadow you apply to another
instance of the same symbol.
FIGURE 7-26
When you apply a Glow
filter to a button, you can
change the horizontal
and vertical width of the
glow (Blur X and Blur
Y), the density of the
blur (Strength), and how
far out the blur extends
(Quality). You can also
choose a different color
for your blur or apply a
Knockout effect (which
leaves the blur but erases
the button) or “Inner
glow” (which erases the
blur and then uses the
blur color to repaint the
surface of the button).
To remove a filter you’ve applied: In the Filter panel, select the filter you want to
remove, and then click the Delete Filter button (trash can).
TIP Applying a filter isn’t an either/or proposition. You can add multiple filters to the same instance to create
different effects: For example, you can add both a glow and a drop shadow, as shown in Figure 7-27.
EDITING A BUTTON SYMBOL
You edit a button symbol, the same way you edit a single-frame graphic symbol:
by switching to symbol editing mode (page 258). In both cases, Flash immediately
applies the changes you make to the button symbol itself, as well as all the instances
of that button symbol.
Templates
While symbols let you reuse images and series of frames,
templates
let you reuse
entire Flash documents. In this section, you see how to use Flash’s prebuilt templates
and how to create your own. In Flash CS6, templates are helpful in several ways:
www.it-ebooks.info
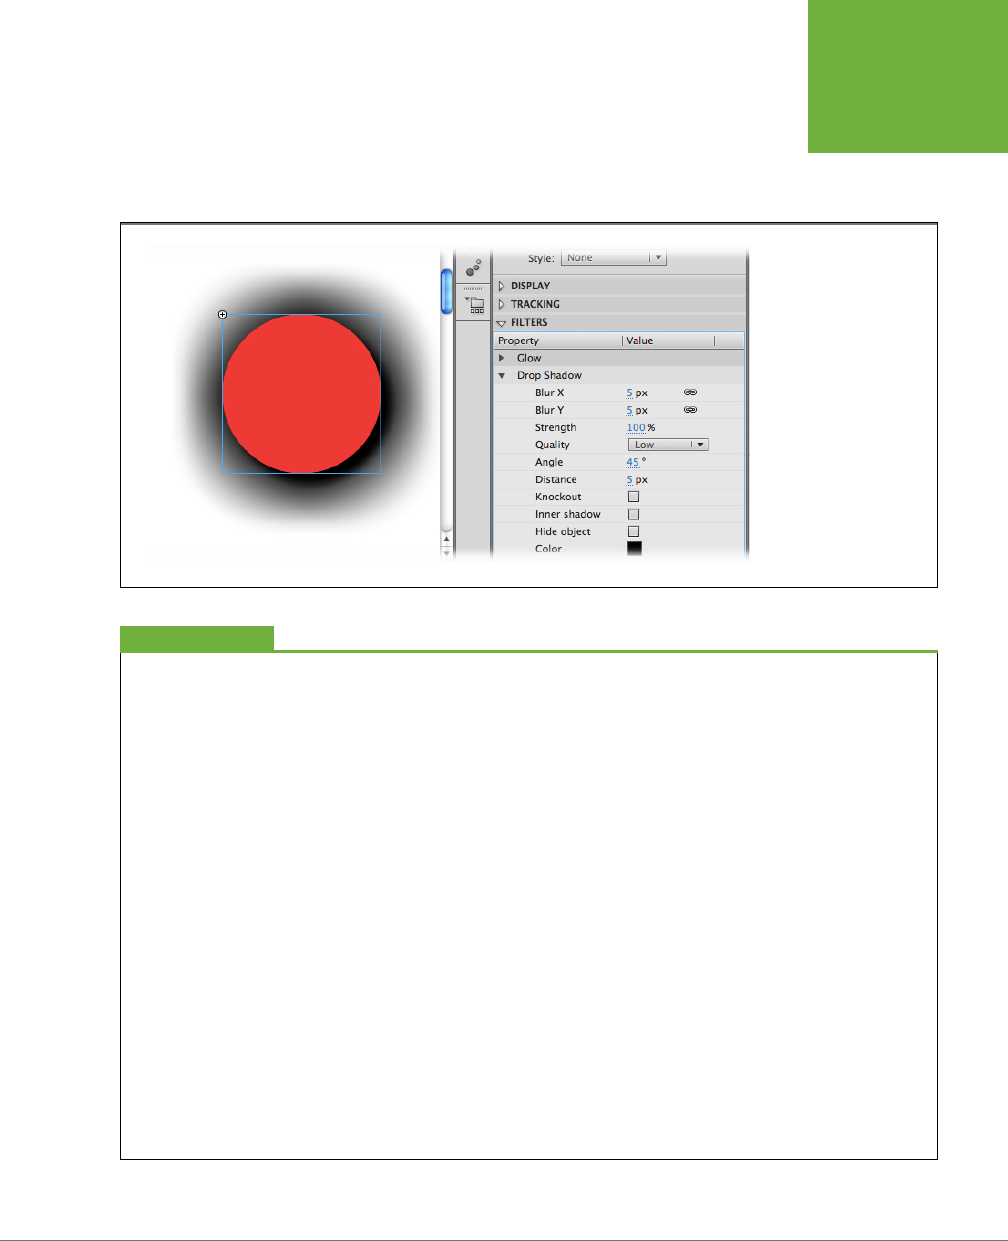
CHAPTER 7: REUSABLE FLASH: SYMBOLS AND TEMPLATES 281
TEMPLATES
• Use Adobe’s predesigned templates as a project starting point. For example,
the Advertising templates start you o with the stage set to web advertising
standards like 160 x 600 Wide Skyscraper or 728 x 90 Leaderboard. Among
the Media Playback templates, you’ll find templates to create photo albums.
FIGURE 7-27
Flash applies filters
in top-down order, so
adding a glow and a drop
shadow yields a different
result than adding a drop
shadow and then a glow.
You can even add the
same filter more than
once to compound the ef-
fect. To change the order
of your filters, simply
drag them to reposition
them in the Filter panel.
Organizing Your Symbols
If you do a lot of work in Flash, chances are you’re going to
create a lot of symbols. But in Flash, as in life, if you can’t see
what you’ve already got, you’re apt to recreate it or go without
it—both of which defeat the purpose of using symbols for in
the first place.
The answer? Organize your symbols into folders.
Flash lets you create folders inside the Library. You can use
these folders to organize your symbols. For example, you
might want to keep all your movie clip symbols in one folder,
all your graphic symbols in another, and so on. Or you might
want to keep all the symbols related to a composite drawing
(like a cartoon character or a corporate logo) in a separate
folder. Use whatever organization makes sense to you; you
can always reorganize your files and folders later.
To create a folder in the Library:
1. In the Library, click the Options menu. From the pop-up
menu that appears, choose New Folder.
2. A folder named “untitled folder 1” appears in the Library
beneath your symbols.
3. Replace the folder name by typing in a new, more
meaningful name, like logo, spaceman, or intro_scene.
Flash selects the folder name automatically when it
creates a new folder, but if you need to change the name
after the fact, double-click it.
4. Drag all the logo-related symbols into the logo folder,
all the spaceman-related symbols into the spaceman
folder, and so on.
If you need more levels of organization, you can place folders
inside folders.
DESIGN TIME
www.it-ebooks.info
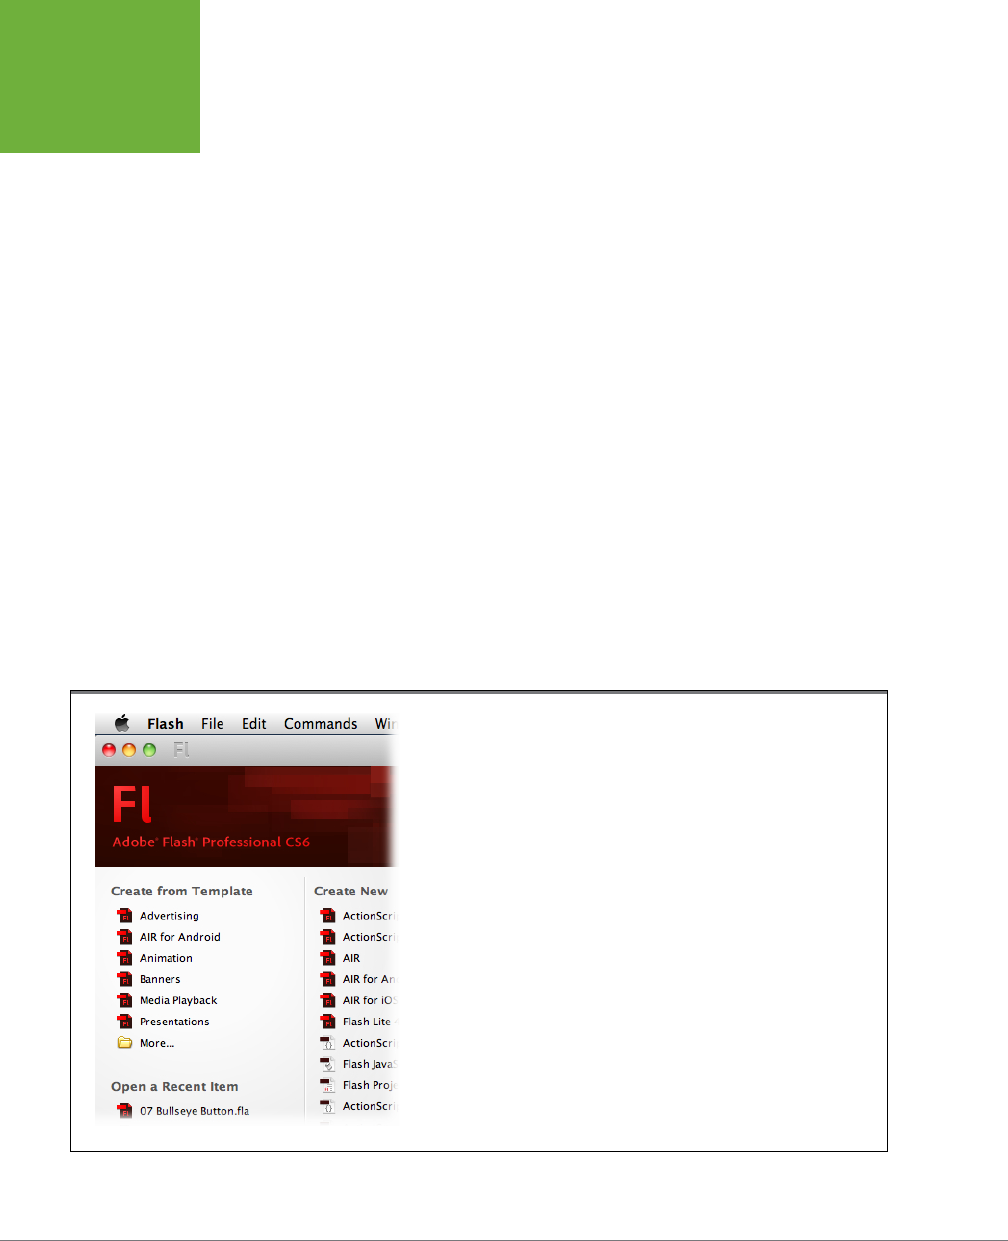
FLASH CS6: THE MISSING MANUAL
282
TEMPLATES
• Use Adobe’s predesigned templates as learning examples. The Animation
and Sample Files templates show how to use advanced techniques such as
tweens, masks, and easing. These are working examples, which you can learn
from by experimenting and analyzing them (as of this writing, these templates
contain no written instructions). Still, if you want to learn how to create ran-
dom eects with ActionScript, you can study the code in the Scripted Rain or
Scripted Snow templates.
• Create your own templates to save time and ensure consistency. Suppose
you create marketing animations for display on your corporate website. You
always use your company’s logo and copyright notice, the same stage size and
color palette, a copyright notice, the same sound clips of your CEO speaking,
and the same intro and credit scenes. By creating a template with these ele-
ments, you can save yourself a lot of time, and you ensure consistency among
your animations (highly important in certain corporate circles).
Flash CS6 comes with a bunch of templates all ready for you to customize. You see
them on the Welcome screen (Figure 7-28) when you start Flash (or choose File→New
and then click the Templates tab). While they’re obviously not specific to your
particular company or project, they
can
save you time on a lot of basic animations,
including banner ads, slideshows, and presentations. They’re also great examples for
learning new Flash skills. Here’s a quick rundown of the major template categories.
• Advertising templates are sized according to web advertising standards. Other
than setting the stage to a specific size, they don’t provide that much help.
FIGURE 7-28
When you first start Flash, the major template categories are displayed on the
Welcome screen. If you don’t see the Welcome screen when you start Flash, you
can always open a template using the File→New command and then clicking the
Templates tab.
www.it-ebooks.info

CHAPTER 7: REUSABLE FLASH: SYMBOLS AND TEMPLATES 283
TEMPLATES
• AIR for Android templates are great learning tools. As you’ll see in Chapter23,
they include example for handling common mobile device behaviors such as
touch screen gestures and accelerometer events.
• Animation templates are more helpful both as a starting point and as learning
examples. You’ll find working buttons and examples of graphic masks—a method
where part of an image that’s concealed is gradually revealed. The animation
template examples shown use an
ease
—that is, an eect that starts o at one
speed and then increases or decreases. The Animation templates also include
several examples that include random movement and timing.
• Banners holds templates similar to the ones in the Advertising group. There are
fewer examples, but they include some ActionScript programming. For example,
the 160 x 600 Simple Button AS3 template includes code to link to a web page.
• Media Playback templates come in two flavors—photo album templates (always
popular) and TV title-safe templates. The TV templates give you a presized stage,
with rectangles marking the safe areas for titles and action. If your work goes
outside the safe area, some TVs may not display all your beautiful animation.
• Presentations are predesigned to help you create PowerPoint-style presenta-
tions in Flash.
• Sample Files are a grab bag of templates that are great learning tools. You’ll
find examples that use Flash’s IK Bone tool (Figure 7-29).
NOTE Flash’s templates are useful—
if
you can figure out what they’re supposed to do and how to custom-
ize them. You’re at the mercy of the people who created the templates. If you’re lucky, they provided a helpful
name and description that appears in the dialog box where you choose a template. If you’re very, very lucky,
they provided instructions, comments, and notes in the template itself.
Opening a Prebuilt Template
Starting a document from a template is similar to opening an existing document.
There’s one big dierence, though. When you use a template to create a new docu-
ment, the original template remains untouched. It’s as if you opened an existing
document and immediately used Save As to save it under a new name. Here are the
steps for using one of the prebuilt templates that come with Flash:
1. Select File→New.
The New Document window appears.
2. In the New Document window, click the Templates tab.
The New from Template window opens (Figure 7-30).
3. In the Category box, select Animation.
Several animation templates appear in the Templates box.
www.it-ebooks.info
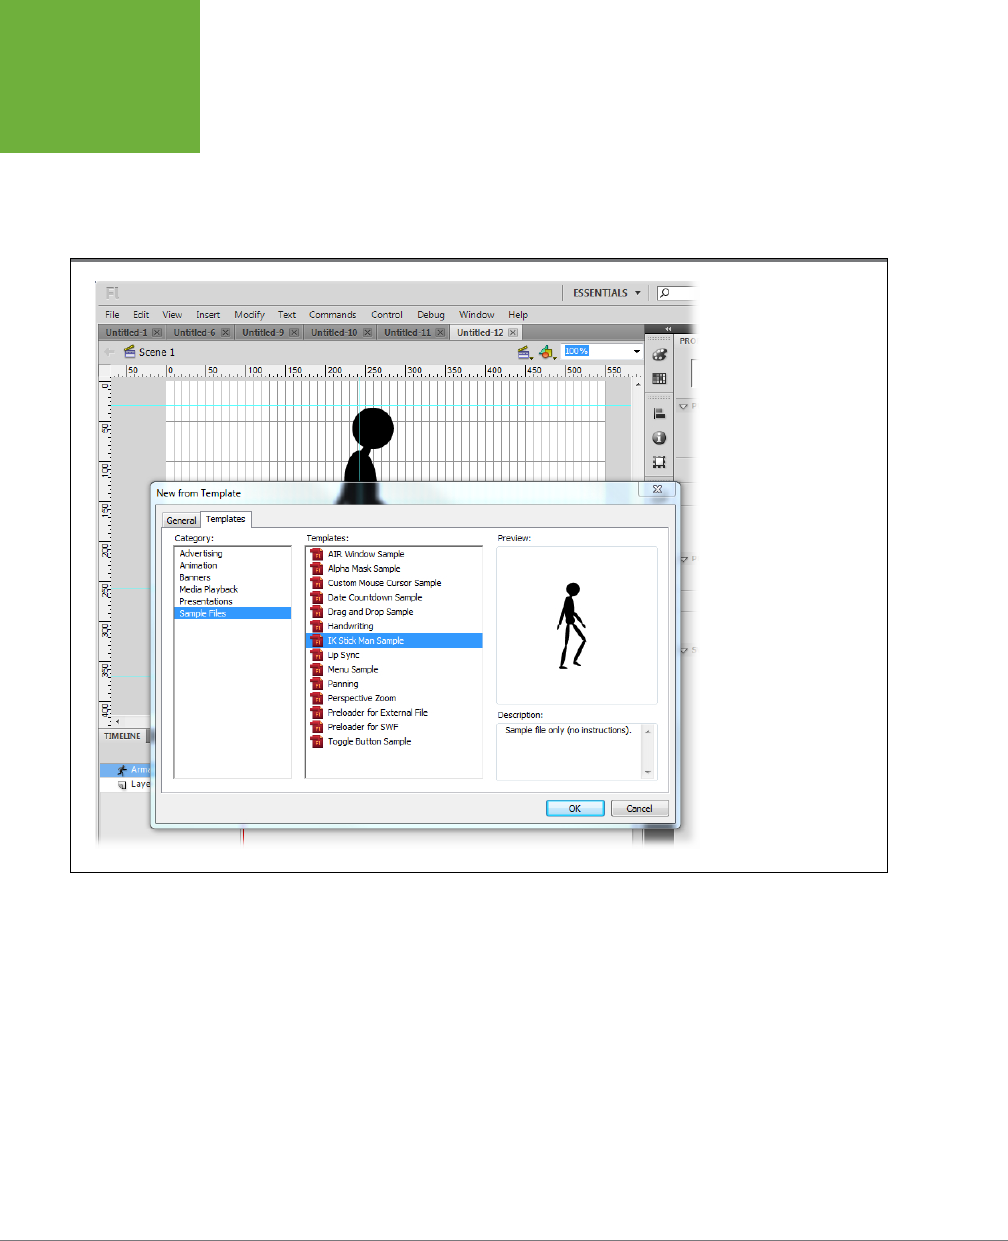
FLASH CS6: THE MISSING MANUAL
284
TEMPLATES
4. At the top of the list, click Animated Button Highlight.
The Preview window shows the stage for the selected template. Sometimes
you won’t see anything but the shape of the stage. For the Animated Button
Highlight, you see the button. The description gives you some hints about the
template and what it is designed to do.
FIGURE 7-29
Templates in the Sample
File group can help you
master specific tools and
techniques. The IK Stick
Man Sample shown here
shows how to use Flash’s
Bone tool (page 325).
5. Click OK.
Flash opens the template, and you’re ready to roll. Several of the prebuilt tem-
plates have instructions, including this one. The instructions are in the top layer
of text on the stage. After you’ve read them, you can delete or hide the layer.
These instructions explain how to change the button’s appearance and behavior.
www.it-ebooks.info
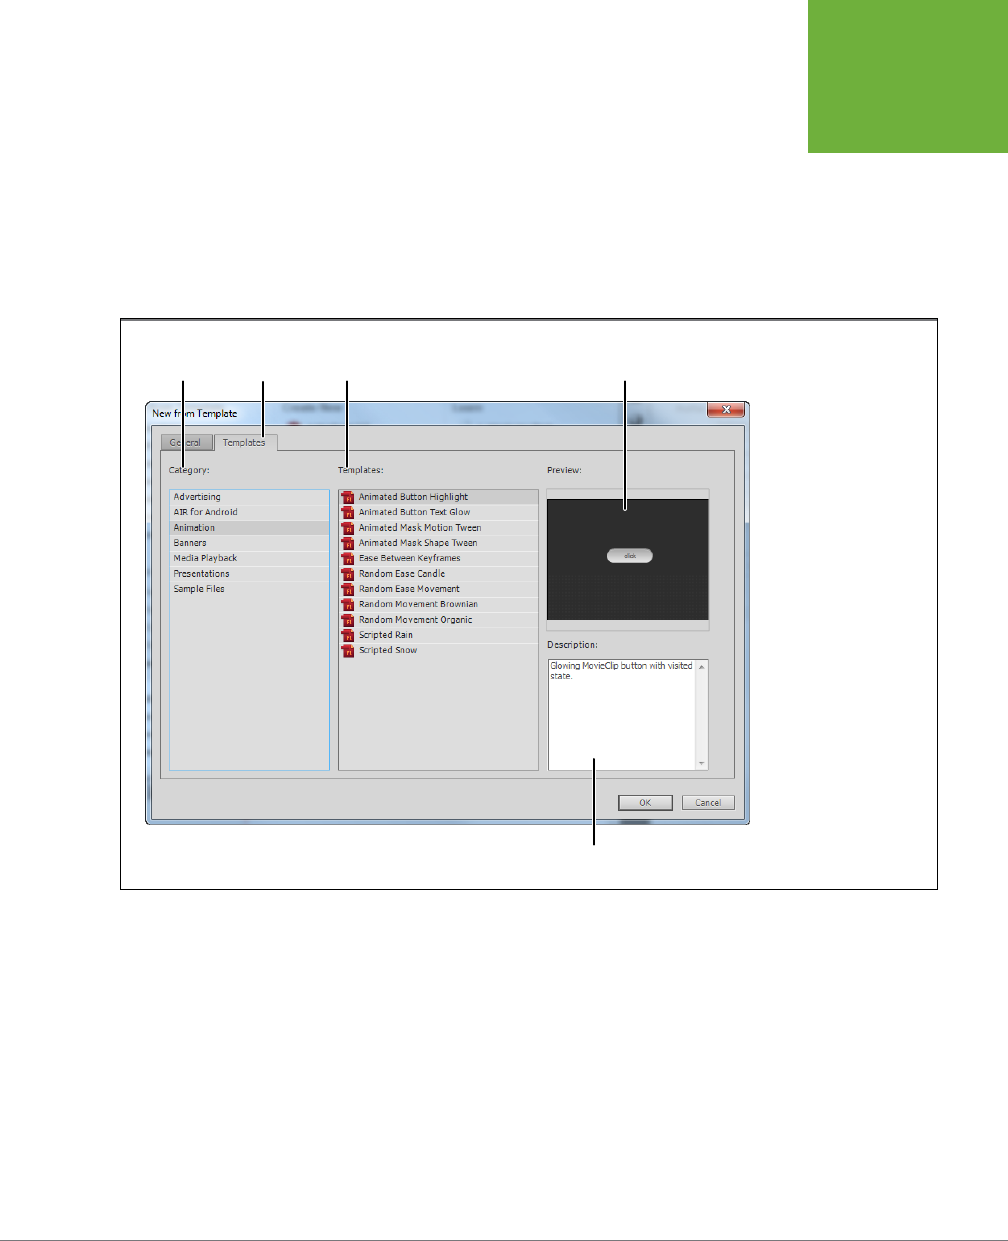
CHAPTER 7: REUSABLE FLASH: SYMBOLS AND TEMPLATES 285
TEMPLATES
With many templates, the best way to start is with a test drive. Watch the animation,
then examine its timeline, symbols, and any ActionScript code that makes it work.
In the Animated Button Highlight template, press Ctrl+Enter (⌘-Return) to see how
the animation works in the Flash Player test window. It’s pretty basic: There’s one
big button on the center of the stage labeled “click”. When you mouse over the
button, its appearance subtly changes—it starts to blink. Click the button, and its
appearance changes again—it stops blinking and has a pressed-down appearance.
The Output panel down near the timeline reads, “Button clicked”.
FIGURE 7-30
Flash offers a ton of
templates you can use to
jump-start the animation
process. They don’t all
come with descriptions
or instructions, but you
can find hints within
the template file. This
section shows you how
to customize the Photo
Slideshow template to
create a spiffy slideshow
in just a couple of
minutes.
Template
tabCategories Templates Preview
Description
Close the Flash Player window and go back to the stage. Click the Timeline tab, and
you can start to explore the mysteries of this template. For example, select the but-
ton on the stage, and then check out the Properties. You see the button is a movie
clip symbol rather than a button symbol. Double-click the button on the stage, and
it opens so you can see the timeline for the symbol, as shown in Figure7-31. This
particular template uses some Flash tools that you’ll learn about later in this book:
ActionScript (page 407) and timeline labels (page 523). But that’s one of the cool
things about templates—you don’t have to know exactly how they work to use them.
In many cases, you can make simple modifications without getting knee-deep in
the mechanics.
www.it-ebooks.info
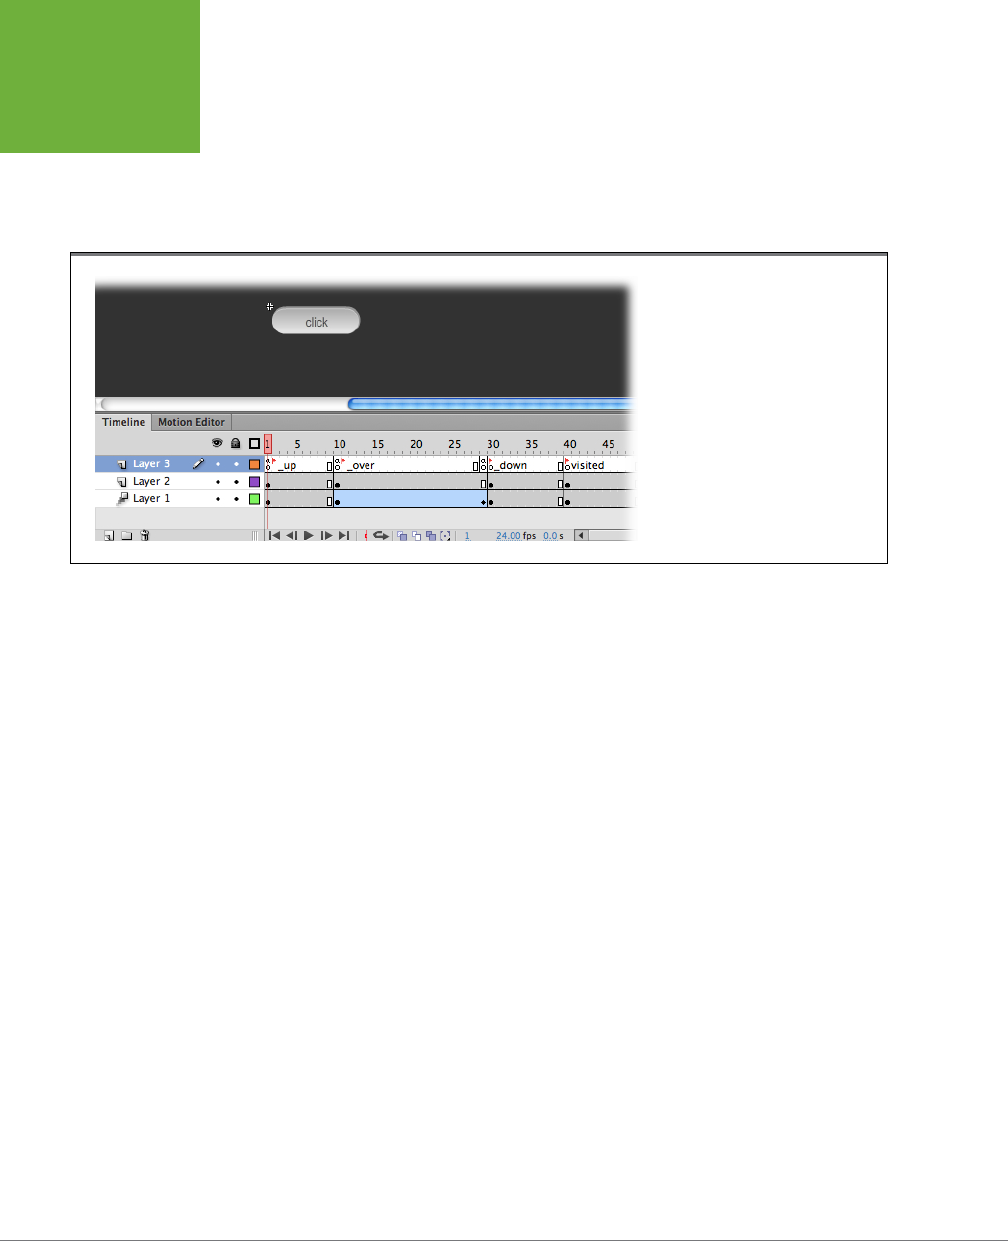
FLASH CS6: THE MISSING MANUAL
286
TEMPLATES
Customizing the Photo Album Template
The Simple Photo Album template (Figure 7-32) is a perfect example of a template
you can use without completely understanding all the ActionScript code and other
techniques that make it work. You can even customize it, which this section shows
you how to do.
FIGURE 7-31
Open the button symbol in the
Animated Button Highlight template,
and you see why the button behaves
the way it does. Layer 3 contains
ActionScript code and timeline labels.
Layer 2 holds the text that appears on
the button. Layer 1 holds the button
shape with the color changes that
display the highlights.
Here are the steps for customizing the template with your own photos:
1. Choose File→New→
Templates and then, under Category, choose Media
Playback. Under Templates, choose Simple Photo Album, and click OK.
The template opens, showing text, buttons, and an image. The brief instructions
for using the template appear in red below the stage.
2. Press Ctrl+Enter (⌘-Return) to test the animation.
Flash Player shows an image that looks like video color bars with the big num-
ber 1. The text above the image says “Image Title 1”. Three familiar-looking
buttons control the animation. The center button is a Play/Pause button, and
the other buttons move the album forward or backward one image.
3. Close the Flash Player window.
When Flash Player closes, you’re back in Flash Professional.
4. In the timeline, click the Show/Hide button for the instructions.
A red X appears when the instructions are hidden.
5. Click the Show/Hide button for the Controls layer.
A red X appears when the three control buttons are hidden. When you’re in-
vestigating a new template, you can learn what’s on each layer by toggling the
Show/Hide button for each layer. In this case, you learn that the controls are
on one layer and that the images and text are on the Images/Titles layer. The
Matte layer is a rectangle that’s partially hidden by the image. When the image
www.it-ebooks.info
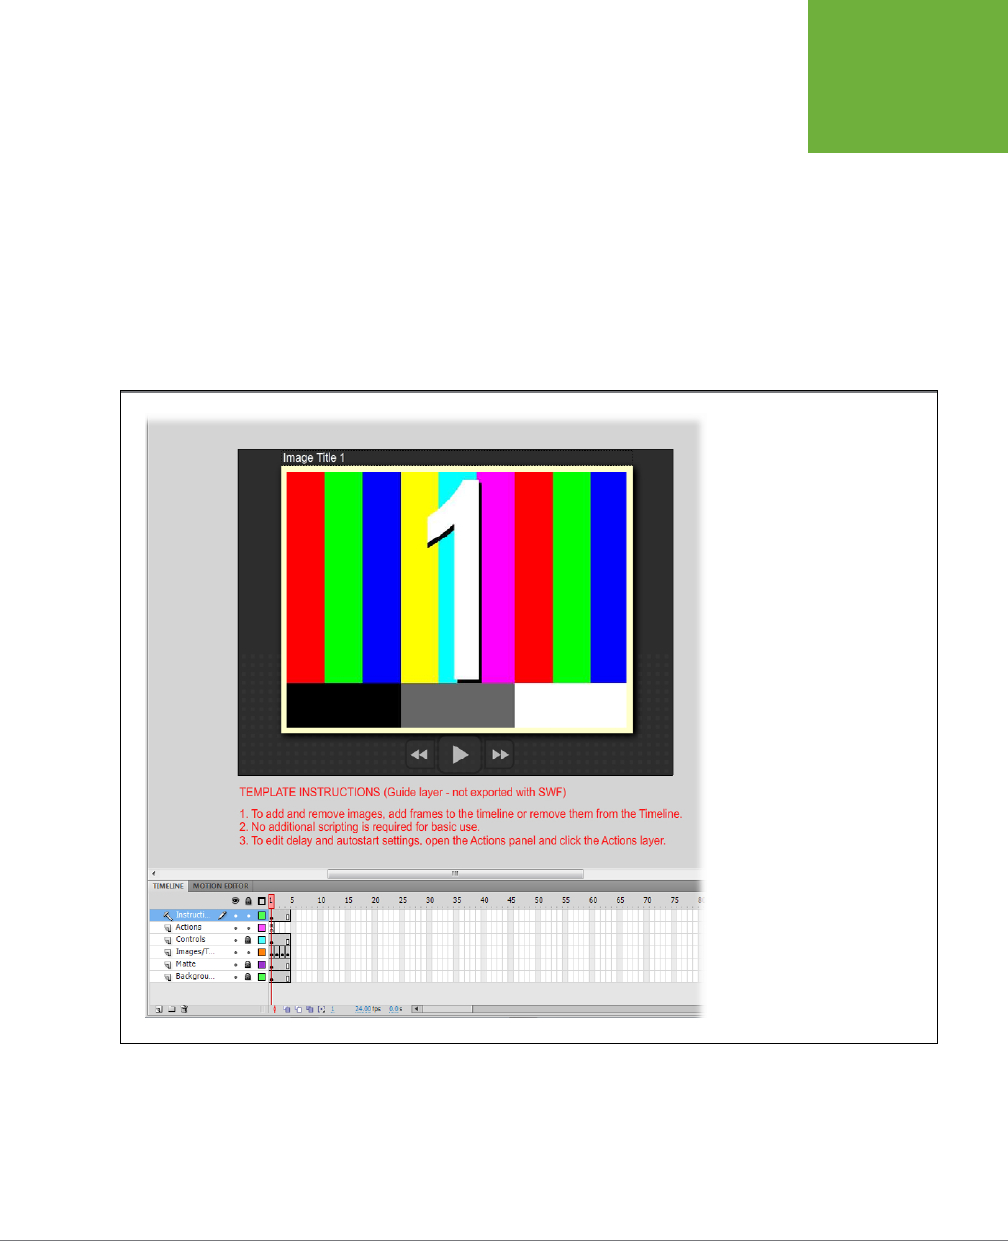
CHAPTER 7: REUSABLE FLASH: SYMBOLS AND TEMPLATES 287
TEMPLATES
is visible, it looks like a border around the image. The background creates the
dark-gray stage color.
6. Drag the playhead to Frames 2, 3, and 4.
Each frame on the timeline corresponds with one of the images. That means
you can swap your own images for the numbered color bar pics.
7. Move the playhead to Frame 1, and then click the color bar image on the
stage.
When the image is selected, the Properties panel shows that it’s a bitmap, and
it’s an instance of
image1.jpg
.
FIGURE 7-32
The Simple Photo template
displays photos one by one. Your
audience can move through the
photo collection using the Play/
Pause and the Back and Forward
controls. It’s a perfect example of
a template that can be used for
many different projects.
8. Examine the Position and Size properties.
Adobe may change the templates from time to time, but the position is prob-
ably something like X: 70 and Y: 35. Those settings indicate the position of the
upper-left corner. The size properties are probably about: W: 500 and H: 376. If
www.it-ebooks.info
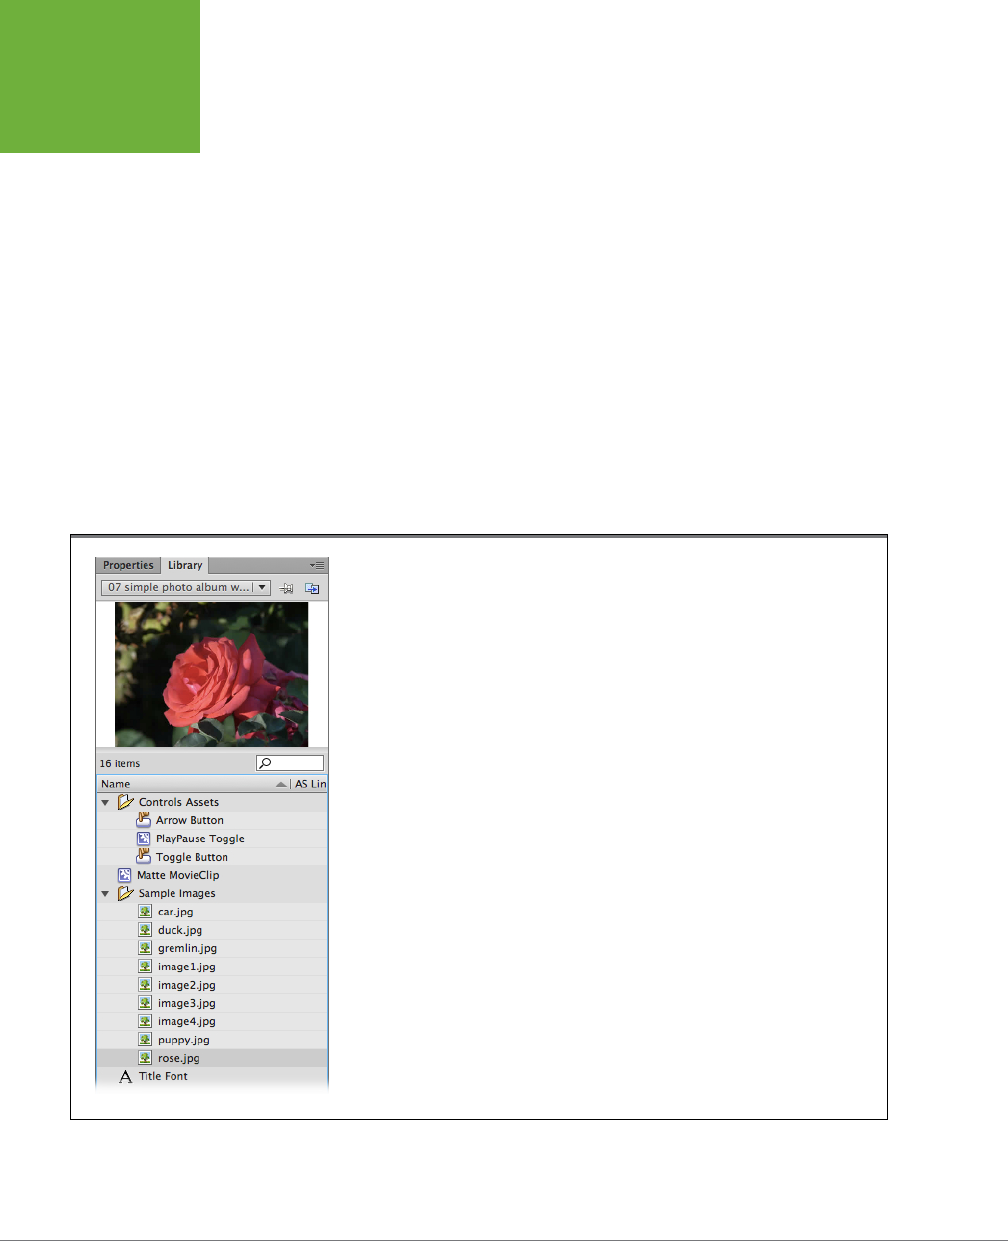
FLASH CS6: THE MISSING MANUAL
288
TEMPLATES
you want to add your own pics, they should be about the same size or at least
the same proportions: 500 x 376 pixels.
9. Prepare your own images for a new album.
You can resize photos or images within Flash, but you’ll probably have best re-
sults if you crop your images before you bring them into Flash using a program
like Photoshop, the GIMP, or iPhoto.
10. Choose File→Import→Import to Library and then select your photos and
click Open.
Shift-click or Ctrl-click to select more than one photo for importing. After you
click Open, the Import to Library window closes, and your photos are added
to the Library.
11. In the Library, select your photos and drag them to the Sample Images folder.
Click to open the Sample Images folder, and you can see the individual color bar
photos. You might as well put your own pics in there, too, as shown in Figure 7-33.
FIGURE 7-33
The album photos are stored in the Sample Images folder in the Library. Here you see a combi-
nation of the photos that came with the template and new photos that have been added: car,
duck, gremlin, puppy, and rose.
www.it-ebooks.info
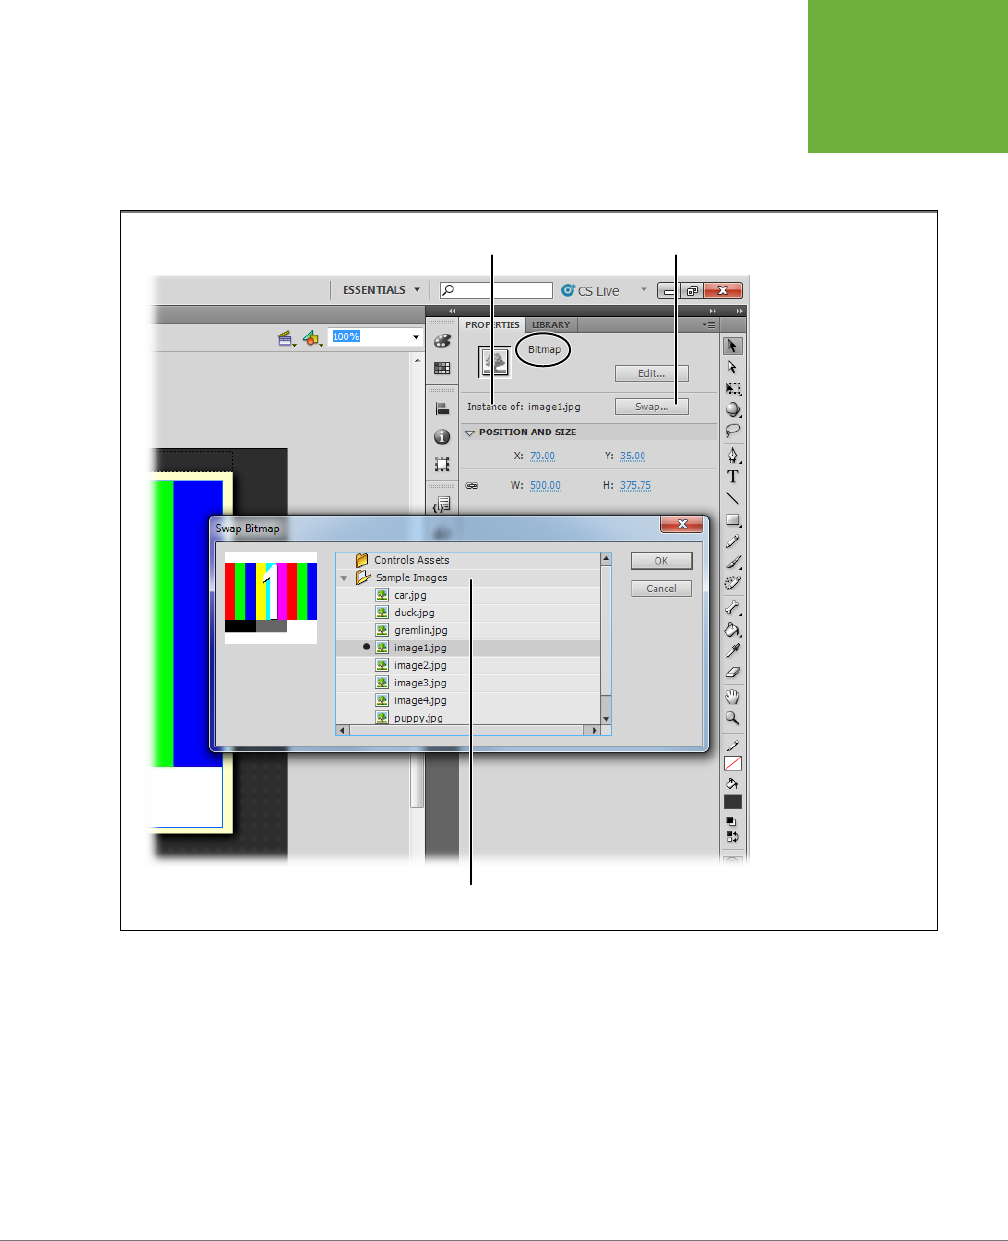
CHAPTER 7: REUSABLE FLASH: SYMBOLS AND TEMPLATES 289
TEMPLATES
12. Select the instance of
image1.jpg
on the stage.
Make sure the playhead is on Frame 1 in the timeline and the Properties panel
says “Instance of: image1.jpg” as shown in Figure 7-34.
FIGURE 7-34
Flash makes it easy to re-
place one Library symbol
for another. Select the
symbol on the stage you
want to replace and then,
in the Properties panel,
click the Swap button. A
new window appears, like
the Swap Bitmap window
shown here. Choose your
replacement symbol from
the list.
Instance name Swap button
Sample images folder open
13. In the Properties panel, click the Swap button.
The Swap Bitmap window opens.
www.it-ebooks.info

FLASH CS6: THE MISSING MANUAL
290
TEMPLATES
14. Open the Sample Images folder and select one of your new images. Then
clickOK.
Your image appears on the stage. If it doesn’t look exactly right, you may need
to tweak the size or position settings.
15. Set the size and position to match the settings you noted in step 8.
This example had a position of X: 70 and Y: 35, and a size of W: 500 and H: 376.
16. Repeat the swapping process for each photo you want to add.
Each frame should display one of your photos.
17. For each frame, double-click the top title and type your own title for the
image.
You can double-click with the Selection tool (V) to open the text for editing.
18. Press Ctrl+Enter (⌘-Return) to test the animation.
Your customized animation plays, showing your own photos and text.
The preceding steps work great if you want to create a photo album with exactly the
same number of pics as the template. Suppose you want to add one more image to
the album. You can do that easily and without digging into the ActionScript code
that makes the album work. All you have to do is extend the timeline in a few places.
The top two layers in the timeline are named Instructions and Actions. You can de-
lete the Instructions layer once you’re done reading it. The Actions layer holds the
ActionScript code for the album. You can learn more about writing your own code
on page 407, but for now, you can leave the Actions layer the way it is. The next
layer moving down is the Controls layer. You want the Play/Pause and Forward and
Back controls to appear with every photo, so you need to extend the Controls layer.
Select Frame 5 and then press F5 to insert a frame (page 100). Do the same for the
Matte layer and the Background layer. You need a new keyframe in the Images/Titles
layer because you want both to change, so press F6. The newly created keyframe
holds that last image and title in the album. All you need to do now is swap them
for the new photo. You can repeat this process to add as many photos as you want
to the album (Figure 7-35).
www.it-ebooks.info
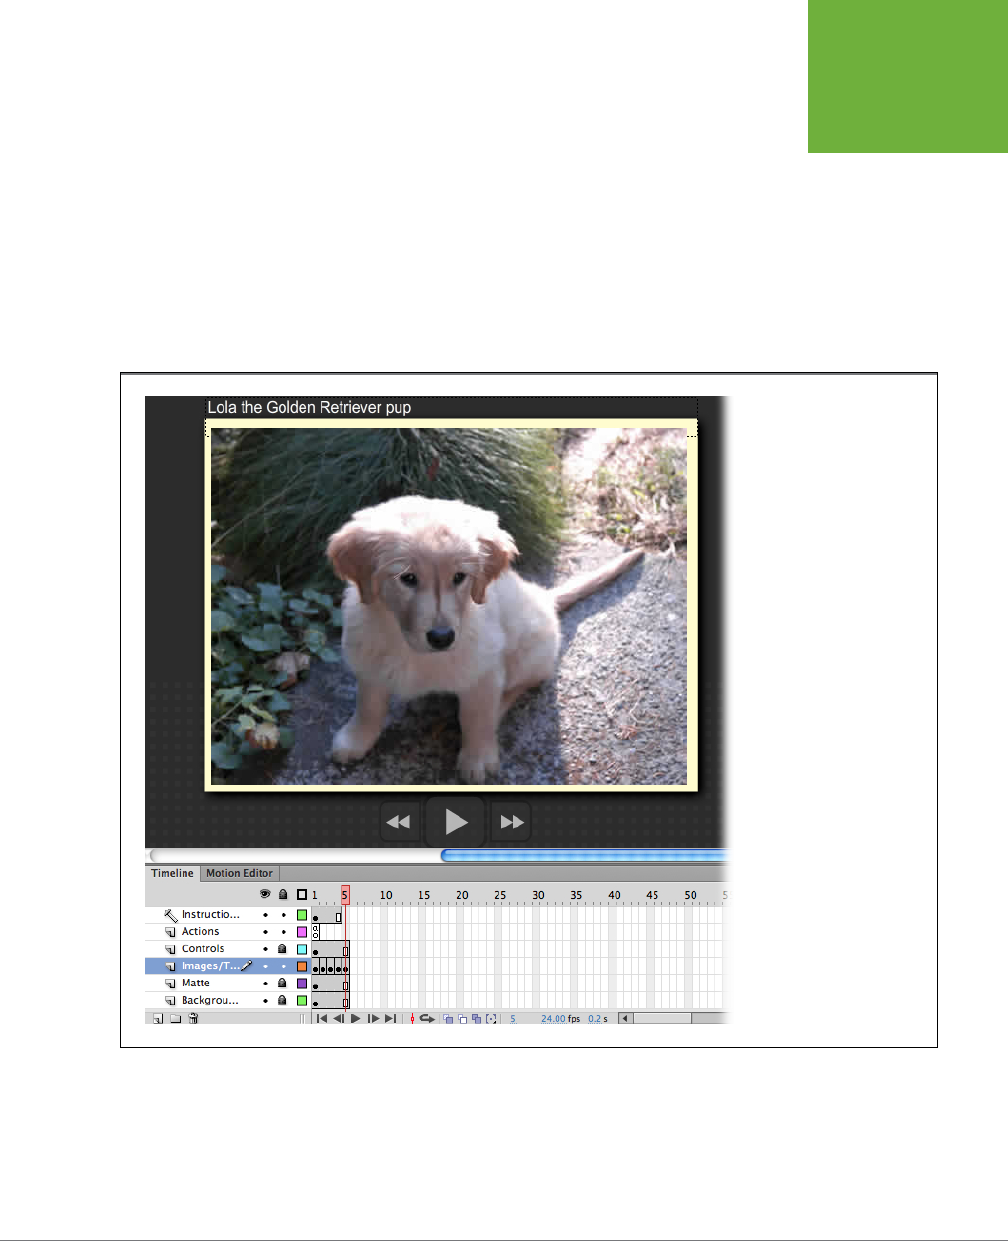
CHAPTER 7: REUSABLE FLASH: SYMBOLS AND TEMPLATES 291
TEMPLATES
Create Your Own Template
Once you start cooking in Flash, you’ll have a bunch of animations that you want
to turn into templates. As they say, why reinvent the wheel? Templates are great
timesavers, and it’s easy to create your own. For now, you may want to experiment
with a file from the Missing CD (
www.missingmanuals.com/cds/flashcs6mm
), such
as
07-5_Photo_Gallery.fla
. This example, shown in Figure 7-36, is a lightbox-style
photo gallery. Click a thumbnail image, and it flips around a bit and then fills the
stage. Another click, and the photo shrinks back to a thumbnail. The gallery holds
nine photos total. If you save the photo gallery as a template, you can open it and
swap the sample photos with your own masterpieces.
FIGURE 7-35
Here the timeline in the
Simple Photo Album
template is extended to
accommodate a new image
and title. New frames were
added to the Controls, Matte,
and Background layers. A
new Keyframe was added to
the Images/Titles layer.
www.it-ebooks.info
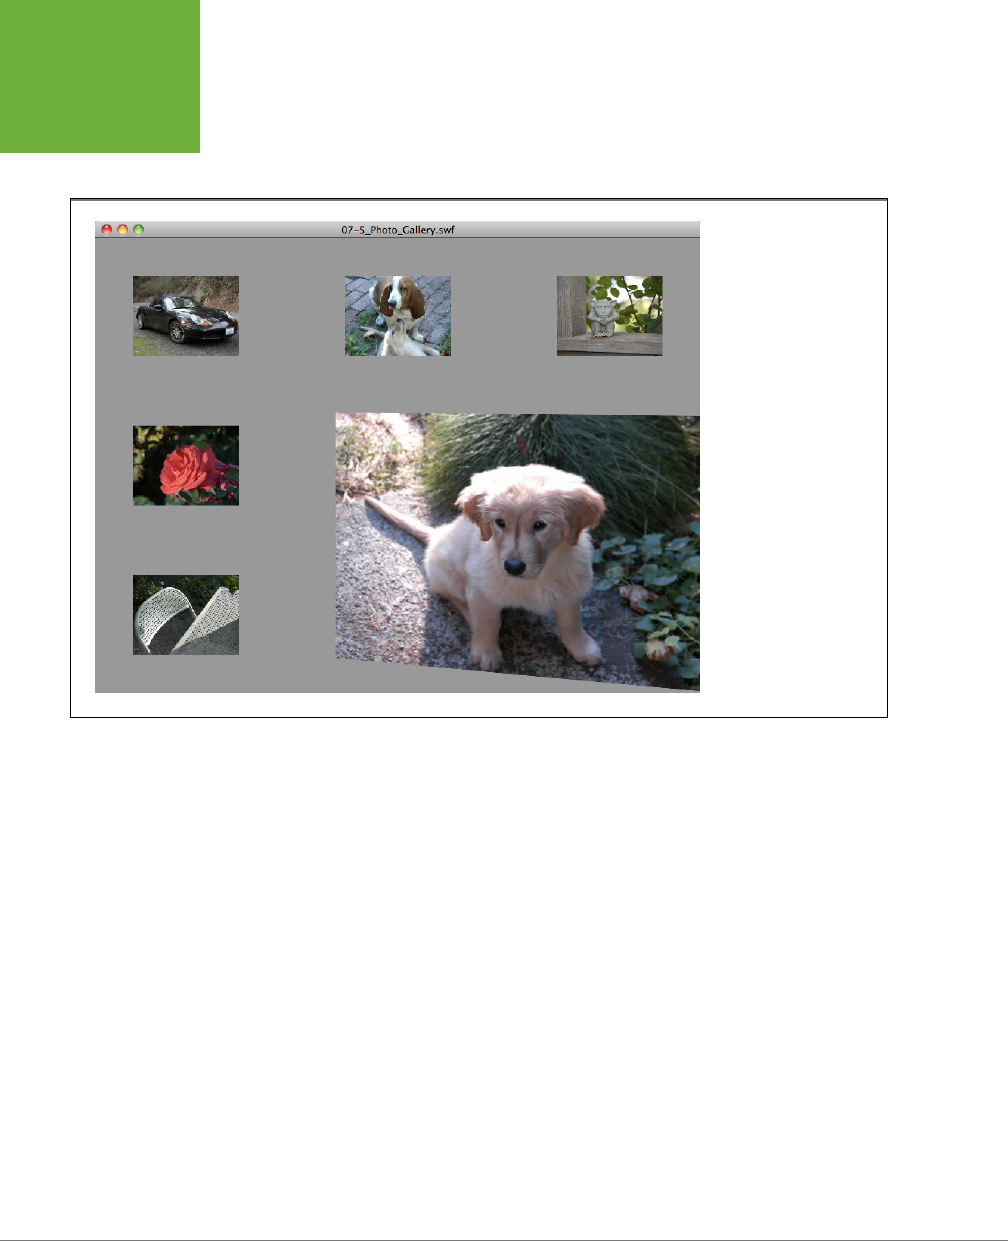
FLASH CS6: THE MISSING MANUAL
292
TEMPLATES
First, open the standard .fla file. It’s all ready to go, and it even has some instructions
in the top layer that appear above the stage. If you want to see the photo gallery in
action, press Ctrl+Enter (⌘-Return).
FIGURE 7-36
The Photo Gallery
template is another pre-
designed Flash document
that you can download
from the Missing CD.
Follow the steps in this
section to turn it into a
reusable template. Then
you can swap the gallery
photos with your own.
To save the Flash document as a template, choose File→Save As Template. A dialog
box appears with a warning that explains that the “SWF history” will be cleared when
the file is saved as a template. Go ahead and click the Save As Template button. The
next thing you see is the Save as Template box shown in Figure 7-37, where there’s
room for a Name, Category, and Description. The Preview window shows the stage
for the template. Fill in the details you want, and then click Save. Flash saves your
file as a template. The next time you choose File→New and click the Templates tab,
you’ll see your saved template along with all the others.
www.it-ebooks.info
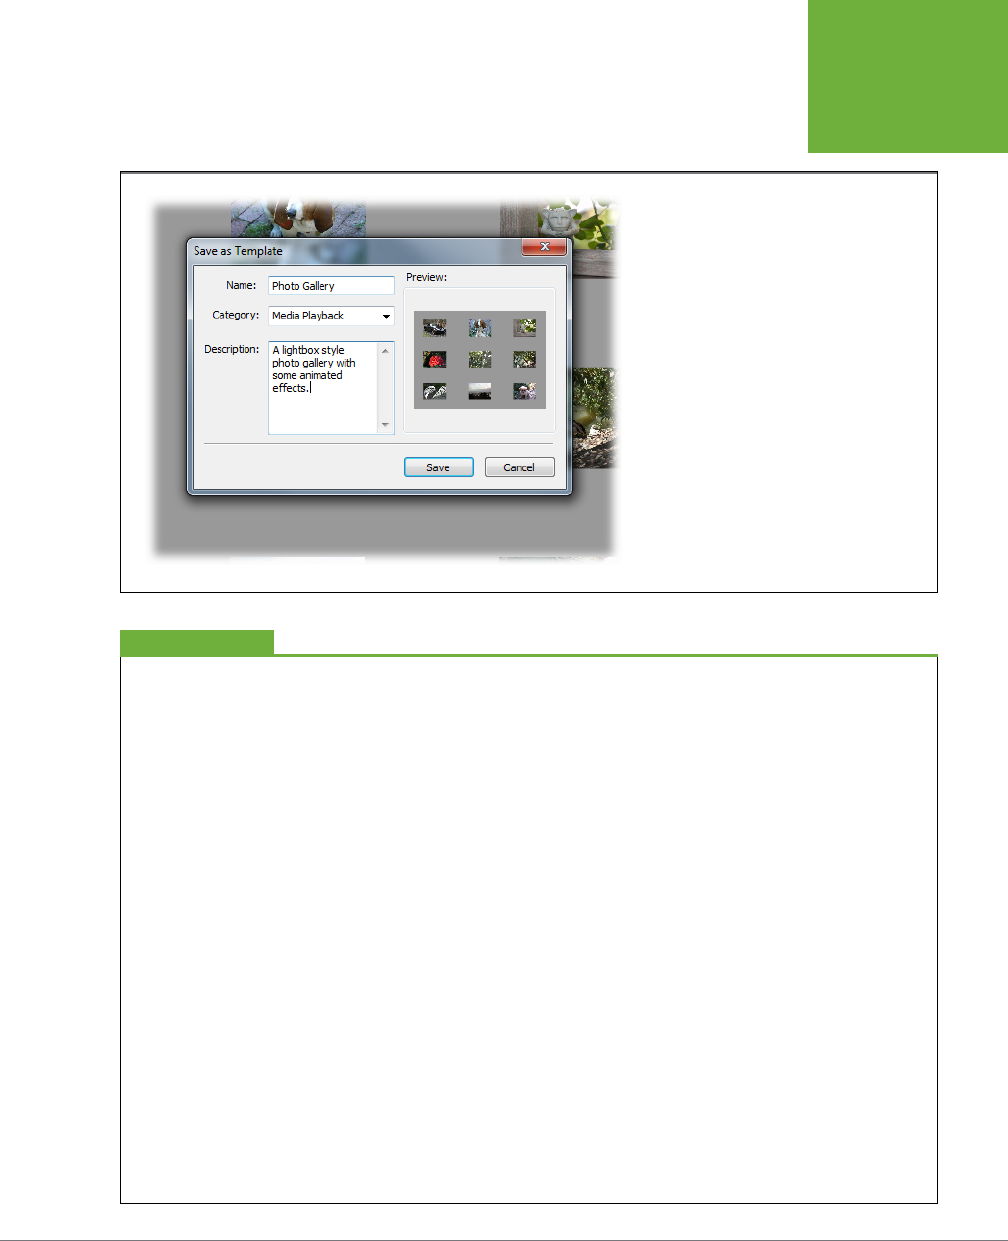
CHAPTER 7: REUSABLE FLASH: SYMBOLS AND TEMPLATES 293
TEMPLATES
FIGURE 7-37
Use the Save as Template dialog box to give your
template a name, a category, and a description.
This information comes in handy when you or
someone else tries to figure out how to use your
creation.
Building a Better Template
Sometimes, you’ll find yourself creating a template almost
by accident. For example, imagine that you’re hard at work
on one animation when your boss comes in, peeks over your
shoulder, and tells you to create another one “just like that one”
for another client. Choose File→Save As Template, continue with
the instructions on page 291, and you’re on your way.
But if you know
beforehand
that you’re creating a template,
you can plan for its reuse. And planning always results in a
more useful template. Here are a few planning tips for creating
a template you’ll use over and over again:
• Include only reusable stuff. If you save a working
animation as a template (complete with company-specific
elements), you’ll need to delete any unusable elements
each time you reuse the template. Consider up front which
elements apply across the board, and include only those
in your template.
• Name your layers. Giving your layers meaningful names
that describe what each layer contains (like actions,
sounds, background, buttons, and so on) is always a good
idea. But it’s even more important when you’re creating
a template, because it gives you (or your colleague, or
whoever’s reusing the template two weeks from now)
an easy way to find and change the elements that need
to be changed.
• Document, document, document. Have pity on the person
who tries to reuse your template a month from now,
and tell him up front what the template’s for (a product
demonstration combined with an order form, for example)
and what needs to be changed (the company logo, demo
movie clip, and three form fields). The quickie description
you type when you create your template is rarely enough.
Instead, provide an Instructions layer at the top of the
timeline. Add a labels layer with words that help other
people understand the animation’s structure. If you’re
including ActionScript code, use comments to explain
how the code works and how someone can make simple
changes.
DESIGN TIME
www.it-ebooks.info

295
CHAPTER
8
Tweens have always been a big tool in Flash’s animation toolbox, and, as ex-
plained in Chapter 3, these days you have more control over tweens than ever.
Flash’s motion tween (page 103) can do more than just show a car moving
down a street—it can make the car stretch out and turn blazing red when it’s going
really fast and scrunch up when it stops. It can even make the car’s shadow change
position as the car and sun move across the screen.
You accomplish these sophisticated tweens by making multiple property changes at
multiple points in time. Want precision control over every aspect of a tween? Turn
to the Motion Editor. This chapter shows you in detail how to apply and fine-tune
your motion tweens, focusing in particular on Motion Editor control. You’ll start with
a refresher on motion presets, which are simply predesigned tweens that you can
apply to objects with a couple of mouse clicks. Then you’ll learn some of the dierent
ways you can edit your tweens on the stage, in the timeline, and using the Motion
Editor. Along the way, you’ll learn how to apply filters for special eects and how
to create more realistic motion (easing).
NOTE If you need a primer on motion tween basics, or tweens in general, head back to page 103.
Applying Motion Presets
Designing a perfect tween can be a lot of work. It’s not so much that it’s dicult,
but creating a complex motion tween where several properties change at dierent
points in time can be time-consuming. Fortunately, right out of the box, Flash gives
Advanced Tweens with
the Motion Editor
www.it-ebooks.info
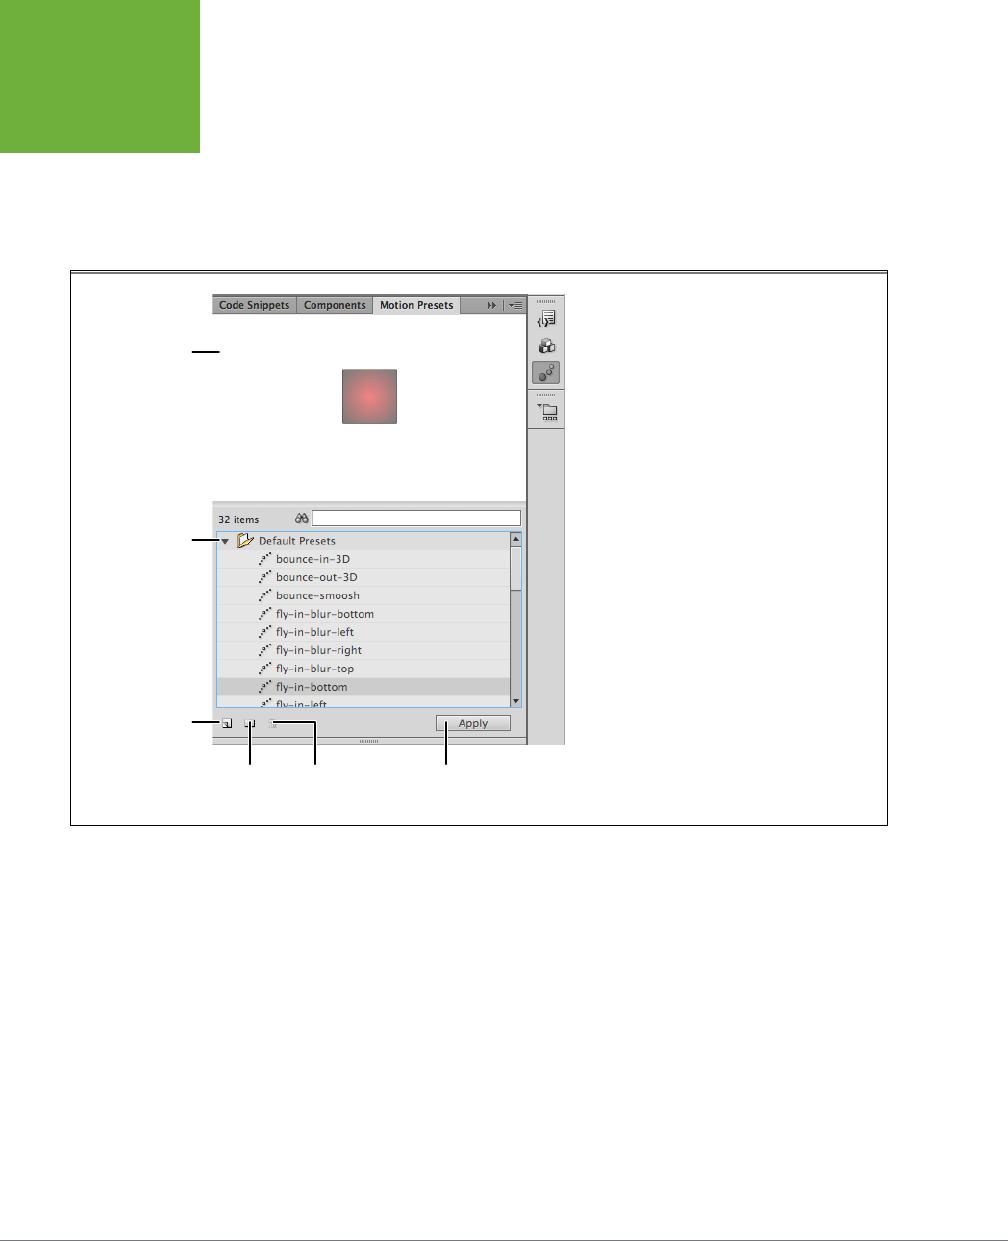
FLASH CS6: THE MISSING MANUAL
296
APPLYING
MOTION
PRESETS
you a head start. Open the Motion Presets panel (Window→Motion Presets), and you
see a handful of predesigned tweens, as shown in Figure 8-1. Initially, the Motion
Presets panel comes with two folders: Default Presets, where the Adobe-designed
presets live, and Custom Presets, where you can store tweens you’ve perfected as
motion presets (see page 298). Just click a motion preset to see a minipreview at
the top of the panel.
FIGURE 8-1
Motion presets are saved tweens that you can
attach to a symbol or text field with a couple of
mouse clicks. Flash comes with several Adobe-
designed motion presets, and you can save and
reuse your own as you work.
Open/close
folder
Save selection
as preset
Preview
window
New
folder Remove
item Apply preset
Not only are motion presets useful design tools, but they’re also great learning tools.
By dissecting some of the professionally designed presets that come with Flash,
you can see how certain eects are created. After you’ve applied presets in your
project, you can modify them, examine them, and steal some of their ideas for your
own tweens. To get started, the following steps show how to apply and modify a
motion preset called
flyin-pause-flyout
. As with most presets, the name gives you
a pretty good hint at the action.
First, the easiest part: applying a motion preset. Like any motion tween, a preset
can be applied only to a symbol or a text field. For this exercise, you can draw your
own simple circle, or you can use the Missing CD document
08-1_Flyin_Preset.fla
from
www.missingmanuals.com/cds/flashcs6mm
.
www.it-ebooks.info
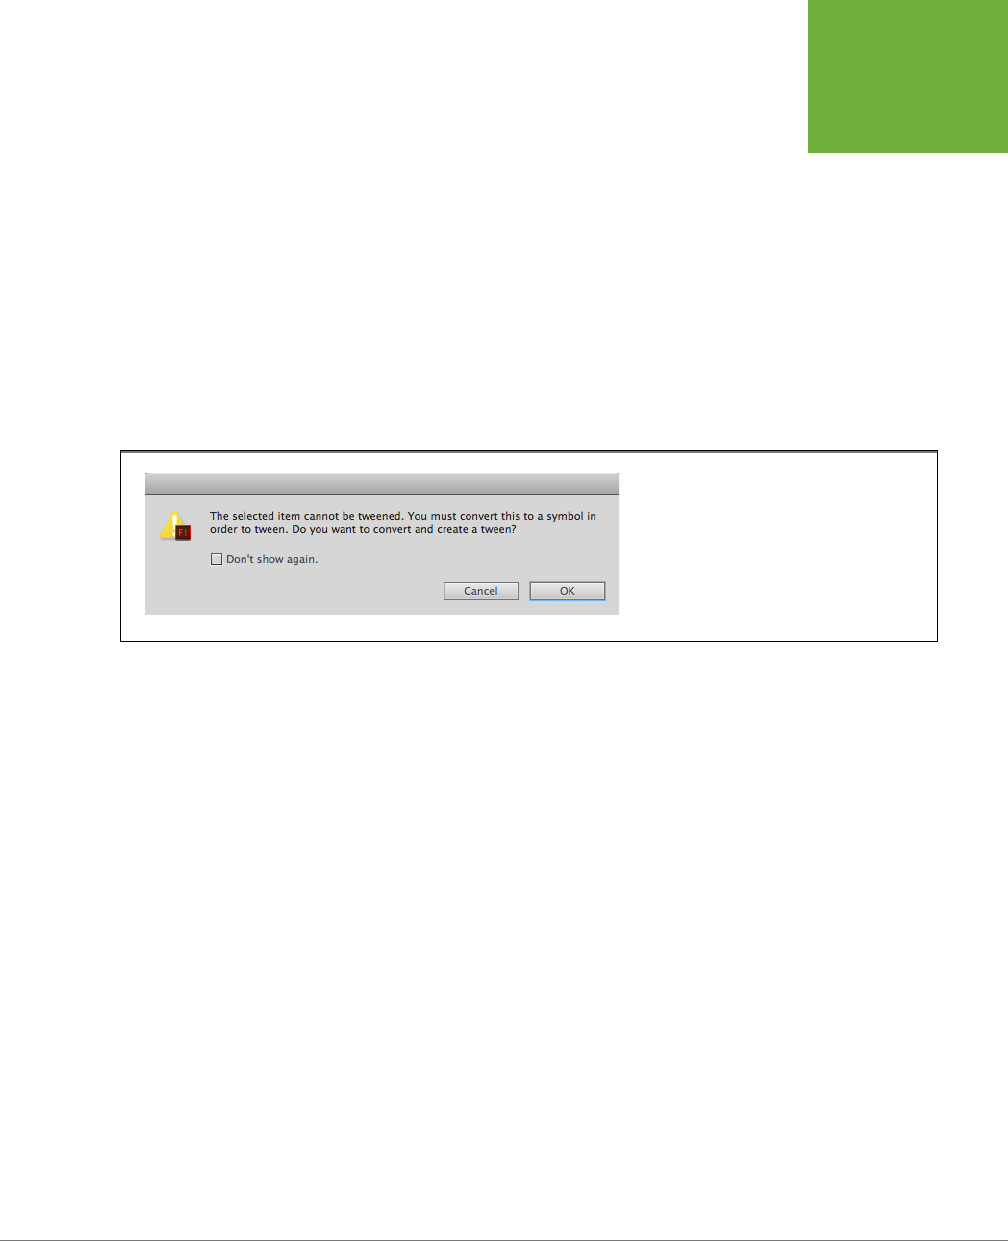
CHAPTER 8: ADVANCED TWEENS WITH THE MOTION EDITOR 297
APPLYING
MOTION
PRESETS
1. Open the Motion Presets panel by choosing Window→Motion Presets.
The Motion Presets panel is small, so you can easily let it float over your work
area while you’re making a selection, and then close it after you’ve applied a
preset. You won’t need it again until you need another preset. If you’re working
in the Essentials workspace, the Motion Presets panel appears at the bottom of
the collapsed panels to the right of the stage.
2. Select the symbol you want to tween; in this case, your circle or the car
from the example file.
The symbol or text field you tween has to be by itself in a layer in the timeline.
If the layer holds more than one object, then Flash creates a new layer for the
object before it applies the tween. If the object can’t be tweened (perhaps it’s
not a symbol), you see a warning like Figure 8-2.
FIGURE 8-2
If you try to apply a motion tween to an object
other than a symbol or a text field, you see this
warning.
3. In the Motion Presets panel, click the
flyin-pause-flyout
preset, and then
click Apply.
A motion path appears attached to the object on the stage, and a blue tween
appears in the main timeline, as shown in Figure 8-3.
4. Press Enter to preview your tween in Flash.
More often than not, you’ll make changes to a preset motion after you apply
it. Start by taking a look at how the motion preset behaves. The
flyin-pause-
flyout
preset blurs the symbol while it’s moving, giving it a sense of speed. It
slows for a bit and then speeds on. As you’ll learn in this chapter, once you’ve
applied the preset you can change the position of the tweened symbol, its
size, and even its appearance. For example, you can increase or decrease the
blurriness of the image.
5. Modify the tween just as you would any tween you created from scratch.
For example, often the tween is working right, but you need to fine-tune the
position of both the object and the motion path. With the Selection tool, drag
a box around both the object and the motion path to select everything. Then
you can drag the whole kit and caboodle to a new position on the stage.
www.it-ebooks.info
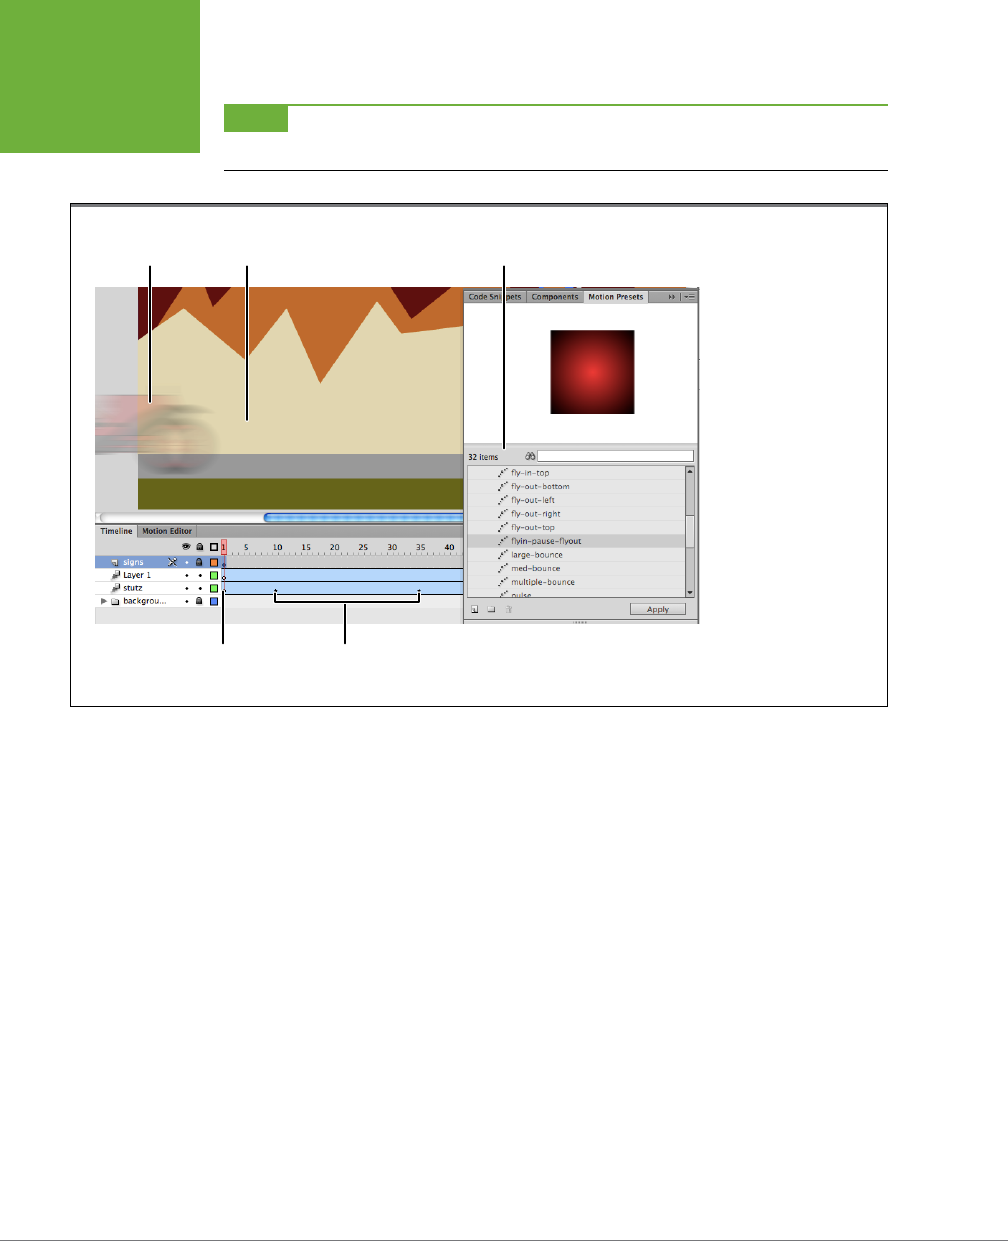
FLASH CS6: THE MISSING MANUAL
298
APPLYING
MOTION
PRESETS
NOTE In different places, this book explains how to make changes to the tween using the motion path
(page 300), the timeline (page 307), the Motion Editor (page 311), and the Properties panel (page 107).
FIGURE 8-3
After you apply a tween
to a movie clip or text
field, you see a motion
path attached to the
tweened object. A blue
tween appears in your
animation’s timeline,
complete with preset
property keyframes.
Default Presets
Car symbol
blurred
Motion
Path
Tween in
main timeline
Property
keyframe
Once you’ve applied a tween using a motion preset, it’s no dierent from a tween
you create from scratch. Also, there’s no connection between the tween and the
presets panel. If you make changes to the tween in your animation, it has no eect
on the one stored in the Motion Presets panel. The opposite is true, too. Unlike with
symbols in the Library, making changes to or deleting the tween in the Motion Presets
panel has absolutely no eect on animations to which you’ve applied the preset.
Saving a Custom Motion Preset
Setting up the perfect motion tween can take time. Perhaps you’ve got a text ban-
ner with some 3-D eects. Or maybe you spent time getting a basketball to bounce
just right. With all that time invested, you want to be able to reuse that work, and as
usual, Flash helps you do just that. You can save your carefully crafted tween as a
motion preset, and then, in the future, apply it to new symbols and text fields with
a click or two. Furthermore, because you modify the tweens created by presets,
they’re very versatile and adaptable to dierent uses. For example, a badminton
shuttlecock might not bounce like a basketball, but it’s probably faster to apply the
basketball-bounce preset to the shuttlecock and then tweak it a bit than to create
a new motion tween from scratch.
www.it-ebooks.info

CHAPTER 8: ADVANCED TWEENS WITH THE MOTION EDITOR 299
MODIFYING
A MOTION
PRESET
Saving a preset is easy, and you have a couple of ways to do the job. Which one you
use may depend on your own preferences or where your mouse happens to hover
at the moment. You can choose one of these methods to save a motion preset:
• Right-click the tween or motion path, and then choose “Save as Motion Preset”
from the pop-up menu.
• Select the tween or motion path, and then click the “Save selection as preset”
button on the Motion Presets panel (Figure 8-1).
In either case, a dialog box opens where you name the preset and then click OK. Once
that’s done, your newly named preset appears in the Custom Presets folder in the
Motion Presets panel. (Your custom preset won’t have an animated preview like the
ones that come with Flash, but you can create one as instructed in the box below.)
DIY Preview
Can I create a preview for my custom motion preset?
If you’ve gone to the work of creating a custom motion preset,
you may want it to have its own nifty preview animation just
like the presets Adobe designed. As it turns out, you can do
that easily. First, publish your preset to create an SWF file
that shows the animation. (SWF files are final files created to
display animations. The details for publishing SWF files are
on page 677.) Then place the SWF file in the folder that holds
your motion presets.
That last bit is the tricky part. The motion presets storage
location is different for different computers, as shown in the
following examples. (The words in brackets, like <hard disk>
and <your name>, represent the disk drives and user names
on your computer, while <locale> represents the locale or lan-
guage for the computer; for example “en” is used for English.)
• Mac OS X:
<hard disk>/Users/<your name>/Library/
Application Support/Adobe/Flash CS6/<locale>/
Configuration/Motion Presets/
• Windows 7 and Vista:
<hard disk>\Users\<your name>\
AppData\Local\Adobe\Flash CS6\<locale>\Configuration\
Motion Presets
• Windows XP:
<hard disk>\Documents and Settings\<your
name>\Local Settings\Application Data\Adobe\Flash
CS6\<locale>\Configuration\Motion Presets\
FREQUENTLY ASKED QUESTION
DELETING MOTION PRESETS
If you decide that a particular motion preset isn’t worthy, you can delete it from the
Motion Presets panel. In the Motion Presets panel, click to select the oending pre-
set, and then click the trash can icon at the bottom of the panel. The stored preset
disappears from the panel, but throwing it away has no eect on any tweens that
were created using the preset.
Modifying a Motion Preset
As discussed earlier in this chapter, Adobe gives you a bunch of snazzy motion
tweens with Flash. But one designer’s perfect tween is another designer’s, well…
nearly perfect tween. Fortunately, you can customize presets after you apply them. In
www.it-ebooks.info

FLASH CS6: THE MISSING MANUAL
300
MODIFYING
A MOTION
PRESET
fact, tweaking a motion preset is great learning ground for designing and perfecting
your own tweens. Editing a motion preset is no dierent from editing a tween you
created yourself, so the following sections “Changing the Motion Path” (below) and
“Editing a Tween Span” (page 307) apply to both motion presets and the tweens
that you create from scratch.
Changing the Motion Path
Whether you use a motion preset or create your own tween, chances are you’ll
want to tweak the motion path. Perhaps the ball doesn’t bounce in just the right
places, or that car looks like it’s driving o the road. The motion path looks like a
line trailing o from the tweened object. As you drag the playhead in the timeline,
you’ll notice that the tweened object follows the motion path. If you need a practice
file, download
08-2_Motion_Path.fla
from the Missing CD (
www.missingmanuals.
com/cds/flashcs6mm
).
You can change this path on the stage using the same Selection tool that you use
to modify any line:
• Move the entire motion path. With the Selection tool, drag a box around any
part of the path. Then drag everything to a new spot.
• Move the starting point for the motion path. With the Selection tool, drag the
diamond-shaped selection point at the beginning of the motion path to a new
location. The end of the path remains anchored where it was, while the motion
path stretches or shrinks to accommodate the move.
• Move the ending point of the motion path. Select the diamond-shaped end
point of the path and drag it to a new location. The starting point of the tween
remains anchored in place, and the motion path adjusts to the move.
• Create a curve in the motion path. First, make sure the motion path is not
selected, by clicking some empty spot on the stage. Then with the Selection
tool, point to the path; when you see a curve appear next to the cursor arrow,
drag to create a curved path (Figure 8-4). You can reshape the path by drag-
ging dierent points along the path.
• Change the tweened object’s position at any point of the motion path. In the
main timeline, move the playhead to the frame where you want to reposition
the tweened object, and then drag the object to a new position. Flash creates
a new property keyframe in the timeline and adjusts the motion path to the
new position. To use this method to move the start or end point, make sure that
the playhead is on the first or last frame of the tween. This action also creates
a diamond-shaped control point in the motion path. You can use the point and
the accompanying control handles to change the shape of the motion path. It’s
similar to any line you draw using the Pen tool (page 68).
The example file
08-2_Motion_Path.fla
includes a wheel with the bounce-smoosh
tween applied. The animation would be much more interesting if the wheel rolled
www.it-ebooks.info
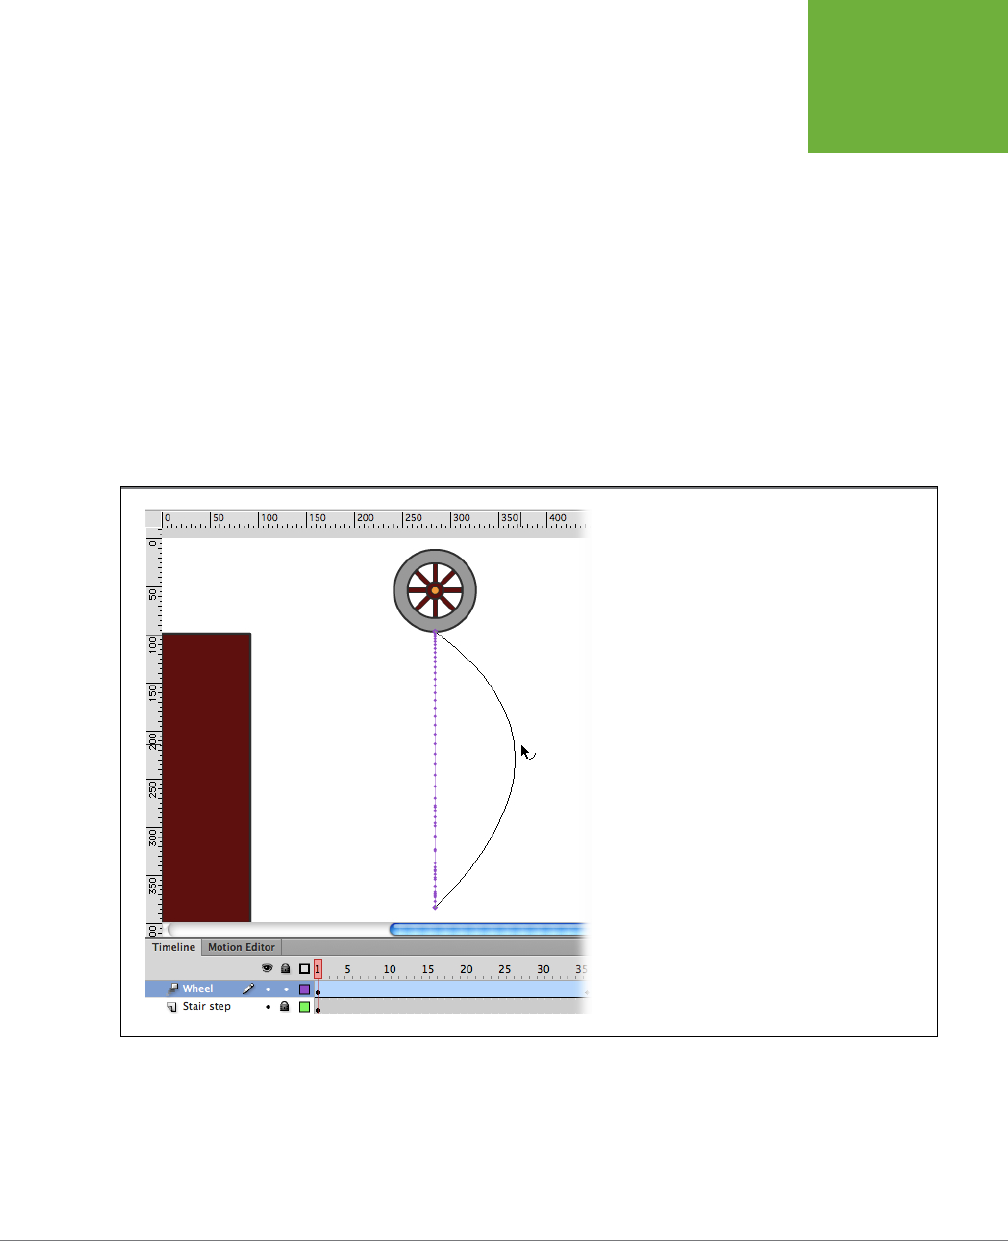
CHAPTER 8: ADVANCED TWEENS WITH THE MOTION EDITOR 301
MODIFYING
A MOTION
PRESET
along the high step, dropped to the ground, and then bounced in a forward motion.
Here’s how to change the path for that eect:
1. Move the playhead to Frame 1 and make sure nothing is selected. Then drag
the wheel so it sits on the step, as shown in Figure 8-5.
If the entire path moves with the wheel, you’ve selected both the path and
the object. To deselect everything, click an empty spot or press Shift+Ctrl+A
(Shift-⌘-A).
2. With the Selection tool, adjust the curve so that the wheel appears to roll
along the top of the stairstep.
When you move the cursor close to the path, it changes to show a curved line
next to the arrow. Drag to adjust the curve in the motion path. The solid line
shows the general arc of the motion, while the small dots show the actual posi-
tion of the tweened object at dierent points in time.
FIGURE 8-4
Use the Selection and Subselection tools to modify a
motion path just as you would any other line.
3. Adjust the end of the motion path so the wheel moves to the right as it
bounces.
You can stretch the path to the right side of the stage, giving the wheel a feeling
of increased forward motion as it bounces.
www.it-ebooks.info
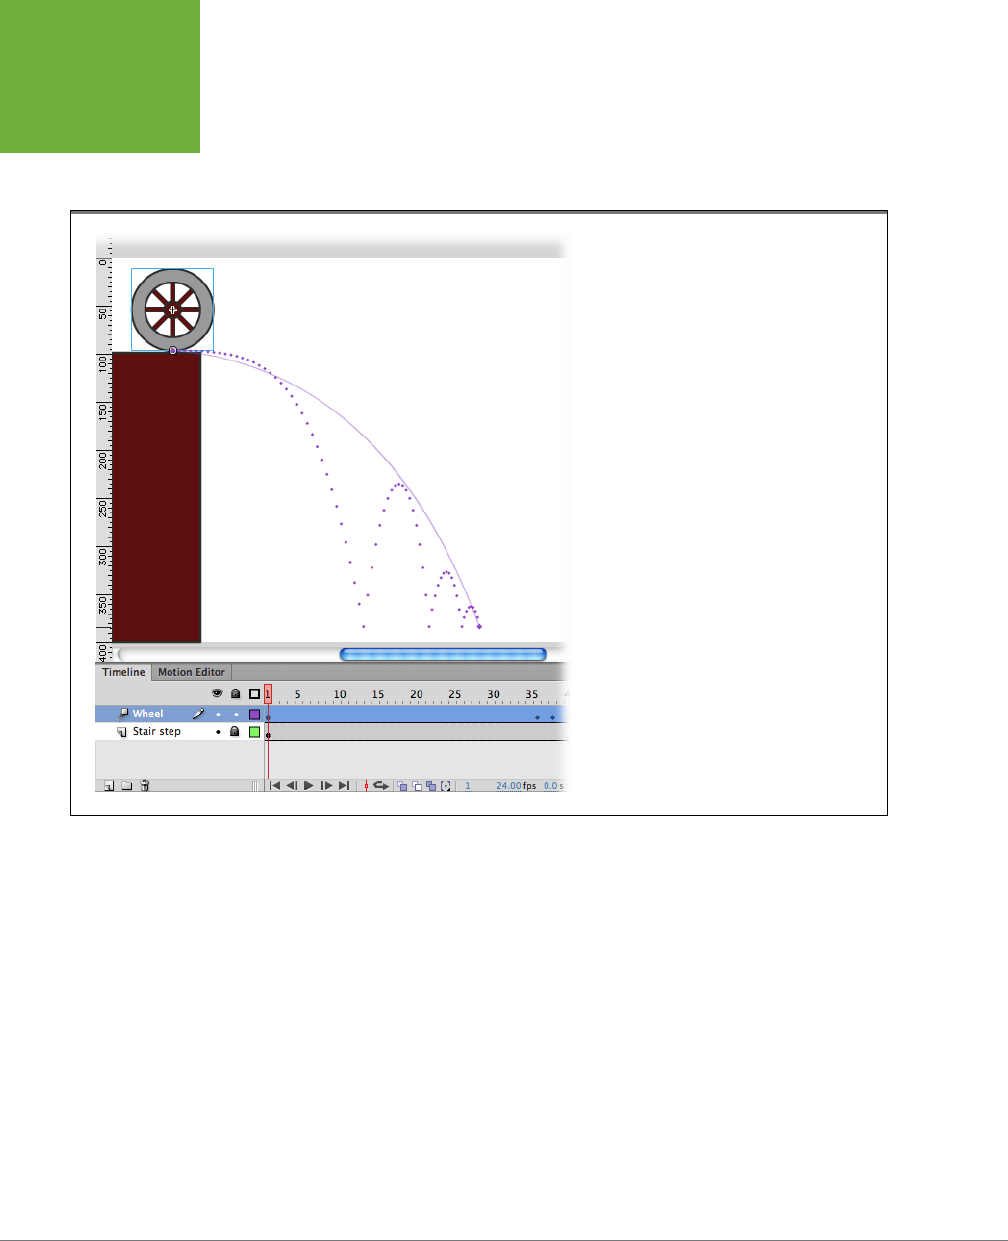
FLASH CS6: THE MISSING MANUAL
302
MODIFYING
A MOTION
PRESET
4. Preview the animation and fine-tune it as necessary.
If you got it perfect the first time, great! If not, try zooming in a little and fine-
tuning the motion path as described in step 2.
FIGURE 8-5
To move the starting point of a motion path, you
can drag the square end point to a new position.
Deleting a Motion Path
You can delete a motion path from a tween by simply selecting it and then press-
ing Delete. The consequence, of course, is that your tween isn’t going anyplace.
The tweened object remains stranded at its starting point until you provide further
instructions. For example, you can copy and paste in a new path, as described next.
Copying and Pasting a Motion Path
Flash gives you tools to create perfect shapes like circles, rectangles, polygons, and
stars, not to mention the precise control that comes with the Pen tool. You can use
any of these drawing tools to create a motion path. If you need a path that matches
a perfect shape or is extremely complex, it’s faster and easier to use Flash’s drawing
tools, rather than dragging tween objects around the stage to modify a motion path.
First you need to create the path with one of the tools that creates a stroke—that
www.it-ebooks.info

CHAPTER 8: ADVANCED TWEENS WITH THE MOTION EDITOR 303
MODIFYING
A MOTION
PRESET
is, any of the shape tools, the Pen, the Pencil, or the Line tool. Then, you paste that
stroke into an existing tween that doesn’t have a motion path.
NOTE A file with a completed version of this project,
08-3_Path_Orient.fla
, is available at
www.
missingmanuals.com/cds/flashcs6mm
.
Here are the steps:
1. In a new Flash document, create two layers, each with 48 frames.
After you create the second layer, Shift-click to select the 48th frame in both
layers, and then press F5 to add new frames on both layers.
2. Create a text field with the words
not oriented
, and then rename the layer
not oriented
.
Make the text nice and bold and about 32 points in size. Double-click the layer
name so you can edit it.
3. Right-click a frame in the timeline of the “not oriented” layer, and then
choose Create Motion Tween from the pop-up menu.
You now have a motion tween with no motion and no tween, because you haven’t
yet made any changes to the tweened object’s properties.
4. In the other layer, use the Oval tool to draw a circle, and then rename that
layer circle.
Set the oval fill color to none by clicking the swatch with the Paint Bucket, and
then, in the upper-right corner of the panel with color swatches, click the square
with a stroke through it. Make the circle about 200 pixels in diameter. If neces-
sary, you can set the size in the Properties panel.
5. Use the Eraser tool, with a small eraser size, to erase a little bit of the circle.
You can’t use a closed shape as a motion path, so you need to break the path
at some point. When you’re done erasing, your stage should look something
like Figure 8-6.
6. Using the Selection tool, drag a box around the circle to select the entire
circle. Copy it (Ctrl+C or ⌘-C), click the “not oriented” tween layer, and then
paste it (Ctrl+V or ⌘-V) into the tween.
As soon as you paste the circle into the tween layer, the text field attaches
itself to the path. At this point, it’s easier to examine your tween if you hide the
original circle by clicking the Show/Hide button in the “circle” layer (Figure 8-6).
7. Press Enter or Return to preview the animation.
Your not oriented text field moves in a circular motion, but the text isn’t oriented
to the circle. It remains right-side up and oriented to the stage. That looks a
www.it-ebooks.info
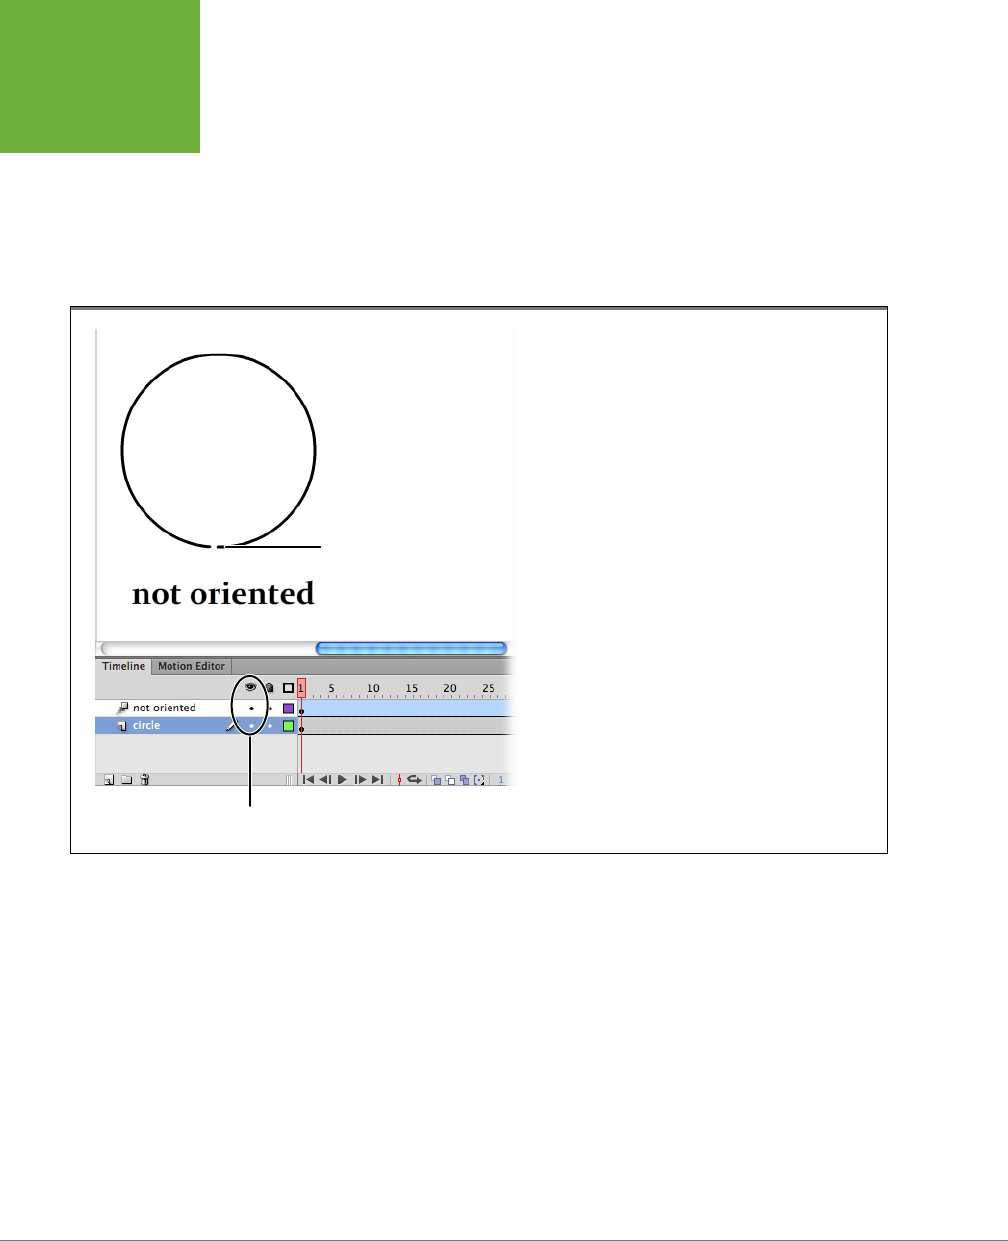
FLASH CS6: THE MISSING MANUAL
304
MODIFYING
A MOTION
PRESET
little odd, but don’t fret. You’ll learn how to orient the text to the circle in the
next section.
You can use any stroke as a motion path, even complex strokes created using the
Pentool with multiple complex Bezier curves. Just make sure you’re not using a
closed path. Even though the circle isn’t a closed path, the motion of the text looks
like it’s making a complete circle. When the movie clip loops, no one in your audi-
ence will ever know there’s a break in the circle.
FIGURE 8-6
If you want a motion path that’s a perfect circle, square,
star, or polygon, it’s easiest to create the path with one of
Flash’s shape tools and then paste it into your tween.
Show/hide buttons
Circle, but not a closed path
Orienting Tweened Objects to a Motion Path
Orienting text fields and symbols to a motion path is as simple as clicking a checkbox.
In this section, you’ll learn how to do that, as well as another handy technique—
copying and pasting a motion from one layer to another in the same animation. When
you’re done, you’ll have one Flash file with two examples of circular motion. In one,
the text field is oriented to the circle; in the other, it’s not (Figure 8-7).
1. Click the Insert Layer button in the timeline’s lower-left corner.
A new layer appears in the timeline.
2. Rename the new layer
oriented
.
Double-click the layer, and then type the new name.
www.it-ebooks.info
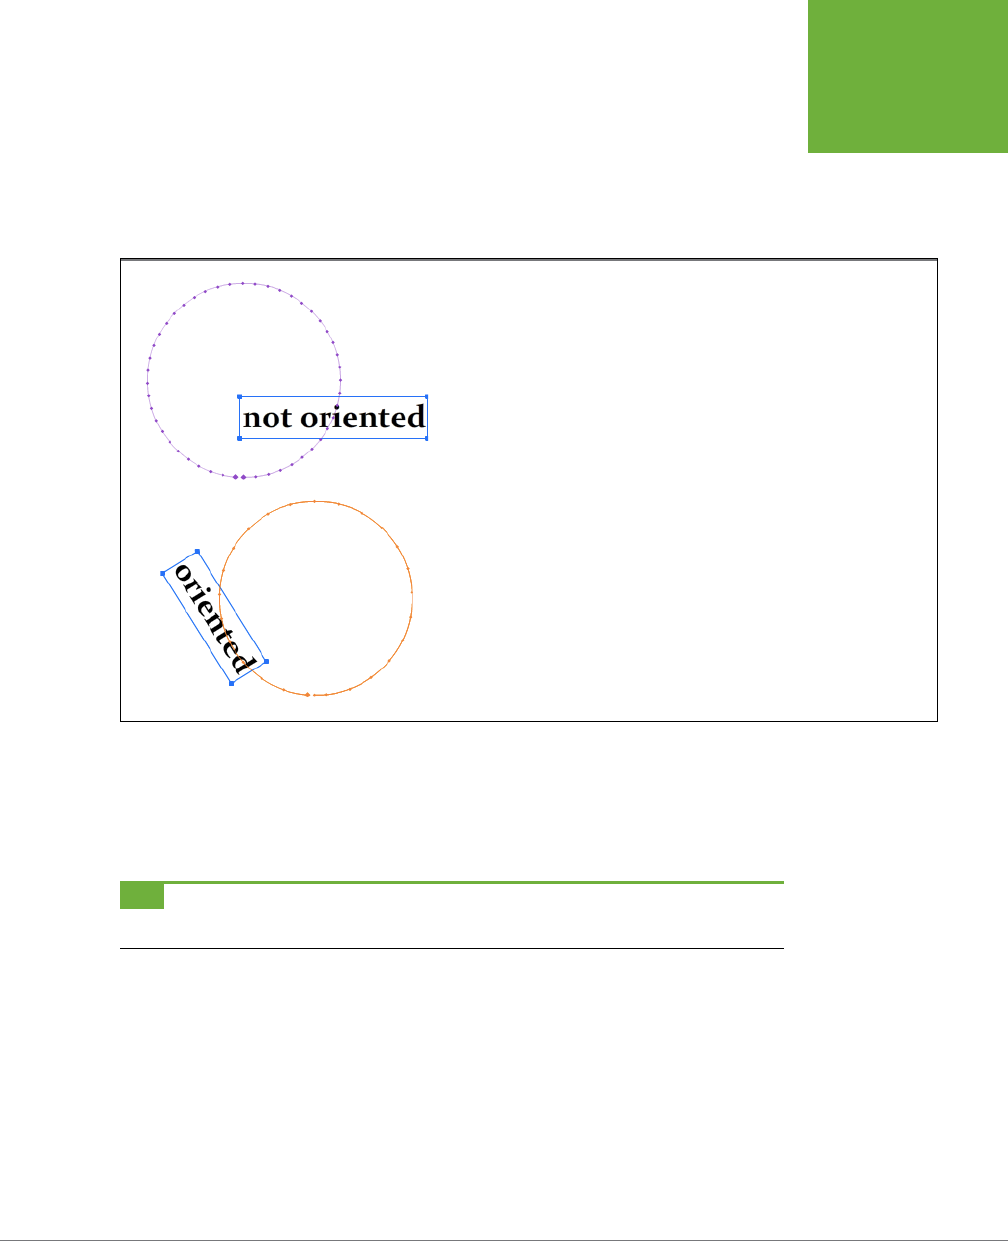
CHAPTER 8: ADVANCED TWEENS WITH THE MOTION EDITOR 305
MODIFYING
A MOTION
PRESET
3. Click the “not oriented” layer name to select all the frames in that layer,
and then copy the frames (Edit→
Timeline→Copy Frames).
When you click the layer name, Flash automatically selects all the frames in the
layer. You can also Ctrl-drag (Control-drag) over the frames to select multiple
frames.
FIGURE 8-7
The text field on the top follows the motion path in a circular motion. The text field on
the bottom is oriented to the circular path, so the top of the text field always points to
the middle of the circle.
4. Click the first frame of the “oriented” timeline, and then paste the frames
(Edit→
Timeline→Paste Frames).
When you paste frames into the timeline, Flash inserts the pasted frames, push-
ing any existing frames on down the timeline.
TIP You can also right-click the timeline to see a shortcut menu that has both the Copy Frames and Paste
Frames commands.
5. Shift-drag the end of the “oriented” timeline to the 48th frame so it matches
the length of other layers.
At this point, your oriented timeline is almost identical to the not-oriented layer.
6. Edit the text field to read “oriented.”
With the Text tool still selected, you can resize the text field to fit the text by
double-clicking the box in the text field’s upper-right corner.
www.it-ebooks.info
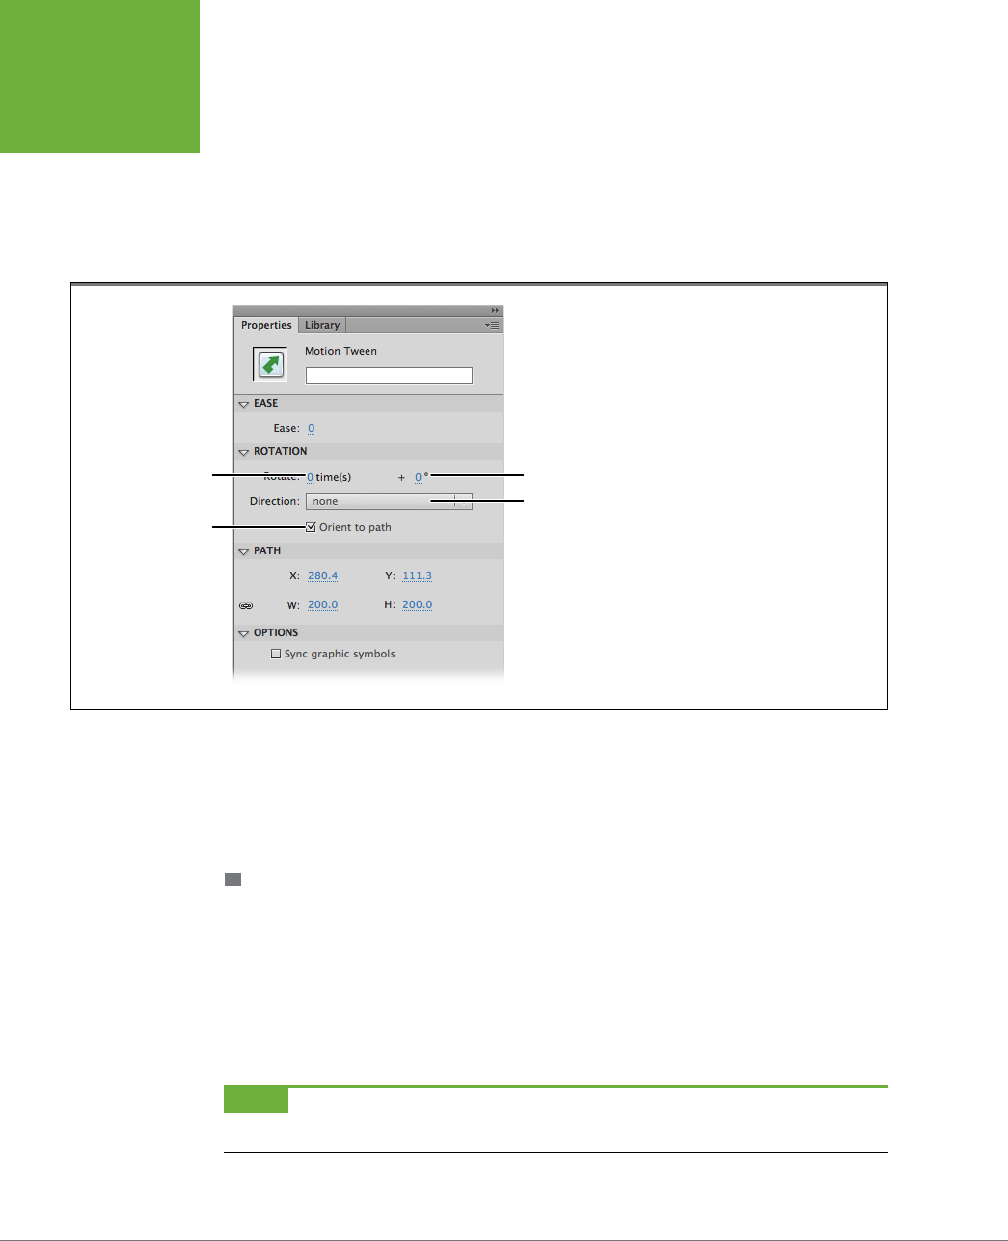
FLASH CS6: THE MISSING MANUAL
306
MODIFYING
A MOTION
PRESET
7. Click the motion path, and then, in the Properties panel, turn on the “Orient
to path” checkbox.
If the “Orient to path” checkbox isn’t showing, click to open the Rotation sub-
panel in the Properties panel, as shown in Figure 8-8. Notice that in the timeline,
Flash has added a property keyframe to every frame of the tween, since the
rotation of the text field changes in every single frame.
FIGURE 8-8
Here the Rotation panel is set to
align a symbol to the motion path.
Other options (not set) control the
direction, angle, and number of
rotations.
Orient to path
checkbox
Number of times
to rotate Angle in degrees
Rotation direction
8. Preview your animation (Ctrl+Enter or ⌘-Return).
Your animation has two text fields that follow a circular path. The text that says
“oriented” is oriented toward the circle and rotates as it makes its rounds. The
text that says “not oriented” remains upright while it follows the motion path.
OTHER THINGS YOU CAN DO IN THE ROTATION SUBPANEL
The Rotation subpanel in the Properties panel has a few other settings in addition
to “Orient to path.” You can use the Direction drop-down menu to choose clockwise
(CW) or counterclockwise (CCW) rotation for a tweened symbol or text field. This
rotation refers to the tweened object rotating around its center point, not to its path
around the circular motion path; in other words, it makes a text field or symbol spin
during the tween. Above the Direction drop-down menu, you can set the number
of times the object spins and its angle at a particular point in time.
NOTE If you turn on “Orient to path,” these other settings are reset, as shown in Figure 8-8. Vice versa is
true, too. Setting Direction to any setting other than “none” deselects the “Orient to path” option.
www.it-ebooks.info

CHAPTER 8: ADVANCED TWEENS WITH THE MOTION EDITOR 307
EDITING A
TWEEN SPAN
Swapping the Tweened Object
Suppose you create the perfect tween for a logo or a text banner. It spins, it moves
in 3-D, and even the transparency changes so it fades in and out at just the right
moments. Then your client informs you of a big change—there’s a new company
logo or dierent text. Before you pull your hair out, read on to see how easy it is to
swap the object of a motion tween. Remember, a motion tween is applied to a single
object, so it’s simply a matter of shifting all the property value changes over to a new
movie clip or text field. To swap a symbol for a tweened object, follow these steps:
1. In the original tween, select the symbol.
The symbol’s properties appear in the Properties panel.
2. In the Properties panel, click the Swap button.
The Swap button appears beneath the symbol’s name and type.
3. In the Swap Symbol box, select the new symbol, and then click OK.
The new symbol replaces the old symbol and performs all the same property
changes.
Editing a Tween Span
The tween span in the timeline deserves a closer look (Figure 8-9), since it gives you
a good overview of what’s going on in a tween. When you create a motion tween,
Flash colors it blue to set it o from the other layers, so you can easily find your
way around. Property keyframes are diamond-shaped in the timeline to distinguish
them from the circle-shaped standard keyframes. Clicking anywhere on the tween
selects the entire tween and moves the playhead to that frame in the tween. What if
you need to select a single frame in a tween? Perhaps you want to copy a tweened
symbol’s properties at that point in the timeline. In that case, Ctrl-click (⌘-click)
the timeline to select a single frame. Then, right-click the frame and choose Copy
Properties from the shortcut menu.
When you apply a motion tween to an object, Flash automatically sets aside a certain
number of frames for the tween, marking them with the blue highlight. If there’s only
one keyframe in the layer, Flash uses all the layer’s frames for the tween. Otherwise,
if there are several keyframes on a layer, Flash uses all the frames between two
keyframes. So, being the clever designer you are, you take this into account when
you create your motion tweens; you lengthen or shorten the available space in the
timeline to make your tweens just the right length. Still, there are times when you
need to make a tween longer or shorter after the fact. The main thing to consider
when you change the number of frames in your tween is the eect the change has
on your carefully positioned property keyframes. For example, suppose you have
the perfect tween for a basketball bouncing, but it seems to be running too slowly.
You want to speed up the bouncing motion but keep the relative positions of the
property keyframes the same. In that case, use the first option in Table 8-1—drag
www.it-ebooks.info
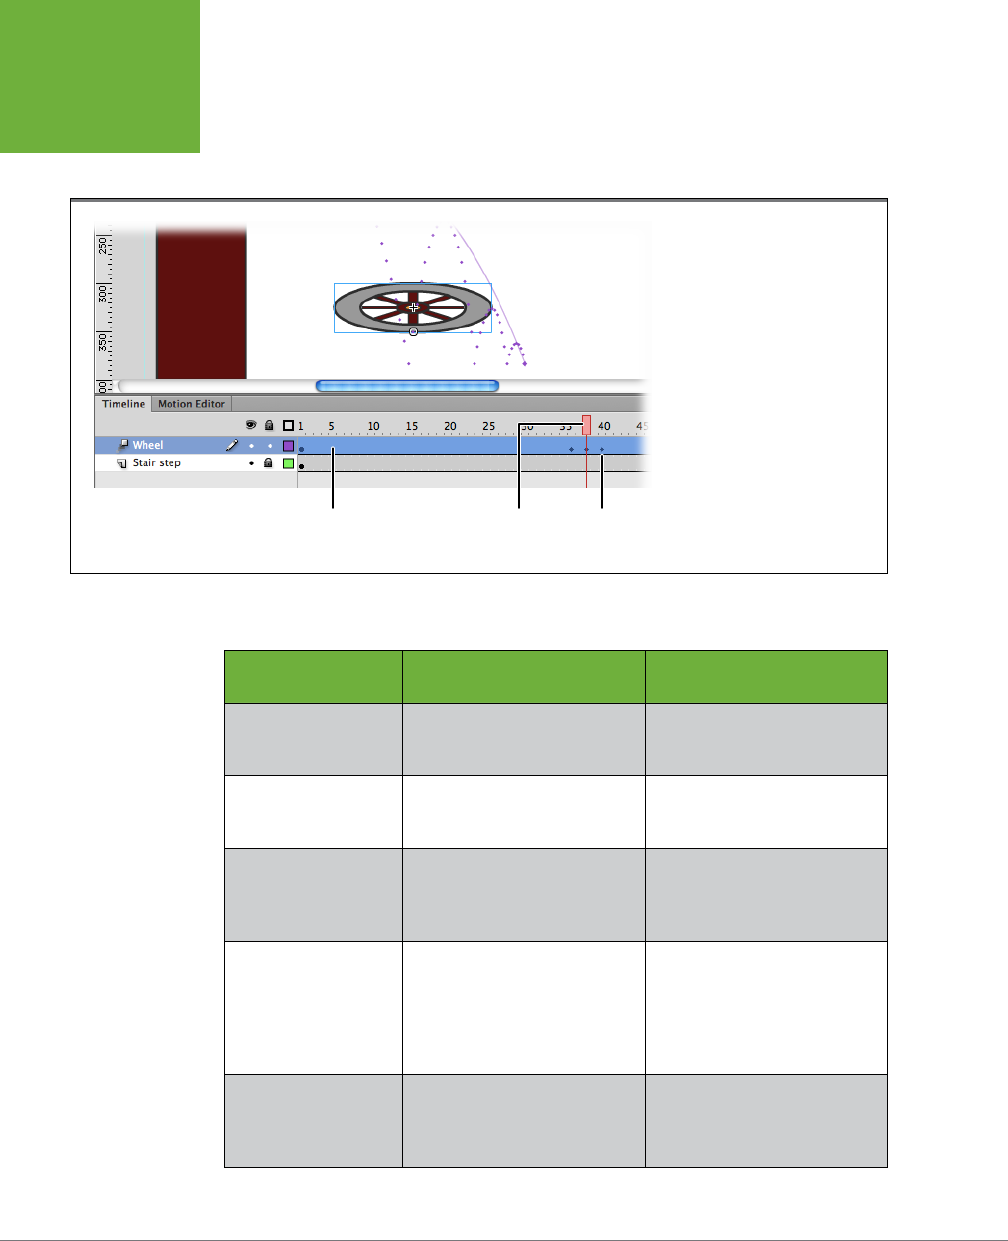
FLASH CS6: THE MISSING MANUAL
308
EDITING A
TWEEN SPAN
the end of the timeline. In another case, you may want to trim a few frames o the
end of your timeline, making it shorter, but you don’t want the property keyframes
to change position at all. To do that, Shift-drag the end of the timeline.
FIGURE 8-9
The tween layer is a light blue
to distinguish it from the other
layers. The small diamond-shaped
markers are property keyframes.
Tween layer Playhead Property
keyframe
TABLE 8-1
Want to lengthen or shorten the timeline of your motion tween? Here are the commands and the way they
affect the property keyframe.
ACTION HOW TO DO IT…
EFFECT ON PROPERTY
KEYFRAMES
Make a motion tween
longer or shorter.
Drag the end of the timeline. Property keyframes move pro-
portionately, keeping their rela-
tive positions along the tween.
Keep a tweened object
on the stage after its
motion is complete.
Shift-drag the end of the
timeline.
Has no effect on property
keyframes.
Remove frames from
a tween.
Ctrl-drag (⌘-drag) to select
the frames to be deleted.
Then press Shift-F5 to remove
frames.
The number of frames between
property keyframes stays the
same, except for the segment
where the frames are removed.
Insert frames into a
tween.
Ctrl-drag (⌘-drag) to select the
number of frames to insert in
the timeline. Then right-click the
selected frames. Choose Insert
Frame from the timeline.
Inserts frames at the point of
selection. Keyframes before
the insertion point remain in
the same position. Keyframes
beyond the insertion point
move down the timeline.
Move a tween span in
the same layer.
Drag the tween span to a new
point in the timeline.
The relationship of all the key-
frames stays the same; however,
the move erases the existing
frames at the new location.
www.it-ebooks.info

CHAPTER 8: ADVANCED TWEENS WITH THE MOTION EDITOR 309
EDITING A
TWEEN SPAN
ACTION HOW TO DO IT…
EFFECT ON PROPERTY
KEYFRAMES
Change the breakline
between two adjacent
tween spans.
Drag the breakline to a new
point.
Property keyframes move pro-
portionately, keeping their rela-
tive positions along the tween.
Delete a tween span. Right-click the tween span, and
then choose Remove Frames
or Clear Frames to replace the
selection with standard frames.
Deletes all the property
keyframes.
Viewing and Editing Property Keyframes in the Timeline
Property keyframes appear in the tween span at the point when any property
changes. Those properties can include the following:
• Position shown as X/Y coordinates in the Properties panel.
• Scale shown as H/W (height and width) coordinates.
• Skew, created with the Transform tool.
• Rotation around the transformation point.
• Color, including tint, brightness, and alpha (transparency).
• Filters, like Drop Shadow, Blur, and Glow.
Suppose you want to change the width of a symbol or text field in the middle of
a motion tween. So you drag the playhead to the point in the timeline where you
want the change to happen. Then, with the tweened object selected, you make
the width change using the W setting in the Properties panel. Flash automatically
adds a diamond-shaped property keyframe to the tween span to mark the change.
As seen on page 307, a single tween span can end up with bunches of property
keyframes scattered all up and down the timeline. Single property keyframe mark-
ers can represent more than one property change, too; for example, you may have
both a color change and a scale change in the same frame. Sometimes when you’re
working with your tween, you want to zero in on property keyframes for specific
types of changes. Perhaps you want to double-check all the color property key-
frames. In that case, right-click the timeline, and then choose View Keyframes from
the shortcut menu, as shown in Figure 8-10. Toggle the dierent options until only
the Color option is checkmarked.
TIP As you’re trying out different effects with the Motion Editor, you may experiment your way from a
good motion tween to a not-so-good motion tween. Don’t forget about the History panel (Windows→Other
Panels→History), where you can backtrack to a previous (and better) point in your work. Just drag the arrow
handle on the left side of the panel back to where things looked good.
www.it-ebooks.info
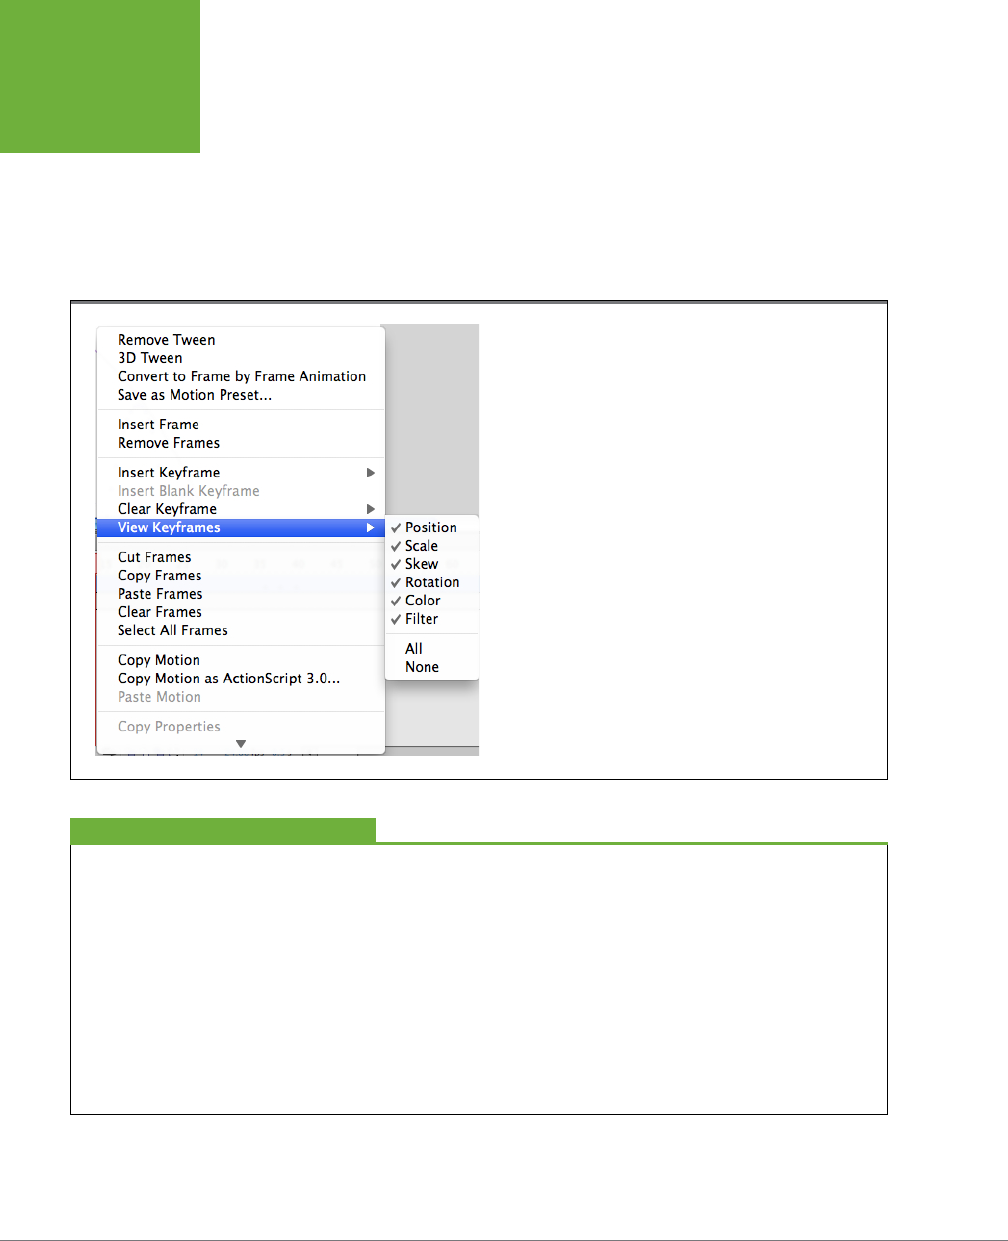
FLASH CS6: THE MISSING MANUAL
310
EDITING A
TWEEN SPAN
Copying Properties Between Property Keyframes
There may be times when you want to duplicate the properties in one property
keyframe to another elsewhere in the tween span, or perhaps to an entirely dierent
tween span. For example, it’s a great way to freeze the action for a certain number
of frames. (Create two motion keyframes with identical properties. Insert frames
in between the keyframes to lengthen the amount of time the action freezes. Or
remove frames to make it shorter.)
FIGURE 8-10
You can select which property keyframes you want marked in
the timeline. Right-click a tween span, and then choose View
Keyframes to see this menu.
No Longer a Tween
Can I change a tween to a frame-by-frame animation
?
Yes. Sometimes you may want to work with the individual
frames inside a tween. Perhaps you want to copy and use
them in another scene. Before you can do that, you need
to convert the tween to a frame-by-frame animation. What
you’re basically doing is changing every frame in your tween
to a keyframe that contains a copy of the tweened object with
all the adjusted position, scale, rotation, and color properties.
Keep in mind, though, that doing so substantially increases the
size of your Flash animation.
Right-click the tween span you want to convert. Choose “Con-
vert to Frame by Frame Animation” from the shortcut menu.
The blue tween highlight disappears from the timeline and
is replaced with keyframes lined up like dominoes, as shown
in Figure 8-11. These are standard keyframes, mind you, not
property keyframes.
FREQUENTLY ASKED QUESTION
Start by Ctrl-clicking (⌘-clicking) the property keyframe you want to copy to select
a single frame. Right-click that frame, and then choose Copy Properties from the
shortcut menu. Head over to the destination frame where you want to paste the
www.it-ebooks.info
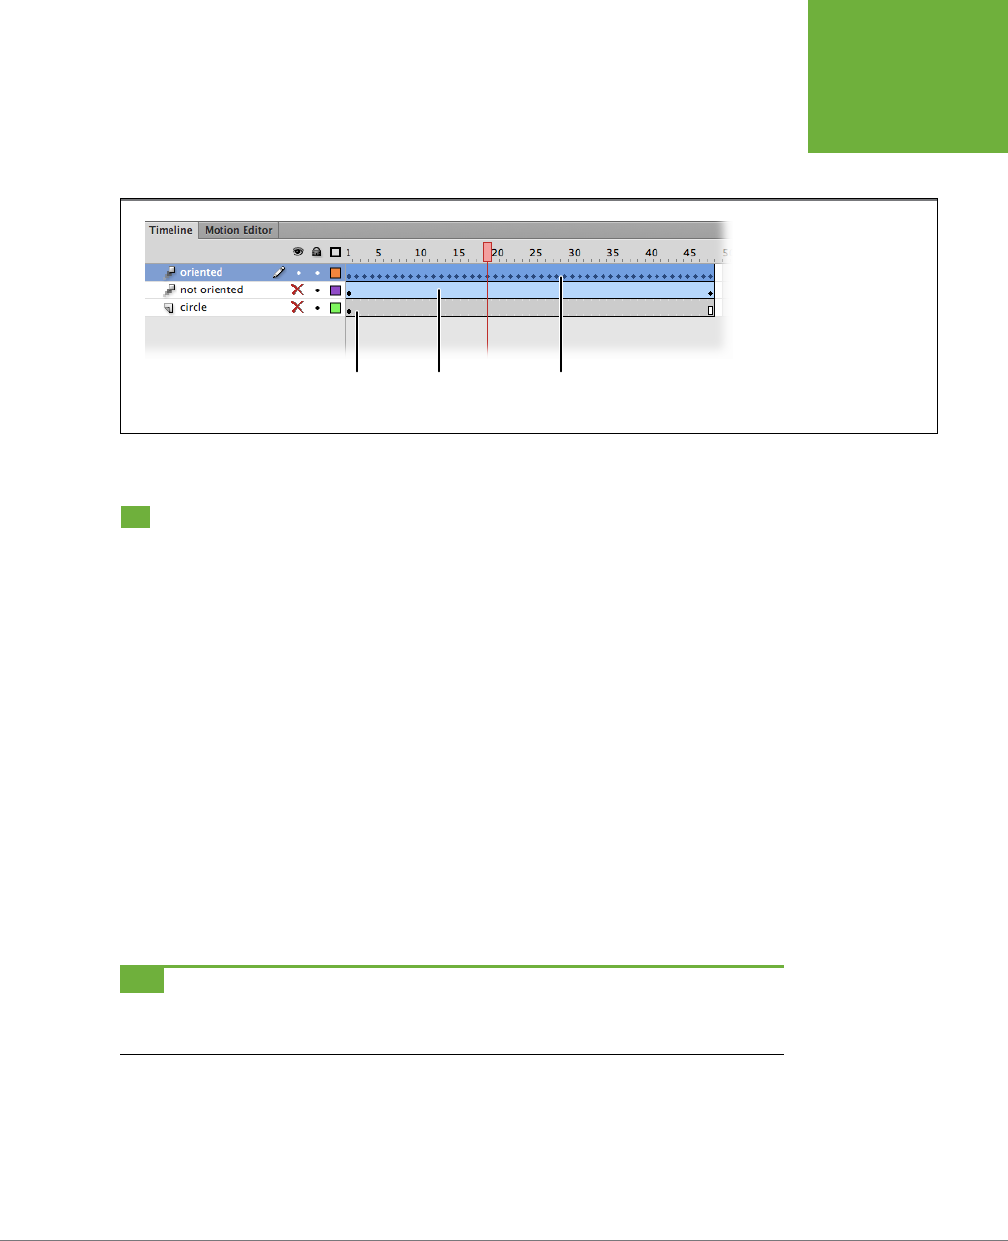
CHAPTER 8: ADVANCED TWEENS WITH THE MOTION EDITOR 311
A TOUR OF
THE MOTION
EDITOR
properties and select that single frame using a Ctrl-click (⌘-click). Then, right-click
that selected frame; you can then choose Paste Properties to paste in all the proper-
ties, or Paste Properties Special, where you can specify which properties to paste.
FIGURE 8-11
When you convert a tween to
frame-by-frame animation,
each and every frame holds a
standard keyframe. Here the
“oriented” layer has been
converted to a frame-by-
frame animation.
Standard
layer Motion
tween span Tween convert to
frame-by-frame
A Tour of the Motion Editor
The Motion Editor is like a powerful microscope that lets you examine a motion
tween’s innards. Combining the features of the timeline and the Properties panel,
the Motion Editor focuses on a single tween span, showing you its workings at a
seemingly molecular level. Not only that, but the Motion Editor also gives you the
power to make a change to any tweenable property at any point in time. With all
this firepower, you can create very complex tweens and control them with better
precision than ever before.
To open the Motion Editor, go to Window→Motion Editor. The Motion Editor won’t
show its stu unless you select either a tweened object on the stage or a tween span
in the timeline. (If you want to experiment with an existing tween, you can download
08-4_Motion_Editor.fla
from the Missing CD page at
www.missingmanuals.com/
cds/flashcs6mm
.) At first glance, the Motion Editor may look a little intimidating,
with lots of properties, numbers, widgets, and graph lines. Don’t be put o—it’s not
tough to master these elements and bend those motion tweens to your iron will. If
you’ve used Flash’s custom easing feature before (it’s been around since Flash 8),
you have a head start.
TIP Using the Essentials workspace, which this book uses throughout, the Motion Editor appears as a tab
below the stage, next to the timeline (Figure 8-12). If you have room, though, you may want to drag the tab to a
new location—like a second monitor. Giving the Motion Editor more room makes your work easier and faster.
There’s a lot going on with the Motion Editor, so it’s best to introduce yourself a
section at a time. At the very top, there are labels for each of its sections:
• Below the Property label, you see the same properties that you’ve used in the
Properties panel, like the X/Y position coordinates, the W/H (width and height)
properties, and so on.
www.it-ebooks.info
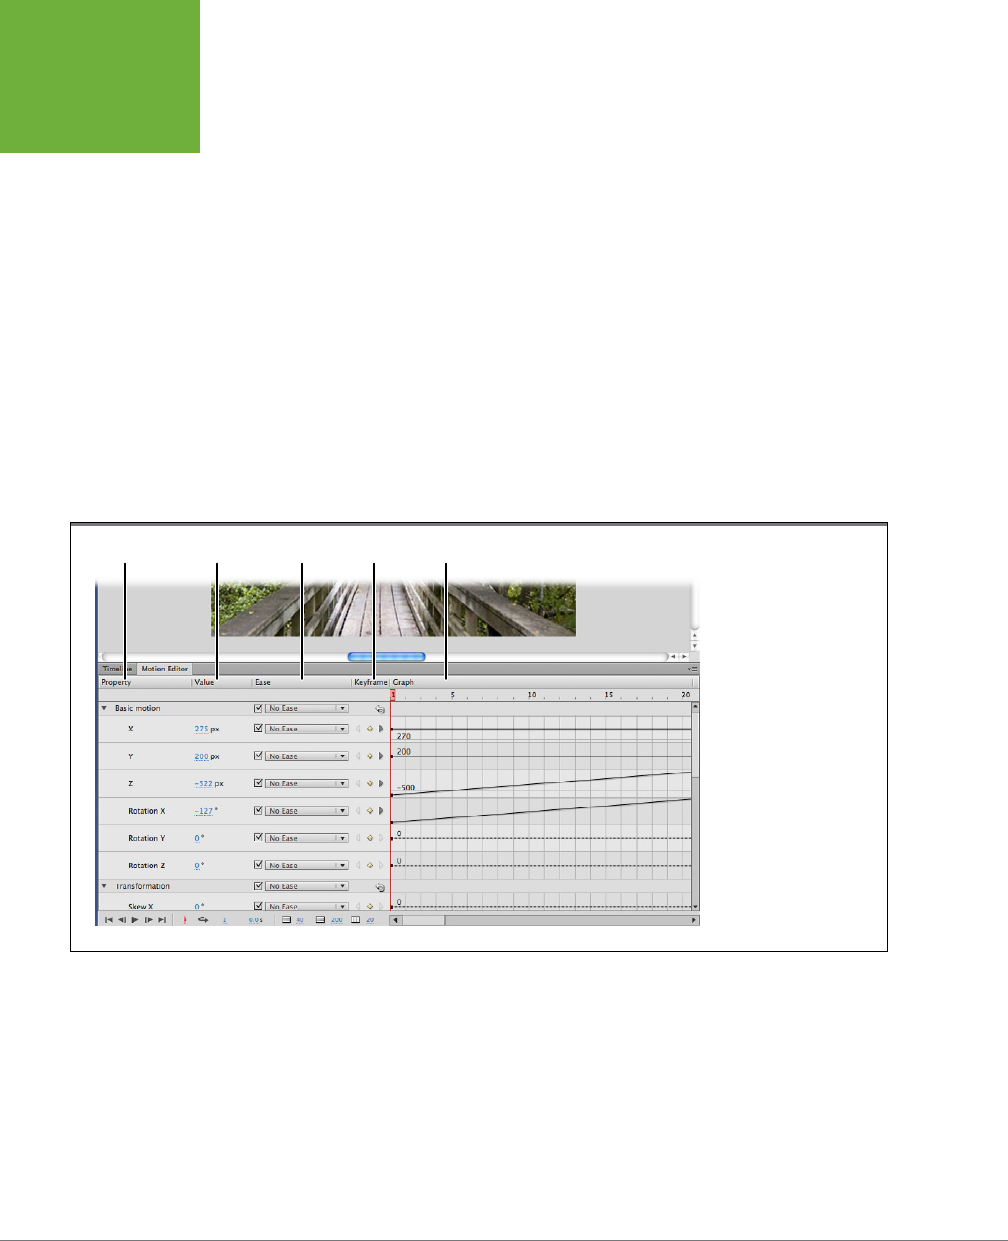
FLASH CS6: THE MISSING MANUAL
312
A TOUR OF
THE MOTION
EDITOR
• The Value settings should look familiar by now. For each property, you can click
and type a new value, or you can drag to scrub in a value.
• The Ease tools (covered on page 320) let you speed up or slow down specific
portions of your tweens. For example, you could make a moving car start o
slowly and then gain speed.
• The triangle buttons under Keyframe give you a way to jump forward and
backward among the property keyframes. You use the diamond button to add
and delete property keyframes.
• The Graph gives you a visual representation of the way properties change over
time, showing the property values as they increase and decrease. The vertical
axis displays property values, while the horizontal axis measures time—just the
way things are in the main timeline. The squares on the graph represent prop-
erty keyframes. The graph isn’t just some way to show you the geeky innards
of your tween; it’s a design tool. You can drag the graph elements around to
make changes in your animation. (More on that on page 320.)
FIGURE 8-12
At first, the Motion Editor
may seem more like a
tool for math geeks than
one for graphic artists.
Give it a chance, though.
Master a couple of Motion
Editor principles, and
you’ll enjoy the control
and precision it provides.
Property Value Ease Keyframe Graph
Workflow for Common Tweens
You won’t see anything at all in the Motion Editor unless you select a tween span in
the timeline or a tweened object on the stage. Most of the time, you want to set up
the basic framework of your tween in the main timeline before you work with the Mo-
tion Editor. That way, you can establish the timing for the major events in the tween,
using some of the steps described on page 307. Using a famous cartoon example,
you might have a coyote chase a roadrunner run o a cli at Frame 6; then up to
Frame 12, the coyote hangs in midair, feet churning; from Frame 12 to Frame 18, the
www.it-ebooks.info

CHAPTER 8: ADVANCED TWEENS WITH THE MOTION EDITOR 313
A TOUR OF
THE MOTION
EDITOR
coyote drops to the desert floor; and so on. After you have the basic timing for these
major positions worked out, you can turn to the Motion Editor to perfect the details.
The Motion Editor breaks down all the tweenable properties into five categories:
• “Basic motion” is where you change the X, Y, and Z properties, positioning
tweened objects in two and three dimensions. (You can move only movie clips
and text fields in three dimensions, so those are the only types of objects to
which you can apply the Z property.)
• Under Transformation, you tween properties like Scale X (width), Scale Y
(height), Skew X, and Skew Y.
• Color Eect includes properties for Alpha, Brightness, Tint, and Advanced Color
(a combination of color eects).
• Use the Filters panel to apply filters like Glow, Blur, and Drop Shadow.
• Eases give you the ability to speed up or slow down property changes at specific
points in the timeline. The details are on page 320.
Within each of those categories you can do the following:
• Add and remove property keyframes (page 313).
• Move property keyframes to change values and timing (page 314).
• Fine-tune and smooth property changes using Bezier curves (page 315).
• Add and remove color eects and filters (page 315).
• Apply easing to change the timing of property changes (page 320).
TIP Keep in mind that a visual effect, like the aforementioned coyote, can be composed of several differ-
ent tweened objects. The spinning legs can be a movie clip that stretches as gravity takes effect—the legs keep
spinning but become elongated. Facial features like the mouth and eyes can be separate tweened objects on
different layers, giving you the opportunity to create lots of different facial expressions.
Adding and Removing Property Keyframes
In the Motion Editor, every property has its own graph line, as shown in Figure 8-13.
Move from left to right along that graph line, and you’re marking the passage of
time. Like the main timeline, it’s measured in frames on a scale at the top of the Mo-
tion Editor. The vertical axis of the graph tracks changes in value for that particular
property. The units used dier according to the property. For example, if it’s the
Y coordinate in the “Basic motion” panel, the value relates to the vertical position
of an object on the stage, and it’s measured in pixels. If it’s the alpha value in the
Color Eect group, it’s a percentage indicating the transparency (0%) or opacity
(100%) of an object.
www.it-ebooks.info
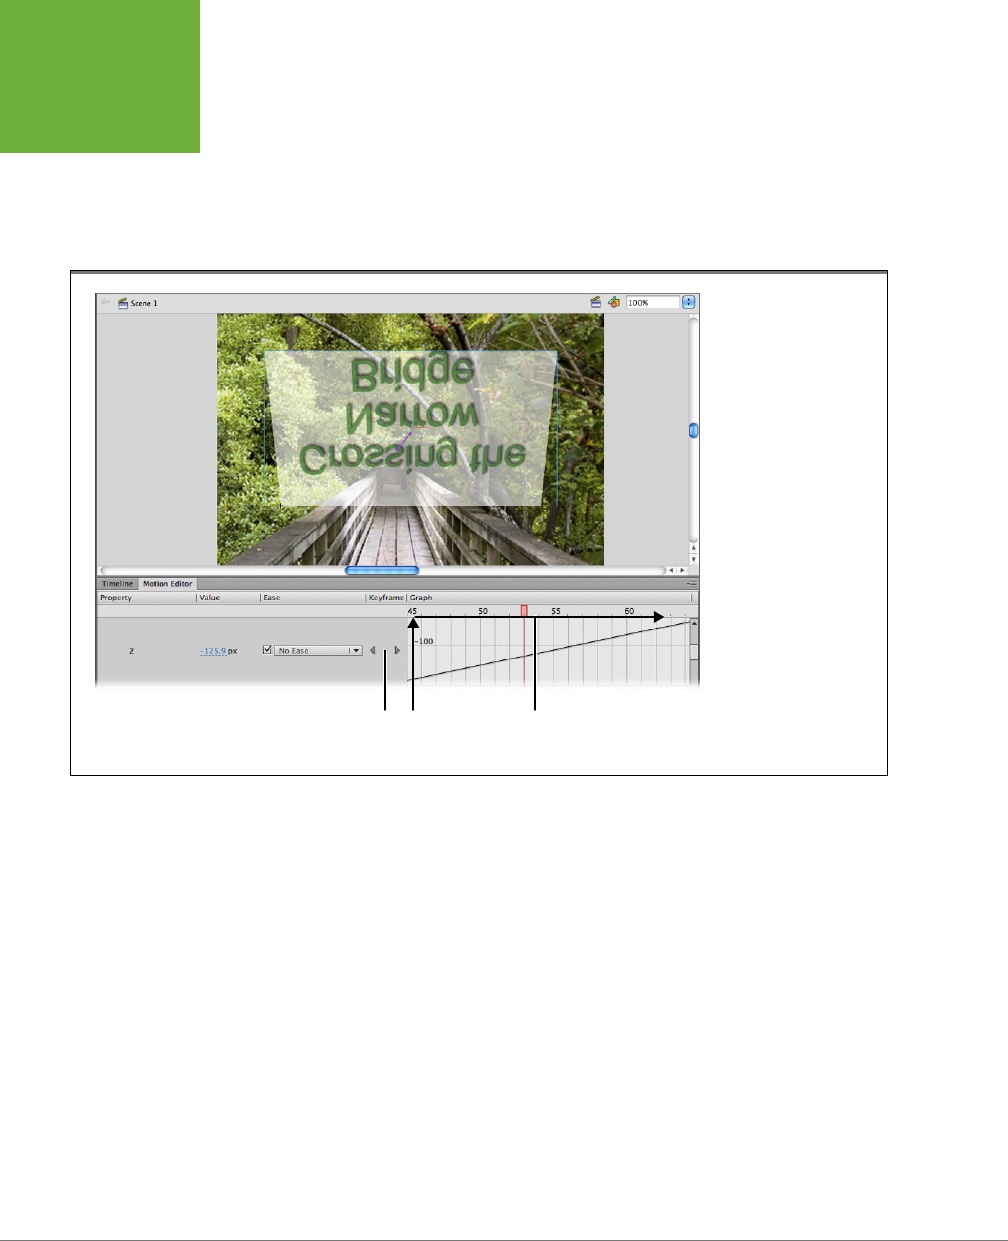
FLASH CS6: THE MISSING MANUAL
314
A TOUR OF
THE MOTION
EDITOR
You apply tweens to values by placing property keyframes along the timeline;
Flash calculates the changes for all the values between two property keyframes
( Figure8-13). To add a property keyframe, move the playhead to the frame where
you want to record a change in value, and then click the diamond-shaped button
under Keyframe. This button is a toggle: If there aren’t any keyframes at that position,
Flash creates one. If there’s a keyframe at that position, Flash removes it.
FIGURE 8-13
Each property has a graph
where the horizontal axis
marks time in frames and
the vertical axis shows
the change in property
values.
Add Property
Keyframe
Property
value
Time
There are other ways to add property keyframes to a graph line. One of the quickest
is simply to right-click at a point in the graph line and then choose Add Keyframe
from the shortcut menu. Another way to add keyframes is to drag the playhead to
a specific frame, and then make a change in a property’s value. Flash automatically
creates the property keyframe.
The Motion Editor uses a solid line in the graph to indicate values in between key-
frames—values that are changing. A dashed line indicates that the values of the
property aren’t changing—static, in Flash-speak.
Moving Property Keyframes
When you work with tweens, timing is everything. Whether you’re controlling the
movement of a jumping cheetah or changing the color of a building as it explodes,
you control the timing by moving property keyframes left and right along the timeline.
You reposition property keyframes in the Motion Editor’s graph by dragging them
with the Selection or Subselection tools. By moving the property keyframe up and
down, you increase or decrease the value of that property. If you drag a property
www.it-ebooks.info
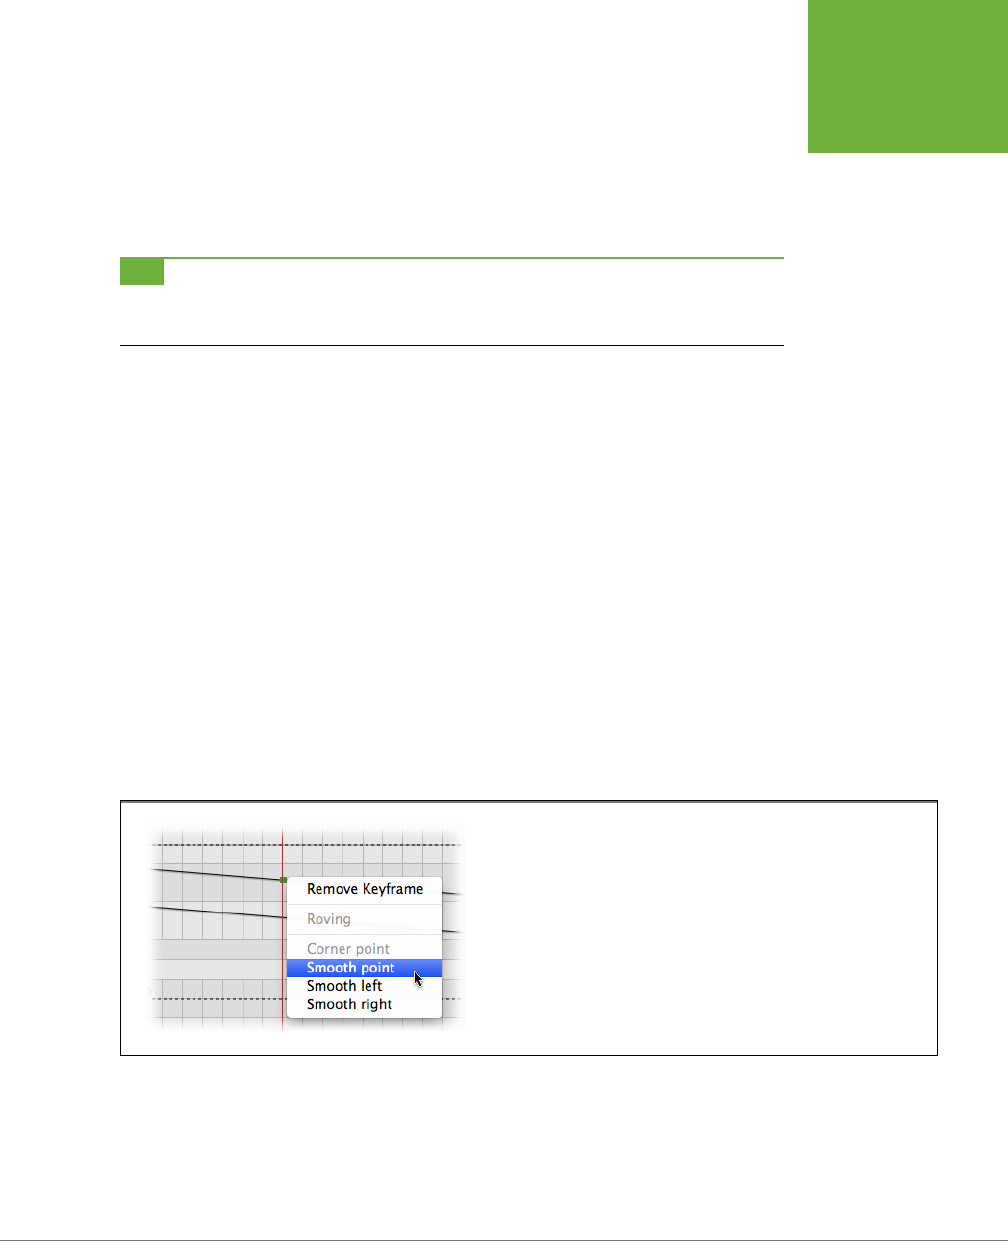
CHAPTER 8: ADVANCED TWEENS WITH THE MOTION EDITOR 315
A TOUR OF
THE MOTION
EDITOR
keyframe left or right along the graph’s timeline, you change the frame (time) at
which the property change happens.
There’s another way you can move property keyframes along the timeline—with rov-
ing keyframes. Using this method, Flash keeps track of the relationship of keyframes
even as you make changes to the timeline. See the box on page 324 for the details.
TIP Sometimes when you move a property keyframe, the entire graph line moves. That’s because you’ve
somehow selected more than one property keyframe. To deselect all the property keyframes, just click an empty
spot on the graph, and then try your move again.
Fine-Tuning Property Changes
In the Motion Editor, the basic motion properties X, Y, and Z go everywhere hand in
hand. Whenever you change one of the properties, the Motion Editor registers the
values for the other two. It’s Flash’s way of keeping tweened objects pinned down
in time and space. The basic motion properties are also the only properties that you
can’t fine-tune using Bezier line tools.
For any properties other than the basic motion properties, you can use Bezier controls
in the Motion Editor graph to create smooth changes that increase or decrease over
time. It’s just like editing a line that you draw on the stage. The property keyframes
can be either sharp-angled corner points where a value changes abruptly, or they
can be gradual curves. Initially, property keyframes are corner points. Right-click
a property keyframe to change a corner point to a curve, as shown in Figure 8-14.
If there are property keyframes on both sides of the one you click, you can choose
whether to add a single Bezier control handle (“Smooth left” or “Smooth right”)
or add two handles (“Smooth point”). If you right-click a property keyframe that’s
already a curve, you can turn it back into a corner point.
FIGURE 8-14
Right-click a property keyframe to change a corner point to a curve. The menu
shows different options depending on the position of the property keyframe.
Adding and Removing Color Eects
Your tween span has no color eects until you apply them (in the Properties panel
or the Motion Editor). To add a color eect using the Motion Editor, position the
playhead on the frame where you want to make a change, click the + button, and
www.it-ebooks.info
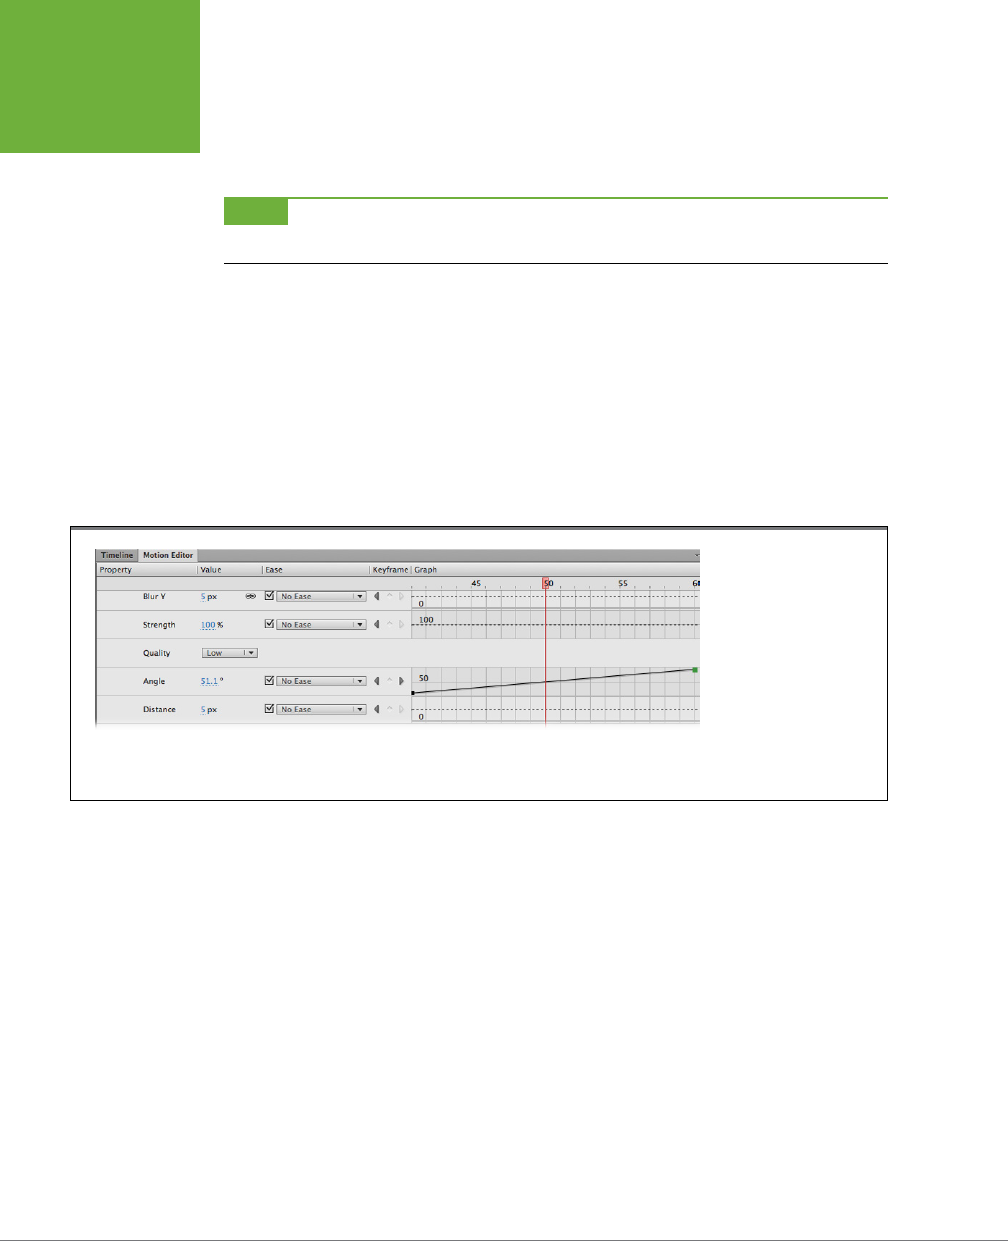
FLASH CS6: THE MISSING MANUAL
316
A TOUR OF
THE MOTION
EDITOR
then choose the eect you want to add: Alpha, Brightness, Tint, or Advanced Color.
Once you choose an eect, its subpanel appears under Color Eect. Click the Value
setting to the right of the property name, and then type a new value.
NOTE Alpha sets the transparency for an object. If you want to apply a combination of alpha, brightness,
and tint, use the Advanced Color option.
To remove a color eect, click the – button, and then choose the name of the eect
from the pop-up menu. Flash removes the property changes from the tweened
object, and the eect’s subpanel goes away.
Using Filters in Tweens
Flash includes a handful of standard filters that you apply to movie clips and text
fields, and when you apply filters using the Motion Editor, you can change the values
of these filters over time. Want a drop shadow to change its angle as the sun moves
across your animation? You can do it with the Motion Editor (Figure 8-15).
FIGURE 8-15
Filters sometimes have
multiple properties. The
Drop Shadow filter shown
here has properties for
the shadow’s blurriness,
strength, quality, and
angle. Not shown, there
are even more properties
for the color and type of
shadow created.
Don’t be afraid to experiment with the filter eects. A single filter can create dra-
matically dierent eects, as shown in Figure 8-16.
Customizing Your Motion Editor View
Working with Flash, you fight a constant battle to get a good view of the stage, the
timeline, and all the panels and windows. It’s a balancing act where you’re constantly
expanding this and shrinking that. Adding the Motion Editor to the mix just makes the
problem tougher. It’s so packed with properties, graphs, and widgets that it requires
tweaking to achieve a workspace that works for you. If you plan to do a lot of work
in Flash and you don’t have a two-monitor system, think seriously about upgrading
to one. With two monitors, you can leave your Motion Editor open on one monitor
and keep your stage and main timeline open on another. To move the Motion Editor,
or remove it from a docked position, drag it by the tab with its name on it.
www.it-ebooks.info
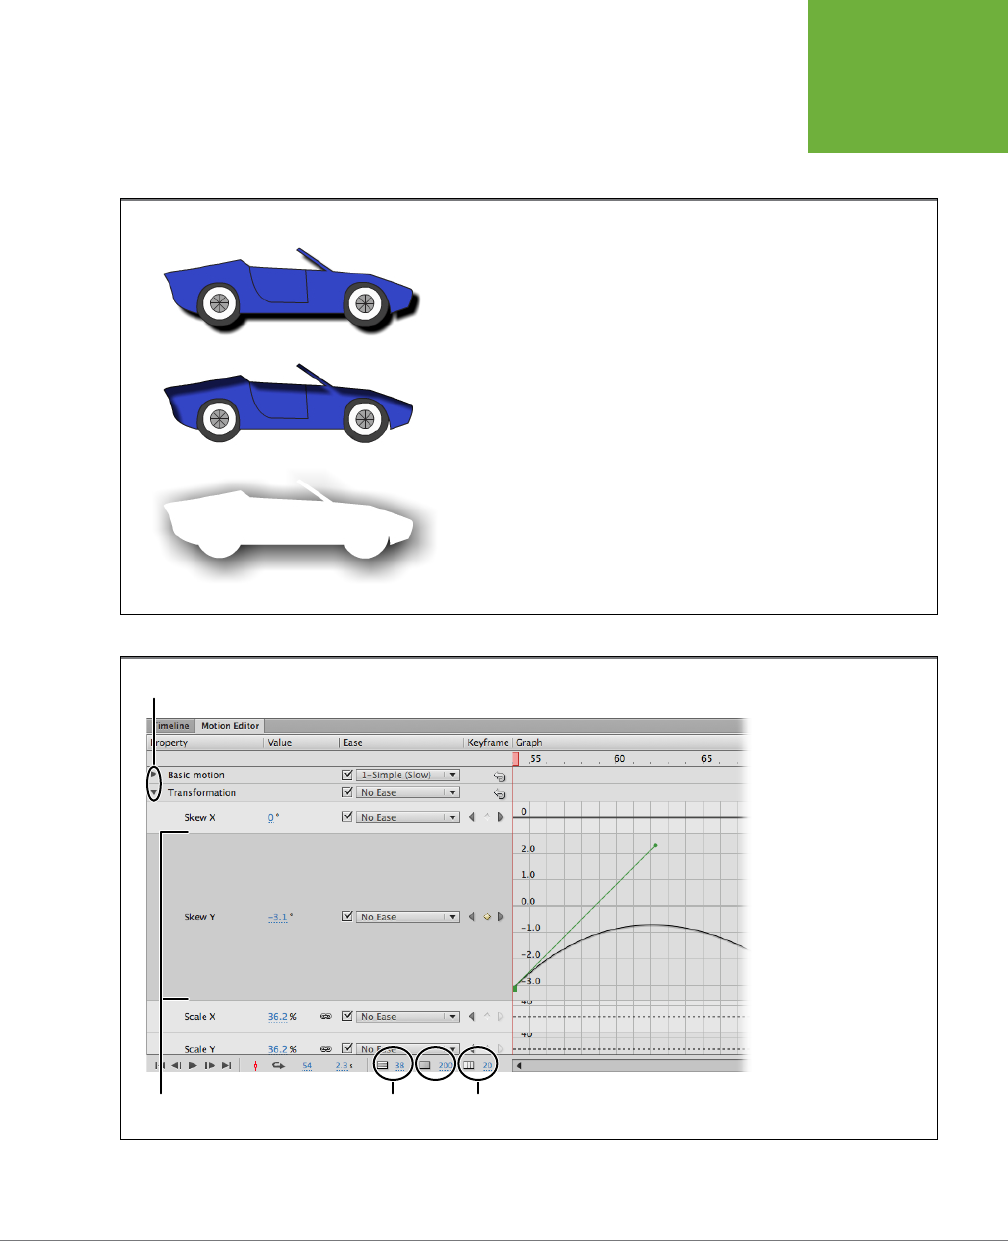
CHAPTER 8: ADVANCED TWEENS WITH THE MOTION EDITOR 317
A TOUR OF
THE MOTION
EDITOR
Initially, Flash gives you a fairly skimpy view of each property. Some of the panels
are closed, depending on the kinds of changes in your tween. To open and close
panels, click the triangle toggle buttons, as shown in Figure 8-17.
FIGURE 8-16
You don’t have to settle for the first effect a filter gives you. The Drop Shadow filter,
for example, gives some remarkably different effects.
Top: When you first apply a drop shadow, it looks like this.
Middle: Adjusting the inner shadow gives the car a more 3-D look.
Bottom: The Knockout property makes the car look like a paper cutout.
FIGURE 8-17
Don’t be afraid to make
adjustments to the
Motion Editor to improve
your workspace. In
the bottom-left corner
are three settings that
change the size of all the
graphs, the expanded
graph, and the number
of frames shown in the
timeline.
Graph size Viewable framesExpanded graph
Open/Close property panel
www.it-ebooks.info

FLASH CS6: THE MISSING MANUAL
318
A TOUR OF
THE MOTION
EDITOR
GETTING THE BEST VIEW PROPERTY GRAPHS
Unlike some windows, you can’t change the amount of horizontal space occupied
by labeled sections like Property, Value, and Ease, but you can change the vertical
space in a number of ways. That vertical space is what’s important when you’re trying
to get a good view of the property graphs while you perfect, for example, a custom
ease (page 323). You can expand a single property graph by clicking anywhere in
the panel to the left of the graph. That graph remains expanded until you click the
panel again. Two settings in the lower-left corner of the Motion Editor control the
height of graphs. A third setting controls the number of frames displayed in the
Motion Editor timeline:
• Graph Size sets the height of all the graphs.
• Expanded Graph Size sets the height of the one expanded graph.
• Viewable Frames sets the number of frames showing in the graph timeline.
Changing Transparency with the Motion
Editor
Now it’s time to turn some of that Motion Editor theory to practice. By now, you
know how to tween dimensions (page 107) and position (page 103); now you’ll learn
how to change the transparency of a tweened symbol. As shown in Figure 8-18, the
Missing CD file
08-5_Tween_Alpha.fla
shows an animated sign for a car company,
but you can use your own symbol if you prefer. In the sample file, the sign spins and
bounces as it gets bigger, giving the impression that it’s coming at the audience.
In the following steps, you adjust the transparency so that the sign goes from an
alpha value of 20 percent to a value of 100 percent, making it completely opaque
at the end of the motion.
NOTE Techies often refer to transparency as the
alpha channel
. Typically, computer video has RGB channels
for red, green, and blue. To store information about the opacity and transparency of an image, programmers
needed another channel, and they dubbed it the alpha channel, because they needed another letter and why
not start at the beginning of the alphabet?
1. Drag the playhead to Frame 1, and then click the layer to make sure that the
motion tween is selected.
Your sign is back to its starting position on the motion path. When you select
the motion tween, the words “Motion Tween” appear at the top of the Proper-
ties panel.
2. Click the Motion Editor tab next to the Timeline tab.
If you don’t see the Motion Editor tab, choose Window→Motion Editor to make
it visible, as shown in Figure 8-19.
www.it-ebooks.info
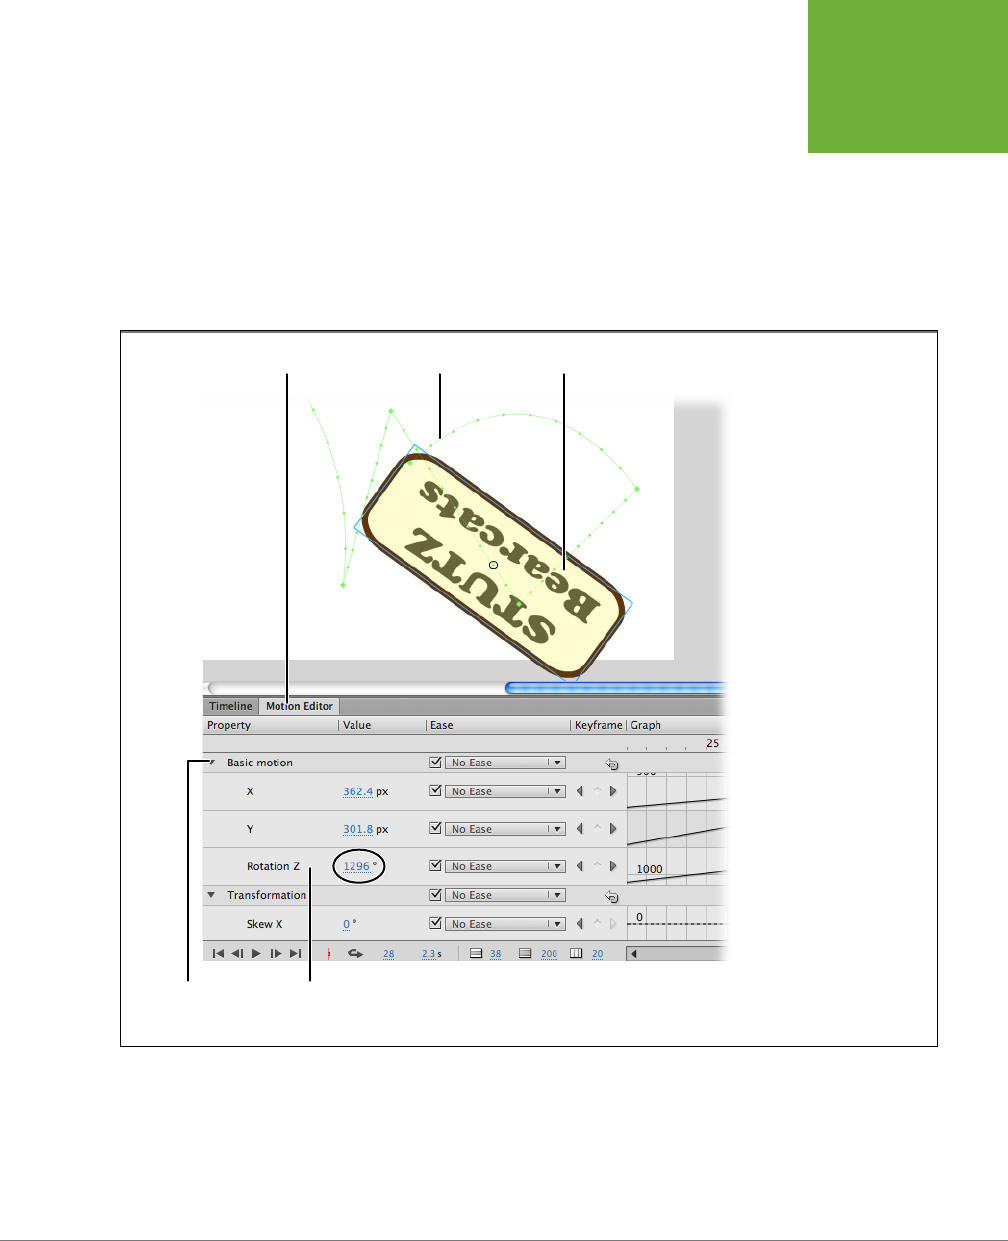
CHAPTER 8: ADVANCED TWEENS WITH THE MOTION EDITOR 319
A TOUR OF
THE MOTION
EDITOR
3. In the Motion Editor window, find the Color Eect section, and then click
the + button to add an alpha color eect to the tween.
If some of the panels are expanded, you may not see the Color Eect panel right
away. Either close the open panels by clicking their expand/collapse triangles,
or use the scroll bar to find the Color Eect panel. When you click the + button,
a shortcut menu gives you four color-related choices: Alpha, Brightness, Tint,
and Advanced Color. After you choose Alpha, a new subpanel opens, showing
an alpha amount as a percentage.
FIGURE 8-18
The Motion Editor is made up
of numerous subpanels. Each
subpanel gives you access
to tweenable properties.
Here the Rotation Z property
is set to 1296. You can click
and type a value or drag to
“scrub in” a value.
Tweened symbolMotion editor Motion path
Rotation ZBasic motion
subpanel
4. Next to “Alpha amount,” change the value to 20%.
You can click the number and type
20
, or you can scrub the value until 20 appears
in the box. Notice how the graph to the right changes as you change the value.
www.it-ebooks.info
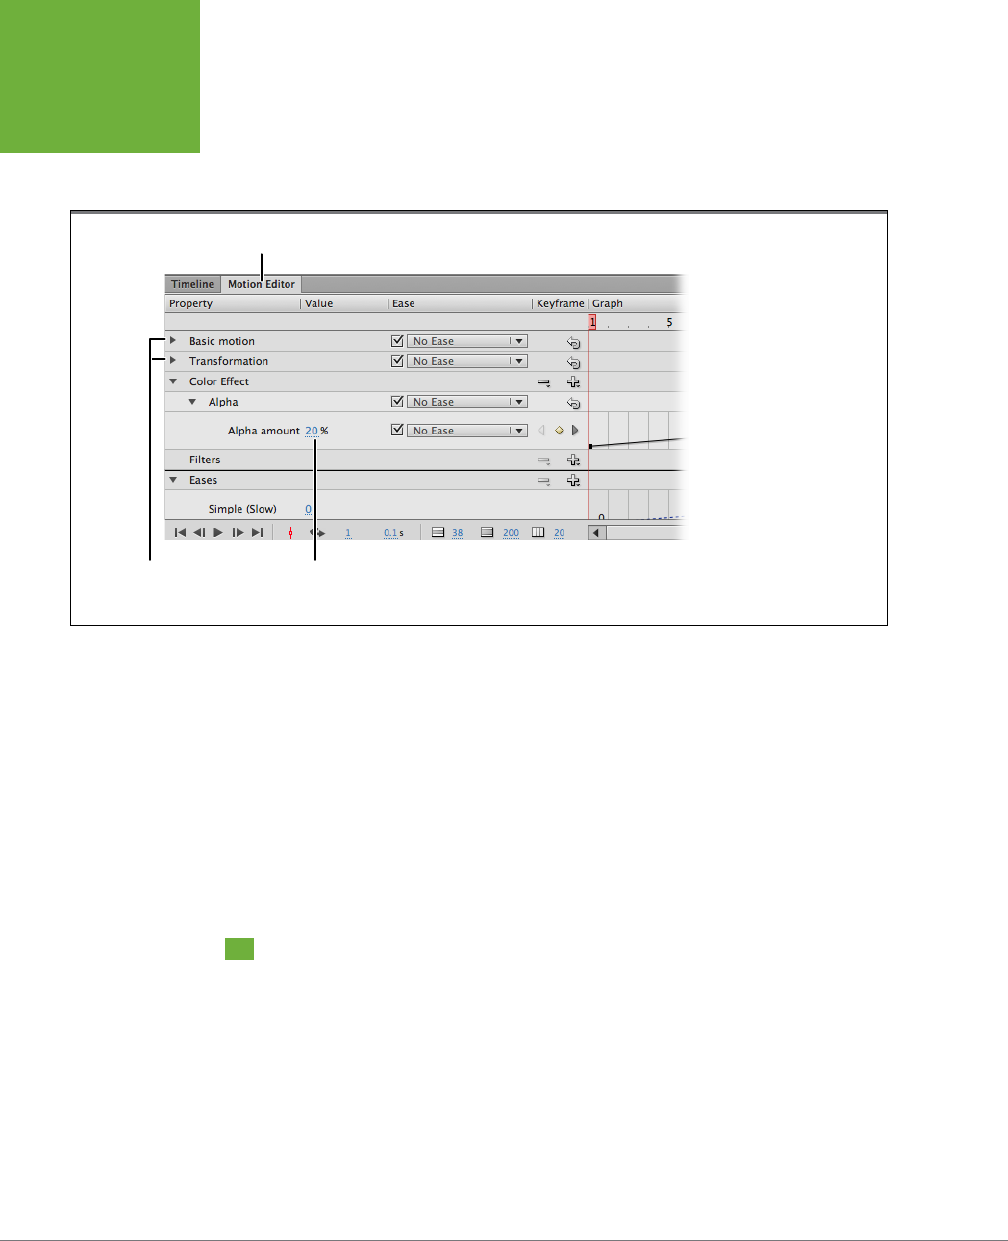
FLASH CS6: THE MISSING MANUAL
320
EASING
TWEENS
5. Click the Timeline tab, and then drag the playhead to the last frame.
By moving the playhead to a new location, you can enter a dierent alpha value
to create the tween.
FIGURE 8-19
The Motion Editor is Com-
mand Central for tweaking
every little detail in your
motion tween. It’s made up
of several panels that give
you access to properties,
effects, and filters. Click the
triangles to expand and col-
lapse the different panels.
Click the + and – buttons
to add and remove effects
and filters.
Motion editor tab
Alpha amount valueClick triangle to
expand/collapse
6. Click the Motion Editor tab, and then change the Alpha amount to 100%.
Setting the Alpha amount to 100% makes the sign symbol completely opaque.
7. Test your animation in Flash or using the Flash Player.
At this point, the animation looks pretty much the same whether you run it
inside Flash (Enter) or you compile the animation and test it in the Flash Player
(Ctrl+Enter or ⌘-Return). Position, size, and alpha properties are all visible inside
Flash, but that’s not always the case with some filters, components, timeline
eects, and ActionScript code.
Easing Tweens
When Flash creates a tween, it doesn’t use an artist’s eye; it uses an accountant’s
calculator. If a cartoon roadrunner sprints across the desert, it moves exactly the
same distance in each frame, even though we all know that cartoon roadrunners
start slowly, build up speed, and then slow as they skid to a stop, usually with a little
thwang motion at the end. It’s up to you to add realistic (or, if you prefer, cartoonistic)
motion to your animations, and fortunately, the Ease tools are there to help. When
you apply an
ease
to one of the properties in your tween span, Flash recalculates
how much of a change takes place in each frame. Suppose you want an object, like
a moving car, to roll gradually to a stop. You can apply an ease that makes the car
www.it-ebooks.info
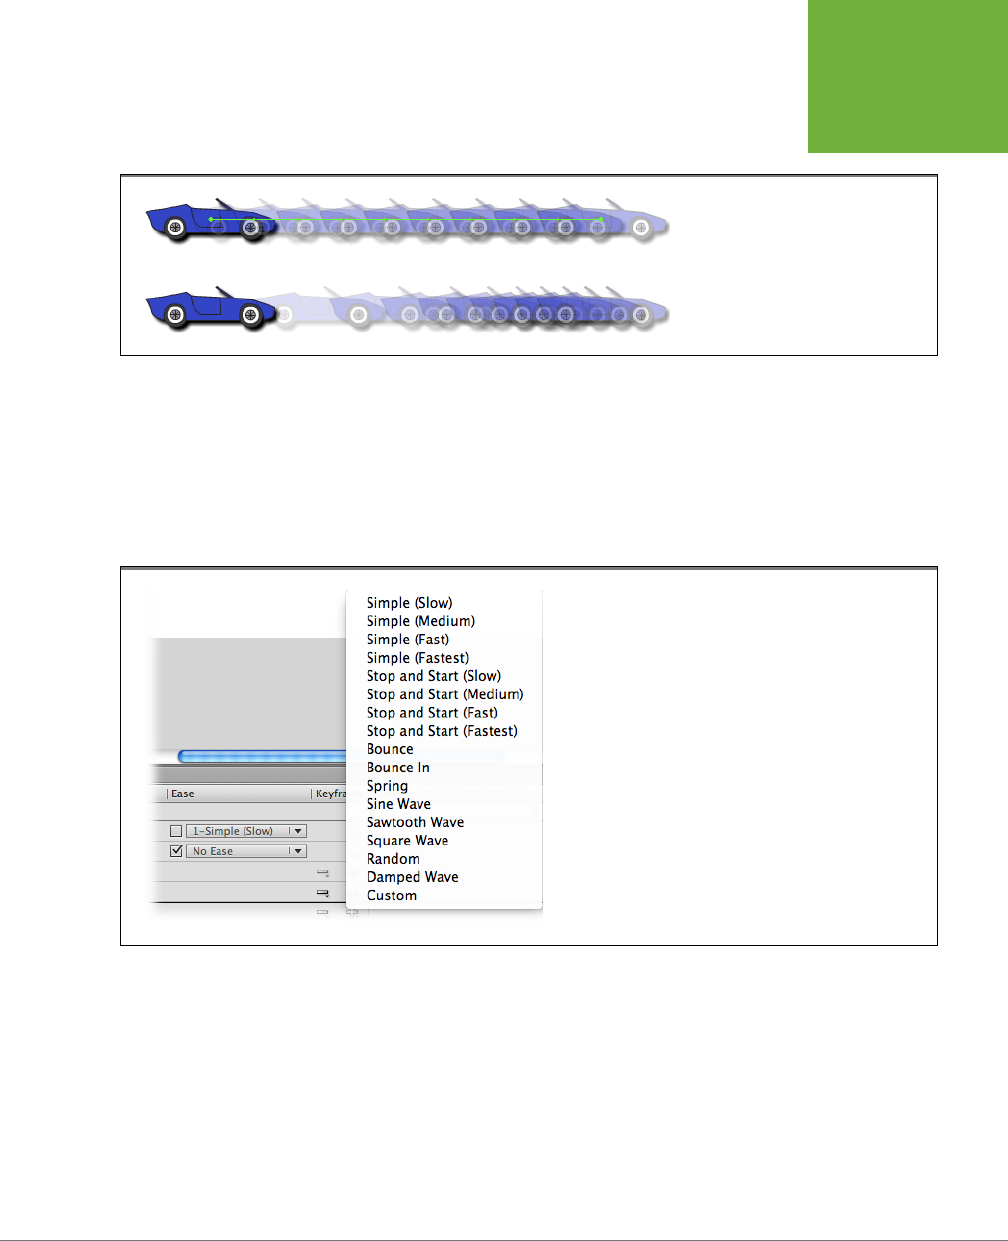
CHAPTER 8: ADVANCED TWEENS WITH THE MOTION EDITOR 321
EASING
TWEENS
move farther in the first few frames, and then shorter distances in the final frames
until it stops, as shown in Figure 8-20.
FIGURE 8-20
These two tweens are onion-skinned to
show the car in several different frames.
The tween on the top has no ease. The
Simple (Fastest) ease was applied to the
tween on the bottom.
Applying an Ease Preset
Flash comes with several ease presets, as shown in the menu in Figure 8-21. Ease
presets aren’t limited to changing the position of an object; you can apply them
individually to specific properties. For example, if you have a lamp shining a yellow
light, you can make that light blink on and o by applying a Square Wave ease to the
alpha value (transparency) of the light. (A square wave is binary; it’s either on or o.)
FIGURE 8-21
Flash gives you ease presets that you apply in the Motion Editor’s
Eases panel.
There are a couple of steps for applying an
ease preset
. First, you need to add the
ease preset to the Motion Editor’s Eases panel. Then you apply the ease to one or
more properties, using the drop-down menus that appear in the Ease section of
each property. Here are the step-by-step details for adding the Square Wave ease to
make a light blink. You can create your own lamp and light, or you can use the simple
desk lamp provided in
08-6_Ease_Tween.fla
found at
www.missingmanuals.com/
cds/flashcs6mm
. In either case, make sure the light emanating from your lamp is a
movie clip on its own layer, and give yourself about 48 frames for the tween span.
www.it-ebooks.info
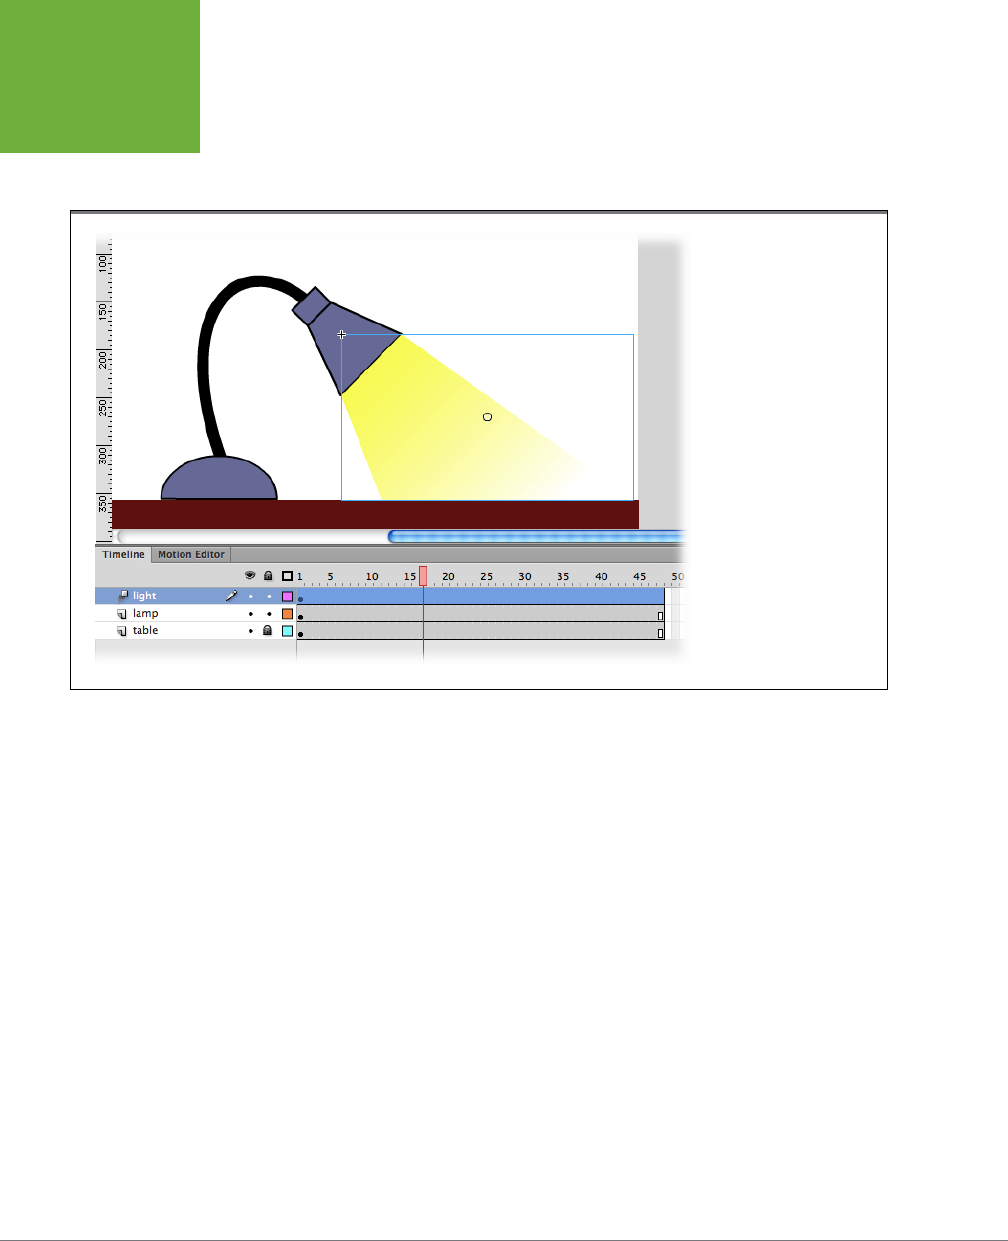
FLASH CS6: THE MISSING MANUAL
322
EASING
TWEENS
1. With the light’s tween selected, as shown in Figure 8-22, open the Motion
Editor (Window→Motion Editor).
The Motion Editor panel opens, with the Eases panel at the bottom.
FIGURE 8-22
Apply the Square Wave
ease to the alpha value
(transparency) of an object,
and you can make it
repeatedly disappear and
reappear. The technique
is used here to make this
lamp blink.
2. In the Eases panel, click the + button to add a new tween, and then choose
Square Wave from the shortcut menu.
When you click the + button, you see the Eases menu (Figure 8-21). After you
select the Square Wave ease, a subpanel for Square Wave appears under the
Eases panel (with any other eases belonging to the tween span).
3. In the Square Wave property subpanel, set the value to 6.
Eases have a related value, but the function of the value may be dierent de-
pending on the ease. The Square Wave’s value controls the number of changes.
In this case, it controls the number of times your lamp blinks on or o.
4. In the Color Eect panel, click the + button, and then choose Alpha from
the pop-up menu.
An Alpha subpanel appears under the Color Eect panel.
5. In the Motion Editor’s timeline, move the playhead to the last frame of the
tween, and then set the alpha value to 0.
Without any easing, this causes the light to gradually dim from 100% to 0%.
www.it-ebooks.info
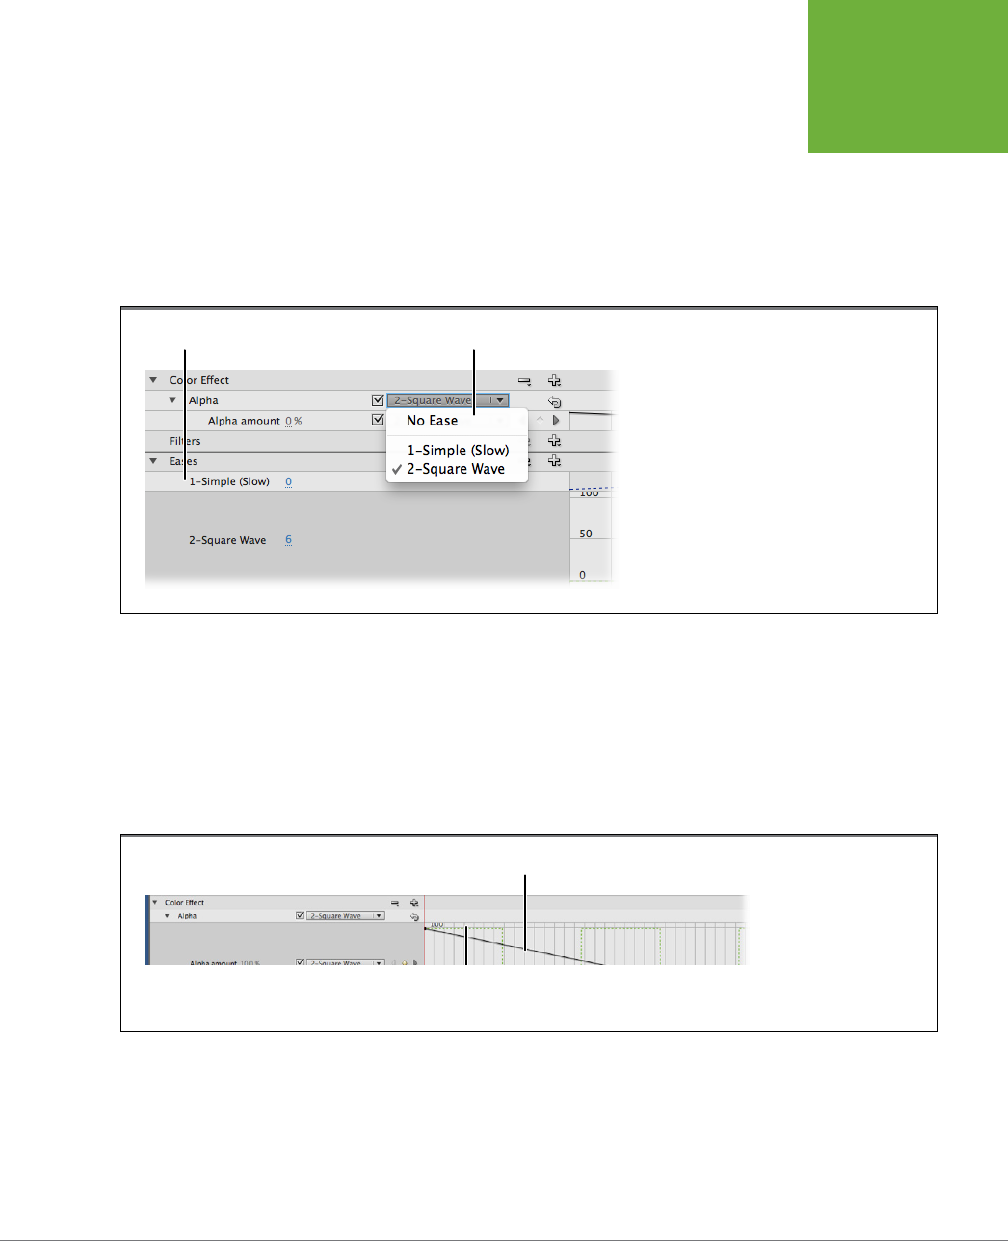
CHAPTER 8: ADVANCED TWEENS WITH THE MOTION EDITOR 323
EASING
TWEENS
6. In the Color Eect→Alpha panel, in the Ease section, choose Square Wave,
as shown in Figure 8-23.
The Square Wave ease is applied to all the Color Eect properties. You can see
that the Alpha property subpanel is also set to Square Wave. You can apply an
ease in some of the category panels, like the Transformation category, where
it applies to all the properties in that category, or you can apply it individually
to each property.
FIGURE 8-23
Once you’ve added an ease to the Eases panel,
you can apply it to any property, using the Ease
drop-down menu.
Eases panel Eases drop-down menu
7. Test your animation.
The light flashes from on to o and then back again. It changes six times, match-
ing the value in the Square Wave subpanel.
After you’ve applied an ease to a property, the graph shows two lines, as shown in
Figure 8-24. The solid line shows any property changes that were originally in that
tween span. The dotted line shows the property changes after you apply the tween.
FIGURE 8-24
The solid line in this
graph shows the original
change in value. The dot-
ted line shows the change
in value after you’ve
applied an ease.
Value applied by square wave
Original tween value
Creating a Custom Ease Preset
You can create your own ease presets and store them in your Flash file. Once you’ve
created a preset, you apply it just as you would any other ease preset. Flash names
your preset for you, so you’ll have to remember what your 3-Custom and 5-Custom
ease presets do. Flash saves the presets in your Flash file, so you can use them with
www.it-ebooks.info
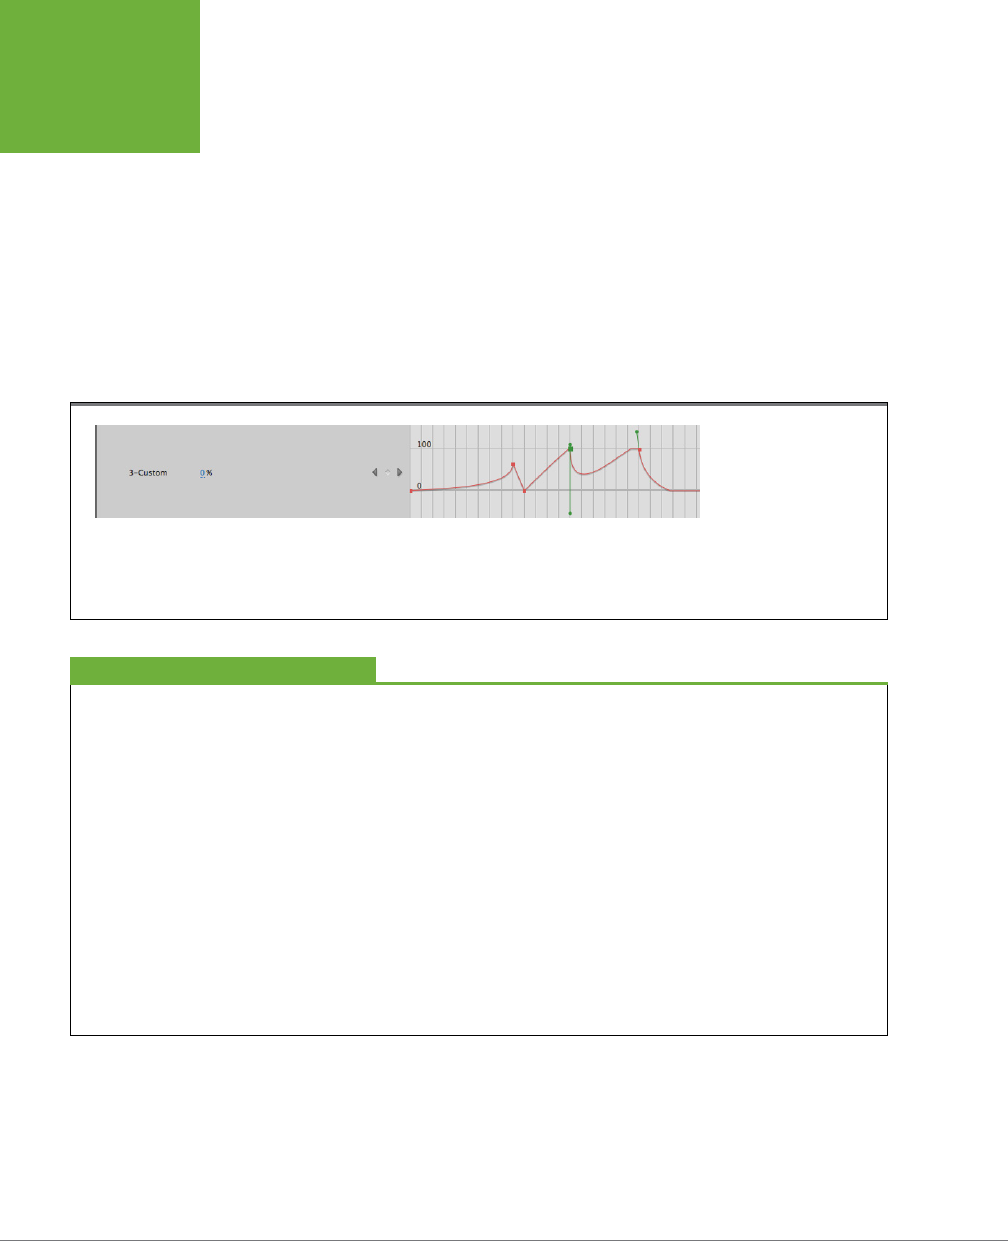
FLASH CS6: THE MISSING MANUAL
324
EASING
TWEENS
any property and they’ll be there the next time you open the file. However, you
can’t use your custom ease in other Flash documents; they’re available only in the
document in which you created them.
To create a custom ease, click the + button in the Eases panel, and instead of choos-
ing one of Adobe’s predesigned ease presets, choose Custom at the bottom of the
menu. A custom preset appears in the panel with any other eases you may be using
in your document. There’s a line in the graph ready for you to edit (Figure 8-25).
You use Flash’s standard line and Bezier tools to change the shape of the line, and
subsequently change the values of any property, once the ease is applied. Page 71
has some tips on editing Bezier curves that were created with the Pen tool. You can
use those same techniques with Motion Editor graphs.
FIGURE 8-25
Use Flash’s Bezier tools to
modify the graph line in
a custom ease preset. It
may take some trial and
error to become proficient
in designing custom ease
presets.
The Keyframe Rovers
What’s a roving keyframe…and why do I care?
Roving keyframes are a concept that migrated from Adobe’s
After Effects program to Flash. Roving keyframes apply only
to properties in the “Basic motion” category (X, Y, and Z).
You can think of a roving keyframe as a keyframe that’s not
tied down to a specific frame. You’re letting Flash move that
keyframe horizontally along the timeline so the speed of a
motion remains consistent throughout the tween.
As for the second part of your question, roving keyframes are
especially helpful if you’ve messed with the motion path on the
stage by dragging the tweened object to different locations.
Often, this type of editing changes the path segment in a way
that affects its timing.
You can change an entire motion path to roving keyframes by
right-clicking the motion path on the stage, or right-clicking
the tween span in the timeline and then choosing Motion
Path→“Switch keyframes to roving” in the shortcut menu.
Using the same technique, you can remove all the roving key-
frames by choosing Motion Path→“Switch keyframes to non-
roving.” If you want to convert a single keyframe, select the
single frame in the timeline with a right-click (Control-click),
and then choose the option from the Motion Path submenu.
FREQUENTLY ASKED QUESTION
www.it-ebooks.info

325
CHAPTER
9
Everywhere you look in the real world, you see things that are linked together: a
dog and its tail, a ribbon and a bow, a train engine and its caboose. And then,
of course, there’s that song about the thigh bone connected to the hip bone.
When objects are connected, they move dierently than they do in isolation, since
the movement of each linked part influences the movement of the others. Flash
gives you a special tool—the Bone tool—that lets you link these kinds of objects,
so when you move the hip bone, the thigh bone automatically moves in a realistic
manner. The animation tool you use is appropriately called a
bone
; specifically an
IK bone
. IK stands for
inverse kinematics
, which is the type of animation algorithm
at work here, but you don’t have to remember that. You can just call them “bones,”
and know that you’re using the same technology that computer game developers
use to make onscreen characters move realistically.
In this chapter, you’ll learn about the two dierent ways you can use Flash’s IK Bones
tool—with symbols, and with shapes. When you use bones with symbols, you link one
symbol to another. For example, suppose you have a train in your animation. Each
car is a separate, carefully drawn symbol. Using bones, you can link the engine to
the coal car, the coal car to the boxcar, and so on, all the way down to the caboose.
The other way you can use bones is with shapes. In the past, if you wanted to draw
a snake, you’d have a hard time getting that snake to squirm and slither properly.
You’d have had to painstakingly reposition, distort, or even redraw several versions
of the snake to make a good animation. Now you can draw a snake, place bones
inside that single shape, and then bend the shape into realistic poses, which makes
it easy to reposition or pose your snake for some realistic slithering and sliding.
Realistic Animation
with IK Bones
www.it-ebooks.info

FLASH CS6: THE MISSING MANUAL
326
LINKING
SYMBOLS WITH
BONES
When you use bones in your animation, you spend a lot of time creating “poses”
where each element is in just the right position. Flash Professional CS6 has tools
to make the posing process go smoothly. You can use constraints and pins, for ex-
ample. If those options sound restrictive…well, they are. The purpose of these tools
is to keep your animated elements from flopping around, making it much easier to
create the proper pose.
NOTE When you use IK Bones, make sure you start off with an ActionScript 3.0–compatible document. For
example, after you go to File→New, choose ActionScript 3.0, Air, “AIR for Android,” or “AIR for iOS.” If you choose
ActionScript 2.0, you get no bones.
Linking Symbols with Bones
What better way to show how IK bones link one symbol to another than with a chain
made up of separate links? Just to show that all the linked symbols don’t have to be
identical, you can throw in a padlock at the end. If you want to get a feeling for the
end result, then open the file
09-2_Simple_Bones_Done.fla
. If you’re ready to start
earning your bones, then open the file
09-1_Simple_Bones.fla
. You’ll find both files
on the Missing CD page at
www.missingmanuals.com/cds/flashcs6mm
.
1. Open the Flash document
09-1_Simple_Bones.fla
.
There are six hollow ellipses on the stage that look like the links in a chain. In the
Library, there are two movie clips: link and padlock. The links on the stage are
dierent colors. Click a link to select it, and then in the Properties panel under
Color Eect, you see that it’s colored using the Tint color eect.
2. Drag the padlock symbol from the Library and position it on the stage so the
lock’s shackle overlaps the rightmost link in the chain, as shown in Figure 9-1.
Before you start linking symbols together, you need to make sure you have
every symbol on the stage. You can’t add new symbols to the bones layer after
you’ve created a bone with the IK Bone tool.
3. Select View→Snapping→“Snap to Objects” to turn “Snap to Objects” o.
It’s easier to position bones precisely in objects if you turn o the cursor’s
snapping action.
4. Click the Bone tool (or press M, the hot key for the Bone tool).
The Bone tool is in the middle of the Tools palette, and there are two tools un-
der the Bone icon. The one on the top is the Bone tool; the one on the bottom
is the Bind tool. The cursor for the Bone tool is a bone and a plus sign. When
the Bone tool is over an object to which you can attach a bone, the solid black
bone turns into a hollow bone.
www.it-ebooks.info
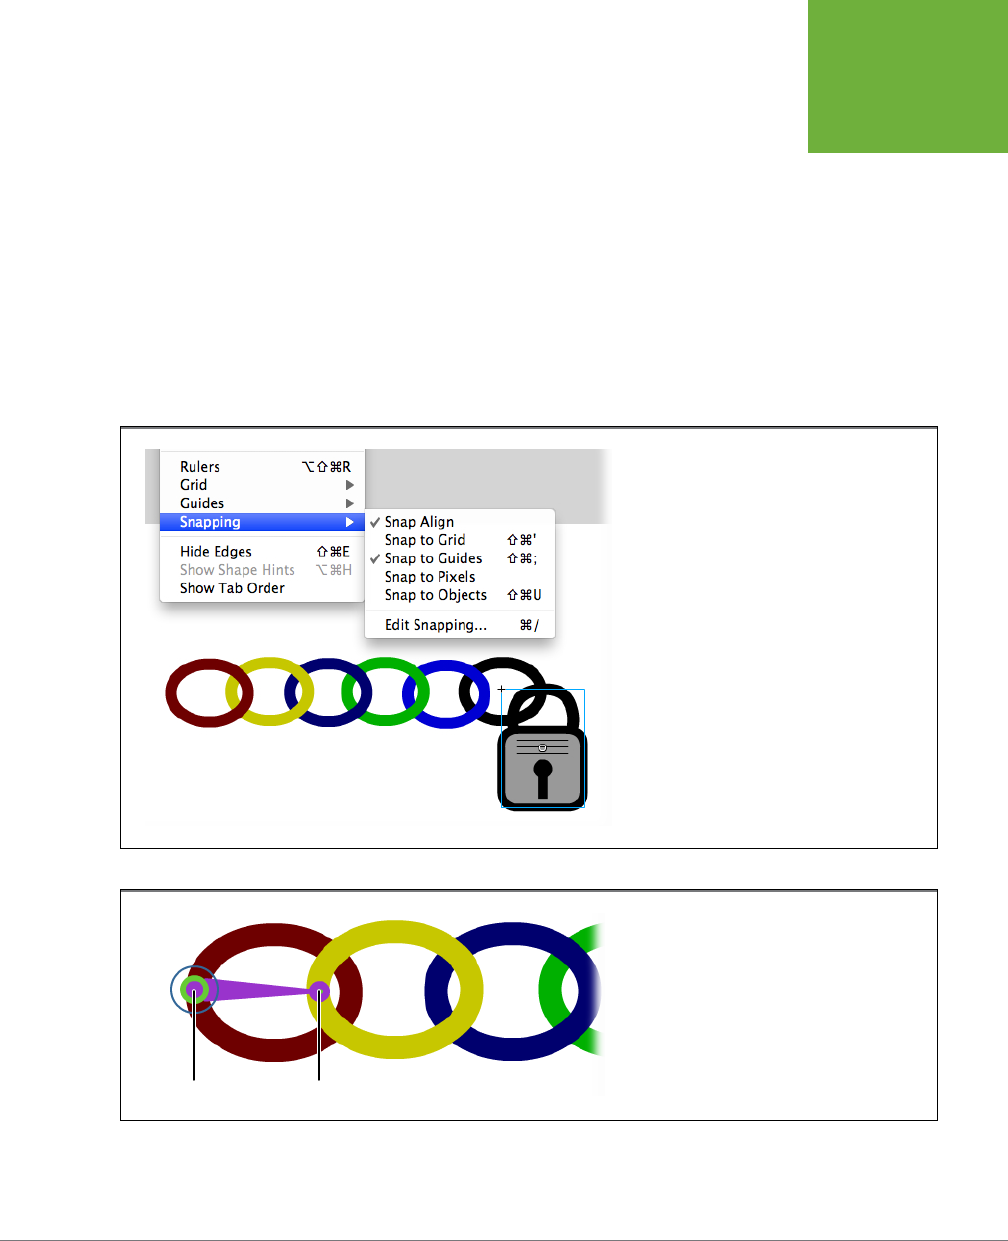
CHAPTER 9: REALISTIC ANIMATION WITH IK BONES 327
LINKING
SYMBOLS WITH
BONES
5. Click the left side of the leftmost link and, while holding the button down,
drag to the right until you reach the left side of the next link, as shown in
Figure 9-2.
You may want to zoom in so that you can carefully place each bone. You drag
to create a bone. The first place you click creates the head of the bone; when
you release the mouse button, you create the tail of the bone. The head, indi-
cated by the large circle, becomes the registration point for the bone, and the
symbol to which it’s attached. That means that the bone symbol pivots around
the head of the bone. When you create a series of bones, known in Flash-speak
as an
armature
, the first bone is known as the
root
bone. The head of the root
bone takes on special importance, since it’s the registration point for the entire
armature or family of symbols.
FIGURE 9-1
With “Snap to Objects” turned off, it’s easier
to position bones and their registration points
accurately.
FIGURE 9-2
Each bone has a head (your first click) and a tail
(where you release the mouse button).
Head Tail
www.it-ebooks.info
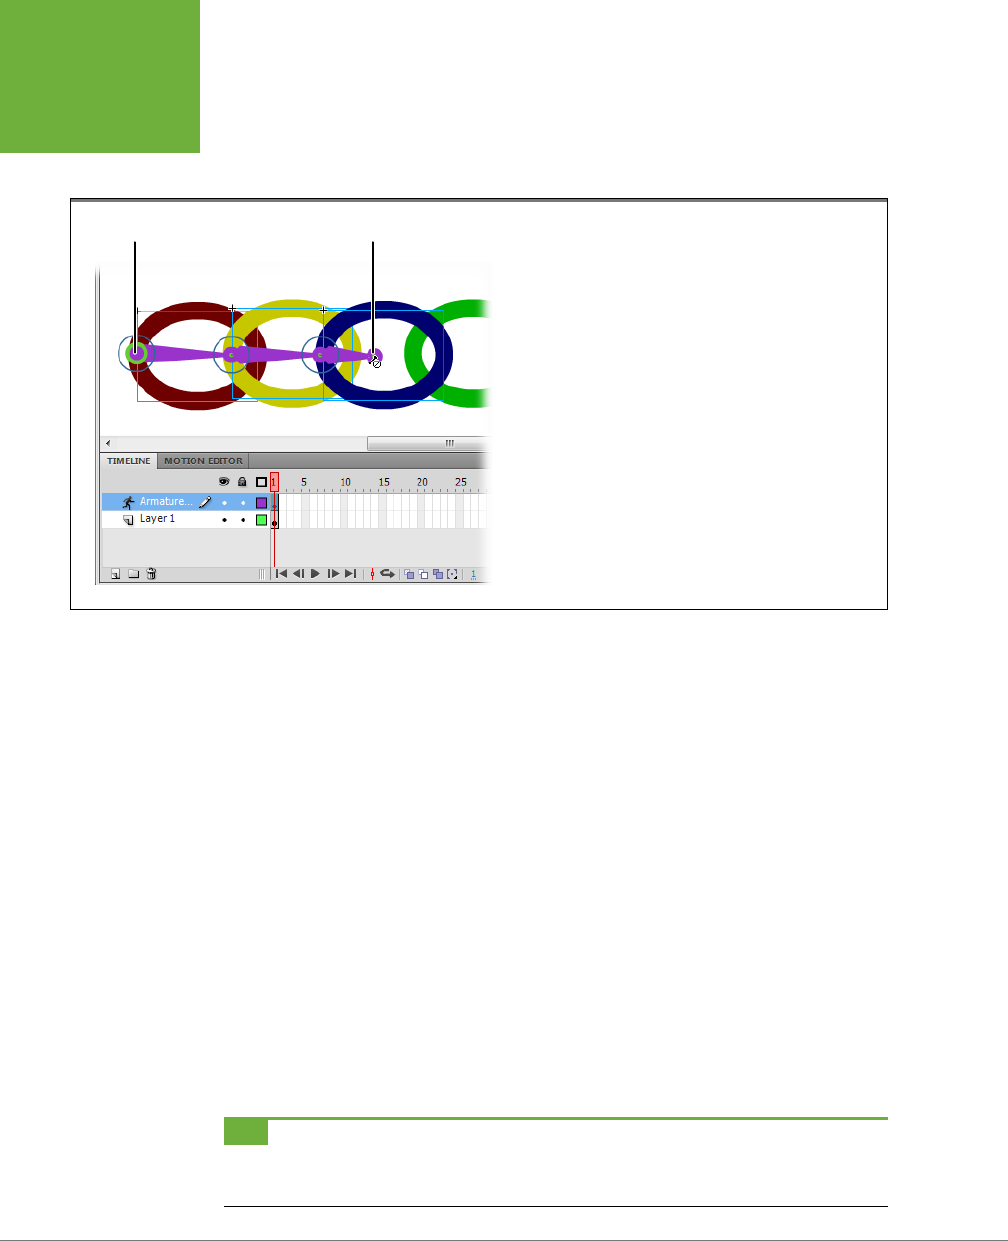
FLASH CS6: THE MISSING MANUAL
328
LINKING
SYMBOLS WITH
BONES
If you glance at the timeline, you notice that adding the first bone creates a new
armature layer (also called
pose layer
) in the timeline (Figure 9-3). Similar to a
motion tween layer, the pose layer has special properties.
FIGURE 9-3
When you create a bone, Flash automatically creates an “arma-
ture” or pose layer. The pose layer is similar to a motion tween
layer, but with a couple of twists to make it work with bones.
Root bone Cursor shows no bone symbol
6. From the tail of the first bone, drag to create another bone that connects
to the next link in the chain.
You can attach bones to either the head or the tail of the first bone. In this
case, you attach a second bone to the tail. As you drag, notice that the cursor
shows a “no” symbol (a circle with a line through it) when you’re over the empty
stage or some other object where it’s not possible to link your bone. It turns
back to a + when the cursor is over a suitable target. In this case, that target
is another symbol.
When you link to a new symbol, Flash automatically repositions the transforma-
tion point to the point where the bones connect. The transformation point is
the point around which the symbol rotates.
7. Repeat this process for the remainder of the chain links until you finally
connect the last bone to the padlock’s shackle.
In this animation, all the links in the chain are instances of the same symbol, but
often you’ll use bones with lots of dierent symbols. For example, if you were
applying bones to the symbols that make up a human body, there’d be sepa-
rate symbols for the head, neck, torso, parts of the arms and hands, and so on.
TIP If necessary, you can switch to another tool, like the Hand tool, to get a better view of your work. You can
then go back to the Bone tool and add more bones. The one thing you can’t do is add new symbols or drawings
to the pose layer.
www.it-ebooks.info
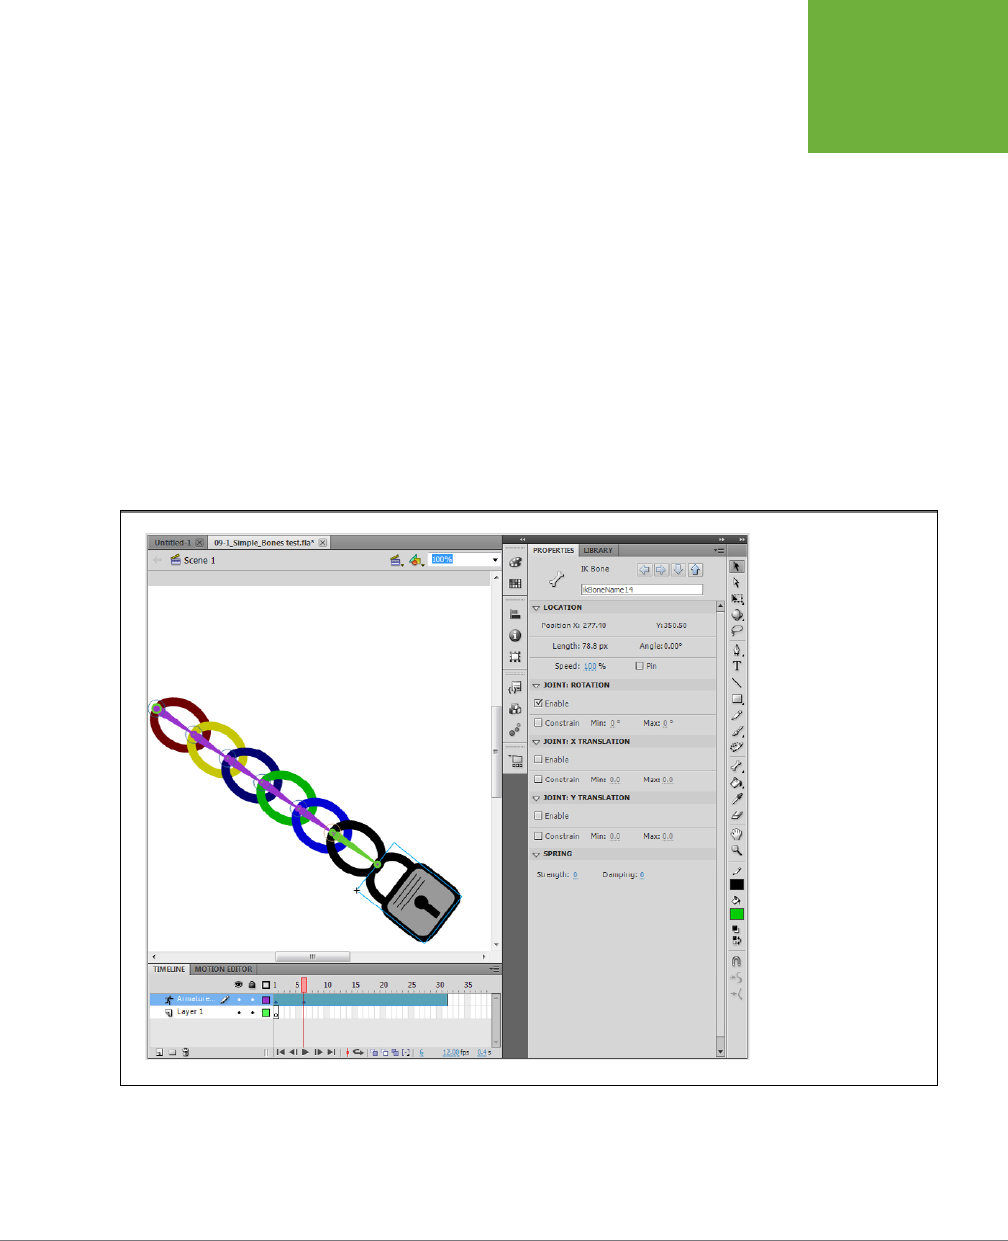
CHAPTER 9: REALISTIC ANIMATION WITH IK BONES 329
LINKING
SYMBOLS WITH
BONES
8. In the pose layer, click Frame 30, and then press F5 to create a frame.
The pose layer extends to become 30 frames long. You can make the pose layer
any length you wish, and you can add and remove frames from the pose layer
as you would any other layer.
9. With the Selection tool, click Frame 5, and then drag the padlock to a new
position (Figure 9-4).
The pose layer is similar to a motion tween layer (page 103). When you reposi-
tion the padlock in Frame 5, Flash creates a tween to animate the motion from
Frame 1 to Frame 5. The frame where you create a new pose is marked with a
small diamond, and it’s called a pose frame.
The bones connecting all the links in the chain and the padlock constrain the
movement of each symbol, giving the entire family of symbols a connected
sense of motion. Not only that, but it’s also easier for you, the artist, to position
the symbols, because they really are connected to one another.
FIGURE 9-4
Pose the chain by
dragging the lock or by
dragging individual links.
When you drag a link, the
links up to the top rotate
around their transforma-
tion points; the links
down to the lock don’t
rotate.
10. Click Frame 10 and reposition one of the middle links in the chain.
Bones have a parent-child relationship. When you move one of the middle links,
the motion is dierent, in that the links on the tail end of the chain move as one
www.it-ebooks.info

FLASH CS6: THE MISSING MANUAL
330
LINKING
SYMBOLS WITH
BONES
group. With a little practice, you’ll learn to use the parent-child relationship of
the bones to quickly pose linked symbols.
11. Every five frames or so, continue to pose the chain and padlock.
Experiment to get a feeling for the motion. You can create a new pose by drag-
ging either a bone or the symbol attached to the bone. You can use either the
Selection tool or the Bone tool to create a pose. If you want a quick preview,
press Enter to see the animation play. You can make it swing back and forth,
like a chain attached to a wall or a door, or you can make it move like a snake
charmer’s cobra. Try some dierent techniques and positions.
12. Press Ctrl+Enter (⌘-Return) to test the animation.
The chain links and the padlock move. The head of the root bone acts as an
anchor. The entire armature can pivot around the head, but it remains fixed at
that point.
Changing the Pose Layer
Creating just the right motion is more art than science. Think about how many move-
ment details there are in a running cheetah, or a swinging pendulum, or a slithering
snake. Chances are, you’ll fiddle with the pose layer after you finish using the Bone
tool. For example, you may want to slow down or speed up the action. You may
want to hold the armature (that is, all the linked bones and their related symbols) in
a certain position for a few beats, and then continue the motion. You may want to
smooth the motion or make it more erratic. You can make those changes by chang-
ing the relationship of the pose frames in the pose layer. For example, adding or
removing frames changes the timing of the animation. Copying and pasting frames
can freeze the action for an interval.
For most actions, you need to select specific frames in the pose layer before you
cut, copy, paste, and so on. In many respects, you manage the pose layer and its
frames the same way you manage other layers. Its behavior is similar to that of
motion tween layers. The pose layer is colored green so you can distinguish it from
normal layers and tween layers, which are shaded with other colors. There’s also a
little figure of a person to the left of the layer name. Each frame with a small diamond
is a
pose frame
. These frames are similar to keyframes in a normal standard layer;
they mark a point in the timeline where you’ve defined exactly how the animated
object is positioned. Flash is responsible for positioning (tweening) the other frames.
Here’s the lowdown on some common operations you can perform in the pose layer:
• Speed up or slow down animation. Move the cursor to the end of the pose layer.
When the cursor is over the right edge, the cursor changes to show arrowheads
pointing left and right. Drag to extend or shorten the pose layer. Flash inserts or
removes frames, making the playing time longer or shorter. As much as possible,
Flash keeps the pose frames in the same position relative to one another. Of
course, if you really shrink the layer, all the pose frames get bunched together.
www.it-ebooks.info
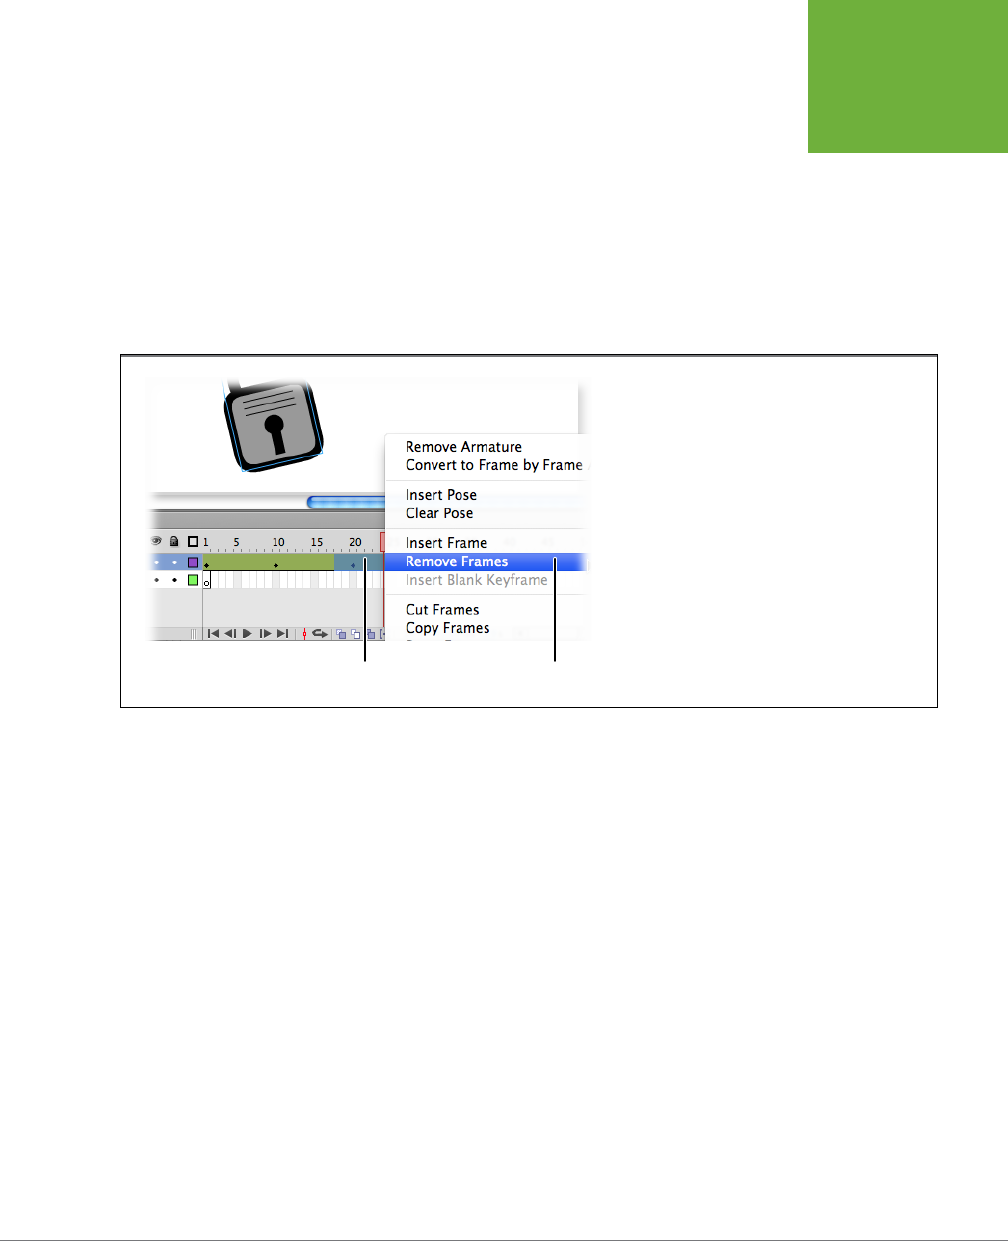
CHAPTER 9: REALISTIC ANIMATION WITH IK BONES 331
LINKING
SYMBOLS WITH
BONES
• Select frames. Click to select a single frame in the pose layer. Double-click to
select all the frames in the pose. Click and drag to select a sequence of frames.
Selected frames show a dierent highlight color. Once the frames are selected,
you can copy, paste, or delete them.
• Remove frames. After you’ve selected the frames you want to remove, right-
click (or Control-click) the selected frames. A shortcut menu appears, displaying
options related to the pose layer, as shown in Figure 9-5. Click Remove Frames
to remove all the selected frames. (This action removes the standard frames in
the pose layer as well as the pose frames.)
FIGURE 9-5
Right-click the Armature layer, and you see this
context menu. You can change the timing in a pose
layer by inserting or removing frames.
Selected frames Remove frames
• Insert a pose. The pose layer has two types of frames. The pose frames, which
display a small diamond, are like keyframes for the armature, where you posi-
tion every part of the armature just the way you want. The other frames are
tweened frames, where Flash determines the position of the armature. You can
turn a tweened frame into a pose frame in a number of ways. First, move the
playhead to the frame you want to change, and then press F6. Flash turns the
frame into a pose frame. You can also right-click the frame in the pose layer and
then choose Insert Pose from the shortcut menu. Inserting a pose doesn’t add
any frames to the timeline; it simply converts the frame at the playhead to a pose.
• Clear a pose. If you want to clear a specific pose frame in your timeline but
leave the rest of it intact, click the frame you want to change. You don’t need
to Ctrl-click (or ⌘-click) in this case. The playhead moves to the clicked frame.
Right-click (or Control-click), and then choose Clear Pose from the shortcut
menu. This action removes the pose but doesn’t remove the frame. The position
of the armature changes because it’s now controlled by the closest pose frames
before or after the displayed frame. If you want to clear several pose frames at
once, you can Ctrl-drag (⌘-drag) to select several frames, right-click, and then
choose Clear Pose to convert the pose frames to standard frames. Clearing a
pose doesn’t remove frames from the pose layer.
www.it-ebooks.info

FLASH CS6: THE MISSING MANUAL
332
LINKING
SYMBOLS WITH
BONES
• Copy a pose. If you want your carefully positioned armature to remain in the
same position for a few frames, one way to do that is to copy the desired pose
and then paste it back into the pose layer. The frames in between two identical
pose frames will all be the same. To copy a pose, Ctrl-click (⌘-click) to select
a frame in the pose layer, right-click it, and then choose Copy Pose from the
shortcut menu.
• Cut a pose. Similar to copying a pose, except that it actually removes the pose
from the frame at the playhead. You can then paste it somewhere else (earlier
or later) in the pose layer. To cut a pose, Ctrl-click (⌘-click) to select a frame in
the pose layer, right-click it, and then choose Cut Pose from the shortcut menu.
• Paste a pose. When you copy or cut a pose, the next logical action is to paste
that pose into the pose layer on a dierent frame. Ctrl-click (⌘-click) to select
the frame where you want to place the pose. Then, right-click (Control-click)
and choose Paste Pose from the shortcut menu.
Combining Bones and Tweening
How do I tween color, dimensions, and other properties when
I use IK Bones
?
There’s one important difference between a pose layer and a
motion tween layer: A pose layer tweens only the position of
the symbols or shapes; you can’t tween colors, dimensions,
or any of the other properties that you can change in a mo-
tion tween. If you want to change those properties, too, the
solution is to create your animation in the pose layer, and then
wrap the entire animation in a movie clip or graphic symbol
(Modify→“Convert to Symbol” or F8).
Once the bone’s animation is contained in a symbol, you can
add it to your main timeline as you would any symbol. Just
drag it onto the stage. At that point, you apply a motion tween
to the entire movie clip or graphic. This trick also lets you use
filters or blends on the animation.
So wrapping your pose layer in a movie clip or graphic symbol
gives you the best of both worlds: IK Bones’ help in creating an
animation and all the power of a motion tween to transform
your animated object.
FREQUENTLY ASKED QUESTION
Creating Branching Armatures
In the lock and chain example earlier in this chapter (page 326), the armature linked
symbols together in one long chain. Often, though, you want to create an armature
that branches out at dierent points. The classic example is a human body. The
less classic example, as in this case, is a robot. For this exercise, start with a new
copy of the file
09-3_Branch_Armature.fla
from the Missing CD page at
www.
missingmanuals.com/cds/flashcs6mm
.
In this example, you’ll operate on a robot with a somewhat human shape. As shown
in Figure 9-6, the armature for the robot isn’t quite complete.
1. Open the file
09-3_Branch_Armature.fla
. If you don’t see the robot’s bones
(armature), use the Selection tool to click the robot’s chest.
When you click the robot with the Select, Subselect, or Bone tools, you see the
armature that holds it together.
www.it-ebooks.info
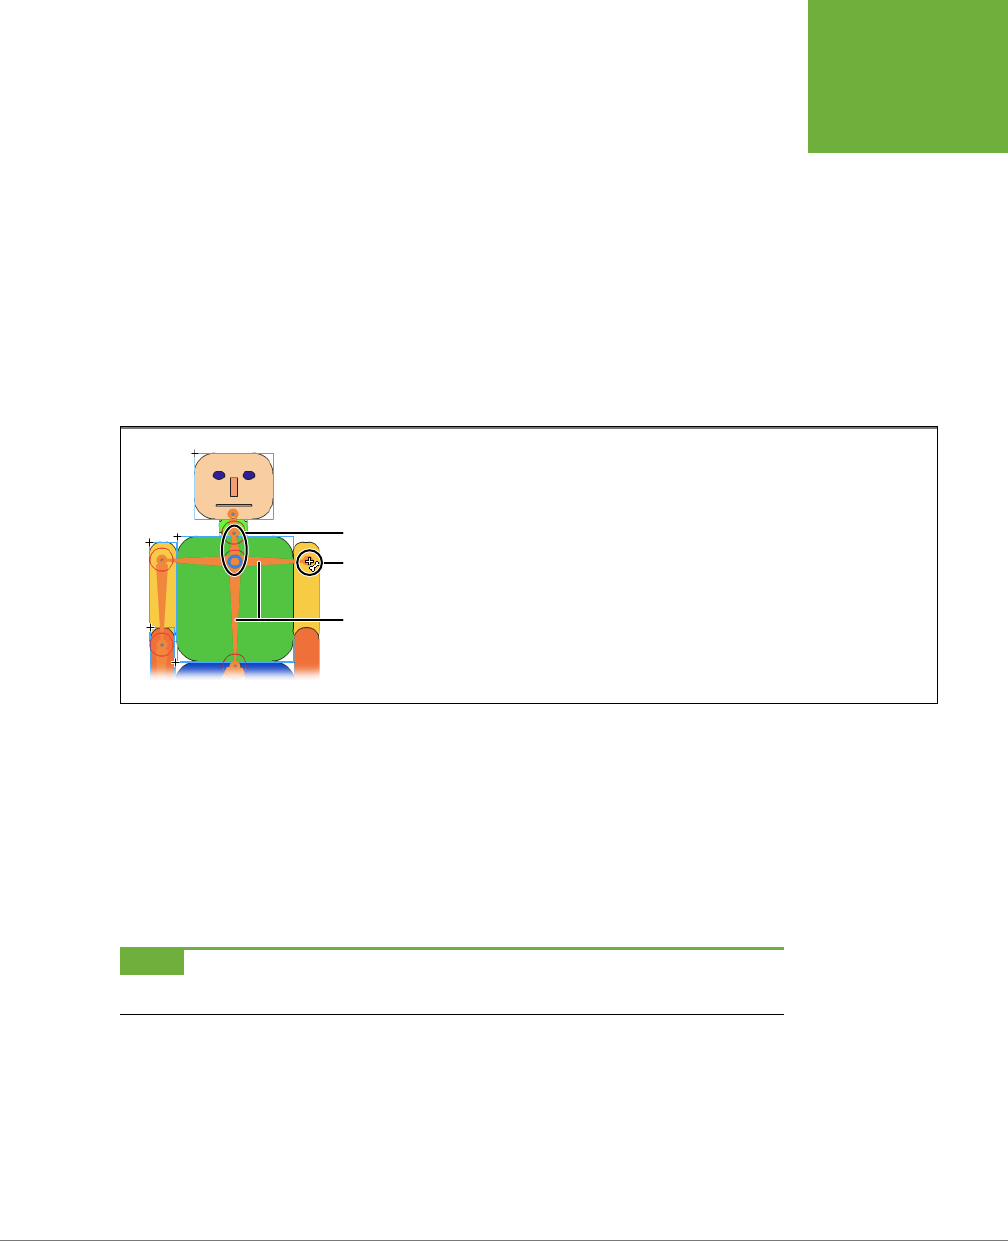
CHAPTER 9: REALISTIC ANIMATION WITH IK BONES 333
LINKING
SYMBOLS WITH
BONES
2. In the “right arm” layer, click the Show/Hide button (beneath the eye icon)
twice to hide and then unhide the layer.
All the pieces for the arm on the right are in a separate layer from the pose
layer and the armature. You can’t draw directly in a pose layer with an existing
armature, but you can add symbols from another layer to an existing armature,
which is what you’ll do in the next step.
3. With the bone tool, click the thick circle in the root bone, and then drag a
new branching bone to the right shoulder, as shown in Figure 9-6.
When you connect from the root bone to the upper arm (technically called the
humerus
), the symbol is automatically moved from the “right arm” layer to the
pose layer, and the bone is connected.
FIGURE 9-6
The root bone (circled) goes from the upper torso to the neck. Branch bones are
already created to the left arm and down to the hips. Here a new branch is being
created to the right shoulder.
Root bone
Bone tool
Branch bones
4. Continue to create bones for the robot’s right arm and hand.
As each bone is added, the connected symbol is moved from the “right arm”
layer into the pose layer.
You can add bones that branch from the head or tail of any bone, and, as you see
in this example, you can create multiple branches from the same joint. So if you
want to create a spider, for example, you can create eight legs that all connect to
the same joint.
NOTE One thing you can’t do is reconnect the tail of a bone to an existing bone. For example, you can’t
connect a bone from the hand to the hipbone.
Controlling the Degree of Rotation
Bodies, even robot bodies, have their limits. You don’t want your robot flapping
around like a rag doll. In terms of IK Bones, that means you don’t want every bone in
the robot armature to have full movement to rotate 360 degrees. Constraining rota-
tion is one of the ways you can create realistic movement when you’re using bones.
Once you put constraints on rotation, it’s easier for you to set up pose frames, too.
www.it-ebooks.info
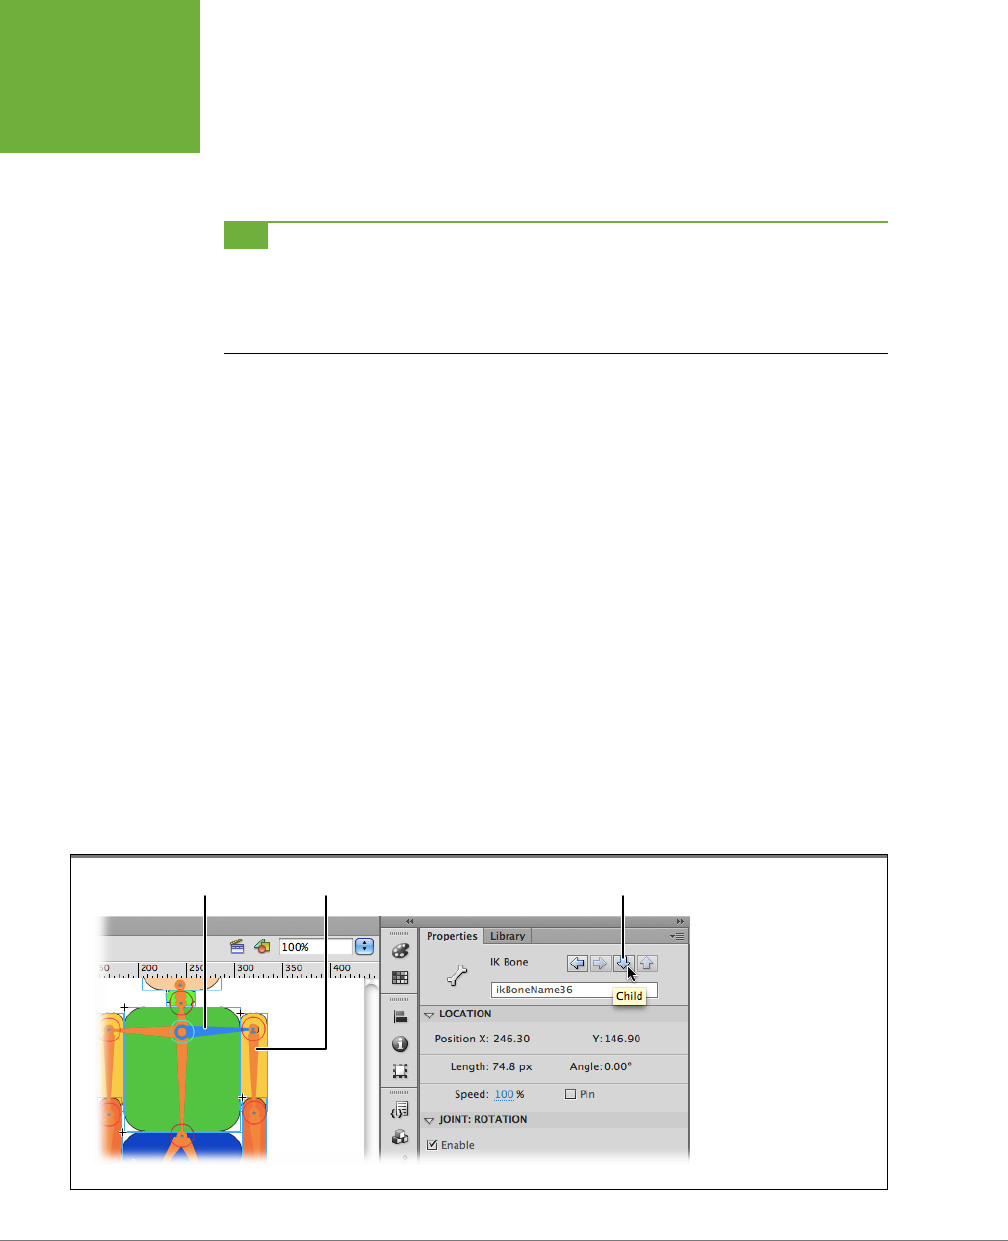
FLASH CS6: THE MISSING MANUAL
334
LINKING
SYMBOLS WITH
BONES
Also, by turning o “Joint: Rotation,” you can prevent bones from pivoting around
specific joints. If you want to provide a certain degree of motion around a point,
you leave the “Joint: Rotation” turned on, but constrain the motion by providing a
minimum and maximum number of degrees for rotation.
TIP When you work with more complex armatures with lots of branching bones, it’s sometimes hard to
control all the flopping parts. When you’re just getting started, it’s helpful to save (File→Save As) multiple cop-
ies of your file with different names, like
robot_arms_down.fla
or
robot_running.fla
. Save a few versions where
you’re happy with the poses. Then if things get out of hand as you’re working on your file, you have a saved file
as a backup.
In the next few steps, you’ll see how to prevent rotation and how to constrain rotation:
1. In the
09-3_Branch_Armature.fla
from the previous section, click the bone
you created in step 3 on page 333.
When you select the bone that connects the root bone to the top of the right
arm, the Properties panel shows settings specific to that bone. There are four
subpanels: Location, “Joint: Rotation,” “Joint: X Translation,” and “Joint: Y
Translation.”
2. In Properties→“Joint: Rotation,” click to turn o the Enable checkbox.
Once you turn o the Enable checkbox for “Joint: Rotation,” the armature won’t
pivot around that joint. You want the robot’s arms to pivot around a joint near
the shoulder, not in the center of the torso.
3. With the bone still selected, click the Child button at the top of the Prop-
erties panel (shown in Figure 9-7), to select the bone that connects to the
right forearm.
The humerus bone is selected, and the Properties panel shows the related
settings.
FIGURE 9-7
You can use the four
buttons at the top of the
Properties panel to traverse
the bones in an armature.
From left to right, the but-
tons are Previous Sibling,
Next Sibling, Child, and
Parent.
Selected bone Child buttonChild bone
www.it-ebooks.info
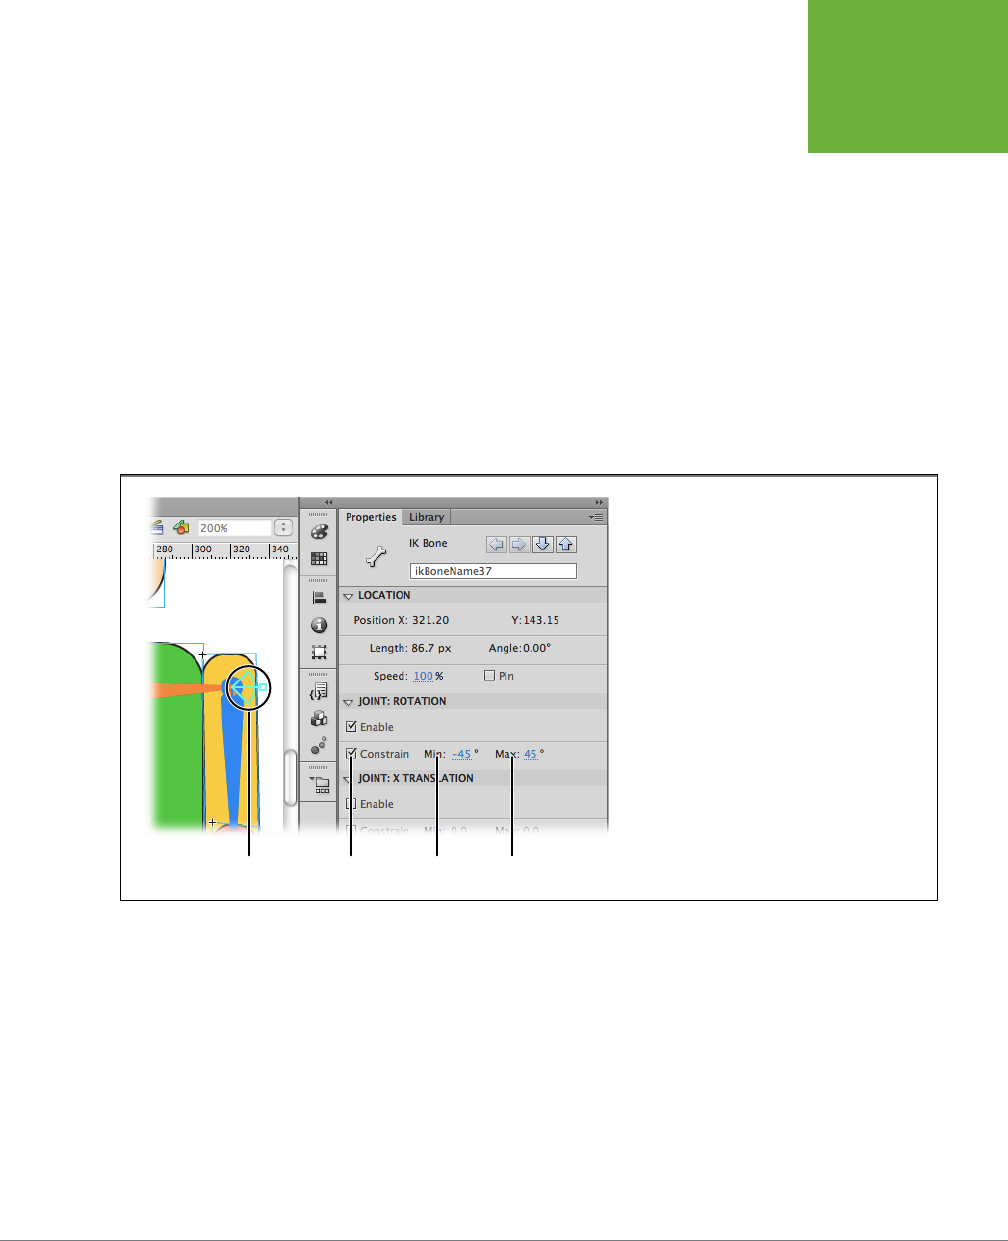
CHAPTER 9: REALISTIC ANIMATION WITH IK BONES 335
LINKING
SYMBOLS WITH
BONES
4. Drag the selected bone to examine its movement.
The horizontal bone from the torso to the top of the arm remains locked in
place, in eect creating a shoulder. The humerus pivots around the joint at the
top of the bone. It can pivot a full 360 degrees.
5. Under Properties→“Joint: Rotation,” click the Constrain button.
With a check in the Constrain checkbox, the Min and Max settings come to life.
6. Enter a value of
–45
in the Min box and a value of
45
in the Max box.
Min and Max settings are displayed as degrees. You can click and type in a value,
or you can scrub in a value. Scrubbing is a good option, because Flash shows
the joint’s angle as you scrub, as shown in Figure 9-8. With the constraints, the
robot arm has a more appropriate range of movement. (Well, appropriate for
a robot, not what you’d want in a major league pitcher.)
FIGURE 9-8
As you type or scrub in a Min and Max “Joint: Rota-
tion” value, Flash shows you the angle of rotation
superimposed over the joint.
Angle of Rotation Constrain Min: Max:
If you want to create a well-behaved robot, you can repeat these steps to turn o
or constrain the rotation in the other joints. Once you’ve done that, you can make
your robot dance a jig by creating dierent poses in the pose layer.
Moving Bones
No matter how talented or lucky you are, it’s unlikely you’re going to get your IK
Bones animations exactly right the first time you set them up. You can, and prob-
ably will, edit the pose layer (as shown on page 330), and edit the armature (as
described in this section).
Here’s a good example of a problem and solution continuing from the exercise begun
on page 326. If you drag the padlock down as far as it can reach, it ends up beyond
www.it-ebooks.info
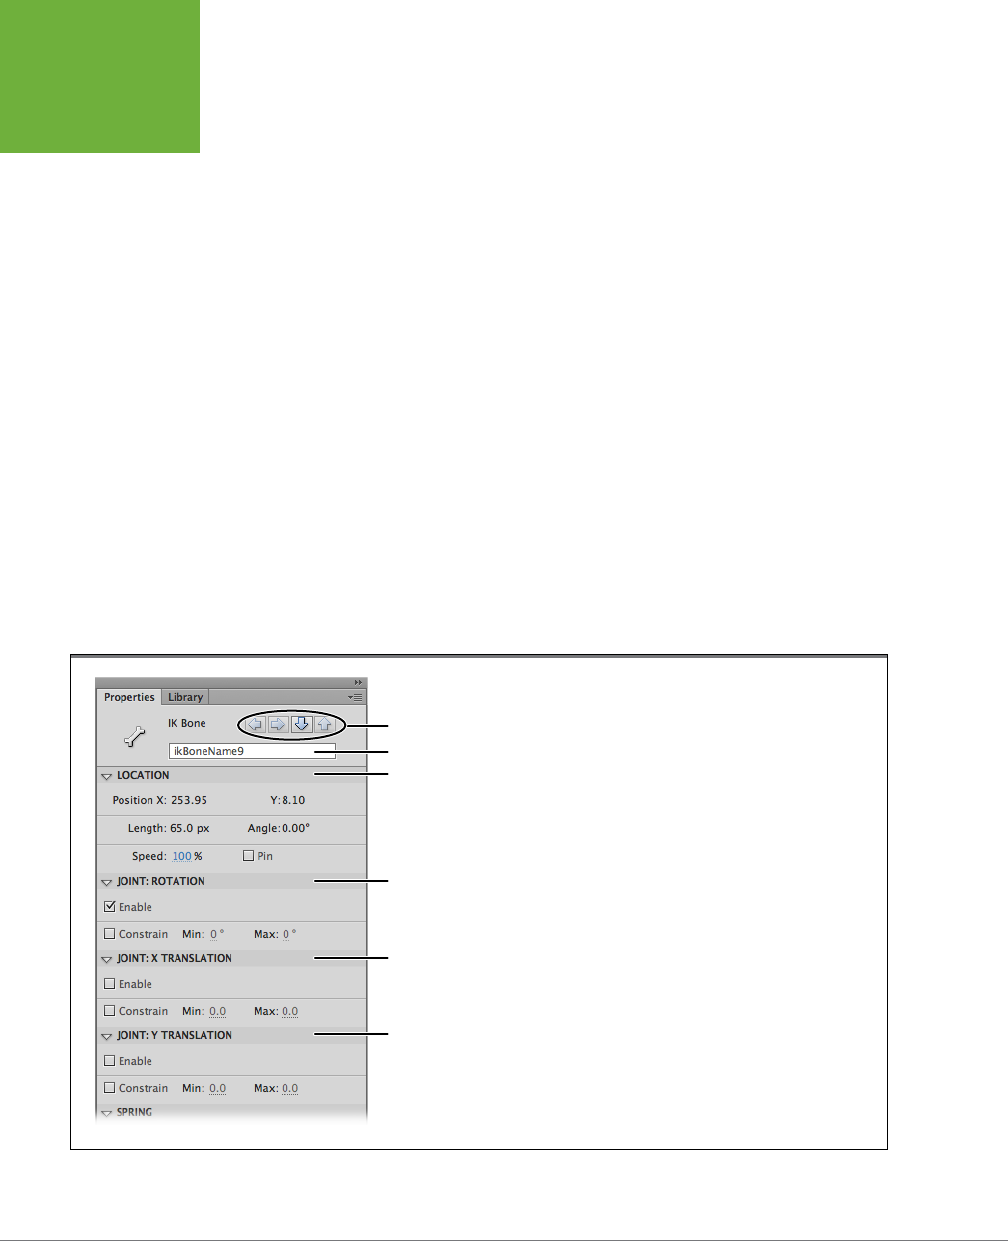
FLASH CS6: THE MISSING MANUAL
336
LINKING
SYMBOLS WITH
BONES
the bottom of the stage. The next few steps show how to move the entire chain and
padlock up higher in the animation.
Here are the steps to move the entire armature to a new location:
1. Open the Flash document
09-1_Simple_Bones.fla
.
If you haven’t done the steps on page 326, do so now. Then continue here with
step 2.
2. Click the first frame in the pose layer.
The playhead moves to the first frame in the layer.
3. Select the root bone.
The root bone is the first bone you created, and in this case, you need to actually
select the bone; just selecting the symbol attached to the bone won’t do the trick.
A selected bone is highlighted in a dierent color. The color depends on your pref-
erence settings in Edit→Preferences→General (Flash→Preferences→General).
When you move the root bone to a new location, the other bones (sometimes
referred to as
children
or
child bones
) move with the root.
When you select any bone, the Properties panel displays settings related to the
bone. The subpanels include Location, “Joint: Rotation,” “Joint: X Translation,”
and “Joint: Y Translation” (Figure 9-9).
FIGURE 9-9
Select a bone, and you see these settings in the
Properties panel. Click the buttons at the top to
change the selection to a different bone. Use the
“Joint: Rotation” setting to let a bone pivot—or
restrict the way a bone pivots. Turn on the “Joint:
Translation” settings if you want to move a bone
on the stage.
Name
Traverse armature buttons
Location
Joint Rotation
Joint: X Translation
Joint: Y Translation
www.it-ebooks.info

CHAPTER 9: REALISTIC ANIMATION WITH IK BONES 337
LINKING
SYMBOLS WITH
BONES
4. In Properties→“Joint: Rotation,” click to turn o the Enable checkbox.
When you first create a root bone, “Joint: Rotation” is turned on and “Joint: X
Translation” and “Joint: Y Translation” are turned o. These initial settings keep
the entire armature rooted to one spot on the stage.
Turning o “Joint: Rotation” on this bone prevents the entire armature from
spinning around when all you want to do is move it.
5. In Properties→“Joint: X Translation,” turn on the Enable checkbox. Do the
same in Properties→”Joint: Y Translation.”
With “Joint: X Translation” and “Joint: Y Translation” turned on, you can move
the root bone and the entire armature along the X and Y axes.
6. Drag the root bone up to the top center of the stage.
The root bone and the armature move slowly as you drag them to a new loca-
tion. There may be some rotation around the joints of some of the child bones
as you move the armature. You can prevent this movement by turning o “Joint:
Rotation.” Remove the checkmark from Properties→“Joint: Rotation”→Enable.
7. Turn Properties→“Joint: Rotation” back on. Turn both Properties→“Joint: X
Translation” and Properties→“Joint: Y Translation” back o.
Now that you’ve moved the armature, these changes reset the properties of
the root bone to their previous settings.
8. Drag the padlock and some of the links on the chain.
Notice that the armature’s movement and action hasn’t changed, just the
location.
In these steps, you changed the location of the chain in Frame 1. If you move the
playhead along the timeline, you see that this move didn’t change the chain’s position
in the other pose frames. This setup probably isn’t what you want for this particular
animation, but it shows a point: One way to create movement about the stage when
you’re working with an armature is to move the root bone between poses. Another
way to animate movement is to wrap your armature inside a movie clip or graphic
symbol, and then use a motion tween to create movement around the stage.
Repositioning Symbol Instances
You don’t always want your symbols to move in lockstep. There are times when you
want some of the symbols to rotate on their own or even move away from the rest
of the armature. For example, suppose you have a clown cartoon character who
keeps losing his hat. The hat bounces around his head at dierent angles and per-
haps even flies o, only to snap back into place. When you connect symbols to one
another using bones, you can reposition the symbols independently using the usual
transform tools. For example, you can “break” the chain in the previous example, as
www.it-ebooks.info
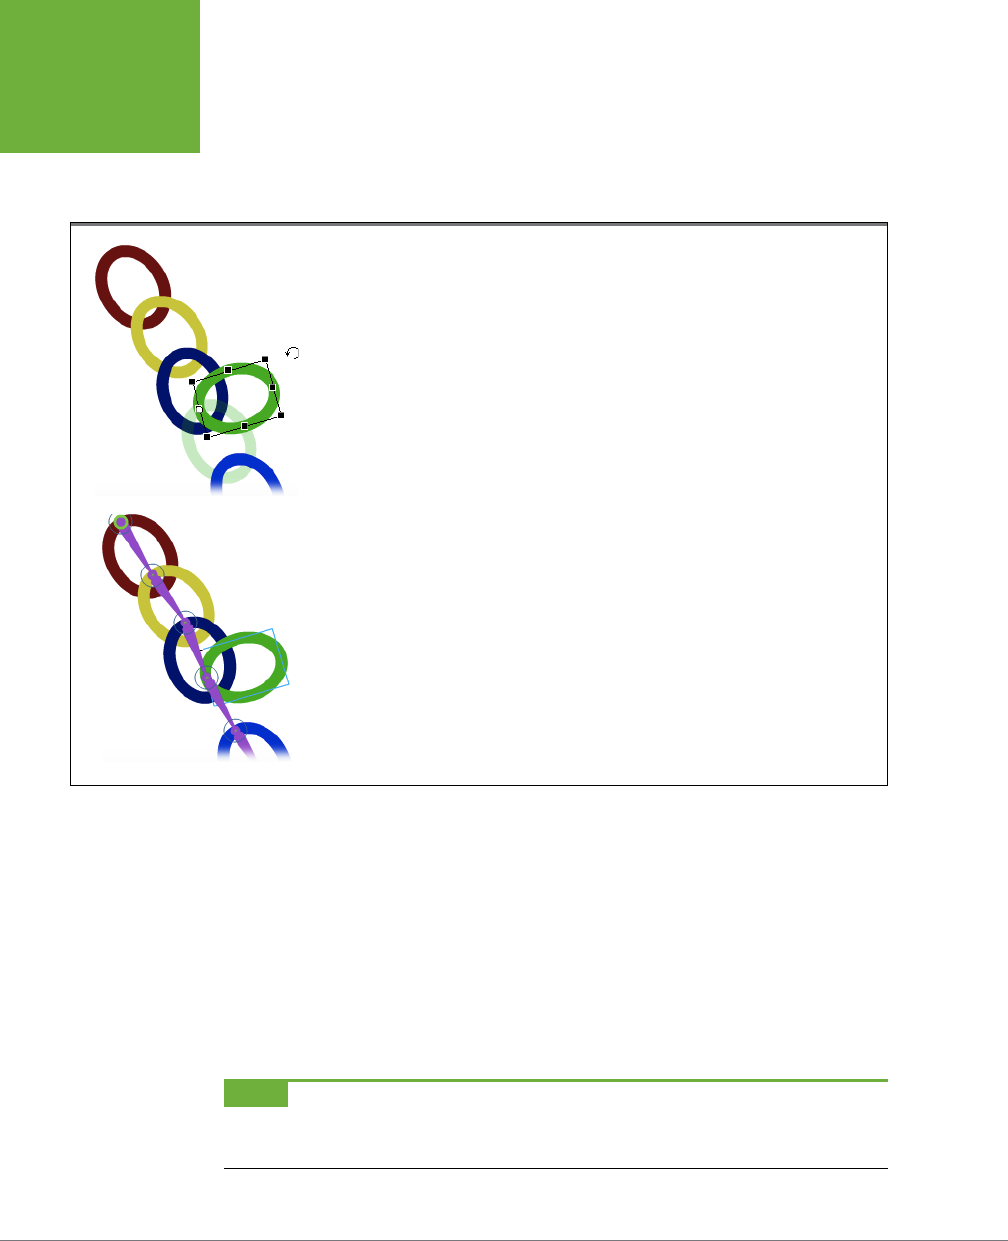
FLASH CS6: THE MISSING MANUAL
338
LINKING
SYMBOLS WITH
BONES
shown in Figure 9-10. Select the Transform tool, and then rotate one of the links in
the middle of the chain. The link pivots around its transformation point. Using the
Transform tool to rotate an instance of a symbol doesn’t change the length of the
bones in the armature.
FIGURE 9-10
Top: To reposition a symbol relative to the bone armature, use the Transform tool.
Bottom: The link has pivoted around its transformation point, but it still moves with the rest of the
armature.
Changing the Length of a Bone
If you want to move the symbol, including its transformation point, you have to
change the length of the connected bones. That’s also a job for the Transform tool.
Select the Transform tool, and then move the cursor over the symbol that you want
to move. Drag the symbol to a new position. As an alternative, you can use the
Selection tool to move a symbol; just press Alt (Option) as you drag.
Flash doesn’t display the armature when you use the Transform tool. When you’re
done, select the symbol to see how the length of the bones have changed to ac-
commodate the move, as shown in Figure 9-11.
NOTE Test the file
09-2_Simple_Bones_Done.fla
to see examples of the different bone techniques. Examine
the armature to see movement and joint constraints. The last few frames of the animation show bones that were
“lengthened,” which makes the chain links appear disconnected.
www.it-ebooks.info
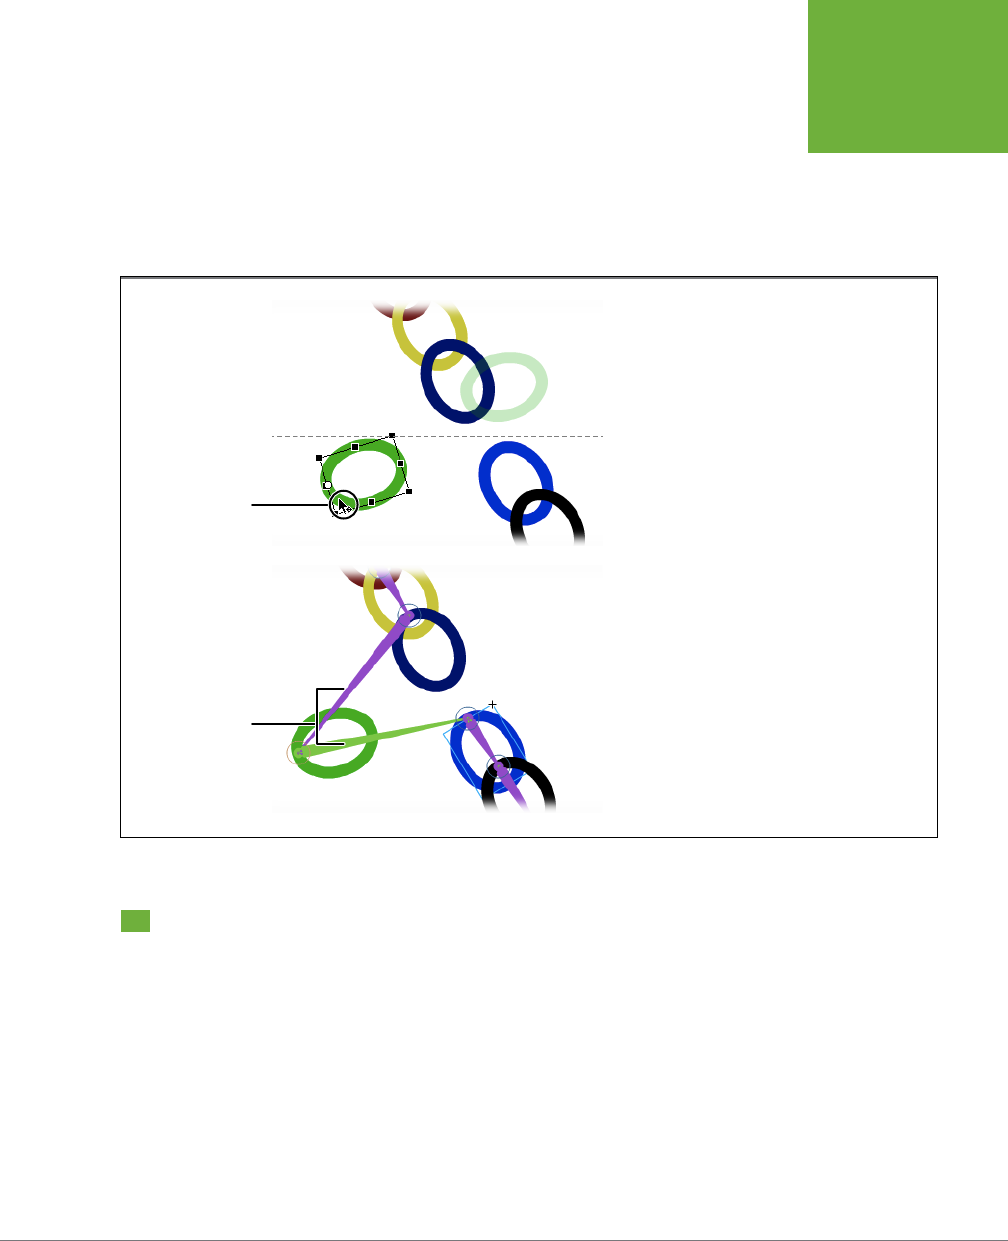
CHAPTER 9: REALISTIC ANIMATION WITH IK BONES 339
PERFECT
POSING WITH
CONTROL
HANDLES
Deleting Bones
Deleting bones from an armature is a pretty straightforward procedure. Just select
the bone, and then press Delete. The bone disappears, along with any child bones
connected to it. The symbols that were connected by the bone remain in the pose
layer, but they’re no longer connected to the armature, so they aren’t animated with
the other symbols.
FIGURE 9-11
Top: Use the Transform tool to move an instance of a
symbol that’s part of an armature. When the cursor
changes to a cross with arrowheads, you can move
the symbol.
Bottom: The bones linking the symbol change in
length to accommodate the move.
Transform tool,
move cursor
Bones changed
length
Perfect Posing with Control Handles
As you work with IK Bones, you spend your time creating a pose, moving down the
timeline, and creating another pose. Anything that helps you arrange an armature
faster makes you more ecient. One problem you encounter when you’re trying
to force your animation into the perfect pose is that all those bones and attached
symbols tend to fly and flop all over the place. As explained earlier, the “Joint: Ro-
tation” and “Joint: Translation” settings help you control and constrain movement.
Want to keep a joint from spinning? Turn o “Joint: Rotation.” Want to restrict the
rotation? Leave rotation turned on, but also turn on the Constrain checkbox and
enter a Min and Max value as explained on page 333. But what about that last joint?
www.it-ebooks.info
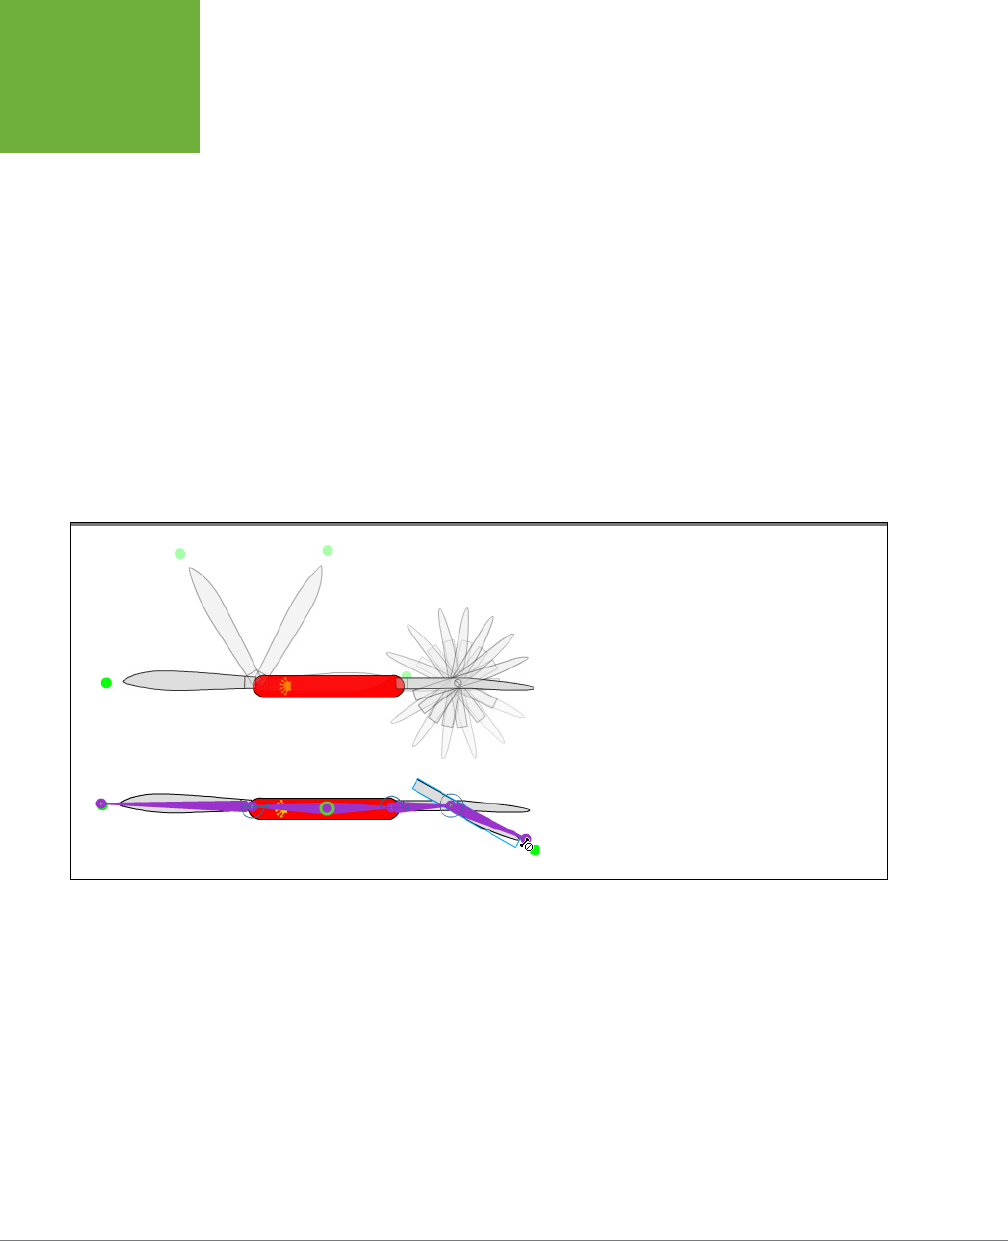
FLASH CS6: THE MISSING MANUAL
340
PERFECT
POSING WITH
CONTROL
HANDLES
The “Joint:Rotation” settings aect the head of a bone, but there’s no way to set
the Min and Max rotation for the joint at a bone’s tail.
For an example of this dilemma, open
09-4_Chris_Army_Knife.fla
. You see a handy
multitooled knife like the one made famous by a certain Alpine nation (Figure 9-12).
If you move the knife blade, it opens just the right amount and closes neatly into the
knife’s handle. Click the bone along the knife blade and in the Properties panel, you
see that “Joint: Rotation” and Constrain are both turned on, and Min and Max values
are set. The scissors don’t behave nearly as well. The short scissor blade spins like a
top, because the tail of the last bone creates the joint where the two scissors blades
meet. What’s the dierence between these two examples? It’s that little green dot
at the end of the knife blade. In essence, you overcome the last bone dilemma by
creating another bone and attaching it to a “dummy” symbol—in this example, a
green dot. When it’s time to publish your animation, you can make that green dot
disappear by going to the Library panel and editing the symbol. Set the fill Alpha
to
0
, and all the green dots in your animation become invisible. Later, if you want
your handles back for posing, you reverse the process.
FIGURE 9-12
Top: The knife blade on the right is constrained, so it
opens and closes realistically. The short blade on the
scissors is not constrained, so it rotates 360 degrees.
Bottom: Use a movie clip symbol (green dot) to create a
dummy handle, and then add a bone from the scissors
joint to the handle. With an extra bone in place, you can
constrain the scissors’ rotation.
If you’re in the mood for some practice, drag another green dot out of the library
and place it near the tip of the short scissors blade. Create a new bone from the scis-
sors joint to the green dot. At that point, send the short scissors blade to the back
(Modify→Arrange→“Send to Back”). The knife looks better that way. Lastly, adjust
the “Joint: Rotation Constrain” settings for the scissors so they behave properly.
Homemade control handles like these have many uses. In the knife example, they
give you a way to move the blades even when they’re hidden behind the red knife
handle. If you want to rotate part of your armature with precision, create an extra-
long bone for your control handle. The further the handle is from the rotating joint,
the more precise your control.
www.it-ebooks.info
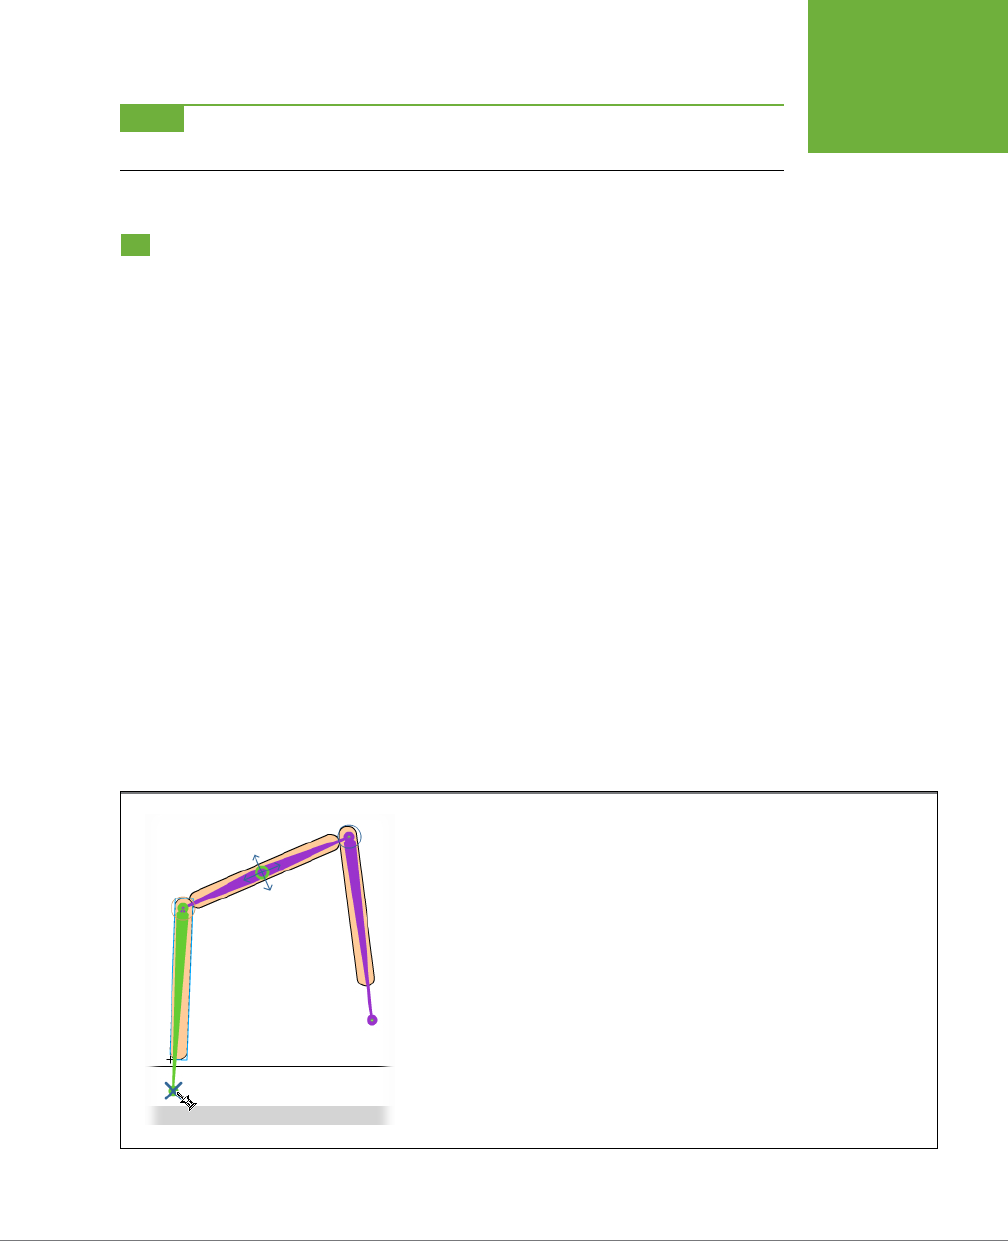
CHAPTER 9: REALISTIC ANIMATION WITH IK BONES 341
BABY STEPS
WITH PINS
NOTE The finished knife project
09-05_Chris_Army_Knife done.fla
is available on the Missing CD
(
www.missingmanuals.com/cds/flashcs6mm
).
Baby Steps with Pins
Flash CS6 has another time-saving feature for IK Bones—
pinning
. This feature lets
you literally pin the tail of any bone to a point on the stage, preventing the armature
from flying and flopping while you arrange a pose. Best of all, pinning a tail joint
couldn’t be simpler, so it’s fast and easy to use. To practice with a simple example,
open
19-6_Pin_Bones.fla
from the Missing CD (
www.missingmanuals.com/cds/
flashcs6mm
). The animation consists of three popsicle sticks, connected with an
armature. The armature makes use of homemade control handles like the ones de-
scribed in the previous section. With the help of pins, you can make the stick figure
crab-walk across the stage.
To pin the tail of a bone to the stage, follow these steps:
1. With the Select tool (V), click the bone.
2. Move the cursor to the tail of the selected bone.
3. When the cursor changes to a pushpin, click the tail of the bone.
Pinning fixes the tail in place but lets the bone rotate around the spot. The pin feature
works like a toggle, so you can turn it o with the same steps. Tail joints that are
pinned show a big X over the joint, as shown in Figure 9-13. You can pin more than
one tail joint in the armature. Get used to quickly pinning and unpinning joints, and
your posing sessions will go much faster.
FIGURE 9-13
Move the cursor over the tail of a selected bone, and it turns into a pushpin. Click to toggle
pinning on and off. Here the left leg is pinned, making it easier to arrange the other bones
for the walking popsicle sticks.
www.it-ebooks.info

FLASH CS6: THE MISSING MANUAL
342
MAKING
SHAPES MOVE
WITH BONES
To make the sticks walk across the stage, move the playhead two or three frames
down the timeline where you want to create a new pose. Pin the tail of the left leg
in place, and then rearrange the pose by raising the right leg as if it’s beginning a
step (Figure 9-13). Move down the timeline a few more frames and bring the right
leg down to its new foothold further to the right. Now, pin the tail of the right leg in
place and unpin the left. Create a couple of poses to bring the left leg down. Repeat
the process a few times, and the popsicle sticks will walk o the edge of the stage.
You could make the three sticks walk across the stage without the help of pins, but
it would take a bit longer. Consider a more complex, legged model, like a person or
a dog, with hips, shoulders, knees, and elbows. With just a couple of clicks, pinning
gives you a quick way to freeze parts of the armature in place while you fiddle with
the rest.
NOTE The finished walking sticks animation is named
19-7_Pin_Bones done.fla
on the Missing CD
(
www.missingmanuals.com/cds/flashcs6mm
).
Making Shapes Move with Bones
There are two ways to use bones. You can use IK Bones to link symbols together,
creating a chain of objects (as described on page 326), or you can add bones to the
inside
of a shape, making that shape bendable and flexible. It’s kind of like dressing
up a group of bones inside a costume. Though both of these methods rely on an
armature made up of bones, the techniques you use to make them work are quite
dierent.
You can add bones to a single shape, or you can add bones to more than one shape.
The word “group” isn’t used here, since you can’t combine the shapes using the
Group commands. The way you add bones to more than one shape is to select all
the shapes that you’re going to include
before
you add the first bone. Flash then
automatically places those selected shapes in the pose layer.
In this exercise, you’ll animate a snake by placing several bones inside it. Unlike a
robot, snakes don’t have limbs, but you can still give them plenty of bones. Down-
load
09-8_Shape_Bones.fla
from the Missing CD page at
www.missingmanuals.
com/cds/flashcs6mm
.
1. Open
09-8_Shape_Bones.fla
.
The lovely rattlesnake is made up of several shapes: a body, a tongue, and two
eyes.
2. Zoom in on the front section.
To place bones precisely inside a shape, it helps to zoom in for a close view. Then,
if you need to get a view of a dierent part of the shape, you can use the Hand
www.it-ebooks.info
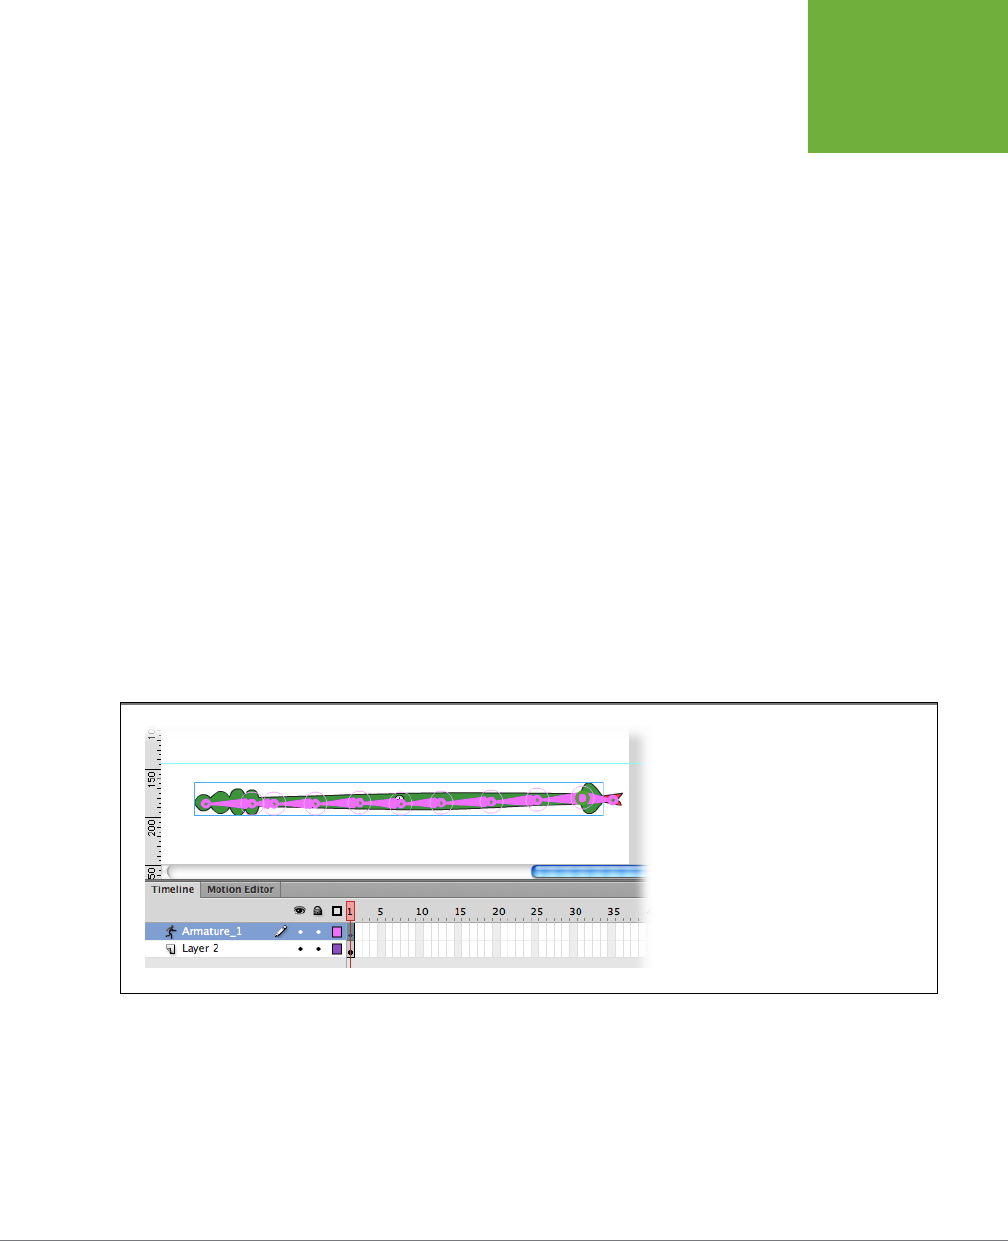
CHAPTER 9: REALISTIC ANIMATION WITH IK BONES 343
MAKING
SHAPES MOVE
WITH BONES
tool to reposition the object on the stage. As mentioned earlier, it also helps to
turn o object snapping (View→“Snapping→Snap to Objects”).
3. Press Ctrl+A (⌘-A) to select the tongue, the body, and the eyes.
You can add bones to more than one shape, but you can’t group those shapes
with the Modify→Group command when you add the bone. Instead, you have
to select all the shapes you want to include in the IK shape object.
4. With the Bone tool, drag to create a bone from the snake’s head to the
tongue.
When you create the first bone, Flash converts all the selected shapes and
the bone into an IK shape object and places the object in a pose layer. Why
start with the head? Your first click sets the transformation point for the entire
armature—better to center the snake on its head rather than its forked tongue.
5. Create a bone from the root bone down the body of the snake.
You can attach bones to both the head and tail of the root bone. You can also
create branches in shapes. (Page 332 describes creating branching armatures
when linking symbols.)
6. Create several more bones inside the body of the snake down to the tail.
Use a total of about eight or nine bones for the snake’s armature (Figure 9-14). If
you use too many bones, it’s more work for you when you try to pose the snake.
Too few bones, and you won’t be able to create the desired snaky slithering.
FIGURE 9-14
The root bone in the snake starts at the
head. One bone extends to the tongue. The
rest of the bones extend down the body of
the snake to the tail.
7. In the pose layer, click Frame 50, and then press F5.
The green pose layer shows 50 frames for you to create some snaky movement.
8. Create several poses to animate the snake so that it moves across the stage
from left to right.
Here are some suggestions: In Frame 1, start with the snake ostage to the left.
In Frame 5, pose the snake with just the head coming on to the stage. In Frames
www.it-ebooks.info
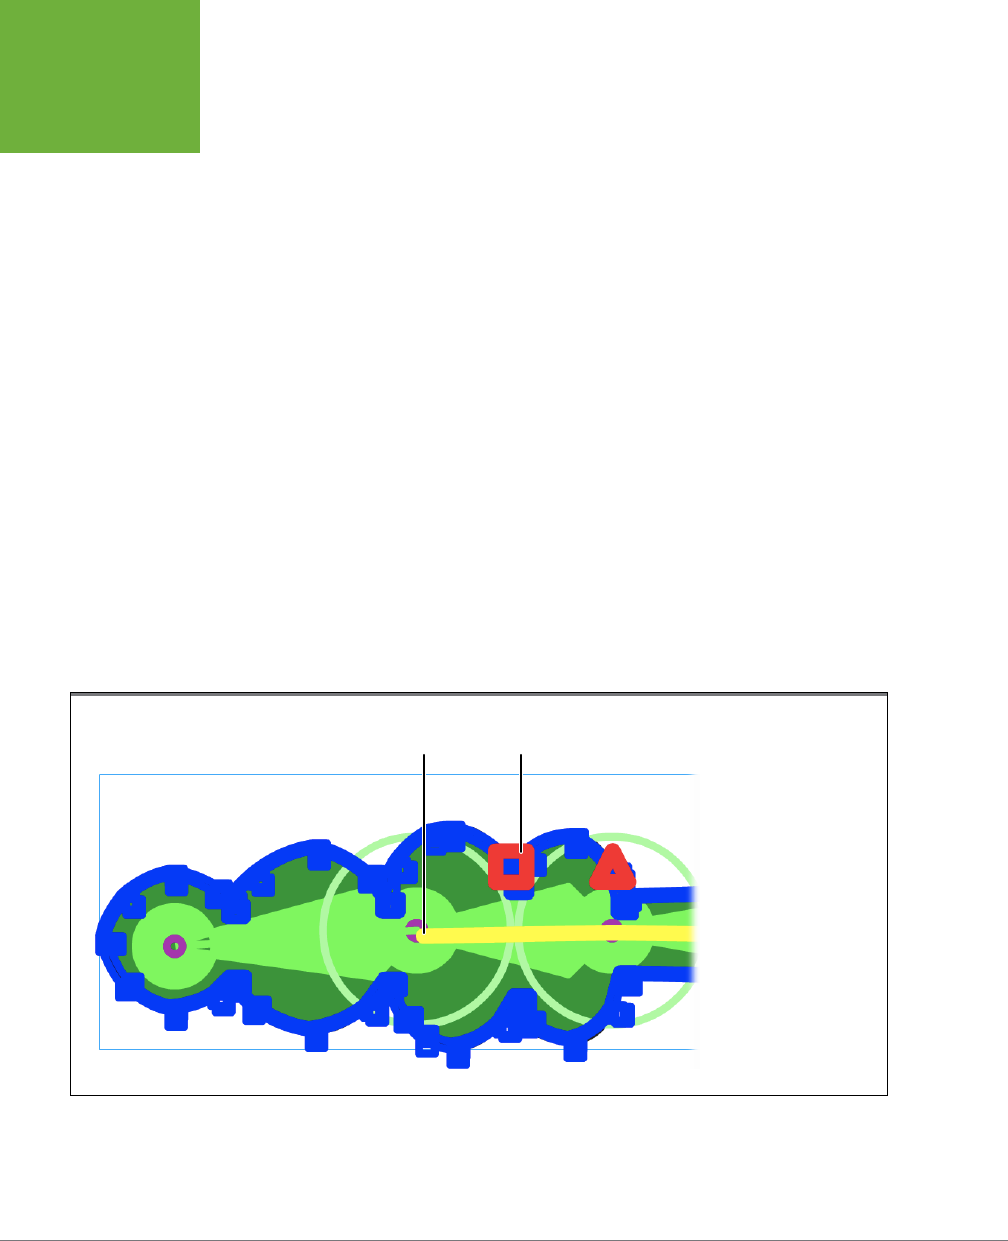
FLASH CS6: THE MISSING MANUAL
344
MAKING
SHAPES MOVE
WITH BONES
10, 20, 30, and 40, pose the snake in dierent S-shaped curves to simulate snake
propulsion across the stage. In Frame 45, show just the snake’s rattle with the
rest of the snake body already ostage. In Frame 50, move the snake entirely
o stage to the right.
9. Test the animation.
If you’re not pleased with the movement at any stage, then try to reposition the
adjacent poses or create more intermediate poses.
You use the pose layer to animate the position and location of the armature. In many
ways, the pose layer seems like a motion tween; however, you can’t use the pose
layer to tween properties like color, transparency, or dimensions. If you want to
change these properties, you need to select the pose layer, and then wrap it in either
a movie clip or a graphic symbol. There are more details in the box on page 332.
Working with Control Points
When you place bones inside shapes, Flash automatically creates control points
around the contour of the shape, as shown in Figure 9-15. The control points establish
the perimeter of the shape as you create dierent poses. Some shapes, especially
more complex and branched shapes, can get contorted in unexpected ways. You can
solve the problem by repositioning the control points. With the Subselection tool,
click the boundary of the shape. The control points and the edge of the shape appear
highlighted. Then just drag the control points to adjust the shape. Control points at a
curve show Bezier-style curve control handles that you can use to modify the curve.
FIGURE 9-15
Flash automatically cre-
ates control points around
the edge of shapes when
you add bones. You can
change the contour of a
shape by dragging the
control points.
Bound to
single bone
Square
control point
www.it-ebooks.info
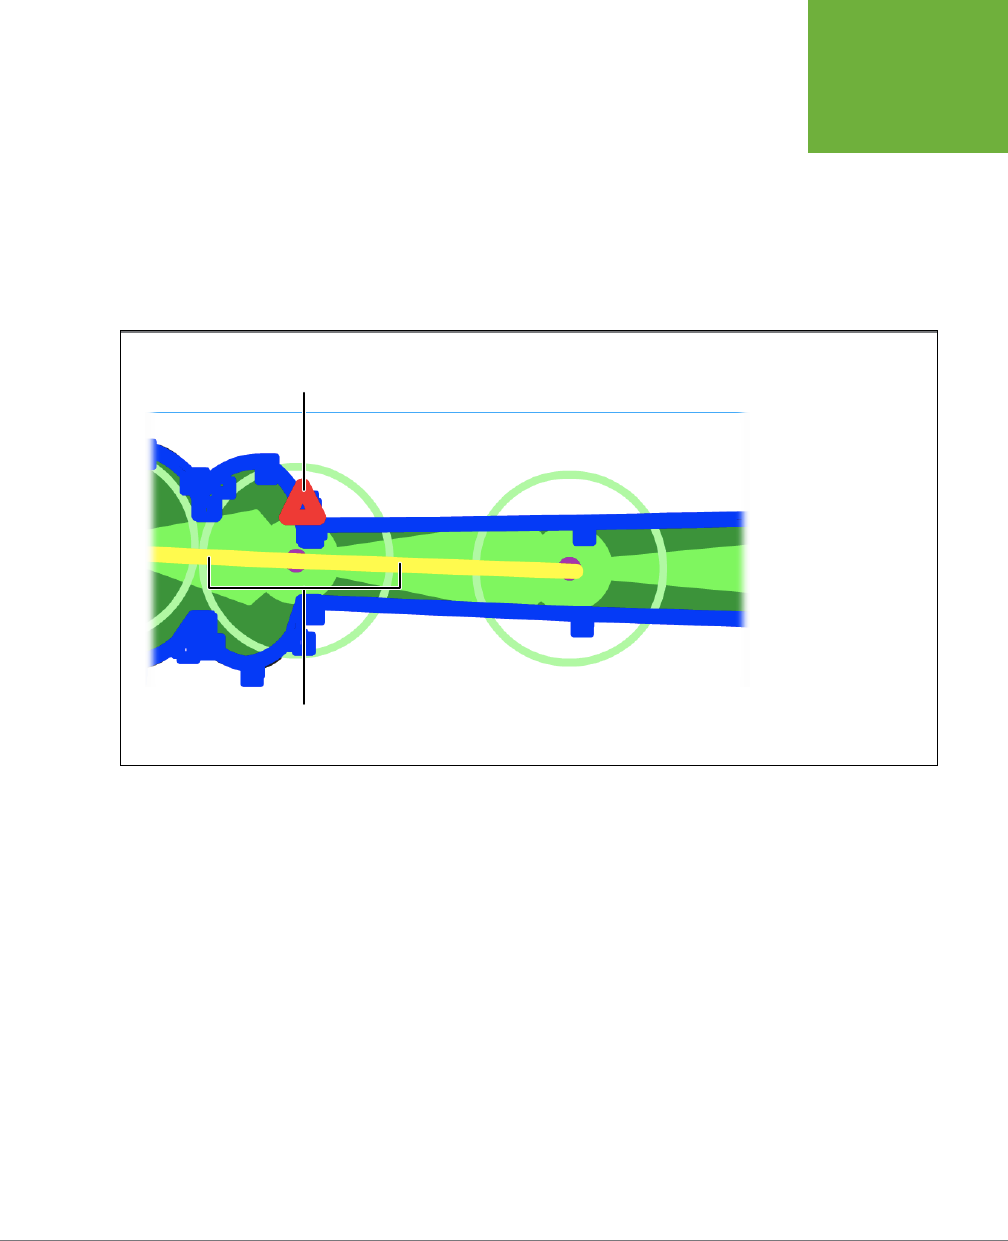
CHAPTER 9: REALISTIC ANIMATION WITH IK BONES 345
MAKING
SHAPES MOVE
WITH BONES
When you add bones to a shape, Flash binds the control points on the perimeter of
the shape to the nearest bone. In some cases, a control point may be bound to more
than one bone, as shown in Figure 9-16. If the control points aren’t configured the
way you’d like, you can edit them using the following techniques:
• View control points bound to a bone. Choose the Bind tool in the Tools panel,
and then click a bone in the armature. The selected bone shows a red highlight.
The control points bound to the selected bone are highlighted in yellow. The
other control points in the armature are colored blue.
FIGURE 9-16
When a control point is
a triangle, that means
it’s bound to more than
one bone.
Bound to
two bones
Triangular
control point
• View bones bound to a control point. Choose the Bind tool in the Tools panel,
and Flash displays the bones and control points in the armature. Square control
points are bound to a single bone. Triangular control points are bound to more
than one bone. Click a control point, and it shows a red highlight. Bones bound
to the control point are highlighted in yellow.
• Bind a control point to a bone. Choose the Bind tool in the Tools panel, and
then click a bone. The control points bound to the bone appear highlighted in
yellow. With the Bind tool, Shift-click a control point that doesn’t show a yellow
highlight, and Flash binds it to the selected bone.
• Remove (unbind) control points from a bone. Use the Bind tool to select a
bone. Ctrl-click (Option-click) a control point that’s highlighted in yellow. The
control point changes from yellow to blue, indicating that it’s no longer bound
to the selected bone.
www.it-ebooks.info

FLASH CS6: THE MISSING MANUAL
346
APPLY SPRING
TO A MOTION
• Bind a bone to a control point. Select a control point with the Bind tool, and
then drag to the bone you want to bind to. As an alternative, Ctrl-clicking
(Option-clicking) acts as a toggle, binding and unbinding control points to
adjacent bones.
• Remove (unbind) a bone from a control point. Select a control point with
the Bind tool, and then drag away from the shape to unbind the control point.
As an alternative, Ctrl-clicking (Option-clicking) acts as a toggle, binding and
unbinding control points to adjacent bones.
Apply Spring to a Motion
An A-flat played on a guitar sounds dierent from an A-flat on a trumpet. The note
may be the same, but the dierences in overtone and timbre make music beautiful
and endlessly entertaining. Motion in the real world is like a symphony orchestra. A
pencil, a feather, and a cooked noodle may move the same distance and arrive at
the same resting point, but the subtleties of their motion are entirely dierent. Your
audience subconsciously recognizes these dierences. When you want to fine-tune
a motion’s subtleties in Flash, turn to the Spring properties: Strength and Damping,
which you find in the Properties panel when you select an IK Bone.
Here’s a simple experiment that shows how Spring works. If you want to skip the
first few steps for creating a rectangle shape with bones, use the file
09-9_Spring_
Settings.fla
from the Missing CD (
www.missingmanuals.com/cds/flashcs6mm
).
1. Choose File→New→ActionScript 3.0.
A new Flash document opens.
2. Select the Rectangle tool (R) and then make sure object drawing mode (J)
is toggled o.
A simple shape works great for this demonstration.
3. In the Properties panel, set Stroke to None and Fill to a color of your choice.
Again, simplicity works just fine.
4. Draw a skinny, horizontal rectangle across the top of the stage, as shown
in Figure 9-17.
In this animation, one side of the rectangle drops to the floor. The shape of
the rectangle and the fluidity of the motion change depending on the Spring
properties.
5. Select the Bone tool (M), and then add two bones to the shape.
Make the bone on the left shorter than the bone on the right.
www.it-ebooks.info
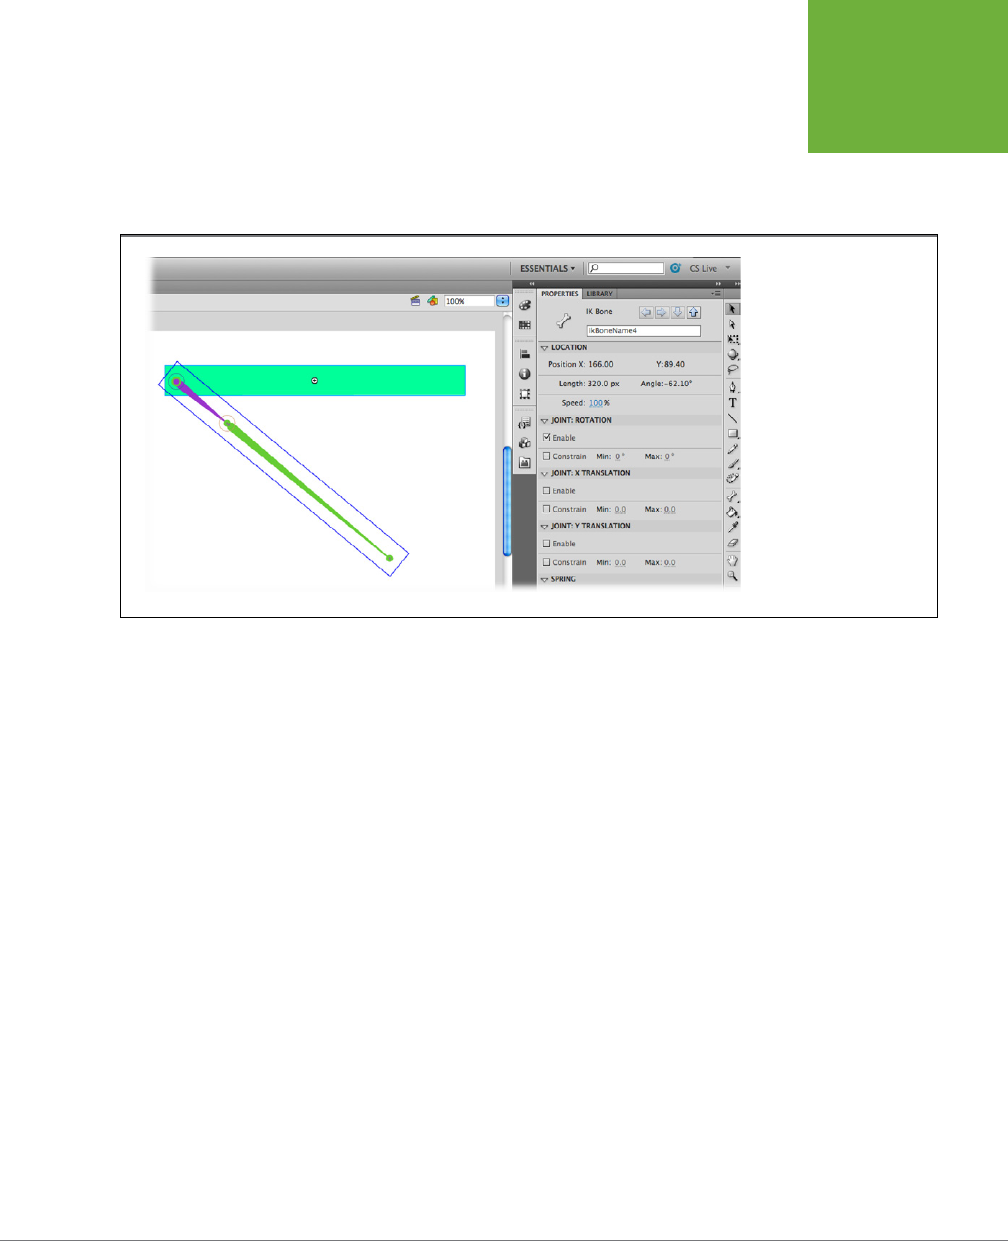
CHAPTER 9: REALISTIC ANIMATION WITH IK BONES 347
APPLY SPRING
TO A MOTION
6. In the timeline, click Frame 24 and then press F5. With the Selection tool (V),
drag the right end of the rectangle down to the bottom of the stage.
Make sure that you’re in the final frame of the animation (Frame 24) and that
the rectangle is pulled tight with no bends in it, as shown in Figure 9-17.
FIGURE 9-17
You apply Spring properties
to individual bones in a
armature. The settings
affect the motion and inter-
action between the bones.
Spring makes a child bone
resist the movement of a
parent bone. How much
resistance? Well, that’s up
to you and the Strength
and Damping properties.
7. Press Enter (Return) to preview the motion.
On the stage, the movement of the rectangle is similar to a pencil. The shape
remains pretty much unchanged through the entire motion.
8. Select the bone on the right, and then change Properties→Spring→Strength
to 70 (Figure 9-18).
A setting of 70 makes the relationship between the parent and child bones
pretty loose.
9. Press Enter (Return) to preview the motion.
This time, the motion is more fluid. The rectangle flutters more like a feather or
some other flexible object.
You apply Spring properties to individual bones, and they change the way the shape
moves. There’s a reaction when the parent bone moves. The child bone resists
the movement, and that resistance changes the shape. See Figure 9-19. Set the
Spring→Strength property to 0, and the joint is rigid. Set the value to 100 and the
joint is very loose. Damping aects the motion, too. In the real world, movement like
springiness is often more dramatic initially and then gradually loses its power until
the object comes to rest. Think about a jack-in-the-box when it pops out. There’s
www.it-ebooks.info
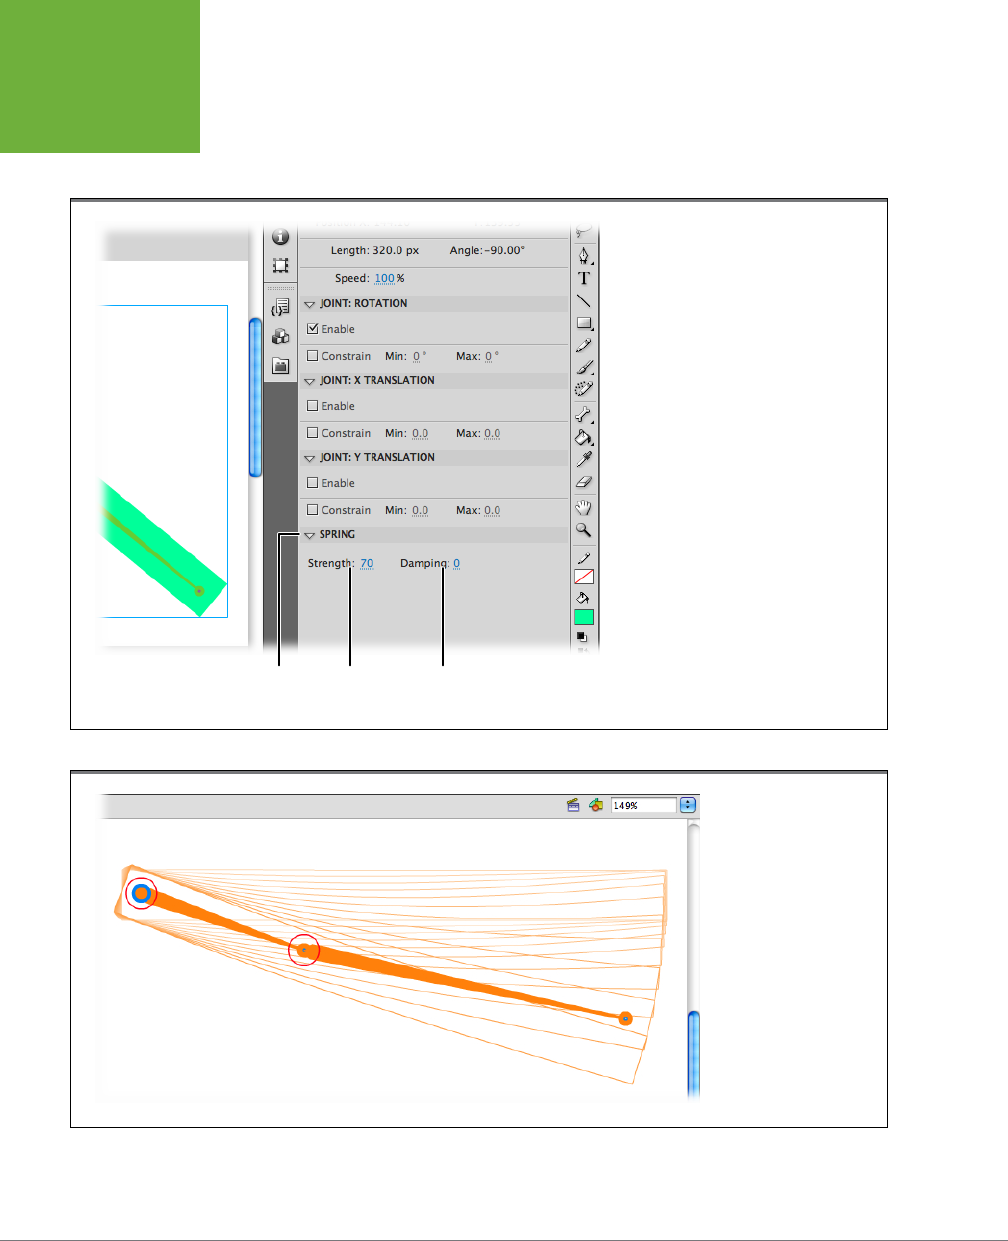
FLASH CS6: THE MISSING MANUAL
348
APPLY SPRING
TO A MOTION
lots of movement at first, but then there’s a little less distance with each bounce. In
Flash, you use the Damping setting to set the dierence between the initial move-
ment and the movement when an object comes to rest.
FIGURE 9-18
Use the Strength setting to determine how
loose the joint is between two bones. Use
the Damping setting to control the timing of
the bouncy motion. Specifically, the damping
affects how the movement diminishes over
time.
StrengthSpring
subpanel
Damping
FIGURE 9-19
If you turn on onion-
skinning and change the
display to outlines, you
can see the curve in the
“rectangle” at different
positions in its journey.
www.it-ebooks.info
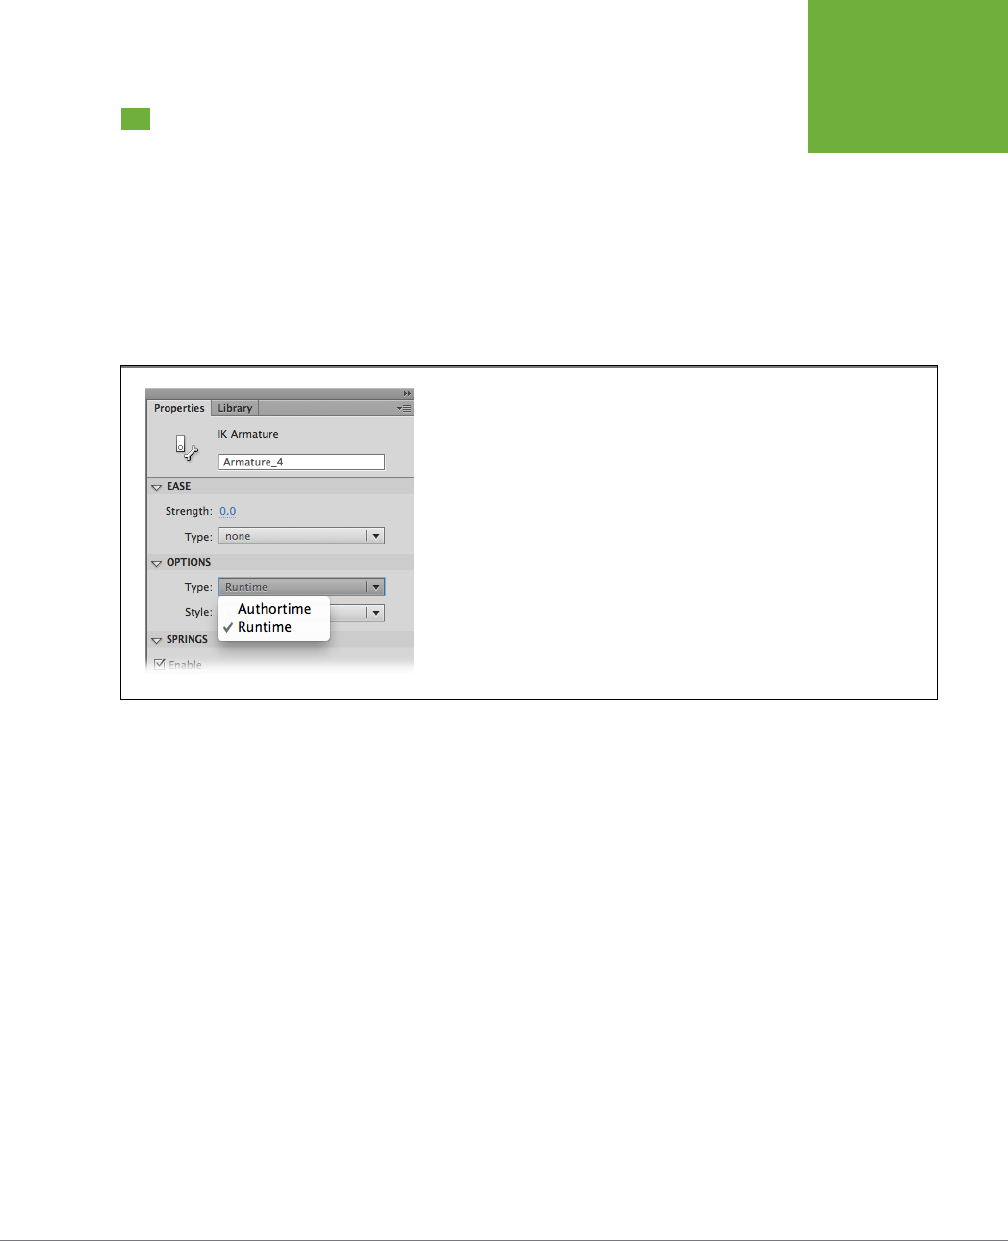
CHAPTER 9: REALISTIC ANIMATION WITH IK BONES 349
ANIMATING
AN ARMATURE
WITH
ACTIONSCRIPT
Animating an Armature with ActionScript
Though it’s not covered in this book, you can use ActionScript 3.0 to animate
IKBones armatures. The IK armature has to be connected to either shapes or movie
clip symbols. You can’t use ActionScript to animate graphic symbols. To prepare
an armature for use with ActionScript, create a pose layer with only a single pose.
If there’s more than one pose in the layer, then you can’t use it with ActionScript.
1. Select a frame in the pose layer.
The settings for the pose layer appear in the Properties panel (Figure 9-20).
FIGURE 9-20
Change the Properties→Options→Type to Runtime if you want to use ActionScript to
control the movement of your IK Bones armature.
2. In Properties, under Options→
Type, choose Runtime from the drop-down
menu.
When you first create an armature, Properties→Options→Type is set to
Authortime, meaning you create the animation in the timeline as you design
the animation. Once you change it to Runtime, you can use ActionScript code
to control the movement of the armature and its elements.
3. Change the instance name for the armature to
amtrChain
.
You can change the name of the armature to match your ActionScript naming
conventions. Initially, Flash gives the armature instance the same name as the
pose layer. You can change the name in either the layer in the timeline or in the
Properties panel.
www.it-ebooks.info

351
CHAPTER
10
Flash gives you a ton of drawing and painting tools you can use to create original
artwork, as you saw in Chapter 2 and Chapter 5. But if you’ve already got some
cool logos or backgrounds that you created in another program (like Adobe
Illustrator and Photoshop), you don’t have to redraw them in Flash. All you have
to do is pull them into Flash—
import
them. Once you do, you can work with them
nearly as easily as you do the images you create directly on the stage.
This chapter introduces you to the dierent types of graphics and still images that
Flash lets you work with. You’ll learn how to import files while preserving just the
features you need in Flash. (If you’re looking for tips on how to work with audio and
video media, turn to Chapter 11.)
NOTE After you’ve incorporated non-Flash media into your animation, you can control that media using
ActionScript. For more details, flip to Chapter 12.
Importing Graphics
Theoretically, you can cut or copy graphic elements from any other program you
have open, paste them into Flash, and then tweak them. For example, say you’ve
created a drawing in Autodesk SketchBook Pro. In SketchBook, you can choose
Edit→Copy. Then, in Flash, you can choose Edit→“Paste in Center” to transfer the
image from SketchBook to your stage, and then edit it using Flash’s drawing and
painting tools. When you import or paste an image onto the stage, Flash stores a
copy in your Library, as shown in Figure 10-1.
Incorporating
Non-Flash Media Files
www.it-ebooks.info
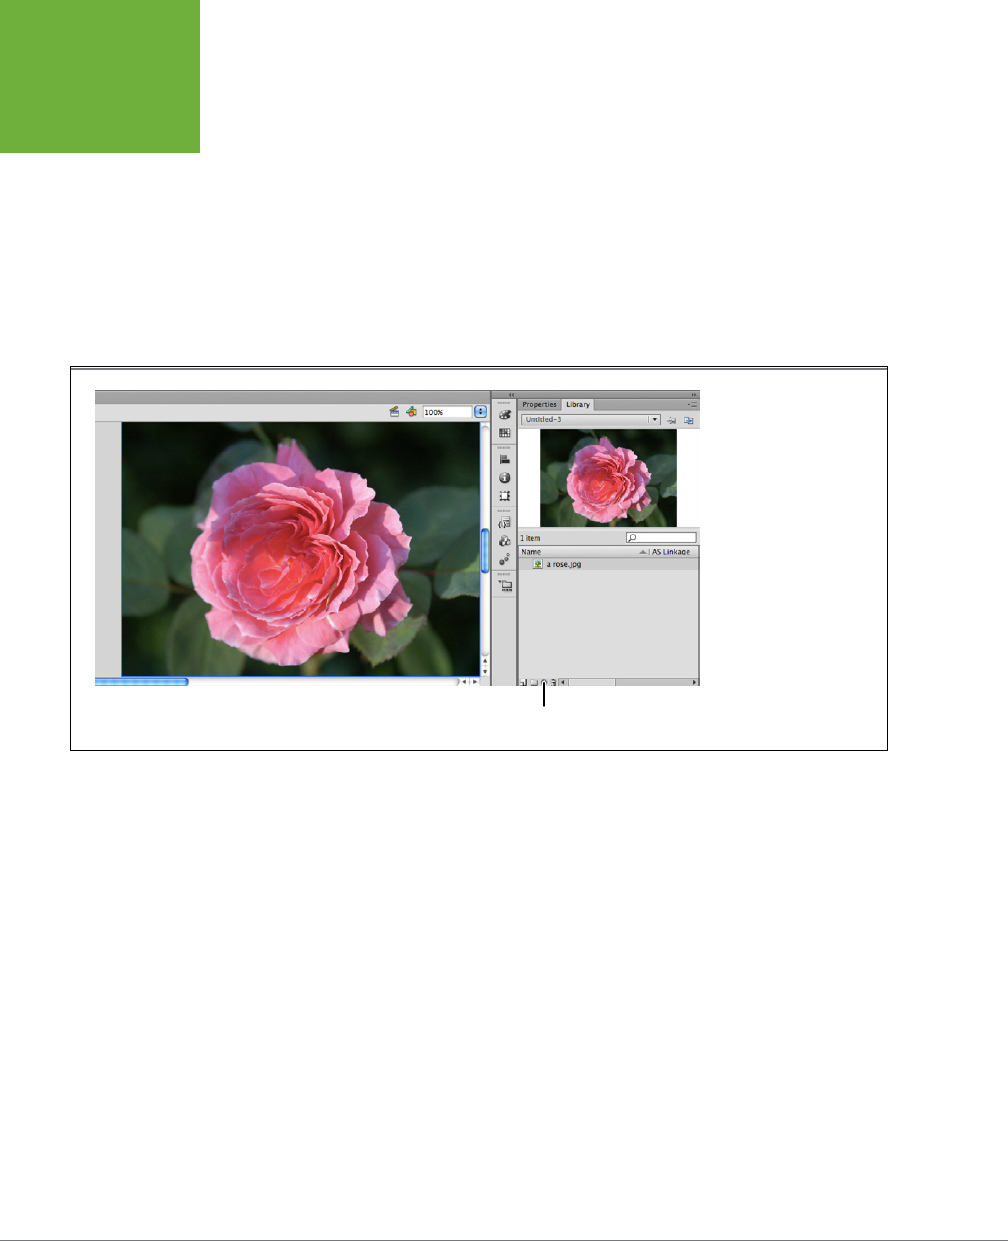
FLASH CS6: THE MISSING MANUAL
352
IMPORTING
GRAPHICS
Copying and pasting usually works, and it’s quick and easy. It’s not surprising that
Adobe tweaked Flash so that Cut and Paste work smoothly with its own programs—
Illustrator, Photoshop, and Fireworks. In fact, the cut-and-paste process opens the
same Import dialog box that you’d see if you’d used the File Import command. That
handy tool helps you import graphics exactly the way you want them in Flash. On
the other hand, using non-Adobe programs, you may get hit-or-miss results by using
the system Clipboard. Flash may decide to flatten (group) the drawing, limiting your
ability to edit it. Flash may also decide to ignore certain eects (like transparency
and gradients) so that the image you paste onto your stage doesn’t quite match
the image you cut or copied.
FIGURE 10-1
After you import a
bitmap, Flash throws a
backup copy of the image
into the Library as a
convenience so you have
the option of dragging
another copy onto the
stage without going
through all the trouble of
importing the file again.
To see the properties of
your newly imported
bitmap, click the informa-
tion icon.
Properties button
A safer alternative: In your non-Adobe programs, save your graphic elements as
separate files, and then import those files into Flash. Flash lets you import most
popular graphics file formats, including .jpg, .gif, .png, and .bmp formats. If you’re
a Flash veteran, you may notice that the list of importable file formats is actually
shorter than it used to be. Adobe has retired some older and less-common formats,
like Macromedia Freehand, Silicon Graphics, Targa, and Windows metafiles. If you’re
working in one of these formats, you need to save your files in one of the formats
listed in Table 10-1.
One of the major improvements in recent versions of Flash is the way it imports
Adobe Photoshop and Adobe Illustrator files. These programs use layers much like
the layers in Flash, as explained on page 135. When you import Photoshop and Il-
lustrator files into Flash, you can choose which layers you want to import, and the
program converts them into Flash layers. Say you’re creating a business presentation
and you’ve got a Photoshop file of a map. The Photoshop (.psd) file has the map on
one layer, city names on another layer, and stars on another layer to highlight where
you’ve had increased sales. Flash imports the map, the city names, and the stars on
separate layers, making it easy for you to show and hide these elements separately
www.it-ebooks.info
CHAPTER 10: INCORPORATING NON-FLASH MEDIA FILES 353
IMPORTING
GRAPHICS
in your Flash animation. Also, if you need to make changes after you pull Photoshop
or Illustrator files into Flash, you can edit the shapes and text within Flash.
TABLE 10-1
Graphics file formats you can import into Flash
FILE TYPE EXTENSION NOTE
Adobe Illustrator .ai Instead of automatically pulling these files in
as flat, rasterized bitmaps, Flash lets you set
import settings that help preserve the original
images’ layers and editable text.
Portable Network
Graphic
.png Instead of automatically importing PNG files
created in Fireworks as flat, rasterized bitmaps,
Flash lets you set import settings that help
preserve the original images’ layers, editable
objects, and editable text.
Photoshop .psd You must have QuickTime 4 (or later) installed
before you can import Photoshop files into
Flash.
Adobe FXG .fxg This is Adobe’s new open source, MXML-based
file format. It works well with Photoshop,
Illustrator, Flash, and Flex. For more details, see
the box on page 354.
AutoCAD DXF .dxf Flash imports 2-D DXF files, but not 3-D DXF.
Font confusion can happen when Flash tries
to match AutoCAD’s nonstandard font system.
Flash imports only ASCII (text-based) DXF
files. Binary DXF files have to be converted to
ASCII before they’re imported to Flash.
Windows Bitmap .bmp, .dib If you’re running a Mac, you must have
QuickTime 4 (or later) installed on your
computer to import Windows bitmap files into
Flash.
Flash and FutureSplash
(pre-Flash)
.swf These are Flash movies that have been
published (also known as
compiled
) for
distribution.
Graphic Interchange
Format (including
animated GIF)
.gif This format, originally developed by
CompuServe (one of the earliest online infor-
mation services), is good for simple drawings.
Joint Photographic
Experts Group
.jpg, .jpeg The most popular format for displaying photos
on the Web.
QuickTime Image .qtif You must have QuickTime 4 (or later) installed
before you can import QuickTime Image files
into Flash.
Tagged Image File .tif, .tiff You must have QuickTime 4 (or later) installed
before you can import TIFF files into Flash.
www.it-ebooks.info

FLASH CS6: THE MISSING MANUAL
354
IMPORTING
ILLUSTRATOR
GRAPHICS
FILES
NOTE If you’re looking for third-party graphics files to import into Flash, check out the box on page 382.
New File Formats for Flash? Why?
With all the file formats floating around, why did Adobe create
two new ones: XFL for Flash and FXG for images?
It’s a reasonable question. If you use Flash, you’re expected
to keep track of dozens of different types of files and un-
derstand their capabilities and shortcomings. Over the
years, Flash has matured from a simple animation tool to an
application-building tool. Branches of that growth include
Flex and AIR—development tools that use Flash files to create
full-blown applications. Adobe created the new file formats
to accommodate the needs of these new app-building tools.
At the same time, there’s an industry trend toward open-source
tools and file formats. In the past, companies like Microsoft and
Adobe created proprietary file formats that only their programs
could open. Once the competition figured it out, the company
would come out with a new version, protecting their corner of
the market. This system wasn’t so great for the consumer. The
trend these days is to develop file formats made of separate
components that are compressed like a ZIP file, often using the
XML scripting language to define the separate parts. Microsoft
went this direction when creating file formats for Office 2007
and 2008, and now Adobe is using a similar method for Flash
and other programs.
Flash Files (.fla and .xfl). Now, when you save a Flash file
(File→Save), the program automatically stores it in the new
format and squashes it using ZIP compression. You can see for
yourself—use a tool like WinZip or StuffIt to open a Flash file.
(You may need to change the file extension to “.zip” before
you can open it.) Once it’s open, it looks like Figure 10-2. Flash
developers who work in teams will love this approach. Artists
can design buttons and widgets somewhat independently of
programmers who write the ActionScript code. Then, each team
member can pop her work into the Flash document without
messing up any other part of the project. Folks who develop
Flash extensions and add-ons will also be fans of the new,
easily accessible file format.
When you save your Flash documents (File→Save), you can
choose Flash CS6 Uncompressed Document (*.xfl) from the
“Save as type” menu. When you choose this option, Flash for-
goes the compression. Instead, it saves your file as a folder with
subfolders to hold all of its parts (called
assets
). For example, a
Library subfolder holds any symbols you’ve created. This setup
makes asset swapping and sharing even easier.
FXG file format. There’s more than one way to operate on a
Flash animation. For example, you can use Flash Professional
with all its bells and whistles. If you’re a designer but not a
programmer, you may want to use Flash Catalyst. On the other
hand, if you’re a developer
and
a programmer, you may want
to use Flash Builder. These last two tools are useful when an
entire team is working on a project. Adobe developed the FXG
file format to ease the cooperation between these programs,
as well as Photoshop, Illustrator, Flash, and Flex. FXG uses
XML-type descriptions to define an image. Technically, this
code is a subset of Flex’s MXML language. To see the innards of
an FXG file, open it using Notepad or TextEdit. You’ll find text
descriptions of the image. It looks a little like the code that
underlies web pages, because XML and HTML have shared roots.
FREQUENTLY ASKED QUESTION
Importing Illustrator Graphics Files
Flash lets you import graphics files you’ve created with another image-editing pro-
gram (like Adobe Illustrator or Photoshop) and then stored on your computer. After
you import a graphics file, you can either edit the image it contains using Flash’s
tools and panels, or just add it directly to your animation.
www.it-ebooks.info
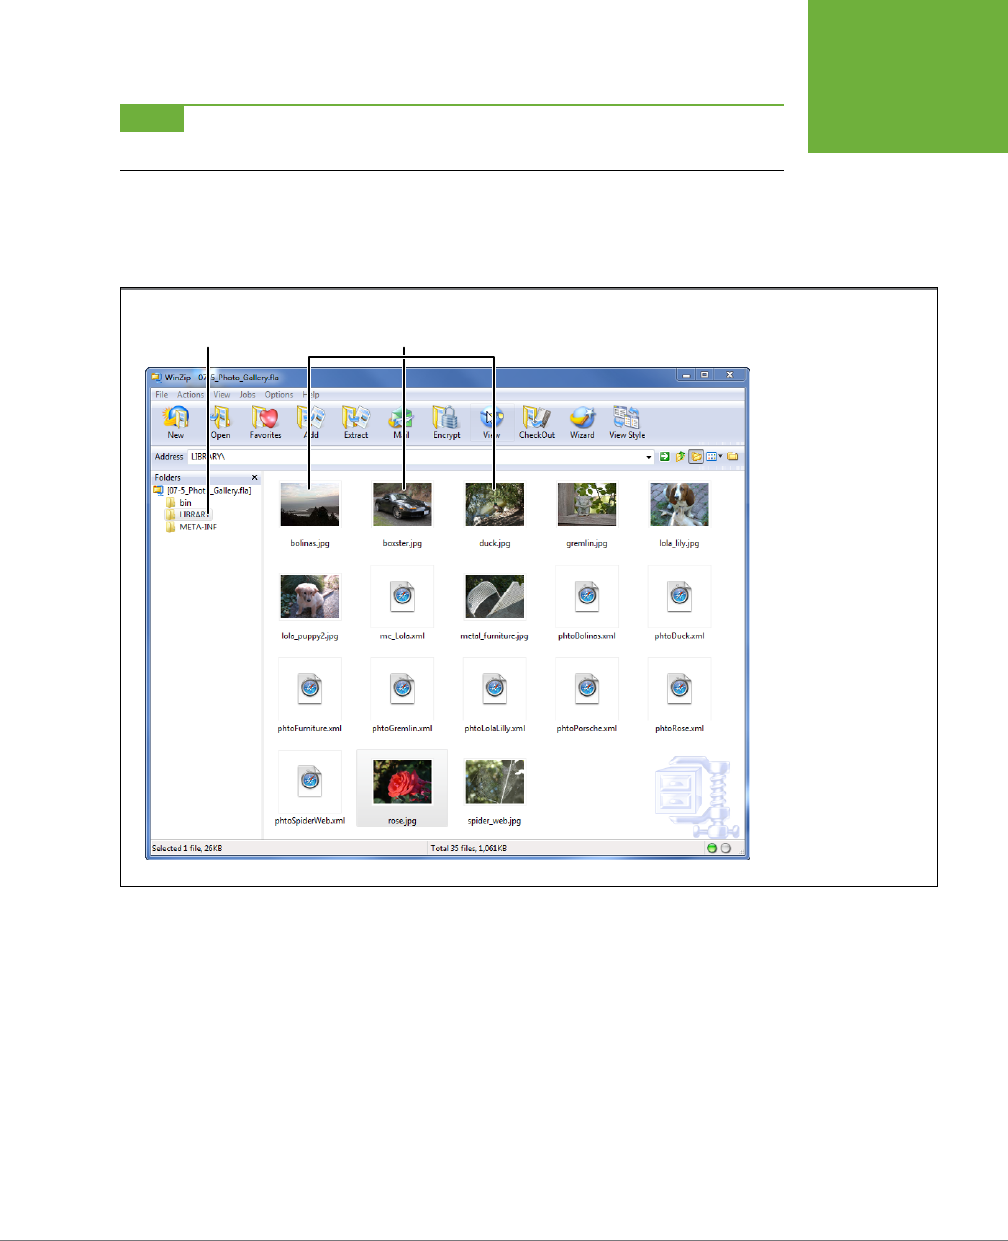
CHAPTER 10: INCORPORATING NON-FLASH MEDIA FILES 355
IMPORTING
ILLUSTRATOR
GRAPHICS
FILES
NOTE Table 10-1 (page 353) shows you a complete list of all the different graphics file formats you can
import into Flash.
As you see in the steps below, after you’ve imported a graphics file, Flash stores a
copy of the image in the Library panel (page 30) so you can add as many instances
of the image to your animations as you like.
FIGURE 10-2
Flash Professional CS6
uses a new file format
that’s easier for everyone
to open and under-
stand. Here a Flash file
is uncompressed and
opened in WinZip, so
you can see its contents
stored in separate folders.
These images are part
of the Photo Gallery file
(
07-5_Photo_Gallery.fla
on the Missing CD page
at
www.missingmanuals.
com/cds/flashcs6mm
).
Photos stored in
the Library folder
Library folder
Of course, there’s no such thing as a free lunch. Depending on the format of your
graphics file (see page 353), Flash either pulls the image in as a collection of edit-
able shapes and layers—which you can work with just as you work with any image
in Flash—or as a flattened bitmap, which limits your editing choices a bit. (Page 364
gives you tips for working with flattened bitmaps.) Flash does its best to give you all
the bells and whistles of the original file format. Flash really excels when you import
a file from one of Adobe’s Creative Suite programs, like Illustrator. As the example
below shows, you get to choose the way Flash imports layers, shapes, and text. As
a result, if you’re importing Illustrator files, Flash lets you go ahead and modify the
shapes (vector graphics) and edit the text after import.
www.it-ebooks.info
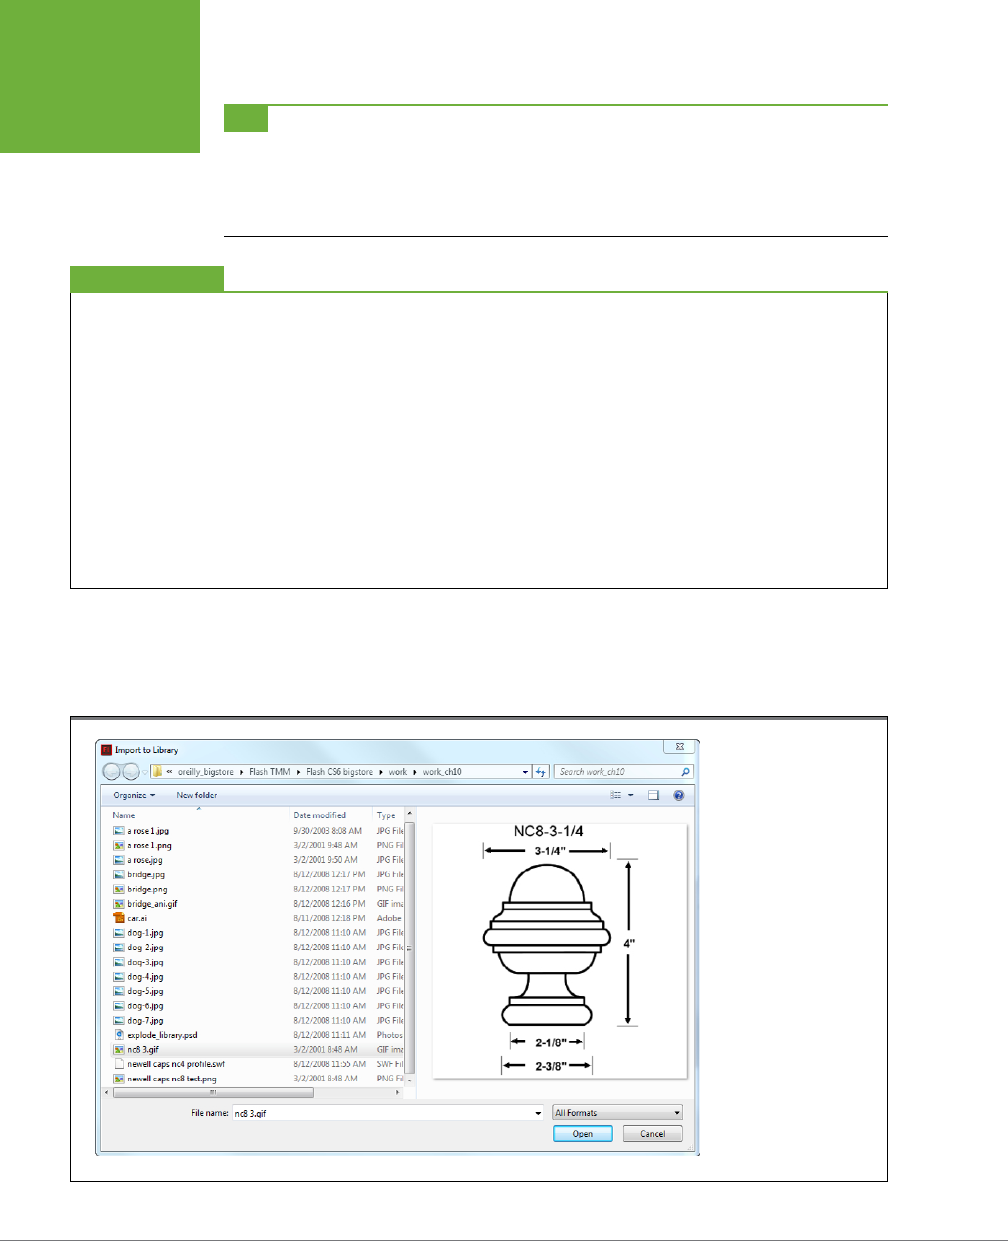
FLASH CS6: THE MISSING MANUAL
356
IMPORTING
ILLUSTRATOR
GRAPHICS
FILES
TIP Adobe Illustrator files are frequently saved for printing on paper using a color space called CMYK (cyan,
magenta, yellow, black). Before you import these files, use Illustrator to convert them to the RGB (red, green,
blue) color space used by Flash. To check and change the color space setting in Illustrator, choose File→Document
Color Mode. Less frequently, you may find Adobe Photoshop files using the CMYK color space. In Photoshop, to
check and change the color space, go to Image→Mode RGB.
Flash/QuickTime Cross-Pollination
Since the good old days of Flash 4, Flash has enjoyed a symbi-
otic relationship with Apple’s QuickTime. Back then, you could
import a QuickTime movie into Flash and then add some Flash
content (for example, buttons that web surfers can press to
start and stop the QuickTime movie). And you still can import
QuickTime movies into Flash and link the two together, as you
see on page 396.
But the relationship between Flash and QuickTime goes be-
yond video integration—it also affects your ability to import
media files into Flash. If you have QuickTime installed on your
computer, for example, Flash lets you import more types of
graphic file formats than it does if you don’t have QuickTime
installed (see Table 10-1 for details).
The bottom line is, if you’re working with others who use both
Macs and PCs, it’s well worth installing QuickTime. When this
was written, the current version was QuickTime 10. Fortunately,
QuickTime is easy to install. It’s free, too. To download a copy,
visit
www.apple.com/quicktime/download
.
UP TO SPEED
1. Choose File→Import→“Import to Stage.”
Your standard file dialog box appears. If you’re using a PC, it looks like
Figure 10-3, for example.
FIGURE 10-3
You can import a graphic
to the stage and the
Library, as you see in the
numbered steps, or just to
the Library (by choosing
File→Import→“Import
to Library”). Either way,
you first have to tell Flash
which file contains the
graphic you want to im-
port—and that’s exactly
what you do here, in the
Import dialog box.
www.it-ebooks.info

CHAPTER 10: INCORPORATING NON-FLASH MEDIA FILES 357
IMPORTING
ILLUSTRATOR
GRAPHICS
FILES
NOTE Looking for an Adobe Illustrator practice file? Go to the Missing CD (
www.missingmanuals.com/cds/
flashcs6mm
) and download either
10-1_Sports_Car.ai
or
10-2_Stutz_Bearcat.ai
.
2. In the “File name” field, type the name of the Adobe Illustrator (.ai) file
you want to import (or, in the file window, click the file to have Flash fill in
the name for you).
Use the drop-down menu at the bottom to see all the dierent types of files
you can import. Initially the drop-down menu is set to All Formats.
3. Click Open.
The Import dialog box disappears, and then Flash displays an extra Import
Settings window that lets you tell it how much editability you want to preserve:
whether you want it to convert the original frames into Flash frames or Flash
layers, to pull in all the frames or just a few, to include invisible layers or not,
and so on. Figure 10-4 shows the Import Settings windows you see when you
import files created with Adobe Illustrator.
4. When you see the “Import to Stage” dialog box (Figure 10-4), click to select
one or more of the following options, and then click OK.
• Select Illustrator Artboard. You can create multiple artboards within an
Illustrator file. They’re similar to having multiple pages in a word process-
ing document. Use the drop-down menu to choose which artboard (page)
you want to import.
• Check Illustrator layers to import. Flash gives you a scrolling list of all the
layers in the Illustrator file, with icons and labels describing the contents
of the layers. Place checkmarks next to the layers and artwork you wish to
import. To the right of the scrolling list, you see Layer Import Options that
change depending on the content of the layer.
On the right site of the Import window, you see “Layer import options for ‘<Path>’:”
or Group, or Text, or whatever you selected on the left. Here’s your opportunity to
fine-tune the import process. Suppose you have a drawing of a car. You can import
the wheels as movie clips with the registration points centered, so you can create
rotating wheels in your Flash animation. Here are examples of the import options:
• Layer import options for paths. If the layer includes lines and shapes, you
can choose to import the content as an
editable path
, meaning that you can
change it later within Flash. Or you can import it as a bitmap, which gives you
fewer editing options.
• Layer import options for text. You have three options for importing text.
Choose “Editable text” if you want to edit or rewrite the text. Choose “Vector
outlines” if you want to change the shapes of letters in the same way you change
the shapes of polygons and circles within Flash. Choose Bitmap if you’re happy
with the text as is and don’t plan to change it other than perhaps tweaking the
color and size a bit.
www.it-ebooks.info
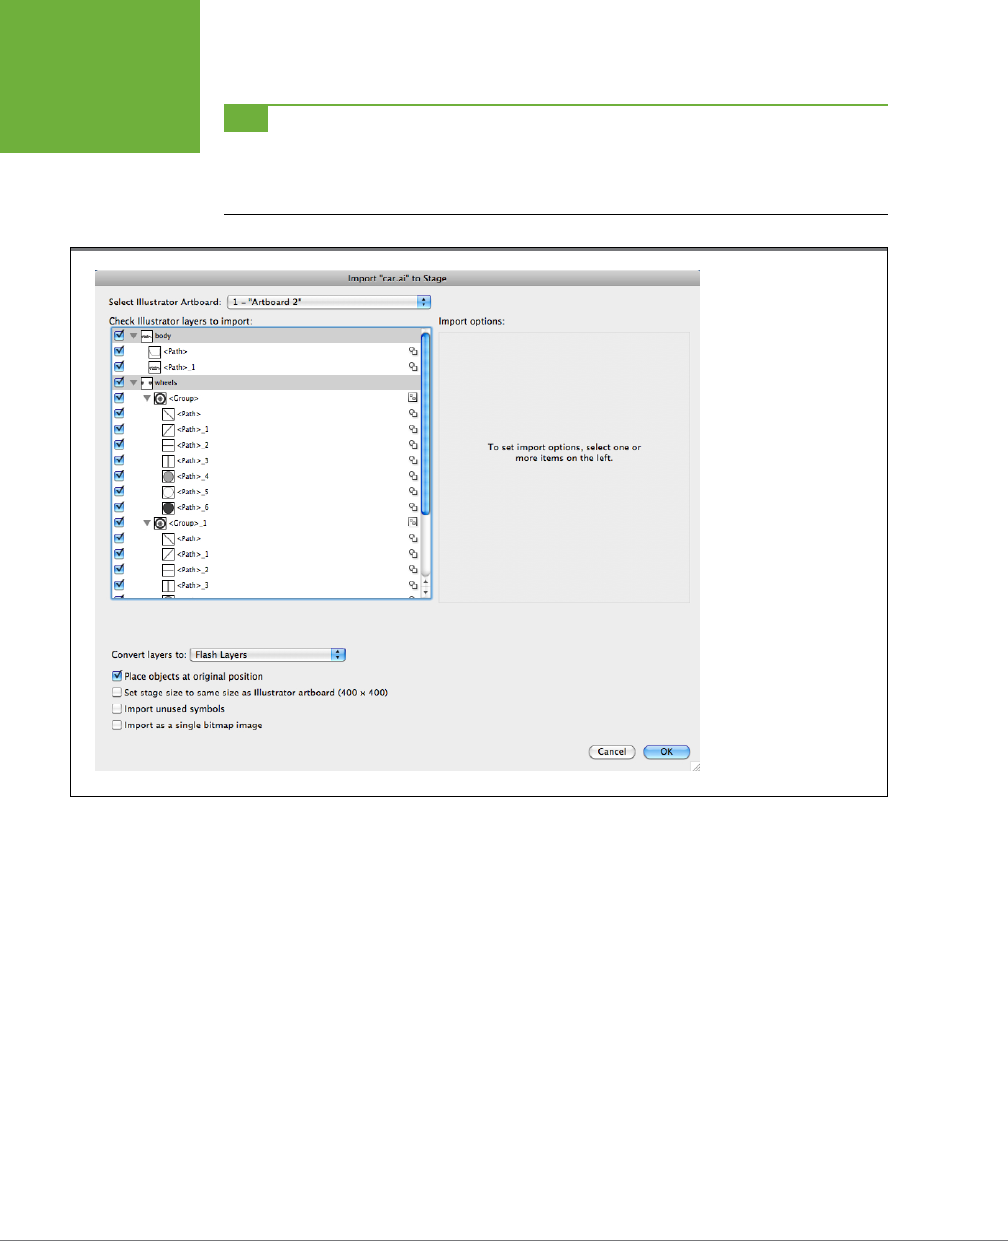
FLASH CS6: THE MISSING MANUAL
358
IMPORTING
ILLUSTRATOR
GRAPHICS
FILES
TIP If you see a yellow triangle with an exclamation point (!), Flash is warning you that one of the graphic
elements may not be imported as expected. For example, you may see an incompatibility warning if you try to
import text that has been rotated in Illustrator. Click the layer, and Flash explains that the best option is to import
the text as vector outlines. Once you fix the problem, the warning sign disappears.
FIGURE 10-4
When you try to import
certain types of vector
files, Flash lets you
specify how much edit-
ability you’re willing to
sacrifice for good-quality
images. Here you see the
dialog box Flash displays
when you try to import
an Adobe Illustrator file.
• Create movie clip. Use this option to instantly turn the graphics in the selected
layer into a Flash movie clip symbol. Check the box, and then give the clip an
Instance name that’s used for the copy of the movie clip symbol that Flash
places on the stage. If your Illustrator artwork uses eects like filters or blends,
choose the “Create movie clip” option. In Flash, only movie clips can have filters
and blends. At the bottom of the “Import to Stage” dialog box, you see options
that aect all the layers you’re importing.
• Convert layers to: Flash Layers/Keyframes/Single Flash Layer. This option
tells Flash to keep the layering structure of the original file intact, to place the
content of each layer in a separate layer or keyframe. If you don’t need to work
with the image’s layers separately, you can flatten the content of all layers onto
a single Flash layer.
• Place objects at original position. This option keeps the dierent elements in
a graphic positioned the same way they were in Illustrator.
www.it-ebooks.info

CHAPTER 10: INCORPORATING NON-FLASH MEDIA FILES 359
IMPORTING
PHOTOSHOP
GRAPHIC FILES
• Set stage to same size as Illustrator artboard/crop area. Turning on this box
automatically changes the Height and Width document settings in Flash to
match the page settings in the Illustrator file you’re importing.
• Import unused symbols. Illustrator has a Symbols panel that’s similar to Flash’s
Library. Turn on this option if you want to import all the symbols in the Illustrator
panel, even if they don’t appear in the document’s page.
• Import as a single bitmap image. Sometimes you’re not interested in multiple
layers, editable shapes, and editable text. All you want is a single picture in your
Library that you don’t want to change. Turn on this box to import the Illustrator
file as a single bitmap picture.
After you’ve made your choices and then clicked OK, the Import settings window
disappears. Flash imports your file, placing it on the stage (or in multiple frames
and layers, based on the options you selected above) and in the Library, as shown
earlier in Figure 10-1.
TIP You can import files into your Library without placing them on the stage. Just choose File→Import→“Import
to Library.”
Importing Photoshop Graphic Files
Photoshop files have a special relationship with Flash, and the import process is
very similar to importing Illustrator files, described on page 354. The Import dialog
box (Figure 10-5) has the same look and layout, but when you look closely at the
options, you see some dierences. That’s not surprising, since Photoshop specializes
in raster or bitmap images, while Illustrator focuses on vector graphics (sometimes
called
drawings
).
The “Import to Stage” dialog box for Photoshop files shows you a scrolling list of
Photoshop layers. Turn on the checkbox for each layer you want to include in the
import process. Click the layer name to highlight the layer, and you see options listed
on the right. The options dier depending on the content of the layer.
Here’s the rundown on the import options you find in the Photoshop “Import to
Stage” dialog box:
Import Options for Bitmaps
• Import this layer as. You have two choices for importing bitmap layers. Choose
“Bitmap image with editable layer styles” if you want to tweak the layer settings
in Flash. If all you need is a picture, choose “Flattened bitmap image.”
• Create movie clip for this layer. Use this option to instantly turn the graphics
in the selected layer into a Flash movie clip symbol. Turn on the box, and then
www.it-ebooks.info
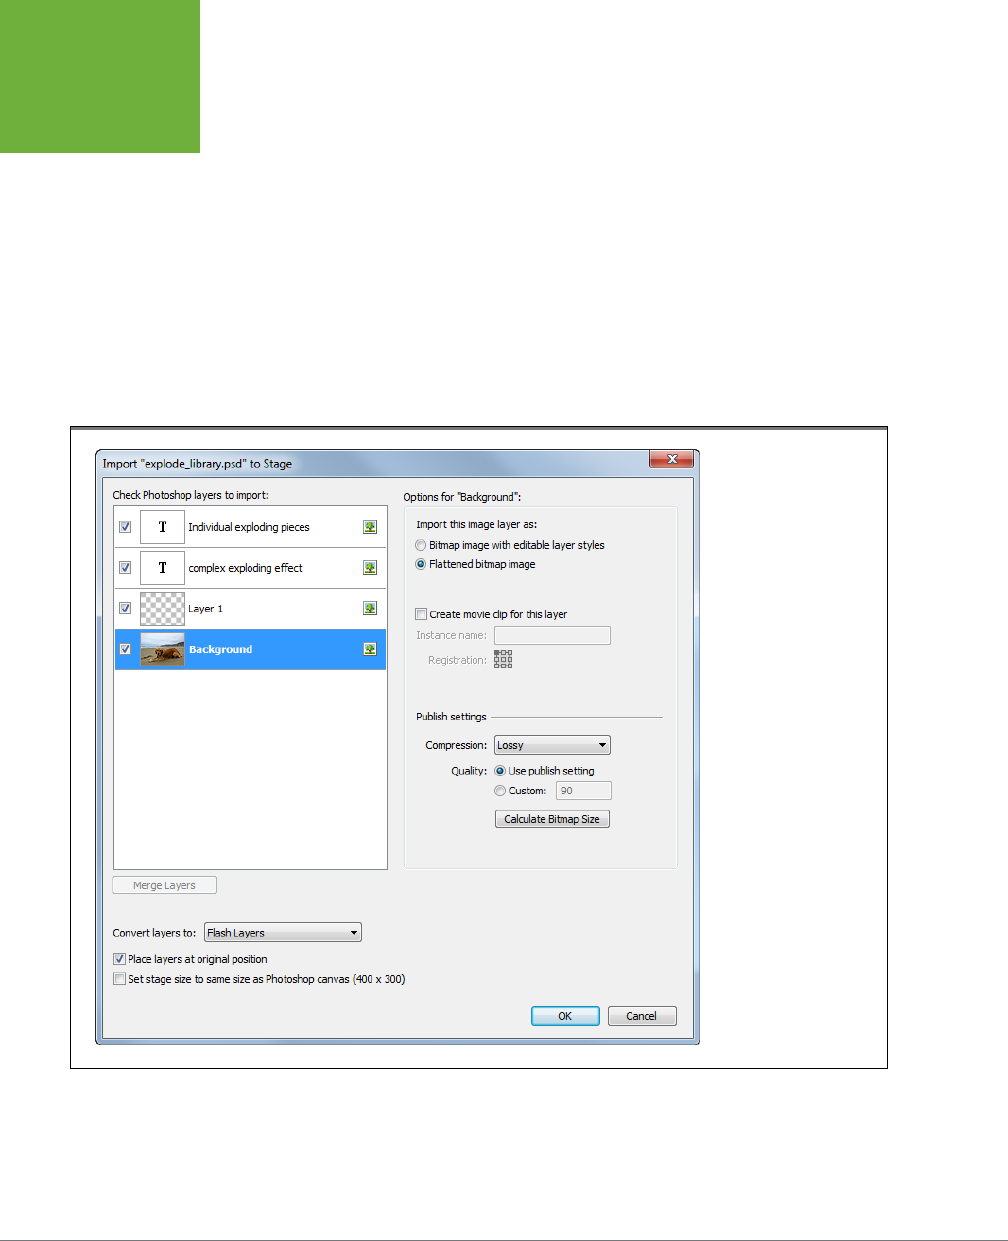
FLASH CS6: THE MISSING MANUAL
360
IMPORTING
PHOTOSHOP
GRAPHIC FILES
give the clip an Instance name (which Flash uses for the copy of the movie clip
symbol it places on the stage).
• Publish settings. You can adjust the quality of bitmaps as you import them
into Flash. This option gives you control over the size of your Flash files, which
is important when you’re posting Flash movies on the Internet (better quality
equals bigger files). Using the Compression drop-down menu, you can choose
between Lossy and Lossless. If you choose lossy compression (similar to JPEG
images), you get a compact file size at the risk of degraded image quality.
Lossless compression retains all the digital information, even when resized. As
with JPEG images, you can adjust the quality of lossy compression images by
setting them to match your Flash publish settings (page 681) or by entering a
number in the Custom box.
FIGURE 10-5
When you import Photo-
shop graphics, Flash gives
you a boatload of control
over the process. Using
the “Import to Stage”
dialog box, you can tweak
the settings on individual
layers of the Photoshop
file so you get exactly the
tools you need for your
animation.
Import Options for Text
• Editable text. Photoshop places text on separate layers from photographs so
that the text can be edited, like it’s in a word processor. Choose this option if
you want to edit text after you’ve brought it into Flash.
www.it-ebooks.info

CHAPTER 10: INCORPORATING NON-FLASH MEDIA FILES 361
IMPORTING
FIREWORKS
GRAPHICS
• Vector outlines. The letters in text are drawn on the screen in the same way
that circles and polygons are drawn. If you want to be able to modify those
letters as if they were any other shape, choose “Vector outlines” as your import
option. You’ll be able to distort your letters in all sorts of fun ways, but you won’t
be able to edit them like editable text.
• Flattened bitmap image. This option turns your text into a bitmap picture, like
a photograph. You can’t do much more than tweak the color and resize it a bit.
Other Photoshop Import Options
The “Import to Stage” dialog box has several other options you can adjust before
you import files:
• Create movie clip for this layer. Select one or more layers, and you can turn
them into a Flash movie clip symbol.
• Merge layers. Below the scrolling list of layers is a Merge Layers button.
Shift-click or Ctrl-click (⌘-click) to select multiple layers, and then click Merge
Layers. Flash creates a new merged layer right in the scrolling list that you
can import into your Flash document. (This process doesn’t aect the original
Photoshop file on your computer.)
• Convert layers to: Flash layers/Keyframes. This option tells Flash to keep the
layering structure of the original file intact, to place the content of each layer in
a separate layer or keyframe.
• Place layers at original position. This option keeps the dierent elements in
a graphic positioned the same way they were in Photoshop.
• Set stage to same size as Photoshop canvas. Turn on this box to automatically
change the Height and Width document settings in Flash to match the page
settings in the Photoshop file you’re importing.
Importing Fireworks Graphics
Fireworks is another program that’s part of Adobe’s Creative Suite family. Fireworks’s
specialty is performing all sorts of graphics tricks for people who design websites. It
has tools for creating buttons, rollover images, and other web graphics. For example,
Fireworks can take a photo file and shrink it down to a very small file size, so it’ll
look fine on a website, but maybe not so great in print. Fireworks creates most of its
magic using the standard web language (HTML), and graphics files (JPEG, GIF, PNG),
with a little JavaScript for programming chores. Although Flash produces SWF files
and uses ActionScript for programming, these two programs play well with each
other, and you’ll often find reasons for swapping files back and forth between them.
NOTE Flash and Fireworks have a working relationship that precedes the Adobe era. Both were published
by Macromedia until Adobe purchased the company.
www.it-ebooks.info

FLASH CS6: THE MISSING MANUAL
362
IMPORTING
FIREWORKS
GRAPHICS
Fireworks is a hybrid in that its working file format (PNG) holds both photographic
images like Photoshop and vector drawings like Adobe Illustrator. Designers often
create complex images in Fireworks that may include photographs, text, and shapes.
They
save
their work in PNG files, but they
export
the files to smaller, simpler formats
to use on the Web. Flash can import almost any of the files that Fireworks saves or
exports. This section shows you how.
Importing Unimportable Graphics
If you’re not importing Adobe Illustrator, Photoshop, or Fire-
works files, don’t expect perfection when you’re importing
complex graphics. That’s especially true if you’re trying to
preserve the ability to edit your graphics in Flash. Flash does
the best it can, but there are an awful lot of variables involved,
from the specific effects you applied, to the graphics, to the
specific version of the program you used to create them.
If the graphics you import into Flash don’t look or behave the
way they do in the original program, try one or more of the
following:
• Ungroup the imported image. You do this by selecting the
image on the stage, and then choosing Modify→Ungroup.
• Try using the Clipboard. First, choose Edit→Preferences→
Clipboard (Windows) or Flash→Preferences→Clipboard
(Mac) to display the Preferences window. You can choose
the color depth and resolution for the image you’re cutting
and pasting. Higher numbers are more likely to match the
original artwork, while lower numbers reduce the file size.
• Return to the original program and see if you can simplify
the image. Reduce the number of colors you’re using, as
well as the number of layers, and flatten (group) as much
of the image as you can. Then try the import process again.
WORKAROUND WORKSHOP
TIP The PNG (Portable Networks Graphic) file format is a standard that was developed to replace GIF files
on the Internet for both copyright and techie reasons. In Fireworks, you can save files as PNGs, or you can export
files as PNGs. Exported files are very small and great for use on websites.
There are three ways to bring graphics from Fireworks into Flash. Before you choose
a method, ask yourself a couple of questions: Do I want the entire image or do I just
want parts of it? Do I want the image in one solid chunk or do I want to animate
individual pieces? After you know the answer to those questions, choose one of
these methods for importing the graphic:
• Use Flash’s File→Import command to import a complete Fireworks graphic.
Whether you saved it as a GIF, JPG or PNG the image will be imported as a
flattened bitmap—that is, one solid image. Even if it had separate layers in
Fireworks, that’s not the case once it’s imported into Flash.
www.it-ebooks.info
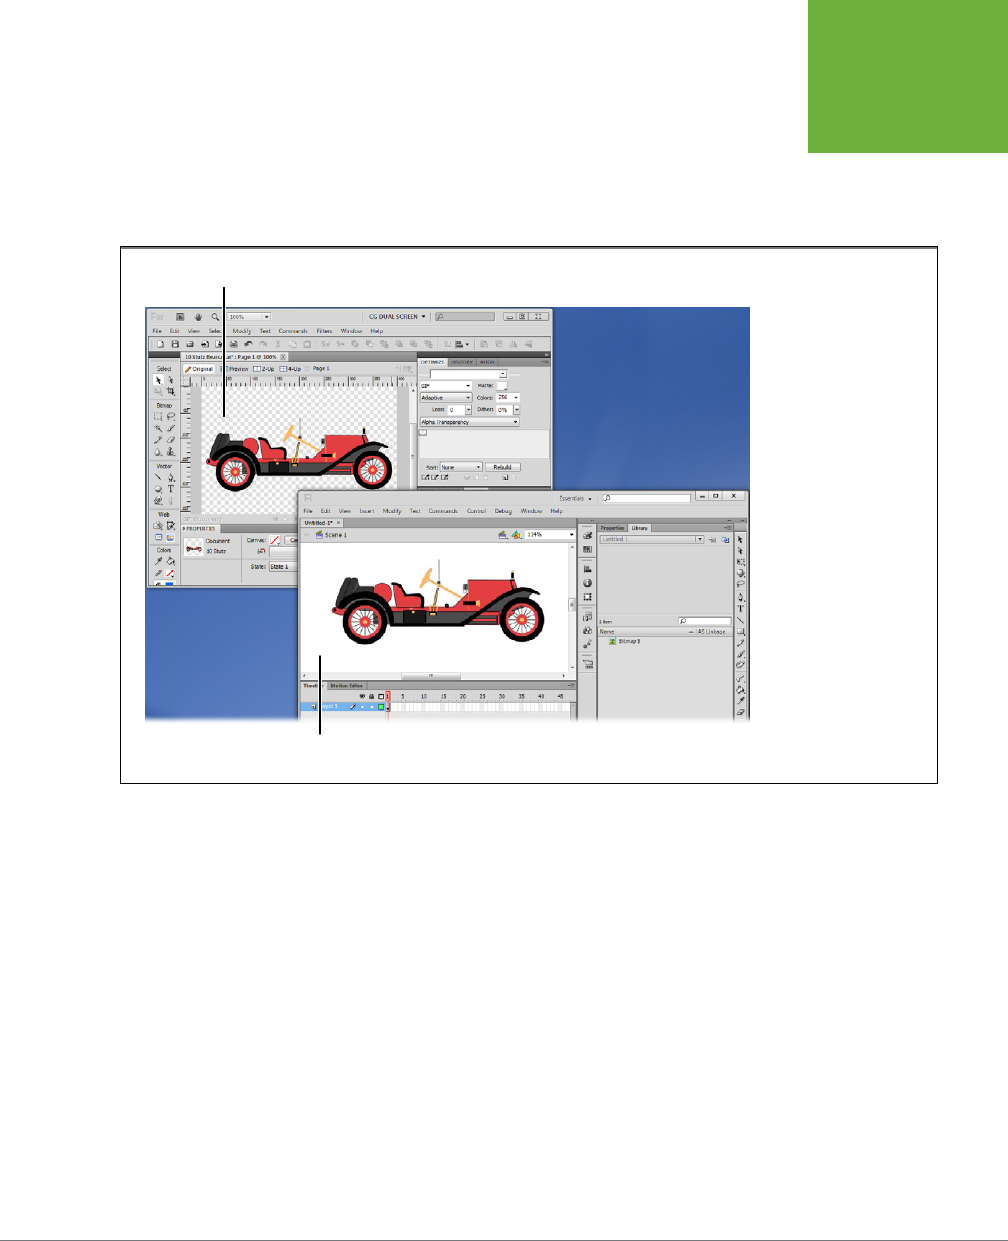
CHAPTER 10: INCORPORATING NON-FLASH MEDIA FILES 363
IMPORTING
FIREWORKS
GRAPHICS
• Drag images from Fireworks to Flash, as shown in Figure 10-6. Before you drag,
select the graphics you want to copy. Make sure any graphics you want to copy
are visible and on unlocked layers. As with the Import method, you graphic in
Flash is a flattened bitmap. The advantage of this option is you can pick can
choose the parts of the image you need in Flash.
FIGURE 10-6
With Adobe Creative Suite
programs, like Fireworks,
you can drag and drop
graphics from one
program to another. An
Import dialog box opens,
letting you choose among
the import options.
Adobe Fireworks
Adobe Flash
• Copying and pasting works, too, and sometimes it’s easier than arranging your
windows for a drag operation. The same rules apply; make sure any graphics
you want to copy are visible and on unlocked layers. Sometimes, you’ll want
the pieces of a Fireworks graphic to be separate objects in your Flash anima-
tion. For example, if you have a car, you may want to animate the wheels so the
they turn. In that case, choose Edit→Copy as Vectors in Fireworks. Then choose
Edit→Paste in Flash. A dialog box, like the one in Figure 10-7 appears. Choose
the Paste Using AI Importer preferences. Translation: I want to import this as if
it were an Adobe Illustrator file. Check the box Maintain layers. That way, each
www.it-ebooks.info
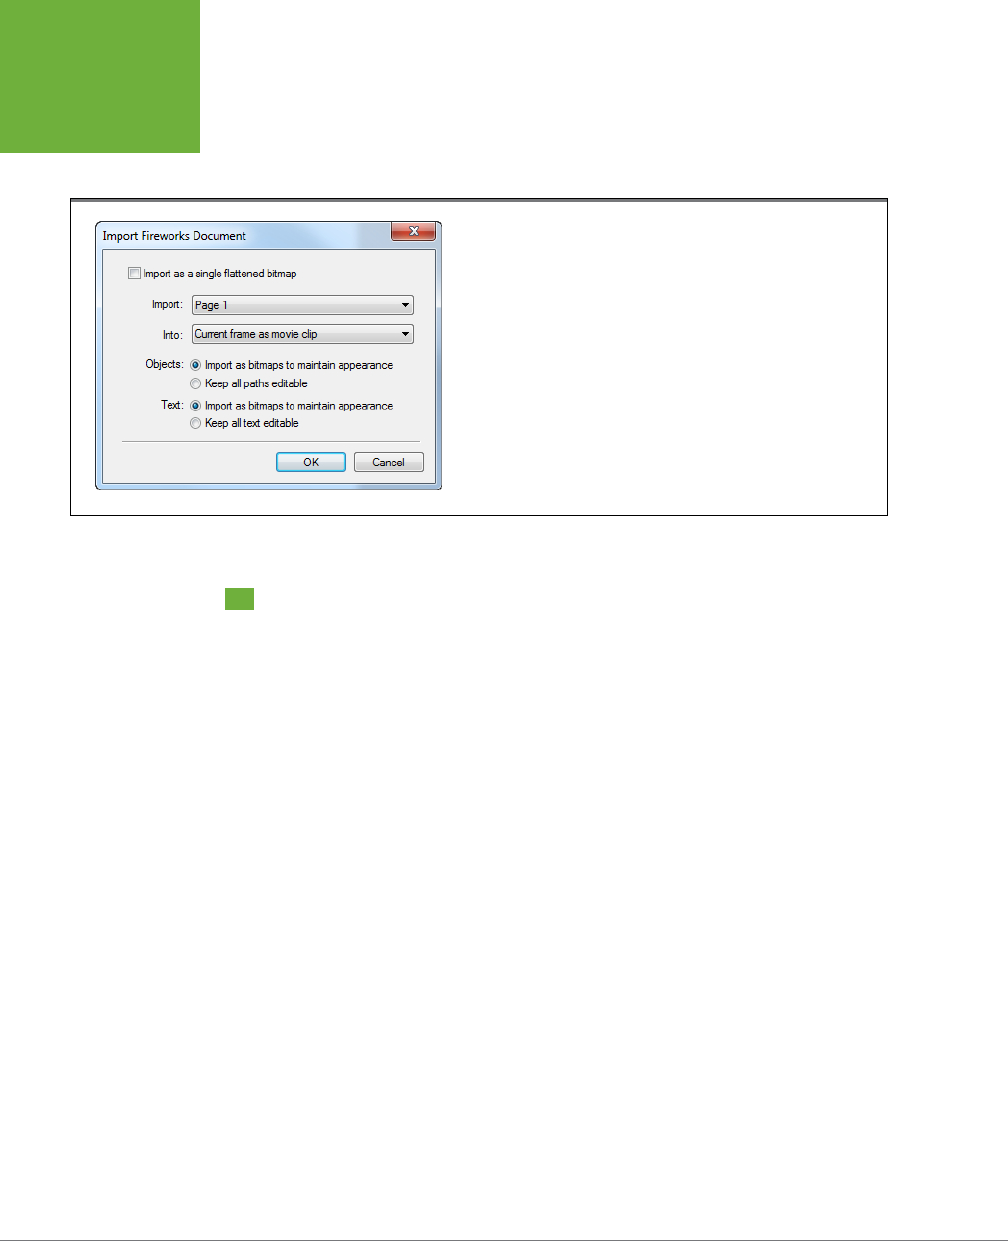
FLASH CS6: THE MISSING MANUAL
364
EDITING
BITMAPS
the elements is appear in Flash timeline layers. At this point, work with the
graphics just as if you created them in Flash. That means you can move them
to dierent layers or you can turn them into symbols for animation.
FIGURE 10-7
If you want to import a Fireworks graphic but as individual elements on
separate layers, use the Edit→Copy as Vectors command in Fireworks.
Then when you Edit→Paste the image into Flash, you see this dialog box
giving you different options for the way the graphic is added to your Flash
animation.
Editing Bitmaps
Depending on the graphics file format you import into Flash, you may be able to
edit the image using Flash’s tools, or you may not. If Flash recognizes the image as
a
vector
image, with distinct strokes and fills, you’re good to go. Just open the Tools
panel, choose a selection, drawing, or painting tool, and then get to work.
But if the image comes through as a bitmap, then you need to do a bit of finagling,
because Flash treats bitmaps as big blobs of undierentiated pixels. (See the box
on page 365 for more details.)
With bitmaps, Flash’s selection tools don’t work as you might expect. Say, for in-
stance, you import a scanned-in photo of the Seattle skyline. Flash treats the entire
photo as a single entity. When you click the Space Needle, Flash selects the entire
scanned-in image. When you try to use the Lasso tool to select the half of the im-
age that contains Mount Rainier, Flash selects the entire image. When you try to
repaint the sky a lighter shade of gray, Flash paints around or behind the imported
bitmap, but not the sky.
Fortunately, Flash gives you a few options when it comes to working with bitmaps:
You can break them apart, you can turn them into vector graphics, or you can turn
them into symbols. The following sections describe each option.
Turning Bitmaps into Fills
Breaking apart
a bitmap image transforms the image from a homogenous group
of pixels into an editable fill. You still can’t click the Space Needle and have Flash
recognize it as a distinct shape (you can do that only with vector art), but you
can
www.it-ebooks.info

CHAPTER 10: INCORPORATING NON-FLASH MEDIA FILES 365
EDITING
BITMAPS
use the Selection, Subselection, and Lasso tools to select the Space Needle, and
then either cut it, copy it, move it, repaint it, or otherwise edit it separately from the
rest of the scanned-in image.
To break apart a bitmap:
1. On the stage, select the bitmap image you want to break apart.
Flash displays a selection box around the image.
2. Choose Modify→Break Apart.
Flash covers the image with tiny white dots to let you know it’s now a fill.
At this point, you can use the Selection, Subselection, and Lasso tools to select por-
tions of the image (something you
couldn’t
do before you broke the bitmap apart).
Vector vs. Bitmap Images
Flash lets you import and work with two different types of
graphics files: vector and bitmap. You can’t tell what type an
image is by looking at it—the difference is in the structure of the
information that makes up the image. Here are the main points:
Computer programs, including Flash, store vector graphics
(such as the original artwork you create on the stage) as a
bunch of formulas. Vector graphics have the advantage of be-
ing pretty modest in size compared with bitmaps, and they’re
scalable. In other words, if you draw a tiny blackbird and then
decide to scale it by 500 percent, your scaled drawing will still
look like a nice, crisp blackbird, only bigger.
In contrast, computer programs store
bitmap
, or
raster
, graph-
ics (such as a digital or scanned-in photo) as a bunch of pixels.
Bitmap doesn’t refer just to files with the Windows bitmap
(.bmp) extension; it refers to all images stored in bitmap for-
mat, including gif, .jpg, .png, and .tif. (You can find a complete
list of the file formats Flash lets you import on page 353.)
The good thing about bitmap graphics is that they let you
create super-realistic detail, complete with complex colors,
gradients, and subtle shadings. On the downside, bitmaps typi-
cally take up a whopping amount of disk space, and they’re
not
particularly scalable: If you scale a photo of a blackbird by 500
percent, it appears blurry because all Flash can do is enlarge
each individual pixel: It doesn’t have access to the formulas it
would need to draw the additional pixels necessary to keep
the detail crisp and sharp at five times the original image size.
Why do you care whether a graphics file is a vector or a bitmap?
Because you work with imported bitmap files differently in
Flash than you do with imported or original vector files. As you
see on page 364, you need to break bitmap images apart before
you can crop them in Flash. Depending on your export settings,
you may need to optimize the bitmaps to reduce the size of
your finished animation. (Chapter 20 provides the details.)
UP TO SPEED
Turning Bitmaps into Vectors
Tracing
a bitmap transforms it into a vector graphic. You can check out the box
above for a rundown of the dierences between the two, but basically, turning a
bitmap into a vector gives you three benefits:
• It can produce a cool, stylized, watercolor eect.
• It may reduce the file size associated with the image (but only in cases where
the image doesn’t have a lot of dierent colors or gradients).
www.it-ebooks.info

FLASH CS6: THE MISSING MANUAL
366
EDITING
BITMAPS WITH
PHOTOSHOP
• It turns a nonscalable image into a scalable image—one you can “zoom in” on
without it turning all fuzzy on you.
NOTE The fewer colors your bitmap has, the more faithful your bitmap-turned-vector is likely to be to the
original. Tracing a bitmap of a hand-drawn sketch done in black charcoal, for example, is going to result in a
vector graphic that resembles the original bitmap much more closely than a bitmap trace of a scanned-in photo.
(Even photos that look to the naked eye as though they have only a handful of colors usually contain many, many
more at the pixel level.)
To trace a bitmap, select the bitmap you want to turn into a vector graphic, and then
select Modify→Bitmap→Trace Bitmap. Figure 10-8 shows you an example.
TURNING BITMAPS INTO SYMBOLS
Suppose you want to add an old-timey sepia color to a photo or you want your
bitmap to gradually fade and then disappear. You can’t change the color, bright-
ness, or transparency (
alpha
) of an imported bitmap, but you
can
change them for
a symbol. So if all you want to do is tint or fade a bitmap, you can use a quick and
easy fix, and transform it into a symbol.
To turn a bitmap into a symbol:
1. Select the bitmap, and then choose Modify→“Convert to Symbol.”
The “Convert to Symbol” dialog box appears.
2. In the “Convert to Symbol” dialog box, choose Movie Clip from the drop-
down menu, and then click OK.
In the Properties panel, click the drop-down list next to Color Eect to set the
symbol’s brightness, tint, and alpha (transparency) settings. If you convert bit-
maps to movie clip symbols, then you can apply filter eects in the Properties
panel (page 276). If you don’t intend to apply a filter and you want to create the
smallest possible file size, choose Graphic from the drop-down menu.
NOTE For the skinny on symbols, check out Chapter 7; for more on color, brightness, and transparency, see
Chapter 5.
Editing Bitmaps with Photoshop
Photoshop is a much more powerful tool than Flash when it comes to editing
bitmap images. If you have experience with Photoshop, Fireworks, or some other
image editor, you probably prefer using it for some chores. These days, that’s not
hard to do provided you have the programs installed on your computer. Right-click
( Control-click) the bitmap image in Flash’s Library and choose Edit with Photoshop.
If you prefer another image editor, such as Fireworks, click the Edit With option
and find the program you want to use. In either case, your bitmap editor of choice
www.it-ebooks.info
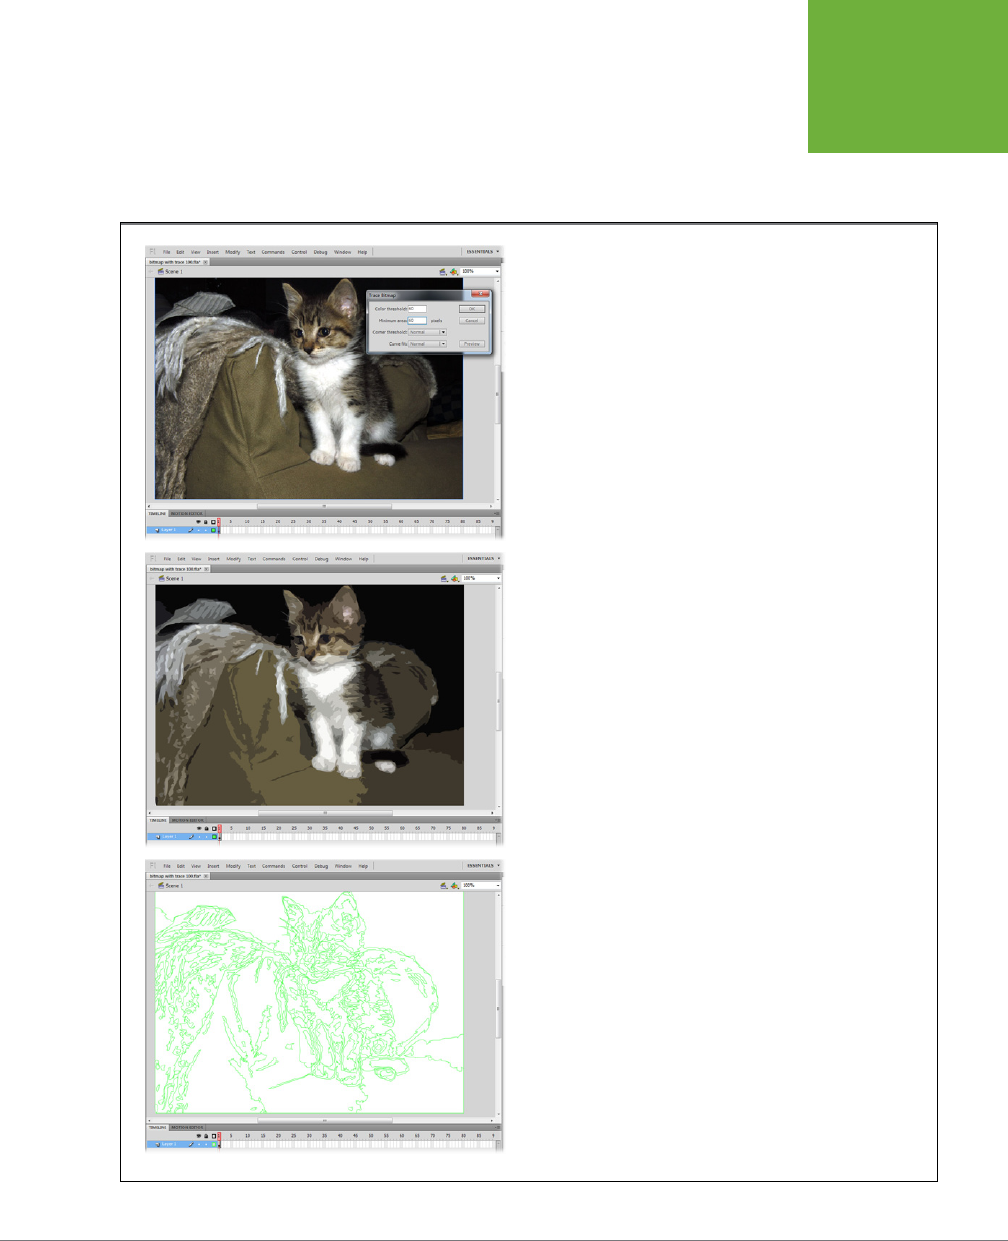
CHAPTER 10: INCORPORATING NON-FLASH MEDIA FILES 367
EDITING
BITMAPS WITH
PHOTOSHOP
opens with the image ready for editing. When you’re done, save and close the file
and return to Flash, where you see the changes already in place. No File Import
commands needed. With each version of the Creative Suite, Adobe adds features
to make this kind of round trip editing easier.
FIGURE 10-8
Top: Here’s the way a scanned-in image looks as a bitmap.
Middle: Here’s how it looks after Flash has traced it (turned it into
vector art). Depending on your settings, the results may be artistic
than, rather than realistic. Here the color threshold and the minimum
area are both set to 60.
Bottom: With the layer set to show outlines, you see the edges for
each swath of color.
www.it-ebooks.info
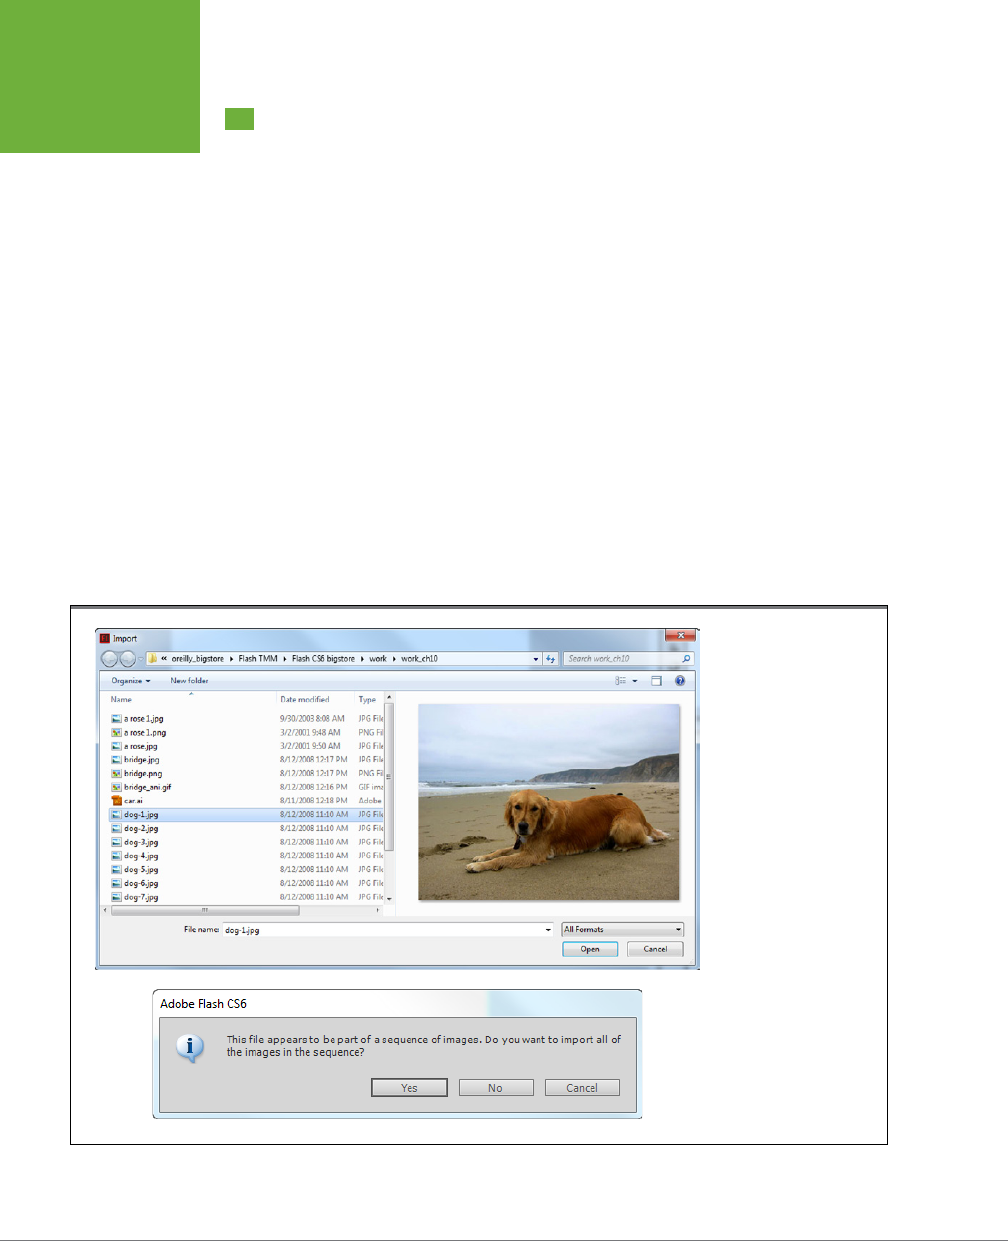
FLASH CS6: THE MISSING MANUAL
368
IMPORTING
A SERIES OF
GRAPHICS
FILES
Importing a Series of Graphics Files
At times, you may have a series of graphics files you want to import into Flash. Say,
for example, you have a series of images you took with a digital camera showing
a dog leaping through the air to catch a tennis ball. If you import all these images
into Flash, one per frame, you’ve got yourself an animation. (How herky-jerky or
smooth the animation appears depends on how many images you have; the more
images, the smoother the animation.)
If you give your graphics files sequential names like
dog_01.gif, dog_02.gif, dog_03.
gif
, and so on, Flash is smart enough to recognize what you’re trying to do and asks
if you want to import the entire series.
To import a series of graphics:
1. Make sure the names of the files you want to import end with sequential
numbers.
For example,
file1.bmp, file2.bmp
, and
file3.bmp
.
2. Choose File→Import→“Import to Stage.”
The Import dialog box you see in Figure 10-9 (top) appears.
FIGURE 10-9
When you tell Flash to
open the first in a series
of sequentially numbered
files (top), the program
asks if you’d like to
import the entire series
(bottom). This trick works
only if the numbers
appear at the end of the
filename just before the
extension and if you don’t
skip any numbers in the
series. And since Flash
begins importing with the
numbered file you chose,
it doesn’t go back and
pick up files containing
lower numbers.
www.it-ebooks.info

CHAPTER 10: INCORPORATING NON-FLASH MEDIA FILES 369
IMPORTING
A SERIES OF
GRAPHICS
FILES
3. In the Import dialog box, click to select the first file in the series, and then
click Import.
The confirmation dialog box you see in Figure 10-9 (bottom) appears.
4. Click Yes.
The confirmation dialog box disappears, and Flash imports the series of files.
In the timeline, you see one image (and one keyframe) per frame.
If you check the Library panel (Window→Library), you see that Flash has placed
each of the image files in the Library.
Using Bridge as a File Manager
A Flash chapter that discusses different graphics file formats
isn’t complete without a mention of Bridge, Adobe’s program
for managing media files of all types (Figure 10-10). If you
got Flash as part of an Adobe Creative Suite collection, you
probably have Bridge installed on your computer. If you think
you’re perfectly happy managing files with Mac’s Finder or
Windows’s Explorer, you don’t know what you’re missing.
Bridge is much more powerful and customizable than either of
those handy and necessary utility programs. Because Bridge is
devoted to media files and because Adobe has the proprietary
key to some of the most important file formats (Photoshop and
Illustrator), Bridge is a more powerful graphics program than
your typical OS utility.
Like Finder and Explorer, you can select a file from a thumbnail
in Bridge, and then launch a program to open it. But Bridge is
much more versatile and flexible when it comes to organizing
media files and showing you the files you want at a given mo-
ment. Bridge tracks all sorts of information about the photos,
graphics, videos, and sound files on your computer, and you get
to decide exactly how those details are displayed. For example,
if you manage a large collection of photographs, Bridge excels
at managing photos’ descriptive
metadata
. (Cameras automati-
cally store details about a photograph in the photo file. That
includes details like the date a picture was snapped or edited,
the exposure used, and the type of lens. As a photographer
or photo archivist, you can also add other metadata tags to
photos to make them easier to find in searches.) Bridge gives
you the tools to read the metadata in photos, and to find, sort,
and view photos based on those details.
There’s not enough room here to fully describe Bridge, but
here’s a short list of some of the things it can do:
• Organize media assets including photos, graphics, video,
and audio files.
• Show media files from different computer folders in a
single catalog.
• Preview Flash SWF files, while using the file catalog.
• Compare and preview most media files.
• Show/hide/find files based on criteria that you provide.
• Automatically import, name, and store photos from digital
cameras and card readers.
• Run automated tasks from programs like Photoshop.
• Manage the tags (metadata) embedded in photos and
other graphics files.
DESIGN TIME
www.it-ebooks.info
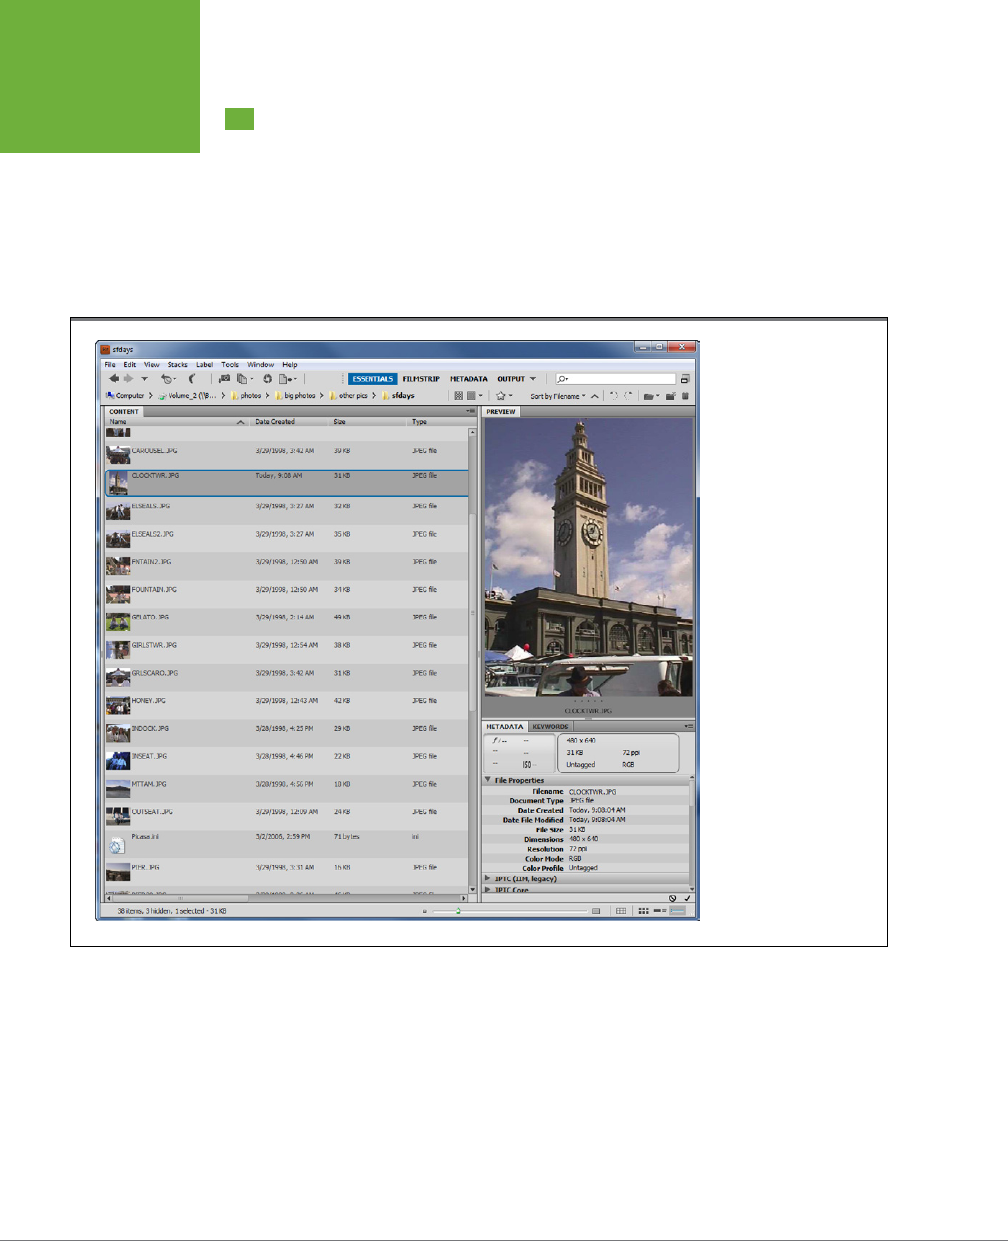
FLASH CS6: THE MISSING MANUAL
370
EXPORTING
GRAPHICS
FROM FLASH
Exporting Graphics from Flash
Sometimes you have artwork in Flash that you’d like to use in another program.
Perhaps it’s a single image that you want to place on a web page, or maybe it’s an
entire animation that you want to save in a format other than Flash’s SWF format.
In either case, it’s easy to save that artwork in a format that other programs can
use. As you might expect, Flash plays especially well with other Adobe programs
like Illustrator, Photoshop, and Fireworks.
FIGURE 10-10
Bridge is Adobe’s
program for managing,
organizing, cataloging,
and previewing media
files of all flavors. You can
customize the program to
show the details you need
for your media files.
www.it-ebooks.info
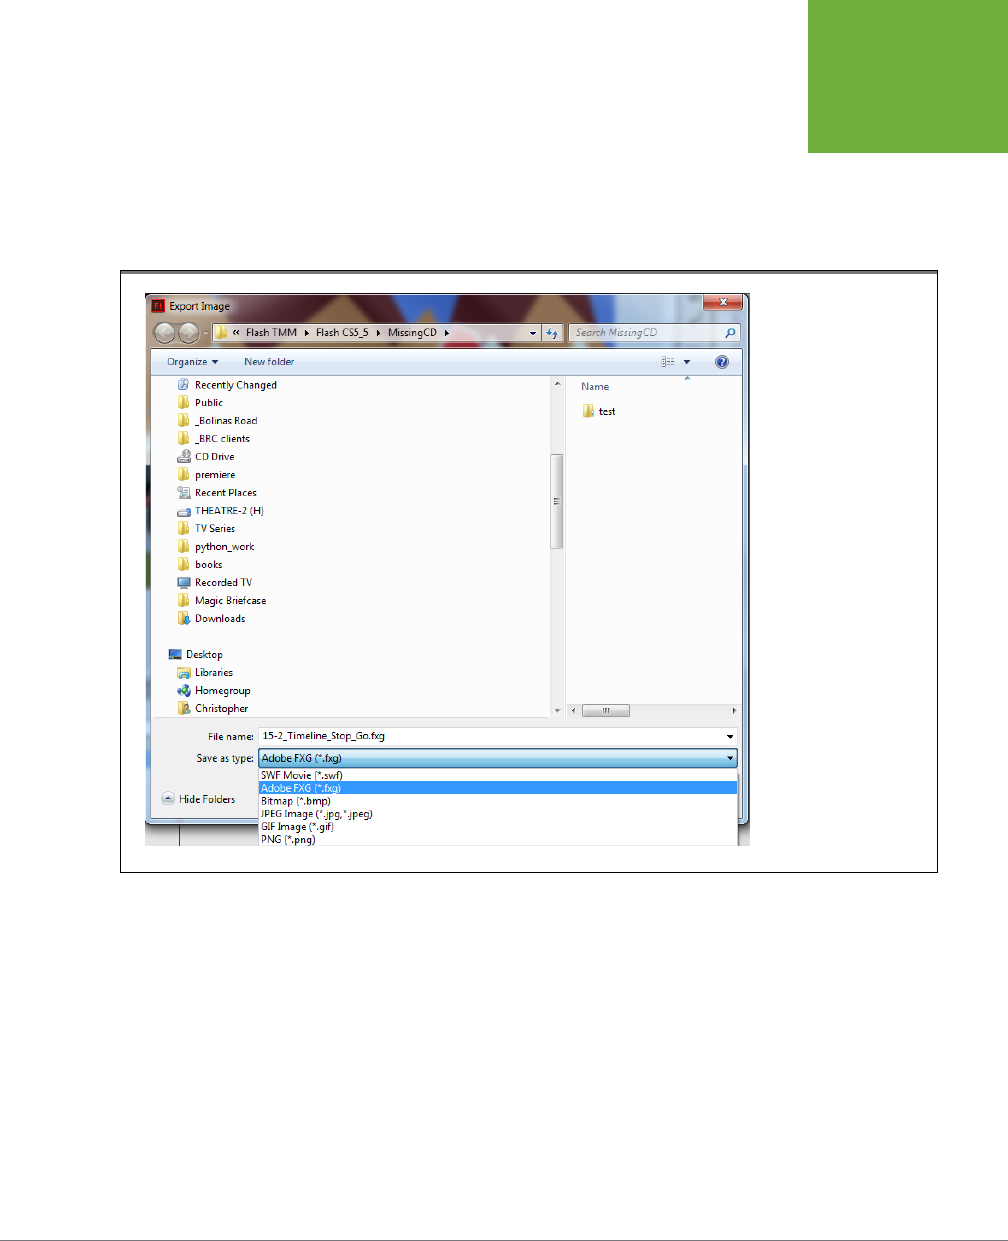
CHAPTER 10: INCORPORATING NON-FLASH MEDIA FILES 371
EXPORTING
GRAPHICS
FROM FLASH
To Export graphics from Flash, go to File→Export, and then choose either Export
Image or Export Movie. Flash opens a box similar to Figure 10-11, where you can
name your file and choose its format. After you click Save, Flash displays another
box, where you can choose options specific to the movie or image file format you
selected. The complete details for exporting single images and animations from
Flash are covered in Chapter 20.
FIGURE 10-11
You can export single
images and animated
sequences from Flash
and save them in file
formats compatible with
other programs. For
the complete details on
exporting, see page 669.
www.it-ebooks.info

373
CHAPTER
11
You can create almost any kind of picture or eect in Flash, but sometimes you
already have the perfect piece of sound or video…and it’s in another file. No
problem: Flash lets you pull in all kinds of other media files—like songs in MP3
files or QuickTime videos. Whether you’re showcasing your band’s performances,
creating an employee training website, or creating an online wedding album, Flash
has all the multimedia tools for the job.
When Flash was born, it was a big deal to have moving pictures on the Internet. Most
folks had pretty slow Internet connections, so it was a kick to see pictures move,
even if they were simple, cartoonish images. The same was true of even the most
basic sound eects. Today, we expect to use the Net to watch our favorite movies,
sports, and TV shows. Sounds have gone from beeps and bells to radio broadcasts,
audiobooks, and entire albums of music. Things have changed, and Flash is often
at the center of the revolution. Apple’s resistance to Flash on its handheld devices
has been an epic battle between two tech heavyweights. One reason it’s been so
controversial is the fact that so many websites use Flash to broadcast video.
As the number of people with fast Internet connections grew, web developers began
to use Flash video (FLV) to broadcast. Most of the web browsers in the world have
Flash capabilities—Adobe’s estimates are way above 90 percent. For you, the good
news is that when you wrap your audio and video oerings in Flash, you don’t have
to force your audience to download and install yet another plug-in. This chapter
explains how to add sound to your animations and how to edit that sound for the
best fit. You’ll also learn how to present video in a predesigned component that
gives the audience playback controls.
Incorporating
Sound and Video
www.it-ebooks.info

FLASH CS6: THE MISSING MANUAL
374
INCORPORATING
SOUND
Incorporating Sound
Flash lets you score your animations much the same way a filmmaker scores a movie.
You can add a soundtrack that begins when your animation begins and ends when
it ends. Or you can tie dierent sound clips to dierent
scenes
(series of frames)
of your animation. For example, say you’re creating an instructional animation to
demonstrate your company’s egg slicer. You can play music during the opening
seconds of your animation, switch to a voice-over to describe your product, and
then end with realistic sounds of boiling, peeling, and slicing to match the visual of
cooks using your product in a real-life setting.
You can also tie sounds to specific
events
in Flash. For example, say you want your
instructional animation to contain a button someone can press to get ordering infor-
mation. You can tie the sound of a button clicking to the Down state of your button,
so when someone clicks your button, she actually
hears
a realistic clicking sound.
NOTE Looking for the perfect sound effect? Start your search in the Sounds library. It’s crammed full of noises
made by animals, machines, and nature. To add a Library sound to your animation, choose Window→Common
Libraries→Sounds, and drag a sound to the stage.
Importing Sound Files
Before you can work with sound in Flash, you need to import a sound file either to
the stage, the Library, or both. Flash lets you import a variety of sound files, as you
can see in Table 11-1.
TABLE 11-1
Audio file formats you can import into Flash
FILE TYPE EXTENSION NOTE
WAV sound .wav Works on Windows only,
unless
you have
QuickTime 4 (or later) installed; then you can
import .wav files into Flash on the Mac, too.
MP3 sound .mp3 Works on both Mac and Windows.
Adobe Sound Document .asnd Sound files used by Adobe’s Soundbooth editing
and mixing program.
Audio Interchange File
format
aiff, .aif Works on Mac only,
unless
you have Quick-
Time4 (or later) installed; then you can import
AIFF files into Flash running in Windows, too.
Sound Designer II .sd2 Only works on Mac, and only if you have
QuickTime 4 (or later) installed.
Sound-only QuickTime
movies
.mov, .qtif Works on both Windows and Mac, but only if
you have QuickTime 4 (or later) installed.
Sun AU .au Works on both Windows and Mac, but only if
you have QuickTime 4 (or later) installed.
www.it-ebooks.info
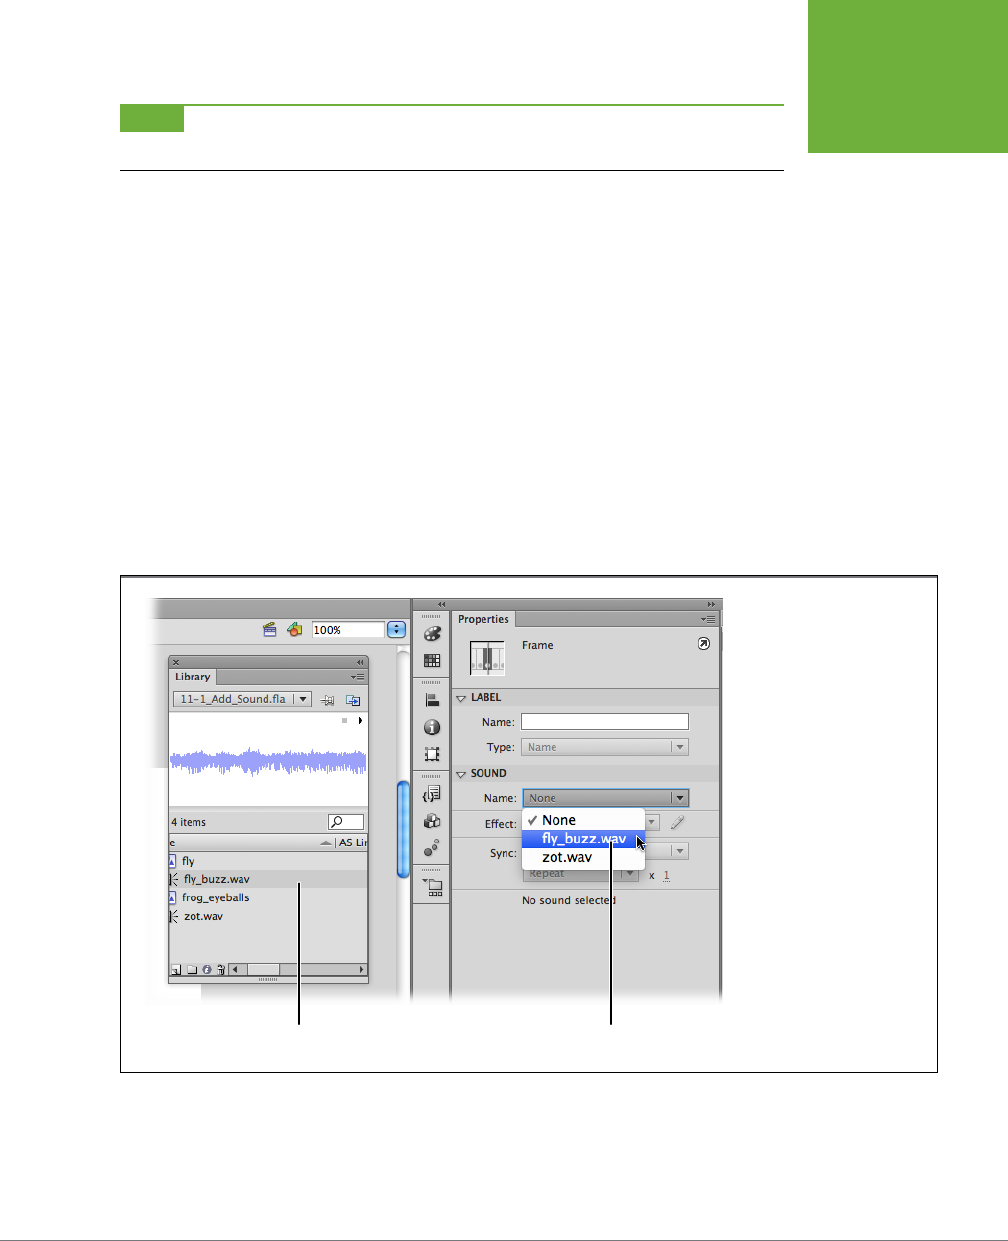
CHAPTER 11: INCORPORATING SOUND AND VIDEO 375
INCORPORATING
SOUND
NOTE As you’re importing sound files, you may notice some differences between Windows and Mac versions
of Flash. For example, the order and the menu names vary slightly between the operating systems.
To import a sound file:
1. Select File→Import→“Import to Library.”
The “Import to Library” dialog box appears.
2. In the “File name” field, type the name of the sound file you want to import
(or, in the file window, click the file to have Flash fill in the name for you).
To see the dierent types of sound files you can import, you can either click
the drop-down menu at the bottom of the “Import to Library” dialog box, or
check out Table 11-1.
3. Click Open (“Import to Library” on a Mac).
The “Import to Library” dialog box disappears, and Flash places a copy of the
imported sound file into the Library (Figure 11-1). When you click to select any of
the frames in your timeline, the Sound subpanel appears in the Properties panel.
FIGURE 11-1
The visual representation Flash
displays when you select an
imported sound clip is called
a waveform. (As discussed
on page 382, you use this
waveform when you’re editing
a sound clip in Flash.) When
you click the Play button
that Flash displays along
with the waveform, you can
preview the sound. Flash puts
a copy of your imported file
in the Library and makes the
imported file available in the
Properties panel.
Sound in Library Select sound
www.it-ebooks.info

FLASH CS6: THE MISSING MANUAL
376
INCORPORATING
SOUND
Adding an Imported Sound to a Frame (or Series of Frames)
You can tell Flash to play an animated sound beginning with any frame of your
animation. Depending on the settings you choose, Flash keeps playing the sound
file either until it finishes (regardless of whether your animation is still playing) or
until you tell it to stop.
This example shows you how to use the
stream
option to synchronize a short sound
clip of a fly buzzing with an animated sequence showing—what else?—a buzzing
fly. Then you’ll learn how to start and stop a second sound (the sound of the fly
becoming a frog’s lunch).
To add an imported sound to a series of frames:
1. Open the file
11-1_Add_Sound.fla
.
This file includes a simple animated sequence with a frog and a fly. The library
already includes a couple of previously imported sounds. You can find this file
on the Missing CD page at
www.missingmanuals.com/cds/flashcs6mm
. (To see
a working version, check out
11-2_Add_Sound_done.fla
.)
2. In the Layers window, click to select the topmost layer (fly).
Flash highlights the layer name, as well as all the frames in that layer.
3. Select Insert→
Timeline→Layer.
Flash creates a new layer and places it above the selected layer.
4. Double-click the new layer name, and then type in
sounds
, as shown in
Figure 11-2.
TIP You add a sound to a button the same way you see shown here, but with two exceptions: You typically
add a sound file for a button to the button’s third, or Down, frame (so that the sound plays when your audience
clicks
down
on the button) and you leave the synchronization option set to Event. To see an example, check out
the file
11-3_Button_Sound.fla
on the Missing CD page.
5. Click the first keyframe in the newly created sounds layer.
In the Properties panel, Flash activates the Frame properties. With a sound file
in the Library, the Sound subpanel appears in the Properties panel.
6. In the Sound subpanel, click the Name drop-down menu, and then choose
the imported sound file
fly_buzz.wav
.
Alternatively, you can drag the sound file symbol from the Library to the
stage. Either way, the sound properties for the file appear at the bottom of the
Properties panel, and the waveform for the buzzing fly sound appears in the
soundtrack layer (Figure 11-3).
www.it-ebooks.info
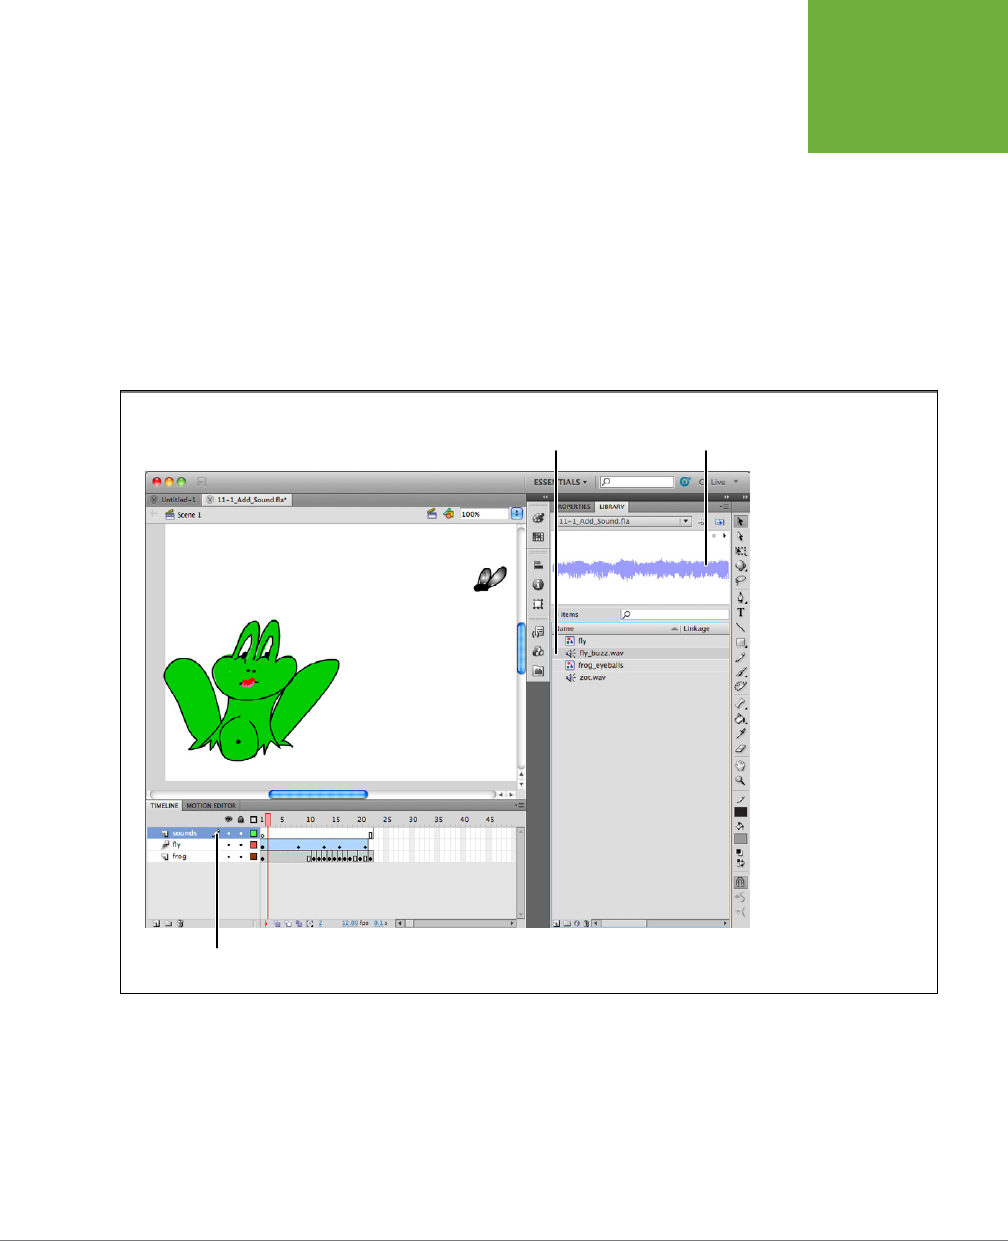
CHAPTER 11: INCORPORATING SOUND AND VIDEO 377
INCORPORATING
SOUND
7. In the Properties panel, click the Sync field, and then, from the first drop-
down list that appears, choose Stream.
Your synchronization choices include these:
• Event. Tells Flash to give the sound its very own timeline. In other words,
Flash keeps playing the sound until the sound finishes, regardless of whether
or not the animation has ended. If you repeat (or loop) the animation in the
Controller, Flash begins playing a new sound clip every time the animation
begins again—with the result that, after a dozen or so loops, you hear a
dozen flies buzzing! Flash assumes you want your sound to behave this
way unless you tell it otherwise.
FIGURE 11-2
Technically speaking, you
can add a sound clip to
any layer you like. But if
you’re smart, you’ll create
a separate layer for your
sounds (some folks even
create a folder with a
separate layer for each
sound). Creating separate
layers helps keep your
keyframes from becoming
so cluttered that you
can’t see everything
you’ve added to them.
It also helps you find
your sounds quickly in
case you want to make a
change down the road.
Sound wave
pattern
Sound in
library
New layer for sounds
• Start. Similar to Event, but tells Flash
not
to begin playing a new sound if
the animation repeats.
• Stop. Tells Flash to stop playing the sound.
www.it-ebooks.info
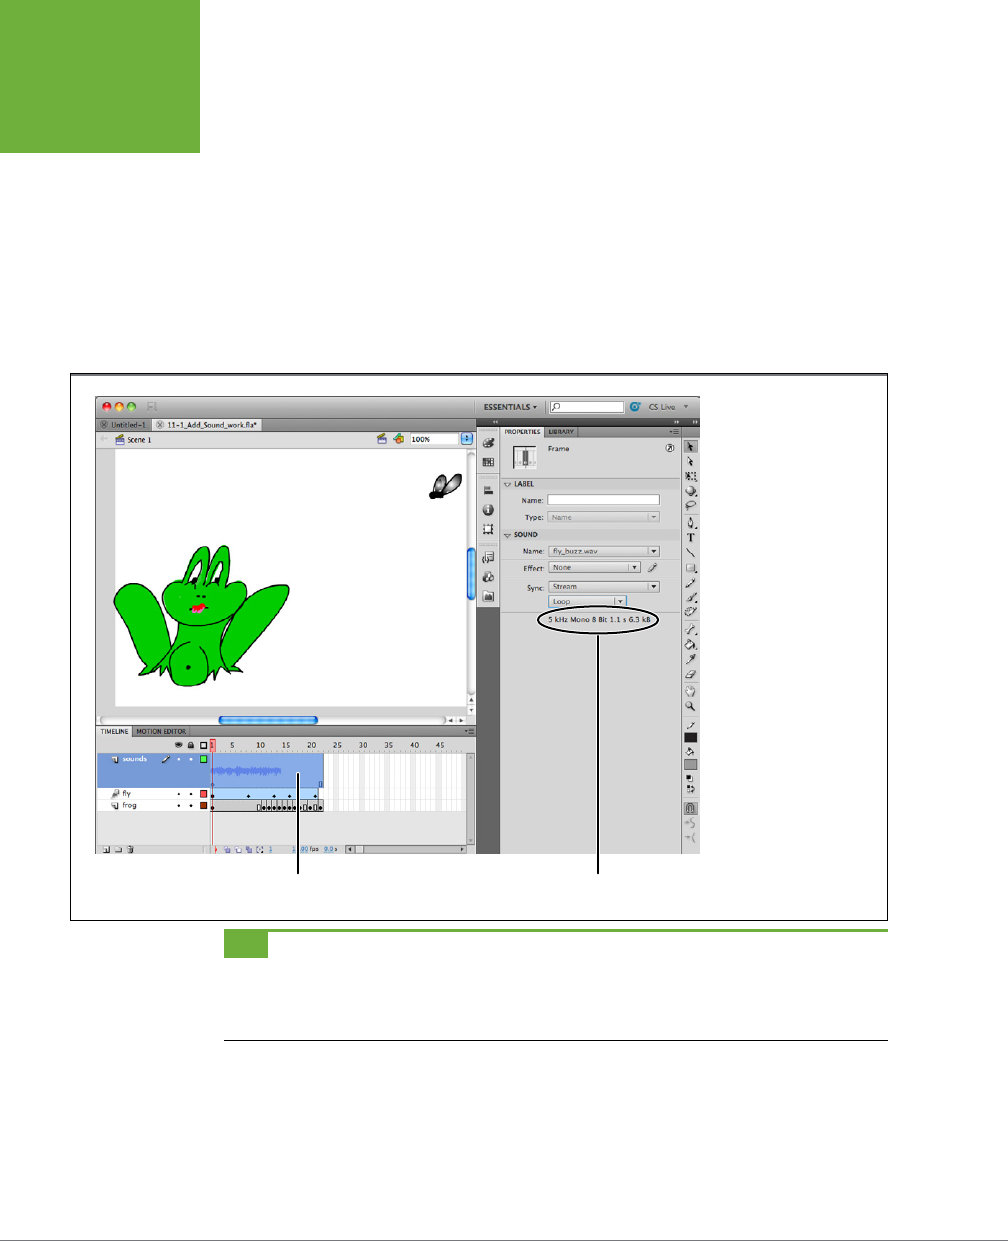
FLASH CS6: THE MISSING MANUAL
378
INCORPORATING
SOUND
• Stream. Tells Flash to match the animation to the sound clip as best it can,
either by speeding up or slowing down the frames-per-second that it plays
the animation. This option is the one you want for
lip-synching
, when you’re
trying to match a voice-over to an animated sequence featuring a talking
head. Because choosing this option also tells Flash to
stream
the sound
file (play it before it’s fully downloaded in those cases where you’ve put
your animation on a website), someone with a slow connection can get a
herky-jerky animation.
FIGURE 11-3
It’s rare that the length
of a sound clip precisely
matches the length of
the animated clip to
which you want to assign
it. Here the sound clip
stretches only to Frame
14—but the layer showing
the buzzing fly stretches
further. You could cut and
paste the sound to fill
those last frames so that
the fly doesn’t become
uncharacteristically silent
all of a sudden, but Flash
gives you much easier
ways to match a sound
clip to a frame span:
streaming, repeating, and
looping.
Expanded layer Sound file details
TIP With your sound set to stream, you can preview your newly added sound on the stage, drag (
scrub
)
the playhead along the timeline. You can scrub forward or backward. To hear just the sound in a specific frame,
Shift-click the playhead over that frame. Flash keeps playing the sound until you let up on either the Shift key or
the mouse.
www.it-ebooks.info

CHAPTER 11: INCORPORATING SOUND AND VIDEO 379
INCORPORATING
SOUND
Using Sound Eectively
If you’ve ever watched a movie that had a breathtakingly
beautiful (or laughably cheesy) musical score, you’ve expe-
rienced the power of sound firsthand. Effective sound can
elevate a decent visual experience into the realm of art.
Ineffective sound can turn that same visual experience into a
nerve-shredding mess.
If you’re thinking about adding sound to your animation,
consider these points:
• Why do you want to add sound? If your answer is to add
emotional punch; to cue your audience aurally to the
interactive features you’ve added to your animation, like
buttons that
click
or draggable objects that
whoosh
; or to
deliver information you can’t deliver any other way (like a
voice-over explaining an animated sequence or realistic
sounds to accompany the sequence); then by all means
go for it. But if your answer is “Because I can,” then you
need to rethink your decision. Sound—as much as any
graphic element—needs to add to the overall message
you’re trying to deliver or it’ll end up detracting from
that message.
• Are you sure your audience will be able to hear your
sound? Sound files are big. They take time to download.
If you’re planning to put your animation on a website,
Flash gives you a couple of different options for managing
download time—but keep in mind that not everyone in
your audience may have a fast connection or the volume
knob on her speaker turned up. (For that matter, some
folks can’t hear. Check out the box on page 34 for tips on
providing hearing-impaired folks with an alternate way
of getting your information.)
• How important is it that your soundtrack matches your
animation precisely? Flash gives you options to help you
synchronize your sound clips with your frames. But you
can’t match a 2-second sound clip to a 10-second animated
sequence without either slowing down the sound or
speeding up the animation. If you want to match a specific
sound clip to a specific series of frames, you may need
to edit one (or both) to get the balance right before you
begin synchronizing them in Flash.
DESIGN TIME
8. From the second drop-down menu next to the Sync field, choose Loop.
Loop tells Flash to repeat the sound clip until the timeline ends. Repeat lets you
tell Flash how many times you want it to play the sound clip (regardless of the
length of the frame span).
9. Test the soundtracked animation by choosing Control→
Test Movie.
You hear a buzzing sound as the fly loops its way across the test movie.
www.it-ebooks.info
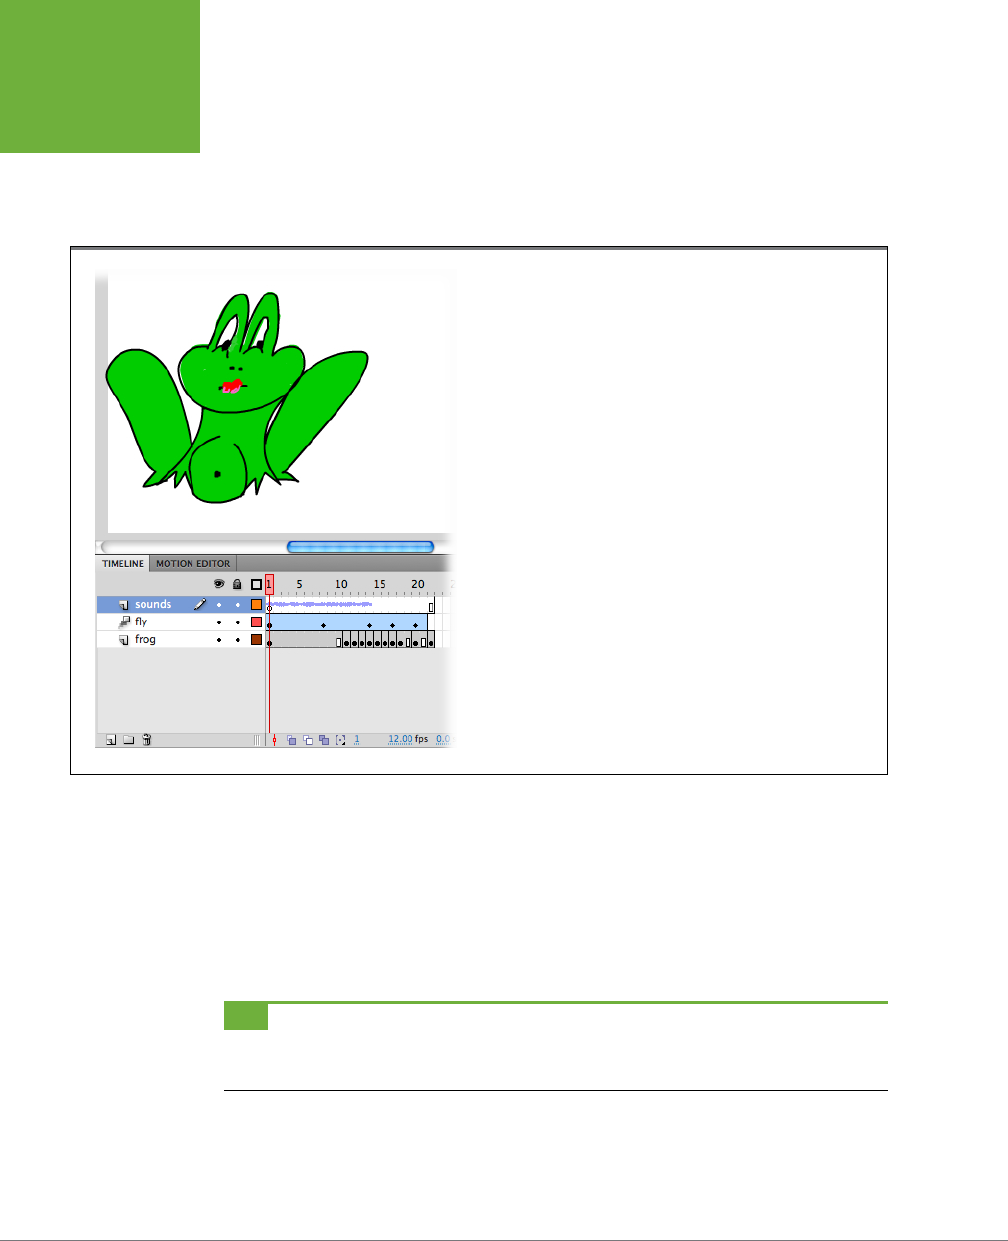
FLASH CS6: THE MISSING MANUAL
380
INCORPORATING
SOUND
Add a second, short sound clip to your animation to make the scene more realistic.
To do so:
1. In the “sound” layer, click Frame 20.
On the stage, you see the frog’s tongue appear (Figure 11-4).
FIGURE 11-4
Beginning sound clips in individual keyframes let you change the
soundtrack at the exact moment your visuals change. Here you see
the frog’s tongue appear in Frame 20 of the frog layer, and it doesn’t
change until Frame 22 (which contains the final keyframe of the anima-
tion). So to match the “zot!” sound to the tongue action, you want to
tell Flash to start playing the zot.wav file on Frame 20 and stop playing
it on Frame 22.
2. Select Insert→
Timeline→Blank Keyframe, or press F6.
Flash places a blank keyframe (a hollow circle) in Frame 20.
3. With Frame 20 selected, in the Sound subpanel, click the arrow next to
Name, and then, from the drop-down list that appears, choose
zot.wav
.
Flash places the waveform for the sound file into the timeline, beginning with
Frame 20.
TIP If you need a better view of the sound’s waveform in your timeline, right-click the layer with the sound,
and then choose Properties. The Properties panel opens. At the bottom, set the layer height to either 200% or
300%, as shown in Figure 11-3.
www.it-ebooks.info
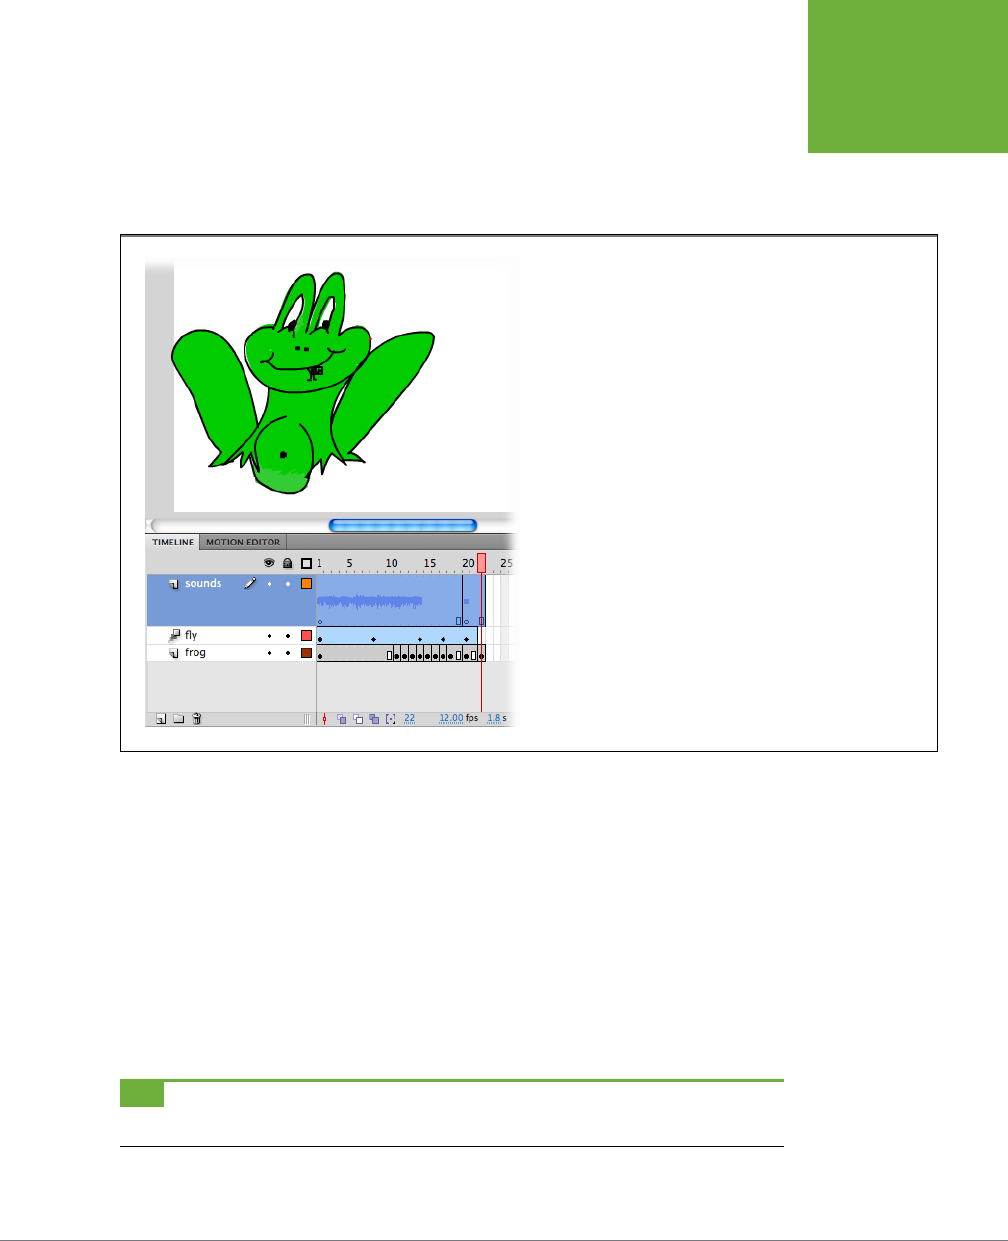
CHAPTER 11: INCORPORATING SOUND AND VIDEO 381
INCORPORATING
SOUND
4. In the Properties panel, click the arrow next to Sync, and then, from the
drop-down list that appears, choose Start. Then, in the soundtrack layer,
click to select Frame 22.
On the stage, you see a very satisfied frog (Figure 11-5).
FIGURE 11-5
Because the synchronization option for the “zot!” sound was set
to start in Frame 20, Flash automatically stops playing the zot.wav
sound file when the animation ends. Still, it’s good practice to tell
Flash specifically when you want it to stop playing a sound file. You’ll
be glad you did when you come back to the animation a week or
two later, because you won’t have any cleanup to do before you add
additional sounds to the timeline.
5. Select Insert→
Timeline→Blank Keyframe or press F6.
Flash places a blank keyframe (a hollow circle) in Frame 22.
6. In the Sound subpanel, click the Name drop-down menu, and then choose
zot.wav
. Click the arrow next to Sync, and then, from the drop-down list that
appears, choose Stop.
You’re done!
7. Test the new sound by choosing Control→
Test Movie.
You hear a buzzing sound as the fly loops its way across the test movie. But as
the frog’s tongue appears, the buzzing stops and you hear a satisfying “zot!”
TIP If you don’t hear any sounds, select Control and see whether the checkbox next to Mute Sounds is turned
on. If it is, click it to turn it off.
www.it-ebooks.info

FLASH CS6: THE MISSING MANUAL
382
INCORPORATING
SOUND
Editing Sound Clips in Flash
You can change the way your imported sound clips play in Flash. You can’t do
anything super-fancy, like mix down multiple audio channels or add reverb—Flash
isn’t a sound-editing program, after all—but you
can
crop the clips, add simple
fade-in/fade-out eects, and even choose which speaker (right or left) your sounds
play out of.
Stock Images, Sounds, and Video Clips
If you’re using Flash to create stuff for work—presentations,
tutorials, web advertisements, marketing materials, or what
have you—then you or someone else on your team is probably
going to be creating all your content from scratch. But there’s
a place in every Flash fan’s toolkit for
stock media
: generic
images, sound clips, and video clips that you purchase (or,
more rarely, get for free) from companies whose job it is to
produce such items.
Typically, you pay a modest fee to use stock images, sounds,
and video clips. Sometimes, you also pay a royalty fee based on
the number of times you use a stock element in your animation.
If you’re using Flash to jazz up your personal website, you
may find that stock media is just what the doctor ordered: You
get something cool that you can use for a relatively low price
without having to invest time and money buying audio and
video equipment or taking drawing lessons.
But even professional animators have been known to rely on
stock media occasionally because it lets them test out a concept
quickly and cheaply.
Places to find stock images, sound clips, and video clips abound
on the Web. Here are a few you might want to check out:
www.freestockfootage.com
www.wildform.com/videolibrary
www.flashkit.com/soundfx
www.gettyimages.com
DESIGN TIME
First, import the sound clip you want to edit, as described on page 374. To edit it,
follow these steps:
1. In the timeline, click any frame that contains a portion of the sound clip’s
waveform.
Flash activates the sound options you see in the Properties panel.
2. In the Properties panel, click the drop-down box next to Eect, and then
choose from the following menu options:
• Left channel. Tells Flash to play the sound through the left speaker.
• Right channel. Tells Flash to play the sound through the right speaker.
• Fade left to right. Tells Flash to begin playing the sound through the left
speaker and then switch midway through the clip to the right speaker.
• Fade right to left. Tells Flash to begin playing the sound through the right
speaker and then switch midway through the clip to the left speaker.
• Fade in. Tells Flash to start playing the sound softly, and then build to full
volume.
www.it-ebooks.info
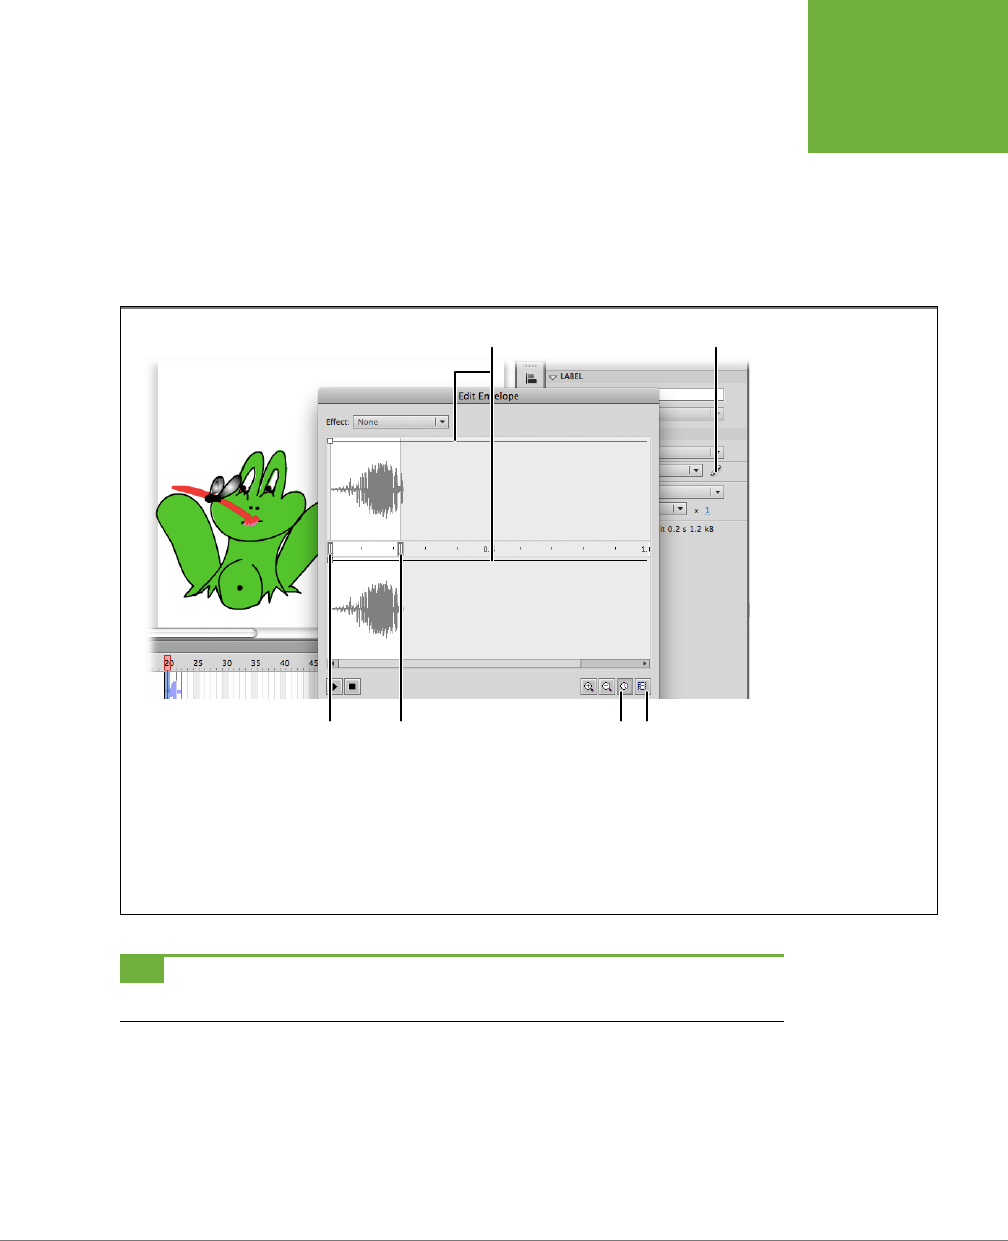
CHAPTER 11: INCORPORATING SOUND AND VIDEO 383
INCORPORATING
SOUND
• Fade out. Tells Flash to start playing the sound at full volume, and then
taper o toward the end.
• Custom. Tells Flash to display the Edit Envelope window you see in
Figure 11-6, which lets you choose the
in point
(the point where you want
Flash to begin playing the sound) and the
out point
(where you want the
sound clip to end). You can also choose a custom fading eect; for example,
you can fade in, then out, then in again.
FIGURE 11-6
The sound file you see
here is a two-channel
(stereo) sound, so you see
two separate waveforms,
one per channel. To crop
the sound clip, drag the
time in and time out
control bars left and right.
Flash ignores the gray
area during playback and
plays only the portion
of the waveform that
appears with a white
background, so here Flash
plays only the second
half of the waveform. To
create a custom fading
effect, you can drag
the envelope handles
separately. These settings
tell Flash to fade out on
the left channel while
simultaneously fading
in on the right channel.
To preview your custom
effect, click the Play icon.
Time in Time out Show seconds Show frames
Envelope handles Click to edit sounds
TIP Clicking the Property panel’s Edit button displays the same Edit Envelope window you see when you
choose the Custom option.
If you want to do more extensive sound editing, you need a separate program like
Adobe’s Audition. It comes with some, but not all, of the Creative Suites. If you need
a sound editor but have cash flow concerns, check out Audacity (
http://audacity.
sourceforge.net
). It’s free and works on Windows, Mac, and Linux computers.
www.it-ebooks.info

FLASH CS6: THE MISSING MANUAL
384
INCORPORATING
VIDEO
Incorporating Video
In the past years, Flash has become the video champion of the Internet. You find
Flash video on sites from YouTube to Hulu to CNET. The major networks ABC, CBS,
and NBC also use Flash video. It wasn’t long ago that a battle royale raged among
Microsoft, Apple, and RealMedia for web video bragging rights. Flash was seldom
mentioned in the contest; after all, it was just for making little animations. But, like
the Trojans with their famous horse, Flash Player managed to sneak onto about 90
percent of today’s computers. And guess what? Flash does video, too. It’s easy for
you to add video to a web page or any other project by adding it to a Flash anima-
tion. It’s easy for your audience, too, since they don’t have to download and install
a special plug-in to watch your masterpiece. Flash is also fueling the surge in video
blogging, or
vlogging
—adding video clips to plain-vanilla blogs. You can find out
more at sites like
http://mashable.com/2009/10/09/video-blogging
.
TIP If you’re watching a video on the Web and wondering whether the site uses Flash to publish it, right-click
(Control-click) the video. If you see “About Flash Player” in the shortcut menu, you know Flash is working behind
the scenes.
May as well face it: Sometimes video footage is more eective than even the most
well-crafted animation. For example, video footage showing a live product dem-
onstration, a kid blowing out the candles on his birthday cake, or an interview with
a CEO can get the point across quickly and directly.
TIP Neither Flash nor the Adobe Media Encoder let you do extensive editing. At best, they let you crop a
segment out of a larger video clip. If you’re interested in piecing together different video segments to create
a movie or a scene, turn to a specialized video editing program like Adobe Premiere or Apple Final Cut Pro. If
your needs are more modest, you can probably get by with Premiere Elements, Apple’s iMovie, or Microsoft’s
MovieMaker.
There are two basic steps to creating Flash video:
• Convert your video to the Flash video file format: .flv or .f4v. Before you
can add video to your Flash animation, you have to convert it to a special file
format. The process, which video techies call
encoding
, creates small files that
can travel quickly over the Internet. Flash comes with the Adobe Media Encoder,
which lets you convert most types of video into Flash video format. The next
section describes the encoding process.
• Import your video into a Flash animation. Once your video clip is in Flash video
format, you can import it into your project. Flash stores a copy of the video
in the Library, and you can drag the video to the stage like any other graphic.
It’s remarkably easy to add video playback controls to your Flash video. If you
have a video that’s already in the Flash video format (.flv or .f4v), you can jump
ahead to page 396 to learn how to import it into your Flash file.
www.it-ebooks.info

CHAPTER 11: INCORPORATING SOUND AND VIDEO 385
INCORPORATING
VIDEO
Encoding: Making Flash Video Files
Video files are notoriously huge, which means they take a long time to travel the
Internet. To solve this problem, Flash uses special video formats that shrink or
compress video into smaller files. The quality might not be what you’d expect from
your 60-inch LED HDTV, but it’s certainly acceptable for web delivery. The process
of converting a video from its original format to Flash video (.flv or .f4v) is called
encoding. If you already have a file in the Flash video format, or if someone else is
responsible for this part of the job, you can jump ahead to page 396.
Overcompression: Too Much of a Good Thing
The final destination for many Flash projects is a website. One
of Flash’s great virtues is the ability to present animations,
video, and sound over the Web without making the audience
wait while humongous files travel the Internet. Flash makes big
files small by compressing them. It uses different compression
methods for images, sound files, and video files. Some types
of compression actually degrade the image, sound, or video
quality. It’s a tradeoff, but it’s the best way to create really
small files that travel the Net quickly. The idea is to keep as
much information as is needed to maintain acceptable qual-
ity and throw out the extra bits. These types of compression
schemes are called lossy formats because they lose data and,
as a result, lose quality. Examples of lossy formats are JPEG
photo files, MP3 audio files, and FLV or F4V Flash video files.
While compression is a good thing because it keeps the file
size down and helps web-based Flash animations load quickly,
it’s possible to overcompress a file. One way that happens is
when you compress a file that’s already been compressed.
If you repeatedly compress photos, sound files, and video
files, you can end up with media mush. For example, take a
JPEG and save it five times using 50% quality—you’ll find that
the last copy is much poorer in quality than the first. You can
do the same thing to MP3 audio files and video files. Ideally,
it’s best to bring uncompressed files into Flash, and then let
Flash do the compression once, when it publishes an SWF file.
For audio files, that means it’s best to use uncompressed AIFF
files on a Mac or WAV files on a PC. For video files, use video
that hasn’t already been compressed. On a PC, you can use
uncompressed AVI files; on a Mac, use uncompressed QuickTime
MOV files. If you’re working in another video editing program
and there’s an option to encode directly to Flash Video (.flv
or .f4v), choose that. Then you can skip the step with Media
Encoder. With video, the compression takes place when you
use the Adobe Media Encoder to make .flv or .f4v files. So, if
you just shot the video with your camcorder, feed the raw
.dv file to Adobe Media Encoder for the best results. If the file
is coming from someone else, ask him to give you the best
quality possible.
UP TO SPEED
Using the Adobe Media Encoder, you can encode any of the common video files
listed in Table 11-2. As explained in the box on page 385, it’s best to start o with a
high-quality, uncompressed video. You can add prebuilt controls that let your audi-
ence control the playback and adjust the volume. You can even apply eects to a
video clip in Flash; for example, skewing and tinting.
www.it-ebooks.info

FLASH CS6: THE MISSING MANUAL
386
INCORPORATING
VIDEO
TABLE 11-2
Some of the most popular video file formats you can convert to Flash Video with Adobe Media Encoder
FILE TYPE EXTENSION NOTE
QuickTime movie .mov The audio/video format Apple’s video player uses.
A free version of QuickTime player is available for
both Macs and PCs.
Audio Video
Interleaved
.avi, .wav Microsoft audio/video formats.
Motion Picture
Experts Group
.mpg, .mpeg MPEG-1 is an early standard for compressed audio
and video media.
.mp2, m2v MPEG-2 is what standard DVDs use.
.mp4, .m4v, .m4a,
.mts
MPEG-4 Part 2 is used by the DivX and Xvid
codecs.
.264 MPEG Part 10 is used by QuickTime 7 and the
H.264 codec.
Digital video .dv Many camcorders use this digital video format.
Windows Media .asf, .wmv, .wma These Microsoft formats are for compressed audio/
video files.
Flash video .flv, .f4v Flash’s video format employs a lossy compression
technique to produce very small files suitable for
broadcast over the Internet.
The hardest part of encoding video files is the wait. It takes time to encode large
video files, but it’s getting better with today’s faster computers. Flash CS6’s installer
automatically puts Adobe Media Encoder on your computer. Fire it up, and it looks
like Figure 11-7. There are two basic things you need to do: Locate the file you want
to encode, and give Adobe Media Encoder instructions about how to process it.
Here are the steps:
1. In Adobe Media Encoder, click the + button in the upper-left corner.
Flash displays a standard Open window similar to the one you use to open a
Flash document.
2. Navigate to the file on your computer that you want to encode, and then
click Open.
The name of the video file appears in the Queue panel.
3. Under Format, choose the Flash video format: FLV or F4V.
Choose F4V if your target is one of the newer smartphones or tablets. The
FLV format is useful for websites with a slower transmission rate. It works with
Flash Player 8 and later. The F4V formats show better quality video in smaller
files, but they work only in Flash Player 9 and later. You can get an idea of the
suitability of a format by examining the available presets, described in the next
step. Flash gives you these presets (predetermined settings) because choosing
www.it-ebooks.info
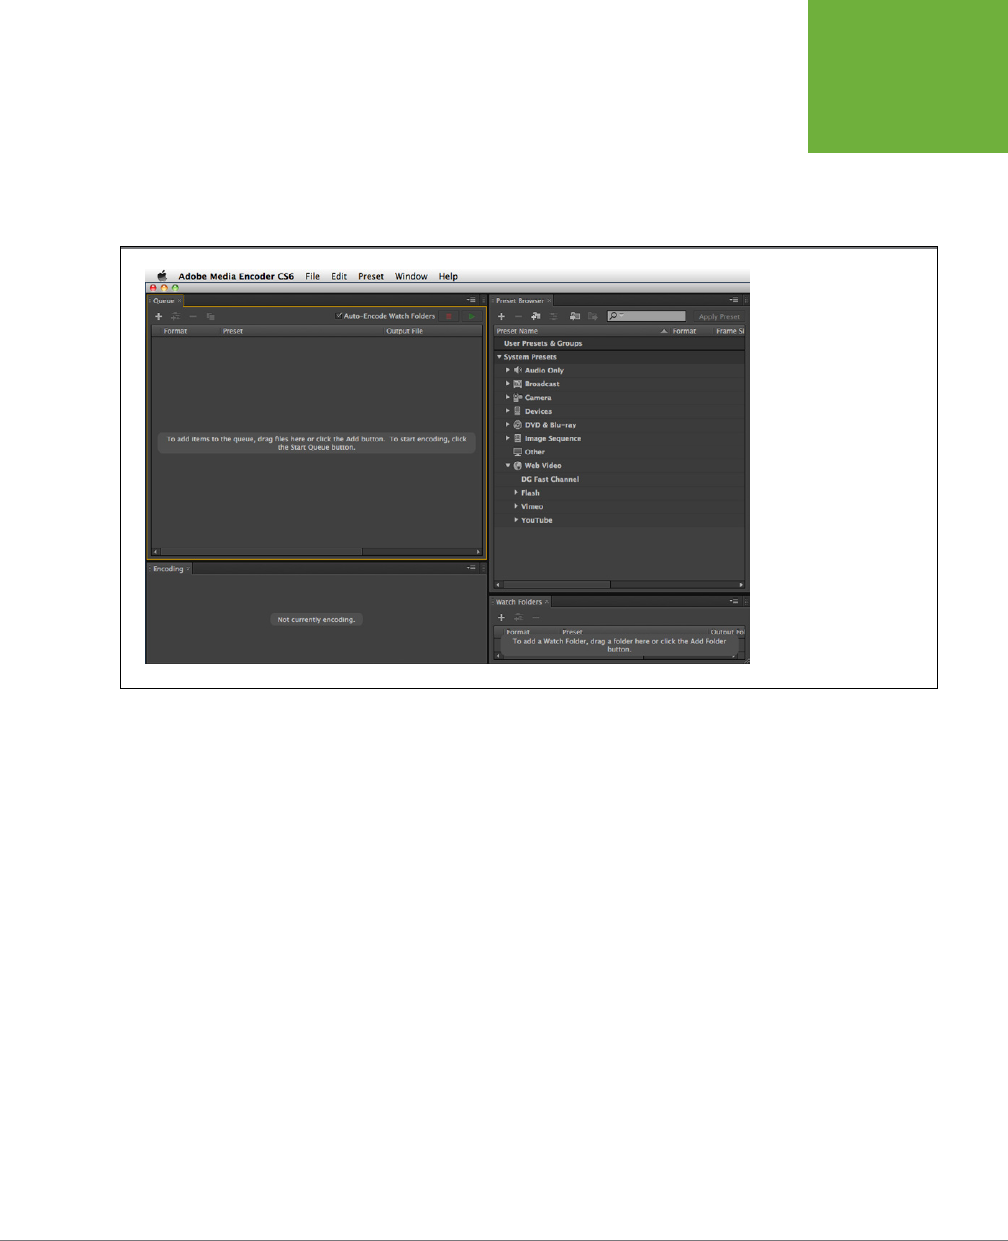
CHAPTER 11: INCORPORATING SOUND AND VIDEO 387
INCORPORATING
VIDEO
all the settings to encode video can be ridiculously complicated. Even when
you choose a file format like FLV or F4V, there are still dozens of settings you
can choose based on how the video is to be distributed and viewed. Adobe
helps you wade through the swamp of video settings by providing presets for
common video needs.
FIGURE 11-7
Adobe Media Encoder is a
multipurpose conversion
tool that comes with
several different Adobe
products, including Flash.
You add media files to the
queue and tell Flash what
type of file you want it to
produce.
4. Under Preset, choose a preset format that matches your project.
The Media Encoder has what may seem like a bewildering number of presets,
as shown in Figure 11-8. The names are descriptive: “Phone & Tablet wifi,” “PC &
TV High,” “16x9.” Experienced videographers may want to tweak the encoding
settings or trim the video clip before it’s encoded.
5. Under Output, you can change the name or location of the file.
If you don’t make any changes under Output, then the encoded file appears
in the same folder as the original video file. It has the same name, but will end
with either .flv or .f4v.
6. Click the Start Queue button in the upper-right corner.
Adobe Media Encoder starts to encode your file. A bar tracks the progress
(Figure 11-9). If you have several files to encode, then add them all to the queue
before you hit Start Queue. The encoder makes no changes to the original file.
When the encoder is finished, a checkmark appears next to the file in the queue,
and you have a new file with an .
flv
or .
f4v
extension.
www.it-ebooks.info
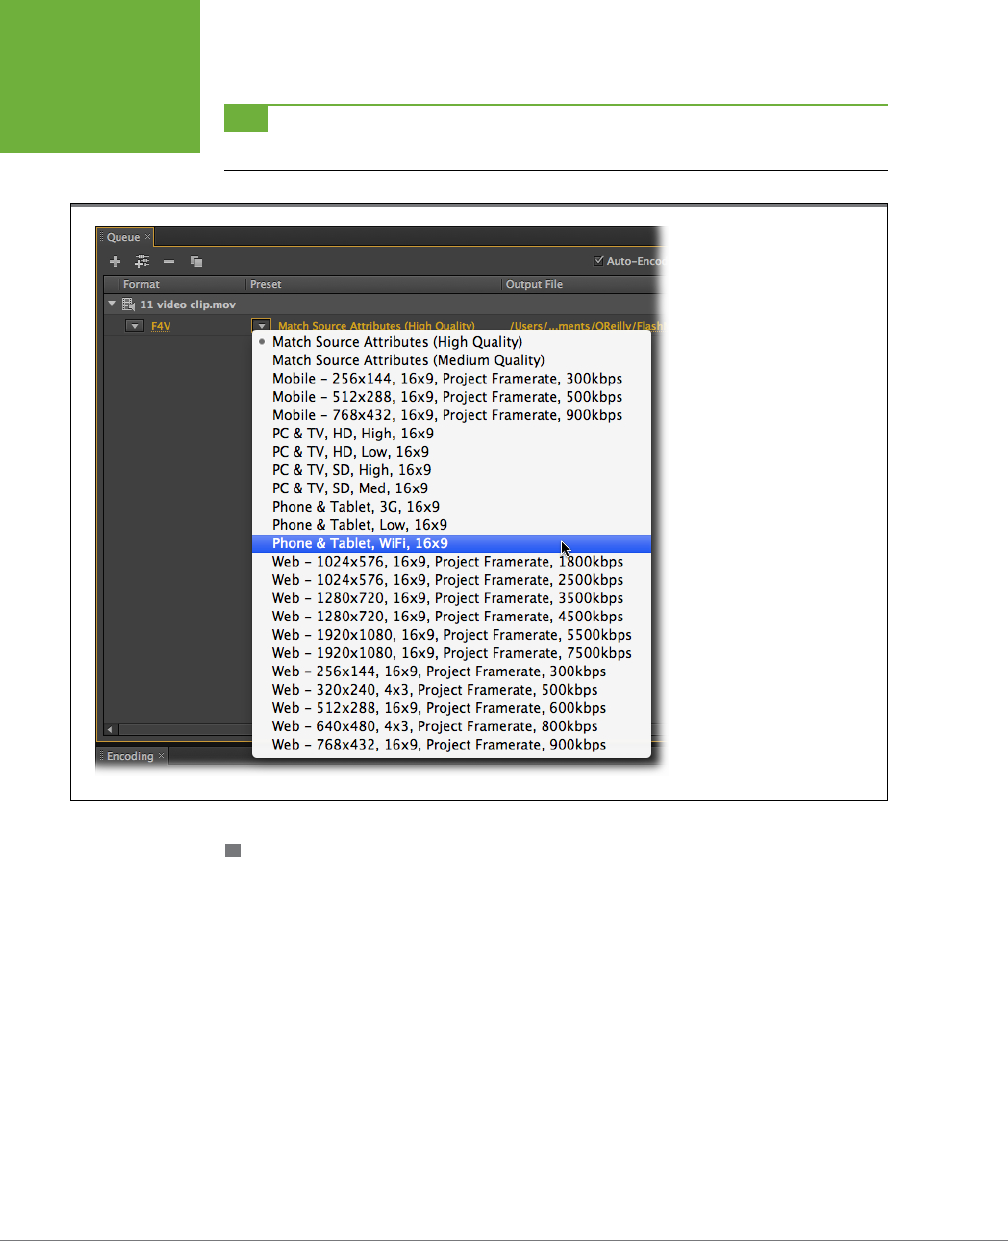
FLASH CS6: THE MISSING MANUAL
388
INCORPORATING
VIDEO
TIP Want to see some details about the encoding process while you wait? Click the Current Encode tab near
the bottom of the window.
FIGURE 11-8
When you first use Adobe Media
Encoder, it’s best to use one
of the presets that match your
project. Later, you may want
to create your own settings by
clicking Edit Export Settings.
The presets shown here are for
the F4V format.
BATCH ENCODING TO SAVE TIME
No matter how you cut it, encoding video takes time and can slow down your com-
puting workflow. If you have lots of video to encode, prepare several video clips for
encoding using the steps described in this section. You can add several encoding
jobs to the encoding queue and then run them all at the same time when you click
Start Queue. Why not do all that encoding overnight or when you head out to lunch?
One way to encode batches of video is to create a
watch folder
. In essence, you tell
the media encoder to automatically encode any video file that’s dropped in your
watch folder. If the Watch Folders panel isn’t visible, go Window→Watch Folders.
Click the + Add Folder button and choose one or more folders. You choose the file
format and preset for each folder individually, making it possible to automatically
encode to dierent settings. Once your folders are set up, make sure that the Auto
Encode Watch Folders box at the top of the Queue panel is checked. At that point
all you need to do to encode a video is drag it to one of your watch folders.
www.it-ebooks.info
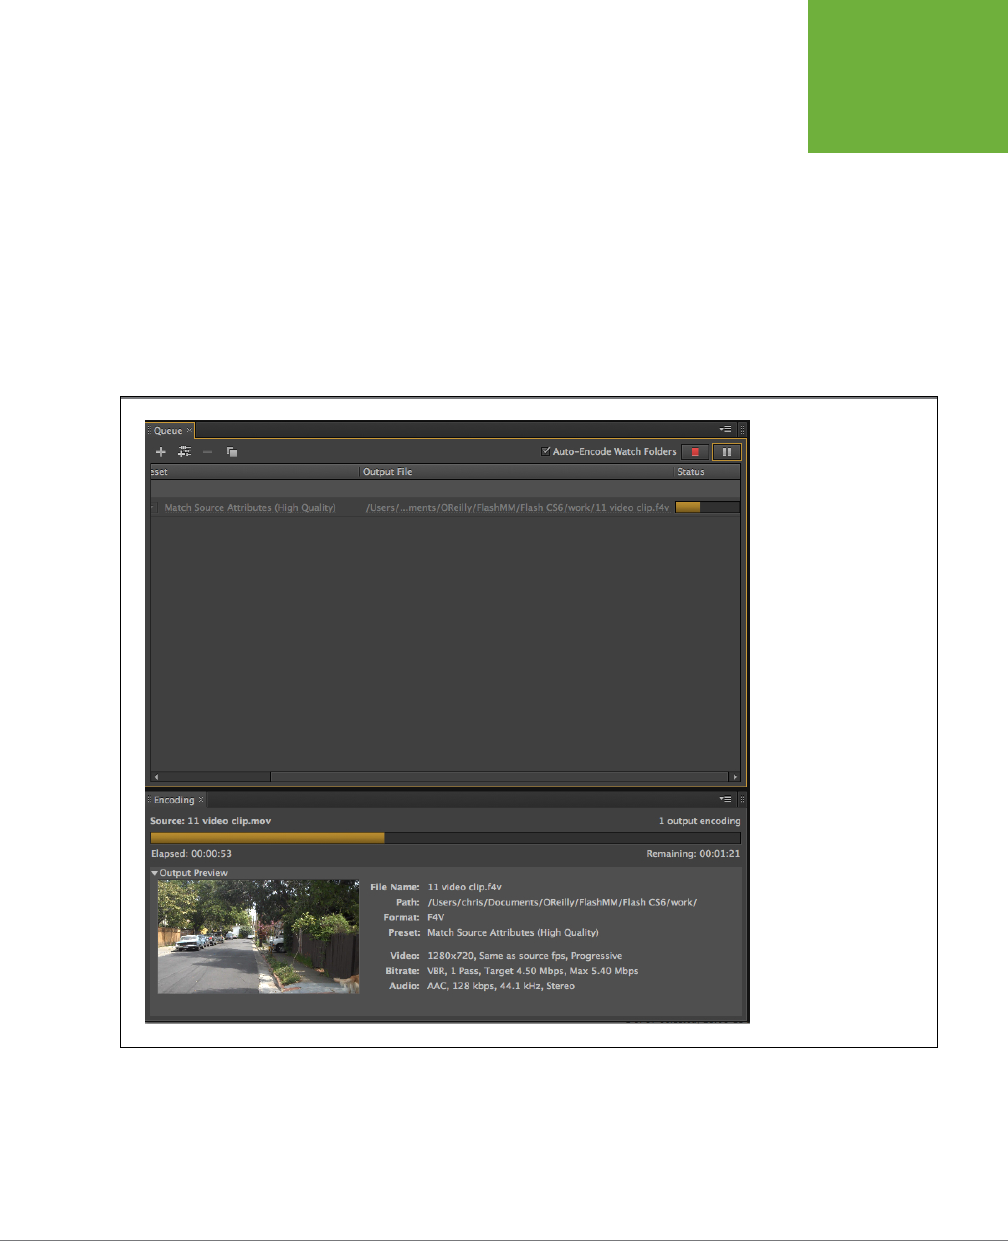
CHAPTER 11: INCORPORATING SOUND AND VIDEO 389
INCORPORATING
VIDEO
Encoding Part of a Video Clip
There are a few reasons why you might want to dig into Adobe Media Encoder’s
export settings before you encode a file. One of the most common scenarios is that
you have a long video and you need to bring only a small part of it into your Flash
project. To do so, follow the encoding steps that begin on page 386. When you reach
step 4, instead of choosing one of Adobe’s presets, right-click (Control-click) the
filename of your video and choose Export Settings. The next thing you see looks like
a video editing window, shown in Figure 11-10. You can’t do extensive editing in this
window like you can with Adobe’s Premiere or Apple’s Final Cut, but you can select
a portion of a video clip to encode. Encoding is pretty slow business, and there’s no
reason to waste time converting video that you won’t use.
FIGURE 11-9
While the Media Encoder
processes your file, it
keeps you updated with a
progress bar and the es-
timated remaining time.
The video also appears in
a preview window.
In the upper-left corner of the Export Settings window is a small preview screen.
Below the screen is a timeline with a playhead similar to Flash’s. Drag the playhead
to see dierent frames in your video. The two markers in the timeline below the
playhead are called the
in point
and the
out point
. You use these two points to select
a segment of the video. As you drag either point, the preview window shows the
www.it-ebooks.info
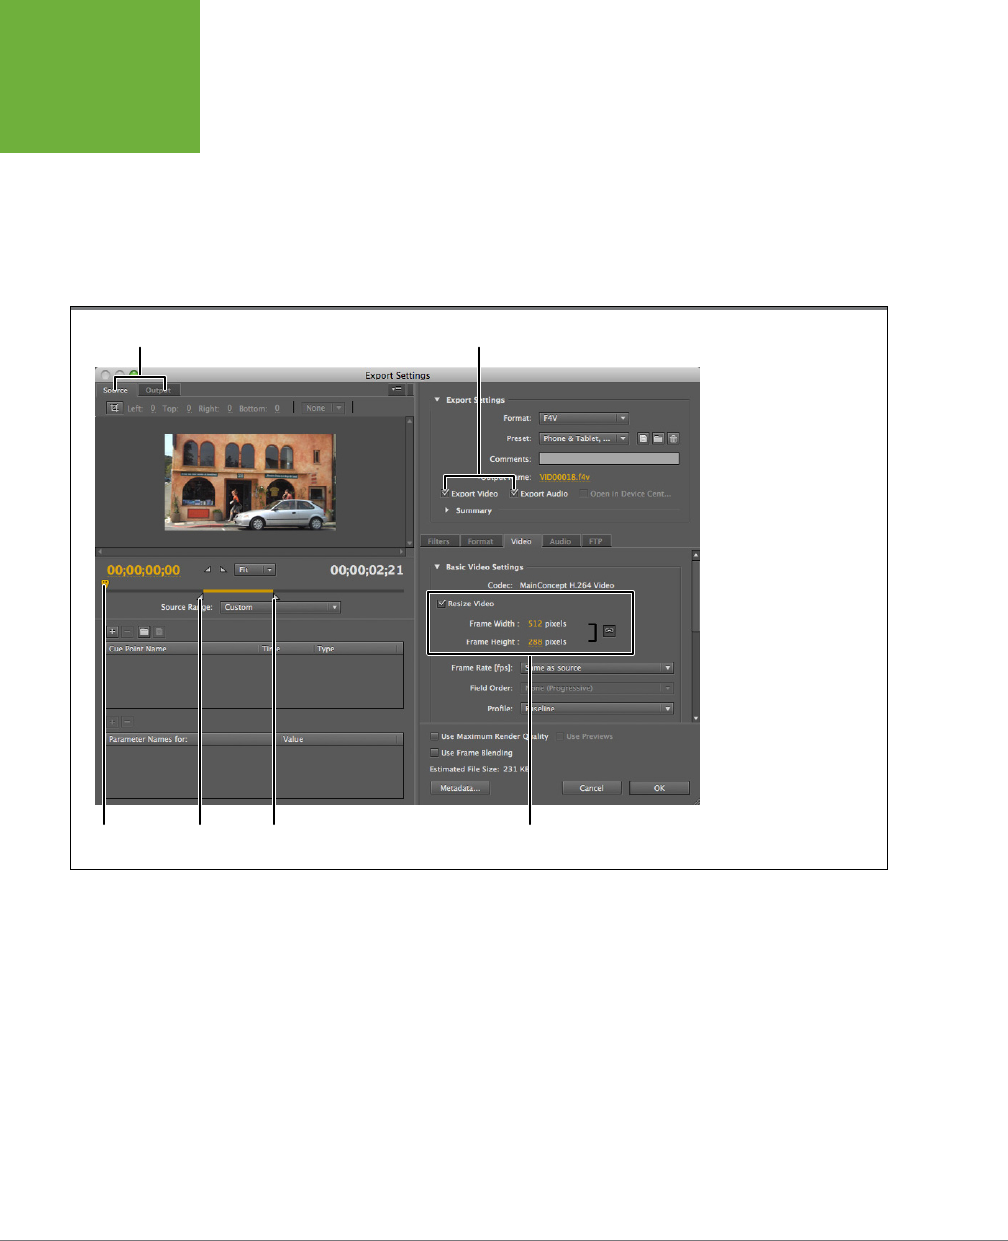
FLASH CS6: THE MISSING MANUAL
390
INCORPORATING
VIDEO
image (or video frame) for that point in time. A highlight appears on the selected
segment of video.
If you want to use one of Adobe’s encoding presets, you can choose one in the
upper-right corner of the Export Settings window. (If you’d rather tweak the export
settings on your own, see page 390.) Click OK, and you’re back at the Media Encoder,
where you can change the name and location for your encoded file, as described
in step 5 on page 387.
FIGURE 11-10
You can’t do extensive
editing in Adobe Media
Encoder, but you can
select the portion of a
video file that you want
encode. The program
also provides tools to
resize the entire video,
to select portions of the
image, and to fine-tune
the video codec used to
encode your Flash video
file.
In pointPlayhead Out point Resize video
Export video and/or audioPreview source or output
Resizing and Cropping a Video Clip
When you choose an encoding preset in Adobe Media Encoder, the preset determines
the dimensions of the video image. For comparison, a wide-screen TV might show a
high-definition image that’s 1920 pixels wide by 1080 pixels high. When you choose
the “Web–512x288” setting, the preset encodes an image that’s 512 pixels wide by
288 pixels high. When you’re in Export Settings, you can choose any size you want.
Understandably, large dimensions, like those for that hi-def TV, mean much larger
files. If your video is traveling the Internet, you can dramatically reduce the travel
time by reducing the video dimensions. The 512 x 288 size of the “Web 512x288”
preset is a nice, compact size for the Net. If you know everyone in your audience
is going to have a fast cable or DSL connection, you can go ahead and bump the
dimension up to a larger dimension.
www.it-ebooks.info
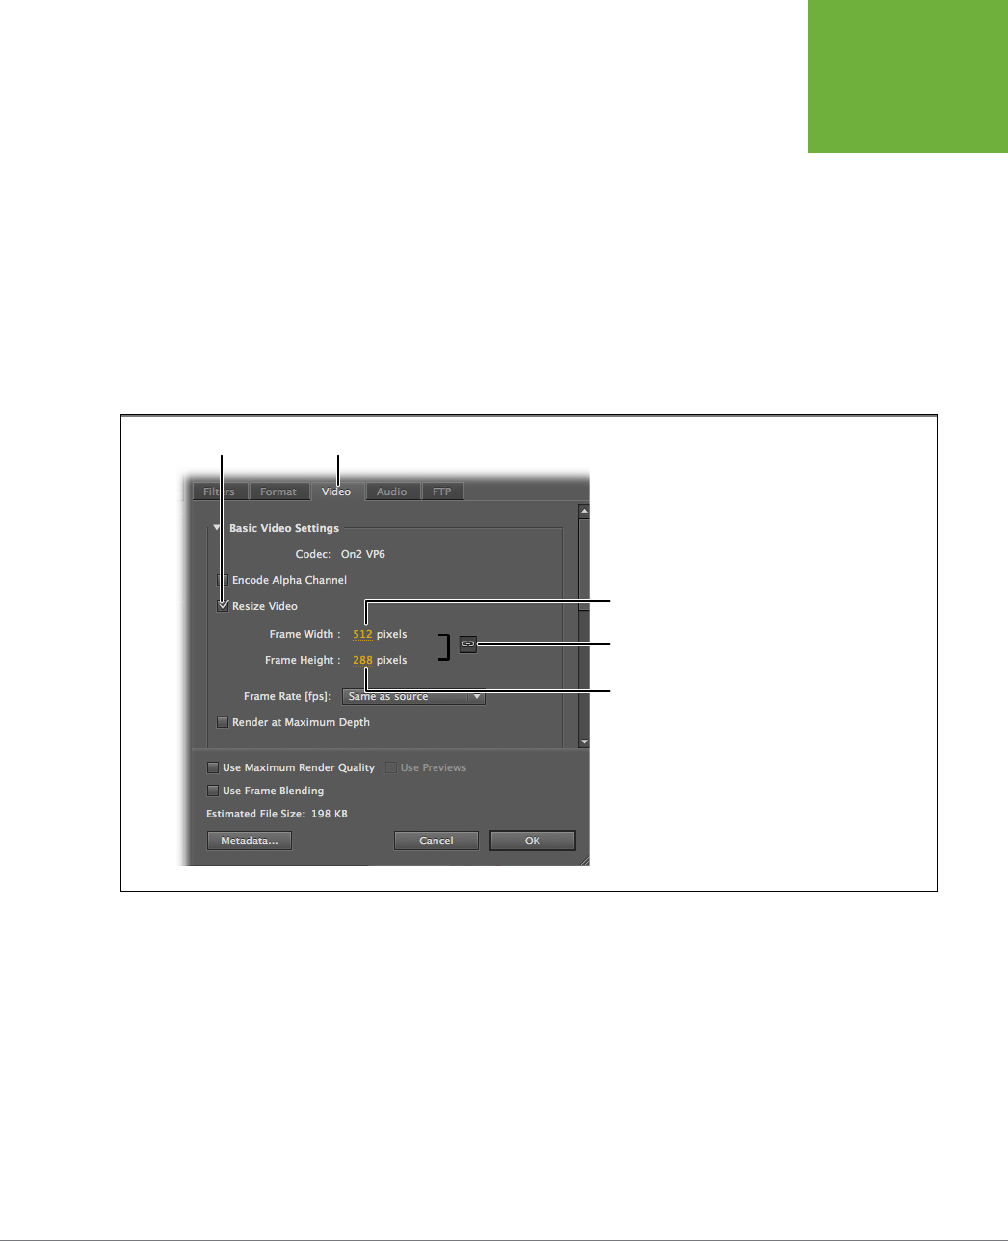
CHAPTER 11: INCORPORATING SOUND AND VIDEO 391
INCORPORATING
VIDEO
After you’ve opened Adobe Media Encoder and added a video to the encoding
queue, as described on page 386, follow these steps to choose a custom size for
the encoded video:
1. Instead of choosing one of Adobe’s presets, right-click (Control-click) the
video filename and choose Export Settings.
The Export Settings window appears, where you can fine-tune many aspects
of the encoding process.
2. On the right side of the Export Settings window, click the Video tab.
This tab displays details about frame size, frame rate, and bitrate, as shown in
Figure 11-11.
FIGURE 11-11
Open Adobe Media Encoder’s Export
Settings window to choose a cus-
tom size for your encoded videos.
Click the Constrain Width/Height
button to maintain the picture’s
original proportions.
Resize check box Preview source or output
Width
Width
Constrain
width/height
3. Click the Resize Video checkbox.
Once you’ve checked the Resize Video box, the encoder uses the size dimen-
sions entered in the next step.
4. Change the height and width dimensions.
Most of the time, you want to maintain your video’s proportions to keep the
images from looking too tall or too fat. To constrain the proportion, make sure
the Constrain Width/Height button is depressed. Then you can enter either a
width or a height dimension, and the other dimension automatically sizes itself.
www.it-ebooks.info
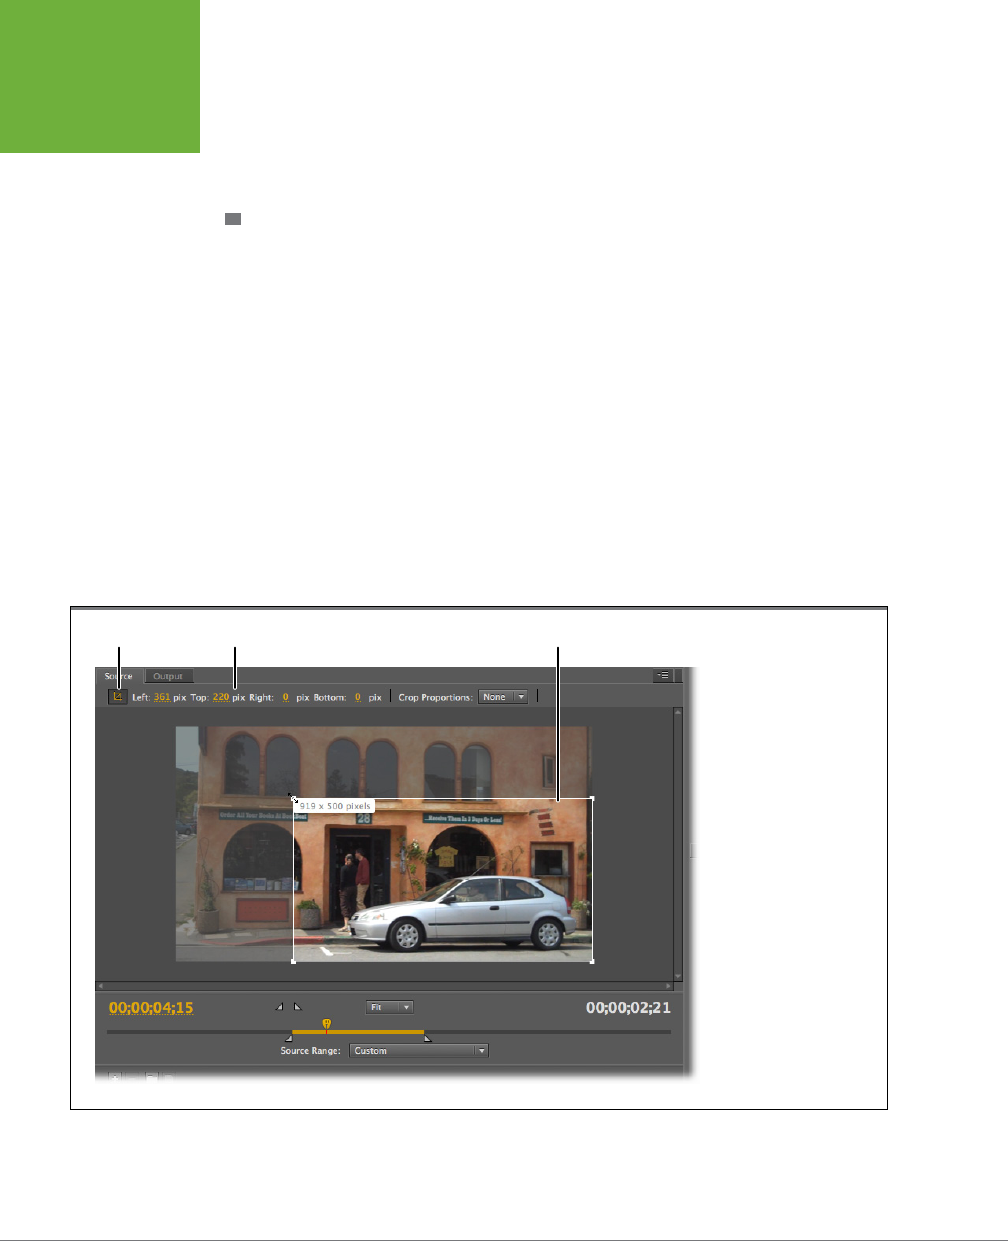
FLASH CS6: THE MISSING MANUAL
392
INCORPORATING
VIDEO
INCORPORATING SOUND
5. Click OK.
The Export Settings window closes, and you see the Adobe Media Encoder
queue.
CROPPING A VIDEO WHILE ENCODING
Cropping a video is just like cropping a photo. Instead of resizing the entire image,
you select a portion of the image that you want to view. With moving pictures,
it’s a little trickier, because the image is changing at multiple frames per second.
The crop that looks great for the first 20 seconds of a clip might not look as good
a minute later. Also keep in mind that when you crop a video, you’re changing the
dimensions and the quality of the image. When you crop into an image too far, you
end up with a blurry picture.
To crop your video, follow the preceding steps to open the Export Settings window
in Adobe Media Encoder. Above the preview window, click the Crop button. A frame
appears around the video image with handles at the corner. Drag the handles to
frame the portion of the picture you want to keep, as shown in Figure 11-12. A tooltip
shows the dimensions of your video image in pixels. You can click the Crop dimen-
sion numbers and then type new values, but keep in mind that these numbers are
showing the number of pixels being trimmed from the edges of the picture.
FIGURE 11-12
Drag the handles in the
crop frame to select the
portion of the video
picture you want to keep
in your encoded video.
Crop boxCrop dimensionsCrop button
www.it-ebooks.info
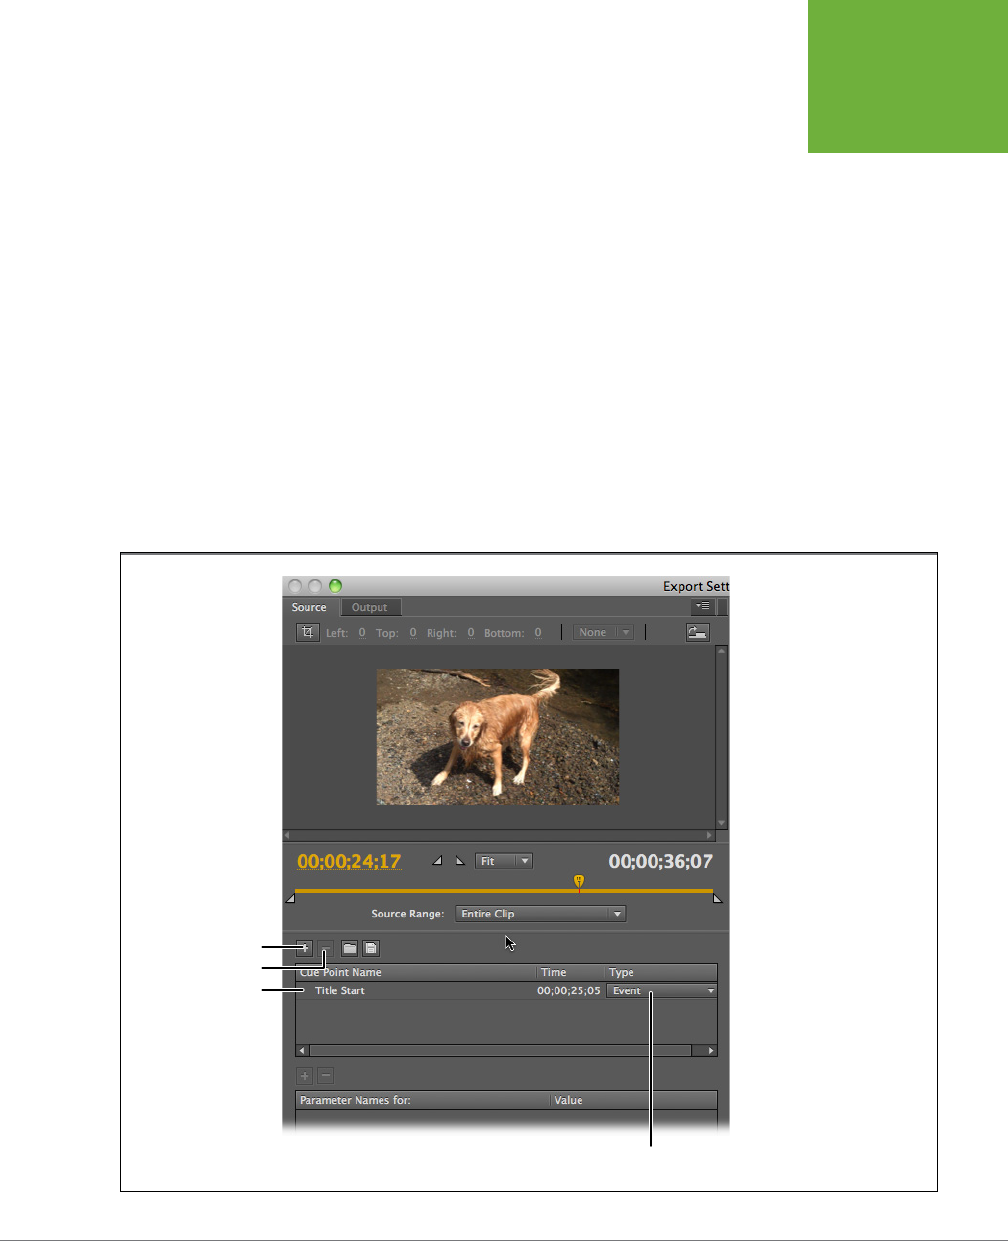
CHAPTER 11: INCORPORATING SOUND AND VIDEO 393
INCORPORATING
VIDEO
Adding Cue Points to Your Video
Flash lets you place
cue points
(markers) in your video clips, which you can then
use to trigger other actions in your Flash animation. For example, perhaps you’d
like to show text on the screen at a certain point in the video, or perhaps you’d
like to trigger a certain sound or narration track. You give cue points names—like
“ narration”—as you create them. Then you use ActionScript code to identify the cue
points and trigger the actions you want performed. (There’s more on ActionScript
starting in Chapter 12.)
You add cue points in Adobe Media Encoder, using the same Export Settings window
that you use to resize or crop your video.
1. In Media Encoder, select Edit→Export Settings to open the Export Settings
window.
You see a preview window showing your video, with a timeline underneath, as
shown in Figure 11-13. Just as in Flash, the timeline has a playhead. Drag the
playhead to a point in the timeline, and you see that frame in your video. Below
the preview, there are two panels: one for cue points and one for parameters.
FIGURE 11-13
You use cue points to place
markers in your video. With
the help of ActionScript, you
can use the cue points to trig-
ger events in your animation.
Cue Point Type
Add Cue Point
Cue Point Name
Delete Cue Point
www.it-ebooks.info

FLASH CS6: THE MISSING MANUAL
394
INCORPORATING
VIDEO
2. Drag the playback head to the point in your video you want to mark.
The video image changes as you move the playback head.
3. Click the + button to add cue points; click the – button to remove them if
you make a mistake.
Flash creates a cue point in the list and gives it a name, a time setting, and a
type. The time setting is determined by the playback head’s position in the
video clip. In the next steps, you’ll change the name and type of the cue point.
4. Click the name, and then type a descriptive name for your cue point.
Flash names all cue points “cue point” when it creates them. It’s up to you to
type something more descriptive.
5. Choose the type of cue point you want to create—Event or Navigation. If
you’re an ActionScript hotshot, set parameters.
Event cue points trigger an action when the video reaches them. Navigation
cue points let you locate and play certain portions of your video. Both Event
and Navigation cue points require ActionScript to work their magic.
6. Click the + button to add parameters to your cue point; click the – button
to remove them if you make a mistake.
Parameters are key-value pairs that programmers use to store and retrieve
information. So the parameter values are available to ActionScript programs
when the video reaches the cue point.
7. Repeat steps 2–6 to add more cue points, or click OK to go back to the
encoder queue.
Other Techniques for Reducing Video File Sizes
No one likes to wait while a web page loads. So when you’re publishing video on
the Web, life is a constant quest to shrink the size of your video files so they’ll travel
the Net faster. In addition to the encoding tricks already mentioned, here are some
tips for shrinking those files while still providing a good video experience. Some of
these techniques are related to creating the video, and others are related to Adobe
Media Encoder and Export Settings.
VIDEO TECHNIQUES FOR REDUCING FILE SIZES
• Use a tripod and keep pans and zooms to a minimum. Steady shots make for
better compression results.
• Start out with good-quality video. When possible, use uncompressed video
before you encode to Flash video. If your video has blips and glitches (called
“noise” by videographers) before you encode it, the video file ends up bigger.
• Avoid fancy eects and transitions. Special eects like fancy wipes or spiral
transitions don’t work as well in Flash video as a plain cut from one scene to
the next. Even dissolves add to the size of your video file.
www.it-ebooks.info

CHAPTER 11: INCORPORATING SOUND AND VIDEO 395
INCORPORATING
VIDEO
ENCODING TECHNIQUES FOR REDUCING FILE SIZES
• Reduce the dimensions of the video. It’s great to have a high-resolution
video that looks beautiful when the audience clicks the full-screen button. But
if it takes too long to download over the Internet, you won’t
have
an audience.
As described on page 390, you can change the dimensions of your video to
reduce the file size.
• Consider using a lower frame rate. You can set the frame rate in the Video
tab of the Export Settings window. The standard frame rate for American TV
is 29.97 frames per second (don’t ask about the decimal; it’s a long story).
The standard for film is 24 fps. Test your videos at 18, 15, or even 12 fps to see
whether the quality/file size tradeo is worth it.
• Use mono sound where possible. If your video is a musical performance, it
may be important to have stereo sound, but otherwise you can save precious
file space by clicking the Audio tab in the Export Settings window and then
choosing Mono.
• Use a lower bit rate for sounds that are mostly voices or don’t require high
fidelity. Go to the Audio tab in Export Settings, and then use the drop-down
menu to reduce the bit rate for sound. The encoder has bit rates from 16 to
256. A bit rate of 64 works for many Flash videos. You can go even lower if the
sound track is primarily voice, with no music.
Preparing to Import Video Files
It’s obvious that before you can import a video clip into Flash, you need to know
where it is: on your computer or somewhere in the Net. It’s also important to know
up front how you expect to link the video file to your finished Flash animation file at
runtime: by embedding the video file directly into your Flash timeline, or by linking
to the video file at runtime, and so on.
This cart-before-the-horse consideration isn’t quite as odd as it seems at first blush.
Video files tend to be so huge that you don’t usually want to embed them directly
into your Flash document the way you embed graphics (page 351) and sound files
(page 374). The process of setting up your Flash animation and Flash video files for
the public to view them is called
deploying
. First you tell Flash where to find the file at
design time, and then you tell Flash how the video will be accessed by your audience.
NOTE Chapter 20 tells you all you need to know about publishing Flash files, including Flash files containing
video clips.
Your deployment options include the following:
• Progressive download from a web server. This option is one of the most popu-
lar because all you need to publish video on the Internet is a regular, garden-
variety web server. Your Flash animation files (SWF) and Flash video files (FLV,
F4V or mp4) are stored on the server. It’s called progressive because the video
starts playing for your visitors before the entire video file is downloaded. The
www.it-ebooks.info

FLASH CS6: THE MISSING MANUAL
396
IMPORTING
VIDEO FILES
downside to this option is the fact that the entire video is eventually stored on
your visitor’s computer, giving her the ability, if she’s clever, to make a copy of
your video. If you aren’t comfortable with bootleg copies, then consider one
of the next two options.
• Stream from Flash Video Streaming Service. This option is the most popular
way to show videos without letting others copy them. Basically, you hire a
company to stream your video from their computers to your website visitors.
Your visitors never have a complete copy on their computers, making it more
dicult (but not impossible) for them to swipe it. You can find a long list of
companies that provide this service on Adobe’s website (
www.adobe.com/
products/flashmediaserver/fvss/
). These companies have a program called
Flash Media Server on their computers, which detects the speed of your web
visitor’s Internet connection and sends the video at a speed it can handle. Your
visitor gets a higher-quality video experience, and you get added security for
copyrighted material. All you have to do is pay for the service.
• Stream from Flash Media Server. This option is similar to the second option
above, except that you (or, more likely, your organization’s IT department) buy
the server hardware, install the server software, and maintain the resulting
system. This option is best if you have deep pockets and don’t mind the hassle
of maintaining a media server. Flash Media Server options start at about $250
and go up from there depending on the features.
NOTE If you have your own web server and want to dip your toe in the Media Server water, you may want
to investigate Red5, an open source (free) Flash Server (
http://osflash.org/red5
).
• A mobile device video bundled in SWF. Use this option in combination with
Flash’s templates for consumer devices and handsets to create animations for
small handheld devices. This option is used to place video inside SWF files used
with phones and handsets.
• Embed video in SWF and play in timeline. This option represents the simplest
way to embed video into your animation, but it works only for very short video
clips (somewhere between 5 and 10 seconds or less). Any more than that, and
the size of your animation file grows so large that you have trouble editing the
file in Flash
and
your audience has trouble viewing it in their Flash Players.
Importing Video Files
Once you have access to a video in the Flash video format (.flv or .f4v), you’re ready
to begin importing the video file into Flash. When you begin this process, your video
can be on your computer or it can be on the Web, where it’s served up by a Flash
Media Server. In this section, you see step-by-step examples for both scenarios.
www.it-ebooks.info

CHAPTER 11: INCORPORATING SOUND AND VIDEO 397
IMPORTING
VIDEO FILES
Importing a Flash Video File Stored on Your Computer
When you have a video on your computer in one of Flash’s video formats (.flv, .f4v,
or .mp4), it’s easy to import it into your Flash project. By making a couple of choices
along the way, you can give your Flash audience standard controls to play and
pause your video, and adjust its sound. To work on the following exercise, you can
download the video
11-4_Building_Implode.flv
from the Missing CD page at
www.
missingmanuals.com/cds/flashcs6mm
.
NOTE If you need to convert a video to one of the Flash video formats (.flv, .f4v, or .mp4), see page 385.
When you add video to your Flash project using this method, Flash creates a link
between the Flash file and your project. Even after you publish a Flash .swf file for
final distribution, the Flash file and your video file remain separate. If the project
is for a website, you need to place both the Flash .swf file and the video file (.flv or
.f4v) on the website, ideally in the same folder. To make things easy for yourself, it’s
best to put your Flash video in the same folder where you save your Flash work file
(.fla) and publish your Flash animation (.swf).
1. Create a new Flash document, and then save it.
It’s always good to name and save your Flash projects at the beginning. It’s
even more helpful when you work with external video files, as you do in this
project. A name like
building_bye_bye.fla
might be appropriate for this one.
2. Place the Flash video
11-4_Building_Implode.flv
in the same folder where
you save your Flash file (.fla) and your published Flash file (.swf).
This step makes it easier for Flash to create a link to the video file. After publish-
ing the .swf, as long as both files are located in the same folder, the link between
the two will continue to work.
3. In Flash, select File→Import→Import Video.
The Import Video dialog box appears, as shown in Figure 11-14, with several
options you can choose using radio buttons. The question is: Where is your
video file? Either it’s on your computer, or it’s stored on a web server with Flash
Media Server software.
4. Select “On your computer.”
Flash wants to know where the file is right now, so it can load it into your project.
At this step, don’t jump ahead and start thinking about where the final project
is going to be published.
5. Click the Browse button, and then locate and select your video file.
Flash displays a standard Open window similar to the one you use to open a
Flash document. It should be easy to locate
11-4_Building_Implode.flv
, because
it’s in the same folder as your Flash file. After you select the file, its name and
www.it-ebooks.info
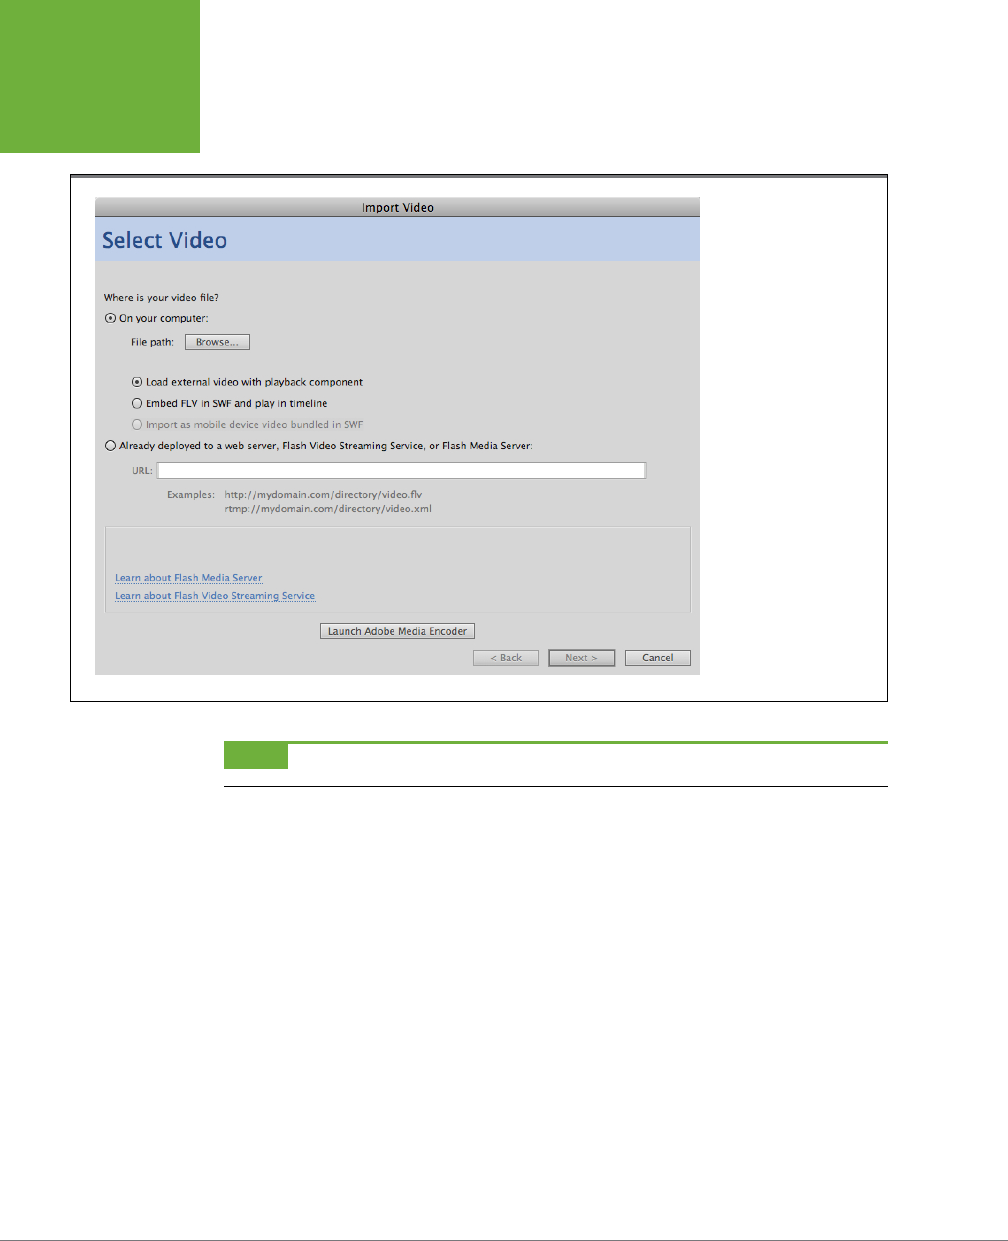
FLASH CS6: THE MISSING MANUAL
398
IMPORTING
VIDEO FILES
path show up under the Browse button. Now that Flash knows where the file is
located, it can work with the video.
FIGURE 11-14
The large Import Video
dialog box walks you
through adding video to
your Flash project. In the
first step, shown here,
you answer questions
about the location of the
video file and how you
want to use it in your
project.
NOTE The video of the imploding building is copyrighted and was provided by
www.freestockfootage.com
.
6. Tell Flash how you want to work with the video by clicking the radio button
labeled: “Load external video with playback component.”
• Load external video with playback component creates a link between
your Flash file and an external video file. When Flash gets a command to
play the video, it finds and plays the external file.
The other two options are used less frequently, but they’re useful for special
cases:
• Embed FLV in SWF and play in timeline. This option embeds video into
your animation. Each frame of video becomes a frame in the Flash timeline.
The result is that the Flash file gets huge very fast, and your audience will
be frustrated trying to download and play the video. Don’t try this option
with clips any longer than 5 or 10 seconds.
www.it-ebooks.info
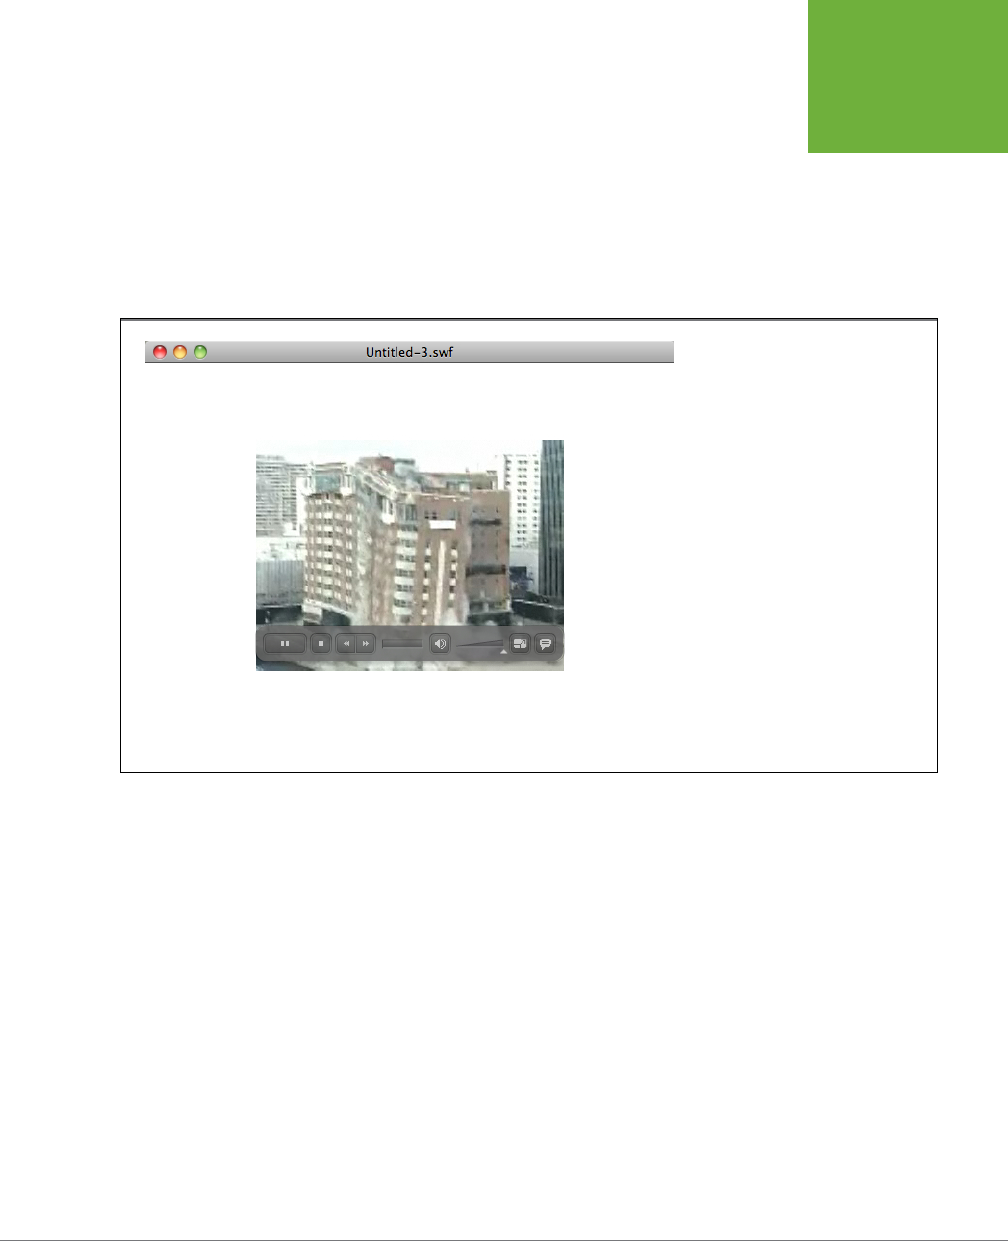
CHAPTER 11: INCORPORATING SOUND AND VIDEO 399
IMPORTING
VIDEO FILES
• Import as mobile device video bundled in SWF. Use this option in combi-
nation with Flash’s templates for consumer devices and handsets to create
animations for handheld devices (a topic not covered in this book).
7. Click Continue to move to the next Import Video step.
The Import Video box changes to show skinning options for your video. A
skin
is a sort of container that adds Play/Pause/Stop type controls to your video,
as shown in Figure 11-15.
FIGURE 11-15
There are two basic types of skins for
Flash video. “Over” skins like the one
shown here sit on top of the video
image, hiding some parts of the picture.
“Under” skins are completely outside
the image.
8. From the Skin drop-down box, choose SkinOverAll.swf.
Use the drop-down menu to choose an Adobe predesigned skin, as shown in
Figure 11-16. Adobe supplies a whole slew of skins with dierent combinations
of controls. SkinOverAll includes all the controls, so this exercise shows you
what’s available. When you tackle a real-world project, you may find you don’t
need quite so many gadgets on your videos.
There are also options to provide no controls at all (usually not the best option)
or to use a custom-designed skin. For example, you might want to put your
client’s logo on the video skin as another way to establish his brand.
9. Click Next.
Flash displays the Import Video: Finish Video Import dialog box you see in
Figure11-17. The details shown may not seem that important until it’s time to pub-
lish your Flash project on a web page. Here’s a translation for each of the lines:
www.it-ebooks.info
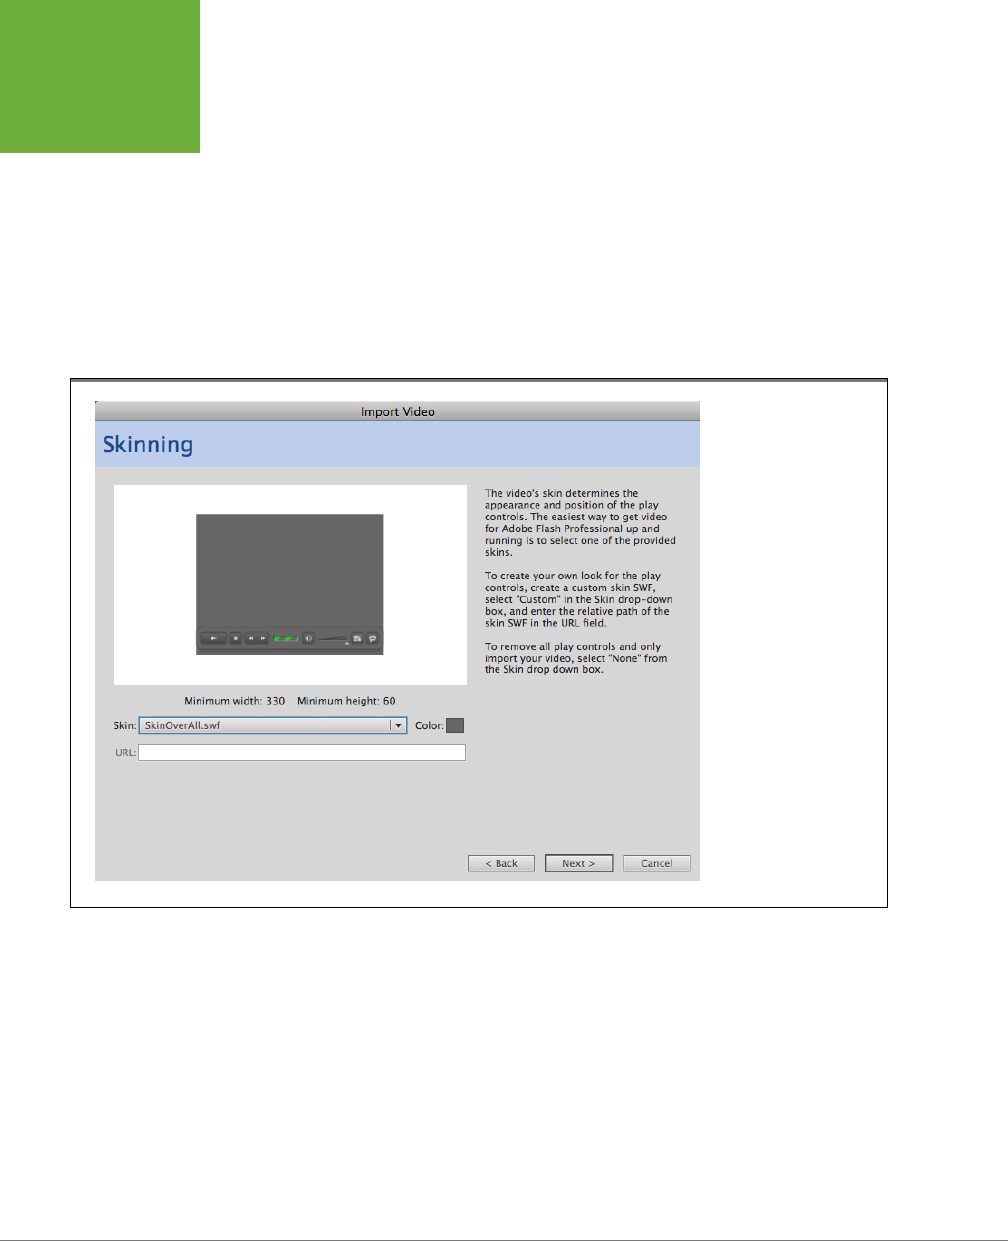
FLASH CS6: THE MISSING MANUAL
400
IMPORTING
VIDEO FILES
• The video you are using is located at: This line lists the folder where the
video file lives. If your final project is going on a web server, you have to
give both
11-4_Building_Implode.flv
and
building_bye_bye.swf
to your
webmaster.
• The video will be located at: (relative paths are relative to your .swf). This
line explains the relationship of your files when you publish your Flash ani-
mation. It shows you the path that has to exist between the .swf and your
video file (
11-4_Building_Implode.flv
). In this case, there is no path (just a
filename) because you’re planning on keeping both the .swf and the .flv in
the same folder, whether it’s on your computer or a web server.
FIGURE 11-16
Give your audience
snazzy video controls by
simply choosing from the
Skin drop-down menu.
Use the buttons in the
lower-right corner of the
Import Video dialog box
to move forward (Next)
or backward (Back) in the
Import Video process. Or
you can give up entirely
(Cancel).
• A Flash video component will be created on the stage and configured
for local playback. This line simply tells you that your video and whatever
skin you selected will appear on the stage in your Flash document.
• The video component uses a skin that has been copied next to your
.fla. This file will need to be deployed to your server. These sentences
are a roundabout way of saying that the skin for your video is stored in a
separate .swf file. Flash places it in the same folder on your computer with
building_bye_bye.fla
. This skin has a name similar to the name you chose
in step 8. In this case, it’s named
SkinOverAll.swf
, and it has to be in the
www.it-ebooks.info
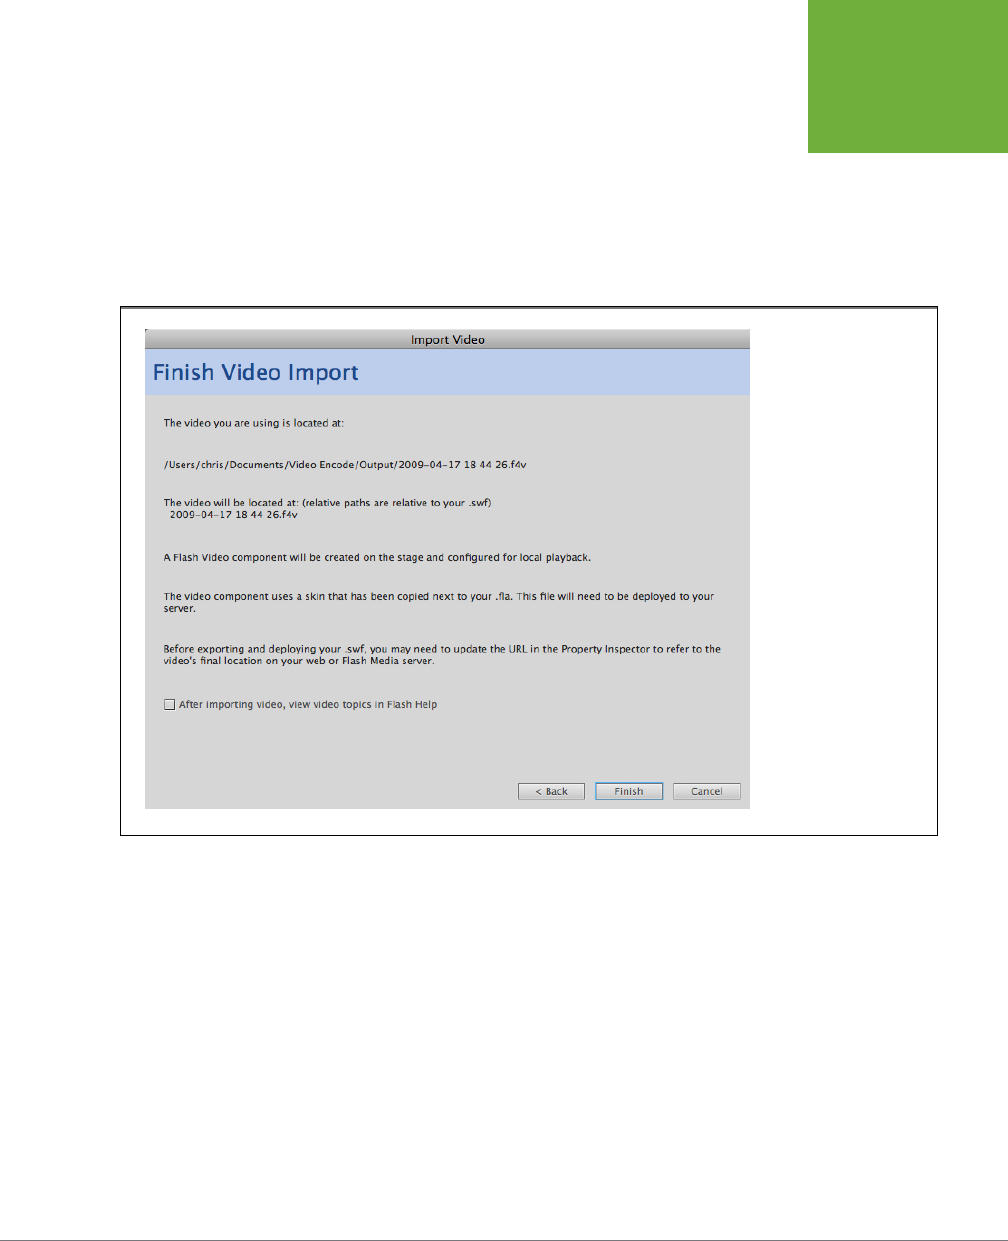
CHAPTER 11: INCORPORATING SOUND AND VIDEO 401
IMPORTING
VIDEO FILES
same folder with
building_bye_bye.swf
and
11-4_Building_Implode.flv
when you publish your Flash animation.
• Before exporting and deploying your .swf you may need to… If
building_
bye_bye.swf
and
11-4_Building_Implode.flv
aren’t in the same folder when
you put your animation on a web server, you need to change the path in
the video component. For more on video components, see the next sec-
tion, page 403.
FIGURE 11-17.
The last details displayed
in the Import Video dialog
box deal with the location
of files. This information
is helpful when it’s time
to publish your Flash
project on a web page.
10. Click Finish.
The “Import Video: Finish Video Import” dialog box disappears. As promised,
you see the video player on your stage along with the skin (video controls). If
you embed the video, rather than load it as described in this example, there’s
also a copy of the video in the Library, as shown in Figure 11-18.
11. Press Ctrl+Enter (⌘-Return on a Mac) to test your Flash project and view
the video.
In the Flash animation, you see your video running. Using the skin controls, you
can start and stop the playback.
www.it-ebooks.info
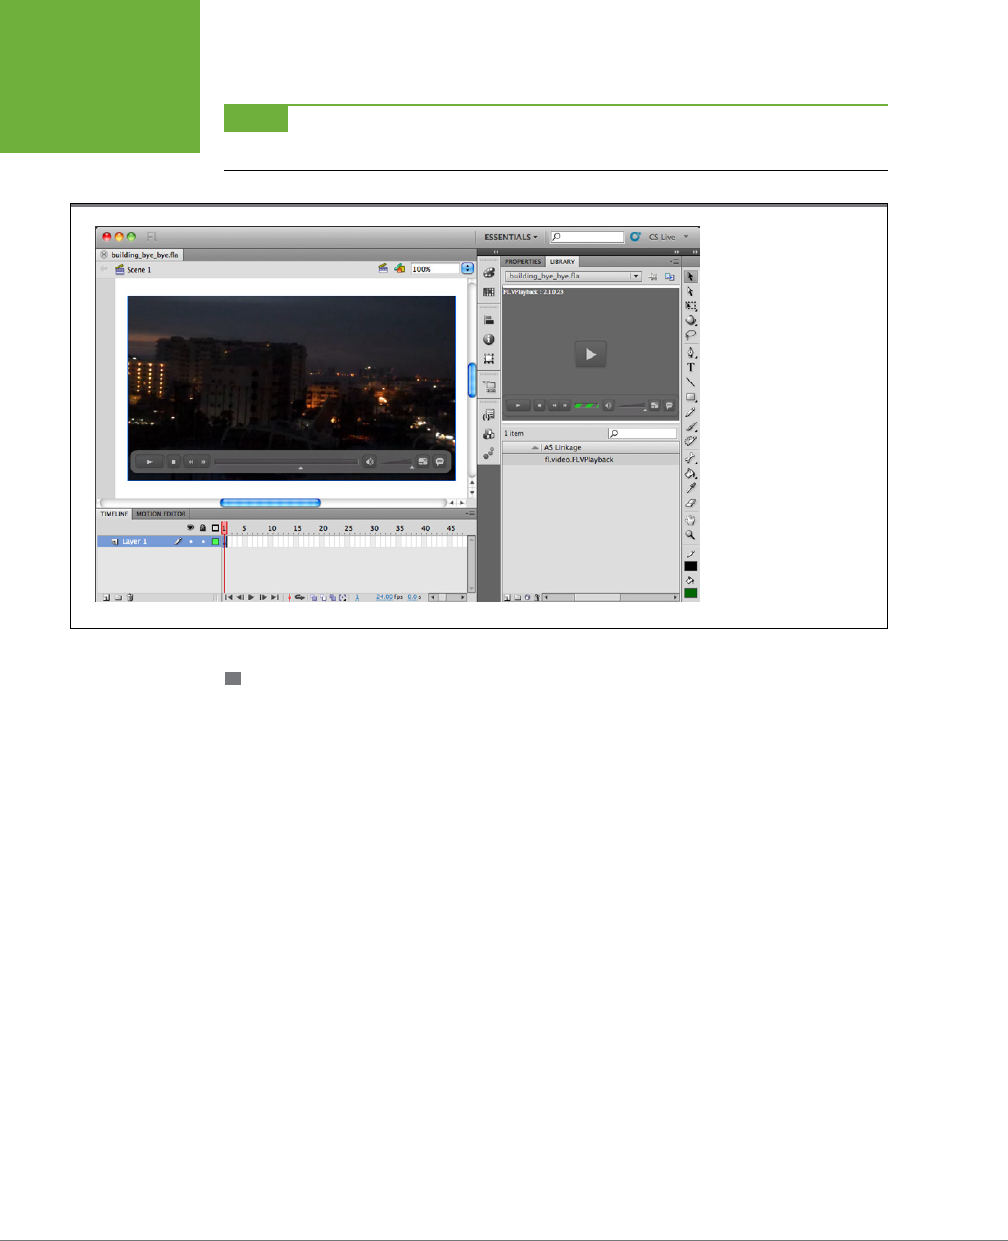
FLASH CS6: THE MISSING MANUAL
402
IMPORTING
VIDEO FILES
NOTE One of Flash’s relatively new tricks is the ability to test video within the Flash workspace. If you want,
you can press Enter (Return) to watch your video instead of Ctrl+Enter (⌘-Return).
FIGURE 11-18
When you finish import-
ing your video to Flash, it
shows up in the Library,
and there’s an instance
already placed on the
stage. If you need another
instance of the video, say
in another scene, you can
simply drag it from the
Library to the stage in
that scene.
DEPLOYING YOUR FLASH VIDEO ON THE WEB
Most of the time, Flash projects that incorporate videos end up on the Web. Whether
you’re uploading the video to a web page or someone is doing it for you, make sure
that all the files make the journey: the Flash animation (.swf), the Flash video file
(.flv or .f4v), and the skin file (named something like
SkinOverAll.swf
).
Importing a Flash Video from the Web
Surprisingly, importing a video file that’s stored on the Web isn’t much dierent from
importing one that’s on your computer, as described on page 396. The Flash video
file may be in a standard web server or one that has Flash Media Server software.
(Don’t worry if you don’t have a video file stored on a web server; there’s an example
file you can practice with, as you’ll see in the following steps.)
The only dierences in the importing process happen at the very beginning.
1. Select File→Import→Import Video.
The “Import Video: Select” window appears.
www.it-ebooks.info

CHAPTER 11: INCORPORATING SOUND AND VIDEO 403
IMPORTING
VIDEO FILES
2. Turn on the radio button next to “Already deployed to a web server, Flash
Video Streaming Service, or Flash Media Server” (Figure 11-14). In the URL
box, type the web address where the file lives, and then click Continue.
The URL for the practice file is
http://examples.oreilly.com/flashcs4mm/11-4_
Building_Implode.flv
. When you click Continue, the “Import Video: Skinning”
window you see in Figure 11-16 appears.
The rest of the steps are identical to those for importing a Flash video file on your
own computer. You can pick up the process at step 8 on page 399.
Customizing the Video Playback Component
In Flash-speak, once your video is added to your Flash file, it’s called the FLVPlayback
component. Components are prebuilt widgets that you drop into your animations.
Someone else went to all the trouble of building (and hopefully testing) the com-
ponent. All you have to do is drop a component into your Flash project and let it do
its stu. Components save you design and programming time, so it’s worthwhile to
learn about them. There’s a whole chapter on components (Chapter 16), but since
you’re already using one in this example, it’s worth covering some of the specific
ways you can customize the FLVPlayback component.
Most components provide a few options that let you customize them for your ne-
farious purposes. For example, in the case of the FLVPlayback component, you can
change the playback behavior of the video and the appearance of the video controls.
You can even change the video source file if you have a newly edited and improved
video. You change the settings for a component by changing its parameters. Here’s
how to view and edit the FLVPlayback parameters:
1. In Flash, click the FLVPlayback component on the stage.
As with other objects, you select the video playback component and then modify
it using the settings in the Properties panel.
2. In the Properties panel, open the Component Parameters subpanel.
The Component Inspector panel opens in Flash. The name of each parameter
(setting) is listed on the left, and its value is shown on the right.
3. Make changes to the FLVPlayback parameters.
You can change multiple parameters. For example, to change the appearance
of the skin (video playback controls), click skinAutoHide, and then set the value
to “true.” To change the color of the skin, click the skinBackgroundColor swatch,
and then choose a new color from the color picker.
www.it-ebooks.info

FLASH CS6: THE MISSING MANUAL
404
IMPORTING
VIDEO FILES
Here’s a complete description of the parameters for the FLVPlayback component:
• align. Determines the alignment of the video image when the video scaleMode
(below) isn’t set to exactFit.
• autoPlay. If set to “true,” the video automatically plays when the Flash anima-
tion frame that holds it is loaded.
• cuePoints. You can add cue points to your video when it’s encoded, as explained
on page 393. Or you can add them using the FLVPlayback component. Click
the magnifying glass to open a window where you can add manual cue points
by typing in a name and a time.
• islive. Used with a Flash Media Server, this value is set to “true” when stream-
ing a live performance.
• preview. Used for the live preview feature that helps you test the parameter
settings. Click the magnifying glass to see your video with the current settings.
• scaleMode. This setting determines how the video image sizes itself after it’s
loaded. There are three options:
noScale
, where the video uses the size of the
Flash video source file;
maintainAspectRatio
, where the video retains its propor-
tions when enlarged or shrunk; and
exactFit
, which forces the video to fit the
dimensions of the component as shown in the Properties panel.
• skin. The name and path for the .swf file that adds playback controls to the video.
• skinAutoHide. If set to “true,” the playback controls disappear unless the mouse
is hovering over the video image.
• skinBackgroundAlpha. Playback controls can be transparent. A value of
1.0=opaque and 0 = invisible. So, a value of 0.8 provides an 80 percent opac-
ity eect.
• skinBackgroundColor. Click the color swatch, and then choose a new color
from the color picker.
• source. The name and path for the Flash video file.
• volume. Sets the audio volume for video playback. A value of 1.0 = full volume
and 0 = no volume. So a value of 0.5 provides half the available volume for
audio playback.
www.it-ebooks.info

Adding Interactivity
PART
3
CHAPTER 12:
Introduction to ActionScript 3
CHAPTER 13:
Controlling Actions with Events
CHAPTER 14:
Organizing Objects with the Display List
CHAPTER 15:
Controlling the Timeline and Animation
CHAPTER 16:
Components for Interactivity
CHAPTER 17:
Choosing, Using, and Animating Text
CHAPTER 18:
Drawing with ActionScript
www.it-ebooks.info

407
CHAPTER
12
When your Flash document is on your computer, you’re in control. You can
make it do whatever you want, whenever you want. But eventually, your
creation has to strike out on its own. You won’t be there to tell your anima-
tion what to do when someone clicks a button or to remind it to turn o the sound
after the first three times through. You need to provide instructions to make your
animation perform automatically—that is,
automate
it.
To automate your animation or make it interactive, you use ActionScript—Flash’s
built-in programming language—to act on, or
script
, the dierent parts of your
animation. For example, you can instruct your animation to load a web page when
someone clicks a button you’ve added, to start playing an audio clip at the begin-
ning of a certain scene, to play your animation in reverse, to loop certain sections
of your animation, and so on.
Flash calls the chunks of ActionScript code you attach to your animation
actions
,
which is a great reminder that ActionScript exists to help your audience
interact
with your animation.
The first part of this chapter explains how ActionScript has grown up from a simple
macro language for animations into a full-blown programming language. After that,
the chapter introduces you to some of ActionScript’s basic concepts, with examples
each step of the way. Follow the examples and try some experiments of your own.
Go ahead, you won’t break anything. You’re on your way to a whole new level of
Flash animation.
Introduction to
ActionScript 3.0
www.it-ebooks.info

FLASH CS6: THE MISSING MANUAL
408
GETTING
TO KNOW
ACTIONSCRIPT
3.0
Getting to Know ActionScript 3.0
ActionScript is a serious programming language. As explained in the box below, folks
in cubicles use ActionScript to develop major programs—like ticket purchasing and
reservation systems. ActionScript incorporates geeky programming concepts like
variables, functions, parameters, and so on. Delve deep and you find the scripting
object model
(the internal, Flash-designated names of all the parts of your anima-
tion). But none of that will stop you from using ActionScript for your own needs.
In fact, Flash has some great tools to ease you into programming, like the Actions
panel and Code Snippets introduced in this chapter. The visual nature of Flash
gives you instant feedback, letting you know when your script works and when it
doesn’t. Combine those features, and you’ve got a great way to dip your toe in the
programming waters. You can even apply the skills you gain with ActionScript to
other programming languages, including that web developer favorite, JavaScript.
ActionScript on the Desk, in the Phone
Believe it or not, now is an exciting time to learn ActionScript.
Not only is ActionScript the programming language Flash uses
to control animations, but it also lets you create lots of other
programs that run via the Internet, on a smartphone, or on your
desktop, just like your wordprocessor or spreadsheet. Adobe
is taking advantage of the fact that nearly every computer
on earth plays the SWF files that Flash creates. ActionScript
programs can sit on a website and run in people’s brows-
ers. Adobe calls these programs
rich Internet applications
(RIAs), and they’re at the forefront of a big wave in computer
software. Traditional (non-artist) programmers use Flex SDK
(now an Apache Open Source project) and Flash Builder to
create these RIAs.
It doesn’t end with the Internet. Flash Player is the little
unit that plays Flash movies on your computer desktop. The
pocket-protector set calls it a
runtime
program, since Flash
Player provides all the support needed to run programs in
a given computer operating system. There are Flash Players
for Windows, Mac, and Linux computers, making it a virtually
universal system. So if you create your program in Flash, it can
run just about anywhere. Adobe has expanded this universality
into a standard dubbed
Adobe Integrated Runtime
(AIR). AIR
combines several standards to produce desktop programs:
Flash, ActionScript, JavaScript, PDF (Adobe Acrobat), and HTML.
You can build AIR programs using Flash, Dreamweaver, Flash
Builder, and other tools. Depending on your program’s version,
it may require either an upgrade or an extension.
There’s icing on the AIR cake, too. You can build applications
for Android devices and Apple’s iOS devices. Yes, that means
you can use Flash to create apps for iPhone, iPad, and all sorts
of Android smartphones and tablets. You may remember all
the furor, gnashing of teeth, and blog space devoted to Apple’s
refusal to allow Flash Player on the iPhone, which meant web
pages that use Flash Player wouldn’t work on iPhones and
iPads. What hasn’t gotten as much press is the fact that Adobe
has done an end run around the issue. That’s right: With AIR,
Flash Pro now lets you create apps and turn the code into
the native language for iOS as well as Android. You can build
apps, test them on mobile devices, and sell them through the
Apple and Android app stores. The last few chapters in this
book get you started.
IN THE NEWS
The Flash/ActionScript Partnership
ActionScript is a great name for a programming language. All computer programs
perform actions, but the cool thing about Flash and ActionScript is that those ac-
tions are so visible. You’re not just “assigning a value to a variable,” as you would
www.it-ebooks.info

CHAPTER 12: INTRODUCTION TO ACTIONSCRIPT 3.0 409
GETTING
TO KNOW
ACTIONSCRIPT
3.0
in typical computer lingo—you’re making the moon move across the sky, or playing
a video clip, or turning up the volume of the music. ActionScript programming is
satisfying because many of the actions it performs are so apparent.
In the earliest versions, ActionScript was sort of tacked on to the Flash animation
machine, the way macro programming was added to early word processors and
spreadsheets. You used drop-down menus and dialog boxes to move parts of your
drawing around the stage. You could start and stop animations on specific frames
using familiar programming techniques like loops and conditionals (more on those
later). In short, you could create some pretty snazzy visual eects.
At first, programming and animation seemed a curious match, since artists and
programmers often seem to be such dierent people. But when you think about it,
programming and drawing are both creative activities. Just like the artist, a program-
mer needs imagination and a vision. And animation is a very programmatic visual
art, complete with reusable chunks of action that branch o into separate scenes.
Today, there are Flash artist/programmers responsible for both the artwork and the
programming code in their projects. There are also large teams producing Flash
projects where artists create the objects that the programmers animate.
NOTE In recent years, Adobe developed separate tools for Flash development teams. Flash Catalyst is a tool
for designers, while Flash Builder is a tool for programmer/developers. When you work in Flash Pro, you have
access to both sides of the coin.
About ActionScript 1.0, 2.0, or 3.0
Today’s Adobe Flash Player can run programs written with any
version of ActionScript (1.0, 2.0, or 3.0), but it uses an entirely
different engine to run the ActionScript 3 programs. More
important, ActionScript 3 programs run faster. ActionScript 3.0
programs also work better with XML, a popular, nearly universal
way to store data, and with CSS (Cascading Style Sheets), used
to format web pages.
ActionScript 1.0 (2000). Flash 5 was the first version to intro-
duce the term “ActionScript,” and for the first time, animators
could type in code like real programmers. Before that, Flash
kept track of commands chosen from drop-down menus and
dialog boxes.
The ActionScript language was based on ECMAScript, which
was a great move, since the popular JavaScript also has the
same roots. Web programmers who know JavaScript can easily
pick up ActionScript.
ActionScript 2.0 (2003). Flash MX 2004 introduced ActionScript
2.0 a few months prior to the date implied by its moniker.
ActionScript 2.0 adopted additional object-oriented program-
ming concepts, making it a better tool for larger projects and
projects developed by teams of programmers. Some conces-
sions were made so that both ActionScript 1.0 and ActionScript
2.0 animations would run in the same Flash Player that was
installed on so many computers.
ActionScript 3.0 (2006). Adobe introduced ActionScript 3.0 with
Adobe Flex 2.0 (a programming system that makes use of the
Flash Player but doesn’t use the Flash Authoring program)—a
sure sign that the language had matured beyond a simple
macro language for controlling Flash animations. ActionScript
3.0 follows established object-oriented programming concepts
very closely, bringing benefits as well as changes from the
previous versions. Adobe Flash CS3 was the first version to
include ActionScript 3.0 as an option. With Flash Pro CS5.5,
Adobe added the ability to create apps for iOS and Android.
These apps are translated into the devices’ native language so
they do not require Flash Player.
UP TO SPEED
www.it-ebooks.info

FLASH CS6: THE MISSING MANUAL
410
GETTING
TO KNOW
ACTIONSCRIPT
3.0
ActionScript 3.0
Each version of Flash has introduced new, more sophisticated features, like better
video handling à la YouTube. For example, Flash CS4 introduced a powerful new
Motion Editor for creating and adjusting tweens. Flash CS5 introduced the Text
Layout Framework. All along, ActionScript has kept pace. (The box on page 409
details some of the history.) With ActionScript 3.0, Flash’s programming language
has matured quite a bit, adopting the latest and best programming concepts. As a
result, ActionScript is more powerful, more consistent, and a better tool for team-
based projects. If you’re a lone artist/programmer, does that mean ActionScript 3.0
doesn’t have any benefits for you? Not at all. You’ll benefit from ActionScript 3.0’s
consistency and power. Tools like the Display List and the Event Listener system will
help you write better programs and keep your sanity in the process.
ActionScript vs. JavaScript and Other Languages
ActionScript and JavaScript have a lot in common. They’re both
scripting
languages,
meaning that they’re programming languages that run inside other programs. Specifi-
cally, ActionScript runs inside Flash Player, and JavaScript runs inside a web browser.
On top of that, ActionScript and JavaScript sprouted from the same programming
language specification, ECMA-262.
NOTE Since you’re just dying to know, ECMA stands for European Computer Manufacturers Association, the
standards group that established the spec.
Initially, programmers used both ActionScript and JavaScript in snippets to perform
quick and easy chores. For example, in ActionScript, you’d write something like the
following:
on (press) {
startDrag(this);
}
You would literally attach code to a drawn object on Flash’s stage. JavaScript uses
similar chunks of code to control the behavior of buttons and rollover images. How-
ever, JavaScript is often interspersed throughout the HTML code that describes web
pages. From a technical point of view, ActionScript and JavaScript are considered
high-level languages because they’re closer to human language than the 1’s and 0’s
of machine language.
As human nature kicked in and Flash animations became more elaborate, ActionScript
snippets got tucked in all over the place. As a result, if an animation didn’t work as
expected, it was hard to find the misbehaving code. It could be almost anywhere.
ActionScript writers started to use more disciplined programming techniques, and
www.it-ebooks.info

CHAPTER 12: INTRODUCTION TO ACTIONSCRIPT 3.0 411
GETTING
TO KNOW
ACTIONSCRIPT
3.0
new versions of ActionScript encouraged better programming practices. The idea
of attaching ActionScript code to any old object became frowned upon. Instead,
programmers tried to keep all their code in one place, usually a single layer in the
timeline. At the same time,
object-oriented programming
was becoming more
popular and better-defined in programming circles, from the Visual Basic coders to
the C programming crowd. ActionScript added object-oriented concepts in version
2.0 and even more in ActionScript 3.0.
ActionScript 3.0 Spoken Here
The ActionScript chapters in this book focus entirely on ActionScript 3.0. If you’re
already versed in one of the earlier versions, you may be pleased to know that
Flash CS6 still supports ActionScript 1.0 and 2.0, but you can’t
mix
code from
ActionScript3.0 with code from earlier versions in the same SWF file. The reason is
that the Flash Player now includes two completely separate
virtual machines
(the
software that interprets ActionScript code and turns it into actions). The original one
runs ActionScript versions 1.0 and 2.0. A completely new virtual machine handles
ActionScript 3.0 code, which tends to run faster.
Diving Deeper into ActionScript
This book introduces ActionScript 3.0 and covers many of the
common elements of ActionScript programming. The goal is
to make you comfortable writing ActionScript code so you
can use it to control your Flash animations. But don’t stop
there—experiment with ActionScript code and branch out from
the examples in this book. If you’re in the midst of a project
and have an ActionScript question, try Flash’s help (Help→Flash
Help). Click the ActionScript topic near the top of the page. That
jumps to a section of the page with ActionScript help topics. For
a compendium of geeky ActionScript details, click the link that
says “ActionScript 3.0 Reference” (middle Figure 12-1). At that
point, you see the ActionScript reference that provides details
on every single object, property and method. There are three
panels; click an item in the top left panel to see its details.
Then to fine tune your selection, click an item in the lower left
panel. The details are always shown in the large panel on the
right. If you do a lot of ActionScript 3.0 coding, this reference
is probably the one you’ll use the most. For more details on
setting up and using Flash’s help files, see page 770.
In an effort to get you up and programming quickly, this book
doesn’t cover everything you’d learn in an advanced computer
science course. There are great books that go into more detail
on ActionScript topics.
Learning ActionScript 3.0
by Rich Shupe
and Zevan Rosser (O’Reilly) is a clearly written guide for begin-
ners. For a more advanced reference,
Essential ActionScript 3.0
by Colin Moock (O’Reilly) is ideal. If you’re an old hand with
ActionScript 2.0 and want to make the move to ActionScript
3.0, consider
ActionScript 3.0 Quick Reference
(O’Reilly) to ease
you through the transition.
CODERS’ CLINIC
TIP If you’re interested in learning more about ActionScript 2.0, find a copy of
Essential ActionScript 2.0
by
Colin Moock.
www.it-ebooks.info
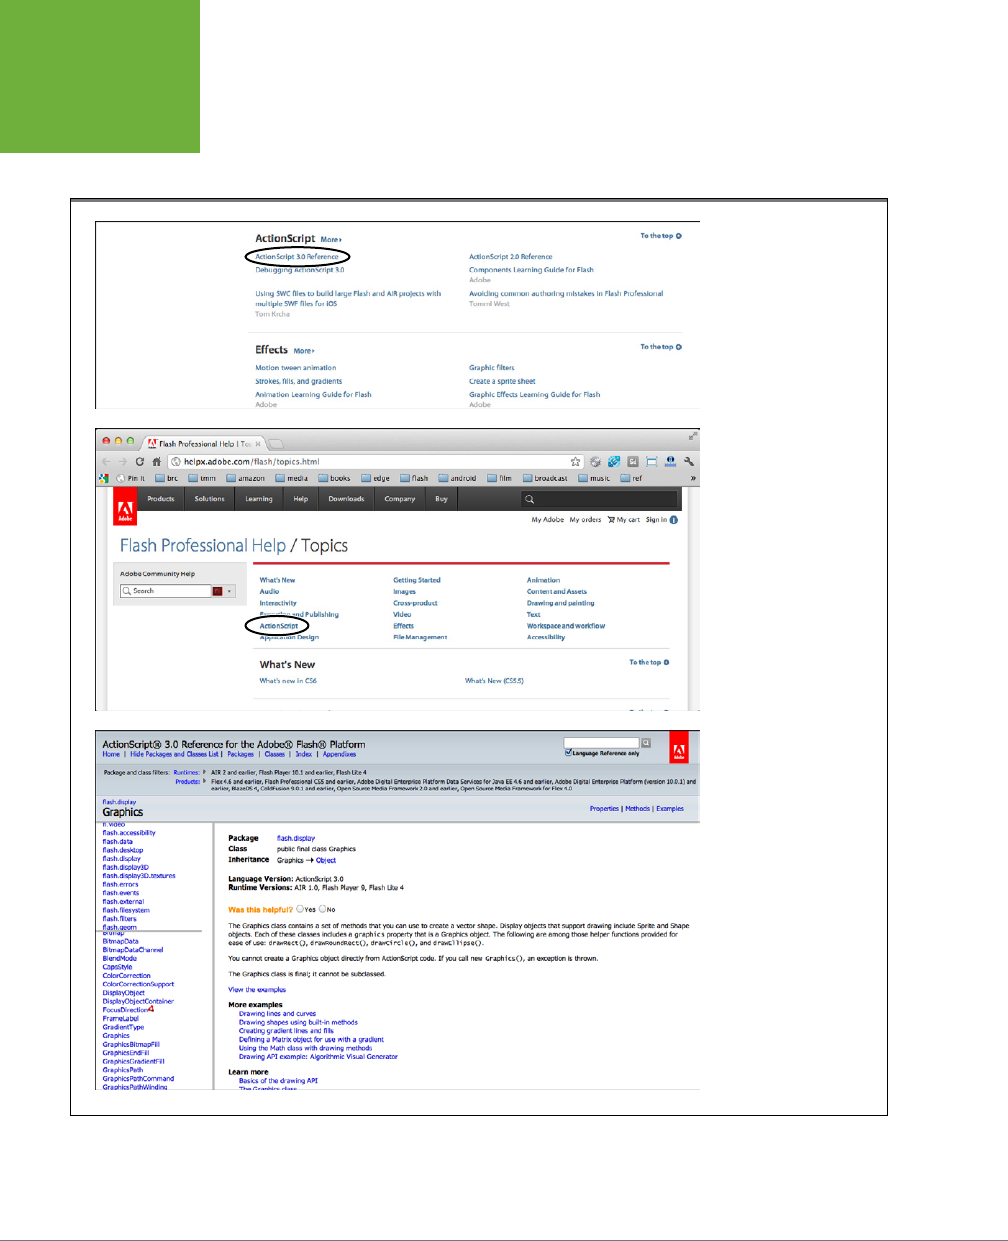
FLASH CS6: THE MISSING MANUAL
412
GETTING
TO KNOW
ACTIONSCRIPT
3.0
If you’re new to ActionScript, no problem. As the language of the future, ActionScript3
is the version to learn. If you’re an experienced ActionScript programmer, it’s worth
a little relearning to gain the advantages that ActionScript 3.0 gives you.
FIGURE 12-1
It takes a few steps to
reach the help reference
for ActionScript. Top: You
see this web page when
you choose Help→Help
in Flash. Click the Action-
Script link (circled).
Middle: That displays sev-
eral ActionScript- related
items, including articles
and a reference. For the
best details, click Action-
Script 3.0 Reference.
Bottom: Finally, you see
the help reference for the
ActionScript and all its
objects, properties and
methods. Use the panels
on the left to display
details in the main panel
on the right.
www.it-ebooks.info

CHAPTER 12: INTRODUCTION TO ACTIONSCRIPT 3.0 413
BEGINNING
YOUR
ACTIONSCRIPT
PROJECT
Beginning Your ActionScript Project
When your Flash project includes ActionScript programming, you have some deci-
sions to make at the outset. As explained in the previous section, you need to decide
whether you’re using ActionScript 2.0 or ActionScript 3.0, since you can’t mix version
3.0 with earlier versions. The exercises in this book all use ActionScript 3.0, so that
fact alone may make your decision easier. Once you’ve decided, you choose the
type of Flash file you want to create in the intro screen or in the File→New dialog
box (Figure 12-2). If you choose one of the AIR options, you’re automatically creating
an ActionScript 3.0 document.
Timeline Programming: Pros and Cons
Ask more than one script writer where it’s best to place code—
the Flash timeline or an ActionScript file—and you’re likely to
start an energetic debate. If you plan on a long ActionScript
career, it’s worth learning both techniques.
Originally, ActionScript was considered a helper tool for anima-
tions. If you wanted the moon to rise at a certain point in an
animation, you’d attach a snippet of ActionScript code to the
moon or to a specific frame in an animation. Before you knew it,
you had bits and pieces of code tucked in every nook and cranny
of your timeline and Flash file. That situation is bad enough if
you’re the only one working on the project, but it was really
a problem for team projects. Eventually, it became a common
practice to keep one timeline layer devoted to ActionScript
code. That way, at least most code was in one place. In recent
years, the growing trend is to store ActionScript code in a
separate file, making it easier for teams to work on the same
project. Artists can work on the drawing in an .fla document,
and programmers can write code in .as documents.
If you’re working on a team project, chances are your team
leaders will tell you exactly where and how to add ActionScript
to the project. If you’re working on your own, you can choose
the method that’s best for you. In some cases, particularly
with smaller projects or projects that need to be hammered
out quickly, it may make perfect sense to attach code to the
Flash timeline. Here are more details about both methods:
Timeline programming is the way everyone used to write
ActionScript. You attach scripts to individual frames in the
Flash timeline. Quick and easy, this method gives a certain
amount of instant gratification. If you want to quickly test an
idea, the tendency is to attach some code to the timeline. The
problem is that you may end up with snippets of ActionScript
code in many different places, which makes it more difficult
to troubleshoot the code if something goes wrong. It’s even
worse if you (or someone else) return to a project years later
to make some changes.
ActionScript file programming is the preferred method for
large projects and true object-oriented programming. One
of the goals of object-oriented programming is to create
code that’s easily reusable. First of all, it has to be readable
and understandable. Second, the chunks of code have to be
somewhat independent. Placing all your code in a separate
.as file forces you to provide more thorough definitions of the
objects in your Flash project. As a result, you write more lines
of code, but there’s a better chance that you can reuse that
code for other projects. When teams of programmers work
on the same project, it’s much easier this way to update the
code and keep track of each updated version.
In the end, it comes down to the needs of your project and, if
you’re the project boss, your personal preference.
CODERS’ CLINIC
Next, you need to decide where you’re going to place your ActionScript code. You
have two choices. You can place your ActionScript code in frames in the Flash
timeline, or you can place your code in one or more separate ActionScript (.as) files:
• To place ActionScript code in the timeline of your Flash file, create a Flash docu-
ment (.fla) by choosing File→New→ActionScript 3.0. You have a choice between
www.it-ebooks.info
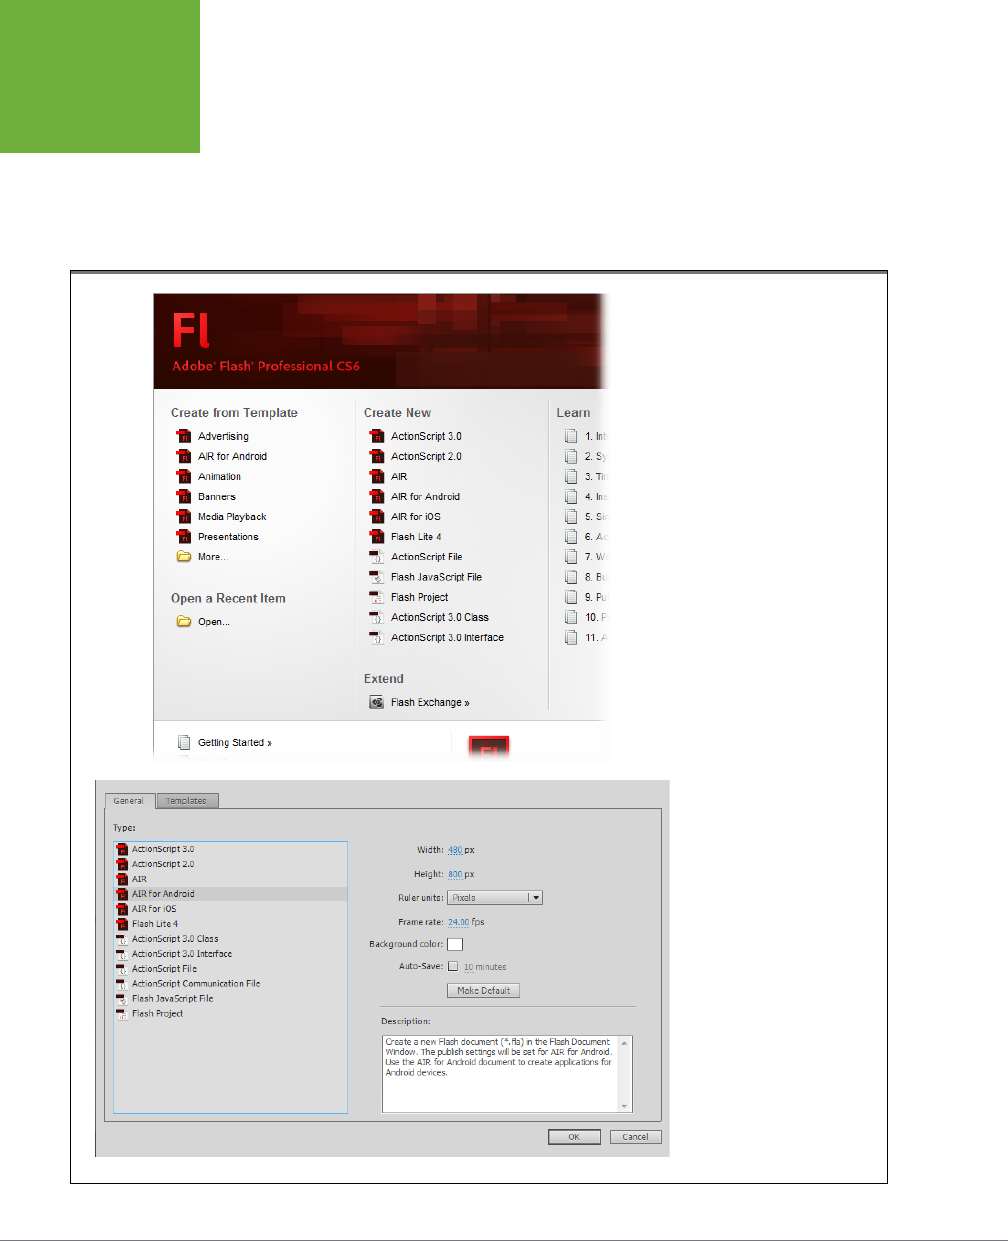
FLASH CS6: THE MISSING MANUAL
414
BEGINNING
YOUR
ACTIONSCRIPT
PROJECT
creating a Flash document based on ActionScript 2.0 or ActionScript 3.0. When
Flash creates a new .fla file, it includes information that (ultimately through the
.swf file) tells the Flash Player what flavor of ActionScript to use. You can use
timeline programming for smaller projects and when you’re not working with
a team of other programmers. Just remember that it’s more dicult to reuse
your ActionScript code if it’s embedded in a Flash document’s timeline.
FIGURE 12-2
When you create a Flash
file, you need to decide
between ActionScript 3.0 and
ActionScript 2.0. You can’t use
code from both in a single
Flash document (.fla). Use the
Intro splash screen (top) or the
File→New command (bottom)
to create a new document. If
you’re using a separate Action-
Script document for your code,
then choose ActionScript File to
create an .as document.
www.it-ebooks.info

CHAPTER 12: INTRODUCTION TO ACTIONSCRIPT 3.0 415
BEGINNING
YOUR
ACTIONSCRIPT
PROJECT
• To place ActionScript code in a separate ActionScript file, create an ActionScript
document (.as) by choosing File→New→ActionScript File. When you work with
teams of programmers and artists, it’s likely the team manager will tell you to
keep ActionScript code in a separate file. Even if you’re working alone, you may
want to keep code in a separate
.as
file so that your work can be reused with
other Flash projects. There’s a bit more programming overhead when you keep
your ActionScript code in a separate file. On the plus side, that overhead leads
to better object-oriented practices, making your code easier to reuse.
For more details on making the choice between timeline programming and keeping
your code in a separate ActionScript file, see the box on page 413.
NOTE Most of the examples in this book use timeline programming to show ActionScript programming
principles.
Writing ActionScript Code in the Timeline
If you’ve got a Flash document open, you’re ready to begin adding ActionScript
code to the timeline. Here are the steps to get you started:
1. Create a new layer in the timeline to store your code.
To make your life easier later, keep your ActionScript code in one place—a single
layer at the top of the timeline that holds only ActionScript code. You can use
any name you want for this layer, but for clarity’s sake, call it
actions
or
scripts
.
2. Click a keyframe where you want to add your code, and then press F9
(Option-F9) to open the Actions panel.
The Actions panel is divided into three main parts, as shown in Figure 12-3. The
Script pane is where you type your ActionScript code. The Actions toolbox
holds a list of ActionScript objects, properties, methods, and events. The Script
navigator shows a list of objects that have ActionScript code attached.
3. Type your statements in the Script pane, or choose statements from the
Actions toolbox.
You can type code directly into the Script pane, or you can double-click or drag
the ActionScript elements in the Actions toolbox. As you add code to individual
frames, you see them listed in the Script navigator (in the toolbox, located on
the left side of the Actions panel), giving you a running list of the objects that
have code attached. To view or edit code for a particular object, click the object
in the Script navigator, and you see the code in the Script pane.
www.it-ebooks.info
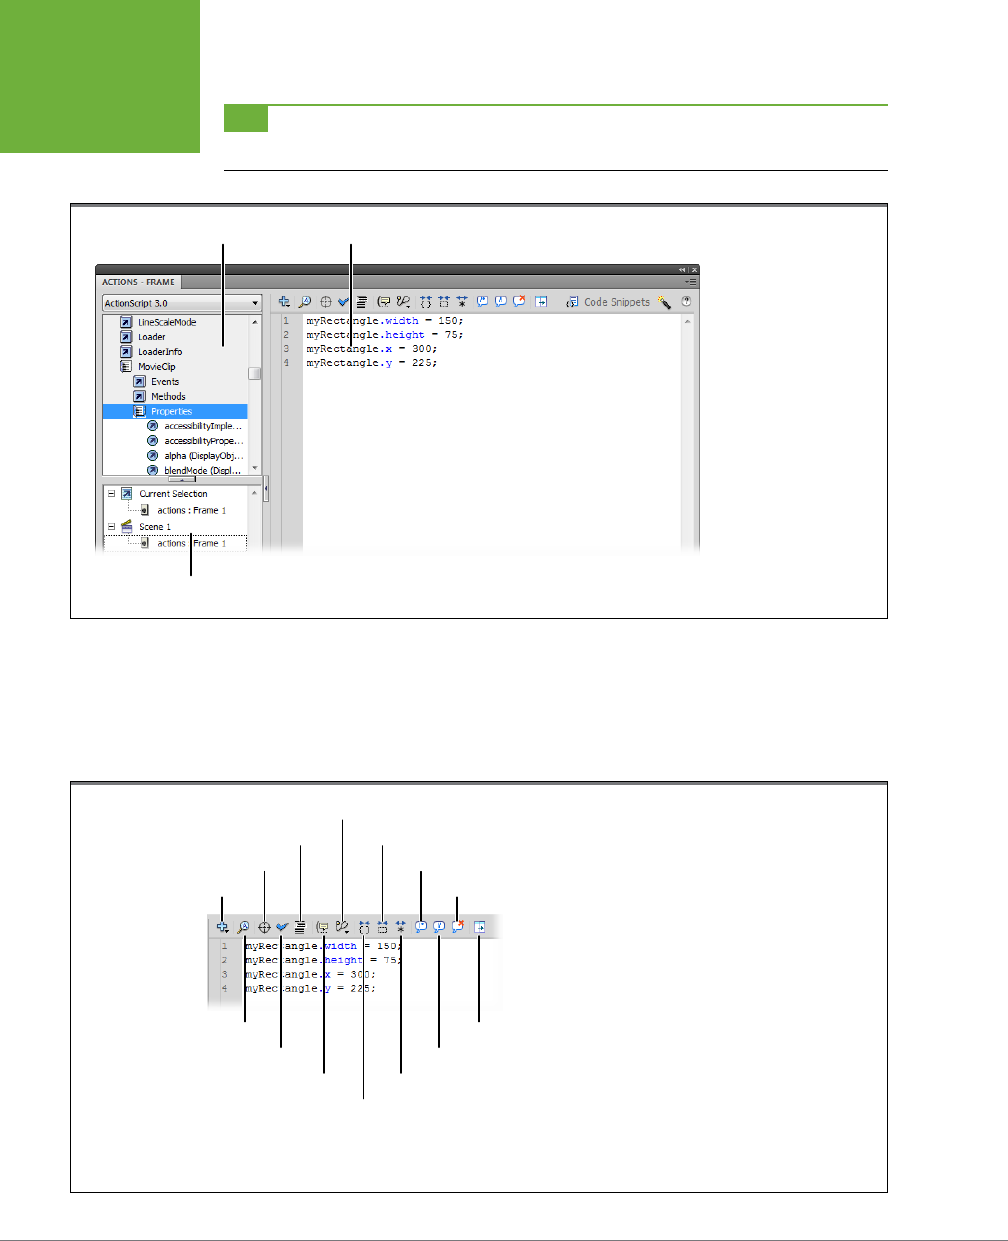
FLASH CS6: THE MISSING MANUAL
416
BEGINNING
YOUR
ACTIONSCRIPT
PROJECT
TIP You can collapse and expand the Actions toolbox and its panels. If you don’t see the item you’re looking
for, click the rectangular buttons with the triangles to open and close the panels.
FIGURE 12-3
The Actions panel has
three parts: the Script
pane, the Actions toolbox,
and the Script navigator.
In the Actions toolbox,
the circle-arrow icons
represent ActionScript
elements that can be
added to your script. Click
the book icons to expand
and collapse the different
ActionScript categories.
Script paneActions toolbox
Script navigator
Using the Script Pane Toolbar
The toolbar above the Script pane provides helpful tools for working with your
ActionScript code (Figure 12-4). The buttons aren’t labeled, but you can see their
names when you mouse over them. From left to right, these are the buttons:
FIGURE 12-4
The buttons in the toolbar above the Script pane
may seem cryptic at first, but they’re worth inves-
tigating. Pause with your cursor over a button to
show a tooltip that explains its function.
Add a new item to the script Remove comment
Insert a target path Apply block comment
Auto format Collapse selection
Debug options
Find
Show/Hide Toolbox
Check syntax Apply line comment
Show code hint Expand all
Collapse between braces
www.it-ebooks.info

CHAPTER 12: INTRODUCTION TO ACTIONSCRIPT 3.0 417
BEGINNING
YOUR
ACTIONSCRIPT
PROJECT
• Add a new item to script. Provides access to the same elements as the Actions
toolbox. Useful if you’ve hidden the toolbox using the Show/Hide toolbox com-
mand (last in this list of buttons).
• Find. Searches your script for words and characters.
• Insert a target path. Click this button, and then choose your target object from
a list, and this tool writes the proper code identifying it.
• Check syntax. Inspects your code for obvious errors.
• Auto format. Formats your script, making it easier to read, by using colors
and indents. To set formatting options, go to Edit→Preferences→ActionScript
(Flash→Preferences→ActionScript on a Mac).
TIP Some coders have reported that in some cases autoformatting has broken their otherwise serviceable
code. To avoid this, test your code before and after autoformatting. If you run into trouble, you can undo the
formatting.
• Show code hint. Displays tooltips with suggestions for your script.
• Debug options. Inserts and removes breakpoints in your code. Breakpoints
stop your program from running, giving you an opportunity to examine the
workings of your program.
• Collapse between braces. Hides the text between a set of curly braces
{}
,
making it easier to read and understand your code. Similar to collapsing an
outline in a word processor.
• Collapse selection. Select the text you want to hide, and then click this button
to hide it. Hold down the Alt (Option) key when you click this button, and the
Actions panel collapses the code not selected.
• Expand all. Expands collapsed portions of your script after you’ve used one of
the two previous commands.
• Apply block comment. Inserts the
/*
and
*/
used to create a block comment.
• Apply line comment. Inserts the
//
used to create a line comment.
• Remove comment. Removes the comment characters from a comment.
• Show/Hide toolbox. If you need more room to see your Script pane, use this
button to hide the Actions toolbox. When the toolbox is hidden, you can use
the “Add a new item to script” button to insert elements.
TIP If you need more room to see your script, use the “Show/Hide toolbox” button on the far right to tem-
porarily hide the Actions toolbox. When the toolbox is hidden, you can use the “Add a new item to script” button
(far left) to insert ActionScript elements.
www.it-ebooks.info
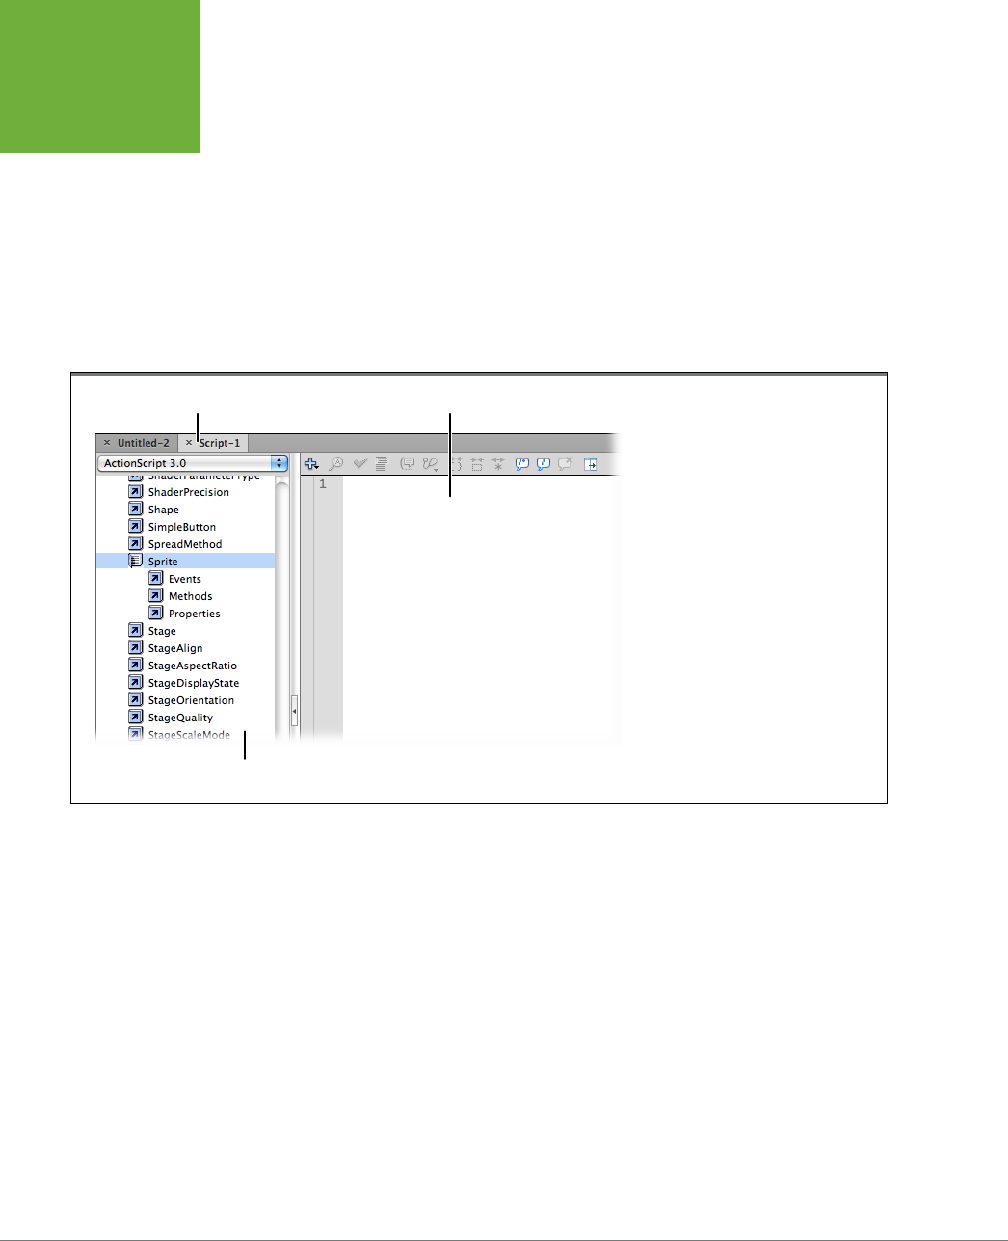
FLASH CS6: THE MISSING MANUAL
418
BEGINNING
YOUR
ACTIONSCRIPT
PROJECT
Writing Code in an ActionScript File
When you want to store all your code in an ActionScript (.as) file, the first thing you
need to do is create the file:
1. Create a new ActionScript file (File→New→ActionScript File).
A new window opens, as shown in Figure 12-5. Initially, the window has a tab
that reads Script-1 or something similar. When you save the ActionScript file
with a name of your choice, that name appears on the tab. The Script window
has two sections, a Script pane and the Actions toolbox. The toolbar above the
Script pane is identical to the one described on page 416.
FIGURE 12-5
The Script window used to write code
in an ActionScript (.as) file looks very
similar to the Actions panel of a Flash
document. There’s no Script navigator,
because the ActionScript code is linked
to particular objects by statements
within the code itself.
Tab showing script filename Script pane
Actions toolbox
2. Save your ActionScript file in the same directory as your Flash file
(File→Save).
A dialog box opens where you can select a folder and then name your document.
You want to save your file in the same directory as your Flash file. This way,
Flash’s compiler can find it when it creates an .swf file for distribution. Another
option is to save your file in a folder that’s designated as the ActionScript class
folder; the steps for doing so are described in the box on page 419.
3. Type your statements in the Script pane or choose statements from the
Actions toolbox.
You can type code directly into the Script pane, or you can double-click or drag
the ActionScript elements in the Actions toolbox.
www.it-ebooks.info

CHAPTER 12: INTRODUCTION TO ACTIONSCRIPT 3.0 419
OBJECT-
ORIENTED
THINKING
When you separate your ActionScript code from a Flash document, it’s up to you to
establish links between your code and the objects in the Flash document. Because
this chapter focuses on the basics, the following examples use timeline programming.
Object-Oriented Thinking
When programmers talk about object-oriented programming, they’re referring to
specific programming techniques—a way of looking at the parts of a program and the
overall design. The idea is to create chunks of programming code that do a specific
job. If you design them all, those chunks can fit together with other pieces of code.
Think for a second about a typical home theater system that has an amplifier/receiver,
a DVD player, a TV screen, and maybe a cable box. Each unit is an object. The folks
who designed the DVD player don’t have to know how to build a TV screen; they
just have to make a DVD player that can plug into a TV. You can plug the same DVD
player into another home theater system, and it’ll work perfectly well. Programmers
strive for that kind of modularity when they build objects.
The benefits are obvious. As long as the objects have an agreed-upon method for
interacting, dierent programmers can work on dierent objects. When they all
come together, they’ll play well with one another. If the objects are truly useful and
flexible, you can reuse them in future projects. Future programmers won’t have to
understand how the DVD player works; all they need to know is how to plug it in
and how to send and receive signals from it.
Creating an ActionScript Class Folder
If you’re working on several ActionScript projects over time,
you want to reuse as much of your ActionScript code as pos-
sible. So you may create objects that work with a variety of
Flash projects.
Perhaps you have some great shopping cart code that you can
use for several different clients. You can put your shopping
cart code in one ActionScript file (.as), and then put code for
each of your clients in separate files. Your client files need to
reach out and use that shopping cart code, but it’s probably
in a different file folder. The solution is to create one or more
ActionScript class folders, where you store code that’s used by
many different Flash projects.
Then you need to tell Flash and ActionScript where to find
those class folders.
You do that through Flash preferences. Go to Edit→
Preferences→
ActionScript→ActionScript 3.0 Settings (on a Mac, go to
Flash→Preferences→ActionScript→ActionScript 3.0 Settings).
Figure 12-6 shows the box that opens to let you set file paths
for three different types of ActionScript files. Use the middle
tool labeled “Folders containing ActionScript class files.” Click
the + button to add a new path to the list; you may have more
than one Library path. Click the folder icon to browse to the
directory that holds the class files.
CODERS’ CLINIC
www.it-ebooks.info
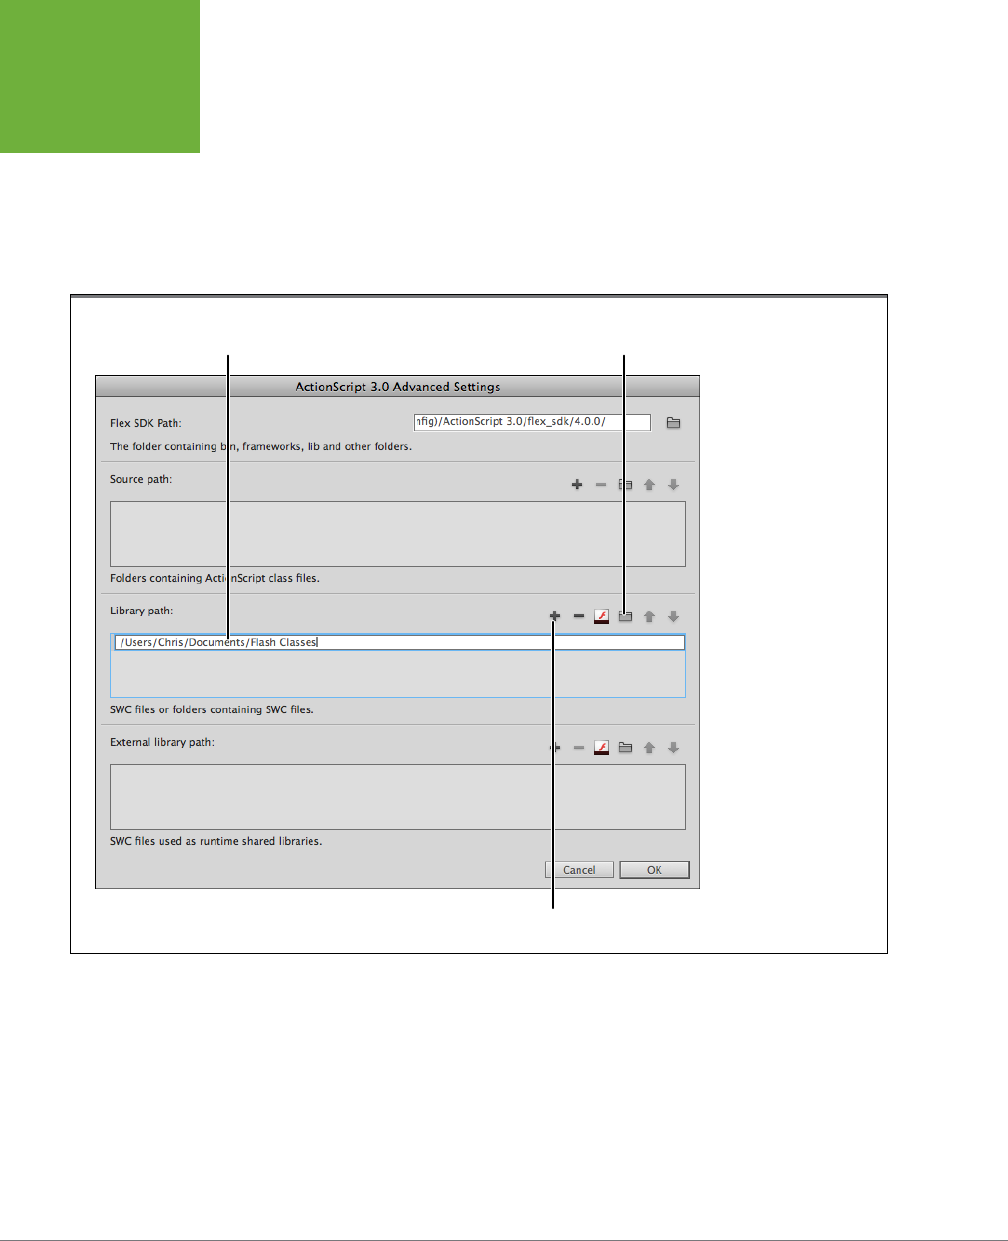
FLASH CS6: THE MISSING MANUAL
420
OBJECT-
ORIENTED
THINKING
In addition to reusability, there are a handful of other concepts that define object-
oriented programming. Some of them don’t make a lot of sense until you understand
the basics of ActionScript, but here are a few of the basics for reference:
• Classes. A class describes an object in the abstract, like the concept of DVD
players. A class is like a generalized blueprint for building an object.
• Instances. An instance is a specific object, like a Sony DVD Player Model N55.
FIGURE 12-6
Use the Preferences
box to change the basic
settings for ActionScript.
Here the path to a folder
holding ActionScript is
specified so the Flash
compiler can find it when
it builds .swf files.
Existing Library path for class files
Click to browse
to new path
Actions toolbox
• Properties. Properties are characteristics that define an object. For example,
color may be a property of the Sony DVD player; that property may be set to
black or silver. Properties are part of an object’s definition, so they’re called
members
of the object.
• Methods. Methods are actions that an object can perform. To continue the
DVD player example, Play, Pause, and Fast Forward are methods of the DVD
player class. These methods also belong to the Sony N55 instance of the DVD
www.it-ebooks.info

CHAPTER 12: INTRODUCTION TO ACTIONSCRIPT 3.0 421
OBJECT-
ORIENTED
THINKING
player class. Methods are part of an object’s definition so, like properties, they’re
members of the object.
• Events. Events act as triggers. Someone presses the Play button on the DVD
player—the event—and the Play method runs. Events are also part of an object’s
definition.
• Encapsulation. It’s not necessary or wise to expose all the inner workings of an
object. It’s important for people to be able to play, pause, and eject discs in the
DVD player, but they don’t need to control the rotation speed or the intensity
of the laser that reads the discs. In object-oriented programming, encapsulated
features are those your audience can’t mess with.
Is ActionScript a True Object-Oriented Language?
If you use the strictest definition for object-oriented program-
ming languages, ActionScript doesn’t make the cut. In true
object-oriented programming, everything is an object and
derives from objects. Even ActionScript 3.0, with its enhanced
object-oriented features, has a few loopholes that you won’t
find in a language like Java (not to be confused with JavaScript).
For example, timeline programming in Flash breaks some of the
accepted rules of object-oriented programming. ActionScript
permits functions that exist outside of an object, referred to
as
function closures
.
ActionScript doesn’t force you to always use object-oriented
programming techniques. Instead, it takes advantage of many
object-oriented concepts and lets you choose how strictly you
want to use them.
CODERS’ CLINIC
Flash itself gives you a good head start toward object-oriented thinking. Consider a
lowly rectangle you draw on the Flash stage. That’s an
object
. All rectangles share
some of the same properties. For example, they have four sides defined by four
points, and they have a surface or face between those sides. All the corners of a
rectangle are right angles.
Once you understand the basics, you can describe a Flash rectangle using a few
properties:
• Width
• Height
• Stroke thickness
• Stroke color
• Fill color
Taking it a step further, you can place that rectangle anywhere on the stage by
placing its upper-left corner on a particular point. That location is another property
of a Flash rectangle.
www.it-ebooks.info

FLASH CS6: THE MISSING MANUAL
422
OBJECT-
ORIENTED
THINKING
ActionScript Classes
If you’re working in Flash, chances are you’re going to use more than one rectangle,
and you don’t have to build every rectangle from the ground up. You can take
certain rectangular characteristics for granted—four sides, right-angled corners.
Other properties you need to define separately for each rectangle—width, height,
color, location on the stage. So you need a class that defines rectangles in general,
and you can then create specific instances of rectangles by defining their individual
properties. And that’s exactly how Flash works.
Class, instance
, and
property
are all
fundamental terms for object-oriented programming and thinking.
Changing an Object’s Properties
In Flash, you change a rectangle’s height or width using the Modify→Transform→Scale
command. To change its location, you drag it to a new place. In ActionScript, by
contrast, you change the height, width, and location by changing the properties in
your ActionScript code:
myRectangle.width = 150;
myRectangle.height = 75;
myRectangle.x = 300;
myRectangle.y = 225;
NOTE It’s common practice to refer to locations on a computer screen as
x/y
coordinates. The
x
refers to
the horizontal position, and the
y
refers to the vertical position. If you need something to help you remember
which is which, remember that a lowercase
y
extends farther in a vertical direction.
Want to put some of these programming concepts to work? Try this:
1. In a new document, draw a rectangle of any size and shape.
You can think of this step as defining an object.
2. Select the rectangle, and then convert it to a symbol (Modify→“Convert to
Symbol”), choosing Movie Clip as the type.
Movie clip is a great catch-all symbol for ActionScript programming. Movie clips
can be as simple or complicated as you want.
3. Create a new layer, double-click the layer name, and then type
actions
.
It’s good programming practice to create a separate layer in the timeline for
your ActionScript code. Naming it
actions
or
scripts
makes it clear that the layer
is reserved for code.
4. For consistency, rename the rectangle layer
drawings
.
Your timeline now has two layers with descriptive names.
www.it-ebooks.info
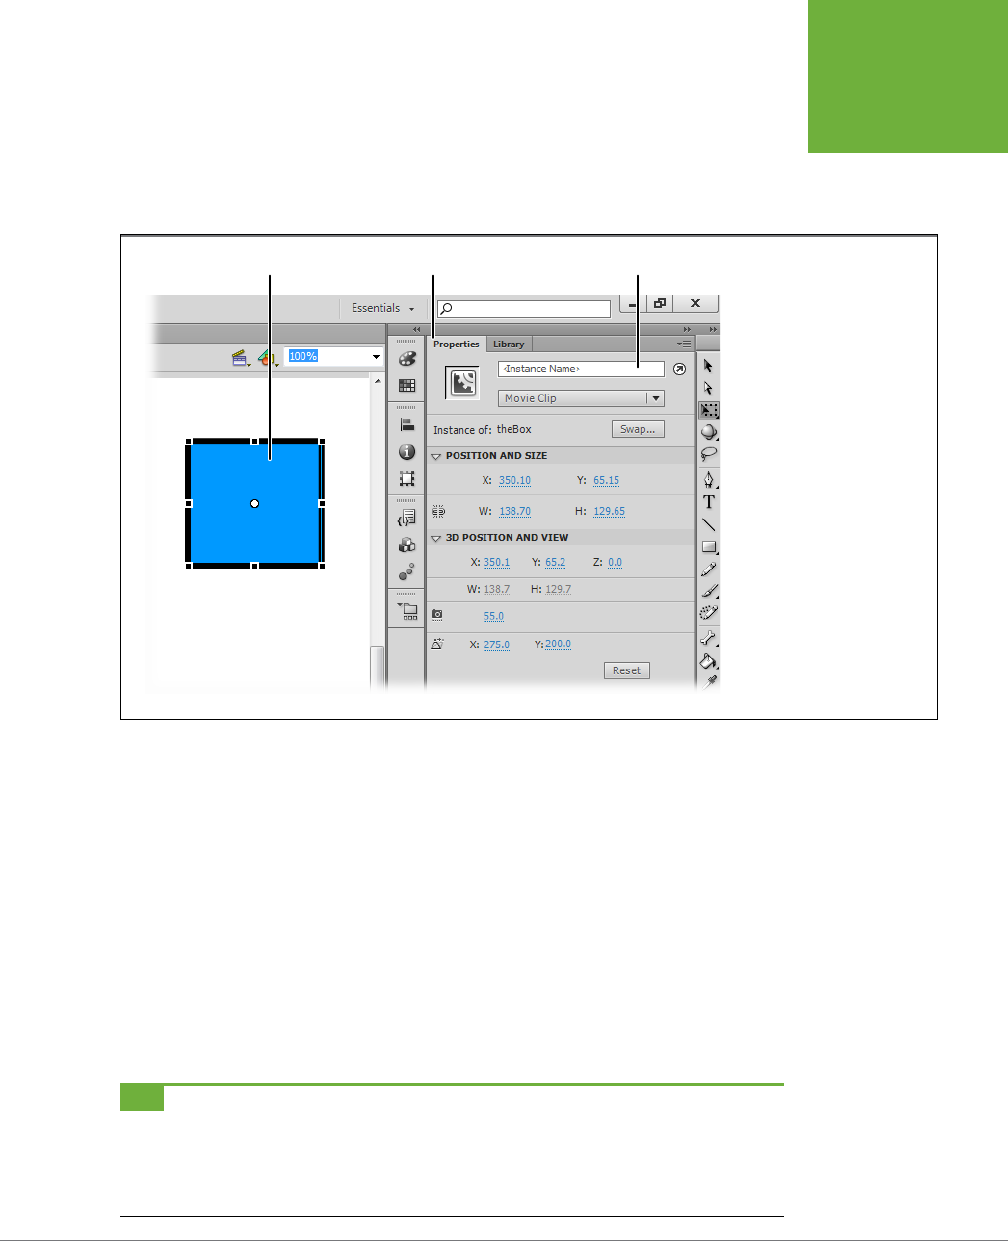
CHAPTER 12: INTRODUCTION TO ACTIONSCRIPT 3.0 423
OBJECT-
ORIENTED
THINKING
5. Make sure the instance on stage is selected, and then in the Properties panel,
type
myRectangle
in the “Instance name” box, as shown in Figure 12-7.
This step is important. If you don’t give objects on the stage a name, there’s no
way to tell ActionScript exactly which object you’re talking about.
FIGURE 12-7
Before you can control
objects on the Flash stage
with ActionScript, you have to
convert them to movie clip or
button symbols, and then name
them in the “Instance name”
box on the Properties panel.
Rectangle drawing Properties panel Instance name box
6. Open the Actions panel.
The Actions panel looks pretty busy when you first see it, as shown earlier in
Figure 12-3. All the details are described on page 415. For now, focus on the big
blank area in the middle, where you type ActionScript code.
7. Select the first frame of the actions layer in the timeline, and then type the
following lines in the Actions panel:
myRectangle.width = 150;
myRectangle.height = 75;
myRectangle.x = 300;
myRectangle.y = 225;
When you’re done, the Script pane should look like Figure 12-8.
TIP Uppercase and lowercase spelling make a difference to ActionScript. Objects named myRectangle,
MyRectangle, and myrectangle are completely different things to ActionScript. ActionScript programmers use
certain typographic conventions that make it easier to read and understand code. One of those conventions is to
use
camel case
for instances of objects. Camel case uses an initial lowercase letter and then uppercase for the
first letter of additional words. For example: thisIsCamelCase.
www.it-ebooks.info
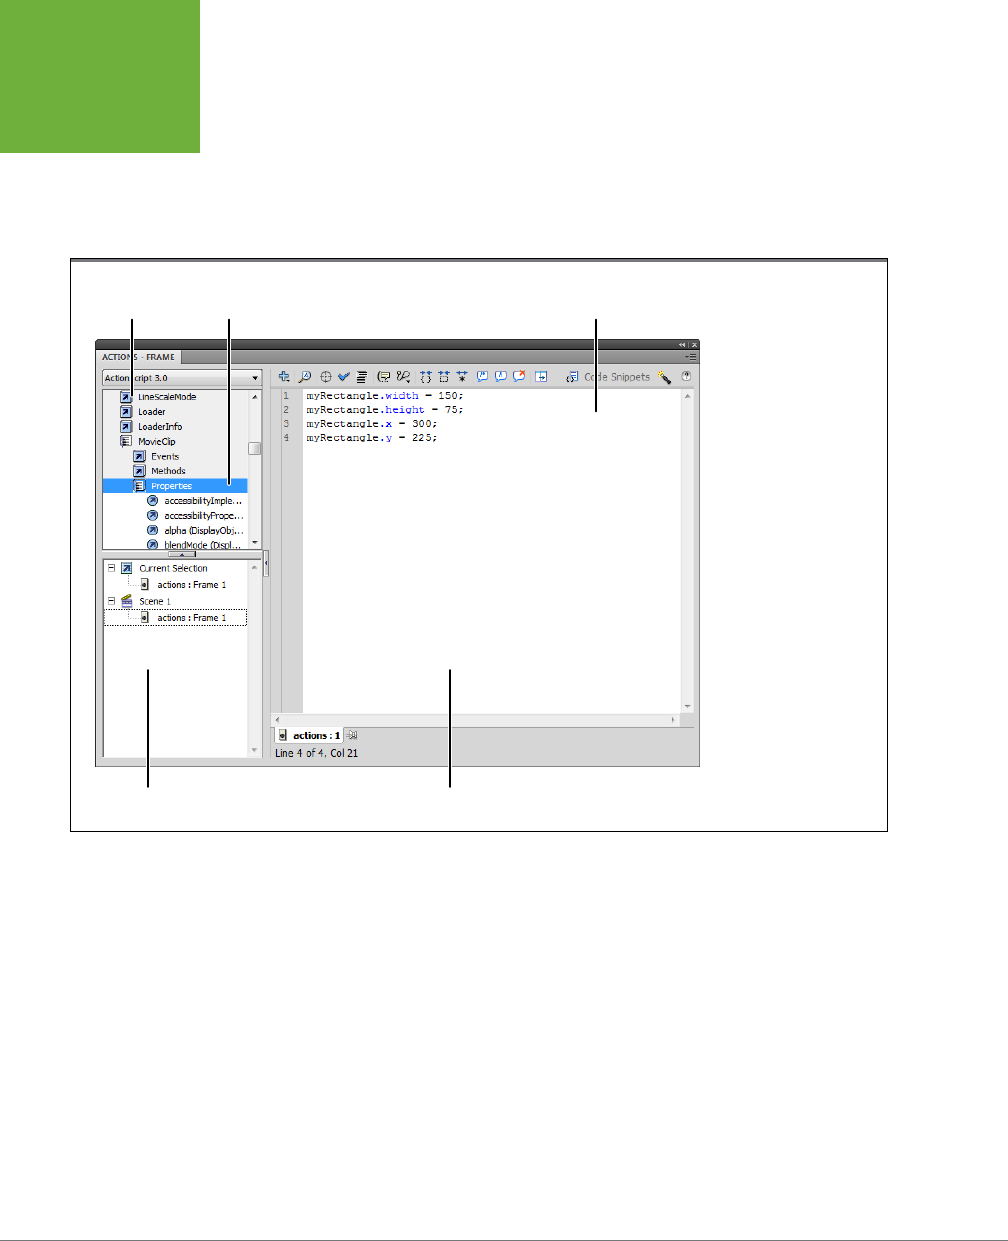
FLASH CS6: THE MISSING MANUAL
424
OBJECT-
ORIENTED
THINKING
8. Click the Check Syntax button (the checkmark) at the top of the Actions
panel to check for typos in your code.
The check syntax feature in ActionScript 3.0 isn’t as picky as it could be. Still, it
helps you find major bloopers in your code, so it’s worth using, especially when
you’re just starting out.
FIGURE 12-8
Type your ActionScript
statements directly into
the Script pane of the
Actions panel. Remember
to include semicolons (;)
at the end of statements,
and remember that
capitalization counts.
Script navigator Script pane
Actions
toolbox
ActionScript
element Your ActionScript code
9. Test your movie.
After a little churning, the Flash Player or your browser appears on your screen.
If everything is working right, your rectangle changes its shape and size. No
matter what dimensions and location your rectangle had to begin with, it takes
on the properties you defined in your ActionScript code. It’s 150 pixels wide
and 75 pixels high, and it’s located 300 pixels from the left (x) of your screen
and 225 pixels from the top (y).
You can probably guess what you need to do to animate this baby. Just add new
frames, including a keyframe, to your timeline, and then type some instructions
similar to the ones in step 7 on page 423. Here are the specific steps:
1. Click the 40th frame in both layers of your timeline, and then press F5 to
insert frames.
www.it-ebooks.info
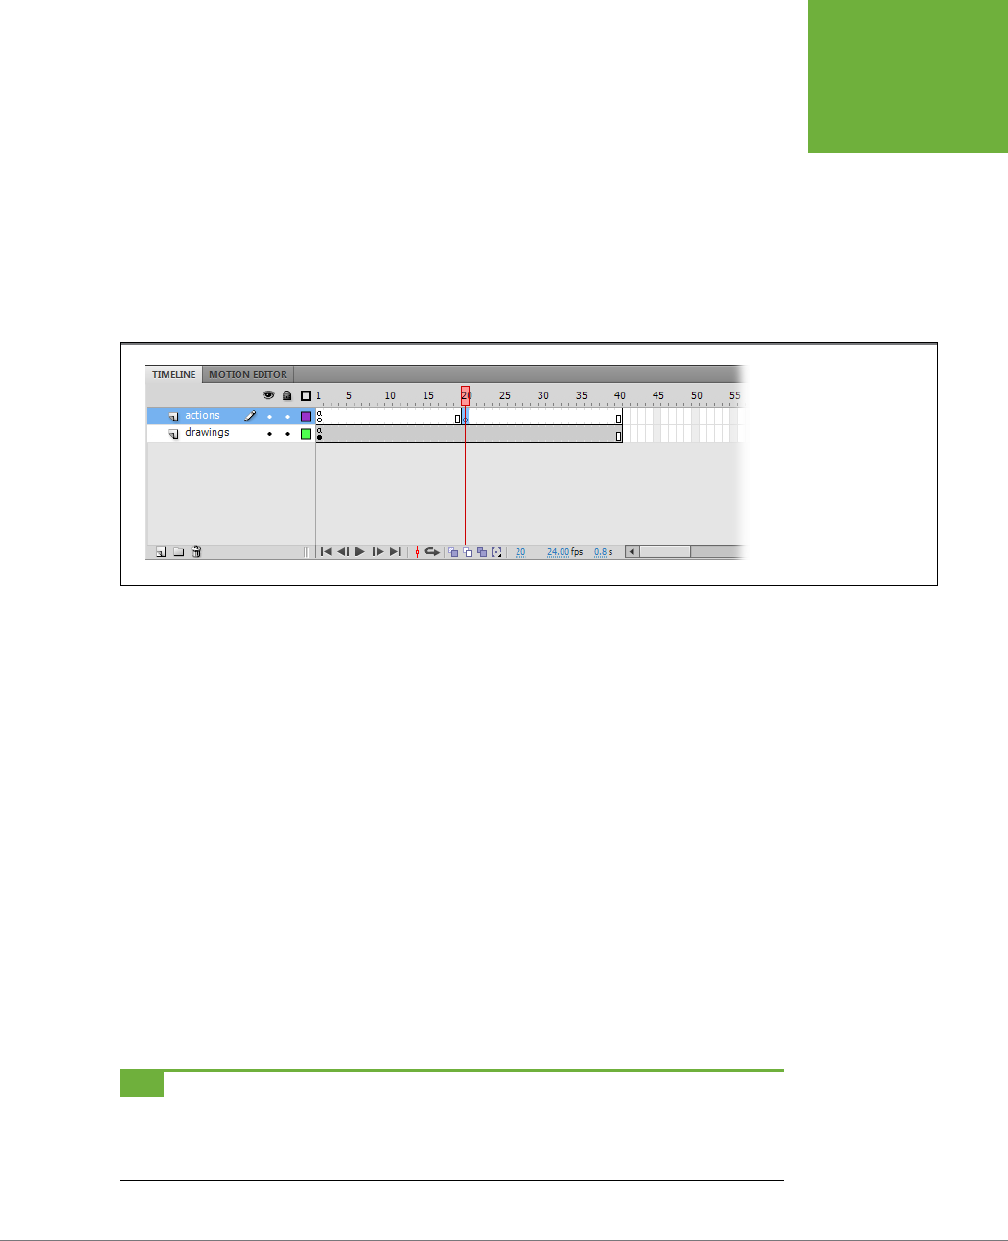
CHAPTER 12: INTRODUCTION TO ACTIONSCRIPT 3.0 425
OBJECT-
ORIENTED
THINKING
You’ve just added 39 new blank frames to each layer of the timeline. Blank
frames show whatever is on the stage in the previous keyframe without chang-
ing anything.
2. Click the 20th frame in the timeline’s actions layer, and then press F6 to
insert a keyframe.
Pressing F6 here places a second keyframe in the middle of the timeline, where
you can change the look of myRectangle using another snippet of ActionScript.
When you’re done, the timeline should look similar to Figure 12-9.
FIGURE 12-9
The timeline shows where
ActionScript is attached
to frames with a small
“a” icon. To prevent
confusion, keep your
ActionScript code on a
layer of its own at the top
of the timeline.
3. In the Actions panel, type the following lines:
myRectangle.width = 200;
myRectangle.height = 200;
myRectangle.x = 100;
myRectangle.y = 225;
Or, to avoid duplicate eort, use the Copy (Ctrl+C or ⌘-C) and Paste (Ctrl+V or
PCs ⌘-V) commands to steal the code from Keyframe 1 to Keyframe 20. Just
copy, paste, and then change the numbers. It’s faster than typing in new code,
and you’re less likely to create a typo.
4. Click the Check Syntax button.
You never know!
5. Test your movie.
Halfway through your animation, the rectangle turns square and moves to the
left—exactly as you programmed it. Not terribly exciting, but you can use these
same methods to dress it up a bit more, which you’ll do in the next section.
TIP When you’re starting out in any programming language, the most common error is misspelling. Computers
are worse than your second-grade teacher. They want everything spelled and punctuated perfectly. If something
goes wrong, double-check your spelling and punctuation first. You can save yourself some grief by copying and
pasting words, like myRectangle, to avoid typos.
www.it-ebooks.info
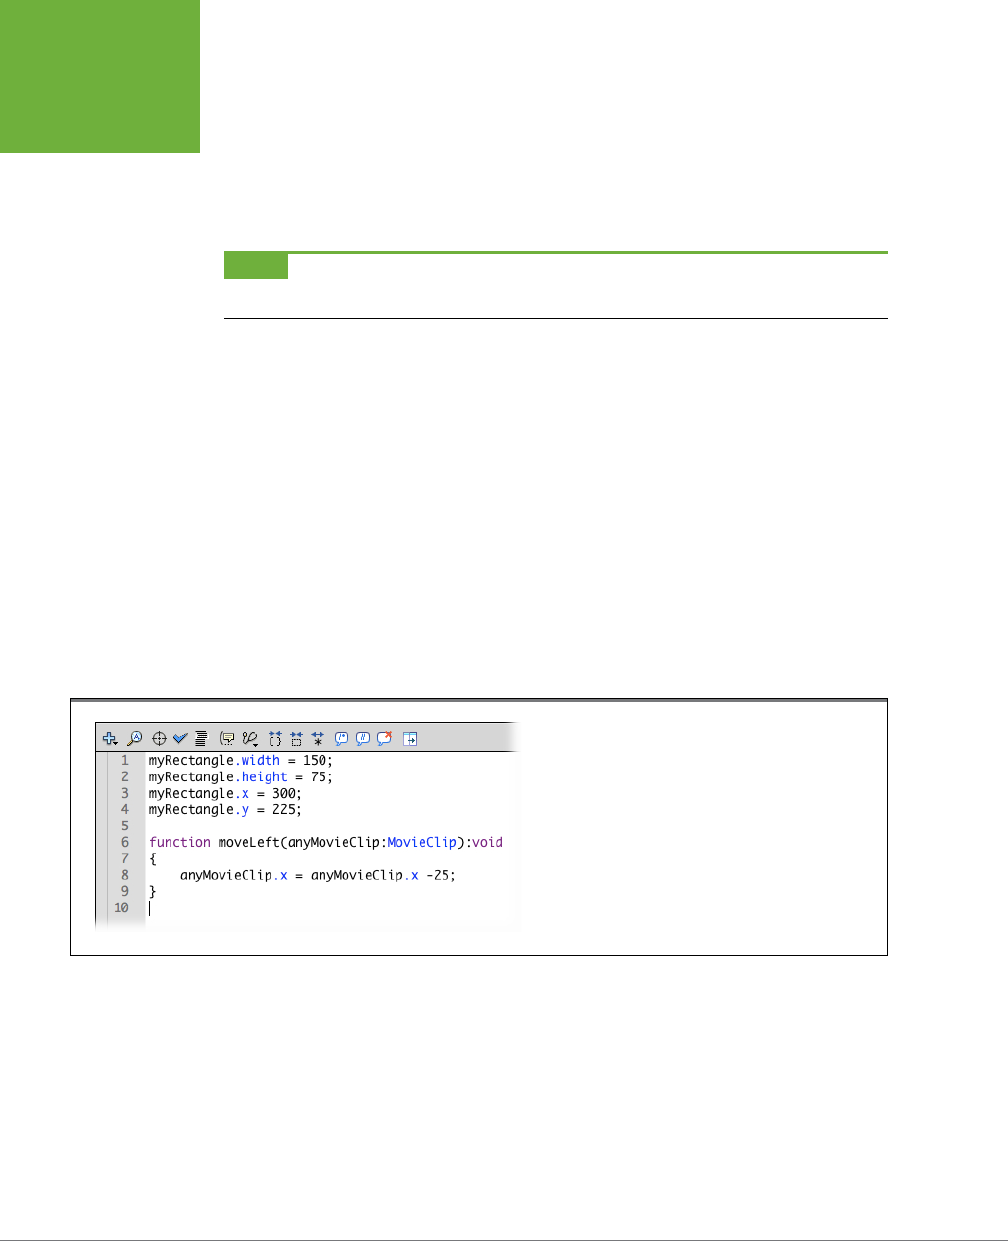
FLASH CS6: THE MISSING MANUAL
426
OBJECT-
ORIENTED
THINKING
Functions and Methods Put the Action in ActionScript
As explained on page 419, properties define the characteristics of objects. Methods
are the actions. Methods explain how a particular object can do something. If you,
as a human being, are an object, then your height, hair color, and gender are your
properties. Walking, talking, and keyboarding are your functions and methods.
NOTE In ActionScript, methods are actions that are a defined part of an object, just like its properties.
Functions are actions that are independent of any particular object.
In the exercise in the previous section, your code moved myRectangle to the left 200
pixels. What if you want to move to the left by 5 pixels at several dierent points
along the timeline? The script writer’s way to do that is to write a
moveLeft()
func-
tion, and then run that function whenever the object needs to be moved. Here’s the
code for a function that handles the move:
function moveLeft(anyMovieClip:MovieClip):void
{
anyMovieClip.x = anyMovieClip.x -5;
}
Go ahead and type the function below the ActionScript code on the first frame of
your document. Start on line 6, so that there’s a little room between the dierent
parts of your code. Click the Check Syntax button and double-check your spelling
and punctuation. When you’re done, it should look like Figure 12-10.
FIGURE 12-10
Compared to the object’s properties, a function is just a
tad more geeky and complicated. The first word, function,
explains that the code that follows is a function. The next
word is the name of the function, moveLeft(). You’ll use
this name every time you want to run the function.
Your function
moveLeft()
is an
action
, and as such it needs an
actor
. Something’s
gotta move, and that something is named inside the parentheses. You’re moving
anyMovieClip. That’s probably a clear enough explanation for you, but it’s not for your
computer. To your computer, “anyMovieClip” might as well be “joeJones.” They’re
both names it’s never heard of. Your computer needs to know exactly what kind of
object it is that you’re moving. So, on the other side of the colon (:), you explain that
anyMovieClip is in fact a MovieClip object. With that explanation, ActionScript can
look up the definition for MovieClips, and it knows exactly what anyMovieClip can
www.it-ebooks.info

CHAPTER 12: INTRODUCTION TO ACTIONSCRIPT 3.0 427
OBJECT-
ORIENTED
THINKING
and can’t do. Your computer also knows how much memory it needs to devote to
anyMovieClip—an issue that becomes more important as your programs grow bigger.
Following the parentheses is the mysterious
:void
—another bit of ActionScript
housekeeping. This code tells ActionScript that
moveLeft()
doesn’t perform a cal-
culation and provide a value in return. Suppose you created a function to find the
area of a rectangle;
getArea()
would do its calculation, and the result would be a
number. Instead of expecting the ominous-sounding
:void
, you’d tell ActionScript
to expect
:Number
.
The actual instructions for your
moveLeft()
function have to be between curly
brackets
{…}
, like the ones you see on the second and fourth lines. The brackets
don’t have to be on lines by themselves, but sometimes it’s easier to read your code
when it’s written that way.
The action in your code is all on one line; everything else was just the necessary
ActionScript overhead used to create every function.
anyMovieClip.x = anyMovieClip.x -5;
Remember how myRectangle.x was shorthand for “the horizontal position
of myRectangle?” You’re using the same shorthand here with anyMovieClip.
ActionScript knows what you mean by
x
, because it’s one of the built-in properties
of the MovieClip class. What’s more, if you change the value of
x
, the movie clip
changes position. You saw that in the example on page 422. Changing a value is
also called
assigning a new value
. And while you may know the
=
symbol as
equals
,
in ActionScript it’s called the
assignment operand
, because it assigns the value on
the right side to the property or variable on the left.
When you wrote:
myRectangle.x = 100;
you were assigning the value
100
to the
x
property of myRectangle. Your
moveLeft()
function’s code is just a little bit more complicated. You’re saying “take the value
that’s currently assigned to anyMovieClip.x, subtract 5, and then put the result back
in the anyMovieClip.x property.” This method of reassigning a value is very common
in ActionScript and almost any programming language.
So you may be wondering why your function used the word
anyMovieClip
instead
of using
myRectangle
as the object of this
moveLeft()
action. The function is lit-
erally for moving
any
movie clip, so it’s not hardcoded for a single rectangle like
myRectangle
. The name in the parentheses is a parameter of the function, so when
you run
moveLeft()
, you tell ActionScript specifically which movie clip you want to
move. Here’s how it’s done:
moveLeft(myRectangle);
It’s that simple to run a function, or as the fellow with the pocket protector and
tape on his glasses would say, “to call a function and pass it a parameter.” To put
your function into action, go back to your timeline. Add keyframes (press F6) every
www.it-ebooks.info
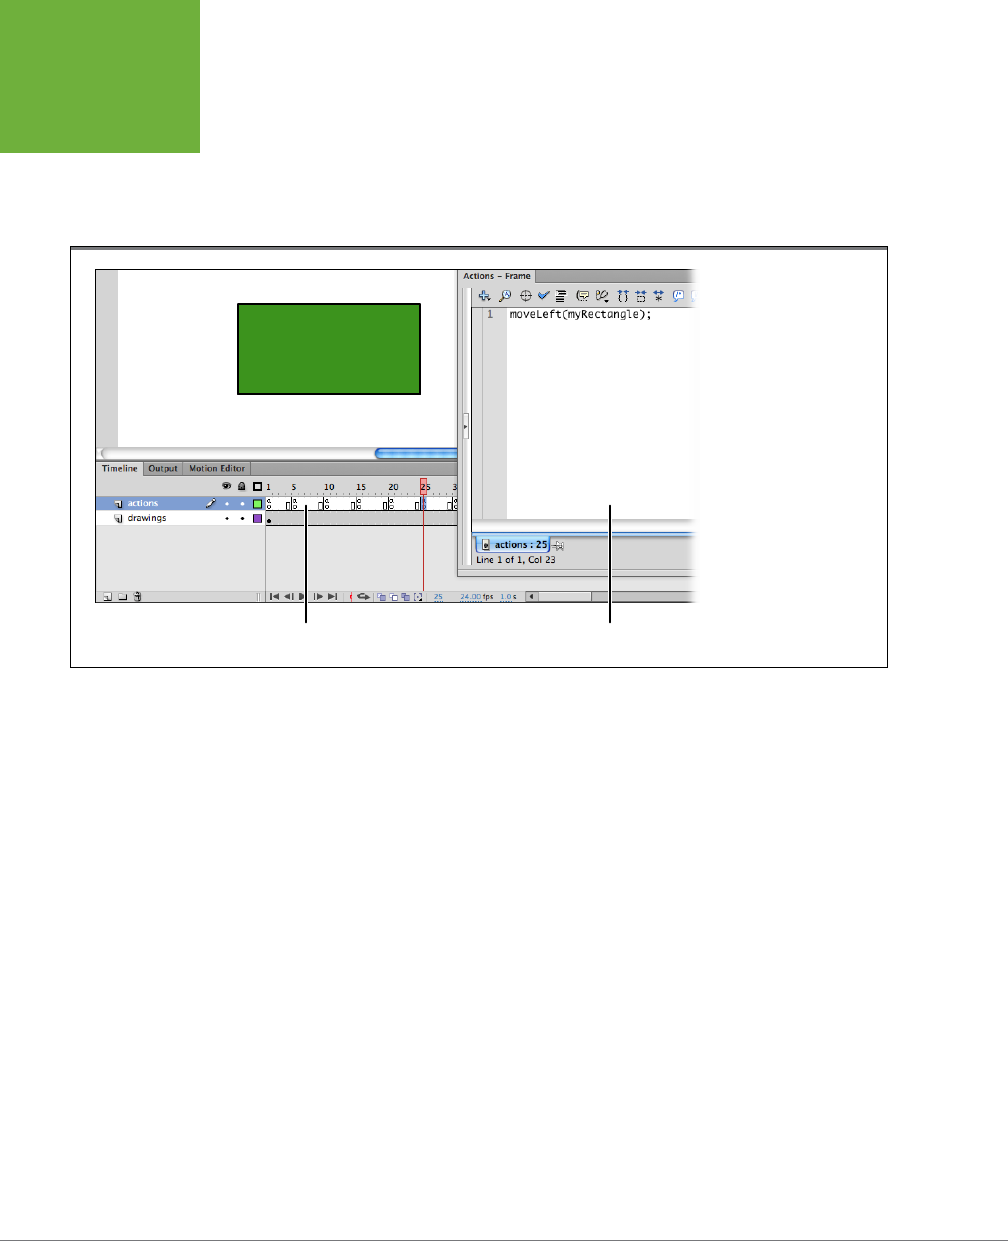
FLASH CS6: THE MISSING MANUAL
428
OBJECT-
ORIENTED
THINKING
fifth frame from Frame 5 to Frame 25. Delete all the code that’s on Frame 20. In the
keyframes from 5 onward, type a call to your function:
moveLeft(myRectangle);
With the code inserted, your timeline looks like the one in Figure 12-11.
FIGURE 12-11
Drag the ActionScript
panel by the top bar,
and you create a floating
window like this one. The
single line calling the
moveLeft()
function ap-
pears in the Script pane.
Timeline with keyframes Floating ActionScript panel
Check syntax, spelling, punctuation, and then test your movie by pressing
Ctrl+Enter⌘-Return. If the scripting deities smile upon you, myRectangle should
move left in 5-pixel increments, and then pause for a bit.
Here’s another great thing about using functions instead of
hardcoding
everything.
Suppose you decide that 5-pixel steps isn’t quite the grand, sweeping motion you
had in mind. All you have to do is change one number in the original function.
Change the code:
anyMovieClip.x = anyMovieClip.x -5;
to the following:
anyMovieClip.x = anyMovieClip.x -25;
and then test the results.
The complete geeky moniker for
moveLeft()
in this example is
function closure
.
In ActionScript, functions that are part of an object definition are called
methods
.
Functions that aren’t part of an object definition are called function closures. (Often,
in other languages, they’re referred to simply as functions.) If
moveLeft()
was part
of the definition for a rectangle object, it would be called a method of
myRectangle
.
www.it-ebooks.info

CHAPTER 12: INTRODUCTION TO ACTIONSCRIPT 3.0 429
USING DATA
TYPES,
VARIABLES,
AND
CONSTANTS
NOTE To see the completed file, download
12-1_Move_Rectangle.fla
from the Missing CD page (
www.
missingmanuals.com/cds/flashcs6mm
).
Events
In the olden days of programming, programs simply ran through a series of state-
ments. The experience was similar to watching an animation with no way to change
it. All you could do was watch it run from beginning to end. The concept of events
helped change all that. When a person clicks a button in a Flash animation, that’s
an event. The response to that event might be a number of things: Perhaps a new
shape appears on the stage, or maybe the animation jumps to a new scene or frame.
ActionScript programmers create methods that
listen
for a particular event, like
that mouse click, and then
handle it
with a particular action, like jumping to a new
scene. It’s a great, tried-and-true method of interaction that lots of programming
languages use.
When you write an ActionScript program, you decide what
events
your program
will listen for. Those events can include any of the following:
• Mouse events, like mouse clicks or mouse movements.
• Touch events, like finger taps or two-finger swipes
• Keyboard events, like pressed keys.
• Frame events, like the Flash playhead moving into or out of specific frames.
• Load events, which report on the progress when loading external files.
Once you’ve identified the events you want your ActionScript program to respond to,
you write
event handlers
to spring into action. Your event handlers will run through
a series of ActionScript statements, which may be made up of functions like the
moveLeft()
function from the previous section. Your event handlers can also change
an object’s properties.
You can use events to hand the controls over to the folks watching your Flash ani-
mations, which makes events an important tool in your Flash/ActionScript toolbox.
Events are so important they have their own chapter (Chapter 13).
NOTE Previous versions of ActionScript handled events in a few different ways, including the well-known
on
statements. ActionScript 3.0 has only one method for handling events—
event listeners
, as introduced here
and covered in more detail on page 443.
Using Data Types, Variables, and Constants
Flash animations are made up of dierent elements, like drawings, text, frames, time-
lines, and movie clips. Some of these elements serve as containers for the others. For
www.it-ebooks.info

FLASH CS6: THE MISSING MANUAL
430
USING DATA
TYPES,
VARIABLES,
AND
CONSTANTS
example, frames can hold drawings and text, and timelines hold frames. ActionScript
is similar. A few basic elements, like
numbers
and
strings
, are the building blocks for
more complicated data containers. Many programming languages use similar data
types but have slightly dierent rules about the way they’re used.
This section introduces the most common data types that you use in ActionScript and
explains how they’re used. If you’ve worked your way through this chapter, you’ve
used some of these already. In examples in the following chapters, you’ll have an
opportunity to give these data types a workout.
TIP This book isn’t an exhaustive reference on ActionScript. It gives you a solid introduction to the language
and shows you how to put it to work right away. If you’re hungry for more details on the subject, check out the
recommendations in the box on page 411.
Numbers
Numbers are one of the data building blocks ActionScript uses. For example, you
may want to tell Flash to play the same movie clip three times. As you saw earlier,
Flash uses numbers to identify positions on the stage, to identify certain frames in
a timeline, and to identify colors. Numbers are so important that Flash has three
dierent data types for numbers. Why have more than one? Well, numbers that
include fractions like 2.5 or 3.14159 require more computing power than integers
like 3 or –1. Choose the right type of number for the job, and you can make your
computer do less work so that your programs run faster.
NUMBER
In ActionScript, a
Number
can be any type of number, including fractions. In many
programming languages, integer data types—like int and uint, described next—are
preferred over numbers when fractions aren’t needed. That’s not necessarily the case
in ActionScript. For some fairly technical reasons having to do with how ActionScript
is designed, many programmers use the Number data type most of the time.
INT
The
int
(think
integer
) data type can represent any whole number from –2,147,483,648
to 2,147,483,647. The int type can’t represent fractions. If you need a fraction or a
number outside this range, use the Number data type.
UINT
The
uint
(think
unsigned integer
) data type can represent numbers from 0 to
4,294,967,295. If you need a negative whole number, use the
int
data type. If you
need a fraction, use the Number data type. The
uint
is particularly useful to identify
colors, since colors are always positive whole numbers.
NUMBERS AND OPERATORS
When you work in ActionScript, you can and probably will perform mathematical
operations with numbers. To perform these feats, you use
operators
, the characters
www.it-ebooks.info

CHAPTER 12: INTRODUCTION TO ACTIONSCRIPT 3.0 431
USING DATA
TYPES,
VARIABLES,
AND
CONSTANTS
that indicate addition, subtraction, multiplication, and so on. Table 12-1 shows the
operators you can use in ActionScript.
Table 12- 1. This table lists the operators you can use in ActionScript 3.0. Examples on the right show each operator in action.
OPERATOR FUNCTION EXAMPLE
+ Adds two numbers 2+3
- Subtracts number on right from number on left 3-2
* Multiplies two numbers 2*3
/ Divides number on left by number on right 6/2
> Expresses greater than (which may make a statement
true or false)
6>2
< Expresses less than (which may make a statement
true or false)
2<6
>= Expresses greater than or equal to (which may make
a statement true or false)
6>=2
<= Expresses less than or equal to (which may make a
statement true or false)
2<=6
== Expresses equality (which may make a statement
true or false)
12==6*2
!= Expresses inequality (which may make a statement
true or false)
3!=2
= Assignment operator myNumber = 6*2
Notice the dierence between the equality operator and the assignment operator.
The equality operator is used to make a statement: The data on the right side of the
equality operator is equal to the data on the left. That statement may be true or false.
The assignment operator has a dierent job. The assignment operator changes the
value of the
variable
on the left. (There’s more on variables on page 435.)
PRECEDENCE AND PARENTHESES
Some statements are simple and unambiguous, like this one:
myNumber = 3 + 12
But a statement can include more than one operator:
myNumber = 3 + 12 / 3
When there’s more than one operator, it’s a little harder to anticipate the value. In
general, ActionScript multiplies and divides before it adds and subtracts. But you
can make things easier for yourself (and others) to read and understand your work
by using parentheses to dictate the order of operations. So the following statement
forces ActionScript to perform the addition before it performs the division:
myNumber = (3 + 12) / 3
www.it-ebooks.info

FLASH CS6: THE MISSING MANUAL
432
USING DATA
TYPES,
VARIABLES,
AND
CONSTANTS
Strings
In geek-speak, strings are sequential lists of letters, numbers, and symbols—strings
of characters. For example, this very sentence is a string. “Foo” is a string with three
characters. You identify strings by placing them inside either single or double quotes:
myCar = "Stutz Bearcat";
visitorName = "Erwin Baker";
If you want to include quotes within your string, you have a couple of options. For
example, you can use single quotes to enclose your string when you want to use
double quotes
in
the string, like so:
famousQuote = 'He said, "My name is Erwin Baker."'
STRINGS AND OPERATORS
You can’t do math with strings, not even if some of the characters are numbers.
But there are other types of operations that work with strings. One very common
operation is to build up longer strings by adding words or characters. Usually this
is called
concatenation
, and it looks a lot like string addition:
carModel = "Stutz" + " " + "Bearcat";
The previous statement adds three strings together. First, it adds a
space
charac-
ter (between the two empty quotes) to the word
Stutz
. Spaces, punctuation, and
numbers are all part of the String data type. Then it adds
Bearcat
onto the string.
So, the value of the stored variable carModel reads
Stutz Bearcat
.
Just to prove the point that you can’t do math with strings, consider these two
statements:
parkingTicket = 50 + 25;
parkingTicket = "50" + "25";
In the first example, parkingTicket is an unpleasant but reasonable number,
75
. In
the second example where two strings are concatenated, you end up with a string
value in parkingTicket of
5025
.
It’s also fairly common to compare two strings to see if they’re the same, which you
have to do every time someone types in a password. To do that type of compari-
son, you use the equality operator (==), not the assignment operator (=). Here’s an
example:
visitorPassword == textFieldPassword;
You can use a statement like that to test whether a password typed into a Flash text
field matches the password the visitor previously supplied.
These aren’t the only operations you can perform with strings, just two of the most
common. You’ll see examples using strings throughout the rest of the book. Chapter
17 covers several common string programming techniques, beginning on page 581.
www.it-ebooks.info

CHAPTER 12: INTRODUCTION TO ACTIONSCRIPT 3.0 433
USING DATA
TYPES,
VARIABLES,
AND
CONSTANTS
Boolean
A
Boolean
is a data type that has one of two values: true or false. The
Boolean
is
very handy, because programs often test conditions and then report on the results.
For example, parkingMeterExpired could be a Boolean data type. In that case, you
might see an expression:
if (parkingMeterExpired == true)
{
ticketVehicle();
}
In human-ese, this translates to “If the value of parkingMeterExpired equals
true
,
then run the function
ticketVehicle()
.” The equality operator creates a statement
that’s either true or false. You’re not assigning a value to parkingMeterExpired; you’re
creating a statement that ActionScript can test.
BOOLEANS AND OPERATORS
The most common Boolean operator has been used several times in this chapter;
that’s the equality (==) operator that’s used to test if two statements are equivalent.
So, if parkingMeterExpired is a Boolean data type, then it has one of two values:
true
or
false
. That makes the statement:
parkingMeterExpired==true
either true or false.
For the times when it’s more convenient to test for a false statement, use the in-
equality operator (!=) as shown in this example:
parkingMeterExpired!=true
Arrays
Unlike the simple data types,
arrays
are containers that can hold more than one
item. Those items don’t even need to be the same data type. For example, a single
array can hold Numbers and strings, which makes them a great way to keep related
information together. Imagine you want to collect dierent tidbits of information
about people who belong to your Stutz Bearcat auto club. For example, you might
want to record first name, last name, age, number of speeding tickets, and whether
their club dues are paid up:
memberDetailsArray = ["Erwin", "Baker", 38, 12, true]
Each tidbit of data is called an
element
, so the above array has five elements. In
the example, the first two elements of the array are strings. The following two are
numbers. The last item is a Boolean, so it can have only two values: true or false.
An array can even hold another array as one of its elements. Individual elements
are separated by commas, and the entire array is enclosed in square brackets. You
can access individual elements in the array by number, but there’s one “gotcha” to
www.it-ebooks.info

FLASH CS6: THE MISSING MANUAL
434
USING DATA
TYPES,
VARIABLES,
AND
CONSTANTS
remember. The first element in an array is referred to as number
0
. So, if you want
to change the last name “Baker” to “Paxton” you assign a new value, like so:
memberDetailsArray[1] = "Paxton";
In ActionScript, arrays are a type of object, and there are a whole crop of methods
(functions) you can use to work with them. For example, there are methods to do
all of the following:
• Add a new element to an array.
• Remove an element from an array.
• Report the number of items in an array.
• Sort and reorder the elements in an array.
Earlier in this chapter (page 426), you saw examples of ActionScript
functions
. Meth-
ods are also functions—they’re actions; they do something. What makes methods
special is that they’re part of the definition of an object. For example, one method
that adds a new element to an array is called
push
. You can think of it as pushing
another plate on a stack of dishes. You use the dot (.) nomenclature to connect it to
the function. Suppose you want to add a new element to your memberDetailsArray
that represents the year a member’s car was built. Here’s the statement that does
the job:
memberDetailArray.push(1937);
The dot (.) nomenclature looks familiar because ActionScript also uses it to access
an object’s properties. Arrays are used in examples in the following chapters.
ActionScript Built-In Data Types
ActionScript has a number of built-in data types that are made up of some of the
simple data types. Some examples include familiar Flash objects, like the following:
• MovieClip
A symbol (from the Flash Library) that’s a movie clip.
• TextField and TLFTextField
A field (or box) that holds text. You can set and change the contents, or your
audience can type them when your program is running.
• SimpleButton
A special type of graphic that’s preprogrammed to behave like a button. Click
it, and your program does something.
• Date
The Date data type represents a specific moment in time. ActionScript code
can access the month, day, hour, and second.
www.it-ebooks.info

CHAPTER 12: INTRODUCTION TO ACTIONSCRIPT 3.0 435
USING DATA
TYPES,
VARIABLES,
AND
CONSTANTS
Variables
If you followed some of the exercises earlier in this chapter, you may have noticed
that programming is the fine art of swapping one value for another. Move an object,
change a color, start playing a movie clip at a certain point—those actions require
providing a new value for a color, stage position, and timeline position.
Like buckets or baskets, variables are the containers that hold these changing values.
DECLARING VARIABLES
Before you can use a variable, you have to tell ActionScript 3.0 what to expect.
You introduce the name you’re planning on using and you explain whether it’s a
number, string, or some other data type. It’s called
declaring a variable
, and here
are some examples:
var minutesOnMeter : Number;
var carModel : String;
var licensePlate: String;
var meterExpired: Boolean;
If you want, you can assign a value to your variable when you declare it.
var minutesOnMeter : Number = 60;
var carModel : "Stutz Bearcat";
var meterExired : Boolean = false;
TIP In general, ActionScript isn’t fussy about white space. If you want to include extra spaces to line things
up as shown in previous examples, that’s fine. Just don’t make mistakes with your spelling and punctuation or
you’ll get a virtual ruler to the back of your hand.
Once you’ve declared that the variable
minutesOnMeter
is a Number, you can’t
store a dierent type of data in it. For example, if you try to assign a string to
minutesOnMeter, an error message appears in the Compiler Error panel, like the one
in Figure 12-12: “Implicit coercion of a value of type Number to an unrelated type
String.” Sentences like that may make you feel like you should call a lawyer, but you
can usually figure out the problem. Double-click the error message, and Flash takes
you directly to the line in your code that caused the error.
FIGURE 12-12
ActionScript’s Compiler Error panel provides about
the problem. Location tells you where the error is,
Description names the type of error.
www.it-ebooks.info

FLASH CS6: THE MISSING MANUAL
436
CONDITIONALS
AND LOOPS
Constants
A constant is a value that never changes through the course of the program. It
might be the color of a stoplight (red) or the boiling point of water (100 degrees
Celsius). Use constants when it’s easier or more readable to refer to something by
name (Stop, BoilingPoint) rather than value. ActionScript programs use variables
more often than constants.
DECLARING CONSTANTS
As with variables, you have to declare constants, and it makes sense to provide their
value at the same time:
const PARKING_TICKET : Number = 50;
Most programmers use all caps for constants to dierentiate them from variables.
If you accidentally try to assign a value to a constant, you get one of those nasty
compiler error messages.
Conditionals and Loops
Using conditions and loops, you can teach your Flash animations how to make
decisions, and viewers will think both you and your animations are very smart.
ActionScript provides a few dierent decision-making statements that you can use
depending on your needs. In human-ese, they work like this:
• If (this condition exists) do (these actions)
• While (this condition exists) do (these actions)
• For (X number of times) do (these actions)
Those three forms of decision-making may seem very similar, but as you’ll see in the
following explanations and examples, there are some important basic dierences.
You’ll hear programmers refer to these decision-making statements using dierent
terms, like “program flow controls,” “conditionals,” and “loops.” These tools have
one thing in common: They all help you dictate whether or not ActionScript runs
some specific lines of code.
Conditionals:
if()
and
switch()
Statements
Two of ActionScript’s statements tackle the “If (this condition exists) do (these ac-
tions)” situations. The first and simplest state is appropriately called an
if
statement.
IF() STATEMENTS TEST A CONDITION
The most basic
if
statements are built like this:
if (this is true) {do this}
www.it-ebooks.info

CHAPTER 12: INTRODUCTION TO ACTIONSCRIPT 3.0 437
CONDITIONALS
AND LOOPS
So, if you’re writing an ActionScript statement for a parking meter cop, it might
look like this:
if (parkingMeterExpired==true) {writeTicket();}
It works like this: If the condition within the parentheses is true, then your code
performs the statements within the curly brackets. If the expression in the paren-
theses is false, then your code ignores the statements within the curly brackets. In
this example, if the parking meter has expired, the cop writes a ticket. If the parking
meter hasn’t expired, the cop doesn’t do anything. (Well, maybe she goes for donuts.)
NOTE The parentheses
()
after
writeTicket
are part of any function including the
writeTicket()
function. The
following semicolon is the proper way to end a statement.
In some cases, you may want to provide some additional alternatives. Suppose
you’re sending your assistant to the auto store. You want him to buy a Stutz Bearcat,
but in the unlikely event that the store doesn’t have any Bearcats, you want him
to buy a Packard Roadster. In ActionScript, that instruction takes the form of an
if…else
statement.
if (storeHasStutzBearcat==true) {
buyStutzBearcat();
} else {
buyPackardRoadster();
}
IF…ELSE IF STATEMENTS CHOOSE FROM MANY OPTIONS
You can string
if…else
statements together to handle several dierent conditions.
The result looks like this:
if (storeHasStutzBearCat==true) {
buyStutzBearcat();
} else if (storeHasPackardRoadster==true) {
buyPackardRoadster();
}
else if(storeHasHudson==true) {
buyHudson();
}
There’s a statement that should resolve any out-of-stock issues at the car store.
ActionScript works through the statements from top to bottom. When it finds a car
in stock, it buys the car. Using this
if…else if
structure, your assistant will purchase
only one car. For example, you won’t end up with both a Packard Roadster and a
Hudson. If the Packard is in stock, the function
buyPackardRoadster()
runs and the
else if(storeHasHudson…)
portion is ignored. If none of the conditions are met, then
your assistant buys no car.
www.it-ebooks.info

FLASH CS6: THE MISSING MANUAL
438
CONDITIONALS
AND LOOPS
SWITCH() STATEMENTS CHOOSE FROM MANY OPTIONS
You can string together as many
if…else if
conditions as you want, but at some point
the code gets a little awkward and hard to read. The
switch()
statement makes a
good alternative when you have more than three conditions to check. Suppose you
want to create a system where a parking ticket costs more depending on the number
of tickets the scoaw has received. The variable numberOfTickets holds a Number
value. A
switch()
statement might look like this:
switch (numberOfTickets) {
case 1 :
parkingTicket = 25;
break;
case 2 :
parkingTicket = 50;
break;
case 3 :
parkingTicket = 75;
break;
case 4 :
parkingTicket = 100;
break;
case 5 :
parkingTicket = 125;
break;
default :
parkingTicket = 0;
}
The switch statement takes the variable numberOfTickets and, starting at the top,
compares it to the first
case
. If the oender has a single parking ticket, then the
value of parkingTicket is set to 25. When ActionScript gets to the word
break
, it
jumps to the end of the
switch()
statement and doesn’t run any of the other cases.
The default case is used when none of the other cases match.
Loops:
while()
and
for()
Statements
There’s a good rule of thumb to remember with computers. If
you’re
doing the
same chore over and over again, there’s probably some way your computer can do
it more eciently. Computers are great at repetitive tasks, and that’s certainly true
of ActionScript, which has two great ways to repeat statements in your programs.
Using the
while()
statement, you can have your computer repeat a task as long as
a certain condition exists. Using the
for()
statement, you can tell your computer
exactly how many times to repeat a task.
WHILE() STATEMENTS REPEAT TASKS AS LONG AS A CONDITION
IS MET
The
while()
statement checks to see if a condition is met. If it is, then the code within
the curly brackets runs. If the condition isn’t met, then ActionScript moves on to the
www.it-ebooks.info

CHAPTER 12: INTRODUCTION TO ACTIONSCRIPT 3.0 439
CONDITIONALS
AND LOOPS
next statement. It’s very common to use the
while()
statement with a variable that’s
incremented. So, if you want your assistant to pop down to the auto store and buy
six Stutz Bearcats (enough for you and a few close friends), you’d put together a
statement like this:
while (myStutzBearcats < 6) {
buyStutzBearcat();
myStutzBearcats = myStutzBearcats + 1;
}
Like the
if()
statement, the condition for the
while()
statement is inside parenthe-
ses, and if the condition is met, then the statements inside curly brackets
{}
run.
In this example, the second line runs a function that buys a Bearcat. The third line
increments
the variable that keeps track of how many Bearcats you own. As long
as that number is less than 6, the program loops; you buy another and add 1 to the
number of Bearcats you own.
The whole idea of incrementing a value, like myStutzBearcats, is so common that
there’s even a shorthand way of adding one to a variable. The third line could also
read:
myBearCats++;
There’s no assignment operator (=), but the statement is assigning a new value to
myBearcats. When you want to count down, you can use the decrement operator
(--). Here’s a statement that sells o your Stutz Bearcats until you have only three left.
while (myStutzBearcats > 3 {
sellStutzBearcat();
myStutzBearcats--;
}
NOTE If you’re reading ActionScript code for pleasure and you come across
i++
, don’t be surprised. The
i
usually stands for
iterator
or
integer
. It’s the programmer’s way of saying, “I need an integer to operate this loop,
but it can be any old integer, it doesn’t need a fancy variable name.” Using the lowercase
i
as a stand-in isn’t a
rule, just a programmers’ tradition.
FOR() STATEMENTS REPEAT TASKS A SPECIFIC NUMBER OF TIMES
The
for()
loop gives you a very compact way to repeat a portion of your program.
The mechanics that make a
for()
statement run are all packed in the first line. It’s
so compact and down to business that it reads a little more like machine talk than
human talk. Here’s an example:
for (var myStutzBearcats:Number = 0; myStutzBearcats < 6; myStutzBearcats++)
{
buyStutzBearcat();
}
www.it-ebooks.info

FLASH CS6: THE MISSING MANUAL
440
COMBINING
ACTIONSCRIPT’S
BUILDING
BLOCKS
Like the earlier statement, this loop buys six Stutz Bearcats. A lot goes on in that
very first line of code. From left to right, here’s what happens:
• The word
for
indicates a
for()
statement.
• The beginning parenthesis is your clue that the condition follows.
• The word
var
means that a variable is being declared.
•
myStutzBearcats:Number
is the name of that variable and its data type.
• The assignment operator (=) immediately gives the variable a value of zero.
• Following the semicolon, you finally arrive at the condition that’s being tested:
Are there fewer than six Bearcats?
• The semicolon ends that statement, and in the next
myStutzBearcats
is
incremented
.
The
for()
statement is very compact, and it puts everything you need to know right
up front. Script writers often create
for()
statements using the variable
i
for the
condition (see the note on page 439). You’ll often see something like:
for (var i = 0; i < 6; i++) {
buyStutzBearcat;
}
Just like the earlier
for
statement, this one purchases six of those beautiful Bearcats.
NOTE For an example of the
for()
statement in action, download
12-2_For_Statement.fla
from the Missing
CD page (
www.missingmanuals.com/cds/flashcs6mm
).
Combining ActionScript’s Building Blocks
This chapter covered a lot of ActionScript theory, and you may be itching to put some
of these concepts into action. In the following chapters, there are many examples
that show you how to do just that.
Here’s a recap of the topics covered in this chapter:
•
Classes
are blueprints for objects.
•
Instances
are specific objects, in use.
• ActionScript objects may have
properties, methods
, and
events
.
•
Properties
are the characteristics of objects; by changing values, your programs
can change those characteristics.
•
Methods
and
functions
are the actions in ActionScript.
•
Methods
are included in the definition of an object.
www.it-ebooks.info

CHAPTER 12: INTRODUCTION TO ACTIONSCRIPT 3.0 441
COMBINING
ACTIONSCRIPT’S
BUILDING
BLOCKS
•
Functions
(technically called function closures) are independent of objects.
•
Events
are used to make Flash projects interactive.
•
Events
have two parts: 1)
event listeners
that wait for events like mouse clicks;
and 2)
event handlers
that run ActionScript statements in response to the event.
•
Variables
are containers for values.
Constants
are named values that never
change.
• Variables can be one of several dierent data types:
number, int, uint, string,
Boolean
, and
array
.
•
Arrays
can hold multiple values and dierent types of data.
•
Operators
are used to perform math functions, assign values, and compare
values.
•
Conditional
statements, like (
if, if…else if
, and
switch
) test to see if a condition
exists, and then, based on the result, run or ignore portions of ActionScript code.
•
Loop
statements (like
while
and
for
) run portions of ActionScript code either a
specified number of times, or while a condition exists.
www.it-ebooks.info

443
CHAPTER
13
In the previous chapter, you learned how to use ActionScript to move, transform, and
change parts of your animation. But
when
something happens is just as important
as the action itself. For example, you may want a movie object to start playing as
soon as the web page opens, or you may want to let your audience decide when
to watch it. You use
events
to control the actions in your animation. It’s as if your
ActionScript program tells Flash: “When this (event) happens, do this (action).” The
classic example is a button on the stage. The action statement says something like:
“When this button gets clicked, go to Frame 25 of the movie clip, and then start
playing.” You provide the programming that puts the people who view your Flash
creations in the driver’s seat. Using events and event handlers, you can send your
programs o into the world on their own, confident that they’ll behave.
This chapter explains how to use ActionScript to detect events when they happen
and how to get your animations to perform specific actions as a result. Unlike previ-
ous versions, ActionScript 3.0 has one single way of handling all kinds of events. So,
once you learn the basics, you’re all set to handle any event.
How Events Work
There are many dierent types of events. Some events—like a mouse click—are trig-
gered by the people viewing your animation. Other events are simply occurrences
in a Flash animation—like a movie clip reaching the last frame. The button is one of
the easiest events to understand, and, not surprisingly, it’s one of the most common.
Someone clicks a button, and then an action takes place. To the person clicking, it
Controlling Actions
with Events
www.it-ebooks.info
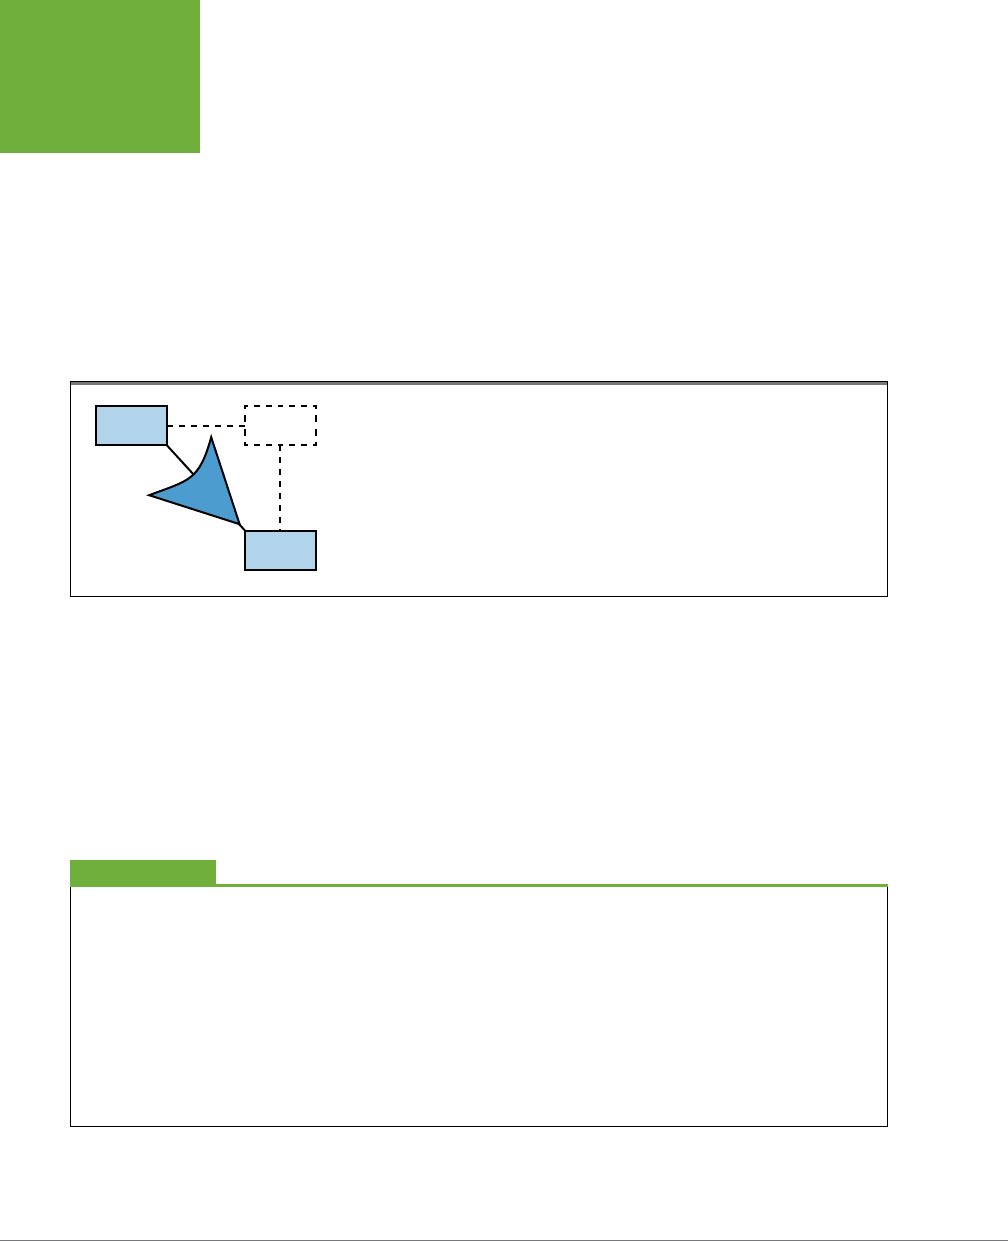
FLASH CS6: THE MISSING MANUAL
444
HOW EVENTS
WORK
appears that the button makes something happen. That’s true to some extent, but
there are some additional gears and levers behind the scenes.
The object related to the event is called the
event target
. So in the button example,
the button is the event target. When an event like a button click happens, an
event
object
is created. The job of this new event object is to deliver information to an
event listener
, which has instructions about what to do when that event happens.
So how does the event target know where to deliver the information carried within
the event object? That detail is handled by
registering
the event. In eect, the code
that registers an event says, “When this event happens, send that event object to
this location.” Figure 13-1 shows the major elements involved in event handling.
FIGURE 13-1
When an event related to the target happens, ActionScript sends a message, in the form of the
event object, to the event listener, which performs the actions. You register specific events, like a
mouse click, beforehand, so the target knows where to send the event object.
listener
target register
event
object
Like most things in ActionScript, an event is considered an object. Obviously, it’s
not an object in the sense that a rectangle or a circle on your stage is an object. It’s
an object by the strict ActionScript definition of an object because it has properties
where it stores information about the event, and it has methods (functions) that let
you perform actions related to the event. The Event class is the definition of events
in a very general sense—similar to the class definition of a rectangle as a four-sided
object. The Event class is the basis for other, more specific Event objects. Dierent
types of events, such as mouse events, keyboard events, and error events, have
properties and methods that serve their specific needs.
Past Events
As ActionScript matured with each version of Flash, it sprouted
several different ways to handle events. Having various ways
to handle events may not have been a bad thing at the time,
but at some point in ActionScript’s evolution, it became a
problem. Some methods were easy to use but made Action-
Script code harder to maintain and troubleshoot. One obvious
problem, from an ActionScript programmer’s point of view,
was remembering which event-handling routines to use in
different circumstances.
One of the welcome changes that ActionScript 3.0 brings is a
single, consistent way to deal with events. This chapter explains
in detail how to handle events using ActionScript 3.0.
FLASHBACK
www.it-ebooks.info

CHAPTER 13: CONTROLLING ACTIONS WITH EVENTS 445
MOUSE EVENTS
Mouse Events
The mouse is the most common way your audience interacts with your Flash creation,
so a lot of events center around the mouse. The MouseEvent class detects all sorts of
mouse events, including a variety of clicks and mouse movements, like mouse over
(when the cursor moves over an object) and mouse out (when the cursor moves
away from an object). Such events are the stu that buttons and other smart objects
are made of. So roll up your sleeves and get ready to create a mouse event listener.
If you have a project deadline looming and just need bulletproof code for a simple
mouse-over event, see the box below.
NOTE A mouse event refers to an event generated by
any
kind of pointer device, whether it’s a mouse, a
trackpad on a laptop, or a drawing pad. Touch and gesture events for smartphones and tablets are managed by
their own event objects.
Create an Event Handler in a Snap
I need an ActionScript 3.0 event handler now! Where can I find
some cut-and-paste code
?
Events and event handlers are fundamental to most Action-
Script projects, so it’s great to have a thorough understanding
of their workings. You’ll get that in the following pages. But
if you don’t have time to look up references and write the
code, Flash CS6 can help you out with Code Snippets. These
predesigned chunks of ActionScript 3.0 code are ready for
you to drop into your project. So, if you need a mouse-over
event handler, select a movie clip symbol and then choose
Window→Code Snippets. Expand the Event Handler, and
then click Mouse Over Event. Flash adds several lines of code to
your project and displays it on the Actions panel. The code has
comments and instructions to help you customize the snippet
to work in your project.
FREQUENTLY ASKED QUESTION
This first example uses two movie clip objects: a circle and some text. The goal is
to create an event listener that recognizes when the mouse is over the circle and
when it’s not—your basic rollover action. When the mouse moves over the circle,
the text changes to say “mouse over.” When the mouse moves out of the circle, the
text changes back to the original message, “mouse out.” Not an earthshaking event,
but you have to start somewhere.
NOTE You can create your own movie clip as described in the following steps, or you can download
13-1_Mouse_Event.fla
from the Missing CD page at
www.missingmanuals.com/cds/flashcs6mm
. If you want to
see how the final project works, download and test
13-2_Mouse_Event_done.fla
.
www.it-ebooks.info
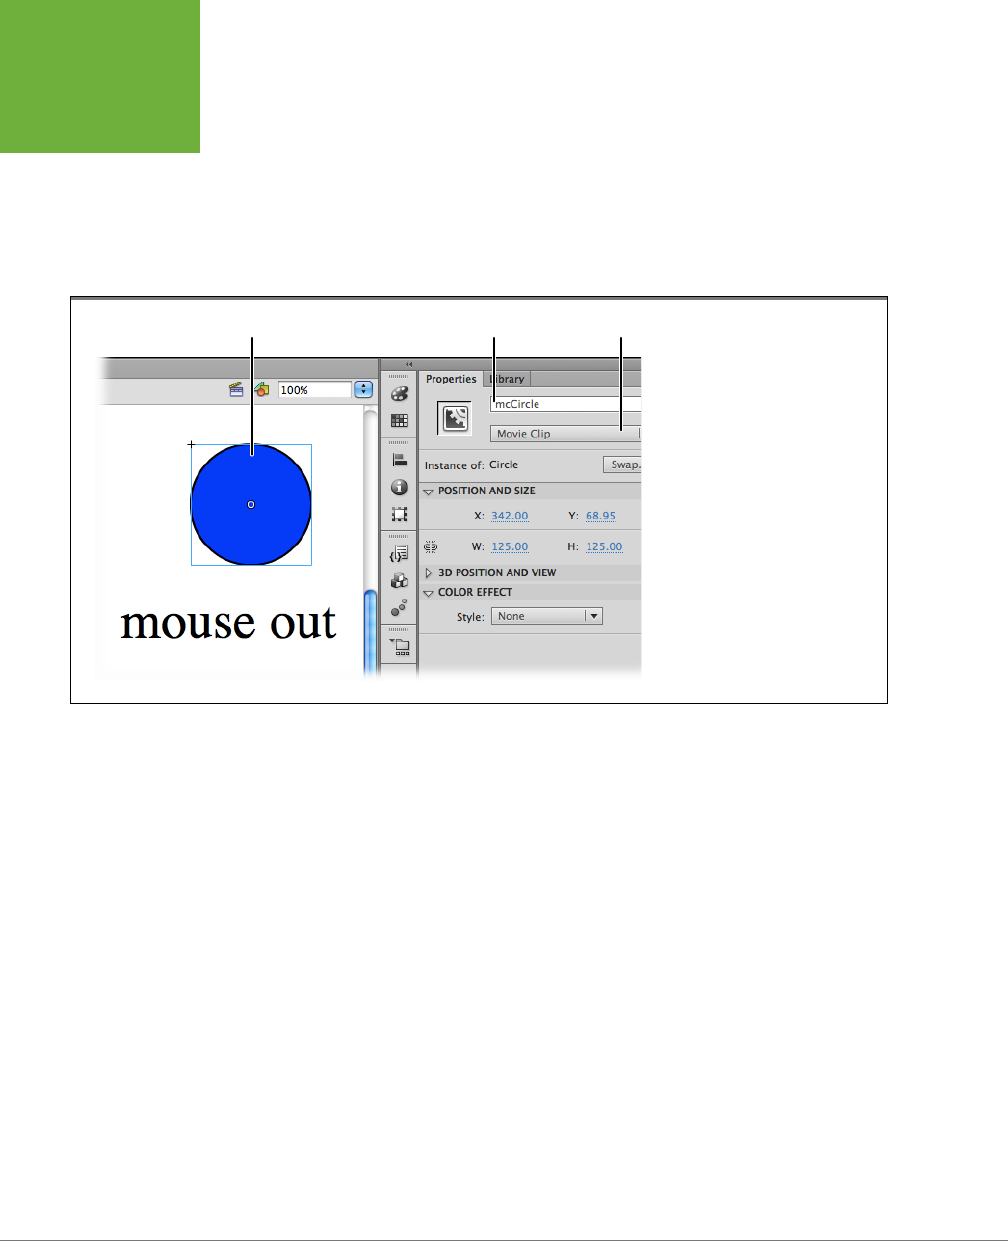
FLASH CS6: THE MISSING MANUAL
446
MOUSE EVENTS
Here are the steps to set up a Flash document with the necessary symbols for the
mouse event experiment.
1. In a new Flash document, draw a circle, and then create some static text
that reads “mouse out.”
When you’re done, you have two objects in Frame 1 of your movie, as shown
in Figure 13-2.
FIGURE 13-2
Before you can program the
instances of the symbols on the
stage, you need to give them
names. Here the circle is a movie
clip symbol named mcCircle.
The text is a movie clip symbol
named mcText.
Movie clip instance Name of instance Symbol type
2. Convert both the circle and the text to movie clip symbols (Modify→“Convert
to Symbol”).
This creates two symbols in the Library and leaves instances of the symbols on
your desktop. As you create the symbols, use whatever names seem appropri-
ate, like
Circle
and
Text
. The symbol names in the Library aren’t as critical as
the
instance
names described in the next step. Your ActionScript code will use
these instance names.
3. Select the circle movie clip instance on the stage, and then, using the Prop-
erties panel, name it
mcCircle
, as shown in Figure 13-2. Select and then name
the text movie clip instance
mcText
.
You can use any name you want for instances on your desktop, but it’s helpful
to add something to the name that identifies the type. Here,
mc
indicates that
the symbol instances are movie clips.
4. Double-click mcText to open the movie clip symbol for editing.
As shown in Figure 13-3, the Text movie clip opens. At the top of the window
you see “breadcrumb” navigation buttons: Scene and mcText. These are helpful
www.it-ebooks.info
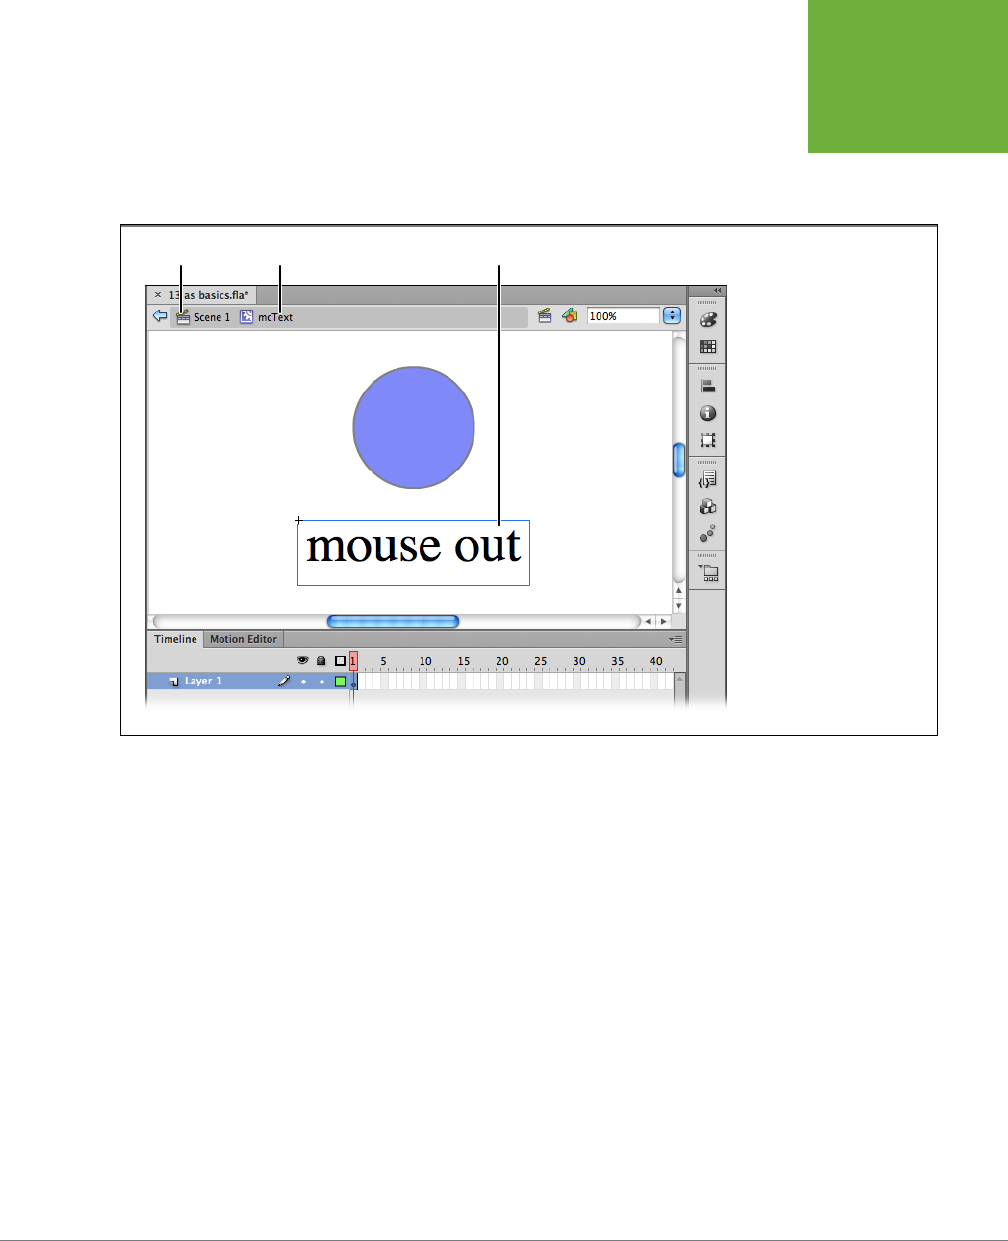
CHAPTER 13: CONTROLLING ACTIONS WITH EVENTS 447
MOUSE EVENTS
when you open symbols within symbols. The new button displays the Library
symbol name (not the instance name). On the stage, the text remains boldly
colored to indicate that it’s part of the symbol you’re editing. The circle is faded
to indicate that it’s not part of the symbol you’re editing.
FIGURE 13-3
When you double-click a
movie clip symbol on the
stage, Flash changes to
symbol edit mode, and the
symbol’s name appears in
the Edit bar. Any changes you
make to a symbol change all
the instances based on that
symbol.
Scene tab Test movie clip tab Movie clip being edited
5. Click Frame 2 in the timeline, and then press F6 to add a keyframe that
includes content from the previous frame.
A new keyframe appears containing your text.
6. Use the text tool to change the text in Frame 2 to read
mouse over
.
Click anywhere in the text to begin editing. When you’re done, just click outside
the text or choose another tool from the Tools palette.
7. Use the Properties panel to label Frame 1
out
, and then label Frame 2
over
.
You can use either labels or frame numbers as references in ActionScript pro-
gramming. In many ways, labels are the best choice because they make your
code easier to understand when you read it. A good label explains more than
a number any day. Also, if you insert new frames in the timeline, the frame
numbers in your ActionScript will no longer be valid.
www.it-ebooks.info

FLASH CS6: THE MISSING MANUAL
448
GETTING HELP
FOR EVENTS
AND EVENT
LISTENERS
8. Click Scene 1 to exit the mcText movie clip and go back to your main movie
clip.
The symbol closes, and you’re back on the main timeline.
9. Add a new layer to your main movie clip, and then name it
actions
.
It’s always best to create a special, well-labeled layer to hold your ActionScript
code.
Getting Help for Events and Event Listeners
Now that the Flash document is ready to go, it’s time to write and register an event
listener, but where do you start? Computers are fussy beasts and won’t work prop-
erly unless everything is done their way. ActionScript is the same. Event handling
uses specific words, punctuation, and even capitalization. Everything has to be just
so, or your event will be a nonevent. For beginning ActionScript coders, one of the
challenges is learning the right words to use to define and register particular events.
This section explains what questions you need to ask as you’re coding and where
to find the answers.
The first question to ask is this: What type of event is going to serve as the trigger
to set your actions in motion? In this case, the event is the movement of the mouse
over an object named mcCircle, so this is a mouse-related event. With that bit of
knowledge, you can consult ActionScript reference tools that list dierent types of
events. You’re looking for one that sounds like it deals with mouse events.
The best reference tool that’s close at hand while you’re ActionScripting is the
ActionScript 3.0 Reference
. Open it through the help menu: Help→Flash Help. A
web page opens with many dierent help topics. Click the ActionScript topic near
the top of the page, then click ActionScript 3.0 Reference. The help systems shows
packages (groups of ActionScript classes) in the top left panel and specific classes
in the lower left panel. Details for a class appear in the large right panel.
This electronic reference book provides details on every object, function, and element
of ActionScript. Click the names on the left to open up descriptions and examples
in the main window. Events are in the list of “packages” in the upper-left corner.
The packages that begin with “fl.” are related to Flash components, video, multi-
language tools, motion classes, tweens, and transitions. Some of these you can’t use
unless you’ve added the related components to your Flash document. The packages
that begin with “flash.” are built into Flash Player and work in any Flash document.
Scroll down and click “flash.events.” The main window fills with classes and descrip-
tions. Under the heading Classes, you see all the dierent types of event classes.
Some may seem a little mysterious, like AsyncErrorEvent. But other names—like
KeyboardEvent and MouseEvent—sound more helpful. One click on MouseEvent,
and your journey is over. The window fills with all the programmer’s details you
www.it-ebooks.info

CHAPTER 13: CONTROLLING ACTIONS WITH EVENTS 449
GETTING HELP
FOR EVENTS
AND EVENT
LISTENERS
need to handle a MouseEvent, like the public constants that mouse events use (see
the box below).
TIP It’s kind of a lengthy trip to hunt down the help details on a specific event type, but it’s worth remem-
bering. If you end up writing a lot of event listeners, you’ll probably remember the details for the events you use
all the time. Occasionally, though, you’ll need to look up the details for some oddball and unfamiliar event type.
So leave some breadcrumbs (or fold down the corner of this page) to remind yourself how to look up events in
the
ActionScript 3.0 Reference
.
The reason for mucking through all this programming gobbledegook is about
to become apparent. Scroll down and look at the items under Public Constants.
These are the names of the actual events that MouseEvent can recognize: CLICK,
DOUBLE_CLICK, and so on, including MOUSE_OUT and MOUSE_OVER—the two
events you need for your script. Each event type (MouseEvent, KeyboardEvent,
ErrorEvent) has related
constants
that you use when you create event listeners. You
have to type these constants exactly as they’re defined (including capital letters,
underscores, and so on) for your event listener to work. In addition to the constants,
the events have properties you can use in your programs. For example, MouseEvent
has properties called altKey, ctrlKey, and shiftKey. These are Booleans, and they can
tell you whether a particular key is being pressed during a mouse event. You can use
them to define, say, a special action for Shift-click and a dierent one for Alt-click.
Mouse Events: Public Constants
Here’s the complete list of constants used by MouseEvent, as
shown in
ActionScript 3.0 Reference
. The first word, in capital
letters, is the constant you use to identify the event. The
word after the colon,
String
, indicates that the constant is of
the string type. The word in quotes is the constant’s actual
value. The most important part of this definition is the word
in caps, because that’s the word you use to register listeners
for a particular mouse event, as explained in the next section.
You can think of these constants as the specific triggers for a
MouseEvent.
CLICK : String = "click"
DOUBLE_CLICK : String = "doubleClick"
MOUSE_DOWN : String = "mouseDown"
MOUSE_MOVE : String = "mouseMove"
MOUSE_OUT : String = "mouseOut"
MOUSE_OVER : String = "mouseOver"
MOUSE_UP : String = "mouseUp"
MOUSE_WHEEL : String = "mouseWheel"
ROLL_OUT : String = "rollOut"
ROLL_OVER : String = "rollOver"
CODERS’ CLINIC
TIP You can ignore the items with the red triangles next to their names unless you’re planning on doing
some AIR (Adobe Integrated Runtime) programming. The triangles indicate that these classes, properties, and
methods are available only in AIR. For more details on AIR projects, see Chapter 21.
Creating a Rollover with a Mouse Event
So you know you want to listen for a mouse event; specifically, you want to trigger
some actions when the mouse is over the mcCircle movie clip. That makes mcCircle
www.it-ebooks.info

FLASH CS6: THE MISSING MANUAL
450
GETTING HELP
FOR EVENTS
AND EVENT
LISTENERS
the
event target
, because it’s the object where the event takes place. As described
earlier and as shown in Figure 13-1, the event target creates an event object, and
then sends it to an event listener. The event object delivers information about the
event that happened. Often, all that’s necessary is notification that the event took
place. As programmer, it’s your job to tell the event target the name of the event
that serves as a trigger and where to deliver the event object. This process is called
registering
an event, and it’s done with a line of code like this:
mcCircle.addEventListener(MouseEvent.MOUSE_OVER, mouseOverListener);
NOTE As usual, create an actions layer in your timeline and use the Actions panel (Window→Actions) to
write your code.
In ActionScript-speak, this statement “registers an event listener.” Almost all events
use a similar method to register event listeners, so it’s worthwhile to examine the
statement completely. The first chunk of code,
mcCircle.addEventListener
, is nearly
recognizable. The dot syntax indicates that mcCircle is an object, and that makes
addEventListener either a property or a method of the object. The action verb “add”
in the name hints that it’s a method, because methods are actions, while properties
are characteristics. In fact, addEventListener is a method that’s included with just
about every object in Flash. That means you can use nearly any object to register
an event listener. The details in the parentheses are the
parameters
for the method.
The first parameter is the event the listener is listening for. In this case, it’s a
MouseEvent, and the specific type of event is named by the constant MOUSE_OVER.
As you know from your extensive research in the Flash help files, those capital-
lettered constants
are
the specific triggers for a MouseEvent. A comma separates
the parameters of the method. In this statement, there are two parameters. The
second parameter,
mouseOverListener
, is the name of the event listener. An
event
listener
is simply a function—a series of statements or actions—that run when the
event happens. You get to name (and write all the code for) the event listener. It’s
helpful to use a name that shows that this is an event listener and that describes the
event that triggers the actions; hence the name “mouseOverListener.”
The event listener is a function, much like the functions described on page 426. The
most significant detail is that the function has to list the event object in its param-
eters. You can think of the event object as the message sent from the event target
to the event listener. Here’s the code for mouseOverListener:
function mouseOverListener (evt:MouseEvent):void
{
mcText.gotoAndStop("over");
}
The first line begins with the keyword
function
, indicating that what follows defines a
function—a list of actions. Next comes the name of the function:
mouseOverListener
.
The function’s parameter is the event object; in this case, the event object’s name
is
evt
. That’s followed by a colon (:) and the object class
MouseEvent
. The name
www.it-ebooks.info

CHAPTER 13: CONTROLLING ACTIONS WITH EVENTS 451
GETTING HELP
FOR EVENTS
AND EVENT
LISTENERS
doesn’t matter—it can be
evt, e
, or
george
. As always, it’s helpful to choose a name
that means something to you now and will still make sense 5 years from now when
you’re trying to remember how the code works. You do have to accurately define the
class or type of event, which in this case is MouseEvent. The term
:void
indicates that
this function doesn’t return a value. If you need to brush up your function-building
skills, see page 426.
Once the curly brackets begin, you know that they contain the list of statements or
actions that the function performs. In this case, there’s simply one line that tells the
movie clip mcText to go to the frame labeled “over” and stop there. All in all, here’s
the complete code so far, with accompanying line numbers:
1 mcCircle.addEventListener(MouseEvent.MOUSE_OVER, mouseOverListener);
2
3 function mouseOverListener (evt:MouseEvent):void
4 {
5 mcText.gotoAndStop("over");
6 }
What you have at this point is one complete and registered event listener. Line 1
identifies mcCircle as the event target for a MOUSE_OVER event. It also registers
the event listener as mouseOverListener. Beginning on Line 3, you have the code
for mouseOverListener. Any actions you place between those curly brackets will
happen when the mouse cursor is over mcCircle.
You can go ahead and test your movie if you want, but it’s not going to behave all
that well. It needs a few more lines of code to make it presentable. If you test your
movie at this point, you’ll see a lot of movie clip flickering. If you mouse over the
circle, the flickering stops and the text changes to “mouse over.” That much works
well. When you move the mouse out of the circle…nothing happens. The text still
reads “mouse over.” That’s because you haven’t written the mouse-out event. For-
tunately, it’s very similar to the mouse-over code. In fact, all you have to do is copy
and paste the mouse-over code, and then make changes where needed, as shown
in bold text in this example:
7
8 mcCircle.addEventListener(MouseEvent.MOUSE_OUT, mouseOutListener);
9
10 function mouseOutListener (evt:MouseEvent):void
11 {
12 mcText.gotoAndStop("out");
13 }
By now, you should be able to read and understand most of the code. Like the first
example, the event is registered using the mcCircle object. The event in this case is
MOUSE_OUT, and the event listener is named accordingly: mouseOutListener. The
action part of the event listener sends the timeline playhead to the frame labeled
“out,” which displays the text “mouse out”—back where it was when the program
started. Perfect.
www.it-ebooks.info

FLASH CS6: THE MISSING MANUAL
452
GETTING HELP
FOR EVENTS
AND EVENT
LISTENERS
Well, almost perfect. If you test the movie now, you’ll find that it behaves well when
you mouse over the circle and when you mouse out of the circle. At the beginning
though, there’s still a bunch of movie clip flickering, unless the mouse starts o
over the circle. Time for a little Flash troubleshooting. Unless they’re told otherwise,
movie clips play one frame, and then the next, and so on, until they reach the last
frame, and then they play over again. And again. And again. Your main movie has
only one frame, so it’s not causing the flickering. mcCircle only has one frame, so it’s
not causing the flickering either. The mcText clip has two frames, and those are the
ones doing the dance when you start your animation. You need a line of code that
stops the movie clip on Frame 1. Then it will be up to the mouse events to control
which frame is shown. All you need is one line that says:
mcText.gotoAndStop(1);
The method
gotoAndStop()
is part of every movie clip. This bit of code tells mcText
to go to Frame 1 and stop. The parameter inside the parentheses has to refer to a
specific frame. You can do that with a frame number, as shown here, or you can do
it with a frame label, as you did in your event listeners. If you’re wondering how you
can find out about the properties and methods for particular classes and objects,
see the box below.
Getting Help for ActionScript Classes
On page 448, the section “Getting Help for Events and Event
Listeners” explained how to find an event and all its program-
ming details in the
ActionScript 3.0 Reference
. You can use
the same reference to look up the properties and methods
of particular classes and objects. For example, if you can’t
remember the exact spelling for the “goto and stop” method,
you can look up the MovieClip class, and you see all the methods
associated with the class.
After opening the
ActionScript 3.0 Reference
(see the box on
page 441), look for MovieClip in the scrolling box at the bottom
left under Classes. Click the word “MovieClip,” and you see
the complete and formal definition of the class, including the
public properties that you can change through ActionScript
programming. Below that, you see the public methods includ-
ing
gotoAndStop()
. There’s a short description that describes
what the method does and the type of parameters it requires.
Scroll down far enough, and you’ll see examples of how to use
the MovieClip class, along with its properties and methods.
CODERS’ CLINIC
As a statement on the first frame of your main movie clip,
mcText.gotoAndStop(1)
runs when the animation begins. It doesn’t really matter whether it comes before
or after the other lines of code. Those other bits of code don’t do anything until an
event happens. Not so with the statement above. There’s nothing to prevent it from
running as soon as Frame 1 of the main movie clip loads.
In ActionScript programming, the order in which dierent functions and statements
appear isn’t always important. It doesn’t matter which event listener appears first in
your code. The order in which the event listeners
run
is determined by the order in
which someone mouses over or out of mcCircle. So whenever possible, you may as
well arrange your code so it’s easy to read and understand. In this case, it’s probably
www.it-ebooks.info

CHAPTER 13: CONTROLLING ACTIONS WITH EVENTS 453
GETTING HELP
FOR EVENTS
AND EVENT
LISTENERS
best to register all your event listeners in the same spot, and then put the event
listener functions together. You may also want to put the code that isn’t dependent
on a listener at the very top. So here, with a little rearranging for readability, is the
code up to this point:
1 mcText.gotoAndStop(1);
2
3 mcCircle.addEventListener(MouseEvent.MOUSE_OVER, mouseOverListener);
4 mcCircle.addEventListener(MouseEvent.MOUSE_OUT, mouseOutListener);
5
6 function mouseOverListener(evt:MouseEvent):void
7 {
8 mcText.gotoAndStop("over");
9 }
10
11 function mouseOutListener(evt:MouseEvent):void
12 {
13 mcText.gotoAndStop("out");
14 }
Line 1 stops mcText in its tracks before it has a chance to start flickering between
its two frames. Lines 3 and 4 register event listeners. Beginning on line 6 are the
functions that make up the event listeners. At this point, you can test your program,
and it should behave pretty well. If something unexpected happens, double-check
your spelling and make sure you have semicolons at the end of the statements.
Add Statements to an Event Listener
So far in this example you’ve seen how an event listener attached to one object
(mcCircle) can eect a change in another object (mcText). A single event listener
can change any number of objects, including the object that registers the listener.
After all, any statements you put between the curly brackets of an event listener
will run when the event happens.
So the next steps change the mcCircle object to give it a rollover-style behavior.
Once you make these changes, both the text and the circle will change in response
to MOUSE_OVER and MOUSE_OUT events. Before you can indulge in ActionScript
programming fun, you need to create a new keyframe in the mcCircle movie clip
with a dierent image. Then you get to add statements to the two event listeners,
mouseOverListener and mouseOutListener, to describe the actions.
Here are the steps to set up mcCircle’s timeline:
1. On the stage, double-click mcCircle to open it for editing.
The circle symbol opens, showing a single frame in the timeline.
2. Click Frame 2 in the timeline, and then press F7 to add a blank keyframe.
A new empty keyframe appears in Frame 2 of the circle timeline.
www.it-ebooks.info

FLASH CS6: THE MISSING MANUAL
454
GETTING HELP
FOR EVENTS
AND EVENT
LISTENERS
3. Draw a star in Frame 2 using the Polystar tool.
The circle timeline now has a circle on Frame 1 and a star on Frame 2.
4. In the Properties panel, label Frame 2
over
, and then label Frame 1
out
.
It’s good to get in the habit of labeling frames you refer to in ActionScript code.
5. In the Edit bar above the stage, click Scene 1 to close the movie clip.
The circle movie clip symbol closes, and you’re back at the main movie clip’s
timeline.
In your ActionScript, you need to add the lines that control the behavior of the
mcCircle movie clip. They’re all of the
gotoAndStop()
variety. Start o with a line
that stops the movie clip from flickering when the animation begins.
mcCircle.gotoAndStop(1);
Then, between the curly brackets of mouseOverListener, add code to change the
circle to a star when a MOUSE_OVER event happens.
mcCircle.gotoAndStop("over");
Last but not least, between the curly brackets of the mouseOutListener, add code
to change the star back to a circle when the mouse moves away from mcCircle.
mcCircle.gotoAndStop("out");
When you’re done, the complete code should look like this:
1 mcText.gotoAndStop(1);
2 mcCircle.gotoAndStop(1);
3
4 mcCircle.addEventListener(MouseEvent.MOUSE_OVER, mouseOverListener);
5 mcCircle.addEventListener(MouseEvent.MOUSE_OUT, mouseOutListener);
6
7 function mouseOverListener(evt:MouseEvent):void
8 {
9 mcText.gotoAndStop("over");
10 mcCircle.gotoAndStop("over");
11 }
12
13 function mouseOutListener(evt:MouseEvent):void
14 {
15 mcText.gotoAndStop("out");
16 mcCircle.gotoAndStop("out");
17 }
www.it-ebooks.info
CHAPTER 13: CONTROLLING ACTIONS WITH EVENTS 455
GETTING HELP
FOR EVENTS
AND EVENT
LISTENERS
Now is a good time to test your movie. If everything runs as it should, you enjoy
a high-quality mouse-over and mouse-out experience. Both the graphics and the
text change with the mouse events. On the other hand, if you’re getting somewhat
dierent results, you may want to download
13-2_Mouse_Event_done.fla
from the
Missing CD page at
www.missingmanuals.com/cds/flashcs6mm
to look for places
where your code doesn’t match the downloaded file.
APPLYING MOUSE EVENTS TO OTHER PROJECTS
As it stands now, your mouse event project isn’t the flashiest thing on the block
(pun intended). Still, it’s worth considering how you can take the same rollover style
behaviors and create larger, more impressive projects. For example, using the same
mouse events, it would be easy to create a photo gallery that has half a dozen or
more photo thumbnails and one large “feature” image, like the one in Figure13-4.
When the mouse moves over one of the thumbnails, the thumbnail changes to dis-
play a highlight, and the feature image changes to match the thumbnail. You can
even add a text caption that changes for each picture. Once you’ve created one
photo gallery, it’s easy to reuse your code by simply swapping in new photos. The
variations are limited only by your time and imagination. For example, the photo
gallery animation mentioned in Chapter 7 (
7-5_Photo_Gallery.fla
), uses mouse-click
events. When a thumbnail is clicked, the playhead moves to a dierent point on the
timeline, where a tween moves the photo in 3-D space until it finally fills the stage.
Another click, and it shrinks back to size.
FIGURE 13-4
Using the mouse-event
techniques described
so far, you can create a
photo gallery like this
one. When the mouse is
over a thumbnail, a large
version of the picture is
shown to the right.
www.it-ebooks.info

FLASH CS6: THE MISSING MANUAL
456
GETTING HELP
FOR EVENTS
AND EVENT
LISTENERS
Creating a Tabbed Window with Mouse
Events
So far this chapter has covered two types of mouse events: MOUSE_OVER and
MOUSE_OUT. The technique for using other events is nearly identical. The most
frequently used mouse event is probably the CLICK event. If you understand the
previous examples with MOUSE_OVER and MOUSE_OUT, you’ll have no problem
putting CLICK to work. Suppose you want to create a Flash project that’s organized
with tabs. You’ve seen a similar system on websites and in programs including Flash.
You click a tab, and it reveals dierent information or a panel of tools.
Using the ActionScript programming tools introduced in this chapter and the pre-
ceding one, you can create a tabbed window like the one shown in Figure 13-5. Here
are the tools you need in your Flash and ActionScript toolbox:
• Three mouse events: MOUSE_OVER, MOUSE_OUT, and CLICK.
• A few IF..ELSE conditional statements to control tab behavior.
• Four movie clips to serve as tabs.
• One movie clip that holds the “content” shown under each tab.
Setting the Stage for Tabbed Folder Display
The tabbed bar in Figure 13-5 is made up of four movie clips, one for each tab sub-
ject: dog, cat, flower, and Porsche. You can make the graphic part of the tab any
shape you want. In this example, the tabs are created with a rectangle primitive.
The top corners are rounded to give it that old-fashioned, tabbed-folder look. The
Classic static text was created with the text tool. The important thing is that each
tab is a separate movie clip, and each movie clip has three frames: over, out, and
selected. In the example, the tabs are 137.5 pixels wide so that four tabs fit snugly
in a 550-pixel horizontal space.
NOTE You can follow the instructions in this section to set up your tabbed folder document, or you can
download
13-3_Tabbed_Folders.fla
from the Missing CD page (
www.missingmanuals.com/cds/flashcs6mm
). If
you want to see a finished and working copy of the project, download
13-4_Tabbed_Folders_done.fla
.
As the mouse moves and clicks, you want to change the tabs’ appearance to provide
some interactive feedback for your audience. In this example, when the mouse is
“out,” the tab contrasts in color with the color of the content’s folder. It looks as if the
tab is behind another open folder. When the mouse moves over the tab, it changes
size and color and the text is bold, providing a highlight eect.
www.it-ebooks.info
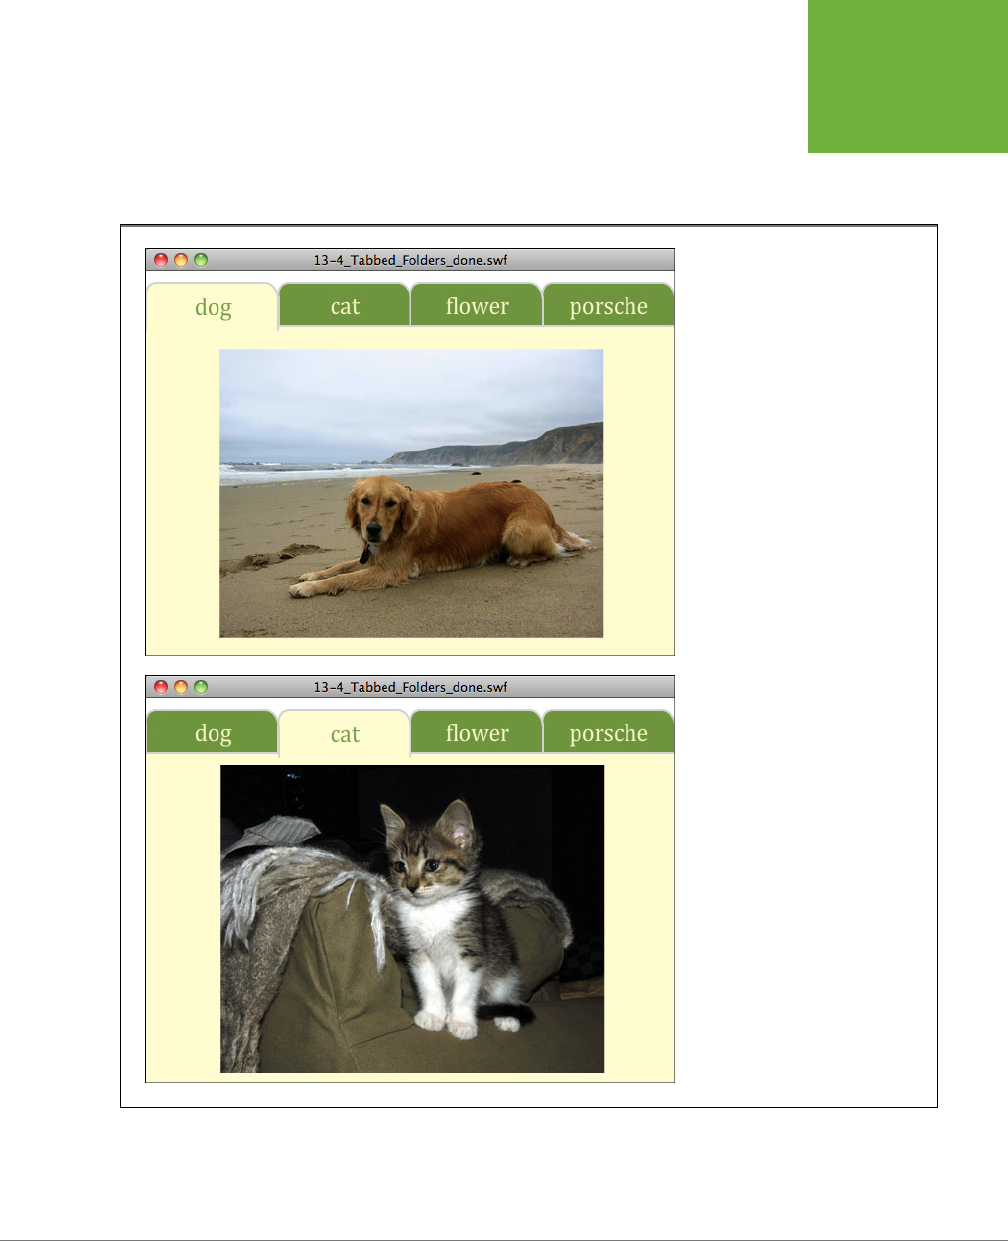
CHAPTER 13: CONTROLLING ACTIONS WITH EVENTS 457
GETTING HELP
FOR EVENTS
AND EVENT
LISTENERS
When the tab is selected and its content is showing, the color of the tab matches
the background color of the folder, giving it the appearance of an open folder. The
frames are labeled
out, over
, and
selected
as shown in Figure 13-6. The ActionScript
code uses the labels to identify particular frames.
FIGURE 13-5
You can make a tabbed window inter-
face using three simple mouse events.
Top: The dog tab is selected, and the
content area below shows a dog.
Bottom: Clicking the cat tab changes
the tab’s appearance and the content
below.
www.it-ebooks.info
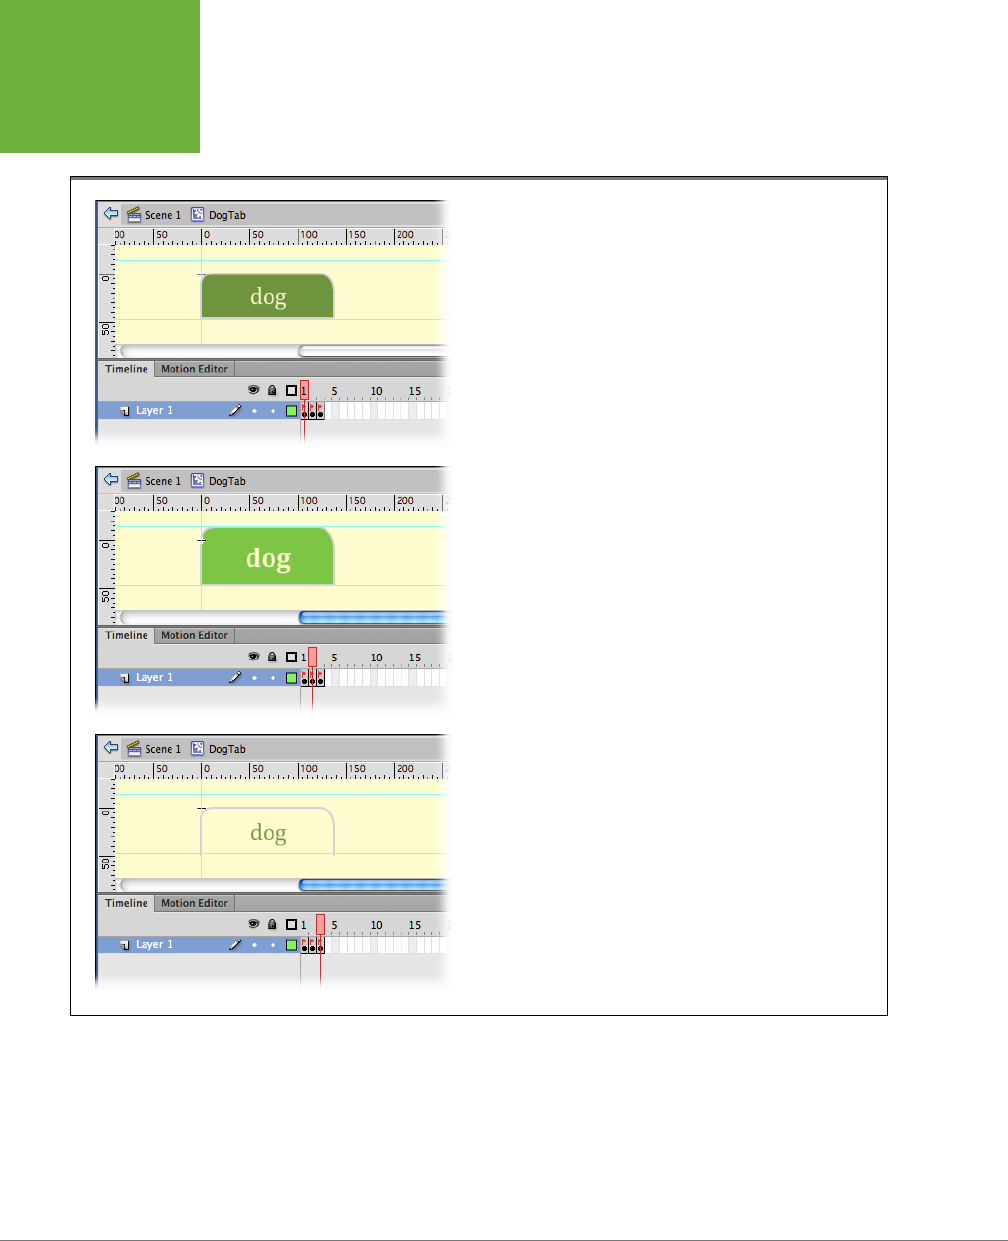
FLASH CS6: THE MISSING MANUAL
458
GETTING HELP
FOR EVENTS
AND EVENT
LISTENERS
The main movie clip has only one frame, but it organizes the actions, tabs, and
content into three layers, as shown in Figure 13-7.
FIGURE 13-6
Each tab is a movie clip with three frames, one for each state of the tab.
Shown here in the symbol editing view, the top picture shows the “out”
state, the middle shows “over,” and the bottom shows “selected.”
Each tab is a separate movie clip symbol, and the instances arranged on the stage
are named mcDogTab, mcCatTab, mcFlowerTab, and mcPorscheTab. There’s one
other movie clip in this project, called mcContent. You guessed it—that’s a movie
clip that covers most of the stage and shows the contents for each of the tabs. The
mcContent movie clip has four frames with labels that match each tab: dog, cat,
flower, and Porsche. So, when the “cat” tab is clicked, the playhead in mcContent
www.it-ebooks.info
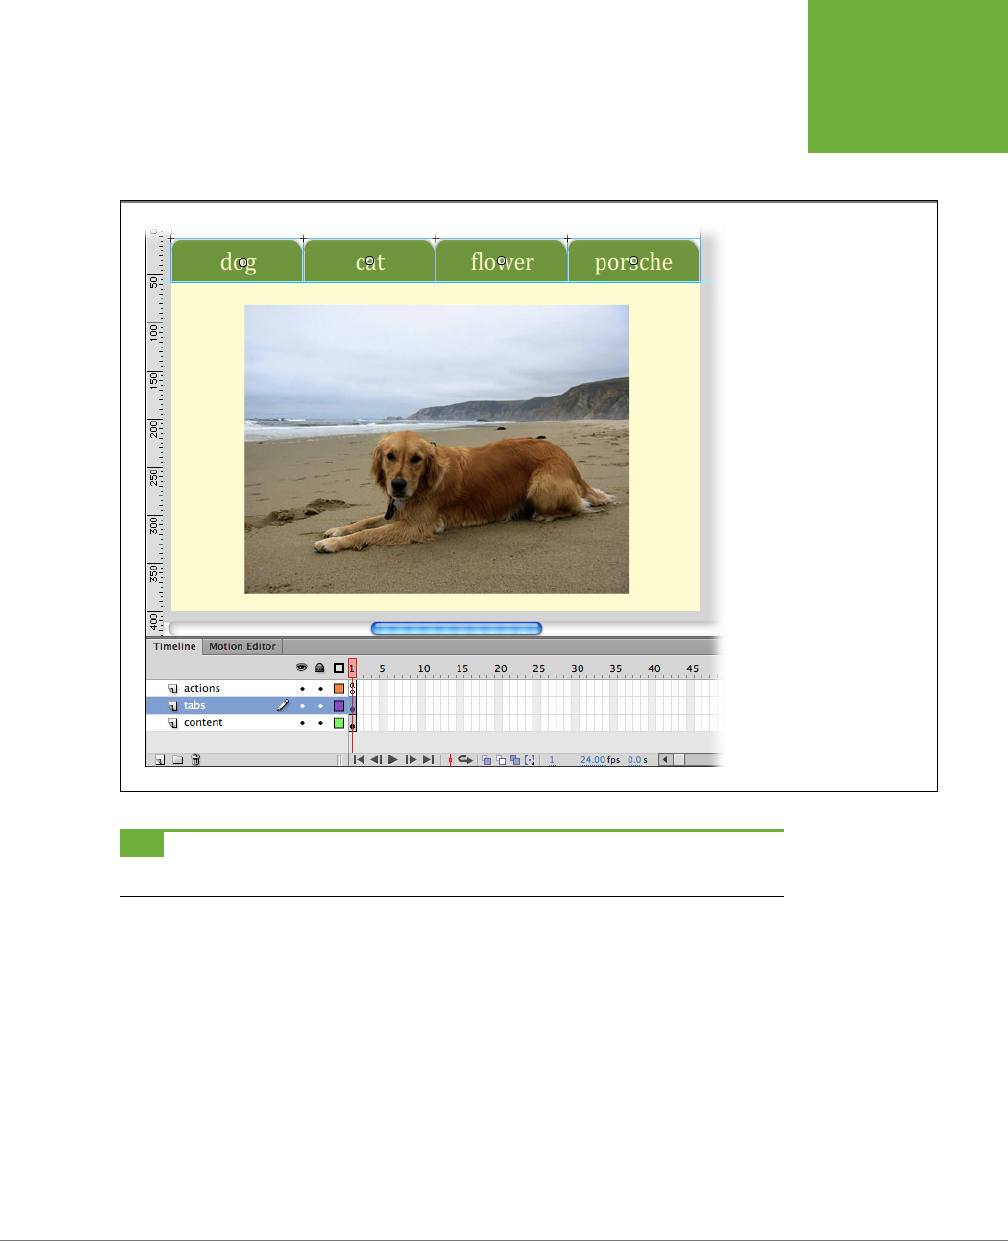
CHAPTER 13: CONTROLLING ACTIONS WITH EVENTS 459
GETTING HELP
FOR EVENTS
AND EVENT
LISTENERS
moves to the “cat” frame. In the example file, there’s a matching photo for each
mcContent frame. If you don’t have photos of your favorite dog, cat, flower, and
Porsche, a static text word will do.
FIGURE 13-7
The timeline for the main
movie clip in this project has
three layers: actions, tabs, and
content. It’s not absolutely
necessary to use three layers,
but it’s helpful to organize
your project using layers.
TIP It’s easy to line up and arrange the tabs on the stage using the Align commands. Use Modify→
Align→Bottom to line up all the bottom edges. Then use Modify→Align→Distribute Widths to space them evenly.
Planning Before Coding
As projects become more complicated, you can save a lot of time by thinking things
through before you start writing code. It’s a lot like doing a rough pencil sketch or
storyboard (page 44) before you draw. With programming, it helps to list the actions
that need to take place for your program to work. You can put these down in the hu-
man language of your choice, but it certainly helps to keep in mind the ActionScript
tools you’ll be using to build your project. Here’s an example of planning notes for
the tabbed window project:
www.it-ebooks.info

FLASH CS6: THE MISSING MANUAL
460
GETTING HELP
FOR EVENTS
AND EVENT
LISTENERS
• On startup, the
dog tab
should be selected, and
dog content
should be showing.
The other tabs should show the “out” frame.
• If the mouse rolls over or out of the
dog tab
, it shouldn’t change its appearance;
it should stay “selected.”
• If the mouse rolls over any of the
non-selected tabs
, they should highlight,
showing the “over” image when the mouse is over, and they should change
back to “out” when the mouse moves away.
• When the mouse clicks
any tab
, the clicked tab should change to “selected”
and all the
other tabs
should change to “out.” The
content
should change to
match the selected tab.
These points present a pretty good sketch of how the tabbed window should behave,
and they give you some programming goals. To help grapple with the elements in
your program, the words indicating movie clips are in italics, and the words indicat-
ing frames are in quotes. In your sketch, use any tools (typographic eects, colors,
circles, and arrows) you want that help you understand the project.
The first bullet point in the sketch is easy to tackle, especially if you warmed up by
completing the rollover project outlined earlier in this chapter (page 448). Here’s
the code you need to start with the dog tab selected and the other tabs set to the
“out” frame:
1 // Start with the Dog tab selected and Dog content showing
2 mcDogTab.gotoAndStop("selected");
3 mcContent.gotoAndStop("dog");
4 // Stop the other tab movie clips from playing on
5 mcCatTab.gotoAndStop("out");
6 mcFlowerTab.gotoAndStop("out");
7 mcPorscheTab.gotoAndStop("out");
Because this project involves more lines of code and is a bit more complicated, it’s
good programming practice to use line numbers and to add comments to the code.
If you don’t have line numbers in your Actions window, click the Options button in
the upper-right corner of the Actions window, and then choose Line Numbers near
the bottom of the menu. In the code shown, the lines that begin with two slashes
(//) are comments. ActionScript ignores anything from the slashes to the end of
the line, so you’re free to put whatever words will help you and others understand
the logic behind your program.
Looking over the “sketch” of your program, you can see that each tab needs to
react to three dierent mouse events: MOUSE_OVER, MOUSE_OUT, and CLICK.
So each tab needs to register event listeners for those mouse events. (If you need a
refresher on registering an event listener, the details are on page 450.) It may look
like a lot of code, but each line uses the same form, or as programmers like to say,
syntax
, to register an event listener.
www.it-ebooks.info

CHAPTER 13: CONTROLLING ACTIONS WITH EVENTS 461
GETTING HELP
FOR EVENTS
AND EVENT
LISTENERS
8
9 // Register mouse event listeners for mcDogTab
10 mcDogTab.addEventListener(MouseEvent.MOUSE_OVER, dogOverListener);
11 mcDogTab.addEventListener(MouseEvent.MOUSE_OUT, dogOutListener);
12 mcDogTab.addEventListener(MouseEvent.CLICK, dogClickListener);
13
14 // Register mouse event listeners for mcCatTab
15 mcCatTab.addEventListener(MouseEvent.MOUSE_OVER, catOverListener);
16 mcCatTab.addEventListener(MouseEvent.MOUSE_OUT, catOutListener);
17 mcCatTab.addEventListener(MouseEvent.CLICK, catClickListener);
18
19 // Register mouse event listeners for mcFlowerTab
20 mcFlowerTab.addEventListener(MouseEvent.MOUSE_OVER, flowerOverListener);
21 mcFlowerTab.addEventListener(MouseEvent.MOUSE_OUT, flowerOutListener);
22 mcFlowerTab.addEventListener(MouseEvent.CLICK, flowerClickListener);
23
24 // Register mouse event listeners for mcPorscheTab
25 mcPorscheTab.addEventListener(MouseEvent.MOUSE_OVER, porscheOverListener);
26 mcPorscheTab.addEventListener(MouseEvent.MOUSE_OUT, porscheOutListener);
27 mcPorscheTab.addEventListener(MouseEvent.CLICK, porscheClickListener);
NOTE Some lines in this script are left empty on purpose. ActionScript doesn’t mind, and a little white space
makes the code easier to read and understand, especially when viewed in the Actions panel.
Now that the event listeners are registered, you have a roadmap for the action part
of your code. The last word in each of those statements—like dogOverListener,
catOutListener, and porscheClickListener—is a reference to an event listener, and
it’s up to you to write the code that defines the actions. For example, lines 10, 11,
and 12 show that mcDogTab needs three listeners, so that’s a good place to start.
Looking back at the sketch, you have a rough outline of how the dog tab is sup-
posed to behave. Those two middle bullet points from page 456 describe what’s
supposed to happen:
• If the mouse rolls over or out of the
dog tab
, it shouldn’t change its appearance;
it should stay selected.
• If the mouse rolls over any of the
non-selected tabs
, they should be highlighted,
showing the “over” image when the mouse is over, and they should change back
to “out” when the mouse moves away.
The word “if” is a good clue that you’ve got an
if…else
situation here. At this point,
it may help to refine your human language describing the actions; however, if you’re
feeling confident, you can jump in and start to code. Here’s a refined version of what
should happen when the mouse moves over the dog tab:
www.it-ebooks.info

FLASH CS6: THE MISSING MANUAL
462
GETTING HELP
FOR EVENTS
AND EVENT
LISTENERS
• If the movie clip
mcDogTab
is selected, then the movie clip
mcDogTab
should
remain on the frame labeled “selected.”
• Else if the movie clip
mcDogTab
isn’t selected, then the movie clip
mcDogTab
should change to the frame labeled “over.”
With the refined description, it’s just a hop, skip, and a jump to the ActionScript
code for the mouse-over event listener. Remember, the lines with double slashes
(//) are just comments, not statements:
28
29 // Event listeners for mcDogTab
30 function dogOverListener(evt:MouseEvent):void
31 {
32 // if the tab is selected, leave it selected on mouse over
33 // else if the tab isn't selected, show the out frame
34 if (mcDogTab.currentLabel == "selected")
35 {
36 mcDogTab.gotoAndStop("selected");
37 }
38 else
39 {
40 mcDogTab.gotoAndStop("over");
41 }
42 }
The
if…else
conditional statement for mcDogTab follows this form:
if (condition)
{
do these statements;
}
else
{
do these statements;
}
The
if…else
structure works well for the tabs because it helps you manage the pos-
sibility that the tab may already be selected when the mouse moves over it. (There
are more details on conditional statements like
if…else
on page 437.)
NOTE When you write the
(condition)
part of the statement (line 34), you want to use ActionScript’s equality
operator, which is two equal signs (= =). You use the equality operator to test whether a statement is true or false.
A single equals symbol (=) is the
assignment operator
in ActionScript and is used to change values.
The next event listener for mcDogTab handles the MOUSE_OUT event. Similar to
the MOUSE_OVER event, you want the tab to do nothing if the tab is selected. If
www.it-ebooks.info

CHAPTER 13: CONTROLLING ACTIONS WITH EVENTS 463
GETTING HELP
FOR EVENTS
AND EVENT
LISTENERS
it’s not selected, then you want the tab to change back to the “out” state. Another
job for
if…else
, and the form for the listener is very similar:
43
44 function dogOutListener(evt:MouseEvent):void
45 {
46 // if the tab is selected, leave the tab selected
47 // else if the tab isn't selected, show the out frame
48 if (mcDogTab.currentLabel == "selected")
49 {
50 mcDogTab.gotoAndStop("selected");
51 }
52 else
53 {
54 mcDogTab.gotoAndStop("out");
55 }
56 }
The actions that need to be performed for the CLICK event were listed in the sketch
as follows:
• When the mouse clicks
any tab
, the clicked tab should change to “selected”
and all the
other tabs
should change to “out.” The
content
should change to
match the selected tab.
There’s no
if…else
situation here. There’s simply a series of actions that need to take
place when a tab is clicked. Those actions position the playhead on specific frames
of the “tab” and “content” movie clips. Here’s the dogClickListener code:
57
58 function dogClickListener(evt:MouseEvent):void
59 {
60 // when clicked change the tab to selected
61 mcDogTab.gotoAndStop("selected");
62 // when clicked change the mcContent to show related frame
63 mcContent.gotoAndStop("dog");
64 // Set all the other tabs to the "out" frame
65 mcCatTab.gotoAndStop("out");
66 mcFlowerTab.gotoAndStop("out");
67 mcPorscheTab.gotoAndStop("out");
68 }
69
When the dog tab is clicked, line 61 changes the dog tab to “selected,” and line 63
displays dog stu in the content movie clip. The other three lines of code, 65–67,
change the other tabs to the “out” state.
www.it-ebooks.info
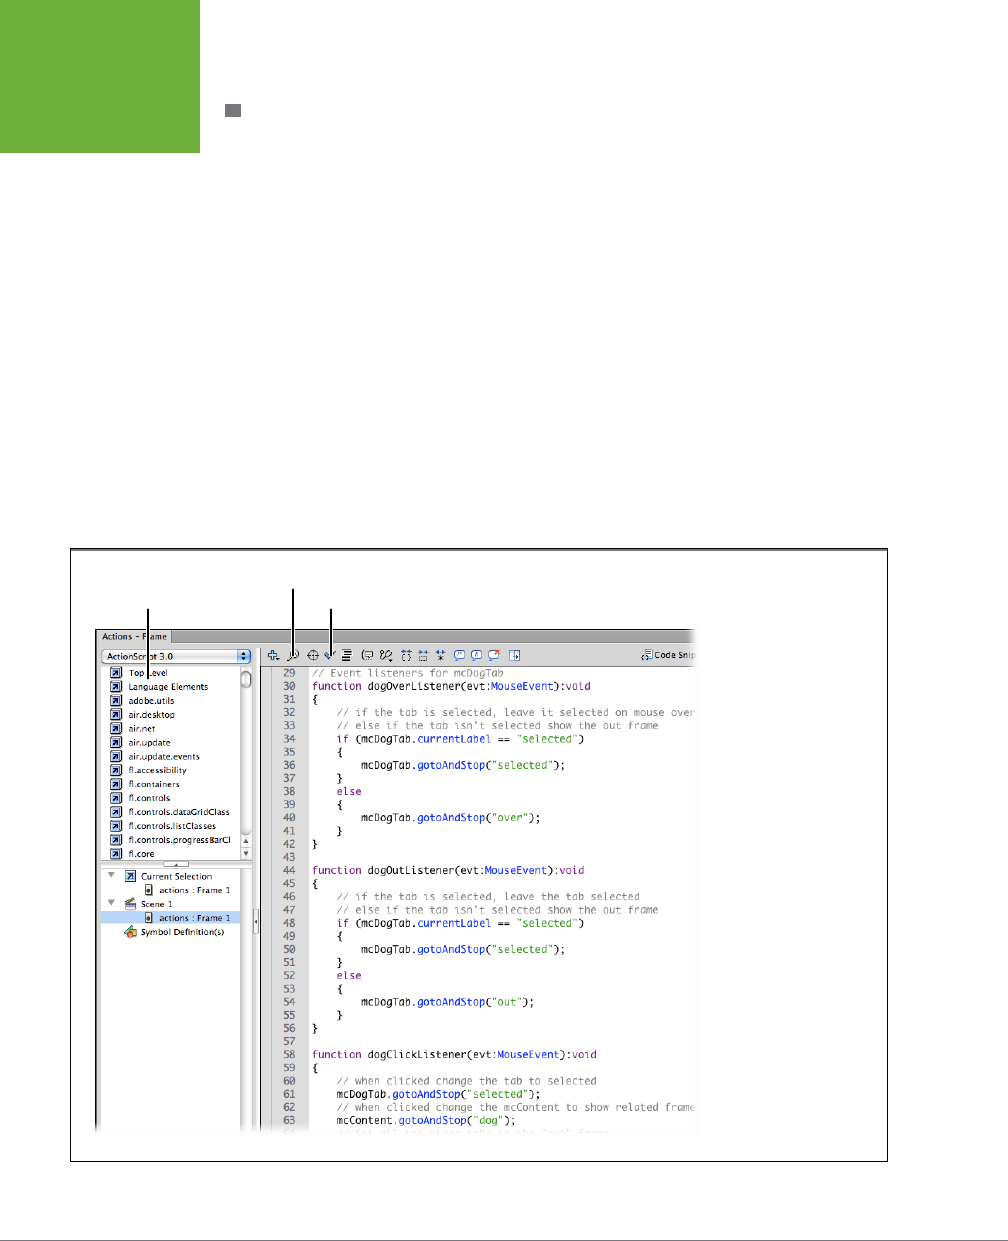
FLASH CS6: THE MISSING MANUAL
464
GETTING HELP
FOR EVENTS
AND EVENT
LISTENERS
TESTING YOUR WORK SO FAR
You’ve finished writing the event listeners for the dog tab. You’ve got three more
tabs to go; however, if you use the “copy and tweak” coding technique described
in this section, the last three tabs will go quickly. Before you copy and reuse code,
you want to make sure it’s working properly. There’s no benefit in copying mistakes,
so this is a good time to test the code for the dog tab.
The first thing to do is to check for typos and obvious errors with the Check Syntax
tool. At the top of the Actions window, click Check Syntax, as shown in Figure 13-8.
A box appears, telling you whether or not there are errors in the code. If there are
errors, you see them listed by line number in the Compiler Errors tab next to the
timeline. Double-click an error, and Flash highlights the oending line of code.
The explanations of errors may seem a little cryptic. If you don’t understand what
Flash is saying, then compare your code to the code in this book. Check spelling,
capitalization, and punctuation carefully. Punctuation errors can include missing
semicolons at the ends of statements or missing parentheses and brackets. Some-
times, bracket confusion includes using an opening bracket ({) when you should
use a closing bracket (}).
FIGURE 13-8
The Actions window has
tools to help you find
typos (Check Syntax), find
and replace words, and
insert prebuilt chunks of
code (Actions toolbox).
Actions toolbox
Find and Replace
Check Syntax
www.it-ebooks.info
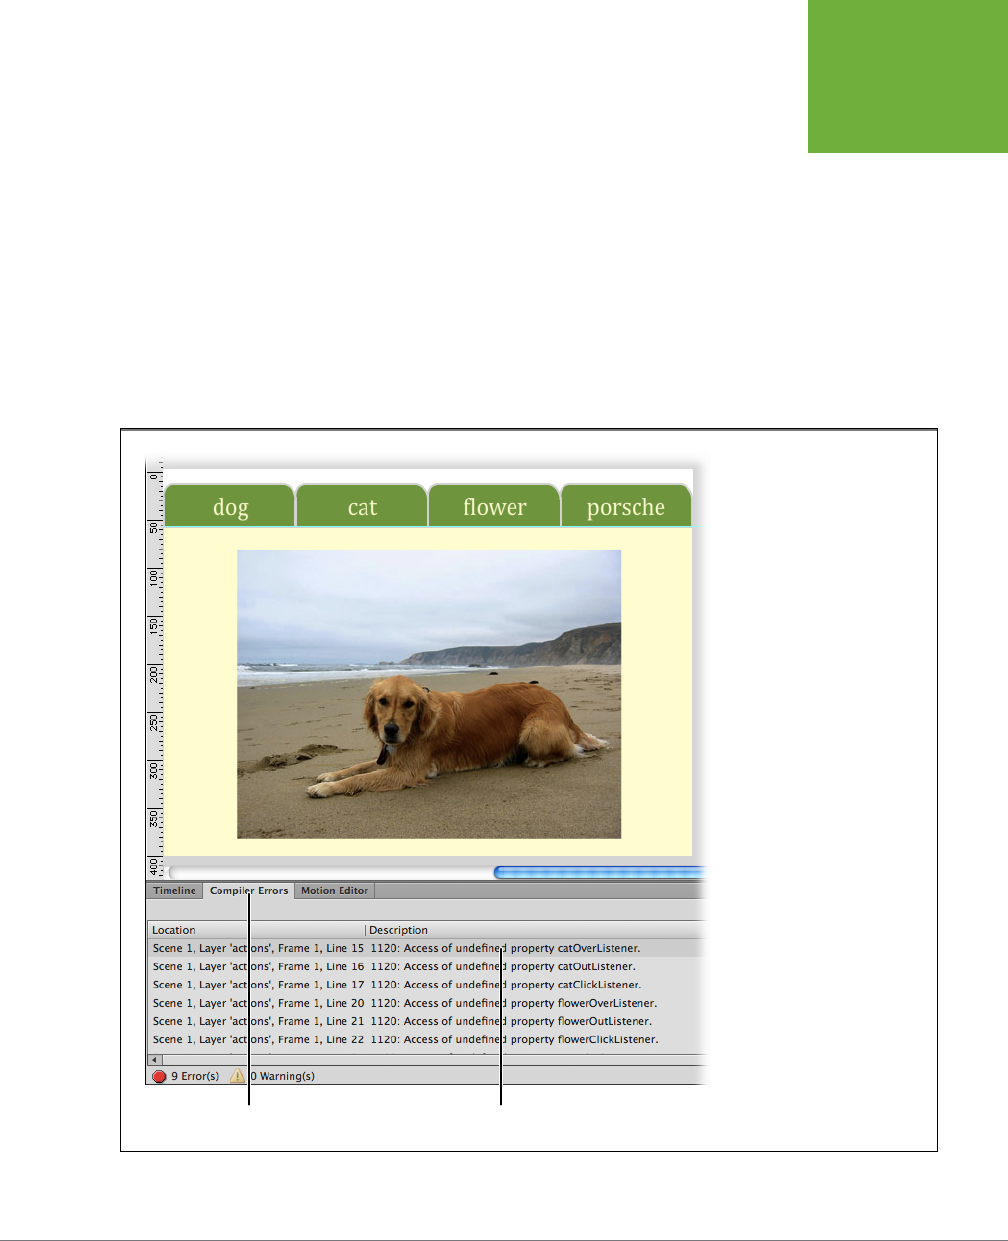
CHAPTER 13: CONTROLLING ACTIONS WITH EVENTS 465
GETTING HELP
FOR EVENTS
AND EVENT
LISTENERS
It takes a little extra eort to test part of your code before your program is com-
plete, but the process gives you a better understanding of how it works. If you’re
copying and reusing code, testing is worth the eort, and it’s likely to save you time
in the long run.
If you test your movie at this point, you just get a lot of flickering, and the Compiler
Errors panel fills up with errors with descriptions like the ones in Figure 13-9: “Access
of undefined property catOverListener” and so on. In the Compiler Errors panel,
double-click the error, and Flash highlights line 15 in your code. The problem is this
line (and others) register event listeners and point to functions that you haven’t
written yet. This confuses ActionScript. Often, if one part of your code doesn’t work
(or isn’t complete), the rest of the code doesn’t run properly—hence the flickering
when you test your program.
FIGURE 13-9
When testing your ActionScript
programs, errors appear in the
Compiler Errors window. Double-
click an error, and ActionScript
highlights the line of code that
created the problem.
Compiler Error tab Error descriptions
www.it-ebooks.info

FLASH CS6: THE MISSING MANUAL
466
GETTING HELP
FOR EVENTS
AND EVENT
LISTENERS
So, to comment out line 15, which registers the catOverListener, place two slash
marks at the beginning so that it looks like this:
// mcCatTab.addEventListener(MouseEvent.MOUSE_OVER, catOverListener);
Problem solved. Place comment marks in front of the lines for the mcCatTab (15,
16, and 17); for the mcFlowerTab (20, 21, and 22); and for the mcPorscheTab (25,
26, and 27).
TIP When you want to comment out more than one line of code, you can use the block comment characters.
Put /* at the front, and then put */ at the end. Everything between those markers is considered a comment, no
matter how many characters, words, or lines there are. Two buttons on the Actions panel toolbar make it easy to
add comment marks to your text. To use the “Add block comment” button, select the text you want to “comment
out,” and then click the button. The “Apply line comment” button places slash marks at the cursor.
Now you can test the dog tab part of your movie; press Ctrl+Enter (⌘-Return). If
everything is working properly, there shouldn’t be any flickering when the anima-
tion runs, because all the movie clips are told to
gotoAndStop()
at a specific frame.
The dog tab should be selected, and the other tabs should be showing the “out”
movie clip frame. When you mouse over any of the tabs, nothing should happen.
The dog tab doesn’t change when you mouse over and out of it, because that’s
what you programmed it to do. The other tabs don’t change because you haven’t
programmed their actions yet.
It would be nice to test the MOUSE_OVER and MOUSE_OUT events on the dog
tab before you copy the code and use it for the other tabs. To do that, you have
to tweak your code so that mcDogTab isn’t “selected” when you test the program.
Change line 2 to read:
mcDogTab.gotoAndStop("out");
And then change the mcCatTab so it’s selected by changing line 5 to:
mcCatTab.gotoAndStop("selected");
Now, when you test your movie, the dog tab should change when you mouse over
it. If everything works as expected, great. If not, you need to search and destroy any
typos that appear in your code. You can download the file
13-4_Tabbed_ Folders_
done.fla
from the Missing CD page (
www.missingmanuals.com/cds/flashcs6mm
)
to compare coding. Open the Actions window in the downloaded file, and you see
the tabbed folders statements with the proper lines commented out and tweaked
The solution is to temporarily remove these lines from your program while you test
the dog tab. You don’t want to delete lines you’ve already written—that would be a
waste of time. Instead you can
comment them out
. In other words, when you place
double slash lines in front of the code, ActionScript ignores the lines because they
look like comments. After testing, you remove the comment marks and turn your
code back into legitimate statements.
www.it-ebooks.info

CHAPTER 13: CONTROLLING ACTIONS WITH EVENTS 467
GETTING HELP
FOR EVENTS
AND EVENT
LISTENERS
for testing. If you compare the code line by line to your project, you should be able
to identify any errors.
Once your code has passed the testing phase, you need to undo the changes you
made. So, change line 2 back to its original form:
mcDogTab.gotoAndStop('selected');
And, likewise, change line 5 back to:
mcCatTab.gotoAndStop("out");
Remove the comment marks from the lines that register event listeners: 15, 16, and
17 for the mcCatTab; 20, 21, and 22 for the mcFlowerTab; and 25, 26, and 27 for the
mcPorscheTab.
With your code tested and working properly, you can copy and tweak with confi-
dence, as described in the next section.
Copy-and-Tweak Coding
If you’ve typed all of the 60-plus lines of code shown so far in this example, you
probably agree that writing and testing code can be a little tedious. The good news
is, if you’ve gotten this far, you can use the copy-and-tweak technique to develop
code for the other three tabs. When you have some code that works properly and
you need to write nearly identical code for another part of your program, it makes
sense to copy the code and then change a name or word here and there. In this
example, all the tabs have very similar behavior. You can copy the event listeners
for mcDogTab, and then paste that code to the bottom of your script. Then, all you
need to do is swap a few names. For example, where it says
mcDogTab
, change it
to
mcCatTab
.
First copy and paste the code you want to modify:
1. Select and copy the code between line 29 and line 68, inclusive.
2. Move to line 70, and then paste the code back into your script.
At this point, you need to rewrite the code for mcCatTab. You can do so in a couple
of ways, but for learning purposes, this exercise will walk you through the changes
one at a time. See Table 13-1.
TABLE 13-1
This table shows how to convert the code for the event listener dogOverListener to catOverListener.
Elements in bold were changed.
LINE # CODE AS WRITTEN FOR MCDOGTAB CODE REVISED FOR MCCATTAB
70 // Event listeners for mcDogTab // Event listeners for mcCatTab
71 function dogOverListener
(evt:MouseEvent):void {
function catOverListener
(evt:MouseEvent):void {
75 if (mcDogTab.currentLabel ==
"selected") {
if (mcCatTab.currentLabel ==
"selected") {
www.it-ebooks.info

FLASH CS6: THE MISSING MANUAL
468
GETTING HELP
FOR EVENTS
AND EVENT
LISTENERS
LINE # CODE AS WRITTEN FOR MCDOGTAB CODE REVISED FOR MCCATTAB
77 mcDogTab.gotoAndStop("selected") mcCatTab.gotoAndStop("selected")
67 // else if the tab isn't select-
ed, change it on mouse over
// else if the tab isn't select-
ed, change it on mouse over
81 mcDogTab.gotoAndStop("over") mcCatTab.gotoAndStop("over")
TIP Reading your code line by line, thinking through the actions that the code performs, and then making
changes is the safest way to rewrite your code. You can also employ ActionScript’s find-and-replace tool; however,
it’s awfully easy to get carried away and make bad changes. To use find and replace, click the magnifying glass
at the top of the Actions window, as shown in Figure 13-8.
The event listener, catOverListener, is very similar to the previous example. You
need to change “dog” to “cat” in the function name and everywhere the tab movie
clip symbol appears. When you’re finished, the code should look like this example:
function catOutListener(evt:MouseEvent):void
{
// if the tab is selected, leave the tab selected
// else if the tab isn't selected, show the out frame
if (mcCatTab.currentLabel == "selected")
{
mcCatTab.gotoAndStop("selected");
}
else
{
mcCatTab.gotoAndStop("out");
}
}
To rewrite the code for the CLICK event, think back to the tasks the code has to
perform. When
any
tab is clicked, it should change to “selected,” and all the
other
tabs should change to “out.” The content needs to be changed to match the selected
tab. With those concepts clearly in mind, it’s fairly easy to adapt the dogClickListener
code to work for catClickListener. Below is the code as it should read after you’ve
made changes. The bolded words have been changed.
function catClickListener (evt:MouseEvent):void
{
// when clicked change the tab to selected
mcCatTab.gotoAndStop("selected");
// when clicked change the mcContent to show related frame
mcContent.gotoAndStop("cat");
// Set all the other tabs to the "out" frame
mcDogTab.gotoAndStop("out");
www.it-ebooks.info

CHAPTER 13: CONTROLLING ACTIONS WITH EVENTS 469
GETTING HELP
FOR EVENTS
AND EVENT
LISTENERS
mcFlowerTab.gotoAndStop("out");
mcPorscheTab.gotoAndStop("out");
}
That finishes the changes that transform the dog tab code to work for the cat tab.
Now you need to repeat the process for the remaining two tabs: flower and Porsche.
When you’ve done that, the rest of your code should look like this:
1 // Event listeners for mcFlowerTab
2 function flowerOverListener(evt:MouseEvent):void
3 {
4 // if the tab is selected, leave it selected on mouse over
5 // else if the tab isn't selected, show the out frame
6 if (mcFlowerTab.currentLabel == "selected")
7 {
8 mcFlowerTab.gotoAndStop("selected");
9 }
10 else
11 {
12 mcFlowerTab.gotoAndStop("over");
13 }
14 }
15
16 function flowerOutListener(evt:MouseEvent):void
17 {
18 // if the tab is selected, leave the tab selected
19 // else if the tab isn't selected, show the out frame
20 if (mcFlowerTab.currentLabel == "selected")
21 {
22 mcFlowerTab.gotoAndStop("selected");
23 }
24 else
25 {
26 mcFlowerTab.gotoAndStop("out");
27 }
28 }
29 function flowerClickListener(evt:MouseEvent):void
30 {
31 // when clicked change the tab to selected
32 mcFlowerTab.gotoAndStop("selected");
33 // when clicked change the mcContent to show related frame
34 mcContent.gotoAndStop("flower");
35 // Set all the other tabs to the "out" frame
36 mcCatTab.gotoAndStop("out");
37 mcDogTab.gotoAndStop("out");
38 mcPorscheTab.gotoAndStop("out");
www.it-ebooks.info

FLASH CS6: THE MISSING MANUAL
470
GETTING HELP
FOR EVENTS
AND EVENT
LISTENERS
39 }
40 // Event listeners for mcPorscheTab
41 function porscheOverListener(evt:MouseEvent):void
42 {
43 // if the tab is selected, leave it selected on mouse over
44 // else if the tab isn't selected, show the out frame
45 if (mcPorscheTab.currentLabel == "selected")
46 {
47 mcPorscheTab.gotoAndStop("selected");
48 }
49 else
50 {
51 mcPorscheTab.gotoAndStop("over");
52 }
53 }
54
55 function porscheOutListener(evt:MouseEvent):void
56 {
57 // if the tab is selected, leave the tab selected
58 // else if the tab isn't selected, show the out frame
59 if (mcPorscheTab.currentLabel == "selected")
60 {
61 mcPorscheTab.gotoAndStop("selected");
62 }
63 else
64 {
65 mcPorscheTab.gotoAndStop("out");
66 }
67 }
68
69 function porscheClickListener(evt:MouseEvent):void
70 {
71 // when clicked change the tab to selected
72 mcPorscheTab.gotoAndStop("selected");
73 // when clicked change the mcContent to show related frame
74 mcContent.gotoAndStop("porsche");
75 // Set all the other tabs to the "out" frame
76 mcCatTab.gotoAndStop("out");
77 mcFlowerTab.gotoAndStop("out");
78 mcDogTab.gotoAndStop("out");
79 }
When you test the code, using Ctrl+Enter (⌘-Return), it should work as advertised.
On startup, the dog tab is selected. Mouse over any of the other tabs, and they
should show a highlight. Click a tab, and it becomes the selected tab, showing re-
lated content in the main part of the window. If your project isn’t working exactly as
www.it-ebooks.info

CHAPTER 13: CONTROLLING ACTIONS WITH EVENTS 471
KEYBOARD
EVENTS AND
TEXT EVENTS
expected, compare your code with
13-4_Tabbed_Folders_done.fla
from the Missing
CD (
www.missingmanuals.com/cds/flashcs6mm
).
MODIFYING TABBED WINDOWS FOR PROJECTS
The tabbed window project creates a container. You can rename the tabs and put
anything you want in the “content” movie clip. The example in this chapter holds a
single picture, but each tab could hold an entire photo collection or a collection of
widgets that work with a database. The tabs simply provide a way to organize the
elements of a project.
You can easily change the tabs themselves for a dierent look. Metallic high-tech
tabs, perhaps? All you have to do is change the shape or the color of the graphics in
the tab movie clips. For example, if you’d like a look that emulates colored file folders,
you can coordinate the color of the tabs with the background of the content movie
clip. If it works better for your project, you can use the same ActionScript code to
manage tabs that run vertically along the edge of the content area.
Keyboard Events and Text Events
ActionScript 3.0 uses a single technique for handling events, so if you know how
to register an event listener for a mouse event, it’s not dicult to handle events for
keyboards or other objects. All events use the same event register and event listener
duo. For example, the keyboard event has two constants: KEY_DOWN and KEY_UP.
You can use the Flash stage itself to register keyboard events.
NOTE You can download the Flash document for this example,
13-5_Keyboard_Events.fla
, from the Missing
CD page at
www.missingmanuals.com/cds/flashcs6mm
.
Here’s a simple example that shows you how to start and stop a movie clip from
running using the KEY_DOWN and KEY_UP events. The movie clip simply shows
a number for each frame as it’s running. This example references an instance of
the Stage class. The stage represents the drawing area in a Flash animation. As a
result, the stage has properties, like width and height, and like other objects, it has
an addEventListener method.
Create a new document. Add a layer, and then name one layer
actions
and the other
layer
counter
. At the first frame of the counter layer, add a movie clip symbol to the
stage. Open the movie clip, and put a big number 1 on the stage. Add four more
keyframes with the numbers 2 through 5 on the stage. In the Properties panel, name
the movie clip mcCounter. Click the first frame in the actions layer, open the Actions
window, and then type this short script:
stage.addEventListener(KeyboardEvent.KEY_DOWN, keyDownListener);
stage.addEventListener(KeyboardEvent.KEY_UP, keyUpListener);
www.it-ebooks.info

FLASH CS6: THE MISSING MANUAL
472
KEYBOARD
EVENTS AND
TEXT EVENTS
function keyDownListener(evt:KeyboardEvent):void
{
mcCounter.stop();
}
function keyUpListener(evt:KeyboardEvent):void
{
mcCounter.play();
}
When you test the animation (Control→Test Movie), it quickly runs through the frames
showing the numbers 1 through 5 on the stage. Press and hold the space bar, and
the numbers stop. Release the space bar, and the numbers start again.
NOTE When you test keyboard events inside Flash, you may notice some odd behavior. That’s because Flash
itself is trapping some keyboard events, and it tends to catch the letter keys. If you actually publish your Flash
project, and then run the SWF in Flash Player or a browser, you get a more accurate experience.
Using Event Properties
Like most things in ActionScript, an event is actually an object. The event object is
passed to the event listener as a parameter inside parentheses. Take this line of code:
function keyDownListener(evt:KeyboardEvent):void {
The
evt
is an instance of the keyboard event that was created when a key was
pressed. You can use any name you want in place of
evt
. The colon and the word
“KeyboardEvent” indicate the type of event.
The KEY_DOWN and KEY_UP constants are parts of the KeyboardEvent class. Key-
board events also have properties that store changeable values. Properties can be
passed to the event listener and used in the event listener’s actions. For example,
the charCode property holds a value that identifies the specific keyboard character
of KEY_DOWN and KEY_UP events. Programs use character codes to identify the
characters shown on a screen or sent to a printer. By adding a couple of lines to your
keyboard event listeners, you can view character codes as you press keys:
stage.addEventListener(KeyboardEvent.KEY_DOWN, keyDownListener);
stage.addEventListener(KeyboardEvent.KEY_UP, keyUpListener);
function keyDownListener(evt:KeyboardEvent):void {
mcCounter.stop();
trace("Key Down");
trace(evt.charCode);
}
function keyUpListener(evt:KeyboardEvent):void {
mcCounter.play();
www.it-ebooks.info
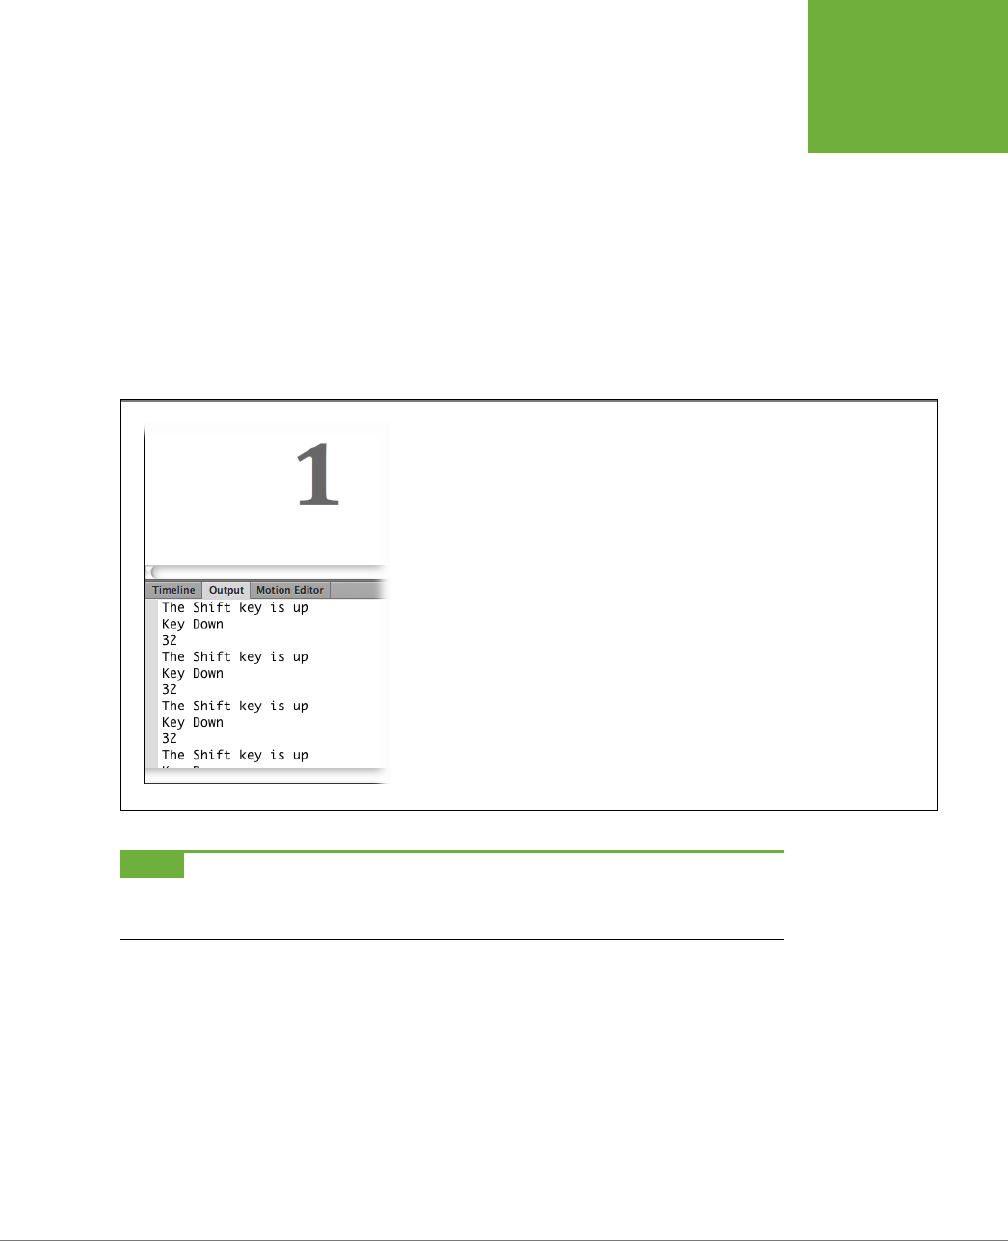
CHAPTER 13: CONTROLLING ACTIONS WITH EVENTS 473
KEYBOARD
EVENTS AND
TEXT EVENTS
trace("Key Up");
trace(evt.charCode);
}
The
trace()
statement is a remarkably handy programmer’s tool that’s used to display
values in the Output panel, as shown in Figure 13-10. If your Output panel is closed,
you can open it with Window→Output or the F2 key. Like any function, you pass
values to the
trace()
statement by placing them inside the parentheses. If you put
a string inside the parentheses, like (“Key Down”), Flash shows that string in the
Output panel when it reaches the
trace()
statement in your code. The two strings
“Key Down” and “Key Up” are called
string literals
by programmers, because the
value of the string is defined. It’s not a variable or a property that changes.
FIGURE 13-10
The Output panel and the
trace()
statement are an ActionScript coder’s friends. Here the
Output panel displays charCode and other statements from keyboard events.
NOTE The
trace()
statement doesn’t have any use in final Flash animations. The most common use of
trace()
is to examine the value of variables while testing a program. Sometimes a
trace()
statement is used to simply
determine whether a program reaches a certain point in the script.
The second
trace()
statement shows the value of a property in the Output window.
As explained previously,
evt
is the event object that’s passed to the event listener,
and charCode is a property of
evt
. Like all good properties, it’s shown with dot syntax
as
evt.charCode
. So the second
trace()
statement shows the value of
evt
’s charCode
property. Each time a key is pressed, a new instance of the KeyboardEvent is created
and passed to the listener keyDownListener. Each instance holds a single value in
the charCode property that corresponds to the key that was pressed.
www.it-ebooks.info

FLASH CS6: THE MISSING MANUAL
474
KEYBOARD
EVENTS AND
TEXT EVENTS
When you test the program, as you press keys, string literals (Key Down and Key Up)
and numbers appear in the Output panel. If you press the space bar, the keyDown-
Listener sends the “Key Down” string, and then the value 32. Because keyboards
repeatedly send character codes when a key is held down, you may see multiple
32s while you hold the key down and one final 32 on KEY_UP.
Keyboard events have six properties called
public
properties, because you can ac-
cess them from your ActionScript program (see Table 13-2).
TABLE 13-2
Public properties of KeyboardEvents
PUBLIC PROPERTY DATA TYPE DESCRIPTION
altKey Boolean True if the Alt key is pressed
charCode uint (unsigned integer) Value of the character code for key up
or key down
ctrlKey Boolean True if the Ctrl key is pressed
keyCode uint (unsigned integer) Value of the key code for key up or key
down
keyLocation uint (unsigned integer) Indicates the location of the key on the
keyboard
shiftKey Boolean True if the Shift key is pressed
Like charCode, keyCode, and keyLocation are used to determine what key was
pressed on a keyboard. The other three properties are used specifically to determine
whether the Alt, Ctrl, or Shift keys are down or up. Add this
trace()
statement to
your keyboard event program to see how the shiftKey property works:
trace(evt.shiftKey);
As a Boolean, the value of shiftKey is
true
when the Shift key is pressed and
false
if it’s not pressed. You can use an
if
conditional statement to test if the Shift key is
pressed. For example, you can replace the preceding statement with this
if…else
statement:
if (evt.shiftKey==true)
{
trace("The Shift key is down");
}
else
{
trace("The Shift key is up");
}
The result is a more complete description than the bare-bones
true
and
false
reports.
www.it-ebooks.info
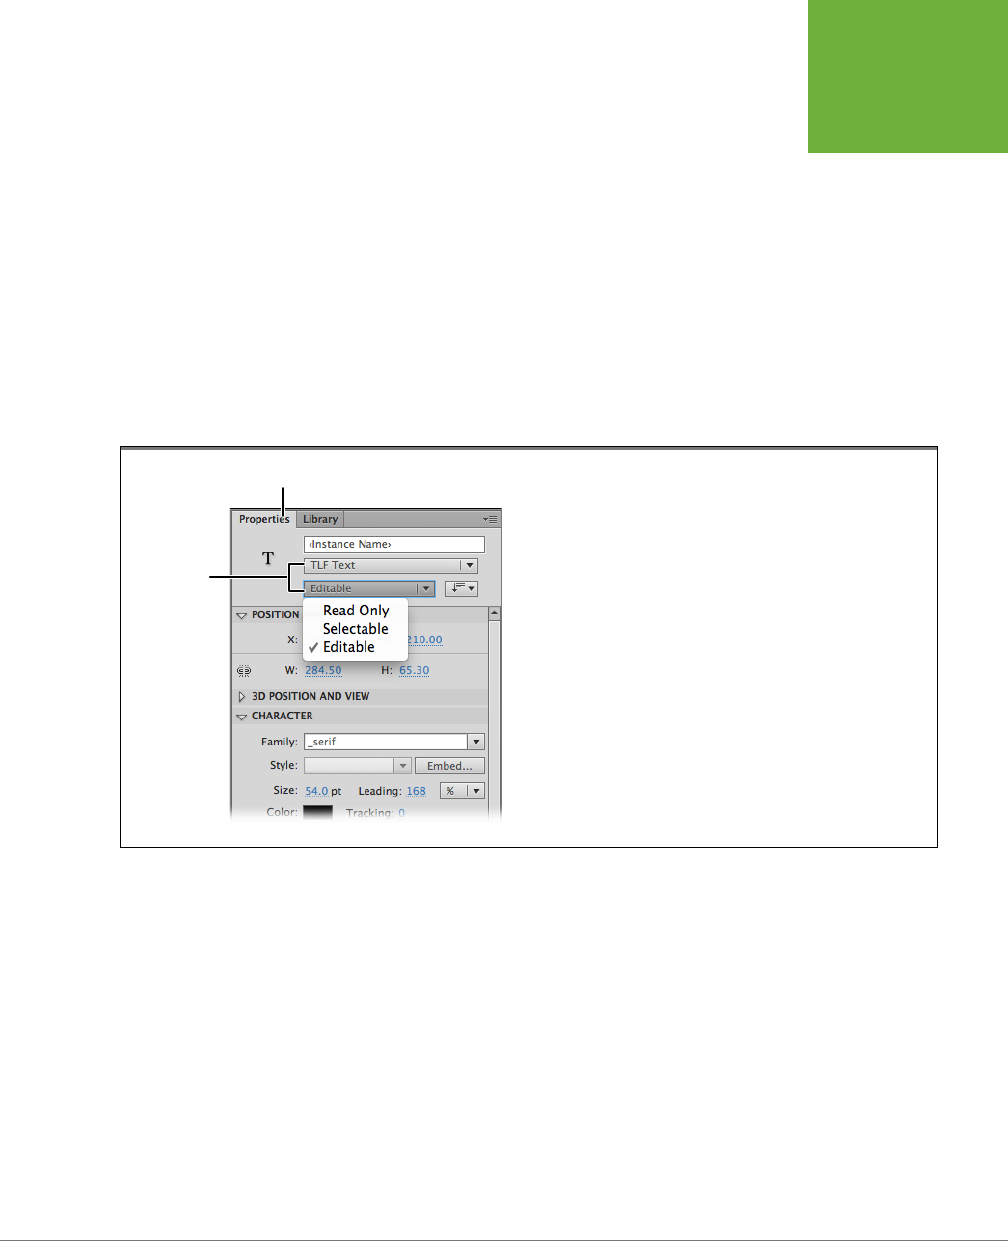
CHAPTER 13: CONTROLLING ACTIONS WITH EVENTS 475
KEYBOARD
EVENTS AND
TEXT EVENTS
Capturing Text Input with TextEvent
KeyboardEvent
works fine for detecting whether or not keys are pressed on the
keyboard, but it’s not very good at capturing the actual text or characters typed
into a program. The best tool for that job is the
TextEvent
. You use the TextEvent
with an object like an input text box.
1. Open a new document.
2. Click the Text tool in the Tools palette, and then choose TLF Text and Edit-
able from the two drop-down lists, as shown in Figure 13-11.
3. Draw a text box on the stage, and then add some preliminary text to the
text box, like
Your name here
.
4. In the Properties panel, name the Input Text box
tfName
.
FIGURE 13-11
As explained on page 216, Flash text can be TLF text or Classic text. TLF
text can be read only, selectable, or editable. Classic text can be static
text, dynamic text, or input text. You can name, and then access, TLF
text, dynamic text, and input text using ActionScript.
Properties panel
Text type
menus
5. Open the Actions window, and then type this code:
tfName.addEventListener(TextEvent.TEXT_INPUT, textInputListener);
function textInputListener(evt:TextEvent):void
{
trace(evt.text);
}
When you test the Flash program, you see a text box on the stage with the words
“Your name here.” Select the text, and then type your own name in its place; any
key you press while the text box is
in focus
appears in the Output panel. The text
box captures each letter and stores it in the
text
property of the Text Event object
www.it-ebooks.info

FLASH CS6: THE MISSING MANUAL
476
KEEPING
TIME WITH
TIMEREVENT
evt
. The TextEvent is passed to textInputListener, which uses the
text
property in
the statement:
trace(evt.text);
NOTE You can download the Flash document for this example,
13-7_Text_Event.fla
, from the Missing CD
page at
www.missingmanuals.com/cds/flashcs6mm
.
Keeping Time with TimerEvent
All the events explored in this chapter so far rely on audience input. There are other
types of events that occur as part of a process and don’t involve audience input. A
good example is the TimerEvent, which triggers an event when a specified amount
of time has passed. Suppose you’re developing a quiz and you want to give students
30 seconds to answer each question. You could use a TimerEvent to move to the
next question every 30 seconds. Sounds merciless, doesn’t it?
Here’s an example that’s not quite so cruel. All it does is change the text on the screen
after a certain interval. Open a new document, and then add a TLF read-only text
field to the stage. Put some placeholder text in the field, like the word “blank.” In
the Properties panel, name the dynamic text field
tfTimerText
. Using ActionScript,
you can create a Timer object. Using the properties of the timer object, you can set
it to trigger an event after a certain amount of time has passed. This example uses
the event to change the text in the dynamic text box. Initially, it says, “It’s not yet
time.” The color of the type is blue. After the timer event, the text reads “Now it’s
time!” as shown in Figure 13-12, and the color of the type changes to red:
1 var timer:Timer = new Timer(1000,3);
2
3 tfTimerText.text = "It's not yet time.";
4 tfTimerText.textColor = 0x0066FF;
5
6 timer.addEventListener(TimerEvent.TIMER_COMPLETE, timerCompleteListener);
7 timer.start();
8
9 function timerCompleteListener(evt:TimerEvent):void
10 {
11 tfTimerText.text = "Now it's time!";
12 tfTimerText.textColor = 0xFF0000;
13 }
www.it-ebooks.info

CHAPTER 13: CONTROLLING ACTIONS WITH EVENTS 477
REMOVING
EVENT
LISTENERS
FIGURE 13-12
In this example, a timer event is used to change the text displayed in
a dynamic text field.
You can’t just drag a timer out of the Tools palette like a circle or a text box, so you
have to use ActionScript code to create a new object. That’s exactly what the code
in line 1 does. From left to right it creates a variable called
timer
(lowercase
t
) which
is of the data type Timer (uppercase
T
). The =
new Timer
portion of the line creates
the timer object. The numbers inside the parentheses are the parameters you use to
set the timer. The first number sets the
delay
property, and the second number sets
the
repeatCount
property. The ActionScript Timer measures time in milliseconds, so
1000 equals a second. With repeatCount set to 3, the timer waits 3 seconds before
triggering the TIMER_COMPLETE event. Setting these two numbers is sort of like
winding up a kitchen timer to a specified interval.
In line 3, a new string of characters is displayed in the text box: “It’s not yet time.”
The following line sets the color of the text to blue. If you’ve read from the beginning
of this chapter, line 6 probably looks familiar. It registers the event listener called
timerCompleteListener. As you can probably guess, line 7 starts the countdown.
Lines 9 through 13 are the event listener for TIMER_COMPLETE. The function dis-
plays the new message in the text box, “Now it’s time!” And it changes the type to
red for added dramatic eect.
NOTE You can download the Flash document for this example,
13-8_Timer_Event.fla
, from the Missing CD
page at
www.missingmanuals.com/cds/flashcs6mm
.
Removing Event Listeners
When you create an event listener, it sits there constantly waiting for the event to
happen. You may forget it’s even there; but still, it sits patiently, waiting, listening,
and using up computer resources in the process. There are a couple of good reasons
why you should remove event listeners when they’re no longer needed. One is the
www.it-ebooks.info

FLASH CS6: THE MISSING MANUAL
478
IN CASE OF
OTHER EVENTS
computer resource issue. It’s also possible for a forgotten event listener to foul up
some other process when you least expect it.
Ideally, you should remove an event listener whenever your program no longer needs
it. For example, in the preceding TimerEvent, you can remove the listener after the
TIMER_COMPLETE event triggers. You can place the code to unregister the timer
within timerCompleteListener:
timer.removeEventListener(TimerEvent.TIMER_COMPLETE, timerCompleteListener);
The code to remove an event listener is very similar to the code used to register it in
the first place. The
removeEventListener()
function is a method of any object that
has a method to
addEventListener()
. The same parameters that define the event
type and the event handler identify the event listener being removed.
In Case of Other Events
The events covered in this chapter are just a few of the many events defined in Flash
and ActionScript. There are events to handle error messages and events to track
the process of a file or web page loading. There are events specific to components
like scroll bars, sliders, context menus, text lists, and color pickers. The good news
is that you use the same statements to register an event listener and to specify the
actions that are to take place when an event happens.
Table 13-3 gives a partial list of some of the event classes recognized by Flash Player.
Table 13-3. Examples of the events available in ActionScript 3.0.
CLASS DESCRIPTION
Activity Event Used by cameras and microphones to indicate they’re active.
AsyncErrorEvent Used to indicate an error in network communication.
ContextMenuEvent Indicates a change when the audience interacts with a context menu.
DataEvent Indicates raw data has completed loading.
ErrorEvent Used to indicate a network error or failure.
Event The base class for all other events classes.
FocusEvent Triggers an event when the audience changes focus from one object
to another.
FullScreenEvent Indicates a change from or to full-screen display mode.
HTTPStatusEvent Creates an event object when a network request returns an HTTP
status code.
IOErrorEvent Indicates an error when trying to load a file.
KeyboardEvent Indicates keyboard activity.
MouseEvent Indicates mouse activity.
www.it-ebooks.info
CHAPTER 13: CONTROLLING ACTIONS WITH EVENTS 479
IN CASE OF
OTHER EVENTS
CLASS DESCRIPTION
NativeDragEvent Used to acquire details about a drag-and-drop event.
NetStatusEvent Reports on the status of a NetConnection, NetStream, or
SharedObject.
ProgressEvent Reports on the progress while a file loads.
SampleDataEvent Used when the Flash Player requests audio data.
SecurityErrorEvent Reports a security error.
ShaderEvent Indicates the completion of a shader operation.
StatusEvent Used by cameras and microphones to report on their status and
connection.
SyncEvent Used by SharedObjects to indicate a change.
TextEvent Indicates a change when the audience enters text.
TimerEvent Indicates the passing of a timing interval.
Smartphone and Tablet Events
Smartphones and tablets have their own unique set of events (not events like getting
left in a taxi; that’s another matter entirely). These devices have capabilities that
we’ve all come to take for granted. For example, because the iPhone has a sensor
called an
accelerometer
, you can shake the phone to clear the screen or reset the
letters in a game. When you make a turn, your location and heading change on your
gadget’s map—if it has a GPS antenna. And of course, all those 1-, 2-, and 3-fingered
swipes are part of the mobile device language. ActionScript continues to add new
classes that register these events. Just as with the mouse and keyboard events,
you write code that “listens” for the event to occur and that shoots a message o
to some other object in your application to take action.
Here are some of the events related to these handheld devices:
EVENT DESCRIPTION
Accelerometer Event Triggered when the accelerometer in a mobile device is
updated. In other words, the gadget was moved, tilted or
shaken.
Geolocation Event Updates details on longitude, latitude, heading, speed, and
altitude when it receives updates from the GPS sensor.
Gesture Event Used by touchscreen devices that handle multitouch (two-
fingered) gestures.
Gesture Phase Provides information on the type of gesture being per-
formed. Is it a tap? Is it a swipe?
PressAndTapGestureEvent Handles press and tap gestures. Often used to trigger pop-
up, contextual menus.
www.it-ebooks.info

FLASH CS6: THE MISSING MANUAL
480
IN CASE OF
OTHER EVENTS
EVENT DESCRIPTION
SoftKeyboardEvent Dispatches a message when a software-driven keyboard
(like the iPad’s touchscreen keyboard) is activated or
deactivated.
SoftKeyboardTrigger Reports on the event that triggered the SoftKeyboard. Was
it the user? Was it content?
StageOrientationEvent Stage object sends a StageOrientationEvent object when
the device is rotated or changed due to softkeyboard acti-
vation or other event.
TouchEvent Detects user contact with the touchscreen. Used with the
other classes to determine the type of event.
TransformGestureEvent Used to detect swipes and report on their type. As always,
the object’s Public Constants give good clues as to the
object’s purpose: GESTURE_PAN, GESTURE_ROTATE,
GESTURE_SWIPE, and GESTURE_ZOOM.
TIP If you’re just beginning to write code for smartphone and tablet apps, you can learn a lot by studying
the code snippets that come with Flash CS6. Go to Window→Snippets and check out the snippets under Mobile
Touch Events, Mobile Gesture Events. Pop some of that code into your Actions window and you’ll see how the
wizards at Adobe expect you to use the event classes they created for handhelds.
www.it-ebooks.info

481
CHAPTER
14
When you create your animation using the Flash authoring tool, you draw
objects on the stage or drag them from the Library. Often, you put one
object inside another. For example, you might place a shape and some text
inside a movie clip that’s on the stage. Then you can move or transform the movie clip
and its content as a whole. When you want one displayed object to appear in front
of or behind another, you use Flash’s Modify→Arrange commands. To a designer,
it all seems pretty natural. But what happens when you put on your ActionScript
programmer’s hat and want to do those same display-related chores using only
ActionScript? The key is the Display List, and that’s the sole topic of this chapter.
The Display List is exactly what its name implies. It’s a running list of the objects
displayed during a Flash animation. You make things visible by adding them to the
Display List and make them disappear by removing them from the list. The Display
List keeps track of the stacking order of objects on the stage, managing the way
they overlap one another. This chapter shows you how to add and remove items
from the Display List and how to manage the stacking order. You’ll learn a lot about
the DisplayObject and DisplayObjectContainer classes. At the end of the chapter
(page 507), there’s a handy reference for some of the most common properties and
methods related to Display List tasks.
The Display List: Everything in Its Place
Simply put, anything that appears on the stage in Flash Player is a
display object
.
That includes shapes, lines, text fields, and movie clips. Because they’re displayable,
these objects have a lot of similar properties, including x/y coordinates that mark their
Organizing Objects
with the Display List
www.it-ebooks.info

FLASH CS6: THE MISSING MANUAL
482
THE DISPLAY
LIST:
EVERYTHING IN
ITS PLACE
position on the stage. They have width and height properties, which you can see in
the Properties panel whenever you select them. If you’re following the ActionScript
discussion that began in Chapter 12, then it’s probably clear that displayable objects
inherit these similar properties from some ancestor class (page 422). In fact, they’re
all descendants of a class called, appropriately enough,
DisplayObject
. As you work
in ActionScript, you’ll find lots of objects that get important, much-used properties
and methods from DisplayObject.
When Display Objects are Display Object Containers
Suppose you create a new Flash document, with nothing on the stage, and you publish
it or test it with Ctrl+Enter (⌘-Return on a Mac). From Flash Player’s point of view, that
empty .swf has two display objects: the stage itself (yep, it’s a display object) and
the animation’s main timeline. Even if there’s only a single frame, the main timeline
is considered a display object that’s placed on the stage. It works like this: Though
the Flash Player’s stage looks empty, it still has a couple of displayable features,
like a background color and the width and height of the stage. Equally important,
the stage is a container. When you put display objects on the stage, they become
visible. Along the same lines, the main timeline is also a display object. Anything
you put in a frame of that main timeline is displayed in the Flash animation. So it,
too, is a container for other display objects. So, before you even start the process
of building your animation, Flash always starts out with two display objects, which
are also containers, as shown in Figure 14-1.
FIGURE 14-1
Every Flash document starts off with two display objects that are also display object containers. You build
your animation by placing additional display objects and display object containers inside those two original
containers.
Stage
DisplayObject
DisplayObjectContainer
Main Timeline
DisplayObject
DisplayObjectContainer
NOTE Technically, the main timeline for any .swf is referred to as the .swf’s
main class instance
, but it’s
easier to think of it as the main timeline, and that’s what it’s called in this chapter.
Now, suppose you place something on that stage. Perhaps you’ve already drawn
a playing card and saved it as a movie clip in the Library. Drag that card from the
Library onto the stage, and now you’ve got three display objects. The stage is a
container holding the main timeline, and the timeline is a container holding the
playing card movie clip. Everything that appears in a Flash animation has to be in
www.it-ebooks.info

CHAPTER 14: ORGANIZING OBJECTS WITH THE DISPLAY LIST 483
ADDING
OBJECTS TO
THE DISPLAY
LIST
a container, and ultimately those containers are held in the main timeline, which is
held in the stage. Objects that can hold or contain other objects are a special type
of display object—they’re
display object containers
. Objects that descend from the
DisplayObjectContainer class have special properties and methods that are uniquely
suited to acting as containers for display objects.
NOTE If you’re eager to see a list of some of DisplayObjectContainer’s special properties and methods, go
ahead and flip to page 507. If you’d like a gradual introduction, just keep on reading.
All display object containers are also display objects, but there are display objects
that don’t have the special properties of a display object container. For example,
a rectangle can’t contain another object. You can group a rectangle with another
object, but technically it doesn’t contain the other object. Table 14-1 shows which
objects inherit properties from the DisplayObjectContainer class and which don’t.
TABLE 14-1
Display objects that can hold or contain other objects inherit the special properties of the
DisplayObjectContainer class.
DISPLAYOBJECT AND
DISPLAYOBJECTCONTAINER CLASS DISPLAYOBJECT CLASS ONLY
Stage Shape
Sprite TextField
MovieClip SimpleButton
Loader Bitmap
Video
StaticText
MorphShape (tween)
In practical terms, you won’t spend a lot of time fretting over the stage and the
main timeline as display objects or display object containers. They’re always there.
You can count on them being there. And there aren’t many ways you can change
them. If you’re approaching ActionScript 3.0 with a Flash designer’s background,
you probably consider the act of placing something in the main timeline as “placing
an object on the stage.” On the other hand, you need to be aware of the properties
and methods available when you’re working with the movie clips, buttons, shapes,
and text that you place on that stage.
Adding Objects to the Display List
Enough theory! It’s time to get back to that empty stage and the task of display-
ing an object. The following exercises use a file called
14-1_Display_List.fla
that’s
www.it-ebooks.info

FLASH CS6: THE MISSING MANUAL
484
ADDING
OBJECTS TO
THE DISPLAY
LIST
available on the Missing CD page at
www.missingmanuals.com/cds
. Several of the
examples in this chapter gradually add ActionScript code to this Flash document.
1. Select File→Open, and then browse to
14-1_Display_List.fla
.
When you open this document, there’s nothing on the stage.
2. If the Library isn’t visible, go to Window→Library to display it.
The Library holds seven movie clips. Five of the movie clips look like simple
playing cards, and are named PlayingCard1 through PlayingCard5. No suits,
just numbers. There are two simple rectangles that represent card tables:
GreenCardTable and BlueCardTable.
3. Open the Actions window by pressing F9 (Option-F9) or Window→Actions.
The Actions window appears without any code. If the Line Number option is
turned on, you see the number 1 in the left margin. If line numbering isn’t turned
on, click the Options button in the upper-right corner, and then choose Line
Numbers from the menu.
Making Library Objects Available to ActionScript
In the exercises in this chapter, you use ActionScript to display
instances of objects in the Library on the stage using Action-
Script code. When you drag a symbol out of the Library and then
place it on the stage, Flash knows what object you’re referring
to because, well, you dragged it. ActionScript 3.0, on the other
hand, knows only classes and objects. Every object has to
derive from a class. In this chapter, the objects in your Library
are movie clips, but that’s not specific enough to distinguish
one from the other. So, in the Flash documents created for
this chapter, each of the movie clips in the Library represent
classes
that
extend
the MovieClip class. In other words, they
represent custom classes derived from ActionScript’s built-in
MovieClip class.
It’s not that hard to associate a movie clip symbol in the
Library with a custom class that’s accessible to ActionScript.
In the Library, right-click the symbol’s name, and then choose
Properties from the pop-up menu. The Symbol Properties
dialog box opens with details about that particular symbol, as
shown in Figure 14-3. Turn on the appropriately named Export
for ActionScript checkbox, and then type in a class name for
the new class you’re creating in the Class text box. Immediately
below the Class text box is the name of the base class. In the
example shown in Figure 14-3, the PlayingCard1 class
extends
the MovieClip class. When you click OK, the Symbol Properties
dialog box closes. Flash can’t find an existing definition for the
PlayingCard1 class, so it displays an alert mentioning the fact,
but because a de facto definition exists in the Library, Flash can
create a definition and place it in the
.swf
, which is what it does.
In the document
14-1_Display_List.fla
, each of the cards and
the card tables represent custom classes created using this
same technique.
CODERS’ CLINIC
4. In the ActionScript window, type in the following code:
1 var card1:PlayingCard1 = new PlayingCard1();
2 addChild(card1);
www.it-ebooks.info
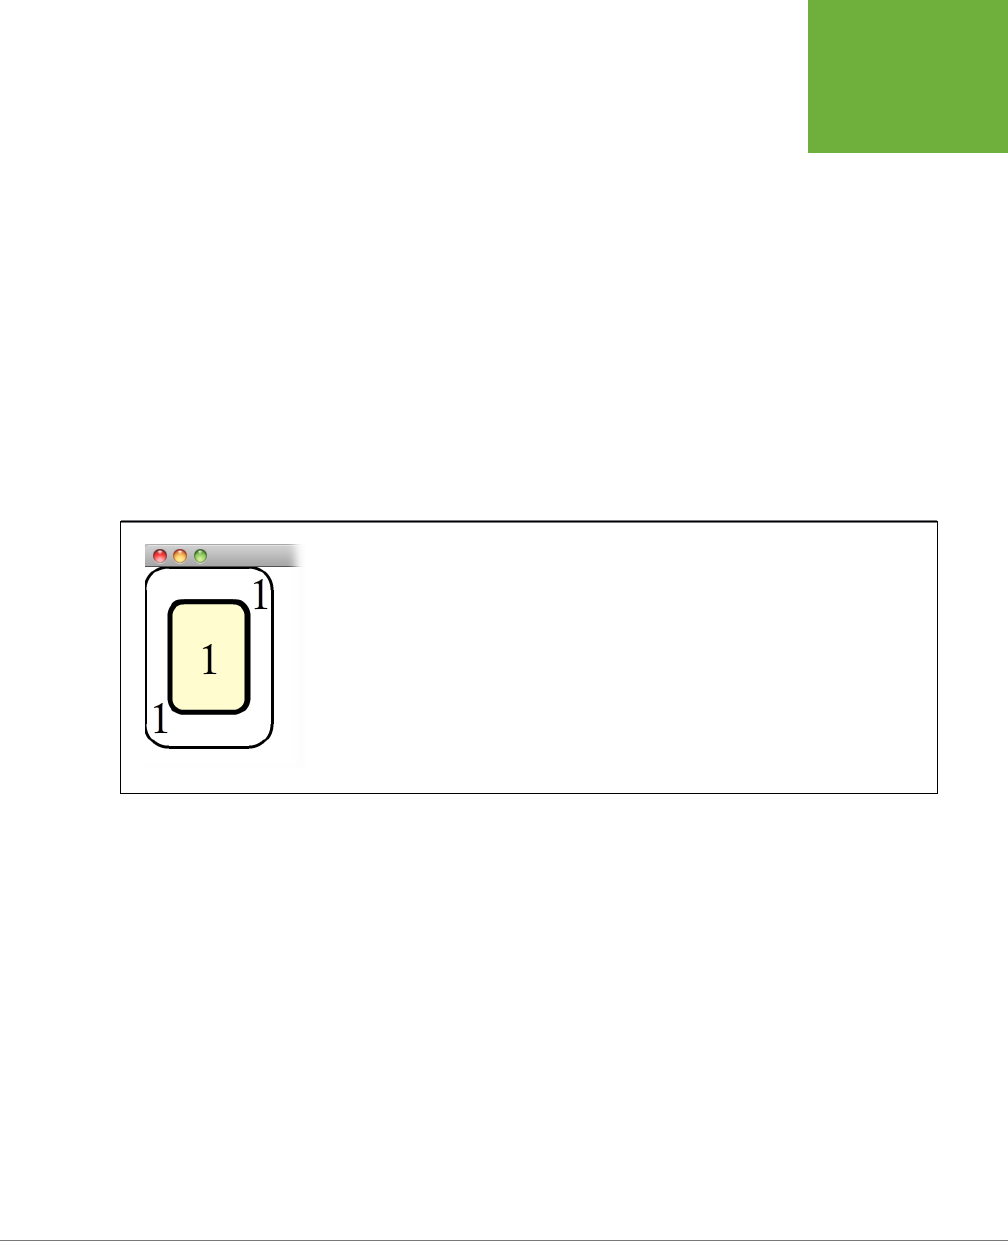
CHAPTER 14: ORGANIZING OBJECTS WITH THE DISPLAY LIST 485
ADDING
OBJECTS TO
THE DISPLAY
LIST
The first line is called a “variable declaration.” It creates a new instance of the
PlayingCard1 class
and stores it in the variable
card1
. (If you want to learn more
about how PlayingCard1 became a class, see the box on page 490.) The second
line adds card1 to the Display List.
5. Press Ctrl+Enter (⌘-Return) to test your ActionScript code.
When the Flash Player runs, a single card with the number 1 appears in the
upper-left corner of the stage.
The second line of code shown in step 4 adds card1 to the Display List, making it
visible on the stage, as shown in Figure 14-2. It’s almost as if you dragged the card
out of the Library. You may be wondering why the method for adding an object to
the Display List is called “addChild.” It has to do with the hierarchical relationship
of displayed objects. (ActionScript just loves hierarchical relationships.) In the case
of the Display List, an object contained in another object is considered a child of
the container. The
addChild()
statement adds card1 as a child to the main timeline
DisplayObjectContainer.
FIGURE 14-2
When you add this playing card to the Display List using ActionScript, you’ll see it on the stage when you
preview the Flash document (Ctrl+Enter or ⌘-Return).
Add a Second Object to the Display List
You can add a second card using the same two steps in your code. First create an
instance of PlayingCard2 using the variable name card2. Then add card2 to the
Display List using the
addChild()
method. Here are the steps:
1. In the Actions panel, press Enter or Return to create a new empty line, and
then type two more lines:
var card2:PlayingCard2 = new PlayingCard2();
addChild(card2);
The main timeline now has two children, as shown in Figure 14-4.
www.it-ebooks.info
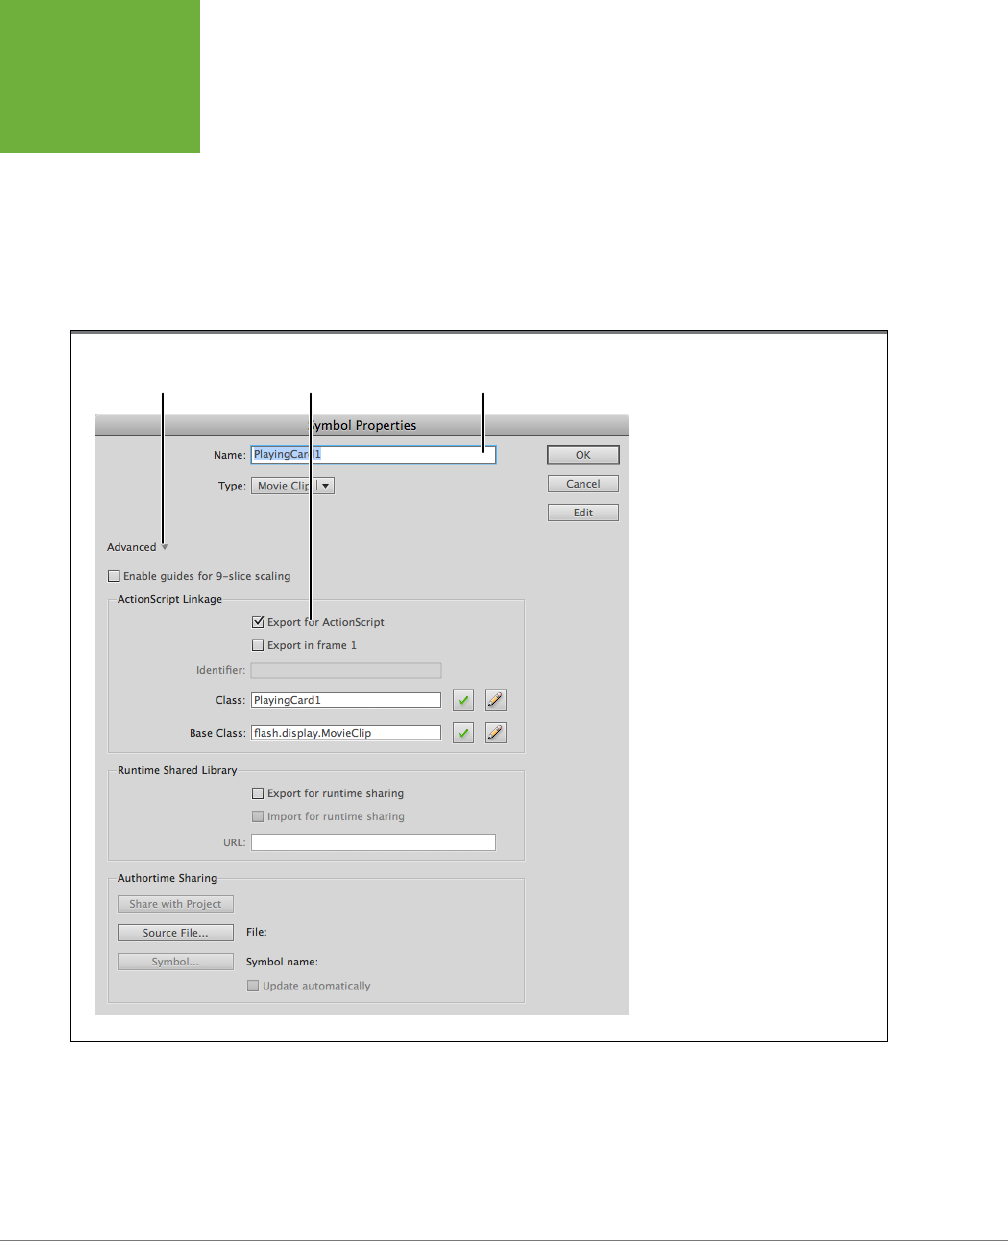
FLASH CS6: THE MISSING MANUAL
486
ADDING
OBJECTS TO
THE DISPLAY
LIST
2. Press Ctrl+Enter (⌘-Return) to test your ActionScript code.
When Flash Player runs, you see the second playing card in the stage’s upper-left
corner. It looks as if only the card2 movie clip is on the stage. That’s because the
second card was placed directly over the first. So far, your ActionScript code
adds cards to the Display List, making them visible. You haven’t provided any
instructions about where to place the cards. Without instructions, ActionScript
places the registration point of an object at 0, 0 on the stage—that’s the upper-
left corner.
FIGURE 14-3
Use the Symbol Properties dialog box
to turn symbols into classes that you
can access with ActionScript code. After
turning on the Export for ActionScript
checkbox, provide a name for the new
class in the Class text box.
Symbol name
Click to
expand/collapse
Export for
ActionScript
3. In the Action panel on the next available line, type the following code:
card2.x = 50;
card2.y = 50;
These lines reposition the card2 movie clip so it appears 50 pixels from the top
and left margins.
www.it-ebooks.info
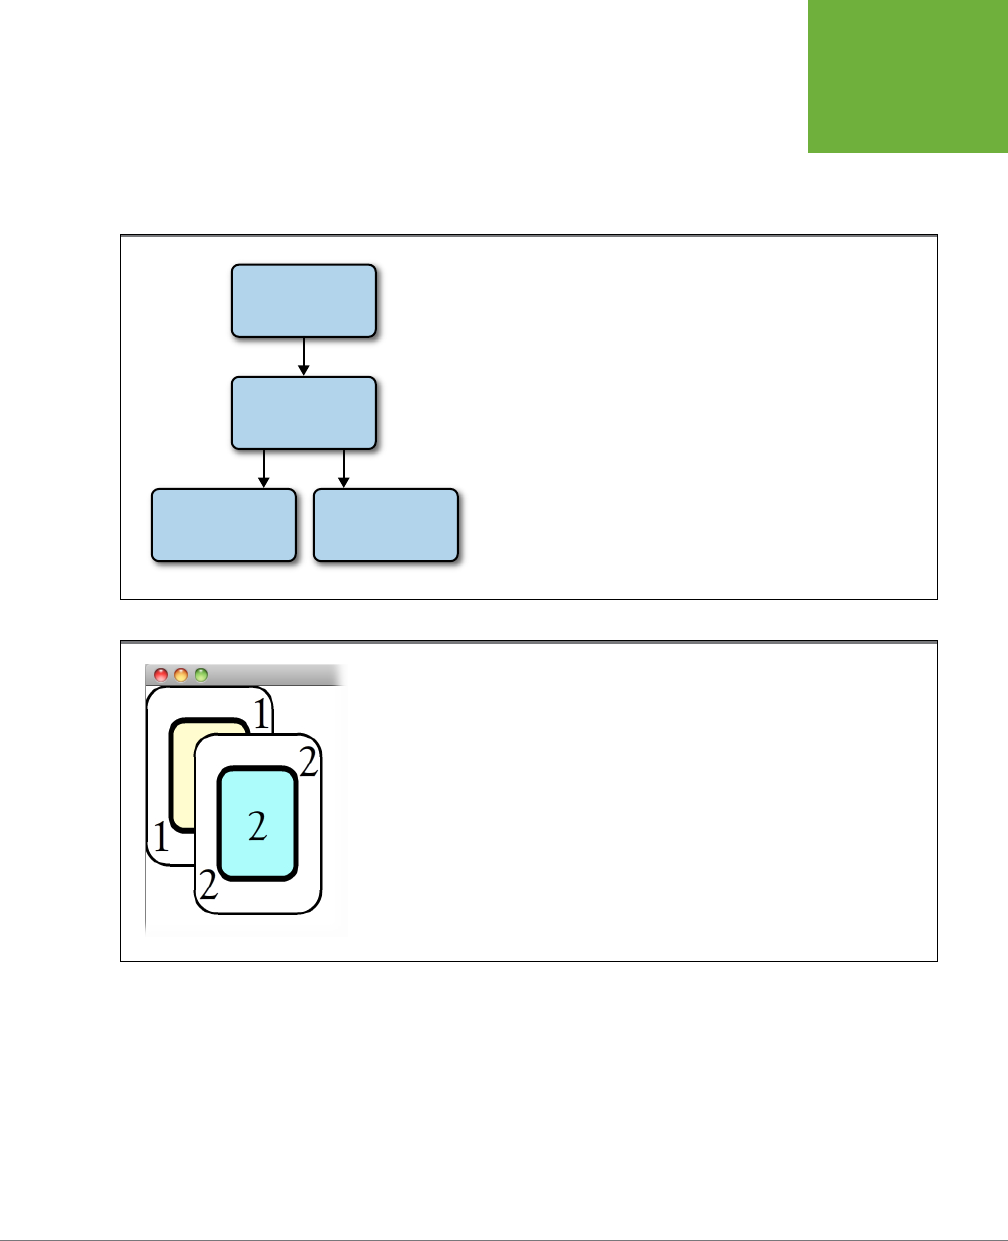
CHAPTER 14: ORGANIZING OBJECTS WITH THE DISPLAY LIST 487
ADDING
OBJECTS TO
THE DISPLAY
LIST
4. Press Ctrl+Enter (⌘-Return) to test your ActionScript code.
This time when Flash Player shows your document, you see both cards
( Figure 14-5). The first card movie clip you placed, card1, appears to be under-
neath card2.
FIGURE 14-4.
This diagram shows the child/parent relationship of the stage, main timeline,
and the two playing card instances. Since they’re movie clips, you can use
the two playing cards as display object containers, but you’ll get to that later
(page 490).
Stage
DisplayObject
DisplayObjectContainer
Main Timeline
DisplayObject
DisplayObjectContainer
PlayingCard2 instance
card2
DisplayObject
PlayingCard1 instance
card1
DisplayObject
FIGURE 14-5
The card2 movie clip is positioned using x/y coordinates. Because card1 was added to the Display List
first, it appears beneath card2.
At this point, the complete code for your project may look like this:
1 var card1:PlayingCard1 = new PlayingCard1();
2 addChild(card1);
3
4 var card2:PlayingCard2 = new PlayingCard2();
5 addChild(card2);
6
7 card2.x = 50;
8 card2.y = 50;
www.it-ebooks.info

FLASH CS6: THE MISSING MANUAL
488
ADDING
OBJECTS TO
THE DISPLAY
LIST
The empty lines aren’t necessary they’re there for housekeeping purposes only,
making the code a little easier to read. As your projects get bigger, you may be
inclined to keep the variable declarations together. So go ahead and rearrange your
code so it looks like this:
1 var card1:PlayingCard1 = new PlayingCard1();
2 var card2:PlayingCard2 = new PlayingCard2();
3
4 card2.x = 50;
5 card2.y = 50;
6
7 addChild(card1);
8 addChild(card2);
Now, when you test the animation, you see card1 peeking out from behind card2.
You can make a couple of interesting conclusions from the code. Display List factoids
so far include these:
• Objects added to the Display List are placed on top of each other. Just like
cards dealt onto a card table, the second object you add to the Display List
covers the first.
• You can apply properties to an object before you display it. In lines 4 and 5,
you define the x/y coordinates for card2 before you display the card using the
addChild()
method in line 8.
You can use both points to your advantage when you develop projects using
ActionScript. Every visible object has a position index number (sometimes called the
Z-order) that tracks its position (or depth) in the stack. No two objects in a container
share the same position index number. When the way objects overlap is important,
you can control their appearance by adding them to the Display List in a specific
sequence. If you’re thinking that’s not always possible, don’t worry—this chapter
shows plenty of other ways to shue cards. Also, you can change the properties of
objects before they’re displayed. For example, you can set the x/y coordinates prior
to displaying the card2 movie clip on the stage. You can work with an object in code
without showing the object to your audience. You can set its position, change its
dimensions and colors, and add transformations and filters without adding it to the
Display List. When you finally place that object on the Display List, it’s essentially
preformatted.
Using trace() to Report on the Display List
As mentioned on page 473, the
trace()
statement is a multipurpose tool that
ActionScript programmers use to double-check their code and report on variables
and objects. It never hurts to trace some of the objects in your code to understand
how ActionScript sees them. A good first step is to place one of your cards inside
the trace statement’s parentheses and see what shows up in the Output panel, as
www.it-ebooks.info
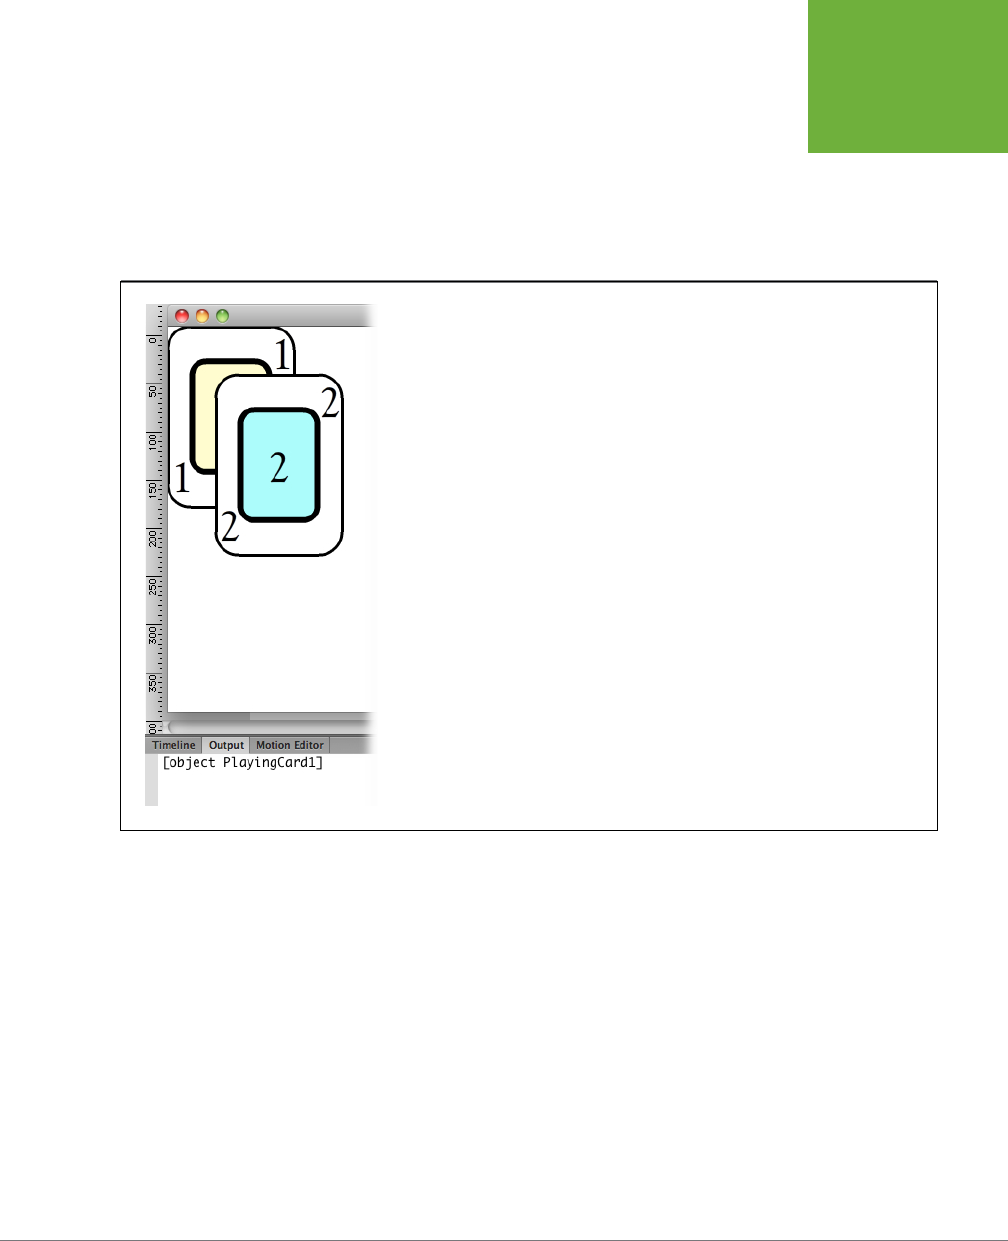
CHAPTER 14: ORGANIZING OBJECTS WITH THE DISPLAY LIST 489
ADDING
OBJECTS TO
THE DISPLAY
LIST
shown in Figure 14-6. Trace shows the following text:
[object PlayingCard1]
. From
this you can deduce that the variable card1 is an object of the PlayingCard1 class.
trace(card1);
Helpful, but what happens if you check the name property for card1?
trace(card1.name);
FIGURE 14-6
Using the trace() statement, you can learn how ActionScript views the objects and variables in
your code. Here trace() reports that the variable card1 is an object of the PlayingCard1 class.
The message that appears in the Output panel is:
instance1
. Not so helpful. If you
don’t specifically give names to objects as you add them to your ActionScript code,
Flash names them for you, and you end up with names of the instance1 variety. So,
the next step for
this
project is to modify your code a little and add names for both
card1 and card2. (If you find the dierences between class names, variable names,
and the name property of an object a little confusing, see the box on page 490.)
You can assign any string you want to the name property of card1 and card2, but
there’s no need to be
too
creative. Something like the following works just fine.
Create new lines, and then add:
card1.name = "Card 1";
card2.name = "Card 2";
www.it-ebooks.info

FLASH CS6: THE MISSING MANUAL
490
ADDING
OBJECTS TO
THE DISPLAY
LIST
Now the trace statements show the names of the objects in the Output panel. Instead
of getting “instance1” and so forth, you get “Card 1” and “Card 2.” Much better, but
you can fashion your
trace()
statements into something even more helpful by adding
some more explanatory text. Anything that appears in quotes in a
trace()
statement
is displayed literally in the Output panel. If you write a statement like
trace(“dog”)
,
you see the word dog displayed in the Output panel. So you can modify your
trace()
statement a bit to make a descriptive sentence about your card variables:
trace(card1.name, " is ", card1);
This statement displays an “almost sentence” that’s a little easier to understand:
Card 1 is [object PlayingCard1]
. Creating this statement might seem like a lot of un-
necessary work at this point, but as your ActionScript becomes more complicated,
statements like this are a big help in understanding what’s going on inside your
code. The next section uses
trace()
statements to report on the parent or display
object containers that hold the cards.
Naming Conventions and Your Sanity
In ActionScript, everything gets named. There are class
names, object names, variable names, and more. Sometimes,
when you’re up to your neck in code, you have one of those
can’t-see-the-forest-for-the-trees moments. One of the ways
experienced coders tell class names apart from variable names
is by the way they spell the names.
Flash gives you a fair amount of freedom in how you name
the classes that you create; however, it’s a convention to use
an initial uppercase letter for class names like PlayingCard1.
It’s also a convention to use an initial lowercase letter for
a variable name like card1. In this example, the names for
instances of cards are Card 1, Card 2, and so on. (Class names
and variable names don’t permit a space in the name, but
instance names do.) This makes the
trace()
statements a little
more readable, plus it’s different from the class and variable
names. Obviously, once you decide on a naming convention,
stick to it. It’ll make your code easier to read and understand.
CODERS’ CLINIC
Placing Objects Inside Display Containers
So far, the code that adds the two cards to the Display List isn’t specific about the
container that holds the objects. When no specific container is identified, ActionScript
places the object in the timeline that holds the code. As you might expect, if your card
is referred to as a “child,” the display object container holding the card is referred
to as a “parent.” You can use the trace statement to show the name of the parent
(the display object container) that holds your cards.
NOTE If you look up the class description for DisplayObject in the ActionScript 3.0 Reference, you find that
it has a property called
parent
. Every display object is held in a display object container, so every display object
has a parent.
www.it-ebooks.info

CHAPTER 14: ORGANIZING OBJECTS WITH THE DISPLAY LIST 491
ADDING
OBJECTS TO
THE DISPLAY
LIST
Add these lines to the end of the code in the Actions panel:
trace(card1.name, " is ", card1);
trace("The parent of ", card1.name," is ", card1.parent);
trace(card2.name, " is ", card2);
trace("The parent of ", card2.name," is ", card2.parent);
Placing
card1.parent
inside the trace statement parentheses causes Flash to show
the object class of the parent in the Output panel—in this case, MainTimeline. The
Output panel displays the words in the quotation marks verbatim. You can include
these words to make the output a little clearer for humans. As shown in Figure 14-7,
both of the cards have the same parent, meaning they’re both held in the same
display object container.
FIGURE 14-7
The trace() statement shows that the main timeline is the
parent of both cards. Programmers often use trace() to make
sure code is behaving as expected.
Once your animations get more populated, you’re likely to place display objects inside
other display object containers. To show that point, the next example adds a card
table to the Display List. The card table is a movie clip, so it has all the properties
and methods of the DisplayObjectContainer class. Using the
addChild()
method,
you can move one of the cards into the card table display object container. Finally,
you’ll add some additional trace statements at the end of the code to gain more
understanding about how the code works.
Follow these steps to update
14-1_Display_List.fla
:
1. On new lines, type the following two lines of code. (You may want to keep
that first line with the other variable declarations):
var greenTable:GreenCardTable = new GreenCardTable();
greenTable.name = "Green Table";
The first line creates a new variable,
greenTable
. It’s an instance of the
GreenCardTable symbol in the Library. (The drawing is a bit primitive, but think
of it as one of those professional green felt card tables.) The second line changes
the name property of this instance to “Green Table.”
2. To position the table, type the following line of code:
greenTable.x = 250;
This code positions greenTable so that it’s 250 pixels from the left margin. That
way, it won’t cover up the other items on the stage.
www.it-ebooks.info
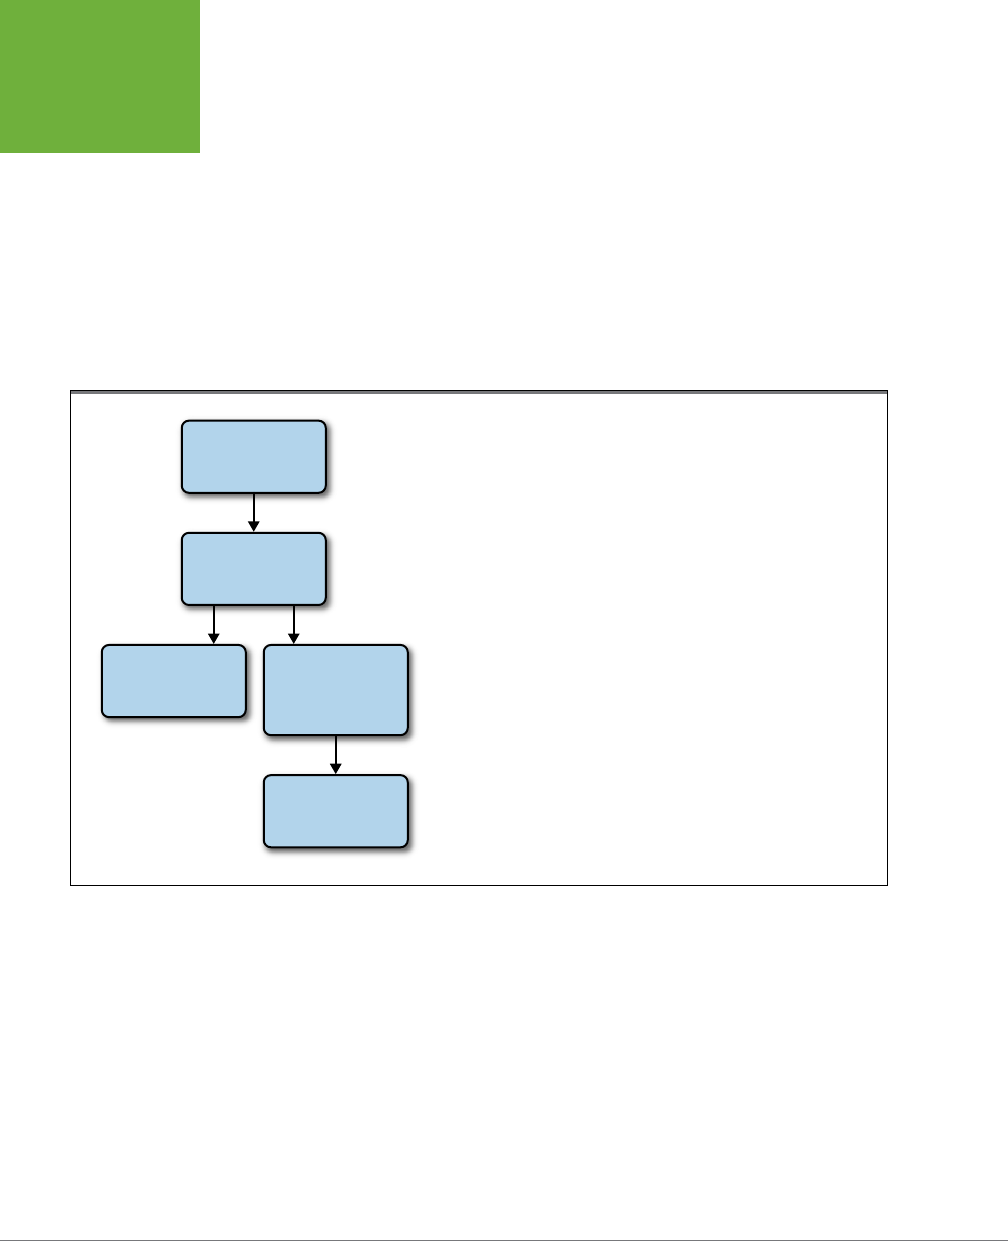
FLASH CS6: THE MISSING MANUAL
492
ADDING
OBJECTS TO
THE DISPLAY
LIST
3. Next, add the following two lines of code:
addChild(greenTable);
greenTable.addChild(card2);
The
addChild()
method in the first line adds greenTable to the Display List. No
parent is designated, so greenTable is in the main timeline. In the second line,
you’re using the
addChild()
method a little dierently from the previous ex-
amples. Since you’re running it specifically as a method of greenTable,
addChild()
adds card2 to the Display List as a child of greenTable. In other words, greenTable
is a display object container that holds card2. Figure 14-8 shows a diagram of
the relationships among the objects on the stage.
FIGURE 14-8
Up through step 5 below, your code displays two instances of playing cards.
One is in the main timeline, and the other card (card2) is in greenTable, a
display object container that is, in turn, contained in the main timeline.
Stage
DisplayObject
DisplayObjectContainer
Main Timeline
DisplayObject
DisplayObjectContainer
GreenCardTable instance
greenTable
DisplayObject
DisplayObjectContainer
PlayingCard1 instance
card1
DisplayObject
PlayingCard2 instance
card2
DisplayObject
4. Beginning on line 18, update the trace statements to match the following
code:
trace(card1.name, "is", card1);
trace("The parent of", card1.name,"is", card1.parent);
trace(card2.name, "is", card2);
trace("The parent of", card2.name,"is", card2.parent.name);
trace(greenTable.name, "is", greenTable);
trace("The parent of", greenTable.name, "is", greenTable.parent);
www.it-ebooks.info
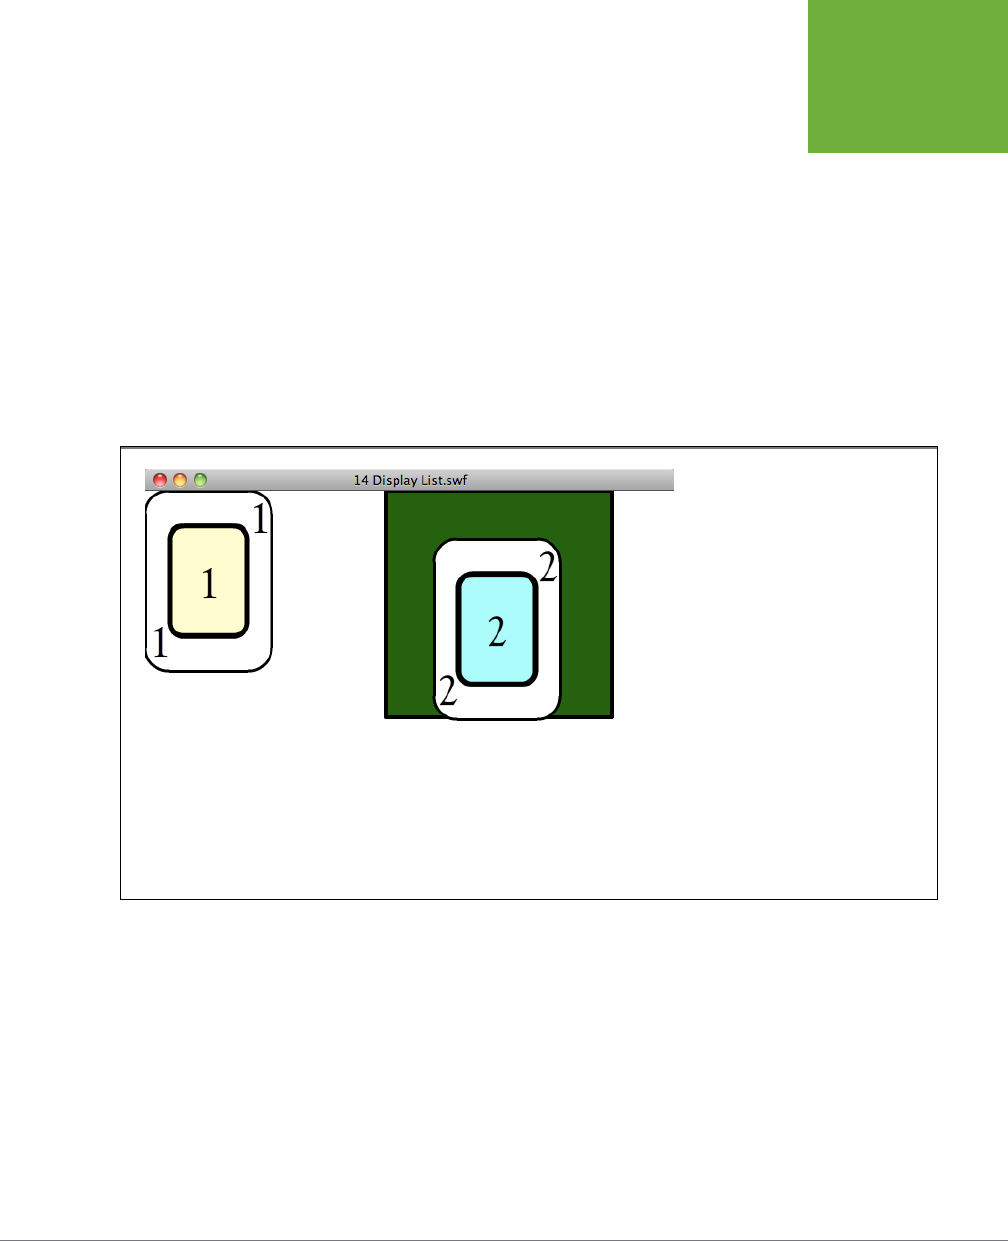
CHAPTER 14: ORGANIZING OBJECTS WITH THE DISPLAY LIST 493
ADDING
OBJECTS TO
THE DISPLAY
LIST
5. Press Ctrl+Enter (⌘-Return) to test your animation.
When you test the code, the display looks like Figure 14-9. In the Output tab,
you see that now the parent of card2 is Green Table. The parent of Green Table
is an object of the MainTimeline class.
The complete text in the Output panel reads:
Card 1 is [object PlayingCard1]
The parent of Card 1 is [object MainTimeline]
Card 2 is [object PlayingCard2]
The parent of Card 2 is Green Table
Green Table is [object GreenCardTable]
The parent of Green Table is [object MainTimeline]
FIGURE 14-9
After you add card2 to the Display List
as a child of greenTable, it appears in
its container. Now that it’s a container,
card2’s x/y coordinates use greenTable
(not the stage) as a reference point.
The card is placed 50 pixels from the
left edge and 50 pixels from the top of
greenTable’s borders.
If you’ve been following the examples in this chapter, then at this point your code
looks something like this:
1 var card1:PlayingCard1 = new PlayingCard1();
2 var card2:PlayingCard2 = new PlayingCard2();
3 var greenTable:GreenCardTable = new GreenCardTable();
4
5 card1.name = "Card 1";
6 card2.name = "Card 2";
www.it-ebooks.info

FLASH CS6: THE MISSING MANUAL
494
ADDING
OBJECTS TO
THE DISPLAY
LIST
7 greenTable.name = "Green Table";
8
9 card2.x = 50;
10 card2.y = 50;
11 greenTable.x = 250;
12
13 addChild(card1);
14 addChild(card2);
15 addChild(greengreenTable.addChild(card2);
16
17 trace(card1.name, " is ", card1);
18 trace("The parent of ", card1.name," is ", card1.parent);
19 trace(card2.name, " is ", card2);
20 trace("The parent of ", card2.name," is ", card2.parent);
21 trace(greenTable.name, "is", greenTable);
22 trace("The parent of", greenTable.name, "is", greenTable.parent);
The main thing the new code does is create and display a new display object
container—the greenTable movie clip instance. A new
addChild()
statement places
card2 inside greenTable. If you’re keeping track of interesting Display List factoids,
here are some more for you:
• You can move display objects from one display object container to another with
the
addChild()
statement. There are two
addChild()
statements related to card2.
The first places card2 in the main timeline. The
greenTable.addChild(card2)
state-
ment moves card2 from the stage into the greenTable DisplayObjectContainer.
A single instance, like card2, can appear in only one place at a time, so the latter
statement takes precedence.
• A display object’s position coordinates are relative to the display object con-
tainer that holds it. Initially, card2 was positioned 50 pixels from the top and
50 pixels from the left border of the stage. After moving it to greenTable, the
code displays card2 relative to greenTable’s borders.
MODIFYING DISPLAY CONTAINERS
The objects inside a display object container are pretty much at the mercy of any
transformations that happen to the container. For example, suppose you move or
scale the width of greenTable while card2 is contained within it. Those changes and
transformations aect card2, since it’s a child of greenTable. You can test this process
by inserting these lines into your code beginning on line 12.
greenTable.y = 75;
greenTable.scaleX = 1.5;
The first line moves greenTable down from the top margin 75 pixels. The second line
scales the display object container, greenTable, making it one and one half times
its original width. When you test the code after these changes, you see that both
the move and the transformation aect card2 as well as greenTable (Figure 14-10).
www.it-ebooks.info
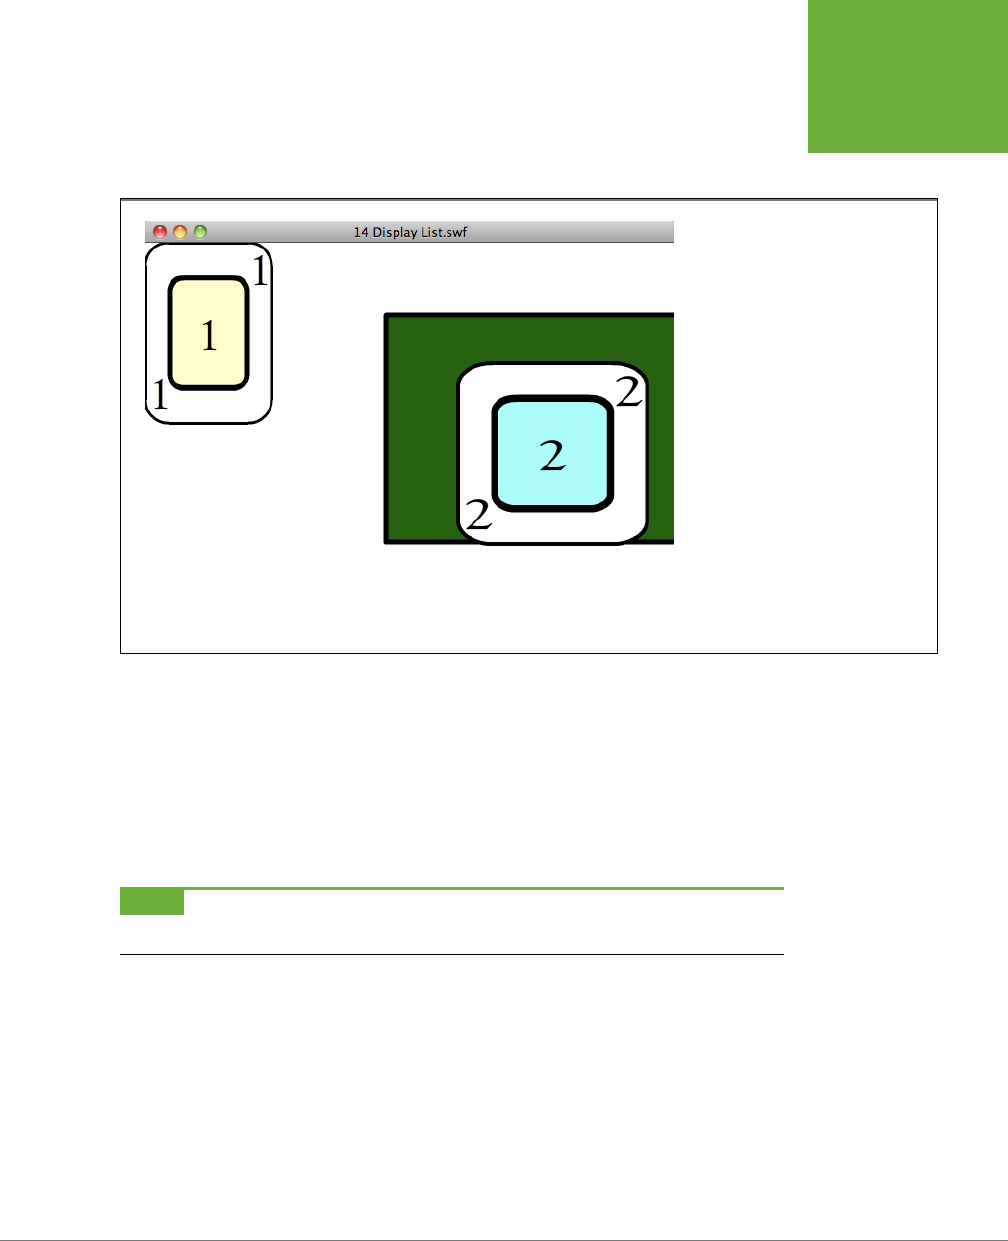
CHAPTER 14: ORGANIZING OBJECTS WITH THE DISPLAY LIST 495
ADDING
OBJECTS TO
THE DISPLAY
LIST
It’s interesting to note that it doesn’t matter whether the code places card2 in the
greenTable container before or after transforming the table: card2 is transformed
in either case.
FIGURE 14-10
As discussed above, the transform state-
ment that scales greenTable also scales
the card inside it.
Moving Objects from One Container to Another
It’s not unusual for a Flash animation to have more than one container, and you’ll
often want to move display objects from one container to another, just as you’d move
a document from one folder to another on your computer. The following updated
ActionScript code expands on the cards and card table theme. It adds a second
table to the stage (blue this time). It then places card1 on the new, blue table.
Trace()
statements at the end of the code report on blueTable.
NOTE If you’re following along, add the bold lines to your project. If you’d like to start from here, you can
use
14-2_Move_DisplayObjects.fla
from the Missing CD (
www.missingmanuals.com/cds
).
1 var card1:PlayingCard1 = new PlayingCard1();
2 var card2:PlayingCard2 = new PlayingCard2();
3 var greenTable:GreenCardTable = new GreenCardTable();
4 var blueTable:BlueCardTable = new BlueCardTable();
5
6 card1.name = "Card 1";
7 card2.name = "Card 2";
8 greenTable.name = "Green Table";
9 blueTable.name = “Blue Table”;
www.it-ebooks.info

FLASH CS6: THE MISSING MANUAL
496
ADDING
OBJECTS TO
THE DISPLAY
LIST
10
11 card2.x = 50;
12 card2.y = 50;
13 greenTable.x = 250;
14 greenTable.y = 75;
15 greenTable.scaleX = 1.5;
16
17 addChild(card1);
18 addChild(card2);
19 addChild(greenTable);
20 addChild(blueTable);
21 greenTable.addChild(card2);
22 blueTable.addChild(card1);
23
24 trace(card1.name, " is ", card1);
25 trace("The parent of ", card1.name," is ", card1.parent);
26 trace(card2.name, " is ", card2);
27 trace("The parent of ", card2.name," is ", card2.parent);
28 trace(greenTable.name, "is", greenTable);
29 trace("The parent of", greenTable.name, "is", greenTable.parent);
30 trace(blueTable.name, “is”, blueTable);
31 trace(“The parent of”, blueTable.name, “is”, blueTable.parent);
In this code, line 4 declares the blueTable variable, and line 9 gives it the name “Blue
Table.” Line 20 adds blueTable to the Display List, and then line 22 puts card1 in the
blueTable DisplayObjectContainer. The code is nearly identical to the code used for
greenTable (page 493). When you test the code, Flash Player displays it, as shown
in Figure 14-11.
So at this point you have two tables and two cards. One of the tables is distorted
a bit by scaling. Suppose you want to move a card from one table to another. That
would be a good job for a mouse click. You can add an event listener to the blue
table that waits for a mouse click and then moves card2 from the green table to
the blue table. Here’s the code for the event listener and the function that runs on
a mouse click. You can insert this code so it begins on line 24:
blueTable.addEventListener(MouseEvent.CLICK, clickTableListener);
function clickTableListener(evt:MouseEvent):void
{
blueTable.addChild(card2);
}
Now when you test your animation, you first see the blue table with card1 and the
green table with card2. If you click the blue table, card2 moves from the green table
to the blue table. It works as planned, but it’s kind of a one-shot deal and pretty dull.
One click, and the fun is over. It would be more exciting if you could click either table
to make card2 jump over to that table. It’s not hard to modify the event listener to
www.it-ebooks.info
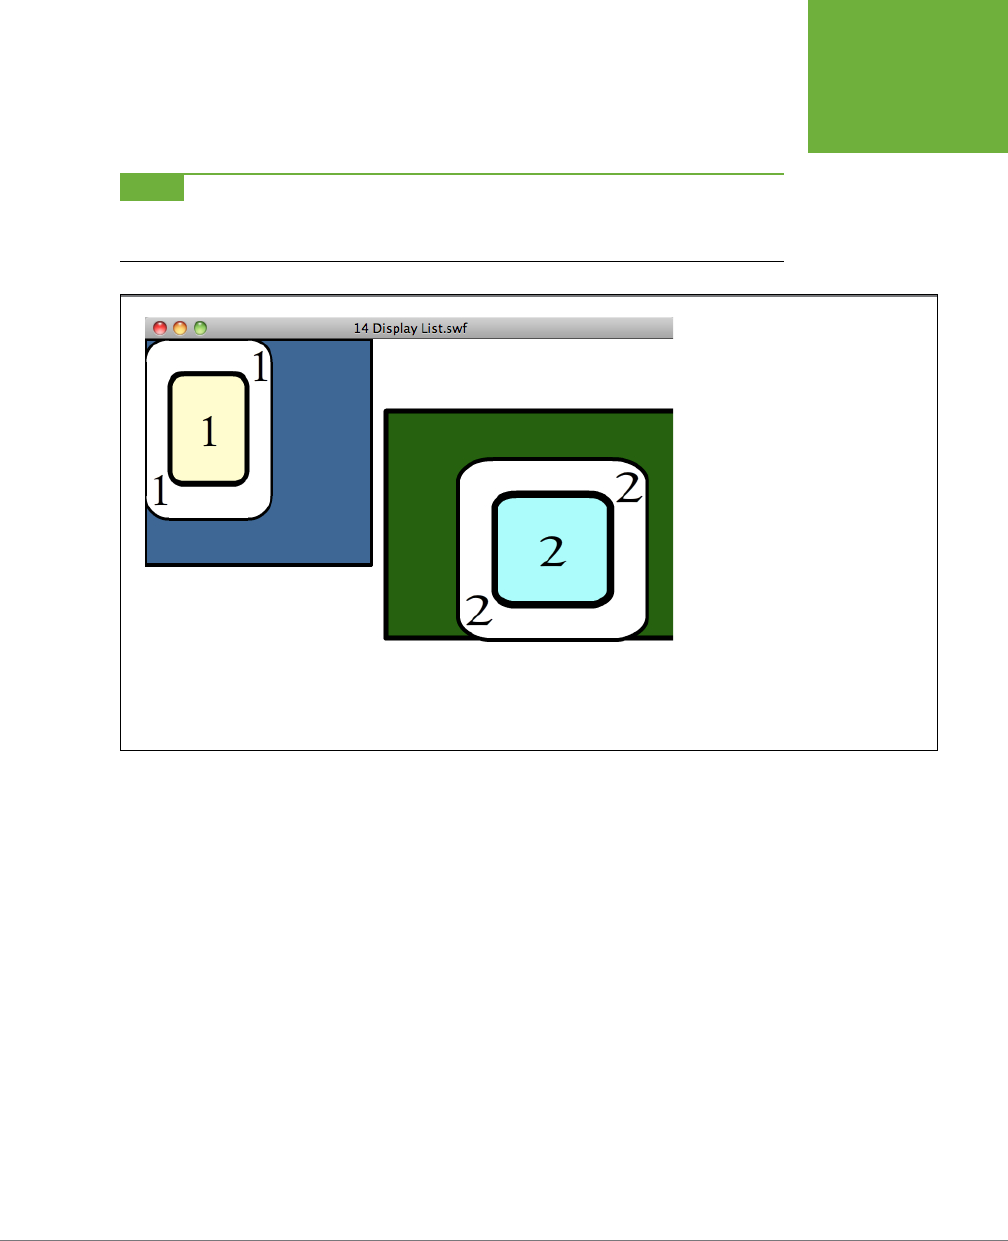
CHAPTER 14: ORGANIZING OBJECTS WITH THE DISPLAY LIST 497
ADDING
OBJECTS TO
THE DISPLAY
LIST
do the job. In fact, the MouseEvent class has a special property—called
target
—that
identifies the object that’s clicked.
NOTE It’s worth noting that clicking on the cards when they’re held in the “table” display object containers
triggers the event listener. When the cards can’t perform the function an error message appears. That’s not an
issue for this exercise, but would need to be accounted for in a finished project.
FIGURE 14-11
In the code that defines this page,
there are two display object containers
representing tables, with cards in them.
A scaleX() method has transformed the
green table (right). The transformation
affects both the table and the card in
the table.
As explained in Chapter 12, this process involves a listened-for event and an event
object. Like any object, the event object has properties, one of which is
target
.
This property stores the name of the object that initiates the event. In this case,
blueTable initiated the event, so it’s the target. To modify the code so that card2
jumps to whichever table is clicked, you need to modify the
clickTableListener()
function so it identifies the clicked target object. Then you need to add an event
listener to greenTable.
Here are the changes you need to make to the code (shown in bold):
blueTable.addEventListener(MouseEvent.CLICK, clickTableListener);
greenTable.addEventListener(MouseEvent.CLICK, clickTableListener);
function clickTableListener(evt:MouseEvent):void
{
evt.target.addChild(card2);
}
Remember,
evt
is the variable name that identifies the MouseEvent in
clickTableListener()
. Like any variable, the actual name is up to you. It could be
www.it-ebooks.info

FLASH CS6: THE MISSING MANUAL
498
ADDING
OBJECTS TO
THE DISPLAY
LIST
event
or simply the letter
e
. The property
target
identifies the object that triggered
the event. With the modified code, either of the tables can listen for the click event.
There’s nothing in the
clickTableListener()
function that’s specific to either the blue
or the green table, so it behaves relative to the container that’s clicked. When you
test the animation, card2 moves to the table you click. If it’s already on the table
you’re clicking, nothing happens.
Now that a display object (card2) is shuing around between display object contain-
ers (greenTable and blueTable), it makes the
trace()
statements that report on parent
and child relationships a little more interesting. Unfortunately, the trace statements
run only once, and they don’t provide any updates when the
clickTableListener()
function runs. One solution would be to copy and paste all the
trace()
statements
so they’re inside the
clickTableListener()
function’s brackets, but that adds a lot of
extra lines to your code. For a more elegant solution, you can turn all the trace state-
ments into a single function, and then simply call that function whenever you need it.
Turning the
trace()
statements into a single function is relatively easy. Create a line
that defines the function with the keyword
function
, and a name you supply, like
traceDisplayList
. Place all the trace statements inside the curly brackets that hold
the function’s code. When you’re done, it looks like the following. The bold line at
the top and the curly brackets are the only changes that need to be made:
function traceDisplayList():void
{
trace(card1.name, "is", card1);
trace("The parent of", card1.name,"is", card1.parent);
trace(card2.name, "is", card2);
trace("The parent of", card2.name, "is", card2.parent.name);
trace(greenTable.name, "is", greenTable);
trace("The parent of", greenTable.name, "is", greenTable.parent);
trace(blueTable.name, "is", blueTable);
trace("The parent of", blueTable.name, "is", blueTable.parent);
}
Throughout this chapter, you’ve added
trace()
statements as the code developed and
grew. If, as you’re working, you want to add more
trace()
statements, just place the
new lines inside the curly brackets. They’ll run with the other statements whenever
your code calls
traceDisplayList()
.
NOTE There are more details about creating functions and methods on page 426.
Now, to show the results of the
trace()
statements in the Output window, you need
only one line of code:
traceDisplayList();
www.it-ebooks.info

CHAPTER 14: ORGANIZING OBJECTS WITH THE DISPLAY LIST 499
ADDING
OBJECTS TO
THE DISPLAY
LIST
For example, if you add this line to the
clickTableListener()
every time someone
clicks one of the tables, the Output panel shows all the
trace()
statements. Here’s
the
clickTableListener()
code with the call to
traceDisplayList()
included:
function clickTableListener(evt:MouseEvent):void
{
evt.target.addChild(card2);
traceDisplayList();
}
Test your project now with Ctrl+Enter (⌘-Return), and card2 jumps to whichever
table you click. Keep an eye on the Output panel, and you see that card2’s parent
is updated with each click.
Removing Objects from the Display List
The statement that removes a display object from the Display List is pleasingly
consistent with the statement that adds objects. It looks like this:
displayObjectContainer.removeChild(child);
So, if you want to remove card1 from the blue table, you write:
blueTable.removeChild(card1);
If you don’t specifically define the display object container, Flash assumes that
you’re referring to the main timeline. That’s the same assumption it makes with the
addChild()
statement. For example, if you want to remove the blue table, you write:
removeChild(blueTable);
That removes blueTable from the main timeline. If blueTable is a display object con-
tainer holding other objects, those contained objects also get removed. Everything
from the container on down disappears from view. If blueTable isn’t contained in the
main timeline—if it’s contained in another display object container, for example—the
code won’t find it and won’t remove it. The result is an error message, specifically
Error #2025: The supplied DisplayObject must be a child of the caller.
The previous section explained how to use a MouseEvent to move a card from one
table to another. That code used the
target
property to identify the table that was
clicked. To remove a card from the Display List when it’s clicked, you need to iden-
tify both the target (card1) and the target’s parent (blueTable). It may look a little
convoluted, but the code that does the trick looks like this:
evt.target.parent.removeChild(evt.target);
Here’s how that statement works, moving from left to right. As explained in the
previous section,
evt.target
identifies the object that was clicked, initiating the
event. By tacking the
.parent
onto that, you identify the container of the object that
was clicked. That’s all you need to invoke the
removeChild()
method. Remember,
removeChild()
is a method of the display object container. Because the child you
www.it-ebooks.info

FLASH CS6: THE MISSING MANUAL
500
MANAGING
THE STACKING
ORDER
want to remove is the object that was clicked, you can place
evt.target
inside the
parentheses of the
removeChild()
statement.
Here’s the event listener for card1, with a call to run
traceDisplayList()
at the end
of the function:
card1.addEventListener(MouseEvent.CLICK, clickCardListener);
function clickCardListener(evt:MouseEvent): void
{
evt.target.parent.removeChild(evt.target);
traceDisplayList();
}
As you see, there’s nothing in the function
clickCardListener()
that mentions card1. It
simply identifies the target that was clicked and the container of that target. So it’s
easy to add an event listener to card2 so that it works in exactly the same manner
and removes card2 from the Display List.
NOTE Removing display objects from the Display List removes them from the main timeline and the stage,
but it doesn’t remove them from memory. As your programs increase in both size and their demands on computer
resources, it becomes important to remove them from memory when they’re no longer needed. To delete all
references to an object from memory you can use a statement like
card2=null;
.
It may not be the most entertaining card game in the world, but at this point when
you test your animation and code, it performs two basic card tricks:
• Click one of the tables, and card2 jumps to that table, if it’s not there already.
• Clicking card1 removes the card from the Display List.
In the next section, you’ll learn how to stack the deck the ActionScript way.
Managing the Stacking Order
As mentioned earlier, when you add display objects to the Display List, it’s like
laying cards on a card table. The first card appears on the table, and the next card
is placed on top of it (Figure 14-12). Each card placed on the table is at a specific
position in the stack. Like a lot of programming lists, the Display List position index
begins at 0. So the first object placed in a display object container is at position 0.
The second object is placed at position 1, and so forth. The position is known as the
index
, and it’s represented by a number that’s an
int
type (integer). As the display
objects in your Flash animation become more numerous, it’s harder to keep track of
them. There are times when it might be easier for you, the ActionScripter, to identify
an object by its position in the stack rather than by its instance name. For example,
you might have a card game where you want to deal the top five cards in the deck.
In this case, the cards’ names don’t matter as much as their position in the deck.
www.it-ebooks.info
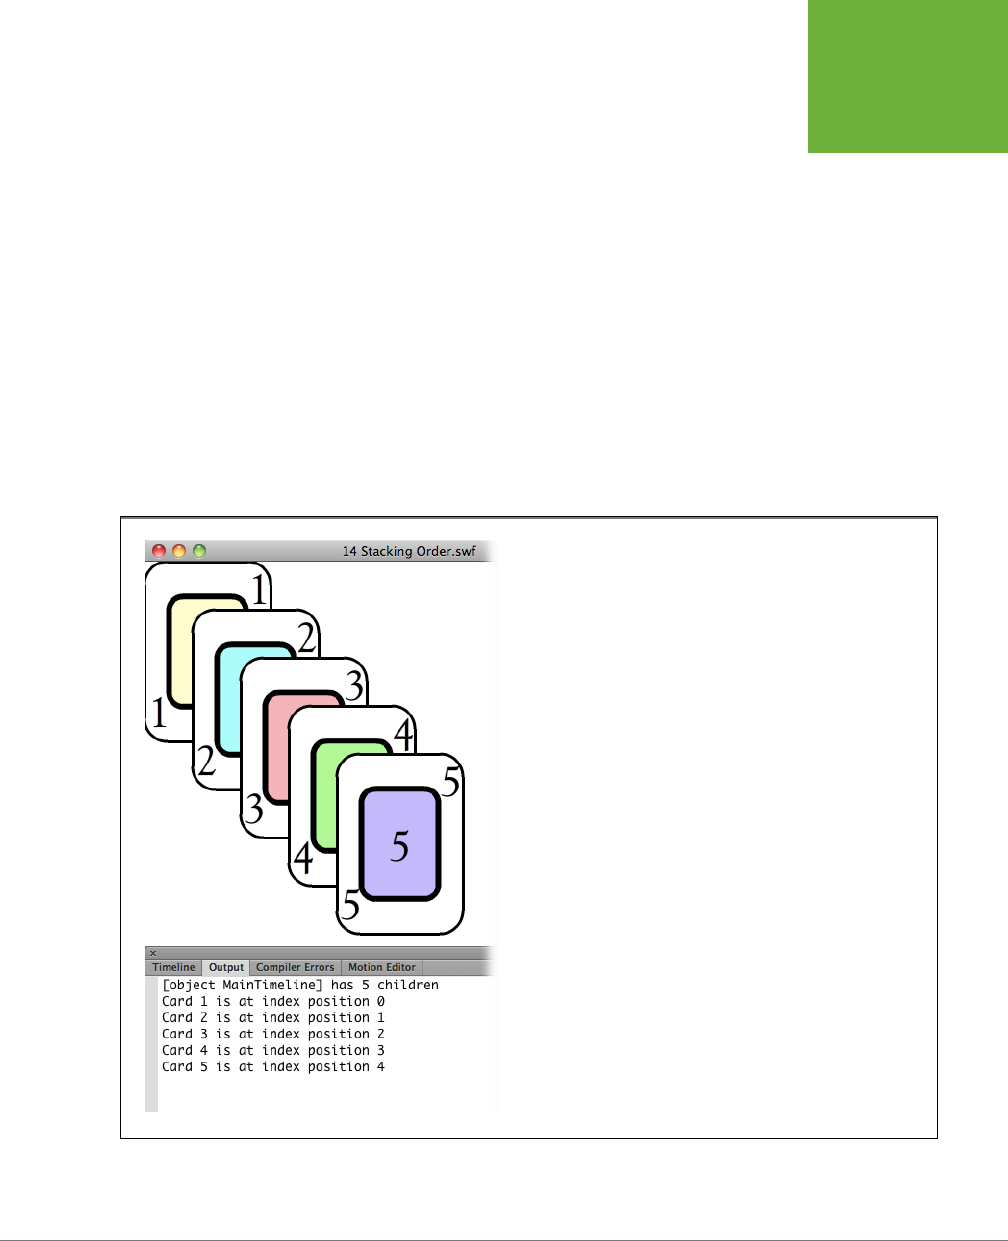
CHAPTER 14: ORGANIZING OBJECTS WITH THE DISPLAY LIST 501
MANAGING
THE STACKING
ORDER
Adding Display Objects by Index Position
Just as display object containers have methods for working with child display objects
by name, they have other methods for working with them by their index. For example,
when you used the
addChild()
method earlier in this chapter, it looked like this:
greenTable.addChild(card1);
This statement adds the display object
card1
to the display object container
greenTable
. Suppose there were already five cards on greenTable and you want
to place card1 in the second-from-the-bottom position. You use the
addChildAt()
method:
greenTable.addChildAt(card1, 1);
The
addChildAt()
method needs two parameters to work: the variable name of the
display object (card1) and the index position (1). Because the position index starts
with 0 at the bottom, you use the
int
1 to place the card in the second position from
the bottom.
FIGURE 14-12
The code in the box on page 506 places cards on the main timeline
display object container. Card 1 was placed first, then Card 2, and so forth.
Trace statements show that Card 1 is at position 0, Card 2 is at position 1,
and so forth.
www.it-ebooks.info

FLASH CS6: THE MISSING MANUAL
502
MANAGING
THE STACKING
ORDER
The Flash document
14-3_Stacking_Order.fla
(on the Missing CD page at
www .
missingmanuals.com/cds
) shows this example. The code below is similar to the
previous examples in this chapter. Here’s a rundown on how the code works:
• The lines with double slashes (//) are comments; they have no eect on the
way the program runs.
• Lines 2 through 6 declare the playing card variables.
• Lines 9 through 13 give each variable an instance name.
• Lines 16 through 25 use the x/y properties to set the position for each card so
that they overlap, making their stacking order easily visible, although the cards
aren’t displayed yet.
• Lines 28 through 31 add card2 through card5 to the Display List using the
addChild()
method. This way, each new display object gets placed on top of the
previous one. As the code adds them, it gives each card a position index starting
with 0. So, card2 index = 0, card3 index = 1, card4 index = 2, card5 index = 3.
Because no display object container is explicitly defined, it places the display
objects in the main timeline. Card1 has not yet been displayed.
• Line 34 adds card1 to the Display List at index position 1, using the
addChildAt()
method. When card1 is added at index position 1, any card at or above
that index gets bumped up by one, to make room for the new card. No
two cards ( DisplayObjects) can have the same index in the main timeline
( Display ObjectContainer). All the cards, except for card2, are repositioned in
the stacking order.
• Line 36 calls the
traceDisplayList()
function.
• Lines 39 through 47 define the
traceDisplayList()
function. The first trace state-
ment uses
card1.parent
to identify the display object container holding card1;
that is, the main timeline. The statement also uses the numChildren property
to display a value showing the number of children held in the display object
container. The rest of the statements use the
getChildIndex()
method of the
DisplayObjectContainer:
1 // Declare variables for the playing cards
2 var card1:PlayingCard1 = new PlayingCard1();
3 var card2:PlayingCard2 = new PlayingCard2();
4 var card3:PlayingCard3 = new PlayingCard3();
5 var card4:PlayingCard4 = new PlayingCard4();
6 var card5:PlayingCard5 = new PlayingCard5();
7
8 // Give the playing cards instance names
9 card1.name = "Card 1";
10 card2.name = "Card 2";
11 card3.name = "Card 3";
12 card4.name = "Card 4";
www.it-ebooks.info

CHAPTER 14: ORGANIZING OBJECTS WITH THE DISPLAY LIST 503
MANAGING
THE STACKING
ORDER
13 card5.name = "Card 5";
14
15 // Set the card’s position on the stage
16 card1.x = 0;
17 card1.y = 0;
18 card2.x = 50;
19 card2.y = 50;
20 card3.x = 50;
21 card3.y = 100;
22 card4.x = 50;
23 card4.y = 150;
24 card5.x = 50;
25 card5.y = 200;
26
27 // Place card2 through card5 on the stage (add to Display List)
28 addChild(card2);
29 addChild(card3);
30 addChild(card4);
31 addChild(card5);
32
33 // Insert card1 at a specific index position
34 addChildAt(card1,1);
35
36 traceDisplayList();
37
38 //Function to show Display List details in Flash’s Output panel
39 function traceDisplayList()
40 {
41 trace(card1.parent, "has", numChildren,"children");
42 trace(card1.name, "is at index position",getChildIndex(card1));
43 trace(card2.name, "is at index position",getChildIndex(card2));
44 trace(card3.name, "is at index position",getChildIndex(card3));
45 trace(card4.name, "is at index position",getChildIndex(card4));
46 trace(card5.name, "is at index position",getChildIndex(card5));
47 }
Test the animation, and you see a Flash stage that looks like Figure 14-13. The Output
panel shows a report on the number of display objects in the main timeline and the
index position of each card:
[object MainTimeline] has 5 children
Card 1 is at index position 1
Card 2 is at index position 0
Card 3 is at index position 2
Card 4 is at index position 3
Card 5 is at index position 4
www.it-ebooks.info
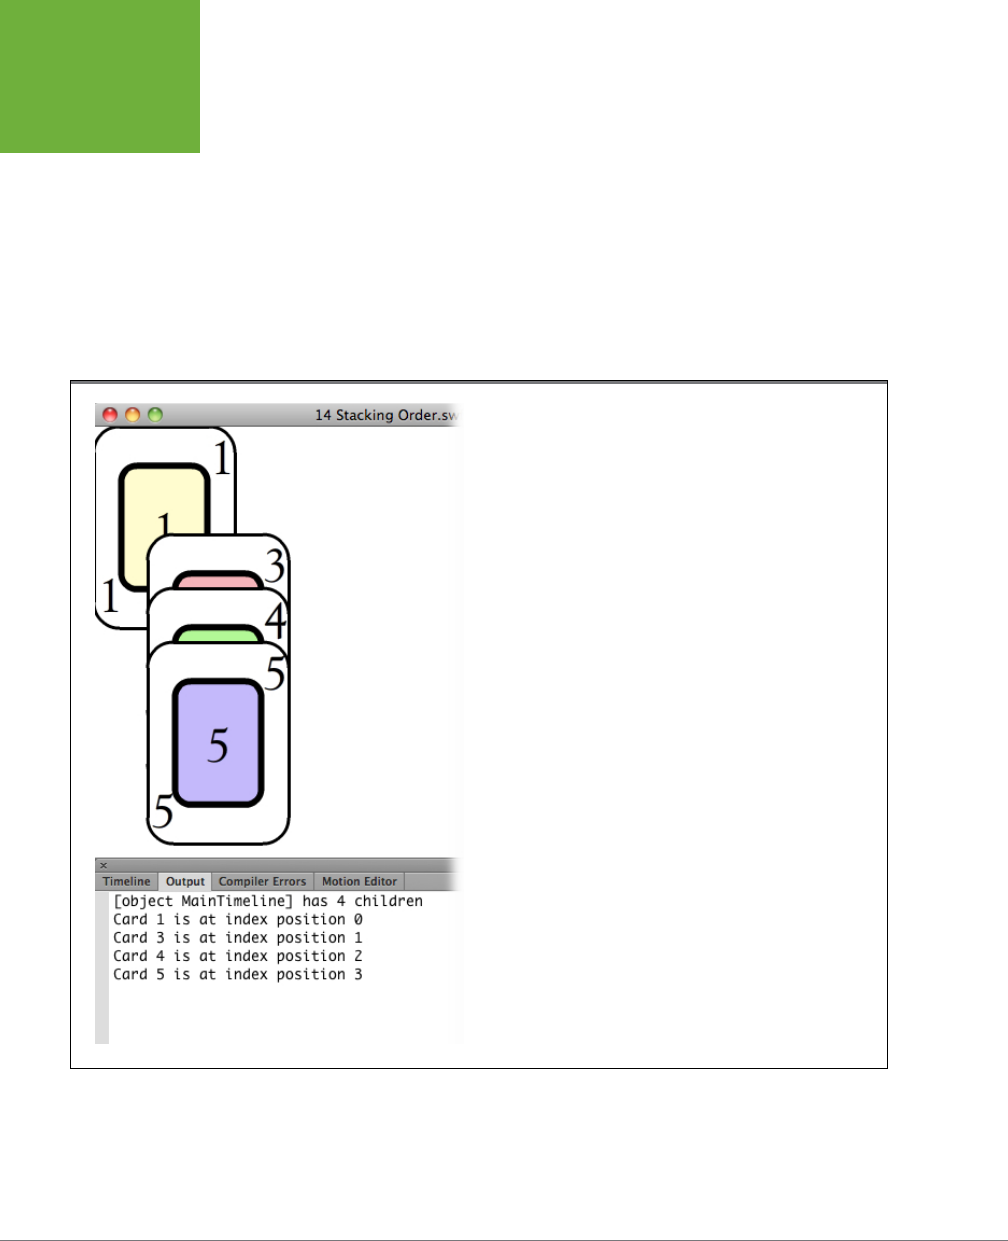
FLASH CS6: THE MISSING MANUAL
504
MANAGING
THE STACKING
ORDER
You can experiment with the code by changing the index number in line 34. As a
result, you see card1 at dierent levels in the pile, and the Output panel reports a
dierent index position.
Removing Display Objects by Index Position
Display object containers have a method for removing the display objects they
hold by referencing their index position. You don’t need to mention the variable
name; just identify the index position by number. You can give the method a try in
14-3_Stacking_Order.fla
. At line 35, insert a line with this statement:
removeChildAt(0);
FIGURE 14-13
Using the method addChildAt(card1,1) places card1 at the second index
position, because the position index begins counting at 0. For the full
code that creates this 14-3_Stacking_Order.fla animation, see page
502.
This statement removes card2, the first card that was placed in the main timeline.
Comment out the line with the
trace()
statements for card2, so it won’t produce an
error, by placing two slashes in front of the line so that it looks like this:
//trace(card2.name, "is at index position",getChildIndex(card2));
www.it-ebooks.info
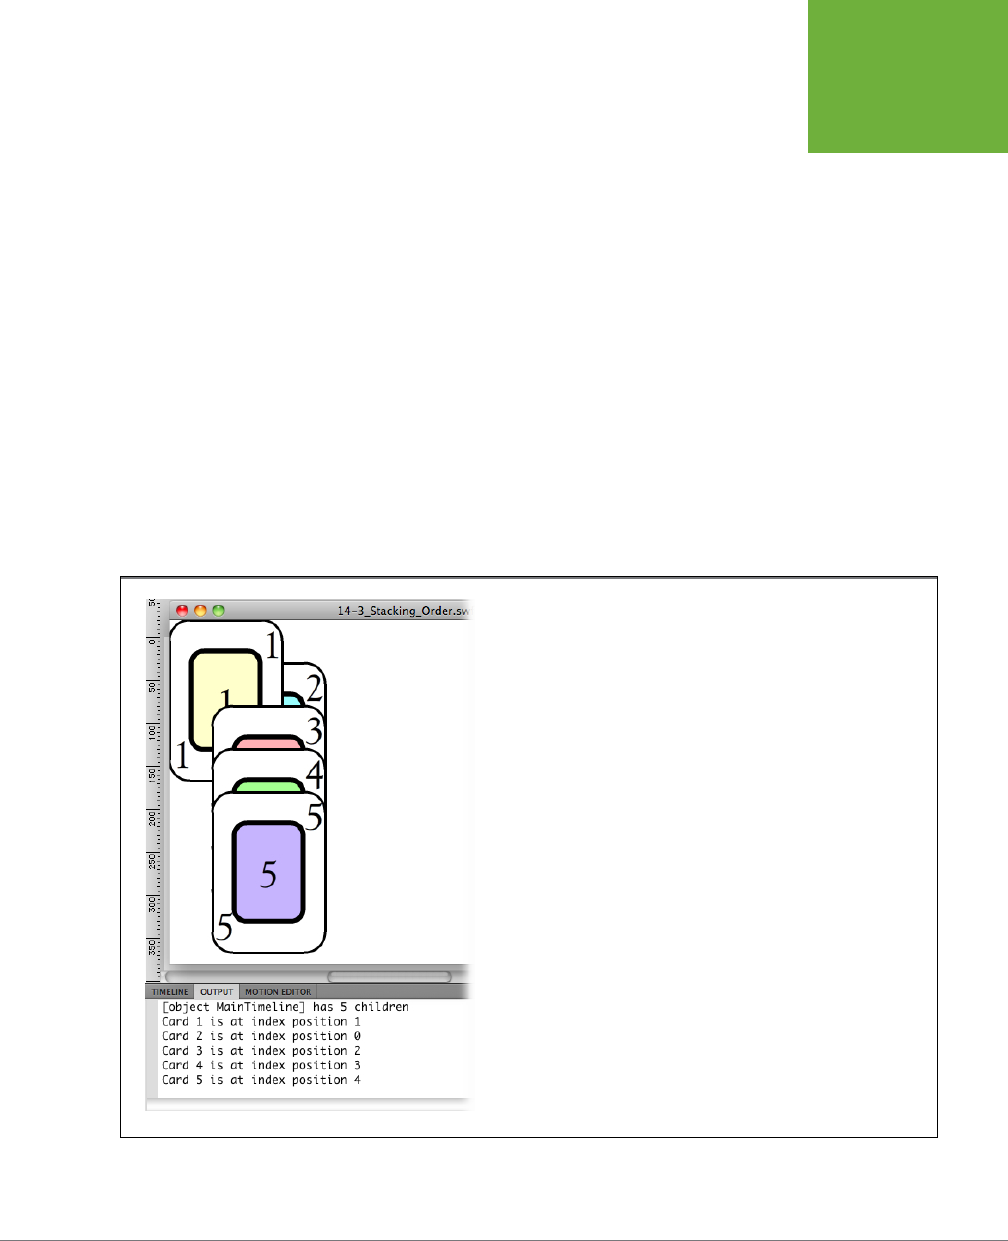
CHAPTER 14: ORGANIZING OBJECTS WITH THE DISPLAY LIST 505
MANAGING
THE STACKING
ORDER
Test the code, and you find that card2 isn’t displayed (Figure 14-14), and the index
position numbers for all the cards have changed:
[object MainTimeline] has 4 children
Card 1 is at index position 0
Card 3 is at index position 1
Card 4 is at index position 2
Card 5 is at index position 3
Getting the Name or Index Position of a Display Object
A major part of the battle in writing ActionScript code is identifying a particular
object that you want to change or manipulate. Display object containers give you
two ways to identify the objects that they hold: You can identify them either by
their variable names or by their index positions. If you have either the name or the
index, the DisplayObjectContainer will provide the other descriptor. For example,
suppose greenTable is a display object container holding several cards. You can get
the index for card1 with a statement like this:
greenTable.getChildIndex(card1);
FIGURE 14-14
In this example, card2 was removed from the display, so only four cards are
displayed.
www.it-ebooks.info

FLASH CS6: THE MISSING MANUAL
506
MANAGING
THE STACKING
ORDER
Attacking it from the other direction, if greenTable is a display object container
holding several cards and you want to know the name of a card at a specific index
position, you can use a command like this:
greenTable.getChildAt(2).name;
In
14-3_Stacking_Order.fla
, the
getChildIndex()
method is used in the
trace()
state-
ments to report on the index position of the various cards. It may be a little redundant,
but you can add statements using the
getChildAt()
method to display the names
of display objects at dierent index levels. To do so, add these lines before the last
curly brace of the traceDisplayList function:
trace("The name of the object at index position 0 is",getChildAt(0).name);
trace("The name of the object at index position 1 is",getChildAt(1).name);
trace("The name of the object at index position 2 is",getChildAt(2).name);
trace("The name of the object at index position 3 is",getChildAt(3).name);
Using a
while
Loop to Eliminate Repetitive Code
In this chapter, you see lots of nearly identical statements
grouped together, like the
trace()
statements in the example
above. The examples in this book use this method to clarify how
the code works. There’s nothing wrong with these statements,
and they produce fine results. But when you see repetitive code
like that, it’s important to know that there’s almost always a
more elegant way to handle the job. Usually, a
while
or a
for
loop (page 438) will do the trick. For example, you can replace
the code above with the following:
var positionIndex:int = 0;
while (positionIndex < numChildren)
{
trace("The name of the object at
index position", positionIndex, "is",
getChildAt(positionIndex).name);
positionIndex++;
}
The first line creates a variable named
positionIndex
of type
int
and stores the value 0 in it. The next line starts a
while
loop. It says “while positionIndex is less than the number of
children in the display object container, run the code between
the curly brackets.” There are two statements in between
the curly brackets. The first is a
trace()
statement that uses
positionIndex to identify a child of the display object container.
That statement ends with the semicolon (;). The first time
positionIndex is used, it displays a number, and the second
time it’s the index for a
getChildAt()
method. The second and
last statement before the closing curly bracket increments
the positionIndex. So, on the first trip through the loop,
positionIndex starts with a value of 0 and ends with a value
of1. The loop continues to run until the value of positionIndex
is greater than or equal to the number of children in the display
object container. If you replace the
trace()
statements above
with this
while
loop, the lines displayed in the Output panel
are identical. They look like this:
The name of the object at index position 0 is Card 2
The name of the object at index position 1 is Card 1
The name of the object at index position 2 is Card 3
The name of the object at index position 3 is Card 4
The name of the object at index position 4 is Card 5
One major advantage that this
while
loop has over the more
literal code is that it works no matter how many children are
held in the display object container. You don’t have to know
in advance and write specific code for each child.
CODERS’ CLINIC
www.it-ebooks.info

CHAPTER 14: ORGANIZING OBJECTS WITH THE DISPLAY LIST 507
SUMMARY OF
PROPERTIES
AND METHODS
Swapping the Position of Two Children
If you’re into multitasking, you’ll be glad to know you can reposition two display
objects at once using the
swapChildren()
or the
swapChildrenAt()
methods. As
you might anticipate at this point, the
swapChildren()
method uses the variable
names of the child display objects, while the
swapChildrenAt()
method uses the
index positions.
Going back to the tried-and-true green card table, here are a couple of examples
that show how to swap the positions of two child display objects. The following code
swaps positions using the variable names of the children:
greenTable.swapChildren(card1, card4);
To swap children by referencing their index positions, you provide an
int
value, like
this:
greenTable.swapChildrenAt(0,3);
Swapping children makes a pretty good mouse-click event. You can try it by
adding the following lines to the code in
14-3_Stacking_Order.fla
. Adding the
traceDisplayList()
function to
clickSwapListener()
updates the Output panel after
the swap has taken place:
card2.addEventListener(MouseEvent.CLICK, clickSwapListener);
function clickSwapListener(evt:MouseEvent):void {
swapChildrenAt(0,4);
traceDisplayList();
}
Test the animation after you’ve added the event listener, and you find a little inter-
activity in the animation. Click card2, and it swaps position with the card at index
position 4. Click card2 again, and the cards move back to their original positions.
The
trace()
statements send updated reports to the Output panel.
Summary of Properties and Methods
This section gives you a summary of the properties and methods covered in this
chapter. This list isn’t exhaustive, but it includes some of the handiest and most
frequently used tools. You can find a complete list in the Flash CS6 help files:
Help→Flash Help→ActionScript 3.0 and Components→ActionScript 3.0 Language
and Components Reference. Look for the DisplayObjectContainer class, and then
scroll down to find the properties and methods. If you see a method and want more
details about it, click its name.
www.it-ebooks.info

FLASH CS6: THE MISSING MANUAL
508
SUMMARY OF
PROPERTIES
AND METHODS
DisplayObjectContainer Properties
All display object containers are also descendants of the DisplayObject type. They
have all the properties you’d expect in a displayable object, like x/y position coordi-
nates, height, and width. In addition, they have a few properties that are particularly
useful in their role as containers. The summary below lists the name of the property
in bold, followed by a description, explaining the characteristics of the property and
a few details about its use. The formal description is the description found in Adobe’s
ActionScript 3.0 Reference. It lists the property name, and then on the right side of
the colon, it shows the data type stored in the property. The formal description is
helpful but a little abstract, so this list also provides an example, which is a little more
concrete and follows the card table and card theme used throughout this chapter.
The examples show how you’d use the property, assuming that the display object
container is an instance of a movie clip named greenTable.
• name. You can assign a name to a display object container using the
name
property. You can use just about anything for a name. In the examples in this
book, the
name
property was used with the
trace()
statement. Be careful not
to confuse the
name
property with variable names or class names. See page
488 for more details about the
name
property.
Formal description
: name: String
Example
: greenTable.name
• numChildren. A property that keeps track of the number of children in a dis-
play object container. The value is an
int
data type. This value is helpful when
you’re writing routines that identify specific child objects in a container. If you
use
numChildren
along with the position index of the children, keep in mind
that the index begins its count at 0, while
numChildren
starts its count at 1. See
page 502 for an example that uses the
numChildren
property.
Formal description
: numChildren: int
Example
: greenTable.numChildren
• parent. Display object containers can have parents, too. Use the
parent
prop-
erty to show the parent of the display object container, which has to also be a
DisplayObjectContainer type. When you work with the Display List, the methods
used most are those that belong to the display object container. Often the easi-
est way to identify the display object container is with the
parent
property. See
page 490 for more details about the
parent
property.
Formal description
: parent: DisplayObjectContainer
Example
: card1.parent. In this example, if
card1
is a display object held in the dis-
play object container
greenTable
, the result identifies
greenTable
as the parent.
DisplayObjectContainer Methods
When you work with the Display List, you’re working with the methods of display
object containers. Methods like
addChild()
and
removeChild()
are indispensable.
www.it-ebooks.info

CHAPTER 14: ORGANIZING OBJECTS WITH THE DISPLAY LIST 509
SUMMARY OF
PROPERTIES
AND METHODS
The summary list below is made up of three parts. The first part shows the name
of the method in bold, and then gives a description, explaining what the method
does, and the result or value that comes from the method. There may also be a page
reference pointing you to a place in this chapter that provides more details about
the method and related issues.
The second part of the summary shows the formal description of the method as
provided by Adobe in the help system’s
ActionScript 3.0 Language and Components
Reference
. From left to right, the formal description begins with the method name,
and then in parentheses shows the parameters required by the method. Parameters
include a descriptive word on one side of the colon and the data type on the other
side of the colon. Some methods have more than one parameter. On the right side
of the parentheses is another colon and a word that describes the data type or class
that the method returns. The formal description is somewhat abstract. The examples
at the end of each summary are more concrete, showing you how you’d write a
statement using the method. The examples continue using the card table and card
theme used in this chapter. The assumption is that the display object container in
the example is an instance of a movie clip named greenTable. The display object is
an instance of a movie clip named “card1.” Where a
name
property is used, card1
has a
name
property of “Card 1.”
• addChild(). Adds a display object to the Display List using the variable name of
the display object. Adding a display object to the Display List makes it visible in
the animation. The display object is added as a child of the display object con-
tainer and then placed on the top of the visual stack, giving it the highest posi-
tion index number. See page 501 for more details about the
addChild()
method.
Formal description
: addChild(child:DisplayObject): DisplayObject
Example
: greenTable.addChild(card1);
• addChildAt(). Adds a display object to the Display List using the variable name
of the child and a specified index position. The child is positioned at the exact
index included in the method parameters. Objects already on the Display List
at that index level or above are bumped up by one. The position index doesn’t
permit empty spots. So, for example, if a display object container has only four
children and you attempt to add a new child at index position 7, your anima-
tion won’t run, and you see an error message with the words, “The supplied
index is out of bounds.” For more examples using the
addChildAt()
method,
see page 501.
Formal description
: addChildAt(child:DisplayObject, index:int):DisplayObject
Example
: greenTable.addChildAt(card1,3);
• contains(). Determines whether a display object is held in a DisplayContainer-
Object. The result is true if the display object is in the display object container.
Formal description
: contains(child:DisplayObject):Boolean
Example
: greenTable.contains(card1);
www.it-ebooks.info

FLASH CS6: THE MISSING MANUAL
510
SUMMARY OF
PROPERTIES
AND METHODS
• getChildAt(). Returns the child display object instance at a particular position
index. After identifying the instance, you can use the properties and methods
of the object. See page 506 for more details.
Formal description
: getChildAt(index:int):DisplayObject
Example
: greenTable.getChildAt(3);
• getChildByName(). Returns the child display object by identifying the
name
property. After identifying the instance, you can use the properties and meth-
ods of the object.
Formal description
: getChildByName(name:String):DisplayObject
Example: greenTable.getChildByName(“Card 1”);
• getChildIndex(). Returns the position index of a display object using the vari-
able name. The result is a value of type
int
. See page 502 for more examples
using the
getChildIndex()
method.
Formal description
: getChildIndex(child:DisplayObject):int
Example
: greenTable.getChildIndex(card1);
• removeChild(). Removes a display object from the Display List and from its
display object container. A child removed from the Display List is no longer
visible in the animation. The object is referenced by its variable name. If the
object is itself a display object container, then the display objects it holds are
also removed. For more details, see page 504.
Formal description
: removeChild(child:DisplayObject):DisplayObject
Example
: greenTable.removeChild(card1);
• removeChildAt(). Removes a display object from the Display List and from its
display object container. The object is referenced by its positionIndex; its name
or variable name isn’t required. If the object is itself a display object container,
then the display objects it holds are also removed. For another example of the
removeChildAt()
method, see page 504.
Formal description
: removeChildAt(index:int):DisplayObject
Example
: greenTable.removeChildAt(2);
• swapChildren(). Swaps the position of two display objects in their display object
container. This changes the visual stacking order—the way objects appear to
overlap one another as well as other display objects in the container. For more
on
swapChildren()
, see page 507.
Formal description
: swapChildren(child1:DisplayObject, child2:DisplayObject):
void
Example
: greenTable.swapChildren(card1, card2);
www.it-ebooks.info

CHAPTER 14: ORGANIZING OBJECTS WITH THE DISPLAY LIST 511
SUMMARY OF
PROPERTIES
AND METHODS
• swapChildrenAt(). Swaps the position of two display objects in their display
object container. This changes the visual stacking order—the way the objects
appear to overlap one another as well as other display objects in the container.
There are more details on the
swapChildrenAt()
method on page 507.
Formal description
: swapChildrenAt(index1:int, index2:int):void
Example
: greenTable.swapChildrenAt(1,3);
www.it-ebooks.info

513
CHAPTER
15
Ordinarily, Flash assumes you want to play your animation in sequential order
from the first frame in your timeline to the last. But sometimes “start at the
beginning and quit at the end” isn’t exactly what you want. Fortunately, by
using a combination of scenes, frame labels, and ActionScript (Chapter 12), you can
control your animation virtually any way you like.
For example, say you’re putting together an instructional animation. You want to start
with an introductory section, move on to the meat of your topic, and then wrap up
with a question-and-answer section. If you organize these sections into separately
named scenes, then you can play with the order of your animation quickly and
easily. If you decide to reposition the question-and-answer scene directly after the
introduction as a kind of pretest, for example, you can do that with a simple drag
of your mouse. You can even add buttons that the trainee can click to replay the
question-and-answer scene over and over, as many times as she likes.
In this chapter, you’ll see how to stop and start playback using ActionScript code.
You’ll see how to use Flash labels, scenes, and ActionScript to make the most com-
mon types of nonsequential playback eects, including
looping
(replaying a section
of your animation over and over again). To make these eects easy to test, you’ll also
see how to add interactive buttons to your animations. To start it o, this chapter
describes how to control the overall speed at which Flash plays your animation on
your audience’s computers.
Controlling the Timeline
and Animation
www.it-ebooks.info

FLASH CS6: THE MISSING MANUAL
514
SLOWING
DOWN (OR
SPEEDING UP)
ANIMATION
Slowing Down (or Speeding Up) Animation
As you saw in Chapter 1, animations are nothing more than a series of content-
containing frames that Flash plays one after another so quickly that your eyes
interpret the overall eect as continuous movement.
You get a pretty good idea of how it will appear to your audience when you test it
on your own computer. But the speed at which Flash actually displays your frames
on
someone else’s
computer depends on several factors, many of which you can’t
control:
• Your audience’s computer hardware. Both processor speed and memory
aect animation playback, especially if the animation is very long or includes
multimedia, like bitmaps, sound, or video clips (Chapter 11). You have no control
over this factor unless you’re developing an animation for playback on a specific
set of machines: for example, if you’re creating a tutorial in Flash that you know
will be played only on the computers in your company’s training room.
• Your audience’s Internet connection. If you’ve added your animation to a web
page, the speed of your audience’s Internet connection aects how quickly your
animation downloads and plays on their computers. You have little or no control
over this factor (beyond
preloading
, which you can learn about in Chapter 19)
because, even if you’re targeting your animation for specific machines with
slower connections, Internet congestion may force download speeds of much
less than that.
• The delivery option you’ve chosen (if you’ve added video). If you’ve incor-
porated a video clip into your animation (Chapter 11), you’ve had to tell Flash
whether you want to:
• Embed the video into your Flash document. If you’ve chosen this option,
your animation won’t begin to play until the person has downloaded the
entire (enormous) Flash document, video clip and all. When the animation
does
begin to play, however, neither his Internet connection speed nor
overall Internet trac aect playback.
• Stream the video at runtime. If you’ve chosen not to embed the video
clip into your Flash document, the person’s Flash Player begins playing
the animation as soon as a few frames’ worth of the animation file have
finished downloading to his computer. When the animation
does
begin to
play, however, it might run in fits and starts, depending on his computer
hardware, Internet connection speed, Internet trac, and the size of your
animation or video file.
• The size and configuration of your finished animation file. Large animation
files—files containing complex animated eects, lots of gradients, and transpar-
ent images, video clips, and so on—take longer than small files to download or
stream over the Internet. They can also take longer to play, because large files
tend to suck up all the memory on a computer or handheld device. You can
www.it-ebooks.info

CHAPTER 15: CONTROLLING THE TIMELINE AND ANIMATION 515
SLOWING
DOWN (OR
SPEEDING UP)
ANIMATION
control this factor by optimizing your animation to keep the file size as small
as possible and by
preloading
sections of your animation. (Chapter 19 shows
you how.)
• The frame rate you’ve applied to your animation. In your animation’s timeline,
you can tell Flash the maximum frame rate you want it to shoot for, in frames
per second (fps).
The easiest factor to control—and the only one covered in this chapter—is the last
one: the frame rate. The following section shows you how to set a new frame rate
for an animation.
Setting a Document Frame Rate
When you create a new animation, Flash assumes a maximum frame rate of 24
fps
(frames per second). In other words, given the constraints listed in the previous
section, Flash tries its best to display one frame every 1/24th of a second. Here’s
another way to look at frame rate: If your animation spans 240 frames, you’re look-
ing at roughly 10 seconds of screen time.
NOTE Previous versions of Flash started out using 12 fps because most people had slower Internet connec-
tions. At 24 fps, Flash matches the frame rate used for years by motion pictures.
In many cases, the standard 24 fps works just fine, but if you’re planning to put your
animation up on a website, you may want to consider a slower rate, like 12 fps. Your
rule of thumb should be to use the lowest frame rate that still provides smooth ac-
tion for your animation. Usually, you decide on a frame rate when you create a new
Flash document. But you can change the frame rate at any time using the document
properties (as shown in Figure 15-1) or using ActionScript. Changing the frame rate
has some pretty significant side eects. First and most importantly, higher frame
rates speed up your document. If you have a 4-minute animation with a 12 fps frame
rate and you change it to 24 fps, your animation now finishes in 2 minutes. Too high
a frame rate can make animation look blurry. Too slow a frame rate creates herky-
jerky movements and may cause audio syncing problems.
The next few examples use a Flash document,
15-1_Frame_Rate.fla
, that you can
find on the Missing CD page at
www.missingmanuals.com/cds/flashcs6mm
.
To see the eects of dierent frame rates, follow these steps and feel free to add
some of your own experiments:
1. Open
15-1_Frame_Rate.fla
, and then press Ctrl+Enter (⌘-Return) to test
the animation.
The Stutz Bearcat auto races across your screen at a blazing 12 fps. The car is
the only animated object in the movie and uses a motion tween to move from
left to right across the screen.
www.it-ebooks.info
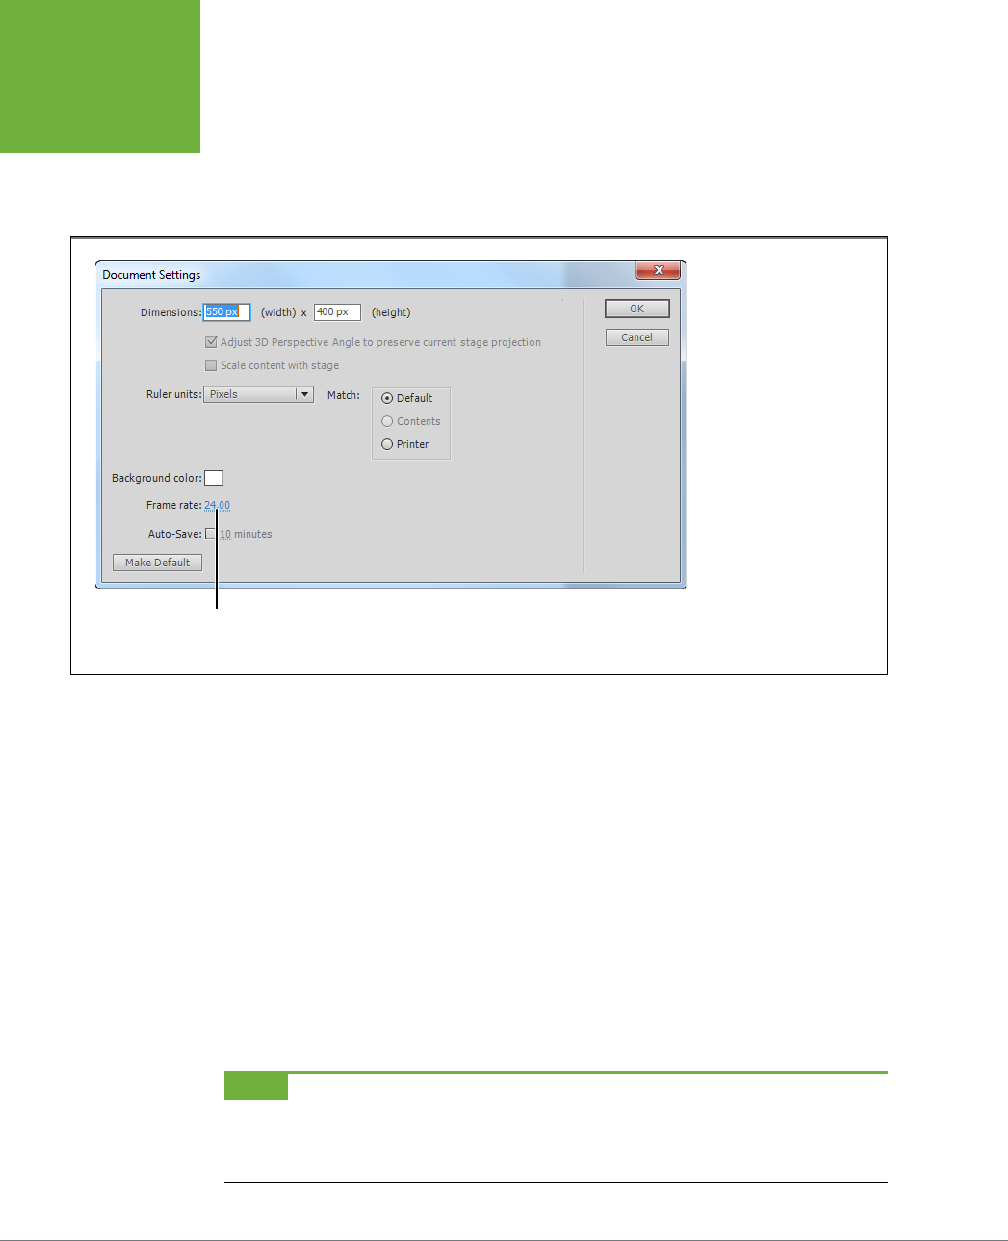
FLASH CS6: THE MISSING MANUAL
516
SLOWING
DOWN (OR
SPEEDING UP)
ANIMATION
2. Below the timeline, click the Frame Rate setting (fps), and then type
8
( Figure 15-2).
You can click the Frame Rate and then type a new number, or you can drag to
change the setting.
FIGURE 15-1
Flash can play your movies
at frame rates from 0.01
frames per second (that is, a
super-slow 100 seconds per
frame) to a blistering 120
frames per second. Going
with a super-low or super-
high frame rate, though, can
cause audio synchronization
problems. Also, setting a
frame rate doesn’t ensure
that your animation will
actually play at that frame
rate; it’s just a suggested
maximum. Several other
factors (page 514) affect
playback, regardless of the
frame rate you set.
Frame rate setting
3. Test the animation by pressing Ctrl+Enter (⌘-Return).
The car moves across the screen in a decidedly herky-jerky fashion.
4. Click Modify→Document to open the Document Properties box, as shown in
Figure 15-1, and then for Frame rate, type a number from 24 to 120. Click OK.
Flash lets you type in a frame rate of anything between 0.01 and 120. But in
most cases, you want to stick with a frame rate of somewhere between 12 and
24 (the standard Hollywood movie frame rate). Every animation is dierent, of
course, and you might actually
want
to create an unusual eect. The Document
Properties window disappears. In the timeline, you see the new frame rate.
5. Test your new frame rate by choosing Control→
Test Movie.
If you type in a frame rate greater than 24, then the car moves noticeably faster
and may even look a bit blurry.
NOTE Frame rate affects the playback speed of the entire animation. Base your frame rate decisions on how
smooth you want the animation to be and the capabilities of your intended audience, as explained on page 515.
If you want to speed up (or slow down) only certain sections of your animation, change the rates by removing
(or adding) frames, as described on page 100.
www.it-ebooks.info
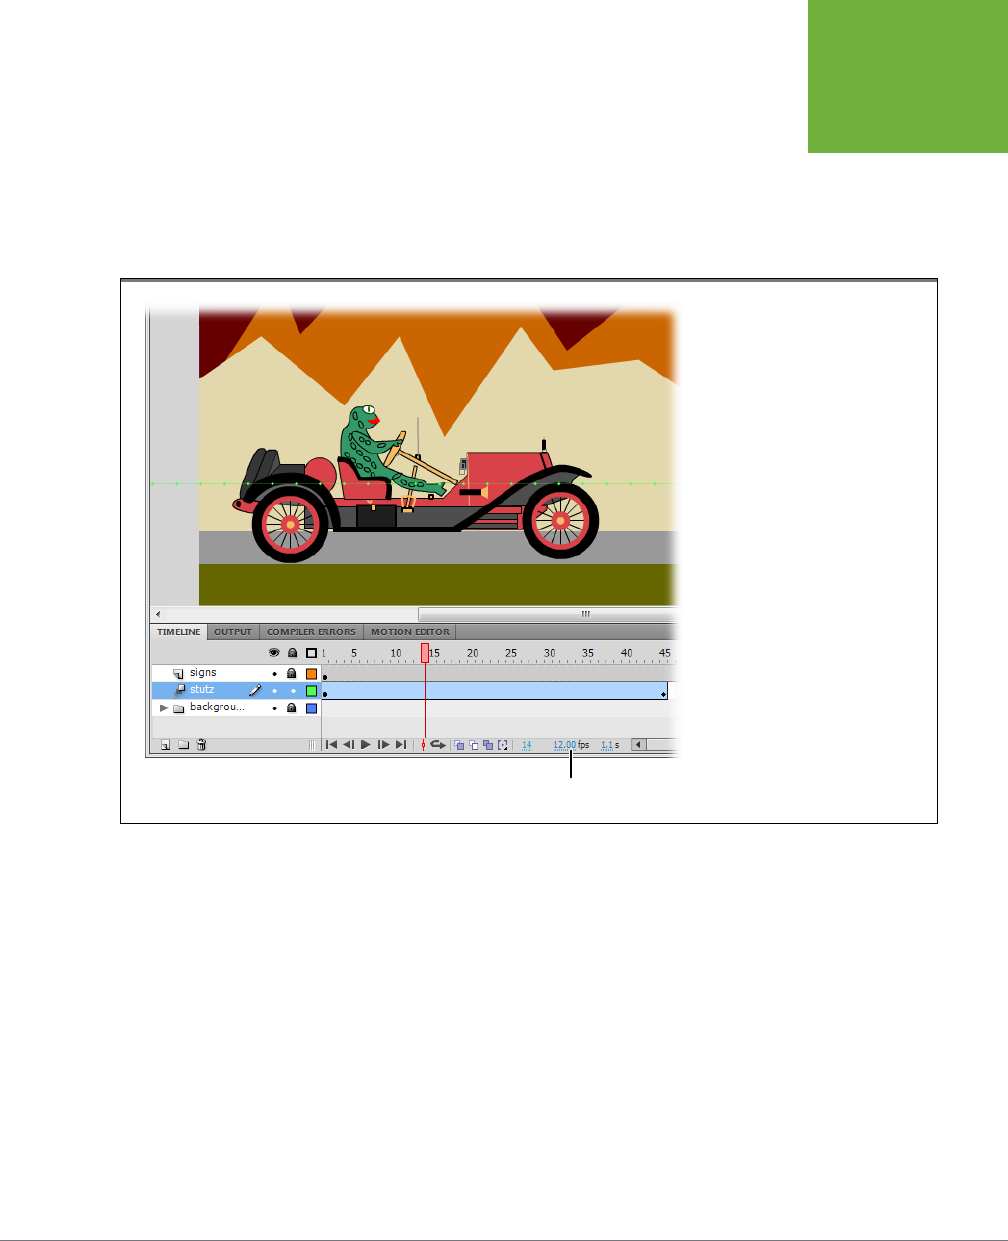
CHAPTER 15: CONTROLLING THE TIMELINE AND ANIMATION 517
SLOWING
DOWN (OR
SPEEDING UP)
ANIMATION
Setting a Frame Rate with ActionScript
ActionScript gives you the tools to change the frame rate for your animation, too,
since the stage has a frameRate property. (If you need more basics on ActionScript
and properties, see Chapter 12.) When you use ActionScript to set the frameRate
property for the stage, it has the same eect as setting a new frame rate in the
timeline when you’re designing your animation.
FIGURE 15-2
In addition to clicking the Frame Rate
setting (circled) in the timeline, Flash
gives you two additional ways to set
your animation’s frame rate. You can
select Modify→Document (which pops
up the window in Figure 15-1) or click
the stage and then change the frame
rate directly in the Properties panel
(Properties→Properties→FPS). Flash
doesn’t prevent you from changing
your frame rate in the middle of build-
ing an animation, but it’s such a basic
characteristic that you typically want
to set it once up front and change it
later only if you absolutely have to.
Frame rate setting
1. Add a new layer for actions to the timeline.
If you’re going to add code to the timeline, it’s good practice to add a special
layer at the top just for code and to name it something like “actions.” That way,
it’s much easier later if you have to hunt down and debug your code.
2. In the actions layer, click the first frame, and then open the Actions panel
(Window→Actions).
The Actions panel opens, as shown in Figure 15-3. For more details about the
tools available in the Actions panel, see page 416.
3. In the Actions panel, type the following line of code:
stage.frameRate=60;
www.it-ebooks.info
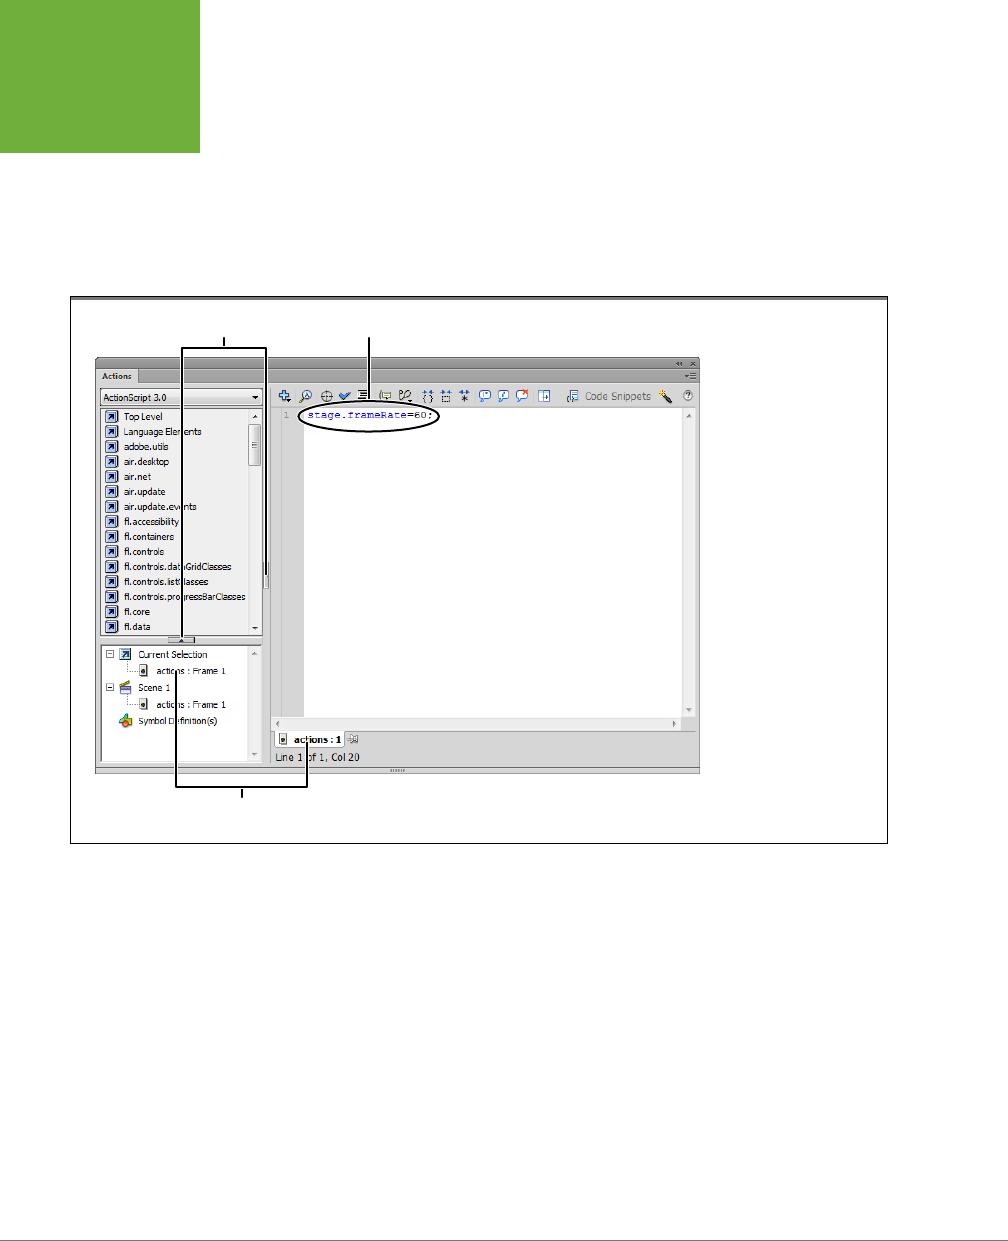
FLASH CS6: THE MISSING MANUAL
518
SLOWING
DOWN (OR
SPEEDING UP)
ANIMATION
Even though you’re changing the frameRate in ActionScript, the rate showing
below the time line still shows a frame rate of 24 fps (or whatever you used in
the last setting). In fact, the frameRate doesn’t ocially change until the actions
on Frame 1 of the timeline are processed.
4. Click the 22nd frame in the actions layer of the timeline, and then press F7.
Flash inserts a blank keyframe in the timeline.
FIGURE 15-3
You type code directly
into the Actions panel.
Click the button to open
or close the side panels.
In this figure, the Current
Selection display shows
that the actions are stored
in (and take place at)
Frame 1.
ActionScript code
Current selection
Click to open/close panels
5. In the Actions panel, type the following code:
stage.frameRate=6;
Make sure that the 22nd frame in the timeline is selected when you type in the
code, because you want the frame rate to change at that point in the anima-
tion. The Current Selection tab should change to show a frame symbol and the
words
actions: Frame 22
.
6. Test your animation using Ctrl+Enter (⌘-Return).
The Stutz Bearcat races up to the stop sign and performs a Hollywood stop,
slowing down and rolling through the intersection, and then o the stage.
www.it-ebooks.info

CHAPTER 15: CONTROLLING THE TIMELINE AND ANIMATION 519
TIMELINE STOP
AND GO
TIP Though you can change the frame rate of a timeline midstream, as shown in this example, in most cases,
it’s better to keep your frame rate at a single speed. Instead, to speed up the action, remove frames from the
sequence; if you want to slow things down, add frames. If you want to slow down or speed up a tweened motion,
that’s easy to do using the Motion Editor, as described on page 311.
Timeline Stop and Go
Starting and stopping an animation is similar to hitting the Pause and Play buttons
on a DVD player. If your audience is viewing your animation in the desktop version
of Flash Player, then they can pause and play the animation by pressing Enter or
Return, just as you start and stop the playback when you’re working in the Flash
authoring environment. ActionScript gives you the tools to start and stop anima-
tions programmatically. There are all sorts of ways you can put this feature to use.
Suppose you want the Stutz Bearcat to make a real stop at that stop sign, instead
of the kind of stop that’ll get you a ticket. You can place a
stop()
command in the
timeline at the frame where you want the animation to stop.
NOTE The
stop()
and
go()
examples in this section also use the car-driving frog graphics. If you’re continuing
to use your document from the previous exercises, delete the code on Frames 1 and 22 that changes the timeline
speed. If you want to start with a new sample document, download
15-2_Timeline_Stop_Go.fla
from the Missing
CD page at
www.missingmanuals.com/cds/flashcs6mm
.
Here’s how to tell your animation when to stop using ActionScript:
1. Open
15-2_Timeline_Stop_Go.fla
.
The actions layer at the top of the timeline has keyframes at Frame 1 and
Frame22, but there’s no code in the frames.
2. Right-click Frame 22, and then choose Actions from the shortcut menu.
The Actions panel opens, and the current selection is set to Frame 22.
3. Type the following code:
stop();
This line of code is a little more complex than it may appear. In essence, it tells
the main timeline of the animation to stop playing. A more complete version of
this statement would read
this.stop()
. In that case, “this” refers to the main time-
line. If you don’t explicitly reference the timeline you’re stopping, ActionScript
assumes you mean the current timeline, which in this case is the main timeline.
4. Test your animation using Ctrl+Enter (⌘-Return).
When the main timeline reaches the 22nd frame, it stops. Oddly, the wheels
of the Stutz Bearcat keep on spinning (Figure 15-4). (That’s got to be hard on
the tires!) The car on the stage is an instance of the StutzBearcatFrog symbol
www.it-ebooks.info
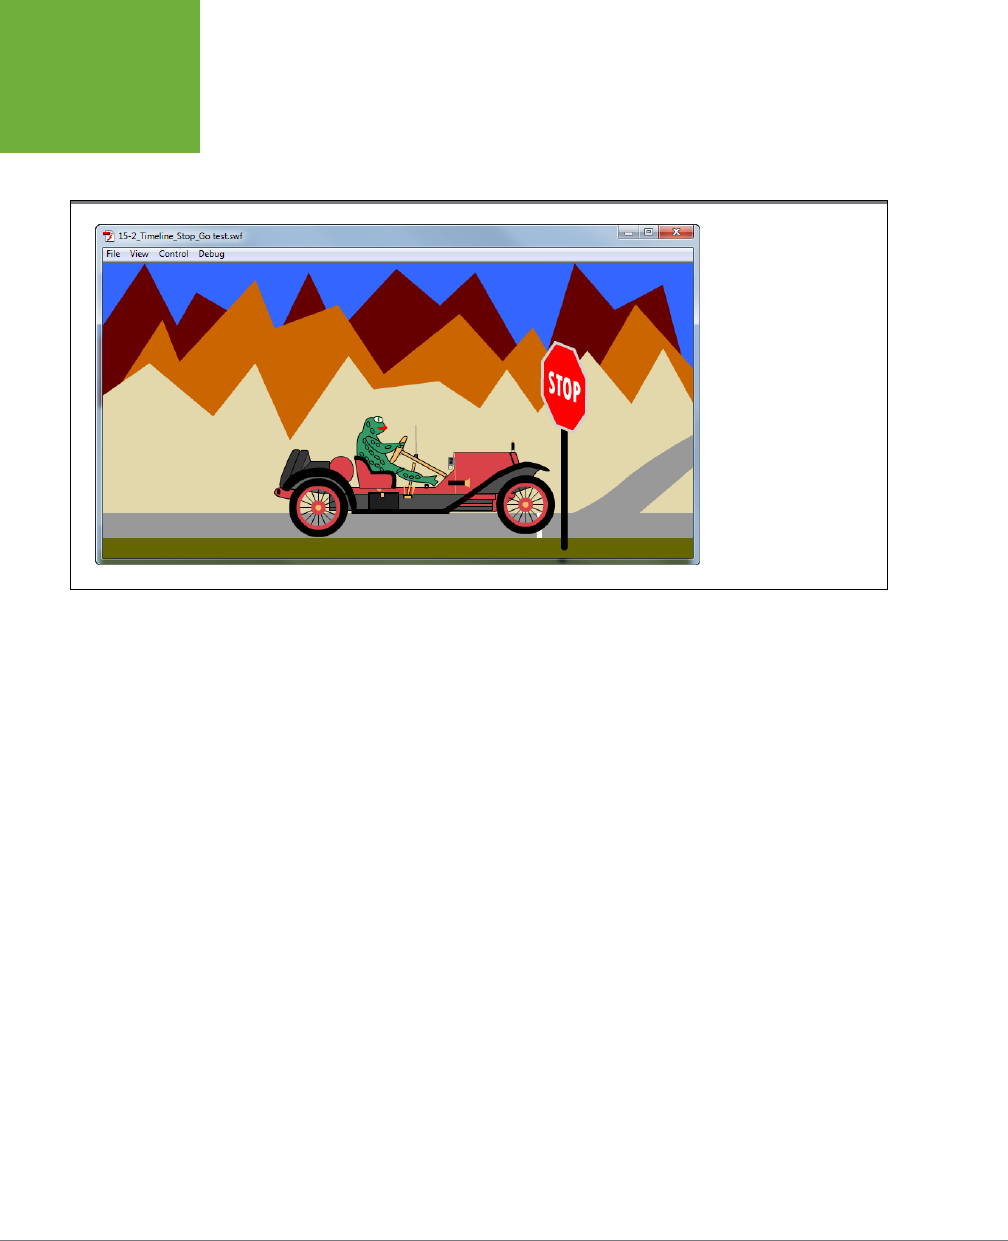
FLASH CS6: THE MISSING MANUAL
520
TIMELINE STOP
AND GO
in the Library. The symbol is a movie clip made up of two frames that make
the car’s wheels spin. To stop the wheels from turning, you need to stop the
StutzBearcat animation, too.
FIGURE 15-4
In this scene, the anima-
tion of the main timeline
stops, but the animation
in the car’s movie clip
keeps running, so the
wheels spin even when
the car is stopped. To
restore the laws of phys-
ics, you have to stop both
the main timeline and
the car’s movie clip using
ActionScript statements.
5. In the Actions panel, add the following line of code:
stutzBearcat.stop();
Now Frame 22 has two
stop()
statements. The first stops the main timeline, and
the second stops the instance of the stutzBearcat movie clip.
6. Test your animation using Ctrl+Enter (⌘-Return).
When the animation runs, the car
and
the car’s wheels make a legal stop in
front of the stop sign.
Using ActionScript to Start a Timeline
As you saw in the previous steps, the
stop()
command stops an animation nicely.
But what about getting that Bearcat rolling again? You stopped the animation by
putting the
stop()
statement in the frame where you wanted to stop, but putting a
play()
statement in the following frame, as logical as it sounds, will do you no good.
The Flash Player will never reach the next frame—it’s stopped. So you have a couple
of choices, depending on what you want to trigger the starting and stopping. If
you want your audience to control it, then you can give them clickable buttons or
controls. If you want the animation to resume on its own, then a TimerEvent is the
best tool in your toolbox. You can add a TimerEvent to the same frame where the
stop()
happened, as shown in Figure 15-5. When the timer is complete, it can trigger
www.it-ebooks.info
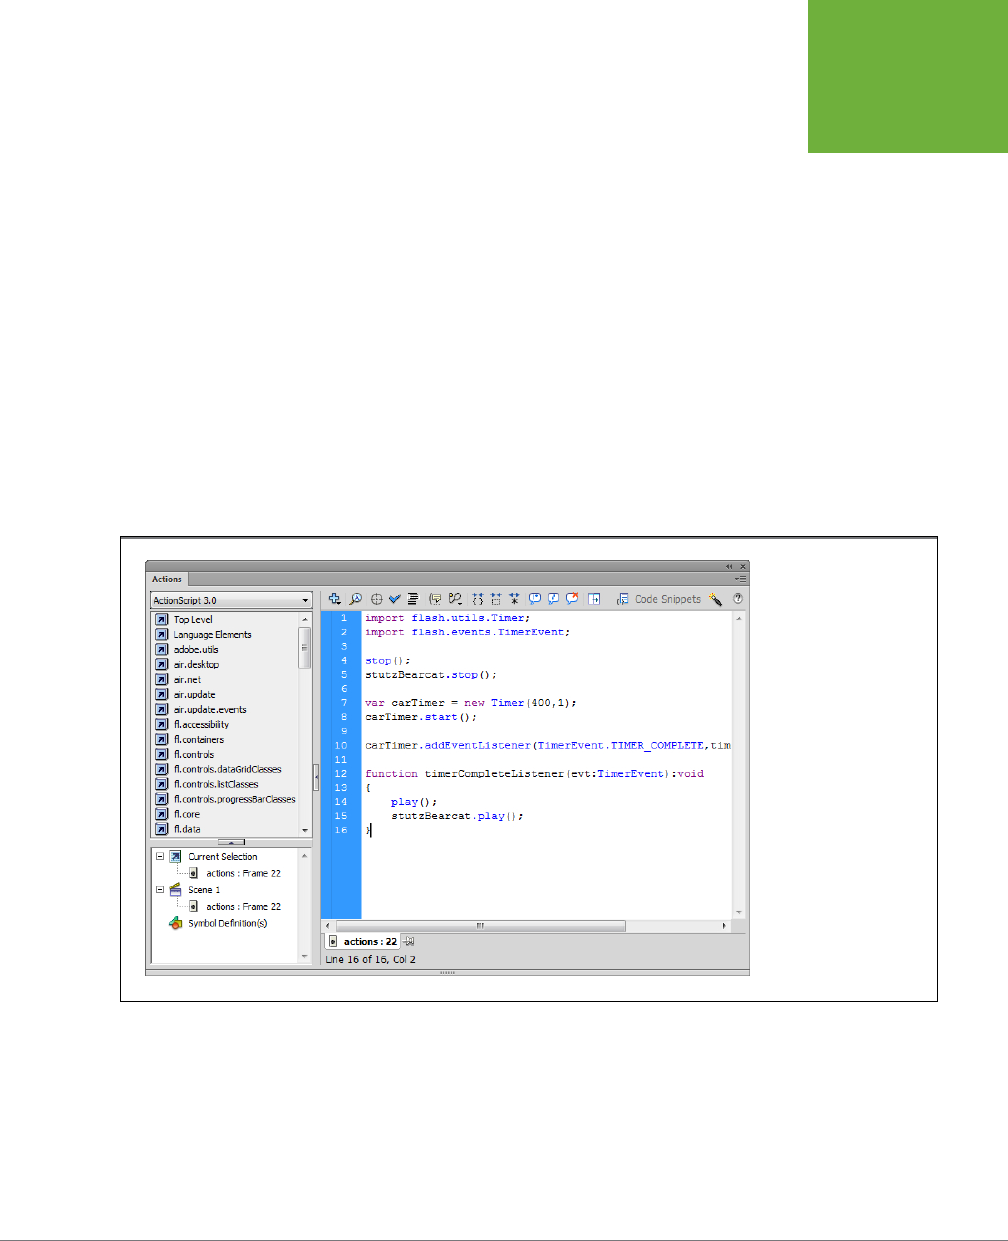
CHAPTER 15: CONTROLLING THE TIMELINE AND ANIMATION 521
TIMELINE STOP
AND GO
a
play()
statement for both the main timeline and the stutzBearcat movie clip. Modify
the code on Frame 22 of the actions layer to read as follows:
1 stop();
2 stutzBearcat.stop();
3
4 var carTimer = new Timer(400,1);
5 carTimer.start();
6
7 carTimer.addEventListener(TimerEvent.TIMER_COMPLETE,
timerCompleteListener);
8
9 function timerCompleteListener(evt:TimerEvent):void
10 {
11 play();
12 stutzBearcat.play();
13 }
FIGURE 15-5
The tab at the bottom
of the Actions panel
provides details about
the location of the code
shown. In this case, the
code resides on the 25th
frame of the actions layer.
The first two lines were already in the code. Line 4 creates a new timer called
carTimer
.
The first number in parentheses (400) sets the timer to wait a little less than half a
second (400 thousandths of a second). The second number (1), sets the timer to run
once. Line 5 starts the timer. The remainder of the code sets up the event handler.
www.it-ebooks.info

FLASH CS6: THE MISSING MANUAL
522
ORGANIZING
YOUR
ANIMATION
Line 7 registers the event listener to run the function
timerCompleteListener()
when
the timer runs out. (For more details on events and event listeners, see page460.)
The code between the curly brackets (line 11 and line 12) are the statements that start
the main timeline and the stutzBearcat movie clip. For the completed exercise, down-
load
15-3_Timeline_Stop_Go_done.fla
from the Missing CD (
www. missingmanuals.
com/cds/flashcs6mm
).
NOTE In 1915, Erwin “Cannonball” Baker set a record driving from Los Angeles to New York in 11 days, 7hours,
and 15 minutes in a Stutz Bearcat.
Organizing Your Animation
As you see in a lot of the examples earlier in this book, you don’t have to do a thing
to your standard timeline, organization-wise. You can let Flash play your animation
sequentially, from Frame 1 right through to Frame 500 (or whatever number your
last frame is) with no problems.
If you need your animation to jump around and play out of sequence, though, there
are a few ways you can do it. Which method is best depends on what you’re trying
to do. Here are three methods, along with their pros and cons:
• Use labels to create bookmarks in the timeline. If you break an animation into
named chunks with frame labels, then you give your animations the potential to
be flexible and more interactive, because you can write ActionScript actions that
target
(act on) each individual chunk. For example, you can let your audience
decide whether to play the ralph_reacts scene first, last, or skip it altogether.
This method is one of the most popular, especially with the ActionScript crowd.
It’s easy to create labels and easy to use them in ActionScript. In short, wherever
you use a frame number to refer to a specific frame in a timeline, you can also
use a frame label.
• Divide your animation into separate .swf files and load them as needed.
This method is great if you have dierent teams working on a long animation.
Team members can create movie clips independently, and then a master movie
clip can load the other movie clips as needed. One of the advantages of this
method is that it’s faster, especially if you’re sending .swf files over the Internet.
Your audience needs to download only the .swf files they actually want to view.
• Create scenes within your Flash document. Scenes have more benefits for the
Flash designer than they do for either the Flash coder or the Flash audience. If
you break an animation into scenes, then you can find what you’re looking for
quickly; you can also easily rearrange your animation, using the Scene panel.
Scenes make it easy to focus on a small section of your animation while you’re
creating and previewing it. You don’t have to preview an entire animation when
all you want to see is one small section. All the scenes are stored in a single .swf
www.it-ebooks.info

CHAPTER 15: CONTROLLING THE TIMELINE AND ANIMATION 523
ORGANIZING
YOUR
ANIMATION
file, so your audience has to download the complete file, even if they’re viewing
only one or two of the scenes.
TIP Both scenes and labeled frames are a natural fit for creating a website in Flash because they let you
organize your content nonsequentially. Page 456 shows you an example of linking content to navigation buttons.
Working with Labeled Frames
Labeled frames
are like named bookmarks. Once you label a frame, you can jump to
that specific point in the timeline using the label’s name. Labeled frames are great
tools to use when you want to give your audience an opportunity to interact with
the animation. For example, if you’re creating a series of lessons, you can create a
label for each lesson. You can then give your students a table of contents, where
they can jump to any lesson with the click of a button. Or, suppose you’re using
Flash to build an animated website and you want to display a dierent web page
when someone clicks a button on your navigation bar. If she clicks the Contact
Us button, for instance, you want to display a web page showing your company’s
contact information.
Technically, you don’t have to label your frames in order to do this. You can create
an
event listener
for your Contact page button that uses code like this:
gotoAndPlay(15);
The problem with this approach is that if you go back and add frames to the begin-
ning of your timeline, it mus up your code. If you add 10 frames to the beginning
of your animation, for example, the old Frame 15 is now the new Frame 25. So, to
make your button work again, you’d have to change the ActionScript code to this:
gotoAndPlay(25);
A much better approach is to give Frame 15 a meaningful label, like
contact
, and
write the ActionScript code this way:
gotoAndPlay("contact");
When you label a frame like this, Flash always associates the same frame with the
label—no matter what number that frame ends up being. So you can edit your
timeline to your heart’s content without ever having to worry that you’re breaking
your actions. As a significant side benefit, using words rather than numbers makes
your code easier to read and understand.
The following sections show you how to label frames, and how to reference those
labels in ActionScript code. This exercise uses a file called
15-4_Frame_Labels.
fla
, which you can find at the Missing CD page at
www.missingmanuals.com/cds/
flashcs6mm
. The completed project is in a file named
15-5_Frame_Labels_done.fla
.
ADDING A FRAME LABEL
Labeling a frame is easy. All you have to do is select a frame and then, in the Proper-
ties panel, type a name for the label.
www.it-ebooks.info
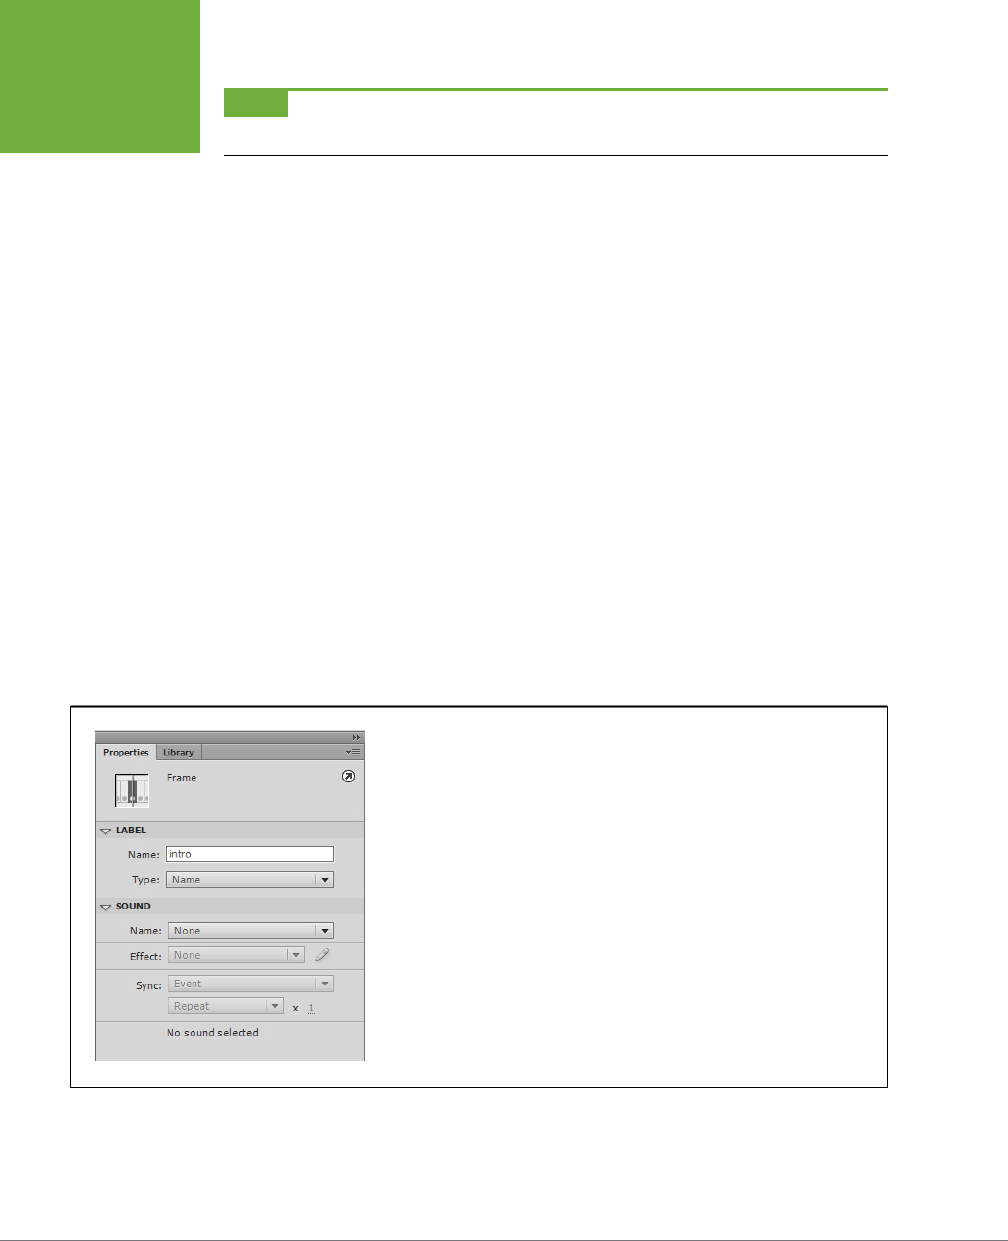
FLASH CS6: THE MISSING MANUAL
524
ORGANIZING
YOUR
ANIMATION
NOTE As with all content (images, sounds, actions, and so on), the label you attach to a keyframe stays in
force until the next keyframe.
To label a frame:
1. Open
15-4_Frame_Labels.fla
in Flash, and then press Enter to play the
animation.
This rather abbreviated movie is made up of three words: Intro, Main, and Credits.
Each word is animated using shape tweens. There are new words at Frame 1,
Frame 16, and Frame 46. The animation has three layers: words, buttons, and
labels. You can label any keyframe in a timeline, but if you place all your labels
in a single layer, they’re easier to find.
2. In the timeline, in the labels layer, click the first frame.
Flash highlights the selected frame, and the Properties panel shows proper-
ties associated with Frame 1. (If the Properties panel isn’t showing, then go to
Window→Properties.)
3. In the Properties panel, click the Label→Name box (Figure 15-6), and then
type
intro
.
Your first label is complete. In the timeline, Flash displays a little red flag in the
frame you attached the label to, followed by the label itself. In the Properties
panel, you may need to click the triangle button next to Label to expand the
Label subpanel.
FIGURE 15-6
Flash assumes a label type of Name, and that’s exactly what you want in most circum-
stances. (The other label types Flash has are Comment, which displays your label in the
timeline but doesn’t let you access it using ActionScript, and Anchor, which lets you
designate the frame as a separate HTML anchor page that your audience can return to
using the browser’s Back button.)
4. In the labels layer, click Frame 16, and then press F6.
A new keyframe appears at Frame 16. Only keyframes can have labels. So to
attach a new label to Frame 16, you need to create a keyframe first.
www.it-ebooks.info

CHAPTER 15: CONTROLLING THE TIMELINE AND ANIMATION 525
ORGANIZING
YOUR
ANIMATION
5. In the Properties panel, click the Label→Name box, and then type
main
.
The second label named
main
appears in the labels layer.
The Dierence Between Scenes and Labeled Frames
It sounds like scenes and frame labels do the same thing:
Both let me break up my animation into chunks and make the
chunks interactive, and both let me target a frame using a
name instead of just the frame number. So if they both do the
same thing, when do I use one over the other?
Using labeled frames
is
very similar to using scenes. But there
are three big differences between the two:
• Simply dragging scenes around in the Scene panel
rearranges the way Flash plays your animation. It doesn’t
work that way with frame labels. (You can rearrange the
way your animation plays using labeled frames, but you
have to write the ActionScript code to do it.)
• It’s harder to break up scenes than to add labels. When
you use scenes, you need to either add new content for
each scene as you build your animation, or—if you’ve
already created your animation and want to break it into
scenes after the fact—you need to cut and paste frames
from the original Scene 1 into your new scenes. Hardly
rocket science, but it is extra work. Adding or changing
frame labels is much quicker.
• As a designer, you see separate timelines when you work
with scenes. When you work with frames, you see one big
timeline. This difference is usually the deal breaker: Some
people love working with content in separate timelines;
some people hate it. It’s interesting to note that no matter
which method you use, Flash stores everything in one big
timeline in the published SWF file.
FREQUENTLY ASKED QUESTION
6. In the labels layer, click Frame 46, and then press F6.
A new keyframe appears at Frame 46.
7. In the Properties panel, click the Label→Name box, and then type
credits
.
The third label named “credits” appears in the labels layer.
TARGETING A FRAME LABEL WITH ACTIONSCRIPT
After you’ve labeled a frame, you can reference that label in an ActionScript action.
This section shows you how to program three buttons that jump to a specific frame
label in the timeline.
NOTE The example in this section is identical to the one on page 532 except for two differences: This example
shows ActionScript targeting labeled frames in a single timeline, while the one on page 532 shows ActionScript
targeting separate scenes.
www.it-ebooks.info
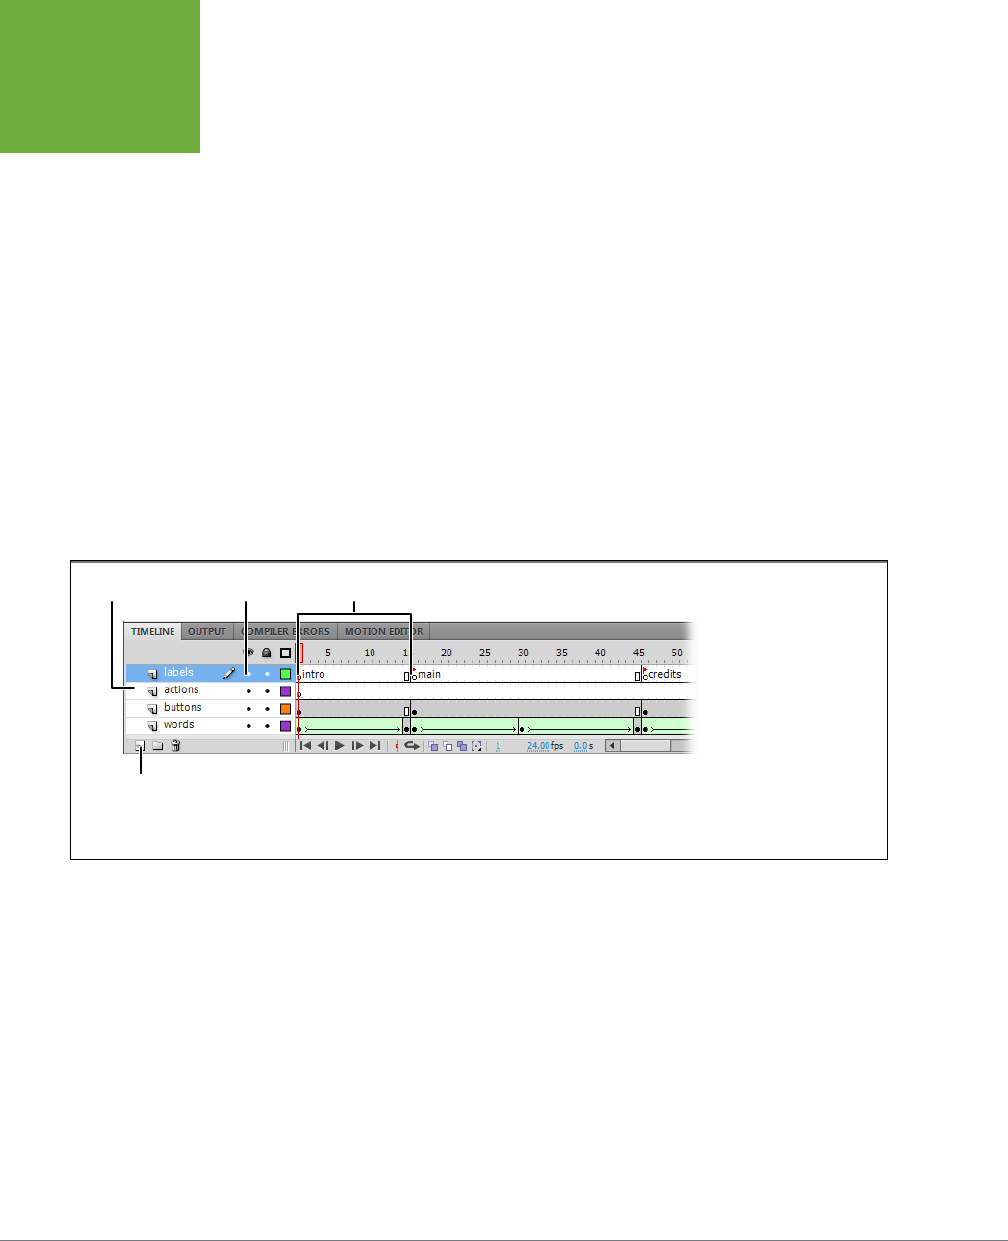
FLASH CS6: THE MISSING MANUAL
526
ORGANIZING
YOUR
ANIMATION
To target a labeled frame:
1. Open the Flash file, and then move the playhead to Frame 1.
On the stage you see the word “Intro” and three buttons with the text “Play
Intro,” “Play Main,” and “Play Credits.”
2. Test the animation by choosing Control→
Test Movie.
In the test window, you see the word “Intro” recede, the word “Main” approach
and recede, and the word “Credits” approach. Clicking the Play Intro, Play Main,
and Play Credits buttons turns the buttons from red to yellow but has no other
eect on the animation.
3. Below Flash’s timeline, click the New Layer button. Then click the name and
type
actions
, as shown in Figure 15-7.
A new layer named
actions
appears in the timeline. You’ll use this layer to hold all
of your ActionScript code. As a rule of thumb, it’s best to keep your ActionScript
code as close together as possible. When snippets of code are tucked away in
dierent layers or movie clips, it’s harder to troubleshoot.
FIGURE 15-7
When you place
ActionScript code in the
timeline, it’s always best
to devote a specific layer
to the code, which makes
it easier to find and debug
your code later. It’s also
a good idea to keep both
the labels layer and the
actions layer at the top of
the timeline.
Labels layer Timeline labels
New layer
Actions layer
4. In the actions layer, create a keyframe at Frame 15 by selecting the frame
and then pressing F6.
An empty circle appears in Frame 15, indicating a keyframe.
5. With Frame 15 still selected, type the following ActionScript statement in
the Actions panel:
stop();
This statement stops the animation from playing when it reaches Frame 15. This
marks the end of the “intro” segment of the animation.
6. Create keyframes and
stop()
statements for Frames 44 and 60, similar to
what you did in steps 4 and 5.
www.it-ebooks.info
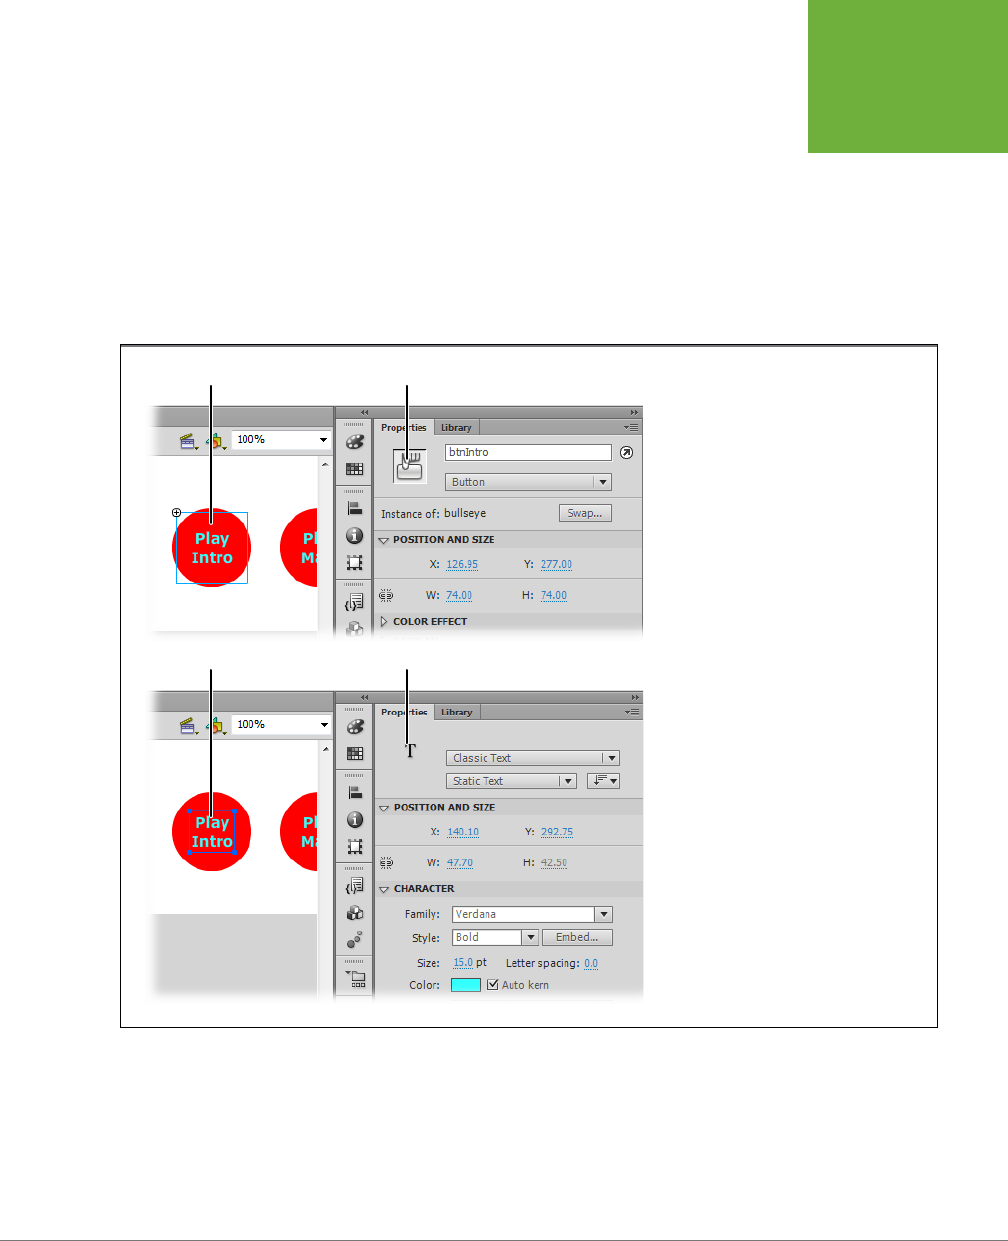
CHAPTER 15: CONTROLLING THE TIMELINE AND ANIMATION 527
ORGANIZING
YOUR
ANIMATION
At this point, each of the three animation segments (intro, main, credits) has a
stop()
statement at the end. If you test your animation now, it will stop at the
end of the Intro. In the following steps, you’ll write code for each of the three
Play buttons.
7. Click the outside edge of the Play Intro button.
The button shows a selection box, and a button icon appears in the Properties
panel, as shown in Figure 15-8. If you see the letter T in the Properties panel, it
means you selected the Play Intro text, not the Play Intro button, so try again.
FIGURE 15-8
These buttons are made up of two parts:
a button symbol, plus text placed over the
symbol. To select just the button, click the
edges outside the text. You can tell whether
you’ve selected the button symbol or the
text by checking the icon that shows in the
Properties panel.
Button selected Button icon
Text selected Text icon
8. In the Properties panel, name the button instance
btnIntro
.
There are three instances of buttons on the stage: Play Intro, Play Main, and Play
Credits. They’re all instances of the BullsEye button in the Library. Before you
can write ActionScript code for each button, you have to name it.
www.it-ebooks.info

FLASH CS6: THE MISSING MANUAL
528
ORGANIZING
YOUR
ANIMATION
9. Repeat steps 7 and 8 to name the remaining two buttons.
Using a consistent naming convention, name the Play Main button
btnMain
, and
the Play Credits button
btnCredits
.
10. Click Frame 1 in the actions layer, and then type the following code to create
an event listener for btnIntro:
1 btnIntro.addEventListener(MouseEvent.CLICK, clickIntroListener);
2
3 function clickIntroListener(evt:MouseEvent)
4 {
5 gotoAndPlay("intro");
6 }
Line 1 registers a MouseEvent listener for btnIntro. Lines 3 through 6 comprise
the function
clickIntroListener()
. This function holds the code that runs when
someone clicks the btnIntro button. (For more details on handling events
and event listeners, see page 448.) Line 5 holds the important action for the
function. The
gotoAndPlay()
statement tells the Flash Player to jump to the
frame labeled “intro” and to begin playing from that point forward. You can
place either a label, like “intro,” or a specific frame number, like “16,” inside the
gotoAndPlay()
parentheses. As explained on page 523, labels are much more
flexible than specific frame numbers.
11. Add event listener code for the remaining two buttons. When you’re through,
it should look like this:
btnIntro.addEventListener(MouseEvent.CLICK, clickIntroListener);
btnMain.addEventListener(MouseEvent.CLICK, clickMainListener);
btnCredits.addEventListener(MouseEvent.CLICK, clickCreditsListener);
function clickIntroListener(evt:MouseEvent)
{
gotoAndPlay("intro");
}
function clickMainListener(evt:MouseEvent)
{
gotoAndPlay("main");
}
function clickCreditsListener(evt:MouseEvent)
{
gotoAndPlay("credits");
}
www.it-ebooks.info

CHAPTER 15: CONTROLLING THE TIMELINE AND ANIMATION 529
ORGANIZING
YOUR
ANIMATION
When you have several similar statements, like these mouse event listeners, you
can save time by writing and testing one statement. Then, with a little copy, paste,
and modify magic, you can quickly create the similar statements. If things don’t
work as planned, double-check the way you modified the code. In this case,
you’d carefully examine all the code where “intro,” “main,” and “credits” appear.
12. Test your animation using Ctrl+Enter (⌘-Return).
If your code is working properly, the animation plays the “intro” and then
stops. When you click any of the Play buttons, Flash plays that segment and
then stops. If your code isn’t working quite right, compare your project with
15-5_Frame_Labels_done.fla
.
As this example shows, frame labels and
gotoAndPlay()
statements are powerful
tools for animations that play out of sequence. Labels give you an easy and conve-
nient way to mark o segments in a timeline, and you can add as many of them as
you want. There’s another related statement,
gotoAndStop()
, which does exactly
what you imagine. It jumps to a specific frame and stops Flash Player from moving
on to the next frame. The next section of this chapter explains how to use
scenes
to accomplish the same tasks.
Working with Scenes
A
scene
in Flash is a series of frames to which you assign a name of your choosing.
When you’re working in Flash, each scene has its own timeline. In the preceding
example using labels, a single timeline was marked o into three parts: intro, main,
and credits. Each segment occupied frames in the same timeline. The first 15 frames
made up the “intro,” the next 30 frames were labeled “main,” and the final 15 frames
were labeled “credits.” You can use scenes to break a larger animation into smaller
chunks that can be targeted with ActionScript.
Each time you create a new scene, Flash displays a brand-new timeline for you to
fill with content. Then, when you play your animation, Flash plays each scene in top-
down order, beginning with the first scene listed in the Scene panel (Figure 15-9),
and ending with the last.
As the following sections show, after you create scenes, you can rename them and
reorganize them with the click of a button.
TIP As an alternative to using scenes, you may want to consider publishing separate .swf files and loading
them into your main animation as needed. This method can be helpful when teams of animators produce a long
animation. Each team works with separate Flash documents and publishes its own .swf files.
CREATING A SCENE
Flash automatically starts you out with one scene (cleverly named Scene 1) each
time you create a new Flash document.
www.it-ebooks.info
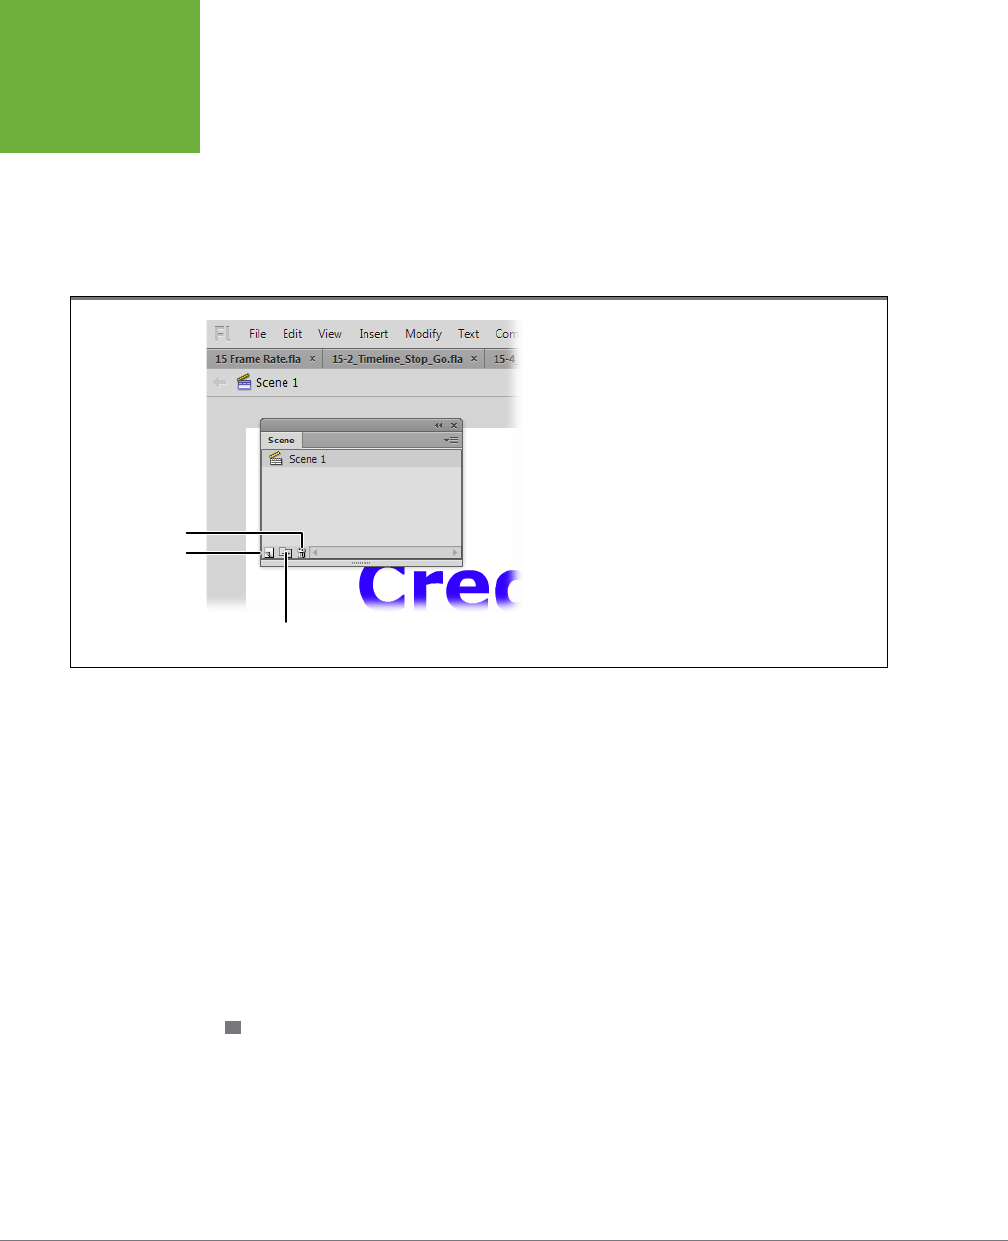
FLASH CS6: THE MISSING MANUAL
530
ORGANIZING
YOUR
ANIMATION
To create additional scenes:
1. In the timeline, create content for the frames you want in your first scene.
If you’re using the example file
15-6_Scenes.fla
, you see two layers, buttons,
and words, each of which extends from Frame 1 through Frame 15. (You can
download this example file from the Missing CD page at
www.missingmanuals.
com/cds/flashcs6mm
.)
FIGURE 15-9
Every animation you create has at least one scene (named
Scene 1, unless you tell Flash differently). By using the
Scene panel to create and name new scenes, you can
organize long animations into manageable chunks. Flash
displays the timeline for each scene separately, so it can be
easy to forget which scene you’re in at any given time. In
fact, your only cue is the scene name Flash displays in the
Edit bar. If you don’t see it (along with the little clapper
icon), choose Window→Toolbars→Edit Bar.
Duplicate Scene
Add Scene
Delete Scene
2. Choose Window→Other Panels→Scene.
The Scene panel appears.
3. Click the Add Scene icon.
In the Scene panel, Flash creates a new scene and then places it directly be-
low Scene 1. Flash also displays a brand-new timeline and a clean, fresh stage
(Figure 15-10).
4. In the timeline, create content for the frames you want in your new scene.
When you’re done, you may want to rename the scene (as discussed in the
next section), and then test it by choosing Control→Test Scene. Or, to create
additional scenes, simply repeat steps 3 and 4.
RENAMING A SCENE
The names Flash gives each scene you create—Scene 1, Scene 2, Scene 3, and so
on, as you see in Figure 15-10—aren’t particularly useful if you’re using scenes as a
way to find the frames you need quickly. Fortunately, Flash makes it easy for you to
rename scenes. Here are the steps:
1. Choose Window→Other Panels→Scene.
The Scene panel appears.
www.it-ebooks.info
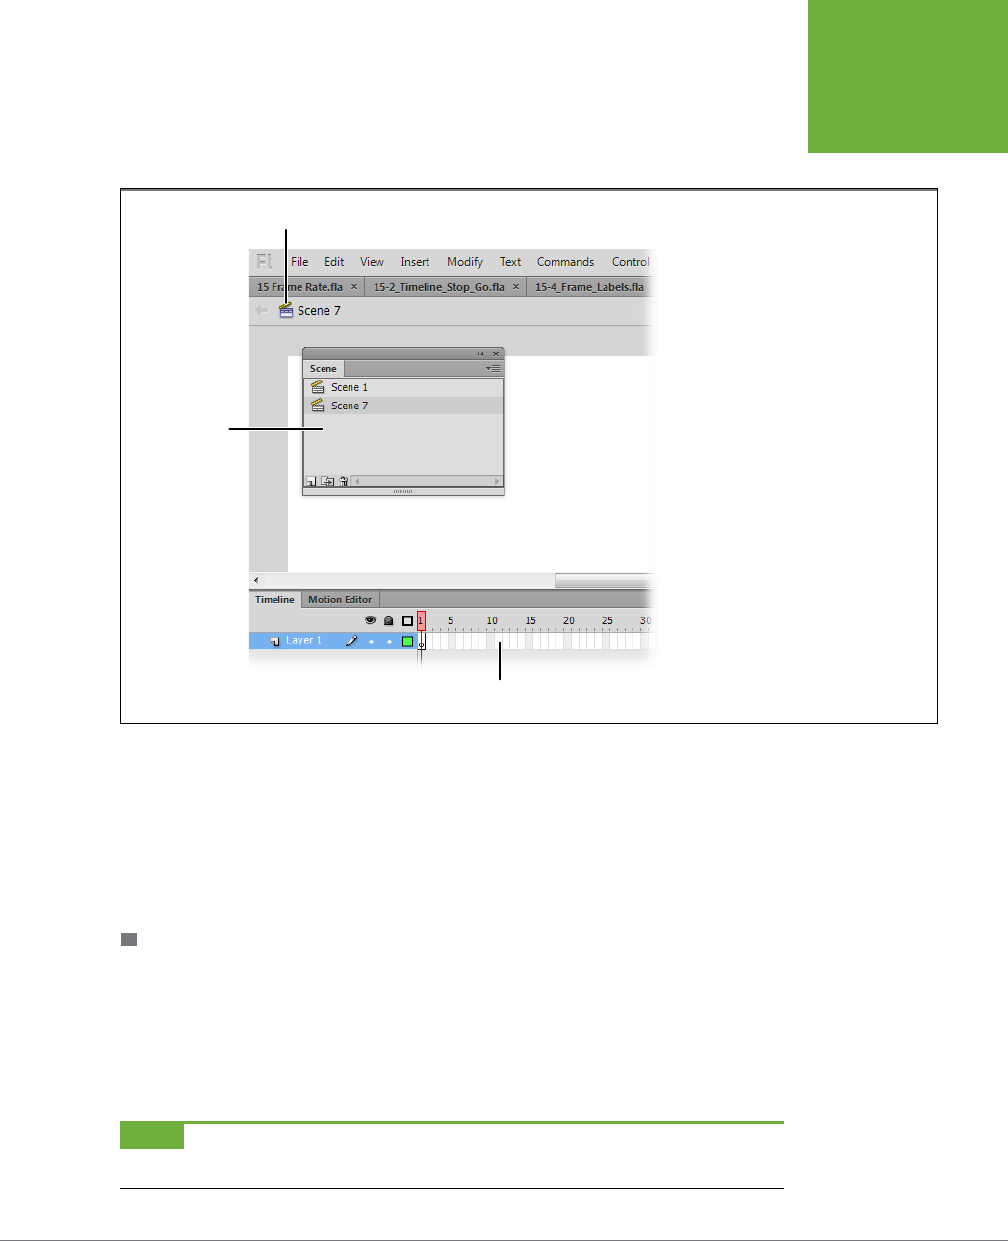
CHAPTER 15: CONTROLLING THE TIMELINE AND ANIMATION 531
ORGANIZING
YOUR
ANIMATION
2. In the Scene panel, double-click the name of the scene you want to change.
Flash displays the scene name in an editable text box.
FIGURE 15-10
Each time you create a new scene, Flash
hides the timeline for the previous scene
and displays a brand-new workspace. At
this point, Flash associates everything you
add to the stage and the timeline to the
newly created scene—here, Scene 7. (Flash
names scenes sequentially; in this figure,
Scenes 2 through 6 were created and then
deleted.)
Scene icon
New timeline
Scene panel
3. Type the new name.
You’ll need to refer to this name in ActionScript code if you’re planning to make
your animation interactive, so short and meaningful is best. For example, you
might choose
intro
for an introductory scene,
main
for the meat of your anima-
tion, and
credits
for the last few wrap-up frames that display your company’s
name and contact info.
REORGANIZING SCENES
Flash always plays scenes in order from the scene that appears at the top of the
Scene panel down to the scene that appears in the bottom. To change the order in
which Flash plays your scenes:
1. Choose Window→Other Panels→Scene.
The Scene panel appears.
NOTE Another way to change the order in which Flash plays your scenes and frames is by using ActionScript,
as shown in the next.
www.it-ebooks.info
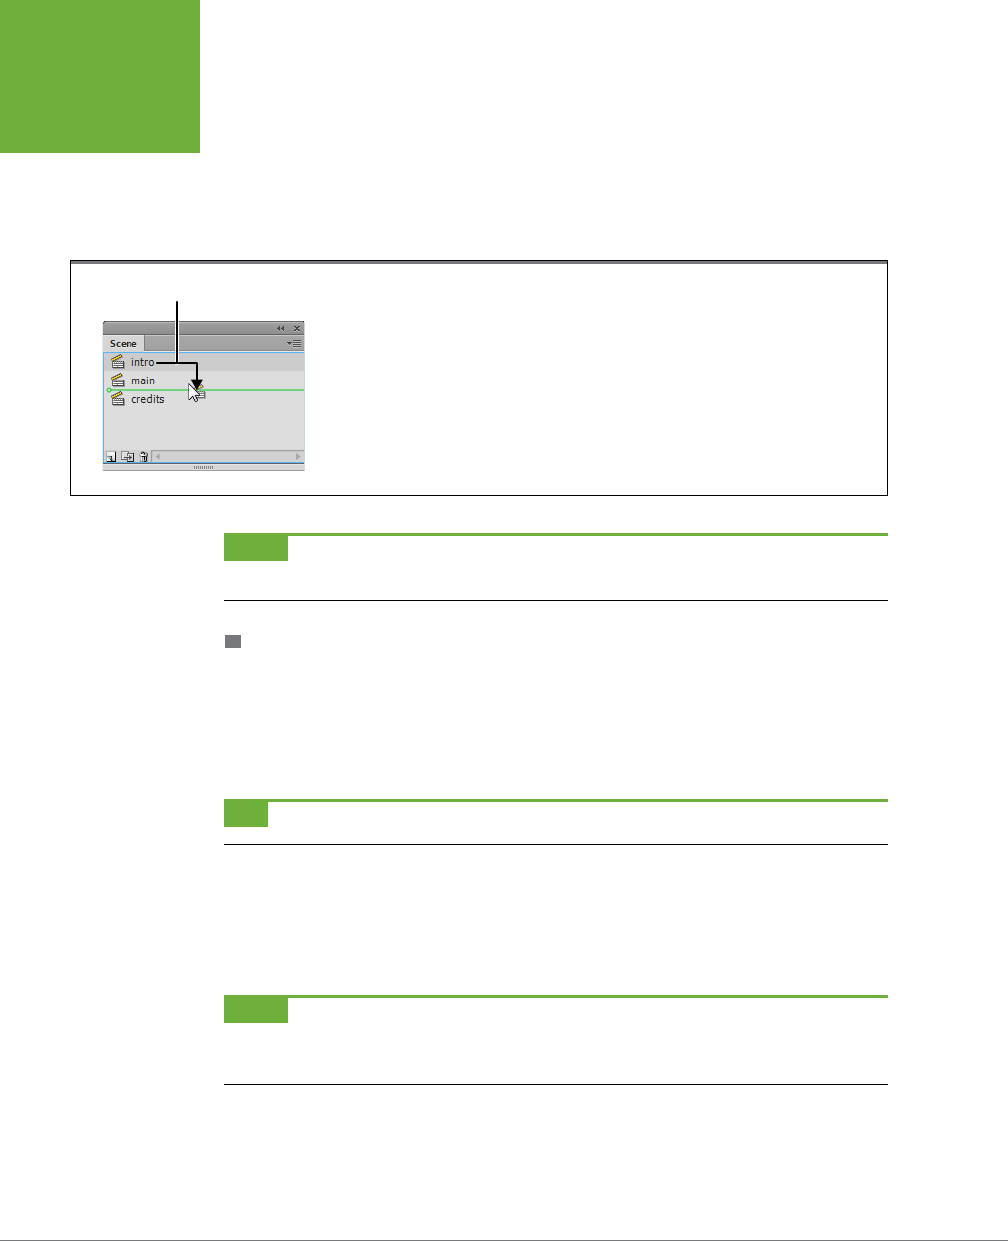
FLASH CS6: THE MISSING MANUAL
532
ORGANIZING
YOUR
ANIMATION
2. In the Scene panel, click the name of the scene you want to move, and then
drag it above or below the other scenes, as shown in Figure 15-11.
The instant you let up on your mouse, Flash reorders the scenes in the Scene
panel. The new order is the order in which Flash plays your animation when you
choose Control→Test Movie.
FIGURE 15-11
Dragging a scene to a new location in the Scene panel automatically reorganizes the sequence in
which Flash plays your animation—no ActionScript necessary. The line that appears as you drag a
scene lets you know where Flash will put the scene when you let up on your mouse.
Change scene sequence
NOTE To play just the scene currently on the stage, select Control→Test Scene (instead of Control→Test
Movie).
TARGETING A SCENE WITH ACTIONSCRIPT
In Flash-speak,
targeting
a scene means writing ActionScript code that performs
some action on a scene. The example in this section shows how to program the but-
tons to jump to a new scene and begin playing the animation at that point. The tools
you use are similar to those used with labels: event listeners and the
gotoAndPlay()
statement. Figure 15-12 gives you a quick overview of how the finished example looks.
TIP For more information on creating button symbols, see page 271.
3. Open the file
15-7_Scenes_Actions.fla
.
In the Scene panel (Window→Other Panels→Scene), notice that the animation
contains three scenes (intro, main, and credits). The stage has three correspond-
ing buttons labeled Play Intro, Play Main, and Play Credits.
NOTE You can download the example files for this section from the Missing CD page at
www.missingmanuals.
com/cds/flashcs6mm
. The file
15-7_Scenes_Actions.fla
is the starting point, and
15-8_Scenes_Actions_done.fla
is the completed animation with ActionScript.
4. Test the animation by selecting Control→
Test Movie.
In the test window, the word “Intro” recedes; the word “Main” approaches and
recedes; and the word “Credits” approaches. The Play Intro, Play Main, and Play
www.it-ebooks.info
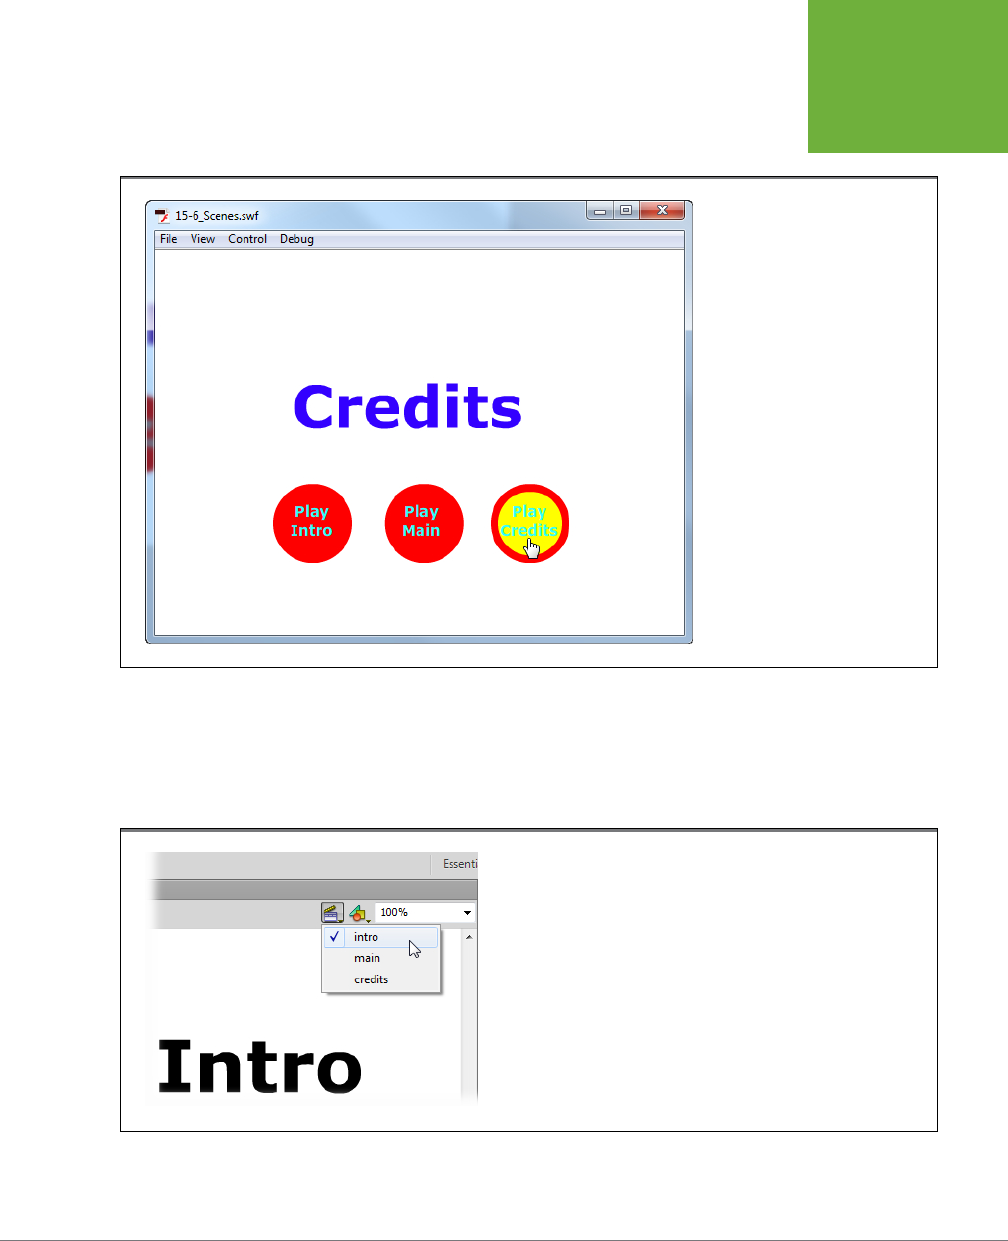
CHAPTER 15: CONTROLLING THE TIMELINE AND ANIMATION 533
ORGANIZING
YOUR
ANIMATION
Credits buttons turn from red to yellow when you move your mouse over them
and turn green when clicked. But none of the buttons aect the animation.
FIGURE 15-12
You may want to break an animation
into scenes so that you can give
your audience the ability to play the
scenes independently. Here, pressing
the Play Credits button plays the
credits scene, pressing the Play Main
button plays the main scene, and
pressing the Play Intro button plays
the (you guessed it) intro scene. To
put together an interactive anima-
tion, you have to first create named
scenes, and then tie those scenes to
buttons using ActionScript code.
5. Click the Edit Scene icon (Figure 15-13), and then choose “intro” if it’s not
already chosen.
The Edit bar displays “intro” to let you know you’re about to edit the intro scene.
On the stage, you see the three buttons shown in Figure 15-12.
FIGURE 15-13
You can switch from scene to scene in your animation using the Scene panel,
but you’ll probably find clicking the Edit Scene icon much handier, because
the Edit Scene icon doesn’t disappear while you’re working.
www.it-ebooks.info

FLASH CS6: THE MISSING MANUAL
534
ORGANIZING
YOUR
ANIMATION
6. Below Flash’s timeline, click the New Layer button. Then click the name and
type “actions,” as shown earlier in Figure 15-7.
A new layer named actions appears in the timeline. You use this layer to hold all
your ActionScript code. As a rule of thumb, it’s best to keep your ActionScript
code as close together as possible. When snippets of code are tucked away in
dierent layers or movie clips, it makes it hard to troubleshoot.
7. In the actions layer, create a keyframe at Frame 15 by selecting the frame
and then pressing F6.
An empty circle appears in Frame 15, indicating a keyframe.
8. With Frame 15, still selected, type the following ActionScript statement in
the Actions panel:
stop();
This statement stops the animation from playing when it reaches Frame 15. With-
out a
stop()
statement here, the Flash Player automatically plays the next scene.
9. Repeat steps 3 through 6 to create action layers, keyframes, and stop()
statements on the last frames of the main scene and the credits scene.
Use the Edit Scene icon to move from one scene to another.
10. Go back to the intro scene, and then click the first frame in the actions layer.
Flash displays the timeline for the intro scene.
11. In the Actions window, type the following code:
1 btnIntro.addEventListener(MouseEvent.CLICK, clickIntroListener);
2 btnMain.addEventListener(MouseEvent.CLICK, clickMainListener);
3 btnCredits.addEventListener(MouseEvent.CLICK, clickCreditsListener);
4
5 function clickIntroListener(evt:MouseEvent):void
6 {
7 gotoAndPlay(1,"intro");
8 }
9
10 function clickMainListener(evt:MouseEvent):void
11 {
12 gotoAndPlay(1,"main");
13 }
14
15 function clickCreditsListener(evt:MouseEvent):void
16 {
17 gotoAndPlay(1,"credits");
18 }
www.it-ebooks.info

CHAPTER 15: CONTROLLING THE TIMELINE AND ANIMATION 535
ORGANIZING
YOUR
ANIMATION
If you’ve been following the ActionScript code sections in this and previous
chapters, the event listeners used in this code should look pretty familiar. If
you need to brush up on event listeners, check out page 448. The only dif-
ferences between this code and the code used to target labels is in the way
the
gotoAndPlay()
method is used. In this example,
gotoAndPlay()
has two
parameters inside the parentheses. The first parameter is a frame number, but
it could just as easily be a label like “start” or “intro.” The second parameter is
the name of a scene. Like labels, the name of the scene has to be inside quotes.
Each of the statements on lines 7, 12, and 17, tell Flash Player to go to a scene
and begin playing the animation at the first frame of that scene.
12. Select lines 1 through 3 in the Actions panel, and then press Ctrl+C (⌘-C).
The three statements that register event listeners for the buttons are copied
and stored on your computer’s Clipboard.
13. Go back to the main scene, and click the first frame in the actions layer.
Flash displays the timeline for the main scene.
14. Click the first line in the Actions panel, and then press Ctrl+V (⌘-V).
You’ve just copied the three statements that register event listeners into the
Actions panel. Each scene is shown on a new timeline beginning with keyframes
at Frame 1 for each layer. The statements that register event listeners in the
intro scene don’t register event listeners for the other scenes. Note that you
don’t need to (and shouldn’t) copy the functions, just the code that uses the
addEventListener()
method.
15. Go back to the credits scene, and click the first frame in the actions layer.
Flash displays the timeline for the main scene.
16. Click the first line in the Actions panel, and then press Ctrl+V (⌘-V).
The three statements that register event listeners are copied into the Actions
panel.
17. Test your animation using Ctrl+Enter (⌘-Return).
If your code is working properly, the animation plays the intro and then stops.
When you click any of the Play buttons, Flash plays that segment and then stops.
NOTE Witha long exercise like this, it’s super-easy to miss a step. To see a working example, check out the
finished file
15-8_Scenes_Actions_done.fla
.
www.it-ebooks.info

FLASH CS6: THE MISSING MANUAL
536
LOOPING A
SERIES OF
FRAMES
Looping a Series of Frames
Looping
—replaying a section of your animation over and over again—is an ecient
way to create long-playing eects for a modest investment of eort and file size.
Say, for example, you want to create a repetitive background eect like sunlight
glinting o water, palm fronds waving in the breeze, or flickering lights. You can
create the frames necessary to show the eect briefly (a couple seconds’ worth
or so), save the frames as a movie clip, and place an instance of that movie clip in
one of the layers of your animation so that the eect spans your entire animation.
Flash automatically replays the movie clip until you tell it otherwise, so you get an
extended eect for a just a few frames’ worth of work—and just a few frames’ worth
of file size, too. What a deal! (For a more in-depth look at movie clip symbols, check
out Chapter 7.)
NOTE You’ve seen this kind of looping background effect in action if you’ve ever watched
The Flintstones
—or
just about any other production cartoon, for that matter. Remember seeing the same two caves shoot past in the
background over and over again as Fred chased Barney around Bedrock? Earlier in this chapter, the car’s spinning
wheels were made up of a two-frame movie clip that looped.
To loop a series of frames using a movie clip symbol:
1. Open the file
15-9_Loop_Frames.fla
, which you can download from the
Missing CD page at
www.missingmanuals.com/cds/flashcs6mm
.
On the stage, you see a sprinkling of white stars on a blue background. In the
Library, you see four symbols, including the blink_lights movie clip symbol
(Figure 15-14).
Since you’ve never seen this movie clip before, take a look at the preview.
NOTE To loop a section of your
main
timeline, all you have to do is attach the following action to the last
frame of the section you want to loop:
gotoAndPlay(1)
. (If you want your loop to begin at a frame other than
Frame 1, replace the 1 in the preceding ActionScript code with the number of the frame at which you want Flash
to begin looping.)
2. In the Library, select the blink_lights movie clip. Then, in the Library’s preview
window, click the Play icon.
You see the lights on the cactus change from red to yellow, pink, and blue in
rapid succession.
3. Preview the main animation by selecting Control→
Test Movie.
In the test window, you see a lone shooting star streak across the background.
www.it-ebooks.info
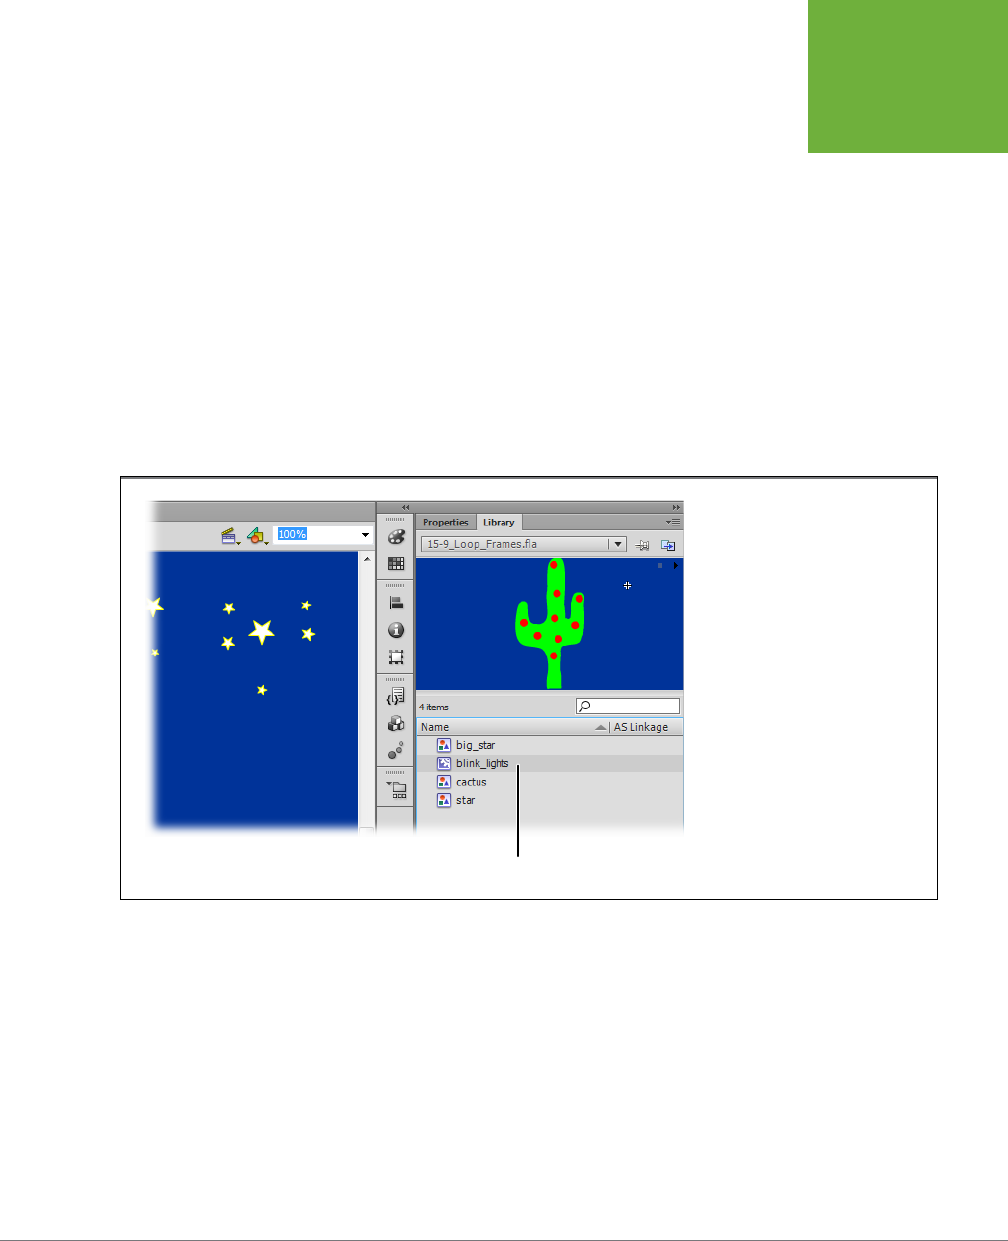
CHAPTER 15: CONTROLLING THE TIMELINE AND ANIMATION 537
LOOPING A
SERIES OF
FRAMES
4. Close the test window to go back to the workspace.
First stop: Add an instance of the blink_lights movie clip symbol to the animation.
5. In the xmas_cactus layer, click the first keyframe (Frame 1) to select it. Then
drag the blink_lights movie clip from the Library to the stage.
Choose Control→Test Movie again to see the results. In the test window that
appears, you see the lights on the cactus blink repeatedly as the shooting star
moves across the screen. In the test window, you can stop the main timeline
from looping by choosing Control→Loop. The shooting star on the main timeline
stops looping, but the lights on the cactus continue to blink because they’re in a
separate timeline in the blink_lights movie clip. If you
don’t
want your embedded
movie clip to loop, you need to tell Flash to stop playing the movie clip after the
first time through. To so instruct it, attach the
stop()
action to the last frame of
your movie clip symbol (
not
to the movie clip instance).
FIGURE 15-14
Looping a series of frames using a
movie clip is super-easy because Flash
does all the work. In fact, Flash always
assumes you want to loop the movie
clips you add to your animations. (If
you don’t want to loop them, then you
can tell Flash to stop playing a movie
clip after the first time through by
attaching the
stop()
action to the last
frame of your movie clip symbol.)
Movie clip symbol
Looping Part of the Timeline
Sometimes, you’ll want to loop just a portion of the timeline. Usually in this kind of
situation, you provide buttons or some other means for letting the viewer switch
between looping portions of the animation. The file
15_10_Loop_Partial.fla
is a simple
(some might say silly) animation with two sections. In this exercise, you’ll create two
looping segments on the timeline using the
gotoAndPlay()
main timeline method.
www.it-ebooks.info

FLASH CS6: THE MISSING MANUAL
538
LOOPING A
SERIES OF
FRAMES
Then you’ll add two button symbols to the stage and use code snippets to program
the buttons to play the dierent segments.
1. Open the file
15_10_Loop_Partial.fla
.
You can download the file from the Missing CD at
www.missingmanuals.com/
cds/flashcs6mm
.
2. Press Ctrl+Enter (⌘-Return) to review the animation.
You can’t preview all the action for this animation by simply playing the timeline.
That’s because it uses movie clip symbols that contain tweens. For the first
48 frames of the animation, you see squares marching across the stage. From
Frame 49 to Frame 96, you see circles marching.
3. Add a new layer and name it
actions looping
.
The actions looping layer will hold the ActionScript code that makes these two
segments loop. At the end of each segment, a single
gotoAndPlay()
method
will send the playhead back to the beginning of that segment.
4. Move the playhead to Frame 48, and then press F6 to create a keyframe.
The
gotoAndPlay()
methods must be anchored to specific frames in the timeline.
5. Press F9 to open the Actions window and add the following code:
gotoAndPlay("squares");
The
gotoAndPlay()
method works with either frame numbers or labels. In this
example, you’ll use labels. Don’t forget the quotes.
6. Move the playhead to Frame 96, and then press F6 to create a keyframe.
At this frame, you’ll add code to loop the second segment.
7. Press F9 to open the Actions window, and add the following code:
gotoAndPlay("circles");
8. Select the buttons layer and move the playhead to Frame 1. Then drag
instances of ButtonCircle and ButtonSquare from the Library onto the stage.
These buttons were premade using Flash’s button symbol. All you need to do
is place them on the stage and program them with ActionScript.
9. Select the ButtonSquare instance. Then go to Window→Code Snippets to
open the snippets window (Figure 15-15).
You must select an object before you can use the Timeline Navigation snippet.
If you haven’t selected an object, then Flash prompts you to do so.
10. Open the Timeline Navigation folder and double-click “Click Go to Frame
and Play.”
www.it-ebooks.info
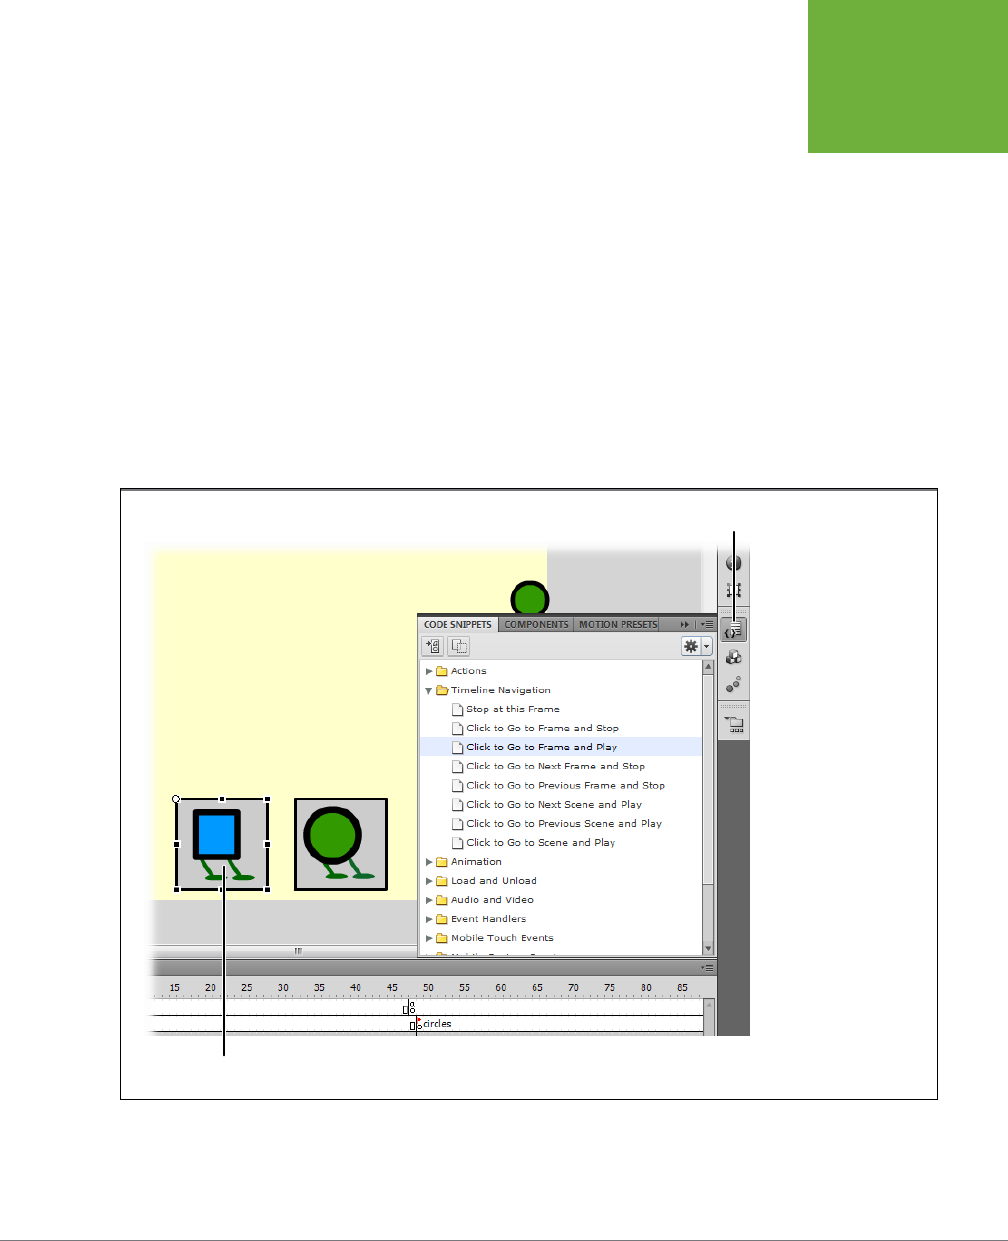
CHAPTER 15: CONTROLLING THE TIMELINE AND ANIMATION 539
LOOPING A
SERIES OF
FRAMES
There are several other navigation snippets worthy of later investigation in this
folder.
11. When prompted to set the instance name, type
btnSquare
and then press OK.
If you followed these steps to the letter, you didn’t name the button instance
when you dragged it to the stage. ActionScript needs an instance name, so it
prompts you to provide one.
12. In the function named “fl_ClickToGoToAndPlayFromFrame,” change the
gotoAndPlay()
method to read:
gotoAndPlay("squares");
13. Select the ButtonCircle instance on stage. Then go to Window→Code Snip-
pets to open the snippets window.
The next few steps repeat the snippet process for the ButtonCircle symbol.
FIGURE 15-15
Make sure you’ve selected
a button symbol before
you use the code snip-
pets. If you’re using the
Essentials workspace, you
can use a button to open
the snippets window.
Selected button symbol
Open code snippets
www.it-ebooks.info

FLASH CS6: THE MISSING MANUAL
540
LOOPING A
SERIES OF
FRAMES
14. Open the Timeline Navigation folder and double-click “Click Go to Frame
and Play.”
15. When prompted to set the instance name, type
btnCircle
and then press OK.
You’re adding the same snippet twice to your code, so Flash has to give the
second listener function a distinguishable name. In this case, it simply adds
“_2” to the name.
16. In the function named “fl_ClickToGoToAndPlayFromFrame_2,” change the
gotoAndPlay() method to read:
gotoAndPlay("circles");
17. Press Ctrl+Enter (⌘-Return) to review the animation.
When you play the animation this time, the squares segment loops until you
click the circle button. You can jump back and forth between segments with a
click of the button. If your squares and circles aren’t behaving, then compare
your animation to
15-11_Loop_Partial done.fla
.
Power to the People
Early on, one of the beefs people had with Flash advertising
and splash screens (intro pages) was the inability to control
the animations. It wasn’t easy to stop, start, bypass, or control
the sound on some of those pages. It gave Flash a bad name.
Things have changed. You can use Flash to create entire web-
based environments with ingenious and creative navigation
systems. If you don’t, even though your audience can right-click
(or Control-click) your animation to view a context menu that
lets them interact with your animation, context menus aren’t
particularly useful when it comes to providing consistent
playback control. For one thing, few audience members know
about them. Also, Flash gurus who also happen to be expert
ActionScript coders can modify, rearrange, add to, and delete
menu options.
Don’t be one of them. Consider the Flash experience from your
audience’s point of view. You won’t go wrong by giving power
to the people. Giving your audience as much control as possible
is always a good idea, but it’s crucial if you’re planning to put
your Flash animation on the Web. You can’t possibly know your
web audience’s hardware configuration.
Say, for example, you create a splash page animation with a
stage size of 550 x 400 pixels, and a file size of 10 MB. Someone
accessing your animation on a handheld, over a slow connec-
tion, or on a machine that’s already maxed out running 10 other
resource-hogging programs won’t be able to see the animation
you see on
your
machine.
But even if everyone on the planet had a high-speed connection
and the latest computer hardware, giving your audience control
would still be important. Why? Because no matter how kick-
butt your animation is, by the 23rd time through, it’s going to
wear a little thin. If you don’t offer at least one of the options
listed below, you risk turning away repeat visitors:
• The ability to bypass intro splash screens and advertising
and go straight to the site’s home page.
• The ability to stop and restart the animation.
• The ability to turn off or turn down the audio.
• The ability to choose which sections of your animation
to play.
• The ability to choose a low-bandwidth, reduced length,
or small-screen version of your animation.
You can accomplish these feats using a combination of buttons,
components, and some ActionScript code. So be merciful to
your audience and let them choose the Flash experience that
works on their end.
DESIGN TIME
www.it-ebooks.info

CHAPTER 15: CONTROLLING THE TIMELINE AND ANIMATION 541
REVERSING
A SERIES OF
FRAMES
Reversing a Series of Frames
Reversing a series of frames is a useful eect. A basketball bouncing up and down,
a flag waving side to side, a boomerang advancing and receding: These things are
all examples of reversing a single series of frames.
Instead of creating the two complete series of frames by hand—one showing a ball
falling, for example, and another showing the same ball bouncing back up—you
can copy the frame series, paste it, and use Modify→Timeline→Reverse Frames to
reverse the pasted frames.
NOTE If you need a file for reverse frame experiments, you can download
15-12_Reverse_Frames.fla
from
the Missing CD (
www.missingmanuals.com/cds/flashcs6mm
).
Reversing Frames in the Timeline
When you use Modify→Timeline→Reverse Frames in conjunction with Flash’s
copy-and-paste function, you can create the reverse of a series of frames quickly,
right in the timeline.
To create a reversed series of frames using Modify→Timeline→Reverse Frames:
1. Click the first frame in the series you want to reverse. Then Shift-click the
last frame in the series you want to reverse.
Flash highlights every frame in the series, from first to last.
2. Select Edit→
Timeline→Copy Frames. In the timeline, click the first frame where
you want to insert the reversed series of frames.
Flash highlights the selected frame.
3. Select Edit→
Timeline→Paste Frames.
Flash pastes the copied frames onto the timeline, beginning at the selected
frame.
4. If the pasted frame series isn’t highlighted, select it.
5. Choose Modify→
Timeline→Reverse Frames (Figure 15-16).
Flash reverses the frames in the timeline.
www.it-ebooks.info
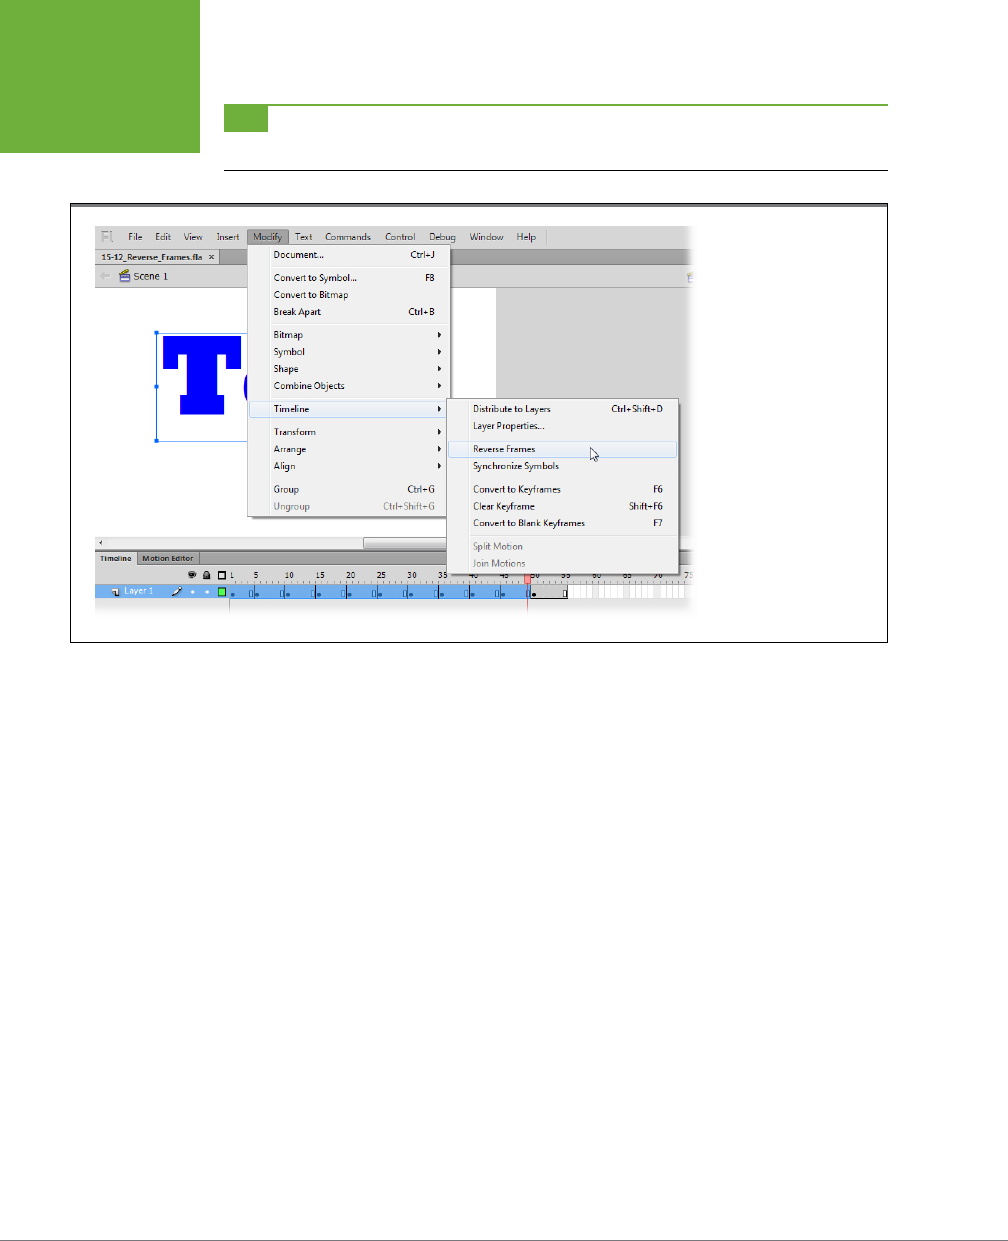
FLASH CS6: THE MISSING MANUAL
542
REVERSING
A SERIES OF
FRAMES
TIP You can reverse the action in a motion tween by selecting the frames you want to change. Right-click
the selected frames and then choose Reverse Keyframes from the shortcut menu.
FIGURE 15-16
Use the Modify→
Timeline→Reverse Frames
command to reverse the
order of the frames in
the timeline. Sometimes,
you’ll want to change the
order of existing frames.
Here the count will change
from a count up (One, Two,
Three…) to a countdown
(Ten, Nine, Eight…).
www.it-ebooks.info

543
CHAPTER
16
Creating common Flash elements like playback controls (Play and Pause but-
tons), text fields, checkboxes, and buttons can add up to a lot of grunt work.
Since they pretty much look the same in every animation, some kind Flash
developers did the grunt work for you and put ready-made versions of these Flash
bits and pieces—called
components
—right into the program.
A component is a compiled, prebuilt movie clip that you can drag onto the stage
and customize. Flash comes with dozens of components (Figure 16-1). If you do a lot
of work in Flash, you’ll appreciate the time components can save you. But another
great thing about components is the consistency they give. For example, the user
interface components discussed in this chapter all look like they belong together. If
you don’t like their style, Flash gives you some convenient ways to change their ap-
pearance. So, if you’re working in a design shop, you can add time-tested components
to your projects and still give each client a look that matches her image and brand.
There’s a consistency in the way you work with components, which also makes them
easy to use. This chapter starts o showing you how to add, modify, and write code
for the Button and ColorPicker components. By the time you’re done, you’ll not only
know how to work with Button components, but you’ll also be 90 percent of the
way to knowing how to use the other Flash components.
After you learn how to add, modify, and program a couple of components, you’ll
learn about the dierent types of components available and what they can do for
you. To wrap it all up, you’ll learn how to find and install components that come
from sources other than Adobe.
Components for
Interactivity
www.it-ebooks.info
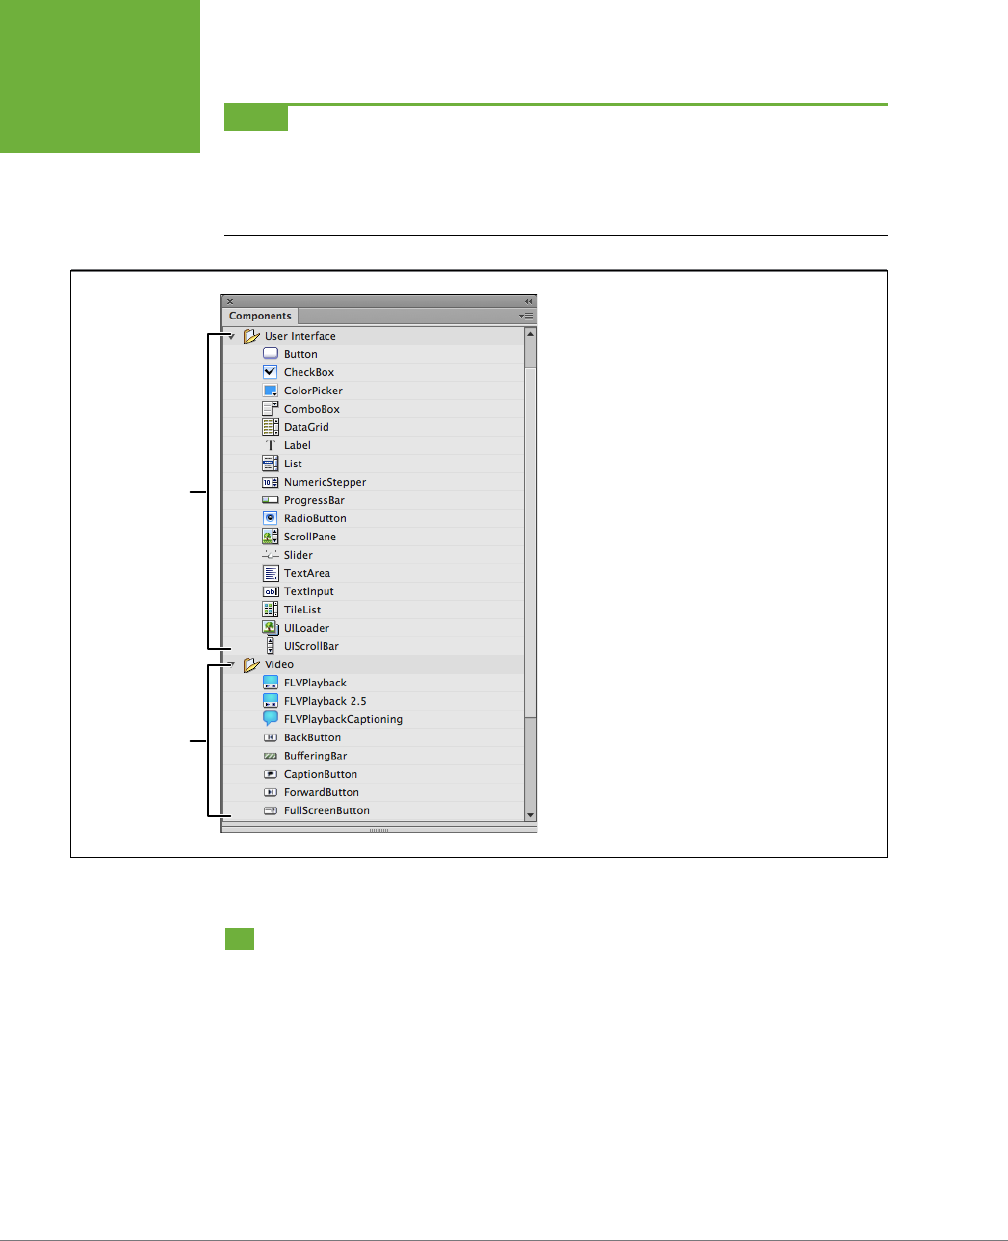
FLASH CS6: THE MISSING MANUAL
544
ADDING
COMPONENTS
NOTE Using components requires a fair amount of ActionScript knowledge. But
creating
your own compo-
nents is an even more ActionScript–intensive proposition. If you’d like to explore creating your own components,
check out both the
ActionScript 3.0 Language and Components Reference
you find in Flash Help (see page 448),
and a good book that covers both ActionScript and object-oriented design. Colin Moock’s
Essential ActionScript
3.0
, and
ActionScript 3.0 Cookbook
by Joey Lott et al. (both O’Reilly) are two of the best on the market.
FIGURE 16-1
Flash CS6 Professional comes with dozens of compo-
nents. Components for ActionScript 3.0 documents
include user interface controls to create interactive but-
tons, boxes, and lists (similar to HTML form controls (not
shown); and video controls, as discussed on page 403.
User interface
components
Video
components
Adding Components
Adding a component to your animation is the first step in using that component.
As you’ll see in the following sections, adding an instance of a component to the
stage is similar to adding an instance of a symbol: All you have to do is drag and
drop. But instead of dragging components from the Library panel, you drag them
from the Components panel.
To add a component to your animation:
1. Select Window→Components.
The Components panel appears.
www.it-ebooks.info
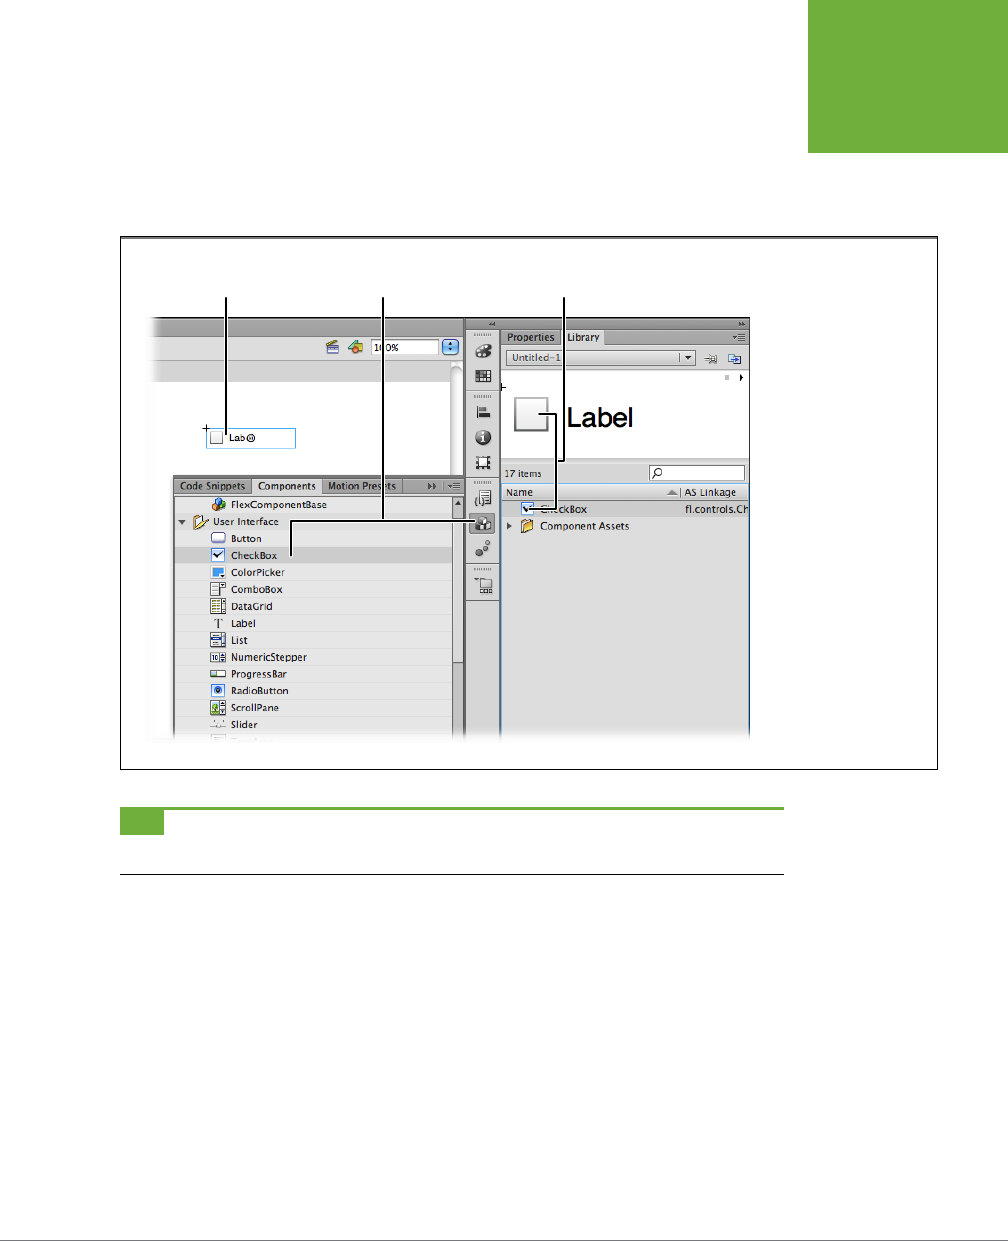
CHAPTER 16: COMPONENTS FOR INTERACTIVITY 545
ADDING
COMPONENTS
2. In the Components panel, click to select the component you want, and then
drag it to the stage.
As Figure 16-2 shows, Flash displays an instance of the component on the stage.
It also places a copy of the component in the Library (Window→Library).
FIGURE 16-2
When you drag a
component from the
Components panel to the
stage, Flash automati-
cally adds the component
and a Component Assets
folder to the Library.
Checkbox component
on stage
Checkbox component
in the libraryComponents panel
TIP Flash gives you another way to add a component: In the Components panel, double-click the component.
When you do, Flash immediately places an instance of the component on the center of your stage.
In most cases, adding a component to the stage is just part of the process. After you
add the component, you still need to customize it and—depending on the component
you choose—add ActionScript code to make it work with the other parts of your
animation. That’s exactly what you’ll do in the following steps. In this example, you’ll
learn how to add buttons to an animation and then use those buttons to control both
the main timeline and the timeline of a movie clip that’s added to the main timeline.
This project uses a file,
16-1_Button_Component.fla
, that you can download from
the Missing CD page (
www.missingmanuals.com/cds/flashcs6mm
). If you’d like to
see the completed project, you can download
16-3_Map_Components_done.fla
.
The first steps in this example set up the Flash document so it works with Button
components and the ActionScript code that makes the buttons work. That involves
creating new layers for actions, labels, and buttons.
www.it-ebooks.info

FLASH CS6: THE MISSING MANUAL
546
ADDING
COMPONENTS
1. In Flash, open
16-1_Button_Component.fla
.
There’s a layer named “words” containing five keyframes. In the last four key-
frames are the names of famous cities. There’s a second empty layer called
“maps.” In the Library, there’s a folder called “map jpgs” and a movie clip called
“Maps.”
2. Click the New Layer button in the lower-left corner of the timeline to add
three layers. From top to bottom, name them
actions, labels,
and
buttons
.
3. In the labels layer, click Frame 1, and then Shift-click Frame 5.
Flash selects all five frames.
4. With the frames selected, press F6.
Empty keyframes are created in each of the frames. You need to have keyframes
to create labels in each of the frames.
5. Add labels to each of the five keyframes by clicking each frame and then
typing its name in the Properties→Label→Name box.
Name Frame 1
world
; name Frame 2
paris
; name Frame 3
london
; name Frame
4
moscow
; and name Frame 5
beijing
. ActionScript uses these labels to find
specific frames in the timeline. You won’t be using this layer again, so you can
go ahead and lock the contents by clicking the button under the padlock.
6. In the Library, double-click the Maps movie clip.
The movie clip opens in Flash.
7. Drag the playhead to inspect the individual frames in the Maps movie clip,
and then click the Scene 1 button.
As you move the playhead, each frame shows a dierent map. The labels in
the timeline name the map. When you click the Scene 1 button, the movie clip
closes and brings you back to the main timeline.
8. Click the maps layer in the main timeline, and then drag the Maps movie
clip to the stage.
The Maps movie clip appears in all five frames of the main timeline because
there’s only one keyframe in the maps layer.
You don’t have to sweat positioning the movie clip by hand; you can do the job
with the Properties panel, as shown in Figure 16-3.
9. With the Maps movie clip selected, in the Properties panel, type the instance
name
maps
.
You have to name the instance of the Maps movie clip before you can control
it with ActionScript.
www.it-ebooks.info
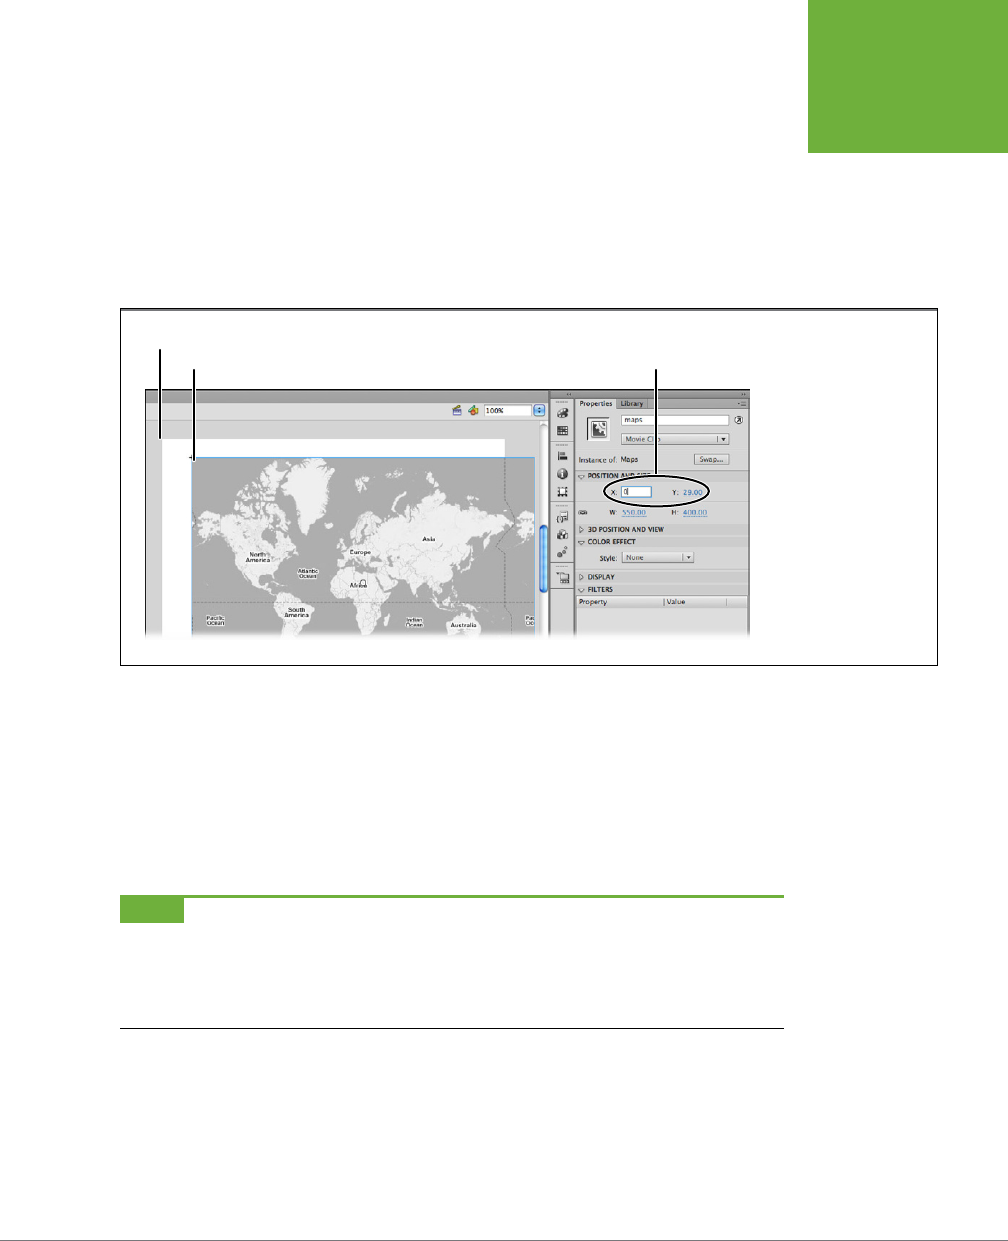
CHAPTER 16: COMPONENTS FOR INTERACTIVITY 547
ADDING
COMPONENTS
Once the Maps movie clip is positioned and named, lock the maps layer so you
don’t accidentally move it when you’re repositioning other elements on the stage.
If you test your animation at this point (Ctrl+Enter or ⌘-Return on a Mac), you’ll
see the maps and city names flash by rapidly. So far, your steps have set up a
sort of slideshow with labels that you can use as bookmarks for your buttons
and ActionScript code. In the next steps, you’ll add buttons and use ActionScript
to control both the main timeline and the Maps movie clip timeline.
FIGURE 16-3
The Maps movie clip is
exactly the same size as
the Flash document, 550 x
400 pixels. Here, the Maps
movie clip isn’t lined up
with the stage, but set-
ting the X/Y coordinates
in Properties to 0,0 posi-
tions it perfectly to cover
the entire stage. ©2008
Google Maps
Corner of stage
X/Y coordinatesCorner of maps movie clip
10. In the timeline, click the buttons layer.
You want to place all the new buttons in the buttons layer of the timeline.
11. Select Window→Components to open the Components panel, and then drag
the Button component to the stage.
The button appears on the stage, and two items appear in the Library: a button
symbol and the Component Assets folder.
NOTE When you add your first component to a Flash project, it increases the file size of the published
.swf
file by about 20 to 50 kilobytes. This isn’t a whopping leap in file size by today’s standards, but it’s good to know
that if you add more components, they usually won’t increase your file size by the same amount. They’ll add only
a few more kilobytes for each component. That’s because most components share a certain amount of underlying
code. Once the basic code is added to the .swf file, it’s available to any components that need it.
12. With the button selected, in the Properties panel, type the instance name
btnParis
.
When you select the button, the Instance Name box is at the top of the Proper-
ties panel. As with other symbols, you have to name the Button components
before ActionScript can work with them.
www.it-ebooks.info
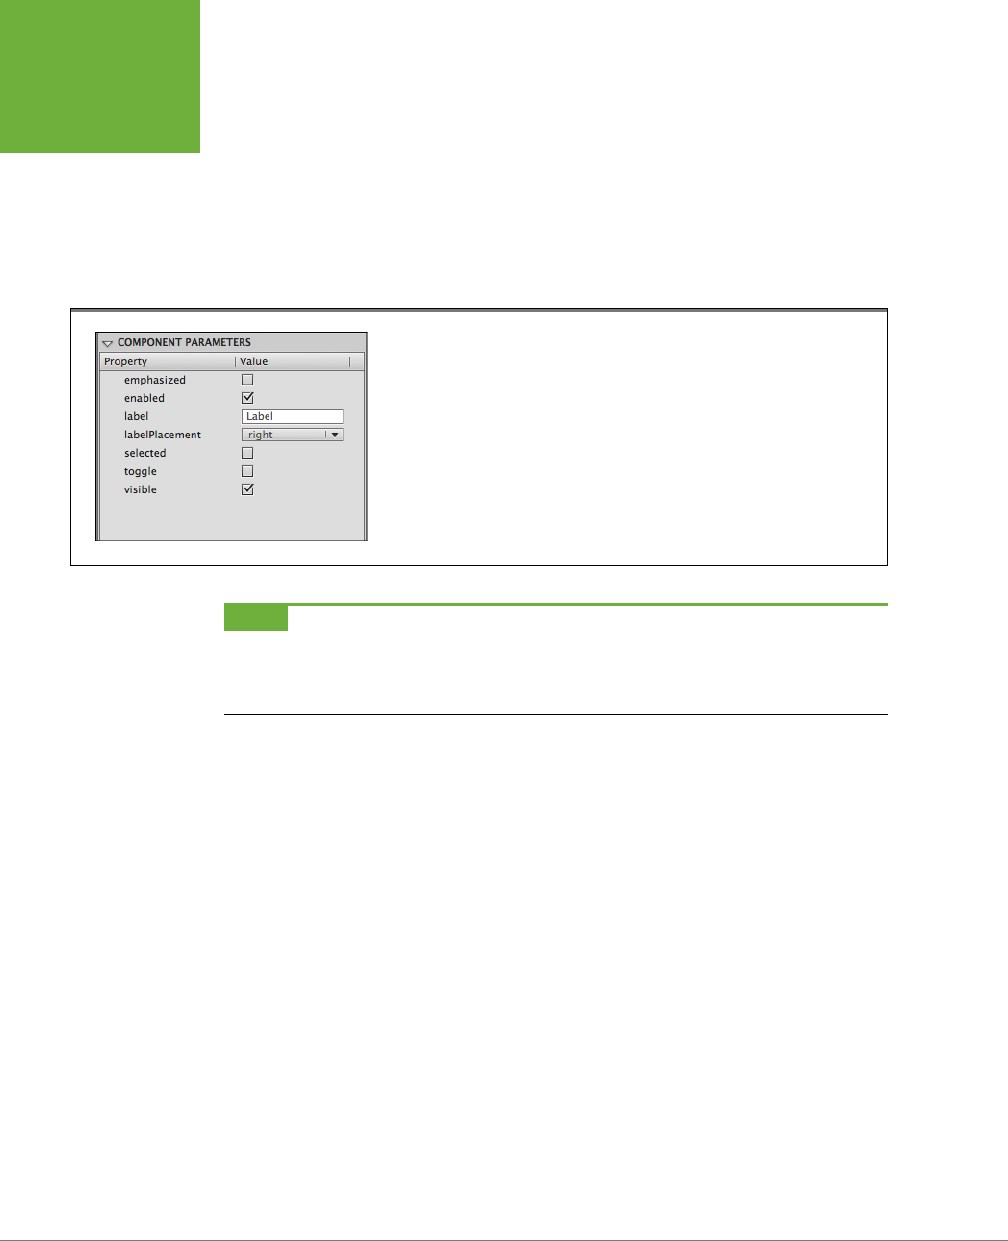
FLASH CS6: THE MISSING MANUAL
548
ADDING
COMPONENTS
13. Select the button on the stage, and then in the Properties panel, if neces-
sary, expand the Component Parameters subpanel.
The Component Parameters subpanel shows the two parts of each parameter:
its name and its value, as shown in Figure 16-4. You customize components for
your project by changing the parameter values. Some parameters, like those with
true/false values, have checkboxes. Other parameters, like the label parameter
for buttons, have text boxes where you can type a new label.
FIGURE 16-4
Use the Component Parameters subpanel to make changes to the component
parameters. The names of parameters appear on the left. Use the text boxes, menus,
and checkboxes on the right to change the parameters’ values.
NOTE In earlier versions of Flash, you used the Components Inspector (Shift-F7) to set component parameters.
In Flash Professional 6, those responsibilities appear in the Component Parameters subpanel in the Properties
panel. Not a bad move, since it puts all your property and parameter settings in the same neighborhood, and
you have one less window cluttering the screen.
14. Click the text box for the label parameter, and then type
Paris
.
What you type in this text box changes the word that appears on the button.
You don’t need to change any of the other parameters right now, but here’s a
rundown on their uses:
• emphasized. If this value is checked, or in programmer-speak
true
, it
changes the button’s appearance. Use it when you want to make one but-
ton stand out from a group of buttons.
• enabled. If this value is deselected, the button won’t work. It’s helpful in
situations where you don’t want your audience to use a button but you
still want it to be visible.
• labelPlacement. As it sounds, this parameter gives you several choices for
the way a label is positioned: left, right, top, or bottom.
• selected. Like “emphasized,” this parameter changes the button’s appear-
ance to show that it’s selected.
www.it-ebooks.info

CHAPTER 16: COMPONENTS FOR INTERACTIVITY 549
ADDING
COMPONENTS
• toggle. If this value is
true
, then the button works like a toggle, and its
appearance changes to reflect that.
• visible. You can hide a button by deselecting the “visible” parameter.
NOTE Components are sometimes called
black boxes
because you can’t inspect their inner workings. The
only things you can look at or change are the characteristics that the developer
exposes
(lets you access) through
the Properties panel, the Component Parameters, or ActionScript classes.
15. Drag three more buttons from the Library to the stage. Give them the in-
stance names “btnLondon,” “btnMoscow,” and “btnBeijing,” and then label them
“London,” “Moscow,” and “Beijing.”
As shown in Figure 16-5, you don’t have worry too much about how the but-
tons are arranged. In the next steps, you’ll use the Align tool to position them
precisely.
FIGURE 16-5
Arrange the buttons so that they’re roughly,
end to end, in a left-to-right order: Paris,
London, Moscow, and Beijing. Then use Flash’s
Modify→Align tools to tidy them up. © 2008
Google Maps
16. Select all the buttons, and then select Modify→Align→Distribute Widths.
The Distribute Widths command evenly lines the buttons up end to end.
www.it-ebooks.info

FLASH CS6: THE MISSING MANUAL
550
ADDING
COMPONENTS
17. Select Modify→Align→
To Stage, and then Select Modify→Align→Bottom.
A checkmark appears next to To Stage on the menu, meaning that subsequent
align commands will be relative to the stage; the Bottom command pushes all
the buttons to the bottom of the stage.
18. Press Ctrl+G (⌘-G) to group the buttons, and then select Modify→Align→
Horizontal Center.
This command centers the buttons at the bottom of the stage. You won’t be
doing anything immediately with single buttons, but you may as well ungroup
them now with a Ctrl+Shift+G (⌘-Shift-G).
At this point, you’ve got everything positioned on the stage and you’ve labeled all the
necessary frames. The only thing that’s missing is the ActionScript code that glues
it all together. If you test the animation at this point, it’s pretty clear what that code
needs to do. The first thing it needs to do is stop the movie clips from playing when
the animation starts. The second thing the code needs to do is program the buttons
to jump to specific frames in the main timeline and the Maps movie clip timeline.
Making Button Components Work with ActionScript
If you’ve followed the ActionScript code exercises earlier in this book, chances are
you’ve been introduced to ActionScript 3.0’s event listeners. Unlike previous versions,
ActionScript 3.0 uses a single method for recognizing and reacting to events. The
following example uses event listeners to react to clicks on the Button components.
If you need to brush up on using event listeners, see page 448.
1. In the actions layer, click Frame 1, and then press F9 (Option-F9).
The Actions panel opens.
2. Type the following code to stop the main timeline and the Maps movie clip.
stop();
maps.stop();
The first line stops the main timeline. The second line stops the Maps movie
clip from playing.
3. Type the following code to register an event listener for the Button compo-
nent with the variable name
btnParis
, as shown in Figure 16-6.
btnParis.addEventListener(MouseEvent.CLICK, clickParisListener);
Event listeners come in two parts. This first part registers an event listener. In
other words, it tells ActionScript to wait for a mouse click on btnParis. When
there’s a click, the
clickParisListener()
function runs.
4. Type the code for the clickParisListener() function:
function clickParisListener(evt:MouseEvent):void
{
gotoAndStop(“paris");
www.it-ebooks.info
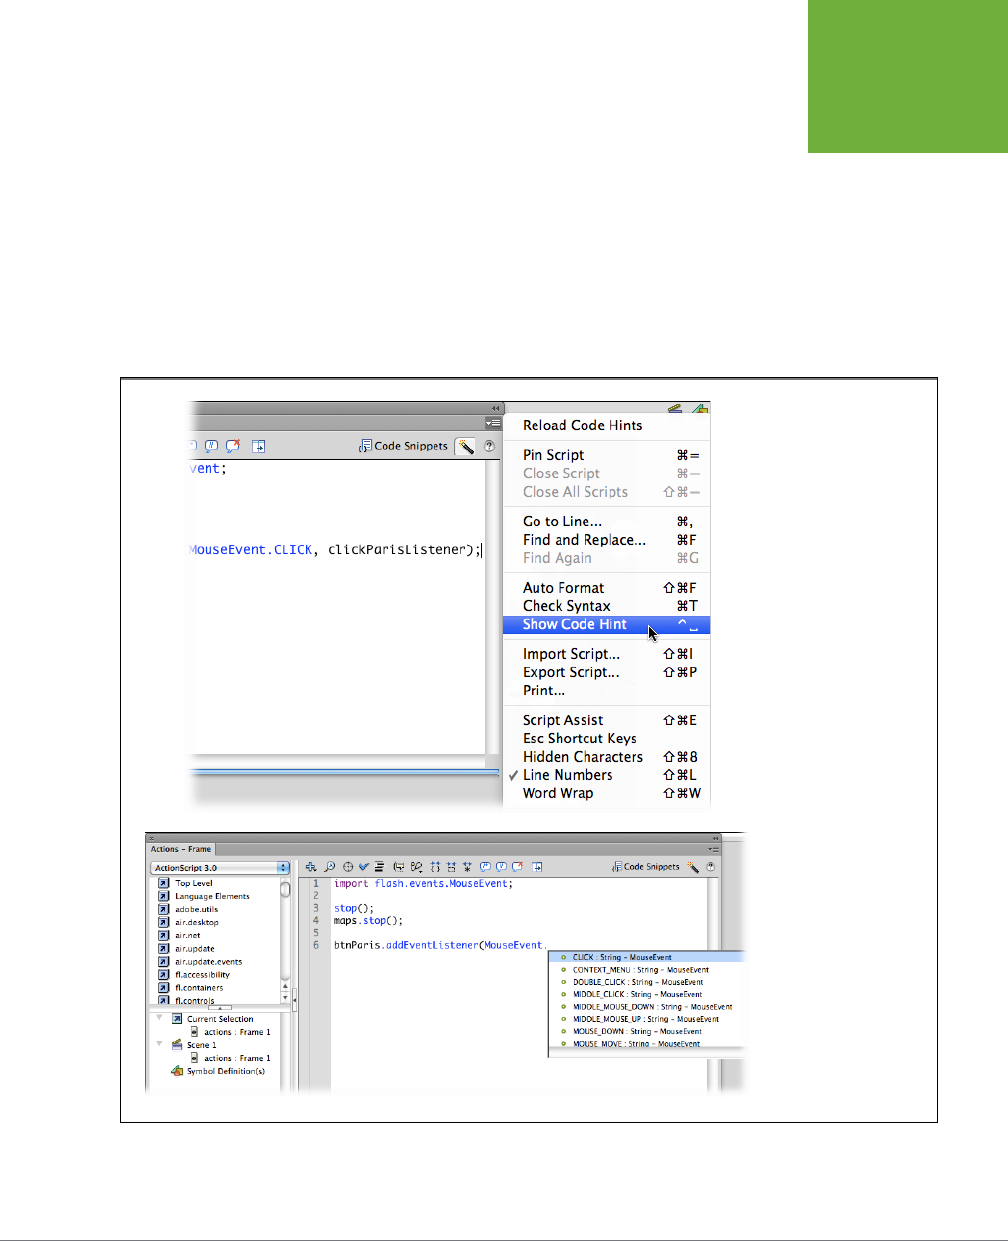
CHAPTER 16: COMPONENTS FOR INTERACTIVITY 551
ADDING
COMPONENTS
maps.gotoAndStop(“paris");
}
The
clickParisListener()
function has two lines of code that control movie clip
timelines. As you might guess, the
gotoAndStop()
method moves to a specific
frame and then prevents the playhead from moving beyond that frame. The
first line inside the curly brackets moves the playhead on the main timeline to
the frame labeled “paris,” which displays the word “Paris” on the stage. The
second line inside the curly brackets moves the playhead on the Maps movie
clip to a frame also labeled “paris.” This displays the map of Paris background,
as shown in Figure 16-7.
FIGURE 16-6
As you type code, the
Actions panel can provide
help.
Top: Use the menu in the
upper-right corner of the
Actions panel to turn on
Show Code Hint.
Bottom: Then, for
example, after you enter
MouseEvent and a period
(.), a drop-down menu
displays the proper-
ties and methods for
MouseEvent. You can keep
on typing, or you can
make a selection from
the list.
www.it-ebooks.info

FLASH CS6: THE MISSING MANUAL
552
ADDING
COMPONENTS
5. Press Ctrl+Enter (⌘-Return) to test the animation.
When the animation runs, it stops on the first frame showing the world map.
Click the Paris button, and the word “Paris” appears and the background map
changes to a city map of Paris.
FIGURE 16-7
ActionScript code controls the main
timeline, which displays the word
“Paris,” and the Maps movie clip, which
displays the Paris city map background.
© 2008 Google Maps
6. Add event listeners for the remaining three buttons with the following code.
When you’re done, the code in Frame 1 in the actions layer should look like this:
1 stop();
2 maps.stop();
3
4 btnParis.addEventListener(MouseEvent.CLICK,clickParisListener);
5 btnLondon.addEventListener(MouseEvent.CLICK,clickLondonListener);
6 btnMoscow.addEventListener(MouseEvent.CLICK,clickMoscowListener);
7 btnBeijing.addEventListener(MouseEvent.CLICK,clickBeijingListener);
8
9 function clickParisListener(evt:MouseEvent):void
10 {
11 gotoAndStop("paris");
12 maps.gotoAndStop("paris");
13 }
14 function clickLondonListener(evt:MouseEvent):void
15 {
16 gotoAndStop("london");
17 maps.gotoAndStop("london");
www.it-ebooks.info
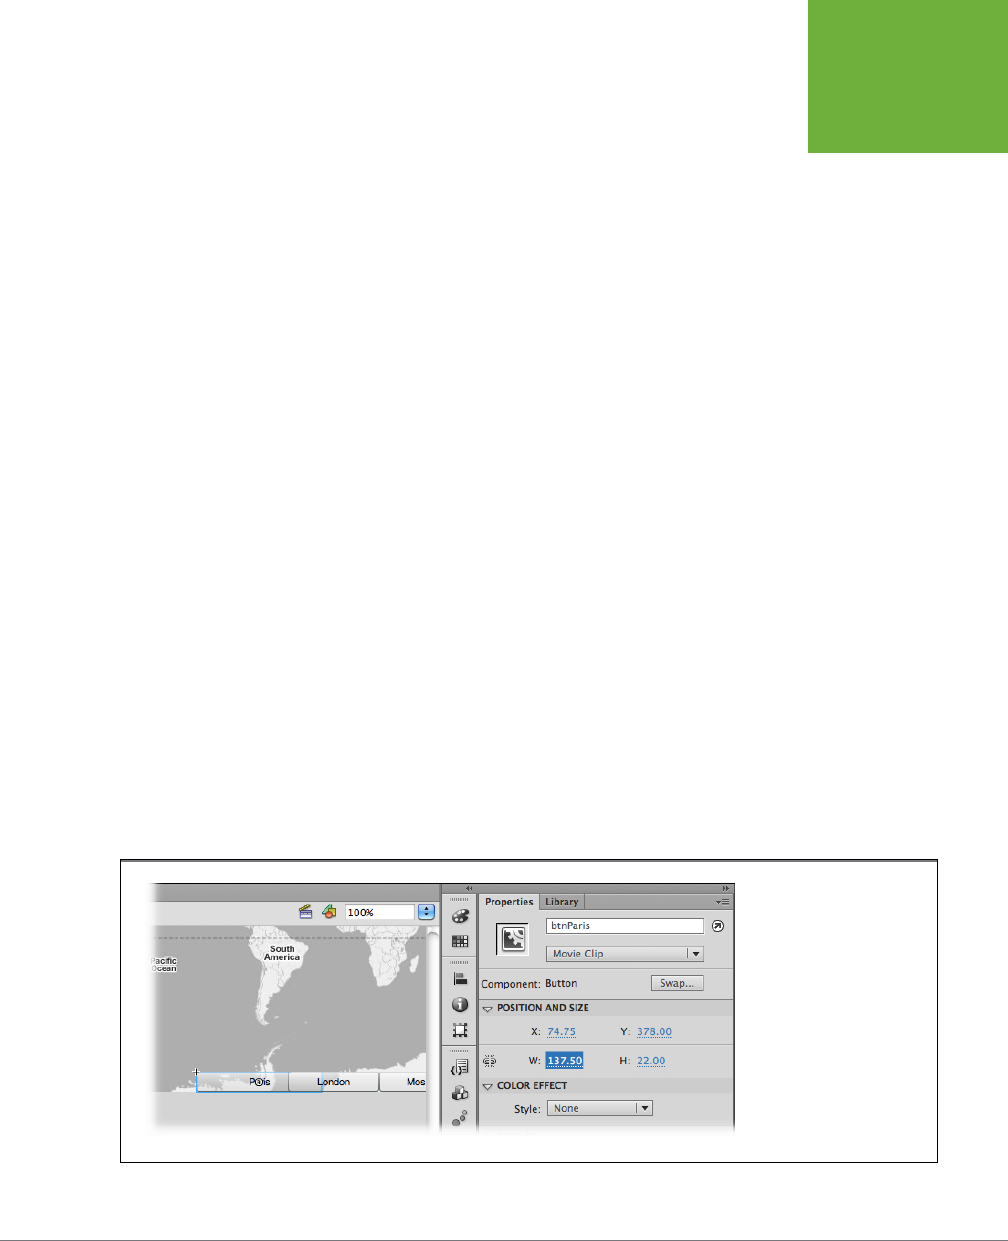
CHAPTER 16: COMPONENTS FOR INTERACTIVITY 553
ADDING
COMPONENTS
18 }
19 function clickMoscowListener(evt:MouseEvent):void
20 {
21 gotoAndStop("moscow");
22 maps.gotoAndStop("moscow");
23 }
24 function clickBeijingListener(evt:MouseEvent):void
25 {
26 gotoAndStop("beijing");
27 maps.gotoAndStop("beijing");
28 }
7. Test the animation again.
When you test the animation, button clicks display the city name and a match-
ing background map.
In this example, it would have been easier to use a single timeline for both the words
and the background maps, but the point is to show how buttons or events can con-
trol multiple timelines—in this case, the main timeline with the words and the Maps
movie clip timeline with the maps.
Modifying Components in the Properties Panel
There are several ways you can modify components after you’ve added them to your
project. The most straightforward way is to change the properties of the component
in the Component Parameters subpanel. Suppose you’d like to make the buttons in
the previous example wider, so they run all the way across the bottom of the stage.
Select btnParis, and in the Properties panel’s “Position and Size” section, click the
link button “Lock width and height values together.” When the link is broken, you
can change width and height independently. Change the width setting to 137.5 (a
fourth of the width of the stage). The width of btnParis changes, but all the other
properties (position, height, and color) remain the same, as shown in Figure 16-8.
FIGURE 16-8
Changing the properties of
an instance of a component
changes that single instance.
Notice that the other but-
tons, btnLondon, btnMoscow,
and btnBeijing, remain the
same width. © 2008 Google
Maps
www.it-ebooks.info
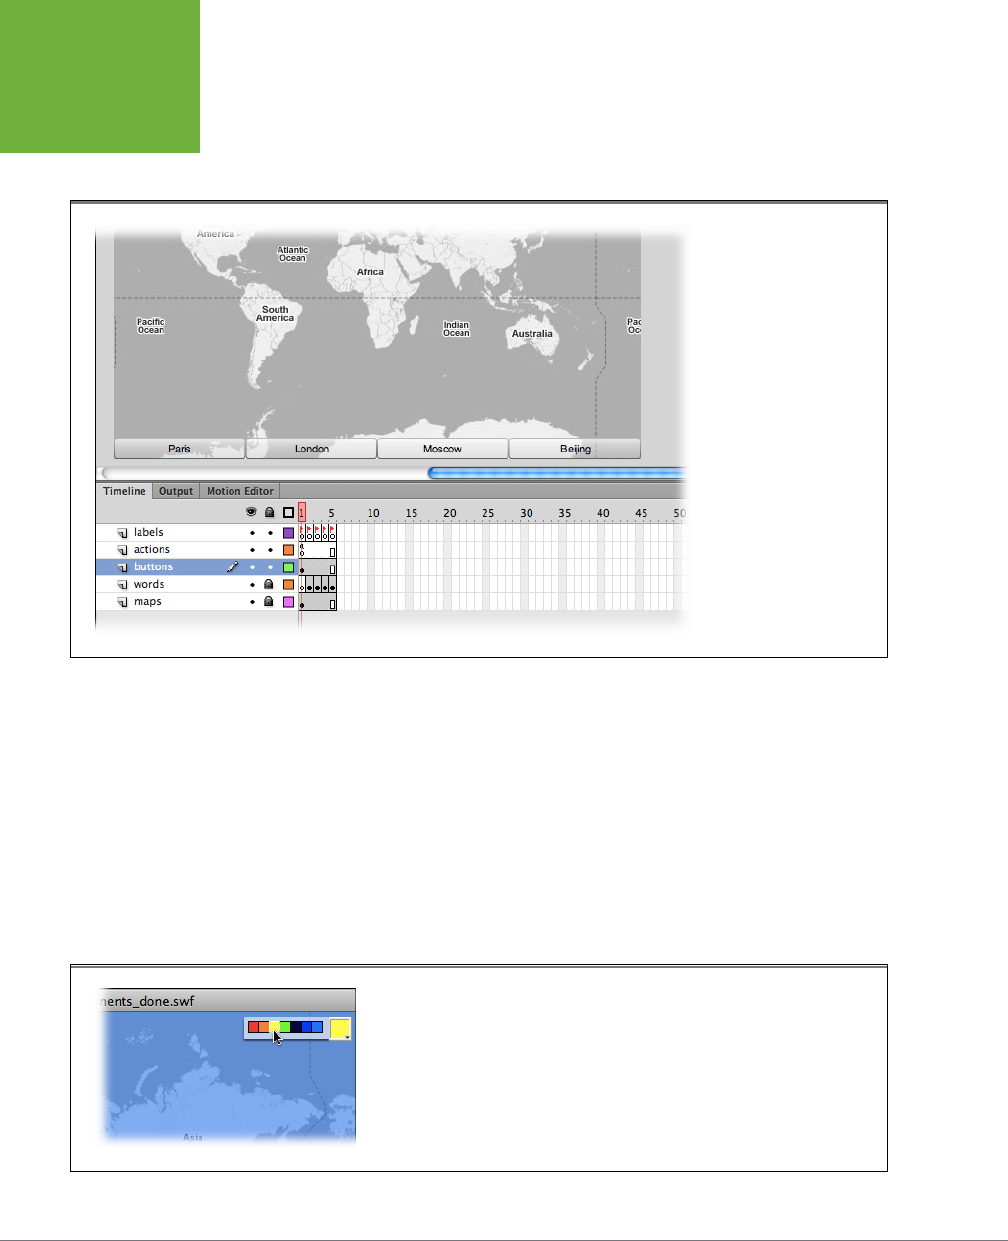
FLASH CS6: THE MISSING MANUAL
554
ADDING
COMPONENTS
For this example, go ahead and make all the instances of the Button component the
same width: 137.5. Then use the Align commands to align them along the bottom of
the stage, so it looks like Figure 16-9.
FIGURE 16-9
Using the Properties panel,
you can change the proper-
ties of the instances on
the stage. Here the width
of the Button components
has been changed. © 2008
Google Maps
Adding a ColorPicker Component
One of the great things about Flash components is their consistency. Once you know
how to add and customize one component, like the Button component, it’s easy to
apply that knowledge to other components. For example, the ColorPicker tool ap-
pears in an animation as a little color swatch. When your audience clicks the swatch,
it displays a palette of colors to choose from, as shown in Figure 16-10. Using this
handy tool, you can give your audience the power to change the colors of elements
in your animation. Even though components like buttons and color pickers have very
dierent purposes, the steps for adding them to the stage, setting their parameters,
and creating event listeners to react to them are very similar.
FIGURE 16-10
The ColorPicker is one of those components that’s fun for your audience. It gives them a
way to customize elements in your animation to suit their own tastes. © 2008 Google Maps
www.it-ebooks.info

CHAPTER 16: COMPONENTS FOR INTERACTIVITY 555
ADDING
COMPONENTS
In this example, you’ll add a ColorPicker component to the animation so your audi-
ence can choose a background color for the main timeline.
NOTE This example continues exercises that started at the beginning of this chapter. If you didn’t work
onthose examples but would like to jump in at this point, download the file
16-2_Color_Picker.fla
from the
MissingCD page at
www.missingmanuals.com/cds/flashcs6mm
. To see the final version, get
16-3_Map_
Components_done.fla
.
1. In the timeline, unlock the maps layer.
The maps layer is a good place to put the ColorPicker because there are no
keyframes. Placing the ColorPicker in the maps layer makes it available in every
frame in the animation.
2. Select Window→Components, and then drag a ColorPicker component on
the stage.
You can place the ColorPicker anyplace you like, but the upper-right corner
is a good spot if you can’t decide. In addition to the instance on the stage, a
ColorPicker gets added to the Library. If you delve into the Library folder named
Component Assets, you find that folders and items specific to the ColorPicker
have been added as well.
3. With the ColorPicker selected, type
cpBackground
in the Properties panel
for the instance name.
It’s good to identify object types as you create instance names. In this case
cp
is used to identify the object as a ColorPicker. Background indicates what the
ColorPicker is changing.
4. Press F9 (Option-F9) to open the Actions window, and then type the fol-
lowing code to import the ColorPickerEvent.
import fl.events.ColorPickerEvent;
When you create documents with Flash, you automatically have access to the
most commonly used ActionScript classes, like the MovieClip class, the Shape
class, and so on. The ColorPickerEvent isn’t included, so you need to import
the packages that define those classes. If you try to run your program without
importing the package, you see an error that says “Error 1046: Type was not
found…”.
5. Continue your code by registering an event listener for the ColorPicker and
a function that runs when the ColorPicker changes:
cpBackground.addEventListener(ColorPickerEvent.CHANGE,changeColorPicker);
function changeColorPicker(evt:ColorPickerEvent):void
{
opaqueBackground = evt.color;
}
www.it-ebooks.info
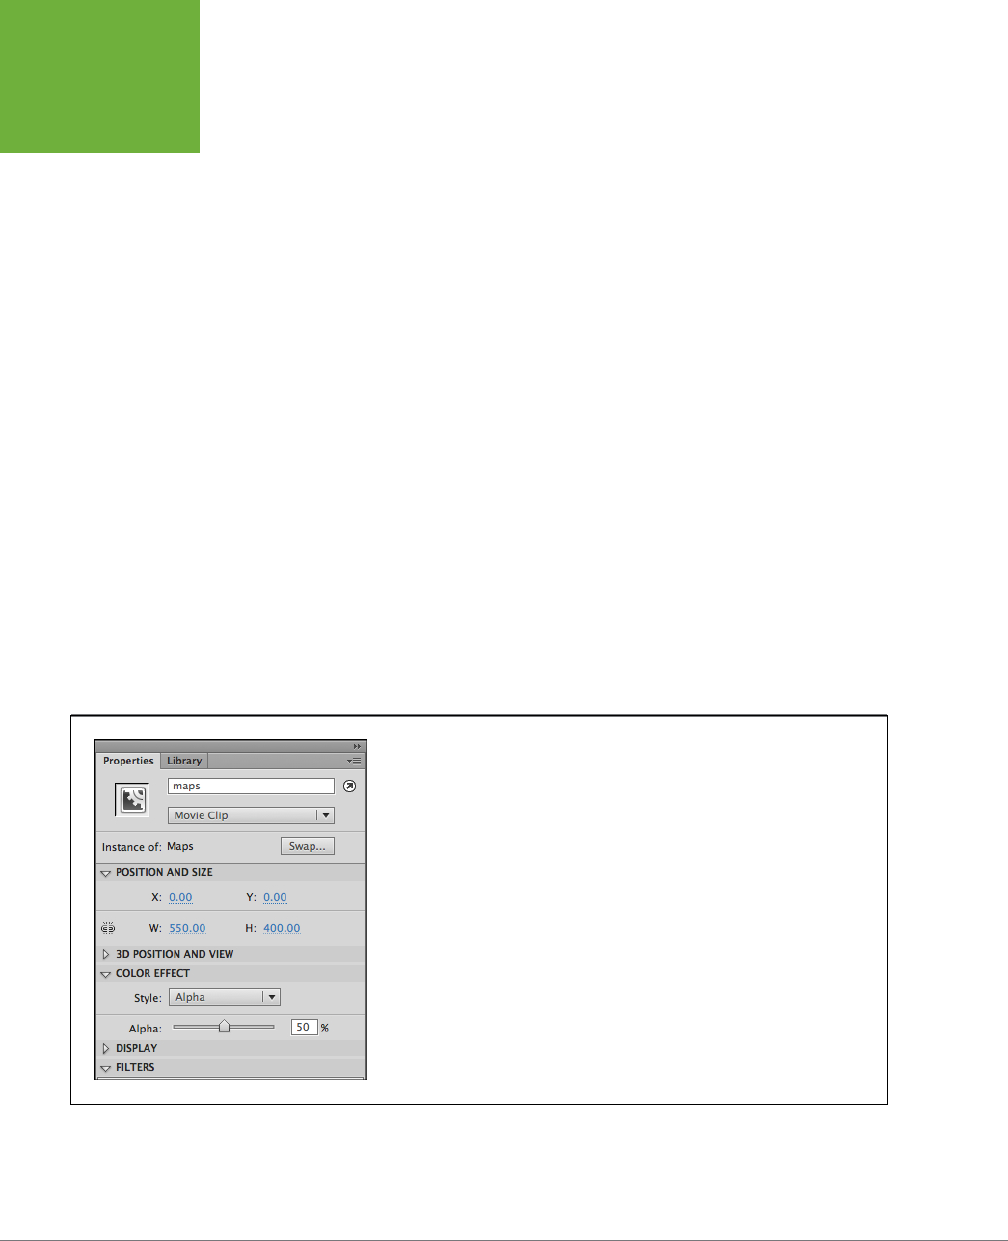
FLASH CS6: THE MISSING MANUAL
556
ADDING
COMPONENTS
This code follows the standard event listener format. One statement registers
the event listener for an object, and the function explains what to do when the
event happens. If you’re already familiar with event listeners, the juicy bit of this
example is the line that says
opaqueBackground = evt.color
;. This line changes
the background color of the main timeline. The opaqueBackground property
is inherited by all DisplayObjects. The ColorPicker event has a property, appro-
priately called
color
, that holds the value of the color that was selected. (If you
need to brush up on events and event handling, see page 448.)
6. With the ColorPicker selected, in the Component Parameters, change the
selectedColor and the showTextField parameters.
At first the selectedColor parameter is set to
black
. If you want folks to notice
that they can change the color, it’s best to set this to something more colorful.
Note that this command changes only the color displayed in the ColorPicker. It
doesn’t actually change the background color at this point; that’s done by the
code within the event listener.
The showTextField parameter gives the audience a text box where they can type
a color’s hexadecimal value. You can assume that your audience would rather
click a color swatch, so set this parameter to
false
.
7. Select the Maps movie clip on the stage, and then select Properties→Color
Eect→Alpha and type
50
.
The Maps movie clip becomes semi-transparent, letting the background color
show through, as explained in Figure 16-11.
FIGURE 16-11
The background color won’t show through if there’s a completely opaque movie clip
covering the stage. Setting the movie clip’s alpha value to 50% lets the background color
show through, giving the image on top a pleasing color effect.
www.it-ebooks.info

CHAPTER 16: COMPONENTS FOR INTERACTIVITY 557
ADDING
COMPONENTS
8. Press Ctrl+Enter (⌘-Return) to test the animation.
When the animation first runs, there’s no background color, since the code that
sets the background color is inside the ColorPicker event. The color changes
when you select a new color in the ColorPicker. If you use the buttons to jump
from city to city, the background color remains constant until a new color is
selected.
As this example shows, the steps for putting the ColorPicker component into ac-
tion are similar to those for using the Button component. Adding an instance of the
component to the stage, creating an event listener, and changing the component
parameters are much the same. The only dierences are related to the components’
purpose and behavior.
MODIFYING THE COLORPICKER WITH ACTIONSCRIPT
Components have properties just like any other objects. When you change the param-
eters of a component, you’re changing properties that the author of the component
has made available to designers. (Other component properties are hidden, where
you can’t mess with them.) You can change those properties using ActionScript, too.
Specifically, you can change a component’s properties while an animation is running,
or as coders like to say, “You can change the properties at runtime.”
Here’s an example that changes the ColorPicker using ActionScript code. The
ColorPicker’s palette shows bunches of colors, many of them very similar. There
may be times when you don’t want to oer so many color choices. For example, if
you’re letting customers choose the color for their new Stutz Bearcat automobile,
you may oer only a handful of color options. Using ActionScript, you can specify
each color shown on the palette, as long as you know the hexadecimal code that
identifies the color.
Add this to the code for your ColorPicker project (step 5 on page 555). You can
place it following the line that begins with the word “import”:
cpBackground.colors =
[0xFF0000,0xFF7700,0xFFFF00,0x00FF00,0x000044,0x0000FF,0x0066FF];
The colors property of the ColorPicker is an array. The values held inside an array
are enclosed in square brackets and separated by commas. The odd-looking num-
bers, like 0xFF7700, are hexadecimal values. Now, when you test the animation, the
ColorPicker shows a palette of only seven colors, as shown in Figure 16-10.
TIP Use Flash’s color panel (Window→Color) to look up the hexadecimal numbers for the colors you need.
Select a color, and the hexadecimal value appears in the text box, as shown in Figure 16-12. Replace the # with
ActionScript’s identifier for hex values,
0x
.
www.it-ebooks.info
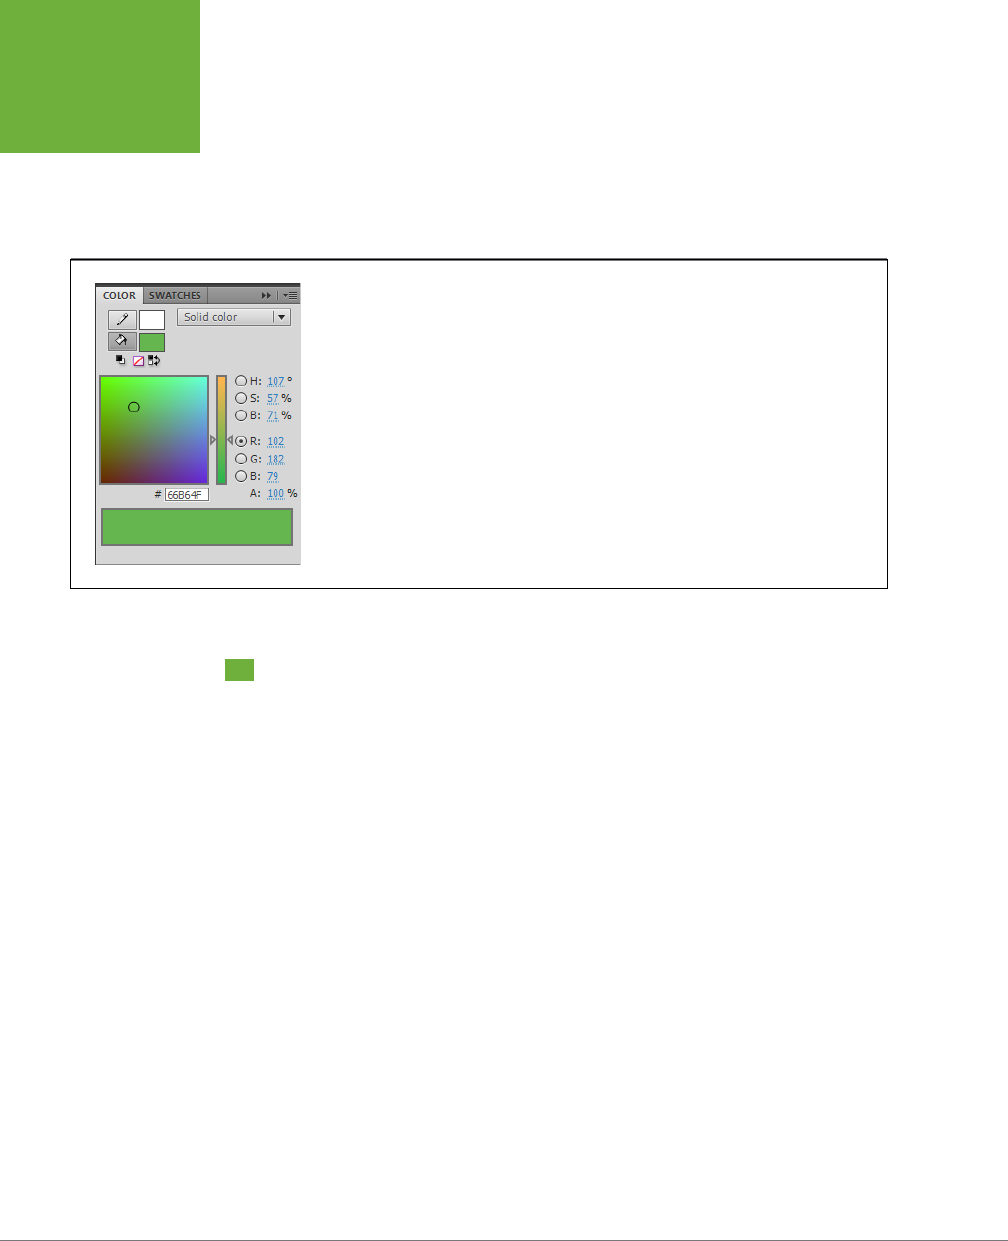
FLASH CS6: THE MISSING MANUAL
558
THE BUILT-IN
COMPONENTS
You can use similar code to change the properties of the ColorPicker (or other com-
ponents). In step 6 on page 556, you used the Component Parameters subpanel
to change the ColorPicker’s showTextField property. To change that setting using
ActionScript, use a statement like this:
cpBackground.showTextField = false;
FIGURE 16-12
Drag the crosshairs to choose a hue, and then adjust the brightness of the color using the vertical
slider on the right. When you’re happy with the color previewed at the bottom, select and copy the
hexadecimal number that appears in the box. To use the number in ActionScript, replace the # with
0x (ActionScript’s identifier for hex values).
The Built-In Components
Choose Window→Components, and you see a panel full of built-in components that
you can drag and drop into your Flash document. Well, it’s almost that easy. You see
dierent components depending on whether your document is based in ActionScript
2.0 or ActionScript 3.0. Like any ActionScript code, you can’t mix version 2.0 com-
ponents and version 3.0 components in the same document. This forward-looking
chapter focuses on the ActionScript 3.0 components. The ActionScript 3.0 built-in
components fall into three main categories:
• Flex components. Flex is a programming tool that, like Flash Professional,
creates applications using ActionScript and SWF files. Also, like Flash, Flex
programs can make use of prebuilt components, which are saved in SWC files.
• User interface components. Similar to HTML components, Flash user interface
components include buttons, checkboxes, lists, text fields, and windows—
everything you need to create a Flash form and collect data from your audience.
• Video components. These components give you tools to work with video clips.
For example, they work with streaming video (where a movie begins to play
before the entire file is downloaded). These components are an indication of
Flash’s growing role as a tool to provide web-based video.
www.it-ebooks.info
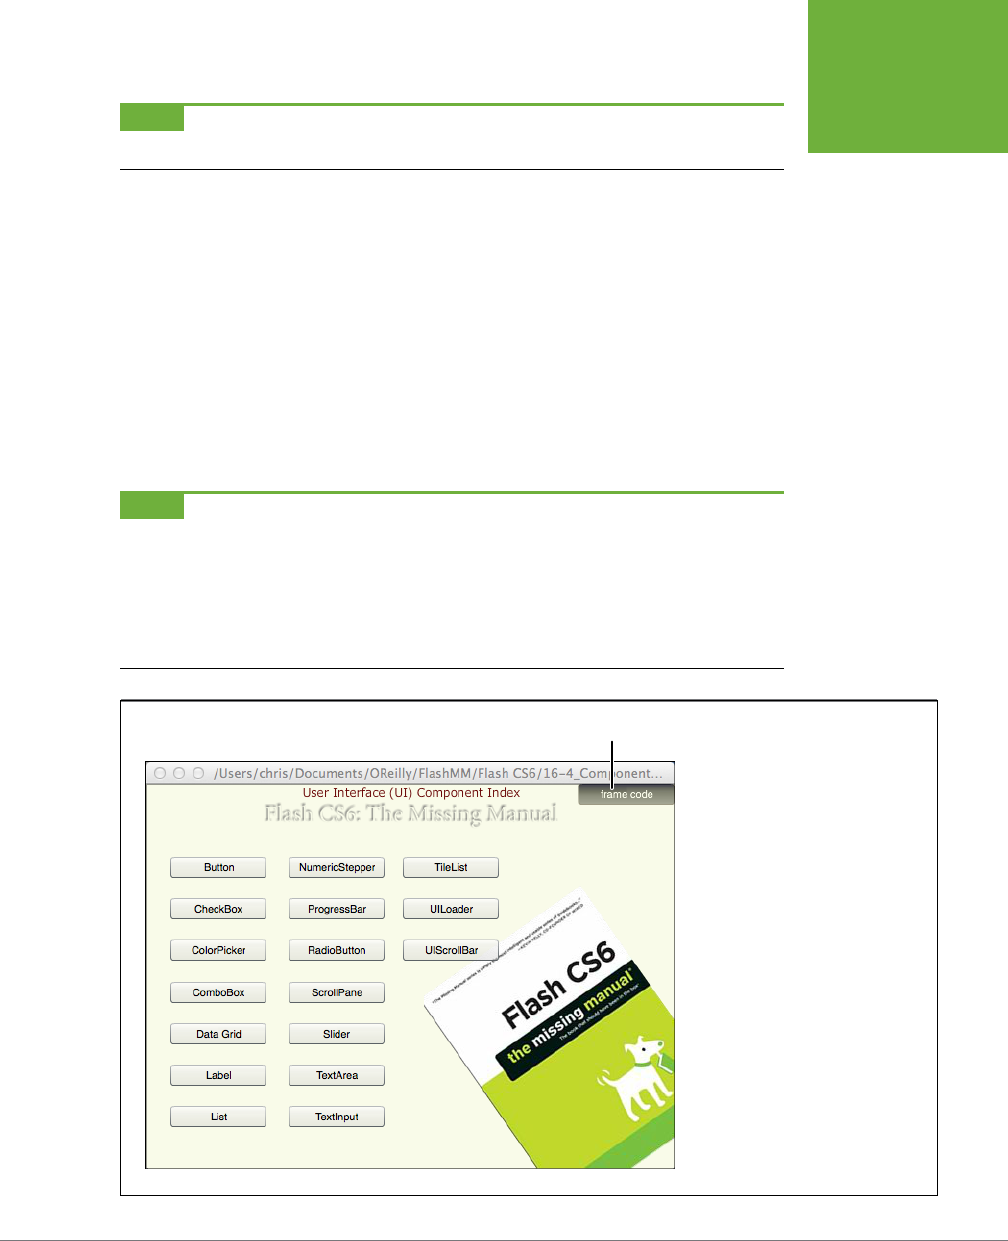
CHAPTER 16: COMPONENTS FOR INTERACTIVITY 559
THE BUILT-IN
COMPONENTS
NOTE This chapter focuses on the user interface components, because they’re by far the most popular Flash
components. For an introduction to the video components, see page 403.
User Interface Components
Similar to HTML form components, Flash’s popular
user interface components
( Figure16-1) let you interact with your audience, display information, and gather in-
formation. Examples of user interface components include buttons, checkboxes, text
fields, and drop-down lists. In this section, you’ll find details about ActionScript3.0
user interface components. For each component, there’s a Component Parameters
subpanel that lets you tweak the component. If you use components a lot, some
of the parameters will become very familiar, because they work with several dif-
ferent components. Other parameters are specific to the purpose of a particular
component, and you may need to refer to this section for the full explanation. See
the box on page 560.
NOTE There’s a companion file for this section,
16-4_Component_Index.zip
. You can see it in Figure 16-13,
and download it from the Missing CD page (
www.missingmanuals.com/cds/flashcs6mm
). The ZIP-compressed file
holds a Flash document and some other assets used to demonstrate the various user interface components. Test
the document with Ctrl+Enter (⌘-Return), and you’ll see buttons for each component, as shown in Figure 16-13.
Click a button to see a component in action. Want to see the ActionScript code behind the component? Click the
frame code button, and you’ll find the code with lots of explanatory comments. Use the button at the bottom of
the window to return to the main index.
FIGURE 16-13
There’s a lot to learn about
components—more than can fit in
the pages of this chapter. Working
examples can be a big help, so there’s
a companion file for this section, down-
load it from the Missing CD page
(www.
missingmanuals.com/cds/flashcs6mm)
.
For each component example, you can
see the underlying ActionScript code.
Just click the “frame code” button.
frame code button
www.it-ebooks.info
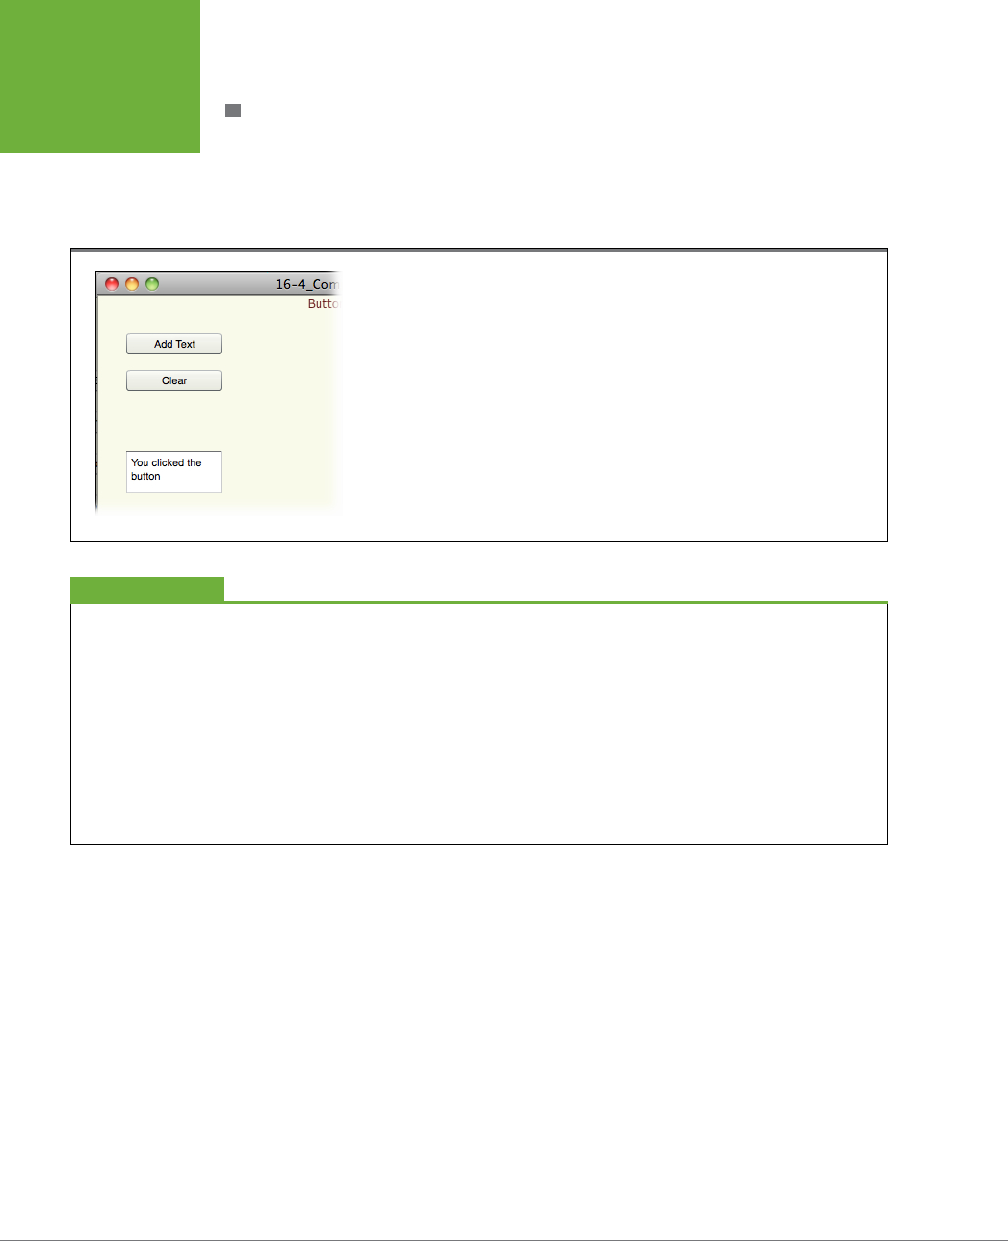
FLASH CS6: THE MISSING MANUAL
560
THE BUILT-IN
COMPONENTS
BUTTON
The Button component hardly needs introduction. It’s a multipurpose component
you can use to receive input from your animation’s audience. The process of using
a Button component is covered in detail beginning on page 545, and you see an
example of the clickable Button component in Figure 16-14.
FIGURE 16-14
Similar to HTML buttons, Button components are straightforward, no-nonsense, clickable
buttons you hook up to ActionScript. For example, you can customize a Button component’s
label to read Add Text or Clear, as shown here, and then write the code necessary to carry out
those tasks.
Learning the Parameters
Back in the days when you used the Component Inspector
to set parameters, you had type in the proper words for a
parameter. Words like
true, false, left, right, top,
and
bottom.
The problem was, it wasn’t always obvious what word the
component expected. That meant you had to look up the
component in the Flash docs or your handy Missing Manual. In
Flash CS6 Professional, component parameters are friendlier.
Now, with the Component Parameters subpanel, you use
checkboxes for true and false values. If you have a positioning
choice, such as left, right, top, or bottom, they’re presented
in a handy drop-down menu. If a color is expected, you can
choose it from a panel of color swatches. Hooray for progress
and helpful widgets!
UP TO SPEED
You may be wondering when it’s best to use a Button component and when it’s best
to use Flash’s button symbol from the Common Libraries. If you’re into customizing a
button with, say, animations and other snazzy eects, then go for the button symbol
from the Common Libraries or design your own button symbol. The symbol gives
you a movie clip timeline where you can do your magic—for all the details, see page
546. The Button component is a predesigned button that you don’t have to fiddle
with too much to make it useful. The button is a good alternative if you’re using
other components, because they’ll all have a similar look. As you see in the Button
Parameters table (Table 16-1), one handy built-in feature of the Button component
is the
toggle
parameter. When you set this parameter to “true,” the button displays
on/o characteristics. Clicking the button turns it on, and the button stays down.
Click it again, and it pops back up into position.
www.it-ebooks.info
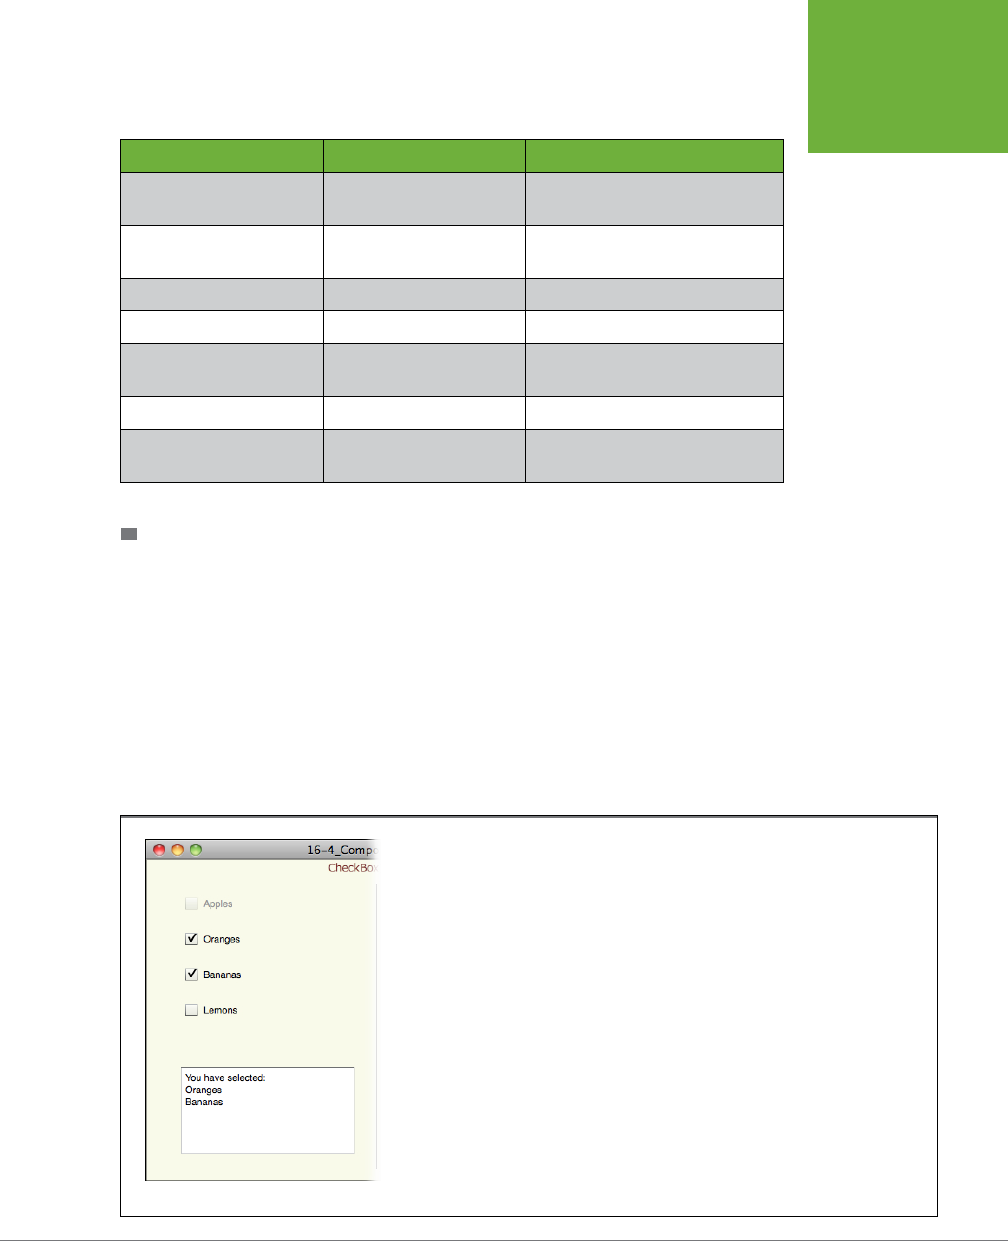
CHAPTER 16: COMPONENTS FOR INTERACTIVITY 561
THE BUILT-IN
COMPONENTS
Table 16-1. Parameters for the Button component.
BUTTON PARAMETERS EXPECTED VALUE PURPOSE
emphasized selected or deselected Changes appearance of button to
stand out from other buttons.
enabled selected or deselected If deselected, the button doesn’t
accept audience input.
label a string of characters Explanatory text label for button.
labelPlacement left, right, top, bottom Positions label relative to button.
selected selected or deselected Changes appearance of a toggle
button to show it’s selected.
toggle selected or deselected Gives the button on/off functions.
visible selected or deselected If deselected, the component is
hidden.
CHECKBOX
The checkbox is another familiar friend to anyone who has completed an online
survey or filled out a questionnaire. The CheckBox component lets you oer your
audience an easy way to choose multiple options, as shown in Figure 16-15. With
checkboxes, folks can make several selections in a group of options. If you want to
limit your audience to a single choice, use the RadioButton component. Checkboxes
are common in computer programs, on the Web, and in print, so your audience will
easily understand how to use them. You can customize the CheckBox component at
design time using the following parameters (Table 16-2). For example, if you check
the
selected
parameter in the Component Parameters subpanel, a checkmark ap-
pears in the checkbox when your animation first runs.
FIGURE 16-15
Unlike RadioButton components (page 571), CheckBox components let your audience make
multiple selections.
www.it-ebooks.info

FLASH CS6: THE MISSING MANUAL
562
THE BUILT-IN
COMPONENTS
NOTE For ActionScript coders, there are two distinct categories for time:
design time
and
runtime
. Design
time is where you are now, when you have Flash open on your computer and you can control events, drawings,
and all details in Flash. Runtime is when your Flash project is out there in the world, where your audience is
viewing it and controlling it.
Using ActionScript, you can change components’ properties while the animation is
running. For example, examine the following code, which could appear at any time
within your animation:
cbApples.enabled = false;
cbOranges.visible = false;
cbBananas.selected = true;
This code turns o the CheckBox
cbApples
, making it appear grayed out and un-
clickable. The CheckBox
cbOranges
is hidden entirely, and
cbBananas
is selected,
so it sports a handsome checkmark.
Table 16-2. Parameters for the CheckBox component.
CHECKBOX
PARAMETERS EXPECTED VALUE PURPOSE
enabled selected or deselected If deselected, CheckBox doesn’t
accept audience input.
label a string of characters Explanatory text for CheckBox.
labelPlacement left, right, top, bottom Positions label relative to
component.
selected selected or deselected Makes a checkmark appear in the
checkbox.
visible selected or deselected If deselected, the component is
hidden.
COLORPICKER
The ColorPicker component (shown in Figure 16-16) displays a palette of colors, giving
your audience an opportunity to select a single color. You can give your audience
a way to customize, text, background colors, and just about any other elements in
the display. For example, suppose you’re selling laptop computer cases. You can
limit the colors shown in the ColorPicker to just those you have available. (You can
learn how to use the ColorPicker tool in detail on page 557.) Select ColorPicker, and
in the Component Parameters subpanel, you see the parameters shown in the fol-
lowing table (Table 16-3).
www.it-ebooks.info
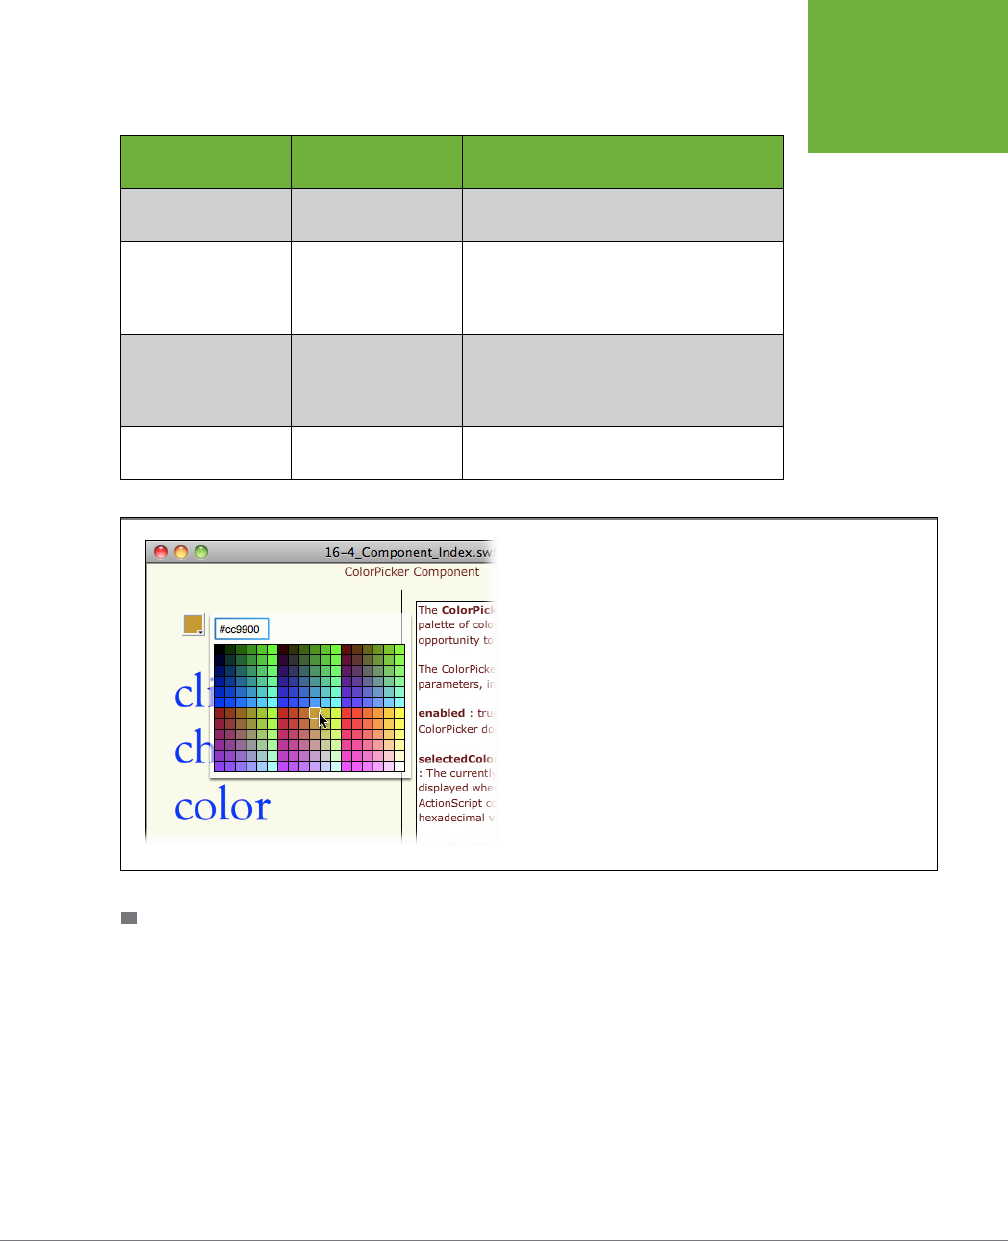
CHAPTER 16: COMPONENTS FOR INTERACTIVITY 563
THE BUILT-IN
COMPONENTS
Table 16-3. Parameters for the ColorPicker component.
COLORPICKER
PARAMETERS EXPECTED VALUE PURPOSE
enabled selected or
deselected
If deselected, ColorPicker doesn’t respond
when clicked.
selectedColor hexadecimal color
value
The currently selected color that’s displayed
when the palette is closed. ActionScript
code can work with the hexadecimal value
of this color.
showTextField selected or
deselected
If selected, a text field displays the
hexadecimal value of the selectedColor
parameter, and your visitors can type a new
hexadecimal value.
visible selected or
deselected
If deselected, the component is hidden.
FIGURE 16-16
The ColorPicker component makes it easy for your audience to select a
single color from an entire palette of options. Using ActionScript code,
you can limit the colors shown in the palette.
COMBOBOX
As Figure 16-17 shows, the ComboBox component lets you display a drop-down
list of options. Use this component when you want to oer people an easy way to
choose a single option (like which animation they want to play, or which web page
they want to hop to) from a predefined list. You can customize the ComboBox
component at design time using the Component Parameters subpanel to change
the parameter values (Table 16-4). Flash automatically adds a scroll bar to your
ComboBox component if you create a long list (over five options). Short list or long,
the ComboBox component lets your audience choose only one option. If you want to
www.it-ebooks.info
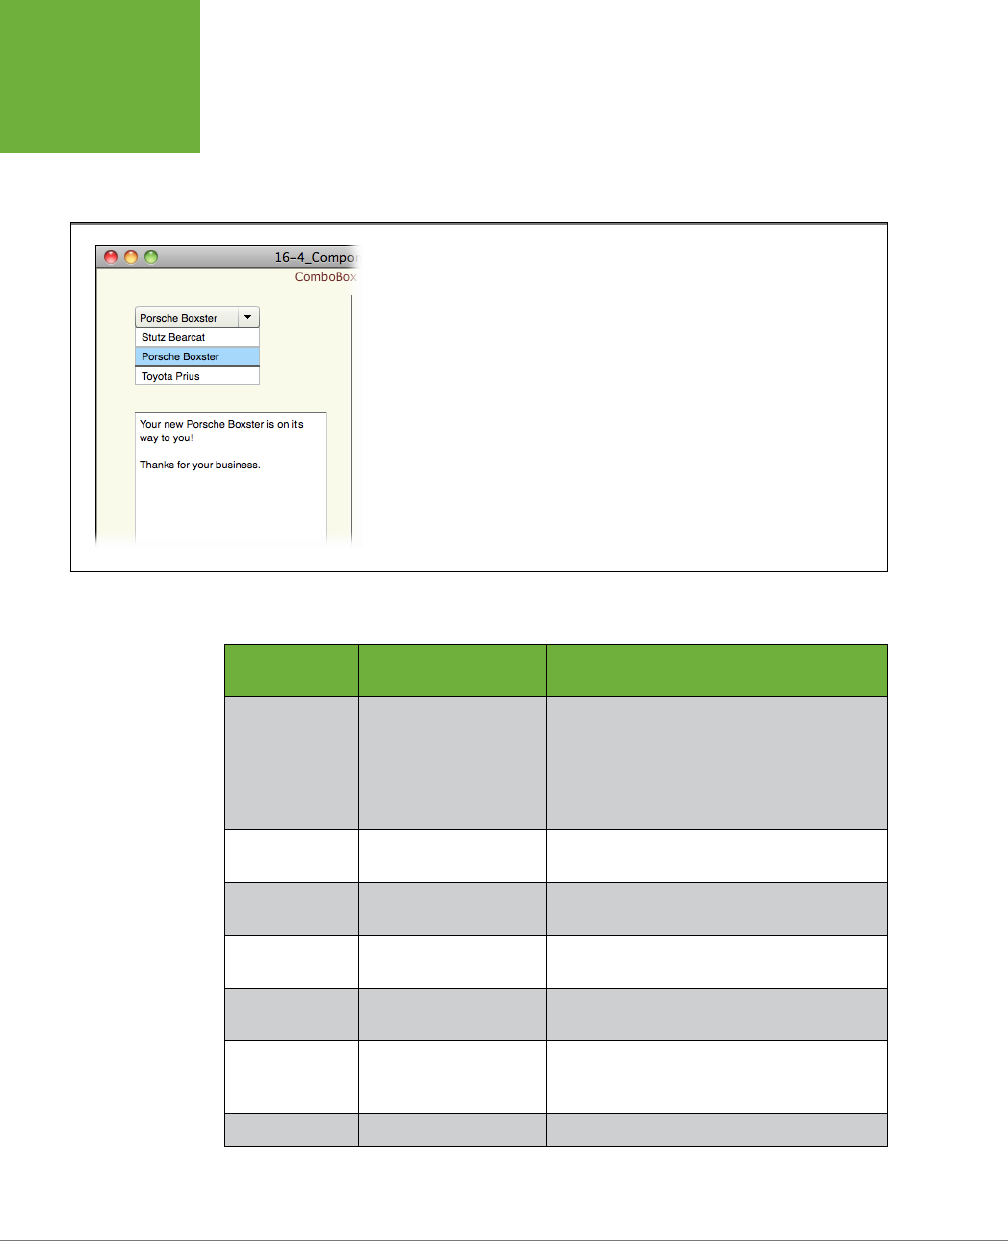
FLASH CS6: THE MISSING MANUAL
564
THE BUILT-IN
COMPONENTS
oer people a list from which they can Shift-click or Ctrl-click multiple options, use
the List component (page567). The ComboBox uses a DataProvider as the source
for its list. You can point to an external file or create the DataProvider in ActionScript
within your document. For more details, see the box on page 566.
FIGURE 16-17
Use the ComboBox component to give your audience a single choice from a list of items.
Table 16-4. Parameters for the ComboBox component.
COMBOBOX
PARAMETERS EXPECTED VALUE PURPOSE
dataProvider a DataProvider object
(for more details, see
the box on page 566)
Points to a data source to provide the items
in the list. The DataProvider object can come
from an external source, or you can create one
using ActionScript code. You can also manu-
ally add values by clicking the Value box in the
Component Inspector.
editable selected or deselected If deselected, your audience can’t make
changes to the ComboBox.
enabled selected or deselected If deselected, your audience can’t use the
ComboBox.
prompt a string of characters The words that appear before your visitor uses
the ComboBox.
restrict a string of characters Limits the characters that a visitor can enter in
the text field.
rowCount a number value Sets the number of items displayed in the list.
If the list has more items, a scroll bar appears.
If the list has fewer items, the list is sized to fit.
visible selected or deselected If deselected, the component is hidden.
www.it-ebooks.info
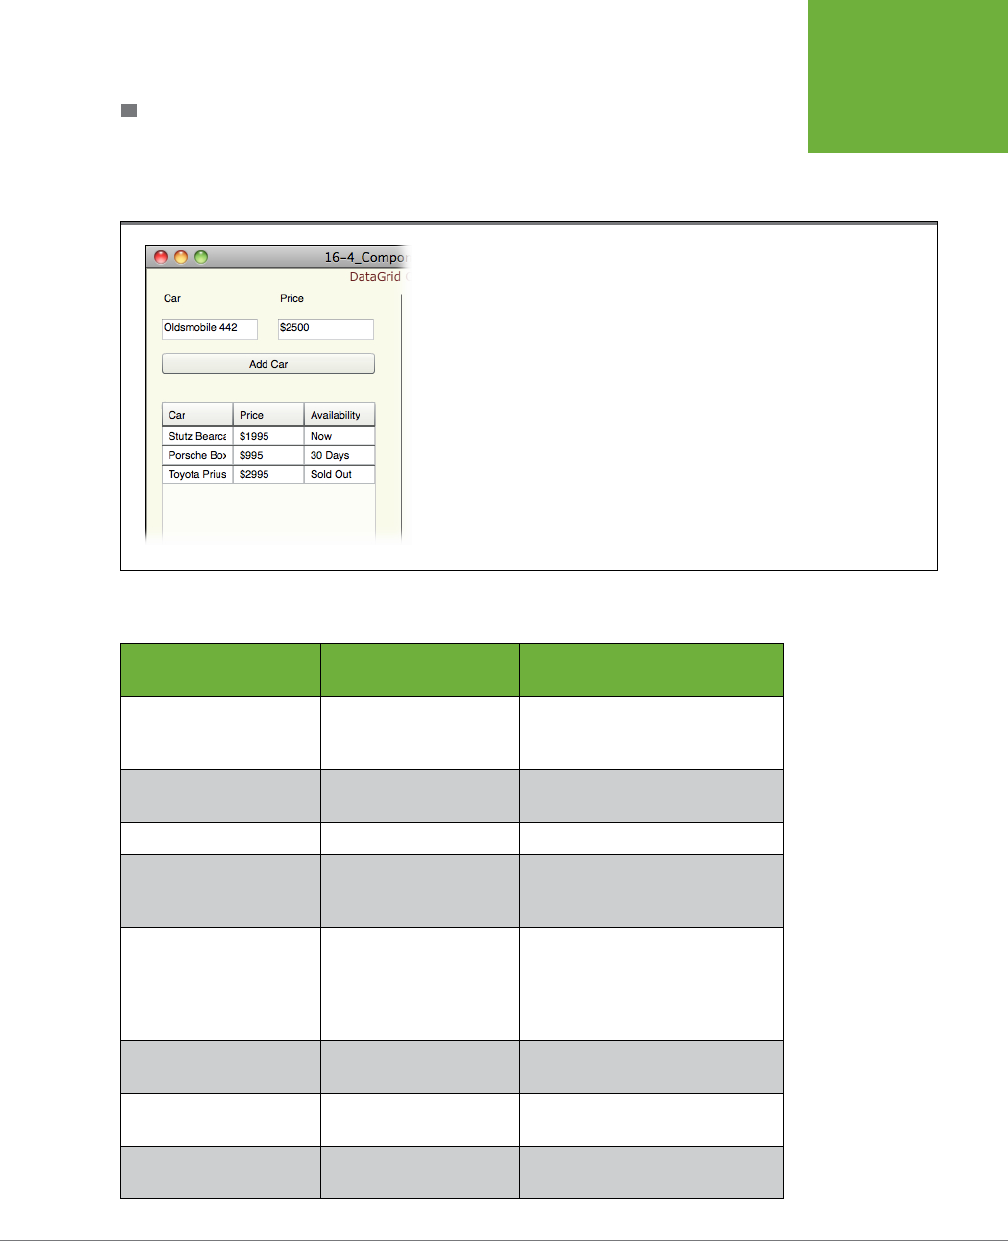
CHAPTER 16: COMPONENTS FOR INTERACTIVITY 565
THE BUILT-IN
COMPONENTS
DATAGRID
The DataGrid component lets you display a table containing multiple rows and col-
umns of data, similar to a spreadsheet, as shown in Figure 16-18. DataGrid parameters
are listed in Table 16-5.
FIGURE 16-18
The DataGrid component displays information in a spreadsheet-style format with rows
and columns.
Table 16-5. Parameters for the DataGrid component.
DATAGRID
PARAMETERS EXPECTED VALUE PURPOSE
allowMultipleSelection selected or deselected If selected, allows the selection of
more than one list item in the data
grid.
editable selected or deselected If deselected, your audience can’t
change the DataGrid.
headerHeight a number value Sets header height in pixels.
horizontalLineScrollSize a number value The amount of content to be
scrolled, horizontally, when your
audience clicks a scroll arrow.
horizontalPageScrollSize a number value The number of pixels the scroll
marker moves when your audi-
ence clicks the scroll bar track.
Similar to a Page Up or Page Down
command.
horizontalScrollPolicy ON, OFF, AUTO Controls whether a scroll bar
appears in the component.
resizableColumns selected or deselected If deselected, your audience can’t
change column widths.
rowHeight a number value Sets the height of the rows in
pixels.
www.it-ebooks.info
FLASH CS6: THE MISSING MANUAL
566
THE BUILT-IN
COMPONENTS
DATAGRID
PARAMETERS EXPECTED VALUE PURPOSE
showHeaders selected or deselected If deselected, the DataGrid doesn’t
display headers.
sortableColumns selected or deselected If deselected, your audience can’t
sort the data in the columns.
verticalLineScrollSize a number value The amount of content to be
scrolled, vertically, when a scroll
arrow is clicked.
verticalPageScrollSize a number value The number of pixels the scroll
marker moves when your audi-
ence clicks the scroll bar track.
Similar to a page up or page down
command.
verticalScrollPolicy ON, OFF, AUTO Controls whether a scroll bar
appears in the component.
Providing Data
What’s a DataProvider
?
Several Flash components—notably List, DataGrid, TileList,
and ComboBox—use DataProvider objects to fill in the blanks.
The DataProvider class is like any other ActionScript class; it
has properties and methods, all of which relate to storing
and retrieving data. You can use methods like AddItem and
AddItemAt to fill a DataProvider with a list of items. When
it’s time to use a component, you can assign your prefilled
DataProvider to the dataProvider parameter (or property) of a
component. For example, here’s the code that adds fine wines
to a DataProvider named wineList:
wineList.addItem({label:"Chateau Thames
Embankment", data:24});
wineList.addItem({label:"Domaine Dogtown
Reserve", data:18});
wineList.addItem({label:"Cuvee Cuyahoga",
data:21});
In this example, each item consists of two parts: label and
data. Label stores a text string representing the name of the
wine, while data stores a number value representing the wine’s
quality rating. (Yes, that’s 24 out of a possible 100.) If you’re
familiar with XML, the paired format consisting of a name and
a value may look familiar.
In this format, you can add the items to a List component.
The List component expects to receive a name and a data
element for each item. To make these fine wines appear in a
list component, you assign the
wineList
DataProvider to the
lstFineWine
List component:
lstFineWine.dataProvider = wineList;
The DataProvider is one more way that Flash Components
achieve consistency even though their purposes and functions
are different.
FREQUENTLY ASKED QUESTION
www.it-ebooks.info

CHAPTER 16: COMPONENTS FOR INTERACTIVITY 567
THE BUILT-IN
COMPONENTS
Typically, you use this component when you want to transfer data from your server
(for example, product names, descriptions, and prices) and display it in Flash in
table form. But you can also use it to display the data you collect (or create) in your
Flash animation. You can populate the cells in the data grid from an external source,
or you can create a DataProvider and store values in it, using ActionScript (see the
box on page 566).
LABEL
A Label component lets you add noneditable, nonclickable text to your Flash creation.
To use the Label component, add the text you want displayed to the
text
parameter
in the Component Inspector. If you’re using ActionScript code, then assign a string
to the
text
property of the label (Table 16-6). As an alternative, you can display
HTML-encoded text using the
htmlText
parameter or property.
TIP For most Flash designers, using Flash’s Text tool is easier and keeps .swf files smaller. Even if you want
to change text during runtime with ActionScript, you can do that with a text field.
Table 16-6. Parameters for the Label component.
PARAMETERS EXPECTED VALUE PURPOSE
autoSize selected or deselected If selected, the label shows all of its text,
regardless of the W and H properties.
condenseWhite selected or deselected When selected, this removes extra white
space from HTML text.
enabled selected or deselected If deselected, your audience can’t access
the component.
htmlText HTML-encoded text Displays HTML encoded text, showing for-
matting, hyperlinks, and other features.
selectable selected or deselected If checked, your audience can select the
text in a label.
text a string of characters The text shown in the display.
visible selected or deselected If deselected, the component is hidden.
wordWrap selected or deselected Controls line breaks in large chunks of text.
LIST
You use the List component (Figure 16-19) to create a clickable, scrollable list from
which your audience can Shift-click to select multiple options. The List uses a
DataProvider as the source. You can point to an external file, or you can create the
DataProvider in ActionScript within your document. For more details, see the box on
page 566. The items that make up each row in a list consist of a label and data. The
label appears in the list display; the data is the part that’s invisible to your audience
but accessible to ActionScript. So, for example, you can create a list where someone
www.it-ebooks.info
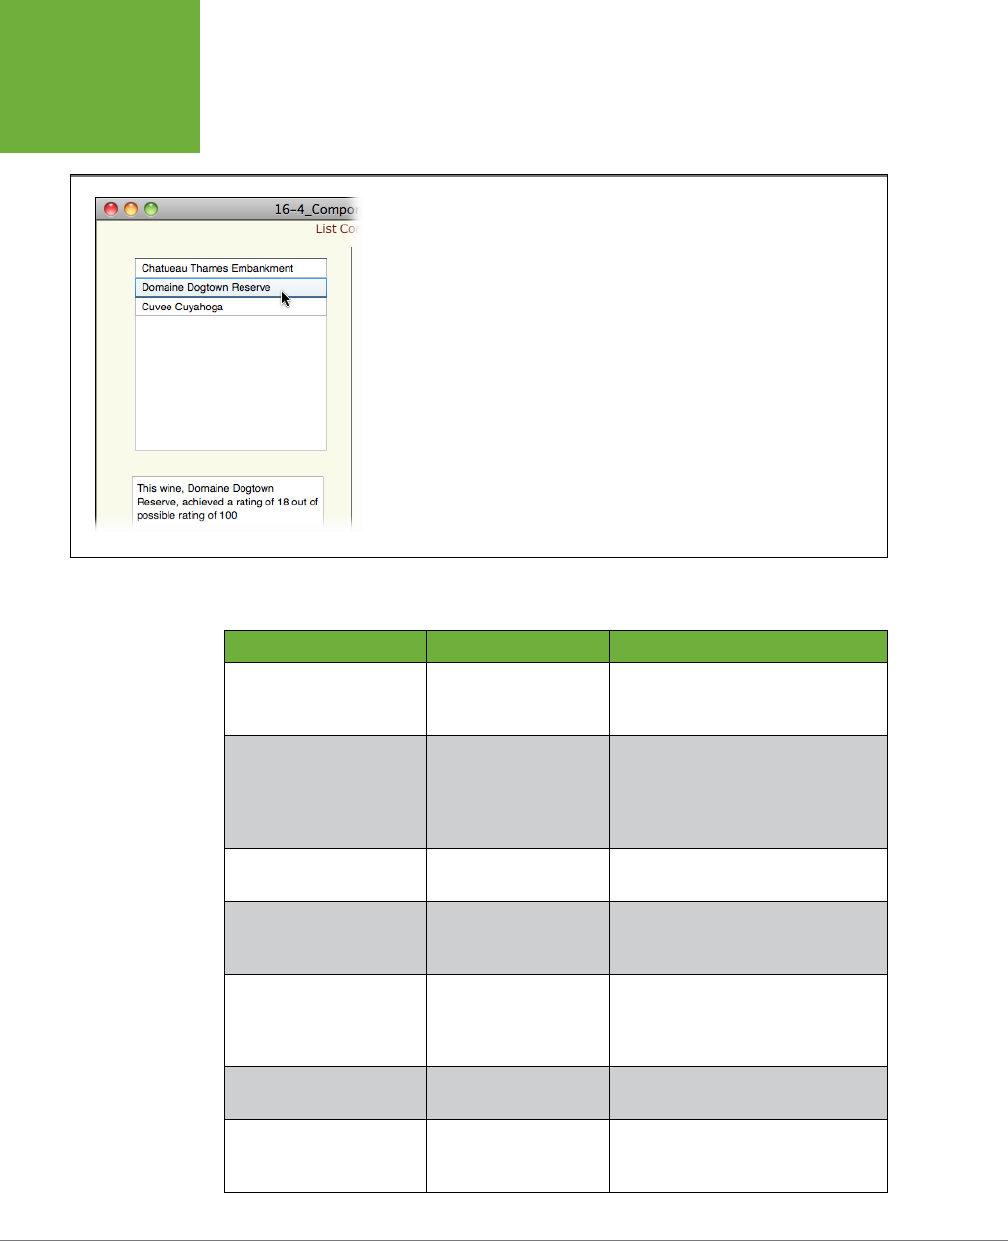
FLASH CS6: THE MISSING MANUAL
568
THE BUILT-IN
COMPONENTS
can choose an employee by name; that selection can then pass the employee’s ID
number to another part of your program.
FIGURE 16-19
The List component is similar to multiple checkboxes (see page 561) in that both let your
audience select multiple options (once you customize the List component by setting
allowMultipleSelection to true in the Component Parameters, Table 16-7). But because List
components are scrollable, they tend to take up less screen real estate than checkboxes,
and so they’re helpful when your stage is already packed with graphics and other
components.
Table 16-7. Parameters for the List component.
LIST PARAMETERS EXPECTED VALUE PURPOSE
allowMultipleSelection selected or deselected If deselected, your audience can
select only one item from the list at
a time.
dataProvider a DataProvider object
(for more details see
the box on page 566)
Points to a data source to provide
the items in the list. The DataProvider
object can be an external source,
or you can create one using
ActionScript.
enabled selected or deselected If deselected, your audience can’t use
the List component.
horizontalLineScrollSize a number value The amount of content to be scrolled,
horizontally, when your audience
clicks a scroll arrow.
horizontalPageScrollSize a number value The number of pixels the scroll
marker moves when your audience
clicks the scroll bar track. Similar to a
Page Up or Page Down command.
horizontalScrollPolicy ON, OFF, AUTO Controls whether a scroll bar appears
in the component.
verticalLineScrollSize a number value The amount of content to be scrolled,
vertically, when a scroll arrow is
clicked.
www.it-ebooks.info
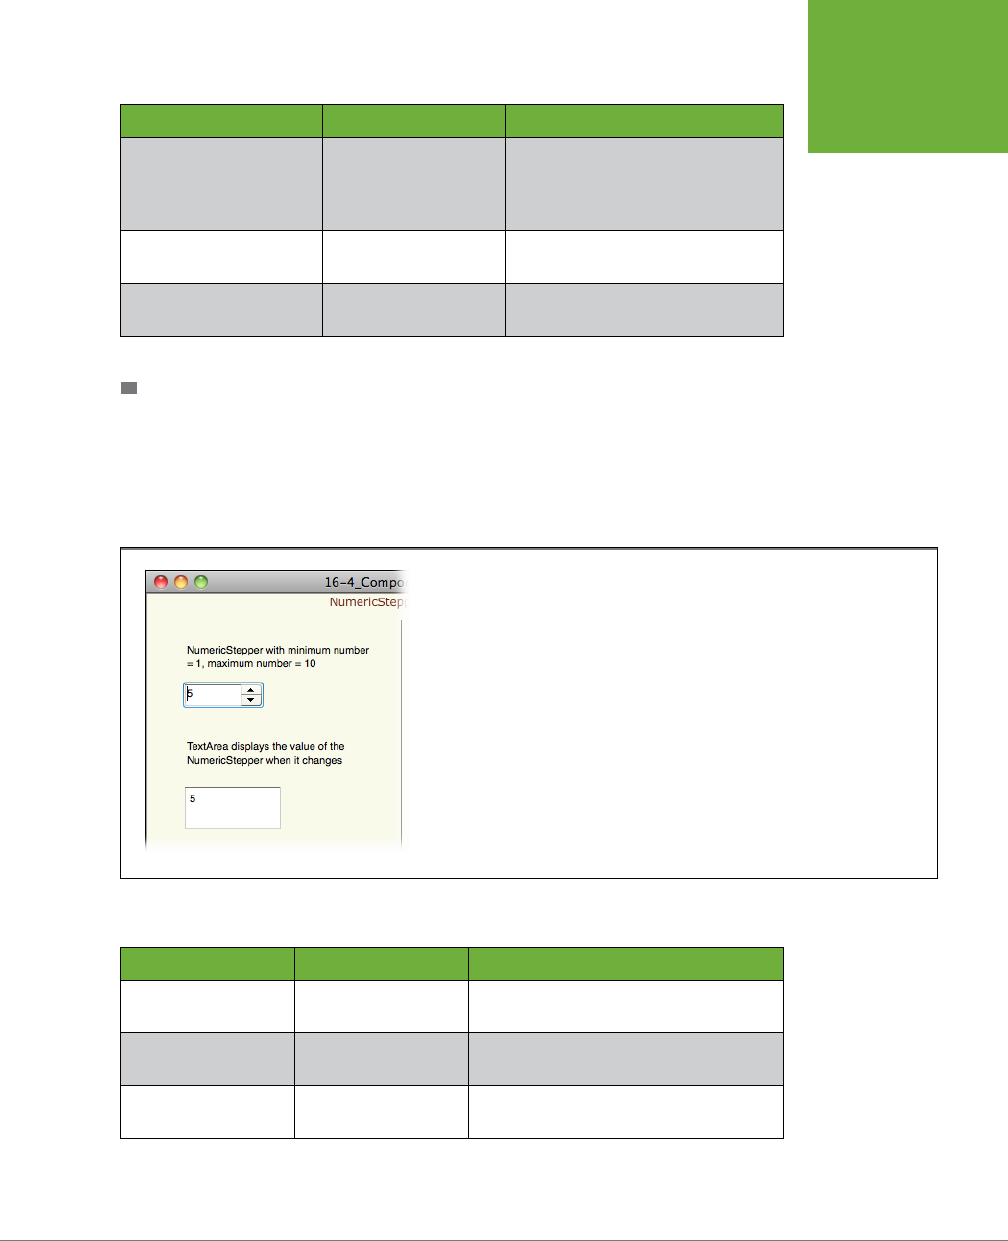
CHAPTER 16: COMPONENTS FOR INTERACTIVITY 569
THE BUILT-IN
COMPONENTS
LIST PARAMETERS EXPECTED VALUE PURPOSE
verticalPageScrollSize a number value The number of pixels the scroll
marker moves when your audience
clicks the scroll bar track. Similar to a
Page Up or Page Down command.
verticalScrollPolicy ON, OFF, AUTO Controls whether a scroll bar appears
in the component.
visible selected or deselected If deselected, the component is
hidden.
NUMERICSTEPPER
You use the NumericStepper component to create a clickable list of numbers, as
shown in Figure 16-20. Simpler for people to use than a type-in-your-own-number
text field, this component makes it easy for you to limit your audience’s choices to
a predefined set of valid numbers. See Table 16-8 for the parameters used with the
NumericStepper component.
FIGURE 16-20
When you use the NumericStepper component, your audience gets an easy way to
specify a number, and you don’t have to use ActionScript to examine the number and see
whether it’s valid (as you would have to if you let them type any number they want).
Table 16-8. Parameters for the NumericStepper component.
PARAMETERS EXPECTED VALUE PURPOSE
enabled selected or deselected If deselected, your audience can’t use the
component.
maximum a number value Sets the highest number the component
can display.
minimum a number value Sets the lowest number the component
can display.
www.it-ebooks.info
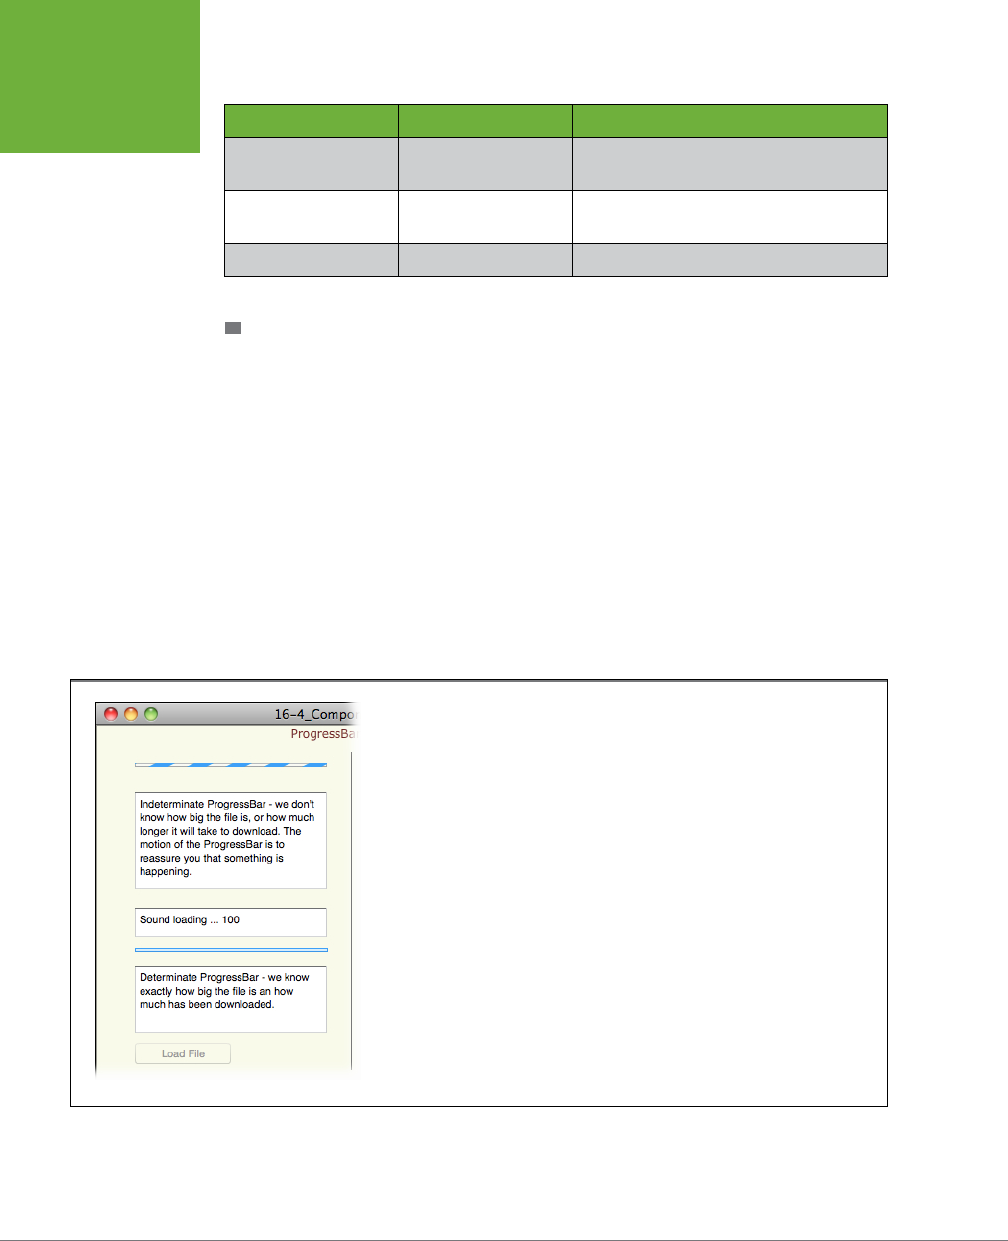
FLASH CS6: THE MISSING MANUAL
570
THE BUILT-IN
COMPONENTS
PARAMETERS EXPECTED VALUE PURPOSE
stepSize a number value Sets the amount the value changes with
each click.
value a number value The current value selected by the
NumericStepper.
visible selected or deselected If deselected, the component is hidden.
PROGRESSBAR
The ProgressBar component, shown in Figure 16-21, is a visual indicator that a file—like
a Flash .swf file—is loading. There are two ways a ProgressBar can work. If you’re
loading a file and have no way of knowing how big the file is, then you can’t very
well say the file is, for example, 50 percent loaded. In that case, the progress bar
is considered
indeterminate
. In other words, it provides some motion, kind of like a
barber’s pole, to show that something’s going on. On the other hand, if you know
how big the file is, you can give your audience more detail on the process. You’ve
probably seen the ProgressBar in action when Flash animations are loading from
web pages. To have the ProgressBar report on the progress of loading a file, type
the name and path of the file in the
source
parameter (Table 16-9). In ActionScript,
you assign the name to the source property of the ProgressBar. You can also use
ActionScript to access the percentComplete property, giving you a way to create
a companion line of text.
FIGURE 16-21
The ProgressBar component lets you give your audience a visual indication of how long
they have left to wait for an animation (or a web page) to load.
www.it-ebooks.info
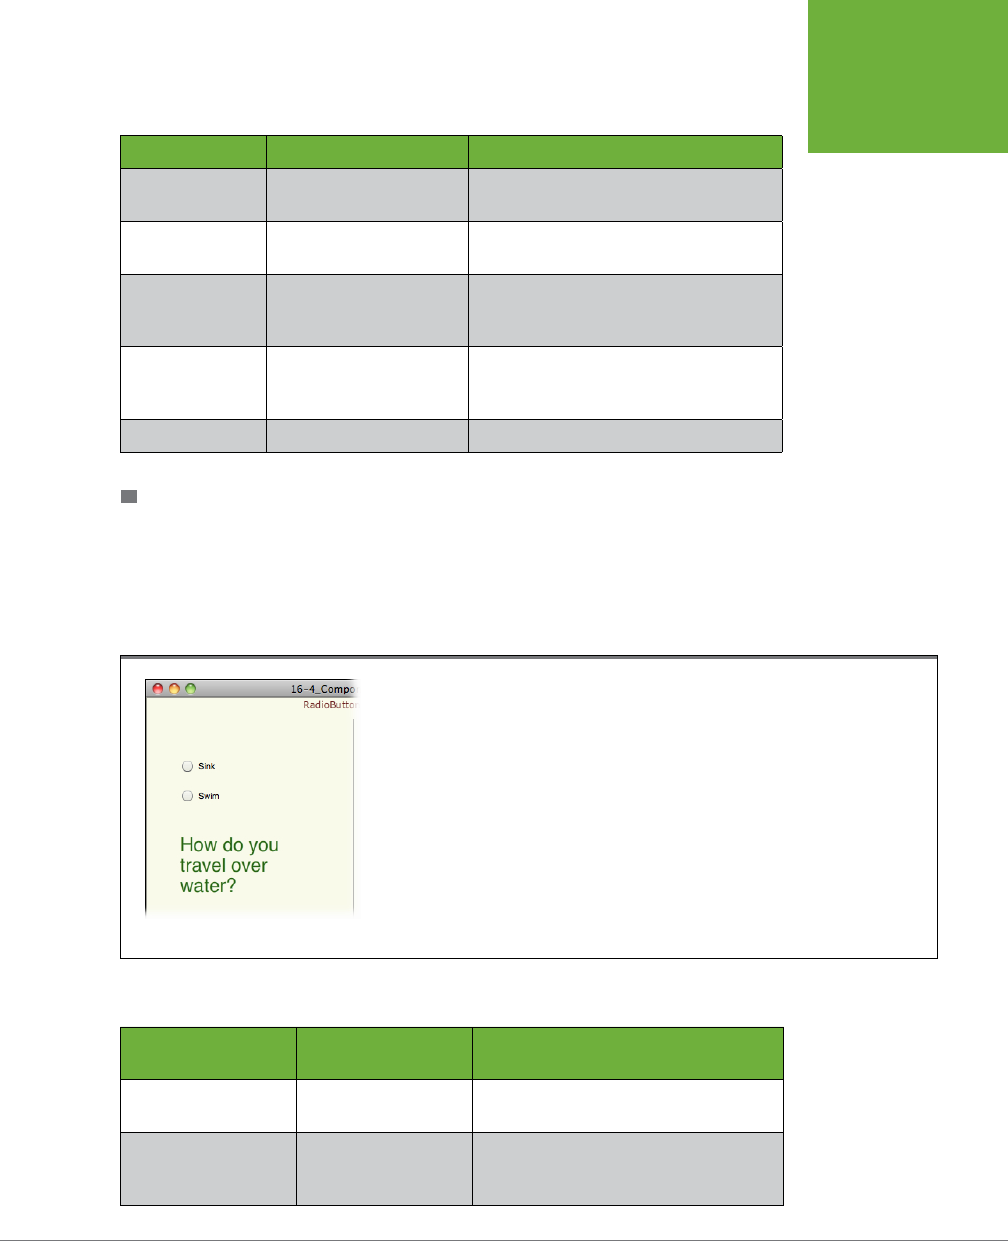
CHAPTER 16: COMPONENTS FOR INTERACTIVITY 571
THE BUILT-IN
COMPONENTS
Table 16-9. Parameters for the ProgressBar component.
PARAMETERS EXPECTED VALUE PURPOSE
direction left or right Sets whether the bar fills from the left or
from the right.
enabled selected or deselected If deselected, your audience can’t access
the component.
mode event, polled, manual, Selects different methods for providing
progress information. Event and polled are
the most common modes.
source an object that’s being
loaded; for example, a
Loader instance
Sets the source for the object that’s being
loaded.
visible selected or deselected If deselected, the component is hidden.
RADIOBUTTON
When you want to make sure your audience chooses just one of several mutually
exclusive options, use a group of RadioButton components (Figure 16-22). Radio
buttons are frequently used in programs and on the Internet, so it’s likely your audi-
ence will be familiar with them. See Table 16-10 for a list of parameters to use with
the RadioButton component.
FIGURE 16-22
RadioButton components let you offer your audience mutually exclusive options, so you
always use RadioButton components in groups of two or more. (If you think you want a
single radio button, you probably want to use a checkbox.) Turning on one radio button
tells Flash to turn off all the other radio buttons with the same groupName.
Table 16-10. Radiobutton parameters.
RADIOBUTTON
PARAMETERS EXPECTED VALUE PURPOSE
enabled selected or deselected If deselected, your audience can’t use the
component.
groupName RadioButtonGroup Identifies the group of buttons from
which your audience can make a single
selection.
www.it-ebooks.info
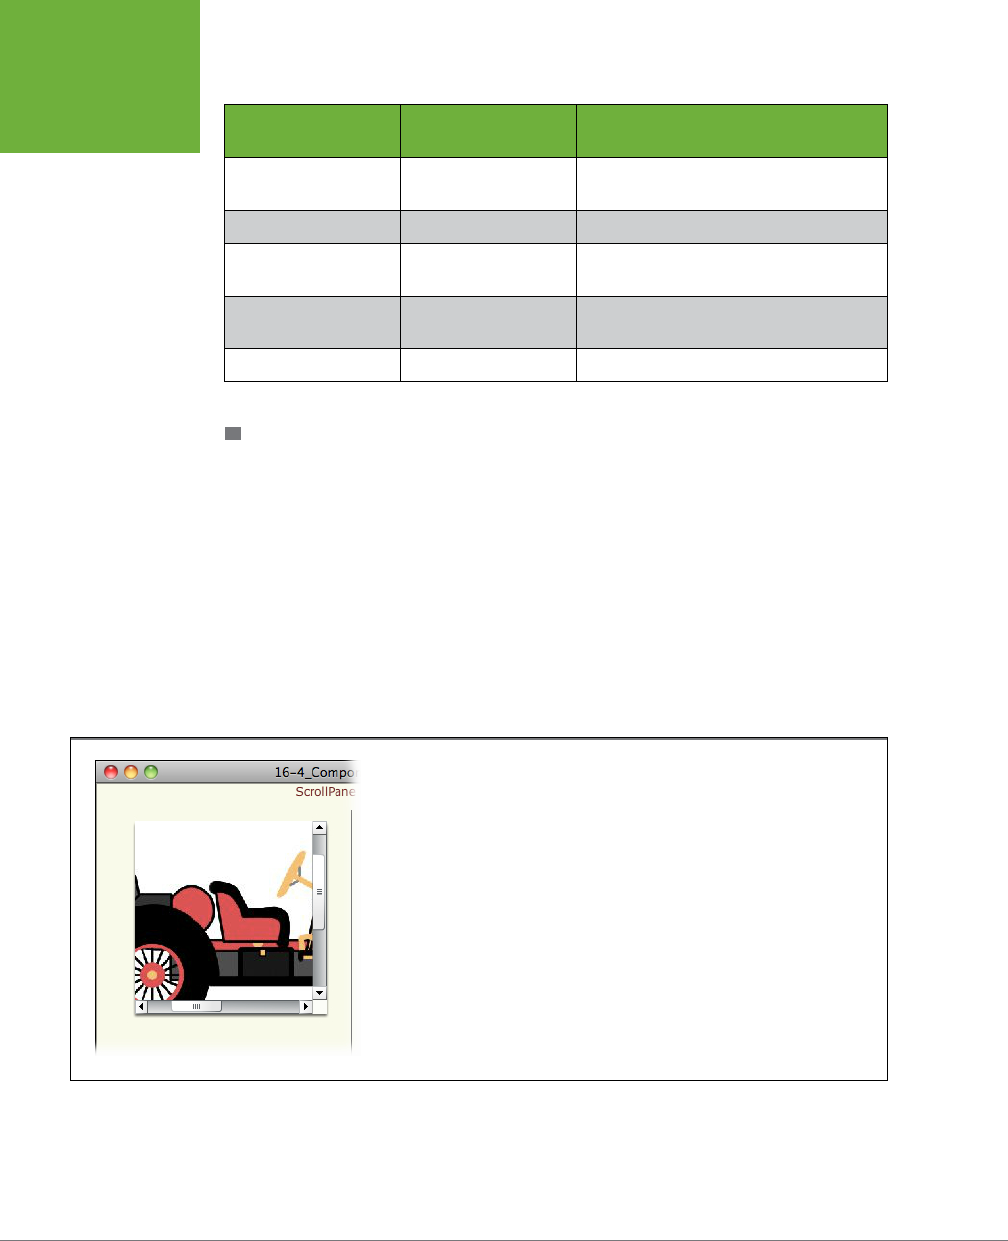
FLASH CS6: THE MISSING MANUAL
572
THE BUILT-IN
COMPONENTS
RADIOBUTTON
PARAMETERS EXPECTED VALUE PURPOSE
label a string of characters Explanatory text for the RadioButton
component.
labelPlacement left, right, top, bottom Positions the label relative to the button.
selected selected or deselected Changes the appearance of the
RadioButton to show it’s checked.
value An object like a string
or a number
Defines the values represented by radio
buttons.
visible selected or deselected If deselected, the component is hidden.
SCROLLPANE
The ScrollPane component helps you include an image that’s too big to fit into your
animation. Think about some of those map programs that let you move a map im-
age inside a frame. You can let your audience position an image using scroll bars
or by dragging in the image. Figure 16-23 shows you the ScrollPane in action, and
Table 16-11 lists the multitude of parameters you find in the Component Inspector.
There are two parameters for each type of scroll bar: horizontal and vertical. These
parameters determine how far the window scrolls when you click the scroll bar’s
arrows and when you click the body or track of the scroll bar. A ScrollPolicy lets you
define scrolling behavior and assign that behavior to many objects and components.
The ScrollPolicy settings can get a little involved, but in most cases, you can leave
horizontalScrollPolicy
and
verticalScrollPolicy
set to AUTO without adverse eects.
FIGURE 16-23
When you display an animation or image using the ScrollPane component, Flash auto-
matically tacks on scroll bars that people can use to choose which part of the animation
they want to see through the window.
www.it-ebooks.info

CHAPTER 16: COMPONENTS FOR INTERACTIVITY 573
THE BUILT-IN
COMPONENTS
Table 16-11. Parameters for the ScrollPane component.
SCROLLPANE
PARAMETERS EXPECTED VALUE PURPOSE
enabled selected or deselected If deselected, your audience can’t use
the component.
horizontalLineScrollSize a number value The amount of content to be scrolled,
horizontally, when your audience clicks a
scroll arrow.
horizontalPageScrollSize a number value The number of pixels by which to move
the scroll marker on the horizontal scroll
bar when your audience clicks the scroll
bar track.
horizontalScrollPolicy ON, OFF, AUTO Controls whether a scroll bar appears in
the component.
scrollDrag selected or deselected If selected, your audience can drag an
image within the ScrollPane.
source name and path to the
file to be displayed;
this can be an Internet
address
Sets the source for the file to be dis-
played in the ScrollPane.
verticalLineScrollSize a number value The amount of content to be scrolled,
vertically, when your audience clicks a
scroll arrow.
verticalPageScrollSize a number value The number of pixels by which to move
the scroll marker on the vertical scroll
bar when your audience clicks the scroll
bar track.
verticalScrollPolicy ON, OFF, AUTO Controls whether a scroll bar appears in
the component.
visible selected or deselected If deselected, the component is hidden.
SLIDER
The Slider component gives your audience an easy way to select a value. Better still,
it helps you prevent them from choosing a useless value. (Ever had someone type
his name into a box where you expected a number?) Sliders are a natural for con-
trolling volume or sizing an image, and there are lots of creative ways to use them.
Use the maximum and minimum parameters to set the range (Table 16-12). Use the
snapInterval
parameter to count by fives or twos if you want. The
tickInterval
param-
eter refers to a visual scale that appears above the slider, as shown in Figure 16-24.
www.it-ebooks.info
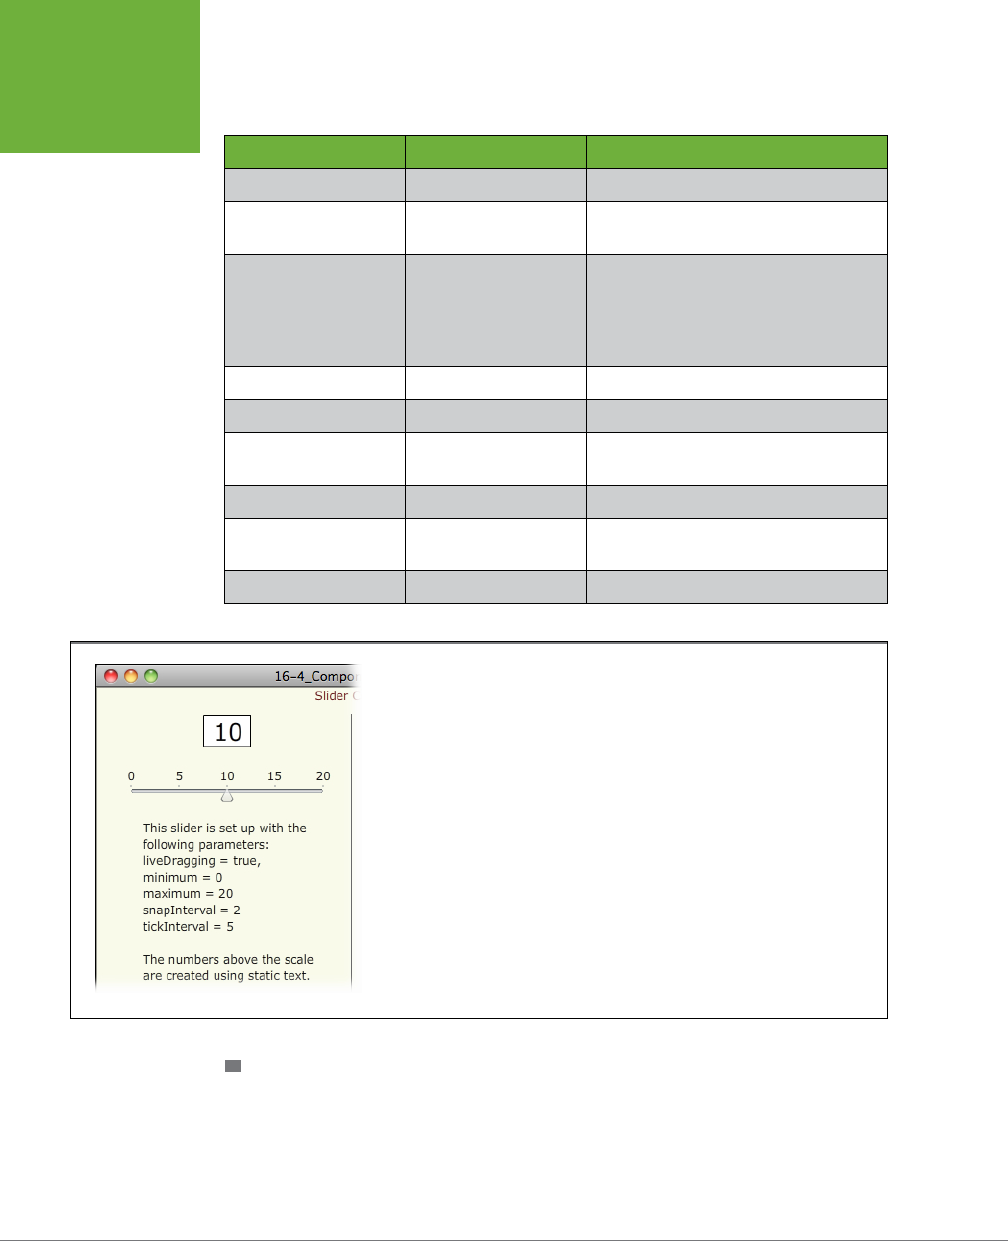
FLASH CS6: THE MISSING MANUAL
574
THE BUILT-IN
COMPONENTS
Table 16-12. Parameters for the Slider component.
SLIDER PARAMETERS EXPECTED VALUE PURPOSE
direction horizontal or vertical Sets the Slider’s orientation.
enabled selected or deselected If deselected, your audience can’t access
the component.
liveDragging selected or deselected If selected, lets your audience drag to
change the Slider’s value. If you deselect
the parameter, it’s up to you to move the
Slider through ActionScript to display a
value.
maximum a number value The high number on the Slider’s scale.
minimum a number value The low number on the Slider’s scale.
snapInterval a number value Sets the precision available on the
Slider’s scale.
tickInterval a number value Shows visual tick marks above the Slider.
value a number value The value represented by the Slider’s
position.
visible selected or deselected If deselected, the component is hidden.
FIGURE 16-24
The slider component doesn’t automatically provide numbers for its scale. Here the
numbers were added using Flash text.
TEXTAREA
The TextArea component (Figure 16-25) is an all-purpose, multiline, scrollable text
field that’s useful for presenting text to your audience. It’s also useful when you want
your audience to be able to type a long comment, or any other information longer
than a few words. You can modify the text property through ActionScript, which
means you can change the text that appears in a text field while your animation is
running. (See Table 16-13 for a list of TextArea parameters.)
www.it-ebooks.info
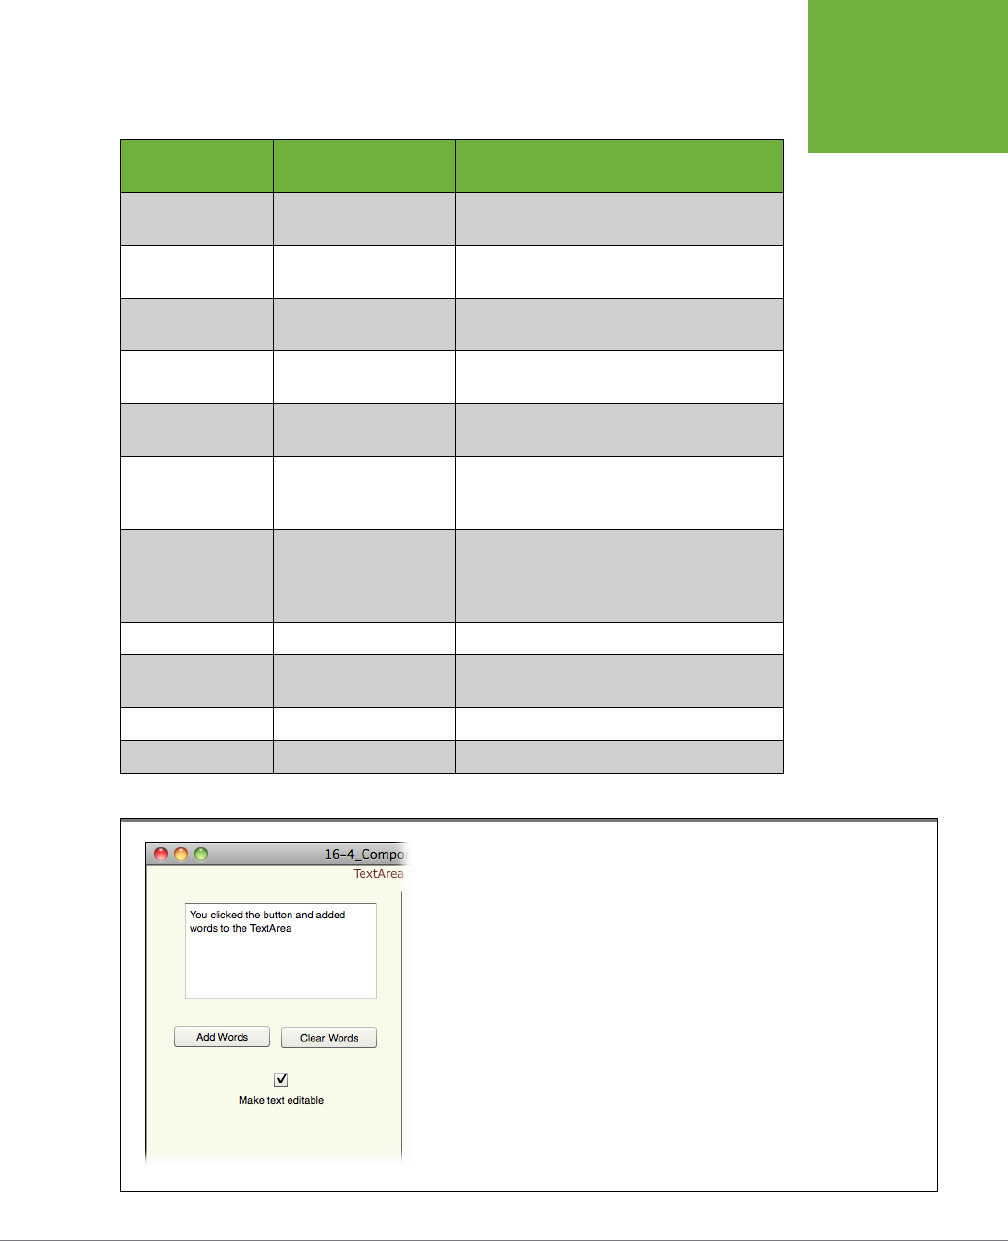
CHAPTER 16: COMPONENTS FOR INTERACTIVITY 575
THE BUILT-IN
COMPONENTS
Table 16-13. Parameters for the TextArea component.
TEXTAREA
PARAMETERS EXPECTED VALUE PURPOSE
condenseWhite selected or deselected When selected, removes extra white space
from HTML text.
editable selected or deselected If deselected, your audience can’t make
changes to the component.
enabled selected or deselected If deselected, your audience can’t access the
component.
horizontalScroll-
Policy
ON, OFF, AUTO Controls whether a scroll bar appears in the
component.
htmlText HTML-encoded text Displays HTML encoded text, showing for-
matting, hyperlinks, and other features.
maxChars a number value Limits the number of characters that the
TextArea component can contain. The set-
ting 0 means there’s no limit.
restrict a string of characters Lets you specify which characters your audi-
ence can type into the TextArea component.
For example, you can limit input to the num-
bers 0–9 if you expect a phone number.
text a string of characters The text to be displayed in the TextArea.
verticalScrollPolicy ON, OFF, AUTO Controls whether a scroll bar appears in the
component.
visible selected or deselected If deselected, the component is hidden.
wordWrap selected or deselected Controls line breaks in large chunks of text.
FIGURE 16-25
The TextArea and TextInput components both let your audience type text, but the
TextArea component (shown here) lets them type multiple lines of text. Flash automati-
cally adds scrollbars if someone types in more text than the TextArea component’s
dimensions can display.
www.it-ebooks.info
FLASH CS6: THE MISSING MANUAL
576
THE BUILT-IN
COMPONENTS
TEXTINPUT
The TextInput component lets you create a single-line text field, used mostly as a
field in a form. (See Table 16-14 for the list of TextInput parameters.) Using this com-
ponent lets you give your audience a free-form text field just long enough to type
what you want them to type (for example, a name, phone number, or email address).
Table 16-14. Parameters for the TextInput component.
TEXTINPUT
PARAMETERS EXPECTED VALUE PURPOSE
displayAsPassword selected or deselected When selected, disguises the actual charac-
ters in the display.
editable selected or deselected If deselected, your audience can’t change the text.
enabled selected or deselected If deselected, the component can’t be
accessed by the audience.
maxChars a number value Limits the number of characters that can be
contained in a TextInput component. If it’s
set to 0, then there’s no limit.
restrict a string of characters Used to limit the characters that can be
typed into the TextInput component; for
example, you can limit input to numbers if
you expect a phone number.
text a string of characters The text shown on the display.
visible selected or deselected If deselected, the component is hidden.
TILELIST
The TileList is used to display several images in a grid (Figure 16-26). For example,
you may want to show several thumbnail images in a row. When your audience clicks
a thumbnail, a larger version of the image is displayed (See Table 16-15).
Table 16-15. Parameters for the TileList component.
TILELIST PARAMETERS EXPECTED VALUE PURPOSE
allowMultipleSelection selected or deselected If selected, your audience can select
more than one image.
columnCount a number value Sets the number of columns in the grid.
columnWidth a number value Sets the width of the columns in pixels.
dataProvider a DataProvider object
(for more details, see
the box on page 566)
Points to a data source to provide
the items in the list. The DataProvider
object can come from an external
source, or you can create one using
ActionScript code.
direction horizontal or vertical Sets whether the TileList scrolls hori-
zontally or vertically.
www.it-ebooks.info
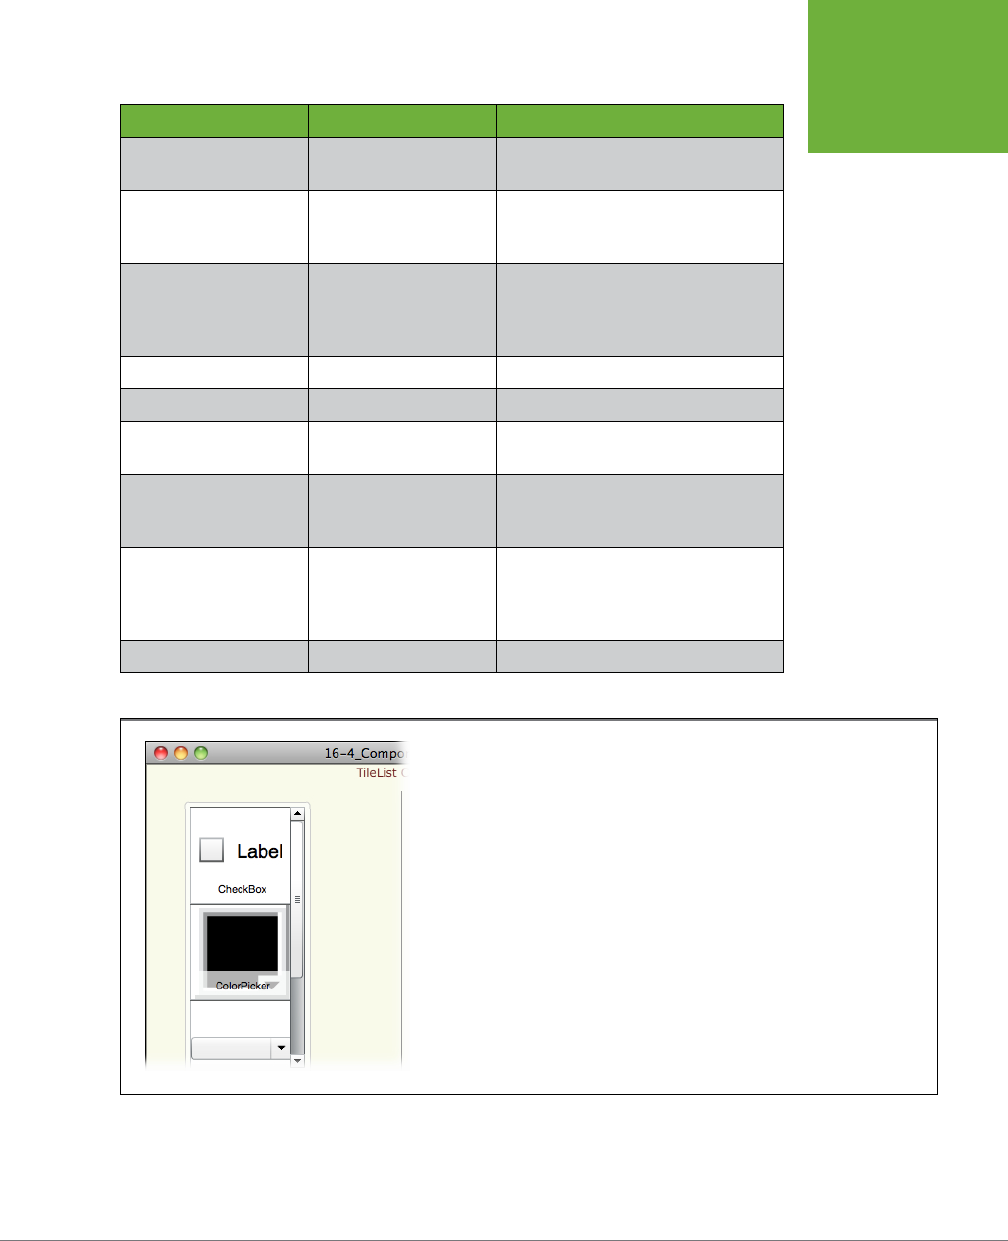
CHAPTER 16: COMPONENTS FOR INTERACTIVITY 577
THE BUILT-IN
COMPONENTS
TILELIST PARAMETERS EXPECTED VALUE PURPOSE
enabled selected or deselected If deselected, your audience can’t use
the component.
horizontalLineScrollSize a number value The amount of content to be scrolled,
horizontally, when your audience clicks
a scroll arrow.
horizontalPageScrollSize a number value The number of pixels by which to
move the scroll marker on the hori-
zontal scroll bar when your audience
clicks the scroll bar track.
rowCount a number value Sets the number of rows in the grid.
rowHeight a number value Sets the height of the rows in pixels.
scrollPolicy ON, OFF, AUTO Controls whether a scroll bar appears
in the component.
verticalLineScrollSize a number value The amount of content to be scrolled,
vertically, when your audience clicks a
scroll arrow.
verticalPageScrollSize a number value The number of pixels by which to
move the scroll marker on the vertical
scroll bar when your audience clicks
the scroll bar track.
visible selected or deselected If deselected, the component is hidden.
FIGURE 16-26
Usually TileList components are filled with images and captions. In honor of this chapter’s
topic, this TileList is filled with images of other components.
www.it-ebooks.info
FLASH CS6: THE MISSING MANUAL
578
THE BUILT-IN
COMPONENTS
UILOADER
Think of the UILoader (user interface loader) as a container for images (.jpg, .gif, and
.png) and Flash animations (.swf) that are outside of your Flash application. You pro-
vide the name and path of the file you want to load into the source parameter (Table
16-16). If you’re ActionScripting, you can assign the name to the
source
property of
the UILoader. Through ActionScript, you can also access the
percentLoaded
property.
Table 16-16. Parameters for the UILoader component.
UILOADER
PARAMETERS EXPECTED VALUE PURPOSE
autoLoad selected or deselected If deselected, the UILoader waits until
it receives a
load()
statement.
enabled selected or deselected If deselected, your audience can’t
access the component.
maintainAspectRatio selected or deselected Determines whether an image main-
tains its proportions; usually left set
to true.
scaleContent selected or deselected If selected, the UILoader auto-
matically scales the image to fit the
loader’s dimensions.
source name and path to the file to
be displayed; this can be an
Internet address
Sets the source for the file to be
loaded.
visible selected or deselected If deselected, the component is
hidden.
UISCROLLBAR
The UIScrollBar component is a fancy, color-customizable scrollbar you can add to a
TextField or TextArea field to make your text fields match your overall color scheme
(see Table 16-17 for parameters).
Table 16-17. Parameters for the UIScroller component.
UISCROLLBAR
PARAMETERS EXPECTED VALUE PURPOSE
direction horizontal or vertical Sets the orientation of the
scroll bar.
scrollTargetName instance name of a textArea or
textInput component
Identifies the text field to be
scrolled.
visible selected or deselected If deselected, the component
is hidden.
www.it-ebooks.info
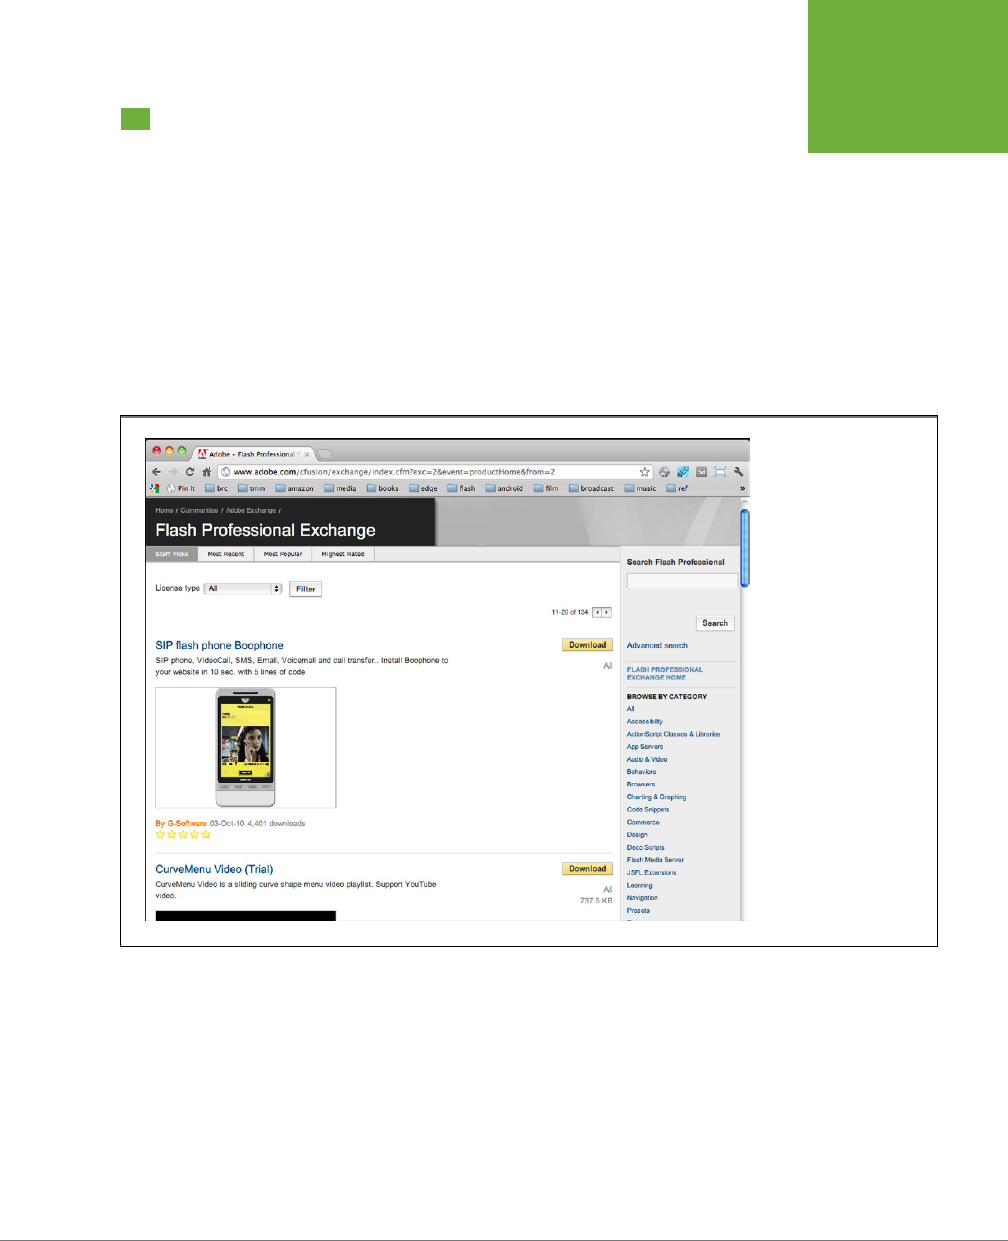
CHAPTER 16: COMPONENTS FOR INTERACTIVITY 579
FINDING
ADDITIONAL
COMPONENTS
Finding Additional Components
In addition to the components that ship with Flash, you can also find components on
the Web (try searching for “Flash components” using your favorite search engine).
Below are a few of the most popular sources for Flash components as this book
goes to press:
• Flash Exchange (
www.adobe.com/cfusion/exchange/index.cfm
). Adobe hosts
a website called Flash Exchange (see Figure 16-27). Adobe itself doesn’t create
the components on the Flash Exchange; instead, regular folks and third-party
software companies submit the components, and the site categorizes and rates
them. To visit the Flash Exchange, select Help→Flash Exchange.
FIGURE 16-27
The Flash Exchange
website (which you
can surf to by selecting
Help→Flash Exchange)
lists hundreds of compo-
nents in nearly a dozen
different categories, from
Navigation to Commerce
and Accessibility. Some
you pay for; others you
can download for free.
Use the component
specifications, number
of downloads, and rating
associated with each
component to help you
decide which ones to try.
• The Flash Components Network (
www.flashcomponents.net
). Similar to Adobe’s
Flash Exchange, this site lists and rates Flash components submitted by a variety
of Flash enthusiasts and software companies.
• ActionScript.org (
www.actionscript.org
). This everything-Flash site lists dozens
of freely downloadable components.
www.it-ebooks.info

FLASH CS6: THE MISSING MANUAL
580
FINDING
ADDITIONAL
COMPONENTS
NOTE Because anyone with the time, inclination, and ActionScript experience can create a Flash component,
Flash enthusiasts (as opposed to established software companies) create most of the Flash components on the Web.
Many of the components are free, but there’s a downside: Components don’t always come with the documentation
you need to customize them, and they virtually never come with a guarantee. They may
not
work as promised,
and they
may
harbor viruses that can damage your computer. Don’t be afraid to try out useful components, but
do exercise the same care and caution you use when you download and install any other software program.
Installing Third-Party Components
After you find and download a component (page 572 lists
several online component resources), you need to install the
component so you can use it in Flash:
1. First, exit Flash if you’ve got it running.
2. Place the .swc or .fla file containing the component in the
folder where you keep components.
3. For PCs, use
C:\Program Files\Adobe\Adobe Flash CS6\
language\Configuration\Components
. For Macs, use
Macintosh HD:Users:username:Library:Application
Support:Adobe:Flash CS6:language:Configuration:Com
ponents
.
4. Start Flash.
5. Open the Components panel (Window→Components)
and check to make sure the new component is available.
UP TO SPEED
Getting a Component’s Version Number
Like programs, components get updates from time to time.
Perhaps the folks who designed the component added new
features, or maybe they needed to make changes so that the
component would be compatible with an updated version of
Flash. In any case, there may come a time when you’ll want to
find out the version number of a component that you’re using in
your Flash project. Fortunately, every component has a version
property, so there’s a consistent way to check. All you need to
do is drag an instance of the component onto the stage, and
then add this ActionScript code to the timeline:
trace(component_instance_name.version);
Replace “component_instance_name” with the actual in-
stance name of the component you added to the stage. Press
Ctrl+Enter (⌘-Return) to test your document. The component’s
version number appears in the Output panel (Figure 16-28).
CODERS’ CLINIC
FIGURE 16-28
You can display the version number of a component in the Output panel simply by placing a
snippet of code in the Actions panel.
www.it-ebooks.info

581
CHAPTER
17
Text plays a big part in many Flash projects, and you can put it there in a few
ways. As explained on page 220, you can use the Text tool to create text
fields and then alter the text’s appearance using the Properties panel. But if
you want your text to undergo changes over the course of an animation, you need
the power of ActionScript. This chapter shows you how to use ActionScript to edit,
format, and manipulate text fields as your animation runs. First, you need to know
about font embedding, to ensure that your audience sees exactly the typefaces you
specify. Then, to edit text on the fly, you’ll learn how to add and remove characters
from strings of text. The remainder of the chapter explains how to create text fields
using ActionScript and how to format and animate text.
What Font Does Your Audience Have?
When you create your Flash masterpiece, you use the fonts installed on your com-
puter. Dozens of fonts show up in the Properties→Character→Family list. Franklin
Gothic or French Script, anyone? Whenever a program like Flash needs a font, it
gets the font description from the file on your computer. Font files mathematically
describe the outlines of each character. Flash uses this description to display type
at all dierent sizes, just like resizing a vector image (page 357).
When your project is finished and you publish it, you create an SWF file (page 7).
There are two ways that Flash handles text. It can look up the font description and
then draw the image, or it can turn the text into a raster image. Raster images are
fine, but because the text is converted to a graphic, you can’t edit the words or
characters when the animation is running on your audience’s computer. It looks
Choosing, Using, and
Animating Text
www.it-ebooks.info

FLASH CS6: THE MISSING MANUAL
582
WHAT FONT
DOES YOUR
AUDIENCE
HAVE?
like text, but it’s really just another graphic. If Flash stores the name of the font in
the SWF file, then Flash Player looks up the font description and has everything it
needs to draw those beautiful, complicated glyphs that make up a typeface. You
can change the text on the fly using ActionScript, and your audience can even add
and edit text if you let them. There’s only one snag with using the font name in your
Flash projects: If your audience’s computer doesn’t have the font file for Franklin
Gothic or French Script, Flash Player uses another font in its place. In the best cases,
the dierence doesn’t show. In the worst cases, your text looks strange and doesn’t
fit properly in the space you’ve provided.
Embedding Fonts in Your SWF file
It’s not always possible to anticipate the fonts your audience will have. (Heck, these
days it’s hard to guess whether your audience will be watching on a computer, a
smartphone, a tablet, or a television screen.) So Flash provides a way to put the
font descriptions
in the SWF file
. In Flash-speak, that’s called
embedding
the font.
With the font description in the animation file, Flash Player has everything it needs.
Of course, embedding adds to the size of the SWF file, but at least your audience
sees the animation as you designed it. In earlier versions of Flash (before CS5), you
had to remember to embed all the fonts you used in your animation. Now, Flash
automatically embeds any characters used in text fields. However, if you want to
generate new text on the fly or give your audience the ability to add text, you need
to embed additional font descriptions.
You need to embed fonts if:
• You create new text objects, like text fields, on the fly using ActionScript.
• You edit text with ActionScript using new characters, numerals, or punctuation.
• You give your audience a way to add or edit text with TLF editable, Classic
dynamic, or Classic input text.
If you’re using Flash CS4 or earlier, it’s best to manually embed fonts unless your
project meets one of the criteria below.
You don’t need to embed fonts if:
• You place your text in fields at design time and use TLF read only, TLF select-
able, or Classic static text.
• All the text in your project is in text fields, and it won’t change when the ani-
mation runs.
• You choose device fonts: _sans, _serif, or _typewriter. This specification au-
tomatically uses fonts already installed on your audience’s computer, phone,
or tablet.
As mentioned earlier, embedding font descriptions in your SWF files adds to the
file size—and you want to keep those SWF files as small as possible. Flash lets you
embed only the necessary fonts and characters—no extras. You wouldn’t want to
embed Zapf Chancery, for example, if you’re not using that font, and you don’t need
www.it-ebooks.info
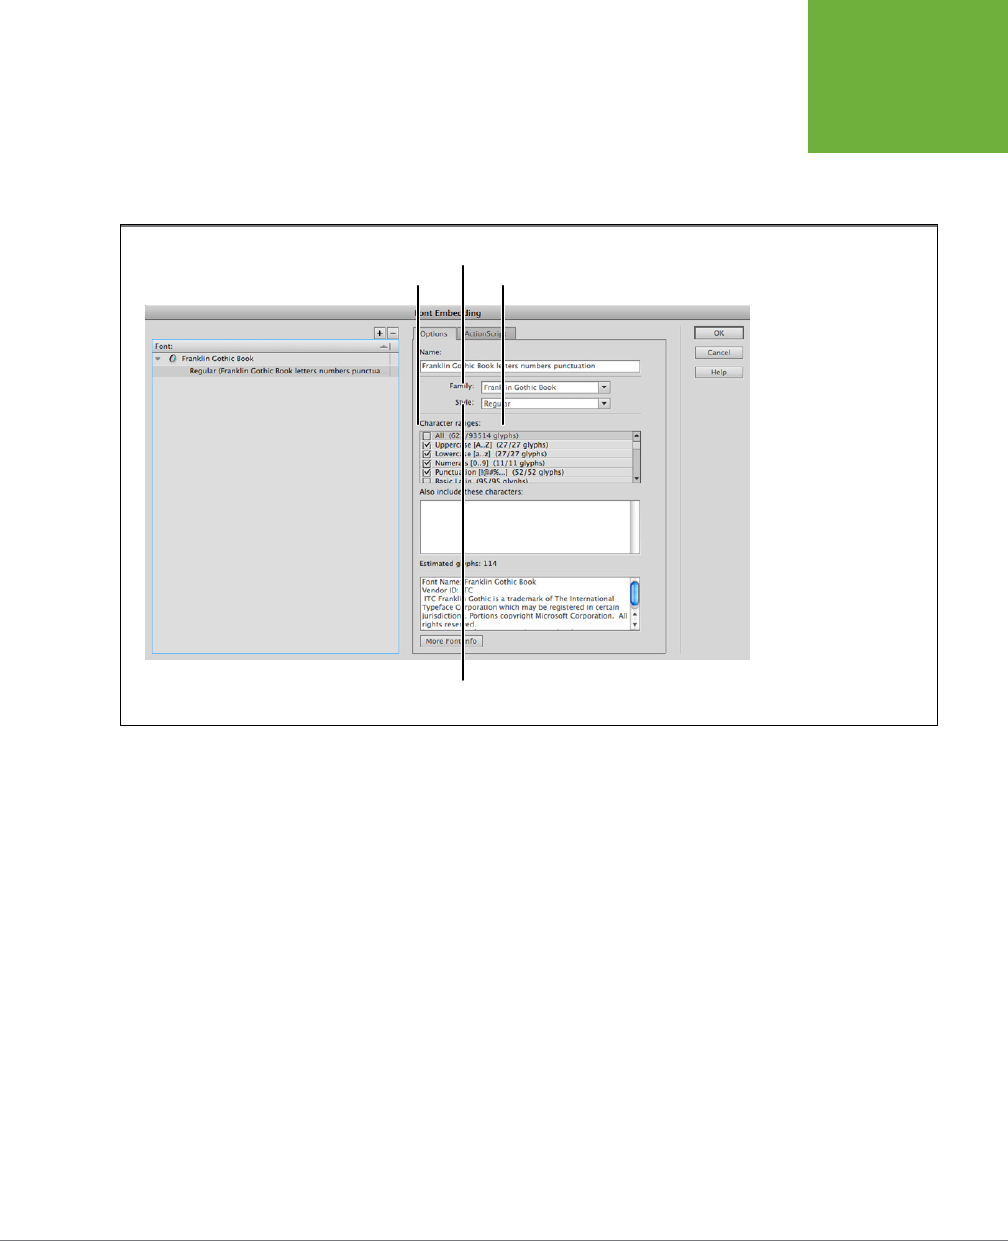
CHAPTER 17: CHOOSING, USING, AND ANIMATING TEXT 583
WHAT FONT
DOES YOUR
AUDIENCE
HAVE?
to embed character descriptions for Q, z, #, and | if they don’t appear in your text
and there’s no potential for them to be used when your animation runs. The Font
Embedding dialog box (Figure 17-1) gives you the tools to embed just the right fonts
and characters.
FIGURE 17-1
If you’re new to Flash,
the concept and process
of embedding fonts can
be a little mind-boggling.
Fortunately, in Flash
Professional CS6, you can
do all these chores in one
spot—the Font Embed-
ding dialog box.
Character ranges ActionScript tab
Family
Style
Follow these steps to embed specific characters from a font in your SWF file:
1. With your Flash document open, choose Text→Font Embedding.
The Font Embedding dialog box opens.
2. Make sure the Options tab is selected, and then use the Family menu to
select the Family and Style you want to embed.
The family is the common name you use for a font, like Times, Arial, or, as shown
in Figure 17-1, Franklin Gothic Book. The style includes Regular, Bold, Italic, and
other characteristics.
3. In the Name box, type a name for the font, like
Franklin Gothic Book letters
numbers punctuation
.
Use a name that helps you identify the font description later. This name appears
in the Library panel.
4. Use the “Character ranges” list to choose the specific characters you want
to embed.
www.it-ebooks.info

FLASH CS6: THE MISSING MANUAL
584
WHAT FONT
DOES YOUR
AUDIENCE
HAVE?
Here’s where you control how much data goes into the SWF file. So if you need
only lowercase letters, no numbers or punctuation, you can choose
Lowercase
[a..z] (27/27 glyphs)
. The more characters you add, the bigger your SWF gets.
Glyph
is another word for character; it also includes numerals and punctuation.
5. Optional: Add characters to the “Also include these characters” box.
Suppose you need to include the dollar sign, a comma, and periods, but don’t
need to include all 52 punctuation glyphs. Just type the necessary punctua-
tion into this box, and don’t select the punctuation option in the “Character
ranges” list.
6.
Optional for ActionScript:
If you’re going to use create text fields on the fly
with ActionScript, click the ActionScript tab.
The ActionScript tab has three sections: “Outline format,” Linkage, and Sharing.
7.
Optional for ActionScript:
In the Linkage section, turn on “Export for
ActionScript.”
The buttons and boxes in the ActionScript tab change from grayed out to avail-
able. Flash automatically turns on “Export in frame 1,” making your font available
at the beginning of your animation.
8.
Optional for ActionScript:
In the “Outline format” section, choose either
Classic (DF3) or TLF (DF4).
Your choice here must match the choices you make when you create text fields.
If you happened to use the Palatino font in both Classic text fields and TLF text
fields, then you need to embed the Palatino font for both text engines.
9.
Optional for ActionScript:
In the Class box, type a name, like
Franklin-
GothicBook
.
Like everything in ActionScript, your font description is an object based on a
class. In this step, you provide the name for a new class, which is based on the
flash.text.Font class.
10.
Optional for ActionScript:
Click the green checkmark button.
Flash displays a message: “A definition for this class could not be found in the
classpath, so one will be automatically generated in the SWF file upon export.”
Translation: This is a new class that didn’t previously exist, so Flash will create
the necessary code to create the class when you publish your SWF file.
11. On the left in the Font area, click the + button.
Flash creates a font symbol and adds it to your Flash document. The name you
provided in step 3 appears in the Font list in the Embedded Font dialog box,
and the font symbol is shown in the Library.
www.it-ebooks.info

CHAPTER 17: CHOOSING, USING, AND ANIMATING TEXT 585
CONTROLLING
TEXT WITH
ACTIONSCRIPT
There are a few technical details when you embed fonts in your SWF files. If the
font’s appearance isn’t important to your project, then consider using system fonts,
as described in the box below. Create separate font symbols for each style, such
as Bold, Italic, and Regular. Remember, TLF text and Classic text are two dierent
beasts where Flash and ActionScript are concerned. You can use both types of text
in a single Flash document, but when you export text for ActionScript, you need to
make sure it matches the text type.
Device Fonts: _sans, _serif, and _typewriter
At the top of the list in Properties
→
Character
→
Family, there
are fonts called _sans, _serif, and _typewriter. What are they,
and how do I use them?
These three font options are known as device fonts. Device
fonts include three generic styles:
_sans
is similar to Helvetica
or Arial,
_serif
is similar to Times or Times New Roman, and
_typewriter
is similar to Courier or Courier New. You find these
choices at the top of the font lists in the Properties→Character
panel and the Text→Font menu. If you specify device fonts
when you create text fields, then Flash Player always looks for
a font that’s installed on the device (computer, smartphone,
or whatever) that’s playing the animation. Sometimes, small
file size is an overriding concern. Perhaps you know that your
audience will be using a slow Internet connection or handheld
devices. When you choose device fonts for your animation, no
fonts are embedded in the .swf file. On the Web, this makes
for smaller, faster Internet transmission. On handhelds, this
conserves resources such as CPU power and battery life. In
both cases, you give up some control over the appearance
of the type.
FREQUENTLY ASKED QUESTION
Controlling Text with ActionScript
If you’re used to using a word processor, it probably seems pretty natural to format
your text with menus and the Properties panel. After all, they aren’t that much dif-
ferent from Microsoft Word menus and dialog boxes. On the other hand, if you want
to make major changes to text on the fly, or if you want to format text with HTML
or CSS, you have to use ActionScript to produce your text. You saw some text and
ActionScript examples in Chapter 12 (page 432). You’ll find more here. First, the
elementary basics, which begin with string theory.
ActionScript Text: String Theory
Flash has lots of text containers, like TLF editable and Classic dynamic text. And then
there are the components: Label, TextArea, and TextInput. All of these text-displaying
tools use the String data type (page 432). As far as ActionScript is concerned, a
string is similar to an array, in that it’s a list of characters. The list can be a single
character or hundreds of characters. Each character is in a specific position in the
list—its index number (page 488). Arrays and strings both begin counting at position
zero (0). So if the string is “Stutz Modern Motorcars,” that capital S is at position 0.
www.it-ebooks.info

FLASH CS6: THE MISSING MANUAL
586
CONTROLLING
TEXT WITH
ACTIONSCRIPT
NOTE Strings are common to most programming languages, and there are loads of books that explain how
to perform string manipulation magic. Most Flash programs don’t require such trickery. This chapter explains some
of the most common techniques used by Flash designers. However, if you’re an aspiring string magician, you may
want to start out with
ActionScript 3.0 Cookbook
or
Essential ActionScript 3.0
, both published by O’Reilly.
Creating a New String
You want to use the name of your company, “Stutz Modern Motorcars,” in an
ActionScript program. The typical way to do so is to create a variable with the data
type string, and then store the name of your company inside that variable. Whenever
you need the company name to appear in your program, you can provide the name
of the variable. Here’s the way you’d create a string variable for your company name:
var strCompanyName:String = "Stutz Modern Motorcars";
This statement does a few things in a single line. It creates and names a String vari-
able strCompanyName, and then it assigns a string value to the variable. You only
have to create the variable with the
var
statement once, and then you can use it as
many times as you want. In this case, the variable name begins with the three let-
ters “str” to indicate that it’s a string, but that’s not necessary. The variable name
could be a single letter.
NOTE String values, like “Stutz Modern Motorcars”, are always shown within either double or single quotes.
One of the reasons you can use either type of quotes is that it provides an easy way to include quotes within your
string. So here are examples of valid strings:
strDont = "don't";
strQuote = 'Ed said, "I love my Stutz Bearcat. I drive it everywhere."';
The important rule is that you have to begin and end the string with the same type of quotation mark.
Because you assign your strings to variables, you can change the strings’ values. For
example, if the boss changes the name of Stutz Modern Motorcars to the simpler
(and even more modern) Stutz Motor Company, you can update your ActionScript
code by assigning the new name to the strCompanyName variable, like so:
strCompanyName = "Stutz Motor Company";
Joining Strings
One of the most common ways to modify a string is to add more text to it. In geek-
speak that’s called concatenation, but you can think of it as joining strings. Suppose
your boss finally gets around to filling out those incorporation papers, and your
company has yet another new name. If you want to add the word “Incorporated”
to the existing strCompanyName, here’s how you’d do it:
strCompanyName = strCompanyName + ", Incorporated";
www.it-ebooks.info

CHAPTER 17: CHOOSING, USING, AND ANIMATING TEXT 587
CONTROLLING
TEXT WITH
ACTIONSCRIPT
As you can see, you’re adding a new string value to the end of the existing string.
The end result is a complete name, “Stutz Motor Company, Incorporated.” Joining
strings is such a common and popular task that there’s a shortcut to help you do so
with fewer keystrokes. It looks like this:
strCompanyName += ", Incorporated";
That line of code does exactly the same thing as the preceding example, just with
fewer keystrokes. Make sure you keep the + sign to the left of the = sign. When you do
it the other way around, the code has an entirely dierent meaning to ActionScript.
NOTE If you want to test some of these string examples, you can use the
trace()
statement to display the
string in the Output panel. For example, to display strCompanyName, add this line to your ActionScript code:
trace(strCompanyName);
Make sure all the string variables are declared with a var statement like this:
var strCompanyName:String = "Stutz Modern Motorcars";
If they’re not declared before they’re used, you’ll get an error.
When you have a string inside quotes, like “, Incorporated,” it’s known as a
string
literal
. The string is
literally
what’s inside the quotes, similar to a constant. When a
string is represented by a variable, like strCompanyName, it’s a
string variable
. In
most situations, you can use either representation. For example, here’s another way
you can construct the new company name:
var strCompanyName:String = "Stutz Motor Company";
var strInc:String = ", Incorporated";
strCompanyName += strInc;
You can use a combination of string literals and string variables when you’re join-
ing a string. You see this technique in use when websites greet you by name. An
ActionScript example looks like this:
var strVisitorName = "Chris Grover";
strGreeting = "Hello, " + strVisitorName + ". What can I do to put you in a
Stutz Bearcat today?";
When you join strings with the concatenation operator (+ or +=), everything inside
the quotes has to be on a single line. That’s one of the reasons you see multiple as-
signment statements when an ActionScripter is creating a long paragraph of text.
var strSalesPitch:String = "The legendary Stutz Bearcat. ";
strSalesPitch += "It's your best value in high-performance ";
strSalesPitch += "sport cars today. ";
strSalesPitch += "At the Stutz Motor Company, we want to know, ";
strSalesPitch += "what can we do to put you in a Stutz Bearcat today?";
www.it-ebooks.info

FLASH CS6: THE MISSING MANUAL
588
CONTROLLING
TEXT WITH
ACTIONSCRIPT
This block of text produces a single long string. Even though there were line breaks
in the ActionScript code, those have no eect on the string when it is displayed. The
line breaks are dictated by the properties and size of the text container. To see how
you specifically place line breaks in a string, see the next section.
NOTE This last example is shown in
17-1_Join_Strings.fla
in the Missing CD (
www.missingmanuals.com/cds/
flashcs6mm
). A trace statement added to the code displays the completed string in the Output panel.
Using TextField’s
appendText()
Method
When you’re using objects of the TextField class, you can use the
appendText()
method. In fact,
appendText()
is preferred because it runs faster than the concat-
enation operator. Here’s some code that shows
appendText()
in action:
1 var tfBearcatBanner:TextField = new TextField();
2 var strSalesPitch:String = new String();
3 strSalesPitch = "Stutz Motor Company\nHome of the legendary Stutz
Bearcat\n";
4 tfBearcatBanner.text = strSalesPitch;
5 tfBearcatBanner.appendText("What can we do to put you in a Bearcat
today?");
6
7 tfBearcatBanner.x = 40;
8 tfBearcatBanner.y = 40;
9 tfBearcatBanner.width = 280;
10 tfBearcatBanner.height = 160;
11
12 addChild(tfBearcatBanner);
The first two lines create a text field and a string. The third line puts some text in the
string strSalesPitch. Line 4 assigns that string to the text property of the text field.
Line 5 is where the
appendText()
method comes in. The text in the parentheses is a
string literal, but it could just as easily be a variable. Lines 7 through 10 positionand
size the text field on the stage. The last line adds the text field to the Display List,
which makes it visible on the stage. When you run this bit of code, Flash Playerdis-
plays the text as shown in Figure 17-2. This example is called
17-2_Append _Text.fla
in the Missing CD (
www.missingmanuals.com/cds/flashcs6mm
).
FIGURE 17-2
The last line of text shown here in Flash Player was added to the TextField using the
appendText()
method.
www.it-ebooks.info

CHAPTER 17: CHOOSING, USING, AND ANIMATING TEXT 589
CONTROLLING
TEXT WITH
ACTIONSCRIPT
Adding Line Breaks to a String
When you’re typing text into a text field, you hit the Enter (or Return) key to begin
a new line, but that doesn’t work when you’re creating a string in ActionScript. You
need to insert a special signal within the string. It’s a backslash with a lowercase n,
which stands for new line. Here’s an example:
strSalesPitch = "Stutz Motor Cars \n Home of the legendary Stutz Bearcat";
If placed in a multiline text field and given enough room to display, this string
appears as two lines:
Stutz Motor Cars
Home of the legendary Stutz Bearcat
There’s a space after the word “Cars” and before the word “Home,” because, after
all, strings are literal. To avoid the extra space at the beginning of the second line,
you have to eliminate the space characters on both sides of
\n
. It looks strange to us
humans, because we see individual words, but that’s not the way ActionScript sees
a string. ActionScript just sees a long line of characters: letters, numbers, spaces,
and punctuation. The only thing that really grabs its attention is the sequence
\n
.
When ActionScript sees that backslash followed by a lowercase n, it knows that’s
the signal for a new line.
Finding a String Within a String
Suppose your Flash animation is more like a computer program. It’s so complex that
you’ve provided 200 pages of help text to help your audience learn how to use it.
You want to create some sort of search function so folks can zero in on the help they
need. A string that’s inside another string is often called a
substring
, and ActionScript
provides some methods to help you find a substring inside a larger string.
To make it simple, this example is going to search for the word “legendary” within
the longer string “Home of the legendary Stutz Bearcat.” Not quite hundreds of
pages, but you get the idea. All strings inherit the same properties and methods
from the string class. Two of those methods are
indexOf()
and
lastIndexOf()
, and
they’re specifically used to search for substrings. As with any good method, you
put them to work by tacking them onto the end of an object. Here’s some code to
show how it works:
var strSalesPitch:String = "Home of the legendary Stutz Bearcat."
strSalesPitch.indexOf("legendary");
The first line creates the string variable named strSalesPitch. The second line runs
the string method
indexOf()
. The method needs to know what substring you’re
searching for, so you provide that as a parameter. You can put the string literal right
inside the parentheses, as shown here with “legendary,” or you can provide a string
variable, which, of course, wouldn’t include the quotes.
So what does the
indexOf()
method do? It gives you back a number. Specifically, it
gives you the index number where the searched-for string begins. In the case above,
www.it-ebooks.info

FLASH CS6: THE MISSING MANUAL
590
CONTROLLING
TEXT WITH
ACTIONSCRIPT
strSalesPitch.indexOf(“legendary”)
is equal to 12, because if you start counting at
zero, and you count the letters and spaces, you find that the letter “l” is at index 12.
The
lastIndexOf()
method works in a similar manner, except that it starts searching
from the end of the string rather than the beginning. If either method is unable to
find the substring, it gives back the number –1. That result is actually helpful, since
you can use it with conditional statements. For example, this code would work:
if (strSalesPitch.indexOf("legendary ") == -1) strComment = "Not legendary.";
The
if()
statement tests to see if the string “legendary” is part of strSalesPitch. If the
statement doesn’t find that string, then the
indexOf()
method returns –1. When that
condition exists, the words “Not legendary” are assigned to strComment. It’s also
useful to partner the “does not equal” (!=) operator with
indexOf()
and
lastIndexOf()
.
So you can write code that says something like the following:
if (strSalesPitch.indexOf("legendary") != -1) strComment = "This is a
legendary automobile.";
In other words, if the code finds the substring, it assigns the string “This is a legend-
ary automobile.” to strComment.
Replacing Words or Characters in a String
Search and replace go hand in hand in the computer world. Suppose there were
changes at the car dealership and you needed to make changes to your sales pitch:
“Home of the legendary Stutz Bearcat.” You can use the replace method. It works
like this:
strSalesPitch = strSalesPitch.replace("Stutz Bearcat","Toyota Prius");
As usual with methods, you tack
replace()
onto the end of the object, in this case, a
string. For parameters, you provide the search words or letters, and then you provide
the replace words or letters. Also, as usual, you use a comma to separate parameters
when there’s more than one. The
replace()
method works with both string literals,
like the ones shown here, or string variables.
Converting Strings to Uppercase or Lowercase
You can change the case of a string using the
toUpperCase()
or
toLowerCase()
methods. Part of the String class, you use these the same way as the other methods.
Continuing with the car dealership theme, here are some examples that use
trace()
to display the strings in the Output panel:
var strSalesPitch = "Home of the legendary Stutz Bearcat";
trace("This is the initial string: \n" + strSalesPitch);
trace("\nThis is toUpperCase: \n" + strSalesPitch.toUpperCase());
trace("\nThis is toLowerCase: \n" + strSalesPitch.toLowerCase());
The first line creates the strSalesPitch variable and assigns the words “Home of
the legendary Stutz Bearcat” to the variable. The next line uses
trace()
to send
the string to the Output panel. (As mentioned on page 473, the
trace()
statement
www.it-ebooks.info

CHAPTER 17: CHOOSING, USING, AND ANIMATING TEXT 591
CREATING TEXT
FIELDS WITH
ACTIONSCRIPT
is a favorite debugging tool of ActionScripters.) The first string inside the
trace()
statement’s parentheses is a string literal that explains what’s to follow: “This is the
initial string:.” The
\n
is the newline character that forces the following text to start
on a new line. It works in the Output panel the same way it works in a text field.
The + (concatenation operator) joins the two strings. The last string is the variable
strSalesPitch. The final two lines are nearly identical to the second line. They add
one more
\n
to provide some additional, helpful white space. Finally, the methods
are applied to the strings. What appears in the Output panel comes as little surprise:
This is the initial string:
Home of the legendary Stutz Bearcat
This is toUpperCase:
HOME OF THE LEGENDARY STUTZ BEARCAT
This is toLowerCase:
home of the legendary stutz bearcat
Enough with the string theory. The next sections show how to create text on thefly
using ActionScript and how to format that text using a few dierent tools. This
example is named
17-4_Change_Case.fla
in the Missing CD (
www.missingmanuals.
com/cds/flashcs6mm
).
Creating Text Fields with ActionScript
You’ve seen how to create and then display objects using ActionScript (page 481),
and text fields are no dierent. You create, and if needed, format the object, and
then you use the
addChild()
method to add the text field to the Display List. Objects
added to the Display List are on the stage, and they’re visible unless you’ve pro-
grammed them otherwise.
ActionScript has two text field classes. The TextField class is the basis for Classic text:
static, dynamic, and input. Use the TLFTextField class to create TLF text. Fortunately,
the properties and methods in both classes are nearly identical, so if you know how
to use one, then you can use the other, too. For example, both text fields use the
.text property to define the characters displayed in the text field—more on that
later. The following examples use the new TLFTextField, which oers more bells and
whistles, but it shouldn’t be hard to translate the techniques to a Classic TextField.
NOTE The properties and methods related to TLF text fields are defined by the TLFTextField class. That means
if you ever have a question, or if you’re ever digging deeper for details about text, you can look up “TLFTextField”
in the
ActionScript 3.0 Language and Components Reference
(page 448), where you’ll find a listing of all the
properties, methods, and events that are part of the TLFTextField class. This section will familiarize you with quite
a few of these features.
www.it-ebooks.info

FLASH CS6: THE MISSING MANUAL
592
CREATING TEXT
FIELDS WITH
ACTIONSCRIPT
You create a new text field like you create an instance of any ActionScript class, us-
ing its constructor method. Here’s some code that creates a text field and displays
it. Try this demonstration yourself to create a TLFTextField:
1. In a new ActionScript 3.0 document, open the Actions panel
(Window→Actions).
At this point, there’s nothing on the stage and a single frame in the timeline.
2. Type the following code and press Enter (Return):
var tlfBanner:TLFTextField = new TLFTextField();
Somewhere as you type or when you hit Enter (Return), Flash generates its own
line of code at the top of your document:
import fl.text.TLFTextField;
Cleverly, Flash knows you need to import the class to create a TLFTextField
object.
3. Continue your code with the following lines:
tlfBanner.text = "Stutz Motor Company\nHome of the legendary Stutz Bearcat";
addChild(tlfBanner);
4. Press Ctrl+Enter (⌘-Return) to test your code.
The result looks like Figure 17-3—not pretty, but at least there’s some text on
the screen. Obviously, a little formatting comes next.
FIGURE 17-3
Text created in ActionScript usually requires some formatting before it’s ready for prime time. Here the typeface
is small and a bit blah. The text doesn’t fit in the 100 x 100 pixel text field that ActionScript provides unless you
specify different dimensions. And because there was no code to position the text field, it showed up in the upper-
left corner.
If you’ve followed the earlier ActionScript examples in this book, the code may seem
pretty familiar. The first line you typed creates a variable called tlfBanner that’s an
instance of TLFTextField. At that point, ActionScript automatically wrote the code
to import the TLFTextClass. In step 3, you created a string literal: “Stutz Motor
Company\nHome of the legendary Stutz Bearcat,” and assigned it to the text field’s
.text property. The last line of code adds the text field to the Display List, making
the text field visible on the stage. Without a single Flash tool touching the stage,
you made text, albeit a bit dull and truncated, appear in a Flash animation. In the
next few steps, you’ll spruce it up.
www.it-ebooks.info

CHAPTER 17: CHOOSING, USING, AND ANIMATING TEXT 593
CREATING TEXT
FIELDS WITH
ACTIONSCRIPT
This example used a string literal to set the text property. In some cases, especially
if you want to perform some string magic, as explained earlier in this chapter, you
may want to use a string variable. That works, too. For example, you could get the
same result in the text field using these lines:
var strSalesPitch:String = new String();
strSalesPitch = "Stutz Motor Company\nHome of the legendary Stutz Bearcat";
tlfBanner.text = strSalesPitch;
The first line creates an instance of the String class. The next line assigns a value to
the string variable. You could use any of the string tricks, like append or replace, at
this point. The last line assigns the string variable to the text field’s .text property.
Positioning, Sizing, and Formatting a Text
Field
You position and size your text field on the stage as you do other visual elements.
In fact, because text fields are rectangular, it’s very similar to working with a rect-
angle. You use the
x
and
y
properties to put the text field in a certain spot on the
stage, and then you use the
width
and
height
properties to size the text field. So,
the first step for the Bearcat banner is to move away from that upper-left corner,
and then give it enough width to show all the text. Here’s the code you add before
the
addChild()
statement:
tlfBanner.x = 40;
tlfBanner.y = 40;
tlfBanner.width = 240;
tlfBanner.height = 160;
Formatting the Text Field’s Background and Border
In addition to positioning and sizing text fields, you can format text fields by chang-
ing their properties. For example, you can add colored backgrounds and borders
for text fields. These are the same properties you change in the Properties panel
using color pickers and text boxes. The dierence here is that you’re accessing the
properties with your code. In the case of backgrounds and borders, not only do you
have to set the color and size, but you also need to set the background and border
properties to true so that they display something like this:
tlfBanner.border = true;
tlfBanner.borderColor = 0x993300;
tlfBanner.borderWidth = 5;
tlfBanner.background = true;
tlfBanner.backgroundColor = 0xFFFFCC;
www.it-ebooks.info

FLASH CS6: THE MISSING MANUAL
594
CREATING TEXT
FIELDS WITH
ACTIONSCRIPT
TIP Here’s an important point to keep in mind when you’re learning to work with text and ActionScript:
Formatting a text field is different from formatting text. You use TLFTextField properties to change the appearance
of the box that holds text, but you can’t change the typeface or font size using text field properties. There’s an
extra step and an extra object when it comes to specifying type, as explained on page 596.
Those aren’t the only color tricks you can perform on a text field. You can set the al-
pha (transparency/opacity) property for the text (.alpha), the border ( .borderAlpha),
or the background (.backgroundAlpha). As usual with alpha properties, you use a
number between 0 and 1 to set the opacity, where 0 is completely transparent and
1 is completely opaque. So a statement like this:
tlfBanner.backgroundAlpha = .20;
makes the background 20 percent opaque.
Adjust the Space Between Text and Border
If you’re going to go to the trouble of giving your text field a background color and a
border, you probably don’t want your text scrunched up against the edge. To create
some breathing room, use the text field’s
padding
properties. There’s a property
for each edge—top, bottom, left, and right—so you use a dierent setting for each.
In this example, 24 pixels is used for all the edges:
tlfBanner.paddingTop = 24;
tlfBanner.paddingLeft = 24;
tlfBanner.paddingRight = 24;
tlfBanner.paddingBottom = 24;
When you want to change something in your text field but don’t know the exact
name of the property, you can use code hinting to help. So, in the previous example,
you can type the variable name for the text field,
tlfBanner
, and press period (.).
After you do that, code hinting displays a scrollable list of properties for the object,
which in this case is a TLFTextField, as shown in Figure 17-4. Scroll through the list
and look for a property that sounds like it might handle the chore at hand. Most
property names are pretty descriptive, as is the case with the padding properties.
If you double-click the property name, Flash adds it to your code. If you begin typ-
ing letters, code hinting automatically scrolls to properties beginning with those
letters. So, if you’re working with a TLFTextField, hit
.pa
to see the padding options.
Autosizing a Text Field
It’s hard to set the dimensions for a text field when you don’t know how much text
it’s going to hold. The ideal solution to this common dilemma is to pin one or more
of the edges of the text field down to the stage and let the other edges shrink and
grow to accommodate the text. ActionScript lets you do just that with the help of
two tools: the TextField’s autoSize property and the TextFieldAutoSize class. First,
you use the value of one of the TextFieldAutoSize constants to define the edge of
the text field you want to pin down. Then you pass that value to your TextField’s
autoSize property. It sounds more complicated than it is: The good news is you can
take care of the whole job with a single line of code:
www.it-ebooks.info
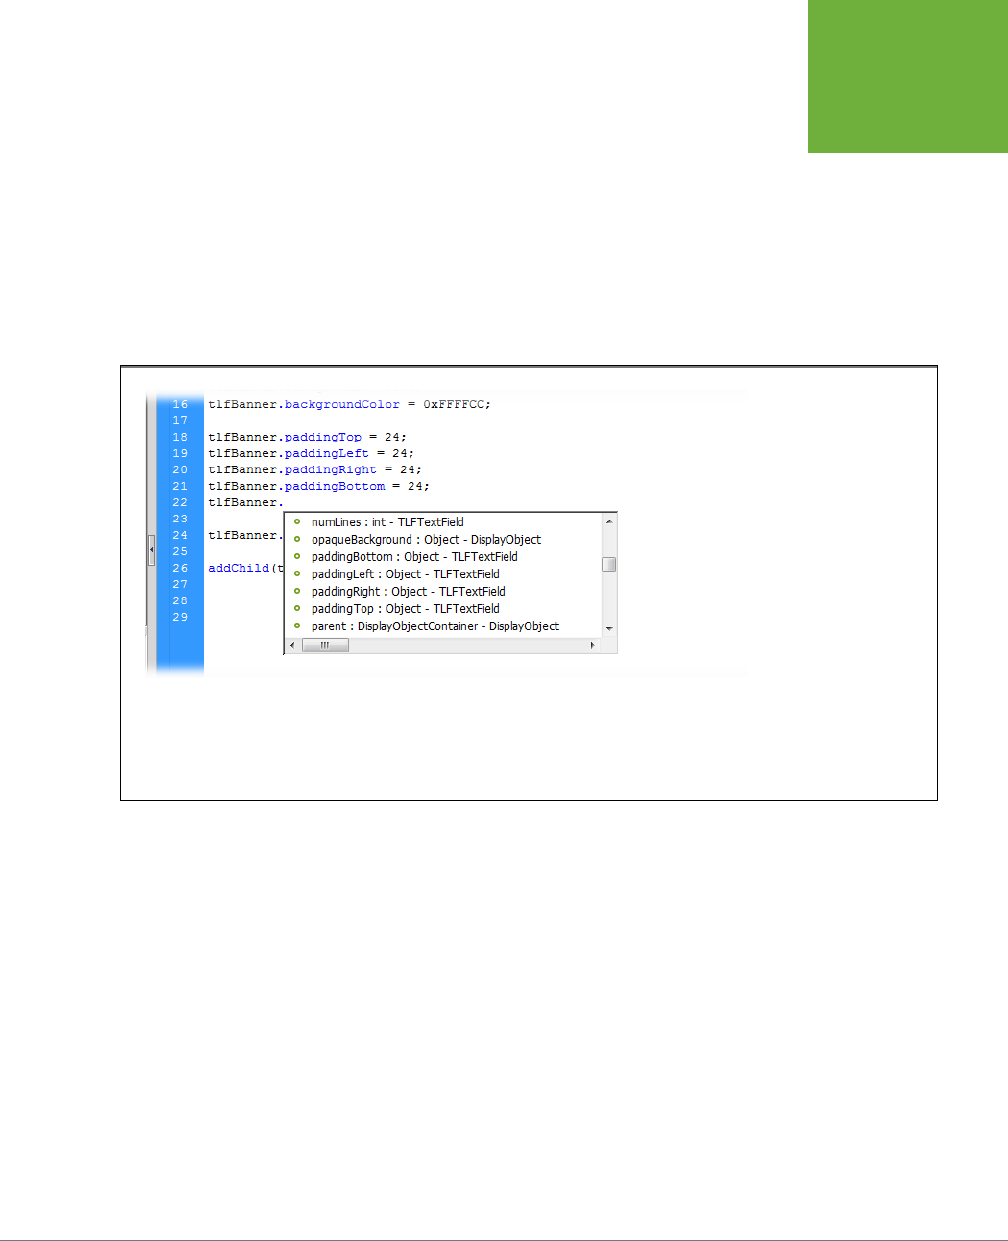
CHAPTER 17: CHOOSING, USING, AND ANIMATING TEXT 595
CREATING TEXT
FIELDS WITH
ACTIONSCRIPT
tlfBanner.autoSize = TextFieldAutoSize.LEFT;
On the right side of the assignment operator (=), TextFieldAutoSize is set to the
constant LEFT. Then the value is assigned to txtBanner’s autoSize property. The
autoSize property expects this value to come packaged with the TextFieldAutoSize
object. It won’t work if you just try to assign the LEFT constant by itself. There are
four constants that control the sizing behavior of a text field:
• TextFieldAutoSize.NONE is what you use if you don’t want to set autosizing
in your code. The text field doesn’t resize at all. If there’s more text than can be
displayed in the text field, it simply doesn’t show.
FIGURE 17-4
When in doubt about
the properties you can
apply to an object, give
code hinting a try. After
the field name, you see
a colon (:) and the type
of object used to set the
property. It could be a
number, string, Boolean,
or other type. Next is a
hyphen (-) and the name
of the class that defines
the property. You might
see TLFTextField listed or
one of the classes from
which it inherits proper-
ties, such as DisplayObject
or Sprite.
• TextFieldAutoSize.LEFT is one of the most common settings. In this case,
the left edge of the text field stays anchored. The right edge can resize to ac-
commodate text (see Figure 17-5). If it’s a multiline text field and there are line
breaks, the bottom can resize, too. When wordWrap is used, only the bottom
is resized. The left, right, and top edges stay put. To turn wordWrap o, add a
line of code like this:
tlfBanner.wordWrap = false;
www.it-ebooks.info
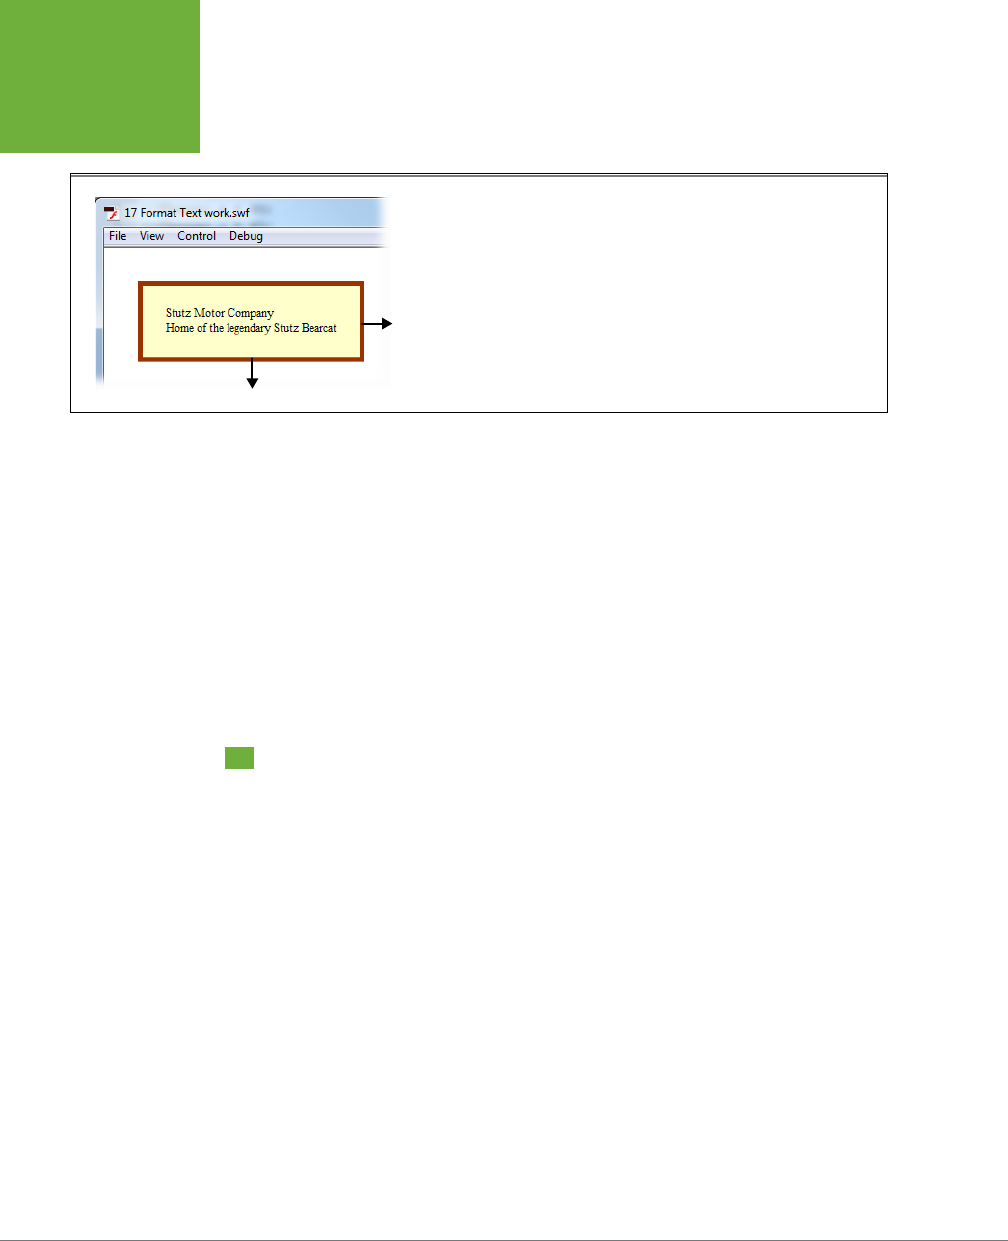
FLASH CS6: THE MISSING MANUAL
596
FORMATTING
CHARACTERS
AND
PARAGRAPHS
FIGURE 17-5
With the TextFieldAutoSize constant set to LEFT, this multiline text field can adjust
the right and bottom edges to accommodate more text.
Room for growth
• TextFieldAutoSize.RIGHT is used less frequently, because it behaves as if the
text is right-justified and flowing to the left. The right edge stays anchored.
When a single line runs long, the left edge resizes. If it’s a multiline text field
and there are line breaks, the bottom resizes, too. When wordWrap is used,
only the bottom is resized.
• TextFieldAutoSize.CENTER comes in handy for headers or other cases where
you want your text right in the middle. Resizing is equally distributed to both
the left and right edges. For multiline text fields with line breaks, the bottom
resizes to accommodate the new lines. If wordWrap is set to
true
, then the bot-
tom resizes and the left, right, and top edges stay put.
Formatting Characters and Paragraphs
Formatting text is such a noble endeavor that ActionScript devotes an entire class
to the job. Once you learn the ins and outs of the TextFormat class, you can do it all.
It works the same for TLF and Classic text and all the text types they encompass.
You can apply a single format to an entire text field and then fine-tune specific
words or phrases with special formatting like bold, italic, or color highlights. Some
formatting properties you apply to specific characters, while others you apply to
entire paragraphs.
Most of the action takes place using the properties of the TextFormat class. As you’d
expect, the TextFormat class has character-level properties that set font names, size,
style, and color. It also includes paragraph-level properties that control the align-
ment, margins, indents, kerning, leading (line spacing), and bullets.
TextFormat is an object itself, so you need to create an instance of the TextFormat
class to use in your program. Here’s an example of code that does that:
var txtFormat:TextFormat = new TextFormat();
www.it-ebooks.info

CHAPTER 17: CHOOSING, USING, AND ANIMATING TEXT 597
FORMATTING
CHARACTERS
AND
PARAGRAPHS
The next step is to choose the format options you want to include in this specific
instance of the class. For example, you can choose the typeface and font size using
the TextFormat’s properties:
txtFormat.font = "Cooper Black";
txtFormat.size = 20;
txtFormat.align = "center";
As explained earlier, when you use ActionScript to create text fields, you need to
choose fonts that you know are on your audience’s computers, or you need to embed
the fonts in the SWF file (see page 568). If the font isn’t available, then the Flash
Player finds a substitute. In this example, the big, bold Cooper Black font is specified.
The number in the size property refers to points, the traditional typographic mea-
surement also used in programs like Microsoft Word. The actual size and readability
of typefaces at the same size can vary, so it’s good to review and experiment when
choosing a typeface and size. The .align property centers the text in the text field.
Once you’ve established your type specs in the TextFormat object, you need to use
the text field’s
setTextFormat()
method and provide your newly created format as
the parameter. That means you put it inside the parentheses, like this:
tlfBanner.setTextFormat(txtFormat);
This statement registers the format for the entire txtBanner text field. A TextFormat
object can include as many or as few properties as you want.
You can use more than one instance of the TextFormat class. Suppose you want to
apply special formatting to a word or two. You can create formats that make type
bold, italic, or change its color. Here’s code that creates two new TextFormat objects,
one for bold text and one for italic text.
var txtFormatBold:TextFormat = new TextFormat();
txtFormatBold.bold = true;
var txtFormatItalic:TextFormat = new TextFormat();
txtFormatItalic.italic = true;
If you want to apply formatting to a word or phrase inside a text field, you need to
tell ActionScript exactly which characters to format, which you do using the index
numbers in the string. For example, if you want to italicize the word “legendary” in
the text “Home of the legendary Stutz Bearcat,” you need to count characters. Don’t
forget to start that count at 0. Then, when you use the
setTextFormat()
method, you
also provide a starting point and ending point for the formatting. It looks like this:
tlfBanner.setTextFormat(txtFormatItalic,12,20);
Formatting with ActionScript is similar to setting properties in the Properties panel.
When you apply the txtFormatItalic format, it doesn’t mess with any of the other
formatting properties. It leaves the font and size settings as they were, changing
only the properties that it specifically defines.
www.it-ebooks.info

FLASH CS6: THE MISSING MANUAL
598
FORMATTING
CHARACTERS
AND
PARAGRAPHS
TIP When you format text with the
setTextFormat()
method, the text has to already be assigned to the text
field, and the formatting applies to the entire text field. If you assign the text after running
setTextFormat()
, it
won’t be as “dressed up” as you expect.
Here’s a chunk of ActionScript code that uses most of the TLFTextField and
TextFormat coding tricks covered so far. The lines beginning with // are comments.
You can download this code from the Missing CD (
www.missingmanuals.com/cds/
flashcs6mm
). The file is named
17-5_Format_Text.fla
:
1 import fl.text.TLFTextField;
2 import flash.text.TextFormat;
3
4 // Define variables, instances of TLFTextField and TextFormat
5 var tlfBanner:TLFTextField = new TLFTextField();
6 var txtFormat:TextFormat = new TextFormat();
7 var txtFormatItalic:TextFormat = new TextFormat();
8 var txtFormatBold:TextFormat = new TextFormat();
9
10 // Assign a string literal to the .text property of the TLFTextField
11 tlfBanner.text = "Stutz Motor Company\nHome of the legendary Stutz
Bearcat";
12
13 // Position and size properties
14 tlfBanner.x = 40;
15 tlfBanner.y = 40;
16 tlfBanner.width = 220;
17 tlfBanner.height = 160;
18
19 // Background and border properties
20 // Remember to set the .background and .border properties to "true"
21 tlfBanner.border = true;
22 tlfBanner.borderColor = 0x993300;
23 tlfBanner.borderWidth = 5;
24 tlfBanner.background = true;
25 tlfBanner.backgroundColor = 0xFFFFCC;
26 tlfBanner.backgroundAlpha = 1;
27
28 // Padding properties determine the distance between the text
29 // and the edge of the text field
30 tlfBanner.paddingTop = 24;
31 tlfBanner.paddingLeft = 24;
32 tlfBanner.paddingRight = 24;
33 tlfBanner.paddingBottom = 24;
34
35 // Autosize permits the text field to grow to accommodate the text
36 tlfBanner.autoSize = TextFieldAutoSize.LEFT;
www.it-ebooks.info

CHAPTER 17: CHOOSING, USING, AND ANIMATING TEXT 599
FORMATTING
CHARACTERS
AND
PARAGRAPHS
37 // Turn off wordWrap for this banner; you might want it on
38 // for paragraph text where line breaks aren't as critical
39 tlfBanner.wordWrap = false;
40 // Turn multiline on so the text box displays more than one line
41 tlfBanner.multiline = true;
42
43 // Define text specifications like font, size, and color
44 // through the txtFormat an instance of the TextFormat class
45 txtFormat.font = "Times";
46 txtFormat.size = 20;
47 txtFormat.align = "center";
48
49 // Heres are two more TextFormat objects that set italics and bold
50 txtFormatItalic.italic = true;
51 txtFormatBold.bold = true;
52
53 // Assign the format using the text field's .setTextFormat() method
54 // The second text format makes specific characters in the
55 // text field italic
56 tlfBanner.setTextFormat(txtFormat);
57 tlfBanner.setTextFormat(txtFormatItalic,32,41);
58 tlfBanner.setTextFormat(txtFormatBold, 42,55);
59
60 // The addChild method adds the text field to the Display List
61 // making it visible on the stage.
62 addChild(tlfBanner);
Line 5 creates the text field called tlfBanner, and line 11 assigns a string literal to its
text property. The lines from 14 through 35 tweak various text field properties, chang-
ing its appearance and behavior. Lines 45 through 51 focus on setting properties for
TextFormat objects. On lines 56 through 58, TextFormat objects are applied to the
tlfBanner text field using the .setTextFormat method. The first one is applied to the
entire text field, while the other two target specific characters by position. The last
line adds tlfBanner to the display list, making it visible on the stage.
When all is said and done, the text field looks like Figure 17-6 (shown in Flash Player).
FIGURE 17-6
This text was created and formatted entirely by
ActionScript. Using the TextFormat object, you can
apply formatting to an entire block of text or to specific
characters, as shown in the italic and bold words in this
example.
www.it-ebooks.info

FLASH CS6: THE MISSING MANUAL
600
FORMATTING
WITH HTML
AND CSS
Formatting with HTML and CSS
When you’re working in ActionScript, there’s more than one way to format text.
The previous technique using ActionScript’s TextFormat object works well when
you’re working on a project on your own. The properties and methods are familiar
if you’re used to working with Flash’s Properties panel. Flash also lets you use the
same formatting tools used by web designers: HTML (hypertext markup language)
and CSS (Cascading Style Sheets). There are a few reasons why you might want to
go this route for a project. Perhaps your project uses lots of text and it’s already
formatted using HTML. In some cases, you may be working on a large project where
some people are responsible for generating the text and others are responsible for
presenting it on the Web or in a Flash-based program.
HTML and CSS Philosophical Dierences
Before you make a decision about using either HTML or CSS for your Flash formatting
chores, it helps to understand their approaches to formatting text. HTML embeds
formatting codes inside the text. For example, the second line in the tlfBanner text
field of the previous example might look like this if you formatted it in HTML:
<font face="Times" size="3"> Home of the <em>legendary</em> <strong>Stutz
Bearcat</strong></font>
When a web browser like Internet Explorer, Safari, or Chrome reads this text, it knows
how to display the text in the browser window. It applies the formatting instructions
and shows the text. It displays the proper typeface if it’s available; otherwise it uses
a substitute font. So HTML coding works fine from the audience point of view. For
designers, it can be a bit of a pain. One of the problems of HTML coding is that the
message gets a bit lost in the formatting tags. Complicated HTML coding is hard
for human eyes to read, and that makes it easy to foul up. When you want to make
changes, it’s a lot of work to go in there and tweak all those bits of embedded code.
These days, the fashionable technique is to use CSS to format web pages. The
underlying philosophy is that it’s best to separate the formatting from the content.
You create styles (type specs) for body text, major headlines, subheads, captions,
and so forth. You store those definitions in a style sheet. Then, in the text, you tag
dierent portions, indicating the styles they should use. In eect, you say: This is a
major headline, this is body text, and this is a caption. When the browser goes to
display your web page, it comes to the text tagged as a headline, and then it looks
up the type specs in the style sheet. It does the same thing for the body text and the
captions. From a designer’s point of view, this system is a tremendous timesaver. If
you want to change the caption style for a website that has 400 captioned pictures,
all you need to do is edit one definition in the style sheet. If all those type specs were
embedded HTML code, you’d need to make 400 separate edits.
www.it-ebooks.info

CHAPTER 17: CHOOSING, USING, AND ANIMATING TEXT 601
FORMATTING
WITH HTML
AND CSS
NOTE Most web pages designed today use a combination of HTML and CSS to format pages. HTML is still
the basic, underlying code for web pages. CSS, JavaScript, and Flash are technologies built on top of the HTML
foundation.
Using HTML Text in Flash
There are two steps to using HTML encoded text in Flash. First, you need to create
strings with the HTML codes embedded. Then you need to assign those strings to
the htmlText property of the text field that will display the formatted text.
When you want to use HTML with its embedded codes in a Flash project, you need
to build strings of text that include all the HTML codes. That means you end up with
a lot of angle brackets, equals signs, and quotes inside your strings. The quotes pres-
ent a small challenge, because your string needs to be wrapped in quotes when it’s
assigned to a variable or a text field (page 586). Fortunately, Flash accepts either
single or double quotes. So if the HTML you’re embedding looks like this line:
<p><font face="Times" size="3"> Home of the <i>legendary</i> <b>Stutz
Bearcat</b></font></p>
You can place it inside single quotes when you use it in Flash. For example, this
statement assigns the HTML coded string to the txtBanner text field. It uses single
quotes to define the string:
tlfBanner.htmlText = '<p><font face="Times" size=24> Home of the
<em>legendary</em> <strong>Stutz Bearcat</strong></font></p>';
HTML is like Flash in that it can use either single or double quotes in most places.
Most of the time, you’ll use double quotes, but be aware that you may sometimes
see single quotes used to assign values in HTML code. In that case, you’d use double
quotes to define your string in Flash.
Once you’ve stored your text in a string, you need to assign that string to a text
field. Lucky for you, all TextField objects have an htmlText property, as shown in
the code example above. It works just like the regular text property except that it
understands how to read and then display text with HTML codes. As with any text
field, you need to use the
addChild()
method to add your text field to the Display
List and show it on the stage.
Creating a Hyperlink with HTML
If there’s one thing that made HTML king of the World Wide Web, it’s the hyperlink.
Hyperlinks are the threads that form that web. Click a linked word, and suddenly
you’re in a dierent part of the universe (or at least, the Web). On page 225, you
saw how to create hyperlinks using the standard Flash authoring tools. The ability
of text fields to use HTML encoded text also enables them to use HTML links. You
create the links using the usual HTML codes: <a> anchor tags. Here’s an example
of an HTML hyperlink:
<a href="http://www.stutzbearcat.net">click me</a>
www.it-ebooks.info

FLASH CS6: THE MISSING MANUAL
602
FORMATTING
WITH HTML
AND CSS
Like most HTML tags, the anchor tag comes in pairs:
<a>in between stu</a>
. The
slash is the defining mark of an end tag. In HTML, you stu that first tag with any
necessary parameters. In this case, the parameter is a web address. The
href
stands
for hypertext reference; the equals sign assigns a value to the reference inside double
quotes. The specific value here is a web address. The words in between the two <a>
tags, “click me,” are visible in the browser window. Depending on the tag’s formatting,
they may appear underlined or highlighted in some way to show that they’re a link.
Beyond that there’s no magic to adding and using HTML hyperlinks in Flash. Here’s
an example of the same link included in a string that’s passed to the htmlText prop-
erty of a text field:
txtBanner.htmlText = '<p>To visit our website <a href="http://www
.stutzbearcat.net">click me</a> </p>';
Flash Player isn’t a web browser, so when your audience clicks the link, their browser
opens and then loads the web page specified in the link. The link can just as easily
point to a file on the local computer. In that case, instead of the
http://
reference,
you’d use a
file://
reference. Keep in mind that in most cases, file system access is
only available when the SWF animation and the file are on same local computer. For
security reasons, file access is severely restricted on web servers.
NOTE You can find HTML examples in
17-6_HTML_Text.fla
in the Missing CD (
www.missingmanuals.com/cds/
flashcs6mm
). There are a lot of HTML tags and keywords, and Flash works with only some of them. A complete
list of HTML tags that work with Flash is included in the help document
ActionScript 3.0 Reference for the Adobe
Flash Platform
. Look up the
Textfield
class and its
htmlText
property.
Using CSS to Format Classic Text in Flash
CSS is the acronym for
Cascading Style Sheets
—an ingenious system for format-
ting HTML text. If you want to read up on how CSS works, you can get an excellent
introduction in David Sawyer McFarland’s
CSS: The Missing Manual
(O’Reilly). You
need to have a basic understanding of CSS to use it with Flash. This book provides
a quick overview of CSS and an example or two to get you started.
CSS style sheets are a little like those wooden Russian dolls where one object is
nested inside another. Starting from the outside and working in, here’s what you
find in a CSS style sheet. A style sheet is a list of formatting specifications. Each
formatting spec has a selector that identifies the HTML tag that it formats. That tag
could be the paragraph tag <p>, or the heading tag <h1>, or an anchor tag <a>. In
CSS lingo, the formatting spec is called a
declaration block
. The declaration block
is contained inside curly braces {}. Within those curly braces are specific declara-
tions that define fonts, styles, colors, sizes, and all the other properties that can be
defined in CSS. (Flash works with only some of these properties.) The declarations
have two parts: a property and a value. So in CSS, if that property is
font-size
, then
the value is a number representing point size. A CSS definition to format an <h1>
heading tag might look like this:
www.it-ebooks.info

CHAPTER 17: CHOOSING, USING, AND ANIMATING TEXT 603
FORMATTING
WITH HTML
AND CSS
h1 {
font-family: Arial;
font-size:18;
font-weight: bold;
color: red;
}
The first line has the selector for
h1
headings, usually the biggest, boldest heading
on a web page. The next four lines show pairs of properties and values. On the left
side of the colon is the property, which is hyphenated if it’s made up of more than
one word. On the right side is the value assigned to that property.
In Flash, you can recreate the function of a CSS style sheet using the StyleSheet
object. It gives you a way to create selectors and then assign values to the properties
Flash recognizes. You can’t use style sheets with TLF text, so here’s Flash’s version
of the specification shown above using a Classic TextField:
1 var txtBanner:TextField = new TextField();
2 var styleSheet:StyleSheet = new StyleSheet();
3 var h1Style:Object = new Object();
4 var pStyle:Object = new Object();
5
6 h1Style.fontFamily = "Arial";
7 h1Style.fontSize = "24";
8 h1Style.fontWeight = "bold";
9 h1Style.color = 0x800000;
10
11 pStyle.fontFamily = "Arial";
12 pStyle.fontSize = "12";
13 pStyle.fontWeight = "normal";
14
15 styleSheet.setStyle("h1", h1Style);
16 styleSheet.setStyle("p", pStyle);
17 txtBanner.styleSheet = styleSheet;
18
19 txtBanner.x = 60;
20 txtBanner.y = 120;
21 txtBanner.width = 200;
22 txtBanner.height = 120;
23 txtBanner.autoSize = TextFieldAutoSize.LEFT;
24 txtBanner.background = true;
25 txtBanner.backgroundColor = 0xFFFFFF99;
26 txtBanner.border = true;
27
28 txtBanner.htmlText = '<h1>Home of the legendary Stutz Bearcat</h1>
<p>What can we do to put you into a Bearcat today?</p>';
29 addChild(txtBanner);
www.it-ebooks.info

FLASH CS6: THE MISSING MANUAL
604
FORMATTING
WITH HTML
AND CSS
Here’s a line-by-line rundown on the ActionScript. As in the other examples, line
1 creates the TextField object called txtBanner. The next three lines also create
objects. Line 2 creates an instance of the StyleSheet class, and lines 3 and 4 create
instances of the more generic Object class. You use these objects to hold the CSS
declarations. That’s exactly what’s going on in lines 6 through 13. Values are being
assigned to the h1Style object, and then the pStyle object.
Note that the property names have been changed slightly. That’s because Action-
Script jumps into action when it sees a minus sign (-). Instead, these properties
eliminate the hyphen and use an uppercase letter for the word following the hyphen.
So where the CSS property is named font-family, the ActionScript property is named
fontFamily. Lines 15 and 16 use styleSheet’s
setStyle()
method. The first parameter
in the parentheses defines the selector:
h1
, the heading style, in line 15 and
p
, the
paragraph style, in line 16. The second parameter in each case is the object that was
created to hold the declarations. These are ActionScript’s substitute for a declaration
block with those paired sets of properties and values.
The styleSheet Object now has formatting instructions for two tags that it’s likely to
encounter in an HTML document. Line 17 assigns the styleSheet object to txtBanner’s
styleSheet property. Lines 19 through 26 are the ActionScript code that formats the
text field. There’s no CSS here; it’s just straight ActionScript. Line 28 gets back into
the CSS business. When you format with CSS, you pass the string to the text field
using the htmlText property. The string itself is formatted like HTML, but instead of
embedding formatting specs, it uses style tags. This little snippet uses two tags, first
the <h1> tag for the heading, and then the <p> tag for its rather skimpy paragraph.
With CSS, you need to assign the StyleSheet property before you put text in the
text field. The last line adds the txtBanner to the Display List for the world to see.
Figure 17-7 shows how the CSS-formatted text looks.
NOTE Flash is very fussy about its style sheets. If it’s unable to read or use any of the styles, it tends to
ignore the entire style sheet. The result is that no formatting is applied.
FIGURE 17-7
This text is formatted with CSS. Styles are applied to the
paragraph <p> tag and to the heading 1 <h1> tag. You can
create CSS styles within your ActionScript code, or you can load
an external CSS file.
There are quite a few things missing from Flash’s version of CSS. First of all, you can
assign only one StyleSheet at a time to a text field’s styleSheet property. One of the
handy things about CSS is the way you use multiple style sheets for the formatting
chores. Another feature missing from Flash’s HTML capabilities is tables, causing
moans among web-savvy designers. Web designers like to use tables to format and
organize text and pictures.
www.it-ebooks.info

CHAPTER 17: CHOOSING, USING, AND ANIMATING TEXT 605
FORMATTING
WITH HTML
AND CSS
Formatting Text with an External CSS File
One of the great features of CSS for designing web pages is that you can use a
single external file (called a CSS style sheet) to format many web pages. Want to
change the color of a heading? Simply change the definition in the style sheet, and
that changes the look of all the web pages. You can use external CSS style sheets
with Flash projects, too—just keep in mind the limitations of HTML and CSS in Flash
mentioned in the previous section.
NOTE There are two files for this project,
17-7_External_CSS.fla
and
17-8flashText.css
. You can find both at
www.missingmanuals.com/cds/flashcs6mm
. Both files need to be in the same folder to test the code.
To start this exercise, you need a file that defines CSS styles. You can download
17-8flashText.css
from the Missing CD site or create your own using a text editor.
It’s short and sweet:
p {
font-family: Arial;
font-size: 12px;
font-weight: normal;
}
h1 {
font-family: Arial;
font-size: 24px;
font-weight: bold;
color: #800000;
}
This external CSS file defines the same CSS styles that were used in the previous
example—the paragraph <p> tag and the heading 1 <h1> tag. Most CSS style sheets
are more complicated than this, but as an example, this works just fine.
The ActionScript code that uses this external file needs to do a few things:
• Load the external CSS file.
• Read (parse) and store the CSS style instructions.
• Apply the CSS styles to a text field rendered as HTML.
• Display the text field.
• Assign text with HTML tags to the htmlText property of the text field.
Here are the steps to load an external CSS style sheet and use the styles with code
created in ActionScript:
www.it-ebooks.info

FLASH CS6: THE MISSING MANUAL
606
FORMATTING
WITH HTML
AND CSS
1. Create an instance of the URLLoader class.
var loader:URLLoader = new URLLoader();
The URLLoader class is used to load external files that reside on a computer
or on the Internet.
2. Register an event listener that triggers when the CSS file has completed
loading.
loader.addEventListener(Event.COMPLETE, loadCSSListener);
The URLLoader class triggers an event when a file has loaded. When that event
triggers, the function
loadCSSListener()
will run.
3. Create an instance of the URLRequest class to identify the CSS file to be
loaded.
var request:URLRequest = new URLRequest("17-8flashText.css");
The URLRequest class is used to identify files by filename and if needed, a path.
In this case, just the filename is used because
17-8flashText.css
is to be stored
in the same folder as the Flash project.
4. Use the
load()
method to load the CSS file. Use “request” as the parameter
for the load method.
loader.load(request);
Adding an extra blank line here sets the function for the event listener o from
the rest of the code.
5. Create the function that runs when the loader event is complete.
function loadCSSListener(evt:Event):void {
The rest of the statements in this exercise are part of this function, which ends
with the closing curly bracket.
6. Create an instance of the StyleSheet class.
var cssFlashStyles:StyleSheet = new StyleSheet();
The StyleSheet class holds CSS style definitions.
7. Read the data in the external CSS file (
flash_text.css
) and store the data in
the style sheet cssFlashStyles.
cssFlashStyles.parseCSS(URLLoader(evt.target).data);
8. The process of reading and processing the CSS definitions is called
parsing
.
The method parseCSS is part of the StyleSheet class. Create an instance of the
TextField class with the variable name
txtBanner
.
var txtBanner:TextField = new TextField();
www.it-ebooks.info

CHAPTER 17: CHOOSING, USING, AND ANIMATING TEXT 607
FORMATTING
WITH HTML
AND CSS
The text field txtBanner displays text stored in one of two properties—the
text
property or the htmlText property.
9. Position and size the txtBanner, and then format the background and border.
txtBanner.x = 60;
txtBanner.y = 120;
txtBanner.width = 200;
txtBanner.height = 120;
txtBanner.autoSize = TextFieldAutoSize.LEFT;
txtBanner.background = true;
txtBanner.backgroundColor = 0xFFFF99;
txtBanner.border = true;
txtBanner.borderColor = 0x800000;
These statements aren’t related to CSS, and their formatting applies to the
entire text field.
10. Add txtBanner to the Display List.
addChild(txtBanner);
Adding txtBanner to the Display List makes it visible on the stage.
11. Assign the cssFlashStyles to the styleSheet property of txtBanner.
txtBanner.styleSheet = cssFlashStyles;
It may seem a little backward, but the style sheet needs to be applied before
the text is assigned to txtBanner.
12. Assign a string of text to txtBanner’s htmlText property.
txtBanner.htmlText = '<h1>Home of the legendary Stutz Bearcat</h1> <p>
What can we do to put you into a Bearcat today?</p>';
}
The text assigned to the htmlText property of txtBanner is a string literal. The
HTML tags <p> and <h1> are embedded within the string.
13. Save your Flash file
17-7_External_CSS.fla
in the same folder as the CSS file
17-8flashText.css
.
If you don’t store the two files in the same folder, then you need to provide complete
path information in the URLRequest, as in step 3.
When you test the movie, Control→Test Movie, you see text formatted as shown
in Figure 17-8. The style definitions are identical in this example and the previous
example, where CSS styles were written into the ActionScript code, so the results
look the same.
www.it-ebooks.info

FLASH CS6: THE MISSING MANUAL
608
CHOOSING THE
RIGHT TEXT
FORMATTING
SYSTEM
FIGURE 17-8
The text for this banner was formatted
using an external CSS style sheet. You
may want to use this method when
websites have pre-existing style sheets.
In general, using external CSS style sheets gives you more flexibility, because you
can change the appearance of text inside of your Flash project by simply editing
the style sheet. As long as the name and location of the external CSS file stay the
same, you don’t even need to fire up Flash or ActionScript or republish your .swffiles.
How cool is that?
Choosing the Right Text Formatting System
So far this chapter has described four dierent ways to format text in Flash anima-
tions. How do you choose the right technique for your project? Here are some general
guidelines about when to use Flash’s Properties panel, ActionScript’s TextFormat
object, HTML, or CSS to format text in your Flash projects:
• Use the Properties panel for its ease of use and when you make all your format-
ting decisions as you design the animation.
• Use ActionScript’s TextFormat object when you need to make changes to your
text while the animation is running.
• Use ActionScript’s TextFormat object when you want to work quickly and your
project creates TextField objects on the fly.
• Use HTML if you have lots of text already formatted in HTML or if your work-
group requires it.
• Use HTML or CSS when you want to embed hyperlinks in dynamic text.
• Use CSS if you’re working on a large web-based project that already has es-
tablished CSS type specs.
• Use CSS if you’re working with lots of text and there are timesaving benefits to
be gained by separating formatting from content.
www.it-ebooks.info

CHAPTER 17: CHOOSING, USING, AND ANIMATING TEXT 609
CHOOSING THE
RIGHT TEXT
FORMATTING
SYSTEM
NOTE When you use HTML and CSS in Flash, you can use only a few of the most common tags and properties.
It’s not surprising that these are the tags and properties that are matched by the TextFormat object. If you’re
choosing HTML or CSS for a specific feature, make sure that you can use that feature in Flash and ActionScript.
You can find a complete list in the
ActionScript 3.0 Reference for the Adobe Flash Platform
in Flash’s help system.
Look under flash.text, and then choose the TextField class. Then choose the
htmlText
property, and you see a
table that lists the tags Flash supports. For CSS, look under flash.text for the StyleSheet class. In its help pages,
you see a table listing the CSS properties supported in Flash and ActionScript.
www.it-ebooks.info

611
CHAPTER
18
If you were one of those kids who loved the Etch-A-Sketch, then you’re probably
going to love this chapter. With ActionScript, you can draw lines and shapes in
your Flash animations. The great advantage of drawing with ActionScript is that
your animations can draw new objects on the fly.
This chapter will introduce the Graphics class and all the power it puts at your finger-
tips. To start with, you’ll learn how ActionScript works with points and lines. You’ll
learn about the virtual pen and how, as it moves from one spot to another, you can
tell it to draw lines (or not). Then you’ll learn how to draw and display Flash’s built-
in shapes, including ellipses, rectangles, and rounded rectangles. There are times
when prebuilt shapes won’t do the job, so you’ll see how to draw more complex and
irregular shapes using nothing but ActionScript code. To wrap things up, this chapter
shows how to move the shapes you’ve drawn about the stage using ActionScript’s
TimerEvent to trigger the motion.
What’s the Point?
It all comes down to the point. Flash’s stage is a mass of points measured by x/y
coordinates. In the upper-left corner, there’s a point that’s referenced by 0, 0,
which means it’s at the 0 point on the horizontal axis and the 0 point of vertical
axis. ActionScript describes the point as x = 0 and y = 0. If you put something on
the stage and don’t tell Flash or ActionScript where you want to place it, chances
are that something will end up at 0, 0. If your stage is one of Flash’s standard sizes,
say 550 x 400 pixels, the lower-right corner is 550, 400 or x = 550 and y = 400.
When drawing with ActionScript, you can bet that you’ll be dealing with a lot of x/y
Drawing with
ActionScript
www.it-ebooks.info

FLASH CS6: THE MISSING MANUAL
612
WHAT’S THE
POINT?
coordinates and a lot of points. If you want to draw a line from one place to another,
you need to define two points. If you want to draw a trapezoid, you need to define,
at least by inference, the four corner points.
Since the point is a building block for all the lines, shapes, and drawings to follow,
ActionScript has a special Point class. Not only does the class give you a place to
store information about specific points, but it also provides some helpful methods
that you can use when you’re working with points and their relationships. For refer-
ence, the Point class is part of the
flash.geom
package. You create instances of the
Point class the same way you create other objects in ActionScript, like so:
var ptNear:Point = new Point();
When you enter this line of code, you’re doing a couple of things at once. First of
all, you’re creating a new variable and providing a variable name, ptNear. The word
after the colon declares the data type—in this case, Point. Then, after the assignment
operator (=), you use the reserved word
new
to explain that you’re creating a new
instance of an object. The word
Point()
with its parentheses is the constructor for
the Point class. When all is said and done, you’ve got yourself a new instance of the
Point class that’s addressed by the variable name ptNear.
As you might guess, Point objects have two properties,
x
and
y
. You can assign val-
ues to these properties to set a point’s location, and if you have the name of a point
but you don’t know where it is, you can read these properties to learn its location.
ptNear.x = 20;
ptNear.y = 20;
trace("The location of ptNear is:",ptNear);
The first two lines assign values to ptNear, an instance of the Point class. The third
line uses that handy
trace()
statement to place information in the Output panel. In
this case, the
trace()
statement reports:
The location of ptNear is: (x=20, y=20)
The Point class has just one other property, oddly called
length
. Thankfully, it’s
not referring to the length of the point. That would confuse everyone, including
Euclid. In this case,
length
refers to the length of a line from 0, 0 to the point. It’s a
read-only
property, meaning you can’t assign a new value to length; all it does is
report on its value.
Most of the interesting and useful features of the Point class are the methods:
•
distance()
. Calculates the distance between two points. Example:
distanceBetweenPoints = Point.distance(ptNear,ptFar);
•
add()
. Adds the coordinates of two points and returns another point in x, y
values.
sumOfPoints = ptNear.add(ptFar);
www.it-ebooks.info

CHAPTER 18: DRAWING WITH ACTIONSCRIPT 613
WHAT’S THE
POINT?
•
subtract()
. Subtracts the coordinates of two points and returns another point
in x, y values.
differenceOfPoints = ptNear.subtract(ptFar);
•
equals()
. Tests to see if two points are equal. Useful for creating conditional
statements, like
if ptBall
equals
ptGround
, then bounce.
if (ptBall.equals(ptGround)) bounce(); //run the function Bounce()
•
interpolate()
. Calculates a point between two end points. You use a third param-
eter, with a value between 0 and 1, to find a point and to determine how close
that point is to one or the other of the end points. Think of it as a percentage.
ptHalfWay = Point.interpolate(ptNear, ptFar, 0.5);
ptQuarterWay = Point.interpolate(ptNear, ptFar, 0.75);
The
interpolate()
method uses three parameters, which as usual make their
appearance inside the parentheses. The first two parameters have to be points.
The third parameter is a number between 0 and 1; that’s a common ActionScript
technique for indicating a percentage. In this case, the closer the number is to
1, the closer the point is to the first point. The closer the number is to zero, the
closer it is to the second point. So, in the examples above, the value 0.5 finds the
midpoint between ptNear and ptFar. The value 0.75 is closer to the first point,
so it finds a point a quarter of the way between the two points.
The best way to understand how these methods work is to use them in ActionScript.
Follow these steps to see how to run the Point class through some of its paces.
NOTE You can download
18-1_Point_Methods.fla
with the following code from the Missing CD (
www.
missingmanuals.com/cds/flashcs6mm
).
1. Select File→New and choose ActionScript 3.0. Select the first frame on the
timeline, and then press F9 (Option-F9).
The Actions panel opens. Figure 18-1 shows the Actions panel with some code
entered.
2. Type the following code (but not the line numbers at left):
1 var ptNear:Point = new Point();
2 var ptFar:Point = new Point();
3 var distanceBetweenPoints:Number;
4 var sumOfPoints:Point;
5 var differenceOfPoints:Point;
6 var pointBetweenPoints:Point;
7 var ptHalfWay:Point;
8 var ptQuarterWay:Point;
9 var ptBall:Point = new Point();
10 var ptGround:Point = new Point();
www.it-ebooks.info

FLASH CS6: THE MISSING MANUAL
614
WHAT’S THE
POINT?
11
12 ptNear.x = 0;
13 ptNear.y = 20;
14 ptFar.x = 100;
15 ptFar.y = 20;
16
17 distanceBetweenPoints = Point.distance(ptNear,ptFar);
18 sumOfPoints = ptNear.add(ptFar);
19 differenceOfPoints = ptNear.subtract(ptFar);
20 ptBall.x = 200;
21 ptBall.y = 350;
22 ptGround.x = 200;
23 ptGround.y = 350;
24 ptHalfWay = Point.interpolate(ptNear,ptFar,0.5);
25 ptQuarterWay = Point.interpolate(ptNear,ptFar,0.75);
26
27 trace("The location of ptNear is:",ptNear);
28 trace("The location of ptFar is:",ptFar);
29 trace();
30 trace("A line from 0, 0 to ptNear is",ptNear.length, "long.");
31 trace("The distance between ptNear and ptFar
is:",distanceBetweenPoints);
32 trace("If you add ptNear to ptFar you get:", sumOfPoints);
33 trace("If you subtract ptFar from ptNear you get:",differenceOfPoints);
34 trace("This point is half the way between ptNear and ptFar:", ptHalf-
Way);
35 trace("This point is a quarter of the way between ptNear and ptFar:",
ptQuarterWay);
36 trace();
37 trace("The location of ptBall is:",ptBall);
38 trace("The location of ptGround is:",ptGround);
39 if (ptBall.equals(ptGround))
40 {
41 bounce();
42 }
43
44 function bounce():void
45 {
46 trace("I'm bouncing");
47 }
The first 10 lines in the code create instances of objects. All except one are Point
class objects. The data type for distanceBetweenPoints is
Number
. Lines 12 through
15 assign values to the x and y properties to ptNear and ptFar. The next block of
statements (lines 17 through 25) show the Point methods discussed in this section.
www.it-ebooks.info
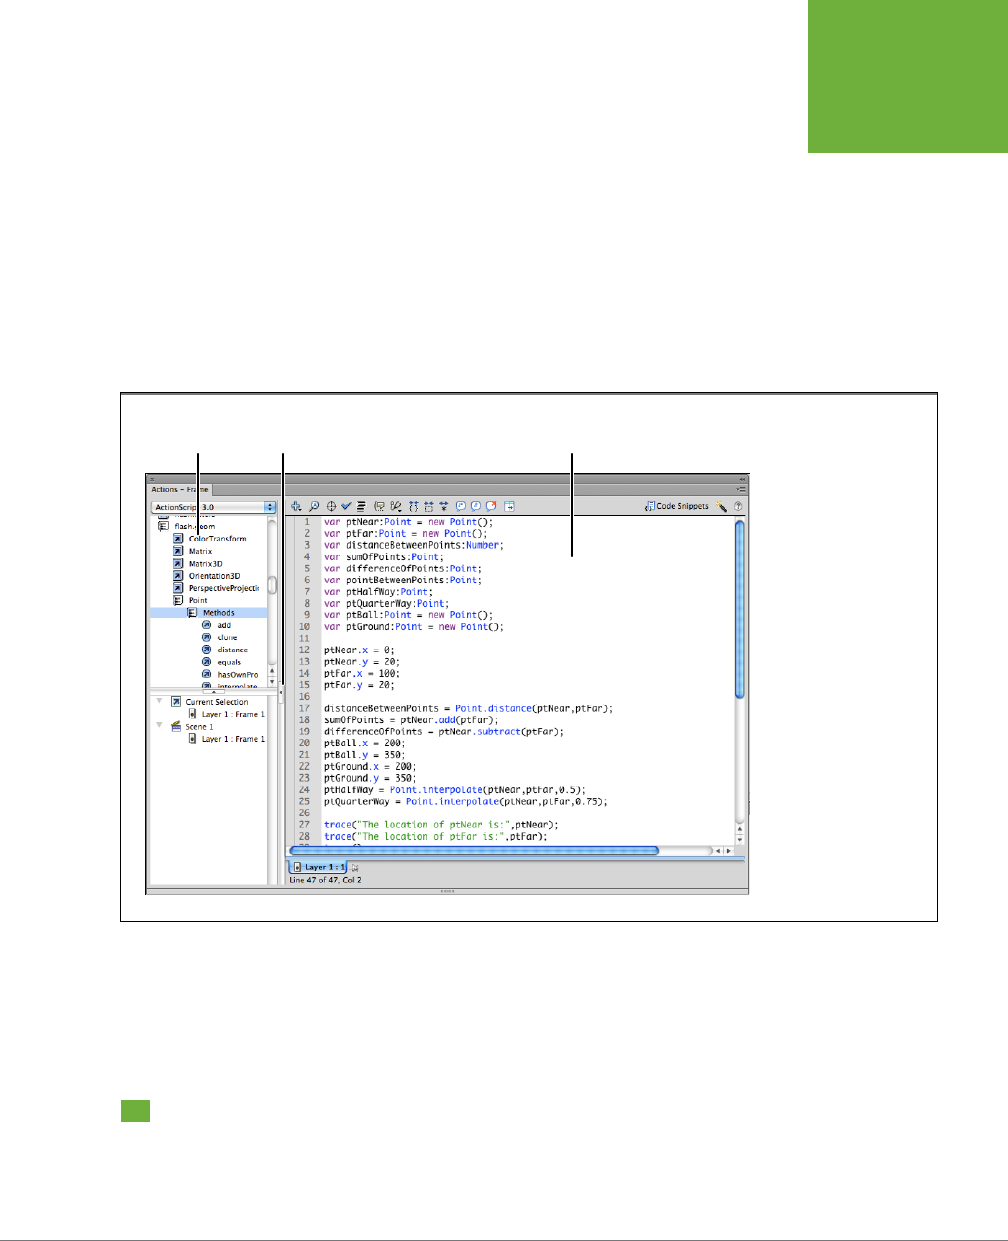
CHAPTER 18: DRAWING WITH ACTIONSCRIPT 615
BEGINNING
WITH THE
GRAPHICS
CLASS
If you want to experiment with these methods, you can use these examples as a
model. From line 27 to line 38 there are
trace()
statements that send text to the Out-
put panel. The text inside quotes is displayed literally; the items outside the quotes
are the variable names. Most of the variables refer to points, so the Output panel
lists the values of their x and y properties. In some cases the output is a distance,
which is a number. Line 39 is a conditional
if()
statement that demonstrates the Point
class’s
equals
property. The two points are equal, because they have the same values
for the x and y properties, so the value of the statement
ptBall.equals(ptGround)
is
true
. With the condition
true
, the if statement calls the
bounce()
function, which is
written on lines 44 through 47. The bounce function sends the words “I’m bouncing”
to the Output panel, as shown in Figure 18-2.
FIGURE 18-1
The appearance of the
Actions panel changes
depending on the way
you configure it. Here
the Actions toolbox is
displayed. You can open
or close it by clicking
the open/close sidebar
button.
Actions
toolbox
Open/close
sidebar Code panel
Working with points is a little abstract, because you can’t really add a point instance
to the display list in Flash. It’s good to understand how points work in ActionScript
and to be aware of the methods of the Points class, but the fun really begins when
you start drawing lines and shapes.
Beginning with the Graphics Class
With ActionScript, you can draw lines, curves, shapes, fills, and gradients. As with
most ActionScript features, this ability comes to you courtesy of a class—in this
www.it-ebooks.info
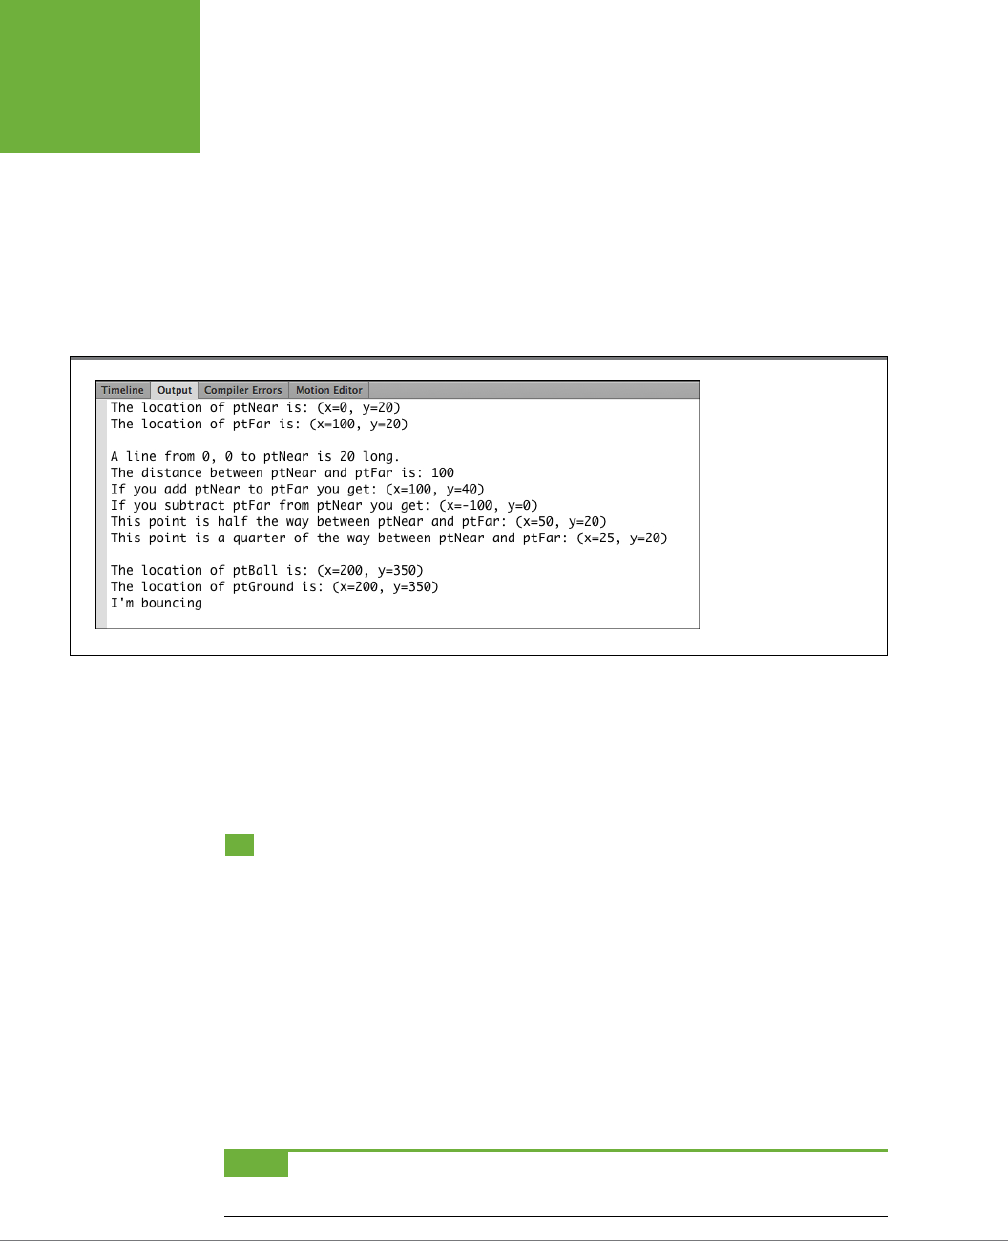
FLASH CS6: THE MISSING MANUAL
616
DRAWING
LINES
case, the
flash.display.Graphics
class. Using the Graphics class, you can draw on
instances of these three classes: Shape, Sprite, and MovieClip. Each of these classes
has a graphics property, which, in turn, provides all the properties and methods of
the Graphics class. So, for example, if you want to define how a line looks, you use
the
graphics.lineStyle()
method. It looks like this:
spriteLine.graphics.lineStyle(3,0x00FF00);
Or, if you want to actually draw a line, it looks like this:
spriteLine.graphics.lineTo(20,150);
FIGURE 18-2
When you put a
reference to a point in a
trace() statement, Flash
automatically shows the
values of the x and y
properties. This Output
panel shows the results
of several Point class
methods.
The important point to notice about the Graphics class is that it’s a read-only prop-
erty of the Shape, Sprite, or MovieClip classes. You reference the Graphics class by
referencing one of those classes, then the Graphics class itself, and then the property
or method of the Graphics class that you want to use.
Drawing Lines
Think about the steps you take when you draw a line in the real world. You probably
have your piece of paper in front of you. You pick up a pen, pencil, or marker. You
place the writing instrument down on a specific point on the paper and drag it to
another point. If you don’t want to continue with another line, you pick up your pen
and the job is done. You pretty much follow those same steps when you draw a line
using ActionScript. Here’s a list of the ActionScript steps:
• Open a Flash document and the Actions panel. The stage is your paper.
• Choose a line style. It’s similar to choosing a pen, pencil, or whatever.
• Move to a specific point on the stage. Here’s where you put pen to paper.
NOTE The code for the next line-drawing exercise is included in
18-2_Draw_Line.fla
in the Missing CD (
www.
missingmanuals.com/cds/flashcs6mm
).
www.it-ebooks.info

CHAPTER 18: DRAWING WITH ACTIONSCRIPT 617
DRAWING
LINES
• Move to another point, drawing a line in the process, dragging the pen across
the paper.
• Stop drawing lines. Lift the pen from the paper.
With those generalizations in mind, here are the specific steps to draw a line on the
Flash stage:
1. Select File→New and choose ActionScript 3.0.
A new, empty Flash document appears.
2. Press F9 (Option-F9).
The Actions window opens, where you can enter ActionScript code.
3. In the Actions panel, create an instance of the Sprite class by typing the
following.
var sprtLine:Sprite = new Sprite();
A Sprite is a container like a MovieClip, except it doesn’t have a timeline. Using
a Sprite instead of a MovieClip when you don’t need a timeline keeps the size
of your .swf slightly smaller.
4. Use the
lineStyle()
method to set the style for the line you want to draw.
sprtLine.graphics.lineStyle(16,0x00FF00);
The first parameter inside the parentheses sets the thickness of the line. In
this case, setting the value to 16 draws a monster line 16 pixels thick. It’s just
as if you typed
16
in the Properties→“Fill and Stroke”→Stroke box. The second
number is a color value shown in hexadecimal format. (For more on colors and
the hexadecimal format, see page 203.)
The
lineStyle()
method has other parameters that define properties like the
opacity of the line or how lines meet at the corners. Often, all you need are
the first two parameters, and if that’s the case, you don’t need to worry about
the
lineStyle()
parameters. But in case you do, here’s a rundown on all the
lineStyle()
parameters:
• thickness. Provides a number (0-255) for the thickness of the stroke in
points.
• color. Provides a color value in hexadecimal format.
• alpha. Provides a number from
1
to
0
that indicates a percentage of trans-
parency.
• pixelHinting. Provides
true
or
false
to change the way Flash Player displays
corners. Flash usually has this option set to
false
, and you seldom need to
change it.
• scaleMode. Provides one of the following constants to determine how a
stroke changes when an object is scaled.
NORMAL
means the line is scaled
www.it-ebooks.info

FLASH CS6: THE MISSING MANUAL
618
DRAWING
LINES
with the object.
NONE
means the line keeps its thickness when scaled.
VERTICAL
means the line keeps its thickness if the object is scaled verti-
cally only.
HORIZONTAL
means the line keeps it thickness if the object is
scaled horizontally only.
• caps. Provides the constants
NONE, ROUND
, or
SQUARE
to set the way
the ends of lines appear.
• joints. Provides the constants
MITER, ROUND
, or
BEVEL
to set the way
lines appear when they meet at corners.
• miterLimit. Provides a number from
1
to
255
to indicate the limit at which
a miter is cut o. The miter in eect trims o the end of a corner when
two lines meet.
The
lineStyle()
method does expect to receive these values in a particular order.
So, for example, you’d get a confused result if you swapped the color value for
the stroke thickness. Or, for example, if you want to provide a
NONE
constant
for scaleMode, you need to provide values for the alpha and pixelHinting pa-
rameters, too. It looks like this:
sprtLine.graphics.lineStyle(3,0x00FF00,1,false,"NONE");
5. Move the virtual pen to the line’s starting point:
sprtLine.graphics.moveTo(20,50);
Think of this statement as moving your pen to a position on the page without
drawing a line. Flash expects a value for x and y for parameters for the
moveTo()
method. Unlike the
lineTo()
method,
moveTo()
is similar to picking the pen up
from the paper and moving it to a new location. This action doesn’t draw a line.
6. Draw a line to another point.
sprtLine.graphics.lineTo(500,380);
Think of this move as dragging your pen across the paper. The
lineTo ()
method
draws a line from the current point to the point specified in the parentheses.
7. Add the sprtLine Sprite to the Display List.
addChild(sprtLine);
Until you use the
addChild()
method to add sprtLine to the Display List, nothing
actually appears in the Flash Player.
8. Test the animation.
You see a Flash Player stage with a big fat green line running diagonally across
the stage, as shown in Figure 18-3.
While you might not draw lines as frequently as you draw rectangles and other
shapes, it’s still good to have a thorough understanding of lines and the
lineStyle()
property, because the stroke outline for other shapes works the same way. If you
www.it-ebooks.info
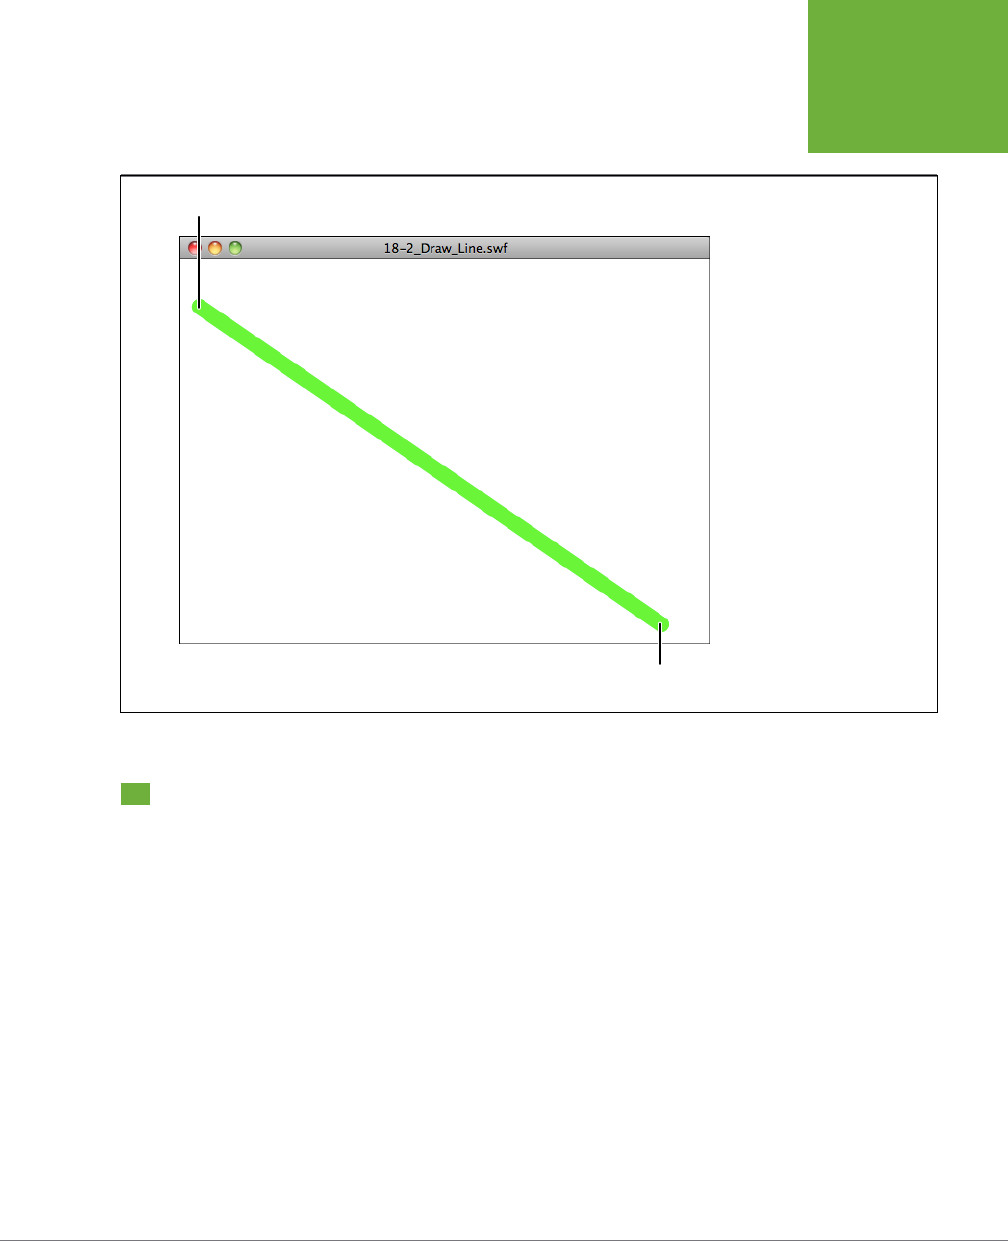
CHAPTER 18: DRAWING WITH ACTIONSCRIPT 619
DRAWING
CURVES
want to draw an irregular shape, as described on page 625, then you need to draw
a series of connected lines.
FIGURE 18-3
The ActionScript code starting
on page 617 draws a 16-pixel-
wide green line from the point
20, 50 to the point 500, 380.
lineTo(500,380)
moveTo(20,50)
Drawing Curves
When you draw a curve using ActionScript, you need to add one more point to the
mix. Think about the way you draw curves in Flash or Adobe Illustrator. You have a
line with two anchor points, and you drag control handles from the anchors to create
a curve. The line doesn’t travel through the control handles, it’s just geometrically
influenced by the position of the handles. ActionScript uses a similar method to cre-
ate curves, but you have to imagine that there’s a single control point connected to
both endpoints. Figure 18-4 shows the concept. By repositioning that control point,
you change the shape of the curve. The
curveTo()
method is similar to the
lineTo()
method described in the previous section. You’re creating a line from the current
position of the virtual pen (one anchor point) to the end point of the curve (another
anchor point). The shape of that line is influenced by a control point.
When you draw a curve in ActionScript, the control point isn’t visible; it’s defined
but doesn’t get displayed on the stage. In the code example here, the control point
is marked with an X, and it’s displayed in a text field. It shares the control point’s
www.it-ebooks.info
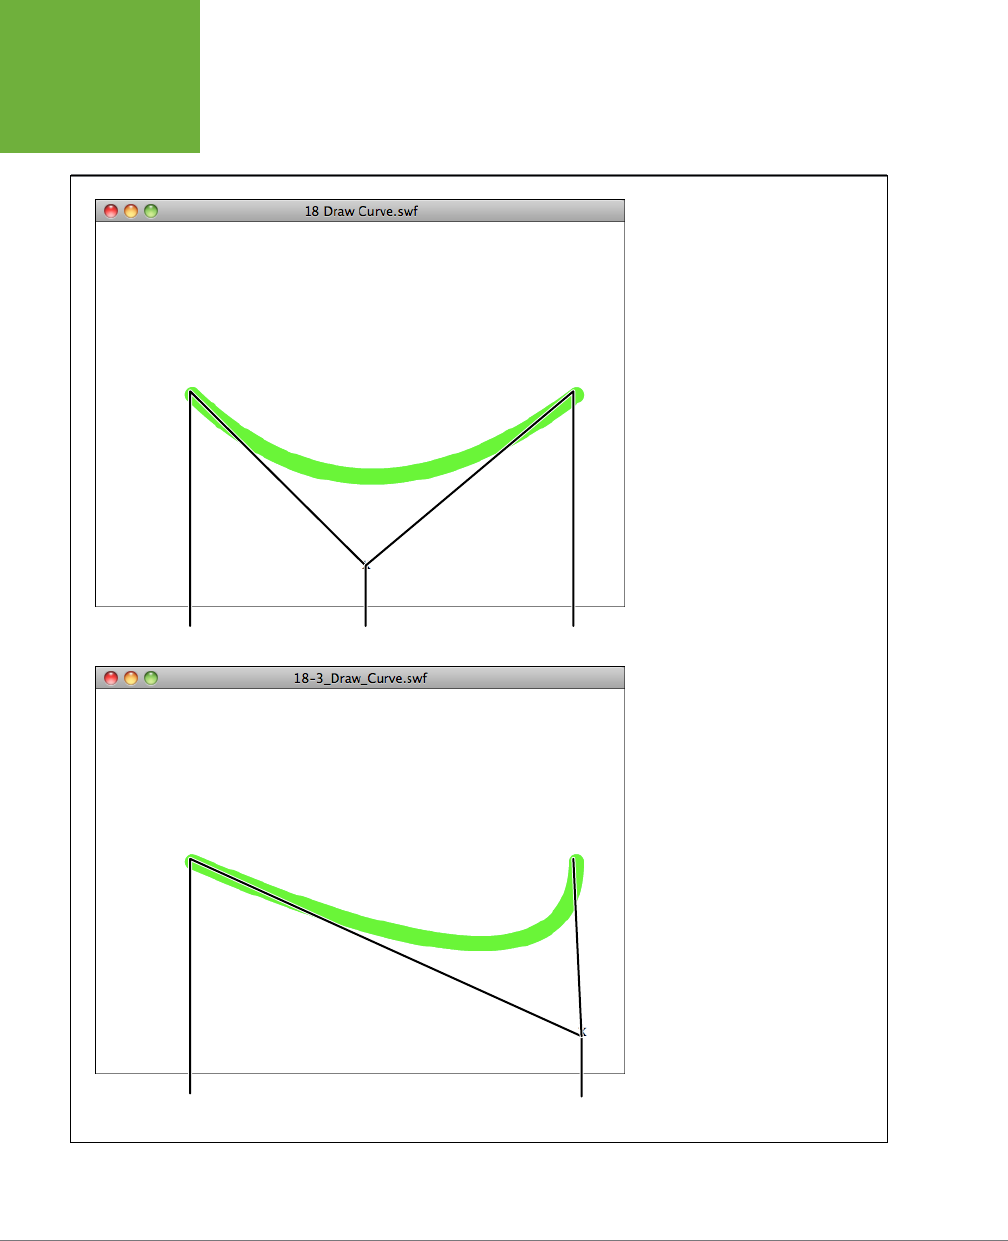
FLASH CS6: THE MISSING MANUAL
620
DRAWING
CURVES
xand y values. This code appears in
18-3_Draw_Curve.fla
in the Missing CD (
www.
missingmanuals.com/cds/flashcs6mm
).
FIGURE 18-4
ActionScript’s
curveTo()
method draws
curves using a quadratic Bezier equa-
tion, but you don’t have to remember
that. Just keep in mind that there are
two anchor points and one control
point. You change the shape of the
curve by repositioning the control point,
using ActionScript code, naturally.
Control pointAnchor point
Anchor point
Anchor point
Control point
www.it-ebooks.info

CHAPTER 18: DRAWING WITH ACTIONSCRIPT 621
DRAWING
CURVES
1 var shpLine:Shape = new Shape();
2 var ptAnchor1:Point = new Point();
3 var ptAnchor2:Point = new Point();
4 var ptControl:Point = new Point();
5 var tfControl:TextField = new TextField();
6
7 ptAnchor1.x = 100;
8 ptAnchor1.y = 180;
9 ptAnchor2.x = 500;
10 ptAnchor2.y = 180;
11 ptControl.x = 500;
12 ptControl.y = 350;
13
14 tfControl.text = "X";
15 tfControl.x = ptControl.x;
16 tfControl.y = ptControl.y;
17 addChild(tfControl);
18
19 shpLine.graphics.lineStyle(16,0x00FF00);
20 shpLine.graphics.moveTo(ptAnchor1.x,ptAnchor1.y);
21 shpLine.graphics.curveTo(ptControl.x,ptControl.y,ptAnchor2.x,ptAnchor2.y);
22 addChild(shpLine);
23
24 shpLine.graphics.moveTo(0,0);
The first line in this example creates a shape. You can create vector drawings in
Sprites, Shapes, and MovieClips. Shapes use even less space than Sprites in your
Flash animation. The three lines from 2 through 4 create points. The names could
be anything, but in this example there’s a hint that two of them are going to serve
as anchor points and one will serve as a control point. Line 5 creates a text field
that’s named tfControl. Lines 7 through 12 position the three points. You can tell
from their y values that ptAnchor1 and ptAnchor2 appear on the same horizontal
axis. The ptControl y value is quite a bit below that axis. Line 14 stores an X in the
text property of tfControl. (Think:
X
marks the spot.) Then, the code assigns
x
and
y
values of the text box the same values that are in ptControl.x and ptControl.y.
Line 17 displays the tfControl text field when it’s added to the Display List using the
addChild()
method. Line 19 defines a
lineStyle()
. The
moveTo()
method on line 20
positions the virtual pen at the first anchor point for the line. Then the
curveTo()
method is used. The first anchor point was already established by the preceding
moveTo()
method, so the
curveTo()
method needs two points. The x and y values of
the control point come first, and then come the x and y values of the second anchor
point. The
addChild()
method in line 22 displays the curve. When you test the curve
code, it draws a curve similar to the one at the bottom in Figure 18-4. If you want to
experiment, you can go ahead and change the
x
and
y
values of ptControl in lines
11 and 12. That changes the shape of the curve, and it also moves the x in the text
field to mark the new position of the control point.
www.it-ebooks.info

FLASH CS6: THE MISSING MANUAL
622
DRAWING
BUILT-IN
SHAPES
Drawing Built-In Shapes
When you graduate from lines to shapes, you get to fill your shapes with a color. The
lineStyle()
method becomes optional, because shapes don’t have to have an outline
stroke. You can draw simple shapes using ActionScript’s built-in methods. The tech-
nique is very similar to drawing lines and curves with the addition of the
beginFill()
method that lets you choose a color and transparency percentage for the fill color.
Here’s the step-by-step for drawing a rectangle and a circle in a MovieClip. You can
find all the code in
18-4_Draw_Shape.fla
in the Missing CD (
www. missingmanuals.
com/cds/flashcs6mm
):
1. Select File→New and choose ActionScript 3.0.
A new, empty Flash document appears.
2. Press F9 (Option-F9).
The Actions panel opens, where you can enter ActionScript code.
3. Type this line into the Actions panel to create an instance of the mcShapes
MovieClip class:
var mcShapes:MovieClip = new MovieClip();
MovieClip is one of three data types that let you draw vector graphics. The other
two classes are Sprite and Shape.
4. Define a
lineStyle()
for your first shape:
mcShapes.graphics.lineStyle(4,0x003300,.75);
This statement uses the Graphics class, which is a property of the MovieClip
class. As explained on page 617, the
lineStyle()
method can accept several
parameters. This code uses three parameters, and the remaining ones are left
unchanged from their original values. The first parameter sets the line or stroke
thickness to 4 pixels. The second parameter provides a hexadecimal color value
(dark green) for the line color. The third and last parameter sets the transpar-
ency for the line to 75%.
5. Define a fill style for your shape:
mcShapes.graphics.beginFill(0x339933,.75);
The method to fill a shape is
beginFill()
. The
beginFill()
method uses only two
parameters. The first sets the fill color, a lighter green, and the second sets the
transparency to 75%.
6. Position the mcShapes movie clip on the stage:
mcShapes.x=mcShapes.y=50;
This line sets both the x and y properties of mcShapes to 50 in one statement.
You can use this form or use separate statements for each property.
www.it-ebooks.info

CHAPTER 18: DRAWING WITH ACTIONSCRIPT 623
DRAWING
BUILT-IN
SHAPES
7. Use the built-in
drawRect()
method to define a rectangle.
mcShapes.graphics.drawRect(0,0,300,250);
The first two parameters for
drawRect()
set the x and y values for the rectangle.
Set at 0, 0, the rectangle is positioned in the upper-left corner of the mcShapes
movie clip; but keep in mind that the movie clip is positioned at 50, 50 on the
stage. The next two parameters set the rectangle’s width and height values. In
this case, the rectangle is 300 pixels wide and 250 pixels high. As with the other
vector drawings, even though you’ve defined the object, it won’t be visible until
you add it to the Display List.
8. Use the
endFill()
method to stop filling the shape:
mcShapes.graphics.endFill();
The
endFill()
method doesn’t use any paramaters.
9. Use the
addChild()
method to display the movie clip mcShapes:
addChild(mcShapes);
The
addChild()
method adds the movie clip to the Display List, which makes
its contents visible.
10. Test the animation.
When the animation runs, the rectangle appears with its registration point
(upper-left corner) at 50, 50 on the stage. Though you gave the stroke and
fill some transparency, the rectangle looks pretty solid because it’s on a plain
white background.
11. Set new colors for the stroke and fill for a second shape, the circle:
mcShapes.graphics.lineStyle(4,0x0033CC,.5);
mcShapes.graphics.beginFill(0x003333,.5);
These are the same methods used in steps 4 and 5, but you’re changing the
color values to shades of blue and setting the transparency to 50 percent.
12. Use the built-in
drawCircle()
method to define a circle and then use the
endFill()
method to stop filling the shape.
mcShapes.graphics.drawCircle(275,100,75);
mcShapes.graphics.endFill();
To define a circle, you need to provide the
drawCircle()
method with a center
point and a radius. The first two parameters are the x and y values of the center
point. The third parameter is the radius, which means this circle will be 150 pixels
in diameter. The
endFill()
method stops filling the shape.
13. Test the animation.
When the animation runs, the circle appears overlapping the rectangle as
shown in Figure 18-5. The rectangle (the first shape you defined) appears on
www.it-ebooks.info
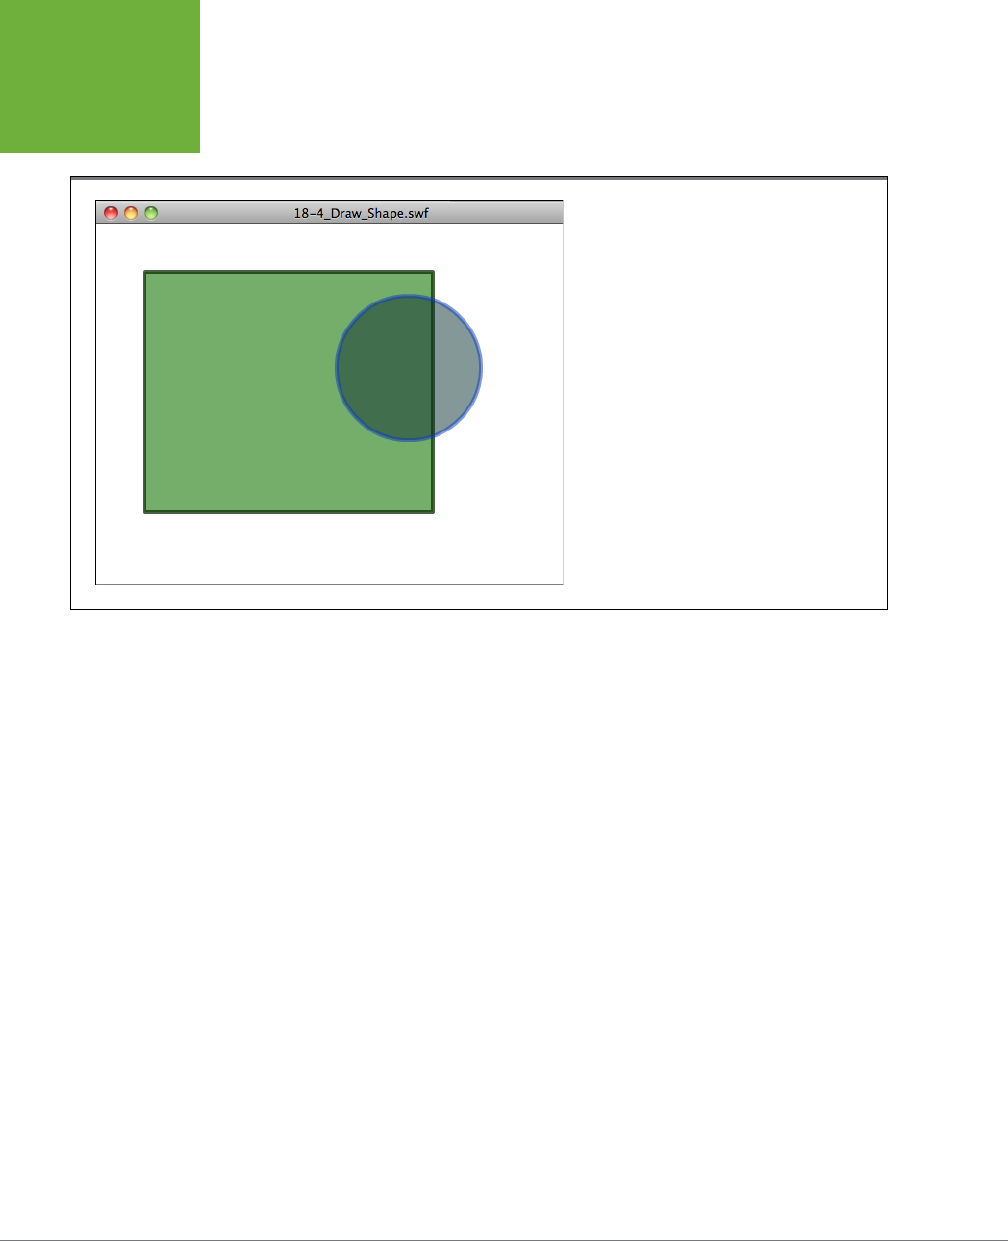
FLASH CS6: THE MISSING MANUAL
624
DRAWING
BUILT-IN
SHAPES
the bottom. Both the rectangle and the circle are positioned relative to their
container mcShapes, not to the stage.
FIGURE 18-5
These two shapes are drawn on a movie clip that’s
positioned at 50, 50 on the stage. The rectangle
was defined first, so it appears underneath the
circle.
ActionScript includes two other built-in shapes, and you use them the same way:
Define the stroke and fill, use one of the drawing methods to create the shape, and
then use the
addChild()
method to display the shape. All that varies from shape to
shape are the parameters you use to describe them. Here are definitions and a brief
explanation for each built-in shape:
• drawEllipse(x:Number, y:Number, width:Number, height:Number). The first
two parameters position the center of the ellipse. The next two parameters set
the dimensions for the ellipse.
• drawRoundRect(x:Number, y:Number, width:Number, height:Number,
ellipseWidth:Number, ellipseHeight:Number). The first two parameters
are numbers that position the rectangle using its registration point. The next
two parameters set the rectangle’s width and height. The last two parameters,
ellipseWidth and ellipseHeight, define the curve for the rounded corners. If the
curves are equal, you can set just the first number, ellipseWidth, and ignore
the second value. If the curve isn’t equal, use both parameters to set dierent
width and height values.
If you entered the statements in this exercise line by line, following the instructions,
the code in your Actions panel looks something like this:
var mcShapes:MovieClip = new MovieClip();
mcShapes.graphics.lineStyle(4,0x003300,.75);
www.it-ebooks.info

CHAPTER 18: DRAWING WITH ACTIONSCRIPT 625
DRAWING
IRREGULAR
SHAPES
mcShapes.graphics.beginFill(0x339933, .75);
mcShapes.x=mcShapes.y=50;
mcShapes.graphics.drawRect(0,0,300,250);
mcShapes.graphics.endFill();
addChild(mcShapes);
mcShapes.graphics.lineStyle(4,0x0033CC,.5);
mcShapes.graphics.beginFill(0x003333,.5);
mcShapes.graphics.drawCircle(275,100,75);
mcShapes.graphics.endFill();
The order of the statements in this code is worth a closer look. First of all, even
though the
addChild()
statement precedes the definition for the circle, the circle
appears in the movie clip when it’s added to the Display List. This is because its par-
ent, mcShapes, has already been added to the stage. Also, the first shape defined,
the rectangle, appears beneath the circle. You can change its position by changing
its position in the code. If you want the rectangle to appear on top of the circle in
the movie clip, move the code that defines the rectangle to follow the code that
defines the circle.
Drawing Irregular Shapes
When you draw the built-in shapes, ActionScript does a lot of the work for you,
but you’re limited to the shapes that ActionScript oers. Sometimes you need to
draw irregular shapes. For example, suppose you needed to draw a floor plan for
a modern home with a number of odd angles and curves. In that case, you need to
draw each line and curve separately. To fill the shape with a color, use the
beginFill()
method when you begin drawing lines. Then, when you’re finished with the shape,
use
endFill()
.
For example, here’s some code that draws a very irregular shape that includes a
variety of angles and one curved edge (see Figure 18-6). Open a new document
and type the following into the Actions panel—or you can use
18-5_Draw_ Irregular_
Shape.fla
from the Missing CD (
www.missingmanuals.com/cds/flashcs6mm
):
1 var mcShapes:MovieClip = new MovieClip();
2
3 mcShapes.graphics.lineStyle(4,0x330000,.5);
4 mcShapes.graphics.beginFill(0xFF3300,.5);
5 mcShapes.graphics.moveTo(200,50);
6 mcShapes.graphics.lineTo(300,150);
7 mcShapes.graphics.lineTo(400,150);
8 mcShapes.graphics.curveTo(425,175,400,200);
9 mcShapes.graphics.lineTo(200,200);
10 mcShapes.graphics.lineTo(200,150);
www.it-ebooks.info

FLASH CS6: THE MISSING MANUAL
626
MAKING
DRAWINGS
MOVE
11 mcShapes.graphics.lineTo(100,150);
12 mcShapes.graphics.lineTo(200,50);
13 mcShapes.graphics.endFill();
14
15 addChild(mcShapes);
FIGURE 18-6
This illustration shows the irregular
shape drawn by the code. The
callouts show the end points for the
moveTo(), lineTo(), and curveTo()
methods. You can find the complete
statements in the code on the
previous page.
Code line 8
curveTo(425,175,400,200)
Code line 10
lineTo(200,150)
Code line 9
lineTo(200,200)
Code line 7
lineTo(400,150)
Code line 5
moveTo(200,50)
Code line 12
lineTo(200,50)
Code line 11
lineTo(100,150)
Code line 6
lineTo(300,150)
If you worked your way through the previous sections in this chapter, most of this
will look familiar. The first two lines set the line style and the fill color. The third line
moves the virtual pen to point 200, 50. Following that are several
lineTo()
methods
with one
curveTo()
method added for good measure. If you want to match up the
code with the lines in the shape, see Figure 18-6. These lines form a closed path
when the last
lineTo()
method ends up back at the beginning: 200, 50. The final line
runs the
endFill()
method.
NOTE Flash fills shapes even if they aren’t entirely enclosed. So, even if line 12 (the line that closes the
shape) was missing in the example above, Flash would still apply a fill to the shape that’s defined by the rest of
the lines.
When you test your animation (Ctrl+Enter on a PC or ⌘-Return on a Mac), you see
an image like Figure 18-6.
Making Drawings Move
As shown earlier in this chapter, you draw lines and shapes on three classes of
objects: Shape, Sprite, and MovieClip. In eect, these objects are canvases for the
www.it-ebooks.info

CHAPTER 18: DRAWING WITH ACTIONSCRIPT 627
MAKING
DRAWINGS
MOVE
drawings. To make drawings move from one location to another, you move the
canvas. You can think of the Shape, Sprite, and MovieClip containers as transparent
sheets of film with the drawings inked on top. You place the film on the stage. Then
to create motion, you reposition the film on the stage. If you want to move objects
together, you can place them on the same piece of film. If you want to move them
independently, you have to place them on separate pieces of film.
To make Shapes, Sprites, and MovieClips move, you change those good old friends,
the x and y properties. You can make them move in response to mouse clicks or
other input from your audience. If you want them to move without prompting, you
need to set up the mechanism.
Using ActionScript’s TimerEvent to Animate Drawings
One popular animation technique makes use of Flash’s TimerEvent. It’s sort of like
setting one of those kitchen minute timers, and each time it goes “ding!,” you move
the drawing. ActionScript’s Timer class uses two constants:
TIMER_COMPLETE
and
TIMER
. In earlier examples (page 476), you saw
TIMER_COMPLETE
in action. It trig-
gers an event when the time has completely run out. You use the
TIMER
constant
when you want to trigger repeated events at regular intervals.
Here’s how it works: When you create an instance of the Timer class, you provide
two parameters. The first parameter is called the
delay
. Think of it as the time in
milliseconds before the timer goes “ding!” The second parameter is the repeatCount.
Think of it as the number of times you want to reset the timer to run again.
So suppose you want to move a drawing every half-second, and you want it to move
across the stage in 12 steps. You can set a timer with a delay of
500
and a repeat-
Count of
12
. Then every time the timer sends a TIMER event (ding!), you move the
drawing by changing its x and/or y properties. Follow these steps to perform this
feat of animation in code.
NOTE You can find a copy of this code in the Flash file
18-6_Animate_Shape.fla
on the Missing CD page at
www.missingmanuals.com/cds/flashcs6mm
.
1. Select File→New and choose
ActionScript 3.0
.
A new, empty Flash document appears.
2. Press F9 (Option-F9).
The Actions panel opens, where you can enter ActionScript code.
3. Type this line into the Actions panel to create an instance of the MovieClip
class named mcShapes:
var mcShapes:MovieClip = new MovieClip();
MovieClip is one of three data types that let you draw vector graphics.
www.it-ebooks.info

FLASH CS6: THE MISSING MANUAL
628
MAKING
DRAWINGS
MOVE
4. Create an instance of the Timer class.
var tmrMover:Timer=new Timer(500,12);
The parameters set the timer’s delay value to 500 milliseconds and the
repeatCount to 12.
5. Define the line and fill style for the circle.
mcShapes.graphics.lineStyle(4,0x000033);
mcShapes.graphics.beginFill(0x0099FF,.5);
You’ve set the line and fill colors to shades of blue. The code sets no alpha value
(transparency) in the line style, so ActionScript assumes it should be 100%—that
is, opaque. The fill has an alpha value of .5, making its transparency 50%.
6. Draw the circle with the
drawCircle()
method and then stop the fill with
endFill()
.
mcShapes.graphics.drawCircle(250,100,75);
mcShapes.graphics.endFill();
The first two parameters place the center of the circle at 250, 100 in the movie
clip. (You haven’t positioned the movie clip, so Flash automatically positions
it at 0, 0.)
7. Add the movie clip to the Display List.
addChild(mcShapes);
This code adds the movie clip to the Display List, making it visible.
8. Start the timer.
tmrMover.start();
The timer starts.
9. Register a TimerEvent listener.
tmrMover.addEventListener(TimerEvent.TIMER,timerMoverListener);
10. Write the function for the TimerEvent listener.
function timerMoverListener(evt:TimerEvent):void
{
mcShapes.x = mcShapes.x + 10;
}
The
timerMoverListener()
function assigns a new value to the
x
property of the
mcShapes movie clip, which makes it move horizontally. To calculate the new
value for
x
, the function takes the current value of
x
and adds 10 to it. Each time
the
TIMER
event triggers, the movie clip moves.
www.it-ebooks.info

CHAPTER 18: DRAWING WITH ACTIONSCRIPT 629
MAKING
DRAWINGS
MOVE
11. Test the animation.
When the animation runs, the blue circle moves across the stage 10 pixels at a
time. It moves 12 times and then stops, as shown in Figure 18-7.
FIGURE 18-7
This circle is animated to move across the stage
through the use of a TimerEvent and the x
property of the object that contains the circle—a
movie clip.
In the example above, if you want to move another object along with the circle,
all you need to do is add that object to the movie clip. Suppose you want to
move a small square along at the same speed. All you need to do is add one
line to step 6 to define the position and size of the square.
mcShapes.graphics.drawRect(100,300,75,75);
Now, if you test the animation, both the circle and the square move across the
stage in sync.
Moving Objects Independently
The world and your animations don’t always move in lockstep. So to make objects
move independently, you can place them in dierent containers. Here’s a variation
on the previous example that places a circle, a rectangle, and a triangle in separate
containers. The code uses the Shape class as a container because it keeps the size
of the published .swf file at a minimum, but you can do the same thing with Sprites,
MovieClips, or any combination.
NOTE You can find a copy of this code in the Flash file
18-7_Move_Three_Shapes.fla
on the Missing CD page
at
www.missingmanuals.com/cds/flashcs6mm
.
1 var shpCircle:Shape = new Shape();
2 var shpRectangle:Shape = new Shape();
3 var shpTriangle:Shape = new Shape();
4
5 shpCircle.graphics.beginFill(0x000077,1);
6 shpCircle.graphics.drawCircle(250,100,75);
7 shpCircle.graphics.endFill();
8
www.it-ebooks.info

FLASH CS6: THE MISSING MANUAL
630
MAKING
DRAWINGS
MOVE
9 shpRectangle.graphics.beginFill(0x009900,1);
10 shpRectangle.graphics.drawRect(200,100,150,100);
11 shpRectangle.graphics.endFill();
12
13 shpTriangle.graphics.moveTo(200,150);
14 shpTriangle.graphics.beginFill(0x880000);
15 shpTriangle.graphics.lineTo(300,250);
16 shpTriangle.graphics.lineTo(100,250);
17 shpTriangle.graphics.lineTo(200,150);
18 shpTriangle.graphics.endFill();
19
20 addChild(shpRectangle);
21 addChild(shpTriangle);
22 addChild(shpCircle);
23
24 var tmrMover:Timer = new Timer(250,30);
25 tmrMover.start();
26
27 tmrMover.addEventListener(TimerEvent.TIMER,timerMoverListener);
28
29 function timerMoverListener(evt:TimerEvent):void
30 {
31 shpCircle.x += 3;
32 shpRectangle.x -= 3;
33 shpTriangle.y += 3;
34 }
What distinguishes this example from the previous one is that the first three
lines create three instances of the Shape class, appropriately named shpCircle,
shpRectangle, and shpTriangle. Lines 5 through 18 define the objects. None of them
have a
lineStyle()
definition, so they’re all fill and no stroke. The alpha value is set
to 1, so they’re completely opaque. The circle and the rectangle are drawn using
built-in shapes, but the triangle is drawn line by line. Lines 20 through 22 use the
addChild()
method to place each shape on the stage.
The TIMER portion of the code is similar to the previous example. On line 24 when
the tmrMover is created, the delay is set to 250 and the repeatCount is set to 30. This
means this timer will tick o events twice as quickly as the earlier example, where
the delay was set to 500. Line 27 registers the event listener
timerMoverListener()
.
By using the
TIMER
constant instead of the
TIMER_COMPLETE
constant, this timer
will trigger 30 events, instead of just one. (For more details, see page 476.) The
function
timerMoverListener()
from line 29 through the last line of the code runs
each time the event triggers.
www.it-ebooks.info

CHAPTER 18: DRAWING WITH ACTIONSCRIPT 631
MAKING
DRAWINGS
MOVE
To move the circle 3 pixels from left to right, this line:
shpCircle.x += 3;
increments the value of the shpCircle’s x property by 3. It’s simply an abbreviated
way of saying:
shpCircle.x = shpCircle.x + 3;
The other two lines in the function work similarly, except that by decrementing the
x
property, line 31 moves the rectangle from right to left. Line 32 operates on the
y
property of shpTriangle, so it moves down the stage.
Each time the clock ticks, the objects move. There are a couple of ways to make
them move at dierent rates of speed. Make the values smaller, and the objects will
move a shorter distance in the same time period. Or, for the most versatility, you
can create separate timers for each object. That way, you can change the delay and
the intervals, as well as the distance that the objects move.
Shapes, Sprites, and Movie Clips for
Drawings
When you create drawings on Shapes, Sprites, and MovieClips, it’s tempting to think
you’re placing the drawings inside containers—but you’re not. At least, not in the true
ActionScript sense of the word “container.” As explained back in Chapter 14 (page
483), Sprite and MovieClip objects are DisplayObjectContainers, meaning that by
using the
addChild()
method, you can put objects inside a Sprite or MovieClip and the
objects will be displayed. Shape, on the other hand, isn’t a DisplayObjectContainer,
so how can it show the drawn objects as shown in this chapter?
The fact of the matter is, when you draw as described in this chapter, you’re drawing
lines and shapes on the canvas or the background of the Shape, Sprite, or MovieClip.
It’s not the same thing as using the
addChild()
method, which adds an object to
a DisplayObjectContainer. For example, you can’t position a drawing to appear in
front of an object that’s added to a MovieClip using the
addChild()
method. Here’s
an example; the code appears in
18-8_Canvas_Drawing.fla
in the Missing CD (
www.
missingmanuals.com/cds/flashcs6mm
):
1 var tfPoem:TextField = new TextField();
2 var mcCanvas:MovieClip = new MovieClip();
3
4 tfPoem.text = "Twas brillig, and the slithy toves";
5 tfPoem.x = 110;
6 tfPoem.y = 110;
www.it-ebooks.info

FLASH CS6: THE MISSING MANUAL
632
REMOVING
LINES AND
SHAPES
7 tfPoem.autoSize=TextFieldAutoSize.LEFT;
8 mcCanvas.addChild(tfPoem);
9
10 mcCanvas.graphics.beginFill(0x99FFFF);
11 mcCanvas.graphics.drawRect(100,100,200,150);
12 mcCanvas.graphics.endFill();
13
14 addChild(mcCanvas);
This example has only two objects: a TextField called tfPoem and a MovieClip called
mcCanvas. Note that the rectangle isn’t an object in its own right. Lines 4 through
7 define the text field, adding text, positioning it, and setting its
autoSize
property
to accommodate the text. Line 8 places the txtField inside mcCanvas. The text field
is now contained in the movie clip, a DisplayObjectContainer. The technique for
creating and displaying the drawing is dierent, though. The rectangle is defined
in lines 10 and 11, but that’s done through the graphics property of mcCanvas. It
never uses the
addChild()
method in mcCanvas. This means the rectangle has no
index value, and you can’t reposition it in the Display List using a command like
addChild()
or
addChildAt()
.
The last line of the code adds mcCanvas to the main timeline. When mcCanvas is
placed in the main timeline (also a DisplayObjectContainer), then both the rectangle
drawn on mcCanvas and the text field that’s contained by mcCanvas are displayed.
Removing Lines and Shapes
So far, this chapter has shown several ways to draw lines and shapes. This section
tells how to make them disappear. The Graphics class has a
clear()
method. When
you use this method, it erases the drawings that were created in the object, resets
the line and fill style settings, and moves the virtual pen back to the 0,0 position.
The
clear()
method is a multipurpose cleanup tool. Here’s an example of the
clear()
method in action. A text field is added to the code that begins on the previous page.
This text field serves as kind of a button that, when clicked, triggers the
clear()
method to remove the drawings on the mcCanvas movie clip. For the complete
code, check out
18-9_Clear_Graphic.fla
in the Missing CD (
www.missingmanuals.
com/cds/flashcs6mm
):
1 var tfPoem:TextField = new TextField();
2 var mcCanvas:MovieClip = new MovieClip();
3
4 tfPoem.text = "Twas brillig, and the slithy toves";
5 tfPoem.x = 110;
6 tfPoem.y = 110;
7 tfPoem.autoSize = TextFieldAutoSize.LEFT;
8 mcCanvas.addChild(tfPoem);
9
www.it-ebooks.info
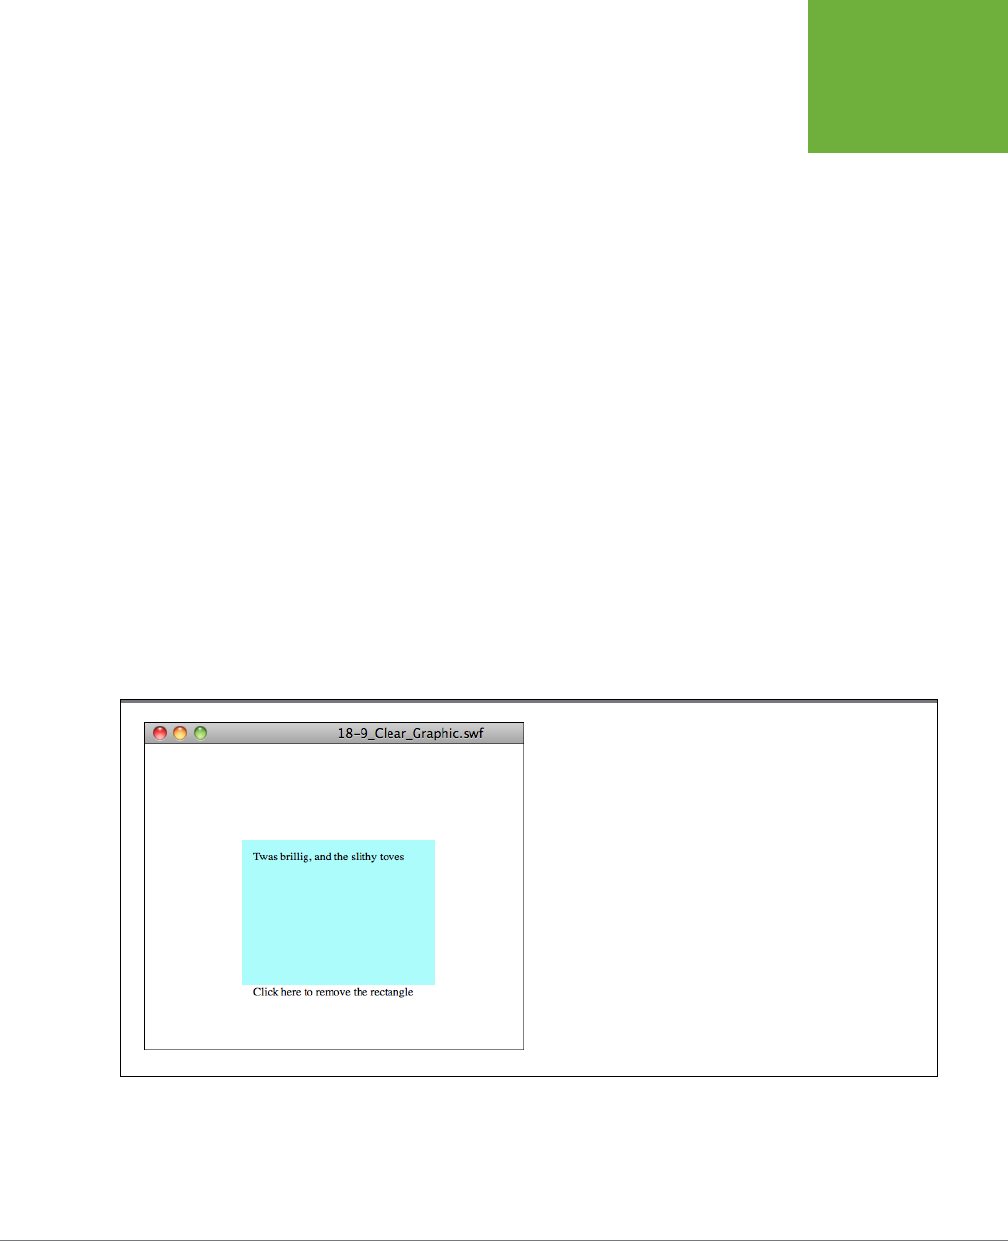
CHAPTER 18: DRAWING WITH ACTIONSCRIPT 633
REMOVING
LINES AND
SHAPES
10 mcCanvas.graphics.beginFill(0x99FFFF);
11 mcCanvas.graphics.drawRect(100,100,200,150);
12
13 addChild(mcCanvas);
14
15 var txtRemoveRectangle = new TextField();
16 txtRemoveRectangle.text = "Click here to remove the rectangle";
17 txtRemoveRectangle.x = 110;
18 txtRemoveRectangle.y = 250;
19 txtRemoveRectangle.autoSize = TextFieldAutoSize.LEFT;
20 addChild(txtRemoveRectangle);
21
22 txtRemoveRectangle.addEventListener(MouseEvent.CLICK,clickListener);
23 function clickListener(evt:MouseEvent):void
24 {
25 mcCanvas.graphics.clear();
26 }
There are no changes to the code until line 15. A new text field,
txtRemoveRectangle
,
is created, and on the following line, text is assigned to the
text
property. The text
field is positioned on the stage, and the
autoSize
property is set. On line 20, the
addChild()
method adds the txtField to the main timeline. Lines 22 through 26 cre-
ate and register an event listener.
When you test this code, it looks like Figure 18-8.
FIGURE 18-8
Click the words at the bottom of this animation, and the rectangle
disappears. The
clear()
method removes the vector graphics from
the movie clip. Drawings in the movie clip disappear, but items
contained by the movie clip, like the text field, remain.
www.it-ebooks.info

637
CHAPTER
19
The odds are against you. When you’re designing an animation and writing Action-
Script code, there may be several ways to do it and have it come out right. Unfortu-
nately, there are many more ways you can do it wrong. Maybe you chose a motion
tween when you meant to choose a shape tween, or you added content to a frame
instead of a keyframe. In ActionScript, a tiny error like using a capital letter in the
wrong place or a misplaced semicolon can ruin everything. The more complex your
project is, the more errors you’re likely to encounter.
The only way to find—and fix—your mistakes before your audience sees them is to
test and debug your projects. Yes, troubleshooting can be tedious, time-consuming,
and not nearly as much fun as designing and creating a brilliant animation. But if you
approach troubleshooting as solving a puzzle or a mystery, it can be fun. Furthermore,
Flash Professional CS6 comes with some pretty powerful testing and debugging
tools to help you find and squash those bugs.
Throughout this book, you’ve seen examples of testing an animation using the
Control→Test Movie option (for an example, look ahead to Figure 19-3). This chapter
expands on that simple test option, plus it shows you how to test animation play-
back at a variety of connection speeds. And if you’ve added ActionScript to your
animation, this chapter shows you how to unsnarl uncooperative ActionScript code
using Flash’s debugging tools.
Testing Strategies
All your audience ever sees is the finished product, not your intentions. So no matter
how sophisticated your animation or how cleverly constructed your ActionScript
Testing and Debugging
Your Animation
www.it-ebooks.info

FLASH CS6: THE MISSING MANUAL
638
TESTING
STRATEGIES
code, if you don’t test your animation and make sure it works the way you want it
to, all your hard work will have been in vain.
The following section shows you how to prepare for testing from the very beginning
by following good Flash development policies. Also, you’ll find out the dierences
between testing on the stage and testing in Flash Player, along with tips for testing
your animation in a web browser.
Planning Ahead
The more complex your animation, the more you need a thorough plan for testing
it. Few of the guidelines in the next two sections are specific to testing in Flash.
Instead, they’re tried-and-true suggestions culled from all walks of programming
life. Following them pays o in higher-quality animations and reduced time spent
chasing bugs.
Ideally, you should begin thinking about testing before you’ve created a single frame
of your animation. Here are some pre-animation strategies that pay o big:
SEPARATE POTENTIALLY TROUBLESOME ELEMENTS
ActionScript actions are very powerful, but they can also cause a lot of grief. Get
into the habit of putting them into a separate layer named “actions” at the top of
your list of layers, so that you’ll always know where to find it. Putting all your labels
into a separate layer (named “labels”) is a good idea, too. With sounds, you may be
able to put them in a single layer, or a sounds folder.
REUSE AS MUCH AS POSSIBLE
Instead of cutting and pasting an image or a series of frames, create a symbol and
reuse it. That way, if a bug raises its ugly head, you’ll have fewer places to go hunting.
You can cut down on bugs by reusing ActionScript code, too. Instead of attaching
four similar ActionScript actions to four dierent frames or buttons, create a single
ActionScript method or function and call it four times.
BE GENEROUS WITH COMMENTS
Before you know it, you’ll forget which layers contain which images, why you added
certain actions to certain objects, or even why you ordered your ActionScript state-
ments the way you did. In addition to adding descriptive comments to all the actions
you create, get in the habit of adding an overall comment to the first frame of your
animation. Make it as long as you want, and be sure to mention your name, the date,
and anything else pertinent you can think of. You create a comment in ActionScript
two dierent ways, as shown below:
// This is an example of a single-line ActionScript comment.
/* This type of ActionScript comment can span more than one line. All you
have to remember is to begin your multiline comment with a slash-asterisk
and end it with an asterisk-slash, as you see here. */
www.it-ebooks.info

CHAPTER 19: TESTING AND DEBUGGING YOUR ANIMATION 639
TESTING
STRATEGIES
STICK WITH CONSISTENT NAMES
Referring to a background image in one animation as “bg,” in another animation
as “back_ground,” and in still another as “Background” is just asking for trouble.
Even if you don’t have trouble remembering which is which, odds are your oce
teammates will—and referring to an incorrectly spelled variable in ActionScript
causes your animation to misbehave quietly. In other words, type
Backgruond
in-
stead of
Background
, and Flash may not pop up an error message; your animation
just looks or acts odd for no apparent reason. Devise a naming convention you’re
comfortable with and stick with it. For example, you might decide always to use
uppercase, lowercase, or mixed case. You might decide always to spell words out,
or always to abbreviate them the same way. The particulars don’t matter as much
as your consistency in applying them. Keep in mind that capitalization counts. Be-
cause ActionScript is case-sensitive, Flash treats “background,” “Background,” and
“BACKGROUND” as three dierent names.
Techniques for Better Testing
The following strategies are crucial if you’re creating complex animations as part of
a development team. But they’re also helpful if it’s just you creating a short, simple
animation all by your lonesome.
• Test early, test often. Don’t wait until you’ve attached actions to 16 dierent
objects to begin testing. Test the first action, and then test each additional ac-
tion as you go along. This iterative approach helps you identify problems while
they’re still small and easy to pinpoint.
• Test everything. Instead of assuming the best-case scenario, see what hap-
pens when you access your animation over a slow connection or using an older
version of Flash Player. What happens when you type the wrong kind of data
into an input text field or click buttons in the wrong order? (Believe this: Your
audience will do all of these things, and more.)
• Test on dierent computers. It’s very important to test on a computer other
than the one that writes the code. For example, an alien computer may have
dierent fonts installed or a dierent version of Flash Player or some other
support file. Use as much variety as possible in testing. Use Macs and PCs. Use
old clunkers and the latest, greatest state-of-the-art machine you can get your
hands on. Then test on an underpowered netbook, a smartphone, and a tablet.
• Test in dierent web browsers. If your animation is going to be viewed over
the Internet, try it out in dierent browsers. These days, Microsoft’s Internet
Explorer, Apple’s Safari, Firefox, and Google’s Chrome are the most widely used
browsers. It’s best to test in each browser. Each of these browsers has several
versions in use. For the fewest surprises and complaints, test in the last two or
three available versions.
www.it-ebooks.info

FLASH CS6: THE MISSING MANUAL
640
TESTING
STRATEGIES
• Test blind. In other words, let someone who’s unfamiliar with how your animation
is supposed to work test it. In programming circles, this type of testing is known
as
usability testing
, and it can flush out problems you never dreamed existed.
• Test in “real world” mode. Begin your testing in the Flash authoring environ-
ment, as described in the next section, but don’t end there. Always test your
animation in a production environment before you go live. For example, if you’re
planning to publish your animation to a website, upload your files (including
your .swf file and any external files your animation depends on) to a web
server, and then test it there, using a computer running the operating system,
connection speed, browser, and Flash Player plug-in version you expect your
audience to be running. (Sure, transferring a few files isn’t
supposed
to make
a dierence—but it often does.) Chapter 20 covers publishing to the Web, as
well as other publishing options.
Testing on the Stage vs. Testing in Flash Player
Flash gives you several options for testing your animation. You
can test on the stage using the Control→Play command, or you
can test in Flash Professional, Air Debug Launcher (desktop or
mobile), or Device via USB. Testing on the stage is the fastest
option, and it’s good for checking your work as you go along,
but in order to try out your animation exactly as your audience
will see it, you have to choose one of the other options. Here’s
some more advice on when to choose each.
Testing on the stage is the quick and easy option, using
the Controller below the timeline and the associated menu
options (Control→Play, Control→Stop, Control→Rewind,
Control→Step Forward One Frame, Control→Step Backward
One Frame, and Control→“Go to End”). Testing on the stage
is quicker than testing in Flash Player, because you don’t have
to wait for Flash to compile (
export
) your Flash document and
then load it into the player. Instead, when you test on the stage,
Flash immediately plays the timeline frame by frame. Use the
loop button and its associated timeline brackets to repeatedly
play a selected group of frames. For simple animations and
to review a portion of your animation, testing on the stage is
easier and quicker than the other testing methods.
The downside to testing on the stage is that it doesn’t always
test what you think it’s testing. For example, if you test a frame
containing a movie clip instance, you don’t see the movie clip
playing; you need to dig down into symbol editing mode to
test the movie clip symbol. And if your animation contains a
button instance and you forget to turn on the checkbox next
to Control→Enable Simple Buttons, then the button doesn’t
work on the stage—even though it may work perfectly well
in a published animation.
To test your animation in an environment similar to that of
the intended audience, use one of the Control→Test Movie
options. When you test an animation by selecting Control→Test
Movie→“in Flash Professional” or Control→Test Scene, Flash
generates an .swf file. For example, if you’re testing a Flash
document named
myDocument.fla
, Flash generates a file
called
myDocument.swf
(or
myDocument_myScene.swf
, if
you’re testing a scene) and automatically loads it into a testing
environment (powered by Flash Player). This option usually
shows you exactly what your audience will see, not counting
computer hardware and connection differences (page 646).
If you started your project from one of the AIR templates,
you have the option to use the AIR Debug Launcher for either
Desktop or Mobile. Use the “On Device via USB” option to test
using a smartphone or tablet connected to your computer.
UP TO SPEED
www.it-ebooks.info
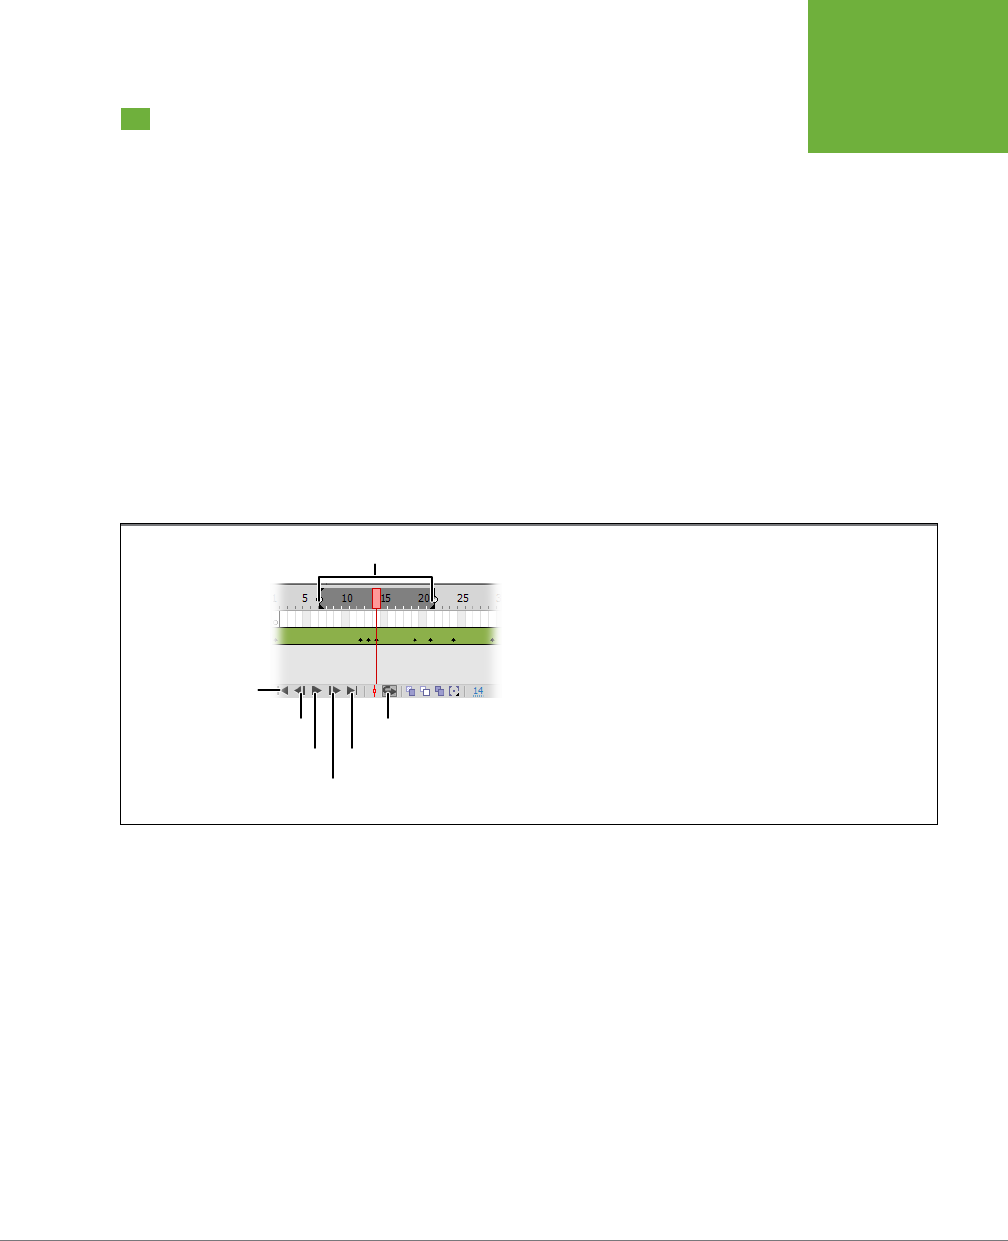
CHAPTER 19: TESTING AND DEBUGGING YOUR ANIMATION 641
TESTING ON
THE STAGE
Testing on the Stage
If all you want to do is check out a few simple frames’ worth of action, this is the
option to use. It’s also the best choice if you want to see your motion path or
not
see
the layers you’ve marked as hidden. (For the skinny on hiding and showing layers,
check out page 138.)
The timeline controller buttons under the timeline (Figure 19-1), make it easy to
test your animation as you build it. This addition makes the older floating controller
(Window→Toolbars→Controller) obsolete. There are some handy menu options that
work with the controllers:
• Control→Loop Playback. Tells Flash to loop playback over and over again after
you click Play on the Controller. Flash keeps looping your animation until you
click Stop. If you don’t turn on this option, Flash just plays the animation once.
• Control→Play All Scenes. Tells Flash to play all the scenes in your animation,
not just the scene currently visible on the stage.
FIGURE 19-1
The easiest way to test part of your animation is with the controller
embedded below the timeline. Click the Loop button and position the
brackets over the section you want to test.
Loop brackets
Step forward one frame
Play Go to last frame
Loop
Go to first frame
Step back one frame
• Control→Enable Simple Frame Actions. Tells Flash to play the actions you’ve
added to frames in the timeline. If you don’t turn on this option, then Flash
ignores all frame actions.
• Control→Enable Simple Buttons. Tells Flash to make your buttons work on
the stage. (If you don’t turn on the checkbox next to this option, mousing over
a button or clicking it on the stage has no eect.)
• Control→Enable Live Preview. Tells Flash to display any components you’ve
added to the stage the way they’ll appear in Flash Player. (The components
don’t work on the stage, but you see how they’re supposed to look.) If you
have components on the stage and you don’t choose this option, then only the
outlines of your components appear.
• Control→Mute Sounds. Tells Flash not to play any of the sound clips you’ve
added to your animation.
www.it-ebooks.info

FLASH CS6: THE MISSING MANUAL
642
USING THE
TEST MOVIE
COMMANDS
If you want to test a particular scene, for example, click the Edit Scene icon in the Edit
bar, and then choose a scene to display the timeline for that scene. If you want to test
a movie clip symbol, select Edit Symbols to display the timeline for that movie clip.
Whether you use the timeline controller or the floating controller, you’ll find the
standard play options, similar to your DVD player or iPod:
• Stop. Clicking this square button stops playback. (Found only on the floating
controller.)
• Go to first frame. Clicking this button rewinds your animation. That is, it moves
the playhead back to Frame 1.
• Step back one frame. Clicking this button moves the playhead back one frame.
If the playhead is already at Frame 1, this button has no eect.
• Play/Pause. Clicking this right-arrow toggle button alternately runs your anima-
tion on the stage and pauses it. Playback begins at the playhead. In other words,
playback begins with the frame you selected in the timeline and runs either until
the end of your animation, or until you press the Stop button.
• Step forward one frame. Clicking this button moves the playhead forward one
frame (unless the playhead is already at the last frame, in which case clicking
this icon has no eect).
• Go to last frame. Clicking this button fast-forwards your animation to the very
end. That is, it sets the playhead to the last frame in your animation.
NOTE You can also drag the playhead back and forth along the timeline to test your animation on the stage
(a technique called
scrubbing
).
Using the Test Movie Commands
Flash’s test modes show you a closer approximation of how your animation will actu-
ally appear to your audience than testing on the stage. When you choose one of the
Test Movie commands, your animation plays in one of the target environments: Flash
Professional, AIR, or “Device via USB.” Test Movie is your best bet if your animation
contains movie clips, buttons, scenes, hidden layers, or ActionScript, since it shows
you
all
the parts of your animation—not just the parts currently visible on the stage.
NOTE Motion paths (the lines) don’t appear when you test your animation in Flash Player, for good reason:
Flash designed them to be invisible at runtime. If you want to see your motion paths in action, you need to test
your animation on the stage.
www.it-ebooks.info
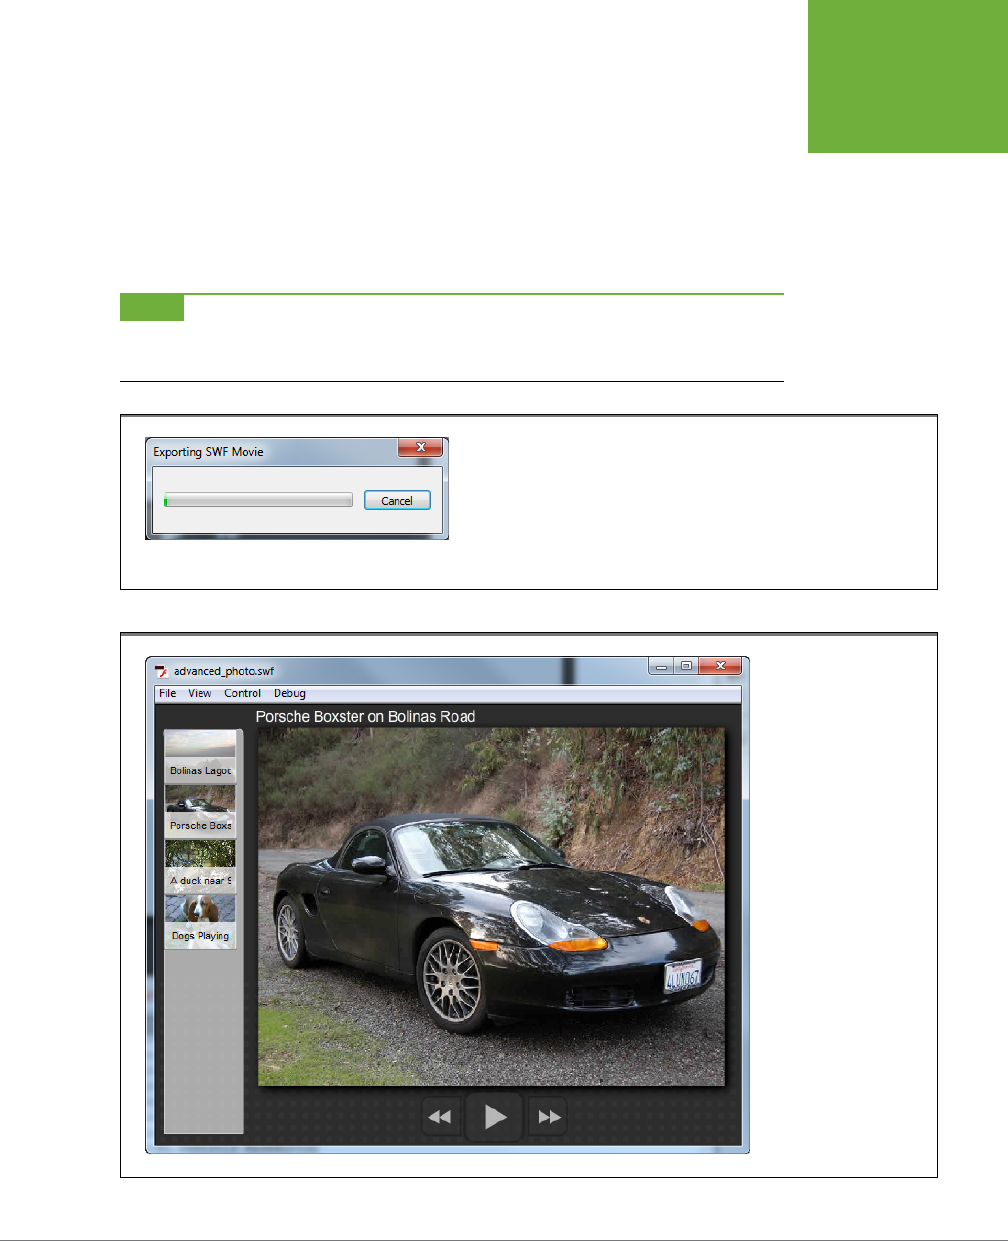
CHAPTER 19: TESTING AND DEBUGGING YOUR ANIMATION 643
USING THE
TEST MOVIE
COMMANDS
Here are the steps for testing an animation in Flash Professional. You use this mode
for animations destined for websites or Flash Player:
1. Select Control→
Test Movie→“in Flash Professional.”
The Exporting SWF Movie dialog box in Figure 19-2 appears, followed by your
animation running in the Flash Player test window, similar to the one in Fig-
ure19-3.
NOTE If you’re working on an AIR project, you can choose one of the AIR options: “in AIR Debug Launcher
(Desktop)” or “in AIR Debug Launcher (Mobile).” Flash remembers your selection, so the next time you can test
your animations with Ctrl+Enter (⌘-Return).
FIGURE 19-2
When you see this dialog box, you know Flash is exporting your animation and
creating an .swf file. If you’ve tested this particular animation before, Flash erases
the .swf file it previously created and replaces it with the new one. Finishing an
export can be fast or slow depending on the size and complexity of your animation
and your computer’s processing speed and memory.
FIGURE 19-3
Normally, when you se-
lect Control→Test Movie
or Control→Test Scene,
Flash opens up Flash
Player in its own window.
To control playback,
you have a couple of
choices: You can choose
options from the File,
View, Control, and Debug
menus, or you can right-
click (Control-click) the
window, and then choose
options from the shortcut
menus that appear.
www.it-ebooks.info

FLASH CS6: THE MISSING MANUAL
644
TESTING INSIDE
A WEB PAGE
2. To control playback—to stop the animation, and then rewind it, for ex-
ample—choose options from the Control menu.
If you’re running Windows, the Control menu appears in your movie test window;
on a Mac, you get the Control menu in Flash itself. (In Windows, you can also see
the Control menu in Flash itself if you turn on tabbed viewing in Preferences.
See the box below for details.)
3. To close Flash Player, select File→Close or click the X in the upper-right
corner of the window (Windows) or the red button in the upper-left corner
of the window (Mac).
NOTE Testing your animation with Test Movie gives you a great sense of what your audience will see. But
factors like connection speed and hardware differences come into play when you actually publish your animation,
so you’ll want to test your animation in a real-life production setting (using the same kind of computer, same
connection speed, and same version browser as you expect your audience to use) before you go live.
Testing Inside a Web Page
In addition to letting you test your animation, Flash lets you test your animation
embedded in a web page. This option lets you see how your animation looks in a web
browser based on the animation alignment, scale, and size options Flash lets you set.
Here’s how it works. You tell Flash in the Publish Settings window (Figure 19-4) that
you want to embed your animation in a web page. Use the settings on the right side
of the Publish Settings window to control the behavior of your animation when it runs
in a web page. When you choose File→Publish Preview→HTML, Flash constructs an
HTML file containing your animation, and then loads it automatically into the web
browser on your computer.
NOTE Tucking your animation into a web page is a popular publishing option, but it’s certainly not the only
one. The other publishing options, including publishing your animation as a QuickTime movie and as a standalone
Flash projector file, are covered in detail in Chapter 20.
Test Multiple Animations
Some folks find a tabbed page—like the tabs in some web
browsers—easier to pop back to, especially if they’re trying
to test several different animations at once. If you’d rather
Flash Player appear in a tabbed page, select Edit→Preferences
(Windows) or Flash→Preferences (Mac).
In the Preferences window that appears, click the General
category. Turn on the checkbox next to “Open test movie in
tabs.” Then choose Control→Test Movie. This time, Flash Player
appears as a tab. When you click the tab, the Flash Developer
menu options change to the Flash Player options.
GEM IN THE ROUGH
www.it-ebooks.info
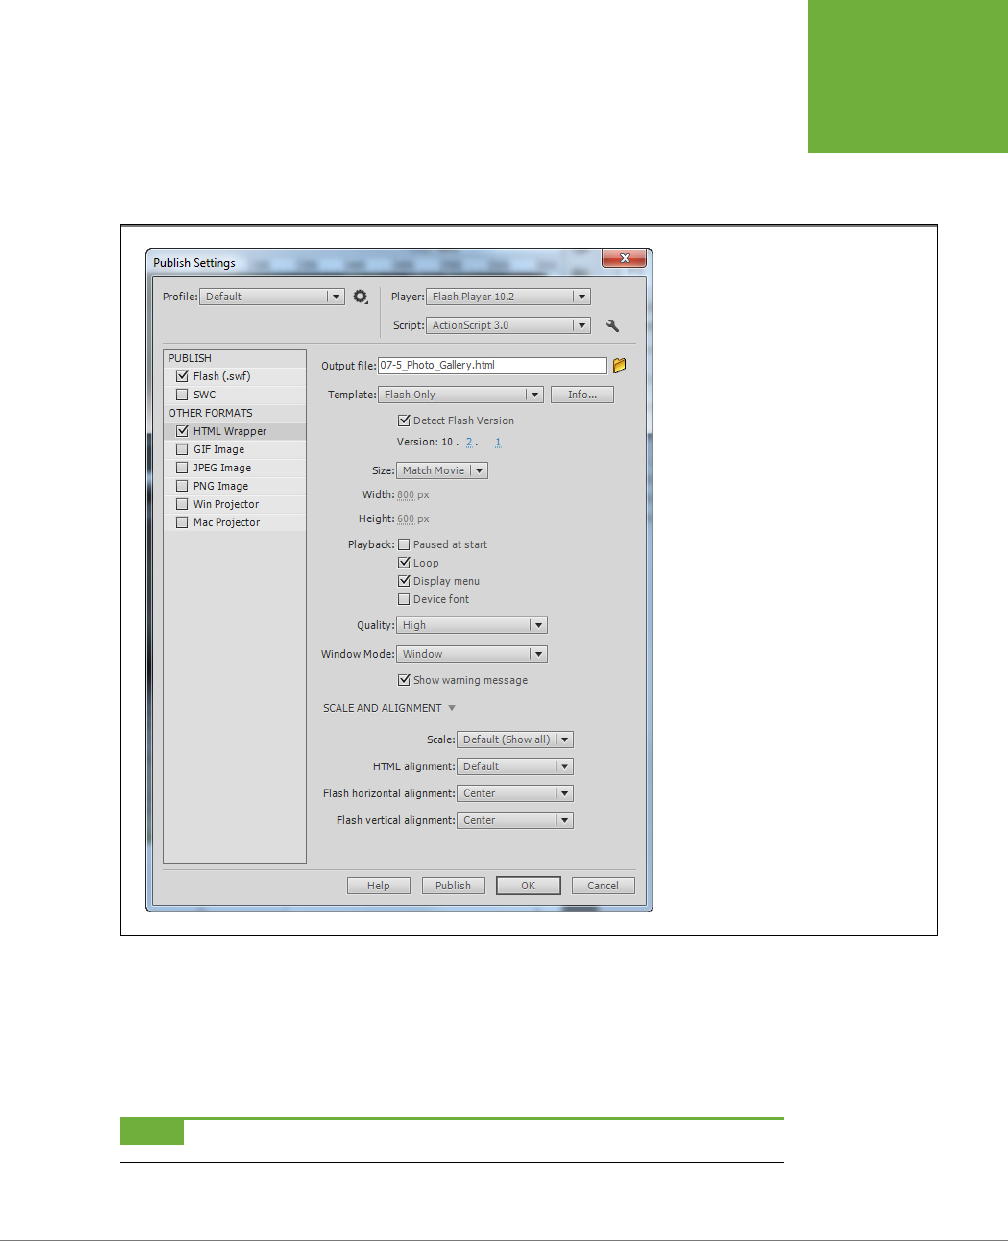
CHAPTER 19: TESTING AND DEBUGGING YOUR ANIMATION 645
TESTING INSIDE
A WEB PAGE
To test your animation inside a web page:
1. Choose File→Publish Settings.
The Publish Settings window appears, as shown in Figure 19-4.
FIGURE 19-4
Flash gives you several publishing options,
one of which is embedding your animation
inside of an HTML wrapper. The name
Flash uses for your HTML file is the name
of your Flash document, but with an .html
extension.
2. Under Other Formats, turn on HTML Wrapper.
Flash displays the HTML options in the right side of the window.
3. Click the Template drop-down menu, and then choose “Flash only.” Click OK.
Flash accepts your changes and closes the Publish Settings dialog box.
NOTE For a description of each of the settings on this tab, see page 685.
www.it-ebooks.info
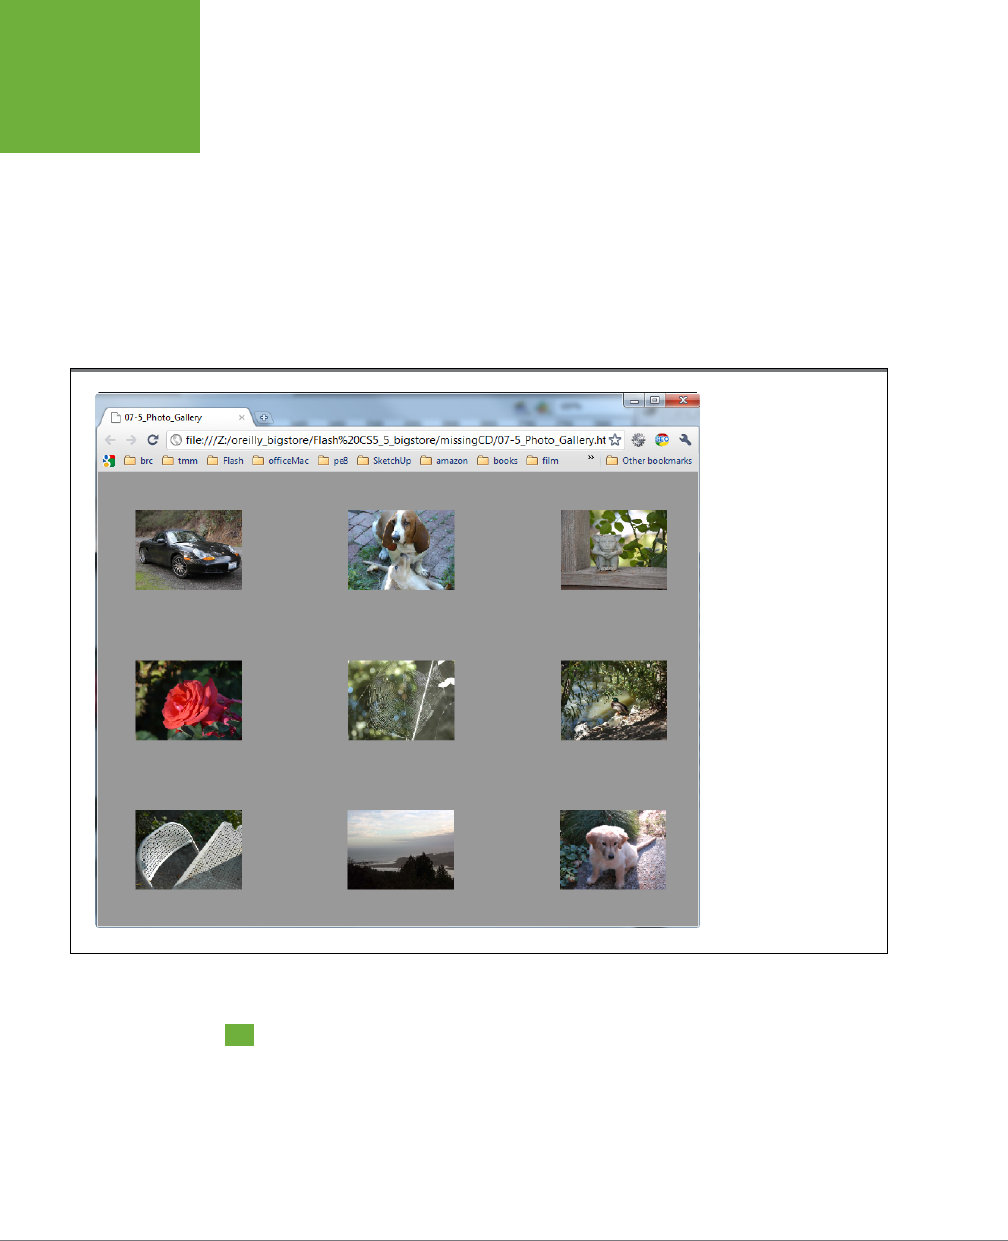
FLASH CS6: THE MISSING MANUAL
646
TESTING
DOWNLOAD
TIME
4. Choose File→Publish Preview→HTML.
The Publishing dialog box appears briefly to let you know Flash is creating an
HTML file. When the dialog box disappears, Flash loads the completed HTML,
including your embedded animation, into the web browser on your computer
(Figure 19-5).
Right-clicking (Windows) or Control-clicking (Mac) the running animation shows you
standard menu options you can use to control playback inside the browser, although
how many options you see depends on whether you turned o the checkbox next
to “Display menu” in the Publish Settings dialog box.
FIGURE 19-5
In addition to creating
an HTML file, choos-
ing File→Publish
Preview→HTML launches
your web browser pre-
loaded with that file.
Testing Download Time
If you’re planning to publish your animation on the Web, you need to know how long
it takes your animation to download from a web server to somebody’s computer.
Chapter 20 gives you several optimization techniques, including tips for preloading
content and reducing your animation’s file size; but before you begin to optimize your
www.it-ebooks.info
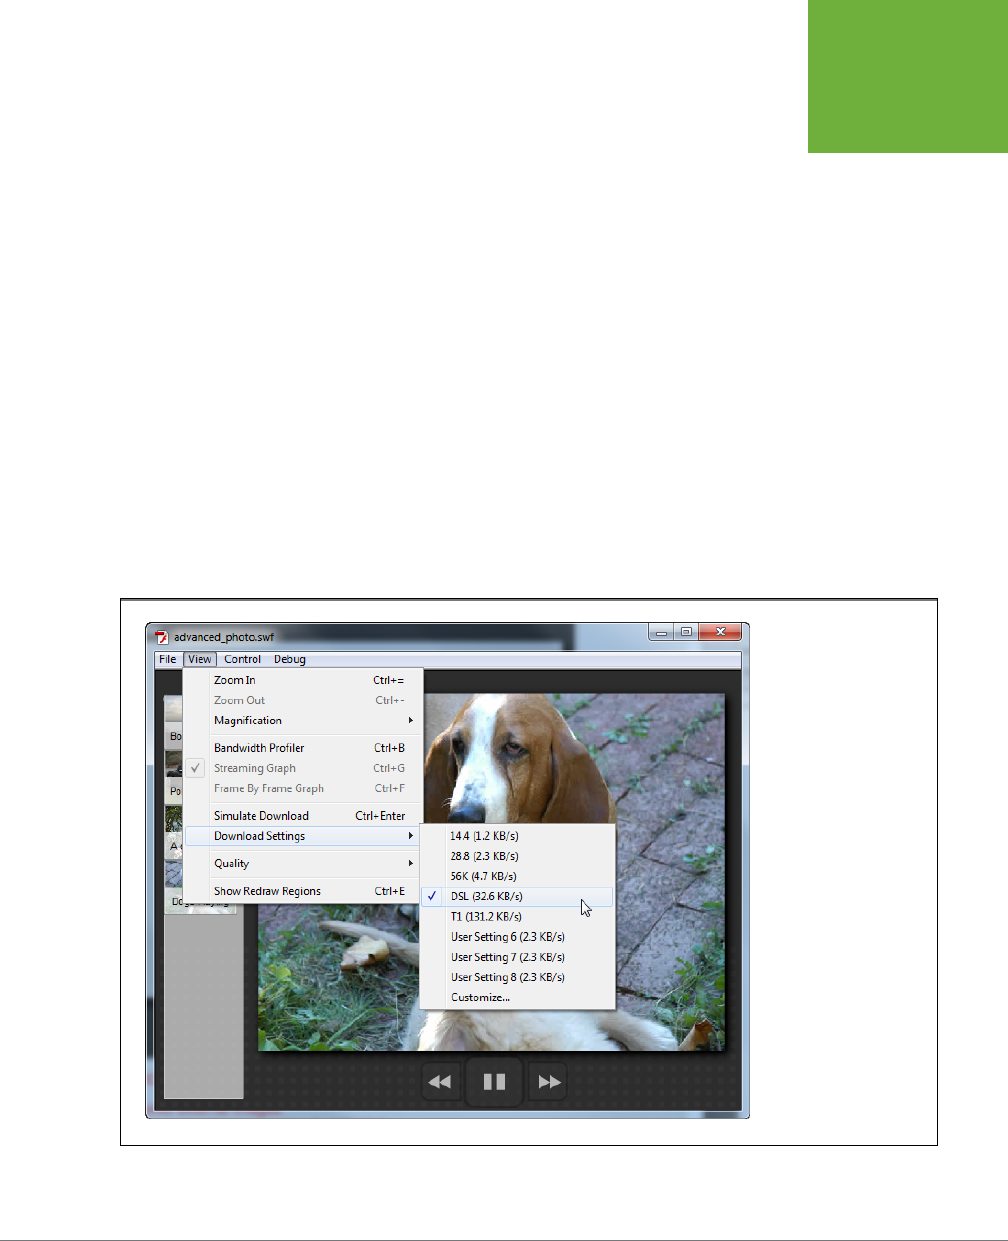
CHAPTER 19: TESTING AND DEBUGGING YOUR ANIMATION 647
TESTING
DOWNLOAD
TIME
animation, you need to know just how bad the situation is and where the bottlenecks
are. The following sections show you how.
Simulating Downloads
You
could
set up a bank of test machines, each connected to the Internet at a dif-
ferent transfer speed, to determine the average download time your audience will
eventually have to sit through. But Flash gives you an easier option: simulating
downloads at a variety of transfer speeds with the click of a button. The simulation
takes into consideration any additional, non-Flash media files that you’ve included
in your animation, like sound and video clips.
To simulate dierent download speeds:
1. Choose Control→
Test Movie→“in Flash Professional.”
The Flash Player (test window) appears.
2. Select View→Download Settings (Figure 19-6), and then, from the submenu,
select the connection speed you expect your audience to be running.
Your choices range from 14.4 (1.2 KB/s) to T1 speed (131.2 KB/s). If you need to
simulate a faster speed, check out Figure 19-7.
FIGURE 19-6
If you’re used to testing
your animation inside
the Flash development
environment, you may
be shocked when you
see how long it takes
to download and play
your animation over the
web. Flash automatically
adjusts for standard line
congestion to give you
a more realistic picture.
So, for example, when
you choose the 14.4 KB/s
setting, Flash actually
simulates the transfer at
the slightly lower rate of
12.0 KB/s.
www.it-ebooks.info
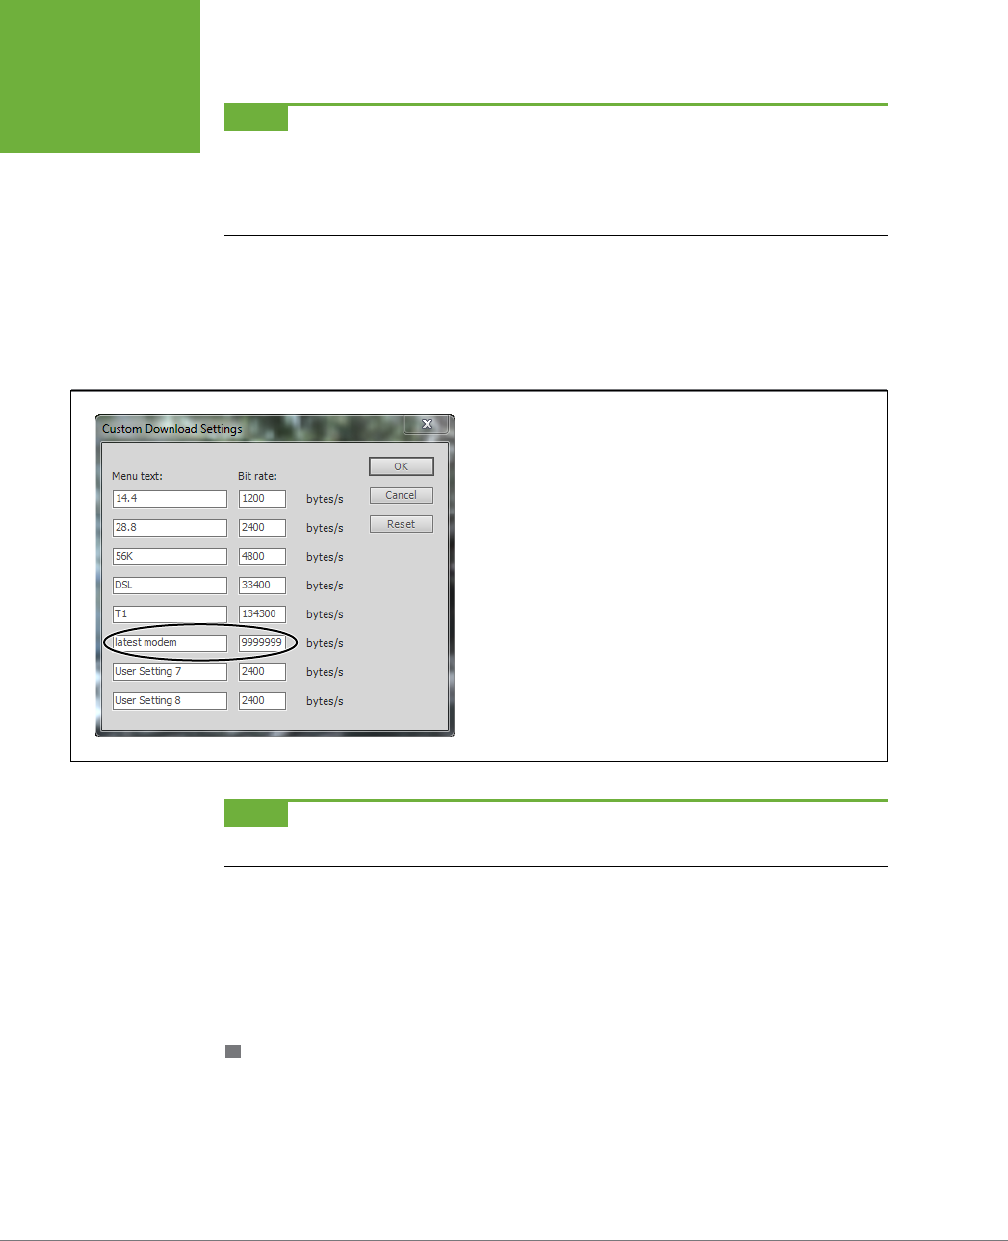
FLASH CS6: THE MISSING MANUAL
648
TESTING
DOWNLOAD
TIME
NOTE Unless you’re planning to let only certain folks view your animation (for example, students in your
company’s training classes), you can’t possibly know for sure what connection rates your audience will be using.
The best approach is to test a likely range. If the animation plays excruciatingly slowly at the lowest connection
speed in your test range, consider either optimizing or offering a low-bandwidth version. Chapter 20 (page 671)
tells you how.
3. Choose View→Simulate Download.
The test window clears, and Flash plays your animation at the rate it would play
it if it had to download your file from a web server at the connection speed you
chose in step 2.
FIGURE 19-7
To keep up with the latest advances in transfer technology, you can
select a faster transfer rate than any of the options Flash has. To do so,
select View→Download Settings→Customize, and then type a label
and the new transfer speed you want to test (from 1 byte per second to
10,000,000).
NOTE The download simulator does not calculate the download time for external assets, such as photos
that are downloaded when the animation is running.
4. Repeat steps 2 and 3 for each connection speed you want to test.
Often, you’ll find that your animation takes too long to play at one—or even
all—of the simulated connection speeds you test. Fortunately, Flash gives you
additional tools to help you pinpoint which frames take longest to download
(so that you know which frames to optimize). Read on for details.
PINPOINTING BOTTLENECKS WITH A BANDWIDTH PROFILER REPORT
Simulating downloads at dierent connection speeds gives you a general, overall
feel for whether you’ll need to optimize your animation or give your audience a
low-bandwidth alternative (or both). But to get more precise information, like which
frames represent the greatest bottlenecks, turn to the
bandwidth profiler report
(Figure 19-8).
www.it-ebooks.info
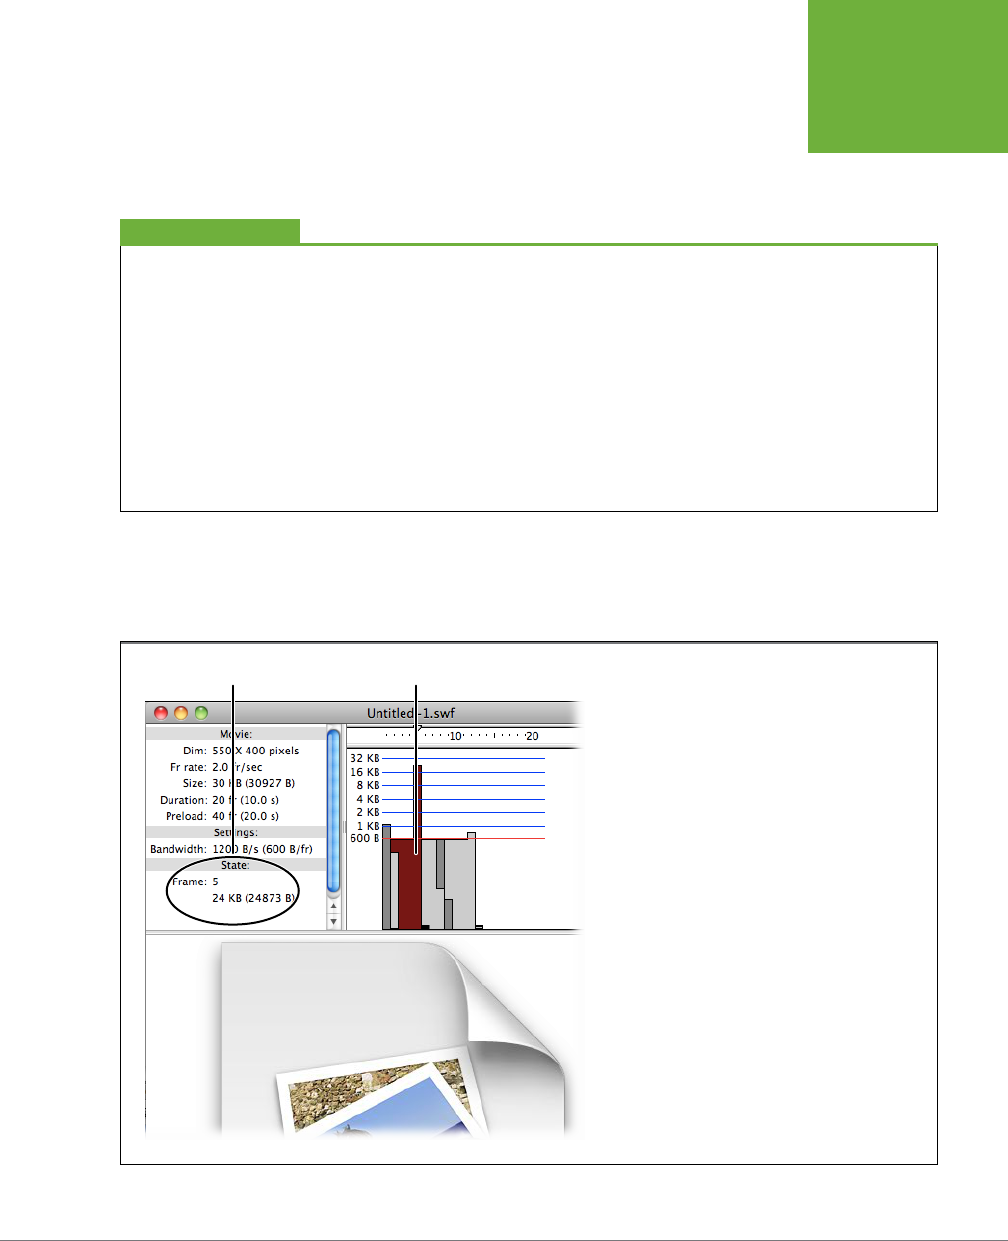
CHAPTER 19: TESTING AND DEBUGGING YOUR ANIMATION 649
TESTING
DOWNLOAD
TIME
To generate a bandwidth profiler report:
1. Choose Control→
Test Movie→“in Flash Professional.”
The Flash Player (test window) appears containing your running animation.
Size Reports
Flash has a second statistical report called a
size report
. To create a
size report, choose File→Publish Settings→Flash→Advanced,
and then turn on the “Generate size report” checkbox. Make
sure you can see the Output window (Window→Output). Then,
when you choose File→Publish, Flash displays the size report
in the Output window. It also automatically generates a text
file named
yourFlashFile Report.txt
that you can pull into a
text editor or word processor.
This report provides detailed information about the elements
that add to the size of the published .swf file. It thoroughly
breaks down the details frame by frame, giving a running total
of the file size in bytes. A summary lists scenes, symbols, and
fonts and shows how the shapes, text, and ActionScript code
add to the heft of your published file. If you’re suffering from
file bloat, generate a report to see which images, symbols,
sounds, or other elements are causing the problem.
CODERS’ CLINIC
2. In the test window, select View→Bandwidth Profiler.
In the top half of the window, Flash displays a report similar to the one in
Figure19-8.
FIGURE 19-8
Flash assumes you want it to display your bandwidth
reports in Streaming Graph format, as shown here,
unless you tell it otherwise. Unfortunately, analyzing
the graph on this kind of report can be tricky; to match
a stacked segment to a particular frame, you have to
click the stacked segment. When you do, Flash displays
the associated frame in the Frame field on the left side
of the report.
Frame number and size Frame size graphed
www.it-ebooks.info
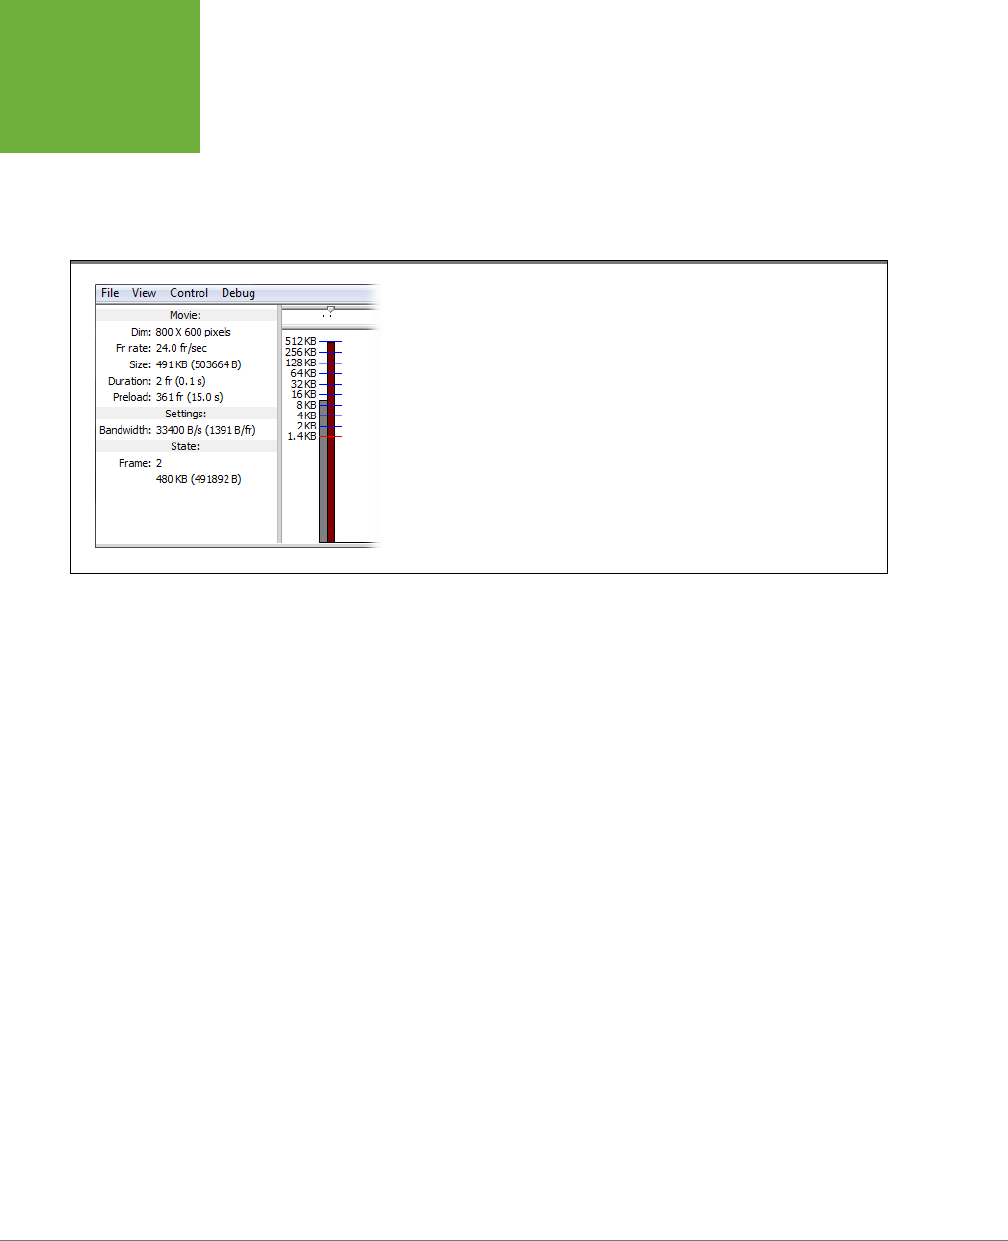
FLASH CS6: THE MISSING MANUAL
650
TESTING
DOWNLOAD
TIME
3. Select View→Frame By Frame Graph.
The graph Flash displays when you choose the Frame By Frame option makes
detecting rogue frames much easier than if you stick with Flash’s suggested
View→Streaming Graph option shown in Figure 19-8. Figure 19-9 has an example
of a Frame By Frame graph.
FIGURE 19-9
On the left side of this Frame By Frame bandwidth profiler report, you see anima-
tion properties pertinent to playback, including the .swf file size and the stage
dimensions and frame rate you set in Flash. The right side of the report shows you a
frame-by-frame picture of the download process. Frame bars that appear above the
red line (here, Flash has drawn the red line at 1.4 KB) mean a wait for data. So Frame 2
is the obvious slow-playing culprit in this animation.
4. Select View→Simulate Download.
The progress bar at the top of the bandwidth profiler report moves as Flash
simulates a download.
The report gives you information you can use to figure out which frames of your
animation are hogging all the bandwidth. You’ll find a timeline and a playhead at the
top of the report. As your animation plays, the playhead moves along the timeline
to help you see at a glance which frames are causing Flash to display those tall
bandwidth-hogging frame bars.
Preload
, the most useful number, tells you how
long your audience has to sit and wait before your animation begins. These are the
details you’ll find in the bandwidth profiler report:
• Dimensions (Dim). The width and height of the stage in pixels.
• Frame rate (Fr rate). The frame rate you set for this animation.
• Size. The size of the .swf file Flash created when you exported (began testing)
the movie.
• Duration. The number of frames in this animation, followed by the number of
seconds the frames take to play based on the frame rate you set.
• Preload. The total number of seconds it takes Flash to begin playing the anima-
tion at the bandwidth setting you chose.
www.it-ebooks.info

CHAPTER 19: TESTING AND DEBUGGING YOUR ANIMATION 651
TESTING
DOWNLOAD
TIME
• Bandwidth. The connection simulation speed you chose by selecting
View→Download Settings.
• Frame. The frame Flash is currently loading.
If your animation played just fine, try testing it using a slower simulated connec-
tion. (Your goal is to make sure as much of your potential audience can enjoy your
animation as possible—even folks running over slow connections and congested
networks.) To do this test, redisplay the bandwidth profiler report, this time using
a dierent connection simulation speed:
1. Choose View→Download Settings.
A submenu appears, showing a list of possible connection simulation speeds,
like 28.8, 56K, and T1.
2. Choose the new simulation speed you want to test. Then choose
View→Simulate Download again.
A new bandwidth profiler report appears, based on the new connection speed.
The Flash Player View Menu Options
Flash Player has several menu options that you can use to
change the way your animation appears as it’s playing. If
you turn on the checkbox next to
Display menu
in the Publish
Settings→HTML dialog box (coming up in Figure 20-1), your
audience can see some of these same options, by right-clicking
(Windows) or Control-clicking (Mac).
If you’re running a Mac, the following menu options don’t
appear directly in Flash Player; instead, they appear in the
Flash menu:
• View→Zoom In. Tells Flash to enlarge your animation.
This option is useful if you want to examine your artwork
close up.
• View→Zoom Out. Tells Flash to shrink your animation.
• View→Magnification. Displays a menu of percentage
options you can choose from to tell Flash to enlarge or
shrink your animation.
• View→Bandwidth Profiler. Creates a bandwidth profiler
report.
• View→Streaming Graph. Tells Flash to display download
data in stacked bars when it creates a bandwidth profiler
report (Figure 19-8).
• View→Frame By Frame Graph. Tells Flash to display the
download time for each frame separately when it creates
a bandwidth profiler report (Figure 19-9).
• View→Simulate Download. Tells Flash to pretend to
download your animation from a web server based on
the download settings you select using View→Download
Settings.
• View→Download Settings. Displays a list of connection
speeds, from 14.4 to T1, to test the download speed of your
animation on a variety of different computers.
• View→Quality. Tells Flash to display your animation’s
artwork in one of three different quality modes: low,
medium, or high. Flash assumes you want high quality
unless you tell it differently. (Choosing low or medium
quality doesn’t reduce simulation download time,
but reducing image quality in the Flash authoring
environment does reduce your animation’s file size, which
in turn speeds up download time.)
• View→Show Redraw Regions. Displays borders around
the moving images in your animation.
UP TO SPEED
www.it-ebooks.info

FLASH CS6: THE MISSING MANUAL
652
THE ART OF
DEBUGGING
The Art of Debugging
Imagine, for an instant, that your animation isn’t behaving the way you think it should.
Testing it on the stage or in Flash Player, and then eyeballing the results, as described
in the previous section, is a good place to start tracking down the problem. But if
you’ve added ActionScript to your animation, chances are you need more firepower.
You need to be able to examine the inner workings of your ActionScript code—the
variables, instance names, methods, and so on—to help you figure out what’s wrong.
Debugging is one of those activities that’s part art, part craft, and part science. Flash
and ActionScript provide several tools that help you track down and eliminate those
pesky bugs of all types. These are some of the tools at your disposal:
• The Check syntax button catches the most obvious typos. If you’ve got too
many parentheses in a line or you misplaced a comma or semicolon, the syntax
checker is likely to notice. Still, it lets lots of the bad guys through.
• The Compiler Errors panel is the next layer of defense against bugs. If there’s a
flaw in your code’s logic (for example, a reference to some object that doesn’t
exist or is misnamed), a message is likely to appear in the Compiler Errors panel.
Sometimes your animation will run anyway; other times it won’t.
• The Output panel displays messages. Using the
trace()
statement, you can
display the values of variable and object properties in the Output panel. So you
get to tell ActionScript what to report on.
• The Debugger is your debugging power tool. It’s kind of like the diagnostic
machine your mechanic connects to your car to see what’s going on inside. The
debugger combines the usefulness of the other tools with the all-important abil-
ity to stop your animation and code in its tracks. That gives you an opportunity
to examine the critical variables, property settings, and values.
NOTE The debugger for ActionScript 3.0 is different in a few ways from the debugger for ActionScript 2.0
and 1.0 code. For details on the older debugger, see
Flash CS3: The Missing Manual
.
You’re likely to use the first three tools as you’re writing and testing your animation. As
your code gets more complex, with multiple timelines, multiple objects, and multiple
functions and methods, you’ll turn to the debugger. This section starts o with the
quick and easy bug squashers, and then moves on to the more complex. The trouble-
some program attached to that diagnostic machine is called
19-1_Debug_Code.fla
,
and you can download it from the Missing CD page at
www.missingmanuals.com/
cds/flashcs6mm
. If you’d like to see how the program is supposed to behave, check
out
19-2_Debug_Code_done.fla
.
Checking with the Syntax Checker
The animation
19-1_Debug_Code.fla
isn’t behaving the way it should—pretty ornery
for a snippet of code that’s only 20 lines long. It’s supposed to draw lines on the
screen from one random point to another. The lines are supposed to randomly vary
www.it-ebooks.info
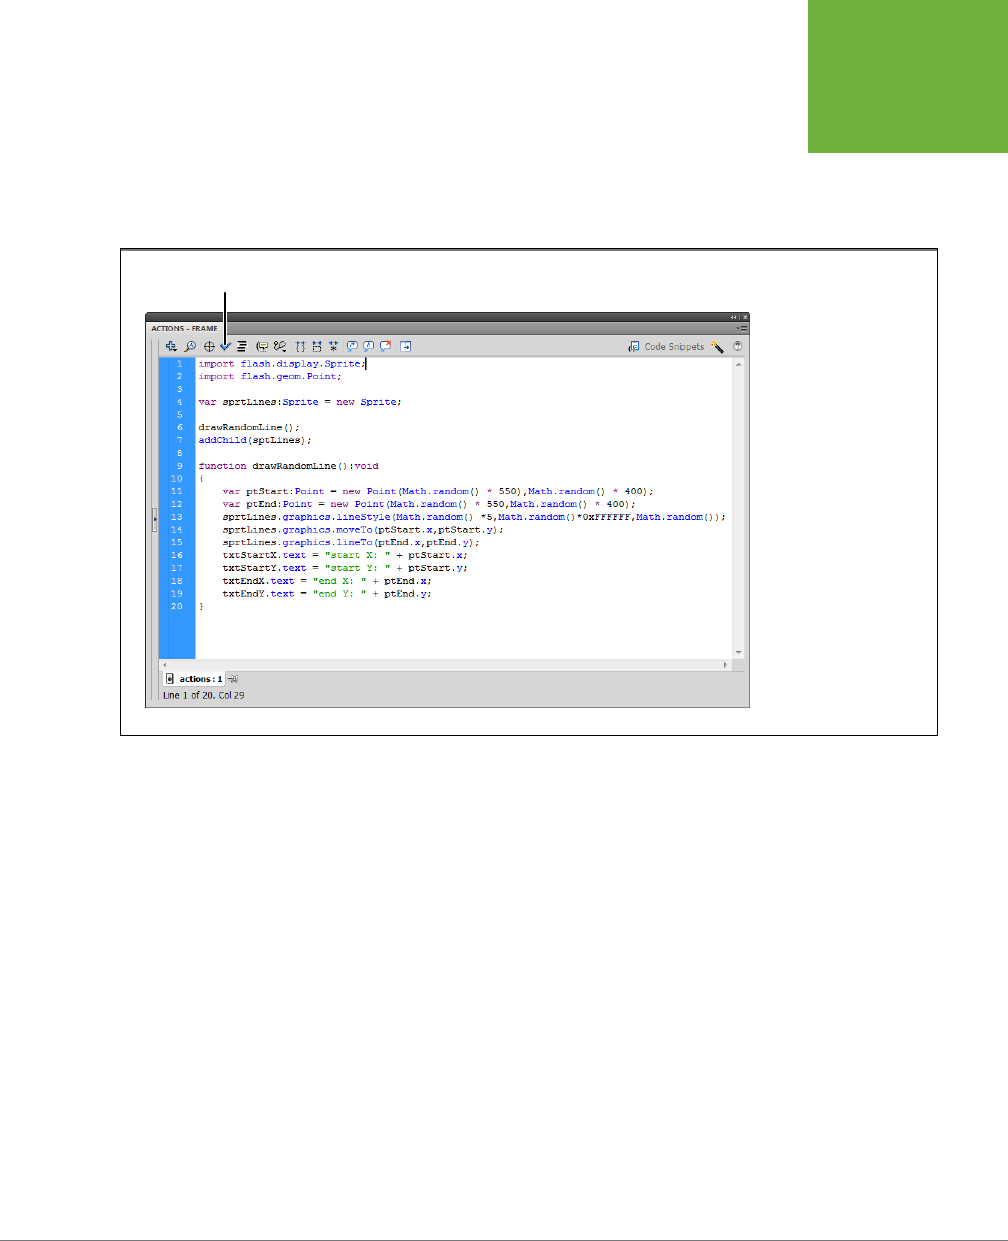
CHAPTER 19: TESTING AND DEBUGGING YOUR ANIMATION 653
THE ART OF
DEBUGGING
in thickness, color, and transparency. There are four text fields in the display that
are supposed to flash the x/y coordinates of the points used to draw the lines. If you
try to test the program with Ctrl+Enter (⌘-Return), nothing much happens. The first
step to putting things on track is to use the “Check syntax” button in the Actions
panel, as shown in Figure 19-10.
FIGURE 19-10
The “Check syntax”
button looks like a
checkmark. One click, and
Flash proofreads your
code to find typos and
punctuation errors.
Check syntax
1. With
19-1_Debug_Code.fla
open in Flash, select Window→Actions.
The Actions panel opens. The Actions panel can look dierent depending on
how you’ve set up your workspace. It also remembers some of the settings, like
which panels are open and closed, from the last time you used it.
2. If you don’t see code in the Actions panel, then in the animation’s timeline,
click Frame 1 in the actions layer.
The Actions panel shows the code associated with particular frames in the
timeline. It’s not a problem with this little snippet, but with larger animations
if you don’t see the actions you want to debug, make sure you’ve selected the
frame that holds the code.
3. In the Actions panel, click the “Check syntax” button.
The “Check syntax” button looks like a checkmark. After a little deep thinking,
you hear a ding, which occurs whether there’s an error or not.
www.it-ebooks.info

FLASH CS6: THE MISSING MANUAL
654
THE ART OF
DEBUGGING
4. Click the Compiler Errors panel, and look for an error message.
If everything is okay, you won’t see any message. If “Check syntax” found an
error, a message appears in the panel. The Compiler Errors panel’s location
may vary depending on how you’ve organized your workspace. If you’re using
the Essentials workspace, it appears beneath your animation. (And if you’re
wondering what the heck a compiler is, see the box on page 655.)
Deciphering the Actions Panel’s Color Code
One quick way to spot problems in your ActionScript code is
to examine the colors Flash uses to display your code in the
Actions panel.
Right out of the box, Flash displays ActionScript keywords and
identifiers in blue, comments in light gray, text strings (text
surrounded by quotes) in green, and stuff it doesn’t recognize
in black. So if you notice a function call or a property that ap-
pears black, you know there’s a problem. A properly spelled
function call or property should appear blue (unless it’s a cus-
tom function), so if it’s black, chances are your finger slipped.
If Flash’s ActionScript coloring scheme is too subtle for your
tastes, you can change the colors it uses.
To change colors:
1. Select Edit→Preferences (Windows) or Flash→Preferences
(Mac).
2. In the Preferences panel that appears, select the
ActionScript category. Make sure the checkbox at “Syntax
colors: Code coloring” is turned on.
3. Click the color pickers next to Foreground, Keywords,
Identifiers, Background, Comments, and Strings to
choose different colors for each of these ActionScript
code elements.
For example, if you have trouble making out the text strings in
your scripts due to red-green color blindness, you can change
Strings to a different hue.
UP TO SPEED
For this animation, the message in the Compiler Errors panel looks like Figure19-
11. As helpful as these details are, sometimes your view of the issue and the
compiler’s view aren’t coming from the same direction, so the messages may
seem a bit cryptic. In this case, you’re told the error is on Line 11. The error’s
description is:
1086: Syntax error: expecting semicolon before dot.
That’s a little on the cryptic side, but it means there’s probably something wrong
with the way the line is punctuated. Double-clicking the error message puts
your cursor in the oending line in the Actions panel.
5. Examine the highlighted line for a syntax error.
Here’s where you get into the grunt work of debugging: looking through your
code to find out where there might be a problem. Flash is a lot fussier about
punctuation than your third-grade teacher, so double-check to make sure
there are commas between parameters and a semicolon at the end of the
www.it-ebooks.info
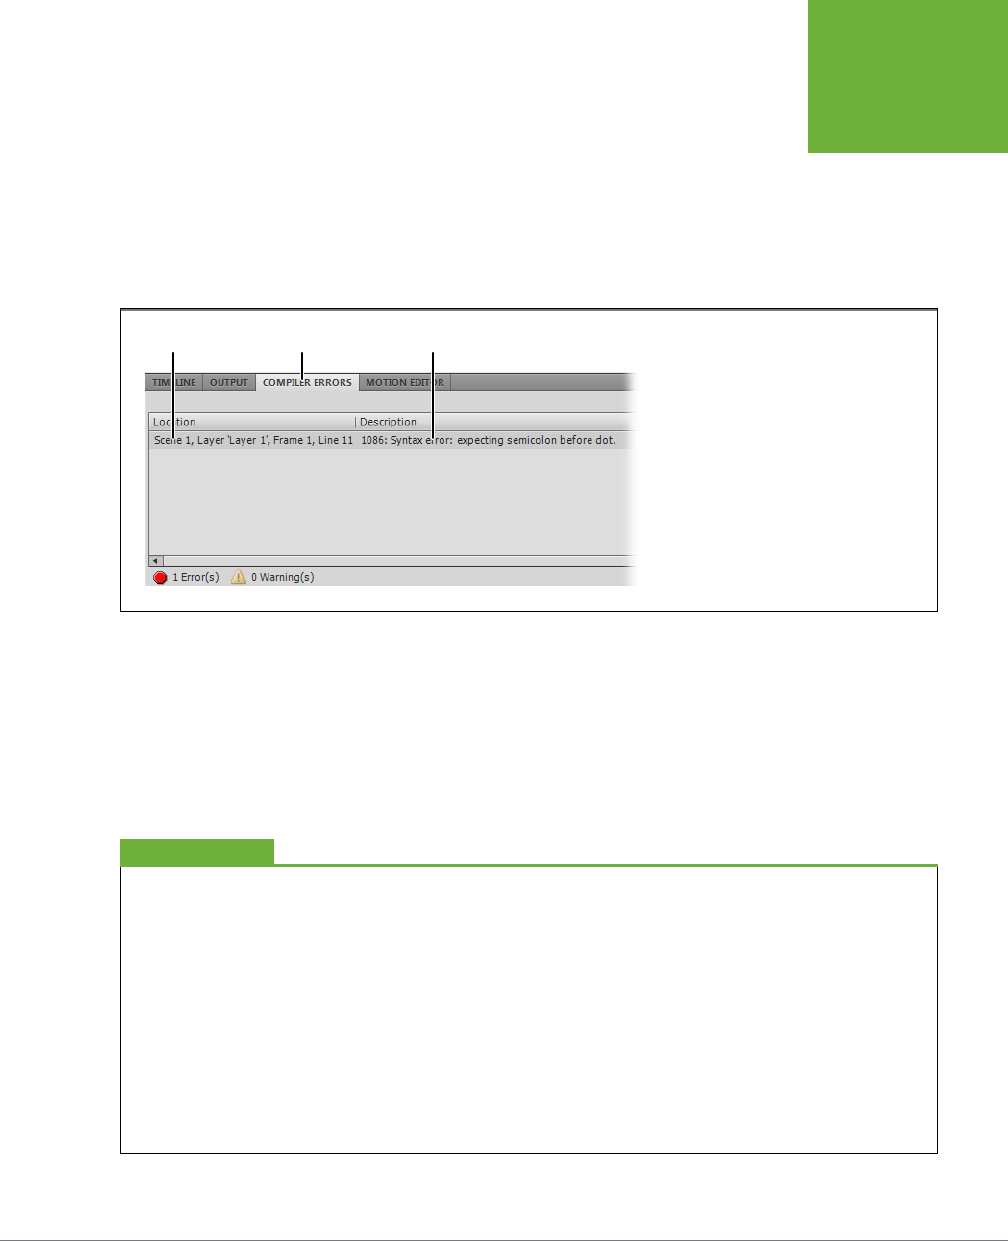
CHAPTER 19: TESTING AND DEBUGGING YOUR ANIMATION 655
THE ART OF
DEBUGGING
line. Parentheses are another place where it’s easy to make a mistake. In any
statement (from the beginning of the line to the semicolon), there should be
an equal number of left parentheses and right parentheses. And yes, they all
need to be in the right spots, too. But it’s so easy to mess up on parentheses
that counting is a legitimate debugging technique. In the code in line 11, there’s
one extra closing parenthesis before the comma:
var ptStart:Point = new Point(Math.random() * 550),Math.random() * 400);
FIGURE 19-11
The messages in the Compiler Errors panel
have two parts. The Location part tells you
where the error is, and the Description part
tells you how the compiler sees the error.
Location DescriptionCompiler Errors tab
6. Delete the error, and then click “Check syntax” again.
This time, you hear the ding, but there’s no error message. That’s fine as far as
it goes. With ActionScript 3.0 code, all the syntax checker does is check the
punctuation and a few other details of your code. The Syntax checker works
quickly because it doesn’t actually compile your code. That means it doesn’t
catch nearly as many errors as you find when you test your animation using
Ctrl+Enter (⌘-Return).
What’s a Compiler and Why Does It Err?
When you write ActionScript code, you name objects and
write statements in a language that’s relatively understand-
able by humans. Your computer, however, speaks a different
language altogether. When Flash compiles your ActionScript
code, it translates the code from your human language to
the computer’s machine language. When Flash comes across
statements that don’t make sense, it says “Aha! A compiler
error!” For example, one very common compiler error is the
simple misspelling of an object’s name.
Flash and ActionScript are very literal. If there’s a misplaced
letter or even an error in capitalization in a word, that’s an
error. For example, if your program has a variable named
myBall
and you mistakenly type in
myball
, ActionScript sees
that second reference as an undefined object and a compiler
error. Anything that prevents the compiler from successfully
identifying all the objects and values and performing all the
methods in your program results in an error.
UP TO SPEED
www.it-ebooks.info

FLASH CS6: THE MISSING MANUAL
656
THE ART OF
DEBUGGING
Finding Errors with the Compiler Errors Panel
When you test your animation using Control→Test Movie or by pressing Ctrl+Enter
(⌘-Return), Flash creates an .swf file. That’s the same as the finished file you dis-
tribute or put on a website so the world can see your animation. In the process, your
ActionScript code is translated into a computer language that’s smaller and faster
than your ActionScript. The process of compiling your code is likely to catch mistakes
that the “Check syntax” button misses. (See the box on page 655 for more details.)
NOTE This example continues debugging the file
19-1_Debug_Code.fla
. The entire process began on page652.
1. Test your animation using Ctrl+Enter (⌘-Return).
An error appears in the Compiler Errors panel, as shown in Figure 19-12. (It could
be worse; sometimes you see seven or eight errors stacked up in the panel.) This
error didn’t appear when you clicked the “Check syntax” button in the previ-
ous exercise, because “Check syntax” doesn’t compile the code. Obviously, the
compiler choked on something you’re trying to feed it. The Compiler Errors panel
reports that the location of the error is “Scene 1, Layer ‘actions’, Frame 1, Line
7.” That’s very helpful information, and what’s more, when you double-click the
error message in the panel, Flash zips you to the Actions panel and finds that
point in your code. But before you double-click, read the description of the error:
1120: Access of undefined property sptLines.
That’s also a good clue, which explains the problem, at least as far as the com-
piler sees it. The compiler thinks you’re trying to make a change to a property
that doesn’t exist. That property has something to do with sptLines.
FIGURE 19-12
Here the Compiler Errors pane is reporting an unde-
fined property. This type of error is often the result
of misspelling an object or a variable’s name.
2. Double-click the error message in the Compiler Errors panel.
Flash zips you to the Actions panel and highlights line 4, which reads:
addChild(sptLines);
3. Examine the highlighted line for a syntax error.
At first this might seem a little puzzling. It’s a simple statement that adds sptLines
to the Display List, which should make its contents visible on the stage. The
compiler error said something about a property, but this line doesn’t seem to
www.it-ebooks.info

CHAPTER 19: TESTING AND DEBUGGING YOUR ANIMATION 657
THE ART OF
DEBUGGING
be changing a property. You know, however, that the compiler sees something
it can’t identify, and that’s
sptLines
. It makes sense to check the code that
precedes the error for previous references to
sptLines
. There aren’t any, and
that’s exactly the problem. The variable sprtLines is defined in the first line of
the code, and the reference to “sptLines” is a typo.
4. In line 7, correct the spelling of sprtLines, and then test the animation.
This time,
19-1_Debug_Code.fla
is a little more entertaining. The animation draws
random lines on the stage. The lines vary in thickness, color, and transparency.
But the text boxes, like the one that reads
start X
, don’t change or provide any
other information. Looks like there’s more debugging to do.
NOTE The animation
19-1_Debug_Code.fla
uses a very slow frame rate of 2 fps so that each line appears
slowly on the screen. If you want to speed up the action, go to Modify→Document and change the frame rate.
If you have the Bandwidth Profiler open and the animation doesn’t play as expected, try turning and you have
the Bandwidth running the animation with the Bandwidth Profiler closed.
Stop the
19-1_Debug_Code.fla
when you’re sufficiently entertained. Because there’s no automatic end to the anima-
tion, Flash can conceivably draw so many lines that your computer will run out of memory trying to display them.
Using the Output Panel and
trace()
Statement
The ActionScript
trace()
statement is one of the easiest ways to debug your
programs—and it delivers a lot of bang for your debugging buck. You get to tell
ActionScript exactly what variable value or object you want to keep track of, and
Flash obligingly sends the details to the Output panel.
Trace()
is such an important
code-writing tool that it’s used throughout the ActionScript examples in this book.
Here’s another good example of the way you can use
trace()
to understand why
your program isn’t behaving as expected.
NOTE This example continues debugging the file
19-1_Debug_Code.fla
. The entire process begins on
page652.
When you tested
19-1_Debug_Code.fla
in step 4 above, the drawing lines part of
the program worked, but the text fields didn’t display information about the points
used to start and end the lines. Text fields display strings of text in your animation.
There are a few dierent types of text fields, and you can format them in a number
of ways. (For all the details, see page 217.) In this case, the text fields show some of
the information that you want displayed, but not all of it.
The
trace()
statement works kind of like a text field. You put the information that you
want displayed inside the
trace()
statement’s parentheses. If you want to display a
string of text, put it inside quotes, like this:
trace("show this text");
www.it-ebooks.info
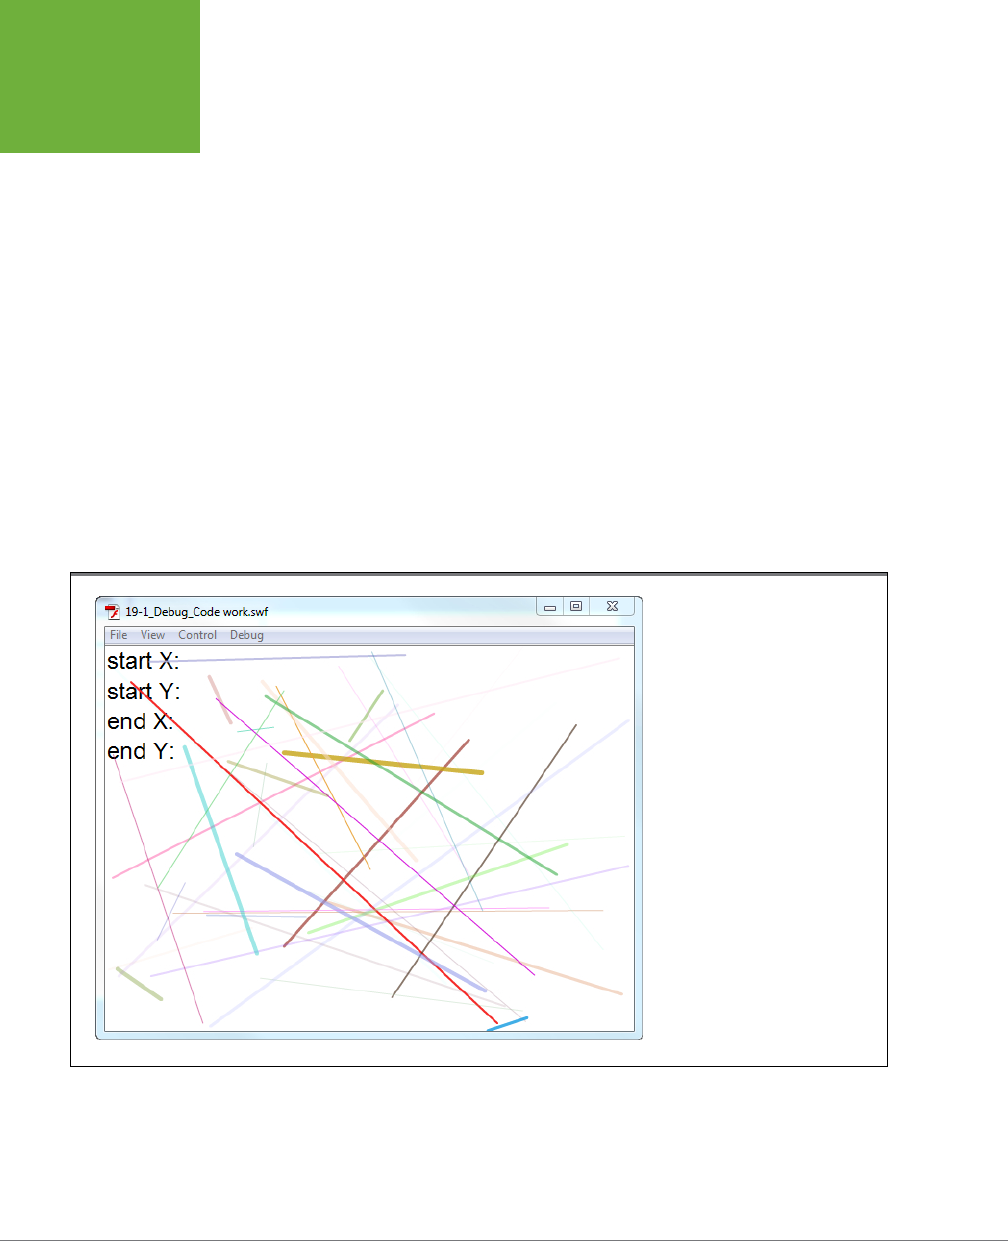
FLASH CS6: THE MISSING MANUAL
658
THE ART OF
DEBUGGING
When your ActionScript code gets to that line, the words “show this text” appear in
the Output panel (without the quotes). If you have a variable named strMsg, and its
value is “show this text,” then you can write a
trace()
statement like this:
trace(strMsg);
This statement would also send the words “show this text” to the Output panel. The
Output panel isn’t at all fussy about the data types. Put the name of a variable, an
instance of an object, or just about anything inside a
trace()
statement, and some-
thing is bound to appear in the Output panel. If the value is a number, that’s what
you see. If it’s a reference to an object, you see the object’s name.
Following are some steps to gain a little insight into the problem with the text fields
in the file
19-1_Debug_Code.fla
.
1. Test the animation as it worked at the end of the previous section.
When you test the animation, you see the random lines drawn properly, but you
see only part of the text that should be displayed in the text fields, as shown
in Figure 19-13. Don’t forget to stop the animation (Control→Stop) or close the
window (File→Close).
FIGURE 19-13
When you test the animation
draw_random_lines_begin.fla
, it
displays lines on the stage, but it
doesn’t display the point coordinates
for the lines as it should.
2. On the stage, click the text fields, and then, in the Properties panel, check
the names of the text fields.
In your Flash document, the text fields on the stage show text, like “start X”
and “start Y.” When you select a text field, you see its name at the top of the
www.it-ebooks.info

CHAPTER 19: TESTING AND DEBUGGING YOUR ANIMATION 659
THE ART OF
DEBUGGING
Properties panel. For example, the text field with the text “start X” is named
txtStartX. The others are named txtStartY, txtEndX, and txtEndY. These are
the names of misbehaving text fields, so you’ll look for references to them in
your code.
3. Select Window→Actions to open the Actions panel.
The Actions panel displays this code, which amounts to only 20 lines:
1 import flash.display.Sprite;
2 import flash.geom.Point;
3
4 var sprtLines:Sprite = new Sprite;
5
6 drawRandomLine();
7 addChild(sprtLines);
8
9 function drawRandomLine():void
10 {
11 var ptStart:Point = new Point(Math.random() * 550,Math.random() *
400);
12 var ptEnd:Point = new Point(Math.random() * 550,Math.random() *
400);
13 sprtLines.graphics.lineStyle(Math.random() *5,Math.
random()*0xFFFFFF,Math.random());
14 sprtLines.graphics.moveTo(ptStart.x,ptStart.y);
15 sprtLines.graphics.lineTo(ptEnd.x,ptEnd.y);
16 txtStartX.text = "start X: " + ptStart.x;
17 txtStartY.text = "start Y: " + ptStart.y;
18 txtEndX.text = "end X: " + ptEnd.x;
19 txtEndY.text = "end Y: " + ptEnd.y;
20 }
4. Search for lines with references to the misbehaving text fields: txtStartX,
txtStartY, txtEndX, and txtEndY.
In lines 16 through 19, values are assigned to the text fields’ properties. Each
value is made of two parts, a string literal with text like “start X:” and then the
string concatenation operator (+) and a reference to an object’s property, like
ptStart.x
. Looking back up in the code, you see on line 11 that the data type for
ptStart is Point. The reference ptStart.x is a reference to the
x
property of a point.
That value is a number. Still, there’s nothing apparently wrong with the code.
5. Insert a line after line 15, and then type the following
trace()
statement:
trace("start X: " + ptStart.x);
The text inside the parentheses is exactly the text that’s supposed to appear
in the text field. In fact, you can copy and paste to create the line. Copying and
www.it-ebooks.info

FLASH CS6: THE MISSING MANUAL
660
THE ART OF
DEBUGGING
pasting is a good technique for an operation like this, because you’ll be sure
the text in the two statements is identical.
TIP If you don’t see your
trace()
statement in the Output panel, select File→Publish Settings→Flash, and
make sure the “Omit trace actions” checkbox is turned off.
6. Test your animation using Ctrl+Enter (⌘-Return) and examine the Output
panel.
When you run your animation, the Output window starts to fill up with lines like:
start X: 549.6419722447172
start X: 499.13692246191204
start X: 239.57312640268356
start X: 64.5334855420515
Comparing the Output panel details, you see that your text fields display the
string literals, like
start X
:, but they aren’t displaying the numbers with all those
decimal places. Those long numbers are generated by the
random()
method
used earlier in the code. For example, the value for ptStart.x is created in line
11 with the statement:
var ptStart:Point = new Point(Math.random() * 550,Math.random() * 400);
This line creates a new variable called
ptStart
. Its data type is Point, which in-
cludes x and y properties. At the same time that the new instance of Point is be-
ing created, values are assigned to those
x
and
y
properties. Instead of providing
specific numbers, you want to provide random numbers that changeevery time
the
drawRandomLine()
method runs. So the statement uses a methodthat’s pro-
vided by the Math class. The section of the statement that reads
Math. random()
* 550
is in eect saying, give me a random number between zero and 550 (the
width of the stage). Likewise, the next bit of code isproviding a number for the
y property that matches the height of the stage.
Math.random()
is providing
a number with a little more precision than is necessary for this snippet of a
program. In fact, the number is too long to fit in the text field.
7. Select the txtStartX text field on the stage, and then in the Properties panel,
change the width to 550.
The width of the text field expands so it’s the length of the stage.
8. Test your animation using Ctrl+Enter (⌘-Return).
When the animation runs, the entire number is displayed in the txtStartX text
field, as shown in Figure 19-14. The
x
and
y
properties aren’t displayed in the
other text fields.
www.it-ebooks.info
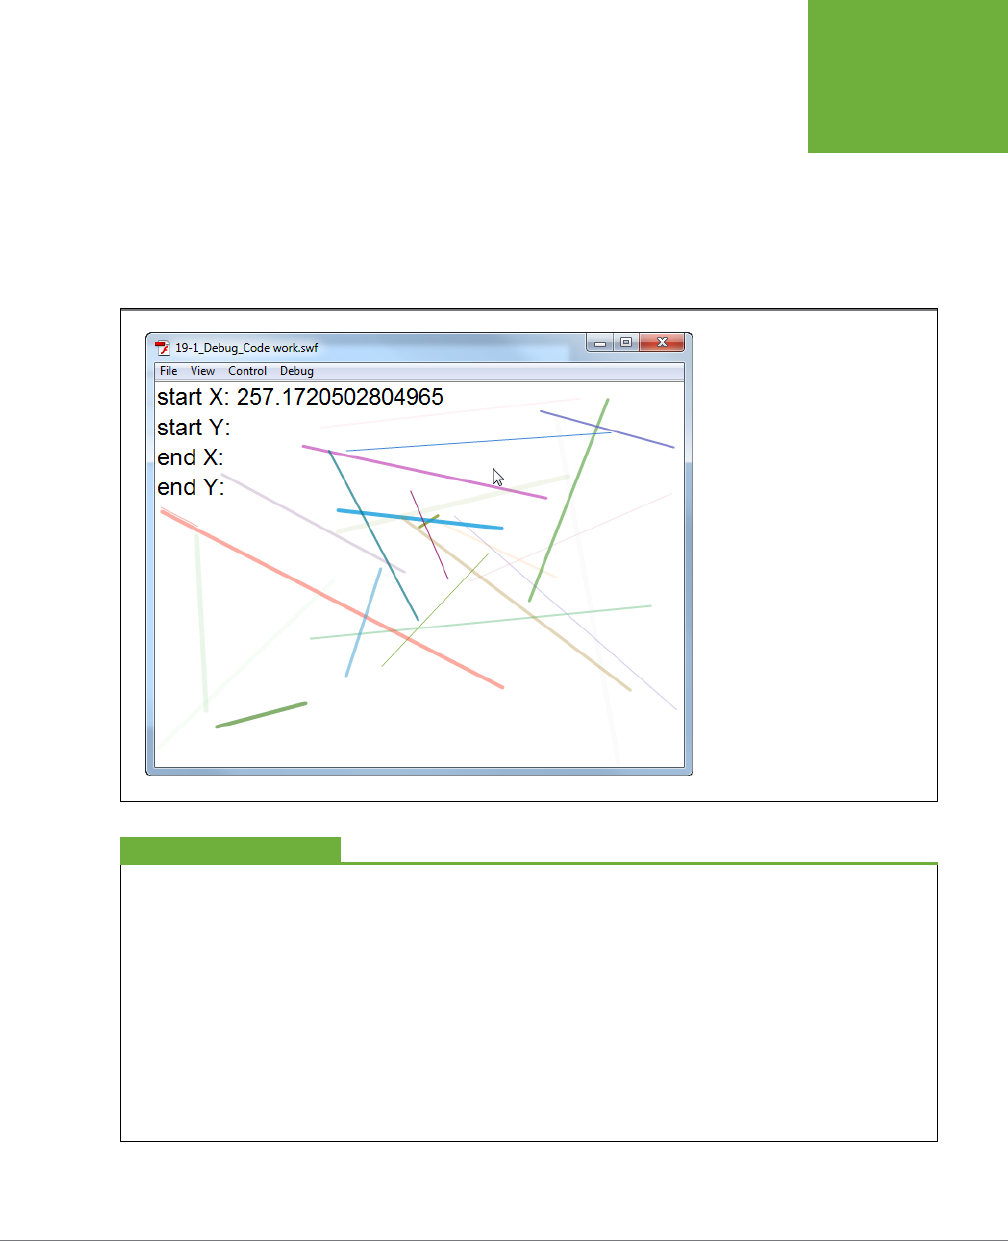
CHAPTER 19: TESTING AND DEBUGGING YOUR ANIMATION 661
THE ART OF
DEBUGGING
Mystery solved. You figured out what’s gone wrong with the code. The solution
is a little less than satisfactory—you don’t really need a number that long for this
animation. Fortunately, that gives you an opportunity to explore the Debugger in
action, as you’ll see in the next section.
You can delete the
trace()
statement from your code or you can temporarily leave it
in. It doesn’t change the appearance of the animation in any way. A third alternative
is to use a handy programmer’s trick called
commenting out
; see the box below.
FIGURE 19-14
After changing the width of the text
field, Flash displays the very long
number that represents the x prop-
erty for your line’s starting point.
Comment Me Out
If you’re planning to keep working on your ActionScript code
and think you’ll need to reuse these
trace()
statements at some
point down the road, you don’t have to delete them and then
type them in again later. Instead, you can “comment them out”
by placing two slashes in front of each line, like this:
// trace("start X: " + ptStart.x);
When you stick two slashes at the beginning of a line of Action-
Script code, Flash ignores everything it finds on the line after
those slashes. In other words, it treats the code as if it were a
plain old comment. Later, when you want to use that
trace()
statement again, all you have to do is remove the slashes and
you’re back in business.
It’s a good idea to remove or comment out
trace()
statements
when you no longer need them. Not only will you avoid clutter-
ing up your Output panel, but there’s a performance boost, too.
TRICK OF THE TRADE
www.it-ebooks.info
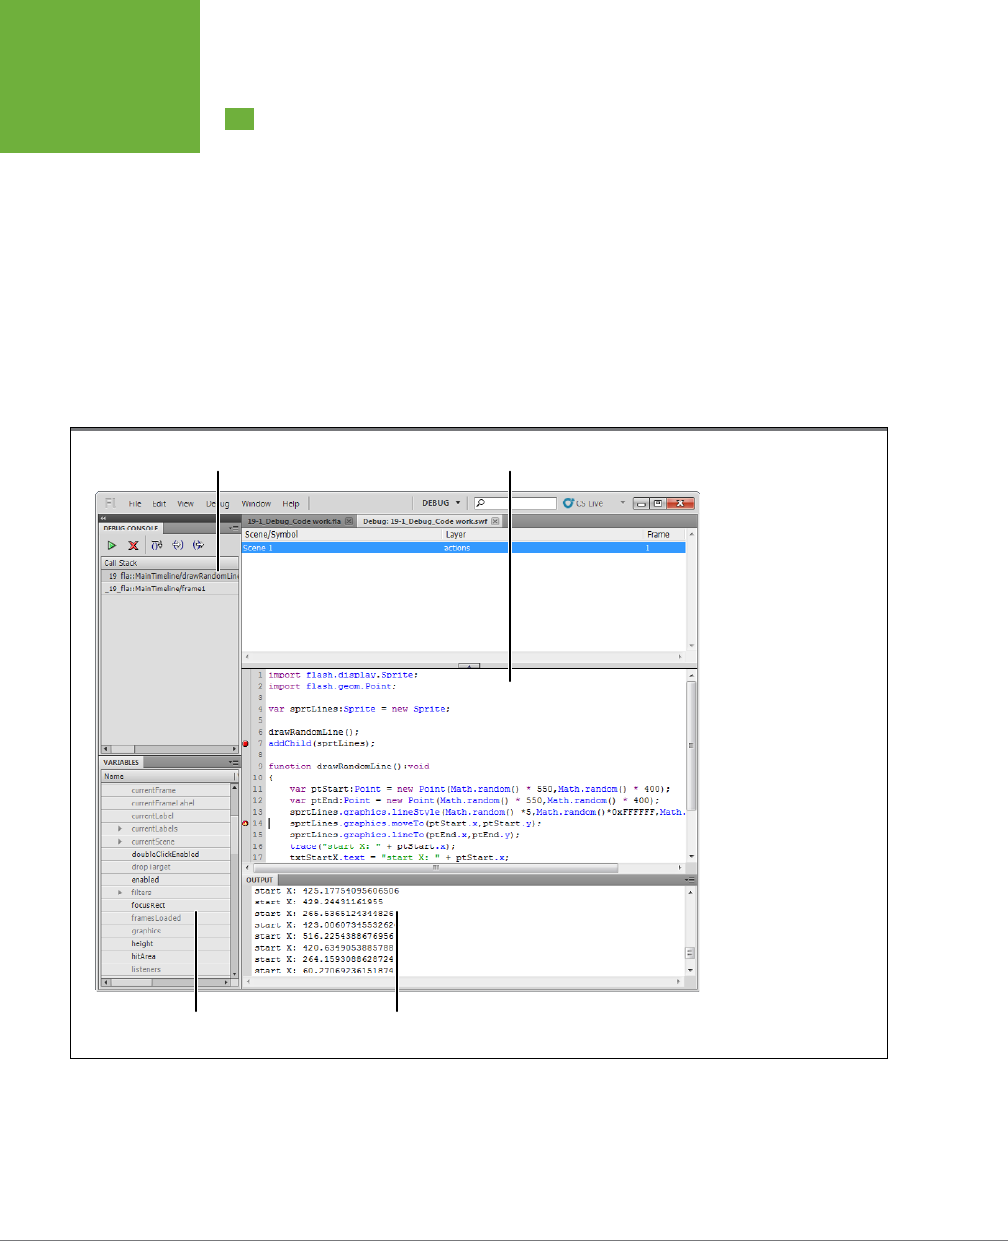
FLASH CS6: THE MISSING MANUAL
662
ANALYZING
CODE WITH
THE DEBUGGER
Analyzing Code with the Debugger
When you need as much debugging muscle as Flash can provide, click Debug→Debug
Movie→“in Flash Professional.” You may think you’ve fired up a dierent program,
but actually, Flash has merely closed some panels, opened others, and rearranged
your view of your animation (Figure 19-15). It also automatically compiles and runs
your animation. Your first visit to the debugger can be a little intimidating, but don’t
worry. Look around for familiar landmarks, and you’ll soon figure out the purposes
of the multiple panels and the messages within:
• The Debug Console in the upper-left corner shows buttons (Figure 19-15). You
use these to move through your code and to end the debug session. You can also
open the Debug Console using menus: Window→Debug Panels→Debug Console.
FIGURE 19-15
The Debugger shows you
what Flash is thinking
behind the scenes.
This panel shows the
instance names, property
values, variable names
and values, and other
ActionScript keywords
and statements that
either you or Flash added
to your animation.
Debug controls Code
Output
Variables
• The Variables panel below the Debug Console is where you really learn what’s
going on in your program. As you work in the debugger, you’ll see variable and
object names here, along with their related values. There are probably a lot of
unfamiliar words in there, because this panel keeps track of every property for
every object in your animation. You don’t need to worry about many of these,
www.it-ebooks.info

CHAPTER 19: TESTING AND DEBUGGING YOUR ANIMATION 663
ANALYZING
CODE WITH
THE DEBUGGER
because Flash takes care of them perfectly well. But when something goes
wrong, look up the name of the oending text box, variable name, or object in
this list, and you’ll be on your way to a solution. You can also open the Variables
panel using menus: Window→Debug Panels→Variables.
• In the upper-right corner, the Scene/Symbol panel is pretty straightforward. It
tracks your animation’s current position in the main timeline, scene, or symbol
timeline. You see the name of the scene or symbol, the layer that contains code,
and the frame number.
• The middle panel shows the ActionScript code you wrote, similar to the Actions
panel. You can force your program to stop at certain places in your code to
give you a chance to inspect the inner workings of the objects. More on that
in the next section.
• At the bottom is the Output panel, covered earlier in this chapter (page 657). If
you’ve used the
trace()
statement while you were writing code and experiment-
ing with ActionScript, you know how helpful the Output panel can be.
Setting and Working with Breakpoints
One of the most important debugging tools in any well-stocked ActionScript pro-
grammer’s arsenal is the
breakpoint
. A breakpoint is an artificial stopping point—sort
of a roadblock—that you can insert into your ActionScript code to stop Flash Player
in its tracks. Setting breakpoints lets you examine your animation at dierent points
during playback so that you can pinpoint where a bug first happens.
Flash lets you set breakpoints at specific lines in your ActionScript code. Setting a
breakpoint lets you play the animation only up until Flash encounters that break-
point. The instant Flash encounters a line with a breakpoint, it immediately stops
the animation so that you can either examine object property values (as described
in the previous section) or step through the remaining code in your action slowly,
line by line, watching what happens as you go.
Setting breakpoints is a great way to track down logic errors in your ActionScript
code. For example, say you’ve created a chunk of code containing a lot of
if
and
switch
conditionals or
while
and
for
looping statements. Stopping playback just
before you enter that long stretch of code lets you follow Flash as it works through
the statements one at a time. By stepping through statements in the order Flash
actually executes them (as opposed to the order you thought Flash was supposed
to execute them), you may find, for example, that the cause of your problem is that
Flash never reaches the
else
section of your
if…else
statement, or never performs any
of the statements inside your
while
block because the
while
condition is never met.
NOTE For more information on using
if…else, do…while
, and other logical statements in ActionScript, check
out Colin Moock’s
Essential ActionScript 3.0
, and
ActionScript 3.0 Cookbook
, by Joey Lott, et al. Both books have
detailed coverage of more advanced ActionScript topics that are beyond the scope of this book.
www.it-ebooks.info

FLASH CS6: THE MISSING MANUAL
664
ANALYZING
CODE WITH
THE DEBUGGER
So far, this chapter has shown how to clean up the buggy code in the file
19-1_ Debug_
Code.fla
. In this section, you can make further improvements to the animation while
learning how to stop your animation and code in its tracks and examine individual
properties using the debugger.
NOTE This example continues debugging the file
19-1_Debug_Code.fla
. The entire process began on page652.
To get started, follow these steps:
1. With
19-1_Debug_Code.fla
open in Flash, click Debug→Debug Movie.
A Flash Player window opens and begins playing your animation. The panels in
Flash change to show the Debug Console, the Variables panel, the Scene/ Symbol
panel, your code, and the Output panel. There’s no information showing in either
the Debug Console or the Variables panel at this point. If you followed the steps
in the previous example, some information appears in the Output panel.
2. In the Flash Player window, select the Play toggle, Ctrl+Enter (⌘-Return).
The animation stops playing.
3. In the panel with the ActionScript code, click to the left of the line numbers
11 and 12.
A red dot appears next to the line number, indicating a breakpoint. These dots
appear next to the lines:
var ptStart:Point = new Point(Math.random() * 550,Math.random() * 400);
var ptEnd:Point = new Point(Math.random() * 550,Math.random() * 400);
4. In the Flash Player window, press Ctrl+Enter (⌘-Return).
The Flash Player may be hidden by the debugger. If necessary, use Alt+Tab
(or ⌘-Tab) to bring it to the front. When you press Ctrl+Enter ( ⌘-Return), the
animation runs for a moment and then stops. A small arrow appears in the
breakpoint next to line 11, indicating that the animation is at this point in the
ActionScript code. You see more details in both the Debug Console (Figure
19-16) and the Variables panel.
There are two items displayed in the Debug Console. You may need to drag the
right edge of the panel to read the entire lines. The line at the top references
the
drawRandomLine()
method in your code. The bottom line references the
main timeline in the animation. When you click dierent items in the Debug
Console, the items listed below in the Variables panel change. Click the top line
before examining the Variables panel in the next step.
5. In the Variables panel, click the expand button next to the word “this,” and
then scroll the panel to view all the variables.
Initially, there are three items in the variables panel:
this, ptStart
, and
ptEnd.
This
refers to the main timeline;
ptStart
and
ptEnd
are variables inside the
www.it-ebooks.info
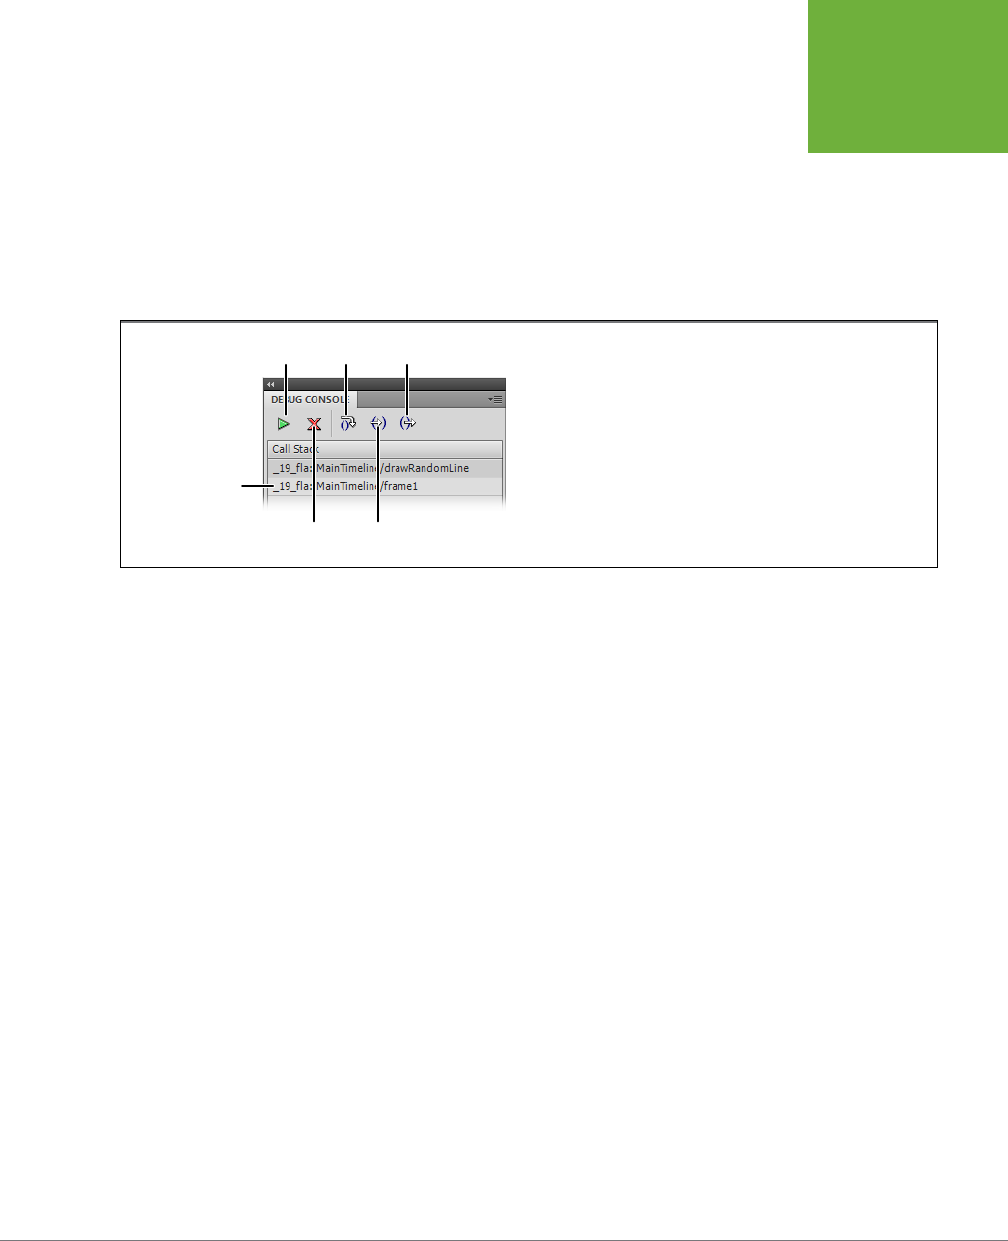
CHAPTER 19: TESTING AND DEBUGGING YOUR ANIMATION 665
ANALYZING
CODE WITH
THE DEBUGGER
drawRandomLine()
function. At this point, the value for both variables is unde-
fined. When you click the + button next to
this
, a list expands beneath, showing
all the properties and variables related to the main timeline. Some of the items
are familiar, like alpha, height, and width. Others may be a bit mysterious, espe-
cially if they’re properties you haven’t yet used in ActionScript. In Flash, there
are a lot of preset values, which you may never need to worry about. If you
look carefully in the list, you find the names of the text fields in your animation:
txtStartX, txtStartY, txtEndX, and txtEndY.
FIGURE 19-16
Here, the Debug Console shows two items: the main timeline and
the
drawRandomLine()
method. Using the buttons at the top of the
console, you can start and stop your animation and the processing of
ActionScript code.
Stop
Step Over
Step In
Play
Main timeline
Step Out
6. Click a second time to close the list.
The lists closes, leaving just the three items showing:
this, ptStart
, and
ptEnd
.
7. In the Debug Console, click the green Continue button.
Flash moves ahead just one step in the code because there’s a breakpoint at
line 12. In the Variables panel, you see that the ptStart item has changed. The
value is no longer undefined; there’s some weird-looking text and numbers
there. And there’s an expand button next to the name.
When you place a breakpoint in your code, the debugger stops before that line
is executed. That’s why, with a breakpoint at line 12, ptStart has newly assigned
values, but ptEnd is still undefined.
8. Click the expand button next to ptStart and examine its properties.
As explained on page 611, the Point class has three properties:
length, x
, and
y
.
Now that ptStart is defined, the variables panel shows values for each. More of
those are really long decimal numbers.
9. Double-click the x value for ptStart and type
300
. Then, double-click the y
value and type
200
.
One of the extremely handy features of the Debugger is that you can change
values of properties when the animation is stopped at a breakpoint.
www.it-ebooks.info
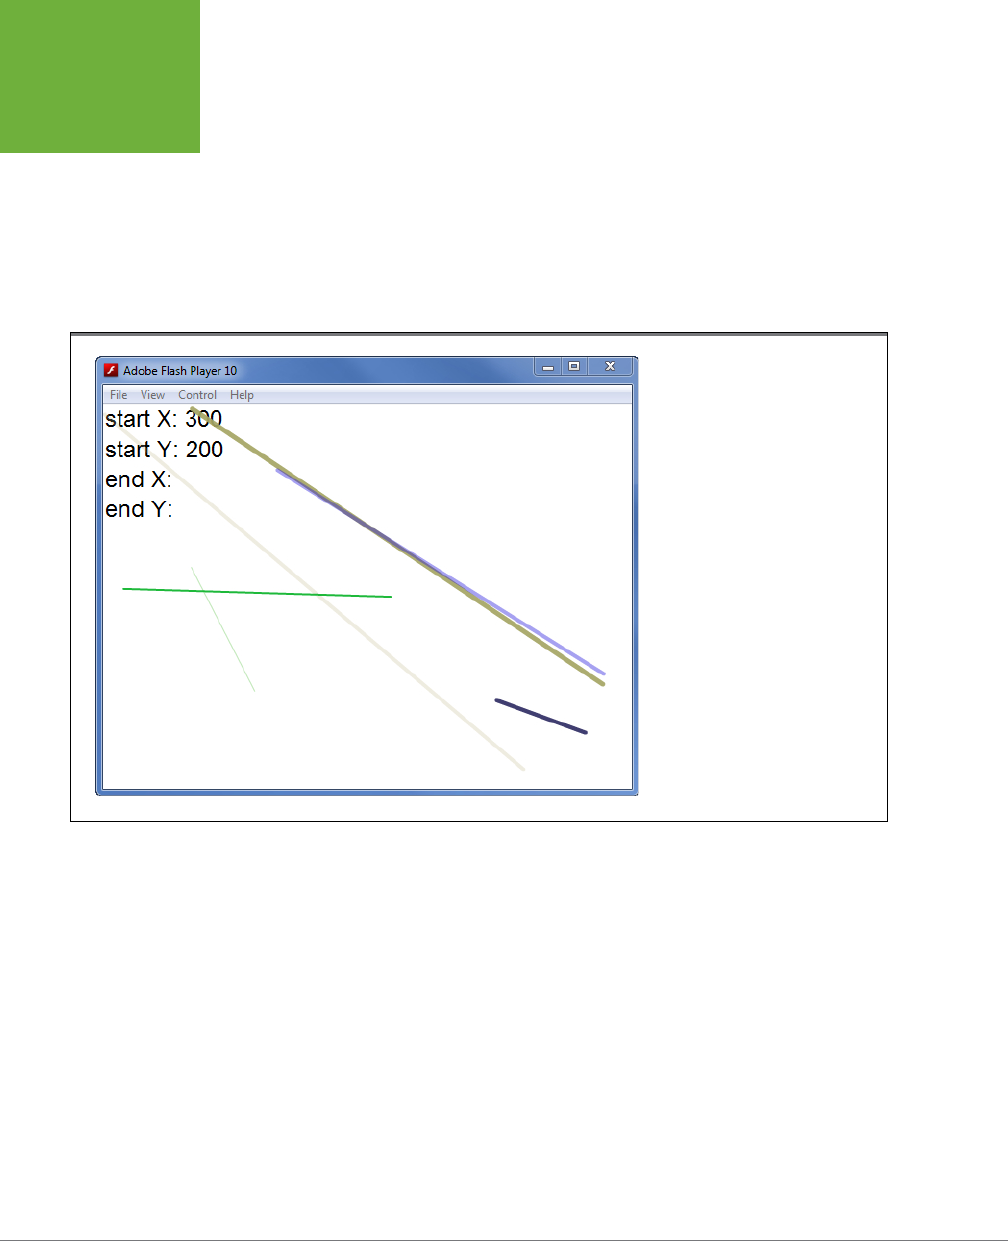
FLASH CS6: THE MISSING MANUAL
666
ANALYZING
CODE WITH
THE DEBUGGER
10. Click the green Continue button.
The animation moves through its two frames, and then it runs the
drawRandomLine()
method again. It stops again at line 11 in the code.
11. Examine the animation in the Flash Player window.
The two text fields at the top of the animation show the values you entered in
the Variables panel: 300 and 200, as shown in Figure 19-17. This small test proves
that if you round the numbers to whole numbers, they’ll fit in the text fields.
FIGURE 19-17
When you change values in the
Debugger, you can see the results
in your animation. Here, the values
for two of the text fields have been
changed. Before the change, the
numbers were too long to be
displayed by the text fields.
12. In the Debug Console, click the red X, also known as the End Debug Ses-
sion button.
Flash restores your project to its appearance before you entered the debugger.
So, one solution to making the numbers fit in the text fields is to round them o to
whole numbers. You can do that with another method that’s part of the Math class.
Here’s what the finished code looks like. The two bold lines show the changes using
the
Math.round()
method:
var sprtLines:Sprite = new Sprite();
drawRandomLine();
addChild(sprtLines);
www.it-ebooks.info

CHAPTER 19: TESTING AND DEBUGGING YOUR ANIMATION 667
ANALYZING
CODE WITH
THE DEBUGGER
function drawRandomLine():void
{var ptStart:Point = new Point(Math.round(Math.random() * 550),Math.
round(Math.random() * 400));
var ptEnd:Point = new Point(Math.round(Math.random() * 550),Math.round(Math.
random() * 400));
sprtLines.graphics.lineStyle(Math.random()*5,Math.random()*0xFFFFFF,
Math.random());
sprtLines.graphics.moveTo(ptStart.x,ptStart.y);
sprtLines.graphics.lineTo(ptEnd.x,ptEnd.y);
txtStartX.text = "start X: " + ptStart.x;
trace("start X: " + ptStart.x);
txtStartY.text = "start Y: " + ptStart.y;
txtEndX.text = "end X: " + ptEnd.x;
txtEndY.text = "end Y: " + ptEnd.y;
}
Now the animation runs as it was intended. It draws lines that are random in posi-
tion, color, thickness, and transparency. The x/y coordinates for the start and end
points of the lines are shown in the upper-left corner of the animation. Not only do
the whole numbers fit in the text fields, but they’re also a little easier to discern than
the monster decimals. The debugged version of the animation is in the Missing CD
(
www.missingmanuals.com/cds/flashcs6mm
), named
19-2_Debug_Code_done.fla
.
NOTE Flash lets you debug your animations remotely after you’ve uploaded them to a web server. This
book doesn’t cover remote debugging, but you can find out more about it in Flash’s help files.
www.it-ebooks.info

669
CHAPTER
20
You’re done designing, developing, and debugging. Your animation is ready
for its audience. You’ve decided whether you want them to view it on a web
page, a smartphone, a tablet, a CD, or on their computers. The next step is to
publish
the animation, which means packaging it in a form your audience can play.
As another alternative, you may
export
the animation, so you (or someone else)
can further edit and develop it using another graphics or animation program (like
Adobe Illustrator or Adobe Fireworks). In this chapter, you’ll learn how to do both.
Using Flash’s publishing settings (Figure 20-1), you’ll see how to tell Flash to publish
your animation as part of a web page, and as a standalone
projector
. You’ll also see
how to export the artwork in your animation as editable image files. But before
you publish or export, you need to learn how to
optimize
your animation (reduce
your animation’s file size) so that it runs as quickly and eciently as possible—a
real concern if you’re planning to publish your animation on the Web or a handheld
with limited memory.
Optimizing Flash Documents
It’s a fact of the digital world—big files take longer to travel the Web and load, and
that creates a bottleneck for many Flash animations. The longer your audience waits,
the more likely you are to lose them to another web page, or app, or quick peek at
Facebook. No one has the patience to wait for a stop-and-start animation. With that
in mind, you should make every eort to keep your published files small. The process
is called
optimization
because you’re seeking the optimal tradeo between quality
and file size. (If you’re still tempted to skip this step, read the box on page 671.)
Publishing and
Exporting
www.it-ebooks.info
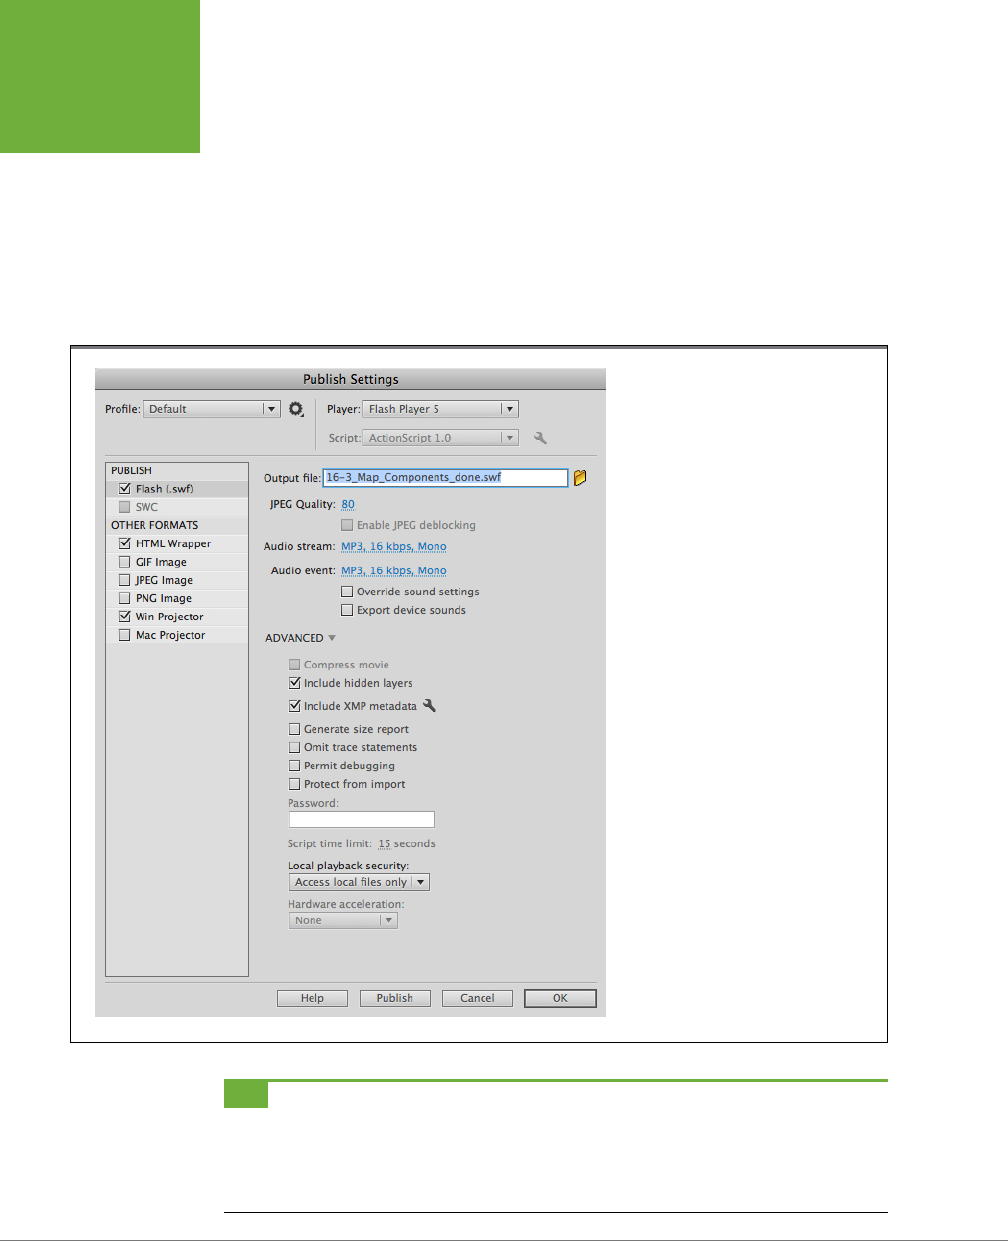
FLASH CS6: THE MISSING MANUAL
670
OPTIMIZING
FLASH
DOCUMENTS
Ideally, you’ve kept file size in mind from the moment you started planning your
project and throughout the entire production process. That’s why there are tips
scattered throughout this book about reducing file size. You can think of optimiza-
tion as low-fat cooking for the animation set: The goal is to get rid of the fat without
getting rid of the flavor. And, as with low-fat cooking, Flash doesn’t have a single
approach to optimization. Your animation may include graphics, sound, and video,
and there are ways to optimize each element. On top of that, every animation and
target audience is dierent—you need to experiment, tweak, and retest using the
strategies outlined next.
FIGURE 20-1
Flash lets you choose how to deliver your
compiled animation. The options shown
here produce a plain .swf that plays in
most browsers. You can also publish it as a
standalone projector file (a self-contained
executable file you double-click to run,
with no need for a web browser or a
separate Flash Player), an image file, or
embedded in a web page.
TIP As you check out the optimization strategies in this section, keep in mind that effective optimization is
always a balancing act. You may decide some effects are worth the bloated file size they require, and some aren’t.
In still other cases, you’ll want to compromise. For example, you might choose to remove half of the gradient
effects you’ve applied to your images so that you reduce file size, but keep the other half. In Flash, you’re the
director, so you get to decide how much is enough.
www.it-ebooks.info

CHAPTER 20: PUBLISHING AND EXPORTING 671
OPTIMIZING
FLASH
DOCUMENTS
Ten Optimization Strategies
Here are 10 tried-and-true strategies for reducing file size. Apply as many as you
can while you’re developing your animation. You can use any of these techniques
to trim down a completed animation. Better yet, keep them in mind as you create
your next animation. That way, you’ll end up with a streamlined animation without
a lot of extra, after-the-fact work.
The Importance of Being Optimized
In an era where lightning-fast connections, high-speed proces-
sors, and multimegabyte memory cards abound, why should I
bother optimizing my Flash documents?
Here’s why: Not everyone has access to the latest, greatest
equipment and Internet service. In many parts of the world,
people don’t have access to affordable T1 connections, for
example. Also, folks relying on the computers at their schools
or jobs don’t have control over their equipment. And, of course,
not everyone has the time, money, or patience necessary to
upgrade every time a new “revolution” in hardware or software
technology hits the market.
There’s a tendency among some animators to resist the extra
effort that optimizing their animations requires. But here’s the
fact: If people can’t see your animation, nothing else matters.
Not the beauty or cleverness of your artwork, nor the sophis-
tication of your animated sequences, nor the appropriateness
of your perfectly synchronized background music.
Here’s a short list of the most common excuses some animators
give for not optimizing their animations (and the reasons why
these excuses don’t fly):
•
It looks great on my machine. If my audience doesn’t
have a fast enough connection, they need to upgrade
.
Animators and others using Flash tend to be running high-
end equipment—much faster and more powerful than the
equipment their audiences are running. The trend toward
smartphones, tablets, and underpowered netbooks as
an on-the-road option reinforces the need for optimized
animations. That’s why testing your animation at a variety
of connection speeds (as discussed on page671) and even
on a variety of machines, if possible, is so important. As
noted above, not everyone
can
upgrade, and not everyone
wants
to. But even if they do, chances are they’re not
going to do it just to see your animation.
•
So what if it takes 5 minutes to download my animation
file? My animation is so fantastic it’s worth waiting for
.
It doesn’t matter if your animation is in line for the next
Webby Award: If your audience can’t run it (or surfs away
impatiently instead of waiting for it to download and
stutter across their screens), you haven’t communicated
effectively—and communicating effectively is, or should
be, the goal of every animation you create in Flash.
•
The big boys (Hollywood trailer-makers, high-end
advertisers, and super-sophisticated, high-traffic sites)
don’t worry about optimization. Why should I?
It’s
true that some folks would still check out the latest
Hollywood teaser even if it took all day to download. But
they don’t have to because the big boys pay an army of
professional testers and software designers to optimize
their animations using the techniques in this chapter.
The bottom line, as you’ve read over and over in this book,
is to determine the needs of your target audience
first
, and
then construct your animation to meet those needs. If you’re
delivering your animation as a standalone file on DVD, you’re
absolutely sure that your audience will be running high-end
equipment, and you know for a fact that they’re highly
motivated to run your animation (for example, they have to
work through the Flash training tutorial you created in order
to keep their jobs), then by all means take optimization with a
grain of salt. But if your audience fits any other profile, ignore
optimization at your own risk.
FREQUENTLY ASKED QUESTION
www.it-ebooks.info
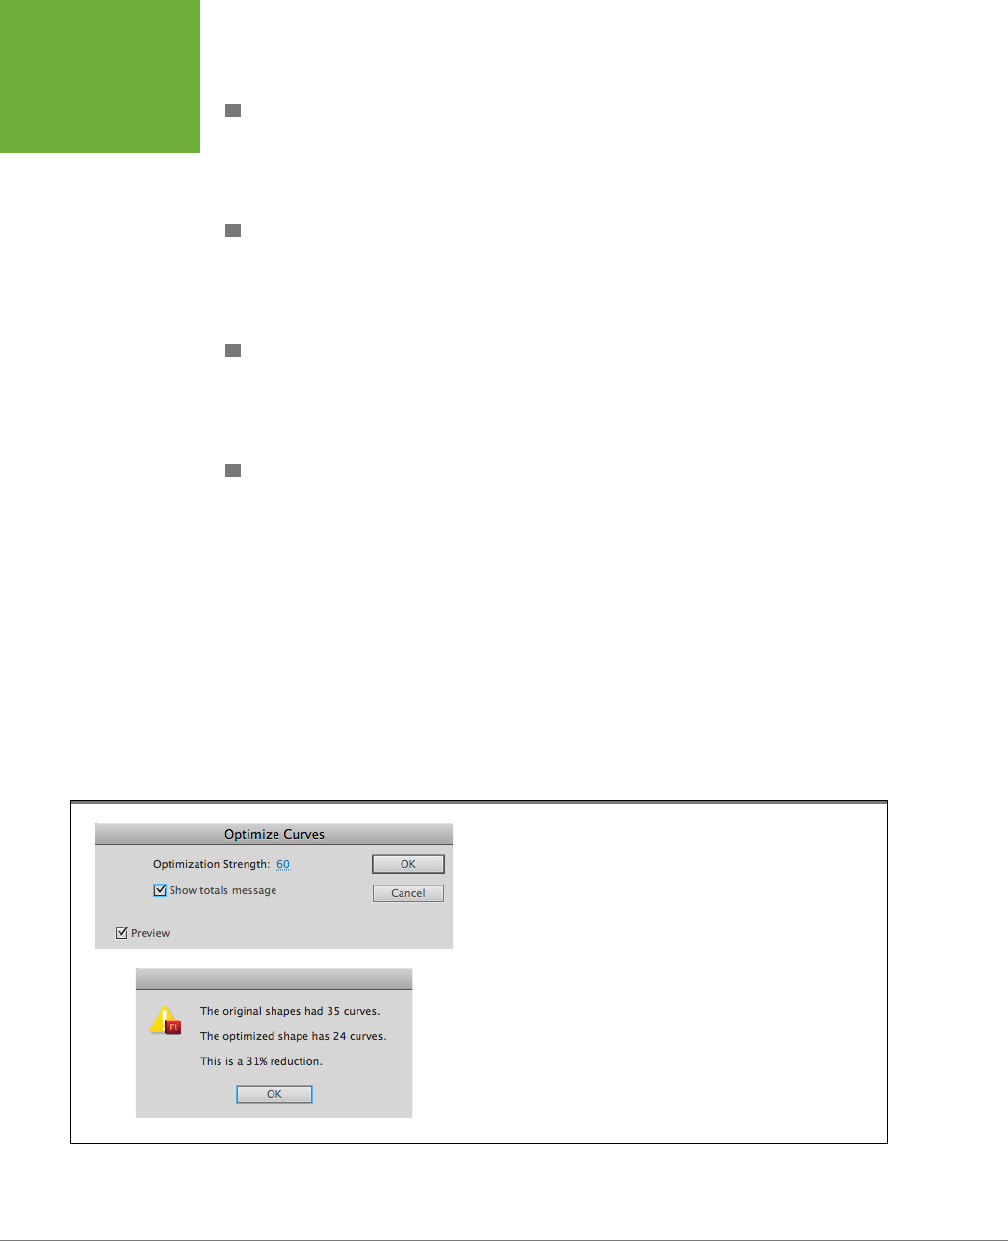
FLASH CS6: THE MISSING MANUAL
672
OPTIMIZING
FLASH
DOCUMENTS
1. USE AS FEW KEYFRAMES AND PROPERTY KEYFRAMES AS POSSIBLE
Flash stores data for every keyframe, which adds to the size of your .swf file. The
regular and tweened frames add very little to file size, so creating an eect with a
tween is more ecient than creating the same eect with frame-by-frame animation.
2. CHOOSE THE PENCIL TOOL OVER THE BRUSH TOOL
In general, brush tool fills are more complex than the lines you create with the Pencil
tool, so brush strokes take up more file space. When you feel both strokes are equally
acceptable, choose the Pencil.
3. CHOOSE SOLID OVER DASHED OR DOTTED LINES
Through the Property Inspector, Flash lets you apply a handful of dash-and-dot ef-
fects to the lines you draw on the stage using the Pencil, Pen, Line, and Shape tools.
But do so sparingly, because these line eects increase file size.
4. OPTIMIZE CURVES AND SHAPES
The fewer anchor points used to define curves and fills, the less information Flash has
to track. Flash even gives you a special Optimize command to remove superfluous
points from your shapes. Here’s how to use it:
1. Select the curved line or fill outline you want to optimize, and then choose
Modify→Shape→Optimize.
The Optimize Curves dialog box you see in Figure 20-2 (top) appears.
2. Type or scrub in a new number to tell Flash how much optimization to apply,
from 0 to a maximum of 100, and then click OK.
Flash displays a message (Figure 20-2, bottom) letting you know what percent-
age of the selected line or outline it was able to dispense with.
FIGURE 20-2
Top: Optimizing a line doesn’t straighten it out or even smooth
it the way that Modify→Shape→Advanced Straighten and
Modify→Shape→Advanced Smooth do; instead, it ever-so-subtly shifts
the points that make up the line. If you want to see how successful
the optimization is, make sure you leave the “Show totals message”
checkbox turned on.
Bottom: Because optimization is a final tweak meant for you to do after
your image already looks the way you want it to look, you don’t see a
huge reduction in size here. Still, depending on the number of curved
lines and fill outlines your animation contains, the saved bytes can
addup.
www.it-ebooks.info
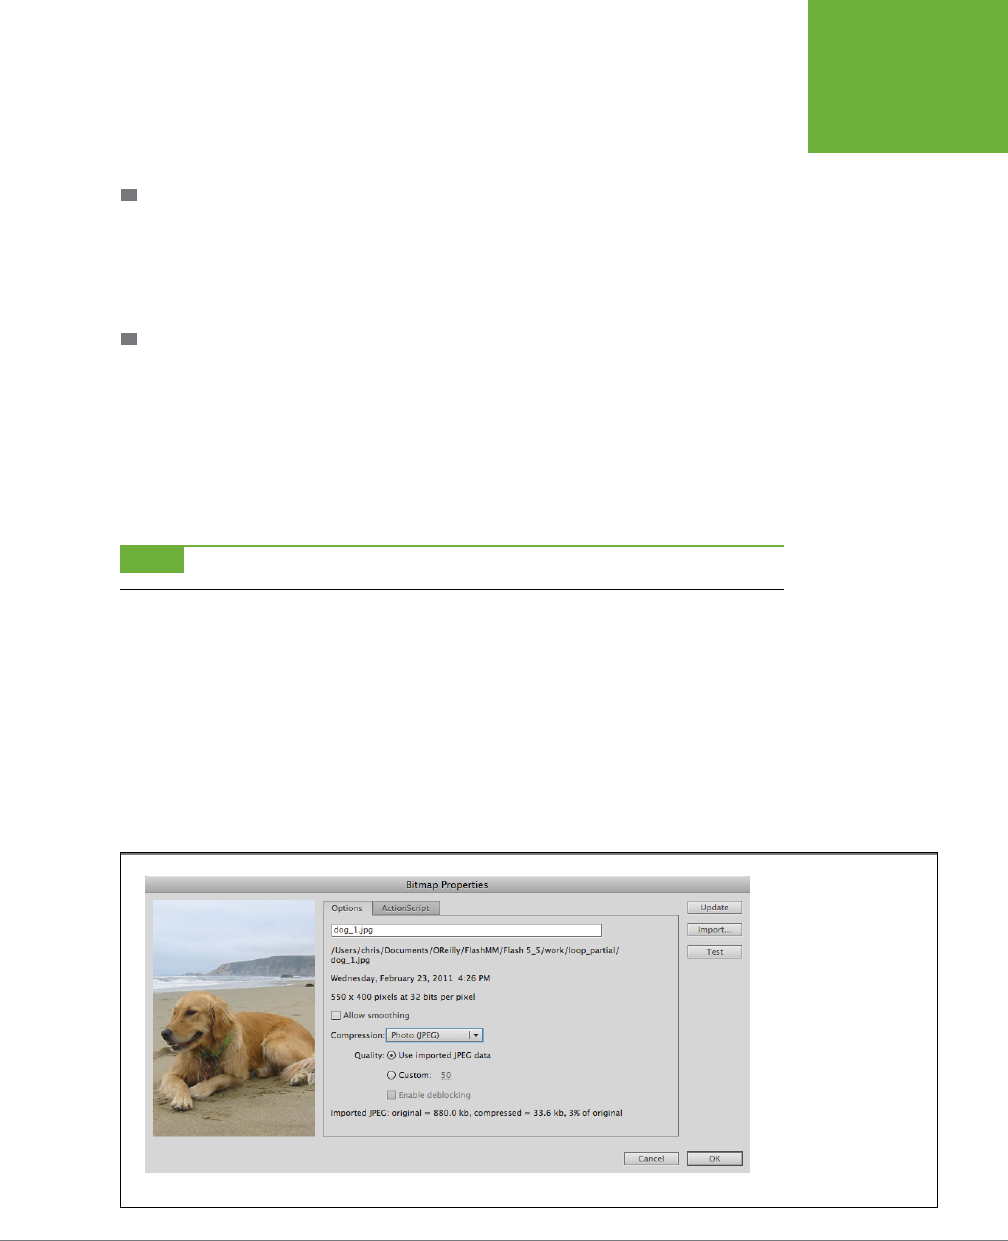
CHAPTER 20: PUBLISHING AND EXPORTING 673
OPTIMIZING
FLASH
DOCUMENTS
3. Click OK.
On the stage, you see the (subtle) results of the optimization.
5. USE SYMBOLS
Creating a reusable symbol (page 248) lets you add multiple instances of a shape or
drawing to your animation without dramatically increasing file size. Even shrinking,
rotating, or recoloring your instances costs less in file size than creating separate
images. This strategy can result in big benefits.
6. TEST BITMAPS AND VECTORS, AND THEN CHOOSE THE MOST EF-
FICIENT OPTION
Often bitmaps, especially photos, are expensive in terms of file size. If you can do
without them, do so; if not, crop them (so that you use as little of them as possible)
or optimize them by choosing a higher-than-standard compression option, as de-
scribed below. On the other hand, overly complicated vector graphics also use a lot
of space. If in doubt, test both options and compare the sizes by generating a size
report (see the box on page 649).
NOTE You can also optimize bitmaps in the Publish Settings dialog box (page 685).
To optimize a bitmap:
1. Import the bitmap into your document’s Library panel.
The steps, if you need a refresher, are in Chapter 10 (page 359).
2. In the Library, double-click the icon next to the imported bitmap’s filename.
(Or select the bitmap, and then, from the Options menu in the upper-right corner
of the Library, choose Properties.)
Either way, the Bitmap Properties window you see in Figure 20-3 appears.
FIGURE 20-3
Everything in life is a
tradeoff, and bitmap
optimization in Flash is no
exception. If you find you
can’t balance image qual-
ity with compression—for
example, by the time you
reach an acceptably high
compression rate, your
image appears nearly
unrecognizable—consider
cropping the bitmap or
turning it into a vector
drawing (page 365).
www.it-ebooks.info

FLASH CS6: THE MISSING MANUAL
674
OPTIMIZING
FLASH
DOCUMENTS
3. From the Compression drop-down list, choose either “Photo (JPEG)” or
“ Lossless (PNG/GIF)”.
Choose the first option if your image contains a lot of dierent colors or trans-
parent eects; choose the second if it contains a few solid lumps of color. Find
out more about JPEGs, PNGs, and GIFs beginning on page 351.
Flash calculates a percent compression rate and displays it near the bottom of
the Bitmap Properties window.
If you chose Photo (JPEG), you can compress the image further. Click the Cus-
tom radio button, and then type a number into the box (Figure 20-3). A value
of 100 is the highest quality and the least compression.
TIP Flash starts you out with a quality rate of 80. You need to experiment to find out the lowest number that
gives you an acceptable tradeoff between file size and quality, but one way to begin is to jot down the current
file size (Flash displays it just below the Quality field), type 25, and then click OK. When you open the Bitmap
Properties window again, Flash displays the new file size for the bitmap based on a file quality of 25. If the image
looks OK, type a lower number; if not, type a higher number. The higher the number, the larger the file size; the
lower the number, the lower the file size.
4. Take a look at your newly optimized image by clicking the Test button.
The preview area shows the way the image looks using the optimization set-
tings you chose. Near the bottom of the Bitmap Properties window, you see
the percent compression rate Flash has calculated based on the Quality setting
you typed in. If the image quality looks horrible, repeat step 2 with a higher
quality setting; if the quality looks OK but the compression rate doesn’t seem
low enough, try again with a lower quality setting. (Sometimes, depending on
your image, a lower quality setting will look practically identical to a slightly
higher quality setting.)
5. When you’re satisfied with the quality-vs.-file-size tradeo, click OK.
Flash hides the Bitmap Properties window and brings you back to your
workspace.
NOTE The image doesn’t appear optimized in the Library preview area. But you can preview the effects of
different optimization settings when you drag the image to the stage.
7. KEEP SOUND CLIPS TO A MINIMUM (OR OPTIMIZE THEM)
Sound clips can quickly swell your animation size, so use them sparingly. Naturally,
sound eects like a bell’s ding or a thunderclap use less space than a high-quality
music soundtrack. A narrator’s voice also takes up less space than most music. As
www.it-ebooks.info
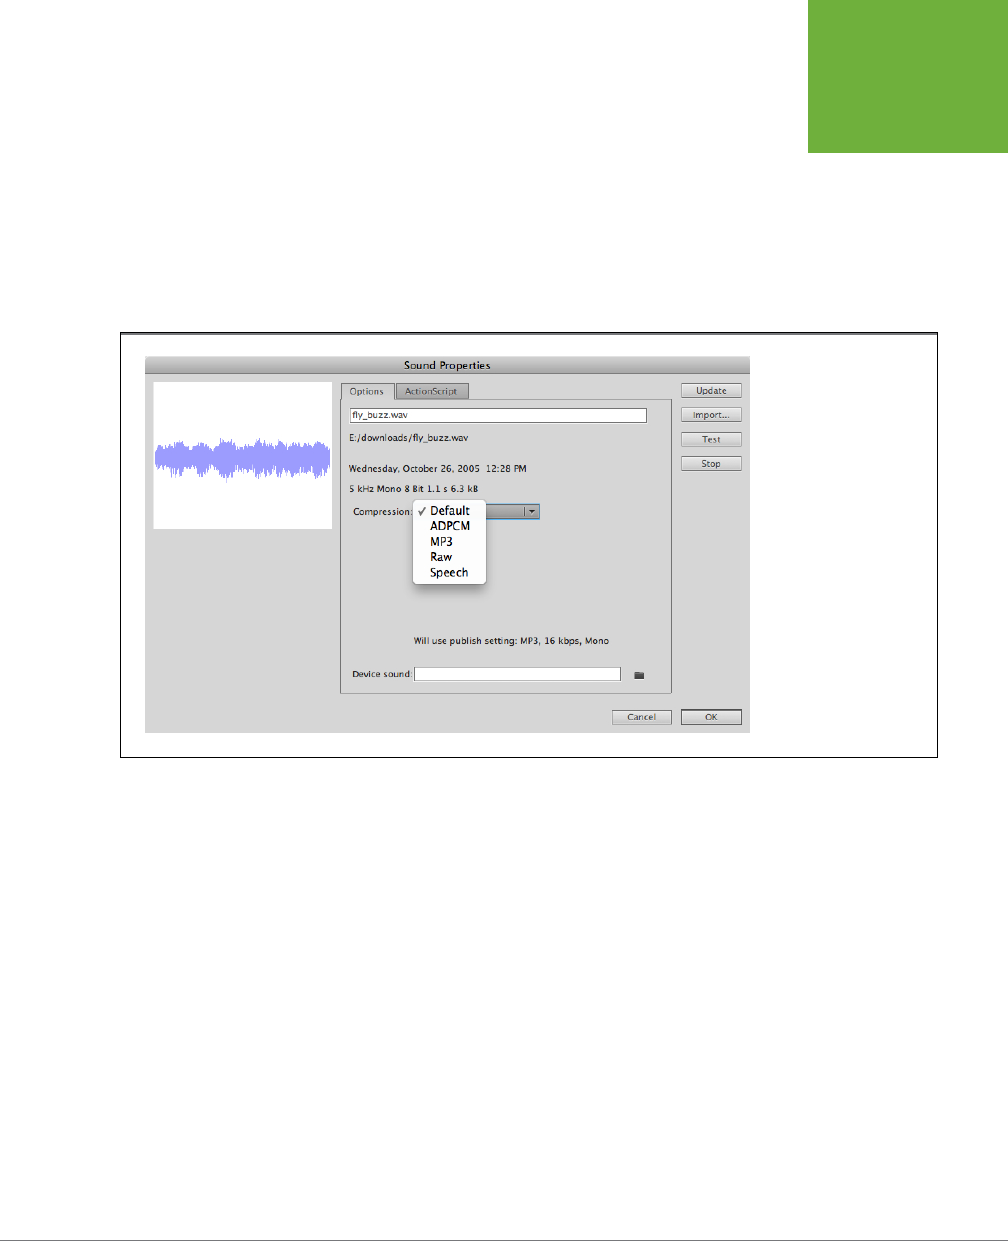
CHAPTER 20: PUBLISHING AND EXPORTING 675
OPTIMIZING
FLASH
DOCUMENTS
a rule, use the shortest clips you can and compress them as much as the quality
can bear. Here are the steps to optimize a sound file that’s already in your Library:
1. In the Library, double-click the icon next to the imported sound file’s name.
This icon is the quickest of three ways to open the properties for a symbol. You
can also use the Options menu in the upper-right corner of the Library panel
or right-click (Control-click) a symbol.
Either way, the Sound Properties dialog box you see in Figure 20-4 appears.
FIGURE 20-4
If you leave compression
set to Default, Flash uses
the Compression option
you set in the Publish
Settings dialog box (page
685) to figure out how to
compress this sound clip.
Otherwise, Flash applies
the Compression option
you set here (unless
you’ve told Flash to
override this compression
setting; see page 682 for
details).
2. Press Update, if you think the sound has been edited.
The file may have been trimmed or changed, using an editor like Soundbooth,
since it was imported.
3. From the Compression drop-down list, choose a compression scheme.
Flash gives you several options. Choosing the right compression scheme gives
you the best size/quality optimization:
• The Default settings are defined in the panel that appears when you go to
File→Publish Settings and click the Flash tab. There are separate settings
for audio streams (longer sounds like music and narration) and events (like
sound eects). You can change these settings by clicking the
Set
buttons.
• ADPCM is good for short event sounds. You can reduce file size by check-
ing the “Preprocessing: Convert stereo to mono” box. Sample rates range
from a primitive 5 kHz to CD-quality 44 kHz. You can also set the ADPCM
www.it-ebooks.info

FLASH CS6: THE MISSING MANUAL
676
OPTIMIZING
FLASH
DOCUMENTS
bits from 2 to 5 bits, with larger numbers increasing file size. Below the
menus you see the setting and the eect they have on reducing or increas-
ing the file size.
• MP3 is the familiar compression format for music. It has the ability to dra-
matically reduce the size of long streams of sound. You can choose the bit
rate (higher numbers, bigger files) and the quality: Fast, Medium, or Best.
(These options refer to the length of time it takes to compress the files.) In
most cases, you’ll want to choose Best because it achieves the best sound
quality for the file size.
• Raw provides no compression, so you’d normally not use it for a web-based
animation. As with ADPCM, you can reduce the size of the sound file by
selecting “Convert stereo to mono” and by reducing the sample rate.
• Speech applies compression that’s suitable for voice, but isn’t full enough
for a symphonic orchestra. You can further tweak the setting by changing
the sample rate (smaller numbers for smaller files).
4. As you experiment with the settings, click the Test button.
You hear the sound file with the compression applied. Click the Stop button
when you’ve heard enough.
5. When you’re satisfied with the quality-vs.-file-size tradeo, click OK.
Flash hides the Sound Properties dialog box and brings you back to your
workspace.
NOTE To make sure Flash uses the Compression option you set in the Sound Properties dialog box, turn off
the “Override sound settings” checkbox in the File→Publish Settings→Flash dialog box. Page 682 has details.
8. GROUP ELEMENTS
Grouping shapes, lines, and other portions of your drawings (by selecting them, and
then choosing Modify→Group) cuts down on file size because Flash can streamline
the information it needs to store. Page 192 has full instructions.
9. AVOID THE EXTRANEOUS
The more you add to your animation, the larger your file size. If you absolutely,
positively need to pare down your file, consider removing or simplifying some (or
all) of your drawings, multimedia files, and graphic eects, paying particular atten-
tion to these space hogs:
• Sound files, embedded video clips, and bitmaps
• Gradient eects
• Alpha (transparency) eects
• Custom colors
www.it-ebooks.info

CHAPTER 20: PUBLISHING AND EXPORTING 677
PUBLISHING
YOUR
ANIMATIONS
Make sure your .swf files don’t include any unnecessary symbols. Look in the Library
panel. If it says Export under Linkage, the symbol is being exported for use with
ActionScript and will definitely be added to the .swf. If the symbol isn’t needed for
the final animation, right-click the symbol, and then choose Properties from the short-
cut menu. In the Symbol Properties dialog box, deselect “Export for ActionScript.”
TIP If you can’t bring yourself to do without media files altogether, go ahead and use them—but abbreviate
them. For example, instead of using a long sound clip, loop a short one. Or use a single sound clip a bunch of
different ways (soft, loud, the first half, the second half) to create multiple sound effects for minimal overhead.
Instead of embedding a video clip as is, try adjusting the in and out points to clip off any nonessential intro or
outro frames when you import it into Flash (page 389). And if you’re using a mask layer, make sure you clip off
every scrap of the background image not revealed by the mask.
10. TELL FLASH TO KEEP YOUR FILE SIZE DOWN
One of the options you want to make sure you set when you’re ready to publish
your animation is the “Compress movie” option in the Publish Settings dialog box
(page 685). (Out of the box, Flash turns on this option, but do double-check that
you haven’t inadvertently turned it o.) Choosing this option tells Flash to squeeze
your animation file as much as it can without sacrificing content. How much Flash
compresses your file depends on the specific elements and eects you’ve included
in your animation; the more text and ActionScript code your animation contains, for
example, the more “bloat” Flash can squeeze out of your file.
Publishing Your Animations
When you publish your animation, Flash Professional reads the images and sounds
in your .fla file, applies compression according to the settings you chose, and then
writes a noneditable file (.swf) that your audience will view.
The kind of noneditable file Flash produces depends on how you decide to publish
your animation. These are your choices:
• A compiled Flash file (.swf). Flash Players, including the Flash Player plug-ins
that come with most browsers, play .swf files. If you plan to include your Flash
animation in a hand-coded HTML file (or to import it into a website creation
program like Adobe Dreamweaver), you want this option.
• A compiled SWC file (.swc). If you’re working with a team on a Flex project,
you can archive components and assets in a SWC file. Flex applications can
access the embedded SWF and the other assets.
• A web page (.html, .swf). Choose this option if you want Flash to put together a
simple web page for you that includes your animation. (You can always tweak the
HTML file later, either by hand or using a web design program like Dreamweaver.)
www.it-ebooks.info

FLASH CS6: THE MISSING MANUAL
678
PUBLISHING
YOUR
ANIMATIONS
• An image file (.jpg, .gif, or .png). You can export an individual frame, or if you
use the GIF format, you can export a series of image files that play as a frame-
by-frame animation—useful for those times when your audience doesn’t have
Flash Player. (For more advice on using ActionScript to detect your audience’s
Flash Player at runtime and oer alternatives, see the box on page 690.)
Preloading Large, Slow-to-Load Content
If your animation is large (approaching a megabyte or more)
and you’re delivering it over the Web, it takes some time for
your audience to download. You need to let them know that
something is happening behind the scenes and give them
an idea how soon they’ll be entertained. That’s the job of
a preloader—a bit of ActionScript and some simple images.
You’ve seen them before when web pages display a “Loading”
message and report on the progress. In essence, a preloader
is a small Flash animation that’s designed to load a larger
animation. The smaller program shows a simple animation
to let the audience know their computer hasn’t frozen. Many
preloaders also report on the progress as a percentage of the
download. You can think of a preloader as a “wrapper” that
holds the larger, slow-loading animation.
Flash CS6 includes a simple preloader template that you can
use for your project. Go to File→New→Templates and click
Sample Files. Near the bottom of the list choose “Preloader
for SWF.” There’s no documentation with the template, but
with a couple of tips, it’s easy to use. All you have to do is
place your larger SWF, larger picture, or other slow-loading
content in the second frame of the layer named “Content.”
Test the animation (Control→Test Movie) and you may not
notice the preloader, because everything runs so quickly when
it’s all on one computer. To see the preloader in action, you
need to make some adjustments in the test environment. Set
View→Download Settings to 56K or one of the slower settings.
Then choose View→Simulate Download. The “Loading” text
pulses while the download percentage is shown in numbers.
If the template doesn’t quite match the style of your project,
it’s easy to swap in your own graphics. The pulsing loading
text is a movie clip symbol in the Library made of a 31-frame
tween. To examine the movie clip, right-click (Control-click)
“loading clip” in the Library and choose Edit. Replace the
“Loading” animation in the symbol but make sure you don’t
change its name. Feel free to change the length of the movie
clip if it suits your needs.
If you want to examine the ActionScript code that powers the
preloader, just click Frame 1 in the actions layer and open the
Actions window. You’ll see that the code stops the animation.
At that point, two event listeners take over. The listeners’ func-
tions are named: onLoading and onComplete. The onLoading
listener displays the pulsing text and download percentage. The
onComplete listener moves the animation to the second frame
in the animation, where the larger, now fully downloaded
content is displayed. The “onComplete” function also does a
little housekeeping, removing the two listeners from memory
because they’re no longer needed.
If you’re interested in learning more about preloading, you can
find more information on the Web; Christopher Skyi’s article on
ActionScript.org is a good place to start (
www.actionscript.org/
resources/articles/869/1/Preloading-in-ActionScript-30-the-
Easy-Way/Page1.html
).
POWER USERS’ CLINIC
• A standalone projector file (.exe, .app). A
projector
file is a self-contained
Flash-Player-plus-your-animation file. Your audience can run a projector file to
play your animation even if they don’t have a copy of Flash Player installed. You
might choose this option if you’re creating a CD or DVD (as opposed to delivering
via the web). You can create projector files for Windows (.exe) or the Mac (.app).
www.it-ebooks.info
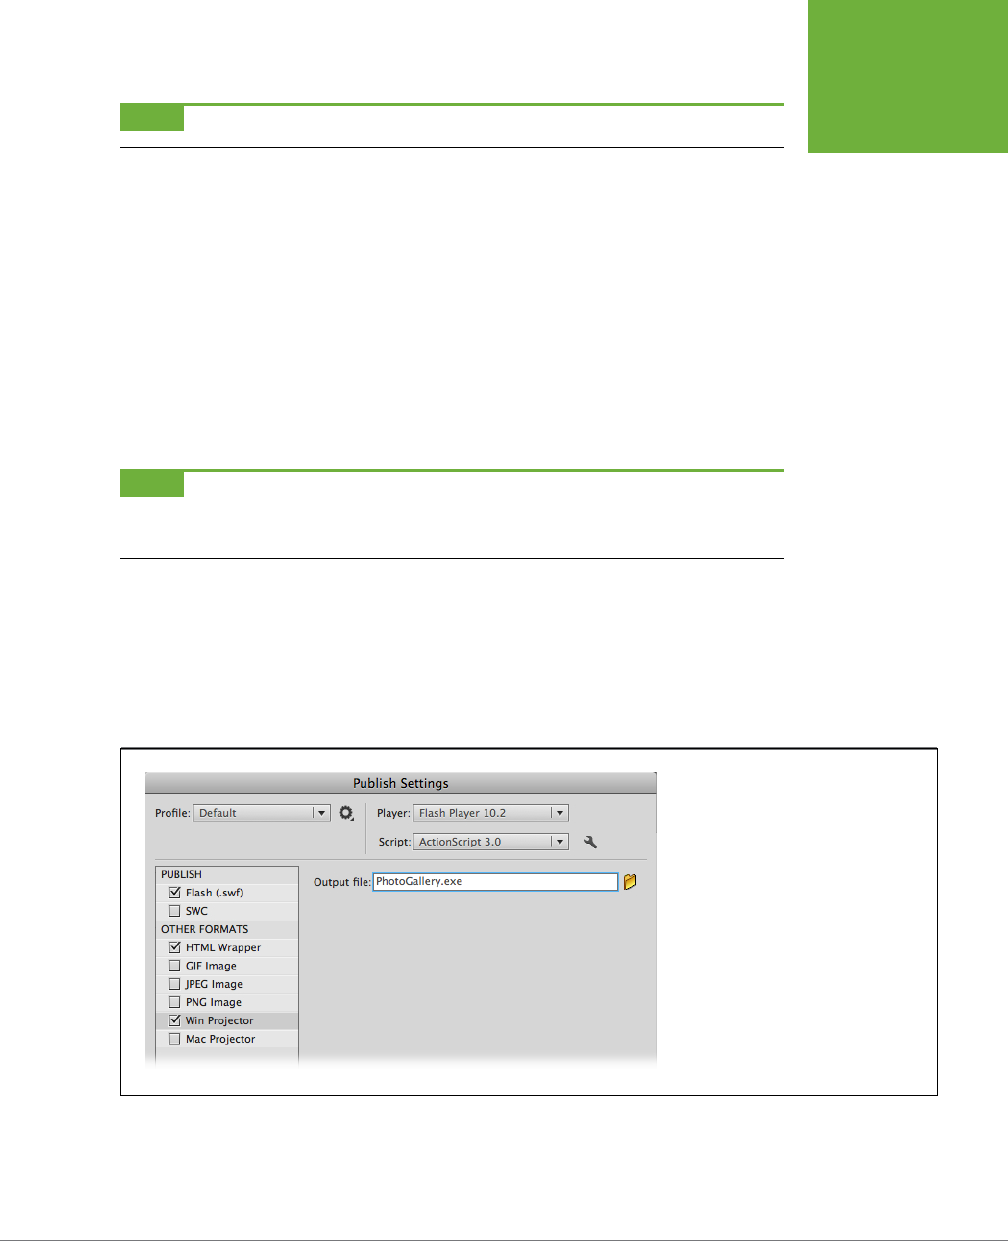
CHAPTER 20: PUBLISHING AND EXPORTING 679
PUBLISHING
YOUR
ANIMATIONS
NOTE Flash gives you another way to turn your artwork into an image file: by
exporting
it (page 370).
You can choose more than one publishing option at a time simply by turning on as
many checkboxes as you like in the Publish Settings dialog box. For example, you
can publish your animation as a compiled Flash file, a web page, and a standalone
projector file all at once when you click Publish.
The following sections show you each of these publishing options in detail.
Publishing as a Compiled Flash (.swf) File
When you publish your animation as an .swf file, your audience can run it using a
Flash Player—either a standalone version of Flash Player, or a web browser plug-in
version. Publishing as an .swf file gives you the flexibility of including your animation
in a from-scratch web page.
NOTE If you’ve worked through any of the examples in this book, you’re already familiar with .swf files.
Each time you test your animation using Control→Test Movie, Flash automatically generates an .swf file and plays
it in the Flash Player that’s built into the test environment.
To publish your animation as a compiled Flash (.swf) file:
1. Choose File→Publish Settings.
A Publish Settings panel, similar to the one in Figure 20-5, appears. Here’s where
you tell Flash what kind of files to publish, and you can choose as few or as many
as you like. Click on a file format to adjust the settings for that particular file.
FIGURE 20-5
Each time you turn on a Type checkbox,
Flash adds a new file type to the publish
process; for example, SWF, HTML, or JPG.
Click the format name to display the
settings for that type of file. With these
settings, the publish process produces an
SWF, an HTML wrapper, and a standalone
Windows projector file. The Win Projector
format name is currently selected.
2. Turn on the checkbox next to “Flash (.swf),” and then turn o all the other
checkboxes.
The Flash tab appears next to the Formats tab.
www.it-ebooks.info
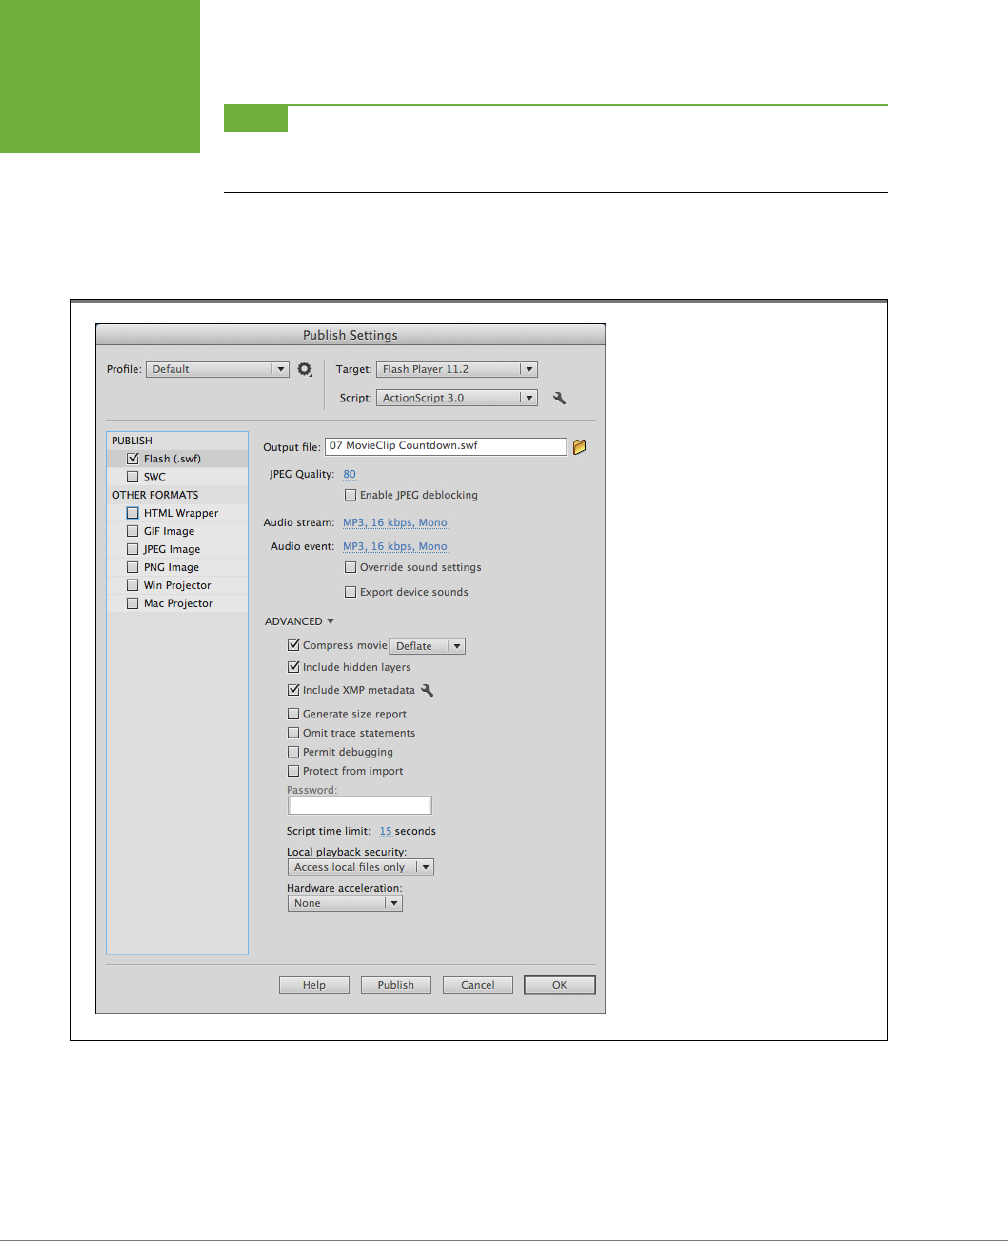
FLASH CS6: THE MISSING MANUAL
680
PUBLISHING
YOUR
ANIMATIONS
NOTE You can use almost any animation to experiment with the Publish and Export settings. If you don’t
have one handy, use
20-1_Publish_Settings.fla
from the Missing CD (
www.missingmanuals.com/cds/flashcs6tmm
).
It’s identical to one of the Chapter 8 motion tween files.
3. Click the words “Flash (.swf)” next to the checkbox.
The Flash settings in Figure 20-6 appear.
FIGURE 20-6
The settings here let you fine-tune the
.swffile that Flash generates when you
click Publish. Normally, you don’t have to
make any changes to these settings. But
in some cases—for example, when you
know your target audience is running an
older version of Flash Player—you do want
to change them. These pages explain each
setting.
4. Change one or more of the following settings:
• Player. Lets you select the version of Flash Player you want to run your ani-
mation. Choose the latest version (Flash Player 11.2) if you’ve included any of
the new-in-Flash-11.2 features or if you’re not sure whether you’ve included
any new features. If you know your audience is running an earlier version
www.it-ebooks.info
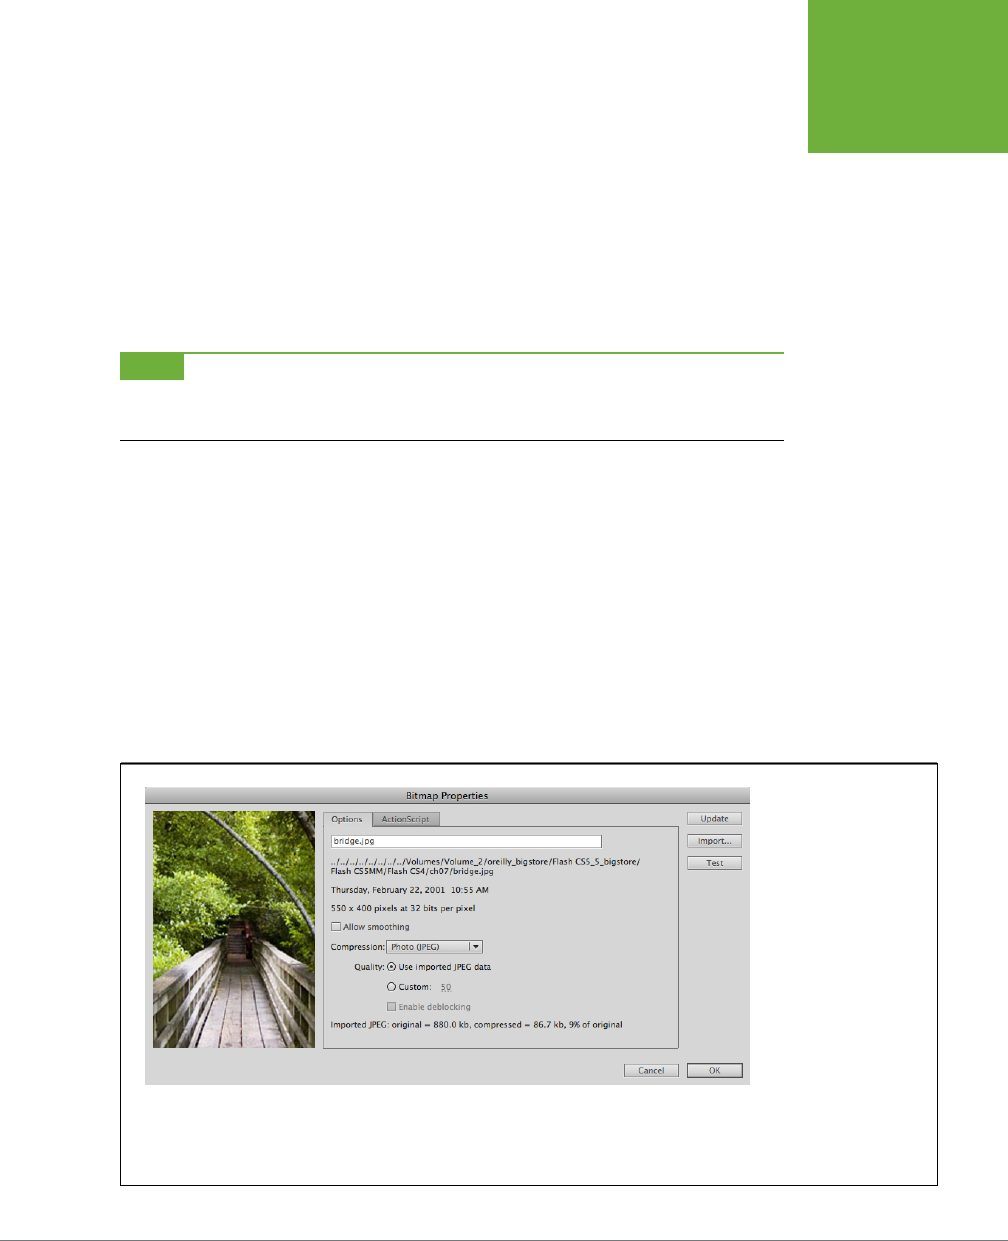
CHAPTER 20: PUBLISHING AND EXPORTING 681
PUBLISHING
YOUR
ANIMATIONS
of Flash Player (for example, Flash Player 8) and you know you won’t be
using any new-in-Flash-11 features, then you can choose the earlier version.
If you choose Flash Player 11, and it turns out that your audience is run-
ning an earlier version of the player, like Flash Player 8, they will need to
download and install the newest version, which isn’t as troublesome as it
sounds. Adobe makes a free downloadable copy of the latest Flash Player
available at
www.adobe.com/products/flashplayer
. The box on page 690
explains how to create a web page that automatically checks to make sure
the proper version of Flash Player is present on your audience’s computers.
NOTE On this menu, you’ll also find options for Adobe AIR, iPhone, and Flash Lite players. Usually, if you’re
developing an animation for one of these platforms, you start your animation using one of the related templates.
The templates size the stage to match the device and automatically choose the right player.
• Script. Tells Flash which version of ActionScript to use. You already made
this decision when you chose File→New to start your animation. So, if you
started with ActionScript 3.0, that’s the only option available here.
• JPEG quality. The quality of your JPEGs is controlled in two dierent places,
and sometimes this leads to confusion. You can set the quality for indi-
vidual images in the Library by right-clicking the library item and choosing
Properties (Figure 20-7). Choose a Custom setting for the image and that’s
the final word. However, if you choose “Use imported JPEG data” then the
image quality is controlled by the Publish Settings (Figure 20-6). In both
cases, you can type or scrub in a quality value from 1 to 100. For highly
compressed images (50 or less) it may help to turn on JPEG deblocking.
FIGURE 20-7
If you choose “Use
imported JPEG data” as
shown here, Flash lets
you set bitmap quality
using the JPEG quality
number in the Publish
Settings window’s Flash
tab. If you set the quality
of your bitmap using the
Bitmap Properties dialog
box, however, Flash
ignores the JPEG quality
number in the Publish
Settings window. In other
words, you can’t tell Flash
to compress the same
image twice.
www.it-ebooks.info
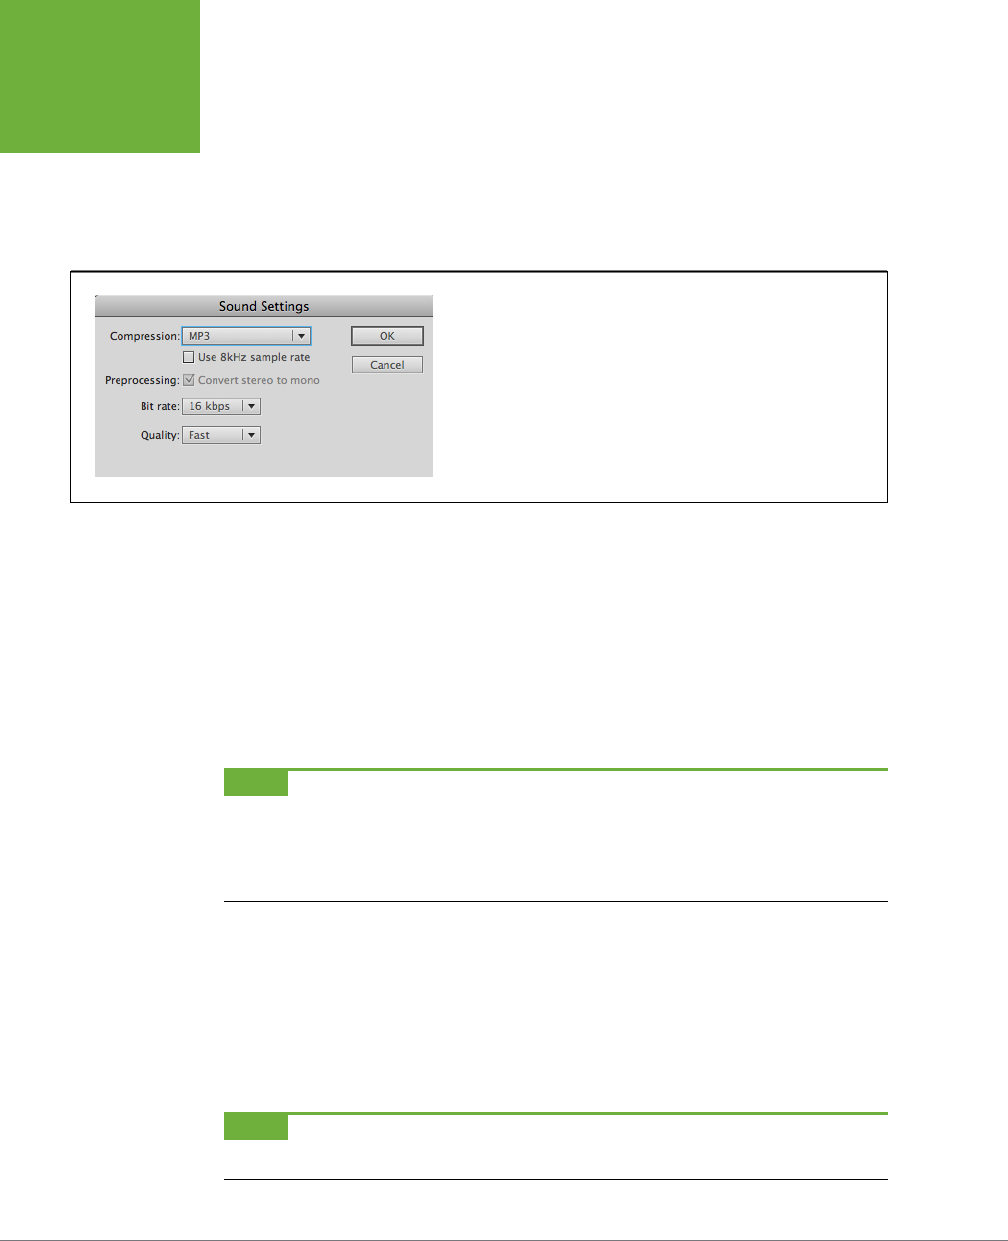
FLASH CS6: THE MISSING MANUAL
682
PUBLISHING
YOUR
ANIMATIONS
• Audio stream. Tells Flash which compression scheme to use for streaming
audio clips for which you haven’t already specified a compression scheme
(page 675). Flash displays the compression scheme it assumes you want.
To specify another one, click the current compression name, and then,
in the Sound Settings dialog box that appears (Figure 20-8), choose the
compression scheme you want.
FIGURE 20-8
In the Publish Settings window, clicking the name next to “Audio stream” or
“Audio event” to opens this Sound Settings dialog box. Here, you can choose
from a variety of compression schemes (like MP3, suitable for long, continu-
ous clips like soundtracks) and lower-quality, byte-saving schemes (like
Speech). Choosing Raw tells Flash not to compress your sounds at all.
• Audio event. Tells Flash which compression scheme to use for audio events
for which you haven’t already specified a compression scheme, using the
Sound Properties dialog box. Flash displays the compression scheme it
assumes you want. To specify another one, click the current compression
name next to “Audio event” and then, in the Sound Settings dialog box that
appears, choose another compression scheme. Your options are identical
to the options Flash gives you for setting “Audio stream” (see Figure 20-8),
and they don’t override individual sound properties unless you turn on
“Override sound settings.”
NOTE Flash gives you two ways to specify a compression scheme for your sound clips. You can specify
a compression scheme for individual sound clips using the Sound Properties dialog box (page 675) or you can
specify one for all the sound clips in your animation using the Audio Stream and Audio Event options you find
in the Publish Settings window. (See below for more detail on the difference between audio streams and audio
events.)
• Override sound settings. Tells Flash to ignore the individual compression
schemes you set for your sound clips using the Sound Properties dialog
box (page 675) and use the compression schemes (both streaming and
event) you set in the Publish Settings window instead. If you
don’t
turn on
this checkbox, Flash uses the compression settings you set in the Publish
Settings window only for those sound clips assigned a Default setting in
the Sound Properties dialog box.
NOTE Flash can only work with what you give it. Specifying a high-quality compression scheme doesn’t
improve a low-quality sound clip.
www.it-ebooks.info

CHAPTER 20: PUBLISHING AND EXPORTING 683
PUBLISHING
YOUR
ANIMATIONS
• Export device sounds. Tells Flash to include MIDI and other device sound
files with the .swf file. Turn on this option only if you’re targeting mobile
devices.
• Compress movie. Tells Flash to reduce .swf file size as much as possible
without sacrificing your animation’s quality. Make sure this option is turned
on. (Flash can’t compress animations targeting pre-6 versions of Flash
Player, but odds are you aren’t doing that anyway.)
• Include Hidden Layers. Flash’s factory settings export all the layers in your
animation, even those that are hidden or nested in movie clips. Uncheck
this option if you want to test or create dierent versions of your animation
by hiding layers in the Flash file.
• Include XMP metadata. Publishes all the details about your animation in-
cluded in the File Info box. Metadata is a standard method for storing details
about a media file. To create metadata in the first place, choose File→File
Info, and then fill in whatever information you want your audience to see.
• Generate size report. Tells Flash to list the bytes in your .fla file by frame,
scene, action, object, and so on. This report is also useful for keeping track
of the content you’ve added to your animation.
• Omit trace actions. Tells Flash to ignore any
trace()
statements you’ve
added to your ActionScript actions (page 473). It’s best to turn this on
before publishing an .swf that’s going out in public. You don’t need other
folks with a Flash debugger seeing your trace details, and trace statements
can slow down playback.
• Permit Debugging. Tells Flash to let you debug your animation remotely
(over the web) using the special Flash Debug Player browser plug-in. This
option also gives you more detailed error messages when you debug lo-
cally. This book doesn’t cover remote debugging, but you can find out more
about it using Flash Help (see Appendix A: Installation and Help).
• Protect from import. Theoretically, this option tells Flash to encode your
.swf file so other folks can’t import it into Flash and edit (steal!) your anima-
tion. Unfortunately, human nature being what it is, you can find programs
floating around the Web to bypass this encoding. So if you need to reference
sensitive information in your Flash animation (like passwords or confidential
company info), don’t store that information in Flash; instead, store it safely
on a protected server and get it at runtime.
• Password. If you’ve chosen “Protect from import” or “Debugging permit-
ted,” type a password in this box. Typing a password lets anyone with the
password import the compiled .swf file into Flash at a later date, and then
edit it—a potential security risk if your ActionScript code contains confi-
dential company information. Typing a password also lets anyone with the
password debug the .swf file remotely. (This book doesn’t cover remote
debugging.)
www.it-ebooks.info

FLASH CS6: THE MISSING MANUAL
684
PUBLISHING
YOUR
ANIMATIONS
• Script time limit. Sets the maximum time that scripts can take to run be-
fore there’s a stage update. If a script runs longer, Flash Player stops the
script from running.
• Local playback security. Lets you tell Flash whether you want your .swf
to be able to exchange information with
local files
(files located on your
audience’s computers) or
network files
(files located elsewhere on the Web).
• Hardware Acceleration. These settings let your animation take advantage
of any advanced video hardware capabilities your audience’s computers
may have. The
Direct
option bypasses the computer browser and draws
directly to the screen. The
GPU
option uses advanced graphics processing
units if they’re available.
5. Click Publish.
The Publish Settings window disappears, and Flash generates an SWF file
using the name you provided. If you didn’t type a name of your own choos-
ing, Flashnames the file based on your .fla filename. For example, if the name
of your Flash document is
myAnimation.fla
, Flash generates a file named
myAnimation.swf
. If you click OK, Flash saves your settings and uses them later
when you’re ready to publish.
TIP You don’t have to go through the Publish Settings window every time you want to publish your anima-
tion. Once you’ve got the settings the way you want them, all you have to do is select File→Publish.
Publishing as a Web Page
If you want to put your animation on a web page, an .swf file by itself isn’t sucient:
It’s always best to create an HTML file (a web page) that embeds that .swf file. You
can create the HTML file either by using your favorite HTML editor or by telling Flash
to generate a simple HTML file for you.
Create a Publish Profile
Customizing Flash’s publishing settings can be time-consum-
ing. If you plan to reuse a batch of options, you can save time by
saving your settings in a profile. So you could create one profile
for publishing Flash CDs or DVDs and another for your website.
That way, when you want to publish a web-page version of
your animation, for example, all you have to do is specify
myWebPageProfile or myCD-DVDprofile.
To create a publish profile:
1. In the Publish Settings dialog box, click the gear-shaped
button next to Profile and choose Create Profile.
2. In the Create New Profile dialog box that appears, type a
name for your profile, and then click OK.
3. Flash saves all your current settings to that profile. As you
continue to make changes in the Publish Settings window,
Flash continues to save those changes to your profile.
4. You can create as many profiles as you like. To change
profiles, click the Profile menu, and then select a new
name.
POWER USERS’ CLINIC
www.it-ebooks.info
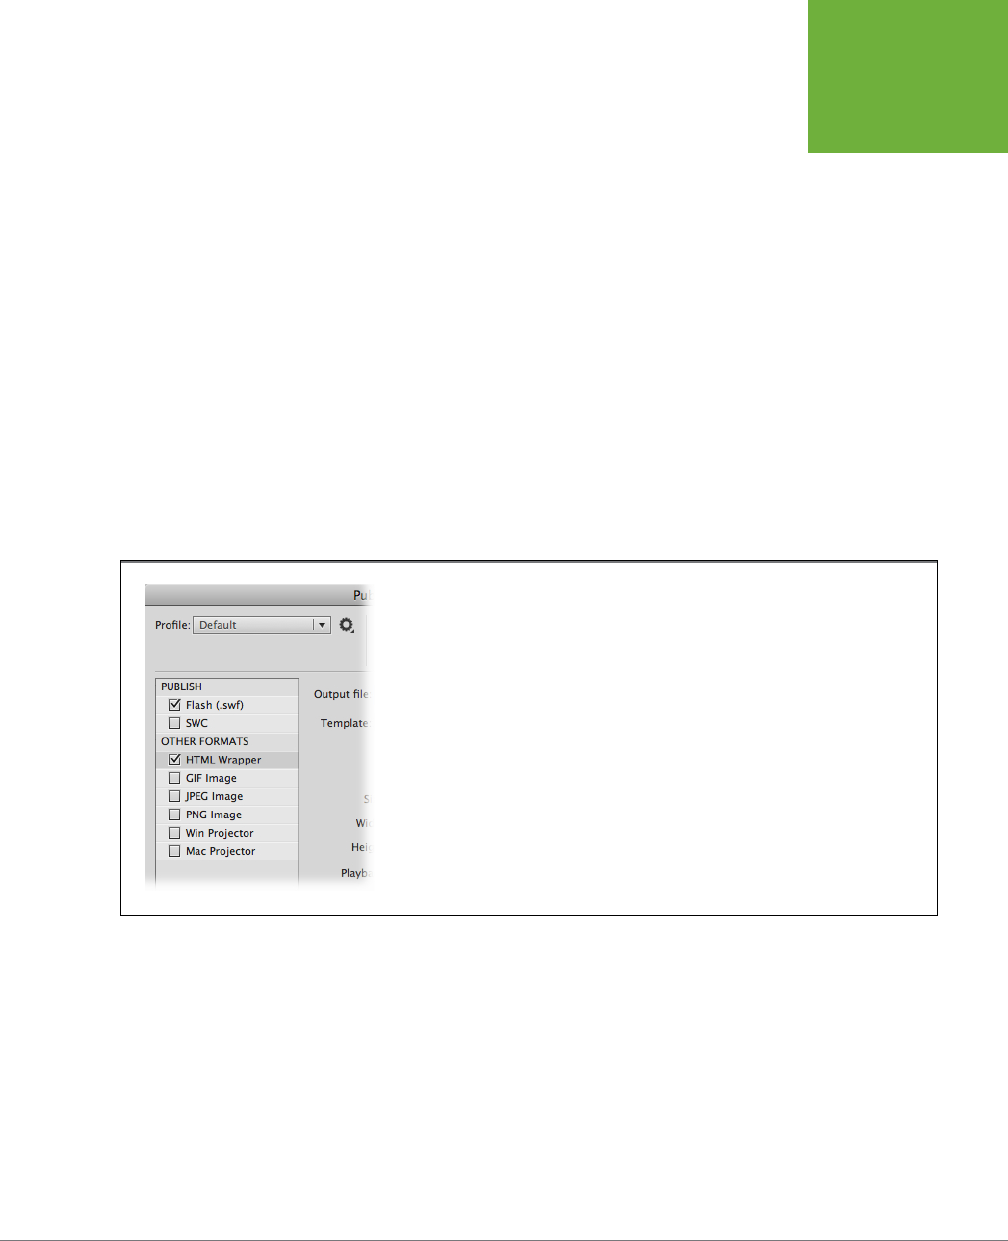
CHAPTER 20: PUBLISHING AND EXPORTING 685
PUBLISHING
YOUR
ANIMATIONS
At a minimum, the HTML file needs to tell the web browser how to display the .swf
file: at the top of the page or in the middle, whether you want the animation to begin
playing immediately or wait until the audience clicks a button, and so on.
Because many people who use Flash want to put their animations on the web, the
Publish Settings dialog box makes it easy to create an .swf in addition to a simple
web page (.html) in one fell swoop.
To publish your animation as a web page (.html and .swf):
1. Choose File→Publish Settings.
The Publish Settings dialog box appears.
2. Make sure the checkboxes next to “Flash (.swf)” and HTML Wrapper are
turned on; if they’re not, turn them both on now.
You can choose to publish several dierent types of files at once, as shown in
Figure 20-9. To publish an SWF file and a web page that holds the SWF file,
check the boxes: Flash (.swf) and HTML Wrapper. Click the words next to the
check-box to display the file settings in the dialog box.
FIGURE 20-9
To publish an SWF file and a web page that holds the SWF file, turn on the Flash (.swf) and HTML
Wrapper checkboxes. Click the words next to the checkbox to display the file settings shown in
Figure20-10.
3. Click the words “Flash (.swf),” and then set up your .swf file.
For the details, see step 4 on page 680.
4. Click the words “HTML Wrapper.”
The HTML publish settings you see in Figure 20-10 appear.
5. If you like, change the template setting.
Most of the time, you want to stick with the “Flash only” template that Flash
assumes you want. But if you’ve added certain elements to your animation, or
if you want to target a specific web browser, Flash needs to insert special HTML
www.it-ebooks.info
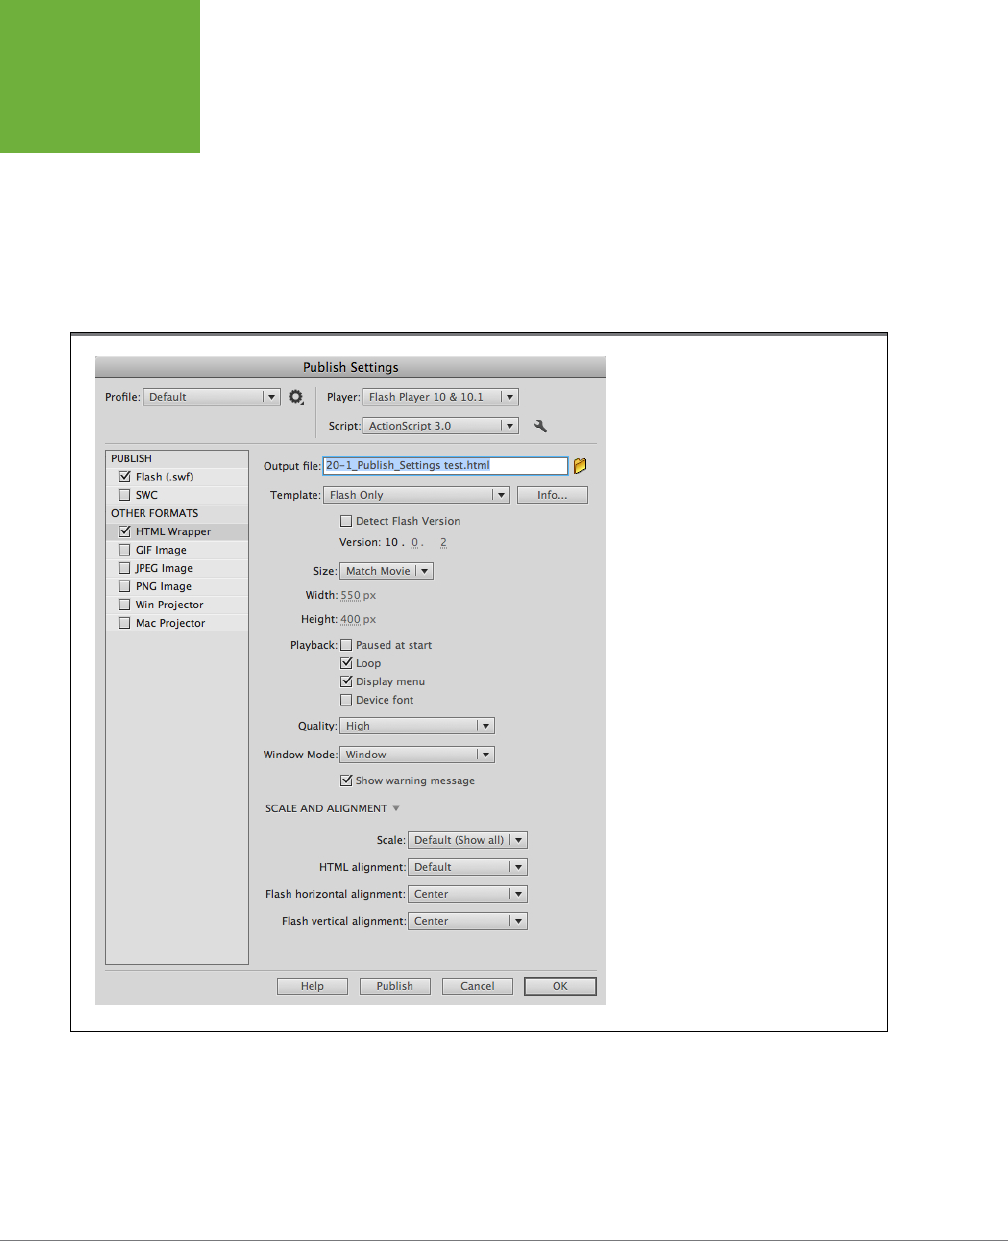
FLASH CS6: THE MISSING MANUAL
686
PUBLISHING
YOUR
ANIMATIONS
tags into the template it uses. In that case, you may need one of the following
options:
• Flash for Pocket PC 2003. Creates an HTML file that runs on Pocket
PC2003.
• Flash HTTPS. Choose this option if you plan to upload your HTML and SWF
file to a secure web server (https://).
• Flash Only. Creates a basic HTML file that runs in any web browser.
FIGURE 20-10
These settings let you tell Flash how you
want your animation to be included in your
web page. This option is great for testing
the way your animation looks on the web,
as well as for creating simple pages. But if
you want a really sophisticated web page,
you need to edit the HTML file that Flash
produces—either in a text editor, or in a
web page creation tool like Dreamweaver.
• Flash Only—Allow Full Screen. Used only with Flash Player 9 or later. This
option adds a parameter to the HTML code that lets Flash content run in
Full Screen mode. The animation can fill an entire monitor without menus,
borders, or the other usual computer paraphernalia.
www.it-ebooks.info

CHAPTER 20: PUBLISHING AND EXPORTING 687
PUBLISHING
YOUR
ANIMATIONS
• Flash with AICC Tracking. Choose this option if you’ve added Learning
Interaction components (Window→Common Libraries→Learning Interac-
tions) to your animation and plan to have these components interact with
an AICC learning management system. (AICC stands for Aviation Industry
CBT Committee.)
• Flash with FSCommand. Choose this option if you’ve included the
ActionScript
fscommand()
statement in your animation. (
fscommand()
lets your Flash animation call a JavaScript statement. JavaScript is the
scripting language supported by most web browsers. Adobe warns that
fscommand()
may not work with Flash Player 10 and later.) The alterna-
tive ExternalInterface should be used instead. Details are available in the
ActionScript 3.0 Reference.
• Flash with Named Anchors. Choose this option if you’ve organized your
animation into named scenes (Chapter 15). Flash generates the tags neces-
sary to let people surf directly from scene to scene using their browsers’
Back buttons.
• Flash with SCORM 1.2 Tracking and Flash with SCORM 2004 Tracking.
Choose one of these options if you’ve added Learning Interaction com-
ponents (Window→Common Libraries→Learning Interactions) to your
animation, and plan to have these components interact with a SCORM
learning management system. (SCORM stands for Shareable Content
Object Reference Model.)
• Image Map. Choosing this option tells Flash to create an HTML image map
(which an HTML-savvy person can turn into hotspots). For this option to
work, you need to have added the frame label
#map
to the frame you want
Flash to turn into an image map, and you need to have chosen GIF Image
(.gif), JPEG Image (.jpg), or PNG Image (.png) in addition to HTML (.html)
in the Formats tab of the Publish Settings window. (Chapter 15 explains
how to add frame labels.)
6. If you chose Flash Only, “Flash Only – Allow Full Screen,” or Flash HTTPS in
the previous step, you can now turn on Detect Flash Version to help make
sure your audience has the correct version of Flash Player to view your
animation.
When you turn on the checkbox for this option, if your audience has a version
of Flash Player older than the one you specified, they see a message, which
explains that they need a newer version and gives them a link to download the
latest version. (See the box on page 690 for further advice.)
7. Turn on any of the following settings if you’d like to tweak how your anima-
tion appears in the web page—which may be dierent from how it appears
in Flash on the stage:
• Size. Lets you tell Flash how large you want your animation to appear in
the web page. Your options are Match Movie, which tells Flash to use the
www.it-ebooks.info

FLASH CS6: THE MISSING MANUAL
688
PUBLISHING
YOUR
ANIMATIONS
dimensions of the stage you specified in the Document Properties win-
dow (page 516); Pixels, which tells Flash you want to specify new height
and width dimensions in pixels; and Percent, which tells Flash you want
to specify new height and width dimensions as a percentage of the web
page display (see below).
• Width/Height. Lets you specify your animation’s width and height in the
web page in pixels or as a percentage of the web page.
• Paused at start. Tells Flash
not
to begin playing your animation as soon
as your audience loads your web page into their browser. If you choose
this option, make sure you either turn on Display menu (see below) or—a
better solution—make sure you’ve included an obvious Play button in your
animation. Otherwise, your audience won’t be able to play your masterpiece.
• Loop. Tells Flash to automatically play your animation over and over again.
• Display menu. Tells Flash to include a shortcut menu for your animation
so that when your audience right-clicks (Windows) or Control-clicks (Mac),
they see animation controller options like Zoom In, Zoom Out, Play, Loop,
Rewind, Forward, and Back.
• Device font. This option applies only to Windows computers. It provides
antialiased (smoothed) system fonts for fonts that aren’t on your audi-
ence’s computers.
• Quality. Tells Flash how precisely (and how processor-intensively) you want
it to
render
, or draw, your animation on your audience’s computers. Your
options range from Low to Best.
• Show Warning Messages. Initially, this option is turned on to display mes-
sages if there are conflicts with the HTML tags that are used in your project.
8. Choose one of the following Window Mode settings to tell Flash how you
want your animation to appear with respect to HTML/DHTML content that
you add to your .html file:
• Window. This standard mode tells Flash to place your animation in a rectan-
gular area on the web page. HTML content can appear around the animation.
• Opaque Windowless. Tells Flash to place your animation on top of HTML
content.
• Transparent Windowless. Tells Flash to erase the background of your
animation (the blank parts of the stage) so that HTML and DHTML content
can show through.
9. Choose from the Scale and Alignment options to size and position your
animation with respect to the rest of your page.
www.it-ebooks.info

CHAPTER 20: PUBLISHING AND EXPORTING 689
PUBLISHING
YOUR
ANIMATIONS
• Default (Show All). Fits as much of the animation into the height/width
dimensions you set as possible without stretching or distorting the anima-
tion. If there’s extra room left over, Flash fills in the empty spaces with black
bands, letterbox style.
• No border. Fits as much of the animation into the height/width dimensions
you set as possible without stretching or distorting the animation. If there’s
extra room left over, Flash crops it.
• Exact fit. Stretches (or squishes) the animation to fit the height/width
dimensions you set.
• No scale. Tells Flash to preserve the stage height/width dimensions you
set in the Document Properties dialog box.
• HTML alignment options include Default (center), Left, Right, Top, or
Bottom.
• Flash horizontal alignment. Tells Flash how you want to align your anima-
tion with respect to the dimensions you set in the Publish Settings dialog
box—in other words, how you want to position your animation horizontally
inside the width-and-height box you’re adding to your web page. Your op-
tions include Left, Center, and Right.
NOTE See step 7 if you want to align the width-and-height box with respect to your web page (as opposed
to aligning your animation with respect to the width-and-height box, which you do using “Flash alignment,” as
described on this page).
• Flash vertical alignment. Tells Flash how you want to align your animation
with respect to the dimensions you set in the Publish Settings dialog box;
in other words, how you want to position your animation vertically inside
the width-and-height box you’re adding to your web page. Your options
include Top, Center, and Bottom.
NOTE You need to know when Flash encounters problems so that you can fix them, so make sure the “Show
warning messages” option is always turned on. Turning on this option tells Flash to pop up any errors that happen
during the publishing process.
10. Click Publish.
The Publish Settings window disappears, and Flash generates both an HTML
file and a Flash file based on the names you provide. If you don’t type names
of your own choosing, Flash names both files based on your .fla filename. For
example, if the name of your Flash document is
myAnimation.fla
, Flash generates
a file named
myAnimation.html
and
myAnimation.swf
. To make your HTML file
and Flash animation available on the Web, you need to upload both of these
files to your web server.
www.it-ebooks.info

FLASH CS6: THE MISSING MANUAL
690
PUBLISHING
YOUR
ANIMATIONS
TIP Sometimes, after you’ve published your .html and .swf files, you may want to change the name of your
web page (.html) to match the other pages on your website. You can do that without a problem, as long as you
don’t change the extension (.html). On the other hand, if you change the name of your animation (.swf), say
from
myAnimation.swf
to
thatAnimation.swf
, the HTML code won’t know how to find it, and it won’t run in the
web page.
The Problem with Detecting Your Audience’s Flash Version
If you create an animation that uses only Flash 11 (or greater)
features, your audience won’t be able to play it in an earlier
version of Flash Player. But how do you know which version
of Flash Player your audience has installed? And if it turns out
they
are
running an earlier version, how can they see your
animation?
The easiest approach to this dilemma is the one most Flash-
ionados opt for: using the Detect Flash Version publishing
option described on page 687.
But making people jump through hoops before they can see
your animation isn’t always the best design choice. For one
thing, not everyone wants to stop what they’re doing and
download yet another plug-in. For another, folks in many
corporate settings aren’t allowed to download and install
software of any kind, even a free Flash Player.
Fortunately, hoop-jumping isn’t necessary: Computers excel at
this kind of automatic detect-this-and-do-that process. With
a little bit of elbow grease, you can devise a more seamless,
professional approach, like one of these:
• Detecting your audience’s installed Flash Player and
automatically displaying a version of your animation that
runs in that player.
• Having your HTML file substitute a static image or
animated GIF file if it doesn’t find the correct Flash Player.
• Having your animation download and install the correct
version of Flash Player for your audience so they don’t
have to.
Many Flash programming folks use another option, called
SWFObject, to detect the presence of a Flash Player in their
audience’s browsers. A small chunk of JavaScript code—
SWFObject 2—is easy to use and works with both HTML and
XHTML. You can find SWFObject and more details at
www.
adobe.com/devnet/flashplayer/articles/swfobject.html
.
DESIGN TIME
Publishing a Frame as a Static Image File
It may seem odd that Flash lets you publish a frame of your animation as a single,
static image—after all, the point of using Flash is creating animations, not images.
But publishing your animation as an image file (in addition to publishing it as a Flash
file) can be a savvy design choice: If some people don’t have Flash Player installed
on their machines and so can’t see your animation, at least they can see your open-
ing frame. Also, sometimes web designers use static images produced by Flash as
graphic links to the animation.
NOTE When you
do
choose to publish an image file, you’re the one who needs to create the HTML to display
that image file; Flash doesn’t do it for you when you select the HTML Wrapper option in the Formats tab of the
Publish Settings window.
www.it-ebooks.info

CHAPTER 20: PUBLISHING AND EXPORTING 691
PUBLISHING
YOUR
ANIMATIONS
PUBLISHING A STATIC GIF
GIF (Graphic Interchange Format) files are super-small, thanks in part to the fact that
they limit your image to 256 colors. GIF files are the best choice for vector images
containing just a few areas of solid color.
NOTE Another way to create static images is to export them by choosing File→Export→Export Image
(page 701).
To publish a frame of your animation as a static GIF file:
1. In the timeline, click to select the frame you want to publish.
Flash highlights the selected frame. On the stage, you see the image you’re
about to publish.
NOTE Another way to tell Flash which frame you want to publish is to add the frame label
#Static
to the
frame you want to publish. Make sure you’ve selected a file type (like GIF, JPEG, or PNG) for the image as described
in step 3. Chapter 15 (page 524) shows you how to label a frame.
2. Choose File→Publish Settings.
The Publish Settings dialog box appears.
3. Turn on the checkbox next to “GIF Image.”
The GIF settings appear in the dialog box as shown in Figure 20-11. If you don’t
see the GIF settings, click the words “GIF Image” next to the checkbox.
4. Choose one or more of the following publishing options:
• Match movie. Tells Flash to create a GIF image the same size as the stage.
• Size (Width/Height). Tells Flash how large you want the GIF file to be,
in pixels. These options are available only if you haven’t turned on “Match
movie” (see above).
• Playback (Static/Animated). Tells Flash whether to create a static GIF file
or an animated GIF file. Make sure you turn on Static. (Page 697 shows you
how to create an animated GIF file.)
• Loop Continuously and Repeat times are used only with animated GIFs.
• Optimize colors. Lowers file size as much as possible without sacrificing
image quality. Always make sure you turn this option on.
• Interlace. Tells Flash to create a GIF that downloads in several passes, so
that a fuzzy version appears first, then a clearer version, then a still clearer
version, and so on. Turning on this option doesn’t reduce download time,
but it does give your audience quick successive “tastes” of the image while
they’re waiting—useful for very large images.
www.it-ebooks.info
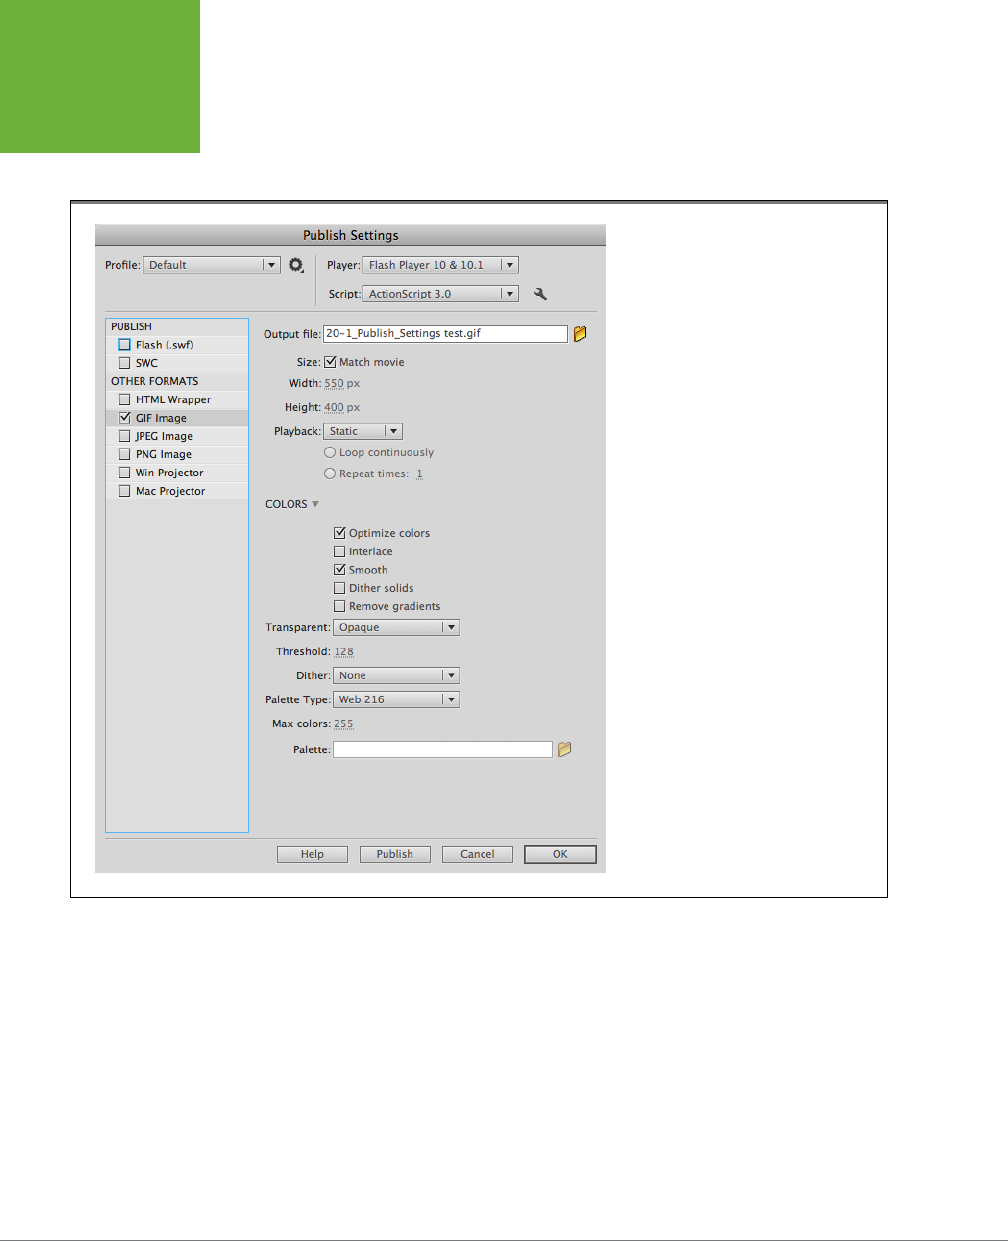
FLASH CS6: THE MISSING MANUAL
692
PUBLISHING
YOUR
ANIMATIONS
• Smooth. Tells Flash to smooth (antialias) your image. Turning on this op-
tion may improve the look of any text your image contains; it can also save
a few bytes.
FIGURE 20-11
GIFs are generally the most compact of the
three static image file formats, but they’re
also the most restrictive: They can display
at most 256 colors. (If the image you’re
exporting contains a bunch of custom
colors, your GIF may look slightly off.) Two
different types of GIFs exist: static and
animated. In this section, you see how to
publish frame content to a static GIF.
• Dither solids. Tells Flash to attempt to match any solid custom colors
you’ve used as closely as it can by combining two colors. If you don’t turn
on this option, Flash chooses the nearest-in-shade solid color in its palette.
• Remove gradients. Tells Flash to convert the gradients in your image to
solid colors. (Gradient eects don’t translate well to the GIF format anyway,
so if your image contains gradient eects, you probably want to turn on
this option.)
• Transparent. Lets you specify the transparency of your image background
(the blank area of the stage). Your options include Opaque (a regular, solid
www.it-ebooks.info

CHAPTER 20: PUBLISHING AND EXPORTING 693
PUBLISHING
YOUR
ANIMATIONS
background), Transparent (no background), or Alpha and Threshold (lets
you choose how transparent you want the background to appear).
• Dither. Tells Flash to
dither
(mix two colors) to try to match all the non-
solid areas of your image as closely as possible. Your options include None
(no dithering), Ordered (minimal dithering, minimal file size increase), and
Diusion (maximum dithering, maximum file size increase).
• Palette Type. Lets you tell Flash which 256 colors to use to create the
GIF image. (GIFs are limited to 256 colors, but you get to pick which 256.)
Your options include Web 216 (web-safe colors), Adaptive (non-web-safe
colors), Web Snap Adaptive (a mix of web-safe and non-web-safe colors),
and Custom (lets you specify a color palette you’ve saved as an .act file,
using a program like Fireworks). Depending on the image you’re publishing,
one of these options may yield better-looking results—although in most
cases, you want to leave this option set to Web 216.
• Max colors. Available only if you’ve selected a palette type of Adaptive or
Web Snap Adaptive (see above), this option lets you specify a maximum
number of colors lower than 256 to save on file size.
• Palette. Available only if you’ve selected a palette type of Custom (see
above), this option lets you type the filename of your own custom color
palette. The palette has to have been created using another program, like
Fireworks, and saved with the .act file extension. If you prefer, you can click
the file icon to browse your computer for the palette filename.
5. Click Publish.
The Publish Settings window disappears, and Flash generates a GIF file based on
the name you set in the Formats tab. If you didn’t type a name, Flash names the
GIF file based on your .fla filename. For example, if the name of your Flash docu-
ment is
myAnimation.fla
, then Flash generates a file named
myAnimation.gif
.
PUBLISHING A JPEG
JPEG (Joint Photographic Experts Group) files typically don’t end up being as small
as GIF files, but they can contain many more colors. Sometimes referred to as the
“photo format,” JPEG is the best choice if your image, like a scanned-in photograph,
contains lots of colors, subtle shading, or gradient eects.
To publish a frame of your animation as a JPEG file:
1. In the timeline, click to select the frame you want to publish.
Flash highlights the selected frame. On the stage, you see the image you’re
about to publish.
2. Choose File→Publish Settings.
The Publish Settings dialog box appears.
www.it-ebooks.info
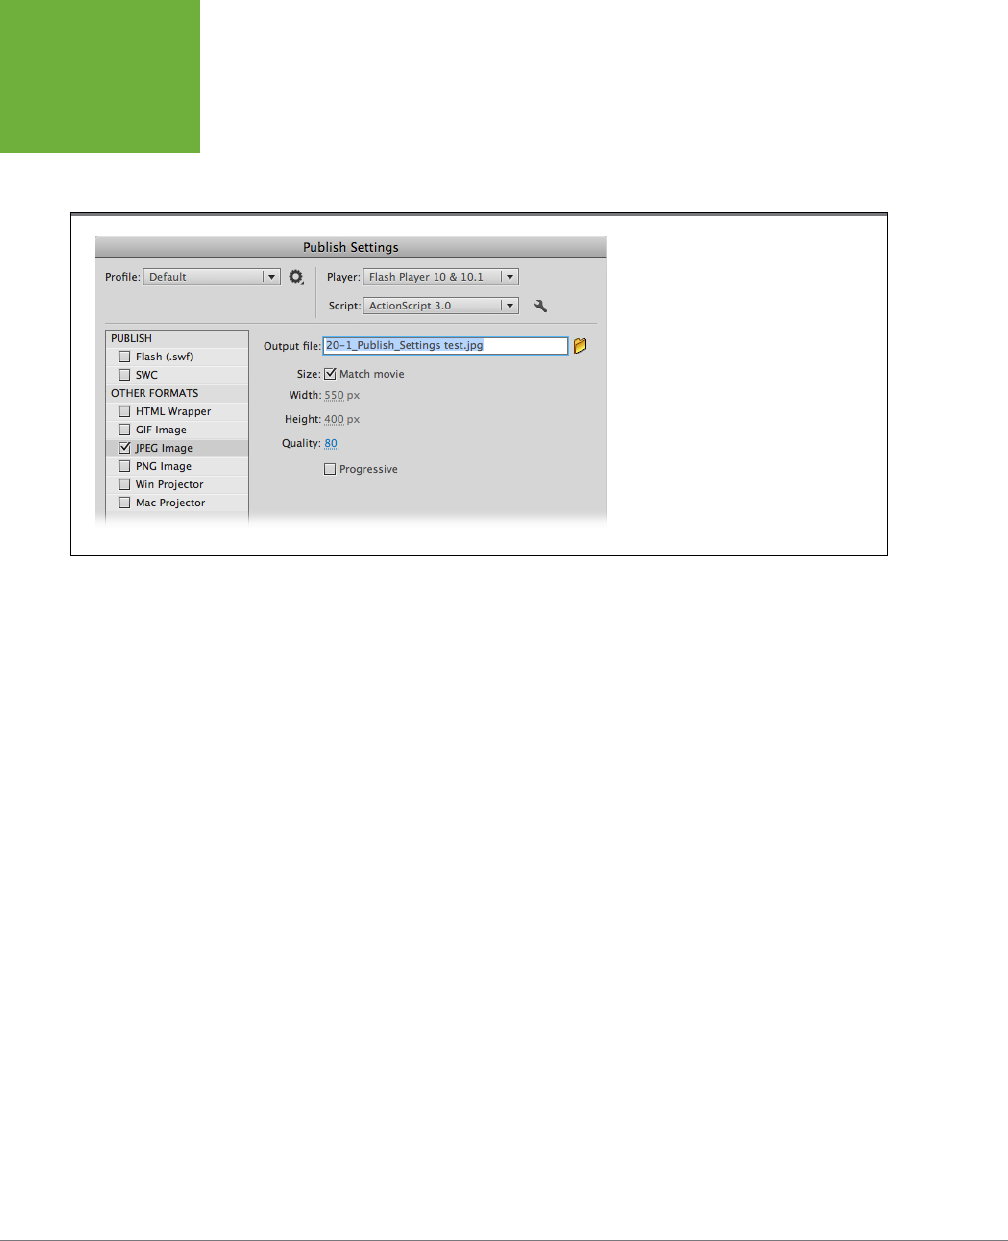
FLASH CS6: THE MISSING MANUAL
694
PUBLISHING
YOUR
ANIMATIONS
3. Turn on the checkbox next to JPEG Image.
The JPEG publishing settings shown in Figure 20-12. appear. If you don’t see the
JPEG settings, click the words “JPEG image” next to the checkbox.
FIGURE 20-12
Publishing a frame of your animation as a
JPEG file is a pretty cut-and-dried process.
As you can see here, the only options Flash
gives you are to specify your image’s size
and quality.
4. Choose one or more of the following publishing options:
• Size: Match movie tells Flash to create a JPEG image the same size as
the stage.
• Width/Height. Tells Flash how large you want the JPEG file to be, in pixels.
These options are available only if you haven’t turned on “Match movie,”
described on page 687.
• Quality. Tells Flash how much detail you want it to include. The larger the
number you type (or specify by dragging the slider), the better your JPEG
image will look, and the larger your JPEG file size will be. (Depending on
your particular image, the image quality may appear similar enough at dif-
ferent quality levels that you can get away with a lower number, thereby
whittling away at your animation’s finished file size. See page 671 for more
on optimization.)
• Progressive. Similar to the GIF Interlace option (page 691), turning on this
option tells Flash to create a JPEG that downloads in several passes, so
that a fuzzy version appears first, then a clearer version, then a still clearer
version, and so on. Turning on this option doesn’t reduce download time,
but it does give your audience quick successive “tastes” of the image while
they’re waiting, which some audiences appreciate.
5. Click Publish.
The Publish Settings window disappears, and Flash generates a JPEG file
based on the name you set in the Formats tab. If you didn’t type a name, then
www.it-ebooks.info

CHAPTER 20: PUBLISHING AND EXPORTING 695
PUBLISHING
YOUR
ANIMATIONS
Flash names the JPEG file based on your .fla filename. For example, if the
name of your Flash document is
myAnimation.fla
, Flash generates a file named
myAnimation.jpg
.
PUBLISHING A PNG
Developed to replace and improve on the GIF file format (back when it looked like
web developers would have to pay royalties for every GIF they produced), the PNG
(Portable Network Graphics) file format oers the best of both worlds: the tiny file
size of a static GIF with the support for 24-bit color of a JPEG. PNG files can include
transparent (alpha) eects, too.
To publish a frame of your animation as a PNG file:
1. In the timeline, click to select the frame you want to publish.
Flash highlights the selected frame. On the stage, you see the image you’re
about to publish.
2. Choose File→Publish Settings.
The Publish Settings dialog box appears.
3. Turn on the checkbox next to PNG Image.
The PNG publishing settings shown in Figure 20-13 appear. If you don’t see the
PNG settings, click the words “PNG Image” next to the checkbox.
4. Choose one or more of the following publishing options:
• Size: Match movie. Tells Flash to create a PNG image the same size as
the stage.
• Width/Height. Tells Flash how large you want the PNG file to be, in pixels.
These options are available only if you haven’t turned on “Match movie,”
described on page 691.
• Bit depth. Tells Flash how many colors you want the PNG to be able to
render. Your options include 8-bit (256 colors, the same as GIF), 24-bit
(16.7 million colors), and 24-bit with Alpha (16.7 million colors, plus the
ability to render your image background as transparent). The more colors,
the larger the file size.
• Optimize colors. Reduces file size without sacrificing the quality of your
image. You always want to turn this option on.
• Interlace. Tells Flash to create a PNG that downloads in several passes, so
that a fuzzy version appears first, then a clearer version, then a still clearer
version, and so on. Turning on this option doesn’t reduce download time,
but it does give your audience quick successive “tastes” of the image while
they’re waiting—useful for very large images.
www.it-ebooks.info
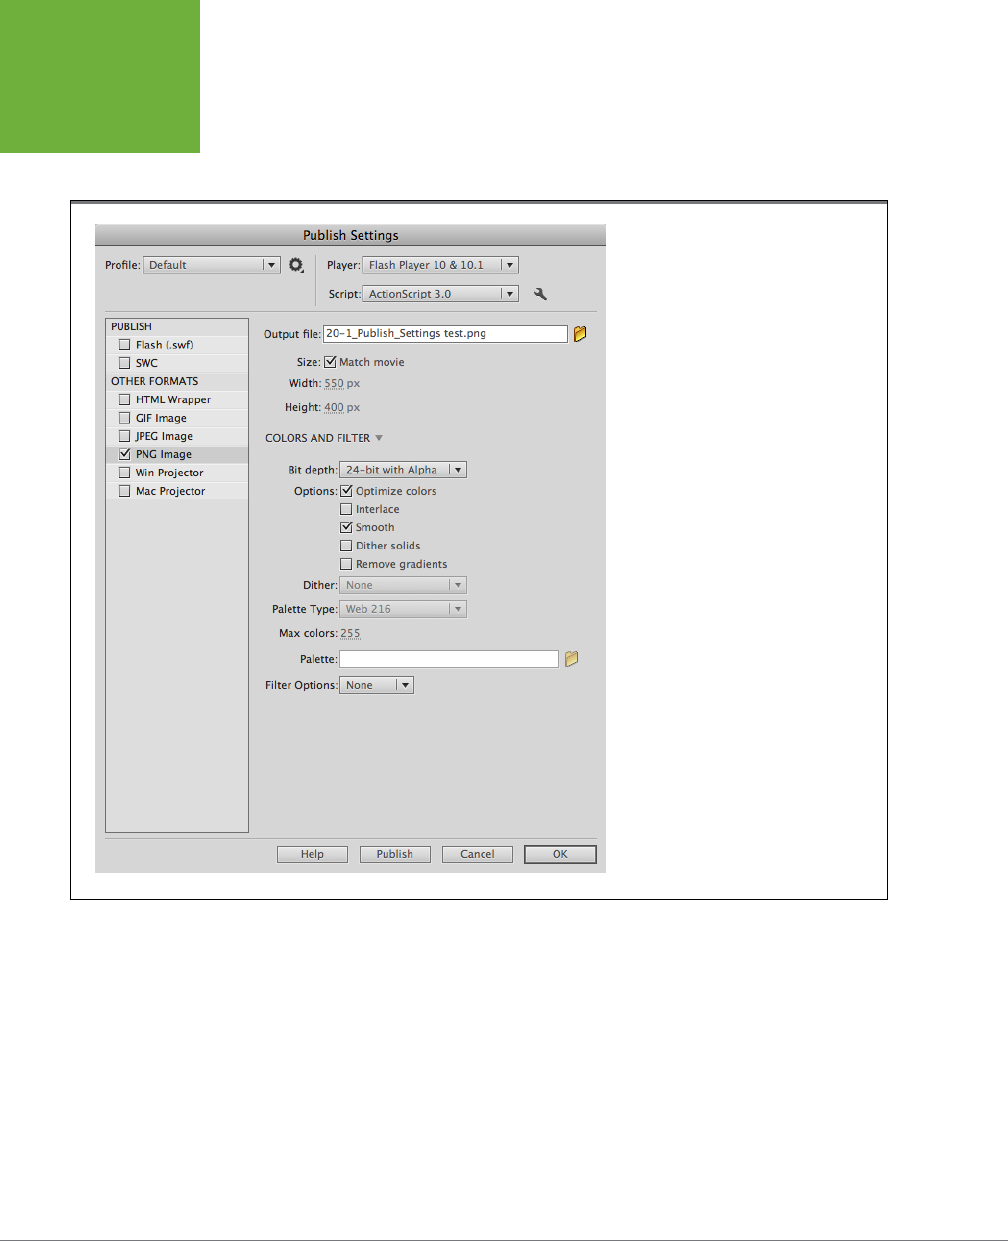
FLASH CS6: THE MISSING MANUAL
696
PUBLISHING
YOUR
ANIMATIONS
• Smooth. Tells Flash to smooth (antialias) your image. Turning on this option
may improve the look of any text your image contains; it can also save a
few bytes of file size.
FIGURE 20-13
Some older web browsers—for example,
Internet Explorer versions 6 and earlier—
don’t completely support PNG files. If you
want to publish a static image but you’re
not sure which browser your audience has
installed, you may want to opt for GIF or
JPEG instead.
• Dither solids. Tells Flash to attempt to match any solid custom colors you’ve
used as closely as it can by combining two colors (only necessary if you
choose a bit depth of 8-bit, as described above). If you don’t turn on this
option, then Flash chooses the nearest-in-shade solid color in its palette.
• Remove gradients. Tells Flash to convert the gradients in your image to
solid colors to save on file size.
• Dither. Tells Flash to
dither
(mix two colors) to try to match all the nonsolid
areas of your image as closely as possible (necessary only if you’ve chosen
a bit depth of 8-bit). Your options include None (no dithering), Ordered
www.it-ebooks.info

CHAPTER 20: PUBLISHING AND EXPORTING 697
PUBLISHING
YOUR
ANIMATIONS
(minimal dithering, minimal file size increase), and Diusion (maximum
dithering, maximum file size increase).
• Palette Type. Available only if you chose a bit depth of 8-bit (see page
695), this option lets you tell Flash which 256 colors to use to create the
PNG image. Your options include Web 216 (web-safe colors), Adaptive (non-
web-safe colors), Web Snap Adaptive (a mix of web-safe and non-web-safe
colors), and Custom (lets you specify a color palette you’ve saved as an
.act file, using a program like Fireworks). Depending on the image you’re
publishing, one of these options may yield better-looking results—although
in most cases, you want to leave this option set to Web 216.
• Max colors. Available only if you’ve selected a Palette Type of Adaptive or
Web Snap Adaptive (see above), this option lets you specify a maximum
number of colors lower than 256 to save file size.
• Palette. Available only if you’ve selected a Palette Type of Custom (see
above), this option lets you type the filename of your own custom color
palette. The palette has to have been created using another program, like
Fireworks, and saved with the .act file extension. If you prefer, you can click
the file icon to browse your computer for the palette filename.
• Filter options. This option lets you tell Flash to apply an additional com-
pression algorithm when it’s creating your PNG file. Normally, you don’t
use this option unless you’re trying to pare down your PNG file by a few
bytes. Your options include None, Sub, Up, Average, Paeth, and Adaptive.
5. Click Publish.
The Publish Settings window disappears, and Flash generates a PNG file based
on the name you provide. If you don’t type a name, Flash names the PNG filename
based on your .fla filename. For example, if the name of your Flash document
is
myAnimation.fla
, Flash generates a file named
myAnimation.png
.
Publishing as an Animated GIF
In addition to static images, the GIF file format lets you create animated images.
Animated GIFs are mini-animations that play right in the web browser, with no need
for a Flash Player add-in. The quality isn’t always stellar, and your audience can’t
interact with them (which is why Flash was invented). But depending on how long
your animation is, and what quality of playback you’re shooting for, they can be an
impressive alternative.
To publish your animation as an animated GIF file:
1. Choose File→Publish Settings.
The Publish Settings dialog box appears.
2. Turn on the checkbox next to GIF Image.
The GIF publishing options shown in Figure 20-14 appear.
www.it-ebooks.info
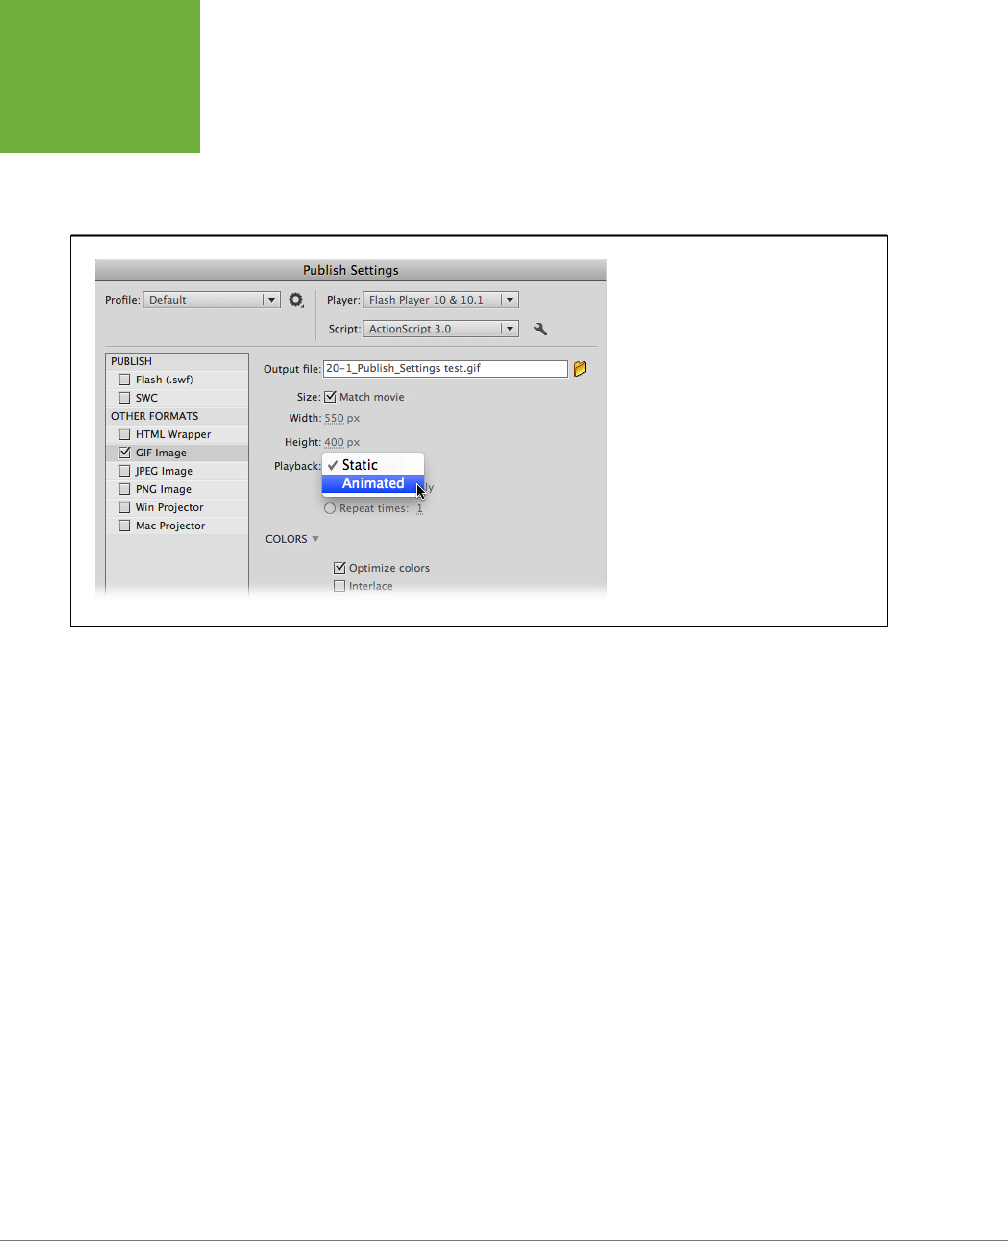
FLASH CS6: THE MISSING MANUAL
698
PUBLISHING
YOUR
ANIMATIONS
3. Set the publishing options you see in Figure 20-14 just as you would for a
static GIF file (page 691), except for the following:
• Static/Animated. This option tells Flash whether to create a static or ani-
mated GIF file. Make sure you turn on Animated.
FIGURE 20-14
Animated GIFs are amazing creatures:
small, decent quality (especially if you’re
only talking about a few frames), and as
easy to include in an HTML file as a static
GIF file (the basic line of HTML code you
need is <img src=“yourGIF.gif”/>). The only
extra settings you have to specify for an
animated GIF, as opposed to a static GIF,
are whether you want the animated GIF to
loop continuously, loop a few times, or not
loop at all.
• Loop continuously. Turn on this option to tell Flash to replay the animated
GIF over and over again.
• Repeat times. Tells Flash to create an animated GIF that automatically
plays the number of times you type into the “times” box.
4. Click Publish.
The Publish Settings window disappears, and Flash generates a GIF file based
on the name you set in the Formats tab. If you didn’t type a name, then Flash
names the GIF file based on your .fla filename. For example, if the name of
your Flash document is
myAnimation.fla
, then Flash generates a file named
myAnimation.gif
.
Publishing as a Standalone Projector
A
projector
is the equivalent of an .swf file and a copy of Flash Player all rolled up
into a single executable file. When you create a projector, your audience doesn’t
need to have either a web browser or Flash Player installed on their computers: All
they need to do to play your animation is to run the projector file.
You’ll want to choose this option if you want to deliver your animation on a CD or
DVD (as opposed to over the web). Tutorials, product demonstrations, and program
mock-ups (as well as the programs themselves) are all examples of the kinds of
animations you might want to publish as projectors.
www.it-ebooks.info

CHAPTER 20: PUBLISHING AND EXPORTING 699
EXPORTING
FLASH TO
OTHER
FORMATS
NOTE If you plan to distribute a Flash projector to folks outside your company, take a look at the Adobe
Player Distribution License, a legalese description of what you can and can’t do with your projector files. Adobemay
change the location of this document, but the time of this writing, you can find a copy online at
www.adobe.com/
products/players/fpsh_distribution1.html
.
To publish your animation as a standalone projector:
1. Choose File→Publish Settings.
The Publish Settings dialog box appears.
2. Turn on the checkbox next to one or both of the following, depending on
the operating system you expect your audience to be running:
• Windows Projector (.exe) to create a projector that runs on Windows.
• Macintosh Projector to create a projector that runs on the Mac.
3. Click Publish.
If you chose “Windows Projector (.exe),” Flash generates an .exe file. If you chose
Macintosh Projector, Flash generates an .app file. Flash names the files basedon
the names displayed in the Formats tab. For example, if the name of your Flash
document is
myAnimation.fla
, Flash generates files named
myAnimation.exe
or
myAnimation.app
.
Exporting Flash to Other Formats
Exporting
your entire animation—or one or more of the individual frames that make
up your animation—is very similar to publishing. In both cases, you get to specify
which file format you’d like Flash to write, and in both cases, you get to tweak file
settings based on the file format you choose. Flash designates the most common
file formats (.html, .swf, .gif, .jpg, .png, and projector files) as publishing destina-
tions, and all other file formats as export destinations. Most of the time, you’ll export
(rather than publish) an image, sound, or your entire animation when you want to
work with it in another graphics or animation program.
To export to a single frame image, select File→Export→Export Image. To export to
an animation (multiframe) file format or an audio format, select File→Export→Export
Movie. In Flash Professional CS6, there are very few dierences in the available for-
mats for Macs and PCs. The most significant is that Windows computers can write
to the Windows BMP, AVI, and WAV formats. Table 20-1 shows the available formats.
TABLE 20-1
File formats to which you can export your Flash animation
FORMAT EXTENSION NOTE
SWF movie .swf Single frame image
Adobe FXG .fxg Single frame image
www.it-ebooks.info
FLASH CS6: THE MISSING MANUAL
700
EXPORTING
FLASH TO
OTHER
FORMATS
FORMAT EXTENSION NOTE
Bitmap .bmp Single frame image
JPEG image .jpg Single frame image
GIF image .gif Single frame image
PNG image .png Single frame image
SWF movie .swf Animation
Windows AVI (Windows
only)
.avi Animation
QuickTime .mov Animation
Animated GIF .gif Animation
WAV audio (Windows only) .wav Audio
JPEG sequence .jpg Animation
GIF sequence .gif Animation
PNG sequence .png Animation
Exporting to HTML5 with CreateJS
As web standards evolve, HTML5, CSS and JavaScript have
taken on some of the functions that were originally in Flash’s
domain. What’s a Flash designer/developer to do with all
those hard earned Flash skills. Well, one new thing you can
do is develop projects in Flash and export them to HTML5 with
a third party extension called CreateJS (
www.createjs.com
). It
won’t be suitable for every project you create. For example, the
CreateJS extension knows how to work with Classic tweens, but
at the time this was written it couldn’t handle motion tweens.
To use CreateJS, you need to download the extension and then
install it using the Adobe Extension manager. After you’ve
done that, you’ll find the Toolkit for CreateJS panel under
Windows→Other Panels→Toolkit for CreateJS.
You can run the extenstion by going Command→Publish to
CreateJS.
GEM IN THE ROUGH
Exporting the Contents of a Single Frame
Exporting the contents of a single frame of your animation lets you create a one-
frame animation or (more commonly) an image file you can edit with another
image-editing program.
www.it-ebooks.info
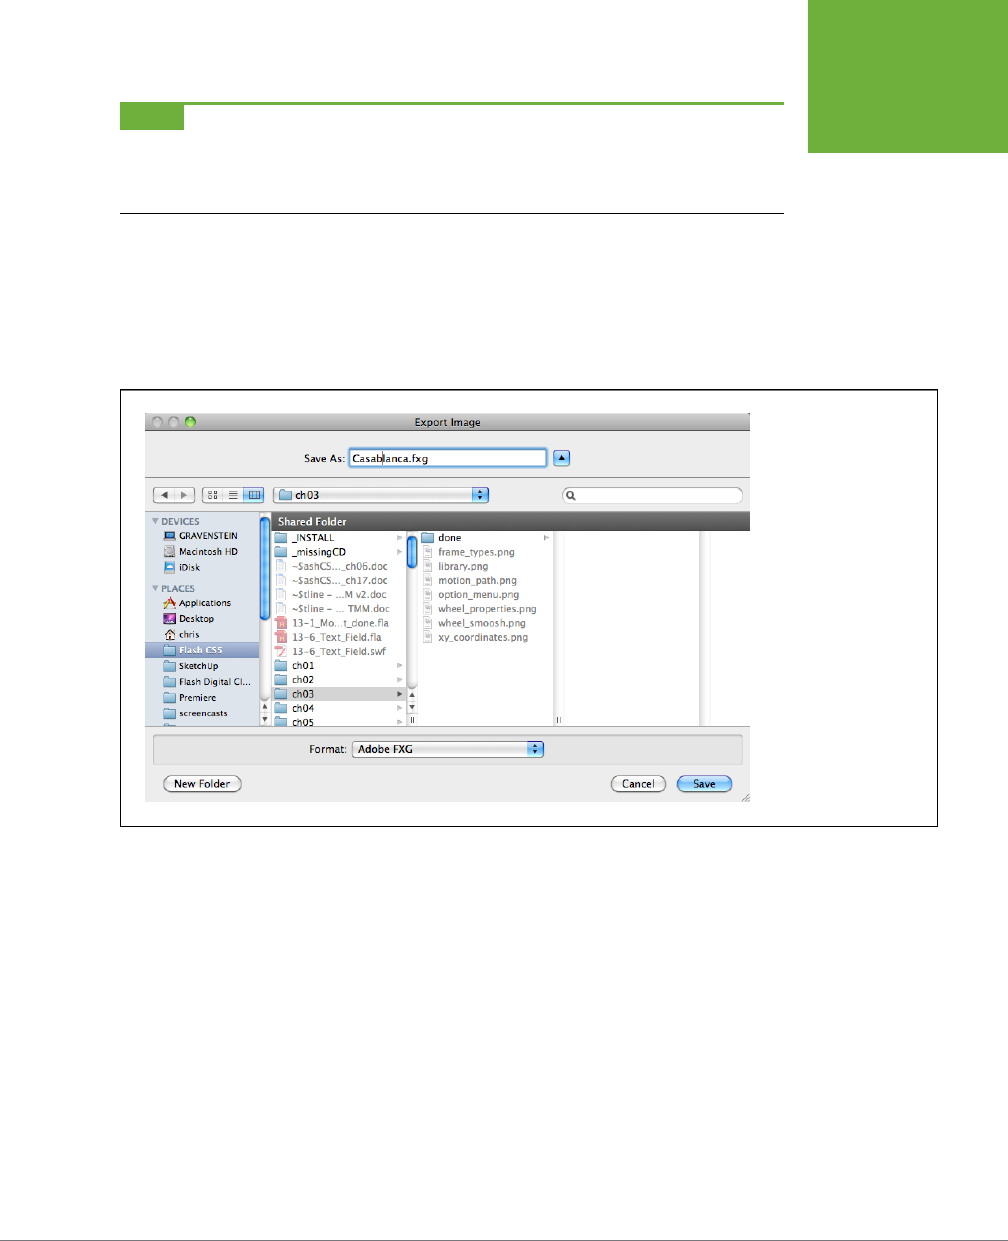
CHAPTER 20: PUBLISHING AND EXPORTING 701
EXPORTING
FLASH TO
OTHER
FORMATS
NOTE Exporting an image from one animation and then importing the image into another animation is
one way to share images between Flash documents. You can also share by saving the image as a graphic symbol
in one animation, and then using the Library panel’s drop-down list to add the symbol to another animation, as
described in Chapter 7.
1. On the stage, click to select the frame you want to export.
Flash highlights the selected frame.
2. Choose File→Export→Export Image.
The Export Image dialog box you see in Figure 20-15 appears.
FIGURE 20-15
The Export Image dialog
box lets you export a
frame to standard image
formats: SWF movie,
Adobe FXG, JPEG, GIF, or
PNG file.
3. From the pop-up menu, choose the file format to which you want to export.
In Windows, this menu is called “Save as type”; on the Mac, it’s called Format.
4. In the Filename (Save As) box, type a name for your exported file.
Leave the file extension Flash suggests.
5. Click Save.
Flash displays an Export window containing format-specific settings, as shown
in Figure 20-16.
www.it-ebooks.info
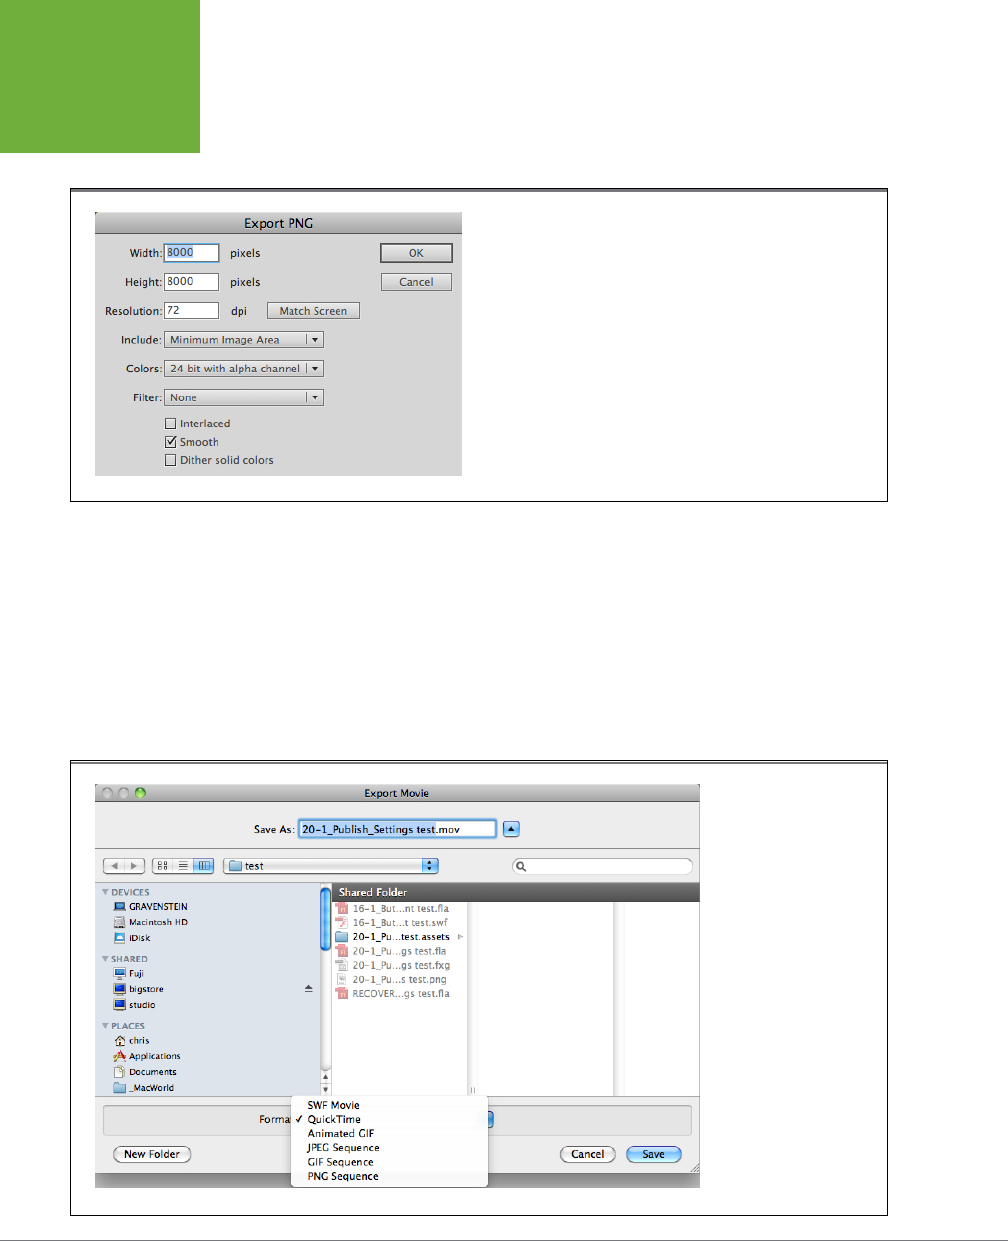
FLASH CS6: THE MISSING MANUAL
702
EXPORTING
FLASH TO
OTHER
FORMATS
6. In the Export window, set one or more export options, and then click OK.
Flash exports the contents of your frame to the file format you chose in step 3.
FIGURE 20-16
The settings window you see after you click Save (and even whether
you see one or not) depends on the format you’re exporting to. Here,
you see the settings window for the PNG format.
Exporting an Entire Animation
Exporting your animation to another file format lets you edit the animation using
another animation program, like Apple’s QuickTime. You might want to do this if,
for example, you want to combine frames from Flash and QuickTime animations
into a single animation.
1. Choose File→Export→Export Movie.
The Export Movie dialog box you see in Figure 20-17 appears.
FIGURE 20-17
The Export Movie dialog
box lets you export your
animation to a variety of
formats, several of which
will be familiar to you if
you’ve had a chance to
check out the section on
publishing (page 677).
www.it-ebooks.info
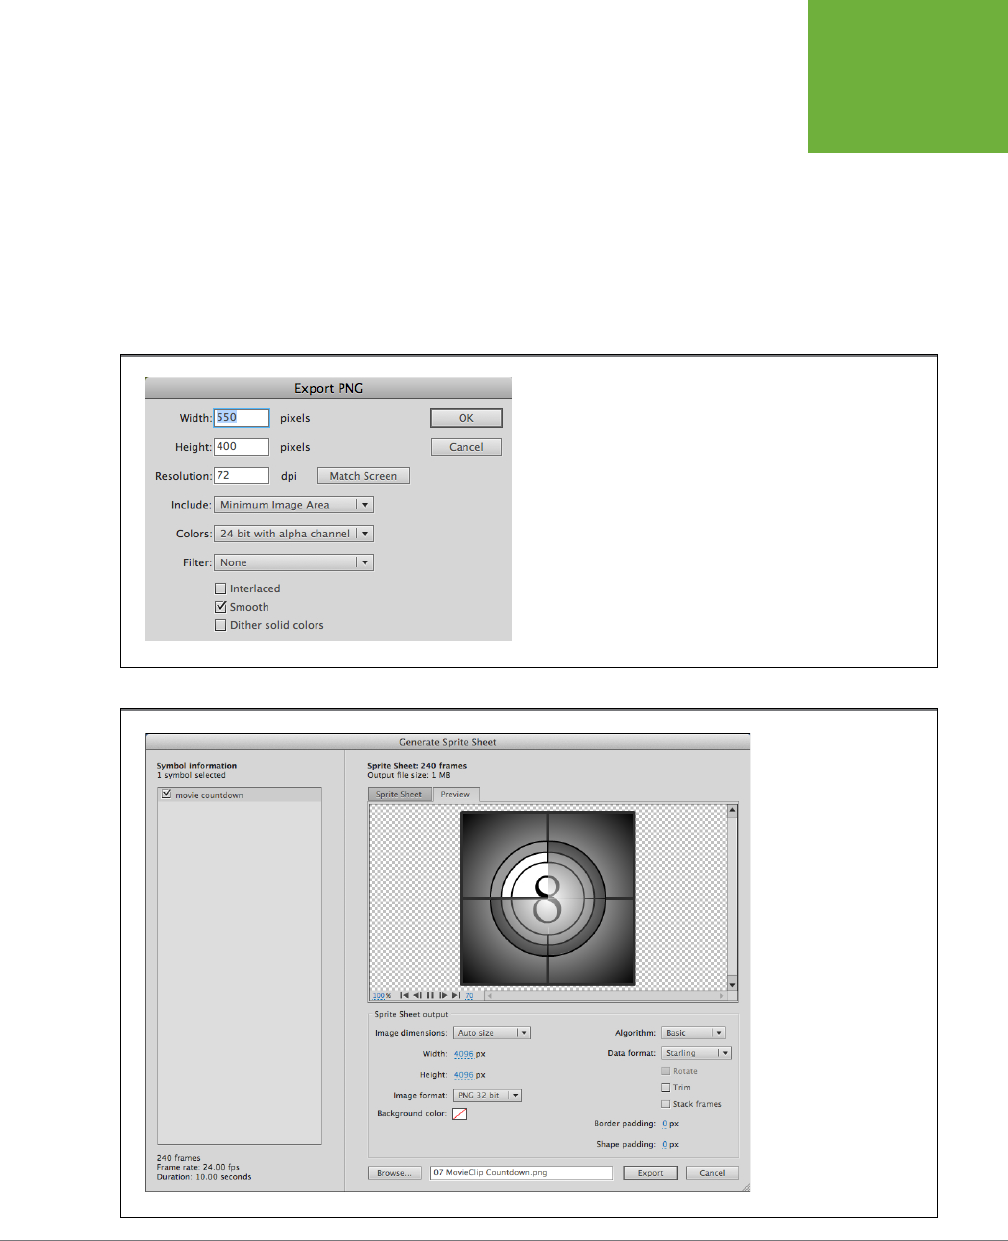
CHAPTER 20: PUBLISHING AND EXPORTING 703
EXPORTING
FLASH TO
OTHER
FORMATS
2. From the pop-up menu, choose the file format to which you want to export.
In Windows, this menu is called “Save as type”; on the Mac, it’s called Format.
3. In the Save As box, type a name for your exported file.
Leave the file extension Flash suggests.
4. Click Save.
Flash displays an Export window containing format-specific settings, as shown
in Figure 20-18.
FIGURE 20-18
When you export your animation, Flash displays the same settings you
see when you publish your animation. From Flash’s perspective, the
two processes are the same, but you may appreciate the convenience
of publishing over exporting. For example, when you publish your
animation, Flash lets you save your settings in an easy-to-reuse
publish profile (see the box on page 684). Not so when you export
your animation.
FIGURE 20-19
You can create sprite
sheets from the symbols
in your library. Sprite
sheets and their ac-
companying JavaScript
code are used for creating
animated web pages
using HTML5, CSS and
JavaScript.
www.it-ebooks.info

FLASH CS6: THE MISSING MANUAL
704
EXPORTING
FLASH TO
OTHER
FORMATS
5. In the Export window, set one or more export options, and then click OK.
Flash exports the contents of your frame to the file format you chose in step 2.
Generating Sprite Sheets from Flash
What’s a sprite sheet and why would I want to generate one?
In the olden days of the web you almost always turned to Flash
to create animations. These days there are more options be-
cause HTML, CSS and JavaScript have new capabilities. If you’re
working with a team or on an HTML only website you may want
to export a Flash animation to an HTML and JavaScript project.
So, what’s a sprite sheet and how does it fit in? Perhaps you
have an animated character such as a large desert bird that
likes to run down the highway. You have all it’s foot motions
animated and they’re stored in a Flash symbol. You could export
each frame of that animation as individual images (gif, png or
jpeg). However, that’s not the best way to serve up an animated
image on the web. It takes less time to download one large
image than it does to download lots of small images. This is
particularly important when developing games or other time-
dependent animations. Sprite sheets take advantage of this.
Each frame of your running bird animation is placed in a single
image and JavaScript code is produced to identify each frame.
You can generate a sprite sheet for a symbol, by right-clicking
it in the Library panel and choosing Generate Sprite Sheet. A
window appears (as shown in Figure 20-19) where you can
adjust settings like size and background color and choose the
image format. Clicking Export generates both the sprite sheet
and the necessary JavaScript code.
FREQUENTLY ASKED QUESTIONS
www.it-ebooks.info

705
CHAPTER
21
Flash began life as a program for creating cool animations in files small enough
to send over the Internet. Flash has evolved since then, gaining the ability to
create interactive animations using ActionScript. During the same period, the
Internet grew up, and the line between desktop applications and web-based services
has blurred. The next step in Flash’s evolution is the ability to create desktop and
mobile applications. After all, not all computers are connected to the Internet
all
the time. Better still, desktop programs don’t have the limitations of browser-based
apps, which are, for safety’s sake, restricted in the ways they can read and write to
files on your computer.
And so Adobe developed the AIR system for creating applications that run outside
a web browser. AIR lets you develop powerful applications using your Flash and
ActionScript skills, and do it quickly. This chapter introduces the concepts behind
Adobe AIR and shows you how to create a bare-bones AIR application. You’ll learn
how to convert your existing Flash animations into an AIR desktop application.
Throughout, you’ll find tips explaining where you can learn more about AIR and how
other developers are using it. The following chapters show how to apply your AIR skills
when building apps for the iPhone operating system (iOS) and Android handhelds.
Meet Adobe AIR
If you’re interested in developing desktop applications or applets that can run on
Windows, Mac, and even Linux computers, read on. AIR stands for Adobe Integrated
Runtime. In programmer-speak, a
runtime
, sometimes called a runtime environ-
ment, works sort of like a translator. You can write a program in a relatively human
Introducing Adobe AIR
www.it-ebooks.info
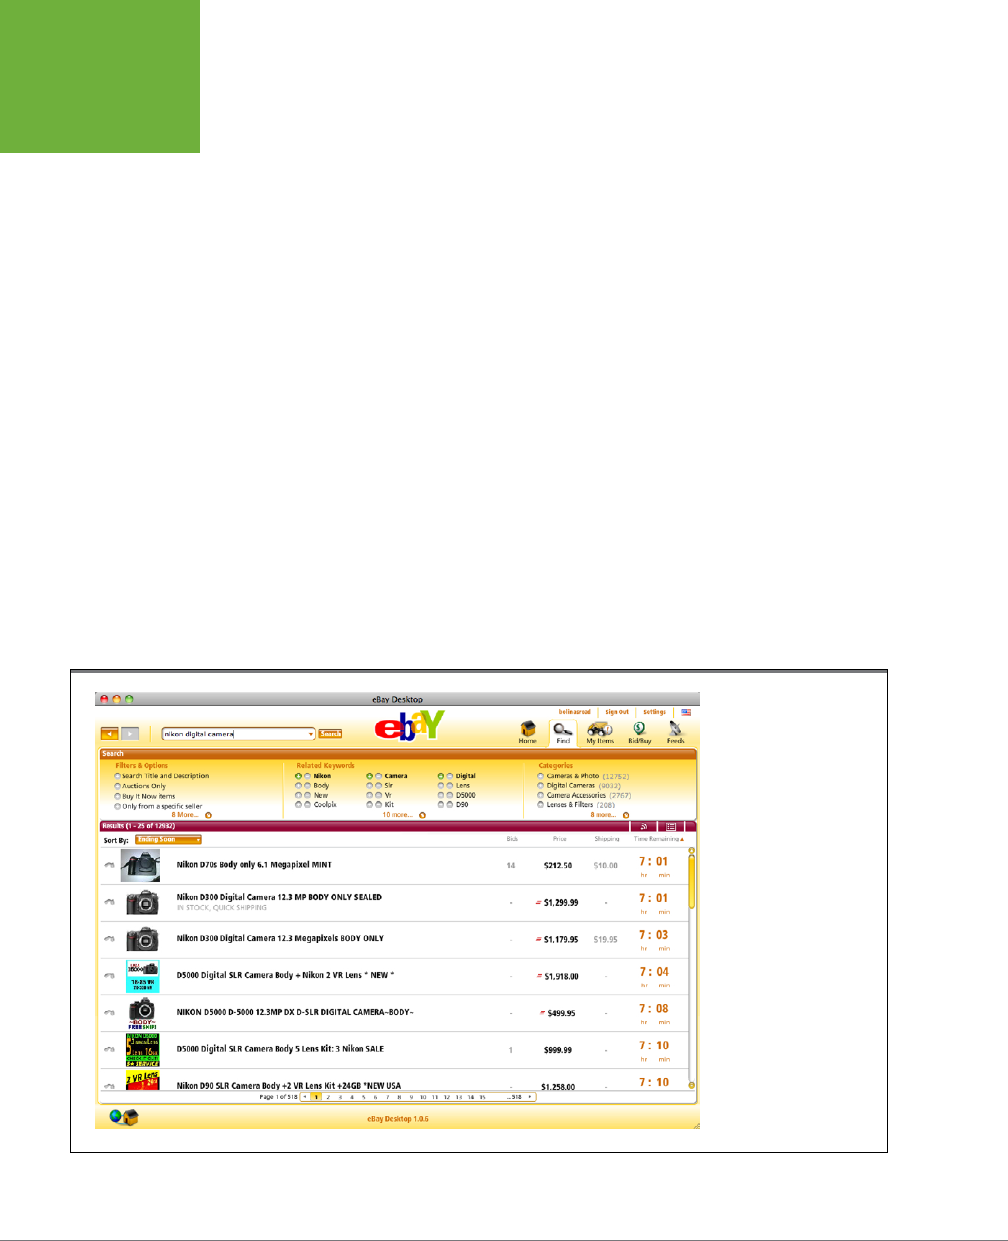
FLASH CS6: THE MISSING MANUAL
706
MEET ADOBE
AIR
language like ActionScript, and the runtime translates your code into the 1s and 0s
that a PC understands. For example, you can display an object on a computer screen
using ActionScript’s
addChild()
method—one line of code. Flash Player (the runtime
environment) pushes around a bunch of bits and bytes to manipulate specific pixels
on the screen. The fact that Adobe has Flash Players for Windows, Mac, and Linux
computers means you can write
one
Flash animation that plays everywhere. You
don’t have to worry about all the dierences among those operating systems. Adobe
has done that work for you. The same runtime concepts apply to AIR.
Like Flash Player, AIR is a runtime environment, but there are significant dierences
between AIR and Flash Player, making each suited for dierent types of projects.
From the beginning, AIR was designed to let Flash designers and web developers
use their expertise to build programs that run on computer and mobile desktops
instead of within web browsers. Many AIR programs retrieve and store data on a web
server, but they also have the ability to work with the local files on a computer in
ways not available to a browser-based app. For example, eBay Desktop ( Figure 21-1)
is an AIR app that lives on the desktop and shues data stored on a web server
when there’s an Internet connection. But other AIR applications can browse through
a computer’s file system and then open a file in the associated application; for
example, Word docs in Word, and MP3s in media players. AIR applications can be
designed to recognize when cameras, thumb drives, or other storage devices are
connected or disconnected. You can use input from microphones in your AIR app
to create audio notes or other features.
FIGURE 21-1
The eBay Desktop is an
example of an AIR appli-
cation. You install it to run
like a desktop program,
but it uses web-based
data to give you real-time
updates on auctions and
other eBay services.
www.it-ebooks.info

CHAPTER 21: INTRODUCING ADOBE AIR 707
CREATING
YOUR
FIRST AIR
APPLICATION
The
Integrated
part of the Adobe Integrated Runtime name comes from the fact
that AIR was designed as a system that gives developers the opportunity to use the
skills they’ve already learned. It’s not limited to Flash and ActionScript. If you’re an
HTML and JavaScript wizard, you can create an entire AIR application using those
tools. If you’re proficient in JavaScript and ActionScript, you can use a combination
of those tools to build your app. Naturally, Adobe hopes you’ll use its tools to create
your apps, so you’ll find AIR capabilities built into lots of its tools, not just Flash and
Flex. For example, Dreamweaver and Fireworks have AIR capabilities, too.
Dierences Between AIR and Flash
Both AIR and Flash are available for Windows, Mac, and Linux computers, so you can
focus on developing one great program and you don’t have to sweat the details of
dierent operating systems. In spite of that, there are many ways AIR applications
and Flash animations dier. Here’s a list of the main dierences:
• AIR uses the Adobe AIR runtime. Flash uses the Flash Player (also a runtime
environment).
• Most AIR applications run in a desktop window. Flash usually uses a browser
window.
• AIR programs can be developed using a combination of tools: Flash, Flex, HTML,
XML, and JavaScript. Flash animations are most often developed using Flash
Professional, Flash Builder, or Flex.
• An AIR application must be installed on a computer like any other desktop ap-
plication. Flash animations simply require that the Flash Player be present. Ac-
cording to Adobe, Flash Player is installed on well over 90 percent of computers.
• Because it’s installed on a computer like any old program, an AIR application
requires a code signing certificate. This bit of security verifies the source of the
program (see page 710). Flash animations don’t require a code signing certificate.
TIP Want to see some snazzy examples of AIR programs? Go to
http://www.adobe.com/cfusion/marketplace/
and click OSMF Marketplace. (OSMF stands for Open Source Media Framework.) As shown in (Figure 21-2) you’ll see
a variety of apps to download. They’re displayed with descriptions and ranked by users.
Creating Your First AIR Application
Developing a bare-bones AIR application is simple. If you’ve worked through a frac-
tion of the exercises in this book, you have the skills to build an AIR app. By doing
a simple “Hello, World” exercise, you’ll learn that you already have all the computer
resources and programming skills you need to produce a working application. Follow
these steps to create an animator’s version of the old, reliable “Hello, World” pro-
gram that’s given so many people their first taste of a new programming language.
www.it-ebooks.info
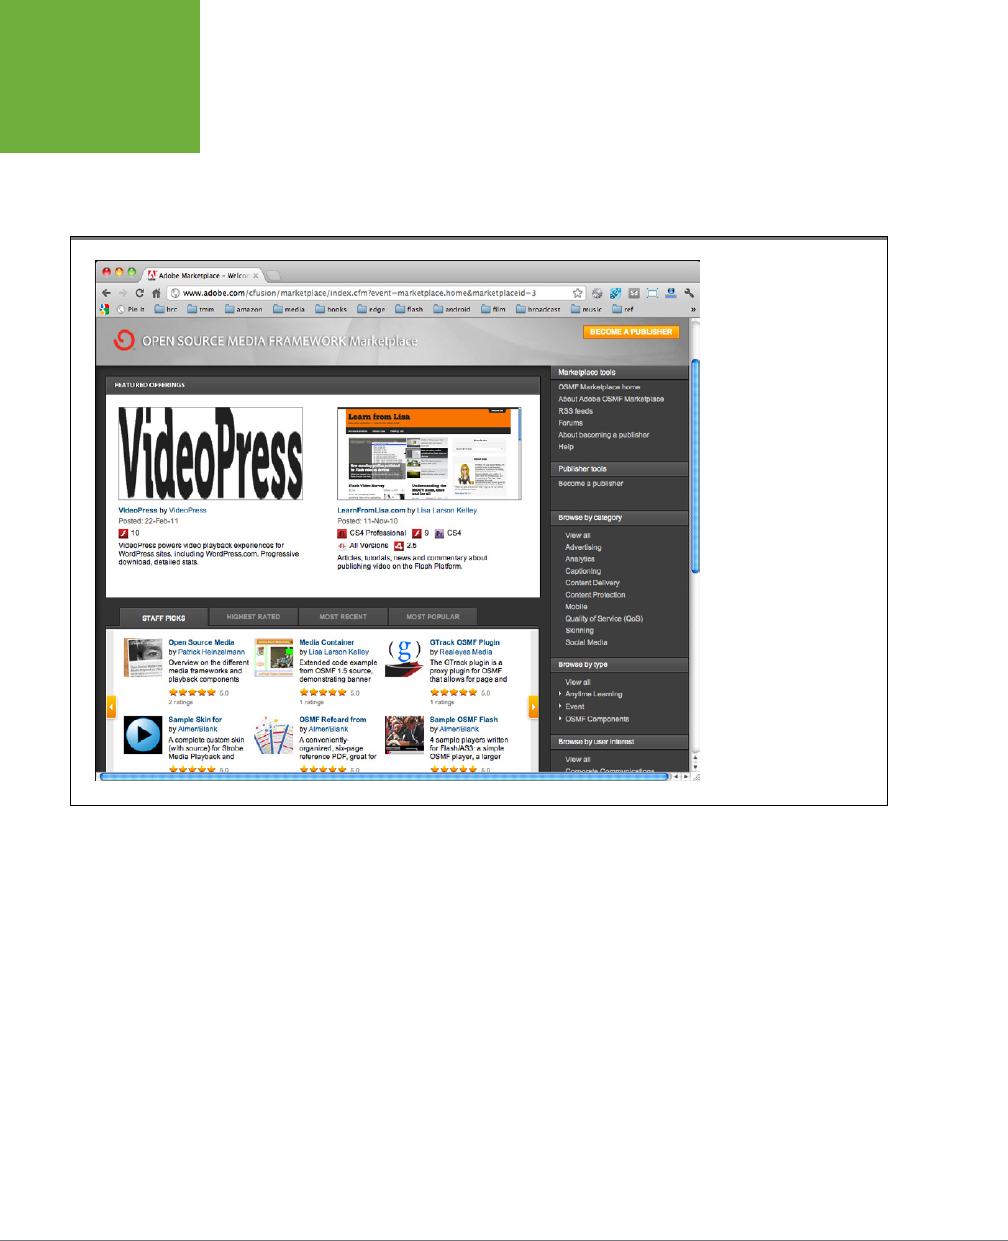
FLASH CS6: THE MISSING MANUAL
708
CREATING
YOUR
FIRST AIR
APPLICATION
1. Choose File→New→AIR, as shown in Figure 21-3.
Flash creates a new document with a stage and timeline that looks just like your
usual Flash workspace. Behind the scenes, there are dierences, because Flash
creates a document that uses the AIR runtime instead of Flash Player.
FIGURE 21-2
Taking a page from
the iTunes App Store,
Adobe created the AIR
Marketplace, where
developers can showcase
and sell their creations.
Want to learn what others
are doing with AIR? Go to
www.adobe.com/cfusion/
marketplace/
. Already
have a finished AIR app?
Maybe yours will make
the Highest Rated or Most
Popular lists.
2. Click the Text tool, and then in the Properties panel, choose TLF Text and
Read Only.
You use the same tools for AIR apps as you use for Flash animations.
3. Click the stage and type some text, such as
Hello Adobe AIR World
.
Change the font, color, and size so that it’s large and attractive on the stage.
4. In the timeline, click Frame 48 and then press F5.
Flash adds new frames to the timeline.
5. Right-click (Control-click) the timeline and then choose Create Motion
Tween.
The timeline changes to light blue, indicating a motion tween.
6. Move the playhead to Frame 48.
www.it-ebooks.info
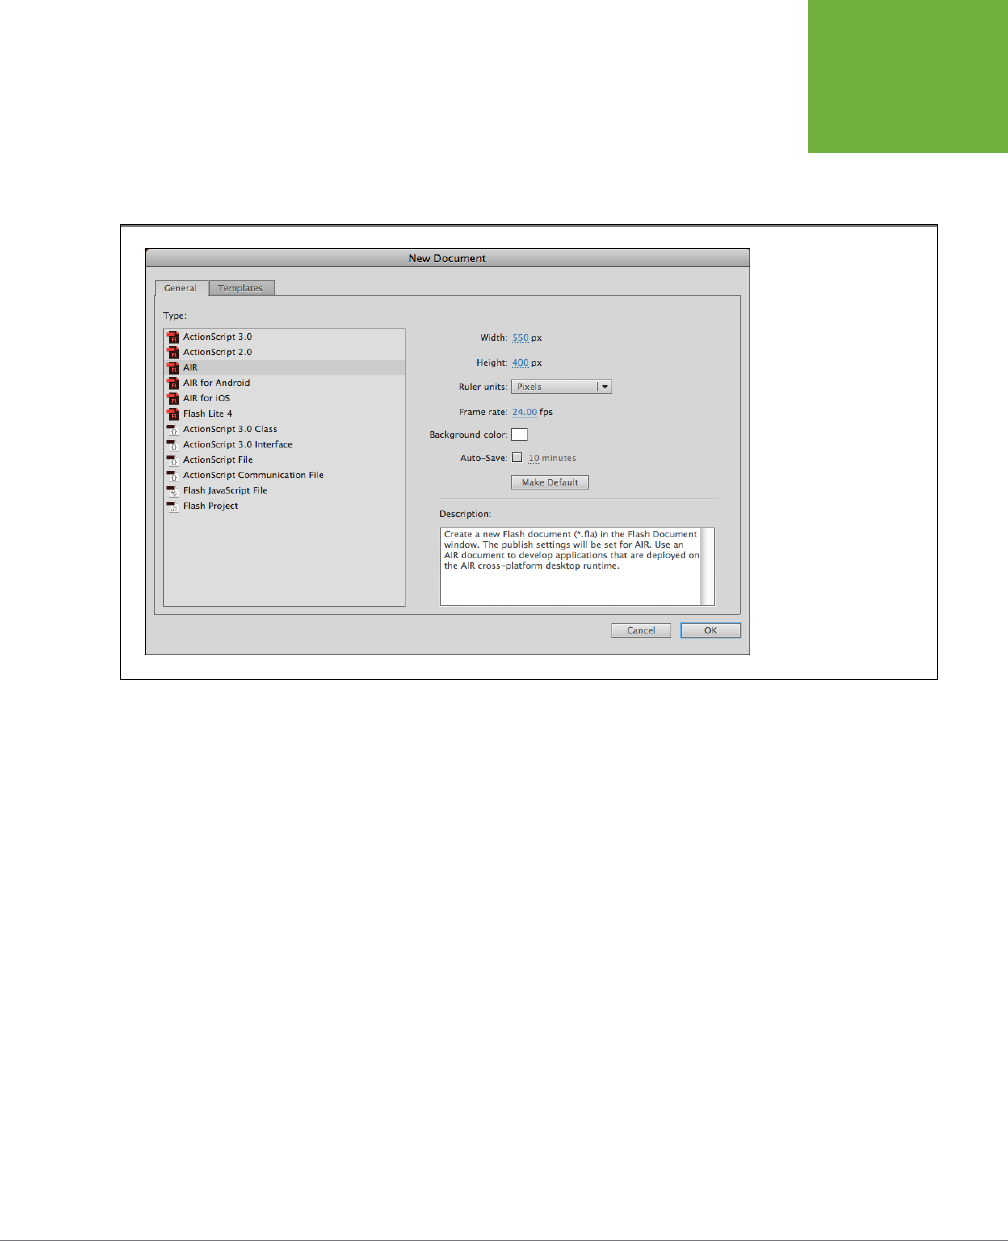
CHAPTER 21: INTRODUCING ADOBE AIR 709
CREATING
YOUR
FIRST AIR
APPLICATION
In the next step, you’ll create a new property keyframe at this location.
7. In the Transform panel (Window→
Transform), set Rotate to 720.
That’s enough to make the text field spin twice.
FIGURE 21-3
Starting an AIR project
in Flash Professional is
similar to starting any
project, but instead of
choosing ActionScript 3.0,
choose AIR 2. This way
Flash knows your project
will use the AIR runtime
instead of the Flash
Player.
8. Click the New Layer button and name the new layer actions.
Time to add a smidgen of ActionScript, just to prove that it works in AIR.
Keep in mind, your AIR applications use ActionScript 3.0 and won’t work with
ActionScript 2.0 or earlier.
9. Right-click the 48th frame of the actions layer and press F6.
A blank keyframe appears in the timeline, where you can add some code.
10. Press F9 (Option-F9) or choose Window→Actions to open the Actions panel.
You have access to the same ActionScript coding tools, including code hinting
and code snippets.
11. Type
stop();
.
This line simply stops the animation when it reaches the last frame.
12. Press Ctrl+Enter (⌘-Return).
After a little computing, your animation runs in a standard window that matches
your Windows or Mac operating system, as shown in Figure 21-4. Additional
details about the app appear in the Output panel.
www.it-ebooks.info

FLASH CS6: THE MISSING MANUAL
710
CREATE A
CODE SIGNING
CERTIFICATE
Your first attempt at an AIR project proves that the various parts work. You use the
standard tools, including tweens and ActionScript, to build applications that run in
the Adobe Integrated Runtime.
FIGURE 21-4
Simple, yes. Underwhelming, probably.
You might even say this example looks
identical to a Flash animation when you
test it. That’s true, but remember that
different things are going on under the
hood. Instead of using Flash Player, your
AIR application is powered by the AIR
runtime.
NOTE Interested in the process of developing a complex AIR app? There’s a story on Adobe TV about an
application developed by the Fiat car company. Its program uses data that’s recorded to a thumb drive while
your car is running. Plug the thumb drive into your computer at home, and the AIR app provides details on how
to drive more economically to reduce your carbon emissions. Your data is pooled with other drivers in the Fiat
community. According to the developers, the AIR app was developed in about five to six months. To find the
video, go to
http://tv.adobe.com
and search for the word Fiat. The video runs about 20 minutes, describing the
project from both the client’s and the developer’s point of view.
Create a Code Signing Certificate
In the previous exercise, you wrote an AIR app that you can test inside Flash, but
that’s about all it can do. You can’t save it in a format that runs outside Flash or share
it with your friends. If you want to produce a program that runs as a standalone
desktop app and distribute it, you need to give people a way to confirm where it’s
coming from. In other words, you need to get a
code signing certificate
. After all, if
you’re going to send this app to other people’s computers, they need to make sure
it’s really coming from you—a known and trusted source.
www.it-ebooks.info

CHAPTER 21: INTRODUCING ADOBE AIR 711
CREATE A
CODE SIGNING
CERTIFICATE
In the bad old days when the Internet was young, just about any website you
visited could install and run (or trick you into running) an evil program on your
computer. There are still bad folks out there trying to push malware onto unsus-
pecting computers, but life online is somewhat safer. The safer environment is due
in part to
certificates
—a system that authenticates the source of a program. If a
program asks you to install it on your computer, you can check its certificate to see
if it’s genuinely from, say, Adobe or Microsoft and not from 16-year-old Todd, aka
GrimHackerOfAnarchy. If you expect strangers to install your apps on their comput-
ers, you should get a code signing certificate from a company like Thawte (
www.
thawte.com
). You’ll find they aren’t cheap—about $300 for a year or $550 for two
years. When you distribute your software, people can check with Thawte or some
other certificate authority (CA) to see if you’re really who you say you are. And of
course, if something goes wrong, they’ll be able to hunt you down through the CA.
All AIR programs require a certificate before you can publish them. That certificate
can be a third-party code signing certificate from a CA, or if you’re not ready for
the big time, you can create what’s known as a
self-signed certificate
. With a self-
signed certificate, you’re vouching for yourself, which is good enough for testing
or for distributing an app among friends and colleagues who know and trust you.
If you decide to go the self-signed route for now, here’s how:
1. Choose File→New→AIR.
Flash creates a new Adobe AIR document. This step also activates some menu
options specific to AIR projects.
2. Choose File→“AIR 3.2 for Desktop Settings.”
The “Application & Install Settings” panel opens. It includes tabs labeled Gen-
eral, Signature, Icons, and Advanced. (AIR 3.2 was the latest version when this
was written. It’s likely that AIR 3.3 or some other version will appear here in
the future.)
3. Click the Signature tab.
The Signature tab displays a form where you can enter details related to code
signing certificates, as shown in Figure 21-5. The More Info button leads to the
Adobe website.
4. Next to Certificate, click the Create (New on a Mac) button.
A form like the one in Figure 21-6 appears, where you create and issue your
own certificate.
5. Fill in the form details, and then click OK.
Use your name or company name as the Publisher. All the fields need to be
filled in, but you can repeat your name in the Organization name field and use
something like
Company
or
Developer
for the Organization unit. Provide a pass-
word and leave the Type set to 1024-RSA. Click the folder next to “Saveas,” and
navigate to a folder on your computer where you want to store the certificate.
www.it-ebooks.info
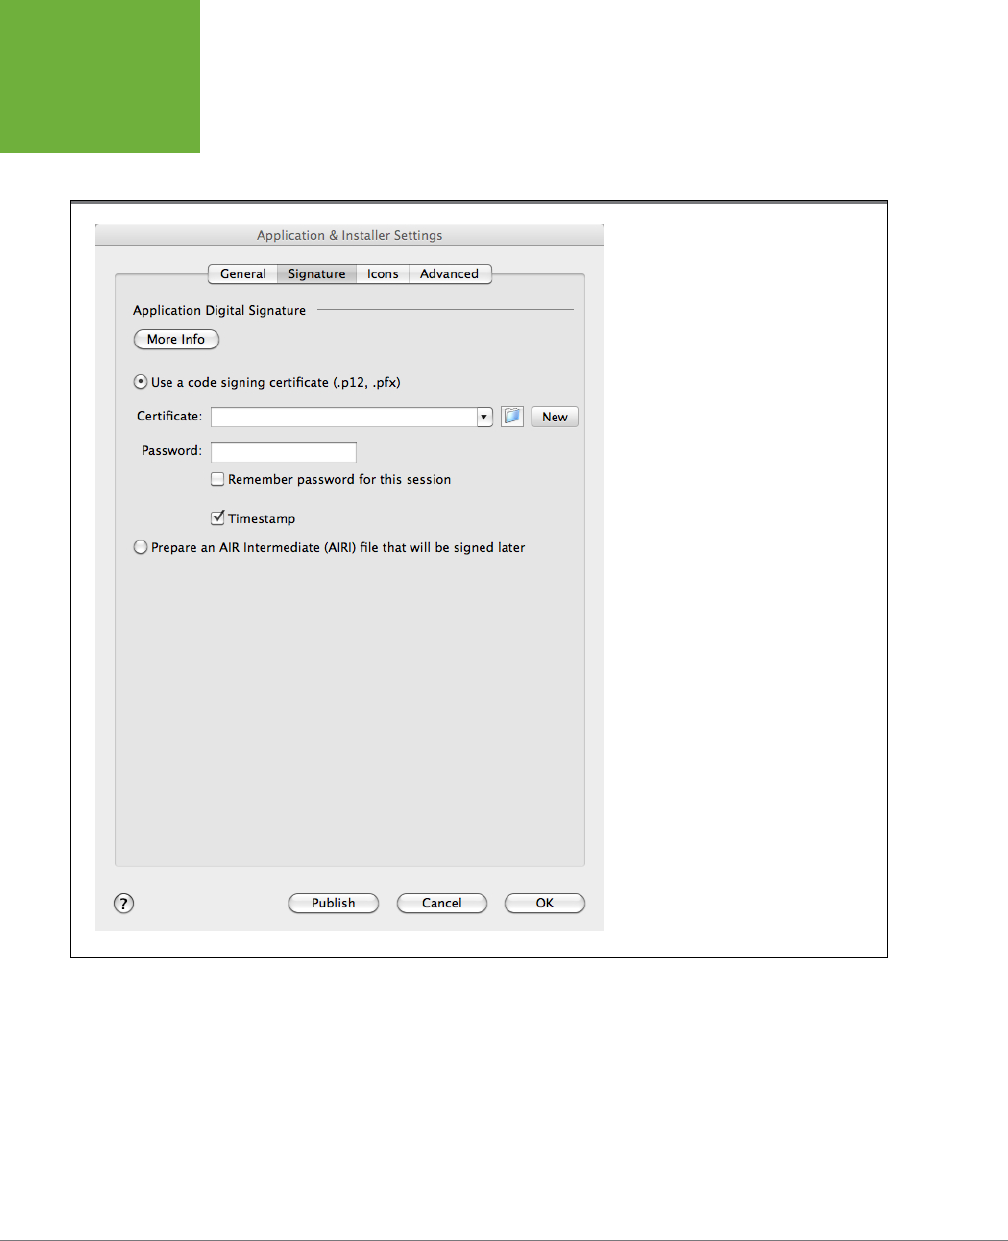
FLASH CS6: THE MISSING MANUAL
712
CREATE A
CODE SIGNING
CERTIFICATE
When you click OK, if all is well, you see a message telling you that a certificate
was created. If you missed a field or made some other mistake, you see an
alert message.
FIGURE 21-5
When you create a self-signed certificate,
you enter information about your organiza-
tion, including a name and password. If you
use a third-party certificate, the issuing
company provides details you can enter
in this form. (The Windows version looks
slightly different, but the functions are the
same.)
6. Click OK.
You return to the Signature tab, where your new certificate is listed in the
Certificate field. Unless you provided a new name, it’s named something like
mycert.p12
.
7. In the Password box, type the password you created in step 5 and turn on
“Remember password for this session.” Click OK.
www.it-ebooks.info
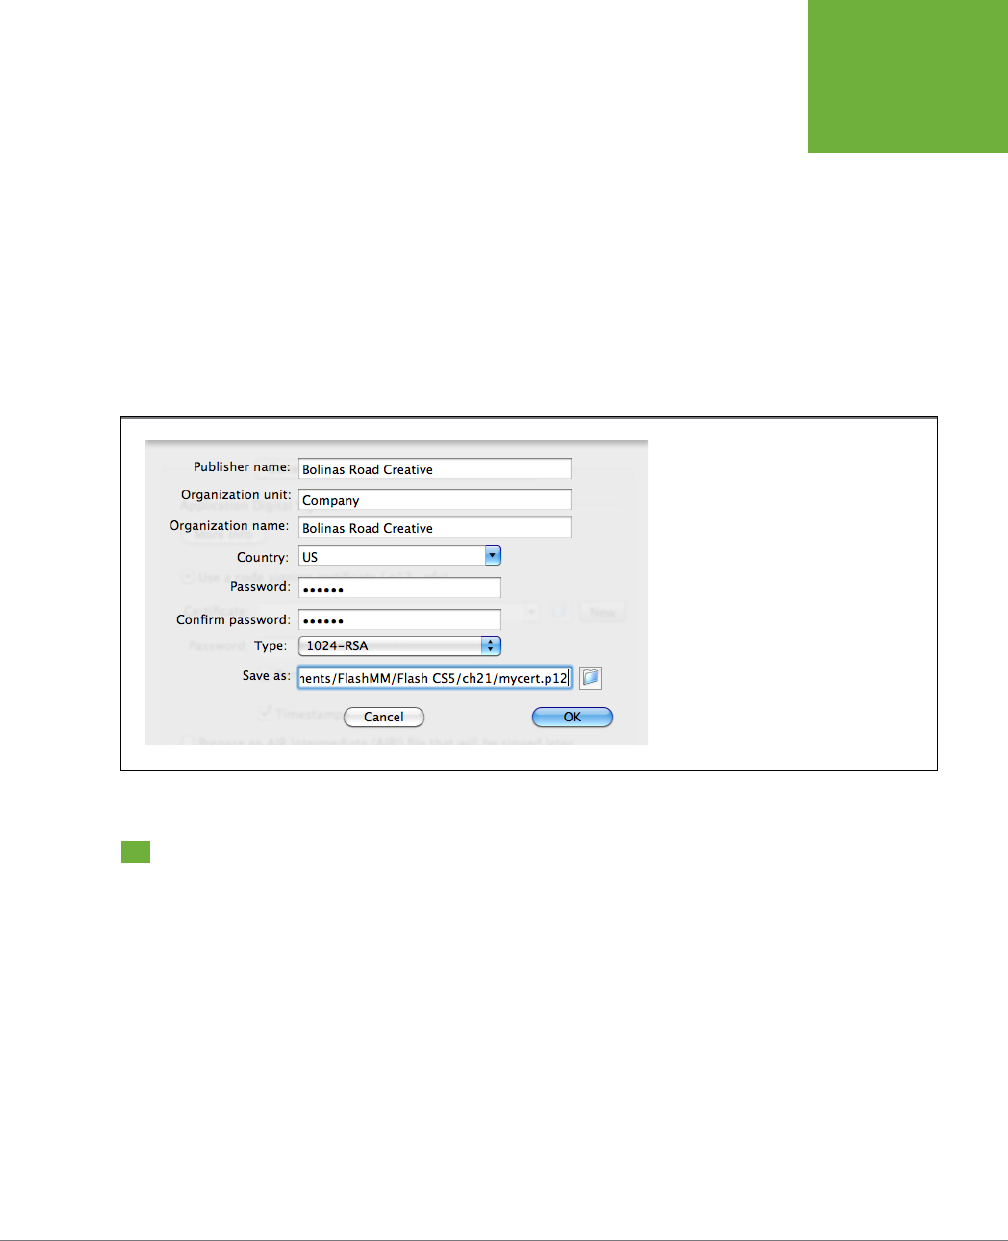
CHAPTER 21: INTRODUCING ADOBE AIR 713
CONVERT
A FLASH
ANIMATION TO
AIR
Your audience’s computers will use the certificate you create to authenticate
the files included in your AIR project. You can go ahead and Publish—that is,
compile and package—an AIR application. If you don’t have a certificate, Flash
won’t let you publish in AIR.
8. Optional: If you’re ready to publish, then instead of clicking OK, click Publish.
Flash creates the files for your AIR project, which at a minimum include a main
.swf
file and an
.xml
descriptor file. These are stored in a single
.air
file, which
is the one you distribute to your audience. If your project includes other assets
like sound or video, they’re also stored in the
.air
file. Your completed AIR app
can be distributed as a download from a website, a file on a disk, or an attach-
ment to an email. For more details on publishing, see page 677.
FIGURE 21-6
Creating a self-signed certificate is pretty
much a fill-in-the-blanks job. Flash creates
a certificate and stores it on your computer.
With this kind of certificate, you can publish
AIR apps and give them to people, but your
self-signed certificate might not be enough
if you want to distribute your app to the
world at large.
Convert a Flash Animation to AIR
If you follow the steps on page 707, you can create a new AIR application from
scratch. You can use all your Flash tools and skills to build a new application. On the
other hand, you may have a great Flash animation that you’d like to convert to AIR.
That’s not hard to do. It’s really just a matter of creating a new AIR document and
then opening your Flash project in another tab. Then you can copy content from the
Flash animation to the AIR project. To give it a try, you can use the Photo Gallery
project from Chapter 7. The file in the Missing CD (
www.missingmanuals.com/cds/
flashcs6mm
) is named
21-1_Flash_Gallery.fla
.
1. Choose File→New→Adobe AIR.
A new AIR document opens in Flash.
www.it-ebooks.info
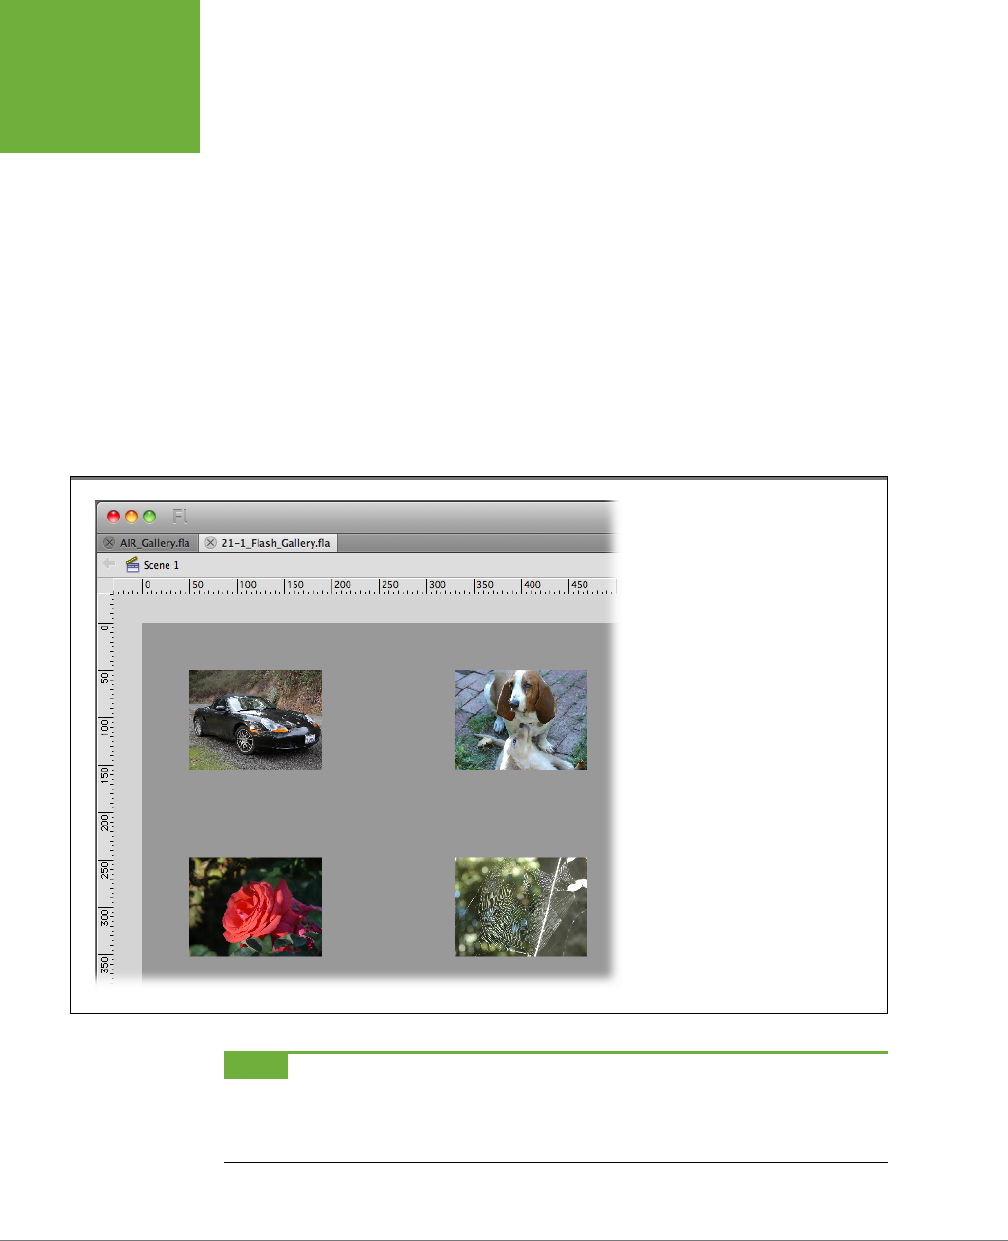
FLASH CS6: THE MISSING MANUAL
714
CONVERT
A FLASH
ANIMATION TO
AIR
2. Choose Modify→Document. Then in the Document Settings, change the docu-
ment width to
800 px
and the height to
600 px
. Set the background color to a
light gray (#999999). Click OK.
After you change the dimensions and click OK, the stage changes to the new
color and larger size.
3. Choose File→Save As, and save this empty document using the name
AIR_ Gallery.fla
.
The tab for this project changes from “untitled” to its new name: AIR_Gallery.fla.
4. Choose File→Open and then find
21-1_Flash_Gallery.fla
.
You have two documents in the Flash workspace, the AIR document and the
Flash Photo Gallery animation. As shown in Figure 21-7, the workspace holds
two projects.
FIGURE 21-7
When you have two projects open, you
can jump back and forth between them
by clicking on their tabs. In this case,
one project is a Flash animation, and the
other is an AIR project.
NOTE The Photo Gallery consists of nine photos which, when clicked, spin around and expand to fill the
stage. A second click reduces them to their former thumbnail size. Motion tweens create the animation, and event
listeners handle the mouse clicks. You’ll find
stop()
methods in the code to keep the animation from continuing
to play at key points. Labels (page 524) are used as timeline markers for the
gotoAndPlay()
methods.
www.it-ebooks.info

CHAPTER 21: INTRODUCING ADOBE AIR 715
PUBLISH
YOUR AIR
APPLICATION
5. In the
21-1_Flash_Gallery.fla
animation, drag the edge between the timeline
and the stage so you can see all the layers in the timeline.
Once all layers are visible, you see the top layer named “instructions” and the
bottom layer named “Gallery.”
6. Right-click (Control-click) any frame in the animation, and then choose
Select All Frames from the shortcut menu.
Once selected, all the frames in the animation show a blue highlight.
7. Right-click (Control-click) a second time and then choose Copy Frames
from the shortcut menu.
The contents of every frame in your animation are stored on the Clipboard.
8. Click the AIR_Gallery.fla tab.
The empty AIR project fills the workspace.
9. Right-click the first frame (the only frame) in the first layer of the timeline.
Then choose Paste Frames.
The timeline in the AIR project fills with the frames and layers that were in the
Flash animation. All the tweens and labels show in the timeline. All the layers
are named as they were in the Flash animation.
10. Click the Library or go to Window→Library.
The symbols and JPEG photos used in this project are listed in the Library.
11. Press Ctrl+Enter (⌘-Return).
The AIR project behaves like the original Flash animation.
Your AIR document now has all the assets and functions that were in the original
project. If you want to examine the code in the project, press F9 (Option-F9) and
take a peek. If you’re happy with the project, save it and go on to the next section
to publish it. If you want, you can make changes such as swapping some of the pic-
tures or developing some new features. AIR projects have capabilities not available
to Flash animations, so in the Actions panel, you’ll find AIR packages with classes,
properties, methods, and events, like those shown in Figure 21-8. For more details
and documentation, go to
http://labs.adobe.com/technologies/air
.
Publish Your AIR Application
Once you’ve got your AIR project squared away, you’ll want to test it, debug it, and
ultimately distribute it to your audience, just like a Flash animation. In Flash-speak,
that means you need to publish your project. The process for publishing an AIR
project is dierent from publishing a Flash animation. For one thing, as explained
on page 710, you need a
code signing certificate
. Usually, Flash animations consist
of one or more SWF files and sometimes some HTML code to create a web page. On
www.it-ebooks.info
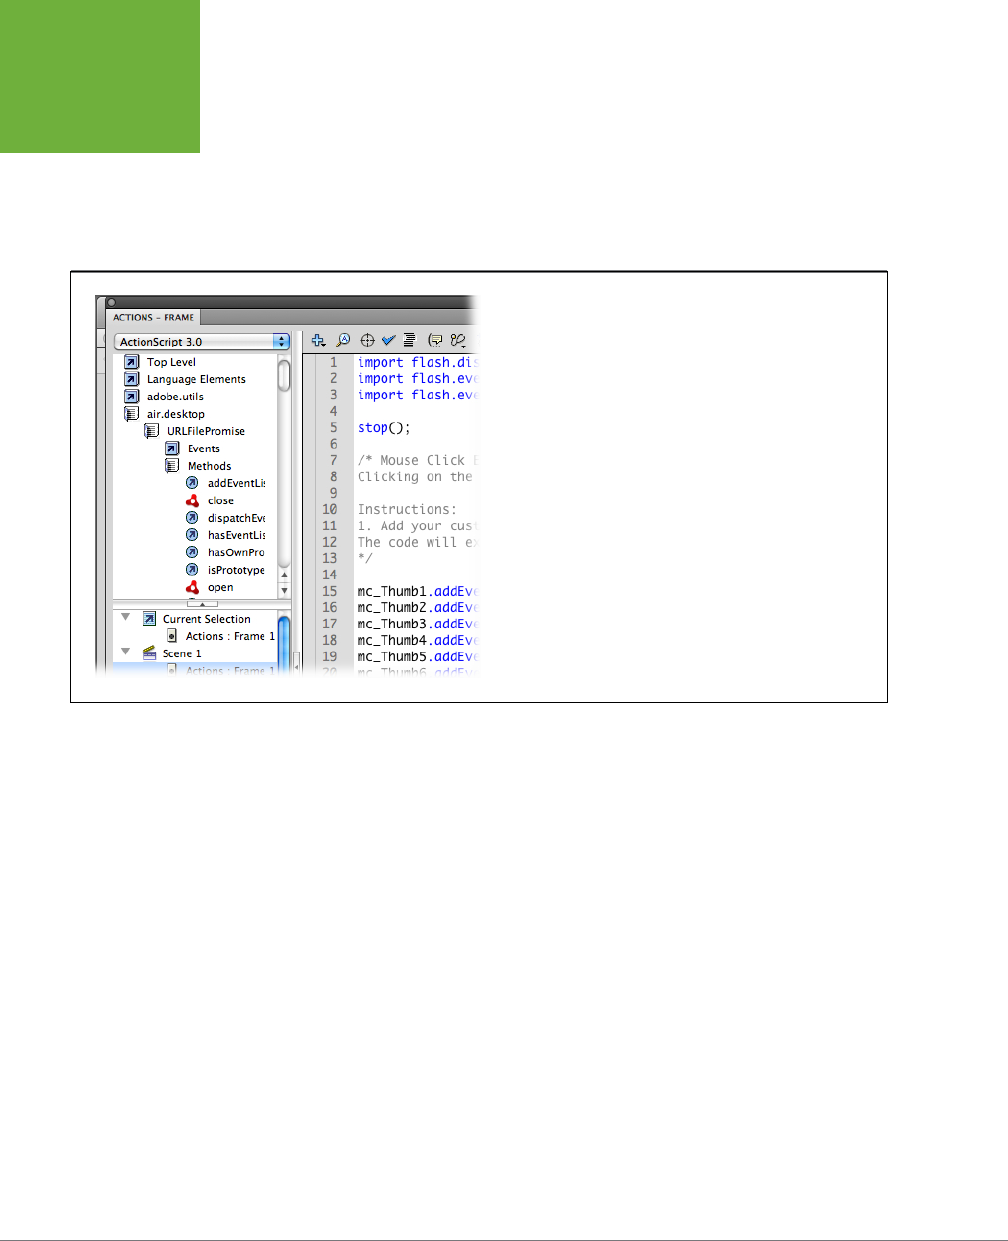
FLASH CS6: THE MISSING MANUAL
716
PUBLISH
YOUR AIR
APPLICATION
the other hand, AIR applications are distributed as a single
.air
file, which holds all
the project’s stu. Your audience uses that
.air
file to install the program and all the
necessary files on their computers. As part of that process, the installation routine
checks to make sure the AIR runtime is on the local computer. If it isn’t, your user is
prompted to install it. The following steps show you how to publish your AIR project.
(You can use your own project or the example from page 707.)
FIGURE 21-8
There are special packages and classes you can use with AIR
projects. Open the Actions panel, and you see several packages
that begin with the name “air.” AIR methods have a special icon
(circled) next to their names in the Actions window and in the
ActionScript documents.
1. With your AIR project open in Flash, choose File→“Adobe AIR 3.2 for Desk-
top Settings.”
The “Application & Installer Settings” window opens, displaying the General tab.
Parts of the form are probably already filled in, such as the Output filename. In
any case, here’s a rundown on all the text boxes and widgets:
• Output file. The name of the file that you distribute to people who want to
install and run your application. The filename ends in
.air
to indicate that it’s
an Adobe AIR application/installation file. Click the folder icon to choose
a folder for the file that Flash creates during the publish process. Turn on
the Windows or Mac installer box to create an
.exe
installer for Windows
computers or a
.dmg
installer for Macs.
• Output as. You have three choices: An “AIR package” contains all the files
necessary to run your application except for the AIR runtime; use this option
if you think your target audience will already have AIR runtime installed.
“Windows installer” (or “Mac installer”) lets you create a standard installa-
tion program for your app. “Application with runtime embedded” creates
a standalone application.
www.it-ebooks.info

CHAPTER 21: INTRODUCING ADOBE AIR 717
PUBLISH
YOUR AIR
APPLICATION
• App Name (Name on the Mac). The application name that appears on the
window when the program is running.
• Version. The version number for your application. You need to update this
when you make improvements to your program.
• App ID. The name AIR uses for this application. By convention, AIR develop-
ers use the reverse of their website address and the app name. For example,
something like
com.MissingManuals.AIR_Gallery
would be appropriate.
• Description. Your description of your program. What does it do? Who
would find it helpful?
• Copyright. Protect your work with a copyright notice and date.
• Window style. This option determines the appearance of the window
that holds your application, called
chrome
in geekspeak. Choose System
Chrome to have the window match the Windows, Mac, or Linux system it
runs on. As an alternative, you can choose Custom Chrome (opaque) or
Custom Chrome (transparent).
• Profiles. Choose where your program is intended to run. Options are
Desktop, Mobile Device, Extended Desktop, Extended Mobile Device, TV,
and Extended TV.
• Included files. Flash automatically adds files needed for your AIR app. In
the Photo Gallery project, it adds
AIR_Gallery.swf
and
AIR_Gallery-app.
xml
(the descriptor file). If your project needs additional assets, like pho-
tos, videos, or sound files, you can add them by clicking the + button, as
shown in Figure 21-9.
2. Click the Signature tab and add your certificate name and password.
If you created a self-signed certificate, as explained on page 710, you can use
that here. Use the password you assigned to the certificate. If you have a cer-
tificate from a third-party certificate authority, use the details it provided for
the certificate name and password.
3. Click the Icons tab.
You use the Icons tab, shown in Figure 21-10, to define program icons used by
the various operating systems (Windows, Mac OS X, Linux) to represent your
application. In pixels, icons are expected to be the following sizes: 16 x 16, 32 x
32, 48 x 48, and 128x 128. Use a program like Fireworks or Photoshop to cre-
ate and size your icons. For this exercise, you can create your own or use the
icons found onthe Missing CD (
www.missingmanuals.com/cds/flashcs6mm
) in
the file
21-2_ Gallery_Icon.zip
. The examples are named
gallery_icon_16.png
,
gallery_icon_32.png
,
gallery_icon_48.png
, and
gallery_icon_128.png
.
www.it-ebooks.info
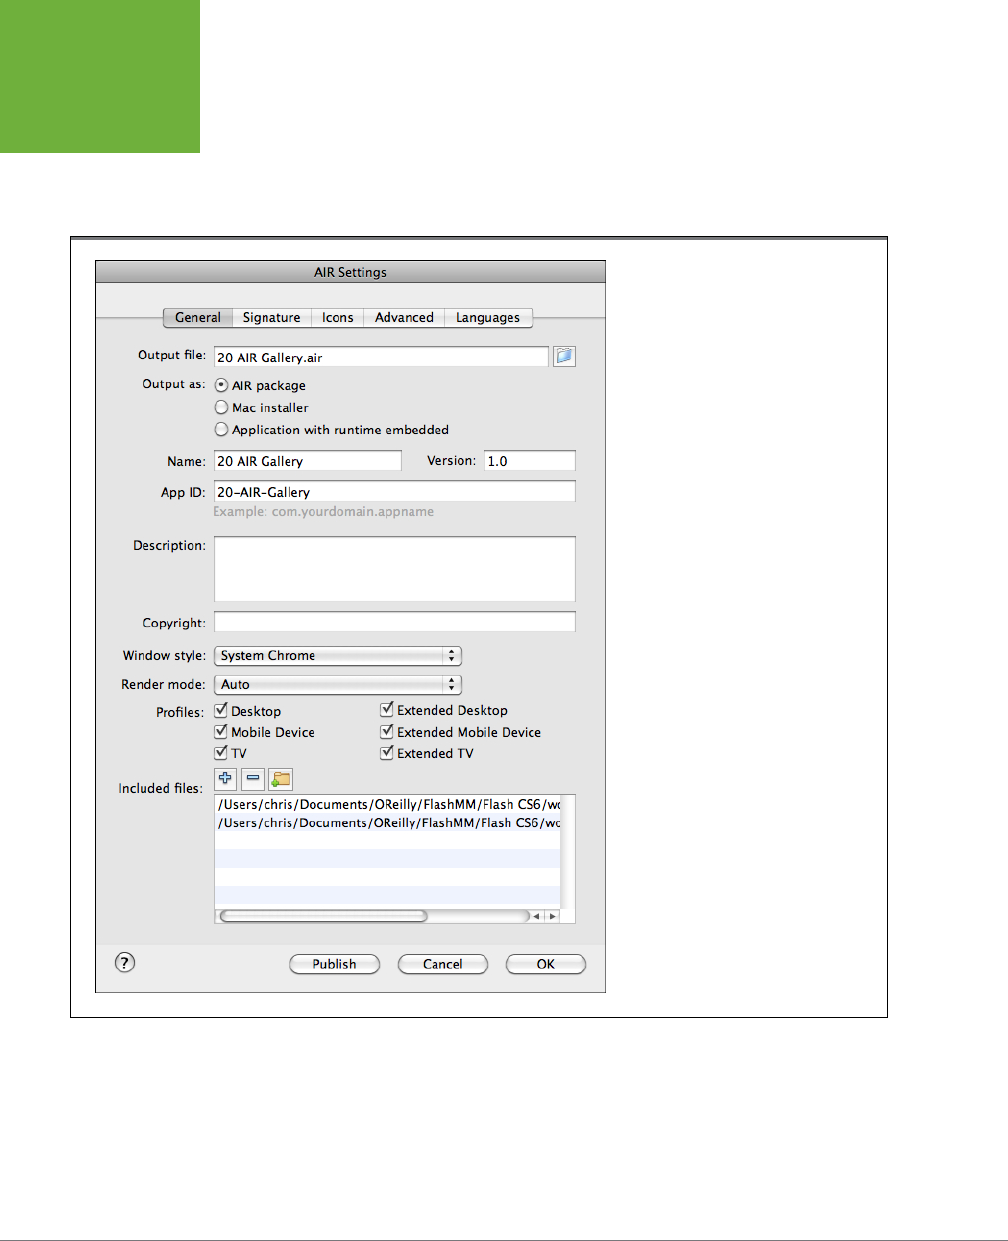
FLASH CS6: THE MISSING MANUAL
718
PUBLISH
YOUR AIR
APPLICATION
4. In the Icons tab, select “icon 128x128.” Then click the folder button to find
and open the file
gallery_icon_128.png
.
After you click Open, the selected icon appears in the Preview pane at the
bottom.
FIGURE 21-9
The .air files created during the publishing
process hold all the items needed to install
an AIR application. You can add files or
remove files and folders using the buttons
in the “Included files” section of the
“ Application & Installer Settings.”
5. Repeat the process to add all four icon sizes to your project.
When you’re finished, four icons of dierent sizes are associated with your
project. When your AIR app is installed on someones desktop, their operating
system will uses the icons to represent the program. Dierent sizes are used
for dierent OS contexts.
www.it-ebooks.info
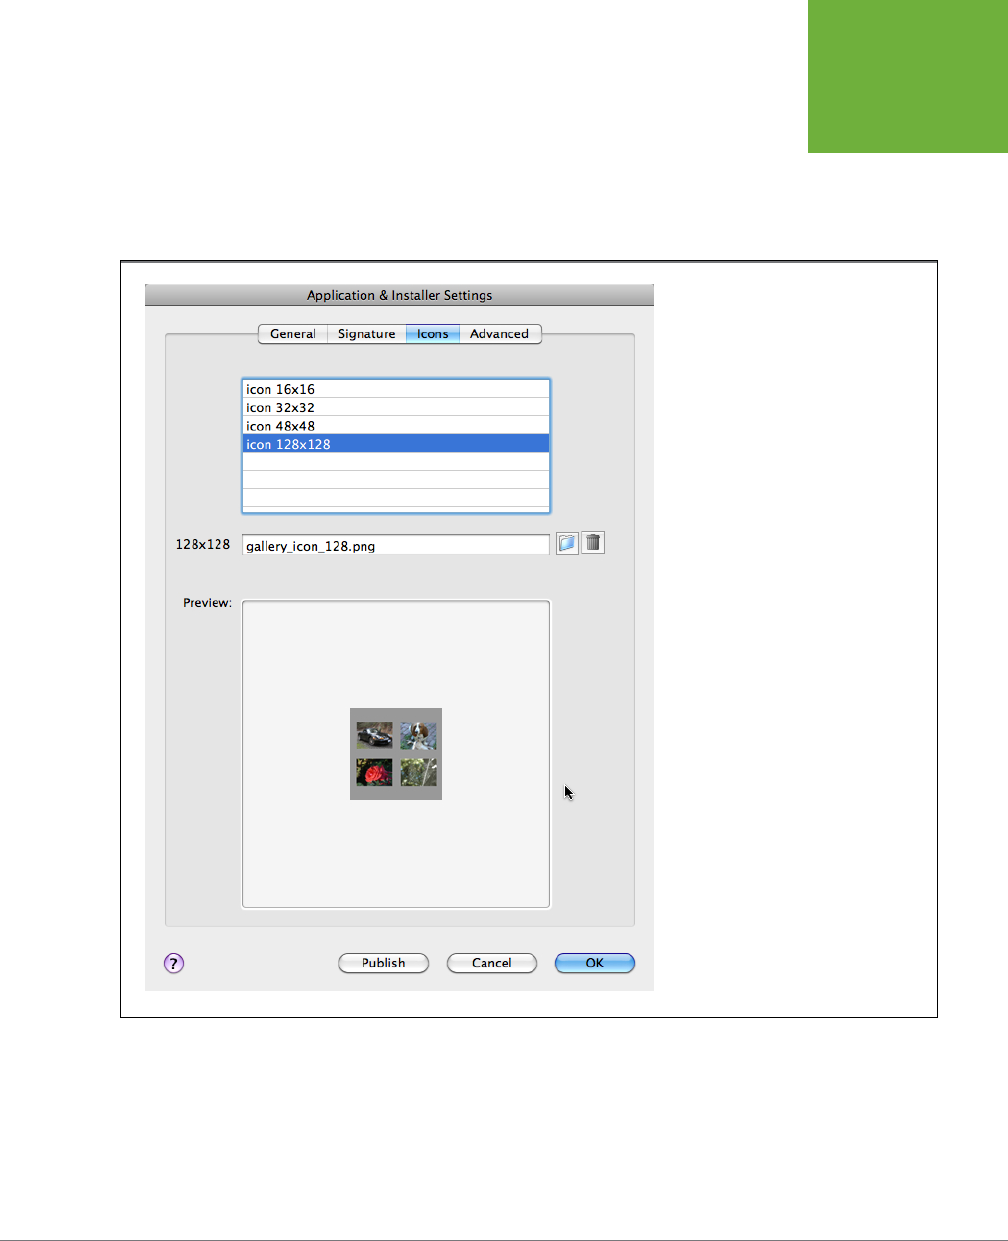
CHAPTER 21: INTRODUCING ADOBE AIR 719
PUBLISH
YOUR AIR
APPLICATION
6. Click the Advanced tab.
You use the advanced options to create file associations, to manage the program
window size and behaviors, and to designate the folder for installation files and
menus. This simple test program doesn’t use any of the advanced features, so
there’s no need to make changes unless you’re feeling adventurous.
FIGURE 21-10
Use the Icons tab to associate program icons
with your AIR application. The host operat-
ing system uses these images to display
thumbnails at various sizes.
7. Click Publish.
You can use the Publish button on the “Application & Installer Settings” win-
dow, or you can use the standard File→Publish command. In either case, Flash
creates an .air file that holds all the assets needed to run your application. If
you selected the installer option, then Flash creates either an .exe installer for
Windows or a .dmg installer for Macs.
www.it-ebooks.info

FLASH CS6: THE MISSING MANUAL
720
MANUALLY
INSTALL
ADOBE AIR
RUNTIME
Once your project is published, you can distribute the .air file or one of the installer
files (.exe or .dmg). When your fans double-click the file, your application installs
itself. If the AIR runtime is not present on the local computer, the installer prompts
the person to download and install it.
Manually Install Adobe AIR Runtime
The strategy for AIR is similar to the one for Flash Player. Hopefully, your audience
will already have AIR installed on their computers because they’ve used some other
AIR program. If AIR isn’t present, the program invites your audience to install AIR
when they install your program. The process is simple—all they have to do is answer
a couple of questions to accept the installation. It makes the installation of your pro-
gram a little longer, but in most cases it won’t be more than 10 to 30 seconds. And
most of the time you won’t need to provide any special instructions for installing the
AIR runtime environment. For any unusual circumstances that may come up, it’s good
to know you can always find the latest version of AIR at
http://get.adobe.com/air
.
www.it-ebooks.info

721
CHAPTER
22
In spite of some well-publicized squabbling between Apple and Adobe, it
is
possible
to use your Flash tools and know-how to create apps for the iPhone, iPod Touch,
and iPad. You can use either the Mac or Windows version of Flash CS6 to create
and package apps that use iOS (Apple’s operating system) for Apple handhelds.
The iOS packager that’s built into Flash Professional CS6 translates your animation
and ActionScript code into a language that Apple devices understand. Once your
app is converted to the right file format, you can test it on Apple gadgets. When it’s
perfected, you can submit your masterpiece to the App Store. (Then all you have to
do is play Angry Birds while you wait for the big checks to roll in.)
In this chapter, you’ll start o with a simple “Hello iPad” app and test it in the AIR
Debug Launcher (Mobile). If you want to test your app on an iPhone, iPod Touch,
or iPad, you have to become a registered developer ($99) and jump through some
of Apple’ssecurity-related hoops. Those details take up a substantial chunk of this
chapter, but once they’re out of the way, you can create and test iOS apps that
include iPad/iPhone gestures and touchscreen behaviors.
NOTE There’s a difference between the AIR apps created with the techniques described in this chapter and
Flash content embedded in a web page. Your AIR for iOS apps are actually translated into the language iDevices
understand. Flash content on websites requires a browser with a Flash Player plug-in. At this writing, Safari
for iPhone, iPodTouch, and iPad didn’t display Flash Player content, because they don’t permit the Flash Player
plug-in. However, there are third-party browsers such as Skyfire (
www.skyfire.com
) that display Flash video and
other content on iDevices.
Making iPhone Apps
www.it-ebooks.info

FLASH CS6: THE MISSING MANUAL
722
YOUR FIRST
“HELLO IPAD”
APP
Your First “Hello iPad” App
Creating a “Hello World” app is a rite of passage for any new coding endeavor, and
your iPad or iPhone project is no dierent. As the following steps show, creating
this simple demonstration using AIR for iOS isn’t much dierent from creating any
simple animation or AIR project.
1. Choose File→New.
The New Document window opens.
2. Choose AIR for iOS and click OK.
When you click “AIR for iOS,” the width and height for the stage are automati-
cally set to 640 x 960, as shown on the left of Figure 22-1. In future iOS projects,
you may want to make changes to the background color or frame rate, but for
now leave them as they are. When you click OK, your new iOS stage appears.
It looks like an iPhone held in the vertical position.
3. Click the Text tool, and in the Properties Panel set the Text engine to TLF
and the text type to Read Only text.
No frills for Hello iPad—all it does is display text on one page so you don’t need
the overhead of Selectable or Editable text.
4. In the Character settings, set the Family (font) to
_serif
and the size to
108
.
In many cases, it’s best to use the device fonts (_sans, _serif, and _typewriter)
when you’re working with iOS. This means the iPad will use the system fonts
already installed on the device, which maximizes performance and minimizes
your app’s size.
5. Drag to create a text box on the stage and type
Hello iPad
or a similar mes-
sage.
6. Press Ctrl+S (⌘-S) to save your work.
7. Go to Control→
Test Movie→“in AIR Debug Launcher (Mobile).”
Your minimalist app displays your message in its own little window. That small
window is ocially called the AIR Debug Launcher. See the right of Figure 22-1.
As the name implies, the AIR Debug Launcher is a special tool for viewing AIR anima-
tions on your computer. Its limitations for testing iOS apps are immediately apparent.
No matter how much you tap, swipe, or give your computer screen the two-finger
squeeze, the Hello iPad app just sits there. However, if your app was an animation
with multiple frames of content, you could use the AIR Debug Launcher to inspect
the animation. Fortunately, Adobe includes the Simulator, a special panel devoted
to iOS features including touch and gestures, geolocation, and the accelerometer.
For more Simulator details, see the box on page 737.
To give your app a real-world test, you need to move it to a real iPad. That’s not as
easy as installing one of your AIR apps on a new computer. The stumbling block
www.it-ebooks.info
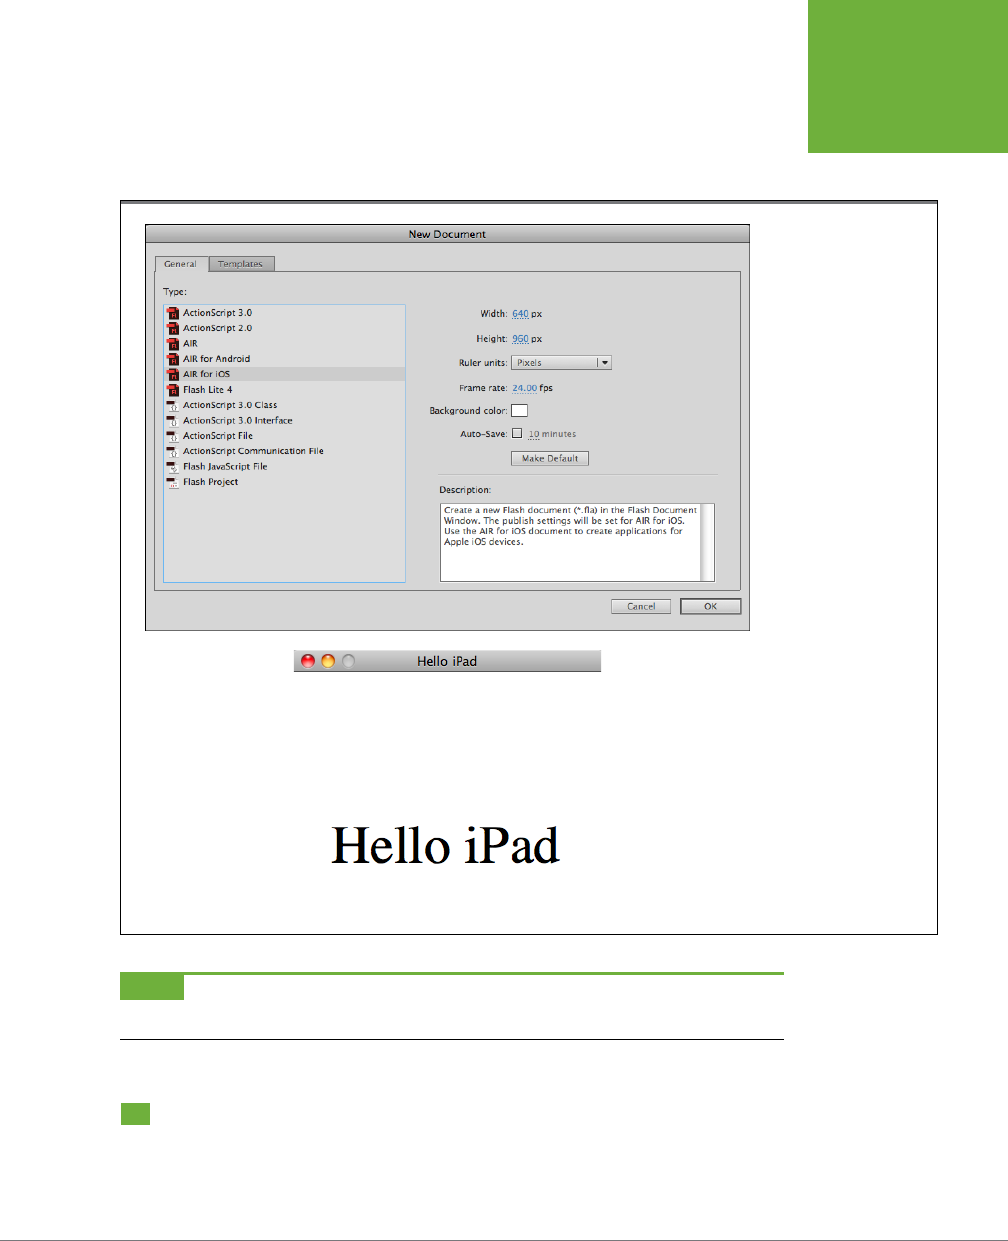
CHAPTER 22: MAKING IPHONE APPS 723
JOINING
THE IOS
DEVELOPER
PROGRAM
is Apple’s security system for the iPhone, iPod Touch, and iPad: You need to join
Apple’s Developer program and acquire security certificates. Unfortunately, this
step is required even if all you want to do is test your app on your own equipment.
FIGURE 22-1
Left: To create an app for
the iPhone or iPad, you
start off with the “AIR for
iOS” setting in the New
Document window.
Right: You can test your
app on your computer in
the AIR Debug Launcher,
but it’s usually a
less-than-complete iOS
experience.
NOTE The operating system for Apple’s popular mobile devices is referred to as iOS. The current version as
of this writing is iOS 5.1. Flash Professional CS6 can produce apps that work with version 3.0 and higher.
Joining the iOS Developer Program
Apple is the gatekeeper when it comes to putting apps on the various iDevices. If
you want to share, sell, or even test your app on an iPhone, iPod Touch, or iPad, you
www.it-ebooks.info

FLASH CS6: THE MISSING MANUAL
724
JOINING
THE IOS
DEVELOPER
PROGRAM
must join Apple’s iOS Developer program. A yearly subscription for an individual
costs $99 (plus tax). Once you’ve joined, you have access to Apple developer tools,
help pages, instructional videos, and developer forums. But for Flash developers,
the vital materials are the certificates and IDs required to move apps from your
computer onto test devices.
It’s easy to sign up. Just grab your credit card and go to
http://developer.apple.com
.
There are separate developer programs for iOS, Mac, and Safari. To create apps for
handhelds, choose the iOS program and follow the registration procedures. For
individual, lone-wolf developers, choose the Standard Individual program for $99.
If you’re signing up for a company, choose Company and be prepared to provide
additional details to prove your company exists and that it’s a responsible entity. If
you’re a really big company, say 500 or more employees, and want to develop and
distribute apps internally, check out the Enterprise program.
Once you’re a paid-up, ocial developer, log in and explore the site. Though it’s
not covered in this book, you may want to go ahead and download Xcode and the
iOS SDK, the tools Apple provides to build apps. You’ll also find the videos, forums
and documentation helpful.
NOTE If you’re interested in developing iPhone apps using Apple’s tools, Craig Hockenberry’s
iPhone App
Development: The Missing Manual
(O’Reilly) is a great place to start learning.
The Purpose of Developer Certificates and App IDs
Apple’s success in selling phones, MP3 players, and tablets relies on more than
manufacturing cool gadgets. Experts agree that iTunes and the App Store give Apple
products an edge over the competition. People flock to Apple products because
they make it easy to buy and organize music, videos, and apps. In the case of apps,
whether they’re free or pay-to-play, customers are confident that there’s no mal-
ware hidden inside, thanks to Apple’s security system. As gatekeeper to the store,
Apple can both certify the individuals and companies oering apps and ensure that
customers can’t legally (or accidentally) add apps to their devices without going
through iTunes or some sort of security checking system.
NOTE Some iPhone and iPad power users
jailbreak
their devices, which frees the devices so they can install
apps without going through Apple. This process voids the warranty and is, naturally, frowned on by the powers
that be, who constantly find ways to disable jailbroken devices. Jailbreaking isn’t covered in this book, but you
can find instructions on the Web in seconds.
As an app developer, you need to jump through at least four security-related hoops
before you can test your app on an iDevice. The requirements are the same whether
you’re using Flash or Apple’s tools to create apps. In broad terms, you need to:
1. Get a developer’s certificate.
2. Assign devices for testing.
www.it-ebooks.info
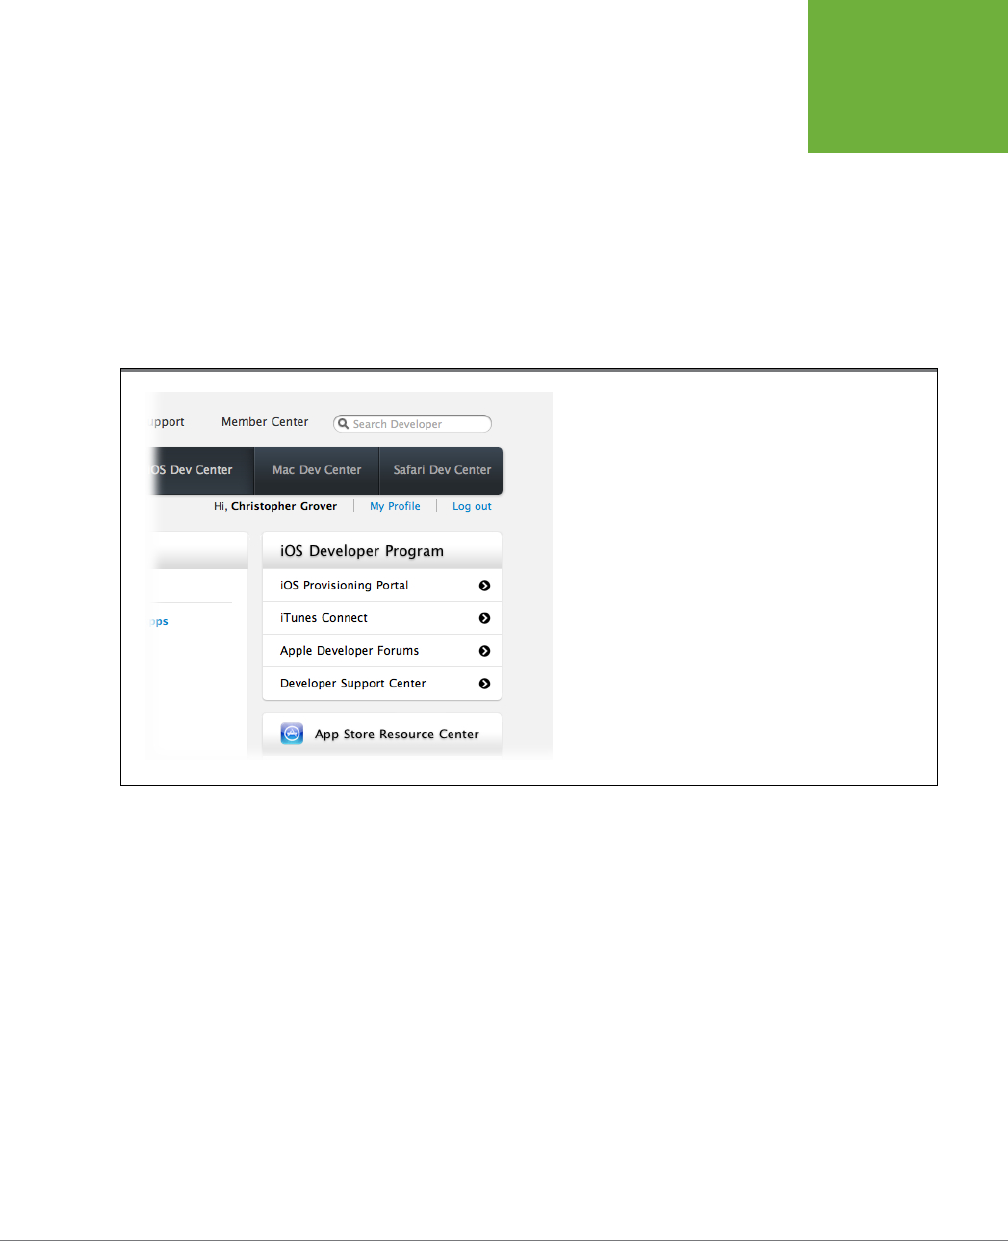
CHAPTER 22: MAKING IPHONE APPS 725
JOINING
THE IOS
DEVELOPER
PROGRAM
3. Create an App ID for your project.
4. Create and install a provisioning profile on testing devices.
If the system sounds complicated and potentially confusing, it is. It might even
sound like a lot of rigmarole, when all you want to do is see if your Flash app will
actually run on an iPad. The good news is, you can handle all the certificate-creating
business on the iOS Provisioning Portal of Apple’s Developer site (Figure 22-2). You
apply the certificates and other details to your application within Flash (File→“AIR
for iOS Settings”). Once those chores are done, it’s easy to add your app to iTunes
and then install it on a testing device.
FIGURE 22-2
Log into the Apple Developer’s site, and you’ll find links to the
Provisioning Portal in the upper-right corner. If you need more
details on developer certificates, testing devices, App IDs, and
provisioning profiles, check out the videos and help files for
each topic.
The following sections describe the procedures for the four security requirements:
developer’s certificate, testing devices, app IDs, and provisioning profiles.
Getting a Developer’s Certificate
The developer’s certificate is your way of proving you are who you say you are. You
only need one certificate to develop multiple apps. Apple, the certification authority,
identifies you through your credit card information when you pay to join the Devel-
oper program. Apps you design will be signed with the name that is on that credit
card. (Keep this in mind if you’re thinking of using someone else’s card to pay for
your Developer subscription.) For companies, Apple requests additional business
information to prove that the company exists and to establish an address. In either
case, you’re held accountable for the apps you develop and distribute.
Once you’re a paid-up, ocial developer, follow these steps on your Macintosh to
get your certificate.
www.it-ebooks.info

FLASH CS6: THE MISSING MANUAL
726
JOINING
THE IOS
DEVELOPER
PROGRAM
NOTE Apple would prefer that everyone use Macs to develop iDevice apps, but you can use Windows
computers and Flash to develop your apps. The trickiest part is setting up your Windows computer to supply the
developer’s certificate when it’s needed. For details, see the box on page 728.
AUTHORIZE APPLE AS A CERTIFICATE AUTHORITY
1. Log into your developer account at
https://developer.apple.com/devcen-
ter/ios
.
2. In the upper-right corner, click Provisioning Portal.
The left side of the Provisioning Portal has links to pages for certificates, devices,
app IDs, provisioning profiles, and distribution. Go ahead and create a bookmark
for this page. You’ll be back.
TIP The right side of the Provisioning Portal has How-To links. Some are text, and some are audio/visual.
Later, if you need a refresher on how to get a certificate, a device or app ID, or a provisioning profile, you might
find them helpful.
3. Click the Certificates link.
The web page displays your developer certificate if you have one. If not, it’s
empty.
TIP The layout for each of the major sections in the Provisioning Portal is similar. So whether you’re working
on a certificate, a device ID, an app ID, or a provisioning profile, the body of the page has tabs at the top. The
tab on the far right is labeled How To. If you’re stumped about the procedure at hand, take a look. You’re likely
to find some answers.
4. At the bottom of the page, click the link that reads: “If you do not have the
WWDR intermediate certificate installed, click here to download now (
https:
//developer.apple.com/certificationauthority/AppleWWDRCA.cer
).”
The intermediate certificate that downloads to your computer is named
AppleWWDRCA.cer
. This is your way of telling your computer that Apple is a
certification authority. (You might be able to skip this step and the next ones if
you’ve already used your computer for Apple development projects.)
5. Once the download is complete, double-click the
AppleWWDRCA.cer
file.
Your Keychain Access application opens, and the Add Certificates dialog box
appears.
6. Set the menu to
login
and click the Add button.
The Apple World Wide Developer Relations Certification Authority certificate
appears in Keychain Access, in the Certificates category, as shown in Figure 22-3.
www.it-ebooks.info
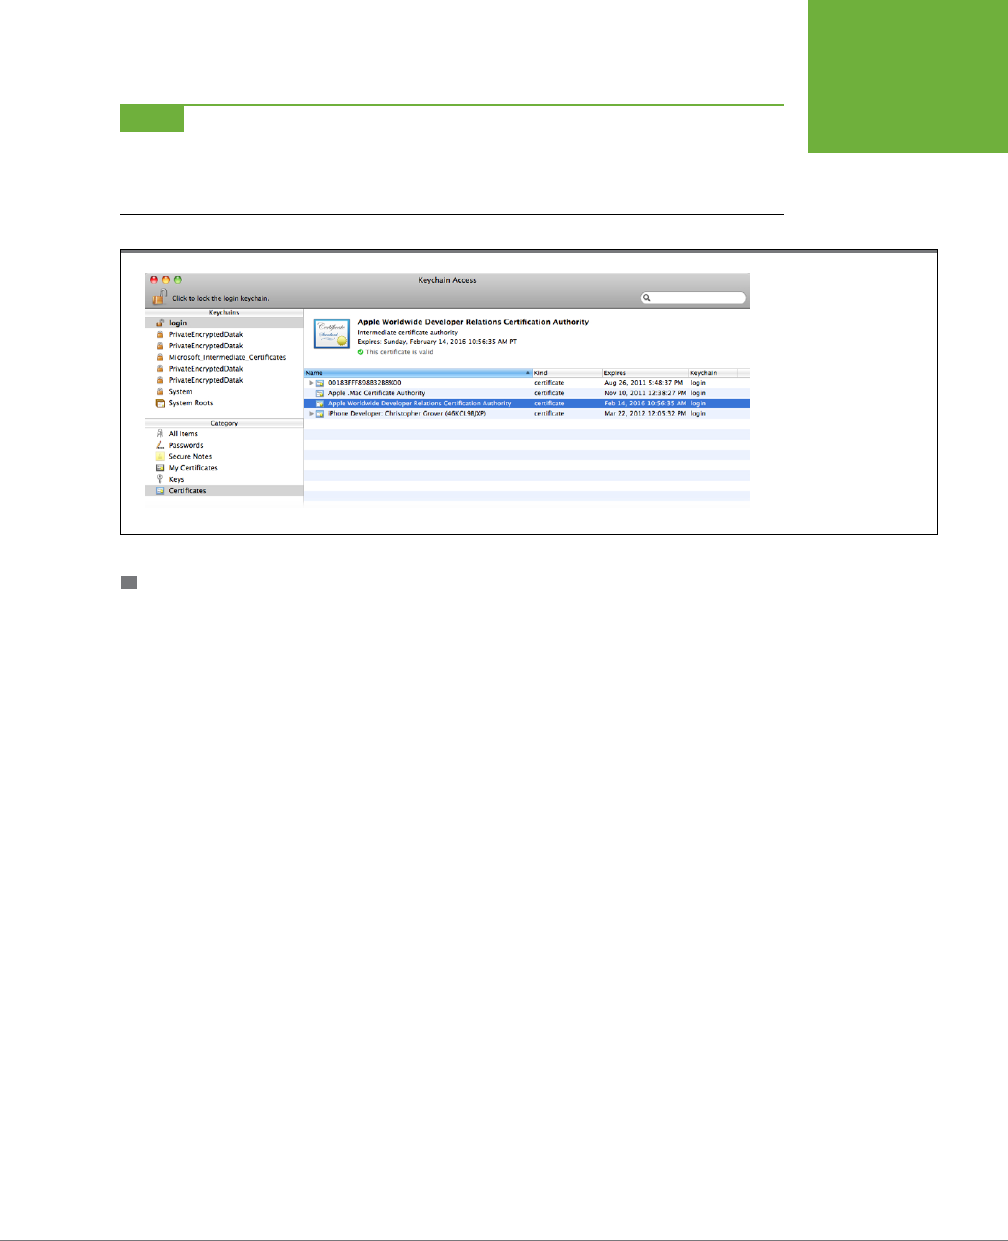
CHAPTER 22: MAKING IPHONE APPS 727
JOINING
THE IOS
DEVELOPER
PROGRAM
NOTE The
keychain
is a security system on Macintosh computers that stores passwords and other security
related information in one place. The keychain then supplies security-related data to websites and programs as
needed. For example, once you’re an authorized iOS developer, information saved in your keychain is used to
sign the apps you create.
FIGURE 22-3
By downloading and
installing the Apple World
Wide Developer Relations
Certificate Authority cer-
tificate to your keychain,
you identify Apple as
an authority worthy of
providing certificates.
REQUEST YOUR DEVELOPER CERTIFICATE
Now that you’ve authorized Apple as a certificate authority, it’s time to have it give
you a certificate. You use the Keychain Access program to create a
certificate request
,
which you will then upload to the Provisioning Portal.
1. Go to Keychain Access→Certificate Assistant→“Request a Certificate From
a Certificate Authority.”
The Certificate Assistant (Figure 22-4) opens, which will walk you through the
process of creating a certificate request.
2. Type the email address and name you used to join the Apple Developer
program. Leave the CA email address blank. Click “Saved to disk.”
3. Click Continue.
The Certificate Assistant prompts you for a name and location for your certificate
request file. You can leave the name as is and save the file to your desktop. It’s
not needed after you upload a copy to the Provisioning Portal.
4. Click Done to close the Certificate Assistant.
Head on back to the Provisioning Portal using that handy bookmark you created
earlier. On the left side of the page, click Certificates. A message appears that says
you don’t have a certificate. Click Request Certificate, and use Choose File to find
the certificate request you saved on your desktop. When you click Choose, the box
closes. On the web page, click Submit, and you’ll see a message letting you know
your request has been submitted. On the certificate page, the status of your request
is set to Pending Approval. If you’re the boss of a team of developers, you’d approve
www.it-ebooks.info
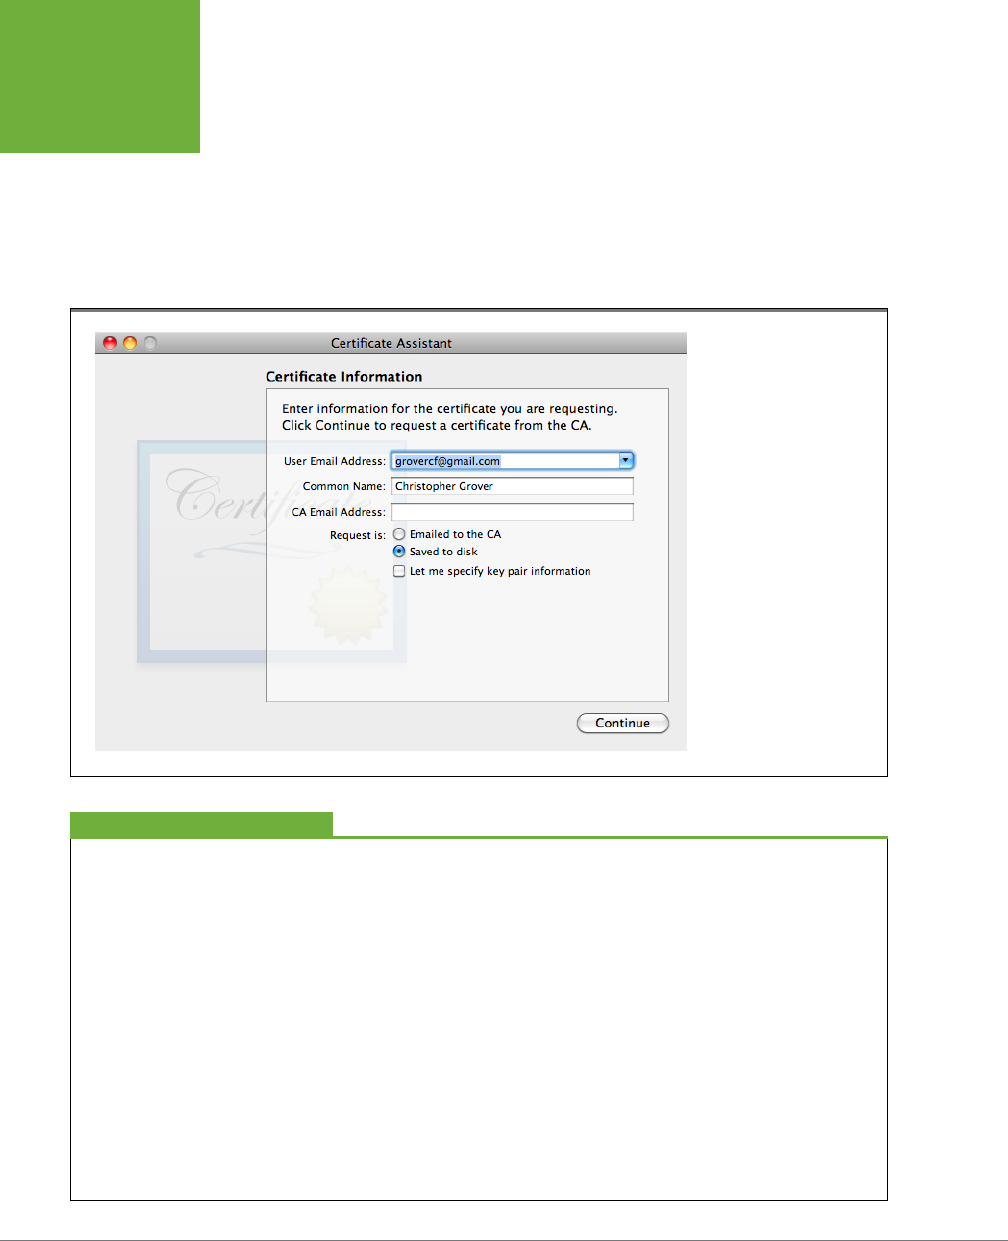
FLASH CS6: THE MISSING MANUAL
728
JOINING
THE IOS
DEVELOPER
PROGRAM
each of their certificate requests for your company. Working alone, you get to ap-
prove your own request by clicking the Approve button.
It doesn’t take long for a certificate to be issued. So if you wait a minute or two
and then refresh the web page, you’ll probably see a Download button. Click the
Download button to save the
developer_identity.cer
file on your computer. Once the
download is complete, double-click the file to add it to your keychain certificates.
Choose “login” from the menu and click Add.
FIGURE 22-4
The Certificate Assistant
collects details from you and
then creates a certificate
request that you submit to
the Provisioning Portal on
the Apple Developer’s site.
Getting a .p12 Certificate for Your Windows Computer
Apple expects everyone to use Macs when they want to build
an app for iDevices, but if you’re creating apps with Flash, you
can do your development on a Windows PC. The tricky part
comes when it’s time to sign your app with your developer’s
certificate. Macs use OS X’s keychain program to install and
safeguard the certificate. On a Windows computer, double-
clicking the
developer_identity.cer
file doesn’t do the job
because Windows computers don’t have a keychain access
program. The easiest solution is to download and install the de-
veloper’s certificate on a Mac and then export a .p12 certificate
from the keychain access program. Right-click (Control-click)
the certificate name and then choose the Export option. The
.p12 certificate can then be moved to a Windows computer and
identified in Flash’s AIR for iOS settings.
If you don’t have access to a Mac, there’s another solution,
but it’s not nearly as easy. You can use OpenSSL (Open Secure
Socket Layer) to manage certificates on a Windows computer.
OpenSSL can also convert the
developer_identity.cer
file from
Apple into a .p12 certificate. The process involves command
line tools and is too lengthy to cover in this chapter; however,
there’s a YouTube video that patiently explains how to do it:
www.youtube.com/watch?v=4GteMgFvA1Y
.
WINDOWS WORKAROUND
www.it-ebooks.info

CHAPTER 22: MAKING IPHONE APPS 729
JOINING
THE IOS
DEVELOPER
PROGRAM
When you’re done, you’ll see an iPhone Developer certificate in the Certificates
category of Keychain Access. If you click the expand arrow next to its name, your
name appears under the iPhone Developer certificate with a key symbol. Under the
kind column, you see “private key.” It’s that private key that ocially identifies you,
giving you Apple developer’s rights. No one else has access to your private key.
Apps you create are signed with a related “public key.”
As you’ll see later, Flash requires a .p12 certificate to publish the IPA file that’s used
by iPhones and iPads. Keychain Access can export this for you. Right-click (Control-
click) the certificate name and then choose the Export option. You choose a folder
and name for the .p12 file, but remember both; you’ll need this info when you fill
out the AIR for iOS settings (page 738). Keychain Access needs two passwords to
complete the export process. First, it asks for a password that’s used with the cer-
tificate; it then asks for your keychain password.
Assigning Devices for Testing
A major goal of security is to keep bad apps from being installed on good iDevices.
On the other hand, developers need to test apps they’re developing. Apple requires
developers to identify
specific, individual
devices that are used to test
specific
appli-
cations under development. As a developer, you register the devices in your account
on the Apple Developer site; you can then associate them with apps.
Each, Apple iDevice has a special identifier called a
UDID
. (It’s
not
the same as the
device’s serial number.) The easiest way to find this identifier is to connect your
device to your computer and fire up iTunes. When you see your gadget listed in
iTunes under Devices, click its name and then go to the summary page. Next to the
picture of your snazzy device, you see its name and details like capacity, software
version, and serial number. Click the serial number, and it changes to display the
UDID, which is a 40-character string of numbers and letters (Figure 22-5, top). You
could memorize the UDID, but it’s probably easier just to press Ctrl+C (⌘-C) to copy it.
Now, head back to the Provisioning Portal and, on the left side of the page, choose
Devices. The Manage tab lists the testing devices that you’ve registered. All it takes
to add a new device is to provide a descriptive name and that 40-character UDID.
Click the Add Device button and fill in the blanks (Figure 22-5, bottom). Apple lets
you register up to 100 devices each year, which should be enough for anybody. (You
can remove devices from your list, but they’ll still count toward that annual total.)
Creating an App ID for Your Project
Apps that you develop are given a unique ID that connects you, the developer, to
the app. In addition, encrypted information stored inside the app makes it easy to
see if the code has been altered from the original. This prevents other individuals
with bad intentions from adding malware or Trojan horses to your perfectly innocent
app. Where do you create your App ID? You guessed it—the Provisioning Portal.
www.it-ebooks.info
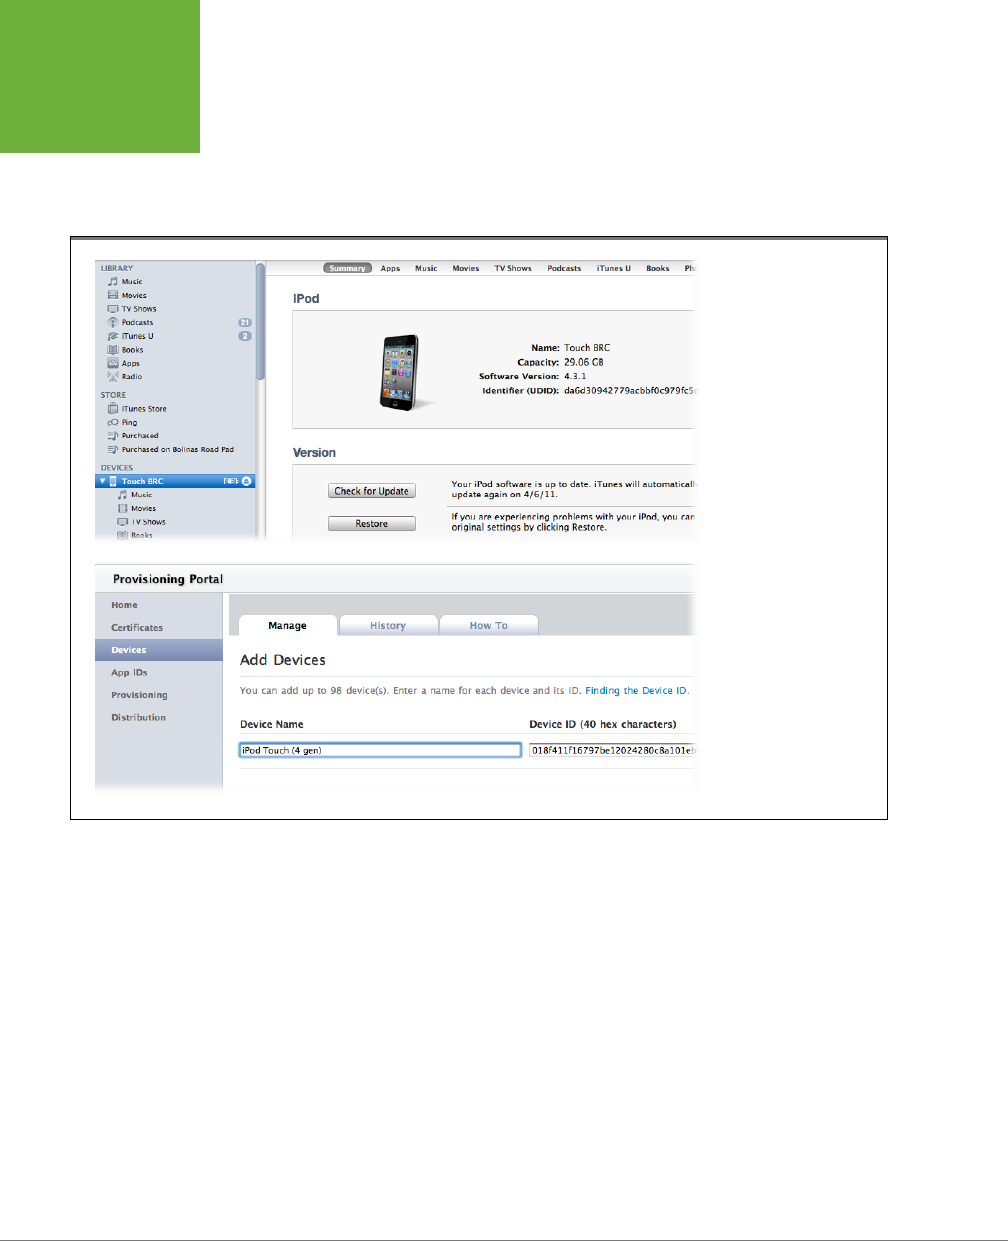
FLASH CS6: THE MISSING MANUAL
730
JOINING
THE IOS
DEVELOPER
PROGRAM
1. On the Apple Developer site (
http://developer.apple.com/iphone
), go to
the Provisioning Portal and click App IDs.
As a developer, you can create multiple app IDs. Once they’re created, you see
them all listed at the bottom of this page.
FIGURE 22-5
Top: Find your device ID in
iTunes and then copy the
40-character string.
Bottom: Go to the
Provisioning Portal on
Apple’s developer site
and fill out this form to
register your iDevices for
app testing.
2. In the upper-right corner, click New App ID.
A new page appears, where you provide a name and other details for the app
you’re building.
3. Under Description, give your app a name. You might want to call this app
AngryArmadillos
.
This name identifies your app in iTunes and on iDevices when it’s installed.
4. Leave Bundle Seed set to
Generate New
.
The bundle seed is a unique identifier provided by Apple. In addition to Generate
New, the menu displays bundle seeds from your previous projects. If you want
several of your apps to share the same keychain access on a user’s computer,
you can set the menu to use the same bundle seed.
www.it-ebooks.info

CHAPTER 22: MAKING IPHONE APPS 731
JOINING
THE IOS
DEVELOPER
PROGRAM
5. Set Bundle Identifier to
com.MyName.AngryArmadillos
.
This is the name that you use in Flash’s iOS Settings to identify your app. It’s
common practice to use a
reverse domain
as an identifier. So, for example, if
your website is
www.MassiveCorp.com
, you’d name the app
com.MassiveCorp
.AngryArmadillos
. Folks who don’t have a website often use their complete
name instead of a domain. For example,
com.ChrisGrover.AngryArmadillos
.
Unlike certificates and provisioning profiles, you don’t have to download a file to
use the app ID. The details for your app IDs remain on Apple’s Provisioning Portal.
You will use the ID without the bundle identifier in “Flash AIR for iOS Settings,” as
described in the next section.
Creating and Installing a Provisioning Profile
You’ve added a developer’s certificate to your keychain, identifying you as an ocial
iOS developer. You’ve registered the devices you plan to use for testing, and you’ve
acquired an ID for the app you’re developing. The last step is to create a provisioning
profile that ties all these elements together. Without a provisioning profile, Flash
can’t translate your Flash project into code that works with iOS. Apple’s provisioning
profile connects you the developer, your testing devices, and your application. The
provisioning profile is installed on the device you use for testing, making it possible
for you to install the app using iTunes.
To create a provisioning profile, follow these steps:
1. On Apple’s Developer site (
https://developer.apple.com/devcenter/ios
),
go to the Provisioning Portal and click Provisioning.
The page where your provisioning profiles live opens. You can create more than
one provisioning profile. In fact, you need a provisioning profile for every app
you test, distribute, or sell.
TIP You can come back to this page to make changes to a provisioning profile and to download your profiles.
Why would you want to make changes? Perhaps you’re creating a new app or you added a new device for testing.
In either case, you’ll want to add those items to your profile and download the new, improved profile to your
computer.
2. In the upper-right corner, click New Profile.
A page like Figure 22-6 opens, where you provide details for the provisioning
profile.
3. Next to Profile Name, type a name, such as
AngryAardvarks
.
4. Next to Certificates, turn on the box with your certificate name.
You must have already created your developer certificate. For details, see
page727.
www.it-ebooks.info

FLASH CS6: THE MISSING MANUAL
732
JOINING
THE IOS
DEVELOPER
PROGRAM
5. Next to App ID, use the menu to select the app you’re developing.
Page 729 explained how to create app IDs. Once they’ve been created, the IDs
appear in this drop-down menu.
FIGURE 22-6
You get to choose a name for your
provisioning profile, but the rest of
the settings depend on the certificate,
device, and app IDs that you’ve already
created.
6. Next to Device, select the testing devices you want to use with this app.
Your registered testing devices automatically appear in the list. You can add
several testing devices to your provisioning profile. If you need to register a
new testing device, see page 729.
7. Click Submit.
It takes only a moment for your submission to be processed. Click your web
browser’s Refresh button, and you should see your new provisioning profile
listed at the bottom of the page with a Download button next to it.
8. Click Download.
Provisioning profiles are small files (about 8 K), so they don’t take long to
download.
You’ll probably want to move the file from your Downloads folder to a more conve-
nient spot, such as the folder with the FLA file for your app. It doesn’t really matter
where you keep the file as long as you know where it is. You need to locate and
identify your provisioning profile in the iOS settings for your app. See page 731.
www.it-ebooks.info

CHAPTER 22: MAKING IPHONE APPS 733
JOINING
THE IOS
DEVELOPER
PROGRAM
Creating an iOS App that Responds to
Gestures
iPhones and iPads don’t come with mice. That’s why Apple had to create a whole new
operating system for its handheld devices. iOS responds to a variety of user inputs:
taps, swipes, and shakes. In general, mouse clicks translate easily to single finger
taps on the iPhone, but if you’re writing code for an iDevice, you want to employ
the other commonly used gestures, too. Fortunately, Adobe developed ActionScript
objects that understand gestures, and they went one step further, creating code
snippets that “listen” for those iOS events.
Handling iOS gestures isn’t the only thing to consider when you create an app
for iDevices. You need to rethink the size and placement of buttons, menus, and
other user interface widgets. Also, when it makes sense to do so, take advantage
of the device’s geolocation and gyroscopic abilities. Here are some more technical
considerations:
• Test your application for performance on the device you expect your audience
to use. iOS devices use slower processors and less memory than most laptops
or desktop computers. Also, remember that older iPhones are slower than the
latest iPad.
• Only ActionScript 3.0 code works with the iOS packager. You cannot use
ActionScript 1.0 or ActionScript 2.0 code in your projects.
• For best results, use system fonts in your apps (_sans, Helvetica; _serif, Times
New Roman; _typewriter, Courier New).
• If your app is destined to be used by iPhones as well as iPads, make sure the
elements are properly sized for the small screen.
Using the Swipe to Next/Previous Code Snippet
Suppose you’re a manufacturer who wants to create a product catalog. You want
shoppers to thumb through the pages to learn details about individual products.
Follow these steps to create a new app for a manufacturer of wooden finials—the
type of ornament you see on the top of gazebos or porch railings. You’ll add Ac-
tionScript code to enable swipe left and swipe right gestures that move from one
frame (page) to another. Your handy app also orients itself to a portrait or landscape
format when the iPhone or iPad is rotated.
1. Open 22-1_iOS_Swipe_Pages.fla. Then choose Save As and name the new
file
Finials.fla
.
This FLA file was created using the “AIR for iOS” option described on page738.
You can find the
22-1_iOS_Swipe_Pages.fla
on the Missing CD at
www.
missingmanuals.com/cds/flashcs6mm
.
www.it-ebooks.info
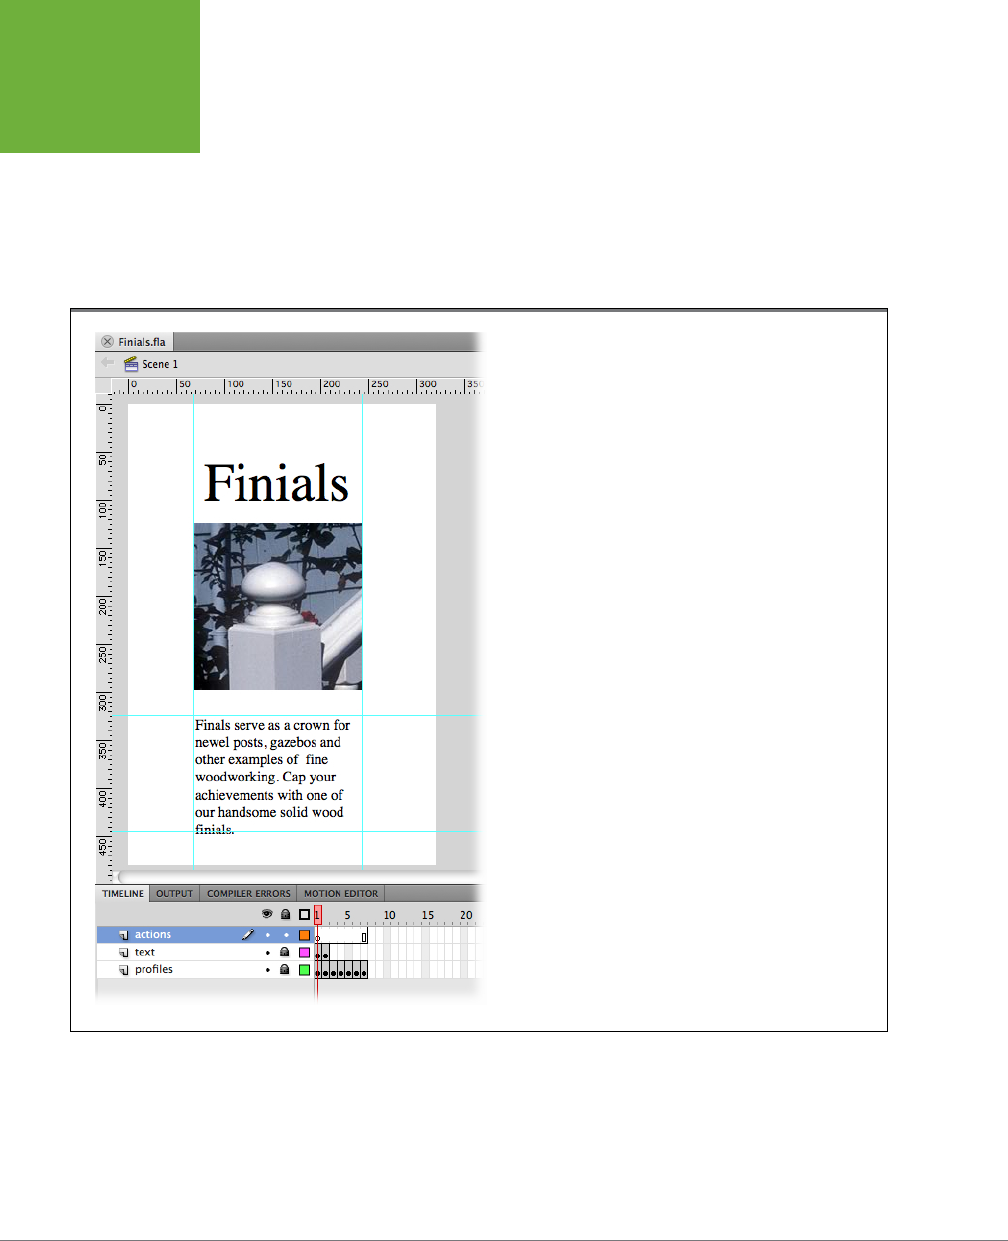
FLASH CS6: THE MISSING MANUAL
734
JOINING
THE IOS
DEVELOPER
PROGRAM
2. Examine the handful of frames in the Flash document.
The first frame (Figure 22-7) shows a photo of a finial on top of a newel post
and displays some introductory text. The user won’t interact with this text, so
TLF Read Only text was used. The font specified is
_serif
. The same text set-
tings are used throughout this project. The following frames (catalog pages)
show line drawings of finials. There are three layers in the timeline: actions,
text, and profiles.
FIGURE 22-7
This iOS project creates a manufacturer’s catalog. Shown here, the
introductory page displays a photo of the product (a finial) in use.
The following pages show designs and specs for other finials.
3. Click Frame 1 in the actions layer on the timeline and then open the Actions
window (Window→Actions).
4. On the first line in the actions, type
stop()
;
This method prevents the animation from moving to the next frame until it
receives a specific command.
www.it-ebooks.info
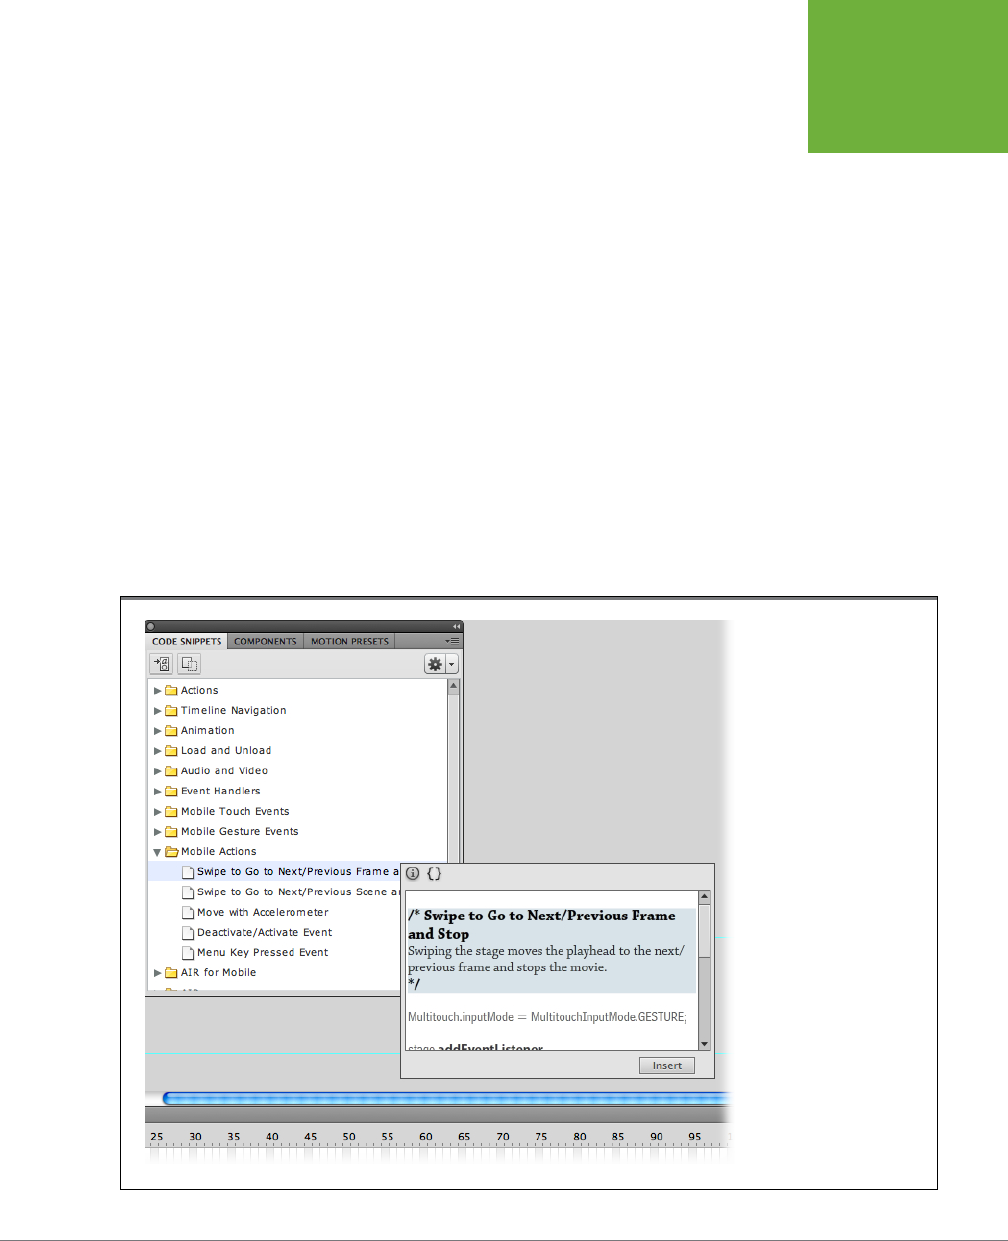
CHAPTER 22: MAKING IPHONE APPS 735
JOINING
THE IOS
DEVELOPER
PROGRAM
5. Press Enter (Return) to create a new line, and then open Code Snippets
You can use the button in the upper-right corner of the Actions window, or you
can use the palette button if it’s visible. The button for Code Snippets looks like
a page of text with two curly brackets above it.
6. Expand the Mobile Actions snippets and click
Swipe to
“Swipe to Go to
Next/Previous Frame and Stop.”
When you select a snippet, the buttons for the Code Snippets heads-up dis-
play (HUD) appears. The “i” button leads to general information. In this case it
says: “Swiping the stage moves the playhead to the next/previous frame in the
timeline and stops the playhead.”
7. Click the bracket button, and after examining the description, click the
Insert button.
The bracket button {} display more details about the snippet, including the
actual code. After you click the Insert button, there’s a little animated flourish,
and the snippet is copied to your code in the Actions window (see Figure 22-8).
In some cases, you need to select an object on the stage before you insert a
code snippet. That’s not the case for this particular gesture.
FIGURE 22-8
Snippets are divided into
categories in the Code
Snippets window. The
Swipe gesture used for
touchscreens is in the
Mobile Actions category. The
snippet’s HUD (heads-up
display) includes an Insert
button, which pops the code
into your Actions window.
www.it-ebooks.info

FLASH CS6: THE MISSING MANUAL
736
JOINING
THE IOS
DEVELOPER
PROGRAM
8. Open the Actions window (Window→Actions) to examine the code.
You can usually learn something by examining code snippets. In some cases,
you’ll pick up new techniques. In other cases, you may want to modify or copy
the code for use elsewhere. Here’s the snippet you added to your project:
/* Swipe to Go to Next/Previous Frame and Stop
Swiping the stage moves the playhead to the next/previous frame and stops
the movie.
*/
Multitouch.inputMode = MultitouchInputMode.GESTURE;
stage.addEventListener (TransformGestureEvent.GESTURE_SWIPE, fl_SwipeToGo-
ToNextPreviousFrame_2);
function fl_SwipeToGoToNextPreviousFrame_2(event:TransformGestureEvent):vo
id
{
if(event.offsetX == 1)
{
// swiped right
prevFrame();
}
else if(event.offsetX == -1)
{
// swiped left
nextFrame();
}
}
The text between /* and */ is a comment that explains the purpose of the snip-
pet. In some cases, snippet comments oer tips for modifying and using the
code. The next line sets the MultitouchInputMode to
Gesture
. ActionScript has
three modes that are used with MultitouchInput: none, Gesture, and TouchPoint.
Only one multitouch mode is in eect at a time, so ActionScript can’t listen for
a Gesture event and a TouchPoint event simultaneously.
The next line adds an event listener. The first parameter in the parentheses
defines the event “TransformGestureEvent.GESTURE_SWIPE.” The next pa-
rameter identifies the method (function) that runs when the event occurs.
Methods are named automatically by snippets and if you use the same snippet
more than once, Flash starts adding numbers to the method’s name simply
to dierentiate them. That’s why in this example there’s a “_2” at the end of
fl_ SwipeToGoToNextPreviousFrame
. In your code, you may see a dierent
number or no number at all.
www.it-ebooks.info

CHAPTER 22: MAKING IPHONE APPS 737
JOINING
THE IOS
DEVELOPER
PROGRAM
The body of the method takes the form of an “if..else if” statement. In eect it
says, if the event was “swiped right,” go to the previous frame; else if the event
was “swiped left,” go the next frame.
The familiar methods
prevFrame()
and
nextFrame()
do the heavy lifting, flip-
ping between pages. The page content in this example is in the main timeline,
so there’s no need to designate a specific movie clip or timeline. Later in this
chapter (page 745), you’ll see how to flip pages in a movie clip symbol that’s
been added to the stage.
NOTE If you want to learn more about multitouch events, you can find all the details in the
ActionScript
Reference for the Adobe Flash Platform
. You can open that document by going to Help→Flash Help and then
choosing “ActionScript 3.0 and Components.”
9. Press Ctrl+S (⌘-S) to save your work.
Flash saves your work as an FLA file.
At this point, you can go ahead and test your application in the AIR Debug Launcher
(Mobile). When tested, you see the first frame of the animation but have no way to
move beyond that frame because your computer won’t respond to a swipe gesture.
Instead, you want to test your app on an iPhone, iPodTouch, or iPad that you’ve
registered as a test device. If you’ve followed the steps beginning on page 727 to
get a developer’s certificate, set up test devices, get app IDs, and get provisioning
profiles, then you’re ready to fill in the AIR for iOS settings. Once that’s done, you
can test your app on an iDevice.
Testing Mobile Events with Simulator
Developing a mobile app on a desktop computer comes with
a few tradeoffs. For example, your desktop is most likely
clueless when you swipe your finger across the screen. It also
probably doesn’t respond much when you tilt it one way or
the other. Those are mobile events that most computers don’t
recognize. Flash CS6 includes a new tool that can help out—the
Simulator (see Figure 22-9). You see it pop up when you go
to Control→Test Movie→“in Air Debug Launcher (Mobile).”
The Simulator has three panels that you expand and collapse
as needed. The accelerometer panel offers a way to simulate
changes in orientation. So, for example, if you have an app that
displays a map when held flat but activates a camera when
held vertically, you can test it in the Simulator. The Touch and
Gesture panel lets you test the usual touchscreen events. Turn
on “Touch layer” in the upper-left corner and then choose
one of the radio buttons: “Click and drag,” “Press and tap,”
“Two-finger tap,” Pan, Rotate, Zoom, or Swipe. At this point,
when you move the mouse over your app in the test window
(Figure 22-9, right), you see a special cursor, and you can tap,
swipe, or perform other gestures using the mouse. If you’re
building an app that knows where it is in the world, use the
Geolocation panel. Type information like latitude or longitude
and then click Send.
Does the Simulator relieve you of the need to test your apps
on real mobile devices? No. You still want to do real-world
testing on the target device. However, the Simulator can be
a great timesaver while you’re in the early to mid stages of
app development.
GEM IN THE ROUGH
www.it-ebooks.info
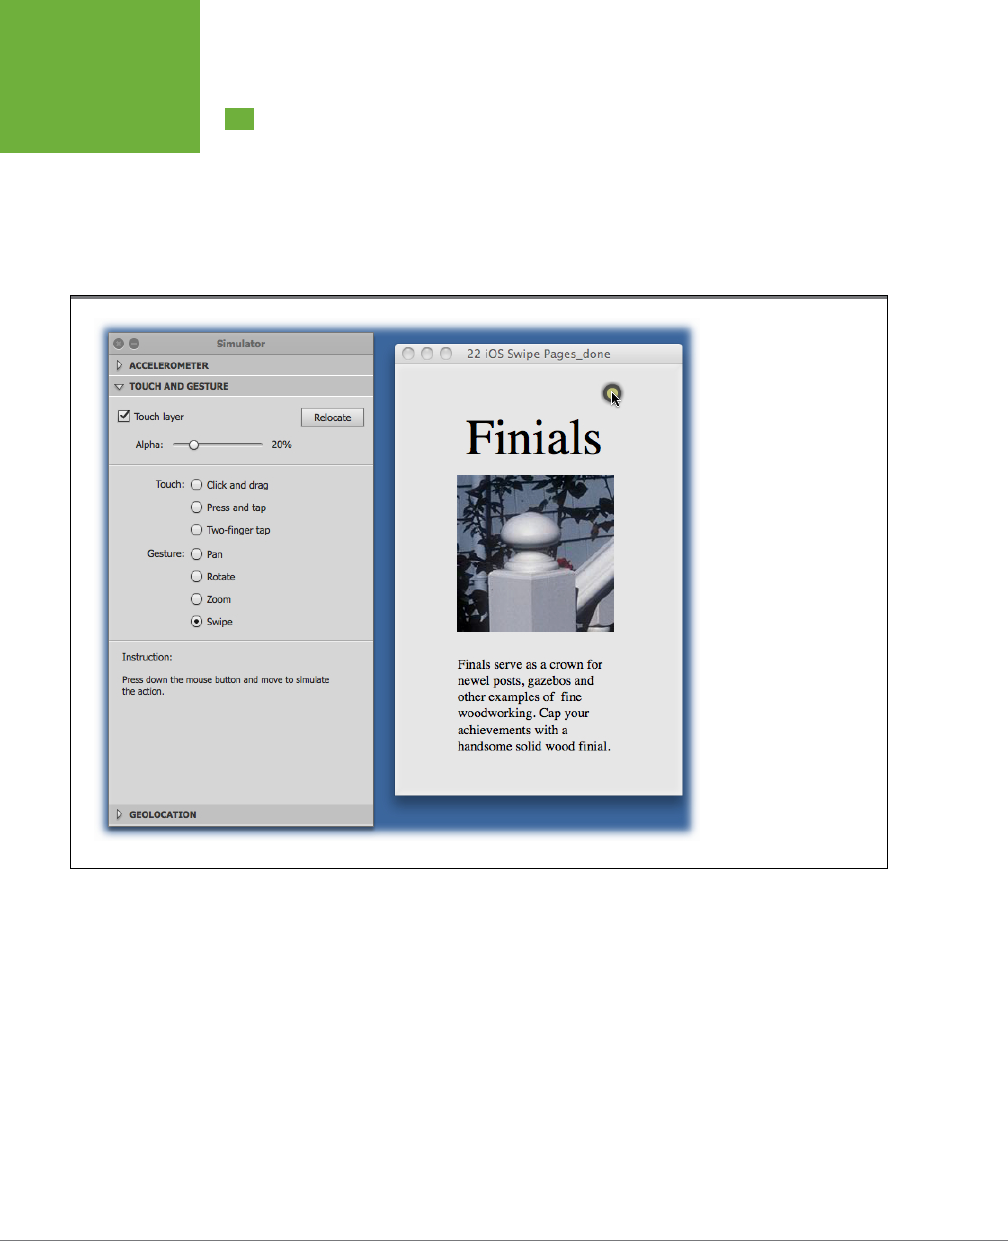
FLASH CS6: THE MISSING MANUAL
738
AIR FOR IOS
APP SETTINGS
Air for iOS App Settings
When you start a new document with the File→“AIR for iOS” command, Flash pro-
vides a bunch of new publishing settings for your document (Figure 22-10). These
include
general settings
that identify folders and documents,
deployment settings
that record information about security certificates, and
icon settings
that are used
to represent your app in iTunes, and on iPhones and iPads.
FIGURE 22-9
When you test a mobile
app in Flash, you see two
panels.
Right: Your app appears
in a window that’s sized
to match a phone or a
tablet. Buttons respond
to clicking, but you need
help with other mobile
events.
Left: The Simulator
provides a way to test
touchscreen gestures,
and accelerometer and
geolocation events.
Tweaking the settings so that everything works isn’t nearly as much fun as design-
ing and testing your app. The good news is that with few exceptions, it’s a “set and
forget” operation. You don’t have to go through these steps every time you build
a new version of your app.
General Settings
To see the settings for your iOS app, go to File→“Air 3.2 for iOS Settings.” The window
has three tabs: General, Deployment, and Icons.
Here’s a rundown on the settings you find under the General tab:
• Output file. Choose a directory and provide a filename for your app. The ex-
tension for iOS apps is
.ipa
. Remember the name and location for your IPA file.
You’ll need to add the file to iTunes later in the app install process.
www.it-ebooks.info
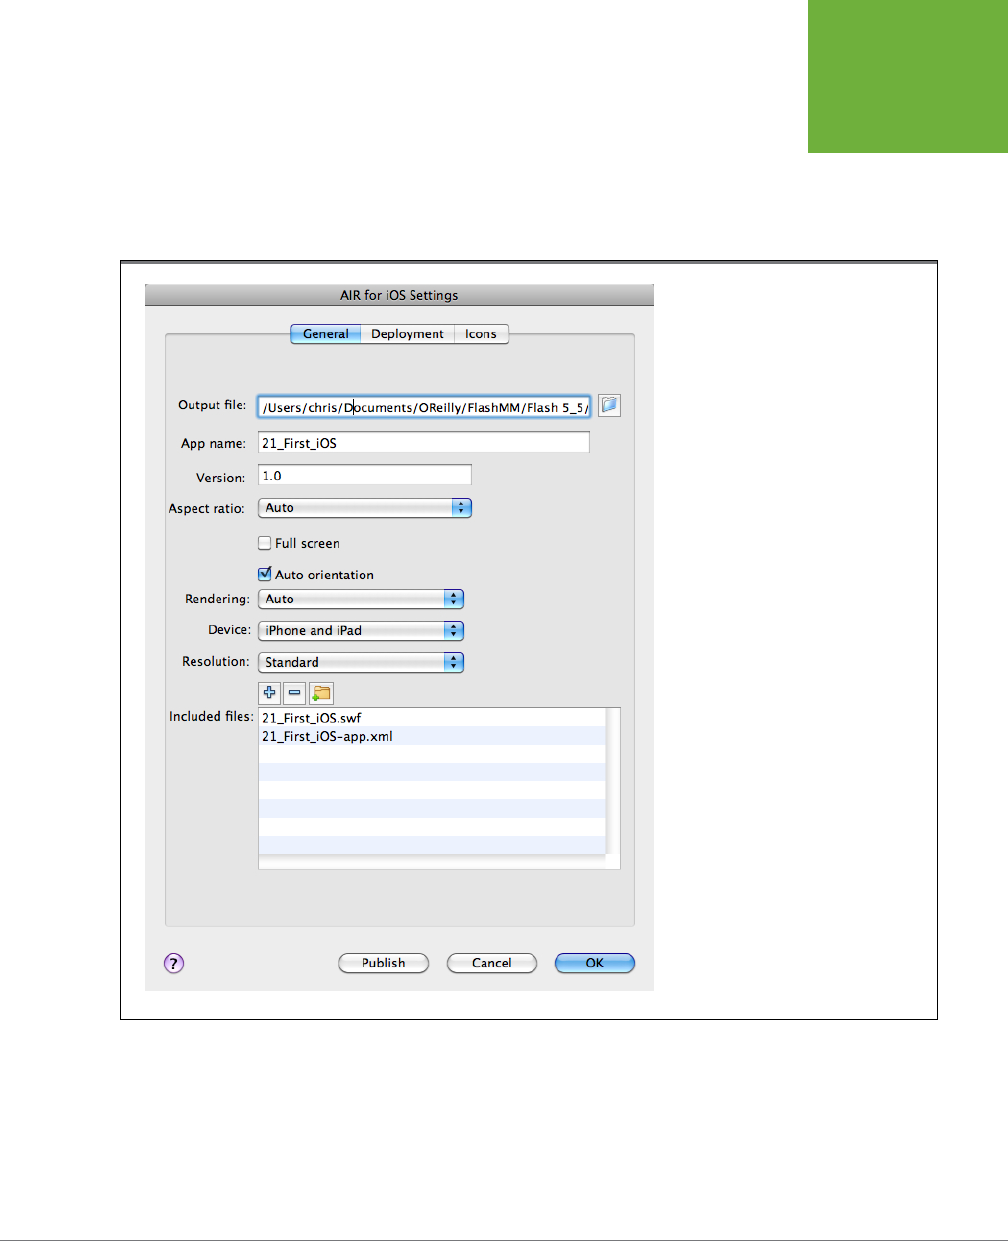
CHAPTER 22: MAKING IPHONE APPS 739
AIR FOR IOS
APP SETTINGS
• App name. Give your application an ocial name. This is the name that appears
under the apps icon on your iDevice and in the App store.
• Version. You can assign version numbers to your app. They usually take a
form like
2.05
, where numbers to the left of the decimal indicate major version
changes.
FIGURE 22-10
The general “AIR for iOS Settings” window
handles some of the basic housekeeping
issues, such as filenames and locations. If
you want your app to work in both portrait
and landscape views, set the aspect ratio to
Auto and check the “Auto orientation box.”
• Aspect ratio. Use this setting to specify whether your app is viewed in portrait
or landscape orientation. Choose
Auto
if it works in both.
• Full screen. Check this box to force your app to fill the screen on an iPad or
iPhone.
www.it-ebooks.info

FLASH CS6: THE MISSING MANUAL
740
AIR FOR IOS
APP SETTINGS
• Auto orientation. iDevices know which end is up. If you check this box, your
app will automatically make adjustments when the iPad or iPhone’s orientation
changes.
• Rendering. It takes computing power to draw graphics on the screen. Devices
have a special graphics processing unit (GPU) to handle these chores. In some
cases, you may prefer to use the central processing unit (CPU). For the examples
in this book, leave rendering set to Auto, which lets the device choose the unit.
• Device. You can designate whether your app is intended for iPhones (including
iPod Touch), iPads, or both.
• Resolution. Apple’s iDevices have increased in resolution in successive genera-
tions. The new Retina displays are high resolution. Older devices are standard
resolution. If you want to be compatible with the widest range of devices,
choose standard.
• Included files. For the projects covered in this book, Flash automatically adds
the needed files to this list as you build your app. In other cases, you may need
to manually add resources.
Deployment Settings
To test, distribute, and sell your app, it needs ocial approval from Apple. In Flash,
the Deployment tab is where you manage these issues. Go to File→“Air for iOS
Settings” and click the Deployment tab (Figure 22-11).
You need to fill in the Deployment form with the following details (if you don’t
complete the form, the publishing process stops before it’s complete and doesn’t
built the IPA file):
• Certificate. Follow the steps on page 727, and you receive a certificate from
Apple that establishes your identity. The certificate takes the form of a small
file with a .p12 extension that you store on your computer. Use the folder button
to locate and identify the file for the deployment settings.
• Password. When you get your certificate from Apple, you provide a password.
That password needs to be added to the deployment settings. This prevents
someone else from using your certificate with his program.
• Provisioning profile. For each app that you build, you tell Apple the specific
iPhones and iPads you’re using for testing. A provisioning profile links and
identifies you, your app, and your testing devices. Your provision profile is an-
other document that’s downloaded from Apple’s Developer site. For details on
creating and downloading a provisioning profile, see page 731
• App ID. Each app you develop has a unique ID. The common form used is to
reverse your domain name and add the app name at the end. So a Missing
Manuals app ID might be
com.missingmanuals.AngryAuthors
. For details on
creating your own app ID, see page 729.
www.it-ebooks.info
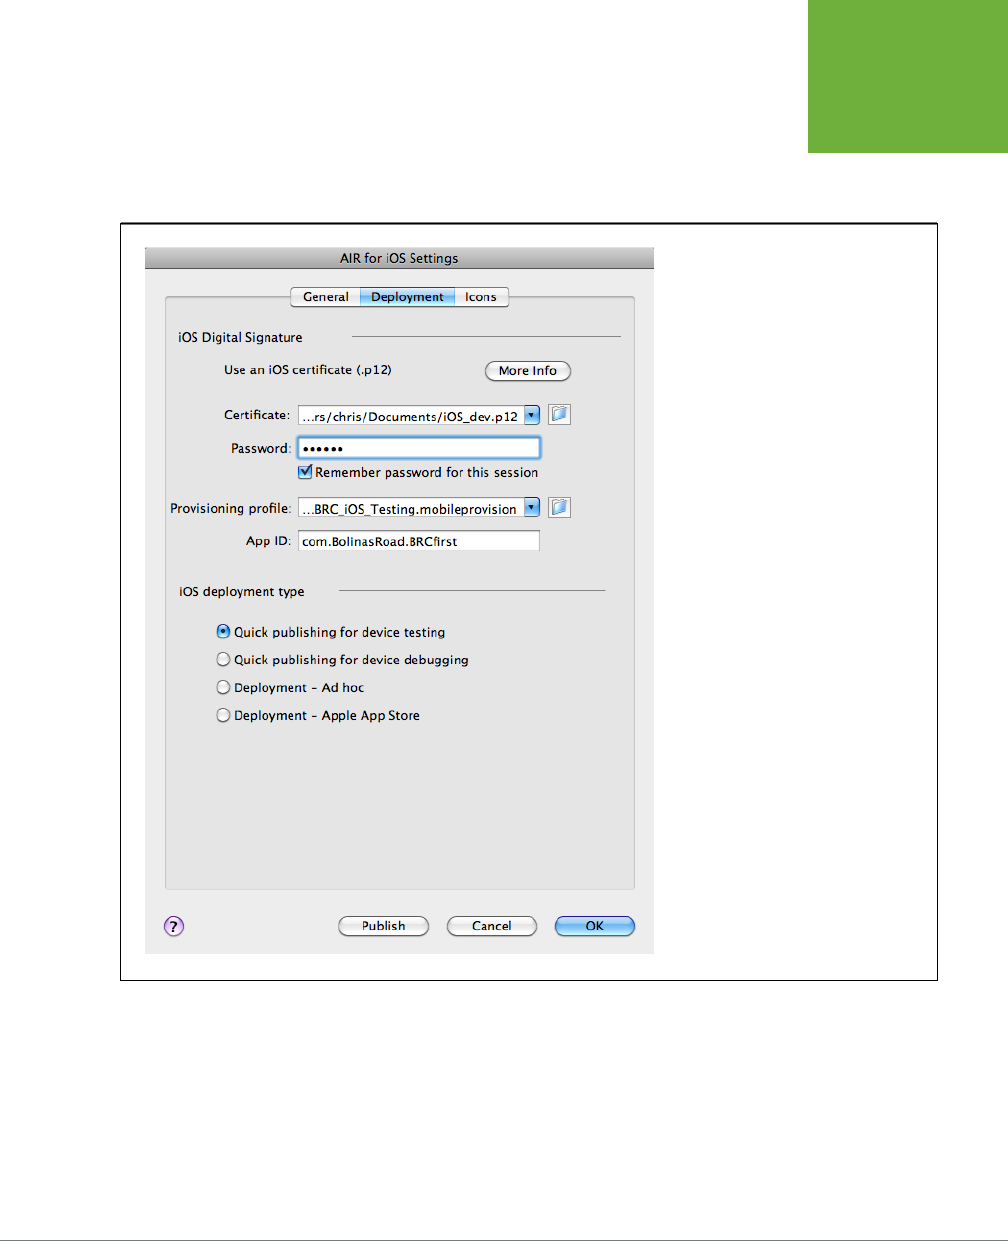
CHAPTER 22: MAKING IPHONE APPS 741
AIR FOR IOS
APP SETTINGS
• iOS deployment type. Use these settings for dierent stages of the develop-
ment process. Your choices are: “Quick publishing for device testing,” “Quick
publishing for device debugging,” “Deployment – ad hoc,” and “Deployment
– Apple Store.”
FIGURE 22-11
You won’t be able to publish an IPA file
unless you enter a provision profile in the
deployment settings. In turn, you need a
developer certificate, device ID, and app ID
to get a provisioning profile.
Icon Settings
iPads and iPhones are visual experiences. Each app is identified by a square icon that
appears in the App Store and on the device. Icons need to be provided in a variety
of sizes measured in pixels: 29x29, 57x57, 114x114, and 512x512. Apps that are also
used on iPads need to include icons at 48x48 and 72x72.
You can produce icons in Flash and export the image files (File→Export→Export
Image). But it’s probably easier to create icons in Fireworks or Photoshop if they’re
www.it-ebooks.info
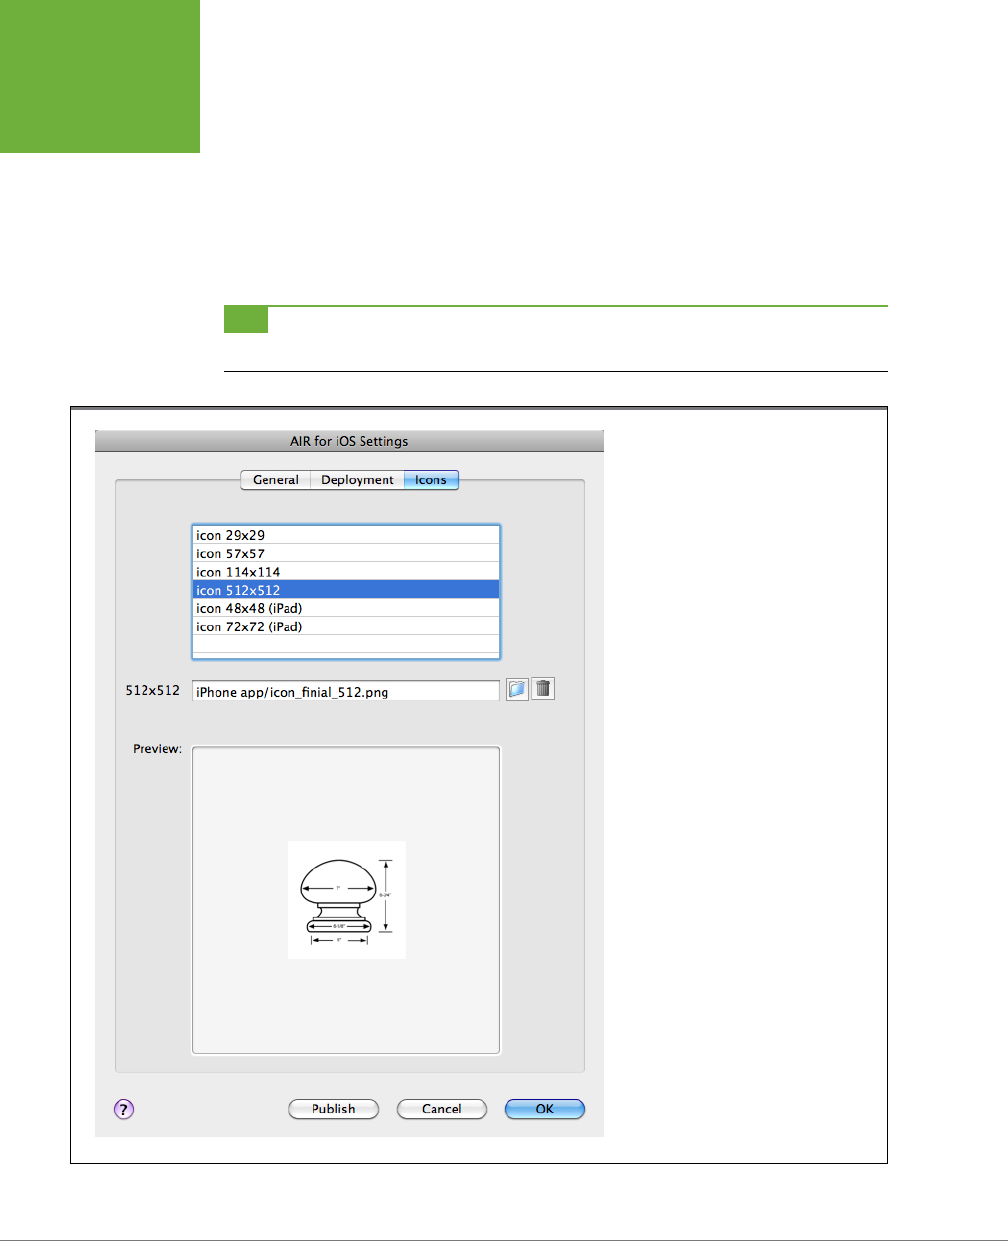
FLASH CS6: THE MISSING MANUAL
742
AIR FOR IOS
APP SETTINGS
available on your computer. Files should be saved in the PNG format, and it’s helpful
in the next step if you include the size in the filename. For example, use names like
myAppIcon29.png and myAppIcon57.png. The process is easiest if you store the
icons in the same folder as your FLA file.
Once you’ve created your icons in the necessary sizes, go to the Icons tab
( Figure 22-12) and click an icon size, such as “icon 29x29,” and then use the box at
the bottom to locate the matching icon that you created.
TIP Developing application icons is an art in itself. You can learn a lot by studying the icons used by your
favorite apps. Icons need to have the impact of a company logo and be identifiable at very small sizes.
FIGURE 22-12
Use the Icons tab to link your app to the
icons that will identify it in the App Store,
and on the iPhones and iPads of the world.
www.it-ebooks.info

CHAPTER 22: MAKING IPHONE APPS 743
AIR FOR IOS
APP SETTINGS
Fill out the details in the General and Deployment tabs. Then, create and identify
the icons for your project in the Icons tab. Once those chores are out of the way, you
can publish, install, and test your app on an iPhone, iPodTouch, or iPad.
Publishing, Installing, and Testing Your App
on an iDevice
When you publish an app that you’ve created with AIR for iOS, Flash creates both
an SWF file and an IPA file. To install the app on your iDevice, you first add the app
(IPA file) to iTunes, where it appears with the all the other apps you got from the
App Store. Then, within iTunes, you move your app to the device.
These steps explain how to move your app from your computer onto a device that’s
plugged in to the USB port. If circumstances prevent you from plugging in, see the
box on page 729.
1. With your AIR for iOS Flash document open in Flash Professional, choose
File→Publish.
You see two successive progress bars as Flash builds an SWF file and then
translates it to an IPA file. If your AIR for iOS settings are incomplete, Flash
stops in the middle of the process and displays an error message.
2. In the Finder or Windows Explorer, double-click the IPA file; for example:
finials.ipa
.
This starts the process that copies your app to the Apps section in iTunes. If
you’re adding a new version of the same app, a dialog box asks if you want to
replace the existing version.
3. To locate your app in iTunes, in the upper-left corner, click Apps.
Your app appears in the main window identified by the name and icon you
provided earlier. If, like a lot of people, you have a gazillion apps, you can search
using the box in the upper-right corner.
4. Connect one of your ocially designated testing devices to the computer
via USB.
The device appears in iTunes’ left column under Devices. In many cases, iTunes
goes through the “synchronizing” process. That means shuing purchased apps
and media back and forth between the computer and the device. This activity
depends in part on the device’s sync settings.
NOTE Your iPhone or iPad must be registered with iTunes. Individual iPhones and iPads are registered with
a specific copy of iTunes on a specific computer. That means, iTunes can add apps and purchased media to the
device. In addition, your device must be registered as a test device on the Apple Developer site, as explained on
page 729.
www.it-ebooks.info
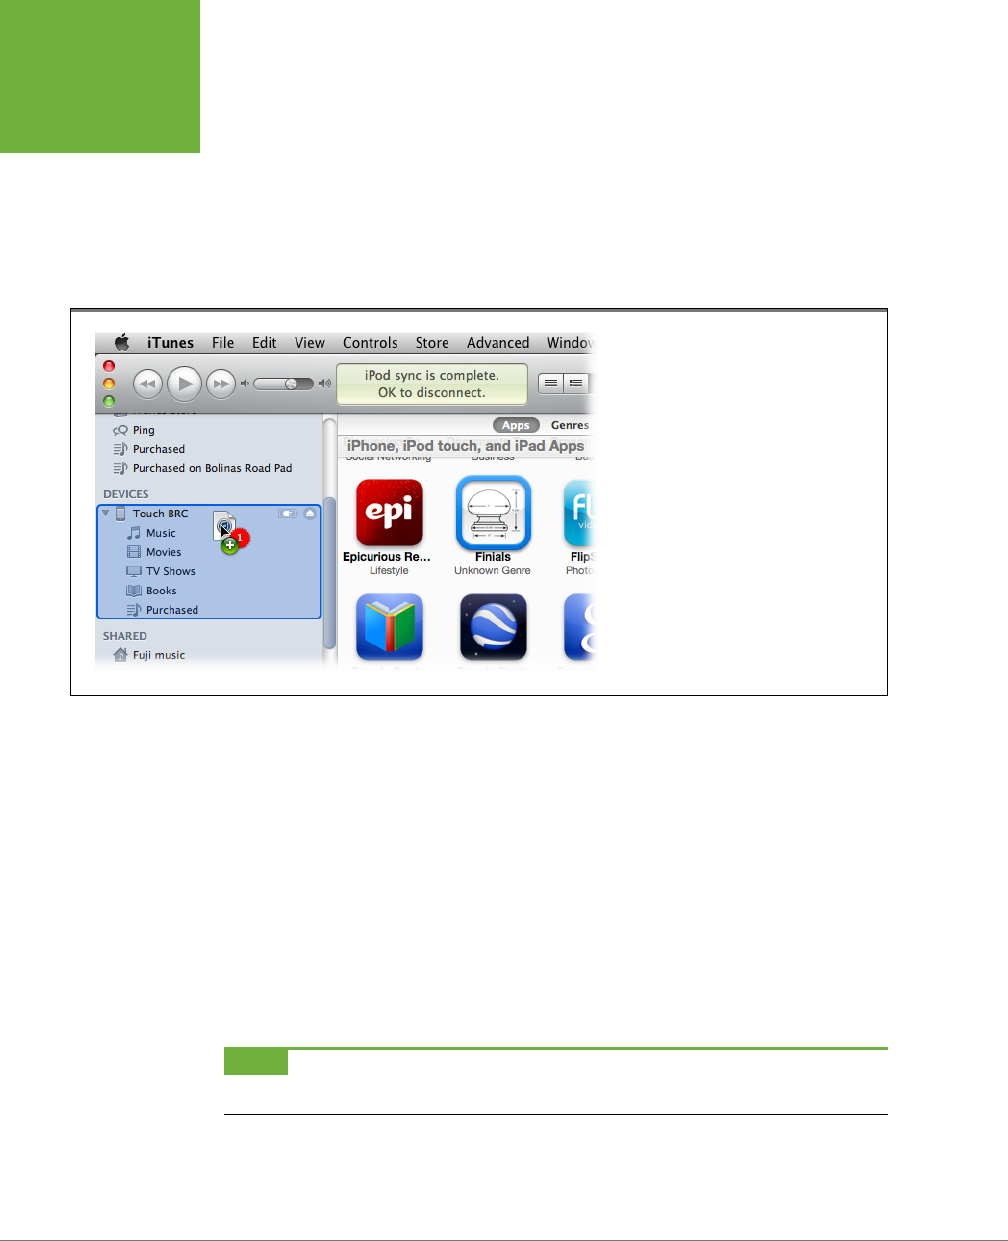
FLASH CS6: THE MISSING MANUAL
744
AIR FOR IOS
APP SETTINGS
5. If necessary, drag your app from the iTunes Apps window on to your device,
as shown in Figure 22-13.
There are dierent reasons why automatic syncing may not copy your app to
the device. It might be your sync settings. Or you may already have a previous
version of the same app on your device. The sure way to get the latest version
on your device is to delete the previous version and then manually drag the
app onto your device.
FIGURE 22-13
To install your app, drag it from the Apps
section in iTunes onto the device listed in the
left column. If you’re repeatedly testing and
retesting, it may save time if you leave the
device connected to your computer and turn
off its auto-syncing features.
6. Test your app on the device.
You don’t have to disconnect your iDevice from the computer to test the app.
Often it’s best to stay connected, especially if you know you’ll be making changes
in Flash and reinstalling the app on your device. Staying connected eliminates
some of the time spent while iTunes and the device synchronize.
Removing Your Test App from the Device
Testing is a repetitive process. Build. Install. Test. Then, you do it all over again. Before
you can install a new version of your app on a test device, you need to delete the
old version. To do that, touch and hold the app’s icon on the device. After a couple
of seconds, all the app icons go wobbly and you see X buttons in their upper-left
corners. Tap the X button on apps you want to remove.
NOTE If you want to examine a finished example of the project started on page 733, download
22-2_iOS_
Swipe_Pages_done.fla
from the Missing CD at
www.missingmanuals.com/cds/flashcs6mm
.
www.it-ebooks.info
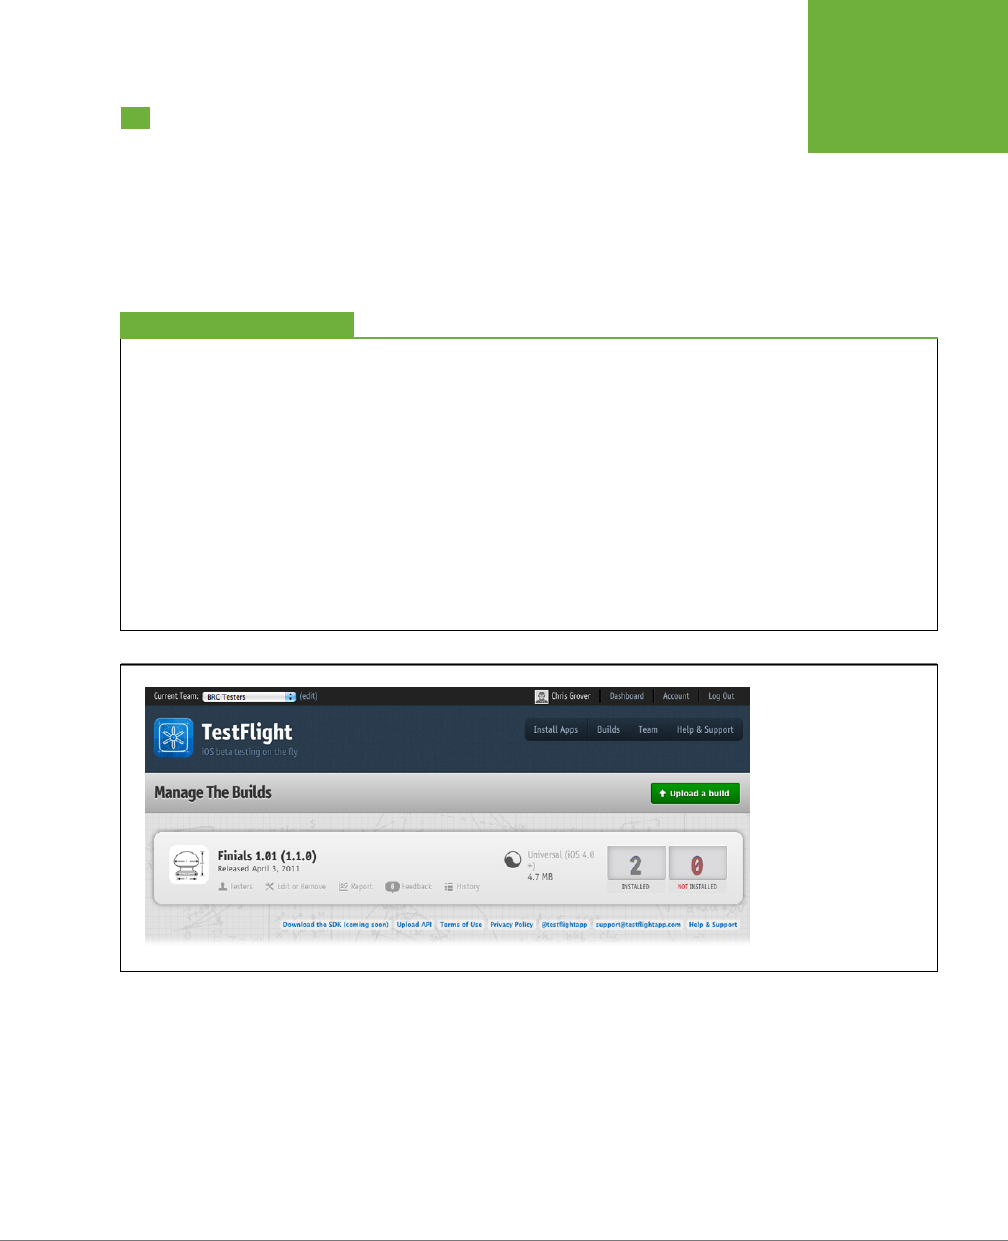
CHAPTER 22: MAKING IPHONE APPS 745
BUILDING A
TAP-READY
APP
Building a Tap-Ready App
The previous example showed how to create an app that recognizes swipe gestures
to move from one page to another. Often, you’ll want to create buttons that respond
to taps, just like buttons respond to mouse clicks in conventional programs. Since
their function is virtually identical, Flash automatically recognizes MouseEvent
clicks as single finger taps when it builds the IPA file. This makes life easier if you’re
repurposing a computer-based AIR app for iOS.
Over-the-Air App Installation with Testflightapp.com
There’s another unique way to move your test apps to iPhones
and iPads. A website called TestFlight (
www.testflightapp.com
)
is set up to deliver apps that are under development to testers.
Currently, the service is free to developers and testers, though
both need to sign up with their certificates and device UDIDs.
Once that is done, developers upload their apps to the site
using the site’s tools (see Figure 22-14). Then, also through the
site, developers notify testers via email that the app is ready
to run through its paces. Testers can click links on the email to
download the app directly to their iDevice. There’s no side trip
through iTunes when you use TestFlight. The process is simple
for both developers and testers.
In addition to bypassing the installation dance with iTunes,
TestFlight gives developers an easy way to reach more testers
scattered over a larger geographic area. If you don’t already
have a designated team of testers, you can use the volunteers
who’ve signed up with TestFlight.
DEVELOPERS’ CORNER
FIGURE 22-14
Testflightapp.com is a
website that distributes
apps under development
to testers. You can use it
with a team of app tes-
ters or you can use it to
easily install your apps on
testing devices, bypassing
the iTunes installation
routine.
Though it looks similar to the app in the previous exercise, it’s constructed dier-
ently. Follow these steps to add tap-ability to the app:
1. Open
22-3_iOS_Tap_Menu.fla
and then save it as
Finials Tap.fla
.
The main timeline for this app has a single frame. Two movie clips symbols are
placed on the stage in that frame. mcMainContent, as the name suggests, holds
the content for the app in several frames (pages). mcMenuBar holds buttons
used to navigate through mcMainContent. Separating the content from the
www.it-ebooks.info
FLASH CS6: THE MISSING MANUAL
746
BUILDING A
TAP-READY
APP
navigation tools has organizational benefits. By putting mcMenuBar on the
one and only frame in the main timeline, the buttons are always available and
ready to handle their chores.
2. On the stage, double-click the mcMainContent movie clip.
The content on the various frames will look familiar if you tackled the “swipe
gesture” exercise earlier in this chapter. ActionScript code appears on the first
two frames of the actions layer. In the first frame, a
stop()
method keeps the
playhead from running through the entire movie clip on startup. The code on the
second frame was added using the “Click to Go to a Frame and Stop” snippet. The
result is when someone clicks on a finial profile in Frame 2, the playhead moves
to the frame showing that finial’s dimensions. Each
gotoAndStop()
method uses
a frame label. For example,
gotoAndStop(“nc3”)
moves the frame labeled
nc3
.
3. Click Scene 1 on the edit bar to close the mcMainContent movie clip.
mcMainContent closes and you’re back at the main timeline.
4. On the stage, double-click the mcMenuBar movie clip.
The movie clip opens on stage for editing. As shown in Figure 22-15, the movie
clip holds three more movie clip symbols. By examining the properties, you
see the instances are named btnBack, btnHome, and btnNext. You’ll use these
names to identify the navigation buttons in the following steps.
FIGURE 22-15
The buttons for this app were placed at the bottom of the screen to make it easy
for iPhone single-handed operation. It’s common for iPhoners to hold their device
in the left hand and use their thumb for simple navigation chores. Bottom buttons
are easier to reach. The right hand is brought in for more complex gestures and
operations.
www.it-ebooks.info

CHAPTER 22: MAKING IPHONE APPS 747
BUILDING A
TAP-READY
APP
5. Click Scene 1 on the edit bar to close the mcMenuBar movie clip.
mcMenuBar closes and you’re back at main timeline.
6. Select mcMenuBar and then open Code Snippets→
Timeline Navigation.
The Timeline Navigation snippets include a number of predesigned chunks of
code that move the playhead within a movie clip. Each has a descriptive name.
You can use these snippets to handle mouse clicks or single finger taps.
7. With mcMenuBar selected, double-click the snippet names “Click to Go to
Previous Frame and Stop.”
The code is automatically added to the actions. An ActionScript symbol appears
in Frame 1 of the actions layer.
8. If necessary, press F9 (Option-F9) to open the Actions window.
As usual, the comment at the beginning of snippet explains its purpose. Without
the comment, the working code appears as follows:
mcMenuBar.addEventListener(MouseEvent.CLICK, fl_ClickToGoToPreviousFrame);
function fl_ClickToGoToPreviousFrame(event:MouseEvent):void
{
prevFrame();
}
The
prevFrame()
method moves the playhead left one frame in the movie clip.
That’s fine, but in this case, you don’t want to move the playhead in the main
timeline; you want to control the playhead in mcMainContent.
9. Change the method to read
mcMainContent.prevFrame()
;
Now the code triggers the
prevFrame()
method in the mcMainContent movie
clip.
You need to make a similar change to the event listener. As it is now, clicking
any point in mcMenuBar triggers the
prevFrame()
method. Instead, you want
ActionScript to listen for clicks on btnBack within the mcMenuBar movie clip.
10. Change the event listener to read:
mcMenuBar.btnBack.addEventListener
(MouseEvent.CLICK, fl_ClickToGoToPrevious Frame);
The dot syntax identifies btnBack within mcMenuBar.
11. Repeat steps 7–10 to add and modify a snippet for btnNext.
Use the snippet named “Click to Go to Next Frame and Stop.”
www.it-ebooks.info

FLASH CS6: THE MISSING MANUAL
748
BUILDING A
TAP-READY
APP
12. Repeat the process to add and modify a snippet for btnHome.
Use the snippet named “Click to Go to a Frame and Stop.” As the instructions in
the comment explain, you change the number 5 in the
gotoAndPlay(5)
method
to customize this code. You can substitute the number 1 so the complete method
reads as follows:
mcMainContent.gotoAndPlay(1).
Or you can use the “home” frame label in mcMainContent.
mcMainContent.gotoAndPlay("home").
13. Go Control→
Test Movie to check the buttons’ operations.
The buttons you created work with either mouse clicks or finger taps so you
can quickly check their operation using the AIR Debug Launcher.
14. In the main timeline, select Frame 1 in the actions layer. Then, open Code
Snippets→Mobile Actions and double-click “Swipe to Go to Next/Previous
Frame and Stop.”
As explained in the exercise on page 733, this code enables the “swipe” gesture
so that users can move from page to page. As with the buttons, this gesture
needs to identify the movie clip that holds the content: mcMainContent.
15. In the Action window (Window→Actions), change the
prevFrame()
and
nextFrame()
methods in mcMainContent.
After you’ve made changes, here’s how the code for the snippet should read:
Multitouch.inputMode = MultitouchInputMode.GESTURE;
stage.addEventListener (TransformGestureEvent.GESTURE_SWIPE, fl_SwipeToGoTo
NextPreviousFrame);
function fl_SwipeToGoToNextPreviousFrame(event:TransformGestureEvent):void
{
if(event.offsetX == 1)
{
// swiped right mcMainContent.prevFrame();
}
else if(event.offsetX == -1)
{
// swiped left mcMainContent.nextFrame();
}
}
www.it-ebooks.info

CHAPTER 22: MAKING IPHONE APPS 749
TIPS FOR
IOS APP
DEVELOPMENT
16. Test your app.
You can test the app again using AIR Debug Launcher to double-check for
compiler errors and try out the buttons. However, you’ll probably want to test
it on an iDevice. That means you need to create a new app ID for this project
and add details to the AIR for iOS settings.
When you test this app on an iPhone or iPad, you’ll see that the mouse click events
work as finger taps. The swipe gesture works as it did in the earlier exercise.
NOTE To see the finished example, download
22-4_iOS_Tap_Menu_done.fla
from the Missing CD at
www.
missingmanuals.com/cds/flashcs6mm
. You’ll need to provide your own AIR for iOS settings to test the app on a
device.
Tips for iOS App Development
iPhones and iPads are remarkable devices that cram a lot of computing power into a
tiny package. It’s easy for users to think of them as desktop and laptop substitutes.
As a developer, you need to consider the dierences and limitations of the iDevice.
You want your app to be quick and responsive. You don’t want it to hog all the device
resources. A well designed app will be used by many. A poorly designed app will
remain undiscovered in some dusty corner of the App store.
Here are some things to consider as you design your winner:
• Make use of iOS behaviors like swipes, taps, and pinches. Avoid behaviors that
won’t work with iOS, like rollovers.
• Where possible, design for both portrait and landscape orientation and test
your app both ways.
• Use tweens only when necessary—they hog iDevice brainpower.
• Use gradients and transparency sparingly—they also hog iDevice brainpower.
• Where possible, use bitmaps instead of vector artwork. iOS likes bitmaps, but
the calculations necessary to draw vectors may use too much CPU power.
• If you use vector art, use the “cache as bitmap” option. This stores the vector art
as a bitmap, making it easier for iDevices to display the image. In ActionScript,
you can set the property for a movie clip:
mcMovieClip.cacheAsBitmap = true
. As
always, test your app to make sure caching helps rather than hurts performance.
• Use system fonts: _san, _serif, and _typewriter.
• Remove event listeners when they are no longer needed.
• Remove objects from the display list and from memory when they are no longer
needed.
www.it-ebooks.info

751
CHAPTER
23
There are two ways to view Flash-developed content on Android devices like
the HTC One smartphones or Motorola Xoom tablets. The old-fashioned way
is to use the device’s web browser to display Flash content that’s embedded
in the web page. The up-and-coming way is to develop an application using AIR for
Android, and that’s the focus of this chapter. (For a comparison of installed apps
versus web-based animations, see the box on page 753.)
You can use all your animation and ActionScript skills to build apps for Android
devices, but there are dierences between mobile apps and web-based or desktop
apps. For example, in an app you’ll want to include touchscreen gestures. If your app
is destined for smaller smartphone screens, you need to make your buttons large,
and the text and images readable. Take a look back at Chapter 22—which explains
how to create apps for Apple’s iOS—even if you plan to focus on Android. That
chapter’s details on using code snippets to add touchscreen gestures, for example,
also applies to Android.
This chapter explains how to create a new Android document in Flash. You’ll also
learn how to create an app that uses Android’s accelerometer to move objects on
the screen. The last section discusses how to convert an iOS app into an Android
app to maximize your app-building eorts. It’s not hard to convert an application
so that it runs on AIR for desktops (Windows, Mac, and Linux), as well as Apple’s
iDevices and Android handsets.
Building Android Apps
www.it-ebooks.info

FLASH CS6: THE MISSING MANUAL
752
MEET AIR FOR
ANDROID
Meet AIR for Android
A philosophical argument is going on in the mobile computing world, and it’s as hotly
contested as the old Mac-vs.-Windows debate. For phones and tablets, the hot issue
is open development (Android) versus controlled/moderated development (iOS). As
covered in Chapter 22, Apple has a pretty firm thumb on application development
for iPhones, iPads, and iPod Touch devices. Their argument is that Apple’s oversight
ensures a quality user experience and inhibits malware. For validation, they point to
the Mac’s track record. Android has a dierent pedigree, which comes from Linux,
the mother of all open source projects. The philosophy behind open source is that
transparency makes code better. Open source makes use of an army of coders ready
to stress test and add to the existing code. This improves the source more quickly
than a closed or proprietary system.
Today, the Android operating system is available under a free software/open source
license. Google makes the entire source code available to developers and is a mem-
ber of the Open Handset Alliance, which includes a number of phone manufactures
including HTC, LG, Motorola, and Samsung.
NOTE The company that founded Android in 2003 included an ex-Apple engineer (Andy Rubin), a voice
communication executive (Rich Miner), an ex-T-Mobile VP (Nick Sears), and an ex-WebTV developer (Chris White).
Google acquired Android, Inc. in 2005.
If you’re going to develop apps for Android devices, you want to visit the ocial
developer’s site:
http://developer.android.com
. The site is well-organized and easy
to navigate. You’ll find an SDK (software development kit) section where you can
download the tools that Java programmers use to develop Android apps (see the
box on page 755). The Dev Guide section provides documentation. Read through
the guide and reference, and you’ll have a renewed appreciation for Flash’s ability to
shield you from some of the nitty-gritty elements of Android programming. Other
resources found on the website include sample code, tutorials, FAQs (frequently
asked questions), and videos. For social interaction with other Android developers,
visit the forums at
http://developer.android.com/community
.
NOTE At this writing, the most recent version of Android is 4.0, also known as Ice Cream Sandwich. It was
developed specifically for tablets. Currently, the source code is not available, but there are promises that it will
be in the future.
What does the dierence between an open and a controlled market mean for you as
an app developer? The process necessary to develop iPhone and iPad apps includes
paying a developer subscription fee ($99) and registering each test device you use.
With Android apps, by contrast, you don’t need to pay anything or jump through as
many hoops to build, test, and market apps. From the consumer end, the iPhone app
store feels like a bricks-and-mortar Apple store—clean, vetted, and ecient. The
www.it-ebooks.info
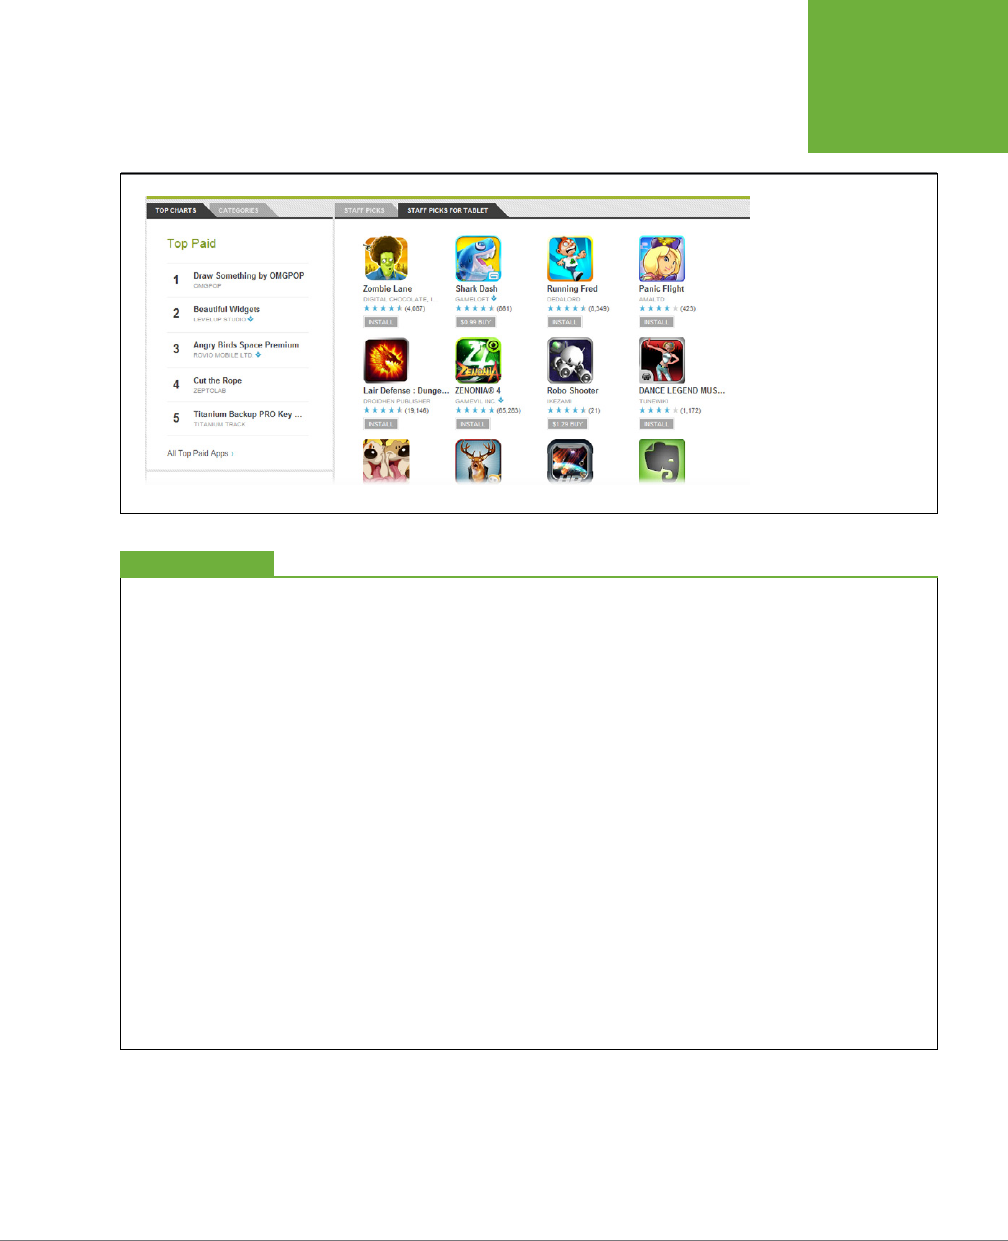
CHAPTER 23: BUILDING ANDROID APPS 753
MEET AIR FOR
ANDROID
Android app stores (
https://play.google.com
and
www.amazon.com/appstore
) and
the apps themselves have a little more Wild West feeling about them (Figure 23-1).
FIGURE 23-1
Android users download
apps directly to their
phones and tablets.
Apps are available at the
Google app store shown
here (
http://play.google.
com
) or from other ven-
dors such as Amazon.
AIR for Android vs. Flash Player
The AIR for Android apps discussed in this chapter are differ-
ent. They’re standalone apps (.apk files) that are installed on
Android devices along with the AIR runtime code. These apps
appear as icons on the phone or tablet’s touchscreen and
behave like any other installed app.
As a developer, AIR apps are generally the best way to show
off your Flash/ActionScript talents. On mobile devices, apps
designed using AIR for Android simply perform better. AIR
apps have use of the entire screen, and they aren’t competing
with HTML content. Since they’re translated into Android-speak,
AIR apps are more responsive. Also, a well-designed AIR for
Android app makes use of all those touchscreen gestures like
swipes and pinches.
If you do create a website that welcomes Android users, make
sure you incorporate user interface elements that will work
for handhelds. Avoid rollovers, for example, and scale the
buttons and other widgets to accommodate big fingers on
small screens.
When Android phones and tablets first hit the market, Adobe
developed a Flash Player specifically for mobile browsers. They
discontinued that effort with Flash Player 11.1 commenting in a
blog that “HTML5 is now universally supported on major mobile
devices, in some cases exclusively. This makes HTML5 the best
solution for creating and deploying content in the browser
across mobile platforms… Our future work with Flash on mobile
devices will be focused on enabling Flash developers to pack-
age native apps with Adobe AIR for all the major app stores. ”
If you’re interested in dipping your toe in HTML5, CSS and
JavaScript waters take a look at Adobe Edge a design/anima-
tion tool that has that familiar Adobe interface. Need missing
manual guidance for Edge? Check out Adobe Edge Preview 5:
The Missing Manual (O’Reilly Media).
UP TO SPEED
Your First “Hello Android” App
In Flash CS6 you start Android apps using a specially designed template that auto-
matically sizes the stage and adjusts other settings. The process is nearly identical
to creating a Flash document for AIR (desktop) or iOS. As you’ll see on page 758,
when you’re ready to test your app on an Android smartphone or tablet, you fill in the
www.it-ebooks.info
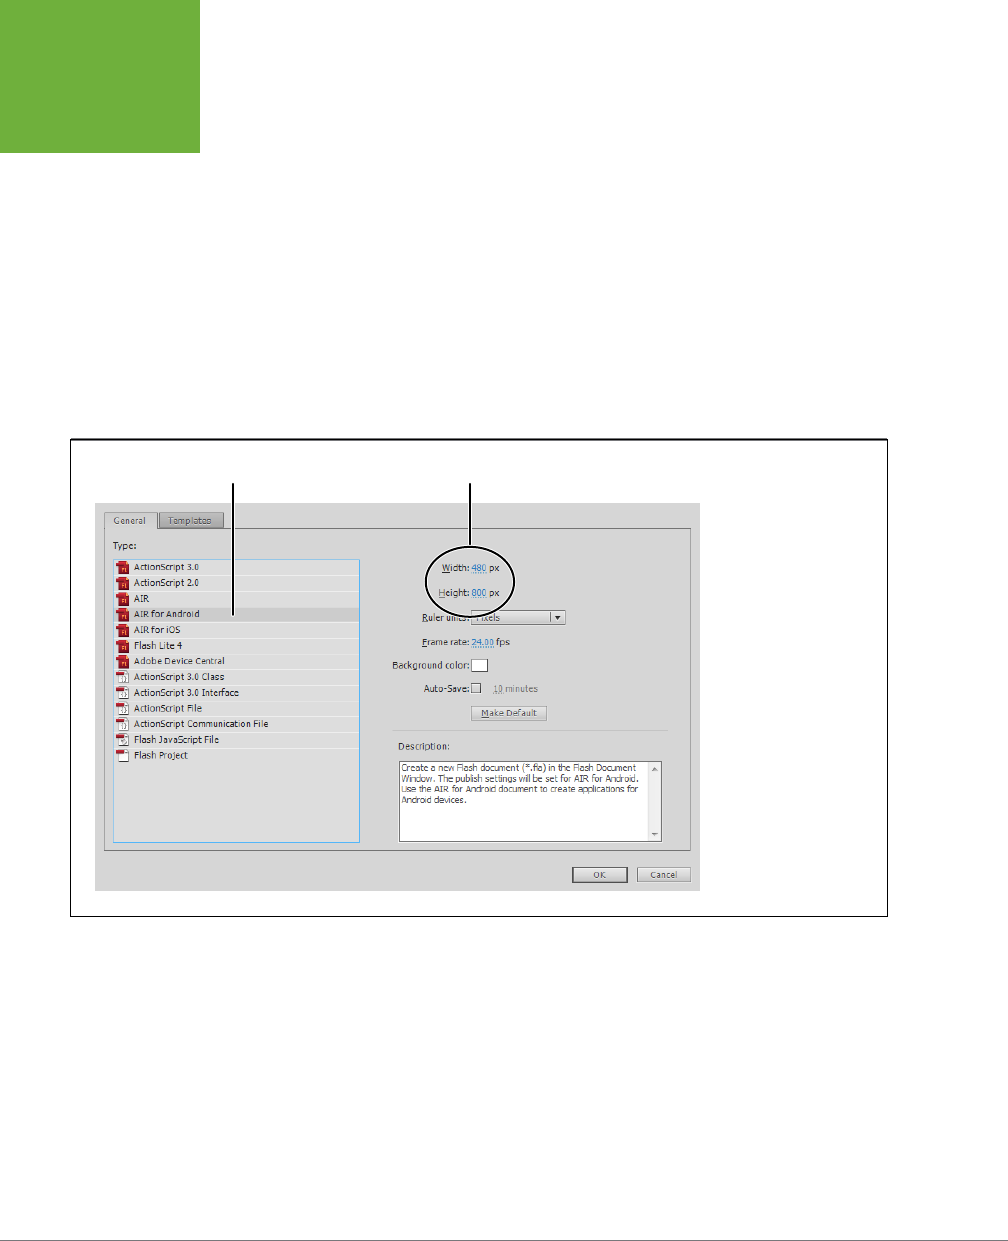
FLASH CS6: THE MISSING MANUAL
754
MEET AIR FOR
ANDROID
deployment and security settings and then publish your AIR for Android app. At that
point, Flash creates the APK file for the device. This exercise shows how to start an
AIR or Android app and then how to test it in Flash’s AIR Debug Launcher ( Mobile).
Why break with tradition? Here’s how you build your first “Hello Android” app.
1. Choose File→New.
The New Document window opens.
2. Choose “AIR for Android” and click OK.
When you choose “AIR for Android,” the width and height for the stage are
automatically set to 480 x 800, as shown in Figure 23-2. You can change the
stage color (background) and the frame rate, but for this first project, leave
them as they are.
FIGURE 23-2
When you create a new
AIR for Android docu-
ment, Flash sets the stage
to 480 x 800 pixels. The
frame rate is set to 24
frames per second, but
you can make changes if
your project requires it.
AIR for Android Stage Size
3. Click the Text tool and then, in the Properties panel, set the Text engine to
TLF
and the text type to
Read Only
text.
Your “Hello Android” app doesn’t need fancy text.
4. In the Character settings, set the Family (font) to
_serif
and the size to
72
.
When you specify a device font like _serif, _sans, or _typewriter, your app uses
a font already installed on the device. This practice keeps your app files small
and is ecient for the device.
5. Drag to create a text box on the stage and type
Hello Android
or a message
of your choice.
www.it-ebooks.info

CHAPTER 23: BUILDING ANDROID APPS 755
MEET AIR FOR
ANDROID
6. Choose File→“AIR for Android Settings.” Set the aspect ratio to Auto and
turn on auto-orientation. Click OK.
With these settings, Android devices will automatically orient the screen to
portrait or landscape mode. The settings are covered in detail beginning on
page 758. When you click OK, the settings window closes.
7. Press Ctrl+S (⌘-S) to name and save your work.
8. Go to Control→
Test Movie→“in AIR Debug Launcher.”
Your Hello Android app appears in a small window and displays the message.
The AIR Debug Launcher (ADL) is a special tool for viewing AIR animations on your
desktop. It’s useful for quick checks of graphics, animations, and simple buttons. If
your app is set up to auto-orient (step 6 above), you can use the Device→Rotate Left
and Device→Rotate Right commands to view it in dierent orientations. If you want
to test out touch gestures or other mobile features, you can do a quick check with the
Simulator described in the box on page 737. If you want to gauge app performance
under real-world conditions, you need to move your Android app (.apk file) and the
AIR runtime to a real device, as described in the next exercise.
The Android-Java Connection
If I didn’t use Flash Professional, what tools would I use to
create Android apps?
Most Android development is done using Java, an object-
oriented programming language that shares much with the C
and C++ languages. Originally developed by Sun Microsystems,
Java is now maintained by Oracle Corporation. Even though
you’re developing Android apps using AIR, at some point
you may want some of the tools from the Java Development
Kit (JDK). To download the JDK, head to
www.oracle.com/
technetwork/java/javase/downloads
. Click the Download JDK
button on that page. Choose your platform, check the licensing
agreement, and click Continue. On the next page, you’ll see a
link to download your version of the Java Developer kit.
You may be saying “Hey, I’ve already got Java on my computer.”
Chances are you have the Java Runtime Environment (JRE),
the tools needed to run Java applications. You probably don’t
have the Java Developer Kit (JDK) unless you or your computer
have already been involved in Java application development.
FREQUENTLY ASKED QUESTION
App Building with the Android
Accelerometer Template
To truly get a feel for Android app development, you need to install your app on an
Android device and test it. If you worked your way through the Apple iOS security
process, you’ll be pleased to learn that life is easier and less expensive in the Android
world. Like the AIR applications described in Chapter 21, with AIR for Android, you
can create a self-signed certificate. You don’t need to get a certificate from an of-
ficial certificate authority (CA) to install and test your app. With your self-signed
www.it-ebooks.info
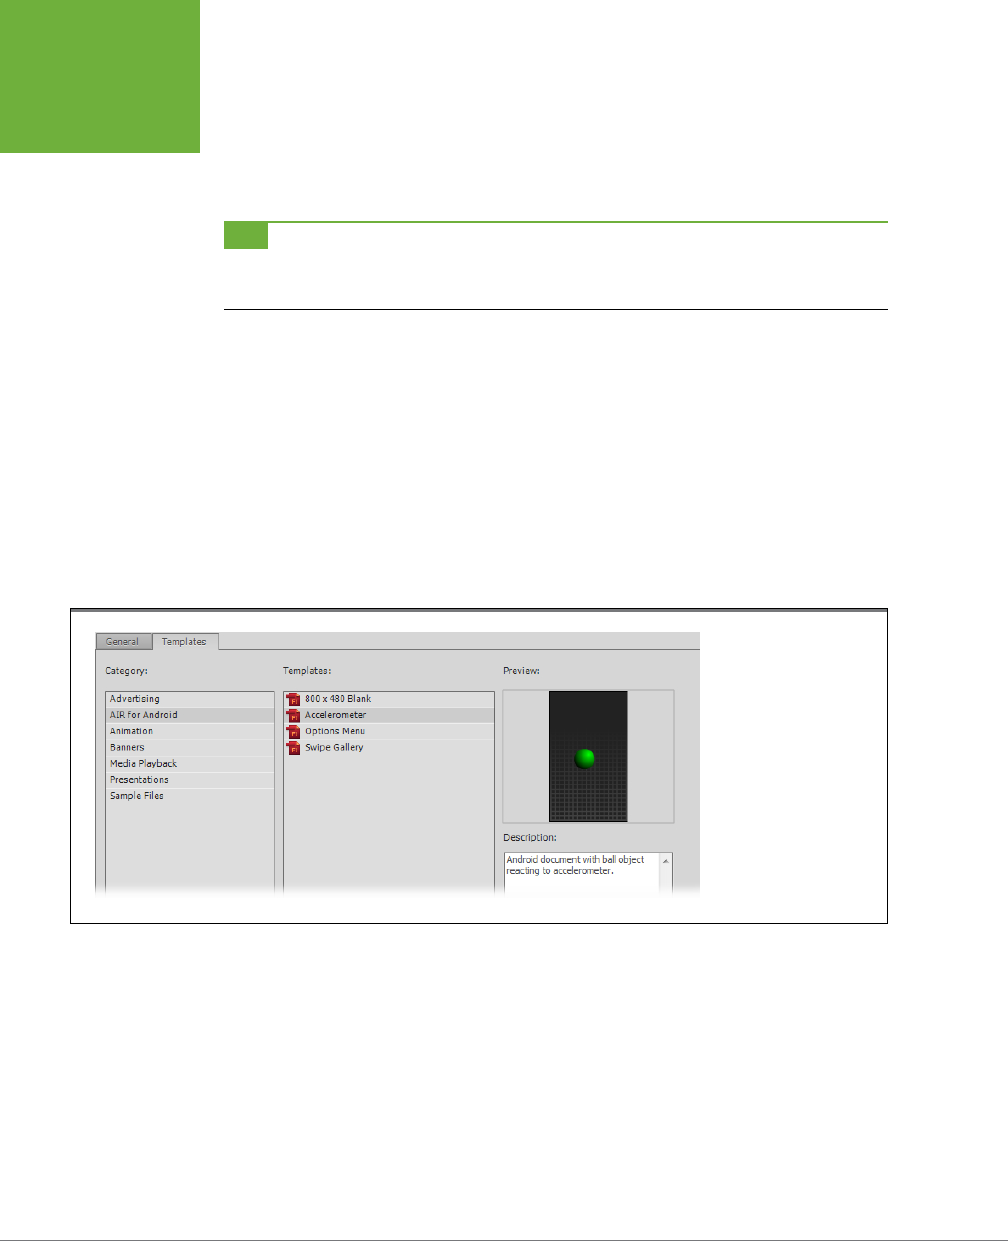
FLASH CS6: THE MISSING MANUAL
756
MEET AIR FOR
ANDROID
certificate, you can move Android apps to devices connected to your computer by
USB cables. This next exercise explains exactly how to do that. For testing purposes,
you’ll use a template that makes use of the Android accelerometer (the unit inside
gadgets that knows which end is up).
TIP Flash Professional CS6 arrives on your computer with several prebuilt templates that provide examples
of Android behaviors and techniques. These templates are easy to use, and they’re great starting points for your
own projects.
1. Choose File→New.
The New Document window opens showing two tabs: General and Templates.
2. Click the Templates tab.
Templates are grouped into categories such as Advertising, Media Playback,
and Presentations.
3. Click the AIR for Android category.
Shown in Figure 23-3, the Android templates include: “800 x 400 Blank,”
Accelerometer, Options Menu, and Swipe Gallery.
FIGURE 23-3
Flash CS6 comes with
templates that show
how to use basic Android
behaviors including
the devices’ built-in
accelerometer. Choosing
a template adds content
and ActionScript code to
your Flash document.
4. Click Accelerometer, and then click OK.
When you click a template, its image appears in the Preview panel, and a de-
scription provides some details on the template. The Accelerometer template’s
description explains that a ball reacts to the device’s accelerometer. When you
click OK, the template opens in Flash.
www.it-ebooks.info

CHAPTER 23: BUILDING ANDROID APPS 757
MEET AIR FOR
ANDROID
5. Go to File→Save and then save the document with a name like
TestAccelerometer
.
It’s a good practice to save your documents when you first create them. One
benefit is that the name is used to fill in some of the blanks in the AIR for Android
settings. Another benefit is that Flash’s Auto-Save feature (Figure 23-2) can
minimize disasters like unexpected power outages.
6. Click the Library tab.
The Library shows that this animation has one movie clip symbol named “ball.”
The instance on the stage has the same name.
7. Click the Timeline tab.
The template starts o with four layers: Instruction, Actions, Ball, and Back-
ground. Below the stage, you see the brief instructions included with the
template.
8. Click the first (and only) frame in the actions layer and then open the Ac-
tions window (Window→Actions).
The ActionScript code that manages Android accelerometer events appears in
the Actions window as shown here:
import flash.events.Event;
var accelX:Number;
var accelY:Number;
var fl_Accelerometer:Accelerometer = new Accelerometer();
fl_Accelerometer.addEventListener(AccelerometerEvent.UPDATE, fl_Accelerom-
eter-
UpdateHandler);
function fl_AccelerometerUpdateHandler(event:AccelerometerEvent):void
{
accelX = event.accelerationX;
accelY = event.accelerationY;
}
ball.addEventListener(Event.ENTER_FRAME, moveBall);
function moveBall(evt:Event){
ball.x -= accelX*30;
ball.y += accelY*30;
if(ball.x > (480-ball.width/2)){
ball.x = 480-ball.width/2;
}
if(ball.x < (0+ball.width/2)){
ball.x = 0+ball.width/2;
www.it-ebooks.info

FLASH CS6: THE MISSING MANUAL
758
MEET AIR FOR
ANDROID
}
if(ball.y > (800-ball.width/2)){
ball.y = 800-ball.width/2;
}
if(ball.y < (0+ball.width/2)){
ball.y = 0+ball.width/2;
}
}
The first line imports Flash events. Then number variables are created for
tracking the X and Y properties of the ball. A new instance of the Accelerometer
object is created and named
fl_Accelerometer
. Like all objects,
fl_ Accelerometer
has an addEventListener method, which is put into action and triggers
fl_ AccelerometerUpdateHandler()
. The ball movie clip has an event listener
that uses the ENTER_FRAME constant to trigger
moveBall()
. The
moveBall()
function updates the position of the ball movie clip based on data provided by
the accelerometer (accelX and accelY) and a series of
if
statements that keep
the ball visible on the stage.
9. Click File→“AIR for Android Settings.”
When you start a document with an Android template, Flash automatically pro-
vides a group of settings specific to Android devices. The settings are grouped
under four tabs: General, Deployment, Icons, and Permissions.
10. Click the General tab. Set the aspect ratio to Auto. Turn on Full Screen and
Auto Orientation.
With these settings, Android devices will automatically orient the screen to por-
trait or landscape mode. The output file, app name, and app ID are automatically
filled in with the name you used when saving the Flash document. Note that the
output file ends with the .apk extent used by Android apps.
11. Click the Deployment tab.
The deployment tab, shown in Figure 23-4, is used to identify your developer’s
certificate and password, choose a deployment type, select a source for the
AIR runtime, and set the behavior after publishing. The following steps describe
each procedure.
12. In the certificate box, identify your developer certificate. If you don’t have
a certificate, click Create to create a self-signed certificate.
If you’ve already created a certificate, you can choose it from the combo box. If
you haven’t created one, it’s easy to create a self-signed certificate on the spot
by clicking the Create button and filling in all the blanks on the form.
You can put the same company/organization name in the “Publisher name,”
“Organization unit,” and “Organization name” boxes. Provide and confirm your
password. You can leave the type set to 1024-RSA and the validity period set
to 25 years. Lastly, give your certificate a name and choose where to save it.
www.it-ebooks.info
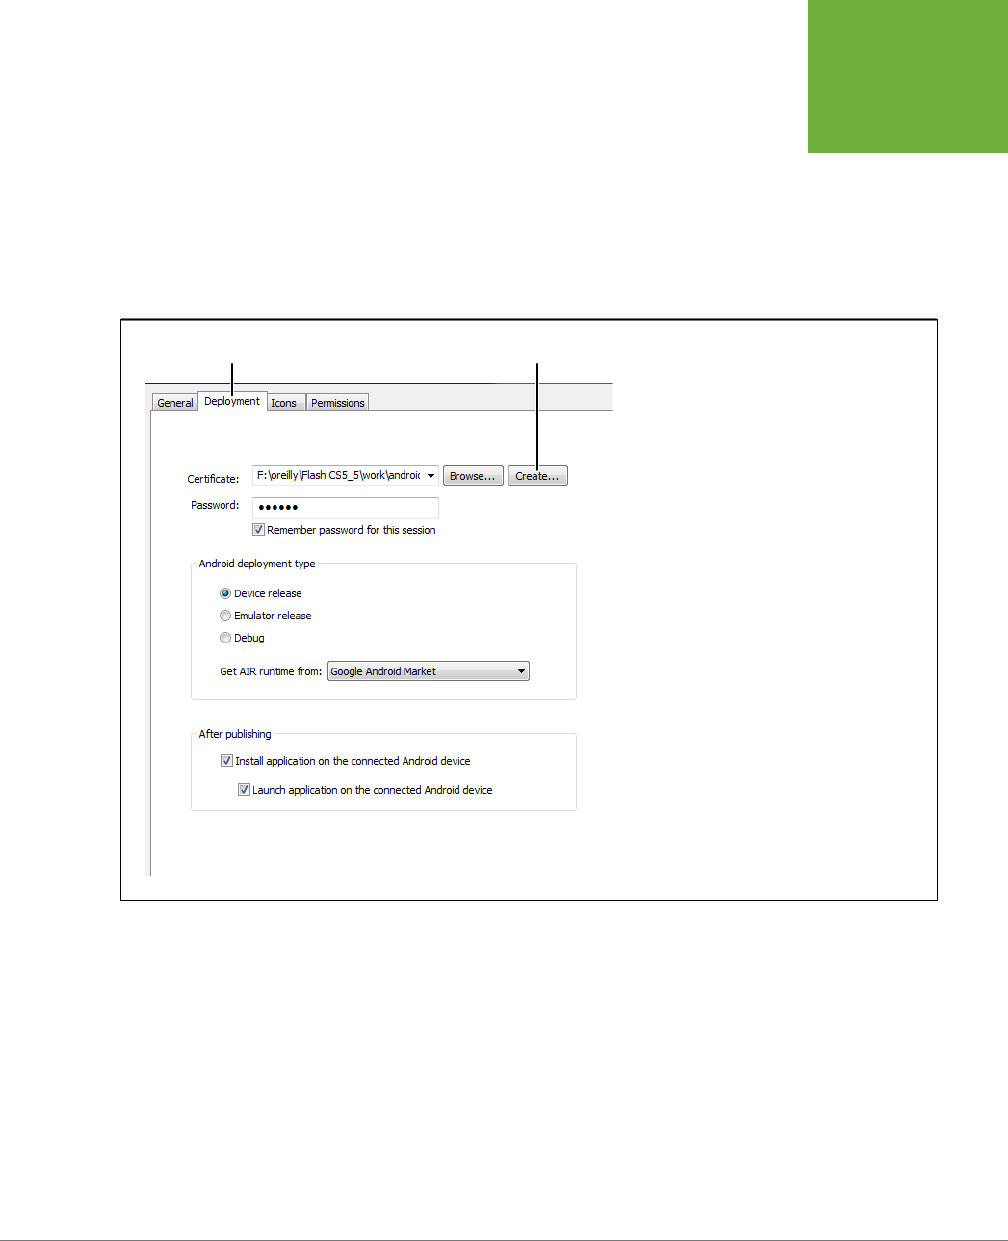
CHAPTER 23: BUILDING ANDROID APPS 759
MEET AIR FOR
ANDROID
When you click OK, Flash automatically loads the new certificate in the deploy-
ment settings. There are more details about security certificates in Chapter 21
(page 710).
13. Back in the Deployment tab of the “AIR for Android Settings” box, set An-
droid development type to “Device release.”
Use this setting to test your app on an Android device that’s connected to your
computer by a USB cable.
FIGURE 23-4
Top: Use the deployment tab to identify your
developer’s certificate. If you don’t have one, you
can easily create a self-signed certificate by clicking
the Create button.
Bottom: To create your self-signed certificate, all
you have to do is fill in all the blanks.
Deployment tab Create certificate
14. Under “After publishing,” turn on both “Install application on the connected
Android device” and “Launch application on the connected Android device.”
As advertised, these options automatically install and launch the app on your
Android gadget.
15. Click the Icons tab.
Each Android app is identified by an icon that users see on the touchscreen. Icons
for Android are displayed in three dierent sizes measured in pixels: 36 x 36, 48 x
48, and 72 x 72. You will want to create distinctive icons for your app in each size.
You can produce icons in Flash and export the image files (File→Export→Export
Image). But it’s easier to use Fireworks or Photoshop if they’re available. Save
www.it-ebooks.info

FLASH CS6: THE MISSING MANUAL
760
BUILDING APPS
FOR BOTH IOS
AND ANDROID
files in the PNG format, and it’s helpful if you include the size in the filename.
For example:
TestAccelerometer_36.png
and
TestAccelerometer_48.png
.
16. For each icon size, click the name/size in the top list and then, in the text
box below, identify the icon’s file.
Once you’ve selected the file, a preview appears in the box at the bottom.
17. Click the Permissions tab and select Internet.
The Permission tab displays a list of Android abilities ranging from writing to
storage to camera and audio recording access. You use this list to choose the
abilities your app requires. When users install your app, they’ll be notified about
its capabilities and the resources it uses. Click on a permission, and a brief
description appears at the bottom of the window. In this case, click Internet to
allow device debugging.
18. On your Android device, turn on USB debugging.
For example, on a Xoom tablet, go to Device Administration→Applications→De
velopment and turn on the USB debugging box. If USB debugging isn’t turned
on, you’ll see an error message when you publish.
19. Click Publish to publish and test your Android app.
You can publish from the “AIR for Android Settings” window, or, if it is closed,
you can publish by choosing File→Publish. A couple of progress bars appear as
Flash creates an SWF file and then builds an APK file for Android devices. The
APK file is installed on the attached device and then launched.
20. Test your app.
You can test your Android accelerometer app while it’s still connected by the
USB cable, or you can disconnect it. Hold the device with the screen facing up.
When you tilt it, the ball rolls to the low point on the screen.
TIP Templates aren’t the only way to add prewritten code to your Android apps. As demonstrated in
Chapter22, there are many code snippets designed specifically for mobile devices. Page 733 explains how to add
swipe gestures to your app to navigate between pages (movie clip frames).
Building Apps for Both iOS and Android
If you read through the iOS chapter before attacking Android, then you’ve probably
noticed the many similarities. When you develop in Flash, you spend most of your
time using your basic animation and ActionScript skills. The part of the process
that’s specific to a platform comes at the beginning, when you start your app, and
at the end, when you publish. Flash handles the translation when you publish for
iOS or Android. This system means you don’t have to sweat many of the nitty-gritty
details of writing low-level code for a specific environment. It’s relatively easy to
www.it-ebooks.info

CHAPTER 23: BUILDING ANDROID APPS 761
BUILDING APPS
FOR BOTH IOS
AND ANDROID
take an app that works for Apple’s iDevices and convert it to work for Android, or
vice versa. Here’s an iOS-to-Android example:
1. Open
23-1_iOS_to_Android.fla
.
This is an iOS project that was completed in Chapter 22. If you’re not familiar
with the project, go to Control→Test Movie to explore the app in the ADL
(AIR Debug Launcher). Clickable buttons control the timeline of a movie clip
( mcMainContent) placed on the stage.
2. Go to File→New→“AIR for Android” to create a new Android document.
Save the new document with the name
AndroidConversion.fla
.
An empty Android document is created.
3. Go to the
23-1_iOS_to_Android.fla
. Click the top layer; then, while holding
the Shift key, click the bottom layer.
All three layers are selected. The layers are named: named “actions,” “content,”
and “menu.”
4. Right-click (Control-click) the layers and choose Copy Layers from the
shortcut menu.
The layers and their content are copied to the Clipboard.
5. Go to
AndroidConversion.fla
. Right-click (Control-click) and then choose
Paste Layers.
The copied layers are pasted into the timeline. The stage content appears
scrunched up in the upper-left corner of the stage. That’s because the two
documents have dierent dimensions. The iOS document is 360 x 480, but the
Android document is 800 x 600.
6. Examine the Android document’s Library (Window→Library).
The movie clips and graphics that were in the iOS doc’s library have been copied
to the Android doc. The object and their instances on the stage have the same
names that were used in the original iOS app.
7. Right-click (Control-click) the first and only frame in the actions layer and
then choose Actions.
The Actions window opens, displaying the ActionScript code that was copied
from the original document and pasted into the new one. The code is unchanged,
and because the objects and instance names are unchanged, the actions work
in the new animation just as they did in the old one.
8. Choose Control→
Test Movie→“in AIR Debug Launcher (Mobile)” to test the
movie as an Android app.
Everything works as it did in the iOS version. In ADL, you can click the Back,
Home, and Next buttons to navigate. The second page shows five finial profiles,
www.it-ebooks.info
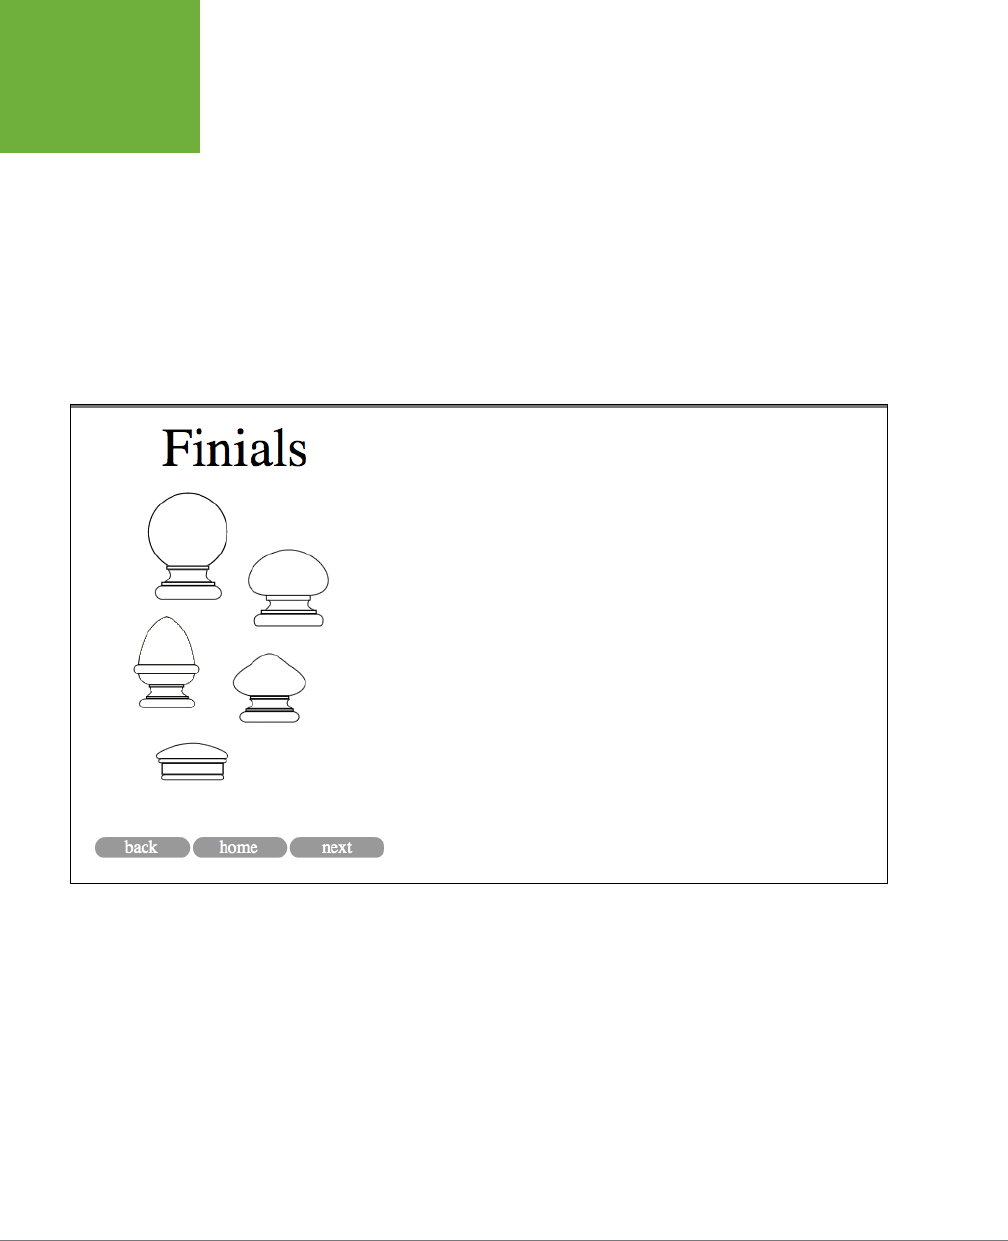
FLASH CS6: THE MISSING MANUAL
762
BUILDING APPS
FOR BOTH IOS
AND ANDROID
as shown in Figure 23-5. Click on a profile to jump to the page that shows the
dimensions for the finial.
To test the app on an Android device, follow the steps from the previous exercise
to complete the deployment settings. Go to File→“AIR for Android Settings” and
fill in the blanks. You may want to reposition the two movie clips on the stage:
mcMainContent and mcMenuBar. After you’ve made these changes, you can test
the app with the Publish command (File→Publish). When you test the Finial app on
an Android device, you can use swipe left and swipe right gestures to move from
page to page. Instead of mouse clicks, single finger taps activate the buttons. For
details on adding swipe gestures to your application, see the code snippets dis-
cussed on page 733.
FIGURE 23-5
Each of the finial profiles is a clickable button in the AIR Debug Launcher. When the
app is installed on an Android device, the buttons respond to finger taps.
Resizing Graphics for Multiplatform Development
Even if you center the mcMainContent and mcMenuBar movie clips, the Finials app
looks a little lost in its Android incarnation (Figure 23-6). It will look much better
if you fill the screen with the content and make the navigation buttons bigger. The
quick and easy way to do this is to simply scale the objects on the stage. There are
two problems with that approach, which might not be a major issue with a simple
app like this one, but could lead to trouble with bigger projects. First of all, the aes-
thetic issue: When you scale a bitmap up, the image is likely to become blocky and
pixelated. The other issue has to do with Android resources. In general, it’s best to
place graphics on the stage at 100 percent scale. That way, the smartphone or tablet
www.it-ebooks.info
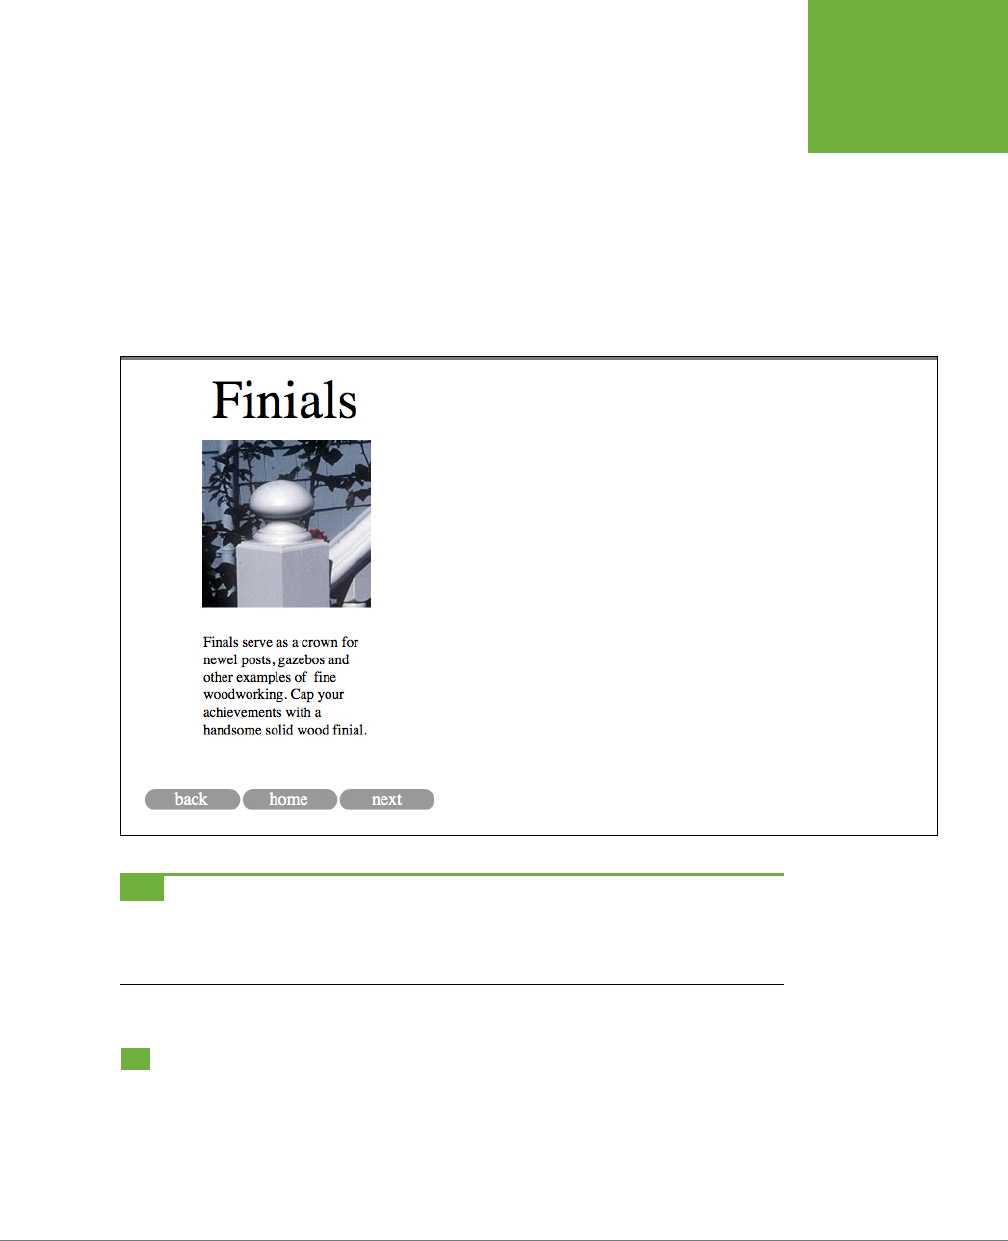
CHAPTER 23: BUILDING ANDROID APPS 763
TIPS FOR
ANDROID APP
DEVELOPMENT
doesn’t have to spend brainpower resizing the graphic. So, the best practice is to go
back to the original artwork and resize it to fit Android’s larger stage.
So, when you’re planning to build an app that’s destined for multiple devices such
as iPhones, iPads, and Android phones and tablets, where do you start? Should
you do your initial design for a small stage or a big stage? Many developers feel it’s
best to begin your development for the small screen, because that’s likely to be the
most challenging. Buttons and other widgets are proportionally bigger compared
with the total stage, so every pixel makes a dierence. In general, it’s easier to scale
your project up to a larger screen.
FIGURE 23-6
The Android template’s stage is bigger than the one for the original iPhone, so the
iOS app looks a little lost in the extra space. Initially, the movie clips are positioned by
the x/y coordinates for the smaller stage. Centering the movie clips helps some, but
you’ll probably want to resize the graphics for Android.
TIP If you plan ahead, you can create your multiple-sized graphics in batches. Adobe Fireworks comes
with most of the CS6 suites, and it’s an excellent program for resizing graphics and outputting files in batches.
In Fireworks, go to File→Batch Process. Fireworks also has a round-trip relationship with Flash. Right-click
( Control-click) a bitmap in a Flash document and then choose “Edit with Fireworks.”
Tips for Android App Development
Android devices are handheld computers, but they aren’t quite as powerful as the
computer that sits on your desktop. On top of that, Android apps use gestures like
swipes and flicks for navigation and other functions. You need to build apps that
work in the Android environment and that don’t hog all the resources. When building
www.it-ebooks.info

FLASH CS6: THE MISSING MANUAL
764
TIPS FOR
ANDROID APP
DEVELOPMENT
Android apps, you want to conserve the device’s brainpower, battery power, and
storage space. Your app has to share all those resources with the other installed apps.
Many of the tips for Android app building are the same as those for any handheld:
• Make use of behaviors like swipes, taps, and pinches. Avoid behaviors that won’t
work with a touchscreen, like rollovers, tiny buttons, and minuscule menus.
• Whenever possible, design for both portrait and landscape orientation.
Make sure to test your app in both positions. If your app works only one way,
you can lock in the orientation using the settings at File→“AIR for Android
Settings”→General.
• Use tweens only when necessary. The calculations to execute a tween gobble
up Android brainpower.
• Use gradients and transparency sparingly—they also hog Android brainpower.
• Where possible, use bitmaps instead of vector artwork. Mobile devices like
bitmaps, but the calculations necessary to draw vectors may use too much
CPU power.
• Pre-size your bitmaps for the application. There’s no need to perform an extra
“scale” calculation if your bitmaps are sized at 100% when they’re on the stage.
• If you use vector art, use the Cache as Bitmap option (Properties→Display→
Render→“Cache as Bitmap.”) This stores the vector art as a bitmap, making it
easier for devices to display the image. In ActionScript, you can set the property
for a movie clip:
mcMovieClip.cacheAsBitmap = true.
As always, test your app
to make sure caching helps rather than hurts performance.
• Use device fonts: _san, _serif, and _typewriter. Using device fonts keeps your
app smaller and increases its performance.
• Remove event listeners when they are no longer needed.
• Remove objects from the display list and from memory when they are no longer
needed.
www.it-ebooks.info

767
APPENDIX
A
It’s 2:00 a.m., you’re
this close
to finishing your animation, and you run into a snag.
If you can’t find the answer to your question in the pages of this book, you have
plenty of other possibilities. First of all, Flash has its own built-in help system,
which may give you the answer you need on the spot. For more complex problems,
you can seek technical support from Adobe or from fellow Flash fans via the Web.
This appendix outlines all these options.
First, in case you need help getting Flash installed on your computer, some basic
instructions follow.
Flash CS6 Minimum System Requirements
While the Flash box lists minimum requirements,
minimum
is the operative word.
You’ll want at least 20 GB free on your hard disk—not just for the program installation,
but to give you room to create and store your Flash masterpieces and import addi-
tional files (like previously created images, sound files, and movies) from elsewhere.
Adobe lists the minimum amount of computer memory as 2 GB for both Macs and
PCs, but as usual, you won’t be sorry if you have two to four times that amount.
The same is true of processor speed—faster multicore processors perform best. For
Windows operating systems, Flash works with Windows XP with Service Pack3,
Vista, or Windows 7. It’s best to have the most recent service packs (operating
system upgrade) installed. For Macs, the requirement is an Intel multicore proces-
sor accompanied by Mac OS X version 10.6 or 10.7. Flash CS6 isn’t compatible with
PowerPC Macs. Last, and certainly not least, is screen size and video card. The
minimum is listed as 1200 x 800 pixels with a 16-bit video card. Again, most of
Installation and Help
www.it-ebooks.info

FLASH CS6: THE MISSING MANUAL
768
FLASH CS6
MINIMUM
SYSTEM
REQUIREMENTS
today’s PCs and Macs, even laptops, meet this requirement. But Flash has so many
windows and panels, it’s great to have a system with more than one monitor or one
very large display. That lets you display multiple panels, the Flash stage, and the
Actions window without having to open, close, and then reopen them all the time.
Adobe lists a DVD drive as one of the requirements. Installing Apple’s QuickTime
7.6.6 or later (which is available for Windows as well as Macs) gives you access to
additional file formats and multimedia features. To activate and to use some of the
online services, such as Adobe TV help, you need a broadband Internet connection.
Installing and Activating Flash
ProfessionalCS6
As with most programs, before you can use Flash, you need to install it on your
computer and activate it. Flash Professional can arrive on your desktop via several
routes. Your copy may come on a DVD, or it may arrive via a download from Adobe’s
online store. With Creative Suite 6, Adobe introduced a new way to acquire the vari-
ous applications. You may subscribe to the suite by paying a monthly subscription
fee. You may have purchased Flash Professional separately or as part of one of the
Creative Suites. Also significant, your copy is for either a Windows PC or a Mac.
These purchasing and system circumstances aect the installation. For example, if
you got your copy of Flash CS6 through the subscription process, you will use the
Adobe Application Manager to install and remove CS6 applications (Figure A-1).
Depending on the settings, the Application Manager may automatically download
and install updates to the applications when they’re available. If you purchase a box
version of Flash CS6, the process for installing and activating your application is
more traditional. Insert the disc and follow instructions. In either case, the process
is pretty straightforward with instructions on what is expected from you each step
of the way.
Once the program is installed, you can start it up as you would any program on
your system:
• For Windows computers, Flash is in the Adobe folder in your Program Files
folder. That path and filename are usually
C:\Program Files\Adobe\Adobe
Flash CS6\Flash.exe
. You can create a shortcut or drag the file to your Windows
taskbar for quicker starting.
www.it-ebooks.info

APPENDIX A: INSTALLATION AND HELP 769
FLASH CS6
MINIMUM
SYSTEM
REQUIREMENTS
• For Macs, Flash is in the Adobe Flash CS6 folder in your Applications folder.
That path and file name is usually
Macintosh HD\Applications\Adobe FlashCS6\
Adobe Flash CS6
. You can make an alias or drag the file to your Dock for quicker
starting.
FIGURE A-1
If you have a subscrip-
tion to Adobe Creative
Suite apps, you’ll use
the Adobe Application
Manager to install and
uninstall applications
as you need them. The
manager also notifies
you when updates are
available.
About Licenses and Activation
Your agreement with Adobe gives you a license to run the application on a limited
number of computers. If you have the standard single license that gives you per-
mission to install one copy on your computer. It also permits you to install a second
copy on a laptop or home computer, providing both copies don’t run at the same
time. Adobe controls your account through the Application Manager or through the
activation or deactivation process.
www.it-ebooks.info
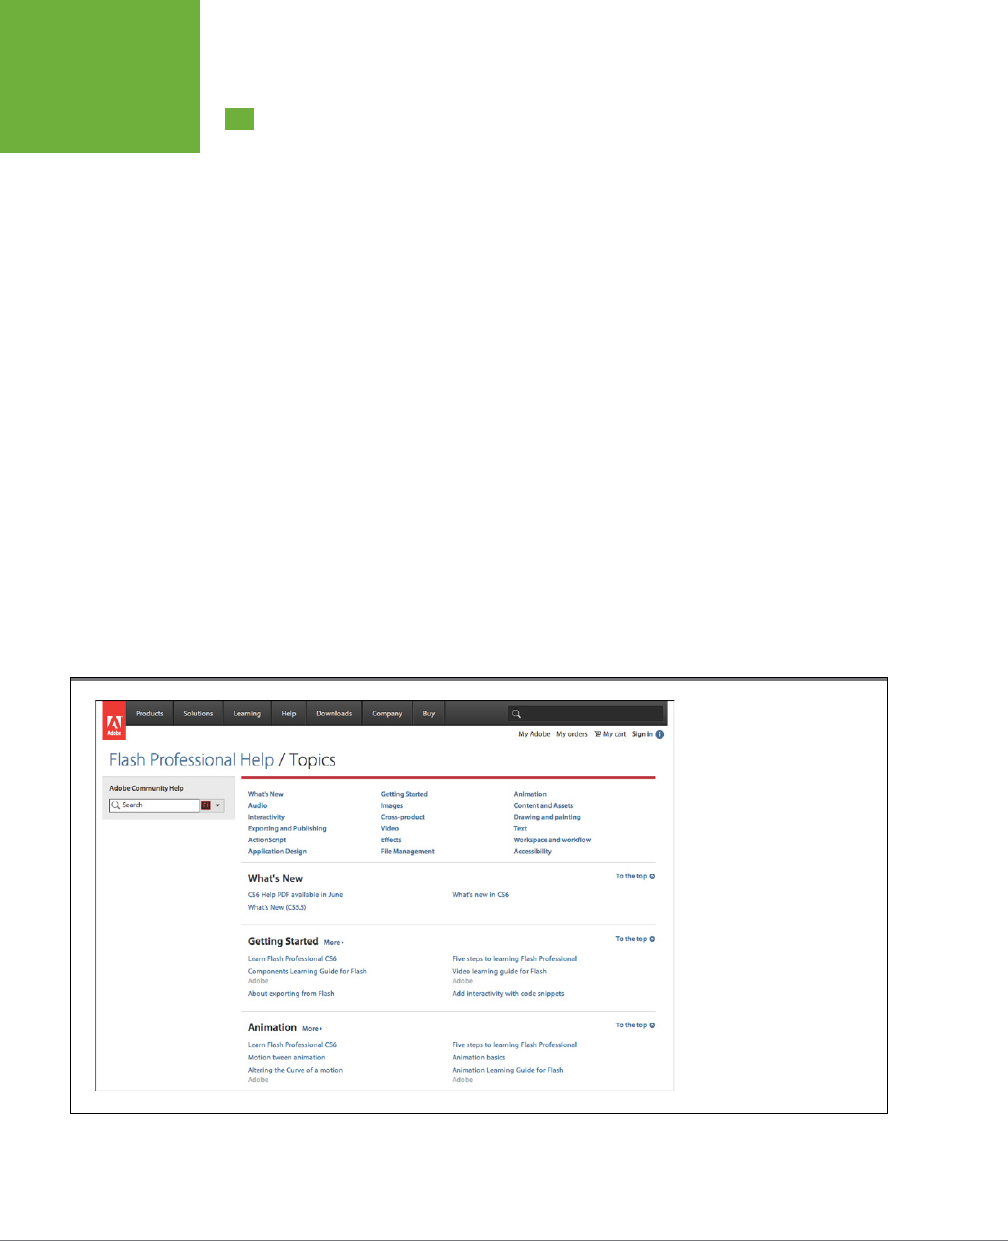
FLASH CS6: THE MISSING MANUAL
770
GETTING HELP
FROM FLASH
Getting Help from Flash
In the olden days of computing, software companies provided nice, thick paperback
manuals with their programs. They weren’t always well-written, and sometimes they
were downright wrong, but at least you could read them on the bus or train on the
way to work or school. These days companies, including Adobe, provide book-length
help files either in the program, online, or both. If you want printed pages, crank up
your printer and load up a ream or two of paper. The online descriptions are more
up to date and accurate than they were in those old printed volumes, but they’re
often a bit cryptic, as if they were written by the software engineers who designed
the programs. Funny, that.
On the positive side, electronic help documents let you use your computer’s search
capabilities to hunt down an answer. Initially, Flash CS6 documents are presented
as online documents. Go Help→Help and a web page appears with a number of
links that lead to various references, videos and articles. A section at the top, serves
somewhat like a table of contents. Click a link like Interactivity, Getting Started or
ActionScript and the page scrolls to a spot with links related to that subject. At first
it may be confusing the way ocial Adobe reference materials are mixed together
with “community” content from the Adobe forums.
At the time this was written, the ocial help documents weren’t available for down-
load; however, there was a link on the help page that said CS6 Help PDF documents
would be available in June 2012 (Figure A-2).
FIGURE A-2
Adobe’s online help files
provide links to articles,
videos and traditional
reference materials. The
Search box at the top
searches the entire Adobe
web site, so it may lead
to pages that promote or
sell Adobe products. The
search box at the left lets
you choose a product, but
it searches for answers
in the “community” also
known as the Adobe
Forums.
www.it-ebooks.info

APPENDIX A: INSTALLATION AND HELP 771
GETTING HELP
FROM ADOBE
Flash Video Workshop Tutorials
Making good use of its own tools, Adobe serves up Adobe TV, where you can find
video tutorials for Flash and other Creative Suite 6 programs. The company adds new
programs, tutorials, and demonstrations all the time. Go to
http://tv.adobe.com
, and
you’ll see a page like Figure A-3. You can use the search box to hunt down videos
on a particular topic, or you can select an index based on specific Adobe products.
For beginners, the series “Flash in a Flash” is a good place to start.
Getting Help from Adobe
Adobe oers a variety of technical support options, from free to for-a-fee.
Online Articles, FAQs, and Sample Code
Adobe maintains a website containing articles on Flash, as well as sample code
and answers to frequently asked Flash-related questions. You can get there quickly
through Help→Flash Support Center. You’ll find lots of articles and tutorials. If you’re
looking for more advanced help, check out the Developer Centers listed in the column
on the right side of the page. There are Developer Centers for Adobe AIR for Flash,
Flash, Flash Lite, Flash Media Server, and Flash Player.
Forums
Adobe hosts online forums, where anyone can ask a question about Flash, and anyone
can answer. User-to-user means that Adobe employees don’t ocially monitor the
forums or answer any questions, so the feedback you get has no ocial sanction
or guarantee of accuracy. Still, the best and fastest answers and advice often come
from other folks in the trenches, so if you’ve worked your way through Adobe’s Tech
Notes, Knowledgebase (online articles), FAQs, and documentation, these forums
(Help→Adobe Online Forums) are definitely worth a look.
Direct Person-to-Person Help
Sometimes, nothing will do but asking a real live technical support person for help.
Adobe sells several dierent pay-to-play support plans. For example, single-incident
support varies from $29 to $249. Other plans are available for workgroups and
enterprises.
www.it-ebooks.info
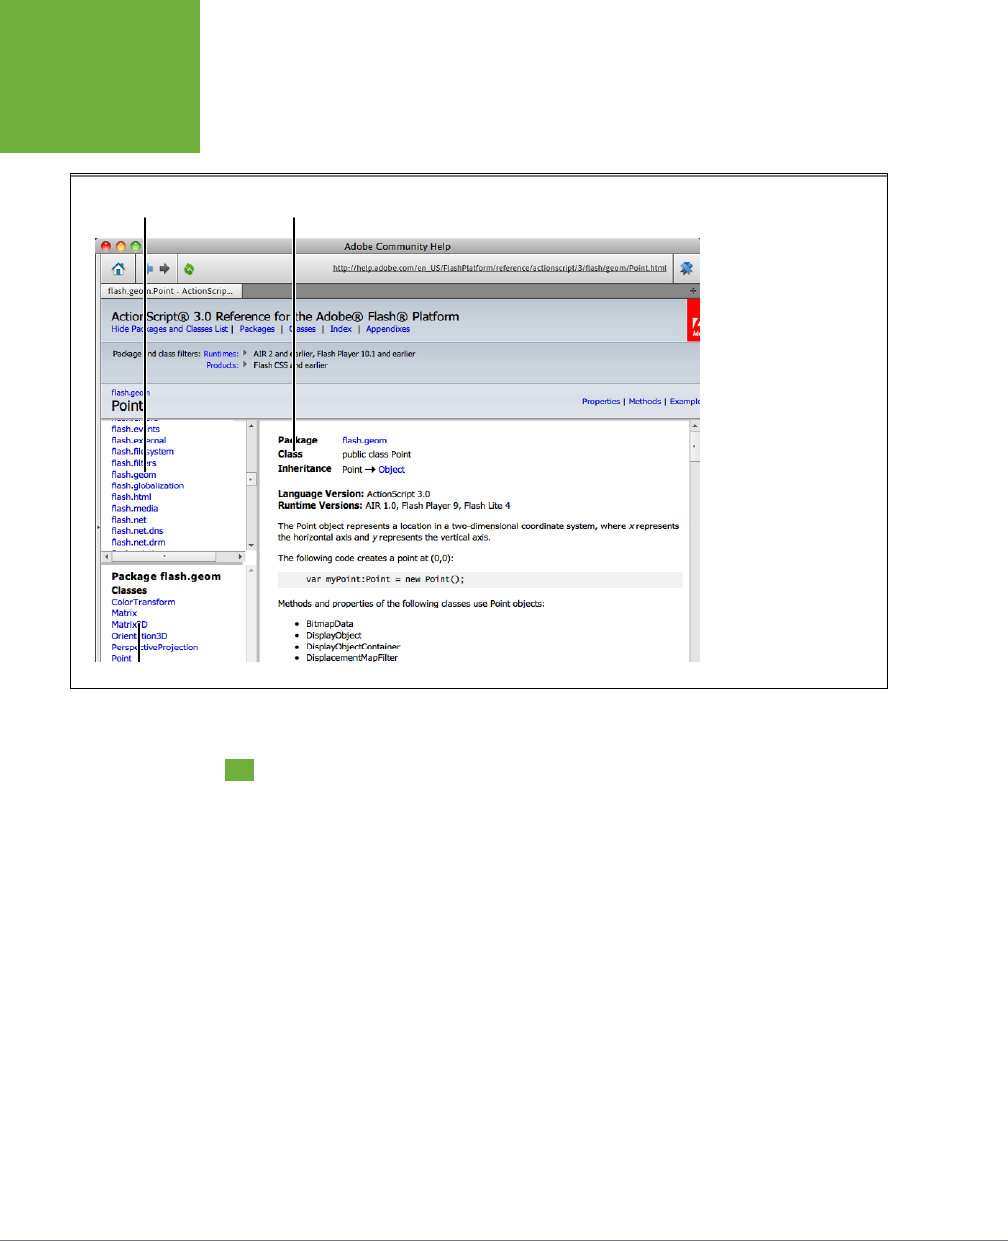
FLASH CS6: THE MISSING MANUAL
772
MORE FLASH
BOOKS
FIGURE A-3
Go to Adobe TV (
http://
tv.adobe.com
) for dem-
onstrations and tutorials
on Adobe products.
Package Definitions
Class
More Flash Books
Flash and ActionScript are popular topics. Designers and developers who are seri-
ous about using these tools generally have a shelf full of books. Some of the books
mentioned here were written for Flash CS5, but by the time you read this they’ll
probably be updated to cover CS6. You’re very likely to find these among the titles:
•
Foundation Flash CS5 for Designers
by Tom Green and David Stiller. Good
coverage of tools and techniques.
•
Flash CS5 Professional Digital Classroom
by Fred Gerantabee. A good beginner
to intermediate Flash guide.
•
How to Cheat in Adobe Flash CS5
by Chris Georgenes. Great for drawing and
animation tips and tricks.
•
Learning ActionScript 3.0
by Rich Shupe and Zevan Rosser. Very good introduc-
tion for those new to ActionScript.
•
Essential ActionScript 3.0
by Colin Moock. The bible when it comes to
ActionScript3.0.
www.it-ebooks.info

APPENDIX A: INSTALLATION AND HELP 773
FINDING FLASH
GURUS
Finding Flash Gurus
Flash is one of those programs that people tend to get passionate about, so it’s not
surprising that there are hundreds of great resources on the Web oering everything
from example code to free components, articles, tutorials, and more.
Here are a few that are definitely worth checking out:
• Flashthusiast (
http://flashthusiast.com
). A blog maintained by Team Tween
of Flash at Adobe. You can read the new developments or search the archives.
• Flash Kit (
www.flashkit.com
). Surprisingly badly designed for a site that focuses
on a design program, Flash Kit nevertheless oers a wealth of sound eects,
fonts, components, and movie clips. It also hosts a well-attended online forum.
• ActionScript.org (
www.actionscript.org
). If you’re interested in all things
ActionScript, then check out this site oering tutorials, articles, and forums
populated by ActionScript programmers. Once you’ve earned your stripes,
there are even job listings where you can put your newfound skills to work.
• FlashTuts+ (
http://active.tutsplus.com
). Tutorials on ActionScript, AIR, Flash,
and other design tools.
• Flashloaded (
www.flashloaded.com
). A place to purchase predesigned Flash
components. You’ll find photo and media galleries, menu and navigation tools,
and animated eects like book-style page flippers.
• Keyframer (
www.keyframer.com
). Chris Georgenes’s website and blog is fun
and has good info, especially for those interested in character animation.
• Best Flash Animation Site (
www.bestflashanimationsite.com
) and Webby
Awards (
www.webbyawards.com
). There’s nothing like watching a beautifully
constructed Flash animation to get you thinking about good design. On these
two sites, you can nominate the coolest Flash animation you’ve ever seen (in-
cluding your own) or simply visit the sites others have nominated.
• Boston Adobe Mobile and Devices User Group (
www.flashmobilegroup.org
).
If you’re interested in creating Flash content for mobile devices (like mobile
phones), you’ll want to check out this site, which oers Flash Lite–specific
articles, seminars, links, and live chats.
www.it-ebooks.info

775
APPENDIX
B
Flash CS6: The Missing Manual
is full of details, explanations, and examples. This
appendix provides quick thumbnail descriptions of every command in every menu
for quick reference.
File
The File menu commands work on your Flash document as a whole. Use the File
menu for major events, like starting a new project, opening a file you created previ-
ously, and adjusting Flash’s Publish and Preview settings.
New
Windows: Ctrl+N
Mac: ⌘-N
The New command opens the New Document dialog box, where you can cre-
ate many dierent types of Flash documents. For web pages, choose Flash File
( ActionScript2.0 or ActionScript 3.0). To create Flash files that will run on smart-
phones or tablets, use “AIR for iOS” or “AIR for Android.” For other phones, organiz-
ers, or small handheld devices, use “Flash File (Mobile).”
Open
Windows: Ctrl+O
Mac: ⌘-O
Flash ProfessionalCS6,
Menu by Menu
www.it-ebooks.info

FLASH CS6: THE MISSING MANUAL
776
FILE
Opens the standard dialog box where you can navigate through your folders and
open Flash files. Use the Open command to quickly find and then open files in Flash.
Consider using the Browse command (described next) if you need to organize your
files and perform other housekeeping chores.
Browse in Bridge
Windows: Ctrl+Alt+O
Mac: Option-⌘-O
Opens Adobe Bridge, where you can organize, preview, import, and work with all
dierent types of graphic files. Bridge shows thumbnail animations of SWF files and
previews of JPEGs and other image files. Use Bridge to edit and search through the
metadata and keywords attached to your graphic files.
Open Recent
Leads to a submenu that shows a list of the last 10 Flash (.fla or .as) files that you
opened and saved. Click a filename to open the Flash animation.
Close
Windows: Ctrl+W
Mac: ⌘-W
Closes the active Flash document. If you made changes to the document, Flash asks
if you want to save it before closing.
Close All
Windows: Ctrl+Alt+W
Mac: Option-⌘-W
Closes all open Flash documents. If you made changes to the documents, Flash asks
if you want to save them before closing.
Save
Windows: Ctrl+S
Mac: ⌘-S
Saves the changes you’ve made to your Flash document. If you haven’t made any
changes since opening the document, the Save command is dimmed.
Save As
Windows: Ctrl+Shift+ S
Mac: Shift-⌘-S
www.it-ebooks.info

APPENDIX B: FLASH PROFESSIONAL CS6, MENU BY MENU 777
FILE
Use Save As to save the active Flash document with a new name or as a dierent
file type. For example, you can save your CS6 file in the Flash CS4 file format or in
the uncompressed (.xfl) format.
Save as Template
Saves your document as a Flash template. Templates provide easy-to-use starting
points for Flash projects. When you save a Flash file as a template, you provide a
category and description of the template. You see templates listed when you use
the File→New command and click the Templates button at the top of the New
Document dialog box.
Check In
Flash can use Adobe’s Version Cue program to make it easier to track changes in
your project and work collaboratively with others. After making changes to a file on
your local computer, use Check In to post those changes on the Version Cue server.
Save All
Saves all open Flash documents.
Revert
Discards any changes you’ve made to your document and reverts to the last saved
version.
Import
Adds graphics, sound, video, and other media files to your Flash animation. Sub-
commands on this menu let you import files to the stage or to the Library of your
active Flash animation. You can also open files in an External Library, where they’re
available to all Flash animations. The last subcommand is used to import video files.
Export
Lets you save images and movies in a variety of dierent file formats so you can
use them in other programs. Some of the Image options include FXG, JPEG, GIF,
and PNG. Some of the Movie options include SWF Movie, QuickTime, Animated GIF,
and JPEG Sequence.
Publish Settings
Windows: Shift+Ctrl+F12
Mac: Shift-Option-F12
Opens the extensive Publish Settings dialog box, where you can fine-tune the produc-
tion of your Flash animations. Use Publish Settings to create web pages (HTML files)
complete with commands to show your Flash animations and position them on the
page. With Publish Settings, you can choose to create Flash
projectors
(standalone
programs that run your animation for Windows or Mac).
www.it-ebooks.info

FLASH CS6: THE MISSING MANUAL
778
FILE
Publish Preview
Windows: F12
Mac: ⌘-F12
Publish Preview runs your Flash animation in the format of your choice. Using the
factory setting for Publish Preview, you see your animation embedded in a web
page. With the submenus, you can choose to see your animation in a projector file
or other formats, like an animated GIF, JPEG, or PNG file.
Publish
Windows: Alt+Shift+F12
Mac: Shift-⌘-F12
Produces the finished files that make up your Flash animation. Flash uses the Publish
Settings dialog box (see page 685) to create the files of your choosing. These may
include Flash movies (SWF), web pages (HTML), projector files (EXE for Windows,
APP for Mac), and the whole spectrum of graphics files (JPEG, GIF, PICT, and PNG).
If you’re publishing for the iPhone, iPod Touch, or iPad, Flash produces both SWF
and IPA files. If you publish for Android, Flash produces SWF and APK files.
AIR Settings
AIR stands for Adobe Integrated Runtime, which is a system for creating desktop
programs that run on PCs, Macs, and other systems using the AIR runtime and other
web technologies, like HTML, JavaScript, and CSS. The benefits to programmers
are that they can use familiar programming tools and don’t have to rewrite pro-
grams for dierent computer systems. Once you create a new AIR file by selecting
File→New→AIR, use this command to set up the AIR project files and to provide
a code signing certificate. For more details on Adobe AIR, go to
www.adobe.com/
products/air
.
AIR for iOS Settings
Use these settings to publish apps for the iPhone, iPod Touch, and iPad. On the
Deployment tab, you identify your developer’s certificate, testing devices, and app
IDs. For details see page 738.
AIR for Android Settings
Use these settings to publish apps for Android smartphones and tablets. On the
Deployment tab, you can create a self-signed certificate that permits testing apps
on devices that are connected via USB cable. For details see page 758.
File Info
Stores metadata for your Flash file. Metadata can include details like the date you
created a file, the name of the file’s author, and the copyright information. Programs
like Adobe Bridge read the metadata stored in files and provide database-type
www.it-ebooks.info

APPENDIX B: FLASH PROFESSIONAL CS6, MENU BY MENU 779
EDIT
features. For example, in Bridge you can search through all your media files for ones
that were created or modified on certain dates.
Share My Screen
Adobe ConnectNow lets you share your screen with up to three other people on-
line. Click the Share My Screen option to open the ConnectNow panel and have live
online meetings with others. Adobe IDs are required, but it’s free to register for one.
Page Setup
Flash documents are meant to be viewed on a computer or mobile device, but you
can print frames of your document on paper. Page Setup opens the dialog box
where you can choose a printer, page size, and orientation before you print from
your Flash document.
Print Margins (Mac only)
Opens the Print Margins dialog box, where you can position Flash frames on your
page before printing. The settings include margin measurements and options for
centering the document horizontally and vertically on the page. (To set margins for
Windows computers, use the Page Setup command.)
Print
Windows: Ctrl+P
Mac: ⌘-P
Prints a frame or a sequence of frames from your Flash document using the settings
from Page Setup and Print Margins.
Send (Windows only)
Opens your email program and attaches the current .fla file to a blank email mes-
sage. All you need to do is type an address and message.
Exit (Mac: Flash→Quit Flash)
Windows: Ctrl+Q
Mac: ⌘-Q
Stops the program, and then closes the Flash window. If there are open documents,
Flash closes them. If there are unsaved documents, the program prompts you to
save them before quitting.
Edit
Use this menu to cut, copy, paste, and change items you’ve selected on Flash’s stage.
www.it-ebooks.info

FLASH CS6: THE MISSING MANUAL
780
EDIT
Undo
Windows: Ctrl+Z
Mac: ⌘-Z
This command undoes the last command you applied. So, if you accidentally deleted
a drawing from your stage, the Undo command brings it back like magic. Remember
the Undo command for those moments when you smack your forehead and say,
“Oh no! Why’d I do that?” For extensive undoing, consider using the History panel:
Window→Other Panels→History (Windows: Ctrl+F10; Mac: ⌘-F10).
Redo
Windows: Ctrl+Y
Mac: ⌘-Y
Repeats the last command you used. So if the last thing you did was paste a circle
on the stage, Redo pastes another circle on the stage. If you’ve just used the Undo
command, Redo restores the change. Thus, you can use Undo to step backward
through your recent commands and Redo to step forward again.
Cut
Windows: Ctrl+X
Mac: ⌘-X
Removes the selected object from the stage and places a copy of it on your com-
puter’s Clipboard. Once it’s on the Clipboard, you can paste it to a new location or
a new document.
Copy
Windows: Ctrl+C
Mac: ⌘-C
Makes a copy of any selected objects and places a copy on the Clipboard. The original
objects remain on the stage. Once you’ve copied an object or group of objects to
the Clipboard, you can paste them to a new location or a new document.
Paste in Center
Windows: Ctrl+V
Mac: ⌘-V
Tells Flash to paste the cut (or copied) object right smack in the middle of the stage’s
visible area, on top of any other image that happens to be there.
Paste in Place
Windows: Ctrl+Shift+V
www.it-ebooks.info

APPENDIX B: FLASH PROFESSIONAL CS6, MENU BY MENU 781
EDIT
Mac: Shift-⌘-V
Tells Flash to paste the cut or copied object in its original position on the stage.
Useful for copying objects from one frame to another, this command ensures that
the objects are positioned in exactly the same location in both frames.
Clear
Windows: Backspace
Mac: Delete
Removes any selected objects from the stage. Flash doesn’t store cleared objects on
the Clipboard, so you can’t use the Paste command to put them back on the stage.
Duplicate
Windows: Ctrl+D
Mac: ⌘-D
Copies any selected objects, and then immediately pastes a duplicate on the stage.
This one command combines the Copy and Paste commands.
Select All
Windows: Ctrl+A
Mac: ⌘-A
Selects all the objects on the stage and work area.
Deselect All
Windows: Ctrl+Shift+ A
Mac: Shift-⌘-A
Removes the selection from any currently selected objects.
Find and Replace
Windows: Ctrl+F
Mac: ⌘-F
Opens the “Find and Replace” panel, where you search your document or scene
for text, symbols, graphics, and media that you specify. You can then, if you wish,
replace those items with something else.
Find Next
Windows: F3
Mac: F3
Searches for the next occurrence of the items identified in the “Find and Replace”
panel.
www.it-ebooks.info

FLASH CS6: THE MISSING MANUAL
782
EDIT
Timeline
Leads to a submenu that shows Edit commands specific to Flash’s timeline. The
submenu commands include the following:
• Remove Frames
Windows: Shift+F5
Mac: Shift-F5
Removes frames from the timeline, shortening the length of the timeline.
• Cut Frames
Windows: Ctrl+Alt+X
Mac: Option-⌘-X
Cuts the contents of the frames, placing that content on the Clipboard, where
you can paste it into other frames. Cut Frames doesn’t reduce the number of
frames in the timeline.
• Copy Frames
Windows: Ctrl+Alt+C
Mac: Option-⌘-C
Copies the selected frames and places them on the Clipboard, so you can paste
them to a dierent location in the timeline.
• Paste Frames
Windows: Ctrl+Alt+V
Mac: Option-⌘-V
Pastes copied or cut frames into the timeline after the selected frame. Pasting
frames increases the overall length of the timeline.
• Clear Frames
Windows: Alt+Backspace
Mac: Option-Delete
Removes the contents of the selected frames, leaving empty frames in place.
(Unlike Cut, Clear Frames
doesn’t
place the frames on the Clipboard.)
• Select All Frames
Windows: Ctrl+Alt+A
Mac: Option-⌘-A
Selects all the frames in all the layers in the visible timeline so you can make
changes to the entire timeline at once.
www.it-ebooks.info

APPENDIX B: FLASH PROFESSIONAL CS6, MENU BY MENU 783
EDIT
• Cut Layers
Remove one or more layer and all its content is added to the Clipboard so it
can be pasted into a new timeline.
• Copy Layers
Similar to Cut Layers (above) but the original layer and its content remain in place.
• Paste Layers
Use this command to paste the layers and content that has been stored on the
clipboard through a Cut Layers or Copy Layers command.
• Duplicate Layers
A single command that copies and pastes layers.
• Copy Motion
Copies the properties of a motion tween so you can paste them onto another
object.
• Copy Motion as ActionScript 3.0
Copies the properties of a motion tween and creates ActionScript 3.0 code,
which you can then use in the Actions panel.
• Paste Motion
Used after Copy Motion to paste the properties of a motion tween onto another
object.
• Paste Motion Special
Lets you choose specific tween properties you want to paste onto another
object. For example, your choices include X and Y positions, horizontal and
vertical scales, rotation, skew, colors, and filters.
Edit Symbols/Document
Windows: Ctrl+E
Mac: ⌘-E
When you edit symbols, you change every instance of the symbol in your document.
Edit Symbols opens the selected Flash symbol so you can edit it in its own timeline.
(When you’re in Edit Symbols mode, this command changes to Edit Document and
brings you back to the document timeline.)
Edit Selected
Lets you edit a selected group or object within a group. Other objects on the stage
that aren’t part of the group are dimmed and inaccessible. Use Edit All (below) to
return to the normal stage.
www.it-ebooks.info

FLASH CS6: THE MISSING MANUAL
784
VIEW
Edit in Place
Use “Edit in Place” to edit symbols within the context of the stage. Other objects
on the stage are dimmed and inaccessible. When you edit a symbol, you change all
instances of that symbol in your document.
Edit All
Restores the normal stage after you use the Edit Selected command.
Preferences (Mac: Flash→Preferences)
Windows: Ctrl+U
Opens the extensive Flash Preferences panel, where you can tweak dozens of set-
tings to make Flash work the way you like to work. You can set Preferences in the
following groups: General, ActionScript, AutoFormat, Clipboard, Drawing, Text,
Warnings, PSD File Importer, AI File Importer, and Publish Cache. For example,
General settings include Flash’s startup options, how many levels of undo to save,
and whether or not to display tooltips when the cursor is over a command or object.
Customize Tools Panel (Mac: Flash→Customize Tools Panel)
Opens the Customize Tools panel, where you can set up the Tools panel with just
the tools you want and arrange them any way you like.
Font Mapping (Mac: Flash→Font Mapping)
Opens the Font Mapping panel, where you can choose substitute fonts for fonts
that are missing on your system. For example, you can choose Times Roman to
substitute for Times.
Keyboard Shortcuts (Mac: Flash→Keyboard Shortcuts)
Use Keyboard Shortcuts to add or change the keys used to invoke specific commands.
View
Use this menu to alter the onscreen display, with features such as zoom, guides and
rulers, preview mode, and snapping to a grid (or other objects).
Go To
Lets you navigate Flash animations that are broken up into multiple scenes. The GoTo
command leads to a submenu where you can select scenes by name or choose First,
Last, Previous, and Next options and specific scenes.
Zoom In
Windows: Ctrl+=
Mac: ⌘-=
www.it-ebooks.info

APPENDIX B: FLASH PROFESSIONAL CS6, MENU BY MENU 785
VIEW
Changes the view of the stage by zooming in twice as much. So, if the view is at
500%, zooming in changes the view to 1,000%.
Zoom Out
Windows: Ctrl+-
Mac: ⌘-hyphen (-)
Changes the view of the stage by adjusting the zoom to half as much. So, if the view
is at 500%, zooming out changes the view to 250%.
Magnification
Leads to a submenu where you can choose from several preset zoom levels that
range from 25% to 800%. In addition, there are options to Show All (zoom to show
all the contents of the current frame), Show Frame (shows the entire stage), and “Fit
in Window” (scale the entire stage to fit in the program window).
Preview Mode
Leads to a submenu with several options related to previewing your animation with
the Control→Play command. The options include the following:
• Outlines
Windows: Ctrl+Alt+Shift+O
Mac: Shift-Option-⌘-O
Displays shapes in the animation as outlines or wireframe representations. With
older, slower computers, this mode can help speed up previews, although most
of today’s machines can keep pace with even the most complex Flash animations.
• Fast
Windows: Ctrl+Alt+Shift+F
Mac: Shift-Option-⌘-F
Turns o antialiasing and other settings that slow down Flash previews.
• Anti-Alias
Windows: Ctrl+Alt+Shift+A
Mac: Shift-Option-⌘-A
Turns on antialiasing, a computer graphics technique that makes shapes and
lines appear smoother on computer screens.
• Anti-Alias Text
Windows: Ctrl+Alt+Shift+T
Mac: Shift-Option-⌘-T
www.it-ebooks.info

FLASH CS6: THE MISSING MANUAL
786
VIEW
Uses antialiasing on text to create a smoother appearance. These settings change
the appearance of text while you’re working inside Flash; to adjust anti-alias set-
tings for your published files, use the Properties panel settings for the Text tool.
• Full
Renders your Flash animation fully, providing a close approximation of the
published animation.
Pasteboard
Windows: Ctrl+Shift+W
Mac: Shift-⌘-W
Shows the workspace around the stage. Works in conjunction with the Magnification
commands (page 785). A checkmark appears in the menu when this option is in force.
Rulers
Windows: Ctrl+Alt+Shift+R
Mac: Shift-Option-⌘-R
Shows or hides the rulers that appear at the top and left of the program window.
With rulers visible, you can drag guidelines to place on the stage. (Guides don’t ap-
pear in your final animation; they’re just visual aids to help you position items on the
stage.) A checkmark appears in the menu when this option is turned on.
Grid
The grid is another visual aid to help you position and align objects on your stage.
The grid appears as horizontal and vertical lines, similar to graph paper. The Grid
command leads to a submenu where you can show or hide the grid and change the
color and spacing of the lines. You can turn the grid’s “snapping” behavior on and
o (see below).
Guides
Show, hide, and lock guides using the submenu under the Guides command. Use
the Edit Guides command to adjust the appearance and behavior of your guides.
The Clear Guides command removes all guides from the stage.
Snapping
When Snapping is turned on, objects automatically line up with other objects. So, for
example, if you turn on Snapping for guides, then objects you drag snap into align-
ment with the nearest guide. You can turn Snapping on or o for the grid, guides,
and objects. The Snapping submenu displays the following commands:
• Snap Align
When Snap Align is turned on, dotted lines appear on the stage when you drag
an object near another object or near the edge of the stage.
www.it-ebooks.info

APPENDIX B: FLASH PROFESSIONAL CS6, MENU BY MENU 787
VIEW
• Snap to Grid
Windows: Ctrl+Shift+’
Mac: Shift-⌘-’
Toggles the snapping behavior of the grid on or o.
• Snap to Guide
Windows: Ctrl+Shift+;
Mac: Shift-⌘-;
Toggles the snapping behavior of guides on or o.
• Snap to Pixels
Use “Snap to Pixels” for super-accurate alignment. With “Snap to Pixels” on,
a grid appears when the zoom level is 400% or greater. This grid represents
individual pixels on your Flash stage.
• Snap to Objects
Windows: Ctrl+Shift+/
Mac: Shift-⌘-U
Toggles the snapping behavior of objects on or o.
• Edit Snapping
Windows: Ctrl+/
Mac: ⌘-/
Opens the Edit Snapping panel, where you can adjust the settings for snapping
behaviors, including
tolerance
(how close objects need to be before snapping
behavior kicks in).
Hide Edges
Windows: Ctrl+H
Mac: Shift-⌘-E
Toggles the highlight that appears on objects when you select them. If you want
to see the object without the highlight, click Hide Edges; a checkmark appears on
the menu.
Show Shape Hints
Windows: Ctrl+Alt+H
Mac: Option-⌘-H
Shows and hides shape hints on the stage. Shape hints are used to control shapes
that are being tweened. By positioning shape hints, you control the appearance of
www.it-ebooks.info

FLASH CS6: THE MISSING MANUAL
788
INSERT
an object as it changes shape during a tween. Turn Show Shape Hints on to make
adjustments, and then turn the hints o to see your objects as they’ll appear in
your animation.
Show Tab Order
Tab Order establishes keyboard navigation in forms and web pages. For example,
if you create a form with the tab order Name = 1, Address = 2, and Phone number
=3, then your visitors can fill in their name, press the Tab key to move on to the
Address field, and so on. Use Show tab order to see a visual representation of the
Tab Order of items on your stage.
Insert
Use the Insert menu to add objects to your animation and to make changes to the
timeline.
New Symbol
Windows: Ctrl+F8
Mac: ⌘-F8
Opens the Create Symbol dialog box, where you name and select the symbol type
(movie clip, button, or graphic).
Motion Tween
Applies a motion tween to an object, which is great for animating movement and
changing properties over time—like color, transparency, and dimensions. You can
use the new Motion Editor to fine-tune every aspect of a motion tween.
Shape Tween
Creates a shape tween between adjacent keyframes. Shape tweens work only on
editable shapes (not text or symbols). They’re great for morphing objects from one
form to another—an acorn to an oak, for example.
Classic Tween
Creates a motion tween between adjacent keyframes (represented by an arrow on
a blue background). Use classic tweens to create nonlinear motions. Classic tweens
work only on symbols, grouped objects, and text blocks. While Adobe still makes
classic tweens available in CS6 for compatibility reasons, it’s replaced them with
the more versatile and powerful motion tween.
www.it-ebooks.info

APPENDIX B: FLASH PROFESSIONAL CS6, MENU BY MENU 789
INSERT
Timeline
The Timeline command leads to a submenu with commands for adding layers and
frames to your timeline:
• Layer
Inserts a new layer in your timeline. You use layers to organize objects on the
stage. For example, layers can hold elements like shapes and text. You can also
create keyframes and tweens on individual layers.
• Layer Folder
Creates a layer folder. Layer folders are used to organize and group layers. By
opening and closing layer folders, you can simplify the appearance of your
timeline.
• Frame
Windows: F5
Mac: F5
Inserts frames into your timeline. If no frame is selected, then this command
inserts one frame in every layer after the current position of the playhead. If
one or more frames are selected, then an equal number of frames are inserted
following the selection. If a position is selected on the right, outside the range
of the current timeline, then Flash adds new frames up to the selected point.
• Keyframe
Inserts new keyframes into the timeline (represented by a solid circle), similar to
the Frame command. Keyframes are dierent from ordinary frames in that the
changes and repositioning of objects in keyframes represent significant changes
in the action of your animation. When you use the Insert Keyframe command,
objects on the stage become part of the new keyframe.
• Blank Keyframe
Inserts blank keyframes into your timeline (represented by a hollow circle).
Similar to the Keyframe command, except there are no objects in a blank
keyframe—you’ve got a clean slate where you can add new objects to the stage.
Scene
Adds a new scene to your Flash animation. Scenes let you divide long animations
into smaller, more manageable parts and create nonlinear animations or animations
that repeat certain segments.
www.it-ebooks.info

FLASH CS6: THE MISSING MANUAL
790
MODIFY
Modify
The commands in the Modify menu let you change the properties of your document,
your timeline, and the objects in your animation. For example, you use commands
in this menu to rotate, scale, and distort the shapes on the stage.
Document
Windows: Ctrl+J
Mac: ⌘-J
Opens the Document window, where you set the width, height, and background
color of the stage. Document settings also control the speed (frames per second)
of your animation and the measurement units used by rulers.
Convert to Symbol
Windows: F8
Mac: F8
Converts selected objects to a symbol, which can be a movie clip, a graphic, or a
button. Symbols are key to many aspects of Flash animations. Among other things,
symbols help to reduce the overall file size of Flash animations.
Break Apart
Windows: Ctrl+B
Mac: ⌘-B
Used to break an imported bitmap into separate pixels that can be selected and ed-
ited. (When you first import a bitmap, Flash treats it as a single discrete element.) This
command also separates grouped objects and symbols into their component parts.
Bitmap
Flash has two Modify commands to help you work with imported bitmap (raster)
images:
• Swap Bitmap
Replace the selected instance of a bitmap with another bitmap.
• Trace Bitmap
Converts the selected bitmap into a vector image, by converting areas of color
into editable vector shapes. In some cases, this can reduce the Flash file size,
but it’s worth testing to see whether that’s the case and that you’re OK with
the changes it makes to the image.
www.it-ebooks.info

APPENDIX B: FLASH PROFESSIONAL CS6, MENU BY MENU 791
MODIFY
Symbol
Flash has two Modify commands to help you work with symbols.
• Swap Symbol
Replace the selected instance of a symbol with another symbol from the Library.
• Duplicate Symbol
Creates a new instance of a symbol you’ve selected on the stage.
Shape
Flash has several commands to help you modify shapes in your animation:
• Advanced Smooth
Windows: Ctrl+Alt+Shift+N
Mac: Shift-Option-⌘-N
Removes the hard angles and bumps from shapes and lines. Applying this com-
mand repeatedly creates smoother and smoother shapes.
• Advanced Straighten
Windows: Ctrl+Alt+Shift+N
Mac: Shift-Option-⌘-M
Removes the curves from lines and line segments. You can apply this command
repeatedly, creating straighter lines each time.
• Optimize
Windows: Shift+Ctrl+Alt+C
Mac: Shift-Option-⌘-C
Reduces the number of anchor points (control points) in a shape or line by
removing unneeded anchor points. This doesn’t change the shape, but it does
reduce the file size and helps make shapes more manageable.
• Convert Lines to Fills
Changes lines into fills, in eect giving them the properties of fills. For example,
once a line is changed to a fill, you can change its shape.
• Expand Fill
Opens the Expand Fill window, where you can expand (enlarge) or inset (shrink)
the fill portion of a shape. This is similar to scaling a shape and works best on
simple objects.
www.it-ebooks.info

FLASH CS6: THE MISSING MANUAL
792
MODIFY
• Soften Fill Edges
Softens the edges of the selected shape, giving it the appearance of fading
away. In the Soften Fill Edges window, you can choose the distance and the
steps (gradations) for the eect.
• Add Shape Hint
Windows: Ctrl+Shift+H
Mac: Shift-⌘-H
When you’re creating a shape tween, you can use hints to control the appear-
ance of objects as they change from one shape to another. By adding hints,
you can highlight important parts of the shape that should be defined during
the transition.
• Remove All Hints
If you’ve applied hints to a shape tween (see the previous command), this com-
mand removes them.
Combine Objects
The Combine Objects submenu lets you create more complex objects by combining
multiple objects created in object drawing mode and altering their grouped features:
• Delete Envelope
Removes the Envelope modifier from the selected object.
• Union
Combines two or more shapes to create a new object by deleting unseen
overlapping sections. The new object consists of the visible portions of the
joined shapes.
• Intersect
Creates an object from the intersection of two or more objects. The new object
shape consists of the overlapping portions of the combined shapes.
• Punch
Removes portions of an object as defined by the overlapping portions of another
object placed on top of it. Areas where the top object overlaps the lower object
are removed, and the top object is deleted entirely.
• Crop
Uses the shape of one object to crop another object. The front or topmost object
defines the shape to be retained. Any part of an underlying shape that overlaps
the top shape remains, while the visible portions of the underlying shapes are
removed, and the topmost shape is deleted entirely.
www.it-ebooks.info

APPENDIX B: FLASH PROFESSIONAL CS6, MENU BY MENU 793
MODIFY
Timeline
The Timeline submenu’s commands help you organize and manipulate the parts
that comprise your animation, notably layers and frames:
• Distribute to Layers
Windows: Shift+Ctrl+D
Mac: Shift-⌘-D
Distributes the selected objects so that each object is on its own layer. Useful
for making sure dierent shapes are on separate layers before applying a tween.
• Layer Properties
Opens the Layer Properties window, where you name layers and adjust set-
tings like layer type, layer colors, layer height, layer visibility, and layer locking.
• Reverse Frames
Rearranges the selected frames in reverse order. In eect, this arranges the
frames so that the animation runs in reverse.
• Synchronize Symbols
Synchronizes the animation of a graphic symbol instance to match the timeline.
It also recalculates the number of frames in a tween to match the number of
frames allotted to it in the timeline.
• Convert to Keyframes
Windows: F6
Mac: F6
Converts the selected frames in the timeline into keyframes. This command
retains the contents of the preceding keyframe. Keyframes are represented
by a solid circle.
• Clear Keyframe
Windows: Shift+F6
Mac: Shift-F6
Converts a keyframe to a standard frame.
• Convert to Blank Keyframes
Windows: F7
Mac: F7
Converts the selected frame to a blank keyframe. Represented in the timeline
by a hollow circle, blank keyframes have no content.
www.it-ebooks.info

FLASH CS6: THE MISSING MANUAL
794
MODIFY
Transform
Leads to a submenu with the following Transform commands:
• Free Transform
Puts the selected object in Free Transform mode where you can perform scale,
rotate, and skew transformations.
• Distort
Puts the selected object in Distort mode. You can change the shape of the object
using handles on the bounding box.
• Envelope
The Envelope modifier lets you distort the shape of an object using handles on
the bounding box.
• Scale
Scale lets you change the height and width of an object by dragging the handles
on the bounding box. Press Shift to resize the object proportionally.
• Rotate and Skew
Places a bounding box around the selected object. Using the handles, you can
freely rotate and skew the object.
• Scale and Rotate
Windows: Ctrl+Alt+S
Mac: Option-⌘-S
Opens the Scale and Rotate window, where you can resize and rotate the se-
lected object by typing numbers into text boxes.
• Rotate 90 degrees CW
Windows: Ctrl+Shift+9
Mac: Shift-⌘-9
Rotates the selected object by 90 degrees in a clockwise direction.
• Rotate 90 degrees CCW
Windows: Ctrl+Shift+7
Mac: Shift-⌘-7
Rotates the selected object by 90 degrees in a counterclockwise direction.
• Flip Vertical
Flips the selected object vertically, putting the top of the object at the bottom.
www.it-ebooks.info

APPENDIX B: FLASH PROFESSIONAL CS6, MENU BY MENU 795
MODIFY
• Flip Horizontal
Flips the selected object horizontally, putting the left side of the object on the
right.
• Remove Transform
Windows: Ctrl+Shift+Z
Mac: Shift-⌘-Z
Removes the previously applied transformations from the selected object.
Arrange
The Arrange submenu’s commands act on the objects in your animation’s layers:
• Bring to Front
Windows: Ctrl+Shift+up arrow
Mac: Shift-Option-up arrow
Brings the selected object to the top level in the frame so that the object ap-
pears to be in front of all other objects in the same frame. This action pertains
only to objects in the same layer in the timeline; it doesn’t reposition layers or
move objects from one layer to another.
• Bring Forward
Windows: Ctrl+up arrow
Mac: ⌘-up arrow
Brings selected objects forward one step in front of other objects in the same
frame. This action pertains only to objects in the same layer in the timeline; it
doesn’t reposition layers or move objects from the layer to another.
• Send Backward
Windows: Ctrl+down arrow
Mac: ⌘-down arrow
Sends the selected object backward one step behind other objects in the same
frame. This action pertains only to objects in the same layer in the timeline; it
doesn’t reposition layers or move objects from one layer to another.
• Send to Back
Windows: Ctrl+Shift+down arrow
Mac: Shift-Option-down arrow
Sends the selected object to the bottom level in the frame so that the object
appears to be behind every other object in the same frame. This action pertains
www.it-ebooks.info

FLASH CS6: THE MISSING MANUAL
796
MODIFY
only to objects in the same layer in the timeline; it doesn’t reposition layers or
move objects from one layer to another.
• Lock
Windows: Ctrl+Alt+L
Mac: Option-⌘-L
Locks selected objects in their current position on the stage. Locked objects
can’t be selected to be moved or transformed in any other way.
• Unlock All
Windows: Ctrl+Alt+Shift+L
Mac: Shift-Option-⌘-L
Unlocks objects that have been locked in position using the Lock command.
Align
The Align submenu’s commands help you position your animation’s objects neatly
in relation to the edges of the stage or to one another:
• Left
Windows: Ctrl+Alt+1
Mac: Option-⌘-1
Aligns selected objects along the left edge.
• Horizontal Center
Windows: Ctrl+Alt+2
Mac: Option-⌘-2
Aligns the center of the selected objects to the same horizontal position.
• Right
Windows: Ctrl+Alt+3
Mac: Option-⌘-3
Aligns selected objects along the right edge.
• Top
Windows: Ctrl+Alt+4
Mac: Option-⌘-4
Aligns selected objects along the top edge.
www.it-ebooks.info

APPENDIX B: FLASH PROFESSIONAL CS6, MENU BY MENU 797
MODIFY
• Vertical Center
Windows: Ctrl+Alt+5
Mac: Option-⌘-5
Aligns the center of the selected objects to the same vertical position.
• Bottom
Windows: Ctrl+Alt+6
Mac: Option-⌘-6
Aligns selected objects along the bottom edge.
• Distribute Widths
Windows: Ctrl+Alt+7
Mac: Option-⌘-7
Spaces selected objects evenly on the stage from left to right.
• Distribute Heights
Windows: Ctrl+Alt+9
Mac: Option-⌘-9
Spaces selected objects evenly on the stage from top to bottom.
• Make Same Width
Windows: Ctrl+Alt+Shift+7
Mac: Shift-Option-⌘-7
Makes the width property of selected objects equal.
• Make Same Height
Windows: Ctrl+Alt+Shift+ 9
Mac: Shift-Option-⌘-9
Makes the height property of selected objects equal.
• Align to Stage
Windows: Ctrl+Alt+8
Mac: Option-⌘-8
Toggles the To Stage behavior of alignment tools. For example, with To Stage
selected, the Align Bottom command aligns selected objects with the bottom
of the stage. A checkmark appears on the menu when this option is selected.
www.it-ebooks.info

FLASH CS6: THE MISSING MANUAL
798
TEXT
Group
Windows: Ctrl+G
Mac: ⌘-G
Combines selected objects into a group. Grouped objects behave as if they’re a
single object. They can be selected with a single click and modified and transformed
with a single command.
Ungroup
Windows: Ctrl+Shift+G
Mac: Shift-⌘-G
Breaks grouped objects (see above) apart into their individual elements.
Text
Use the commands on the Text menu to modify the appearance of text on the stage:
Font
Choose a typeface from a list of fonts available on your computer.
Size
Apply a new size to the selected text. Sizes range from 8 point to 120 point.
Style
Available type styles include Plain, Bold, Italic, Subscript, and Superscript.
Align
Use this command to set the text alignment to Left, Centered, Right, or Justified.
Letter Spacing
Letter spacing is a typographic eect sometimes used in headings and logos to
increase or decrease the space between all letters by the same fixed amount.
Scrollable
Use the Scrollable command to make dynamic text or input text fields scrollable, so
the text can be longer than the available space in the text box.
Check Spelling
Runs Flash’s spell checker on the text in the Spelling Setup window (see below).
www.it-ebooks.info

APPENDIX B: FLASH PROFESSIONAL CS6, MENU BY MENU 799
COMMANDS
Spelling Setup
Use the Spelling Setup command to identify the text that needs to be spell-checked,
select your language, choose a personal dictionary, and set options for words you
want the spell checker to ignore.
Font Embedding
Opens the Font Embedding window, where you can manage all the fonts used in
your animation and make sure the proper fonts are available for your audience. For
the details, see page 582.
Commands
The Commands menu helps you automate tasks in Flash. You can create commands
for tasks that you perform repeatedly and download prebuilt commands from the
Adobe Exchange website.
Manage Saved Commands
Opens the Manage Saved Commands panel, where you can rename and delete
commands.
Get More Commands
Opens your web browser to the Adobe Exchange page, where you can find com-
mands others have created. Some are for sale and some are free.
Run Command
Use Run Command to run a JavaScript command. An Open File dialog box opens,
where you can navigate to the script you want to run.
Convert Symbol to Flex Component
You can convert Flash content into a Flex component in the .swc file format. Your
content in Flash must be a movie clip symbol and must use ActionScript 3.0 (as
opposed to an earlier version).
Convert Symbol to Flex Container
Similar to the option above that creates components for Flex, this option creates
Flex containers.
Copy Font Name for ActionScript
Font names are sometimes complicated, with odd combinations of upper- and
lower-case letters. To make sure you use exactly the right name in your ActionScript
code, select a text field and then use this command to copy the font name to the
Clipboard. At that point, you can paste it into your code.
www.it-ebooks.info

FLASH CS6: THE MISSING MANUAL
800
CONTROL
Copy Motion as XML
Records an XML description of your animation that you can reuse in other projects.
Export Motion XML
Exports a copied motion as an XML file so you can import and reuse it in other
animations.
Import Motion XML
Imports an XML file that defines a Flash motion so you can apply it to objects in
your animation.
Control
Control menu commands provide playback controls to test your animation in the
program window, the Flash Player, and HTML pages.
Play
Windows: Enter
Mac: Return
Plays the timeline in the Flash window, showing the contents of each frame on the
stage.
Rewind
Windows: Shift+comma (,)
Mac: Shift-comma (,)
Moves the playhead in the timeline back to the first frame.
Go To End
Windows: Shift+period (.)
Mac: Shift-period (.)
Moves the playhead in the timeline to the last frame.
Step Forward One Frame
Windows: period (.)
Mac: period (.)
Moves the playhead in the timeline ahead one frame.
www.it-ebooks.info

APPENDIX B: FLASH PROFESSIONAL CS6, MENU BY MENU 801
CONTROL
Step Backward One Frame
Windows: comma (,)
Mac: comma (,)
Moves the playhead in the timeline back one frame.
Test Movie
Windows: Ctrl+Enter
Mac: ⌘-Return
The Test Movie option leads to a submenu, where you can choose to test your movie
in Flash Professional, Device Central, “AIR Debug Launcher (Desktop),” “AIR Debug
Launcher (Mobile),” or “on Device via USB.” These options may look similar, but in
each case, they use the designated runtime environment. Once you’ve selected the
environment for testing your movie, a checkmark appears next to its name. Then you
can use the Ctrl+Enter (⌘-Return) command to test it. Flash compiles the animation
and then runs it. If your movie has more than one scene, then this command plays
all the scenes in order.
Test Scene
Windows: Ctrl+Alt+Enter
Mac: Option-⌘-Return
Compiles and tests the scene in the timeline. If you want to test and view all the
scenes in your movie, use Test Movie (above).
Clear Publish Cache
Clears the publish cache of any previously stored files. Flash can create temporary
files when you publish your animation. Doing so can speed up the process the next
time you publish and test your animation. To adjust the publish cache settings, go
to Edit→Preferences→Publish Cache (Flash→Preferences→Publish Cache).
Clear Publish Cache and Test Movie
This command clears the cache of any previously stored files and then publishes
and tests the animation.
Loop Playback
Repeats the playback of your movie or scene when testing. When the movie reaches
the end, it starts playing from the beginning again.
Play All Scenes
Tells Flash to play all the scenes in your animation, not just the currently selected
scene.
www.it-ebooks.info

FLASH CS6: THE MISSING MANUAL
802
DEBUG
Enable Simple Frame Actions
Windows: Ctrl+Alt+F
Mac: Option-⌘-F
Tells Flash to play the actions you’ve added to frames in the timeline. (These are
basic actions like Play and Stop commands.) If you don’t turn on Enable Simple
Frame Actions, then Flash ignores frame actions.
Enable Simple Buttons
Windows: Ctrl+Alt+B
Mac: Option-⌘-B
Makes your buttons work on the stage. If you turn o this menu item, mousing over
and clicking buttons has no eect.
Enable Live Preview
Displays components you’ve added to the stage as they’ll appear in the Flash Player.
If you turn this item o, then Flash displays components as outlines.
Mute Sounds
Windows: Ctrl+Alt+M
Mac: Option-⌘-M
Prevents Flash from playing sound clips during playback.
Debug
Debug commands give you tools to play back your movie and, at the same time,
examine the inner workings of the timeline, object properties, and ActionScript code.
Similar to testing, you can debug your animation in dierent environments: Flash
Professional, “AIR Debug Launcher (Desktop),” “AIR Debug Launcher (Mobile),” or
“on Device via USB.”
Debug Movie
Windows: Ctrl+Shift+Enter
Mac: Shift-⌘-Return
Plays your animation while displaying information in the Debugger window, where
you can monitor the list of objects and variables your animation and ActionScript
are using.
www.it-ebooks.info

APPENDIX B: FLASH PROFESSIONAL CS6, MENU BY MENU 803
DEBUG
Continue
Windows: Alt+F5
Mac: Option-F5
Continues playback after being stopped by the debugger.
End Debug Session
Windows: Alt+F12
Mac: Option-F12
Stops the debugging session and stops playback of the animation.
Step In
Windows: Alt+F6
Mac: Option-F6
Used during debugging in combination with breakpoints, the Step In command runs
ActionScript functions step by step.
Step Over
Windows: Alt+F7
Mac: Option-F7
Use Step Over during debugging in combination with breakpoints to step through
your ActionScript code a line at a time. Stepping over a line of code tells Flash to
execute the code even if the line contains a function call.
Step Out
Windows: Alt+F8
Mac: Option-F8
Use Step Out during debugging in combination with breakpoints. You use this
command to return from examining a function in your ActionScript code (see Step
In, above).
Remove All Breakpoints
Windows: Ctrl+Shift+B
Mac: Shift-⌘-B
Breakpoints are used in debugging as a way to stop the animation and ActionScript
program from running, which gives you the opportunity to examine the code, vari-
ables, and properties. This command removes all the breakpoints you previously
placed in your ActionScript program.
www.it-ebooks.info

FLASH CS6: THE MISSING MANUAL
804
WINDOW
Begin Remote Debug Session
Remote debugging is the programmer’s art of debugging an .swf file on a remote
server. Use this command to begin remote debugging after you’ve done the neces-
sary setup chores of choosing your ActionScript version, creating a remote debug-
ging file (.swd), and uploading files to the server.
Window
This menu is Command Central for opening and closing the many windows you use
when working in Flash. Checkmarks appear next to the names of currently open
windows. Clicking next to the name opens or closes the window.
Duplicate Window
Windows: Ctrl+Alt+K
Mac: Option-⌘-K
Creates a second program window. Use this command when you want more than
one view of your animation or timeline. It’s useful for side-by-side comparisons of
two separate frames or other aspects of your Flash animation.
Toolbars
Leads to a submenu with the following commands:
• Main (Windows only)
Opens the Main toolbar, which includes buttons for frequently used commands
including New, Open, “Go to Bridge,” Save, Print, Cut, Copy, Paste, Undo, Redo,
“Snap to Object,” Smooth, Straighten, “Rotate and Skew,” Scale, and Align. Like
many toolbars, the Main toolbar can float or dock to the edge of the workspace.
• Controller
Opens the Controller toolbar, which you use to play, pause, and navigate through
the frames of your animation.
• Edit Bar
Opens the Edit bar, which appears between the timeline and the stage in your
program window.
Timeline
Windows: Ctrl+Alt+T
Mac: Option-⌘-T
Displays the timeline in your program window, which you use to work with frames
and layers in your animation.
www.it-ebooks.info

APPENDIX B: FLASH PROFESSIONAL CS6, MENU BY MENU 805
WINDOW
Motion Editor
Opens the Motion Editor panel, which you use to fine-tune motion tweens. The Mo-
tion Editor uses graphs to show how properties change over time. In particular, the
Motion Editor gives you greater control over the easing applied to property changes.
Tools
Windows: Ctrl+F2
Mac: ⌘-F2
Shows and hides the Tools palette, which holds tools for selection, drawing, shape
creation, text, color application, and color picking.
Properties
Windows: Ctrl+F3
Mac: ⌘-F3
Opens the Properties window, where you view—and edit—various aspects of objects
in your animation.
Library
Windows: Ctrl+L
Mac: ⌘-L
Opens the Library window, which stores objects used in your animation, like graph-
ics, movie clips, buttons, and sound clips.
Common Libraries
Opens the Common Library windows, which include Buttons, Classes, and Sounds.
Motion Presets
Opens a panel with predesigned motion tweens like “Fly-in,” “Fly-out,” and Bounce.
You can use Adobe-designed presets or store your own custom-designed presets
using this panel.
Project
Opens the Project window, where you can manage multiple files that are part of an
application or large project.
Actions
Windows: F9
Mac: Option-F9
Opens the Actions panel, where you define and edit ActionScript code used in your
animation.
www.it-ebooks.info

FLASH CS6: THE MISSING MANUAL
806
WINDOW
Code Snippets
Opens a panel with dozens of chunks of code that you can use in your ActionScript
programs. Snippets are organized in these groups: Actions, Timeline Navigation,
Animation, “Load and Unload,” “Audio and Video,” Event Handlers, Mobile Touch
Events, Mobile Gesture Events, Mobile Actions, “AIR for Mobile,” and AIR.
Behaviors
Windows: Shift+F3
Mac: Shift-F3
Opens the Behaviors panel, which automates the process of applying actions to
objects in your animation. (Behaviors aren’t available with ActionScript 3.0.)
Compiler Errors
Windows: Alt+F2
Mac: Option-F2
Opens the Compiler Errors window, where Flash displays the problems that may
happen during the compilation of your animation.
Debug Panels
Opens the Debug panel, which you use to find errors in your ActionScript programs.
The Debug panel displays the lines of your code, variables, values, and properties,
while giving you the opportunity to execute code a line at a time. The Debug sub-
panels are Debug Console, Variables, and ActionScript 2.0 Debugger.
Movie Explorer
Windows: Alt+F3
Mac: Option-F3
Displays the Movie Explorer window, where you see a hierarchical representation of
your Flash animation, breaking it down into scenes and objects.
Output
Windows: F2
Mac: F2
Opens the Output window, which is used in combination with
trace()
statements to
debug ActionScript code.
www.it-ebooks.info

APPENDIX B: FLASH PROFESSIONAL CS6, MENU BY MENU 807
WINDOW
Align
Windows: Ctrl+K
Mac: ⌘-K
Displays the Align window, which you use to align, distribute, and position objects on
the stage. The Align commands are identical to those in the Modify→Align submenu,
except that the window displays icons that visually indicate the alignment command.
Color
Windows: Alt+Shift+F9
Mac: Shift-⌘-F9
Opens the Color window, from which you pick stroke, fill, and gradient colors. The
Color window provides several tools to identify colors, including color pickers,
swatches, and RBG color tools.
Info
Windows: Ctrl+I
Mac: ⌘-I
Opens the Info panel, which provides details on the position of the mouse cursor and
the colors at that location. The Info panel also provides height, width, and location
information for selected objects on the stage.
Swatches
Windows: Ctrl+F9
Mac: ⌘-F9
Opens the Swatches panel, where you can pick colors to apply them to objects in
your animation. You use the Swatches panel to create and save custom colors for
your animation.
Transform
Windows: Ctrl+T
Mac: ⌘-T
Opens the Transform window, which you use to resize, rotate, and skew objects in
your animation.
Components
Windows: Ctrl+F7
Mac: ⌘-F7
Opens the Components window, where you choose components to add to your ani-
mation. Components are grouped in these categories: Flex, User Interface, and Video.
www.it-ebooks.info

FLASH CS6: THE MISSING MANUAL
808
WINDOW
Component Inspector
Windows: Shift+F7
Mac: Shift-F7
Displays the Component Inspector window, which you use to set parameters, bind-
ings, and XML schema for components you add to your animation.
Other Panels
Leads to a submenu with additional panels, including the following:
• Accessibility
Windows: Alt+Shift+F11
Mac: Shift-⌘-F11
Opens the Accessibility window, which you use to provide accessibility informa-
tion to screen readers and to set accessibility options for individual Flash objects.
• History
Windows: Ctrl+F10
Mac: ⌘-F10
Displays the History panel, where you see a record of actions performed during
the current Flash authoring session. Use the slider to the left of the list to back-
track and undo these actions. By selecting and saving multiple actions in the
History panel, you can create
commands
(reusable actions, similar to macros)
that you run from the Commands menu.
• Scene
Windows: Shift+F2
Mac: Shift-F2
Opens the Scene window, which lists all the scenes in your animation. Reorganize
the list of scenes to change the order in which scenes play in your animation.
• Strings
Windows: Ctrl+F11
Mac: ⌘-F11
Opens the Strings panel, where you can create and update multilingual content
for your animation. Using strings, you specify content for text fields that accom-
modate multiple languages. Flash can automatically determine which language
to use based on the language used by the computer running Flash Player.
www.it-ebooks.info

APPENDIX B: FLASH PROFESSIONAL CS6, MENU BY MENU 809
HELP
• Web Services
Windows: Ctrl+Shift+F10
Mac: Shift-⌘-F10
This panel helps to connect your Flash application to web-based services, like
those provided by the SOAP protocol or RESTful design architecture.
Extensions
Leads to a submenu with additional Adobe services and community-based tools.
Initially, there is only one item in the submenu::
• Kuler
A community-based tool that lets Flash fans share, rate, and reuse color palettes.
You can use this resource when you’re looking for inspiration.
Workspace
Leads to a submenu of commands that let you customize the Flash workspace and
save your favorite workspace layouts for use with later projects. You can also use
the Workspace menu on the main menu bar.
Hide Panels
Windows: F4
Mac: F4
Hides all panels and toolbars, leaving only the main program window visible. This
command works like a toggle.
Help
The Help menu provides access to Flash help files included with the product and
links to the Adobe website. (Many of the Help and Support resources were still in
the works at the time this book went to press.)
Search Field (Mac Only)
The first help option on the Mac is a search field. Enter words to display and highlight
the related menu command.
Flash Help
Windows: F1
Mac: F1
Opens the Help window in Flash, where you can find and view the help information
that’s included with the Flash program. Use the panels on the left to select books
www.it-ebooks.info

FLASH CS6: THE MISSING MANUAL
810
HELP
and to type in search words and phrases. Help articles appear on the right side of
the Help window.
Flash Support Center
Opens your browser to the Flash Support pages, where you can find tech support.
Get Latest Flash Player
Leads to Adobe’s website, where you can find the latest version of Flash Player.
Adobe Product Improvement Program
Opens a dialog box, where, if you wish, you can give Adobe permission to anony-
mously collect information about how you use its products. The company then uses
this information to develop future products. If you choose to participate, you can
always turn this feature o later through the same menu command.
Flash Exchange
Opens Adobe’s Extension manager and provides access to Flash Exchange, where
you can download components and other extensions that add to Flash’s features.
Omniture
This command leads to a web page with information about Omniture SiteCatalyst,
a product that provides tracking and analysis for Rich Internet Applications.
Manage Extensions
Opens Adobe’s Extension Manager, where you can add components and features
to Flash.
Manage AIR SDK
Use this tool to identify the location of the AIR SDK. AIR is the Adobe Intergrated
Runtime that is used to develop standalone desktop and mobile apps. The SDK is
the software development kit used to create AIR apps.
Adobe Online Forums
Opens your browser to Adobe’s forums, where you can interact with other design-
ers and developers.
Complete/Update Adobe ID Profile
To use some of the features provided with Flash CS6 Professional, you need an
Adobe ID. This menu item provides a link to the online site where you can create or
modify your Adobe ID.
Product Registration
Many of Adobe’s online services, such as CS Live, use your Adobe ID. Using this com-
mand, you can register your product and create or make changes to your ID profile.
www.it-ebooks.info

APPENDIX B: FLASH PROFESSIONAL CS6, MENU BY MENU 811
HELP
Deactivate
Opens a window where you can deactivate Flash. After deactivation, you can install
Flash on another computer.
Updates
Runs Adobe’s product update tool. You have to have an activated product and
Internet access to download updates from Adobe’s website.
About Adobe CS6 Professional (Mac: Flash→About Flash)
Opens the About Adobe CS6 Professional window, where you see the product name
and version, as well as copyright information.
www.it-ebooks.info

813
animating text without, 233–239
arrays, 433–434
built-in data types, 434–435
changing object properties with,
422–426
classes, 422–423
conditionals and loops, 436–439
constants, 436–437
controlling text with. Seestrings
(ActionScript)
creating class folders, 419
creating text fields with, 591–594
drawing with. Seedrawing with
ActionScript
events, 429
formatting text with, 596–600
for() statements, 439
functions and methods in, 426–429
help references, 411–413, 448, 452
vs. JavaScript, 410–411
making button components work
with, 550–553
making Library objects available to,
484
modifying ColorPicker component
with, 557–558
naming conventions in, 490
numbers, 430–431
object-oriented programming and,
421
overview, 408
partnership with Flash, 408–409
previous versions of, 409
Index
Symbols
3-D
moving/rotating objects in, 181–185
moving text in, 238–239
Position and View subpanel (text),
240
rotating/moving/skewing text in,
222–223
Translation tool, 184
= (assignment operand in
ActionScript), 427–428
+ (concatenation) operator, 591
!= (does not equal) operator, 590
== (equality) operator, 431, 433
() parentheses in ActionScript, 431
“ “ (quotation marks)
defining strings with, 601
for string values, 586
A
accelerometer template (Android),
755–760
accessibility, 34
ActionScript
3.0-compatible documents, 326
ActionScript 2.0, 19
ActionScript 3.0 Cookbook, 544, 586
ActionScript 3.0 Language and
Components Reference, 448, 509
ActionScript Reference for the Adobe
Flash Platform, 737
Actions panel, 415–416
www.it-ebooks.info

INDEX
814
ACTIONS
PANEL
publishing applications, 715–720
self-signed certificates, 711–714
aligning objects, 78–79, 190–195
alpha channel (transparency), 318
anchor points
defined, 62
in motion paths, 115
moving with Subselection tool, 165
Android apps
accelerometer template, 755–760
converting to iOS, 760–764
development tips, 763–764
“Hello Android” app, 753–755
overview, 751–753
Animated Button Highlight template,
284–285
animations
adding components to, 544–550
animating drawings with TimerEvent,
627–629
animating text, 233–239
“auto refinishing” animation, 6–7
background, 5–6
bones and. Seebones
“Compress movie” option, 677
controlling speed of, 514–519
converting to AIR, 713–715
exporting, 699–700
frame-by-frame. Seeframe-by-frame
animations
playing out of sequence, 522–523
playing (tutorial), 41
publishing. Seepublishing animations
starting/stopping, 519–520
templates, 283
testing. Seetesting animations
tips from experts, 45–46
Anti-alias settings (type), 241–242
appendText() method, 588
Apple World Wide Developer
Relations Certification Authority
certificate, 726–727
armatures (bones)
branching, 332–333
defined, 327
arranging drawn objects, 75–76
arrays (ActionScript), 433–434
assignment operand (=) in
ActionScript, 427–428
audio file formats, 374
Script pane toolbar, 416–417
setting frame rates with, 517
specifying colors for, 203
starting timeline with, 520–522
strings, 432
summary of properties/methods,
507–510
support for ActionScript 1 and 2, 411
targeting labeled frames with,
525–529
targeting scenes with, 532–535
timeline programming
pros and cons, 413–415
writing code, 415
Timer, 477
variables, 435–436
while() statements, 438–439
writing code in ActionScript files,
418–419
Actions panel, 654
Add Anchor Point tool, 71
addChild() methods, 509, 591
addChild() statement, 485, 491–492,
494
addEventListener() method, 478
Adobe AIR. SeeAIR (Adobe Integrated
Runtime)
Adobe Player Distribution License,
699
ADPCM sound format, 676
Advanced Character subpanel (TLF
text), 242–243
advertising templates, 282
AICC learning management system,
687
AIR (Adobe Integrated Runtime)
AIR for Android templates, 283
AIR for iOS
app settings, 738–743
“Hello iPad” app, 722–723
AIR Marketplace, 708
code signing certificates, 710–713
converting Flash animations to,
713–715
Debug Launcher, 722, 737, 755
defined, 408
vs. Flash, 707–708
“Hello World” application, 707–709
installing runtime environment, 720
overview, 705–706
www.it-ebooks.info

INDEX 815
CLASSIC TEXT
animating the drop, 103–107
copying/pasting frames, 109–110
reversing frames in frame span, 110
tweening dimension properties of
symbols, 107–109
branching armatures (bones), 332–333
Break Apart command, 234, 257
breakpoints (debugging), 663–666
Bridge, Adobe, 369–370
brightness (color), 198
Brush tool
basics, 72–75
vs. Pencil tool, 672
button components
adding sounds to, 376
basics, 560–561
working with ActionScript, 550–553
button symbols
creating, 273–275
creating instances of, 276–279
editing, 280
editing instances of, 276–280
oddly shaped/invisible, 277
overview, 271–272
C
case
camel case (ActionScript), 423
of strings, 590–591
certificates
code signing, 710–713
developer, 724–726, 725–729
characters
Character subpanel (text), 240–242
formatting with ActionScript,
596–600
replacing in strings, 590
CheckBox component, 561–562
Check syntax button (debugging),
652–655
Check Syntax tool, 464
child bones, 336
circles, drawing with ActionScript,
622–625
classes
ActionScript 3, 422–423
OOP, 420
classic text
advanced formatting functions, 231
creating hyperlinks with, 227–229
Audio stream/Audio event options,
682–683
Audition, Adobe, 383
Autoformatting (ActionScript), 417
AutoSave checkbox, 50
autosizing text fields, 594–595
B
backgrounds
Background color box, 50
of text fields, 593–594
backstage area, 23
bandwidth profiler reports, 648–651
Banner templates, 283
batch encoding (video), 388
beginFill() method (ActionScript), 622
Bind tool, 345
bitmaps
breaking apart, 364–365
editing with Photoshop, 366–367
import options for, 359–360
optimizing, 673–675
selecting colors, 169–171
turning into fills, 364–365
turning into symbols, 366
turning into vectors, 365–366
black boxes (components), 549
blank keyframes, 92
Blend option (shape tweens), 119
bones
Bone tool, 326
branching armatures, 332–333
changing length of, 338
combining with tweening, 332
controlling rotation of, 333–335
control points (shapes), 344–346
deleting, 339
linking symbols with, 326–330
moving, 335–337
moving shapes with, 342–346
overview, 325–326
pinning, 341–342
pose layers, 328, 330–332
posing with control handles, 339–340
repositioning symbol instances,
337–338
Spring properties, 346–348
Boolean data type (ActionScript), 433
borders, text field, 593–594
bounce-smoosh tween
www.it-ebooks.info

INDEX
816
CLEARING
button, 550–553
ColorPicker, 554–559
Component Assets folder, 547
Component Parameters subpanel,
548, 553, 560
modifying in Properties panel,
553–554
overview, 543–544
User Interface. SeeUser Interface
components
compressing
“Compress movie” option, 677
Flash videos, 385
sound clips, 682–683
concatenation (strings), 432, 591
conditional statements (ActionScript),
436–439
constants (ActionScript), 436–437
containers
contains() method
(DisplayObjectContainer), 509
text, 228–233
content
adding to multiple layers, 136–138
defined, 46
preloading, 678
Controller
timeline, 641
toolbar, 27
Control menu (Flash), 800–802
control points (bones), 344–346
Convert Anchor Point tool, 71
Convert to Symbol dialog box, 251,
268
copying/pasting
Copy Frames/Paste Frames
commands, 305
drawn objects, 82–83
frames, 109–110, 127–129
keyframe properties, 115–117
layers (animation), 145
motion paths, 114–115, 302–303
objects, 172–173
pose frames, 332–333
properties between property
keyframes, 310–311
shape tweens, 129–130
Create New Symbol dialog box, 255,
263
cropping video clips, 390–392
formatting with CSS, 602–604
positioning/sizing, 240
vs. TLF text, 216–218
types, 218
clearing
clear() method (Graphics class), 632
keyframes, 102, 131
objects, 172
posed frames, 331
clip symbols, 251
CMYK color space, 356
code
analyzing with Debugger, 662–666
Code Snippet Window, 735
commenting out, 661
copy-and-tweak coding, 467–471
hinting, 594–595
reusing, 638
signing certificates, 710–713
color
basics, 198–199
changing text color, 224–226
color code (Actions panel), 654
color eects using Motion Editor,
315–316
ColorPicker components, 554–559,
562–563
creating custom, 199–202
of fills, changing, 87–88
gradients, 206–209
RGB and HSB, 199
rules for using, 202
saving swatches, 203–204
selecting bitmap, 169–171
specifying for ActionScript, 203
of stage, 50–51
of strokes, changing, 84–86
tools, 29
using images as fill “color”, 203–205
ComboBox component, 563–564
Commands menu (Flash), 799–800
commenting code, 460, 466–467,
638, 661
Common Libraries, 560
compiled Flash files (publishing),
679–684
compiler errors, 435, 465, 655
components
adding to animations, 544–550
built-in, 558–559
www.it-ebooks.info

INDEX 817
DOCUMENTS
frames, 102–103, 129
graphic symbols, 262–263
iOS test apps, 744
layer folders, 151
layers (animation), 146–147
lines/shapes (ActionScript), 632–633
motion paths, 302
Motion Presets, 299
multiframe graphic symbols, 267
deploying Flash videos, 395–396, 402
deployment settings (AIR for iOS),
740–741
design time (ActionScript), 562
Detect Flash Version publishing
option, 690
developer program (iOS). SeeiOS
developer program
device fonts, 585
dimension properties of symbols,
tweening, 107–109
Display Lists
adding display objects by index
position, 501–504
adding objects to, 483–488
DisplayObjectContainer
classes, 482–483
methods, 508–510
properties, 508–509
identifying display objects, 505–506
modifying display containers,
494–495
moving objects between containers,
495–499
overview, 481–482
placing objects inside display
containers, 490–495
removing display objects by index
position, 504–505
removing objects from, 499–500
stacking order of objects, 500
swapping display object positions,
507–508
using trace() to report on, 488–490
distorting objects, 179–181
Distribute to Layers function, 139
Distribute Widths command, 549
dithering (color), 693
docked toolbars/panels, 26
documents
adding text to, 220–222
CSS (Cascading Style Sheets)
CSS: The Missing Manual, 602
formatting classic text with, 602–604
formatting text with, 600–601
formatting text with external files,
605–606
cue points (video), 392–394
curves
adding to motion paths, 113
converting straight line segments to,
166
drawing with ActionScript, 619–621
drawing with Pen tool, 70–72
optimizing, 672–673
customizing
color gradients, 208–209
colors, 199–202
FLVPlayback component (video),
403–404
Photo Album template, 286–287
saving custom Motion Presets,
298–299
templates, 282
view in Motion Editor, 316–317
Cut Frames command, 129, 131
D
Damping property (bones), 346–348
dashed/dotted lines, 672
DataGrid component, 565–567
DataProvider objects, 566–567
data types (ActionScript), 429
Date data type (ActionScript), 434
debugging
analyzing code with Debugger,
662–666
Compiler Errors panel, 656–657
Debug menu (Flash), 802–804
overview, 652
setting breakpoints, 663–666
Syntax checker, 652–655
trace() statement, 657–661
using Output panel, 657–661
declaration blocks (CSS), 602
declaring constants, 436
declaring variables (ActionScript),
435
Deco tool, 196–198
deleting
bones, 339
www.it-ebooks.info

INDEX
818
DOWNLOAD
TIME, TESTING
E
Ease option (shape tweens), 119
ease presets, 321–322
editing
bitmaps, 364
bitmaps with Photoshop, 366–367
button symbols, 280
editable paths, 357
editable text, 218
Edit bar, 26–27
Edit menu (Flash), 779–784
Edit Snapping window, 191–192
frame-by-frame animations, 99–104
graphic symbols, 258–262
instances of button symbols,
276–280
instances of graphic symbols,
257–259
instances of movie clip symbols, 271
instances of multiframe graphic
symbols, 266
motion paths, 110–115
movie clip symbols, 271
multiframe graphic symbols, 267
multiple frames, 132–136
property keyframes in timeline,
308–309
software for videos, 384
sound files, 382–384
symbol editor, 252–255
tween spans, 307–310
ellipse shape (ActionScript), 624
embedding fonts in SWF files,
582–585
encapsulation (OOP), 421
encoding Flash videos, 385–390, 392,
395
endFill() method (ActionScript), 623
end points (motion paths), 113–114
envelope distortions of objects,
180–181
equals property (Point class), 615
Eraser tool, 79–82
errors, compiler, 655–657
Essential ActionScript 3.0, 544, 586
Essentials workspace, 21–22
events
ActionScript 3, 429
event handler snippets, 445
Document Properties dialog box, 516
Document Settings window, 49
exchanging symbols between, 259
opening new, 47–48
optimizing. Seeoptimizing files
properties, setting, 48–50
download time, testing, 646–651
drawing
aligning objects, 78–79
arranging drawn objects, 75–76
Brush tool, 72–75
changing fill colors, 87–88
changing stroke colors, 84–86
converting strokes to fills, 189–190
copying/pasting objects, 82–83
with Deco tool, 196–198
Drawing Eect subpanel, 196–197
Eraser tool, 79–82
Line tool, 65–66
measurement guides, 50–53
merge mode, 56–58, 60–61
modes overview, 55–56
object mode, 58–60
opening new document page, 47–48
Pencil tool, 66–68
Pen tool, 68–72
planning for, 43–47
predesigned templates for, 52
selecting objects on stage, 61–63
setting document properties, 48–50
shapes, 53–54
shape tools, 76–78
strokes and fills, 63–65
tools, 28
drawing with ActionScript
animating drawings, 626–631
built-in shapes, 622–625
curves, 619–621
drawRandomLine() method, 660
Graphics class, 615–616
irregular shapes, 625–626
lines, 616–619
moving objects independently,
629–631
Point class, 611–615
shapes/sprites/movie clips, 631–632
Drop Shadow filter, 317
duplicating objects, 84, 173
Dynamic Text, 218
www.it-ebooks.info

INDEX 819
FRAME
BY FRAME
ANIMATIONS
Flash CS6
Adobe help, 771–772
vs. AIR, 707–708
file formats, 19
flash.geom package, 612
Help, 770–773
installing/activating, 768–770
menus. Seemenus (Flash)
minimum system requirements,
767–768
new features in, 3–5
online resources, 773–774
potential uses for, 1–3
Professional workspace, 16
reference books, 772
starting, 15–20
workspace. Seeworkspace
Flash Player
detecting version of, 690
testing in, 640
View menu, 651
flipping objects, 177, 178
floating toolbars/panels, 26
flowing text between containers,
232–233
FLVPlayback component (video),
403–404
flyin-pause-flyout motion preset,
296–299
folders
organizing layers with, 150–151
organizing symbols into, 281
fonts
device, 585
embedding in SWF files, 582–585
overview, 219, 581–582
formats, file. Seefiles
formatting
text fields, 593–594
text with ActionScript, 596–600
text with external CSS files, 605–606
text with HTML and CSS, 600–606
for() statements (ActionScript), 439
forums, online (Adobe), 771
frame-by-frame animations
changing tweens to, 310
creating, 93–97
editing, 99–104
overview, 91–92
testing, 97–98
event listeners, 448–451, 453–455,
477
keyboard and text, 471–475
mouse. Seemouse events
in OOP, 421
overview, 443–444
properties, 472–474
registering, 450
TimerEvent, 476–478
exporting
animations, 699–700
content of single frames, 700
Exporting Flash Movie dialog box,
643
Export Settings window (video),
389–390
graphics from Flash, 370
F
files
audio formats, 374
File menu (Flash), 18–19, 775–779
formats
for exporting animations, 699–
700
Flash import, 353
FXG, 354
overview, 19
video, 384, 386
managing with Adobe Bridge,
369–370
opening (tutorial), 35
fills
basics, 54
changing color of, 87–88
converting strokes to, 189–190
creating, 63–65
defined, 29
turning bitmaps into, 364–365
using images as fill “color”, 203–205
filters
applying to button symbols, 273,
277–281
using in tweens, 316
Find and Replace function, 132
Fireworks, 361–365
Flash
Exchange website, 19
Media Server, 396
www.it-ebooks.info

INDEX
820
FRAME
BY FRAME
BANDWIDTH
PROFILER
REPORT
importing series of, 368–369
resizing for multiplatform
development, 762–763
tablets, 67
graphic symbols
converting existing images to,
250–254
creating instances of, 255–256
creating in symbol editing mode,
252–255
deleting, 262–263
editing, 258–262
editing instances of, 257–259
multiframe. Seemultiframe graphic
symbols
overview, 249–250
registration points vs. transformation
points, 253
Grid Fill eect, 197
grid tool, 51
grouping objects, 188
guide layers, 192–195
guides tool, 51
H
“Hello Android” app, 753–755
“Hello iPad” app, 722–723
“Hello World” app (AIR), 707–709
Help
from Adobe, 771–772
Flash, 15, 770–773
menu (Flash), 809–811
hexadecimal numbers (color), 203,
557
hiding/showing multiple layers
(animation), 138–141
hinting, code, 594–595
hints, shape, 121–123
History panel, 309
horizontalScrollPolicy setting, 572
HTML (Hypertext Markup Language)
creating hyperlinks with, 601–603
formatting text with, 600–602
publishing animations as, 685–689
hue (color), 198
hyperlinks
HTML, 601–603
text, 225–228
Frame By Frame bandwidth profiler
report, 650
frames
adding sound files to, 376–381
basics, 24
converting to movie clip symbols,
269
copying/pasting, 109–110, 127–129
deleting, 102–103, 129
editing multiple, 132–136
exporting content of, 700
frame rates, 515–516, 517
inserting static, 101
labeled. Seelabeled frames
looping series of, 536–538
moving, 130–131
publishing as static image files,
690–697
removing/cutting/clearing, 131
reversing in frame span, 110
selecting, 99–100
static image files, 690–697
turning tweened into posed, 331
freehand mode (Lasso tool), 166–167
Free Transform tool, 174–181
fscommand() statement, 687
function closures (ActionScript), 421,
428
functions (ActionScript 3), 426–429
FXG file format, 354
G
general settings (AIR for iOS),
738–740
getChild() methods
(DisplayObjectContainer),
510–511
GIF (Graphic Interchange Format) files
publishing animated, 697–698
publishing static, 691–693
gotoAndPlay() statements, 528–529,
535
gotoAndStop() method, 452, 551
gradients, color, 206–209, 225
graphics. See alsoimages
elements, selecting, 159–161
exporting from Flash, 370
Graphics class (ActionScript),
615–616
importing, 351–354
www.it-ebooks.info

INDEX 821
JPEG (JOINT
PHOTOGRAPHIC
EXPERTS
GROUP) FILES
Adobe AIR runtime, 720
Flash Professional CS6, 768–770
iOS apps, 743–744
provisioning profiles (Apple), 731–732
instances
of button symbols, 276–282
defined (OOP), 420
of graphic symbols, 255–256,
257–259
of movie clip symbols, 269–271
of multiframe graphic symbols,
264–266, 266
of symbols, 337–338
Interactive Advertising Bureau, 52
interpolate() method (Point class),
613
int (integer) data type (ActionScript),
430
iOS apps
building tap-ready, 745–748
converting to Android, 760–764
“Hello iPad” app, 722–723
overview, 721, 733
publishing/installing/testing,
743–744
swipe to next/previous code snippet,
733–737
testing mobile events with Simulator,
737
iOS developer program
assigning devices for testing, 729
creating app IDs, 729–731
developer certificates, 725–729
overview, 723–724
provisioning profiles, 731–732
purpose of certificates/IDs, 724–726
iPhone App Development: The Missing
Manual, 724
irregular shapes
drawing with ActionScript, 625–626
selecting with Lasso tool, 167
J
jailbreaking mobile devices, 724
Java Development Kit (JDK), 755
JavaScript vs. ActionScript, 410–411
joining strings, 586–588
Joint: Rotation settings (bones),
334–335, 340
JPEG (Joint Photographic Experts
I
icon settings (AIR for iOS), 741–743
iDevices, 743–744
IDs for iDevice apps, 724–726,
729–731
if() statements (ActionScript), 436
IK bones. Seebones
Illustrator, importing from, 354–359
images. See alsographics
converting to graphic symbols,
250–254
using as fill “color”, 203–205
vector vs. bitmap, 365
importing
files to Library, 359
Flash videos
stored on computers, 397–402
stored on web, 402–403
graphics, 351–354
graphics from Fireworks, 361–365
Illustrator files, 354–359
options for bitmaps, 359–360
Photoshop files, 359–361
series of graphics files, 368–369
sound files, 374–375
unimportable graphics, 362
video files, 384, 395–396
incrementing values (while()
statements), 439
indexOf() method (string class),
589–590
index position
adding display objects by, 501–504
identifying display objects with,
505–506
removing display objects by,
504–505
Ink Bottle tool
adding strokes to shapes with, 64
coloring strokes with, 86–87
Ink option (Pencil tool), 67
in point/out point markers (video),
389
Input Text, 218
inserting
Insert menu (Flash), 788–789
keyframes, 100–102
static frames, 101
installing
www.it-ebooks.info

INDEX
822
KERNING TEXT
deleting, 146–147
Distribute to Layers function, 139
Layer Properties dialog box, 144
locking/unlocking, 148
moving, 147
multiple. Seemultiple layers
organizing with folders, 150–151
Outline view, 149–150
renaming, 141–144
reordering (moving), 146
spotlight eect with mask layers,
151–154
leading (text), 230, 240
length property (Point class), 612
Library
importing files to, 359
panel, 30–31, 249
line breaks (strings), 589–590
lines
drawing with ActionScript, 616–619
Line tool, 65–66
removing (ActionScript), 632–633
lip-synching (sound), 378
List component, 567–569
literals, string, 587
locking/unlocking layers (animation),
148
looping
defined, 98
parts of timeline, 537–540
series of frames, 536–538
with while() and for() statements,
436–439
lossy formats (video), 385
M
Mac
starting Flash in, 16–18
Magic Wand, 169–172
Magnification menu (Edit bar), 39
main timeline, 482
Main toolbar, 27
mask layers, 151–154
Math.random() method, 660
Math.round() method, 666
measurement guides, 50–53
Media Encoder, Adobe, 384, 386–390
Media Playback templates, 283
menu bar, 22–23
menus (Flash)
Group) files
publishing, 693–695
quality of, 681
K
kerning text, 230, 240
keyboard events, 471–475
keyboard shortcuts
Actions panel, 415
arranging drawn objects, 76
clearing keyframes, 131
deselecting objects, 159
displaying Properties panel, 30
duplicating objects, 63
frames and keyframes, 96
ruler measurement units, 51
scaling objects, 175
Selection tool, 61
Subselection tool, 62
timeline, 93
Tools panel, 60
Undo command, 38
ungrouping, 550
viewing animations, 98
keychain security system (Apple), 727
keyframes
basics, 92
clearing, 102
inserting, 100–102
moving, 130–131
selecting, 99–100
keyword function, 498
L
Label component, 567
labeled frames
adding, 523–525
overview, 523
vs. scenes, 525
targeting with ActionScript, 525–529
Lasso tool, 62–63, 166–170
lastindexOf() method (string class),
589–590
launching Flash CS6, 15–20
layers
benefits of, 142
copying/pasting, 145
creating for actions/labels/buttons,
545–549
defined, 135
www.it-ebooks.info

INDEX 823
MULTICOLUMN
TEXT
CONTAINERS
tutorial, 39–41
motion tweens
bounce-smoosh tween. Seebounce-
smoosh tween
modifying timelines of, 308
mouse events
applying to dierent projects, 455
basics, 445–448
constants (MouseEvent class), 449
creating rollovers with, 449–452
tabbed window project
copy-and-tweak coding, 467–471
modifying windows for dierent
projects, 471
overview, 456
planning before coding, 459–464
tabbed folder display preparation,
456–459
testing code, 464–468
movie clips
creating drawings on, 631–632
MOVIECLIP data type, 434
movie clip symbols
creating, 268–270
creating instances of, 269–270
editing, 271
editing instances of, 271
vs. multiframe graphic symbols, 251
overview, 267
moving
anchor points with Subselection tool,
165
bones, 335–337
drawings with ActionScript, 626–631
end points on motion paths, 113–114
frames and keyframes, 130–131
layers, 146, 147
motion paths, 111–112
objects, 172–173
objects between display containers,
495–499
objects in 3-D, 181–185
objects independently, 629–631
objects with Selection tool, 163–164
objects with Subselection tool,
164–165
property keyframes, 314–315
shapes with bones, 342–346
text in 3-D, 222–223, 238–239
multicolumn text containers, 232–233
Commands, 799–800
Control, 800–802
Debug, 802–804
Edit, 779–784
File, 775–779
Help, 809–811
Insert, 788–789
Modify, 790–798
Text, 798–799
View, 784–788
Window, 804–809
merge drawing mode, 56–58, 60–61
metadata, 683
methods
ActionScript, 507–510
ActionScript 3, 426–429, 434
DisplayObjectContainer, 508–510
OOP, 420–421
Mobile Actions snippets, 735
Modify menu (Flash), 790–798
morphing. Seeshape tweens
Motion Editor
adding/removing property
keyframes, 313–314
basics, 311–312
changing transparency with, 318–321
color eects, 315–316
customizing view, 316–317
ease presets, 321–323
moving property keyframes, 314–315
property changes, 315
using filters in tweens, 316
workflow for common tweens,
312–313
motion paths
adding curves to, 113
changing, 300–302
copying/pasting, 114–115, 302–303
deleting, 302
moving, 111–112
moving end points on, 113–114
orienting tweened objects to,
304–306
overview, 110–111
Motion Presets
applying, 295–299
bounce-smoosh preset, 40
deleting, 299
previewing custom, 299
saving custom, 298–299
www.it-ebooks.info

INDEX
824
MULTIFRAME
GRAPHIC
SYMBOLS
moving between display containers,
495–499
moving independently, 629–631
moving/rotating in 3-D, 181–185
moving with Subselection tool,
164–165
object drawing mode, 58–61
object-oriented programming (OOP),
419–421
placing inside display containers,
490–495
removing from Display Lists, 499–
500
reshaping with Selection tool,
163–164
selecting on stage, 61–63
selecting parts of, 161–163
stacking, 185–189
swapping tweened, 307–309
transforming, 174–175. See
alsotransforming objects
onion skinning, 132–136
online forums (Adobe), 771
opaqueBackground property, 556
opening files (tutorial), 35
OpenSSL (Open Secure Socket Layer),
728
operators (ActionScript), 430–432
optimizing files
importance of, 671
overview, 669–671
strategies for, 671–679
Options menu button (panels), 31
Options tools, 29
“Orient to path” checkbox, 306–307
OSMF Marketplace, 707
Outline view (layers), 149–150
Output panel, 657–661, 473
Oval tool, 76–79
P
.p12 certificates for Windows, 728
padding properties (text fields),
594–595
painting
Paint modes (Brush tool), 74
spray painting Symbols, 195–196
panels
Align, 78–79
basics, 25–27
multiframe graphic symbols
creating, 263–264
creating instances of, 264–266
deleting, 267
editing, 267
editing instances of, 266
vs. movie clips, 251
overview, 263
saving series if frames as, 249–250
multiline text containers, 229–230
multiplatform development, 762–763
multiple frames, editing, 132–136
multiple layers
adding content to, 136–138
showing/hiding, 138–141
N
naming
consistency in, 639
name property
(DisplayObjectContainer), 508
scenes, 530–531
nesting symbols, 249, 250
New Document window, 48
nextFrame() method, 737
Number data type, 614
numbers (ActionScript 3), 430–431
numChildren property
(DisplayObjectContainer), 508
NumericStepper component, 569–570
O
objects
adding to Display Lists, 483–488
aligning, 78–79, 190–195
applying gradient swatches to,
207–208
arranging drawn, 75–76
changing dimensions with Transform
tool, 109
changing properties of, 422–426
copying/pasting, 82–83
cutting/copying/pasting, 172–173
cutting out irregular shapes from,
81–82
duplicating, 84, 173
freehand selection of, 166
grouping, 188
modifying properties of, 170–171
moving, 172–173
www.it-ebooks.info

INDEX 825
PUBLISHING
saving in Fireworks, 362–363
Point class (ActionScript), 611–615
polygon mode (Lasso tool), 168
Polystar tool, 76–79
pose layers (bones), 328, 330–332
posing with control handles, 339–340
preloader template, 678
preloading content, 678
Presentation templates, 283
prevFrame() method, 737
primitives, Rectangle/Oval, 78
profiles
provisioning (Apple), 731–732
publish profiles, 684
ProgressBar component, 570–571
projector files, 678
projectors, 698–699
properties
3-D, 185–186
ActionScript, 507–510
copying between property
keyframes, 310–311
DisplayObjectContainer, 508–509
document, 48–50
layer, 144
of objects, 170–171, 422–426
in OOP, 420
Properties pane, 87
public (keyboard events), 474–475
text engine, 240
Properties panel
coloring strokes with, 85–86
modifying components in, 553–554
overview, 29–30
tutorial, 36–37
property keyframes
adding/removing, 313–314
basics, 92, 106
copying/pasting properties of, 115–117
copying properties between, 310–311
moving, 314–315
viewing/editing in timeline, 308–309
provisioning profiles (Apple), 731–732
public constants (MouseEvent class),
449
public properties (keyboard events),
474–475
publishing
AIR applications, 715–720
iOS apps, 743–744
Library, 30–31
Properties, 29–30, 36–37
summarized descriptions of, 31–34
Tools, 27–29
paragraphs
formatting with ActionScript,
596–600
Paragraph subpanel (TLF text), 243
parameters
Button component, 560
Checkbox component, 562
ColorPicker component, 563
ComboBox component, 564
Component Parameters subpanel,
560
DataGrid component, 565
FLVPlayback component, 404
Label component, 567
lineStyle() method, 617
List component, 567–569, 568–569
for methods, 450
NumericStepper component,
569–570
ProgressBar component, 571
RadioButton components, 571–572
ScrollPane component, 573
Slider component, 574
TextArea component, 575
TextInput component, 576
TileList component, 576–577
parent property
DisplayObject, 490
DisplayObjectContainer, 508
Paste Properties Special dialog box,
116
paths, motion. Seemotion paths
Pencil tool
basics, 66–68
vs. Brush tool, 672
Pen tool, 68–72
Perspective property (3-D), 185–186
Photo Album template, 286–287
Photoshop
editing bitmaps with, 366–367
importing graphics from, 359–361
pinning (bones), 341–342
pixels, defined, 29
playhead (timeline), 24
PNG (Portable Network Graphics) files
publishing, 695–697
www.it-ebooks.info

INDEX
826
PUBLISHING
ANIMATIONS
rotating
bones, 333–335
objects, 176–177
objects in 3-D, 181–185
Rotation subpanel, 306
text in 3-D, 222–223
round rectangle shape (ActionScript),
624
rulers
tool, 51
viewing, 104
runtime
defined, 562
engine, 98
environment, 705
S
Sample File templates, 283
saturation (color), 198
saving
custom Motion Presets, 298–299
Flash files, 354
scaling objects, 175–176
scenes
creating, 529–530
vs. labeled frames, 525
overview, 529
renaming, 530–531
reorganizing, 531–532
Scene/Symbol panel, 663
targeting with ActionScript, 532–536
SCORM learning management system,
687
Script pane toolbar (ActionScript),
416–417
Script window (ActionScript), 418
ScrollPane component, 572–573
scrubbing, 41, 106, 642
segments
defined, 62
Pen tool and, 68
Selectable text, 218
selecting
bitmap colors with Magic Wand,
169–171
frames and keyframes, 99–100
graphic elements, 159–161
Lasso tool, 166–170
objects on stage, 61–63
overview, 157–159
Publish Settings window, 644–645
publishing animations
as animated GIFs, 697–698
as compiled Flash files, 679–684
file choices, 677–679
frames as static image files, 690–697
JPEG files, 693–695
PNG files, 695–697
publish profiles, 684
as standalone projectors, 698–699
static GIFs, 691–693
as web pages, 684–689
pulsing loading text symbol, 678
Q
QuickTime, 356
R
RadioButton components, 571–572
random() method, 660
Raw sound format, 676
Read Only text, 218
rectangles
drawing with ActionScript, 622–625
Rectangle tool, 76–79
registering events, 444, 450
registration points (graphic symbols),
253, 254
removeChild() methods
(DisplayObjectContainer), 510
removeEventListener() function, 478
Remove Frames command, 131
renaming layers, 141–144
reordering layers, 146
replace() method (strings), 590
repurposing symbols, 271
reshaping objects with Selection tool,
163–164
resizing
graphics for multiplatform
development, 762–763
stage (tutorial), 37–38
video clips, 390–392
Reverse Keyframes command, 112
reversing frames in frame span, 110
RGB and HSB colors, 199, 201, 356
rich Internet applications (RIAs), 408
robot animation project, 332–335
rollovers (mouse events), 449–452
root bones, 327
www.it-ebooks.info

INDEX 827
STRINGS
(ACTIONSCRIPT)
adding to series of frames, 376–381
compressing, 385, 682–683
editing, 382–384
importing, 374–375
optimizing, 674–675
overview, 374
Sound Settings dialog box, 682
stock media, 382
using eectively, 379
Speech sound format, 676
spotlight eect (layers), 151–154
Spray Brush tool, 195–196
Spring properties (bones), 346–348
sprites
creating drawings on (ActionScript),
631–632
defined, 617
Square Wave ease preset, 321–322
stacking objects, 185–189
stage
changing size of, 37–38, 48–50
overview, 23–24
positioning with X/Y coordinates, 103
selecting objects on, 61–63
changing color of, 50–51
testing on, 640–641
standalone projectors, 678, 698–699
static frames
basics, 92
inserting, 101
moving, 130
static image files, publishing, 690–
697
Static Text, 218
stock media, 382
storyboards, 44–46
Straighten option
Pencil tool, 67
Selection tool, 161
straight lines
converting segments to curves, 166
drawing with pen tool, 69
Streaming Service (Flash video), 396
Strength property (bones), 346–348
strings (ActionScript)
adding line breaks to, 589–590
appendText() method, 588
basics, 432
converting to uppercase/lowercase,
590–591
parts of shapes/objects, 161–163
Selection tool
basics, 61–62
moving/reshaping objects with,
163–164
overview, 159
Subselection tool, 164–165
self-signed certificates, 711–714
setTextFormat() method, 597–598
shapes
creating drawings on (ActionScript),
631–632
cutting out irregular, 81–82
drawing, 53–54
drawing built-in (ActionScript),
622–625
drawing irregular (ActionScript),
625–626
moving with bones, 342–346
optimizing, 672–673
removing (ActionScript), 632–633
selecting parts of, 161–163
tools, 76–78
ungrouped, 162–164
shape tweens
copying/pasting, 129–130
creating, 117–120
overview, 117
shape hints, 121–123
showing/hiding multiple layers,
138–141
SIMPLEBUTTON data type
(ActionScript), 434
Simulator (mobile events), 737
single-line text containers, 229–230
sizing
size reports, 649
text fields, 593
skewing
objects, 178–179
text in 3-D, 222–223
skins (Flash video), 399
Slider component, 573–574
Smooth option
Pencil tool, 67
Selection tool, 161
snake animation, 342–344
snapping feature, , 52
snippets, code, 735–736
sound clips
www.it-ebooks.info

INDEX
828
STROKES
tap-ready iOS apps, 745–748
targeting scenes, 532–535
target platforms, 47
target property (ActionScript), 498,
499
targets, event, 444
templates
Android accelerometer, 755–760
basics, 280–284
opening prebuilt, 283–285
predesigned, 52
preloader, 678
TestFlight website, 745
testing
assigning iDevices for, 729
button instances, 276
iOS apps, 743–744
mobile events with Simulator, 737
videos, 402
testing animations
code for tabbed window project,
464–468
download time, 646–651
frame-by-frame, 97–98
inside web pages, 644–647
multiple animations, 644
on stage vs. Flash Player, 640–641
strategies for, 637–640
Test Movie commands, 642–644
text
adding to documents, 220–222
advanced formatting of, 230
animating without ActionScript,
233–239
appendText() method, 588
applying color gradients to, 225
changing color of, 224–226
Character subpanel, 240–242
choosing size of, 220
choosing type of, 217–218
containers, 228–233
controlling with ActionScript.
Seestrings (ActionScript)
engine properties, 240
events, 471–475
fonts. Seefonts
formatting
with ActionScript, 596–600
with external CSS files, 605–606
with HTML and CSS, 600–606
creating, 586
finding substrings, 589–590
joining, 586–588
overview, 585
replacing words/characters in, 590
string literals, 473, 587
string variables, 587
substrings, 589–590
strokes
basics, 53–54
changing color of, 84–86
converting to fills, 189–190
creating, 63–65
defined, 29
subpanels, Properties, 30
Subselection tool, 62, 164–165
substrings, 589–590
swapChildren() methods
(ActionScript), 507–508, 510
swapping tweened objects, 307–309
Swap Symbol dialog box, 258
swatches, color, 203–204
SWF files
compiled, 679–684
embedding fonts in, 582–585
swipe to next/previous code snippet,
733–737
Switcher, Workspace, 20
switch() statements (ActionScript),
438
symbols
button. Seebutton symbols
exchanging between documents, 259
graphic. Seegraphic symbols
instances of, 447
linking with bones, 326–330
movie clip. Seemovie clip symbols
organizing into folders, 281
overview, 248–249
repurposing, 271
reusable, 673
spray painting, 195–196
Symbol Properties dialog box, 484
turning bitmaps into, 366
tweening dimension properties of,
107–109
Symmetry Brush, 197–198
Syntax checker (debugging), 652–655
T
www.it-ebooks.info

INDEX 829
TWEENS/
TWEENING
types of, 218
toggle parameter (Button
component), 560
toolbars, 25–27
Tools panel, 27–29
trace() statement (ActionScript)
basics, 473
debugging with, 657–661
displaying strings with, 587
reporting on Display Lists with,
488–491
tracing bitmaps, 365–366
tracking, text, 230, 240
transformation points (graphic
symbols), 253
transforming objects
distorting, 179–181
envelope distortions, 180–181
flipping, 177, 178
overview, 174–175
rotating, 176–177
scaling, 175–176
skewing, 178–179
three-dimensionally, 182–184
Transform tool
changing bone lengths with, 338
changing object dimensions with, 109
rotating symbol instances with,
338–339
translating objects (3-D), 184
transparency (color), 199, 201, 318–321
tutorials
Motion Presets, 39–41
opening files, 35
playing animations, 41
Properties panel, 36–37
resizing stage, 37–38
Zoom tool, 38–40
tweens/tweening
changing to frame-by-frame
animations, 310
combining with bones, 332
defined, 40
easing, 320–322
editing tween spans, 307–310
motion tweens. Seemotion tweens
orienting tweened objects to motion
paths, 304–305
swapping tweened objects, 307–309
using filters in, 316
hyperlinks, 225–228
importing
from Illustrator, 357
from Photoshop, 360
moving in 3-D, 238–239
overview, 215–216
position/height/width of, 222
rotating/skewing/moving in 3-D,
222–223
TextArea component, 574–575
TextEvent, 475–476
TextFormat class, 596–600
TextInput component, 576
Text menu (Flash), 798–799
Text tool, 220–221
TLF vs. Classic, 216–218
typefaces and fonts, 219
text fields
autosizing, 594–595
creating with ActionScript, 591–594
formatting backgrounds/borders of,
593–594
padding properties, 594–595
positioning/sizing, 593
TEXTFIELD data type (ActionScript),
434
TextFields class, 588
TileList component, 576–577
timeline
looping part of, 537–540
overview, 24–25
programming ActionScript, 413
reading, 97
starting with ActionScript, 520–522
stop and go commands, 519–520
Timeline Navigation snippets, 747
viewing/editing property keyframes
in, 308–309
TimerEvent
animating drawings with, 627–629
basics, 476–478
Tinted Frames option, 119
TLF (Text Layout Framework) text
3-D Position and View subpanel, 240
Advanced Character subpanel,
242–243
advanced formatting functions, 230
vs. Classic Text, 216–218
Paragraph subpanel, 243
TLFTextField class, 591
www.it-ebooks.info

INDEX
830
TYPEFACES
AND FONTS
on web, 402
editing programs, 384
encoding, 385–390, 395
file formats, 386
importing, 384
overview, 384
reducing size of files, 394–395
resizing/cropping, 390–392
skins, 399
viewing
animations, 98
customizing views in Motion Editor,
316–317
property keyframes in timeline,
308–309
rulers, 104
tools for, 28–29
View menu
Flash, 784–788
Flash Player, 651
Vine Fill tool, 197
virtual machines, 411
W
watch folders (video), 388
web pages
publishing animations as, 684–689
testing animations in, 644–647
websites, for downloading
Adobe AIR, 720
Audacity, 383
Flash Player, 681
Java Development Kit (JDK), 755
OSMF Marketplace, 707
Red5 Flash Server, 396
WWDR intermediate certificate, 726
websites, for further information
accessibility, 34
Adobe Player Distribution License,
699
AIR documentation, 715
Android developers site, 752
Android forums, 752
Apple developer accounts, 726
Fiat AIR app, 710
Flash expertise/tips, 773–774
Interactive Advertising Bureau, 52
iOS developer program, 724
TestFlight, 745
video-blogging, 384
when to use, 95
workflow for common tweens,
312–313
typefaces and fonts, 219
U
UDID identifiers for iDevices, 729
uint (unsigned integer) data type
(ActionScript), 430
Undo command, 131
ungrouped shapes, 162–164
usability testing, 640
use count (symbols), 254
User Interface components
Button, 560–561
CheckBox, 561–562
ColorPicker, 562–563
ComboBox, 563–564
DataGrid, 565–567
Label, 567
List, 567–569
NumericStepper, 569–570
overview, 559–560
ProgressBar, 570–571
RadioButton, 571–572
ScrollPane, 572–573
Slider, 573–574
TextArea, 574–575
TextInput, 576
TileList, 576–577
V
Vanishing Point property (3-D),
185–186
variables (ActionScript)
declarations, 485
defined, 435–436
panel, 662
string, 587
vector images, 365–366
verticalScrollPolicy setting, 572
vertical text containers, 229–230
videos, Flash
adding cue points to, 392–394
compressing, 385
creating, 384–385
customizing FLVPlayback
component, 403–404
deployment
options, 395–396
www.it-ebooks.info

INDEX 831
ZOOM TOOL
(TUTORIAL)
while loops, 506
while() statements (ActionScript),
438–439
Window menu (Flash), 804–809
Windows, Microsoft
starting Flash in, 15–16
work area (stage), 23
workspaces, Flash
menu bar, 22–23
stage, 23–24
switching between, 20–22
timeline, 24–25
WWDR intermediate certificate, 726
X
Xcode, 724
XFL file format, 354
XMP metadata, 683
X/Y coordinates, 103, 611–612
Z
Zoom tool (tutorial), 38–40
www.it-ebooks.info
