FlexSet IP 280S (Version 3) Telephone User Guide (for Coral IPx And FlexiCom Systems) Ip_280s_(v3)_user_guide_(coral_ipx_and_flexicom) (v3) (coral Flexicom)
User Manual: flexset-ip_280s_(v3)_user_guide_(coral_ipx_and_flexicom)
Open the PDF directly: View PDF ![]() .
.
Page Count: 283 [warning: Documents this large are best viewed by clicking the View PDF Link!]
- Table of Contents
- Introduction
- FlexSet Overview
- Operating the FlexSet
- Overview
- Using the Telephony Features
- Using the System Defined Fixed Keys
- Second Party Speaker Status
- Using the Speakerphone or Headset
- Volume Adjustment
- Ring Adjustment
- Making Calls
- Making Internal Calls
- Making External Calls
- Receiving and Answering Calls
- During Idle
- Return Calls
- Station Telephony Features
- Overview
- Account Code
- ACD and UCD Hunt Groups
- Activation Code
- Auto Set Relocate
- Boss Groups
- Call Forwarding / Follow Me
- Call Log
- Call Pickup
- Caller ID Control
- Calls Waiting: Receiving
- Camp On (Call Back)
- Cancellation Code
- Canned Messages
- Conference (Multi-Party) Calls
- COS Switchover
- Directory
- Divert Call
- Do Not Disturb (DND)
- ELA (Extension Line Appearance) Group
- Executive Privilege
- FlexiCall
- Freedom
- Group Calls
- Preset Conference Activation
- Temporary Conference Activation
- Joining
- Adding Participants (when not part of the Call)
- Adding Participants (by Group Operator)
- Submitting Request to Speak
- Controlling Permission to Speak
- Forced Release of a Participant
- Forced Release of an Entire Group Call
- Defining a Group Call Operator:
- Group Call Access Codes
- Headset Only
- Help: Requesting
- Help: Answering
- Hold
- Individual Remote System Services (IRSS) - Freedom
- To enable IRSS (from remote phone providing caller ID):
- To cancel IRSS:
- Placing IRSS Calls:
- Options available while in an established IRSS call
- Broker/Consultation/3-Way Conference call
- To activate Voice Mail/IVR from your IRSS phone:
- To activate the FlexiCall All feature from your IRSS phone:
- To cancel the FlexiCall All feature from your IRSS phone:
- To enable a new IRSS phone from your present IRSS phone:
- To cancel IRSS feature from your IRSS phone:
- Malicious Call Trace
- Messages: Options
- Viewing and answering messages left at your station:
- Leaving a message at another system station from idle when message list is empty:
- When your phone rings (message delivery):
- Leaving a message indication at an idle station:
- Leaving a message indication at a busy or non-answering station:
- When your phone rings (message waiting delivery):
- Answering a Message Waiting return call:
- Mute Microphone
- Page Queue
- Paging: Announcing, Public Address
- Paging: Voice Paging
- Paging: Zone Page
- Park
- Phone Lock
- Programming: Feature Keys
- Programming: Button Labeling
- Recording a Call
- Redial
- Relay (Accessory)
- Reminder
- Room Status
- Series Call
- Silent Monitoring
- Speed Dialing: Private Library
- Speed Dialing: Using Private and Public Libraries
- Touch-Tone Dialing (DTMF) for Other Common Carriers (OCC)
- Transfer (Xfer)
- Transfer: Broker/Consultation/3-Way Conference Call
- Wakeup
- Whisper Paging
- Attendant Features
- Setup
- Appendix A: Glossary
- Appendix B: Tones
- Appendix C: LED Indications (Programmable Keys)
- Appendix D: ISDN Cause Numbers
- Appendix E: Troubleshooting
- Index: Soft Keys and Feature Codes

FlexSet-IP
280S
User Guide
.
(FlexSet Version 3)
(Coral Version15.5)
.
Creating a new world of IPportunities

© Copyright by TADIRAN TELECOM LTD., 2002-2007.
All rights reserved worldwide.
The Coral is Protected by U.S. Patents 6,594,255; 6,598,098; 6,608,895; 6,615,404
All trademarks contained herein are the property of their respective holders.
The information contained in this document is proprietary and is subject to all relevant copyright, patent and
other laws protecting intellectual property, as well as any specific agreement protecting TADIRAN TELECOM
LTD.'s (herein referred to as the "Manufacturer") rights in the aforesaid information. Neither this document nor
the information contained herein may be published, reproduced or disclosed to third parties, in whole or in part,
without the express, prior, written permission of the Manufacturer. In addition, any use of this document or the
information contained herein for any purposes other than those for which it was disclosed is strictly forbidden.
The Manufacturer reserves the right, without prior notice or liability, to make changes in equipment design or
specifications.
Information supplied by the Manufacturer is believed to be accurate and reliable. However, no responsibility is
assumed by the Manufacturer for the use thereof nor for the rights of third parties which may be affected in any
way by the use thereof.
Any representation(s) in this document concerning performance of the Manufacturer's product(s) are for
informational purposes only and are not warranties of future performance, either express or implied. The
Manufacturer's standard limited warranty, stated in its sales contract or order confirmation form, is the only
warranty offered by the Manufacturer in relation thereto.
This document may contain flaws, omissions or typesetting errors; no warranty is granted nor liability assumed
in relation thereto unless specifically undertaken in the Manufacturer's sales contract or order confirmation.
Information contained herein is periodically updated and changes will be incorporated into subsequent editions.
If you have encountered an error, please notify the Manufacturer. All specifications are subject to change
without prior notice.

Table of Contents TOC-1 FlexSet-IP 280S User Guide
Table of Contents
Introduction..................................................................................................................... 1
Conventions............................................................................................................. 2
Related Documentation........................................................................................... 3
FlexSet Overview ............................................................................................................ 4
Front View ............................................................................................................... 4
Bottom, Side and Rear View ................................................................................... 5
PC Connection ........................................................................................................ 6
Component Descriptions ......................................................................................... 7
Handset Hook and Telephone Number ................................................................... 9
Desk Elevation at 28º ............................................................................................ 10
Desk Elevation at 60º ............................................................................................ 11
Wall Mounting........................................................................................................ 12
Using the Display Panel ........................................................................................ 13
Using the Fixed and Navigator Keys ..................................................................... 14

Table of Contents TOC-2 FlexSet-IP 280S User Guide
Operating the FlexSet................................................................................................... 15
Overview................................................................................................................ 15
Using the Telephony Features .............................................................................. 16
Using the System Defined Fixed Keys .................................................................. 17
Second Party Speaker Status ............................................................................... 18
Using the Speakerphone or Headset .................................................................... 19
Volume Adjustment ............................................................................................... 24
Ring Adjustment .................................................................................................... 25
Making Calls .......................................................................................................... 27
Making Internal Calls............................................................................................. 28
Making External Calls............................................................................................ 36
Receiving and Answering Calls............................................................................. 43
During Idle ............................................................................................................. 45
Return Calls........................................................................................................... 50

Table of Contents TOC-3 FlexSet-IP 280S User Guide
Station Telephony Features......................................................................................... 53
Overview................................................................................................................ 53
Account Code........................................................................................................ 54
ACD and UCD Hunt Groups.................................................................................. 56
Activation Code ..................................................................................................... 60
Auto Set Relocate.................................................................................................. 61
Auto Set Relocate: Permanent.............................................................................. 62
Auto Set Relocate: Temporary .............................................................................. 63
Boss Groups.......................................................................................................... 64
Boss Groups: Using............................................................................................... 65
Boss Groups: Privacy............................................................................................ 66
Boss Groups: Exclusive Hold ................................................................................ 67
Boss Groups: Call Forwarding............................................................................... 68
Call Forwarding / Follow Me .................................................................................. 70
Call Log ................................................................................................................. 74
Call Pickup............................................................................................................. 77

Table of Contents TOC-4 FlexSet-IP 280S User Guide
Caller ID Control.................................................................................................... 78
Calls Waiting: Receiving........................................................................................ 79
Camp On (Call Back)............................................................................................. 81
Cancellation Code ................................................................................................. 83
Canned Messages................................................................................................. 84
Conference (Multi-Party) Calls .............................................................................. 86
Conference Calls: Meet Me ................................................................................... 87
Conference Calls: Conference Multi-Party Lock.................................................... 88
Conference Calls: Conference View/Release ...................................................... 89
COS Switchover .................................................................................................... 90
Directory ................................................................................................................ 91
Divert Call.............................................................................................................. 97
Do Not Disturb (DND)............................................................................................ 98
ELA (Extension Line Appearance) ...................................................................... 100
ELA Group Line Keys: Programming .................................................................. 101
ELA Groups: Using.............................................................................................. 103

Table of Contents TOC-5 FlexSet-IP 280S User Guide
ELA Groups: Privacy ........................................................................................... 105
ELA Groups: Exclusive Hold ............................................................................... 106
Executive Privilege .............................................................................................. 107
FlexiCall............................................................................................................... 108
Freedom .............................................................................................................. 113
Group Calls.......................................................................................................... 114
Group Calls: Preset Conference Activation ......................................................... 117
Group Calls: Temporary Conference Activation .................................................. 118
Group Calls: Joining ............................................................................................ 119
Group Calls: Adding Participants (when not part of the Call) .............................. 120
Group Calls: Adding Participants (by Group Operator) ....................................... 121
Group Calls: Submitting Request to Speak......................................................... 122
Group Calls: Controlling Permission to Speak .................................................... 123
Group Calls: Forced Release of a Participant ..................................................... 124
Group Calls: Forced Release of an Entire Group Call......................................... 125
Headset Only....................................................................................................... 126

Table of Contents TOC-6 FlexSet-IP 280S User Guide
Help: Requesting................................................................................................. 127
Help: Answering .................................................................................................. 128
Hold ..................................................................................................................... 129
Individual Remote System Services (IRSS) - Freedom....................................... 130
Malicious Call Trace ............................................................................................ 137
Messages: Options.............................................................................................. 138
Mute Microphone................................................................................................. 141
Page Queue ........................................................................................................ 142
Paging: Announcing, Public Address .................................................................. 146
Paging: Voice Paging .......................................................................................... 147
Paging: Zone Page.............................................................................................. 149
Park ..................................................................................................................... 150
Phone Lock.......................................................................................................... 152
Programming: Feature Keys................................................................................ 153
Programming: Button Labeling............................................................................ 160
Recording a Call.................................................................................................. 163

Table of Contents TOC-7 FlexSet-IP 280S User Guide
Redial .................................................................................................................. 164
Relay (Accessory) .............................................................................................. 167
Reminder............................................................................................................. 168
Room Status........................................................................................................ 169
Series Call ........................................................................................................... 171
Silent Monitoring.................................................................................................. 172
Speed Dialing: Private Library ............................................................................. 175
Speed Dialing: Using Private and Public Libraries .............................................. 179
Touch-Tone Dialing (DTMF) for Other Common Carriers (OCC)........................ 180
Transfer (Xfer) ..................................................................................................... 181
Transfer: Broker/Consultation/3-Way Conference Call ....................................... 185
Wakeup ............................................................................................................... 189
Whisper Paging ................................................................................................... 191

Table of Contents TOC-8 FlexSet-IP 280S User Guide
Attendant Features ..................................................................................................... 193
Available Functions ............................................................................................. 193
Call Forward ........................................................................................................ 196
Canned Messages............................................................................................... 198
Malicious Call Trace ............................................................................................ 201
Room Status........................................................................................................ 202
WakeUp............................................................................................................... 204
Call Charge.......................................................................................................... 206
Station Setup Features........................................................................................ 208
System Features ................................................................................................. 211
Trunk Setup Features.......................................................................................... 217
Setup............................................................................................................................ 222
Overview.............................................................................................................. 222
Coral Telephony Features ................................................................................... 223
User Definitions Menu ......................................................................................... 229
System Definitions Menu..................................................................................... 234

Table of Contents TOC-9 FlexSet-IP 280S User Guide
Appendix A: Glossary ................................................................................................ 329
Appendix B: Tones ..................................................................................................... 334
Appendix C: LED Indications (Programmable Keys) .............................................. 337
Appendix D: ISDN Cause Numbers........................................................................... 338
Appendix E: Troubleshooting ................................................................................... 344
Index: Soft Keys and Feature Codes ........................................................................ 346

Introduction 1 FlexSet-IP 280S User Guide
Introduction
The FlexSet-IP 280S or Terminal with soft keys meets all your telephony and office needs. It combines the ability to
communicate with the IP world with the solid dependability and high level of functionality available from the Coral. It can be
used in a typical office environment or can connect to the Coral via the IP environment from an external location, enabling
telecommuting without losing the benefits of the Coral’s rich features.
The benefits you receive from working with the FlexSet will become an invaluable part of your work environment. While the
technology employed in the FlexSet is state of the art, using the telephone is simple and straightforward. You will
immediately appreciate the easy to reach soft keys. Depending on the state of the telephone, the display automatically changes
to provide you with the appropriate options.
The FlexSet-IP 280S or Terminal with soft keys is a fully functional keyset that meets all your telephony and office needs. It
combines the ability to communicate with the IP world with the solid dependability and high level of functionality available
from the Coral.
Many of the feature options, which have been assigned during initial installation, are provided on an extension (station) basis.
Feature allocation may also be redefined to suit changing working stations or adapted to your individual requirements by your
system administrator. Not every feature in this guide may have been installed in your system, or at your extension. Check with
your system administrator for a list of the specific features installed. This User Guide provides a full description of the
capabilities and operation of the FlexSet-IP 280S (Version 3 and later) terminals.
The main section of this guide is organized according to the two distinct feature types – Station Features and Attendant
Features. The appendices, located at the end of this guide, give basic explanations of special terms and operations used
throughout the guide, and are useful to consult for a fuller explanation of telephony terms.
Introduction 2 FlexSet-IP 280S User Guide
Conventions
Conventions
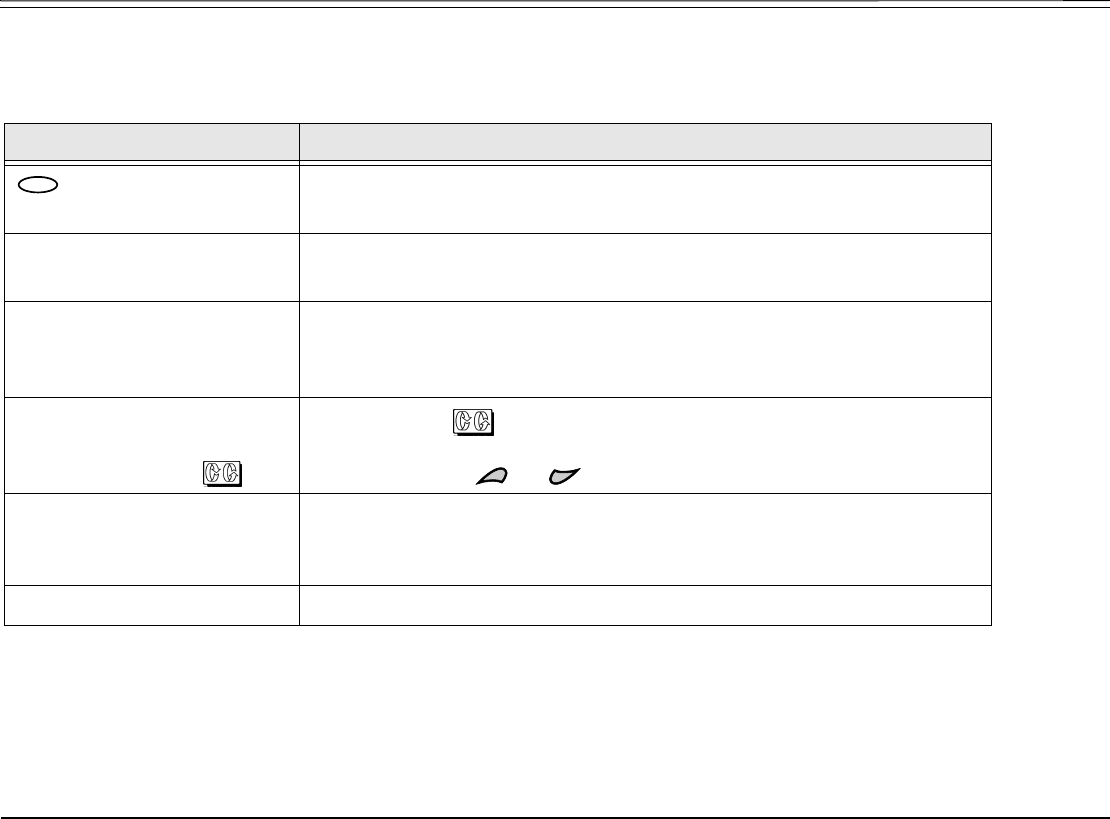
The following typographical conventions are used throughout this guide.
Example Description
Icons are used to represent the actual fixed and navigator keys.
See page 14 and page 8 for a complete listing.
[AutRdl] Soft key names appear in a clear distinctive box.
See page 253 for a complete listing.
HOLD Emphasized (bold) text indicates system-defined fixed keys or Direct Station
Selection (DSS) user programmable keys.
See page 17 for a complete listing.
Press [St/Rm#] and enter the
station/room number, or scroll
through the list using .
The scroll icon ( ) indicates that the following soft keys (when available)
can be used to scroll through lists: [Next], [Prev], [FastUp], [FastDn], [PortUp], [PortDn].
You can also use the and buttons to scroll through lists.
“See Ring Adjustment” Text in italics refers you to another section of the guide or to other Coral
system manuals. The blue font indicates that this is a clickable cross-
reference link. Italicized text is also used for notes.
EXCLUSIVE HOLD Text in Courier font indicates a display message
ESC

Introduction 3 FlexSet-IP 280S User Guide
Related Documentation
Related Documentation
• Attendant Console User Guide
• FlexSet 280, 280D, 280D-Z, 120, 120D and 120L User Guide
• Program Interface and Database Reference Manual (Version 15.5)
• Terminal Equipment (FlexSet) Installation Manual
• Coral Voice over IP (VoIP) Installation Manual
FlexSet Overview 4 FlexSet-IP 280S User Guide
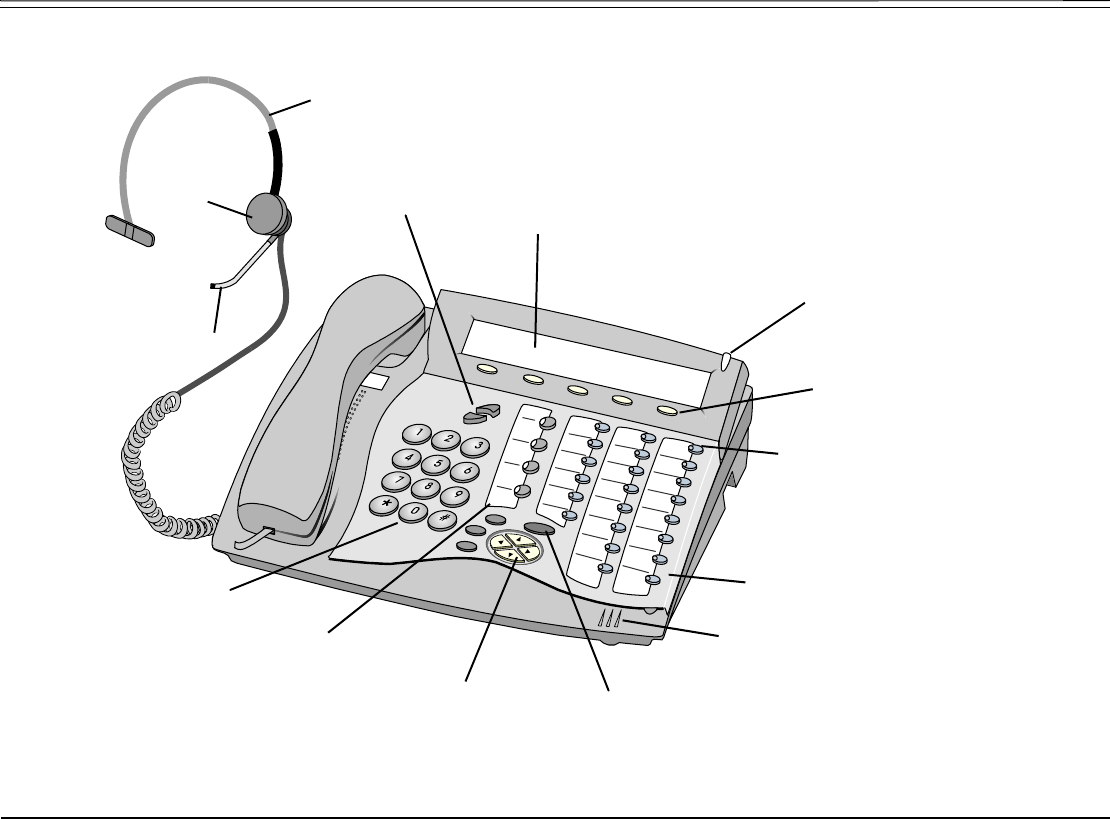
Front View
FlexSet Overview
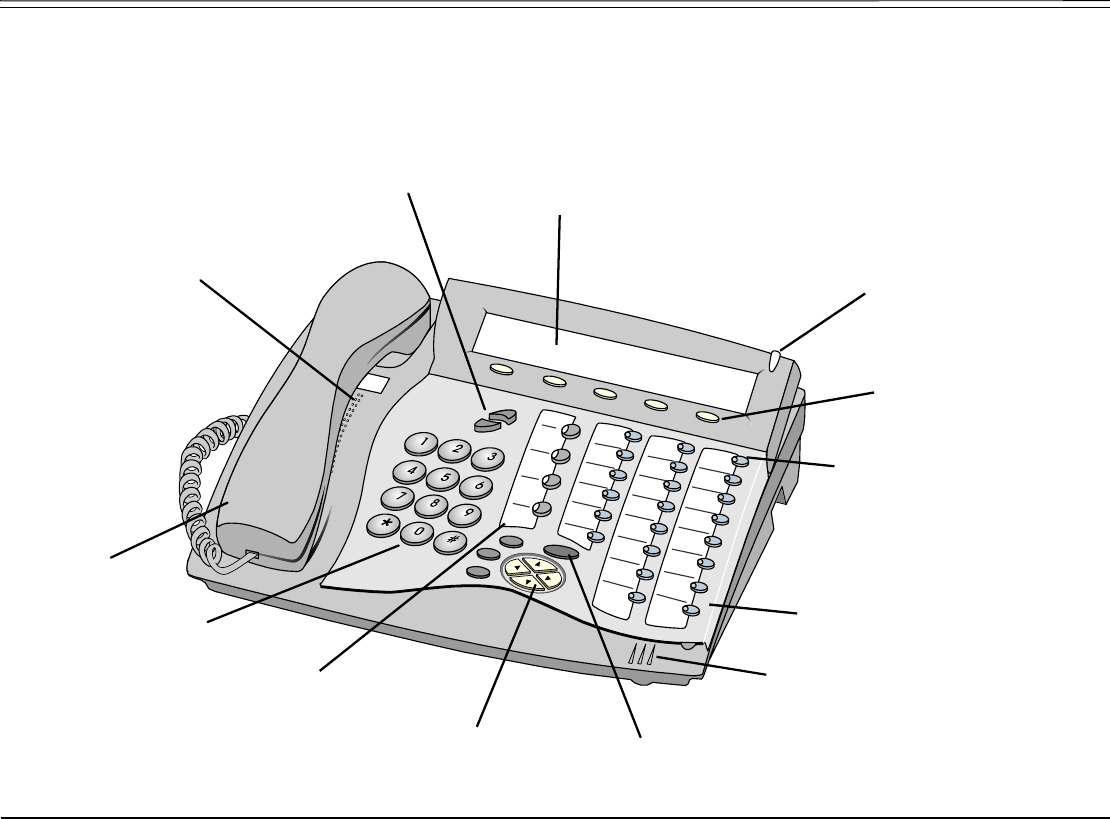
Front View
Volume buttons
Ring and
Message waiting lam
p
5 soft keys
4 fixed keys
Removable Faceplate
Dial pad
(key pad)
Handset
Loudspeaker,
voice announcer,
electronic ringer
22 user programmable
keys with LED indicators
for dial number or
telephony features
Di
sp
l
ay pane
l
,
3 lines, 40 characters each
Navigator keys
4 system defined (fixed)
keys, (
identical function to all
ke
y
sets in the s
y
stem
)
programmable,
Microphone
FlexSet Overview 5 FlexSet-IP 280S User Guide
Bottom, Side and Rear View
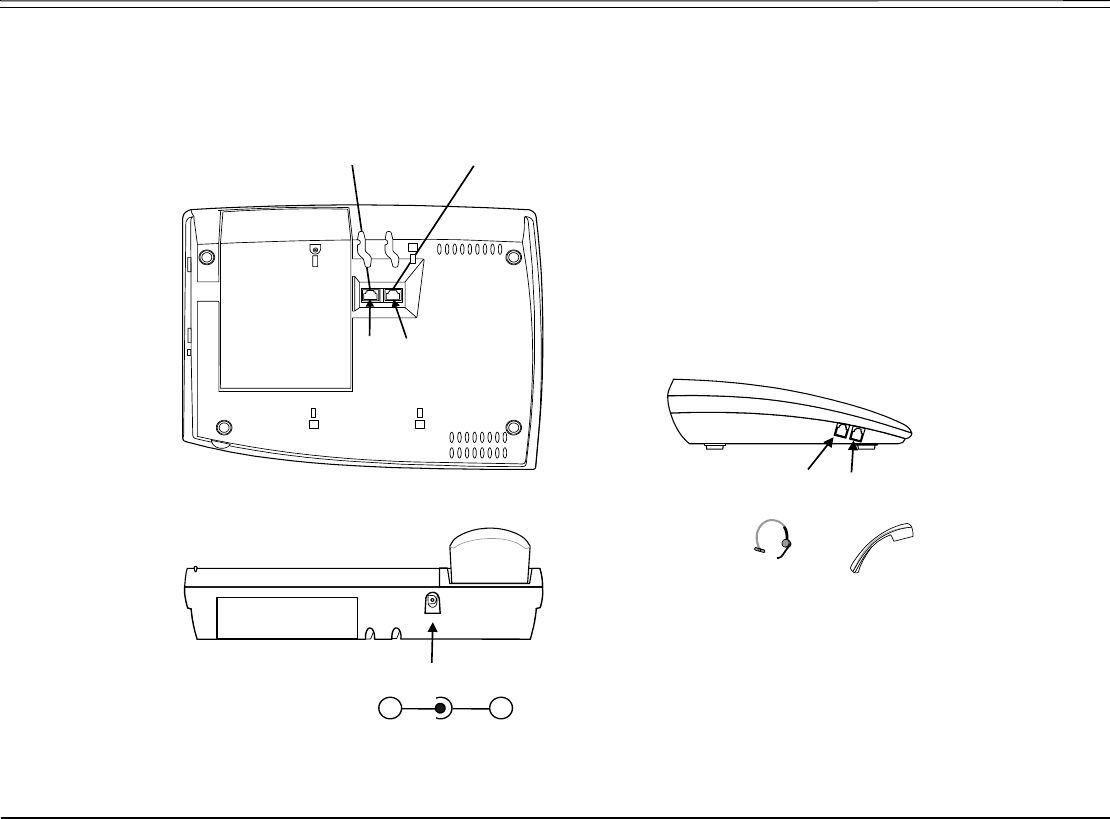
Bottom, Side and Rear View
Rear view
Bottom view
RJ-45 jack to P
C
(or next FlexSet-IP 280S)
RJ-45 jack to LAN
(or previous FlexSet-IP 280S)
Left side vie
w
DC
Power Supply
(24 to 36 VDC)
#1
Handset
Connection
#2
Headset
Connection
LAN
PC
+
-
FlexSet Overview 6 FlexSet-IP 280S User Guide
PC Connection
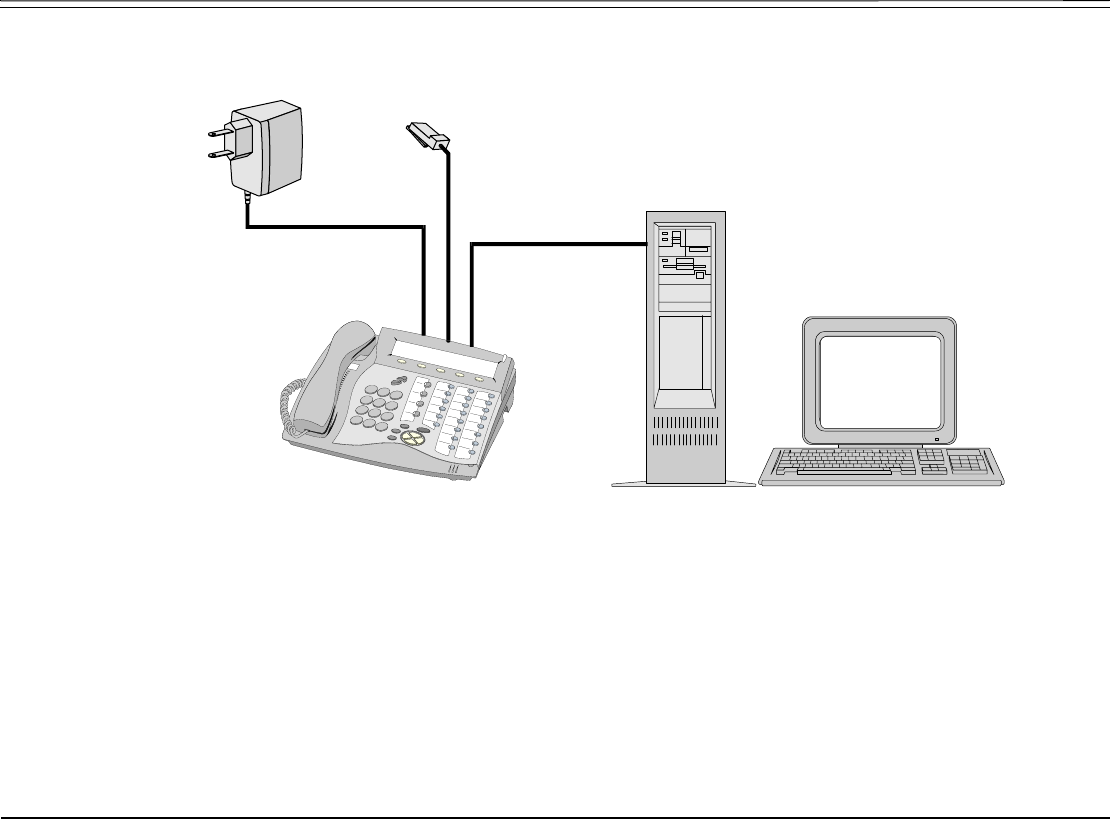
PC Connection
LAN
PC
Flex
S
et-IP 2
80S
External
power supply

FlexSet Overview 7 FlexSet-IP 280S User Guide
Component Descriptions
Component Descriptions
The following table defines controls, buttons and keys found on the FlexSet.
Component Description
Dial Pad (Key Pad) Digit buttons used for dialing phone numbers or extension numbers.
FlexSet Display The display is composed of three lines: System lines (1st and 2nd lines), and function options (on 3rd
line) according to FlexSet status. See Using the Display Panel on page 13.
Handset Works as typical phone handset.
Headset Non-manufacturer headset purchased by customer (see page 18, page 23, and page 224).
Hook Switch On-hook or off-hook for handset.
Handset Latch Used to catch the handset when wall mounted or for elevated (60° or higher) desktop mounts.
Loudspeaker Output sound device used in hands free operation, paging and ringing.
Microphone Input sound device used in hands free operation.
Ring and Message
Waiting Lamp
Lamp flashes at a slow rate, indicating that a message is waiting.
Lamp flashes at a faster rate (to the beat of the ring) when the phone is ringing.
FlexSet Overview 8 FlexSet-IP 280S User Guide
Component Descriptions
Programmable
Keys (DSS)
Provides a shortcut to a string of dial commands or telephone number, by using a pre-defined key,
known as a DSS (Direct Station Selection) key. Instead of dialing a number or dial commands, this
can be done by pressing the programmed key.
Several dial commands, in a series, may be programmed into one DSS key - useful for one-button
speed dialing, voice response and voice mail system access, and other complex dialing patterns.
Features keys can be programmed exactly as they are programmed in the FlexSet 280D and 120D
series keysets.
There are 22 user programmable keys on the FlexSet-IP 280S A red LED lights when a key is
activated. See Programming: Feature Keys on page 153.
System-defined
Keys
Four system-wide programmed keys (market dependent) for basic features: SPKR, LOOP (used as
LINE key), Xfer and Hold (see page 17).
Fixed keys and (see Using the Fixed and Navigator Keys on page 14).
Navigator Keys
and
Up/down, right/left arrows used to move from one option to another on
the display. Used for selecting without choosing or activating the option. See Using the Fixed and
Navigator Keys on page 14.
Soft keys Located below the display panel, keys used to directly activate the feature option. See Using the
Telephony Features on page 16.
Volume Buttons Adjust the volume (see Volume Adjustment on page 24) of the following components:
• Ringer - from idle or while the phone is ringing (see Ring Adjustment on page 25)
• Speaker/Handset/Headset - during a conversation (see Using the Speakerphone or Headset on
page 19)
Component Description
ENTER ESC
ABC
MENU
FlexSet Overview 9 FlexSet-IP 280S User Guide
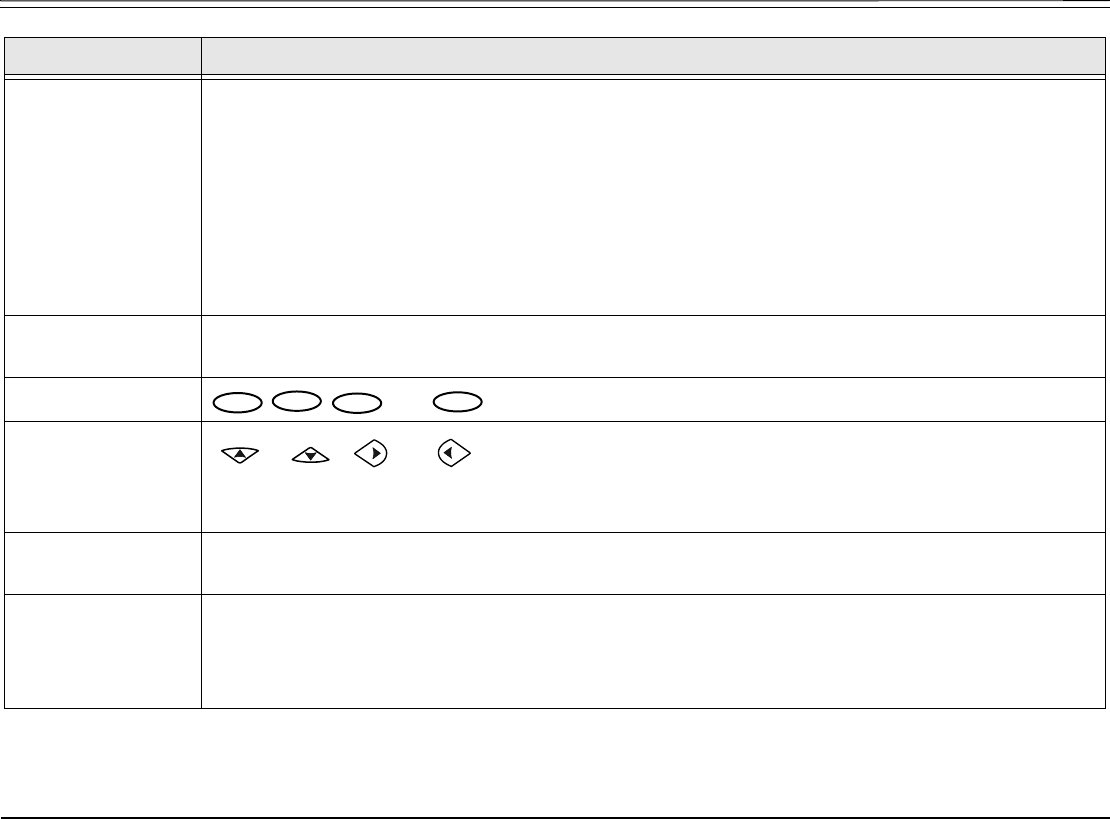
Handset Hook and Telephone Number
Handset Hook and Telephone Number
Place Telephone
Number here
(plastic cover)
Handset
Off-Hook
Removable Handset
On-Hook
FlexSet Overview 10 FlexSet-IP 280S User Guide
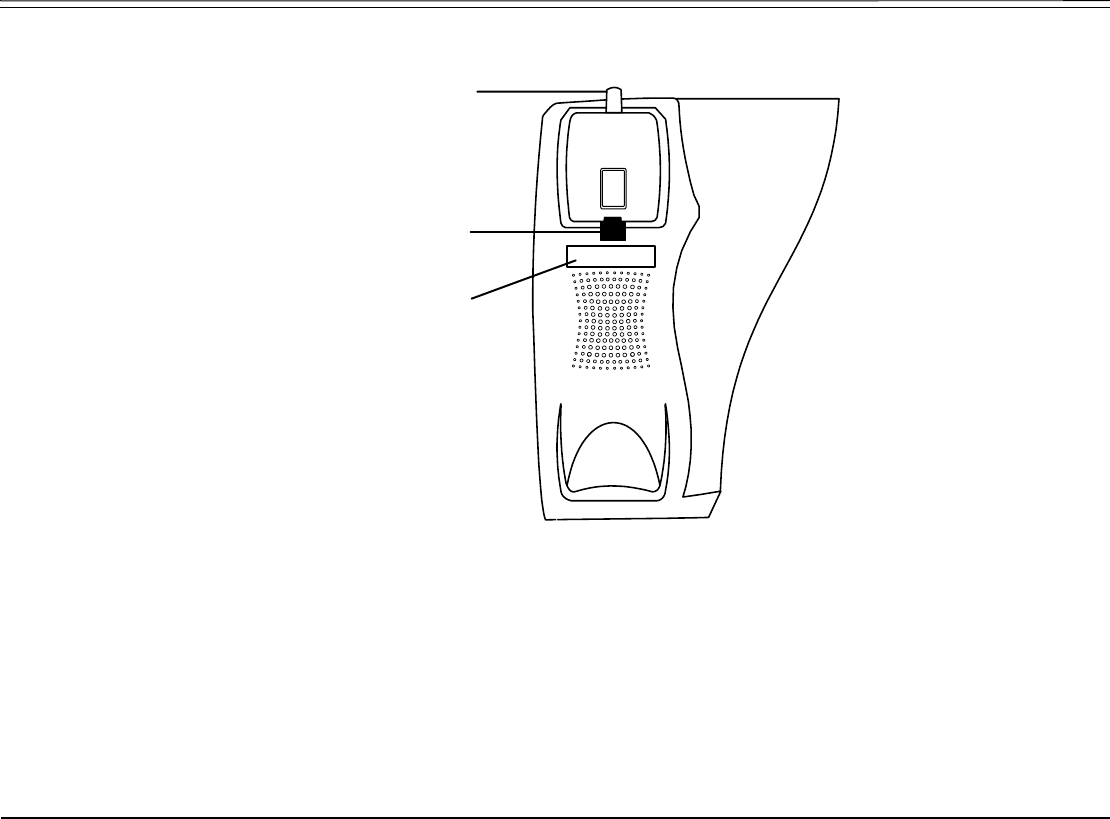
Desk Elevation at 28º
Desk Elevation at 28º
NOTE! For full instructions regarding desk elevation, refer to the Coral Terminal Equipment Installation
Manual.
Desktop
Elevatio
n
Br
ac
k
e
t
12
O
28
O
O
FlexSet Overview 11 FlexSet-IP 280S User Guide
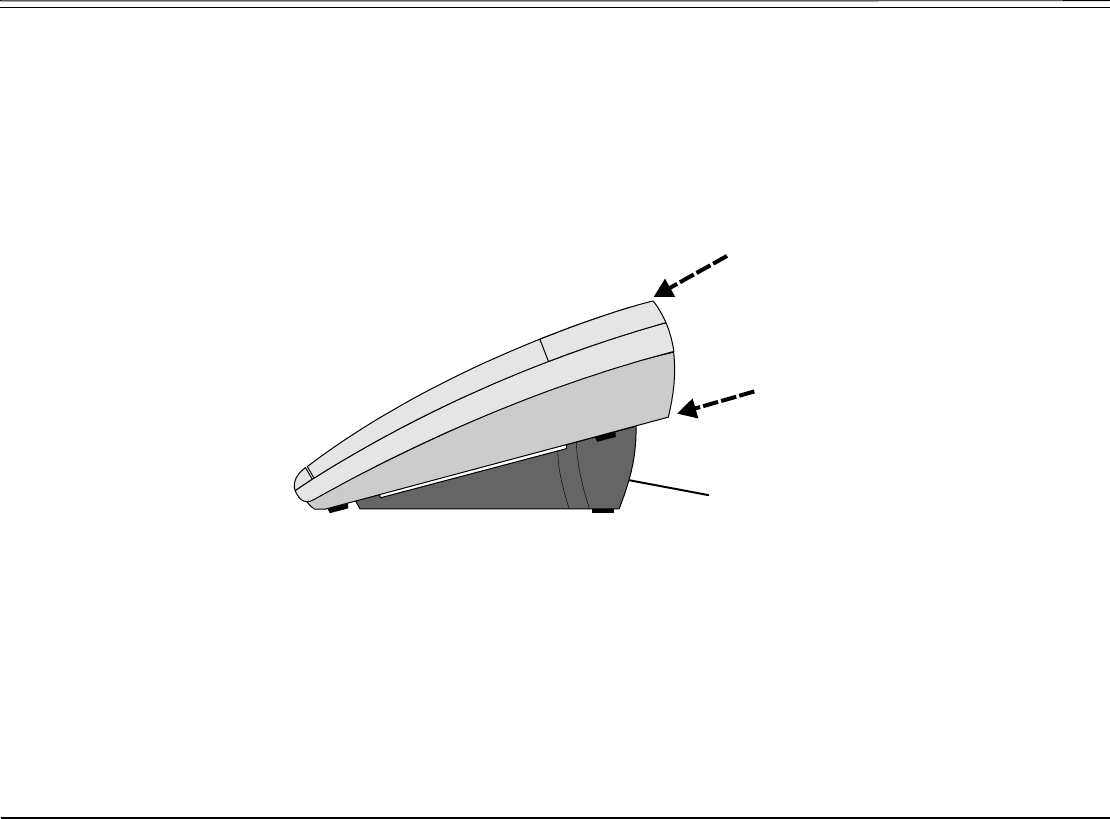
Desk Elevation at 60º
Desk Elevation at 60º
NOTE! For full instructions regarding desk elevation, refer to the Coral Terminal Equipment Installation
Manual.
Desktop
Elevation
Stand
FlexSet
Line
cord
entry
44
O
60
O
O
Desk
FlexSet Overview 12 FlexSet-IP 280S User Guide
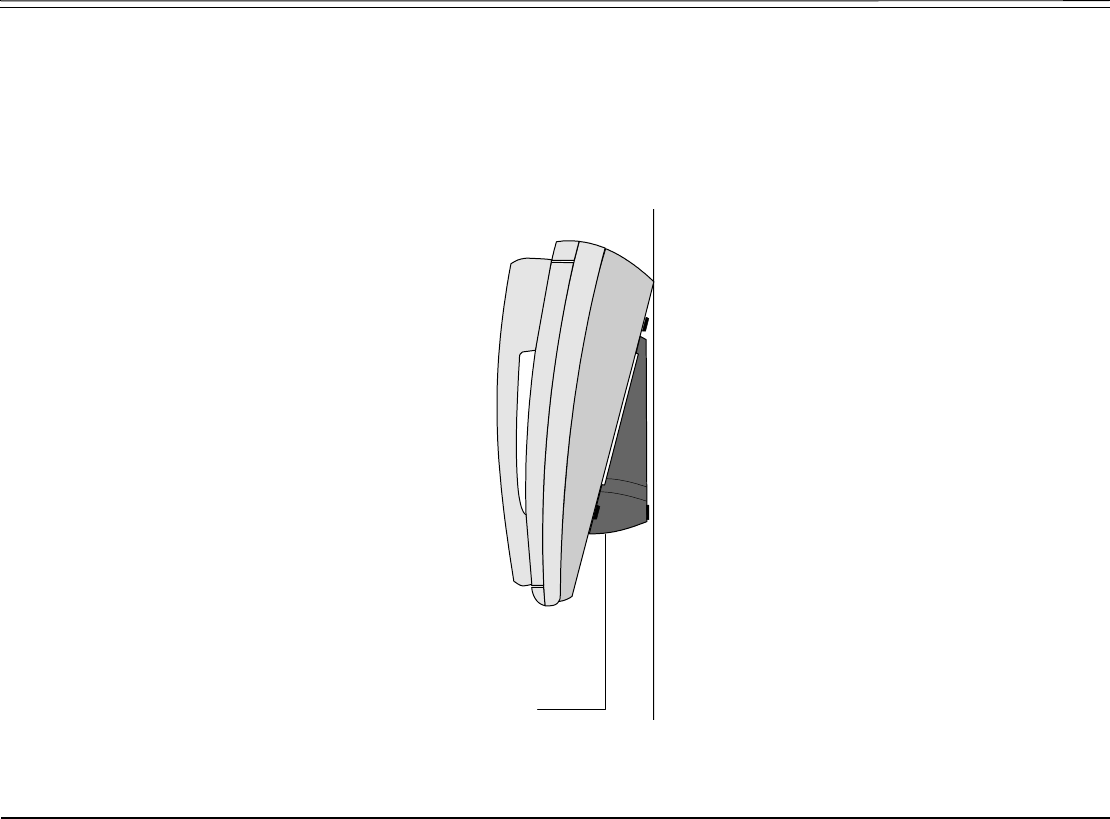
Wall Mounting
Wall Mounting
The FlexSet can be wall mounted when required.
NOTE! For full instructions regarding wall mounting your phone, refer to the Coral Terminal Equipment
Installation Manual.
WALL
WALL MOUNT

FlexSet Overview 13 FlexSet-IP 280S User Guide
Using the Display Panel
Using the Display Panel
The FlexSet Display provides an easy-to-use control interface. On this display several different classes of function
information and controls are found. During normal operation the active function assumes control over the entire area of the
display and all of the soft keys. Meanwhile, the System Lines (1st and 2nd lines) which usually, in idle state, include the time,
date, site name, station name and number, automatically change to relay pertinent information about telephony states and
operations, and the calling party’s information.
Five soft keys located immediately below the display screen, act as triggers for any currently displayedFlexSet function or
option. All of the information on the display panel (3rd line) continually changes to reflect options related to the current state
of the FlexSet. In this manner, no matter which state the telephone is in (i.e. Idle, Ringing, etc.) the relevant option is always
next to and enabled by one of the soft keys.
Display Panel
System Information Lines
Ri
ng an
d
M
essage
Waiting Indicator
Feature Options
10:50 26 May 2007 site name
user name station no.
Msg CALLog Fwd DND FlexiC
Soft Keys
FlexSet Overview 14 FlexSet-IP 280S User Guide
Using the Fixed and Navigator Keys
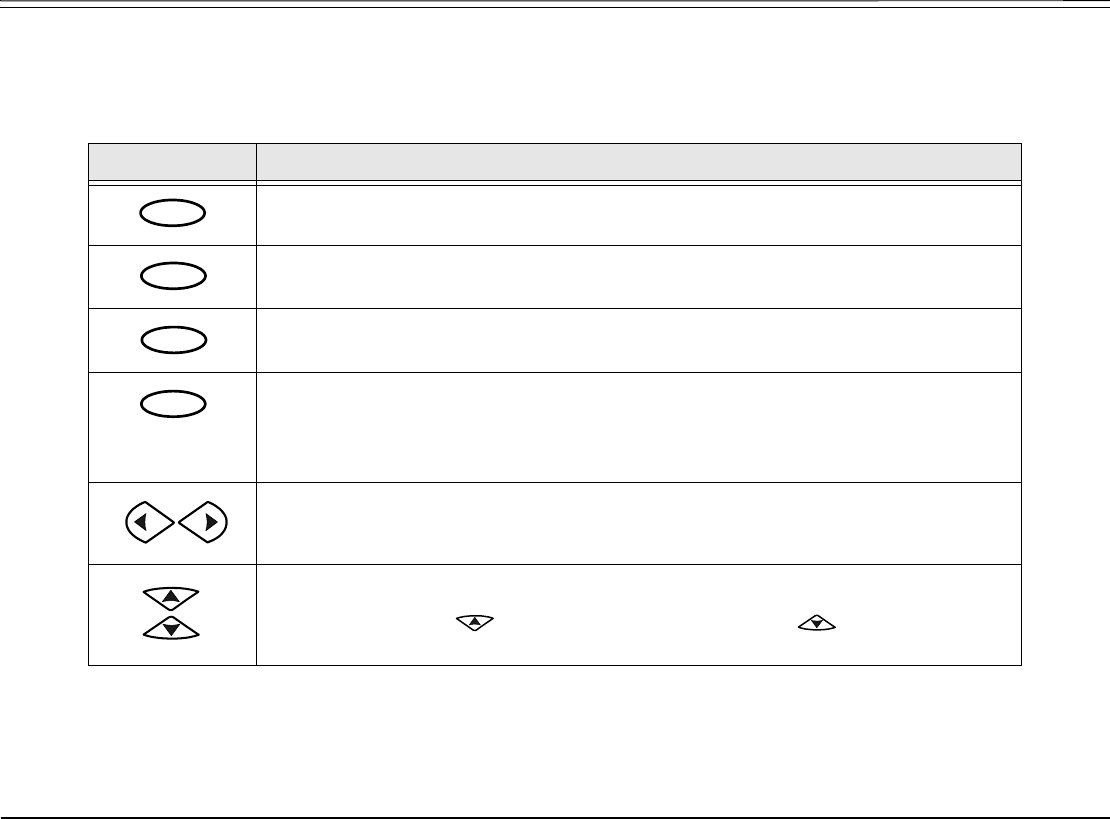
Using the Fixed and Navigator Keys
The following table lists all theFlexSet fixed keys and describes the actions they invoke.
Fixed Key Action
Activates a telephony feature after selecting it with the navigator keys (same as using
the soft key).
Returns to the previous menu or list.
For future use.
Provides access to all theFlexSet functions availabe during idle via the Features
menu and provides access to the other Main Menu options (see page 45).
NOTE! In order for the Main Menu options to appear on the display panel, you must press and
hold the OK button for at least three seconds.
Moves the cursor (→) left and right, or goes to the next or previous menu or list when
the cursor is at the end of a line.
Used to scroll soft key option lists when ↓ , or ↑ appear on the display line above
the soft keys. Press to scroll back one menu or list; to scroll forward
one menu or list.
ENTER
ESC
ABC
MENU

Operating the FlexSet 15 FlexSet-IP 280S User Guide
Overview
Operating the FlexSet
Overview
Operating the phone is as simple as pressing a button. Operate the phone using a combination of soft and fixed keys. The
phone options appear in the display area on the bottom line of the display panel, and automatically change to reflect the
current state of the telephone.
Five soft keys, located immediately below the display panel, allow you to enable the relevant options as they appear. The soft
key options change every time the phone status changes.
Four system-defined keys are provided, the functions of which are system-wide programmable. Typical functions for these
keys are:HOLD, XFER, LOOP and SPKR (see Using the Fixed and Navigator Keys on page 14).
Soft key functions can also be selected by pressing on the navigator keys. Pressing on the respective arrow moves the
location of the cursor to the next function. To activate the required function, press .
Use or
[Esc] to bring theFlexSet display to the beginning of the soft key options. When the [Esc] soft key does not appear
on the display panel, press the left key instead to return to the previous soft key options.
Press up/down keys and to scroll through lines of the soft key feature options. Press left/right keys and
to move from one option to the next on the displayed line.
A selected option is indicated by an arrow at its left (→ Fwd).
Additional options on a lower line of the display are indicated by a down arrow (↓ Msg).
Additional options on a higher line of the display are indicated by an up arrow (↑ RoomSt).
Additional options on both a lower and higher line of the display are indicated by a double arrow (Remind).
An activated option is indicated by a bullet at its left (• Fwd).
A selected and activated option is indicated by a bold arrow at its left ($ Fwd).
ENTER
ESC
Operating the FlexSet 16 FlexSet-IP 280S User Guide
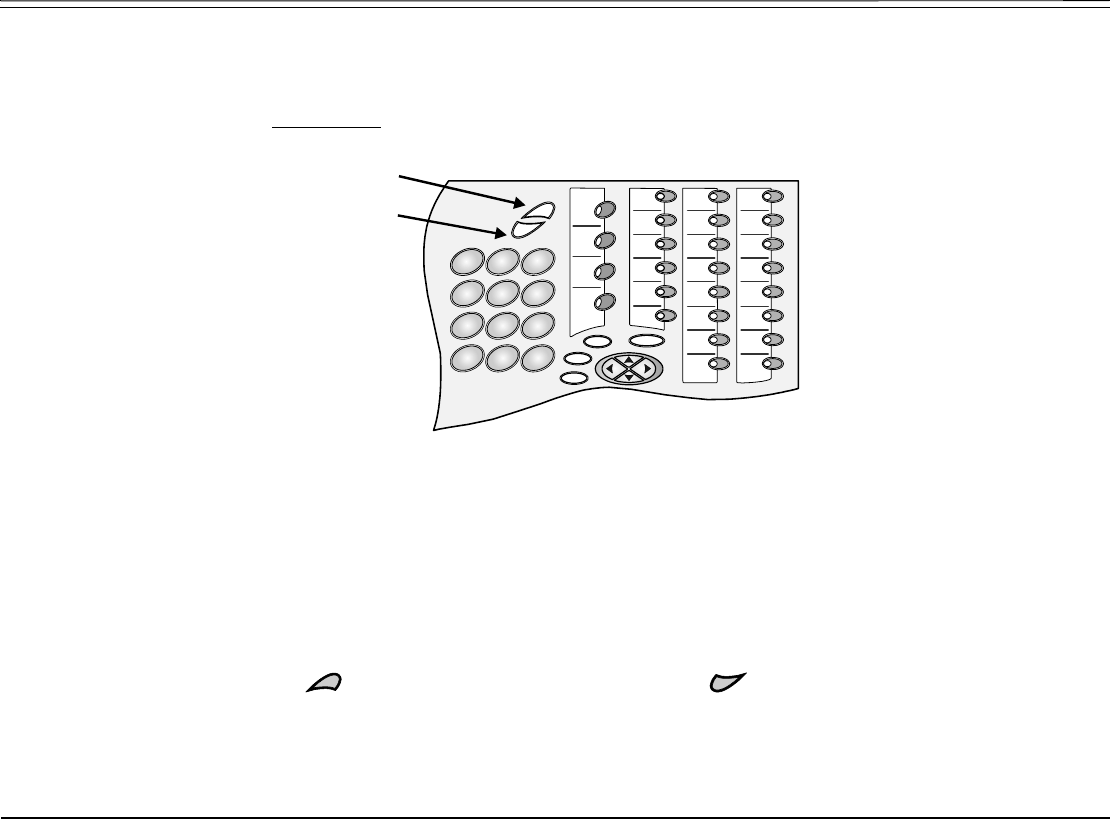
Using the Telephony Features
Using the Telephony Features
You do not have to memorize any access codes to activate any of the rich array of Coral system telephony features.
Each state change in the phone (such as from idle to ring, ring to answer, answer to transfer, etc.) causes the associated state-
related features to appear on the display panel. Simply choose the feature you would like to activate by pressing its associated
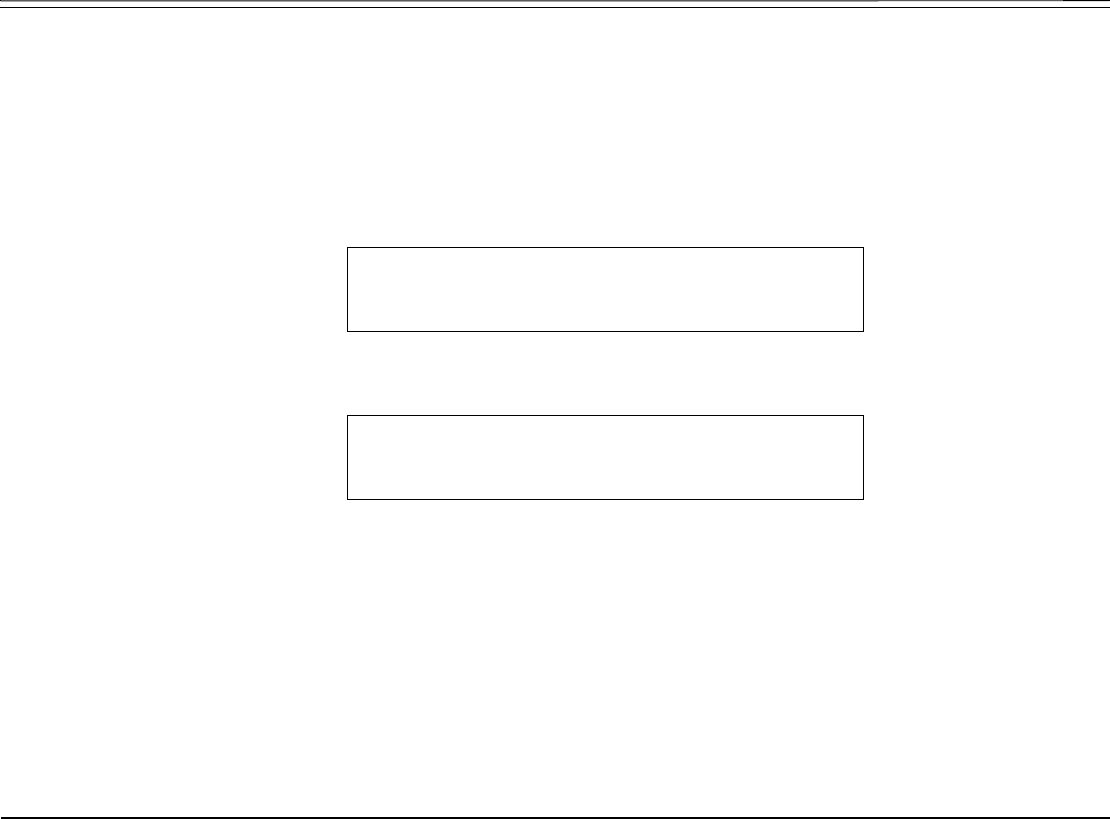
soft key. When the feature is activated, a bullet appears next to the feature. As shown below, while in Idle mode when DND
(Do Not Disturb) is off, no bullet appears next to DND. When DND is activated, a bullet is displayed next to DND.
DND OFF
DND ON
NOTE! Figures depicting the various display panel (5-soft key) options appear throughout this guide.
Where a list, menu or sub-menu continues through several lines, these are indicated as Page 1,
Page 2, etc. The location of the soft key options that appear in the figures in this guide may differ
from their actual locations on your FlexSet.
Several telephony features are toggle switches. Therefore, the first time you press a feature’s soft key, the feature is activated
or turned on. The second time you press the same feature’s soft key, the feature is canceled or turns off automatically.
See Index: Soft Keys and Feature Codes on page 252 for an alphabetic list of all available feature options.
Page 1 10:50 26 May 2007 Company xyz
user name station number
→DND FlexiC Redial Page_Q Remind
Page 2 *DND*
user name station number
→•DND FlexiC Redial Page_Q Remind
Operating the FlexSet 17 FlexSet-IP 280S User Guide
Using the System Defined Fixed Keys
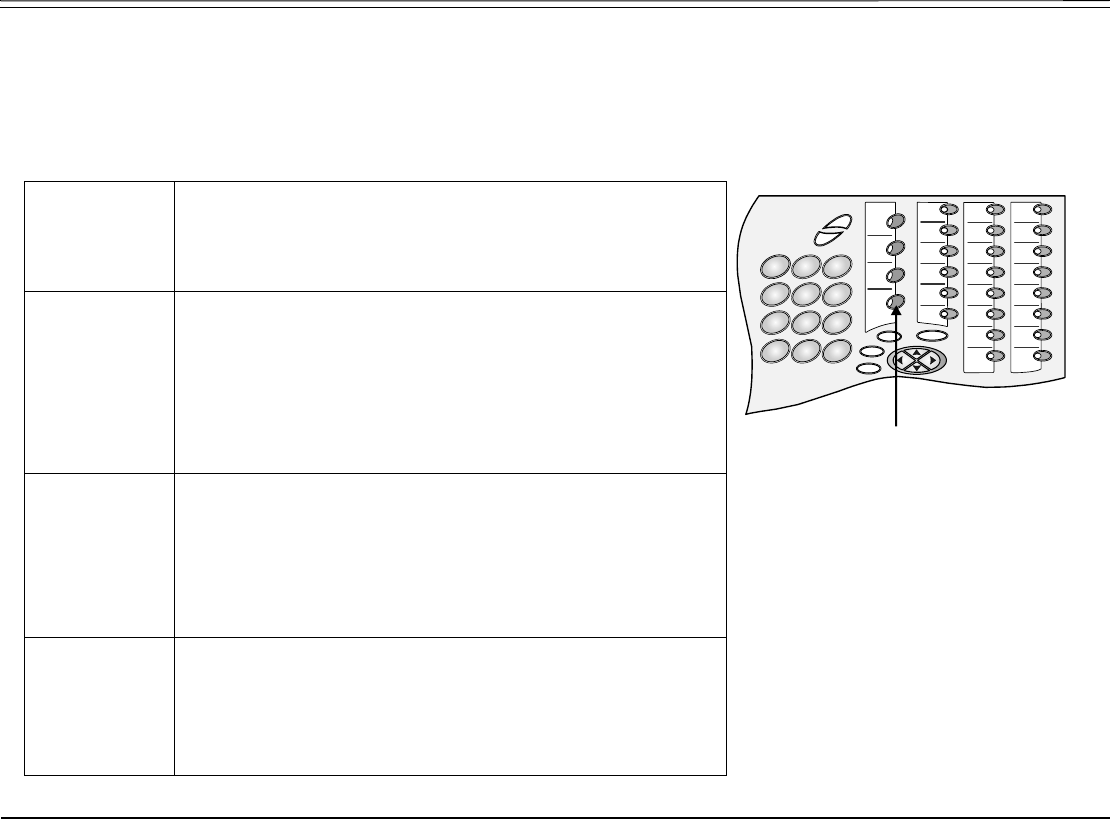
Using the System Defined Fixed Keys
Four FlexSet buttons are programmed during installation, and are the same for each keyset system-wide. These fixed system
keys cannot be programmed from the telephone, and can only be changed, system-wide, by the system administrator. The four
system-defined fixed keys are different from site to site. The default features are:
Hold The Hold key is used for placing a party on Hold while
another call is made or received. The held party can hear one
of the following: music, ring-back tone, busy tone or no sound
at all, as defined system-wide. (see Hold on page 129).
Transfer/
Recall (XFER)
While engaged on a call you can activate a feature by
pressing the Transfer key. When using Transfer, a special
distinctive dial tone is heard, enabling you to either transfer
the call, or activate a feature. Transfer puts the second party
on Hold and provides one of the following: music, ring-back
tone, busy tone or no sound at all, as defined system-wide
(see Transfer (Xfer) on page 181).
LOOP The LOOP key is used for making and receiving calls. When
several LOOP keys are in use, the station acts as if it is a
multi-line instrument. To program additional LOOP keys, see
Programming: Feature Keys on page 153:
• default LOOP access code: #121
• default LOOP Originating Only access code: #125
Speaker
(SPKR)
The Speaker key is used to converse hands-free. When
conversing through the speaker, voice volume can be
adjusted. Volume of call monitoring, paging, etc. can also be
adjusted by using the volume control buttons.
See page 19 and page 24.
3
78
9
2
1
456
#
*
0
ENTER
ESC
ABC
MENU
Fixed S
y
stem Ke
y
s
Operating the FlexSet 18 FlexSet-IP 280S User Guide
Second Party Speaker Status
Second Party Speaker Status
This feature alerts you when the loudspeaker of the party you are conversing with is activated for hands-free or group
conversation. A Speaker tone and display message notify you when the called/calling party is in SPKR mode, or if they
switch to SPKR mode during a call.
Therefore, when advised that the second party's keyset (FlexSet, DKT, T207M or T208M) is in Speakerphone mode, you
can choose to refrain from publicizing private information.
Detection of your party's activated loudspeaker:
A speaker tone is heard and the SPKR ON message flashes on the second line of the display:
• when you answer a call initiated with an activated loudspeaker
• when the called party answered you with an activated loudspeaker
• during a call, when the second party activates the loudspeaker
ANSWER (2nd party)
(2nd party) SPKR ON
↓→ Page_Q Xfer Hold Mute CallWt

Operating the FlexSet 19 FlexSet-IP 280S User Guide
Using the Speakerphone or Headset
Using the Speakerphone or Headset
The FlexSet is equipped with a speaker so that it can operate as a speakerphone. This enables you to converse without lifting
the handset. Pressing the speakerphone (SPKR) key automatically switches on the microphone and speaker. All dialing or
conversation is automatically hands-free; the handset remains on the cradle.
There are, however, several ways of using the speaker key, such as: in conjunction with a headset, or when SPKR is
programmed for on/off operation, and using the [Spk/Hs] (Speaker/Handset) soft key to switch between the handset and the
speaker.
Hands-Free Conversation
With handset on cradle:
When the handset is on the cradle and SPKR flashes, you can speak hands-free by pressing the flashing SPKR key or by using
one of the methods described in Making Calls on page 27.
Switchover from speakerphone to handset:
When you are using the speakerphone and want to use the handset for private conversation, lift the handset. The SPKR key
LED will go off.
Switchover from handset to speakerphone:
When you are using the handset and want to use the speakerphone, first press SPKR. When the SPKR key LED is lit, replace
the handset on the cradle.
Disconnecting calls:
Either press the lit SPKR key when the handset is on the cradle or replace the handset onto the cradle when the SPKR key
LED is off.
Call monitoring (when programmed for combined audio):
When you are using the handset and wish to activate the speaker for group listening, press SPKR. When the LED is lit, the
combined audio is active. To return to private conversation, press SPKR again. The LED will go off.

Operating the FlexSet 20 FlexSet-IP 280S User Guide
Using the Speakerphone or Headset
Using the Spk/Hs Soft key (when the phone is programmed for SPKR On/Off key):
When using headset (or handset is off cradle):
When your phone is equipped with a headset, you can answer and disconnect calls by pressing the SPKR On/Off key. When
the SPKR key LED is lit, you are connected. Pressing the lit key will disconnect the call. To switch between handset and
hands-free operation, you must press [Spk/Hs] from the phone display.
With handset on cradle:
If the phone rings and SPKR flashes, you can speak hands-free by pressing the flashing SPKR key. The key LED will now be
steadily lit.
Switchover from speakerphone to handset:
When you are using the speakerphone and want to use the handset for private conversation, lift the handset. The SPKR key
LED will remain lit.
Switchover from handset to speakerphone:
When you are using the handset and want to use the speakerphone, first press [Spk/Hs], then when the LED is lit, place the
handset on the cradle.
Disconnecting calls:
There are two ways to disconnect calls:
• Pressing the lit SPKR key.
• Returning the handset or pressing hookswitch when [Spk/Hs] is off (a bullet is not displayed).

Operating the FlexSet 21 FlexSet-IP 280S User Guide
Using the Speakerphone or Headset
When the Phone is programmed as Headset Only and for SPKR On/Off key
When your phone is equipped with a headset:
When the Headset Only feature is activated (see Headset Only on page 126), and SPKR is set to operate as On/Off (connect/
release) switch, you can answer and disconnect calls by pressing SPKR.
When the key LED is lit:
You are connected. Pressing the lit key will disconnect the call.
Disconnecting calls:
Press the lit SPKR key.
NOTES!
• See your system administrator to program SPKR to operate as an On/Off switch.
• When the phone is set for Zip Tone mode (see page 234), the ring sounds at the headset only, rather than
through the speaker.
• If the phone is defined as Headset Only (see Headset Only on page 126), the speakerphone will not operate.
Operating the FlexSet 22 FlexSet-IP 280S User Guide
Using the Speakerphone or Headset
Earpiece,
electronic
ringer
Microphone
Headset
(purchased by the customer)
Volume buttons
Ring and
Message waiting lam
p
5 soft keys
4 fixed keys
Removable Faceplate
Dial pad
(key pad)
22 user programmable
keys with LED indicators
for dial number or
telephony features
Display panel,
3 lines, 40 characters each
Navigator keys
4 system defined (fixed)
keys, (
identical function to all
ke
y
sets in the s
y
stem
)
programmable,
Microphone

Operating the FlexSet 23 FlexSet-IP 280S User Guide
Using the Speakerphone or Headset
Headset Cord (#2) Disconnect
• Headset Cord (#2) Disconnect enables activating a selected preprogrammed key by disconnecting the handset/headset
cord. The feature enables you to automatically invoke a keyset function such as Do Not Disturb, Login/Logout, Attended/
Unattended, Call Forward, or any other preprogrammed key function, upon disconnection of the headset cord.
• One of the Headset Cord Disconnect purposes is to block a telephone from accepting calls when the headset cord is
disconnected. Any call forwarding to the keyset will be automatically cancelled when the feature is activated.
• This feature is generally combined with the Headset Only feature to allow calls to be conducted via the headset/handset
even if the cradle switch is on-hook.
NOTE! The Headset Cord Disconnect feature does not work with all headset equipment. The feature is
operable only with headsets that do not use auxiliary equipment, such as splitters, volume
amplifiers, external headset/handset switches.
• See your system administrator for the programmable button assigned for this feature.
• The corresponding button should be programmed to perform the required function.
Operation
• If a key is preprogrammed with a feature having ON/OFF states (e.g. Do Not Disturb), the system will toggle the feature
Off when the Cord is connected, and On when the Cord is disconnected. The Login/Logout function is excluded from this
rule, as it operates in the reverse mode.
• If the key is programmed with a feature without ON/OFF states, the system will operate the same key contents when
connecting/disconnecting the cord (e.g. dialing an external number).
• When enabled by disconnecting the cord (#2), the feature can be disabled also by pressing the button.
• The feature activated by pressing a button when the cord is plugged in, will remain active when the cord is disconnected.
• Connecting the cord will cancel the feature that has been activated by pressing a programmable key or dialing a feature
code when the cord was disconnected.
Operating the FlexSet 24 FlexSet-IP 280S User Guide
Volume Adjustment
Volume Adjustment
Press the volume buttons to increase or decrease the volume of the phone loudspeaker and handset.
While the volume is being changed, the top line of the display shows the volume level.
Speaker volume levels range from a MIN unit value of 0 to a MAX unit value of 9 (27dB range).
The Handset volume level ranges from a MIN unit value of 0 to a MAX unit value of 6 (18dB range).
Speaker and Handset each has its own audio level and is independently influenced by volume buttons as follows:
•Speaker: When conversing through the speaker, voice volume can be adjusted. Volume of call monitoring, paging, etc.
can also be adjusted. This can also be done from idle.
•Speakerphone: When conversing hands-free, the built-in sensitive microphone is used to amplify your voice. The system
operates in such a way that the two connecting parties (i.e. you and the far side) cannot be heard simultaneously; the
stronger party is heard. Press to hear the far side more strongly, press to be heard more easily (or to break in).
•Handset: When conversing through the handset or headset, receiver volume can be adjusted.
3
789
2
1
456
#
*
0
ENTER
ESC
ABC
MENU
Volume Up
Volume Down
V
olume Buttons

Operating the FlexSet 25 FlexSet-IP 280S User Guide
Ring Adjustment
Ring Adjustment
The ring volume (as well as ring tones) of your FlexSet-IP 280S can be changed by using soft keys from idle. The ring
volume can also be adjusted by using the volume buttons while the phone is ringing. You can use this to change the ring of
two different telephones in the same room. Also note that the Message Lamp lights in beat with the ring while the phone is
ringing.
Adjusting the ring volume level while ringing:
Press the up or down volume buttons. The ring volume level ranges from 0 (MIN ring) to 15 (MAX ring).
Adjusting ring settings from idle:
1. Press [UsrDef] and choose [Ring].
2. There are three ring elements that can be adjusted:
[Volume] change by pressing the volume buttons. Ring volume ranges from 0 to 15.
[Intrnl] Internal enables you to change the ring tone (default or custom) set and record your own voice ring tone
for calls originating from an internal source.
•To change the current ring tone for internal calls, press [Deflt] or [Custom], and then press [Apply].
•To record your own voice ring tone for internal calls, press [Custom], [Edit], and then [Record]. Pickup the
handset, press [Start], and then start recording (up to 16 seconds) your ring tone. When you are finished, press
[Stop], and then [Save]; the New ring will be updated after RESTART message appears on the
top line indicating that your custom ring is being saved in your FlexSet-IP’s memory.
NOTE! Recording a new ring tone deletes the previous custom ring tone (if any) from your FlexSet-IP’s
memory.
•To listen to your own internal ring tone, press [Custom], [Edit], and then [Play].
MENU

Operating the FlexSet 26 FlexSet-IP 280S User Guide
Ring Adjustment
[Extrnl] External enables you to change the ring tone (default or custom) set and record your own voice ring tone
for calls originating from an external source.
•To change the current ring tone for external calls, press [Deflt] or [Custom], and then press [Apply].
•To record your own voice ring tone for external calls, press [Custom], [Edit], and then [Record]. Pickup the
handset, press [Start], and then start recording (up to 16 seconds) your ring tone. When you are finished, press
[Stop], and then [Save]; the New ring will be updated after RESTART message appears on the
top line indicating that your custom ring is being saved in your FlexSet-IP’s memory.
NOTE! Recording a new ring tone deletes the previous custom ring tone (if any) from your FlexSet-IP’s
memory.
•To listen to your own external ring tone, press [Custom], [Edit], and then [Play].
.
CAUTION!
The Ringer is disabled and the FlexSet cannot receive calls when DND or
Call Forward All are indicated by bullet and *DND* or *FwdAll* messages
on the display.

Operating the FlexSet 27 FlexSet-IP 280S User Guide
Making Calls
Making Calls
To place a call use any of the following methods:
• Lift the handset and dial from the dial pad.
• Press SPKR and begin dialing directly from the dial pad.
• Begin dialing without lifting the handset. The Speaker is automatically activated.
• Press any idle (LED not lit) DSS or LOOP, LOOP originating only, or LINE key, and after hearing a dial tone begin
dialing.
NOTE! If you receive error messages when attempting to connect, refer to Appendix E: Troubleshooting
on page 250 at the end of this document.
The options available in each of the selected FlexSet states are described on the following pages:
Internal Calls
Upon Hearing Ringback Tone.......................................................page 28
Upon Hearing Reorder Tone.........................................................page 30
Upon Hearing Busy Tone..............................................................page 31
During a Call .................................................................................page 33
During a Break In..........................................................................page 35
External Calls
Upon Hearing Ringback Tone.......................................................page 38
Upon Hearing Busy Tone..............................................................page 40
During a Call .................................................................................page 41
Operating the FlexSet 28 FlexSet-IP 280S User Guide
Making Internal Calls
Making Internal Calls
Upon Hearing Ringback Tone
After dialing an internal destination number, the following features appear on your FlexSet display when you hear a ringback
tone. Wait for answer or press the nearby soft key to activate the required feature.
See page 16 for further details.
NOTE! A message indicating the called party’s status (or other relevant information) may appear on the
second line of the display until you answer the call (see Canned Messages on page 84).
[Msg.] Leave Message. If no one answers your call, use this feature to leave a “message” at the called party’s
station. This feature lights the message waiting lamp at the called party’s station indicating that a message
was left, and it leaves a simple message such as CALL SUSAN on the destination station’s keyset display.
See Messages: Options on page 138.
[Msg-Wt] Message Waiting. The Attendant can use this feature to leave a message waiting indication at a busy or idle
station, room or group. See Leaving a message indication at a busy or non-answering station: on page 140.
[CampOn] Camp On, also known as Call Back. When a station does not answer, you may request that the system
automatically call you back when the required destination number is available. See Camp On (Call Back) on
page 81.
[V-Page] Voice Page the called party’s keyset station using this feature. Your call is automatically answered and your
voice heard over the called party’s speakerphone. See Paging: Voice Paging on page 147.
INTERNAL called number or name
↓→ Msg. CampOn V-Page Mute Number

Operating the FlexSet 29 FlexSet-IP 280S User Guide
Making Internal Calls
[Mute] Mute can be activated during ringback so that when the call is answered your side of the conversation is
muted and the called party will not hear you. When this feature is activated by the [Mute] on/off toggle switch,
a bullet appears to the left of [Mute]. The mute feature deactivates the microphone for your speakerphone and
handset or headset. Press the toggle key again to reactivate the microphone (see Mute Microphone on
page 141).
[Number] Number is used to briefly display the caller’s dial number instead of the name.
Operating the FlexSet 30 FlexSet-IP 280S User Guide
Making Internal Calls
Upon Hearing Reorder Tone
After dialing an internal station that is idle, but has been set to Do Not Disturb or UNATTEND, the following features are
available. After dialing a station and receiving a reorder tone, override can be applied by pressing [DNDOvr].
[CampOn] Camp On, also known as Call Back. Use this feature to have the system automatically call you back when
the DND destination station becomes available. See Camp On (Call Back) on page 81.
[SendCw] Not used during reorder tone.
[V-Page] Voice Page the called party’s keyset station using this feature. Your call is automatically answered and your
voice heard over the called party’s speakerphone after the Voice Page tone stops. See Paging: Voice Paging
on page 147.
[Mute] Mute can be activated during reorder tone so that when the Do Not Disturb is overridden, your side of the
conversation is muted and the called party will not hear anything. When this feature is activated by the [Mute]
on/off toggle switch, a bullet appears to the left of [Mute]. The mute feature deactivates the microphone for
your speakerphone and handset or headset. Press the toggle key again to reactivate the microphone. See Mute
Microphone on page 141.
[Msg.] Leave Message. Use this feature to leave a “message” at the called party’s station. This feature lights the
message waiting lamp at the called party’s station indicating that a message was left, and it leaves a simple
message such as CALL SUSAN on the destination station’s display. See Messages: Options on page 138.
[Brk-In] Break In operates as [DNDOvr].
[DNDOvr] DND Override enables an authorized user to send a ring tone thus overriding the Do Not Disturb status.
When you hear the reorder tone, if DON’T DIST or UNATTENDED message appears, override can be
applied and your call can be put through to the station.
DONT DIST called number or name
↓→ CampOn SendCW V-Page Mute Msg.
Operating the FlexSet 31 FlexSet-IP 280S User Guide
Making Internal Calls
Upon Hearing Busy Tone
After dialing an internal destination number, the following features appear on your display when you hear a busy tone. Hang
up or press one of the soft keys.
[Msg.] Leave Message. Use this feature to leave a “message” at a busy station. This feature lights the message
waiting lamp at the busy station and leaves a simple message such as CALL SUSAN on the destination
station’s keyset display. See Messages: Options on page 138.
[Msg-Wt] Message Waiting. The Attendant can use this feature to leave a message waiting indication at a busy or idle
station, room or group. See Leaving a message indication at an idle station: on page 139.
[CampOn] Camp On, also known as Call Back. Use this feature to have the system automatically call you back when
the busy destination station is available. See Calls Waiting: Receiving on page 79.
[Brk-In] Break-In enables an authorized user to break into an established two party call. Both conversing parties will
hear the Break In warning tone. Your voice will be heard after the warning tone stops. During Break-In you
can release the ports or alternate between parties. See During a Break In on page 35.
NOTE! Only stations with appropriate COS may activate the Break-In feature.
[SendCw] Send Call Waiting is used to send a call waiting tone to the busy party. This feature is also known as Call
Waiting or Call Offer. The station is now aware that another call is waiting. Your side hears a second
(quicker) ringback tone (system-wide defined).
BUSY called number or name
↓→ Msg. CampOn V-Page Mute Number

Operating the FlexSet 32 FlexSet-IP 280S User Guide
Making Internal Calls
[V-Page] Voice Page the called party’s keyset station using this feature. The other party receives a message that they
are being paged. Your voice is heard over the called party’s speakerphone after the warbling tone stops. See
Paging: Voice Paging on page 147.
[Number] Number is used to briefly display the caller’s dial number instead of the name.
[Mute] Mute can be activated during busy tone so that if you break-in, your side of the conversation is muted for
silent monitoring (handset, headset and speakerphone). When this feature is activated by the [Mute] on/off
toggle switch, a bullet appears to the left of [Mute]. The mute feature deactivates the microphone for your
speakerphone and handset or headset. Press the toggle key again to reactivate the microphone. See Mute
Microphone on page 141.
[S.Mon2] 2-Way Silent Monitoring is used to monitor both sides of a 2-way conversation simultaneously. This feature
can be activated from idle, or while attempting to call a busy or non-answering destination. At the prompt,
dial the station or dial number. See Silent Monitoring on page 172.
[CallWt] Calls Waiting can be used to view the number of calls waiting for you during a conversation. See
ACD and UCD Hunt Groups on page 56.

Operating the FlexSet 33 FlexSet-IP 280S User Guide
Making Internal Calls
During a Call
The following features are available during an internal call:
[Page Q] Page Queue places your call on hold by sending it to one of ten Page Queue destinations. You are then free to
page all the system members from your FlexSet and announce that there is a call for Mr. Doe on a specific
Page Queue Line. The call can be picked up from any system station. See Page Queue on page 142.
[Xfer] Transfer passes your call to another destination. Pressing [Xfer] places the called party on Hold. Dial a number
(internal or external), and disconnect to transfer the call, or first announce the call and then disconnect. See
Transfer (Xfer) on page 181.
[Hold] Hold places the active call on hold. See Hold on page 129.
[Mute] Mute can be activated during a conversation to mute your side of the conversation (handset, headset and
speaker-phone). When this feature is activated by the [Mute] on/off toggle switch, a bullet appears to the left of
[Mute]. The mute feature deactivates the microphone for your speakerphone and handset or headset. Press the
toggle key again to reactivate the microphone. (see Mute Microphone on page 141).
[CallWt] Calls Waiting can be used to view the number of calls waiting for you during a conversation. See
ACD and UCD Hunt Groups on page 56.
[Park] Park your call at your station so that you can pick it up at another system station. See Park on page 150.
[Number] Number is used to briefly display the caller’s dial number instead of the name.
ANSWER 2nd party name or number
↓→ Page_Q Xfer Hold Mute CallWt

Operating the FlexSet 34 FlexSet-IP 280S User Guide
Making Internal Calls
[Spk/Hs] Speaker/Headset toggles between speaker and the handset operation. See Using the Speakerphone or
Headset on page 19.
[Privac] Privacy puts your FlexSet into Privacy mode. This prevents other members of your Boss Group or ELA
Group from accidentally joining your conversations.
[ExHold] Exclusive Hold puts your FlexSet into Exclusive Hold mode. This ensures that a call placed on hold can be
retrieved only at your station. If Exclusive Hold is cancelled, the call put on hold can be retrieved by any
other member of your Boss Group or ELA Group.
[DND-WP] Do Not Disturb - Whisper Page is used to enable or block your FlexSet from receiving a message
whispered by another station. When this feature is activated, a bullet appears next to [DND-WP]. If you press
while on a call, the feature will be active for the duration of the current call only.
NOTE: Whisper page receiving is not available on the current version of the phone.
Operating the FlexSet 35 FlexSet-IP 280S User Guide
Making Internal Calls
During a Break In
After dialing a busy destination number and choosing [Brk-In] (see Upon Hearing Busy Tone on page 31), both conversing
parties can hear your voice. You may press SPKR or hang up in order to allow the continuation of the call, or press on one of
the following soft keys.
[Xfer] Transfer is used to converse in private with the caller party (from the original 2-way call). The called party is
released. See Transfer (Xfer) on page 181.
[Mute] Mute can be activated during a Break In to mute your side, allowing you to listen to the conversation but not
speak. When this feature is activated by [Mute] on/off toggle switch, a bullet appears to the left of [Mute]. The
mute feature deactivates the microphone for your speakerphone and handset or headset. Press the toggle key
again to reactivate the microphone (see page 141).
[FrcRls] Forced Release enables an authorized user to end the conversation and release two ports actively connected
to each other.
[Dest] Destination is used to converse, in private, with the 3rd party. The called party is put on hold. Press again for
3-way conversation.
[Source] Source is used to converse, in private, with the called party. The 3rd party is put on hold. Press again for 3-
way conversation.
[CallWt] Calls Waiting can be used to view the number of calls waiting for you during a conversation.
[Number] Number is used to briefly display the two port dial numbers instead of the names.
[Spk/Hs] Speaker/Headset toggles between speaker and the handset operation. See Using the Speakerphone or
Headset on page 19.
B TO called number or name 3rd party
↓→ Xfer Mute FrcRls Dest Source
Operating the FlexSet 36 FlexSet-IP 280S User Guide
Making External Calls
Making External Calls
When Making External Calls:
• In some systems an outside dial tone must be heard before dialing can begin.
• In some systems using Automatic Routing Selection, internal dial tone or no tone is heard after dialing the access code.
• In some cases (as defined by Class of Service) dialing must begin with a Forced Account code before the called number
can be dialed. When Forced Account code is required, the distinctive dial tone will be heard after dialing the external line
code, and the ENTER ACCOUNT # message appears on the top line. See Account Code on page 54 and Caller ID
Control on page 78.
•Stop Dial. Press [StopDl] or # after the external number to tell the system that you have finished sending digits over a trunk
line. In response the system sends your call immediately towards the destination without waiting for inter-digit time out.
• In certain systems the cost, or number of meter units of the call are displayed, after an external call terminates. This
appears for a short while, or until another call is made or received, in the format defined for your system.
• Some systems may be programmed with a limit to the duration of outgoing externals calls. Once the limit is reached, the
call will be automatically disconnected.
• On external calls routed via an ISDN trunk, call messages are displayed (such as connection status, call fail, etc.). Most
messages are for system administrators and technicians and will not be seen during normal operation (see the Message
Definitions table below).
Message Definition
NO B.C: If the Bearer Capability of the trunk or dial service you are attempting to connect
to does not match your station’s COS.
NON ISDN ROUTE: If your station’s COS is set to ISDN only and call attempts are made through a
trunk group not defined as ISDN only.
QUE GROUP #: In certain systems if no trunk is available the call may be held in a queue and
this displays the number of the queue.
Operating the FlexSet 37 FlexSet-IP 280S User Guide
Making External Calls
CO DISC./USER BUSY: The party called is engaged.
ON HOOK BY/NORMAL
CLEAR:
The called party has hung up (on hook, idle).
CO DISC./CALL REJECTED: The call cannot be completed because the called party does not allow it.
CO DISC./CAUSE #: ISDN protocols define error messages, with codes indicating the cause of failed
connections. See Appendix D: ISDN Cause Numbers on page 244.
Message Definition

Operating the FlexSet 38 FlexSet-IP 280S User Guide
Making External Calls
Upon Hearing Ringback Tone
After dialing an external destination number, the following features appear on your FlexSet display when you hear the
ringback tone. Wait for an answer or press one of the soft keys to activate the required feature.
[Msg.] Leave Message is used when dialing a network destination.
If no one answers your call, use this feature to leave a “message” at the called party’s station. This feature
lights the message lamp at the called party’s station indicating that a message was left, and a simple message
such as CALL SUSAN is left on the destination station’s keyset display. See Messages: Options on
page 138.
[Mute] Mute can be activated during ringback so that when the call is answered your side of the conversation is
muted and the called party will not hear you. When this feature is activated by the [Mute] on/off toggle switch,
a bullet appears to the left of [Mute]. The mute feature deactivates the microphone for your speakerphone and
handset or headset. Press the toggle key again to reactivate the microphone. (see Mute Microphone on
page 141).
[AutRdl] Auto Redial is used to have the system automatically redial the unanswered destination. Further redial
options are available after activation (see Redial on page 164).
1. Press [AutRdl]. The system will now automatically redial at timed intervals.
2. When the called party answers, press the flashing SPKR key or lift the handset to enable conversation.
[ElapTm] Elapsed Time - not used during ringback.
[CallWt] Calls Waiting is used to view the number of calls waiting for you. See ACD and UCD Hunt Groups on
page 56.
OUT trunk line
DIAL outside telephone number
↓→ Msg. Mute AutRdl Save# ElapTm

Operating the FlexSet 39 FlexSet-IP 280S User Guide
Making External Calls
[FlshTk] Flash on Trunk is used to send a signal through the system to trunk lines in order to operate certain types of
features that are available on the second system. The second system is a telephone switching center, PABX or
another Coral system. This feature is also known as Calibrated Opening.
[Number] Number is used to briefly display the trunk dial number instead of the name.
[Park] Not used during ringback.
[StopDl] Stop Dialing is not used during ringback. Press this button before you hear ringback tone, in order to notify
the system when dialing out has been completed. In response the system sends your call immediately towards
the destination without waiting inter-digit time out.
[OCC] OCC is used for users connected with pulse trunks and/or for when your FlexSet is defined with Auto
Transfer. This feature enables you to send touch-tone dialing (DTMF tones) over non-DTMF trunks or
stations for applications or services (such as Voice Mail) requiring DTMF tones. See Touch-Tone Dialing
(DTMF) for Other Common Carriers (OCC) on page 180.
[Series] Not used during ringback.
[CampOn] Camp On, also known as Call Back. When a network station does not answer, you may request that the
system automatically call you back when the required destination number is available. See Calls Waiting:
Receiving on page 79.

Operating the FlexSet 40 FlexSet-IP 280S User Guide
Making External Calls
Upon Hearing Busy Tone
After dialing an external destination, the following features appear on your FlexSet display when you hear a busy tone. Hang
up and dial later or press the nearby soft key to activate the required feature.
[Msg.] Leave Message is used when dialing network destinations and not external destinations.
Use this feature to leave a “message” at a busy station. This feature lights the message waiting lamp at the
called party’s station indicating that a message was left, and it leaves a simple message such as CALL
SUSAN on the destination station’s keyset display. See Messages: Options on page 138.
[CampOn] Camp On, also known as Call Back. Used only when dialing network destinations and not external
destinations. When the network station is busy, you may request that the system automatically call you back
when the required destination number is available. See Calls Waiting: Receiving on page 79.
[AutRdl] Auto Redial is used to have the system automatically redial the unanswered destination. Further redial
options are available after activation (see Redial on page 164).
[Save#] Save Number is used to save the dial number of the busy destination. The saved number can then be redialed
by pressing [Redial] [Saved#] from idle (see Redial on page 164).
NOTE! The saved number will remain in memory until another number is saved by repeating the above
procedure.
OUT trunk line
USER BUSY
↓→ Msg. Mute AutRdl Save# ElapTm
Operating the FlexSet 41 FlexSet-IP 280S User Guide
Making External Calls
During a Call
The following features are available during an external call:
[Page Q] Page Queue places your call on hold by sending it to one of ten Page Queue destinations. You are then free to
page all the system members from your FlexSet and announce that there is a call for Mr. Doe on a specific
Page Queue Line. The call can be picked up from any system station. See Page Queue on page 142.
[Xfer] Transfer passes your call to another destination. Pressing [Xfer] places the called party on hold. Dial a number
(internal or external). Disconnect to transfer the call, or first announce the call and then disconnect. See
Transfer (Xfer) on page 181.
[AutRdl] Auto Redial is used for outgoing calls only. Use Auto Redial to have the system automatically redial the
unanswered destination. Further redial options are available after activation. See Redial on page 164.
[Hold] Hold places the active call on hold. See Hold on page 129.
[Mute] Mute can be activated during a conversation to mute your side of the conversation (handset, headset and
speakerphone). When this feature is activated by the [Mute] on/off toggle switch, a bullet appears to the left of
[Mute]. The mute feature deactivates the microphone for your speakerphone and handset or headset. Press the
toggle key again to reactivate the microphone. (see Mute Microphone on page 141).
[ElapTm] Elapsed Time toggle feature is used to view or cancel the call duration in HH:MM:SS format up to 13 hours
(12:59:59). See Setup on page 222.
EXT ANS trunk line
DIAL outside telephone number
↓→ Page_Q Xfer AutRdl Hold Mute

Operating the FlexSet 42 FlexSet-IP 280S User Guide
Making External Calls
[Save#] Save Number is used to save the dial number of the called external destination. The saved number can then
be redialed by pressing [Redial] [Saved#] from idle (see Redial on page 164).
NOTE! The saved number will remain in memory until another number is saved by repeating the above.
[Park] Park your call at your station so that you can pick it up at another system station. See Park on page 150.
[CallWt] Calls Waiting is used to view the number of calls waiting for you during a conversation.
[FlshTk] Flash on Trunk is used to send a signal through the system to trunk lines in order to operate certain types of
features that are available on the second system. The second system is a telephone switching center, PABX or
another Coral system. This feature is also known as Calibrated Opening.
[Number] Number is used to briefly display the trunk dial number instead of the name.
[OCC] OCC is used for users connected with pulse trunks and/or when your FlexSet is defined with Auto Transfer.
This feature enables you to send touch-tone dialing (DTMF tones) over non-DTMF trunks and stations6 for
applications or services (such as Voice Mail) requiring DTMF tones. See Touch-Tone Dialing (DTMF) for
Other Common Carriers (OCC) on page 180.
[Series] Series is used to mark an external call before transferring it to a third party. This causes the call to return to
you after the third party hangs up. This feature can only be used during conversation.
[AcctCd] Account Code is used to enter an account code for the current external call. The code is marked on the
SMDR printout. See Account Code on page 54.
[Privac] Privacy puts your FlexSet into Privacy mode. This prevents other members of your Boss Group or ELA
Group from accidentally joining your conversations.
[ExHold] Exclusive Hold puts your FlexSet into Exclusive Hold mode. This ensures that a call placed on hold can be
retrieved only at your station. If Exclusive Hold is cancelled, the call put on hold can be retrieved by any
other member of your Boss Group or ELA Group.
Operating the FlexSet 43 FlexSet-IP 280S User Guide
Receiving and Answering Calls
Receiving and Answering Calls
There are several ways to answer calls. Answer the call directly by using the conventional methods such as pressing the
flashing SPKR key, lifting the handset or pressing any flashing key (DSS, LOOP, Line, etc). Other options include using one
of the state-related Coral system telephony features before you answer or diverting the unanswered call. The state related
features automatically appear, as shown in the display below:
The caller ID is displayed on the top line.
NOTE! If caller ID has been blocked (see Caller ID Control on page 78), the # RESTRICTED message
for incoming internal calls or # UNAVA message for incoming external calls appears on the top
line instead.
[DND] Do Not Disturb is used to send a reorder (busy) tone to the incoming call, thus avoiding answering the call.
Once DND is activated, all incoming calls will receive reorder tones. See Do Not Disturb (DND) on page 98.
[Mute] Mute can be activated during ringing (before answering) so that when the call is answered your side of the
conversation is muted, and the caller will not hear you. When this feature is activated by the [Mute] on/off
toggle switch, a bullet appears to the left of [Mute]. The mute feature deactivates the microphone for your
speakerphone and handset or headset. Press the toggle key again to reactivate the microphone. (see Mute
Microphone on page 141).
[FwdAll] Call Forward All. Use this feature to forward all incoming calls to another destination. To operate, press
[FwdAll] when your FlexSet is ringing and select the destination. See Call Forwarding / Follow Me on page 70.
caller #
↓→ DND Mute FwdAll All-E CallWt

Operating the FlexSet 44 FlexSet-IP 280S User Guide
Receiving and Answering Calls
[All-E] Call Forward All External. Relevant for external calls only. Use this feature to forward all incoming
external calls to another destination. To operate, press [All-E] when your FlexSet is ringing and select the
destination. See Call Forwarding / Follow Me on page 70.
[Number] Number is used to briefly display the caller’s dial number instead of the name.
[CallWt] Calls Waiting is used to view the number of calls waiting for you (including this incoming call).
Tip: See Divert Call on page 97. Divert is used to divert an incoming call to another system station,
group or Library number. Press a preprogrammed DIVERT CALL to XXXX key.
Operating the FlexSet 45 FlexSet-IP 280S User Guide
During Idle
During Idle
The following telephony features appear by default on the third line of your FlexSet display during idle. Alternatively, they
can be reached by pressing > [Featrs].
Tip: Features and their locations in the idle state may be redefined to suit changing working stations or
adapted to your individual requirements by your system administrator. Not every feature in this
guide may have been installed in your system, or at your extension. Check with your system
administrator for a list of the specific features installed.
10:50 26 May 2007 Company xyz
user name station number
↓→ Msg CALLog Fwd DND FlexiC
MENU

Operating the FlexSet 46 FlexSet-IP 280S User Guide
During Idle
[Msg] Message is used to view, answer and delete messages, or to leave a message at another system station or at a
network number. See Messages: Options on page 138.
[CALLog] Call Log allows you to view and redial the last 40 incoming/ last 40 outgoing calls. See Call Log on page 74.
[Fwd] Call Forward enables you to define the conditions under which incoming calls to your station are forwarded
to another destination. See Call Forwarding / Follow Me on page 70.
[DND] Do Not Disturb is used to block all incoming calls to your station. See Do Not Disturb (DND) on page 98.
[FlexiC] FlexiCall allows you to set a telephone located outside the enterprise as your FlexSet’s double. Use this
feature to edit FlexiCall options. See FlexiCall on page 108.
[Redial] Redial is used to redial the last dialed number, or a number that has been saved. See Redial on page 164.
[Page Q] Page Queue retrieves a held Page Queue call. A Page Queue call can be picked up from any system station.
See Page Queue on page 142.
[Hold] Hold retrieves a call from hold. See Hold on page 129.
[Remind] Reminder is used to set, review, or cancel reminders, which will ring your FlexSet at a designated time.
More than one reminder can be programmed. See Reminder on page 168.
[Pickup] Call Pickup enables you to pickup another ringing station in your system. See Call Pickup on page 77.
[CampOn] Camp On, also known as Call Back. When a network station is busy or does not answer, you may request
that the system automatically call you back when the required destination number is available. See page 81.
[Park] Park. When a call is parked at your station, [Park] appears with a bullet to the left. Use this function to retrieve
the call. See Park on page 150.
[V-Page] Voice Page is used to call another keyset station. The called keyset station will automatically answer the
voice page, acting in a similar manner to an intercom. See Paging: Voice Paging on page 147.
[WhspPg] Whisper Page is used to quietly page one party of a two party call. The other party does not hear the whisper
page. See Whisper Paging on page 191.

Operating the FlexSet 47 FlexSet-IP 280S User Guide
During Idle
[SltMon] Silent Monitor enables an authorized (COS and AUTHORIZATION) user to monitor any port, station or
trunk (except conference), without warning to the monitored party. See Silent Monitoring on page 172.
[AcctCd] Account Code is used to mark an external call (incoming or outgoing) with an account code, which can be
used for later reference/billing. Used to enter an account code for the current external call.. See Account Code
on page 54.
[IdCtrl] Caller ID Control overrides the system-defined caller ID defaults when making external calls (as well as
internal calls, depending on system-wide settings). Thus, if your ID is sent by default when calling external
numbers, selecting this will block the number, and vice versa. See Caller ID Control on page 78.
[WakeUp] Wake Up is used to set, review, or cancel wakeup calls which will ring your FlexSet at a designated time.
More than one wakeup call can be programmed. See Wakeup on page 189.
[aWake] Attendant WakeUp is relevant for Attendant Console only. Press [aWake] to access the attendant wakeup
options. See WakeUp on page 204.
[CnfIns] Conference Inspect allows you to release a conference participant from an ongoing conference. You may
also view the participant list. See Conference Calls: Conference View/Release on page 89.
[GpCall] Group Calls is used to activate Group Call Conference features. See Group Calls on page 114.
[AcdUcd] ACD/UCD Options is used to activate ACD/UCD features for Call Center or Hunt group agents. See
ACD and UCD Hunt Groups on page 56.
[Lock] Phone Lock is used to prevent unauthorized persons from using your phone line. Incoming calls may still be
answered. See Phone Lock on page 152.
[Exec] Executive Privilege is used to copy all the COS features from any system station to your telephone, in order
to use features or to dial numbers restricted to the current station. See Executive Privilege on page 107.
[COS-Sw] COS Switchover is used to change your Class of Service from Primary to Secondary or vice versa. Different
COS give different dial and feature capabilities to a particular station. See COS Switchover on page 90.
[Setup] Setup is used to program your station for specific feature activation. See Setup on page 222.

Operating the FlexSet 48 FlexSet-IP 280S User Guide
During Idle
[Trace] Malicious Call Trace is used to record the next x (a system-defined variable) calls to your FlexSet. A list of
these calls can be sent to a printer or terminal. See Individual Remote System Services (IRSS) - Freedom on
page 130.
[aTrace] Attendant Call Trace is relevant for Attendant Console only. Use Attendant Malicious Call Trace to set or
print a call trace for any station. See Malicious Call Trace on page 201.
[RoomSt] Room Status (or Canned Messages) is used to toggle the room status definition (or canned message) of
your station on or off. See Room Status on page 169 or Canned Messages on page 84.
[aRmSts] Attendant Room Status (or Attendant Canned Messages) is relevant for Attendant Console only. Use the
Attendant Room Status feature to toggle the room status definition (or canned message) of any station on or
off. See Room Status on page 202 or Canned Messages on page 198.
[BG:Fwd] Boss Group: Call Forward enables you to define the conditions under which incoming calls to your Boss
Group are forwarded to another destination. See Boss Groups: Call Forwarding on page 68.
[aFwd] Attendant Call Forward is relevant for Attendant Console only. Used by the attendant to program stations,
boss groups and ACD/UCD groups so that incoming calls ring at another destination. See Call Forward on
page 196.
[Charge] Call Charge is relevant for Attendant Console only. This attendant feature shows the charges accumulated
per station. The attendant may reset and print the Charge Table content. See Call Charge on page 206.
[St.Set] Station Setup is relevant for Attendant Console only. Station Setup allows the attendant to define stations for
specific feature activation. See Station Setup Features on page 208.

Operating the FlexSet 49 FlexSet-IP 280S User Guide
During Idle
[Tk.Set] Trunk Setup is relevant for Attendant Console only. Trunk Setup allows the attendant to define trunks for
specific feature activation. See Trunk Setup Features on page 217.
[System] System Setup is relevant for Attendant Console only. System features (time, public library, etc) can be edited
from this menu. See System Features on page 211.

Operating the FlexSet 50 FlexSet-IP 280S User Guide
Return Calls
Return Calls
Options
This class of calls typically indicates Return calls from busy or no answer stations, user errors, system errors or messages that
are sent back to the attendant after an operation has succeeded or failed. Calls that are returned to the attendant generally
require additional operations. To help you identify the type of return call that is pending, accompanying detailed messages are
also shown on the console display.
Use the following guide to navigate through this topic:
Attendant: Intercepted Calls.........................................................page 51
Attendant: Message Waiting Delivery ........................................page 140
Attendant: Ports Without Disconnect Supervision .......................page 52
Attendant: WakeUp Fail .............................................................page 204
Hold Return ................................................................................page 129
Message Delivery .......................................................................page 139
Page Queue Return.....................................................................page 142
Parked Call Return.....................................................................page 150
Reminder Rings...........................................................................page 168
Series Call Return.......................................................................page 171
Transfer is not Completed...........................................................page 182
WakeUp Rings .............................................................................page 204

Operating the FlexSet 51 FlexSet-IP 280S User Guide
Return Calls
Intercepted Calls (Attendant Station)
The attendant may be called upon to assist with intercepted calls to a station. A station’s call could be intercepted for the
following reasons:
•Dial Fail: Incomplete number dialed.
•COS Fail: Class of Service denies the use of a certain feature.
•Toll Barrier: Block on certain external numbers.
•Undefined Destination: The destination is not recognized by the system.
•Passcode Fail: Illegal Account Code. VFAC number is not recognized by the system.
Answering Intercept:
1. Answer the call. The intercepted caller number and its COS number are displayed on the first line of the display. The
second system line displays a written fail message and the dialed number, feature code or outgoing destination number.
2. Ask the caller for the dialed number. If the number is incorrect or a denied feature, the attendant can transfer the call to
another destination.
INTCPT caller # COS #
DIAL/COS/T-BAR/UNDEFINED/FAIL dialed #
↓→ DND Mute FwdAll All-E Number
Operating the FlexSet 52 FlexSet-IP 280S User Guide
Return Calls
Ports Without Disconnect Supervision (Attendant Station)
When two Ports Without Disconnect Supervision (PWDS) are connected, the length of conversation allowed is
predetermined. The attendant is called from time to time to control the connection.
Your phone rings
Connected parties hear break-in warning tone
Answering return calls – PWDS:
1. Answer the call.
2. The connected parties hear break-in warning tone.
3. Listen for conversation.
4. If the conversation has ended, press [FrcRls] (Forced Release).
Otherwise, press SPKR to continue the call for another period of time.
PWDS CALL your #
party #1 PWDS party #2
↓→ DND Mute FwdAll All-E Number
BTO party #1 party #
↓→ Xfer Mute FrcRls Dest Source

Station Telephony Features 53 FlexSet-IP 280S User Guide
Overview
Station Telephony Features
Overview
The following pages detail the rich array of Coral system telephony features available on your FlexSet. Features are accessed
by use of the context-sensitive soft keys for ease of use, providing you with a wealth of functionality within easy grasp.
The features can also be operated by using their system dial codes so that they may be programmed into the programmable
keys. For more detailed information on feature default dial codes, see Index: Soft Keys and Feature Codes on page 252.
Any feature can be programmed into a programmable key by using its feature code and any required destination number. For
example, you may want to program a CALL FWD SUSAN key that automatically forwards all your calls to Susan (see
page 153 for instructions on how to program a feature key).
This section is organized alphabetically, on a feature-by-feature basis. Use of this guide is straightforward, with each feature
listed separately. However, certain features have various user options. In this case, all of the options are listed under the major
feature name; examples of this are ACD & UCD Groups, Boss Groups, ELA Groups and Group Calls.
NOTE! The following pages list the features that are available on your FlexSet. Not every feature in this
list may have been installed in your system, or at your station/extension. Features are dependent
on the assigned Class of Service (COS) levels. Check with your system administrator for a list of
the specific features installed.
Station Telephony Features 54 FlexSet-IP 280S User Guide
Account Code
Account Code
An account code can be entered before or during an external (incoming or outgoing) call, causing the call to be marked with
the account code on the SMDR (Station Message Detailed Records) printout.
Depending upon your system definition, up to 16 digits are available for account numbers. Only one account number entry is
allowed for a single call. Any additional number show the message “ALREADY SET”. Should you dial a wrong account
number (when VFAC is installed in your system), the error message “PASSCODE FAIL” appears.
Select [AcctCd] and enter the Account Code.
Page 1 10:50 26 May 2007 Company xyz
user name station number
→CampOn Park V-Page WhspPg [AcctCd]
Page 2 ENTER ACCOUNT #
ACCOUNT NUMBER
∗∗∗∗∗ ∗∗∗∗ Enter Destination ∗∗∗∗∗ ∗∗∗∗∗

Station Telephony Features 55 FlexSet-IP 280S User Guide
Account Code
Activating during external call:
1. Select [AcctCd].
2. Dial the relevant account number.
3. Listen for the confirmation tone.
4. Continue with the call or hang-up.
NOTE! Last Number Redial code, Saved Number code or Speed Number can also be used instead of an
outside line where applicable.
Activating from idle:
1. Select [AcctCd].
2. Enter the relevant account number or press the outside line key.
3. Enter the external line access code.
4. Dial the external number.
5. Continue with the call.
Forced Account Code:
In some cases (as defined by Class of Service) dialing must begin with a Forced Account code before the called number can
be dialed. When Forced Account code is required, the distinctive dial tone will be heard after dialing the external line code,
and the ENTER ACCOUNT # message appears on the top line. See Making External Calls on page 36.
Station Telephony Features 56 FlexSet-IP 280S User Guide
ACD and UCD Hunt Groups
ACD and UCD Hunt Groups
An ACD/UCD group is a number of stations operating together for the purpose of automatic call distribution. The ACD/UCD
groups form the building blocks for modern call centers. The Automatic/Uniform Call Distribution Systems improve
incoming call handling by queuing and routing callers. They are used in businesses handling a large volume of incoming
calls. ACD/UCD systems prevent incoming callers from receiving busy tones. They encourage callers to wait rather than ring
elsewhere.
The incoming calls are distributed among a group of agents. Agents can log in or out of the group. When all lines are in use,
an announcement plays for callers waiting in queue. If the queue is full, calls are routed to a predetermined telephone number.
Calls incoming to an ACD/UCD group are answered by free agents, according to system wide defined rules. The most
commonly used rule by an ACD is for the longest waiting call to be answered by the agent who has been waiting for a call for
the longest period of time. UCD groups do not provide call distribution to the longest waiting staff. The UCD system
automatically delivers each incoming call to the next available agent's line.
Select [AcdUcd] to access the ACD and UCD options.
Page 1 10:50 26 May 2007 Company xyz
user name station number
→IdCtrl WakeUp CnfIns GpCall [AcdUcd]
Page 2 ACD & UCD Hunt Groups
↓→ CallWt LoadID LogI/O PrmLog RlsRsm

Station Telephony Features 57 FlexSet-IP 280S User Guide
ACD and UCD Hunt Groups
[CallWt] Calls Waiting provides you with the ability to view the number of calls waiting for any ACD group. To view
the number of waiting calls, press [CallWt], and enter the ACD group number at the prompt.
Alternatively, if the Calls Waiting ACD# programmable key for your group is flashing, view the number of
waiting calls for your group (even during a call) by simply pressing the key. The number of waiting calls is
displayed on the top line.
To program a Calls Waiting ACD# key, see page 153.
[LoadID] Load ID is used to load your ID into the system, identifying you as an ACD agent. A bullet appears next to
[LoadID] to indicate your ID is loaded.
Once registered within the system, you may join as many ACD Groups as required. Your ID remains in the
system provided you remain logged into at least one ACD Group. You may load a different ID number while
logged in, which will override the previous ID.
1. Press [LoadID]. Your current ID number appears on the display.
2. Enter your ID number at the prompt (4 digits).
3. Listen for the confirmation tone.
[LogI/O] Log In/Out enables you to join or leave an ACD Group. You may belong to more than one group
simultaneously. To join an ACD group:
1. Press [LogI/O].
2. Dial the ACD group. The ID number is displayed on the middle line.
3. Choose [Set] to join the group or [Cancel] to leave the group.
4. Listen for the confirmation tone. The ASSIGN message indicates that you are logged in, while the DE-
ASSIGN message on the top line indicates you are logged out.
5. If you have not loaded your ACD 4 digit ID number, the NO ID, LOGIN message appears. In this
instance, load your ID number and restart the login process.
6. To join additional groups, repeat Steps 1-4.
7. If you are a member of more than one ACD group, use the Primary Login feature (see below) to define
one of those groups as your primary group.

Station Telephony Features 58 FlexSet-IP 280S User Guide
ACD and UCD Hunt Groups
[PrmLog] Primary Login Group. If you are a member of more than one ACD group, you can use this feature to define
one of those groups as your primary group. Once you have logged into your primary group, waiting calls will
always be routed to you from this group first.
1. Press [PrmLog].
2. Dial the primary ACD group number.
3. Choose [Set] to join the group or [Cancel] to leave the group.
4. If you have not loaded your ACD 4-digit ID number, the NO ID, LOGIN message appears. Load your
ID number.
If this feature is activated, a bullet appears next to [PrmLog].
NOTE! If no group is defined as primary or if log out is defined for the primary group, then the first group
you logged into (previous page) is defined as primary by system.
[RlsRsm] Release/Resume. Press [RlsRsm] to temporarily leave all the ACD/UCD groups of which you are a member.
Press again to rejoin your group/s. When released a bullet appears next to [RlsRsm].
The top line will show RELEASED ALL when you leave your group/s and RESUMED ALL when you rejoin.
You will be automatically released from all groups of which you are a member if you do not answer a call
within a predetermined time (defined system-wide).
[RlsUCD] Release UCD is used to temporarily exit (or rejoin) the UCD group of which you are a member.
1. Press [RlsUCD].
2. Dial your UCD Hunt group number.
3. Press [Set] to exit or [Cancel] to rejoin.
4. Listen for the confirmation tone.
NOTE! You can preprogram a feature key for use as a toggle key. To program a Release/Resume UCD#
key, use feature code #1991 followed by the specific UCD group number.

Station Telephony Features 59 FlexSet-IP 280S User Guide
ACD and UCD Hunt Groups
[WrapTm] Wrap Time is used to provide an idle ACD/UCD group member with a time-out period between consecutive
group calls. The time-out period is determined for each group on a system-wide basis. This feature allows the
agent to utilize the wrap-up code without interference from outside calls.
1. Press [WrapTm].
WRAP-UP ON appears on the system display line and a bullet appears next to [WrapTm].
2. Press [WrapTm] again to end the Wrap-Up time interval.
WRAP-UP OFF appears on the system display line.
[WrapCd] Wrap Code is used to send the appropriate wrap-up code for the last incoming ACD call you answered. See
your ACD Supervisor for an updated list of codes.
1. Press [WrapCd]
2. Dial the appropriate 4-digit code number.
3. Listen for the confirmation tone.
[ACDBsy] Busy ACD Group, an Attendant feature, enables the attendant to define the maximum number of calls that
can be placed in a waiting queue for any ACD group. Once this number is reached, additional calls arriving at
the ACD group will hear the busy tone.
1. Press [ACDBsy].
2. Dial an ACD group number or press the buttons to scroll between the ACD groups.
[Next] and [Prev] appear, which can also be used to scroll between groups.
3. Choose [Charge] (change call number) to change the maximum number of callers that will hear the busy
tone.
4. Enter a 3-digit number with leading zeros, up to 254 (e.g. 023 for 23).
5. Choose [Cancel] to delete the limitation.
6. Press [Exit] to terminate.
[MoveSt] Auto Set Relocate (move station) is designed for use as hot seat-feature in call center environments,
allowing you to move your station and all your station’s predefined features to a new location. See Auto Set
Relocate on page 61.

Station Telephony Features 60 FlexSet-IP 280S User Guide
Activation Code
Activation Code
Use the Activation code (default code: #11, #
>
1, or
>
1) as required when programming features.
The following symbol in this manual indicates an activation code: 9
See your system manager, as to which activation code is used in your system. The activation code can be entered by dialing or
programming a key with the code, or adding the code to the program of a feature key.
.
Station Telephony Features 61 FlexSet-IP 280S User Guide
Auto Set Relocate
Auto Set Relocate
Auto Set Relocate enables you to transfer your station and all your station’s predefined features to a new location, thus sparing
you the inconvenience of having to re-enter all the stored speed numbers and to reset previously defined features at your new
permanent or temporary location. This feature enables you to use any FlexSet available from your Coral system while keeping
your unique extension dial number. FlexSets are defined to have either the Permanent (see page 62) or Temporary (see
page 63) Auto Set Relocate feature enabled. Before activating this feature, contact your system administrator to determine
what your Auto Set Relocate setting is. If you are defined as permanent, you will not be able to use temporary (unless
redefined by your system administrator), and vice versa.
NOTE! When invoking the Auto Set Relocate feature, incorrect information may be sent to the local
Emergency or E911 Center. Before activating this feature, contact your local administrator to
ensure that your new and current system profiles are compatible with the E911 Center.
Auto Set Relocate is accessed by selecting [Setup] [MoveSt] or [AcdUcd] [MoveSt] from the idle screen.
.
Page 1 10:50 26 May 2007 Company xyz
user name station number
→Lock Exec COS-Sw [Setup] Trace
Page 2 Feature Setup
↑PrvLib Secure DND-WP [MoveSt]
Page 3 RELOCATE
ENTER SOURCE NO.
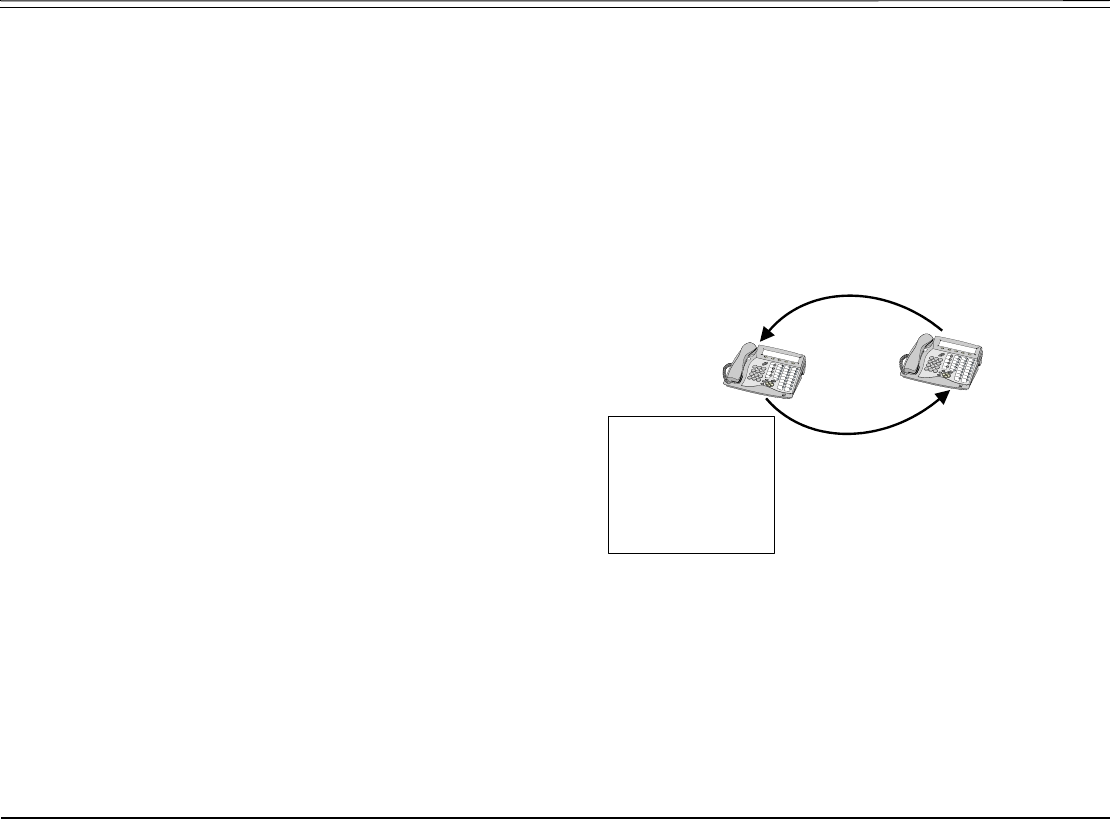
Station Telephony Features 62 FlexSet-IP 280S User Guide
Auto Set Relocate: Permanent
Auto Set Relocate: Permanent
When defined for permanent relocation, this feature enables you to swap phones within the same Coral system by assigning
one FlexSet the profile of the other FlexSet, and vice versa. All the phones' properties, numbering, programmable keys,
membership in groups, etc. are automatically exchanged. This feature facilitates the phone relocation procedure, eliminating
the need for traditional phone moves that involve physical disconnection of the station wires and reconnection at another
location. Both source and destination phones (see figure below) should be FlexSets. The Auto Set Relocate is activated at the
destination station. The phone swap holds until a reverse swap is performed.
Activating from the Destination (new) location
1. Select [Setup] [MoveSt] or [AcdUcd] [MoveSt].
2. Dial your (source) station number.
3. Enter your (source) passcode (4 digits).
4. Dial the activation code 9.
5. The station now initializes with the source profile.
Reversing from the Source (original)
location
Repeat the above procedure from your original source location.
Destination
Station
- Dial Number
- Keyset Definition
- COS
- Programmable keys
- Private Library
- Message indication
- Group membership
- Personal Director
y
Source
Station
(Passcode)
Swapping:
1. Auto Set Relocate
activation from the
Destination station
2. Source station's
passcode to be
entered

Station Telephony Features 63 FlexSet-IP 280S User Guide
Auto Set Relocate: Temporary
Auto Set Relocate: Temporary
When defined for temporary relocation, this feature allows a temporary move of your extension from one location to another,
while preserving your extension's original setup. The Auto Set Relocate function enables you to access customized features of
your FlexSet from another FlexSet. By activating the feature you can relocate all of your (source) phone's programmable
keys, numbering, membership in groups, etc. to another (destination) phone located elsewhere within the same Coral system.
As this takes place, the source phone acquires the full profile of the destination phone, and vice versa.
The Auto Set Relocate is activated at the destination station. The temporary phone swap is automatically reversed at
midnight. Reactivating Auto Set Relocate at the already swapped destination station causes:
• Automatic cancellation of the first relocation
• Exchange of the new (third user's) phone profile with the destination phone profile
Activating from the Destination (new) location:
1. Select [Setup] [MoveSt] or [AcdUcd] [MoveSt].
2. Dial your (source) station number.
3. Enter your (source) passcode (4 digits).
4. Dial the activation code 9.
5. The station now initializes with the source profile.
Canceling from the Destination (new) location:
1. Select [Setup] [MoveSt] or [AcdUcd] [MoveSt].
2. Dial your (source) station number.
3. Enter your (source) passcode (4 digits).
4. To cancel, dial the cancellation code 8.
5. The station now initializes with its original profile.

Station Telephony Features 64 FlexSet-IP 280S User Guide
Boss Groups
Boss Groups
A Boss Group is a number of stations operating together in which the individual stations may or may not simultaneously ring,
as defined by the system per Boss Group.
Members of a Boss group share a LINE key which functions very much like a common line among keysets. The appropriate
LINE key flashes at all stations when a call arrives and can then be answered by any group member.
Calls directed to a Boss Group ring at all members assigned to ring within the group, then may be directed to any members
that are assigned to ring after a delay (ring delay after time-out).
When set to ring at a specific station, the call can be either transferred to any group member or picked up by any group
member when the original group member is not in exclusive hold. Any group member can join a conversation for ‘1A2’ or 3-
way conversation by pressing the appropriate illuminated LINE key, but only when the original group member is not in
Privacy mode. Additional members can join to make a 4-way conversation when allowed system-wide, and none of the three
participants have Privacy on.
To program a line key, see page 153.
The maximum number of lines available for your group is defined on a per group basis.
Use the following guide to navigate through this section:
Boss Groups: Using......................................................................page 65
Boss Groups: Privacy ...................................................................page 66
Boss Groups: Exclusive Hold .......................................................page 67
Boss Groups: Call Forwarding......................................................page 68

Station Telephony Features 65 FlexSet-IP 280S User Guide
Boss Groups: Using
Boss Groups: Using
Making calls:
1. Press a free LINE key.
2. Dial the required number.
NOTE! The line key LED of all group members changes from off to steady on.
Receiving calls:
When the line flashes (note that the telephone may also ring):
1. Press the flashing LINE key or, if phone rings, lift the handset.
2. Answer the call.
NOTE! The line key LED of all group members now changes from flashing to steady on.
Joining a group conversation (1A2 type):
You can join any group conversation when a LINE key is lit, with two exceptions:
• When the member’s station is set to privacy, in which case the message PRIVACY is displayed and a reorder tone is
heard, or
• When another member has already joined the conversation and the group is not defined for 4 members, in which case the
message ILLEGAL is displayed and a reorder tone is heard.
To join the group conversation, press the lit LINE key.

Station Telephony Features 66 FlexSet-IP 280S User Guide
Boss Groups: Privacy
Boss Groups: Privacy
As a Boss Group member you can put your telephone into Privacy mode. This prevents other FlexSet stations within your
Boss Group from accidentally joining your conversations.
The feature can be utilized for a specific call or for all calls.
Operating Privacy for all calls
To operate this feature for all calls, see page 227.
Operating Privacy for current call
You may override the station Privacy setting on a call-by-call basis. Thus, if your station is in Privacy mode, you may remove
the Privacy restriction and allow others to join your conversation; alternatively if your station is not in Privacy mode, you
may apply Privacy to a specific call.
This is done by pressing [Privac] during a call. Press this key to toggle the feature on and off. This key can be pressed as many
times as necessary.
Once Privacy is defined for your station (all calls) the Privacy key LED remains illuminated, and a bullet is displayed next to
[Privac], even if the key is pressed to temporarily override the Privacy feature. However, when your call is completed the
telephone will return to the permanent status, private or non-private, as previously defined for all calls.

Station Telephony Features 67 FlexSet-IP 280S User Guide
Boss Groups: Exclusive Hold
Boss Groups: Exclusive Hold
As a Boss Group member, you can put your telephone into Exclusive Hold mode. This ensures that a call you place on hold
can be retrieved only at the station where Exclusive Hold was originally placed. If Exclusive Hold is cancelled, the call put on
hold can be retrieved by any other member of your Boss Group, by pressing the flashing LINE key. The feature can be utilized
for a specific call or for all calls.
Operating Exclusive Hold for all calls
To operate this feature for all calls, see page 227.
Operating Exclusive Hold for current call
You may override the station Exclusive Hold setting on a call-by-call basis. Thus, if your station is in Exclusive Hold mode,
you may remove the Exclusive Hold restriction and allow others to pick up your held call; alternatively if your station is not
in Exclusive Hold mode, you may apply Exclusive Hold to a specific call. This is done by pressing [ExHold] during a call before
pressing HOLD. Press this key to toggle the feature on and off. This key can be pressed as many times as necessary. If your
telephone is not in Exclusive Hold mode for all calls, press [ExHold] before you press [Hold]. Press [Hold] to place a call into
Exclusive Hold. The LINE on hold will remain steady on at all other FlexSets, and the call will only be retrievable from your
station.
Transferring call to a group member (during conversation):
Once Exclusive Hold is defined for your station (all calls) the Exclusive Hold key LED remains illuminated, and a bullet is
displayed next to [ExHold], even if the key is pressed to temporarily override the Exclusive Hold feature. However, when your
call is completed the telephone will return to the permanent status, as previously defined for all calls. If your telephone is in
Exclusive Hold mode for all calls, press [ExHold] before you press [Hold].
1. Press [Hold]. The LINE on hold will flash at all FlexSets.
2. Listen for the confirmation tone.
3. Inform the party to whom you wish to transfer on which line the call is on hold.
Returning or picking up a call on hold:
Press the flashing LINE key.
Station Telephony Features 68 FlexSet-IP 280S User Guide
Boss Groups: Call Forwarding
Boss Groups: Call Forwarding
Calls arriving at your Boss Group can be forwarded, according to certain criteria, to ring at various destinations.
Calls incoming from an external source only can be forwarded using [All-E], [Busy-E], [NoAn-E], and [Time-E]. Additionally, calls from
Internal and External sources can be forwarded to different destinations, as described on page 73.
Possible destinations are operator, station/group, external number via public and private speed call library, DVMS pre-
recorded message, UNA/central bell, group call, or network number (and the Boss Group itself for external calls).
Boss Group Call Forwarding options are accessed by selecting [BG:Fwd] from idle state.
[All] or [All-E] Forward All. Forwards your incoming Boss Group calls to another destination. The destination can call back
or return calls to your group, and outgoing calls can still be placed from within the group.
[Busy] or [Busy-E] Forward Busy. Forwards your incoming Boss Group calls to another destination when your Boss Group
lines are all busy.
[NoAns] or [NoAn-E] Forward No Answer. Forwards your incoming Boss Group calls to another destination when none of your
Boss Group lines are being answered.
[Time] or [Time-E] Forward Timed. Forwards your incoming Boss Group calls to another destination during specific, system-
defined time periods. See table on page 71.
Page 1 10:50 26 May 2007 Company xyz
user name station number
→aRmSts [BG:Fwd] aFwd Charge St.Set
Page 2 Boss Group: Call Forward
E=External
↓All All-E •Busy Busy-E •NoAns

Station Telephony Features 69 FlexSet-IP 280S User Guide
Boss Groups: Call Forwarding
Operating Boss Group: Call Forward:
1. Select [BG:Fwd].
2. Press the required forwarding option ([All], [All-E], [Busy], [Busy-E], [NoAns], [NoAn-E], [Time], [Time-E]).
3. Press [St/Gp#] and dial your boss group number, OR
Scroll between groups by using [PortUp], [FastUp], [PortDn] and [FastDn].
4. To set Call Forward, choose [Dest] and dial the destination number to which calls are to be forwarded, OR
To cancel Call Forward, choose [Cancel].
5. Press SPKR or [Exit] to exit and save.

Station Telephony Features 70 FlexSet-IP 280S User Guide
Call Forwarding / Follow Me
Call Forwarding / Follow Me
Calls arriving at your station can be forwarded to ring at various destinations, depending on the state of the terminal (all, busy,
no answer, timed). In addition to the forwarding options detailed above, your FlexSet can distinguish between calls arriving
from an internal or external source when forwarding.
Calls incoming from an external source only can be forwarded using [All-E], [Busy-E], [NoAn-E], and [Time-E]. Additionally, calls from
Internal and External sources can be forwarded to different destinations, as described on page 73. Possible destinations are
operator, station/group, external number via public and private speed call library, DVMS pre-recorded message, UNA/central
bell, group call, or network number (and the station itself for external calls).
A bullet appears next to any active forwarding feature on the Forwarding Options screen (page 2 below), and an additional
bullet appears next to [Fwd] on the idle screen (Page 1 below).
Forwarding options are accessed by pressing [Fwd] from idle state.
Page 1 10:50 26 May 2007 Company xyz
user name station number
↓→ Msg CALLog •[Fwd] DND FlexiC
Page 2 Call Forwarding
E=External BNA=BusyNoAns
↓→ FwdAll All-E •Busy Busy-E •NoAns
Station Telephony Features 71 FlexSet-IP 280S User Guide
Call Forwarding / Follow Me
[FwdAll] or [All-E] Forward All. Forwards your incoming calls to another destination. The destination can call back or return
calls to your terminal, and you can still place outgoing calls from your terminal.
If [FwdAll] or [All-E] is activated, a *FwdAll* message appears on the top line to remind you that this feature has
been activated at your station, and the Distinctive Dial Tone sounds upon lifting your handset (see Appendix
B: Tones on page 240).
NOTE! Call Forward All activation is also available during an incoming call (when ringing). See below.
[Busy] or [Busy-E] Forward Busy. Forwards your incoming calls to another destination when your terminal is busy.
[NoAns] or [NoAn-E] Forward No Answer. Forwards your incoming calls to another destination when you do not answer within a
system-defined number of rings.
[BNA] or [BNA-E] Forward Busy/No Answer. Forwards your incoming calls to another destination when your terminal is busy,
or when you do not answer within a predetermined number of rings. [BNA] enables you to program [Busy] and
[NoAns] in one action, while [BNA-E] enables you to program [Busy-E] and [NoAn-E] in one action.
[Undef] Undefined. Forwards your incoming calls to another destination when your station is unplugged or when
your station has lost its Primary Call Agent because of network problems.
[Time] or [Time-E] Forward Timed. Forwards your incoming calls to another destination during specific, system-defined time
periods. The system-defined time can include up to two separate time periods, for example, between 12:00pm
and 12:30pm and between 6:00pm and 6:30pm your calls can be forwarded to the front desk.
Use the following table to document the system-defined time periods:
Time Period From To
1st
2nd

Station Telephony Features 72 FlexSet-IP 280S User Guide
Call Forwarding / Follow Me
[FllwMe] or [Fllw-E] Follow Me. Allows you to collect your calls from another station. The source station is then put into a Call
Forward All state; [FwdAll] or [All-E] respectively.
Operating Call Forward:
1. Choose the required forwarding option ([FwdAll], [All-E], [Busy], [Busy-E], [NoAns], [NoAn-E], [BNA], [BNA-E], [Undef], [Time], [Time-E]).
2. You may scroll through the other forwarding options with the button or .
3. To set Call Forward, dial the destination number, OR
To cancel Call Forward, choose [Cancel], OR
To change the Call Forward destination, choose [Dest] to enter destination and dial the destination number.
4. Listen for confirmation tone.
Operating Follow Me:
1. Choose [FllwMe] or [Fllw-E] from the location where you wish the calls to be forwarded.
2. Dial the number of your own (source) station (i.e. from which you wish to collect the calls).
A *FOLLOW ME source user name* message appears on the top line of your destination station.
3. To activate, choose [Set].
OR
To cancel, choose [Cancel].
4. Listen for confirmation tone.
Canceling Follow Me from the source location:
1. Choose [FwdAll] or [All-E] from your own (source) station.
2. Choose [Cancel].
3. Listen for confirmation tone.
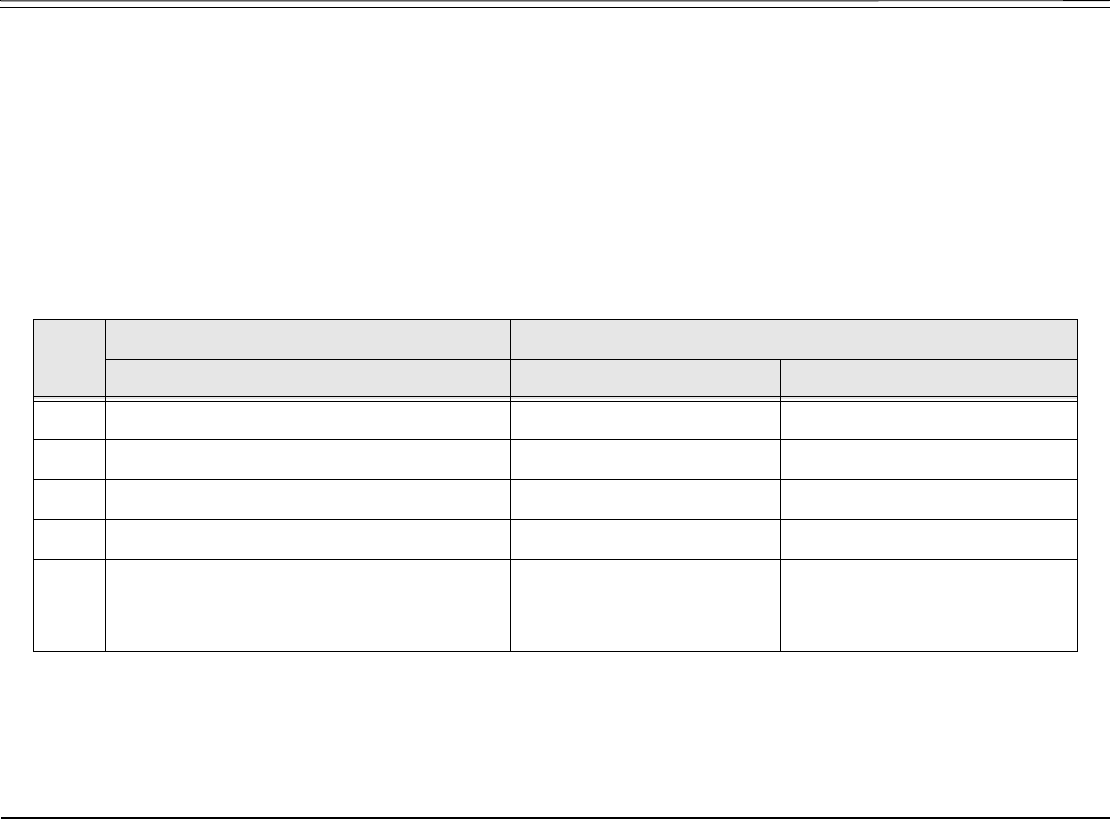
Station Telephony Features 73 FlexSet-IP 280S User Guide
Call Forwarding / Follow Me
Internal/External Call Forwarding
In addition to the forwarding options detailed above, your FlexSet can distinguish between calls arriving from an internal or
external source when forwarding. For each forwarding feature (forward all, when busy, on no answer, etc), you can program
your FlexSet to forward your calls as follows:
• Forward Internal and External calls to the same destination
• Forward Internal and External calls to different destinations
• Forward Internal calls only, while External calls keep ringing at your station
• Forward External calls only, while Internal calls keep ringing at your station
This is demonstrated in the following table using the [FwdAll] and [All-E] feature as an example:
Possible destinations for X are: operator, station/group, external number via public and private speed call library, DVMS pre-
recorded message, UNA/central bell, group call, or network number.
Possible destinations for Y are the same as for X, plus your own station number, thus facilitating forwarding of internal calls
to another destination, whilst retaining external calls at your own station, as shown in Case 5 above.
Case Forward Option Resultant Call Destination
[FwdAll] Set To: [All-E] Set To: Internal Calls Go To External Calls Go To
1 Cancel (not set) and Cancel (not set) Your Station Your Station
2 Destination X and Cancel (not set) Destination X Destination X
3 Cancel (not set) and Destination Y Your Station Destination Y
4 Destination X and Destination Y Destination X Destination Y
5 Destination X and Destination Y
(programmed as
Your Station)
Destination X Your Station
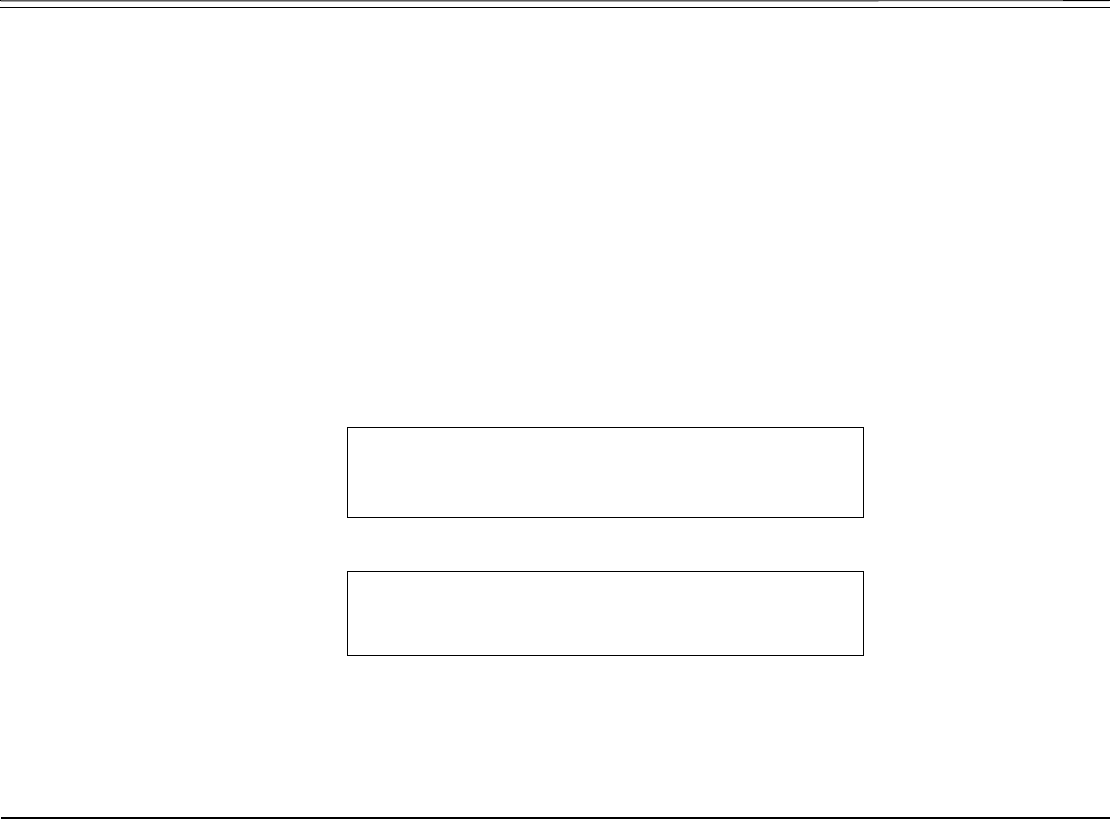
Station Telephony Features 74 FlexSet-IP 280S User Guide
Call Log
Call Log
The Call Log feature allows you to view and redial the last 40 outgoing and last 40 incoming calls outgoing and incoming
calls to your station. Calls are displayed with the name and number (where available).
If the name is unavailable, just the number will be shown.
If the number is unavailable, the Call Log will display Unknown Number.
If the number is restricted, the Call Log will display Restricted Number.
If incoming calls are not answered, a message indicating the number of new calls is displayed on the FlexSet idle screen:
< xx New Calls >, where xx indicates the number of new calls. This count is reset to zero once the Call Log is viewed,
and is not shown again until there are new calls logged.
See Call Log Setup options, on page 229.
Press [CALLog] to access the Call Log options. If no calls are logged for your station, the < No Calls Logged > message is
displayed.
[Out] Outgoing Call Log is used to view the last 40 outgoing calls made from your station.
[In] Incoming Call Log is used to view the last 40 calls made to your station.
Page 1 10:50 26 May 2007 Company xyz
<02 New Calls>
↓→ Msg [CALLog] Fwd DND FlexiC
Page 2 Call Log
→Out •In
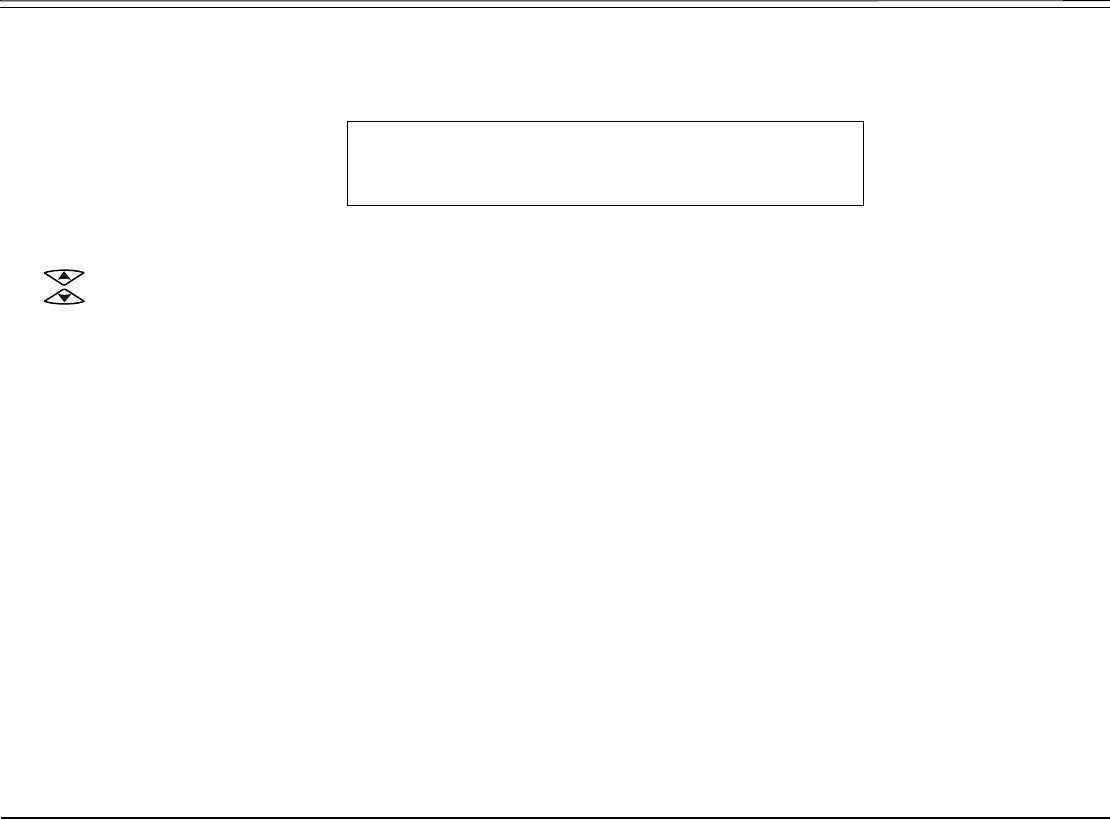
Station Telephony Features 75 FlexSet-IP 280S User Guide
Call Log
A bullet appears next to •[Out] or •[In] to indicate when outgoing or incoming calls are logged for your station. If no calls are
logged, pressing [Out] or [In] displays the < No Calls Made > or < No Calls Received > message, respectively.
Use to scroll through the call records. The calls are listed in order of receipt/dialing, and are numbered accordingly at the
left of the call display, with the most recent listed first. In the example above, 01: Steve Williams 7652345
indicates that Steve Williams was the most recent person to call/be called.
NOTE! A maximum of 40 incoming and 40 outgoing calls are stored. Once this number is reached, any
new calls added to the call log will result in the oldest(41st) record being deleted, on a first in, first
out basis.
If an incoming call was originally answered, or has subsequently been dialed from the call log record, the ‘√’ symbol appears
to the left of the call display, as shown in the above example.
When new incoming calls are viewed in the Call Log, and the Call Log is set to hide duplicate numbers ( [Duplic] = No, as
described on page 229), the number of times that they called is displayed in parentheses after the name and number. Once the
Call Log has been viewed, this number resets to zero and is hidden.
Page 3 In 10:00 29 May, 2006
↓√ 01: Steve Williams 7652345 (xx)
→Delete Dial Number Esc

Station Telephony Features 76 FlexSet-IP 280S User Guide
Call Log
The following options are available:
[Delete] Choose [Delete] to delete the selected entry from the call log.
[Dial] Choose [Dial] to dial the selected entry from the call log.
[Name] / [Number] If the combined size of the logged name and number is larger than the display area (35 characters), the
display shows only the name. An additional context-sensitive soft key is presented allowing you to toggle
between viewing the number or the name. When a name is displayed, choose [Number] to view the dial number.
When a number is displayed, choose [Name] to view the name.
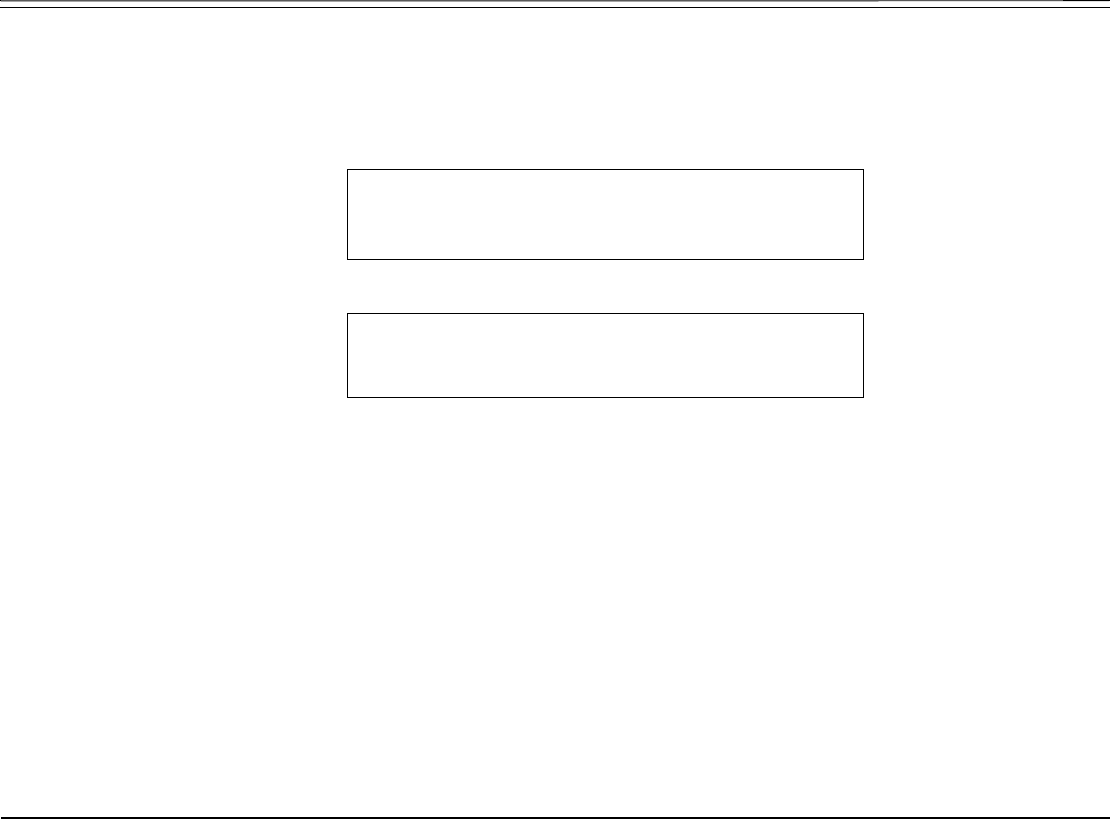
Station Telephony Features 77 FlexSet-IP 280S User Guide
Call Pickup
Call Pickup
This feature enables you to pick up any ringing station or central bell within your system or pre-programmed Pickup Group.
Press [Pickup] to access the Pickup options.
[Direct] Direct Call Pickup (default dial number: #180 or 77) is used to answer any ringing station in your system. At
the prompt, dial the number of the station that is ringing and answer the call.
[Group] Group Call Pickup (default dial number: #181 or 76) is used to answer any ringing station in your Pickup
Group. The call connects immediately upon pressing [Group].
NOTE! See your system administrator to define your own Pickup Group.
[Night] Night Call Pickup (default dial number: #192) is used to answer incoming calls after the attendant leaves or
when a central bell is ringing. Normally this feature is activated for incoming calls during the night answering
period. The call connects immediately upon pressing [Night].
Page 1 10:50 26 May 2007 Company xyz
user name station number
→Redial Page_Q Remind [Pickup]
Page 2 Call Pickup
→Direct Group Night
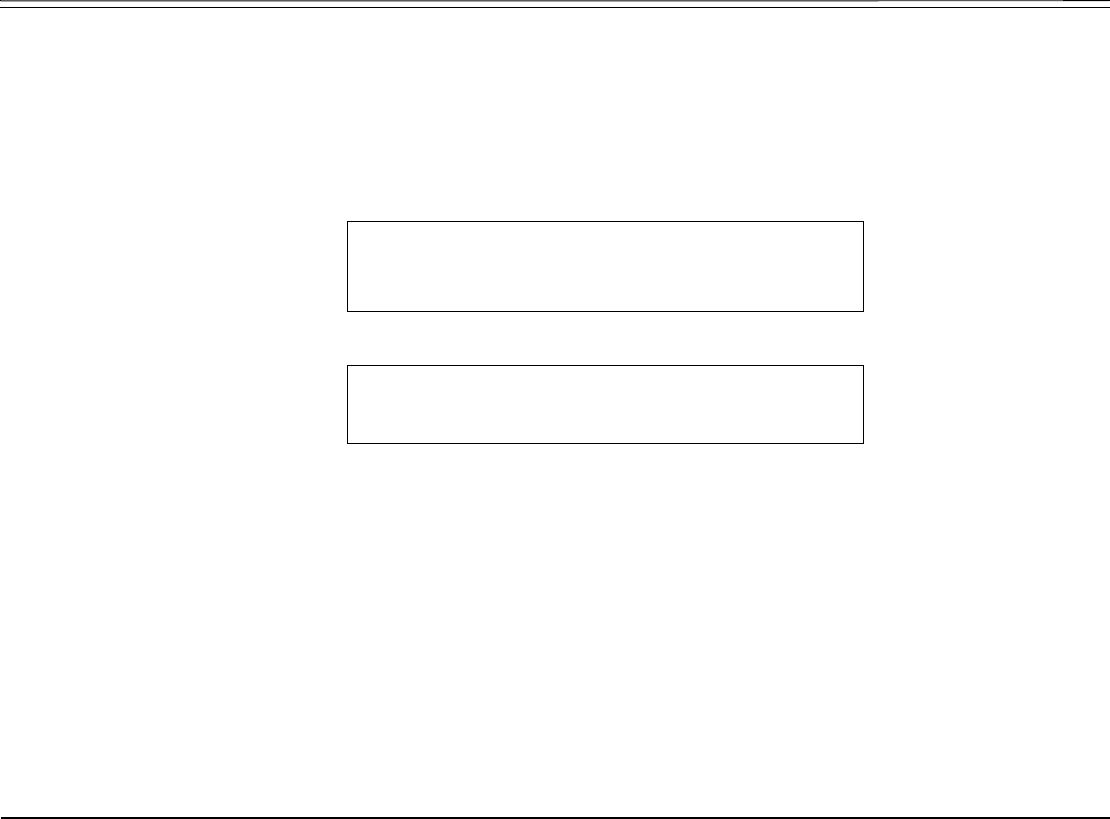
Station Telephony Features 78 FlexSet-IP 280S User Guide
Caller ID Control
Caller ID Control
This feature enables you (from idle) to allow or restrict the presentation of your phone number from appearing on the display
of the called external party (as well as internal party, depending on system-wide settings). Your telephone is pre-set in the
system to either restrict or display for all calls. Use [IdCtrl] to override this setting on a per-call basis (if permitted by COS).
Press [IdCtrl] to dial using ID Control.
Operating Caller ID Control:
1. Press [IdCtrl].
2. Dial the number.
3. Your call automatically connects. If your Coral system is set to restrict caller ID, it will now be presented to the called
party, and vice versa.
NOTE! When you have a Caller ID programmed key, the LED is lit when Caller ID Control is restricted
from your station.
Page 1 10:50 26 May 2007 Company xyz
user name station number
→[IdCtrl] WakeUp CnfIns GpCall AcdUcd
Page 2 DIAL
ID. RESTRICTED
***** Enter Destination ****

Station Telephony Features 79 FlexSet-IP 280S User Guide
Calls Waiting: Receiving
Calls Waiting: Receiving
The call waiting tone, voice paging tone or muted ring indicates that another call is waiting for you to answer. When you hear
this tone, or when the second row displays a call waiting message, you have the following choices:
Action Method
Current Call Waiting Call
Hold Answer 1. Press [Hold]
2. Upon hearing the ring, answer the waiting call
Join in 3-way mode Press flashing button (only available if your FlexSet is defined as Auto Join)
Continue Redirect Press a preprogrammed DIVERT CALL to XXXX key.
See Divert Call on page 97. Divert is used to divert an incoming call to another system
station, group or Library number.
Continue View number of
waiting calls
• Press [CallWt] (see Receiving and Answering Calls on page 43);
or
• For a specific ACD group, press a preprogrammed Call Waiting ACD DSS button
Station Telephony Features 80 FlexSet-IP 280S User Guide
Calls Waiting: Receiving
Hold/
Continue
Join in Broker/
Consultation/3-
Way/
Combination
Conference
Call
(All the
following
features are
activated after
the waiting call
is answered.)
Press to put the current call on hold and answer the waiting call. Press again to establish
one of the following call types:
To activate a Broker Call
• Press [XFER] to alternate between the parties (any number of times)
Then either:
• Press [SPKR] or hang up in order to allow conversation between the two parties;
or
• Press [FrcRls] to release all parties and press [SPKR]
To activate a Consultation Call
When your conversation is concluded, press [XFER] to return to the original call (the
consultation is released)
To activate a 3-Way Call
• Press [FrcRls] to release the third party and return to original call (same as Consultation
Call);
or
• Press [XFER] to connect all three parties
To activate a Combination Call
1. Press [XFER] to put the third party on hold
2. After concluding the private conversation, press [XFER] to complete a 3-Way
Conference Call
To add members to a 3-Way Call (Continous Conference)
• Press the Last Party Release DSS key to release the last party to join the conference;
or
• Press to connect a new member to a 3-way call (becomes Continous Conference Call)
Action Method
Current Call Waiting Call
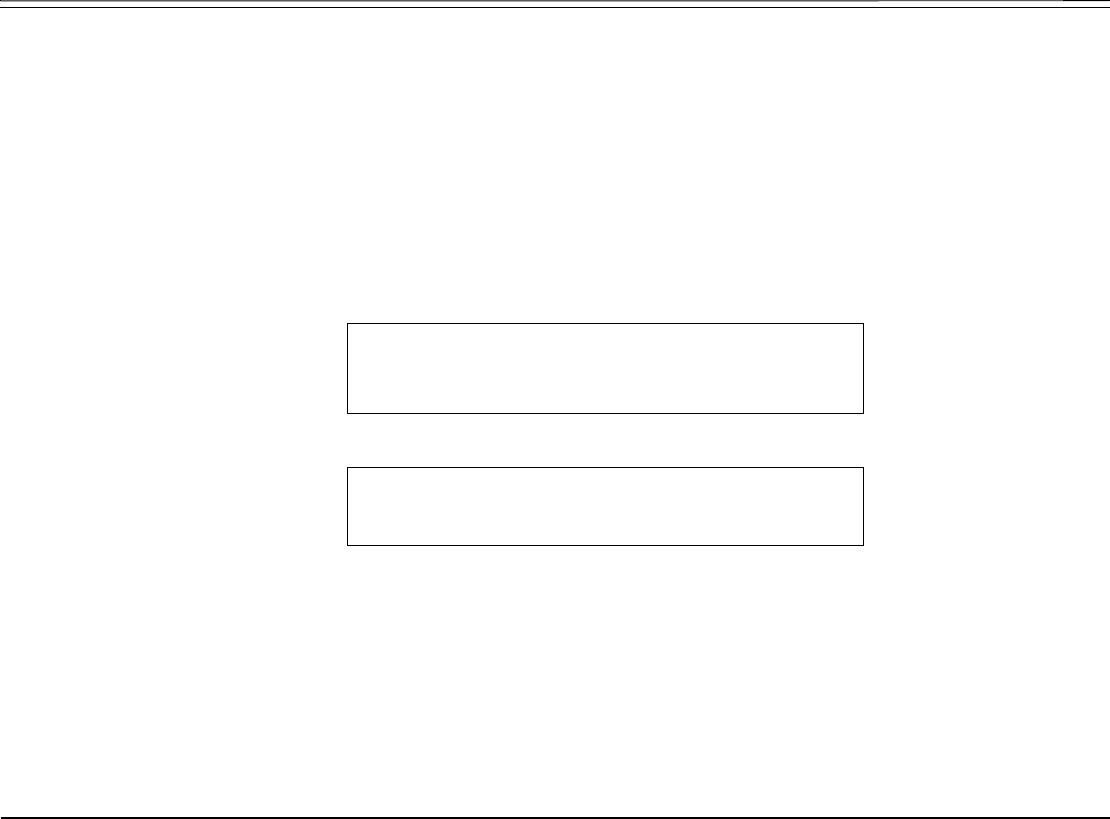
Station Telephony Features 81 FlexSet-IP 280S User Guide
Camp On (Call Back)
Camp On (Call Back)
Use this feature when a station or a network destination is busy or does not answer, or when an outside line is busy, to request
that the system automatically call you back when the required destination number or line is available. (Upon hearing a busy
tone originating from an external destination, use the auto redial [AutRdl] feature instead - see page 38.)
Answering the call causes the camped on station to immediately ring.
Camp On can also be operated from idle.
Camp On is automatically cancelled after a system-wide defined period after activation.
Press [CampOn] to camp on to the unavailable line.
Camping On upon hearing a busy tone:
1. Press [CampOn] after hearing the busy tone.
2. The CAMPING ON Name message appears to inform you that you are camped on.
Alternatively, press [SendCw] to send a call waiting tone to the busy station. The station is now made aware that another call
is waiting. Your side hears a second (quicker) ringback tone (system-wide defined).
Page 1 10:50 26 May 2007 Company xyz
user name station number
→[CampOn] Park V-Page WhspPg AcctCd
Page 2 CAMPING ON
LIST EMPTY
***** Enter Destination ****

Station Telephony Features 82 FlexSet-IP 280S User Guide
Camp On (Call Back)
Camping On while your FlexSet is idle:
1. Press [CampOn].
2. Dial the destination number.
3. The CAMPING ON Name message appears to inform you that you are camped on.
Entering additional destinations to the Camp On list:
1. Press [CampOn].
2. Choose [Dest] to enter destination.
3. Dial the destination number.
4. The CAMPING ON Name message appears to inform you that you are camped on.
Canceling a number from the Camp On list:
1. Press [CampOn].
2. Use [Next] or the button to scroll through the list of Camp On destinations and select a destination.
3. Choose [Cancel] to cancel Camp-On.
When the line is available, the system will call you back. Answer the call to automatically dial the camped on station/trunk (or
should you hear the distinctive dial tone (defined system-wide), press [CampOn] to initiate ringing).
For Trunks Only:After the trunk line is free, you must continue dialing the outside dial number for external numbers.

Station Telephony Features 83 FlexSet-IP 280S User Guide
Cancellation Code
Cancellation Code
Use the Cancellation code (default code: #10, #
>
0, or
>
0) as required when programming features.
The following symbol indicates a cancellation code: 8
See your system manager, as to which cancellation code is used in your system. The cancellation code can be entered by
dialing or programming a key with the code, or adding the code to the program of a feature key.
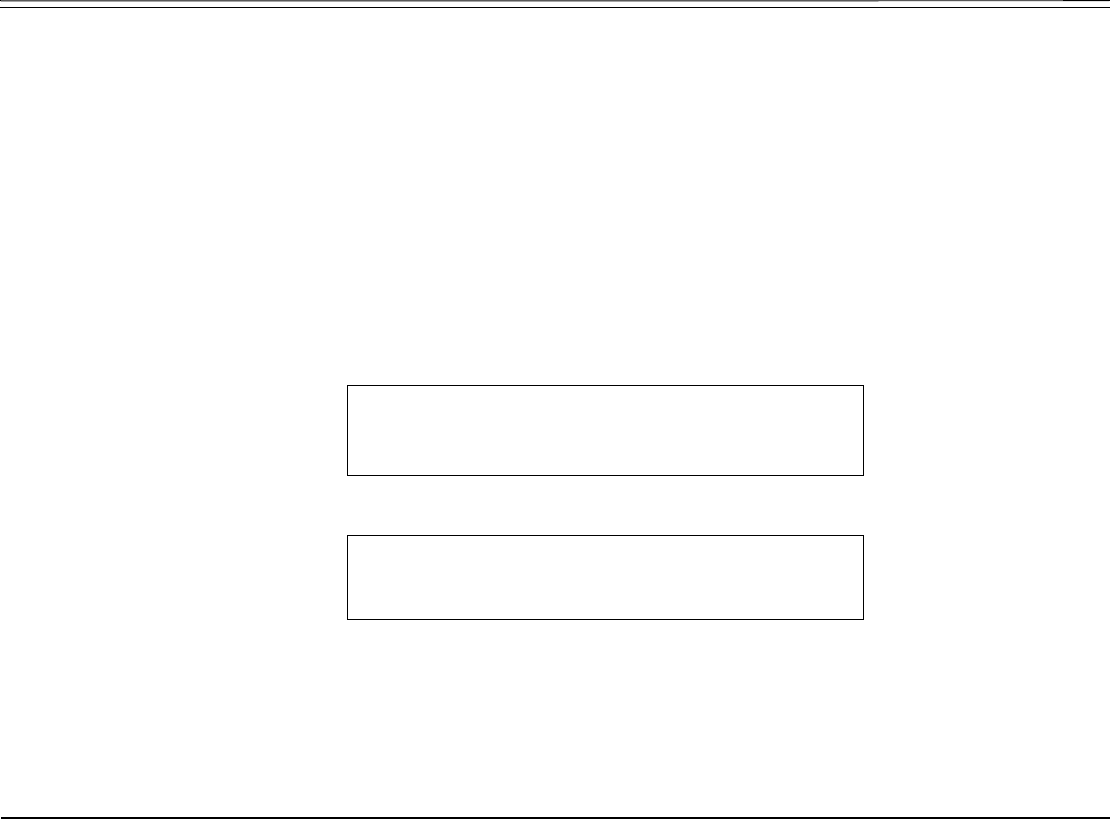
Station Telephony Features 84 FlexSet-IP 280S User Guide
Canned Messages
Canned Messages
Use this feature to set one of any 16 canned messages for your station. Any internal caller to your station sees this message
displayed on the second line of their display panel until you answer the call.
Canned message texts are pre-programmed by your system adminitrator. They can be used to indicate your status (or any
other pertinent information) to the calling party. Contact your system administrator for the list of canned message texts used in
your organization. Use the Table on page 85 to list the canned messages available at your telephone.
NOTE! Check with your system administrator whether your Coral system supports the Canned Messages
or Room Status feature. If your Coral system supports the Room Status feature (see page 169),
the Canned Message feature is unavailable.
Press [RoomSt] to access the Canned Messages options.
[RmStsx] Press the required Canned Message soft key ([RmStsx] where x= 0 to 15, see Table on page 85) to activate. The
canned message appears on the top line. When activated, a bullet is shown next to •[RmStsx], and next to
•[RmSts]. To cancel, press the relevant lit •[RmStsx] key again.
NOTE! The first canned message that you activated is the one that appears on the internal caller’s
display panel. Therefore, to set a new message ensure that you cancel all previous messages.
Page 1 10:50 26 May 2007 Company xyz
user name station number
↑→ [RoomSt]
Page 2 Room Status
↓→ RmSts0 RmSts1 RmSts2 RmSts3 RmSts4

Station Telephony Features 85 FlexSet-IP 280S User Guide
Canned Messages
Canned Message - Text and User Access Codes
Canned Message
Number
Soft Key Access Code
(Dial Pad#)
Canned Message Text
0[RmSts0] 7026
1[RmSts1] 7027
2[RmSts2] 7028
3[RmSts3] 7029
4[RmSts4] 7030
5[RmSts5] 7031
6[RmSts6] 7032
7[RmSts7] 7033
8[RmSts8] 7034
9[RmSts9] 7035
10 [RmSs10] 7036
11 [RmSs11] 7037
12 [RmSs12] 7038
13 [RmSs13] 7039
14 [RmSs14] 7040
15 [RmSs15] 7041

Station Telephony Features 86 FlexSet-IP 280S User Guide
Conference (Multi-Party) Calls
Conference (Multi-Party) Calls
Conference calls allow several users to carry on a multi-party conversation. Up to 6 or 15 participants are permitted,
depending on the system hardware assigned to the conference call.
Use the following guide to navigate through this section:
Conference Calls: Meet Me ..........................................................page 87
Conference Calls: Conference Multi-Party Lock ..........................page 88
Conference Calls: Conference View/Release ..............................page 89

Station Telephony Features 87 FlexSet-IP 280S User Guide
Conference Calls: Meet Me
Conference Calls: Meet Me
Joining a conference:
Dial the conference number (7098-7099) at the assigned time.
NOTE! A warning tone will be heard by all the participants.
Adding an additional party to a conference:
1. Press [Xfer].
2. Dial the assigned conference number.
3. Press SPKR or hang up to leave the conference, or remain on the line to stay connected to the conference.
NOTE! A warning tone will be heard by all the participants.
Leaving a conference:
Press SPKR or hang up.
Force Releasing an entire conference:
Press [FrcRls].

Station Telephony Features 88 FlexSet-IP 280S User Guide
Conference Calls: Conference Multi-Party Lock
Conference Calls: Conference Multi-Party Lock
The authorized participant can block other users from joining an ongoing conference. Conference Lock acts as an on/off
switch, locking and unlocking the conference as required.
Press [CnfLck] once to lock the conference. Press again to Unlock.
NOTE! If you “lock” the conference and leave, you will not be able to rejoin until another conference
member “unlocks”.
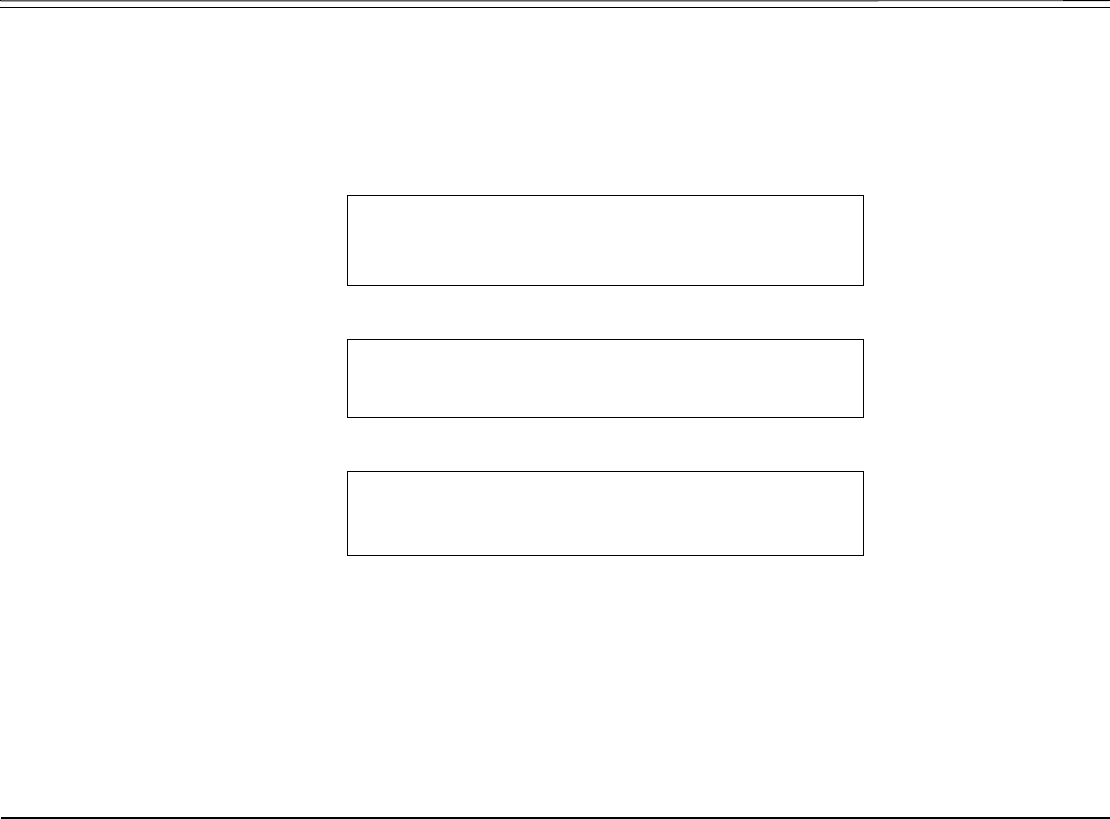
Station Telephony Features 89 FlexSet-IP 280S User Guide
Conference Calls: Conference View/Release
Conference Calls: Conference View/Release
This feature allows an authorized user, from idle, to release a conference participant from an ongoing conference. The feature
also allows viewing the participant list.
Press [CnfIns] to access this feature.
1. Press [CnfIns].
2. Dial the Conference number.
3. Choose [Parti#] and dial the participant number or use the [Next] and [Prev] to scroll between participants and choose which one
should be released.
4. Choose [FrcRls] to activate Forced Release for the participant displayed on the top line. No confirmation tone will be heard.
5. If the Conference contains no participants, the display shows CONF EMPTY on the top line.
6. Press SPKR or [Exit] to exit. You may repeat this process for any number of participants.
Page 1 10:50 26 May 2007 Company xyz
user name station number
→IdCtrl WakeUp [Cnflns] GpCall AcdUcd
Page 2 CONF. INSPECT
ENTER CONF NUM
***** Enter Destination ****
Page 3 RELEASE Participant Name
CONF Conference #
↓Parti# Prev Next FrcRls Exit

Station Telephony Features 90 FlexSet-IP 280S User Guide
COS Switchover
COS Switchover
Each station has a Primary and Secondary Class Of Service (COS), which provides the basis for dialing and feature
capabilities for a particular station. Use this feature to change your Class of Service from Primary to Secondary or vice versa.
Press [COS-Sw] to access this feature.
t
1. Press [COS-Sw].
2. Dial your 4-digit Passcode. To define your passcode, see Setup: Passcode on page 222.
3. Press [Second] to switch to your secondary COS or [Primry] to return to your primary COS.
4. Listen for the confirmation tone.
NOTE! COS Switchover is denied when your phone is in Checkout mode.
Page 1 10:50 26 May 2007 Company xyz
user name station number
→Lock Exec [COS-Sw] Setup Trace
Page 2 COS CHANGE
ENTER PASSCODE
Page 3 YOUR PRIMARY
COS IS: 0
→Primry Second

Station Telephony Features 91 FlexSet-IP 280S User Guide
Directory
Directory
This feature provides a searchable directory listing. Both Shared and Personal records are combined and organized
alphabetically, for easy retrieval. A search result can be dialed at the touch of a key.
The Directory enables:
• Fast search by name
• Number retrieval and autodial
• Add/edit entries to the Personal directory
Shared Directory is composed of the following internal and external numbers:
• Public Speed Call Library
• Hunt Group
• Boss Group
• All stations defined in the system
Personal Directory is a self-built database of external telephone numbers. It is accessible only from the station at which it
was entered.
An entry to the Personal Directory is distinguished from a Shared Directory entry by a preceding asterisk.
Calls arriving to your station are matched against entries to your Personal Directory. Incoming calls from contacts listed in the
directory are shown on the display as they appear in the Directory.

Station Telephony Features 92 FlexSet-IP 280S User Guide
Directory
To search through the Directory:
NOTE! Both Shared and Personal directories are accessed by the first constituent of an entry. If an entry
consists of a given name and a family name, the search will look for the attribute listed first.
1. Dial feature code ## or #1994.
2. For Personal Directory contacts press [Priv] or dial the feature code #9.
3. Enter all or part of the name of your contact party using the alphanumeric keys (see Keypad – Alphabetic Mode and
Editing Keys on page 94).
You may also use the volume keys, [Next] and [Prev] to scroll through the Directory.
4. While the name or number of the retrieved contact party is displayed, you can do one of the following:
• Place a call by pressing [Dial] or asterisk (*) - see steps below.
• Modify a Personal Directory contact information by pressing [Edit] or dialing #2. See To modify an entry to the
Personal Directory: on page 92.
• Permanently remove a Personal Directory entry by pressing [Remove] or dialing #0. See To remove an entry from the
Personal Directory: on page 93.
To place a call from the Directory:
To place a call from within the Directory, press [Dial] or asterisk (*) while the name or number of the retrieved contact party is
displayed.
To modify an entry to the Personal Directory:
1. Press [Edit] or dial #2 while the name or number of the retrieved contact party is displayed.
2. Edit the name using the alphanumeric keys. Up to 16 characters are allowed (press [LoCase], [UpCase], [Char], [Digit], [Space],
[BckSpc] as required). See Keypad – Alphabetic Mode and Editing Keys on page 94.
3. To edit the number press [Number] or the key.
4. To edit the name press [Name].

Station Telephony Features 93 FlexSet-IP 280S User Guide
Directory
5. To save the changes press [Save] or press the key.
6. To place a call press [Dial] or asterisk (*). Save the changes and call the saved contact.
To remove an entry from the Personal Directory:
To permanently delete an entry (personal directory only), press [Remove] or dial #0 while the entry is displayed. You will not be
able to restore the deleted entry. The entry subsequent to the one removed appears on the display.
To add a new entry to the Personal Directory:
1. Dial feature code ## or #1994.
2. Press [New] or dial #1.
3. At the prompt, enter the name of your contact party using the alphanumeric keys. Up to 16 characters are allowed (press
[LoCase], [UpCase], [Char], [Digit], [Space], [BckSpc] as required). See Keypad – Alphabetic Mode and Editing Keys on page 94.
4. Press [Number] or press the key.
5. At the prompt, enter the telephone number of your contact party (do not enter the outside line access code).
6. Press [Save] or press the key to save the entry (an asterisk marks the saved entry as a Personal one).
OR
Press [Dial] or press asterisk (*) to save the entry and call the saved contact.
NOTE! Any attempt to make an entry in excess of the number of entries allowed by the system, or to
assign a dial number already existing on the Directory to a new contact, will fail.

Station Telephony Features 94 FlexSet-IP 280S User Guide
Directory
Keypad – Alphabetic Mode
Use the keypad to make new entries or navigate through the directory to a specific entry. The cursor advances automatically
when a different key is pressed. If two consecutive letters are on the same key, wait for the cursor to disappear before
proceeding to the next key. The following table indicates the key presses used to input the required letters. This table may
override the designations on your keypad.
For example, to enter “ANN” press: [2 ABC] [6 MNO] [6 MNO] [WAIT] [6 MNO] [6 MNO]
AN N
KEYS CHARACTERS
Press: 1 Time 2 Times 3 Times 4 Times
[1] ––––
[2 ABC] ABC–
[3 DEF] DEF–
[4 GHI] GH I –
[5 JKL] JKL–
[6 MNO] MNO–
[7 PQRS] PQRS
[8 TUV] TUV–
[9 WXYZ] WX Y Z
[*] ––––
[0] ––––
[#] ––––
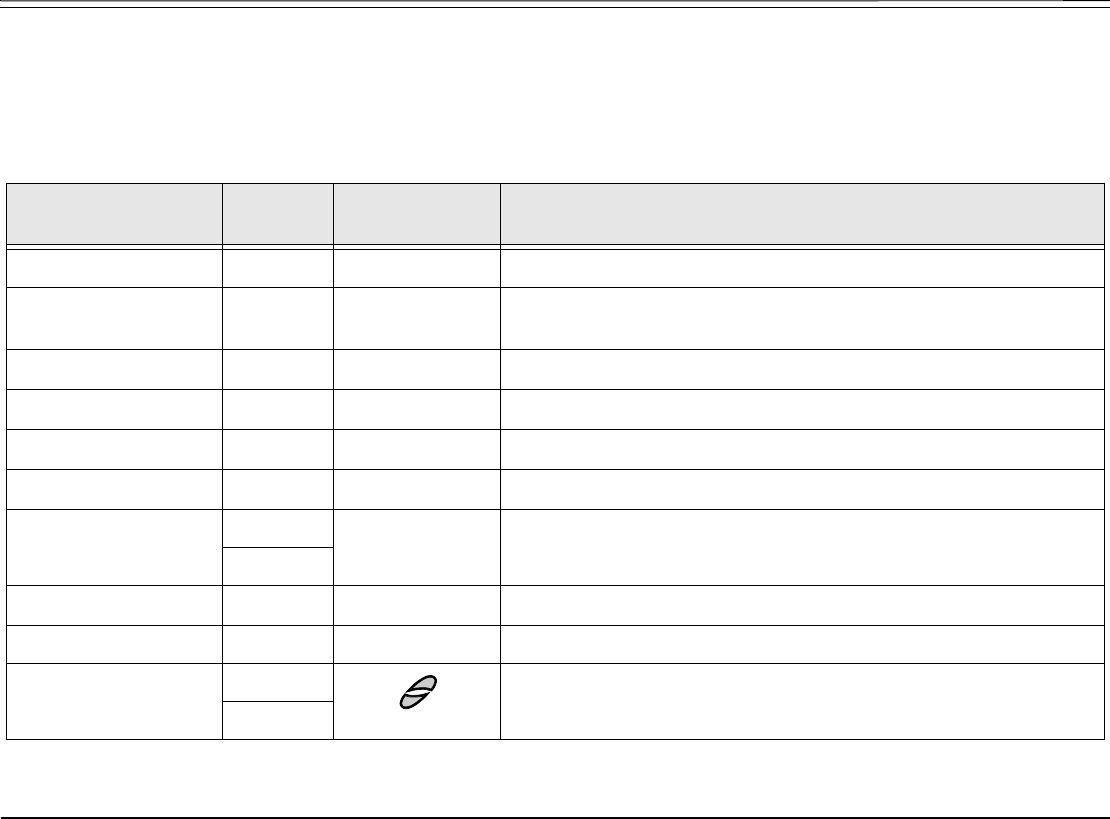
Station Telephony Features 95 FlexSet-IP 280S User Guide
Directory
Editing Keys
The Directory service allows you to easily retrieve a telephone number by keying a name of your contact and to place a call to
the search result as soon as the match is found. The available key combinations are listed in the table below.
Options marked with a diamond (♦) are applicable for the Personal Directory only.
Option Soft Key Access Code
(Dial Pad#)
Description
Personal Directory ♦[Priv] #9 Access the personal directory subset only.
Delete Entry ♦[Remove] #0 Delete the displayed personal entry.
(There is no option to restore the deleted entry.)
New Entry ♦[New] #1 Add a new entry to your Personal Directory.
Modify Entry ♦[Edit] #2 Edit the displayed personal entry.
Backspace ♦[BckSpc] #3 Erase the last entered character or digit.
Space ♦[Space] #4 Insert a space between words.
Name/Number [Number] #5 Toggle between name and number of your contact.
To program a Name/Number toggle button, use feature code #128.
[Name]
Save ♦[Save] N/A Save the displayed contact.
Send [Dial] * Place a call to the displayed contact and save.
Scroll [Next] Scroll through the Directory entries, contact by contact (entries are
alphabetically organized).
[Prev]
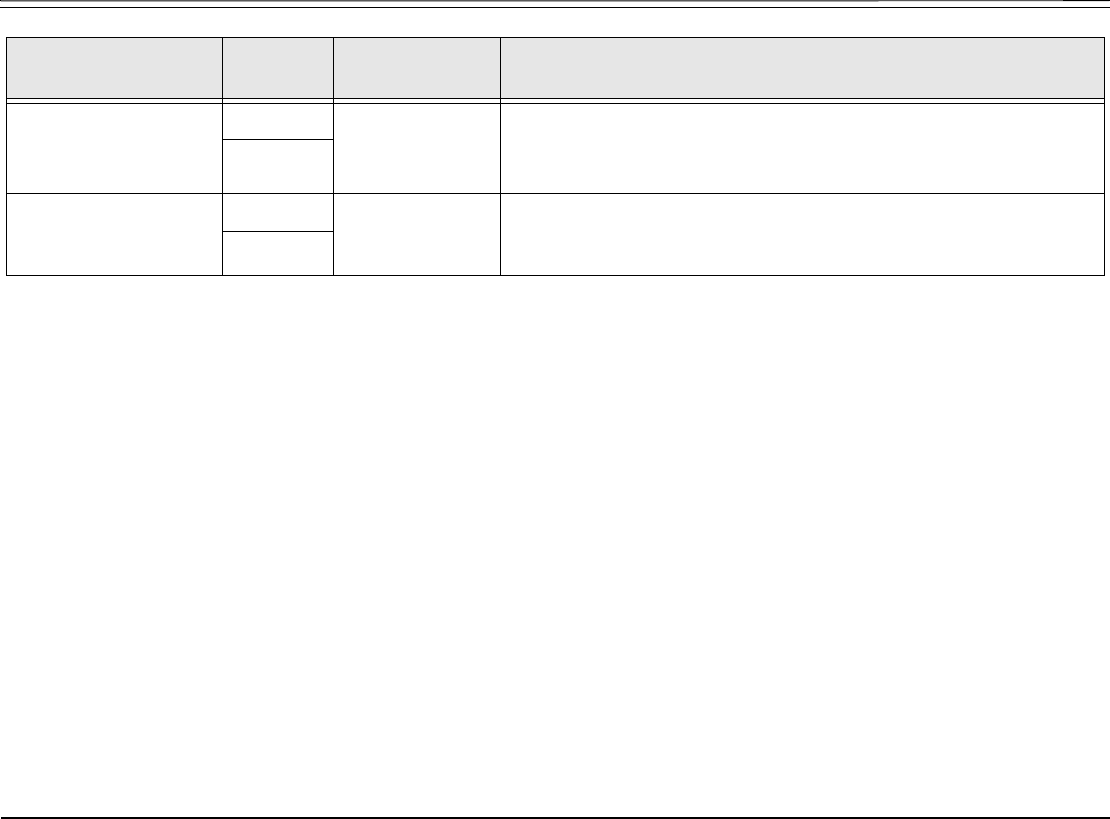
Station Telephony Features 96 FlexSet-IP 280S User Guide
Directory
Caps Lock ♦
Uppercase/Lowercase
Characters
[LoCase] Designated DSS
button
Toggle between uppercase and lowercase characters.
To program the Caps Lock toggle button, contact your system
administrator for the Caps Lock feature code.
[UpCase]
Character/Digit ♦[Char] Designated DSS
button
Toggle between digits and characters.
To program the Character/Digit toggle button, contact your system
administrator for the Character/Digit feature code.
[Digit]
Option Soft Key Access Code
(Dial Pad#)
Description
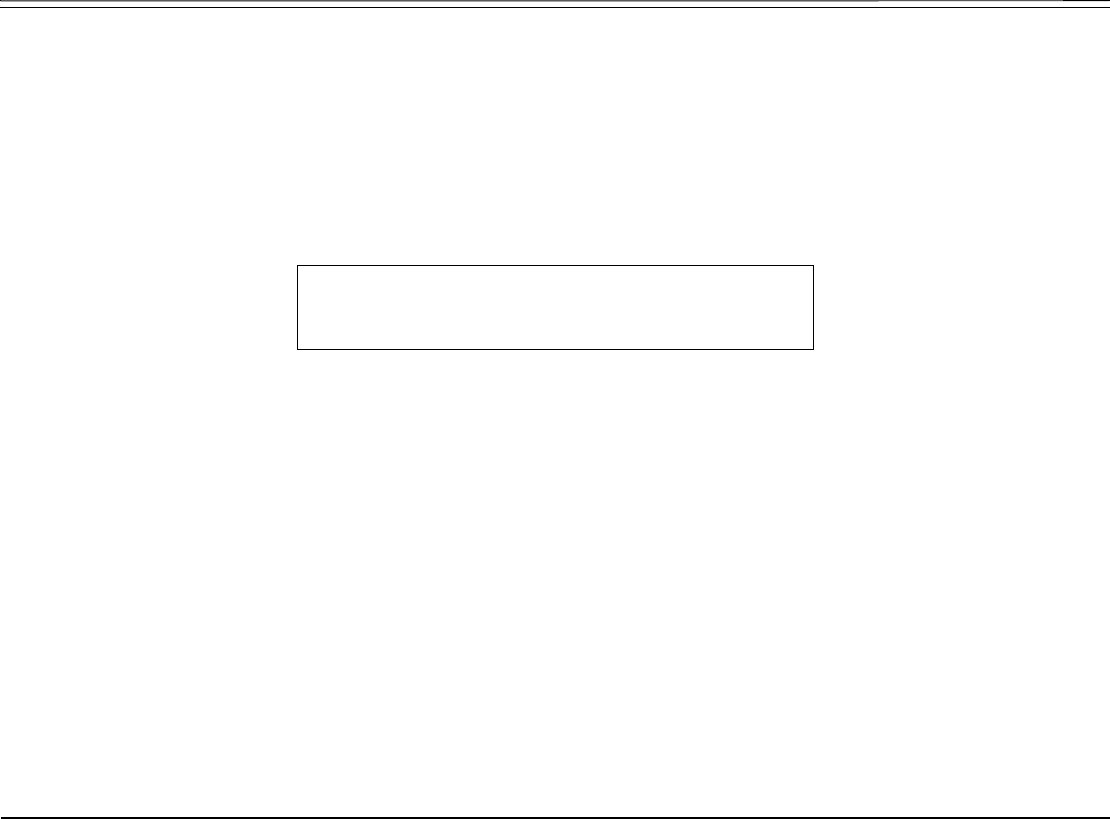
Station Telephony Features 97 FlexSet-IP 280S User Guide
Divert Call
Divert Call
Enables you to divert an incoming call while actively engaged in another call, or while an idle station is ringing, without
answering it. The call you are engaged in is not interrupted, nor is the incoming caller aware of the diversion. The destination
can be any permissible dial number in the system. Typically Divert Call can be used to send an incoming call to a boss group,
a secretary, or to voice mail, by making Library the destination of the diversion. This feature can be utilized only if you have
a programmed DIVERT CALL key with a destination upon receiving an incoming call. The caller name or number is
displayed on the top left.
To activate during ringing:
1. Press a preprogrammed DIVERT CALL to XXXX key.
2. The incoming call is diverted to the programmed destination; the current call continues uninterrupted or the station
remains idle.
NOTES!
•See page 153 for instructions on how to program a key. To program a DIVERT CALL key, use feature code
#1445, followed by the destination number. You may program as many keys as you want, each with a different
destination.
• Possible destinations are operator, station/group, network number, public speed call library, DVMS pre-recorded
message, UNA/central bell or group call.
• Your station must be defined as multi-appearance to be able to divert a new call while engaged in a previous one.
caller #
↓→ DND Mute FwdAll All-E CallWt
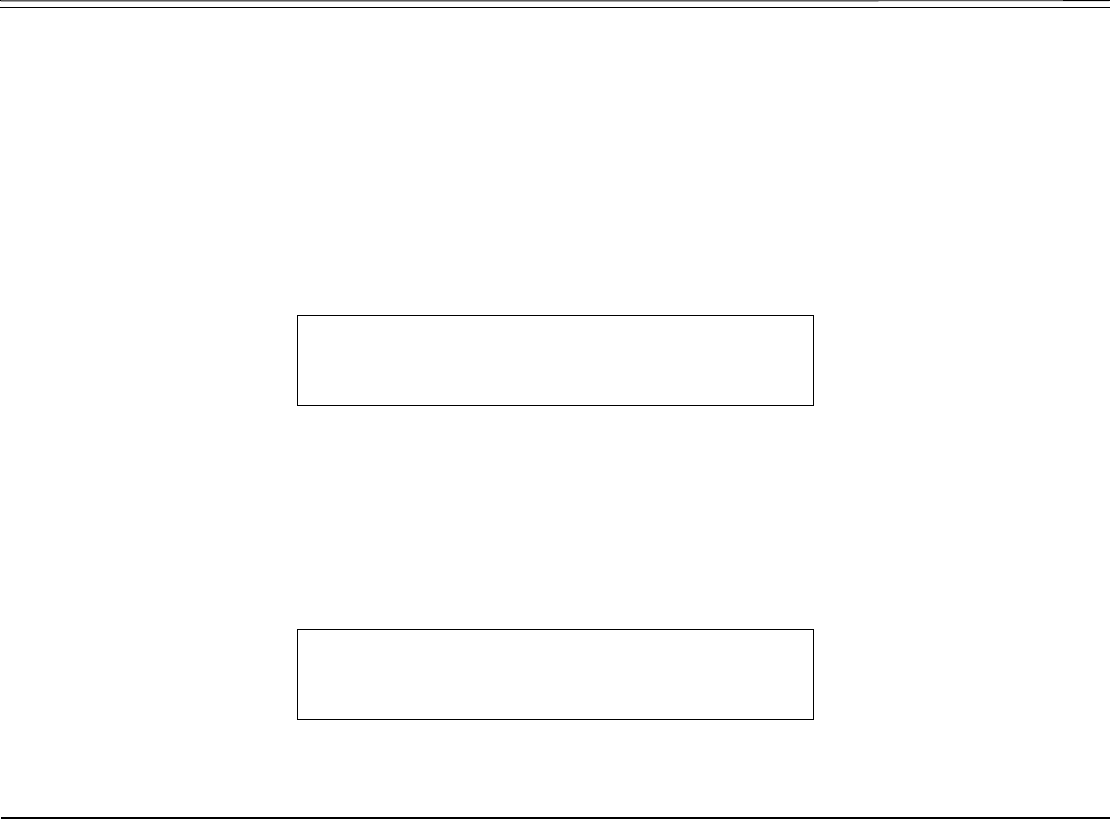
Station Telephony Features 98 FlexSet-IP 280S User Guide
Do Not Disturb (DND)
Do Not Disturb (DND)
Use the Do Not Disturb feature to block all incoming calls to your station. When blocked, you can still receive Voice Page
calls and you are still able to make outgoing calls.
Any call forwarding to your telephone is automatically cancelled when you activate the DND feature. Only a station that has
DND Override privilege will be able to call your telephone.
When the feature is activated, the calling station will see the DONT DIST message (or UNATTENDED for Attendant) and hear
the reorder tone.
This feature is accessible via [DND] from idle or when receiving an incoming call.
To activate, press the [DND] toggle key once. To cancel, press the [DND] toggle key again.
NOTE! Should you hear a reorder tone, DND is denied at your station (as defined by the Class of
Service).
When the feature is activated, a bullet (or thick arrow) appears next to [DND] and a *DND* message briefly appears on the top
line to remind you that the feature is activated.
10:50 26 May 2007 Company xyz
user name station number
↓→ Msg CaLLog Fwd [DND] FlexiC
10:50 26 May 2007 Company xyz
user name station number
↓→ Msg CaLLog Fwd •[DND] FlexiC

Station Telephony Features 99 FlexSet-IP 280S User Guide
Do Not Disturb (DND)
Do Not Disturb Override
This feature can be applied to stations that are idle, but have been set to Do Not Disturb or Unattended. After dialing a station
and receiving a reorder tone, if the DONT DIST or UNATTENDED message appears on the top line, an authorized user can
override the DND using this feature and your call can be put through to the station.
1. Press [DNDOvr] or [Brk-In].
2. Listen for the ringback tone and wait for an answer.

Station Telephony Features 100 FlexSet-IP 280S User Guide
ELA (Extension Line Appearance)
ELA (Extension Line Appearance)
Similar to the Boss Group feature (see page 64), an ELA Group is a number of stations operating together in which the
individual stations share a common line appearance. Unlike a Boss Group, the ELA Group number is the extension number of
the first (main) ELA member station. Therefore, there are no ELA NPL type numbers reserved in the system.
Up to 32 ELA line keys may be programmed on each group member station. When an ELA-defined line key flashes, it flashes
at all the member stations. Any member may answer the call by pressing the flashing line key. The line key remains lit as long
as the call is in progress. In addition to flashing, member stations may be alerted to incoming calls by an accompanying ring.
The ring setting (whether the ring is immediate, delayed, or no ring) can be determined at each member station if at least one
line key is defined by the user.
If the ELA call is put on hold, the line key flashes at all the member stations and any member (provided the privacy feature is
not activated) may break-in to the call by pressing the flashing line key. To place a call, a member may press any available
line key; the line key remains lit at all member stations for the duration of the call.
Use the following guide to navigate through this section:
ELA Group Line Keys: Programming .........................................page 101
ELA Groups: Using .....................................................................page 103
ELA Groups: Privacy ..................................................................page 105
ELA Groups: Exclusive Hold.......................................................page 106

Station Telephony Features 101 FlexSet-IP 280S User Guide
ELA Group Line Keys: Programming
ELA Group Line Keys: Programming
Each FlexSet in an ELA Group can be programmed with up to 32 ELA line keys. To learn about the different uses of ELA line
keys, see below.
NOTE! In order for ELA calls to be received on the main ELA station, the station must be defined as multi-
appearance and be a member of an ELA group. You may belong to more than one ELA group.
To Program ELA Line Keys:
1. Press [Setup] [ProgKy].
2. Press the DSS key you want to program as the ELA line key.
3. Dial the ELA LINE feature code (default: #17718).
4. Dial the ELA Group number (main ELA station extension number).
5. Continue to enter the Ring State (see below).
6. Enter the line key number (00 to 31). Two digits must be entered.
7. Press the selected DSS key again.
8. Press SPKR to release.
ELA: Defining the ELA Line Keys Ring State
Only one type of ring state may be defined on your station. (If your station is member of more than one ELA group, you can
define different ring states for each ELA group).
Although you are prompted to set the ring state each time when programming individual ELA line key (see above), you can
use this feature to override any previous ring state definition and set one ring state for all the ELA line keys. Note that the last
ring state defined (whether using this ELA feature or when programming an ELA line key) will apply to all the ELA line
keys.
NOTE! Regardless of the ring state defined for your station, the line key flashes for all incoming ELA
Group calls and remains lit for the duration of the call.
Station Telephony Features 102 FlexSet-IP 280S User Guide
ELA Group Line Keys: Programming
Press [ELA] from idle and then dial the ELA Group number to define the ring state of ELA line keys.
[Yes] Ye s is used to define ELA line keys to immediately ring at your station upon receiving an ELA Group call.
[No] No is used to define ELA line keys to not ring at your station upon receiving an ELA Group call.
[Delay] Delay is used to define ELA line keys to ring at your station upon receiving an ELA Group call after a
system-defined timeout period.
Page 1 10:50 26 May 2007 Company xyz
user name station number
↑→ RoomSt [ELA]
Page 2 EXT. LINE APPEAR
***** Enter Destination ****
Page 3 EXT. XXXX
→Yes No Delay

Station Telephony Features 103 FlexSet-IP 280S User Guide
ELA Groups: Using
ELA Groups: Using
Calling an ELA Group:
• Dial the ELA Group number.
NOTE! The line key LED of the ELA main station as well as all group members flashes and may also ring
(see ELA: Defining the ELA Line Keys Ring State on page 101).
Making calls:
1. Press a free ELA LINE key.
2. Dial the required number.
NOTE! The line key LED of the ELA main station as well as all group members changes from off to
steady on for the duration of the call.
Receiving calls:
When the line flashes (note that the telephone may also ring - see page 101):
1. Any ELA member may press the flashing LINE key or, if phone rings, lift the handset.
2. Answer the call.
NOTE! The line key LED of all group members now changes from flashing to steady on for the duration of
the call.
Putting a call on hold:
• Press a programmed HOLD key at your station.
NOTE! If Exclusive Hold is defined at your station, then pressing Hold causes an exclusive hold state
such that the call can only be retrieved from your station. See ELA Groups: Exclusive Hold on
page 106.

Station Telephony Features 104 FlexSet-IP 280S User Guide
ELA Groups: Using
Retrieving a call from on hold:
• Any member of the ELA Group may press a flashing LINE key, provided that the Exclusive Hold feature was not
activated for the call (see ELA Groups: Exclusive Hold on page 106).
Breaking in to an ELA call:
• Any member of the ELA Group may break-in to a call by pressing the lit LINE key, provided that the Privacy feature
was not activated for the call (see ELA Groups: Exclusive Hold on page 106). Both parties hear a break-in warning
tone before you join the conversation.

Station Telephony Features 105 FlexSet-IP 280S User Guide
ELA Groups: Privacy
ELA Groups: Privacy
As an ELA Group member you can put your telephone into Privacy mode. This prevents other FlexSet stations within ELA
Group from joining or breaking in to your conversations. The feature can be utilized for a specific ELA call or for all ELA
calls.
Operating Privacy for all ELA calls:
1. To activate Privacy, press [Setup] [Privac].
The message PRIVACY is displayed.
When this feature is activated, a bullet appears next to [Privac].
2. To cancel Privacy, press [Privac] again.
The message NO PRIVACY is displayed.
You may override the station Privacy setting on a call-by-call basis. Privacy is a toggle feature. Thus, if your station is in
Privacy mode, you may remove the Privacy restriction and allow others to join your conversation; alternatively, if your
station is not in Privacy mode, you may apply Privacy to a specific call.
NOTE! Once Privacy is defined for your station (for all calls) a bullet is displayed next to [Privac], even if the
key is pressed to temporarily override the Privacy feature. However, when your call is completed
the telephone will return to the permanent status, private or non-private, as previously defined for
all calls.

Station Telephony Features 106 FlexSet-IP 280S User Guide
ELA Groups: Exclusive Hold
ELA Groups: Exclusive Hold
As an ELA Group member, you can put your telephone into Exclusive Hold mode. This ensures that a call you place on hold
can be retrieved only at the station where Exclusive Hold was originally placed. If Exclusive Hold is cancelled, the call put on
hold can be retrieved by any other member of the ELA Group, by pressing the flashing LINE key. The feature can be utilized
for a specific call or for all calls.
Operating Exclusive Hold for all ELA calls
1. To activate Exclusive Hold, press [Setup] [ExHold].
The message EXCLUSIVE HOLD is displayed.
When this feature is activated, a bullet appears next to [ExHold].
2. To cancel Exclusive Hold, press [ExHold] again.
The message NON EXCL. HOLD is displayed.
You may override the station Exclusive Hold setting on a call-by-call basis. Exclusive Hold is a toggle feature. Thus, if your
station is in EXCLUSIVE HOLD mode, you may remove the Exclusive Hold restriction and allow others to pick up your held
call; alternatively, if your station is not in EXCLUSIVE HOLD mode, you may apply Exclusive Hold to a specific call. This
is done by pressing [ExHold] during a call before pressing HOLD. Press this key to toggle the feature on and off. This key can be
pressed as many times as necessary. If your telephone is not in Exclusive Hold mode for all calls, press [ExHold] before you
press [Hold]. Press [Hold] to place a call into Exclusive Hold. The LINE on hold will remain steady on at all other FlexSets in the
ELA Group, and the call will only be retrievable from your station.
Transferring call to a group member (during conversation):
Once Exclusive Hold is defined for your station (all calls) a bullet is displayed next to [ExHold], even if the key is pressed to
temporarily override the Exclusive Hold feature. However, when your call is completed the telephone will return to the
permanent status, as previously defined for all calls. If your telephone is in Exclusive Hold mode for all calls, press [ExHold]
before you press [Hold].
1. Press [Hold]. The LINE on hold will flash at all FlexSets in the ELA Group.
2. Listen for the confirmation tone.
3. Inform the party to whom you wish to transfer on which line the call is on hold.
Station Telephony Features 107 FlexSet-IP 280S User Guide
Executive Privilege
Executive Privilege
Use this feature to temporarily copy all the COS features from any system station to your FlexSet, enabling you to use
features or to dial numbers restricted at your current station. After one call, the current FlexSet returns to its previous COS.
Some FlexSets may be denied the Executive Privilege feature, as defined by the current Class of Service.
Press [Exec] to access this feature.
Operating Executive Privilege:
1. Press [Exec].
2. Dial the station number.
3. Dial the passcode of that station (see Setup on page 222).
Now the current FlexSet resembles the other station. Continue to dial as you would from that station.
Page 1 10:50 26 May 2007 Company xyz
user name station number
→Lock [Exec] COS-Sw Setup Trace
Page 2 EXECUTIVE
*** Enter Dial # ***
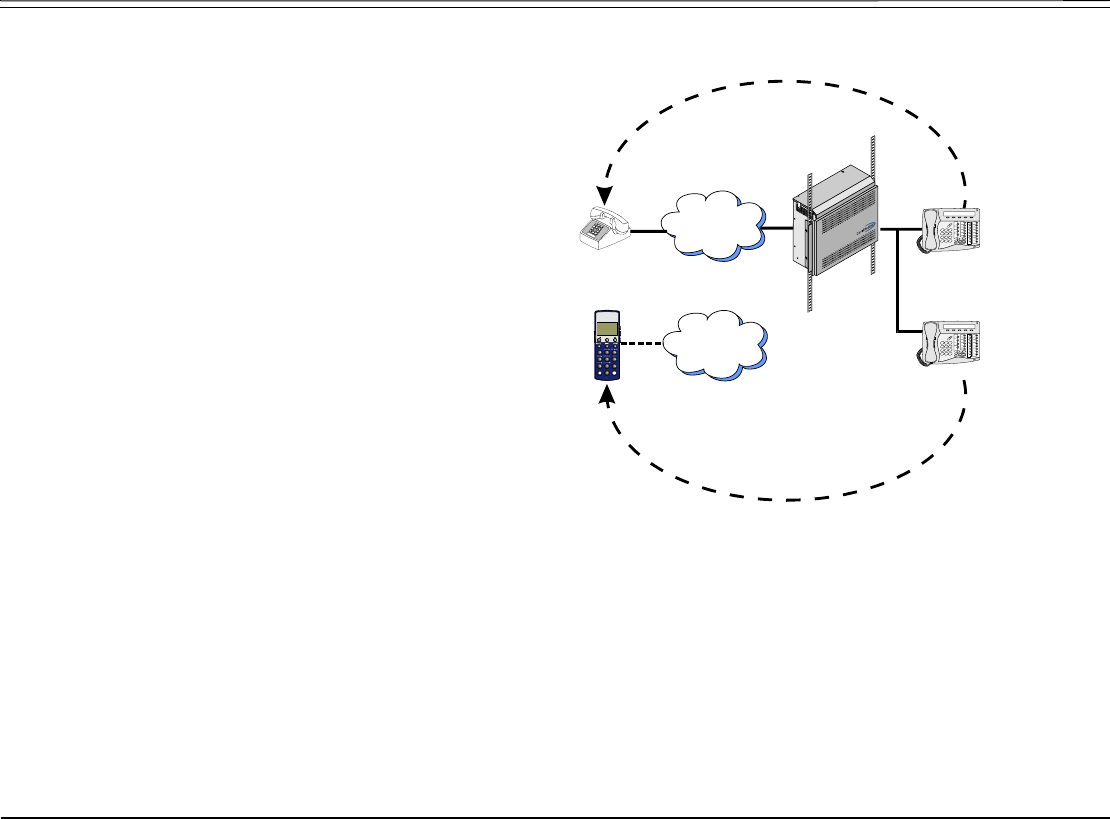
Station Telephony Features 108 FlexSet-IP 280S User Guide
FlexiCall
FlexiCall
Calls ringing at your Coral station can
simultaneously ring at any designated internal or
external phone (such as home phone, mobile, and
second station) and can be answered at either
phone. Your FlexSet can distinguish between calls
arriving from an internal or external source when
ringing at the remote destination (see Internal/
External FlexiCall on page 109). Calls can be
transferred back to the original FlexSet anytime
during the call.
The FlexiCall feature is an ideal solution for office
applications requiring a “courtesy” telephone, and
applications requiring an extension telephone to a
system FlexSet. The FlexiCall feature may be used
also to “semi-connect” ancillary devices such as
answering machines, fax machines, or data
modems to your FlexSet, without using a separate
telephone number.
PSTN
Cellular
FCN
ON/OFF
ENTER
1
4
7
2
5
8
0
3
6
9
Home Phone
Cellular Phone
Office Phone 1
Office Phone 2
NOTES!
• The remote destination rings even when your office FlexSetis disconnected.
• The remote destination does not ring if any of the following features is activated at your Coral station: Do Not
Disturb, Call Forward All, Call Forward Busy, Call Forward Timed, Auto Answer.
• The remote destination does not ring for the following incoming calls: Group call, Bell/UNA, Reminder, Wakeup,
Voice Page, Boss Group and ELA Group calls (except for the first ringing member defined with the FlexiCall
feature).
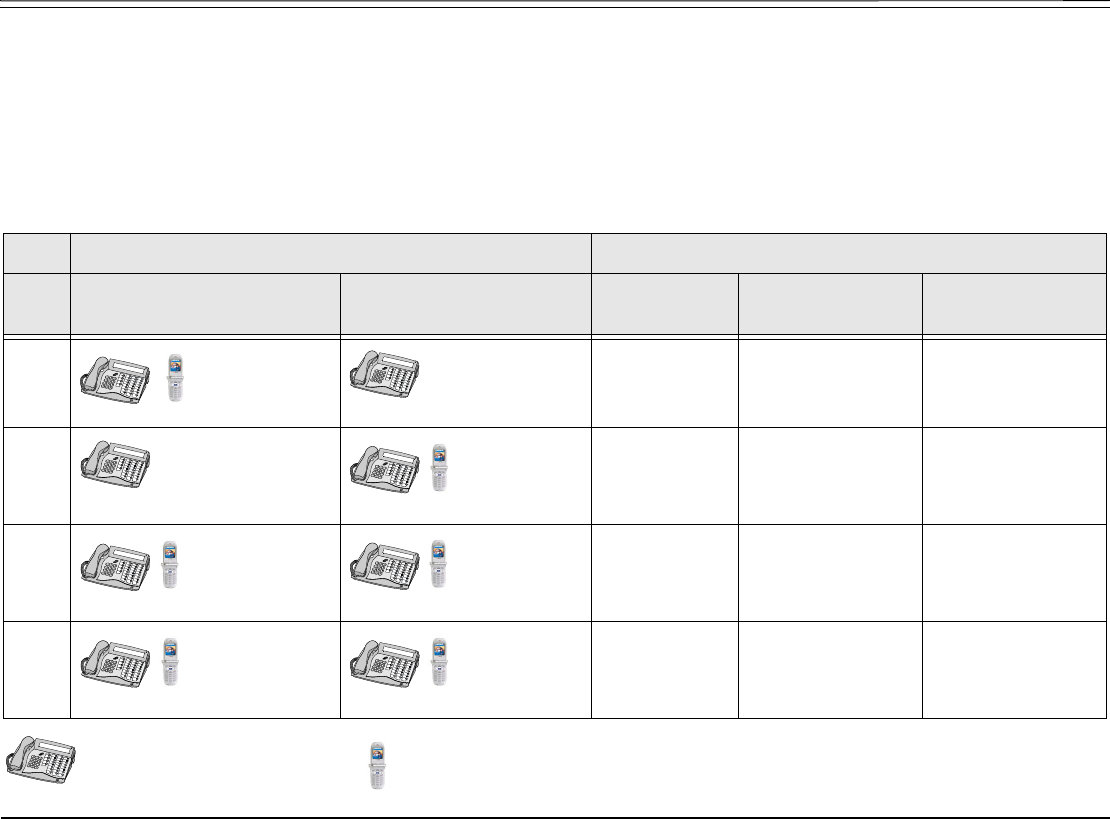
Station Telephony Features 109 FlexSet-IP 280S User Guide
FlexiCall
Internal/External FlexiCall
You can distinguish between calls arriving from an internal or external source when operating the FlexiCall feature.
You can set calls arriving to your FlexSet to concurrently ring at your remote phone as follows (see table below):
• Internal and External calls ring at your remote phone.
• Only internal calls ring at your remote phone.
• Only external calls ring at your remote phone.
= your Coral Station = your remote phone
To set Set FlexiCall options as follows:
Case Internal Calls ring at: External Calls ring at: FlexiCall All
Set to:
FlexiCall
Internal Set to:
FlexiCall
External Set to:
1
Disabled Activated Disabled
2
Disabled Disabled Activated
3
Enabled Irrelevant Irrelevant
4
Disabled Activated Activated

Station Telephony Features 110 FlexSet-IP 280S User Guide
FlexiCall
Press [FlexiC] to access the FlexiCall options.
[All] All Incoming Calls is used to define your remote destination for all incoming calls.
[Extern] External Calls is used to define your remote destination for all incoming external calls.
[Intern] Internal Calls is used to define your remote destination for all incoming internal calls.
To Operate FlexiCall:
1. From idle press [FlexiC].
2. Choose the required FlexiCall option ( [All], [Extern], or [Intern] ).
3. To set FlexiCall, dial your remote destination number (internal number or Public/Private Library number) at which calls
will ring simultaneously with your Coral station.
A remote destination can be: an operator, station, network number, UNA/ Central Bell, or external number (stationary or
cellular) via Public/Private Speed Call Library.
• To cancel FlexiCall, choose [Cancel];
• To change the FlexiCall destination, choose [Dest] and dial the remote destination number.
4. Listen for the confirmation tone.
NOTE! [Intern] and [Extern] calls may be routed to different destinations. If [All] is defined, it overrides the
settings for Internal and External.
Page 1 10:50 26 May 2007 Company xyz
user name station number
↓→ Msg CaLLog Fwd DND [FlexiC]
Page 2 FlexiCall Remote Dest
→All Extern Intern

Station Telephony Features 111 FlexSet-IP 280S User Guide
FlexiCall
Receiving Calls at a Remote Destination
If your remote destination is located outside the enterprise (PSTN or public cellular network), you can answer all your FlexSet
calls from your remote destination. Once you answer a call at your remote destination, your remote phone will be activated as
a part of the Coral system and you have the following options:
Function Dial Use to:
Place a new call *1 Listen for a dial tone indicating that you can place a call to a new contact. Your original
conversing party will be disconnected.
Transfer call *2 A dial tone prompts you to enter the required transfer number. Transfer can be screened or
unscreened. To return to the original conversing party (when transfer destination is busy or
does not answer) dial *2 again.
Switch to Broker/
Consultation/3-Way
Conference call
*2 A dial tone prompts you to enter the required third party number. Depending on your Class
of Service definitions, one of the following party functions will be activated (see Broker/
Consultation/3-Way Conference call on page 134):
Broker Call, Consultation, 3-Way, or
Combination of Broker/Consultation/3-Way Conference Call
Divert call to Coral
station
*3 A dial tone prompts you to enter a divert number. You will be disconnected and your
conversing party will be transferred to the divert number. Your number will not show on the
divert party’s display.
Access voice mail/IVR *4 For instructions on accessing voice mail from an IRSS phone, see page 112.
Divert call to your
FlexSet
*5 You will be disconnected and your conversing party will be transferred to your Coral
station. Your number will not show on your FlexSet’s display. If your station does not
answer within the system-defined time-out period, the call will return to your remote phone.
Call Recording/
Help Requesting
*6 Used to Start/Stop Recording incoming calls (requires a system-wide defined Navigator application).
Or send Help request (requires a pre-selected system-wide defined keyset station), see page 127.
Station Telephony Features 112 FlexSet-IP 280S User Guide
FlexiCall
To activate voice mail/IVR from your remote phone:
You can access your voice mailbox, retrieve messages and setup voice mail options for your Coral station.
1. Answer the remote call.
2. Dial *1. Listen for the dial tone. Your original party will be released.
3. Dial the voice mail or IVR dial number (see table below).
4. At the automated voice mail answer, dial the voice mail remote access code followed by your station number to access
your station’s voice mail box.
5. Dial *4 as soon as the automated voice mail answers. This allows the system to recognize the voice mail (or IVR)
commands.
6. Choose the required option from the voice mail or IVR system menu.
NOTE! Contact your system administrator for the voice mail (IVR) dial number and voice mail remote
access code. Use the table below to record that number and code:
Voice Mail (IVR) Numbers/Codes
Voice Mail (IVR)
Dial Number
Voice Mail Remote
Access Code


Station Telephony Features 114 FlexSet-IP 280S User Guide
Group Calls
Group Calls
Group Calls are conference calls, allowing participation of up to 100 members at a time. Two options are offered:
• Preset Group Calls comprised of predefined members
• Add On (Temporary) Group Calls containing no predefined members, where participants are added from the Group Call
initiator station
Each Group Call has its own unique dial number. Group Call members can be internal stations or external numbers dialled
through Public Library numbers.
When a Group Call is placed, all stations defined as registered members for that particular group ring. As a member joins the
conference (i.e. answers the incoming group call ring), all actively participating members can be alerted by a defined warning
tone. Unanswered stations will continue ringing until the defined timeout period is completed, without disturbing the
conference.
Depending on the system settings, a warning tone may be heard by a conference initiator upon activating the group call, and
by all the participants every time a participant joins (or leaves) an ongoing conference. Group members may be blocked from
joining the conference once the ringing has stopped. The conference may, if desired, be locked to those users that are not
listed on the system as the conference registered members. When the Group Call is not locked, the non-registered members
may join an ongoing conference by dialing the Group Call access code, or be connected by a registered member.
The conference is controlled by a user defined as the Group Operator.
Participants may join a conference with the ability to speak and hear each other, or in the Mute mode to only hear other group
members. In case of a muted conference, only the Group Call initiator has the right to speak. Other participants can be granted
permission to speak by the Group Operator. These options are set in the Group Call definitions. An authorized user can force
release a participant or terminate an entire conference.
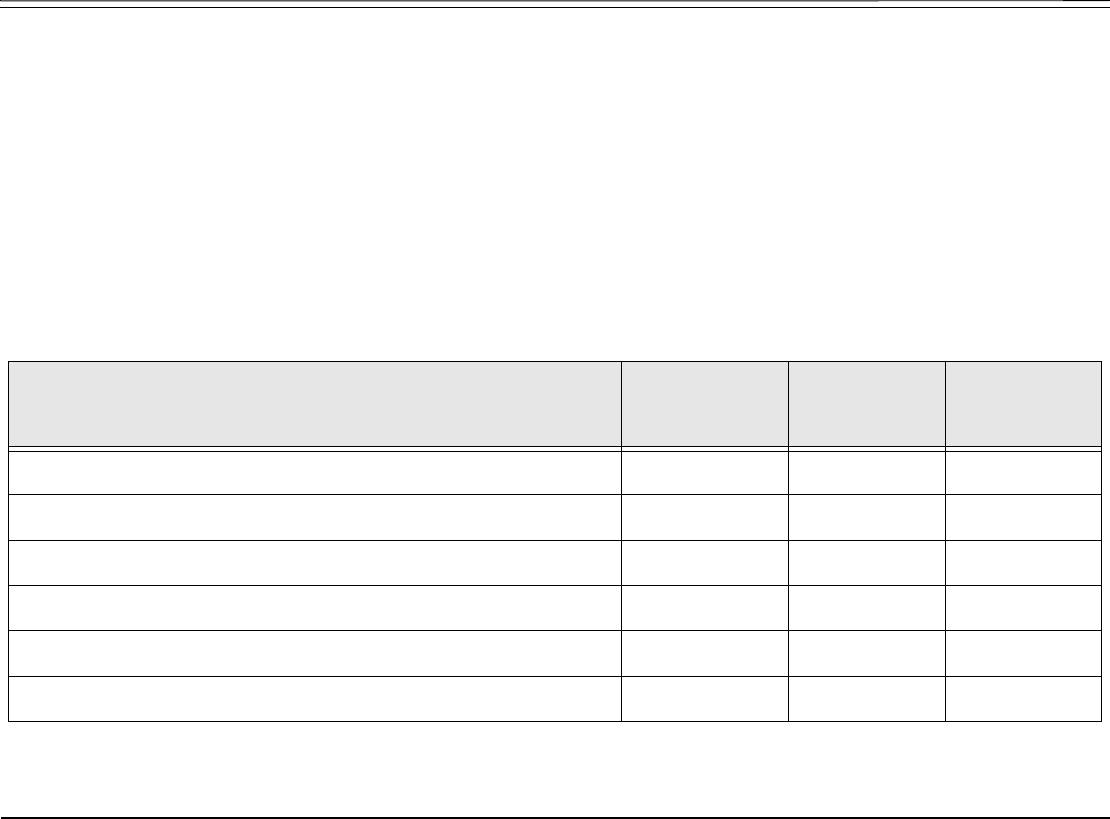
Station Telephony Features 115 FlexSet-IP 280S User Guide
Group Calls
Defining a Group Call Operator:
If you are authorized to be a Group Call Operator you can define another (COS defined) station as the operator of a group call.
1. Press the preprogrammed Group Call Operator DSS key, or dial the Group Call operator code (#17716).
See Programming: Feature Keys on page 153 for instructions on how to program a DSS key.
2. Dial the keyset station number.
NOTE! If you are authorized to be a Group Call Operator you can also dial your own station number to
define yourself as the group call operator.
Group Call Access Codes
Use the following form to write in your group call details:
Group Call Members Group
Operator
Group Call
Access Code
(group #)
Conference
Number
(conf #)
Station Telephony Features 116 FlexSet-IP 280S User Guide
Group Calls
Use the following guide to navigate through this section:
Group Calls: Preset Conference Activation ................................page 117
Group Calls: Temporary Conference Activation .........................page 118
Group Calls: Joining ................................................................... page 119
Group Calls: Adding Participants (when not part of the Call).....page 120
Group Calls: Submitting Request to Speak................................page 122
Group Calls: Controlling Permission to Speak ...........................page 123
Group Calls: Forced Release of a Participant ............................page 124
Group Calls: Forced Release of an Entire Group Call ...............page 125
Press [GpCall] to access the Group Call options.
[PrtRel] Participant Release is used to allow an authorized user to release a participant from an ongoing conference.
The feature does not allow the user to view the list of participants. See page 124.
[GrpRel] Group Release is used to allow an authorized user to release the entire group call. See page 125.
[AddOn] Temporary Add On. The Temporary Conference feature allows an authorized user to establish an Add-On
(Temporary) Group Call by adding participants as the conference is being set up. See page 118.
Page 1 10:50 26 May 2007 Company xyz
user name station number
→IdCtrl WakeUp CnfIns [GPCall] AcdUcd
Page 2 Group Call Conference
→PrtRel GrpRel AddOn

Station Telephony Features 117 FlexSet-IP 280S User Guide
Group Calls: Preset Conference Activation
Group Calls: Preset Conference Activation
Preset Group Calls are comprised of a number of specified members whose stations ring simultaneously when an assigned
Group Call number is dialled. This feature allows a conference initiator to contact all the registered members with one button
press. The maximum number of participants is 100, depending on the system configuration.
Calling a Preset Group:
1. Press the preprogrammed Group Call DSS key, or dial the Group Call access code.
See Programming: Feature Keys on page 153 for instructions on how to program a DSS key.
2. All the member stations start ringing.
3. Wait for members to join, listen for the warning tone (if defined system-wide) every time a member answers.
4. Start speaking when the CONF COMPLETED message appears momentarily on the display (the message indicates that all
non-answered stations have stopped ringing).
5. If none of the member stations answered, the NO ANSWER message appears.
NOTE! For Group Call access code, see the table on page 115.

Station Telephony Features 118 FlexSet-IP 280S User Guide
Group Calls: Temporary Conference Activation
Group Calls: Temporary Conference Activation
The Temporary Conference feature allows an authorized user to establish an Add-On (Temporary) Group Call by adding
participants as the conference is being set up. For this purpose, vacant Group Calls containing no preset members are defined
system-wide. The Group Call initiator adds members from his/her station. A Temporary Group Call may include internal
stations and/or external telephone numbers via a public speed call library. A few preset group calls may be joined to an Add-
On Group Call via Public Libraries.
Calling a Temporary Group:
1. Press [GpCall] [AddOn].
2. Listen for the dial tone.
3. Dial the Group Call access code.
4. Press [AddPrt].
5. Dial the required station and/or Public Library. To add additional members, repeat from Step 1.
Up to 5 or 14 destinations can be added, depending on the system configuration.
6. To delete a participant, press [DelPrt]. Press [DelPrt] again to delete additional participants. This operates on a last-in-first-out
basis – the participant added most recently will be deleted first, followed by the next most recent, and so on.
7. Press [Call] to initiate the Group Call.
All the called stations will now start ringing. As each member joins you will hear a warning tone (if defined system-
wide).
8. Start speaking when the CONF COMPLETED message appears momentarily on the display (the message indicates that all
non-answered stations have stopped ringing).

Station Telephony Features 119 FlexSet-IP 280S User Guide
Group Calls: Joining
Group Calls: Joining
The registered members join a conference being initiated by answering the incoming group call.
Provided the conference is not locked against non-registered participants, they can join the conference by dialing the group
call access code or can be transferred to the group call by an authorized user.
Joining a Group Call:
While your phone is ringing:
1. Answer the ringing phone or press the lit Group Call DSS key.
2. A warning tone will be heard by all participants (if defined system-wide).
After station has stopped ringing:
1. Press the lit Group Call DSS key or dial the Group Call access code.
2. A warning tone will be heard by all participants (if defined system-wide).
NOTE! When the group is defined as blocked against joining an ongoing conference, the BUSY message
will be displayed and the busy tone will be heard.
Leaving a Group Call:
1. Press SPKR or hang up.
2. A warning tone will be heard by all participants (if defined system-wide).

Station Telephony Features 120 FlexSet-IP 280S User Guide
Group Calls: Adding Participants (when not part of the Call)
Group Calls: Adding Participants (when not part of the Call)
Allows an authorized user to transfer a new participant to an established conference. The feature enables a user engaged in a
conversation to add his conversing party to the ongoing conference. The feature can be enabled when the Group Call is not
locked against non-registered participants, and connecting to the ongoing conference is not restricted.
Adding an additional participant to an ongoing Group Call:
While connected to a station/trunk:
1. Press [Xfer].
2. Listen for the dial tone.
3. Press the lit Group Call DSS key or dial the Group Call access code.
A warning tone will be heard by all participants (if defined system-wide).
4. Both the new participant and yourself are connected to the group call.
NOTES!
•When the group is defined as locked against non-registered participants, and one of the conversing parties is not
registered, the reorder tone is heard and the CNF LOCK message is displayed. The registered party joins
successfully, while the non-registered party is disconnected. If neither are registered members, both conversing
parties will be disconnected.
•When the group is defined such that no new participant can join an ongoing conference, both conversing parties
will be disconnected. The busy tone is heard and the BUSY message is displayed.

Station Telephony Features 121 FlexSet-IP 280S User Guide
Group Calls: Adding Participants (by Group Operator)
Group Calls: Adding Participants (by Group Operator)
Allows the group operator to add participants to an established conference of which the group operator is also a participant.
Adding an additional participant to an ongoing Group Call:
1. Press the preprogrammed ADD MEMBER DSS key during an established conference; the corresponding DSS key is lit.
NOTE! See page 153 for instructions on how to program a DSS key. To program an ADD MEMBER key,
use feature code #1304.
2. Press the member’s preprogrammed DSS key.
NOTES!
• You cannot manually dial the internal/public/private library number. Therefore, you will need to assign DSS keys
for each conference member (up to 6 or 15, depending on system hardware) you want to be able to add to a
Group Call following this procedure.
• DSS buttons may also be programmed with Trunk Groups followed by an external dial number to enable joining
external members. These members, however, are subject to all previous group call definitions, where they must
be given the right to speak or remain in Mute mode while listening to the Group Call (see page 122).
3. The member’s phone rings.
The ADD MEMBER DSS key LED is turned off and the member’s DSS key lights at the Group Operator’s station.
4. The member answers and joins the group call.
NOTE! The ADD MEMBER DSS LED remains lit when attempting to add a non-legal dial number to the
Group Call, allowing you to attempt another number.

Station Telephony Features 122 FlexSet-IP 280S User Guide
Group Calls: Submitting Request to Speak
Group Calls: Submitting Request to Speak
Members may be permitted to participate in a Group Call with the ability to speak and hear each other, or in the Mute mode.
In case of a muted conference only a Group Call initiator has the right to speak. The user defined as Group Operator can set
his own station to the audible mode, while connected to the conference, and may grant the right to speak to other participants.
This feature allows you to request permission to speak from the Group Operator. The request is submitted while your current
conference is in progress, without disturbing it.
Sending a request to speak to the group operator:
1. Press the Speech Request DSS key or [Xfer]. (To program a Speech Request key, use Help feature access code #1443,
followed by the Group Operator dial number.)
2. Continue attending the current conference, while watching the Speech Request key LED and the second line of the
display.
3. The TRX. ON message indicates that you are given permission to speak.
4. The TRX. OFF message indicates that the permission to speak is taken away from you.

Station Telephony Features 123 FlexSet-IP 280S User Guide
Group Calls: Controlling Permission to Speak
Group Calls: Controlling Permission to Speak
This function is relevant for Group Calls defined to admit participants only in Mute mode. This feature allows the Group
Operator to grant a participant permission to speak – either by operator's own initiative or as a response to the Request to
Speak sent by a Group Call participant. The operator can ignore the Request to Speak, or act as described below. To utilize the
feature, the Group Operator's keyset must be equipped with a display and the DSS buttons programmed with participants' dial
numbers.
Responding to the request to speak:
1. Listen for the muted ring and check the station number/name displayed.
2. Press the flashing DSS button associated with the station that is requesting permission to speak.
3. Notify the participant that permission to speak is given.
Initiating permission to speak:
1. Press the steadily lit DSS button associated with the required participant.
2. Ask the participant to start speaking.
Retracting permission to speak:
1. Notify the participant that the permission will be retracted.
2. Press the flashing DSS button associated with the participant to be muted.
NOTE! A Group Operator who left the conference and rejoined in the Mute mode must give himself
permission to speak by pressing the steadily lit DSS button pre-programmed with his own dial
number.

Station Telephony Features 124 FlexSet-IP 280S User Guide
Group Calls: Forced Release of a Participant
Group Calls: Forced Release of a Participant
This feature allows an authorized user, from idle, to release a participant from an ongoing conference. The feature does not
allow the user to view the list of participants.
Releasing a single participant:
1. Press [GpCall] [PrtRel].
2. Listen for the dial tone.
3. Dial the participant number or press the programmed DSS key.
4. Press [FrcRls] - no confirmation tone will be heard.
5. Press [Exit] to exit.
The group operator can also release a participant from an ongoing conference provided that the operator is authorized to
release Group Call participants in the COS.
Releasing a participant (Group Call Operator):
1. Press the preprogrammed RELEASE MEMBER DSS key during an established conference; the corresponding DSS key is
lit.
NOTE! See page 153 for instructions on how to program a DSS key. To program an RELEASE MEMBER
key, use feature code #1305.
2. Press the member’s preprogrammed DSS key.
NOTE! You cannot manually dial the internal/public/private library number.
3. The member is disconnected from the conference.
The member’s DSS key is extinguished at the Group Operator’s station.
4. The member returns to Idle state.

Station Telephony Features 125 FlexSet-IP 280S User Guide
Group Calls: Forced Release of an Entire Group Call
Group Calls: Forced Release of an Entire Group Call
This feature allows an authorized user to release the entire group call from idle.
Releasing an entire Group Call:
1. Press [GpCall] [GrpRel].
2. Listen for the dial tone.
3. Dial the access code of the required Group Call.
4. Press [FrcRls] - no confirmation tone will be heard.
5. Press [Exit] to exit.

Station Telephony Features 126 FlexSet-IP 280S User Guide
Headset Only
Headset Only
The feature is designed for users operating in Headset mode. It is of particular value at information centers where the headset
option is the most efficient way of communication. When activated, the Headset Only feature causes calls to be conducted via
the headset and disables the FlexSet’s microphone and loudspeaker, along with the features that use these devices, e.g. voice
page, etc. Calls are conducted via the headset even if the cradle switch is on-hook, enabling a user to make full use of the
hands-free operation.
NOTES! When utilizing Headset Only feature:
•The SPKR key should be programmed as an ON/OFF (connect/release) key. See your system administrator.
• The phone can be set for Zip Tone mode. This mode is used to sound the ring tones directly through the
headset, rather than through the speaker. (For Zip Tone setup, see page 234)
• Refer to page 21 for instructions on operating a FlexSet programmed as Headset Only.
To activate Headset Only:
•Press [Setup] [HeadSt]
A bullet appears to the left of [HeadSt].
To disable Headset Only:
•Press [Setup] •[HeadSt]

Station Telephony Features 127 FlexSet-IP 280S User Guide
Help: Requesting
Help: Requesting
The Help Requesting feature allows you to alert a pre-selected station while you are in conversation with a request for help.
The Help feature is operated while your current call is in progress, without disrupting the call. Once you have agreed upon a
partner for the help procedure, a predetermined action can take place between you and your partner when Help is activated.
A DSS key must be programmed to activate Help Requesting.
Programming a Help Requesting key:
1. Press [Setup] [ProgKy].
2. Choose and press the DSS key.
3. Dial feature access code (default dial number: #1443).
4. Dial the destination station.
The destination must be another keyset equipped with a display.
5. Press the selected DSS key again.
6. You may program many keys, each with a different destination.
To program additional keys, repeat Steps 1 - 5.
Sending a Help Request:
During a call when you need help, press the HELP DSS key and continue the call, while watching the HELP key LED. Your
HELP key LED is lit while the destination phone rings. The LED flashes when the call is answered.
The destination station displays the help message on the station display while the station is ringing. Wait for help or press the
HELP key again.
NOTE! Discuss with co-worker/partner what Help procedure should be performed when Help is
requested.

Station Telephony Features 128 FlexSet-IP 280S User Guide
Help: Answering
Help: Answering
This feature allows you to receive a call for help from another station.
Answering a Help Request:
1. Answer the call, listen for the confirmation tone and check the station number displayed.
2. Press SPKR or hang up to release.
3. Take help action as agreed.
NOTE! If engaged in a call when help is requested, a muted ring tone and message is received.
Terminate the call or put it on hold and answer, so the requesting station knows that you have
received the request for help.

Station Telephony Features 129 FlexSet-IP 280S User Guide
Hold
Hold
A calling party can be placed on hold while another call is made. The held party can hear one of the following: music, reorder
tone, busy tone or no sound at all as defined system-wide.
Call Hold is accessible via [Hold] or HOLD.
During a call, press [Hold] or HOLD to place the second party on hold.
The [Hold] soft key is shown with a bullet next to it, indicating that a call has been placed on hold at your station. A *HOLD*
message appears on the top line to remind you that a call is held at your station. The HOLD LED is lit and LOOP flashes.
Retrieving the call from Hold:
Press the flashing LOOP key to connect or:
1. Press [Hold] or HOLD.
2. Choose [ReConn]. If more than one party has been placed on hold, scroll between names by using [Next].
3. The held calls are returned in “first in/first out order”.
If you do not return to the call on hold within a predetermined amount of time, the call will automatically return to you.
If your telephone is defined (by the system administrator) as Hard HOLD, the message CALL ON HOLD appears after
placing a call on hold. When Hard Hold is activated on a call, your station will be considered busy for additional
incoming calls; however, outgoing calls can still be made.
Page 1 10:50 26 May 2007 Company xyz
user name station number
→Page_Q Xfer [Hold] Mute CallWt
Page 2 CALL HOLD Name
→Next ReConn
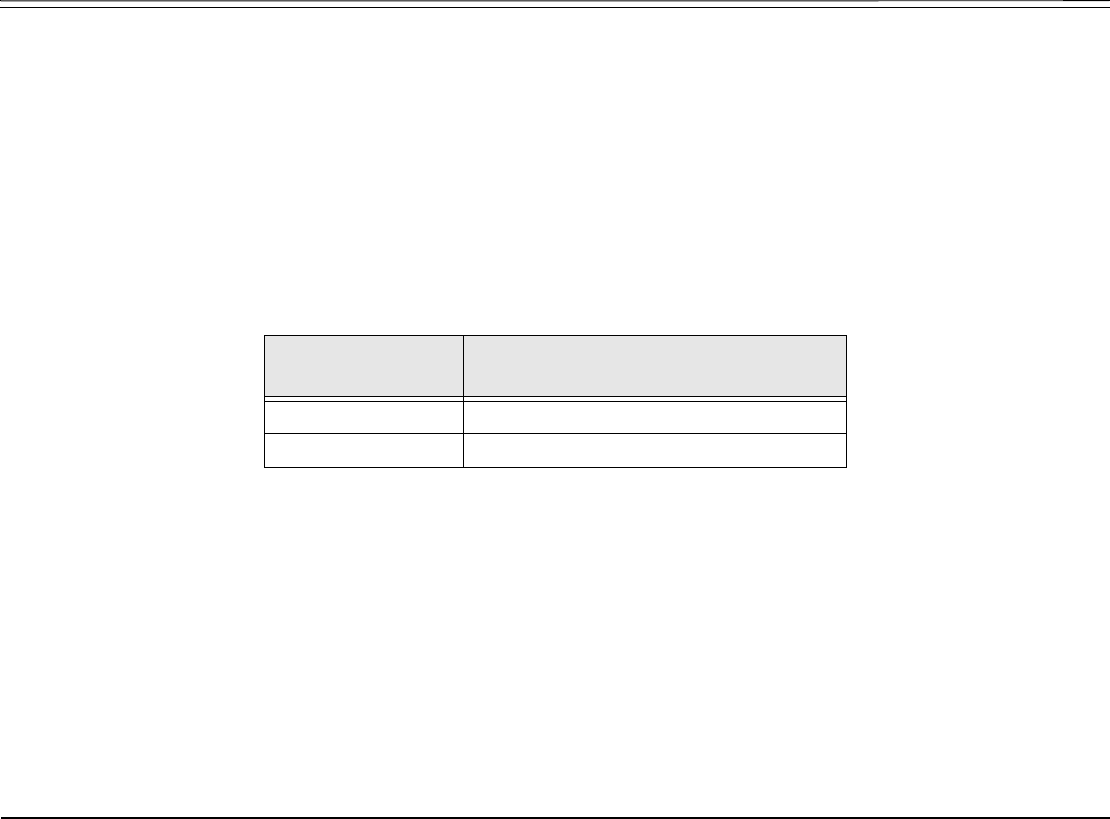
Station Telephony Features 130 FlexSet-IP 280S User Guide
Individual Remote System Services (IRSS) - Freedom
Individual Remote System Services (IRSS) - Freedom
The Freedom feature, also known as Individual Remote System Services (IRSS), enables you to connect an off-site non-Coral
phone (such as your home phone or mobile) to the Coral and make calls from within the system. Many of the Coral’s
extensive features (e.g. transfer, conference call, voice mail, access to public and private libraries) are available from this off-
site phone. The off-site telephone operates as a virtual station in the Coral network, retaining the original features of the
external telephone in addition to the Coral features.
NOTE! To enable the IRSS feature at your Coral station, you must first program a Private/Public Library
number with your off-site phone number (see page 227 and page 214). Use the table below to
record library numbers that contain your IRSS destination.
To enable IRSS (from remote phone providing caller ID):
1. Dial IRSS feature code #17714.
2. At the dial tone, enter the number of a Private/Public Library containing your off-site phone number.
3. Listen for the confirmation tone.
To cancel IRSS:
1. Dial IRSS feature code #17714.
2. At the dial tone, dial the cancellation code 8.
3. Listen for the confirmation tone.
Private/Public
Library Number:
IRSS Off-Site Phone Number

Station Telephony Features 131 FlexSet-IP 280S User Guide
Individual Remote System Services (IRSS) - Freedom
Placing IRSS Calls:
For IRSS calls placed from phones that send Caller ID, the IRSS feature must be enabled at your Coral station. See steps
below.
For IRSS calls placed from phones that do not send Caller ID information, the IRSS feature must be enabled using the
Executive Privilege feature. See page 131.
To place a call from IRSS phone providing Caller ID:
1. Place a call to your desk phone. Listen for the distinctive dial tone.
2. If a passcode is required (as defined by the Class of Service), enter it now.
3. At the dial tone, dial the number of the person you wish to call.
Possible destinations can be external number (stationary or cellular) or network number, or a Coral destination, including
station, trunk/trunk group, dial service, routing access, public/private library, voice mail.
If your destination is an external number, it should be preceded by the outside line access code.
You can activate any of the options described in the table on page 133.
To place a call from IRSS phone that does not provide Caller ID:
This applies for IRSS calls from off-site phones that do not possess a Caller ID number and, therefore, cannot be identified by
the Coral.
NOTE! Some telephones may be denied the Executive Privilege feature (defined by Class Of Service).
In order to use Executive Privilege your station must be defined with a passcode.
1. Place a call to the Executive Privilege number (contact your system administrator for that number).
2. Listen for the dial tone.
3. Dial your own Coral station number.
4. Dial your 4-digit passcode. Listen for the distinctive dial tone.
5. Dial the required destination number.

Station Telephony Features 132 FlexSet-IP 280S User Guide
Individual Remote System Services (IRSS) - Freedom
Possible destinations can be: external number (stationary or cellular), network number, or a Coral destination, including
station, trunk/trunk group, dial service, routing access, public/private library, and voice mail.
NOTE! If your destination is an external number, it should be preceded by an external line access code.
• If your destination is voice mail (IVR access code), skip to page 135.
• If your destination is a FlexiCall All feature, skip to page 135.
• To enable another IRSS phone, skip to page 136.
6. Listen for the ringback tone.
7. Wait for an answer.
8. You can activate any of the options described in the table below.

Station Telephony Features 133 FlexSet-IP 280S User Guide
Individual Remote System Services (IRSS) - Freedom
Options available while in an established IRSS call
Function Dial Use to:
Place a new call *1 Listen for a dial tone indicating that you can place a call to a new contact. Your original
conversing party will be disconnected.
Transfer call *2 A dial tone prompts you to enter the required transfer number. Transfer can be screened or
unscreened.
To return to the original conversing party (when transfer destination is busy or does not
answer) dial *2 again.
Switch to Broker/
Consultation/3Way
Conference Call
*2 A dial tone prompts you to enter the required third party number. Depending on your Class
of Service definitions, one of the following party functions will be activated (see Broker/
Consultation/3-Way Conference call on page 134):
• Broker Call
• Consultation
•3-Way
• Combination of Broker/Consultation/3-Way Conference Call
Divert call to a Coral
station
*3 A dial tone prompts you to enter a divert number. You will be disconnected and your
conversing party will be transferred to the divert number. Your number will not show on the
divert party’s display.
Access voice mail/IVR *4 For instructions on accessing voice mail from an IRSS phone, see below.
Call Recording/
Help Requesting
*6 Used to Start/Stop Recording outgoing calls (requires a system-wide defined Navigator application).
Or send Help request (requires a pre-selected system-wide defined keyset station), see page 127.

Station Telephony Features 134 FlexSet-IP 280S User Guide
Individual Remote System Services (IRSS) - Freedom
Broker/Consultation/3-Way Conference call
While engaged in an established FlexiCall or IRSS call, you can use one of the options listed below, as defined by your Coral
station Class of Service. See page 185 for more information on Broker/Consultation/3-Way Conference calls.
Function Use to:
Broker Call To activate a Broker call:
1. Dial *2.
2. Dial the third party and wait for an answer.
3. Dial *2 to alternate between parties (any number of times).
When you hang up, the other parties will remain in conversation.
Consultation Call To activate a Consultation call:
1. Dial *2.
2. Dial the number of the person you wish to consult with.
3. When your conversation is concluded, dial *2 to return to the original call. The consulted party
will be released.
3-Way Conference
Call
To activate a 3-Way Conference call:
1. Dial *2.
2. Dial the number of the person you wish to add on to the call.
3. When the party answers, dial *2 for a 3-way call.
Combination of
Broker/
Consultation/
3-Way Conference
Calls
To activate any combination of Broker/Consultation/3-Way Conference calls:
1. Dial *2.
2. Dial the third party number and wait for an answer.
3. Dial *2. The third party is put on hold.
4. When you have concluded your private conversation, dial *2 to complete a 3-way Conference call.
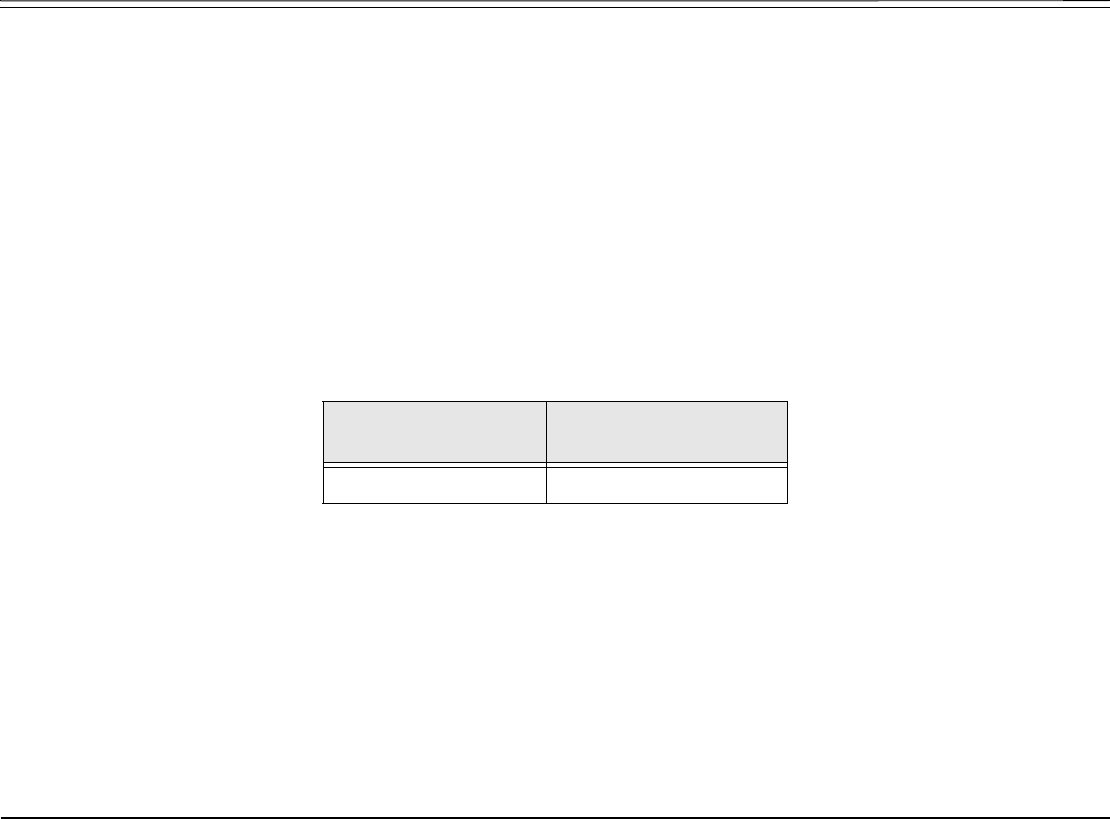
Station Telephony Features 135 FlexSet-IP 280S User Guide
Individual Remote System Services (IRSS) - Freedom
To activate Voice Mail/IVR from your IRSS phone:
You can access your voice mailbox, retrieve messages and setup voice mail options for your Coral station.
1. Place a call to your desk phone. Listen for the distinctive dial tone.
2. Dial the voice mail or IVR dial number (contact your system manager for the dial number and access code).
3. At the automated voice mail answer, dial the voice mail remote access code followed by your station number to access
your station’s voice mail box.
4. Dial *4 as soon as the automated voice mail answers. This allows the system to recognize the voice mail or IVR
commands.
5. Choose the required option from the voice mail or IVR menu.
NOTE! Contact your system administrator for the voice mail (IVR) dial number and voice mail remote
access code. Use the table below to record that number and code:
Voice Mail (IVR) Dial
Number
Voice Mail Remote
Access Code

Station Telephony Features 136 FlexSet-IP 280S User Guide
Individual Remote System Services (IRSS) - Freedom
To activate the FlexiCall All feature from your IRSS phone:
1. Place a call to your desk phone. Listen for the distinctive dial tone.
2. Dial the FlexiCall All feature code #17710.
3. At the dial tone, dial the destination number. Wait for the confirmation tone.
Possible destinations are: operator, station, network number, UNA/Central Bell or external number (stationary or
cellular) via Public/Private Speed Call Library.
To cancel the FlexiCall All feature from your IRSS phone:
1. Place a call to your desk phone. Listen for the distinctive dial tone.
2. Dial the FlexiCall All feature code #17710.
3. At the dial tone, dial the cancellation code 8. Wait for the confirmation tone.
To enable a new IRSS phone from your present IRSS phone:
1. Place a call to your desk phone.
2. At the distinctive dial tone, dial the passcode assigned to your station.
3. At the tone, dial IRSS feature code #17714.
4. At the tone, dial the number of the private library containing the number of the remote phone to be designated as your
new IRSS phone.
5. Listen for the reorder tone. You are now disconnected. You can now access your station from your newly assigned IRSS
phone.
To cancel IRSS feature from your IRSS phone:
1. Repeat Steps 1-3 above.
2. Dial the cancellation code 8. The IRSS feature is deactivated at your Coral station.

Station Telephony Features 137 FlexSet-IP 280S User Guide
Malicious Call Trace
Malicious Call Trace
This feature records the next x (a system-defined variable) calls to your FlexSet. A list of the calls can also be sent to a printer
or terminal.
Press [Trace] to access the Malicious Call Trace options.
[On/Off] Malicious Call Trace On/Off toggles the Malicious Call Trace on or off. If this feature is activated, a bullet
appears next to [On/Off], and next to [Trace] on the Idle screen.
NOTE! If there are insufficient system resources for the feature to be available at your station, the
message NO TRACE RECORD will be displayed.
[Print] Malicious Call Trace Print sends a list of the calls to a terminal or printer. The message
CALL TRACE PRINT appears. The listing is not deleted when printed; it may be printed later with
subsequent updates.
The details recorded are: originating number (for external calls: ANI if available or trunk number if not
available), your station number and the time of calls.
NOTE! Malicious Call Trace must previously be activated, or the message CALL TRACE OFF will appear
and the action will not be completed.
Page 1 10:50 26 May 2007 Company xyz
user name station number
→Lock Exec COS-Sw Setup [Trace]
Page 2 Malicious Call Trace
→On/Off Print
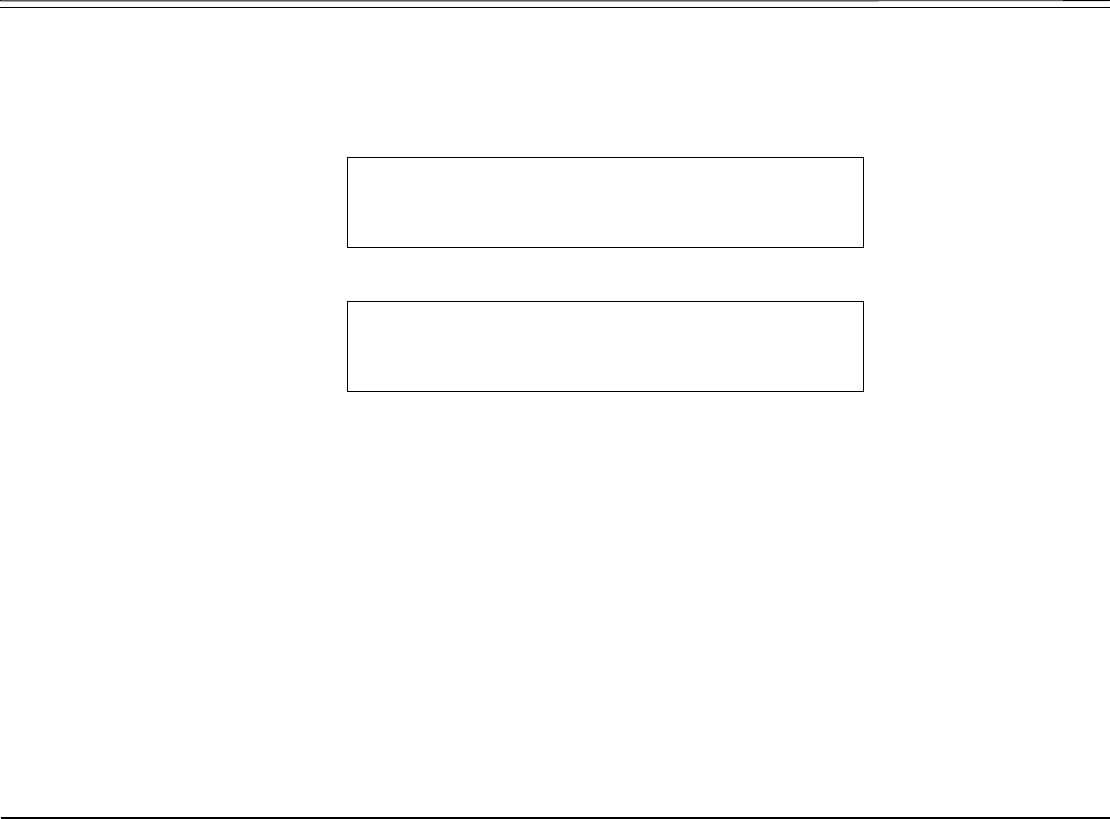
Station Telephony Features 138 FlexSet-IP 280S User Guide
Messages: Options
Messages: Options
You can leave a message at another station and conversely, any station can leave a message at your station.
Press [Msg] to access the message options.
.
[Msg.] Leave Message is used to leave a message at another station, or to access messages left at your station.
Viewing and answering messages left at your station:
1. The message lamp flashes and a bullet appears next to the [Msg] and [Msg.] keys when there is a message waiting. The
message consists of simple text, such as CALL SUSAN, or CALL VOICE MAIL, which is displayed on the top line.
2. Choose one of the following options after pressing [Msg.]:
[Prev] To view the previous message. If there is no previous message, LIST START appears on the top line.
[Next] To view the next message. If there are no other messages, then LIST END appears on the top line.
[Call] To call back the message sender. The message lamp is turned off if there are no other messages. .
[Dest] / [LveMsg]To leave a message at another system station, dial a station, boss group or network number, and listen for
the confirmation tone.
[Cancel] To cancel the message and the flashing message lamp without calling back the message sender.
[Number] To briefly display the number of the person who left a message.
Page 1 10:50 26 May 2007 Company xyz
user name station number
↓→ •[Msg] CALLog Fwd DND FlexiC
Page 2 Message Options
→•
[Msg.] MsgCan Msg-Wt

Station Telephony Features 139 FlexSet-IP 280S User Guide
Messages: Options
Leaving a message at another system station from idle when message list is
empty:
1. Press [Msg.].
2. Press [Dest] and dial a station, boss group or network number.
3. Listen for the confirmation tone.
You will hear a reorder tone when trying to leave a message at stations not equipped with a flashing message lamp.
When your phone rings (message delivery):
1. Answer the call and check the station number displayed.
2. Deliver the relevant message.
NOTE! A message left at a Boss Group turns ON the message lamp of the first Boss Group member only.
[MsgCan] Message Cancel allows you to cancel a message that you left at another station.
1. Press [MsgCan].
2. Dial the station, boss group or network number at which you left a message.
3. Listen for the confirmation tone.
[Msg-Wt] Message Waiting. The Attendant can use this feature to leave a message waiting indication at a busy or idle
station, room or group.
Leaving a message indication at an idle station:
1. Press [Msg-Wt] (Message Waiting).
2. Choose [StRmGp] and dial a station/room/group number, or scrollf through the list using .
3. Choose [Set] to assign or [Cancel] to deassign message.
4. Press SPKR or [Exit] to exit.
NOTE! A message left at a Boss Group activates the message lamp of the first member of that Boss
Group only.
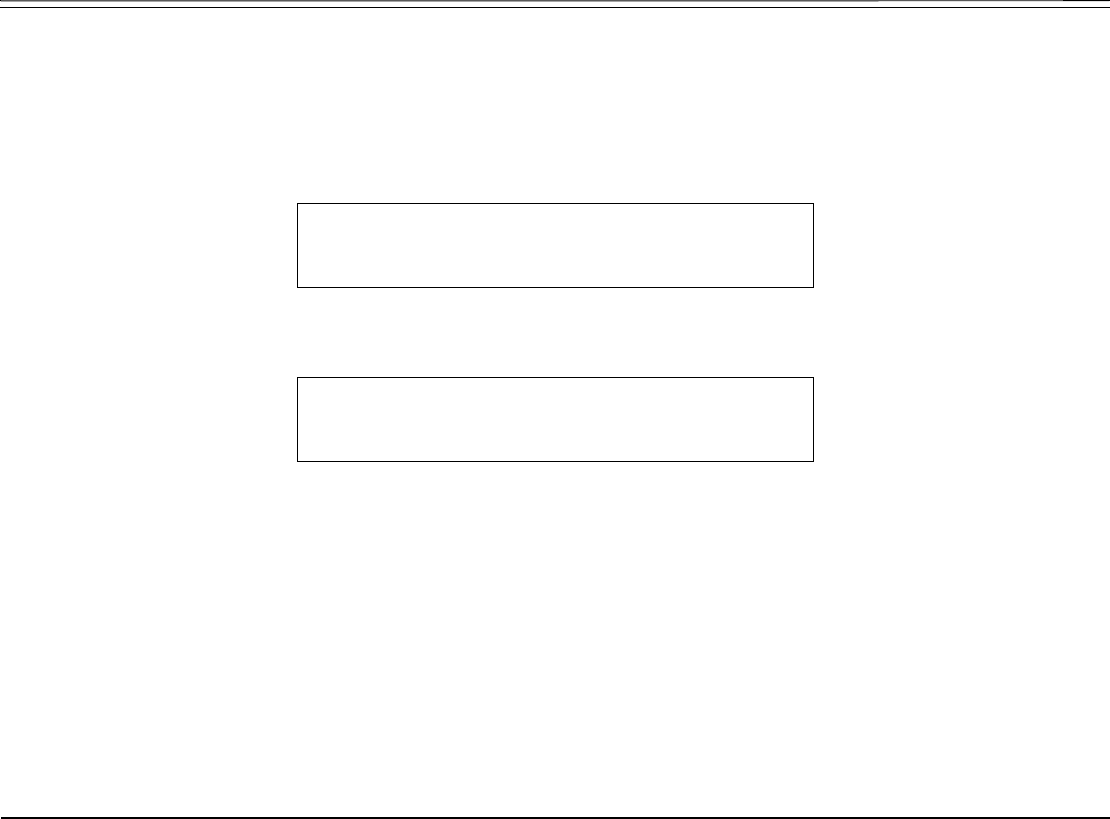
Station Telephony Features 140 FlexSet-IP 280S User Guide
Messages: Options
Leaving a message indication at a busy or non-answering station:
1. Press [Msg-Wt] (or press XFER and dial 7) when hearing the busy tone or the station does not answer.
2. Listen for the confirmation tone.
When your phone rings (message waiting delivery):
Your phone rings
During message delivery
Answering a Message Waiting return call:
1. Answer the call and check the station number displayed.
2. Deliver the relevant message.
3. Message Waiting Indication for the relevant station will be cancelled automatically on answering if defined as a Hot Line,
OR
Press [Msg-Wt] to cancel the Message Waiting indication.
4. Press SPKR or hang up to release.
NOTE! The method of canceling Message Waiting Indication is defined system-wide; Message Waiting
Return calls can be defined system-wide as Hot Lines.
station or room # MSG. your #
MESSAGE ANSWER
→DND Mute FwdAll Number
ANSWER station or room #
↓→ Page_Q Xfer Hold Mute CallWt

Station Telephony Features 141 FlexSet-IP 280S User Guide
Mute Microphone
Mute Microphone
During a conversation you may need to temporarily turn off the microphone on your telephone (handset and speakerphone).
This will prevent the other party from hearing a portion of your conversation. The [Mute] key is an on/off switch and can be
pressed as many times as necessary.
The mute feature deactivates the microphone for your speakerphone and handset or headset. Press the toggle key again to
reactivate the microphone.
To turn off the microphone during a call:
• Press [Mute].
Party cannot hear your side of the conversation.
A bullet appears to the left of [Mute].
To return to 2-way conversation:
• Press the lit •[Mute].
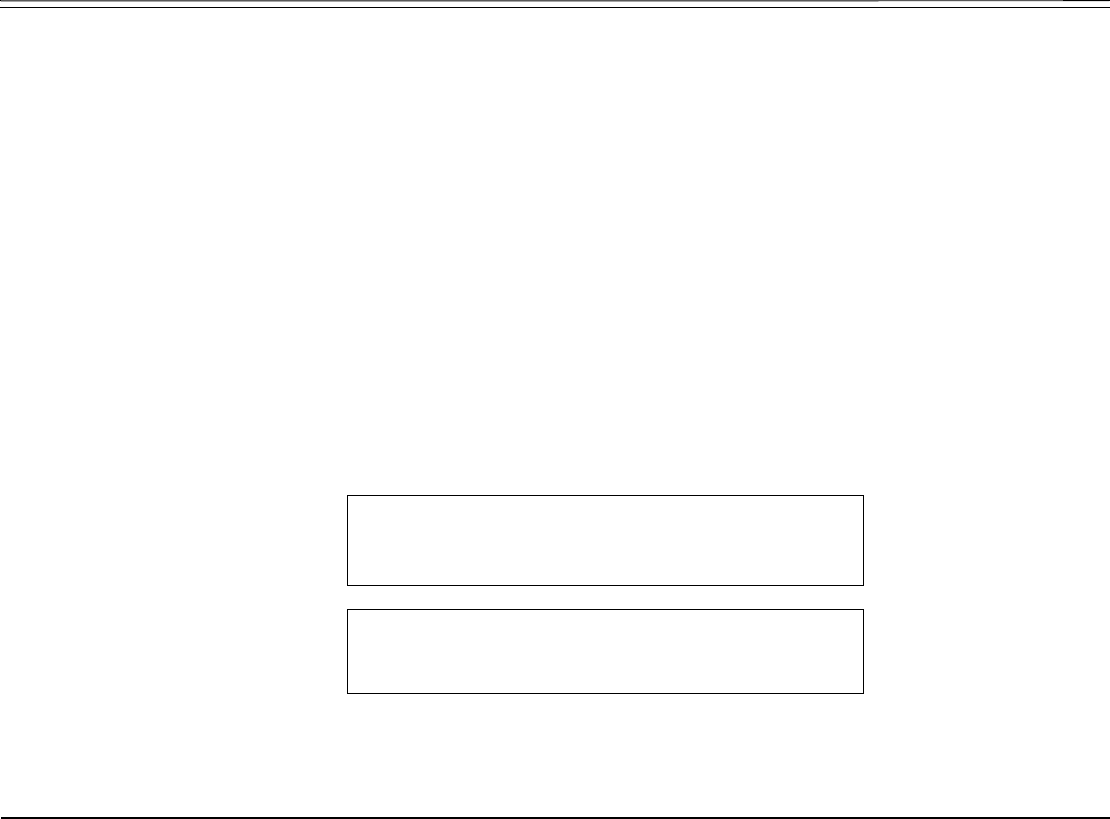
Station Telephony Features 142 FlexSet-IP 280S User Guide
Page Queue
Page Queue
Page Queue allows you to park a call (up to ten calls can be multi-parked simultaneously) on designated Page_Q numbers by
sending the call to one of ten Page Queue destinations. Once parked, a call can be either retrieved at another station or you can
page someone else to pick up the call at any station or group of stations. You can page any system member from your FlexSet
and announce that there is a call for Mr. Doe on Page Queue Line x. The call can be picked up from any system station by
dialing the Page Queue access code (default access codes are 7060-7069).
NOTE! To pick up the call, Mr. Doe should dial from any station to the relevant Page-Queue number
(default numbers 7060-7069). If the call is not picked up within a predetermined time, it will
automatically return to the originating station from which Page Queue was placed.
The party placed on Page Queue may hear one of the following: music, recorded tone, busy tone or no sound at all, as defined
system-wide for each Page Queue.
To place a call in Page Queue:
1. While on a call, press [Page Q] to access the Page Queue options
,
2. Press a free [Page Qx] (ten options see Table on page 145) to send the call to Page Queue number x.
3. Listen for the confirmation tone.
Page 1 EXT ANS 2nd party
↓→ [Page Q] Xfer AutRdl Hold Mute
Page 2 Page_Q Place/Pickup Call
↓→ PageQ1 PageQ2 PageQ3 PageQ4 PageQ5
Station Telephony Features 143 FlexSet-IP 280S User Guide
Page Queue
4. Announce that there is a call on Page_Q line x.
Using available communication means notify another user to pick up the call.
Usually announcing a call for pick up includes the name of the person being notified and the relevant Page_Q number.
NOTES! You can use one of the following methods to announce a call:
• Make a public address over PA speakers (see page 146).
• Voice page a specific station (see page 147).
• Voice page a group of stations (see page 149).
To pick up a call placed in Page Queue (from any station):
1. Lift the handset of any telephone.
2. Dial assigned Page_Q access code (7060-7069, see Table on page 145).
3. Begin speaking.
To pick up a call placed in Page Queue (from Page Queue originating station):
1. Press •[Page Q] to access the Page Queue options.
,
2. Press the relevant lit •[Page Qx] (ten options see Table on page 145) to retrieve the call from Page Queue number x.
3. Begin speaking.
Page 1 10:50 26 May 2007 Company xyz
user name station number
→Redial •[Page Q] Remind PickUp
Page 2 Page_Q Place/Pickup Call
↓→ PageQ1 PageQ2 PageQ3 PageQ4 PageQ5
Station Telephony Features 144 FlexSet-IP 280S User Guide
Page Queue
Return Call:
If the call is not picked up within a predetermined time, it will automatically return to the originating station from which Page
Queue was placed.
1. Press SPKR or pick up the handset to answer.
2. Begin speaking.
NANS page Q dial# 2nd party#
→DND Mute FwdAll All-E Number
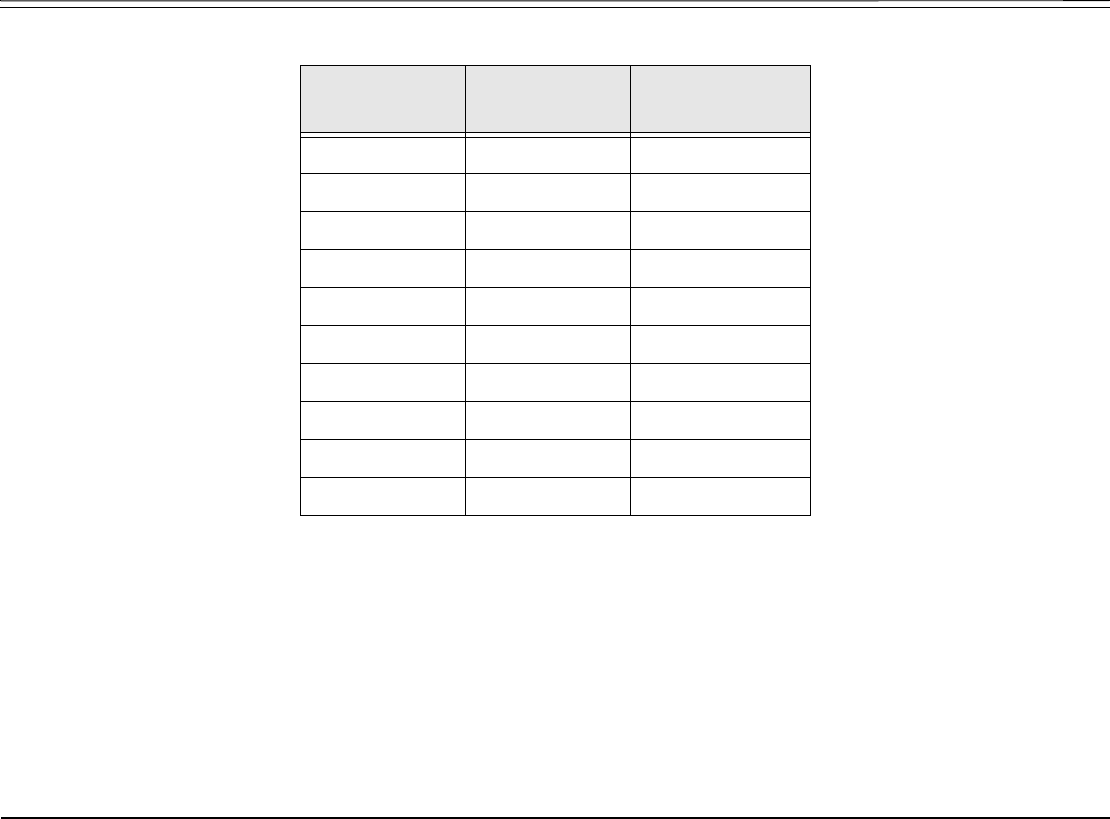
Station Telephony Features 145 FlexSet-IP 280S User Guide
Page Queue
Page Queue - Access Codes
Page queue
Number
Soft Key Access Code
(Dial Pad#)
1[PageQ1] 7060
2[PageQ2] 7061
3[PageQ3] 7062
4[PageQ4] 7063
5[PageQ5] 7064
6[PageQ6] 7065
7[PageQ7] 7066
8[PageQ8] 7067
9[PageQ9] 7068
10 [PagQ10] 7069
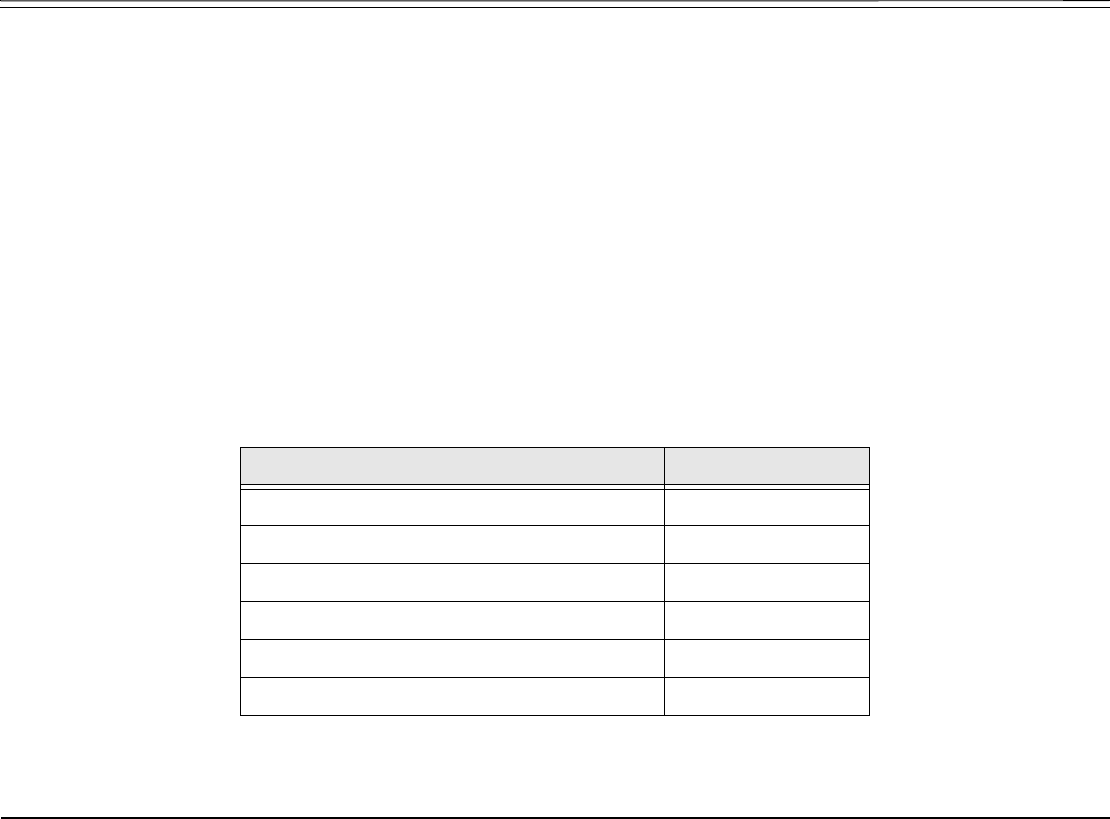
Station Telephony Features 146 FlexSet-IP 280S User Guide
Paging: Announcing, Public Address
Paging: Announcing, Public Address
When a public address system is attached to the Coral system, use this feature to announce a message over your system’s
Public Address (PA) speakers.
Use the form below to write in locations and their associated access codes.
Paging a message over public address:
1. Press PAGE XXXX DSS key or dial PA access code.
2. Announce your message.
3. Press SPKR or hang up to release.
NOTE! See Programming: Feature Keys on page 153 for instructions on how to program a DSS key.
PA Paging - Access Codes
Area/Location Access Code
1. 7074
2. 7075
3. 7076
4. 7077
5. 7078
6. 7079
Station Telephony Features 147 FlexSet-IP 280S User Guide
Paging: Voice Paging
Paging: Voice Paging
This feature enables you to voice page another keyset (FlexSet, DKT, T207M or T208M) from your FlexSet. Essentially this
feature is an intercom allowing persons to converse between stations, or can be employed as a simple pager.
Press [V-Page] to access the Voice Page feature.
Voice Paging a single keyset station:
When Busy:
• Press [V-Page] upon reaching a busy keyset station to send a message to the other party that they are being paged.
When Unanswered:
• Press [V-Page] upon hearing the ringback tone at unanswered keyset station. The call will automatically connect.
From Idle:
1. Press [V-Page].
2. Dial a keyset station number.
3. Listen for the Voice Page tone and begin speaking.
NOTE! When you hear reorder tone and DNT DIS VP message appears, the station is protected from
receiving voice page calls. (See Voice Page Receive on page 224 for configuration instructions.)
Page 1 10:50 26 May 2007 Company xyz
user name station number
→CampOn Park [V-Page] WhspPg AcctCd
Page 2 VOICE PAGE
***** Enter Destination ****

Station Telephony Features 148 FlexSet-IP 280S User Guide
Paging: Voice Paging
Answering a Voice Page:
1. Listen for the voice page (warbling) tone.
2. If you are in a conversation, either place the call on hold or hang up, then continue with the following steps:
When Auto Answer is Defined, see Setup on page 222:
• When the tone stops, the voice page automatically connects through the speaker.
Converse hands-free, or lift the handset for private conversation.
When Manual Answer is Defined, see Setup on page 222:
• Press the flashing SPKR key or lift the handset.
Station Telephony Features 149 FlexSet-IP 280S User Guide
Paging: Zone Page
Paging: Zone Page
Use this feature to page a pre-programmed group of keysets (FlexSet, DKT, T207M or T208M) within a zone, area or
dispersed within your company. The entire group can be paged by dialing the Zone Page access code (default dial numbers:
7300 to 7309).
Use the form below to write in the various paging zones or areas in your company and their associated access codes.
Sending a Zone Page:
1. Dial the Zone Page Access Code or press a pre-programmed DSS key with the Access Code number.
(See Programming: Feature Keys on page 153 for instructions on how to program a DSS key.)
2. Announce your message to the group.
3. Disconnect when you finish announcing.
NOTE! See your system administrator to view or define the zone group access codes and their
respective members.
Zone Paging - Access Codes
Area/Location Access Code Area/Location Access Code
1. 7300 6. 7305
2. 7301 7. 7306
3. 7302 8. 7307
4. 7303 9. 7308
5. 7304 10. 7309
Station Telephony Features 150 FlexSet-IP 280S User Guide
Park
Park
During a call, use Park to place the second party on hold at your station so that it can be picked-up at another station. The [Park]
soft key is shown with a bullet next to it, indicating that a call has been parked at your station. The parked party hears music
or a tone (system-defined).
Press [Park] to Park a call, or to retrieve from Park.
Parking a Call:
1. While on a call press [Park].
2. Listen for the confirmation tone.
The call goes into Park and LOOP flashes at your station. Your station is free to make other calls.
Retrieving a Parked Call (from any station):
1. Lift the handset of any telephone.
2. Press [Park] or dial Park feature code #183.
Page 1 10:50 26 May 2007 Company xyz
user name station number
→CampOn [Park] V-Page WhspPg AcctCd
Page 2 CALL PARK Name
→Next ReConn
Station Telephony Features 151 FlexSet-IP 280S User Guide
Park
3. Dial the station number at which the call was parked. If more than one party has been placed on Park, scroll between
names by using [Next].
4. Begin speaking.
Retrieving a Parked Call (from the originating station where the call was parked):
Press the flashing LOOP, LINE, or DSS key and begin speaking.
OR
1. Press [Park].
2. Choose [ReConn] or dial the activation code 9. If more than one party has been placed on Park, scroll between names by
using [Next], or by pressing the button.
3. Begin speaking.
Return Call:
If the parked call is not picked up within a predetermined time (system-defined timeout), the call will automatically return to
the originating station from which the park was made.
1. Press SPKR or pick up the handset to answer.
2. Begin speaking.
NOTE! More than one call can be parked at a single station, but calls are retrieved on a first-in, first-out
basis (FIFO). That is, the first parked call (first-in) will be the first call that is picked up (first-out).
However, if multi-parking is required it is recommended that the Page Queue feature be used
instead (see Page Queue on page 142).
RECALL 2nd party#
→DND Mute FwdAll All-E Number
Station Telephony Features 152 FlexSet-IP 280S User Guide
Phone Lock
Phone Lock
Use this feature to prevent unauthorized persons from using your phone line. Incoming calls may still be answered.
Press [Lock] to lock your FlexSet.
Locking/unlocking your phone:
1. Press [Lock] or [Unlock].
2. Dial your 4-digit Passcode number. To define your passcode, see Setup: Passcode on page 225.
3. Listen for the confirmation tone.
4. When your phone is locked, all outbound dialing is prohibited, and FlexSet features are not accessible. All soft keys are
replaced with [Unlock]. Attempting to dial a number or access a feature results in the PHONE LOCKED message being
displayed.
Page 1 10:50 26 May 2007 Company xyz
user name station number
→[Lock] Exec COS-Sw Setup Trace
Page 2 PHONE UNLOCK
ENTER PASSCODE
Page 3 10:50 26 May 2007 Company xyz
user name station number
UnLock UnLock UnLock UnLock UnLock
Station Telephony Features 153 FlexSet-IP 280S User Guide
Programming: Feature Keys
Programming: Feature Keys
The FlexSet comes equipped with 4 system-defined (fixed) keys as well as user programmable keys. You are able to program
most of the programmable keys from the FlexSet itself.
There are 22 user programmable keys for the FlexSet-IP 280S (see Front View, on page page 4).
Press [Setup] [ProgKy] to access the Key Programming options.
Page 1 10:50 26 May 2007 Company xyz
user name station number
→Lock Exec COS-Sw [Setup] Trace
Page 2 Feature Setup
→IdlDsp Lang Pascod [Progky] Prefer
Page 3 PROGRAM
SELECT BUTTON.
→Prev Next
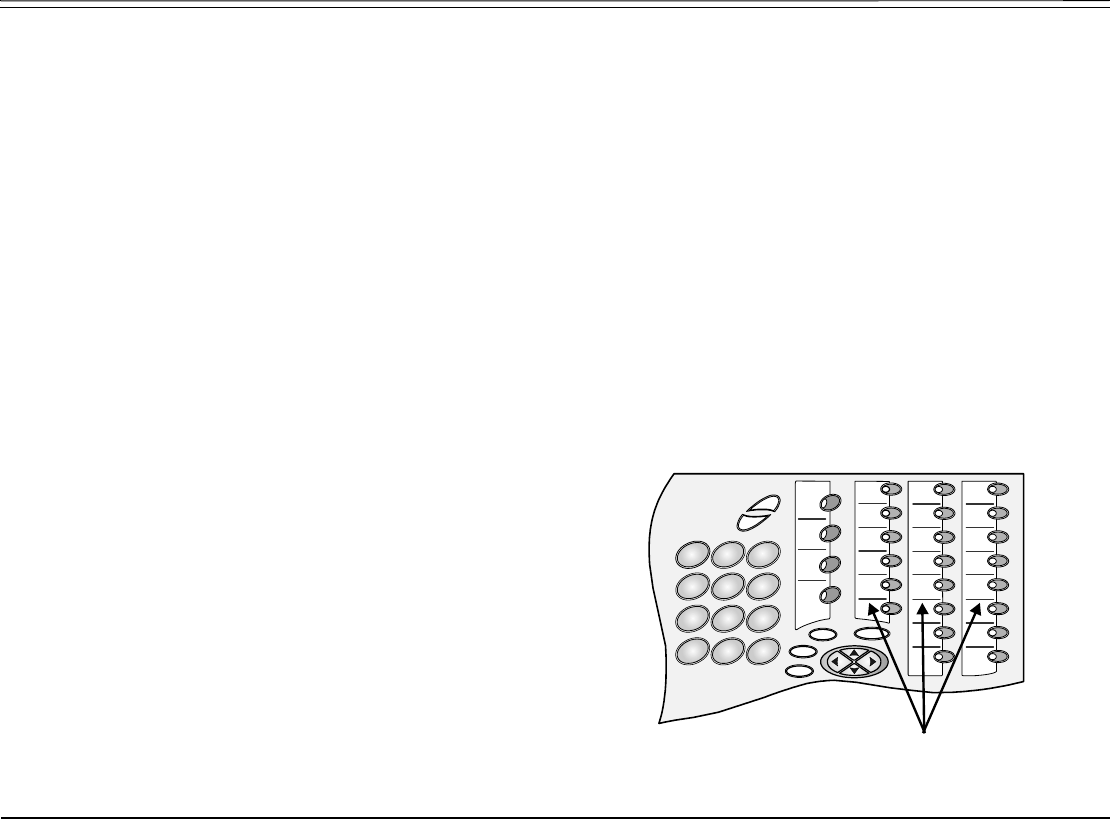
Station Telephony Features 154 FlexSet-IP 280S User Guide
Programming: Feature Keys
The programmable buttons may include either dial numbers (stations, groups, trunks, trunk groups, etc.) or Coral feature
activation codes. Several dial commands, in a series, may be programmed into one programmable key - useful for one-button
speed dialing, voice response and voice mail system access, and other complex dialing patterns.
Features keys can be programmed exactly as they are programmed in the FlexSet 280D series keysets.
Use the following guide to navigate through this topic:
Programming Feature Keys........................................................page 155
Programming Boss Group Line Keys .........................................page 156
Programming ELA Group Line Keys ..........................................page 157
Programming: Button Labeling ...................................................page 160
Index: Soft Keys and Feature Codes..........................................page 252
Programming Keys: Examples ...................................................page 158
3
78
9
2
1
456
#
*
0
ENTER
ESC
ABC
MENU
Pro
g
rammable Ke
y
s

Station Telephony Features 155 FlexSet-IP 280S User Guide
Programming: Feature Keys
Programming Feature Keys
To Program Feature Keys:
1. Press [ProgKy].
2. Press the DSS/Feature key you wish to program.
3. Dial the numbers exactly as you would normally to enable the feature or to speed dial.
4. If the button is already programmed, the contents appear on the system lines.
5. Press the DSS/Feature key again to save the contents to memory.
To View Programmed Key Contents:
1. Press [ProgKy].
2. Press programmed key.
3. View contents on system lines.
4. If the length of the number exceeds the display size, press the [Next] button to scroll through additional digits.
5. Press SPKR to release.
To Delete Programmed Key Contents:
1. Press [ProgKy].
2. Press the programmed key.
3. View contents on system lines.
4. Press [Prev] or the button.
5. Press the programmed key again to delete.

Station Telephony Features 156 FlexSet-IP 280S User Guide
Programming: Feature Keys
Programming Boss Group Line Keys
Each FlexSet in a Boss Group can be programmed with up to 6 line keys. The use of programmed line keys assists in defining
the various ways in which a Boss Group can answer incoming calls. To learn about the different uses of Boss line keys, see
Boss Groups on page 64.
To Program Line Keys:
1. Press [ProgKy].
2. Press the LINE NN DSS key you wish to program.
3. Dial Boss LINE feature code (default dial number: #126).
4. Dial the Boss Line number (00 = first line, 01 = second line, etc. up to 05). Two digits must be entered.
5. Dial the Boss Group number.
6. Press the selected LINE NN DSS key again.
7. Press SPKR to release.
NOTE! Do not perform the above steps if your FlexSet has a button preprogrammed with a number of the
trunk reserved for your Boss Group. This button will be used as a line key.

Station Telephony Features 157 FlexSet-IP 280S User Guide
Programming: Feature Keys
Programming ELA Group Line Keys
Each FlexSet in an ELA Group can be programmed with up to 32 ELA line keys. To learn about the different uses of ELA line
keys, see ELA (Extension Line Appearance) on page 100.
To Program ELA Line Keys:
1. Press [Setup][ProgKy].
2. Press the LINE NN DSS key you want to program.
3. Dial the ELA LINE feature code (default dial number: #17718).
4. Dial the ELA Group number (main ELA station number).
5. Dial the Ring State digit, as follows (one digits must be entered):
[3] Delay- Delay ringing after a system-defined timeout period.
[6] - No ring upon receiving an ELA Group call.
[9] - Ye s immediately ring upon receiving an ELA Group call.
6. Dial the ELA Line number (00 = first line, 01 = second line, etc. up to 31). Two digits must be entered.
7. Press the selected LINE NN DSS key again.
8. Press SPKR to release.

Station Telephony Features 158 FlexSet-IP 280S User Guide
Programming: Feature Keys
Programming Keys: Examples
Key
Contents
Key Description Procedure/Example
DSS
(Direct Station
Selection)
Permits you to make or transfer a call to an
extension or trunk by using a defined key, and
provides a busy lamp indication for stations or
trunks programmed under a DSS key.
To program a DSS key for extension 4577:
Press [ProgKy], press the key you wish to program and
then the extension number 4577. To conclude, press
the key again.
Single feature Permits you to activate or cancel a single Coral
feature.
To program a key to turn the Do Not Disturb (DND)
feature on and off: Press [ProgKy], press the key you
wish to program and then the feature code #145. To
conclude, press the key again.
Series of
features
Permits you to program a series of features under
a single key; useful for one-button speed dialing,
voice response and voice mail system access, and
other complex dialing procedures. The SPKR code
#120 must be programmed between each
successive feature sequence.
To program a key to simultaneously turn off the DND
and transfer all calls to a library number programmed
for voice mail:
Press [ProgKy], press the key you wish to program and
then the feature code #145. Dial twice, in succession,
SPKR code #120. Enter feature code #141 7000 (an
example of a library number). To conclude, press the
key again.
NOTE! In order for this to work properly, one of the two
features must be previously activated.
Feature key
without
confirmation
tone or display
Permits you to activate or cancel a feature or
series of features without hearing a confirmation
tone or seeing a display. The SPKR code #120
must be programmed twice after each successive
feature sequence.
Follow the directions above and dial twice, in
succession, SPKR code #120 after library code 7000.

Station Telephony Features 159 FlexSet-IP 280S User Guide
Programming: Feature Keys
Series of
features with
LED indication
Permits you to activate or cancel a series of
features with the LED being controlled by the key
pressing order. When the key is pressed the first
time, the LED will light and the features will be
activated. When the key is pressed again, the LED
will be extinguished, regardless of the current
state of the features.
NOTE! The LED On/Off feature code #1301 must
be programmed before the first feature code is
entered in order to function properly.
To program a key to simultaneously turn on both the
DND and idle display features:
Press [ProgKy], press the key you wish to program and
then the LED On/Off feature code #1301 and feature
code #145. Dial twice, in succession, SPKR code
#120. Enter feature code #137. To conclude, press the
key again.
Outside
telephone
number
(Speed Key)
• Permits you to program a key to dial
an outside telephone number.
To program a key to dial (914)354-8132 over trunk
group 9:
Press [ProgKy], press the key you wish to program and
then enter the trunk group number (9) followed by the
area code 914 and the number 3548132. To conclude,
press the key again.
XDA (External
Destination
Appearance)
Permits you to program a DSS key to provide a
common line appearance of external destinations
for Boss Group members. When the external
destination calls into the Boss Group, its Public
Library key lights at all the boss group member’s
stations.
Program each Boss Group member with a DSS key
containing the reserved Public Library number for the
external destination.
Key
Contents
Key Description Procedure/Example
Station Telephony Features 160 FlexSet-IP 280S User Guide
Programming: Button Labeling
Programming: Button Labeling
The FlexSet includes a removable faceplate for the programmable buttons on the phone, enabling the user to label
the buttons.
The DESI Plus Labeling System is used to label the buttons on the FlexSet. DESI Plus is a user-friendly and powerful
telephone designation strip program, which allows an office printer to quickly create labels custom-designed for various
FlexSets.
The FlexSet comes with a preprinted DESI label inserted beneath the faceplate. Additional blank DESI Labels may be
purchased from your dealer in letter or A4 sized paper. The sheets of peel-off stickers are provided to label the FlexSet buttons
with names and phone numbers. To choose the appropriate label sheet layout designated for the specific FlexSet model, refer
to the table below.
Use DESI software downloaded from the manufacturer’s site: http://www.tadirantele.com/products_terminals.asp or from the
DESI site: http://www.desi.com to print the labels from your computer. Follow the online download instructions.
FlexSet Model
Label Sheet Catalog #
Details
Letter,
(8 ½ x 11”)
A4
IP 280S 7244-7400430 7244-7400420 26 buttons, with Navigator

Station Telephony Features 161 FlexSet-IP 280S User Guide
Programming: Button Labeling
Printing the multi-designation label:
• Use the DESI software to select the layout of your multi-designation label (as described on the previous page)
• Enter the button content names per button location
• Feed your printer with the label sheet
• From the DESI Plus/DESI Lite menu, choose File > Print
NOTE! The left column on the multi-designation label is intended for the four system-defined fixed keys.
Other columns are intended for the programmable speed dial keys.
FlexSet-IP 280S
Lift up to remove cover
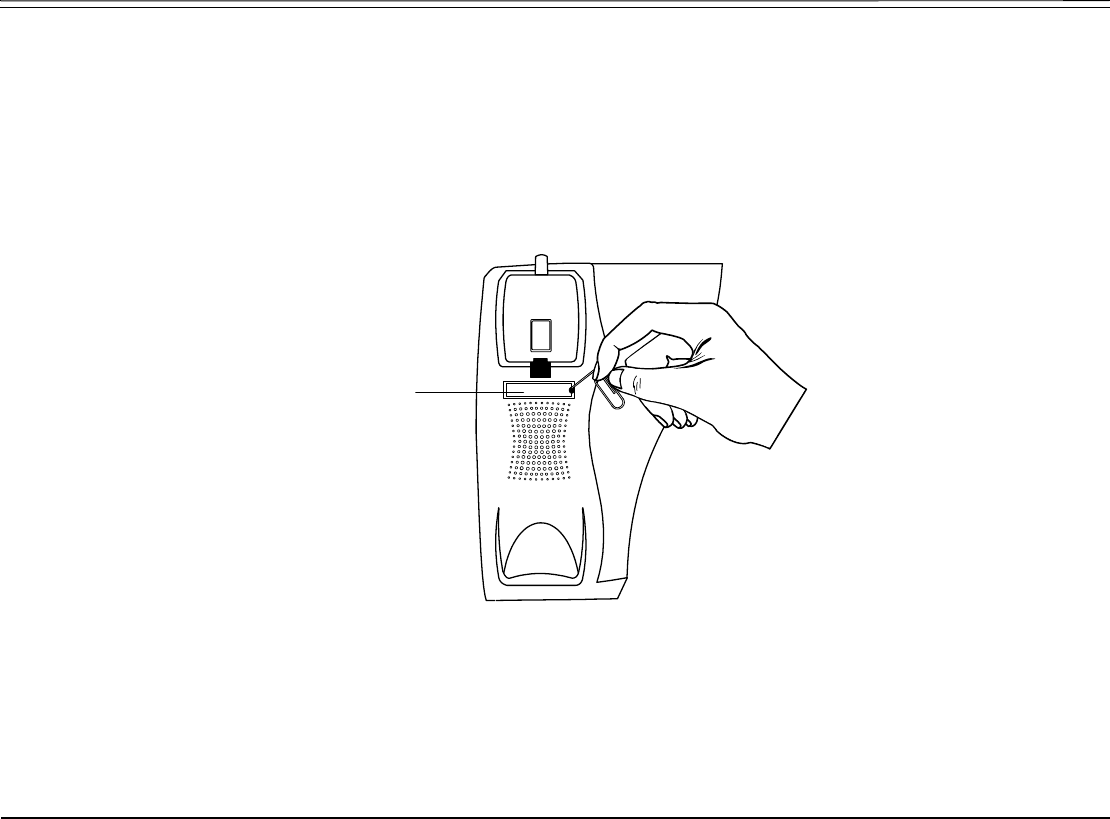
Station Telephony Features 162 FlexSet-IP 280S User Guide
Programming: Button Labeling
Inserting the telephone number:
1. Insert a pointed tool into the hole located on the plastic plate covering the blank telephone number, as shown in the figure
below.
2. Lift upward to remove the plastic plate.
3. Peel off the printed label intended for the telephone number.
4. Insert the printed label.
5. Put the plastic plate back in place over the phone number.
Remove
plate with
paperclip

Station Telephony Features 163 FlexSet-IP 280S User Guide
Recording a Call
Recording a Call
This feature allows you to start recording while in conversation with a second party, 3-way or multi-party conference. It is
operated while the current call is in progress, without disrupting the call.
The Coral system must be equipped with a uCMC, iCMC, CMC, WiCMC or CMC for Windows.
The feature is activated by pressing a toggle RECORD key (a programmed HELP key with APDL as the destination). The
RECORD key is used as a trigger for a predefined destination (APDL) to start recording the call to the user’s voicemail box.
Programming a Record key:
1. Press [Setup] [ProgKy].
2. Choose and press the DSS key.
3. Dial HELP feature access code (default dial number: #1443).
4. Dial the destination APDL.
5. Press the selected DSS key again.
To Start Recording the Call:
1. During a call, in order to record the conversation, press the RECORD DSS key and continue the call.
2. Recording starts when the RECORD key LED flashes.
To Stop Recording the Call:
1. During a call that is already being recorded, press the RECORD DSS key again to end the recording.
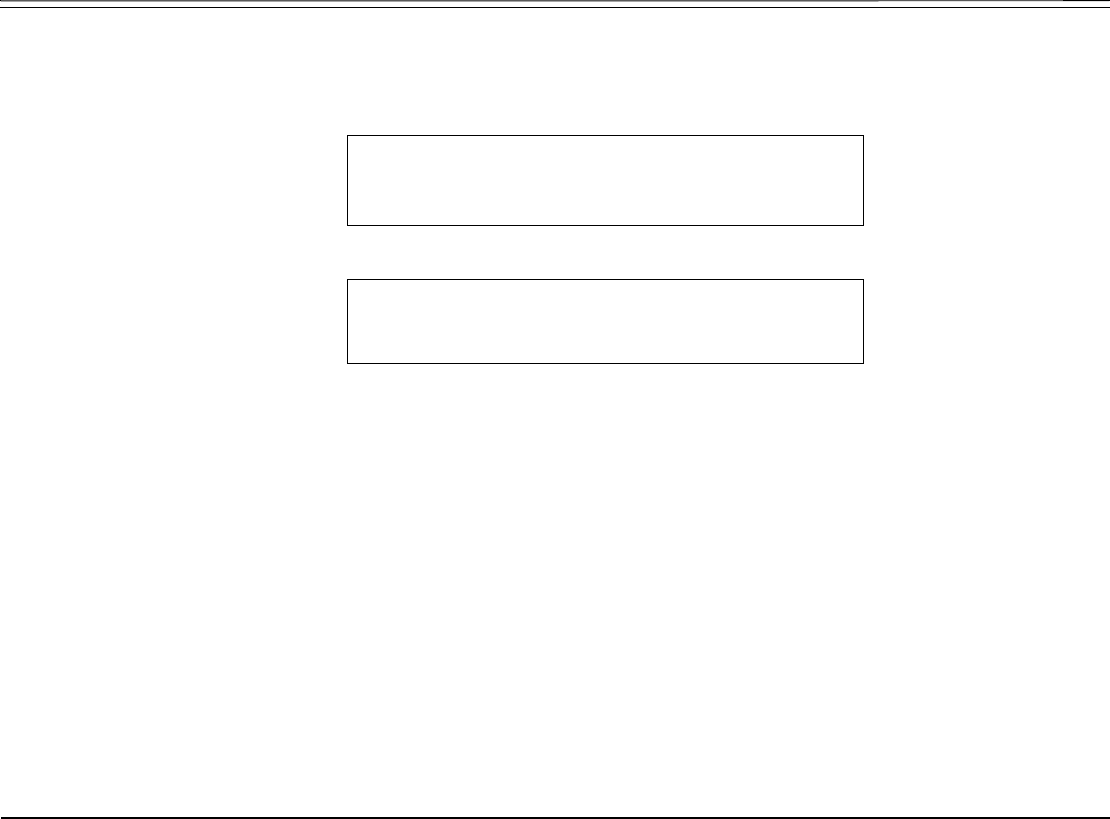
Station Telephony Features 164 FlexSet-IP 280S User Guide
Redial
Redial
Redialing options are accessed by pressing [Redial] from idle state.
[Last#] Last Number Redial is used to redial the last number (most recent number) dialed from this FlexSet. You
can also press asterisk key (*) from the dial pad to redial the most recent number.
[Saved#] Saved Number Redial is used to redial an outside number that you have stored in memory.
A number can be saved during a conversation, when you hear a busy tone, or when the dialed number is not
answered by choosing [Saved#].
NOTE! As opposed to Last Number Redial, the saved number will remain in memory until another
number is saved by repeating the above procedure.
[AutRdl] Auto Redial is used to repeatedly redial an outside number that is busy. More than one number can be stored
in the Auto Redial list. A number can be entered for auto redialing either when you hear the busy tone when
making an external call (see Upon Hearing Busy Tone on page 40), or upon hearing ringback (see Upon
Hearing Ringback Tone on page 38), or from idle before making an external call (see below). The number
will be redialed until the external phone rings, or up to a system-defined number of attempts, before the
number is erased from the Auto Redial list.
Page 1 10:50 26 May 2007 Company xyz
user name station number
→[Redial] Page_Q Remind Pickup
Page 2 Redial Numbers
→Last# Saved# AutRdl

Station Telephony Features 165 FlexSet-IP 280S User Guide
Redial
Activating Auto Redial from idle (before making an external call):
1. Press [AutRdl].
2. Dial the required outside line access code or press the relevant preprogrammed outside line key.
Possible outside line access codes are trunk number, trunk group number, routing access, dial service, private/public
library number, last number redial code, or saved number code.
3. Dial the outside number.
4. Press [Enable].
The number will now automatically redial at timed intervals. When the called party answers, press the flashing SPKR key
or lift the handset to enable conversation.
Once Auto Redial has been activated, the following options appear in idle state after pressing [AutRdl]. The features in the
following table affect all numbers in the redial list.
Press [Next] and [Prev] to scroll through the redial list. When the required number is found the Auto Redial features (see table
below) can be directly activated for the selected number. Press SPKR to exit.
To Press Display Message Feature
Key LED
Comments
Cancel [CanAll] AUTO REDIAL /
LIST EMPTY
Off Deletes all numbers in the redial list. A
confirmation tone is heard.
Freeze [FrzAll] HOLD SET Flashing Ceases all automatic dialing. Confirmation tone is
heard.
Restart
(release from
freeze)
[RstAll] /
SPKR
HOLD REMOVED On Re-enables dialing of the "Frozen" numbers.
Add [Add] On Adds another external number to the redial list.

Station Telephony Features 166 FlexSet-IP 280S User Guide
Redial
nn = serial number (01, 02, 03…), tttt = outside line access code or name, dddd = external telephone number
NOTE! It is recommended that you program a feature key to make the most out of the Auto Redial
feature. To program an Auto Redial feature key, see Programming: Feature Keys on page 153.
Default Auto Redial access code: #178.
To Press Display Message Feature
Key LED
Comments
Select a saved
redial number
[Next] /
[Prev]
REP DIAL # nn
tttt dddddddddd
On Selects the next or previous number in the redial list.
Enable [Enable] /
SPKR
Exits the redial feature and returns to normal keyset
operation.
Restart
(release from
freeze)
[Restar] REP DIAL # nn
HOLD REMOVED
On Re-enables dialing of the selected number.
Immediately
Dial
[ImDial] CONFIRMED On Confirms the selected number and immediately dials.
Cancel [Cancel] On Deletes the selected number.
Freeze [Freeze] REP DIAL # nn h
HOLD SET
Flashing Ceases dialing the selected number.
Assign Priority
(double redial
cycle)
[Priori] REP DIAL # nn P
PRIORITY SET
On Increases the redialing rate for a selected number.
Cancel Priority [CanPri] REP DIAL # nn
PRIORITY REMOVED
On Remove Priority - Returns selected number to standard
redial cycle.
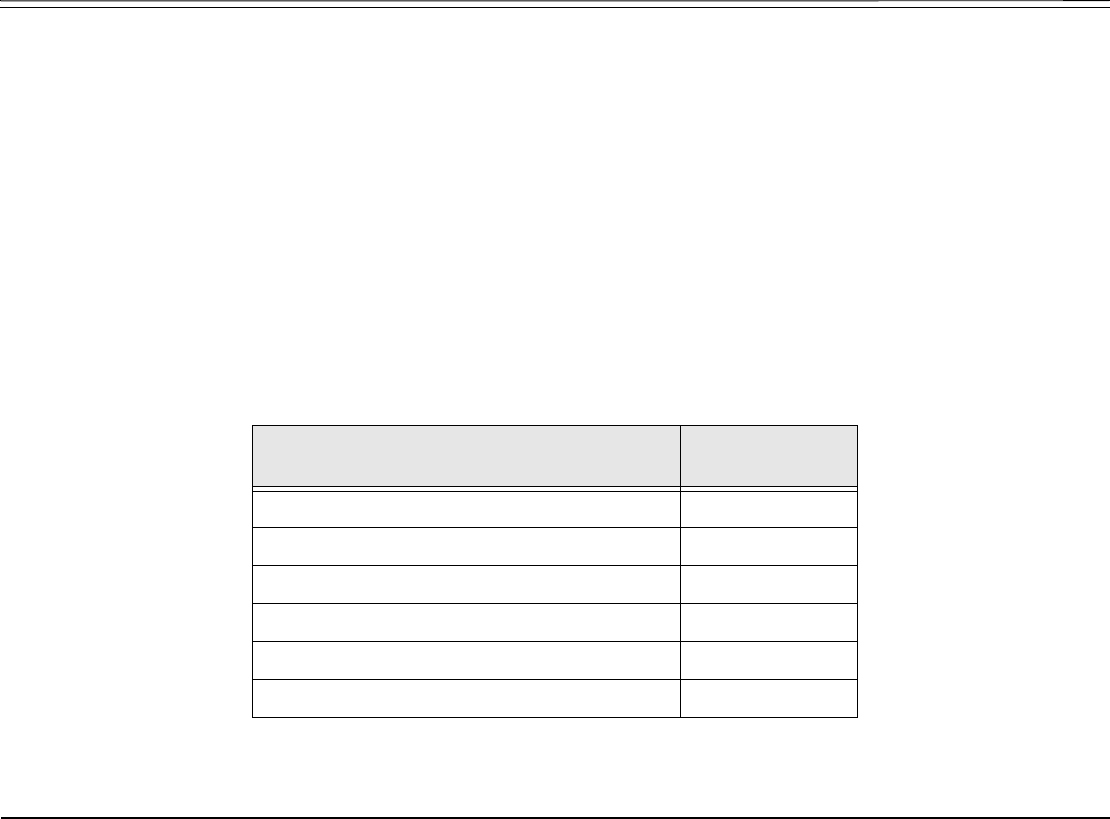
Station Telephony Features 167 FlexSet-IP 280S User Guide
Relay (Accessory)
Relay (Accessory)
You can switch a relay on or off in order to activate certain external devices, such as external alarm, or electric lock. These
devices are installed by your company. Use the form below to write down the types of external devices and their associated
codes that are installed.
Activating/deactivating Relay:
1. Dial the Relay Code (Default Dial Numbers: 7086 to 7091).
2. Choose [Set] to turn relay on;
OR
Choose [Cancel] to turn relay off.
3. Listen for the confirmation tone.
Relay Codes
External Device Relay
Access Code
1. 7086
2. 7087
3. 7088
4. 7089
5. 7090
6. 7091

Station Telephony Features 168 FlexSet-IP 280S User Guide
Reminder
Reminder
Use this feature to set, review, or cancel reminders, which will ring your FlexSet at a designated time. You can set reminders
to ring your FlexSet at one or more designated times. If you do not answer the call, the FlexSet will ring three more times at
one minute intervals. More than one reminder can be programmed. Press [Remind] to access the Reminder menu.
Entering a Reminder request:
To enter a reminder request, press [Remind], enter the time you wish to be called at the ENTER TIME prompt, and choose [AM] or
[PM]. Note that four digits are required for a 12-hr clock: (i.e. 0805 for 8:05).
To add another reminder time, choose [New] and continue as above.
To scroll through the reminder list, press [Next].
To cancel the selected reminder time (displayed on the top line), choose [Cancel].
When Reminder call rings:
When the FlexSet rings, the REMIN message appears on the top line indicating that this is a reminder call. Press SPKR to
answer the call; The ANSWER REMIN message appears on the top line. Choose one of the following:
1. Press [Snooze] to have the system call you again later (after a system-defined time period).
2. Press SPKR again to cancel the reminder.
Page 1 10:50 26 May 2007 Company xyz
user name station number
→Redial Page_Q Hold [Remind] Pickup
Page 2 REMINDER 12:00PM
→New Next Cancel
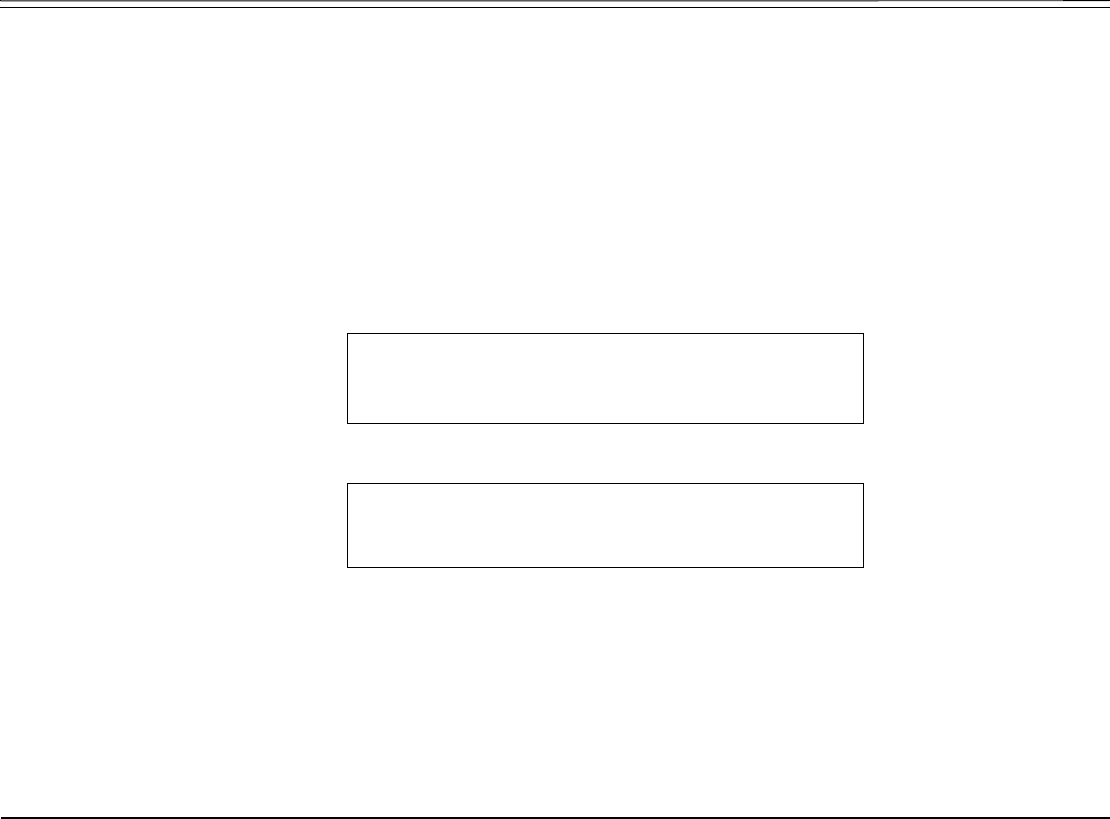
Station Telephony Features 169 FlexSet-IP 280S User Guide
Room Status
Room Status
Used to turn the Room Status definition of your station on or off. There are 16 different Room Status definitions. Use the
Table on page 170 to write in the various room statuses and related access codes available at your telephone.
This feature is applicable for Hotel/Motel use. In cases where this is required, specific instructions will be given.
NOTE! Check with your system administrator whether your Coral system supports the Room Status or
Canned Messages feature. If your Coral system supports the Canned Messages feature (see
page 84), the Room Status feature is unavailable.
Press [RoomSt] to access the Room Status options.
[RmStsx] Press the required Room Status soft key ([RmStsx] where x= 0 to 15, see Table on page 85) to activate. The
status definition appears on the top line. When activated, a bullet is shown next to [RmStsx], and next to [RmSts]
on the idle screen.
To cancel, press the relevant lit •[RmStsx] key again.
Page 1 10:50 26 May 2007 Company xyz
user name station number
↑→ [RoomSt]
Page 2 Room Status
↓→ RmSts0 RmSts1 RmSts2 RmSts3 RmSts4

Station Telephony Features 170 FlexSet-IP 280S User Guide
Room Status
Room Status - Names and User Access Codes
Room Status
Number
Soft Key Access Code
(Dial Pad#)
Name
0[RmSts0] 7026
1[RmSts1] 7027
2[RmSts2] 7028
3[RmSts3] 7029
4[RmSts4] 7030
5[RmSts5] 7031
6[RmSts6] 7032
7[RmSts7] 7033
8[RmSts8] 7034
9[RmSts9] 7035
10 [RmSs10] 7036
11 [RmSs11] 7037
12 [RmSs12] 7038
13 [RmSs13] 7039
14 [RmSs14] 7040
15 [RmSs15] 7041

Station Telephony Features 171 FlexSet-IP 280S User Guide
Series Call
Series Call
Series is used to mark an external call before transferring it to a third party. This causes the call to return to you after the third
party hangs up. This feature can only be used during conversation.
Marking a call as a Series Call:
1. During conversation, press [Series] to mark the call.
2. Listen for the confirmation tone.
3. Transfer the call when you are ready.
The marked call will now return to you after the third party has hung up.
NOTE! Should you try to mark a call that has already been marked the error message ALREADY SET will
appear.
When your telephone rings (third party hangs up):
1. The call will return to you with the SERIES message displayed.
2. Answer the call as normal when your station rings.
3. Ask calling party if transfer to another party is required; or
Set up the call as a series call; or Hang up.
Station Telephony Features 172 FlexSet-IP 280S User Guide
Silent Monitoring
Silent Monitoring
This feature enables an authorized (COS and AUTHORIZATION) user to monitor and/or record (may require additional
hardware) any system port, station, trunk, etc. in any state (except data and conference), without audio or visual warning to
the monitored party. While monitoring a port, your telephone returns a busy signal for all incoming calls.
The volume can be adjusted using the buttons whilst monitoring, and you can whisper by pressing [WhspPg].
Press [SltMon] to access the Silent Monitoring options.
[S.Mon1] 1-Way Split Silent Monitoring is used to monitor either side of a 2-way conversation separately. Only one
of the conversing parties can be heard at any one time. This feature can be activated from idle only, as
follows:
1. Press [S.Mon1].
Page 1 10:50 26 May 2007 Company xyz
user name station number
→[SltMon] AcctCd IdCtrl WakeUp aWake
Page 2 Silent Monitoring
↓→ S.Mon1 S.Mon2

Station Telephony Features 173 FlexSet-IP 280S User Guide
Silent Monitoring
2. At the prompt, dial the station number of the original destination (1st party), then:
• To monitor the 1st conversing party, choose [Origin] or dial the cancellation code 8
• To monitor the 2nd conversing party, choose [Prtner] or dial the activation code 9
• To cancel Split Silent Monitor, press SPKR or hang up.
NOTE! If you hear the reorder tone when attempting to monitor a call, the port is SECURED against
monitoring.
[S.Mon2] 2-Way Silent Monitoring is used to monitor both sides of a 2-way conversation simultaneously. This feature
can be activated from idle, or while attempting to call a busy or non-answering destination.
NOTE! This feature requires a CNSsl card, an 8DRCF, an 8DRCM card or a CNF card to be installed in
the system. When a CNF card is installed, it must be defined as C3-WAY.
Operating from idle:
1. Press [S.Mon2].
2. At the prompt, dial the station number.
Options available while monitoring:
• To cancel 2-way Silent Monitor, press [Abort], SPKR or hang up.
• To whisper to the 1st party, press [WhspPg].
Operating upon hearing busy or ringback tone:
1. Dial the station.
2. Upon hearing busy or ringback tone, press [S.Mon2].
OR
Press [Xfer] and dial 9.

Station Telephony Features 174 FlexSet-IP 280S User Guide
Silent Monitoring
Options available while monitoring:
• To cancel 2-way Silent Monitor, press [Abort], SPKR or hang up.
• To whisper to the 1st party, press [WhspPg].
NOTE! If you hear the reorder tone when attempting to monitor a call either the port is protected against
monitoring (SECURED) or All conference card ports are engaged (NO RESOURCE).
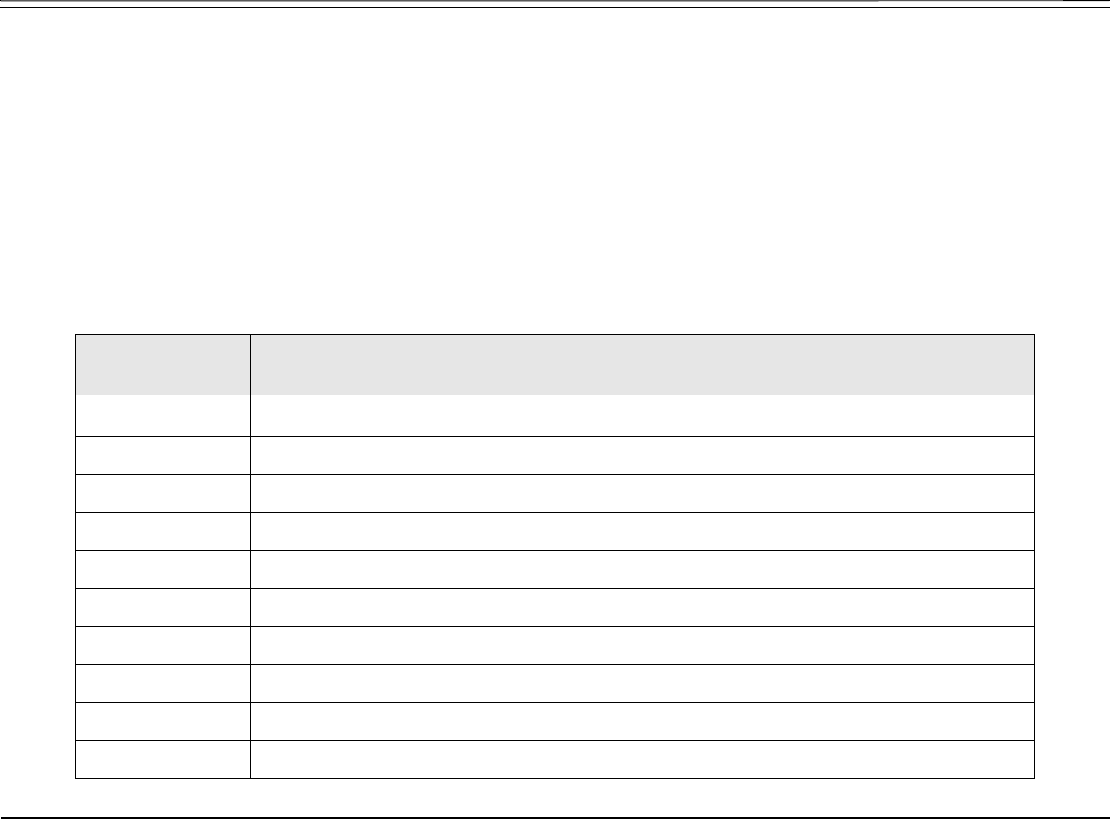
Station Telephony Features 175 FlexSet-IP 280S User Guide
Speed Dialing: Private Library
Speed Dialing: Private Library
You may program your telephone with your own private Speed Dial directory, which can be used to speed dial long
numbers. Each entry is called a Private Library Number. The Private Library can be programmed with an external or
internal dial number. You can also use a Private Library to dial external or network numbers for features that allow only
internal destinations such as Call Forward, Divert and Hunt features. When entering external dial numbers, make sure to
include the external access code into the Private Library number as well.
The speed dial numbers are programmed per station and are unique to each station. Therefore, dialing the same private
library number at one station will most likely include a different destination than dialing the same Private Library
number at another station. Use the table below to write down your Coral Speed Dial numbers.
Private Library - Speed Dial Numbers
Private Library
Number
Private Library Contents (Destination)
7000
7001
7002
7003
7004
7005
7006
7007
7008
7009

Station Telephony Features 176 FlexSet-IP 280S User Guide
Speed Dialing: Private Library
Programming a new Private Library:
Private Libraries are saved via the Coral system with your station number but not in your FlexSet’s memory.
Private Library is accessible from the Setup menu. Press [Setup] [PrvLib] to access the Private Library options.
[Lib#] Library is used to select a new Private Library number.
[Prev] Previous scrolls to the previous Private Library.
[Next] Next scrolls to the next Private Library.
To program or change a Private Library Speed Dial number
1. Press [Setup] [PrvLib].
2. Choose [Lib#] and dial the Library number to be programmed or scroll through the list of private library numbers using [Next]
and [Prev] or the and keys.
Page 1 10:50 26 May 2007 Company xyz
user name station number
→Lock Exec COS-Sw [Setup] Trace
Page 2 Feature Setup
↓→ [PrvLib] Secure DND-WP MoveSt
Page 3 PRIVAT LIBRARIES
→Prev Next

Station Telephony Features 177 FlexSet-IP 280S User Guide
Speed Dialing: Private Library
3. The Library number (e.g.: PRIVAT LIB 7000) appears on the top line of the display. The Library contents appear on
the second line of the display.
NOTE! Use the table on page 175 to write down your Coral Private Speed Dial numbers (default Private
Library numbers are 7000 to 7009, these may differ in your system, see your system administrator
for your system’s Private Library numbers).
4. Dial the digits you would normally dial to place the call (include outside line access code). Insert required dial parameters
in between the dialing digits when needed. These parameters appear over pages on your FlexSet display. Press the
relevant soft key when needed. The list of dial parameters is given below:
NOTES! Possible outside line access codes are: trunk number, trunk group number, dial service, routing
access or another public/private library number.
The number of digits that can be programmed, including Codes and Pause (time delay), is limited
by the system (defined system-wide). Should you try entering a longer digit string than allowed,
the system will give the error message LENGTH EXCEEDED, and programming will stop.
[Extrn#] External telephone number. Choose this to program or change an external number in the required Library
number. Dial the required external number. Press SPKR to save your entry, or [Next] or [Prev] to save this
number and select a new library number.
[Next] Next is used to view the next Library number.
[Prev] Previous is used to view the previous Library number.
[Cancel] Cancel is used to delete the Library contents.
After entering the outside access code, when entering digits into the Library number, you may also enter any
one of these special dial codes in between the digits to enhance dialing:
[Pause] [x sec] Time Delay (seconds) where x=1 to 9: Introduces a delay of x seconds before the following digits are dialed.
[Codes] [Final] Final Digit (stop dial). Indicates to the system to stop dialing the outside number (display shows ‘.’).

Station Telephony Features 178 FlexSet-IP 280S User Guide
Speed Dialing: Private Library
[Codes] [FreeDl] Free Dial. Offers the user a free time interval in which he is able to dial any number of digits.
[Codes] [Pulse] Dial Pulse. Notifies the system that all following digits will be Dial Pulse digits.
[Codes] [Tone] Dial Tone (DTMF). Notifies the system that all following digits will be DTMF digits.
[Codes] [DspOff] Display Off. Inhibits the display of the Library contents on the FlexSet. Also used for Call Accounting
System (digits displayed as ‘_’).
[Codes] [DspOn] Display On. Enables the display of the Library contents on the FlexSet. Also used for Call Accounting
System.
[Codes] [WaitDT] Wait for Dial Tone. Asks the system to wait for Dial Tone before dialing the digits.
[Codes] [Dsp -] Display Dash (–). Displays a dash (–) within the dialing number on the FlexSet.
[Codes] [FlshTk] Flash Trunk. Sends a Calibrated Opening (Flash) over a trunk line (display shows hf).
[Codes] [Dial *] Dial Asterisk (*). Dials an asterisk (*) as part of the dialing number.
[Codes] [Dial #] Dial Pound (#). Dials a pound sign (#) as part of the dialing number.
Deleting a single Private Library Number from memory:
1. Press [Setup] [PrvLib].
2. Choose [Lib#] and dial the Library number to be removed or scroll through the list of private library numbers using [Next] and
[Prev] or the and keys.
3. The Library number (e.g.: PRIVAT LIB 7000) appears on the top line of the display. The Library contents appear on
the second line of the display.
4. Choose [Cancel].
5. Press SPKR to exit.

Station Telephony Features 179 FlexSet-IP 280S User Guide
Speed Dialing: Using Private and Public Libraries
Speed Dialing: Using Private and Public Libraries
Speed dialing using a Private Library or system Public Library number is basically the same, therefore the process
is described generally for both dialing systems. If Public Speed Dialing is available on your system, consult your
company directory for library numbers.
To dial a Public or Private Speed dial number:
1. Lift handset.
2. Dial speed call library number (Private or Public).
Notes: 1) In some cases the Speed Dialing number must be followed by a Forced Account code. When Forced Account
code is required the distinctive dial tone is heard after dialing the speed call library number.
2) Certain speed dialing numbers require that you dial the relevant outside line access code. When required, the
dial tone is heard after dialing the Speed call library number.
Station Telephony Features 180 FlexSet-IP 280S User Guide
Touch-Tone Dialing (DTMF) for Other Common Carriers (OCC)
Touch-Tone Dialing (DTMF) for Other Common Carriers (OCC)
NOTE! Requires FlexSet-IP software version 3.26 or higher.
Enables you to send DTMF tones using the dial pad over non-DTMF trunks and stations during any call (FlexSet to trunk,
FlexSet to FlexSet, 3-Way Conference, Meet-Me Conference, etc.). In this way you can control any device (such as Voice
Mail, IVR, start/stop recording a call, etc.) requiring DTMF response.
The party information is displayed on the top line. The digits are displayed on the second line as they are dialed and the
corresponding DTMF tones are heard by all parties to the call.
NOTE! FlexSets defined with Auto Transfer must use this feature even when sending DTMF tones to
DTMF trunks and stations.
The OCC feature is an on/off toggle switch. Press [OCC] once to activate DTMF mode; press again to return to normal mode.
Activating using soft keys:
1. Press [OCC].
2. Dial the required digits.
Activating using preprogrammed key:
1. Press the preprogrammed OCC key.
2. Dial the required digits.
NOTE! To learn how to program a key, see page 153. To program an OCC key, use feature code #127.
ANSWER party info
DIAL 123456...
↑→ [OCC]

Station Telephony Features 181 FlexSet-IP 280S User Guide
Transfer (Xfer)
Transfer (Xfer)
You can transfer both internal and external calls to other users within your system or outside it. Transfer routes a call you
received to an idle station. It can also link a call you held to other ports. When Auto transfer is defined at a station, dialing a
number will automatically transfer that number, thus initial use of [Xfer] or XFER is not necessary, although subsequent actions
do require pressing [Xfer] (as defined in this manual). This feature is typically utilized by attendants. Remaining procedures are
the same as for a regular transfer. A call can be screened or unscreened:
•Screened Transfer (Consultation Transfer): You may announce the call before transferring.
•Unscreened Transfer (Direct transfer, Blind transfer, Unsupervised transfer or Cold transfer): You may transfer
the call without a prior announcement or without notifying the recipient. When the destination is busy, hanging up will
cause the system to camp on (external call only) to the busy station.
Transferring an established call:
1. During a call, press [Xfer] or XFER.
2. Dial the third party destination number.
3. Choose one of the following options:
• Wait for an answer to announce the call and disconnect (screened transfer).
You can now alternate between the two parties and speak privately with one while the other is put on hold
by choosing the relevant flashing Exclude Source/Destination soft keys.
• If [Source] is flashing, choose [Source] to speak privately with the first party.
• If [Dest] is flashing, choose [Dest] to speak privately with the second party.
• If neither [Source] nor [Dest] are flashing, choose either [Source] or [Dest] and then converse 3-way.
• If you are in 3-way and you wish to converse privately again with any party; choose either the [Source] or [Dest] and
the other party will again be put on hold.
• Press [Xfer] to release the destination (second) party and return to 2-way conversation with the source.
• Choose [FrcRls] to release all parties.
• Choose [3-Way] to establish a 3-way call.

Station Telephony Features 182 FlexSet-IP 280S User Guide
Transfer (Xfer)
OR
• Disconnect to automatically transfer the call (unscreened transfer).
If the 3rd party is busy or does not answer, the call will return to you with the relevant BUSY or NO
ANSWER message.
Station does not answer
Station is busy
Answer the return call, then either:
• Ask the calling party if they wish to transfer to another party.
• Hang up.
• Press [CampOn] to automatically camp on to the station from which the call was transferred.
Transferring a held call:
Use transfer of a held call to connect an incoming call to the held party, such as when you have to locate someone for a caller.
1. Press [Xfer] or XFER. While the party is being held, dial a destination number.
2. Press the flashing DSS key associated with the held call.
3. Press SPKR or hang up to transfer the call.
NANS station unanswered # original caller #
NO ANSWER station unanswered #
→DND Mute FwdAll All-E Number
SBSY busy station # original caller #
BUSY busy station #
→DND Mute FwdAll Number CallWt
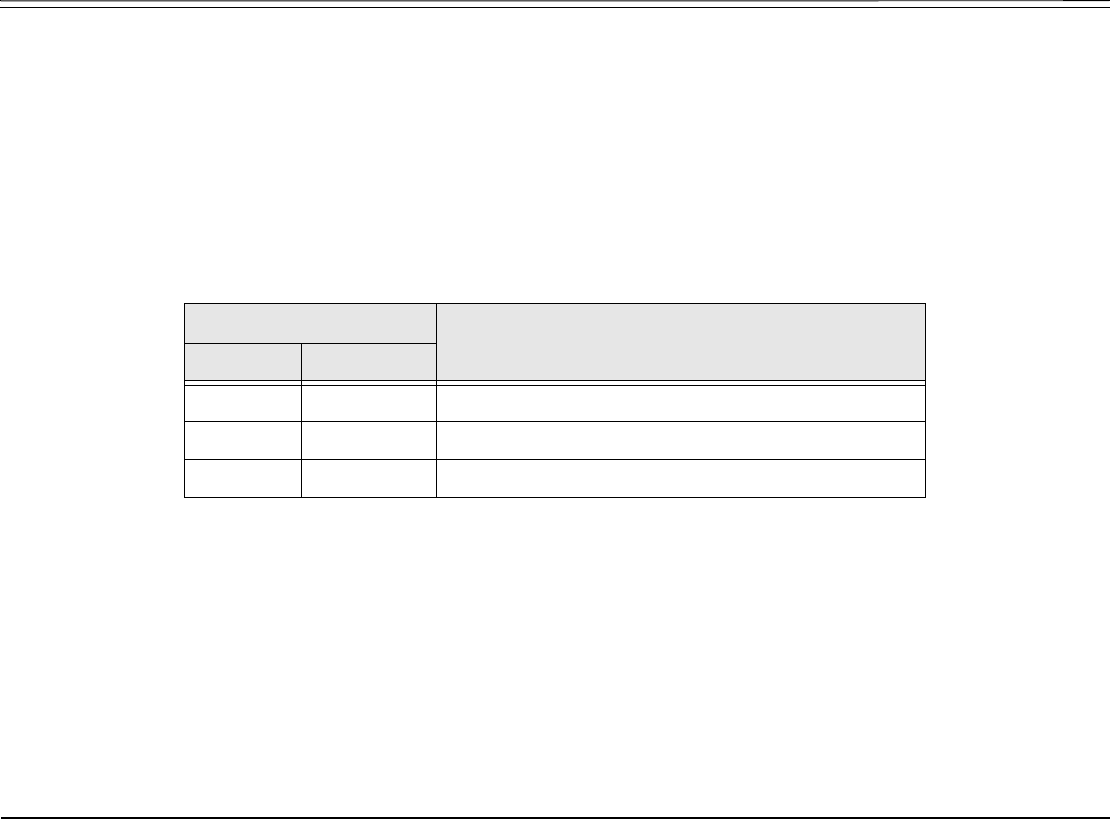
Station Telephony Features 183 FlexSet-IP 280S User Guide
Transfer (Xfer)
Transfer: Split Call
Split call allows you to alternate between two other parties, by pressing soft keys defined as Exclude Source and Exclude
Destination. The feature also allows 3-way conversation by merely pressing one of the keys, [Source] or [Dest], when the bullet
next to that key is steadily lit. This feature can be activated in any sequence, any number of times. When you speak privately,
with either the Source or Destination, the other party is automatically put on hold.
Source: the first party with whom a connection was made.
Destination: the second party with whom a connection was made.
The following table allows identifying the progress of split calls when your FlexSet is not equipped with a message display.
Activating Split Call on conversation:
1. Press [Xfer].
2. Dial the destination number and wait for an answer.
3. You can now alternate between the two parties and speak privately with one while the other is put on hold by pressing
the relevant flashing key.
4. Press the flashing [Source] to speak privately with the first party; or
Press the flashing [Dest] to speak privately with the second party; or
You can press [3-Way] or the key with a steadily lit bullet and then converse 3-way.
Keys Status
Source Dest
On Flashing Speaking privately with source (first party)
Flashing On Speaking privately with destination (second party)
On On 3-way conversation

Station Telephony Features 184 FlexSet-IP 280S User Guide
Transfer (Xfer)
5. If you wish to converse privately again with any party:
Press either the [Source] or [Dest] key and the other party will again be put on hold.
6. If you wish to release the destination (second) party and return to 2-way conversation with the source, press [Xfer].
7. If you wish to release all parties press [FrcRls].

Station Telephony Features 185 FlexSet-IP 280S User Guide
Transfer: Broker/Consultation/3-Way Conference Call
Transfer: Broker/Consultation/3-Way Conference Call
Your telephone can be set up to use one or all (if your Transfer COS is defined as ALL) of the following three-party transfer
functions, as defined by your Transfer COS definition (consult your system administrator for details).
Each action is performed by first pressing [Xfer] (transfer) or XFER; however, for stations where Auto Transfer is defined (in
the Class of Service), transfer will take place as soon as the required number is dialled. This will take effect only the first time
that the transfer takes place. Subsequent actions do require pressing [Xfer] as defined in this manual.
Function Use to:
Broker Call This feature allows you to put a call on hold and then converse privately with a third party, while
switching between the two calls. The party not in conversation is automatically put on hold and cannot
hear any other conversation. See Transfer: Broker on page 186.
Consultation Call This feature allows you to consult with a third party. While consulting, the original caller will be put on
hold. After consultation is complete the two original parties will be reconnected and the consulted party
is then released. See Transfer: Consultation on page 187.
3-Way Conference
Call
This feature allows you to bring a third party into an ongoing conversation. All three parties can
converse in a three party conference. See Transfer: 3-Way Conference on page 187.
Combination of
Consultation/
Broker/
3-Way Conference
This feature allows you to change a conversation from broker to consultation to 3-way conference by
pressing [Xfer] or XFER while in conversation. The first transfer allows you to converse privately with a
third party. The second transfer allows you to speak privately with the original party, while the third
party is put on hold. The third transfer places you in a 3-way conversation with all parties.

Station Telephony Features 186 FlexSet-IP 280S User Guide
Transfer: Broker/Consultation/3-Way Conference Call
Transfer: Broker
During a call, use this feature to connect to a third party while placing the original (source) party on hold. You may continue
to switch between the two calls (parties). The party not in conversation is automatically put on hold.
1. During the call, press [Xfer] or XFER.
2. Dial the third party dial number.
3. Wait for an answer.
The original party is placed on hold. You may now speak freely with the third party.
4. The following options are now available:
•Press [Broker] or [Source] or [Dest] to alternate between the calls any number of times.
[Source] and [Dest] flash depending on which party you are connected to.
•Press a non-flashing [Source] or [Dest] soft key for a 3-way call.
•Press [FrcRls] in order to release all parties and press SPKR.
•Press SPKR or hang up in order to allow conversation between the two parties.
NOTE! If you do not succeed in establishing the Brokered call, your Transfer COS definition may not be
set to use the Broker Call function. Consult your system administrator for details.

Station Telephony Features 187 FlexSet-IP 280S User Guide
Transfer: Broker/Consultation/3-Way Conference Call
Transfer: Consultation
This feature allows you to consult with a third party while the original caller (or called party) is automatically placed on hold.
After the consultation is complete, the two original parties are reconnected and the consulted party is released.
1. During the call, press [Xfer] or XFER.
2. Dial the third party dial number.
3. When your call is answered, the original party is placed on hold so that you may converse privately with the second
party.
4. After the consultation is concluded, press [Conslt] or [Xfer] to return to the original call and disconnect from the consulted
party.
NOTE! If you do not succeed in establishing the Consultation call, your Transfer COS definition may not
be set to use the Consultation Call function. Consult your system administrator for details.
Transfer: 3-Way Conference
During a call you can use this feature to add another party to the call, creating a 3-way Conference call.
1. During the call, press [Xfer] or XFER.
2. Dial the third party dial number.
3. Wait for the third party to answer.
4. Press [3-Way] or XFER to connect all 3 parties. If your COS definition is defined as ALL, then you must press [3-Way]
again to establish the 3-way call;
or
Press [FrcRls] to release the third party and to return to the original call (same as consultation call).

Station Telephony Features 188 FlexSet-IP 280S User Guide
Transfer: Broker/Consultation/3-Way Conference Call
Other options after 3-way call is established:
• Press [Xfer] or XFER again to release the third party, and continue conversing with the original party.
• Press the lit [Source] to converse privately with the first (Source) party that you connected to. The third (Destination)
party is put on hold while you converse and [Dest] flashes.
• Press the lit [Dest] to converse privately with the second (Destination) party that you connected to. The second
(Source) party is put on hold while you converse and [Source] flashes.
• Press the flashing [Dest] or [Source] soft key to switch between the Source and Destination parties.
• Press [3-Way] to reconnect all three parties again.
• Press [FrcRls] to end the call (3-Way or 2-Way).
NOTE! If you do not succeed in establishing a 3-way call, your Transfer COS definition may not be set to
use the 3-Way Call function. Consult your system administrator for details.
Station Telephony Features 189 FlexSet-IP 280S User Guide
Wakeup
Wakeup
Use this feature to program your FlexSet to ring at designated times. If you do not answer the call, the FlexSet will ring three
more times at one-minute intervals. If you do not answer by the third call, the wakeup call is routed to the attendant and a
wakeup report is printed.
Press [WakeUp] to access the Wakeup options.
Entering first Wakeup request:
1. Press [WakeUp].
2. Enter the time you wish to be called at the ENTER TIME prompt.
Note that four digits are required for a 12-hr clock: (i.e. 0805 for 8:05)
3. Choose [AM] or [PM].
NOTE! If you hear a reorder tone, Wakeup is denied at your station (as defined by Class of Service). In
order to make use of this feature, request that the attendant activate Wakeup at your station.
4. To add another Wakeup time, choose [New] and continue as above.
5. To scroll through the Wakeup list, press [Next].
6. To cancel the selected Wakeup time (displayed on the top line), choose [Cancel].
Page 1 10:50 26 May 2007 Company xyz
user name station number
→IdCtrl [WakeUp] Cnflns GpCall AcdUcd
Page 2 WAKEUP 10:00am
→New Next Cancel

Station Telephony Features 190 FlexSet-IP 280S User Guide
Wakeup
When Wakeup call rings:
When the FlexSet rings, the WAKE CALL NAME/NUM message appears on the top line indicating that this is a Wakeup
call. Press SPKR to answer the call. Choose one of the following:
1. Press [Snooze] to have the system recall you later; or
2. Press SPKR to cancel the reminder.
Station Telephony Features 191 FlexSet-IP 280S User Guide
Whisper Paging
Whisper Paging
This feature allows an authorized user to break into an ongoing call, without interfering with the call itself, by whispering to
one of the conversing parties. A Whisper Tone, in and out, is heard by the side whispered to.
The second party engaged in the original call hears neither tone, nor the whisper, and the whisperer cannot hear the second
conversing party. The party whispered to continues to hear the second party, and also hears the whisperer in lowered volume.
The party whispered to can reject the whisper page.
This feature can also be activated while in Silent Monitor and then the whisperer can be heard as well as hear the two parties
conversing.
Press [WhspPg] to Whisper Page a station.
Sending a Whisper Page:
1. Press [WhspPg].
2. Dial a station number.
3. Listen for the whisper tone.
4. Deliver the message and disconnect.
Page 1 10:50 26 May 2007 Company xyz
user name station number
→CampOn Park V-Page [WhspPg] AcctCd
Page 2 WHSPR PAGE
*Enter Destination*

Station Telephony Features 192 FlexSet-IP 280S User Guide
Whisper Paging
NOTES!
• Whisper Page may not be sent to FlexAir handsets (T-402, T-404, T-408, T-304) and IP stations (T207M, T208M,
T207S, T208S and FlexSet-IP 280S).
• This feature can be activated while you are silent monitoring the whispered party (see Silent Monitoring on
page 172). Then you can be heard by the whispered party, as well as hear the two conversing parties.
• When you hear the reorder tone and the DND WHISPER message appears, the station is protected from receiving
whisper paging calls.
• If you hear the reorder tone and the ON-HOOK BY message appears, the receiving party has rejected your
whisper page.
Attendant Features 193 FlexSet-IP 280S User Guide
Available Functions
Attendant Features
Available Functions
The following pages list the Attendant features that are available on your FlexSet. Attendant features are available only when
the station is defined as having Attendant station privileges. Not every Attendant feature listed may have been installed in
your system, or at your station/extension. Attendant features are dependent on the assigned Class of Service (COS) levels.
Check with your system administrator for a list of the specific features installed.
Most attendant features are activated upon other stations. The available features are displayed below. These features are
accessed from idle.
10:50 26 May 2007 Company xyz
user name station number
→aWake aTrace aRmSts aFwd Charge
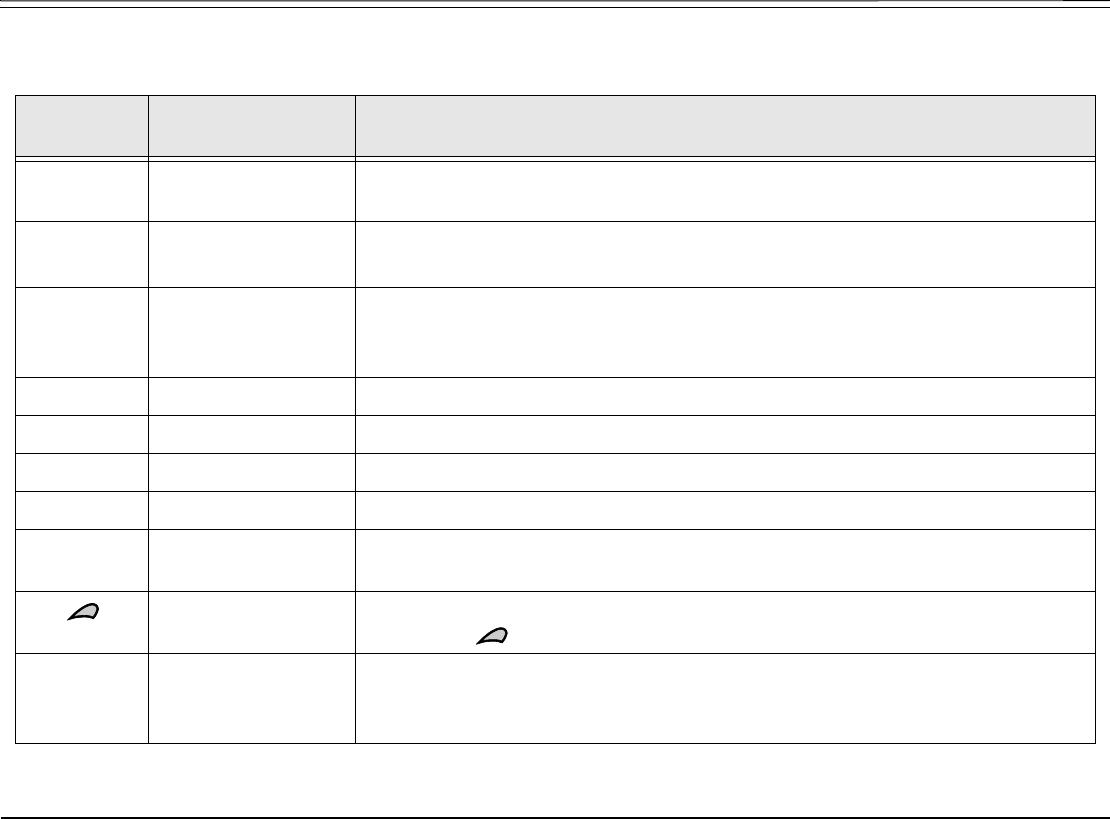
Attendant Features 194 FlexSet-IP 280S User Guide
Available Functions
Available Functions
Function
Option
Mnemonic Function Explanation
[Dest] Destination Any station, trunk, ACD/UCD Hunt Group, Boss Group and Public Library port
defined in the system.
[St#]
[St/Rm#]
Station #
Station/Room #
Port dial number defined in the Coral system for a telephone line.
[St/Gp#]
[StRmGp]
Station/Group #
Station/Room/ Station
Group
A number of stations linked together (members) for a common function such as
ACD/UCD group or Boss Group. A station can be defined as a member of many
ACD/UCD groups and/or Boss Groups.
[Trunk#] Trunk Dial # Dial Number assigned to a trunk.
[TrkGP#] Trunk/Group Number A number of trunks linked together (members) for a common outgoing function.
[FastUp] Fast Up Scroll Used to fast scroll forward to the next assigned feature.
[FastDn] Fast Down Scroll Used to fast scroll backward to the previous assigned feature.
[Next] Next Used to scroll forward port by port through available ports. While scrolling, the port
name/number appears on the top line.
Operates similarly to [Next].
Keeping the button depressed will scroll forward continuously.
[Prev] Previous Used to scroll backward port by port through available ports. While scrolling, the
port name/number appears on the top line.
Once you reach the first port on the list, this option changes to another option.
Attendant Features 195 FlexSet-IP 280S User Guide
Available Functions
Operates similarly to [Prev].
Keeping the button depressed will scroll backward continuously.
Scrolling The scroll icon used in this document indicates features for which scroll lists are
available, namely the [PortUp], [PortDn], [Next], [Prev], [FastUp] and [FastDn] soft keys,
and buttons.
[Cancel] Cancel Used to cancel or to deassign a selected feature.
[Set] Activate Used to activate or to assign a selected feature.
[Exit] Exit/Terminate Same as pressing SPKR.
Used to determine the end of the feature programming or to escape from the
current operation.
Function
Option
Mnemonic Function Explanation

Attendant Features 196 FlexSet-IP 280S User Guide
Call Forward
Call Forward
The attendant may program stations, boss groups and ACD/UCD groups so that incoming calls ring at various destinations,
depending on the state of the terminal (all, busy, no answer, timed).
These features can also be operated directly from a user station when defined by the COS, without attendant involvement.
Calls incoming from an external source only can be forwarded using [All-E], [Busy-E], [NoAn-E], and [Time-E]. Additionally, calls from
Internal and External sources can be forwarded to different destinations, as described in Internal/External Call Forwarding on
page 73.
Possible destinations are operator, station/group, external number via public and private speed call library, DVMS pre-
recorded message, UNA/central bell, group call, or network number (and the station itself for external calls).
Attendant Call Forwarding options are accessed by pressing [aFwd] from idle state.
[All] or [All-E] Forward All. The attendant may program stations, boss groups and ACD/UCD groups so that incoming calls
ring at another destination. The destination can call back or return calls to the source, and the user can still
place outgoing calls from their telephone. The Distinctive Dial Tone sounds upon lifting the handset at the
user’s station.
Page 1 10:50 26 May 2007 Company xyz
user name station number
→Trace aTrace RoomSt aRmSts [aFwd]
Page 2 Attendant: Call Forward
E=External BNA=BusyNoAns
↓→ All All-E Busy Busy-E NoAns

Attendant Features 197 FlexSet-IP 280S User Guide
Call Forward
[Busy] or [Busy-E] Forward Busy. The attendant may program stations and boss groups so that incoming calls ring at another
destination when the originally called station or group is busy.
[NoAns] or [NoAn-E] Forward No Answer. The attendant may program stations and boss groups so that incoming calls ring at
another destination when the originally called station or group does not answer within a system-defined
number of rings.
[Time] or [Time-E] Forward Timed. The attendant may program stations, boss groups and ACD/UCD Groups so that incoming
calls ring at another destination during specified system-defined time periods. See table on page 71.
Operating Attendant Call Forward:
1. Press [aFwd].
2. Choose the required forwarding option ([All], [All-E], [Busy], [Busy-E], [NoAns], [NoAn-E], [Time], [Time-E]).
3. Choose [St/Gp#] and dial the originating station/group number, or scroll between stations/groups using .
4. To set Call Forward, choose [Dest] and dial the call forward destination number, OR
To cancel Call Forward, choose [Cancel].
5. Press SPKR or [Exit] to exit and save.
Attendant Features 198 FlexSet-IP 280S User Guide
Canned Messages
Canned Messages
The Canned Messages feature is used to set a canned message for other stations. The attendant may set individual stations
with any one of 16 canned messages so that internal callers to the station see the message displayed on the second line of their
display panel until the call is answered.
Canned Messages can also be set directly from a user station, without attendant involvement (see page 84).
Canned message texts are pre-programmed by your system adminitrator. They can be used to indicate the station’s status (or
any other pertinent information) to the calling party. Contact your system administrator for the list of canned message texts
used in your organization. Use the Table on page 200 to list the canned messages available.
NOTE! Check with your system administrator whether your Coral system supports the Canned Messages
or Room Status feature. If your Coral system supports the Room Status feature (see page 202),
the Canned Message feature is unavailable.
Press [aRmSts] to access the Canned Messages options.
[RmStsx] Canned Message x (where x= 0 to 15, see Table on page 200).
Page 1 10:50 26 May 2007 Company xyz
user name station number
→Trace aTrace RoomSt [aRmSts] aFwd
Page 2 Attendant: Room Status
↓→ RmSts0 RmSts1 RmSts2 RmSts3 RmSts4

Attendant Features 199 FlexSet-IP 280S User Guide
Canned Messages
Operating Canned Messages:
1. Press the required Canned Message soft key. The canned message appears on the top line.
2. Press [St/Rm#] and enter the station/room number, or scroll through the list using .
3. Choose [Set] to activate, OR
Choose [Cancel] to deactivate or reset.
The status definition ASSIGN/DEASSIGN appears on the top line.
4. Press SPKR or [Exit] to exit and save.
NOTE! The first canned message that you activated is the one that will appear on the internal caller’s
display panel. Therefore, to set a new canned message ensure that you cancel all previously set
canned messages.

Attendant Features 200 FlexSet-IP 280S User Guide
Canned Messages
Canned Message - Text and Attendant Access Codes
Canned Message
Number
Soft Key Access Code
(Dial Pad#)
Canned Message Text
0[RmSts0] 7010
1[RmSts1] 7011
2[RmSts2] 7012
3[RmSts3] 7013
4[RmSts4] 7014
5[RmSts5] 7015
6[RmSts6] 7016
7[RmSts7] 7017
8[RmSts8] 7018
9[RmSts9] 7019
10 [RmSs10] 7020
11 [RmSs11] 7021
12 [RmSs12] 7022
13 [RmSs13] 7023
14 [RmSs14] 7024
15 [RmSs15] 7025
Attendant Features 201 FlexSet-IP 280S User Guide
Malicious Call Trace
Malicious Call Trace
The Attendant may initiate this feature that records the next x (a system-defined variable) calls to any station or room. A list
of the calls can also be sent to a printer or terminal. Press [aTrace] to access the Attendant Malicious Call Trace options.
[On/Off] Malicious Call Trace On/Off toggles the Malicious Call Trace on or off.
1. Press [On/Off].
NOTE! If the system resources are insufficient for the feature to be available, the message
NO TRACE RECORD appears.
2. Choose [St/Rm#] and dial a station/room number, or scroll through the list using .
3. To start call trace, choose [Set]. To stop call trace, choose [Cancel].
[Print] Malicious Call Trace Print sends a list of the calls to a terminal or printer. Malicious Call Trace must
previously be activated (see On/Off above), or the message CALL TRACE OFF will appear and the action
will not be completed.
1. Press [Print].
2. Choose [St/Rm#] and dial a station/room number, or scroll through the list using [Next] and [Prev] only.
3. Choose [Set] to print. The message CALL TRACE PRINT appears.
Page 1 10:50 26 May 2007 Company xyz
user name station number
→Trace [aTrace] RoomSt aRmSts aFwd
Page 2 Attendant: Call Trace
→On/Off Print
Attendant Features 202 FlexSet-IP 280S User Guide
Room Status
Room Status
Used to turn the Room Status definition of a station on or off. There are 16 different Room Status definitions for each station.
This feature is applicable for Hotel/Motel use. Contact your system administrator for their various definitions. Use the Table
on page 203 to write in the various room statuses.
NOTE! Check with your system administrator whether your Coral system supports the Room Status or
Canned Messages feature. If your Coral system supports the Canned Messages feature (see
page 198), the Room Status feature is unavailable.
Press [aRmSts] to access the Room Status options.
[RmStsx] Room Status x (where x= 0 to 15, see Table on page 203).
1. Press the required Room Status soft key. The status definition appears on the top line.
2. Press [St/Rm#] and enter the station/room number, or scroll through the list using .
3. Choose [Set] to activate, OR
Choose [Cancel] to deactivate or reset.
The status definition ASSIGN/DEASSIGN appears on the top line.
4. Press SPKR or [Exit] to exit and save.
Page 1 10:50 26 May 2007 Company xyz
user name station number
→Trace aTrace RoomSt [aRmSts] aFwd
Page 2 Attendant: Room Status
↓→ RmSts0 RmSts1 RmSts2 RmSts3 RmSts4

Attendant Features 203 FlexSet-IP 280S User Guide
Room Status
Room Status - Names and Attendant Access Codes
Room Status
Number
Soft Key Access Code
(Dial Pad#)
Name
0[RmSts0] 7010
1[RmSts1] 7011
2[RmSts2] 7012
3[RmSts3] 7013
4[RmSts4] 7014
5[RmSts5] 7015
6[RmSts6] 7016
7[RmSts7] 7017
8[RmSts8] 7018
9[RmSts9] 7019
10 [RmSs10] 7020
11 [RmSs11] 7021
12 [RmSs12] 7022
13 [RmSs13] 7023
14 [RmSs14] 7024
15 [RmSs15] 7025
Attendant Features 204 FlexSet-IP 280S User Guide
WakeUp
WakeUp
The attendant may program the system to call any room/station at a designated time.
If the user does not answer the initial wakeup call, recall will be attempted three times before the feature cancels (when
defined system-wide).
If none of the recall attempts are answered, or the line is busy, or the handset is not on the cradle, then the attendant will
receive a call with the NOT WOKEN message on the top line indicating that the wakeup call failed.
Should such a failure occur, it is recommended that the attendant provide an alternate means for waking the guest.
Printouts are possible for: new/cancel, fail, success. The printout type is also defined system-wide.
Press [aWake] to access the Attendant WakeUp options.
station or room # NOT WOKEN
Page 1 10:50 26 May 2007 Company xyz
user name station number
→IdCtrl WakeUp [aWake] CnfIns GpCall
Page 2 Attendant: WakeUp
→Reques Report

Attendant Features 205 FlexSet-IP 280S User Guide
WakeUp
[Reques] WakeUp Request is used to program a station to ring at a specified time.
Entering a new Wakeup Request:
1. Press [Reques].
2. Choose [St/Rm#] and dial the station/room number, or scroll through the list using .
3. Choose [Set] to enter a new time for the station/room. The ENTER TIME message appears on the top line.
4. Dial in the wakeup time.
NOTE! Four digits are required for a 12-hr clock: (i.e. 0805 for 8:05).
5. Choose [AM] or [PM].
6. Press SPKR or [Exit] to exit.
Canceling Wakeup Request:
1. Press [Reques].
2. Choose [St/Rm#] and dial a station/room number, or scroll through the list using .
3. Choose [Cancel] to delete the time.
4. Press SPKR or [Exit] to exit.
[Report] WakeUp Report is used to print the wakeup requests that were not answered. The report may be sorted by
the requested wakeup time, or by the station number, as defined system-wide.
1. Press [Report].
2. The WAKEUP REPORT message appears on the top line of the display.
3. Listen for the confirmation tone. The printer automatically prints the report.

Attendant Features 206 FlexSet-IP 280S User Guide
Call Charge
Call Charge
The Call Charge feature is used to determine call charges accumulated per station.
Press [Charge] to access the Call Charge options.
]
[Report] Call Charge Report. The Attendant may request the Call Charge printout at any time for a single station/
room or for all stations/rooms without resetting the Charge Table content. This feature is useful for informing
a hotel guest of current telephone charges.
Printing for a single station/room:
1. Press [Report].
2. Choose [St/Rm#] and dial a station/room number, or scroll through the list using [Next] and [Prev].
3. Choose [Set] to print. The PRINTED message appears on the top line of the display.
4. Press SPKR or [Exit] to exit.
Printing for all stations/rooms:
1. Press [Report].
2. Choose [All-St] to print.
Page 1 10:50 26 May 2007 Company xyz
user name station number
↑→ [Charge] St.Set Tk.Set System
Page 2 Attendant: Call Charge
→Report Reset

Attendant Features 207 FlexSet-IP 280S User Guide
Call Charge
3. Listen for the confirmation tone.
[Reset] Call Charge Print and Reset is used to reset the charge table back to zero and print the charges accumulated
per station. The attendant may request print and reset for only one station/room or for all stations/rooms. This
feature is useful for giving a hotel guest the telephone charges at checkout time.
Printing and resetting the charge table:
For a single station/room:
1. Press [Reset] (print with reset).
2. Choose [St/Rm#] and dial a station/room number, or scroll through the list using [Next] and [Prev].
3. Choose [Set] to reset and print. The PRINTED WITH RESET message appears on the top and middle lines of the
display.
4. Press SPKR or [Exit] to exit.
For all stations/rooms:
1. Press [Reset] (print with reset).
2. Scroll to the beginning of the list using [Prev].
3. Choose [All-St] to reset and print.
4. Listen for the confirmation tone.

Attendant Features 208 FlexSet-IP 280S User Guide
Station Setup Features
Station Setup Features
The Station Setup Features menu allows an attendant to define stations for specific feature activation. Some of these features
operate permanently, or until redefined. Other features operate on a one-time basis; after the feature is activated, it is then
cancelled and must be redefined or reactivated in order to operate again.
Press [St.Set] to access the Station Setup Features.
♦ [ChkI/O] Check In/Check Out enables certain activities to be performed automatically (primarily used for rooms/
stations). These are: Room Block/Unblock, Charge Print, Canceling Existing Messages and Terminating
DND. Additionally, if defined system-wide, Wakeup and Call Forward are cancelled and Charge is reset. In
some systems (defined system-wide) this feature can be activated only on idle stations. If an attempt is made
to activate the feature on a busy station, the BUSY message is displayed.
♦ [DND] Do Not Disturb (DND) is used to activate Do Not Disturb for a station or boss group. A caller to this station
will hear a reorder tone, and only a station with DND override is able to call that station.
[HotDly] Hot Station Delay is used to program a telephone to ring another station, automatically connect to a paging
device, or automatically dial out when the handset is taken off-hook, or SPKR is pressed, and no digits are
dialed within the programmed first digit time-out. Possible destinations are operator, station, hunt group,
Page 1 10:50 26 May 2007 Company xyz
user name station number
↑→ Charge [St.Set] Tk.Set System
Page 2 Station Features - Setup
↓→ ChkI/O DND HotDly HotImm OrgOnl

Attendant Features 209 FlexSet-IP 280S User Guide
Station Setup Features
boss group, keyset voice page, zone group page, page public address, UNA/central bell, outside trunk call,
public and private speed dial, pre-recorded DVMS message, group call, and network number.
NOTE! Hot Station Delay is not applicable for SIP telephones, such as: T207S and T208S.
[HotImm] Hot Station Immediate is used to program a telephone to immediately ring another station, automatically
connect to a paging device, or automatically dial out immediately when the handset is taken off-hook, or
SPKR is pressed (or upon dialing from T207S and T208S telephones). Possible destinations are operator,
station, hunt group, boss group, keyset voice page, zone group page, page public address, UNA/central bell,
outside trunk call, public and private speed dial, pre-recorded DVMS message, group call, and network
number.
♦ [OrgOnl] Originating Only is used to prohibit incoming calls from arriving at a station. In this case the user can only
make outgoing calls, but is unable to receive calls. A caller to this station will hear the reorder tone.
♦ [Rstrct] Outgoing Call Restriction is used to prevent a station from making outgoing trunk calls.
♦ [Block] Station Blocking is used to temporarily prevent a station from both making and receiving calls. A caller to
this station will hear the reorder tone.
♦ [TrmOnl] Terminating Only is used to prohibit a station from originating any telephone calls (internal or external).
When defined as Terminating Only, the user can receive calls, but is unable to make calls.

Attendant Features 210 FlexSet-IP 280S User Guide
Station Setup Features
Operating features marked with ♦ (Above):
1. Choose the required feature option ( [ChkI/O], [DND], [OrgOnl], [Rstrct], [Block], or [TrmOnl] ).
2. Press [St/Rm#] and dial a station/room number, or scroll through the list using .
3. Choose [Set] to activate (ASSIGN message appears), OR
Choose [Cancel] to deactivate (DEASSIGN message appears).
NOTE! For [ChkI/O], [Set] activates Check Out and [Cancel] activates Check In.
4. Press SPKR or [Exit] to exit.
Operating features marked with (Above):
1. Choose the required feature option ( [HotDly] or [HotImm] ).
2. Press [St/Rm#] and dial the originating station number, or scroll through the list using .
3. Choose [Dest] and dial the destination number, OR
Choose [Cancel] to cancel feature.
4. Press SPKR or [Exit] to exit.
Attendant Features 211 FlexSet-IP 280S User Guide
System Features
System Features
The System Controls menu allows the attendant to program certain features for system-wide operations.
Press [System] to access the System Setup Features.
[Alarm] Alarm is used to identify and examine system alarms.
See the PI & Database Reference Manual for a detailed list of the alarm codes and their definitions.
1. Press [Alarm].
2. Choose [Next] (next alarm) to scroll through the alarm list. The alarm number and its code are listed on the system lines.
3. Make a list of each alarm number to report to the technician.
4. Press SPKR or [Exit] to exit.
Page 1 10:50 26 May 2007 Company xyz
user name station number
↑→ Charge St.Set Tk.Set [System]
Page 2 System Features - Setup
↓→ Alarm ATT-To XfrD/N Day/N1 Day/N2
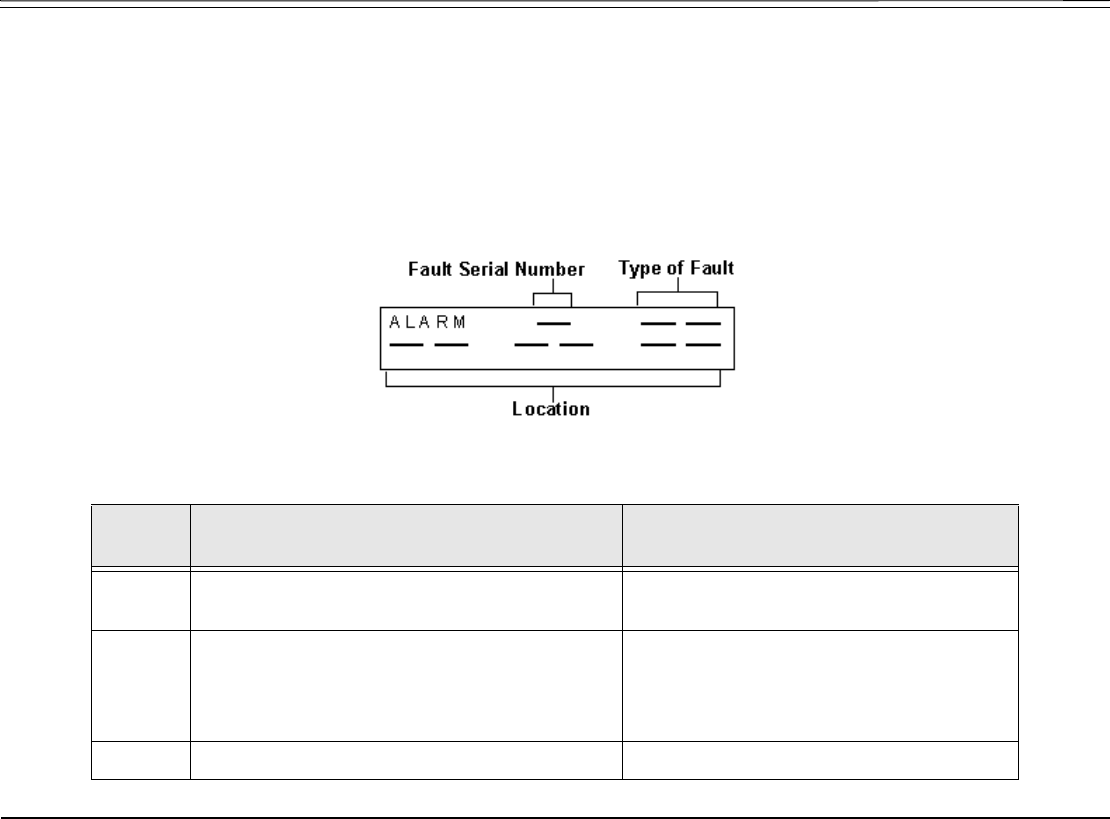
Attendant Features 212 FlexSet-IP 280S User Guide
System Features
Alarm message – LED status:
When an ALARM DSS key is programmed (default dial number: #1997), the LED status indicates the following
conditions:
Off: No alarms
Flashing: Alarm condition has occurred
Steady On: Alarm condition remains but has been examined by the attendant
Table of Alarm Types
Type of
Fault
Description Action
60 Data Terminal Ready (DTR) not sent. SMDR printer is malfunctioning and
requires service.
61 SMDR backup buffer has reached 75% of its
capacity. Only 25% of the number of records
defined system-wide can now be
accommodated in the space remaining.
The printer requires immediate service or
the SMDR records will be lost.
other — Call service technician.

Attendant Features 213 FlexSet-IP 280S User Guide
System Features
[ATT-To] Alternate Attendant Destination. This feature enables you to program an alternate attendant destination or
extension if the console is left unattended. After a time-out period, incoming calls to an unattended console
will be re-routed to the selected destination and the attendant console will go into Unattended mode
(see Do Not Disturb (DND) on page 98). Any action that is performed at the original console will force it back
to Attended mode and the alternate destination back to normal operation.
Possible destinations are station, hunt group, boss group, UNA/ central bell, pre-recorded DVMS message,
public/private speed call, and group call.
Program an alternate destination in the following way:
1. Press [ATT-To].
2. Dial the destination number where calls are to be forwarded, OR
Choose [Dest] to change the destination, OR
Choose [Cancel] to cancel the alternate destination.
3. Listen for the confirmation tone.
[XfrD/N] Day/Night Transfer toggle feature. Press [XfrD/N] to switch from automatic to manual transfer between the
various Day/Night service modes and back again. When set to Auto Transfer, a bullet is displayed next to
[XfrD/N].
When set to Automatic, the system will transfer service modes without attendant supervision.
When set to Manual, the attendant must decide when to change modes using [Day/N1] and [Day/N2] (see below).
[Day/N1] Day/Night 1 toggles between Day (normal mode) and Night 1 service modes. When set to Night 1, a bullet is
displayed next to [Day/N1].
[Day/N2] Day/Night 2 toggles between Day (normal mode) and Night 2 service modes. When set to Night 2, a bullet is
displayed next to [Day/N2].
Use the table below to enter the relevant information concerning Day/Night Transfer. Contact your system
administrator for Day/Night Transfer times and destinations.
Attendant Features 214 FlexSet-IP 280S User Guide
System Features
Day/Night Transfer Information
[PubLib] Public Library is used to program or update the Public Speed Call telephone library.
To update/add/cancel a Public Speed Dial number:
1. Press [PubLib].
2. Choose [Lib#] and dial the library number, or scroll through the list of library numbers using .
The Library number/name (e.g. PUBLIC LIB 6000) appears on the top line of the display. The Library
contents appear on the second line of the display.
3. Choose [Extrn#] and enter the digits you normally dial to place the external call, including the outside line
access code. Possible outside line access codes: trunk number, trunk group number, dial service, routing
access or another public/personal library number and, for special purposes, station/group numbers.
Special dial codes can be added to the outside dial number (see table below).
NOTE! A new number programmed into an existing library number will erase the old number, but will
save the old library name.
4. Alternatively, choose [Cancel] to delete the Library contents.
5. Press SPKR or [Exit] to terminate.
Service
Mode
Start Time
(for automatic transfer)
Incomplete Calls
Destination
Intercept Calls
Destination
COS
Primary/Secondary
DAY
NIGHT 1
NIGHT 1
CAUTION!
When a library number is deleted, its name is also deleted. Names can
only be entered by an authorized technician or system administrator.
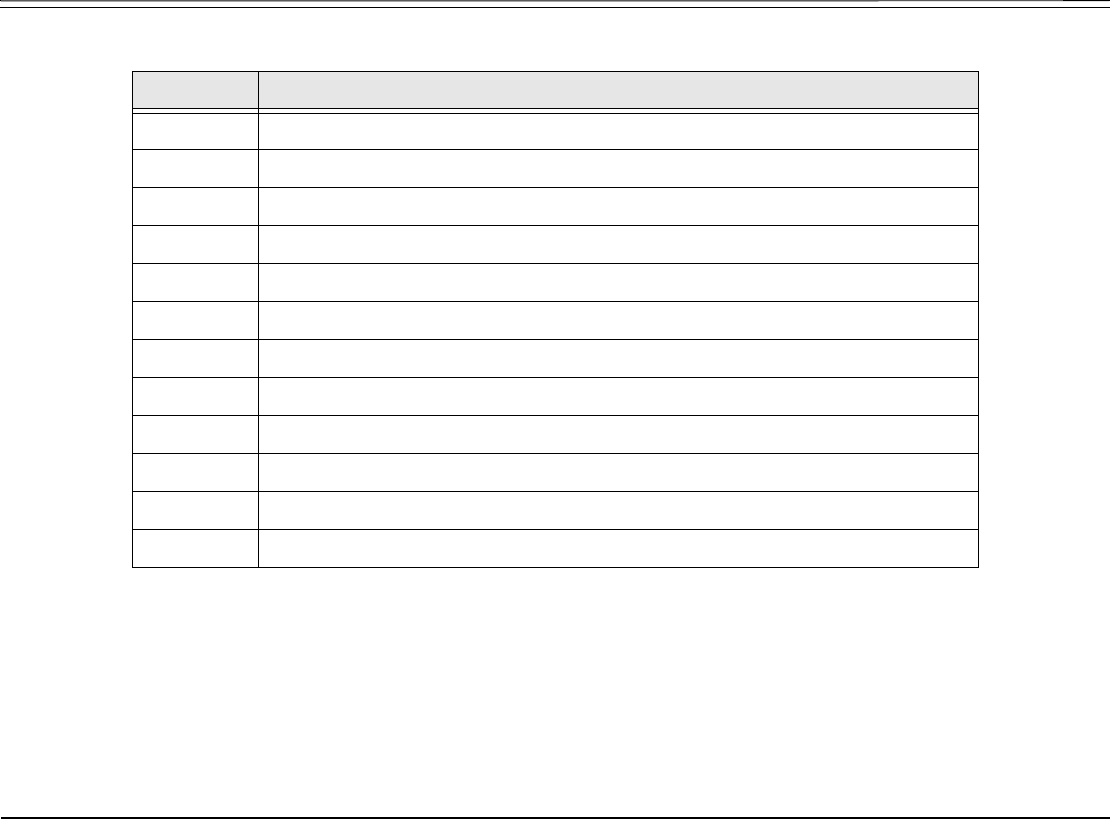
Attendant Features 215 FlexSet-IP 280S User Guide
System Features
The following table defines the special codes that may be used as part of the outside number.
NOTE! The number of digits that can be programmed, including dial codes, is limited by the Coral
(defined system-wide). If you try entering a longer digit string than allowed the system will give the
error message LENGTH EXCEEDED, and programming will stop.
Codes Description
*x Delay dialing by X seconds (x = 1 to 9)
#0 Stop dial (end of outside or network number)
#1 Outpulsing wait period during which user is able to dial any number of digits
#2 All digits following will be Dial Pulse
#3 All digits following will be DTMF
#4 Inhibits display (for Call Accounting System and key set display)
#5 Enables display (for Call Accounting System and key set display)
#6 Wait for second dial tone
#8 Display ‘_’ (for Call Accounting System and key set display)
#9 Calibrated Opening on trunk (FlashTk)
** Dial * out
## Dial # out

Attendant Features 216 FlexSet-IP 280S User Guide
System Features
[Time] Time is used to change the system time and date to reflect the time and date where the Coral system is
installed.
NOTE! To set an offset time, see To delete a digit, select the digit using the buttons and press * to delete.
on page 231.
Setting the time:
1. Press [Time].
2. Dial the time, 4 digits (12 hour clock) use leading zeros, e.g. 0805 for 5 minutes after 8.
3. Choose [AM] or [PM].
4. Choose [Set].
5. Listen for the confirmation tone.
Setting the date:
1. Press [Time].
2. Choose [Date].
3. Dial the date, 6 digit format: mm:dd:yy or dd:mm:yy (depending on your system setup). Use leading zeros.
For Example: May 26, 2006 should be entered as 052606 in North America, 260506 in Europe.
4. Choose [Set].
5. Listen for the confirmation tone.
Attendant Features 217 FlexSet-IP 280S User Guide
Trunk Setup Features
Trunk Setup Features
Trunk Controls allow the attendant to define the operation of system trunks for special use, such as for incoming or outgoing
calls only, or for designation of a trunk as reserved for a particular group or specific station.
Press [Tk.Set] to access the Trunk Setup Features.
♦ [AutGrd] Auto Guard is used to view which of the trunks have been automatically blocked from use for outgoing calls
by the Auto Guard feature. When ASSIGN appears in the display the trunk line is blocked. DEASSIGN
means the trunk line is in use by the system. Auto Guard automatically blocks a trunk when the system
detects no dial tone on a trunk.
When a trunk is Assigned (Blocked):
When a trunk is in ASSIGN status (blocked), cancel the Auto Guard as follows:
1. Choose [AutGrd].
2. Choose [Trunk#] and dial a trunk number, or scroll through the list using .
3. Choose [Cancel] to deactivate (DEASSIGN message appears).
4. Choose [Exit] or SPKR to terminate.
Page 1 10:50 26 May 2007 Company xyz
user name station number
↑→ Charge St.Set [Tk.Set] System
Page 2 Trunk Features - Setup
→AutGrd Block BsyOut DIL-D DIL-N

Attendant Features 218 FlexSet-IP 280S User Guide
Trunk Setup Features
5. Make an external call on the specific trunk. If the call goes through, the line is okay.
If the trunk is still blocked, call the technician and reactivate Auto Guard, by following Steps 1 and 2 above and
choosing [Set] to activate (ASSIGN message appears).
♦ [Block] Central Office (CO) Block is used to view which of the trunks have been blocked at the central office. When
ASSIGN appears in the display the trunk line is blocked for both outgoing and incoming calls. DEASSIGN
means the trunk line is in use by the system.
♦ [LAR] Look Ahead Routing is used to view the status of trunks/Dial Services that have been automatically blocked
from use for outgoing calls. The Coral system automatically blocks a trunk/Dial Service in case of a failure to
establish an outgoing connection via that trunk/Dial Service. The LAR Block feature enables an attendant to
manually block/unblock the failed trunk/Dial Service.
When ASSIGN appears in the display the trunk/Dial Service line is blocked. DEASSIGN means the trunk/
Dial Service line is in use by the system.
After unblocking a trunk/Dial Service, make an external call on the specific trunk/Dial Service. If the call
goes through, the trunk/Dial Service is unblocked. If the trunk/Dial Service is still blocked, call the technician
and re-activate LAR Block.
If LAR Block activation failed due to insufficient resources (the system ran out of LAR Service Timers), the
message NO RESOURCE appears upon dialing activation code.
NOTE! If the trunk/Dial Service was manually blocked, it can only be unblocked manually. Automatic
unblock will not work in this case.
[DIL-x] Direct In Line (DIL) is used to program incoming CO lines to ring directly at a specific destination
depending on the required service mode (Day, Night 1, Night 2), without intervention. Possible destinations
are operator, station, hunt group, boss group, UNA/central bell, public speed call, voice mail, modem, group
call, pre-recorded DVMS message, wait queue and network number.
[DIL-D] DIL at Day service period.
[DIL-N1] DIL at Night 1 service period.
[DIL-N2] DIL at Night 2 service period.

Attendant Features 219 FlexSet-IP 280S User Guide
Trunk Setup Features
♦ [BsyOut] Busy Out is used to block any trunk for both incoming and outgoing calls. (This feature may be used to block
faulty trunks until the CO service is restored.) When ASSIGN appears in the display the trunk line is blocked.
DEASSIGN means the trunk line is in use by the system.
♦ [DropND] Drop No Dial is used to program an outgoing trunk to be dropped when a caller does not dial the first digit
within a system-wide time limit. The trunk is then made available to other users.
♦ [HotImm] Hot Trunk Immediate is used to program an outgoing trunk so that the trunk automatically and immediately
connects to the system.
♦ [HotDly] Hot Trunk Delay is used to program an outgoing trunk to automatically connect to the system, after first
digit time-out, when no dialing has taken place.
♦ [IncOnl] Incoming Only is used to reserve any trunk for incoming calls only, thereby preventing outgoing calls on
that trunk.
♦ [OutOnl] Outgoing Only is used to reserve any trunk for outgoing calls only. All incoming calls on that trunk will
continue ringing with no answer and will not be transferred to any destination.
[RsvdTo] Reserved To is used to reserve any trunk and trunk group to a specific station or boss group. The reservation
will prevent any other stations or boss group stations from making outgoing calls on these trunks.
Attendant Features 220 FlexSet-IP 280S User Guide
Trunk Setup Features
Operating features marked with ♦:
1. Choose the feature soft key ( [AutGrd], [LAR], [Block], [BsyOut], [DropND], [HotImm], [HotDly], [IncOnl], [OutOnl] ).
2. Choose [Trunk#] and dial a trunk number, or scroll through the list using .
3. Choose [Set] to activate (ASSIGN message appears), or
Choose [Cancel] to deactivate (DEASSIGN message appears).
4. Choose [Exit] or SPKR to terminate.
Operating features marked with :
1. Choose the feature soft key ( [DIL-D] , [DIL-N1], [DIL-N2], [RsvdTo] ).
2. Choose [Trunk#] and dial a trunk number, or scroll through the list using .
3. Choose [Dest] and dial the destination number, or
Choose [Cancel] to cancel feature.
4. Choose [Exit] or SPKR to terminate.

Attendant Features 221 FlexSet-IP 280S User Guide
Trunk Setup Features
CO Trunk Number
(as listed in your local
telephone directory)
Coral
Trunk
Number
Incoming CO lines ring directly at the following
destinations according to Service Mode
Outgoing
CO Lines
Reserved To
[RsvdTo]
Power Fail
Destination
(programmed
by authorized
technician or
system
administrator)
DAY
[DIL-D]
NIGHT 1
[DIL-N1]
NIGHT 2
[DIL-N2]

Setup 222 FlexSet-IP 280S User Guide
Overview
Setup
Overview
The general features of your FlexSet can quickly and easily be configured using the soft keys. Many of these features will
only need to be configured once, however they can easily be reconfigured at any future stage should your requirements
change.
The following pages detail the setup and configuration options:
Coral Telephony Features ..........................................................page 223
User Definitions Menu ................................................................page 229
System Definitions Menu ............................................................page 234
NOTE! The SysDef Menu is intended for system administrators or qualified technicians only since
changing your phone’s setup configuration could cause it to malfunction. Consequently, this guide
only provides an overview of the SysDef menu. For information about the SysDef Menu, system
administrators can refer to the Terminal Equipment (FlexSet) Installation Manual.
Setup 223 FlexSet-IP 280S User Guide
Coral Telephony Features
Coral Telephony Features
The Feature Setup menu enables you to adjust the general features of your FlexSet.
Press [Setup] to access the Feature Setup options.
[AutAns] Auto Answer activates your phone to answer all incoming calls automatically via the speakerphone after a
predetermined number of rings. Press [AutAns] once to activate; press again to deactivate. When activated, a
bullet is displayed next to [AutAns].
Page 1 10:50 26 May 2007 Company xyz
user name station number
→Lock Exec COS-Sw [Setup] Trace
Page 2 Feature Setup
↓→ AutAns VP-AA VP-Rcv ElapTm HeadSt
CAUTION!
Leaving your workstation while Auto Answer is activated will cause your
station to answer an incoming call. All conversations in the room can be
heard. A trunk call trapped in Auto Answer could lock up the trunk until
released by the system.

Setup 224 FlexSet-IP 280S User Guide
Coral Telephony Features
[VP-AA] Voice Page Auto Answer activates your phone to answer all incoming Voice Pages automatically via the
speakerphone after a predetermined number of rings. Press [VP-AA] once to activate; press again to deactivate.
When activated, a bullet is displayed next to [VP-AA].
[VP-Rcv] Voice Page Receive toggles the availability of your station to receive Voice Pages. Press [VP-Rcv] once to
activate; press again to deactivate. When activated, a bullet is displayed next to [VP-Rcv].
[ElapTm] Elapsed Time Display toggles the display of the time spent during an incoming or outgoing external or
network call. When activated from idle, Elapsed Time makes the duration of a call automatically display
whenever the call is established. When activated during a call, Elapsed Time displays duration of the current
call.
The elapsed time is shown in HH:MM:SS format up to (13 hours) 12:59:59.
NOTE! The system may be programmed with a limit on the duration of your external calls. Once this limit
is reached, the call will be automatically disconnected.
From Idle:
•Press [Setup] [ElapTm] once to activate; press again to deactivate; a bullet is displayed next to [ElapTm] on the
Setup screen, and next to [ElapTm] that is displayed whilst on a call.
During a call:
•Press [ElapTm] once to activate or deactivate the Elapsed Time display. When the conversation is over, the
Elapsed Time feature reverts to the state it was set to before the conversation started.
[HeadSt] Headset Only. This feature is designed for users operating in Headset mode. When activated, the Headset
Only feature causes calls to be conducted via the headset and disables the FlexSet microphone and
loudspeaker, along with the features that use these devices (e.g. voice page). Calls are conducted via the
headset, even if the cradle switch is on-hook.
Press [HeadSt] to activate and deactivate the Headset Only feature; when activated, a bullet is displayed next to
[HeadSt]. See Headset Only on page 126.

Setup 225 FlexSet-IP 280S User Guide
Coral Telephony Features
[IdlDsp] Idle Display. When in Idle mode, the first line of the display shows the time, date and site name, and the
second line displays your name and station number. Press [IdlDsp] to toggle the display of the system lines on/
off.
[Lang.] Language. Use this feature to set the language for your FlexSet display. The languages available differ
according to the country. Scroll using [Next] and [Prev], and then press [Set] to chose the language.
[Pascod] Passcode. Your FlexSet can be defined with a unique passcode known only to you. This passcode allows you
(if defined in your COS) to operate certain Coral FlexiCom features such as Phone Lock, Executive
Privilege, Auto Set Relocate and COS Switchover. You can define the 4-digit passcode for your FlexSet only
at your own FlexSet. Save your passcode in a safe place.
To define your passcode (when no passcode is currently defined):
1. Press [Pascod].
2. Enter your new passcode number at the prompt.
3. Redial the number to confirm, and listen for the confirmation tone.
To change your passcode:
1. Press [Pascod].
2. Enter your old passcode number at the prompt, followed by your new passcode number.
3. Redial the number to confirm, and listen for the confirmation tone.
[ProgKy] Program Key. The FlexSet comes equipped with 4 system-defined (fixed) keys as well as user
programmable keys. You are able to program most of the programmable keys from the FlexSet itself. The
programmable keys may be assigned to directly access other stations, station groups, trunks, trunk groups, or
CAUTION!
Once a passcode has been defined, the code is known only to you. If you forget the passcode you
will not be able to utilize the features that require the code. Therefore, write your passcode number in
a secure place for future reference.

Setup 226 FlexSet-IP 280S User Guide
Coral Telephony Features
system features.
See Programming: Feature Keys on page 153 for instructions on how to program a DSS key.
[Prefer] Preference is used to prioritize specific trunk or line connections for your FlexSet. This causes the system to
automatically choose the available line, loop or trunk in prioritized order when placing a call (lifting the
handset, pressing SPKR or dialing a number).
To view the priorities:
1. Press [Next] or the button to scroll through the list.
2. Listen for the confirmation tone.
To cancel priorities:
1. Press dial the cancellation code 8.
2. Listen for the confirmation tone.
To select priorities:
1. Select the required destinations by pressing the programmed DSS keys.
You can program a maximum of six priorities in any order:
• OUTSIDE Line: trunk/trunk group/dial service or routing access
• LOOP (default access code #121)
• LOOP Originating Only (default access code #125)
• Boss Group Line Key
• ELA Line Key
2. Press dial the activation code 9
3. Listen for the confirmation tone.
NOTES!
• If you intend to select an OUTSIDE line as the first priority, you must program a LOOP or LINE key to be able to
dial internal numbers. When activating a feature, press LOOP or LINE first, then dial the required number.

Setup 227 FlexSet-IP 280S User Guide
Coral Telephony Features
• This feature is useful if you make mostly trunk (external) calls. Assign a preference to an outside line(s), and each
time you make a call, you will be connected directly to an external trunk.
[PrvLib] Private Library is used to program your personal Speed Dial Directory. A Private Library can be used to
speed dial long numbers. Also, you can use a Private Library to dial external or network numbers for features
that allow only internal destinations such as Call Forward, Divert and Hunt features.
For a full explanation of this feature, see Speed Dialing: Private Library on page 175.
[Secure] Security Line is used to block another user from employing the Break In feature on your FlexSet extension.
All Call Waiting and Break In feature tones are blocked. When activated, a caller attempting to break in to
your station will receive a reorder tone. Only a station that has Security override privilege can break into your
secured phone.
Press the [Secure] toggle switch to activate, and again to deactivate. A bullet is displayed next to [Secure] to
indicate when the feature is activated.
[DND-WP] Do Not Disturb - Whisper Page is irrelevant on the current version of the phone.
NOTE! Whisper page receiving is not available on the current version of the phone.
[Privac] Privacy. As a Boss Group member, you can put your FlexSet into Privacy mode. This prevents other
members of your Boss Group from accidentally joining your conversations. See Boss Groups: Privacy on
page 66.
1. To activate Privacy, press [Setup] [Privac].
The message PRIVACY is displayed.
When this feature is activated, a bullet appears next to [Privac].
2. To cancel Privacy, press [Privac] again.
The message NO PRIVACY is displayed.
[ExHold] Exclusive Hold. As a Boss Group member, you can put your FlexSet into Exclusive Hold mode. This
ensures that a call placed on hold can be retrieved only at your station. If Exclusive Hold is cancelled, the call

Setup 228 FlexSet-IP 280S User Guide
Coral Telephony Features
put on hold can be retrieved by any other member of your Boss Group.
See Boss Groups: Exclusive Hold on page 67.
1. To activate Exclusive Hold, press [Setup] [ExHold].
The message EXCLUSIVE HOLD is displayed.
When this feature is activated, a bullet appears next to [ExHold].
2. To cancel Exclusive Hold, press [ExHold] again.
The message NON EXCL. HOLD is displayed.
[MoveSt] Auto Set Relocate (move station) allows you to move your station and all your station’s predefined features
to a new location.
See Auto Set Relocate on page 61.
[IRSS] Individual Remote System Services (IRSS) - Freedom enables you to connect an off-site non-Coral phone
(such as your home phone or mobile) to the Coral and make calls from within the system.
See Individual Remote System Services (IRSS) - Freedom on page 130.
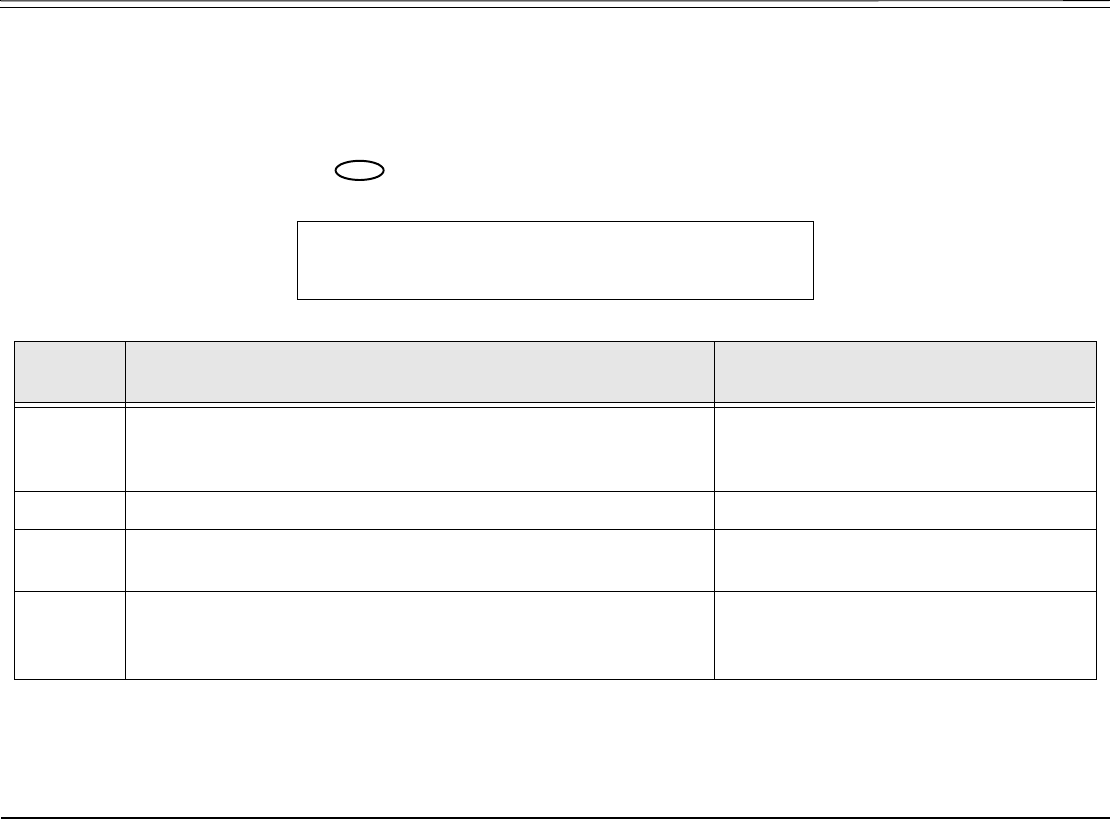
Setup 229 FlexSet-IP 280S User Guide
User Definitions Menu
User Definitions Menu
The UserDef function is used for setting various operating parameters for the FlexSet-IP 280S, as well as general
maintenance functions. These options are set with their factory default values. However, you may wish to change the
maintenance options to suit your individual needs.
To access the UserDef options, press and choose [UsrDef].
UserDef
→CALLog Vers Time Ring
Setup
Option
Description Method
[CALLog] Call Log Maintenance enables the definition of several Call Log
options. The Call Log enables FlexSet-IP 280S users to view the
last 40 incoming and last 40 outgoing call details.
See CALL Log: on page 230.
[Vers] Software Version is used to view your phone’s version.
[Time] Time Zone is used to adjust the local time zone of your phone. See Adjusting the local Time Zone: on
page 232.
[Ring] Ring Type is used to adjust the ring volume of your
FlexSet-IP 280S, change the current ring tone setting, and record
your own voice ring tones.
See Ring Adjustment on page 25.
MENU
Setup 230 FlexSet-IP 280S User Guide
User Definitions Menu
CALL Log:
You may delete call log entries and edit setup parameters for the Call Log feature (See Call Log on page 74).
To access the Call Log options:
1. Press [UsrDef] and choose [CALLog].
2. There are four call log elements:
[Delete] Delete enables you to delete outgoing or incoming call records, or both.
[Out] Deletes all outgoing call records.
[In] Deletes all incoming call records.
[Both] Deletes all call records.
NOTE! Ensure that you wish to remove these calls from the Call Log before deleting, as there is no
confirmation message.
[Intrnl] Internal enables you to include or exclude internal calls in the log.
•To include internal calls in the log, choose [Yes].
•To exclude internal calls from the log, choose [No].
A bullet appears next to Intrnl if internal calls are included.
[Duplic] Duplicate setting includes or excludes duplicate numbers in the Call Log. A duplicate number is one that has
called your station, or that has been called, more than once.
When set to [Yes], duplicate numbers will be listed separately.
UserDef: Call Log
→Delete Intrnl Duplic OutLin
MENU

Setup 231 FlexSet-IP 280S User Guide
User Definitions Menu
When set to [No], only the most recent call will be displayed for each logged name/number. In this case, the
number of times that they called is displayed in parentheses after the name and number as shown in the
diagram above. Once the Call Log has been viewed, this number resets to zero and is hidden.
[OutLin] OutLine enables you to set the outside line access code to be dialed when calling numbers from the Call Log.
The default external access code is 9.
At the prompt, enter the required outside line access code and choose [Save].
To delete a digit, select the digit using the buttons and press * to delete.
Setup 232 FlexSet-IP 280S User Guide
User Definitions Menu
Adjusting the local Time Zone:
You may adjust the GMT Time Zone for your phone when needed.
To view/edit the current Time Zone setting:
1. Press [UsrDef] [Time] [Zone].
The second line displays the following information:
•Requested - your requested Time Zone. In the example above, Auto Detect indicates a request for the Time Zone
definition from the DHCP server.
•Granted - the actual time zone offset granted by the system. In the example above, the Time Zone is two hours ahead
of GMT time.
2. Press [Edit] to to adjust the local time zone of the FlexSet-IP 280S. There are three options:
[Sign] Used to toggle between + and - (GMT).
[Auto] Used to request the Time Zone definition from the DHCP server. Any numbers that were entered are erased
and changed to dashes and (Auto Detect) is displayed next to the dashes.
[Save] To save the new time zone offset.
Userdef: Time
Requested: Auto Detect; Granted: +02:00
edit
Userdef: Time
GMT: +--:--
sign auto save
MENU

Setup 233 FlexSet-IP 280S User Guide
User Definitions Menu
3. Begin entering the required Time Offset at the flashing box using the dial pad, as follows:
• Ensure the Time Offset is entered in +/- HH:MM format (HH=Hours: 0..12, MM=number of minutes).
• Entering an hour greater than 12 is ignored.
• The minutes are rounded up to the nearest 15 minute interval: 00, 15, 30 or 45.
• Press [Sign] to toggle between + and - (GMT).
• Press [Auto] to request the Time Zone definition from the DHCP server. Any numbers that were entered are erased and
changed to dashes and (Auto Detect) is displayed next to the dashes.
4. Press [Save] to save your changes; the time display is adjusted after the FlexSet-IP 280S is initialized.
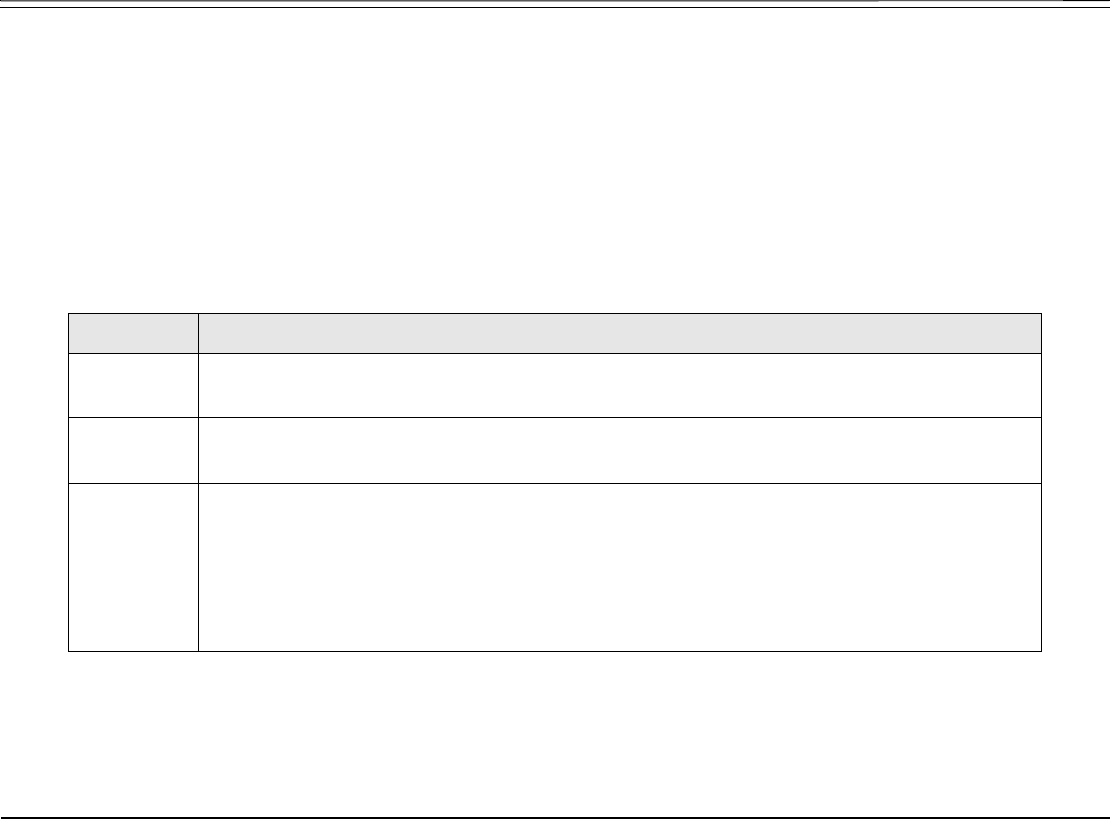
Setup 234 FlexSet-IP 280S User Guide
System Definitions Menu
System Definitions Menu
The SysDef function is primarily used for setting various operating parameters for your FlexSet-IP by your system
administrator or qualified technician. These options are set with their factory default values but may be edited as required.
CAUTION! A password is required as a reminder that these parameters are sensitive and affect the operation of your
FlexSet-IP 280S. This section provides a brief overview of the options available from the SysDef menu. Changing your
FlexSet-IP’s setup configuration could cause your phone to malfunction. For a detailed explanation of the SysDef menu,
system administrators can refer to the Installation manual.
The SysDef menu consists of the following menus and options:
Menus Options
IP Params • Static - Used to enter/edit IP addresses and parameters for the FlexSet-IP 280S
• Current - Used to view current IP addresses and parameters for the FlexSet-IP 280S
Operating
Mode
• Zip Tone - Configure the FlexSet-IP 280S to work in Zip Tone mode
• Survivability - Enable the system survivability feature for the FlexSet-IP 280S
Diagnostics • Software Version - Displays the current software version number of the FlexSet-IP 280S
• Hardware Issue - Displays the current firmware version number of the FlexSet-IP 280S
• Packets Lost - Displays the amount of packets lost (in percentage) since the last connection
• Average Delay - Displays the average delay statistic since the last connection
• Speed - Displays the network connection speed (10 or 100 Mbps)
• Duplex Mode - Displays the duplex mode (Full or Half)

Appendix A: Glossary 235 FlexSet-IP 280S User Guide
Appendix A: Glossary
Term Description
ACD/UCD Group Automatic Call Distribution and Uniform Call Distribution. Calls enter the system and are
automatically routed to the ACD or UCD members based upon system definitions of
availability and overflow.
Attendant/Operator The individual responsible for answering incoming calls and transferring them to their
required destinations, as well as attending to trunk, system and station feature controls.
Auto Transfer When auto transfer is defined at a station, dialing the number to which a call is to be
transferred will automatically transfer the call; use of the XFER key is not necessary. This
feature is typically utilized by attendants. (See also Transfer/Xfer on page 238.)
Boss Group A Boss Group is a number of stations operating together in which the individual station
may or may not ring simultaneously as defined by the system per Boss Group. The
appropriate line key will flash at all stations set to ring at a specific station; the call can be
either transferred to any group member or picked up by any group member when not in
exclusive hold. Any group member can join a conversation by merely pressing the
appropriate illuminated line key. However, only one additional member can join, and this
is only when the original group member is not in privacy mode.
Class Of Service (COS) A Class-of-Service (COS) consists of a list of features that are available to the telephone
line user. However, the user may be denied certain features. Each internal telephone is
marked with two classes-of-service, Primary and Secondary, which can be defined
differently. In order to increase flexibility, the Coral system allows switching between the
Primary and Secondary COS, but only one COS can be utilized at a time. When the
telephone is in check-out mode, the telephone is marked by a system-wide defined COS
and the user is denied this feature.

Appendix A: Glossary 236 FlexSet-IP 280S User Guide
CO Trunk Number
(Incoming)
The number that is dialed by an outside telephone user from the public network (through
the Central Office) in order to call into the Coral system for an internal station. (Number
listed in the local telephone directory).
Database The memory in which the ‘flexible database system information’ is stored. Programming
the database is usually carried out during installation, however, it is field- or remotely-
modifiable.
Dial For the purpose of this guide “Dial” means entering the relevant digits by pressing the
number on the Dial Pad (Keypad) that operates a feature or sends a call to a destination.
Dial also means pressing a key programmed with the feature or destination (DSS).
Disconnect You may disconnect from an ongoing call by either pressing the Speaker key or by
manually replacing the handset onto its cradle (i.e. hang up).
Direct Station
Selection (DSS)
Permits you to make or transfer a call to an extension by using a defined key. DSS can
also be used on all accessible system ports. Instead of dialing a number this can be
done by pressing the programmed key. Also provides busy lamp field for programmed
stations.
ELA Group ELA Group is a number of stations (up to 32) operating together in which the individual
stations share a common line appearance. When an ELA-defined line key flashes, it
flashes at all the member stations. Any member may answer the call by pressing the
flashing line key. If the ELA call is put on hold, the line key flashes at all the member
stations and any member (provided the privacy feature is not activated) may break-in to
the call by pressing the flashing line key. To place a call, a member may press any
available line key; the line key remains lit at all member stations for the duration of the
call.
Extension Each Coral internal telephone is called a station or an extension.
Term Description

Appendix A: Glossary 237 FlexSet-IP 280S User Guide
Forced Account Code A feature that forces the station user to dial an account code before having access to an
outside line. A display equipped keyset user attempting to access an outside line without
dialing the account code will receive the message “ENTER ACCOUNT #” on the display.
After dialing the account code, the user will be able to continue dialing the intended
number.
Idle A station or extension that is not ringing or busy, therefore available for use.
Intercept If you misdial or dial an unauthorized code (restricted to you), you will receive a reorder
tone or will be routed directly to the attendant/operator/master extension, as defined in
your system.
Off-Hook Lifting the telephone handset from its cradle has the same effect as pressing a
preprogrammed LOOP, LINE or SPKR fixed key, but automatically inhibits the
Speakerphone facility. Off- hook provides the dial tone, which then enables you to dial or
activate a feature.
LINE The line key is used for making and receiving calls when the station is defined as a
member of a Boss group or an ELA group. When several line keys are in use, the station
will act as if it is a multi-line instrument.
LOOP The loop key is used for making and receiving calls. When several loop keys are in use
the station will act as if it is a multi-line instrument.
On-Hook Replacing the telephone handset on its cradle – has the same effect as pressing the [Exit]
or SPKR key.
Outside Line Access
Code
A series of digits which must be dialed or keyed in order to gain access to a trunk or trunk
group.
Port Provides access to a device, station or trunk from within the system.
Term Description

Appendix A: Glossary 238 FlexSet-IP 280S User Guide
Recall- Automatic The call that you have transferred to another extension that is busy or that does not
answer, or that you have put on ‘hold’, which has returned to you after a predetermined
time-out period.
Station Each Coral internal telephone is called a station or an extension.
Station Group A number of stations linked together (members) for a common function, such as ACD/
UCD group or Boss group. A station can be defined as a member of many ACD/UCD
groups and/or Boss groups.
System-defined Ask your system administrator for these values.
Telephony Features The FlexSet is part of the Coral family of telephones that have access to a rich array of
telephony features that are user activated. The features supplied by the Coral system
appear in the FlexSet display whenever the FlexSet is engaged.
Time-Out A predetermined period of time allowed to complete a specific function. If the function is
not completed, for example dialing, the caller is dropped and the exchange equipment
freed for other users. (See also Recall- Automatic above.)
Transfer/Xfer While engaged on a call you can initiate a feature by pressing the XFER (Transfer) key.
XFER provides you with a distinctive dial tone, which enables you to either transfer the
call, or activate a feature. XFER puts the second party on Hold and provides one of the
following: music, reorder tone, busy tone or no sound at all, as defined system-wide. If
your Coral system is connected to another PABX you may have to use the FLASH key
instead of the XFER key. The XFER key is used for local Coral system features, while
the FLASH key is used to flash on trunks. In some systems, if you are not connected to a
DTMF destination, transfer can be carried out by dialing ‘1’ instead of pressing the XFER
key. In some systems transfer is applied automatically when you dial a number. (See
also Auto Transfer on page 235.)
Term Description
Appendix A: Glossary 239 FlexSet-IP 280S User Guide
Trunk An outside line from the telephone company that terminates at the customer’s location.
Trunk Group A number of trunks linked together (members) for a common outgoing function.
Trunk Number The access code number that is dialed or keyed by station user in order to gain access to
a specific outside line.
Verified Forced
Account Code (VFAC)
A feature that forces the station user to dial a secret authorization account code before
accessing an outside line. Before dialing is allowed, VFAC verifies the presence of the
account code. If the code is not present, dialing is blocked. When the code is found,
dialing is allowed. Except for verification, VFAC is the same as Forced Account Code.
Term Description
Appendix B: Tones 240 FlexSet-IP 280S User Guide
Appendix B: Tones
Tones are audible signals of various frequencies that give information about the status of calls and features. While using the
Coral system, many different tones will be heard. These tones may vary for different locations, as each system is customized
during installation. While the sounds of the tones themselves are not described, their general use is discussed below. In order
to familiarize yourself with these tones, try accessing various features and listen to the resultant tone signals. The most
frequently heard tones are:
Tone Description
Break-In/Break-Out Tone A warning tone received by a station user indicating that a third party has broken
into, or is leaving (breaking out) an existing conversation.
Break-In Warning Tone heard during the entire break-in period. Indicates that a third party is
listening (not used in North America).
Busy Tone Tone heard when the destination you have dialed (extension or trunk) is busy.
Call Waiting Tone Tone heard at your station while engaged on a call or activating a feature
indicating that another call is waiting to be answered (this appears only when
multi-appearance is defined for your station).
Confirmation Tone Tone heard indicating that the telephony feature has been activated or
deactivated.
Dial Tone Tone heard after off-hooking (lifting) your handset from idle.

Appendix B: Tones 241 FlexSet-IP 280S User Guide
Distinctive Dial Tone This tone indicates that certain features are in use at your FlexSet, for example,
when you have programmed your FlexSet not to receive calls with either Call
Forward All, or Do Not Disturb, and you lift the handset. DDT is also heard
between patterns of digits when dialing certain features, for example, Account
Code feature. When the following features are applied at your telephone, the
distinctive dial tone is heard when the handset is lifted:
• Call Forward All
• Call Forward All External
• Do Not Disturb
• Messages Waiting
• Secondary COS
Key Click When defined for the FlexSet, a tone heard when pressing any button on the dial
pad.
Reorder Tone You hear this tone at your FlexSet if:
• You try to access a denied feature or misdial
• You have stayed off-hook for too long before dialing
• The station you have called does not answer within the predetermined interval
• The station you have called is in Do Not Disturb status
Ringback Tone Tone is heard when the destination you have dialed is ringing.
Second Ringback Tone Tone that the calling party hears indicating that the called party is currently busy.
When the called party disconnects, the waiting call will be the next one ringing to
the destination.
Tone Description

Appendix B: Tones 242 FlexSet-IP 280S User Guide
Speaker Status Tone Indicates that the second conversing party’s keyset is in speakerphone mode.
Enables you to keep your privacy when you call someone who answered the call
or placed the call back to the speaker, and there are other people in the phone
environment.
Tick Tone A tone indicating that you may continue dialing.
VIP Ring Tone A warbling tone heard when receiving a call from a station designated as VIP.
Enables you to identify an incoming call as a high priority call.
Voice Paging Tone A warbling tone heard when using the paging facility.
Whisper Tone Tone heard during a conversation indicating that a Whisper Page is about to be
received from a third party. The second (conversing) party does not hear the tone.
NOTE! Whisper page receiving is not available on the current
version of the phone.
Tone Description
Appendix C: LED Indications (Programmable Keys) 243 FlexSet-IP 280S User Guide
Appendix C: LED Indications (Programmable Keys)
LED indications visually show the state of certain features. LEDs typically indicate that a feature is either activated (steady
on) or is pending further commands or needs additional information (flashing). The LED indications usually go hand-in-hand
with various messages when equipped with a display.
NOTE! In special cases the key may operate differently. See the relevant feature for explanations of
various messages that can appear.
LED Indications Description
Off Indicates that the feature is inactive or the DSS destination is idle.
Wink A signal that flashes at a fast rate of 120 pulses per minute (400/100mS). Typically
indicates that a call is on hold or park, normally the telephone does not ring.
Flashing A signal that flashes at a slow rate of 60 pulses per minute (800/200mS). Typically
indicates that a call is pending, in most cases the station will also ring.
Steady On Indicates that a feature programmed on that key is active. When defined as DSS,
indicates that the port designated by this key is in use. When defined as a loop, line
or speaker indicates that a call is in progress.
Message Lamp Dedicated LED for message waiting indication. The message lamp may be enabled
or disabled system-wide. The lamp does not interfere with a programmed MSG
key.
Appendix D: ISDN Cause Numbers 244 FlexSet-IP 280S User Guide
Appendix D: ISDN Cause Numbers
Cause # CODE MEANING ACTION
0 valid cause code not yet received
1 unallocated (unassigned) number check number and call again*
2 no route to specified transit network notify system administrator
3 no route to destination notify system administrator
4 send special information tone
5 misdialed trunk prefix
6 channel unacceptable notify system administrator*
7 call awarded and being delivered in an established
channel
no action
8 prefix 0 dialed but not allowed
9 prefix 1 dialed but not allowed
10 prefix 1 dialed but not required
11 more digits received than allowed
16 normal clearing (message displayed as text) no action*
17 user busy (message displayed as text) call later
18 no user responding call later

Appendix D: ISDN Cause Numbers 245 FlexSet-IP 280S User Guide
19 no answer from user (user alerted) call later
21 call rejected call later
22 number changed check number and call again*
23 reverse charging rejected
24 call suspended
25 call resumed
26 non-selecting user clearing
27 destination out of order call later
28 invalid format (address incomplete) check number and call again*
29 facility rejected notify system administrator
30 response to status inquiry
31 normal unspecified no action*
33 circuit out of order
34 no circuit/channel available call later*
35 destination unattainable
37 degraded service
38 network out of order wait and call later
39 transit delay range cannot be achieved
Cause # CODE MEANING ACTION

Appendix D: ISDN Cause Numbers 246 FlexSet-IP 280S User Guide
40 throughput range cannot be achieved
41 temporary failure call later*
42 switching equipment congestion call later
43 access information discarded no action*
44 requested circuit/channel not available notify system administrator
45 preempted
46 precedence call blocked
47 resource unavailable, unspecified notify system administrator
49 quality of service not available notify system administrator
50 requested facility not subscribed notify system administrator
51 reverse charging not allowed
52 outgoing calls barred
53 outgoing calls barred within GUG
54 incoming calls barred
55 incoming calls barred within GUG
56 call waiting not subscribed
57 bearer capability not authorized notify system administrator
58 bearer capability not presently available call later
Cause # CODE MEANING ACTION

Appendix D: ISDN Cause Numbers 247 FlexSet-IP 280S User Guide
63 service or option not available, unspecified notify system administrator
65 bearer capability not implemented check destination is correct, try again from
different compatible terminal, notify system
administrator if message returns
66 channel type not implemented notify system administrator
67 transit network selection not implemented
68 message not implemented
69 requested facility not implemented notify system administrator
70 only restricted digital information bearer capability
is available
notify system administrator
79 service or option not implemented, unspecified notify system administrator
81 invalid call reference value notify system administrator
82 channel does not exist
83 a suspended call exists, but this call identity does
not
no action*
84 call identity in use no action*
85 no call suspended no action*
86 call having the requested call identity has been
cleared
no action*
87 called user not member of GUG
Cause # CODE MEANING ACTION

Appendix D: ISDN Cause Numbers 248 FlexSet-IP 280S User Guide
88 incompatible destination check destination is correct, try again from
different compatible terminal, notify system
administrator if message returns
89 non-existent abbreviated address
90 destination address missing, and direct call not
subscribed
91 invalid transit network selection notify system administrator
92 invalid facility parameter
95 invalid message, unspecified notify system administrator
93 mandatory information element is missing notify system administrator
95 invalid message, unspecified notify system administrator
97 message type non-existent or not implemented notify system administrator
98 message not compatible with call state or
messages type non-existent or not implemented
notify system administrator
99 information element non-existent or not
implemented
notify system administrator
100 invalid information element contents notify system administrator
101 message not compatible with call state notify system administrator
102 recovery on timer expiry no action*
103 mandatory information element length error
Cause # CODE MEANING ACTION
Appendix D: ISDN Cause Numbers 249 FlexSet-IP 280S User Guide
111 protocol error, unspecified notify system administrator
112 type of protocol not available
113 ISUP not available
127 interworking, unspecified notify system administrator
* If the message returns frequently, notify your system administrator
Cause # CODE MEANING ACTION

Appendix E: Troubleshooting 250 FlexSet-IP 280S User Guide
Appendix E: Troubleshooting
Failure Messages
The following failure messages may appear on your FlexSet-IP 280S to indicate there is a connection error. See the table
below to determine the cause of the problem and the solution.
Failure Message Problem Solution / Action
CODEC MISMATCH Each FlexSet-IP 280S operates a specific set of
codecs that determines the compression rate at
which the FlexSet-IP 280Scommunicates with the
Coral.
This message indicates that the compression rate
of your FlexSet-IP 280S has not been correctly
defined in the Class of Service (COS).
Notify your system administrator.
IP Address not Legal The static Self IP Address defined in the FlexSet-
IP 280S is invald.
Notify your system administrator
DNS Server Address is
missing...
The DNS Server IP Address was not provided by
the DHCP Server. There is no DNS Server defined
in the FlexSet-IP 280S.
Notify your system administrator.
NO MEDIA CHANNEL In order to connect to the dialed number, the
system requires an available Media Channel.
Currently all IP Media Channels are engaged.
The media channel resources will be freed once
another user ends their conversation.
Hang up and try again later.
No Net Mask There is no Subnet Mask configured in the
FlexSet-IP 280S.
Notify your system administrator.

Appendix E: Troubleshooting 251 FlexSet-IP 280S User Guide
NO PHYSICAL LINK Your FlexSet-IP 280S is not connected to the
network.
Check all wires, connections, hubs and
switches to determine if any parts or
components are unplugged or damaged.
Searching CA no. x (1-10) The system is searching for a Call Agent with a
correct IP address.
If the message persists, this indicates that the
FlexSet-IP 280S is unable to communicate with
the UGW card.
Notify your system administrator.
Searching for DHCP
server...
For keysets with dynamic IP addresses, indicates
that the system is attempting to connect to the
DHCP server upon keyset initialization.
If the message persists, indicates that there is no
response from the DHCP server.
If there is no connection to the network,
check the connection to the LAN/PC and
then reboot. If the problem persists, notify
your system administrator that there is a
problem with the DHCP server
functionality (DHCP server is inactive on
the network).
Trying DNS server... For keysets with static IP addresses, indicates
that:
• Primary DNS server address has been defined
in the phone
• No Call Agent IP address has been defined in
the phone
Notify your system administrator.
WRONG ZONE SETUP The FlexSet-IP 280S is attempting to connect to a
UGW in a zone in which it is not configured.
Notify your system administrator.
Failure Message Problem Solution / Action

Index: Soft Keys and Feature Codes 252 FlexSet-IP 280S User Guide
Index: Soft Keys and Feature Codes
This appendix details the rich array of options available on your phone. Features are accessed by use of the context-sensitive
soft keys. The features can also be operated by using their dial codes, so that they may be programmed into the programmable
keys.
Soft Key
These are the soft key options that appear on the bottom line of the display area of your phone. This column is arranged in
alphabetical order. In situations where there are two or three features, one standard, one attendant, and one boss group:
• The attendant feature takes the format aXXXXX
(for example, Trace and aTrace, where Trace is the standard feature and aTrace is the attendant feature).
• The boss group feature takes the format BG:XXX.
(for example, Fwd and BG:Fwd, where Fwd is the standard feature and BG:Fwd is the boss group feature).
Source
This is the route taken using the soft keys to reach this soft key message.
•Feat corresponds to the idle state (or > [Featrs])
•Call corresponds to the FlexSet state during a call (ongoing, ringing, etc.).
Feature Code
The feature code is the default code (numbering plan) that is used to operate the relevant feature using the dial pad. The
feature code can be used to pre-program the FlexSet DSS buttons with the specific feature.
When the soft key links to a sub-menu (e.g. pressing [Fwd] opens a list of forwarding options), “MENU” is used to show
that this is a multilevel menu.
For more detailed information on how to use the feature codes and how to program them, refer to the Coral FlexSet 280,
280D, 280D-Z, 120, 120D and 120L User Guide, or the Attendant Console User’s Guide. See page 153 for instructions
on how to program a feature into a programmable key by using its feature code.
MENU

Index: Soft Keys and Feature Codes 253 FlexSet-IP 280S User Guide
Soft Key Reference
The following table lists details of each soft key and location of the feature in this manual.
Soft Key Information
Soft Key Source Default
Feature
Code
What it Means Reference
[1stsec] -
[9thsec]
Setup>PrvLib>Pause 31 - 39 Private Library (#193) – Delay 1-9 Seconds page 175
[3-Way] Call #122 Xfer: when COS is defined for 3-Way Conference Call page 187
[AcctCd] Feat, Call #1990 Account Code page 54
[ACDBsy] AcdUcd #1746 Used by the Attendant to define Max Calls Waiting for Busy
ACD Group
page 56
[AcdUcd] Feat MENU ACD & UCD Hunt Groups:
[CallWt] [LoadID] [LogI/O] [PrmLog] [RlsRsm] [RlsUCD] [WrapTm] [WrapCd] [ACDBsy]
page 56
[Add] Redial>AutRdl #178 Auto Redial - Add number to the list page 164
[AddOn] GpCall #1449 Group call Temporary (Add on) Group Call page 118
[AddPrt] GpCall, AddOn #1449 Add Participant to Group Call page 118
[aFwd] Feat MENU Attendant: Call Forward:
[All] [All-E] [Busy] [Busy-E] [NoAns] [NoAn-E] [Time] [Time-E]
page 196
[Alarm] System #1997 Alarm Display page 211

Index: Soft Keys and Feature Codes 254 FlexSet-IP 280S User Guide
[All] BG:Fwd #168 Boss Group Call Forward All page 68
[All] aFwd #168 Attendant Call Forward All page 196
[All] FlexiC #17710 FlexiCall remote destination for ALL calls page 108
[All-E] Fwd #17702 Call forward all for External calls page 70
[All-E] BG:Fwd #17707 Boss Group - Call forward all for External calls page 68
[All-E] aFwd #17707 Attendant - Call Forward All for External calls page 196
[All-St] Charge>Reset #1978 Attendant – Charge, Reset for all stations page 207
[AM] Remind, WakeUp,
System>Time, aWake
2 Used to set time to AM (between midnight and noon) page 216
[aRmSts] Feat MENU Attendant Room Status options:
[RmSts0] [RmSts1]……[RmSs14] [RmSs15]
page 196
[aTrace] Feat MENU Attendant: Call Trace: [On/Off] [Print] page 201
[ATT-To] System #146 Alternate Attendant Destination page 211
[AutAns] Setup #138 Auto Answer (on/off) page 222
[AutGrd] Tk.Set #1998 Trunk AUTO GUARD page 217
[AutRdl] Redial, Call #178 Auto Redial: when calling a trunk & from idle.
Charge options: [Next] [CanAll] [FrzAll] [RstAll] [Add]
page 164
[aWake] Feat MENU Attendant Wake Up options: [Reques] [Report] page 204
Soft Key Source Default
Feature
Code
What it Means Reference

Index: Soft Keys and Feature Codes 255 FlexSet-IP 280S User Guide
[BckSpc] Dir #3 Directory (##, #1994) Personal – (Backspace) Erase the last
entered character
page 95
[BG:Fwd] Feat MENU Boss Group Call Forwarding options:
[All] [All-E] [Busy] [Busy-E] [NA] [NoAn-E] [Time] [Time-E]
page 68
[Block] St.Set #153 Station Blocking page 208
[Block] Tk.Set #157 Trunk CO Blocked Display page 217
[BNA] Fwd #147 Call Forward Busy/No Answer page 70
[BNA-E] Fwd #17705 Call Forward Busy/No Answer for External calls page 70
[Both] >UsrDef>
CALLog>Delete
Delete BOTH incoming and outgoing calls page 229
[Brk-In] Call #124,
hf-3
Break-In page 35
[Brk-In] Call #124,
hf-3
Do Not Disturb Override page 98
[Broker] Call #122 Xfer: when COS=Broker Call page 186
[BsyOut] Tk.Set #155 Trunk Busy Out page 217
[Busy] Fwd #140 Call Forward Busy page 70
[Busy] BG:Fwd #167 Boss Group Call Forward Busy page 68
[Busy] aFwd #167 Attendant Call Forward Busy page 196
Soft Key Source Default
Feature
Code
What it Means Reference
MENU

Index: Soft Keys and Feature Codes 256 FlexSet-IP 280S User Guide
[Busy-E] Fwd #17701 Call Forward Busy for External calls page 70
[Busy-E] BG:Fwd #17706 Boss Group Call Forward Busy for External calls page 68
[Busy-E] aFwd #17706 Attendant Call Forward Busy for External calls page 196
[CALLog] Feat, Tools N/A Call log page 74
[CALLog] Call log page 74
[CallWt] Call #1325 Number of Calls Waiting Display page 56
[CallWt] AcdUcd #1982 ACD: Calls Waiting Display page 56
[CampOn] Feat #176 Camp-On/Call-Back page 81
[CampOn] Call #176,
hf-2
CampOn/Call-Back (appears when calling a port) page 81
[CanAll] Redial>AutRdl #178 Auto Redial - Cancel All numbers page 164
[Cancel] #10, #*0 Cancel page 83
[CanPri] Redial>AutRdl #*9 Auto Redial (#178) - Cancel Priority page 164
[Change] AcdUcd>ACDBsy #11, #*1 Max Calls Waiting for Busy ACD Group (#1746) page 56
[Char] Dir N/A Directory (##, #1994) Personal – Toggle between digits and
characters
page 95
[Charge] Feat MENU Attendant Call Charge options: [Report] [Reset] page 206
Soft Key Source Default
Feature
Code
What it Means Reference
MENU

Index: Soft Keys and Feature Codes 257 FlexSet-IP 280S User Guide
[ChkI/O] St.Set #1970 Station Check In/Out page 208
[CnfIns] Feat #1983 CONFERENCE Inspect/Release Single Participant page 89
[CnfLck] Call #1441 CONFERENCE Lock (during conference) page 88
[Codes] Setup>PrvLib MENU MENU for Special Dial Codes, in Private Library (#193):
[Final] [FreeDl] [Pulse] [Tone] [DspOff] [DspOn] [WaitDT] [Dsp -] [FlshTk] [Dial *] [Dial #]
page 175
[Conslt] Call #122 Xfer: when COS is defined as Consultation Call page 187
[COS-Sw] Feat #149 COS Switchover page 90
[Date] System>Time #188 Time Date – Set Date page 211
[Day/N1] System #185 Day/Night1 - Service Mode Select page 211
[Day/N2] System #184 Day/Night2 - Service Mode Select page 211
[Delete] CALLog Delete call records page 74
[DelPrt] GpCall, AddOn #1449 Delete Participant from Group Call page 118
[Dest] Call #1322 Exclude Destination (Split Call) page 183
[Dest] Pickup #180, 77 Call Pickup Directed (Destination) page 77
[Dial #] Setup>PrvLib>Codes ## Private Library (#193) – Dial # Out page 175
[Dial *] Setup>PrvLib>Codes ** Private Library (#193) – Dial * Out page 175
[Dial] CALLog>In
CALLog>Out
N/A Call log - Call Back (dial the selected entry from the call log) page 74
Soft Key Source Default
Feature
Code
What it Means Reference

Index: Soft Keys and Feature Codes 258 FlexSet-IP 280S User Guide
[Dial] Dir * Directory (##, #1994) – Place a call to the displayed contact page 95
[Dial] CALLog N/A Used to dial the recognized number page 74
[Digit] Dir ##,
#1994
Directory (##, #1994) Personal – Toggle between characters
and digits
page 95
[DIL-D] Tk.Set #164 Trunk Direct In Line at DAY service page 217
[DIL-N1] Tk.Set #163 Trunk Direct In Line at Night1 service page 217
[DIL-N2] Tk.Set #165 Trunk Direct In Line at Night2 service page 217
[Dir] Dir #9 Directory (##, #1994) – Access the personal directory subset
only
page 95
[Dir] Feat #1994 Directory phones page 91
[Direct] Pickup #180, 77 Call Pickup Directed (Destination) page 77
[DND] Feat #145 Do Not Disturb (or Attended / Unattended for Attendant) page 98
[DND] St.Set #1999 Station Do-Not-Disturb page 208
[DNDOvr] Call #124,
hf-3
Do Not Disturb Override page 98
[DND-WP] Setup #1745 Whisper Page, (DND) Receiving (on/off) page 222
[DropND] Tk.Set #162 Trunk Drop On No Dial page 217
[Dsp -] Setup>PrvLib>Codes #8 Private Library (#193) – Display '-' page 175
Soft Key Source Default
Feature
Code
What it Means Reference
Index: Soft Keys and Feature Codes 259 FlexSet-IP 280S User Guide
[DspOff] Setup>PrvLib>Codes #4 Private Library (#193) – Inhibit Display page 175
[DspOn] Setup>PrvLib>Codes #5 Private Library (#193) – Enable Display page 175
[Duplic] >UsrDef
>CALLog
Record the same ID number at all call appearances
(Duplic=Yes) or only the last call appearance (Duplic=No)?
page 229
[Edit] Dir #2 Directory (##, #1994) Personal – Edit the displayed entry
[BckSpc] [Space] [LoCase] [UpCase] [Digit] [Number] [Save] [Dial] [Exit]
page 95
[ElapTm] Setup, Call #129 Call Elapsed Time Display (on/off) page 222
[Enable] Redial>AutRdl #178 Auto Redial - Activate page 164
[Esc] CALLog N/A Escape (Terminate or Release) page 74
[Exec] Feat #170 Executive Privilege page 107
[ExHold] Setup #187 Boss Group: Exclusive Hold (on/off) page 222
[Exit] N/A Terminate or Release
[Exit] CnfIns #1983 Conference View/Release – Exit page 89
[Extern] >UsrDef
>CALLog
Outside line access code needed to access external trunks
from CALL Log records
page 229
[Extern] FlexiC #17711 FlexiCall remote destination for External calls page 108
[Extrn#] Setup>PrvLib (#193) Private Library – used to enter Outside Line Access Code
followed by External Phone #
page 175
Soft Key Source Default
Feature
Code
What it Means Reference
MENU
MENU

Index: Soft Keys and Feature Codes 260 FlexSet-IP 280S User Guide
[FastDn] Tk.Set, St.Set #*5 Scroll Fast Backward
(Rapidly goes backward to the previously assigned feature in
a scroll list)
page 227
[FastUp] Tk.Set, St.Set #*3 Scroll Fast Forward
(Advances rapidly to the next assigned feature in a scroll list)
page 227
[Feat] “Feature” used to reach Feature options, as shown during idle
state. (Irrelevant for FlexSet 121S/281S)
page 45
[Final] Setup>PrvLib>Codes #0 Private Library (#193) – End of number / Stop Dial page 175
[FlexiC] Feat MENU FlexiCall Remote Destination options: [All] [Extern] [Intern] page 108
[Fllw-E] Fwd #17713 Follow me for External calls page 70
[FllwMe] Fwd #189 Follow Me page 70
[FlshTk] Call #150 Flash On Trunk (Calibrated Opening) page 41
[FlshTk] Setup>PrvLib>Codes #9 Private Library (#193) – Flash On Trunk (Calibrated Opening) page 175
[FrcRls] Call #123 Forced Release page 35
[FrcRls] CnfIns #11, #*1 Conference View/Release (#1983) - Forced Release a
selected Participant
page 86
[FreeDl] Setup>PrvLib>Codes #1 Private Library (#193) – Outpulsing Wait Period for Free
Dialing
page 175
[Freeze] Redial>AutRdl #*6 Auto Redial (#178) - Freeze (Hold Set for specific number) page 164
Soft Key Source Default
Feature
Code
What it Means Reference
MENU

Index: Soft Keys and Feature Codes 261 FlexSet-IP 280S User Guide
[FrzAll] Redial>AutRdl #*6 Auto Redial (#178) - Freeze All (Hold Set for all numbers) page 164
[Fwd] Feat MENU Call Forwarding options: [FwdAll] [All-E] [Busy] [Busy-E] [NoAns] [NoAn-E]
[BNA] [BNA-E] [Time] [Time-E] [FllwMe] [Fllw-E]
page 70
[FwdAll] Fwd, Call #141 Call Forward All: when phone rings OR from idle page 70
[GpCall] Feat MENU Group Call Conference options: [PrtRel] [GrpRel] [AddOn] page 114
[Group] Pickup #181, 76 Call Pickup Group page 77
[GrpRel] GpCall #1447 Group Call. Release the entire group page 125
[HeadSt] Setup #1302 Head Set Only (on/off) page 222
[Hold] Feat, Call #171 Call Hold page 129
[HotDly] Tk.Set #161 Trunk Hot Delayed page 217
[HotDly] St.Set #182 Station Hot Delay page 208
[HotImm] Tk.Set #160 Trunk Hot Immediate page 217
[HotImm] Tk.Set #166 Station Hot Immediate page 208
[IdCtrl] Feat #1444 Caller ID Control page 78
[IdlDsp] Setup #137 Idle Display (on/off) page 222
[ImDial] Redial>AutRdl #11, #*1 Auto Redial (#178) - Immediate Dial page 164
[In] CALLog N/A Incoming received calls page 74
Soft Key Source Default
Feature
Code
What it Means Reference

Index: Soft Keys and Feature Codes 262 FlexSet-IP 280S User Guide
[IncOnl] Tk.Set #158 Trunk Incoming Only page 217
[Intern] FlexiC #17712 FlexiCall remote destination for Internal calls page 108
[Extern] >UsrDef
>CALLog
Outside line access code needed to access external trunks
from CALL Log records
page 229
[Intrnl] >UsrDef>
CALLog
Whether INTERNAL calls are saved (external calls are always
saved)
page 229
[IRSS] Setup #17714 Destination for IRSS (Individual Remote System Services) page 222
[Lang] Setup #1328 “Language” Multilingual Display page 222
[LAR] Tk.Set #1979 Look Ahead Routing – Block page 217
[Last#] Redial #143, * Last Number Redial page 164
[Lib#] System>PubLib #194 Public Library – Library Number# page 211
[Lib#] Setup>PrvLib #193 Private Library – Used to enter specific Private Library
number#
page 175
[Line] Call #126 Line for Boss Group Programmed key (Line # + Boss Group#) page 64
[LoadID] AcdUcd #1973 ACD: Load ID page 56
[LoCase] Dir N/A Directory (##, #1994) Personal – Toggle between uppercase
and lowercase characters
page 95
[Lock] Feat #148 Phone Dial Lock page 152
Soft Key Source Default
Feature
Code
What it Means Reference
MENU
MENU
Index: Soft Keys and Feature Codes 263 FlexSet-IP 280S User Guide
[LogI/O] AcdUcd #1974 ACD: Log-In/Out page 56
[LveMsg] Msg>Msg. #175 Message - Leave A Message at another destination page 138
[MoveSt] Setup, N/A Move Station: Auto Set Relocate or Terminal Portability
(Default feature code Not Available)
page 61
[Msg.] Feat>Msg, Call #175,
#5, hf-5
Message (when calling a station or from idle) page 138
[Msg] Feat MENU Message options: [Msg.] [MsgCan] [Msg-Wt] page 138
[MsgCan] Feat>Msg #1440 Message Cancel page 138
[Msg-Wt] Feat>Msg, Call #156 Attendant Message Waiting: when calling a station or from idle page 140
[Mute] Call #1320 Mute Microphone page 141
[Name] Dir #5 Directory (##, #1994) – Toggle between number and name of
your contact
page 95
[Name] CALLog N/A Used to display the party name instead of the number page 74
[New] Dir #1 Directory (##, #1994) Personal – Add a new entry page 95
[New] Remind #172 Reminder – Add New Time page 168
[New] WakeUp #173 Wakeup – Add New Time page 189
[Next] #*2 Advances forward through a scroll list one step at a time
Same as
Soft Key Source Default
Feature
Code
What it Means Reference

Index: Soft Keys and Feature Codes 264 FlexSet-IP 280S User Guide
[Night] Pickup #192 Night Answer (Bell/UNA Pickup) page 77
[NoAn-E] Fwd #17703 Call forward no answer for External calls page 70
[NoAn-E] BG:Fwd #17708 Boss Group - Call forward no answer for External calls page 68
[NoAn-E] aFwd #17708 Attendant - Call forward no answer for External calls page 196
[NoAns] Fwd #142 Call Forward No Answer page 70
[NoAns] BG:Fwd #169 Boss Group - Call Forward No Answer page 68
[NoAns] a:Fwd #169 Attendant - Call Forward No Answer page 196
[Number] Dir #5, #128 Directory (##, #1994) – Toggle between name and number of
your contact. [BckSpc] [Name] [Save] [Dial] [Exit]
page 95
[Number] CALLog N/A Used to display the party number instead of the name page 74
[Number] Call #128 Display port Number instead of port Name, for a system-wide
period of time
[OCC] Call #127 Send Tones (DTMF) for OCC (Other Common Carriers) page 142
[On/Off] Trace #1740 Malicious Call Trace - on/off page 130
[On/Off] aTrace #1742 Attendant Malicious Call Trace - on/off page 201
[OrgOnl] St.Set #151 Station Originating Only page 208
[Origin] SltMon, S.Mon1 #1448 Used to monitor the 1st conversing party. page 172
[Out] CALLog N/A Outgoing calls made page 74
Soft Key Source Default
Feature
Code
What it Means Reference

Index: Soft Keys and Feature Codes 265 FlexSet-IP 280S User Guide
[OutLin] >UsrDef>
CALLog
Outside line access code needed to access external trunks
from CALL Log records
page 230
[OutOnl] Tk.Set #190 Trunk Outgoing Only page 217
[Page Q] Feat, Call MENU Page_Q Place/Pickup Call options:
[PageQ1] [PageQ2] ……[PageQ9] [PagQ10]
page 142
[PageQ1] -
[PagQ10]
Page_Q 7060-
7069
Page Queue 1-10 page 142
[Park] Feat, Call #183,
#7, 79
Call Park page 150
[Parti#] CnfIns #1983 Conference View/Release - Conference Participant # page 89
[Pascod] Setup #179 Passcode Change page 222
[Pause] Setup>PrvLib MENU Options for Delay Dialing X seconds, in Private Library (#193):
[1 sec] [2 sec] [3 sec] [4 sec] ….[9 sec]
page 175
[Pickup] Feat MENU Pickup options to answer a ringing call: [Direct] [Group] [Night] page 77
[PM] Remind, WakeUp,
SystemSys>Time,
aWake
7 Used to set time to PM (between noon and midnight)
[Prefer] Setup #131 Preference page 222
Soft Key Source Default
Feature
Code
What it Means Reference
MENU
Index: Soft Keys and Feature Codes 266 FlexSet-IP 280S User Guide
[Prev] #*4 Moves backwards through the scroll list one step at a time.
Same as .
[Primry] COS-Sw #10, #*0 COS Switchover (#149) - Select Primary COS page 90
[Print] Trace #1741 Malicious Call Trace - Printout page 137
[Print] aTrace #1743 Attendant Malicious Call Trace - Printout page 201
[Priori] Redial>AutRdl #*8 Auto Redial (#178) - Priority Assign page 164
[Privac] Setup #186, #6 Boss Group: Privacy (on/off) page 222
[PrmLog] AcdUcd #1442 ACD: Primary Log-In page 56
[ProgKy] Setup #139 Programming Key page 222
[PrtRel] GpCall #1446 Group call Release of a Participant page 124
[PrvLib] Setup #193 Programming Private Library page 175
[PubLib] System #194 Programming Public Library page 211
[Pulse] Setup>PrvLib>Codes #2 Private Library (#193) – Dialing Pulses page 175
[Redial] Feat MENU Redial Number options: [Last#] [Saved#] [AutRdl] page 164
[Remind] Feat #172 Reminder Request page 168
[Remove] Dir #0 Directory (##, #1994) Personal – Remove the displayed entry page 95
[Report] aWake #1971 Attendant Wakeup Report Printout page 204
Soft Key Source Default
Feature
Code
What it Means Reference

Index: Soft Keys and Feature Codes 267 FlexSet-IP 280S User Guide
[Report] Charge #1972 Station Call Charge Printout page 206
[Reques] aWake #1980 Attendant Wakeup Request page 204
[Reset] Charge #1978 Station Call Charge Reset with Printout page 206
[Restar] Redial>AutRdl #*7 Auto Redial (#178) - Restart (Cancel Freezing) page 164
[Ring] >Userdef
>Ring
Ring Adjustment options: [Volume] [Intrnl] [Extrnl] page 229
[RlsRsm] AcdUcd #1975 ACD/UCD: RLS/Resume all page 56
[RlsUCD] AcdUcd #1991 UCD Release/Resume page 56
[RmSts0] –
[RmSs15]
RoomSt #7026-
#7041
Room Status and Canned Message 0-15 page 169
[RmSts0] –
[RmSs15]
aRmSts #7010-
#7025
Attendant Room Status and Canned Message 0-15 page 202
[RoomSt] Feat MENU Room Status and Canned Message options:
[RmSts0] [RmSts1]……[RmSs14] [RmSs15]
page 169
[RstAll] Redial>AutRdl #178 Auto Redial - Restart All page 164
[Rstrct] St.Set #154 Station Outgoing Call Restriction page 208
[RsvdTo] Tk.Set #159 Trunk Reserved To page 217
[S.Mon1] SltMon #1448 Silent Monitor 1-Way Splitting page 172
Soft Key Source Default
Feature
Code
What it Means Reference
MENU

Index: Soft Keys and Feature Codes 268 FlexSet-IP 280S User Guide
[S.Mon2] SltMon, Call #1981,
hf-9
Silent Monitor 2-Way Both page 172
[Save#] Call #196, #9 Save External Number for future redialing page 164
[Saved#] Redial #196, #9 Saved Number Redial, from Idle State page 164
[Second] COS-Sw #11, #*1 COS Switchover (#149) - Select Secondary COS page 90
[SendCW] Call hf-8 Send Call Wait tone / CampOn Offhook / Call Offer / 2nd Ring page 31
[Series] Call #195 Series Call page 41
[SltMon] Feat MENU Silent Monitoring options: [S.Mon1] [S.Mon2] page 172
[Snooze] Call 4 On receiving Reminder and Wakeup Calls – Snooze page 168
[Source] Call #1321 Exclude Source (Split Call) page 183
[Space] Dir #4 Directory (##, #1994) Personal – Insert a space between
words
page 95
[Spk/Hs] Call #1323 Handset/Speaker page 18
[St.Set] Feat MENU Station Features – Setup (Attendant only):
[ChkI/O] [DND] [HotDly] [HotImm] [OrgOnl] [Rstrct] [Block] [TrmOnl]
page 208
[St#] St.Set Enter Station #, in Attendant features page 208
Soft Key Source Default
Feature
Code
What it Means Reference

Index: Soft Keys and Feature Codes 269 FlexSet-IP 280S User Guide
[St/Gp#] BG:Fwd #168,
#167,
#169,
#1984
Enter Boss Group dial number in [BG:Fwd]
• (#168) [FwdAll]
• (#167) [Busy]
• (#169) [NoAns]
• (#1984) [Time]
• (#17709) [Time-E]
page 68
[St/Gp#] aFwd, St.Set Station/Group #, in Attendant features page 193
[St/Rm#] aWake>Reques,
aTrace, aRmSts,
Charge
#1980,
#1742,
#1743
Station/Room #, in Attendant features page 193
[StopDl] Call #130, # Stop Dial page 36
[StRmGp] Enter Station/Room/Group #, in Attendant features page 193
[System] Feat MENU System Features - Setup (Attendant only):
[Alarm] [ATT-To] [XfrD/N] [Day/N1] [Day/N2] [PubLib] [Time]
page 211
[Time] System #188 Time/Date Set page 211
[Time] aFwd #1984 Attendant Call Forward Timed page 196
[Time] Fwd #1985 Call Forward Timed page 70
[Time] BG:Fwd #1984 Boss Group Call Forward Timed page 68
[Time] >UsrDef Time Zone setting page 229
Soft Key Source Default
Feature
Code
What it Means Reference
MENU

Index: Soft Keys and Feature Codes 270 FlexSet-IP 280S User Guide
[Time-E] Fwd #17704 Call forward time for External calls page 70
[Time-E] BG:Fwd #17709 Boss Group Call forward time for External calls page 68
[Time-E] aFwd #17709 Attendant Call forward time for External calls page 196
[Tk.Set] Feat MENU Trunk Features - Setup (Attendant only): [AutGrd] [Block] [BsyOut]
[DIL-D] [DIL-N1] [DIL-N2] [DropND] [HotImm] [HotDly] [IncOnl] [OutOnl] [RsvdTo]
page 217
[Tone] Setup>PrvLib>Codes #3 Private Library (#193) – Dialing DTMF Tones page 175
[Trace] Feat MENU Malicious Call Trace options: [On/Off] [Print] page 137
[TrkGp#] Tk.Set Enter Trunk Group #, in Attendant features page 217
[TrmOnl] St.Set #152 Station Terminating Only page 208
[Trunk#] Tk.Set Enter Trunk Dial Number in Attendant features page 217
[UpCase] Dir N/A Directory (##, #1994) Personal – Toggle between lowercase
and uppercase characters
page 95
[Vers] >UsrDef FlexSet-IP Software Version page 229
[VP-AA] Setup #133 Voice Page Auto Answer (on/off) page 222
[V-Page] Feat, Call #191,
#3, hf-6
Voice Page activation page 147
[VP-Rcv] Setup #134 Voice Page Receiving (on/off) page 222
[WaitDT] Setup>PrvLib>Codes #6 Private Library (#193) – Wait for Dial Tone page 175
Soft Key Source Default
Feature
Code
What it Means Reference
MENU
Index: Soft Keys and Feature Codes 271 FlexSet-IP 280S User Guide
[WakeUp] Feat #173 Wake Up Request page 189
[WhspPg] Feat, Call #1744 Whisper Page, Announcing page 191
[WrapCd] AcdUcd #1977 ACD: Wrap-Up Code page 56
[WrapTm] AcdUcd #1976 ACD/UCD: Wrap-Up Time page 56
[Xfer] Call #122 Transfer/Hookflash page 181
[XfrD/N] System #1993 Day/Night Transfer (Auto/Manual) page 211
Soft Key Source Default
Feature
Code
What it Means Reference
International Headquarters
Tadiran Telecom Business Systems Ltd.
18 Hasivim St., P.O.Box 450
Petach-Tikva 49105, Israel
Tel. +972-3-9262000, Fax. +972-3-9262310
Visit us at our website http://www.tadirantele.com
Email: coral@tadirantele.com
USA Headquarters
Tadiran Telecom, Inc.
4 Tri Harbor Court
Port Washington, NY 11050
Tel. +1-516-632-7200, Fax. +1-516-632-7210
Coral FlexSet-IP280S(FlexSetVersion3,CoralVersion15.5)
UserGuide (Coral IPx and Coral FlexiCom)
1stEdition2FW200
TM
