Groove Agent 2 – Operation Manual Steinberger VSTi Grooveagent
Steinberger VSTi GrooveAgent 2 GrooveAgent Manual GrooveAgent_Manual Steinberger - VSTi GrooveAgent 2 - GrooveAgent Manual
Steinberger VSTi GrooveAgent 2 GrooveAgent Manual grooveagent_manual Steinberger - VSTi GrooveAgent 2 - GrooveAgent Manual
Groove Agent - 2.0 - Operation Manual GrooveAgent_2_en Free User Guide for Steinberg Groove Agent Software, Manual
User Manual: Steinberger VSTi GrooveAgent 2 GrooveAgent Manual Steinberger - VSTi GrooveAgent 2 - GrooveAgent Manual
Open the PDF directly: View PDF ![]() .
.
Page Count: 248 [warning: Documents this large are best viewed by clicking the View PDF Link!]
- English
- Table of Contents
- Welcome!
- How do I use Groove Agent?
- What is Groove Agent?
- Register Groove Agent!
- The Steinberg Key
- System requirements (PC version)
- Installing Groove Agent (PC version)
- System requirements (Mac version)
- Installing Groove Agent (Mac version)
- Activating the Steinberg Key
- Setting up Groove Agent as a VST instrument in your host application
- Setting up Groove Agent as a DXi2 instrument
- Using Groove Agent in an AU compatible application
- Groove Agent stand-alone and ReWire
- First test
- Groove Agent terminology
- About the sounds in this VST instrument
- Using Groove Agent
- The LCD window
- Range
- The right-click menu
- Sliders and buttons
- Mute, grouping and instrument selection
- Stop/Run
- Under the hood
- The setup lid
- Creating a drum track in Groove Agent
- Using Groove Agent’s MIDI output in Cubase SX
- Using the automation in Cubase SX
- Composing with Groove Agent’s Memory slots in Cubase SX
- About the styles
- 1950 Swing
- 1951 Samba
- 1952 Jazz Trio
- *Bop
- 1953 Paint
- * Ominous
- * Machinery
- 1954 Cha-Cha
- 1955 3/4
- * 6/8
- 1956 Rumba
- 1957 Shuffle
- 1958 Fox
- 1959 Tom-Toms
- 1960 Bossa Nova
- 1961 Twist
- 1962 12/8
- * Slow Blues
- 1963 Train Beat
- 1964 Tamla
- 1965 Soul
- 1966 Pop
- * Steady Beat
- 1967 Backbeat
- 1968 New Orleans Funk
- 1969 Songo
- * Mozambique
- 1970 Olympic
- 1971 Cajun
- 1972 Bonzo
- 1973 Dark Side
- 1974 Reggae
- * Bombay Dance Hall
- * Roots
- 1975 Funk
- 1976 Disco
- 1977 Hard Rock
- * Grunge
- * Indie Punk
- * Unplugged
- * Ballad
- 1978 TexMex
- 1979 Basic Hip-Hop
- * Live Hip-Hop
- * Sloppy Hip-Hop
- 1980 Boogie
- 1981 Elektro
- * Vintage FR-3
- * Vintage TR-7
- *Vintage CR-8
- * Meek Ballad
- * Axis Y
- 1982 Slick
- 1983 Breakbeat
- 1984 Arena
- * HM Straight
- * HM Triplets
- * Grind
- * Progressive
- 1985 World Ethno
- 1986 Detroit Techno
- * Daft
- 1987 LA Shuffle
- 1988 House
- 1989 Westcoast
- 1990 Mini Works
- 1991 Fusion
- 1992 Trance
- 1993 Modern Soul
- 1994 Trip-Hop
- * Bristol Trip
- 1995 Busy Beat
- 1996 Drum’n’Bass
- 1997 Ambient
- 1998 Hip Hop
- 1999 2-Step
- 2000 Tribal Techno
- 2001 Nordic Pop
- 2002 Nu RnB
- * Kelly
- 2003 Mini Club
- Tempo Guide
- 80 or 160 BPM, what’s the correct tempo?
- Finding a suitable style for your song
- Jamming with Groove Agent
- Smooth handling
- Controlling Groove Agent from a MIDI keyboard
- Contact, Internet
- Credits
- Last but not least…
- Deutsch
- Inhaltsverzeichnis
- Willkommen!
- Wie verwende ich Groove Agent?
- Wie funktioniert Groove Agent?
- Lassen Sie Groove Agent registrieren!
- Der Steinberg Key
- Systemvoraussetzungen (PC-Version)
- Installieren von Groove Agent (PC-Version)
- Systemvoraussetzungen (Mac-Version)
- Installieren von Groove Agent (Mac-Version)
- Aktivieren des Steinberg Key
- Einrichten von Groove Agent als VST-Instrument in der Host-Applikation
- Einrichten von Groove Agent als DXi2-Instrument
- Verwenden von Groove Agent in einer AU- kompatiblen Anwendung
- Groove Agent als Standalone-Anwendung und ReWire
- Der erste Test
- Groove Agent-Terminologie
- Die Klänge dieses VST-Instruments
- Arbeiten mit Groove Agent
- Das LCD-Fenster
- Range – Der Tempobereich
- Das Kontextmenü
- Regler und Schalter
- Der Zeitskala-Schieberegler
- Der Link-Schalter des Zeitskala-Reglers
- Der Complexity-Schieberegler
- Der Link-Schalter des Complexity-Reglers
- Snare/Sidestick-Schalter
- Accent-Schalter
- Fill-Schalter
- Der Schalter »1/2 Tempo Feel«
- Random-Schalter
- Der Schalter »Auto Fill«
- Der Schalter »Random Fill«
- Shuffle-Drehregler
- Humanize-Drehregler
- Limiter-Drehregler
- Ambience-Drehregler
- Auswählen der Instrumente, Stummschalten und Gruppieren
- Stop/Run-Schalter
- Weitere Funktionen
- Der Setup-Bereich
- Erzeugen einer Drum-Spur in Groove Agent
- Verwenden der MIDI-Ausgabe von Groove Agent in Cubase SX
- Verwenden der Cubase SX-Automation
- Das Komponieren in Cubase SX mit Hilfe der Groove Agent-Speicherplätze
- Die einzelnen Stilrichtungen
- 1950 Swing
- 1951 Samba
- 1952 Jazz Trio
- *Bop
- 1953 Paint
- * Ominous
- * Machinery
- 1954 Cha-Cha
- 1955 3/4
- * 6/8
- 1956 Rumba
- 1957 Shuffle
- 1958 Fox
- 1959 Tom-Toms
- 1960 Bossa Nova
- 1961 Twist
- 1962 12/8
- * Slow Blues
- 1963 Train Beat
- 1964 Tamla
- 1965 Soul
- 1966 Pop
- * Steady Beat
- 1967 Backbeat
- 1968 New Orleans Funk
- 1969 Songo
- * Mozambique
- 1970 Olympic
- 1971 Cajun
- 1972 Bonzo
- 1973 Dark Side
- 1974 Reggae
- * Bombay Dance Hall
- * Roots
- 1975 Funk
- 1976 Disco
- 1977 Hard Rock
- * Grunge
- * Indie Punk
- * Unplugged
- * Ballad
- 1978 TexMex
- 1979 Basic Hip-Hop
- * Live Hip-Hop
- * Sloppy Hip-Hop
- 1980 Boogie
- 1981 Elektro
- * Vintage FR-3
- * Vintage TR-7
- *Vintage CR-8
- * Meek Ballad
- * Axis Y
- 1982 Slick
- 1983 Breakbeat
- 1984 Arena
- * HM Straight
- * HM Triplets
- * Grind
- * Progressive
- 1985 World Ethno
- 1986 Detroit Techno
- * Daft
- 1987 LA Shuffle
- 1988 House
- 1989 Westcoast
- 1990 Mini Works
- 1991 Fusion
- 1992 Trance
- 1993 Modern Soul
- 1994 Trip-Hop
- * Bristol Trip
- 1995 Busy Beat
- 1996 Drum’n’Bass
- 1997 Ambient
- 1998 Hip Hop
- 1999 2-Step
- 2000 Tribal Techno
- 2001 Nordic Pop
- 2002 Nu RnB
- * Kelly
- 2003 Mini Club
- Tempoübersicht
- 80 oder 160 BPM, wo liegt das richtige Tempo?
- Die passende Stilrichtung für Ihren Song
- Mit Groove Agent jammen
- Bequeme Anwendung
- Steuern von Groove Agent per MIDI-Keyboard
- Kontakt, Internet
- Credits
- Last but not least…
- Français
- Table des matières
- Bienvenue !
- Comment utiliser Groove Agent ?
- Groove Agent : Qu’est-ce que c’est ?
- Enregistrez votre logiciel !
- La clé Steinberg
- Configuration nécessaire – PC sous Windows
- Installer Groove Agent (version PC)
- Configuration nécessaire – Mac OS
- Installer Groove Agent (version Mac)
- Activation de la clé Steinberg Key
- Configurer Groove Agent comme instrument VST dans votre application hôte
- Configurer Groove Agent comme un instrument DXi2
- Utiliser Groove Agent dans une application compatible AU
- Groove Agent indépendant et ReWire
- Premier test
- La terminologie de Groove Agent
- À propos des sons de cet instrument VST
- Utilisation de Groove Agent
- L’affichage LCD
- Range
- Le menu “clic droit”
- Faders, potentiomètres et boutons
- Mute, groupage et sélection d’instruments
- Stop/Run
- Sous le couvercle
- Sous le petit couvercle
- Créer une piste rythmique dans Groove Agent
- Utiliser la sortie MIDI de Groove Agent dans Cubase SX
- Utiliser l’automatisation dans Cubase SX
- Composer avec les cases mémoire de Groove Agent dans Cubase SX
- À propos des styles
- 1950 Swing
- 1951 Samba
- 1952 Jazz Trio
- *Bop
- 1953 Paint
- * Ominous
- * Machinery
- 1954 Cha-Cha
- 1955 3/4
- * 6/8
- 1956 Rumba
- 1957 Shuffle
- 1958 Fox
- 1959 Tom-Toms
- 1960 Bossa Nova
- 1961 Twist
- 1962 12/8
- * Slow Blues
- 1963 Train Beat
- 1964 Tamla
- 1965 Soul
- 1966 Pop
- * Steady Beat
- 1967 Backbeat
- 1968 New Orleans Funk
- 1969 Songo
- * Mozambique
- 1970 Olympic
- 1971 Cajun
- 1972 Bonzo
- 1973 Dark Side
- 1974 Reggae
- * Bombay Dance Hall
- * Roots
- 1975 Funk
- 1976 Disco
- 1977 Hard Rock
- * Grunge
- * Indie Punk
- * Unplugged
- * Ballad
- 1978 TexMex
- 1979 Basic Hip-Hop
- * Live Hip-Hop
- * Sloppy Hip-Hop
- 1980 Boogie
- 1981 Elektro
- * Vintage FR-3
- * Vintage TR-7
- *Vintage CR-8
- * Meek Ballad
- * Axis Y
- 1982 Slick
- 1983 Breakbeat
- 1984 Arena
- * HM Straight
- * HM Triplets
- * Grind
- * Progressive
- 1985 World Ethno
- 1986 Detroit Techno
- * Daft
- 1987 LA Shuffle
- 1988 House
- 1989 Westcoast
- 1990 Mini Works
- 1991 Fusion
- 1992 Trance
- 1993 Modern Soul
- 1994 Trip-Hop
- * Bristol Trip
- 1995 Busy Beat
- 1996 Drum’n’Bass
- 1997 Ambient
- 1998 Hip Hop
- 1999 2-Step
- 2000 Tribal Techno
- 2001 Nordic Pop
- 2002 Nu RnB
- * Kelly
- 2003 Mini Club
- Guide de tempo
- 80 ou 160 BPM, quel est le tempo correct ?
- Trouver un style adapté à votre morceau
- Jam Session avec Groove Agent
- Manipulations plus confortables
- Contrôler Groove Agent depuis un clavier MIDI
- Contact, Internet
- Crédits
- Enfin…

Groove Agent
2 English
The information in this document is subject to change without notice and does not rep-
resent a commitment on the part of Steinberg Media Technologies GmbH. The software
described by this document is subject to a License Agreement and may not be copied
to other media. No part of this publication may be copied, reproduced or otherwise
transmitted or recorded, for any purpose, without prior written permission by Steinberg
Media Technologies GmbH.
All product and company names are ™ or ® trademarks of their respective owners.
Windows XP is a trademark of Microsoft Corporation. The Mac logo is a trademark used
under license. Macintosh is a registered trademark. Mac OS X is a registered trademark.
© Steinberg Media Technologies GmbH, 2005.
All rights reserved.

Groove Agent
English 3
ENGLISH
Table of Contents
4Welcome!
6 How do I use Groove Agent?
7What is Groove Agent?
7 Register Groove Agent!
8 The Steinberg Key
10 System requirements (PC version)
10 Installing Groove Agent (PC version)
11 System requirements (Mac version)
11 Installing Groove Agent (Mac version)
12 Activating the Steinberg Key
13 Setting up Groove Agent as a VST instrument in your host application
14 Setting up Groove Agent as a DXi2 instrument
15 Using Groove Agent in an AU compatible application
16 Groove Agent stand-alone and ReWire
17 First test
18 Groove Agent terminology
20 About the sounds in this VST instrument
27 Using Groove Agent
28 The LCD window
29 Range
29 The right-click menu
30 Sliders and buttons
39 Mute, grouping and instrument selection
40 Stop/Run
41 Under the hood
44 The setup lid
48 Creating a drum track in Groove Agent
50 Using Groove Agent’s MIDI output in Cubase SX
51 Using the automation in Cubase SX
52 Composing with Groove Agent’s Memory slots in Cubase SX
53 About the styles
71 Tempo Guide
73 80 or 160 BPM, what’s the correct tempo?
73 Finding a suitable style for your song
73 Jamming with Groove Agent
74 Smooth handling
74 Controlling Groove Agent from a MIDI keyboard
76 Contact, Internet
76 Credits
77 Last but not least…
Groove Agent
4 English
Welcome!
In early 2002, a member of our Swedish VST forum suggested that
someone should create a modern-day drum machine VST instrument.
Just like in the old days, when drum machines offered exotic musical
styles like Rumba and Cha-Cha, this baby would be able to play a huge
number of styles. And with today’s 24 bit audio technology, velocity
layers, real ambience recordings and an easy to use control panel,
what could go wrong?
A year later it was time for Groove Agent, a modern day drum machine.
Now it’s early 2005 and we’re presenting Groove Agent 2 – the next
logical step. We’ve added content in the form of acoustic and elec-
tronic drum kits plus 27 new styles and some improved functionality.
But the basic behavior of our drum machine is still the same, so for any-
one saying:
- “I can’t program drums”,
- “I don’t have the time to program drums”,
- “Inspire me!”,
Groove Agent 2 offers instant assistance and inspiration for producing
songs, jingles, film scores or any other genre that requires versatility
and speed. We also know that some Groove Agent customers prefer
using our drum machine as a rhythmic source to feed external sound
modules, or to use the built-in sounds for their own drumming. Or any
combination thereof.
I firmly believe that the slogan we used two years ago still holds true
for this updated version of Groove Agent: “Create a professional
drum track in the same 3 minutes it takes to play your song!”.
Groove Agent
English 5
ENGLISH
So why not skip the boring parts of life and concentrate on the inter-
esting bits! I personally consider song-writing to be the finest craft of
all, and Groove Agent 2 is designed to help anyone who needs drums
in their music; instant drums to keep the creative flow.
Computer tools can’t replace real humans, no more in music programs
than in other software. We’ve done our best in maintaining the human
touch in Groove Agent 2 by asking real musicians to contribute with
their very best grooves. And when they thought the job was done, then
came the hard bits; adding half tempo feel and sidestick versions of all
25 levels of complexity for each style! The results often surprised the
musicians too, and the collected effort of all that musical activity re-
sides somewhere there in those thousands of bars of drumming.
Please use Groove Agent 2 to create sweet music! Music is good for
your soul, and hopefully this musical tool will assist and inspire you to
reach higher levels.
Sven Bornemark
/Producer

Groove Agent
6 English
How do I use Groove Agent?
You can use Groove Agent as stand-alone application or together with
a host application, a sequencer program. If your sequencer supports
VST instruments, then you can use Groove Agent. Here’s how to get
started:
1.
Prepare a track and load Groove Agent.
2.
Select a style or a sub-style using the top slider in Groove Agent (see
page 30). Wait while it loads its sound data.
3.
Click the Run button and Groove Agent starts playing. Move the Com-
plexity slider to hear variations in the style.
4.
Choose another style and hear what it sounds like when you change
the individual drum sounds, click the fill button, mute or un-mute the
percussion instruments, try the half tempo feel or add a syncope (ac-
cent). Have you found the ambience knob yet?
Now it’s time to let Groove Agent act as a real drummer in your music!
Groove Agent
English 7
ENGLISH
What is Groove Agent?
Technically speaking, Groove Agent uses thousands of custom de-
signed MIDI patterns created by Swedish top musicians. These pat-
terns trigger samples especially recorded for this instrument. That’s
basically it!
The Timeline slider allows you to choose a musical style or sub-style
and its associated drum kit. Some of the kits are acoustic, others are
electronic. The Complexity slider provides you with increasing degrees
of advanced play. For each level there’s an associated fill, half tempo
feel pattern and sidestick version. On top of that, there’s an Edit section
where you can tweak the sounds and even change your instruments.
We’re especially proud of the fine musicianship behind every single
level of the styles available. This piece of software was produced by
musicians for musicians!
Register Groove Agent!
Before getting carried away with Groove Agent, which we’re sure you
will be, please take a moment to complete and return the enclosed
registration card. This will entitle you to technical support, and we’ll
also keep you up to date with the latest news and updates.
Groove Agent
8 English
The Steinberg Key
❐
Please read the following section before installing the Groove Agent
software.
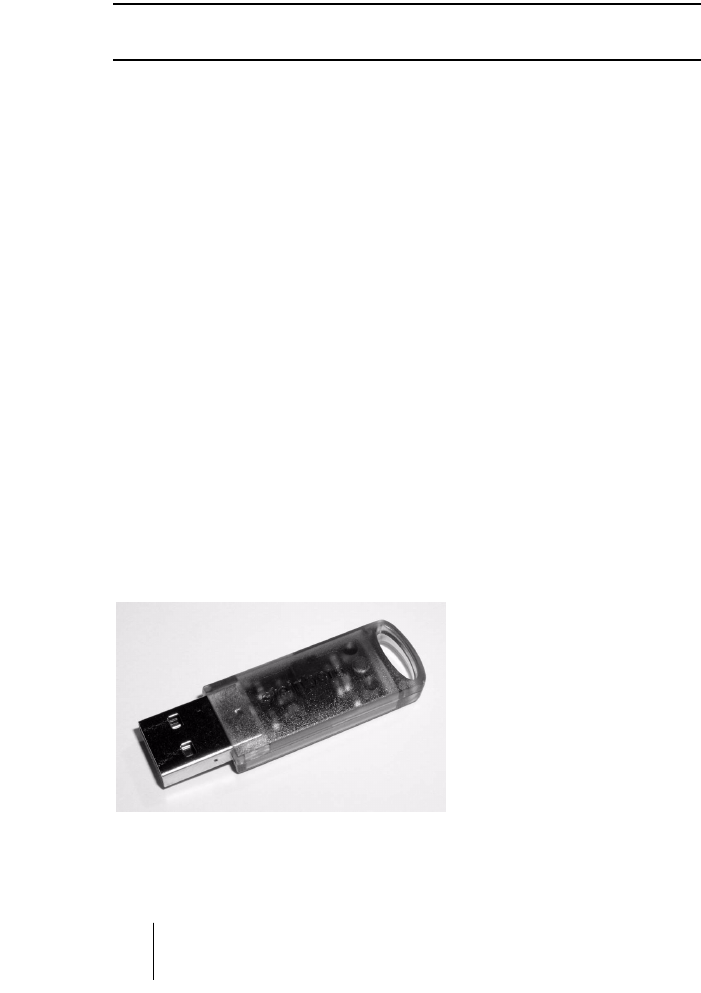
Included with the Groove Agent package, you will find an activation
code (not to be confused with the serial number) for the Steinberg
Key (sometimes referred to as a “dongle”), a hardware copy protec-
tion device that is part of the Groove Agent copy protection scheme.
Groove Agent will not run if there is no Steinberg Key and if this key
hasn’t been properly activated. You can either separately purchase a
new Steinberg Key for use with Groove Agent, or use a key previously
bought for use with a different Steinberg application.
•
If you have a Windows PC and have never used a dongle on your
computer before, the installation routine may initiate a restart of Win-
dows after installation of the key drivers. After the restart, the key must
be plugged into the USB port for the installation routine to continue.
•
If you already own software that requires a Steinberg Key, it should be
plugged into the computer’s USB port after installing Groove Agent
and restarting the computer!
When the key is plugged into the USB port, Windows will automatically
register it as a new hardware device and will attempt to find drivers for it
– these necessary drivers won’t be present until Groove Agent has
been installed and the computer restarted.
The Steinberg Key

Groove Agent
English 9
ENGLISH
The Steinberg Key is, in fact, a little computer on which your Stein-
berg software licenses are stored. All hardware-protected Steinberg
products use the same type of key, and you can store more than one
license on one key. Also, licenses can (within certain limits) be trans-
ferred between keys – which is helpful, e.g. if you want to sell a piece
of software.
❐
If you already own a Steinberg Key (e.g. for Cubase or Nuendo), you can
load your Groove Agent license onto that one, using the activation code
supplied with Groove Agent. This way you need only one USB key for
both your host and Groove Agent (see below).
❐
The Steinberg Key must not be plugged in before or during the installa-
tion of Groove Agent if this is the first time you use such a key. Other-
wise Windows will register it as new USB hardware and try to find drivers
that won’t be present before Groove Agent installation.

Groove Agent
10 English
System requirements (PC version)
To run Groove Agent you’ll need:
•A PC with a 800 MHz Pentium or Athlon processor (1.4 GHz or faster recom-
mended).
• 384 MB of RAM (512 MB recommended).
• 450 MB of hard disk space.
• Windows® XP Home or Professional.
• Windows MME compatible audio hardware (an ASIO compatible audio card
is recommended).
•If you want to use Groove Agent as a plug-in, you’ll need Cubase or Nuendo
(version 1.5 or higher) or another VST 2.0 or DXi 2 compatible host application.
Please note that some features may not be supported in other host applications.
•A Steinberg Key and a free USB port.
• Monitor and graphics card supporting 1024 x 768 resolution (a dual monitor
setup and a display resolution of 1152 x 864 are recommended).
❐
Please also observe the system requirements of your host application.
Installing Groove Agent (PC version)
To install Groove Agent on your PC:
1.
Switch on your computer and wait for Windows to load.
2.
Insert the Groove Agent CD ROM into your CD ROM drive.
3.
Open the Windows Explorer, or the “My Computer” window, and dou-
ble-click on the CD ROM drive icon.
4.
Double-click on the Groove Agent Installer icon to run the installation
program, and follow the on-screen instructions.

Groove Agent
English 11
ENGLISH
System requirements (Mac version)
To run Groove Agent you’ll need:
•A Power Mac G4 867 MHz computer (Power Mac G4 Dual and 1.25 GHz or
faster recommended).
• 384 MB of RAM (512 MB recommended).
• 450 MB of hard disk space.
• Mac OS X version 10.3 or higher.
• CoreAudio compatible audio hardware.
•If you want to use Groove Agent as a plug-in, you’ll need Cubase or Nuendo
(version 1.5 or higher) or another VST 2.0 or AU compatible host application.
Please note that some features may not be supported in other host applications.
•A Steinberg Key and a free USB port.
• Monitor and graphics card supporting 1024 x 768 resolution (a dual monitor
setup and a display resolution of 1152 x 864 are recommended).
❐
Please also observe the system requirements of your host application.
Installing Groove Agent (Mac version)
To install Groove Agent on your Mac:
1.
Switch on your computer and insert the Groove Agent CD ROM.
2.
If the CD window doesn’t open automatically, double-click on the
Groove Agent icon.
3.
Double-click on the Groove Agent Installer icon to run the installation
program, and follow the on-screen instructions.

Groove Agent
12 English
Activating the Steinberg Key
❐
Whether you bought a new key when you bought Groove Agent, or if you
want to use one you previously bought with a different Steinberg product:
your Steinberg Key does not yet contain a valid license for Groove Agent.
You must download a license to it before you can launch Groove Agent!
Use the activation code supplied with the program in order to down-
load a valid Groove Agent license to your Steinberg Key. This process
is the same both for existing and new keys. Proceed as follows:
1.
After installation and restarting the computer, plug the Steinberg Key
into the USB port.
If you are unsure of which port this is, consult the computer’s documentation.
2.
If this is the first time a copy protection device is plugged in, it will be
registered as a new hardware device, and a dialog will appear asking
you whether you would like to find drivers for the device manually or
automatically.
Choose to find drivers automatically. The dialog closes, and you may have to reboot
your computer.
3.
Make sure that your computer has a working internet connection.
License download is made “online”. If your Groove Agent computer isn’t connected to
the internet, it’s possible to use another computer for the online connection – proceed
with the steps below and see the help for the License Control Center application.
4.
Launch the “License Control Center” application (found in the Win-
dows Start menu under “Syncrosoft” or in the Macintosh Applications
folder).
This application allows you to view your Steinberg Keys and load or transfer licenses.
5.
Use the License Control Center “Wizard” function and the activation
code supplied with Groove Agent to download the license to your
Key. Simply follow the on-screen instructions.
If you are uncertain about how to proceed, consult the help for LCC.
When the activation process has completed, you are ready to launch
Groove Agent!

Groove Agent
English 13
ENGLISH
Setting up Groove Agent as a VST instrument
in your host application
This section describes how to set up Groove Agent with Cubase SX
as your host application. However, the same procedure applies to
most host applications, and you should consult your host’s documen-
tation if you need further help.
Make sure the host program has been correctly installed and set up to
work with your MIDI and audio hardware (e.g. MIDI keyboard and an
audio card).
To set up Groove Agent:
1.
Open the VST Instruments window.
2.
Click the “No Instruments” label and select Groove Agent from the
pop-up menu.
3.
Wait for a few seconds while Groove Agent loads its default style
samples. The Groove Agent window opens automatically.
4.
In the VST host application, select Groove Agent as the output for a
MIDI track.

Groove Agent
14 English
Setting up Groove Agent as a DXi2 instrument
❐
The information in this section refers to using Groove Agent within Cake-
walk SONAR. We assume that you have correctly set up both SONAR
and your available MIDI and audio hardware. Should you wish to use
Groove Agent within another DXi2 compatible host application, please
refer to its documentation.
Proceed as follows to activate Groove Agent:
1.
Make sure that SONAR receives MIDI data that you generate with
your external MIDI master keyboard. You can check this visually with
the “MIDI In/Out Activity” tray icon.
2.
In SONAR, open the “Synth Rack” window from the View menu.
3.
Click the Insert button (or select the Insert option on the main menu).
4.
Open the DXi Synth submenu and select “Groove Agent” from the
pop-up menu.
5.
By default the “Insert DXi Options” dialog appears. To create one MIDI
track and connect an audio track to Groove Agent’s 1+2 outputs, ac-
tivate the options “Midi Source Track” and “First Synth Output”. To
create all available Groove Agent outputs activate “All Synth Outputs”.
Refer to your host application’s documentation for further details.
6.
Clicking the “Connection State” button in the Synth Rack will acti-
vate/deactivate Groove Agent. By default this is automatically acti-
vated when DXi SoftSynths are loaded.
7. Double-click on the “Groove Agent” entry or click the “Synth Proper-
ties” button in the tool bar of the Synth Rack to open the Groove Agent
window.
8.
In SONAR, select the previously created MIDI track “Groove Agent”.
Groove Agent will now receive MIDI data from the selected track.
Groove Agent receives MIDI data in 16 channel multi-mode. It is therefore not neces-
sary to assign a specific MIDI receive channel in Groove Agent. However, you should
make sure that the MIDI channel of the currently selected SONAR track is set to the
channel on which Groove Agent is to receive MIDI data.

Groove Agent
English 15
ENGLISH
Using Groove Agent in an AU compatible
application
You can use Groove Agent in an AU host application (e.g. Logic).
The Groove Agent AU version is installed in the folder “Library/Audio/
Plug-ins/Components” and lets Groove Agent work in an AU environ-
ment – without any performance loss or incompatibilities.
For Logic Pro 7 proceed as follows:
1.
Open the Track Mixer and choose the desired Instrument channel.
2.
[Command]-click the I/O field and, in the pop-up menu that appears,
choose either Multi-Channel or Stereo.
3.
In the sub-menu that appears, select All Instruments and then Groove
Agent.
Groove Agent is now loaded as an AU instrument.
When set, you are ready to load some samples and start using
Groove Agent!

Groove Agent
16 English
Groove Agent stand-alone and ReWire
Groove Agent can be used as a stand-alone application, indepen-
dently of any host application. This makes it possible to use Groove
Agent in sequencer applications that do not support one of the pro-
vided plug-in formats of Groove Agent (i.e. VST, DXi, AU), but allow
for data exchange using ReWire.
ReWire2 is a special protocol for streaming audio and MIDI data be-
tween two computer applications. When using ReWire, the order in
which you launch and quit the two programs is very important, as the
first audio application launched will capture the sound card resources.
Proceed as follows:
1.
First, launch the sequencer application you wish to use (e.g. Ableton
Live, ProTools).
If your sequencer supports ReWire, it will provide a way to assign audio and MIDI
channels for the exchange of data. See the documentation of your sequencer applica-
tion for details.
2.
Now, launch Groove Agent as a stand-alone application.
If you chose to create desktop and Start menu items during installation of Groove
Agent, you can launch the program just like any other application on your computer.
You can also double-click the Groove Agent program file in the installation folder.
When you now play a style with Groove Agent, the sound is streamed
via ReWire to the assigned mixer channels in your host. You can route
the separate instrument outputs to individual mixer channels (up to 8).
Note that you are now running two completely separate applications.
When you save your sequencer project, this will include the overall
channel and bus configuration, but none of the settings in Groove
Agent! To retain your Groove Agent settings, choose the Save Bank
command from the Groove Agent File menu. You may want to choose
a file name that indicates that the file contains settings created for a
particular sequencer project.
Similarly, when you re-open a project in your sequencer application
and have launched Groove Agent, use the Load Bank command in
Groove Agent to reload the Groove Agent settings pertaining to this
particular project.

Groove Agent
English 17
ENGLISH
First test
Let’s make sure Groove Agent is properly set up and ready to play:
1.
If you load Groove Agent as a VST instrument, make sure Groove
Agent is selected as the output for a MIDI track and that the MIDI
channel chosen is any other than channel 10. If required, make sure
your MIDI controller is routed to this track.
2.
Open the Groove Agent panel. Move the Style slider to a style of your
choice. Be prepared to wait for a second or two while Groove Agent
loads its samples for this style. The green LCD window is helpful here
with its Loading and Ready messages.
3.
Adjust the tempo of your host application to suit each style’s favorite
tempo range as displayed in the “range” field in the green LCD window.
4.
Click Run in the Groove Agent window. Now you should see the red
LCD meters on the Groove Agent interface flash and the beat light in-
dicate 1-2-3-4. You should also hear cool rhythms streaming from
your speakers!

Groove Agent
18 English
Groove Agent terminology
LCD window
– The big, green window tells you, at all times, what’s
going on inside Groove Agent. This is your main source for information.
LCD meters
– These are the cool, red level meters that start flashing
when Groove Agent is playing. They indicate that sound is being out-
put from Groove Agent, but for more detailed control you should use
the level meters in your host sequencer.
Style
– A certain musical style, normally linked to a unique drum and
percussion kit.
Kit
– A special set of drums and percussion associated with each
style. Style and kit can be chosen separately.
Complexity
– The level of advancement in a style. In Groove Agent
the complexity levels go from left (simple) to right (advanced). Music
in general benefits from variations in a song, and in Groove Agent
they’re easy to reach.
Fill – A live drummer usually plays a fill every eight bars or so, empha-
sizing the song’s structure and movement. A fill may be regarded as
“an improvised exclamation mark”. Going from the verse into the cho-
rus? Time for a fill!
Half tempo feel – Typically, slowing down the kick and snare pattern
to half speed, while keeping the rest of the pattern going in the other
instruments, creates a dramatic effect. This is very typical live drummer
behavior! Real drummers do this all the time, if you don’t stop them.
Accent – Before drum machines became popular, an accent was a
marked hit, typically played on the crash cymbal and kick drum. When
played off beat, like e.g. on the 8th note preceding a bar line, it be-
comes a syncope.
Shuffle – Sometimes referred to as “swing factor”. These terms indi-
cate the relationship between the 8th notes (sometimes 16th notes),
as these can either be perfect 8ths (“straight 8ths”) or swung (“triplet
8ths”).

Groove Agent
English 19
ENGLISH
Limiter – This is probably the first device a recording engineer reaches
out for when recording drums. Limiting (or compression, the difference
is not always easily defined) controls the overall output level and can
also be used as an effect.
Ambience – Groove Agent comes with a complete set of ambience
recordings for all drums and percussion instruments. The acoustic
sounds have been recorded with distant microphones and the elec-
tronic sounds have been processed through various reverb and effects
units.
Dry/Wet – These are terms that describe the two extremes of a sound.
Either it’s recorded very closely in a damped environment – dry – or
we’re dealing with the sound recorded from a distance or bathed in
reverb – wet.
•New in Groove Agent 2 is the right-click menu. We’ve added some
new features that can be reached by pressing the right mouse button
or by left-clicking in the logo area.
Via this menu you can reach the About screen or go to the Groove Agent and Stein-
berg websites. You can also reach new functions like changing the number of mixer
outputs, edit MIDI output behavior, change the MIDI mute key mode or instruct Groove
Agent 2 what to do when the host stops.
Groove Agent
20 English
About the sounds in this VST instrument
Before we started producing the musical content for this instrument,
we scanned the market for existing drum libraries we could use. Using
ready made samples would save us oceans of time (Per “Worra” Lars-
son/SampleTekk is the first person to agree here), but unfortunately
we could not find anything suitable. Either those libraries were incom-
plete in terms of drum sounds (have you ever seen a sample archive
that includes “hihat gliss” or “spoons”?) or inconsistent in the way
they were recorded.
We wanted (1) a complete selection of kits and sounds and (2) ambi-
ent recordings of everything. So we started recording…
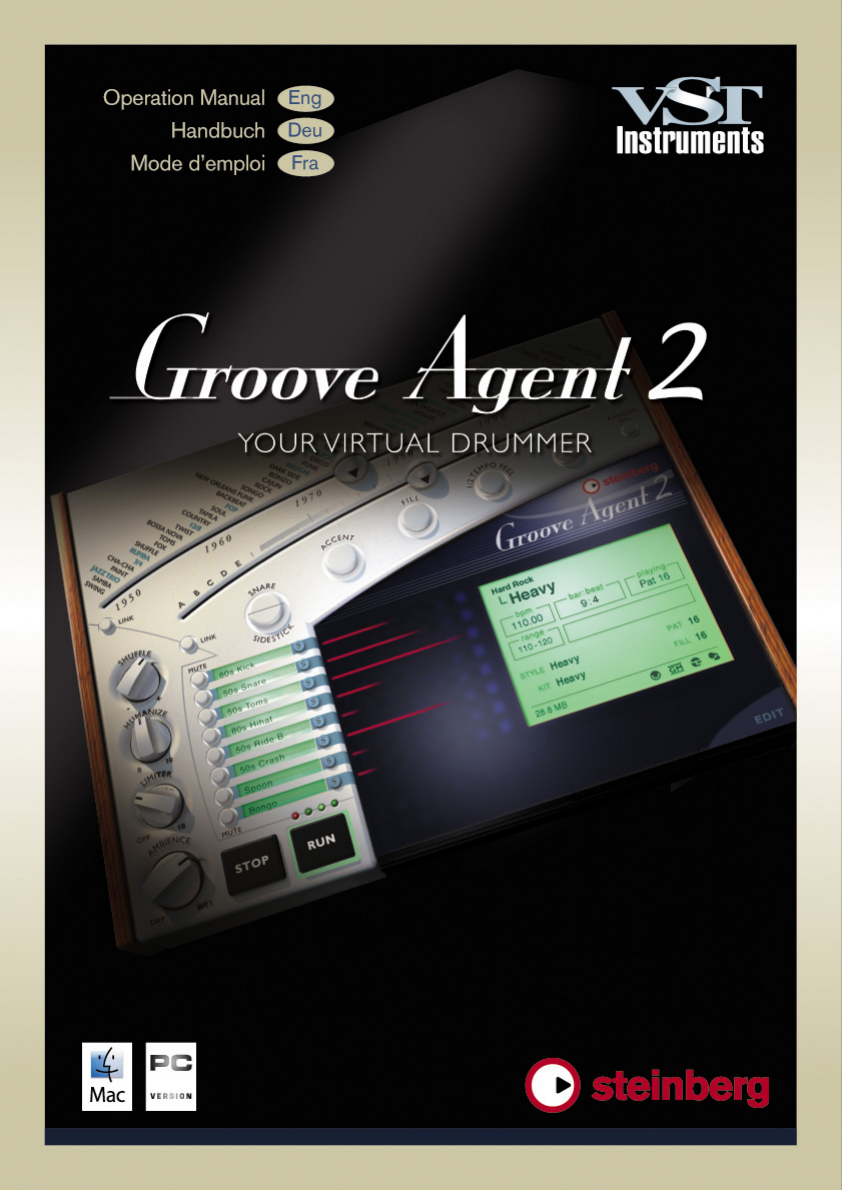
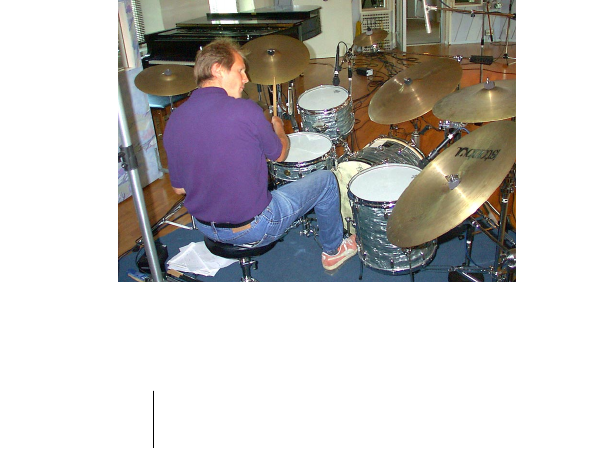
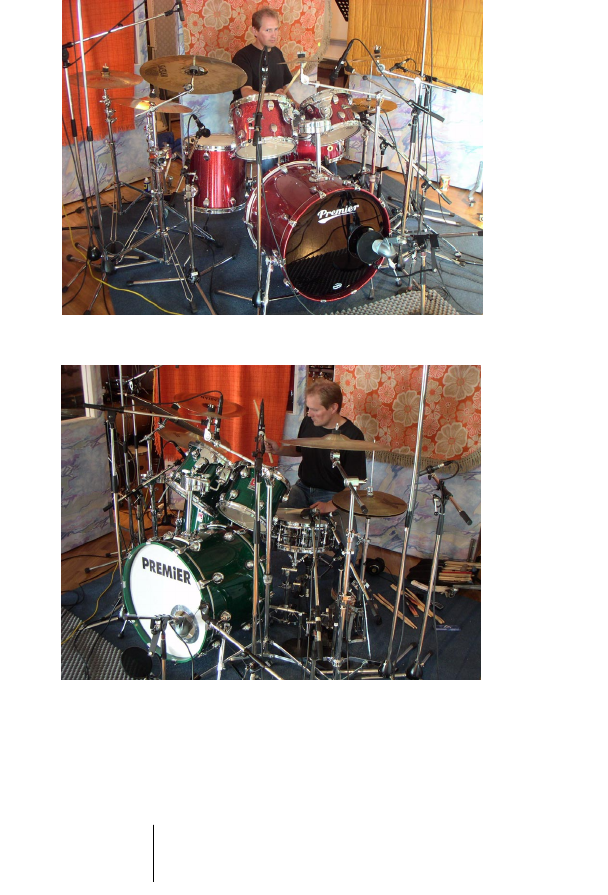
The wonderful Studio Kuling in Örebro, Sweden, has the most dramatic
recording room we’ve ever seen! The room itself is large and mostly
covered with wood panels, and engineer Jens Bogren certainly knows
his way around the equipment. With Mats-Erik Björklund playing all in-
struments, sound designers Per “Worra” Larsson/SampleTekk and
Sven Bornemark started recording multiple velocity levels of each
sound.
There was an initial agreement that this archive should cover most
grounds – as many musical landscapes as possible. Therefore we
decided upon recording all these instruments:
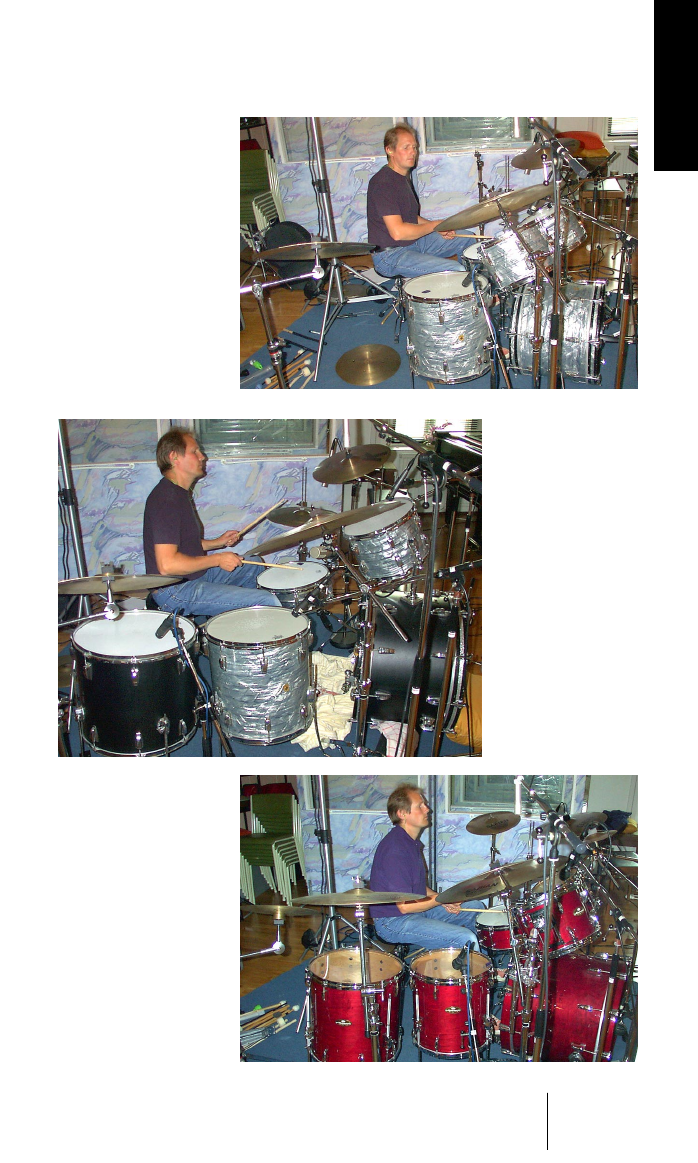
A 50s jazz kit. Not very
damped, sounds a bit
loose, sloppy.
Groove Agent
English 21
ENGLISH
A 60s pop kit. Very
damped drums from
the era when they put
towels on the toms!
A 70s rock kit. Loud,
deep and ringing.
This kit is big!
An 80s studio kit. Fresh
and modern, like on
most of today’s CDs.
Groove Agent
22 English
On top of that, we added stuff that adds color and realism to the dif-
ferent eras and attitudes we wanted to cover. 50s drums played with
brushes and mallets, 80s kit with rods and additional snares like pic-
colo and deep models.
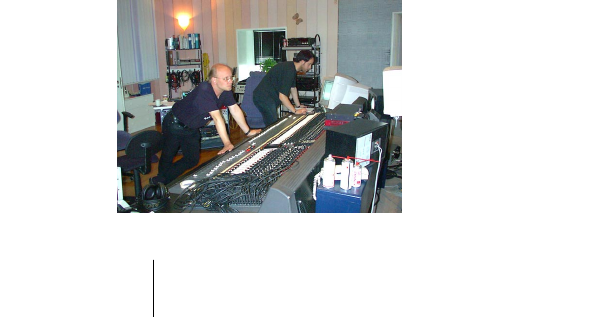
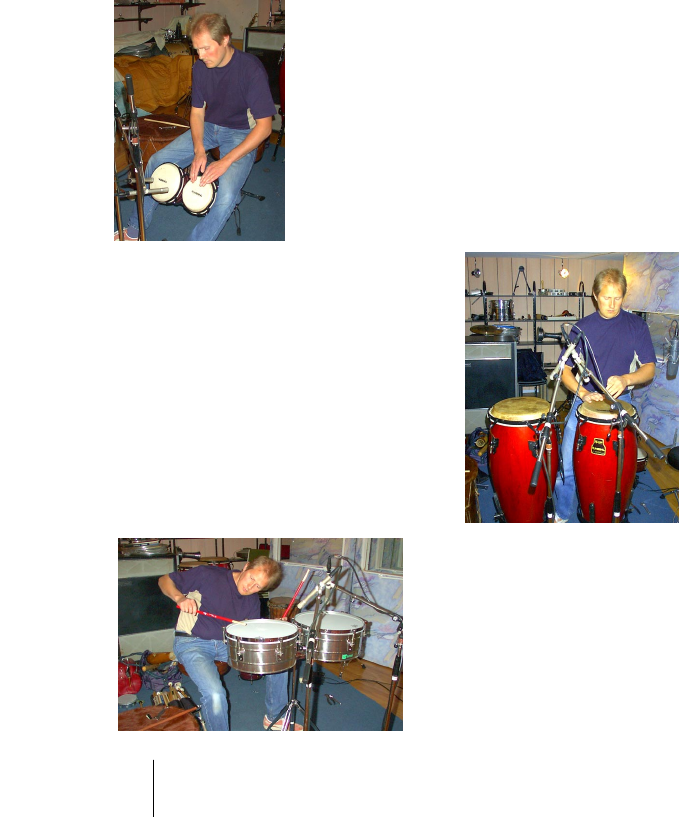
To make the archive complete, we had a long session with only per-
cussion instruments, both those included in the GM protocol plus an
array of other, interesting sounds: African fur drum, rainstick, tambou-
rine, cascabelles, mouthplopp etc.
Recording bongos…
…congas…
…and timbales

Groove Agent
English 23
ENGLISH
Jens Bogren came up with the suggestion that we’d run everything
through an analogue 24 track tape recorder for “that warm sound”.
Great idea! Coupled with our original intention to produce a very com-
plete archive, this is what we actually recorded:
• Tracks 1-2: closely miked drum.
• Tracks 3-4: overhead microphones.
• Tracks 5-6: ambient mics 2 meters away.
• Tracks 7-8: distant mics 7 meters away.
After the recording sessions, Per Larsson spent several months edit-
ing the sounds. Editing in a multitrack environment like this is a task
very different from working with only stereo samples. We carefully
chose the takes that would go together best and went for a mixed
setup, where the 50s and 70s kits use the dry and distant sounds and
the remaining instruments use the dry and ambient recordings.
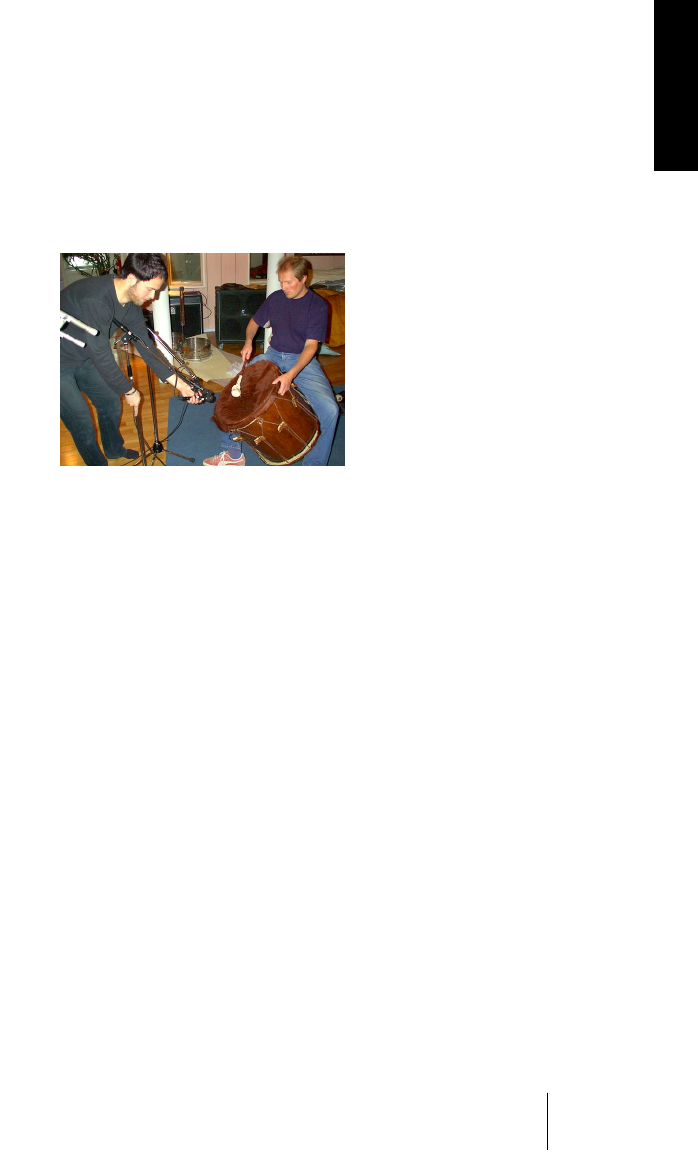
Mats-Erik Björklund was also the person responsible for bringing all
the carefully chosen instruments to the studio. So even if the 70s hihat
recordings went astray and we totally forgot to record the sound of a
whistle, his help has been invaluable!
So much for acoustic timbres. For the more modern and experimental
electronic sounds we turned to the sample library of Primesounds,
Stockholm. There was the multitude of sounds we needed. On top of
that, many of our musicians spent time on building their own unique
sounds from the ground up.
❐
Sounds marked with a B, M or R were recorded with Brushes, Mallets
and Rods respectively.
Groove Agent
24 English
The new sounds for Groove Agent 2
The Groove Agent 2 sessions sported Mats-Erik behind the drums
and as the main sound designer. Engineer for this second round was
Rickard Bengtsson. Mats-Erik took the opportunity to record some
useful kits to make the sonic palette even more complete:
The Studio kit – A top of the
line set with some of the best
drums and cymbals around.
We wanted to achieve a
sound that would fit in a lot of
styles that demand a good,
clean and modern sound. The
three snares are high quality
snares with different depth
and materials and carefully
tuned to bring out the true
characteristic of the instru-
ments.
The Heavy kit – This drum-set
is intended to fit in many of to-
day’s Metal styles, where busy
bass drumming is a vital ingre-
dient. The dry character of the
ride-cymbal and the great
sound from the crashes will
cut through any wall of guitars.
Groove Agent
English 25
ENGLISH
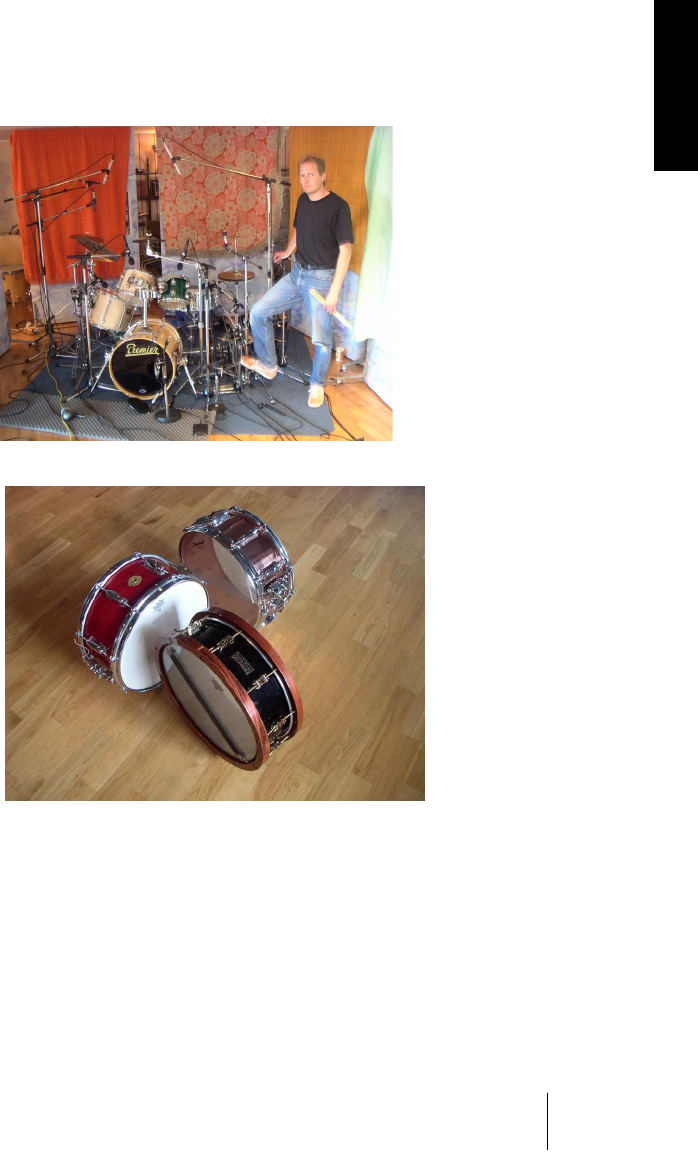
The Noisy kit – We wanted to cre-
ate a modern drum sound using tra-
ditional drums. These instruments
are very small but along with the
boom-box effect they sound much
bigger than they really are. We ex-
perimented a lot with different digi-
tal effects and came up with a
sound that we think will last. The
snares are a thin, high pitched pic-
colo and a small 10" mini-snare.
Some of the cymbals are rare vin-
tage instruments that are almost
impossible to find anywhere today,
while others are modern, noisy
sounding instruments that have
seen better days...
A red Slingerland “Radio
King” (the world’s most re-
corded snare drum), a black
handmade snare drum from
Hanus & Hert in Prague and a
Slingerland copper snare.
In order to achieve our sonic goals, it was decided that we would not
add acoustic ambience this time. Rickard had just purchased an Even-
tide Harmonizer “Orville” unit and spent considerable time creating
some very significant environments for the drum sounds. The resulting
sounds are very rich and colorful.

Groove Agent
26 English
In addition to the three acoustic kits,
a handful of vintage drum machines
from Sven Bornemark’s private col-
lection were added. Some of these
beauties are over thirty years old, so
sampling them was not without
complications. Old analogue gear
has a tendency to sound a bit differ-
ent from day to day, and even from
beat to beat, so when comparing
the original, built in rhythms with our
MIDI renditions, there are some dif-
ferences. However, we think we’ve
managed to capture and re-pack-
age the better part of the magic of
these drum machines of yesteryear.
The vintage drum machines got their ambience from a vintage EMT
plate reverb unit located in Malmö’s most well known recording studio,
Tambourine Studios.
Groove Agent
English 27
ENGLISH
Using Groove Agent
Here’s the extremely compact version for the impatient amongst you:
Choose what style you want to use with the upper slider. Make sure
the lower slider is somewhere in the middle third of its total range and
that the tempo is inside the tempo range of the chosen style. Start your
sequencer, and when you want the drums to start playing, hit Run in
Groove Agent.
For really easy living, activate Auto Fill. Move the Complexity slider to
the left for easier/gentler playing and to the right for a more advanced/
noisy/wild drummer. Stop Groove Agent with its own Stop button or by
stopping your sequencer. To record the output of Groove Agent as a
MIDI part, click Edit, open the Setup section and put the MIDI Output
switch to the ON position (this only works in Cubase and Nuendo).

Groove Agent
28 English
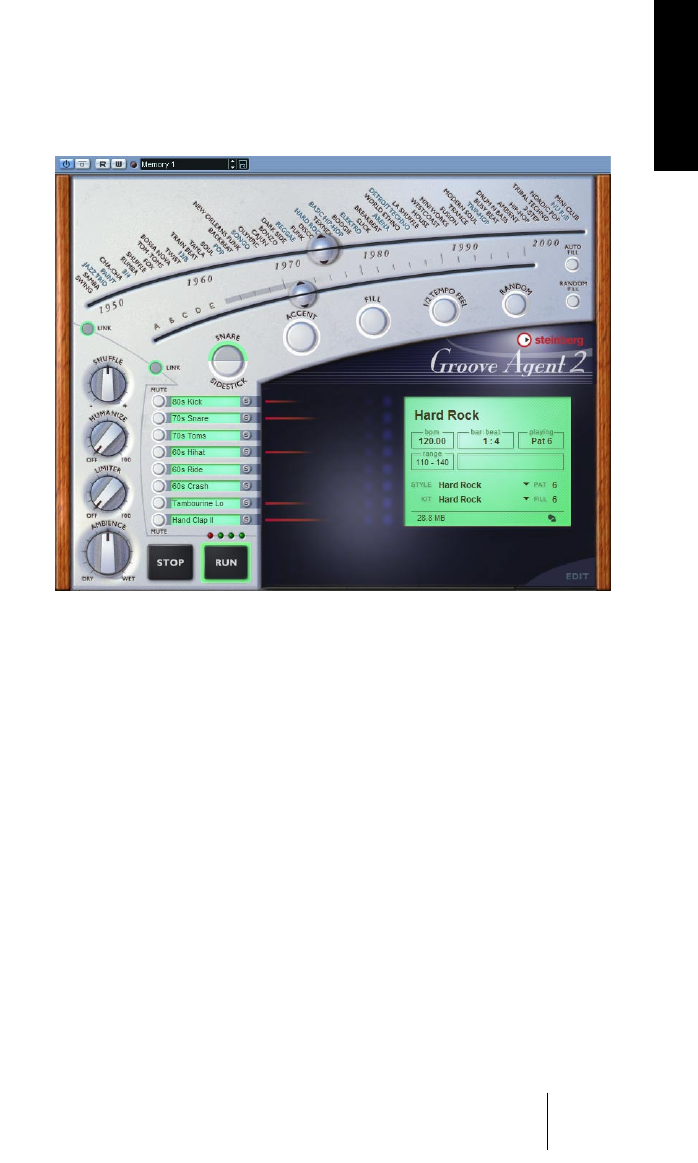
The LCD window
The information given in this window
is mostly self explanatory, but let us
give you the most useful tip of all:
When navigating the Style and Com-
plexity sliders, the big LCD window
always tells you where the sliders are.
We’ve crammed 54 styles into the
top slider, and some users may find
the style names difficult to read. Please, have a look in the LCD win-
dow. It makes it much easier for you to place the sliders exactly where
you want them.
You have probably noticed that some of the style names above the top
slider are colored differently. That’s because they house sub-styles,
the new additional 27 styles that have been added in Groove Agent 2.
Here’s the trick:
1. Select a differently colored style with the slider as usual.
2. Right click with your mouse button and select any of the new styles
listed in the pull-down menu.
•As you might have expected, it’s still possible to combine the music of
one style with the drum kit from another style. Just de-activate the Link
button and use separate positions (and sub-menus) for the two halves
of the style selector.

Groove Agent
English 29
ENGLISH
Range
Each style has its own favorite tempo range. If you play a hectic House
style at 40 BPM, it probably won’t sound very impressive. We won’t try
to stop you from trying any style in any tempo, but we remind you of
each style’s home BPM range in the LCD window.
The recommended tempo range should be regarded as a helpful hint
if realism is what you’re after. If not, break this rule!
❐
For a tempo map overview, see page 71.
The right-click menu
Several new features can be reached by right-clicking in an unused
area of the main interface of by clicking in the logo area:
• About Groove Agent 2 – This page lists the people involved and shows the
version number. You can exit the Credits page by clicking anywhere in it.
• Groove Agent website – Info, sound clips, FAQ and a friendly forum at this
dedicated website.
• Steinberg website – Here’s where you can learn more about other cool and
creative software.
•Audio Outputs – You can decide how many stereo outputs Groove Agent will
occupy in your host’s mixer. Please notice, that due to technical reasons, the
changes made here won’t be seen until Groove Agent has been re-started.
•MIDI Output – Groove Agent 2 can output its drumming to either a MIDI part
(as before) or to a MIDI file! That MIDI file can then be imported to your host
for further tweaking.
•MIDI Mute Key Mode – Remote control of Groove Agent 2 is now easier than
ever! Two new modes in this department. More info in the section “Controlling
Groove Agent from a MIDI keyboard” on page 74.
•When Host Stops – The Pause behavior has been changed in Groove Agent 2.
Please consult the section “Stop/Run” on page 40.
Groove Agent
30 English
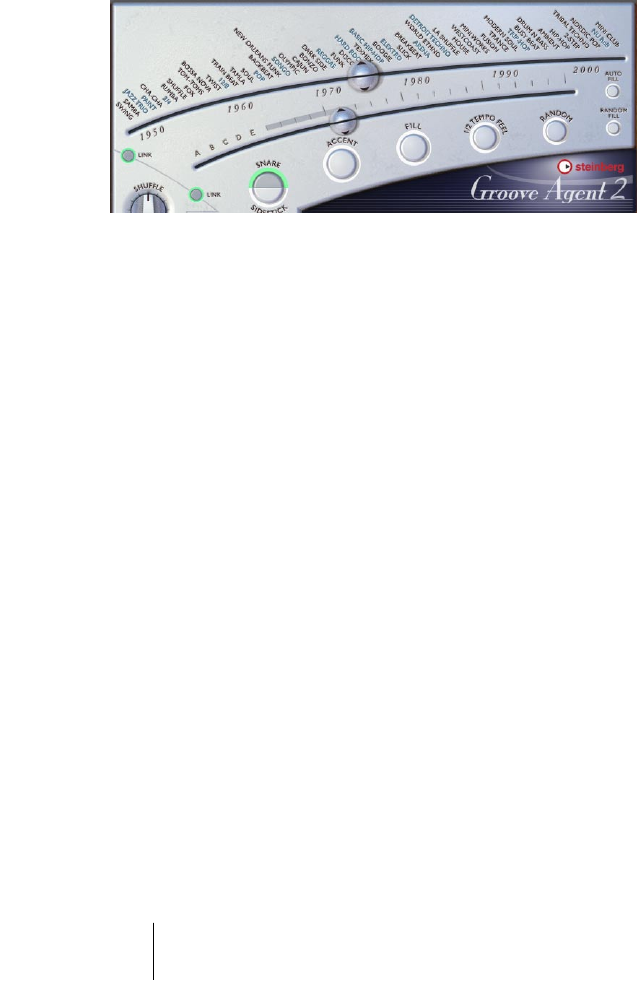
Sliders and buttons
The style slider/timeline
The top slider is perhaps the most important gadget in the entire instru-
ment. It is a timeline with various musical styles written above it. When
dragging the slider along this timeline, you select what style to use.
Every style has its own carefully crafted drum kit assigned to it. Many of
the early styles sound a bit old by today’s standards – both musically
and soundwise – and that’s exactly the point!
When first selecting a style, the plug-in will take a few seconds to load
the samples. When you move to another style, there are a few sec-
onds of loading time again. But if you go back to the first style again,
loading time will be much shorter, because the samples are still in your
computer’s cache. This is especially true for the Windows operating
systems. So, if you are brave enough to use several styles within one
song, you may encounter glitches at those style changes, but only the
first time.
Styles stored in memory locations stay loaded, so Groove Agent will
not glitch when switching between them.
The 27 new styles introduced in Groove Agent 2 can be reached by
moving the slider to a differently colored style name and right-clicking
on it. You can then make a selection from the pull down menu.

Groove Agent
English 31
ENGLISH
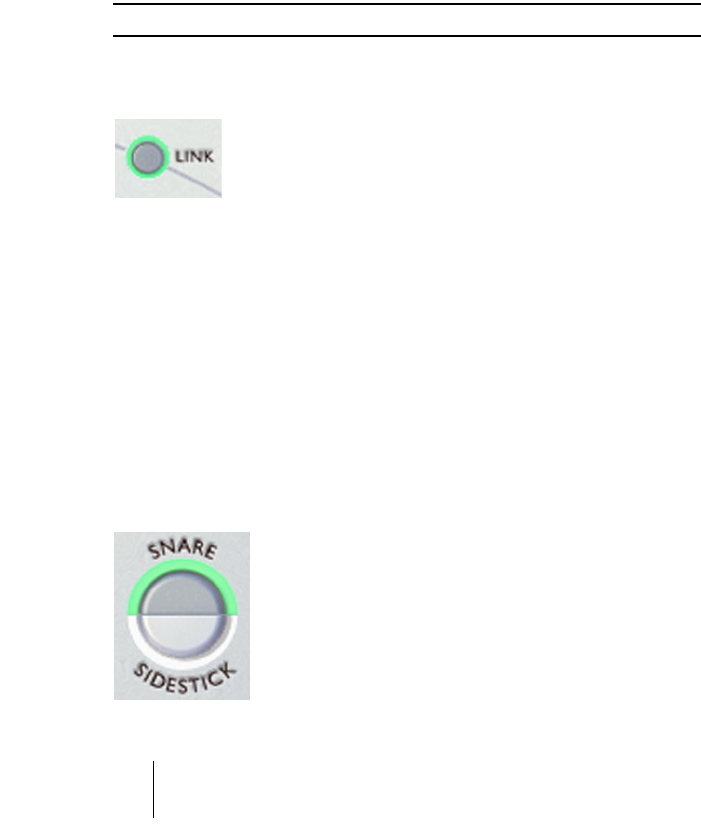
The Style Link button
Choosing a style also selects a drum and percussion
kit especially assigned to it. As long as the two halves
of the slider are linked, that is. Clicking the Link button
once un-links the two halves of the slider button, mak-
ing it possible for you to play the Bossa Nova style with a Techno
drum kit! In this mode, the upper half selects the playing style and the
lower half of the slider the kit.
Click the Link button again, if you want to re-establish the Link between
the style and the corresponding kit.
❐
Please note that selecting a new kit usually calls for new samples to be
loaded. This may take a few seconds.
❐
There are two ways to help you place the lower half of the slider more
accurately. Either (1) look at the LCD window or (2) grab the slider and
move your mouse pointer to the last character of a style name.
The Complexity slider
This tool is also very important, since it makes the drumming built into
Groove Agent come alive. Getting acquainted with this slider shouldn’t
be too problematic, since its behavior is very predictable.
If you move this slider to the left, you’ll reach the simpler levels of com-
plexity. As a matter of fact, the first levels – named A, B, C, D, and E –
are usually not even complete patterns. Something is missing here, be
it a kick drum or a few beats. The reason we gave you these levels is
because we think you might find them suitable for song intros or when
producing very sparse music. Maybe only the first verse of your song
needs this gentle touch?
By moving the slider to the right, you move into the more busy terri-
tory. Here you’ll find variations 1-20 of the chosen style and the further
you move to the right, the busier it gets. Some may even regard the
rightmost levels to be totally unlistenable, but that’s intentional. This
drummer gets a bit wild sometimes!
Groove Agent
32 English
For convenience’s and predictability’s sake, level changes occur only
at bar lines. This means that if you want to change from level 8 to 11
and move the slider on the second beat of a bar, you’ll have to wait un-
til the next bar to hear the new level. This behavior gives you time to
trigger fills (and click other buttons if you need to) a bit in advance.
If you really want to change levels instantly, you should get acquainted
with the memory section. There you can jump between ANY combina-
tions of panel settings in a split second.
❐
Complexity levels 1-15 are generally regarded as “normal” or “most useful”.
The Complexity Link button
The 25 levels of complexity each have their own unique
fill. By moving the slider to a certain level and then hit-
ting the Fill button, you’ll hear the fill associated with
that level.
You can however separate the two halves of the slider. When you click
the Link button, the two halves can be dragged individually. In this
mode, it’s perfectly possible to use a very simple rhythm and activate a
rather complex fill. Or vice versa.
You may also find the Link button useful if you’ve decided that “fill num-
ber 13” (or whatever) is the only one you want to use at a particular po-
sition in your song. Or throughout the song, for that matter.
Clicking the Link button again re-establishes the link between com-
plexity and fill.
Snare/Sidestick
One common practice in traditional drumming is to
make the sound “lighter” by playing with the stick
lying down on the snare drum hitting the metal rim.
This is called sidestick and here’s the button for it.
You may switch between regular snare and sides-
tick at any level of complexity.
Groove Agent
English 33
ENGLISH
While we’ve tried our very best to make the sidestick option sound as
natural and musical as possible, there are instances where it felt really
awkward to use the sidestick. Therefore, the sidestick option is avail-
able in most but not all the complexity levels in Groove Agent.
❐
The sidestick playing technique generally sounds more natural at lower
complexity levels.
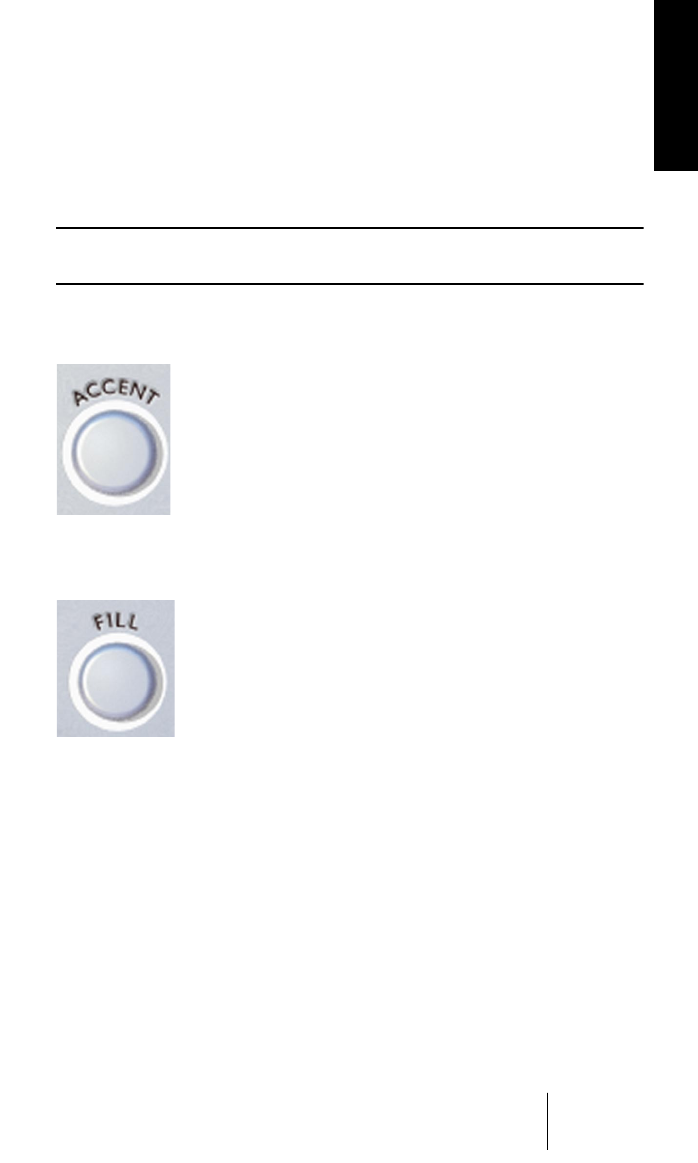
Accent
This button triggers a kick + crash cymbal hit. You may
use it as an accent in your song. When hit at an off-
beat, the accent hit becomes a syncope. The current
drum pattern stops for as long as you keep the button
pressed. Holding down the Accent button for approxi-
mately one quarter note after you hit it on an off-beat
creates a very realistic syncope.
Fill
This is one of the most rewarding buttons of this in-
strument! A drum machine that played its patterns very
regularly and automatically triggered a fill every 8th bar
would sound right most of the time but certainly not al-
ways.
In Groove Agent you are the band leader, the conduc-
tor! Hit the button when you feel it’s time for a fill, and Groove Agent
will obey. If you hit the button early in a bar, you’ll hear more of the fill
bar than if you hit the button late in a bar. Armed with this knowledge,
you can turn even the wilder fills into more discrete ones.
Please note that in most styles the fills end with a crash cymbal on the
downbeat of the next bar, just like a live drummer. You can turn this ef-
fect off by muting the Crash group.
Speaking of arming, you can actually start a pattern with a fill. When
Groove Agent is stopped, hitting the fill button will arm it, so that click-
ing the Run button makes Groove Agent start playing with a fill.

Groove Agent
34 English
There are 25 levels of complexity in each style. This also applies to
fills; the lower numbered fills are generally less busy than the higher
numbered ones.
❐
Some musical styles have a definite 2 or 4-bar pattern feel to them. While
an irregular (like 7 or 9) bar period in your music may cause such a pat-
tern to sound wrong (a bit like “one bar late”), it’s reassuring to know that
after a fill the music always restarts at “bar 1" in such a pattern.
❐
Fills can also be used for endings. Hit the Fill button in the last bar of
your song and then the Stop button on the last beat.
Half Tempo Feel
One trick many live drummers use, is to change their
playing to “half tempo feel”. It usually involves slowing
down the kick and snare pattern to half tempo while
keeping the hihat/ride pattern going. Figge, one of the
musicians involved in this project, suggested that we
include this feature in Groove Agent. After some seri-
ous thought, we decided it would definitely be a big
bonus; no other drum machine (that we know of) has a “Half Tempo
Feel” button. But all drummers do!
In Groove Agent, all the half tempo feel patterns have been especially
programmed to imitate this trick. One very obvious example can be
found in the Fox style. Play it at a moderately brisk tempo and then hit
the Half Tempo Feel button. You will notice how the playing style turns
into something very similar to funk.
In practice, the Half Tempo Feel function doubles the amount of avail-
able styles! You can think of the half tempo feel as the basic rhythm of
your song. And then, near the end, perhaps disengage the button for
an uptempo, gospel style ending!
❐
Try activating the Half Tempo Feel button at the bridge section of a song
and then go back to normal play for the end choruses. Or at any other part
where you feel the urge to increase the excitement or coolness with this
function.
Groove Agent
English 35
ENGLISH
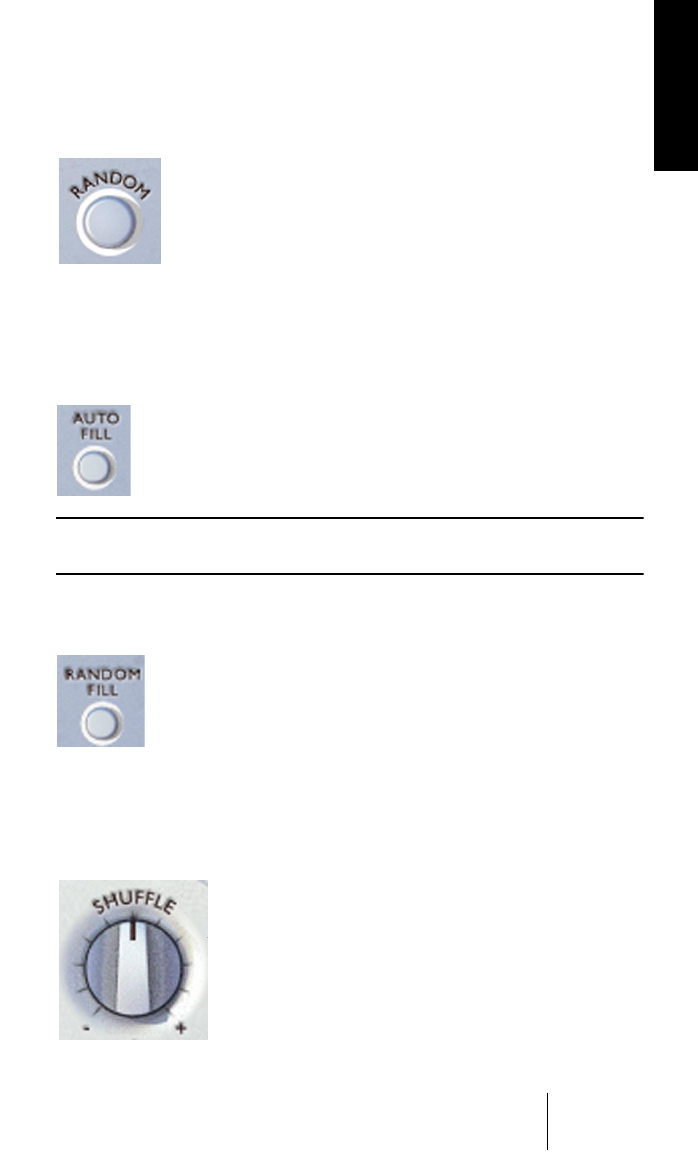
Random
If you want some automatic pattern variation, the Ran-
dom button is very handy. This function automatically
changes patterns for you. The general idea is to make
the drumming sound less rigid, less predictable. The
LCD window shows you what level is currently playing.
The Random button only moves within a range of ±2 levels from the
slider’s original position.
Auto Fill
Here’s a handy little button. It can automate the way fills are
triggered. When you move from one complexity level to an-
other with Auto Fill activated, Groove Agent automatically
plays a fill before the next level.
❐
If an auto save function is active in your sequencer, it may cause Groove
Agent to trigger a fill. The medicine is to turn Auto Save off.
Random Fill
This is another little tool to make life easier. If you stay
within one complexity level and trigger a fill every now and
then, this button will make sure that every time there’s a fill,
it’ll be a slightly different one.
As with the Random button, the randomly chosen fill always lies within
±2 steps from the slider’s current location.
Shuffle
Some of the music in this world has a “straight”, or
“even”, subdivision. Eights are even eights, so to
speak. Other genres use some form of triplets,
giving the rhythm a certain “swing”, a smoother,
rolling character.
Groove Agent
36 English
Musically, these two types are known as straight and swing based
music. And to make matters more complicated, swung music can be
based on either triplet 8ths (as in the song “New York, New York”) or
triplet 16th notes (as in Stevie Wonder’s “Sir Duke”).
The Shuffle knob affects the sub-timing of the 8ths or 16ths and acts
a bit differently than the other Groove Agent controls. If you play a
straight style and turn the knob to the right (+), you’ll hear the music
change into a more “swingy” style (the even 8ths or 16ths turning into
triplet feel). On the other hand, a swing based style becomes more
straight if you turn the dial to the left (–).
Unfortunately, while we’ve tried our best to provide a logical user in-
terface, the Shuffle knob can be used to mess things up, too. If you
turn in towards 7 o’clock when playing a straight style, or if you turn it
towards 5 o’clock when playing something triplet based, the result will
sound weird, to say the least. Use at your own risk!
The normal position for this knob is 12 o’clock. At this setting, all
styles sound as they were originally composed.
❐
For that cajun, zydeco, or New Orleans kind of swing, try using a straight
style and move the Shuffle knob halfway to its triplet position, to the 57-
60% region.
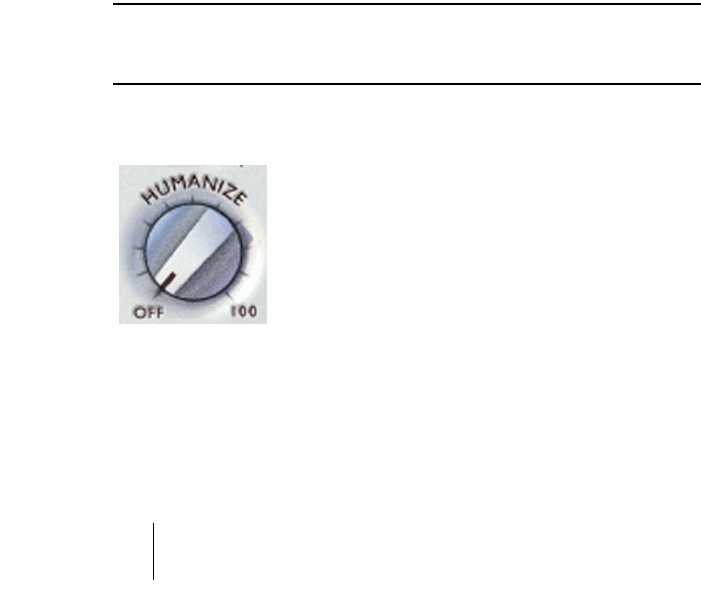
Humanize
Even though the musical tracks feeding Groove
Agent have been created with great care and mu-
sicality, you may want to give your drumming a bit
more natural variation. This knob gradually makes
the instrument play more “inaccurately” in terms of
timing and dynamics.
The normal position for this knob is to the far left.
Groove Agent
English 37
ENGLISH
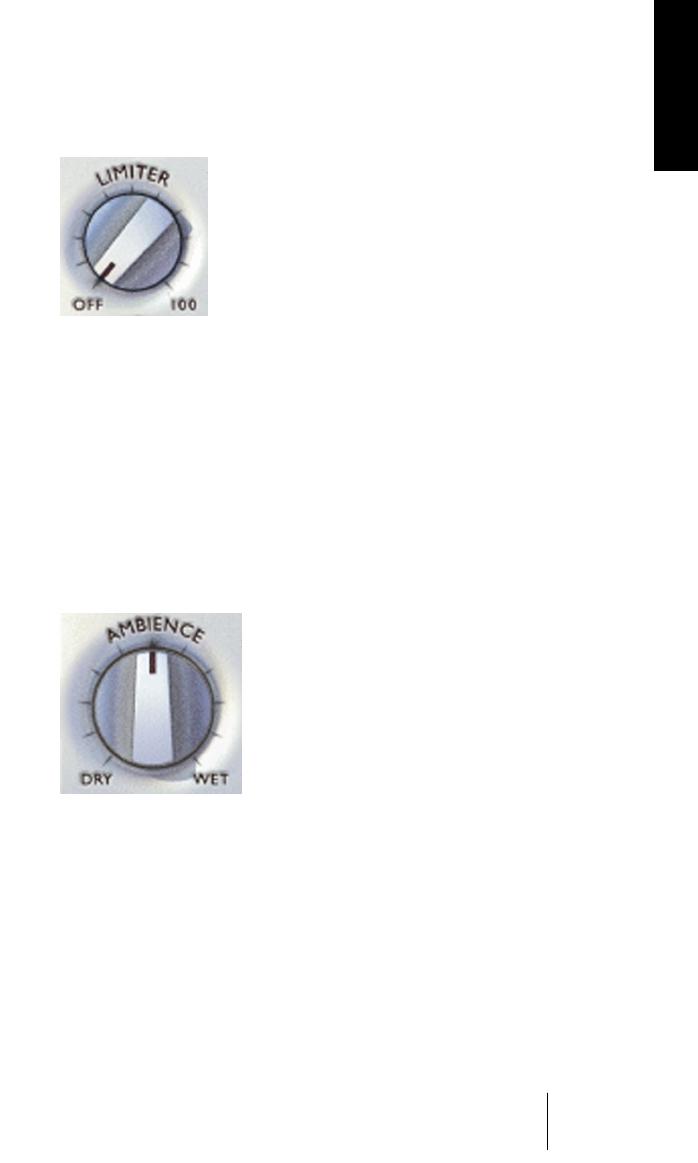
Limiter
The first thing any studio engineer reaches out for
when recording drums is probably a dynamics pro-
cessor, like a compressor or a limiter. We’ve thrown
in a simple limiting device in Groove Agent to put
that dynamic control within easy reach for you.
If you feel that the drums don’t cut through your
complete musical mix, then this Limiter may help
you obtain a stronger and more consistent sound pressure level.
The knob you see actually controls four stereo limiters simultaneously.
If you assign individual groups to different outputs, the loud kick on
output 1 will still affect the crash cymbal on output 3. This linking
makes the Limiter behave more predictably.
Use with care! There’s nothing worse than an over-squished mix.
The normal position for this knob is its minimum (Off) position.
Ambience
This knob is one of the highlights of Groove
Agent! All the acoustic drums and percussion
instruments were recorded using a mix of sev-
eral techniques:
• Every instrument close miked, giving a very dry sound.
•Every instrument recorded through the overhead microphones, giving a rather
dry sound but with a sweet stereo image.
• Every instrument recorded through the ambience microphones, positioned
approximately 2 meters from the source. This gave us a warm, roomy sound
with a controlled amount of “air”.
• Every instrument recorded through a pair of distant mikes, placed over 7 me-
tres away. Now we’re talking room! These recordings give a definite hall atmo-
sphere. Overly roomy? Yes, definitely!
• The new drums that come with Groove Agent 2 have electronic and electro-
mechanical reverb added to them.

Groove Agent
38 English
Now, while editing the sound archive for Groove Agent, we carefully
chose the ambience recording that should go with every dry source.
For the 50s kit, we used the close-up microphones for drums and hi-
hat and the overheads for the cymbals. We then added the distant re-
cordings for ambience. This gave us a chance to create old sounding,
overly acoustic kits for that vintage sound.
For other kits we used different combinations, and for the modern,
electronic sounds we added normal studio effects units like reverbs
and delays.
All in all, the very natural sounding ambience is there for you to use!
We’ve preset a lot of different kits to go with the different musical
styles, but if you want to change the preset version, use this dial to
your heart’s content!
This knob also acts as a master control for the 8 individual group Am-
bience controls.
The normal position for this knob is 12 o’clock. Turning it all the way to
the left produces an all dry sound, while all the way to the right gives
you the ambient (wet) sounds only.
Groove Agent
English 39
ENGLISH
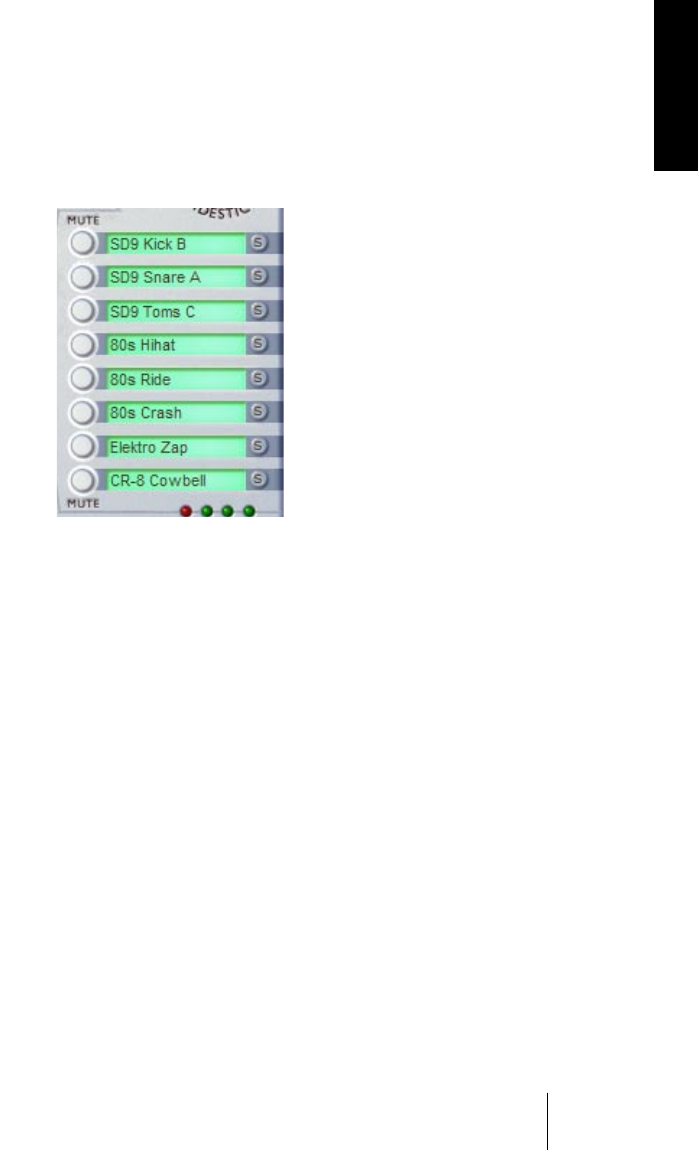
Mute, grouping and instrument selection
The sounds in Groove Agent are organized in 8 logical groups:
1. Kick (bass) drum
2. Snare drum
3. Toms or effects
4. Hihat
5. Ride and Chinese cymbals
6. Crash and splash cymbals
7. Percussion group 1
(usually “high and quick” instruments)
8. Percussion group 2
(usually “low and slow” instruments)
You can use the corresponding Mute button at any time to kill the
sound output from any of these groups. Mute activated = no sound.
Mute disabled (un-lit) = sound on.
One welcome addition in Groove Agent 2 is the inclusion of Solo but-
tons. When you’re listening to a full drum kit and want to tweak one of
the groups only, it’s usually easier to press Solo for that group. Solo
activated = one group only is heard. Solo not active (un-lit) = all groups
are heard.
While listening to the preset styles and their related kits, you may want
to experiment with changing individual instruments or instrument
groups. Click the sound name field to open a pop-up menu from which
you can choose a different instrument. Change that tight 80s studio
kick to a dull 50s jazz kick in one easy go and hear the results instantly!

Groove Agent
40 English
Stop/Run
These buttons start and stop Groove Agent. While this instrument can
be used with your host sequencer stopped, it always plays at the BPM
rate (tempo) of your host program. When your sequencer is running,
Groove Agent follows the tempo and synchronizes to the beat position
of the host.
You can make Groove Agent start simultaneously with your sequencer
by using this method:
1. Start your sequencer.
2. Start Groove Agent.
3. Click the sequencer stop button.
Now, the next time you start your sequencer, Groove Agent will start
too! The waiting status of the Run button is indicated by a green light
surrounding the Run button. This is good for those situations where
you want the drums to play from the very start of a song or a section.
New in Groove Agent 2 is the facility to choose your favorite Stop/
Run behavior. You do so by right-clicking somewhere in the Groove
Agent screen or by clicking on the Steinberg logo. Selecting “When
Host Stops -> Pause Playback” puts your drummer in waiting mode
whenever the host is stopped. Selecting “When Host Stops -> Stop
Playback” means that Groove Agent 2 has to be restarted manually.
Different modes for different situations.
Groove Agent
English 41
ENGLISH
Under the hood
So far we have only described the functions you can reach on the top
surface of Groove Agent. The black area surrounding the large LCD
window is not only holding the level meters, it’s also the lid under which
the Edit department resides. Let’s open the lid by clicking “Edit” in the
lower right corner of the instrument panel.
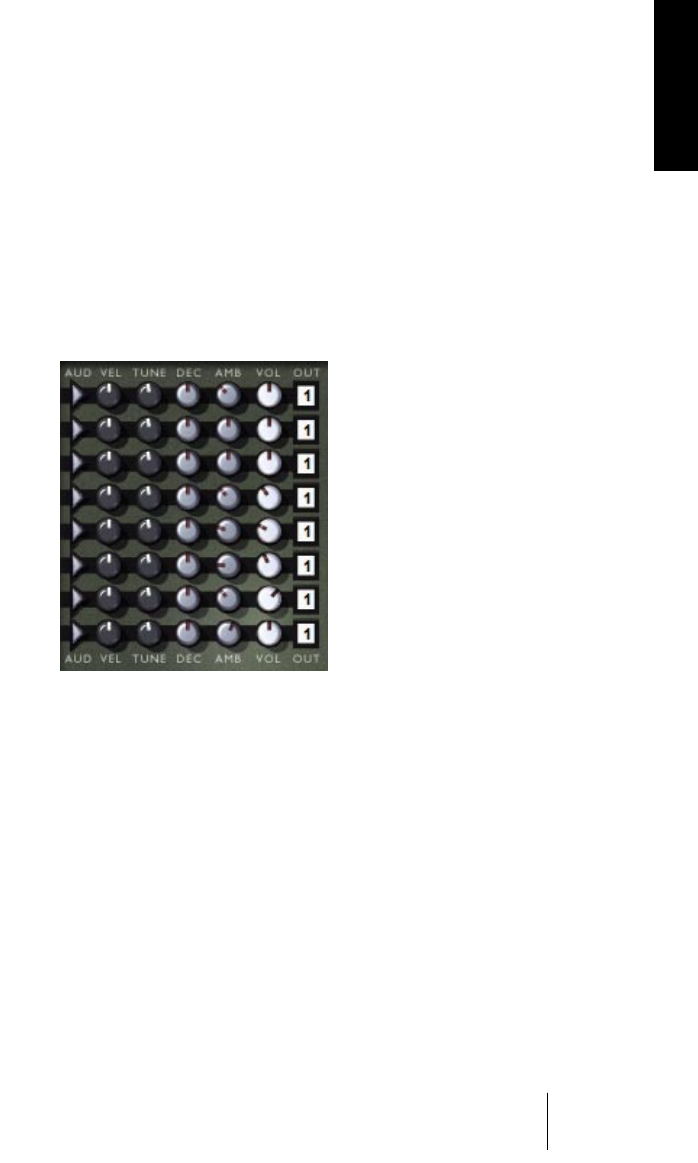
The sound edit knobs
There are eight rows of controls in
the area close to the middle of the
screen. The functions for all the
eight instrument groups are identi-
cal, so we’re using the top row as
an example.
All knobs have their default position
at 12 o’clock.
Aud – This knob lets you audition the sound chosen in the group win-
dow to the left. This function is handy when auditioning the sounds
themselves and the edits you make to them.
Vel – The Velocity Offset knob alters the response of the drum sounds.
When turned counter-clockwise, the MIDI input velocities are scaled
down to lower values, making more use of the softer samples. Turning
the knob past 12 o’clock increases the input velocities, producing a
harder, louder sound. To compensate for the decrease/increase in over-
all output, a volume compensating device is connected to each group
output.
This knob may also be regarded as a quick method for making the
acoustic drums sound more loose or tight.
Groove Agent
42 English
Tune – You can tune each group up and down by as much as 12
seminotes with this knob. Please note that for ease of use, the knob
has a much finer resolution around its 12 o’clock position than at its
end positions.
Dec – Altering the decay of an instrument can create interesting
changes to the sound, especially if they’re recorded with ambience as
our acoustic drum and percussion sounds. A normal snare can be
turned into an extremely damped drum or to an almost gated reverb
kind of noise.
Amb – Here you can fine tune the amount of ambience for each group
from dry to wet. The main Ambience knob (in the bottom left corner of
the window) always serves as a master control, so if you make sure it’s
in its 12 o’clock position, it’ll be easier for you to do the fine tuning.
Vol – Finally you can adjust the total volume for each instrument group.
Out – Each group can be assigned to any of the 1-8 available stereo
outputs. This is useful when you want to tweak one or more groups
with external EQ or effects.
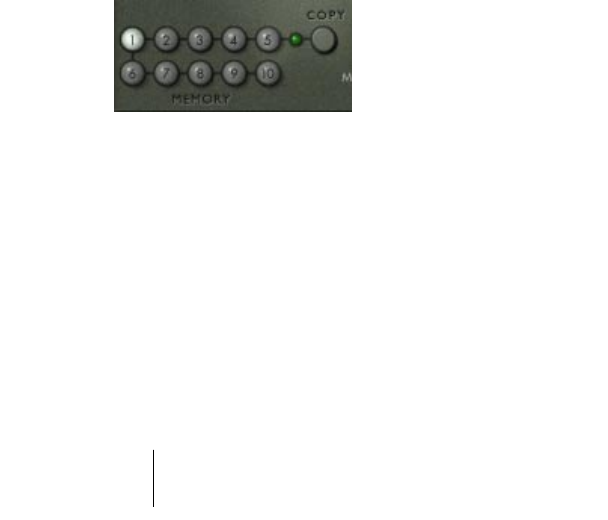
Memory
When you first open Groove Agent, the
first memory button is lit. This means that
it’s active, it’s listening, it registers every
change you make. You don’t have to ac-
tivate this memory slot – it’s always live.
The Copy button copies whatever is on Groove Agent’s panel into any
of the 10 memory locations. Click Copy and then a memory button,
and the procedure has been completed.
A dark button means that this location is empty, a green-ish color indi-
cates that something has been saved here and a bright light shows
the currently active memory.
Each of the 10 memory slots can be regarded as a snapshot of all set-
tings in the entire instrument. After some tweaking you may have found
an overall setting that is absolutely right for, say, the verses of your song.

Groove Agent
English 43
ENGLISH
By clicking the Copy button and then memory slot number 2, all the
current settings are stored in Memory 1 but also moved into the new
memory slot. You are now free to go further and find the right sound
for, say, the chorus. With slot 2 active, you may fiddle around the panel
to your heart’s desire. That perfect verse setting is safely stored at
memory position 1, so you’re free to experiment. (While this description
does not represent the ultimate in flexibility when using Groove Agent,
this is ONE way to use automation.)
Here’s another suggestion. Since the Memory slots store the entire
front panel settings of this instrument, you can jump between com-
plexity levels instantly and even completely different styles and kits in
one go! This may not be the ultimately realistic scenario – how many
drummers do you know that can change an entire kit in a snap – but it
sure gives you more flexibility than anyone could ask for!
❐
If you save your Groove Agent settings as a Bank (.fxb), all the content of
the Memory buttons will be retained.
Master volume
It’s not very hard to describe a knob marked as Mas-
ter Volume, is it? You may think that it controls the
overall output from this instrument, and if so, you’re
absolutely right!
When using several outputs, the Master Volume knob
controls all outputs.
New in Groove Agent 2 is that audio activity stops when the Master
Volume control is at its minimum position. If you’re using Groove
Agent 2 as a pure MIDI player, and using none of its internal sounds
(controlling external drum sounds only), you may want to save some
CPU power this way.

Groove Agent
44 English
The setup lid
By clicking the rugged button
above the little Setup lid, you
open an area resembling a bat-
tery compartment. This is where
the really secret functions are
hidden. You close this lid by clicking the Close button in the lower
right corner. Let’s open it and have a look!
MIDI Output
One fantastic feature of Groove Agent is its ability to write a MIDI part
containing the notes you actually hear! By setting this switch to the
ON position, a whole array of new possibilities appears!
If you arrange your drumming in real-time with your sequencer in record
mode (you should try it – this was our ultimate goal when designing
Groove Agent), a MIDI part will be created as you go. After this stage
you are free to open that newly created part and perform various tasks:
• Delete, add, copy or move individual notes.
• Copy any desired length of this new part into another section of the song or
into another song altogether.
• Use another kind of quantizing or dynamics.
• Copy the entire part, delete the kick drum in the original part and delete all
other instruments in the copy part on another track. Now you can assign the
kick part to another virtual or physical instrument, e.g. your favorite sampler. If
you’re using a Cubase drum map, this whole operation is even simpler.
❐
The MIDI Output feature really belongs to the outskirts of the VST 2.0
protocol. We’re pushing the limits here. We have no idea what MIDI Out-
put may do (or not do) in every available host program. We only guaran-
tee that MIDI Output works correctly in Steinberg’s Cubase and Nuendo.
If you’re using a program that can’t handle MIDI output from a VST in-
strument like described above, you’ll have to use your host’s automa-
tion facilities while creating your arrangements. Please also refer to
the following section describing a brand new function: Live <> File.

Groove Agent
English 45
ENGLISH
• It’s usually a good idea to turn on the SysEx (System Exclusive) filter in
your sequencer when using Groove Agent. If you don’t filter out SysEx,
the Run and Stop commands are written into the MIDI part, causing
Groove Agent’s engine to start playing along with the incoming MIDI
data. If you filter out SysEx, the Run and Stop commands aren’t written
into the MIDI part and life becomes generally easier.
❐
It is advisable to turn off your sequencer’s auto quantize function when
Groove Agent writes a MIDI track. You can always quantize the drumming
later, if you want to.
When MIDI Output is active, this status is shown by a MIDI
plug symbol in the LCD window.
Live <> File
Here’s another new feature in Groove Agent 2! You may choose to di-
rect its MIDI output to either a MIDI part in your host – as described
above – or to a MIDI file on your desktop!
If you set MIDI Output to ON and the newly added DIP switch
Live <> File to the File position, Groove Agent 2 will record a MIDI file
for you and place it on your desktop. Remember to set the MIDI Out-
put switch to OFF when you’re finished (this action instructs Groove
Agent 2 to write that file). You can then import that MIDI file into your
song for further tweaking. Just use the “Import MIDI File” function of
your host, or common drag and drop import if you prefer, and you’re
there! Please note that every time you start Groove Agent 2 in this
mode, any previous MIDI file will be overwritten.
Right-clicking on an unused area or clicking in the logo area gives you
these same options in the pull-down menu.
Groove Agent
46 English
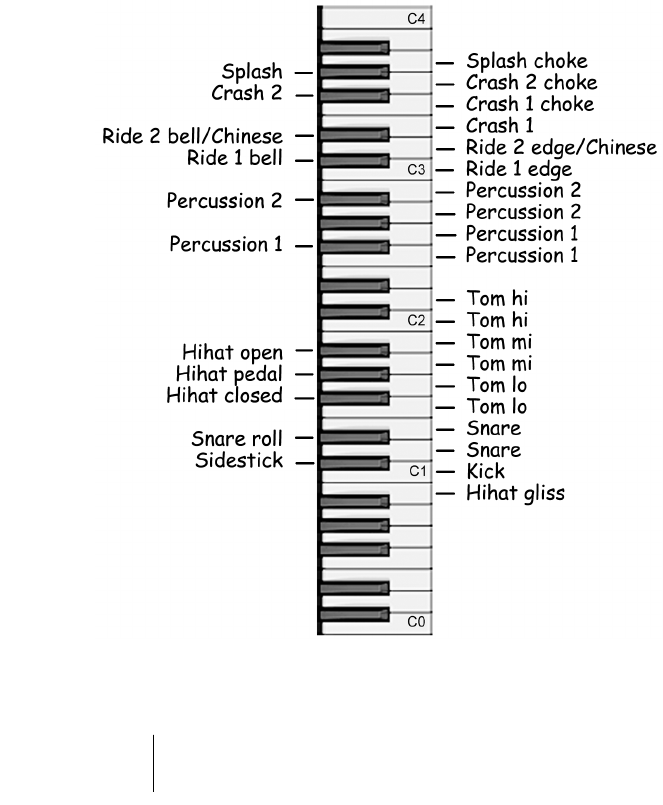
GM Output
We’ll tell you more about GM Output shortly, but first some background.
For Groove Agent we used the following keyboard mapping. You’ll
see it if you use the MIDI Output function and look at the MIDI part that
Groove Agent creates. It starts off like an ordinary GM map with kick
drum on C1, sidestick on C#1 etc. But after tom 1 you’ll notice differ-
ences. There are two groups of percussion instruments and, finally, a
series of ride and crash cymbals above C3.
This is the map we’ve used, but we honestly don’t think you’ll have to get
too involved in it. When editing a Groove Agent generated MIDI part,

Groove Agent
English 47
ENGLISH
you’ll probably want to have the speaker icon (or similar) activated, so
that you can hear the drum sounds while you scroll through the notes.
When you set the GM Output to its ON position, Groove Agent will
redirect output notes so that it follows the General MIDI protocol.
When GM Output is active, this status is shown by a GM
symbol in the LCD window.
Ambience Split
You can make Groove Agent output the ambient or reverberated
sounds to a separate mixer channel output. This is handy if you want to
process that part of the sound separately. With this button activated,
the wet signal will only be heard on the highest numbered mixer output.
So what can you do with the ambience on a separate output? Well, EQ
or dynamics processing can create interesting effects. Or if you export
Groove Agent’s drumming to an audio file, you can experiment with the
isolated ambience file. What does it sound like with the ambient sound
a bit late – or a bit early? Or with the dry sound from a techno snare
combined with the ambience from a piccolo snare…? Experiment!
When Ambience Split is active, this status is shown by a split
sound chain in the LCD window.
Vintage mode
We’ve exaggerated the effect of a timeline that houses authentic styles
and sounds by adding some clever filtering and narrowing the stereo
width. We believed that you would appreciate the old fashioned sound
of an old style playing an old kit. But there may be times when you want
to turn this effect off, so we’ve added a button here for you to do so.
With Vintage Mode deactivated, all vintage emulation gets deactivated.
The Vintage Mode effect can only be heard on styles between 1950
and 1975 and it is most prominent on the earlier genres.
When Vintage Mode is active, this status is shown by a
gramophone symbol in the LCD window.

Groove Agent
48 English
Reset All
The Reset All button is handy if you want to start building your own kit
from scratch. This could be the case if you’re using Groove Agent as
a pure sound module. Clicking the Reset All button empties all the
group slots and sets all the edit knobs to their default position.
If you’ve lost yourself completely when editing the kit of a certain style,
you can always get the original kit back by first selecting another style
and then going back to the one you used before.
Creating a drum track in Groove Agent
When you want to add drums to your music, the scenario may be either
one of these two:
1. Your sequencer program is an empty screen but you have very defi-
nite musical ideas in your head. You want to start with the drums.
2. A couple of instruments and/or vocals have already been recorded,
and now you want to add a drum arrangement.
Groove Agent offers at least three different ways of creating a drum
track:
•Method 1: Play along with your song in real-time, using your se-
quencer’s automation to capture every move you make. Those moves
can include “non-musical” events like real-time tweaking of sound pa-
rameters (edit knobs etc.).
Advantage: After recording, you can edit your moves in great detail. Your own knob
tweaking gets recorded as editable MIDI events. For sequencers that don’t accept
MIDI output from a VST instrument, this is one of a few workarounds.
Disadvantage: You cannot edit individual hits in Groove Agent’s drumming this way, al-
though you can always add individual hits by playing them live on your MIDI keyboard.

Groove Agent
English 49
ENGLISH
•Method 2: Play along with your song in real-time, using the Groove
Agent panel controls to create a living and breathing drum track. Your
sequencer records the MIDI notes output by Groove Agent in a MIDI
part. The MIDI Output switch must be activated for this to work. We
believe this is the most intuitive and creative way to create a drum track.
Advantage: “What-you-hear-is-what-you-get”. The drum part will sound identical to
your performance. Also, it’s easy to delete, add, copy or move individual notes in the
newly created drum part. You can re-direct certain notes to trigger drum sounds in an-
other instrument, like e.g. a sampler.
Disadvantage: If you want to use a lot of dynamic controls, like the Limiter knob fading
in and out or switching snare drums during a song, these events are not captured, only
the MIDI notes streaming out of Groove Agent.
❐
Of course, you can mix these two methods of working, by automating
Groove Agent to map out the song and then recording its output to a
MIDI track for fine tuning. You can think of this as rendering Groove
Agent’s output to a MIDI track, like you can render the audio output of
plug-ins to an audio track. Of course, you can render Groove Agent’s out-
put to an audio track, too!
•Method 3: First create a series of settings using the Memory function.
One setting may be perfect for the verse, the next one for the chorus
and so on. Then, when you are happy with the individual memory set-
ups, you can map out the song by switching between memories while
it plays.
Advantage: Since the Memories capture EVERYTHING currently on screen, this is the
only way to switch instantly between different complexity levels or even between differ-
ent styles and kits! This is the method to use if it’s really drastic changes you’re after.
Disadvantage: Switching between pre-set scenarios may seem a bit static, since fills
and real-time variations will need to be recorded or programmed in separately.
❐
The creative musician may combine any of these methods to obtain the
ultimate drum track, one that includes an editable MIDI part with moving
knobs and instant switching between levels, styles and kits!
Here’s a slightly different angle: Set up a suitable controller – like a
five octave MIDI keyboard the way you like it. Then record a MIDI per-
formance of pattern start, stop, select, fill, parameter adjustments and
individual drum hits. This method can be used with Groove Agent’s
MIDI output active or not.

Groove Agent
50 English
Using Groove Agent’s MIDI output in Cubase SX
While we’re not sure what every available host will do with MIDI notes
being sent from a VST instrument (as far as we know, Groove Agent is
the first virtual instrument with this feature), Cubase SX users can cer-
tainly use this method. Follow these steps.
1. Open Groove Agent in your VST instruments rack. Select Groove
Agent as your input (and de-select it as an output to avoid double trig-
gering) on the desired MIDI track. Open the Edit and Setup lids in
Groove Agent and make sure that MIDI Output is set to ON. For most
situations, the auto quantize function in your sequencer should be
turned OFF. You’re now ready to start recording your drum track.
2. Start recording in Cubase SX. Record your drums. In this mode, the
settings for Limiter, Ambience and drum sounds won’t be recorded,
only the drum notes. When the song or section of the song is over, hit
Groove Agent’s Stop button and then the Stop button in Cubase.
3. In order to hear what you just recorded, make sure that the MIDI track
you’re using has its output set to Groove Agent. If not, it may output
notes to another VSTi or external module, and you won’t hear Groove
Agent play back the rhythm.

Groove Agent
English 51
ENGLISH
Using the automation in Cubase SX
This and the following section give step by step instructions describ-
ing how you create a drum track in Cubase SX. However, similar pro-
cedures apply to most host applications, and you should consult your
host’s documentation if you need further help.
Working with automation is perhaps the most straightforward method.
If you’re not used to this approach, here’s a helpful guide to get the
job done in Cubase SX.
1. Open Groove Agent in your VST instruments rack. From Groove
Agent’s panel, activate the Write button (W). Look in the Cubase SX
project window, and you’ll notice that a new track called VST Instru-
ments, plus another track below it, have been created. For most situa-
tions, the auto quantize function in your sequencer should be turned
OFF. You’re now ready to start recording your drum track.
2. Start Cubase SX. When it’s time for the drums to start playing, hit the
Run button (with or without a fill being armed, remember?). Drag the
sliders, push the buttons and turn the knobs until your drum track
sounds right. When the song or section of the song is over, hit Groove
Agent’s Stop button and then Cubase’s Stop button.
3. After recording, right-click the VST Instrument Automation track and
select “Show used automation for all tracks”. All the automation classes
(Run/Stop, Fill, Pattern Select etc.) will have a separate track.
4. Click the Read button (R) in Groove Agent or in one of the newly cre-
ated automation sub-tracks. Now you’ll see the actual data in all the
tracks. This data can be freely edited.
5. To prevent unintentional over-writing of data, make sure the Write but-
ton is only lit when you deliberately want to over-write the automation
data.

Groove Agent
52 English
Composing with Groove Agent’s Memory slots
in Cubase SX
For more drastic changes, i.e. if you want to change style, kit and sound
in one go, the Memory buttons come into play. Proceed as follows.
1. Open Groove Agent in your VST instruments rack. Prepare settings
for the various parts of your song in Groove Agent and save those
“snapshots” in different memory locations. You may want to use one
snapshot for the first verse and another snapshot for the chorus etc.
2. From Groove Agent’s panel, activate the Write button (W). Look in
the Cubase project window, and you’ll notice that a new track called
VST Instruments, plus another track below it, have been created. For
most situations, the auto quantize function in your sequencer should
be turned OFF. You’re now ready to start recording your drum track.
3. Start Cubase SX. Record your drum track by hitting Run and selecting
different Memory slots when you reach various sections of your song.
When the song or section of the song is over, hit Groove Agent’s Stop
button and then Cubase’s Stop button.
4. After recording, right click on the VST Instrument Automation track
and select “Show used automation for all tracks”. All the automation
classes (Run/Stop, Fill, Pattern Select etc.) will be on a separate track.
5. Click the Read button (R) in Groove Agent or in one of the newly cre-
ated automation sub-tracks. Now you’ll see the actual data in all the
tracks. This data can be freely edited.
6. To prevent unintentional over-writing of data, make sure the Write but-
ton is only lit when you deliberately want to over-write the automation
data.
❐
You may prefer sending Program Change commands from your MIDI key-
board to select memory locations. If so, use normal MIDI recording, since
automation will not be involved. If you play live drums on your keyboard
while recording, those notes will also be recorded.
❐
In Cubase SX, the MIDI SysEx filter must be turned OFF for parameter
automation to work.

Groove Agent
English 53
ENGLISH
About the styles
Here’s a short description of each style, as expressed by the musicians
themselves. Those styles that are new to Groove Agent 2 are marked
with an asterisk (*). Please note that while the original 54 Groove Agent
styles were closely related to years and the timeline, the new styles are
not related to any years in particular. Example: “Vintage FR-3” is a sub
style to “1981 Elektro”, not because it has a particular 1981 flavour,
but because those old analogue machines are electronic devices.
1950 Swing
Here’s a style used for jazz and big band playing. It’s hard to cover all
the possibilities in a field as complex as swing/big band drumming, so I
chose a straight, forward view for this one. The style was programmed
around 144 BPM. It’s divided into two sections: the first half in “2”, the
second in “four on the floor” in order to match the different bass pat-
terns often used in this type of drumming. RB
1951 Samba
This Samba style is a mixture between the authentic Samba (when
played on the drum kit) and the Samba style that many jazz and fusion
drummers use in their playing. MEB
1952 Jazz Trio
The lost art of brushes! Not many people these days know how to use
brushes “the right way”! It’s one thing to own a pair, another to be able
to play them. A third issue is to make a VST instrument handle them
convincingly.
We’ve implemented the “brush stroke” in Groove Agent and combined
it with my own inspiration from brush greats such as Buddy Rich, Louie
Bellson, Jo Jones and all the lessons taken from brush legend Ed Thig-
pen (known from the Oscar Peterson Trio among others). You should
know that I don’t agree 100% with Sven about what happens when we
push the sidestick button! It’s a “hire one drummer – get two” effect
and that’s not so bad, after all! RB

Groove Agent
54 English
*Bop
This busy jazzy style could easily be used in a small jazz combo, like pi-
ano, bass, drums and a solo instrument. A good choice when you
want to make your version of one of the many jazz standards out there.
So open up Real Book, hit the Run-button and play. MEB
1953 Paint
Sometimes there’s no need for regular, rhythmic drum playing. If you
tell a drummer to “do something”, he or she will probably get into
some sort of creative mood and start producing wonderful noises.
This is a style that emulates such a situation. SB
* Ominous
This style is a non-rhythmic sound-fx journey through different moods
and places, preferably unpleasant ones… Heartbeats, scary noises,
chimes and many more noises merge into a melting pot of suggestive
impressions. It ranges from the simple to the complex but in a non-lin-
ear fashion, beyond the boundaries of standard pattern playing. Still
the Fill, Sidestick and Half tempo functions will vary the contents. Also
try using the Random-function a lot. So, imagine where you will be,
and it will be so… NE
* Machinery
Factory hall? No it’s not a reverberation algorithm this time. It’s the
static rhythm of machines working together. Some are small and fast,
others are big and slow or vice versa, and they’re added one by one
and speeding from a small scale industry into the final cacophony of
hammers and wheels. Move carefully and put your helmet on! NE
1954 Cha-Cha
Cha-Cha style is a sidestick based style that sounds best with the
sidestick button enabled. MEB

Groove Agent
English 55
ENGLISH
1955 3/4
Here are a number of different styles that have the 3/4 signature in
common. The complexity doesn’t go from easy to wild in this one. It’s
more like a journey through different attitudes and emotions, all in
“three quarter time”. For best results, set your sequencer’s time signa-
ture to 3/4. SB
* 6/8
One silly omission in the original edition of Groove Agent was that the
6/8 style was missing. There are many lovely songs that need this kind
of rhythm, songs like “If you don’t know me by now” and “When I need
you”. Please note that you must set the time signature of your host to
6/8 to play this style properly. SB
1956 Rumba
This is the Afro-Cuban version of the Rumba, not to be confused with
the Rhumba (with an “h”) that can often be heard in older drum ma-
chines. MEB
1957 Shuffle
An uncomplicated style which can give you, as a drummer, a lot of
possibilities if you are creative. Instead of just playing backbeats on
the snare drum, you can play the whole pattern along with the hihat or
ride cymbal, which will give you a “fat” sound in what you’re produc-
ing. It’s harder for your left hand (if you play an ordinary drum set) but
a lot more fun! RB
1958 Fox
This is one style that has been around for longer than anyone cares to
remember. Call it foxtrot, slowfox of whatever; some people would still
refer to it as “music”. A merry and light uptempo style. SB

Groove Agent
56 English
1959 Tom-Toms
This style is used in many different situations. With it’s origin in the
1920’s, when Duke Ellington played “jungle music” in Harlem and then
made totally unforgettable by Gene Krupa with the Benny Goodman
Orchestra at Carnegie Hall playing “Sing, Sing, Sing” in 1938, this
type of drumming is heard in almost every movie made reflecting the
30’s and 40’s. RB
1960 Bossa Nova
The traditional Bossa Nova style is played with the sidestick on the
snare drum. Activate the sidestick button for that authentic feel. MEB
1961 Twist
The inspiration here was of course Chubby Checker’s classic “Let’s
Twist Again”. On the record, the song is played really straight and sim-
ple, but as you crank up the complexity slider here in Groove Agent,
you’ll get more variations and additions of bass drum patterns and ride
cymbals. RB
1962 12/8
This style is a hybrid. The original idea was to create a slow 12/8 feel,
similar to what you can hear in many love songs from the fifties. While
composing the patterns, I raised the tempo just for fun and noticed
that with faster BPM rates there’s a whole new feeling, a funky and
pretty modern touch. Use it in a ballad or turn it up for that groovy
beat. PS
* Slow Blues
If I were forced to choose one style and one tempo for an all-night jam
session, I’d say “Slow blues at 60 BPM” without hesitation. It’s a mood
and tempo that could last an entire evening. There are so many cool
standards that fit here: “Summertime”, “Red House”, “Sweet Sixteen”
and numerous other classics. Or any relaxed improvisation. Slow Blues
in Groove Agent is rather dynamic; see how it increases in volume and
intensity as the complexity levels get higher. Also, it re-starts a couple
of times (at level 7, 12 and 18) from it’s basic closed hihat groove. SB

Groove Agent
English 57
ENGLISH
1963 Train Beat
This is a style where the drummer has to work hard with the snare
drum. It works well in country and rock’n’roll songs and will give your
music a “busy” feeling. PS
1964 Tamla
For this style I was inspired by the rock classic “Pretty Woman”. This
rhythm was also frequently used by artists on the legendary Tamla
Motown label. There can’t be a better way to start an up-tempo song,
than with a snare drum pounding the beat! PS
1965 Soul
This style is influenced by some of the groovy drummers behind
James Brown. MEB
1966 Pop
High energy pop drumming at your service! Fave tempo is 146 BPM.
These rhythms were created to inspire all the other boys in the band.
Pop drumming is the motor to a popcycle, with fill-ins from corny to
rocket fuel. Can you find the two-bar fill going from A to Z and back
again? Happy ride! dB
* Steady Beat
Here’s a very basic style that suits almost any tempo. It’s perfect when
you need a steady drummer who doesn’t do any unexpected exercises,
someone who never flips out, someone who’s not into impressing any-
one – but just plays. Plays a steady beat. This style can also be used if
you want something with a triplet feeling. Just turn the Shuffle-knob to
the right and you will have a steady Shuffle-beat. MEB
1967 Backbeat
This is the perfect up-tempo style. The drumming is pretty intense and
it doesn’t stop to catch its breath, and maybe that is why it’s very easy
to create a dance friendly song based on this groove. PS

Groove Agent
58 English
1968 New Orleans Funk
In the winter of 1968-69, great drummer Joseph “Zigaboo” Modeliste
recorded the classic New Orleans R’n’B style tune “Cissy Strut” with
funk pioneers The Meters. Zigaboo invented the characteristic funk
groove often referred to as “the second line” style, very typical for The
Meters’ groove. The Zigaboo grooves are (together with James Brown’s
“Funky Drummer”) among the most sampled and recycled grooves in
the history of modern Afro-American music. This exact groove is found
at complexity level 8. Enjoy! MK
1969 Songo
Songo was created in the late sixties by drummer Chanquito of the
group Los Van Van. This style has inspired many of today’s jazz and
fusion drummers. Songo is one of the more modern Afro-Cuban styles
and is sometimes a drummer’s first step into the world of Latin music.
MEB
* Mozambique
The Mozambique was invented in the 1960s and is one of the more
modern Latin rhythms. It’s often heard on recordings with funk, jazz
and Latin bands and has been developed by several well known drum-
mers. MEB
1970 Olympic
It’s funny how a drumming style without accentuated backbeats can
make a song really swing. I took the drumming from The Beatles’ Get
Back and scaled it down. The result can be heard at the lower levels.
I also took the style a few steps further, the levels to the right. My
graphics designer suggested that this one could be used for gymnas-
tic exercises, hence the style name. SB

Groove Agent
English 59
ENGLISH
1971 Cajun
You no longer need to go “Deep down in Louisiana close to New Or-
leans” to get that spicy cajun feeling. Just tune in to Groove Agent’s
1971 Cajun style, set your VSTi host to preferred 86 degrees, or…
BPM, and get cooking! Add a pinch of accordion and a bouncing
bass to the busy snare, and you’re off. Bon appetite! MK
1972 Bonzo
This style is, as the name suggests, to some extent inspired by the late
great John Bonham of Led Zeppelin, perhaps the most influential hard
rock drummer. I suggest you turn the Ambience dial up to at least 2
o’clock to get that big heavy feel. The patterns A to E are intended to
emulate Mr. Bonham’s habit of playing the drumkit with his bare hands.
To achieve this effect, Percussion 2 should be activated for these pat-
terns. Percussion 1 is supposed to sound like a tambourine attached
to the hihat. The complexity increases from pattern 1-10 with hihat and
then it starts over for Pat 11-20 with ride. The 1/2 Tempo Feel patterns
have small snare triplet things going on that are not found in the regular
patterns.
Although perhaps not environmentally correct, some songs just call
for being run on leaded fuel. MD
1973 Dark Side
It never ceases to amaze me, how you can sell so many records and
play so few notes. There’s a fair amount of inspiration from Pink Floyd’s
“Dark Side of the Moon” album in this style, well suited for slow songs.
SB
1974 Reggae
This is a triplet based version of reggae usually played with sidestick.
The sound of the drums is very dry. When we recorded these drum
samples for Groove Agent, sound engineer Jens Bogren turned around,
looked at us and asked: “Do you really want it to sound like that?”. We
nodded. MEB

Groove Agent
60 English
* Bombay Dance Hall
It’s the third millennium global dance hall beat. Could be London,
could be Bombay, could be Sollentuna. It doesn’t really matter, as
long as everybody is having a good time. Some artists marry this style
to Reggae, others to Hip Hop. It’s all around and it’s up to you. Try
adding or subtracting ambience to the different instruments to vary
the sense of space. NE
* Roots
Roots, rock, reggae. The percussionist – playing big bottles and a
vibra-slap – is free-wheeling through the different complexity levels,
whereas the drummer goes from simple to busy. He’s using rim-shot
already on some mid levels, so selecting the “Sidestick” function will
make him play a deep fur-drum accordingly. Enough of tech-talk, it’s
time to quote the old rasta in Trench-town who once said: “It’s like
football. It’s there. It’s in your knees…”. NE
1975 Funk
This is funk drumming inspired by funk guru George Duke (Party Down)
at one end to the unexpected Frank Zappa (I Don’t wanna Get Drafted)
at the other… As a matter of fact, they did some great music together,
too! Of course, many are the innovators of funk. Earth Wind & Fire’s
Fred White really did some seriously simple but stunningly groovy stuff.
In the 1970’s, funk music was often played quite straight except for
the drums that added a little more swing to it. Add the Slick Triangle
and the Wood Block at any time. Style programmed in 126 BPM. dB
1976 Disco
In the early 1970’s, the disco era began. In April 1976, the famous
New York club Studio 54 took disco-ing to a higher level, but it was the
movie Saturday Night Fever that spread the hustling world wide. The
drums may sound muffled and some of the fills are kind of cheesy, but
that is the charm of this style. When mixed with the rest of the band,
this beat makes a nice and funky dance groove. So bring out your bell-
bottom pants and your platform shoes, grow some hair on your chest,
put on a satin shirt slashed to the waist and get down on it! FvW

Groove Agent
English 61
ENGLISH
1977 Hard Rock
I grew up listening to The Beatles in the early seventies. After that I
was a young soul without a home, listening to whatever was on the ra-
dio, but I never found “my thing”. Then, when I was sixteen, someone
gave me a black album from a band I’d never heard of, and I was just
blown away by the intro of “Hells bells” starting up their album “Back
in black”.
Yepp, I became a hardrocker!! So here you have some steady and
heavy drums for anyone with Angus-ambitions!! JS
* Grunge
Nirvana, Mudhoney, Melvins… I think this list wouldn’t get an end. The
Music Industry calls them Grunge. So, preheat your amp, strap your
guitar, aim at the F# power-chord and press the “Run”-button for this
style. MS
* Indie Punk
A classic drum figure for a Punk song should be powerful and fast.
But a drum figure for a Modern Punk song must be powerful, fast, in-
dividual and creative in order to stress the structure of the song.
These characteristics are implemented in this style. Enjoy and keep on
rocking! MS
* Unplugged
Music Television made it popular. A big rock song must also be
played in a smooth ambience so the audience can easily listen to the
voice of the singer. This style is full of soft played beats/fills and it is
using the popular and lovely rods. MS
* Ballad
It’s early in the morning, your coffee is still hot and your latest ballad
needs some steady and powerful drums. Try this one! The tambourine
can add extra sparkle to the chorus and maybe straighten out the
overall drum sound as well. (And psst, here’s something I just discov-
ered: try this one at 120 BPM! Pretty energetic, eh?) MS

Groove Agent
62 English
1978 TexMex
I once played a song to Sven with a strange, loose kind of drumming
together with bass, piano and slide guitar. It sounded a bit like a not-
so-very-well-rehearsed-gig in a small restaurant somewhere on the
borderline between Texas and Mexico. “This is very weird and very
cool”, Sven said. “We have to include this in Groove Agent“. “Ok!”. JS
1979 Basic Hip-Hop
This style was inspired by early Hip-Hop and the way it sounded in the
early digital drum machine era. LW
* Live Hip-Hop
In a big discussion about Hip-Hop, a friend told me that a real drum-
mer in a Hip-Hop band only needs a bass drum, a snare, a hihat, a
crash and no toms. He was right. This style will provide you with a full
palette for your live song. Don’t forget to use the percussion in the
chorus! MS
* Sloppy Hip-Hop
The “Sloppy Hip Hop” style is inspired by the works of Beastie Boys
and others, giving you a sense of floating time, where quantizing is
banned… The basic character of the groove is slightly altered from
level 14 and up. Warning: Changing the loose handclap to a more dis-
tinct sound may produce some really weird timing effects, as will ex-
cessive use of the Humanize-function. Select this style when you’re in
the mood for drifting away, avoiding all the boundaries of a regulated
beat. NE
1980 Boogie
Some bands built their careers on simple three-chord songs where
the drummer had to work a bit harder. This is a classic boogie style
where the feeling is focused on the hihat and ride. PS

Groove Agent
English 63
ENGLISH
1981 Elektro
My intention here was to create a style that sounds like an analog
drum machine programmed for early synth-pop tunes. It’s not an 808
or a 909 but a totally new “box” with retro and electronic sounds. LW
* Vintage FR-3
Original rhythms from a very old drum machine. Slow Rock x 3 (“home”
tempo: 80 BPM). Samba x 4 (110). Rhumba x 3 (130). Beguine x 4
(130). Mambo x 4 (140). Bossanova x 3 (145). Rock’n Roll x 4 (160).
There were no fills in this machine, so we’ve created some for you.
Same goes for Sidestick and Half Tempo Feel. This baby didn’t even
have a cymbal! The sound differs somewhat from the real thing, in that
the original machine sounds a bit different each time it is played! MS
* Vintage TR-7
A slightly newer analogue box. Slow Rock and Ballad x 2 (“home”
tempo: 80 BPM). Western (90). Samba 1 + 2 (110). Rhumba x 2, Be-
guine x 2, Cha-Cha x 2, Mambo x 2, Baion x 2, Tango and 6/8 March
(130). Bossa Nova x 3 and Bolero (145). Rock’n Roll 1 x 2 and Rock’n
Roll 2 (155). MS
*Vintage CR-8
An almost modern drum machine because you could program it, but
still analogue sounding. Habanera (“home” tempo: 70 BPM). S. Rock
(80). Samba 1 + 2 and Merengue (110). Mambo, ChaCha, Tango,
Beguine, Enka and Rock 1-6 (120). Then comes a combination of
Rock 1/Rock 4 (120). Disco and Swing 1 + 2 (120). Rhumba and
Rhumba/ChaCha combination (130). BossaNova and BossaNova/
Mambo combination (145). Foxtrot (160). Combining two rhythms is a
cool trick! MS

Groove Agent
64 English
* Meek Ballad
Follow me back to the early 80s. This could be the next great thing…
The slowly evolving groove adds a few more programmed hits on ev-
ery level, giving you a fair chance to find just the desired complexity.
The style was created by adding each instrument one by one, just as it
was in the childhood of these legendary “rhythm composers”. The
meek shall inherit the earth. NE
* Axis Y
Back in the 80s, people had ugly hair cuts, pink jackets and played on
hexagonal drums. Beware, because some of that might return any
day! This style prepares you for at least the musical revival. Put on
your dancing shoes and get into the groove. NE
1982 Slick
This style is a 16th note based beat, inspired by the sessions re-
corded in L.A. around 1980, with master drummers like Jeff Porcaro
and John Robinson. Actually, the beat itself isn’t very innovative, but
it’s too representative for this great genre to leave it out. A slow tempo
is a must for this style. Favorite tempo range is 73-88 bpm. FvW
1983 Breakbeat
Wirebird shouted “HEEEELP” from deep down in “the Pixelmine”,
when he created that fabulous front panel. I said “With what?”. “With
breakbeats!”, he shouted from below. “You mean dirty, groovy, kind of
playing-too-much à la Chemical Brothers?”. “Yepp!”. “Yo, I’ll do it!!”, I
replied. And while you’re at it, dear user, why don’t you run the whole
thing through some nice distortion. JS

Groove Agent
English 65
ENGLISH
1984 Arena
During the glory days of the 80s, the hardrock guys wore tight pants,
sprayed their long hair and stole make-up from their girlfriends. There
is no doubt that they really could play drums though – hard and dis-
tinctive. Since the music should be hard and loud, the dynamic has
pretty much just one level – louder!
The fills are very typical for those drummers, intense, distinctive and
almost composed sometimes. PS
* HM Straight
HM Straight and HM Triplets are based on the European style of
Heavy Metal with a lot of double bass pedal work as well as some of
my own chops from the albums/bands I played in, such as the albums
“Beware the heavens” by Sinergy and “Sign Of truth” and “Anima
Mundi” by Dionysus. The triplet rolls were inspired by the one and only
Scott Travis, especially from the time before Judas Priest when he
played with Paul Gilbert in Raxor X. The Raxor X song “Scarified” is a
milestone in metal with its magnificent drum intro groove and I made a
lot of variations of grooves of this type. The more straight and powerful
grooves were made in the style of Jörg Michael, one of today’s most
hired and respected German drummers. RM
* HM Triplets
A triplet based groove with a lot of 3-stroke rolls in the bass drums.
The rolls in particular were inspired by my friend and Brazilian metal
band Angras drummer Aquiles Priester, who developed it to a new
level in modern metal drumming. While touring with Saxon I got the
chance to pick up a drum fill or two which I throw in here and there.
It’s from another great drummer and friend, the legendary Fritz Ran-
dow, one of the most technical drummers in European metal. RM
* Grind
These grooves are kinda busy and made for higher tempos. Notice
how the bass drum uses 8th notes, 8th note triplets and then 16ths in
various modern approaches. These grooves were influenced and
played in the style of The Haunted, Krisiun and Hate Eternal. If you’re
huge a fan of brushes, these grooves are not for you! ;-) RM

Groove Agent
66 English
* Progressive
Here’s a rather technical style with a lot of busy fills. “Progressive” is a
mixture of the sound of new progressive styles and some old progres-
sive bands back in the 80s. Certain levels were recorded in various
odd meters and played over a loop of four bars. Don’t get lost! MEB
1985 World Ethno
Take one big, wide pad, one fretless bass and one electric guitar play-
ing 8ths through a delay unit, and you’ll find yourself in a “world/ethno”
kind of ambience, that’ll make you say “Manu”?!? JS
1986 Detroit Techno
As you may have already guessed, the techno roots are in Detroit. In
this style I decided to give you a lot of noise. No energy has been
saved here! They would call it “Hard to the bone” in the old days. DS
* Daft
Keep it fair and square. Simple and stupid. Keep it going. Keep it up.
Perhaps the bottle will distract you. Never mind. It’s just a bottle. Keep
it safe. NE
1987 LA Shuffle
Somewhere around complexity level 15 you will find a sibling to a girl
called Rosanna. All over these grooves you will hear a whole bunch of
her relatives from earlier decades, also known as ghost notes. Tiny
triplets in between, especially from the snare drum, that add a fine
masked web to a sturdy, laidback foundation. A slick style, yeah! Not
to be used in a too high BPM environment! 78 is perfect! dB
1988 House
House music is a quite laidback electronic style that lives on its own
groove. It’s a bouncy style with percussion as one of its main elements.
House was born when DJs added 808 and 909 analog drum machines
to beef up the dance music. DS

Groove Agent
English 67
ENGLISH
1989 Westcoast
This is the beat many drummers would play if you told them to just
cruise at 98 Bpm. A straight “perfect-day-for-going-to-the-beach”
groove with influences from modern gospel music and contemporary
pop/rock beats. FvW
1990 Mini Works
All the sounds in this style come from the legendary Mini, built by a
very clever guy called Moog. Every sound is note-off dependant. This
means that the important note-off events become tempo-independent.
Mini Works is built up around this rule, which turns the note-offs into
important rhythmical components as well as all the cool little note-ons!
There are 5 different grooves with 5 complexity levels each. Like five
time zones in a synth clock. Every sound has its own effect in ambi-
ence mode which makes the note-off function even more extreme.
Fave tempo: 95 BPM. Fave ambience: none! dB
1991 Fusion
The inspiration for this busy style comes from some of the fusion
records of the early nineties. MEB
1992 Trance
When creating this Trance style, I wanted to make room for catchy
melodies, so the drumming is easy and not supposed to take too
much room in a mix. Now, if you still think the drums occupy too much
sonic space, tweak the knobs until your melodies become the main el-
ement again. DS
1993 Modern Soul
Straight and very well suited for slow pop and soul ballads. Modern
Soul contains a hybrid of analog, processed sounds and electronic
sounds. LW

Groove Agent
68 English
1994 Trip-Hop
This is a trip to the darker side of Trip-Hop. Picture yourself in a spooky
attic late at night, on your knees looking for an old photo album in a
worn chest. Suddenly the room comes to life, the floor squeaks and
wooden toys start playing in a slow, rhythmic groove. What next? Get
into the groove or run for your life! W
* Bristol Trip
Portishead was one of the bands that popularized Trip Hop. They
loved to play their songs live with an acoustic drum kit and a tricky-
playing drummer. Be my guest! MS
1995 Busy Beat
A lot of 16th notes coming at you in this one, especially at the higher
complexity levels. Busy Beat is a kind of modern funk style with plenty
of ghost notes on the snare drum. I’ve been inspired by the groove
from the Spin Doctors’ hit “Two Princes” as well as Candy Dulfer’s
song “Funkyness”. If you listen carefully, the sources of inspiration
should be obvious. Programming was made at 104 Bpm. FvW
1996 Drum’n’Bass
This style combines the use of high speed beats with a natural half
tempo feel, resulting in a playful rhythmic ballet. Thunderdome sub
basses push the speaker limits, while frantic high pitched sounds
keep the flow going. NE
1997 Ambient
Time to chill with some ambient grooves and spacious rhythms. It’s 5
am at the club and the previously crowded dance floor is visited only
by a couple of slow dancers, chillin’ to the beat as the faint early morn-
ing light passes through the drapes. My favorite tempo for this style is
somewhere around 90 BPM. Try experimenting with different combina-
tions of dry and wet sounds and alternative pitches. The long reverb tail
on some of the low pitched drums can create a really nice rhythmic
tension to dry high pitched cymbals or percussion sounds. W

Groove Agent
English 69
ENGLISH
1998 Hip Hop
Groovy, fat and heavy Hip-Hop with a modern sound in contrast to the
Basic Hip-Hop style. It’s been programmed to sound a little “off” in the
beat with a nice swing to it. Closely related to Modern RnB. New, fresh
kick, snare and effects noises were designed especially for this style. LW
1999 2-Step
A very tiny and fast affair with high pitched sounds. There’s a slight
swing factor in this mixture of 2-Step, Garage and early synth-pop. LW
2000 Tribal Techno
This style was programmed to fit the sound of modern techno. It has a
lot of my own personality in it. This is my tribute to the underground
techno culture. You may recognize some of the grooves. The name of
the style says a lot. Listen to those tribal grooves and you will under-
stand the name. DS
2001 Nordic Pop
A straight and modern pop groove, inspired by the Nordic hit phenom-
enon during the past ten years or so. Steady, compressed and simple.
New, fresh kick and snare were designed especially for this style. LW
2002 Nu RnB
An effective groove with poly-rhythmic fills for that special feeling.
Modern RnB/Hiphop style with a compressed sound, if you like. Kick
and snare were designed especially for this style. LW
* Kelly
This is a cool, yet energetic modern R&B-style. The basic beat is slow
and heavy while the hihats and other small sounds play in double
tempo, creating a dynamic contrast. Try using a lot of different fills to
vary the formula. No feelings were hurt during the making of this style.
NE

Groove Agent
70 English
2003 Mini Club
Again, a Moog-only built up sound bank. And again 5 different grooves
with 5 complexity levels each. This style will hopefully find its way to the
floor of the future dance club. Try the note-off dependant sounds, too!
Every sound slot has to be active to make these rhythms complete.
There are no special percussion add-ons in this one. Original groove
was made in 120 BPM with absolutely no ambience, but personally I
like the full ambience version just as much, especially since every sound
has its own special FX treatment! dB
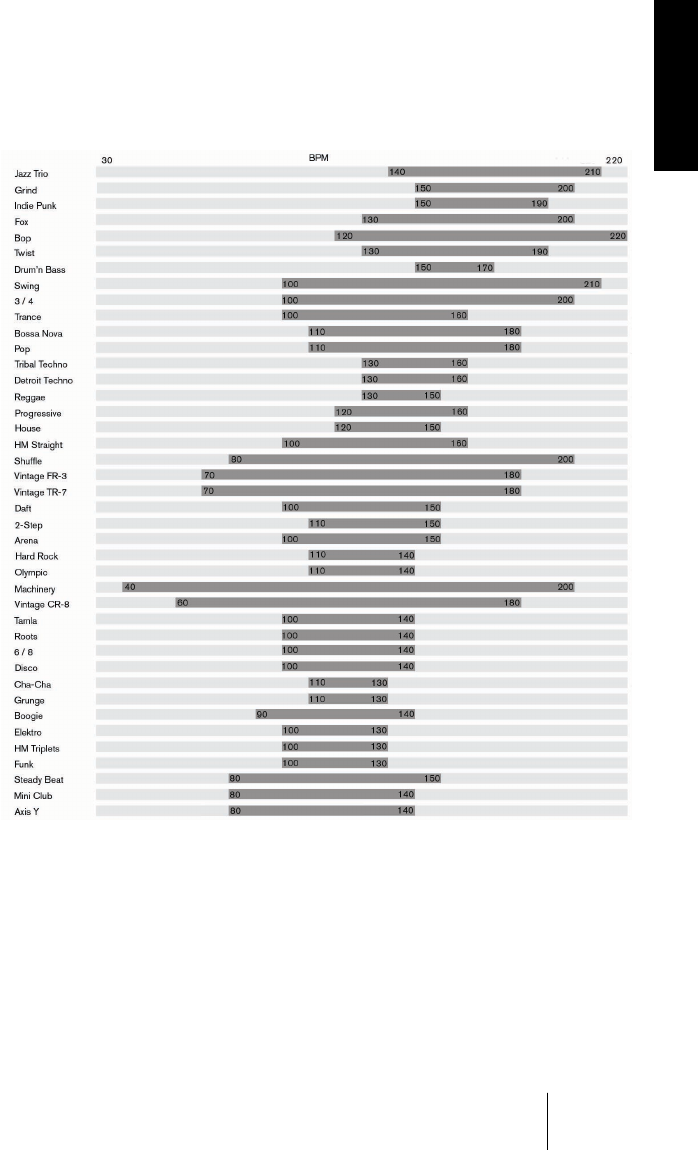
Groove Agent
English 71
ENGLISH
Tempo Guide
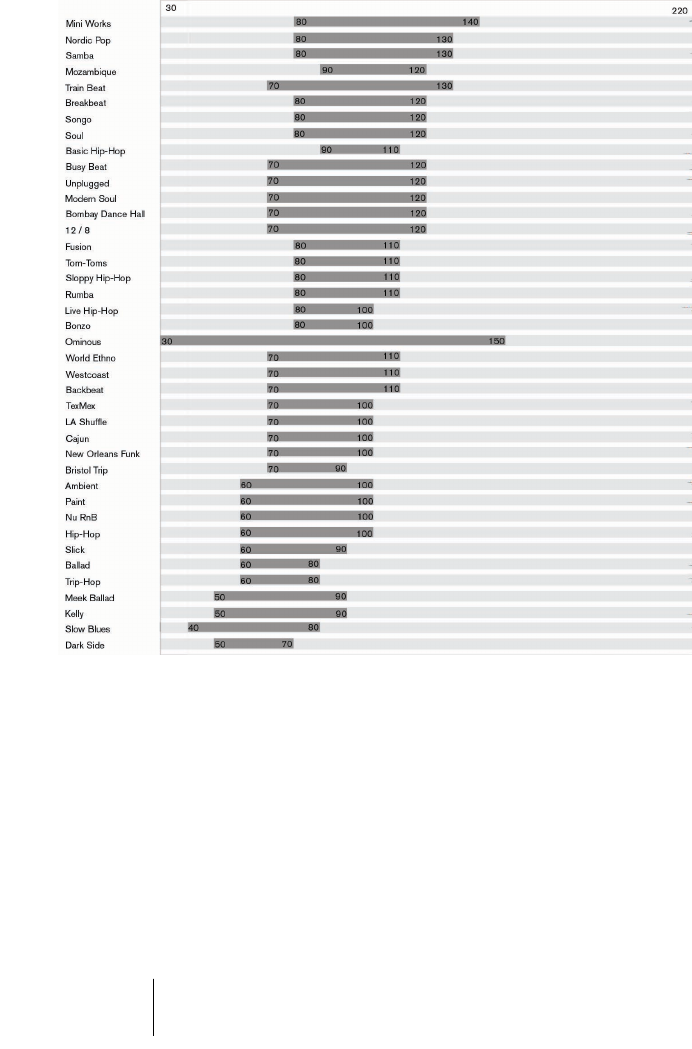
Groove Agent
72 English

Groove Agent
English 73
ENGLISH
80 or 160 BPM, what’s the correct tempo?
Normally, we decide a certain style’s tempo by defining where the
downbeats and backbeats are. A rhythm that goes boom-chick-boom-
chick probably counts 1-2-3-4 at the same rate. In most popular west-
ern music the kick (bass drum) plays the downbeats (1 and 3) and the
snare drum plays the backbeats (2 and 4).
As with all living things, this rule has its exceptions. Reggae has a half
tempo feel built in to itself by nature. The reggae style we’ve included
in Groove Agent actually plays the backbeat on the third beat of the
bar. It simply seemed sensible to specify its favorite tempo range to
130-150 BPM rather than half those figures. This is also true for the
cajun style.
On the other hand, styles like Tom-Toms, Backbeat and Train Beat are
sort of double speed by nature. Here, the Train Beat style works best
somewhere in the 100 BPM region. More practical than 200, don’t
you think?
Finding a suitable style for your song
So, you are working on a song in 104 BPM and now you want to know
what styles have a suitable tempo? Take a look at the tempo map. It
provides a rough guide to suitable tempo ranges for the various styles.
Jamming with Groove Agent
You may feel the urge to play a drum instrument yourself. Perhaps you
have a much better idea for a kick drum pattern than what’s been pro-
grammed into Groove Agent or you may want to add a very special
tambourine rhythm. If so, please feel free to do just that!
If you mute, say, the kick drum, Groove Agent won’t play the kick drum
pattern. You can add your own kick drum playing from your MIDI key-
board, and if you’re recording the MIDI output of Groove Agent, your
playing will end up in that newly created MIDI part, too.

Groove Agent
74 English
Smooth handling
We are the first to agree that some of the knobs in this instrument are
small, very small. When tweaking the sounds, a knob can suddenly
jump from one position to another. Not very comfortable.
❐
If your sequencer lets you choose what sort of mouse movement controls
knobs, you should try “linear” (up and down) mode. This generally gives a
better and more predictable feel and handling.
Controlling Groove Agent from a MIDI keyboard
There are situations where you want to control Groove Agent via a
remote MIDI device such as a keyboard. We have prepared a scheme,
so that almost everything you can do directly on screen can also be
carried out remotely. Here’s a complete description.
•MIDI notes B0-A3 (35-69) play the internal sounds according to the
keyboard map shown on page 46. These drum sounds are available at
all times.
•If you control Groove Agent on MIDI channel 10, the keyboard be-
comes compatible with standard General MIDI (GM) mapping.
•MIDI note A#3 (70) doubles as the Accent button. It also kills drum-
ming for as long as it’s held; play a syncope and hold this key for one
quarter note for very realistic behavior. Please note that this key has
better timing than the Accent button on screen.
•MIDI note B3 (71) stops Groove Agent when it’s running.
•Moving the modulation wheel or using CC 66 triggers a fill.
•When controlling Groove Agent on an odd numbered channel MIDI
notes C4-C6 (72-96) serve dual purposes. Pressing any of these keys
starts Groove Agent. C4 selects complexity level A, G5 selects level
15 etc. If you hit a key harder than velocity 90, you will trigger a fill.
•When controlling Groove Agent on an even numbered channel the
white MIDI keys C4-B4 (72-83) are used to mute and un-mute the 8
individual instrument groups. The black keys above C4 (C#4-A#5 or
73-94) select memory locations 1-10 for you.

Groove Agent
English 75
ENGLISH
•The new right-click menu “MIDI Mute Key Mode” will provide you with
three modes for group handling:
– Toggle: Like before, white keys in the range C4-C5 switch instrument groups 1-8 on
and off.
– Velocity Switch: Notes with high velocity (>64) mute groups, notes with low velocity
un-mute groups.
– While Held: Groups are temporarily muted (or un-muted, depending on their current
status) while notes are held.
If you have an extra modulation wheel or dedicated controller/s on
your keyboard, you can use these CC’s to control Groove Agent:
MIDI CC Destination
Please note that the controllers mentioned here may also be handy
when editing Groove Agent drum parts in your sequencer.
You can get one level deeper in detail when controlling Groove Agent
via MIDI. These commands double as edit controls for each of the 8
output groups on MIDI channel 1-8:
CC Destination
2 and 65 Snare/Sidestick selection
3 and 64 Half Tempo Feel
7 Overall volume
76 Host BPM (60 + value) if your host does not support tempo sync
77 Humanize
78 Shuffle
83 Vintage on/off
91 Ambience
Prg chng Memory select 1-10

Groove Agent
76 English
MIDI CC Destination
Contact, Internet
For more info, latest news, and to get into contact with the Groove
Agent staff, please visit our website: www.bornemark.se.
Credits
Concept and realization: Sven Bornemark
Programming: Paul Kellett / mda
Design and graphics: Wirebird
Acoustic sound design: Per “Worra” Larsson/SampleTekk, Sven
Bornemark and Mats-Erik Björklund
Recording engineer: Jens Bogren and Rickard Bengtsson at Studio
Kuling, Örebro
Session drummer: Mats-Erik Björklund
Electronic sounds from Primesounds and our private collections. Addi-
tional samples from the studios of Daniel Sunebring, Lars Westin and
Wirebird. Mini sounds created by Dan Bornemark at Studio McBuddha.
EMT plate reverb recorded at Tambourine Studios, Malmö
CC Destination
69 Mute
70 Vel Offset
71 Tune
72 Ambience
73 Volume
74 Output
75 Decay

Groove Agent
English 77
ENGLISH
Musicians: Per Almered, Roger Berg, Mats-Erik Björklund, Dan Borne-
mark, Sven Bornemark, Mats Dagerlind, Nils Erikson, Marshall Karlsson,
Ronny Milianowicz, Per Samuelsson, Michael Spork, Jens Ståhlstierna,
Daniel Sunebring, Figge von Wachenfeldt, Lars Westin and Wirebird
Audio mastering: Uffe Börjesson
Project management: Helge Vogt
Manual: Sven Bornemark and Mats Dagerlind with kind assistance of
the Steinberg Manuals Department
Throughout the production period we have received lots of help from
the Steinberg staff in Hamburg. You guys are too many to mention, so
THANK YOU ALL!
We would like to thank the following companies for their friendly sup-
port: MusicMania/Feedback Music (Malmö) and Audiomaster (Örebro).
Last but not least…
Thank you, HeavenlyHansson, for suggesting this instrument.
And thank you, Per “Worra” Larsson of SampleTekk, for being such a
patient audio editor.
And Mats-Erik, I’m so grateful you had the knowledge, musicianship
and energy to spend on this instrument. Now, finally, you have the fine
sample-sets of your own drums you always wanted!

Groove Agent
78 English
Groove Agent
Handbuch
von Sven Bornemark

Groove Agent
80 Deutsch
Die in diesem Dokument enthaltenen Informationen können ohne Vorankündigung ge-
ändert werden und stellen keine Verpflichtung seitens der Steinberg Media Technolo-
gies GmbH dar. Die in diesem Dokument beschriebene Software wird im Rahmen einer
Lizenzvereinbarung zur Verfügung gestellt und darf nicht kopiert werden. Ohne aus-
drückliche schriftliche Erlaubnis durch die Steinberg Media Technologies GmbH darf
kein Teil dieses Handbuchs für irgendwelche Zwecke oder in irgendeiner Form mit ir-
gendwelchen Mitteln reproduziert oder übertragen werden.
Alle Produkt- und Firmennamen sind ™- oder ®-Warenzeichen oder Kennzeichnungen
der entsprechenden Firmen. Windows XP ist ein Warenzeichen der Microsoft Corpora-
tion. Das Mac-Logo ist eine Marke, die in Lizenz verwendet wird. Macintosh ist ein ein-
getragenes Warenzeichen. Mac OS X ist ein eingetragenes Warenzeichen.
© Steinberg Media Technologies GmbH, 2005.
Alle Rechte vorbehalten.

Groove Agent
Deutsch 81
DEUTSCH
Inhaltsverzeichnis
82 Willkommen!
85 Wie verwende ich Groove Agent?
86 Wie funktioniert Groove Agent?
86 Lassen Sie Groove Agent registrieren!
87 Der Steinberg Key
89 Systemvoraussetzungen (PC-Version)
89 Installieren von Groove Agent (PC-Version)
90 Systemvoraussetzungen (Mac-Version)
90 Installieren von Groove Agent (Mac-Version)
91 Aktivieren des Steinberg Key
92 Einrichten von Groove Agent als
VST-Instrument in der Host-Applikation
93 Einrichten von Groove Agent als DXi2-Instrument
94 Verwenden von Groove Agent in einer AU-kompatiblen Anwendung
94 Groove Agent als Standalone-Anwendung und ReWire
96 Der erste Test
97 Groove Agent-Terminologie
99 Die Klänge dieses VST-Instruments
106 Arbeiten mit Groove Agent
107 Das LCD-Fenster
108 Range – Der Tempobereich
108 Das Kontextmenü
110 Regler und Schalter
120 Auswählen der Instrumente, Stummschalten und Gruppieren
121 Stop/Run-Schalter
122 Weitere Funktionen
126 Der Setup-Bereich
132 Erzeugen einer Drum-Spur in Groove Agent
134 Verwenden der MIDI-Ausgabe von Groove Agent in Cubase SX
135 Verwenden der Cubase SX-Automation
136 Das Komponieren in Cubase SX mit Hilfe der
Groove Agent-Speicherplätze
138 Die einzelnen Stilrichtungen
158 Tempoübersicht
160 80 oder 160 BPM, wo liegt das richtige Tempo?
160 Die passende Stilrichtung für Ihren Song
161 Mit Groove Agent jammen
161 Bequeme Anwendung
162 Steuern von Groove Agent per MIDI-Keyboard
165 Kontakt, Internet
165 Credits
166 Last but not least…

Groove Agent
82 Deutsch
Willkommen!
Anfang des Jahres 2002 schlug ein Mitglied des schwedischen VST-
Forums vor, einen modernen Drumcomputer als VST-Instrument zu
entwickeln. Dieses Gerät sollte eine Vielzahl verschiedener Stilrich-
tungen wiedergeben – wie früher, als Rhythmusgeräte noch exotische
musikalische Stilrichtungen wie Rumba und Cha-Cha enthielten. Bei
der heutigen 24-Bit-Technologie, Velocity-Layers, Aufnahmen mit ech-
ter Räumlichkeit und einer leicht anzuwendenden Bedienoberfläche
kann schließlich nichts schiefgehen!
Ein Jahr später gab es dann Groove Agent, einen modernen Drum-
computer. Zu Beginn des Jahres 2005 möchten wir Ihnen nun – als
nächsten logischen Schritt – Groove Agent 2 vorstellen. Wir haben
Content in Form von akustischen und elektronischen Dumkits hinzuge-
fügt, ebenso wie 27 neue Stilrichtungen und natürlich weiterführende
Funktionen. Die grundsätzliche Funktionsweise des Drumcomputers
ist jedoch gleich geblieben. Jedem, der also folgende Sätze ausspre-
chen würde…
•»Ich kann keine Drums programmieren.«
• »Ich habe zum Programmieren von Drums keine Zeit.«
• »Inspiriere mich!«.
…bietet Groove Agent 2 sofortige Unterstützung und Inspiration zum
Erstellen von Songs, Jingles, Filmmelodien und jedes andere musika-
lische Genre, das Vielseitigkeit und Geschwindigkeit erfordert. Wir
wissen auch, dass die Benutzer Groove Agent bevorzugt als Rhyth-
musquelle für externe Soundmodule einsetzen, um die integrierten
Sounds für ihr eigenes Spiel zu verwenden, oder um die verschiede-
nen Möglichkeiten zu kombinieren.
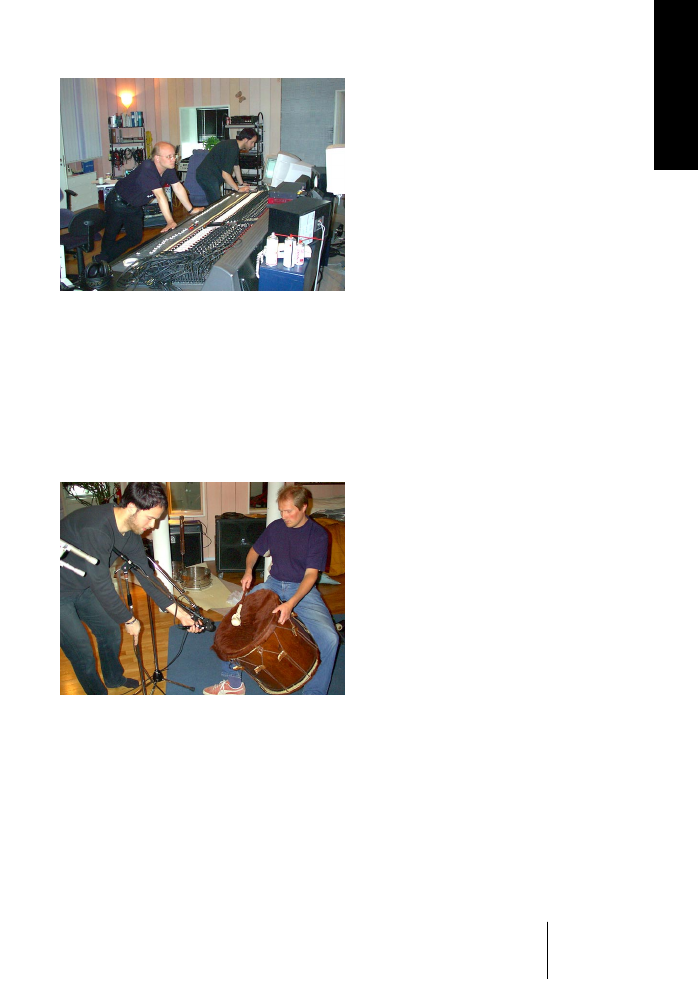
Groove Agent
Deutsch 83
DEUTSCH
Ich bin fest davon überzeugt, dass das Motto, das wir vor zwei Jahren
hatten, auch heute noch gilt: »Zum Erzeugen einer professionellen
Drum-Spur benötigen Sie nur noch drei Minuten – die Zeit, die Ihr
Song dauert!«.
Lassen wir also die langweiligen Dinge des Lebens hinter uns und
konzentrieren uns auf das Wesentliche! Für mich persönlich ist das
Songschreiben das schönste Handwerk. Groove Agent 2 wurde für
all jene entwickelt, die sofort verwendbare Drums zum Erzeugen ihrer
Musik benötigen. Der Kreativität sind so keine Grenzen gesetzt.
Computerprogramme können Menschen nicht ersetzen. Dies gilt für
Musikprogramme genauso wie für andere Software. Um Groove
Agent 2 so »menschlich« wie möglich zu gestalten, haben wir echte
Musiker gebeten, ihre besten Grooves beizusteuern. Als die Musiker
dachten, sie seien fertig, begann erst der eigentliche Teil der Arbeit:

Groove Agent
84 Deutsch
das Erstellen einer 1/2 Tempo- und einer Sidestick-Version für alle 25
Variationen jedes Stils! Die Ergebnisse waren oft für die Musiker
selbst überraschend und die gemeinsamen musikalischen Bemühun-
gen zeigen sich nun in Tausenden Schlagzeugtakten.
Bitte verwenden Sie Groove Agent 2 dazu, gute Musik zu machen!
Musik ist gut für die Seele und dieses musikalische Werkzeug wird
Sie beim Komponieren hoffentlich unterstützen und inspirieren.
Sven Bornemark
/Urheber

Groove Agent
Deutsch 85
DEUTSCH
Wie verwende ich Groove Agent?
Sie können Groove Agent als Standalone-Anwendung benutzen oder
in eine Host-Applikation (Sequenzer) laden. Wenn Ihr Sequenzer also
VST-Instrumente unterstützt, können Sie Groove Agent verwenden.
Und so geht’s:
1. Wählen Sie eine Spur aus und laden Sie Groove Agent.
2. Wählen Sie mit dem obersten Schieberegler in Groove Agent eine
Stilrichtung bzw. eine Unterkategorie aus (siehe Seite 111). Warten
Sie einen Augenblick, bis die entsprechenden Klangdaten geladen
werden.
3. Klicken Sie auf den Run-Schalter und Groove Agent beginnt mit der
Wiedergabe. Verschieben Sie den Complexity-Schieberegler, um
sich die Variationen der Stilrichtung anzuhören.
4. Wählen Sie eine andere Stilrichtung aus und hören Sie sich an, wie es
klingt, wenn Sie einzelne Schlagzeug-Sounds verändern. Klicken Sie
auf den Fill-Schalter, schalten Sie die einzelnen Instrumente stumm und
heben Sie die Stummschaltung wieder auf. Klicken Sie auf den Schalter
»1/2 Tempo Feel« oder fügen Sie durch Klicken auf den Accent-Schal-
ter eine Synkope hinzu. Haben Sie schon den Ambience-Drehregler
ausprobiert?
Nun können Sie Groove Agent in Ihrer Musik als echten Schlagzeuger
einsetzen.

Groove Agent
86 Deutsch
Wie funktioniert Groove Agent?
Technisch gesehen verwendet Groove Agent tausende von MIDI-Se-
quenzen, die von schwedischen Topmusikern »maßgeschneidert« ein-
gespielt wurden. Diese Sequenzen steuern eigens für die jeweiligen
Instrumente aufgenommene Samples an. Das war es eigentlich schon!
Mit dem Zeitskala-Schieberegler können Sie eine musikalische Stil-
richtung bzw. eine Unterkategorie und das entsprechende Schlagzeug
(Drum-Kit) auswählen. Einige dieser Drum-Kits sind akustisch, die an-
deren elektronisch. Mit dem Complexity-Schieberegler können Sie den
Grad der Komplexität einstellen. Für jeden Komplexitätsgrad steht ein
entsprechendes Drum-Fill, eine 1/2 Tempo- und eine Sidestick-Ver-
sion zur Verfügung. Im Edit-Bereich können Sie Klänge bearbeiten und
sogar Instrumente austauschen.
Wir sind besonders stolz auf die hohe Musikalität, die sich hinter jeder
Variation der vorhandenen Stilrichtungen verbirgt. Dieses Programm
wurde von Musikern für Musiker erstellt!
Lassen Sie Groove Agent registrieren!
Bevor Sie Groove Agent verwenden, füllen Sie bitte die beigefügte
Registrierungskarte aus und senden Sie sie ein. Sie erhalten dadurch
das Recht auf technische Unterstützung und wir halten Sie außerdem
über Updates und andere Neuigkeiten auf dem Laufenden.

Groove Agent
Deutsch 87
DEUTSCH
Der Steinberg Key
❐
Bitte lesen Sie den folgenden Abschnitt, bevor Sie die Software für
Groove Agent installieren.
Im Lieferumfang von Groove Agent ist der so genannte »Activation
Code« (nicht zu verwechseln mit der Seriennummer) für den Steinberg
Key enthalten. Der Steinberg Key ist ein Kopierschutzstecker (auch
»Dongle« genannt), durch den unerlaubtes Vervielfältigen der Software
verhindert wird. Der Groove Agent kann nur zusammen mit einem (rich-
tig aktivierten) Steinberg Key gestartet werden. Dieser ist nicht im Lie-
ferumfang enthalten. Wenn Sie nicht bereits über einen Steinberg Key
verfügen, müssen Sie diesen separat kaufen. Wenn Sie bereits über
einen Steinberg Key (für ein anderes Steinberg-Produkt) verfügen,
können Sie diesen für Groove Agent aktivieren.
•Wenn Sie mit einem PC unter Windows arbeiten und zuvor noch kei-
nen Key verwendet haben, startet der Installationsprozess evtl. nach
der Installation der Key-Treiber Ihr Windows-System neu. Stecken Sie
den Key nach dem Neustart des Computers in den USB-Anschluss,
damit der Installationsprozess fortgeführt werden kann.
•Wenn Sie bereits einen Steinberg Key besitzen, müssen Sie den Key
nach der Installation von Groove Agent und nach dem anschließen-
den Neustart des Computers an den USB-Anschluss anschließen.
Wenn der Key in den USB-Anschluss gesteckt wird, erkennt Windows
ihn automatisch als neue Hardware und versucht, Treiber für ihn zu fin-
den – diese notwendigen Treiber sind vor der Installation von Groove
Agent und einem anschließenden Neustart Ihres Computers nicht ver-
fügbar.
Der Steinberg Key

Groove Agent
88 Deutsch
Der Steinberg Key ist eigentlich ein kleiner Computer, auf dem Ihre
Steinberg-Software-Lizenzen gespeichert sind. Alle Steinberg-Pro-
dukte, die durch Hardware-Keys geschützt sind, verwenden dieselbe
Art Key auf denen auch mehrere Lizenzen gespeichert werden kön-
nen. Außerdem können Lizenzen (innerhalb bestimmter Grenzen) zwi-
schen Keys übertragen werden. Dies ist sinnvoll, wenn Sie z.B. eine
bestimmte Software verkaufen möchten.
❐
Wenn Sie bereits einen Steinberg Key besitzen (z.B. für Cubase oder
Nuendo), können Sie Ihre Lizenz für Groove Agent mit Hilfe des mitgelie-
ferten Aktivierungskodes auf diesen Key laden. So benötigen Sie nur ei-
nen Key für Ihren Host und für Groove Agent (siehe unten).
❐
Wenn Sie zum ersten Mal einen Steinberg Key verwenden, schließen Sie
diesen nicht vor oder während des Installationsvorgangs von Groove
Agent an. Andernfalls registriert Windows ihn als neue USB-Hardware
und versucht Treiber zu finden, die erst nach der Installation von Groove
Agent bereitstehen.

Groove Agent
Deutsch 89
DEUTSCH
Systemvoraussetzungen (PC-Version)
Um mit Groove Agent arbeiten zu können, benötigen Sie:
• Einen PC mit 800 MHz Pentium oder Athlon Prozessor (1,4GHz oder
schneller).
• 384 MB RAM (512 MB empfohlen).
• 450 MB freier Speicherplatz auf der Festplatte.
• Windows® XP Home oder Professional.
• Windows MME-kompatible Audio-Hardware (ASIO-kompatible Audiokarte
empfohlen).
•Wenn Sie Groove Agent als Plug-in verwenden möchten, benötigen Sie Cu-
base oder Nuendo (Version 1.5 oder höher) oder eine andere VST 2.0-bzw.
DXi 2-kompatible Host-Applikation. Letztere unterstützen möglicherweise nicht
alle Funktionen von Groove Agent.
•Einen Steinberg Key (Dongle) und einen freien USB-Anschluss.
•Einen Monitor und eine Grafikkarte mit einer Auflösung von 1024 x 768
(Dual-Monitor-Setup und Darstellungsauflösung von 1152 x 864 empfohlen).
❐
Bitte beachten Sie die Systemvoraussetzungen Ihrer Host-Applikation!
Installieren von Groove Agent (PC-Version)
Gehen Sie wie folgt vor, um Groove Agent auf Ihrem PC zu installieren:
1. Schalten Sie Ihren Computer ein und starten Sie Windows.
2. Legen Sie die Groove Agent-CD in das entsprechende Laufwerk Ihres
Computers.
3. Öffnen Sie den Windows Explorer oder das Arbeitsplatz-Fenster und
doppelklicken Sie auf das Symbol des CD-Laufwerks.
4. Doppelklicken Sie zum Starten des Installationsprogramms auf das
Installer-Symbol und befolgen Sie die Anweisungen auf dem Bild-
schirm.

Groove Agent
90 Deutsch
Systemvoraussetzungen (Mac-Version)
Um mit Groove Agent arbeiten zu können, benötigen Sie:
•Einen PowerMac G4 867 MHz-Computer (PowerMac G4 Dual und 1,25GHz
oder schneller empfohlen).
• 384 MB RAM (512 MB empfohlen).
• 450 MB freier Speicherplatz auf der Festplatte.
• Mac OS X-Version 10.3 oder höher.
• CoreAudio-kompatible Audio-Hardware.
•Wenn Sie Groove Agent als Plug-in verwenden möchten, benötigen Sie Cu-
base oder Nuendo (Version 1.5 oder höher) oder eine andere VST 2.0- bzw.
AU-kompatible Host-Applikation. Letztere unterstützen möglicherweise nicht
alle Funktionen von Groove Agent.
• Einen Steinberg Key (Dongle) und einen freien USB-Anschluss.
•Einen Monitor und eine Grafikkarte mit einer Auflösung von 1024 x 768
(Dual-Monitor-Setup und Darstellungsauflösung von 1152 x 864 empfohlen).
❐
Bitte beachten Sie die Systemvoraussetzungen Ihrer Host-Applikation!
Installieren von Groove Agent (Mac-Version)
So installieren Sie Groove Agent auf Ihrem Mac:
1. Schalten Sie Ihren Computer ein und legen Sie die Groove Agent-CD
in das Laufwerk.
2. Falls sich das CD-Fenster nicht automatisch öffnet, doppelklicken Sie
auf das Groove Agent-Symbol.
3. Doppelklicken Sie zum Starten des Installationsprogramms auf das In-
staller-Symbol und befolgen Sie die Anweisungen auf dem Bildschirm.

Groove Agent
Deutsch 91
DEUTSCH
Aktivieren des Steinberg Key
❐
Ihr Steinberg Key enthält bisher noch keine gültige Lizenz für Groove
Agent (egal, ob Sie einen neuen Key zusammen mit dem Programm
erworben haben oder ob Sie einen bereits vorhandenen Key nutzen
möchten). Sie müssen daher eine Lizenz auf diesen Key herunterladen,
bevor Sie Groove Agent verwenden können!
Mit dem Aktivierungskode, der im Lieferumfang von Groove Agent ent-
halten ist, können Sie eine Lizenz für das Programm auf Ihren Steinberg
Key herunterladen. Der Vorgang ist dabei sowohl für neue als auch für
bereits vorhandene Steinberg Keys derselbe. Gehen Sie wie folgt vor:
1. Nachdem die Installation abgeschlossen und der Computer neu ge-
startet ist, schließen Sie den Steinberg Key am USB-Anschluss an.
Wenn Sie sich nicht sicher sind, welchen Anschluss Sie verwenden müssen, lesen Sie
dies in der Dokumentation zu Ihrem Computer nach.
2. Beim ersten Anschließen wird der Dongle als neue Hardware erkannt
und ein Dialog wird angezeigt, indem Sie gefragt werden, ob Sie die
Treiber für die Hardware manuell oder automatisch suchen möchten.
Verwenden Sie die automatische Suche. Der Dialog wird geschlossen und eventuell
müssen Sie Ihren Computer neu starten.
3. Stellen Sie eine Verbindung mit dem Internet her.
Das Herunterladen der Lizenz erfolgt »online«. Wenn Sie mit dem Computer, auf dem
Sie Groove Agent verwenden, nicht auf das Internet zugreifen können, ist es auch
möglich, einen anderen Rechner zu verwenden. Fahren Sie einfach mit den unten be-
schriebenen Schritten fort und lesen Sie die Hilfe im »Lizenz Kontroll Center«.
4. Starten Sie die Anwendung »Lizenz Kontroll Center« (im Windows-
Start-Menü unter »Syncrosoft« bzw. im Anwendungen-Ordner unter
Mac OS X).
Über diese Anwendung können Sie die auf dem Steinberg Key vorhandenen Lizenzen
überprüfen und weitere Lizenzen darauf übertragen.
5. Verwenden Sie die Funktionen des Assistenten-Menüs und den Akti-
vierungskode, den Sie mit Groove Agent erhalten haben, um eine Li-
zenz auf Ihren Key herunterzuladen. Befolgen Sie dabei einfach die
Anweisungen auf dem Bildschirm.
Alle weiteren Schritte werden in der Hilfe der Anwendung beschrieben.
Wenn der Aktivierungsprozess beendet ist, können Sie Groove Agent
starten.

Groove Agent
92 Deutsch
Einrichten von Groove Agent als
VST-Instrument in der Host-Applikation
In diesem Abschnitt wird beschrieben, wie Sie Groove Agent einrich-
ten müssen, wenn Sie mit Cubase SX als Host-Applikation arbeiten.
Bei den meisten Host-Applikationen verläuft die Einrichtung sehr ähn-
lich. Weitere Informationen entnehmen Sie bitte dem Handbuch Ihrer
Host-Applikation.
Vergewissern Sie sich, dass die Host-Applikation korrekt installiert
und für den Betrieb mit Ihrer MIDI- und Audio-Hardware (z.B. MIDI-
Keyboard und Audiokarte) eingerichtet ist.
Gehen Sie zum Einrichten von Groove Agent wie folgt vor:
1. Öffnen Sie das Fenster »VST-Instrumente«.
2. Klicken Sie dort auf eines der Einblendmenüs »Kein Instrument« und
wählen Sie Groove Agent aus.
3. Warten Sie ein paar Sekunden, bis Groove Agent alle Samples für die
in der Grundeinstellung voreingestellte Stilrichtung geladen hat. Das
Groove Agent-Bedienfeld wird automatisch geöffnet.
4. Wählen Sie in der VST Host-Applikation Groove Agent als Ausgang
für eine MIDI-Spur aus.

Groove Agent
Deutsch 93
DEUTSCH
Einrichten von Groove Agent als DXi2-Instrument
❐
Dieser Abschnitt bezieht sich auf die Verwendung von Groove Agent in
Cakewalk SONAR. Vergewissern Sie sich, dass Sie sowohl SONAR als
auch Ihre MIDI- und Audio-Hardware richtig installiert haben.
Wenn Sie Groove Agent in einer anderen DXi2-kompatiblen Host-Anwen-
dung verwenden möchten, lesen Sie die entsprechende Dokumentation.
Gehen Sie folgendermaßen vor, um Groove Agent einzurichten:
1. Stellen Sie sicher, dass SONAR MIDI-Daten empfängt, die Sie mit
Ihrem externen MIDI-Master-Keyboard erzeugen. Überprüfen Sie dazu
die Anzeige »Midi In/Out Activity«.
2. Öffnen Sie in SONAR über das View-Menü das Fenster »Synth Rack«.
3. Klicken Sie den Insert-Schalter (oder wählen Sie im Hauptmenü die
Insert-Option).
4. Öffnen Sie das Untermenü »DXi Synth« und wählen »Groove Agent«.
5. Standardmäßig wird der Dialog »Insert DXi Options« geöffnet. Wenn
Sie eine MIDI-Spur erzeugen und eine Audiospur an die Groove Agent-
Ausgänge 1 und 2 leiten möchten, schalten Sie die Optionen »MIDI
Source Track« und »First Synth Output (Audio)« ein. Wenn Sie Spuren
für alle verfügbaren Ausgänge von Groove Agent erzeugen möchten,
schalten Sie die Option »All Synth Outputs« ein. Weitere Informationen
entnehmen Sie bitte der Dokumentation Ihrer Host-Anwendung.
6. Mit dem Schalter »Connection State« im Dialog »Synth Rack« können
Sie Groove Agent ein- bzw. ausschalten. Standardmäßig sind neu ge-
ladene DXi-SoftSynths eingeschaltet.
7. Doppelklicken Sie auf den Eintrag »Groove Agent« oder klicken Sie in
der Werkzeugzeile des Dialogs »Synth Rack« auf den Schalter »Synth
Properties«, um das Bedienfeld von Groove Agent zu öffnen.
8. Wählen Sie in SONAR die neu erstellte MIDI-Spur »Groove Agent«
aus. Groove Agent empfängt jetzt MIDI-Daten über diese Spur.
Groove Agent empfängt MIDI-Daten im 16-fachen Multi-Modus. Daher ist es nicht not-
wendig, einen bestimmten MIDI-Kanal zum Empfangen von MIDI-Daten zuzuweisen.
Stellen Sie jedoch sicher, dass der MIDI-Kanal der ausgewählten Spur in SONAR auf
den Kanal eingestellt ist, auf dem Groove Agent MIDI-Daten empfangen soll.

Groove Agent
94 Deutsch
Verwenden von Groove Agent in einer AU-
kompatiblen Anwendung
Sie können Groove Agent in einer AU-kompatiblen Host-Anwendung
verwenden (z.B. Logic).
Die AU-Version von Groove Agent wird unter »Library/Audio/Plug-ins/
Components« installiert und ermöglicht das Verwenden von Groove
Agent in einer AU-Umgebung ohne Leistungseinbußen oder Kompati-
bilitätsprobleme.
Gehen Sie in Logic Pro 7 folgendermaßen vor:
1. Öffnen Sie den Track Mixer und wählen Sie den gewünschten Instru-
ment-Kanal aus.
2. Klicken Sie mit gedrückter [Befehlstaste] in das I/O-Feld und wählen
Sie im angezeigten Einblendmenü entweder »Multi-Channel« oder
»Stereo« aus.
3. Wählen Sie im angezeigten Einblendmenü die Option »All Instruments«
und dann »Groove Agent«.
Groove Agent ist jetzt als AU-Instrument geladen.
Wenn Sie diese Einstellungen vorgenommen haben, können Sie
Samples laden und mit Groove Agent arbeiten.
Groove Agent als Standalone-Anwendung und
ReWire
Groove Agent kann auch als eigenständige Anwendung (»Stand-
alone«) verwendet werden, unabhängig von einer Host-Anwendung.
Wenn ein Sequenzer keines der angebotenen PlugIn-Formate von
Groove Agent (d.h. VST, DXi, AU) unterstützt, dafür aber den Daten-
austausch über das ReWire-Protokoll ermöglicht, können Sie Groove
Agent auch mit diesem Sequenzer zusammen verwenden.

Groove Agent
Deutsch 95
DEUTSCH
ReWire2 ist ein Protokoll, mit dem Audio- und MIDI-Daten zwischen
verschiedenen Computer-Anwendungen ausgetauscht werden kön-
nen. Beim Arbeiten mit ReWire ist die Reihenfolge, in der die zwei
Programme gestartet werden, von größter Wichtigkeit, da die zuerst
gestartete Anwendung die Ressourcen der Soundkarte belegt. Ge-
hen Sie folgendermaßen vor:
1. Starten Sie zunächst die gewünschte Sequenzeranwendung (z.B.
Ableton Live, ProTools).
ReWire-kompatible Anwendungen ermöglichen das Zuweisen von Audio- und MIDI-
Kanälen für den Datenaustausch. Nähere Informationen dazu entnehmen Sie bitte der
Dokumentation zu Ihrer Sequenzeranwendung.
2. Starten Sie anschließend Groove Agent als Standalone-Anwendung.
Sie können das Programm wie jede andere Anwendung auf Ihrem Computer über das
Start-Menü oder das entsprechende Desktop-Symbol (Windows) bzw. über das An-
wendungssymbol im Anwendungen-Ordner (Mac) starten. Alternativerweise können
Sie auch auf die Programmdatei im Installationsordner doppelklicken.
Wenn Sie jetzt mit Groove Agent einen Style spielen, werden die ent-
sprechenden Signale über ReWire an die zugewiesenen Mixerkanäle
des Sequenzers übertragen. Sie können die Ausgänge der einzelnen
Instrumente jeweils an einen eigenen Mixerkanal leiten (bis zu 8).
Beachten Sie, dass jetzt zwei voneinander unabhängige Anwendungen
auf Ihrem Computer laufen. Wenn Sie das Sequenzerprojekt speichern,
werden die Kanal- und Buskonfigurationen gespeichert, jedoch keine
der Einstellungen in Groove Agent! Um die Einstellungen von Groove
Agent zu speichern, wählen Sie im File-Menü von Groove Agent den
Befehl »Save Bank«. Achten Sie beim Eingeben des Dateinamens dar-
auf, einen Namen zu wählen, der darauf hinweist, dass diese Datei Ein-
stellungen enthält, die sich auf ein bestimmtes Sequenzerprojekt
beziehen.
Wenn Sie ein bereits vorhandenes Sequenzerprojekt öffnen und auch
Groove Agent gestartet haben, müssen Sie die zu diesem Projekt ge-
hörenden Einstellungen für Groove Agent über den Befehl »Load Bank«
laden.

Groove Agent
96 Deutsch
Der erste Test
Stellen Sie sicher, dass Groove Agent richtig eingerichtet und betriebs-
bereit ist:
1. Wenn Sie Groove Agent als VST-Instrument laden, vergewissern Sie
sich, dass Groove Agent auch als Ausgang für eine MIDI-Spur ausge-
wählt ist. Die Spur darf mit Ausnahme von Kanal 10 auf jeden MIDI-Ka-
nal eingestellt sein. Stellen Sie gegebenenfalls sicher, dass Ihr MIDI-
Controller (MIDI-Keyboard) Daten an diesen Kanal sendet.
2. Öffnen Sie das Groove Agent-Bedienfeld. Stellen Sie mit dem oberen
Schieberegler die gewünschte Stilrichtung ein. Das Laden der ent-
sprechenden Samples kann ein paar Sekunden dauern. Der aktuelle
Status wird im grünen LCD-Fenster durch »Loading…« (laden) und
»Ready!« (Ladevorgang abgeschlossen) angezeigt.
3. Passen Sie ggf. das Tempo Ihrer Host-Applikation dem bevorzugten
Tempobereich der Stilrichtung an. Dies wird im BPM-Feld des LCD-
Fensters angezeigt.
4. Klicken Sie im Groove Agent-Bedienfeld auf den Run-Schalter. Die
roten LCD-Pegelanzeigen auf der Groove Agent-Bedienoberfläche
und die Beat-Anzeigen leuchten nun auf. Außerdem sollten coole
Rhythmen aus Ihren Lautsprechern tönen!

Groove Agent
Deutsch 97
DEUTSCH
Groove Agent-Terminologie
Zeitskala-Regler – Der obere Schieberegler im Bedienfeld von
Groove Agent. Hiermit können Sie die Schlagzeug-Stilrichtungen aus-
wählen. Die verschiedenen Stilrichtungen sind entlang einer Zeitskala
aufgeführt und können durch Positionieren des Reglers aufgerufen
werden.
Complexity-Regler – Schieberegler unter dem Zeitskala-Regler, der
zum Einstellen komplexerer Variationen jeder der Stilrichtungen ver-
wendet werden kann. Verschieben Sie den Regler nach links, um die
einfachen Variationen aufzurufen, und nach rechts, um komplexere Va-
riationen auszuwählen. Im Allgemeinen sind Variationen ein gutes Stil-
mittel. Groove Agent macht es Ihnen hier ganz leicht.
LCD-Fenster – Im grünen Bereich rechts unten im Groove Agent-
Bedienfeld wird angezeigt, was sich gerade innerhalb von Groove
Agent abspielt. Dieser Bereich ist also Ihre wichtigste Informations-
quelle.
Pegelanzeigen – Damit sind die roten Pegelanzeigen gemeint, die
aufleuchten, sobald Groove Agent Sounds wiedergibt. Wenn Sie je-
doch genaue Informationen benötigen, sollten Sie die Pegelanzeigen
Ihrer Host-Applikation verwenden.
Stilrichtung – Ein bestimmter musikalischer Stil mit einem dazu pas-
senden Drum- und Percussion-Kit.
Drum-Kit – Eine spezielle Zusammenstellung von Schlagzeug- und
Percussion-Instrumenten, die einer Stilrichtung zugeordnet sind. Stil-
richtung und Drum-Kit lassen sich separat auswählen.
Fill – Ein lebendiger Schlagzeuger spielt zur Betonung der Song-
Struktur üblicherweise etwa alle acht Takte eine Variation (früher
nannte man so etwas in Deutschland »Wirbel«, heute heißt es »Fill«).
Ein Fill betont einen Wechsel in Ihrer Musik: Sie wechseln von der
Strophe in den Refrain? Dann ist es Zeit für ein Fill!
1/2 Tempo Feel – Wenn die Bass-Drum (auch »Kick-Drum«) und
Snare-Drum halbes Tempo spielen, während der Rest des Pattern un-
verändert bleibt, erzielen Sie eine Art dramatischen Effekt. Richtige
Schlagzeuger machen das häufig – wenn Sie nicht gestoppt werden.

Groove Agent
98 Deutsch
Accent – Bevor es Drumcomputer gab, verstand man unter einem
Accent eine betonte Zählzeit, die normalerweise von Bass-Drum und
Becken gespielt wurde. Auf einer unbetonten Zählzeit (einem sog.
Offbeat), z.B. der letzten Achtelnote vor dem Taktende eines 4/4-
Taktes, wird so eine Synkope erzeugt.
Shuffle – Hiermit wird das rhythmische Verhältnis von Achtelnoten
(manchmal Sechzehntelnoten) zueinander bezeichnet. Bei Achtelnoten
kann es sich um »gerade« Achtel oder »swingende« Achtel (triolische
Achtel) handeln.
Limiter – Der Limiter ist wahrscheinlich das wichtigste Gerät, das ein
Toningenieur verwendet, wenn er Schlagzeug aufnimmt. Das Be-
grenzen (bzw. Komprimieren – der Unterschied ist marginal) hilft beim
Steuern des Gesamtausgabepegels, kann aber auch als Effekt ver-
wendet werden.
Ambience – Groove Agent wird mit einem vollständigen Satz von
Schlagzeug- und Percussion-Instrumenten ausgeliefert, die mit eige-
ner Räumlichkeit aufgenommen wurden. Die akustischen Klänge wur-
den hierzu mit Mikrofonen in geeigneten Räumen aufgenommen und
die elektronischen Klänge wurden mit Hilfe verschiedener Hall- und
Effektgeräte bearbeitet.
Dry/Wet – Gemeint sind hier die beiden Extremzustände eines
Klangs. Dry: Der Klang wurde in gedämpfter Umgebung und aus äu-
ßerst geringer Entfernung aufgenommen. Wet: der Klang wurde aus
der Entfernung aufgenommen bzw. mit Hall-Effekten bearbeitet.
•Neu in Groove Agent 2 ist das Kontextmenü. Wir haben einige neue
Funktionen hinzugefügt, die Sie durch Klicken mit der rechten Maus-
taste bzw. durch Klicken auf das Groove Agent-Logo öffnen können.
Über das Kontextmenü können Sie auch den About-Screen (in dem die an der Ent-
wicklung beteiligten Personen aufgelistet sind) öffnen oder die Groove Agent- bzw. die
Steinberg-Website aufrufen. Hier stehen Ihnen auch neue Funktionen zur Verfügung,
mit denen Sie z.B. die Anzahl der Mixerausgänge ändern, das Verhalten der MIDI-Aus-
gänge bearbeiten, den »MIDI Mute Key Mode« festlegen bzw. das Verhalten von
Groove Agent 2 beim Stoppen der Host-Applikation bestimmen können.
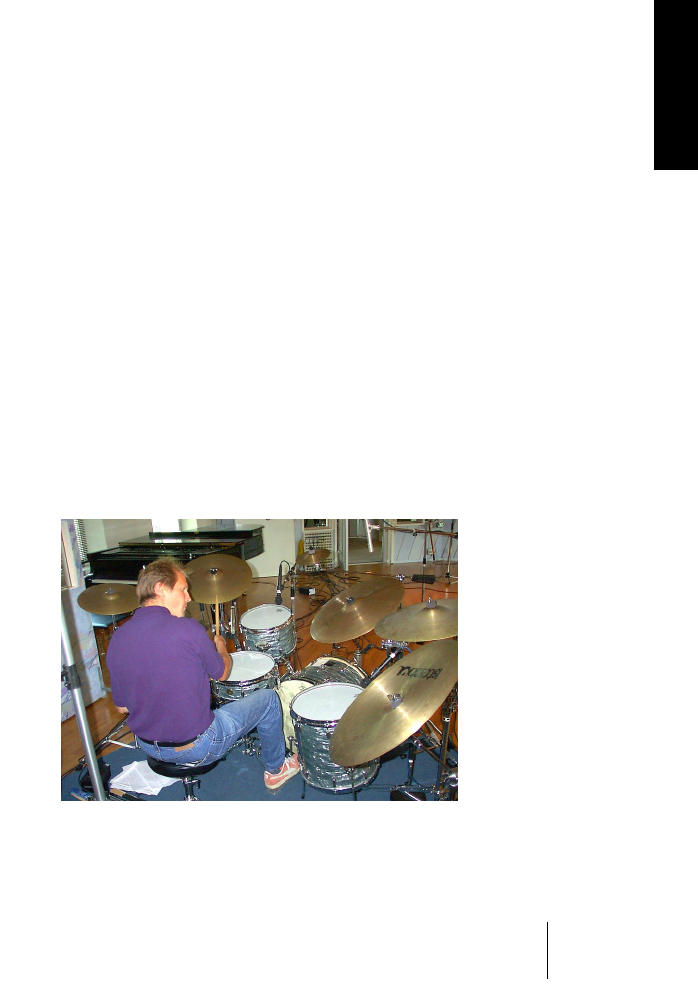
Groove Agent
Deutsch 99
DEUTSCH
Die Klänge dieses VST-Instruments
Vor der Erstellung der Drum-Sounds für dieses Instrument, haben wir
den Markt nach verwertbaren Drumsound-Bibliotheken abgesucht. Dies
hätte uns viel Zeit und Mühe erspart – Per »Worra« Larsson/Sample
Tekk kann ein Lied davon singen. Leider konnten wir nichts Passendes
finden. Entweder enthielten diese Klangbibliotheken nicht alle notwendi-
gen Klänge – haben Sie jemals eine Sample-Zusammenstellung gese-
hen, die »HiHat Gliss« oder »Spoons« enthält? – oder sie waren nicht
konsistent aufgenommen.
Wir wollten eine vollständige Auswahl an Drum-Kits und räumliche
Sounds aller Instrumente. Also begannen wir, selbst aufzunehmen…
Das wunderbare Studio Kuling in Örebro in Schweden besitzt das
eindrucksvollste Aufnahmestudio, das wir jemals gesehen haben! Der
Raum selbst ist groß und mit Holz verkleidet. Der Toningenieur Jens
Bogren kennt sich mit seinem Equipment wirklich gut aus. Während
Mats-Erik Björklund alle Instrumente spielte, begannen die Sound-De-
signer Per »Worra« Larsson/Sample Tekk und Sven Bornemark damit,
verschiedene Anschlagdynamikpegel für jeden Klang aufzunehmen.
Unser Ziel war es, mit unserer Klangbibliothek so viele Bereiche wie
möglich abzudecken. Daher haben wir die folgenden Instrumente auf-
genommen:
Ein 50er Jahre Jazz-Kit.
Nicht sehr gedämpft,
klingt relativ offen und
lässig.
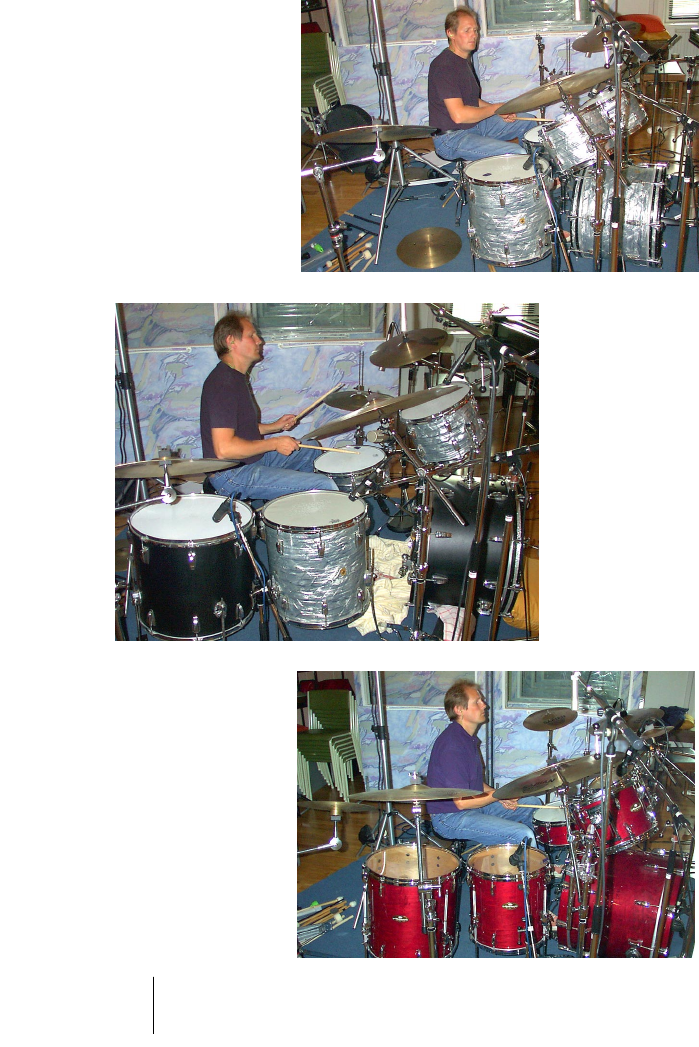
Groove Agent
100 Deutsch
Ein 60er Jahre Pop-Kit.
Sehr stark gedämpfte
Drums aus einer Zeit, in
der man sogar Handtü-
cher auf die Toms legte!
Ein 70er Rock-Kit.
Laut, tief und reso-
nant. Dieses Kit ist
riesig!
Ein 80er Jahre Studio-
Kit. Frisch und modern,
wie auf den meisten
heutigen CDs.
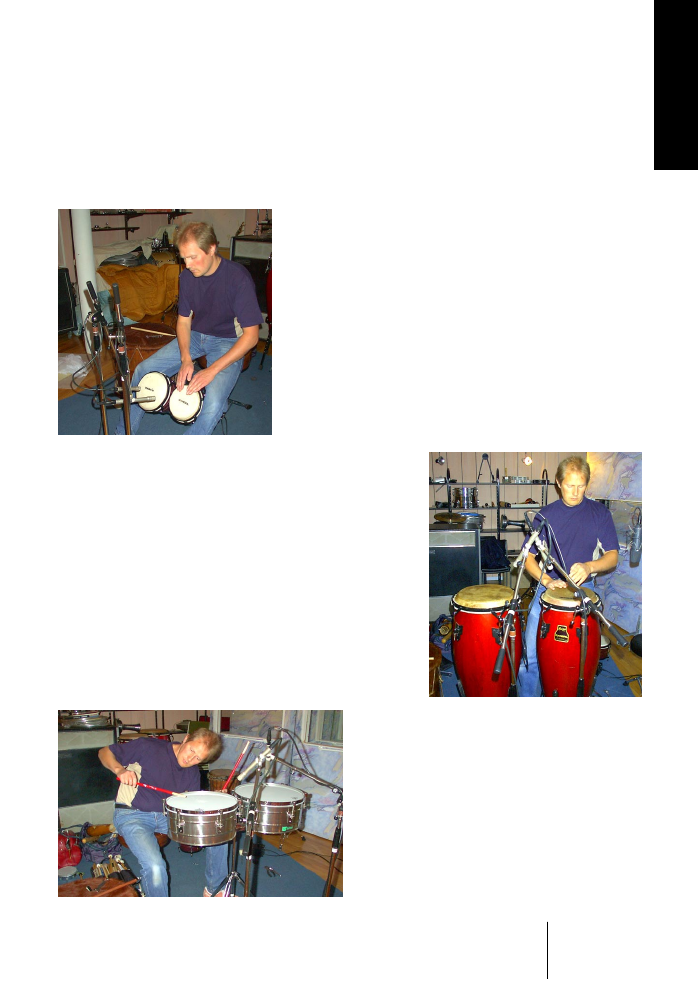
Groove Agent
Deutsch 101
DEUTSCH
Darüber hinaus haben wir Stilmittel verwendet, die den Klängen der je-
weils dargestellten Ära eine spezielle Lebendigkeit und Authentizität
verleihen. So wurden die Drums der 50er Jahre z.B. mit Besen und
Schlegeln und die der 80er Jahre mit Rods und zusätzlichen Snare-
Drums wie Piccolo gespielt.
Zur Vervollständigung der Klangbibliothek nahmen wir in einer langen
Aufnahme-Session ausschließlich Percussion-Instrumente auf: die
aus dem GM-Protokoll sowie eine Vielzahl anderer interessanter
Instrumente wie afrikanische Felltrommeln, Regenrohr, Tambourine,
Cascabelles usw.
Das Aufnehmen von Bongos…
…Congas…
…und Timbales

Groove Agent
102 Deutsch
Jens Bogren machte den Vorschlag, alles durch eine analoge 24-Spur
Bandmaschine laufen zu lassen, um einen »wärmeren« Klang zu erzeu-
gen. Gute Idee! Am Ende kamen folgende Aufnahmen dabei heraus:
• Spur 1 und 2: Mikrofon-Nahabnahme
• Spur 3 und 4: Overhead-Mikrofon
• Spur 5 und 6: Raumabnahme-Mikrofon mit 2 Meter Abstand
• Spur 7 und 8: Raumabnahme-Mikrofon mit 7 Meter Abstand
Nach der Aufnahme verbrachte Per Larsson mehrere Monate mit dem
Bearbeiten der Klänge. Das Editieren in einer Mehrspurumgebung un-
terscheidet sich erheblich von der einfachen Stereo-Samplebearbei-
tung. Wir haben die Aufnahmen zusammengestellt, die am besten
zueinander passen. Für die Kits der 50er und 70er haben wir z.B. tro-
ckene und entfernte und für die übrigen Instrumente trockene und
räumliche Aufnahmen verwendet.
Mats-Erik Björklund brachte die sorgfältig ausgewählten Instrumente
für die Aufnahme ins Studio. Auch wenn wir die 70er Jahre HiHat-Auf-
nahmen verloren und völlig vergaßen, den Klang einer Pfeife aufzuneh-
men, war seine Mitarbeit für das Projekt immer unschätzbar!
So viel zu den akustischen Klängen. Die moderneren und experimentel-
leren Klänge entnahmen wir der Sample-Bibliothek von Primesounds,
Stockholm. Sie enthält eine Vielzahl der Klänge, die wir benötigten. Zu-
sätzlich opferten viele der beteiligten Musiker Zeit für die Erstellung ei-
gener, einzigartiger Klänge.
❐
Klänge, die mit einem B, M oder R markiert sind, wurden mit Besen (B),
Schlegeln (M, engl. für »Mallets«) und Rods (R) aufgenommen.
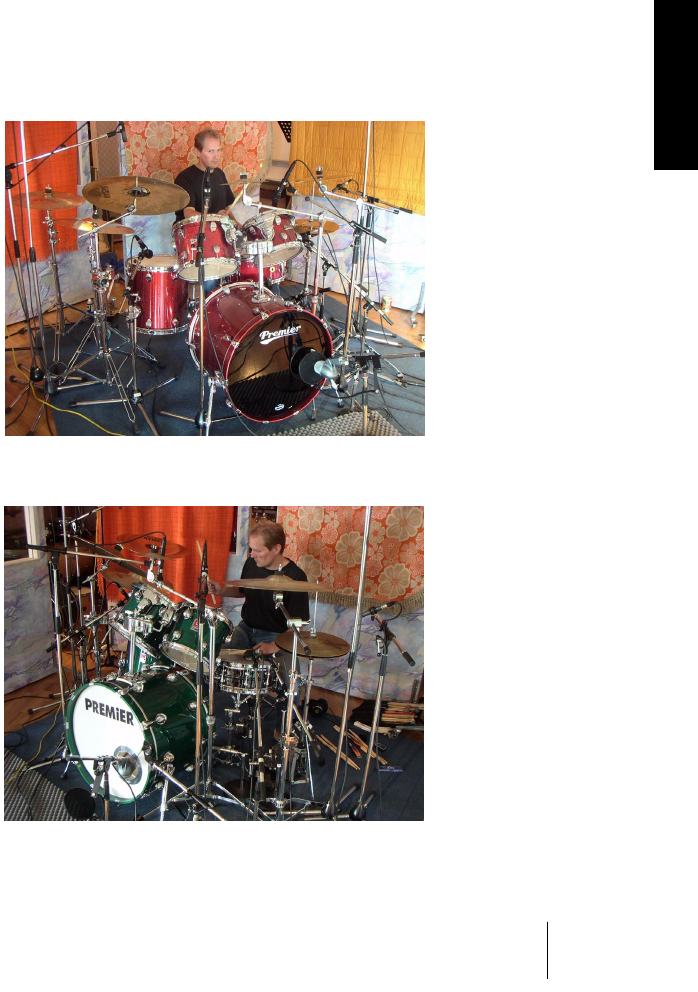
Groove Agent
Deutsch 103
DEUTSCH
Die neuen Sounds für Groove Agent 2
In den Sessions für Groove Agent 2 spielte Mats-Erik hinterm Schlag-
zeug und als wichtigster Sounddesigner eine tragende Rolle. Tonin-
genieur in dieser zweiten Runde war Rickard Bengtsson. Mats-Erik
nahm die Gelegenheit wahr, einige nützliche Drumkits aufzunehmen,
um die Soundpalette noch zu vervollständigen:
Das Studio-Kit – Ein hochwer-
tiges Set mit einigen der bes-
ten Drums und Becken. Wir
wollten einen Sound, der für
viele Stilrichtungen passt, die
einen guten, klaren und mo-
dernen Sound erfordern. Bei
den drei Snare-Drums handelt
es sich um hochqualititative
Snares unterschiedlicher Ton-
höhen und Materialien, die
sorgfältig gestimmt wurden,
um den wahren Charakter der
Instrumente herauszustellen.
Das Heavy-Kit. Dieses Drumset
wurde so konzipiert, dass es zu
vielen der heutigen Metal-Stil-
richtungen passt, bei denen
aufwändige Bass-Drums eine
unentbehrliche Zutat sind. Der
trockene Charakter der Ride-
Becken und der großartige
Sound der Crash-Becken lässt
jede Gitarrenwand bröckeln.
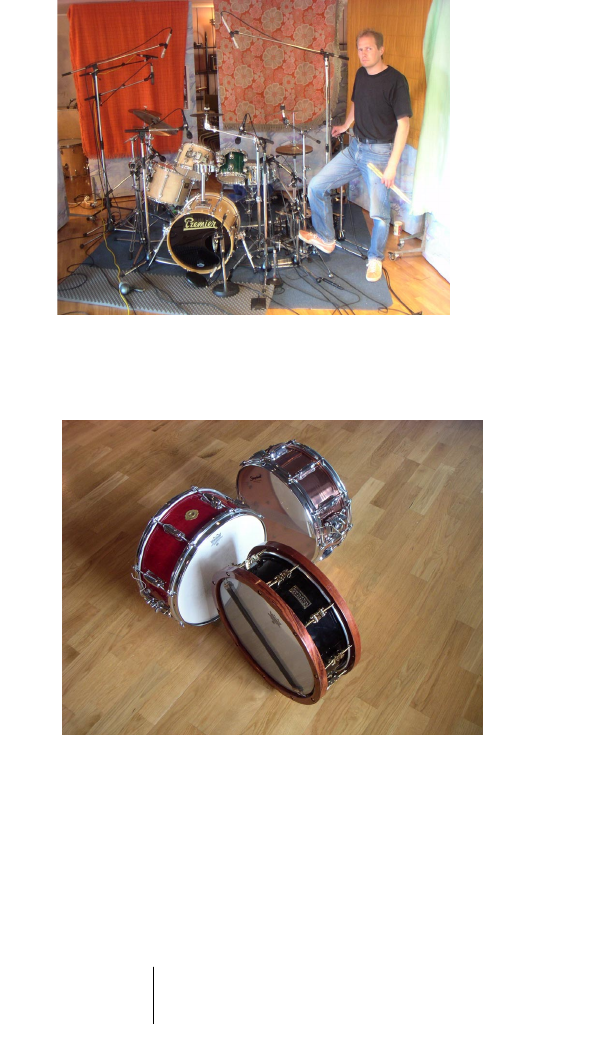
Groove Agent
104 Deutsch
Das Noisy-Kit – ein moderner
Drum-Sound mit traditionellen
Drums. Diese Instrumente sind
sehr klein, aber zusammen mit dem
Boom-Box-Effekt klingen sie grö-
ßer, als sie wirklich sind. Beim Ex-
perimentieren mit einer Vielzahl
digitaler Effekte fanden wir zu ei-
nem Sound, von dem wir denken,
dass er von Dauer ist. Die Snare-
Drums bestehen aus einer dünnen,
hochgestimmten Piccolo-Snare
und einer kleinen 10" Mini-Snare.
Bei einigen der Becken handelt es
sich um seltene Vintage-Instru-
mente, die heutzutage kaum noch
aufzutreiben sind. Andere hingegen
sind moderne, laut klingende Instru-
mente, die auch schon bessere
Tage gesehen haben…
Eine rote Slingerland »Radio
King« (für Aufnahmen die
weltweit am meisten genutzte
Snare-Drum), eine schwarze,
handgemachte Snare-Drum
von Hanus & Hert in Prag und
eine kupferfarbene Slinger-
land-Snare.
Um den gewünschten Sound zu erzielen, haben wir uns diesmal dazu
entschlossen, keinen Raumklang hinzuzufügen. Rickard hatte gerade
den Effektprozessor Eventide Harmonizer »Orville« erworben und ver-
brachte beträchtliche Zeit damit, bedeutende Umgebungen für die
Drum-Sounds zu erzeugen. Die resultierenden Sounds sind sehr reich
und farbig.

Groove Agent
Deutsch 105
DEUTSCH
Zu den drei akustischen Kits kom-
men noch eine Handvoll Vintage-
Drumcomputer aus Sven Borne-
marks Privatkollektion. Einige die-
ser Prachtexemplare sind über
dreißig Jahre alt, so dass das Er-
stellen von Samples nicht ganz un-
kompliziert war. Alte Analoggeräte
haben die Tendenz, von einem Tag
auf den anderen, und sogar von ei-
nem Schlag auf den anderen, un-
terschiedlich zu klingen. Vergleicht
man also die ursprünglichen, inte-
grierten Rhythmen mit den MIDI-
Übersetzungen, hört man die Un-
terschiede. Wir denken dennoch,
dass wir den Zauber dieser Drum-
computer von gestern einfangen
und neu verpacken konnten.
Die Vintage-Drumcomputer wurden mit dem Raumklang eines EMT-
Plattenhalls aus einem der bekanntesten Aufnahmestudios in Malmö,
den Tambourine Studios, aufgenommen.

Groove Agent
106 Deutsch
Arbeiten mit Groove Agent
Hier eine Kurzanleitung für besonders Ungeduldige:
•Wählen Sie mit dem oberen Schieberegler (Zeitskala-Regler) die Stil-
richtung aus, die Sie verwenden möchten.
•Verschieben Sie den unteren Schieberegler (Complexity-Regler) etwa
in das mittlere Drittel der Reglerbahn.
•Vergewissern Sie sich, dass das in Ihrem Sequenzer eingestellte
Tempo mit dem zulässigen Tempobereich für die ausgewählte Stil-
richtung übereinstimmt.
•Starten Sie Ihren Sequenzer und klicken Sie auf den Run-Schalter in
Groove Agent, wenn die Drums wiedergegeben werden sollen.
Wenn Sie es sich leicht machen möchten, schalten Sie die Funktion »Auto Fill« ein.
•Durch Bewegen des Complexity-Reglers nach links werden die Drum-
Sounds leichter/sanfter, durch Bewegen nach rechts komplexer/lauter/
wilder. Sie können Groove Agent durch Klicken auf den Stop-Schalter
oder durch Stoppen des Sequenzers anhalten.
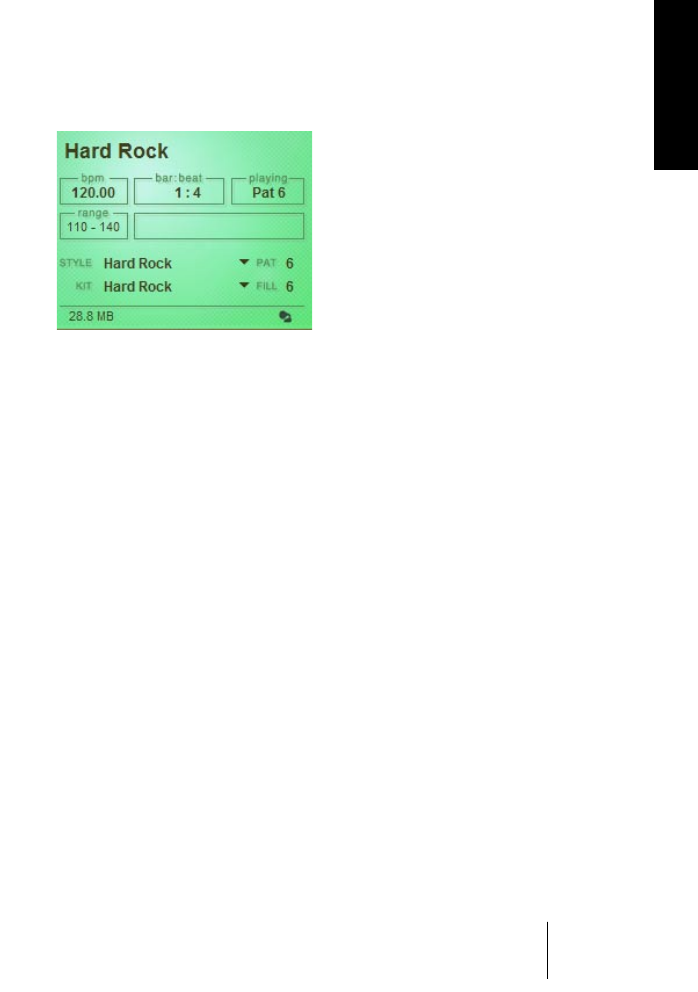
Groove Agent
Deutsch 107
DEUTSCH
•Um die Sounds von Groove Agent als MIDI-Part aufzunehmen, klicken
Sie auf den Edit-Schalter rechts unten, öffnen Sie den Setup-Bereich
durch Klicken auf den geriffelten Knopf und verschieben Sie den
Schalter »MIDI Output« in die ON-Position (nur Cubase und Nuendo).
Das LCD-Fenster
Die in diesem Bereich des Groove
Agent-Bedienfelds angezeigten Infor-
mationen sind eigentlich selbsterklä-
rend. Ein sinnvoller Hinweis hierzu:
Wenn Sie die Zeitskala- und Comple-
xity-Schieberegler einstellen, wird in
diesem Bereich angezeigt, wo sich
die Regler gerade befinden.
Wir haben den oberen der beiden Schieberegler mit 54 Stilrichtungen
prall gefüllt und manche Benutzer meinen vielleicht, dass die Namen
schwierig zu lesen sind. Falls Sie auch dieser Meinung sind, orientie-
ren Sie sich einfach am LCD-Fenster. Hier können Sie die Position der
Regler leichter ablesen.
Sie haben sicherlich bemerkt, dass einige der Stilrichtungen über dem
Schieberegler in einer anderen Farbe dargestellt sind. Für diese Stil-
richtungen stehen Ihnen Unterkategorien zur Verfügung. Es handelt
sich dabei um die 27 neuen Stilrichtungen des Groove Agent 2. Und
so geht’s:
1. Wählen Sie mit dem Schieberegler eine andersfarbige Stilrichtung aus.
2. Klicken Sie mit der rechten Maustaste und wählen Sie eine der neuen
Stilrichtungen aus dem Einblendmenü aus.
•Sie können die Musik einer bestimmten Stilrichtung mit dem Drumkit
einer anderen Stilrichtung kombinieren. Schalten Sie dazu einfach
den Link-Schalter aus und ziehen Sie die beiden Reglerhälften des
Zeitskala-Schiebereglers an unterschiedliche Positionen (und Unter-
menüs).

Groove Agent
108 Deutsch
Range – Der Tempobereich
Jede Stilrichtung besitzt einen bestimmten Tempobereich. Wenn Sie
eine hektische House-Figur mit 40 BPM (Beats Per Minute: Zählzeiten
pro Minute) wiedergeben, klingt sie wahrscheinlich nicht besonders
eindrucksvoll. Wir möchten Sie natürlich nicht davon abhalten, mit un-
terschiedlichen Tempoeinstellungen zu experimentieren. Das Range-
Feld gibt Ihnen jedoch einen Hinweis auf den ursprünglich für diese
Stilrichtung vorgegebenen Tempobereich.
Halten Sie sich an das empfohlene Tempo, wenn es Ihnen um eine
möglichst realistische Wiedergabe einer bestimmten Stilrichtung geht.
Wenn dies nicht der Fall ist, ignorieren Sie diese Vorgabe einfach!
❐
Auf Seite 158 dieses Handbuchs finden Sie eine Tempoübersicht.
Das Kontextmenü
Einige der neuen Funktionen können Sie über ein Kontextmenü aus-
wählen, das Sie durch Klicken mit der rechten Maustaste auf eine leere
Stelle des Bedienfelds bzw. durch Klicken auf das Groove Agent-Logo
aufrufen. Folgende Menüpunkte stehen Ihnen zur Verfügung:
•About Groove Agent 2 – Hier finden Sie eine Liste der an der Entwicklung be-
teiligten Personen sowie die Versionsnummer. Klicken Sie auf diese Seite, um
sie wieder zu schließen.
• Groove Agent Website – Mit diesem Befehl können Sie die Groove Agent-
Website öffnen, auf der Ihnen Sound-Clips, ein Bereich mit FAQ und ein Fo-
rum zur Verfügung stehen.
• Steinberg Website – Mit diesem Befehl können Sie die Steinberg-Website
öffnen, auf der Sie mehr über unsere kreative Software erfahren.
•Audio Outputs – Über dieses Untermenü können Sie festlegen, wie viele Ste-
reo-Ausgänge Groove Agent im Mixer Ihrer Host-Applikation verwendet. Bitte
beachten Sie, dass diese Änderungen aus technischen Gründen erst beim
Neustart von Groove Agent wirksam werden.
•MIDI Output – Die Drum-Sounds von Groove Agent 2 werden entweder an ei-
nen MIDI-Part (wie bei der ersten Version) oder an eine MIDI-Datei ausgege-
ben! Diese MIDI-Datei können Sie dann zur weiteren Verwendung in Ihre
Host-Applikation importieren.

Groove Agent
Deutsch 109
DEUTSCH
•MIDI Mute Key Mode – Die Fernbedienung von Groove Agent 2 ist nun leich-
ter denn je! Hierfür stehen Ihnen zwei neue Modi zur Verfügung. Weitere Infor-
mationen erhalten Sie im Abschnitt »Steuern von Groove Agent per MIDI-
Keyboard« auf Seite 162.
•When Host Stops – Das Verhalten bei Pausen wurde in Groove Agent 2 geän-
dert. Weitere Informationen erhalten Sie im Abschnitt »Stop/Run-Schalter« auf
Seite 121.

Groove Agent
110 Deutsch
Regler und Schalter
Der Zeitskala-Schieberegler
Dieser Regler ist wahrscheinlich der wichtigste des gesamten Instru-
ments. Es handelt sich dabei um eine Zeitachse mit darüber angeordne-
ten, der jeweiligen Ära zugehörigen Stilrichtungen. Durch Verschieben
des Reglers entlang der Zeitachse wählen Sie die gewünschte Stilrich-
tung aus.
Jeder Stilrichtung wurde ein eigenes, speziell für sie zugeschnittenes
Drum-Kit zugeordnet. Viele der älteren Stilrichtungen klingen für heu-
tige Standards unter musikalischen und klanglichen Gesichtspunkten
etwas veraltet. Aber genau darum geht es hier!
Wenn Sie eine Stilrichtung zum ersten Mal auswählen, benötigt das
PlugIn einige Sekunden zum Laden der Samples. Wenn Sie auf eine
andere Stilrichtung umschalten, werden wieder einige Sekunden Lade-
zeit benötigt. Wenn Sie nun zur ersten Stilrichtung zurückschalten, be-
schleunigt sich die Ladezeit wesentlich, denn die Samples befinden
sich noch im Cache-Speicher Ihres Computers. Dies gilt insbesondere
unter Windows. Wenn Sie also mutig genug sind, mehrere Stilrichtun-
gen innerhalb eines Songs zu verwenden, kommt es eventuell beim Stil-
richtungswechsel zu Aussetzern, allerdings nur beim ersten Mal.
In Memory-Speicherplätzen abgelegte Stilrichtungen bleiben geladen,
so dass Groove Agent beim Umschalten nicht »ins Stolpern« gerät.
Die 27 neuen Stilrichtungen in Groove Agent 2 können Sie aufrufen,
indem Sie den Schieberegler auf eine andersfarbig gekennzeichnete
Stilrichtung verschieben, mit der rechten Maustaste darauf klicken
und eine Option aus dem Einblendmenü auswählen.

Groove Agent
Deutsch 111
DEUTSCH
Der Link-Schalter des Zeitskala-Reglers
Durch Auswählen einer Stilrichtung wählen Sie auch
ein speziell dafür angepasstes Drum- und Percussion-
Kit aus, wenn die beiden Hälften des Reglergriffs mit-
einander verbunden sind. Durch Klicken auf den Link-
Schalter heben Sie die Verbindung der beiden Hälften auf, so dass
Sie die Stilrichtung Bossa Nova mit einem Techno-Drum-Kit spielen
können! In diesem Modus wählen Sie mit der oberen Reglerhälfte die
Stilrichtung und mit der unteren Reglerhälfte ein Drum-Kit aus.
Durch erneutes Klicken auf den Link-Schalter kombinieren Sie die bei-
den Reglerhälften wieder und stellen so die ursprüngliche Einstellung
des Reglers wieder her.
❐
Durch das Auswählen eines neuen Drum-Kits müssen häufig zuerst
neue Samples geladen werden. Dies kann einige Sekunden dauern.
❐
Es gibt zwei Methoden zum genauen Einstellen der unteren Reglerhälfte:
Sie können sich am grünen LCD-Fenster orientieren oder den Regler mit
der Maus auf Höhe des letzten Buchstabens einer Stilrichtung verschieben.
Der Complexity-Schieberegler
Auch dieser Regler ist sehr wichtig, denn durch ihn wird Groove Agent
lebendig. Die Bedienung dieses intuitiven Reglers ist nicht schwierig.
Wenn Sie den Regler nach links verschieben, aktivieren Sie weniger
komplexe Rhythmusvariationen. Genau genommen handelt es sich bei
den ersten Einstellungen – A, B, C, D und E – gar nicht um vollständige
rhythmische Figuren. Hier fehlt irgend etwas, sei es die Bass-Drum oder
ein paar Schläge. Wir haben diese Rhythmusvariationen für Song-Intros
oder zum Erzeugen von »ruhiger« Musik hinzugefügt. Vielleicht benötig-
ten Sie für die erste Strophe Ihres Songs ja einen sanften Einstieg?
Durch Verschieben des Reglers nach rechts gelangen Sie in den be-
lebteren Bereich. Hier befinden sich die Variationen 1 bis 20 der aus-
gewählten Stilrichtung. Je weiter Sie den Regler nach rechts bewegen,
desto belebter wird es. Manche mögen die Variationen ganz rechts für
sehr extrem halten, doch das ist gewollt. Dieser Schlagzeuger lässt
halt manchmal »die Sau raus«!

Groove Agent
112 Deutsch
Aus Gründen der Bequemlichkeit und Vorhersehbarkeit werden Vari-
ationswechsel nur an Taktgrenzen eingefügt. Wenn Sie also auf der
zweiten Zählzeit eines Takts von Variation 8 auf Variation 11 umschal-
ten, hören Sie die neue Variation erst ab dem darauf folgenden Takt.
Auf diese Weise können Sie rechtzeitig Fills und gegebenenfalls an-
dere Funktionen einschalten.
Wenn Sie schnell zwischen Variationen umschalten möchten, sollten
Sie sich mit dem Memory-Bereich vertraut machen. Er enthält Funktio-
nen, mit denen Sie in Sekundenbruchteilen zwischen beliebigen Ein-
stellungen umschalten können.
❐
Die Complexity-Variationen 1 bis 15 können als »normal« oder »sinnvoll«
bezeichnet werden.
Der Link-Schalter des Complexity-Reglers
Die 25 Variationen einer Stilrichtung verfügen alle über ein eigenes,
einzigartiges Fill. Durch das Verschieben des Complexity-Reglers auf
eine bestimmte Variation und anschließendes Klicken auf den Fill-
Schalter hören Sie das entsprechende Fill.
Sie können auch die beiden Hälften des Reglergriffs separat verwen-
den. Wenn Sie auf den Link-Schalter klicken, lassen sich die beiden
Hälften separat verschieben. Auf diese Weise können Sie z.B. einen
einfachen Rhythmus mit einem sehr komplexen Fill kombinieren.
Sie können den Link-Schalter auch verwenden, wenn Sie entschieden
haben, dass Sie »nur das Fill Nummer 13« (oder irgendein bestimmtes
anderes Fill) in einem bestimmten Teil Ihres Songs verwenden möchten
– oder sogar im gesamten Song…
Durch erneutes Klicken auf den Link-Schalter werden die beiden Hälf-
ten des Reglergriffs wieder zusammengefügt.
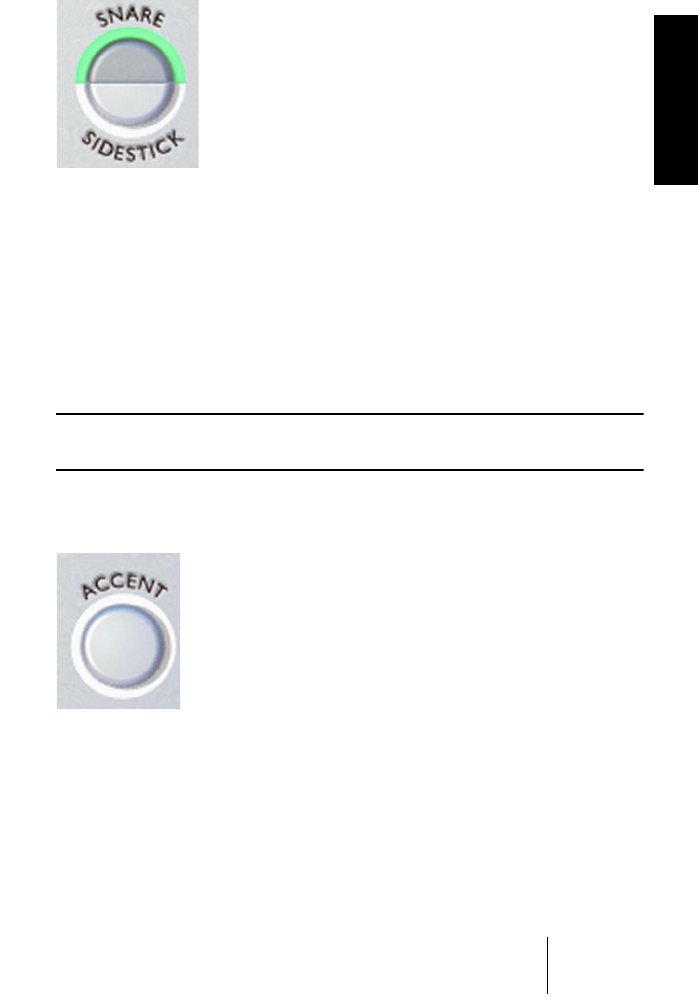
Groove Agent
Deutsch 113
DEUTSCH
Snare/Sidestick-Schalter
Eine oft verwendete traditionelle Schlagtechnik für
die Snare-Drum besteht darin, mit dem quer über
dem Fell liegenden Schlagzeugstock auf den Me-
tallrand zu schlagen. So erzielen Sie einen »leichte-
ren« Klang mit anderer Charakteristik als üblich. Auf
Englisch wird diese Technik »Sidestick« genannt
und der entsprechende Schalter dient zum Um-
schalten zwischen »normalem Anschlag« und
»Sidestick-Anschlag«. Sie können in jeder Variationsebene zwischen
den beiden Modi umschalten.
Obwohl wir uns sehr darum bemüht haben, die Sidestick-Option im-
mer möglichst natürlich und musikalisch richtig klingen zu lassen, gab
es Fälle, in denen es unserer Meinung nach ungeschickt gewesen
wäre, eine Sidestick-Version zu verwenden. Aus diesem Grund ist die
Option zwar für die meisten, jedoch nicht für alle Variationsebenen
des Complexity-Reglers verfügbar.
❐
Die Sidestick-Funktion klingt im Allgemeinen bei den weniger komplexen,
niedrigeren Variationsebenen natürlicher.
Accent-Schalter
Mit diesem Schalter lösen Sie einen gemeinsamen
Schlag von Bass-Drum und Crash-Becken aus. Ver-
wenden Sie dies innerhalb Ihres Songs als Akzent.
Wenn Sie den Akzent auf einem Offbeat (einer nicht
betonten Zählzeit) auslösen, wird er zur Synkope. Die
aktuelle rhythmische Figur wird dabei so lange gehal-
ten, wie Sie den Schalter drücken. Wenn Sie den
Accent-Schalter nach dem Auslösen eines Akzents
auf einem Offbeat noch etwa eine Viertelnote lang gedrückt halten,
erzeugen Sie eine sehr realistisch klingende Synkope.

Groove Agent
114 Deutsch
Fill-Schalter
Dies ist einer der interessantesten Schalter dieses In-
struments! Wenn ein normaler Drumcomputer seine
rhythmischen Figuren wiedergibt und dabei sehr re-
gelmäßig und automatisch jeden achten Takt ein Fill
spielt, klingt dies häufig richtig, aber eben nicht immer.
In Groove Agent sind Sie der Bandleader! Klicken Sie
auf den Fill-Schalter, wenn Sie ein Fill einfügen möchten, und Groove
Agent führt es aus. Wenn Sie den Schalter frühzeitig innerhalb eines
Takts drücken, hören Sie einen größeren Fill-Anteil, als wenn Sie den
Schalter später im Takt drücken. So können Sie selbst wildere Fills in
etwas diskretere verwandeln.
Bitte beachten Sie, dass Fills in den meisten Stilrichtungen mit einem
Crash-Beckenschlag auf der nächsten Eins enden. Durch Stumm-
schalten der Crash-Gruppe können Sie dies verhindern.
Sie können eine rhythmische Figur auch mit einem Fill beginnen. Wenn
Sie im Stop-Modus auf den Fill-Schalter klicken, wird er »scharfge-
schaltet«, so dass Groove Agent mit einem Fill beginnt, sobald Sie auf
den Run-Schalter klicken.
Die niedriger nummerierten Fills sind im Allgemeinen weniger kompli-
ziert als die höher nummerierten.
❐
Einige musikalische Stilrichtungen verfügen über eine deutliche zwei- oder
viertaktige Struktur. Eine ungerade Taktanzahl (wie z.B. eine sieben- oder
neuntaktige Strophe) kann dazu führen, dass solch ein Pattern irgendwie
»falsch« klingt (gefühlsmäßig z.B. einen Takt zu früh oder zu spät). Hier
können Sie mit einem Fill einiges begradigen, denn danach beginnt die
Musik immer bei »Takt 1«.
❐
Mit Fills können Sie auch gute Effekte für das Ende Ihres Songs erzeugen.
Klicken Sie im letzten Takt des Songs auf den Fill- und bei der letzten
Zählzeit auf den Stop-Schalter.

Groove Agent
Deutsch 115
DEUTSCH
Der Schalter »1/2 Tempo Feel«
Schlagzeuger variieren Ihr Spiel oft durch den Ein-
satz eines 1/2 Tempo Feel. Hierbei wird meist das
Bass- und Snare-Drum-Pattern auf das halbe Tempo
verlangsamt, während die HiHat-/Ride-Beckenfigur
normal weiter gespielt wird. Figge, einer der an die-
sem Projekt beteiligten Musiker, schlug vor, diese
Spielweise in Groove Agent mit aufzunehmen. Dies
ist ein echtes Plus, denn kein anderer uns bekannter Drumcomputer
verfügt über diese Funktion – aber alle Schlagzeuger tun es!
Alle Pattern mit 1/2 Tempo Feel in Groove Agent wurden speziell pro-
grammiert, um diesen Trick zu imitieren. Ein sehr offensichtliches Bei-
spiel findet sich in der Stilrichtung Fox. Geben Sie diese rhythmische
Figur in moderatem Tempo wieder und klicken Sie dann auf den
Schalter »1/2 Tempo Feel«. Sie werden feststellen, dass der Spielstil
sich in etwas verwandelt, das dem Funk sehr nahe kommt.
Durch diese Funktion wird die Anzahl der vorhandenen Stilrichtungen
praktisch verdoppelt! Sie können »1/2 Tempo Feel« beispielsweise
auch als grundlegenden Rhythmus für Ihren Song auswählen und die-
sen dann durch erneutes Klicken auf den Schalter »1/2 Tempo Feel«
mit einem im Tempo verdoppelten, gospelartigen Schluss versehen!
❐
Verwenden Sie den Schalter »1/2 Tempo Feel« z.B. bei den Übergängen
Ihrer Songs und schalten Sie für die End-Refrains wieder auf das ur-
sprüngliche Rhythmusmuster zurück. Sie können den Schalter auch in
jedem anderen Songteil verwenden, den Sie hervorheben möchten.
Random-Schalter
Mit diesem Schalter können Sie die rhythmische Figur
bequem und automatisch von Groove Agent variieren
lassen. Die Funktion wechselt die Pattern automatisch
für Sie, so dass die Drum-Sounds weniger statisch und
vorhersehbar klingen. Im grünen LCD-Fenster wird ange-
zeigt, welche Variation gerade wiedergegeben wird. Mit der Random-
Funktion werden nur Variationen aktiviert, die höchstens um ±2 Variati-
onen von der Originalposition des Complexity-Reglers entfernt sind.
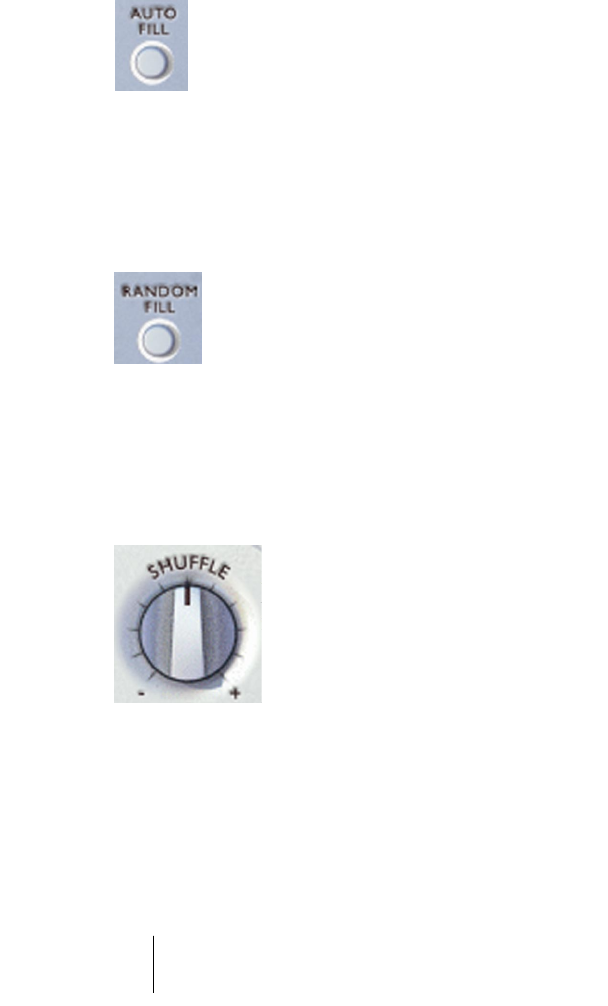
Groove Agent
116 Deutsch
Der Schalter »Auto Fill«
Dies ist ein praktischer kleiner Knopf. Sie können damit Fills
automatisieren. Wenn Sie diese Funktion einschalten und
mit dem Complexity-Regler von einer Rhythmus-Variation
zur nächsten umschalten, spielt Groove Agent automatisch
ein Fill vor der nächsten Variation.
Wenn in Ihrem Sequenzer die Funktion zum automatischen Speichern
eingeschaltet ist, kann diese ein Fill in Groove Agent auslösen. Schal-
ten Sie diese Sequenzer-Funktion daher lieber aus.
Der Schalter »Random Fill«
Auch dieses kleine Werkzeug soll Ihr Leben ein wenig er-
leichtern. Wenn Sie bei ein und derselben Rhythmus-
Variante bleiben und nur hin und wieder ein Fill auslösen
möchten, können Sie durch Einschalten dieser Funktion
leichte Fill-Variationen erzielen.
Ähnlich wie beim Random-Schalter werden nach dem Zufallsprinzip
Fills ausgewählt, die höchstens um ±2 Schritte von der Originalposition
des Complexity-Reglers (und dem dazugehörigen Fill) entfernt sind.
Shuffle-Drehregler
Ein Teil der Musik auf dieser Welt ist in »gerade«
oder auch »gleichmäßige« Einheiten unterteilt. Ach-
tel sind hier sozusagen »gerade« Achtel. Andere
Genres verwenden eine eher triolische Form, wo-
durch der Rhythmus den so genannten »Swing«,
also einen schwingenden, weicheren, rollenden
Charakter erhält.
In der Musik sind diese beiden Typen als »gerade« bzw. »swingende«
Musik bekannt. Um die Dinge noch ein wenig komplizierter zu gestal-
ten, kann swingende Musik entweder auf Achteltriolen basieren (wie
in dem Song »New York, New York«) oder auf triolischen Sechzehn-
telnoten (wie in Stevie Wonders »Sir Duke«).

Groove Agent
Deutsch 117
DEUTSCH
Der Shuffle-Drehregler beeinflusst, wie Achtel oder Sechzehntel auf-
gefasst werden und verhält sich dabei etwas anders als die anderen
Groove Agent-Regler. Wenn Sie eine Stilrichtung mit geradem Rhyth-
mus wiedergeben und den Regler nach rechts (+) drehen, hören Sie,
dass die Musik einen »swingenderen« Charakter erhält (weil die gera-
den Achtel oder Sechzehntel eine eher triolische Form annehmen).
Ein auf Swing basierender Rhythmus lässt sich dagegen durch Dre-
hen des Reglers nach links (-) »begradigen«.
Den Shuffle-Drehregler sollten Sie allerdings mit Vorsicht verwenden.
Wenn Sie z.B. den Drehregler bei Wiedergabe eines geraden Rhyth-
mus in die 7-Uhr-Position drehen oder bei Wiedergabe eines trioli-
schen Rhythmus in die 5-Uhr-Position, klingt das Ergebnis gelinde
gesagt merkwürdig. Verwendung auf eigene Gefahr!
Die normale Reglerposition ist die 12-Uhr-Stellung. In dieser Einstel-
lung werden alle Rhythmen so wiedergegeben, wie sie ursprünglich
komponiert wurden.
❐
Für einen Cajun-, Zydeco- oder New Orleans-Swing-Stil sollten Sie eine
»gerade« Stilrichtung verwenden und den Shuffle-Drehregler nach
rechts drehen (etwa bei 57 bis 60%). Der entsprechende Prozentwert
wird im grünen LCD-Fenster angezeigt.
Humanize-Drehregler
Die Groove Agent zugrunde liegende Musik
wurde mit großer Sorgfalt und Musikalität aufge-
nommen. Wenn Sie trotzdem einige eher natürli-
che Variationen hinzufügen möchten, können Sie
mit diesem Regler das Spiel des Instruments hin-
sichtlich Timing und Dynamik zusehends »unge-
nauer« gestalten.
Die normale Reglerposition ist die Off-Position.
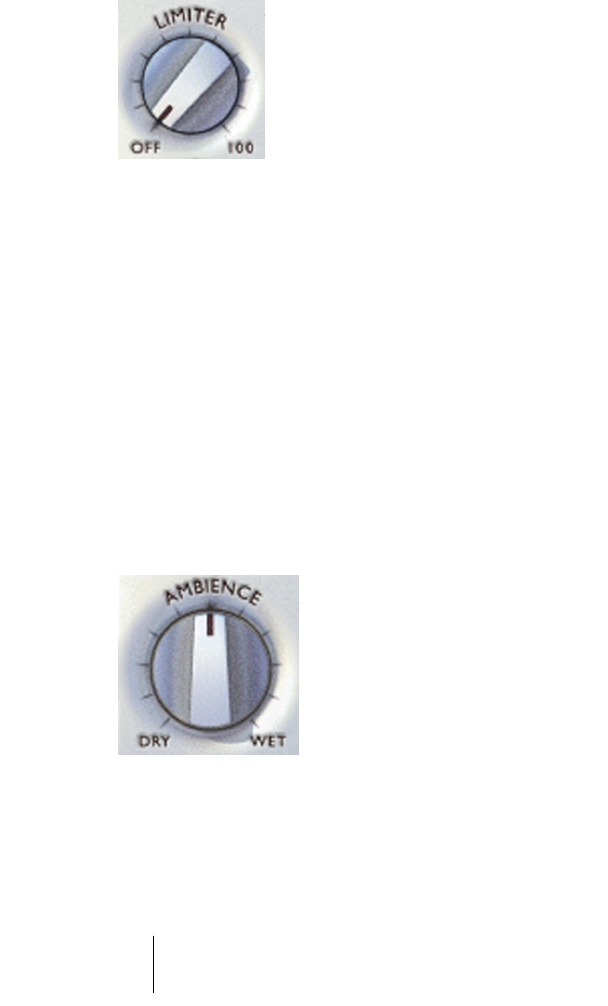
Groove Agent
118 Deutsch
Limiter-Drehregler
Das wichtigste Instrument für einen Toningenieur
bei der Aufnahme von Schlagzeug ist wahrschein-
lich ein Dynamikprozessor – z.B. ein Kompressor
oder Limiter.
Wir haben in Groove Agent einen einfachen Limi-
ter integriert, damit Sie schnell eine Möglichkeit
zur Dynamiksteuerung zur Hand haben.
Wenn Sie das Gefühl haben, dass die Drums sich im musikalischen
Mix nicht ausreichend durchsetzen, kann Ihnen dieser Limiter dabei
helfen, einen konsistenteren und damit höheren Schalldruckpegel zu
erzeugen.
Der Regler steuert eigentlich vier Stereo-Limiter gleichzeitig. Auch
wenn Sie einzelne Gruppen verschiedenen Ausgängen zuordnen, be-
einflusst die über den Ausgang Out 1 ausgegebene laute Bass-Drum
dennoch das über den Ausgang Out 3 ausgegebene Crash-Becken.
Dadurch ist der Limiter intuitiver.
Bitte vorsichtig einsetzen!
Normalerweise ist dieser Regler auf den Minimalwert eingestellt (Off-
Position).
Ambience-Drehregler
Dieser Drehregler ist einer der großen Plus-
punkte von Groove Agent! Alle akustischen
Schlagzeug- und Percussion-Instrumente wur-
den mit folgenden Techniken aufgenommen:
•Jedes Instrument wurde mit einem sehr nah aufgestellten Mikrofon aufgenom-
men, was in einem sehr trockenen Klang resultiert.
• Jedes Instrument wurde mit Overhead-Mikrofonen aufgenommen, was einen
sehr trockenen Klang, aber auch ein schönes Stereobild bewirkt.

Groove Agent
Deutsch 119
DEUTSCH
•Jedes Instrument wurde mit Raummikrofonen aufgenommen, die in etwa zwei
Meter Entfernung zur Klangquelle positioniert wurden. Dies ergab einen war-
men, räumlichen Klang.
• Jedes Instrument wurde mit einem Paar Raummikrofonen aufgenommen, die
in mehr als sieben Meter Entfernung zur Klangquelle positioniert wurden. Wir
reden also über einen wirklichen Raumanteil im Klang! Diese Aufnahmen ha-
ben einen deutlichen Hall!
• Die neuen Drum-Sounds in Groove Agent 2 wurden mit elektronischem und
elektromechanischem Hall aufgenommen.
Bei der endgültigen Zusammenstellung der Groove Agent-Klangbibli-
othek haben wir uns sehr viel Mühe gemacht. Beim Kit der 50er Jahre
haben wir die nahen Mikrofone für Drums und HiHat und die Over-
heads für die Becken verwendet. Dann haben wir die entfernteren
Aufnahmen für die Räumlichkeit hinzugefügt. Mit diesem traditionellen
Klang konnten wir altklingende, akustische Kits erzeugen.
Für andere Kits haben wir andere Kombinationen verwendet und bei
den modernen elektronischen Sounds haben wir normale Studioeffekt-
geräte wie Hall oder Echo eingesetzt.
Alles in allem steht Ihnen eine sehr natürlich klingende Räumlichkeit
zur Verfügung! Wir haben eine ganze Menge verschiedener Drum-Kits
für die unterschiedlichen musikalischen Stilrichtungen voreingestellt.
Wenn Sie die voreingestellte Version verändern möchten, verwenden
Sie diesen Regler und lassen Sie sich von Ihren Gefühlen leiten!
Dieser Regler ist auch der Masterregler für die acht individuellen
AMB-Drehregler (siehe Seite 123).
Die normale Einstellung dieses Reglers ist die 12-Uhr-Stellung. Wenn
Sie den Regler ganz nach links drehen, erzielen Sie einen trockenen
Klang, wenn Sie ihn nach rechts drehen, einen räumlichen Klang.
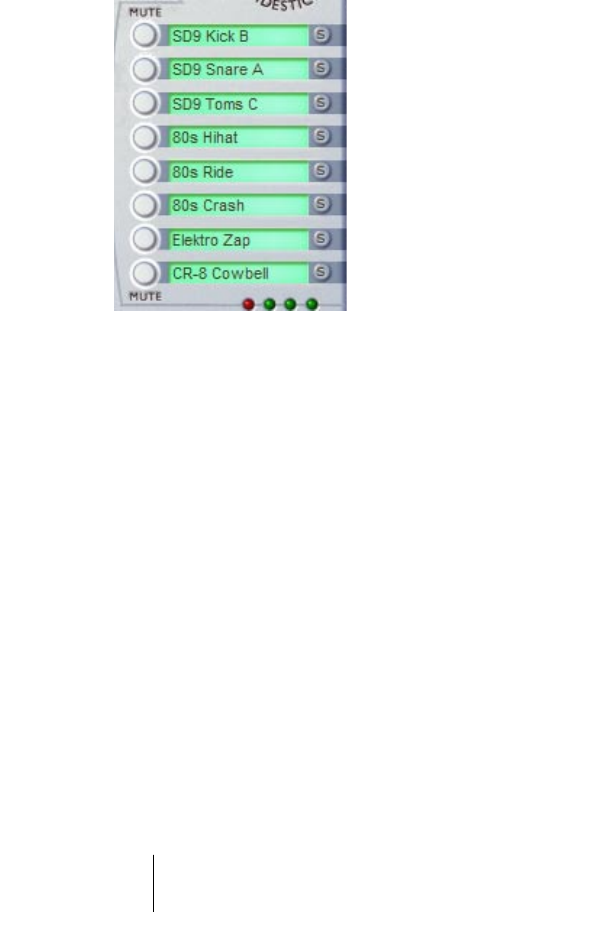
Groove Agent
120 Deutsch
Auswählen der Instrumente, Stummschalten
und Gruppieren
Die Groove Agent-Klänge sind in acht logische Gruppen untergliedert:
1. Bass-Drum (Kick-Drum)
2. Snare-Drum
3. Toms oder Effekte
4. HiHat
5. Ride- und Chinesische Becken
6. Crash- und Splash-Becken
7. Percussion-Gruppe 1 (meist »hohe
und schnelle« Instrumente)
8. Percussion-Gruppe 2 (meist »tiefe
und langsame« Instrumente)
Sie können den entsprechenden Mute-Schalter zum Stummschalten
der jeweiligen Gruppe verwenden. Wenn der Mute-Schalter einge-
schaltet ist, wird kein Klang ausgegeben.
Eine willkommene Neuigkeit in Groove Agent 2 sind die Solo-Schalter.
Wenn Sie ein gesamtes Drumkit anhören und nur eines der Instrumente
verändern möchten, können Sie den Solo-Schalter für diese Gruppe
einschalten, so dass nur diese eine Gruppe zu hören ist. Wenn der
Solo-Schalter ausgeschaltet ist (nicht aufleuchtet), sind alle Gruppen
zu hören.
Wenn Sie sich die voreingestellten Stilrichtungen und die entspre-
chenden Drum-Kits anhören, verspüren Sie vielleicht den Wunsch, zu
experimentieren und einzelne Instrumente bzw. ganze Gruppen aus-
zutauschen. Wenn Sie auf eines der grünen Felder klicken, wird eine
Liste angezeigt, in der Sie Instrumente auswählen können. Tauschen
Sie einfach die knallharte Studio-Kick der 80er durch eine dumpfe
Jazz-Kick der 50er Jahre aus und hören Sie sich das Ergebnis an!

Groove Agent
Deutsch 121
DEUTSCH
Stop/Run-Schalter
Mit diesen Schaltern starten und stoppen Sie Groove Agent. Das In-
strument lässt sich auch verwenden, wenn der Host-Sequenzer ge-
stoppt ist. Es verwendet aber immer dessen Tempo (BPM-Einstellung).
Wenn Ihr Sequenzer läuft, folgt Groove Agent dem Tempo und läuft
synchron zur Taktposition.
Mit der folgenden Methode können Sie Groove Agent simultan mit
Ihrem Sequenzer starten:
1. Starten Sie Ihren Sequenzer.
2. Starten Sie Groove Agent.
3. Stoppen Sie den Sequenzer.
Wenn Sie nun den Sequenzer erneut starten, beginnt Groove Agent
ebenfalls mit der Wiedergabe! Wenn der Run-Schalter eingeschaltet
ist, leuchtet eine grüne Umrahmung um den Schalter auf. Dies eignet
sich für Situationen, in denen die Drums mit dem Beginn des Songs
oder eines bestimmten Abschnitts einsetzen sollen.
Neu in Groove Agent 2 ist die Möglichkeit, ein bevorzugtes Stop/Run-
Verhalten zu bestimmen. Klicken Sie dazu mit der rechten Maustaste
auf das Groove Agent-Bedienfeld bzw. mit der linken Maustaste auf
das Groove Agent-Logo. Wählen Sie aus dem Untermenü »When
Host Stops« die Option »Pause Playback«, um den Drumcomputer in
den Pause-Modus zu setzen, wenn die Host-Applikation stoppt.
Wenn Sie im Untermenü »When Host Stops« den Modus »Stop Play-
back« einschalten, müssen Sie Groove Agent 2 manuell neu starten.
Unterschiedliche Situationen erfordern unterschiedliche Modi.
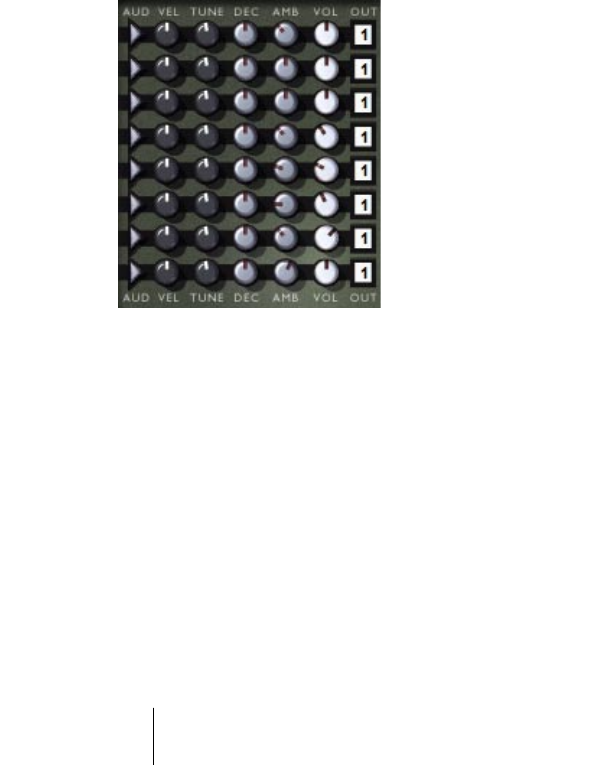
Groove Agent
122 Deutsch
Weitere Funktionen
Bisher haben wir nur die Funktionen beschrieben, die sich auf der
Oberfläche von Groove Agent befinden. Der dunkle Bereich hinter
dem grünen LCD-Fenster enthält aber nicht nur die Pegelanzeigen,
sondern hier verbirgt sich auch der Editierbereich von Groove Agent.
Klicken Sie auf den Edit-Schalter in der rechten unteren Ecke des
Groove Agent-Bedienfelds, um diesen Bereich zu öffnen.
Die Klangbearbeitung
Im mittleren Bereich des Groove
Agent-Bedienfelds finden Sie acht
Reihen mit Steuerelementen. Die
Funktionen sind für alle acht
Instrumentengruppen identisch.
Die Standardeinstellung ist für alle
Regler die Mittenposition (12 Uhr).
Aud – Mit diesem Taster können Sie den – im Bereich direkt links da-
neben ausgesuchten – Klang auslösen und hören. Dies ist praktisch,
wenn Sie die ursprünglichen Klänge und das Ergebnis Ihrer Bearbei-
tung klanglich überprüfen möchten.
Vel – Mit diesem Velocity Offset-Regler können Sie die Ansprechemp-
findlichkeit des betreffenden Klangs verändern. Wenn Sie den Regler
nach links drehen, werden die für das Instrument eingehenden MIDI-
Anschlagsdynamikwerte vermindert, wodurch gedämpfter klingende
Samples verwendet werden. Wenn Sie den Regler über den 12-Uhr-
Punkt hinaus nach rechts drehen, werden die für das Instrument einge-
henden MIDI-Anschlagsdynamikwerte erhöht, was einen härteren und
lauteren Klang bewirkt. Zum Kompensieren der hierdurch erhöhten
oder verminderten Lautstärke im Gesamtausgang existiert für jeden
Gruppenausgang ein Pegelregler (VOL).

Groove Agent
Deutsch 123
DEUTSCH
Mit dem VEL-Regler können Sie einen akustischen Schlagzeugklang
sehr schnell weicher oder härter gestalten.
Tune – Mit diesem Regler lässt sich jede Gruppe um bis zu 12 Halb-
töne nach oben bzw. unten verstimmen. Beachten Sie, dass der Reg-
ler aus praktischen Gründen im Bereich seiner 12-Uhr-Einstellung
über eine wesentlich feinere Auflösung verfügt als im übrigen Bereich.
Dec – Durch das Verändern des Ausklangverhaltens (Decay) kann ein
Klang auf interessante Weise verändert werden, besonders wenn er –
wie unsere akustischen Drum- und Percussion-Klänge – mit eigener
Räumlichkeit aufgenommen wurde. Eine normale Snare kann auf
diese Weise wie eine extrem gedämpfte Trommel klingen oder sich
wie durch ein Gate geschickter Hall anhören.
Amb – Mit diesem Regler lässt sich für jede Gruppe eine Feinrege-
lung des Anteils an Räumlichkeit (Englisch: Ambience) herstellen. Der
Ambience-Drehregler (im »metallenen« Teil der Oberfläche, links un-
ten im Groove Agent-Bedienfeld) dient hierbei stets als Hauptregler.
Wenn Sie diesen auf eine 12-Uhr-Position einstellen, können Sie die
Feineinstellungen leichter vornehmen.
Vol – Mit diesem Pegelregler können Sie den Gesamtpegel der jewei-
ligen Instrumentengruppe einstellen.
Out – Jede Gruppe kann einem der 1-8 vorhandenen Stereo-Aus-
gänge (Outputs) zugeordnet werden. Das ist z.B. dann sinnvoll, wenn
Sie eine oder mehrere Gruppen mit externen EQ-Einstellungen oder
Effekten bearbeiten möchten.
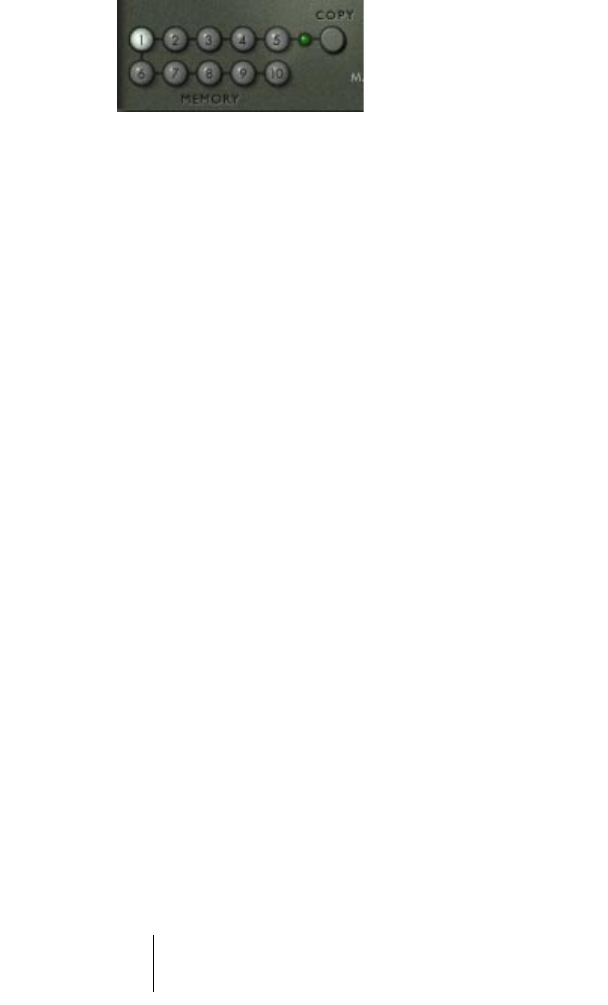
Groove Agent
124 Deutsch
Memory – Die Speicherplätze
Wenn Sie Groove Agent zum ersten
Mal starten, leuchtet der erste Me-
mory-Schalter auf. Das bedeutet, dass
er aktiv ist, »zuhört«, und jede Ände-
rung registriert, die Sie vornehmen.
Sie müssen diesen Speicherplatz
nicht aktivieren, er ist stets aktiv.
Mit dem Copy-Taster kopieren Sie die aktuellen Einstellungen des
Bedienfelds von Groove Agent in einen der zehn vorhandenen Spei-
cherplatz-Schalter. Klicken Sie auf »Copy« und danach auf einen der
Speicherplätze, dann wird der Kopiervorgang ausgeführt.
Wenn der Speicherplatz-Schalter dunkel dargestellt wird, ist der
Speicherplatz leer. Wenn der Schalter eine grünliche Färbung auf-
weist, sind auf diesem Speicherplatz Einstellungen gespeichert. Der
Schalter des gerade aktiven Speicherplatzes leuchtet hell auf.
Jeder der 10 Speicherplätze kann zum Speichern aller Einstellungen
des gesamten Instruments verwendet werden. Nehmen wir an, Sie ha-
ben bei aktivem Speicherplatz 1 beispielsweise eine Gesamteinstel-
lung vorgenommen, die für die Strophen in Ihrem Song passend ist.
Wenn Sie auf den Copy-Taster und danach auf den Speicherplatz-
Schalter Nummer 2 klicken, werden nun alle in Speicherplatz 1 vorlie-
genden Informationen auch im Speicherplatz 2 gespeichert. Dieser wird
zum aktiven Speicherplatz und Sie können sich nun dem Einstellen des
richtigen Klangs z.B. für den Refrain widmen. Sie können alles auspro-
bieren, was Sie möchten, denn die perfekte Stropheneinstellung bleibt
ja weiterhin in Speicherplatz 1 gesichert. (Das beschriebene Vorgehen
ermöglicht zwar nicht das Optimum an Flexibilität beim Verwenden von
Groove Agent, kann aber als eine Methode zum Automatisieren ange-
sehen werden).
Ein weiterer Vorschlag: Da in den Speicherplätzen jeweils alle Einstel-
lungen der gesamten Benutzeroberfläche des Instruments gespeichert
werden, können Sie schnell zwischen Stilrichtungsvariationen und so-
gar völlig verschiedenen Stilrichtungen und Drum-Kits hin- und her-

Groove Agent
Deutsch 125
DEUTSCH
schalten! Das Szenario mag zwar nicht gerade realistisch anmuten
(oder kennen Sie einen Schlagzeuger, der durch Fingerschnippen mal
eben ein ganzes Schlagzeug austauschen kann?), aber Sie erhalten
auf diese Weise sehr flexible Möglichkeiten!
❐
Wenn Sie Ihre Groove Agent-Einstellungen als Bank (im .fxb-Format)
speichern, bleiben alle in den Speicherplätzen gespeicherten Informatio-
nen erhalten.
Master Volume-Regler
Wie der Name »Master Volume« schon sagt, dient
dieser Regler zum Steuern des Gesamtausgangspe-
gels dieses Instruments. Wenn Sie mehrere Aus-
gänge verwenden, steuert der Master Volume-Regler
den Ausgangspegel aller dieser Ausgänge.
Neu in Groove Agent 2 ist die Tatsache, dass die Audioaktivität stoppt,
wenn der Master Volume-Regler auf den Minimalwert eingestellt ist.
Wenn Sie Groove Agent 2 als reinen MIDI-Player verwenden und kei-
nen der internen Sounds benutzen (lediglich als Controller für externe
Drum-Sounds), können Sie auf diese Weise CPU-Leistung sparen.

Groove Agent
126 Deutsch
Der Setup-Bereich
Wenn Sie auf den geriffelten
Schalter unterhalb des grünen
LCD-Fensters klicken, wird der
Setup-Bereich geöffnet. Hier sind
die wirklich geheimen Funktionen
versteckt. Wenn Sie auf den CLOSE-Schalter rechts unten im Groove
Agent-Bedienfeld klicken, werden die Funktionen wieder ausgeblendet.
Im Folgenden werden die einzelnen Funktionen des Setup-Bereichs ge-
nauer beschrieben.
Die Funktion »MIDI Output«
Eine fantastische Eigenschaft von Groove Agent ist seine Fähigkeit,
einen MIDI-Part zu schreiben, der die Noten enthält, die Sie gerade
hören! Wenn Sie diesen Schalter auf seine ON-Position einstellen, er-
öffnet sich eine ganze Reihe neuer Möglichkeiten!
Wenn Sie das Schlagzeug in Echtzeit arrangieren, während sich Ihr
Sequenzer im Aufnahmemodus befindet (Sie sollten es probieren –
gerade für diese Arbeitsmethode wurde Groove Agent entwickelt),
wird währenddessen ein MIDI-Part erzeugt. Diesen Part können Sie
anschließend öffnen und folgende Bearbeitungsschritte vornehmen:
• Löschen, Hinzufügen, Kopieren oder Verschieben von Noten.
•Kopieren eines beliebigen Teils des neuen Parts in einen anderen Bereich des
Songs oder aber in einen völlig anderen Song.
• Anwenden einer anderen Quantisierungsart oder Dynamikeinstellung.
•Kopieren Sie z.B. den gesamten Part, löschen Sie die Bass-Drum im Original-
Part und löschen Sie die anderen Instrumente in der Kopie des Parts, die auf
einer anderen Spur positioniert wurde. Nun können Sie die Bass-Drum-Noten
einem anderen virtuellen oder physischen Instrument zuordnen, z.B. Ihrem
Lieblingssampler. Wenn Sie eine Cubase-Drum-Map verwenden, wird der ge-
samte Vorgang noch leichter.

Groove Agent
Deutsch 127
DEUTSCH
❐
Die Funktion »MIDI Output« gehört zum Randbereich des VST 2.0-Proto-
kolls. Wir bewegen uns damit an der Grenze der Möglichkeiten und
können die Wirkung der Funktion »MIDI Output« in anderen Host-Pro-
grammen nicht vorhersehen. Wir garantieren nur, dass die Funktion in
Steinbergs Cubase und Nuendo richtig funktioniert.
Wenn Sie ein Programm verwenden, das die MIDI-Ausgabe durch ein
VST-Instrument nicht wie oben beschrieben verarbeiten kann, müssen
Sie beim Erstellen Ihrer Arrangements die Automationsmöglichkeiten
des Programms verwenden. Bitte lesen Sie auch die Beschreibung
der neuen Funktion »Live <> File« im folgenden Abschnitt.
• Es ist normalerweise sinnvoll, den SysEx-Filter (Filter, der SysEx-Daten
aus dem Datenstrom entfernt) Ihres Sequenzers zu aktivieren, wenn Sie
Groove Agent verwenden. Wenn Sie SysEx-Daten nicht herausfiltern,
werden die Run- und Stop-Befehle in den MIDI-Part aufgenommen, wo-
durch Groove Agent je nach eingehenden Daten plötzlich mitspielt oder
eben nicht. Wenn Sie SysEx-Daten herausfiltern, werden Run- und Stop-
Befehle nicht Bestandteil des MIDI-Parts, was das Leben erheblich er-
leichtert.
❐
Es ist ratsam, die Auto-Quantize-Funktion des Sequenzers auszuschalten,
wenn Groove Agent eine MIDI-Spur aufnimmt. Sie können das Schlagzeug
später immer noch quantisieren.
Wenn die Funktion »MIDI Output« eingeschaltet ist, wird
dies durch ein kleines MIDI-Steckersymbol unten im grünen
LCD-Fenster angezeigt.
Live <> File
Dies ist eine weitere neue Funktion in Groove Agent 2, mit der Sie
festlegen können, ob die MIDI-Ausgabe, wie oben beschrieben, an ei-
nen MIDI-Part in Ihrer Host-Applikation oder an eine MIDI-Datei auf
dem Desktop geschrieben werden soll.
Wenn Sie die Funktion »MIDI Output« auf »ON« und die Funktion
»Live <> File« auf »File« schalten, nimmt Groove Agent 2 eine MIDI-
Datei für Sie auf und legt diese direkt auf dem Desktop ab. Setzen Sie
die Funktion »MIDI Output« anschließend wieder auf »OFF« (so erhält

Groove Agent
128 Deutsch
Groove Agent 2 die Anweisung, diese Datei zu schreiben). Sie können
diese MIDI-Datei dann in Ihren Song importieren, um sie dort weiter zu
bearbeiten. Verwenden Sie dazu einfach die Funktion »Import MIDI File«
in Ihrer Host-Applikation oder importieren Sie sie durch Ziehen und Ab-
legen. Beachten Sie, dass die zuvor aufgenommene MIDI-Datei über-
schrieben wird, wenn Sie Groove Agent 2 in diesem Modus starten.
Klicken Sie mit der rechten Maustaste an eine leere Stelle im Bedien-
feld bzw. mit der linken Maustaste auf das Groove Agent-Logo, um
diese Funktion über das Kontextmenü aufzurufen.
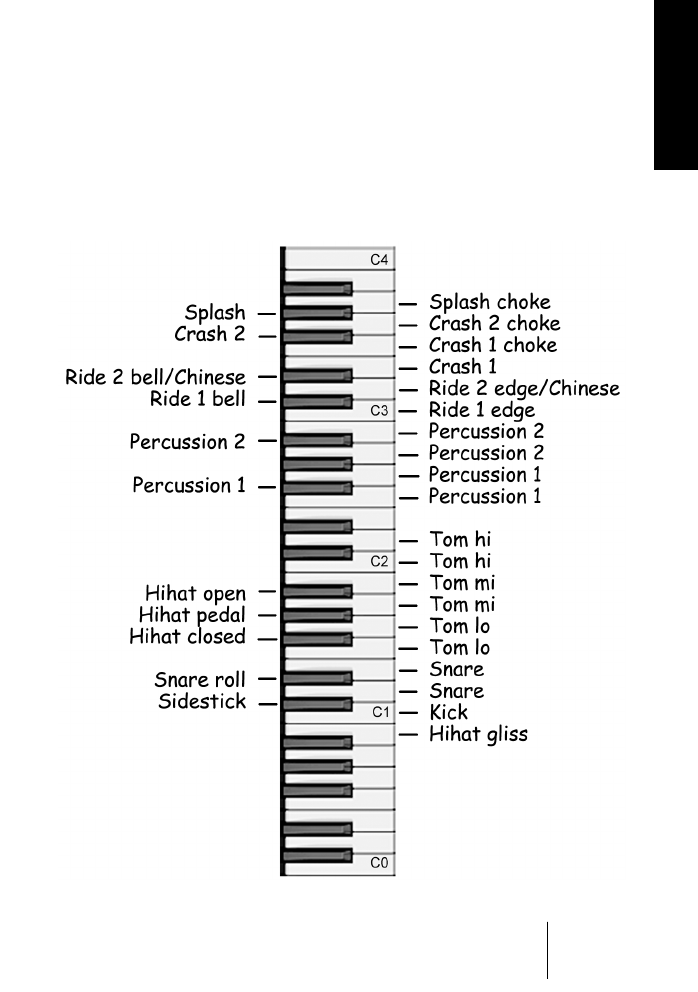
Groove Agent
Deutsch 129
DEUTSCH
Die GM Output-Funktion
Wir wenden uns gleich der Ausgabe im General MIDI-Format (GM)
zu, doch zunächst ein paar Hintergrundinformationen.
Als wir Groove Agent entwickelten, mussten alle Musiker dieselbe
Tastaturzuordnung verwenden. Sie können die Zuordnung erkennen,
wenn Sie die Funktion »MIDI Output« verwenden und sich den von
Groove Agent erzeugten MIDI-Part ansehen. Sie beginnt wie eine ge-
wöhnliche GM-Zuordnung mit der Bass-Drum auf C1, dem Sidestick
auf C#1 usw. Aber nach Tom 1 werden Sie Unterschiede feststellen.
Es gibt zwei Gruppen von Percussion-Instrumenten und noch eine
Anzahl von Ride- und Crash-Becken oberhalb der Notenposition C3.

Groove Agent
130 Deutsch
Wir haben diese Notenzuordnung entwickelt, aber ehrlich gesagt
müssen Sie sich nicht unbedingt damit befassen. Wenn Sie einen
durch Groove Agent erzeugten MIDI-Part bearbeiten, werden Sie
wahrscheinlich sowieso das Lautsprechersymbol im Editor aktiviert
haben, so dass Sie beim Überprüfen der jeweiligen Noten die zugehö-
rigen Klänge hören können.
Wenn Sie außerdem die GM Output-Funktion aktivieren, indem Sie
diesen Schalter auf seine ON-Position einstellen, leitet Groove Agent
die Ausgangsnoten automatisch so um, dass sie dem General MIDI-
Protokoll entsprechen.
Wenn die GM Output-Funktion eingeschaltet ist, wird dies
durch ein kleines GM-Symbol unten im grünen LCD-Fens-
ter angezeigt.
Ambience Split
Sie können festlegen, dass Groove Agent den räumlichen Anteil oder
verhallte Klänge über einen separaten Mixerkanal-Ausgang ausgibt.
Dies ist praktisch, wenn Sie diese Klangbestandteile separat bearbei-
ten möchten. Wenn diese Funktion aktiviert ist, gibt nur der Mixerka-
nal-Ausgang mit der höchsten Nummer die Effekt-Sounds aus.
Was also lässt sich mit dem separat ausgegebenen räumlichen Signal
anfangen? Nun, mit EQ oder Dynamikbearbeitung lassen sich hier inte-
ressante Effekte erzielen. Sie können die mit Groove Agent erzeugten
Schlagzeug-Sounds auch als Audiodatei exportieren und mit dem se-
paraten räumlichen Signal experimentieren. Wie klingt es beispiels-
weise, wenn das räumliche Signal ein wenig später einsetzt – oder zu
früh? Oder Sie kombinieren den trockenen Klang einer Techno-Snare
mit dem räumlichen Signal einer Piccolo-Snare…?
Viel Spaß beim Experimentieren!
Wenn »Ambience Split« eingeschaltet ist, wird dies durch
ein kleines Symbol unten im grünen LCD-Fenster angezeigt,
das eine in zwei Stränge aufgespaltene Klangkette darstel-
len soll.

Groove Agent
Deutsch 131
DEUTSCH
Die Vintage Mode-Funktion
Wir haben uns bemüht, die Wirkung der mit dem Zeitskala-Regler aus-
wählbaren authentischen Stilrichtungen und Klänge überzubetonen, in-
dem wir besondere Filtermethoden verwendet und die Stereobreite
vermindert haben. Ziel war es, den Schlagzeug-Sound einer altmodi-
schen Stilrichtung auch entsprechend »alt« klingen zu lassen. Doch es
gibt sicher auch Fälle, in denen Sie diesen Effekt ausschalten möchten.
Dazu dient der Schalter »Vintage Mode«. Wenn Sie ihn ausschalten,
wird die gesamte Emulation der altmodischen Klänge deaktiviert.
Die Vintage Mode-Funktion ist nur Bestandteil von Stilrichtungen zwi-
schen 1950 und 1975 und am deutlichsten in den früheren Genres
zu hören.
Bei aktiver Vintage Mode-Funktion wird unten im grünen
LCD-Fenster ein kleines Grammophonsymbol angezeigt.
Reset All-Taster
Dieser Taster ist praktisch, wenn Sie Ihr eigenes Schlagzeug von Grund
auf neu zusammenstellen möchten. Dies kann z.B. der Fall sein, wenn
Sie Groove Agent als reines Soundmodul verwenden. Durch das Drü-
cken des Reset All-Tasters werden alle Einträge in den Gruppenspalten
entfernt und die Steuerelemente auf ihre Grundeinstellungen zurückge-
setzt.
Wenn Sie sich beim Editieren eines Kits einer bestimmten Stilrichtung
einmal völlig vergaloppieren, können Sie immer zum Original zurück-
kehren, indem Sie zunächst eine andere Stilrichtung auswählen und
dann zu derjenigen zurückkehren, die Sie zuvor verwendet haben.

Groove Agent
132 Deutsch
Erzeugen einer Drum-Spur in Groove Agent
Die Ausgangsposition für das Hinzufügen von Schlagzeug-Sounds
kann z.B. folgendermaßen aussehen:
1. Sie haben noch nichts in Ihren Sequenzer eingespielt, verfügen aber
über klare musikalische Ideen und möchten mit den Drums beginnen.
2. Sie haben bereits ein paar Instrumente und/oder Stimmen aufgenom-
men und möchten nun ein Schlagzeug-Arrangement hinzufügen.
Groove Agent stellt mindestens drei unterschiedliche Methoden zum
Erstellen einer Drum-Spur zur Verfügung:
•Methode 1: Spielen Sie mit Groove Agent in Echtzeit die Drums für
Ihren Song ein und verwenden Sie die Sequenzer-Automation, um all
Ihre Bewegungen aufzuzeichnen. Letztere können auch »nicht-musika-
lische« Vorgänge, wie das Verändern von Klangparametern beinhalten.
Vorteil: Nach der Aufnahme können Sie Ihre Bewegungen mit großer Genauigkeit be-
arbeiten. Das Verändern von Steuerelementen wird in Form editierbarer MIDI-Daten
aufgenommen. Dies ist eine der möglichen Lösungen, falls Sie einen Sequenzer ver-
wenden, der keine MIDI-Ausgabe durch ein VST-Instrument akzeptiert.
Nachteil: Auf diese Weise können Sie die einzelnen »Schläge« nicht bearbeiten. Sie
können jedoch immer einzelne Schläge des Schlagzeugs live über Ihr MIDI-Keyboard
hinzufügen.
•Methode 2: Spielen Sie mit Groove Agent in Echtzeit die Drums für Ih-
ren Song ein und verwenden Sie die Groove Agent-Regler zum Erzeu-
gen einer lebendigen Drum-Spur. Ihr Sequenzer nimmt die von Groove
Agent ausgegebenen MIDI-Noten in einem MIDI-Part auf. Hierzu muss
der Schalter »MIDI Output« aktiviert sein. Dies ist wahrscheinlich der in-
tuitivste und kreativste Ansatz zum Erstellen einer Drum-Spur.
Vorteil: »Was-Sie-hören-ist-das-was-Sie-erhalten". Der entstehende Drum-Part ist iden-
tisch mit dem von Ihnen gespielten Ablauf. Zudem ist das Löschen, Hinzufügen, Kopieren
oder Bewegen von Noten innerhalb des erzeugten Drum-Parts – sowie darüber hinaus –
sehr leicht möglich. Sie können Noten gegebenenfalls umleiten, um Drum-Sounds anderer
Instrumente – z.B. eines Samplers – zu spielen.
Nachteil: Wenn es Ihnen in starkem Maß um dynamische Kontrolle geht, wie z.B. um das
Ein- und Ausblenden des Limiter-Drehreglers oder um das Umschalten zwischen Snare-
Drums während eines Songs, werden diese Vorgänge leider nicht mit den MIDI-Daten zu-
sammen ausgegeben. Die ausgegebenen Daten enthalten nur die MIDI-Noten, die Groove
Agent spielt.

Groove Agent
Deutsch 133
DEUTSCH
❐
Sie können diese beiden Arbeitsansätze natürlich kombinieren, indem Sie
Groove Agent zunächst so automatisieren, dass der Song skizziert vorliegt
und dann seine MIDI-Ausgabe für Feinarbeiten auf eine MIDI-Spur aufneh-
men. Stellen Sie sich das Ganze so vor, als ob Groove Agent Daten auf
eine MIDI-Spur exportierte, ähnlich dem Ausgeben von PlugIn-Audiodaten
auf eine Audiospur. Sie können die Ausgabe des Groove Agent natürlich
auch auf eine Audiospur exportieren.
•Methode 3: Erzeugen Sie zunächst mit Hilfe der Speicherplätze in
Groove Agent eine Reihe von Einstellungen, z.B. eine für die Strophen,
die nächste für den Refrain usw. Wenn Sie mit Ihren gespeicherten Ein-
stellungen zufrieden sind, können Sie den Song skizzieren, indem Sie
die einzelnen gespeicherten Einstellungen durch Umschalten während
der Wiedergabe aufrufen.
Vorteil: Da in den Speichereinstellungen wirklich alle Groove Agent-Einstellungen enthal-
ten sind, ist dies der einzige Weg, um direkt zwischen unterschiedlichen rhythmischen
Variationen oder sogar Stilrichtungen und Drum-Kits umzuschalten! Verwenden Sie
diese Methode, wenn es Ihnen um wirklich drastische Veränderungen geht.
Nachteil: Das Umschalten zwischen voreingestellten Szenarien kann ein wenig statisch
wirken. Fills und Echtzeit-Variationen müssen separat aufgenommen oder programmiert
werden.
❐
Kreative Musiker können alle diese Methoden kombinieren, um die
bestmögliche Drum-Spur zusammenzustellen, die einen editierbaren
MIDI-Teil enthält und sich bewegende Regler sowie sofortiges Umschal-
ten zwischen Variationen, Stilrichtungen und Drum-Kits ermöglicht!
Hier noch ein etwas anderer Vorschlag: Stellen Sie einen passenden
MIDI-Controller – z.B. ein fünfoktaviges MIDI-Keyboard – so ein, wie
Sie es möchten (siehe Seite 162). Nehmen Sie damit eine MIDI-Per-
formance auf, die das Starten, Stoppen und Auswählen von Pattern
enthält, sowie Fills, Parameteränderungen und individuelle Schläge
beinhaltet. Diese Methode funktioniert unabhängig davon, ob Groove
Agent MIDI-Daten ausgibt oder nicht.

Groove Agent
134 Deutsch
Verwenden der MIDI-Ausgabe von Groove
Agent in Cubase SX
Wir sind nicht sicher, wie unterschiedliche Host-Applikationen mit den
von Groove Agent ausgegebenen MIDI-Noten umgehen werden (so-
weit wir wissen, ist Groove Agent das erste Instrument, das diese Mög-
lichkeit zur Verfügung stellt), aber Cubase SX-Benutzer können diese
Eigenschaft mit Sicherheit anwenden. Gehen Sie folgendermaßen vor.
1. Öffnen Sie Groove Agent über das Fenster »VST-Instrumente« von
Cubase SX. Wählen Sie als Eingang der gewünschten MIDI-Spur
Groove Agent aus (und deselektieren Sie das Instrument als MIDI-
Ausgang, um das Auslösen doppelter Noten – sog. Doppeltrigger –
zu vermeiden). Öffnen Sie die Edit- und Setup-Bereiche in Groove
Agent und aktivieren Sie die Funktion »MIDI Output«. Die Auto-Quan-
tisierung sollte in Ihrem Sequenzer in der Regel ausgeschaltet sein.
Nun können Sie mit der Aufnahme Ihrer Drum-Spur beginnen.
2. Starten Sie die Aufnahme in Cubase SX. Nehmen Sie das Schlagzeug
auf. In diesem Modus werden die Einstellungen für Limiter, Ambience
und Drum-Sounds nicht mit aufgenommen, sondern nur die von Groove
Agent gespielten Schlagzeugnoten. Wenn der Song oder Songab-
schnitt vorüber ist, klicken Sie auf den Stop-Schalter in Groove Agent
und danach auf den Stop-Schalter in Cubase.
3. Um das gerade aufgenommene Material zu hören, wählen Sie Groove
Agent als Ausgang für die betreffende MIDI-Spur. Sie können die auf
der Spur aufgenommenen Noten aber auch an ein anderes VST-Instru-
ment oder externes Modul ausgeben, das dann statt Groove Agent den
Rhythmus wiedergibt.

Groove Agent
Deutsch 135
DEUTSCH
Verwenden der Cubase SX-Automation
In diesem und dem nächsten Abschnitt finden Sie eine schrittweise An-
leitung zum Erzeugen einer Drum-Spur in Cubase SX. Für die meisten
anderen Host-Applikationen gelten ganz ähnliche Regeln. Im Zweifels-
fall lesen Sie bitte die entsprechenden Abschnitte im Handbuch des je-
weiligen Programms.
Das Verwenden der Automation ist wahrscheinlich die einfachste Me-
thode. Hier eine Beschreibung, falls Sie sich noch nie im Rahmen von
Cubase SX damit befasst haben.
1. Öffnen Sie Groove Agent über das Fenster »VST-Instrumente« von
Cubase SX. Aktivieren Sie den Write-Schalter (W) am oberen Rand
des Groove Agent-Bedienfelds. Im Projekt-Fenster von Cubase SX
werden nun eine neue Spur namens VST-Instrumente sowie eine wei-
tere Spur direkt darunter eingerichtet. In den meisten Fällen sollte die
Auto-Quantisierungsfunktion in Ihrem Sequenzer ausgeschaltet sein.
Sie haben nun die Vorbereitungen für die Aufnahme Ihrer Drum-Spur
abgeschlossen.
2. Starten Sie Cubase SX. Klicken Sie auf den Run-Schalter, wenn die
Drums starten sollen (mit oder ohne Start-Fill – erinnern Sie sich
noch? – siehe Seite 114). Verschieben Sie die Schieberegler, klicken
Sie auf die Schalter und drehen Sie die Regler, bis Ihre Drum-Spur
richtig klingt. Wenn der Song oder Songabschnitt vorüber ist, klicken
Sie auf den Stop-Schalter in Groove Agent und danach auf den Stop-
Schalter in Cubase.
3. Klicken Sie anschließend mit der rechten Maustaste in die VST-Instru-
ment-Automationsspur und wählen Sie »Verwendete Automation aller
Spuren anzeigen«. Alle Automationsklassen (Run/Stop, Fill, Pattern-
Auswahl usw.) verfügen hier über separate Spuren.
4. Klicken Sie in Groove Agent oder in einer der neu erzeugten Automa-
tionsunterspuren auf den Read-Schalter (R). Sie können nun die er-
zeugten Automationsdaten in allen Spuren sehen. Diese Daten lassen
sich frei bearbeiten.
5. Um ein unbeabsichtigtes Überschreiben von Daten zu verhindern,
sollten Sie sich vergewissern, dass der Write-Schalter nur aktiviert ist,
wenn Sie wirklich Automationsdaten überschreiben möchten!

Groove Agent
136 Deutsch
Das Komponieren in Cubase SX mit Hilfe der
Groove Agent-Speicherplätze
Wenn Sie drastischere Veränderungen erreichen möchten, also bei-
spielsweise direkt zwischen unterschiedlichen rhythmischen Variatio-
nen oder Stilrichtungen und Drum-Kits umschalten wollen, kommen
die Groove Agent-Speicherplätze ins Spiel. Gehen Sie wie folgt vor:
1. Öffnen Sie Groove Agent über das Fenster »VST-Instrumente« von
Cubase SX. Bereiten Sie die Einstellungen für die verschiedenen Ab-
schnitte Ihres Songs in Groove Agent vor und speichern Sie diese
»Schnappschüsse« in den verschiedenen Groove Agent-Speicherplät-
zen. Sie werden wahrscheinlich einen Schnappschuss für die erste
Strophe, den nächsten für den Refrain usw. verwenden.
2. Aktivieren Sie den Write-Schalter (W) am oberen Rand des Groove
Agent-Bedienfelds. Im Cubase Projekt-Fenster werden jetzt eine neue
Spur namens VST-Instrumente sowie eine weitere Spur direkt darun-
ter eingerichtet. In den meisten Situationen sollte die Auto-Quantisie-
rungsfunktion in Ihrem Sequenzer ausgeschaltet sein. Sie haben nun
die Vorbereitungen zur Aufnahme Ihrer Drum-Spur abgeschlossen.
3. Starten Sie Cubase SX. Klicken Sie auf den Run-Schalter, wenn die
Drums starten sollen, und aktivieren Sie die in den Speicherplätzen ge-
speicherten Einstellungen, wenn Sie die entsprechenden Abschnitte
Ihres Songs erreichen. Wenn der Song oder Songabschnitt vorüber
ist, klicken Sie auf den Stop-Schalter in Groove Agent und danach auf
den Stop-Schalter in Cubase.
4. Klicken Sie mit der rechten Maustaste in die VST-Instrument-Automa-
tionsspur und wählen Sie »Verwendete Automation aller Spuren anzei-
gen«. Alle Automationsklassen (Run/Stop, Fill, Pattern-Auswahl usw.)
verfügen hier über separate Spuren.
5. Klicken Sie in Groove Agent oder in einer der neu erzeugten Automa-
tionsunterspuren auf den Read-Schalter (R). Sie können nun die er-
zeugten Automationsdaten in allen Spuren sehen. Diese Daten lassen
sich frei bearbeiten.
6. Um ein unbeabsichtigtes Überschreiben von Daten zu verhindern,
sollten Sie sich vergewissern, dass der Write-Schalter nur aktiviert ist,
wenn Sie wirklich Automationsdaten überschreiben möchten!

Groove Agent
Deutsch 137
DEUTSCH
❐
Wenn Sie von Ihrem MIDI-Keyboard aus Program-Change-Befehle zum
Auswählen von Speicherplätzen senden möchten (siehe Seite 162 ff.),
verwenden Sie hierzu die normale MIDI-Aufnahme, denn die Automation
spielt hierbei keine Rolle. Wenn Sie von der Keyboard-Tastatur aus wäh-
rend der Aufnahme live Schlagzeug spielen, werden diese Noten eben-
falls mit aufgezeichnet.
❐
Der MIDI-SysEx-Filter in Cubase SX muss ausgeschaltet sein, damit die
Parameterautomation funktioniert.

Groove Agent
138 Deutsch
Die einzelnen Stilrichtungen
Im Folgenden wird jede Stilrichtung kurz mit den Worten der Musiker
selbst beschrieben. Die neuen Stilrichtungen in Groove Agent 2 sind
mit einem Sternchen (*) gekennzeichnet. Die ursprünglichen 54 Groove
Agent-Stilrichtungen waren stark an bestimmte Jahreszahlen und die
Zeitskala gebunden, die neuen Stilrichtungen hingegen beziehen sich
nicht auf bestimmte Jahre. Beispiel: »Vintage FR-3« ist eine Unterkate-
gorie von »1981 Elektro«, weil diese alten Analoggeräte elektronisch
sind – und nicht weil diese Stilrichtung für das Jahr 1981 besonders
typisch war.
1950 Swing
Ein im Jazz und im Rahmen von Big-Bands verwendeter Spielstil. In
einem Feld, so komplex wie der Swing und die Big-Band, ist es sehr
schwierig, alle Möglichkeiten abzudecken. Ich habe mich daher für
den folgenden Ansatz entschieden: Der Rhythmus wurde mit einer
Geschwindigkeit von ungefähr 144 Schlägen pro Minute (BPM) pro-
grammiert. Er ist in zwei Abschnitte unterteilt: die erste Hälfte in »2«,
die zweite Hälfte in »four on the floor«, um damit die verschiedenen
Bassfiguren abzudecken, die häufig bei diesem Rhythmustyp verwen-
det werden. RB
1951 Samba
Dieser Samba-Rhythmus ist ein Mischung aus authentischem Samba
(wie er auf dem Schlagzeug gespielt wird) und einem Sambastil, den
viele Jazz- und Fusion-Schlagzeuger verwenden. MEB
1952 Jazz Trio
Die verlorene Kunst des Spiels mit Besen! Heutzutage wissen nicht
mehr besonders viele Leute, wie man Besen »richtig« anwendet! Ein
paar Besen zu besitzen und sie spielen zu können sind zwei unter-
schiedliche Themen. Ein drittes Thema ist es, ein VST-Instrument
dazu zu bringen, überzeugend Besen zu spielen…

Groove Agent
Deutsch 139
DEUTSCH
Wir haben den »Besenschlag« in Groove Agent implementiert und ihn
kombiniert mit meiner eigenen Inspiration durch großartige Besenspieler
wie Buddy Rich, Louie Bellson, Jo Jones sowie mit all den Lektionen der
Besenlegende Ed Thigpen (u.a. bekannt vom Oscar Peterson Trio). Sie
sollten wissen, dass ich mit Sven nicht zu 100 Prozent darin überein-
stimme, was passieren soll, wenn man den Sidestick-Schalter anklickt!
Das Ergebnis ist daher ein »Mieten Sie einen Schlagzeuger – erhalten
Sie zwei«-Effekt und das ist ja schließlich auch nicht so schlecht! RB
*Bop
Diese lebhafte, »jazzy« Stilrichtung ist für eine kleine Jazz-Combo mit
Piano, Bass, Schlagzeug und einem Solo-Instrument geeignet. Dies
ist eine gute Wahl, wenn Sie einem der vielen Jazz-Standards ent-
sprechen möchten. Schlagen Sie also das »Real Book« des Jazz auf,
klicken Sie auf »Run« und spielen Sie. MEB
1953 Paint
Manchmal besteht keine Notwendigkeit für ein regelmäßiges, rhythmi-
sches Schlagzeug. Wenn Sie einem Drummer sagen, er solle »etwas
tun«, dann verfällt er wahrscheinlich in kreative Stimmung und beginnt
damit, wunderbare Geräusche zu erzeugen. Diese Stilrichtung emu-
liert solch eine Situation. SB
* Ominous
Diese Stilrichtung ist eine nicht-rhythmische Reise mit Effekt-Sounds
durch unterschiedliche Stimmungen und Orte, bevorzugt die unange-
nehmen… Herzklopfen, Schreckgeräusche, Läuten usw. vereinen sich
hier in einem Schmelztiegel suggestiver Eindrücke. Einfache und kom-
plexe Geräusche sind hier in nichtlinearer Form zusammengestellt und
gehen über die Grenzen der standardmäßigen Pattern hinaus. Mit den
Funktionen Fill, Sidestick und Half Tempo können Sie die Inhalte variie-
ren. Verwenden Sie auch die Random-Funktion. Überlegen Sie einfach,
wo Sie hin möchten – und so sei es… NE

Groove Agent
140 Deutsch
* Machinery
Eine Fabrikhalle? Nein, diesmal handelt es sich nicht um einen Reverb-
Algorithmus, sondern um den statischen Rhythmus, den Maschinen im
»Zusammenspiel« erzeugen. Einige sind klein und schnell, andere groß
und langsam, oder umgekehrt. Die Geräusche werden nacheinander
hinzugefügt und reichen, je nach Geschwindigkeit, von einer kleinen In-
dustriehalle bis hin zur endgültigen Kakophonie von Hammern und Rä-
dern. Langsam Schreiten und Schutzhelm aufsetzen! NE
1954 Cha-Cha
Der Cha-Cha ist ein auf dem Sidestick basierender Rhythmus, der am
besten klingt, wenn der Sidestick-Schalter aktiviert ist. MEB
1955 3/4
Hier handelt es sich um eine Anzahl verschiedener Rhythmen im Drei-
vierteltakt. In dieser Stilrichtung werden die Variationen nicht immer
komplexer und wilder. Es handelt sich dabei eher um eine Reise durch
die verschiedenen Ansätze und Emotionen des Dreivierteltakts. Beste
Resultate erzielen Sie, wenn Ihr Sequenzer auf die Taktart 3/4 einge-
stellt ist. SB
* 6/8
Eine Nachlässigkeit in der ursprünglichen Version von Groove Agent
war, dass die 6/8-Stilrichtung fehlte. Es gibt zahlreiche wunderbare
Songs, die diesen Rhythmus haben, wie z.B. »If you don’t know me by
now« und »When I need you«. Beachten Sie bitte, dass Sie die Taktart
Ihrer Host-Applikation auf »6/8« setzen müssen, um diese Stilrichtung
richtig zu spielen. SB
1956 Rumba
Hierbei handelt es sich um die afro-kubanische Version des Rumba,
die nicht mit dem Rhumba (mit einem »h«) verwechselt werden sollte,
der oft in älteren Drumcomputern anzutreffen ist. MEB

Groove Agent
Deutsch 141
DEUTSCH
1957 Shuffle
Ein unkomplizierter Rhythmus, der Ihnen als Schlagzeuger eine Menge
Möglichkeiten eröffnet, wenn Sie kreativ sind. Anstatt nur die Back-
beats (also die 2 und die 4) auf der Snare-Drum zu spielen, können Sie
beispielsweise das ganze – auf der HiHat oder dem Ride-Becken ge-
spielte – Pattern auf der Snare doppeln, wodurch Sie einen »fetten«
Sound erzeugen. Wenn Sie auf einem normalen Schlagzeug spielen,
ist die Anstrengung für Ihre linke Hand größer, aber es macht auch
mehr Spaß! RB
1958 Fox
Ein Rhythmus, den es länger gibt, als irgend jemand sich erinnern
möchte. Sie können ihn Foxtrott, Slowfox oder anders benennen;
manche Menschen nennen es dennoch einfach »Musik«. Ein fröhlicher
und leichter schneller Rhythmus. SB
1959 Tom-Toms
Diese Stilrichtung wird in vielen verschiedenen Situationen verwendet.
Sie hat ihren Ursprung in den 20er Jahren, als Duke Ellington in Harlem
»Jungle Music« spielte, und wurde unvergesslich gemacht durch Gene
Krupa und das Benny Goodman Orchestra, die 1938 in der Carnegie
Hall »Sing, Sing, Sing« spielten. Diese Stilrichtung ist in fast jedem Film,
der die 30er und 40er Jahre des 20. Jhdt. behandelt, zu hören. RB
1960 Bossa Nova
Der traditionelle Bossa Nova-Rhythmus wird mit Sidestick auf der
Snare-Drum gespielt. Aktivieren Sie den Sidestick-Schalter für das
authentische Gefühl. MEB
1961 Twist
Die Inspiration für diese Stilrichtung war natürlich Chubby Checkers
Klassiker »Let's Twist Again«. Auf der Schallplatte wird der Song
ziemlich gerade und einfach gespielt, doch wenn Sie in Groove Agent
den Complexity-Schieberegler ein wenig aufziehen, hören Sie diverse
weitere Variationen und Zusätze zu Bass-Drum und Ride-Becken. RB

Groove Agent
142 Deutsch
1962 12/8
Bei dieser Stilrichtung handelt es sich um ein zweischneidiges Schwert.
Es war die ursprüngliche Idee, einen langsamen 12/8-Rhythmus einzu-
spielen, wie man ihn aus vielen Schnulzen der 50er Jahre kennt. Wäh-
rend der Zusammenstellung der Pattern erhöhte ich einmal das Tempo
aus Spaß und bemerkte dabei, dass sich durch das höhere Tempo
plötzlich so etwas wie ein völlig neues Gefühl, eher funky und mit ziem-
lich modernem Ansatz einstellte. Verwenden Sie diesen Rhythmus also
in einer Ballade oder beschleunigen Sie ihn für den groovy Beat. PS
* Slow Blues
Wenn ich eine Stilrichtung und ein Tempo für eine abendfüllende Jam-
Session aussuchen müsste, würde ich ohne zu Zögern »Slow blues at
60 BPM« wählen. Dies ist eine Tonart und ein Tempo, die einen ganzen
Abend ausreichen. Es gibt viele coole Standard-Songs für diese Stil-
richtung: »Summertime«, »Red House«, »Sweet Sixteen« und zahlreiche
andere Klassiker. Natürlich auch entspannte Improvisation. Slow Blues
in Groove Agent ist eher dynamisch; beobachten Sie, wie Lautstärke
und Intensität in den höheren Variationsebenen steigen. Der grundle-
gende HiHat-Groove wird mehrmals neu gestartet (bei Variationsebene
7, 12 und 18). SB
1963 Train Beat
Bei diesen Rhythmus arbeitet der Schlagzeuger besonders viel auf
der Snare-Drum. Der Rhythmus eignet sich gut für Country- und
Rock’n‘Roll-Songs. PS
1964 Tamla
Der Rock-Klassiker »Pretty Woman« inspirierte mich zu diesem Rhyth-
mus. Er wurde häufig von den Künstlern des legendären Tamla Motown
Labels verwendet. Es gibt wohl kaum eine bessere Art, einen Uptempo-
Song zu beginnen, als mit einer Snare die den Beat vorgibt! PS

Groove Agent
Deutsch 143
DEUTSCH
1965 Soul
Dieser Rhythmus ist beeinflusst durch die Klasse-Schlagzeuger, die
James Brown begleitet haben. MEB
1966 Pop
Hochenergetisches Pop-Schlagzeug gefällig? Das Lieblingstempo ist
146 BPM. Diese Rhythmen sind dafür gedacht, alle anderen Bandmit-
glieder mitzureißen. Dieses Pop-Schlagzeug mit seinen Fills, die vom
Banalen bis zum Haarsträubenden die ganze Bandbreite umfassen,
ist ein wahrer »Motor« für Ihre Musik. Finden Sie das zweitaktige Fill,
das von A bis Z und wieder zurückgeht? Viel Spaß beim Experimen-
tieren! dB
* Steady Beat
Es handelt sich um einen sehr grundliegenden Stil, der fast auf jedes
Tempo passt. Dies ist praktisch perfekt, wenn Sie einen verlässlichen
Drummer benötigen, der keine unvorhersehbaren Experimente macht,
jemanden, der niemals über die Stränge schlägt, der nicht versucht zu
beeindrucken. Jemanden, der einfach spielt, und zwar einen geradlini-
gen Rhythmus. Diese Stilrichtung können Sie auch verwenden, wenn
Sie etwas mit einem Triolen-Feeling benötigen. Drehen Sie für einen
geradlinigen Shuffle-Beat einfach den Shuffle-Drehregler nach rechts.
MEB
1967 Backbeat
Der perfekte Uptempo-Rhythmus. Das Schlagzeug ist ziemlich intensiv
und gönnt sich keine Pause zum Atemholen. Vielleicht ist es deswegen
so leicht, auf der Grundlage dieses Grooves einen tanzbaren Song zu
machen. PS

Groove Agent
144 Deutsch
1968 New Orleans Funk
Im Winter 1968-69 nahm der großartige Schlagzeuger Joseph »Ziga-
boo« Modeliste die klassische New Orleans R'n'B-Style-Nummer
»Cissy Strut« mit den Funk-Pionieren »The Meters« auf. Zigaboo er-
fand den charakteristischen Funk-Groove, der oft als »the second line
style« bezeichnet wird, sehr typisch für den Groove der »The Meters«.
Die Zigaboo-Grooves gehören (neben denen von James Browns
»Funky Drummer«) zu den am meisten gesampleten und recycleten
Grooves in der Geschichte der modernen afro-amerikanischen Musik.
Der genaue Groove findet sich in der Complexity-Reglervariation 8.
Viel Spaß! MK
1969 Songo
Songo wurde in den späten Sechzigern von dem Schlagzeuger Chan-
quito der Gruppe Los Van Van erfunden. Dieser Stil hat viele heutige
Jazz- und Fusion-Drummer inspiriert. Songo ist eine der moderneren
afro-kubanischen Stilrichtungen und verhilft so manchem Schlagzeuger
zu seinen ersten Schritten in die Welt der Latin Music. MEB
* Mozambique
Mozambique wurde in den Sechzigern erfunden und ist einer der mo-
derneren Latin-Rhythmen. Diese von mehreren bekannten Drummern
erzeugte Stilrichtung hört man oft bei Aufnahmen von Funk-, Jazz- und
Latin-Bands. MEB
1970 Olympic
Es ist faszinierend, wie ein Schlagzeugstil ohne betonte 2 und 4 es
schafft, dass ein Song wirklich anfängt zu swingen. Ich habe das
Schlagzeug der Beatles-Nummer »Get Back« kopiert und dann vermin-
dert. Das Ergebnis ist in den niedrigeren Variationen zu hören. Außer-
dem habe ich den Stil weiterentwickelt, was in den höheren Variationen
zu hören ist. Unser Grafiker meinte, dass man diesen Rhythmus für
gymnastische Übungen benutzen könnte, daher der Name. SB

Groove Agent
Deutsch 145
DEUTSCH
1971 Cajun
Man muss nicht mehr nach »Deep down in Louisiana close to New
Orleans« gehen, um das besondere Cajun-Gefühl zu bekommen. Su-
chen Sie einfach in Groove Agent den 1971er Cajun-Stil heraus, stel-
len Sie die Host-Applikation Ihres VST-Instruments vorzugsweise auf
86 Grad – pardon BPM – und schon fängt es an zu brodeln! Fügen
Sie der Snare eine Prise Akkordeon und ein Quentchen Bass hinzu –
und fertig. Guten Appetit! MK
1972 Bonzo
Dieser Rhythmus wurde, wie der Name schon nahelegt, zu einem
gewissen Teil durch den verstorbenen, großartigen John Bonham von
Led Zeppelin inspiriert, der vielleicht der einflussreichste Hard-Rock-
Drummer war. Ich schlage vor, Sie drehen den Ambience-Drehregler
zumindest auf die 2-Uhr-Position, um so dass fette, schwere Spiel zu
hören. Die Pattern A bis E sollen Bonhams Angewohnheit simulieren,
das Schlagzeug mit bloßen Händen zu spielen. Um diese Wirkung zu
erzielen, sollte Percussion 2 für diese Pattern aktiviert werden.
Percussion 1 soll wie ein an der HiHat angebrachtes Tambourine
klingen. Die Komplexität steigert sich von Pattern 1 bis 10 mit Hihat
und beginnt erneut ab Pattern 11 bis 20 mit dem Ride-Becken. Die
1/2 Tempo Feel-Pattern enthalten kleine triolische Snare-Figuren, die
in den regulären Pattern nicht vorhanden sind.
Auch wenn es umweltschädlich ist, schreien doch manche Songs
danach, mit verbleitem Benzin betrieben zu werden. MD
1973 Dark Side
Ich bin immer wieder erstaunt, wie man mit so wenigen Noten so viele
Platten verkaufen kann. Dieser Stil wurde zu einem großen Teil durch
Pink Floyds Album »Dark Side of the Moon« inspiriert und eignet sich
sehr gut für langsame Songs. SB

Groove Agent
146 Deutsch
1974 Reggae
Dies ist eine triolische Variante des Reggae, die meist mit Sidestick
gespielt wird. Der Klang der Drums ist sehr trocken. Als wir diese
Samples für Groove Agent aufnahmen, drehte sich der Toningenieur
Jens Bogren um, sah uns an und fragte: »Wollt Ihr wirklich, dass es so
klingt?«. Wir nickten. MEB
* Bombay Dance Hall
Wir schreiben das dritte Jahrtausend des Global-Dance-Hall-Beats.
Wir befinden uns in London, Bombay, Sollentuna. Das alles spielt
keine Rolle, solange wirklich jeder Spaß hat. Einige Künstler verbinden
diese Stilrichtung mit Reggae, andere mit Hip Hop. Alles ist möglich
und alles hängt von Ihnen ab. Versuchen Sie den einzelnen Instrumen-
ten Raumklang hinzuzufügen bzw. diesen zu entfernen. NE
* Roots
Roots, Rock, Reggae. Der Percussionist – mit großen Flaschen und
einer Vibra-Slap – bewegt sich in freier Fahrt auf den verschiedenen
Complexity-Variationsebenen, während der Schlagzeuger alles – von
einfach bis belebt – macht. Der Rim-Shot wird bereits in den mittleren
Variationsebenen eingesetzt, so dass bei Verwendung der Sidestick-
Funktion entsprechend eine tiefe Felltrommel ertönt. Genug der Tech-
nik – zitieren wir lieber den alten Rastafari aus Trench-Town, der ein-
mal sagte: »It’s like football. It’s there. It’s in your knees…«. NE

Groove Agent
Deutsch 147
DEUTSCH
1975 Funk
Hier handelt es sich um Funky Drumming das einerseits durch den Funk-
Guru George Duke (Party Down) und andererseits erstaunlicherweise
durch Frank Zappa (I Don't wanna Get Drafted) inspiriert wurde… aber
die beiden haben ja auch zusammen großartige Musik gemacht! Im Be-
reich des Funk gibt es natürlich viele Innovatoren. Fred White von Earth
Wind & Fire spielte einiges, was wirklich einfach war, aber supergut
grooved.
In den Siebzigern wurde – mit Ausnahme der Drums, die dem Ganzen
ein wenig Swing gaben – die Funk-Musik oft ziemlich gerade gespielt.
Fügen Sie nach Belieben eine »Slick Triangle« und den »Wood Block«
hinzu. Stilrichtung programmiert für 126 BPM. dB
1976 Disco
In den frühen Siebzigern begann die Disco-Ära. Im April 1976 hob der
berühmte New Yorker Club Studio 54 das Discofieber noch um ein
paar Grad. Doch es war der Film »Saturday Night Fever«, der die Mode
weltweit verbreitete. Die Drums mögen gedämpft und einige der Fills
wirklich käsig klingen, doch das ist der Charme dieser Stilrichtung.
Wenn man diesen Beat mit dem Rest der Band vermischt, wird daraus
ein netter, funky Tanzgroove. Holen Sie also Ihre ausgestellten Hosen
und Ihre Plateau-Schuhe heraus, lassen Sie das Haar auf Ihrer Brust
wachsen, tragen Sie ein bis zum Nabel aufgeknöpftes Satinhemd und
legen Sie mal richtig los! FvW
1977 Hard Rock
Ich wuchs in den frühen Siebzigern auf und hörte dabei die Beatles.
Danach war ich eine junge Seele ohne Heimat, die sich alles anhörte,
was aus dem Radio kam, doch ich fand niemals »mein Ding«. Dann, als
ich sechzehn war, gab mir jemand das schwarze Album einer Band,
von der ich noch nie zuvor gehört hatte, und das Intro zu »Hells bells«,
mit dem das Album »Back in black« begann, hat mich geradezu umge-
hauen.
So wurde ich zum Hardrocker!! Und dies sind daher verlässliche
Heavy Drums für alle mit Angus-Ambitionen!! JS

Groove Agent
148 Deutsch
* Grunge
Nirvana, Mudhoney, Melvins… ich glaube dies ist eine unendliche
Liste. Die Musikindustrie nennt das Grunge. Bleibt nur: Verstärker vor-
heizen, Gitarre umschnallen, den F#-Powerchord parat halten und auf
»Run« klicken. MS
* Indie Punk
Eine klassische Schlagzeugfigur für einen Punk-Song sollte kraftvoll
und schnell sein. Eine Schlagzeugfigur für einen modernen Punk-
Song muss hingegen kraftvoll, schnell, individuell und kreativ sein, so
dass die Struktur des Songs betont wird. Diese Eigenschaften wur-
den in die Stilrichtung implementiert. Genießen Sie einfach und:
»Keep on rocking!«. MS
* Unplugged
MTV machte diese Stilrichtung berühmt. Ein großer Rock-Song muss
auch einmal in einer ruhigen Athmosphäre gespielt werden, so dass
die Zuhörer einfach die Stimme des Sängers hören können. Diese
Stilrichtung ist voller sanft gespielter Beats/Fills und verwendet die
beliebten Rods. MS
* Ballad
Es ist früh am Morgen, Ihr Kaffee ist noch heiß und Ihre letzte Ballade
benötigt einige geradlinige und kraftvolle Drums. Probieren Sie doch
diese Stilrichtung aus! Das Tambourine kann dem Refrain zusätzliche
Brillanz verleihen und vielleicht auch den allgemeinen Drum-Sound glät-
ten. (Und psst, ich habe außerdem noch folgenden Tipp: Probieren Sie
diese Stilrichtung mal bei 120 BPM! Ganz schön energisch, was?) MS
1978 TexMex
Ich spielte Sven einmal einen Song mit einer merkwürdig losen Art von
Schlagzeug zusammen mit Bass, Piano und Slide-Guitar vor. Das
Ganze klang ein wenig wie ein nicht besonders gut eingeübter Auftritt
in einem kleinen Restaurant an der Grenze zwischen Texas und Mexiko.
»Sehr merkwürdig und sehr cool«, meinte Sven. »Das müssen wir in
Groove Agent mit aufnehmen.« »Ok!«. JS

Groove Agent
Deutsch 149
DEUTSCH
1979 Basic Hip-Hop
Dieser Rhythmus wurde vom frühen Hip-Hop und der Art und Weise in-
spiriert, wie er am Anfang der digitalen Drumcomputer-Ära klang. LW
* Live Hip-Hop
Bei einer langen Diskussion über Hip-Hop erzählte mir ein Freund,
dass ein echter Drummer in einer Hip-Hop-Band nur eine Bass-Drum,
eine Snare, eine HiHat, ein Crash-Becken und keine Toms benötigt.
Er hatte absolut recht. Diese Stilrichtung bietet Ihnen die ganze Pa-
lette für Ihren Live-Song. Vergessen Sie die Percussions im Refrain
nicht! MS
* Sloppy Hip-Hop
Die Stilrichtung »Sloppy Hip Hop« ist inspiriert von den Beastie Boys
und anderen Bands, bei denen man das Gefühl hat, dass die Musik
keinen Takt at und mit Quantisierung nicht gearbeitet wurde… Der
grundlegende Charakter des Grooves wird ab der 14. Variationsebene
aufwärts leicht verändert. Achtung: Wenn Sie auf die Idee kommen
sollten, die flockigen Handclaps durch einen definierteren Sound zu er-
setzen, könnte es zu wirklich seltsamen Timing-Effekten kommen. Das-
selbe gilt für ein allzu großzügiges Verwenden der Humanize-Funktion.
Wählen Sie diese Stilrichtung aus, wenn Sie einfach abdriften und alle
Grenzen eines regelmäßigen Beats aufheben möchten. NE
1980 Boogie
Manche Bands haben ihre Karrieren auf einfachen Drei-Akkorde-Songs
aufgebaut, in denen der Schlagzeuger dann umso härter arbeiten
musste. Hier handelt es sich um den klassischen Boogie-Stil, mit der
Betonung auf HiHat und Ride-Becken. PS
1981 Elektro
Es war meine Absicht etwas zu erzeugen, das wie ein – für frühe
Synth-Pop-Stücke programmierter – analoger Drumcomputer klingt.
Es ist keine 808 oder 909, sondern eine total neue »Box« mit Retro-
und Elektronik-Sound. LW

Groove Agent
150 Deutsch
* Vintage FR-3
Ursprüngliche Rhythmen aus einem sehr alten Drumcomputer. Slow
Rock x 3 (»Home« Tempo: 80 BPM). Samba x 4 (110). Rhumba x 3
(130). Beguine x 4 (130). Mambo x 4 (140). Bossanova x 3 (145).
Rock’n Roll x 4 (160). Das Einzige, was hier fehlte, waren Fills – also
haben wir welche für Sie erstellt. Dasselbe gilt für die Sidestick-Ver-
sion und Half Tempo Feel. Dieses Schmuckstück hatte nicht einmal
ein Becken! Der Sound unterscheidet sich etwas von dem Originalge-
rät, bei dem der Sound bei jedem Mal etwas anders klingt! MS
* Vintage TR-7
Ein etwas neueres Analoggerät. Slow Rock und Ballad x 2 (»Home«
Tempo: 80 BPM). Western (90). Samba 1 + 2 (110). Rhumba x 2,
Beguine x 2, Cha-Cha x 2, Mambo x 2, Baion x 2, Tango und 6/8
March (130). Bossa Nova x 3 und Bolero (145). Rock’n Roll 1 x 2 und
Rock’n Roll 2 (155). MS
*Vintage CR-8
Dieser Drumcomputer ist fast modern, da er schon programmierbar
ist. Dennoch klingt er analog. Habanera (»Home« Tempo: 70 BPM).
S. Rock (80). Samba 1 + 2 und Merengue (110). Mambo, ChaCha,
Tango, Beguine, Enka und Rock 1-6 (120). Dann kommt eine Kombi-
nation aus Rock 1/Rock 4 (120). Disco und Swing 1 + 2 (120).
Rhumba und Rhumba/ChaCha-Kombination (130). BossaNova und
BossaNova/Mambo-Kombination (145). Foxtrot (160). Das Kombinie-
ren zweier Rhythmen ist ein echt cooler Trick! MS
* Meek Ballad
Kehren Sie mit mir zurück in die frühen Achtziger. Das könnte das
nächste große Ding werden… Ein sich langsam entwickelnder Groove,
der auf jeder Variationsebene noch einige programmierte hinzufügt und
Ihnen eine faire Chance gibt, genau die gewünschte Complexity-Variati-
onsebene zu finden. Die Stilrichtung wurde erzeugt, indem jedes Instru-
ment einzeln hinzugefügt wurde, genau wie in der frühen Phase dieser
legendären »Rhythm Composer«. Den Sanftmütigen gehört das Him-
melreich. NE

Groove Agent
Deutsch 151
DEUTSCH
* Axis Y
Zurück zu den Achzigern, mit den schrecklichen Frisuren, den pinken
Jackets und den hexagonalen Drums. Vorsicht, so was kann jederzeit
wiederkehren! Diese Stilrichtung bereitet Sie zumindest auf das musi-
kalische Revival vor. Ziehen Sie Ihre Tanzschuhe an und dann frei
nach Madonna: »Get into the groove«. NE
1982 Slick
Hier handelt es sich um einen auf Sechzehntelnoten gegründeten
Rhythmus, der durch um 1980 in L.A. aufgenommene Sessions von
Meisterschlagzeugern wie Jeff Porcaro und John Robinson inspiriert
ist. Eigentlich ist der Rhythmus selbst nicht besonders innovativ, aber
er ist zu repräsentativ für dieses großartige Genre, um hier nicht mit
eingebunden zu werden. Hier ist ein langsames Tempo ein Muss! Der
bevorzugte Tempobereich liegt bei 73 bis 88 BPM. FvW
1983 Breakbeat
Wirebird schrie »HIIILFE« aus der Tiefe der »Pixelmine«, als er an der
großartigen Benutzeroberfläche von Groove Agent arbeitete. Ich fragte
»Womit?«. »Mit Breakbeats!«, schrie er von unten zurück. »Du meinst
dreckig, groovy, irgendwie ‘too much’, wie die Chemical Brothers?«.
»Yepp!«. »Yo, mach’ ich!!«, antwortete ich. Und wenn Sie gerade dabei
sind, lieber Benutzer, warum schieben Sie das Ganze nicht auch noch
durch einen netten kleinen Verzerrer? JS
1984 Arena
In den glorreichen Tagen der Achtziger trugen die Hardrock-Jungs
enge Hosen, knallten sich Haarspray in die Mähne und stahlen das
Make-up ihrer Freundinnen. Doch es gibt keinen Zweifel daran, dass sie
am Schlagzeug wirklich was ‘drauf hatten – sie spielten hart und eigen.
Da diese Musik hart und laut sein sollte, gibt es nur einen Dynamikwert:
LAUTER!
Die Fills sind sehr typisch, intensiv, eigen und manchmal fast wie spezi-
ell komponiert. PS

Groove Agent
152 Deutsch
* HM Straight
HM Straight und HM Triplets basieren auf der europäischen Heavy
Metal-Variante: Double-Bass-Spiel und auch einige eigene Samples
aus den Alben der Bands, in denen ich spielte, wie z.B. die Alben »Be-
ware the heavens« von Sinergy und »Sign Of truth« und »Anima Mundi«
von Dionysus. Die Triolen-Wirbel sind inspiriert von dem einzigartigen
Scott Travis, besonders aus der Zeit vor Judas Priest, als er mit Paul
Gilbert in Raxor X spielte. Der Song »Scarified« von Raxor X ist ein
Meilenstein des Metal, mit dem fantastischen Drum-Intro. Ich machte
eine Vielzahl von Variationen von Grooves dieser Art. Die geradlinigste
und stärksten Grooves wurden im Stil von Jörg Michael, einem der
meistgebuchten und meistrespektierten deutschen Schlagzeuger, er-
stellt. RM
* HM Triplets
Ein triolischer Groove mit vielen dreifachen Bass-Drum-Wirbeln. Be-
sonders die Wirbel wurden von meinem Freund Aquiles Priester, dem
Drummer der brasilianischen Metal-Band Angras, inspiriert, der zu ei-
ner neuen Ebene des modernen Metal-Drummens vorstieß. Auf mei-
ner Tour mit Saxon konnte ich ein Drum-Fill aufschnappen, dass ich
hier und da einsetzte. Dies stammt von einem anderen großartigen
Drummer und Freund: dem legendären Fritz Randow, einem der bes-
ten Drummer des European Metal. RM
* Grind
Diese Grooves sind recht lebhaft und für höhere Tempi geeignet. Be-
achten Sie den Einsatz von Achtelnoten, Achteltriolen und Sechzehn-
telnoten bei der Bass-Drum in verschiedenen modernen Ansätzen.
Diese Grooves wurden beeinflusst vom Stil von Bands wie »The
Haunted«, »Krisiun« und »Hate Eternal«. Wenn Sie ein großer Fan von
Besen sind, dann sind diese Grooves definitiv nichts für Sie! ;-) RM

Groove Agent
Deutsch 153
DEUTSCH
* Progressive
Dies ist eine eher technische Stilrichtung mit zahlreichen lebhaften
Fills. »Progressive« ist eine Mischung aus dem Sound der Stilrichtun-
gen »New Progressive« und »Old Progressive« aus den Achtzigern.
Einige Variationen wurden in verschiedenen ungeraden Metren aufge-
nommen und in einer viertaktigen Loop gespielt. Verlieren Sie sich
bloß nicht! MEB
1985 World Ethno
Man nehme eine breiten, weiten Flächenklang, einen bundstablosen
Bass und eine elektrische Gitarre, die Achtel durch ein Echogerät
spielt – und schon findet man sich in einer »World Ethno«-Atmosphäre
wieder und hört sich sagen »Manu«?!? JS
1986 Detroit Techno
Wie Sie sich wahrscheinlich schon gedacht haben, liegen die Techno-
Wurzeln in Detroit. Ich entschied mich dafür, für diese Stilrichtung or-
dentlich Krach zu machen. Es wurde keine Energie gespart! In den al-
ten Tagen hätte man so etwas »Hart bis auf die Knochen« genannt. DS
* Daft
Halten Sie es offen und ehrlich. Schlicht und einfach. Halten Sie es
am laufen. Weiter so! Falls Sie die Flasche ablenkt – es ist nur eine
Flasche. Weniger ist mehr. NE
1987 LA Shuffle
Irgendwo in der Gegend der Complexity-Ebene 15 werden Sie die
Schwester eines Mädchens namens Rosanna treffen. Quer durch die
hier versammelten Grooves werden Sie eine ganze Reihe Ihrer Ver-
wandten aus früheren Dekaden – auch als Geisternoten bekannt – er-
blicken. Winzige triolische Einwürfe, speziell auf der Snare, die eine
kräftige ausgeruhte rhythmische Grundlage mit einem feinen Netz ver-
webt. Ein raffinierter Stil, oh ja! Das Ganze sollte nicht mit zu hohem
Tempo verwendet werden! 78 BPM ist perfekt! dB

Groove Agent
154 Deutsch
1988 House
House-Musik ist ein ziemlich ausgeruhter elektronischer Stil, der vom
eigenen Groove lebt. Es handelt sich um einen hüpfenden Rhythmus
mit Percussion als einem der Hauptelemente. House entstand, als DJs
damit begannen, ihre Tanzmusik mit analogen 808- und 909-Drum-
computern aufzupeppen. DS
1989 Westcoast
Viele Schlagzeuger würden diesen Rhythmus spielen, wenn Sie ihnen
sagen, sie sollten irgendetwas mit 98 BPM spielen. Ein gerader »per-
fekter-Tag-um-an-den-Strand-zu-gehen«-Groove mit Einflüssen aus
der modernen Gospelmusik und modernen Pop/Rock-Beats. FvW
1990 Mini Works
Alle Klänge in dieser Stilrichtung wurden mit dem legendären Mini er-
zeugt, den ein sehr schlauer Mensch namens Moog erfand. Jeder Klang
ist abhängig vom Note-Off-Befehl. Das heißt, die wichtigen Note-Off-
Befehle werden tempounabhängig. Mini Works baut auf dieser Regel
auf, durch die Note-Off-Befehle zu genau so wichtigen rhythmischen
Komponenten werden wie all die kleinen coolen Note-Ons! Es gibt fünf
verschiedene Grooves mit je fünf Variationen. Wie fünf Zeitzonen in ei-
ner Synth Clock. Jeder Sound hat einen eigenen räumlichen Effekt im
Ambience-Modus, was die Note-Off-Funktion noch extremer wirken
lässt. Lieblingstempo: 95 BPM. Lieblingsräumlichkeit: keine! dB
1991 Fusion
Die Inspiration zu dieser geschäftigen Stilrichtung stammt von den
Fusion-LPs der frühen Neunziger. MEB
1992 Trance
Beim Erzeugen dieses Trance-Stils wollte ich Platz für eingängige
Melodien lassen. Daher ist das Schlagzeug leicht und soll nicht zu viel
Platz im Mix wegnehmen. Wenn Sie dennoch denken, dass die Drums
zu viel auditiven Platz einnehmen, drehen Sie an den Reglern, bis Ihre
Melodien wieder zum Hauptelement geworden sind. DS

Groove Agent
Deutsch 155
DEUTSCH
1993 Modern Soul
Geradeaus und sehr gut für langsame Pop- und Soul-Balladen geeig-
net. Modern Soul enthält eine Zusammenstellung von analogen, bear-
beiteten Sounds und elektronischen Klängen. LW
1994 Trip-Hop
Eine Reise auf die dunkle Seite des Trip-Hop. Stellen Sie sich vor, Sie
sind nachts auf einem gespensterhaften Dachboden und knien auf der
Suche nach einem alten Fotoalbum vor einer alten abgenutzten Truhe.
Plötzlich wird der Raum lebendig, der Boden quietscht und hölzernes
Spielzeug beginnt, einen langsamen rhythmischen Groove zu erzeugen.
Was nun? Grooven Sie sich ein oder rennen Sie um Ihr Leben! W
* Bristol Trip
Portishead war eine der Bands, die den Trip-Hop berühmt gemacht
haben. Sie liebten es, Ihre Songs live mit einem akustischen Drumkit
zu spielen und mit einem raffinierten Drummer. Fühlen Sie sich herz-
lich eingeladen! MS
1995 Busy Beat
In dieser Stilrichtung begegnen Sie einer Menge Sechzehntelnoten,
speziell in den höheren Variationsebenen. Busy Beat ist eine Art mo-
derner Funk-Stil mit vielen Geisternoten auf der Snare-Drum. Ich habe
mich vom Groove des Spin Doctors-Hits »Two Princes« sowie von
Candy Dulfers Song »Funkyness« inspirieren lassen. Wenn Sie genau
hinhören, werden die Inspirationsquellen offensichtlich. Die Program-
mierung wurde für ein Tempo von 104 BPM gemacht. FvW
1996 Drum’n’Bass
Diese Stilrichtung kombiniert schnelle Beats mit einem natürlichen
»1/2 Tempo Feel«, was in einem spielerischen rhythmischen Tanz re-
sultiert. Thunderdome-Sub-Bässe nagen an den Grenzen der Laut-
sprecherleistungsfähigkeit, während hektische Hochtonklänge den
Fluss aufrechterhalten. NE

Groove Agent
156 Deutsch
1997 Ambient
Zeit zum Chillout mit ein paar Ambient-Grooves und räumlichen Rhyth-
men. Es ist 5 Uhr morgens im Club und die zuvor stark bevölkerte Tanz-
fläche wird nur noch von ein paar langsamen Tänzern benutzt, die ihren
Puls zu den Beats langsam herunterfahren, während das fahle Morgen-
licht durch die Gardinen sickert. Mein Lieblingstempo für diesen Stil
liegt irgendwo bei 90 BPM. Probieren Sie verschiedene Kombinationen
aus trockenen und Effekt-Sounds sowie alternative Tonhöhen aus! Der
lange Hallschwanz auf manchen der tief gestimmten Drums kann im
Verhältnis zu den trockenen hochgestimmten Becken- oder Percus-
sion-Sounds eine wirklich nette rhythmische Spannung erzeugen. W
1998 Hip Hop
Groovy, phat und heavy Hip-Hop mit modernem Sound im Gegensatz
zum Basic Hip-Hop-Stil. Diese Stilrichtung wurde so programmiert,
dass sie ganz leicht »neben« dem Beat liegt und so einen guten Swing
erzeugt. Eng verwandt mit modernem RnB. Neue frische Bass-, Snare-
und Effekt-Sounds wurden speziell hierfür entwickelt. LW
1999 2-Step
Eine sehr kleine und schnelle Affäre mit hochgestimmten Klängen.
Diese Mischung aus 2-Step, Garage und frühem Synth-Pop verfügt
über einen leichten Swing-Faktor. LW
2000 Tribal Techno
Dieser Stil wurde für moderne Techno-Musik programmiert. Es steckt
viel von mir selbst darin. Es ist mein Tribut an die Underground Techno-
Kultur. Vielleicht erkennen Sie manche Grooves. Der Name dieser Stil-
richtung sagt es eigentlich. Hören Sie sich die Tribal Grooves an und
Sie werden den Namen verstehen. DS
2001 Nordic Pop
Ein gerader und moderner Pop-Groove, inspiriert durch das »Nordische
Hit-Phänomen« der letzten zehn Jahre. Stetig, komprimiert und einfach.
Die Bass- und Snare-Sounds wurden speziell hierfür entwickelt. LW

Groove Agent
Deutsch 157
DEUTSCH
2002 Nu RnB
Ein effektiver Groove mit polyrhythmischen Fills für das ganz spezielle
Feeling. Moderne RnB/Hip-Hop-Stilrichtung mit komprimiertem Sound,
wenn Sie so wollen. Die Bass- und Snare-Sounds wurden speziell hier-
für entworfen. LW
* Kelly
Dies ist eine coole, aber energische und moderne R&B-Stilrichtung.
Der grundlegende Beat ist langsam und schwer, während die HiHats
und andere Sounds doppeltes Tempo spielen und so einen dynami-
schen Kontrast bilden. Versuchen Sie zu variieren, indem Sie viele ver-
schiedene Fills verwenden. Beim Erzeugen dieser Stilrichtung wurden
keine Gefühle verletzt. NE
2003 Mini Club
Wiederum eine nur aus Moog-Sounds bestehende Bank. Und auch
hier 5 verschiedene Grooves mit jeweils 5 Variationsebenen. Diese Stil-
richtung findet hoffentlich ihren Weg zur Tanzfläche zukünftiger Tanz-
clubs. Probieren Sie auch hier die Note-Off-abhängigen Klänge aus!
Keine Soundgruppe darf stummgeschaltet sein, damit diese Rhythmen
vollständig sind. Hier gibt es keine speziellen Percussion-Zusätze. Der
Original-Groove wurde mit 120 BPM und absolut null Räumlichkeit er-
stellt, doch ich mag die Version mit voller Räumlichkeit ebenso gern,
denn jeder Klang erhält hier seine spezielle Effektbearbeitung! dB
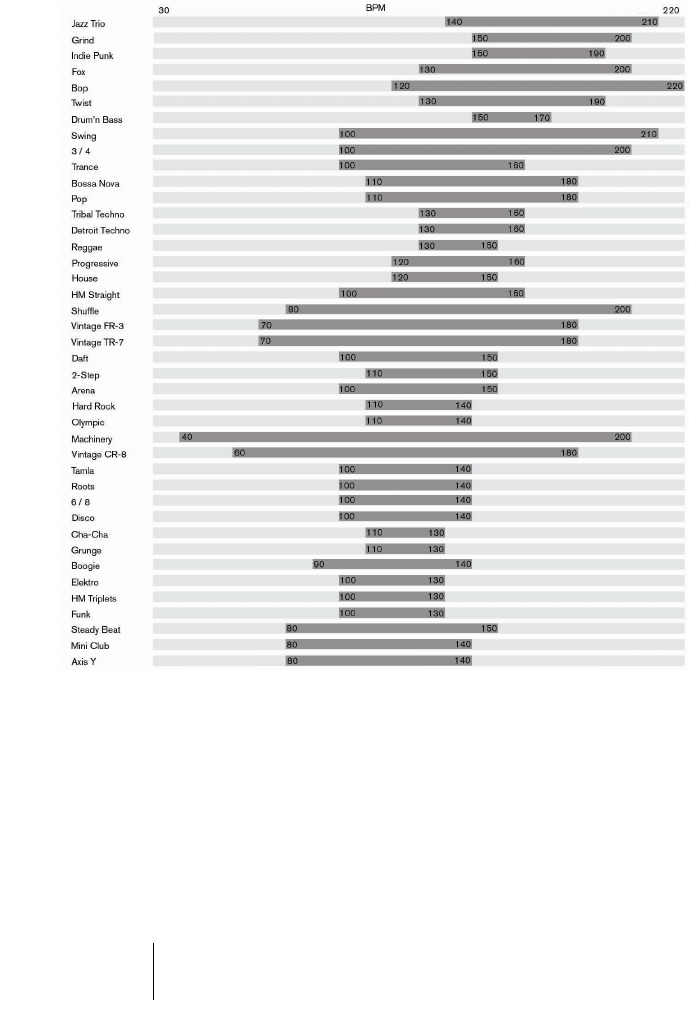
Groove Agent
158 Deutsch
Tempoübersicht
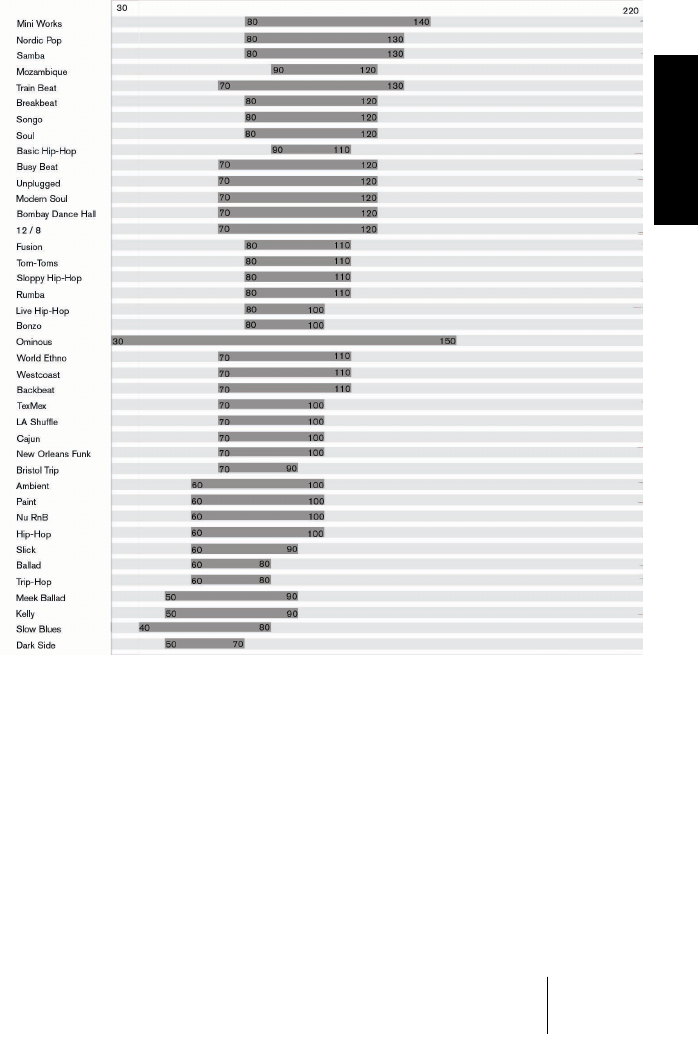
Groove Agent
Deutsch 159
DEUTSCH

Groove Agent
160 Deutsch
80 oder 160 BPM, wo liegt das richtige Tempo?
Wir entscheiden normalerweise über das Tempo einer bestimmten
Stilrichtung, indem wir uns vergegenwärtigen, wo sich die betonten
Taktteile (Downbeat) und die unbetonten Taktteile (Upbeat) befinden.
Ein Rhythmus, der sich wie Bum-Tschick-Bum-Tschick anhört, lässt
sich höchstwahrscheinlich durch Zählen von 1-2-3-4 in derselben Ge-
schwindigkeit durchzählen. In einem Großteil der westlichen populären
Musik werden die Downbeats (1 und 3) von der Bass-Drum gespielt
und die Backbeats (2 und 4) von der Snare-Drum.
Wie immer gibt es auch hier Ausnahmen. Reggae z.B. hat von Natur
aus einen »1/2 Tempo Feel«. Der Reggae in dieser Groove Agent-Ver-
sion spielt den Backbeat eigentlich auf dem dritten Schlag des Takts.
Es schien uns einfach sinnvoller zu sein, seinen bevorzugten Tempo-
bereich bei 130 bis 150 BPM anzusiedeln, als diese Zahlen zu halbie-
ren. Gleiches gilt für die Stilrichtung Cajun.
Stilrichtungen wie Tom-Toms, Backbeat und Train Beat haben ande-
rerseits irgendwie den natürlichen Hang zum doppelten Tempo. Die
Stilrichtung Train Beat funktioniert am besten irgendwo in der Region
um 100 BPM. Sicher praktischer als 200, nicht wahr?
Die passende Stilrichtung für Ihren Song
Angenommen Sie arbeiten an einem Song mit 104 BPM und möchten
wissen, welche Stilrichtungen diesem Tempo entsprechen? Schauen
Sie sich die Tempoübersicht an. Sie gibt Ihnen Anhaltspunkte, welche
Stilrichtungen über ein passendes Tempo verfügen.

Groove Agent
Deutsch 161
DEUTSCH
Mit Groove Agent jammen
Vielleicht verspüren Sie den Drang, selbst ein Schlagzeug-Instrument
zu spielen. Vielleicht haben Sie eine viel bessere Idee für das Bass-
Drum-Pattern, als das, was Groove Agent Ihnen hierzu bietet, oder
Sie möchten gerne einen sehr speziellen Tambourine-Rhythmus hin-
zufügen. Das ist alles machbar!
Wenn Sie beispielsweise die Bass-Drum stummschalten, gibt Groove
Agent das Bass-Drum-Pattern nicht wieder. Sie können nun Ihre ei-
gene Bass-Drum über das MIDI-Keyboard einspielen. Wenn Sie die
MIDI-Ausgabe von Groove Agent aufnehmen, landet Ihr Spiel auch in
einem neu erzeugten MIDI-Part.
Bequeme Anwendung
Wir stimmen Ihnen sofort zu, wenn Sie sagen, einige der Regler die-
ses Instruments sind klein, sehr klein. Beim Sound-Einstellen kann ein
Regler plötzlich von einer Extremposition in die andere springen. Das
ist nicht sehr komfortabel.
❐
Wenn Ihr Sequenzer Ihnen Auswahlmöglichkeiten bei der Anwendung
von Reglern und anderen Steuerelementen ermöglicht, sollten Sie die
Einstellung »linear« (auf- und abwärts) auswählen. Auf diese Weise kön-
nen Sie in der Regel besser und übersichtlicher arbeiten.

Groove Agent
162 Deutsch
Steuern von Groove Agent per MIDI-Keyboard
Sie können Groove Agent auch von einem angeschlossenen MIDI-
Gerät, z.B. einem MIDI-Keyboard, aus fernsteuern. Wir haben ein ent-
sprechendes Schema vorbereitet, so dass fast alles, was Sie auf dem
Bildschirm direkt erledigen können, auch über eine solche Fernsteue-
rung erledigt werden kann. Hier folgt eine vollständige Beschreibung.
•Mit den MIDI-Noten B0 bis A3 (35-69) lassen sich die internen
Sounds gemäß der auf Seite 129 vorliegenden Abbildung wiederge-
ben. Auf diese Drum-Sounds kann stets zugegriffen werden.
•Wenn Sie Groove Agent über MIDI-Kanal 10 ansteuern, entspricht
das Keyboard-Mapping dem General-MIDI-Standard (GM).
•Die MIDI-Note A#3 (70) fungiert als Accent-Schalter. Sie unterbindet
auch die Patternwiedergabe, so lange Sie sie herunterdrücken; spielen
Sie eine Synkope und halten Sie diese Taste etwa eine Viertelnote lang
gedrückt, um einen realistischen synkopischen Effekt zu erzeugen.
Bitte beachten Sie, dass das Timing dieser Taste besser ist, als das
des Accent-Schalters auf dem Bildschirm.
•Die MIDI-Note B3 (71) stoppt Groove Agent wenn das Instrument läuft.
•Durch Bewegen des Modulationsrads oder durch Senden des
Control-Change-Befehls 66 lösen Sie ein Fill aus.
•Beim Steuern von Groove Agent über einen ungeraden Kanal, dienen
die MIDI-Noten C4 bis C6 (72-96) zwei Zwecken. Das Drücken einer
dieser Tasten startet Groove Agent. C4 wählt die Complexity-Ebene
(Variation) A, G5 die Ebene15 aus usw. Wenn Sie eine der Tasten mit
einem Anschlagdynamikwert von mehr als 90 anspielen, lösen Sie ein
Fill aus.
•Beim Steuern von Groove Agent über einen geraden Kanal, können
Sie mit den weißen MIDI-Tasten C4 bis B4 (72-83) die acht einzelnen
Instrumentengruppen stummschalten oder die Stummschaltung auf-
heben.
Mit den schwarzen Tasten oberhalb C4 (C#4 bis A#5 oder 73-94)
lassen sich die Speicherplätze 1 bis 10 auswählen.

Groove Agent
Deutsch 163
DEUTSCH
•Wenn Sie im Kontextmenü das Untermenü »MIDI Mute Key Mode« öff-
nen, stehen Ihnen drei verschieden Modi zum Verwalten von Gruppen
zur Verfügung:
– Toggle: Wie oben. Mit den weißen Tasten C4-C5 lassen sich die Instrumentgruppen
1-8 ein- und ausschalten.
– Velocity Switch: Noten mit höheren Anschlagstärkewerten (>64) schalten Gruppen
stumm, Noten mit niedrigeren Anschlagstärkewerten heben die Stummschaltung von
Gruppen auf.
– While Held: Gruppen werden kurzfristig stummgeschaltet (bzw. deren Stummschal-
tung aufgehoben, je nach aktuellem Status), solange die Noten gehalten werden.
Wenn Sie zusätzlich über ein weiteres Modulationsrad oder andere
spezielle Controller auf Ihrem Keyboard verfügen, können Sie fol-
gende Control Change-Nummern (CCs) zum Steuern von Groove
Agent verwenden:
Auch beim Bearbeiten von Groove Agent Drum-Parts in Ihrem Sequen-
zer können sich die hier genannten Controller-Nummern als praktisch
erweisen.
Diese MIDI-Control-
Change-Nummer(n)… steuern…
2 und 65 Snare/Sidestick-Auswahl
3 und 64 1/2 Tempo Feel
7 Gesamtlautstärke
76 Das Host-Tempo (60 + Wert), falls Ihre Host-Ap-
plikation Temposynchronisation nicht unterstützt.
77 Humanize-Funktion
78 Shuffle-Funktion
83 Vintage Mode-Funktion An/Aus
91 Ambience-Funktion
Prg chng Speicherauswahl 1 bis 10

Groove Agent
164 Deutsch
Sie können Groove Agent vielseitiger steuern, wenn Sie die Steuer-
möglichkeiten über MIDI verwenden. Die folgenden Befehle fungieren
als Steuerung für jede der acht Ausgangsgruppen auf den MIDI-Kanä-
len 1 bis 8:
MIDI-Control-Change-Nummer Funktion
69 Mute
70 Vel Offset
71 Tune
72 Ambience
73 Volume
74 Output
75 Decay

Groove Agent
Deutsch 165
DEUTSCH
Kontakt, Internet
Besuchen Sie unsere Website: http://www.bornemark.se, um weitere
Informationen zu erhalten und um mit den an Groove Agent beteiligten
Personen in Kontakt zu treten.
Credits
Konzept und Realisation: Sven Bornemark
Programmierung: Paul Kellett / mda
Design und Graphik: Wirebird
Akustisches Sounddesign: Per »Worra« Larsson/Sample Tekk, Sven
Bornemark und Mats-Erik Björklund
Toningenieur: Jens Bogren und Rickard Bengtsson im Studio Kuling,
Örebro
Session Drummer: Mats-Erik Björklund
Elektronische Klänge von Primesounds sowie Privatkollektionen. Zu-
sätzliche Samples aus den Studios von Daniel Sunebring, Lars Wes-
tin und Wirebird. Die Mini-Sounds wurden von Dan Bornemark im
Studio McBuddha erstellt. Der EMT-Plattenhall wurde in den Tambou-
rine Studios in Malmö aufgenommen.
Musiker: Per Almered, Roger Berg, Mats-Erik Björklund, Dan Borne-
mark, Sven Bornemark, Mats Dagerlind, Nils Erikson, Marshall Karls-
son, Ronny Milianowicz, Per Samuelsson, Michael Spork, Jens
Ståhlstierna, Daniel Sunebring, Figge von Wachenfeldt, Lars Westin
und Wirebird
Audio Mastering: Uffe Börjesson
Projektmanagement: Helge Vogt
Handbuch: Sven Bornemark und Mats Dagerlind mit freundlicher
Unnterstützung der Steinberg-Handbuchabteilung
Während der Produktion haben wir sehr viel Hilfe von Mitarbeitern von
Steinberg in Hamburg erhalten. Ihr seid einfach zu viele, daher
VIELEN DANK AN EUCH ALLE!

Groove Agent
166 Deutsch
Wir möchten uns bei den folgenden Firmen für ihre freundliche Unter-
stützung bedanken: MusicMania/Feedback Music (Malmö) und Audio-
master (Örebro).
Last but not least…
Danke, HeavenlyHansson, für die Anregung zu diesem Instrument.
Und Dank an Per »Worra« Larsson von Sample Tekk für das geduldige
Audio-Editing.
Dank gilt auch Mats-Erik für sein Wissen, seine Musikalität und Ener-
gie, die er in dieses Instrument eingebracht hat. Lohn dafür sind natür-
lich auch die langersehnten und großartigen Sample-Sets der Drums!
Groove Agent
Mode d’Emploi
par Sven Bornemark

Groove Agent
168 Français
Les informations contenues dans ce document sont sujettes à modification sans préa-
vis, et ne sont pas contractuelles de la part de Steinberg Media Technologies GmbH.
Le logiciel décrit dans ce document est sujet à un Agrément de Licence et ne peut
être copié sur un autre média. Aucune partie de ce manuel ne peut être copiée, repro-
duite ou transmise ou enregistrée de toute manière que ce soit, pour quelque propos
que ce soit, sans la permission écrite préalable de la part de Steinberg Media Tech-
nologies GmbH.
Tous les noms de produits et de sociétés sont des marques™ ou ® de leur propriétaire
respectif. Windows XP est une marque déposée de Microsoft Corporation. Le logo
Mac est une marque déposée utilisée sous licence. Macintosh et Power Macintosh
sont des marques déposées.
© Steinberg Media Technologies GmbH, 2005.
Tous droits réservés.

Groove Agent
Français 169
FRANÇAIS
Table des matières
170 Bienvenue !
173 Comment utiliser Groove Agent ?
174 Groove Agent : Qu’est-ce que c’est ?
174 Enregistrez votre logiciel !
175 La clé Steinberg
177 Configuration nécessaire – PC sous Windows
177 Installer Groove Agent (version PC)
178 Configuration nécessaire – Mac OS
178 Installer Groove Agent (version Mac)
179 Activation de la clé Steinberg Key
180 Configurer Groove Agent comme instrument VST
dans votre application hôte
181 Configurer Groove Agent comme un instrument DXi2
182 Utiliser Groove Agent dans une application compatible AU
183 Groove Agent indépendant et ReWire
184 Premier test
185 La terminologie de Groove Agent
187 À propos des sons de cet instrument VST
194 Utilisation de Groove Agent
195 L’affichage LCD
196 Range
196 Le menu “clic droit”
197 Faders, potentiomètres et boutons
206 Mute, groupage et sélection d’instruments
207 Stop/Run
209 Sous le couvercle
212 Sous le petit couvercle
217 Créer une piste rythmique dans Groove Agent
219 Utiliser la sortie MIDI de Groove Agent dans Cubase SX
220 Utiliser l’automatisation dans Cubase SX
221 Composer avec les cases mémoire de Groove Agent dans Cubase SX
223 À propos des styles
241 Guide de tempo
243 80 ou 160 BPM, quel est le tempo correct ?
243 Trouver un style adapté à votre morceau
243 Jam Session avec Groove Agent
244 Manipulations plus confortables
244 Contrôler Groove Agent depuis un clavier MIDI
246 Contact, Internet
246 Crédits
247 Enfin…

Groove Agent
170 Français
Bienvenue !
Au début de l’année 2002, un des membres de notre forum VST suédois
a suggéré que quelqu’un pourrait créer une boîte à rythmes qui serait un
instrument VST bénéficiant des technologies actuelles. Un instrument qui
rappellerait les bonnes vieilles boîtes à rythmes, où l’on trouvait des styles
de l’époque, comme la Rumba et le Cha-Cha ; ce nouveau-né serait aussi
capable de jouer un grand nombre de styles différents. Et grâce à la tech-
nologie audio 24 bits d’aujourd’hui, il disposerait aussi des couches de
vélocité, des enregistrements en ambiance réelle et d’un tableau de bord
convivial... il y a un problème ?
Un an plus tard, nous vous présentions Groove Agent, une boîte à
rythmes moderne. Et maintenant, début 2005 nous vous présentons
Groove Agent 2 – l’étape logique suivante. Nous lui avons ajouté du
contenu sous la forme de drum kits acoustiques et électroniques, plus
27 nouveaux styles et avons amélioré certaines fonctions. Mais le com-
portement de base de votre “drum machine” reste le même, aussi pour
quelqu’un qui dirait :
- “Je ne sais pas programmer les rythmes”,
- “Je n’ai pas le temps de programmer les rythmes”,
- “Je cherche l’inspiration !”,
Groove Agent 2 offre une assistance et une inspiration instantanée
pour la production de morceaux, jingles, bandes son ou tout autre
genre musical nécessitant souplesse et rapidité. Nous savons aussi
que certains habitués de Groove Agent préfèrent utiliser notre
boîte à
rythmes
comme source rythmique pour alimenter des expandeurs exter-
nes, ou pour utiliser les sons intégrés dans leurs propres rythmiques.
Ou tout autre combinaison possible.
Je crois sincèrement que le slogan que nous avions inventé il y a deux
ans est encore vrai pour cette version de Groove Agent :
“Créez une rythmique professionnelle en 3 minutes, le temps que dure
votre morceau !”.
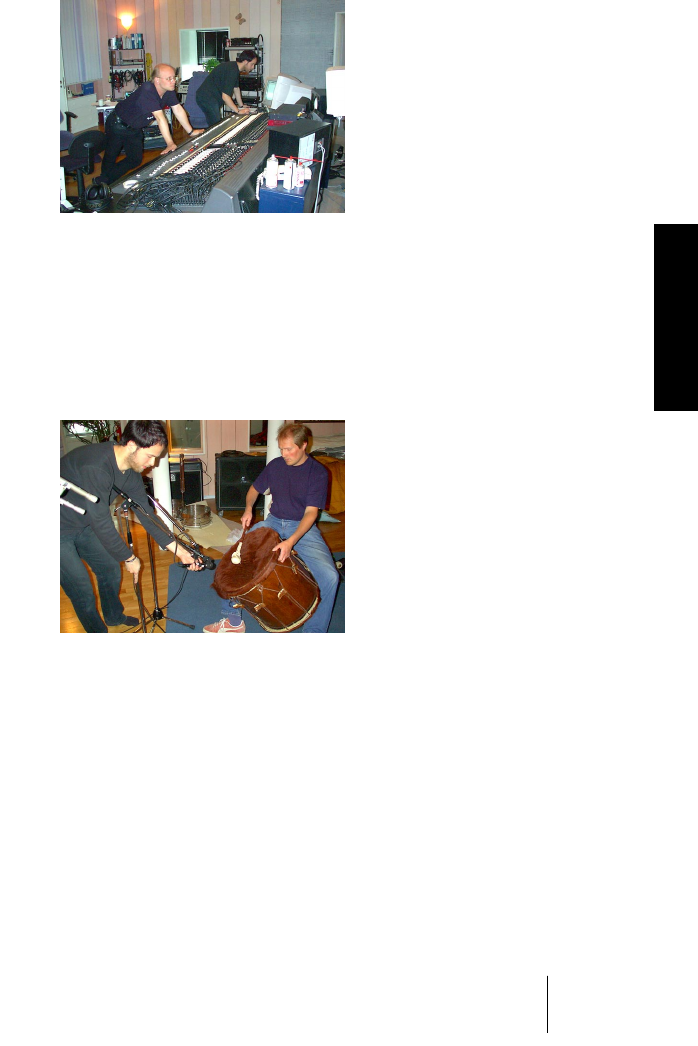
Groove Agent
Français 171
FRANÇAIS
Pourquoi ne pas oublier les moments ennuyeux de la vie et se concen-
trer sur les moments les plus intéressants ! Personnellement, je consi-
dère que l’écriture de chansons est le plus bel art au monde, et Groove
Agent 2 est conçu pour aider tous ceux qui ont besoin de rythmique
dans leur musique ; une rythmique instantanée pour ne pas interrompre
votre créativité.
Les outils informatiques ne peuvent remplacer la réalité humaine, pas
plus dans les programmes musicaux que dans les autres logiciels.
Nous avons fait de notre mieux pour garder un aspect humain dans
Groove Agent 2 en demandant à de vrais musiciens de contribuer à
sa programmation, en jouant leurs meilleurs grooves. Et quand ils ont
pensé que c’était terminé, le plus dur restait à faire ; ajouter des ver-
sions ayant un feeling mi-tempo et du “Sidestick” aux 25 niveaux de
complexité de chaque style ! Les résultats surprennent souvent les
musiciens eux-mêmes, et l’ensemble de ces efforts est réuni dans des
centaines de mesures rythmiques.

Groove Agent
172 Français
Merci d’utiliser Groove Agent 2 pour créer de la bonne musique !
La musique est nécessaire à l’âme, et grâce à ce nouvel outil musical
vous serez assisté et inspiré pour atteindre des sommets encore plus
élevés.
Sven Bornemark
/Créateur

Groove Agent
Français 173
FRANÇAIS
Comment utiliser Groove Agent ?
Vous pouvez utiliser Groove Agent comme application indépendante
ou bien avec une application hôte : un séquenceur logiciel. Si votre sé-
quenceur supporte des instruments VST, vous pouvez utiliser Groove
Agent. Commencez comme ceci :
1. Préparez une piste et chargez Groove Agent.
2. Sélectionnez un style ou un style associé avec le fader supérieur de
Groove Agent (voir page 197). Attendez un instant jusqu’à ce que les
données de sons soient complètement chargées.
3. Si vous cliquez sur le bouton Run, Groove Agent commence à jouer.
Bougez le fader Complexity pour écouter les variations de style.
4. Sélectionnez un autre style et écoutez-le pendant que vous changez
les sons individuels de batterie, cliquez sur le bouton Fill ou rendez
muets les instruments de percussion, vérifiez comment ça sonne plus
lent (en cliquant sur le bouton 1/2 Tempo Feel) ou ajoutez une syncope
(en cliquant sur le bouton Accent). D’ailleurs, avez-vous déjà essayé le
potentiomètre Ambience ?
Maintenant il est temps d'intégrer Groove Agent dans votre musique
comme un véritable batteur !

Groove Agent
174 Français
Groove Agent : Qu’est-ce que c’est ?
En termes techniques Groove Agent utilise des milliers de patterns
MIDI par défaut qui ont été créés par de célèbres musiciens suédois.
Ces patterns déclenchent des échantillons spécialement enregistrés
pour cet instrument.
Le fader supérieur vous permet de sélectionner un style musical ou un
style associé et le kit correspondant. Vous pouvez choisir des kits
acoustiques ou des kits électroniques. Grâce au fader Complexity
vous pouvez en régler la complexité, c’est-à-dire un style plus élaboré.
Pour chaque niveau il existe un Fill correspondant, un pattern mi-tempo
et une version Sidestick. De plus, la section Edit vous permet d’éditer
les sons et même de changer les instruments.
Nous sommes très fiers de l’expertise musicale qui est incluse dans
chaque niveau de style disponible. Ce logiciel a été produit par des
musiciens pour des musiciens !
Enregistrez votre logiciel !
Veuillez remplir et renvoyer la carte d’inscription fournie dans la boîte
de votre logiciel. De cette façon, vous aurez accès au support techni-
que et serez tenu informé des mises à jour et autres nouveautés con-
cernant Groove Agent.
Groove Agent
Français 175
FRANÇAIS
La clé Steinberg
❐
Veuillez lire cette section avant d’installer le logiciel Groove Agent.
Dans le coffret Groove Agent, vous trouverez un code d’activation (à
ne pas confondre avec le numéro de série) pour la clé “Steinberg
Key” (parfois appelée “dongle”), ce dispositif fait partie du système de
protection anti-copie de Groove Agent. Groove Agent ne fonction-
nera pas tant que vous n’aurez pas correctement installé et activé la
clé Steinberg Key. Vous avez la possibilité d’acheter séparément une
clé Steinberg afin de l’utiliser avec Groove Agent, ou d’utiliser une clé
achetée précédemment avec une autre application Steinberg.
•Si vous avez un PC sous Windows et que vous n’avez jamais utilisé
de dongle sur cet ordinateur jusqu’à maintenant, la routine d’installa-
tion peut initier un redémarrage de Windows après l’installation des
pilotes de la clé. Après le redémarrage, la clé doit être branchée dans
le port USB pour que la routine d’installation se poursuive.
•Si vous possédez déjà un logiciel nécessitant une clé Steinberg Key,
celle-ci doit être branchée dans le port USB de l’ordinateur après
avoir installé Groove Agent et redémarré l’ordinateur !
Lorsque la clé est branchée dans le port USB, Windows la répertorie
automatiquement comme un nouveau matériel et essaie de trouver les
pilotes adéquats – or ces pilotes indispensables ne seront présents
qu’après l’installation d’Groove Agent et le redémarrage de l’ordinateur.
La clé Steinberg Key

Groove Agent
176 Français
La clé Steinberg Key est en fait un petit ordinateur, sur lequel vos li-
cences logicielles Steinberg sont mémorisées. Tous les produits
Steinberg protégés de cette manière utilisent la même clé, et les li-
cences peuvent (dans certaines limites) être transférées d’une clé de
protection à une autre – ce qui est pratique lorsque vous désirez re-
vendre un des logiciels.
❐
Si vous possédez déjà une clé Steinberg Key (par ex. pour Cubase ou
Nuendo), vous pouvez charger votre licence Groove Agent sur celle-ci,
en utilisant le code d’activation fourni avec Groove Agent. Ainsi vous
n’aurez besoin que d’une seule clé USB pour l’application hôte et pour
Groove Agent (voir ci-après).
❐
La clé Steinberg Key ne doit pas être branchée, ni avant, ni durant l’ins-
tallation d’Groove Agent si c’est la première fois que vous utilisez une
telle clé. Sinon Windows l’enregistrerait comme un nouveau matériel
USB et essaierait de trouver des pilotes qui ne seront pas présents
avant l’installation de Groove Agent.

Groove Agent
Français 177
FRANÇAIS
Configuration nécessaire – PC sous Windows
Pour utiliser Groove Agent, vous aurez besoin de :
•Un PC équipé d’un processeur Pentium ou Athlon 800 MHz (1,4 GHz ou plus
rapide est recommandé).
• 384 Mo de RAM (512 Mo recommandé).
• 450 Mo d’espace disponible sur votre disque dur.
• Windows® XP Personnel ou Professionnel.
•Matériel audio compatible Windows MME (une carte audio compatible ASIO
est recommandée).
•Si vous voulez utiliser Groove Agent comme plug-in vous avez besoin de Cu-
base ou Nuendo (version 1.5 ou supérieure) ou une autre application hôte com-
patible VST 2.0 ou DXi 2. Notez que quelques fonctions ne sont supportées
que par Cubase ou Nuendo.
• Une clé ”Steinberg Key” et un port USB libre.
• Moniteur et carte graphique d’une résolution de 1024 x 768 (une configura-
tion avec double moniteur et une résolution d’affichage de 1152 x 864 sont
recommandées).
❐
Veillez aussi à respecter la configuration nécessaire à votre application
hôte.
Installer Groove Agent (version PC)
Pour installer Groove Agent sur votre PC, procédez comme ceci :
1. Démarrez votre ordinateur et lancez Windows.
2. Insérez le CD de Groove Agent dans le lecteur CD de votre ordinateur.
3. Lancez l’Explorateur ou ouvrez la fenêtre “Poste de travail” et double-
cliquez sur l’icône du lecteur CD.
4. Double-cliquez sur l’icône du programme de configuration pour dé-
marrer l’installation de Groove Agent et suivez les instructions à l’écran.

Groove Agent
178 Français
Configuration nécessaire – Mac OS
Pour utiliser Groove Agent, vous aurez besoin de :
•Un ordinateur Power Mac G4 867 MHz (Power Mac G4 Dual et 1.25 GHz ou
plus est recommandé).
• 384 Mo de RAM (512 Mo recommandé).
• 450 Mo d’espace disponible sur votre disque dur.
• Mac OS X version 10.3 ou plus récente.
• Une carte audio compatible CoreAudio.
•Si vous voulez utiliser Groove Agent comme plug-in vous avez besoin de Cu-
base ou Nuendo (version 1.5 ou supérieure) ou une autre application hôte
compatible VST 2.0 ou AU. Notez que quelques fonctions ne sont supportées
que par Cubase ou Nuendo.
• Une clé ”Steinberg Key” et un port USB libre.
• Moniteur et carte graphique d’une résolution de 1024 x 768 (une configura-
tion avec double moniteur et une résolution d’affichage de 1152 x 864 sont
recommandées).
❐
Veillez aussi à respecter la configuration nécessaire à votre application
hôte.
Installer Groove Agent (version Mac)
Pour installer Groove Agent sur votre Mac, procédez comme ceci :
1. Allumez votre ordinateur et insérez le CD du Groove Agent.
2. Si la fenêtre du CD ne s’ouvre pas automatiquement, double-cliquez
sur l’icône de Groove Agent pour l’ouvrir.
3. Double-cliquez sur l’icône de l’Installateur de Groove Agent pour
charger le programme d’installation. Suivez les instructions à l’écran.

Groove Agent
Français 179
FRANÇAIS
Activation de la clé Steinberg Key
❐
Que vous ayez acheté une nouvelle clé avec Groove Agent, ou que vous
en utilisiez une acquise précédemment avec un autre produit Steinberg :
votre clé Steinberg Key ne contient pas encore de licence valide pour
Groove Agent. Vous devez télécharger cette licence afin de pouvoir lan-
cer Groove Agent !
Utilisez le code d’activation fourni avec le programme afin de télé-
charger une licence valide Groove Agent sur votre clé Steinberg Key.
Ce processus est le même pour une ancienne clé ou une nouvelle.
Procédez comme ceci :
1. Après l’installation du programme et le redémarrage de l’ordinateur,
branchez la clé Steinberg Key dans le port USB.
Si vous n’êtes pas sûr du port à utiliser, consultez la documentation de l’ordinateur.
2. Lors du premier branchement de la clé de protection anti-copie, celle-
ci est répertoriée comme un nouveau matériel, et un dialogue apparaît
vous demandant si vous désirez rechercher les pilotes de ce matériel
manuellement ou automatiquement.
Choisissez la méthode de recherche automatique. Le dialogue se referme. Il faudra
peut être “redémarrer” votre ordinateur
3. Vérifiez que votre ordinateur dispose d’une connexion internet en état
de marche.
Le transfert de licence s’effectue “en ligne”. Si votre ordinateu
r Groove Agent
n’est pas
connecté à l’internet, il est possible d’utiliser un autre ordinateur pour cette connexion. Sui-
vez les étapes ci-dessous et consultez l’aide de l’application
Centre de Contrôle de Li-
cences en cas de besoin.
4. Lancez l’application “Centre de Contrôle de Licences” (se trouvant
dans le menu Démarrer de Windows sous “Syncrosoft” ou dans le
dossier Applications du Macintosh).
Cette application permet de visualiser vos clés Steinberg et de charger ou de transfé-
rer les licences de l’une à l’autre.
5. Utilisez le menu “Assistants” du Centre de Contrôle de Licences et le
code d’activation fourni avec Groove Agent pour télécharger la licence
sur votre clé. Il suffit de suivre les instructions à l’écran.
Si vous n’êtes pas sûr de savoir comment procéder, consultez l’aide du CCL.

Groove Agent
180 Français
Lorsque le processus d’activation est terminé, vous êtes prêt à lancer
Groove Agent!
Configurer Groove Agent comme instrument
VST dans votre application hôte
La section suivante décrit comment configurer le Groove Agent avec
Cubase SX comme application hôte. Notez que la même procédure
est aussi valable pour la plupart des applications hôte. Reportez-vous
à la documentation correspondante pour avoir des informations plus
détaillées.
Assurez-vous que l’application hôte a été installée et configurée cor-
rectement pour l’utilisation de votre matériel MIDI et audio (par exem-
ple le clavier MIDI et la carte audio).
Procédez comme ceci pour configurer Groove Agent :
1. Ouvrez la fenêtre “VST Instruments”.
2. Cliquez dans une case d'instrument VST et sélectionnez Groove
Agent dans le menu local qui apparaît.
3. Attendez un instant jusqu’à ce que Groove Agent charge les échan-
tillons de style par défaut. La fenêtre Groove Agent s’ouvre automati-
quement.
4. Dans l’application hôte VST, sélectionnez Groove Agent comme sor-
tie pour une des pistes MIDI.

Groove Agent
Français 181
FRANÇAIS
Configurer Groove Agent comme un
instrument DXi2
❐
Les informations de ce paragraphe font référence à l’usage de Groove
Agent à partir de Cakewalk SONAR. Nous supposons que vous avez cor-
rectement configuré la SONAR et votre matériel MIDI et audio (cartes).
Si vous désirez utiliser Groove Agent à partir d’une autre application
hôte compatible DXi2, veuillez vous reporter à la documentation corres-
pondante.
Procédez comme ceci pour activer Groove Agent:
1. Vérifiez que SONAR reçoit bien les données MIDI qui sont générées
par votre clavier MIDI externe. Vous pouvez vérifier cela à l’aide de
l’icône “Activité MIDI In/Out”.
2. Dans SONAR, ouvrez la fenêtre “Synth Rack” à partir du menu View.
3. Cliquez sur le bouton Insert (ou sélectionnez l’option Insert du menu
principal).
4. Ouvrez le sous-menu DXi Synth et sélectionnez “Groove Agent” dans
le menu local.
5. Par défaut, c’est le dialogue “Insert DXi Options” qui apparaît. Pour
créer une seule piste MIDI et connecter une piste audio aux sorties
1+2 de Groove Agent, activez les options “Midi Source Track” et
“First Synth Output”. Afin de créer toutes les sorties Groove Agent
possibles activez “All Synth Outputs”. Reportez-vous à la documenta-
tion de votre application hôte pour plus de détails.
6. Cliquez sur le bouton “Connection State” dans la fenêtre Synth Rack
afin d’activer/désactiver Groove Agent. Par défaut, il est automatique-
ment activé lors du lancement des synthés DXi.
7. Double-cliquez sur la ligne “Groove Agent” ou cliquez sur le bouton
“Synth Properties” (Propriétés du Synthé) dans la barre d’outils de la
fenêtre Synth Rack pour ouvrir la fenêtre Groove Agent.

Groove Agent
182 Français
8. Dans SONAR, sélectionnez la piste MIDI précédemment créée
“Groove Agent”. Groove Agent reçoit désormais les données MIDI de
la piste sélectionnée.
Groove Agent reçoit les données MIDI en mode Multi 16 canaux. Il n’est donc pas né-
cessaire d’assigner un canal MIDI spécifique pour la réception dans Groove Agent.
Toutefois, assurez-vous que le canal MIDI de la piste sélectionnée dans SONAR est
réglé sur le numéro du canal sur lequel vous voulez que Groove Agent reçoive les don-
nées MIDI.
Utiliser Groove Agent dans une application
compatible AU
Vous pouvez utiliser Groove Agent dans une application hôte AU (ex.
Logic).
La version AU de Groove Agent est installée dans le dossier “Library/
Audio/Plug-ins/Components“ et permet à Groove Agent de travailler
dans un environnement AU – sans aucune dégradation des perfor-
mances, ni incompatibilité.
Pour Logic Pro 7 procédez comme ceci :
1. Ouvrez la console de pistes et choisissez la voie d’Instrument désirée.
2. Faites un [Commande]-clic sur le champ I/O et dans le menu local qui
apparaît, choisissez Multicanal ou Stéréo.
3. Dans le sous-menu qui apparaît, sélectionnez All Instruments puis
Groove Agent.
Groove Agent est alors chargé comme un instrument AU.
Lorsque c’est fait, vous êtes prêt à charger quelques échantillons et à
commencer à utiliser Groove Agent !

Groove Agent
Français 183
FRANÇAIS
Groove Agent indépendant et ReWire
Groove Agent peut être employé comme une application spécifique,
indépendamment de toute application hôte. Il est alors possible d’uti-
liser Groove Agent dans des applications séquenceur qui ne sont pas
compatibles avec un des formats de plug-in de Groove Agent (tel que
VST, DXi, AU), mais permettent l’échange de données via ReWire.
ReWire2 est un protocole spécial de streaming de données audio et
MIDI entre deux applications. Lorsque vous utilisez ReWire, l’ordre
dans lequel vous lancez et quittez les deux programmes est très im-
portant, car c’est la première application audio lancée qui capturera
les ressources de la carte son. Procédez comme ceci :
1. Lancez d’abord l’application séquenceur que vous désirez utiliser
(ex. Ableton Live, ProTools).
Si votre séquenceur est compatible ReWire, il dispose d’un moyen d’assigner les
voies audio et MIDI pour l’échange des données. Reportez-vous à la documentation de
votre application séquenceur pour les détails.
2. Puis lancez Groove Agent en tant qu’application indépendante.
Si vous décidez de créer des éléments de Bureau et du menu Démarrer pendant l’ins-
tallation de Groove Agent, vous pourrez lancer le programme comme n’importe quelle
autre application présente sur votre ordinateur. Vous pouvez aussi double-cliquer sur
le fichier du programme Groove Agent dans le dossier d’installation.
Désormais, lorsque vous jouerez un style avec Groove Agent, le son
sera envoyé via ReWire aux voies de la console que vous avez assi-
gnées dans votre application hôte. Vous pouvez envoyer les sorties
des instruments séparément à des canaux individuels de la console
(jusqu’à 8).
Notez que vous faites maintenant fonctionner deux applications com-
plètement séparées. Lorsque vous sauvegardez votre projet séquen-
ceur, celui-ci inclut l’ensemble de la configuration des voies et des
bus, mais pas les réglages effectués dans Groove Agent ! Pour con-
server ces réglages, choisissez la commande Save Bank dans le menu
File de Groove Agent. Vous pouvez choisir un nom de fichier indiquant
que ce fichier contient des réglages créés pour un projet séquenceur
particulier.

Groove Agent
184 Français
De même, lorsque vous réouvrez un projet dans votre application sé-
quenceur après avoir lancé Groove Agent, utilisez la commande Load
Bank dans Groove Agent pour recharger les réglages Groove Agent
correspondant à ce projet particulier.
Premier test
Pour vous assurer que Groove Agent est configuré correctement et
prêt à jouer, procédez comme ceci :
1. Si vous chargez Groove Agent comme instrument VST, assurez-vous
qu’il est sélectionné comme sortie MIDI pour une piste et choisissez le
canal MIDI désiré, sauf le canal 10. Si besoin est, assurez-vous que vo-
tre contrôleur MIDI est assigné à cette piste.
2. Ouvrez le tableau de bord de Groove Agent. Positionnez le fader Style
sur un style de votre choix. Notez que le chargement des échantillons
correspondant à ce style peut prendre un petit moment. L’affichage
LCD vert vous indique que le style est en train d’être chargé (“Loa-
ding…”) ou bien que le chargement est terminé (“Ready!”).
3. Réglez le tempo de votre application hôte au tempo du style, indiqué
dans le champ “range” de l’affichage LCD vert.
4. Cliquez sur le bouton Run de Groove Agent. Les diodes rouges du VU-
mètre sur le tableau de bord du Groove Agent se mettent à clignoter et
l’affichage des battements indique 1-2-3-4. De plus, vous devez enten-
dre ces rythmes sur vos haut-parleurs !

Groove Agent
Français 185
FRANÇAIS
La terminologie de Groove Agent
L’affichage LCD – Le gros affichage vert vous indique ce qui se passe
dans Groove Agent. C’est votre principale source d’informations.
Les VU-mètres LCD – Les VU-mètres rouges s’allument lorsque le
Groove Agent joue. Ils vous indiquent que des sons sortent de Groove
Agent. Pour des informations plus précises, veuillez utiliser les VU-mè-
tres de votre séquenceur hôte.
Style – Un style musical, normalement associé à un kit de batterie et
de percussions spécifique.
Kit – Un jeu de batterie et de percussions associé à un style. Style et
kit peuvent aussi être sélectionnés séparément.
Complexity – Le degré de complexité d’un style. Vous pouvez régler
le fader Complexity de Groove Agent à gauche (niveau simple) et à
droite (niveau avancé). Groove Agent vous offre ainsi un moyen simple
d’introduire des variations dans vos morceaux.
Fill – Normalement un batteur joue un Fill (transition) à peu près tou-
tes les huit mesures pour accentuer la structure et le mouvement du
morceau. Un Fill peut être considéré comme un “point d'exclamation
improvisé“. Par exemple pour passer du couplet au refrain, un Fill sera
le bienvenu !
1/2 Tempo Feel – Typiquement, si vous ralentissez les patterns de la
grosse caisse et de la caisse claire à mi-tempo tout en maintenant le
tempo du reste des patterns des autres instruments, vous pouvez créer
un effet spécial. C’est une astuce très habituelle des vrais batteurs – il
le font sans arrêt si vous ne les en empêchez pas !
Accent – Avant que les boîtes à rythmes ne soient devenues populai-
res, un accent était un battement accentué habituellement joué sur une
cymbale crash et une grosse caisse. S’ils sont joués à contretemps (off-
beat – c’est-à-dire si les accents sont placés entre les temps) comme
par exemple sur la croche qui précède une barre de mesure, vous obte-
nez une syncope.
Shuffle – Parfois aussi nommé “facteur swing”. Ces termes indiquent
la relation entre les croches (parfois double-croches), qui peuvent être
soit des notes entières soit des triolets.

Groove Agent
186 Français
Limiter – C’est probablement l’appareil de prédilection de l’ingénieur
du son quand il enregistre des batteries. La limitation (ou bien compres-
sion, la différence n’est pas toujours évidente) contrôle le niveau de sor-
tie global et peut aussi être utilisée comme effet.
Ambience – Groove Agent vous offre un jeu d’enregistrements d’am-
biance pour tous les instruments de batterie et de percussion. Les sons
acoustiques ont été enregistrés avec des microphones éloignés et les
sons électroniques ont été traités par divers effets et réverbérations.
Dry/Wet – Ces termes décrivent les deux extrêmes d’un son. Un son
peut être enregistré de très près et dans un environnement neutre
(“Dry”) ou à une certaine distance, ou traité par un effet de réverbéra-
tion (“Wet”).
•Nouveauté de Groove Agent 2 le menu “clic droit”. Nous y avons ajouté
quelques nouvelles fonctions qui sont accessibles par un clic droit sur
le bouton de la souris ou par un clic gauche sur le logo.
Via ce menu vous pouvez afficher l’écran “À propos” (About), inscrire votre programme
ou aller sur les sites web Groove Agent et Steinberg. Vous pouvez aussi accéder à de
nouvelles fonctions telles que changer le nombre de sorties de mixage, modifier le com-
portement de la sortie MIDI, changer le réglage du mode “MIDI mute key” ou indiquer à
Groove Agent 2 ce qu’il doit faire lorsque l’application hôte s’arrête.
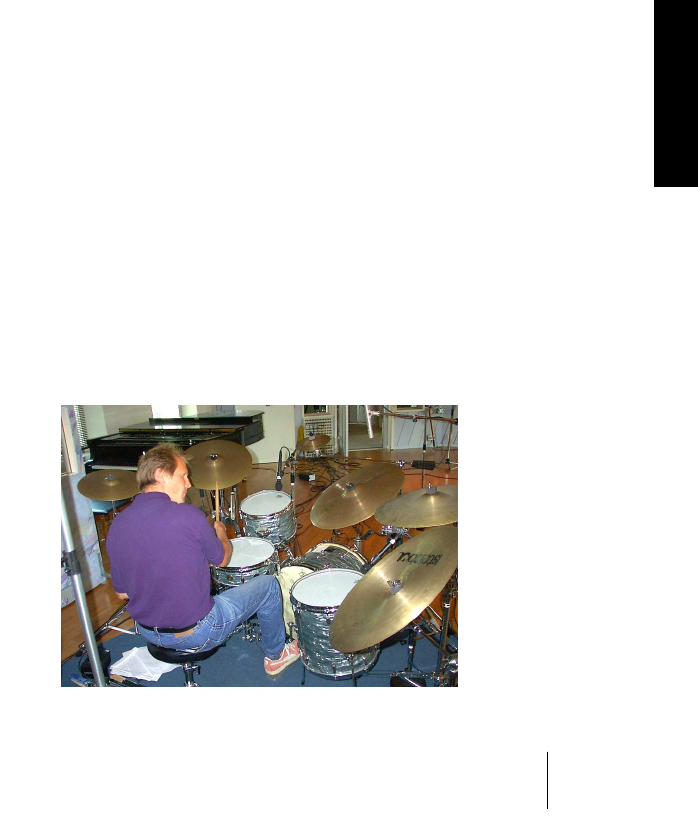
Groove Agent
Français 187
FRANÇAIS
À propos des sons de cet instrument VST
Avant de travailler sur le contenu musical de cet instrument nous avons
étudié le marché pour trouver des sonothèques (ou librairies) de batte-
rie que nous aurions pu utiliser. En utilisant des échantillons déjà faits
nous aurions gagné beaucoup de temps (Per “Worra” Larsson/Sam-
pleTekk peut en raconter des histoires à ce propos). Mais malheureuse-
ment nous n’avons rien trouvé d’adéquat. Soit que les librairies étaient
incomplètes en matière de sons de batterie (avez-vous jamais trouvé un
ensemble d’échantillons incluant un “hihat gliss” ou des “spoons” ?)
soit qu’elles étaient enregistrées de façon incohérente.
Nous cherchions un choix complet de kits et de sons et des enregis-
trements d’ambiance. C’est comme ça que nous avons commencé à
enregistrer…
Le merveilleux Studio Kuling à Örebro, en Suède, est le studio d’enre-
gistrement le plus fantastique que nous ayons jamais vu ! La salle elle-
même est grande et recouverte de boiseries et sans aucun doute l’in-
génieur du son, Jens Bogren, s’y connaît en équipement. Avec Mats-
Erik Björklund qui sait jouer de tous les instruments, les sound desi-
gner Per “Worra” Larsson/SampleTekk et Sven Bornemark ont com-
mencé à enregistrer les différents niveaux de vélocité de chaque son.
Au départ, il fallait que cet ensemble recouvre presque tous les styles
– c’est-à-dire autant de genres musicaux que possible. Nous avons
donc décidé d’enregistrer tous ces instruments :
Un kit jazz, années 50.
Pas trop atténué, sonnant
un peu vague et léger.
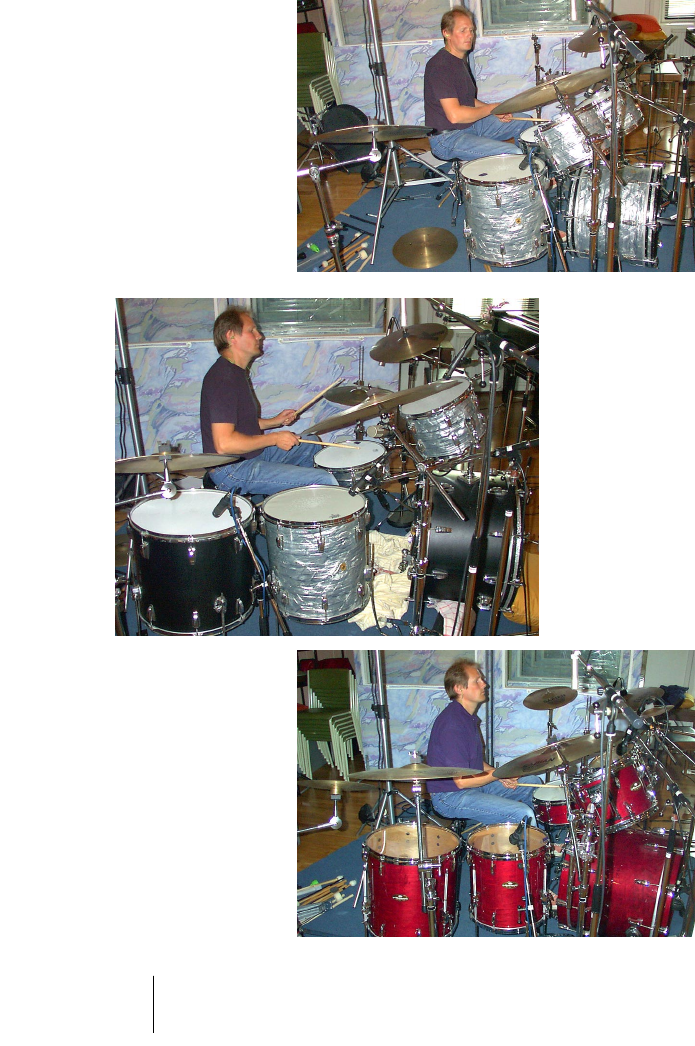
Groove Agent
188 Français
Un kit pop, années 60.
Les batteries très atté-
nuées de l’époque où
l’on mettait des couver-
tures dans les toms !
Un kit rock, années
70. Bruyant, profond
et résonnant. Ce kit
est unique !
Un kit studio, années
80. Frais et moderne,
comme sur la plupart
des CD d’aujourd’hui.
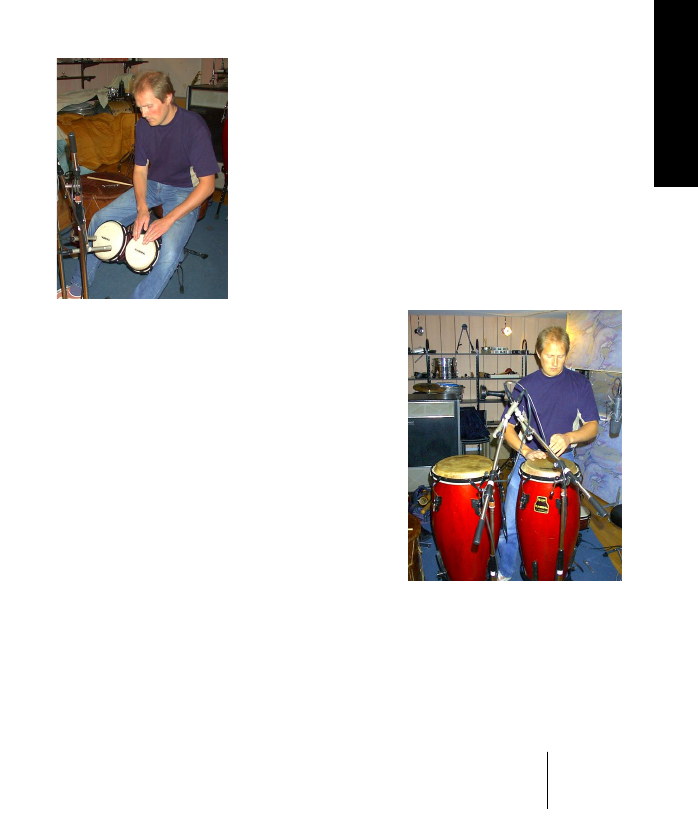
Groove Agent
Français 189
FRANÇAIS
Faites aussi attention aux petits détails qui ajoutent de la couleur et de
la vivacité aux différentes époques et attitudes que nous avons couver-
tes. Les batteries années 50 par exemple ont été jouées avec des ba-
lais et des maillets de vibraphones, le kit des années 80 avec des
baguettes de roseau et il y a aussi des caisses claires supplémentaires
comme le “Piccolo” et le “Deep”.
Pour compléter cette archive sonore nous avons eu une longue ses-
sion dédiée seulement aux percussions : celles qui sont incluses dans
le protocole GM et d’autres tout aussi intéressantes comme le tam-
bour africain (African fur drum), le baton de pluie (Rainstick), le Tam-
bourin, les Cascabelles, et le tambour de bouche (!) etc.
Enregistrement de bongos…
…congas…

Groove Agent
190 Français
…et timbales
Jens Bogren eut l’idée de tout faire passer par un magnétophone ana-
logique 24 pistes pour avoir un son plus “chaud”. Bonne idée ! Avec
notre intention d’origine de produire une archive sonore très complète,
nous avons finalement enregistré ce qui suit :
• Pistes 1-2 : batterie enregistrée de très près.
• Pistes 3-4 : microphones suspendus.
• Pistes 5-6 : microphones d’ambiance à 2 mètres de distance.
• Pistes 7-8 : microphones à 7 mètres de distance.
Après les sessions d’enregistrement, Per Larsson a consacré plusieurs
mois à leur édition. Éditer dans un environnement multipiste n’est pas
du tout comparable au travail avec des échantillons stéréo. Nous avons
soigneusement trié les prises qui s’harmonisaient le mieux et nous nous
sommes décidés pour une configuration mixte, ou les kits des années
50 et 70 sont enregistrés secs (dry) et à distance et les autres instru-
ments secs et avec des microphones d’ambiance.
C’est Mats-Erik Björklund qui a emporté au studio tous ces instruments
soigneusement choisis. Ainsi, même si les enregistrements de la char-
leston des années 70 avaient disparu et que nous avions totalement
oublié d’enregistrer le son d’un sifflet, son aide aurait été très appréciée !
Pour les sons électroniques, plus modernes et expérimentaux, nous
avons utilisé la librairie d’échantillons de Primesounds, Stockholm.
Nous y trouvions la multitude de sons dont nous avions besoin. En plus,
beaucoup de nos musiciens se sont consacrés à créer leurs propres
sons en partant de zéro.
❐
Les sons marqués d’un B, M ou R ont été respectivement enregistrés
avec des balais (Brushes), des maillets de vibraphones (Mallets) et des
baguettes de roseau (Rods).
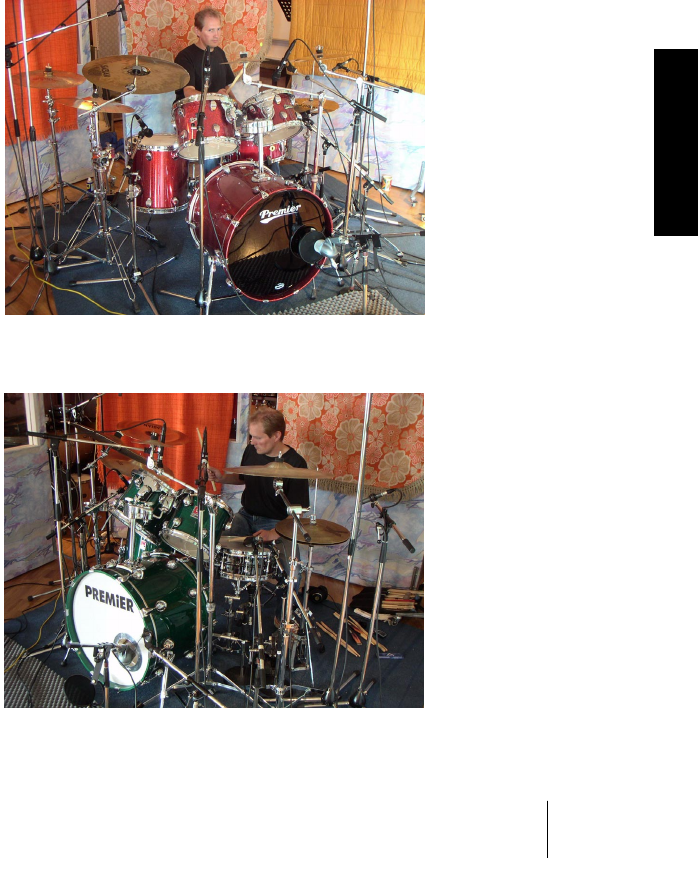
Groove Agent
Français 191
FRANÇAIS
Les nouveaux sons de Groove Agent 2
Les sessions Groove Agent 2 se sont déroulées avec Mats-Erik à la
batterie et comme sound designer principal. L’ingénieur du son de ce
second “round” était Rickard Bengtsson. Mats-Erik a eu l’idée d’enre-
gistrer des kits très utiles afin de rendre encore plus complète la pa-
lette sonore :
Le kit Studio – Un ensemble
parfait contenant les meilleurs
sons de batteries et de cym-
bales. Nous voulions obtenir
un son s’adaptant à de nom-
breux styles demandant un
bon son, propre et moderne.
Les trois caisses claires sont
magnifiques dans les aigus
avec des profondeurs et des
matériaux différents et sont
soigneusement accordées
afin de mettre en évidence les
caractéristiques réelles de
ces instruments.
Le kit Heavy – est un drum-
set conçu pour s’adapter à la
plupart des styles Metal
d’aujourd’hui, où un pied de
grosse caisse énergique est
un ingrédient vital. Le carac-
tère sec de la cymbale “ride”
et la magnifique sonorité pro-
duite par les cymbales
“crash” pourront passer n’im-
porte quel mur de guitares.
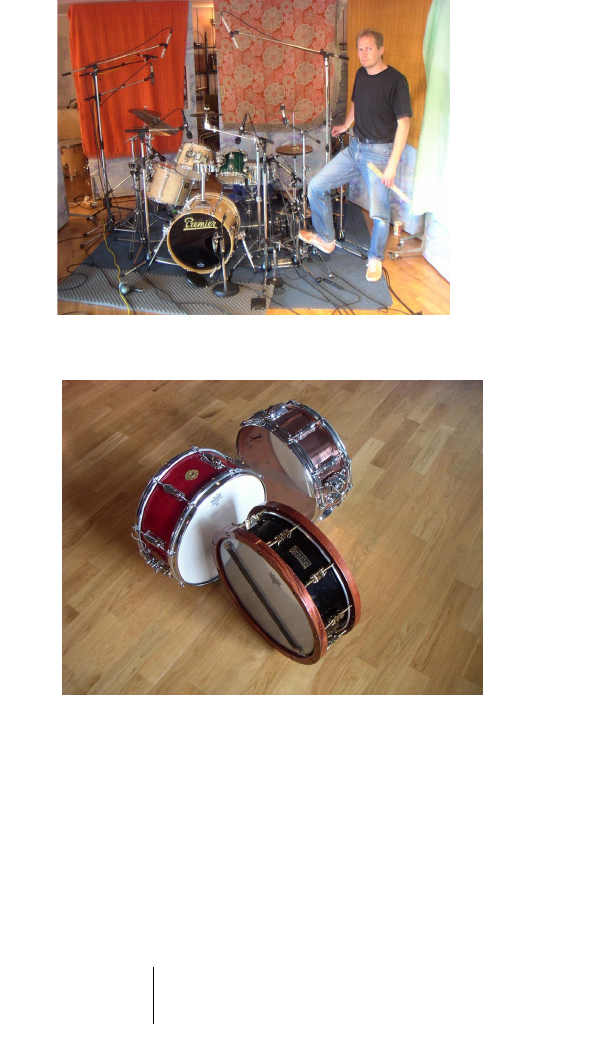
Groove Agent
192 Français
Le kit Noisy – Nous voulions créer
un son de batterie moderne utili-
sant des instruments traditionnels.
Ces instruments sont très petits,
mais grâce à l’effet “boom-box” ils
sonnent comme s’ils étaient beau-
coup plus grands. Nous avons es-
sayé différents effets numériques et
avons obtenu un son, qui, nous le
pensons, restera dans les annales.
Les caisses claires sont un piccolo
aigu et frêle ainsi qu’une mini
caisse claire de 10". Certaines
cymbales sont des instruments Vin-
tage rares pratiquement introuva-
bles aujourd’hui, alors que d’autres
sont des instruments modernes,
ayant connu des jours meilleurs.
Une Slingerland “Radio King”
rouge (la plus enregistrée des
caisses claires), une caisse
claire noire faite à la main de
chez Hanus & Hert à Prague
et une Slingerland en cuivre.
Afin d’atteindre le but que nous nous étions fixé, il a été décidé de ne
pas ajouter d’ambiance acoustique cette fois. Rickard a juste acheté
un Harmoniseur “Orville” Eventide et passé un temps considérable à
créer des environnements très représentatifs des sons de batterie.
Les sons obtenus sont très riches et colorés.

Groove Agent
Français 193
FRANÇAIS
En plus des trois kits acoustiques,
une poignée de boîtes à rythmes
Vintage provenant de la collection
privée de Sven Bornemark ont été
ajoutées. Certaines de ces beautés
ont plus de trente ans, et leur sam-
pling n’a pas été sans complica-
tions. Le vieux matériel analogique
a tendance à sonner un peu diffé-
remment d’un jour à l’autre, voire
même d’un temps à l’autre, aussi
lorsqu’on les compare à l’original,
ces rythmes intégrés passant par
nos interprétations MIDI, font appa-
raître quelques différences. Toute-
fois, nous pensons que nous avons
réussi à capter et reconditionner
l’essentiel de la magie de ces boî-
tes à rythmes d’antant.
Les boîtes à rythmes Vintage tirent leur ambiance d’une réverb à pla-
que EMT Vintage située dans le plus réputé des studios d’enregistre-
ment de Malmö, les Studios Tambourine.
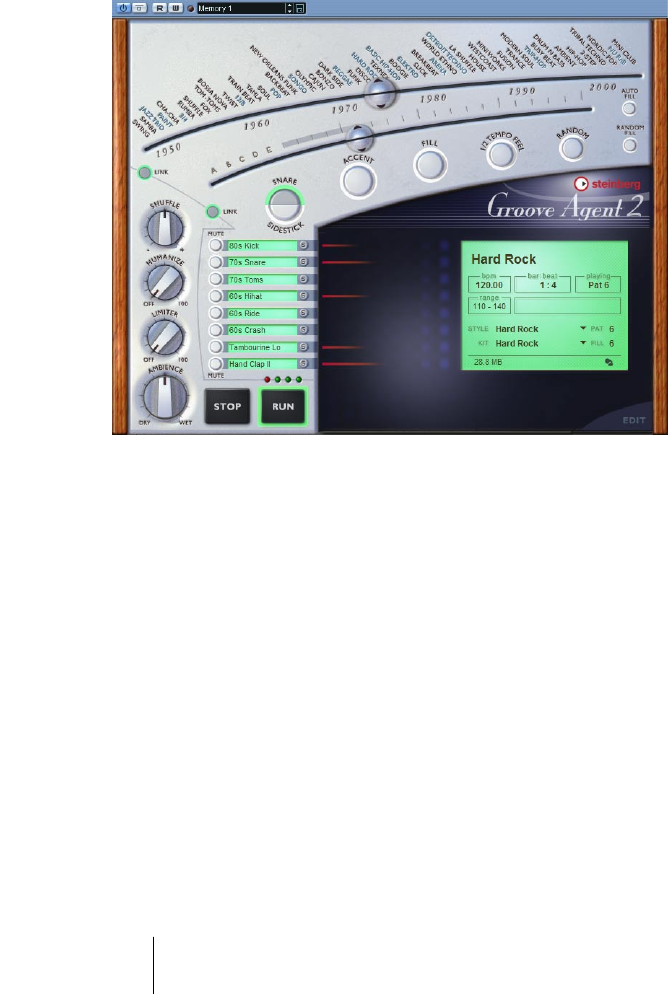
Groove Agent
194 Français
Utilisation de Groove Agent
Voici une introduction extrêmement compacte pour les utilisateurs les
plus impatients d’entre vous :
Sélectionnez le style que vous voulez utiliser avec le fader supérieur.
Assurez-vous que le fader inférieur est réglé sur une valeur moyenne
et que le tempo choisi est dans la plage des tempos (range) du style
choisi. Démarrez la lecture de votre séquenceur et cliquez sur Run
dans Groove Agent pour entendre les batteries.
Pour rendre les choses plus faciles, activez la fonction Auto Fill. Bougez
le fader Complexity vers la gauche pour obtenir des sons plus doux ou
bien vers la droite pour des kits de batterie plus avancés/bruyants/sau-
vages. Arrêtez Groove Agent en cliquant sur le bouton Stop ou en arrê-
tant votre séquenceur. Si vous voulez enregistrer la sortie de Groove
Agent en tant que conteneur MIDI, cliquez sur Edit et puis sur Setup et
réglez le bouton MIDI Output sur ON (cela ne fonctionne qu’avec Cu-
base et Nuendo).

Groove Agent
Français 195
FRANÇAIS
L’affichage LCD
Les informations de cet afficheur sont
très faciles à comprendre, mais voici
quand même quelques conseils :
Si vous bougez les faders Style et
Complexity, l’affichage LCD vous in-
dique toujours l’endroit où vous vous
trouvez.
Nous avons réussi à entasser 54 sty-
les dans le fader supérieur et certains utilisateurs trouveront peut-être
que les noms des styles ne sont pas très faciles à déchiffrer. L’affichage
LCD vous aide alors à placer les faders sur l’endroit désiré.
Vous avez probablement remarqué que certains noms de style inscrits
au-dessus du fader supérieur sont coloriés différemment. C’est parce
qu’ils abritent des styles associés, les 27 nouveaux styles supplémen-
taires qui ont été ajoutés dans Groove Agent 2. Voici comment ça
marche :
1. Sélectionnez un style colorié différemment à l’aide du curseur, comme
d’habitude.
2. Faites un clic avec le bouton droit de la souris et sélectionnez un des
nouveaux styles listés dans le menu déroulant.
•Comme vous vous y attendiez, il est toujours possible de combiner la
musique d’un style avec le drum kit d’un autre style. Il suffit de désac-
tiver le bouton Link et d’avoir des positions (et des sous-menus) sépa-
rés pour les deux parties du sélecteur de styles.

Groove Agent
196 Français
Range
Chaque style a sa propre plage (“range”) de tempo. Si vous jouez un
style House agité à 40 BPM, il ne sonnera pas d’une façon très impres-
sionnante. Nous ne voulons pas vous empêcher d’expérimenter avec
les tempos – nous vous rappelons seulement le BPM de base de cha-
que style dans l’affichage LCD.
La plage de tempo recommandée doit être considérée comme une
aide lorsque vous voulez atteindre un résultat réaliste. Si ce n’est pas
ce que vous voulez – allez-y !
❐
Vous trouverez l’assignation des tempos à la page 241.
Le menu “clic droit”
Plusieurs nouvelles fonctions sont accessibles par un clic droit sur un
endroit inhabituel de l’interface ou en cliquant sur la zone du logo :
•À propos de Groove Agent 2 – Cette page regroupe les noms des gens con-
cernés et affiche le numéro de version. Vous quittez la page des Crédits en
cliquant n’importe où dessus.
•Site web Groove Agent – Info, clips sonores, FAQ et un forum d’échange se
trouvent sur ce site web spécifique.
• Site web Steinberg – Vous en saurez plus sur nos autres logiciels “cool et
créatifs”.
•Audio Outputs – Vous pouvez choisir combien de sorties stéréo seront occu-
pées par Groove Agent dans votre console hôte. Veuillez noter, que pour des
raisons techniques, les changements effectués ici ne seront pris en compte
qu’après avoir redémarré Groove Agent.
•MIDI Output – Groove Agent 2 peut restituer ses rythmiques sous forme d’un
conteneur MIDI (comme avant) ou d’un fichier MIDI ! Ce fichier MIDI pourra
être importé dans votre application hôte pour y subir toutes sortes de choses.
• MIDI Mute Key Mode – La télécommande de Groove Agent 2 est devenue
plus simple ! grâce à deux nouveaux modes. Vous en saurez plus en lisant
“Contrôler Groove Agent depuis un clavier MIDI” à la page 244.
•When Host Stops – Le comportement de la Pause a été changé dans Groove
Agent 2. Reportez-vous à la section “Stop/Run” à la page 207.

Groove Agent
Français 197
FRANÇAIS
Faders, potentiomètres et boutons
Le fader Style
Le fader supérieur est probablement le gadget le plus important de tout
l’instrument. Il s’agit d’une échelle de temps de divers styles musicaux.
En bougeant le fader sur l’échelle vous sélectionnez le style utilisé.
À chaque style est assigné un propre kit soigneusement crée. Beau-
coup des styles anciens peuvent sembler un peu démodés pour le
goût d’aujourd’hui – de point de vue musical et sonore – mais, c’est
exactement là leur intérêt !
Si vous sélectionnez un style pour la première fois, le chargement des
échantillons peut prendre un petit moment. Si vous changez de style, il
peut encore durer quelques secondes, mais si vous retournez au pre-
mier style, le chargement sera beaucoup plus rapide, car les échan-
tillons se trouvent encore dans la mémoire cache de votre ordinateur.
C’est d’autant plus vrai pour les systèmes Windows. Ainsi, si vous avez
suffisamment de courage pour utiliser plusieurs styles dans un même
morceau, vous ne rencontrerez des interruptions dans les transitions de
style que lors du premier changement.
Les styles qui ont été chargés dans la mémoire restent chargés et
Groove Agent ne produira aucune interruption pendant le changement.
Les 27 nouveaux styles ajoutés à Groove Agent 2 sont accessibles en
plaçant le curseur sur un nom de style colorié différemment et en fai-
sant un clic droit dessus. Vous pouvez ensuite faire votre choix dans
le menu déroulant.

Groove Agent
198 Français
Le bouton Link Style
Si vous sélectionnez un style et que les deux moitiés
du fader sont liés, les kits de batterie et de percussion
assignés sont aussi sélectionnés. Cependant si vous
cliquez sur le bouton Link, le lien entre les deux moitiés
du fader est annulé et vous pouvez jouer un style Bossa Nova avec un
kit Techno ! Dans ce mode, vous pouvez sélectionner le style avec la
moitié supérieure du fader et le kit avec la moitié inférieure.
Si vous cliquez encore une fois sur le bouton Link, les deux moitiés du
fader sont à nouveau liées.
❐
Notez que si vous sélectionnez un nouveau kit, vous chargez automati-
quement de nouveaux échantillons. Cela peut durer quelques secondes.
❐
Deux méthodes vous aideront à placer la moitié inférieure du fader plus
précisément. Vous pouvez soit utiliser l’affichage LCD, soit déplacer le fa-
der en pointant avec la souris sur le dernier caractère du nom du style.
Le fader Complexity
Ce fader est très important, car il rend Groove Agent plus vivant et
authentique. Le maniement de ce fader n’est pas très compliqué, car
son comportement est très prévisible.
Si vous bougez ce fader vers la gauche, vous sélectionnez les niveaux
de complexité basse. Pour être concret, les premiers patterns – nom-
més A, B, C, D et E – ne sont pas très complets. Il leur manque quel-
que chose, soit une grosse caisse, soit quelques battements. Nous
les avons quand même ajoutés parce que vous pourriez en avoir be-
soin pour l’intro d’un morceau ou si vous produisez de la musique très
“minimaliste”. Le premier couplet de votre morceau pourrait peut-être
avoir besoin de ce détail ?
Si vous bougez le fader vers la droite, vous sélectionnez des niveaux de
complexité haute qui sont plus énergiques. Ici, vous trouverez les varia-
tions 1 à 20 du style sélectionné : plus vous réglez le fader à droite, plus
le style sera complexe. Vous pensez probablement que les niveaux les
plus complexes ne sont pas supportables, mais c’était justement notre
intention. De temps en temps ce batteur dévient un peu sauvage !

Groove Agent
Français 199
FRANÇAIS
Par convenance et pour préserver une certaine cohérence, il est con-
seillé de ne changer de niveau qu’aux barres de mesure. Cela signifie
que si vous voulez passer du niveau 8 au niveau 11 et que vous bougez
le fader pendant le deuxième temps d’une mesure, vous devrez atten-
dre jusqu’à la prochaine mesure pour entendre le niveau choisi. Ce
comportement vous donne le temps de déclencher des Fills (et de cli-
quer sur d’autres boutons, si vous le désirez) un peu à l’avance.
Si vous voulez absolument changer de niveau instantanément, vous
devrez vous familiariser avec la section Memory. Ici, vous pouvez pas-
ser à N’IMPORTE QUELLE combinaison en quelques secondes.
❐
Les niveaux de complexité 1 à 15 sont généralement considérés comme
“normaux” ou “habituels”.
Le bouton Link Complexity
Chacun des 25 niveaux de complexité a son propre
Fill. Quand vous bougez le fader vers un certain niveau
et que vous cliquez sur le bouton Fill, vous écoutez le
Fill associé à ce niveau.
Vous pouvez cependant séparer les deux moitiés du fader. Si vous cli-
quez sur le bouton Link, les deux moitiés peuvent être réglées séparé-
ment. Dans ce mode, vous pouvez parfaitement utiliser un rythme très
simple et activer un Fill plutôt complexe ou vice versa.
Le bouton Link est aussi très utile lorsque vous décidez que le “Fill nu-
méro 13" (ou n’importe quel autre) est le seul que vous désirez utiliser
dans une partie déterminée de votre morceau ou bien dans le morceau
entier.
Cliquer une deuxième fois sur le bouton Link recombine les deux moitiés.
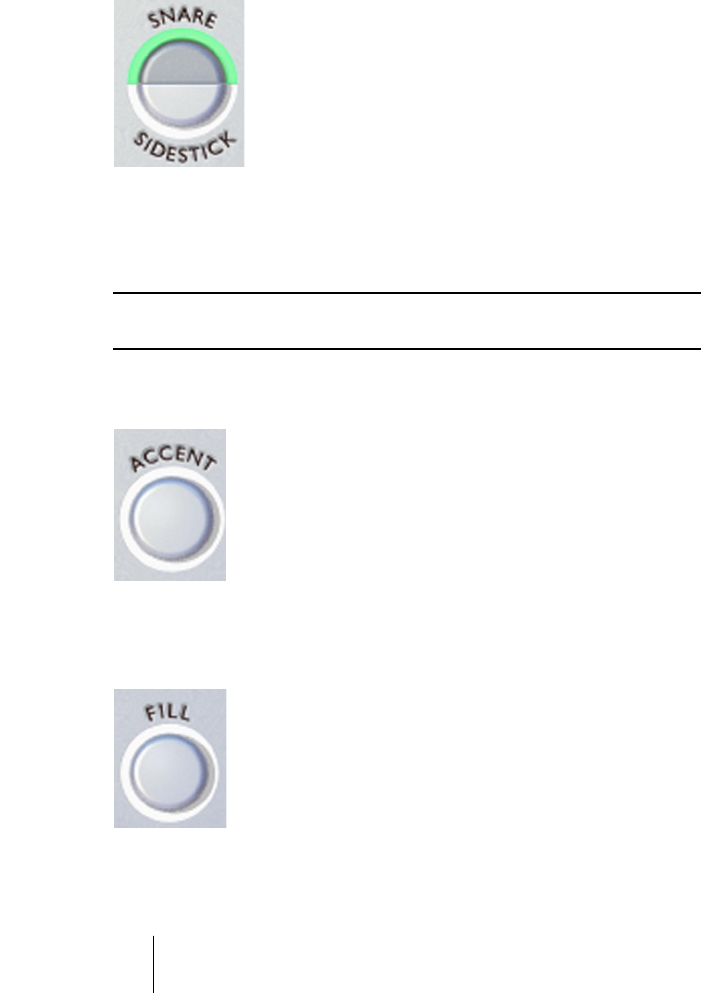
Groove Agent
200 Français
Snare/Sidestick
Une technique très répandue parmi les batteurs con-
siste à placer la baguette sur la grosse caisse en bat-
tant sur le bord métallique afin d’obtenir un son plus
“léger”. C’est ce que l’on appelle un Sidestick et
voici le bouton correspondant. Vous pouvez passer
des options Snare à Sidestick pendant n’importe
quel niveau de complexité.
Bien que nous ayons tout fait pour rendre le son Sidestick le plus natu-
rel et musical possible, dans certaines circonstances il n’est pas possi-
ble de l’utiliser. Donc, l’option Sidestick n’est pas disponible pour tous
les niveaux de complexité du Groove Agent.
❐
L’option Sidestick a des effets plus naturels si elle est combinée avec les
niveaux de complexité basse.
Accent
Ce bouton déclenche une frappe de grosse caisse et
de cymbale crash. Ceci peut servir d’accent dans un
morceau. Joué sur un contretemps, l’accent devient une
syncope. Le pattern de batterie en cours est arrêté
jusqu’à ce que vous relâchiez le bouton. Si vous cliquez
et maintenez enfoncé le bouton de la souris pendant à
peu près une noire après l’avoir déclenché sur un con-
tretemps, vous obtenez une syncope.
Fill
Voilà un des boutons les plus importants de cet instru-
ment ! Une boîte à rythmes rejouant ses patterns régu-
lièrement, déclenchant un Fill toutes les 8 mesures
sonnera correctement la plupart du temps, mais certai-
nement pas toujours.

Groove Agent
Français 201
FRANÇAIS
Dans Groove Agent, vous êtes le leader du groupe, le chef d’orches-
tre. Cliquez sur ce bouton si vous pensez qu’il est temps pour un “Fill”,
et Groove Agent le jouera. Si vous cliquez sur ce bouton au début
d’une mesure, vous entendrez plus de la mesure “Fill” que si vous cli-
quez dessus vers la fin d’une mesure. En sachant cela, vous pouvez
rendre les Fills les plus sauvages très discrets.
Veuillez noter que dans la plupart des styles, les Fills se terminent
avec une cymbale crash au premier temps de la mesure suivante, tout
comme les jouerait un batteur “réel”. Vous pouvez désactiver cet effet
en rendant muet ce groupe de cymbale crash.
Il est d’ailleurs aussi possible de commencer un pattern par un Fill.
Lorsque Groove Agent est arrêté et que vous activez le bouton Fill, il
passe en “état d’alerte”. Cliquer sur “Run” démarrera alors Groove
Agent en commençant avec un Fill.
Il y a 25 niveaux de complexité pour chaque style. Ceci s’applique aussi
aux Fills ; les Fills ayant des petits numéros sont généralement moins
complexes et énergiques que ceux ayant des numéros plus élevés.
❐
Certains styles ont été enregistrés avec un feeling de 2 ou 4 mesures. Si
vous jouez un tel pattern avec de la musique basée sur une période de
mesures irrégulière (par ex. 7 ou 9), ce pattern sonnera faux (un peu
comme “une mesure en retard”). Mais, après un Fill, la musique dans un
tel pattern recommencera toujours à la “mesure 1”.
❐
Les Fills peuvent aussi être utilisés comme fin. Activez le bouton Fill dans
la dernière mesure de votre morceau et cliquez sur Stop au dernier temps.

Groove Agent
202 Français
1/2 Tempo Feel
Souvent, les batteurs changent leur façon de jouer
pour produire un feeling mi-tempo. Normalement,
ceci consiste à ralentir les patterns de grosse caisse
et de caisse claire à mi-tempo tout en maintenant le
rythme de la charleston et des cymbales Ride. Figge,
un des musiciens participant à ce projet a suggéré
d’inclure cette fonction dans Groove Agent. Après avoir réfléchi, nous
avons décidé que ce serait effectivement un super bonus ; aucune
autre boîte à rythmes (à notre connaissance) ne dispose d’une fonction
“1/2 Tempo Feel”. Pourtant, tous les batteurs l’utilisent !
Dans Groove Agent, tous les patterns ayant un feeling mi-tempo ont
été programmés spécialement pour imiter cette astuce. Un très bon
exemple se trouve dans le style Fox. Jouez-le à un tempo assez vif puis
cliquez sur le bouton “1/2 Tempo Feel”. Le style deviendra plus pro-
che du Funk.
En pratique, la fonction “1/2 Tempo Feel” double la quantité des sty-
les disponibles ! Vous pouvez vous imaginer cette fonction comme le
rythme de base de votre morceau. Et puis, vers la fin, vous pouvez dé-
sactiver ce bouton pour une fin de tempo rapide, au style Gospel !
❐
Activez ce bouton lors du pont d’un morceau et revenez à la lecture nor-
male pour les refrains finaux (ou toute autre section pour laquelle vous dé-
sirez augmenter l’intérêt ou au contraire la douceur, grâce à cette fonction.
Random
Pour une variation des patterns, le bouton Random est
très utile. Cette fonction change automatiquement les
patterns. L’idée générale est de produire des sons de
batterie moins rigides, moins prévisibles. L’affichage
LCD montre le niveau actuel.
Le champ d’action du bouton Random est de ±2 niveaux par rapport à
la position d’origine du fader.
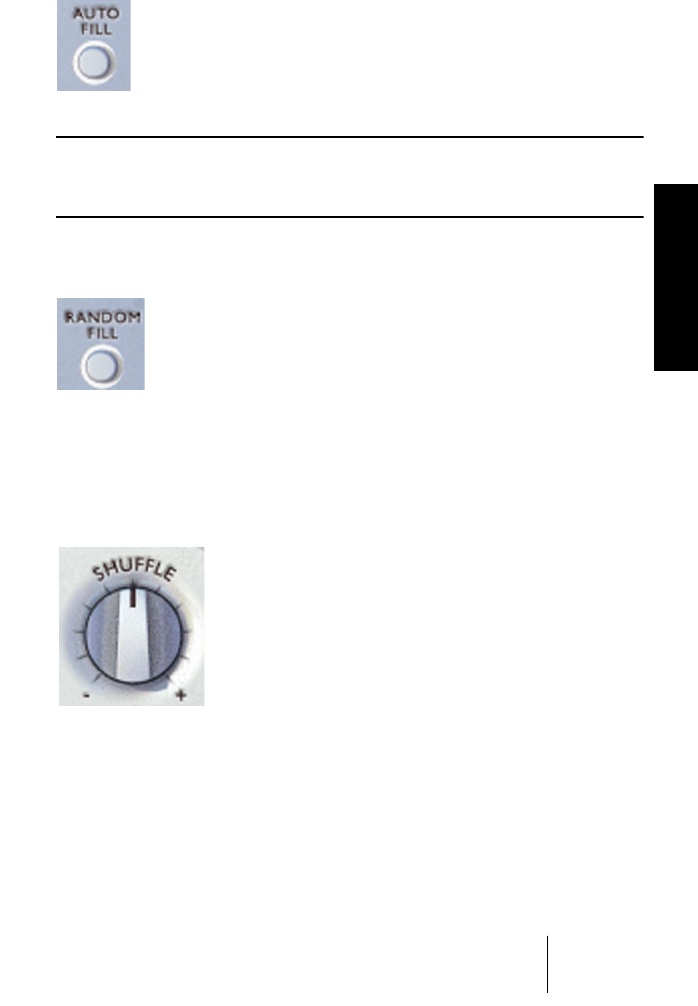
Groove Agent
Français 203
FRANÇAIS
Auto Fill
Voilà un autre bouton très utile. Il est utilisé pour automatiser
la façon dont les “Fills” sont déclenchés. Lorsque vous pas-
sez d’un niveau de complexité à un autre et que Auto Fill est
activé, Groove Agent introduira automatiquement un “Fill”
avant le niveau suivant.
❐
Si une fonction de sauvegarde automatique est activée dans votre sé-
quenceur, ceci pourrait amener Groove Agent à déclencher un “Fill”. Si tel
est le cas, désactivez la fonction de sauvegarde automatique.
Random Fill
Encore un moyen de vous faciliter la vie! Lorsque vous
restez dans un seul niveau de complexité et que vous dé-
clenchez un “Fill” de temps à autres, ce bouton permet
d’obtenir des “Fills” légèrement différents à chaque fois.
Comme pour le bouton Random, le Fill choisi de cette façon se trouve
toujours dans la plage de ±2 niveaux par rapport à la position actuelle
du fader.
Shuffle
Certains styles musicaux ont une subdivision “fran-
che” ou “binaire”. D’autres genres utilisent des for-
mes de triolets, ajoutant un certain “swing” au
rythme, un caractère plus doux et roulant.
Musicalement, ces deux types sont connus comme
musique binaire et musique ternaire. Et pour com-
pliquer les choses: la musique ternaire peut se ba-
ser soit sur des triolets de croches (comme dans “New York, New
York”) ou des triolets de double-croches (comme dans “Sir Duke” de
Stevie Wonder).
Le potentiomètre Shuffle affecte le sous-timing des croches ou double-
croches et est réglé différemment des autres contrôles de Groove
Agent. Si vous jouez un style binaire et réglez le potentiomètre vers la
droite (+), vous entendrez changer le style de la musique qui deviendra
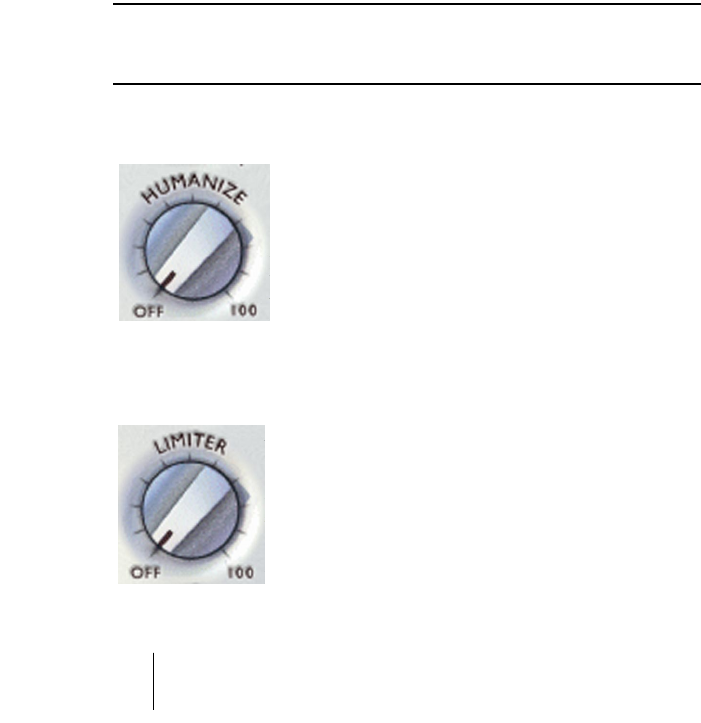
Groove Agent
204 Français
plus “swing” (les croches ou double-croches binaires se déplacent
pour donner une base ternaire). Inversement, un style basé sur un
swing devient plus binaire lorsque vous réglez le potentiomètre vers la
gauche (–).
Malheureusement, bien que de grands efforts aient été faits pour four-
nir une interface utilisateur intuitive, ce potentiomètre peut aussi provo-
quer des effets indésirables. Le régler vers 7 heures lors de la lecture
d’un style binaire, ou vers 5 heures avec une musique basée sur des
triolets produira des résultats pour le moins bizarres. Utilisez-le avec
précaution et à vos risques et périls !
Le réglage normal de ce potentiomètre est à 12 heures. Avec ce ré-
glage, tous les styles sonneront comme ils ont été composés.
❐
Pour des swings Cajun, Zydeco ou New Orleans, essayez d’utiliser un
style binaire et tournez le potentiomètre Shuffle à mi-chemin vers sa
position de triolet, c’est-à-dire réglez-le sur 57-60%.
Humanize
Bien que les pistes musicales utilisées dans
Groove Agent aient été créées soigneusement et
avec musicalité, il se peut que vous désiriez ajou-
ter quelques variations naturelles à votre batterie.
Ce potentiomètre diminue la précision du timing et
de la dynamique.
Le réglage normal est sur le minimum (tout à gau-
che).
Limiter
La première chose que tout ingénieur du son uti-
lise lors de l’enregistrement de la batterie est pro-
bablement un traitement de la dynamique, par ex.
un compresseur ou un limiteur. Dans Groove
Agent un limiteur simple a été intégré pour vous
faciliter ce type de contrôle.
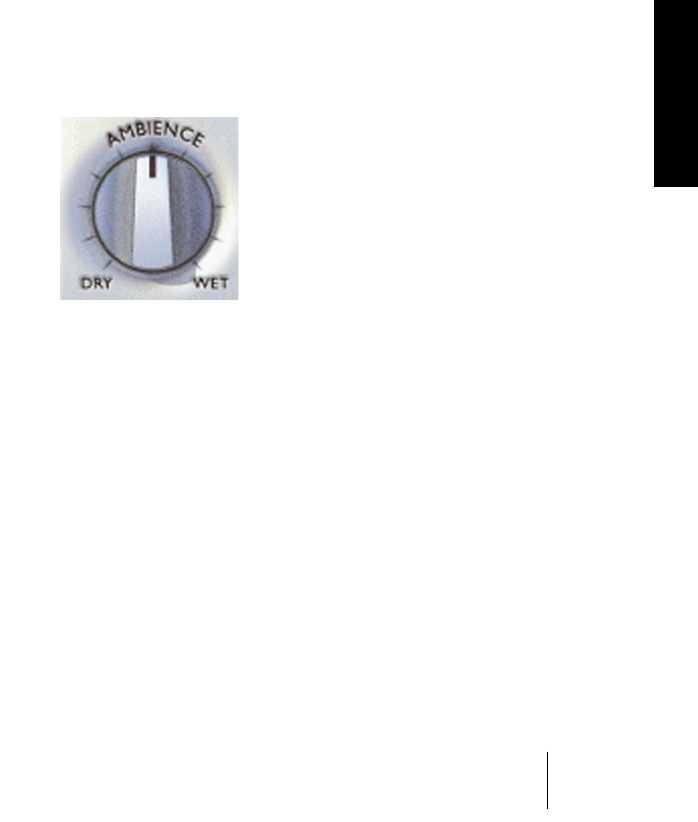
Groove Agent
Français 205
FRANÇAIS
Si la batterie n’est pas assez forte dans votre mixage global, le limiteur
pourrait vous aider à obtenir un niveau de pression sonore plus fort et
plus cohérent.
Ce potentiomètre contrôle en fait quatre limiteurs stéréo simultané-
ment. Si vous assignez des groupes spécifiques à chaque sortie, la
grosse caisse forte sur la première sortie affectera toujours la cymbale
crash sur la sortie 3. Ceci donnera des résultats beaucoup plus prévisi-
bles pour le limiteur.
Utilisez cette fonction avec précaution !
Le réglage normal de ce potentiomètre est sur le minimum (off).
Ambience
Voilà un des clous de Groove Agent ! Tous les
batteries et instruments de percussion acous-
tiques ont été enregistrés en utilisant un mé-
lange des techniques suivantes :
• Chaque instrument est enregistré de très près, pour un son très sec (dry).
• Chaque instrument est enregistré avec des micros suspendus, pour un son
assez sec mais avec une bonne image stéréo.
•Chaque instrument est enregistré avec les microphones d’ambiance, position-
nés à environ 2 mètres de la source. Ceci produit un son chaud, spacieux
avec une quantité “d’air” contrôlée.
• Chaque instrument est enregistré avec une paire de microphones éloignés,
positionnés à plus de 7 mètres de la source. Voilà ce qu’on appelle “espace” !
C’est ce qui donne une atmosphère de salle. Beaucoup d’espace ? En effet !
• Les nouveaux sons de batterie fournis avec Groove Agent 2 ont été complé-
tés par une réverb électronique et électro-mécanique.
Lors de l’édition des archives sonores de Groove Agent, nous avons
choisi soigneusement les enregistrements d’ambiance pour chaque
source de base. Pour le kit années 50, nous avons placé les micros
très près des “drums” et de la charleston et des micros suspendus
pour les cymbales. Puis nous avons ajouté des enregistrements plus
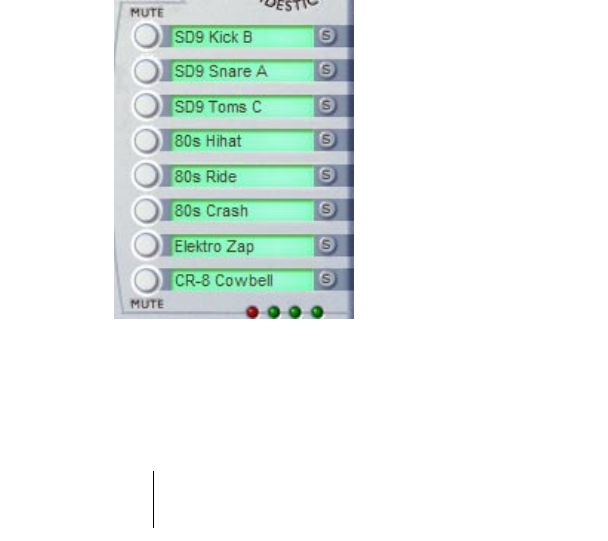
Groove Agent
206 Français
distants pour l’ambiance. Il en résulte des kits aux sons anciens, par-
faitement acoustiques donnant un son d’époque.
Pour les autres kits, nous avons utilisé différentes combinaisons et
pour les sons modernes, électroniques, nous avons ajouté des effets
basiques de studio comme la réverbération et les délais.
Somme toute, vous avez accès à une ambiance très naturelle ! Il y a
des kits adaptés à chacun des styles musicaux, mais vous pouvez
aussi changer les préréglages à votre guise avec ce potentiomètre !
Ce potentiomètre fonctionne aussi comme contrôle général des
8 contrôles Ambience de groupe.
Le réglage normal de ce potentiomètre est à 12 heures. Si vous le ré-
glez à fond à gauche, le son obtenu sera complètement sec (dry), et
un réglage très élevé (à fond à droite) ne donnera que le son d’am-
biance (wet).
Mute, groupage et sélection d’instruments
Les sons du Groove Agent sont repartis dans 8 groupes :
1. Grosse Caisse (Kick (Bass) drum)
2. Caisse claire (Snare drum)
3. Toms ou effets
4. Charleston (Hihat)
5. Cymbales Ride et Chinoise
6. Cymbales Crash et Splash
7. Premier groupe de percussion
(normalement les instruments
“hauts et rapides”)
8. Second groupe de percussion
(normalement les instruments
“graves et lents”)
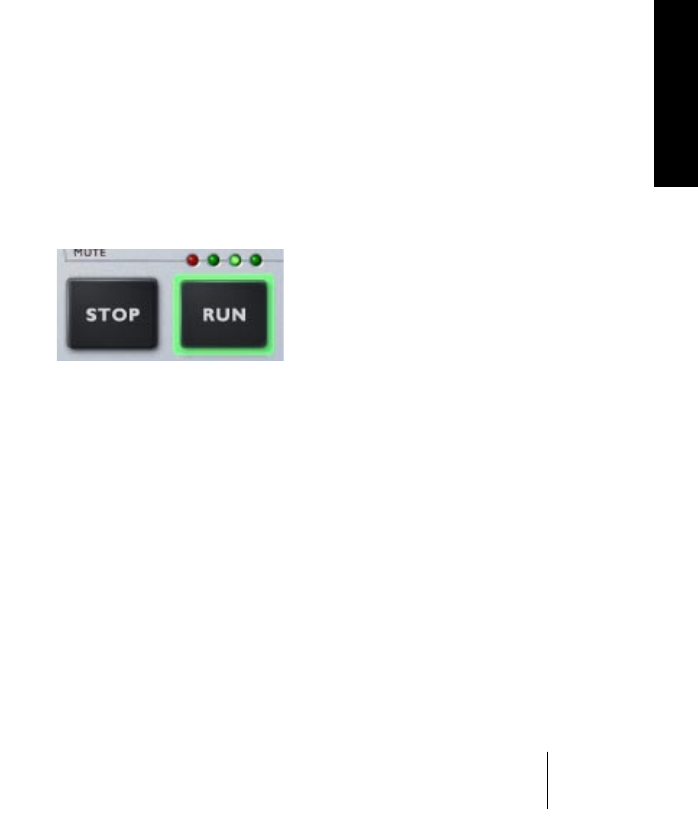
Groove Agent
Français 207
FRANÇAIS
Vous pouvez à tout moment utiliser les différents boutons Mute (Muet)
pour rendre muet un de ces groupes. Si ce bouton est activé, vous
n’entendrez pas le son correspondant, s’il est désactivé (éteint), vous
l’entendrez.
Autre ajout fort apprécié dans Groove Agent 2, les boutons Solo.
Lorsque vous écoutez un drum kit complet et que vous souhaitez ré-
gler un seul de ses groupes, il est bien plus simple de presser le bou-
ton Solo de ce groupe. Solo est activé = un seul groupe est audible.
Solo n’est pas activé (éteint) = tous les groupes sont audibles.
En écoutant les préréglages des styles et de leurs kits respectifs,
vous pouvez faire des essais et par exemple changer des instruments
séparés ou même des groupes d’instruments. Cliquez dans un des
champs de noms verts, pour ouvrir une liste d’instruments et choisis-
sez-en un. Interchangez simplement le kit des années 80 avec le kit
des années 50 (ou n’importe quel autre) et écoutez le résultat !
Stop/Run
Ces boutons servent à démarrer/arrêter Groove Agent. Bien que cet
instrument puisse être utilisé si votre séquenceur hôte est arrêté, il
jouera toujours au tempo (BPM) de l’hôte. Lorsque votre séquenceur
est activé, Groove Agent suit le tempo et se synchronise aux temps
(beats) de l’hôte.
Vous pouvez lancer Groove Agent et votre séquenceur simultanément,
en procédant comme ceci :
1. Démarrez votre séquenceur.
2. Lancez Groove Agent.
3. Cliquez sur le bouton Stop du séquenceur.

Groove Agent
208 Français
Maintenant, la prochaine fois que vous démarrerez votre séquenceur,
Groove Agent démarrera aussi ! L’état d’attente est indiqué par le
bouton Run dont le pourtour est allumé en vert. C’est très utile lorsque
vous voulez relire des sons de batterie dès le tout début d’un morceau
ou d’une section.
Autre nouveauté dans Groove Agent 2, la possibilité de choisir votre
moyen Stop/Run favori : soit un clic droit n’importe où dans l’écran de
Groove Agent, soit un clic sur le logo Steinberg. Sélectionner “When
Host Stops -> Pause Playback” (Lorsque l’hôte s’arrête -> Pause de
la lecture) place votre batteur en mode d’attente chaque fois que
l’hôte est arrêté. Sélectionner “When Host Stops -> Stop Playback”
(Lorsque l’hôte s’arrête -> Arrêt de la lecture) signifie que Groove
Agent 2 devra être redémarré manuellement. Différents modes pour
différentes situations.
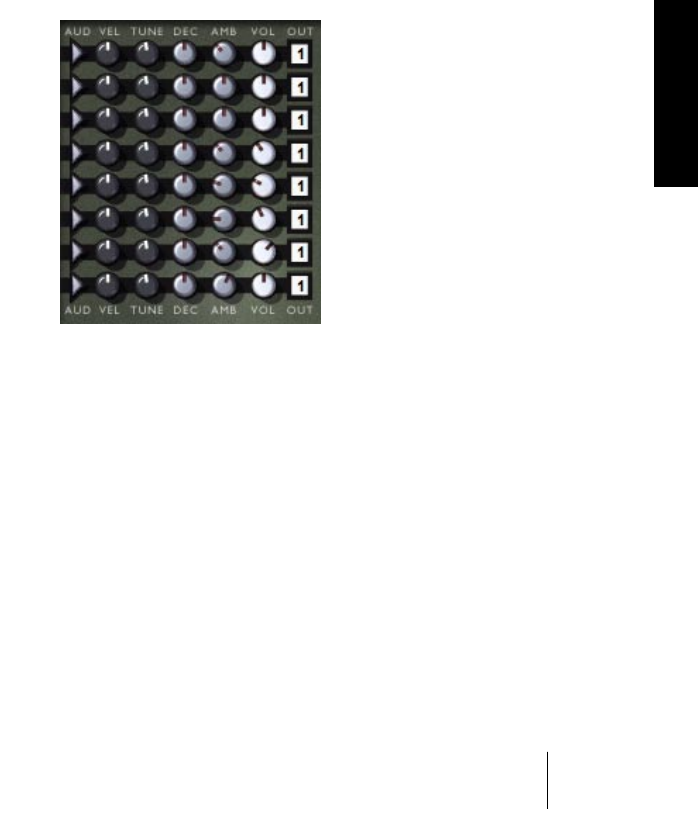
Groove Agent
Français 209
FRANÇAIS
Sous le couvercle
Jusqu’à maintenant, nous n’avons décrit que les fonctions visibles à la
surface de Groove Agent. La zone noire entourant le grand affichage
LCD ne contient pas seulement des VU-mètres, c’est aussi un couver-
cle sous lequel se trouve la section Edit. Ouvrez-le en appuyant sur
“Edit” en bas à droite du tableau de bord de l’instrument.
Les potentiomètres d’édition sonore
Huit rangées de contrôles se trou-
vent dans la zone située près du
milieu de l’écran. Les fonctions sont
identiques pour l’ensemble des huit
groupes d’instruments, nous allons
donc utiliser la rangée du haut
comme exemple.
Par défaut, tous les potentiomètres
sont réglés sur 12 heures.
Aud – Ce potentiomètre permet d’écouter le son choisi dans les grou-
pes, à gauche. Cette fonction est pratique pour écouter le son d’origine
et les éditions effectuées.
Vel – Ce potentiomètre modifie la réponse des sons de batterie.
Lorsqu’il est tourné dans le sens contraire des aiguilles d’une montre,
les vélocités d’entrée MIDI sont réduites à des valeurs plus faibles, ce
qui favorise l’usage des échantillons plus doux. Tourner ce potentiomè-
tre au-delà de 12 heures augmente les vélocités, produisant un son
plus dur et plus fort. Pour compenser son influence sur le volume de
sortie général, un système de compensation de volume est connecté à
chaque sortie de groupe.
Ce potentiomètre peut aussi être considéré comme un moyen rapide de
rendre les sons de batterie acoustique plus vagues ou plus concis.
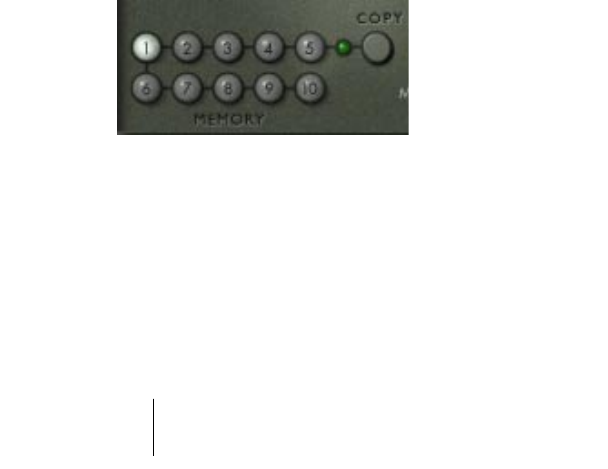
Groove Agent
210 Français
Tune – Vous pouvez accorder chaque groupe sur ±12 demi-tons
grâce à ce potentiomètre. Veuillez noter, que pour faciliter son usage,
ce potentiomètre a une résolution plus fine autour de 12 heures que
dans les positions extrêmes.
Dec – Modifier le déclin (Decay) d’un instrument permet de créer des
changements de sonorité intéressants, surtout s’ils ont été enregis-
trés avec une ambiance comme nos sons de batterie et de percus-
sions acoustiques. Une caisse claire normale peut ainsi devenir une
percussion extrêmement atténuée ou sonner comme si elle était trai-
tée par une réverb avec effet de porte (gated).
Amb – Vous pouvez ici régler avec précision la quantité d’ambiance
de chaque groupe, de Dry à Wet. Le potentiomètre Ambience princi-
pal (situé en bas à gauche de la fenêtre), sert toujours de contrôle glo-
bal, et s’il est bien réglé sur 12 heures, ce sera plus facile pour vous
de procéder à un réglage fin.
Vol – Enfin vous pouvez régler le volume global de chaque groupe
d’instruments.
Out – Chaque groupe peut être assigné à l’une des 8 sorties stéréo
disponibles. C’est pratique lorsque vous désirez appliquer une égali-
sation ou des effets externes à un (ou plusieurs) groupe(s).
Memory (Mémoire)
Lorsque vous ouvrez Groove
Agent pour la première fois, le
premier bouton Memory est
allumé. Cela signifie que la
mémoire est active, qu’elle écoute
et enregistre chaque changement
effectué. Vous n’avez pas besoin
d’activer cette case mémoire, elle l’est déjà.
Le bouton Copy copiera tout l’ensemble du tableau de bord de Groove
Agent dans un des 10 emplacements mémoire. Cliquez sur Copy puis
sur un des boutons mémoire et la procédure est terminée.
Un bouton sombre signifie que cet emplacement est vide, une couleur
verte indique que quelque chose a été sauvegardé ici et un bouton
clair lumineux indique la mémoire actuellement active.

Groove Agent
Français 211
FRANÇAIS
Chacun des 10 emplacements mémoire peut être considéré comme
un “instantané” de tous les réglages de l’instrument. Après quelques
essais, vous vous apercevrez qu’un des réglages globaux est parfait
pour, disons, les couplets de votre chanson.
En appuyant sur le bouton Copy puis sur l’emplacement mémoire 2,
tous les réglages actuels seront mémorisés dans la mémoire 1 mais
aussi déplacés vers ce nouvel emplacement mémoire. Vous pouvez
désormais continuer tranquillement à régler, disons, le refrain. Avec
l’emplacement 2 actif, vous pouvez manipuler tous les réglages du
tableau de bord selon vos désirs. Le réglage parfait du couplet est en
sécurité dans l’emplacement 1, vous êtes libre de faire des essais.
(Bien que cette description ne soit pas représentative de l’extrême sou-
plesse de Groove Agent, c’est UNE manière d’utiliser l’automatisation.)
Voici une autre suggestion. Comme les emplacements mémoire con-
servent l’ensemble des réglages du tableau de bord de l’instrument,
vous pouvez passer d’un niveau de complexité à un autre instantané-
ment et même à des styles complètement différents et les assembler
en un clic ! Ce n’est peut-être pas le scénario le plus réaliste – con-
naissez-vous beaucoup de batteurs capables de changer de batterie
en un claquement de doigt – mais cela procure certainement plus de
souplesse que personne n’en a jamais demandé !
❐
Si vous sauvegardez les réglages de Groove Agent sous forme de Ban-
que (.fxb), tout le contenu des boutons Memory sera conservé.
Master Vol
Ce n’est pas très compliqué de décrire un potentiomè-
tre marqué Master Volume, n’est-ce pas ? Vous pensez
qu’il contrôle la sortie générale de cet instrument, et
vous avez absolument raison !
Si vous utilisez plusieurs sorties, le potentiomètre Master Volume les
contrôle toutes.
Autre nouveauté dans Groove Agent 2, l’activité audio s’arrête lors-
que le contrôle Master Volume est réglé au minimum. Si vous utilisez
Groove Agent 2 comme un simple lecteur MIDI, sans employer aucun
de ses sons internes (contrôle de sons de batterie externe unique-
ment), vous économiserez ainsi de la puissance de calcul.

Groove Agent
212 Français
Sous le petit couvercle
En appuyant sur le bouton
situé au-dessus du petit cou-
vercle Setup, vous accédez à
une zone ressemblant à un
compartiment de piles. C’est là
que sont cachées les fonctions les plus secrètes. Vous refermez ce
couvercle en appuyant sur le bouton de fermeture en bas à droite.
Pour le moment, laissons-le ouvert et observons !
MIDI Output
Une des caractéristiques les plus fantastiques de Groove Agent est
sa possibilité de générer les codes MIDI correspondant à toutes les
notes que vous entendez réellement ! En réglant ce commutateur sur
ON, tout un ensemble de nouvelles possibilités apparaît !
Si vous arrangez votre rythmique en temps réel avec votre séquenceur
en mode Enregistrement (vous devriez essayer – c’était notre challenge
lors de la conception de Groove Agent), un conteneur MIDI sera créé
au fur et à mesure. Après quoi vous pourrez l’ouvrir et effectuer diver-
ses tâches :
• Effacer, ajouter, copier ou déplacer des notes individuelles.
• Copier la longueur voulue de ce nouveau conteneur dans une autre section
de la chanson ou dans un autre morceau.
• Utiliser d’autres types de quantification ou de nuances.
• Copier tout le conteneur, effacer la grosse caisse du conteneur d’origine et
effacer les autres instruments dans le conteneur copié sur une autre piste.
Vous pouvez ensuite assigner la partie de grosse caisse à un autre instrument
virtuel ou physique, par exemple, votre échantillonneur favori. Si vous utilisez
une Drum Map Cubase, toutes ces opérations deviennent très simples.
❐
Cette fonction de Sortie MIDI se situe aux limites du protocole VST 2.0,
que nous avons poussé dans ses derniers retranchements. Nous n’avons
aucune idée de ce que peut faire (ou ne pas faire) cette fonction dans cha-
que programme hôte disponible. Nous garantissons uniquement qu’elle
fonctionne correctement dans les programmes Cubase et Nuendo de
Steinberg.

Groove Agent
Français 213
FRANÇAIS
Si vous utilisez un programme ne pouvant gérer la sortie MIDI depuis
un instrument VST comme décrit précédemment, il vous faudra utili-
ser les possibilités d’automatisation de l’application hôte lors de la
création des arrangements. Veuillez aussi lire le paragraphe suivant,
décrivant la nouvelle fonction: Live <> File.
•Il vaut mieux activer le filtre SysEx de votre séquenceur lorsque vous utili-
sez Groove Agent. Si vous ne filtrez pas les messages SysEx, les com-
mandes Run et Stop sont écrites dans le conteneur MIDI, ce qui démarrera
la lecture via le moteur de Groove Agent dès la réception de données
MIDI. Si vous filtrez les SysEx, les commandes Run et Stop ne seront pas
écrites dans le conteneur MIDI et la vie en sera généralement simplifiée.
❐
Il est conseillé de couper la fonction de quantification automatique (Auto
Quantize) de votre séquenceur lorsque Groove Agent écrit une piste MIDI.
Vous pourrez toujours quantifier la rythmique plus tard, si vous le désirez.
Lorsque la fonction MIDI Output est active, cet état est indi-
qué par un symbole de prise MIDI apparaissant dans l’affi-
chage LCD.
Live <> File
Voici encore une nouvelle fonction dans Groove Agent 2 ! Vous pou-
vez choisir de diriger sa sortie MIDI soit vers une partie MIDI de votre
application hôte – comme décrit précédemment – soit vers un fichier
MIDI dans votre ordinateur !
Si vous réglez MIDI Output sur ON et le nouveau bouton Live <> File
sur la position File (Fichier), Groove Agent 2 créera un fichier MIDI
qu’il placera sur le bureau. N’oubliez pas de remettre le bouton MIDI
Output sur OFF lorsque vous avez terminé (cette action indique à
Groove Agent 2 d’écrire le fichier). Vous pourrez ensuite importer ce
fichier MIDI dans votre morceau pour l’éditer. Il suffit d’utiliser la fonc-
tion “Importer Fichier MIDI” de votre application hôte, ou de faire un
glisser-déposer si vous préférez, et c’est fait ! Veuillez noter qu’à cha-
que fois que vous démarrez Groove Agent 2 dans ce mode, le fichier
MIDI précédent sera remplacé.
Un clic doit sur une zone inutilisée ou un clic sur le logo vous propo-
sera ces mêmes options dans un menu déroulant.
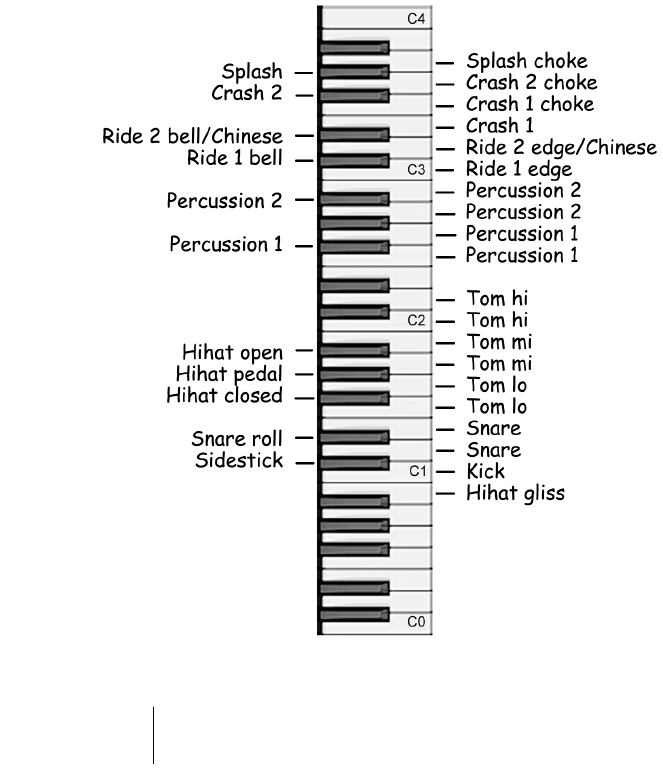
Groove Agent
214 Français
GM Output
Nous vous en dirons plus sur GM Output très bientôt, voyons d’abord
son principe.
Dans Groove Agent, nous avons utilisé la configuration de clavier ou
“keyboard map” ci-dessous. Vous la verrez si vous utilisez la fonction
MIDI Output et que vous regardez le conteneur MIDI créé par Groove
Agent. C’est une table GM ordinaire commençant par la grosse caisse
(Kick Drum) sur C1, Sidestick sur C#1 etc. Mais après le Tom 1, vous
constaterez quelques différences. Il y a deux groupes d’instruments à
percussion et enfin une série de cymbales Ride et Crash après C3.

Groove Agent
Français 215
FRANÇAIS
Voici la table (Map) que nous avons utilisée, mais honnêtement nous
ne pensons pas que vous devez vous en préoccuper. Lorsque vous
éditez un conteneur MIDI généré par Groove Agent, il est préférable
que l’icône de haut-parleur (ou autre icône similaire) soit activée, afin
de pouvoir entendre les sons de percussion lorsque vous faites défiler
les notes.
Si vous réglez GM Output en position ON, Groove Agent redirigera
les notes émises afin de suivre le protocole General MIDI.
Lorsque la fonction GM Output est active, cet état est indi-
qué par un symbole GM apparaissant dans l’affichage LCD.
Ambience Split
Vous pouvez faire en sorte que Groove Agent restitue l’ambiance ou
les sons réverbérés sur une des sorties de mixage séparée. C’est pra-
tique si vous désirez traiter cette partie du son séparément. Lorsque
ce bouton est activé, seul le signal sec (Dry) sera audible sur la sortie
portant le numéro le plus élevé.
Que pouvez-vous faire avec une ambiance sur une sortie séparée ? Et
bien, le traitement par de l’égalisation (EQ) ou le traitement de la
dynamique peut créer des effets intéressants. Ou, si vous exportez la
rythmique de Groove Agent dans un fichier audio, vous pourrez faire
des essais sur le fichier de l’ambiance isolée. Comment cela sonnera-
t-il si l’ambiance est un peu retardée – ou un peu avancée ? Ou si
vous combinez le son d’une caisse claire techno avec l’ambiance
d’une caisse claire piccolo… ? Faites des essais !
Lorsque la fonction “Ambience Split” est active, cet état est
indiqué par un symbole représentant une dérivation de la
chaîne sonore apparaissant dans l’affichage LCD.

Groove Agent
216 Français
Vintage Mode
Nous avons exagéré l’effet temporel qui enveloppe les styles et sons
authentiques en ajoutant un peu de filtrage intelligent et en diminuant
l’ampleur stéréo. Nous pensions que vous apprécieriez le son vieillot
du style rétro joué sur du vieux matériel. Mais vous aurez peut-être
envie parfois de désactiver cet effet, c’est pourquoi nous avons ajouté
un bouton ici. Lorsque le Mode Vintage est désactivé, toutes les simu-
lations Vintage le sont aussi.
L’effet Vintage Mode n’est audible que sur les styles compris entre
1950 et 1975 et il est plus marqué sur les genres les plus anciens.
Lorsque la fonction Vintage Mode est active, cet état est indi-
qué par un symbole de phonographe apparaissant dans l’affi-
chage LCD.
Reset All
Le bouton Reset All est pratique si vous désirez commencer à créer
votre propre kit de batterie à partir de rien. Ce peut être le cas si vous
utilisez Groove Agent comme un simple expandeur. Le fait d’appuyer
sur le bouton Reset All vide toutes les cases de groupes ; et tous les
potentiomètres d’édition retrouvent leur position par défaut.
Si vous êtes complètement perdu lors de l’édition d’un kit d’un certain
style, vous pouvez toujours revenir au kit d’origine en sélectionnant
d’abord un autre style pour revenir ensuite au style désiré.

Groove Agent
Français 217
FRANÇAIS
Créer une piste rythmique dans Groove Agent
Lorsque vous désirez ajouter une rythmique à votre musique, le scé-
nario peut être un des suivants :
1. Votre programme séquenceur est un écran vide mais vous avez des
idées musicales bien définies en tête. Vous désirez commencer par la
rythmique.
2. Quelques instruments et/ou voix ont déjà été enregistrés, et vous
désirez ajouter un arrangement de batterie.
Groove Agent dispose d’au moins trois moyens différents pour créer
une piste rythmique :
•Méthode 1 : Jouez tout en étant accompagné par votre morceau en
temps réel, utilisez l’automatisation de votre séquenceur pour captu-
rer chacun de vos gestes. Qui peuvent inclure des événements “non-
musicaux” tels que la modification en temps réel des paramètres so-
nores (potentiomètres d’édition, etc.).
Avantage : Après l’enregistrement, vous pouvez modifier vos gestes plus en détail.
Même vos réglages de potentiomètres ont été enregistrés sous forme d’événements
MIDI éditables. Pour les séquenceurs qui n’acceptent pas la sortie MIDI d’un instru-
ment VST, c’est un moyen de contourner le problème.
Inconvénient : Vous ne pouvez pas modifier des frappes particulières de cette manière
dans Groove Agent, bien que vous puissiez toujours ajouter des frappes individuelles
en les jouant en direct sur votre clavier MIDI.
•Méthode 2 : Jouez tout en étant accompagné par votre morceau en
temps réel, utilisez les commandes de Groove Agent pour créer une
piste rythmique vivante et qui respire. Votre séquenceur enregistre la
sortie des notes MIDI de Groove Agent dans un conteneur MIDI. Le
commutateur MIDI Output doit être activé pour que cela fonctionne.
Nous pensons que c’est le moyen le plus intuitif et le plus créatif de
réaliser une piste rythmique.
Avantage : Vous obtenez ce que vous entendez. Le conteneur rythmique sonnera
comme ce que vous avez joué. De plus, il est facile d’effacer, ajouter, copier ou déplacer
des notes séparées dans ce nouveau conteneur rythmique. Vous pouvez rediriger certai-
nes notes pour déclencher des sons de percussion d’un autre instrument, comme un
échantillonneur par exemple.
Inconvénient : Si vous désirez utiliser beaucoup de contrôles de dynamique, en agissant
sur le potentiomètre Limiter ou sur la caisse claire pendant un morceau, ces événements
ne seront pas capturés, seul le flux des notes MIDI sortant de Groove Agent le sera.

Groove Agent
218 Français
❐
Bien entendu, vous pouvez mélanger ces deux méthodes de travail, en
automatisant Groove Agent pour construire le morceau puis en enregis-
trant sa sortie sur une piste MIDI pour y retravailler plus finement. Vous
pouvez considérer qu’il s’agit de récupérer la sortie de Groove Agent sur
une piste MIDI, comme vous récupérez la sortie audio des plug-ins sur
une piste audio. Bien sûr, vous pouvez également récupérer la sortie de
Groove Agent sur une piste audio !
•Méthode 3 : Créez d’abord une série de réglages en utilisant la fonc-
tion Memory. Un réglage qui conviendra au couplet, un autre pour le
refrain, etc. Puis, lorsque vous êtes satisfait de vos différentes confi-
gurations de mémoires, il ne vous reste plus qu’à élaborer le morceau
en passant d’une mémoire à une autre pendant qu’il joue.
Avantage : Comme les mémoires capturent TOUT ce qui apparaît à l’écran à un moment
donné, c’est la seule manière de passer instantanément d’un niveau de complexité à un
autre, d’un style à un autre ou d’un kit à un autre ! C’est la méthode à utiliser si vous
recherchez des changements radicaux.
Inconvénient : Le fait de passer d’un scénario préréglé à un autre peut sembler un peu
statique, car les reprises et les variations en temps réel devront être enregistrées ou pro-
grammées séparément.
❐
Le musicien créatif pourra combiner chacune de ces méthodes pour
obtenir une piste rythmique parfaite, incluant un conteneur MIDI éditable
avec des actions sur les potentiomètres et un passage instantané entre
les différents niveaux, styles et kits !
Voici un point de vue légèrement différent : Installez un contrôleur adé-
quat – comme un clavier MIDI cinq octaves – comme vous voulez. Puis
enregistrez en MIDI le jeu d’un pattern : Start, Stop, Select, Fill, régla-
ges de paramètres et frappes de batterie séparées. Cette méthode
pourrait être utilisée avec la fonction MIDI Output de Groove Agent
activée ou pas.

Groove Agent
Français 219
FRANÇAIS
Utiliser la sortie MIDI de Groove Agent dans
Cubase SX
Bien que nous ne soyons pas sûrs que toutes les applications hôtes
disponibles puissent gérer des notes MIDI envoyées d’un instrument
VST (pour le moment, Groove Agent est le premier instrument virtuel
ayant cette possibilité), les utilisateurs de Cubase SX pourront certai-
nement utiliser cette méthode. Suivez ces étapes.
1. Ouvrez Groove Agent dans la fenêtre Instruments VST. Sélectionnez
Groove Agent comme entrée (et désélectionnez-le comme sortie pour
éviter le double déclenchement) sur la piste MIDI désirée. Ouvrez les
couvercles Edit et Setup dans Groove Agent et vérifiez que la fonction
MIDI Output est activée. Dans la plupart des situations, la fonction de
quantification automatique (Auto Quantize) de votre séquenceur devra
être désactivée. Vous êtes alors prêt à commencer l’enregistrement de
votre piste rythmique.
2. Commencez à enregistrer dans Cubase SX. Enregistrez votre batterie.
Dans ce mode, des réglages Limiter, Ambience et des sons de batterie
ne sont pas enregistrés, seules les notes le sont. Lorsque le morceau
ou la section du morceau est terminé, appuyez sur le bouton Stop de
Groove Agent puis sur le bouton Stop de Cubase.
3. Pour entendre ce que vous venez d’enregistrer, vérifiez que la piste
MIDI que vous utilisez a sa sortie réglée sur Groove Agent. Sinon, il se
peut qu’elle restitue les notes d’un autre instrument VST ou celles
d’un module externe, et vous n’entendriez pas Groove Agent relire la
rythmique.

Groove Agent
220 Français
Utiliser l’automatisation dans Cubase SX
Cette section et la suivante donnent des instructions pas à pas sur la
création d’une piste rythmique dans Cubase SX. Cependant, des pro-
cédures similaires s’appliquent à la plupart des applications hôtes.
Reportez-vous à la documentation de votre application hôte si vous
avez besoin d’aide.
La méthode qui consiste à utiliser l’automatisation est peut-être la
plus directe. Si vous n’êtes pas familier de cette approche, voici un
guide pour vous aider à réaliser ce travail dans Cubase SX.
1. Ouvrez Groove Agent dans la fenêtre Instruments VST. Depuis le
tableau de bord de Groove Agent, activez le bouton Write (W). Regar-
dez dans la fenêtre de projet de Cubase SX, vous remarquerez qu’une
nouvelle piste appelée “Instruments VST”, plus une autre piste en des-
sous, ont été créées. Dans la plupart des cas, la fonction de quantifica-
tion automatique (Auto Quantize) de votre séquenceur devra être
désactivée. Vous êtes alors prêt à commencer l’enregistrement de
votre piste rythmique.
2. Démarrez Cubase SX. Lorsque le moment est venu de jouer la rythmi-
que, appuyez sur le bouton Run (avec ou sans “Fills” prêt à démarrer,
vous vous souvenez ?). Actionnez les faders, poussez les boutons et
tournez les potentiomètres jusqu’à ce que votre piste rythmique sonne
comme il faut. Lorsque le projet ou la section du projet est terminé,
appuyez sur le bouton Stop de Groove Agent puis sur le bouton Stop
de Cubase.
3. Après l’enregistrement, faites un clic droit sur la piste “Instruments
VST” et sélectionnez “Montrer l’Automatisation Utilisée pour toutes
les Pistes”. Toutes les catégories d’automatisation (Run/Stop, Fill,
Pattern Select, etc) auront une piste séparée.
4. Appuyez sur le bouton Read (R) dans Groove Agent ou dans une des
nouvelles sous-pistes d’automatisation créées. Désormais vous voyez
les données réelles dans toutes les pistes. Vous pouvez les éditer à
votre convenance.
5. Pour éviter de supprimer des données par mégarde, vérifiez que le
bouton Write n’est allumé que lorsque vous désirez réellement modi-
fier des données d’automatisation.

Groove Agent
Français 221
FRANÇAIS
Composer avec les cases mémoire de Groove
Agent dans Cubase SX
Lorsqu’il faut effectuer des changements plus importants, par ex. pour
changer de style, de kit et de son en une seule fois, c’est là que les
boutons Memory entrent en jeu. Procédez comme ceci.
1. Ouvrez Groove Agent dans votre rack d’instruments VST. Préparez
les réglages des différents parties de votre projet dans Groove Agent
et sauvegardez ces “instantanés” dans les divers emplacements
mémoire. Vous pouvez utiliser un instantané pour le premier couplet,
un autre pour le refrain, etc.
2. Depuis le tableau de bord de Groove Agent, activez le bouton Write
(W). Regardez dans la fenêtre de projet de Cubase, vous remarque-
rez qu’une nouvelle piste appelée “Instruments VST”, plus une autre
piste en dessous, ont été créées. Dans la plupart des cas, la fonction
de quantification automatique (Auto Quantize) de votre séquenceur
devra être désactivée. Vous êtes alors prêt à commencer l’enregistre-
ment de votre piste rythmique.
3. Démarrez Cubase SX. Enregistrez votre piste rythmique en appuyant
sur Run et en sélectionnant les différents emplacements mémoire
lorsque vous arrivez aux différentes sections du projet. Lorsque le pro-
jet ou la section du projet est terminé, appuyez sur le bouton Stop de
Groove Agent puis sur le bouton Stop de Cubase.
4. Après l’enregistrement, faites un clic droit sur la piste “Automatisation
des Instruments VST” et sélectionnez “Montrer l’Automatisation Utili-
sée pour toutes les Pistes”. Toutes les catégories d’automatisation
(Run/Stop, Fill, Pattern Select, etc) auront une piste séparée.
5. Appuyez sur le bouton Read (R) dans Groove Agent ou dans une des
nouvelles sous-pistes d’automatisation créées. Désormais vous voyez
les données réelles dans toutes les pistes. Vous pouvez les éditer à
votre convenance.
6. Pour éviter de supprimer des données par mégarde, vérifiez que le
bouton Write n’est allumé que lorsque vous désirez réellement modi-
fier des données d’automatisation.

Groove Agent
222 Français
❐
Vous préférerez peut-être envoyer des commandes de changement de
programmes (Program Change) depuis votre clavier MIDI pour sélec-
tionner les emplacements mémoire. Dans ce cas, utilisez l’enregistre-
ment MIDI normal, car l’automatisation ne sera pas prise en compte. Si
vous jouez la rythmique en direct depuis votre clavier tout en enregis-
trant, ces notes seront également enregistrées.
❐
Dans Cubase SX, le filtre de SysEx MIDI doit être sur OFF pour que
l’automatisation des paramètres fonctionne.

Groove Agent
Français 223
FRANÇAIS
À propos des styles
Voici une brève description de chaque style, tels que les décrivent les
musiciens eux-mêmes. Les styles qui sont nouveaux dans Groove
Agent 2 sont repérés par un astérisque (*). Veuillez noter que si les 54
styles d’origine de Groove Agent étaient rattachés à des années bien
précises, ce n’est pas le cas des nouveaux styles. Exemple : “Vintage
FR-3” est un style associé à “1981 Elektro”, non pas parce qu’il a une
saveur particulière à l’année 1981, mais parce que ces anciennes ma-
chines analogiques sont des appareils électroniques.
1950 Swing
C’est un style utilisé pour le jazz et les big bands. Il est difficile de cou-
vrir toutes les possibilités dans un domaine aussi complexe que la
rythmique swing/big band, aussi ai-je choisi une méthode simple et di-
recte pour celui-ci. Le style a été programmé autour de 144 BPM. Il
est divisé en deux sections : la première moitié en “2”, la seconde en
“4 on the floor” afin de correspondre aux différents patterns de basse
souvent utilisés dans ce type de rythmique. RB
1951 Samba
Ce style de Samba est un mélange entre la Samba authentique
(lorsqu’elle est jouée sur le drum kit) et le style de Samba que la plu-
part des batteurs jazz et fusion utilisent dans leur rythmique. MEB
1952 Jazz Trio
Tout l’art des balais ! Peu de gens aujourd’hui savent comment utiliser
les balais “comme il faut” ! C’est une chose que d’en avoir une paire,
et c’en est une autre de savoir s’en servir. Un autre problème est de
concevoir un instrument VST pouvant les gérer de manière convain-
cante…
Nous avons implémenté le “brush stroke” dans Groove Agent et nous
l’avons combiné avec ma propre inspiration issue des plus grands,
tels que Buddy Rich, Louie Bellson, Jo Jones et de toutes les leçons
prise avec le légendaire Ed Thigpen (qui a fait partie de l’Oscar Peter-

Groove Agent
224 Français
son Trio entre autres). Vous devez savoir que je ne suis pas d’accord
à 100% avec Sven à propos de ce qu’il se passe lorsque l’on appuie
sur le bouton Sidestick ! Ça donne un effet “deux batteurs pour le prix
d’un”… qui n’est pas si mauvais que ça, après tout ! RB
*Bop
Ce style jazzy énergique peut facilement être employé dans un petit
ensemble de jazz, avec piano, basse, batterie et un instrument solo.
C’est un bon choix lorsque vous désirez interpréter votre propre ver-
sion d’un des nombreux standards de jazz. Il ne reste plus qu’à ouvrir
le Real Book, appuyer sur le bouton Run et jouer. MEB
1953 Paint
Il n’est parfois pas nécessaire d’avoir un jeu de rythmique régulier. Si
vous dites à un batteur de “faire quelque chose”, il ou elle entrera pro-
bablement dans une sorte de transe créatrice et commencera à jouer
des sons magnifiques. Ce style simule ce type de situation. SB
* Ominous
Ce style est un voyage arythmique parmi les effets sonores, selon dif-
férents modes et lieux, de préférence parmi les plus déplaisants…
Battements de cœur, bruits angoissants, carillons et bien d’autres for-
mant un “melting pot” d’impressions suggestives. Il va du plus simple
au plus complexe, mais d’une manière non-linéaire, allant bien au-delà
des frontières du jeu de pattern standard. Comme toujours les fonc-
tions Fill, Sidestick et Half Tempo permettent des variations. Essayez
aussi la fonction Random sans modération. Imaginez un lieu, et vous y
êtes… NE
* Machinery
Hall d’usine ? Non il ne s’agit pas d’un algorithme de réverbération.
C’est le rythme statique de machines fonctionnant ensemble. Certai-
nes sont petites et rapides, d’autres énormes et lentes ou vice versa,
elles ont été ajoutées une à une, allant de la petite industrie à la caco-
phonie finale de marteaux et de roues. Déplacez-vous avez précaution
et mettez votre casque ! NE

Groove Agent
Français 225
FRANÇAIS
1954 Cha-Cha
Le style du Cha-Cha est basé sur le jeu en “Sidestick” et sonne mieux
si le bouton Sidestick est activé. MEB
1955 3/4
Il existe un certain nombre de styles différents en 3/4. La complexité
ne va pas du plus simple au plus compliqué avec ce style. C’est plus
un voyage passant par différentes attitudes et émotions, comme une
“mesure à trois/quatre”. Pour obtenir de meilleurs résultats, réglez
aussi la mesure sur 3/4 sur votre séquenceur. SB
* 6/8
Omission idiote dans l’édition d’origine de Groove Agent, le style 6/8
avait été oublié. Beaucoup de belles chansons ont besoin de ce gen-
dre de rythme, comme “If you don’t know me by now” et “When I need
you”. Veuillez noter que vous devez régler la mesure de votre applica-
tion hôte sur 6/8 pour jouer ce style correctement. SB
1956 Rumba
Il s’agit d’une Rumba Afro-Cubaine, à ne pas confondre avec le style
Rhumba (avec un “h”) souvent présent sur les anciennes boîtes à ryth-
mes. MEB
1957 Shuffle
C’est un style peu compliqué qui vous donnera, en tant que batteur,
beaucoup de possibilités si vous êtes créatif. Au lieu de simplement
jouer les temps faibles à la caisse claire, vous pouvez jouer le pattern
complet sur la charleston ou la cymbale Ride, ce qui donnera un son
plus “épais” à votre musique. C’est un peu difficile pour la main gau-
che (si vous jouez sur une batterie ordinaire), mais quel plaisir ! RB
1958 Fox
C’est un style qui existe depuis pas mal de temps. Appelé aussi Fox-
trot, Slowfox ou autre ; certains s’y réfèrent comme à un style très mu-
sical. Il s’agit d’un style aux temps forts joyeux et légers. SB

Groove Agent
226 Français
1959 Tom-Toms
Ce style est utilisé dans de nombreuses situations différentes. Son
origine remonte aux années 20, lorsque Duke Ellington jouait de la
“jungle music” à Harlem et il est devenu inoubliable grâce à Gene
Krupa avec le Benny Goodman Orchestra au Carnegie Hall jouant
“Sing, Sing, Sing” en 1938, ce type de jeu de batterie se retrouve
dans presque tous les films traitant des années 30 et 40. RB
1960 Bossa Nova
Ce style de Bossa Nova traditionnel est joué en Sidestick à la caisse
claire. Activez le bouton Sidestick pour donner plus d’authenticité. MEB
1961 Twist
Ici l’inspiration a été donnée par le classique “Let's Twist Again” de
Chubby Checker. Sur le disque, le morceau est joué d’une manière très
régulière et simple, mais plus vous poussez le fader de complexité de
Groove Agent, plus vous obtenez des variations et des ajouts de pat-
terns rythmiques à la grosse caisse et à la cymbale Ride. RB
1962 12/8
Il s’agit d’un style hybride. À l’origine, l’idée était de créer un rythme à
12/8 lent, similaire à celui que vous entendez dans les chansons
d’amour des années cinquante. Mais en composant les patterns, j’ai
augmenté le tempo pour m’amuser et j’ai constaté qu’avec un BPM
plus rapide on avait une sensation tout à fait nouvelle, avec une sorte
de touche Funky assez moderne. Utilisez-le dans les ballades ou
transformez-le en “groovy beat”. PS
* Slow Blues
Si je devais choisir un style et un tempo pour toute une jam session, ce
serait “Slow blues à 60 BPM” sans hésitation. C’est un mode et un
tempo qui peuvent tenir une nuit entière. Il y a tellement de beaux stan-
dards qui l’utilisent : “Summertime”, “Red House”, “Sweet Sixteen” et
bien d’autres classiques ; ou toute improvisation relaxe. Slow Blues de
Groove Agent est plutôt dynamique; il augmente en volume et en inten-
sité avec les niveaux de complexité. De plus, il redémarre parfois (aux
niveaux 7, 12 et 18) à partir de son groove charley fermé de base. SB

Groove Agent
Français 227
FRANÇAIS
1963 Train Beat
C’est un style où le batteur doit travailler dur à la caisse claire. Il con-
vient bien aux chansons Country et Rock'n'Roll et donnera à votre
musique une sensation “d’énergie”. PS
1964 Tamla
Pour ce style je me suis inspiré du classique Rock “Pretty Woman”. Ce
rythme était aussi fréquemment utilisé par les artistes du légendaire label
Tamla Motown. C’est un bon moyen de démarrer un morceau sur un
temps levé, plutôt qu’avec une caisse claire qui va marteler le tempo ! PS
1965 Soul
Ce style est influencé par certains batteurs “groovy” tel que ceux qui
ont accompagné James Brown. MEB
1966 Pop
Jeu de batterie pop très énergique à votre service ! Tempo favori :
146 BPM. Ces rythmes ont été créés dans le but d’inspirer tous les
autres musiciens du groupe. Ce jeu de batterie Pop est un vrai
“moteur”, avec ses reprises, des plus banales aux plus décoiffantes.
Est-il possible de trouver une reprise de deux mesures allant de A à Z
et inversement ? Happy ride ! dB
* Steady Beat
Voici un style très basique convenant à la plupart des tempo. Il est
parfait lorsque vous avez besoin d’un batteur stable qui ne part pas
dans des exercices inattendus, quelqu’un qui ne se fâche jamais et ne
veut pas impressionner – mais qui joue... un battement régulier. Ce
style peut aussi servir au jeu des triolets. Il suffit de tourner le bouton
Shuffle vers la droite et vous aurez un “Steady Shuffle-beat”. MEB
1967 Backbeat
C’est un style parfait pour mettre en valeur les temps faibles. C’est un
jeu assez intense qui ne s’arrête jamais pour reprendre son souffle, et
c’est peut-être pourquoi il est facile de créer un morceau agréable à
danser sur ce rythme. PS

Groove Agent
228 Français
1968 New Orleans Funk
Durant l’hiver 1968-69, le grand batteur Joseph “Zigaboo” Modeliste
enregistrait le célèbre “Cissy Strut” dans le plus pur style R'n'B New
Orleans avec les pionniers du Funk, “The Meters”. Zigaboo a inventé
un groove funk caractéristique souvent nommé le style “second line”,
très typique du groove des “The Meters”. Les grooves Zigaboo sont
(avec ceux du “Funky Drummer” de James Brown) les plus fréquem-
ment échantillonnés et recyclés des grooves de l’histoire de la musi-
que Afro-Américaine moderne. Le groove exact se trouve au niveau de
complexité 8. Amusez-vous bien ! MK
1969 Songo
Le Songo a été créé à la fin des années 60 par le batteur Chanquito
du groupe “Los Van Van”. Ce style a inspiré bon nombre des batteurs
jazz et fusion d’aujourd’hui. Le Songo est un des styles Afro-Cubains
les plus modernes et c’est parfois le premier pas du batteur dans le
monde de la musique Latino. MEB
* Mozambique
Le Mozambique a été inventé dans les années 60 et c’est un des ryth-
mes Latins les plus modernes. On l’entend souvent sur des enregistre-
ments de groupes funk, jazz et Latins et il a été développé par plusieurs
batteurs de renom. MEB
1970 Olympic
C’est amusant de voir comment un jeu de batterie dont les temps fai-
bles ne sont pas accentués peut donner du swing à un morceau. J’ai
pris la rythmique du “Get Back” des Beatles et je l’ai ralentie. Le résul-
tat est audible dans les niveaux de complexité faibles. J’ai aussi poussé
ce style un peu plus loin, quelques niveaux vers la droite. Mon concep-
teur graphique m’a suggéré que celui-ci pourrait servir pour les exerci-
ces de gymnastique, d’où son nom ! SB

Groove Agent
Français 229
FRANÇAIS
1971 Cajun
Vous n’aurez plus besoin de “Deep down in Louisiana close to New
Orleans” (descendre en Louisiane tout près de New-Orleans) pour
entendre ce feeling cajun épicé. Il vous suffit désormais de choisir le
style 1971 Cajun de Groove Agent, réglez votre application hôte VSTi
sur 86 degrés F°, ou… BPM de préférence, et laissez mijoter ! Ajou-
tez une pincée d’accordéon et une grosse caisse bien dodue à une
caisse claire énergique, et c’est prêt. “Bon appétit” ! MK
1972 Bonzo
Ce style est, comme son nom le suggère, quelque peu inspiré par John
Bonham de Led Zeppelin, peut-être le batteur Hard Rock le plus mar-
quant. Je vous suggère de régler le potentiomètre Ambience sur au
moins 2 heures pour retrouver ce feeling “heavy”. Les patterns A à E
sont supposés simuler les habitudes de jeu de Mr Bonham frappant sa
batterie à mains nues. Pour obtenir cet effet, la Percussion 2 doit être
activée pour ces patterns. La Percussion 1 est supposée sonner
comme un tambourin fixé à la charleston. La complexité augmente du
pattern 1 à 10 avec la charleston puis elle reprend pour les patterns 11
à 20 avec la cymbale Ride. Les patterns à mi-tempo ont des petits trio-
lets de caisse claire que l’on ne trouve pas dans les motifs normaux.
Bien que ce soit pas bon pour l’environnement, certains morceaux ont
besoin de “carburant avec plomb”. MD
1973 Dark Side
Cela m’amuse toujours ! Comment peut-on vendre autant de disques en
jouant si peu de notes. Ce style est largement inspiré de l’album “Dark
Side of the Moon” des Pink Floyd, parfait pour les morceaux lents. SB
1974 Reggae
Il s’agit d’une version Reggae basée sur les triolets, jouée habituelle-
ment en Sidestick. Le son de la batterie est très sec. Lorsque nous
avons enregistré ces échantillons pour Groove Agent, l’ingénieur du
son Jens Bogren après avoir tourné en rond, nous a regardé et a dit :
“Vous voulez vraiment un son comme ça ?”. Nous avons confirmé. MEB

Groove Agent
230 Français
* Bombay Dance Hall
C’est le Dance Hall Beat global du troisième millénaire. Que ce soit à
Londres, à Bombay ou à Sollentuna. Cela n’a pas d’importance tant
que tout le monde passe du bon temps. Certains artistes marient ce
style au Reggae, d’autres au Hip Hop. Tout est possible et c’est à
vous de choisir. Essayez d’ajouter ou de réduire l’ambiance des diffé-
rent instruments afin de modifier la notion d’espace. NE
* Roots
Roots, Rock, Reggae. Le percussionniste – jouant sur de grosses bou-
teilles et sur un vibra-slap – passe à sa guise par les différents niveaux
de complexité, alors que le batteur va du plus simple au plus compli-
qué. Il utilise déjà le rim-shot à certains niveaux intermédiaires, donc le
fait de sélectionner la fonction “Sidestick” le fera jouer de manière plus
profonde. Assez parlé technique, laissons parler le vieux rasta qui di-
sait : “C’est comme le foot. C’est là. C’est dans tes genoux…”. NE
1975 Funk
Cette rythmique funky est inspirée du gourou funk George Duke (Party
Down) d’un côté et de Frank Zappa (I Don't wanna Get Drafted) de
l’autre… En fait, ils faisaient de la bonne musique ensemble aussi !
Bien sûr, nombreux sont les innovateurs du Funk. Fred White de Earth
Wind & Fire a fait des choses très simples mais étonnamment groovy.
Dans les années 70, la musique Funk était jouée assez simplement, sauf
la batterie qui lui ajoutait un peu plus de swing. Ajoutez du Slick Triangle
et du Wood Block à tout moment. Style programmé en 126 BPM. dB
1976 Disco
Au début des années 70, la mode disco a commencé. En Avril 1976, le
célèbre club New-Yorkais Studio 54 a propulsé le disco à un niveau plus
élevé, mais c’est le film Saturday Night Fever qui l’a fait connaître au monde
entier. La batterie peut sonner de manière assourdie et certains Fills un peu
“moches”, mais c’est ce qui fait le charme de ce style. Lorsqu’il est mélangé
au reste du groupe, ce rythme donne un groove “funky dance” agréable.
Ressortez vos pantalons “pattes d’éph” et vos chaussures à semelle com-
pensée, laissez-vous pousser les cheveux, mettez une chemise en satin
ouverte sur la poitrine et “get down on it !” FvW

Groove Agent
Français 231
FRANÇAIS
1977 Hard Rock
J’ai grandi en écoutant les Beatles au début des années 70. Ensuite
j’ai été une jeune âme errante, écoutant tout ce qui passait à la radio,
mais je n’ai jamais trouvé “ma chose à moi”. Puis, lorsque j’ai eu seize
ans quelqu’un m’a donné un album noir d’un groupe que je n’avais
jamais entendu, et j’ai été sidéré par l’intro des “Hells bells” au début
de leur album “Back in black”.
Yepp, je suis devenu un hard rocker ! ! Et vous avez donc ici une batte-
rie solide et lourde pour tous ceux ayant les ambitions d’Angus ! ! JS
* Grunge
Nirvana, Mudhoney, Melvins… Je pense que cette liste est sans fin.
L’Industrie de la Musique les appelle Grunge. Faites préchauffer votre
ampli, “strapez” votre guitare, plaquez un accord de FA# “power-
chord” et pressez le bouton “Run” de ce style. MS
* Indie Punk
Une figure de batterie classique d’un titre Punk qui sera puissant et
rapide. Mais aussi une figure de batterie pour un titre Punk moderne
tout aussi puissant, rapide, spécifique et créatif pour bien “stresser” la
structure du morceau. Ces caractéristiques ont toutes été implé-
mentées dans ce style. Amusez-vous et “keep on rocking” ! MS
* Unplugged
La télévision l’a rendu populaire. Un bon titre rock doit aussi pouvoir
être joué dans une ambiance douce afin que le public puisse entendre
facilement la voix du chanteur. Ce style est rempli de “beats/fills”
joués en douceur et avec des baguettes. MS
* Ballad
Très tôt le matin, votre café est encore trop chaud et votre dernière
ballade a besoin d’une batterie stable et puissante. Essayez celle-là !
Le tambourin ajoutera de la légèreté au refrain tout en donnant de la ri-
gidité à la rythmique dans son ensemble. (Et psst, j’ai aussi découvert
autre chose : essayez-la à 120 BPM ! Plutôt énergétique, hein ?) MS

Groove Agent
232 Français
1978 TexMex
Un jour j’ai joué à Sven un morceau avec une sorte de rythmique
étrange et molle avec basse, piano et guitare glissando. Il sonnait un
peu comme un truc “pas très bien répété” joué dans un petit restau-
rant quelque part à la frontière entre le Texas et le Mexique. “C’est très
étrange et très cool”, a dit Sven. “Nous allons l’inclure dans Groove
Agent”. “Ok !”. JS
1979 Basic Hip-Hop
Ce style a été inspiré par l’ancien Hip-Hop et la manière dont sonnaient
les premières boîtes à rythmes numériques. LW
* Live Hip-Hop
Grosse discussion à propos du Hip-Hop, un ami m’a dit qu’un vrai
batteur dans un groupe de Hip-Hop n’a besoin que d’un pied de
grosse caisse, une caisse claire, une charley, une cymbale crash mais
pas de toms. Il avait raison. Ce style vous offre une palette complète
pour votre morceau en live. N’oubliez pas d’utiliser la percussion dans
le refrain ! MS
* Sloppy Hip-Hop
Le style “Sloppy Hip Hop” est inspiré des travaux des Beastie Boys et
autres, pour qui le “temps flottant” a un sens et où la quantification est
bannie… Le caractère principal de ce groove est légèrement modifié
à partir du niveau 14. Attention : Remplacer le handclap plutôt vague
par un son plus distinct peut produire des effets de timing vraiment bi-
zarres, tout comme un usage excessif de la fonction Humanize. Choi-
sissez ce style lorsque vous êtes dans un mode “à la dérive”, voulant
éviter toutes les limitations d’un battement régulier. NE
1980 Boogie
Certains groupes construisent leur carrière sur de simples morceaux
à trois accords où le batteur doit travailler plus que les autres musi-
ciens. C’est un style Boogie classique où le feeling est basé sur la
charleston et la cymbale Ride. PS

Groove Agent
Français 233
FRANÇAIS
1981 Elektro
Mon intention ici était de créer un style qui sonne comme une boîte à
rythmes analogique programmée pour les premiers tubes pop synthé.
Ce n’est pas une 808 ni une 909 mais une “boîte” complètement nou-
velle avec des sons rétro et électroniques. LW
* Vintage FR-3
Rythmes d’origine d’une très ancienne boîte à rythmes. Slow Rock x 3
(tempo de base : 80 BPM). Samba x 4 (110). Rhumba x 3 (130). Be-
guine x 4 (130). Mambo x 4 (140). Bossanova x 3 (145). Rock’n Roll
x 4 (160). Il n’y a pas de Fills dans cette machine, nous en avons donc
créés quelques-uns. Idem pour Sidestick et Half Tempo Feel. Ce
bébé n’avait même pas de cymbale ! Le son diffère quelque peu de la
réalité, car la machine d’origine sonnait un peu différemment à chaque
fois qu’on jouait dessus ! MS
* Vintage TR-7
Une boîte à rythmes analogique un peu plus récente. Slow Rock et
Ballad x 2 (tempo de base : 80 BPM). Western (90). Samba 1 + 2
(110). Rhumba x 2, Beguine x 2, Cha-Cha x 2, Mambo x 2, Baion x 2,
Tango et 6/8 March (130). Bossa Nova x 3 et Bolero (145). Rock’n
Roll 1 x 2 and Rock’n Roll 2 (155). MS
*Vintage CR-8
Une boîte à rythmes presque moderne parce que vous pouviez la pro-
grammer, mais avec un son analogique. Habanera (tempo de base :
70 BPM). S. Rock (80). Samba 1 + 2 et Merengue (110). Mambo,
ChaCha, Tango, Beguine, Enka et Rock 1-6 (120). Puis une combi-
naison de Rock 1/Rock 4 (120). Disco et Swing 1 + 2 (120). Combi-
naison de Rhumba et Rhumba/ChaCha (130). Combinaison de
BossaNova et BossaNova/Mambo (145). Foxtrot (160). Combinez
deux rythmes c’est assez sympa ! MS

Groove Agent
234 Français
* Meek Ballad
Suivez-moi au début des années 80. Ce pourrait être un grand événe-
ment… Ce groove évoluant lentement ajoute quelques touches pro-
grammées de plus à chaque niveau, ce qui vous donne une bonne
chance de trouver la juste complexité. Ce style a été créé en ajoutant
chaque instrument un à un, tout comme on le faisait à l’aube de ces lé-
gendaires “rhythm composers”. NE
* Axis Y
Retournons dans les années 80, les gens avaient des coupes de che-
veux horribles, des vestes roses et jouaient sur des batteries hexago-
nales. Attention, on pourrait bien les revoir un de ces jours! Ce style
vous prépare au “revival” musical. Mettez vos chaussures de danse et
entrez dans le groove. NE
1982 Slick
Ce style est un rythme à la double-croche, inspiré par les sessions
enregistrées à L.A. vers 1980, avec des maîtres de la batterie tels que
Jeff Porcaro et John Robinson. En fait, le rythme lui-même n’est pas
très innovant, mais il est trop représentatif de ce genre majeur pour
être ignoré. Un tempo lent est un plus pour ce style. Mon tempo favori
se situe entre 73 et 88 bpm. FvW
1983 Breakbeat
Wirebird criait “HEEEELP” des profondeurs de sa “mine à Pixels”,
lorsqu’il a créé cette fabuleuse face avant. J’ai dit “Avec quoi ?”.“Avec
des temps faibles !”, criait-il d’en bas. “Tu veux dire une sorte de “j’en
fais trop” sale et groovy à la Chemical Brothers ?”. “Yepp !”. “OK, je
t’envoie ça ! !”, répliquai-je. Et tant que vous y êtes, cher utilisateur,
pourquoi ne pas ajouter une pointe de jolie distorsion. JS

Groove Agent
Français 235
FRANÇAIS
1984 Arena
Aux jours les plus glorieux des années 80, les hard rockers portaient
des pantalons moulants, laquaient leur cheveux longs et empruntaient
le maquillage de leur petite amie. Il ne fait aucun doute qu’ils étaient
capables de jouer de la batterie, quoique d’une manière un peu dure
et particulière. Comme la musique devait être dure et forte, la dynami-
que est juste à un niveau plus fort !
Les reprises sont vraiment typiques de ces batteurs : intenses,
particulières et presque composées parfois. PS
* HM Straight
Les styles HM Straight et HM Triplets sont basés sur le style européen
du Heavy Metal avec beaucoup de travail à la pédale de type “double
basse” ainsi que quelques éléments tirés des albums ou des groupes
dans lesquels j’ai joué, tels que les albums “Beware the heavens” de
Sinergy et “Sign Of truth” ou “Anima Mundi” de Dionysus. Les roule-
ments de triolets ont été inspirés par l’unique Scott Travis, surtout
avant l’époque de Judas Priest lorsqu’il jouait avec Paul Gilbert dans
Raxor X. Le morceau Raxor X “Scarified” est un événement marquant
de l’époque Heavy Metal du fait de son magnifique groove d’intro à la
batterie et j’ai réalisé beaucoup de variations de grooves de ce type.
Les grooves les plus simples et les plus puissants ont été faits dans le
style de Jörg Michael, un des batteurs allemands d’aujourd’hui les plus
recherché et respecté. RM
* HM Triplets
Un groove basé sur des triolets avec beaucoup de roulements à 3
frappes à la grosse caisse. Les roulements en particulier ont été inspi-
rés par mon ami Aquiles Priester batteur du groupe brésilien Heavy
Metal Angras, qui l’a développé à un niveau plus moderne de la ryth-
mique Metal. Lorsque j’étais en tournée avec Saxon, j’ai eu la chance
de récupérer un ou deux “drum fills” que j’ai replacé ici et là. Ils sont
dûs à un autre grand batteur et ami, le légendaire Fritz Randow, un
des batteurs les plus techniques du Heavy Metal européen. RM

Groove Agent
236 Français
* Grind
Ces grooves sont plutôt énergiques et faits pour les tempos les plus
rapides. Écoutez comment la grosse caisse joue les croches, les trio-
lets de croches et même les doubles-croches selon diverses appro-
ches modernes. Ces grooves ont été influencés par et joués dans le
style de The Haunted, Krisiun et Hate Eternal. Si vous êtes un incon-
ditionnel des balais, ces grooves ne sont pas pour vous ! ;-) RM
* Progressive
Un style plutôt technique avec beaucoup de “fills” énergiques. “Pro-
gressive” est un mélange de sonorités des styles “new progressive”
et de certains anciens groupes progressifs des années 80. Certains
niveaux ont été enregistrés de diverses manières peu “orthodoxes” et
joués sur une boucle de quatre mesures. Ne vous y perdez pas ! MEB
1985 World Ethno
Prenez un gros pad bien large, une basse fretless et une guitare électri-
que jouant à la croche à travers une unité de Delay, et vous vous retrouve-
rez dans une ambience “world-ethno”, qui vous fera dire “Manu” ? ! ? JS
1986 Detroit Techno
Comme vous le savez déjà, les racines de la Techno sont à Detroit.
J’ai décidé de mettre beaucoup de bruit dans ce style. Pas d’écono-
mies d’énergie ici ! Il aurait pu s’appeler “Hard to the bone” il y a quel-
ques temps. DS
* Daft
Laissez-le comme il est, simple et carré... un peu stupide. Laissez-le al-
ler. La bouteille vous distraira peut-être. Peu importe, ce n’est qu’une
bouteille. Ne l’abîmez pas. NE

Groove Agent
Français 237
FRANÇAIS
1987 LA Shuffle
Quelque part autour du niveau de complexité 15 vous trouverez la
sœur d’une fille appelée Rosanna. Dans tous ces grooves vous enten-
drez tout le reste de la famille des décades précédentes, aussi appe-
lées “notes fantôme”. Des petits triolets par-ci par-là, surtout pour la
caisse claire, ajoutent une fine dentelle à un fondement costaud et
décontracté. Un style lisse, yeah ! Ne pas utiliser dans un environne-
ment BPM trop rapide ! 78 sera parfait ! dB
1988 House
La House Music est un style électronique assez décontracté qui vit de
son propre groove. C’est un style alerte dont la percussion est un des
principaux éléments. La House est née lorsque les DJ ont ajouté des boî-
tes à rythmes analogiques 808 et 909 pour étoffer la Dance Music. DS
1989 Westcoast
C’est le rythme que de nombreux batteurs voudraient jouer si vous
leur demandiez de rester à 98 BPM. Un groove simple “une journée
parfaite pour aller à la plage” avec des influences issues du gospel
moderne et des rythmes Pop-Rock contemporains. FvW
1990 Mini Works
Tous les sons de ce style proviennent du légendaire Mini, construit
par un gars très intelligent appelé Moog. Chaque son est dépendant
du relâchement de la note (note-off). Ce qui signifie que les événe-
ments note-off importants deviennent indépendants du tempo. Mini
Works a été élaboré autour ce principe, qui transforme les notes-off
en composants rythmiques importants autant que les sont les petites
notes-on bien tranquilles ! Il y a 5 grooves différents avec 5 niveaux de
complexité chacun. Comme cinq zones temporelles d’une horloge de
synthé. Chaque son a son propre effet en mode Ambience, ce qui
rend la fonction note-off encore plus extrême. Tempo favori : 95 BPM.
Ambiance favorite : aucune ! dB
1991 Fusion
L’inspiration de ce style énergique provient des disques Fusion du
début des années 90. MEB

Groove Agent
238 Français
1992 Trance
Lors de la création de ce style Trance, je voulais faire de la place aux
mélodies entraînantes, afin que la rythmique soit simple et pas trop
envahissante dans un mixage. Maintenant, si vous pensez que la bat-
terie occupe encore trop d’espace sonore, tournez les potentiomètres
jusqu’à ce que vos mélodies deviennent à nouveau l’élément principal.
DS
1993 Modern Soul
Simple et parfait pour les ballades pop lentes et sentimentales. Modern
Soul contient des sons traités hybrides à la fois analogiques et électro-
niques. LW
1994 Trip-Hop
C’est un voyage vers la face cachée du Trip-Hop. Imaginez-vous dans
une mansarde lugubre à la nuit noire, à quatre pattes en train de cher-
cher un vieil album photo dans un vieux coffre. Soudain la pièce prend
vie, le sol bouge et les jouets en bois commencent à jouer selon un
rythme lent. Et alors ? Entrez dans le groove ou fuyez ! W
* Bristol Trip
Portishead a été un des groupes ayant popularisé le Trip Hop. Ils
aimaient jouer leurs morceaux en Live avec un drum kit acoustique et
un batteur au jeu compliqué. Vous êtes les bienvenus ! MS
1995 Busy Beat
Beaucoup de doubles-croches dans celui-ci, surtout dans les niveaux
de complexité élevés. Busy Beat est une sorte de style funk moderne
avec beaucoup de notes fantômes à la caisse claire. J’ai été inspiré par
le groove du tube “Two Princes” de Spin Doctor ainsi que par la chan-
son “Funkyness” de Candy Dulfer. Si vous écoutez attentivement, les
sources d’inspiration seront évidentes. La programmation a été faite à
104 bpm. FvW

Groove Agent
Français 239
FRANÇAIS
1996 Drum’n’Bass
Ce style combine l’usage de rythmes rapides avec un feeling mi-tempo
naturel, ce qui donne une rythmique de danse assez vive. Ses infra-bas-
ses retentissantes repoussent les limites des haut-parleurs, alors que
des sons aigus frénétiques laissent aller la musique. NE
1997 Ambient
Il est temps de se rafraîchir avec des grooves d’ambiance et des ryth-
mes plus amples. Il est 5 heures du mat’ dans la boîte et la piste bondée
jusqu’à maintenant n’est plus fréquentée que par un seul couple de
danseurs de Slow, essayant de se rafraîchir sur cette rythmique alors
que la faible lueur du jour passe à travers les tentures. Mon tempo favori
pour ce style est autour de 90 BPM. Essayez des combinaisons diffé-
rentes de sons avec et sans effets et d’autres hauteurs. La longue fin de
réverb dans les sons de batterie graves peut créer une tension rythmi-
que vraiment agréable sur les sons de cymbales aigus ou les sons de
percussion sans effet. W
1998 Hip Hop
Hip-Hop groovy, épais et lourd avec un son moderne contrastant avec
les style Hip-Hop de base. Il a été programmé pour sonner un peu “en
dehors” du rythme ce qui lui donne un swing agréable. Proche du
RnB moderne. La grosse caisse rafraîchissante, la caisse claire et les
effets ont été spécialement conçus pour ce style. LW
1999 2-Step
Une rythmique courte et rapide avec des sons aigus. Il y a un léger
facteur swing dans cette mixture de 2-Step, Garage et ancien style
pop synthé. LW
2000 Tribal Techno
Ce style a été programmé pour convenir au son de la techno moderne.
Il a une très forte personnalité. C’est mon tribut à la culture techno
underground. Vous y reconnaîtrez certains grooves. Le nom du style
en dit beaucoup. Écoutez ces grooves tribaux et vous comprendrez
son appellation. DS

Groove Agent
240 Français
2001 Nordic Pop
Un groove pop simple et moderne, inspiré du phénomène nordique
des dix dernières années. Solide, compressé et simple. La grosse
caisse rafraîchissante, la caisse claire et les effets ont été spéciale-
ment conçus pour ce style. LW
2002 Nu RnB
Un groove efficace avec reprises polyrythmiques pour donner un fee-
ling spécial. Style RnB/Hip Hop moderne avec un son compressé, si
vous voulez. Grosse caisse et caisse claire ont été spécialement con-
çues pour ce style. LW
* Kelly
Un style R&B moderne cool, tout en étant énergétique. Le battement de
base est lent et lourd alors que les charleys et autres petits sons jouent
au double du tempo, ce qui crée un contraste dynamique. Essayez
d’utiliser plusieurs Fills différents pour faire varier la formule. Aucune
sensation désagréable n’a été ressentie en fabriquant ce style. NE
2003 Mini Club
Là encore une banque de sons façon Moog. Et là aussi 5 grooves dif-
férents avec 5 niveaux de complexité chacun. Ce style trouvera avec
bonheur son chemin vers la piste de danse des clubs du futur. Essayez
les sons dépendants des événements note-off là aussi ! Chaque case
de son doit être active pour que ces rythmes soient complets. Pas
d’ajout de percussion spécial dans celui-ci. Le groove d’origine est à
120 BPM avec absolument aucune ambiance, mais personnellement
j’aime assez la version “100% ambiance”, surtout parce que chaque
son dispose son propre traitement Special FX ! dB
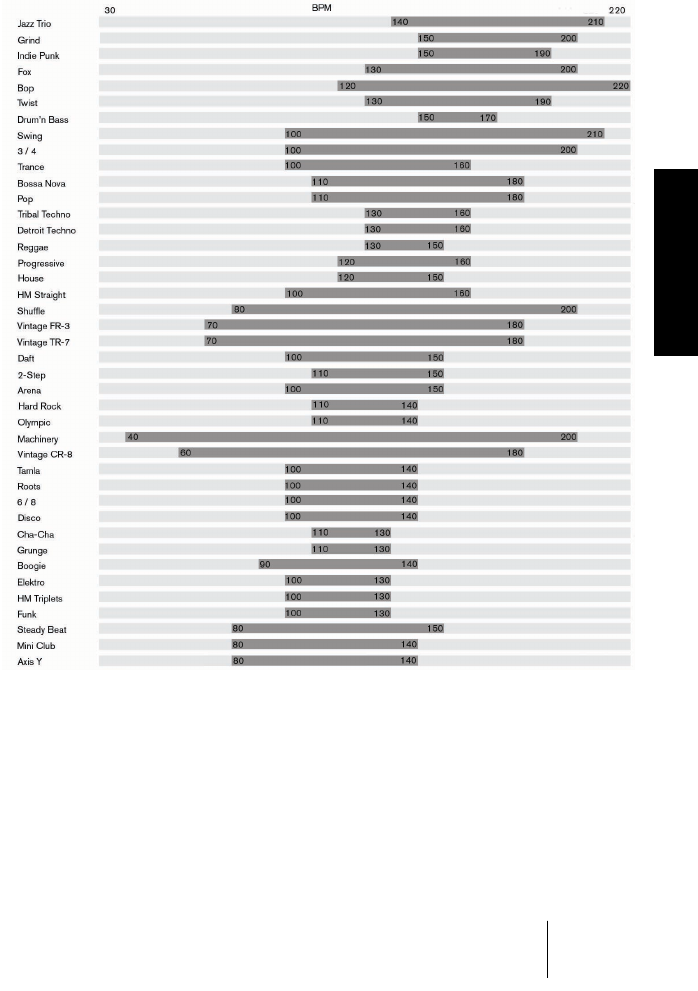
Groove Agent
Français 241
FRANÇAIS
Guide de tempo
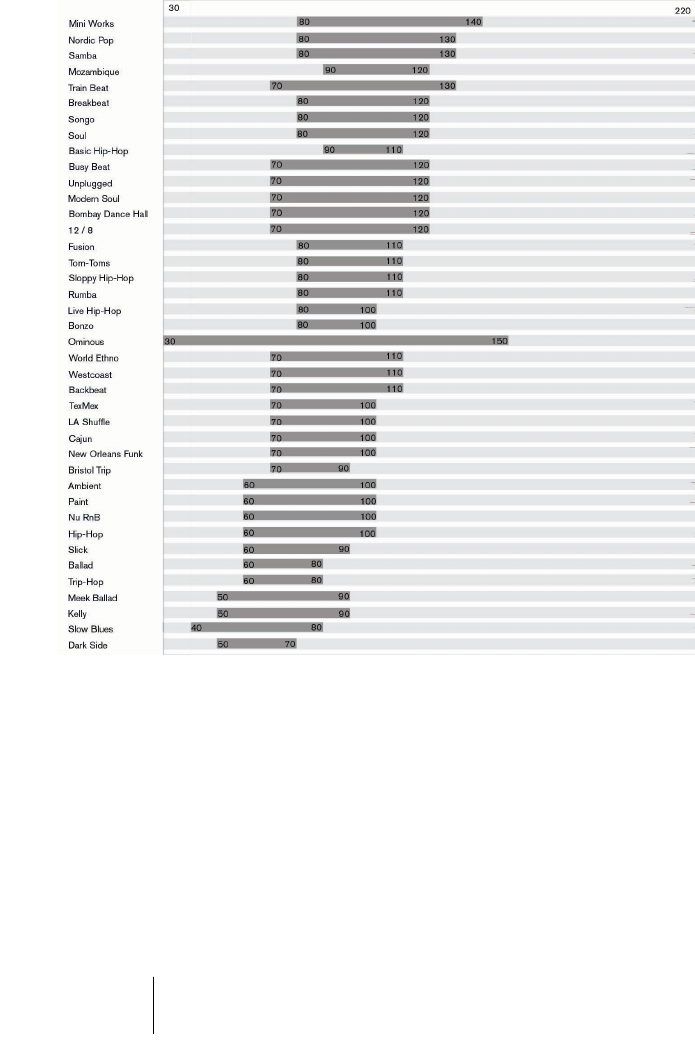
Groove Agent
242 Français

Groove Agent
Français 243
FRANÇAIS
80 ou 160 BPM, quel est le tempo correct ?
Normalement, nous décidons du tempo d’un style en définissant où doi-
vent être les temps faibles et forts. Un rythme qui fait boom-chick-boom-
chick se comptera probablement 1-2-3-4 toujours à la même vitesse.
Dans la plupart des musiques populaires occidentales la grosse caisse
joue les temps forts (1 et 3) et la caisse claire les temps faibles (2 et 4).
Comme toute chose vivante, cette règle a ses exceptions. Le Reggae
a un feeling mi-tempo par nature. Le style Reggae que nous avons
inclus dans Groove Agent joue en fait le temps faible sur le troisième
temps de la mesure. Il semblait évident de spécifier un tempo favori
autour de 130-150 BPM plutôt que des tempos deux fois moins rapi-
des. C’est aussi vrai pour le style Cajun.
Par contre, des styles tels que Tom-Toms, Backbeat et Train Beat
sont par nature des sortes de rythmes à vitesse double. Par exemple,
le style Train Beat fonctionne mieux autour de 100 BPM. Beaucoup
plus pratique que 200, n’est-ce pas ?
Trouver un style adapté à votre morceau
Supposons que vous travailliez sur un morceau à 104 BPM et que
vous désiriez savoir quels styles ont un tempo adéquat… Regardez le
tableau des tempos. C’est un bon guide pour vous aider à trouver des
plages de tempos pour les différents styles.
Jam Session avec Groove Agent
Vous ressentez l’urgence de jouer de la batterie vous-même. Peut-
être avez-vous une meilleure idée pour un pattern de grosse caisse
que ce qui a été programmé dans Groove Agent ou vous désirez ajou-
ter un rythme de tambourin très spécial. Dans ce cas, n’hésitez pas !
Par exemple, si vous rendez muette la gosse caisse, Groove Agent ne
jouera plus ce pattern. Vous pouvez alors ajouter votre propre grosse
caisse jouée sur votre clavier MIDI, et si vous enregistrez la sortie MIDI
de Groove Agent, ce que vous jouez figurera aussi dans ce nouveau
conteneur MIDI.

Groove Agent
244 Français
Manipulations plus confortables
Nous sommes les premiers à le reconnaître, certains des potentio-
mètres de cet instrument sont petits, très petits même. Lorsque vous
réglez un son, un potentiomètre peut soudainement passer d’une
position à une autre. Ce n’est pas très confortable.
❐
Si votre séquenceur vous permet de choisir quel type de mouvement de
souris contrôlera les potentiomètres, essayez le mode “linéaire” (haut et
bas). C’est ce qui donne généralement un meilleur toucher et des mani-
pulations plus prévisibles.
Contrôler Groove Agent depuis un clavier MIDI
Il y a des situations dans lesquelles il est préférable de contrôler
Groove Agent via un instrument MIDI externe tel qu’un clavier. Nous
avons préparé un synoptique, afin que tout ce que vous pouvez faire
directement à l’écran puisse aussi être effectué à distance. En voici la
description complète.
•Les notes MIDI B0-A3 (35-69) jouent les sons internes en fonction de
leur répartition sur le clavier, voir page 214. Ces sons de percussion
sont tout le temps disponibles.
•Si vous contrôlez Groove Agent sur le canal MIDI 10, le clavier de-
vient compatible avec la configuration standard General MIDI (GM).
•La note MIDI A#3 (70) est un double du bouton Accent. Le jeu de
batterie s’arrête tant qu’elle est maintenue ; jouez un rythme syncopé
et maintenez cette touche pendant la durée d’une noire et vous ob-
tiendrez un comportement très réaliste. Veuillez noter que cette tou-
che a un meilleur timing que le bouton Accent à l’écran.
•La note MIDI B3 (71) arrête Groove Agent lorsqu’il est en fonctionne-
ment.
•Actionner la molette de modulation ou utiliser CC 66 déclenche un Fill.

Groove Agent
Français 245
FRANÇAIS
•Lors du contrôle de Groove Agent sur un canal MIDI de numéro im-
pair, les notes MIDI C4-C6 (72-96) ont deux fonctions. Presser une
de ces touches démarre Groove Agent. C4 sélectionne le niveau de
complexité A, G5 sélectionne le niveau 15 etc. Si vous frappez une
touche avec une vélocité supérieure à 90, vous déclenchez un Fill.
•Lors du contrôle de Groove Agent sur un canal MIDI de numéro pair,
les touches blanches MIDI C4-B4 (72-83) vous permettent de rendre
muets ou non 8 groupes d’instruments séparément. Les touches noi-
res au-dessus de C4 (C#4-A#5 ou 73-94) sélectionnent les empla-
cements mémoire 1 à 10.
•Le nouveau menu clic-droit “MIDI Mute Key Mode” donne accès à
trois modes pour la gestion des groupes :
– Toggle : Comme avant, les touches blanches de C4 à C5 activent ou désactivent les
groupes d’instruments 1 à 8.
– Velocity Switch : Les notes ayant une vélocité élevée (>64) rendent les groupes
muets, les notes ayant une vélocité faibles les rendent non muets.
– While Held : Les groupes sont rendus muets temporairement (ou non muets, selon
leur état actuel) lorsque les notes sont tenues.
Si vous disposez d’une autre molette de modulation ou d’autres
contrôleurs spécifiques sur votre clavier, vous pouvez utiliser ces
Control Changes (CC) afin de contrôler Groove Agent :
Destination du CC MIDI
CC Destination
2 et 65 Snare/Sidestick
3 et 64 1/2 Tempo Feel
7 Master Vol
76 BPM hôte (60 + valeur) si votre application hôte ne gère pas la
synchro du tempo
77 Humanize
78 Shuffle
83 Vintage Mode
91 Ambience
Prg chng Memory select 1-10

Groove Agent
246 Français
Veuillez noter que les contrôleurs mentionnés ici peuvent aussi être
pratiques lors de l’édition des parts de batterie Groove Agent dans
votre séquenceur.
Vous avez accès à un niveau plus détaillé lorsque vous contrôlez
Groove Agent via MIDI. Ces commandes doublent les contrôles d’édi-
tion de chacun des 8 groupes de sortie sur les canaux MIDI 1 à 8 :
Destination du CC MIDI
Contact, Internet
Pour avoir plus d’informations, nouvelles et pour contacter l’équipe
Groove Agent, veuillez visiter notre site web : www.bornemark.se.
Crédits
Conception et réalisation : Sven Bornemark
Programmation : Paul Kellett / mda
Conception graphique : Wirebird
Création de sons acoustiques : Per “Worra” Larsson/SampleTekk,
Sven Bornemark et Mats-Erik Björklund
Ingénieur du son : Jens Bogren/Studio Kuling, Örebro
Batteur de la session : Mats-Erik Björklund
CC Destination
69 Mute
70 Vel Offset
71 Tune (Accord)
72 Ambience
73 Volume
74 Output (Sortie)
75 Decay

Groove Agent
Français 247
FRANÇAIS
Sons électroniques de Primesounds et de nos collections privées.
Échantillons supplémentaires des studios de Daniel Sunebring, Lars
Westin et Wirebird. Mini sons créés par Dan Bornemark dans le Stu-
dio McBuddha. Réverb à plaque EMT enregistrée dans les Studios
Tambourine, Malmö.
Musiciens : Per Almered, Roger Berg, Mats-Erik Björklund, Dan Bor-
nemark, Sven Bornemark, Mats Dagerlind, Nils Erikson, Marshall
Karlsson, Ronny Milianowicz, Per Samuelsson, Michael Spork, Jens
Ståhlstierna, Daniel Sunebring, Figge von Wachenfeldt, Lars Westin
et Wirebird.
Mastering audio : Uffe Börjesson
Coordination du Projet : Helge Vogt
Manuel : Sven Bornemark et Mats Dagerlind avec l’aimable collabora-
tion du département de documentation de Steinberg.
Pendant le temps de production nous avons reçu beaucoup d’aide de
l’équipe Steinberg Hambourg. Car vous êtes trop nombreux pour
vous nommer : MERCI À TOUS !
Merci aux compagnies suivantes pour leur aimable support :
MusicMania/Feedback Music (Malmö) et Audiomaster (Örebro).
Enfin…
Merci à HeavenlyHansson pour avoir proposé cet instrument.
Et merci à Per “Worra” Larsson of SampleTekk d’être un spécialiste
audio si patient.
Et à Mats-Erik, je lui suis reconnaissant de son fabuleux savoir-faire de
musicien et de l’énergie qu’il dépense sur son instrument. Finalement,
il a réussi à avoir les meilleurs ensembles de sons de sa propre batte-
rie... c’est son rêve de toujours !

Groove Agent
248 Français
