Openwrt OrangePi Zero MTD Patch Gw 01 Armbian Developers Guide.en
User Manual:
Open the PDF directly: View PDF ![]() .
.
Page Count: 6
www.wireless-road.com
Building Armbian image for GW-01 from sources.
Compiling image from sources.
Clone Armbian OS project:
git clone --depth 1 https://github.com/armbian/build
cd build
Run following command to compile image.
./compile.sh
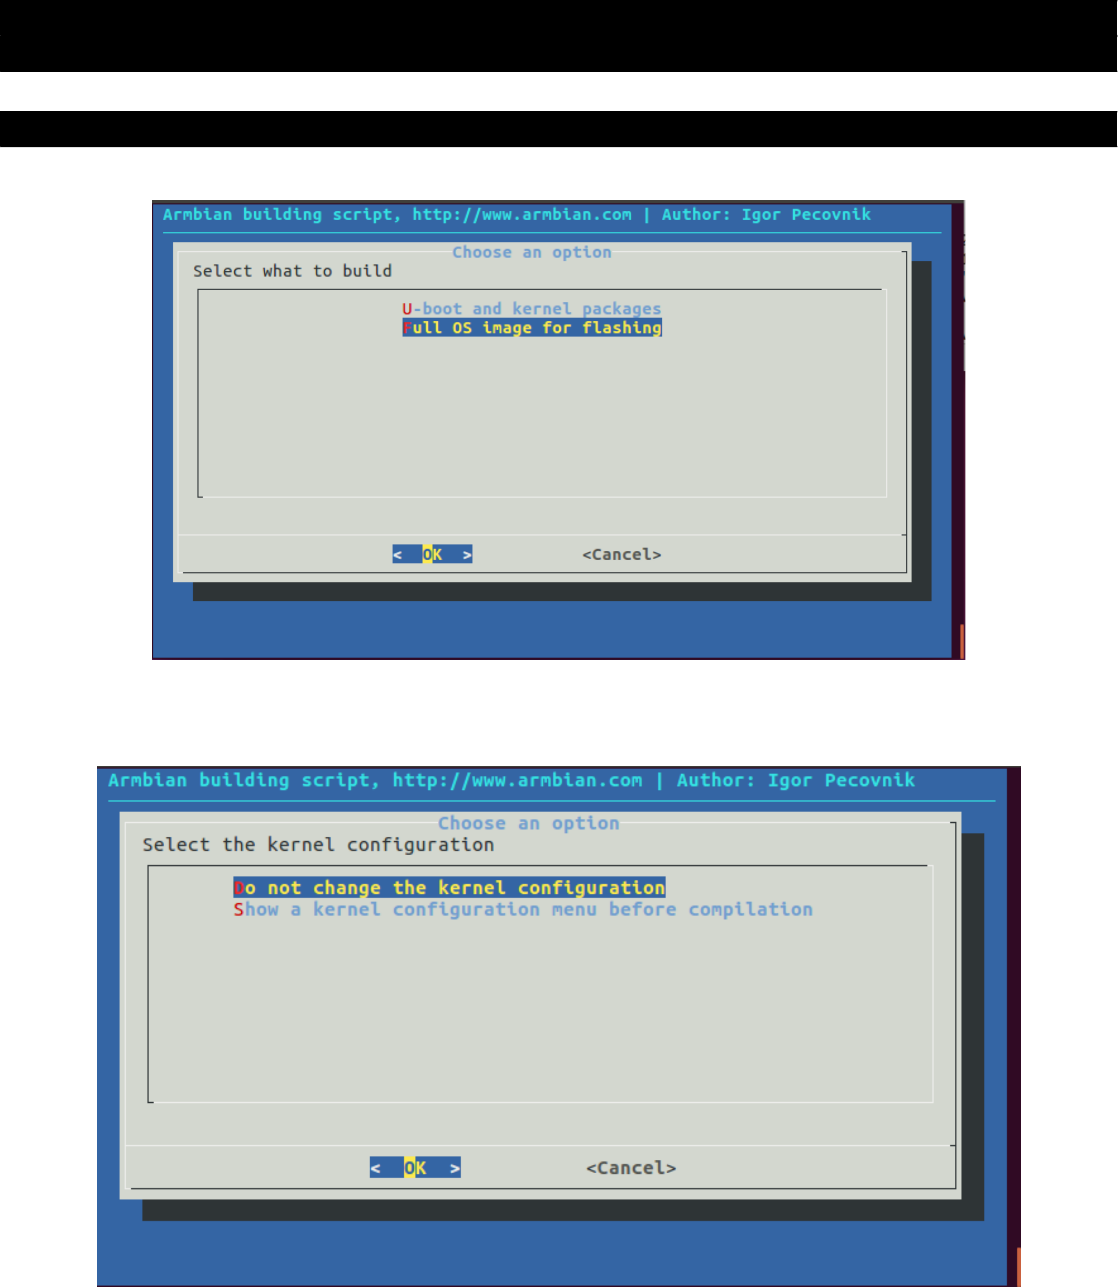
But before compilation process following window will appears:
Select «Full OS image for flashing» and press «Ok». In following choose «Do not change
the kernel configuration»:
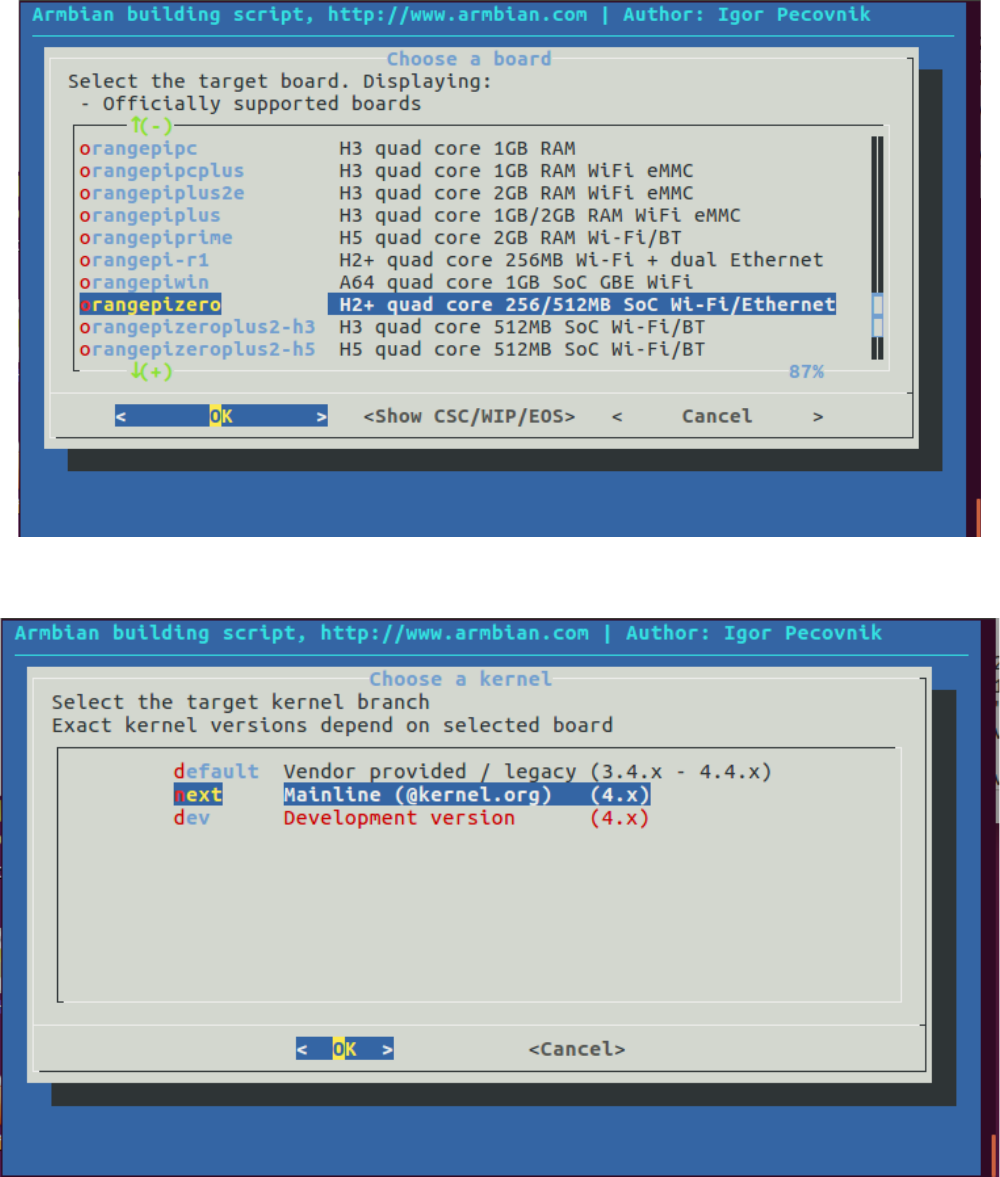
Then select «orangepizero» configuration:
«Mainline» kernel branch:

«stretch» release:
Then compilation process will be started. You need to wait while it will be finished. At the end of this
process you should see following:
There is image to write on microSD card.
Flashing image in microSD card.
sudo dd if=output/images/Armbian_5.41_Orangepizero_Debian_stretch_next_4.14.40.img
of=/dev/sdx
Where /dev/sdx is your microSD card. Make sure that you flash in SD card.
After that plug microSD card to GW-01 and power up the device.
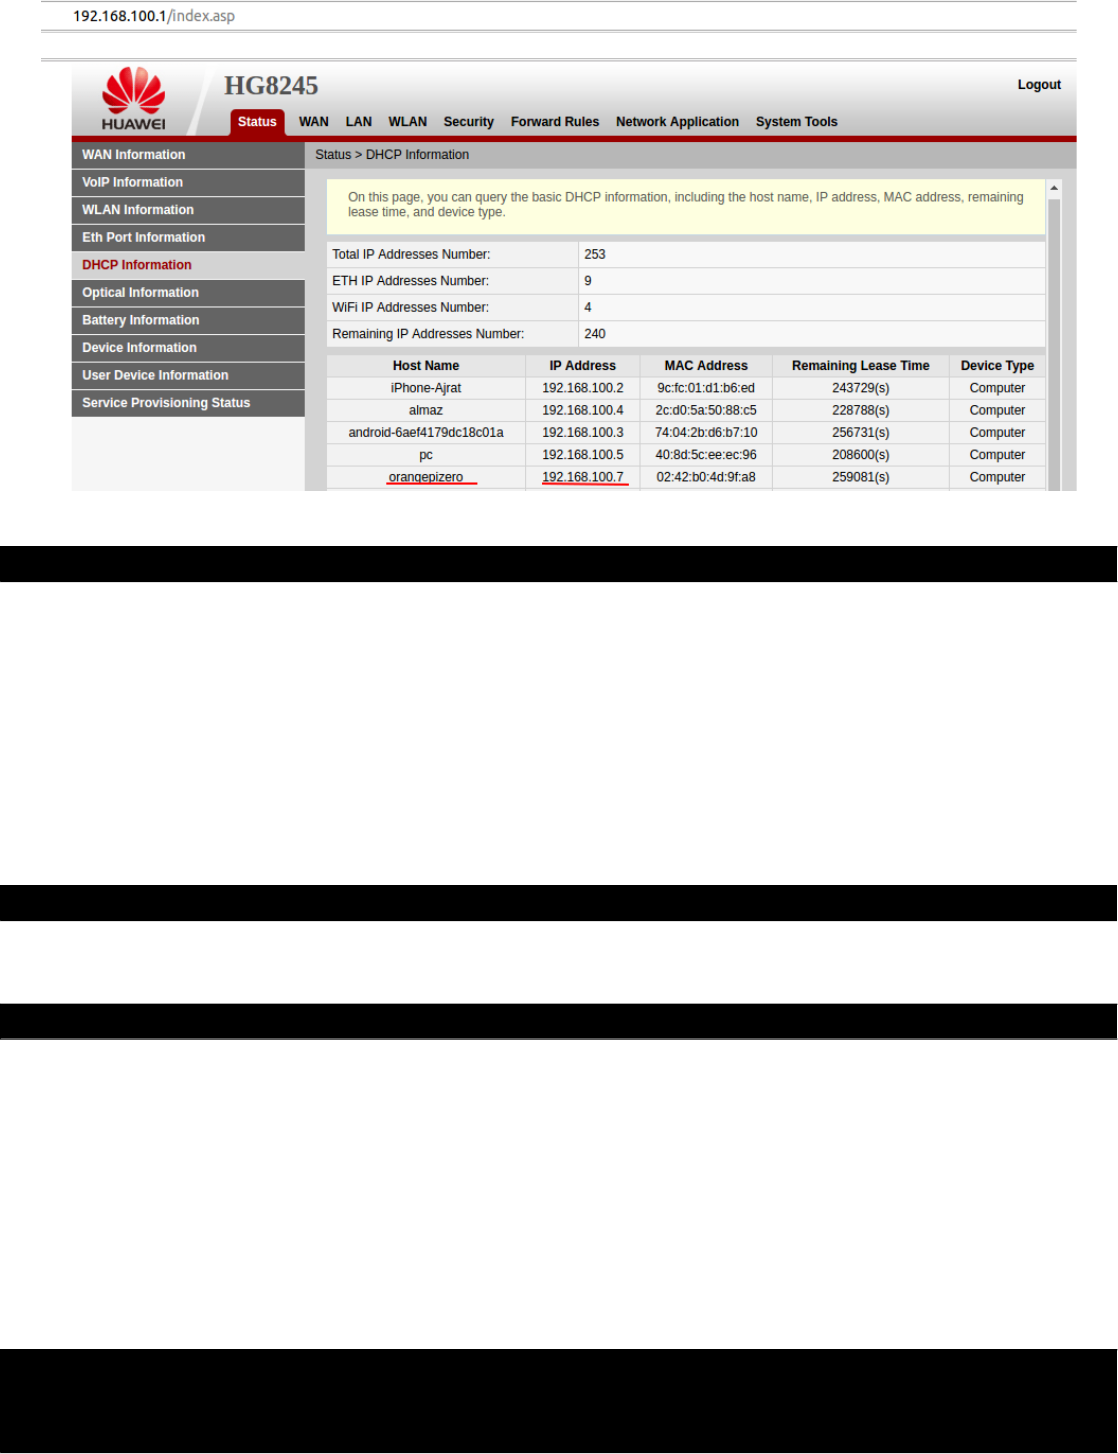
Remote access via SSH.
Look for orangepizero device on your DHCP server:
Now connect to it via SSH:
ssh root@192.168.100.7
User/pass to login: root/1234.
You will be asked to change password and add new user.
After that we ready to configure spi interface and install required lorawan packets.
Enabling SPI on armbian on first booting
Check that spidev not exist in list of devices:
ls /dev/spidev*
Add params to config file to enable SPI interface:
nano /boot/armbianEnv.txt
Change overlays param to:
overlays=usbhost2 usbhost3 spi-spidev spi-add-cs1
Add following at the end of file:
param_spidev_spi_bus=1
param_spidev_spi_cs=1
Exit with file saving.
Configure dts tree:
cp /boot/dtb/overlay/sun8i-h3-spi-spidev.dtbo ~
cd ~
dtc -I dtb -O dts -o sun8i-h3-spi-spidev.dts ./sun8i-h3-spi-spidev.dtbo
nano sun8i-h3-spi-spidev.dts

Set folowing in fragment@2:
status = «ok»;
reg = <0x1>;
Exit with file saving.
Then compile new dtbo file and replace old one with that:
rm sun8i-h3-spi-spidev.dtbo
dtc -I dts -O dtb -o sun8i-h3-spi-spidev.dtbo ./sun8i-h3-spi-spidev.dts
sudo rm /boot/dtb/overlay/sun8i-h3-spi-spidev.dtbo
sudo cp sun8i-h3-spi-spidev.dtbo /boot/dtb/overlay/
After that reboot:
reboot
After reboot connect to the gateway via ssh as user you created previously.
ssh al@192.168.100.7
Now you should see spidev1.1 in list of your devices:
ls /dev/spidev*
SX1301 reset script.
Create SX1301 reset script:
cd ~
touch iC880-SPI_reset.sh
nano iC880-SPI_reset.sh
Enter following to that file and save it:
#!/bin/bash
echo "11" > /sys/class/gpio/export
sleep 2
echo "out" > /sys/class/gpio/gpio11/direction
echo "0" > /sys/class/gpio/gpio11/value
sleep 1
echo "1" > /sys/class/gpio/gpio11/value
sleep 1
echo "0" > /sys/class/gpio/gpio11/value
sleep 1
echo "2" > /sys/class/gpio/export
sleep 2
echo "out" > /sys/class/gpio/gpio1/direction
echo "1" > /sys/class/gpio/gpio1/value
sleep 5
echo "0" > /sys/class/gpio/gpio1/value
sleep 1
echo "0" > /sys/class/gpio/gpio1/value
Then set is as executable:
sudo chmod +x iC880-SPI_reset.sh
Installing lora_gateway.
Download and modify the library:
cd ~
git clone https://github.com/Lora-net/lora_gateway.git
cd lora_gateway
nano libloragw/src/loragw_spi.native.c
Change /dev/spidev0.0 to /dev/spidev1.1 and save file.
Complie the library:
make
Installing packet_forwarder.
Download and compile the library:
cd ~
git clone https://github.com/Lora-net/packet_forwarder.git
cd packet_forwarder/
./compile.sh
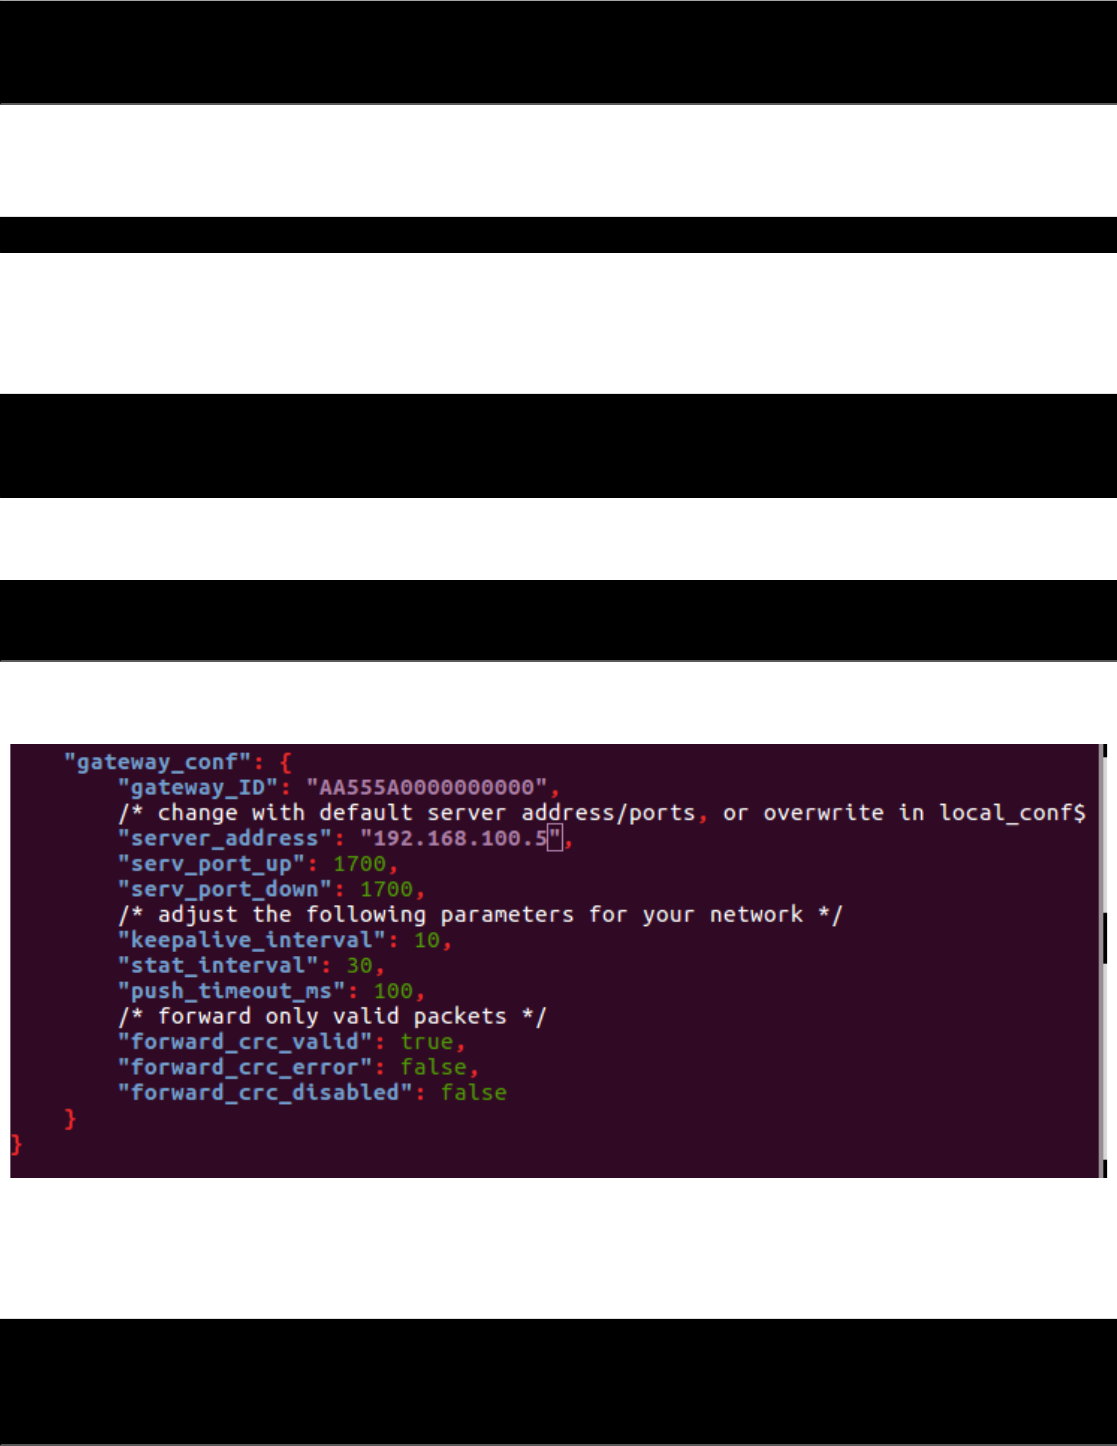
Set lora server IP address:
cd lora_pkt_fwd/cfg/
cp global_conf.json.PCB_E286.EU868.basic ../global_conf.json
nano global_conf.json
Set «server_port_up» and «server_port_down» to port your lora server uses. Set «server_address» to IP
address of lora server you use. For example:
Now all ready to run the gateway.
Running the gateway.
Run this at every power up of gateway:
cd ~
sudo ./iC880-SPI_reset.sh
sudo chmod 777 /dev/spidev1.1
cd packet_forwarder/lora_pkt_fwd
./lora_pkt_fwd
