Hitachi Command Director Installation And Configuration Guide CONVENTION 14 Software
User Manual: CONVENTION 14
Open the PDF directly: View PDF ![]() .
.
Page Count: 120 [warning: Documents this large are best viewed by clicking the View PDF Link!]
- Hitachi Command Director Installation and Configuration Guide
- Contents
- Preface
- Overview of Hitachi Command Director
- Installing Hitachi Command Director
- Setting up Command Director
- Initial setup tasks
- Custom properties file
- Modifying the custom.properties file
- Restarting the HCmD server
- Enabling performance data collection using Agent for RAID Extension
- Configuring Command Director in secure mode
- Enabling SSL communications
- Enabling secure connection between HCmD server and web clients
- Enabling secure connection between HCmD and HDvM servers
- Enabling secure connection between HCmD server and Host Collector server
- Enabling secure connection between HCmD server and Agent for RAID Extension
- Disabling SSL for Command Director
- Viewing logs
- Setting up Command Director CLI
- Starting and stopping services in Linux
- Configuring data collectors
- Overview
- Configuring storage system collectors
- Configuring host collectors
- Prerequisites for configuring host collectors
- Enabling host discovery and data collection
- Launching local Host Collector to discover hosts
- Specifying host logon settings
- Host logon settings details
- Validating host connectivity
- Refreshing host file system and storage utilization data
- Verifying host data collection
- Upgrading Command Director
- Removing Command Director
- Removing hosts and storage systems from Command Director
- Command Director files
- Host Collector support information
- Troubleshooting Command Director
- Troubleshooting Agent for RAID Extension connections
- Troubleshooting Host Collector connections
- Troubleshooting host discovery timeout issues
- Troubleshooting receiving email alerts and reports
- Troubleshooting HNAS database message logging using NoLog property
- Troubleshooting a Command Director database in an unstable state on a VM
- Troubleshooting "bad ELF interpreter" error when using Command Director on 64 bit Linux
- Troubleshooting inability to discover a Linux host
- Troubleshooting ERR_1330: Required dependent library is missing to communicate with Windows target machine
- Troubleshooting a lack of performance data for HNAS nodes that are accessed through an incorrect IP address
- Glossary
- Index
Hitachi Command Suite
Command Director
Installation and Configuration Guide
MK-90HCMD002-17

© 2014 Hitachi, Ltd. All rights reserved.
No part of this publication may be reproduced or transmitted in any form or by any means, electronic or mechanical,
including photocopying and recording, or stored in a database or retrieval system for any purpose without the
express written permission of Hitachi, Ltd.
Hitachi, Ltd., reserves the right to make changes to this document at any time without notice and assumes no
responsibility for its use. This document contains the most current information available at the time of publication.
When new or revised information becomes available, this entire document will be updated and distributed to all
registered users.
Some of the features described in this document might not be currently available. Refer to the most recent product
announcement for information about feature and product availability, or contact Hitachi Data Systems Corporation at
https://portal.hds.com.
Notice: Hitachi, Ltd., products and services can be ordered only under the terms and conditions of the applicable
Hitachi Data Systems Corporation agreements. The use of Hitachi, Ltd., products is governed by the terms of your
agreements with Hitachi Data Systems Corporation.
Hitachi is a registered trademark of Hitachi, Ltd., in the United States and other countries. Hitachi Data Systems is a
registered trademark and service mark of Hitachi, Ltd., in the United States and other countries.
Archivas, Essential NAS Platform, HiCommand, Hi-Track, ShadowImage, Tagmaserve, Tagmasoft, Tagmasolve,
Tagmastore, TrueCopy, Universal Star Network, and Universal Storage Platform are registered trademarks of Hitachi
Data Systems.
AIX, AS/400, DB2, Domino, DS6000, DS8000, Enterprise Storage Server, ESCON, FICON, FlashCopy, IBM, Lotus,
MVS, OS/390, RS/6000, S/390, System z9, System z10, Tivoli, VM/ESA, z/OS, z9, z10, zSeries, z/VM, and z/VSE are
registered trademarks or trademarks of International Business Machines Corporation.
iPad is a trademark of Apple Inc., registered in the U.S. and other countries.
All other trademarks, service marks, and company names in this document or web site are properties of their
respective owners.
Microsoft product screen shots are reprinted with permission from Microsoft Corporation.
Notice on Export Controls. The technical data and technology inherent in this Document may be subject to U.S.
export control laws, including the U.S. Export Administration Act and its associated regulations, and may be subject
to export or import regulations in other countries. Reader agrees to comply strictly with all such regulations and
acknowledges that Reader has the responsibility to obtain licenses to export, re-export, or import the Document and
any Compliant Products.
2
Hitachi Command Director Installation and Configuration Guide

Contents
Preface................................................................................................. 7
Intended audience................................................................................................... 8
Product version........................................................................................................8
Release notes.......................................................................................................... 8
Referenced documents and additional resources........................................................ 8
Document conventions............................................................................................. 9
Conventions for storage capacity values.....................................................................9
Accessing product documentation........................................................................... 10
Getting help...........................................................................................................10
Comments.............................................................................................................11
1 Overview of Hitachi Command Director................................................. 13
Product overview................................................................................................... 14
What's new in Hitachi Command Director.................................................................14
Command Director installation components..............................................................15
Supported storage systems.....................................................................................15
Supported system configuration.............................................................................. 16
Deploying Command Director on a separate server, and HCS components, Agent for
RAID, and Agent for RAID Extension on the same server.....................................16
Deploying HCmD server, HCS components, and Agent for RAID and Agent for RAID
Extension on separate servers........................................................................... 17
Recommended screen resolution............................................................................. 19
Port usage by Command Director components......................................................... 19
Data collection support...........................................................................................19
Command Director iPad app requirements............................................................... 20
2 Installing Hitachi Command Director..................................................... 21
Installation workflow.............................................................................................. 22
HCmD server installation.........................................................................................22
Installation prerequisites for HCmD server..........................................................22
Installing the HCmD server on Windows.............................................................23
Installing the HCmD server on Linux.................................................................. 24
3
Hitachi Command Director Installation and Configuration Guide

Host Collector installation....................................................................................... 26
Installation prerequisites for Host Collector.........................................................26
Installing Host Collector on Windows..................................................................27
Installing Host Collector on Linux.......................................................................28
3 Setting up Command Director...............................................................31
Initial setup tasks...................................................................................................32
Verifying the installation.................................................................................... 32
Registering the license...................................................................................... 32
Viewing licensed capacity.............................................................................34
Specifying an email address when you first log in................................................34
Custom properties file............................................................................................ 34
Modifying the custom.properties file........................................................................ 35
Application by Capacity business view properties.................................................35
Application Consumed Capacity property............................................................ 36
Host Collector timeout and data retention properties...........................................36
SLO Recommendation related properties............................................................ 37
HCmD server SSL properties..............................................................................38
Modifying HCmD server settings........................................................................ 39
Modifying default port settings..................................................................... 39
Modifying login window legal disclaimer text................................................. 39
Hiding or showing the legal disclaimer in the login window.............................39
Changing the Command Director email address.............................................40
Restarting the HCmD server....................................................................................40
Enabling performance data collection using Agent for RAID Extension........................40
Enabling performance data collection on Windows.............................................. 40
Enabling performance data collection on Linux....................................................41
Configuring Command Director in secure mode........................................................ 41
Enabling SSL communications............................................................................41
SSL certificates............................................................................................42
Keytool command........................................................................................42
Enabling secure connection between HCmD server and web clients......................42
Generating a CSR and importing a signed certificate to Command Director......45
Enabling secure connection between HCmD and HDvM servers............................45
Enabling secure connection between HCmD server and Host Collector server........48
Enabling secure connection between HCmD server and Agent for RAID Extension
.......................................................................................................................50
Disabling SSL for Command Director.................................................................. 53
Viewing logs.......................................................................................................... 53
Setting up Command Director CLI........................................................................... 54
Starting and stopping services in Linux.................................................................... 54
4 Configuring data collectors................................................................... 55
Overview...............................................................................................................56
Data configuration workflow..............................................................................56
Accessing data collector configuration settings....................................................57
Configuring storage system collectors......................................................................58
Prerequisites for configuring storage system collectors........................................ 58
Storage system collector settings....................................................................... 59
Adding a storage system collector......................................................................61
4
Hitachi Command Director Installation and Configuration Guide

Manually refreshing storage system data............................................................ 62
Verifying storage system data collection............................................................. 62
Configuring host collectors......................................................................................63
Prerequisites for configuring host collectors........................................................ 64
Enabling host discovery and data collection........................................................ 65
Launching local Host Collector to discover hosts..................................................65
Specifying host logon settings............................................................................66
Host logon settings details.................................................................................67
Validating host connectivity............................................................................... 68
Refreshing host file system and storage utilization data....................................... 68
Verifying host data collection............................................................................. 69
5 Upgrading Command Director...............................................................71
Preparing to upgrade Command Director................................................................. 72
Disk space requirements.........................................................................................72
Upgrading HCmD server on Windows...................................................................... 73
Removing Command Director............................................................................ 73
Upgrading HCmD server on Linux............................................................................74
Upgrading Host Collector on Windows..................................................................... 75
Upgrading Host Collector on Linux...........................................................................75
Post-upgrade tasks.................................................................................................76
6 Removing Command Director............................................................... 77
Removing Command Director server on Windows.....................................................78
Removing Command Director server on Linux.......................................................... 78
Removing Command Director Host Collector on Linux............................................... 78
7 Removing hosts and storage systems from Command Director................81
Usage and prerequisites......................................................................................... 82
RemoveUsingConf.................................................................................................. 82
RemoveHost.......................................................................................................... 83
RemoveStorageSystem........................................................................................... 84
Results of removing hosts and storage systems........................................................84
A Command Director files........................................................................ 87
Command Director Installation folder.......................................................................88
Log files................................................................................................................ 88
Data files...............................................................................................................88
Configuration files.................................................................................................. 88
B Host Collector support information........................................................ 91
Host Collector server support.................................................................................. 92
Host bus adapter support for Host Collector............................................................. 93
Storage system support for Host Collector................................................................95
Network-attached storage support for Host Collector................................................ 95
Volume Manager support for Host Collector..............................................................95
5
Hitachi Command Director Installation and Configuration Guide

C Troubleshooting Command Director.......................................................99
Troubleshooting Agent for RAID Extension connections........................................... 100
Troubleshooting Host Collector connections............................................................100
Troubleshooting host discovery timeout issues........................................................100
Setting Host discovery timeout properties......................................................... 101
Troubleshooting receiving email alerts and reports..................................................101
Troubleshooting HNAS database message logging using NoLog property.................. 102
Troubleshooting a Command Director database in an unstable state on a VM........... 102
Troubleshooting "bad ELF interpreter" error when using Command Director on 64 bit
Linux...................................................................................................................103
Troubleshooting inability to discover a Linux host....................................................103
Troubleshooting ERR_1330: Required dependent library is missing to communicate with
Windows target machine.......................................................................................103
Troubleshooting a lack of performance data for HNAS nodes that are accessed through
an incorrect IP address......................................................................................... 103
Glossary............................................................................................ 105
Index................................................................................................ 115
6
Hitachi Command Director Installation and Configuration Guide

Preface
This document describes how to install and configure Hitachi® Command
Director (HCmD).
□Intended audience
□Product version
□Release notes
□Referenced documents and additional resources
□Document conventions
□Conventions for storage capacity values
□Accessing product documentation
□Getting help
□Comments
Preface 7
Hitachi Command Director Installation and Configuration Guide

Intended audience
This document is intended for Hitachi Command Director (HCmD) users.
To use this document, you should have a working knowledge of the following:
• Hitachi Device Manager (HDvM), Tuning Manager (HTnM), Hitachi Tiered
Storage Manager (HTSM), and Hitachi NAS Platform.
• Storage system and performance concepts.
• Service Level Objectives (SLOs) and Service Level Agreements (SLAs).
Product version
This document revision applies to Hitachi Command Director v8.1.1.
Release notes
Read the release notes before installing and using this product. They may
contain requirements or restrictions that are not fully described in this
document or updates or corrections to this document.
Release notes can be found on the documentation CD or on the Hitachi Data
Systems Support Portal: https://portal.hds.com/
Referenced documents and additional resources
The following referenced documents can be found on the applicable
documentation CD:
•Hitachi Command Suite Command Director User Guide, MK-90HCMD001
•Hitachi Command Suite Command Director CLI Reference Guide,
MK-90HCMD004
•Hitachi Command Suite Command Director API Reference Guide,
MK-90HCMD005
•Hitachi Command Suite Command Director Release Notes, RN-90HCMD003
•Hitachi Command Suite System Requirements, MK-92HC209
•Hitachi Command Suite Administrator Guide, MK-90HC175
•Hitachi Command Suite documentation
•Hitachi Command Suite Tuning Manager documentation
The referenced documents are available on the Hitachi Data Systems Support
Portal: https://portal.HDS.com.
8 Preface
Hitachi Command Director Installation and Configuration Guide

Document conventions
This document uses the following typographic conventions:
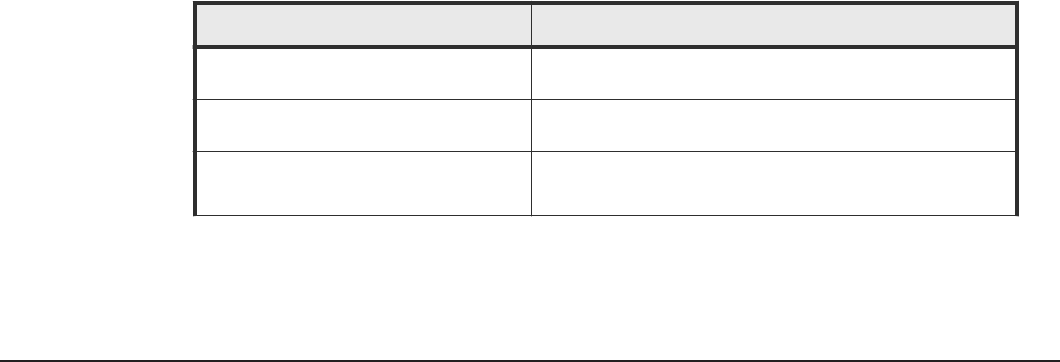
Convention Description
Bold Indicates text on a window, other than the window title, including menus,
menu options, buttons, fields, and labels. Example: Click OK.
Italic Indicates a variable, which is a placeholder for actual text provided by the
user or system. Example: copy source-file target-file
Note: Angled brackets (< >) are also used to indicate variables.
Monospace Indicates text that is displayed on screen or entered by the user. Example:
pairdisplay -g oradb
< > angled brackets Indicates a variable, which is a placeholder for actual text provided by the
user or system. Example: pairdisplay -g <group>
Note: Italic font is also used to indicate variables.
[ ] square brackets Indicates optional values. Example: [ a | b ] indicates that you can choose a,
b, or nothing.
{ } braces Indicates required or expected values. Example: { a | b } indicates that you
must choose either a or b.
| vertical bar Indicates that you have a choice between two or more options or arguments.
Examples:
[ a | b ] indicates that you can choose a, b, or nothing.
{ a | b } indicates that you must choose either a or b.
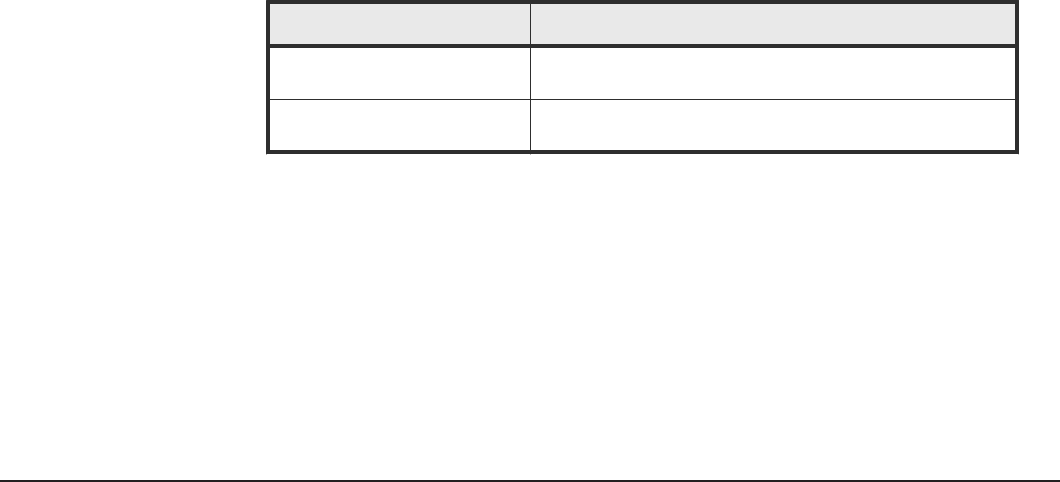
This document uses the following icons to draw attention to information:
Icon Label Description
Note Calls attention to important or additional information.
Tip Provides helpful information, guidelines, or suggestions for performing
tasks more effectively.
Caution Warns the user of adverse conditions or consequences (for example,
disruptive operations).
WARNING Warns the user of severe conditions or consequences (for example,
destructive operations).
Conventions for storage capacity values
Physical storage capacity values (for example, disk drive capacity) are
calculated based on the following values:
Preface 9
Hitachi Command Director Installation and Configuration Guide
Physical capacity unit Value
1 kilobyte (KB) 1,000 (10 3) bytes
1 megabyte (MB) 1,000 KB or 1,0002 bytes
1 gigabyte (GB) 1,000 MB or 1,0003 bytes
1 terabyte (TB) 1,000 GB or 1,0004 bytes
1 petabyte (PB) 1,000 TB or 1,0005 bytes
1 exabyte (EB) 1,000 PB or 1,0006 bytes
Logical storage capacity values (for example, logical device capacity) are
calculated based on the following values:
Logical capacity unit Value
1 block 512 bytes
1 KB 1,024 (210) bytes
1 MB 1,024 KB or 1,0242 bytes
1 GB 1,024 MB or 1,0243 bytes
1 TB 1,024 GB or 1,0244 bytes
1 PB 1,024 TB or 1,0245 bytes
1 EB 1,024 PB or 1,0246 bytes
Accessing product documentation
Product user documentation is available on the Hitachi Data Systems Portal:
https://portal.hds.com. Check this site for the most current documentation,
including important updates that may have been made after the release of
the product.
Getting help
Hitachi Data Systems Support Portal is the destination for technical support
of your current or previously-sold storage systems, midrange and enterprise
servers, and combined solution offerings. The Hitachi Data Systems customer
support staff is available 24 hours a day, seven days a week. If you need
technical support, log on to the Hitachi Data Systems Support Portal for
contact information: https://portal.hds.com
Hitachi Data Systems Community is a new global online community for HDS
customers, partners, independent software vendors, employees, and
prospects. It is an open discussion among these groups about the HDS
portfolio of products and services. It is the destination to get answers,
discover insights, and make connections. The HDS Community complements
our existing Support Portal and support services by providing an area where
10 Preface
Hitachi Command Director Installation and Configuration Guide

you can get answers to non-critical issues and questions. Join the
conversation today! Go to community.hds.com, register, and complete your
profile.
Comments
Please send us your comments on this document to doc.comments@hds.com.
Include the document title and number, including the revision level (for
example, -07), and refer to specific sections and paragraphs whenever
possible. All comments become the property of Hitachi Data Systems
Corporation.
Thank you!
Preface 11
Hitachi Command Director Installation and Configuration Guide

12 Preface
Hitachi Command Director Installation and Configuration Guide

1
Overview of Hitachi Command Director
Review information about the Hitachi® Command Director installation
infrastructure and requirements.
You can refer to the following topics:
□Product overview
□What's new in Hitachi Command Director
□Command Director installation components
□Supported storage systems
□Supported system configuration
□Recommended screen resolution
□Port usage by Command Director components
□Data collection support
□Command Director iPad app requirements
Overview of Hitachi Command Director 13
Hitachi Command Director Installation and Configuration Guide

Product overview
Hitachi Command Director (HCmD) centralizes storage management
reporting across the Hitachi Command Suite (HCS) by providing custom
business views of applications and reports about Hitachi storage usage.
Command Director also provides a convenient way to align Hitachi storage
assets with applications and the business functions that use them.
Command Director correlates data collected from the following sources:
• Storage system configuration data from Hitachi Device Manager (HDvM).
• Performance data from the Agent for RAID instances.
• Storage tier data from Hitachi Tiered Storage Manager (HTSM).
• Configuration data from supported third party storage systems through the
HCmD Data Collector.
• Storage utilization data from hosts.
The data collected from the sources mentioned above is manipulated to
provide reports to enable the following functions:
• Monitor application storage. Define corporate-wide standard Service Level
Objectives (SLOs) for all your applications and issue proactive alerts when
application SLOs are at risk.
• Monitor Hitachi enterprise storage health. Detect potential storage system
performance issues. You can also outsource the function of keeping your
storage systems running optimally and finding root causes of problems if
they arise.
• Key performance indicator (KPI) reports. KPI reports provide consolidated
storage allocation, performance, and trend data reporting by applications
and business units.
• Host discovery. You can use the Command Director host discovery feature
to discover hosts on your network and gather their file system and storage
utilization information. This allows Command Director to provide end-to-
end mapping of the path from the hosts to the storage system volumes.
What's new in Hitachi Command Director
Hitachi Command Director includes the following new or enhanced
functionality:
• Support for creating and managing applications based on VMware
datastores. Applications can be created automatically based on VMware
datastores and then monitored in application reports. The applications can
also be managed like any other application.
• Support for removing hosts, storage arrays, and related data. The CLI
includes utilities for removing one host or array at a time, or you can
remove a list of one or the other.
14 Overview of Hitachi Command Director
Hitachi Command Director Installation and Configuration Guide

• Support for Command Director server on Red Hat Enterprise Linux v6.6
and v7.0, as well as on Oracle Enterprise Linux v6.6 and v7.0.
• Support for Agent for RAID Extension on Red Hat Enterprise Linux v5.11
and v7.0 and on Oracle Enterprise Linux v7.0.
Command Director installation components
To use Command Director, install and configure the following components:
•Command Director (HCmD) server: The HCmD server is the primary
component that communicates with the various data collector components.
HCmD server uses the collectors on Device Manager and Tuning Manager
instances to retrieve storage system configuration and performance data,
and correlates this data to generate reports. The HCmD server installer
also installs a preconfigured Local Host Collector.
○HCmD collects tier data from Hitachi Tiered Storage Manager.
○Hitachi NAS Platform data collectors collect performance data from
Hitachi NAS systems.
•Host Collector: The Host Collector component allows you to configure
host probes. The probes discover all hosts on any network and provide
end-to-end mapping of the path from the hosts to the storage system
volumes. The Host Collector is installed by default, but use is optional.
The default Host Collector discovers hosts on the HCmD server subnet and
hosts on different subnets that you can access through a firewall. However,
to access remote hosts on a different subnet and behind a firewall, install
this component on a server in each subnet, and make sure your firewall
settings allow communication between the Command Director server and
this component.
•HCmD Data Collector: The HCmD Data Collector component enables you
to collect configuration data from supported third party storage systems
such as EMC Symmetrix®. This component is installed by default with the
HCmD server.
•Agent for RAID Extension: The Agent for RAID Extension gathers
storage system performance data from Agent for RAID instances in the
environment where it is installed. This component is installed by default
with Tuning Manager Agent for RAID. However, for HCmD to obtain
performance data from the Agent for RAID Extension instance, you must
enable this component’s service on Tuning Manager Agent for RAID server.
For steps to enable the service, see Enabling performance data collection
using Command Director Agent for RAID on page 40.
Supported storage systems
Command Director supports the following storage systems:
• Hitachi Virtual Storage Platform (VSP)
• Hitachi Virtual Storage Platform G1000
Overview of Hitachi Command Director 15
Hitachi Command Director Installation and Configuration Guide
• Hitachi Universal Storage Platform (USP) series
○Hitachi Tagmastore® Network Storage Controller Model NSC55
○Hitachi Universal Storage Platform
○Hitachi Universal Storage Platform V
○Hitachi Universal Storage Platform VM
• Hitachi Adaptable Modular Storage (AMS), Hitachi Simple Modular Storage,
and Hitachi Workgroup Modular Storage (WMS)
○700 series: Adaptable Modular Storage (AMS) 100, AMS 200, AMS 300,
AMS 500, AMS 1000, Workgroup Modular Storage 1000, Simple Modular
Storage 100
○800 series: AMS 2100, AMS 2300, AMS 2500
• Hitachi Unified Storage (HUS)
○Hitachi Unified Storage 110, Hitachi Unified Storage 130, Hitachi Unified
Storage 150
• Hitachi Unified Storage VM (HUS VM)
• EMC Symmetrix® VMAX-1SE, with support for SMI-S Provider v4.3
For more information, see the Hitachi Command Suite System Requirements.
Supported system configuration
This section describes the typical system configuration for installing
Command Director and its components.
To ensure optimal performance and to avoid port conflicts, Hitachi
recommends that you install the Command Director server and the HCmD
components on separate servers.
Depending on how Hitachi Command Director is configured in your
environment and the size of the configured environment, you can choose to
deploy Command Director in one of the following ways:
•Deploying Command Director on a separate server, and HCS components,
Agent for RAID, and Agent for RAID Extension on the same server on page
16
•Deploying HCmD server, HCS components, and Agent for RAID and Agent
for RAID Extension on separate servers on page 17
Deploying Command Director on a separate server, and HCS
components, Agent for RAID, and Agent for RAID Extension on the
same server
In a small to medium sized environment, you can install the Hitachi
Command Suite components, Agent for RAID, and Agent for RAID Extension
on the same server as shown in the figure below.
In this deployment, the Command Director client is accessing the Command
Director server, which is installed on a separate server and connected to a
16 Overview of Hitachi Command Director
Hitachi Command Director Installation and Configuration Guide
server on which Device Manager, Tuning manager, Hitachi Tiered Storage
Manager, Agent for RAID, and Agent for RAID Extension are installed.
Figure 1-1 Deploying Command Director on a separate server, and HCmD
components, Agent for RAID, and Agent for RAID Extension on the same
server
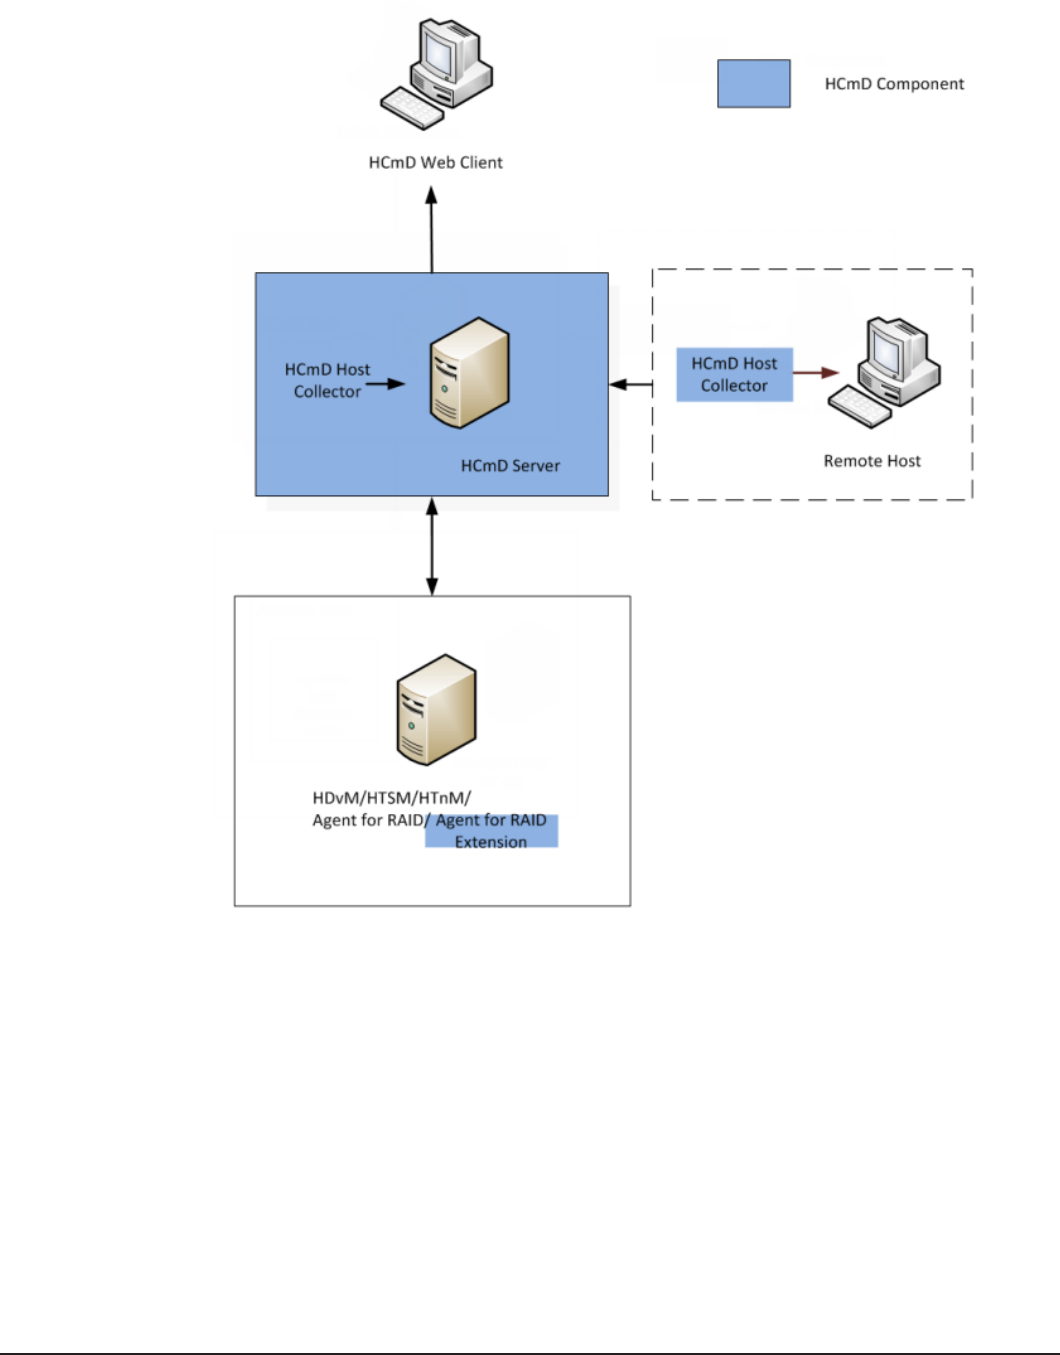
Deploying HCmD server, HCS components, and Agent for RAID and
Agent for RAID Extension on separate servers
In this deployment, the HCmD client is accessing the HCmD server, which is
installed separately and connected to two separate servers - one on which
Device Manager, Tuning Manager, and Tiered Storage Manager are installed
Overview of Hitachi Command Director 17
Hitachi Command Director Installation and Configuration Guide
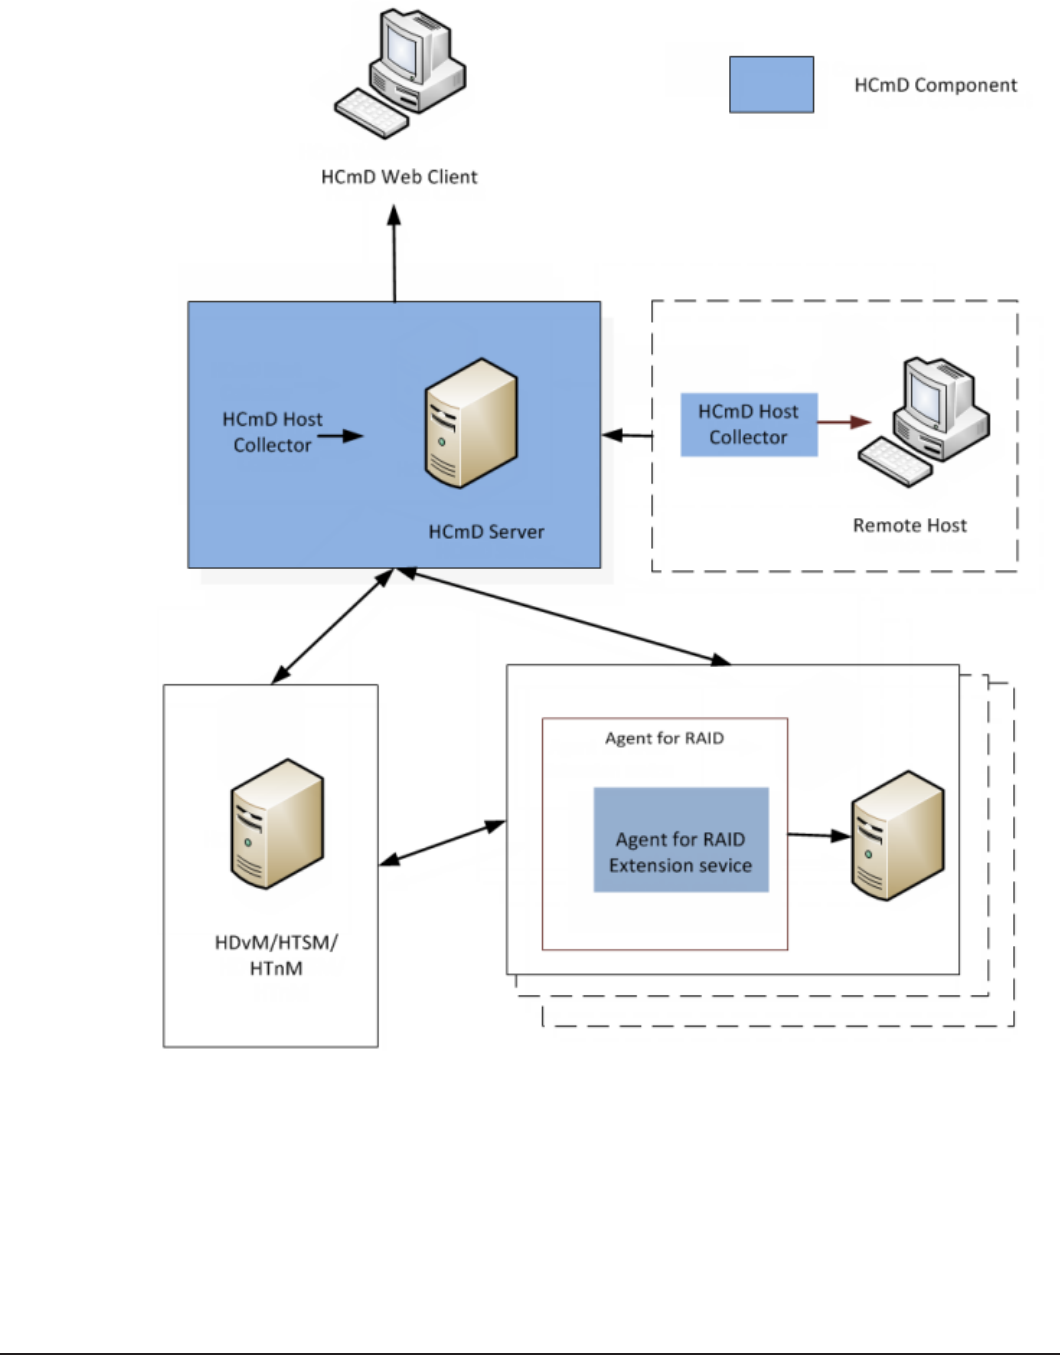
and the other on which Agent for RAID and Agent for RAID Extension are
installed.
Figure 1-2 Deploying HCmD server, HCS components, and Agent for RAID
and Agent for RAID Extension on separate servers
18 Overview of Hitachi Command Director
Hitachi Command Director Installation and Configuration Guide
Recommended screen resolution
A minimum setting of 1024 by 768 pixels is recommended for your screen to
display all reports and elements displayed on the Command Director web
client.
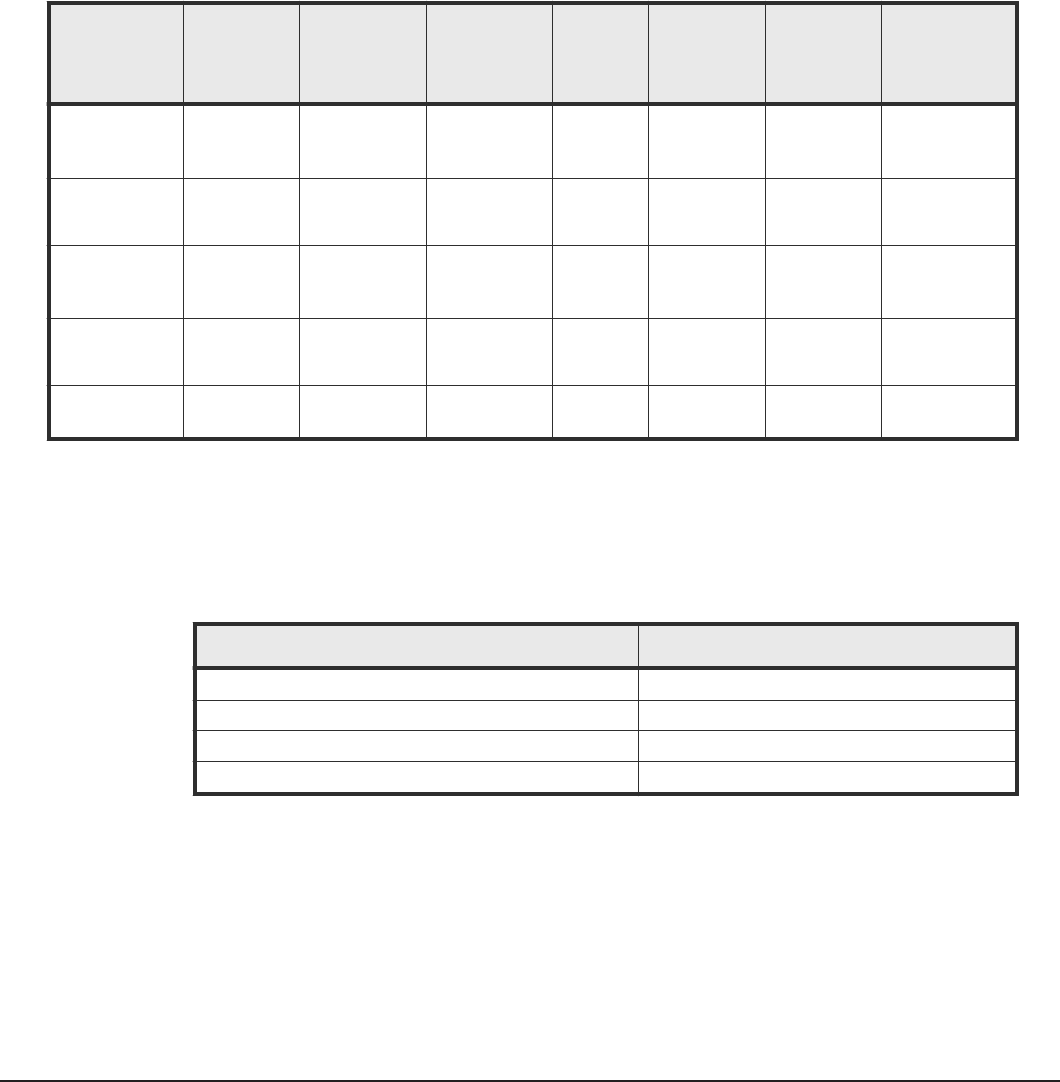
Port usage by Command Director components
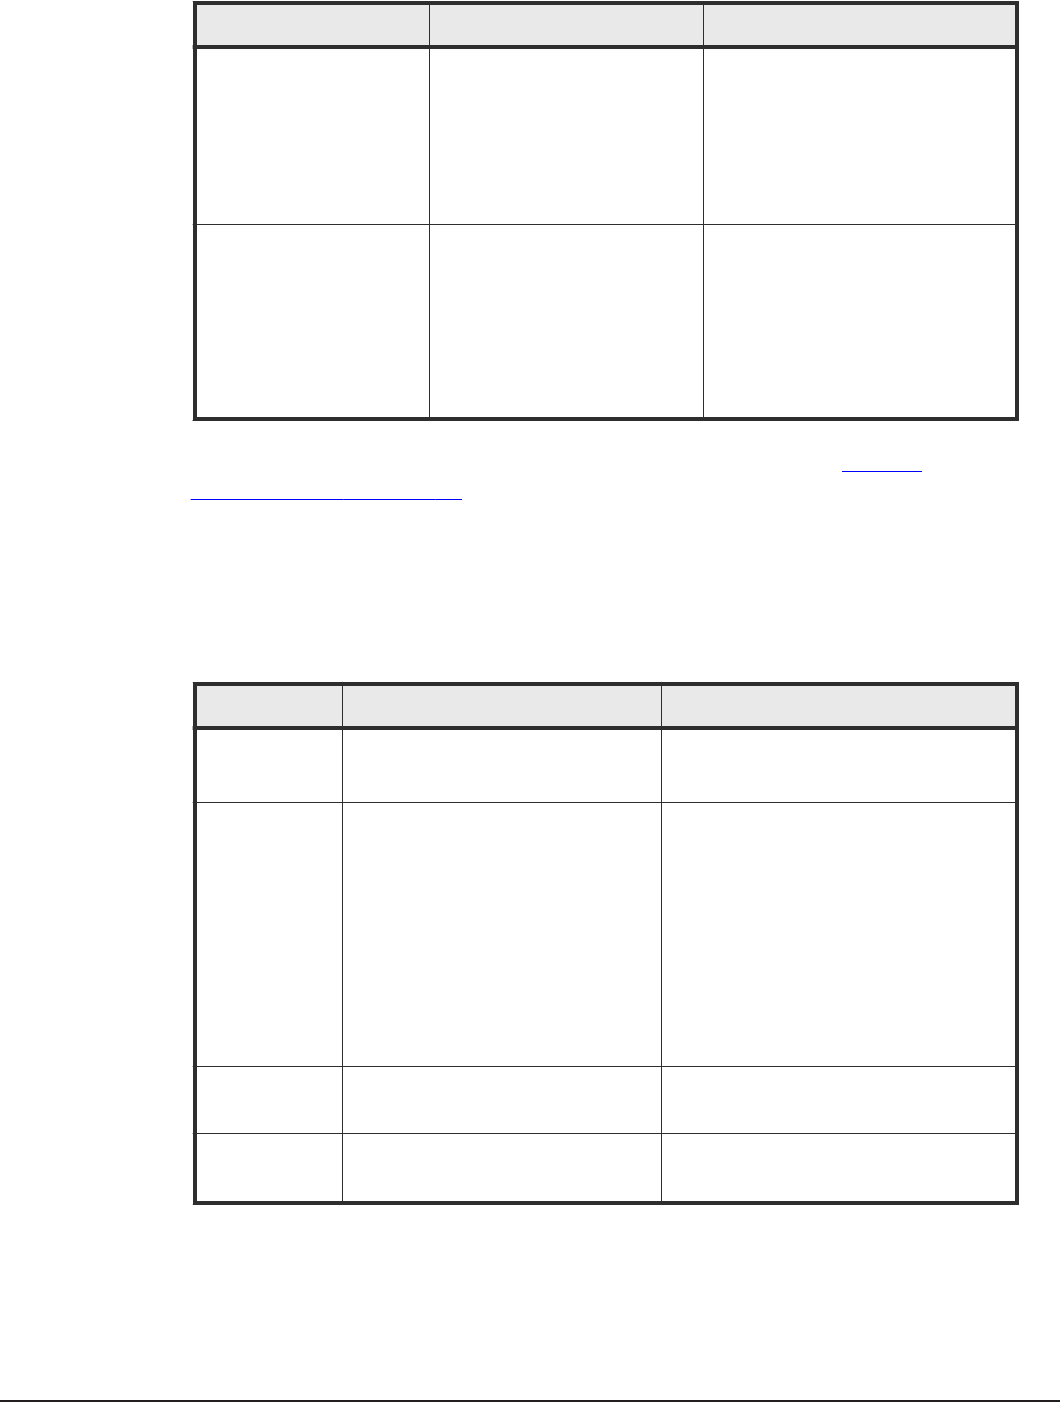
Command Director components use the ports listed in the following table.
Component
Server TCP
port
(default)
Shutdown
TCP port
(reserved)
My SQL
(reserved)
Source
IP Target IP Type of
traffic
Register
firewall
exception
Agent for
RAID
Extension
25075 /
25076
25079 n/a HCmD
server
Agent for
RAID
Extension
Two
directions
25075/25076
in and out
HCmD Data
Collector
25065/
25066
25069 n/a HCmD
server
HCmD Data
Collector
One
direction
n/a
HCmD Host
Collector
25045/
25046
25049 n/a HCmD
server
HCmD Host
Collector
server
One
direction
25045/ 25046
in and out
HCmD server 25015 /
25016
25019 25020 Client
browser
HCmD
server
One
direction
25015/ 25016
in and out
HNAS Data
Collector
25055 25059 n/a HCmD
server
HNAS Data
Collector
Two
directions
25055 in and
out
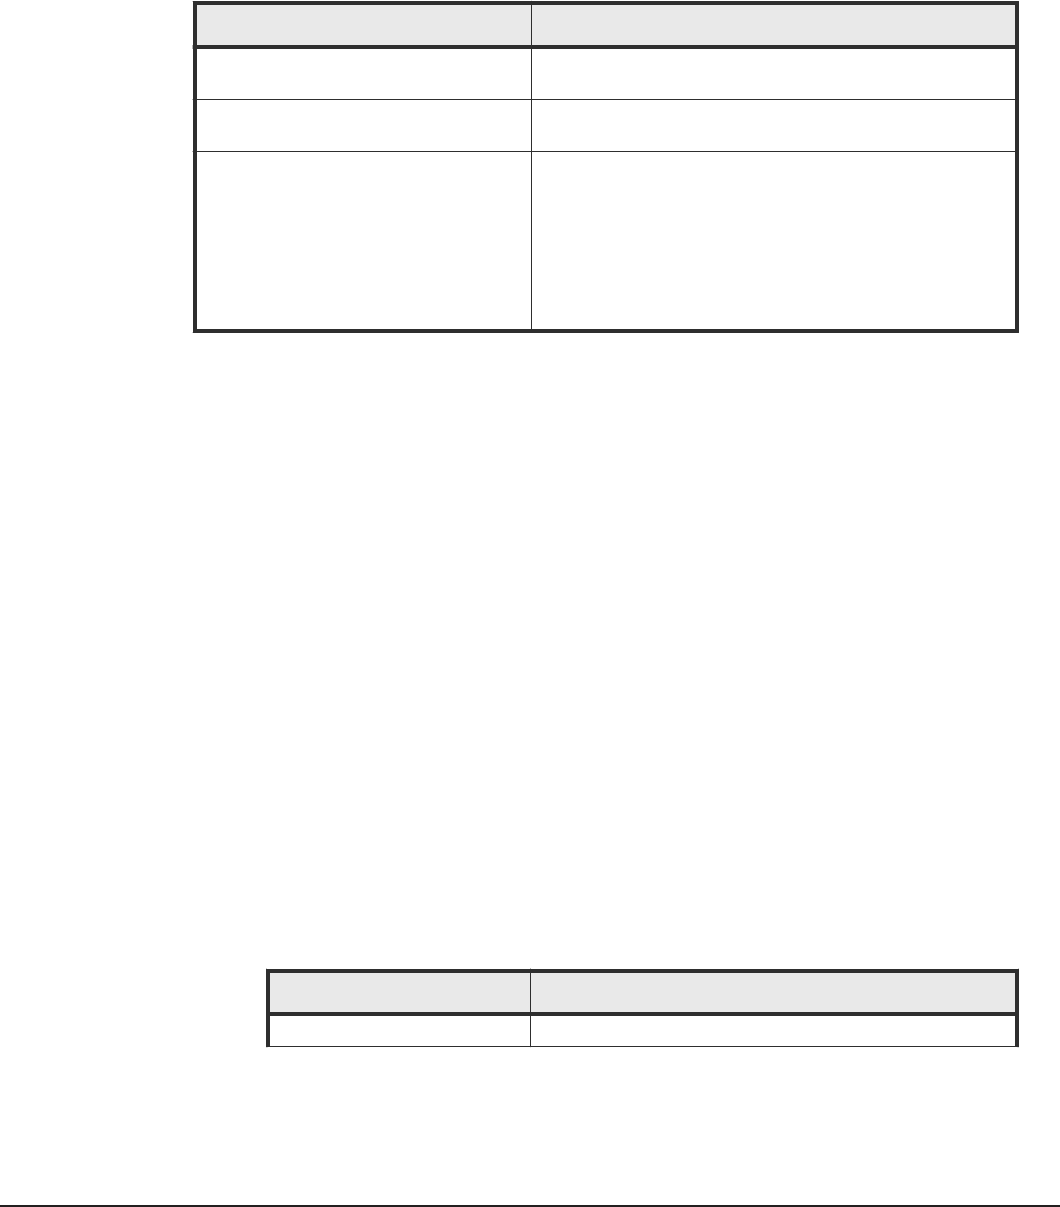
Data collection support
Command Director supports and is compatible with the multiple types and
versions of Hitachi data collection products listed in the following table.
Product Version
Hitachi Device Manager (HDvM) 8.0 and later.
Tiered Storage Manager (HTSM) 8.0 and later.
Tuning Manager (HTnM) 8.0 and later.
Agent for RAID 8.0 and later.
Overview of Hitachi Command Director 19
Hitachi Command Director Installation and Configuration Guide

Command Director iPad app requirements
The Hitachi Command Suite for iPad® apps support the Command Director
product functionality to provide a global management dashboard for business
application service level monitoring across your Hitachi storage environment.
You can download the apps for free from the App Store at iTunes.apple.com.
Hitachi Command Suite 8 for iPad v3.1.0 supports Command Director v8.0.0
reports. It is compatible with iPad v1, 2, and 3, and iPad Air on iOS v6.0 or
later.
Version 1.1 of the app supports HCmD v7.6.0 reports. It is compatible with
iPad v1, 2, and 3, and iPad Air on iOS v7.0.
To use the app and perform storage management tasks, make sure the
following prerequisites are met:
• You have licensed Hitachi Command Director.
• You can connect to HCmD server using HTTP or HTTPS with the server IP
address and port information (25015 for HTTP and 25016 for HTTPS).
After the prerequisites are met, use your Command Director user ID and
password to log on to the HCmD server using the app.
20 Overview of Hitachi Command Director
Hitachi Command Director Installation and Configuration Guide

2
Installing Hitachi Command Director
Install Hitachi Command Director (HCmD) Server and associated components
on Windows or on Linux.
□Installation workflow
□HCmD server installation
□Host Collector installation
Installing Hitachi Command Director 21
Hitachi Command Director Installation and Configuration Guide

Installation workflow
Follow this workflow to install HCmD server and its components:
HCmD server installation
The HCmD server collects and correlates configuration and performance data,
performs host discovery, and generates reports. You can install the HCmD
server on the Windows and Linux operating systems.
The following components are installed by default when you install the HCmD
server.
• Host Collector
The Host Collector software allows Command Director to discover hosts on
your network and obtain information about their mappings to a given
storage system.
• HNAS Data Collector
The HNAS Data Collector software allows Command Director to discover
Hitachi NAS Platform hosts on your network and obtain their file system
information.
• HCmD Data Collector
The HCmD Data Collector software allows Command Director to collect
configuration data from third party storage systems that support SNIA
Storage Management Initiative Specification (SMI-S).
Installation prerequisites for HCmD server
HCmD server installation requires that you complete the following tasks:
• Verify that the HCmD server meets the minimum hardware requirements.
For more information, see the Hitachi Command Suite System
Requirements.
22 Installing Hitachi Command Director
Hitachi Command Director Installation and Configuration Guide
• Make sure that all Hitachi Device Manager instances from which you want
to collect data are installed and configured.
• Ensure that all programs are closed.
• Disable any virus scanning utilities running on the server.
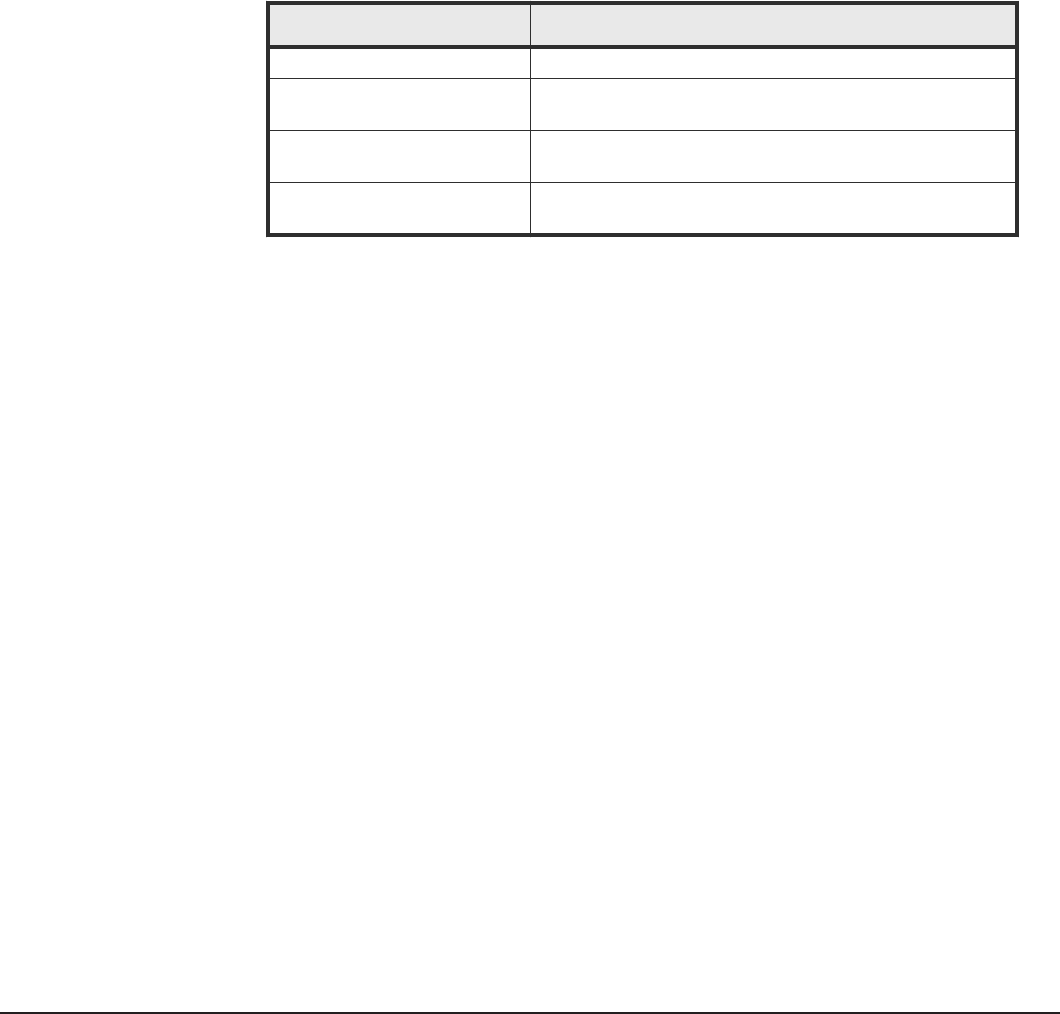
Before beginning installation, make sure that the following information is
readily available:
Item Description
HCmD host IP address The IP address of the host where you want to install the
HCmD server
Administrator or root ID and password
of the HCmD server
Credentials to log on to the host to install the HCmD
server
The following ports are available:
25015 for HCmD server
25045/25046 for Host Collector
25055 for HNAS Data Collector
25065 for HCmD Data Collector
Default port numbers for HCmD server, Host Collector,
HNAS Data Collector, and HCmD Data Collector
Installing the HCmD server on Windows
Procedure
1. Insert the Command Director installation media in the host.
If the installer does not start automatically, browse the media and open
the HCmD-Install-Server-release.exe file.
2. In the Welcome window, click Next.
3. In the License Agreement window, accept the license agreement
terms, and then click Next.
4. In the Select Destination Directory window, specify the folder where
you want to install the Command Director, and then click Next.
The default directory is:
C:\Program Files\Hitachi\CommandDirector
5. In the Port Setup windows that follow (one for each component
installed with the HCmD server), specify the port number, and then
choose one of the following options:
• If you want to retain the port number entered by default, click Next.
The following table lists the default port numbers of the various
components that are installed with the HCmD server.
Component Default port number
HCmD server 25015
Installing Hitachi Command Director 23
Hitachi Command Director Installation and Configuration Guide

Component Default port number
HCmD Host Collector 25046 (service port on the Host collector that
communicates with the HCmD server).
HCmD HNAS Data Collector 25055 (service port on the HCmD HNAS Data Collector
that communicates with the HCmD server).
HCmD Data Collector 25065 (service port on the HCmD Data Collector that
communicates with the HCmD server).
• Otherwise, enter the new port number in the Port field. Make note of
the number for later reference. You need this port number for
Command Director configuration after installation.
6. To display a legal disclaimer during log on:
a. Click Yes in the Login Disclaimer window.
b. Enter the name of your company in the Company Name field, and
then click Next.
7. In the Select Start Menu Folder window, select the Start Menu folder
where you want to create the program’s shortcuts, and then click Next.
You can accept the default folder for Hitachi Command Director or specify
some other location. As another option, you can choose a browser to
have Hitachi Command Director automatically loaded from a given user’s
default browser. If you want the shortcuts to be available for all users,
select the Create shortcuts for all users option.
8. In the Information window, review the summary to ensure the
information is appropriate for your installation, then click Install.
9. When the installation is complete, click Finish in the Completing Setup
window to exit Setup.
Result
After a successful installation, the following services are installed in your
system:
• Hitachi Command Director
• Hitachi Command Director Database
• HCmD Host Collector
• HCmD HNAS Data Collector
• HCmD Data Collector
Installing the HCmD server on Linux
Procedure
1. Log on to Linux as the root user.
2. Insert the Command Director installation media in the host.
3. Run the command wget Installation-media-directory/Linux/HCmD-
Install-Server-release.tar.
4. Run the command tar -xf HCmD-Install-Server-release.tar.
24 Installing Hitachi Command Director
Hitachi Command Director Installation and Configuration Guide
5. Run the command cd HitachiCommandDirector.
6. Run the command ./install.sh and then follow the prompts in the
steps below to install the server.
The default directory is /opt/Hitachi/CommandDirector/cli/linux/
hcmdcli.
7. Follow the prompts to review and accept the license agreement.
8. Follow the prompts to accept the default ports or specify the port number
at the appropriate prompt.
If you do not accept the default ports, make note of the port numbers for
later reference. You need the port numbers for Command Director
configuration after installation.
• The following table lists the default port numbers of the various
components that are installed with the HCmD server.
Component Default port number
HCmD server 25015
HCmD Host Collector 25046 (service port on the Host collector that
communicates with the HCmD server).
HCmD HNAS Data Collector 25055 (service port on the HCmD HNAS Data Collector
that communicates with the HCmD server).
HCmD Data Collector 25065 (service port on the HCmD Data Collector that
communicates with the HCmD server).
9. Follow the prompts to choose whether to display a legal disclaimer during
log on and add a business name.
10. In the Installation Summary, review the summary to ensure the
information is appropriate for your installation, and then press Enter to
run the installation.
11. When the installation is complete, an Installation Complete message
displays. Press Enter to exit the installation.
Result
After a successful installation, the following services are installed in your
system:
• Hitachi Command Director
• Hitachi Command Director Database
• HCmD Host Collector
• HCmD HNAS Data Collector
• HCmD Data Collector
You can access the Command Director GUI by using a browser on Windows.
Installing Hitachi Command Director 25
Hitachi Command Director Installation and Configuration Guide
Host Collector installation
You can use the host discovery feature for agentless host discovery on your
network and gather their file system and storage utilization information. Host
discovery allows Command Director to map a complete end-to-end path from
the host to the storage system volumes.
A default Host Collector is configured and available to discover hosts on the
HCmD server subnet. If there are hosts on a different subnet and you can
access them through a firewall, you can use the default host collector.
To access remote hosts on a different subnet and behind a firewall, install this
component on a server in each subnet, and make sure your firewall settings
allow communication between the Command Director server and this
component. This installation is optional.
For information about activating the Host Collector, see “Administering
HCmD” in the Hitachi Command Director User Guide.
The Host Collector server discovers Microsoft Windows, Linux, Solaris, HNAS,
HP-UX, AIX®, ESX hosts using VMware vCenter® server, and Hyper-V® hosts.
All data on discovered hosts is forwarded to the HCmD server when all Host
Collectors are properly configured.
Installation prerequisites for Host Collector
Complete the following installation prerequisites for installing a Host Collector
instance on a server in the subnet of interest before you proceed to install
the Host Collector.
• Verify that the Host Collector server meets the minimum hardware
requirements. For more information, see the Hitachi Command Suite
System Requirements.
• Make sure HCmD server is installed and configured.
• Ensure that all programs are closed.
• Disable any virus scanning utilities running on the server.
Before beginning installation, make sure that the following information is
readily available:
Item Description
Host IP address The IP address of the host where you want to install the
Host Collector
Administrator or root ID and password Credentials to log on to the host to install the Host
Collector
The following ports are available:
25015 for HCmD server
Default port numbers for HCmD server and Host Collector
26 Installing Hitachi Command Director
Hitachi Command Director Installation and Configuration Guide

Item Description
25045/25046 for Host Collector
25055 for HNAS Data Collector
Installing Host Collector on Windows
Procedure
1. Insert the Command Director installation media in the host.
If the installer does not start automatically, browse the installation media
and open the HCmD-Install-Host-Collector-release.exe file.
2. In the Welcome window, click Next.
3. In the License Agreement window, accept the license agreement
terms, and then click Next.
4. In the Destination Directory window, specify the folder where you
want to install the Host Collector, and then click Next.
The default directory is:
C:\Program Files\Hitachi\CommandDirector\Host Collector
5. In the HCmD Host Collector Port Setup window, specify the port
number on the Host Collector server that communicates with the HCmD
server and choose one of the following options:
• If you want to retain the default Host Collector server port number
25046, click Next.
• Otherwise, specify the new number in the Port field. Make note of the
number to refer to later. You need this number for Command Director
configuration after installation. Click Next.
6. In the HCmD HNAS Data Collector Port Setup window, specify the
port number and choose one of the following options:
• If you want to retain the default HCmD HNAS Data Collector port
number 25055, click Next.
• Otherwise, specify the new number in the Port field. Make note of the
number for later reference. You need this number for Command
Director configuration after installation. Click Next.
7. In the Select Start Menu Folder window, select the Start Menu folder
where you want to create the program’s shortcuts, and click Next. You
can accept the default folder for Hitachi Command Director or specify
some other location. As another option, you can choose a browser to
have Hitachi Command Director automatically loaded from a given user’s
default browser. If you want the shortcuts to be available for all users,
check the Create shortcuts for all users option.
8. In the Information window, review the summary to ensure the
information is correct, and click Install.
Installing Hitachi Command Director 27
Hitachi Command Director Installation and Configuration Guide
9. When the installation is completed, in the Completing Setup window,
click Finish to exit Setup.
10. Repeat this installation procedure on a server in each subnet where you
need to discover the hosts.
Result
After successfully installing the Host Collector, the following services run on
the server where the Host Collector is installed:
• HCmD Host Collector
• HCmD HNAS Data Collector
Installing Host Collector on Linux
Procedure
1. Log on to Linux as the root user.
2. Insert the Command Director installation media in the host.
3. Run the command wget Installation-media-directory/Linux/HCmD-
Install-Host-Collector-release.tar.
4. Run the command tar -xf HCmD-Install-Host-Collector-
release.tar.
5. Run the command cd HCmDHostCollector.
6. Run the command ./install.sh and then follow the prompts in the
steps below to install Host Collector.
7. Follow the prompts to review and accept the license agreement.
8. Follow the prompts to accept the default ports or specify the port number
at the appropriate prompt.
I f you do not accept the default ports, make note of the port numbers
for later reference. You need the port numbers for Command Director
configuration after installation.
• The following table lists the default port numbers of the various
components that are installed with the HCmD server.
Component Default port number
HCmD Host Collector 25046 (service port on the Host collector that
communicates with the HCmD server).
HCmD HNAS Data Collector 25055 (service port on the HCmD HNAS Data Collector
that communicates with the HCmD server).
9. Follow the prompts to choose whether to display a legal disclaimer during
log on and add a business name.
10. In the Installation Summary, review the summary to ensure the
information is appropriate for your installation, then press Enter to run
the installation.
28 Installing Hitachi Command Director
Hitachi Command Director Installation and Configuration Guide

11. When the installation is complete, an Installation Complete message
displays. Press Enter to exit the installation.
Result
After a successful installation, the following services are installed in your
system:
• HCmD Host Collector
• HCmD HNAS Data Collector
Installing Hitachi Command Director 29
Hitachi Command Director Installation and Configuration Guide

30 Installing Hitachi Command Director
Hitachi Command Director Installation and Configuration Guide

3
Setting up Command Director
Setting up Hitachi Command Director (HCmD), involves configuring host
collectors, storage systems, performance data, status data timeout
properties, and SSL based communication to and from the Command Director
server.
You can refer to the following sections:
□Initial setup tasks
□Custom properties file
□Modifying the custom.properties file
□Restarting the HCmD server
□Enabling performance data collection using Agent for RAID Extension
□Configuring Command Director in secure mode
□Viewing logs
□Setting up Command Director CLI
□Starting and stopping services in Linux
Setting up Command Director 31
Hitachi Command Director Installation and Configuration Guide

Initial setup tasks
After installation, you must perform the initial setup tasks to configure
Command Director for use.
1. Verify the installation.
2. Register the license.
3. Specify email address for alerts and reports.
Verifying the installation
You can verify that the installation was successful by accessing the HCmD
web interface from a browser. Before you access the web interface, make
sure you have Adobe® Flash Player v10.1 or later installed on the client
computer.
To access the Command Director web interface, enter the following URL in a
web browser:
http://HCmD-server-address:port-number
HCmD-server-address: IP address or host name of the HCmD server.
port-number: Port number of the HCmD server. The default is 25015.
The login window appears.
Registering the license
When you log on to Command Director initially, you must specify a valid
license key. You can obtain your license key from the Hitachi Data Systems®
representative. Follow the procedure described here to specify the license
key:
Procedure
1. Log on to Command Director.
32 Setting up Command Director
Hitachi Command Director Installation and Configuration Guide
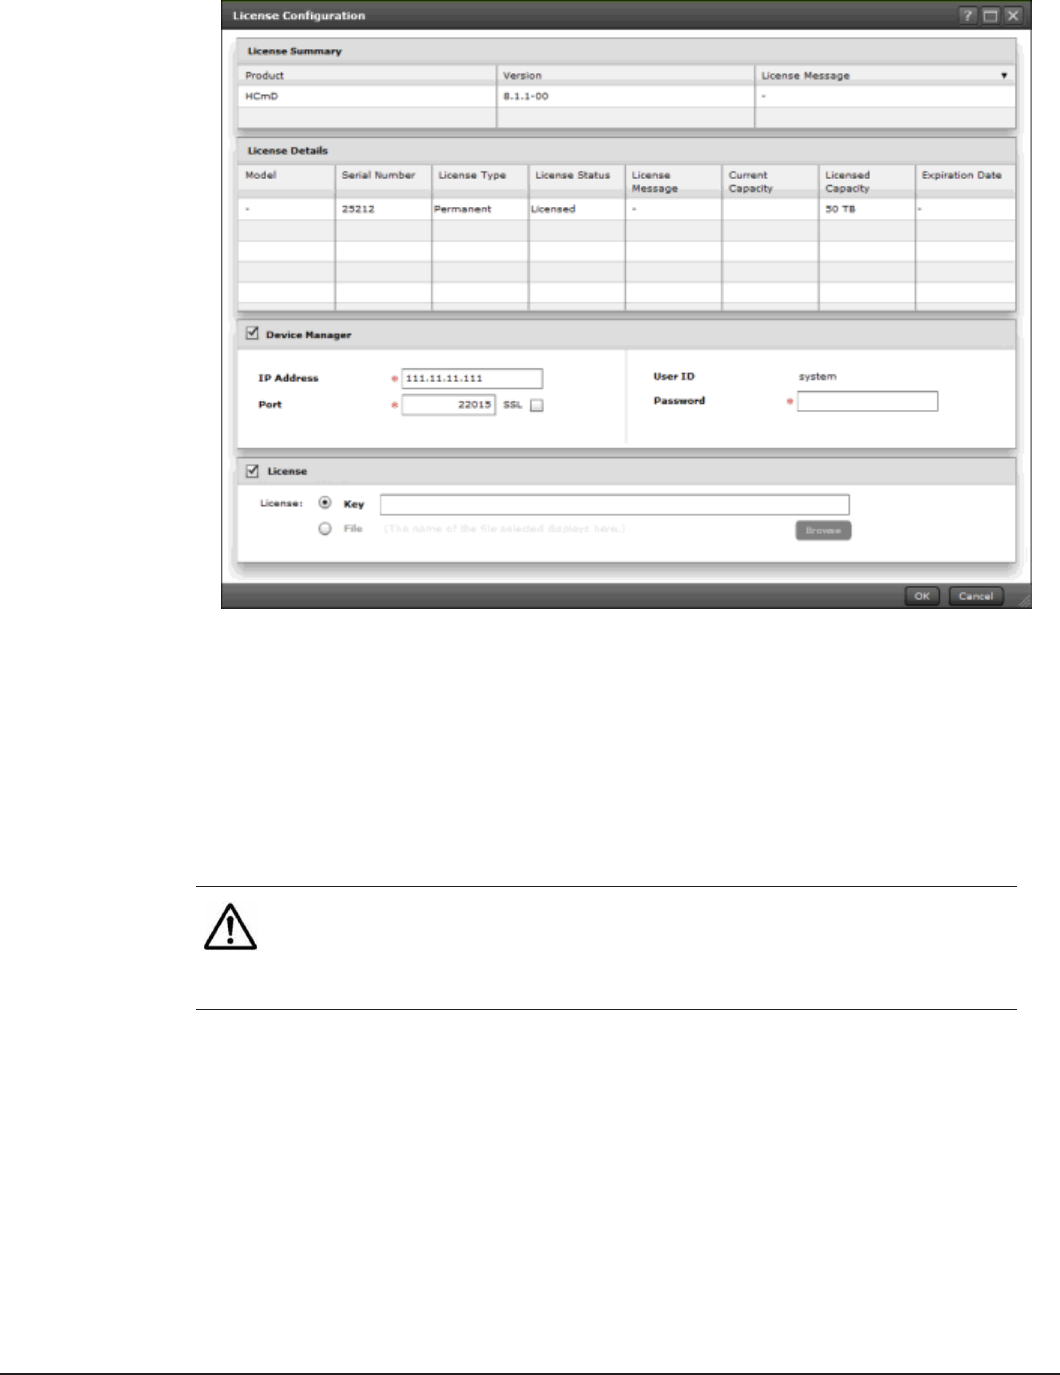
2. On the menu bar, click License.
3. In the License Configuration window, specify the following Device
Manager settings:
•IP Address: enter the IP address of the Device Manager instance.
•Port: enter the Device Manager HTTP or HTTPS port. The default port
for HTTP is 22015 and 22016 for HTTPS.
•SSL: select the check box to enable Secure Sockets Layer (SSL)
communication between the Command Director server and Device
Manager server (when selected, the port automatically changes to
22016).
Note: Before you select the SSL check box, make sure SSL is enabled
on the Device Manager server. For information about enabling SSL on
the Device Manager server, see the Hitachi Command Suite
Administrator Guide.
•User ID: this is the Device Manager instance user account used by
the system, and the user ID is always system (you cannot change it).
•Password: enter the password of the system user account in the
Device Manager instance.
4. In the License pane, enter the Command Director license key in the Key
field, or click File and click Browse to navigate to where the license file
resides.
5. Click OK.
Setting up Command Director 33
Hitachi Command Director Installation and Configuration Guide

Note: When you register the license key for the first time, you are
prompted to enter an email address after your license information is
validated.
Viewing licensed capacity
After you register a license, the Licensed Capacity field in the License Details
pane displays the storage capacity from the registered license. However, if
you have registered an unlimited storage capacity license of any storage
system, the Licensed Capacity field will display Unlimited only after you
configure the storage system collectors in Command Director and refresh the
gathered storage system configuration data.
Also, the model information for all storage systems is populated only after
data refresh.
Specifying an email address when you first log in
The first time you log on, the User Email window appears and you are
prompted for your email address. This address is associated with your user
account and is used to send Service Level Objective (SLO) alerts and
scheduled reports.
Prerequisites
The email server must be configured for you to receive alerts or reports. For
the configuration procedure, see the Hitachi Command Director User Guide.
Note: If you are unable to receive alerts and reports by email, refer to
Troubleshooting receiving email alerts and reports on page 101
Procedure
1. In the User Email window, enter your email address in the Email field.
2. Click Save.
Custom properties file
The custom.properties file, which is located in the Command Director
installation folder, contains user entries from the Command Director
installation wizard and Command Director applications.
In Windows, the default location of this file is C:\Program Files\Hitachi
\CommandDirector\conf.
In Linux, the default location of this file is/opt/Hitachi/CommandDirector/
conf.
34 Setting up Command Director
Hitachi Command Director Installation and Configuration Guide

Modifying the custom.properties file
You can modify the properties in the custom.properties file to set different
values for timeout, data retention, and SSL settings, among others. If a
property has an empty value or if you delete a property entirely from the file,
the default value for that property is used.
Be careful when you modify the properties to avoid the potential negative
effects on your enterprise following such a modification.
When you modify any property in the custom.properties file, you must
restart the HCmD server for the changes to take effect. For information about
restarting HCmD server, see Restarting the HCmD server on page 40.
Note: The directories and values that are listed in the examples are defaults.
Application by Capacity business view properties
You can access the Application by Capacity business view properties and view
or modify their default values as needed. The following table describes the
Application by Capacity properties in the custom.properties file. The
settings in these properties control how applications are grouped and
displayed under the Resources tab.
For more information about the custom.properties file, see Custom
properties file on page 34.
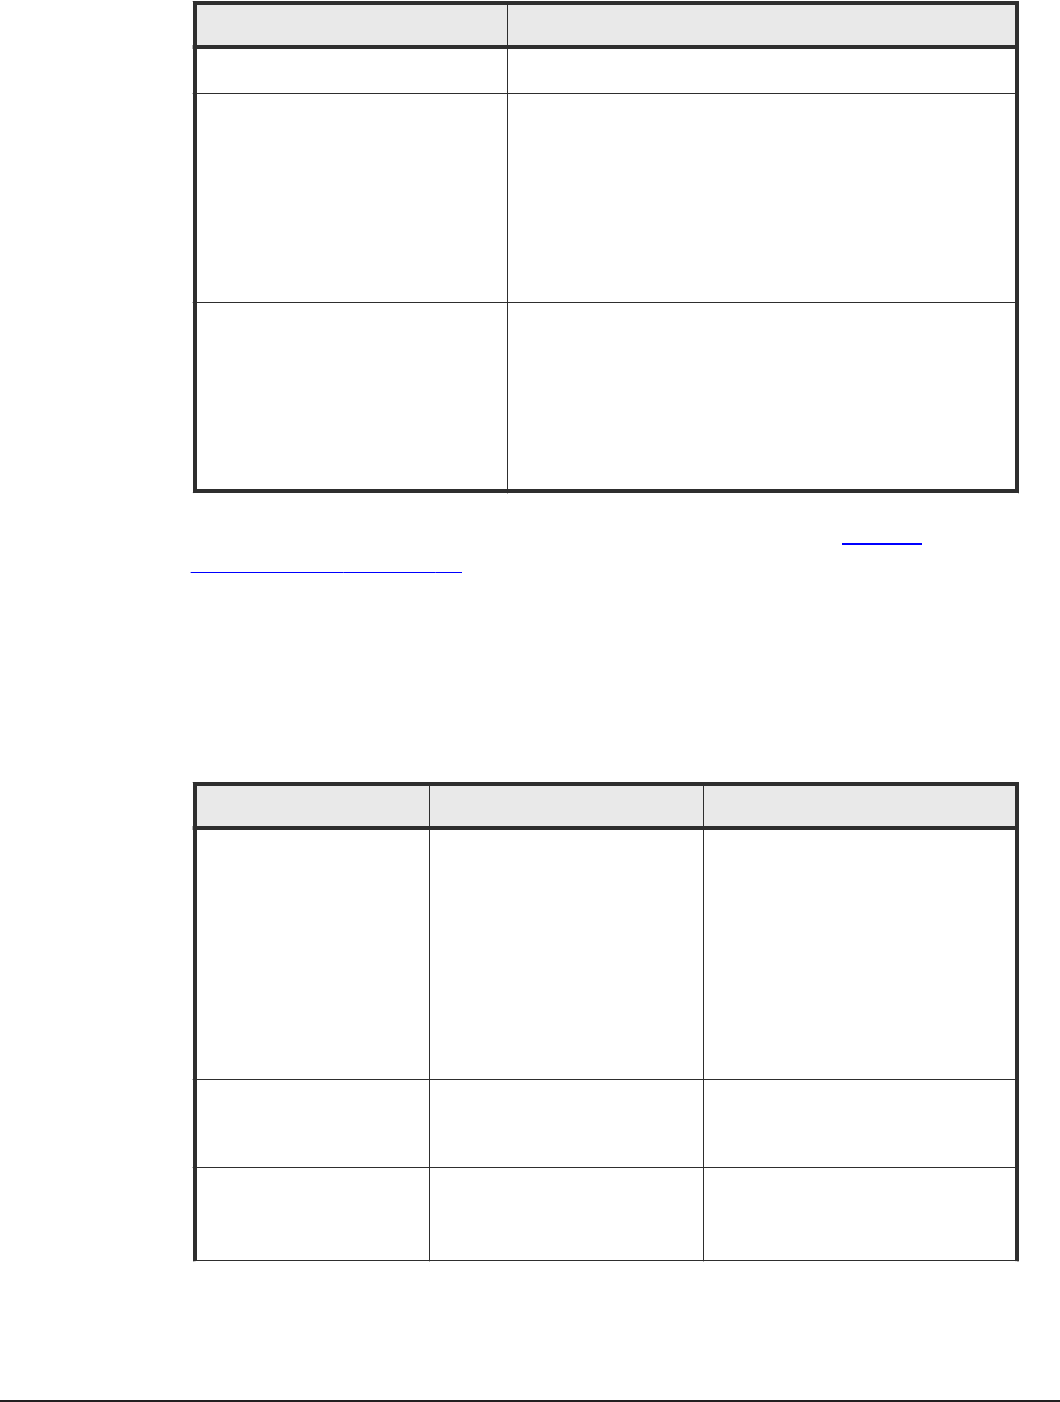
Description Property Required modification
Threshold that identifies
the high capacity
applications (in TB)
tags.app.capacity.high.thre
shold.in.tb=5
Default: 5 (TB)
Set the high capacity threshold for
the applications listed in the
Application by Capacity view under
the Resources tab.
The threshold setting you configure
groups all large capacity applications
that are equal to or greater than this
value, and groups them as Large.
Threshold that identifies
the low capacity
applications (in TB)
tags.app.capacity.low.thres
hold.in.tb=1
Default: 1 (TB)
Set the low capacity threshold for
the applications listed in the
Application by Capacity view under
the Resources tab.
The threshold setting you configure
groups all low capacity applications
that are equal to or less than this
value, and groups them as Small.
Note that all capacity applications
that are greater than the Small
Setting up Command Director 35
Hitachi Command Director Installation and Configuration Guide

Description Property Required modification
capacity threshold and less than the
Large capacity threshold are
grouped as Medium capacity
applications.
Application Consumed Capacity property
You can access the Application Consumed Capacity property in the
custom.properties file and view or modify its default value as needed. The
property stores the aggregated capacity consumed by HDT tier data in an
application. This data is used in the following reports:
• Pool usage by application
• Pool tier utilization trend
• Pool tier utilization forecast trend
The following table describes the Application Consumed Capacity property.
The value set is the aggregated retention period (in years) that represents
application consumed capacity by HDT tier data during this period.
Note: Changing the default value will increase or decrease the report
response and the space required to store this data.
Description Property Required modification
Retention period (in years)
that represents the
capacity consumed by HDT
tiers
app.capacity.rollup.by.hdt.
tier.retention.in.years=7
Default: 7
Set the number of years of capacity
consumed by tier data to use when
calculating trend and forecast
reports.
For more information about the custom.properties file, see Custom
properties file on page 34.
Host Collector timeout and data retention properties
The custom.properties file contains the following timeout and data
retention properties related to the host collector. You can modify the
properties listed in the following table based on your requirements.
Description Property
Host data gather
(Host collector timeout property)
This timeout property limit is
specified in seconds and controls the
data refresh frequency for gathering
data before timing out. This value
host.data.collector.process.timeout.sec=21600
Default: 21600 seconds (6 hours)
36 Setting up Command Director
Hitachi Command Director Installation and Configuration Guide
Description Property
should always be lower than or
equal to the default.
Storage system scan
(Storage system collector timeout
property)
This scanning task timeout property
limit is in minutes and controls the
time in which HDvM can perform a
storage system scan before timing
out.
hdvm.task.timeout.minutes=5
Default: 5 minutes
SLO status data retention
(SLO status data retention property)
This data retention property limit is
in days and controls the amount of
time that SLO status data is retained
before it is overwritten with new
status data.
slo.status.data.retention.days=30
Default: 30 days
For more information about the custom.properties file, see Custom
properties file on page 34.
SLO Recommendation related properties
You can access the Service Level Objectives (SLO) Recommendation related
properties and view or modify their default values as needed. The following
table describes the SLO Recommendation related properties, which are in the
custom.properties file.
Description Property Required modification
Thresholds that identify
random, sequential, and
mixed workloads
sre.random.workload.identif
ication.threshold.percent=6
0.0
sre.mixed.workload.identifi
cation.threshold.percent=40
.0
Defaults: 60.0 (random) and
40.0 (mixed)
Set the random and mixed threshold
property values to a percentage
value other than the defaults.
These property values represent a
percentage of random IOs (input-
output) out of the total percentage
of IOs.
Random should always be greater
than the mixed workload value, and
should not exceed 100 percent.
Standard recommended
deviation value
sre.recommendation.standard
.deviations=1.0
Default: 1.0
Set a standard deviation value that
is added to the mean to derive a
volume representative value.
Borderline threshold value
multiplied by the missed
threshold value
sre.recommendation.borderli
ne.ratio=0.8
Default: 0.8
Set a borderline threshold value that
then is multiplied by a missed
threshold value to derive a
borderline ratio value.
Setting up Command Director 37
Hitachi Command Director Installation and Configuration Guide
Description Property Required modification
The total number of input
data days minus a selected
time span of data input
days
sre.recommendation.input.da
ta.time.span.in.days=28
Default: 28
Set a selected time span (number of
days) of data input that is
subtracted from the total number of
input data days. This value is read
and used during an SLO
recommendation evaluation (floating
point numbers are not supported in
this calculation).
The location of the LDEV
IO data archive
sre.recommendation.archive.
home.dir=C:\...\HCmD-
Installation-Folder\data
\ldevioarchive
Default: The location is in the
following Windows folder:
HCmD-Installation-Folder\data
\ldevioarchive
Set a path location for the LDEV IO
data archive on your system.
For more information about the custom.properties file, see Custom
properties file on page 34.
HCmD server SSL properties
You can access the HCmD server SSL properties in the custom.properties
file and modify their default values as needed. The following table describes
the properties.
Description Property Required modification
Enabling or
disabling SSL
hcmd.is.secure.connection=false
Default: false
Set this property to true to enable secure
communication between the Command
Director server and client (web interface).
Trustallservers hscp.https.trustallservers=true
Default: true
Set this property to true to accept all
certificates and enable secure
communication between the Command
Director server and Host Collector server
or Device Manager server. Setting this
property to false configures Command
Director to only trust other target servers
that are identified in the truststore list,
and if set to false, Command Director is
able to communicate with the Host
Collector server only if its public key is
imported into the truststore.
Truststore file
name
hscp.https.truststore.file=
Default: none
Modify this property only if you have set
the trustallservers property to false.
Truststore
password
hscp.https.truststore.pass=
Default: none
Modify this property only if you have set
the trustallservers property to false.
38 Setting up Command Director
Hitachi Command Director Installation and Configuration Guide
Note: If you set the trustallservers property to false, make sure you
specify the correct values for the truststore file name and truststore
password properties.
For more information about the custom.properties file, see Custom
properties file on page 34.
Modifying HCmD server settings
You can modify the custom.properties file to change some of the HCmD
server settings according to your requirements. You can modify the following
properties.
•Modifying default ports on page 39
•Modifying login window legal disclaimer text on page 39
•Hiding or showing the legal disclaimer in the login window on page 39
•Changing the Command Director email address on page 40
Modifying default port settings
You can modify default port settings in the custom.properties file. The best
practice is to retain the default settings.
Port usage Default setting
Command Director proxy port for connecting to HTnM htnm.proxy.http.port=25015
Tomcat SSL port hcmd.https.port=25016
Local host data collector port alps.local.port=25046
Command Director Data Collector port apollo.local.port=25065
For more information about the custom.properties file, see Custom
properties file on page 34,
Modifying login window legal disclaimer text
To change the legal disclaimer text, edit the LICENSE.txt file, which is
located by default in one of the following:
• In Windows: \HCmD-Installation-Folder\conf
• In Linux: HCmD-installation-folder/conf
Hiding or showing the legal disclaimer in the login window
By default, the legal disclaimer appears when you log on.
• To hide the legal disclaimer, set the show.license.agreement property to
false.
• To show the legal disclaimer, set the show.license.agreement property to
true.
The property is located in the custom.properties file.
Setting up Command Director 39
Hitachi Command Director Installation and Configuration Guide

For more information about the custom.properties file, see Custom
properties file on page 34.
Changing the Command Director email address
When alerts or scheduled reports are sent, the default email address that
appears in the From field of the Command Director email messages is
noreply@hcmd.tcc. This setting is stored in the custom.properties file.
To change the email address that appears in the From field of the Command
Director email messages, modify the hscp.email.from.address property.
For more information about the custom.properties file, see Custom
properties file on page 34.
Restarting the HCmD server
Any changes you make in the Command Director settings take effect only
when you restart the HCmD server. You must restart these component
services from the services panel in the following order:
1. Hitachi Command Director Database
2. Hitachi Command Director
3. HCmD Data Collector
4. HCmD Host Collector
5. HCmD HNAS Data Collector
Enabling performance data collection using Agent for RAID
Extension
The Agent for RAID Extension component gathers storage system
performance data from the Agent for RAID instances installed in your
environment. This component is installed by default when you install the
Tuning Manager Agent for RAID. For Command Director to begin gathering
performance data, the Agent for RAID Extension service must be enabled.
Enabling performance data collection on Windows
In the Services panel of the Agent for RAID server, select Agent for RAID
Extension, right-click, and then select Start to start the service.
Alternately, to start this service automatically the next time you start the
system, right-click, select Properties, and then set the Startup type of the
service to Automatic.
40 Setting up Command Director
Hitachi Command Director Installation and Configuration Guide

Enabling performance data collection on Linux
Procedure
1. Navigate to the AgentforRAIDExtension/bin folder in the Agent-for-
RAID-installation-folder, and then copy the script
AgentforRAIDExtension to the /etc/init.d folder.
2. Modify permission of the executable to grant execute permission to the
root user. Then, run the following command to start the Agent for RAID
Extension service:
# /etc/init.d/AgentforRAIDExtension start.
3. Run the following command to confirm that the Agent for RAID Extension
service is running:
# ps aux | grep AgentforRAIDExtension/process-name.
Configuring Command Director in secure mode
After installation, Command Director works in non-secure mode by default.
The following steps describe how to configure Command Director to work in
secure mode using Secure Sockets Layer (SSL) v3:
•Enabling SSL communications on page 41
•Enabling secure connection between the Command Director server and
web clients on page 42
•Enabling secure connection between HCmD and HDvM servers on page
45
•Enabling secure connection between HCmD server and Host Collector
server on page 48
•Enabling secure connection between HCmD server and Agent for RAID
Extension on page 50
•Disabling SSL for Command Director on page 53
Enabling SSL communications
You can enable Command Director for SSL-based authentication for secure
data transmission to and from the Command Director server. SSL-based
communication lets you to verify identities of connecting applications and
encrypt data that is transferred between the server and client. The same SSL
port supports both GUI and REST API communications with the Command
Director server.
You can enable SSL for the following types of communication in the
Command Director environment:
• Communication between the Command Director server and the web client.
• Communication between the Command Director server and Device
Manager server.
Setting up Command Director 41
Hitachi Command Director Installation and Configuration Guide

• Communication between the Command Director server and Host Collector
server installed on a remote host.
• Communication between the Command Director server and Agent for RAID
Extension installed on the Agent for RAID server.
When enabling SSL communications, note that:
• Communication between the Command Director server and HNAS Data
Collector is unsecured. However, all data from the HNAS Data Collector is
encrypted.
• Communication between the Command Director server and the HCmD
Data Collector is secured by default.
• The Command Director CLI supports an unsecure connection only (using
the HTTP protocol) to the Command Director server. For more information
about the Command Director CLI, see the Hitachi Command Director CLI
Reference Guide.
SSL certificates
To enhance security on the Command Director server, SSL certificates are
used to verify the user’s identity. Command Director supports the following
security certificates:
• Self-signed, which is a certificate that is self-signed by the issuer of the
certificate. You can use Command Director to create this certificate.
• Signed and trusted, which is a certificate that is signed by a trusted
certificate authority (CA). To obtain a signed certificate, generate a
certificate signing request (CSR), send it to the CA, and have it returned
from the CA.
For details about generating a certificate signing request (CSR) see
Generating a CSR and importing signed certificate to Command Director on
page 45.
Keytool command
The procedures to enable SSL communication use the Java® keytool
command, which is a key and certificate management tool. For information
about this command, refer to Oracle documentation.
To run the keytool command, set the PATH environment variable to include
the Java installation directory.
Enabling secure connection between HCmD server and web clients
You can configure SSL-based communication between the Command Director
server and a client (web interface) by creating a self-signed SSL server
certificate using Command Director, or by using a digitally-signed certificate
from a certificate authority (CA). The following procedure describes how to
create an SSL certificate:
42 Setting up Command Director
Hitachi Command Director Installation and Configuration Guide
Procedure
1. From the Services panel, stop the Hitachi Command Director service.
2. Create a server key store:
a. Make sure to set the PATH environment variable to point to the HCmD-
installation-folder\jre\bin folder in Windows or HCmD-
installation-folder/jre/bin in Linux.
b. Open a console window and navigate in Windows to the HCmD-
installation-folder\jre\lib\security folder or in Linux to HCmD-
installation-folder/jre/lib/security.
In Windows, the default Command Director server installation folder is
C:\Program Files\Hitachi\CommandDirector.
In Linux, the default Command Director server installation folder
is /opt/Hitachi/CommandDirector.
c. Run the following command:
keytool -genkey -alias HCmD-server-keystore-alias -dname
"CN=common-name, O=organization-name,
OU=organization-unit-name, L=locality-name, S=state,
C=country" -keyalg RSA -keypass HCmD-server-private-key-
password -storepass HCmD-server-keystore-password -
validity number-of-days-to-expire -keystore keystore-file-
name
For example, to generate a keystore named HCmDServer.ks, enter:
keytool -genkey -alias HCmDServer -dname "CN=HCmDServer,
O=ABC Corp, OU=SSC, L=Santa Clara, S=CA, C=US" -keyalg RSA
-keypass hcmdserver -storepass hcmdserver -validity 30
-keystore HCmDServer.ks
Note: If the trustallservers property is set to false, you must add the
storetype to the end of the command in Step 2.c, as follows:
-storetype jks
An example using storetype follows:
keytool -genkey -alias HCmDServer -dname "CN=HCmDServer,
O= ABC Corp, OU=SSC, L=Santa Clara, S=CA, C=US" -keyalg
RSA -keypass hcmdserver -storepass hcmdserver
-validity 30 -keystore HCmDServer.ks –storetype jks
Note: The location of the keytool is:
• in Windows, HCmD-installation-folder\jre\bin\keytool.
• in Linux: HCmD-installation-folder/jre/bin/keytool.
3. Generate the Command Director server certificate:
a. For a self-signed certificate, run the following command:
keytool -export -alias HCmD-server-keystore-alias -
storepass HCmD-server-keystore-password -file HCmD-server-
certificate-file-name -keystore keystore-file-name
Setting up Command Director 43
Hitachi Command Director Installation and Configuration Guide
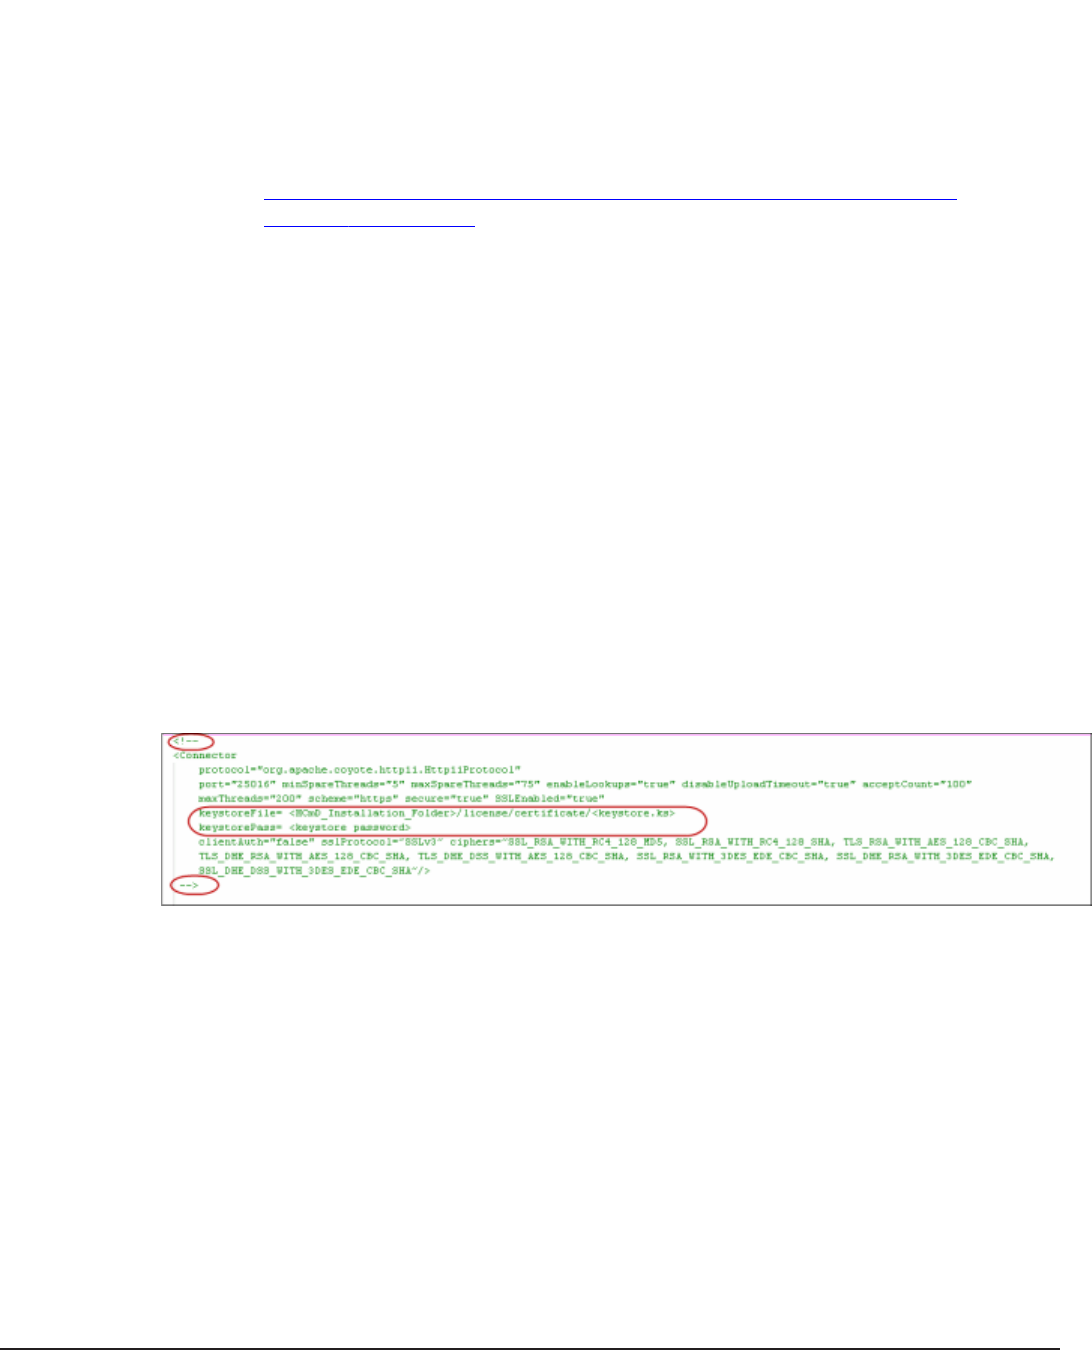
For example, to generate a Command Director server certificate
named HCmDServer.cer using the keystore file HCmDServer.ks, run:
keytool -export -alias HCmDServer -storepass hcmdserver -
file HCmDServer.cer -keystore HCmDServer.ks
In Windows, the generated certificate is placed in the HCmD-
installation-folder\jre\lib\security folder, or in Linux at HCmD-
installation-folder/jre/lib/security.
b. For a digitally-signed certificate, follow the procedure described in
Generating a CSR and importing a signed certificate to Command
Director on page 45.
4. In Windows, delete the comment marks from Connector section of the
HCmD-installation-folder\tomcat\conf\server.xml or in Linux from
HCmD-installation-folder/tomcat/conf/server.xml. Add the
keystoreFile and keystorePass properties and replace the SSL
protocol and cipher values as shown here:
•keystoreFile = "HCmDserver.ks"
•keystorePass ="hcmdserver"
•sslprotocol = "SSLv3" ciphers="SSL_RSA_WITH_RC4_128_MD5,
SSL_RSA_WITH_RC4_128_SHA, TLS_RSA_WITH_AES_128_CBC_SHA,
TLS_DHE_RSA_WITH_AES_128_CBC_SHA,
TLS_DHE_DSS_WITH_AES_128_CBC_SHA,
SSL_RSA_WITH_3DES_EDE_CBC_SHA,
SSL_DHE_RSA_WITH_3DES_EDE_CBC_SHA,
SSL_DHE_DSS_WITH_3DES_EDE_CBC_SHA"
The following screen shot highlights the section where you replace the
SSL protocol and the cipher values.
Figure 3-1 Modifying SSL properties
5. Save and close the file.
6. Set the hcmd.is.secure.connection property to true in the
custom.properties file located as follows and then save and close the
file.
• In Linux at HCmD-installation-folder/conf/custom.properties.
• In Windows at HCmD-installation-folder\conf
\custom.properties.
7. From the Services panel, start the Hitachi Command Director service.
44 Setting up Command Director
Hitachi Command Director Installation and Configuration Guide

8. Access the web interface in secure mode by entering https://HCmD-
server-address:25016 in a web browser.
HCmD server address is the IP address or the host name of the server.
9. Accept the certificate at the security alert that indicates that the
Command Director certificate is untrusted.
10. Verify that the Command Director client is enabled in secure mode by
logging in and verifying that a lock icon appears in the bottom right pane
of your browser window.
Generating a CSR and importing a signed certificate to Command Director
You can get a digitally-signed SSL certificate from a trusted certificate
authority (CA) by sending them a certificate signing request (CSR). After you
obtain the signed certificate, you can import it to the Command Director
server truststore.
Procedure
1. Open the Command Prompt and run the following command:
keytool -certreq -alias HCmD-server-keystore-alias
-keystore keystore-file-name -storepass
keystore-password -file csr-file-name
For example, to generate a request named HCmDServer.csr enter:
keytool -certreq -alias HCmDServer -keystore HCmDServer.ks
-storepass hcmdserver -file HCmDServer.csr
2. Send the CSR file to the certificate authority. The CA sends you a
digitally-signed certificate with a .cer extension.
3. Import the signed certificate to the HCmD truststore using the following
command:
keytool -import -v -trustcacerts -alias HCmD-server-keystore
alias -file signed-certificate-obtained-from-CA -keystore
HCmD- truststore-file -storepass trust-store-password
Enabling secure connection between HCmD and HDvM servers
You can configure SSL-based communication between the Command Director
server and Device Manager server by creating a Command Director truststore
and importing the Device Manager certificate to that truststore. You also need
to import the Common Component certificate to the truststore.
Procedure
1. From the Services panel, stop the Hitachi Command Director service.
2. Create the Command Director truststore:
a. Make sure to set the PATH environment variable to point to the HCmD-
installation-folder\jre\bin folder in Windows or HCmD-
installation-folder/jre/bin in Linux.
Setting up Command Director 45
Hitachi Command Director Installation and Configuration Guide

b. Open a console window and navigate to the HCmD-installation-
folder\jre\lib\security folder in Windows or to HCmD-
installation-folder/jre/lib/security in Linux .
In Windows, the default Command Director server installation folder is
C:\Program Files\Hitachi\CommandDirector.
In Linux, the default Command Director server installation folder
is /opt/Hitachi/CommandDirector.
c. Run the following command:
keytool -genkey -alias HCmD-server-keystore-alias -dname
"CN=common-name, O=organization-name, OU=organization-unit
name, L=locality-name, S=state, C=country" -keyalg RSA -
keypass HCmD-server-private-key-password -storepass HCmD-
server-keystore-password -validity number-of-days-to-
expire -keystore keystore-file-name
For example, to create a truststore called HCmDTrustStore.ks, enter:
keytool -genkey -alias HCmDTrustStore -dname
"CN=HCmDTrustStore, O=ABC Corp, OU=SCC, L=Santa Clara,
S=CA, C=US" -keyalg RSA -keypass hcmdadmin -storepass
hcmdadmin -validity 360 -keystore HCmDTrustStore.ks
3. Enable SSL in the Device Manager server and in Common Component by
following the procedure in the Hitachi Command Suite Administrator
Guide.
4. Export the Device Manager certificate from the keystore file (available in
the HDvM-installation-folder\HiCommandServer\ folder) using the
following command:
keytool -export -alias HDvM-keystore-alias -storepass DvM-
server-keystore-password -file DvM-certificate-file-name -
keystore HDvM-keystore-file-name
For example, to export the Device Manager certificate,
hdvm_certificate.cer enter:
keytool -export -alias hdvmcert -storepass 123456 -file
hdvm_certificate.cer -keystore keystore
5. Copy the generated Device Manager certificate file to the Command
Director server in one of the following folders:
• In Windows, the HCmD-installation-folder\jre\lib\security
• In Linux, the HCmD-installation-folder/jre/lib/security
6. Import the Device Manager certificate into the Command Director
truststore using the following command:
keytool -import -v -trustcacerts -alias HDvM-keystore-alias -
file HDvM-certificate-file-name -keystore HCmD-truststore-
file-name -storepass HCmD-truststore-password
For example, to import a certificate named hdvm_certificate.cer into
HCmDTrustStore.ks, enter:
keytool -import -v -trustcacerts -alias hdvmcert -file
hdvm_certificate.cer -keystore HCmDTrustStore.ks -storepass
hcmdadmin
46 Setting up Command Director
Hitachi Command Director Installation and Configuration Guide
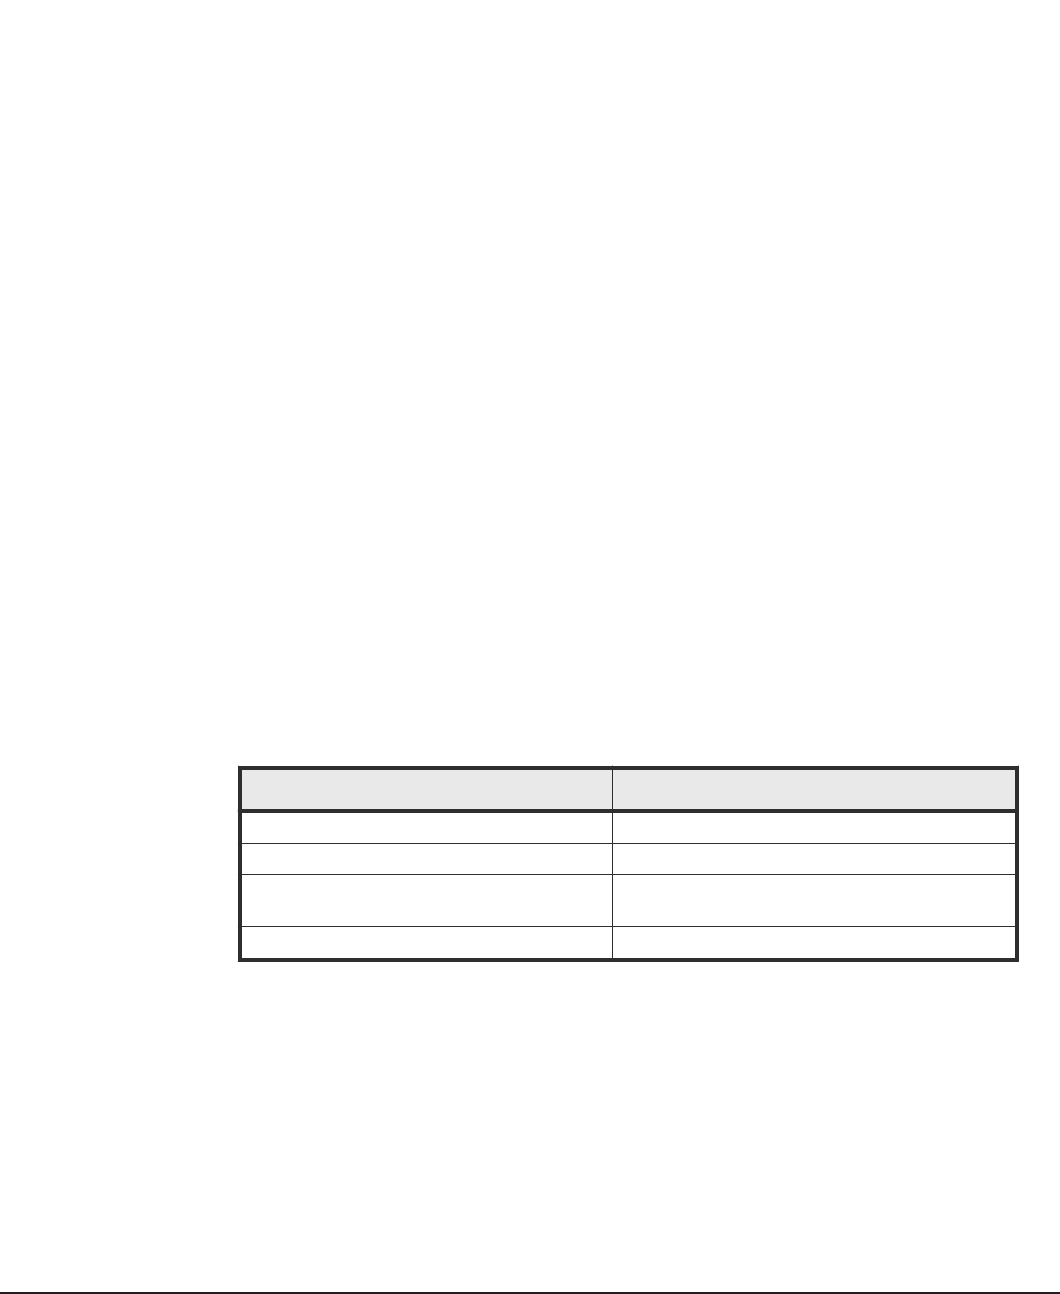
7. Export the Common Component certificate from the keystore file
(available in the HDvM-installation-folder\HiCommand\Base64\uCPSB
\jdk\jre\lib\security\jssecacert folder) using the following
command:
keytool -export -alias Common-Component-keystore-alias -
storepass Common-Component-server-keystore-password -file
Common-Component-certificate-file-name -keystore Common-
Component-keystore-file-name
For example, to export the Common Component certificate,
CommonComponent_certificate.cer enter:
keytool -export -alias common_componentcert -storepass
123456 -file common_component_certificate.cer -keystore
keystore
8. Copy the generated Common Component certificate file to the Command
Director server in one of the following locations:
• In Windows, the HCmD-installation-folder\jre\lib\security
• In Linux, the HCmD-installation-folder/jre/lib/security
9. Import the Common Component certificate into the Command Director
truststore using the following command:
keytool -import -v -trustcacerts -alias Common-Component-
keystore-alias -file Common-Component-certificate-file-name -
keystore HCmD-truststore-file-name -storepass HCmD-
truststore-password
For example, to import a certificate named
CommonComponent_certificate.cer into HCmDTrustStore.ks, enter:
keytool -import -v -trustcacerts -alias common_componentcert
-file common_component_certificate.cer -keystore
HCmDTrustStore.ks -storepass hcmdadmin
10. Modify the HCmD-installation-folder\conf\custom.properties file
(or in Linux, the HCmD-installation-folder/conf/custom.properties
file) for certificate information.
Property Value to set
hcmd.is.secure.connection true
hscp.https.trustallservers false
hscp.https.truststore.file Location of the Command Director truststore
file.
hscp.https.truststore.pass truststore password
11. Save and close the file.
12. From the Services panel, start the Hitachi Command Director service.
Setting up Command Director 47
Hitachi Command Director Installation and Configuration Guide

Enabling secure connection between HCmD server and Host
Collector server
You can configure SSL-based communication between the Command Director
server and the Host Collector server to gather data securely from the remote
host.
Procedure
1. From the Command Director server Services panel, stop the Hitachi
Command Director service, and then the HCmD Host Collector
service.
2. Set up SSL on the Host Collector server:
a. Make sure to set the PATH environment variable to point to the HCmD-
installation-folder\jre\bin folder in Windows or HCmD-
installation-folder/jre/bin in Linux.
b. In the Host Collector is not local, open a console window and navigate
to the Host-Collector-installation-folder\jre\bin folder or in
Linux to the Host-Collector-installation-folder/jre/bin folder.
If the Host Collector is local, navigate to HCmD-installation-folder
\jre\bin in Windows or Host-Collector-installation-
folder/jre/bin in Linux.
In Windows, the default Host Collector installation folder is
C:\Program Files\Hitachi\CommandDirector\Host Collector.
In Linux, the default Host Collector server installation folder is /opt/
Hitachi/CommandDirector/HostCollector.
c. Create the Host Collector keystore using the following command:
keytool -genkey -alias Host-Collector-keystore-alias -
dname "CN=common-name, O=organization-name,
OU=organization unit-name,
L=locality-name, S=state, C=country" -keyalg RSA -keypass
Host-Collector-private-key-password -storepass Host-
Collector-keystore-password -keystore Host-Collector
keystore-file-name
For example, to generate a Host Collector keystore named
hdcServer.ks, enter:
keytool -genkey -alias hdcServer -dname "CN=hdcServer,
O=ABC Corp, OU=SSC, L=Santa Clara, S=CA, C=US" -keyalg RSA
-keypass hdcproject -storepass hdcproject -keystore
hdcServer.ks
d. Generate the Host Collector certificate using the following command:
keytool -export -alias Host-Collector-keystore-alias -
storepass Host-Collector-keystore-password -file Host-
Collector-certificate-file-name -keystore Host-Collector-
keystore-file-name
48 Setting up Command Director
Hitachi Command Director Installation and Configuration Guide

For example, to generate a Host Collector certificate named
hdcServer.cer, enter:
keytool -export -alias hdcServer -storepass hdcproject -
file hdcServer.cer -keystore hdcServer.ks
e. In Windows, copy the Host Collector keystore and certificate files you
created to the Host-Collector-installation-folder\license
\certificate folder, or in Linux to the Host-Collector-
installation-folder/license/certificate folder.
f. Open the server.xml file located in Windows at Host-Collector-
installation-folder\tomcat\conf\server.xml or in Linux at Host-
Collector-installation-folder/tomcat/conf/server.xml and
delete the comment marks in the Connector protocol section.
g. Add the keystoreFile and keystorePass properties and replace the SSL
protocol and cipher values as shown here:
keystoreFile = "hdcServer.ks" keystorePass = "hdcproject"
ssl protocol = "SSLv3" ciphers= "SSL_RSA_WITH_RC4_128_MD5,
SSL_RSA_WITH_RC4_128_SHA, TLS_RSA_WITH_AES_128_CBC_SHA,
TLS_DHE_RSA_WITH_AES_128_CBC_SHA,
TLS_DHE_DSS_WITH_AES_128_CBC_SHA,
SSL_RSA_WITH_3DES_EDE_CBC_SHA,
SSL_DHE_RSA_WITH_3DES_EDE_CBC_SHA,
SSL_DHE_DSS_WITH_3DES_EDE_CBC_SHA"
h. Save and close the file.
See Enabling secure connection between the Command Director
server and web clients on page 42, for an example on how to modify
the SSL properties in the server.xml file.
i. From the Services panel, start the HCmD Host Collector service.
3. Set up SSL on the Command Director server:
• In Windows, copy the Host Collector certificate created in Step 2 to
HCmD-installation-folder\jre\bin.
• In Linux, copy the Host Collector certificate created in Step 2 to HCmD-
installation-folder/jre/bin.
a. Create the Command Director keystore using the following command:
keytool -genkey -alias HCmD-server-keystore-alias -dname
"CN=common-name, O=organization-name, OU=organization-unit
name, L=locality-name, S=state, C=country" -keyalg RSA -
keypass HCmD-server-private-key-password -storepass CmD-
server-keystore-password -keystore HCmD-server-keystore-
file
For example, to create a Command Director keystore called
hdcClient.ks, enter:
keytool -genkey -alias hdcClient -dname "CN=hdcClient,
O=ABC Corp, OU=SSC, L=Santa Clara, S=CA, C=US" -keyalg RSA
-keypass hdcproject -storepass hdcproject -keystore
hdcClient.ks
Setting up Command Director 49
Hitachi Command Director Installation and Configuration Guide

b. Import the Host Collector certificate to the Command Director
keystore using the following command:
keytool -import -v -trustcacerts -alias Host-Collector-
certificate-alias -file Host-Collector-certificate-file
name -keystore HCmD-server-keystore-file-name -keypass
HCmD-server-private-key-password -storepass HCmD-server-
keystore-password
For example, to import the Host Collector certificate hdcServer.cer,
to the Command Director keystore hdcClient.ks, enter:
keytool -import -v -trustcacerts -alias hdcServer -file
hdcServer.cer -keystore hdcClient.ks -keypass hdcproject -
storepass hdcproject
c. Modify the custom.properties file in Windows at HCmD-
installation-folder\conf\custom.properties or in Linux at HCmD-
installation-folder/conf/custom.properties for certificate
information as described in Step 7 in Enabling secure connection
between Command Director and HDvM servers on page 45.
d. From the Services panel of the Command Director server, restart the
Hitachi Command Director service.
Enabling secure connection between HCmD server and Agent for
RAID Extension
You can configure SSL-based communication between the Command Director
server and the server where the Agent for RAID Extension is installed to
securely gather performance data.
Procedure
1. From the Command Director server Services panel, stop the Hitachi
Command Director service and from the Agent for RAID server
Services panel, stop the Agent for RAID Extension service.
2. Set up SSL on the Agent for RAID Extension server:
a. Open a console window and navigate in Windows to the Agent-for-
RAID-Extension-installation-folder\jre\bin folder or in Linux to
the Agent-for-RAID-Extension-installation-folder/jre/bin
folder.
The default Agent for RAID Extension installation folder on Windows is
C:\Program Files(x86)\HiCommand\TuningManager\jp1pc\agtd
\AgentforRAIDExtension
The default installation directory on Linux is /opt/jp1pc/agtd/
AgentforRAIDExtension.
b. Make sure to set the PATH environment variable in Windows to the
Agent-for-RAID-Extension-installation-folder\jre\bin folder or
in Linux to the Agent-for-RAID-Extension-installation-
folder/jre/bin folder.
50 Setting up Command Director
Hitachi Command Director Installation and Configuration Guide

c. Create the Agent for RAID Extension keystore using the following
command:
keytool -genkey -alias Agent-for-RAID-Extension-keystore-
alias -dname "CN=common-name, O=organization-name,
OU=organization-unit-name, L=locality-name, S=state,
C=country" -keyalg RSA -keypass gent-for-RAID-Extension
private-key-password -storepass Agent-for-RAID-Extension
keystore-password -keystore Agent-for-RAID-Extension-
keystore-file-name
For example, to generate an Agent for RAID Extension keystore
named agentServer.ks, enter:
keytool -genkey -alias agentServer -dname "CN=agentServer,
O=ABC Corp, OU=SSC, L=Santa Clara, S=CA, C=US" -keyalg RSA
-keypass agentproject -storepass agentproject -keystore
agentServer.ks
d. Generate the Agent for RAID Extension certificate using the following
command:
keytool -export -alias Agent-for-RAID-Extension-keystore
alias -storepass Agent-for-RAID-Extension-keystore-
password -file Agent-for-RAID-Extension-certificate-file-
name -keystore Agent-for-RAID-Extension-keystore-file-name
For example, to generate an Agent for RAID Extension certificate
named agentServer.cer, enter:
keytool -export -alias agentServer -storepass agentproject
-file agentServer.cer -keystore agentServer.ks
e. Copy the Agent for RAID Extension keystore and certificate files you
created in Windows to the Agent-for-RAID-Extension
installation-folder\license\certificate or in Linux to Agent-
for-RAID-Extension-installation-folder/license/certificate.
f. Open the Agent-for-RAID-Extension-installation-folder\tomcat
\conf\server.xml file (or the Agent-for-RAID-Extension-
installation-folder/tomcat/conf/server.xml file) and delete the
comment marks in the Connector section.
g. Add the keystoreFile and keystorePass properties and replace the SSL
protocol and the cipher values as shown here:
keystoreFile =
"Agent-for-RAID-Extension-installation-folder\license
\certificate\agentServer.ks"
keystorePass= "agentproject"
SSLprotocol = "SSLv3" ciphers="SSL_RSA_WITH_RC4_128_MD5,
SSL_RSA_WITH_RC4_128_SHA,TLS_RSA_WITH_AES_128_CBC_SHA,
TLS_DHE_RSA_WITH_AES_128_CBC_SHA,TLS_DHE_DSS_WITH_AES_128_C
BC_SHA,SSL_RSA_WITH_3DES_EDE_CBC_SHA,
SSL_DHE_RSA_WITH_3DES_EDE_CBC_SHA,
SSL_DHE_DSS_WITH_3DES_EDE_CBC_SHA"
h. Save and close the file.
Setting up Command Director 51
Hitachi Command Director Installation and Configuration Guide
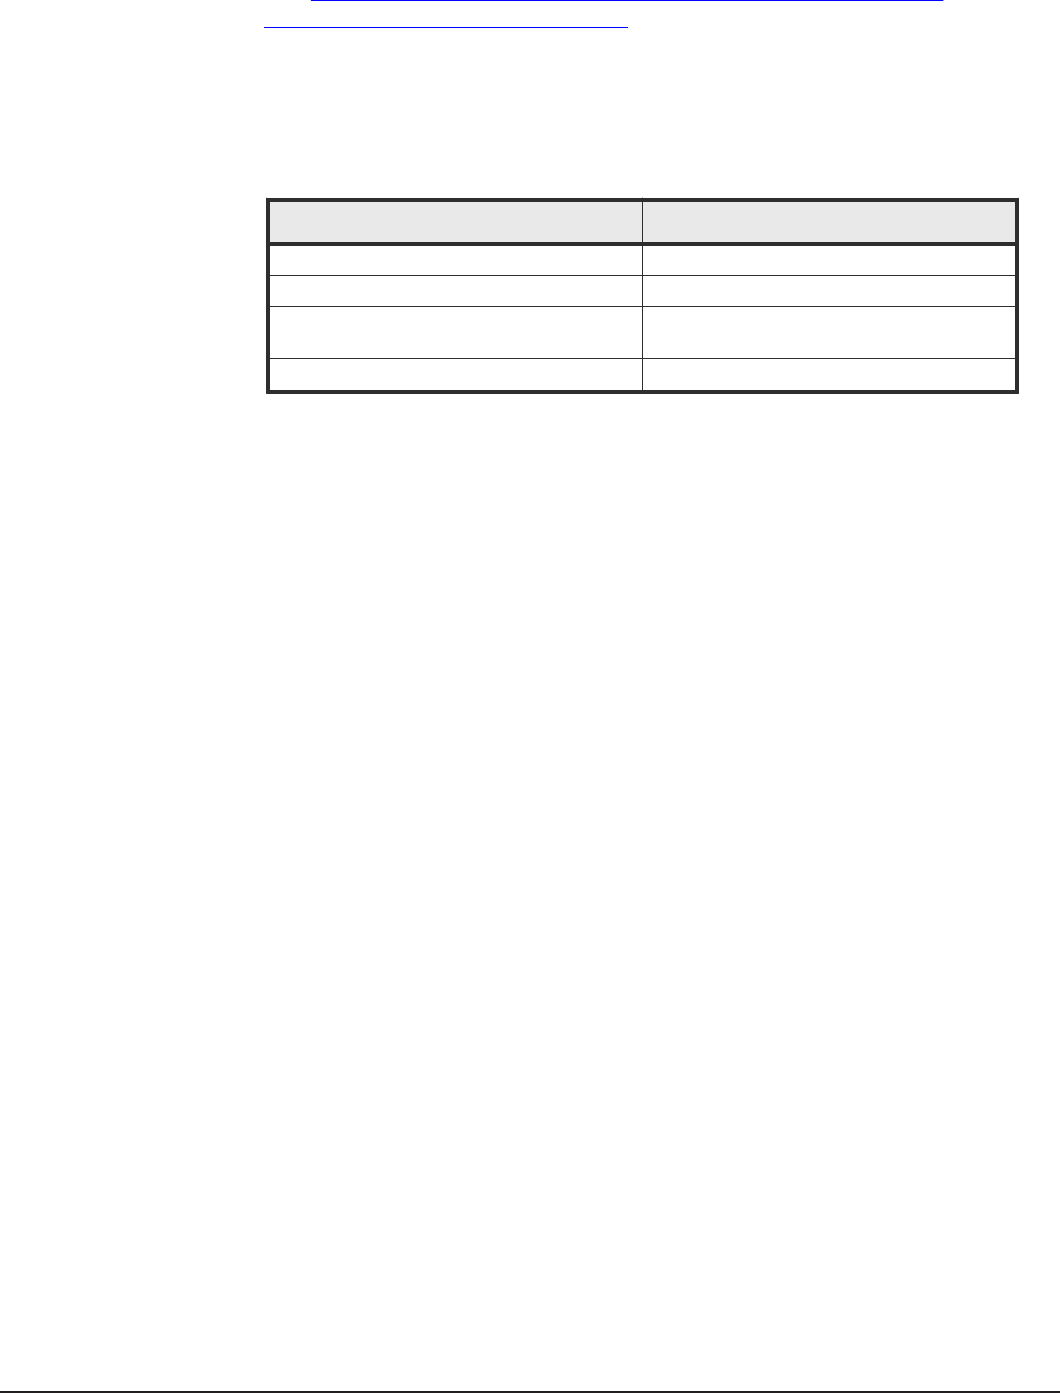
See Enabling secure connection between the Command Director
server and web clients on page 42, for an example on how to modify
the SSL properties in the server.xml file.
i. Modify the HCmD-installation-folder\conf\system.properties file
in Windows or the HCmD-installation-folder/conf/
system.properties in Linux for certificate information as shown in
the following table:
Property Value to set
rae.is.secure.connection true
rae.https.trustallservers false
rae.https.truststore.file Location of the Agent for RAID Extension
truststore file
rae.https.truststore.pass truststore password
j. Save and close the file.
k. From the Services panel, start the Agent for RAID Extension
service.
3. Set up SSL on the Command Director server:
a. Copy the Agent for RAID Extension certificate created in Step 2 to the
Windows folder:HCmD-installation-folder\jre\bin or to the Linux
folder: HCmD-installation-folder/jre/bin.
b. Create the Command Director keystore using the following command:
keytool -genkey -alias HCmD-server-keystore-alias -dname
"CN=common-name, O=organization-name, OU=organization-unit-
name, L=locality-name, S=state, C=country" -keyalg RSA -
keypass HCmD-server-private-key-password -storepass HCmD-
server-keystore-password -keystore HCmD-server-keystore-
file
For example, to create a Command Director keystore called
agentClient.ks, enter:
keytool -genkey -alias agentClient -dname "CN=agentClient,
O=ABC Corp, OU=SSC, L=Santa Clara, S=CA, C=US" -keyalg RSA
-keypass agentproject -storepass agentproject -keystore
agentClient.ks
c. Import the Agent for RAID Extension certificate to the Command
Director keystore using the following command:
keytool -import -v -trustcacerts -alias Agent-for-RAID
Extension-certificate-alias -file Agent-for-RAID-Extension
certificate-file-name -keystore HCmD-server-keystore-file-
name -keypass HCmD-server-private-key-password -storepass
HCmD-server-keystore-password
52 Setting up Command Director
Hitachi Command Director Installation and Configuration Guide
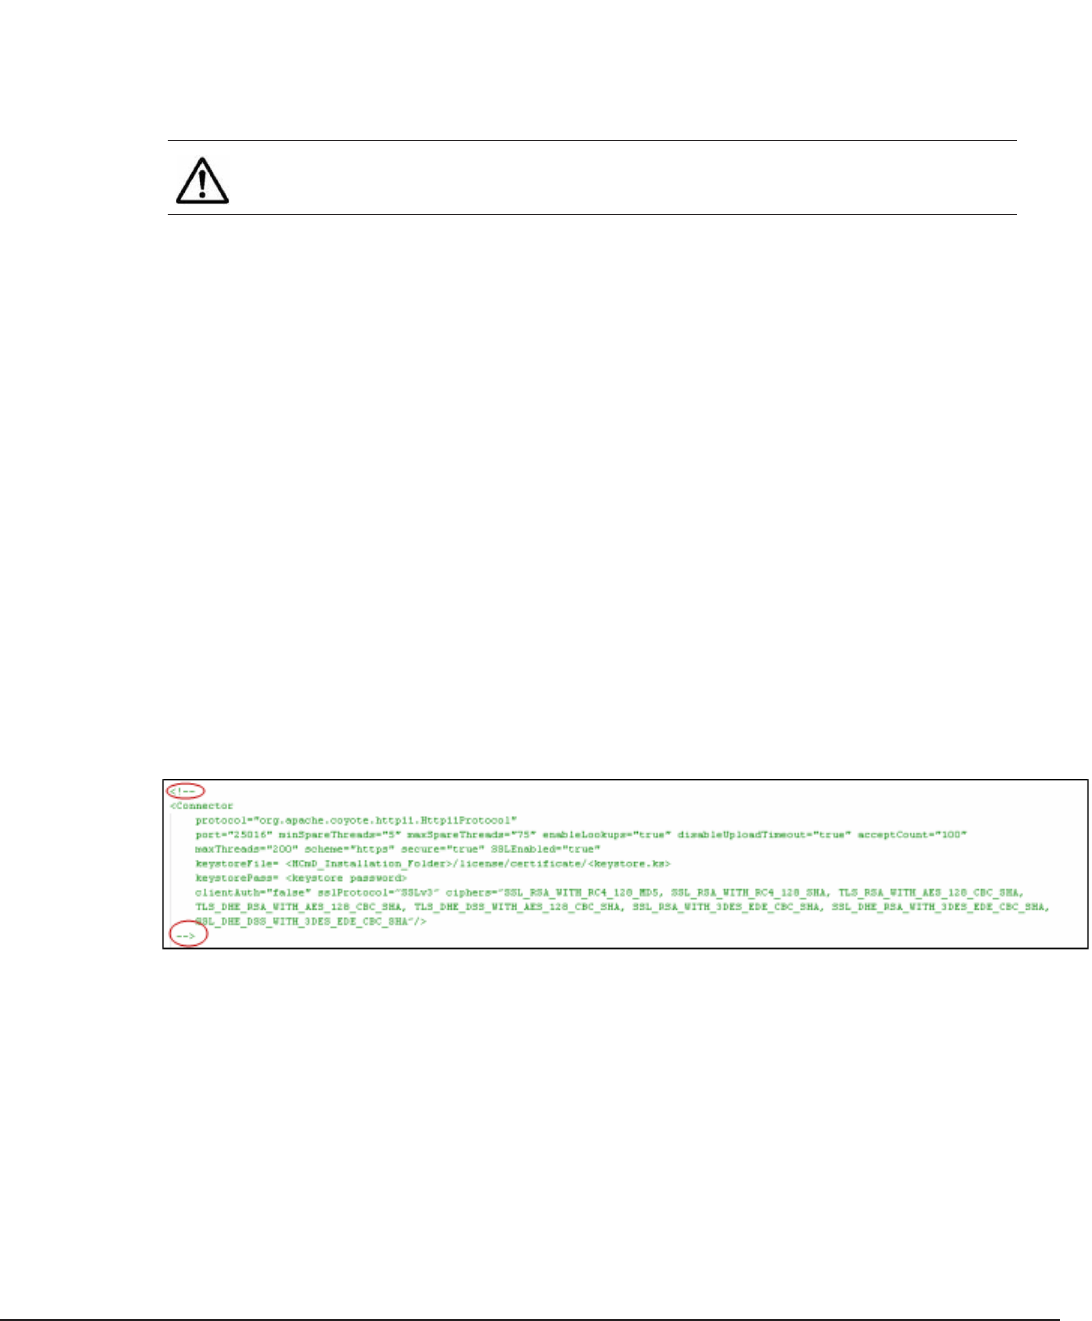
For example, to import the Agent for RAID Extension certificate
agentServer.cer, to the Command Director keystore
agentClient.ks, enter:
keytool -import -v -trustcacerts -alias agentServer -file
agentServer.cer -keystore agentClient.ks -keypass
agentproject -storepass agentproject
d. From the Services panel of the Command Director server, restart the
Hitachi Command Director service.
Note: The Agent for RAID Extension component is installed on the same
server as the Agent for RAID.
Disabling SSL for Command Director
If SSL is enabled for any communication from the Command Director server,
you can disable it anytime.
Procedure
1. From the Services panel, stop the Hitachi Command Director service.
2. Set the hcmd.is.secure.connection property in the custom.properties
file to false in one of the following locations, and then save the file.
• In Windows at HCmD-installation-folder\conf
\custom.properties.
• In Linux at HCmD-installation-folder/conf/custom.properties.
3. Comment out the Connector section of the server.xml file in one of the
following locations:
• In Windows at HCmD-installation-folder\tomcat\conf
\server.xml.
• In Linux at HCmD-installation-folder/tomcat/conf/server.xml.
4. Save and close the file.
5. From the Services panel, start the Hitachi Command Director service.
Viewing logs
Every basic user action is logged so that you can view changes made in the
Command Director. For example, you can view when a user logged in, when
Setting up Command Director 53
Hitachi Command Director Installation and Configuration Guide

the data collection started, and who modified business views, folders,
applications, and reports.
Note the following:
• Logs capture only Command Director actions. You cannot view changes
made to Device Manager instances.
• A new log file is started once an existing log file exceeds 10 MB in size,
and HCmD only supports up to a maximum of 10 log files at any given
time.
To view Command Director logs, open the hcmd_audit.log file available in
the following folder:
HCmD-installation-folder\logs\ or HCmD-installation-folder/logs/
Setting up Command Director CLI
Command Director provides command line interface commands you can use
to generate reports (tabular only) and manage applications in bulk.
The Command Director CLI package comes in a .zip file located as listed
below. Open the .zip file and extract all files to a local directory.
• In Windows: HCmD-installation-folder\cli
• In Linux: HCmD-installation-folder/cli
You can also extract the CLI package to a remote client (your computer) and
connect to the HCmD server (using the HTTP protocol) for generating reports
and extracting report data.
The Command Director CLI is also supported on Linux. You can refer to the
Hitachi Command Suite System Requirements for version information.
For more information on setting up Command Director CLI and using the
commands, see the Hitachi Command Director CLI Reference Guide.
Starting and stopping services in Linux
If you have Command Director installed on Linux, you can start and stop
services by using the hitachiCommandDirector script.
Usage:
sh
hitachiCommandDirector {start | stop} {hcmd | database |
host_collector | hnas_collector | data_collector | all}
Example; to stop the database:
sh hitachiCommandDirector stop database
54 Setting up Command Director
Hitachi Command Director Installation and Configuration Guide

4
Configuring data collectors
Configure storage system collectors to retrieve configuration data from
Hitachi Device Manager and performance data from Agent for RAID. Host
collectors must be configured in order to discover hosts and their connectivity
to the storage system.
□Overview
□Configuring storage system collectors
□Configuring host collectors
Configuring data collectors 55
Hitachi Command Director Installation and Configuration Guide

Overview
After installing Command Director, you must configure these data collectors:
• Storage System Collectors on these components:
○Device Manager (HDvM) instances for gathering storage system
configuration data.
○Agent for RAID Extension instances for gathering storage system
performance data.
○(Optional) Tiered Storage Manager (HTSM) for storage system tier
information. Configure this data collector to view tier information in
your reports.
○HCmD Data Collector to communicate with the SMI-S Provider to collect
configuration data from third-party storage systems, if available in your
environment.
• Host Collectors
○The Host Collectors enable agentless hosts discovery on your network
and gather their file system and storage utilization information.
The Command Director server installation comes with a default Host
Collector that is configured and available for use on the current subnet.
This module provides instructions for enabling and configuring host
discovery and data collection for hosts on the local subnet using the
default Host Collector. For host discovery and data collection on other
subnets, see the topic regarding “Administering HCmD” in the Hitachi
Command Director User Guide.
○The HNAS Data Collector is installed by default when you install the
HCmD server. This data collector allows Command Director to discover
Hitachi NAS Platform hosts on your network and obtain their file system
information.
Data configuration workflow
Follow this workflow to configure the data collectors in Command Director to
obtain storage system information from Command Director components and
host information from hosts discovered in your environment:
56 Configuring data collectors
Hitachi Command Director Installation and Configuration Guide

Accessing data collector configuration settings
You can access data collection configuration settings from the Administration
tab in the Command Director user interface.
If you are accessing the Command Director user interface for the first time,
make sure you have performed these initial setup tasks:
• Verify that you can access the Command Director web interface from a
browser. For the verification procedure, see Verifying the installation on
page 32.
• Register the license keys. For the license registration procedure, see
Registering the license on page 32.
Configuring data collectors 57
Hitachi Command Director Installation and Configuration Guide

• Register your email address to obtain alerts and reports. For the email
registration procedure, see Specifying an email address when you first log
in on page 34.
Configuring storage system collectors
After installing Command Director, you must configure the various storage
system collectors to start data collection from the following sources:
• Hitachi Device Manager (HDvM) (for collecting configuration data)
• Agent for RAID Extension (for collecting storage system performance data)
• Tiered Storage Manager (for collecting tier information data)
• HCmD Data Collector (for collecting configuration data from third-party
storage systems registered with Storage Management Initiative
Specification (SMI-S) provider)
Command Director aggregates and manipulates the data collected from the
storage system collectors and reports on the storage system performance
and efficiency based on your requirements and business views.
Prerequisites for configuring storage system collectors
Configuring the storage system collectors requires that your environment
meets the necessary prerequisites. Complete the following before you
configure the collectors:
• Verify that the relevant services are running on their corresponding servers
before adding or configuring the storage system collectors. The following
table lists the Command Director data collection components, their service
names, and the servers the components run on.
HCmD data collection
component Service name Server
Hitachi Device Manager HiCommand® Server Hitachi Device Manager server
Agent for RAID Extension Agent for RAID Extension Tuning Manager Agent for RAID
server
Tiered Storage Manager Tiered Storage Manager Hitachi Device Manager server
HCmD Data Collector HCmD Data Collector HCmD server
• Verify that all relevant Device Manager instances are running. Keep the IP
address, port number, user name, and password for every Device Manager
instance readily available. You must have administrator privileges for every
Device Manager resource.
• Make sure that an Agent for RAID Extension is installed on every host on
which Agent for RAID is installed. Have the IP address and port number of
every Agent for RAID installed in your environment readily available.
• Verify that the Agent for RAID instances are configured to run in Storage
Logical Partition (SLPR) unrestricted mode. Failing to do so will result in
58 Configuring data collectors
Hitachi Command Director Installation and Configuration Guide
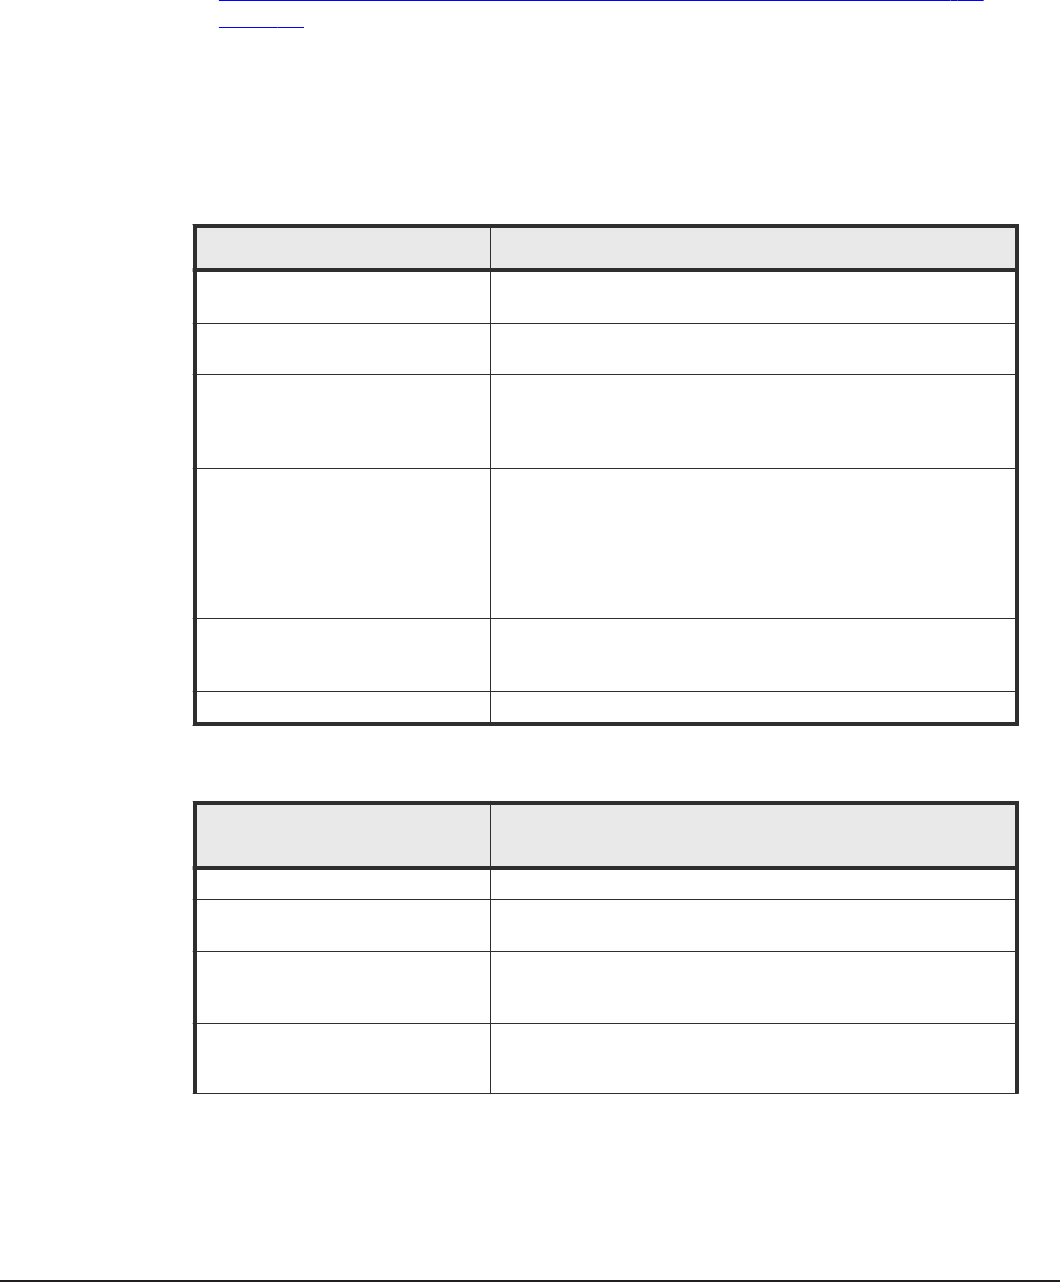
partial data collection for that instance. For details about how to set up the
Agent for RAID for this functionality, see the Hitachi Command Suite
Tuning Manager Software Installation Guide.
• Enable the Agent for RAID Extension service using the steps listed in
Enabling performance data collection using Agent for RAID Extension on
page 40.
Storage system collector settings
The tables in this topic list the settings and details for configuring various
storage system collectors in Command Director.
The following table lists the Device Manager collector settings.
HDvM collector settings Description
IP address Enter the IP address of the host using the Device Manager
Data Collector.
Name Enter the name associated with the Device Manager Data
Collector.
Port If during the installation you specified a port other than the
default, enter it here. The default port number is 2001 (2443,
if SSL is enabled). Note that Hitachi does not recommend that
you change the default port number.
SSL Select the check box to enable SSL communication between
the Command Director server and Device Manager server.
Note: Before you select the SSL check box, make sure SSL is
enabled on the Device Manager server. For more information
about enabling SSL on the Device Manager server, see the
Hitachi Command Suite Administrator Guide.
User ID Enter the user ID for Device Manager. The user ID must have
access to all the storage systems registered in the Device
Manager server.
Password Enter the password for Device Manager.
The following table lists the Agent for RAID Extension settings.
Agent for RAID Extension
settings Description
Name Enter the name associated with Agent for RAID Extension.
IP address Enter the IP address of the Agent for RAID host where Agent
for RAID Extension is installed.
Port If during the installation you specified a port other than the
default (25075), enter it here. Note that Hitachi does not
recommend that you change the default port number.
SSL Select the check box to enable SSL communication between
the Command Director server and Agent for RAID Extension
(Agent for RAID host).
Configuring data collectors 59
Hitachi Command Director Installation and Configuration Guide
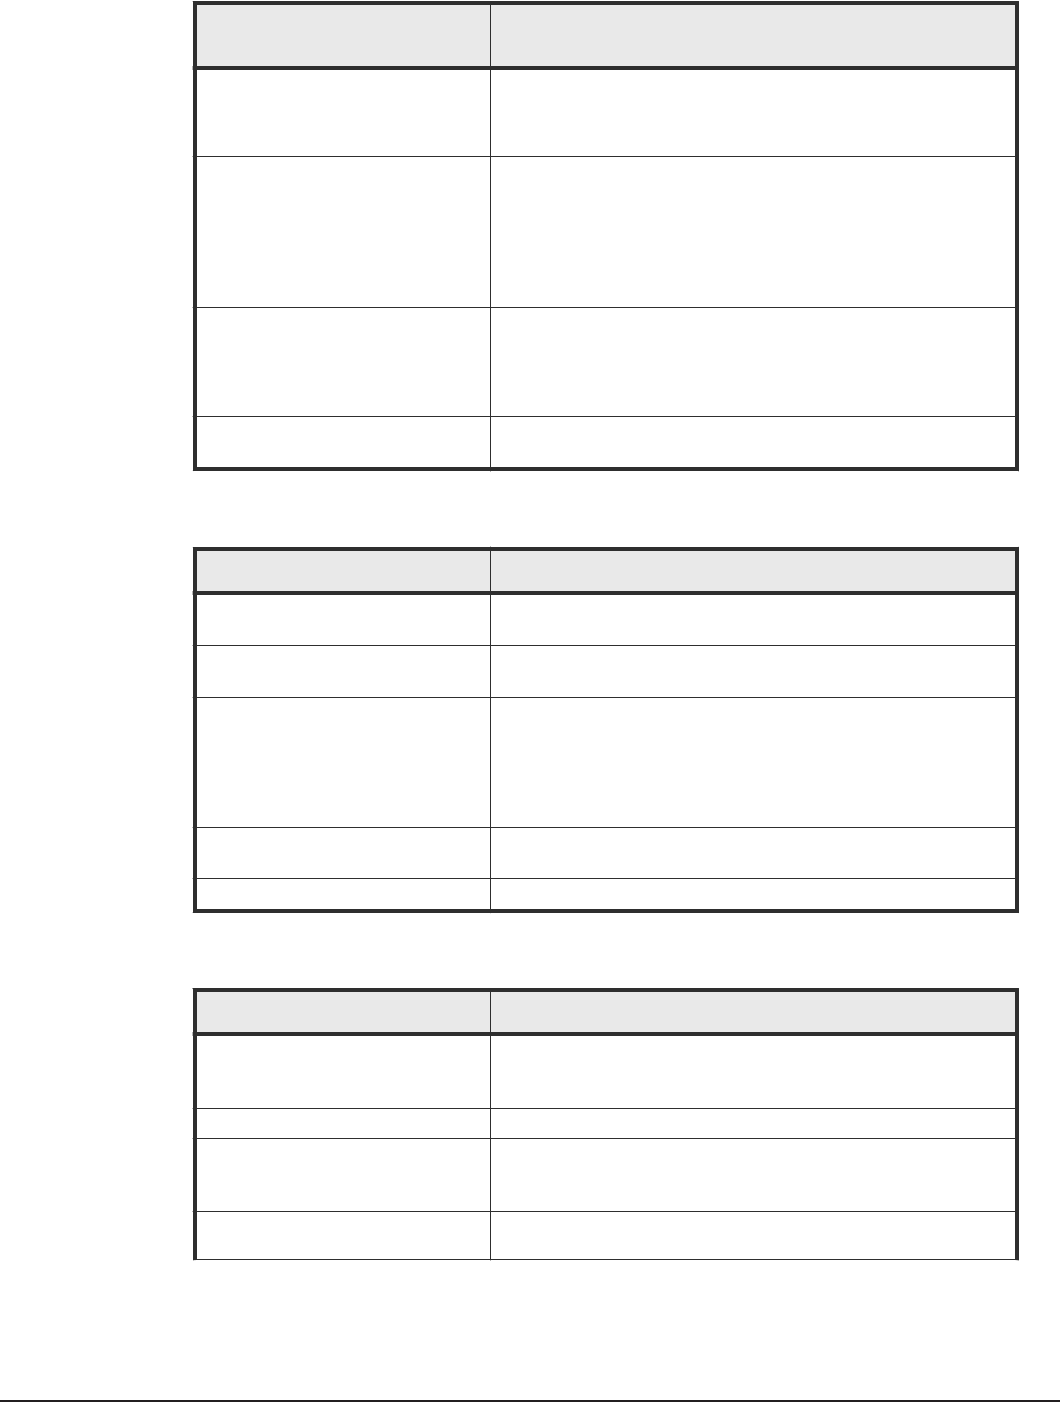
Agent for RAID Extension
settings Description
Note: Before you select the SSL check box, make sure SSL is
enabled on the Device Manager server. For more information
about enabling SSL on the Device Manager server, see the
Hitachi Command Suite Administrator Guide.
HTnM IP Address Enter the IP address of the Tuning Manager server that
connects to the Agent for RAID host where Agent for RAID
Extension is installed.
This information is required to support the link and launch
capability to display the Tuning Manager Performance Reporter
from Command Director.
HTnM Port Enter the port number of the Tuning Manager server.
This information is required to support the link and launch
capability to display the Tuning Manager Performance Reporter
from Command Director.
HCmD server IP address Specify the IP address of the HCmD Server used by Agent for
RAID Extension
The following table lists the HTSM collector settings.
HTSM collector settings Description
IP Address Select the IP address of the host using the Device Manager
and Tiered Storage Manager Data Collector.
Name Enter the name associated with the Tiered Storage Manager
Data Collector.
Port Enter the port number published for the remote HTSM CLI
client. The default port number is 20352.
If during the installation you specified a port other than the
default, enter it here. Note that Hitachi does not recommend
that you change the default port number.
User ID Enter the user name registered in HTSM. The User ID must
have reference and modify permission.
Password Enter the password for the user registered in HTSM.
The following table lists the SMI-S provider collector settings.
SMI-S provider collector settings Description
IP Address Enter the IP Address of the SMI-S provider connected to the
third party storage system. For example, the IP address of the
supported EMC SMI-S provider v4.2 or v4.3.
Name Enter the name associated with the SMI-S Provider.
Port If during the installation you specified a port other than the
default, enter it here. Note that Hitachi does not recommend
that you change the default port number.
SSL By default, the SSL communication between the Command
Director server and SMI-S Provider is enabled.
60 Configuring data collectors
Hitachi Command Director Installation and Configuration Guide
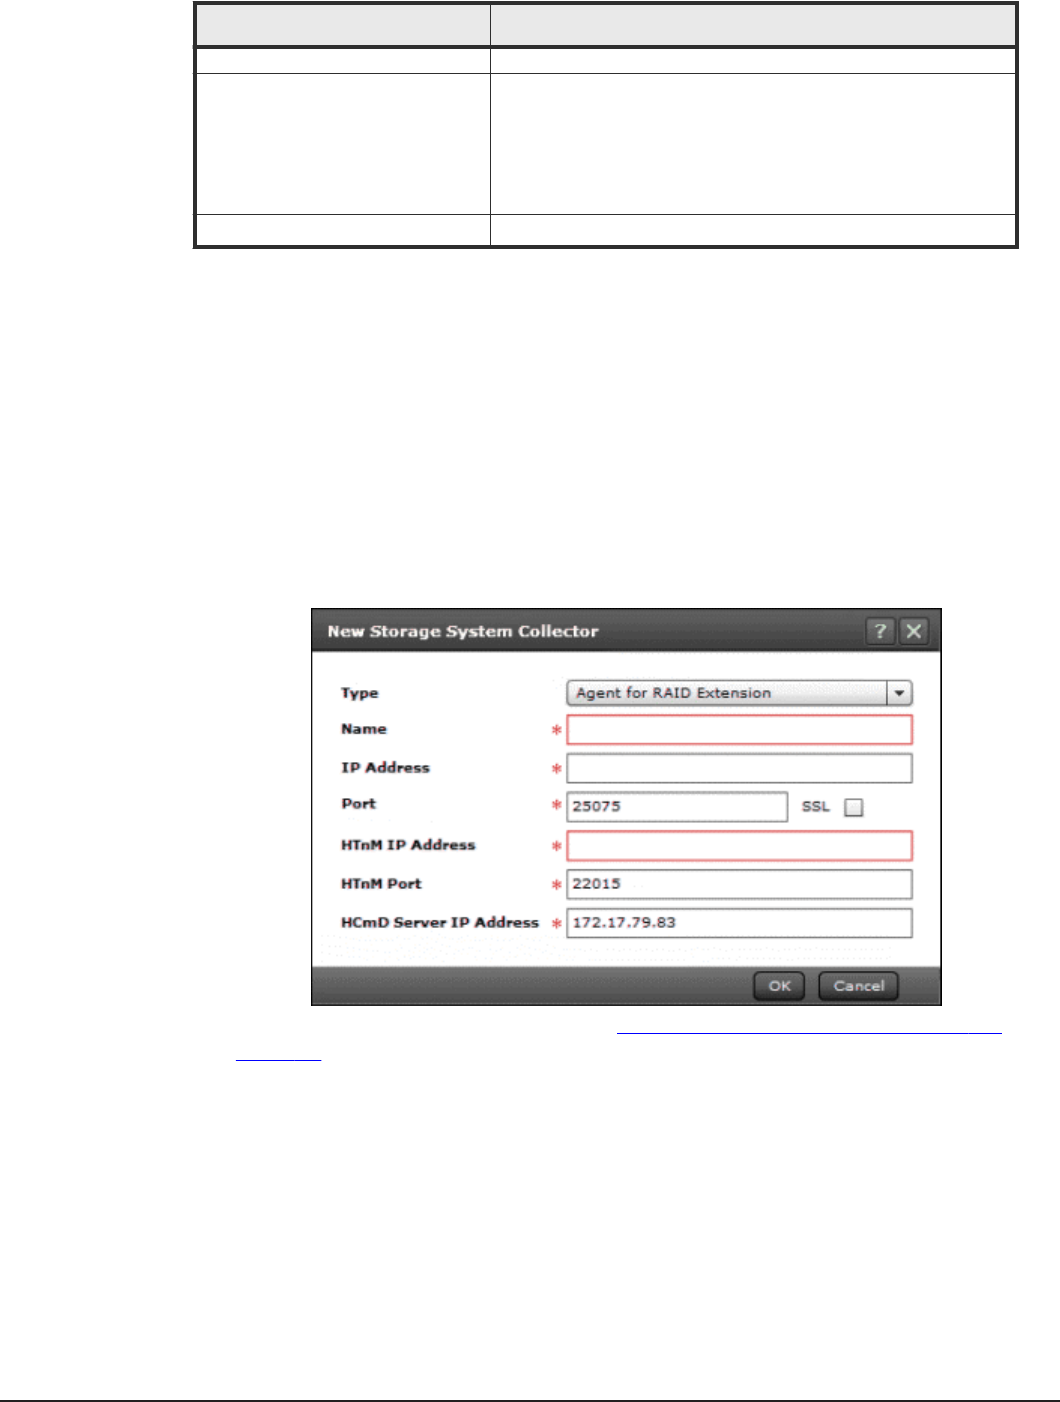
SMI-S provider collector settings Description
Click the check box to disable SSL communication.
User ID Enter the user ID registered in the SMI-S Provider. The User ID
could be for any of the following roles:
• Administrator
• Manager
• Monitor
• Security administrator
Password Enter the password for the user registered in SMI-S Provider.
Adding a storage system collector
Data collection from various storage system collectors begins only after you
add or configure the collectors in Command Director. Configuring a storage
system collector requires that you add the necessary information for each
collector in the corresponding New Storage System Collector window.
Procedure
1. Select the Administration tab.
2. Under Data Collection, select Storage System Collectors.
3. Click New.
4. Use the information in the tables in Storage system collector settings on
page 59 to configure the storage system collectors.
5. When you are finished specifying the data collector settings, click OK.
Result
After you configure the Device Manager and HTSM Data Collectors, Agent for
RAID Extension, and the SMI-S Provider (if applicable in your environment),
Command Director starts to retrieve your storage information. This can take
some time.
Configuring data collectors 61
Hitachi Command Director Installation and Configuration Guide
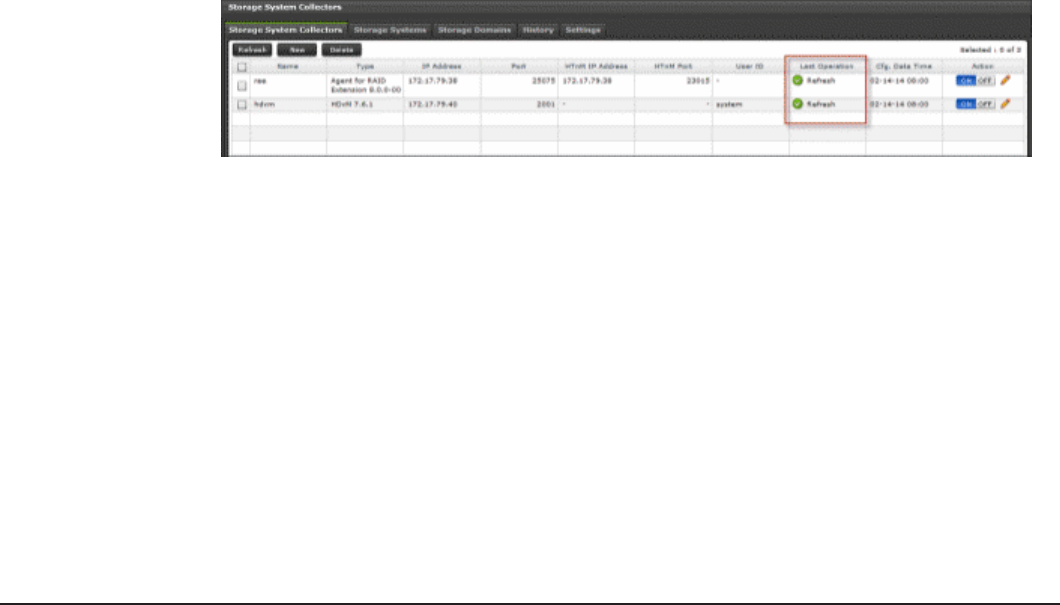
Manually refreshing storage system data
By default, performance data is collected every 5 minutes, and the
configuration data is collected every 4 hours. You can manually refresh the
storage system data before the next scheduled collection to verify that the
storage system collectors are configured properly.
Procedure
1. Select the Administration tab.
2. Under Data Collection, select Storage System Collectors.
3. Select the Storage System Collectors tab, Storage Systems tab, or
the Storage Domains tab.
4. Click Refresh.
Verifying storage system data collection
After configuring storage system data collection, you can monitor whether
the data was retrieved successfully by displaying storage system information,
which includes:
• Storage information by storage system
• Storage domain information that includes tier information (for Hitachi
storage systems only)
Procedure
1. Select the Administration tab.
2. Under Data Collection, select Storage System Collectors tab.
The Storage System Collectors window is displayed.
3. In the Storage System Collectors window, review the list of your
configured Storage System Collectors and verify the Last Operation
status and Cfg. Data Time (Configuration Data Time) against each
configured Storage System collector to check which operation (data scan
or refresh) was performed, and whether it was successful.
62 Configuring data collectors
Hitachi Command Director Installation and Configuration Guide
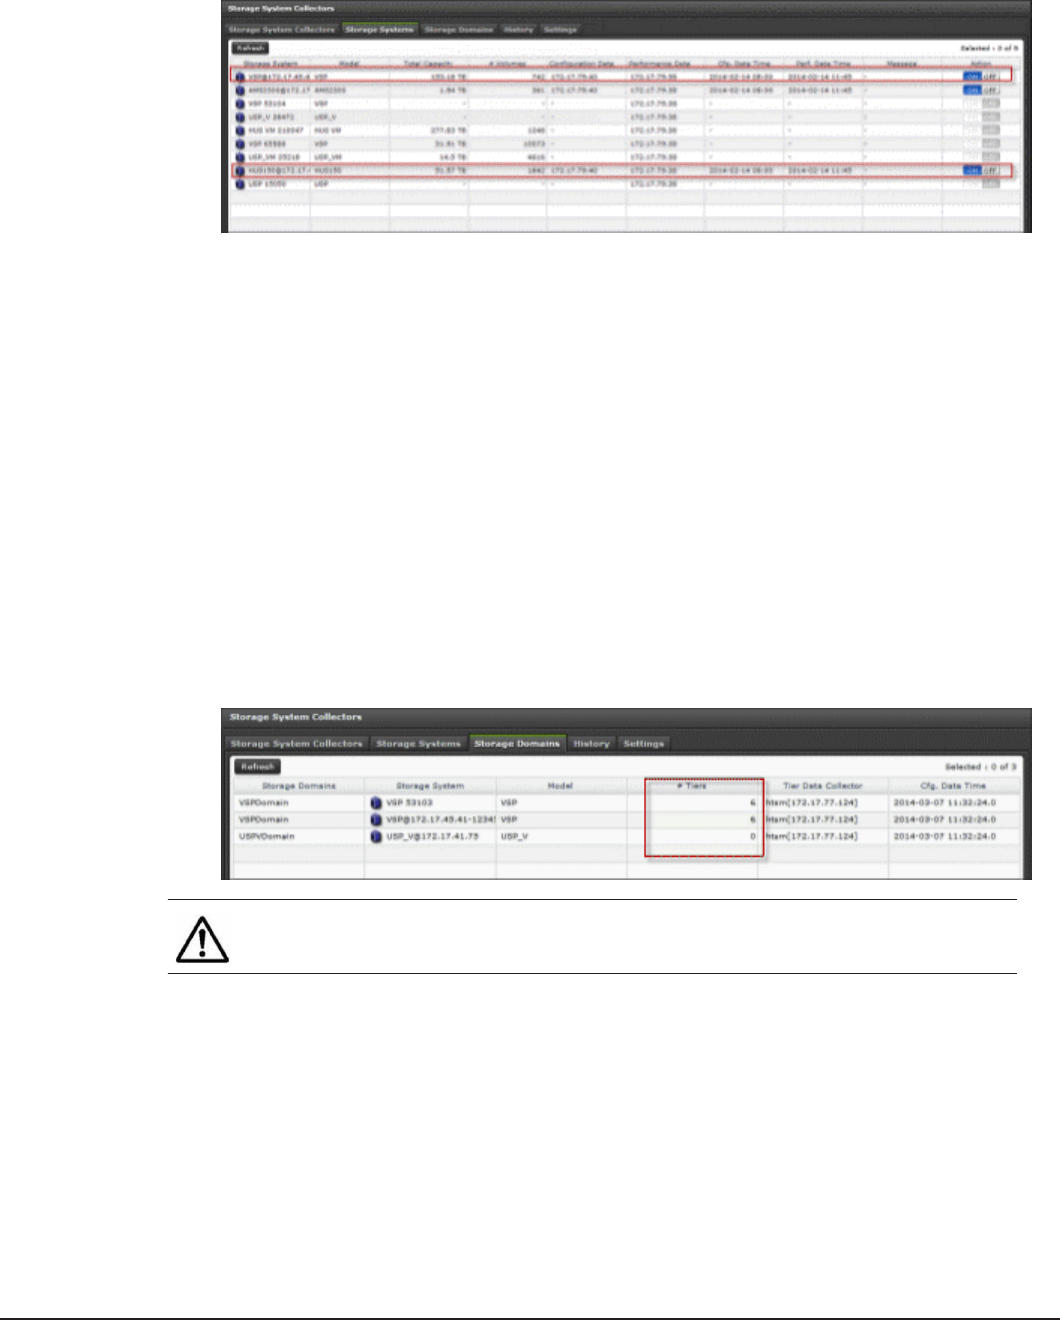
4. View the storage information by storage system. In the Storage System
Collectors window, select the Storage Systems tab.
The Storage Systems window is displayed.
In the Storage Systems window, check the following fields for each
storage system:
• Verify that, for Hitachi storage systems, the appropriate Device
Manager and Agent for RAID Extension are registered in the
Configuration Data Collector and Performance Data Collector
fields, respectively. For third-party storage systems, verify that the
appropriate HCmD Data collector has been registered in the
Configuration Data Collector field. In the preceding figure, the
circled entries identify the storage systems that have their appropriate
data collectors registered.
• After you perform a data refresh (when you click Refresh on the
selected storage system), make sure the Total Capacity and #
Volumes fields are populated with the appropriate information.
5. If you added HTSM Data Collector, click the Storage Domains tab in the
Storage System Collectors window, then view the storage domain
information to verify that the tier information collection is successful.
Note: Tier information is displayed only for Hitachi storage systems.
6. In the Storage Domains window, check that the tier information is
populated in the #Tiers field. This field displays the number of tiers
defined in a storage domain.
Configuring host collectors
Configure host collectors to discover hosts on the network.
Configuring data collectors 63
Hitachi Command Director Installation and Configuration Guide

You must configure host collectors to discover hosts on your network and
gather their file system and storage utilization information. Command
Director uses this information to provide end-to-end mapping of the path
from the host to the storage system volumes.
Command Director provides a default Host Collector that is configured and
available to discover hosts and data collection on the local subnet. Command
Director also supports host discovery on other subnets, but you must install a
host collector separately on each subnet on which you want to discover
hosts.
In addition to the host collector, a HNAS Data Collector is also installed by
default when you install the HCmD server. This data collector allows
Command Director to discover Hitachi NAS Platform hosts on your network
and obtain their file system information. You do not need to configure the
HNAS Data Collector. HNAS hosts are discovered automatically when the
Local Host Collector is launched.
The procedure to perform host discovery and data collection on the local
subnet using Host Collector is described subsequently. For host discovery and
data collection on other subnets, see the Hitachi Command Director User
Guide.
Prerequisites for configuring host collectors
Complete the following prerequisites before you configure the host collectors
in Command Director:
• Make sure that the HCmD Host Collector and HCmD HNAS Data Collector
services are running before configuring the host collector.
• Make sure you understand what privileges are used to perform data
gathering operations on remote hosts. For more information, see Appendix
A, “Using Host Collector in a secure environment,” in the Hitachi Command
Director User Guide.
• If you plan to use sudo (“superuser do”) to collect data from Linux or
UNIX®-based servers, make sure you know the commands that are
enabled for sudo. See Appendix B, “Setting up configuration gathering
operation using sudo,” in the Hitachi Command Director User Guide.
• Make sure you know the type of hosts you can discover and those
supported by Command Director. For support information, see Host
Collector support information on page 91.
• Make sure to configure a vCenter Collector to use vCenters available on
your network and to gather information about the ESX servers associated
with the vCenter.
For information about configuring a vCenter Collector, see the topic
regarding “Configuring vCenter Collector” section in the Hitachi Command
Director User Guide.
64 Configuring data collectors
Hitachi Command Director Installation and Configuration Guide
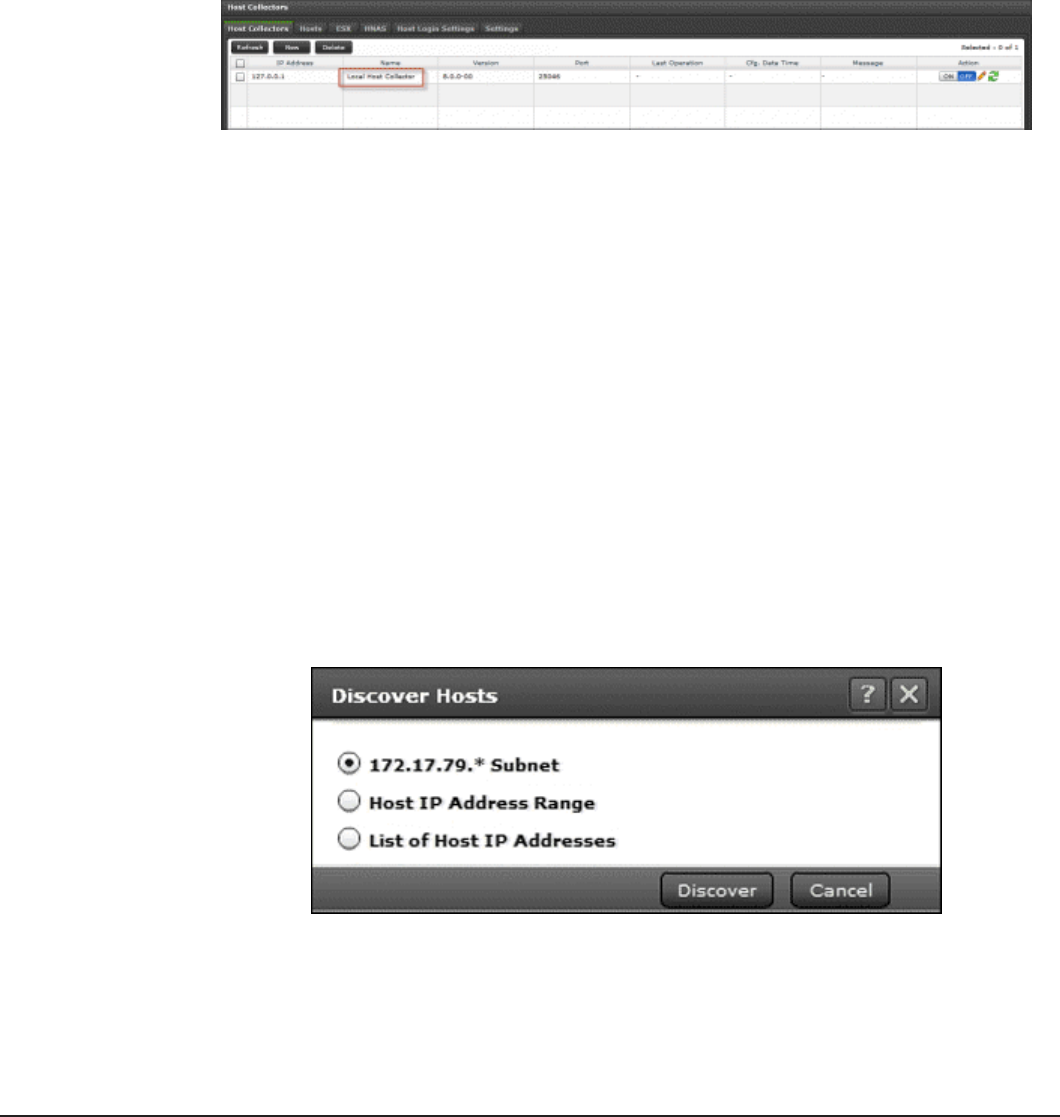
Enabling host discovery and data collection
The default Host Collector that is preconfigured and available for the current
subnet is disabled by default.
Procedure
1. Select the Administration tab.
2. Under Data Collection, select the Host Collectors tab.
The Host Collectors window is displayed.
The Action column displays the Host Collector status (ON and OFF). The
figure shows that the local Host Collector is disabled (OFF).
3. To enable the local Host Collector, click the ON/OFF button.
The status changes to ON, which indicates that the Local Host Collector is
enabled.
Launching local Host Collector to discover hosts
You can discover hosts by launching the Local Host Collector and selecting
one of several discovery options.
Procedure
1. Select the Administration tab.
2. Under Data Collection, select Host Collectors.
3. In the Host Collectors window, select Local Host Collector.
4. In the Action column, click the Click to discover hosts icon.
The Discover Hosts window appears.
5. Specify how you want Host Collector to locate the hosts of interest by
selecting one of the following options, and clicking Discover.
Configuring data collectors 65
Hitachi Command Director Installation and Configuration Guide

• Discover the hosts on the local subnet.
• Specify a range of host IP addresses.
• Specify a list of host IP addresses.
For more information about any of these options, see the Hitachi
Command Director User Guide.
Specifying host logon settings
To ensure proper communication between the Host Collector and the remote
hosts, you must specify the host logon settings, which include the user name
and password for the target hosts. You must also specify the protocol settings
for the host to allow the device-file-to-storage mapping discovery process.
The host logon settings (also called Global OS Settings) are applied by
default to each host of the selected operating system type that is added to
the system. The host logon settings set for Windows systems are the same
as those for Hyper-V hosts.
Procedure
1. Select the Administration tab.
2. Under Data Collection, select Host Collectors.
3. In the Host Collectors window, select the Host Login Settings tab.
The Host Login Settings window is displayed.
4. Enter host logon information from the tables in Host logon settings
details on page 67 in this window for each discovered host type.
5. When you are finished specifying the host logon parameters for each tab,
click Save.
6. In the information dialog that appears confirming successful update of
the Global OS Settings for the selected host, click OK.
66 Configuring data collectors
Hitachi Command Director Installation and Configuration Guide

Postrequisites
You do not need to specify host logon settings for ESX hosts because the
information is obtained from the vCenter server. The vCenter credentials you
provide when you add a vCenter Collector are used to connect to the ESX
hosts. For more information about configuring the vCenter collector, see the
Hitachi Command Director User Guide.
Host logon settings details
The host logon settings are applied by default to each host of the selected OS
type that is added to the system. The following tables list information you
need to specify for each discovered host type.
The logon settings for Linux, Solaris, HP-UX, and AIX hosts are listed in the
following table. Specify the appropriate logon details in the respective tabs in
the Host Login Settings window.
Setting Description
User ID Enter the user name to use to log on to the hosts.
Password Enter the password to use to log on to the hosts.
sudo When you select the sudo (“superuser do”) option, Command Director
does not require the user ID to be root to collect data from Linux or
UNIX-based servers. Sudo allows a system administrator to work using
his own account and change to root or another user identity on the
system for commands that need it. Operations performed when the sudo
option is enabled are logged.
SSH Port Specify the port number, if it is different from the default, for the secure
shell protocol used to communicate to the hosts. The default port
number 22 is displayed.
The logon settings for Windows and Hyper-V hosts are listed in the following
table. Specify the logon details under the Windows tab in the Host Login
Settings window.
Setting Description
User ID Enter the user name to use to log on to the Windows or Hyper-V hosts.
Password Enter the password to use to log on to the Windows or Hyper-V hosts.
Windows Service Specify the appropriate Windows service:
•Windows Service Management: Uses the Windows Service
Manager (also known as Service Control Manager), which is
responsible for creating, deleting, and running the service.
•Windows Management Instrumentation: A Windows service
running on the remote server that also allows Command Director to
create a task and run an application remotely on that system.
When you select one of these Windows Services, Command Director
creates the service and runs the required task on the remote server
using the specified Windows facility.
Configuring data collectors 67
Hitachi Command Director Installation and Configuration Guide
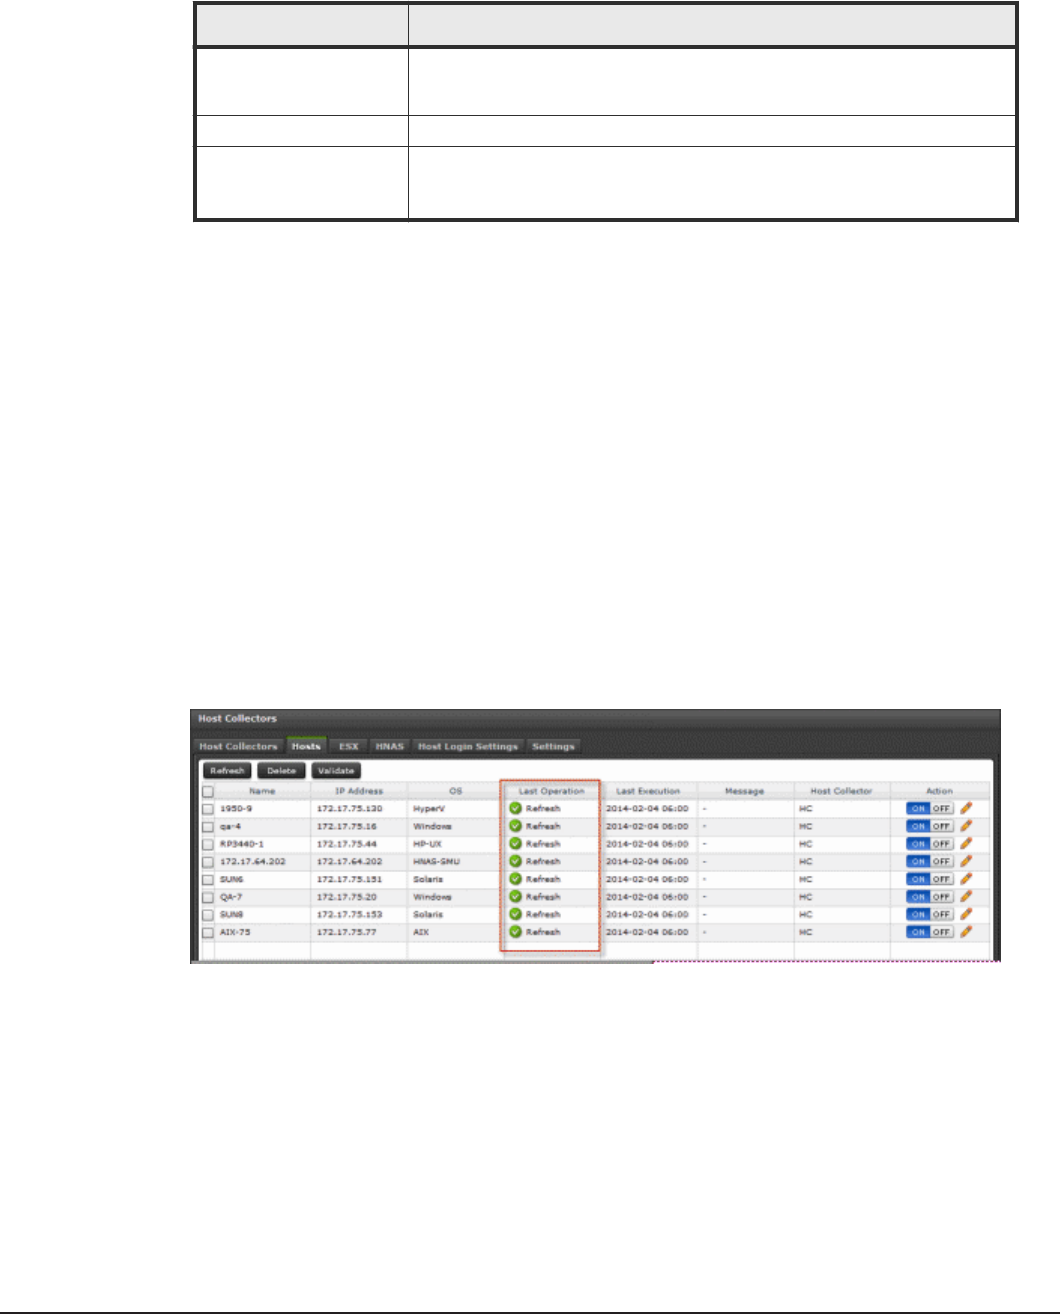
The logon settings for the HNAS-SMU are listed in the following table. Specify
the logon details under the HNAS-SMU tab in the Host Login Settings
window.
Setting Description
User ID Enter the user name to log on to the HNAS SMU using SSH.
Note: Do not use the HNAS GUI login credentials to log in to the SMU.
Password Enter the password to use to log on to the HNAS hosts.
SSH Port Specify the port number, if it is different from the default, for the secure
shell protocol used to communicate to the hosts. The default port
number 22 is displayed.
Validating host connectivity
You can validate connectivity between the Local Host Collector and the target
hosts. The system can validate the host connectivity information for all the
selected hosts simultaneously. Validation error information is displayed in the
Message column for the relevant hosts.
Procedure
1. Select the Administration tab.
2. Under Data Collection, select Host Collectors.
3. Select the Hosts tab.
4. In the Discovered Hosts window, select the host whose connection you
want to validate, and click Validate.
Result
In the preceding example, a host failed to validate because of wrong login
credentials. If the host connectivity is valid, the Last Operation field displays
Refresh and the message field is empty.
Refreshing host file system and storage utilization data
You can refresh the Host Collector data at specific intervals (in the Settings
tab) or on demand, to obtain host file system information and storage
mapping information.
68 Configuring data collectors
Hitachi Command Director Installation and Configuration Guide
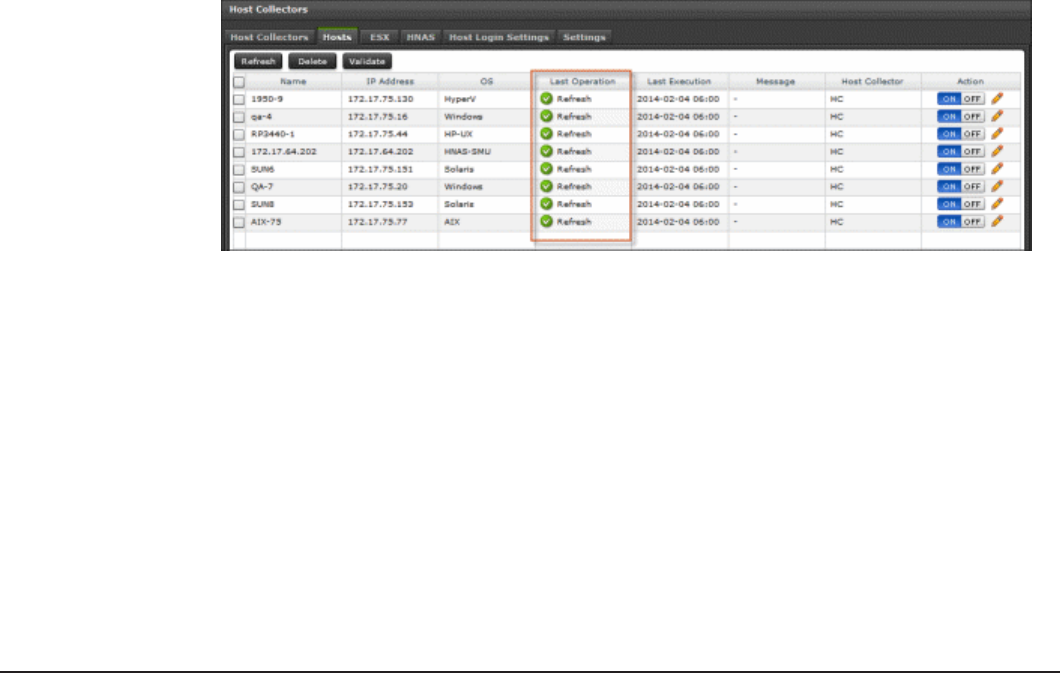
Procedure
1. Select the Administration tab.
2. Under Data Collection, select Host Collectors.
3. In the Host Collectors window, select the Local Host Collector.
4. Click Refresh.
Result
Command Director initiates data collection for the local Host Collector.
Verifying host data collection
After you configure the data collectors, the Host Collectors window displays
the following information about the discovered hosts in your environment:
• Hosts tab: Displays information about the discovered Windows, Solaris,
Linux, HP-UX, and AIX hosts.
• HNAS tab: Displays information about the discovered HNAS hosts.
• ESX tab: Displays information about the ESX hosts discovered using the
vCenter server.
You can use this procedure to verify that the data was successfully retrieved.
Procedure
1. Select the Administration tab.
2. Under Data Collection, select Host Collectors.
3. In the Host Collectors window, select the Hosts tab.
4. In the Hosts tab, review the list of the discovered hosts and verify the
Last Operation status against the local Host Collector to check which
operation (data scan or refresh) was performed and whether it was
successful.
Configuring data collectors 69
Hitachi Command Director Installation and Configuration Guide
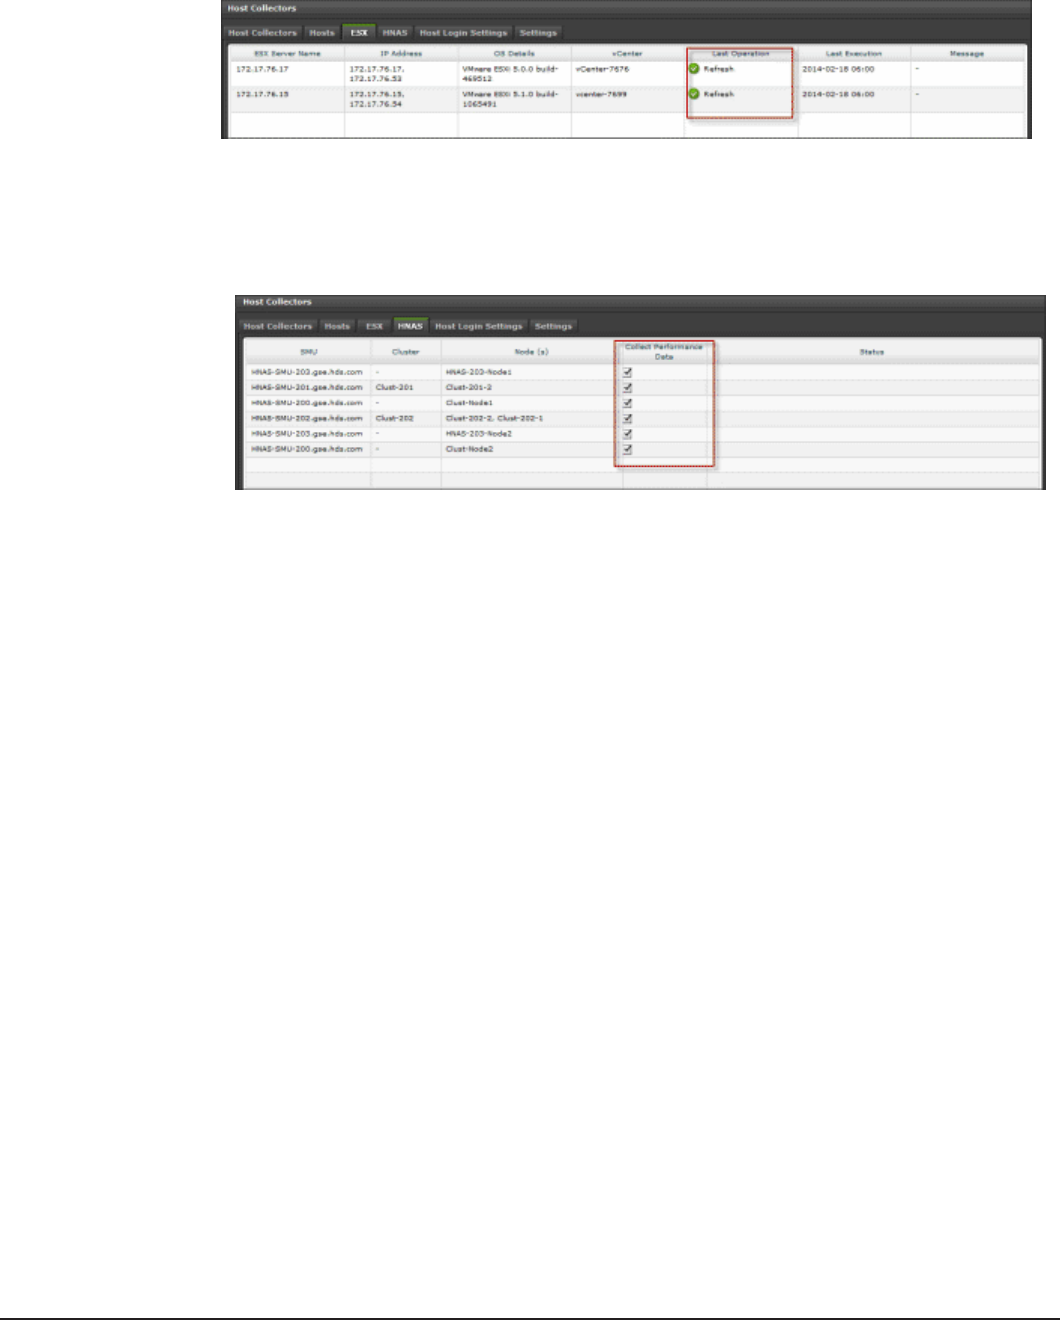
5. Verify that you have configured vCenter Collector successfully and that
you can view information about ESX hosts discovered by vCenter
collectors. To do so, select the ESX tab in the Host Collectors window.
6. In the ESX tab, verify the Last Operation status against each
configured vCenter collector to check which operation (data scan or
refresh) was performed and whether it was successful.
7. Select the HNAS tab to view information about the discovered HNAS
hosts.
8. In the HNAS tab, check whether the HNAS Data Collector is collecting
performance data. A check mark in the Collect Performance Data
column indicates that the HNAS Data Collector is collecting performance
data.
70 Configuring data collectors
Hitachi Command Director Installation and Configuration Guide

5
Upgrading Command Director
Upgrade Hitachi Command Director (HCmD) by upgrading the HCmD server
and optionally, the Host Collector.
Refer to the following topics:
□Preparing to upgrade Command Director
□Disk space requirements
□Upgrading HCmD server on Windows
□Upgrading HCmD server on Linux
□Upgrading Host Collector on Windows
□Upgrading Host Collector on Linux
□Post-upgrade tasks
Upgrading Command Director 71
Hitachi Command Director Installation and Configuration Guide
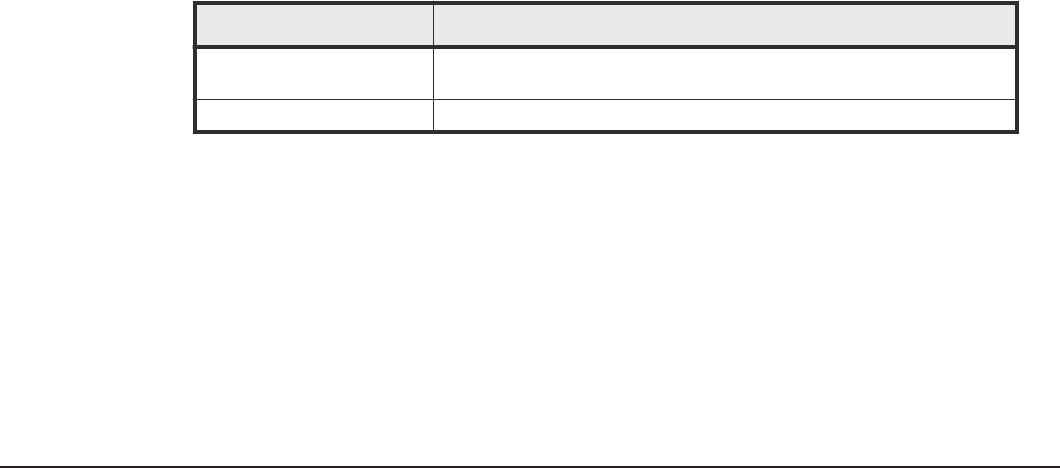
Preparing to upgrade Command Director
Upgrading to Command Director v8.1.1 requires that you upgrade these
components individually. The following is a best practice sequence of tasks
for upgrading to v8.1.1:
• Upgrade HCmD server.
• Upgrade Host Collector (optional). Upgrade this component only if you
have an existing installation of Host Collector on another subnet or host.
Review the following notes before you begin upgrading Command Director.
• Before upgrade, make sure that you disable scripts that automatically start
the HCmD services that are stopped during the upgrade. If these services
are not stopped, your upgrade installation can fail or be incomplete. After
a successful upgrade, you can re-enable the scripts.
• You must upgrade all components of your Command Director installation
individually and make sure that they remain in the same version.
• Make sure that Device Manager, Tuning Manager, Tiered Storage Manager,
and Agent for RAID to which HCmD connects, are v8.1.1.
○To upgrade to the appropriate Device Manager and Tiered Storage
Manager version, see the Hitachi Command Suite documentation.
○To upgrade to the appropriate Tuning Manager and Agent for RAID
version, see the Hitachi Command Suite Tuning Manager
documentation.
○The Agent for RAID Extension is automatically upgraded to the same
version as the Tuning Manager Agent for RAID server when you install
Agent for RAID. HCmD supports Agent for RAID Extension v8.1.1.
• You must manually configure HTnM and HDvM to use port 22015 as the
default port following an HCmD server upgrade from an earlier version to
v8.1.1.
The following table lists the various upgrade scenarios and the steps involved
in upgrading to HCmD v8.1.1:
Upgrading from HCmD Steps involved in upgrade
v7.6.0 and later Upgrade to v8.1.1 using the upgrade procedures provided in this
guide.
Earlier than v7.6.0 Upgrade is not supported.
Disk space requirements
Upgrading your installation of Command Director may require more available
disk space than a new installation. This is due to the accumulation of
production data during normal operation of Command Director. Before
upgrading, the installer creates a backup of data available in some folders.
72 Upgrading Command Director
Hitachi Command Director Installation and Configuration Guide

You may therefore require up to twice the amount of disk space used by the
data in the backed up folders.
Upgrading HCmD server on Windows
Prerequisites
Upgrading the HCmD server requires that you meet the prerequisites before
proceeding to the upgrade installation.
Before you upgrade the HCmD server, complete the following:
• Close all Command Director application windows, log files, text editors that
access Command Director files, browser windows that access the
Command Director UI client, Windows Services window, and the Command
Director database connections.
• Disable virus scanning utilities running on the server.
• Disable all scripts that automatically start the HCmD services that are
stopped during the upgrade installation.
Procedure
1. Run the following executable to upgrade the HCmD server:
HCmD-Install-Server-release.exe
The installer provides the following options to complete your upgrade
installation:
•Install: Upgrade your existing version of HCmD server to the most
recent version.
•Cancel: Cancel the upgrade installation.
Depending on the version you upgrade from (version v7.6.0 or later), the
installer displays the following messages:
• Information needed to continue upgrading to the most recent version.
• Click Next in the installation setup screen to upgrade your current
version of HCmD server to the most recent version.
2. Review the upgrade installation summary, and then click Install.
3. Click Finish to exit the installer.
Result
Following an HCmD server upgrade from a version earlier than v8.0, you
must manually configure the default port for HTnM and HDvM to use port
22015.
Removing Command Director
Removing or uninstalling Command Director requires that you back up the
Command Director database (optional), uninstall the existing version of
Upgrading Command Director 73
Hitachi Command Director Installation and Configuration Guide
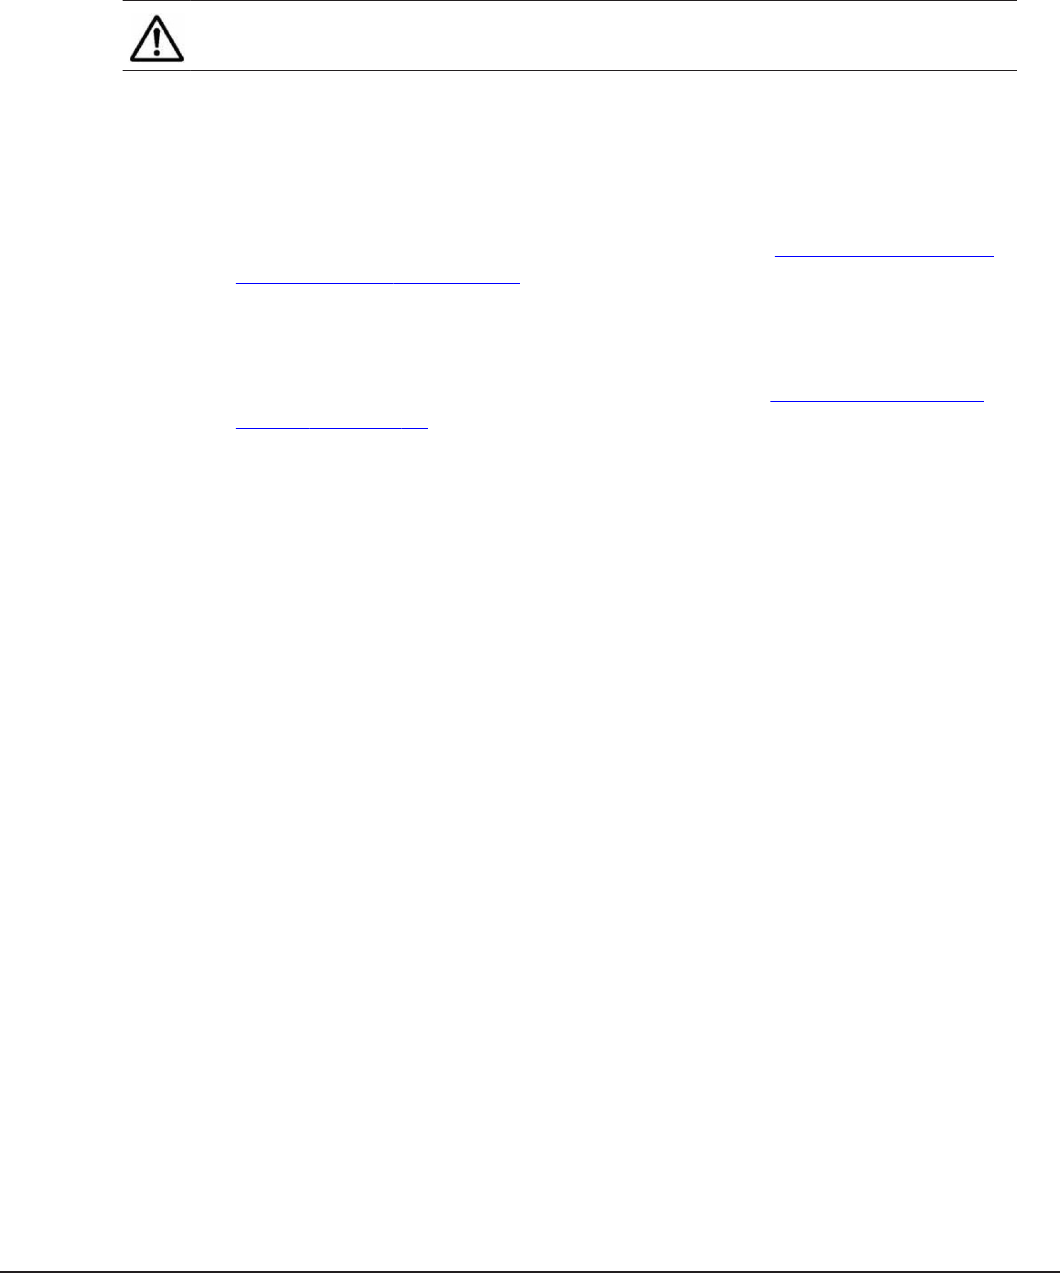
Command Director, and then perform a fresh installation of Command
Director to the most recent version.
For more information about backing up the database, see the Hitachi
Command Director Release Notes.
Note: When removing Command Director, make sure that you also remove
any other remote host collectors associated with it.
Procedure
1. Click Uninstall in the installer to remove the existing version of
Command Director.
2. Follow the prompts to uninstall the existing version of HCmD server.
For information about removing HCmD server, see Removing Command
Director server on page 78.
3. After the current version is successfully uninstalled, the fresh installation
of HCmD server v8.1.1 is started automatically. Follow the prompts to
install HCmD server.
For information about installing HCmD server, see Installing the HCmD
server on page 22.
Upgrading HCmD server on Linux
Prerequisites
Upgrading the HCmD server requires that you meet the prerequisites before
proceeding to the upgrade installation.
Before you upgrade the HCmD server, complete the following:
• Close all Command Director application windows, log files, text editors that
access Command Director files, browser windows that access the
Command Director UI client, and the Command Director database
connections.
• Disable virus scanning utilities running on the server.
• Disable all scripts that automatically start the HCmD services that are
stopped during the upgrade installation.
• Disable all Host Collectors and Storage System Collectors.
Procedure
1. Log on to Linux as the root user.
2. Insert the Command Director installation media in the host.
3. Run the following command: cp Installation-media-directory/
Linux/HCmD-Install-Server-release.tar
74 Upgrading Command Director
Hitachi Command Director Installation and Configuration Guide

4. Run the following command: tar -xf HCmD-Install-Server-
release.tar
5. Run the following command: cd HitachiCommandDirector
6. Run the following command: ./install.sh
7. At the prompt, accept the upgrade and respond to all prompts to
proceed. The upgrade creates a backup folder that can be used to restore
the earlier version if necessary.
8. In the Upgrade Summary, review the summary to ensure the information
is appropriate for your upgrade, and then press Enter to run the
upgrade.
9. When the upgrade is complete, an Upgrade Complete message displays.
Press Enter to exit the upgrade.
Result
Command Director is upgraded.
Upgrading Host Collector on Windows
The upgrade process requires only that you run the executable for that
component and follow the on-screen prompts. The following procedure
provides upgrade instructions for the Host Collector.
Procedure
1. Close all application windows and log files related to Command Director.
2. Disable all scripts that automatically start the HCmD services that are
stopped during the upgrade installation.
3. Disable virus scanning utilities running on the server.
4. Run the executable HCmD-Install-Host-Collector-release.exe for
Host Collector and follow the prompts to upgrade.
The Host Collector component is upgraded directly.
Upgrading Host Collector on Linux
The upgrade process requires only that you run the executable for that
component and follow the on-screen prompts. The following procedure
provides upgrade instructions for the Host Collector.
Procedure
1. Close all application windows and log files related to Command Director.
2. Disable all scripts that automatically start the HCmD services that are
stopped during the upgrade installation.
3. Disable virus scanning utilities running on the server.
Upgrading Command Director 75
Hitachi Command Director Installation and Configuration Guide
4. Run the following command: cp Installation-media-directory/
Linux/HCmD-Install_Host_Collector-release.tar
5. Run the following command: tar -xf HCmD-Install_Host_Collector-
release.tar
6. Run the following command: cd HCmDHostCollector
7. Run the following command: ./install.sh and follow the prompts to
upgrade.
The Host Collector component is upgraded directly.
Post-upgrade tasks
To use Command Director after an upgrade installation, you must perform
the following checks to ensure that all required services are running, the
relevant collectors are enabled, and Command Director is refreshed.
Complete the following before you use Command Director after an upgrade:
• Make sure to manually configure HTnM and HDvM to use port 22015 as the
default port following an HCmD server upgrade from an earlier version to
v8.1.1.
• Make sure the following services are running:
○Hitachi Command Director Database
○Hitachi Command Director
○HCmD Host Collector
○Agent for RAID Extension (on Agent for RAID server)
○HCmD Data Collector
○HCmD HNAS Data Collector
• Perform a data refresh to begin populating data in Command Director
reports.
Caution: You must refresh all collectors in Command Director. Failure to
do so could leave Command Director in an unstable state.
For information about refreshing data collectors, see Configuring data
collectors on page 55.
Note: Certain EMC report data does not display until after the data refresh is
complete.
• In the Physical Capacity by Storage System report in the Reports tab, EMC
array data will re-appear after refresh.
• In the Storage System Capacity Overview report in the Dashboard,
capacity will be reduced until after refresh.
• In the Storage System Capacity Overview report in the Storage Systems
Business View, capacity will be reduced until after refresh.
76 Upgrading Command Director
Hitachi Command Director Installation and Configuration Guide
6
Removing Command Director
Removing the Command Director server software (HCmD Server) and its
components also deletes the corresponding logs and database files. To
preserve this information, back up your data before you remove Command
Director.
For more information about backing up the logs and database files, see the
Hitachi Command Director Release Notes.
Note: On Microsoft Windows, you can remove all Command Director
components using Start > All Programs > HCmD-component > Uninstall.
To uninstall Agent for RAID Extension, you must uninstall the Tuning Manager
Agent for RAID.
□Removing Command Director server on Windows
□Removing Command Director server on Linux
□Removing Command Director Host Collector on Linux
Removing Command Director 77
Hitachi Command Director Installation and Configuration Guide
Removing Command Director server on Windows
Procedure
1. On the Start menu, select Control Panel.
2. Open Programs and Features and select Hitachi Command Director.
3. Click Uninstall/Change to remove the component. When you remove
Command Director server, the Host Collector and HNAS Data Collectors
are uninstalled automatically.
Note: If the HCmD CLI has been extracted, the foregoing procedure will
not remove it. You can remove it by deleting it. For more information,
see the Hitachi Command Director CLI Reference Guide.
Result
Alternately, you can remove Command Director by running the
uninstall.exe from the following Windows folder: \HCmD-Installation-
Folder\
Removing Command Director server on Linux
Follow the steps in this procedure to uninstall Command Directorserver on
Linux:
Procedure
1. Log in as the root user.
2. Run the following command: cd opt/Hitachi/CommandDirector/
3. Run the following command:./uninstall.sh
4. Respond to each prompt in the uninstallation procedure.
5. Press Enter to uninstall Command Director.
A confirmation message displays when the uninstallation is complete.
6. Press Enter to exit the uninstaller.
Removing Command Director Host Collector on Linux
Procedure
1. Log in as the root user.
2. Run the following command: cd opt/Hitachi/CommandDirector/
HostCollector/
78 Removing Command Director
Hitachi Command Director Installation and Configuration Guide

3. Run the following command: ./uninstall.sh
4. Press Enter at the prompt to begin the uninstall.
The uninstall may take few minutes. A message displays to confirm that
uninstallation is complete.
5. Press Enter to exit the uninstaller.
Removing Command Director 79
Hitachi Command Director Installation and Configuration Guide

80 Removing Command Director
Hitachi Command Director Installation and Configuration Guide

7
Removing hosts and storage systems
from Command Director
Command Director provides a CLI utility that you can use to remove hosts,
storage systems, or both. The utility also removes related data.
□Usage and prerequisites
□RemoveUsingConf
□RemoveHost
□RemoveStorageSystem
□Results of removing hosts and storage systems
Removing hosts and storage systems from Command Director 81
Hitachi Command Director Installation and Configuration Guide

Usage and prerequisites
Usage
The removal utility is located in the bin folder at: <Command Director
Installation directory>/CommandDirector/utils/bin folder.
Usage is as follows:
hcmd-utils [RemoveHost host-name | ESX-name | HNAS-SMU-name] |
[RemoveStorageSystem storage-system-name] | [RemoveUsingConf]
Prerequisites for removal of a storage system
1. Remove the storage system from Device Manager, Tuning Manager, and
its Agent for RAID instance.
2. Stop the Hitachi Command Director service.
3. Back up the Command Director database.
For more information, see the Hitachi Command Director Release Notes.
Prerequisites for removal of a host, HNAS, or ESX server
1. Before removing an ESX server from Command Director, remove it from
its vCenter that is registered in Command Director. This is required
because Command Director collects ESX server data through the
registered vCenter collector.
2. Stop the Hitachi Command Director service.
3. Back up the Command Director database.
For more information, see the Hitachi Command Director Release Notes.
RemoveUsingConf
Use the RemoveUsingConf command when you want to remove more than
one resource at a time.
Use the following procedure to decommission more than one resource at a
time and remove all related data from reports.
1. Perform the required prerequisites.
For more information, see Usage and prerequisites on page 82.
2. Navigate to [Command Director]\utils\conf and add the names of the
resources to the remove-util.conf file.
Enter the names of hosts under #Hosts and the names of storage
systems under #Storage Systems.
3. Run the command as follows: [Command Director]\utils\bin>hcmd-
utils.bat RemoveUsingConf
The output messages confirm clean up of the resources with a message
for each resource name.
82 Removing hosts and storage systems from Command Director
Hitachi Command Director Installation and Configuration Guide

4. Start the Hitachi Command Director service.
5. Refresh the Storage Collectors and Host Collectors.
6. If you have removed hosts (including ESX servers or HNAS SMUs)
refresh the Host Collectors.
Example
You want to remove an ESX server "187.12.17.32", a host "R7-L9", and a
storage system "VSP G1000@187.12.19.76".
1. Remove the ESX server from the vCenter that is registered in Command
Director.
2. Remove the storage system from Device Manager and from Tuning
Manager and its Agent for RAID instance.
3. Stop the Hitachi Command Director service.
4. In remove-util.conf, add the ESX server name and the hosts name
under #Hosts. Add the storage system name under #Storage Systems.
5. Run the command as follows:
• In Windows: [Command Director]\utils\bin>hcmd-utils.bat
RemoveUsingConf
• In Linux: [Command Director]\utils\bin>hcmd-utils.sh
RemoveUsingConf
The output messages confirm clean up with a message for each resource
name:
"Clean up completed for Host: 187.12.17.32"
"Clean up completed for Host: R7-L9"
"Clean up completed for Storage System: VSP G1000@187.12.19.76"
6. Start the Hitachi Command Director service.
7. Refresh the Host Collectors and Storage System Collectors.
RemoveHost
Use the RemoveHost command to delete a single host.
Use the following procedure to remove one host at a time and remove all
related data from reports.
1. Perform the required prerequisites.
For more information, see Usage and prerequisites on page 82.
2. Run the command as follows, using the name of a host, (including ESXs
and HNAS-SMUs):
[Command Director]\utils\bin>hcmd-utils.bat RemoveHost host-
name
The output includes a message confirming that cleanup is complete.
3. Restart the Hitachi Command Director Service.
4. Refresh the Host Collectors and Storage System Collectors.
Removing hosts and storage systems from Command Director 83
Hitachi Command Director Installation and Configuration Guide

For more information about the results of removing a host, see Results of
removing hosts and storage systems on page 84.
RemoveStorageSystem
Use the RemoveStorageSystem command to remove a single storage system.
Use the following procedure to remove one storage system at a time and
remove all related data from reports.
1. Perform the required prerequisites.
For more information, see Usage and prerequisites on page 82.
2. Run the command as follows: [Command Director]\utils\bin>hcmd-
utils.bat RemoveStorageSystem storage-system-name
The output includes a message confirming that cleanup of the storage
system is complete.
3. Restart the Hitachi Command Director service.
4. Refresh the Storage Collectors and Host Collectors.
For more information about the results of removing a host, see Results of
removing hosts and storage systems on page 84.
Results of removing hosts and storage systems
Removal of a Storage System
Removal of a storage system by using the utility has the following effects:
• Any applications that have no storage as a result of the removal of the
storage system are also removed.
• In the case of an application having allocated storage from multiple
storage systems, when one storage system is removed, the associated
LDEVs of the storage system are removed from the application and the
overall application capacity goes down.
• The removed storage system and its related removed application entities
no longer display in the following business views in the Resources tab:
○Storage Systems
○Applications By Capacity
○Applications By Pool
○All Applications
○Any user-defined business view
• The removed storage system and its related removed application entities
no longer display in capacity reports and performance reports for
applications and for storage systems.
84 Removing hosts and storage systems from Command Director
Hitachi Command Director Installation and Configuration Guide

Removal of a Host, HNAS server, or ESX server
Removal of a Host, HNAS server, or ESX server by using the utility has the
following effects:
• Any auto-created host applications are removed.
• In the case of a manually created application with multiple hosts assigned,
the associated LDEVs of the removed host or ESX server are removed from
the application and the overall application capacity goes down.
• The Hosts view in the Resources tab no longer displays the removed host
or ESX server.
• Any datastores and datastores applications in a removed ESX are deleted.
• The File Server view in the Resources tab no longer displays the removed
HNAS server.
• All other business views display only applications of hosts that have not
been removed.
• Capacity and performance reports display only applications of hosts that
have not been removed.
Impact on Capacity Trend and Forecast Trend reports
Upon removal of a Storage System or Host or ESX server, the storage
capacity associated with them will also be removed in Command Director.
This result will be visible in the following as a decline in overall capacity:
• Storage System Capacity Trend report (available in the Dashboard the
Resources tab).
• Storage System Capacity Forecast Trend report (available in the
Dashboard and the Resources tab).
• Pool Detailed Capacity Trend report in the Reports tab under Utilization.
Removing hosts and storage systems from Command Director 85
Hitachi Command Director Installation and Configuration Guide

86 Removing hosts and storage systems from Command Director
Hitachi Command Director Installation and Configuration Guide


Command Director Installation folder
The default Command Director Windows installation folder is C:\Program
Files\Hitachi\CommandDirector.
The default Command Director Linux installation folder is /opt/Hitachi/
CommandDirector.
Log files
In Windows, the Command Director log files are in the following folder:
HCmD-installation-folder\logs.
In Linux, the Command Director log files are in the following folder:
HCmD-installation-folder/logs.
The Command Director log files are:
•hscp.log
•hscp_audit.log
Data files
In Windows, the Command Director data files are in the following folder:
HCmD-installation-folder\data.
In Linux, the Command Director data files are in the following folder:
HCmD-installation-folder/data.
HCmD data files are organized into the following subfolders:
•backup
•activemq
•collector
•db
•perf-data
Configuration files
In Windows, the Command Director configuration files are in the following
folder:
HCmD-installation-folder\conf.
88 Command Director files
Hitachi Command Director Installation and Configuration Guide

In Linux, the Command Director configuration files are in the following folder:
HCmD-installation-folder/conf.
Command Director files 89
Hitachi Command Director Installation and Configuration Guide

90 Command Director files
Hitachi Command Director Installation and Configuration Guide

B
Host Collector support information
This appendix provides the Host Collector support information for the
following network elements:
□Host Collector server support
□Host bus adapter support for Host Collector
□Storage system support for Host Collector
□Network-attached storage support for Host Collector
□Volume Manager support for Host Collector
Host Collector support information 91
Hitachi Command Director Installation and Configuration Guide
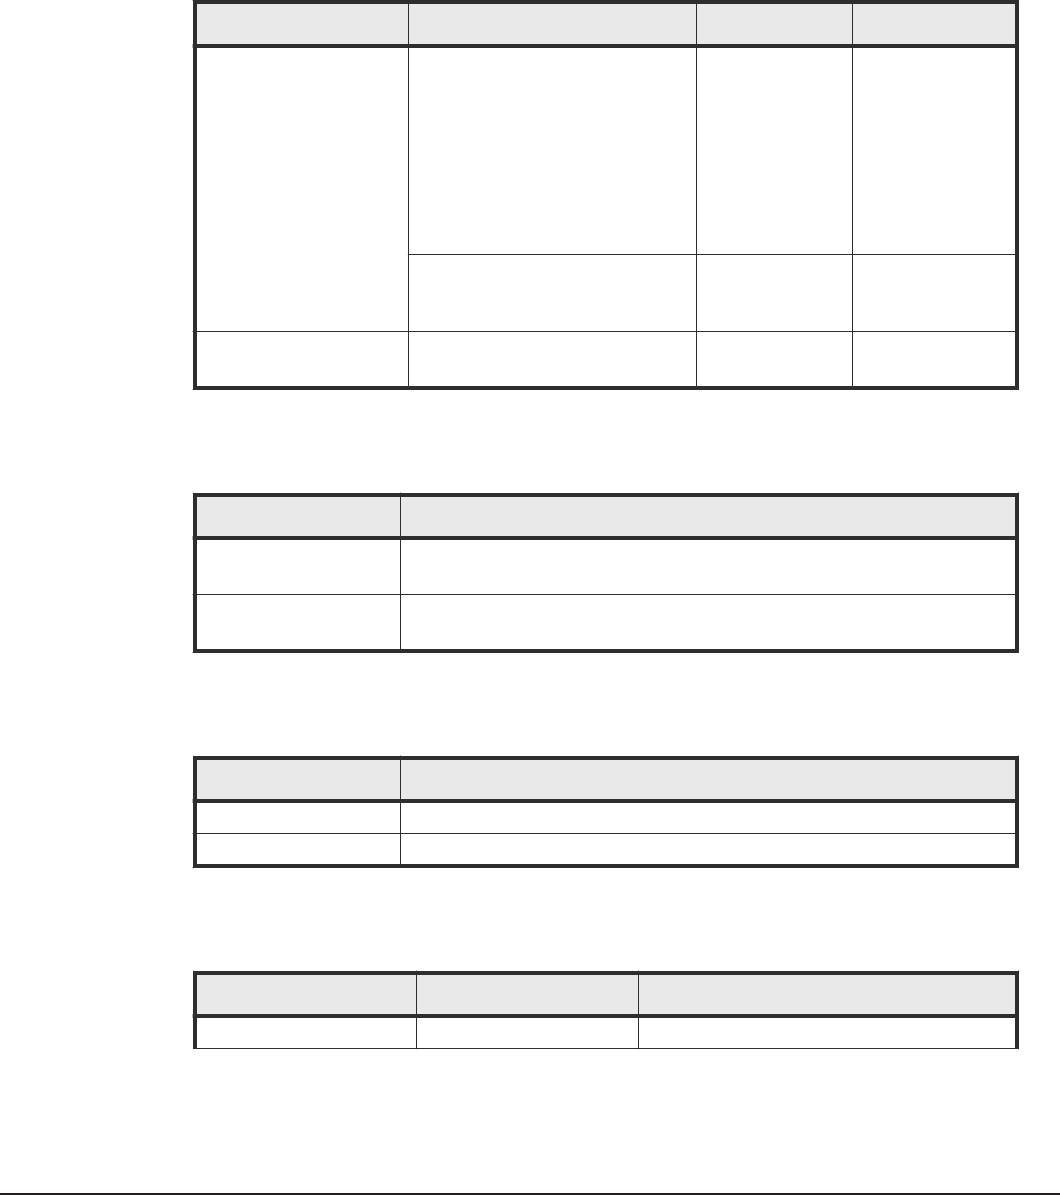
Host Collector server support
The Host Collector supports servers running on different operating systems.
The following table lists information about servers supported by the Host
Collector on Microsoft Windows.
Operating system Server version Service pack Architecture
Microsoft Windows 2008 • Standard Edition
• Enterprise Edition
• Datacenter Edition
• Standard Edition without
Hyper-V
• Enterprise Edition without
Hyper-V
• Datacenter Edition without
Hyper-V
SP2 none
• R2 Standard Edition
• R2 Enterprise Edition
• R2 Datacenter Edition
SP1 x64
Microsoft Windows 2012 • Standard Edition
• Datacenter Edition
none none
The following table lists information about servers supported by the Host
Collector for Solaris platform.
Server version Architecture
5.10 • SPARC 32-bit, 64-bit
• x86 32-bit
5.11 • SPARC 32-bit, 64-bit
• x86 32-bit
The following table lists information about servers supported by the Host
Collector for HP-UX platform.
Server version Architecture
11iv2 IPF, PA-RISC 64-bit
11iv3 IPF, PA-RISC 64-bit
The following table lists information about servers supported by the Host
Collector on IBM-AIX.
Server version Technology level Architecture
6.1 04 POWER 64-bit
92 Host Collector support information
Hitachi Command Director Installation and Configuration Guide

Server version Technology level Architecture
7.1 - POWER 64-bit
The following table lists information about servers supported by the Host
Collector on Linux.
Operating system Server version Architecture
Red Hat EL or ELAP 5.6 x86, x64
5.7 x86, x64
5.8 x86, x64
5.9 x86, x64
6.3 x86, x64
6.4 x86, x64
6.5 x86, x64
The following table lists information about servers supported by the Host
Collector on VMware.
Operating system Server version
vCenter 4.0, 4.1, 5.0, 5.1
ESX 3.5, 4.0, 4.1, 5.0
ESXi 5.1.0
5.5
The following table lists information about servers supported by the Host
Collector on SUSE LES.
Operating system Server version Service pack Architecture
SUSE LES 10 SP3 x86, x64
11 No SP, SP1, SP3 x86, x64
Host bus adapter support for Host Collector
For host bus adapter (HBA) information gathering operations, the HBA vendor
must provide an HBA library that is SNIA-compliant.
The following table lists information about Host Collector HBA support for
Solaris systems.
Host Collector support information 93
Hitachi Command Director Installation and Configuration Guide

Host bus adapter Additional information
JNI FCI-1063 When you use JNI HBAs, the API library
accompanying the driver is required. The HBA
API library (JNI SNIA Fibre Channel HBA
LIBRARY v1.0.0.0.0.b.011205-15 or later)
provided by the HBA vendor is required.
JNI FC64-1063
JNI FCE-6410
JNI FCE-6460 When you use QLogic HBAs, the API library
accompanying the driver is required. The HBA
API library (QLogic SDM Library 1.25 or later)
provided by the HBA vendor is required.
QLogic QLA2200
Host bus adapter Additional information
JNI FCI-1063 When you use JNI HBAs, the API library
accompanying the driver is required. The HBA
API library (JNI SNIA Fibre Channel HBA
LIBRARY v1.0.0.0.0.b.011205-15 or later)
provided by the HBA vendor is required.
JNI FC64-1063
JNI FCE-6410
JNI FCE-6460
QLogic QLA2200 When you use QLogic HBAs, the API library
accompanying the driver is required. The HBA
API library (QLogic SDM Library 1.25 or later)
provided by the HBA vendor is required.
The following table lists information about Host Collector HBA support for
Linux systems.
Host bus adapter Additional information
QLogic QLA2200F When you use QLogic HBAs, the API library accompanying the driver is
required. The HBA API library provided by the HBA vendor is also
required.
QLogic QLA23xx
QLogic QLA24xx
Hitachi GV-CC62G1
The following table lists information about Host Collector HBA support for
Microsoft Windows systems.
Host bus adapter Additional information
Emulex LP8000 When you use Emulex HBAs, the API library accompanying the driver is
required. The HBA API library provided by the HBA vendor is also
required
Emulex LP9002L
Emulex LP9002DC
Emulex LP9802
QLogic QLA23xx Download the Fibre Channel Information Tool from the following site to
acquire WWN information about the HBA, and then perform the
installation. Refer to the following URL for the supported HBAs:
www.microsoft.com/downloads/details.aspx?
QLogic QLA24xx
94 Host Collector support information
Hitachi Command Director Installation and Configuration Guide
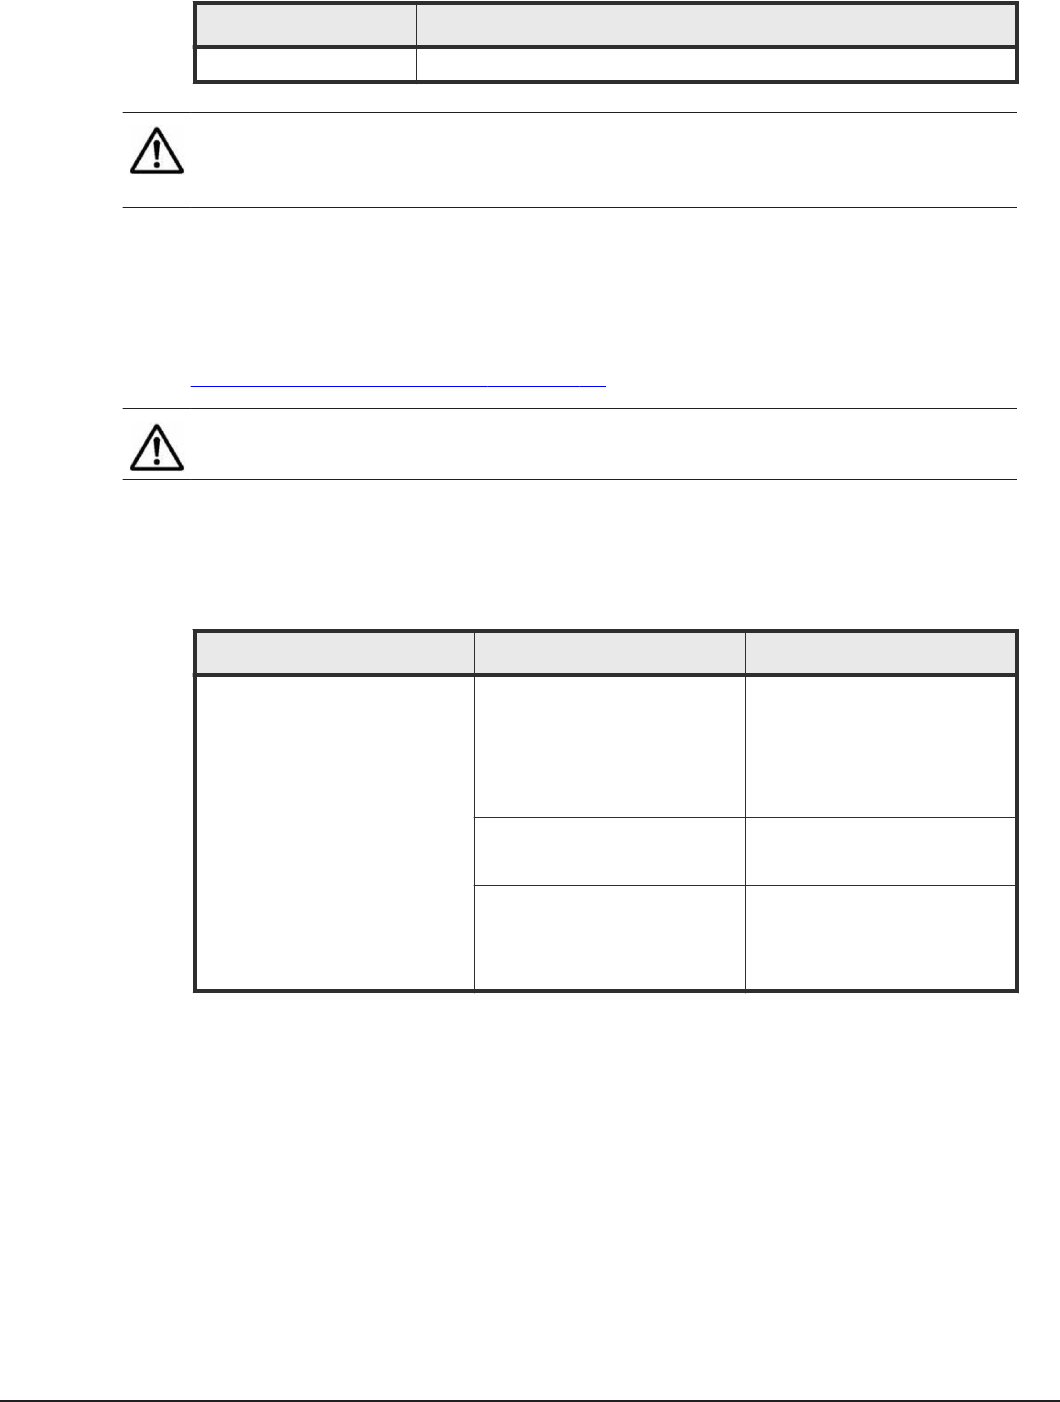
Host bus adapter Additional information
Hitachi GV-CC62G1 none
Note: The preceding tables do not include version-specific operating system
information because the HBA gather utility is based on an SNIA-compliant
API.
Storage system support for Host Collector
Host Collector can collect data on devices coming from various Hitachi
storage systems. For information about the supported storage systems, see
Supported storage systems on page 15.
Note: Host Collector does not support configuration gathering operations on
the storage systems themselves.
Network-attached storage support for Host Collector
The following table lists information about HNAS support for Host Collector.
Network attached storage Model SMU code
Hitachi NAS Platform 3080
3090
3100
3200
7.0, 8.0
3080
3090
10.2, 11.0, 11.1
4060
4080
4100
11.1, 11.2, 11.3, 12.0
Volume Manager support for Host Collector
The following table lists information about Volume Manager support for Host
Collector on Microsoft Windows 2008.
Host Collector support information 95
Hitachi Command Director Installation and Configuration Guide

Microsoft Windows 2008 version Service pack Architecture Volume
manager
• Standard 32-bit Edition
• Enterprise 32-bit Edition
• Datacenter 32-bit Edition
• Standard without Hyper-V 32-bit
Edition
• Enterprise without Hyper-V 32-bit
Edition
• Datacenter without Hyper-V 32-bit
Edition
SP2 x86 • Basic
• Dynamic
• Standard Edition
• Enterprise Edition
• Datacenter Edition
• Standard without Hyper-V Edition
• Enterprise without Hyper-V Edition
• Datacenter without Hyper-V Edition
SP2 x64 • Basic
• Dynamic
• R2 Standard Edition
• R2 Enterprise Edition
• R2 Datacenter Edition
none x64 • Basic
• Dynamic
• R2 Standard Edition
• R2 Enterprise Edition
• R2 Datacenter Edition
SP1 x64 • Basic
• Dynamic
The following table lists information about Volume Manager support for Host
Collector on Solaris.
Solaris
version Architecture Volume manager Volume manager
version
10 SPARC none none
Kernel mode; 32-bit or 64-bit SVM
VxVM
1.0
5.0MP1
AMD64 none none
Kernel mode; 64-bit SVM 1.0
11 SPARC none none
Kernel mode; 32-bit or 64-bit SVM
VxVM
1.0
5.0MP1
AMD64 none none
Kernel mode; 64-bit SVM 1.0
The following table lists information about Volume Manager support for Host
Collector on Linux Red Hat EL or Red Hat ELAP.
96 Host Collector support information
Hitachi Command Director Installation and Configuration Guide

OS version Architecture Volume manager Volume manager
version
5.6 x86, x64 none none
LVM2 Independent
5.7 x86, x64 none none
LVM2 Independent
5.8 x86, x64 none none
LVM2 Independent
5.9 x86, x64 none none
LVM2 Independent
6.3 x86, x64 none none
LVM2 Independent
6.4 x86, x64 none none
LVM2 Independent
The following table lists information about Volume Manager support for Host
Collector on HP-UX.
HP-UX version Service pack Architecture Volume
manager
Volume
manager
version
11iv2 PA-RISC 64-bit none none
LVM Independent
11iv3 PA-RISC 64-bit none none
LVM2.1 Independent
The following table lists information about Volume Manager support for Host
Collector on IBM-AIX.
IBM AIX version Technology level
(TL) Architecture Volume manager
Volume
manager
version
6.1 4 POWER 64-bit LVM Independent
7.1 none POWER 64-bit LVM Independent
The following table lists information about Volume Manager support for Host
Collector on SUSE LES.
SUSE LES version Service pack Architecture Volume manager Volume manager
version
10 SP3 x86, x64 none none
LVM2 Independent
Host Collector support information 97
Hitachi Command Director Installation and Configuration Guide
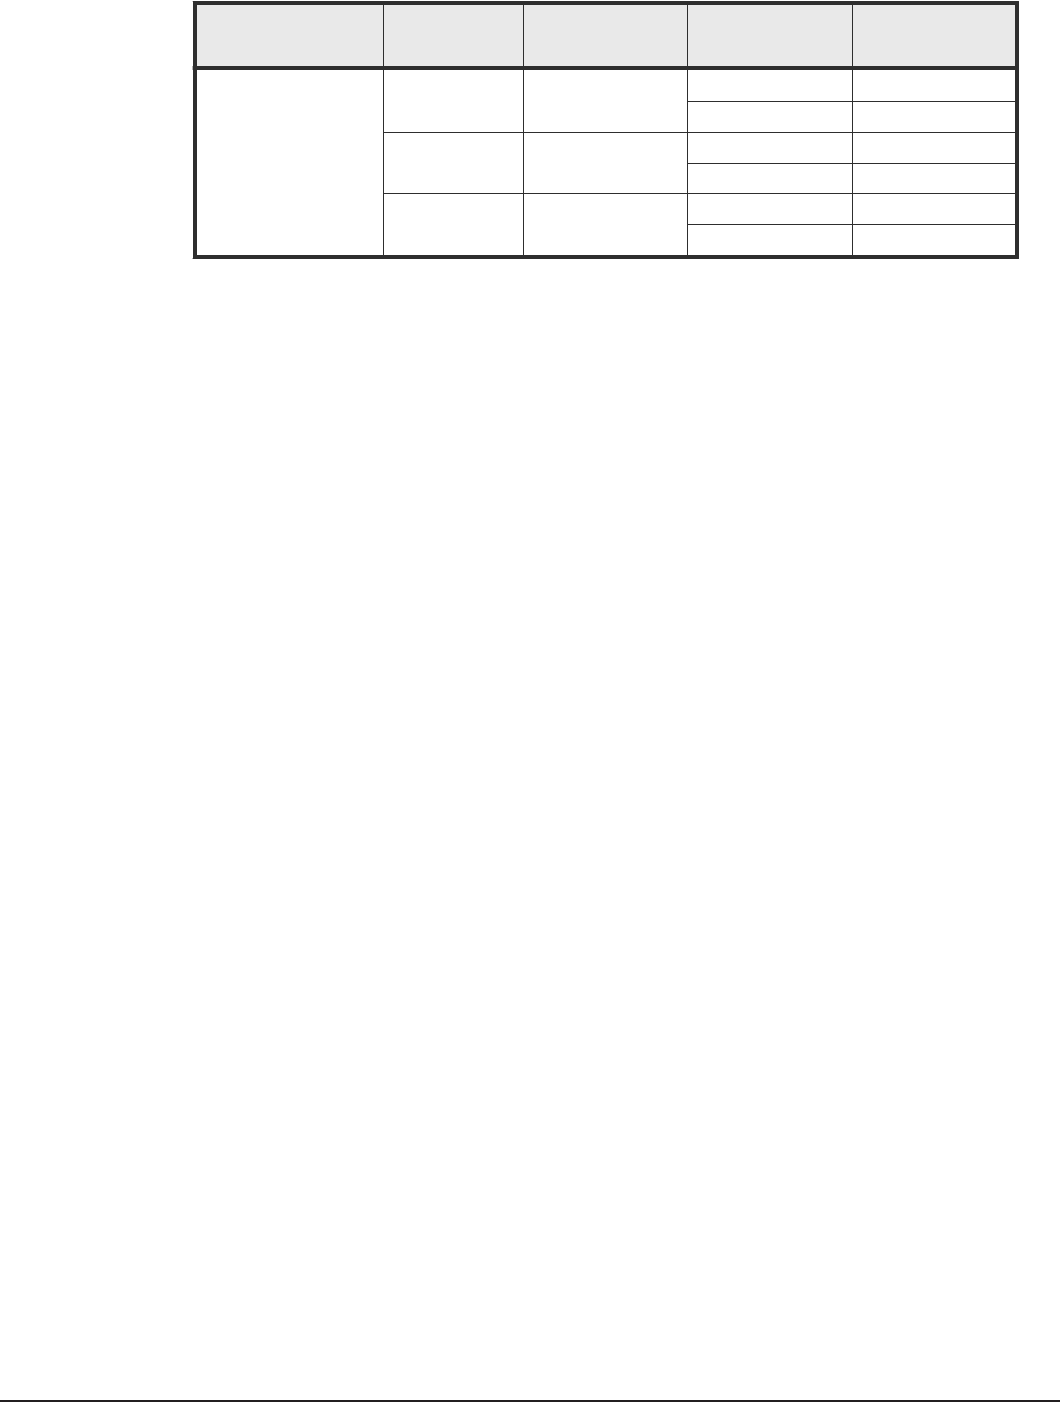
SUSE LES version Service pack Architecture Volume manager Volume manager
version
11 none x86, x64 none none
LVM2 Independent
SP1 x86, x64 none none
LVM2 Independent
SP3 x86, x64 none none
LVM2 Independent
98 Host Collector support information
Hitachi Command Director Installation and Configuration Guide

C
Troubleshooting Command Director
This appendix describes how to troubleshoot Hitachi Command Director.
□Troubleshooting Agent for RAID Extension connections
□Troubleshooting Host Collector connections
□Troubleshooting host discovery timeout issues
□Troubleshooting receiving email alerts and reports
□Troubleshooting HNAS database message logging using NoLog property
□Troubleshooting a Command Director database in an unstable state on a
VM
□Troubleshooting "bad ELF interpreter" error when using Command
Director on 64 bit Linux
□Troubleshooting inability to discover a Linux host
□Troubleshooting ERR_1330: Required dependent library is missing to
communicate with Windows target machine
□Troubleshooting a lack of performance data for HNAS nodes that are
accessed through an incorrect IP address
Troubleshooting Command Director 99
Hitachi Command Director Installation and Configuration Guide

Troubleshooting Agent for RAID Extension connections
If your connection to Agent for RAID Extension does not go through, a
firewall might be blocking IP traffic to the ports on which Agent for RAID
Extension listens. Check for the following to resolve connection issues:
Procedure
1. Make sure the Agent for RAID Extension service (on the Agent for RAID)
is running.
2. Make sure that your firewall settings allow communication with Agent for
RAID Extension services.
• For Agent for RAID Extension, make sure your firewall allows
communication on the port for Agent for RAID Extension (default:
25075) and the port for HCmD server (default: 25015) you configured
during installation, using the TCP protocol.
Troubleshooting Host Collector connections
If you have an issue connecting to a Host Collector, a firewall might be
blocking IP traffic to the port on which the Host Collector or the HCmD server
listens. Check for the following to resolve the connection issue:
Procedure
1. Make sure that the HCmD Host Collector service is running.
In the Services Control Panel, check that the HCmD Host Collector
service is running.
2. Make sure that your firewall settings allow communication between the
HCmD server and the Host Collector server.
• For the HCmD server, make sure the server firewall allows
communication on the port you configured during installation (default:
25015) using the TCP protocol.
• For the Host Collector, make sure the server firewall allows
communication on the port you configured during installation (default:
25046) using the TCP protocol.
Troubleshooting host discovery timeout issues
The host discovery process starts with an instruction from the HCmD server
to the Host Collector to discover the information for a particular host. The
Host Collector then performs four operations, each of which by default has a
set amount of time to finish before timing out:
100 Troubleshooting Command Director
Hitachi Command Director Installation and Configuration Guide

Procedure
• Discovering the presence of the target host on the network
• Logging on to the target host
• Gathering the target host’s file system and storage utilization configuration
data
• Sending the target host’s discovery data to the HCmD server
Setting Host discovery timeout properties
If the host discovery or data collection process times out, you can increase its
default timeout property setting. However, doing so might extend the time
the Host Collector requires to gather from the hosts of interest on the
network.
When you modify any timeout property, restart the Hitachi Command
Director service from the Services panel for the changes to take effect.
Adjust the timeout settings by editing the properties listed in the following
table:
Description Property Settings
Gather the target host’s file
system and storage utilization
configuration data.
Name of the property:
host.data.collector.process.timeout.sec
Default: 21600 seconds
Location: HCmD-installation-folder\conf
\custom.properties file
Note: If you increase the timeout value for
host.data.collector.process.timeout.sec, you
must also increase the timeout value for the
process.timeout.limit.sec property.
Send the target host’s discovery
data to HCmD server.
Name of the property: process.timeout.limit.sec
Default: 900 seconds
Location: HCmD-installation-folder\Host Collector\conf
\alps.properties file
Troubleshooting receiving email alerts and reports
If you are unable to receive alerts or reports via email, check your virus
scanner software. It may include a property that is set to prevent mailings.
In that case, you will need to disable the property or modify it to allow the
local server to send emails.
Troubleshooting Command Director 101
Hitachi Command Director Installation and Configuration Guide
Troubleshooting HNAS database message logging using
NoLog property
You can use this property to avoid messages being logged into and filling up
the HCmD HNAS dblog each time that an HNAS CLI command collects
performance or configuration information.
This property file setting enables you to control whether messages are
generated and sent to the HNAS dblog each time that HNAS CLI commands
are executed on an HNAS SMU or node. The location of the Command
Director files are in the following Windows folder: \HCmD-Installation-
Folder\conf. The following table lists the hnas.nolog.enabled= property,
which is in the alps.properties file. The property settings are listed in the
following table.
Description Property Required modification
Setting controls messages
sent to HNAS dblog when
HNAS CLI command
executes on HNAS SMU or
node
hnas.nolog.enabled=true
Default: true
When set to true, then nolog is
prefixed with each CLI command
that is executed on an HNAS SMU or
node, and none of these messages
are logged in the HNAS dblog.
When set to false, then each CLI
command that is executed on an
HNAS SMU or node, and its
corresponding message, is logged in
the HNAS dblog.
This property allows you to control
when to allow or limit messages
being logged in the HNAS dblog.
Troubleshooting a Command Director database in an
unstable state on a VM
The HCmD database on a virtual machine (VM) system can enter an unstable
state if the VM encounters an unexpected or unscheduled loss of power.
This is rare occurrence that is only caused by an unexpected or unscheduled
loss of power. As a result of this condition, you can experience problems
starting or being able to access the HCmD database on a VM. The
unexpected or unscheduled loss of power can cause the HCmD database to
become unstable and remain in a state that prevents you from using it.
Procedure
1. Login to the VM system with the HCmD database.
2. Check the status of the HCmD service.
102 Troubleshooting Command Director
Hitachi Command Director Installation and Configuration Guide

3. If you cannot start or access the HCmD database because it is in an
unstable state, then you need to contact customer support for
assistance.
Troubleshooting "bad ELF interpreter" error when using
Command Director on 64 bit Linux
After installing Command Director on 64 bit Linux, you may encounter an
error when attempting to validate a host on Windows.
The cause is indicated as follows:
Cause: /opt/Hitachi/CommandDirector/HostCollector/lib/native/unix/
WinDelUtil.sh: /opt/Hitachi/CommandDirector/HostCollector/lib/native/unix/
winexe.x86.SUSE: /lib/ld-linux.so.2: bad ELF interpreter: No such file or
directory)"
This error results from missing 32 bit libraries. To resolve it, install
"glibc.i686".
Troubleshooting inability to discover a Linux host
If the Host Collector does not discover a Linux host, the cause may be that
port 902 is open in the host. To resolve this issue, end the process that is
using port 902. Add the Linux host again.
Troubleshooting ERR_1330: Required dependent library is
missing to communicate with Windows target machine
The message "ERR_1330: Required dependent library is missing to
communicate with Windows Target machine" can display when Command
Director is installed on a Linux server and you attempt to validate Windows
hosts.
Resolve the error by installing "smbclient".
Troubleshooting a lack of performance data for HNAS nodes
that are accessed through an incorrect IP address
Command Director may be unable to collect HNAS performance data. This
can occur when the HNAS-SMU accesses the node using a public IP address
instead of through the private IP address. The HNAS-SMU must have access
to the private IP address that is configured through the VLAN.
Troubleshooting Command Director 103
Hitachi Command Director Installation and Configuration Guide

To resolve the issue, reconfigure the node so that it is accessed by the HNAS-
SMU through the private IP address.
104 Troubleshooting Command Director
Hitachi Command Director Installation and Configuration Guide

Glossary
A
alert
An event that is generated when an SLO is violated. You can also set up
email notifications with the event details.
application
In Hitachi Command Director, applications represent groups of storage
volumes used by an actual application. An application can be defined by
volumes belonging to a host group or by storage consumed by a physical
host discovered by the Command Director agentless host collector.
B
business view
A business hierarchy that organizes hosts, applications, and other folders
for reporting purposes. Storage capacity and storage type utilization, I/O
operations per second (IOPS), and SLO status are summarized for the
application and for every folder in the hierarchy. The same applications
can be organized according to multiple hierarchies.
C
CA
See certificate authority.
capacity
The amount of data storage space available on a physical storage device,
generally measured in bytes (MB, GB, TB, and so on).
Glossary 105
Hitachi Command Director Installation and Configuration Guide

certificate
Refers to a digital certificate used with SSL. The browser examines the
certificate and determines whether it is authentic before allowing
communication.
certificate signing request
A message that is sent from an applicant to a certification authority to
apply for a digital identity certificate.
certification authority
The authority and organization responsible for issuing and revoking user
certificates, and ensuring compliance with policies and procedures for
secure creation and management of digital certificates.
CLI
Command Line Interface. A method of interacting with software using a
command line interpreter. The Command Director CLI is used to generate
and save reports, and perform application management operations.
CSR
See certificate signing request.
D
data collection
A method of discovering and gathering information from the storage
system collectors on the Hitachi Device Manager and Agent for RAID
servers and the host collectors installed on hosts in the network.
data refresh
Collecting information from the data collectors on the Hitachi Device
Manager and Agent for RAID servers, and updating the information
displayed in the Hitachi Command Director GUI.
DB
database
device
Refers to the name of a computer, storage, IP switch, or FC switch in
Hitachi IT Operations Analyzer.
106 Glossary
Hitachi Command Director Installation and Configuration Guide

G
GUI
graphical user interface
H
HBA
See host bus adapter.
HCmD
Hitachi Command Director. For v7.0 and later, new name for Hitachi
Storage Command Portal (HSCP).
HCS
Hitachi Command Suite. For v7.0 and later, new name for Hitachi Device
Manager. See HDvM.
HDvM
Hitachi Device Manager. For version v7.0 and later, this name has
changed to Hitachi Command Suite. Allows you to consolidate storage
operations and management functionality in a system that contains
multiple Hitachi storage systems. Device Manager quickly discovers the
key configuration attributes of storage systems, and allows your
organization to begin managing complex and heterogeneous storage
environments using a browser-based GUI.
Hitachi NAS Platform
A storage system that provides high-performance read/write access to
data through multiple protocols, such as CIFS, NFS, iSCSI, and FTP. It is a
highly scalable and modular Network Attached Storage (NAS) server, with
multigigabit throughput from network to disk.
host
One or more host bus adapter (HBA) world wide names (WWN).
host bus adapter (HBA)
One or more dedicated adapter cards that are installed in a host, have
unique WWN addresses, and provide Fibre Channel I/O connectivity to
storage systems, typically through Fibre Channel switches. Unlike
general-purpose Ethernet adapters, which handle a multitude of network
Glossary 107
Hitachi Command Director Installation and Configuration Guide

protocols, host bus adapters are dedicated to high-speed block transfers
for optimized I/O performance.
HTnM
Tuning Manager. A real-time software monitor that can view the current
state of the host, file system, database, storage area network, and
storage resources. In Tuning Manager, a resource indicates any object
that is used by an application. You can compare this information with the
normal behavior or the baseline performance stored in the database. The
ability to query a historical database for performance and capacity trend
analysis on each component of the storage area network lets you
correlate the current changes in performance with recent changes to the
physical configuration, software, workload, or other environmental
changes that may be causing changes in an application's performance.
The Tuning Manager series consists of Agents that collect the performance
data for each monitored resource and the Tuning Manager program that
manages all the Agents.
HTSM
Hitachi Tiered Storage Manager. Software that is used to perform
migration. The term migration refers to moving the data stored on one
volume to another volume. Tiered Storage Manager moves the data on a
predefined set of volumes to another set of volumes that have the same
characteristics.
I
I/O
input/output
Internet protocol (IP)
The protocol that governs the breakup of data messages into packets
(units of data), the routing scheme for transmitting them, and the
reassembly of the packets into the original data messages at the
destination. Most networks combine IP with a higher-level protocol called
Transmission Control Protocol (TCP), which establishes a virtual
connection between a source and a destination.
IP
See Internet protocol.
108 Glossary
Hitachi Command Director Installation and Configuration Guide

K
key performance indicator (KPI)
A measurement used to help an organization define and measure
progress toward organizational goals. KPIs are used in business
intelligence to assess the present state of the business and to prescribe a
course of action. KPIs are typically tied to an organization's strategy.
L
logical unit (LU)
A volume, or LDEV, created in an open storage system, or configured for
use by an open-systems host, for example, OPEN-V.
logical unit number (LUN)
A unique management number that identifies a logical unit (LU) in a
storage system. A logical unit can be an end user, a file, a disk drive, a
port, a host group that is assigned to a port, an application, or virtual
partitions (or volumes) of a RAID set.
Logical unit numbers (LUNs) are used in SCSI protocols to differentiate
disk drives in a common SCSI target device, such as a storage system. An
open-systems host uses a LUN to access a particular LU.
logical volume
An area on a disk consisting of device files that are logically integrated
using a volume manager. Also referred to as an LDEV.
LUN
See logical unit number.
N
NAS
Network attached storage
node
A monitored computer, switch, or storage system in Hitachi IT Operations
Analyzer.
Glossary 109
Hitachi Command Director Installation and Configuration Guide

P
parity
In computers, parity refers to a technique of checking whether data has
been lost or written over when it is moved from one place in storage to
another or when transmitted between computers.
Parity computations are used in RAID drive arrays for fault tolerance by
calculating the data in two drives and storing the results on a third. The
parity is computed by XOR'ing a bit from drive 1 with a bit from drive 2
and storing the result on drive 3. After a failed drive is replaced, the RAID
controller rebuilds the lost data from the other two drives. RAID systems
often have a "hot" spare drive ready and waiting to replace a drive that
fails.
parity group
RAID groups can contain one or more parity groups. You can think of the
RAID group as the actual RAID container for data protection, and the
parity group as a partition of that container. Using parity groups, multiple
logical units can be created from each RAID group, and ported out to the
same or different servers. This allows granularity in logical unit sizes
being obtained from the RAID group.
If each partition (parity group) is assigned to the same server, there
should be no contention for the RAID group's disk resources. You can use
the entire RAID group as one parity group and create one large logical
unit.
pool
A set of volumes that is reserved for storing Copy-on-Write Snapshot data
or Dynamic Thin Provisioning write data.
R
RAID
redundant array of independent disks
A collection of two or more disk drives that presents the image of a single
logical disk drive to the system. Part of the physical storage capacity is
used to store redundant information about user data stored on the
remainder of the storage capacity. In the event of a single device failure,
the data can be read or regenerated from the other disk drives.
RAID employs the technique of disk striping, which involves partitioning
each drive's storage space into units ranging from a sector (512 bytes) up
to several megabytes. The stripes of all the disks are interleaved and
addressed in order.
110 Glossary
Hitachi Command Director Installation and Configuration Guide

S
Secure Sockets Layer (SSL)
A common protocol for managing the security of message transmission
over the Internet.
Two SSL-enabled peers use their private and public keys to establish a
secure communication session, with each peer encrypting transmitted
data with a randomly generated and agreed-upon symmetric key.
self-signed certificate
A digital identity certificate signed by the person who created it, rather
than a trusted certificate authority.
service level agreement
An agreement that specifies what service is provided and how it is
supported, and the responsibilities of the parties involved. These parties
may be storage administrators (who provide storage) and their clients
(application administrators who request storage).
service level objective
A stated level of availability, serviceability, performance, operation, or
other attributes of a service (for example, billing and penalties for
violations).
SLOs are intended as operational guidelines for the implementation of the
service negotiated under a service level agreement (SLA). SLOs comprise
SLAs containing service parameters and goals.
SLA
See service level agreement.
SLO
See service level objective.
SMI-S
Storage Networking Industry Association (SNIA)’s Storage Management
Initiative Specification.
SNIA
Storage Networking Industry Association
Glossary 111
Hitachi Command Director Installation and Configuration Guide

SPARC
Scalable Processor Architecture. A reduced instruction set computer
(RISC) architecture developed by Sun Microsystems and used in the Sun
workstation family.
SQL
Structured Query Language used to communicate with a database.
SSL
See Secure Sockets Layer.
storage system
The Hitachi enterprise storage box for the Hitachi Universal Storage
Platform (USP, USP-V, USP-VM), Hitachi Unified Storage and the Network
Storage Controller (NSC).
T
tier
A user-friendly descriptor that summarizes the type of storage hardware
on which a logical volume resides. Typical storage hardware
characteristics that are referred to by a tier are: disk speed, disk capacity,
disk type (for example, FC, SCSI), RAID level, storage system model,
virtualization level (for example, internal vs. external), and pool type (if
relevant). All volumes that share the characteristics summarized by the
tier are annotated with that tier's name.
V
virtual machine
One instance of an operating system along with one or more applications
running in an isolated partition within the computer. A VM enables
different operating systems to run in the same computer at the same time
as well as prevents applications from interfering with each other. All
virtual machines run simultaneously.
VM
See virtual machine.
112 Glossary
Hitachi Command Director Installation and Configuration Guide

volume (vol or VOL)
A name for the logical device (LDEV), or logical unit (LU), or concatenated
LDEVs, that are created in a storage system that have been defined to
one or more hosts as a single data storage unit.
W
WWN
World wide name. A unique identifier for an open systems host. It is
typically a node name that is a 64-bit address assigned to HBAs (host bus
adapters) or storage system ports that define the endpoints of a Fibre
Channel connection between storage and hosts for purposes of volume
input/output.
WWN is essential for defining the SANtinel™ parameters because it
determines whether the open systems host is to be allowed or denied
access to a specified logical unit or a group of logical units.
Glossary 113
Hitachi Command Director Installation and Configuration Guide

114 Glossary
Hitachi Command Director Installation and Configuration Guide

Index
A
Agent for RAID Extension 40
enabling Agent for RAID Extension service 40
installation 40
system requirements 40
Application by Capacity 35
Application Consumed Capacity 36
audience 8
C
Command Director
file location 87
ports usage 19
components 15
configuration 56
Command Director server
installation 22
installation directory 23, 24
port 23, 24
restarting 40
setting up 31
timeout for getting data from Host Collector
100
upgrading 73
logs 53
conf folder 88
configuration
data collectors 55
Host Collectors 63
storage system collectors 61
Storage System Collectors 58
system 16
configuration files 88
custom.properties file 35–37
D
data collectors
configuring 55
data configuration
workflow 56
discovering HNAS hosts 63
documentation
referenced 8
E
email alerts
troubleshooting 101
email reports
troubleshooting 101
enabling Agent for RAID Extension service 40
enabling host discovery 65
enabling performance data collection 40
ESX hosts
discovering 64
F
firewall problems
Host Collector 100
Agent for RAID Extension 100
Tuning Manager Data Collector 100
H
HCmD
see Command Director 14
Hitachi Command Director, see Command
Director 14
Host Collector
configuration for vCenter 64
configuring 63
installation directory 28
port 28
refreshing host file system data 68
refreshing storage utilization data 68
specifying host login settings 66
timeout settings 100
validating host connectivity 68
verifying host data collection 69
HBA support information 93
host login settings 66
installing on Linux 28
installing on Window 27
launching 65
Index 115
Hitachi Command Director Installation and Configuration Guide

NAS support information 95
refreshing 68
removing, on Linux 78
server support information 92
storage system support information 95
troubleshooting host discovery problems 100
upgrading
on Linux 75
on Windows 75
host collectors
configuration prerequisites 64
hosts
removing 81, 83
results of removing 84
I
installation
Command Director components 21
Command Director server 22
Host Collector on other subnets 26
on Windows 23
Host Collector 27
workflow 22
installed services
Hitachi Command Director 23, 24
iPad app
Hitachi Command Suite for iPad 20
IT Operations Analyzer collectors
configuring new 56
L
launching Local Host Collector 65
legal disclaimer
hiding/showing 39
modifying 39
license key, specifying 32
Linux
Host Collector, uninstalling 78
installation on
HCmD server 24
Host Collector 28
starting and stopping services 54
Uninstalling Command Director server 78
upgrading HCmD server on 74
logs
default directory 53
viewing 53
M
modifying
Command Director server settings 39
N
nolog property 102
P
performance data collection
enabling on Windows 40
ports
default settings 39
modifying 39
ports, Command Director components 19
preface 7
prerequisites
host collector configuration 64
R
referenced documents 8
RemoveHost 83
RemoveStorageSystem 84
RemoveUsingconf 82
removing
Command Director components 77
Command Director server, on Windows 78
removing hosts and storage systems
prerequisites 82
usage 82
S
Secure Sockets Layer
see SSL 41
secure sockets layer (SSL)
enabling for Agent for RAID Extension 59
service name
HCmD Data Collector 23, 24
HCmD HNAS Data Collector 23, 24, 28
HCmD Host Collector 23, 24, 28
Hitachi Command Director Database 23, 24
Hitachi Command Director Server 23, 24
Host Collector 28
default directory
Linux 24
setting up, Command Director server 31
SLO Recommendation 37
specifying email 34
SSL 41
disabling 53
enabling connection between HCmD server
and Agent for RAID Extension 50
enabling connection between HCmD server
and GUI 42
enabling connection between HCmD server
and HDvM server 45
enabling connection between HCmD server
and host collector server 48
generating certificate signing request 45
certificates 42
starting and stopping services
Linux 54
Storage System Collectors
configuration prerequisites 58
116 Index
Hitachi Command Director Installation and Configuration Guide

storage systems
removing 81, 84
results of removing 84
system configuration 16
connecting HCmD server to two separate
servers 17
deploying Command Director on a separate
server 16
T
timeout settings, Host Collector 100
troubleshooting
Host Collector firewall problems 100
unstable database problems on a VM system
102
host discovery problems 100
U
uninstalling from Linux
Command Director server 78
upgrading
Command Director components 71
Host Collector
on Linux 75
on Windows 75
Command Director server
on Linux 74
on Windows 73
Command Director, preparing to 72
V
verifying
host data collection 69
installation 32
W
workflow
data configuration 56
installation 22
Index 117
Hitachi Command Director Installation and Configuration Guide

118 Index
Hitachi Command Director Installation and Configuration Guide

Hitachi Command Director Installation and Configuration Guide

Hitachi Data Systems
Corporate Headquarters
2845 Lafayette Street
Santa Clara, California 95050-2639
U.S.A.
www.hds.com
Regional Contact Information
Americas
+1 408 970 1000
info@hds.com
Europe, Middle East, and Africa
+44 (0) 1753 618000
info.emea@hds.com
Asia Pacific
+852 3189 7900
hds.marketing.apac@hds.com
MK-90HCMD002-17
