Installation Guide
User Manual:
Open the PDF directly: View PDF ![]() .
.
Page Count: 23

Python Installation Guide
1. Installing Python
Python comes in several shapes and sizes. To make sure that everything works
properly, it is recommended that every person in the course use the same version of
Python. Hence, even if you already have Python installed on your computer, it will
be best if you install a new version (see instructions below) so you can be
consistent with everyone else.
Before you install anything, be sure to!completely read the installation
instructions on this page for your particular operating system. While you are
unlikely to make any mistakes, it is best for you to do things in exactly the order
described here.
Important Note About Python 2:!If you have the 2.7 version of Anaconda
already installed, this may conflict with the installation process below. In that case
you will either need to remove the old version of Anaconda, or (if you think you
still need it for another class or project) set up a!special environment in which you
can still reach this older version: https://conda.io/docs/user-guide/tasks/manage-
environments.html
1.1 Windows
We recommend that all students with Windows use Windows 10. This version has
been out long enough, and is stable enough, that everyone should be using it. If
you are using an older version of Windows, we recommend that you upgrade now
before the semester starts.
For this class, we need to use!Anaconda Python version 3.6. This is the most
recent version of Python for Anaconda. Click on one of the two links below to
install the correct version for your operating system. If you are unsure whether
your operating system is 32 or 64 bit, download the 32-bit version, which is
guaranteed to work on all systems.
http://repo.continuum.io/archive/Anaconda3-4.4.0-Windows-x86_64.exe (64 bits)
http://repo.continuum.io/archive/Anaconda3-4.4.0-Windows-x86.exe (32 bits)
The file that you download is an installer app. Simply double click on it and follow
directions. At one point in the installer, it will ask you whether you want to install
for yourself or for all users.!Select the option "All Users (requires admin
privileges)”. On the next page it will ask you what directory you want to install in.
By default, it will install inC:\ProgramData\Anaconda3. Leave this alone and
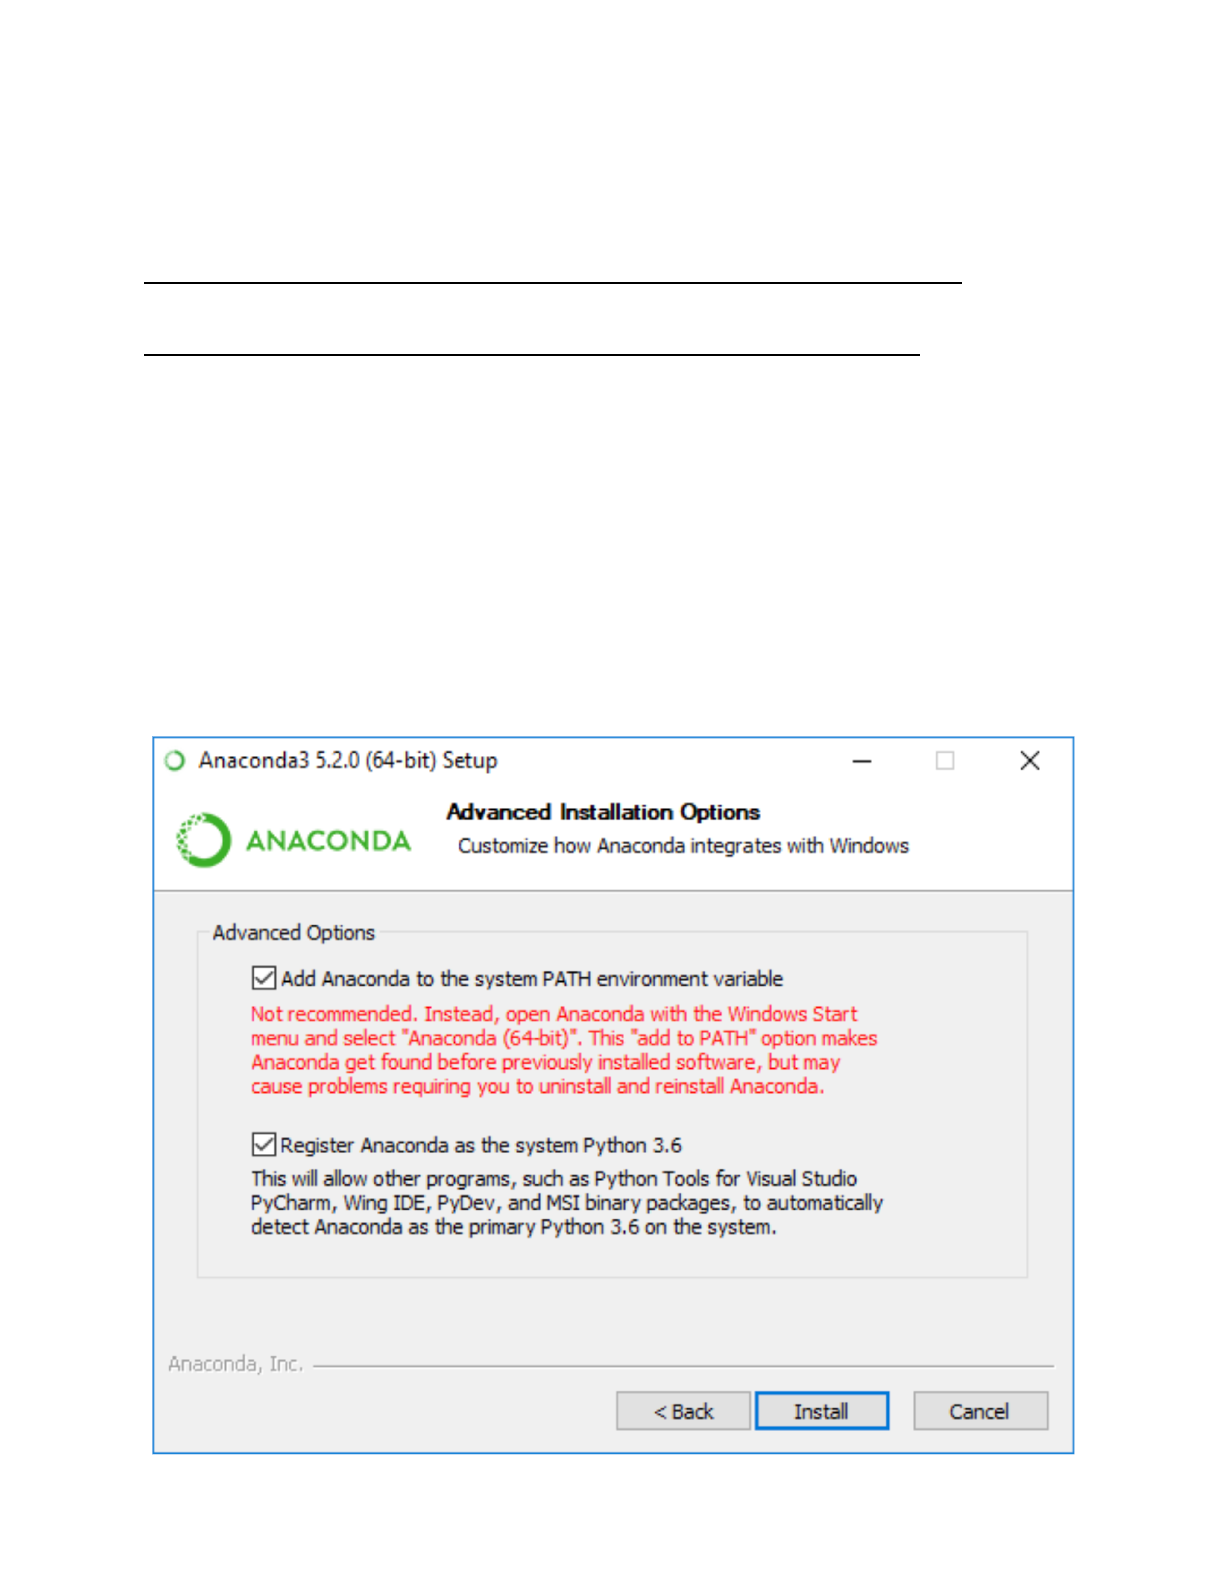
click!Next. Finally, you will see a page with check boxes talking about your
Path.!You must select the top box, even though it warns you not to. If you do
not check this box, you will not be able to use Python from the command shell.
Now click "Install". The installer may ask for your password, which is its way of
asking for permission to install Anaconda. Installation may take a minute.
1.2 Mac
The version of Python that we are using for this class is only compatible with
Mavericks (10.9) or higher. If you have an older version of OS X, we recommend
that you upgrade to El Capitan (10.11).
Click on the link below to install the correct version for your operating system:
http://repo.anaconda.com/archive/Anaconda3-5.2.0-MacOSX-x86_64.pkg
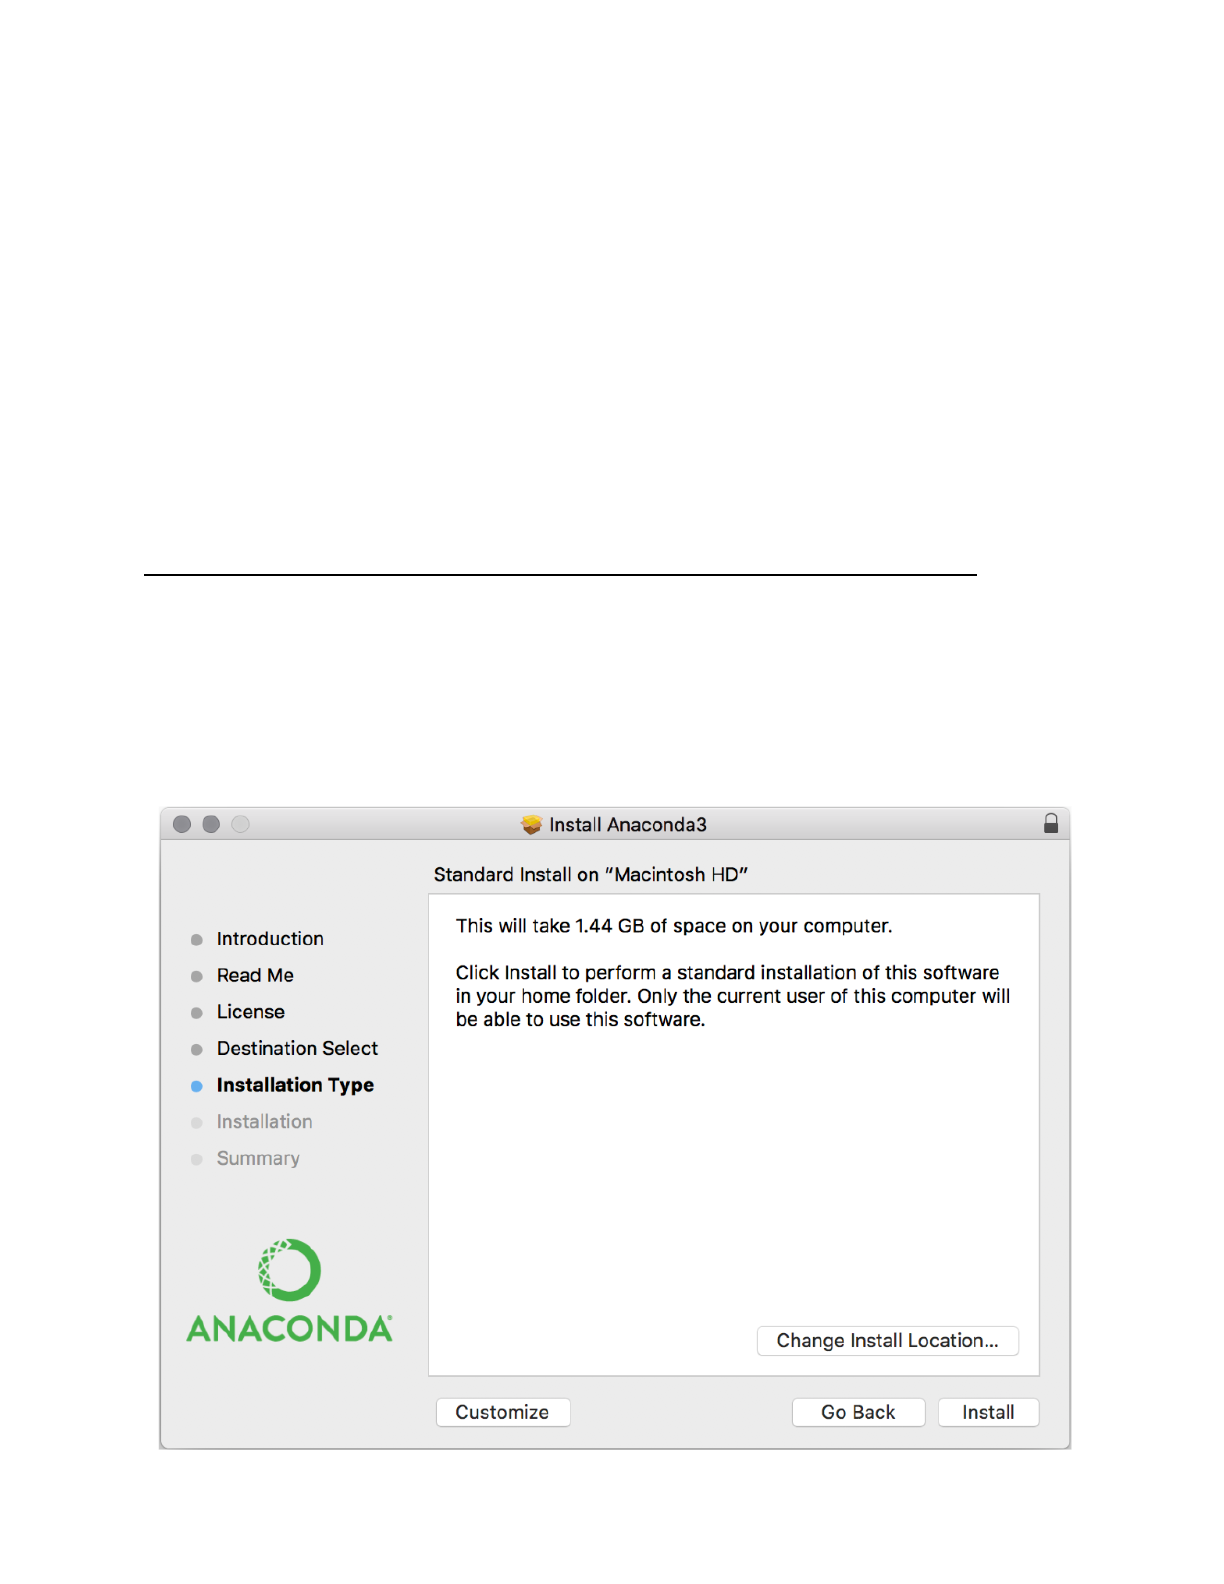
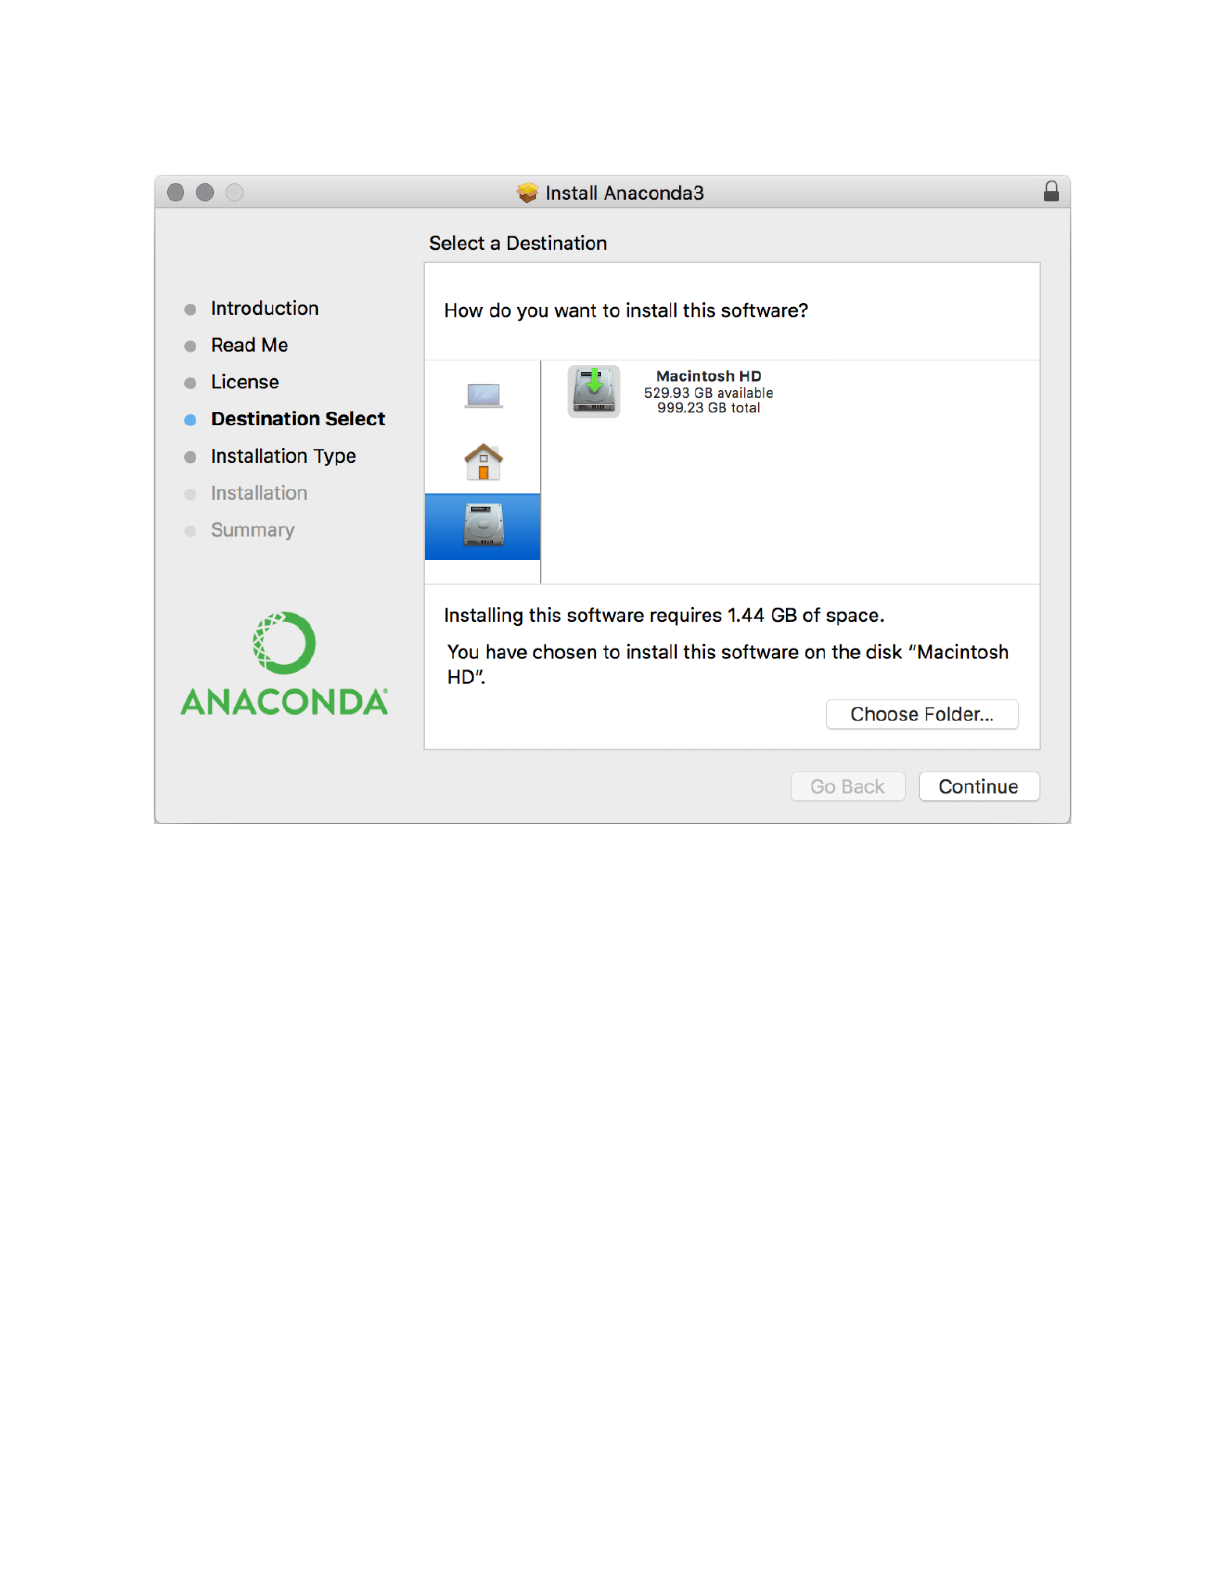
The file that you download is an installer app. Simply double click on it and follow
directions. Make sure to choose the “install on a specific disk” option and then
navigate to the “Application” folder on your hard drive (after clicking the “Choose
Folder” button).
When you download this file, you will get a web page asking you to fill in some
information. Ignore this web page. You do not need to fill in the information; your
download has started already.
1.3 Linux
Linux installation is possible, but it is not as straight-forward as the two main OS
options. In particular, to install on Linux, you have to be comfortable with
command shell and be ready to install files with a package installer. If this sounds
daunting to you, you might want to rethink about whether you want to use Linux
just yet.
For this class, we need to use Python version 3.6. This is the most recent version of
Python for Anaconda. We prefer that you use Anaconda. However, some flavors of
Linux (e.g Ubuntu) really want you to use their version of Python. If you cannot
use Anaconda, look at the instructions for using an alternate version of python.

Use one of the two links below to install the correct version for your operating
system. We highly doubt that you need the 32-bit version, but you should use this
one if you are unsure. The 32-bit version is guaranteed to work on all systems.
https://repo.anaconda.com/archive/Anaconda3-5.2.0-Linux-x86.sh (32 bits)
http://repo.anaconda.com/archive/Anaconda3-5.2.0-Linux-x86_64.sh (64 bits)
This is not graphical installer. To install it, you must navigate to the folder with the
downloaded file and run it with bash. For example, if you downloaded the 64-bit
version, you would type
!bash Anaconda3-5.2.0-Linux-x86_64.sh"
You should use the "bash" command even if you are not using the bash shell. You
may install Anaconda where ever you wish. By default, it installs in your home
directory. However, we prefer to install it in /usr/local. The choice is up to you.
2. Using the command shell
Now that you have installed Python, it is a good idea to test it out. While you do
not need to know anything about Python yet, you do need to learn how to run
Python programs that are already made for you.
The first thing that you need to do is to familiarize yourself with command shell for
your OS. The command shell is a text-based version of a file manager. So it is the
equivalent of Windows Explorer on Windows, or the Finder on MacOS. At any
given time it is open to a specific folder (or directory) on your computer. We call
the folder that is currently open in the shell the working directory.
From within the command shell, you can do everything that you could do with a
graphical file manager. You can move, rename, and copy files. You can change the
current directory. You can even run programs. In a graphical file manager, you run
a program by double-clicking on it; in a command shell, you type the name of the
program.
Every computer user has what is known as a home directory. This is the folder that
has your name. In Windows 10, this is a hidden folder which contains all your
other folders, like Downloads or the Desktop. In MacOS, it is the folder you
typically see when you ask for a new Finder window. Whenever you open a new
command shell, it always starts in the home directory. As your homework and lab
assignments will often be in different folders, the first thing you need to learn about
the command shell is how to change directories. This is explained in more details
below.
2.1 Windows
In Windows, the command shell is called the PowerShell. There is another, older
command shell called the Command Prompt. However, official Microsoft policy
since Windows 10 is to use the newer PowerShell, and that is what we recommend.
It is much closer to the MacOS and Linux versions we show in class, and so you
will be less confused.
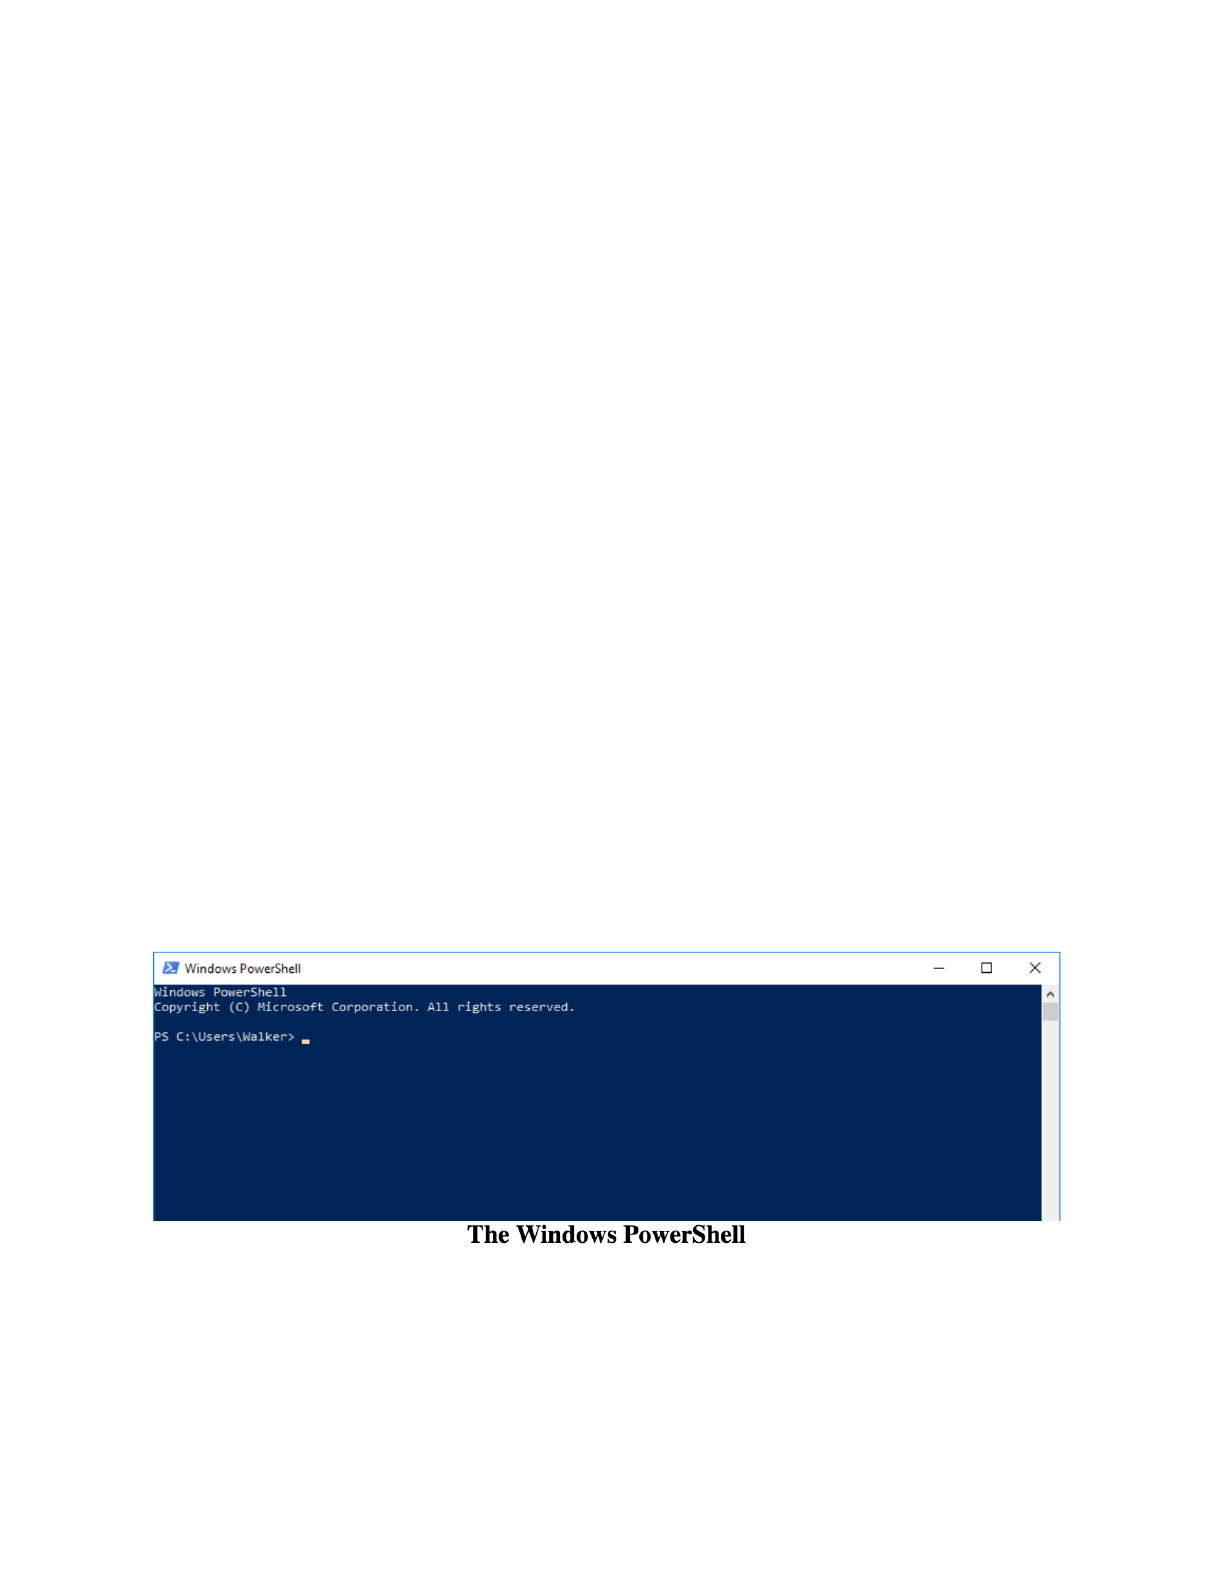
To find the PowerShell, just search for "PowerShell" in the search box at the
bottom of the Start Menu. When you start up the PowerShell, you get a Window
that looks something like the illustration below. At any given time, the bottom line
of the PowerShell is the working directory followed by a > symbol.
To get the PowerShell to do something, simply type in a command, and hit Return.
The shell will then process the command, either doing something or printing out an
error message. When done, it will present the prompt again, ready for you to type
in a new command.

As mentioned above, the PowerShell works like the Windows Explorer. At any
given time it is open to a specific folder (or directory) on your computer, which we
call the working directory.
When working on a Python assignment, you want to make sure that the working
directory is the directory that contains the .py files you are currently editing. Many
times, a student has found themselves editing a .py folder while testing one (of the
same name) in a different folder.
Navigating directories
The two most important commands to know in Windows are ls and cd.
Typing in ls displays the current working directory as well as all of its contents.
The cd command is an abbreviation for "change directory". It is how you move
from one folder to another. When you type this command into the PowerShell, you
must give it two things: the command cd and the name of the folder you wish to go
to. Using the example above, suppose we wish to switch the working directory to
Desktop. Then you would type
cd Desktop
Try this out and then type ls. See the difference?
There are a couple of important tricks to know about the cd command.
Backing Out of a Directory
The simplest form cd can only move to a folder that is "sees" (e.g. is a folder inside
the working directory). If you change to directory (such as Desktop), you can no
longer see the original directory (your home directory); it is outside of the current
working directory. So how do you back-out if you go into a folder by mistake? The
solution is that there is a special folder called "..". This refers to the folder that
contains the current one. Type
cd .."

and see what happens. If you typed it just after moving into the Desktop folder
(from the previous example), then you should be back in your home directory.
Combining cd .. with regular uses of the cd command are enough to allow you to
move up and down the directory hierarchy on your computer.
Tab Completion
If you are new to the PowerShell, you might find yourself quickly getting tired of
all the typing that you have to do. Particularly when you have a directory with a
very long name. A slight misspelling and you have to start all over again.
Fortunately, Windows has tab completion to speed things up. Go to your home
directory and type (but do not hit Return)
cd D
Now hit the tab key. See what happens? Windows turns "D" into the first folder
that it can find that starts with that letter (which is likely to be Desktop, and not
Documents, as it comes first alphabetically).
Changing Multiple Directories at Once
Suppose you are currently in the your home directory; you want to move to the
folder "Favorites" which is inside of "Documents". You could do this with two cd
commands. But to do it with a single command, you just connect the folders with a
\, as follows:
cd Documents\Favorites"
When you combine this with .., you can do some rather clever tricks. Suppose you
are currently in the Desktop directory, and you want to move in the Documents
directory (which is contained in your home directory). You can do this with the
command
cd ..\Documents"
We refer to these expressions as paths; they are are a "path" from the working
directory to the directory that you want to go to.

Absolute Paths
The paths that we have shown you are more properly called relative paths. They
show how to get from the working directory to your new directory. The correct
path to use depends on exactly which directory is the current working directory.
Absolute paths are paths that do not depend on the working directory; instead they
depend on the disk drive. They always start with name of the drive. For example,
suppose you inserted a USB drive into the computer, and you wanted to open that
drive in the PowerShell. The USB drive will (typically) be the the E: drive, so you
simply type
cd E:"
You can combine this with the \ symbol to move anywhere you want on the USB
stick. If the USB stick has a folder called "Python" on it, simply type
cd E:\Python"
Any time that you need to change disk drives, you need to use absolute paths. If
your user account is called "Sally", then you return to your home directory by
typing
cd C:\Users\Sally"
Folder Names with Spaces
The PowerShell breaks up the commands that you type in by spaces. That means
that if you have a folder with spaces in the name, it will break it up into references
to two different folders. For example, suppose you have a folder called "Python
Examples", and you type
cd Python Examples"
You will get an error saying that Windows cannot find that path. To solve the
problem, put the directory in quotes. The following should work correctly.

cd "Python Examples""
If you are changing multiple directories then you need to put the entire path in
quotes (not just the folder). For example, if you want to go to "Program Files" on
the C drive, type
cd "C:\Program Files”"
The Drag-and-Drop Shortcut
Here is a useful trick: if you take a folder and drag-and-drop it onto the
PowerShell, it will fill the window with the absolute pathname of that folder.
Therefore, to quickly move the PowerShell to a specific folder, do the following:
Type cd followed by a space.
Drag and drop the folder on to the PowerShell.
Hit Return.
Manipulating Files (OPTIONAL)
The PowerShell allows you to do everything that Windows Explorer can do (and
more). You can use the PowerShell to make folders, move files, and delete files.
However, none of this is necessary for you to learn. For this class, you never need
to understand how to do anything other than navigate directories. You can do
everything else in Windows Explorer (or some other program) if you wish.
Make a Directory
To make a new folder or directory, use the command mkdir followed by the name
of the new folder. For example:
mkdir MyFolder"
The new folder will appear in the current working directory.

You can also delete a directory with the rmdir command. For example, to delete the
folder we just made, type
rmdir MyFolder"
The PowerShell will only delete empty directories. If there is anything in a
directory, it will not let you delete it. You have to delete the contents first.
Move (or Rename) a File
You move files with the move command. The way this command works is that you
give it two file names. It searches for a file with the first file name; once it finds it,
it makes a copy with the new file name and then deletes the original.
For example, suppose you wanted to rename the file test.py to assignment3.py.
Then you would type
move test.py assignment3.py"
(this by the way, illustrates why paths cannot have spaces in them).
If the second filename is path to a file, then it will move the the file into the correct
directory. For example, suppose we now wanted to move assignment3.py to the
Desktop (which is a folder in the current working directory), and rename it
completed.py. Then we would type
move assignment3.py Desktop\completed.py"
If we want to keep the name as assignment3.py, you could shorten this to
move assignment3.py Desktop"
In this case, the PowerShell will move assignment3.py into Desktop, but keep the
name of the file unchanged.

Copy a File
The move command will always delete the original (name of) the file when it is
done. Sometimes we want to make a copy of a file. We do that with the copy
command. Suppose that assignment3.py is in the working directory and we want to
put a copy on the Desktop without deleting the original. Then we would type
copy assignment3.py Desktop\assignment3.py"
Delete a File
Files are deleted with the del command. In our running example, to delete the file
assignment3.py, you would type
del assignment3.py"
Be very careful with this command. It completely erases the file. It does not move
the file your Recycle Bin. You cannot retrieve a file deleted this way.
Getting Help
There are hundreds of resources out there on how to learn to use the PowerShell in
Windows. If you want to learn more, we suggest this tutorial as a starting point:
http://powershelltutorial.net/
2.2 Macintosh
On the Macintosh, the command shell is called the Terminal. If it is not in your
Dock (where it belongs!), it can be found in the Applications > Utilities folder as
shown below. We recommend putting it in your Dock immediately.
When you start up the Terminal, you will get some message about the "last
login" (a holdover of the days in which Terminals were used to connect machines
over the network) followed by a line with a cursor that looks like a box. The left
side of the line will depend on your settings, but the last symbol will likely be

either a $ or a >. This symbol is called the prompt, and it is a cue for you to type
something into the Terminal.
To get the Terminal to do something, simply type in a command, and hit Return.
The shell will then process the command, either doing something or printing out an
error message. When done, it will present the prompt again, ready for you to type
in a new command.
As mentioned above, the Terminal works a lot like the Finder. At any given time it
is open to a specific folder (or directory) on your computer, which we call the
working directory.
When working on a Python assignment, you want to make sure that the working
directory is the directory that contains the .py files you are currently editing. Many
times, a student has found themselves editing a .py folder while testing one (of the
same name) in a different folder.
Navigating Directories
Because you often need to change your working directory, the three most important
commands to know in the Terminal are pwd, ls, and cd.
Typing in pwd displays the current working directory.
The command ls lists the contents (files and folders) in the working directory.
The cd command is an abbreviation for "change directory". It is how you move
from one folder to another. When you type this command into the Terminal, you
must give it two things: the command cd and the name of the folder you wish to go
to. Using the example above, suppose you wish to switch the working directory to
Desktop. Then you would type
cd Desktop"
Try this out and then type ls; see the difference?
There are a couple of important tricks to know about the cd command.

Backing Out of a Directory
The simplest form cd can only move to a folder that is "sees" (e.g. is a folder inside
the working directory). If you change to directory (such as Desktop), you can no
longer see the original directory (your home directory); it is outside of the current
working directory. So how do you back-out if you go into a folder by mistake?
The solution is that there is a special folder called "..". This refers to the folder that
contains the current one. Type
cd .."
and see what happens. If you typed it just after moving into the Desktop folder
(from the previous example), then you should be back in your home directory.
Combining cd .. with regular uses of the cd command are enough to allow you to
move up and down the directory hierarchy on your computer. It is also possible to
type cd by itself, without a directory name. If you do this, it will immediately put
you back in your home folder. This is very helpful should you ever get lost while
using the Terminal.
Tab Completion
If you are new to the Terminal, you might find yourself quickly getting tired of all
the typing that you have to do. Particularly when you have a directory with a very
long name. A slight misspelling and you have to start all over again.
Fortunately, MacOS has tab completion to speed things up. Go to your home
directory and type (but do not hit Return)
cd Desk"
Now hit the tab key. See what happens? It completes the work "Desk" to
"Desktop", because it is the only thing in your home folder that starts with
"Desk" (if you actually do have something else in your folder that starts with
"Desk", this example will not work).

As another example type (but do not hit Return)
cd D
and hit tab again. There are at least two things in your home directory that start
with D: Desktop and Documents. MacOS does not know which one to complete to,
so it lists the possibilities for you. Tab autocompletion only works when the
Terminal has enough information to uniquely pick one option from the current
folder. Try doing this again with
cd De"
What happens?
Changing Multiple Directories at Once
Suppose you are currently in the your home directory and you want to move to the
folder "iTunes" which is inside of "Music". You could do this with two cd
commands. But to do it with a single command, you just connect the folders with a
/, as follows:
cd Music/iTunes"
When you combine this with .., you can do some rather clever tricks. Suppose you
are currently in the Desktop directory, and you want to move in the Documents
directory (which is contained in your home directory). You can do this with the
command
cd ../Documents"
We refer to these expressions as paths; they are are a "path" from the working
directory to the directory that you want to go to.

Absolute Paths
The paths that we have shown you are more properly called relative paths. They
show how to get from the working directory to your new directory. The correct
path to use depends on exactly which directory is the current working directory.
Absolute paths are paths that do not depend on the working directory. In MacOS
(and all Unix systems), absolute paths start with a /. This / represents the root
directory that contains everything else. For example, if you wanted to go to your
Applications directory (which is just inside the root directory), you would type
cd /Applications"
Absolute paths are very important when you are trying to navigate to a different
disk drive. In MacOS, when you plug in a new disk drive it is added to the /
Volumes folder (note the / indicating that Volumes is just inside the root folder).
Suppose you have a Kingston USB drive from the Campus store named
KINGSTON. To view the contents of this drive in the terminal, type
cd /Volumes/KINGSTON"
To drive home the difference between relative and absolute paths, create a folder
called "Applications" in your home directory. Make sure the terminal is in the
home directory (go home by typing cd by itself) and type
cd Applications"
Look at the contents with ls. Now go back to the home directory again and type
cd /Applications"
Look at the contents with ls. See the difference?
Folder Names with Spaces
The Terminal breaks up the commands that you type in by spaces. That means that
if you have a folder with spaces in the name, it will break it up into references to

two different folders. For example, suppose you have a folder called "Python
Examples", and you type
cd Python Examples"
You will (likely) get an error saying that the folder "Python" does not exist. To
solve the problem, put the directory in quotes. The following should work
correctly.
cd "Python Examples""
If you are changing multiple directories then you need to put the entire path in
quotes (not just the folder). For example, if "Python Examples" were on the
Desktop, you would type
cd "Desktop/Program Files""
Alternatively, you can represent a space using the escape character \ which we
talked about in class. For example, the following should also work correctly:
cd Python\ Examples"
If you use Tab Completion a lot, you will notice that this is the preferred way of
handling spaces.
The Drag-and-Drop Shortcut
Here is a useful trick: if you take a folder and drag and drop it onto the Terminal, it
will fill the window with the absolute pathname of that folder. Therefore, to
quickly move the Terminal to a a specific folder, do the following:
Type cd followed by a space.
Drag and drop the folder on to the Terminal window.
Hit Return.

This trick works on Windows and Linux as well. However, MacOS has an even
faster trick that is unique to its operating system. Simply take the folder icon and
drop it onto the Terminal icon (in your Dock), and it will open a new Terminal
window with that folder as its working directory.
Manipulating Files (OPTIONAL)
The Terminal allows you to do everything that Finder can do (and more). You can
use the Terminal to make folders, move files, and delete files. However, none of
this is necessary for you to learn. For this class, you never need to understand how
to do anything other than navigate directories. You can do everything else in the
Finder (or some other program) if you wish.
Make a Directory
To make a new folder or directory, use the command mkdir followed by the name
of the new folder. For example, type:
mkdir MyFolder"
The new folder will appear in the current working directory.
You can also delete a directory with the rmdir command. For example, to delete the
folder you just made, type
rmdir MyFolder"
The Terminal will only delete empty directories. If there is anything in a directory,
it will not let you delete it. You have to delete the contents first.
Move (or Rename) a File
You move files with the mv command. The way this command works is that you
give it two file names. It searches for a file with the first file name; once it finds it,
it makes a copy with the new file name and then deletes the original.

For example, suppose you wanted to rename the file test.py to assignment3.py.
Then you would type
mv test.py assignment3.py"
(this by the way, illustrates why paths cannot have spaces in them).
If the second filename is path to a file, then it will move the the file into the correct
directory. For example, suppose you now wanted to move assignment3.py to the
Desktop (which is a folder in the current working directory), and rename it
completed.py. Then you would type
mv assignment3.py Desktop/completed.py"
If you want to keep the name as assignment3.py, you could shorten this to
mv assignment3.py Desktop
In this case, the Terminal will move assignment3.py into Desktop, but keep the
name of the file unchanged.
Copy a File
The mv command will always delete the original (name of) the file when it is done.
Sometimes you want to make a copy of a file. We do that with the cp command.
Suppose that assignment3.py is in the working directory and we want to put a copy
on the Desktop without deleting the original. Then you would type
cp assignment3.py Desktop/assignment3.py"
Delete a File
Files are deleted with the rm command. In our running example, to delete the file
assignment3.py, you would type
rm assignment3.py"

Be very careful with this command. It completely erases the file. It does not move
the file your Trash. You cannot retrieve a file deleted this way.
Getting help
There are many resources out there on how to learn to use the Terminal in OS X. If
you want to learn more, we suggest this tutorial as a starting point:
https://macpaw.com/how-to/use-terminal-on-mac
2.3 Linux
Let's be honest here. If you use Linux, do you really need to learn how to use the
command shell? How is it possible to do anything in Linux without knowing how
to use the command shell?
On the off chance that you honestly have never used a command shell in Linux, the
hard part is finding the program that provides access to the shell. Which program to
use depends on your choice of GUI.
•X11: xterm (http://en.wikipedia.org/wiki/Xterm)
•Gnome: Gnome Terminal (http://en.wikipedia.org/wiki/GNOME_Terminal)
•KDE: konsole (http://en.wikipedia.org/wiki/Konsole)
Once you have that running, simply refer to the instructions for Macintosh. While
the programs are not exactly the same (particularly if you are running a shell other
than Bash), they are close enough for purposes of this class.

3. Python interactive shell
Start the command shell for your OS and type
python
This will put you in the "Python Interactive Shell".
The Python Interactive Shell looks exactly like the command shell except that it
takes Python commands (and does not respond to operating system commands to
list files or change the working directory). While the command shells are different
for all operating systems, the Python Interactive Shell should look and behave
exactly the same way for everyone.
The > > > symbols are the prompt. To get the shell to do something, just type a
Python command. For example, type
>>> 1+1"
and hit Return (do not type the > > >; it is already there). See what happens?
To exit the Python Interactive Shell, type exit() and hit Return.
4. Installing Atom
The last program to install is Atom Editor. Technically, you can write Python
programs in any text editor. But you should use an editor designed for
programming, otherwise you will have white space issues and other issues. We
recommend Atom since it is the same across all platforms and it’s free. Some
people prefer Sublime Text or Komodo Edit. Feel free to use whichever editor you
like best.
To install Atom, go to https://atom.io/

You should see a yellow "Download" button, which has your computer system's
OS information above it. Click on that button.
If you are using a Windows computer, the downloaded file will be an .exe file.
Double click it and Atom should install automatically. For Linux computers, install
the .deb file and then double click on it. You should then be able to install it using
your package manager.
If you are using a Mac computer, the downloaded file should be a .zip. Double
click on that .zip file, and then drag the resulting Atom.app to your applications
folder. The first time you attempt to open it, it may warn that it is an unverified
application from the internet. Ignore this and click open on the window that pops
up.
Configuring preferences
One of the most controversial aspects of Python is that it treats spaces and tabs
very differently. If you accidentally put a tab in your program, it will cause your
program will crash. And you will have a hard time finding it because both tabs and
spaces look exactly the same.
Most of the time, this is not a problem. However, we must first configure Atom so
that indentation is consistent across all of our files. First, open Atom. Then, open
the Settings menu option; in Windows, it is under the File category, and in Mac, it
is under Atom (and is named Preferences). Then, in the settings window that opens,
select the Editor category, and scroll down. First, check the boxes "Show Indent
Guide" and "Show Invisibles" so that your settings match this image:
This will allow you to see both tabs and spaces, and to tell the difference between
both. Spaces will look like light dots which are centered vertically on each line.
Tabs will look like two '>' characters next to each other.
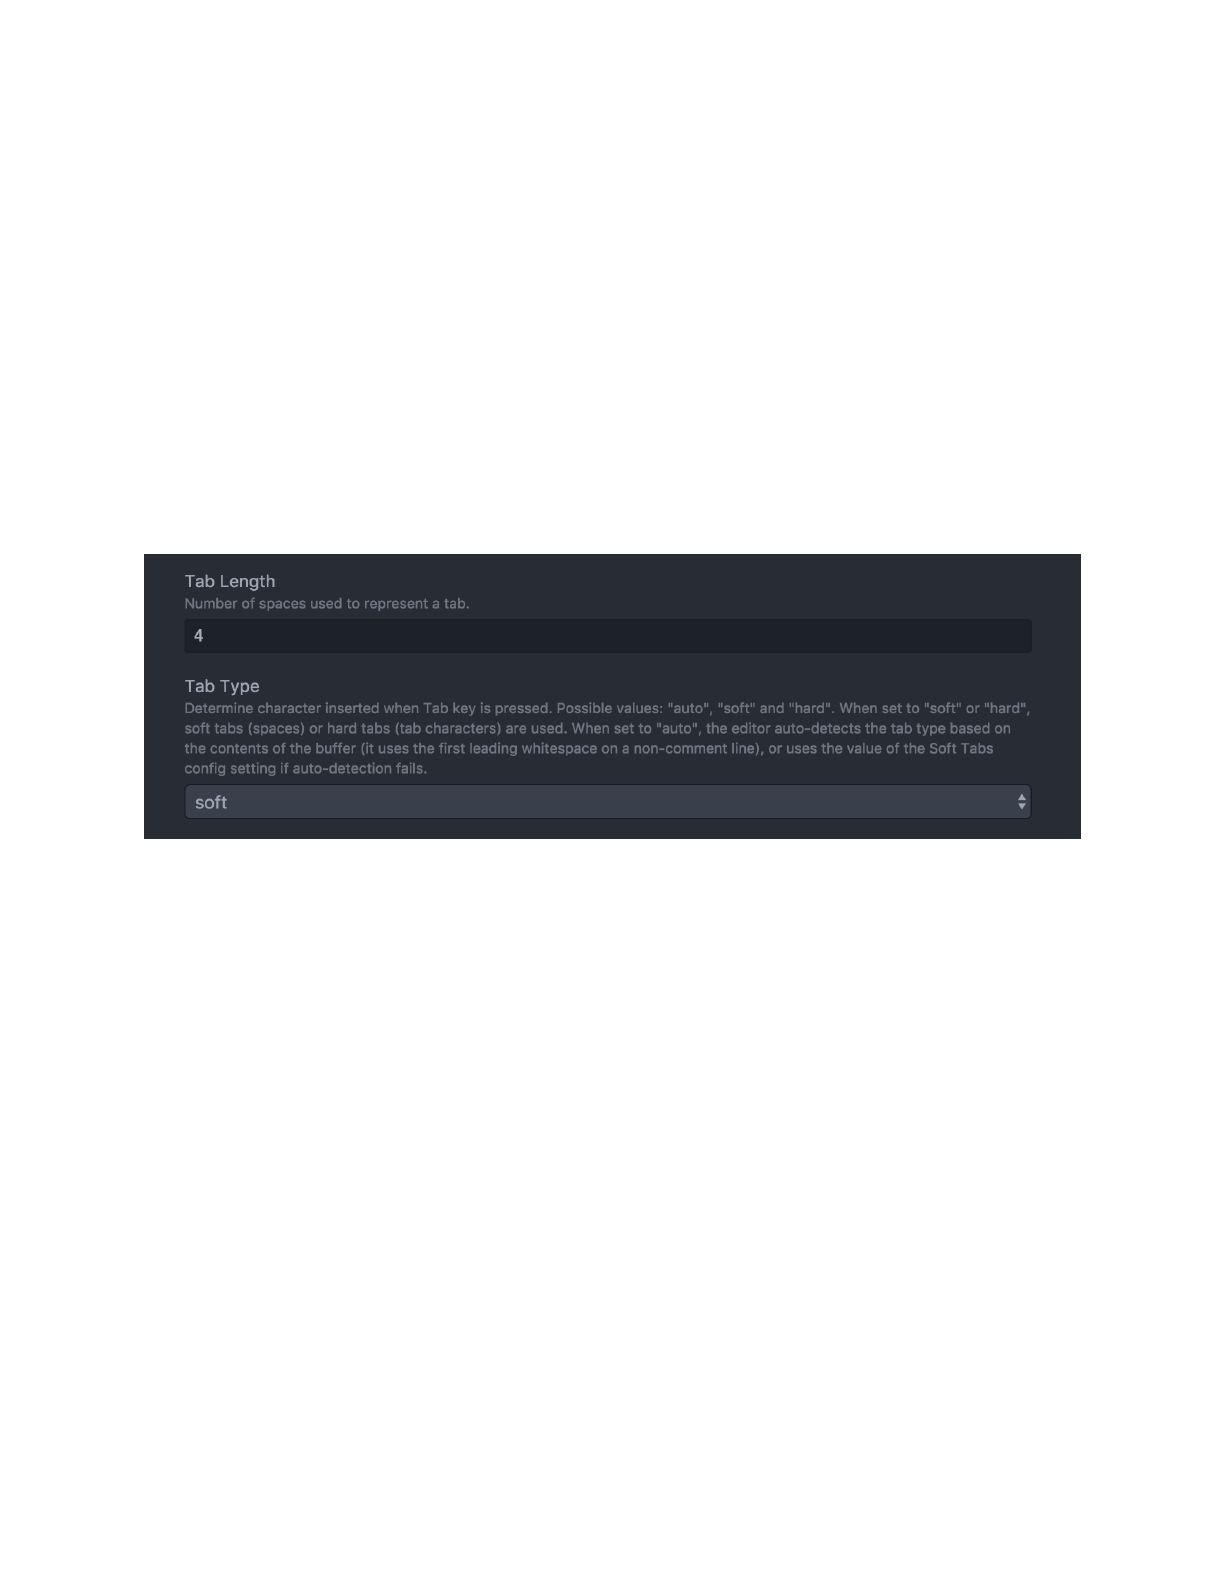
Continue scrolling down. Change the value in "Tab Length" to 4, and click on the
value in "Tab Type". This should open a drop-down menu. Select "soft". This will
make Atom automatically replace all Tabs you input with 4 spaces. After
configuring, these two settings should look like this:
