Installing Xilinx ISE (Windows 10) Installation Guide Virtualbox
User Manual:
Open the PDF directly: View PDF ![]() .
.
Page Count: 34

Installing Xilinx ISE
(VirtualBox)

Starting Notes
•These slides were made in January 2018 for installing
•“ISE Design Suite for Windows 10 -14.7”
•The download runs using VirtualBox, which runs on a variety of
operating systems including Windows 10 and Mac
•There are also a few usage notes at the end

Notes
•This is a set of Xilinx tools on a Linux virtual machine (from Virtualbox)
•In other words, clicking on the shortcuts from the install launch Virtualbox
and that virtual machine has the Xilinx tools installed on it
•This should work for Linux too, but this guide doesn’t cover that
•For Windows 7, you can instead use the webpack:
•Link: https://www.xilinx.com/products/design-tools/ise-design-suite/ise-
webpack.html (this guide also doesn’t cover it)
•Xilinx doesn’t explicitly support mac, but, Xilinx provides a virtual
machine, which can still be used as long as VirtualBox is installed on
the Mac. If that doesn’t work, you can instead dual boot with boot
camp, or create a Windows 7 Virtual Machine and install it

Finding the Download
Download link:
https://www.xilinx.com/support/download/index.html/content/xilinx/en/do
wnloadNav/design-tools/14_7-windows.html
Whether you are a Mac or Windows user, download the compressed file.
(Despite, if you on Mac, the fact that the download says “windows”)
You may need to create an account with Xilnix and provide a company,
I just used the campus address and contact info.
If that works, skip the next slides and proceed to either “Windows Install” or
“Mac Install”

Finding the Download
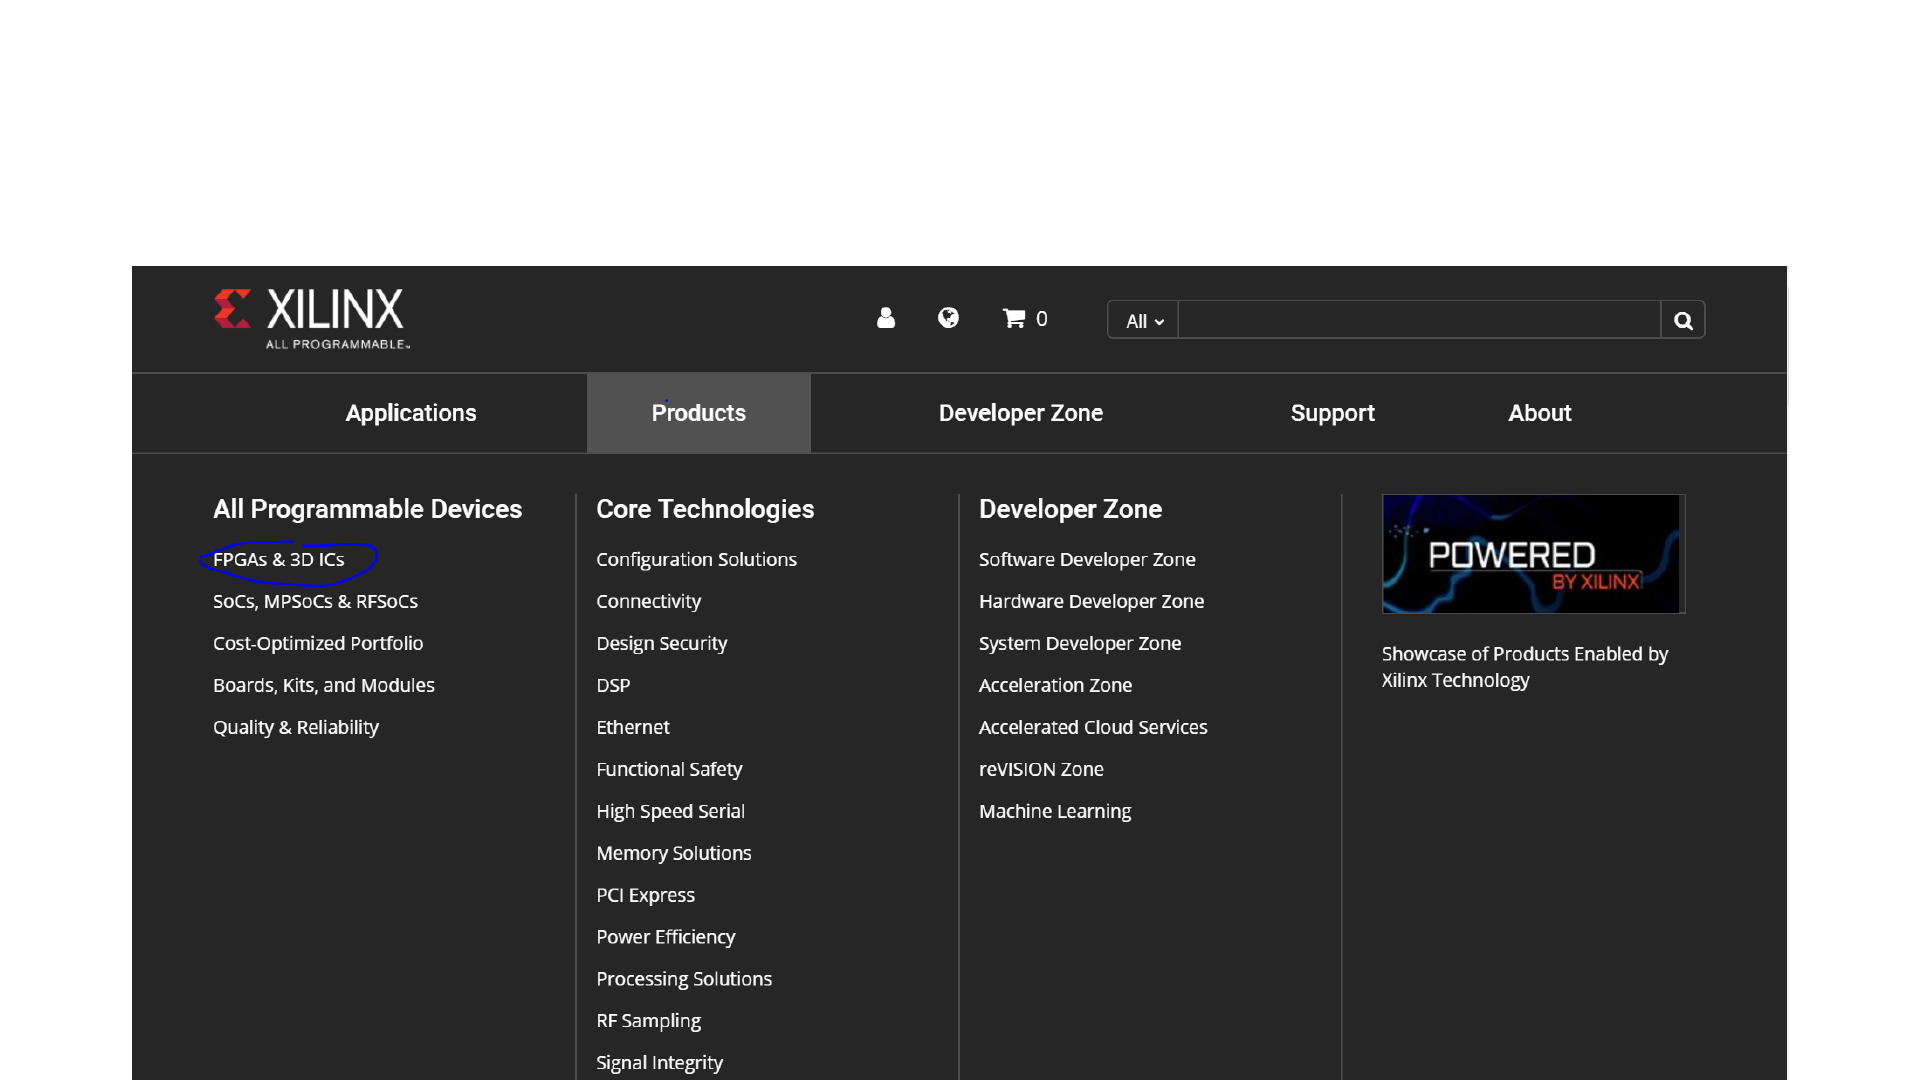
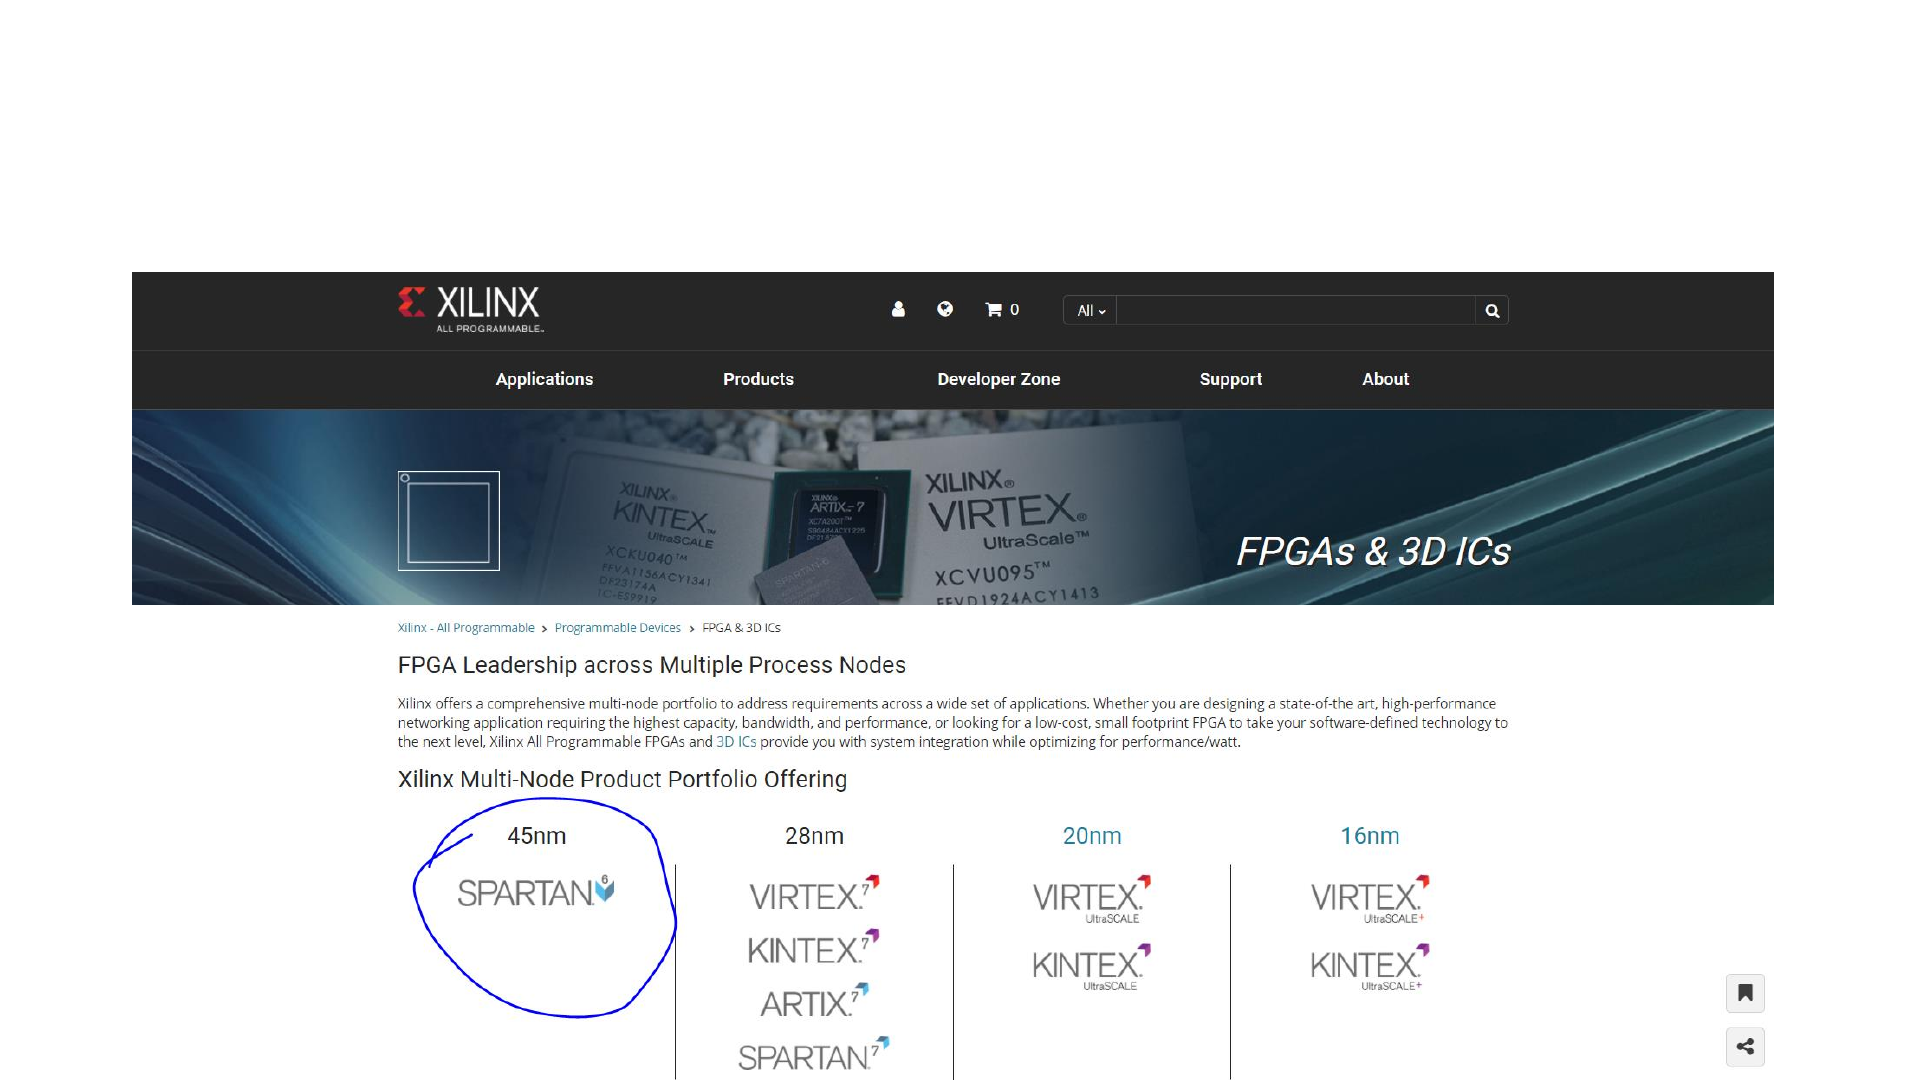
•Navigate to Xilinx’s Products listing, and look for the product page for
the “Spartan 6”
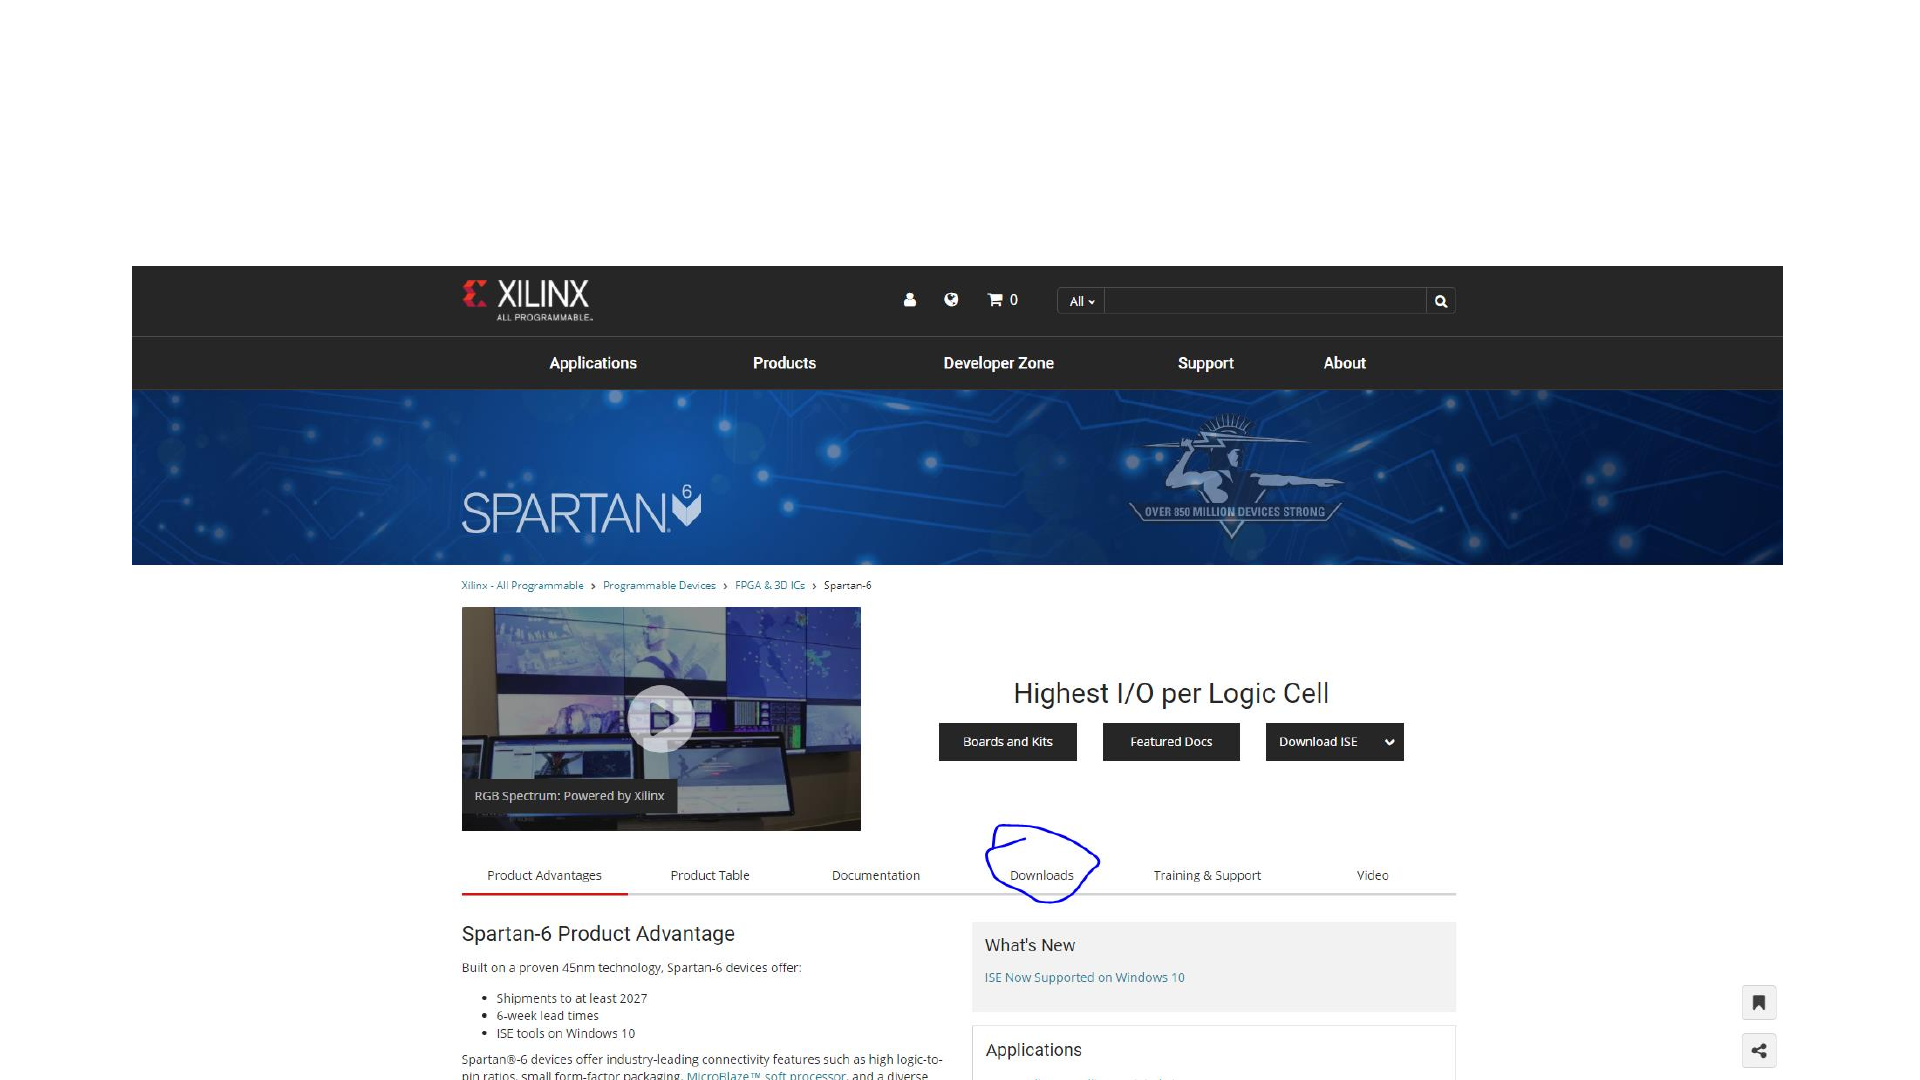
•Look for the associated downloads tab
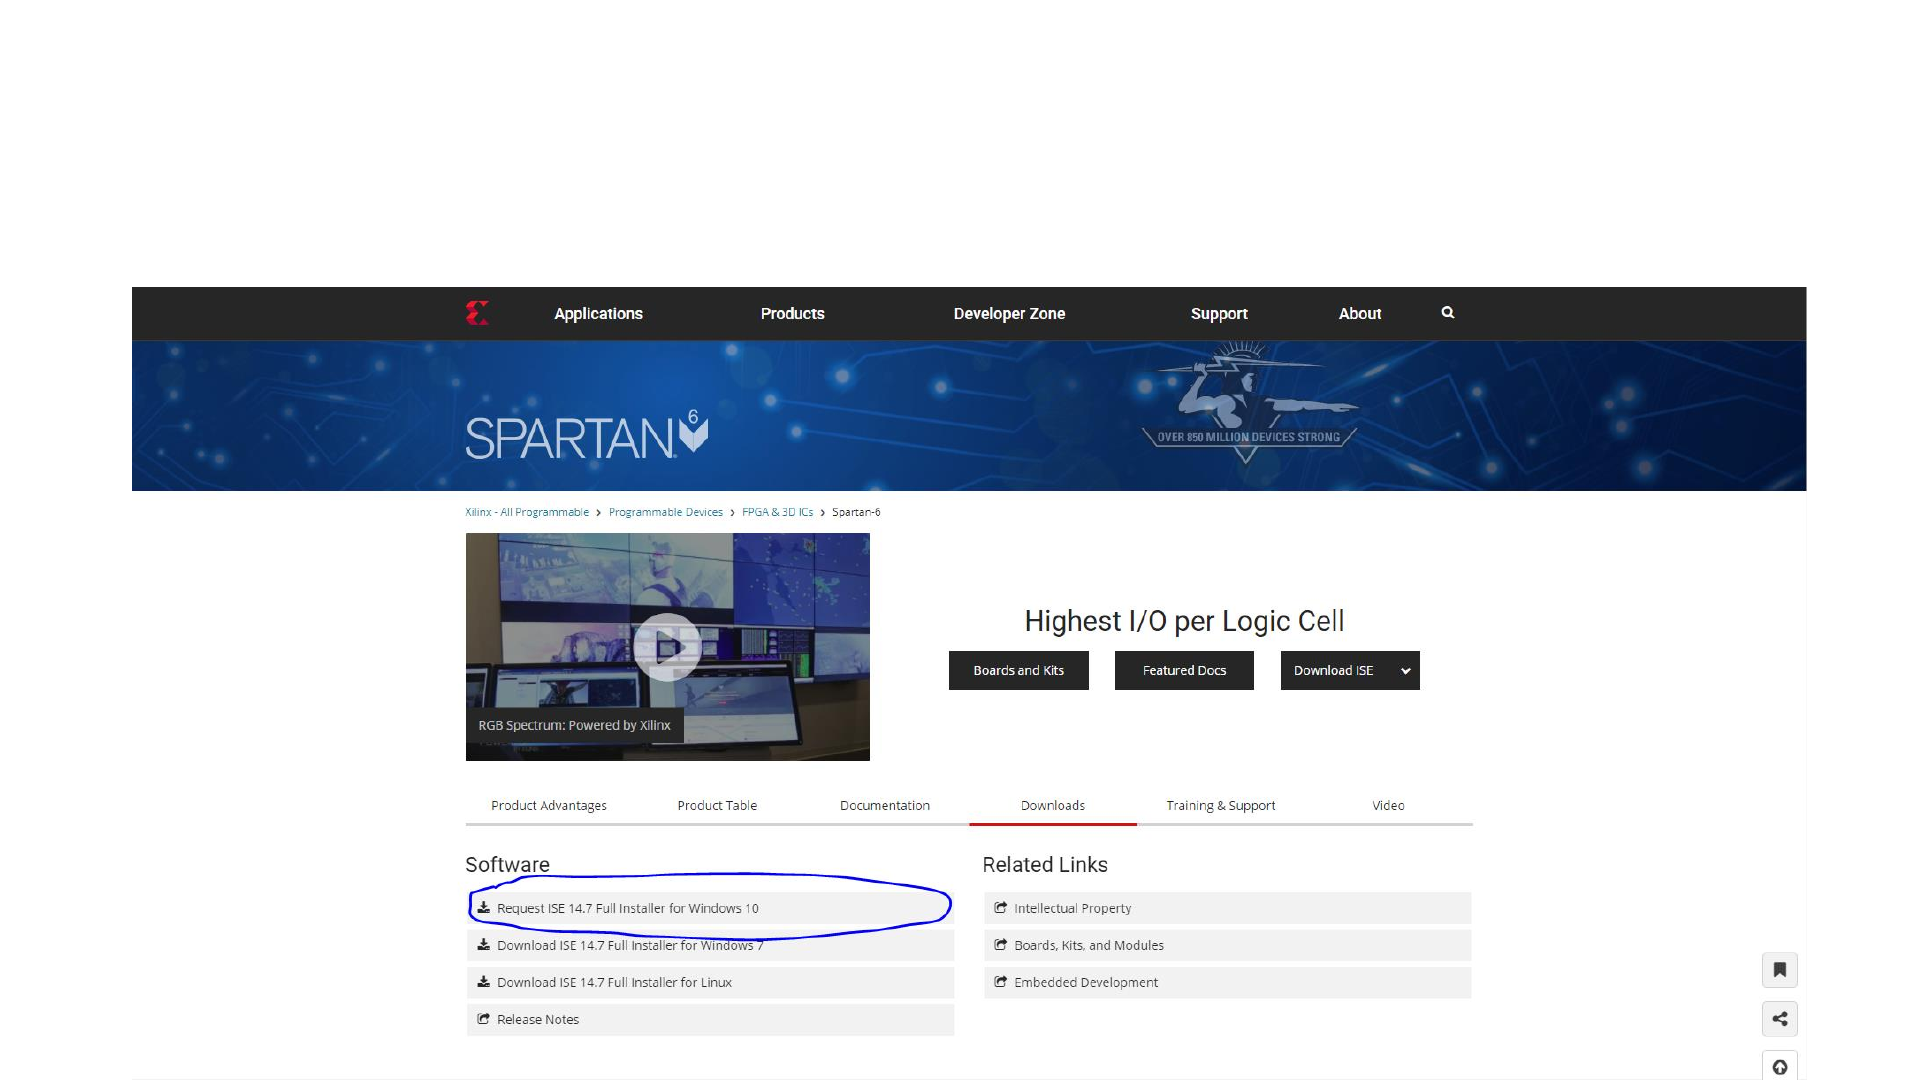
•Look for the Windows 10 Installer compressed download (tar or zip)
•Note: even if you are installing for Mac, we will use the Windows 10 install
files
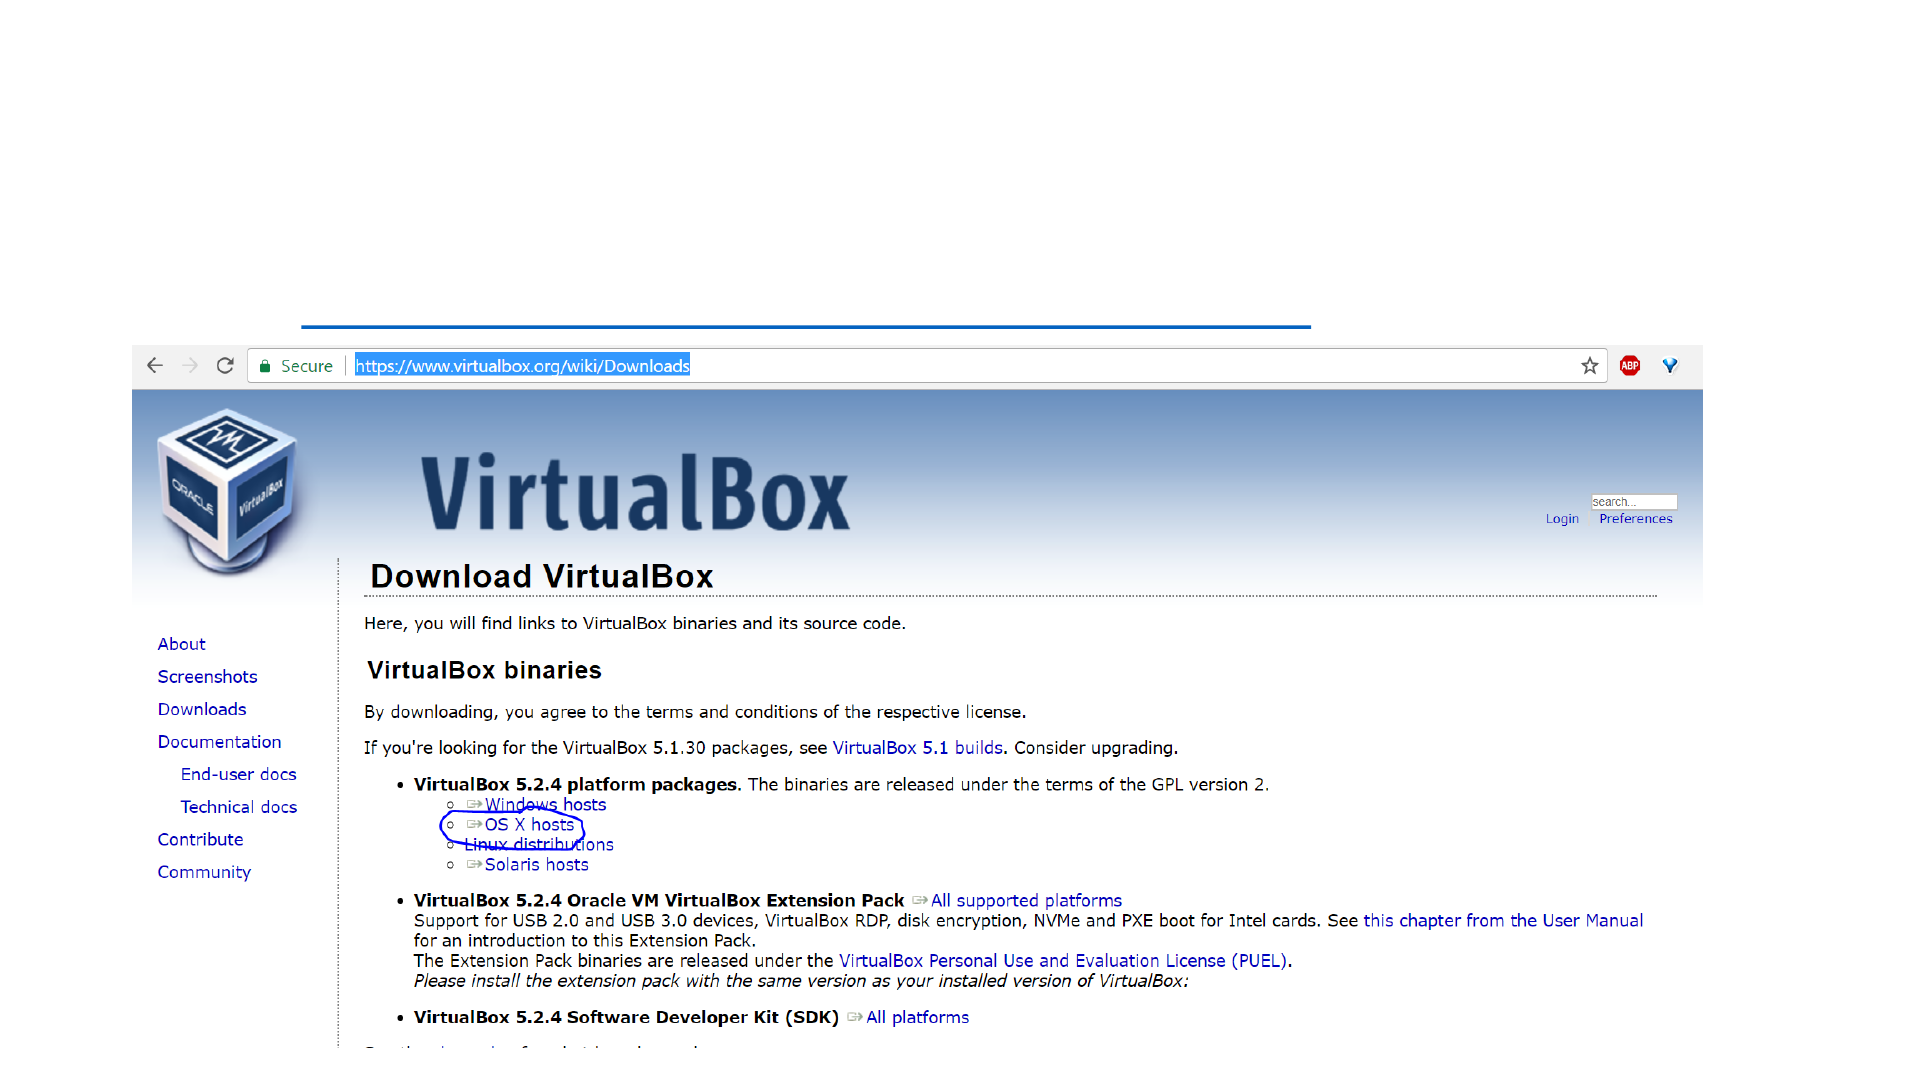
•The next few slides are screenshots walking through the website to
find the link at the time this guide was made
Finding the Download
Finding the Download
Finding the Download
Finding the Download

Windows Install
Installer
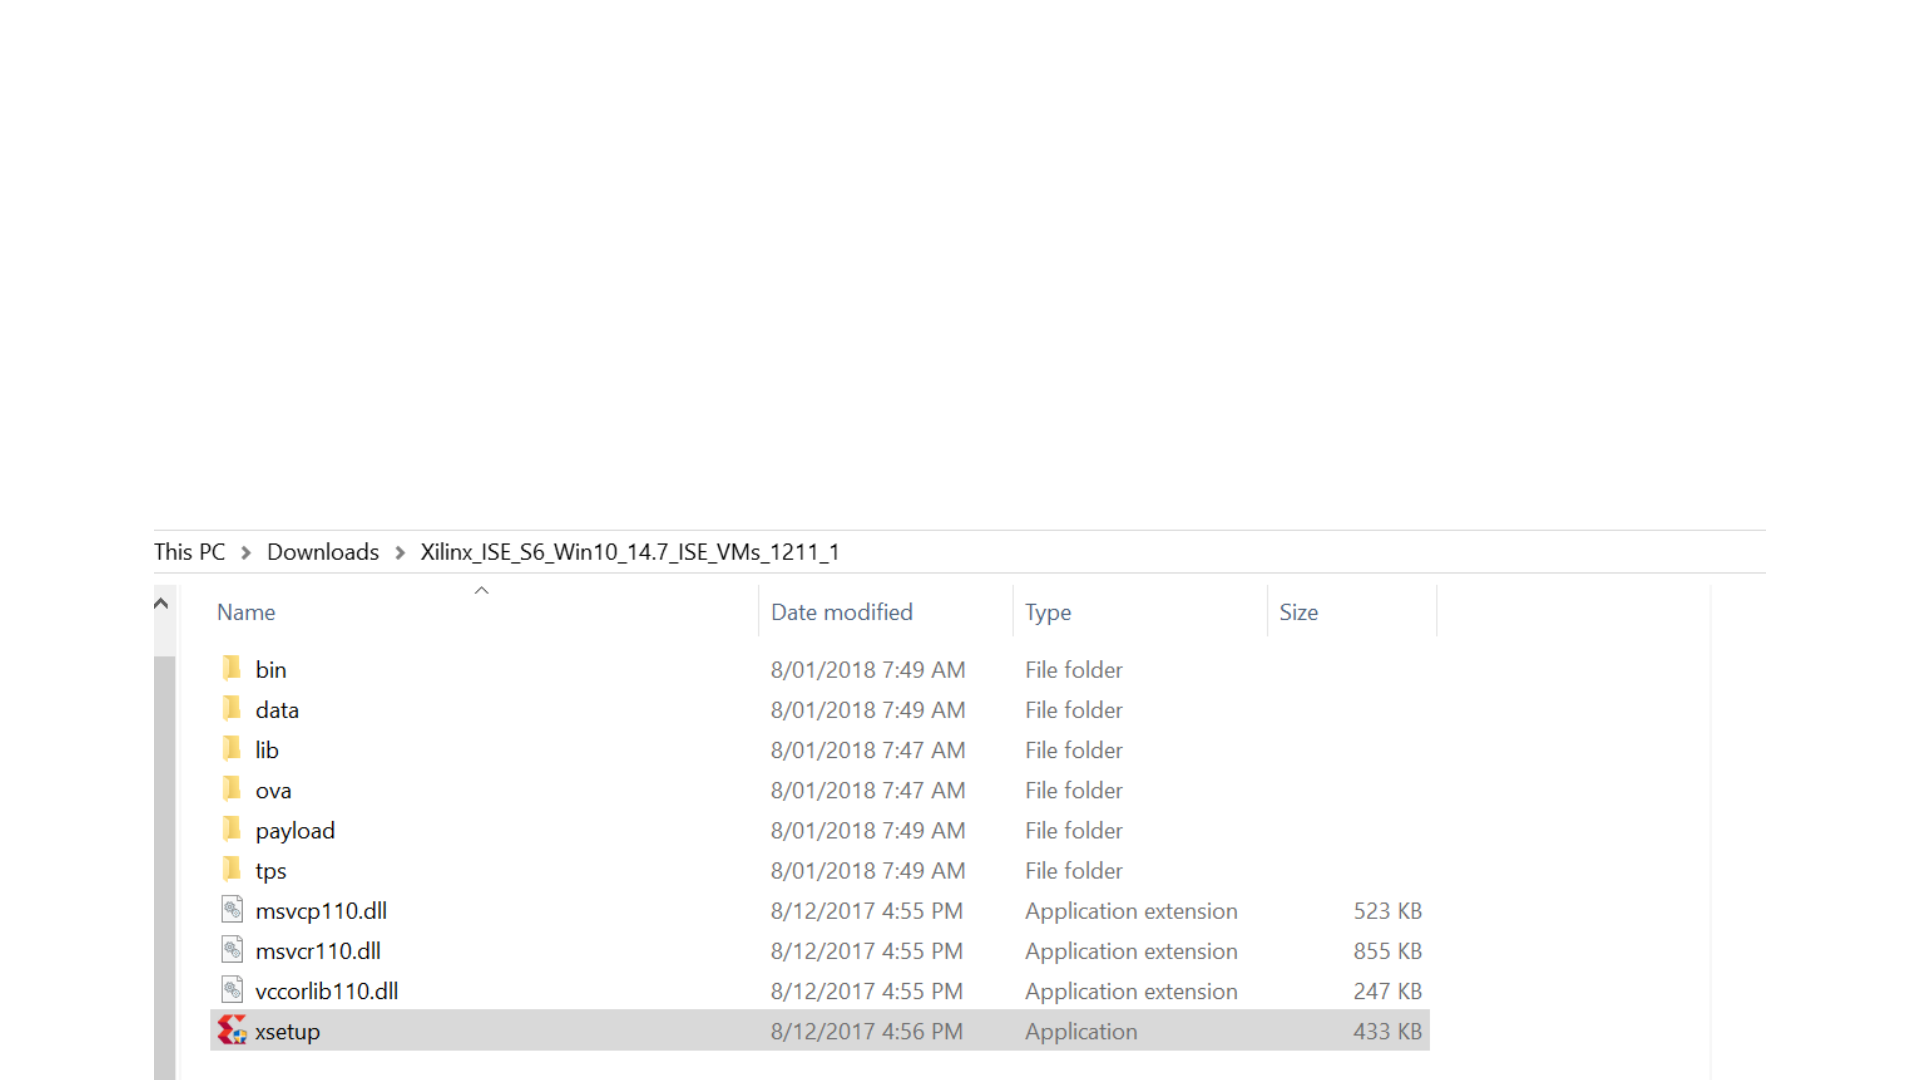
•Just unzip the installer and click “xsetup”
•It’s pretty straightforward, but there’s a couple options that you might
want to pay attention to (see next two slides before install)
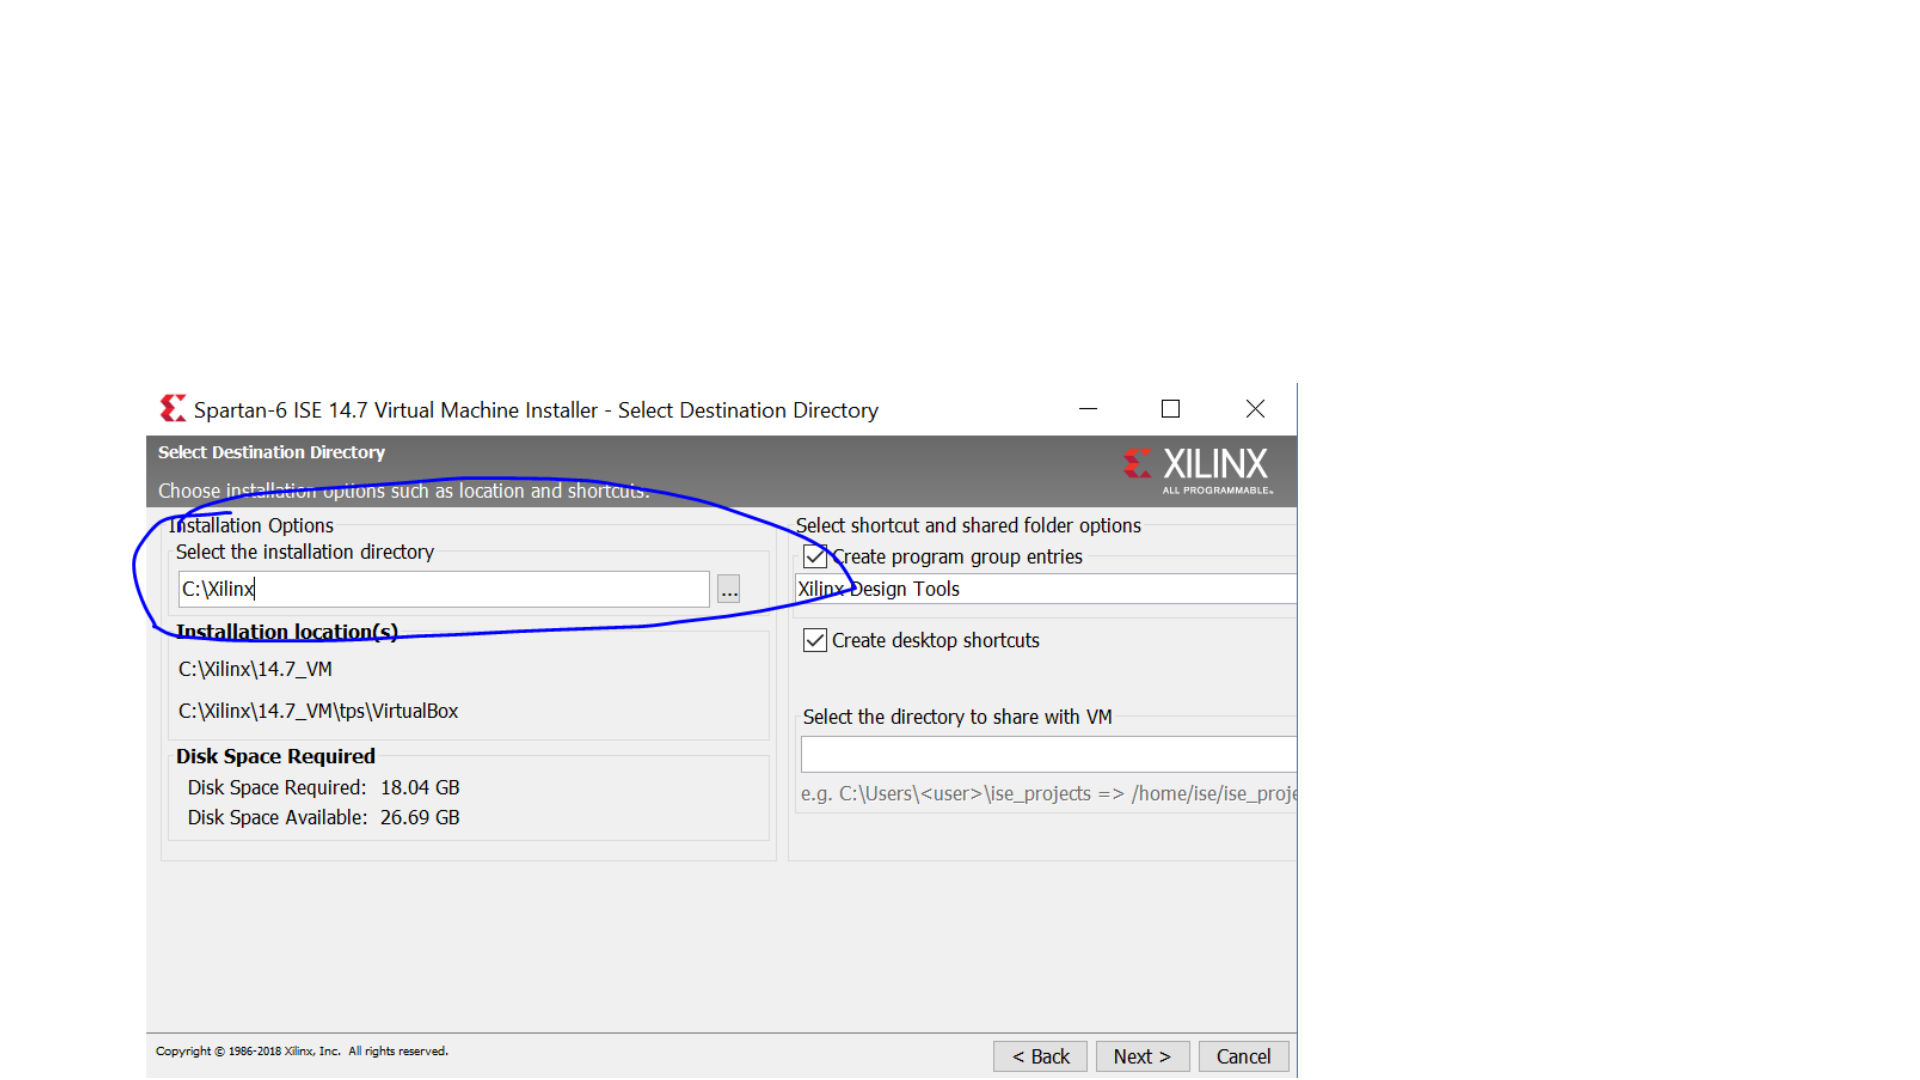
Installer –File Location
•At this stage, you can select the install directory. Xilinx takes up a large
swath of memory so it’s a good idea to set this to a bigger hard drive
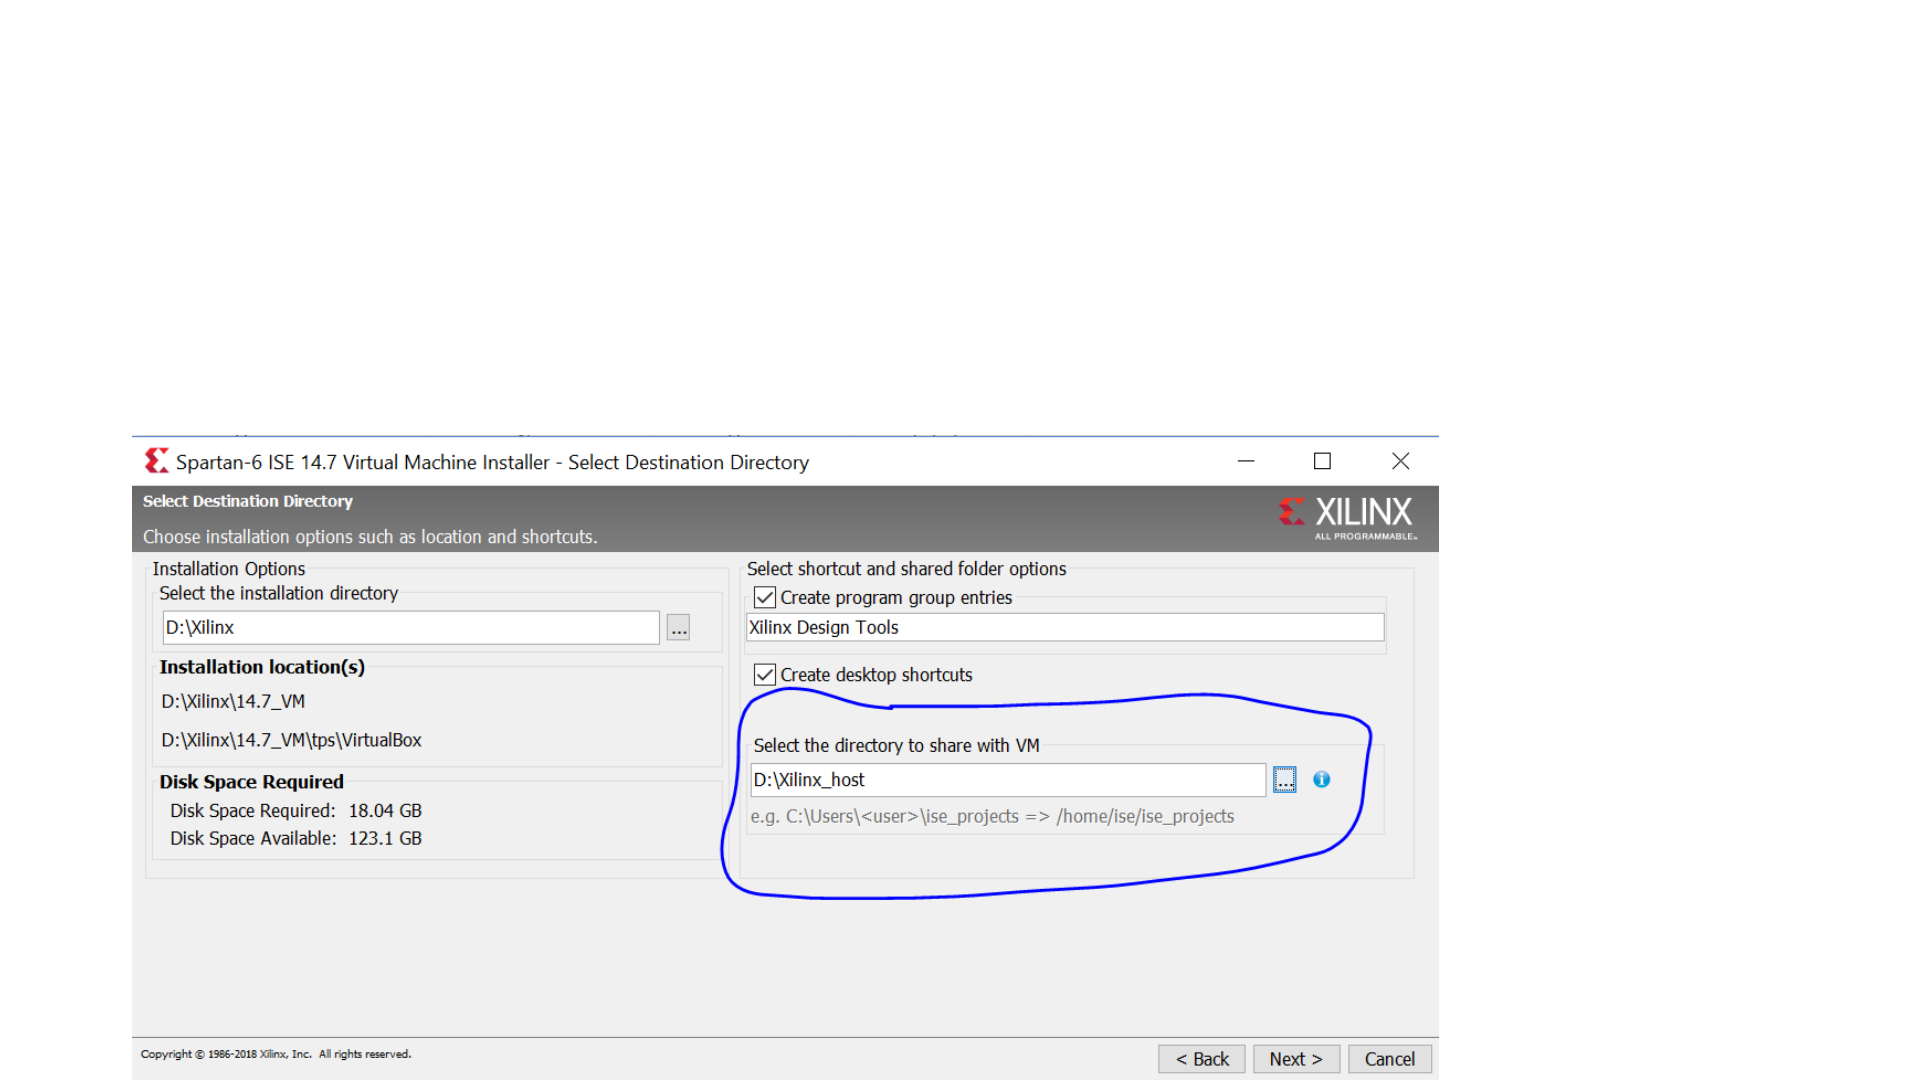
Installer –Shared Folder
•You can set up a folder to be visible from both your (host) operating
system and the virtual machine’s (guest) operating system. This is
good for quickly moving files around. (See Usage Notes)

Shared Folder
•The shared folder in the VM should have a desktop shortcut
•If you forgot to do this in the installer, you can create a new shared
folder following the Mac instructions for a shared folder later in these
slides.
•(See next slide for screenshot)
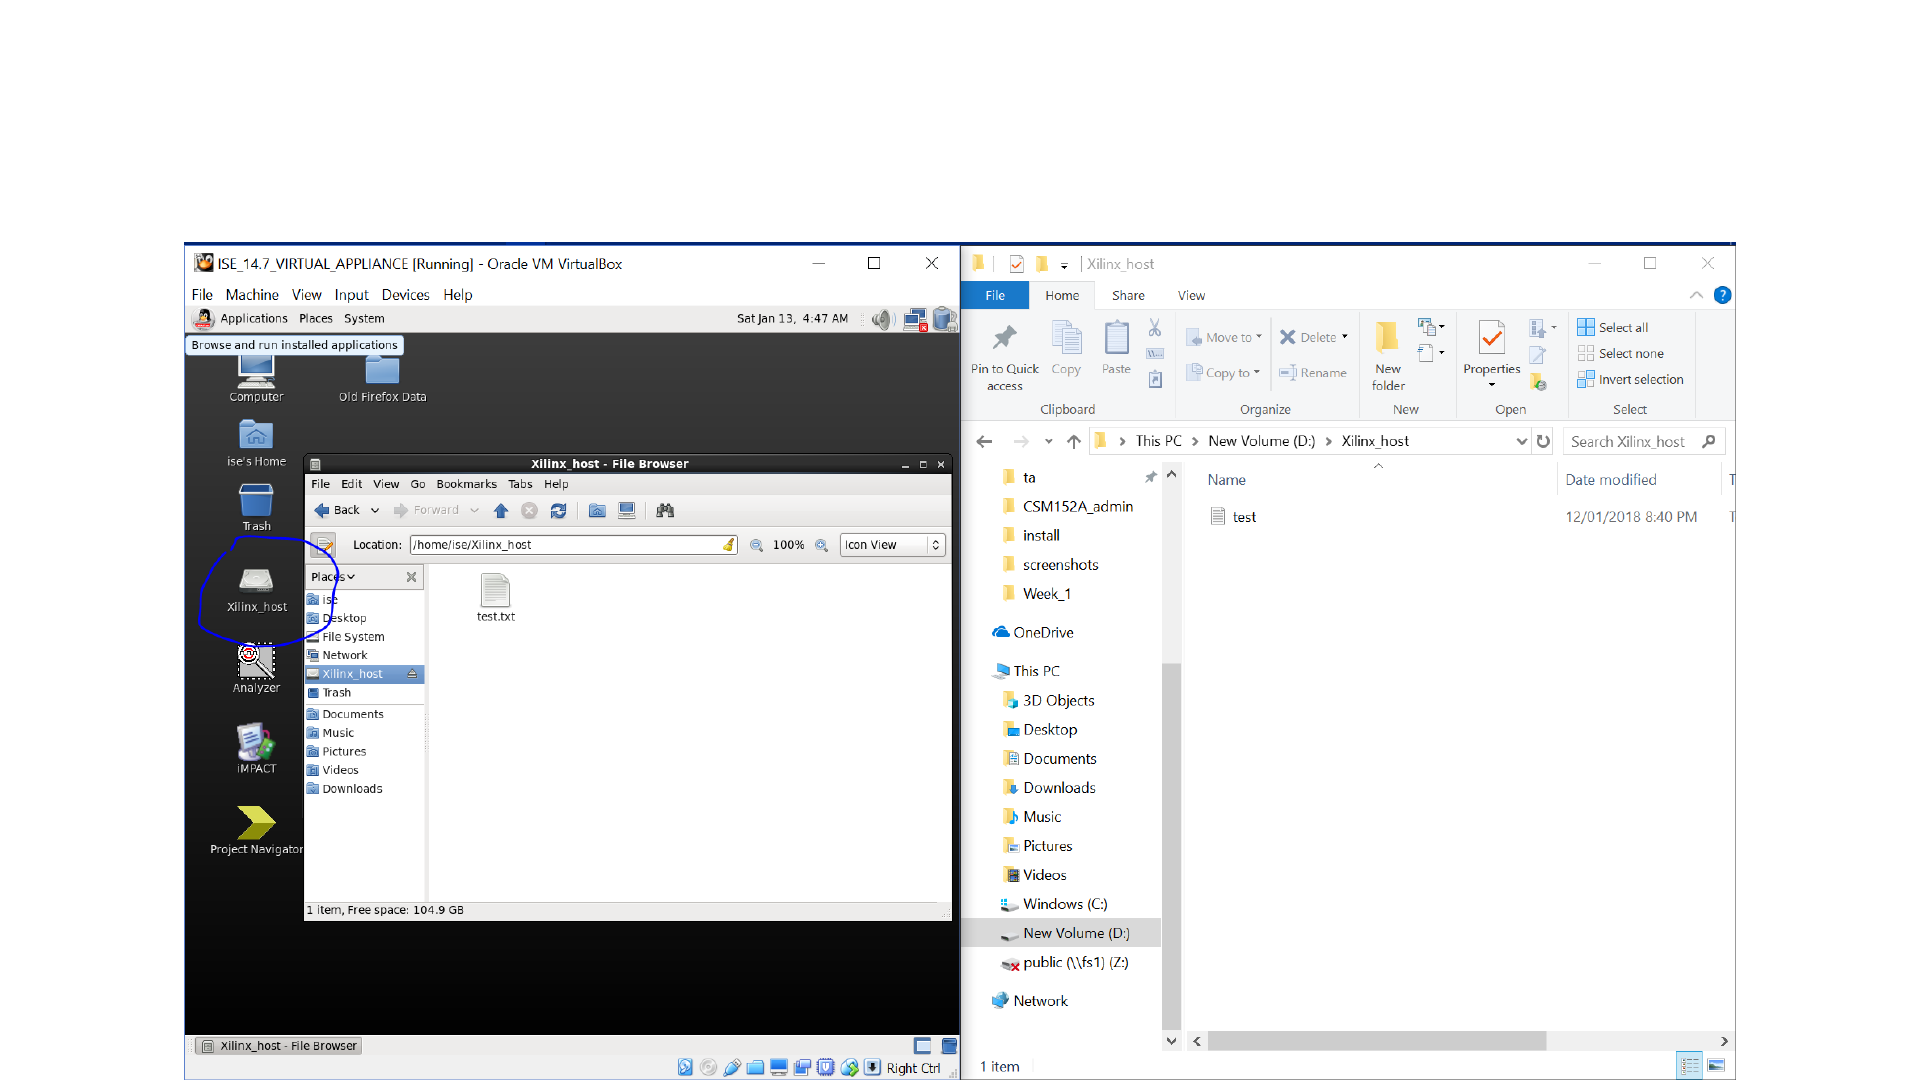
Shared Folder
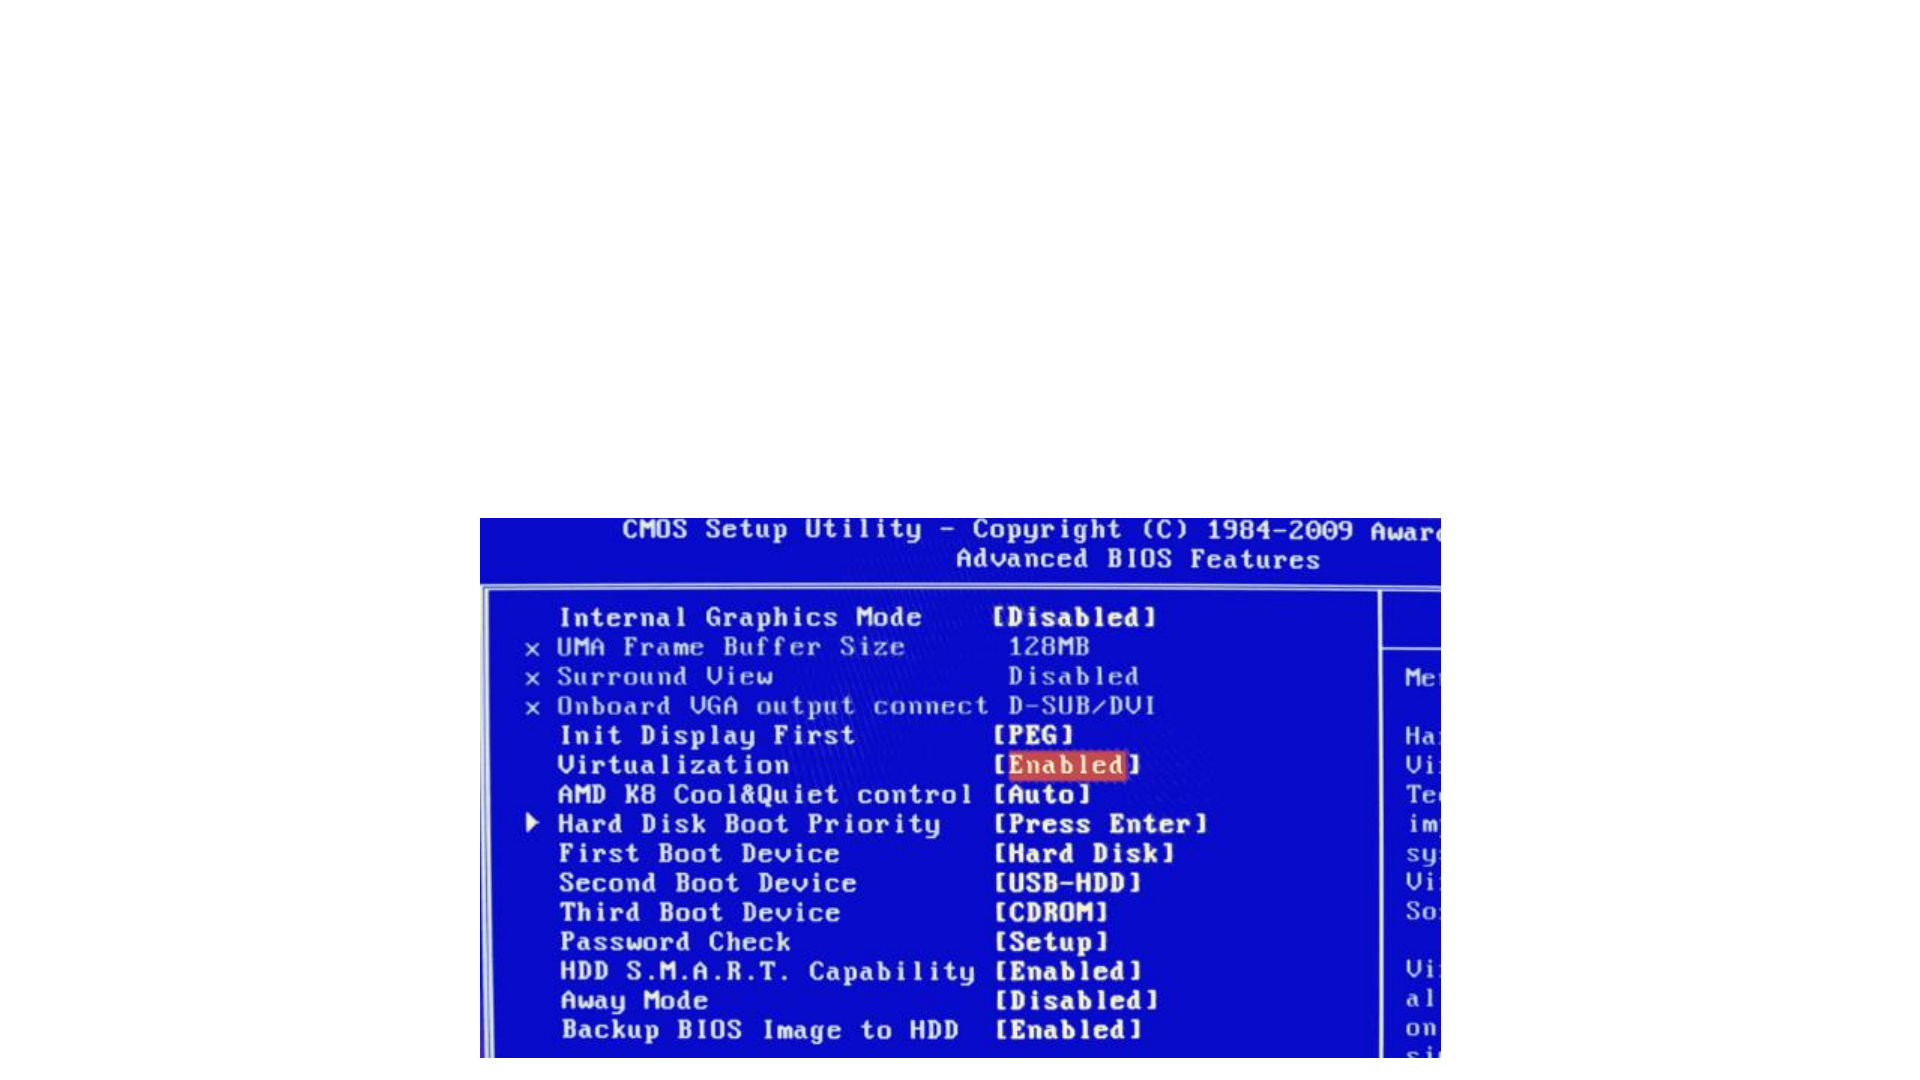
Additional Setup
•You may need to enable hardware virtualization on your computer
•For that, you will need to restart and enter the BIOS and find the
setting “virtualization” and enable it

Mac Install
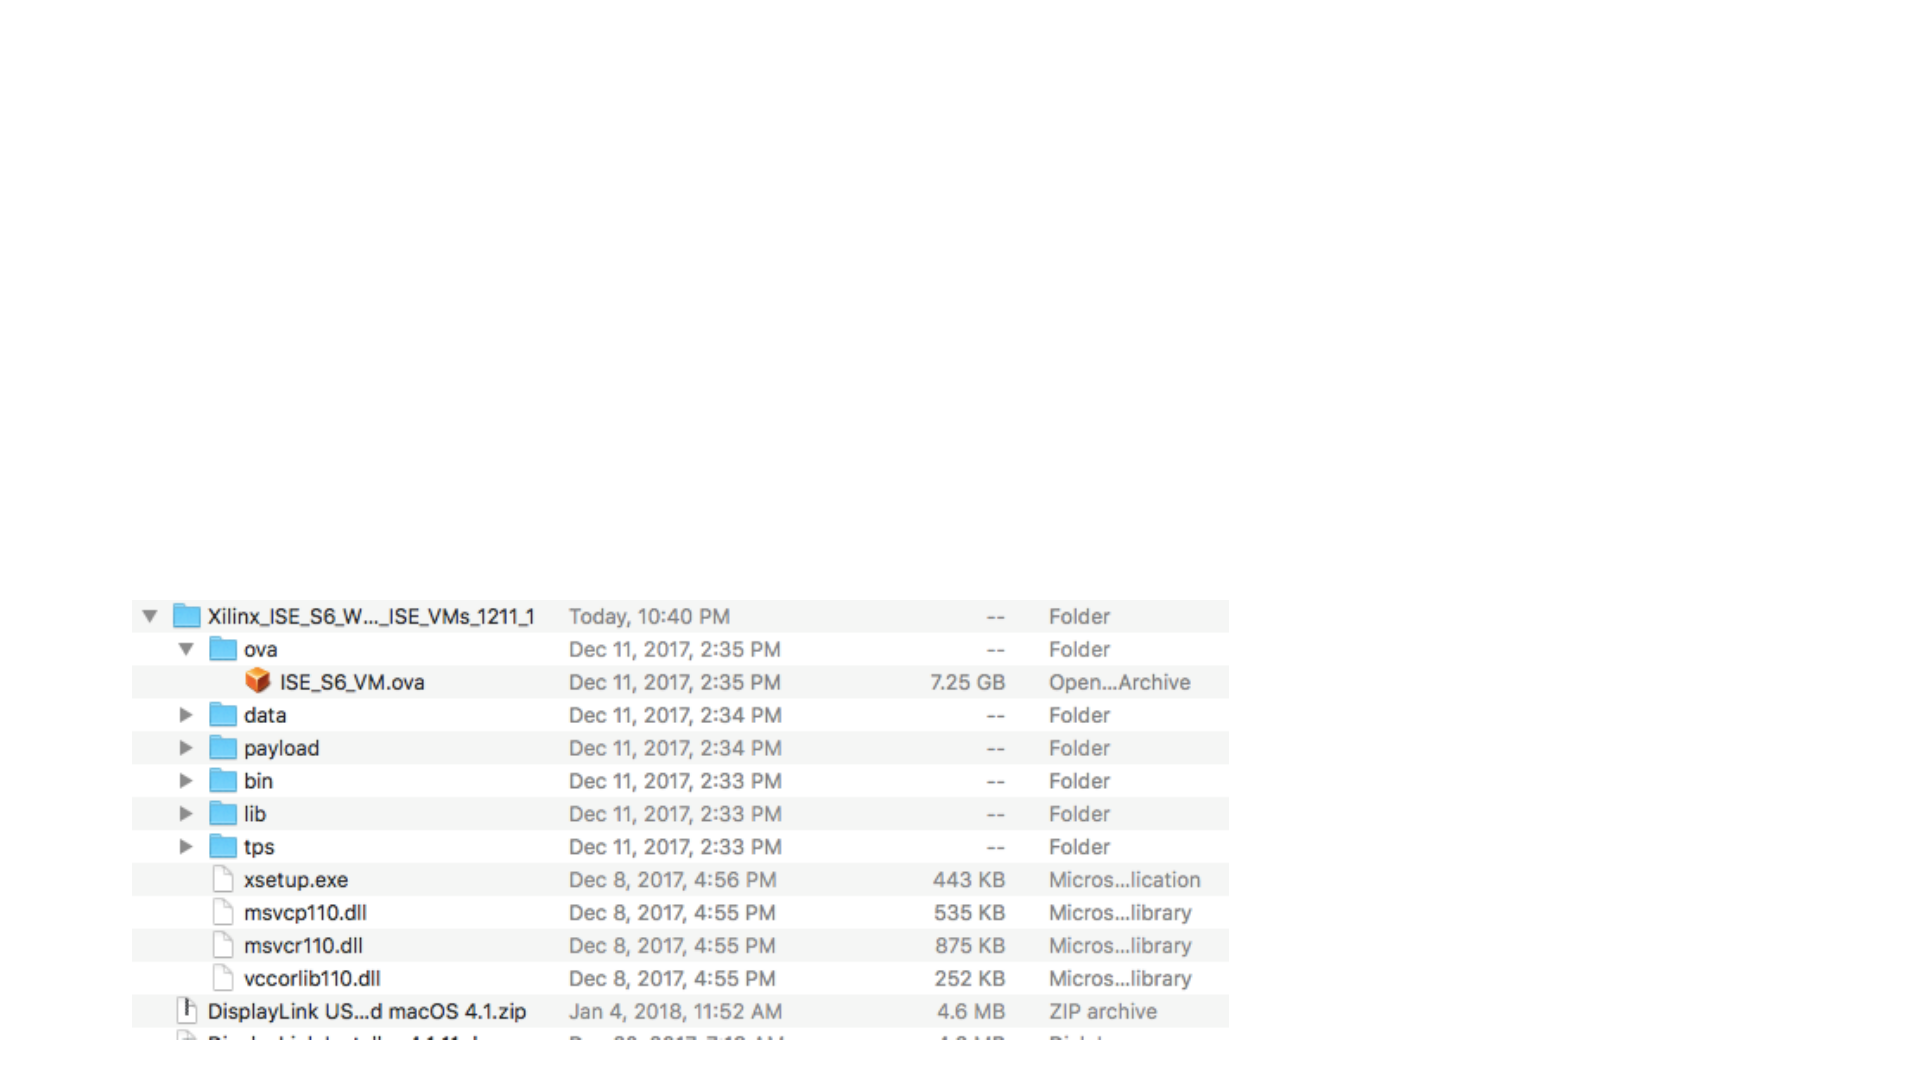
Importing the Virtual Machine
•Unzip the “Xilinx_ISE_S6_Win10_14.7_ISE_VMs…” folder
•Navigate to the .ova file, and double click it, and click “import”
•There might be a file compression or corruption issue, if that
happens, redo the unzip or download step
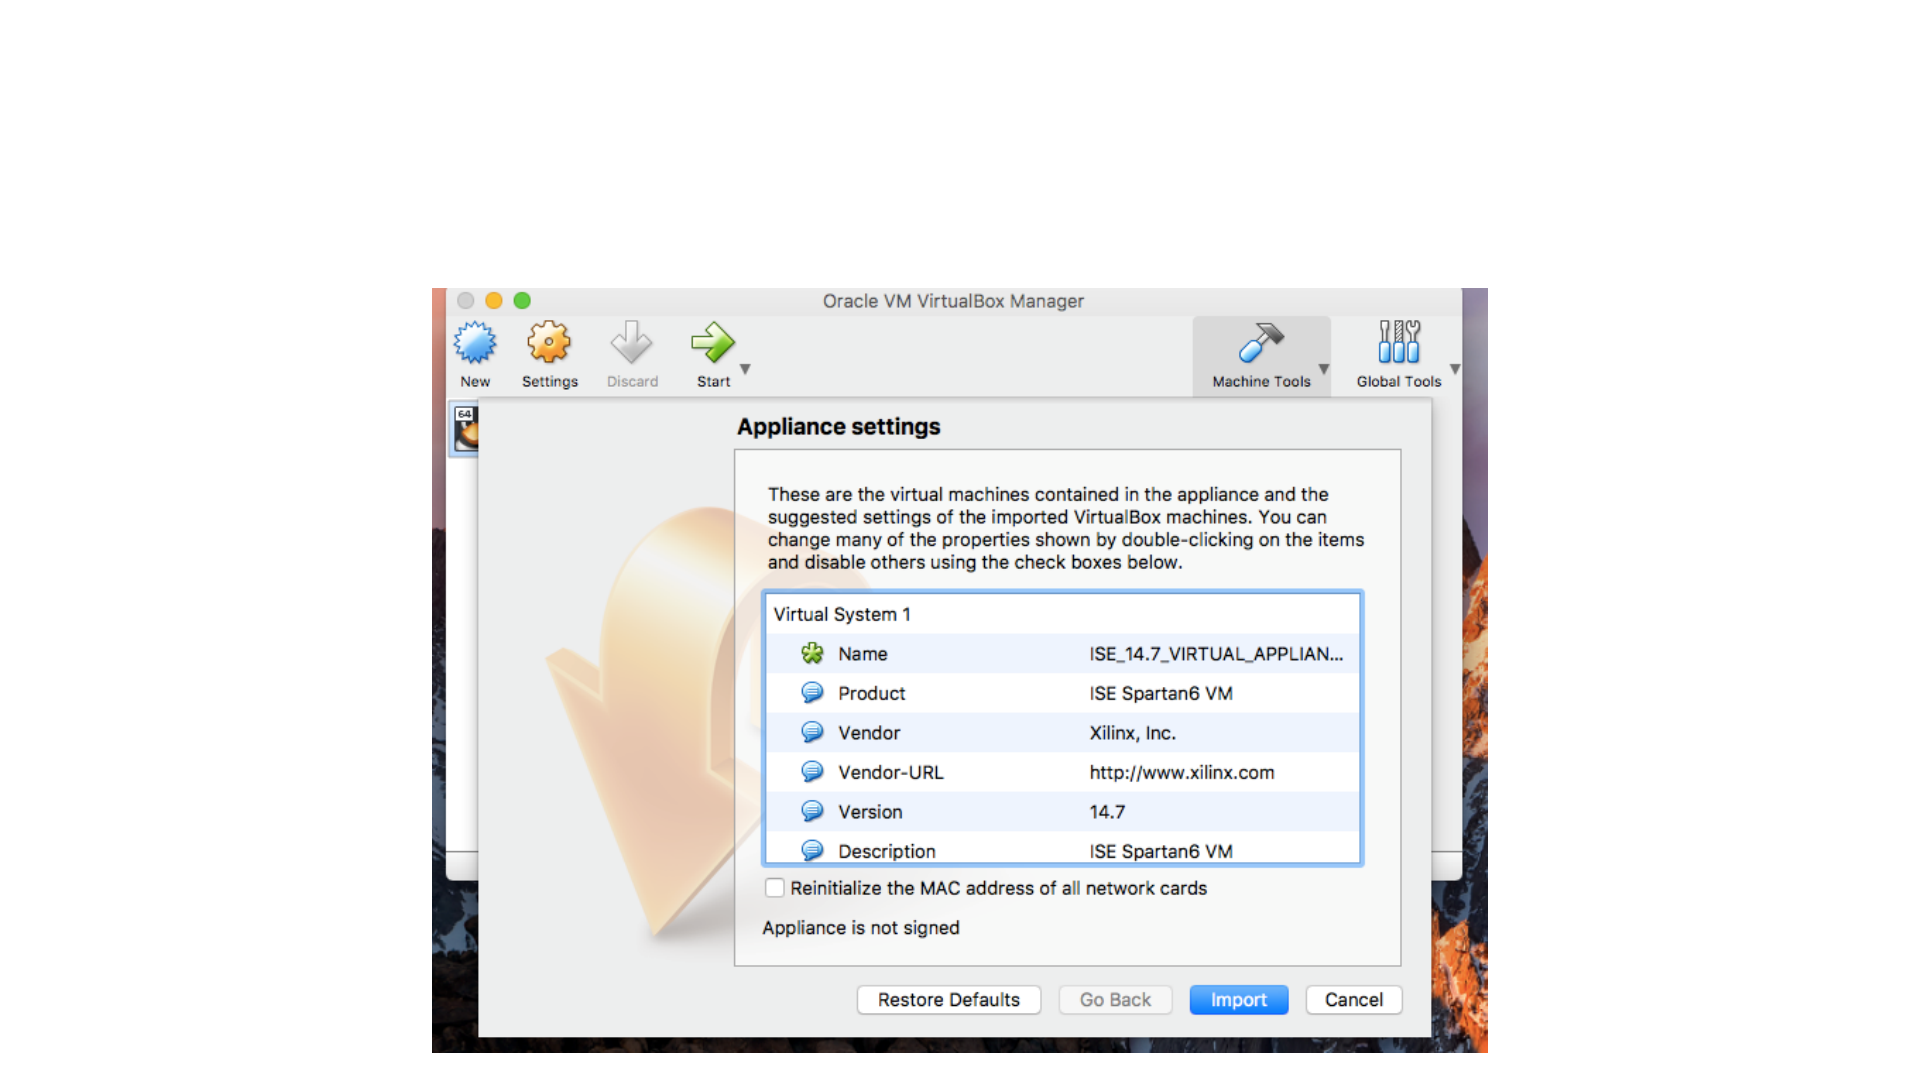
Importing the Virtual Machine

Shared Folder
•You probably want to set up a shared folder on Mac as well, so that
both the (guest) virtual and (host) native operating systems can
access the same files.
•These are steps to add a new shared folder, so if you did not set up a
shared folder with the windows installer, you can follow these steps
too.

Shared Folder
•Shutdown the virtual machine
•In the VirtualBox manager, click to select the virtual machine
•Navigate to Settings > Shared Folders
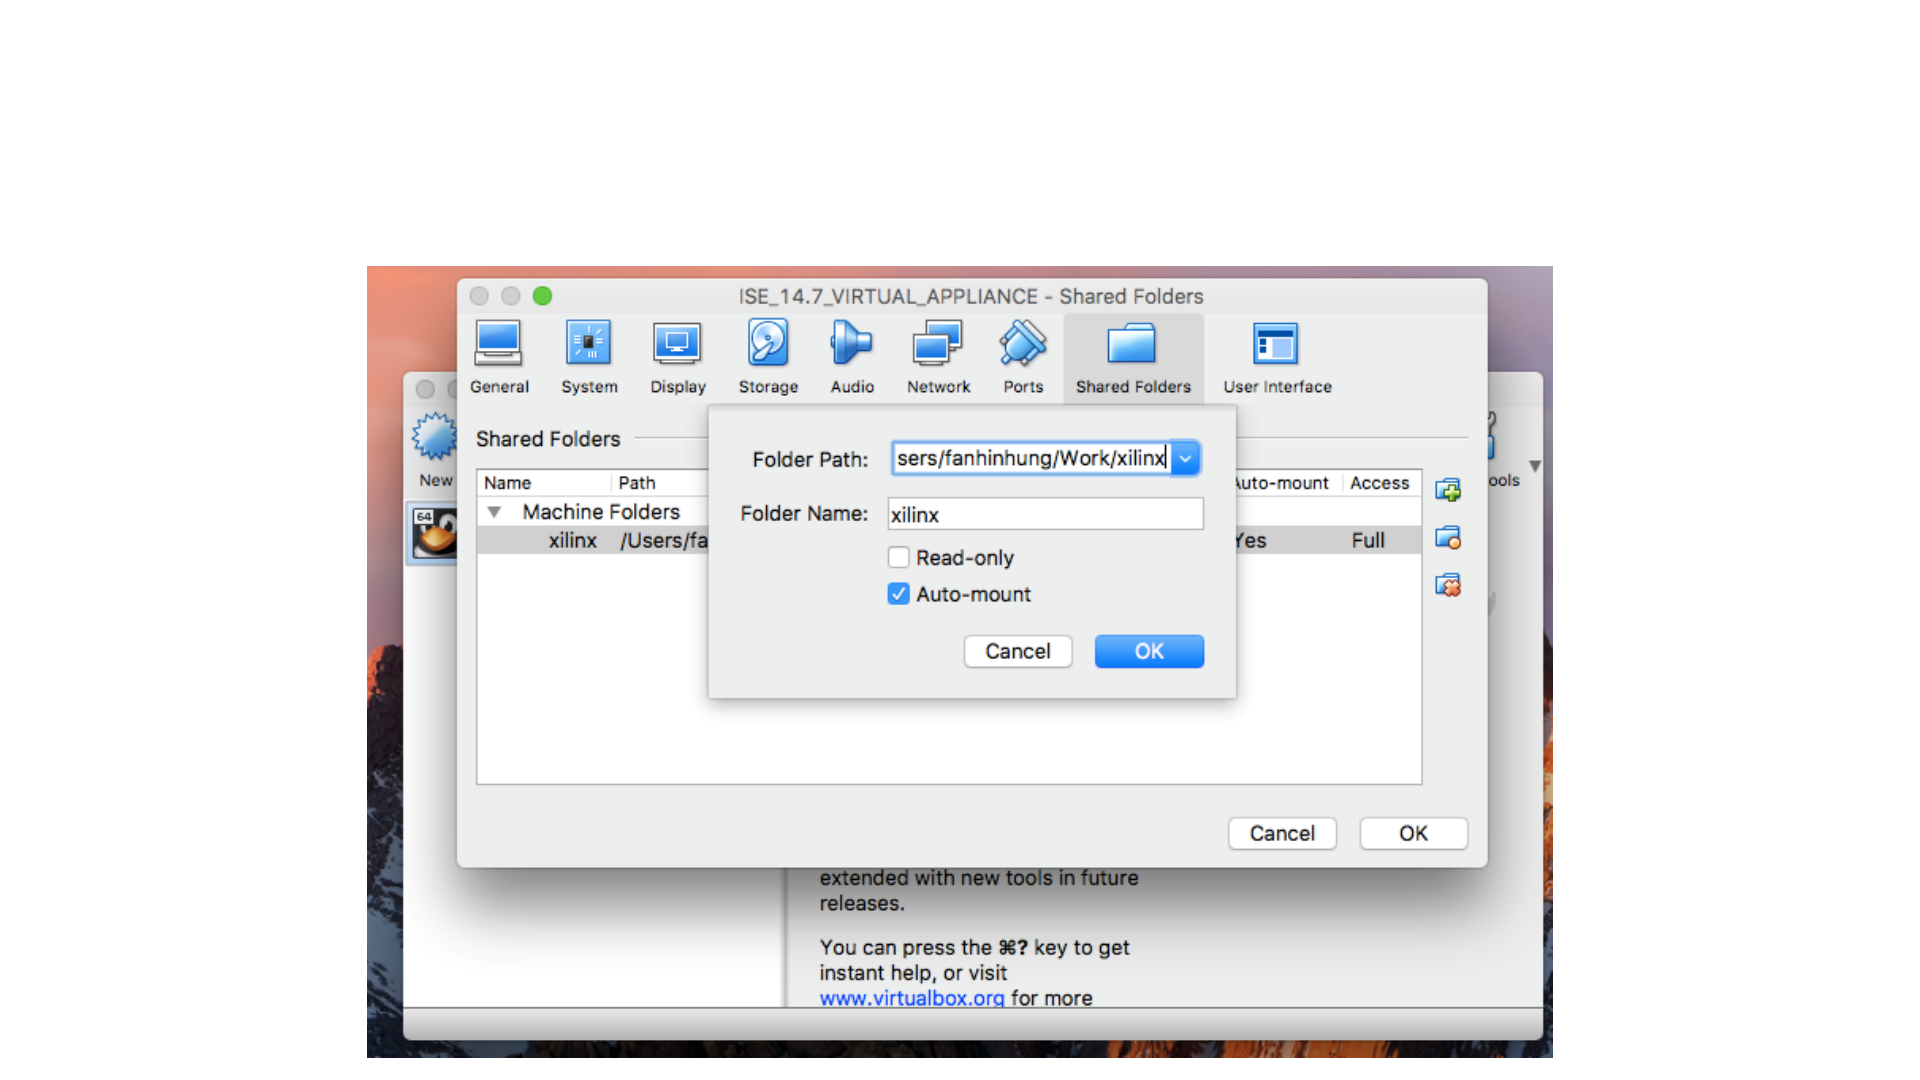
•Using the button at the right, add a folder from your native operating
system, which you want to be visible from the virtual machine.
•Make sure you select “Auto-mount” when you add this folder.
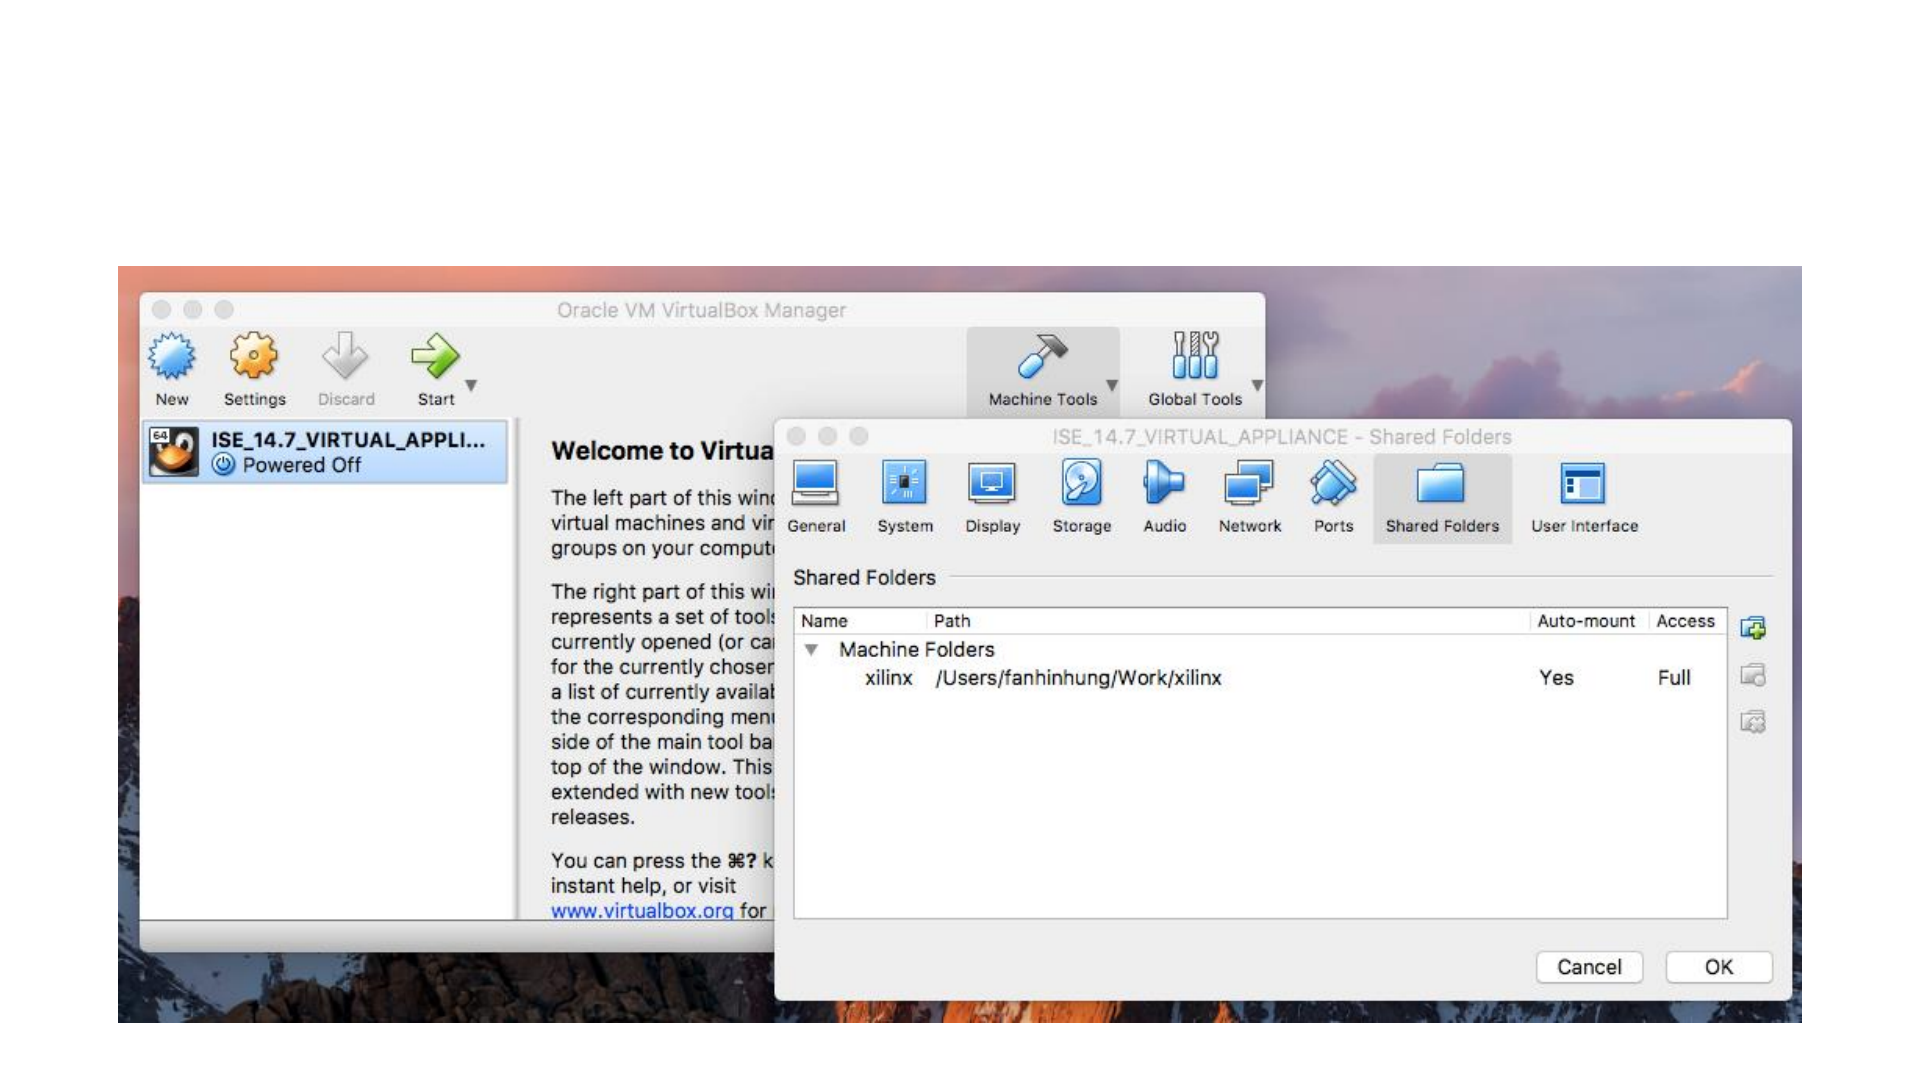
Shared Folder
Shared Folder

Shared Folder

Additional (Usage) Notes
Also some error debugging for both Mac and Windows
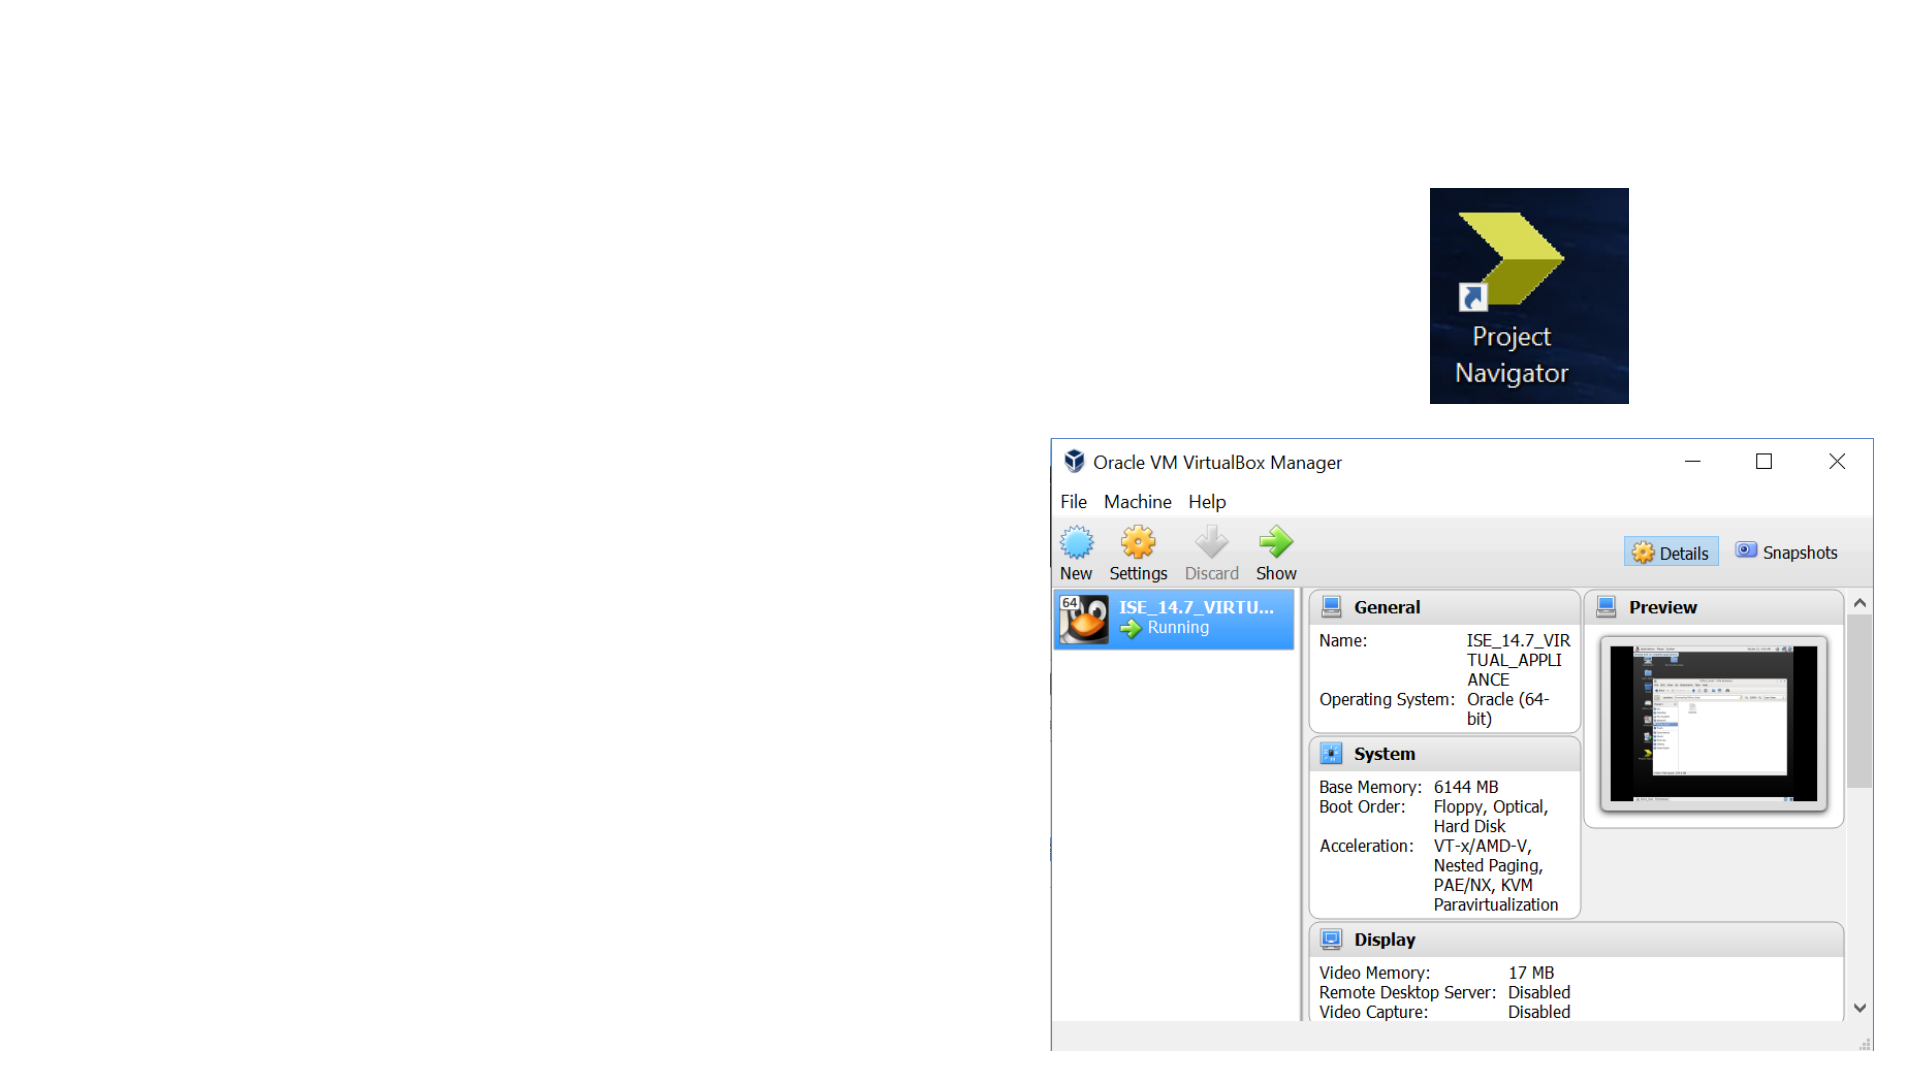
Usage Notes –Starting Machine
•To use what you’ve installed, click on the “Project
Navigator” shortcut: (On Windows)
•Alternatively, you can open the virtual machine
through VirtualBox
•From your start menu or launcher, open
“Oracle VM VirtualBox”
•“ISE_14.7_VIRTUAL_APPLIANCE”
is the virtual machine
•In the VM, the shortcut looks the same

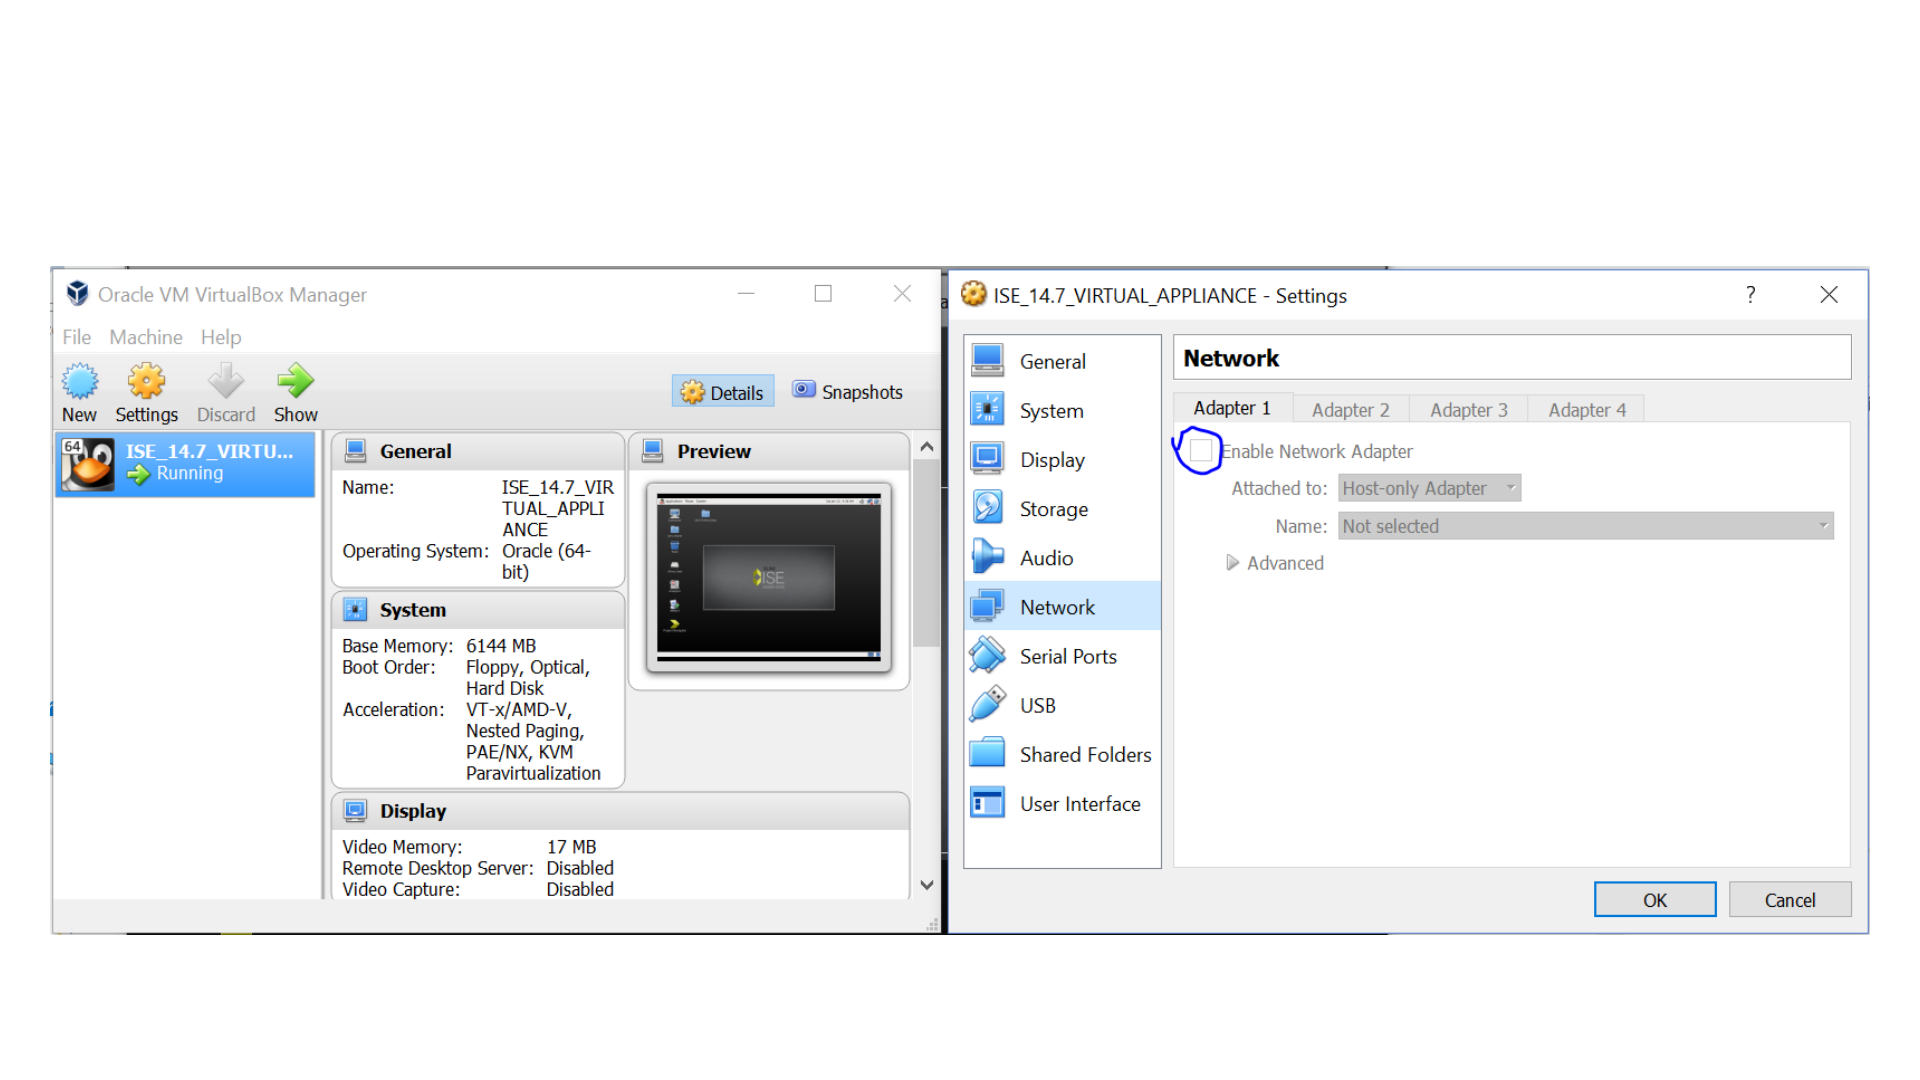
Usage Notes –Network Connection Error
•If there’s a problem with the host network connection, preventing
you from starting the virtual machine, you can disable the connection
by:
•Opening the “Oracle VM VirtualBox” app
•Selecting the machine “ISE_14.7_VIRTUAL_APPLIANCE”
•Navigating to:
•Settings > Network > Adapter 1
•And disabling the network adapter
•(See screenshot on next page)
Usage Notes –Network Connection Settings

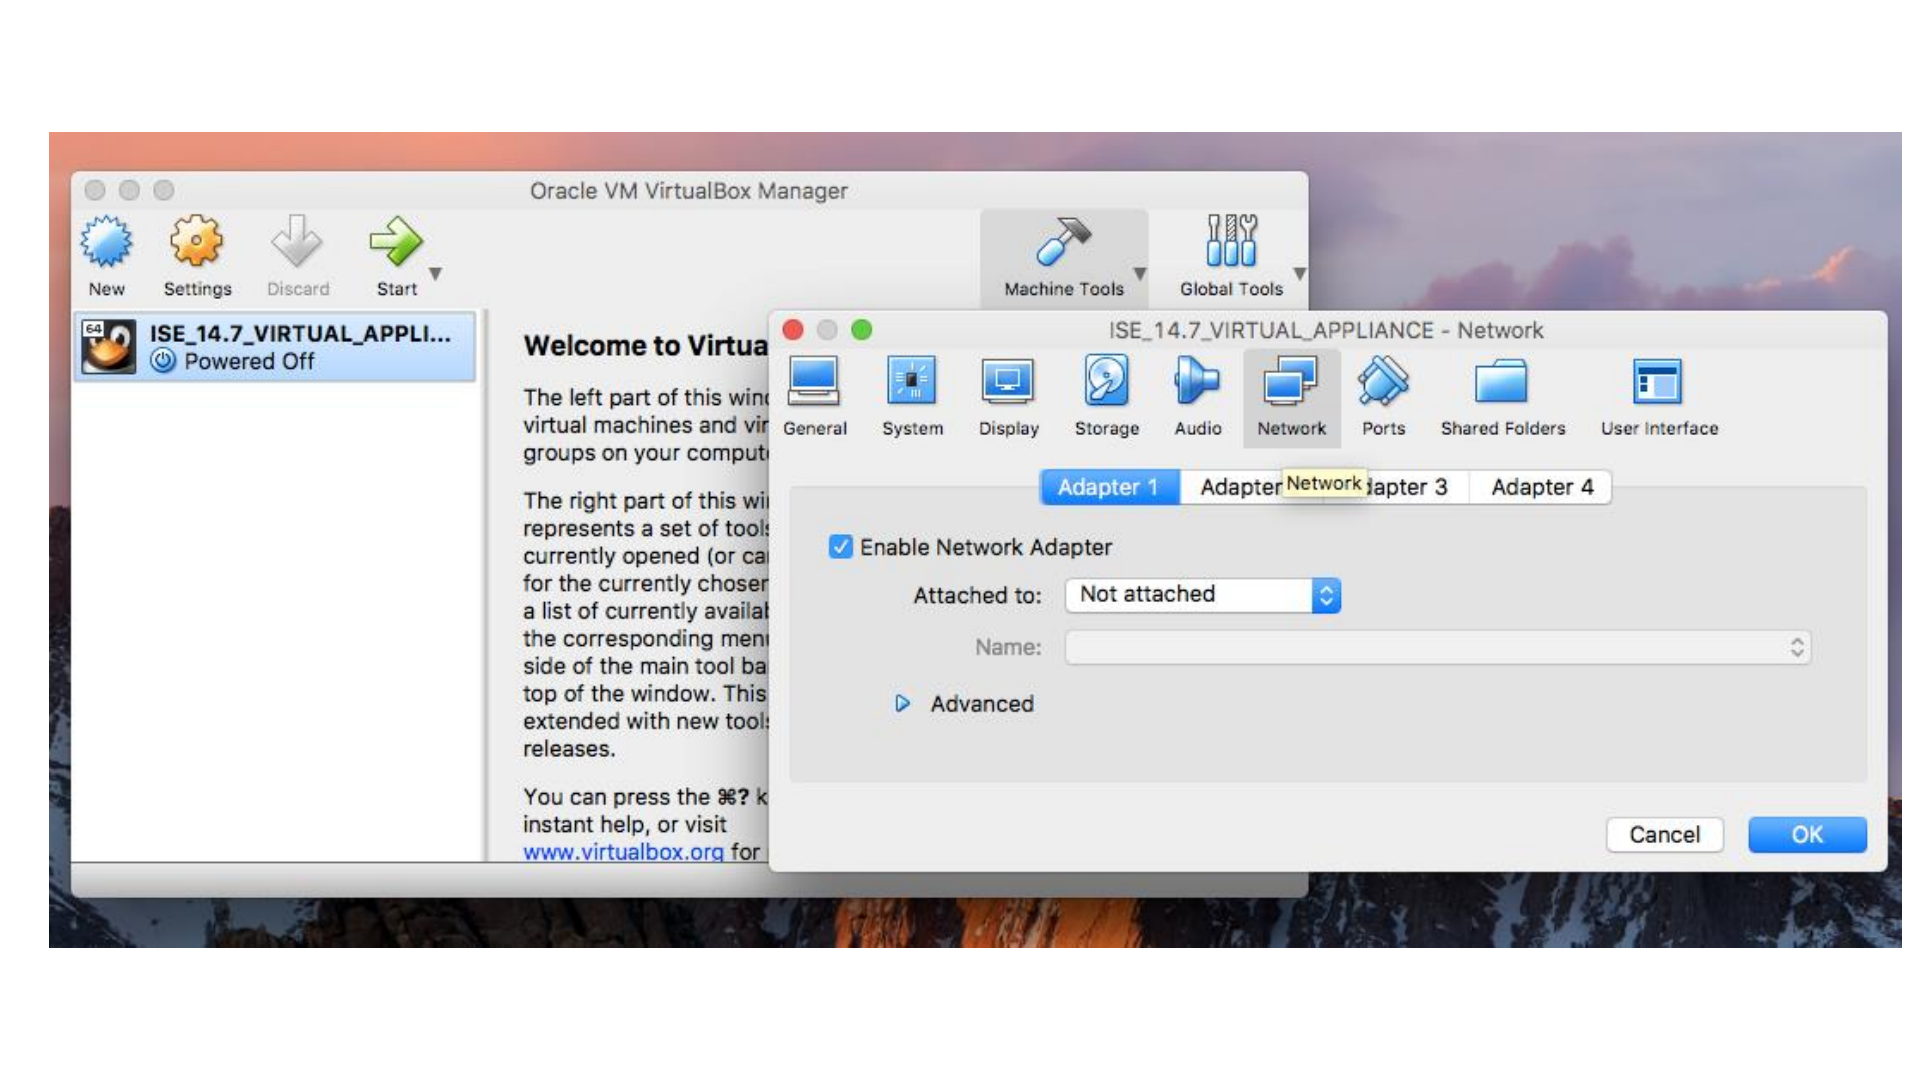
Usage Notes –Network Connection
Alternative
•If the previous doesn’t work, you can also set the machine to enable
the connection, but not use it. (this might be needed if you see the
error “Empty or null host only interface name is not valid)
•Select the machine “ISE_14.7_VIRT…”
•Go to Settings > Network > Adapter 1
•Enable the adapter
•Set “attached to” to “Not attached” and click ok
•(See next slide for screenshot)

Usage Notes –Cleanup
•The project files take up a large amount of memory. If you’re done
with a project, you can “clean up project files” to get rid of some
temporary or recreate-able files.
•The simulations also create “.wdb” files which contain the wave form
data. These can sometimes get long and are good to delete if you’re
not using them.
•(See next screenshots on slide)
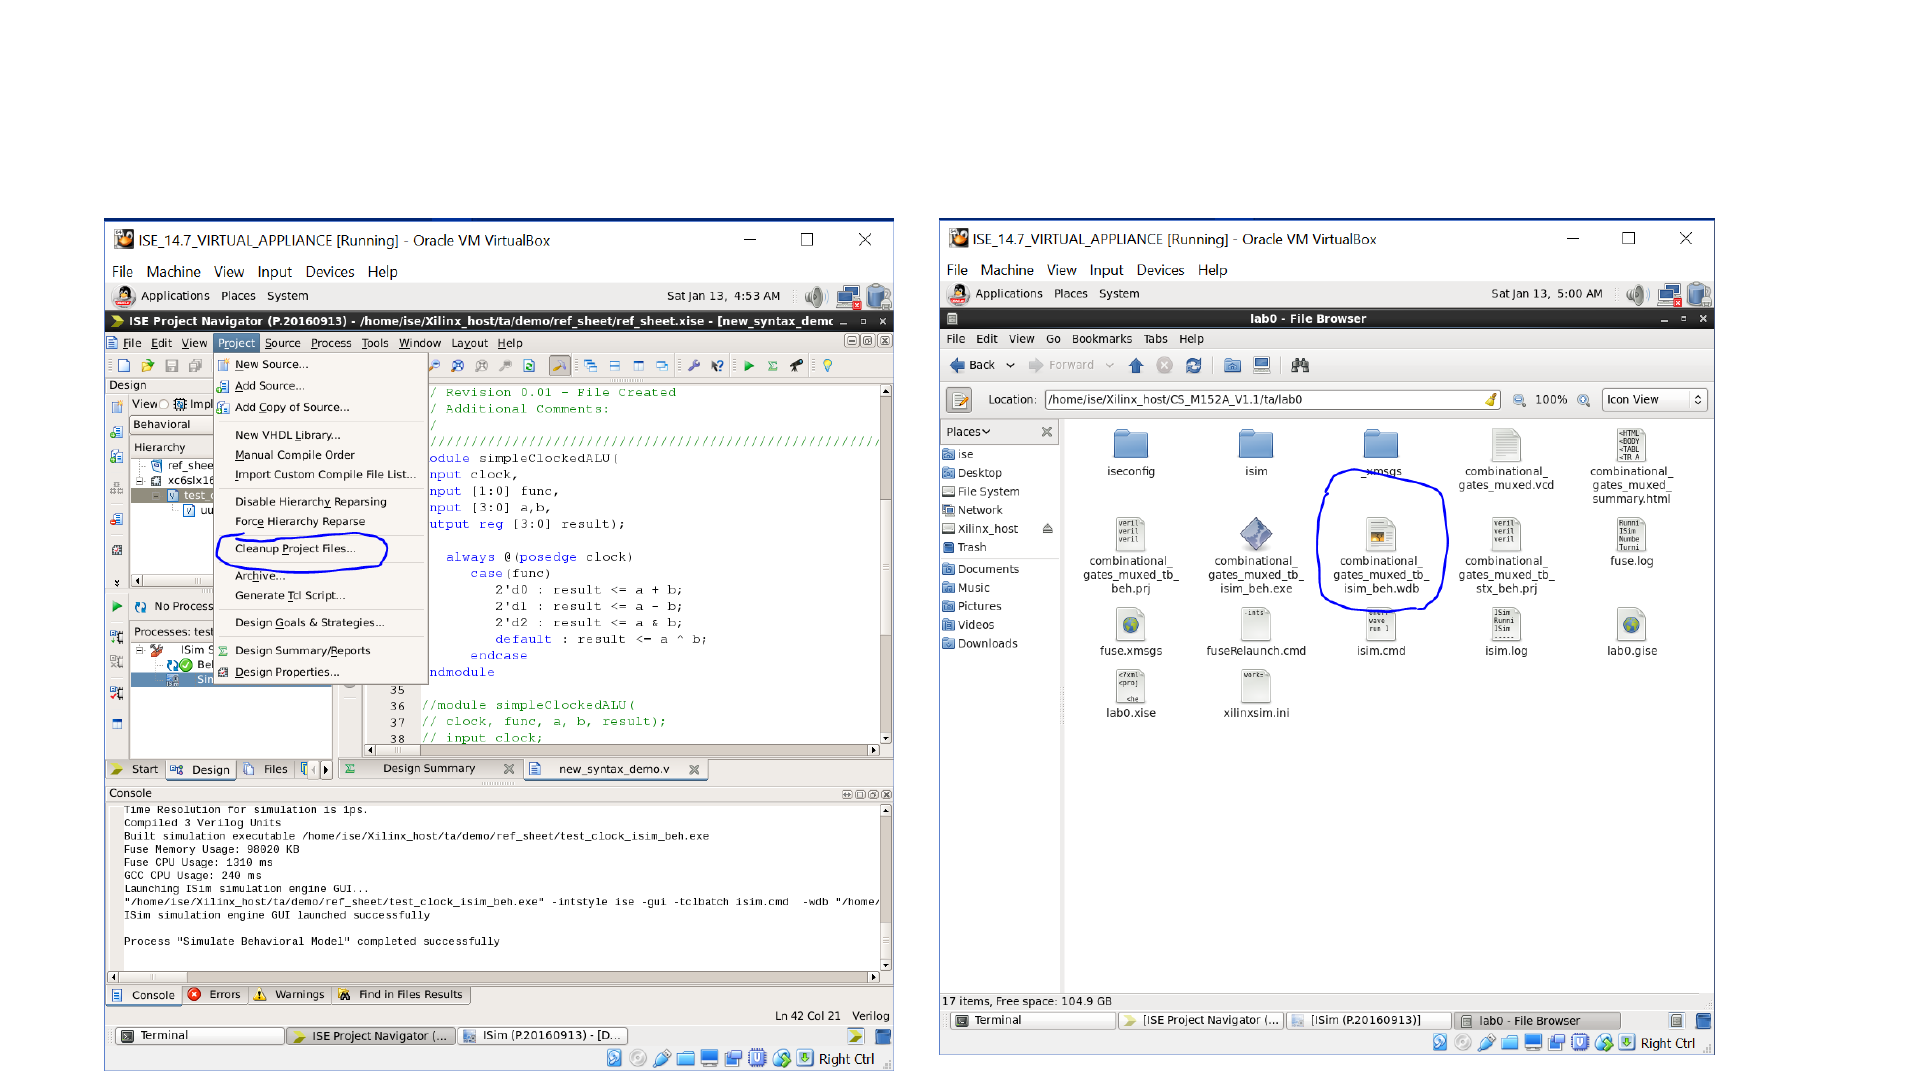
Usage Notes –Cleanup

Usage Notes –Linux UI
•If you need to access the terminal, use the “Applications” button at
the top left
