WVU RC Ation Manual
User Manual:
Open the PDF directly: View PDF ![]() .
.
Page Count: 121 [warning: Documents this large are best viewed by clicking the View PDF Link!]

WVU-RC Documentation
Release 1.0
Guillermo Avendano-Franco
November 07, 2018

CONTENTS
1 Introduction 3
1.1 Infrastructure and Services ........................................ 3
1.2 Getting Help ............................................... 5
1.3 Policies .................................................. 8
2 Quick Start 11
2.1 Getting Access .............................................. 11
2.2 Connect to the cluster .......................................... 12
2.3 Command Line Interface ......................................... 17
2.4 Editing Files ............................................... 24
2.5 Storage .................................................. 25
2.6 Job Submission .............................................. 26
2.7 Transferring Files ............................................ 26
3 For Basic Users 31
3.1 Terminal-based Text Editors ....................................... 31
3.2 Terminal-based Text Editors ....................................... 37
3.3 Globus Online .............................................. 44
3.4 Samples of Job Submission scripts .................................... 46
3.5 Environment Modules .......................................... 48
3.6 Managing Scratch Contents ....................................... 50
3.7 XWindow ................................................. 52
4 For Advanced Users 55
4.1 Conda and BioConda ........................................... 55
4.2 Singularity Containers .......................................... 55
4.3 Singularity Containers .......................................... 61
4.4 Installing Packages in User Locations .................................. 61
4.5 Miniconda ................................................ 63
4.6 Using MPI on RC HPC Clusters ..................................... 64
4.7 Executing HADOOP jobs ........................................ 65
4.8 Python Modules ............................................. 67
4.9 Python and scientific libraries ...................................... 69
4.10 Python Virtual Environments ...................................... 71
5 For Developers 73
5.1 Programming Languages ......................................... 73
5.2 Parallel Programming .......................................... 73
5.3 GCC: The GNU Compiler Collection .................................. 73
6 For Administrators 75
i

6.1 Documentation on Sphinx ........................................ 75
7 Domain Specific Details 77
7.1 Engineering: ANSYS Products ..................................... 77
7.2 Engineering: ANSYS/Forte ....................................... 78
7.3 Engineering: Running OpenFOAM simple tutorial ........................... 86
7.4 Bioinformatics: Conda and BioConda .................................. 87
7.5 Bioinformatics: Using Bowtie2 ..................................... 90
7.6 Matlab: Running Matlab scripts on a HPC cluster ............................ 94
7.7 Visualization: VisIt ............................................ 100
8 Clusters Specifications 109
8.1 Mountaineer Cluster ........................................... 109
8.2 Spruce Knob ............................................... 109
8.3 Thorny Flat Cluster ............................................ 111
8.4 Go First Data-Analytics Cluster ..................................... 111
9 References 113
9.1 Common Unix commands ........................................ 113
9.2 Linux Commands ............................................ 114
10 Indices and tables 117
ii

WVU-RC Documentation, Release 1.0
West Virginia University Research Computing (WVU-RC) is a team inside WVU’s Information Technology Services
(ITS) dedicated to supporting, enabling and advancing computational research at WVU.
This site contains information about how to use the various technologies provided by the Research Computing division
at West Virginia University. Most documentation here refers to our High Performance Computing clusters but we also
provide a variety of other services a large storage service called DataDepot, a DMZ (demilitarized zone) for high speed
data transfers called Research Exchange (REX) and support and training in areas of High Performance Computing,
Data Analysis and Parallel Programming.
There are several websites associated with WVU-RC activities, here is a list of the most relevant ones:
The official webpage in ITS portal about the Research Computing Division WVU Research Computing - ITS
Website
The legacy documentation was a Wiki website continue to be online for a while WVU Research Computing -
Legacy Wiki
The HelpDesk ticket system WVU Research Computing - HPC HelpDesk
For requesting help, create a new ticket at the Research Computing HPC Help Desk web page. You are welcome to
e-mail any member of the WVU-RC team directly, but since we are not always at our desk, the ticket system will
guarantee that your support question will be seen by someone currently available.
CONTENTS 1

WVU-RC Documentation, Release 1.0
2 CONTENTS

CHAPTER
ONE
INTRODUCTION
Despite the fact that this documentation is mostly about our High Performance Computing (HPC) Clusters, West
Virginia University Research Computing (WVU-RC) offers a variety of technologies and services beyond HPC, the
Introduction chapter summarizes those services and the policies regarding its usage.
First time users should go to Quick Start. This chapter is presented as a tutorial where the basic elements of using a
computer cluster are presented and guide the user step by step from getting an account to submit a job and take the
results back to his/her own desktop computer.
Once you have followed the Quick Start we move into For Basic Users, this chapter assumes that user knows at least
how to enter into the cluster and submit a basic job. The chapter provides basic information that was not covered in
the Quick Start tutorial. We include more information about command line interface, the various text-based editors,
environment modules and more details on the various elements that were skipped before.
The next chapter For Advanced Users is intended for users who feel comfortable with the Command Line Interface.
Advanced users are supposed to know how to create scripts using Shell Scripting or any other interpreted language.
Advanced users could want to install their own software, using containers, or Conda environments.
The chapter For Developers is intended for users with interest on using their own programs on the clusters. We
introduce the basics of using compilers, build systems, parallel programming, debugging, profiling and optimization.
A developers can be considered as an advanced user who program their own codes, or integrate other codes in more
than a simple linear work flow.
The chapter For Administrators we make reference to the various tools that can be used to monitor the global health
of the clusters. In general users does not need to have that global view, but knowing how the entire cluster works can
give them insights about their own role in having an effective usage of the cluster.
The next chapter, Domain Specific Details collects sections for various packages that are relevant for a restrict number
of researchers.
Chapter Clusters Specifications should serve as a reference about the current configuration of the clusters, in terms of
hardware, software, modules, and queues.
The final chapter References is also referential, it is collects tables about Unix commands, PBS options, variables, it
should be of good use when you know exactly what you are looking for.
1.1 Infrastructure and Services
We provide access to centrally managed computational systems, several High Performance Computing and data anal-
ysis clusters. We also offer Infrastructure that support researchers such as large and secure storage, high-speed data
transfer channel using a demilitarized zone (DMZ), support in areas of High Performance Computing, Parallel pro-
gramming and visualization and tranning on those areas via workshops and seminars.
Here we summarize the different dimensions of action for WVU-RC:
3

WVU-RC Documentation, Release 1.0
1.1.1 High-Performance Computing
We operate 2 High-Performance computing Clusters and one more has been acquired and should be deployed by the
end of the year.
The High Performance Computing facilities are funded by the National Science Foundation EPSCoR Research In-
frastructure Improvement Cooperative Agreement #1003907, the state of West Virginia (WVEPSCoR via the Higher
Education Policy Commission), the WVU Research Corporation and faculty investments.
The two clusters in operation are called Mountaineer and Spruce Knob. The newest cluster, called Thorny Flat should
be in operation by the end of 2018.
Mountaineer is WVU’s oldest shared cluster and it is a 384 core Intel high-density computing cluster based on Xeon
Westmere processors. Each node has 12 cores and 48GB of RAM, providing 4GB per node average. Storage is
provided by a direct-attached SAN unit with 10TB of formatted disk space, as well as a network attached storage
system with 60 TB of storage capacity. Mountaineer will stop operation when the new cluster Thorny Flat starts.
Spruce Knob is WVU’s current HPC system. This system is 176 nodes, 3,376 core heterogeneous high-density com-
puting cluster based on Intel Xeon Sandy Bridge, Ivy Bridge, Haswell, and Broadwell processors. Spruce Knob
follows a condo model where faculty members can purchase direct access to nodes on the cluster making them part
owners of the cluster.
Thorny Flat will be the next generation HPC cluster, with around 111 nodes, more than 4000 cores and a number of
Nvidia P6000 GPU cards for extra computing power.
1.1.2 Data Analysis Cluster
GoFirst Cluster is a dedicated WVU MS Business Data Analytics computing resource that allows students in the Busi-
ness Data Analytics M.S. program to gain experience in a controlled, secure cloud-computing environment. GoFirst
is build from four compute nodes running HDFS shared filesystem, to run Hadoop and Spark jobs using RStudio as a
frontend interface.
1.1.3 Research Exchange
REX is a Science DMZ, or demilitarized zone, which is a dedicated “express lane” network for research data traffic
within the University’s larger network. It is funded through a nearly $487,000 cyber infrastructure grant that WVU
Research Corp. won in 2014 year from the National Science Foundation.
REX gives Information Technology Services the ability to separate research traffic from other Internet traffic, guaran-
tee high-speed Internet2 access for WVU researchers, and facilitate data exchanges with off-campus collaborators. The
upgrades also provide WVU researchers with greater access to off-campus resources such as national scientific super-
computing centers. The grant funded the development and deployment of two Data Transfer Nodes, high-performance
data transfer “depots” that will improve the ability to move large science data sets. These Data Transfer Nodes have
640TB of raw disk storage, giving researchers a high-speed storage location when transferring large data sets.
1.1.4 HPC storage
WVU-RC offers researchers access to two tiers of storage through our Data Direct Network GRIDScaler system. Our
standard tier of storage is available free to all users, but users also have the option to purchase dedicated group storage
on the system.
The GRIDScaler system provides access to high-speed parallel GPFS storage and currently provides over 7 GB of
throughput and 1 PB of raw storage.
4 Chapter 1. Introduction

WVU-RC Documentation, Release 1.0
All users of HPC systems have access to more than 400 TB of high-speed scratch storage. Scratch storage is for
temporary storage of files and gives researchers a place to process large amounts of data. In addition, each user is
provided 10 GB of home directory space and 10 GB of group storage space upon request.
Some researchers prefer to have dedicated group storage on the HPC cluster to store large amounts of data for process-
ing without the fear of it being removed. These researchers can purchase dedicated storage for their group at $189/TB
per year. This also offers an easy way to share data between researchers in the same group.
1.1.5 Data Depot
The WVU Research Data Depot is a centrally managed, reliable, secure and fast data storage system specifically
designed to meet the university’s diverse research storage needs. Designed to handle all size of files, from small to
very large, researchers who use this service will have access to their data both on and off campus and can also use it
to collaborate with researchers outside of WVU.
ITS designed the Data Depot to be easy to use. Researchers have access to drag and drop files through an interface
they are accustomed to using such as Windows, OSX or Linux file managers. Command line tools, such as sftp, and
Linux based command, such as mount, can also be used to access the files on lab PCs/servers.
More information on: Research Data Depot
1.1.6 Seminars and workshops
WVU-RC supports the mission of educate users on High Performance Computing, Parallel Programming and Data
Analysis via seminars and workshops.
1.2 Getting Help
To request the opening of an account, software installation, general support on HPC, DataDepot and most of our
services please open a ticket on
WVU Research Computing - HPC HelpDesk
1.2. Getting Help 5

WVU-RC Documentation, Release 1.0
Click Open a New Ticket and fill mandatory fields marked with a red *
6 Chapter 1. Introduction

WVU-RC Documentation, Release 1.0
Once all relevant information is provided, click on Create Ticket and your request will be submitted to the WVU-RC
for processing.
1.2. Getting Help 7

WVU-RC Documentation, Release 1.0
1.3 Policies
1.3.1 Running Jobs on Login Node
Running jobs/tasks on the login node is not permitted. When the RC admin team notices this occurring, the processes
will be killed immediately to ensure system stability. If you are having trouble submitting jobs through the scheduler,
please follow instructions on Getting Help and we would he happy to help.
1.3.2 Data storage
Current storage limits are specific to each cluster and directories (Home and Scratch). For information about where
these directories are located and storage quotas please visit the Disk Storage page.
1.3.3 Sharing User Directories
Initially sharing user directories or scratch space is not permitted. This is for tracking user purposes. However, we
recognize that research is collaborative in nature, and therefore we are attentive for request for sharing resources across
user spaces for temporary or fixed time limits to get jobs completed. Please follow instructions on Getting Help and
the WVU-RC team with these requests.
Users also have the option of using group storage for sharing of files. A Principal Investigator (PI) may request up to
10 GB of group storage for free. Additional storage may be purchased if desired. For more information, please visit
Persistent Group Storage.
1.3.4 Getting Software Installed On the Cluster
Software needed on the cluster for research work can be installed at user requests. However, we initially recommend
that software, scripts, and programming libraries be installed locally in user directories as opposed to system-wide.
This is generally because system-wide installs of software/libraries not supported directly by Red Hat Enterprise Linux
(RHEL) may get broken during system-wide updates. If the software/library has a large enough appeals (multiple
users/multiple research teams) we can and will assist in installing a system-wide version. If assistance is needed for
installing software/libraries locally in your user directory please follow instructions at Getting Help, the WVU-RC
team we will gladly assist.
1.3.5 User Priority for Job Submission
Depending on what hostname your submitting jobs on, different priority defaults are assigned to your job submission.
On Mountaineer priority for queues are set by fair share queueing. This means that user priority is assigned based on a
combination of the size of the job and how much system resources you have used during the given week, with higher
priority assigned to larger jobs and/or user jobs that have used less system resources in the week. On Spruce knob, the
research team nodes are first come first serve priority, with jobs submitted before other jobs having higher priority. For
specifications associated with the standby queue and community node queues on Spruce Knob, please see the Spruce
Knob Queue page. If you would like to have different priority settings for your research teams queue please follow
instructions at Getting Help for the WVU-RC team attend your request.
1.3.6 Database Management on Clusters
The current set-up for the HPC clusters is for common HPC use. This means that the compute nodes where set-up
with the idea that data will be transferred to the system, computed, and then transferred off. Database management
8 Chapter 1. Introduction

WVU-RC Documentation, Release 1.0
systems are not currently supported on the cluster because the compute nodes where never initially set-up to handle
the data storage required. However, if your research team has a need for Managed Database systems that have large
storage needs with a database management system back-end (i.e. MySQL, Oracle, etc) please Getting Help the RC
HPC team and we can come up with solutions to handle these data requests.
1.3.7 X11 Forwarding - Running visualization software
Non compute intensive processes for visualization purposes can be run on the login node. These processes include
“could” gnuplot, R and Matlab. However, if your visualization job requires computing data before producing graphs
and figures, it is best to run these jobs through the scheduler in batch mode. Compute intensive jobs, visualization
or not, are not permitted to run on the head-node. If you have any questions about the best way to accomplish your
computing goal, please follow instructions on Getting Help through the help desk and we will provide any assistance
needed to fulfill your requirements.
1.3. Policies 9

WVU-RC Documentation, Release 1.0
10 Chapter 1. Introduction

CHAPTER
TWO
QUICK START
This is a short tutorial intended for first-time users. We assume no familiarity with High Performance Computing
(HPC). The only requirement is basic familiarity with your own computer in order to install the SSH client needed to
connect to the cluster.
We start on Getting Access on how to request and account. Once the access is granted, we proceed to Connect to
the cluster to install and use a SSH client that allow you to get a terminal on the HPC cluster. A Terminal and its
command line interface can be the first barrier for an user only familiarized with Graphical User Interfaces (GUI), on
Command Line Interface we present the most basic commands that will help you to create and manipulate folders and
files. The next step is to learn how to edit files, on Editing Files we show how to use nano a very simple but effective
text editor. We will use it to create the first program in FORTRAN that we will use later to explain execution on a
batch system. The next section, Storage, explains the several options to store data on the cluster, this is very important
for first time users as they have the tendency to rely only on the $HOME folder a storage space that is very limited in
most scientific purposes. At this point we are ready to submit our first job. The section Job Submission shows how to
write a submission script and submit the job to the queue system. Finally, section Transferring Files explains how to
move files in and out between the HPC cluster and your own computer.
At the end of this tutorial, you should have your account activated, connected to spruce, able to create files and folders,
submitting simple jobs to the queue system and taking the data back to your own machine.
2.1 Getting Access
A High-Performance Computing (HPC) cluster is a research infrastructure intended to be used by multiple users
simultaneously in order to execute calculations that are beyond the capabilities of current personal computers and
workstations.
There are two steps involve in getting access to our HPC clusters, having a WVU account and using that WVU account
to get a HPC account.
2.1.1 WVU Login Account
To gain access to WVU’s Research Computing systems (including HPC systems), users need to first have a WVU
Login Account.
You can request a WVU login account for someone from outside the WVU community in order for the person to have
access to specific online resources here. You will need the person’s legal name, birth date and current email address
in order to make the request, which can be accomplished by filling out the Special Account Request form. Click the
LOGIN Account Ticket button to get started.
Any employee may submit a request on behalf of a colleague elsewhere and there is no charge to request or use this
service.
11

WVU-RC Documentation, Release 1.0
If you need a WVU Login account, please make a request with Service Desk.
Click on LOGIN Account Ticket and follow instructions.
2.1.2 HPC Account
After getting a WVU Login Account, you will need to request access to Research Computing systems through the
Research Computing Help Desk web page by clicking on the ‘Open a new ticket’ button and selecting ‘New User
Account Request’ under help topic. More information on Getting Help
On Help Topic select New User Account Request Enter your personal information such as Full Name and WVU’s
email address. Personal email addresses (MSN, Gmail, etc) are not allowed for WVU users, for external users, its
advisable for them to use an institutional account instead of a personal one.
Enter the field for Principal Investigator (PI), he or her will be the person to be contacted in order to get your account
accepted.
For accounting purposes is very important that you fill a Project Title and a fairly complete Project Abstract This
information is collected in order to prepare usage reports for financing institutions.
HPC users must ensure data that is covered by Federal security or privacy laws (e.g., HIPAA, ITAR, FERPA, classified
information, etc.) is not stored on any WVU HPC system (Mountaineer or Spruce Knob). These systems currently do
not meet the enhanced security requirements imposed or implied by those laws or regulations. By selecting the check
mark you are acknowledging you will not store ANY protected data on WVU’s HPC systems.
Please acknowledge use of these supercomputing systems (Mountaineer and/or Spruce Knob) at WVU, which are
funded in part by the National Science Foundation EPSCoR Research Infrastructure Improvement Cooperative Agree-
ment #1003907, the state of West Virginia (WVEPSCoR via the Higher Education Policy Commission) and WVU, in
your publications produced using these resources.
Once the the ticket is submitted a the PI will be notified for acceptance and your HPC account will be created. You
will be notified once the account is ready for usage.
For any additional questions regarding access, please email us at helpdesk@hpc.wvu.edu.
2.2 Connect to the cluster
A HPC cluster is a big computing infrastructure intended for concurrent usage by many users. A desktop, laptop or
even workstations are intended for a single user at a time. In general Graphical User Interfaces consume important
amount of resources even when the user is not making use of them, that is one of the reasons why is common practice
in HPC clusters to only allow remote shell access and limited capabilities for GUI applications.
Due to security reasons, HPC clusters are intended to be accesed using a secure shell, the standard secure shell
nowadays is called SSH. Secure Shell (SSH) is a cryptographic network protocol for operating network services
securely over an unsecured network such as internet. The typical application of SSH in HPC is to provide remote
command-line login and remote command execution.
SSH was created as replacement to Telnet and old method for remote communication with no capability of encryption.
This kind of access have been disabled and will not work on any cluster.
In other to connect to any of our clusters you need a username, your name as user of the cluster. You should have
obtained that username with your WVU Login account The next step is to use a SSH client to connect to one of our
clusters.
12 Chapter 2. Quick Start

WVU-RC Documentation, Release 1.0
2.2.1 Get a SSH Client
An SSH Client is a piece of software that allow you to run a remote session on a computer, over a network using a
secure connection based on the SSH protocol.
A SSH client is usually installed on MacOS and most Unix/Linux distributions so if you are using one of those
Operating Systems you do not need to install anything.
Windows users will have to acquire an SSH client. PuTTY is a free implementation of SSH for Windows platforms, it
comes along with an xterm terminal emulator.
Go to PuTTy to know more about the product or download it directly from PuTTY Download.
PuTTY is not the only SSH client available for Windows. See for example Comparison of SSH clients for several
alternatives.
2.2.2 Connecting to a cluster via SSH
On MacOS and Unix/Linux, open a terminal shell and type:
$> ssh <username>@<hostname>
or:
$> ssh -Y <username>@<hostname>
Where <username> is your WVU Login account username and <hostname> is the name of the cluster you wish
to connect to. The -Y option is used to forward X windows applications running on the server to be forwarded to your
local machine. Remember that the $> symbols above are there to indicate a command on the terminal, you should not
enter those initial characters.
We currently have two clusters Mountaineer and Spruce Knob the hostnames are:
Table 2.1: WVU’s High Performance Computer (HPC) Clusters
Cluster Hostname Status
Mountaineer mountaineer.hpc.wvu.edu To be decommissioned by the end of 2018
Spruce Knob spruce.hpc.wvu.edu Operational
Thorny Flat thorny.hpc.wvu.edu To be deployed by the end of 2018
If you want to connect to Spruce use the following command:
$ ssh <username>@spruce.hpc.wvu.edu
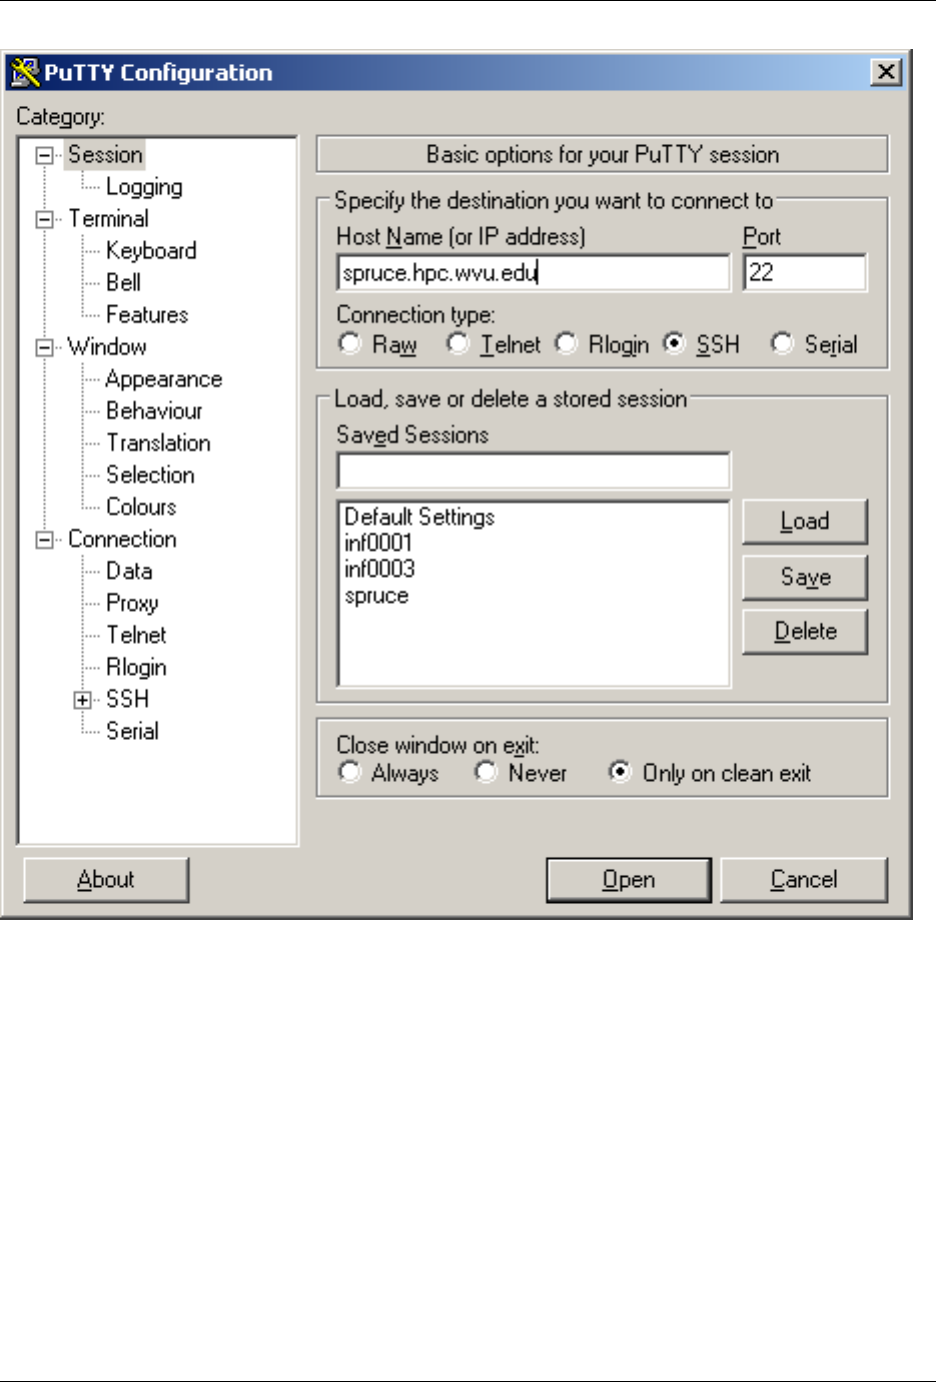
If you are using Windows and PuTTy, click on PuTTy Icon and enter the hosname
2.2. Connect to the cluster 13
WVU-RC Documentation, Release 1.0
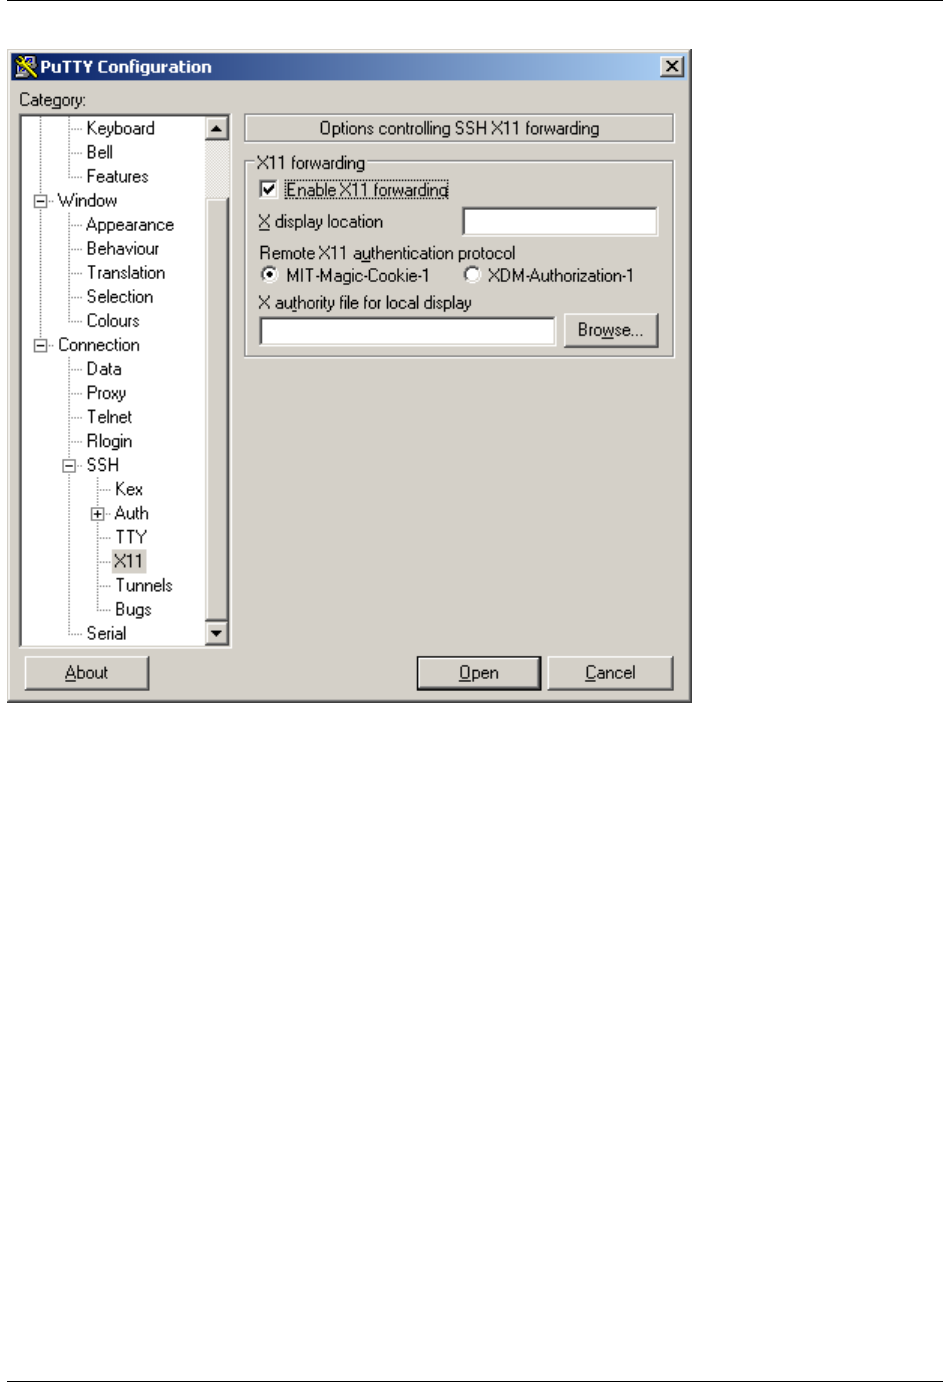
If you want to get X11 forwarding, ie remote windows popping on your local machine, enable X11 forwarding as
shown below.
14 Chapter 2. Quick Start
WVU-RC Documentation, Release 1.0
2.2.3 Logging In
When your SSH access is granted, you will be prompted with a login message (below is the Spruce Knob login
message):
$> ssh <username>@spruce.hpc.wvu.edu
------------------------------------------------------------------------------
Welcome to the Spruce Knob Supercomputer
Shared Research Facilities, West Virginia University
------------------------------------------------------------------------------
** Unauthorized use/access is prohibited. **
The actual or attempted unauthorized access, use, or modification of this
system is strictly prohibited. Unauthorized users may be subject to
institutional disciplinary proceedings and/or criminal and civil penalties under
state, federal, or other applicable domestic and foreign laws. The use of this
system is monitored and recorded for administrative and security reasons. Anyone
accessing this system expressly consents to such monitoring and is advised that
if monitoring reveals possible evidence of criminal activity, the Institution
may provide the evidence of such activity to law enforcement officials.
In addition, users must ensure data that is protected by Federal
security or privacy laws (e.g., HIPAA, ITAR, FERPA, classified information, etc.)
is not stored on this system. This system is not intended to meet the enhanced
security required by those laws or regulations.
2.2. Connect to the cluster 15

WVU-RC Documentation, Release 1.0
By logging on to this system, you acknowledge your awareness of and acceptance
of with WVU's Acceptable Use Policies and you agree not to store any of the
before mentioned protected data.
WVU Acceptable Use of Data and Technology Resources Policies:
http://it.wvu.edu/governance/standards-and-procedures/all-standards/au
------------------------------------------------------------------------------
Password:
Following this message, you will be prompted for your password. Type in your password and you will be given a
command prompt. If you are out of WVU network you will be asked to provide Two-Factor Authentication. You can
know more about this on Two-Factor Authentication (Duo) Articles
Once your identity is confirmed the login procedure will resume:
Last login: Thu Nov 1 09:23:22 2018 from 157.182.62.87
______________________________________________________________________________
Questions and Problem Reports:
- Email: helpdesk@hpc.wvu.edu
- Help Desk Ticket System: https://helpdesk.hpc.wvu.edu
Additional information on Spruce Knob:
- Documentation: http://wiki.hpc.wvu.edu
- HPC Website: http://sharedresearchfacilities.wvu.edu/facilities/hpc
______________________________________________________________________________
Further system related information:
- Spruce Knob utilizes the TORQUE/PBS resource manager to manage compute
resources.
To run an interactive shell, issue:
qsub -I -q queue_name
To submit a batch job, issue: qsub job_script.sh
To show all queued jobs, issue: showq or qstat
To check a job status: checkjob <jobId>
To kill a queued job, issue: canceljob <jobId>
Example PBS job scripts are located at:
http://wiki.hpc.wvu.edu/hpc_wiki/index.php/Sample_Job_Scripts
The following man pages provide helpful pbs information:
man pbs_resources_linux (How-to request cluster resources)
man qsub
man qstat
- Spruce Knob utilizes Environment Modules to help manage different software
packages available on the cluster. "module avail" shows the available
modules.
- Spruce has two file systems available to users:
- $HOME (permanent storage that is backed up via snapshots, 10GB Limit)
- $SCRATCH (temporary storage that is NOT backed up, current allocation 130 TB)
- Please acknowledge use of this Super Computing System (Spruce Knob) at WVU,
which are funded in part by the National Science Foundation EPSCoR
Research Infrastructure Improvement Cooperative Agreement #1003907, the
16 Chapter 2. Quick Start

WVU-RC Documentation, Release 1.0
state of West Virginia (WVEPSCoR via the Higher Education Policy Commission)
and WVU, in your publications produced using these resources.
_______________________________________________________________________________
Recent Updates:
- 2018.05.18 - Completed OS and server updates across entire system.
At this point you will get a terminal prompt such as:
<username>@srih0001:~$
All the commands executed from now on are happening on a remote machine, the Spruce Knob head node, this is the
place were most of your direct interaction with the cluster happens.
2.2.4 Logging Out
Logging out of a cluster can be done with the exit command:
$> exit
The exit command will attempt to terminate any process running on the head. In some cases, you will get an error that
jobs are either currently running or currently stopped. You can view stopped jobs using the jobs command:
$> jobs -l
[1]+ 3325 Stopped vim script56.py
The output of jobs -l will give you the job PID number (in this case 3325) and the command (vim script56.py). To kill
jobs preventing successful logout, use the kill command:
$> kill -s 9 3325
Once all jobs are terminated, the exit command will close the connection to host. On section Job Submission we will
explain how to submit jobs on the queue system. Jobs on the queue system are not killed when you log out of the head
node.
2.3 Command Line Interface
The interaction with a HPC cluster happens most of the time using a Command Line Interface (CLI). One the cluster
all your interaction is controlled by a program called a shell. You identify that you are in shell when you see what is
called a prompt, a set of characters that indicate that the shell is ready to receive instructions to operate.
To issue a command to the shell you type a command, eventually followed for a few arguments. When you end typing
the full command you type the ENTER key, the command is executed and if the command is programmed to produce
screen output it will appear on your terminal as it executes. Once the command is terminated you get a new prompt
indicating that the shell is ready for new commands.
The CLI interface is a powerful way to interact with a remote computer.
1. It takes little resources on the remote machine allowing the machine to serve tens, hundreds and in some cases
even thousands of concurrent users.
2. The shell is far more than command reader and executioner, it is actually a complete programming language.
You can create complex sets of instructions by doing what is called Shell Programming actually the ability to do
shell programming is what we use in this document to differentiate a basic user from an advanced user.
2.3. Command Line Interface 17

WVU-RC Documentation, Release 1.0
3. Despite of the learning curve being steeper, the CLI give you far more control on the machine, so as you
become more comfortable using it you will be able to do things than on a Graphical User Interface are simply
cumbersome.
Using a CLI is probably the biggest obstacle than beginners has to overcome before start taking advantage of a HPC
cluster. Here we will offer a short straight to the point introduction to the bare minimals of managing files and folders
on the shell.
2.3.1 Files and Folders
Operating Systems from UNIX legacy, Linux and MacOS being the most prominent examples, uses the idea of folders
and files to organize the data on their storage device. Differently from Windows, on UNIX there is not such idea of
Drives C: or D: or letters for CD Drives or USB Keys. In UNIX every piece of data on any storage device is logically
located in some place of a filesystem tree. Thing about the filesystem tree where the lowest level is called the root folder
and is indicated by /. From /you will see branches like /bin,/lib and many others, those are folders. Inside each
folder there are potentially more folders and files. The tree structure as a metaphor for storing data is very powerful
and in the case of UNIX system that data structure is deeply exploited in UNIX systems, even hardware devices such
as sound outputs, hard drives receive a file-like entry on the rooted tree. When you insert a USB drive, Modern Linux
distributions and MacOS will mount it automatically, meaning that it will receive a location on the tree, in the case of
Linux, the mounting point is usually somewhere inside /media/, in MacOS the mounting point is /Volumes.
In the particular case of your interaction with the HPC cluster there are two important folders that you should be aware
of. They are so important that they receive special variables to tell you what they are.
2.3.2 The echo and cat commands
Your fist command will show you what those locations are. Execute:
$> echo $HOME
/users/<username>
$> echo $SCRATCH
/scratch/<username>
The first command to learn is echo. The command above uses echo to show the contents of two shell variables
$HOME and $SCRATCH. Shell variables are ways to store information in such a way that the shell can use it when
needed. Each user on the cluster receives appropriated values for those variables.
Lets explore a bit more the usage of echo. Enter this command line and execute ENTER:
$> echo "I am learning UNIX Commands"
I am learning UNIX Commands
The shell is actually able to do basic arithmetical operations, execute this command:
$> echo $((23+45*2))
113
Notice that as customary in mathematics products take precedence over addition. That is called the PEMDAS order
of operations, ie “Parentheses, Exponents, Multiplication and Division, and Addition and Subtraction”. Check your
understanding of the PEMDAS rule with this command:
$> echo $(((1+2**3*(4+5)-7)/2+9))
42
Notice that the exponential operation is expressed with the ** operator. The usage of echo is important, otherwise,
if you execute the command without echo the shell will do the operation and will try to execute a command called
42 that does not exists on the system. Try by yourself:
18 Chapter 2. Quick Start

WVU-RC Documentation, Release 1.0
$> $ $(((1+2**3*(4+5)-7)/2+9))
-bash: 42: command not found
As you have seen before, when you execute a command on the terminal in most cases you see the output printed on
the screen. The next thing to learn is how to redirect the output of a command into a file. This will be very important
later to submit jobs and control where and how the output is produced. Execute the following command:
$> echo "I am learning UNIX Commands" > report.log
With the character >redirects the output from echo into a file called report.log. No output is printed on the screen.
If the file does not exist it will be created. If the file exists previously, the file is erased and only the new contents are
stored.
To check that the file actually contains the line produced by echo, execute:
$> cat report.log
I am learning UNIX Commands
The cat (concatenate) command displays the contents of one or several files. In the case of multiple files the files are
printed in the order they are described in the command line, concatenating the output so the name of the command.
You can even use a nice trick to write small text on a file. Execute the following command, followed by the text that
you want to write, sat the end execute Ctrl-D (^D), the Control Key followed by the Dkey. I am annotating below
the location where ^D should be executed:
$> cat > report.log
I am learning UNIX Commands^D
$> cat report.log
I am learning UNIX Commands
In fact there are hundreds of commands, most of them with a variety of options that change the behavior of the original
command. You can feel bewildered t first by the large number of existing commands, but in fact most of the time you
will be using a very little number of them. Learning those will speed up your learning curve.
Another very simple command that is very useful in HPC is date. Without any arguments, it prints the current date
to the screen. Example:
$> date
Mon Nov 5 12:05:58 EST 2018
2.3.3 Folder commands
As we mention before, UNIX organizes data in storage devices as a tree. The commands pwd,cd and mkdir will
allow you to know where you are, move your location on the tree and create new folders. Later we will see how to
move folders from one location on the tree to another.
The first command is pwd. Just execute the command on the terminal:
$> $ pwd
/users/<username>
It is very important at all times to know where in the tree you are. Doing research usually involves dealing with
important amount of data, exploring several parameters or physical conditions. Organize properly all the data in
meaningful folders is very important to research endeavors.
When you log into a cluster, by default you are located on your $HOME folder. That is why most likely the command
pwd will return that location in a first instance.
2.3. Command Line Interface 19

WVU-RC Documentation, Release 1.0
The next command is cd. This command is used to change directory. Directory is another name for folder. The
term directory is also widely used. At least in UNIX the terms directory and folder are exchangeable. Other Desktop
Operating Systems like Windows and MacOS have the concept of smart folders or virtual folders, where the folder
that you see on screen has not correlation with a directory in the filesystem. In those cases the distinction is relevant.
There is another important folder defined in our clusters, its called the scratch folder and each user has its own. The
location of the folder is stored in the variable $SCRATCH. Notice that this is an internal convection and is not observed
in other HPC clusters.
Use the next command to go to that folder:
$> cd $SCRATCH
$> pwd
/scratch/<username>
Notice that the location is different now, if you are using this account for the first time you will not have files on this
folder. It is time to learn another command to list the contents of a folder, execute:
$> ls
$>
Assuming that you are using your HPC account for the first time, you will not have anything on your $SCRATCH
folder. This is a good opportunity to start creating one folder there and change your location inside, execute:
$> mkdir test_folder
$> cd test_folder
We have use two new commands here, mkdir allow you to create folders in places where you are authorized to do
so. For example your $HOME and $SCRATCH folders. Try this command:
$> mkdir /test_folder
mkdir: cannot create directory `/test_folder': Permission denied
There is an important difference between test_folder and /test_folder. The former is a location in your
current working directory (CWD), the later is a location starting on the root directory /. A normal user has no rights
to create folders on that directory so mkdir will fail and a error message will be shown on your screen.
The name of the folder is test_folder, notice the underscore between test and folder. In UNIX, there is no
restriction having files or directories with spaces but using them become a nuisance on the command line. If you want
to create the folder with spaces from the command line, here are the options:
$> mkdir "test folder with spaces"
$> mkdir another\ test\ folder\ with\ spaces
In any case you have to type extra characters to prevent the command line application of consider those spaces as
separators for several arguments in your command. Try executing the following:
$> mkdir another folder with spaces
$> ls
another another folder with spaces folder spaces test_folder test folder with spaces with
Maybe is not clear what is happening here. There is an option for ls that present the contents of a directory:
$>ls -l
total 0
drwxr-xr-x 2 myname mygroup 512 Nov 2 15:44 another
drwxr-xr-x 2 myname mygroup 512 Nov 2 15:45 another folder with spaces
drwxr-xr-x 2 myname mygroup 512 Nov 2 15:44 folder
drwxr-xr-x 2 myname mygroup 512 Nov 2 15:44 spaces
drwxr-xr-x 2 myname mygroup 512 Nov 2 15:45 test_folder
20 Chapter 2. Quick Start

WVU-RC Documentation, Release 1.0
drwxr-xr-x 2 myname mygroup 512 Nov 2 15:45 test folder with spaces
drwxr-xr-x 2 myname mygroup 512 Nov 2 15:44 with
It should be clear, now what happens when the spaces are not contained in quotes "test folder with spaces"
or escaped as another\ folder\ with\ spaces. This is the perfect opportunity to learn how to delete empty
folders. Execute:
$> rmdir another
$> rmdir folder spaces with
You can delete one or several folders, but all those folders must be empty. If those folders contain files or more folders,
the command will fail and error message will be displayed.
After deleting those folders created by mistake, lets check the contents of the current directory. The command ls -1
will list the contents of a file one per line, something very convenient for future scripting:
$> ls -1
another folder with spaces
test_folder
test folder with spaces
2.3.4 Commands for copy and move
The next two commands are cp and mv. They are use to copy or move files or folders from one location to another.
In its simplest usage, those two commands take two arguments, the first argument is the source and the last one the
destination. In the case of more than two arguments the destination must be a directory. The effect will be to copy or
move all the source items into the folder indicated as destination.
Before doing a few examples with cp and mv lets use a very handy command to create files. The command touch
is use to update the access and modification times of a file or folder to the current time. In case there is not such a
file, the command will create a new empty file. We will use that feature to create some empty files for the purpose of
demonstrate how to use cp and mv.
Lets create a few files and directories:
$> mkdir even odd
$> touch f01 f02 f03 f05 f07 f11
Now, lets copy some of those existing files to complete all the numbers up to f11:
$> cp f03 f04
$> cp f05 f06
$> cp f07 f08
$> cp f07 f09
$> cp f07 f10
This is good opportunity to present the *wildcard, use it to replace an arbitrary sequence of characters. For instance,
execute this command to list all the files created above:
$> ls f*
f01 f02 f03 f04 f05 f06 f07 f08 f09 f10 f11
The wildcard is able to replace zero or more arbitrary characters, see for example:
$> ls f*1
f01 f11
There is another way of representing files or directories that follow a pattern, execute this command:
2.3. Command Line Interface 21

WVU-RC Documentation, Release 1.0
$> ls f0[3,5,7]
f03 f05 f07
The files selected are those whose last character is on the list [3,5,7]. Similarly a range of characters can be
represented. See:
$> ls f0[3-7]
f03 f04 f05 f06 f07
We will use those special character to move files based on its parity. Execute:
$> mv f[0,1][1,3,5,7,9] odd
$> mv f[0,1][0,2,4,6,8] even
The command above is equivalent to execute the explicit listing of sources:
$> mv f01 f03 f05 f07 f09 f11 odd
$> mv f02 f04 f06 f08 f10 even
2.3.5 Delete files and Folders
As we mention above, empty folders can be deleted with the command rmdir but that only works if there are no
subfolders or files inside the folder that you want to delete. See for example what happens if you try to delete the
folder called odd:
$> rmdir odd
rmdir: failed to remove `odd': Directory not empty
If you want to delete odd, you can do it in two ways. The command rm allow you to delete one or more files entered
as arguments. Lets delete all the files inside odd, followed by the deletion of the folder odd itself:
$> rm odd/*
$> rmdir odd
Another option is to delete a folder recursively, this is a powerful but also dangerous option. Even if deleting a file is
not actually filling with zeros the location of the data, on HPC systems the recovery of data is practice unfeasible. Lets
delete the folder even recursively:
$> rm -r even
2.3.6 Summary of Basic Commands
The purpose of this brief tutorial is familiarize you with the most common commands used in UNIX environments.
We have shown 10 commands that you will be using, very often on your interaction. This 10 basic commands and one
editor from the next section is all that you need to be ready for submitting jobs on the cluster.
The next table summarizes those commands.
22 Chapter 2. Quick Start

WVU-RC Documentation, Release 1.0
Table 2.2: WVU’s High Performance Computer (HPC) Clusters
Command Description Examples
echo
Display a given message on the
screen
$> echo "This is a
message"
cat
Display the contents of a file on
screen
Concatenate files
$> cat my_file
date
Shows the current date on screen $> date
Wed Nov 7 10:40:05 EST 2018
pwd
Return the path to the current
working directory
$> pwd
/users/username
cd
Change directory $> cd sub_folder
mkdir
Create directory $> mkdir new_folder
touch
Change the access and modification
time of a file
Create empty files
$> touch new_file
cp
Copy a file in another location.
Copy several files into a destination
directory
$> cp old_file new_file
mv
Move a file in another location.
Move several files into a destination
directory
$> mv old_name new_name
rm
Remove one or more files from the
file system tree
$> rm trash_file
$> rm -r full_folder
2.3. Command Line Interface 23
WVU-RC Documentation, Release 1.0
2.4 Editing Files
After learning a few commands the next thing to learn is to edit text files. As we will see later, editing small text files
is a common procedure on a HPC cluster; the submission scripts are relatively small text files. Many scientific codes
use text-based input files for running simulations. You need to know at least one basic editor to help you with those
tasks.
There are several editors available on modern UNIX/Linux machines. The most widely used are vi, emacs and nano.
The standard de facto editor in UNIX is vi and a hacker favorite. The Single UNIX Specification (SUS) specifies vi,
so every conforming system must have it.
The second most commonly used editor is emacs, sometimes not installed by default on many systems it is usually
provided on most Linux distributions.
The third editor is GNU nano a very user-friendly editor. For this tutorial we will focus on nano, for editing short text
files, this editor serves its purpose.
2.4.1 Opening GNU nano
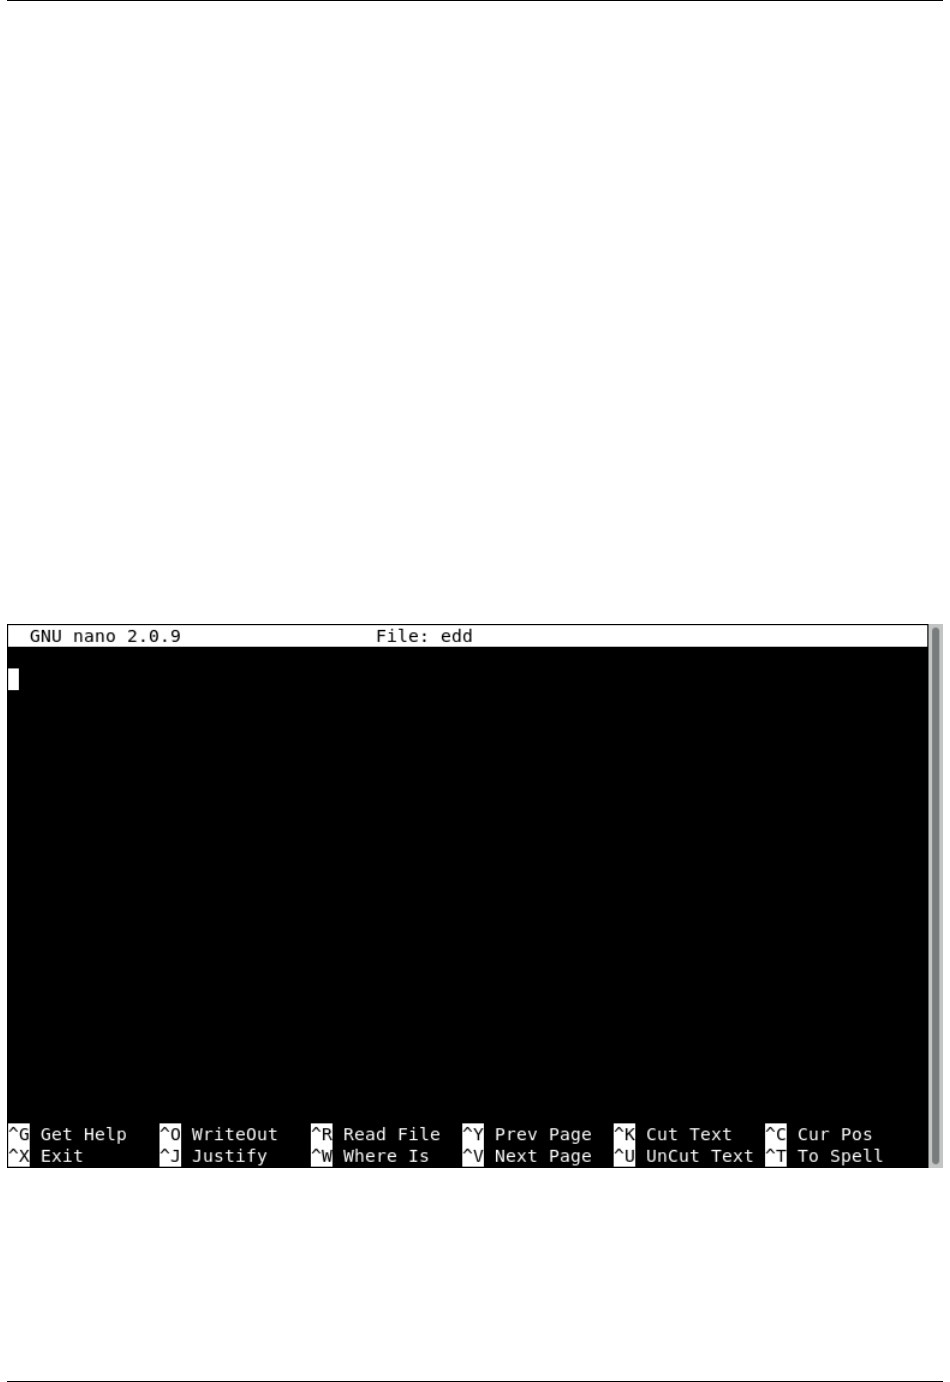
On a terminal execute:
$> nano <name_of_file>
You will get a text application that looks like this:
2.4.2 Using GNU nano
The bottom two lines shows the commands to use. The symbol ^means press the CONTROL KEY (left or right) and
keep it pressed until you press the command key. The character of the command is not case sensitive so pressing ^X
is equivalent to ^x.
24 Chapter 2. Quick Start

WVU-RC Documentation, Release 1.0
Executing commands with nano will sometimes change the list of subcommands, some of them are indicated like M-C,
in that case Mmeans the META character that in modern keyboards is indicated like Alt.
The command ^G display a complete list of keystrokes available from the main window. To exit from the help page,
execute ^X
nano offers a farily complete set of basic utilities to edit files.
Search for text with ^W and the text to find. The command ^_ allow you to go to a specific line number.
2.4.3 Copy, Cut and Paste
The command ^K and ^U only serve to cut and paste the line where the cursor is located. When you cut the text, its
contents are stored in what is called the cut buffer. The command ^U just takes the contents of the cut buffer and write
its contents to the location of the cursor. As the contents of the cut buffer are not erase you can use ^U to repeat the
same contents as many times as you want.
For more advance copy and paste, you need to learn how to select blocks of text before cutting them to the cut buffer
First, move the cursor to the start of the text you want to select, press the M-A key combination (Alt-A in modern
keyboards) to mark the start, then move the cursor to the end of the section you want to select. Once you have marked
the beginning and end of text, the ^^ (Esc-6) and ^K key combinations can be used to copy or cut it, respectively. In
a command like ^^, the meaning of that is press the Control Key followed by the carret symbol ^.
2.4.4 Quitting Nano
To quit nano, use the ^X key combination. If the file you are working on has been modified since the last time you
saved it, you will be ask to save the file first. Type yto save the file, or nto exit nano without saving the file.
2.5 Storage
2.5.1 Home Directory
Home directories on Spruce Knob are located in /users directory and is the default login location for users. The default
disk quota for each user is 10 Gb. As such, we recommend that home directories use should be primarily to store
scripts, binary executables and other small data file types. For research data, users should use Spruce Knobs Scratch
space.
This data is backed up on a daily basis via snapshots and tape. Users can retrieve up to 4 weeks of older
files from /users/.snapshots/{date}/$USER if needed. If files are not available in the snapshot, please contact
helpdesk@hpc.wvu.edu and the HPC team will attempt to retrieve the data from tape.
Note: Users may check their storage quota via the following command:
quota
2.5.2 Scratch Directory
Scratch directories are located in /scratch directory, and can be easily moved to using the $SCRATCH environment
variable set-up by default for each user.
cd $SCRATCH
2.5. Storage 25

WVU-RC Documentation, Release 1.0
Scratch directories on Spruce Knob are treated as true scratch space: There is no user defined quota for space. All
users scratch directories share the same file space, which is set at 130 Tb. When the scratch directory becomes full,
files are automatically deleted by date. To facilitate this, all users should use their scratch space as true temporary
storage. However, we will notify users well in advanced for schedule file deletions to give users ample time to remove
data to prevent data loss.
Note: Scratch data is NOT backed up.
2.5.3 Persistent Group Storage
Research groups may purchase long term persistent storage from the RC HPC. This storage allows users to keep data
on the cluster that will not be removed. In addition, this storage utilizes the same GPFS file system so files can be
written directly to this storage from jobs executing on the cluster.
Persistent storage must be purchased in 1 TB chunks. To purchase this storage, go to https://helpdesk.hpc.wvu.edu
,select “Open a New Ticket”, and select “Dedicated Storage Order” from Help Topic. For more information, please
contact helpdesk@hpc.wvu.edu.
For groups who have purchased this storage, it can be accessed here:
cd /group/{group_name}
Note: Persistent group storage is NOT backed up.
Note: Persistent Group storage has been replaced by a the new ‘Research Data Depot Service
<https://wvu.teamdynamix.com/TDClient/KB/ArticleDet?ID=35328>‘__.
2.5.4 Archival Storage
Please see the Research Data Depot Service for archival storage options.
For additional information please contact helpdesk@hpc.wvu.edu.
2.6 Job Submission
Shared resources like Computer clusters are intended to be used by several people at the same time. To coordinate
usage of the resources, users should request to a system called “Resource Manager” to give them access to some
resources for a predefined amount of time.
The set of resources that are requested and the set of commands that you plan to execute is called a job. There are two
kinds of jobs: “interactive” and “non-interactive”
2.7 Transferring Files
2.7.1 Data Transfer Nodes
The HPC facility has two servers dedicated for transferring files around WVU as well with other locations around
the globe. These two servers are called Data Transfer Nodes (DTNs) and have over 400 TB of usable temporary
storage. These servers are connected at 10 Gb/sec speed to WVU’s Science DMZ which is dedicated to transferring
research data and is separated from other network traffic. This allows data to be transferred with low latency and high
bandwidth to other locations.
26 Chapter 2. Quick Start

WVU-RC Documentation, Release 1.0
DTNs are connected directly to the Spruce Knob HPC cluster which allows fast transfer of data to and from Spruce
Knob. Data to Spruce Knob is transferred over FDR Infiniband at speeds up to 56 Gb/sec. In addition to HPC users,
this space is for all researchers at WVU who need to temporarily store and transfer data to other locations at WVU or
elsewhere throughout the world.
The preferred method for transferring data to and from the data transfer nodes is to use Globus Online. Globus Online
establishes a GridFTP service for transferring files which makes file transfer much faster as well as restartable if they
fail. Data transfers throughput is improved when a user is transferring multiple files from a directory because the
GridFTP service will send multiple files at the same time. In addition, users will receive notifications through email
and the web interface of the status of the transfer. Globus Online provides users a very easy to use web interface for
transferring files to other locations who have Globus Connect Servers or through Globus Connect Personal. Almost
all major research institutions have access to Globus Online. In addition, users can install Globus Connect Personal
on their personal computers for free. The application supports Windows, Linux, and Mac.
Please see the Using Globus Online instructions on how to use Globus Online with WVU’s Data Transfer Nodes.
Users may also use sftp to transfer files to and from the DTNs. To access the DTNs you need to use the hostname
data.hpc.wvu.edu (i.e. sftp username@data.hpc.wvu.edu). However, scp and rsync are not permitted. Note: If you
use sftp with the DTNs your directory structure will be different than you are using on Spruce Knob. Your landing
directory upon login will be /home/user_name. Your scratch directory is located at /scratch/user_name.
Note: Data Transfer Nodes and Globus Online are only connected directly to Spruce Knob. If you need to transfer
files to Mountaineer, you will need to use Alternative Transfer Methods and connect to mountaineer.hpc.wvu.edu.
2.7.2 Using Globus Online
Review https://www.globus.org/researchers/getting-started for a step by step guide on how to get a Globus Online
Account and to start transferring files.
The following are the basic steps for getting started using Globus Online with WVU DTN Servers.
Access Globus Online Web Portal
1. Go to http://www.globus.org with your web browser and select “Sign Up” if you do not already have access to
Globus Online. If you already have access, select Log in in the upper right hand corner.
2. Search for your organization which will be “West Virginia University” and select “Continue”.
3. Select “West Virginia University” at the Identity Provider on the CiLogon Page and select “Log On”.
4. You will now be redirected to WVU’s Sign on Page. Here you will enter you WVU Logon information and
select “LOGIN”.
5. You should now be successfully logged into Globus Online and ready to transfer file.
Transfer Files with Globus Online
1. To transfer files to/from your local PC/workstation you need to install Globus Connect Personal. Please visit
https://www.globus.org/globus-connect-personal and under “Downloads” select the version that matches your
operating system. The next page will guide you through the process of installation. If you just need to transfer
data between the WVU’s HPC center and another location that uses Globus Online you may skip this step.
2. Go to https://www.globus.org/xfer/StartTransfer to start the process of transferring files.
3. On the “Transfer Files” Page there will be a section for two endpoints. Each “Endpoint” can be be used to trans-
fer files to and from the Endpoint to the other Endpoint. For WVU’s DTNs you will search for “wvu#hpcdtn”.
2.7. Transferring Files 27

WVU-RC Documentation, Release 1.0
4. If you are using an endpoint that is not managed by WVU, you will be presented with the following request:
“Please authenticate to access this endpoint”. Select “Continue” if you wish to continue.
5. A CiLogon page will be presented where you can select the appropriate Identity Provider for this endpoint.
After you make your selection, please select “Logon On”.
6. You should now be presented with a login page from your Identity Provider.
7. On the WVU DTN Endpoint, your default file location will be /gpfs. You can transfer directly to/from your
home directory, group directory, or scratch directory by selecting the desired path in the “Path” section.
8. By using selecting the file to transfer and use the arrows you should now be able to transfer files between end
points. You should receive an email when your transfer completes or if there are errors. You can also monitor
the transfer under the “Activity” section/tab.
Note: For those who prefer to use a command line interface (CLI) for data transfers, you may use Globus Online via
the CLI.
Globus Online Hints
1. Globus Online recently made an update that allows users to bookmark endpoints and specific directory locations.
This makes it quicker and easier to transfer files after the first use. More information on bookmarks can be found
at https://www.globus.org/blog/greatly-improved-endpoint-search.
Using Globus Online with Pittsburgh Supercomputing Center (PSC)
WVU Researcher’s have the option to purchase archival storage through PSC’s Data SuperCell. For more information
on getting access to SuperCell please contact the Research Computing Help Desk at https://helpdesk.hpc.wvu.edu.
With the Data SuperCell, users can easily and quickly transfer files from WVU to PSC via Globus Online. Instructions
on how to configure Globus Online to work with PSC’s Data Supercell can be found here.
Globus Online Command Line Interface
For those who prefer to use a command line interface (CLI) for data transfers, you may use Globus Online via the CLI.
Detailed instructions on how to utilize the CLI can be found at [https://support.globus.org/entries/30058643-Using-
the-Command-Line-Interface-CLI- Globus Online CLI Instructions]. Below is an example of using Globus Online
CLI for reference.
1. Ensure both end points you are using for the Globus Online transfer are activated and will not expire before the
transfer completes. This can be done at Globus Endpoints and can also done from the command line via the
following command.
:$> ssh globus_username@cli.globusonline.org endpoint-activate endpoint_name
:
2. You can use one of the following options with the transfer command to transfer files.
:Simple method: one file or recursive directory
: transfer [OPTIONS] -- SOURCE-ENDPOINT/FILE DESTINATION-ENDPOINT/FILE
: transfer [OPTIONS] -- SOURCE-ENDPOINT/DIRECTORY/ DESTINATION-ENDPOINT/DIRECTORY/ -r
:Advanced method: multiple input lines read from stdin
: transfer [OPTIONS] < INPUT LINE(S)
:
3. Example Transfer:
• Create a file with a list of files to be transferred
28 Chapter 2. Quick Start

WVU-RC Documentation, Release 1.0
:cat << EOF > /tmp/yourfilehere
:username#psc-cilogon/file.txt
:wvu#hpcdtn/gpfs/home/username/file.txt
:EOF
:
• Execute transfer command :
2.7.3 Alternative Transfer Methods
To transfer files to the Spruce Knob system and you prefer/can’t use the Globus Online method described above, you
may still use the Data Transfer nodes by using the data.hpc.wvu.edu hostname. Note: You can only use Globus
Online and SFTP with the Data Transfer Nodes. Other methods of transfer (ex. scp, and rsync) can be used for
transfers against the login nodes but it is not recommended for large transfers.
Using SCP
HPC clusters require authenticated connections that uses the encrypted protocol SSH, because of this regular ftp
connections are blocked. SCP comes with all current Unix like operating systems (including Linux and Mac OS X)
and is available from a terminal. To copy a single file using scp you can type
$> scp <filename> username@hostname:.
Where filename is the name of the file you want to be copied, and username is your username, hostname is the
hostname of the cluster you are connecting to. You will be prompted for your username password, and then the
transfer will begin after authentication. After the hostname address name you can specify where you want the file to
be copied to and what the file will be named on the server. Using the scp command, a colon ‘:’ must be specified after
the target machines address, in the above example the period ‘.’ tells scp to copy the file to the default directory (your
home directory) and name the file the current filename. For instance, if the filename was ‘python_script.py’, scp will
copy the file to your home directory and name the file python_script.py. If, for example, you wanted to copy the file
to your SCRATCH directory (information about the SCRATCH directory can be found at the File System page) and
name the file a different name you could use the command
$> scp <filename> username@hostname:$SCRATCH/new_filename
The above commmand will re-name the file to new_filename and place it in your SCRTACH directory. If you instead
want to copy over entire directories, this can be done the with -r option
$> scp -r <directory> username@hostname:.
The above command will copy recursively the specified directory from your local machine to your home directory
on the cluster preserving filenames of the directory. A great option for copying over directories is to first tarball the
directory into a single file. This can be done using the Unix tar command
$> tar cvzf archive.tar.gz <directory>
$> scp archive.tar.gz username@hostname:.
Then after connecting to the server through SSH, you can unarchive the tarball using
$> tar xvzf archive.tar.gz
The tar command compresses the directory (which will also speed up transfer time) into a single file. This is also a
great way to combine multiple files on a local machine before transfer
2.7. Transferring Files 29

WVU-RC Documentation, Release 1.0
$> tar cvzf archive.tar.gz <file1> <file2> ... <file100>
The archive.tar.gz is the name of the soon to be created tarball. You can name this file whatever you want, and file name
extensions are not required, .tar.gz is recommended so you can quickly know that you are looking at a compressed
tarball.
Using WinSCP
For transferring files on a Windows computer, you will have to obtain a windows SCP client. We recommend WinSCP,
it’s free and has a very easy to use graphical interface.
30 Chapter 2. Quick Start

CHAPTER
THREE
FOR BASIC USERS
3.1 Terminal-based Text Editors
There are several terminal-based editors available on our clusters. We will focus our attention on three of them: nano,
emacs, and vim. Your choice of an editor depends mostly on how much functionality do you want from your editor,
how many fingers do you want to use for a given command and the learning curve to master it. For HPC users the
editor is an important choice. Most of your time you are on the terminal executing commands or editing files, being
those input files, submission scripts or the output of your calculations.
Let’s review those three editors to give you the opportunity to have an informed choice.
3.1.1 Nano
Nano is a small, free and friendly editor with commands that usually manage using the Control (CTRL) combined
with some other key.
You can start editing a file using a command line like this:
nano myfile.f90
There are several commands available, the list below comes from the help text. When you see the symbol “^” it means
to press the Control (CTRL) key, the symbol “M-” is called Meta, but in most keyboards is identified with the (Alt)
key.
^G (F1) Display this help text
^X (F2) Close the current file buffer / Exit from nano
^O (F3) Write the current file to disk
^J (F4) Justify the current paragraph
.
^R (F5) Insert another file into the current one
^W (F6) Search for a string or a regular expression
^Y (F7) Move to the previous screen
^V (F8) Move to the next screen
.
^K (F9) Cut the current line and store it in the cutbuffer
^U (F10) Uncut from the cutbuffer into the current line
^C (F11) Display the position of the cursor
^T (F12) Invoke the spell checker, if available
.
^_ (F13) (M-G) Go to line and column number
^\ (F14) (M-R) Replace a string or a regular expression
^^ (F15) (M-A) Mark text at the cursor position
. (F16) (M-W) Repeat last search
.
31

WVU-RC Documentation, Release 1.0
M-^ (M-6) Copy the current line and store it in the cutbuffer
M-} Indent the current line
M-{ Unindent the current line
.
^F Move forward one character
^B Move back one character
^Space Move forward one word
M-Space Move back one word
^P Move to the previous line
^N Move to the next line
.
^A Move to the beginning of the current line
^E Move to the end of the current line
M-( (M-9) Move to the beginning of the current paragraph
M-) (M-0) Move to the end of the current paragraph
M-\ (M-|) Move to the first line of the file
M-/ (M-?) Move to the last line of the file
M-] Move to the matching bracket
M-- (M-\_) Scroll up one line without scrolling the cursor
M-+ (M-=) Scroll down one line without scrolling the cursor
M-< (M-,) Switch to the previous file buffer
M-> (M-.) Switch to the next file buffer
M-V Insert the next keystroke verbatim
^I Insert a tab at the cursor position
^M Insert a newline at the cursor position
^D Delete the character under the cursor
^H Delete the character to the left of the cursor
M-T Cut from the cursor position to the end of the file
M-J Justify the entire file
M-D Count the number of words, lines, and characters
^L Refresh (redraw) the current screen
M-X Help mode enable/disable
M-C Constant cursor position display enable/disable
M-O Use of one more line for editing enable/disable
M-S Smooth scrolling enable/disable
M-P Whitespace display enable/disable
M-Y Color syntax highlighting enable/disable
M-H Smart home key enable/disable
M-I Auto indent enable/disable
M-K Cut to end enable/disable
M-L Long line wrapping enable/disable
M-Q Conversion of typed tabs to spaces enable/disable
M-B Backup files enable/disable
M-F Multiple file buffers enable/disable
M-M Mouse support enable/disable
M-N No conversion from DOS/Mac format enable/disable
M-Z Suspension enable/disable
The most basic usage is to edit a file, and exit from the editor with CTRL-X. Nano ask you if you want to save the file,
you answer “Y” and offers you a name. Simply press ENTER and your file is saved.
32 Chapter 3. For Basic Users

WVU-RC Documentation, Release 1.0
3.1.2 Emacs
Emacs is an extensible, customizable, open-source text editor. Together with Vi/Vim is one the most widely used
editors in Linux environments. There are a big number of commands, customizations and extra modules that can be
integrated with Emacs. We will just go briefly covering the basics.
The number of commands for Emacs is large, here the basic list of commands for editing, moving and searching text.
=== Entering Emacs ===
emacs <filename>
=== Leaving Emacs ===
suspend Emacs (or iconify it under X) C-z exit Emacs permanently C-x C-c
=== Files ===
read a file into Emacs C-x C-f save a file back to disk C-x C-s save all files C-x s insert contents of another
file into this buffer C-x i replace this file with the file you really want C-x C-v write buffer to a specified
file C-x C-w toggle read-only status of buffer C-x C-q
=== Incremental Search ===
search forward C-s search backward C-r regular expression search C-M-s reverse regular expression
search C-M-r select previous search string M-p select next later search string M-n exit incremental search
RET undo effect of last character DEL abort current search C-g Use C-s or C-r again to repeat the search
in either direction. If Emacs is still searching, C-g cancels only the part not matched.
=== Motion ===
entity to move over backward forward character C-b C-f word M-b M-f line C-p C-n go to line beginning
(or end) C-a C-e sentence M-a M-e paragraph M-{ M-} page C-x [ C-x ] sexp C-M-b C-M-f function
C-M-a C-M-e go to buffer beginning (or end) M-< M-> scroll to next screen C-v scroll to previous screen
M-v scroll left C-x < scroll right C-x > scroll current line to center, top, bottom C-l goto line M-g g goto
char M-g c back to indentation M-m
=== Killing and Deleting ===
entity to kill backward forward character (delete, not kill) DEL C-d word M-DEL M-d line (to end of)
M-0 C-k C-k sentence C-x DEL M-k sexp M– C-M-k C-M-k kill region C-w copy region to kill ring
M-w kill through next occurrence of char M-z char yank back last thing killed C-y replace last yank with
previous kill M-y
=== Marking ===
set mark here C-@ or C-SPC exchange point and mark C-x C-x set mark arg words away M-@ mark
paragraph M-h mark page C-x C-p mark sexp C-M-@ mark function C-M-h mark entire buffer C-x h
=== Query Replace ===
interactively replace a text string M-% using regular expressions M-x query-replace-regexp Valid re-
sponses in query-replace mode are
replace this one, go on to next SPC or y replace this one, don’t move , skip to next without replacing
DEL or n replace all remaining matches ! back up to the previous match ^ exit query-replace RET enter
recursive edit (C-M-c to exit) C-r
=== Formatting ===
indent current line (mode-dependent) TAB indent region (mode-dependent) C-M-indent sexp (mode-
dependent) C-M-q indent region rigidly arg columns C-x TAB indent for comment M-; insert newline
after point C-o move rest of line vertically down C-M-o delete blank lines around point C-x C-o join line
3.1. Terminal-based Text Editors 33

WVU-RC Documentation, Release 1.0
with previous (with arg, next) M-^ delete all white space around point M-put exactly one space at point
M-SPC fill paragraph M-q set fill column to arg C-x f set prefix each line starts with C-x . set face M-o
=== Case Change ===
uppercase word M-u lowercase word M-l capitalize word M-c uppercase region C-x C-u lowercase region
C-x C-l
3.1.3 Vi/Vim
The third editor widely supported on Linux systems is “vi”. Over the years since its creation, vi became the de-facto
standard Unix editor. The Single UNIX Specification specifies vi, so every conforming system must have it.
vi is a modal editor: it operates in either insert mode (where typed text becomes part of the document) or normal mode
(where keystrokes are interpreted as commands that control the edit session). For example, typing i while in normal
mode switches the editor to insert mode, but typing i again at this point places an “i” character in the document. From
insert mode, pressing ESC switches the editor back to normal mode.
Vim is an improved version of the original vi, it offers
Here is a summary of the main commands used on vi. On Spruce when using “vi” you are actually using “vim”.
To Start vi
To use vi on a file, type in vi filename. If the file named filename exists, then the first page (or screen) of the file will
be displayed; if the file does not exist, then an empty file and screen are created into which you may enter text:
vi filename edit filename starting at line 1
vi -r filename recover filename that was being edited when the system crashed
To Exit vi
Usually, the new or modified file is saved when you leave vi. However, it is also possible to quit vi without saving
the file. Note: The cursor moves to bottom of the screen whenever a colon (:) is typed. This type of command is
completed by hitting the <Return> (or <Enter>) key:
:x<Return> quit vi, writing out modified file to file named in original invocation
:wq<Return> quit vi, writing out modified file to file named in original invocation
:q<Return> quit (or exit) vi
:q!<Return> quit vi even though latest changes have not been saved for this vi call
Moving the Cursor
Unlike many of the PC and MacIntosh editors, the mouse does not move the cursor within the vi editor screen (or
window). You must use the the key commands listed below. On some UNIX platforms, the arrow keys may be used
as well; however, since vi was designed with the Qwerty keyboard (containing no arrow keys) in mind, the arrow keys
sometimes produce strange effects in vi and should be avoided. If you go back and forth between a PC environment
and a UNIX environment, you may find that this dissimilarity in methods for cursor movement is the most frustrating
difference between the two. In the table below, the symbol ^ before a letter means that the <Ctrl> key should be held
down while the letter key is pressed:
j or <Return> [or down-arrow] move cursor down one line
k [or up-arrow] move cursor up one line
h or <Backspace> [or left-arrow] move cursor left one character
34 Chapter 3. For Basic Users

WVU-RC Documentation, Release 1.0
l or <Space> [or right-arrow] move cursor right one character
0 (zero) move cursor to start of current line (the one with the cursor)
$ move cursor to end of current line
w move cursor to beginning of next word
b move cursor back to beginning of preceding word
:0<Return> or 1G move cursor to first line in file
:n<Return> or nG move cursor to line n
:$<Return> or G move cursor to last line in file
Screen Manipulation
The following commands allow the vi editor screen (or window) to move up or down several lines and to be refreshed.
^f move forward one screen
^b move backward one screen
^d move down (forward) one half screen
^u move up (back) one half screen
^l redraws the screen
^r redraws the screen, removing deleted lines
Adding, Changing, and Deleting Text
This command acts like a toggle, undoing and redoing your most recent action. You cannot go back more than one
step.
uUNDO WHATEVER YOU JUST DID; a simple toggle
Inserting or Adding Text
The following commands allow you to insert and add text. Each of these commands puts the vi editor into insert mode;
thus, the <Esc> key must be pressed to terminate the entry of text and to put the vi editor back into command mode.
iinsert text before cursor, until <Esc> hit
Iinsert text at beginning of current line, until <Esc> hit
aappend text after cursor, until <Esc> hit
Aappend text to end of current line, until <Esc> hit
oopen and put text in a new line below current line, until <Esc> hit
Oopen and put text in a new line above current line, until <Esc> hit
Changing Text
The following commands allow you to modify text.
rreplace single character under cursor (no <Esc> needed)
Rreplace characters, starting with current cursor position, until <Esc> hit
cw change the current word with new text, starting with the character under cursor, until <Esc> hit
cNw change N words beginning with character under cursor, until <Esc> hit; e.g., c5w changes 5 words
3.1. Terminal-based Text Editors 35

WVU-RC Documentation, Release 1.0
Cchange (replace) the characters in the current line, until <Esc> hit
cc change (replace) the entire current line, stopping when <Esc> is hit
Ncc or cNc change (replace) the next N lines, starting with the current line, stopping when <Esc> is hit
Deleting Text
The following commands allow you to delete text.
xdelete single character under cursor
Nx delete N characters, starting with character under cursor
dw delete the single word beginning with character under cursor
dNw delete N words beginning with character under cursor; e.g., d5w deletes 5 words
Ddelete the remainder of the line, starting with current cursor position
dd delete entire current line
Ndd delete N lines, beginning with the current line; e.g., 5dd deletes 5 lines
dNd same as Ndd
Cutting and Pasting Text
The following commands allow you to copy and paste text.
yy copy (yank, cut) the current line into the buffer
Nyy copy (yank, cut) the next N lines, including the current line, into the buffer
yNy same as Nyy
pput (paste) the line(s) in the buffer into the text after the current line
Searching Text
A common occurrence in text editing is to replace one word or phase by another. To locate instances of particular sets
of characters (or strings), use the following commands.
/string search forward for occurrence of string in text
?string search backward for occurrence of string in text
nmove to next occurrence of search string
Nmove to next occurrence of search string in opposite direction
Determining Line Numbers
Being able to determine the line number of the current line or the total number of lines in the file being edited is
sometimes useful.
:.= returns line number of current line at bottom of screen
:= returns the total number of lines at bottom of screen
^g provides the current line number, along with the total number of lines, in the file at the bottom of the screen
36 Chapter 3. For Basic Users

WVU-RC Documentation, Release 1.0
Saving and Reading Files
These commands permit you to input and output files other than the named file with which you are currently working.
:r filename<Return> read file named filename and insert after current line (the line with cursor)
:w<Return> write current contents to file named in original vi call
:w newfile<Return> write current contents to a new file named newfile
:12,35w smallfile<Return> write the contents of the lines numbered 12 through 35 to a new file named
smallfile
:w! prevfile<Return> write current contents over a pre-existing file named prevfile
3.2 Terminal-based Text Editors
There are several terminal-based editors available on our clusters. We will focus our attention on three of them: nano,
emacs, and vim. Your choice of an editor depends mostly on how much functionality do you want from your editor,
how many fingers do you want to use for a given command and the learning curve to master it. For HPC users the
editor is an important choice. Most of your time you are on the terminal executing commands or editing files, being
those input files, submission scripts or the output of your calculations.
Let’s review those three editors to give you the opportunity to have an informed choice.
3.2.1 Nano
Nano is a small, free and friendly editor with commands that usually manage using the Control (CTRL) combined
with some other key.
You can start editing a file using a command line like this
‘‘ nano myfile.f90‘‘
There are several commands available, the list below comes from the help text. When you see the symbol “^” it means
to press the Control (CTRL) key, the symbol “M-” is called Meta, but in most keyboards is identified with the (Alt)
key.
^G (F1) Display this help text
^X (F2) Close the current file buffer / Exit from nano
^O (F3) Write the current file to disk
^J (F4) Justify the current paragraph
^R (F5) Insert another file into the current one
^W (F6) Search for a string or a regular expression
^Y (F7) Move to the previous screen
^V (F8) Move to the next screen
^K (F9) Cut the current line and store it in the cutbuffer
^U (F10) Uncut from the cutbuffer into the current line
^C (F11) Display the position of the cursor
^T (F12) Invoke the spell checker, if available
^_ (F13) (M-G) Go to line and column number
^\ (F14) (M-R) Replace a string or a regular expression
^^ (F15) (M-A) Mark text at the cursor position
(F16) (M-W) Repeat last search
3.2. Terminal-based Text Editors 37

WVU-RC Documentation, Release 1.0
M-^ (M-6) Copy the current line and store it in the cutbuffer
M-} Indent the current line
M-{ Unindent the current line
^F Move forward one character
^B Move back one character
^Space Move forward one word
M-Space Move back one word
^P Move to the previous line
^N Move to the next line
^A Move to the beginning of the current line
^E Move to the end of the current line
M-( (M-9) Move to the beginning of the current paragraph
M-) (M-0) Move to the end of the current paragraph
M-\ (M-|) Move to the first line of the file
M-/ (M-?) Move to the last line of the file
M-] Move to the matching bracket
M-- (M-_) Scroll up one line without scrolling the cursor
M-+ (M-=) Scroll down one line without scrolling the cursor
M-< (M-,) Switch to the previous file buffer
M-> (M-.) Switch to the next file buffer
M-V Insert the next keystroke verbatim
^I Insert a tab at the cursor position
^M Insert a newline at the cursor position
^D Delete the character under the cursor
^H Delete the character to the left of the cursor
M-T Cut from the cursor position to the end of the file
M-J Justify /_staticthe entire file
M-D Count the number of words, lines, and characters
^L Refresh (redraw) the current screen
M-X Help mode enable/disable
M-C Constant cursor position display enable/disable
M-O Use of one more line for editing enable/disable
M-S Smooth scrolling enable/disable
M-P Whitespace display enable/disable
M-Y Color syntax highlighting enable/disable
M-H Smart home key enable/disable
M-I Auto indent enable/disable
M-K Cut to end enable/disable
M-L Long line wrapping enable/disable
M-Q Conversion of typed tabs to spaces enable/disable
M-B Backup files enable/disable
M-F Multiple file buffers enable/disable
M-M Mouse support enable/disable
M-N No conversion from DOS/Mac format enable/disable
M-Z Suspension enable/disable
The most basic usage is to edit a file, and exit from the editor with CTRL-X. Nano ask you if you want to save the file,
you answer “Y” and offers you a name. Simply press ENTER and your file is saved.
38 Chapter 3. For Basic Users

WVU-RC Documentation, Release 1.0
3.2.2 Emacs
Emacs is an extensible, customizable, open-source text editor. Together with Vi/Vim is one the most widely used
editors in Linux environments. There are a big number of commands, customizations and extra modules that can be
integrated with Emacs. We will just go briefly covering the basics.
The number of commands for Emacs is large, here the basic list of commands for editing, moving and searching text.
Entering Emacs
:: emacs
Leaving Emacs
suspend Emacs (or iconify it under X) C-z
exit Emacs permanently C-x C-c
Files
read a file into Emacs C-x C-f
save a file back to disk C-x C-s
save all files C-x s
insert contents of another file into this buffer C-x i
replace this file with the file you really want C-x C-v
write buffer to a specified file C-x C-w
toggle read-only status of buffer C-x C-q
Incremental Search
search forward C-s
search backward C-r
regular expression search C-M-s
reverse regular expression search C-M-r
select previous search string M-p
select next later search string M-n
exit incremental search RET
undo effect of last character DEL
abort current search C-g
Use C-s or C-r again to repeat the search in either direction. If
Emacs is still searching, C-g cancels only the part not matched.
Motion
entity to move over backward forward
character C-b C-f
word M-b M-f
line C-p C-n
3.2. Terminal-based Text Editors 39

WVU-RC Documentation, Release 1.0
go to line beginning (or end) C-a C-e
sentence M-a M-e
paragraph M-{ M-}
page C-x [ C-x ]
sexp C-M-b C-M-f
function C-M-a C-M-e
go to buffer beginning (or end) M-< M->
scroll to next screen C-v
scroll to previous screen M-v
scroll left C-x <
scroll right C-x >
scroll current line to center, top, bottom C-l
goto line M-g g
goto char M-g c
back to indentation M-m
Killing and Deleting
entity to kill backward forward
character (delete, not kill) DEL C-d
word M-DEL M-d
line (to end of) M-0 C-k C-k
sentence C-x DEL M-k
sexp M-- C-M-k C-M-k
kill region C-w
copy region to kill ring M-w
kill through next occurrence of char M-z char
yank back last thing killed C-y
replace last yank with previous kill M-y
Marking
set mark here C-@ or C-SPC
exchange point and mark C-x C-x
set mark arg words away M-@
mark paragraph M-h
mark page C-x C-p
mark sexp C-M-@
mark function C-M-h
mark entire buffer C-x h
Query Replace
interactively replace a text string M-%
using regular expressions M-x query-replace-regexp
Valid responses in query-replace mode are
40 Chapter 3. For Basic Users

WVU-RC Documentation, Release 1.0
replace this one, go on to next SPC or y
replace this one, don’t move ,
skip to next without replacing DEL or n
replace all remaining matches !
back up to the previous match ^
exit query-replace RET
enter recursive edit (C-M-c to exit) C-r
Formatting
indent current line (mode-dependent) TAB
indent region (mode-dependent) C-M-\
indent sexp (mode-dependent) C-M-q
indent region rigidly arg columns C-x TAB
indent for comment M-;
insert newline after point C-o
move rest of line vertically down C-M-o
delete blank lines around point C-x C-o
join line with previous (with arg, next) M-^
delete all white space around point M-\
put exactly one space at point M-SPC
fill paragraph M-q
set fill column to arg C-x f
set prefix each line starts with C-x .
set face M-o
Case Change
uppercase word M-u
lowercase word M-l
capitalize word M-c
uppercase region C-x C-u
lowercase region C-x C-l
3.2.3 Vi/Vim
The third editor widely supported on Linux systems is “vi”. Over the years since its creation, vi became the *de-facto*
standard Unix editor. The Single UNIX Specification specifies vi, so every conforming system must have it.
vi is a modal editor: it operates in either insert mode (where typed text becomes part of the document) or normal mode
(where keystrokes are interpreted as commands that control the edit session). For example, typing i while in normal
mode switches the editor to insert mode, but typing i again at this point places an “i” character in the document. From
insert mode, pressing ESC switches the editor back to normal mode.
Vim is an improved version of the original vi, it offers
Here is a summary of the main commands used on vi. On Spruce when using “vi” you are actually using “vim”.
3.2. Terminal-based Text Editors 41

WVU-RC Documentation, Release 1.0
To Start vi
To use vi on a file, type in vi filename. If the file named filename exists, then the first page (or screen) of the file will
be displayed; if the file does not exist, then an empty file and screen are created into which you may enter text.
vi filename edit filename starting at line 1
vi -r filename recover filename that was being edited when the system crashed
To Exit vi
Usually, the new or modified file is saved when you leave vi. However, it is also possible to quit vi without saving
the file. Note: The cursor moves to bottom of the screen whenever a colon (:) is typed. This type of command is
completed by hitting the (or ) key.
:x<Return> quit vi, writing out modified file to file named in original invocation
:wq<Return> quit vi, writing out modified file to file named in original invocation
:q<Return> quit (or exit) vi
:q!<Return> quit vi even though latest changes have not been saved for this vi call
Moving the Cursor
Unlike many of the PC and MacIntosh editors, the mouse does not move the cursor within the vi editor screen (or
window). You must use the the key commands listed below. On some UNIX platforms, the arrow keys may be used
as well; however, since vi was designed with the Qwerty keyboard (containing no arrow keys) in mind, the arrow keys
sometimes produce strange effects in vi and should be avoided. If you go back and forth between a PC environment
and a UNIX environment, you may find that this dissimilarity in methods for cursor movement is the most frustrating
difference between the two. In the table below, the symbol ^ before a letter means that the key should be held down
while the letter key is pressed.
j or <Return> [or down-arrow] move cursor down one line
k [or up-arrow] move cursor up one line
h or <Backspace> [or left-arrow] move cursor left one character
l or <Space> [or right-arrow] move cursor right one character
0 (zero) move cursor to start of current line (the one with the cursor)
$ move cursor to end of current line
w move cursor to beginning of next word
b move cursor back to beginning of preceding word
:0<Return> or 1G move cursor to first line in file
:n<Return> or nG move cursor to line n
:$<Return> or G move cursor to last line in file
Screen Manipulation
The following commands allow the vi editor screen (or window) to move up or down several lines and to be refreshed.
^f move forward one screen
^b move backward one screen
^d move down (forward) one half screen
^u move up (back) one half screen
^l redraws the screen
42 Chapter 3. For Basic Users

WVU-RC Documentation, Release 1.0
^r redraws the screen, removing deleted lines
Adding, Changing, and Deleting Text
This command acts like a toggle, undoing and redoing your most recent action. You cannot go back more than one
step.
‘‘ u UNDO WHATEVER YOU JUST DID; a simple toggle‘‘
Inserting or Adding Text
The following commands allow you to insert and add text. Each of these commands puts the vi editor into insert mode;
thus, the key must be pressed to terminate the entry of text and to put the vi editor back into command mode.
i insert text before cursor, until <Esc> hit
I insert text at beginning of current line, until <Esc> hit
a append text after cursor, until <Esc> hit
A append text to end of current line, until <Esc> hit
o open and put text in a new line below current line, until <Esc> hit
O open and put text in a new line above current line, until <Esc> hit
Changing Text
The following commands allow you to modify text.
r replace single character under cursor (no <Esc> needed)
R replace characters, starting with current cursor position, until <Esc> hit
cw change the current word with new text, starting with the character under cursor, until <Esc> hit
cNw change N words beginning with character under cursor, until <Esc> hit; e.g., c5w changes 5 words
C change (replace) the characters in the current line, until <Esc> hit
cc change (replace) the entire current line, stopping when <Esc> is hit
Ncc or cNc change (replace) the next N lines, starting with the current line, stopping when <Esc> is hit
Deleting Text
The following commands allow you to delete text.
x delete single character under cursor
Nx delete N characters, starting with character under cursor
dw delete the single word beginning with character under cursor
dNw delete N words beginning with character under cursor; e.g., d5w deletes 5 words
D delete the remainder of the line, starting with current cursor position
dd delete entire current line
Ndd delete N lines, beginning with the current line; e.g., 5dd deletes 5 lines
dNd same as Ndd
Cutting and Pasting Text
The following commands allow you to copy and paste text.
yy copy (yank, cut) the current line into the buffer
3.2. Terminal-based Text Editors 43

WVU-RC Documentation, Release 1.0
Nyy copy (yank, cut) the next N lines, including the current line, into the buffer
yNy same as Nyy
p put (paste) the line(s) in the buffer into the text after the current line
Searching Text
A common occurrence in text editing is to replace one word or phase by another. To locate instances of particular sets
of characters (or strings), use the following commands.
/string search forward for occurrence of string in text
?string search backward for occurrence of string in text
n move to next occurrence of search string
N move to next occurrence of search string in opposite direction
Determining Line Numbers
Being able to determine the line number of the current line or the total number of lines in the file being edited is
sometimes useful.
:.= returns line number of current line at bottom of screen
:= returns the total number of lines at bottom of screen
^g provides the current line number, along with the total number of lines, in the file at the bottom of the screen
Saving and Reading Files
These commands permit you to input and output files other than the named file with which you are currently working.
:r filename‘‘ read file named filename and insert after current line (the line with cursor)‘‘
:w‘‘ write current contents to file named in original vi call‘‘
:w newfile‘‘ write current contents to a new file named newfile‘‘
:12,35w smallfile‘‘ write the contents of the lines numbered 12 through 35 to a new file named smallfile‘‘
:w! prevfile‘‘ write current contents over a pre-existing file named prevfile‘‘
3.3 Globus Online
3.3.1 Overview
For a quick start guide please visit: Globus: How to Get Started.
If you need further assistance beyond this documentation, please contact helpdesk@hpc.wvu.edu.
44 Chapter 3. For Basic Users

WVU-RC Documentation, Release 1.0
3.3.2 Transfer Data
Use Globus Online web browser to transfer data files between your PC/workstation and the WVU HPC systems. There
are two dedicated servers, data transfer nodes (DTNs), that are connected to WVU’s Science DMZ (REX) that allow
data to be transferred with low latency and high bandwidth across WVU campus as well as to other locations around
the globe. This space is available for all researchers at WVU who need to temporarily store and transfer data.
Logging in and transferring files
Visit the URL Globus Online to login.
Select West Virginia University from the organizational list and login using your WVU Login username and password.
Transferring data to your local workstations/PC
To learn how to transfer data to your local workstation, you will need to install Globus Connect Personal.
3.3.3 Share Data
Use Globus Online to share your data files with researchers located at other institutions around the world without
needing administrative assistance.
Note If you are not using an endpoint that starts with wvu\#, before you can start sharing data using Globus, you
must contact Research Computing and request that a shared endpoint be created for you.
3.3.4 Archive Data
Globus Online provides an easy mechanism for researchers to archive their data sets for free to their MIX Google
Drive account via a Google Drive Connector. All WVU faculty and students have unlimited storage in Google Drive
through their MIX account. Staff can request a MIX account by contacting helpdesk@hpc.wvu.edu. Google Drive
gives researchers a safe environment to archive their data sets, which replicates between multiple data centers to
prevent data loss. Note: You can also use the Google Drive web interface as well as the Google Drive Sync Client to
transfer files to your Google Drive MIX account; however, the sync client and web interface is best used for small files
(Example .docx, .pdf, etc.). Globus Google Drive Connector is optimized for transferring a large number of files as
well as very large files, which cannot be done, via the Google Drive Web Interface on Sync Client. You will see the
best performance with Google Drive Connector with transferring several large files at once. If you have many small
files, it might be best to zip/tar these files first before transferring to Google Drive.
Google Drive is not approved for use of sensitive or protected data sets (i.e. HIPPA, FERPA, ITAR, sub-
ject to Export Control laws, etc.). If you need assistance archiving these types of data sets, please contact
helpdesk@hpc.wvu.edu.
To archive data to a Google Drive you will need to follow the instructions in the Globus Online Google Drive Connector
Instructions, which will guide you on how to make a Shared Endpoint that you can attach to your MIX Google Drive
Account to transfer data to/from.
Globus Online Google Drive Connector Instructions
•Note: In step one, when searching all endpoints you will need to search for ‘wvu#gdrive’.
To transfer files to your MIX Google Drive Account, review the “Transfer Data” Section above. You will want to select
the name of the Shared Endpoint you just created in step 3 as one of the two endpoints. The other endpoint could be a
WVU endpoint, such as wvu#hpcdtn or a personal endpoint you created that connects to your workstation/PC.
3.3. Globus Online 45

WVU-RC Documentation, Release 1.0
3.3.5 Publish Data
Use Globus Online to publish your datasets, possibly as a requirement from a granting agency. Published datasets are
organized by communities and their member collections and are searchable by other Globus users.
Note If you are not using an endpoint that starts with wvu\#, before you can start sharing data using Globus, you
must contact Research Computing and request that a shared endpoint be created for you.
For more information on how to publish your data sets using Globus Online, visit Globus, Data Publication User
Guide.
3.4 Samples of Job Submission scripts
Below are bash scripts that can be modified and submitted to the qsub command for job submission. For details about
the different parts of the scripts please visit the Running Jobs page. These scripts can be copied and pasted in the
terminal using any number of text editors (i.e. vi, emacs, etc...)
3.4.1 Script for running a non-array batch queue
The below script has PBS directives to set-up commonly used variables such as job name, resources needed, e-mail
address upon job completion and abnormal termination and specify a queue to run on
#!/bin/sh
#This is an example script for executing generic jobs with
# the use of the command 'qsub <name of this script>'
#These commands set up the Grid Environment for your job. Words surrounding by a backet ('<','>') should be changed
#Any of the PBS directives can be commented out by placing another pound sign in front
#example
##PBS -N name
#The above line will be skipped by qsub because of the two consecutive # signs
# Specify job name
#PBS -N <name>
# Specify the resources need for the job
# Walltime is specified as hh:mm:ss (hours:minutes:seconds)
#PBS -l nodes=<number_of_nodes>:ppn=<number_of_processors_per_node,walltime=<time_needed_by_job>
# Specify when Moab should send e-mails 'ae' below user will
# receive e-mail for any errors with the job and/or upon completion
# If you don't want e-mails just comment out these next two PBS lines
#PBS -m ae
# Specify the e-mail address to receive above mentioned e-mails
#PBS -M <email_address>
# Specify the queue to execute task in. Current options can be found by excuting the command qstat -q at the terminal
#PBS -q <queue_name>
# Enter your command below with arguments just as if you where going to execute on the command line
46 Chapter 3. For Basic Users

WVU-RC Documentation, Release 1.0
# It is generally good practice to issue a 'cd' command into the directory that contains the files
# you want to use or use full path names
3.4.2 Script for running an array batch queue
Script is the same as above, but adds PBS -t to execute array request job submissions.
#!/bin/sh
#This is an example script for executing genetic jobs with
# the use of the command 'qsub <name of this script>'
#These commands set up the Grid Environment for your job. Words surrounding by a backet ('<','>') should be changed
#Any of the PBS directives can be commented out by placing another pound sign in front
#example
##PBS -N name
#The above line will be skipped by qsub because of the two consecutive # signs
# Specify job name, use ${PBS_ARRAYID} to ensure names and output/error files have different names
#PBS -N <name_${PBS_ARRAYID}
# Specify the range for the PBS_ARRAYID environment variable
# <num_range> can be a continous range like 1-200 or 5-20
# or <num_range> can be a comma seperated list of numbers like 5,15,20,55
# You can also specify the maximum number of jobs queued at one time with the percent sign
# so a <num_range> specified as 5-45%8 would launch forty jobs with a range from 5-45, but only queue 8 at a time until
# all jobs are completed.
# Further, you can mix and match continous range and list like 1-10,15,25-40%10
#PBS -t <num_range>
# Specify the resources need for the job
# Walltime is specified as hh:mm:ss (hours:minutes:seconds)
#PBS -l nodes=<number_of_nodes>:ppn=<number_of_processors_per_node,walltime=<time_needed_by_job>
# Specify when Moab should send e-mails 'ae' below user will
# receive e-mail for any errors with the job and/or upon completion
# If you don't want e-mails just comment out these next two PBS lines
#PBS -m ae
# Specify the e-mail address to receive above mentioned e-mails
#PBS -M <email_address>
# Specify the queue to execute task in. Current options can be found by excuting the command qstat -q at the terminal
#PBS -q <queue_name>
# Enter your command below with arguments just as if you where going to execute on the command line
# It is generally good practice to issue a 'cd' command into the directory that contains the files
# you want to use or use full path names
# Any parameter or filename that needs to use the current job number of the array number range use ${PBS_ARRAYID}
3.4. Samples of Job Submission scripts 47

WVU-RC Documentation, Release 1.0
3.5 Environment Modules
3.5.1 What are Modulefiles
Modulefiles are files written in the Tool Command Language (Tcl) and are used by the module command to implement
different environments for particular applications. Whenever a user on a Unix/Linux based system runs applications,
compiles code, etc. what the user can succesfully do is determined by the current shell environment. The most
common application of this concept is the Unix/Linux PATH shell environment. When a user types a command, that
command is either referenced by a full path name: e.g. /usr/bin/some_dir/another_dir/command_utility or the path
needs to be specified in the user’s PATH shell environment. Another example is when a particular user compiles
application code, often several libraries need to be accessible and their are Unix shell environment variables that
direct the compiler where to look (e.g. LD_LIBRARY_PATH). On a moderately sized or large cluster this becomes
somewhat complicated to keep track of all the libraries and commands available on the system. An example would
be compile-time libraries: often on a HPC system their are several versions of the same library to fullfill all user’s
needs. If all libraries where available by default to all users there is a good chance that application code would access
the incorrect versions and cause errors. Modulefiles can be loaded and unloaded to modify certain shell environment
variables to make applications available to the user and not interfere with other applications.
On RC HPC managed systems we use modulefiles to control shell environment for any libraries, compilers, and
software that are installed locally (not globally located by default). In addition, modulefiles contain useful information
such as version numbers, URLs for webpages and manuals, and MAN page information. Further, modulefiles are a
great way to see what software, libraries and compilers are available on our systems.
3.5.2 Listing available modefiles
To list the currentely available modulefiles on the system use the module command with the available subcommand:
$> module available
--------------------------------------------- /usr/share/Modules/software ----------------------------------------------
chemistry/autodock_vina genomics/clumpp genomics/muscle genomics/tabix
chemistry/gamess genomics/cufflinks genomics/phase genomics/tablet
chemistry/gaussian/g03 genomics/distruct genomics/phrap genomics/tophat2
chemistry/gromacs genomics/eigensoft genomics/picard-tools genomics/trf
data/cdf/3.5.0.2 genomics/emboss genomics/plink genomics/trinity
data/hdf5/1.8.12 genomics/fasta36 genomics/qiime genomics/vcftools
genomics/abyss genomics/fastqc genomics/repeatexplorer gnu/parallel
genomics/allpaths genomics/fastx_toolkit genomics/rsem mae/elk/2.3.16
genomics/beagle genomics/gatk genomics/samtools statistics/matlab
genomics/bedtools genomics/hmmer genomics/shapeit
genomics/blast genomics/igv genomics/soapdenovo
genomics/bowtie2 genomics/lastz genomics/structure
-------------------------------------------- /usr/share/Modules/development --------------------------------------------
compilers/gcc/4.8.2 libraries/DFS/myhadoop libraries/hdf5/1.8.12 mpi/mpich2/1.2.1
compilers/gcc/4.9.0 libraries/bupc/2.2 libraries/mkl/4.1.1.036 mpi/mvapich2/1.9
compilers/intel/14.0 libraries/cdf/3.5.0.2 mpi/intel/4.1.1.036 mpi/openmpi/1.6.5
The output of the available subcommand informs the full path where the modulefiles are located (e.g.
/usr/share/Modules/software) as well as a list of modulefiles in that particular location (e.g. gnu/parallel). Impor-
tantly, all modulefiles are sectioned by categories. For instance, all compiler modulefiles start with ‘compilers/’ (i.e.
compilers/gcc/4.8.2). The module available command can be given words for matching, and will return modulefiles
that start with the given word. For instance, if you want to list all MPI modulefiles:
48 Chapter 3. For Basic Users

WVU-RC Documentation, Release 1.0
$>module available mpi
-------------------------------------------- /usr/share/Modules/development --------------------------------------------
mpi/intel/4.1.1.036 mpi/mpich2/1.2.1 mpi/mvapich2/1.9 mpi/openmpi/1.6.5
Further, you can list all gcc compilers:
$>module available compilers/gcc
-------------------------------------------- /usr/share/Modules/development --------------------------------------------
compilers/gcc/4.8.2 compilers/gcc/4.9.0
3.5.3 Showing what a modulefile does
Viewing the contents of a modulefile can be done using the module command with the show subcommand:
$> module show compilers/intel/14.0
-------------------------------------------------------------------
/usr/share/Modules/development/compilers/intel/14.0:
module-whatis Name: Intel Compiler
module-whatis Version: 14.0
module-whatis Category: compiler, runtime support
module-whatis Description: Intel Compiler Family (C/C++/Fortran for x86_64)
module-whatis URL: http://software.intel.com/en-us/articles/intel-compilers/
setenv INTEL_LICENSE_FILE 28519@srih0001.hpc.wvu.edu
prepend-path PATH /shared/software/intel/bin
prepend-path MANPATH /shared/software/intel/man
prepend-path LD_LIBRARY_PATH /shared/software/intel/lib/intel64
-------------------------------------------------------------------
the modulefile starts with the location of the modulefile (/usr/share/Modules/development/compilers/intel/14.0). The
next few lines module-whatis gives information about version numbers, categories for tools, URLs for more informa-
tion. If you only want to see these first few lines you can use the whatis subcommand:
$> module whatis compilers/intel/14.0
compilers/intel/14.0 : Name: Intel Compiler
compilers/intel/14.0 : Version: 14.0
compilers/intel/14.0 : Category: compiler, runtime support
compilers/intel/14.0 : Description: Intel Compiler Family (C/C++/Fortran for x86_64)
compilers/intel/14.0 : URL: http://software.intel.com/en-us/articles/intel-compilers/
Returning back to the actual modulefile, after the whatis lines you have specific Tcl commands that modify the en-
vironment. In this example we have two types of commands: 1) setenv which creates a shell environment variable
(INTEL_LICENSE_FILE in this case). 2) prepend-path statement which modify a current shell environment variable.
In this case the first prepend-path modifies the PATH environment variable by adding /shared/software/intel/bin to
make that directory available to the user. More information about Tcl commands found in modulefiles can be found in
the modulefile manpage (man modulefile).
3.5.4 Loading and Unloading modulefiles
Loading and unloading modulefiles can be done using the module command the subcommands load and unload. In
this example, the Intel C compiler is named icc:
3.5. Environment Modules 49

WVU-RC Documentation, Release 1.0
$> icc
-bash: icc: command not found
$> module load compilers/intel
$> icc
icc: command line error: no files specified; for help type "icc -help"
$> module unload compilers/intel
$> icc
-bash: icc: command not found
As shown in the above command, initially the icc commands could not be found. After loading the module, icc could
be found (although I gave it no input so it gave me an error), and as expected after unloading the module icc could not
be found anymore. For more information about module subcommands see the module manpage (man module)
3.5.5 Using modulefiles through qsub
Modulefiles can be used through the scheduler just as on the command line. In your batch shell script (see Running
Jobs for details) you can place the module load/unload or any other module subcommand directly before you executed
commands.
3.6 Managing Scratch Contents
Scratch is designed to be a high-performance, low-latency, parallel file system and it is uniquely built for HPC systems.
That means that data is allocated in parallel on several virtual disks intended to be read and write in parallel from
several computers. In order for the scratch system to perform its best the files should be balanced across all disks and
frequently used files should also being balanced.
In the page we will offer some tricks that will help you regain control of your scratch space in preparation to transfer-
ring your files to other locations.
3.6.1 Knowing my current usage
First we should know what we have in terms of used space and number of files
$ /usr/lpp/mmfs/bin/mmlsquota --block-size M gpfs01:scratch
Block Limits | File Limits
Filesystem Fileset type MB quota limit in_doubt grace | files quota limit in_doubt grace Remarks
gpfs01 scratch USR 1943448 62914560 68157440 235 none | 557657 24000000 25000000 172 none
You can also get this information in GigaBytes
$ /usr/lpp/mmfs/bin/mmlsquota --block-size G gpfs01:scratch
Block Limits | File Limits
Filesystem Fileset type GB quota limit in_doubt grace | files quota limit in_doubt grace Remarks
gpfs01 scratch USR 1898 61440 66560 1 none | 557657 24000000 25000000 172 none
On this case I am using almos 1900 GB of data in half million files. I would like to reduce as much as possible before
trying to move my data out of Scratch. We will focus on command line tricks that will help you search for Big files,
search for small and numerous files. The idea is to attack first the biggest contributors to my usage. This examples
will be as generic as possible. At the end of the day its up to you to decide which data is not longer needed and can be
safely deleted.
50 Chapter 3. For Basic Users

WVU-RC Documentation, Release 1.0
Consider delete a irreversible procedure, there is a way to recover files that have been deleted very recently but do not
count on it. Being sure that you delete what you actually want to delete. The commands below are powerful and with
that power comes a danger too.
3.6.2 Searching for empty files
An empty file is still a file. Even if apparently not using space its metadata still exists and any transfer of that file is
also a file operation. This is something that in most cases is harmless. Be careful, in some cases empty files are used
for some codes to indicate run conditions. Their sole existence carries a meaning.
On Spruce every user has an environmental variable pointing to their personal Scratch folder. You can see that variable
with:
$ echo $SCRATCH
/scratch/<USERNAME>
On this examples we will use this variable to allow you to copy and paste this commands in total generality
find $SCRATCH -size 0
I got thousands of files. Some of them I do not want to remove, but there are quite a number of files like this:
./OrbitalGAF/58d36a1374d8b558e47f9623/58d36a1374d8b558e47f9623.e1165669
./OrbitalGAF/58d46c6d74d8b558e47f9cf7/58d46c6d74d8b558e47f9cf7.o1172814
./OrbitalGAF/58d46c6d74d8b558e47f9cf7/58d46c6d74d8b558e47f9cf7.e1172814
./OrbitalGAF/58d36a1374d8b558e47f9629/58d36a1374d8b558e47f9629.o1165671
./OrbitalGAF/58d36a1374d8b558e47f9629/58d36a1374d8b558e47f9629.e1165671
./OrbitalGAF/58d46c6d74d8b558e47f9cc7/58d46c6d74d8b558e47f9cc7.o1172802
./OrbitalGAF/58d46c6d74d8b558e47f9cc7/58d46c6d74d8b558e47f9cc7.e1172802
./OrbitalGAF/58d46c6d74d8b558e47f9cca/58d46c6d74d8b558e47f9cca.o1172803
./OrbitalGAF/58d46c6d74d8b558e47f9cca/58d46c6d74d8b558e47f9cca.e1172803
./OrbitalGAF/58d46c6d74d8b558e47f9cd3/58d46c6d74d8b558e47f9cd3.o1172806
./OrbitalGAF/58d46c6d74d8b558e47f9cd3/58d46c6d74d8b558e47f9cd3.e1172806
./OrbitalGAF/58d46c6d74d8b558e47f9cd6/58d46c6d74d8b558e47f9cd6.o1172807
./OrbitalGAF/58d46c6d74d8b558e47f9cd6/58d46c6d74d8b558e47f9cd6.e1172807
./OrbitalGAF/58d46c6d74d8b558e47f9cd9/58d46c6d74d8b558e47f9cd9.o1172808
./OrbitalGAF/58d46c6d74d8b558e47f9cd9/58d46c6d74d8b558e47f9cd9.e1172808
./OrbitalGAF/58d46c6d74d8b558e47f9cf4/58d46c6d74d8b558e47f9cf4.o1172813
./OrbitalGAF/58d46c6d74d8b558e47f9cf4/58d46c6d74d8b558e47f9cf4.e1172813
./OrbitalGAF/58d36a1374d8b558e47f963e/58d36a1374d8b558e47f963e.o1165678
./OrbitalGAF/58d36a1374d8b558e47f963e/58d36a1374d8b558e47f963e.e1165678
./OrbitalGAF/58d46c6d74d8b558e47f9cb5/58d46c6d74d8b558e47f9cb5.o1172796
./OrbitalGAF/58d46c6d74d8b558e47f9cb5/58d46c6d74d8b558e47f9cb5.e1172796
./OrbitalGAF/58d46c6d74d8b558e47f9cbe/58d46c6d74d8b558e47f9cbe.o1172799
./OrbitalGAF/58d46c6d74d8b558e47f9cbe/58d46c6d74d8b558e47f9cbe.e1172799
./OrbitalGAF/58d46c6d74d8b558e47f9cc1/58d46c6d74d8b558e47f9cc1.o1172800
./OrbitalGAF/58d46c6d74d8b558e47f9cc1/58d46c6d74d8b558e47f9cc1.e1172800
./OrbitalGAF/58d46c6d74d8b558e47f9cc4/58d46c6d74d8b558e47f9cc4.o1172801
./OrbitalGAF/58d46c6d74d8b558e47f9cc4/58d46c6d74d8b558e47f9cc4.e1172801
./OrbitalGAF/58d36a1374d8b558e47f9653/58d36a1374d8b558e47f9653.o1165683
All those are empty files created by Torque/Moab from simulations that I have carried out in the past. Those files in
the format:
<JOB_NAME>.o<JOB_ID_NUMBER>
<JOB_NAME>.e<JOB_ID_NUMBER>
Those files contain the standard Output (o) and Standard Error (e) from the jobs that run on Spruce. Many of those
files are empty because on my executions I usually send the output of the command to some other file and because
3.6. Managing Scratch Contents 51

WVU-RC Documentation, Release 1.0
the codes that I use do not write anything on the standard error. Deleting those empty files will not help me with my
storage usage by it will reduce the number of files that I will have to move later on.
I can target those files with a more specific command:
find $SCRATCH -size 0 -regextype posix-egrep -regex ".*\.[o,e][0-9]{5,7}"
The command above search for all empty files on Scratch that contains. On my account I found thousands of cases
that I can safely delete. In most cases those files are not important to you to keep. They are empty and not used at all
other than telling you the JOB_ID that you probably do not need for old jobs. If you feel confortable deleting those
files you can execute:
find $SCRATCH -size 0 -regextype posix-egrep -regex ".*\.[o,e][0-9]{5,7}" -exec rm {} \;
On my case it help me delete 16113 files
3.6.3 Searching for Big Files
Some problems and codes produce big files. In some cases those files are not needed to extract the actual answers for
which you run those calculations and could be deleted safely. The first step is knowing where they are. This command
search for files bigger than 2GB
find $SCRATCH -size +2G
You can increase or decrease the value if you are getting too many or very few. Once you identify the biggest files you
can use the their names to target those files for deletion. Imagine that the files called “WAVECAR” can be deleted.
You can use this command”
find $SCRATCH -size +2G -name "WAVECAR" -exec rm {} \;
3.7 XWindow
3.7.1 Introduction to X
To view a graphical user interface (GUI) from one of HPC systems you will need to have a X Windows System (often
shorten to just ‘X’) installed on your PC. UNIX based operating systems (Linux and Mac OS X) come with an X
Window terminal called X11. For Windows based machines, you will need to install one.
Once you have a functioning X Server running on your PC, you will need to tunnel your graphics program from the
HPC system to your PC.
Note: You may execute lite (i.e. not resource intensive) GUI programs on the login nodes of the HPC systems.
However, these should be programs cannot be resource intensive. If you need to run programs such as MAT-
LAB and you plan on doing computation through the MATLAB GUI, you will need to submit your job to the
scheduler.
3.7.2 Launching X (GUI Programs)
Linux/OS X Instructions
With Linux or OS X you can simply run the command below from your terminal window to enable X11 forward
through SSH.
52 Chapter 3. For Basic Users
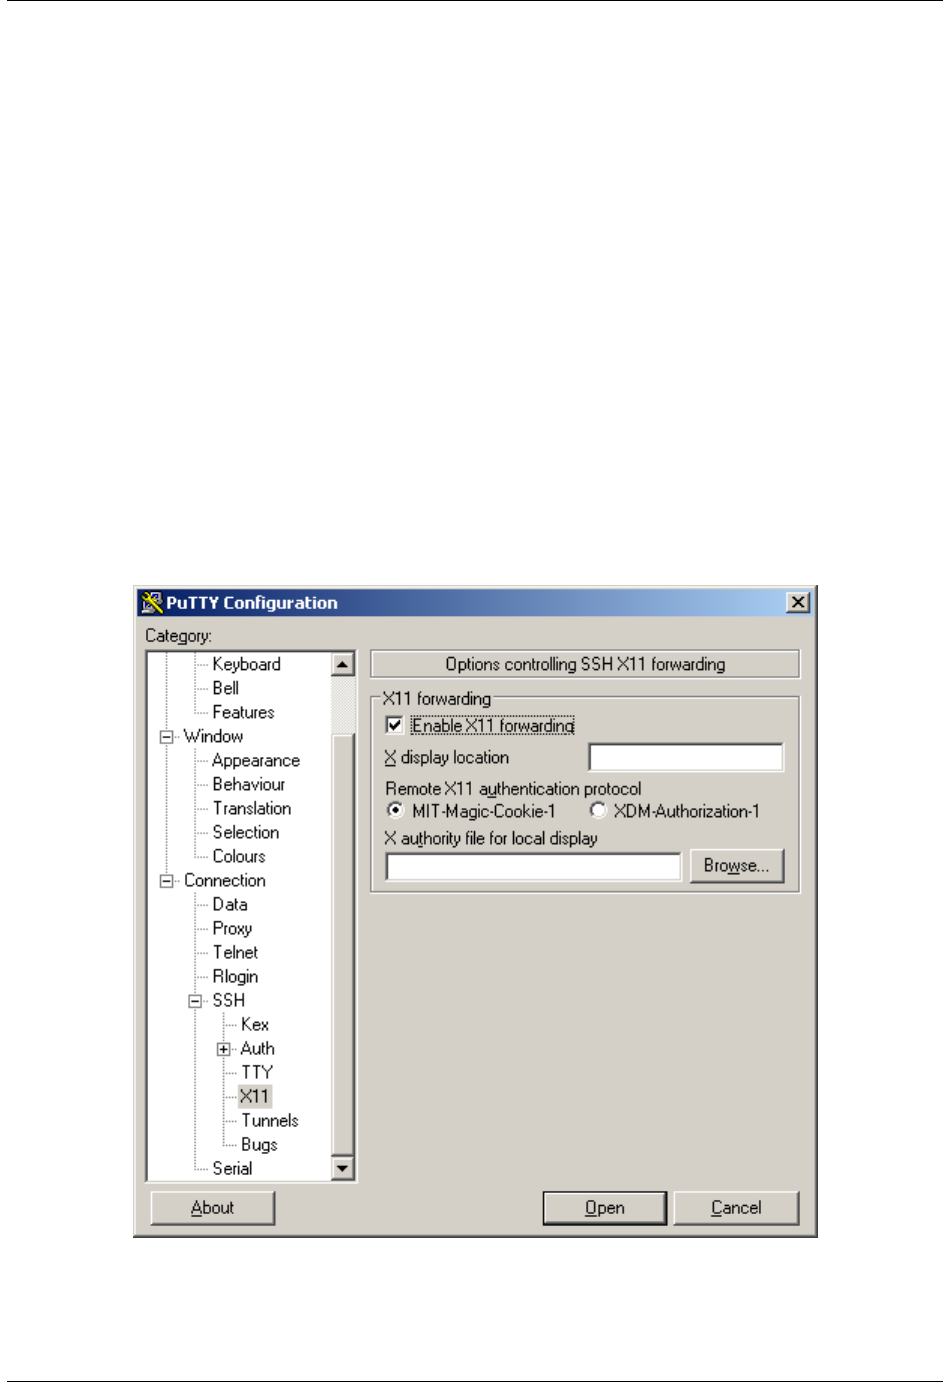
WVU-RC Documentation, Release 1.0
$> ssh -XC username@hostname
To verify your X setup, you can run the command “xclock” from the terminal. If you have successfully tunneled your
X traffic, you should see a small clock show up on your screen which you may now close. If you are not seeing a
clock, please open a HelpDesk Ticket for further assistance.
Windows Instructions
Windows does not have a built in X11 Server so one will need to be installed. Below are instructions for Xming which
is compatible with Putty but you maybe also which to look into MobaXterm.
1. Download Xming from here https://sourceforge.net/projects/xming/files/Xming/6.9.0.31/Xming-6-9-0-31-
setup.exe/download.
2. Install and follow the on-screen instructions. If you do not already have Putty installed you will want to select
“Full Installation” when you get to the “Select Components” screen.
3. At the end of the installation you can keep “Launch Xming” selected or launch Xming from your start menu.
4. When Xming is running, you will have a icon in your Windows systray that looks like an “X”.
5. Follow the Putty Instructions to setup connectivity but before you click “Open” be sure to set “Enable X11
forwarding” under the Category Option section. This will be under Connection, SSH, and X11. Example:
6. You should now be connected to an HPC system with X Forward enabled.
3.7. XWindow 53

WVU-RC Documentation, Release 1.0
7. To verify your X setup, you can run the command “xclock” from the terminal. If you have successfully tunneled
your X traffic, you should see a small clock show up on your screen which you may now close. If you are not
seeing a clock, please open a HelpDesk Ticket for further assistance.
3.7.3 Running X (GUI Programs) on Computing Nodes
GUI intensive programs must be ran on a compute node. To accomplish this, one will need to follow the applicable
above steps to first establish a X session to an HPC system. Once this has been accomplished you will need to run
the following command which will launch an interactive job and give you terminal access on a compute node. Note:
The following command is just an example and you will still need to set the appropriate pbs flags that meets the task’s
needs.
$> qsub -q standby -X -I
54 Chapter 3. For Basic Users

CHAPTER
FOUR
FOR ADVANCED USERS
4.1 Conda and BioConda
4.2 Singularity Containers
Containers are a software technology that allows us to keep control of the environment where a given code runs.
Consider for example that you want to run a code in such a way the same code runs on several machines or clusters
ensuring that the same libraries are loaded and the same general environment is present. Different clusters could come
installed with different compilers, different Linux distributions and different libraries in general. Containers can be
used to package entire scientific workflows, software and libraries, and even data and move them to several compute
infrastructures with complete reproducibility.
Containers are similar to Virtual Machines, however, the differences are enough to consider them different technologies
and those differences are very important for HPC. Virtual Machines takes up a lot of system resources. Each Virtual
Machine (VM) runs not just a full copy of an operating system, but a virtual copy of all the hardware that the operating
system needs to run. This quickly adds up to a lot of precious RAM and CPU cycles, valuable resources for HPC.
In contrast, all that a container requires is enough of an operating system, supporting programs and libraries, and
system resources to run a specific program. From the user perspective, a container is in most cases a single file that
contains the file system, ie a rather complete Unix filesystem tree with all libraries, executables, and data that are
needed for a given workflow or scientific computation.
There are several container solutions, one prominent example is Docker, however, the main issue with containers is
security, despite the name, containers do not actually contain the powers of the user who executes code on them. That
is why you do not see Docker installed on an HPC cluster. Using dockers requires superuser access something that on
shared resources like an HPC cluster is not widely offered.
Singularity offers an alternative solution to Docker, users can run the prepared images that we are offering on Spruce
or bring their own.
For more information about Singularity and complete documentation see: https://singularity.lbl.gov/quickstart
4.2.1 How to use a singularity Image
There are basically two scenarios, interactive execution and job submission.
Interactive Job
If you are using Visit or RStudio, programs that uses the X11 forwarding, ensure to connect first to the cluster with
X11 forwarding, before asking for an interactive job. In order to connect into Spruce with X11 forwarding use:
55

WVU-RC Documentation, Release 1.0
ssh -X <username>@spruce.hpc.wvu.edu
Once you have login into the cluster, create an interactive job with the following command line, in this case we are
using standby as queue but any other queue is valid.
qsub -X -I -q standby
Once you get inside a compute node, load the module:
module load singularity/2.5.1
After loading the module the command singularity is available for usage, and you can get a shell inside the image
with:
singularity shell /shared/software/containers/<Image Name>
Job Submission
In this case you do not need to export X11, just login into Spruce
ssh <username>@spruce.hpc.wvu.edu
Once you have login into the cluster, create a submission script (“runjob.pbs” for this example), in this case we are
using standby as queue but any other queue is valid.
#!/bin/sh
#PBS -N JOB
#PBS -l nodes=1:ppn=1
#PBS -l walltime=04:00:00
#PBS -m ae
#PBS -q standby
module load singularity/2.5.1
singularity exec /shared/software/containers/<Image Name> <command_or_script_to_run>
Submit your job with
qsub runjob.pbs
4.2.2 Central Installed Singularity Images
Currently, we are offering the following Images on Spruce, these images were created to bind the shared folders that
we currently offer on Spruce (/users, /gpfs, /group and /scratch). The recipes allows verifying how each of those
images were created and give you a template for creating your own. Notice that in order to create a Singularity image
you need root access, so you need to install Singularity on your own computer to create the image there and transfer
the created image file back to Spruce.
Keras 2.4 + TensorFlow 1.5 with GPU support
Keras is a high-level neural networks API, written in Python and capable of running on top of TensorFlow, CNTK, or
Theano. It was developed with a focus on enabling fast experimentation. Being able to go from idea to result with the
least possible delay is key to doing good research.
Webpage: https://keras.io
56 Chapter 4. For Advanced Users

WVU-RC Documentation, Release 1.0
Image Name: Keras-2.1.4_TensorFlow-1.5.0.simg
Recipe:
Bootstrap: docker
From: gw000/keras-full
%environment
SHELL=/bin/bash
export SHELL
VARIABLE=HELLO-CUDA-EXAMPLE
export VARIABLE
%labels
AUTHOR gufranco@mail.wvu.edu
%post
. /environment
echo 'SHELL=/bin/bash' >> /environment
chmod +x /environment
mkdir -p /users
mkdir -p /group
mkdir -p /gpfs
mkdir -p /data
mkdir -p /scratch
touch /usr/bin/nvidia-smi
%files
hello.cu # copied to root of container
hello
Keras-2.1.4_TensorFlow-1.5.0.bst
RStudio Desktop 1.1 with R 3.4.3
RStudio is an integrated development environment (IDE) for R. It includes a console, syntax-highlighting editor that
supports direct code execution, as well as tools for plotting, history, debugging and workspace management.
Webpage: https://www.rstudio.com/products/RStudio
Image Name: RStudio-desktop-1.1.423_R-3.4.3.simg
Recipe:
Bootstrap: shub
From: jekriske/rstudio:1.1.423_desktop
%runscript
exec echo "The runscript is the containers default runtime command!"
%files
RStudio-desktop-1.1.423_R-3.4.3.bst
%environment
SHELL=/bin/bash
export SHELL
%labels
AUTHOR gufranco@mail.wvu.edu
4.2. Singularity Containers 57

WVU-RC Documentation, Release 1.0
%post
mkdir /scratch
mkdir /users
mkdir /group
mkdir /gpfs
touch /usr/bin/nvidia-smi
Stacks 2.1
Stacks is a software pipeline for building loci from short-read sequences, such as those generated on the Illumina
platform. Stacks was developed to work with restriction enzyme-based data, such as RAD-seq, for the purpose of
building genetic maps and conducting population genomics and phylogeography.
Webpage: http://catchenlab.life.illinois.edu/stacks/
Image Name: Stacks-2.1.simg
Recipe:
Bootstrap: docker
From: ubuntu:trusty-20170817
%help
A Singularity image for Stacks v2.1
%labels
AUTHOR gufranco@mail.wvu.edu
Maintainer Guillermo Avendano Franco
Stacks v2.1
%environment
SELL=/bin/bash
export SHELL
%post
STACKS_VERSION=2.1
sudo locale-gen en_US.UTF-8
sudo update-locale
sudo apt-get --yes update
sudo apt-get --yes install build-essential autoconf automake wget git zlib1g-dev libbz2-dev libncurses5-dev curl unzip
sudo apt-get --yes install libdbd-mysql-perl
sudo apt-get --yes install software-properties-common
sudo add-apt-repository --yes ppa:ubuntu-toolchain-r/test
sudo apt-get --yes update
sudo apt-get --yes install g++-4.9
cd /tmp
echo "Installing Stacks"
STACKS_URL="http://catchenlab.life.illinois.edu/stacks/source/stacks-${STACKS_VERSION}.tar.gz"
STACKS_ZIP=stacks.tar.gz
wget -O ${STACKS_ZIP} "${STACKS_URL}"
tar xf ${STACKS_ZIP}
cd stacks-${STACKS_VERSION}
CC=gcc-4.9 CXX=g++-4.9 ./configure
58 Chapter 4. For Advanced Users

WVU-RC Documentation, Release 1.0
make -j4
sudo make install
sudo mkdir /tests
sudo mv tests/*/tests
echo "Sorting some env variables..."
sudo echo 'LANGUAGE="en_US:en"' >> $SINGULARITY_ENVIRONMENT
sudo echo 'LC_ALL="en_US.UTF-8"' >> $SINGULARITY_ENVIRONMENT
sudo echo 'LC_CTYPE="UTF-8"' >> $SINGULARITY_ENVIRONMENT
sudo echo 'LANG="en_US.UTF-8"' >> $SINGULARITY_ENVIRONMENT
echo "Done"
mkdir /data
mkdir /scratch
mkdir /users
mkdir /group
mkdir /gpfs
touch /usr/bin/nvidia-smi
%runscript
echo "Welcome to STACKS 2.1" >&2
exec "$@"
%files
Stacks-2.1.bst
%test
echo "Testing STACKS"
#for testfile in $(ls /tests/*.t);
#do
#bash ${testfile};
#done
TensorFlow Official version with GPU support
TensorFlow™ is an open source software library for high-performance numerical computation. Originally developed
by researchers and engineers from the Google Brain team within Google’s AI organization, it comes with strong
support for machine learning and deep learning and the flexible numerical computation core is used across many other
scientific domains.
The image included, comes from the official dockers repository running on Python 3 and supporting GPUs
Webpage: https://www.tensorflow.org
Image Name: TensorFlow_gpu_py3.simg
Recipe:
#####################################################################
# Tensor Flow Container #
# ===================== #
# #
# This container provides Tensor Flow as imported #
# from the official Dockers container #
# #
# singularity build TensorFlow_gpu_py3.simg TensorFlow_gpu__py3.bst #
# #
#####################################################################
4.2. Singularity Containers 59

WVU-RC Documentation, Release 1.0
Bootstrap: docker
From: tensorflow/tensorflow:latest-gpu-py3
%runscript
exec echo "The runscript is the containers default runtime command!"
%files
TensorFlow_gpu_py3.bst
%environment
SELL=/bin/bash
export SHELL
%labels
AUTHOR gufranco@mail.wvu.edu
%post
echo "The post section is where you can install, and configure your container."
#apt-get update && apt-get -y upgrade
mkdir /data
mkdir /gpfs
mkdir /users
mkdir /group
mkdir /scratch
touch /usr/bin/nvidia-smi
Visit 2.13.2
VisIt is an Open Source, interactive, scalable, visualization, animation and analysis tool. From Unix, Windows or Mac
workstations, users can interactively visualize and analyze data ranging in scale from small (<101 core) desktop-sized
projects to large (>105 core) leadership-class computing facility simulation campaigns. Users can quickly generate
visualizations, animate them through time, manipulate them with a
variety of operators and mathematical expressions, and save the resulting images and animations for presentations.
VisIt contains a rich set of visualization features to enable users to view a wide variety of data including scalar and
vector fields defined on two- and three-dimensional (2D and 3D) structured, adaptive and unstructured meshes. Owing
to its customizeable plugin design, VisIt is capabable of visualizing data from over 120 different scientific data formats.
Webpage: https://wci.llnl.gov/simulation/computer-codes/visit
Image Name: Visit-2.13.2.simg
Recipe:
# Singularity container with Visit 2.13.2
#
# This is the Bootstrap file to recreate the image.
#
Bootstrap: docker
From: ubuntu:trusty
%runscript
exec echo "The runscript is the containers default runtime command!"
%files
Visit-2.13.2.bst
60 Chapter 4. For Advanced Users

WVU-RC Documentation, Release 1.0
%environment
SHELL=/bin/bash
export SHELL
PATH=/data/visit2_13_2.linux-x86_64/bin:$PATH
export PATH
%labels
AUTHOR gufranco@mail.wvu.edu
%post
echo "The post section is where you can install, and configure your container."
apt-get update && apt-get -y install x11-apps wget emacs libgl1-mesa-dev
mkdir -p /data
mkdir -p /gpfs
mkdir -p /users
mkdir -p /group
mkdir -p /scratch
touch /usr/bin/nvidia-smi
cd /data && wget http://portal.nersc.gov/project/visit/releases/2.13.2/visit2_13_2.linux-x86_64-ubuntu14.tar.gz
cd /data && tar -zxvf visit2_13_2.linux-x86_64-ubuntu14.tar.gz
4.3 Singularity Containers
4.4 Installing Packages in User Locations
4.4.1 Overview: GNU Build System
To install packages on GNU/Linux systems, packages that are programmed in C/C++ or other compiled languages
need to be compiled and installed. A large majority of these packages will use the GNU Build system, which can be
broken into three distinct stages: 1) Configuring the package, 2) Building the package and 3) installing the package.
These three stages are controlled by two programs: ‘configure’ and ‘make’. ‘make’ is a Linux utility that is pre-
installed on all Linux systems. While ‘configure’ will be come with the package as it provides package specific
information to the ‘make’ utility. Installing these packages can be done in three steps, but user specific options will
need to be given to make sure the package is installed correctly. This page will provide instructions on how to build
these packages without superuser privileges.
Setting up the Directory Structure
Before you can start the build/install process, you need to set up the directory structure. There are many different
ideologies and principles on how to do this. Here, I will show only the strategy we use on the Research Computing
clusters to install and manage software. Throughout this page, I’m going to use the package name ‘example_pkg-
1.4.7.tar.gz’ to demonstrate the commands. This package naming style is very common, and will most likely be the
naming convention you encounter.
The directory structure we use, is to have a parent directory for the package name, and then three subsequent directories
named ‘build’, ‘source’, and ‘install’. This directory topology allows us to distinguish the source and build trees from
each other (more on what this means below), and keep versions in the install directory. That way, if you upgrade or
change versions of software, all versions of the same software package can be located in the same parent directory. In
our example, this directory structure can be made using:
4.3. Singularity Containers 61

WVU-RC Documentation, Release 1.0
mkdir example_pkg
cd example_pkg
mkdir build source install
You then move the tarball into the source directory, and extract the files:
mv example_pkg-1.4.7.tar.gz example_pkg/source
cd example_pkg/source
tar xzvf example_pkg-1.4.7.tar.gz
This should create the directory example_pkg-1.4.7, and this extracted directory is called the ‘source tree’ since it
contains only source files and nothing compiled or built.
The Configure Stage
Once the directory structure is set up, we now have to configure the build tree, to compile and install the software
package. This is done by running the ‘configure’ script. There are two general steps of configure. First, you need
to load the appropriate dependency environments. Second, you need to tell configure where you want to install the
software.
On most systems, you will not have to load dependency environments, however, on you do on Research Computing
clusters; and this will be the norm for almost all High Performance Computing clusters. Loading dependency en-
vironments are done through module files. The dependencies for each particular package will be different, but they
should be listed within the installation manual either on the package website or within the readme/install file. The
readme/install file is almost always within the top directory of the extracted package directory as README and/or
INSTALL. For example, it might be example_pkg-1.4.7/README in our example.
With the correct module files loaded, you now can run the configure script. You will want to provide the ‘–prefix’
option to tell configure where to install the software. You will additionally, want to run the configure script from the
build directory that we set up earlier. This is good practice, and allows easy cleaning (what is referred to as VPATH
building).
cd example_pkg/build
mkdir 1.4.7
cd 1.4.7
../../source/example_pkg-1.4.7/configure --prefix=/users/username/example_pkg/install/1.4.7
This command will tell configure to install the binaries, libraries, documentation, etc.. in
/users/username/example_pkg/install/1.4.7 directory. The configure process will output a large amount of package
information to the screen. And if the correct dependencies are loaded and the package is well built, this process should
complete without error. If not, it’s almost certainly because of a missing dependency. If you do not understand the
error (most will be missing package ‘XXYY’), and you need help to resolve it, please use our helpdesk ticket system
to request help.
The Make/Build Stage
If the configure step finishes without error. The Make/Build step can be completed with the single command from
within the build directory (directory you ran configure in):
make
The Install Stage
If the configure step finishes without error, it is almost certain that the make step will finish (unless the package main-
tainers incorrectly built the configure script). Therefore, the install step can be completed with the single command.
62 Chapter 4. For Advanced Users

WVU-RC Documentation, Release 1.0
Again from within the build directory:
make install
This command will put all the binaries, libraries, documentation wherever you specified using the –prefix option.
4.4.2 Additional Documentation
•GNU Autoconf Manual
•GNU Automake Manual
•GNU Make Manual
4.5 Miniconda
Sometimes you want complete control on your Python installation rather than rely on the packages and versions
provided for you by the central installed python installation. This page will guide you in the process of installing
miniconda on your home account. We describe here how to download, install and update a miniconda installation that
will give you complete control on the packages that you have and the pace on which those packages will be updated.
4.5.1 Downloading Miniconda
Miniconda can be downloaded from:
wget https://repo.continuum.io/miniconda/Miniconda3-latest-Linux-x86_64.sh
sh Miniconda3-latest-Linux-x86_64.sh
4.5.2 No installing anything
Just load the module:
module purge
module load genomics/qiime
This module will load python 2.7.3 and qiime on top of that
4.5.3 Installing QIIME on a virtual environment on top of python 2.7.13
Use this:
module purge
module load compilers/python/2.7.13
virtualenv veqiime
cd veqiime
source ./bin/activate
pip install numpy
pip install qiime (this step takes around a minute)
After installation all that you have to do is:
4.5. Miniconda 63

WVU-RC Documentation, Release 1.0
module load compilers/python/2.7.13
cd veqiime
source ./bin/activate
and qiime is ready for use.
4.5.4 Installing QIIME on top of python 2.7.13 (No virtual env)
Execute:
module purge module load compilers/python/2.7.13
pip install qiime --user
In this case qiime will be installed locally on your home directory at:
~/.local/lib/python2.7/site-packages
All that you have to do is:
module load compilers/python/2.7.13
And qiime is ready for use.
4.5.5 Installing with Miniconda
First install miniconda following the instructions:
wget https://repo.continuum.io/miniconda/Miniconda3-latest-Linux-x86_64.sh
sh Miniconda3-latest-Linux-x86\_64.sh
source ~/.bashrc
conda install numpy
conda create -n qiime1 python=2.7 qiime matplotlib=1.4.3 mock nose -c bioconda
Finally follow the instructions at the end of the installation
To activate this environment, use:
> source activate qiime1
To deactivate this environment, use:
> source deactivate qiime1
4.6 Using MPI on RC HPC Clusters
Many parallel programs take advantage of Message Passing Interface (MPI) to communicate across compute nodes
and efficiently scale up computational analysis. While we can’t give instructions on how to run every program using
MPI, all the programs using MPI need to be told which hosts and cpus to run. Generally, most programs use the mpirun
executable that comes pre-packaged with MPI libraries to accomplish this task. The general syntax for running parallel
programs with mpirun is:
64 Chapter 4. For Advanced Users

WVU-RC Documentation, Release 1.0
mpirun -np <processor number> -machinefile <procs file> command [..args]
With -np option specifying the number of processors the job requires, and the -machinefile option with a file that
contains the host address and number of CPUs to use on each host. On a distributed computing cluster with a scheduler
in place (both RC clusters), the number of processors will be the same number of processors requested with the qsub
command. Further, it is almost impossible to know which hosts your job will run on, since that is determined by a
number of factors with the current state of the system. Therefore Moab/Torque provides a machinefile for each job
that is executed through the scheduler, and it’s location is stored in the $PBS_NODEFILE variable. Therefore, on our
clusters, the general syntax of running a program parallel with MPI is:
module load <mpi/modulefile>
mpirun -np <processor number> -machinefile $PBS_NODEFILE command [..args]
with being the appropriate module file for the MPI package the program was compiled with. Of course, you should
consult the programs documentation for details, as some programs come with their own mpirun substitute and/or work
better with certain MPI libraries than others. Also, each MPI libraries have differences with their mpirun commands,
and therefore you should take a look at the MPI’s own documentation (links below).
4.6.1 MPI Standards
Message Passing Interface standards are available free for download at www.mpi-forum.org.
4.6.2 Useful Books
Parallel Programming with MPI. Peter Pecheco. ISBN-13:978-1558603394
Parallel Programming in C with MPI and OpenMP. Michael Quinn. ISBN-13:978-0072822564
MPI: The Complete Reference. Snir et al. ISBN-13:978-0262692168
4.6.3 Libraries
Current information about location and version of library can be found in their respective modulefiles.
Library Documentation
Intel http://software.intel.com/en-us/articles/intel-mpi-library-documentation
Mpich2 http://www.mpich.org/documentation/guides/
Mvapich2 http://mvapich.cse.ohio-state.edu/support/
OpenMPI http://www.open-mpi.org/doc/
4.7 Executing HADOOP jobs
4.7.1 What is Hadoop
Hadoop is an open-source software package that utilizes large scale data processing by using the Hadoop Distributed
File System (HDFS) to provide fast bandwidth of large data across clusters. Using the Hadoop interface, it is possible
to split large data across both nodes and processors to increase data processing time. Hadoop’s advantage is processing
large data files (gigabytes to terabyte range), in a non-POSIX compliant filesystem to increase throughput performance.
Hadoop is currently installed on the Spruce Knob cluster.
4.7. Executing HADOOP jobs 65

WVU-RC Documentation, Release 1.0
4.7.2 Using Hadoop on the cluster
Running Hadoop jobs are very similar to running other jobs on the cluster. You will run all of your commands within
a PBS job script. However, before you run Hadoop commands, you need to start the Hadoop datanode. To do this, you
need to load a few module files and run a few start-up scripts. In addition a specific PBS directive (PBS -W) needs to
be specified so Hadoop runs properly:
#PBS -W x=nmatchpolicy:exactnode
module load compilers/java/jre1.8.0
module load libraries/DFS/myhadoop
source $MH_HOME/etc/spruce_default.conf
myhadoop-configure.sh
start-all.sh
Below these lines, you can place your intended hadoop commands. At the end of your script, you need to stop the
hadoop datanode:
stop-all.sh
myhadoop-cleanup.sh
Both of these commands will end the Hadoop backend. Hadoop commands after the cleanup scripts will result in
errors. Here is an example Hadoop script that will run on 3 nodes with 1 processor a node. The example is a word-
count program that is distributed with Hadoop that counts the presence of all words in small sample of Shakespeare
playwrights taken from Project Gutenberg.
#!/bin/bash
#PBS -q standby
#PBS -N hadoop_job
#PBS -l nodes=3:ppn=1
#PBS -o hadoop_run.out
#PBS -e hadoop_run.err
#PBS -W x=nmatchpolicy:exactnode
#PBS -V
module load compilers/java/jre1.8.0
module load libraries/DFS/myhadoop
# Configure myHadoop environment
source $MH_HOME/etc/spruce_default.conf
myhadoop-configure.sh
# Start Hadoop Cluster
start-all.sh
#### Run your jobs here
echo "Run some test Hadoop jobs"
hadoop dfs -mkdir Data
hadoop dfs -copyFromLocal $HADOOP_HOME/data/gutenberg Data
hadoop dfs -ls Data/gutenberg
hadoop jar /shared/software/myhadoop/hadoop-1.2.1/hadoop-examples-1.2.1.jar wordcount Data/gutenberg Outputs
hadoop dfs -ls Outputs
echo
66 Chapter 4. For Advanced Users

WVU-RC Documentation, Release 1.0
#### Stop the Hadoop cluster
stop-all.sh
#### Cleanup myHadoop configurations
myhadoop-cleanup.sh
exit 0
4.7.3 R Interface with Hadoop - Rhipe
Running large datasets within R is difficult since R loads all data into memory. However, using Hadoop with R can
overcome that limitation. To use the R package Rhipe, after setting up the hadoop datanode, you can load the two
modules for the dynamically shared R binary and the Rhipe R package:
module load compilers/R/3.1.0
module load libraries/R/Rhipe
Note: Rhipe must be loaded after the R module - otherwise you will get a pre-requisite error.
4.7.4 Further Information
Useful Webpages
•Apache Hadoop
•Myhadoop Sourceforge
•Rhipe
Useful Books
Hadoop: The Definitive Guide. Tom White. ISBN: 978-1-4493-1152-0
Parallel R. Q.E. McCallum and S. Watson. ISBN: 978-1-4493-0992-3
4.8 Python Modules
Python modules are installed using the DistUtils tools. This can either be done through the packaged setup.py script
within the package distribution tarball:
python setup.py install
Or without downloading the package, you can use the installer tools pip:
pip install <package_name>
Or easy_isntall:
easy_install <package_name>
The above commands will install the module in the system-wide site package directory usually located at
/usr/local/lib/pythonX.Y/site-packages. However, on the any machine where you do not have superuser privileges,
including the Research Computing clusters, this will throw a permission error. Therefore, you need to modify the
commands instructing python to use an user scheme installation.
4.8. Python Modules 67

WVU-RC Documentation, Release 1.0
4.8.1 Python User Flag
An easy way to install Python modules locally (within your user directory) is by using the User flag with the DistUtils
installation methods:
python setup.py install --user
pip install --user <package_name>
The User Flag directs python to install the package in a user site package directory usually located at
/lib/pythonX.Y/site-packages, with usually being a hidden directory in the user’s home directory. This is generally
the preferred method of locally installing modules as this user site package is by default in the python library path:
meaning modules installed this way can be used as if they were installed system-wide.
4.8.2 Python Home/Prefix Flag
Another way to install Python modules locally is by using the Home flag or the Prefix flag with the DistUtils installa-
tion:
$> python setup.py install --home=<dir>
Or
python setup.py install --prefix=<dir>
Using pip:
pip install --target <dir> <package_name>
Using easy_install:
easy_install --install-dir=<dir> <package_name>
With
representing the directory location you want the package installed into. These flags essentially do the same thing by
directing Python to install the module in the specified directory. These directories will not be searched by default with
Python. Therefore, in order to use these modules in your Python scripts you will have to modify the PYTHONPATH
environment variable to include the specified directory. Or alternatively, modify sys.path from within your python
script (for this method, consult python documentation.
export PYTHONPATH=<dir>
4.8.3 Virtual Environments
The problem with Python User, Home and Prefix flags are that they will all be searched secondary to the system-wide
site package. This is a problem if you are trying to install locally a different version of a module already installed
system-wide. A way to get around this is by using Python Virtual Environments.
Installing R Packages in default Directories
The two usual ways to install R packages from CRAN is either executing
install.packages('<Package Name>')
from the R prompt. Or using the command
68 Chapter 4. For Advanced Users

WVU-RC Documentation, Release 1.0
R CMD INSTALL <package>
from the command line. The second command only works if you have already downloaded a copy of the package
from CRAN or an external site. The first will automatically download the package from CRAN. R will automatically
detect that you do not have permissions to write in the system-wide R library folder and will prompt if you would like
to install in a local directory from within your home directory. This folder will also be checked automatically when
you run R for packages, allowing you to use anything you install in this way.
Installing R Packages in non-default directories
4.8.4 Using install.packages()
To use install.packages from the R prompt, before you start R you need to modify the R_LIBS environment variable
export R_LIBS=<dir>
Then inside the R prompt you execute install.packages() as normal (see above).
4.8.5 Using R CMD INSTALL
For ‘R CMD INSTALL’ command, you can specify the path with the l flag (lowercase ‘L’)
R CMD INSTALL -l <dir> <package_name>
4.8.6 Using Installed Packages from non-default directories
To use locally installed packages, before you execute R you just need to modify the R_LIBS environment variable to
tell R where to search for local packages.
export R_LIBS=<dir>
4.9 Python and scientific libraries
Module: languages/python/2.7.13
Module: languages/python/3.6.0
Path /shared/software/languages/python/2.7.13
Path /shared/software/languages/python/3.6.0
Date January 24, 2017
Python currently has two active versions, there are some important differences that prevent python code from running
with python 3. That means that some packages are currently no python 3 ready and some of them will never be. Python
2 will stop being supported on 2020, so until that happens python 2 and 3 will coexist and that is the reason why we
keep both on our cluster.
4.9.1 Packages included
*Python-2.7.13
*Python-3.6.0
4.9. Python and scientific libraries 69

WVU-RC Documentation, Release 1.0
4.9.2 Libraries included
We provide a comprehensive collection of scientific libraries for python:
Python 2.7 and 3.6
:: coverage (4.3.4) cycler (0.10.0) Cython (0.25.2) dask (0.13.0) decorator (4.0.11) future (0.16.0) h5py (2.6.0)
ipython (5.1.0) ipython-genutils (0.1.0) matplotlib (2.0.0) mpmath (0.19) networkx (1.11) nose (1.3.7)
numpy (1.12.0) olefile (0.44) pandas (0.19.2) pexpect (4.2.1) performance (0.5.1) pickleshare (0.7.4) Pil-
low (4.0.0) pip (9.0.1) prompt-toolkit (1.0.9) ptyprocess (0.5.1) Pygments (2.2.0) pymongo (3.4.0) pypars-
ing (2.1.10) python-dateutil (2.6.0) pytz (2016.10) scikit-image (0.12.3) scikit-learn (0.18.1) scipy (0.18.1) sim-
plegeneric (0.8.1) six (1.10.0) sympy (1.0) toolz (0.8.2) traitlets (4.3.1) virtualenv (15.1.0) wcwidth (0.1.7)
Python 2.7 only
:: appdirs (1.4.0) backports.shutil-get-terminal-size (1.0.0) enum34 (1.1.6) functools32 (3.2.3.post2) packaging (16.8)
pathlib2 (2.2.1) scandir (1.4) setuptools (34.0.2) subprocess32 (3.2.7) wheel (0.29.0)
Python 3.6 only
:: CacheControl (0.11.7) lockfile (0.12.2) natsort (5.0.1) requests (2.13.0) scikit-bio (0.5.1) setuptools (28.8.0)
4.9.3 Notes from building
Python 2 and 3 where compiled with ‘sqlite‘ support and python 3 with ‘lzma‘. SqLite is used by IPython to record
history of commands and LZMA is a newer compression algorithm that Python 3 is linked to.
Both version were compiled with GCC 6.3.0 with Link-time optimization (LTO) and Profile-guided optimization
(PGO) to maximize performance in production runs.
Compilation proceed with (similar for 6.3.0):
../configure --prefix=/shared/software/languages/python/2.7.13
make profile-opt
make install
The Makefile was modified to remove the command option -fuse-linker-plugin
--- Makefile.orig 2017-01-24 09:52:54.597959711 -0500
+++ Makefile 2017-01-24 10:27:24.152893000 -0500
@@ -469,7 +469,7 @@
$(MAKE) profile-removal
build_all_generate_profile:
- $(MAKE) build_all CFLAGS="$(CFLAGS) $(PGO_PROF_GEN_FLAG) -flto -fuse-linker-plugin -ffat-lto-objects -flto-partition=none" LDFLAGS="$(LDFLAGS) $(PGO_PROF_GEN_FLAG) -flto -fuse-linker-plugin -ffat-lto-objects -flto-partition=none" LIBS="$(LIBS)"
+ $(MAKE) build_all CFLAGS="$(CFLAGS) $(PGO_PROF_GEN_FLAG) -flto -ffat-lto-objects -flto-partition=none" LDFLAGS="$(LDFLAGS) $(PGO_PROF_GEN_FLAG) -flto -ffat-lto-objects -flto-partition=none" LIBS="$(LIBS)"
run_profile_task:
: # FIXME: can't run for a cross build
@@ -479,7 +479,7 @@
$(LLVM_PROF_MERGER)
build_all_use_profile:
- $(MAKE) build_all CFLAGS="$(CFLAGS) $(PGO_PROF_USE_FLAG) -flto -fuse-linker-plugin -ffat-lto-objects -flto-partition=none" LDFLAGS="$(LDFLAGS) -flto -fuse-linker-plugin -ffat-lto-objects -flto-partition=none"
70 Chapter 4. For Advanced Users

WVU-RC Documentation, Release 1.0
+ $(MAKE) build_all CFLAGS="$(CFLAGS) $(PGO_PROF_USE_FLAG) -flto -ffat-lto-objects -flto-partition=none" LDFLAGS="$(LDFLAGS) -flto -ffat-lto-objects -flto-partition=none"
# Compile and run with gcov
.PHONY=coverage coverage-lcov coverage-report
@@ -947,7 +947,7 @@
commoninstall: \
altbininstall libinstall inclinstall libainstall \
sharedinstall oldsharedinstall altmaninstall \
-
+
# Install shared libraries enabled by Setup
DESTDIRS= $(exec_prefix) $(LIBDIR) $(BINLIBDEST) $(DESTSHARED)
4.10 Python Virtual Environments
Python virtual environments are used to build completely isolated python workflows. Primarily they are used to solve
the need for multiple versions within python modules. Often, you might have the need to use pkgA which needs pkgC
version 1.24, but you also need pkgB which needs pkgC version 2.1. If you use setuptools to install the packages
(i.e. pip or easy_install), you will create a dependency issue since both versions of pkbC will be installed to the same
location.
To resolve this, you can create python virtual environments that all isolation of package dependencies, so you can
successfully have different versions of packages installed and tied to seperate python interpreters. Setting up python
virtual environments is easy, and using them is no different than using python it’s self.
4.10.1 Using Virtual Environments with python2
First, load which version of python2 you would like to use as your base python interpreter. For instance, if you want
python 2.7.10, then load the 2.7.10 python modefule. If you want to use the default system python (v. 2.6), then you
do not need to load a python modulefile. However, you do need to load the virtualenv modulefile.
module load compilers/python/2.7.10 compilers/python/virtualenv
Then create a virtualenv directory with the ‘virtualenv’ command.
virtualenv workflow1
You should now have a directory called ‘workflow1’. You can use whatever name you want for the virtualenv, so long
as you remember what directory corresponds with what environment. You now need to simply activate the virtualenv.
source workflow1/bin/activate
Your command prompt will now be pre-emptied by (workflow1) to remind you that you have an activate virtualenv.
You can now proceed to use python, pip, and easy_install just as you would regularly.
4.10.2 Using Virtual Environments with python3
First, load the python3 modulefile. The python3 modulefile comes with it’s own virtual environment utility, so you do
not need to load the virtualenv modulefile.
module load compilers/python/3.5.1
Then create a virtualenv directry with the ‘pyvenv’ command.
4.10. Python Virtual Environments 71

WVU-RC Documentation, Release 1.0
pyvenv workflow1
You should now have a directory called ‘workflow1’. You can use whatever name you want for the virtualenv, so long
as you remember what directory corresponds with what environment. You now need to simply activate the virtualenv.
source workflow1/bin/activate
Your command prompt will now be pre-emptied by (workflow1) to remind you that you have an activate virtualenv.
You can now proceed to use python, pip, and easy_install just as you would regularly.
4.10.3 Activating virtual environments using the C shell
If you are using the shells csh or tcsh, you will not be able to source the ‘activate’ file. Instead, you need to source the
activate.csh file.
source workflow1/bin/activate.csh
4.10.4 Using site-wide system packages
The centrally installed python interpreters (python loaded with modelefiles), usually have some common scientific
packages installed with them by default. For instance, python 2.7.10 already has Numpy 1.9.2 and Matplotlib 1.4.2
installed. To have your virtualenv keep using these packages so you do not need to install them in your virtualenv,
using the –system-site-packages option.
virtualenv --system-site-packages
Or
pyvenv --systems-site-packages
72 Chapter 4. For Advanced Users

CHAPTER
FIVE
FOR DEVELOPERS
5.1 Programming Languages
5.1.1 Python
5.1.2 R Language
5.1.3 C and C++
5.1.4 Fortran
5.2 Parallel Programming
5.3 GCC: The GNU Compiler Collection
Module: languages/gcc/6.3.0
Path /shared/software/languages/gcc/6.3.0
Date January 24, 2017
5.3.1 Packages included
Main Package
• gcc-6.3.0
Dependencies for GCC
• gmp-4.3.2
• isl-0.15
• mpc-0.8.1
• mpfr-2.4.2
Dependencies to test GCC
• autogen-5.18.7
• libunistring-0.9.7
• libffi-3.2.1
73

WVU-RC Documentation, Release 1.0
• gc-7.2
• guile-2.0.13
Development tools for build packages
• autoconf-2.69
• automake-1.15
• m4-1.4.18
• libtool-2.4.6
Convenience libraries included
* gsl-2.3 (GNU Scientific Library) * sqlite-autoconf-3160200 (SQLite is a self-
contained SQL database engine) * xz-5.2.3 (LZMA compression)
5.3.2 Older Modules it obsoletes
* compilers/gcc/4.8.2 * compilers/gcc/4.9.0 * compilers/gcc/5.3.0 * libraries/gsl/2.1 (Integrated for con-
venience) * libraries/sqlite/3.9.2
74 Chapter 5. For Developers

CHAPTER
SIX
FOR ADMINISTRATORS
6.1 Documentation on Sphinx
6.1.1 Creation
1. Create a Repostory called
WVUResearchComputing.github.io
2.
6.1.2 Changing the documents
These are the steps to create a working environment for introducing changes to the documentation. Create one folder
for both “sphinx” and “master” branches:
mkdir DOCS
cd DOCS
git clone --single-branch -b sphinx https://github.com/WVUResearchComputing/WVUResearchComputing.github.io.git sphinx
git clone --single-branch -b master https://github.com/WVUResearchComputing/WVUResearchComputing.github.io.git master
cd sphinx
git remote set-url origin git@github.com:WVUResearchComputing/WVUResearchComputing.github.io.git
cd ../master
git remote set-url origin git@github.com:WVUResearchComputing/WVUResearchComputing.github.io.git
After this commands, the DOCS folder will contain two subfolders, “sphinx” and “master”. The branch “sphinx” has
the sources and “master” the generated web pages.
Editing the documentation is basically adding or modifying the ”.rst” files in the subfolder “texts”. To compile the
documentation execute:
make html
75

WVU-RC Documentation, Release 1.0
76 Chapter 6. For Administrators

CHAPTER
SEVEN
DOMAIN SPECIFIC DETAILS
7.1 Engineering: ANSYS Products
7.1.1 Log in to Spruce
Enter on Spruce with X11 forwarding, at least on Linux it is with
ssh -X <USERNAME>@spruce.hpc.wvu.edu
On Windows you can MobaXTerm and the program will give you X11 forwarding too
You can test the X11 forwarding with:
xeyes
A small window with two eyes will pop up on your screen, execute CTRL-C to exit The test will just prove that a
window can be created on your client machine.
7.1.2 Create an interactive job
Ask for an interactive job with X11 Forwarding enabled, I am using “debug” queue, change accordingly
qsub -X -I -q debug
Wait around 2 minutes to get a compute node allocated for you Different queues could have different response times
before a compute node can be allocated to you. In general use “standby” on Spruce for Interactive jobs to run during
a 4-hour timeframe.
7.1.3 Load the module for ANSYS Fluids or Structures
There are two modules corresponding to equal number of ANSYS Suites of packages
module load ansys/fluids_18.1
and
module load ansys/structures_18.1
You can load one or another or both, they use the same MPI Runtime Libraries so they are compatible to each other.
77

WVU-RC Documentation, Release 1.0
7.1.4 Executing the ANSYS package of your choice
Most commands will be directly accessible to you, you do not need to enter the full path
fluent
The fluent window opens and on the lower right corner you will see:
/shared/software/ansys/fluids_181/ansys_inc/v181/fluent/fluent18.1.0/bin/fluent -r18.1.0 3d -alnamd64 -path/shared/software/ansys/fluids_181/ansys_inc/v181/fluent -ssh -cx sllc0001.hpc.wvu.edu:41717:33691
Starting /shared/software/ansys/fluids_181/ansys_inc/v181/fluent/fluent18.1.0/lnamd64/3d/fluent.18.1.0 -cx sllc0001.hpc.wvu.edu:41717:33691
Welcome to ANSYS Fluent Release 18.1
Copyright 2017 SAS IP, Inc. All Rights Reserved.
Unauthorized use, distribution or duplication is prohibited.
This product is subject to U.S. laws governing export and re-export.
For full Legal Notice, see documentation.
Build Time: Apr 11 2017 14:22:58 EDT Build Id: 10162
--------------------------------------------------------------
This is an academic version of ANSYS FLUENT. Usage of this product
license is limited to the terms and conditions specified in your ANSYS
license form, additional terms section.
--------------------------------------------------------------
Cleanup script file is /gpfs/home/gufranco/cleanup-fluent-sllc0001.hpc.wvu.edu-48370.sh
You can try also ANSYS/Forte
forte.sh
A window with 3 big buttons appear, click Simulate
The Full Window for Forte appears.
In the case of ANSYS Structures 18.1 all that you have to do after loading the module is to open the Workbench:
runwb2
7.2 Engineering: ANSYS/Forte
7.2.1 Overview
ANSYS Forte is the only CFD simulation package for internal combustion engines that incorporates proven AN-
SYS Chemkin-Pro solver technology – the gold standard for modeling and simulating gas phase and surface chem-
istry. Forte includes state-of-the-art automatic mesh generation (AMG), including solution adaptive mesh Refinement
(SAM) and geometry-based adaptive mesh refinement (AMR). While legacy engine-combustion CFD simulations uti-
lize chemistry solvers that are too slow to handle the chemistry details required for accurate predictions of ignition
and emissions, Forte enables the use of multicomponent fuel models to combine with comprehensive spray dynamics
– without sacrificing simulation time-to-solution.
78 Chapter 7. Domain Specific Details
WVU-RC Documentation, Release 1.0
7.2.2 Features
• Automatic mesh generation that eliminates weeks of effort typically spent on manual mesh preparation
• Embedded Chemkin-Pro solver technology that provides the computational speed required for predictive engine
simulations
• True multicomponent fuel-vaporization models that enable a self-consistent representation of the physical spray
and the kinetics for accurate prediction of fuel effects
• Advanced spray models that dramatically reduce grid and time-step dependency when compared to existing
approaches
• The ability to track soot particle nucleation, growth, agglomeration and oxidation without a compute-time
penalty to predict particle size and number
7.2.3 Tutorial
This tutorial will describe the steps needed to complete the execution of the first examples from the tutorial documen-
tation.
Connect to Mountaineer
ssh -X username@mountaineer.hpc.wvu.edu
The ‘-X‘ is necessary to get access to the graphical interface needed to prepare the simulation.
Load the Module
module load ansys/forte/17.2
Forte initial GUI
Execute the ANSYS/Forte GUI
First, we need to create a directory for the simulation we want to perform. Lets create for example a directory called
‘forte’ and inside create a subdirectory for our first simulation. The first simulation will be ‘SectorMesh’
7.2. Engineering: ANSYS/Forte 79
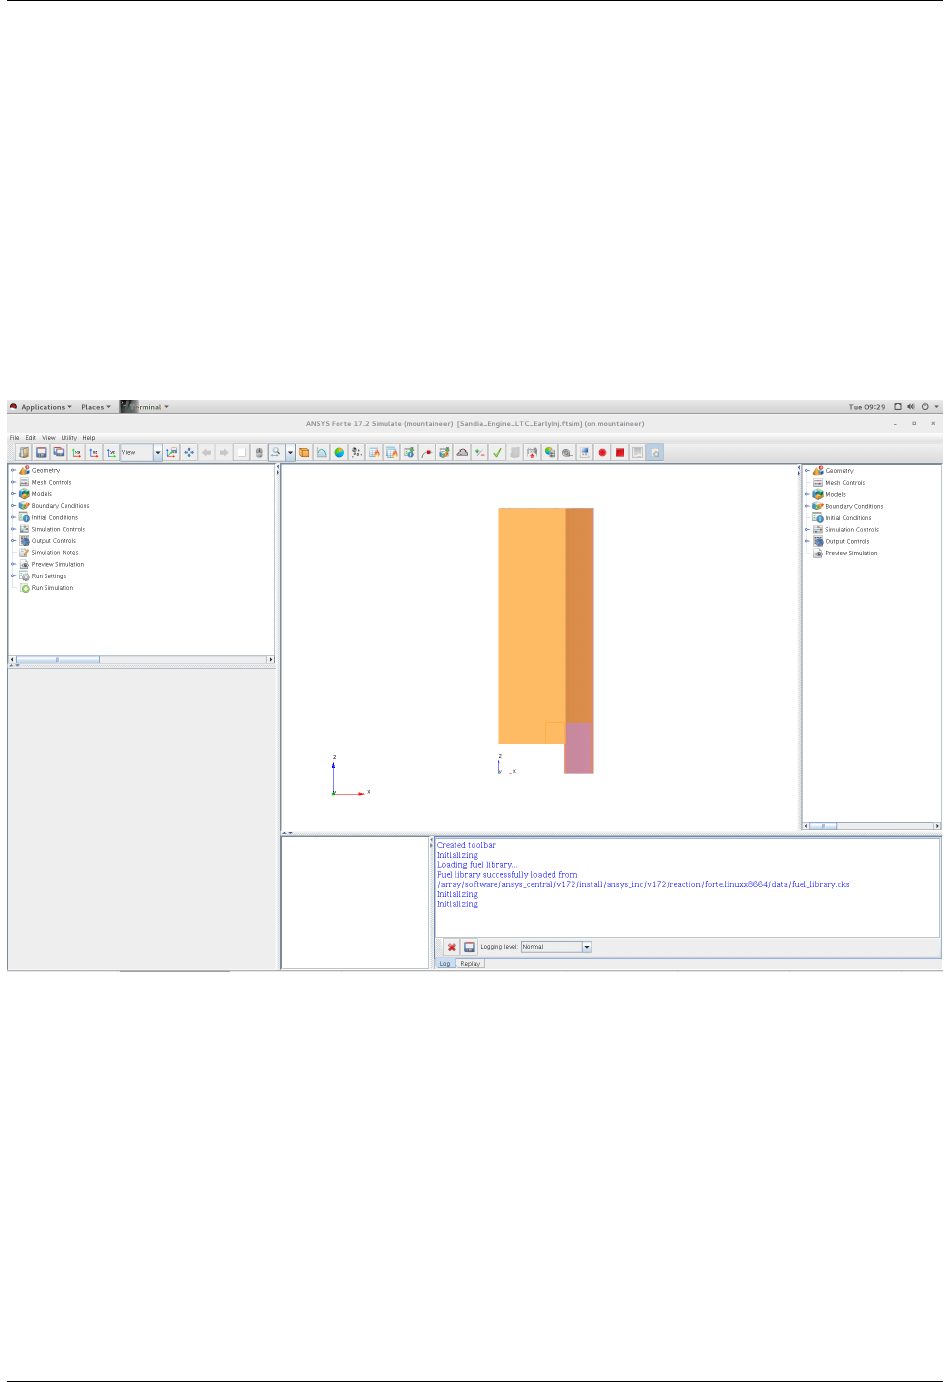
WVU-RC Documentation, Release 1.0
mkdir $HOME/forte
mkdir $HOME/forte/SectorMesh
The Official Tutorials for Forte are in ‘/software/ansys_central/Forte_Tutorials’, we will copy San-
dia_Engine_LTC_EarlyInj.ftsim to the directory we just create.
cp /software/ansys_central/Forte_Tutorials/Quick-start_SectorMesh/Sandia_Engine_LTC_EarlyInj.ftsim $HOME/forte/SectorMesh
We will use this input for this tutorial, now, we can launch the GUI using the command:
forte.sh &
The ‘&’ will free your terminal so you can enter more commands there. Otherwise you will need another terminal when
we actually launch the simulation. Once you execute ‘forte.sh’ you should get a window with 3 buttons: Simulate,
Monitor and Visualize.
Simulate Window
Click on Simulate button and open the file ‘Sandia_Engine_LTC_EarlyInj.ftsim‘ You should get the ‘Simulate’ win-
dow. Click on Menu ‘File - Open...’ and search for the input file ‘Sandia_Engine_LTC_EarlyInj.ftsim’, in your
directory ‘forte/SectorMesh’. The main window will display the mesh, you get on the log panel messages such
Loading fuel library...
Fuel library successfully loaded from
/array/software/ansys_central/v172/install/ansys_inc/v172/reaction/forte.linuxx8664/data/fuel_library.cks
Initializing
Initializing
Now we are ready to create the scripts and run the simulation on Mountaineer
Simulate Window
80 Chapter 7. Domain Specific Details
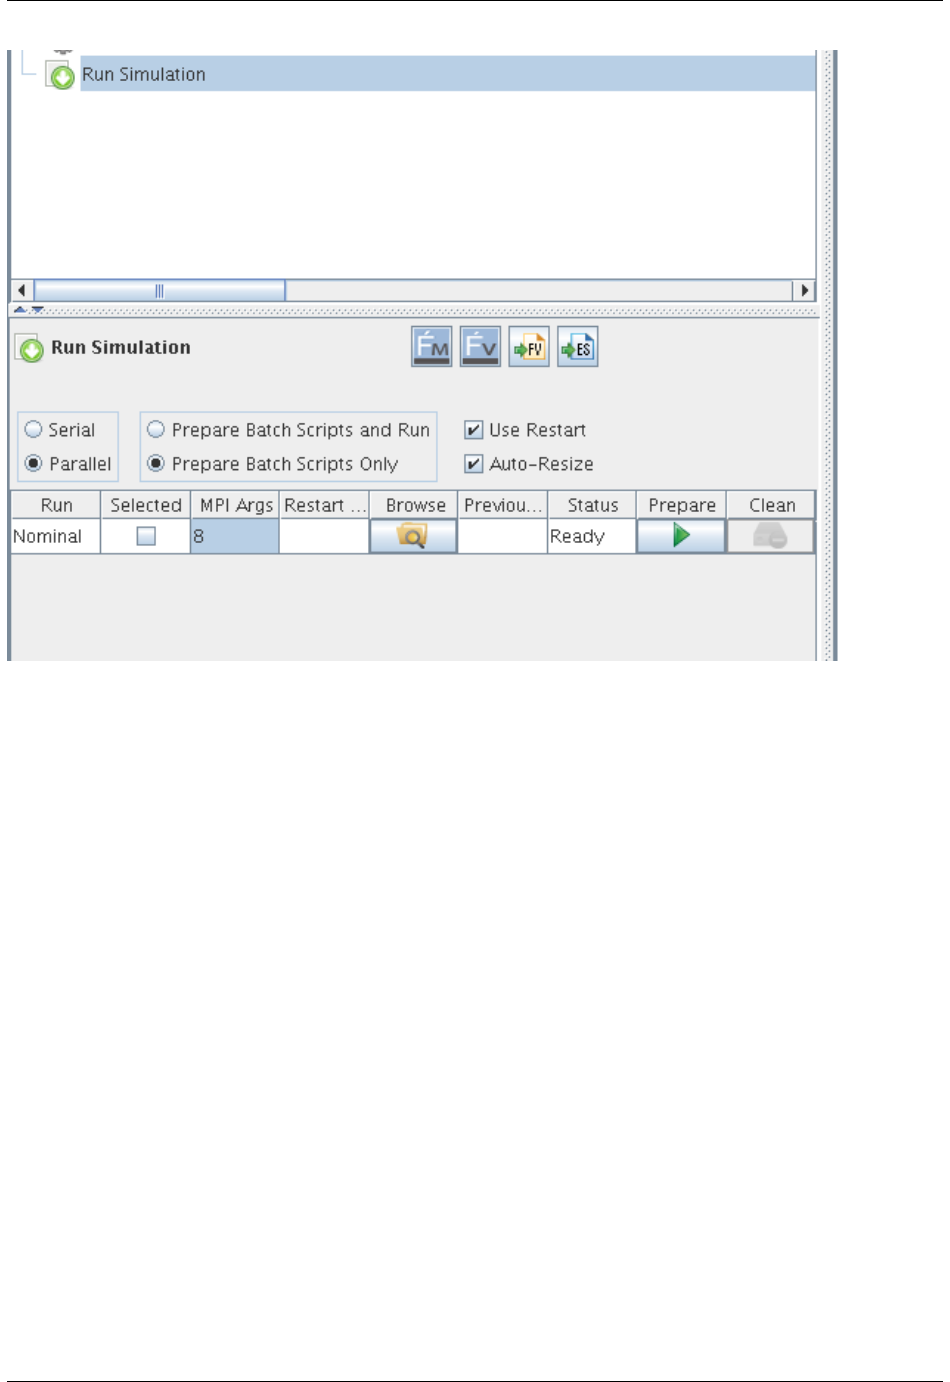
WVU-RC Documentation, Release 1.0
Prepare simulation files
Click on “Run Simulation” in the tree panel. The options for runnig the simulation appear in a panel down the tree
panel. There are several options that we need to change. Select Parallel instead of Serial. Change to ‘Prepare Batch
Scripts Only’. There is also a field under ‘MPI Args’, change that to the number of cores that you want use. 8 could
be a reasonable number for this small simulation. Click the Green triangle under ‘Prepare’.
Now, we need to go back to the terminal and see the effects of preparing the simulation runs. A new direc-
tory is created called ‘Sandia_Engine_LTC_EarlyInj.analysis’. Inside that directory there are one file called ‘San-
dia_Engine_LTC_EarlyInj.ftsim’ and a directory called ‘Nominal’ The contents of Nominal are:
chem.inp
chem.out
fuel_lib_chem.inp
fuel_lib_chem.out
fuel_lib_gas.asc
fuel_lib_xml.out
gas.asc
PREPARED
run_env.bat
run_env.sh
run_mpi.bat
run_mpi.sh
Sandia_Engine_LTC_EarlyInj.ftsim
therm.dat
xml.out
Now, we need to prepare the submission script for Mountaineer Go to ‘Nominal’ directory and create the script file
7.2. Engineering: ANSYS/Forte 81

WVU-RC Documentation, Release 1.0
cd $HOME/forte/SectorMesh/Sandia_Engine_LTC_EarlyInj.analysis/Nominal
cat <<EOF >runjob.pbs
#!/bin/sh
#PBS -N FORTE
#PBS -l nodes=1:ppn=8,walltime=01:00:00
#PBS -m ae
##PBS -M username@mail.wvu.edu
#PBS -q hour
module load ansys/forte/17.2
cd $PBS_O_WORKDIR
sh run_mpi.sh
EOF
You should remove one #from ##PBS -M username@mail.wvu.edu and change the email address in order to
receive notifications when job finish. We are requesting 1 hour (walltime=01:00:00), using one node (nodes=1) and
creating 8 MPI processes (ppn=8). Those values should be adapted to the needs of your job. If you ask for more than
one hour you must change also the queue where you are submiting the jobs (#PBS -q hour), consider for example
queues ‘day’ and ‘week’ if your jobs need more time to complete.
Submit the job with
qsub runjob.pbs
The job is submitted to the queue, it will start running when enough resources are free to start executing your job. You
can always monitor the status of your submission with
qstat -u username
Once your job simulation start execution, you can monitor the progress by looking at the MONITOR file, one way of
doing that is using tail command.
tail -f MONITOR
You should see something like
7852 116.38 3.908E-02 5.000E-06 Maximum reached 953.80 330.53 0.4565 9.79E+00 15729 190
7853 116.42 3.909E-02 5.000E-06 Maximum reached 953.70 330.51 0.4563 9.79E+00 15729 191
7854 116.45 3.909E-02 5.000E-06 Maximum reached 953.60 330.49 0.4556 9.78E+00 15729 194
7855 116.49 3.910E-02 5.000E-06 Maximum reached 953.50 330.48 0.4557 9.78E+00 15729 191
7856 116.52 3.910E-02 5.000E-06 Maximum reached 953.41 330.46 0.4560 9.78E+00 15729 190
7857 116.56 3.911E-02 5.000E-06 Maximum reached 953.31 330.44 0.4557 9.78E+00 15729 190
7858 116.60 3.911E-02 5.000E-06 Maximum reached 953.21 330.42 0.4549 9.77E+00 15729 188
7859 116.63 3.912E-02 5.000E-06 Maximum reached 953.12 330.41 0.4552 9.77E+00 15729 188
Cycle# CA[deg] Time[s] Step[s] Step constraint MaxT[K] MinT[K] MaxP[MPa] MaxV[m/s] #Cells #Clusters
7860 116.67 3.912E-02 5.000E-06 Maximum reached 953.02 330.38 0.4550 9.77E+00 15729 188
7861 116.70 3.913E-02 5.000E-06 Maximum reached 952.92 330.37 0.4551 9.76E+00 15729 188
7862 116.74 3.913E-02 5.000E-06 Maximum reached 952.82 330.35 0.4542 9.76E+00 15729 185
7863 116.78 3.914E-02 5.000E-06 Maximum reached 952.72 330.33 0.4542 9.76E+00 15729 187
7864 116.81 3.914E-02 5.000E-06 Maximum reached 952.63 330.32 0.4544 9.76E+00 15729 188
7865 116.85 3.915E-02 5.000E-06 Maximum reached 952.53 330.29 0.4541 9.75E+00 15729 186
7866 116.88 3.915E-02 5.000E-06 Maximum reached 952.43 330.28 0.4535 9.75E+00 15729 186
7867 116.92 3.916E-02 5.000E-06 Maximum reached 952.33 330.26 0.4534 9.75E+00 15729 188
7868 116.96 3.916E-02 5.000E-06 Maximum reached 952.23 330.25 0.4534 9.74E+00 15729 186
7869 116.99 3.917E-02 5.000E-06 Maximum reached 952.13 330.23 0.4538 9.74E+00 15729 187
Cycle# CA[deg] Time[s] Step[s] Step constraint MaxT[K] MinT[K] MaxP[MPa] MaxV[m/s] #Cells #Clusters
82 Chapter 7. Domain Specific Details

WVU-RC Documentation, Release 1.0
7870 117.03 3.917E-02 5.000E-06 Maximum reached 952.03 330.21 0.4535 9.74E+00 15729 189
7871 117.06 3.918E-02 5.000E-06 Maximum reached 951.93 330.19 0.4527 9.74E+00 15729 192
7872 117.10 3.918E-02 5.000E-06 Maximum reached 951.83 330.18 0.4528 9.73E+00 15729 192
7873 117.14 3.919E-02 5.000E-06 Maximum reached 951.73 330.16 0.4530 9.73E+00 15729 192
The screen will update when the execution advances. When simulation finishes you should get a summary of execution
like
============================================================
Engine Summary Data:
------------------------------------------------------------
Cylinder Index 1
------------------------------------------------------------
Power 9.84048 [kW]
IMEP 0.42126 [MPa]
Fuel Mass 5.35000E-002 [g/cyc]
Fuel Lower Heating Value 44.52000 [kJ/g]
Gross ISFC 195.72213 [g/kW-h]
ISFC(IVC->EVO) 223.19199 [g/kW-h]
Total Chemical Heat Release 2376.63829 [J]
Total Heat Release From P-V 1297.21755 [J]
Combustion Efficiency 0.99782 []
Thermal Efficiency 0.41315 []
Max Pressure 8.62842 [MPa]
Max Temperature 1262.21947 [K]
Max Pressure Rise Rate 0.84582 [MPa/deg]
CA @ 2% Heat Release -14.97600 [deg ATDC]
CA @ 10% Heat Release -8.99000 [deg ATDC]
CA @ 30% Heat Release -5.98561 [deg ATDC]
CA @ 50% Heat Release -5.98561 [deg ATDC]
CA @ 90% Heat Release 0.02813 [deg ATDC]
10%-90% Heat Release Duration 9.01813 [deg]
Soot @ EVO 3.66015E-004 [g/kg-f]
7.16372E-005 [g/kW-h]
8.72851E-006 [ppm]
EINOx @ EVO 3.39138E+000 [g/kg-f]
6.63767E-001 [g/kW-h]
2.09039E+001 [ppm]
CO @ EVO 2.17074E+001 [g/kg-f]
4.24862E+000 [g/kW-h]
2.19759E+002 [ppm]
UHC @ EVO 1.30878E+001 [g/kg-f]
2.56157E+000 [g/kW-h]
C1-UHC @ EVO 2.59096E+002 [ppm]
VOC @ EVO 1.35866E+001 [g/kg-f]
2.65920E+000 [g/kW-h]
C1-VOC @ EVO 2.63832E+002 [ppm]
============================================================
Normal termination: Cycle# 8092, CrankAngle[deg] 125.00, Time[s] 4.0278E-02
CGNS solution file closed successfully
================================================================================
Summary of computational times:
Total wall-clock time 1438.9 seconds (23 min, 58.9 sec)
Wall-clock time in chemistry 230.8 seconds ( 3 min, 50.8 sec)
7.2. Engineering: ANSYS/Forte 83

WVU-RC Documentation, Release 1.0
Total CPU time 11511.0 seconds ( 3 h, 11 min, 51.0 sec)
CPU time in chemistry 1497.8 seconds (24 min, 57.8 sec)
================================================================================
Licenses Released
Many files are now on you Nominal directory.
chem_0 chemsolver.csv fuel_library_diag_0 gas.asc
chem_0.out COMPLETE fuel_library_diag_1 massfraction.csv
chem_1 dynamic.csv fuel_library_diag_2 memory_diagnostics.csv
chem_1.out flow_diagnostics.csv fuel_library_diag_3 molefraction.csv
chem_2 FORTE.e107840 fuel_library_diag_4 MONITOR
chem_2.out FORTE.log fuel_library_diag_5 nc14h30_fueltable.csv
chem_3 FORTE.o107840 fuel_library_diag_6 Nominal_CA_p_125.00_8092.ftrst
chem_3.out fuelchem_0 fuel_library_diag_7 Nominal.ftavg
chem_4 fuelchem_0.out fuel_lib_xml.out Nominal.ftind
chem_4.out fuelchem_1 fueltable.out Nominal.ftres
chem_5 fuelchem_1.out fueltran_0 run_env.bat
chem_5.out fuelchem_2 fueltran_0.out run_env.sh
chem_6 fuelchem_2.out fueltran_1 runjob.pbs
chem_6.out fuelchem_3 fueltran_1.out runjob.pbs~
chem_7 fuelchem_3.out fueltran_2 run_mpi.bat
chem_7.out fuelchem_4 fueltran_2.out run_mpi.sh
chemdiag_0 fuelchem_4.out fueltran_3 Sandia_Engine_LTC_EarlyInj.ftsim
chemdiag_1 fuelchem_5 fueltran_3.out speciesmass.csv
chemdiag_2 fuelchem_5.out fueltran_4 spray.csv
chemdiag_3 fuelchem_6 fueltran_4.out therm.dat
chemdiag_4 fuelchem_6.out fueltran_5 thermo.csv
chemdiag_5 fuelchem_7 fueltran_5.out wall_heat_transfer.csv
chemdiag_6 fuelchem_7.out fueltran_6 whole_domain_parameters.csv
chemdiag_7 fuel_lib_chem.inp fueltran_6.out xml.out
chem.inp fuel_lib_chem.out fueltran_7
chem.out fuel_lib_gas.asc fueltran_7.out
The best way of continue from here is to copy those files back to your workstation for post-processing and analysis.
You can however continue on Mountaineer and start analysing the results of the simulation. On the initial window
with three buttons, click on Monitor and open the project file. The image on the left, you can get see basic plots of
temperature and pressure as a function of crank angle. By clicking on the Visualize button you get a big window where
you can see visualizations of the fluids inside the crank.
84 Chapter 7. Domain Specific Details
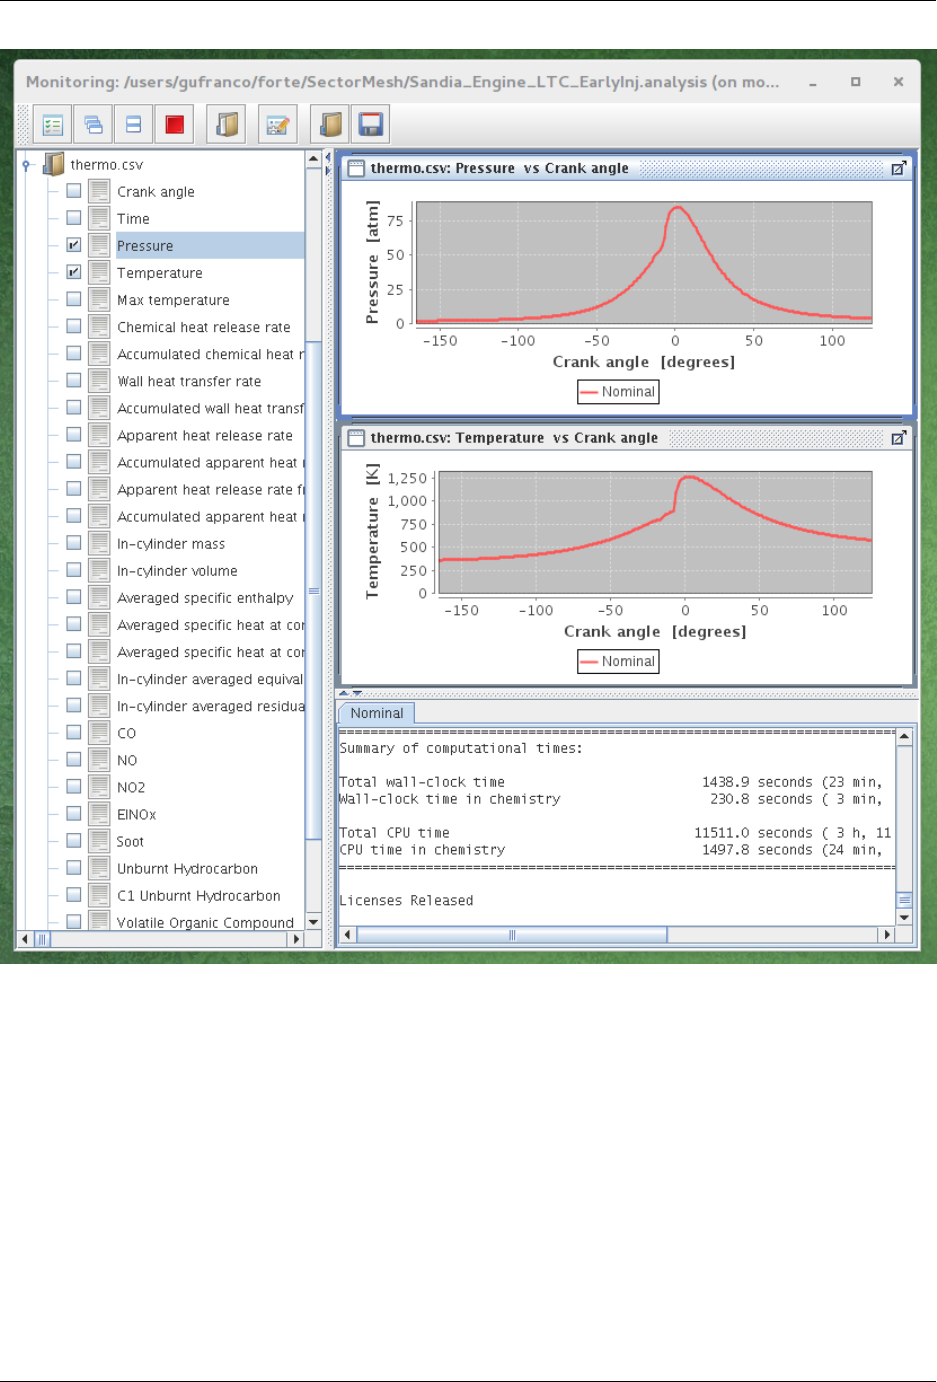
WVU-RC Documentation, Release 1.0
7.2. Engineering: ANSYS/Forte 85
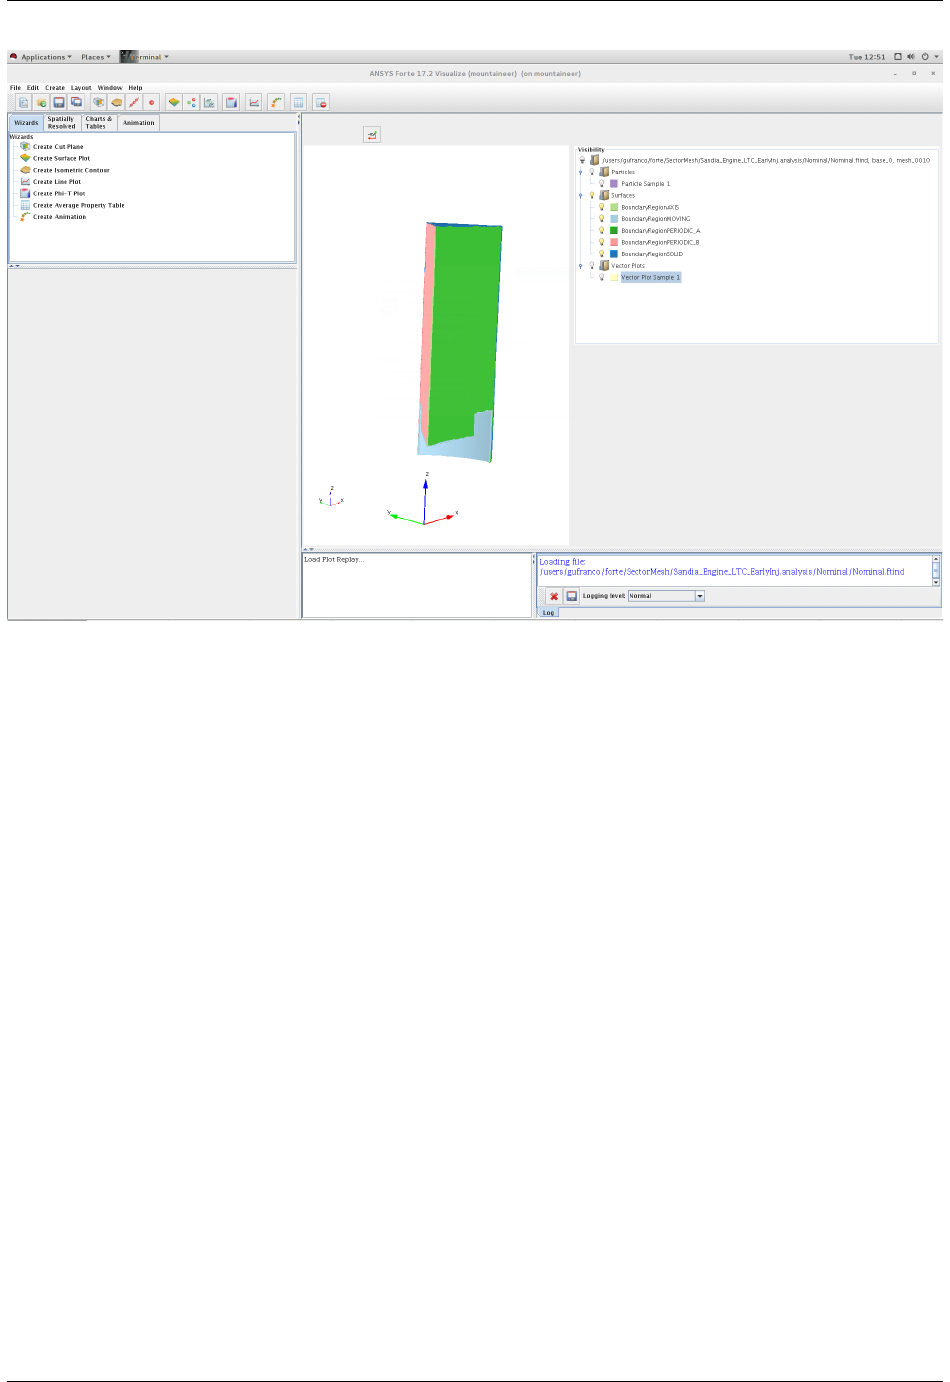
WVU-RC Documentation, Release 1.0
asdsadsd
7.3 Engineering: Running OpenFOAM simple tutorial
7.3.1 Load modules
OpenFOAM was compiled with gcc 5.3.0 and openMPI 1.6.5. These modulefiles will need to be loaded to run
OpenFOAM.
$> module load compilers/gcc/5.3.0 mpi/openmpi/1.6.5 libraries/openfoam/3.0+
7.3.2 Run OpenFOAM
Below is a sample tutorial given by OpenFOAM to show how to run OpenFOAM on our systems. The commands
below will initiate an interactive job on the debug queue, and execute the openFoam tutorial.
$> debug
$> module load compilers/gcc/5.3.0 libraries/openfoam/3.0+
$> mkdir -p $FOAM_RUN
$> run
$> cp -r $FOAM_TUTORIALS/incompressible/simpleFoam/pitzDaily ./
$> mv pitzDaily/*.
$> blockMesh
$> simpleFoam
86 Chapter 7. Domain Specific Details

WVU-RC Documentation, Release 1.0
7.3.3 Using ParaView with OpenFoam
Visualization of openFoam output can be executed from the head node. To use paraFoam, make sure you have logged
in with X11 forwarding enabled.
$> module load compilers/gcc/5.3.0 libraries/openfoam/3.0+ visualization/paraview
$> run
$> paraFoam
7.4 Bioinformatics: Conda and BioConda
Conda is an open source package management system and environment management system that runs on Windows,
macOS and Linux. Conda quickly installs, runs and updates packages and their dependencies. Conda easily creates,
saves, loads and switches between environments.
We have Conda installed on Spruce, all that you have to do to enable the conda environment is to execute:
source /shared/software/miniconda3/etc/profile.d/conda.sh
Bioconda is a channel for the conda package manager specializing in bioinformatics software. Bioconda offers a
repository of more than 4000 bioinformatics packages
In the future most packages in bioinformatics will be offered via Bioconda instead of independent modules. That allow
us to keep packages consistent and updated.
To get a better idea about using bioconda and the packages provided here we prepare a basic tutorial on its usage on
Spruce.
7.4.1 Preparing the environment
On spruce:
You can load the module, but it only remembers you the script that needs to be sourced to operate with Bioconda
module load genomics/bioconda
In fact the conda environment is enable only when you actually source the script
source /shared/software/miniconda3/etc/profile.d/conda.sh
7.4.2 Knowing which environments are available
By the time of writting this tutorial Spruce offers three environments centrally installed:
$ conda info --envs
# conda environments:
#
/scratch/gufranco/bowtie2
base */shared/software/miniconda3
qiime2-2018.8 /shared/software/miniconda3/envs/qiime2-2018.8
tpd0001 /shared/software/miniconda3/envs/tpd0001
7.4. Bioinformatics: Conda and BioConda 87

WVU-RC Documentation, Release 1.0
7.4.3 Activating an existing environment
Suppose that you want to use the environment called “tpd0001”, to achieve that execute
conda activate tpd0001
7.4.4 Deactivating the current environment
conda deactivate
7.4.5 Creating a new environment from a YML file
You can create your own environment, one easy way of doing that is via a YML file that describes the channels and
packages that you want on your environment. The YML file will look like this, for a simple case when you want one
env for bowtie2 (bowtie2.yml)
name: spruce-bowtie2
channels:
- bioconda
- conda-forge
- defaults
dependencies:
- bowtie2
Another example is this YML file for installing a curated set of basic genomics codes that requires just a few depen-
dencies. (biocore.yml)
name: biocode
channels:
- bioconda
- conda-forge
- defaults
dependencies:
- bamtools
- bcftools
- bedtools
- hmmer
- muscle
- raxml
- samtools
- sga
- soapdenovo-trans
- soapdenovo2
- sra-tools
- vcftools
- velvet
To create an environment from those YML files you can select one location on your scratch folder
conda env create -p $SCRATCH/bowtie2 -f bowtie2.yml
or for the biocore.yml
conda env create -p $SCRATCH/biocore -f biocore.yml
By default, new environments are created inside your $HOME folder on $HOME/.conda
88 Chapter 7. Domain Specific Details

WVU-RC Documentation, Release 1.0
7.4.6 Listing the packages inside one environment
Bowtie2 has a number of dependencies (19 dependencies for 1 package) Notice that only bowtie2 comes from bioconda
channel. All other packages are part of conda-forge, a lower level channel.
$ conda activate $SCRATCH/bowtie2
$ conda list
# packages in environment at /scratch/gufranco/bowtie2:
#
# Name Version Build Channel
bowtie2 2.3.4.2 py36h2d50403_0 bioconda
bzip2 1.0.6 h470a237_2 conda-forge
ca-certificates 2018.8.24 ha4d7672_0 conda-forge
certifi 2018.8.24 py36_1 conda-forge
libffi 3.2.1 hfc679d8_5 conda-forge
libgcc-ng 7.2.0 hdf63c60_3 conda-forge
libstdcxx-ng 7.2.0 hdf63c60_3 conda-forge
ncurses 6.1 hfc679d8_1 conda-forge
openssl 1.0.2p h470a237_0 conda-forge
perl 5.26.2 h470a237_0 conda-forge
pip 18.0 py36_1 conda-forge
python 3.6.6 h5001a0f_0 conda-forge
readline 7.0 haf1bffa_1 conda-forge
setuptools 40.2.0 py36_0 conda-forge
sqlite 3.24.0 h2f33b56_1 conda-forge
tk 8.6.8 0 conda-forge
wheel 0.31.1 py36_1 conda-forge
xz 5.2.4 h470a237_1 conda-forge
zlib 1.2.11 h470a237_3 conda-forge
7.4.7 Using a conda environment in a submission script
To execute software in a non-interactive job you need to source the main script, activate the environment that contains
the software you need, execute the the scientific code and deactivate the environment. This is a simple example
showing that for bowtie2
#!/bin/bash
#PBS -N MY_JOB
#PBS -q standby
#PBS -j oe
#PBS -l nodes=1:ppn=2
source /shared/software/miniconda3/etc/profile.d/conda.sh
conda activate $SCRATCH/bowtie2
bowtie2 .....
conda deactivate
7.4.8 Deleting a environment
To remove an environment you can just execute this command.
conda remove --all -p $SCRATCH/bowtie2
7.4. Bioinformatics: Conda and BioConda 89

WVU-RC Documentation, Release 1.0
7.4.9 More documentation
Conda Documentation
[https://conda.io/docs/user-guide/tasks/manage-environments.html# Managing environments]
Using Bioconda — Bioconda documentation
Available packages — Bioconda documentation
7.5 Bioinformatics: Using Bowtie2
This tutorial will show how to use Job Arrays to manage the alignment of a big pair of sequencing data.
For the purpose of the tutorial, consider that you receive a pair of files like this:
Estrogen_24_1.clean.fq
Estrogen_24_2.clean.fq
And you have a reference like:
Oncorhynchus_mykiss_chr.fa
This tutorial will show you how to do the alignments concurrently by splitting the fq files and use BSseeker and
bowtie2 for the alignment. When the job is done we use samtools to merge the results in a single BAM file.
7.5.1 1. Transfer the files
The files refered above are really big, the first step is to send those files to the cluster. The files are too big for store
them on your home account so you have to use the scratch space. There are two ways of sending the files to the
cluster. Using command line tools like rsync or using the Globus connector to sent those files from your computer to
the cluster.
If you are using Linux or Mac on your side, the command to send those files will be,
rsync -av Estrogen_24_1.clean.fq Estrogen_24_2.clean.fq Oncorhynchus_mykiss_chr.fa [username]@spruce.hpc.wvu.edu:/scratch/[username]
Globus is another alternative, follow the instructions: [Transferring_Files]
7.5.2 2. Preparing folders
It is always good practice to keep some structure on the files that you will use on your research. We suggest creating a
few directories, for the references, for the big sequence fq files, output and temporary files.
cd /scratch/[username]
mkdir REFS OUTPUT TMP WGBS
Now we need to move the big fq files to WGBS and the reference to REFS
mv Estrogen_24_1.clean.fq Estrogen_24_2.clean.fq WGBS
90 Chapter 7. Domain Specific Details

WVU-RC Documentation, Release 1.0
mv Oncorhynchus_mykiss_chr.fa REFS
7.5.3 3. Splitting the files
Our first couple of jobs consists on splitting the two big fq files. We can get an idea about how big they are by counting
the number of lines
$ wc -l WGBS/Estrogen_24*.fq
‘‘ 670407612 WGBS/Estrogen_24_1.clean.fq‘‘
‘‘ 670407612 WGBS/Estrogen_24_2.clean.fq‘‘
‘‘ 1340815224 total‘‘
They have the same number of lines, more than 670 million lines. It is important to realize that you cannot simple cut
those files arbitrarily. Each 4 lines makes a block of information that cannot be splitted
@ST-E00144:275:HW5VJCCXX:7:1101:2564:1327 1:N:0:NTGAGCCA
NGAGAATATTTTTGGTTATTTTTTTTAGTTTTTGATTTGGAAGATTTATTAGATAGAGAATATTGTTGGTTATTTTTTTTAGTTTTTGATTTGGAGGATGTAGTAAATAGATAATATTTTTGTTGTGTATTTTTTTTAGTTTTTGTGTTG
+
#AAAAA7-7A
1. !/bin/bash
2. PBS -N SPLIT
3. PBS -l nodes=1:ppn=1
4. PBS -l walltime=4:00:00
5. PBS -m ae
6. PBS -q standby
cd $PBS_O_WORKDIR
mkdir -p WGBS/split echo $file split -d -a 3 -l 2400000 WGBS/${file} WGBS/split/${file}_
The submission script will create a job called “SPLIT” using one node (nodes=1) and one process per node (ppn=1).
We set a walltime in 4 hours, the limit for the standby queue. We suppose to submit this job from the scratch directory.
So the first step is to move into that directory using cd $PBS_O_WORKDIR, we create a folder for the split files
inside WGBS. The split command:
split -d -a 3 -l 2400000 WGBS/${file} WGBS/split/${file}_
The split command will create split files with 3 digits (-a 3), starting from 000. It will split every 2.4 million lines, the
file indicated under the file variable that will will use next. All those split files will be stored at WGBS/split using the
same name as the original but with a suffix being underscored “_” and the 3 digits mentioned before.
We submit the jobs like this:
qsub runjob_split.pbs -v file=Estrogen_24_1.clean.fq
qsub runjob_split.pbs -v file=Estrogen_24_2.clean.fq
7.5. Bioinformatics: Using Bowtie2 91

WVU-RC Documentation, Release 1.0
Those two jobs takes around 30 minutes in one of our compute nodes. Once that splitting is complete you can see
many files populating the WGBS/split folder. Those are the files we will use in our next step
7.5.4 4. Using BSseeker2
The webpage of the project is here: 1Copy the link and download the software, at the time of writing this (April
2017), the latest version was 2.1.0 and the download URL was:
wget ‘‘\ ‘‘‘http://pellegrini.mcdb.ucla.edu/BS_Seeker2/BSseeker2_v2.1.0.tar.bz
<http://pellegrini.mcdb.ucla.edu/BS_Seeker2/BSseeker2_v2.1.0.tar.bz>‘__
Once you have the code, uncompress it with:
tar -jxvf BSseeker2_v2.1.0.tar.bz
The submission script (runjob.pbs) will look like:
#!/bin/sh
#PBS -N ALIGN_${PBS_ARRAYID}
#PBS -l nodes=1:ppn=4
#PBS -l walltime=04:00:00
#PBS -l feature='!smp'
#PBS -m ae
#PBS -q standby
#PBS -t 0-279
module load compilers/python/2.7.13
module load genomics/bowtie2
if [ ${PBS_ARRAYID} -lt 10 ]
then
JAID=00${PBS_ARRAYID}
elif [ ${PBS_ARRAYID} -lt 100 ]
then
JAID=0${PBS_ARRAYID}
else
JAID=${PBS_ARRAYID}
fi
SCRATCH=/scratch/[username]
REFS=${SCRATCH}/REFS
WGBS=${SCRATCH}/WGBS
TEMP=${SCRATCH}/TMP
OUTP=${SCRATCH}/OUTPUT
FQ1=${WGBS}/split/Estrogen_24_1.clean.fq_$JAID
FQ2=${WGBS}/split/Estrogen_24_2.clean.fq_$JAID
FA=${REFS}/Oncorhynchus_mykiss_chr.fa
echo 'Job start: '`date`
cd $PBS_O_WORKDIR
cd BSseeker2_v2.1.0
mkdir -p ${TEMP}
python bs_seeker2-align.py -1 $FQ1 -2 $FQ2 -m 3 --aligner=bowtie2 -o ${OUTP}/Estrogen_24.${JAID}.align -f sam -g $FA --temp_dir=${TEMP}
echo 'Job complete: '`date`
92 Chapter 7. Domain Specific Details

WVU-RC Documentation, Release 1.0
There a number of details to mention here. We cut the fq files in 2.4 million lines in order to be sure we can process
them in our 4 hour walltime. The Job Array start with 0 and ends at 279. This piece of code ensures 3 digit numbers
filling with leading zeros as needed:
if [ ${PBS_ARRAYID} -lt 10 ]
then
JAID=00${PBS_ARRAYID}
elif [ ${PBS_ARRAYID} -lt 100 ]
then
JAID=0${PBS_ARRAYID}
else
JAID=${PBS_ARRAYID}
fi
The rest of the script defines locations for references, the split files and output. Finally it launches BSseeker2. Re-
member to replace [username] with your username.
SCRATCH=/scratch/[username]
REFS=${SCRATCH}/REFS
WGBS=${SCRATCH}/WGBS
TEMP=${SCRATCH}/TMP
OUTP=${SCRATCH}/OUTPUT
FQ1=${WGBS}/split/Estrogen_24_1.clean.fq_$JAID
FQ2=${WGBS}/split/Estrogen_24_2.clean.fq_$JAID
FA=${REFS}/Oncorhynchus_mykiss_chr.fa
echo 'Job start: '`date`
cd $PBS_O_WORKDIR
cd BSseeker2_v2.1.0
mkdir -p ${TEMP}
python bs_seeker2-align.py -1 $FQ1 -2 $FQ2 -m 3 --aligner=bowtie2 -o ${OUTP}/Estrogen_24.${JAID}.align -f sam -g $FA --temp_dir=${TEMP}
echo 'Job complete: '`date`
The command bowtie creates several threads, to ensure enough cores we set ppn=4.
7.5.5 4. Checking completion for all jobs
Sometimes jobs failed for one reason or another. It could be hard to check the output one by one to see if some job
needs to be executed again. This small python script could help you with that task (BSresubmit.py)
#!/usr/bin/env python
import argparse
import os
if __name__ == '__main__':
parser =argparse.ArgumentParser(description='Process some integers.')
parser.add_argument('-output_directory','-d', metavar='PATH',type=str, help='Directory for search output files', default='.')
parser.add_argument('-prefix','-p', metavar='PREFIX',type=str, help='Filenames must be prefix+NUM+suffix', required=True)
parser.add_argument('-suffix','-s', metavar='SUFFIX',type=str, help='Filenames must be prefix+NUM+suffix', required=True)
parser.add_argument('-min_split_number','-m', metavar='N',type=int, help='min number of split', default=0)
parser.add_argument('-max_split_number','-n', metavar='N',type=int, help='max number of split', required=True)
args =parser.parse_args()
7.5. Bioinformatics: Using Bowtie2 93

WVU-RC Documentation, Release 1.0
failures=[]
for iin range(args.min_split_number, args.max_split_number+1):
filename="%s%s%s%03d%s"%(args.output_directory,os.sep, args.prefix, i, args.suffix)
if not os.path.isfile(filename):
failures.append(i)
continue
rf=open(filename)
data=rf.readlines()
if not 'END' in data[-1]:
failures.append(i)
if len(failures)==0:
print("All the jobs are complete in the range")
else:
print("Some jobs need to be resubmitted:")
print(failures)
In order to check if all the jobs are complete execute:
‘‘ ./BSresubmit.py -d OUTPUT -p Estrogen_24. -s .align.bs_seeker2_log -n 279‘‘
Once you have all the data you can move forward and merge the files using samtools:
7.6 Matlab: Running Matlab scripts on a HPC cluster
This simple tutorial explains how to use Matlab without launching the graphical interface and using the submission
script.
7.6.1 Executing Matlab scripts
Consider this simple script that computes first and second derivatives of a function to find extrema and inflection points
of a given function.
derivatives.zip
You can create a directory for this, for example MATLAB and uncompress there the file derivatives.zip:
unzip derivatives.zip
It will uncompress a file called “derivatives.m”, that is the actual matlab code that we would like to execute on the
cluster.
The submission script is very simple, for this example we will use a single core:
#!/bin/sh
#PBS -N MATLAB
#PBS -l nodes=1:ppn=1
#PBS -l walltime=1:00:00
#PBS -m ae
#PBS -q debug
module purge
module load statistics/matlab/2014a
94 Chapter 7. Domain Specific Details

WVU-RC Documentation, Release 1.0
cd $PBS_O_WORKDIR
matlab -nodisplay -r derivatives
Store this lines into a file called runjob.pbs
This submission script is telling the PBS system that we are creating a job called “MATLAB”, that will use one node
(nodes=1) and one core per node (ppn=1), during one hour (walltime=1:00:00). I will be notified by email (-m ae)
either for the job being aborted or ended. The queue were the job is submitted is called “debug” but you can also
choose other queues such as “comm_mmem_week” or “comm_mmem_day”. that will offer extended periods of time.
The lines module purge and module load statistics/matlab/2014a will prepare the environment for executing Matlab
on the HPC cluster.
Finally, the script will execute the matlab script “derivatives.m” without opening the graphical user interface (GUI).
Notive that you should execute matlab -nodisplay -r derivatives without adding the ”.m”. Matlab will always search
for a file called “derivatives.m”
You submit the job from the command line executing:
$qsub runjob.pbs
987788.srih0001.hpc.wvu.edu
You should get like above the JobID, an identifier that allow you to keep track of your execution. You can monitor the
execution like this: When in queue, ie, waiting for execution:
$ qstat 987788
Job ID Name User Time Use S Queue
------------------------- ---------------- --------------- -------- - ------
987788.srih0001 MATLAB gufranco 0 Q debug
When running:
$ qstat 987788
Job ID Name User Time Use S Queue
------------------------- ---------------- --------------- -------- - ------
987788.srih0001 MATLAB gufranco 0 R debug
When finished:
$ qstat 987788
Job ID Name User Time Use S Queue
------------------------- ---------------- --------------- -------- - -----
987788.srih0001 MATLAB gufranco 00:00:07 C debug
When the job concludes, you will get the files:
derivatives.fig
derivatives.m
derivatives.png
MATLAB.e987788
MATLAB.o987788
runjob.pbs``
The figures where generated and save on the same folder you submit your job. The output of your execution is stored
at MATLAB.o987788
<MATLAB(R)>
Copyright 1984-2014 The MathWorks, Inc.
R2014a (8.3.0.532) 64-bit (glnxa64)
7.6. Matlab: Running Matlab scripts on a HPC cluster 95
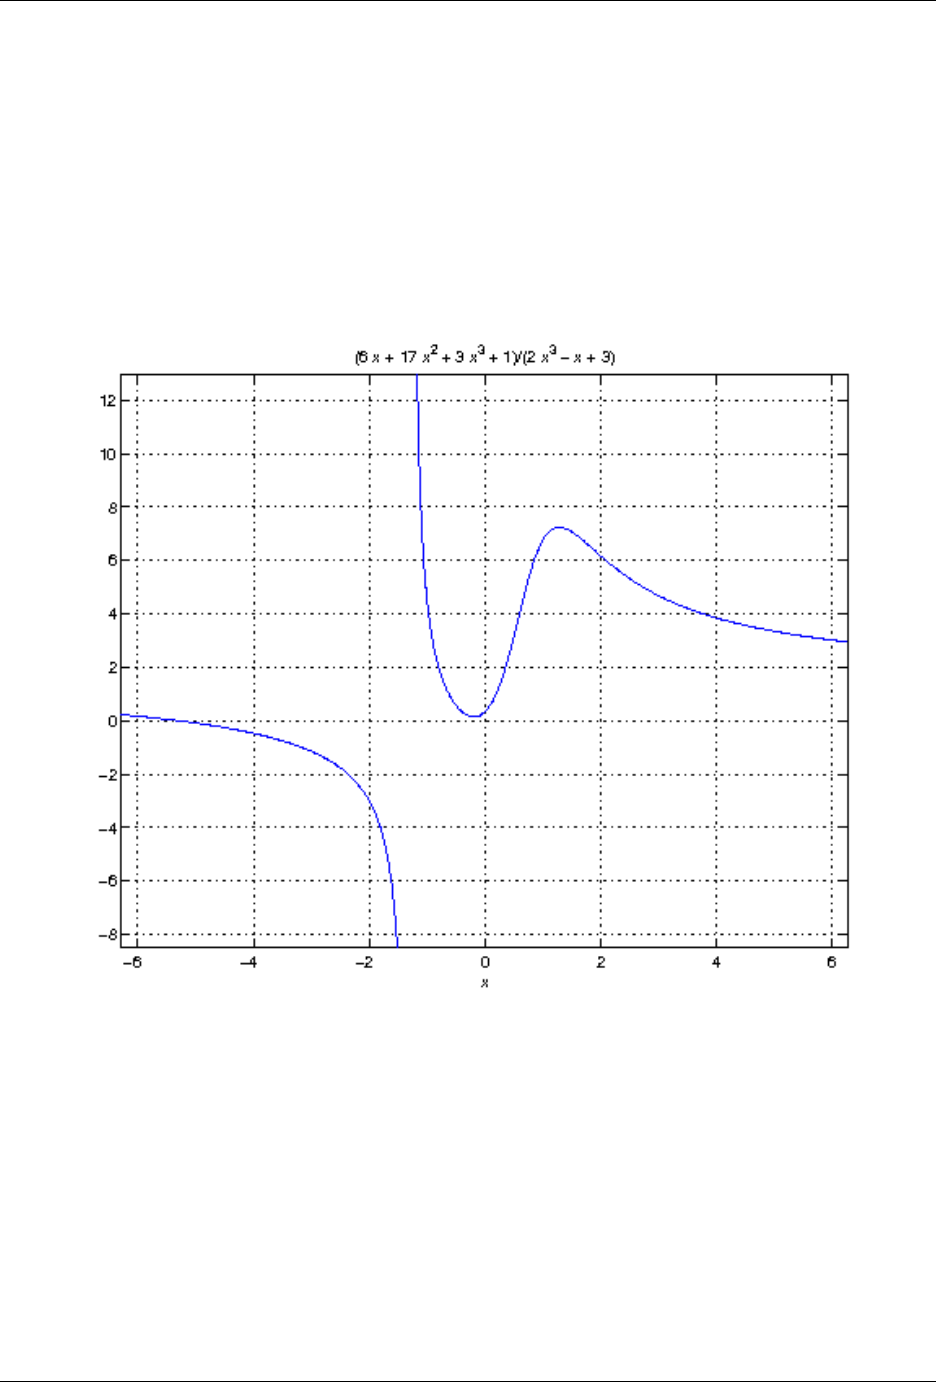
WVU-RC Documentation, Release 1.0
Figure 7.1: derivatives.png
96 Chapter 7. Domain Specific Details

WVU-RC Documentation, Release 1.0
February 11, 2014
To get started, type one of these: helpwin, helpdesk, or demo.
For product information, visit www.mathworks.com.
First Derivatives: Finding Local Minima and Maxima
==================================================
f =
(3*x^3 + 17*x^2 + 6*x + 1)/(2*x^3 - x + 3)
ans =
3/2
ans =
3/2
ans =
- 1/(6*(3/4 - (241^(1/2)*432^(1/2))/432)^(1/3)) - (3/4 - (241^(1/2)*432^(1/2))/432)^(1/3)
ans =
-1.2896
First Derivative: Local extremum Points
=======================================
g =
(9*x^2 + 34*x + 6)/(2*x^3 - x + 3) - ((6*x^2 - 1)*(3*x^3 + 17*x^2 + 6*x + 1))/(2*x^3 - x + 3)^2
ans =
((2841*((3^(1/2)*178939632355^(1/2))/176868 + 2198209/530604)^(1/3))/1156 + 9*((3^(1/2)*178939632355^(1/2))/176868 + 2198209/530604)^(2/3) + 361/289)^(1/2)/(6*((3^(1/2)*178939632355^(1/2))/176868 + 2198209/530604)^(1/6)) + ((337491*6^(1/2)*((3*3^(1/2)*178939632355^(1/2))/9826 + 2198209/9826)^(1/2))/39304 + (2841*((3^(1/2)*178939632355^(1/2))/176868 + 2198209/530604)^(1/3)*((2841*((3^(1/2)*178939632355^(1/2))/176868 + 2198209/530604)^(1/3))/1156 + 9*((3^(1/2)*178939632355^(1/2))/176868 + 2198209/530604)^(2/3) + 361/289)^(1/2))/578 - 9*((3^(1/2)*178939632355^(1/2))/176868 + 2198209/530604)^(2/3)*((2841*((3^(1/2)*178939632355^(1/2))/176868 + 2198209/530604)^(1/3))/1156 + 9*((3^(1/2)*178939632355^(1/2))/176868 + 2198209/530604)^(2/3) + 361/289)^(1/2) - (361*((2841*((3^(1/2)*178939632355^(1/2))/176868 + 2198209/530604)^(1/3))/1156 + 9*((3^(1/2)*178939632355^(1/2))/176868 + 2198209/530604)^(2/3) + 361/289)^(1/2))/289)^(1/2)/(6*((3^(1/2)*178939632355^(1/2))/176868 + 2198209/530604)^(1/6)*((2841*((3^(1/2)*178939632355^(1/2))/176868 + 2198209/530604)^(1/3))/1156 + 9*((3^(1/2)*178939632355^(1/2))/176868 + 2198209/530604)^(2/3) + 361/289)^(1/4)) - 15/68
((2841*((3^(1/2)*178939632355^(1/2))/176868 + 2198209/530604)^(1/3))/1156 + 9*((3^(1/2)*178939632355^(1/2))/176868 + 2198209/530604)^(2/3) + 361/289)^(1/2)/(6*((3^(1/2)*178939632355^(1/2))/176868 + 2198209/530604)^(1/6)) - ((337491*6^(1/2)*((3*3^(1/2)*178939632355^(1/2))/9826 + 2198209/9826)^(1/2))/39304 + (2841*((3^(1/2)*178939632355^(1/2))/176868 + 2198209/530604)^(1/3)*((2841*((3^(1/2)*178939632355^(1/2))/176868 + 2198209/530604)^(1/3))/1156 + 9*((3^(1/2)*178939632355^(1/2))/176868 + 2198209/530604)^(2/3) + 361/289)^(1/2))/578 - 9*((3^(1/2)*178939632355^(1/2))/176868 + 2198209/530604)^(2/3)*((2841*((3^(1/2)*178939632355^(1/2))/176868 + 2198209/530604)^(1/3))/1156 + 9*((3^(1/2)*178939632355^(1/2))/176868 + 2198209/530604)^(2/3) + 361/289)^(1/2) - (361*((2841*((3^(1/2)*178939632355^(1/2))/176868 + 2198209/530604)^(1/3))/1156 + 9*((3^(1/2)*178939632355^(1/2))/176868 + 2198209/530604)^(2/3) + 361/289)^(1/2))/289)^(1/2)/(6*((3^(1/2)*178939632355^(1/2))/176868 + 2198209/530604)^(1/6)*((2841*((3^(1/2)*178939632355^(1/2))/176868 + 2198209/530604)^(1/3))/1156 + 9*((3^(1/2)*178939632355^(1/2))/176868 + 2198209/530604)^(2/3) + 361/289)^(1/4)) - 15/68
ans =
1.2860
-0.1892
Second Derivatives: Finding Inflection Points
=============================================
h =
(18*x + 34)/(2*x^3-x+3)-(2*(6*x^2 - 1)*(9*x^2 + 34*x + 6))/(2*x^3 - x + 3)^2 - (12*x*(3*x^3 + 17*x^2 + 6*x + 1))/(2*x^3 - x + 3)^2 + (2*(6*x^2 - 1)^2*(3*x^3 + 17*x^2 + 6*x + 1))/(2*x^3 - x + 3)^3
7.6. Matlab: Running Matlab scripts on a HPC cluster 97

WVU-RC Documentation, Release 1.0
ans =
1.8651543689917122385037075917613
0.57871842655441748319601085860196
7.6.2 Using the Matlab Compiler
The first step is to load matlab to get access to its executables:
module load statistics/matlab/2014a
Prepare the compilation environment with:
$ mbuild -setup``
MBUILD configured to use 'gcc' for C language compilation.``
To choose a different language, execute one from the following:``
mex -setup C++ -client MBUILD ``
mex -setup FORTRAN -client MBUILD``
You cannot compile matlab scripts that uses the symbolic toolbox
https://www.mathworks.com/products/ineligible_programs.html
So we will use another script for this tutorial.
mandelbrot.zip
After uncompress the file “mandelbrot.m”:
mcc -m mandelbrot.m
It takes a while, when finished you will get some extra files:
mandelbrot
run_mandelbrot.sh
The submission script changes to:
#!/bin/sh
#PBS -N MATLAB
#PBS -l nodes=1:ppn=1
#PBS -l walltime=1:00:00
#PBS -m ae
#PBS -q debug
module purge
module load statistics/matlab/2014a
cd $PBS_O_WORKDIR
./run_mandelbrot.sh /shared/software/MATLAB/R2014a
After submit the job with:
qsub runjob.pbs
You get the results on “MATLAB.o#######” with the corresponding JobID
98 Chapter 7. Domain Specific Details

WVU-RC Documentation, Release 1.0
Figure 7.2: Mandelbrot fractal generated from Matlab
7.6. Matlab: Running Matlab scripts on a HPC cluster 99

WVU-RC Documentation, Release 1.0
7.7 Visualization: VisIt
From: https://wci.llnl.gov/simulation/computer-codes/visit
VisIt is an Open Source, interactive, scalable, visualization, animation and analysis tool. From Unix, Windows or Mac
workstations, users can interactively visualize and analyze data ranging in scale from small (<101 core) desktop-sized
projects to large (>105 core) leadership-class computing facility simulation campaigns. Users can quickly generate
visualizations, animate them through time, manipulate them with a variety of operators and mathematical expressions,
and save the resulting images and animations for presentations. VisIt contains a rich set of visualization features to
enable users to view a wide variety of data including scalar and vector fields defined on two- and three-dimensional (2D
and 3D) structured, adaptive and unstructured meshes. Owing to its customizeable plugin design, VisIt is capabable
of visualizing data from over 120 different scientific data formats (see this partial list).
7.7.1 Introduction
VisIt is available on Spruce Knob in a client server model. In order to utilize Visit, you will need to install a local
(client) copy of VisIt on your workstation/laptop. This will allow you to visualize your data on your workstation but
but be able to run VisIt against data stored in Spruce Knob filesystems. For any back-end processing that VisIt might
need, it can also take advantage of Spruce Knob’s processing power.
7.7.2 Client Installation
By the time this wikipage was reviewed (July 19, 2017) the latest version available was 2.12.3 released on June, 2017.
Client executables are available from 1. Be sure to read the install notes for your particular installation need. In most
cases you will use the 64 bit version appropriated for your OS (Windows, Mac or Linux)
Note: You will need to download a version that matches an available version on Spruce Knob. Currently we have
2.12.2 released on April 2017. If both client and server are 2.12.x they should work correctly
7.7.3 Running VisIt in the Client/Server Model
After successfully installing VisIt on your workstation, you can run through the following steps to start using it on in
connection with Spruce Knob. Note: The following setups up VisIt to run in Parallel Mode but the same instructions
apply for a serial run. When you enter the number of processors you need during the submission process, just select 1.
Configuring Client to use Spruce Knob as a Server
• Execute ‘visit’:
You can just use the icon or the command line. The command line is useful to identify problems during the first
configuration of Visit to use Spruce as server. On MacOS the command line is accesible with:
‘‘ /Applications/VisIt.app/Contents/Resources/bin/visit‘‘
• Go-to Options menu and select Host Profiles ....
• In the Host profiles window, select New and enter the following information on the Host Settings tab.
• Select the Launch Profile tab and select New Profile and enter the following information in the Settings sub
tab.
• Select the Parallel sub tab and enter the following information. Note, you can use a different Queue setting but
in most cases standby should be sufficient unless you suspect your task will last longer than 4 hours.
100 Chapter 7. Domain Specific Details

WVU-RC Documentation, Release 1.0
Figure 7.3: host_settings.png
7.7. Visualization: VisIt 101
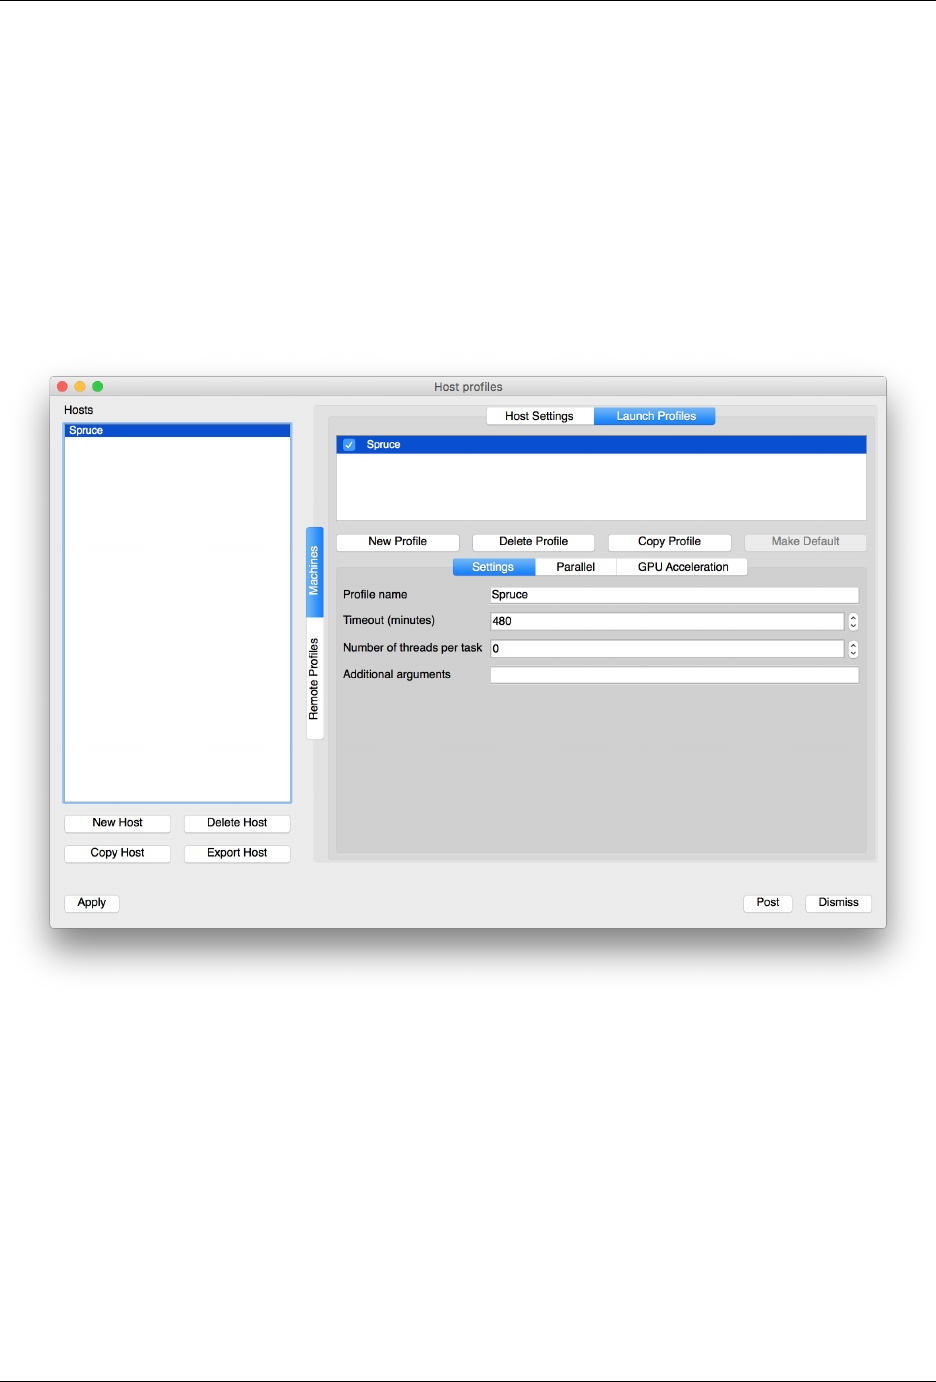
WVU-RC Documentation, Release 1.0
Figure 7.4: launch_profiles.png
102 Chapter 7. Domain Specific Details
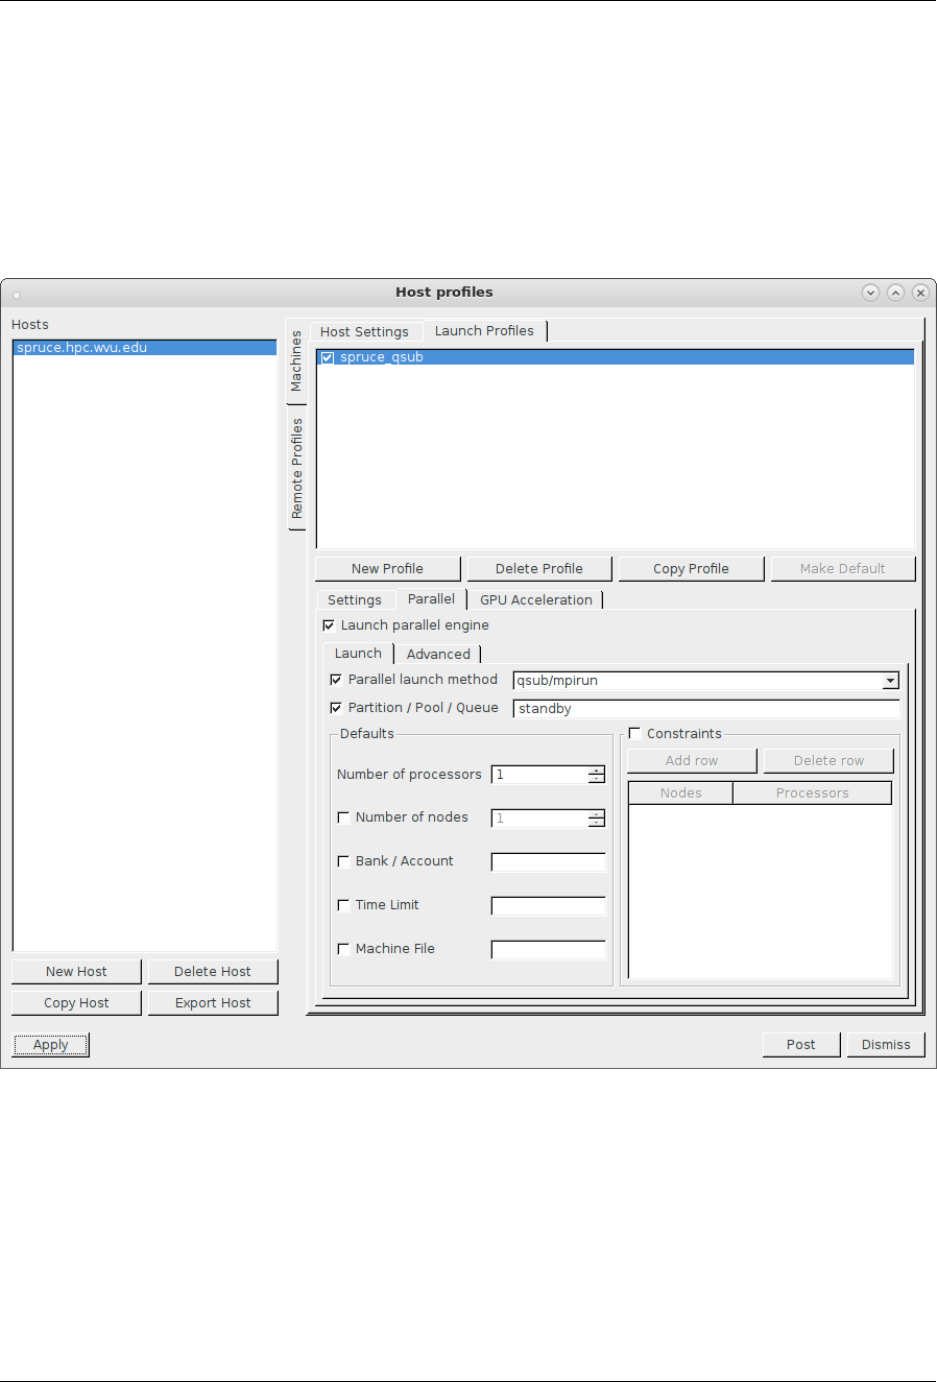
WVU-RC Documentation, Release 1.0
Figure 7.5: parallel_options.png
7.7. Visualization: VisIt 103
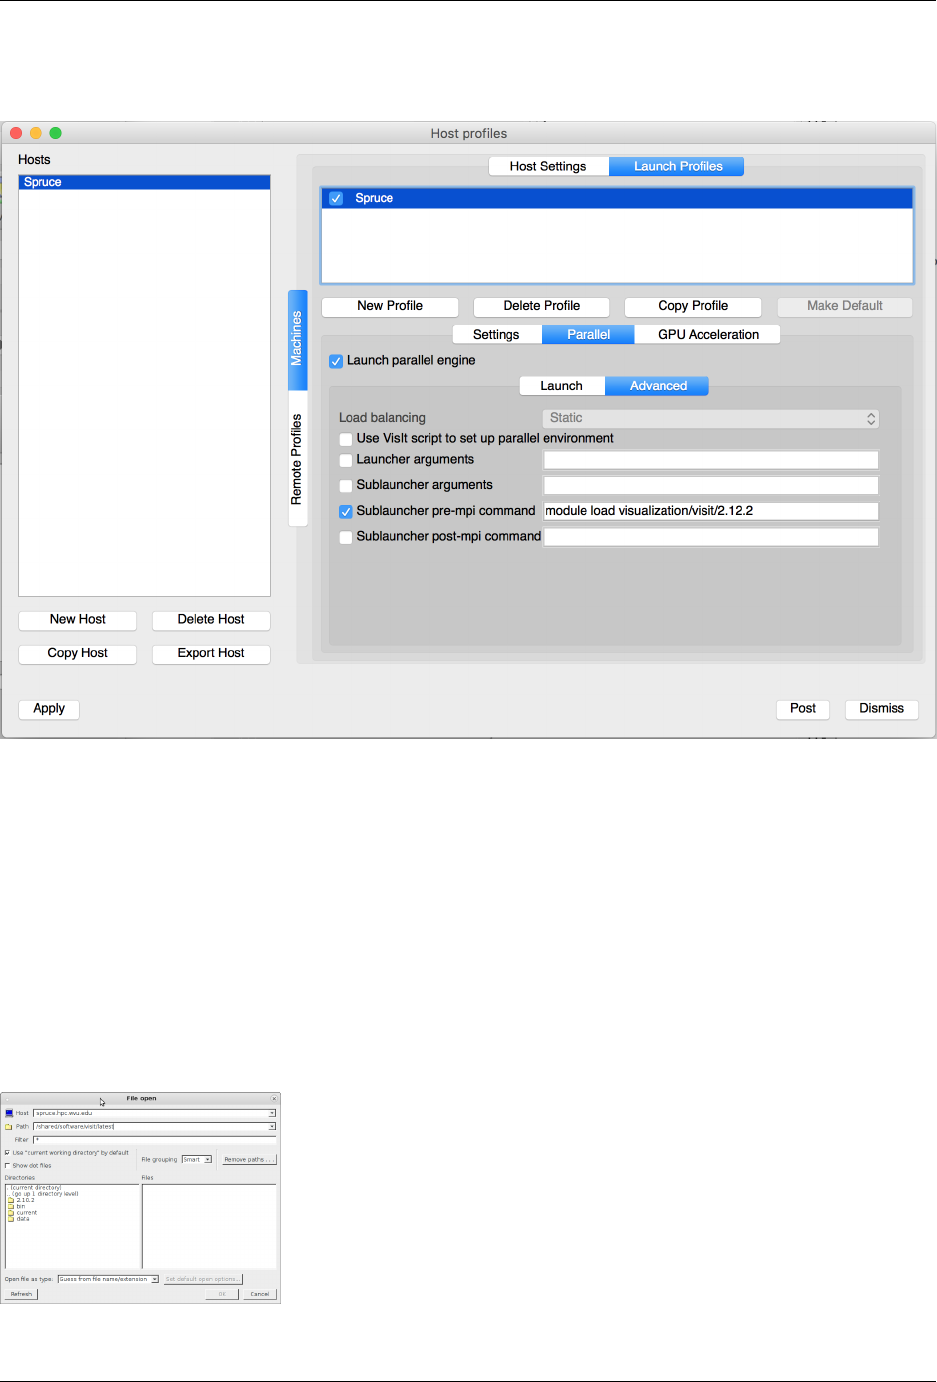
WVU-RC Documentation, Release 1.0
• Within the Parallel sub tab, select the Advanced sub tab, and enter module load visualization/visit/2.10.2 in
the Sublauncher pre-mpi command field. Screen should look as follows:
Figure 7.6: parallel_advanced.png
• Select Apply in the lower left corner.
• Select Options and Save Settings from the menu on the main VisIt user interface.
Connect your client to Spruce Knob
• If VisIt is not already running on your workstation, start it by executing visit on the command line.
• Select Open under the Sources section.
• Select spruce.hpc.wvu.edu in the Host Section and enter your password when prompt. You should see screen
similar to the following.
104 Chapter 7. Domain Specific Details
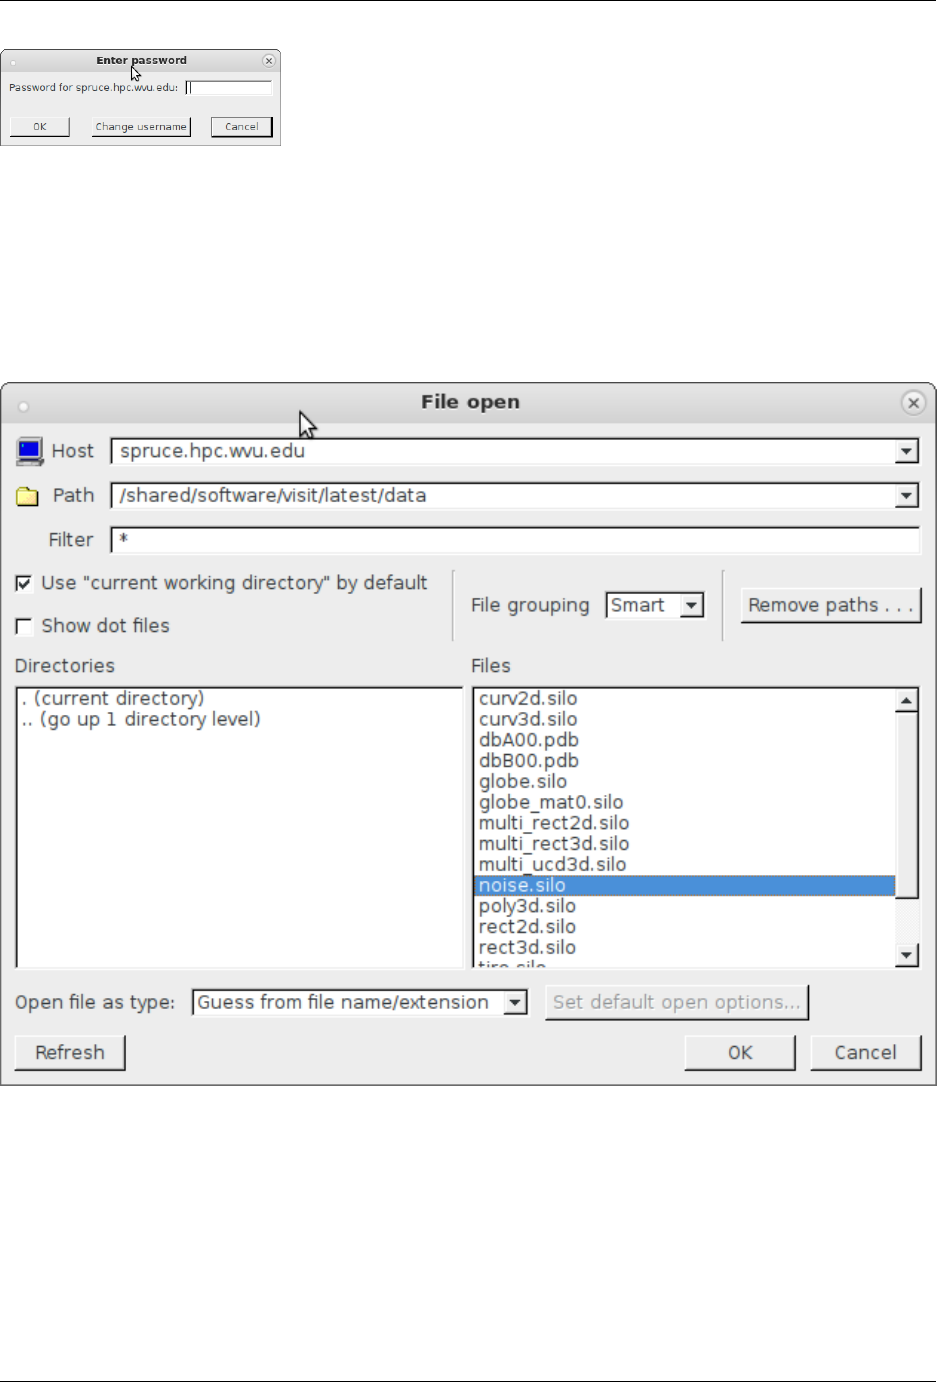
WVU-RC Documentation, Release 1.0
• You should now see the contents of your home directory and ready to use VisIt on your local data.
Visualize an Example VisIt Dataset
Note: This assumes you have already connected to Spruce Knob from your client workstation following the instruc-
tions from the previous section.
• Change Path to /shared/software/visit/latest/data and select globe.silo.
Figure 7.7: example_data.png
• If necessary, change the options for job submission and select OK.
• The following dialog box will appear until a spot is open on the cluster for your job to run. When using the
standby queue, this should be less than 60 seconds assuming the cluster is not completely busy.
• In Plots select Pseudocolor and disp_magnitude.
• Select Draw and you should see an output similar to the following.
7.7. Visualization: VisIt 105
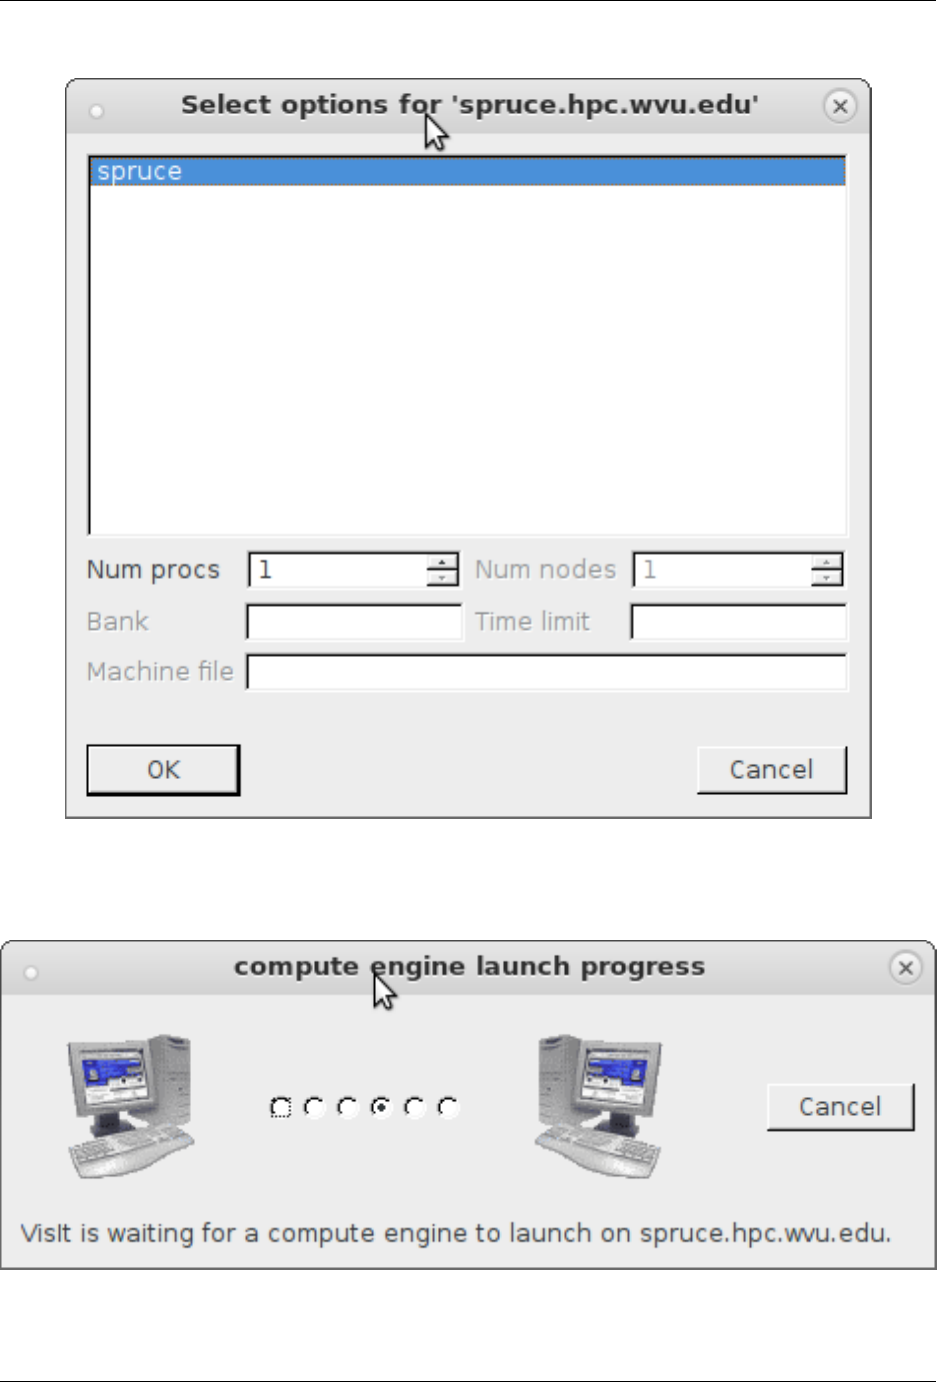
WVU-RC Documentation, Release 1.0
Figure 7.8: select_options.png
Figure 7.9: compute_engine.png
106 Chapter 7. Domain Specific Details

WVU-RC Documentation, Release 1.0
Figure 7.10: visit_output.png
7.7. Visualization: VisIt 107

WVU-RC Documentation, Release 1.0
108 Chapter 7. Domain Specific Details

CHAPTER
EIGHT
CLUSTERS SPECIFICATIONS
8.1 Mountaineer Cluster
8.1.1 Hardware
8.1.2 Queues
8.1.3 Environment modules
8.2 Spruce Knob
8.2.1 Hardware
8.2.2 Queues
8.2.3 Environment modules
The current state and limits of queues can be found using the qstat command.
$> qstat -q
server: srih0001.hpc.wvu.edu
Queue Memory CPU Time Walltime Node Run Que Lm State
---------------- ------ -------- -------- ---- --- --- -- -----
admin -- -- -- -- 0 0 -- E R
ahismail -- -- -- -- 6 1 -- E R
alromero -- -- -- -- 13 5 -- E R
bts0019 -- -- -- -- 0 0 -- D S
bvpopp -- -- -- -- 7 0 -- E R
cedumitrescu -- -- -- -- 12 12 -- E R
comm_256g_mem -- -- 168:00:0 -- 4 5 -- E R
comm_gpu -- -- 168:00:0 -- 3 1 -- E R
comm_large_mem -- -- 168:00:0 -- 5 268 -- E R
comm_mmem_day -- -- 24:00:00 -- 9 38 -- E R
comm_mmem_week -- -- 168:00:0 -- 71 264 -- E R
comm_smp -- -- 168:00:0 -- 6 0 -- E R
debug -- -- 00:15:00 -- 0 0 -- E R
dsmebane -- -- -- -- 2 0 -- E R
genomics_core -- -- -- -- 16 300 -- E R
gmunu -- -- -- -- 0 0 -- E R
109

WVU-RC Documentation, Release 1.0
gspirou -- -- -- -- 0 0 -- E R
jaspeir -- -- -- -- 0 0 -- E R
jbmertz -- -- -- -- 3 2 -- E R
jbmertz_gpu -- -- -- -- 2 0 -- E R
jplewis -- -- -- -- 8 114 -- E R
jplewis_large -- -- -- -- 0 0 -- E R
jshawkins -- -- -- -- 0 0 -- E R
jthibaul -- -- -- -- 0 0 -- D R
mcwilliams_gpu -- -- -- -- 0 0 -- E R
sp0045 -- -- -- -- 13 0 -- E R
spdifazio -- -- -- -- 25 600 -- E R
standby -- -- 04:00:00 -- 271 538 -- E R
stmcwilliams -- -- -- -- 1 0 -- E R
stmcwilliams_lp -- -- -- -- 1 0 -- E R
tdmusho -- -- -- -- 0 0 -- E R
testqueue -- -- -- -- 0 0 -- E R
training -- -- -- -- 0 0 -- D S
vyakkerman -- -- -- -- 13 0 -- E R
zbetienne -- -- -- -- 1 0 -- E R
----- -----
495 2148
There are three main queue types - research team queues, the standby queue, and community node queues.
8.2.4 Research Team Queues
Research teams that have bought their own compute nodes have private queues that link all their compute nodes
together. Only users given permission from the research team’s buyer (Usually the labs PI) will have permission to
directly submit jobs to these queues. While these are private queues - unused resources/compute nodes from these
queues will be available to the standby queue (see below). However, per the system-wide policies, all research team’s
compute nodes must be available to the research team’s users within 4 hours of job submission. By default, these
queues are regulated by first come, first serve queuing. However, individual research teams can ask for different
settings for their respective queue, and should contact the RC HPC team with these requests.
8.2.5 Standby Queue
The standy queue is for using resources from research teams queues that are not currently being used. Priority on the
standby queue is set by fair share queuing. This means that user priority is assigned based on a combination of the size
of the job and how much system resources the user have used during the given week, with higher priority assigned
to larger jobs and/or user jobs that have used fewer system resources in the week. Further, the standby queue has a 4
hour wall time.
8.2.6 Community Node Queues
Spruce Knob has several queues that start with the word ‘comm’. These queues are linked to the 51 compute nodes
bought using NSF funding sources, and as such is open for Statewide Academic use, hardware/resource information
can be found on the Spruce Knob Systems page These queues are separated by node type (i.e. large memory, gpu, smp)
and can be used by all users. Currently, these nodes are regulated by fair share queuing. This means that user priority
is assigned based on a combination of the size of the job and how much system resources the user have used during
the given week, with higher priority assigned to larger jobs and/or user jobs that have used less system resources in
the week. Further, all community queues have a 24 hour wall time, except for the week long medium memory queue
(comm_mmem_week). comm_mmem_week allows jobs up to a week (168 hours); however, this queue class also
limits the maximum number of nodes to 11, and a single user can not exceed 80 CPUs total within this queue. These
110 Chapter 8. Clusters Specifications

WVU-RC Documentation, Release 1.0
restrictions are set to prevent a single user occupying a large number of the community resources for an excessively
long time.
8.3 Thorny Flat Cluster
8.3.1 Hardware
8.3.2 Queues
8.3.3 Environment modules
8.4 Go First Data-Analytics Cluster
8.4.1 Hardware
8.4.2 Usage
8.3. Thorny Flat Cluster 111

WVU-RC Documentation, Release 1.0
112 Chapter 8. Clusters Specifications

CHAPTER
NINE
REFERENCES
9.1 Common Unix commands
The Research Computing HPC server’s use Red Hat Enterprise Linux (RHEL) as the operating system. Many clusters
around the world run exclusively Unix/Linux based operating systems. We strongly encourage users to actively get
familiar with Unix command line interface and GNU/Linux in particular. Outstanding and Free documentation is pro-
vided at [http://www.tldp.org The Linux Documentation Project], specifically their [http://www.tldp.org/guides.html
Guides] which cover basic topics including Using Linux and shell scripting to advanced File system and kernel mod-
ulization guides. Below is a succinct list of Unix commands that will help you get started in moving around and
manipulating files.
9.1.1 Moving around the file system
pwd List current directory
ls List contents of current directory
ls -l List contents of current directory with more information per file including permissions, last edited time, and
size of file
ls -lh Same as ls -lh except file size in included in ‘human readable’ form (gigabytes, megabytes, kilobytes)
ls -lt Same as ls -l, except list files in chronological order with newer files occurring at the top
cd dirname Changes current directory to dirname
cd .. Changes current directory up one hierarchy level
9.1.2 Examining Files
cat <filename> Concatenates filename and prints to standard output (screen)
less <filename> A filter that pages through filename one full screen at a time. Allows both forward and back-
ward movement through file
more <filename> Similar to less, except cannot move backwards through file
9.1.3 Manipulating Files and Directories
cp <filename1> <filename2> Copies filename1 to filename2. If filename2 is the name of a directory, copies
filename1 into the directory
cp -i <filename1> <filename2> Copies filename1 to filename2 and ask permission before overwriting
113

WVU-RC Documentation, Release 1.0
cp -r <directory1> <directory2> Copies directory1 and all of it’s contents to directory2
mv <filename1> <filename2> Renames ‘’filename1” to ‘’filename2’‘. If ‘’filename2” is a directory, moves
‘’filename1” into directory
mv -i <filename1> <filename2> Renames ‘’filename1” to ‘’filename2” and ask permission before over-
writing files
rm <filename> Removes file
rm -i <filename> Removes file and ask permission before doing so
rm -r <directory> Removes directory and it’s contents
rm -ir <directory> Removes directory and it’s contents asking permission for each file
mkdir <directory> Create a directory with ‘’directory” as a name
rmdir <directory> Remove an empty directory
9.2 Linux Commands
The Research Computing HPC server’s use Red Hat Enterprise Linux (RHEL) as the operating system. Many clusters
around the world run exclusively Unix/Linux based operating systems. We strongly encourage users to actively get
familiar with Unix command line interface and GNU/Linux in particular. Outstanding and Free documentation is
provided at The Linux Documentation Project, specifically their Guides which cover basic topics including Using
Linux and shell scripting to advanced File system and kernel modulization guides. Below is a succinct list of Unix
commands that will help you get started in moving around and manipulating files.
9.2.1 Moving around the file system
pwd List current directory
ls List contents of current directory
ls -l List contents of current directory with more information per file including permissions, last edited
time, and size of file
ls -lh Same as ls -lh except file size in included in ‘human readable’ form (gigabytes, megabytes,
kilobytes)
ls -lt Same as ls -l, except list files in chronological order with newer files occurring at the top
cd
*dirname*
Changes current directory to dirname
cd .. Changes current directory up one hiearchy level
9.2.2 Examining Files
cat
*filename*
Concatenates filename and prints to standard output (screen)
less
*filename*
A filter that pages through filename one screenful at a time. Allows both forward and backward
movement through file
more
*filename*
Similar to less, except cannot move backwards through file
114 Chapter 9. References

WVU-RC Documentation, Release 1.0
9.2.3 Manipulating Files and Directories
cp *filename1
filename2*
Copies filename1 to filename2. If filename2 is the name of a directory, copies
filename1 into the directory
cp -i *filename1
filename2*
Copies filename1 to filename2 and ask permission before overwriting
cp -r *directory1
directory2*
Copies ‘’directory1 and all of it’s contents to directory2
mv *filename1
filename2*
Renames filename1 to filename2. If filename2 is a directory, moves filename1 into
directory
mv -i *filename1
filename2*
Renames filename1 to filename2 and ask permission before overwriting files
rm *filename* Removes file
rm -i *filename* Removes file and ask permission before doing so
rm -r *directory* Removes directory and it’s contents
rm -ir *directory* Removes directory and it’s contents asking permission for each file
mkdir *directory* Create a directory with directory as a name
rmdir *directory* Remove an emptry directory
9.2. Linux Commands 115

WVU-RC Documentation, Release 1.0
116 Chapter 9. References

CHAPTER
TEN
INDICES AND TABLES
•genindex
•modindex
•search
117
