Mason Cash Terracotta Bread Forms Form
User Manual: mason-cash-terracotta-bread-form Fante's Kitchen Shop
Open the PDF directly: View PDF ![]() .
.
Page Count: 16
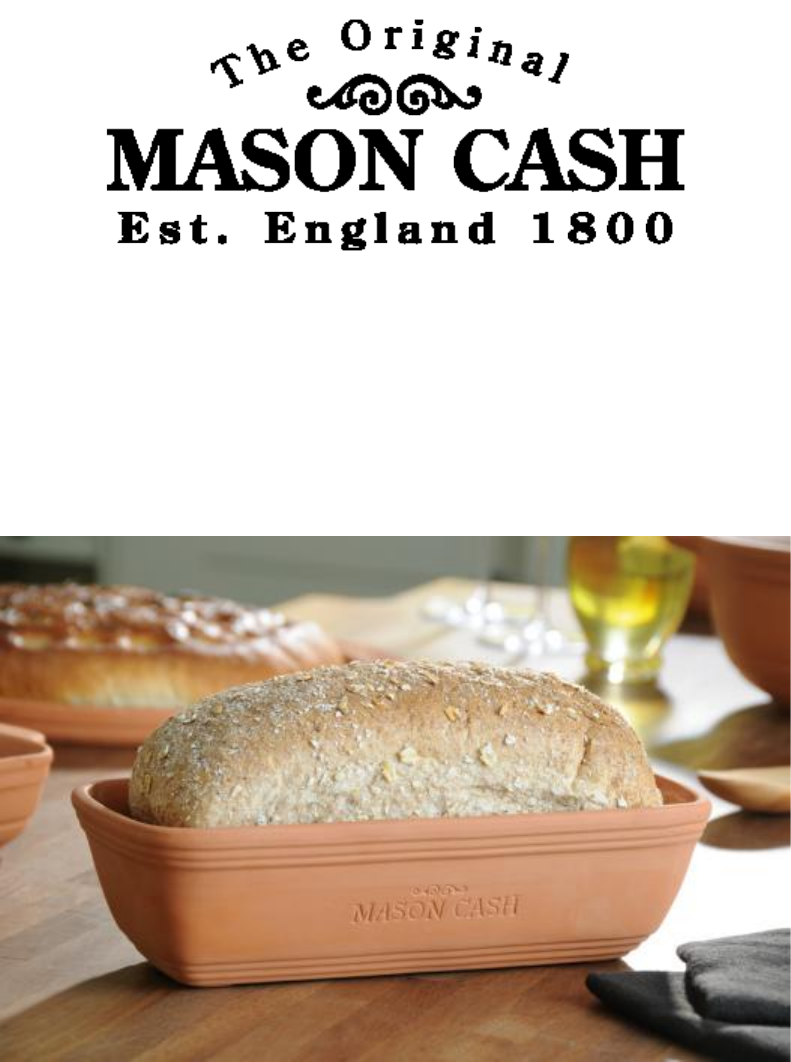
How to Season a Terracotta Bread Form
31/08/2012
This tutorial will show you how to season your Mason Cash Terracotta Bread Form.
Instructions
Before using your bread form for the first time, hand wash in warm soapy water.
To season – don’t worry, you only need to go through the seasoning process once.
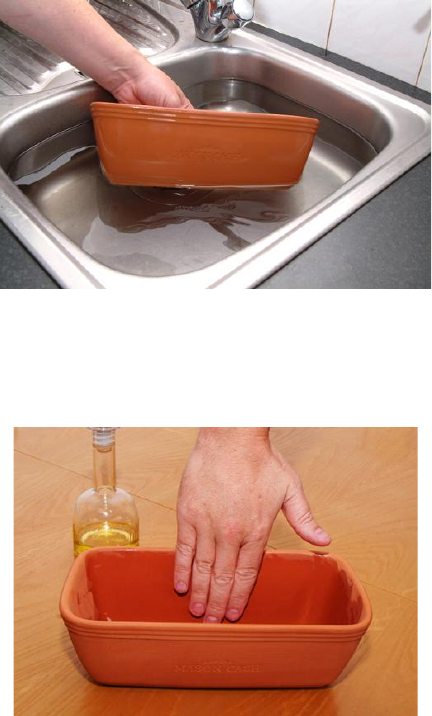
1. Immerse the bread form completely in clean, warm water and let it soak for up to half an hour.
2. Remove the bread form from the water, wipe and leave it to dry for up to 2 hours.
3. Rub the bread form with vegetable oil to coat the baking surface entirely.
4. Place it in a cold oven and increase the heat to 240°C to 250°C. Bake the bread form for
approximately 20 minutes until the oil is dry.
5. Remove from the oven and allow it to cool completely.
Repeat steps 2 to 5 again. Please note that unglazed terracotta will soak in fats and oils so will
stain when seasoned. This is a design feature that improves the performance of the stone every
time it is used. The more you use it, the more the non-stick performance of the bread form
improves.
• DO NOT use the bread form on hobs or under grills.
• DO NOT place the bread form directly onto work surfaces or tabletops.
• Allow to cool before washing in warm soapy water.
• DO NOT put in a dishwasher or in a microwave.

How to Season a Terracotta Baking Stone
20/08/2012
Instructions
Before using your Baking Stone for the first time,
hand wash in warm soapy water.
To season – don’t worry, you only need to go through
the seasoning process once.
1. Immerse the stone completely in clean, warm water
and let it soak for up to half an hour.
2. Remove the stone from the water, wipe and leave it
to dry for up to 2 hours.
3. Rub the
stone with
vegetable
oil to coat
the baking surface entirely.
4. Place it in a cold oven and increase the heat to
250°C, Bake the stone for approximately 20 minutes
until the oil is dry.
5. Remove from the oven and allow it to cool completely.
Repeat steps 3 to 5 again. Please note that unglazed terracotta will soak in fats and oils so will
stain when seasoned. This is a design feature that improves the performance of the stone every
time it is used. The more you use it, the more the non-stick performance of the stone improves.
• DO NOT use the stone on hobs or under grills.
• DO NOT place the stone directly onto work surfaces or tabletops.
• Allow to cool before washing in warm soapy water.
• DO NOT put in a dishwasher or in a microwave.
© The Rayware Group 2012
www.rayware-trade.co.uk
Baking Bread - Preparing your ingredients
25/09/2012
Instructions
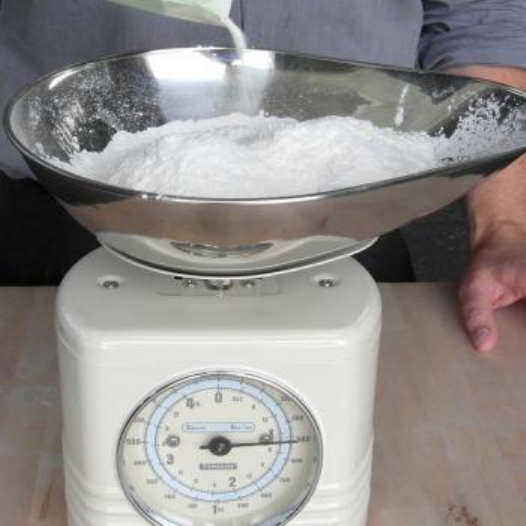
Flour
Decide how much flour you want to use.
A kilo is always a good, manageable
quantity as it is a comfortable size for
kneading and will provide two large
loaves, three smaller loaves or a bakers
dozen rolls or buns. You can always
freeze the loaves you don’t need
immediately, but if you really like
making bread you can use 500grams of
flour for one large family loaf.
Either way, take the weight of the flour
as being 100%. All other ingredients
will be a percentage of this.
Water
Different flours absorb different quantities of water, but for a strong white flour the rule of
thumb is to add 60% water. So for 1 kilo of flour, add 600ml water. If using a wholemeal flour,
use 65%, or use 80% for a ciabatta for instance. Always use warm water, but not boiling water.
Yeast
With different yeast options available at supermarkets or bakeries, this may get a little
confusing. As a rule of thumb, use 1.4% (14g per kilo of flour) fast acting yeast, 1% for dried
yeast and 2% for fresh yeast.
Salt
Salt measurements may not seem important, but if you add too little your loaf will taste quite
bland. Add too much and it will be too salty. Ideally you need to add 2% salt, no more and no
less.
Oils or Butters
You can add oils or butters to bread dough if you like, but it is not necessary. Adding oils or
butters gives a slightly softer crumb, allowing the bread to keep better. Again, the rule of thumb
is to add 2%.
Mixing Dough
25/09/2012
Instructions
Mixing the Dough
You can mix dough in 3 ways,
but the quickest is the one mix
method.
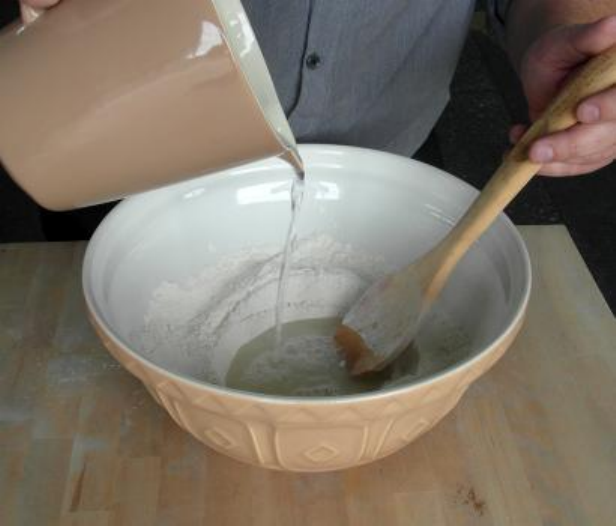
The One Mix Method
Simply add all the ingredients
to a mixing bowl and knead
immediately. Add the flour,
salt and yeast to the bowl first
and mix, then add the water
and oil. Mix with a wooden spoon or your hands, then use your hands to form a rough, soft
dough. If the dough is dry, add more water drop by drop.
The Two Stage Mix Method
This takes a little longer, but the results are worth the wait whilst kneading effort is reduced.
Mix the flour and water first to form a rough dough, cover and let it rest for half an hour or so.
This allows gluten to develop making the dough easier to develop which is useful if you have a
batch of loaves to make. Then add the salt and yeast (and oils if required), Knead them all
together then knead.
Sponge Mix Method
This method requires patience and time, but if you start the process before you go to bed, you
will have a wonderful dough to work with in the morning. Begin by creating the dough mix of
half the flour with all of the water and yeast and leave it for several hours which will allow the
yeast to strongly ferment giving a more flavoursome loaf. Once fermented for long enough
(once you have woken up), add the rest of the flour and the salt and mix it into a dough, adding
oil or butter if required.
Kneading
25/09/2012
Instructions
Always knead on a flat, smooth solid
surface with plenty of room – ideally
a wooden surface with little wood
grain. To start kneading, tip your
dough out of the mixing bowl onto
the work surface. It’s good to clean
your hands after this. Don’t worry if
your dough sticks to the work surface
or your hands – it’s supposed to in
order to stretch the glutens in the
dough. The quicker you knead, the
less it will stick.
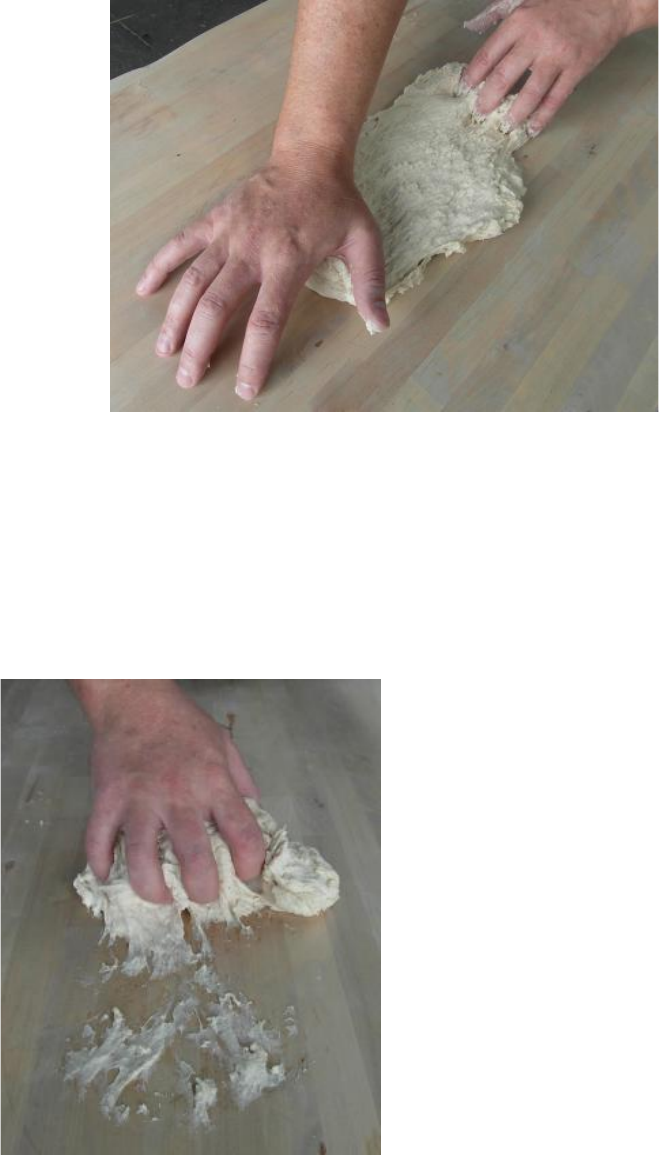
Firstly, press down on the dough with your fingertips about a quarter of the way up the
dough. Then in a smooth motion use the heel of your hand to press into the dough just above
your first hand, pushing down and away (until you run out of room or arm length).
Then cup your hand and scrape the dough back on top of itself and turn it 90 degrees
clockwise. Keep doing this over and over again.
You will notice long, thin strands of gluten forming in the dough as you stretch it.
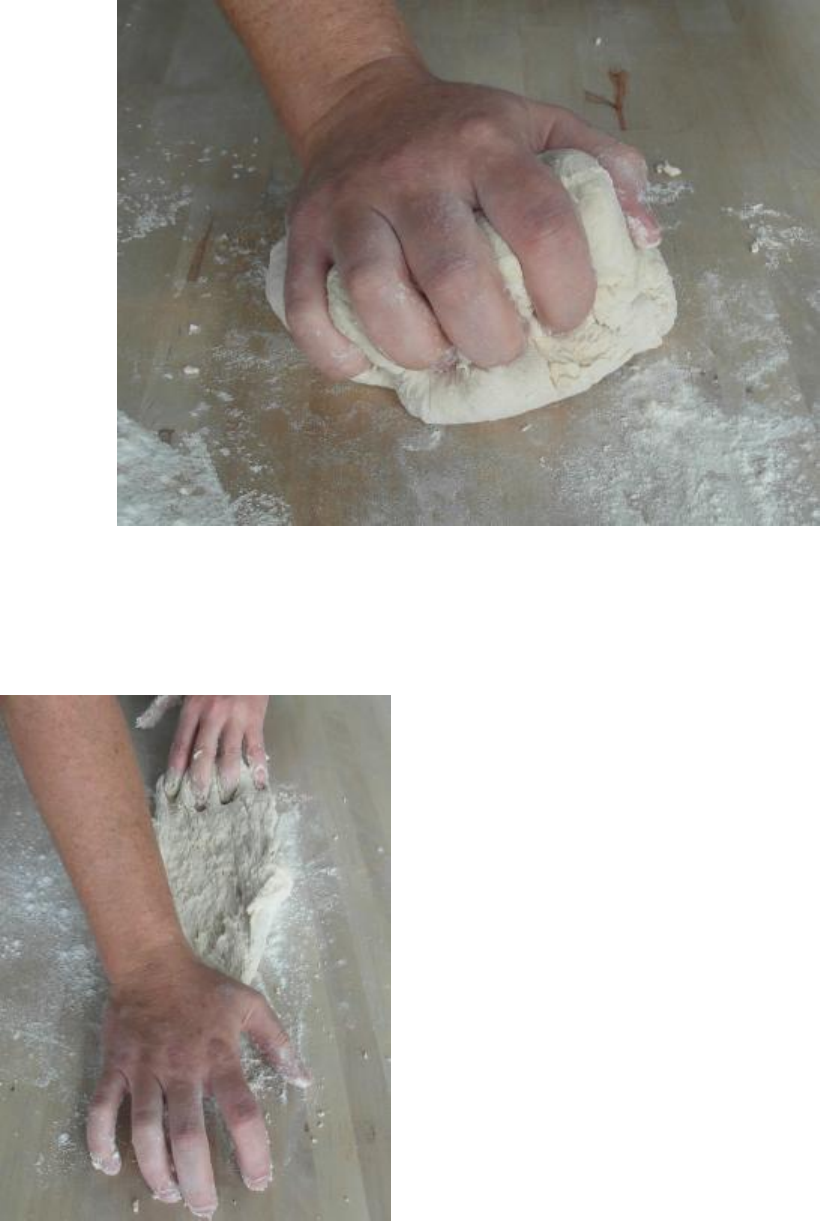
With each stretch, the dough becomes less sticky and after 5 to 10 minutes (depending on how
fast you knead or the type of flour used) it shouldn’t stick to anything and it becomes less flaky
and more solid. When this happens, use shorter stretches until you are only stretching it to double
its length.
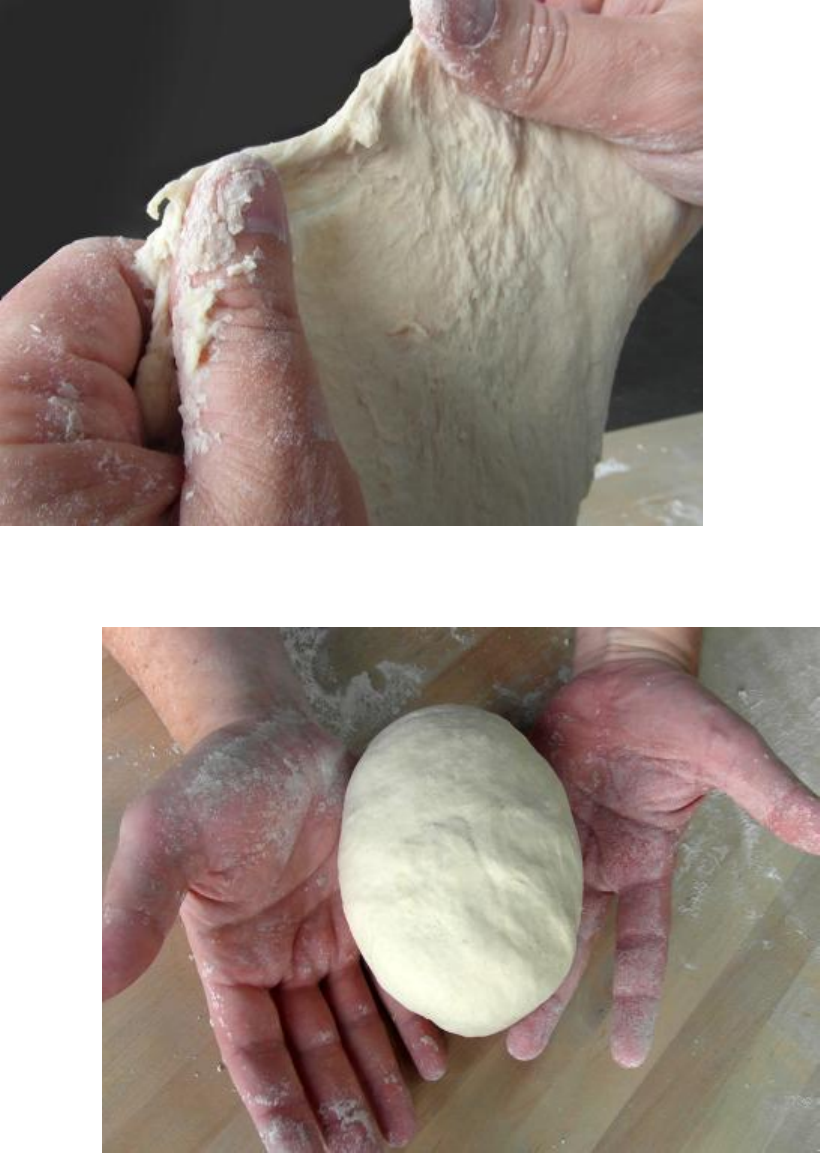
Every couple of minutes, try stretching the dough to
thinly to form a skin. It should get thinner and thinner
before breaking. When the dough “skin” can’t be
stretched any thinner, it is ready. The rule of thumb
with strong white flour dough is that you should
stretch it thin enough to let light through. If you have
over kneaded the dough – and you shouldn’t over-
knead in 10 minutes it will revert back to a soft and
sticky state. If it does this, it is no good.
Another Note – if you are making a fruit or nut bread,
knead the fruit or nuts in at the end of
kneading. Stretch the dough out on the work surface,
scatter over the ingredients, then fold, roll and knead
briefly, to disperse them.
Shaping a Round Loaf
25/09/2012
Instructions
When you are
satisfied with your
dough, you should
shape it into a round.
It will then rise
evenly, and you can
easily gauge its
progress. This also
encourages the yeast
to work for you during
rising. As it ferments,
the gas bubbles gently
stretch the strands of
gluten and this
stretching is most effective if the strands are taut to begin with, which they will be, if you do this.
Lay your dough, smoothest side facing down, on the work surface and prod a little with all your
fingers to flatten it.
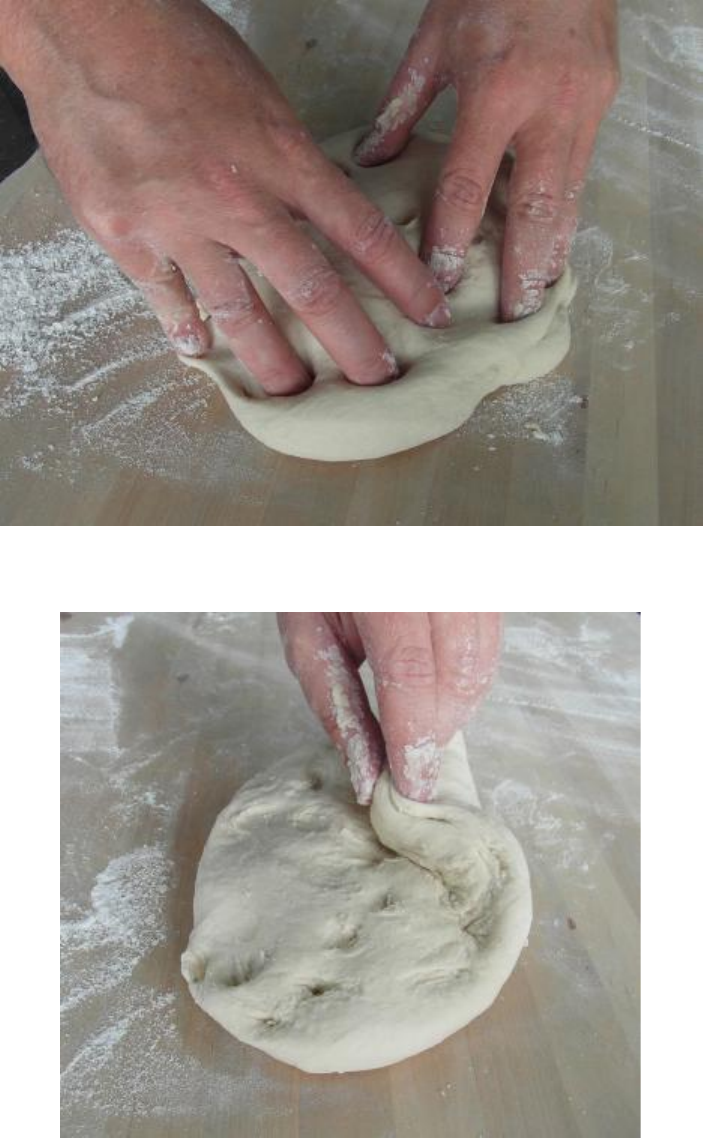
Now, with one or two fingers and a thumb, lift an edge, fold it into the middle and press down.
Make about an eighth turn of the dough, pick up the edge at the side of the fold you just made
and press into the middle. Repeat this step until you return to the edge of the dough where you
started.
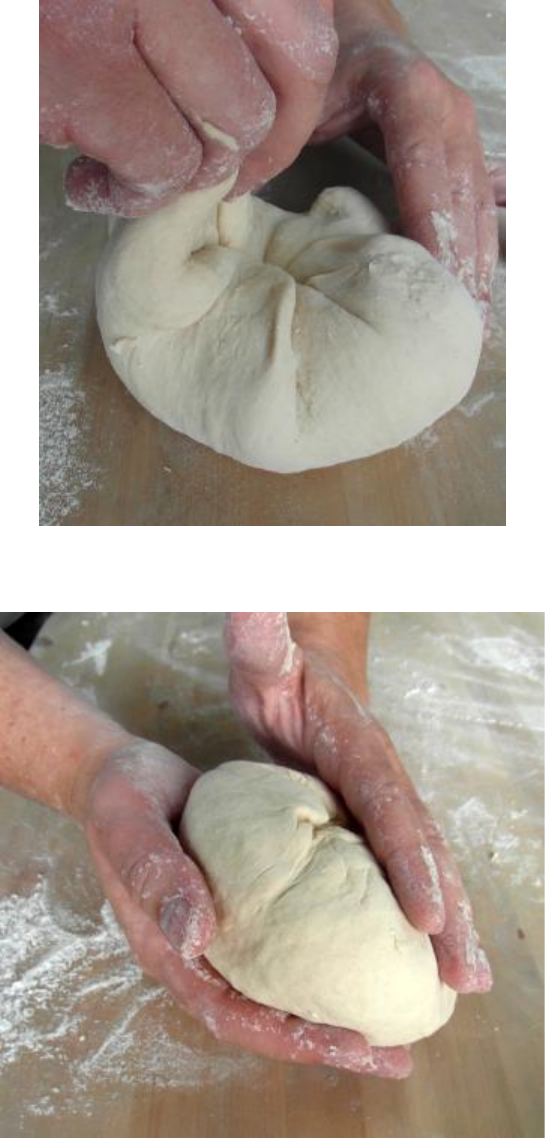
Now flip it over. You should have a nice, smooth, round dough.
Put your hands flat on the work surface, palms up, either side of the dough, one forward, and one
back. Now, in a fluid motion, bring your hands together under the dough, at the same time
sliding the forward hand back and the back hand forward. This both spins the dough and
stretches the upper surface down and under. Repeat this ‘spinning’ action two or three times.
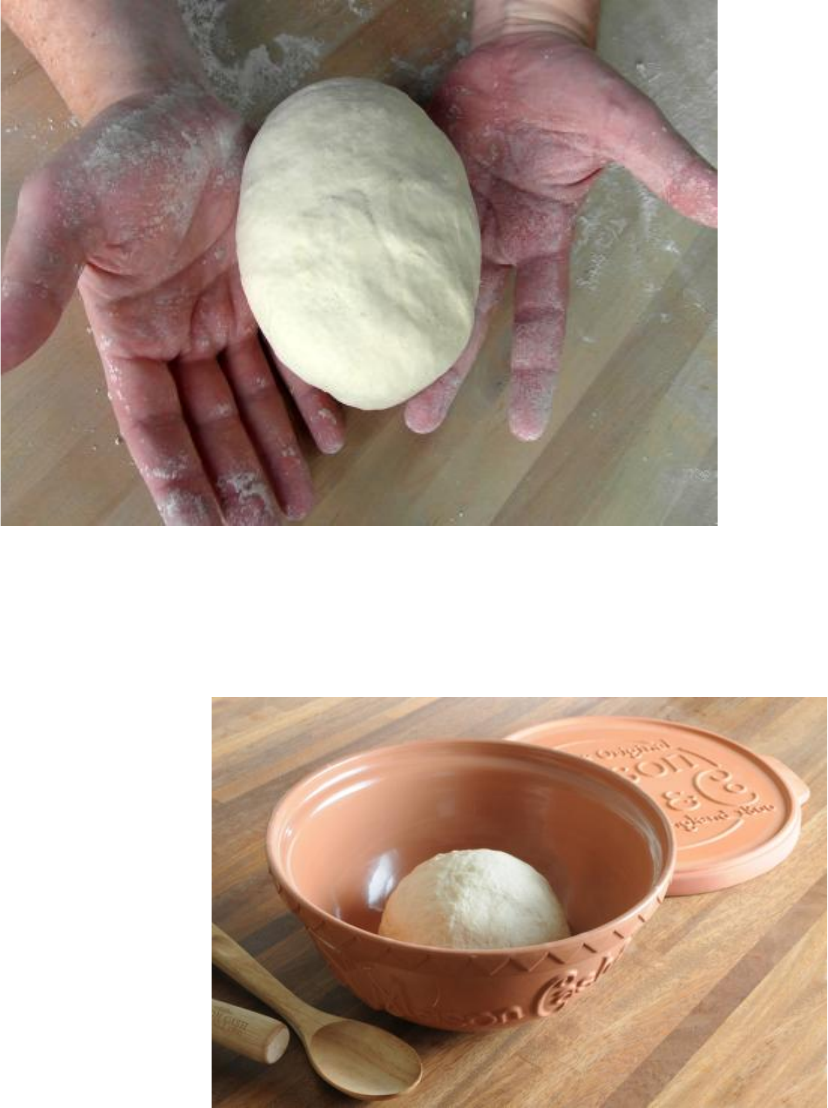
With practice, you can start to cup yours hands around the dough; the point of the flat hands is to
discipline yourself t use the inside edges of your palms and little fingers to do the stretching
work.
Proving
25/09/2012
Instructions
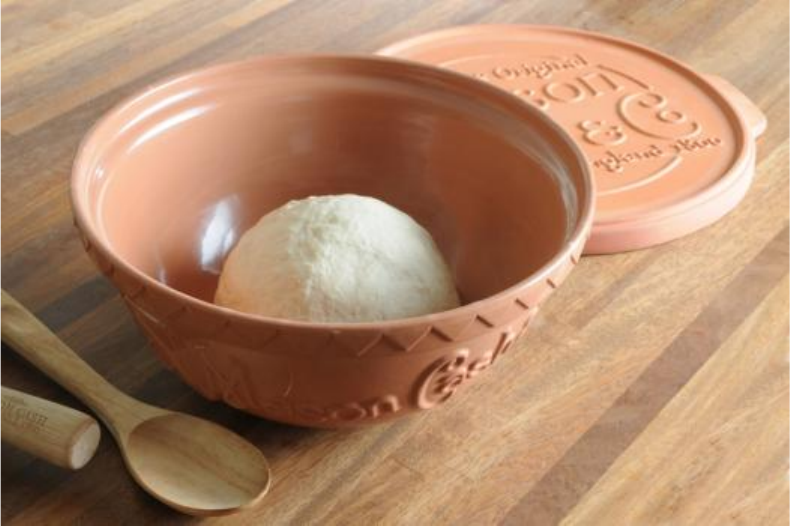
First you need to find a
container in which your dough
can comfortably double in size
without billowing over the top.
This may well be the mixing
bowl you started off with, but
give it a quick wipe first and
dry with a tea towel. We find
the best equipment for dough
rising is the Mason Cash bread
baking set, which encorporates
a mixing bowl and a proving lid.
Now, you can either flour the dough all over, or oil it. If you added oil to the dough, it makes
sense to use the same type of oil, but any oil will be fine. Oiling is slightly better than flouring,
as it makes an airtight coating, which prevents the dough from drying out. It also enables you to
oil the container, which makes it easier to turn the dough out later. (Don’t oil the container if you
have floured the dough, though; you will just make oily flour lumps.)
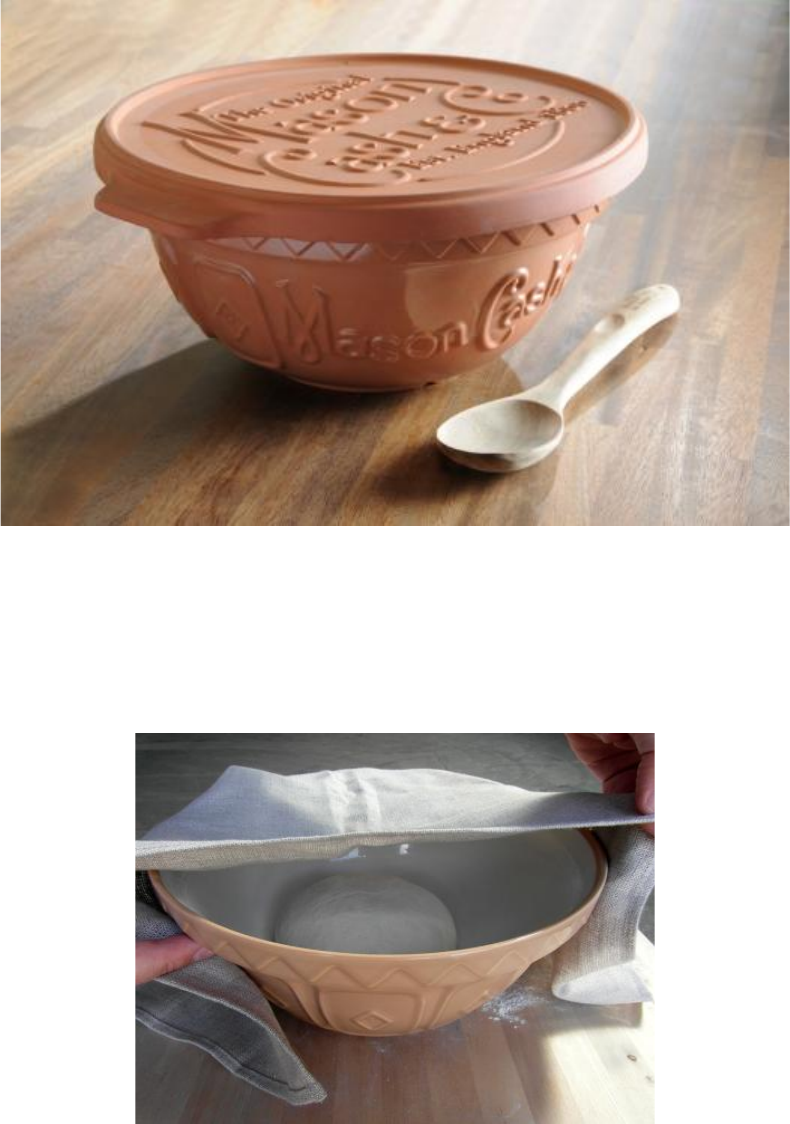
Either way put the dough into the container and cover it. I find the simplest way is to put the
container in a bin liner and tuck the opening underneath. This makes a lovely environment for
your dough – a little humidity from the fermentation process and a little extra warmth from the
bag (black absorbs and radiates heat) Covering the bowl with cling film would be nearly as good,
though a little more wasteful, as you cant reuse it.
Now you need to leave your dough to rise in a warmish place. A pleasantly heated kitchen is
ideal, but a slightly cold room is still fine – the dough will just take longer to rise. An airing
cupboard, with the boiler going, is likely to be too warm. On top of the Aga is too warm. For a
really slow overnight rise, you could put the covered dough in the fridge, but you will rarely
want to (unless you are making brioche)
During this period of rising, we want the gluten to be stretched by the activity of the yeast to the limit of
its elasticity, at which point the dough will have roughly doubled in size. Beyond this, the dough
noticeably loses it structure and elasticity; it will start to look flaccid and a bit holey. This is not a
disaster, but the dough will be a little weaker for it.
Once the dough has risen sufficiently, uncover and tip it out on to your slightly floured work
surface. Gently press into the dough with your fingertips and squash it all over until it is roughly
the size you started with. A common term for this is ‘knocking back’ which suggests punching
and battering – a level of domestic violence not conductive to a happy relationship with your
bread. You have spent a long time loving it, don’t ruin it all now.
You can now leave your dough to rise a second time, following the same spinning and shaping process as
before, in order to further mature and improve it. You can even repeat the rising and deflating process
three, four maybe five times, Each time you’ll notice the dough becoming more satiny and pillowy. You
cannot do this indefinitely though. Eventually there will be no sugars left for the yeast to feed on, and you
need it to have enough oomph for the final prove before baking.
Shaping, Slashing & Baking
Shape the Loaves
You can make any shape of loaf you like, but I tend to just stick to four shapes; a round, a
tapered baton, a baguette type stick and a sort of stubby cylinder. I rarely bake bread in a loaf tin,
because I much prefer the appearance of a naturally formed loaf; also I don’t much like the
texture of the pale lower crust of a tin loaf.
A Baguette Type Stick
I usually make four of these long, thin loaves from a kilo batch, so they weigh about 400g each.
With the dough smooth side down on your work surface, prod it flat, and then roll it up towards
you fairly tightly. Now working with both hands flat, roll and stretch the dough like a plasticine
snake, as thin and long as you like, remembering, of course, that it still has to fit in your oven.
You can leave the ends rounded.
A Tin Loaf
With your dough smooth side down, prod it fairly flat with your fingertips until it is as wide as
your tin is long. Now roll up the dough towards you as tightly as you can, then press along the
seam with your fingers and lay seam side down. Smooth and stretch the ends down and tuck ten
underneath. Lift up the dough and drop it into the loaf tin.
Rolls
Weigh or slice off pieces of dough between 100g and 150g, according to how large you want
your rolls to be, but do try to keep them roughly the same size. Choose any shape you like. To
shape rounds, simply follow the technique for shaping a batch of dough; for tapered batons,
shape as for a large loaf.
Leave to Prove
Proving is the final rising of your shaped loaf before baking (the fact that your dough rises a final
time ‘proves’ that it is still active) If you are not baking in a loaf tin, you will need to sit it in a
basket, or on a cloth or board, Whichever you use, dust it generously with flour. Loaves in
proving baskets should always be smooth side down. With linen cloths or wooden boards, I
suggest proving loaves the right way up, as they will keep heir shape better this way. If you are
using cloths, you can ruck them up a little to give some support to the sides of the loaves. This is
particularly effective with baguettes. Always cover your dough with plastic bags.
Giving precise times for proving is not helpful but, again, you want the dough to roughly double
in size; this could take as little as 20 minutes, or as long as 2 hours, depending in the vigour with
which the dough is fermenting.
Keep an eye on the dough as it proves. When it’s looking significantly bigger, give it a gently
squeeze at the sides. Do this every so often and you will feel it getting lighter and airier. If, after
such a gently squeeze, the dough springs airily back to its original shape, and if it has almost (but
not quite) doubled in size, it is about right. It is hard to describe the perfect moment in words.
The best I can say is that a really well shaped, tightly moulded, perfectly risen loaf has a certain
look and feel about it, as if it is just bursting to be baked.
If the bread is over proved, the gluten will lose its structure, the dough will start to look a little
saggy, and the finished crumb will end up coarse, and too ‘holey’ Under proved bread will be a
little dense and heavy, and also prone to the dreaded ‘flying crust’ syndrome, whereby the top
crust deceitfully balloons away from the rest of the dough in the oven.
You should err on the side of under rather than over proving, though; it will rise some more in
the oven.
Slash the Tops
Making cuts in a loaf helps it to expand in the oven. Proved bread already has a slightly dry crust
from contact with the air, which inhibits rising, and slashing through this crust exposes the soft,
stretchy dough inside. I nearly always slash my bread, but there are a couple of exceptions. I
usually leave round rolls just as they are – they stay rounder that way. And low gluten breads,
such as rye, rise very little in the oven, so the slashes are, in effect redundant – they would open
only a little, which looks ugly. Low gluten breads have a beauty all their own. During proving,
because of the low surface tension, the dough crackles all over as it expands, like a shattered
windscreen.
Many bakers use an old fashioned razor blade for slashing. I prefer a sharp, long bladed, serrated
knife – a bread knife, in fact. Don’t just pile in. Imagine a line on the dough ten cut along it,
using your spare hand just to hold the loaf in place. Use long strokes and be controlled, but
confident. It is crucial that you don’t press down when you cut – you will squash the dough, and
press out precious gas. Work swiftly, but don’t rush – you will end up snagging and stretching
the dough. Slash up to 1cm (half an inch) deep, using two or three strokes on each cut if you
need to. Make your slashes evenly deep and evenly spaced.
Your slashes should be simple. Beautiful though they can be, they are not made purely for
decoration – they have a job to do, which is to help the bread expand. And they will do their job
that much better if you let the gluten help, too. Let me explain how.
When you shape the loaves tightly, you put tension on the gluten; now you can use this tension
to pull the slashes open. Round loaves have equal tension all around, pulling outwards and
downwards, so a cut in any direction will open well. All the longer shaped loaves have lateral
tension. They have been rolled up, like a carpet, or a coiled spring. The more you cut across
(perpendicular to) this tense gluten, the more the cuts will open, So a lengthways cut opens most,
crossways cuts open least. Experiment with the different options and decide which you like the
look of best. Scoring the loaf on the diagonal is a good compromise.
Slashing is a very good test of the quality of your dough. If it is well kneaded and perfectly risen,
the cuts will open out, even as you make them.
Bake the Bread
Once you’ve slashed your loaf, spray it all over with water, if you want to. Now either put the
baking tray in the oven or slip the dough from the peel on to the baking stone. To do this, lay the
front edge of the peel in position, resting on the stone, and then pull it away, like a tablecloth
party trick.
As soon as all the loaves are in, pour a good slosh of boiling water from the kettle into the
roasting tray (keep your face back) and shut the door. Do all this as fast as you possibly can, to
keep the precious heat in.
Now, for a few minutes at least, you must leave the door shut, to keep the heat in; this is the time
for ‘oven spring’ the final rise before the crust hardens. After 10 minutes, have a look. Shuffle
the bread about of its colouring unevenly and lower the temperature to
200oc / Gas Mark 6 – if the crust is still very pale
180oc / Gas Mark 4 – if the crust is noticeably browning
170oc / Gas Mark 3 – if the crust seems to be browning quickly
These temperatures apply to fan assisted ovens. If you are using a conventional non fan assisted
gas or electric oven, you will need to have your oven approximately 15oc / 1 Gas Mark hotter.
Continue baking, adjusting the temperature as you see fit. The total baking time will depend on
your particular oven and the size of your loaves. If during baking the crust appears to be fully
browned, cover it loosely with foil to prevent over browning. Use the following timings as a
guide, but rely on your own judgement. These represent total baking time in the oven;
12 rolls – 10 -20 minutes
3 small loaves – 30 – 40 minutes
2 large loaves – 40 – 50 minutes
When your bread is fully baked, it will feel lighter than when it went in. This is because it will
have lost about 20 percent of its weight through evaporation. The crust should feel firm (though
less so on rolls) and it should sound hollow when tapped on the base. This is no definite test
though; a loaf will also sound hollow when it could really do with another 10 minutes baking.
So, if in doubt, bake for a bit longer. If your bread is a little over baked, all it will have is a
slightly over thick crust, and there is nothing wrong with that.
Leave to cool
If you have a cooling rack, put your bread in it. If not, a propped up oven shelf would do fine.
Now leave it alone to cool. Your bread is full of steam, and is in fact still cooking. You must let
it finish, in its own time. If you cut hot bread, it will be steamy, heavy and doughy. Hot rolls are
about the only exception to the leave it alone rule, but only if you pull them apart. Don’t squash
or cut them.
