NanDECK Manual
User Manual:
Open the PDF directly: View PDF ![]() .
.
Page Count: 179 [warning: Documents this large are best viewed by clicking the View PDF Link!]
nanDECK Manual
by Andrea “Nand” Nini
Program version 1.24.1 – 2018-10-05
2
Index
An overview ....................................................................................................................................................................... 6
Editor commands ................................................................................................................................................................ 9
Getting started… ............................................................................................................................................................... 11
Ranges .............................................................................................................................................................................. 15
Colors ............................................................................................................................................................................... 16
Labels and sequences ........................................................................................................................................................ 19
Label functions ................................................................................................................................................................. 25
AUTOLABEL .............................................................................................................................................................. 25
AUTORANGE ............................................................................................................................................................. 25
CASESTRING .............................................................................................................................................................. 25
CONCAT ...................................................................................................................................................................... 26
CONCAT1 .................................................................................................................................................................... 26
COOFRAME ................................................................................................................................................................ 26
COOFRAMES .............................................................................................................................................................. 26
DIRFILES ..................................................................................................................................................................... 26
ENVIRONMENT ......................................................................................................................................................... 27
EVAL............................................................................................................................................................................ 27
EXPAND ...................................................................................................................................................................... 27
FILTER ......................................................................................................................................................................... 27
GRADIENTSEQ .......................................................................................................................................................... 29
GROUP ......................................................................................................................................................................... 29
JOIN ............................................................................................................................................................................. 30
JOINIF .......................................................................................................................................................................... 30
LABELRANGE ............................................................................................................................................................ 30
LABELSTRING ........................................................................................................................................................... 31
LABELSUB .................................................................................................................................................................. 31
LENGTH ...................................................................................................................................................................... 32
PRODUCT .................................................................................................................................................................... 32
RANGEADD ................................................................................................................................................................ 32
RANGECOUNT ........................................................................................................................................................... 33
RANGEMUL ................................................................................................................................................................ 33
RANGEREM ................................................................................................................................................................ 33
RANGESUB ................................................................................................................................................................. 33
REPLACE .................................................................................................................................................................... 34
ROUND ........................................................................................................................................................................ 34
SAVELABEL ............................................................................................................................................................... 34
STRINGLABEL ........................................................................................................................................................... 34
TOKENIZE .................................................................................................................................................................. 34
TOKENIZESEQ ........................................................................................................................................................... 35
TRANSLATE ............................................................................................................................................................... 35
Frames .............................................................................................................................................................................. 36
Frame functions ................................................................................................................................................................ 40
FRAMEBAR ................................................................................................................................................................ 40
FRAMEBEZIER........................................................................................................................................................... 40
FRAMEBOX ................................................................................................................................................................ 40
FRAMECLOCK ........................................................................................................................................................... 41
FRAMECOUNT ........................................................................................................................................................... 42
FRAMEDISK ............................................................................................................................................................... 42
FRAMEHEX ................................................................................................................................................................ 42
FRAMELINE ............................................................................................................................................................... 43
FRAMELIST ................................................................................................................................................................ 43
FRAMEMELD ............................................................................................................................................................. 44
FRAMEMOSAIC ......................................................................................................................................................... 44
FRAMENET ................................................................................................................................................................. 45
FRAMEPATH .............................................................................................................................................................. 45
FRAMEPER ................................................................................................................................................................. 46
FRAMERECT .............................................................................................................................................................. 46
FRAMESUB ................................................................................................................................................................. 46
FRAMETRANS ........................................................................................................................................................... 46
FRAMETRI .................................................................................................................................................................. 47
3
Expressions ....................................................................................................................................................................... 48
Comments ......................................................................................................................................................................... 49
Script lists ......................................................................................................................................................................... 50
Create PDF ....................................................................................................................................................................... 51
Save images ...................................................................................................................................................................... 52
Convert a PDF to images .................................................................................................................................................. 52
Command-line parameters ................................................................................................................................................ 53
Keyword wizards .............................................................................................................................................................. 54
Linked data editor ............................................................................................................................................................. 56
Virtual table ...................................................................................................................................................................... 57
Visual editor ..................................................................................................................................................................... 59
Configuration .................................................................................................................................................................... 61
Compare decks ................................................................................................................................................................. 64
Shortcuts ........................................................................................................................................................................... 65
References ........................................................................................................................................................................ 65
F.A.Q. ............................................................................................................................................................................... 65
Directives .......................................................................................................................................................................... 67
BASERANGE .............................................................................................................................................................. 67
BATCH ......................................................................................................................................................................... 67
BEZIER ........................................................................................................................................................................ 68
BEZIERS ...................................................................................................................................................................... 69
BLEED ......................................................................................................................................................................... 70
BORDER ...................................................................................................................................................................... 70
BRUSH ......................................................................................................................................................................... 71
BUTTON ...................................................................................................................................................................... 73
CANVAS ...................................................................................................................................................................... 74
CANVASSIZE ............................................................................................................................................................. 75
CANVASWORK .......................................................................................................................................................... 75
CARDS ......................................................................................................................................................................... 75
CARDSIZE ................................................................................................................................................................... 75
CASE ............................................................................................................................................................................ 76
CASEELSE .................................................................................................................................................................. 76
CHROMAKEY............................................................................................................................................................. 76
COLOR ......................................................................................................................................................................... 77
COLORCHANGE ........................................................................................................................................................ 78
COLORS ...................................................................................................................................................................... 78
COMMENT .................................................................................................................................................................. 79
COMPARE ................................................................................................................................................................... 79
COPY............................................................................................................................................................................ 80
COPYCARD ................................................................................................................................................................ 81
CORRECTION ............................................................................................................................................................. 81
COUNTER ................................................................................................................................................................... 82
DECK ........................................................................................................................................................................... 82
DICE ............................................................................................................................................................................. 83
DISPLAY ..................................................................................................................................................................... 83
DOWNLOAD ............................................................................................................................................................... 84
DPI ................................................................................................................................................................................ 84
DRAW .......................................................................................................................................................................... 84
DUPLEX ...................................................................................................................................................................... 85
EDGE............................................................................................................................................................................ 85
ELLIPSE ....................................................................................................................................................................... 87
ELSE ............................................................................................................................................................................. 88
ELSEIF ......................................................................................................................................................................... 88
END .............................................................................................................................................................................. 88
ENDFRAME ................................................................................................................................................................ 88
ENDIF .......................................................................................................................................................................... 88
ENDLAYER ................................................................................................................................................................. 89
ENDLINK .................................................................................................................................................................... 89
ENDSECTION ............................................................................................................................................................. 89
ENDSELECT ............................................................................................................................................................... 90
ENDSEQUENCE ......................................................................................................................................................... 90
ENDVISUAL ............................................................................................................................................................... 90
4
FILL .............................................................................................................................................................................. 91
FOLDER ....................................................................................................................................................................... 91
FONT ............................................................................................................................................................................ 92
FONTALIAS ................................................................................................................................................................ 93
FONTCHANGE ........................................................................................................................................................... 94
FONTRANGE .............................................................................................................................................................. 94
FOOTER ....................................................................................................................................................................... 95
FOR .............................................................................................................................................................................. 96
FRAME ........................................................................................................................................................................ 97
GAP .............................................................................................................................................................................. 97
GRID ............................................................................................................................................................................ 98
HEADER ...................................................................................................................................................................... 99
HEXGRID .................................................................................................................................................................. 100
HTMLFILE ................................................................................................................................................................ 101
HTMLFONT .............................................................................................................................................................. 102
HTMLIMAGE ............................................................................................................................................................ 103
HTMLKEY ................................................................................................................................................................. 103
HTMLMARGINS ....................................................................................................................................................... 104
HTMLTEXT ............................................................................................................................................................... 105
ICON .......................................................................................................................................................................... 106
ICONS ........................................................................................................................................................................ 107
IF ................................................................................................................................................................................. 108
IMAGE ....................................................................................................................................................................... 110
IMAGEFILTER .......................................................................................................................................................... 113
IMAGESIZE ............................................................................................................................................................... 113
INCLUDE ................................................................................................................................................................... 113
INPUTCHOICE .......................................................................................................................................................... 115
INPUTLIST ................................................................................................................................................................ 116
INPUTNUMBER ....................................................................................................................................................... 117
INPUTTEXT .............................................................................................................................................................. 118
LAYER ....................................................................................................................................................................... 119
LAYERDRAW ........................................................................................................................................................... 119
LIMIT ......................................................................................................................................................................... 120
LINE ........................................................................................................................................................................... 121
LINERECT ................................................................................................................................................................. 122
LINK ........................................................................................................................................................................... 123
LINKCOLOR ............................................................................................................................................................. 124
LINKENCCSV ........................................................................................................................................................... 124
LINKENCODE........................................................................................................................................................... 124
LINKFILTER ............................................................................................................................................................. 125
LINKMULDIS ........................................................................................................................................................... 125
LINKMULTI .............................................................................................................................................................. 126
LINKNEW .................................................................................................................................................................. 127
LINKRANDOM ......................................................................................................................................................... 127
LINKSEP .................................................................................................................................................................... 127
LINKSTYLES ............................................................................................................................................................ 128
LINKTRIM ................................................................................................................................................................. 128
LINKUNI .................................................................................................................................................................... 128
LOG ............................................................................................................................................................................ 128
MACRO...................................................................................................................................................................... 130
MARGINS .................................................................................................................................................................. 131
MOSAIC ..................................................................................................................................................................... 131
NANDECK ................................................................................................................................................................. 132
NEXT.......................................................................................................................................................................... 132
ORIGIN ...................................................................................................................................................................... 132
OVERSAMPLE .......................................................................................................................................................... 133
PAGE .......................................................................................................................................................................... 133
PAGEFONT ............................................................................................................................................................... 134
PAGEIMAGE ............................................................................................................................................................. 134
PATTERN .................................................................................................................................................................. 136
PIE .............................................................................................................................................................................. 137
POLYGON ................................................................................................................................................................. 138
5
PRINT ......................................................................................................................................................................... 139
QRCODE .................................................................................................................................................................... 139
RECTANGLE............................................................................................................................................................. 140
RENDER .................................................................................................................................................................... 141
RHOMBUS ................................................................................................................................................................ 142
ROUNDRECT ............................................................................................................................................................ 143
RTFFILE .................................................................................................................................................................... 144
RTFTEXT ................................................................................................................................................................... 145
SAVE .......................................................................................................................................................................... 146
SAVEGIFA ................................................................................................................................................................ 147
SAVEPAGES ............................................................................................................................................................. 147
SAVEPDF .................................................................................................................................................................. 147
SECTION ................................................................................................................................................................... 148
SELECT...................................................................................................................................................................... 148
SEQUENCE ............................................................................................................................................................... 149
SET ............................................................................................................................................................................. 150
SPECIAL .................................................................................................................................................................... 150
STAR .......................................................................................................................................................................... 151
STORE........................................................................................................................................................................ 152
TABLE ....................................................................................................................................................................... 152
TAG ............................................................................................................................................................................ 152
TEXT .......................................................................................................................................................................... 154
TEXTFONT ................................................................................................................................................................ 156
TEXTLIMIT ............................................................................................................................................................... 156
THREADS .................................................................................................................................................................. 157
TOKEN ....................................................................................................................................................................... 157
TRACK ....................................................................................................................................................................... 158
TRACKRECT............................................................................................................................................................. 159
TRIANGLE ................................................................................................................................................................ 160
UNIT ........................................................................................................................................................................... 161
VECTOR .................................................................................................................................................................... 161
VISUAL...................................................................................................................................................................... 162
ZOOM ........................................................................................................................................................................ 162
Code examples ................................................................................................................................................................ 163
Wargame counters ...................................................................................................................................................... 163
Dice results ................................................................................................................................................................. 164
Score track .................................................................................................................................................................. 165
Boggle dice ................................................................................................................................................................. 166
Catan map ................................................................................................................................................................... 167
Clock ........................................................................................................................................................................... 168
Hex board ................................................................................................................................................................... 169
Triangle map ............................................................................................................................................................... 170
Chess board ................................................................................................................................................................. 171
Trivia cards ................................................................................................................................................................. 172
Hex racetrack .............................................................................................................................................................. 173
Tuckbox ...................................................................................................................................................................... 174
Number wheel ............................................................................................................................................................. 175
Tripples tiles ............................................................................................................................................................... 176
Path tiles ..................................................................................................................................................................... 177
Combinations .............................................................................................................................................................. 178
Standard 52-deck of cards ........................................................................................................................................... 179
6
An overview
nanDECK is a program capable of creating graphic elements from scripts: every line of a script contains a command,
for rendering texts, rectangles and other graphic elements. The program was made for creating cards, but it can be used
for many other graphic objects; each card is treated like a different page, in which you can draw different graphical
elements. At the start, you can write the script in the large edit box in the center of the window:
You can load a script with the “Open deck” button, save it with “Save” and “as” buttons, and create the deck with the
buttons “Validate deck” and “Build deck”.
Tip: You can do both if you right-click the “Validate deck” button.
All commands start with a keyword, an equal sign (=) and a list of parameters; for many commands, the 1st parameter is
a range of “cards” in which the command will be executed. The commands without a range will be evaluated only once
(for example the BORDER directive to draw a border on all cards, or the CARDS directive for setting the number of the
cards in the deck), or for every card (like the FONT directive); in other words, the program creates the 1st card in the
deck, and executes all the script on it, then it switches on the 2nd card, and executes all the script and so on; each ranged
directive is executed only if the range match.
Note: the CARDS directive is no longer needed, now the program creates automatically a deck using the information
from all the directives in the script. For example, if you have a 10-30 range, the deck will be created with 30 cards.
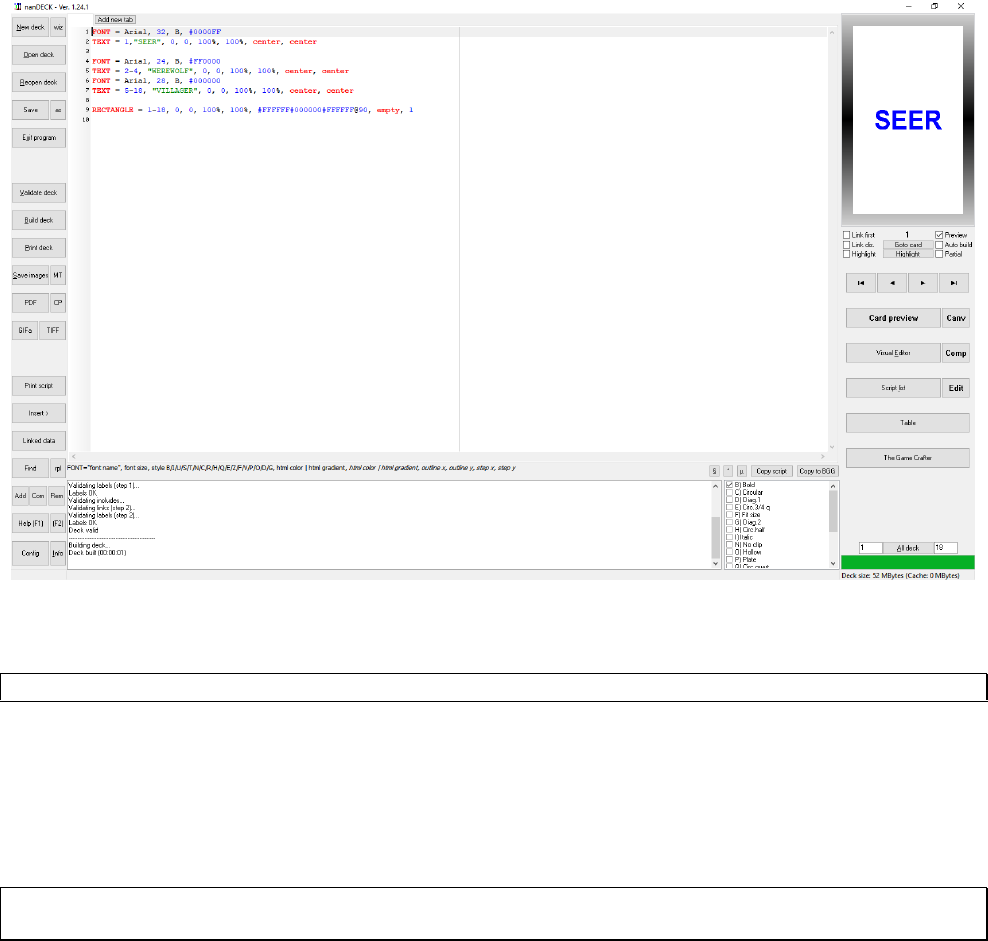
For example, in a game of Werewolf, I need a card with a word “SEER”, three “WEREWOLF” and thirteen
“VILLAGER”. The first card will be:
FONT = Arial, 32, B, #0000FF
TEXT = 1,"SEER", 0, 0, 100%, 100%, center, center
With the 1st line, I choose a font: Arial 32, bold, and blue (the #0000FF parameter); with the 2nd line I draw the word
“SEER” in the center of the whole card #1 (starting from 0,0 – top left of the card, 100% width and 100% height). The
other cards will be drawn with these lines:
FONT = Arial, 24, B, #FF0000
TEXT = 2-4, "WEREWOLF", 0, 0, 100%, 100%, center, center
7
FONT = Arial, 28, B, #000000
TEXT = 5-18, "VILLAGER", 0, 0, 100%, 100%, center, center
Note the range 2-4 and 5-18, for three and thirteen cards. Other elements can be added, for example a rectangle:
RECTANGLE = 1-18, 0, 0, 100%, 100%, #FFFFFF#000000#FFFFFF@90, empty, 1
The rectangle is on all the cards (range 1-18), from 0,0 – top left, 100% width and 100% height, with a gradient starting
from white (#FFFFFF), to black (#000000), again to white, rotated 90°; not filled (empty parameter) and with a border
thickness of 1”.
The flexibility of the program is that an element can be added on one or more than one card, changing only the range
parameter. If you want to add an image on all the cards, you can add a line like this:
IMAGE = 1-18, "Logo.png", 0, 0, 20%, 20%, 0, TP
In the left bar in the main window you can use these command buttons:
New deck: creates a new script.
wiz: creates a new script selecting some options.
Open deck: open a saved script.
Reopen deck: open a saved script, picking one from a list of the last accessed.
Save: save the current script.
as: save the current script with another name.
Exit program: close the program.
Validate deck: the program check the syntax of the script.
Build deck: the program builds the deck of cards.
Print deck: the program print the deck of cards.
Save images: the program saves the images of each card of the deck, see page 52.
MT: the program can launch several instances of itself, each with a range of the deck.
PDF: the program creates a PDF file with all the cards’ images, see page 51.
CP: the program creates one image from each page of a PDF, see page 52.
GIFa: with this option, you can save the current deck into an animated GIF image (you can choose the delay between
images and select an optimized palette).
TIFF: with this option, you can save a multi-page TIFF image (with RGB or CMYK color space).
Print script: print the current script.
Insert >: this button open a menu, where you can insert a color, a font, an image, a symbol, a gradient, an include file, a
linked file, a label, a frame or a folder.
Linked data: you can edit the data from a linked csv file, see page 56.
Find: find a string in the script editor.
rpl: find and replace a string in the script editor.

8
Add (CTRL+R): the program adds a comment in the current line / selected block of the script.
Com (CTRL+E): the program toggles a comment in the current line / selected block of the script.
Rem (CTRL+U): the program removes a comment in the current line / selected block of the script.
Help (F1): the program shows a help page for the current directive.
(F2): the program shows a window for modifying the current directive.
Config: the configuration options, see page 61.
Info: info about the author.
In the right bar, you can use these command buttons:
Link first: if you check this option, only the first line from a data file (csv or spreadsheet) is read, for testing purpose.
Link dis.: if you check this option, the data file (csv or spreadsheet) is not read, and are shown only the fields’ names,
for testing purpose.
Preview: remove the check in this option if you want to hide the card preview (the rendering is faster).
Goto card: click to select a card from the deck to be viewed.
Auto build: check this option if you want to see in real time the script’s changes in the preview.
Highlight (checkbox): check this option to highlight with colors each line of the editor and each graphic element of the
preview.
Highlight (button): click to highlight the graphic element of the preview corresponding to the current line of the editor.
Partial: the program renders the current card only until the position of the cursor in the editor.
Arrow buttons: with these buttons, you move between the cards of the deck (first, prior, next, and last).
Card preview: this button shows you an enlarged view of the current card.
Canv: this button shows you the canvas (the “zero” card).
Visual Editor: the program opens the visual editor window, see page 59.
Comp: this button shows a window for comparing different decks of cards.
Script list: in this window, you can execute several scripts, in a batch mode, see page 50.
Edit: in this window, you can edit the content of a linked spreadsheet file.
Table: the program opens the virtual table window, see page 57.
The Game Crafter: in this window, you can upload a deck of card directly to the website
http://www.thegamecrafter.com for printing and/or publishing your game.
All deck: this button selects all the cards in the deck to be rendered (the start-end range is in the two edit box to the left
and right of this button).

9
Editor commands
CTRL+X Cut
CTRL+C Copy
CTRL+V Paste
CTRL+A Select all
CTRL+B Validate and build the current card
CTRL+I Insert card’s number (character §)
CTRL+O Insert frame’s number (character °)
CTRL+P Insert frame’s number (character µ)
CTRL+R Comment current line/selected text
CTRL+U Remove comment from current line/selected text
CTRL+E Toggle comment on/off in current line/selected text
SHIFT+CTRL+I Block indent
SHIFT+CTRL+U Block un-indent
SHIFT+ALT+UP Move block up one line
SHIFT+ALT+DOWN Move block down one line
CTRL+D Add new tab with a new version
SHIFT +CTRL+D Duplicate current line
CTRL+M Line break
CTRL+N Add new tab (empty)
CTRL+T Show windows side by side
CTRL+Y Delete line
SHIFT+CTRL+Y Delete EOL
CTRL+Z Undo
SHIFT+CTRL+Z Redo
CTRL+0…9 Go to marker 0…9
SHIFT+CTRL+0…9 Set/remove marker 0…9
SHIFT+CTRL+C Set columns selection
SHIFT+CTRL+L Set lines selection
SHIFT+CTRL+N Set standard selection
SHIFT+CTRL+B Match bracket
CTRL+F Find
CTRL+H Replace
CTRL+G Go to line
F1 Help (current line directive)
CTRL+F1 Auto layout (white on black)
F2 Modify (current line directive)
CTRL+F2 Auto layout (color)
F3 Modify (current line directive, visual mode)
CTRL+F3 Auto layout (black on white)
F4 Visual editor
F5 Auto build switch
F6 Go to card
F7 Highlight current line
CTRL+F7 Highlight all lines switch
F8 Insert label
CTRL+F8 Insert frame
F9 Insert color
CTRL+F9 Insert gradient
F10 Partial build switch (build source until current line)
Tip: You can copy the current card’s image if you press CTRL+C after a click on the card image.

10
Tip: You can validate and build the current card’s image if you right-click on the card image.
Tip: You can validate and build the whole deck if you right-click on the “Validate deck” button.
Tip: You can edit more than one script simultaneously, right click on the tab on the upper side of the screen and choose
the voice “Add new tab” to add another tab to the editor.
Tip: You can move between cards using the mouse wheel.

11
Getting started…
This is a simple yet complete tutorial about how to create a deck of cards starting from a spreadsheet file.
First, I wrote some data, and save them as Data.xlsx:
Note: each column will be identified with the name in the first line (each must be different).
I start nanDECK, and as first line I link that file:
LINK = Data.xlsx
Then I save the script, as tut01.txt, in the same folder with the Excel file (if I want to save it in a different folder, in the
LINK line I must specify also the path, for example c:\users\nand\desktop\data\data.xls).
I want to put the title in the top of the card, then I select a font with the line:
FONT = Arial, 24, , #000000
Font name for the 1st parameter, size for the 2nd, and color for the 4th. The 3rd is empty, this is the place for flags like B
(bold), I (italic), U (underline) and so on (among others, if you want to shrink the font size to fit the space, use a N flag,
if you don’t want to see the text background, use a T flag). If you use more than one flag, put them all in this parameter
(for example: BTN).
And add the title with this line:
TEXT = 1-3, [name], 0, 0, 100%, 20%
The 1st parameter is the range, and I want to put this text on three cards (from 1 to 3, then the syntax is 1-3), the 2nd
parameter is the column name from the Excel file (enclosed in square brackets), the others are the position (0, 0 is top
left), width (100% of the card’s width) and height (20% is a fifth of the card’s height).
Note: I can use also values in cm, and I can specify 0, 0, 6, 1.8 (for a default card of 6 x 9 cm), but with percent values I
can change the size of the card without having to change every size of every element.
With a click on “Validate deck” button, “Build deck” button, the deck is created with three (ugly) cards:
Let’s add some images:
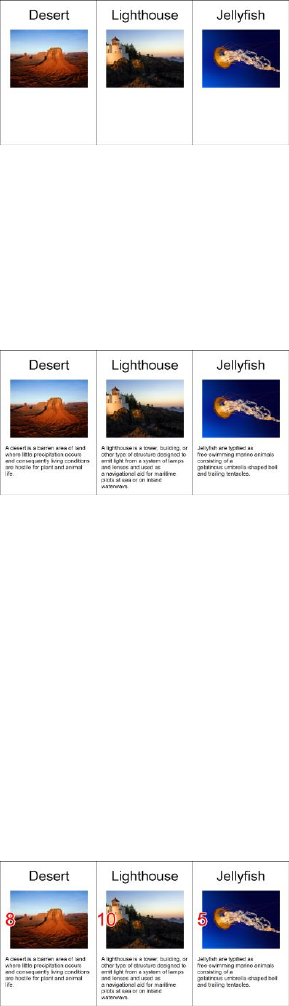
12
IMAGE = 1-3, [img], 0, 20%, 100%, 40%, 0, P
The 0 in the 7th parameter is the angle of rotation for the image, and the P is for proportionally resize the image, if you
have transparent PNGs, add a N flag in the same parameter (i.e. PN).
I’ve added the images’ files in the same folder with the spreadsheet and the script, and this is the result after Validate +
Build:
These lines are for the description:
FONT = Arial, 10, , #000000
TEXT = 1-3, [desc], 5%, 65%, 90%, 30%, left, wordwrap
I choose a smaller font, and since the description is more than one line, I add left as horizontal alignment and wordwrap
as vertical. This is the result:
These lines are for the value column:
FONT = Arial, 32, T, #FF0000
TEXT = 1-3, [value], 0, 20%, 20%, 40%
To make the number readable on every background, I can add an outlined text:
FONT = Arial, 32, T, #FFFFFF
TEXT = 1-3, [value], 0, 20%, 20%, 40%, center, center, 0, 100, 0.1
The “0, 100, 0.1” are respectively for angle, transparency and outline width.
Note that these lines must be added before, because every element in a script is drawn accordingly to its position: first
are drawn elements in the first lines, the last drawn are those in the bottom lines.
I have four icons (one for each element), each identified with a letter in my Excel file (and on each card, there may be
more than one icon). I add these lines in the script:
ICON = 1-3, A, air.png
ICON = 1-3, E, earth.png
ICON = 1-3, F, fire.png
ICON = 1-3, W, water.png
ICONS = 1-3, [icons], 80%, 20%, 20%, 40%, 20%, 10%, 0, PN
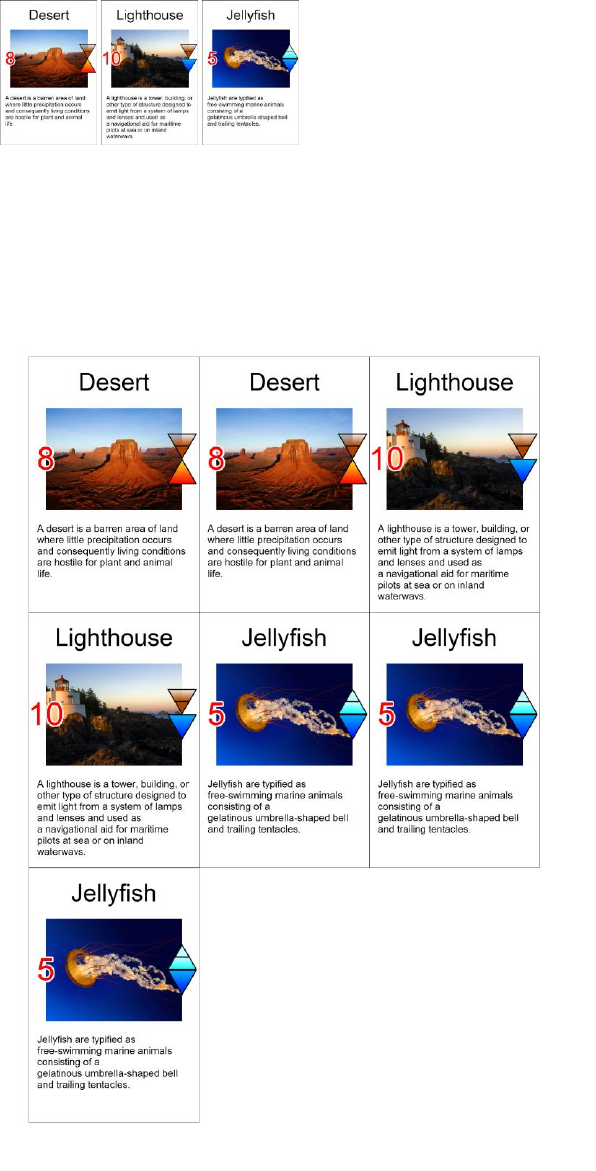
13
In the last line, I specify the icons’ area (80%, 20%, 20%, 40%), the size of each icon (20%, 10%), the angle of rotation
(0) and to use proportional resize (P) and PNG transparency (N).
I’ve added the four png files in the same folder. And this is the result:
Finally, I want to duplicate each card for the number specified in the “num” column, then I add, as first line (before the
LINK), this directive:
LINKMULTI = num
I must also change every range 1-3 into 1-7. This is the result page:
This is a more compact version of the script, here the 1st parameter (the range) is empty for most directives because I
want to put the text/images on all the cards, and if I leave the 1st parameter empty, nanDECK uses as a default 1-n,
where n is the number of lines in the Excel file.
14
LINKMULTI = num
LINK = Data.xlsx
FONT = Arial, 24, , #000000
TEXT = , [name], 0, 0, 100%, 20%
IMAGE = , [img], 0, 20%, 100%, 40%, 0, P
FONT = Arial, 10, , #000000
TEXT = , [desc], 5%, 65%, 90%, 30%, left, wordwrap
FONT = Arial, 32, T, #FFFFFF
TEXT = , [value], 0, 20%, 20%, 40%, center, center, 0, 100, 0.1
FONT = Arial, 32, T, #FF0000
TEXT = , [value], 0, 20%, 20%, 40%
ICON = , A, air.png
ICON = , E, earth.png
ICON = , F, fire.png
ICON = , W, water.png
ICONS = , [icons], 80%, 20%, 20%, 40%, 20%, 10%, 0, PN

15
Ranges
Many directives (like IMAGE or TEXT) have a parameter for specifying for which cards will be executed that
directive. A card in a range may be specified directly with a number, a list of cards with a list of numbers separated by a
comma “,” and a range of cards with the first and last cards separated with a dash “-” or the first card and a number,
separated with a number sign “#”.
Examples:
RECTANGLE = 1, 0, 0, 6, 9, #0000FF
RECTANGLE = "1,3,5,7", 0, 0, 6, 9, #0000FF
RECTANGLE = 1-10, 0, 0, 6, 9, #0000FF
RECTANGLE = 10#5, 0, 0, 6, 9, #0000FF
Note: in the 2nd line the range must be enclosed in quote for the presence of commas, however, you can always enclose
all ranges in quotes.
You can mix the two methods, and use a complex range, like:
RECTANGLE = "1-10,12,15,19-20,35#3", 0, 0, 6, 9, #0000FF
A number in a range can be the result of an expression (see page 40), and must be enclosed between “{” and “}. For
example:
RECTANGLE = 1-{2*5}, 0, 0, 6, 9, #0000FF
Usually, the order doesn’t matter (1-10 is equal to 10-1) but for one command, COPYCARD, the order is important,
because the source range is uses as specified, these two rows are different:
COPYCARD = 11-20, 1-10
COPYCARD = 11-20, 10-1
The 1st row gives as result this sequence of cards:
1,2,3,4,5,6,7,8,9,10,1,2,3,4,5,6,7,8,9,10
The 2nd row gives as result this sequence of cards:
1,2,3,4,5,6,7,8,9,10,10,9,8,7,6,5,4,3,2,1
There is a syntax that can be used to change that behavior, useful, for example, to invert sub-ranges of cards (for
printing front-back). For example:
COPYCARD = 10-18, 1-9$abc>cba
The first group of characters is the start pattern, the second group is the destination pattern, reversed in groups of three
cards. You can obtain the same result manually writing:
COPYCARD = 10-18, "3-1,6-4,9-7"
This syntax is useful also if you want to specify a “hollow” range, for example, if you want a rectangle only on even
cards:
RECTANGLE = 1-10$ab>a, 1, 1, 4, 4, #FF0000
Note: the $abc>cba syntax works only when the card number is defined using a CARDS command.
See also: Labels and sequences chapter (page 19), AUTORANGE label function (page 25), and BASERANGE
directive (page 67) about the interaction between ranges and sequences.
16
Colors
In this program, the colors will be defined by a string of seven characters, starting with a number sign “#” and six
hexadecimal digits (using the HTML syntax), two for each component (red-green-blue), for example:
White #FFFFFF
Black #000000
Red #FF0000
Green #00FF00
Blue #0000FF
Cyan #00FFFF
Magenta #FF00FF
Yellow #FFFF00
Tip: if you use the wizard for a new deck (the “wiz” button, to the right of “New deck” button), you can check the
“Include labels for HTML colors” to obtain a set of 140 label definition for many colors.
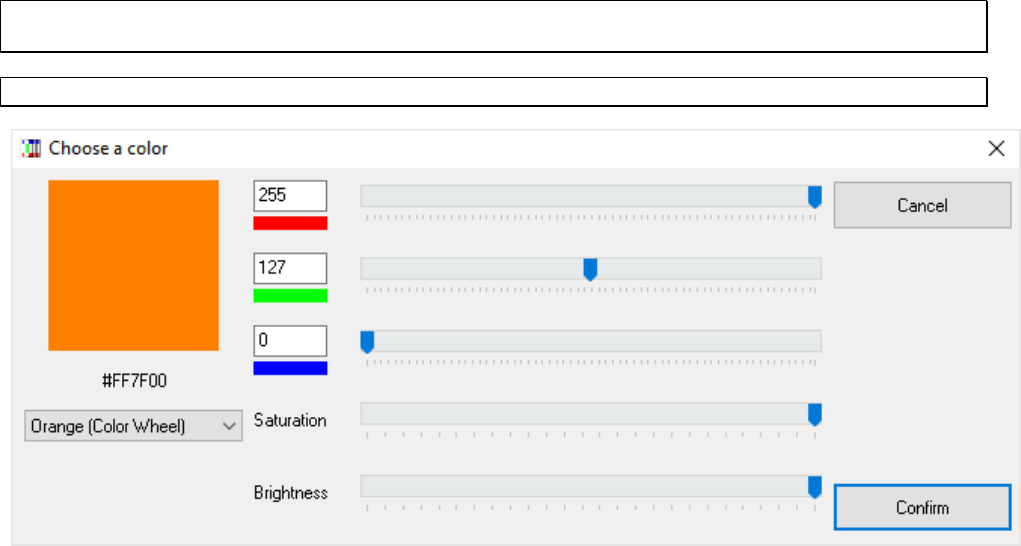
Tip: you can choose a color from a color picker, clicking on the button “Insert” and choosing the menu voice “Color”.
If instead of a hexadecimal digit you specify a letter “H”, you obtain a random value from 0 to 15. For example, if you
want a complete random color, with this syntax you can use #HHHHHH, instead for a random hue of blue, you can use
#0000HH, and so on. The letter “L” stands for the last color used, then #LLLLLL is the last color, instead #0000LL is
the last blue component used.
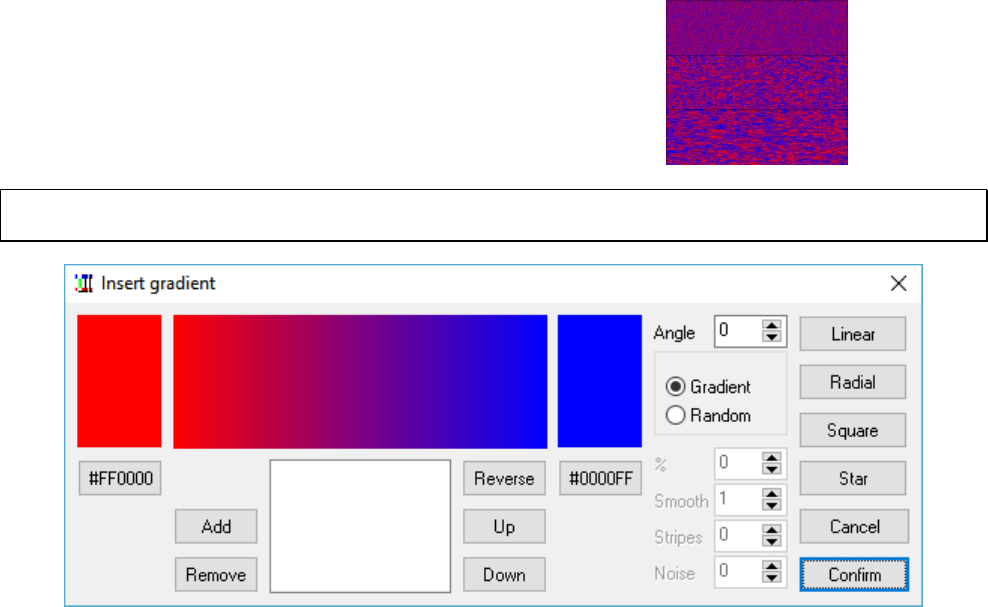
You can concatenate more than one color to obtain a gradient, followed by a “@” to specify the angle. If you use these
special values for the angle, you obtain a special gradient:
360 Radial gradient
361 Elliptical gradient
362 Square gradient
363 Star gradient
These are some examples:

17
From black to white, horizontal
#FFFFFF#000000@0
From red to blue, vertical
#0000FF#FF0000@90
From cyan to magenta, radial
#FF00FF#00FFFF@360
From cyan to magenta, elliptical
#FF00FF#00FFFF@361
From teal to yellow, square
#FFFF00#008080@362
From orange to purple, star
#400080#FFA500@363
From red, to green, to blue, horizontal
#0000FF#00FF00#FF0000@0
If you omit the “@”, the colors are randomized (and smoothed); specifying a "%" and a number, you set a threshold for
the 2nd color, for example:
Blue and red, randomized
#0000FF#FF0000
Blue and red, randomized 50%
#0000FF#FF0000%50
Red and blue, randomized 50%
#FF0000#0000FF%50
Blue, green, and red, randomized
#0000FF#00FF00#FF0000
Specifying a $ and a number, the colors are smoothed that number of times (without specifying it, the color is smoothed
only one time), for example:
Blue and red
#0000FF#FF0000
Blue and red, no smoothing
#0000FF#FF0000$0
Red and blue, two smoothing
#FF0000#0000FF$2
If you add a & and a number in the color, the pattern is created with a Perlin Noise algorithm, with a number of
iteration equal to the numeric parameter, for example:
Blue and red, eight iterations
#0000FF#FF0000&8
Blue and red, six iterations
#0000FF#FF0000&6
Blue and red, three iterations
#0000FF#FF0000&3
If you add a ç in the color, the random pattern is made of stripes (and you can use more ç to make the stripes longer),
for example:
18
Blue and red, randomized
#0000FF#FF0000
Blue and red, striped
#0000FF#FF0000ç
Blue and red, striped x 2
#0000FF#FF0000çç
Tip: you can choose a gradient from a visual form, clicking on the button “Insert” and choosing the menu voice
“Gradient”.

19
Labels and sequences
A label is used as a variable value in a script, and may be initialized and used several times in the code. It can be
initialized with this syntax:
[name] = value
And used specifying its name (always delimited with “[” and “]”). This is an example:
[alpha] = "This is a text"
FONT = Arial, 32, , #000000
TEXT = 1-10, [alpha], 0, 0, 6, 9, center
A sequence is a list of values used as a parameter in a directive. Each value is separated using the character pipe “|”. For
each card in the directive’s range the program uses a different element in a sequence (restarting from the first if the
sequence’ size isn’t enough to fill the range), for example, if you want ten cards, half with the word “odd” and half with
the word “even”, you can use the TEXT directive, with a range 1-10 and a sequence of the two words as text parameter
(“odd|even”).
FONT = Arial, 32, , #000000
TEXT = 1-10, "odd|even", 0, 0, 6, 9, center
Sequences may be very long, you can manipulate them in a clearer manner if you use them in labels. Usually a
sequence must be on a single line, but you can split a long sequence into multiple lines, starting the first line with a “{”
and ending the last line with a “}”. For example:
{[long] = "one|
two|
three|
four|
five|
six|
seven|
eight|
nine|
ten"}
FONT = Arial, 32, , #000000
TEXT = 1-10, [long], 0, 0, 6, 9, center
Tip: The split-line syntax with “{” and “}” can be used not only for sequences, but with every command.
If the label contains a sequence (like in the above example), you can obtain the number of elements contained using the
syntax “(name)”. It can be used directly as a parameter or in an expression. For example:
[alpha] = one|two|three
FONT = Arial, 32, , #000000
TEXT = 1-{(alpha)*2}, [alpha], 0, 0, 6, 9, center
The result deck will be composed of six cards, with the word sequence one-two-three-one-two-three.
When you define a label, there are some characters you can use as prefix or postfix for the [name] to obtain special
behavior.
[name]number = value
The resulting value is the original value repeated number times. Instead, with these letters as a prefix, you can use this
program as a combinatorial engine:
C combination
P permutation
E derangement (permutation with no element in its original position)
20
F circular shift (right)
B circular shift (left)
CR combination with repetitions
PR permutation with repetitions
ER derangement with repetitions
Tn extracts only a random sample of n elements instead of the full set
C[name]number = object1|object2…objectN
P[name]number = object1|object2…objectN
E[name]number = object1|object2…objectN
F[name]number = object1|object2…objectN
B[name]number = object1|object2…objectN
These syntaxes create two labels with a combination and a permutation of number objects from the sequences, for
example:
C[label1]2 = A|B|C
P[label2]2 = A|B|C
E[label3]2 = A|B|C
F[label4]2 = A|B|C
B[label5]2 = A|B|C
these labels will be translated into:
[label1] = AB|AC|BC
[label2] = AB|AC|BA|BC|CA|CB
[label3] = BA|BC|CA
[label4] = AB|BC|CA
[label5] = AB|CA|BC
With repetitions:
CR[label1]2 = A|B|C
PR[label2]2 = A|B|C
ER[label3]2 = A|B|C
the result will be:
[label1] = AA|AB|AC|BB|BC|CC
[label2] = AA|AB|AC|BA|BB|BC|CA|CB|CC
[label3] = BA|BC|CA|CC
A sample of three elements:
CRT3[label1]2 = A|B|C
one of the possible result could be:
[label1] = BC|AA|CC
Special flags:
D remove duplicate elements
X remove “rotated” elements
S remove elements with the same “structure”
N randomize elements
A sort elements in ascending order
Z sort elements in descending order
I keep only crossing paths
O keep only paths that doesn’t cross themselves
The “D” flag is useful when you have multiple elements in combinations/repetitions, for example:
21
C[label1]2 = A|B|C|C
will be evaluated as:
[label1] = AB|AC|AC|BC|BC|CC
If you don’t want repetitions, you can add the “D” flag (as a prefix) and the result will be:
[label1] = AB|AC|BC|CC
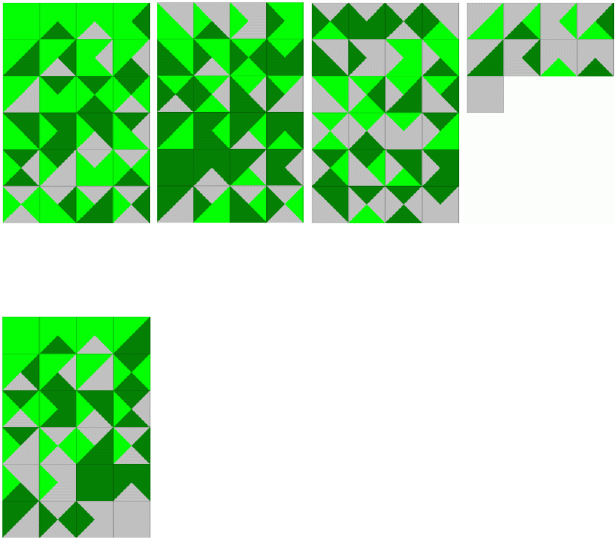
The “X” flag need a longer explanation. Let’s say, you need to create tiles with 4 quadrants, with all the combination of
three elements (plains, woods and mountains), this is the starting script:
CARDSIZE = 4, 4
[QUARTER1] = 0, 0, 2, 2, 0, 4
[QUARTER2] = 0, 0, 4, 0, 2, 2
[QUARTER3] = 4, 0, 4, 4, 2, 2
[QUARTER4] = 0, 4, 2, 2, 4, 4
PR[SCHEMA]4 = P|F|M
[ALL] = 1-{(SCHEMA)}
[COLOR_P] = #00FF00
[COLOR_F] = #008000
[COLOR_M] = #C0C0C0
TRIANGLE = [ALL], [QUARTER1], [COLOR_[SCHEMA:1,1]]
TRIANGLE = [ALL], [QUARTER2], [COLOR_[SCHEMA:2,1]]
TRIANGLE = [ALL], [QUARTER3], [COLOR_[SCHEMA:3,1]]
TRIANGLE = [ALL], [QUARTER4], [COLOR_[SCHEMA:4,1]]
This is the result (4 pages of 81 tiles):
The tiles are all different, but not if you rotate them, for example, PFPF is equal to FPFP (rotated 90°). To eliminate
them, you can use the “X” prefix. This is the result (1 page of 24 tiles):
The “X” flag can be used more than once, to specify that not all the “rotations” will be considered as equals; for
example, with only one “X”, the sequence 0102 is equal to:
1020
0201

22
2010
In a square token with a number on each side, this is equal to 90° rotations. Instead, with “XX”, the sequence 0102 is
equal only to 0201 (in a square token, this is equal to considering only rotations of 180°, or rather, that rotations of 90°
aren’t considered).
The “S” flag remove elements with the same structure: for example, the sequence 0102 has the same structure of the
sequence 1210. In the previous example, from the 24 tiles, only six have a different structure:
The “N” flag will be used if you want to randomize the sequence, if you write, for example:
N[elements] = alpha|beta|gamma|delta
it will be randomly evaluated each time you validate the deck, for example as:
[elements] = beta|gamma|delta|alpha
If you want to analyze only a sub-string from the result of the permutation/combination engine or an external linked
file, you can use the “:” syntax to extract a sub-string, the syntax is [label:start,number] where start is the starting
character and number is the length of the sub-string in characters. For example, in the script about tiles in the previous
page, every line extracts only a character from the label (composed of four characters), and associates it with another
label:
TRIANGLE = [ALL], [QUARTER1], [COLOR_[SCHEMA:1,1]]
TRIANGLE = [ALL], [QUARTER2], [COLOR_[SCHEMA:2,1]]
TRIANGLE = [ALL], [QUARTER3], [COLOR_[SCHEMA:3,1]]
TRIANGLE = [ALL], [QUARTER4], [COLOR_[SCHEMA:4,1]]
If the label [SCHEMA] was, as an example, “PFPM”, these lines will be evaluated as:
TRIANGLE = [ALL], [QUARTER1], [COLOR_P]
TRIANGLE = [ALL], [QUARTER2], [COLOR_F]
TRIANGLE = [ALL], [QUARTER3], [COLOR_P]
TRIANGLE = [ALL], [QUARTER4], [COLOR_M]
Tip: you can view a list of labels, their contents, and choose one of them from a list, clicking on the button “Insert” and
choosing the menu voice “Label”.
You can extract a single element in a sequence using the ? operator in an expression (delimited with curly brackets {
and }). If you omit the number, it’s used the current card (i.e. is the same to use ? or ?§).
For example, this script will print the letter “c”:
[ALPHA] = a|b|c|d|e
FONT = ARIAL, 32, , #000000
TEXT = 1, {ALPHA?3}, 0, 0, 100%, 100%
There is also a syntax for creating labels with a condition and with a for…next cycle (note that you can’t define a label
between standard IF…ENDIF or FOR…NEXT blocks):
[label]%[condition], variable, start, end, step = value
The [condition] parameter must be a label, it cannot be written directly because a condition is too complex to be
evaluated correctly in a single line. This is an example:
[check1]=[a]=1
[check2]=[a]<>1
[color]%[check1]=#FF0000
23
[color]%[check2]=#0000FF
In this example, if [a] is 1, the label [color] is red (#FF0000), if [a] isn’t 1, the label [color] is blue (#0000FF).
The condition can be omitted, in this case the label is defined only if it doesn’t already exist. In this example, the label
[alpha] is red, and the label [beta] is blue:
[alpha]=#FF0000
[alpha]%=#0000FF
[beta]%=#0000FF
The label creation can be repeated in a for…next cycle, for example, if you want to define ten labels, with powers of
two, you can write:
[lab(count)]%,(count),1,9 = {(count)^2}
Note that the condition parameter is empty (the comma after the % symbol), and that if the step parameter is omitted,
its value is assumed equal to one. The variable (count) can be anything (the parentheses aren’t really needed). The result
is equal to write this code:
[lab1]=1
[lab2]=4
[lab3]=9
[lab4]=16
[lab5]=25
[lab6]=36
[lab7]=49
[lab8]=64
[lab9]=81
An alternate syntax for the definitions of labels in a loop is this:
[label]%[condition], variable, [sequence] = value
In this syntax, a step in the loop is executed for each value of the sequence (value that is replaced in the variable), for
example:
[seq] = alpha|beta|gamma
[lab_(var)]%, (var), [seq] = test_(var)
The result is equal to this code:
[lab_alpha]=test_alpha
[lab_beta]=test_beta
[lab_gamma]=test_gamma
Note that the interaction between ranges and sequences is based on the extraction of the Nth element from a sequence
when is rendered the Nth card in the range, i.e. if you have a range that doesn't starts with the 1st card of the deck, the
elements from the sequence are apparently extracted wrongly. Example:
[ALPHA] = a|b|c|d|e
FONT = ARIAL, 32, , #000000
TEXT = 3-5, [ALPHA], 0, 0, 100%, 100%
In the 3rd card (the 1st of the range) shows the letter a (the 1st of the sequence). If you instead want to show the letter c
you must add a BASERANGE directive:
BASERANGE = 1-5, ON
[ALPHA] = a|b|c|d|e
FONT = ARIAL, 32, , #000000
TEXT = 3-5, [ALPHA], 0, 0, 100%, 100%
25
Label functions
AUTOLABEL
This function creates a label containing a sequence of numbers. This is the syntax:
[name] = AUTOLABEL(start, end, step, separator, padding)
For example, this line:
[a] = AUTOLABEL(1, 10, 2)
will be evaluated as:
[a] = 1|3|5|7|9|11
The standard separator is the pipe (the “|” character), if you want a different separator, you can specify it as the 4th
parameter. If you specify a number in the 5th parameter, the result number is padded to the left with zeroes until the
length of the number reach that parameter.
AUTORANGE
This function calculates a range starting from the previous AUTORANGE (or card 1, if it was the first), the only
parameter is a number of cards. This is the syntax:
[name] = AUTORANGE(number)
For example, these rows:
[a] = AUTORANGE(10)
[b] = AUTORANGE(5)
[c] = AUTORANGE(8)
will be evaluated as:
[a] = 1-10
[b] = 11-15
[c] = 16-23
You can reset the counter, using a negative number as parameter. For example, these rows:
[a] = AUTORANGE(10)
[b] = AUTORANGE(-5)
[c] = AUTORANGE(8)
will be evaluated as:
[a] = 1-10
[b] = 1-5
[c] = 6-13
CASESTRING
This function modifies the capitalization of a string, this is the syntax:
[label] = CASESTRING(string, flag)
You can choose one of these flags:
U the string changes to uppercase
26
L the string changes to lowercase
F every first character in a string is changed to uppercase, the others to lowercase
If the flag is not specified, the string is changed to uppercase.
CONCAT
This function creates a label concatenating different strings, this is the syntax:
[name] = CONCAT(parameter1, repeat1, parameter2, repeat2, …parameterN, repeatN)
Each parameter is repeated a number of times equal to the next parameter. This is an example:
[test] = CONCAT(#000000, 3, #FFFFFF, 2)
Will be evaluated as:
[test] = #000000#000000#000000#FFFFFF#FFFFFF
CONCAT1
This function is equivalent to CONCAT, with a repetition of each parameter of one, this is the syntax:
[name] = CONCAT(parameter1, parameter2, …parameterN)
COOFRAME
This function outputs the four coordinates of a frame (see page 36); instead of using the standard <frame> syntax, that
is evaluated in the Validate step, this function is evaluated later, in the Build step. This is the syntax:
[name] = COOFRAME(frame)
COOFRAMES
This function is similar to COOFRAME, and is used when there are more than one frame that can be selected. The 1st
parameter is the number of the frame, selected from all that have the name specified in the 2nd parameter (you can use
also wildcard characters like * and ?):
[name] = COOFRAMES(number, frame)
DIRFILES
This function creates a sequence label using names of files from a folder (and subfolders), this is the syntax:
[name] = DIRFILES(path, extension)
The extension can be a sequence of extensions, like jpg|bmp|gif.
This is an example:
[img] = DIRFILES("c:\images\", jpg)
and it will be evaluated as:
[img] = "c:\images\one.jpg|c:\images\two.jpg|c:\images\three.jpg"
Instead of an extension, you can specify in the 2nd parameter a file mask (with * and ? as wildcards). For example:
[img] = DIRFILES("c:\images\", "img*.jpg")
27
You can also combine the two parameters in one. For example:
[img] = DIRFILES("c:\images\img*.jpg")
ENVIRONMENT
This function reads an environment variable from the operating system, this is the syntax:
[name] = ENVIRONMENT(variable)
For example, this reads the path for the user folder:
[folder] = ENVIRONMENT(userprofile)
EVAL
This function creates a sequence with the results of the evaluation of another sequence, this is the syntax:
[name] = EVAL(sequence)
This is an example:
[alpha] = {1+1}|{2*3}|{3^3}
[beta] = EVAL([alpha])
These two lines are equivalent to:
[beta] = 2|6|27
Note: you obtain the same result with a single line:
[beta] = EVAL({1+1}|{2*3}|{3^3})
EXPAND
This function creates a sequence replicating itself numseq times, with each element replicated numele times (this
parameter is option, if not specified is treated equal to one):
[name] = EXPAND(sequence, numseq, numele)
This is an example:
[alpha] = a|b|c
[beta] = EXPAND([alpha], 2, 3)
These two lines are equivalent to:
[beta] = a|a|a|b|b|b|c|c|c|a|a|a|b|b|b|c|c|c
FILTER
This function creates a sequence taking elements from another sequence, filtering and grouping them using some rules.
The basic syntax is:
[name] = FILTER([name], filter1, filter2 …filterN)
In the filterN parameters you can use wildcards: ? for any character, * for any characters, and use ranges of characters
within parenthesis (as an example, 1(0-9) matches a number from 10 to 19). For example, this script will print only
elements that start with a zero (four elements on eight):
28
[ALPHA] = 000|001|010|011|100|101|110|111
[BETA] = FILTER([ALPHA], 0*)
FONT = ARIAL, 32, , #000000
TEXT = 1-{(BETA)}, [BETA], 0, 0, 100%, 100%
In the 1st parameter you can specify these additional flags:
§ the sorted/added elements are used to create the new sequence
> (multiple, header) sort characters from an element in ascending order before comparing it to the filters
< (multiple, header) sort characters from an element in descending order before comparing it to the filters
+ (multiple, header) add numbers from an element before comparing it to the filters
@ keep only the characters specified after this flag
# discard all the characters specified after this flag
$ (multiple, header) counts the maximum occurrences of a character(s) in the same element
^ (multiple, header) counts the maximum occurrences of specific character(s) in all positions on the previous
accepted elements
~ (header) counts all the occurrences of specific character(s) in all positions on the previous accepted elements
= (multiple, header) counts the maximum occurrences of specific character(s) in the same position on the
previous accepted elements
£ (header) counts the maximum occurrence of a straight of characters
° set the rule for evaluating a straight (if not specified, is used the ASCII sequence of letters/numbers)
% (multiple) replace a character(s) with another(s), all the couples are specified after this flag
! counts the distance (in characters) between two copies of the same characters, specified after this flag
& (header) the element is evaluated from his position within the sequence, starting from one
¬ the condition (for including or not an element) is reversed (for inserting the symbol, type ALT + 0172)
_ if an element is not included, a null string is added in its position
ç the result isn’t padded with zeroes to the length of the longest element
. (multiple, header) the starting characters in each element are permutated
You can combine multiple flags, and use a space if you want to mix two similar functions, for example, a $ followed by
$$ can be coded as “$ $$”. The flags marked with header must be specified before the sequence, not after.
For example, this script will print only elements that contains a zero and two ones (three elements on eight):
[ALPHA] = 000|001|010|011|100|101|110|111
[BETA] = FILTER(>[ALPHA], 011)
FONT = ARIAL, 32, , #000000
TEXT = "1-{(BETA)}", [BETA], 0, 0, 100%, 100%
The flags marked with (multiple) in the above list (i.e.: > < + $ ^ = % .) can be repeated, when you must consider
elements not as single characters, but as strings composed with more than one character. For example, the element
“0123” gives these results:
+ 6
++ 24
> 0123
>> 0123
< 3210
<< 2301
This is as example for utilization of “$” flag. First, a label is created with all the permutations (with repetitions) of four
elements from a set of five (a, b, c, d, and e), then, another label is created filtering only the occurrence of a three-of-a-
kind and four-of-a-kind:
pr[a]4 = a|b|c|d|e
[b] = FILTER($[a], 3, 4)
FONT = ARIAL, 64, , #000000
TEXT = 1-{(b)}, [b], 0, 0, 100%, 100%
In this example, the same sequence is filtered to get only the labels that contains one or less repetitions of the same
character in the same position:
29
pr[a]4 = a|b|c|d|e
[b] = FILTER(=[a], 0, 1)
FONT = ARIAL, 64, , #000000
TEXT = 1-{(b)}, [b], 0, 0, 100%, 100%
In this example of the replacement option (with the % option), the characters “a”, “d”, and “g” are replaced with the
numbers “1”, “2”, and “3”:
[test_a] = abc|def|ghi
[test_b] = FILTER(§[test_a]%a1d2g3)
The result sequence [test_b] is equal to:
1bc|2ef|3hi
Usually the strings found and replaced with the % option are the same length, but you can specify a null character using
a ¢ symbol (for inserting it, type ALT + 0162). Example:
[test_a] = abc|def|ghi
[test_b] = FILTER(§ç[test_a]%%abx¢de¢¢)
Note the ç symbol added to disable the padding; the result sequence [test_b] is equal to:
xc|f|ghi
You can create a sequence of parameters with a “FOR=” keyword, for example, if you want ten numbers, instead of
adding all of them you can use a single parameter like “1-10FOR=-” (the 2nd minus symbol is the position of the counter
in the result.
Instead of a parameter used as a filter, you can specify a “mask” (with the prefix “MASK=”), that is used to apply the
filter only to some characters of the elements from the sequence; you specify a character that you want to consider with
a “1”, and a character to ignore with a “0”. For example, if you want to apply the rules only to the even characters of a
ten-character string, use this parameter: MASK=0101010101
If there are more than one rule in the 1st parameter, and if you specify a number before the mask keyword, that mask is
applied only to a single rule (1 for the 1st rule, 2 for the 2nd, and so on).
GRADIENTSEQ
This function creates a sequence of gradients, splitting one into several sections, the syntax is:
[name] = GRADIENTSEQ(gradient, number, element)
For example, with this line the program creates a sequence of three gradients:
[gradient] = GRADIENTSEQ(#000000#FF0000@0, 3)
If you don’t specify the 3rd parameter, the sequence contains number element; instead it contains only the Nth
parameter, where N is the 3rd parameter.
GROUP
This function takes all the elements in a sequence and removes all the duplicate elements, optionally, it can return a
count of all the elements adding the keyword COUNT in the 2nd parameter. The syntax is
[name] = GROUP(sequence, function)
For example:
[alpha] = a|b|a|e|c|c|c|a|b|f|d|e
[beta] = GROUP([alpha])
30
[gamma] = GROUP([alpha], COUNT)
The two resulting sequences contain these values:
[beta] = a|b|c|d|e|f
[gamma] = 3|2|3|1|2|1
JOIN
This function uses alternatively the elements from two (or more) sequences for building a new sequence, the syntax is:
[name] = JOIN(sequence1, sequence2, …sequenceN)
The length of the new sequence is equal to the longest source sequence. This is an example:
[label1] = A|B
[label2] = 1|2|3|4
[label3] = JOIN([label1], [label2])
The 3rd label will be evaluated as:
[label3] = A1|B2|A3|B4
JOINIF
This function add elements to a sequence using a condition to choose from two other sequences, the syntax is:
[name] = JOINIF(sequence, value1, condition, value2, sequence true, sequence
false)
Every parameter can be a single value or a sequence. The condition can be one of this symbol:
= equal
<> different
> major
< minor
>= major or equal
<= minor or equal
@ contained
# not contained
This is an example:
[label] = JOINIF(A|B|C, 1|2|3, <=, 2, D|E|F, X)
The label will be evaluated as:
[label] = AD|BE|CX
LABELRANGE
This function creates a range, using elements from a sequence. The syntax for this function is:
[name] = LABELRANGE(sequence, value, offset)
If you specify the optional value parameter, the range is created with only the cards matching the value parameter
position (wildcards * and ? are accepted). If you don’t specify the value parameter, the default element from a sequence
is considered “1”. The offset parameter, if specified, will be added to every card of the range.
31
For example:
[sequence] = 0|1|1|0|0|1
[label] = LABELRANGE([sequence])
Result:
[label] = "2,3,6"
The item parameter can also accept these operators (in the format operatorvalue):
= the item’s position from the sequence is included if it’s equal to the value (this operator can be omitted)
<> the item’s position from the sequence is included if it’s different from the value
> the item’s position from the sequence is included if it’s greater than the value
< the item’s position from the sequence is included if it’s smaller than the value
>= the item’s position from the sequence is included if it’s greater or equal to the value
<= the item’s position from the sequence is included if it’s smaller or equal to the value
@ the item’s position from the sequence is included if the value is contained in it
# the item’s position from the sequence is included if the value isn’t contained in it
For example:
[sequence] = 1|2|3|4|5|6|7|8|9|10
[label] = LABELRANGE([sequence], >=5)
Result:
[label] = "5,6,7,8,9,10"
LABELSTRING
This function creates a string with elements taken from a sequence. The syntax for this function is:
[name] = LABELSTRING(sequence, number)
Without the optional number parameter, the result is a single string, taken from concatenating every element of the
sequence. If you specify a number as 2nd parameter, for every nth element a new element of the sequence is created. For
example:
[sequence] = A|B|C|D|E|F
[label] = LABELSTRING([sequence])
These two lines are equivalent to:
[label] = ABCDEF
Another example:
[sequence] = A|B|C|D|E|F
[label] = LABELSTRING([sequence], 2)
Result:
[label] = AB|CD|EF
LABELSUB
This function extracts a sequence from another, taken only the elements in a range, the syntax is:
[name] = LABELSUB(sequence, "range")
32
For example:
[sequence] = LABELSUB(alpha|beta|gamma|delta, "1,3-4")
Result:
[sequence] = alpha|gamma|delta
LENGTH
This function creates a new sequence with the lengths of the elements of the sequence in the 1st (and only) parameter,
the syntax is:
[name] = LENGTH(sequence)
For example:
[sequence] = ABC|DE|F|GH|IJK|LMNO
[label] = LENGTH([sequence])
Result:
[label] = 3|2|1|2|3|4
PRODUCT
This function combines two (or more) sequences, in the result every element of the first sequence is combined with
every element of the second sequence (and so on), the syntax is:
[name] = PRODUCT(sequence1, sequence2, …sequenceN)
The length of the new sequence is equal to the product of the length of all source sequences. This is an example:
[label1] = A|B
[label2] = 1|2|3|4
[label3] = PRODUCT([label1], [label2])
The 3rd label will be evaluated as:
[label3] = A1|A2|A3|A4|B1|B2|B3|B4
RANGEADD
This function combines several ranges in one, the syntax is:
[range] = RANGEADD("range1", "range2", …"rangeN")
For example:
[range1] = "1-3"
[range2] = "2-4"
[range3] = "8-10"
[range] = RANGEADD([range1],[range2],[range3])
Result:
[range] = "1-4,8-10"
33
RANGECOUNT
This function returns the number of cards in a range, the syntax is:
[number] = RANGECOUNT("range")
For example:
[number] = RANGECOUNT("1,4-6,10-15")
Result:
[number] = 10
RANGEMUL
This function creates a new range from pairs of range/number of repetition of that range:
[range] = RANGEMUL("range1", num1, "range2", num2, …"rangeN", numN)
For example:
[range] = RANGEMUL(1,2,3,4)
Result:
[range] = "1,1,3,3,3,3"
RANGEREM
This function extracts a sub-range from another range, this is the syntax:
[range] = RANGEREM("range1", "range2", …"rangeN")
This directive removes the ranges range2, ... rangeN from range1.
For example:
[range1] = "1-10"
[range2] = "3,4"
[range3] = "7-9"
[range] = RANGEREM([range1], [range2], [range3])
Result:
[range] = "1-2,5-6,10"
RANGESUB
This function extracts a sub-range from another range, this is the syntax:
[range] = RANGESUB("range", start, number)
The sub-range starts from the element specified by the start parameter, and is composed of number elements. If the
number parameter is missing (or equal to zero) the sub-range goes to the end of the initial range; if the start parameter is
equal to zero, the sub-range starts from the last element taken with another RANGESUB function (or from the start of
the initial range), in a behavior like that implemented with AUTORANGE function.
For example:
34
[range1] = "1-10"
[range] = RANGESUB([range1], 3, 4)
Result:
[range] = "3-6"
REPLACE
This function replaces in a string (or a sequence) all instances of a substring with another. The syntax for this function
is:
[name] = REPLACE("string", "from", "to")
ROUND
This function returns the 1st parameter rounded, the 2nd parameter specify the number of decimal digits (if not specified,
it is zero, if it’s a negative number, the rounding is by power of tens), the 3rd parameter is a keyword that specify if the
rounding is UP, or DOWN (if you don't specify it, the rounding is down when the rounded digit is 4 or less, and up if
it's 5 or more). The syntax is:
[name] = ROUND(value, precision, keyword)
SAVELABEL
This function saves the content of a label (or more than one label) into a CSV text file or a spreadsheet file (if the
extension of the filename is .xls or .xlsx). The syntax for this function is:
[name] = SAVELABEL("filename", label1 , label2, …labelN)
The result label [name] contains the filename. Note: do not use the [ ] in the label parameters.
STRINGLABEL
This function creates a sequence label with elements taken from a string. The syntax for this function is:
[name] = STRINGLABEL("string", length)
The optional length parameter sets the number of characters taken for each element of the sequence. If omitted, the
length is one character. For example, these two lines are equivalent:
[label] = STRINGLABEL("This is a test")
[label] = "T|h|i|s| |i|s| |a| |t|e|s|t"
TOKENIZE
This function extracts a substring from a string, using a separator that slices the string into several tokens, and a number
that specify the single token extracted. The syntax for this function is:
[name] = TOKENIZE("string", number, separator)
If the separator is not specified, is assumed to be equal to “|” (pipe), note that is the same separator for the elements in a
sequence. For example:
[result] = TOKENIZE("Alpha-Beta-Gamma", 2, -)
The [result] label would be equal to “Beta”
35
TOKENIZESEQ
This function extracts a sequence from another sequence, using a separator that slices each element of that sequence
into several tokens, and a number that specify which tokens are extracted; all the tokens are concatenated in the result
sequence. The syntax for this function is:
[name] = TOKENIZE("string", number, separator)
For example:
[result] = TOKENIZE("Alpha-Beta-Gamma|Delta-Epsilon-Zeta|Eta-Theta-Iota", 2, -)
The [result] label would be equal to “Beta|Epsilon|Theta”
TRANSLATE
This function replaces in a sequence (specified in the 1st parameter) all the elements found in another sequence
(specified in the 2nd parameter) with elements taken from another sequence (specified in the 3rd parameter). The syntax
is:
[label] = TRANSLATE(sequence, sequence key, sequence value)
For example, this script:
[test] = x|y|x|w|x|y|y|z
[from] = x|y|z
[to] = a|b|c
[result] = TRANSLATE([test],[from],[to])
Gives this sequence as a result:
[result] = a|b|a||a|b|b|c
36
Frames
A frame is a special label, used when you need to identify a rectangular area used for placing a graphical content. A
frame is defined used this syntax:
<name> = position x, position y, width, height
And can be used for example with a RECTANGLE directive:
RECTANGLE = 1, <name>, #000000
This is a behavior that can be done also with a label, but in a frame, you can add an alignment and a specific size, with
this syntax:
<name, alignment, width, height>
The “alignment” can be a flag from this list:
TL top-left
TC top-center
TR top-right
CL center-left
CC center-center
CR center-right
BL bottom-left
BC bottom-center
BR bottom-right
An example with all these nine alignments:
<frame> = 1, 1, 4, 7
FONT = Arial, 16, , #FFFFFF, #0000FF
RECTANGLE = 1, <frame>, #CCCCFF
TEXT = 1, "TL", <frame, TL, 1, 1>, CENTER, CENTER
TEXT = 1, "TC", <frame, TC, 1, 1>, CENTER, CENTER
TEXT = 1, "TR", <frame, TR, 1, 1>, CENTER, CENTER
TEXT = 1, "CL", <frame, CL, 1, 1>, CENTER, CENTER
TEXT = 1, "CC", <frame, CC, 1, 1>, CENTER, CENTER
TEXT = 1, "CR", <frame, CR, 1, 1>, CENTER, CENTER
TEXT = 1, "BL", <frame, BL, 1, 1>, CENTER, CENTER
TEXT = 1, "BC", <frame, BC, 1, 1>, CENTER, CENTER
TEXT = 1, "BR", <frame, BR, 1, 1>, CENTER, CENTER
Result: Image 1
One between width and height can be expanded to the full extent of frame’s width or height, using this syntax and one
of these alignments for width:
<name, alignment, height>
TW top aligned, full width
CW center aligned, full width
BW bottom aligned, full width
Example:
<frame> = 1, 1, 4, 7
FONT = Arial, 16, , #FFFFFF, #0000FF
RECTANGLE = 1, <frame>, #CCCCFF
TEXT = 1, "TW", <frame, TW, 1>, CENTER, CENTER
TEXT = 1, "CW", <frame, CW, 1>, CENTER, CENTER
TEXT = 1, "BW", <frame, BW, 1>, CENTER, CENTER
Result: Image 2
Image 1
Image 2
37
This syntax and these alignments are used for a full height:
<name, alignment, width>
HL full height, left aligned
HC full height, center aligned
HR full height, right aligned
<frame> = 1, 1, 4, 7
FONT = Arial, 16, , #FFFFFF, #0000FF
RECTANGLE = 1, <frame>, #CCCCFF
TEXT = 1, "HL", <frame, HL, 1>, CENTER, CENTER
TEXT = 1, "HC", <frame, HC, 1>, CENTER, CENTER
TEXT = 1, "HR", <frame, HR, 1>, CENTER, CENTER
Result: Image 3
Another type of syntax can be used to extract only a position (useful with lines):
<name, alignment>
PTL top-left
PTC top-center
PTR top-right
PCL center-left
PCC center-center
PCR center-right
PBL bottom-left
PBC bottom-center
PBR bottom-right
<frame> = 1, 1, 4, 7
RECTANGLE = 1, <frame>, #CCCCFF
LINE = 1, <frame, PTL>, <frame, PBR>, #FF0000, 0.2
LINE = 1, <frame, PTR>, <frame, PBL>, #FF0000, 0.2
Result: Image 4
Instead of using two frames, you can also combine two alignment of this type in a single frame, for example, with this
script the result is the same of the Image 4:
<frame> = 1, 1, 4, 7
RECTANGLE = 1, <frame>, #CCCCFF
LINE = 1, <frame, PTL, PBR>, #FF0000, 0.2
LINE = 1, <frame, PTR, PBL>, #FF0000, 0.2
Instead of using a size (width or height) in cm, you can use a fraction of the whole frame size, using a
number followed by “%%” (instead, a single “%” gives you a size equal to a fraction of the whole
card). For example:
<frame> = 1, 1, 4, 7
FONT = Arial, 16, , #FFFFFF, #0000FF
RECTANGLE = 1, <frame>, #CCCCFF
TEXT = 1, "TL", <frame, TL, 50%%, 50%%>, CENTER, CENTER
Result: Image 5
Tip: you can view a list of frames, their contents, and choose one of them from a list, clicking on the button “Insert”
and choosing the menu voice “Frame”.
With these syntaxes, you can align a sub-frame starting from the last sub-frame, in the four directions:
TS top aligned, full width
BS bottom aligned, full width
Image 3
Image 4
Image 5

38
SL left aligned, full height
SR right aligned, full height
<frame> = 1, 1, 4, 7
FONT = Arial, 16, , #FFFFFF, #0000FF
TEXT = 1, TS1, <frame, TS, 1>, CENTER, CENTER
FONT = Arial, 16, , #FFFFFF, #00FF00
TEXT = 1, TS2, <frame, TS, 1>, CENTER, CENTER
FONT = Arial, 16, , #FFFFFF, #FF0000
TEXT = 1, TS3, <frame, TS, 1>, CENTER, CENTER
FONT = Arial, 16, , #000000, #FFFF00
TEXT = 1, TS4, <frame, TS, 0>, CENTER, CENTER
Result: Image 6
In this example, the first frame can also be referenced with TW, and the result didn’t change.
If you specify a zero as the width/height of the element, it fills all the available space (the 4th frame
in this example).
With these flags, the program extracts three coordinates from the four of a frame, useful when using the TRIANGLE
directive (see page 160), for a shape that fills half of the frame:
HTL top left, top right, and bottom left
HTR top left, top right, and bottom right
HBL top left, bottom left, and bottom right
HBR top right, bottom left, and bottom right
For example:
<frame> = 1, 1, 4, 7
RECTANGLE = 1, <frame>, #CCCCFF
TRIANGLE = 1, <frame, HTL>, #FF0000
Result: Image 7
These flags give also three coordinates:
TTL an arrowhead with the point to the top-left corner of the frame
TTC an arrowhead with the point to the center of the top side of the frame
TTL an arrowhead with the point to the top-right corner of the frame
TCL an arrowhead with the point to the center of the left side of the frame
TCR an arrowhead with the point to the center of the right side of the frame
TBL an arrowhead with the point to the bottom-left corner of the frame
TBC an arrowhead with the point to the center of the bottom side of the frame
TBR an arrowhead with the point to the bottom-right corner of the frame
For example:
<frame> = 1, 1, 4, 7
RECTANGLE = 1, <frame>, #CCCCFF
TRIANGLE = 1, <frame, TTC>, #FF0000
Result: Image 8
Image 6
Image 7
Image 8
39
With several functions, you can create groups of frames, and referencing them with wildcards (the list is after this
chapter):
* a group of any characters,
? any one character,
~ a random frame from a group,
! the first frame from a group, the frame is then deleted from the frame group (instead of the first frame, a
random frame is selected if used with the “~” symbol),
/ normally, the frames created with a function are added to the existing ones; with this
character in the frames’ name, the definition rewrites the previous frames (the name is
considered without “/”),
° this is not a wildcard used in a frame name, but instead is used when the frame number is
needed in a standard expression (with “{” and “}” delimiters),
µ this is not a wildcard used in a frame name, but instead is used when the frame name is
needed in a text (without “{” and “}” delimiters).
Finally, in a frame name with ! or ~ wildcards, you can specify more than one frame adding a
number before the symbol. For example, if you want three random green box from a grid, three
blue and three red you can write:
[base] = FRAMEBOX(0, 0, 6, 9, 1, 1, E)
RECTANGLE = 1, <3!~base*>, #00FF00
RECTANGLE = 1, <3!~base*>, #0000FF
RECTANGLE = 1, <3!~base*>, #FF0000
GRID = 1, 0, 0, 6, 9, #000000, 0.1, 6, 9
Result: Image 9
Note: without the “!” symbol, the randomized frames may overlay themselves. Instead, without
the “~” symbol, the frames are extracted from the start of the group. For example, with this script:
[base] = FRAMEBOX(0, 0, 6, 9, 1, 1, E)
RECTANGLE = 1, <3!base*>, #00FF00
RECTANGLE = 1, <3!base*>, #0000FF
RECTANGLE = 1, <3!base*>, #FF0000
GRID = 1, 0, 0, 6, 9, #000000, 0.1, 6, 9
Result: Image 10
Image 9
Image 10
40
Frame functions
FRAMEBAR
This function creates a list of frames (see page 36) arranged in a line. The syntax for this function is:
[name] = FRAMEBAR(pos x1, pos y1, pos x2, pos y2, frame width, frame height,
number, zoom)
The frames are created with a name composed from the [name] and a number, the number goes from “1” to the 7th
parameter.
Example:
[bar] = FRAMEBAR(0, 0, 6, 6, 1, 1, 5)
You can use frames with wildcards (? for any one character, * for a group of any characters), can use the tilde (~)
symbol as a flag for addressing a random frame, the exclamation mark (!) as a flag for deleting the frame after use, and
referencing the current frame’s number with the degree (°) symbol (in an expression) or the current frame’s name with
the micro (µ) symbol (in a text).
The zoom optional parameter is used if you want to resize the frame of a percent (100 is equal to no change).
FRAMEBEZIER
This function creates a list of frames (see page 36) arranged in a Bezier curve. The syntax for this function is:
[name] = FRAMEBEZIER(pos x1, pos y1, handle x1, handle y1, handle x2, handle y2,
pos x2, pos y2, frame width, frame height, number, zoom)
The frames are created with a name composed from the [name] and a number, the number goes from “1” to the 11th
parameter.
Example:
[bezier] = FRAMEBEZIER(0, 0, 3, 0, 3, 6, 6, 6, 1, 1, 10)
You can use frames with wildcards (? for any one character, * for a group of any characters), can use the tilde (~)
symbol as a flag for addressing a random frame, the exclamation mark (!) as a flag for deleting the frame after use, and
referencing the current frame’s number with the degree (°) symbol (in an expression) or the current frame’s name with
the micro (µ) symbol (in a text).
The zoom optional parameter is used if you want to resize the frame of a percent (100 is equal to no change).
FRAMEBOX
This function creates a list of frames (see page 36), based on a rectangular grid. The syntax for this function is:
[name] = FRAMEBOX(pos x, pos y, width, height, frame width, frame height, flags,
zoom x, zoom y)
The last parameters (zoom x and zoom y) are optional, if not specified are equal to 100 (no zoom); if you want half
sized frames, you can specify 50, if you want double sized frames, the value is 200, and so on. The zoom can be
different between horizontal and vertical values.
The frames are created with a name composed from the [name] and the flag in the 7th parameter. You can use these
flags:
L letters
N numbers
P zero-padded numbers
C coordinates
E coordinates with letters and numbers
41
R coordinates with letters and numbers (numbers are reversed)
. dot separator for C flag
- minus separator for C flag
_ underscore separator for C flag
W add only “white” squares in a chessboard
B add only “black” squares in a chessboard
With these flags, coordinates are added to each frame name:
L A, B, C, D…
N 1, 2, 3, 4…
P 01, 02, 03, 04…
C 0101,0102,0103…0201,0202,0203…
E A1,A2,A3…B1,B2,B3…
C. 1.1,1.2,1.3…2.1,2.2,2.3…
C- 1-1,1-2,1-3…2-1,2-2,2-3…
C_ 1_1,1_2,1_3…2_1,2_2,2_3…
If you didn’t specify any flag, the frames are created with the same name.
Example:
[box] = FRAMEBOX(0, 0, 4, 3, 1, 1, C_)
The resulting frames will be:
<BOX1_1> = 0, 0, 1, 1
<BOX1_2> = 0, 1, 1, 1
<BOX1_3> = 0, 2, 1, 1
<BOX2_1> = 1, 0, 1, 1
<BOX2_2> = 1, 1, 1, 1
<BOX2_3> = 1, 2, 1, 1
<BOX3_1> = 2, 0, 1, 1
<BOX3_2> = 2, 1, 1, 1
<BOX3_3> = 2, 2, 1, 1
<BOX4_1> = 3, 0, 1, 1
<BOX4_2> = 3, 1, 1, 1
<BOX4_3> = 3, 2, 1, 1
You can use frames with wildcards (? for any one character, * for a group of any characters), can use the tilde (~)
symbol as a flag for addressing a random frame, the exclamation mark (!) as a flag for deleting the frame after use, and
referencing the current frame’s number with the degree (°) symbol (in an expression), or the current frame’s name with
the micro (µ) symbol (in a text). For example, if you want to split an image into 4 images (in a 2 x 2 pattern) and save
them, you can use this script:
[a] = FRAMEBOX(0, 0, 6, 9, 3, 4.5, N)
IMAGE = 1, "c:\my images\earth.jpg", 0, 0, 6, 9, 0
SAVE = 1, "c:\my images\earth _{°}.jpg", <a*>
FRAMECLOCK
This function creates a list of frames (see page 36) arranged in a circle (like a clock’s quadrant). The syntax for this
function is:
[name] = FRAMECLOCK(pos x, pos y, width, height, frame width, frame height,
number, angle, zoom, start, end, factor)
The frames are created with a name composed from the [name] and a number, the number goes from “1” to the 7th
parameter.
Example:
42
[clock] = FRAMECLOCK(0, 0, 4, 4, 1, 1, 8)
You can use frames with wildcards (? for any one character, * for a group of any characters), can use the tilde (~)
symbol as a flag for addressing a random frame, the exclamation mark (!) as a flag for deleting the frame after use, and
referencing the current frame’s number with the degree (°) symbol (in an expression) or the current frame’s name with
the micro (µ) symbol (in a text).
The angle optional parameter is used if you want to rotate all the frames of a precise degree.
The zoom optional parameter is used if you want to resize the frame of a percent (100 is equal to no change).
The start and end optional parameters are used if you want to draw only an arc instead of full circle (both are degrees).
The factor optional parameter, if not zero, creates a spiral of frames, instead of a circle (positive for clockwise spirals,
negative for anti-clockwise spirals).
FRAMECOUNT
This function creates a label with the number of frames from a single frame name, or a list of frame names. The syntax
for this function is:
[name] = FRAMECOUNT(frame1, frame2, …frameN)
In the [name] parameter you can use wildcards (? for any one character, * for a group of any characters).
FRAMEDISK
With this function, you can define a group of frames, specifying two frames, and including all the frames in the circle
drawn used the first frame as a center and the latter as a radius. It works with frames created from FRAMEBOX and
FRAMEHEX functions. The syntax is:
[diskgroup] = FRAMEDISK(frame center, frame radius)
For example:
CARDSIZE = 18, 20
HEXGRID = 1, 0, 0, 18, 20, 1,, #000000, EMPTY, 0.1
[base] = FRAMEHEX(0, 0, 18, 20, 1, E)
[diskgroup] = FRAMEDISK(basee6, basee4)
POLYGON = 1, <diskgroup>, 6, 90, #FF0000
FRAMEHEX
This function creates a list of frames (see page 36), based on a hexagonal grid. The syntax for this function is:
[name] = FRAMEHEX(pos x, pos y, width, height, hex size, flags, zoom x, zoom y)
The last parameters (zoom x and zoom y) are optional, if not specified are equal to 100 (no zoom); if you want half
sized frames, you can specify 50, if you want double sized frames, the value is 200, and so on. The zoom can be
different between horizontal and vertical values.
The frames are created with a name composed from the [name] and the flag in the 6th parameter. You can use these
flags:
L letters
N numbers
P zero-padded numbers
C coordinates
E coordinate with letters + numbers
. dot separator for C flag
- minus separator for C flag
_ underscore separator for C flag
O outer frame (the default, it creates a frame suitable for drawing a circle outside the hex)
I inner frame (it creates a frame suitable for drawing a circle inside the hex)
43
X uses a pattern for obtaining “easy to cut” hexagons (“trihexagonal” tiling)
A the hexes are arranged in horizontal lines instead of vertical
S the line (or the column, if the A flag is specified) starts with a shifted hex
With these flags, coordinates are added to each frame name:
L A, B, C, D…
N 1, 2, 3, 4…
P 01, 02, 03, 04…
C 0101,0102,0103…0201,0202,0203…
E A1,A2,A3…B1,B2,B3…
C. 1.1,1.2,1.3…2.1,2.2,2.3…
C- 1-1,1-2,1-3…2-1,2-2,2-3…
C_ 1_1,1_2,1_3…2_1,2_2,2_3…
If you didn’t specify any flag, the frames are created with the same name.
You can use frames with wildcards (? for any one character, * for a group of any characters), can use the tilde (~)
symbol as a flag for addressing a random frame, the exclamation mark (!) as a flag for deleting the frame after use and
referencing the current frame with the degree (°) symbol (in an expression) or the current frame’s name with the micro
(µ) symbol (in a text). For example, this script draws a circle on a random hex of the first column of a grid:
CARDSIZE = 18, 20
HEXGRID = 1, 0, 0, 18, 20, 1, , #000000, EMPTY, 0.1
[base] = FRAMEHEX(0, 0, 18, 20, 1, E)
ELLIPSE = 1, <~basea*>, #FF0000
FRAMELINE
With this function, you can define a group of frames, specifying a first frame, a last frame, and including all the frames
in the shortest path between the two. It works with frames created from FRAMEBOX and FRAMEHEX functions. The
syntax is:
[linegroup] = FRAMELINE(frame start, frame end)
For example:
CARDSIZE = 18, 20
HEXGRID = 1, 0, 0, 18, 20, 1,, #000000, EMPTY, 0.1
[base] = FRAMEHEX(0, 0, 18, 20, 1, E)
[linegroup] = FRAMELINE(basea1, baseh9)
POLYGON = 1, <linegroup>, 6, 90, #FF0000
FRAMELIST
With this function, you can define a group of frames, and use a single command on all of them. The syntax is:
[group] = FRAMELIST(frame1, frame2, …frameN)
You can specify a single frame for parameter, or use another group of frames, or specify a range of frames using the
syntax frameX..frameY (to add every frame with that name and numbered between X and Y). Before the name of the
frame you can use these flags:
£ the frames are reversed on each line (from top to bottom, from right to left)
$ the frames are in bidirectional order (from left to right in the first row, from right to left in the next row, and so
on…)
% the frames are listed in vertical order (from left to right, from top to bottom)
%£ the frames are reversed on each vertical line (from left to right, from bottom to top)
%$ the frames are in bidirectional vertical order (from top to bottom in the first column, from bottom to top in the
next column, and so on…)
- the order with the frames in a group are added is completely reversed (it can be added to each of the above
combinations
44
After the name of the frame you can specify how many frames are skipped with the syntax frame&N where N is the
number of the frames to skip.
For example, this script draws three circles on the first three hexes in the top-left corner of a grid:
CARDSIZE = 18, 20
HEXGRID = 1, 0, 0, 18, 20, 1,, #000000, EMPTY, 0.1
[base] = FRAMEHEX(0, 0, 18, 20, 1, E)
[group] = FRAMELIST(basea1, basea2, baseb1)
ELLIPSE = 1, <group>, #FF0000
FRAMEMELD
With this function, you create a new frame, merging several others. The syntax is
[newframe] = FRAMEMELD(frame1, frame2, …frameN)
For example:
CARDSIZE = 18, 20
HEXGRID = 1, 0, 0, 18, 20, 1,, #000000, EMPTY, 0.1
[base] = FRAMEHEX(0, 0, 18, 20, 1, E)
[group] = FRAMEDISK(basef3, basef1)
POLYGON = 1, <group>, 6, 90, #FF0000
[meld] = FRAMEMELD(based1, baseh5)
ELLIPSE = 1, <meld>, #0000FF, EMPTY, 0.2
FRAMEMOSAIC
This function reads all the images in a folder, arrange them in a rectangle, and creates a new group of frames, one for
each image. If the images fill more than one instance of that rectangle, you can use a page parameter to specify which
rectangle is drawn from all the possible choices. The frames are created with a name composed from the [name] and a
number, the number starts from “1”. The syntax for this function is:
[newframe] = FRAMEMOSAIC("folder", pos x, pos y, width, height, page, flags,
zoom)
Parameters:
"folder": a folder to search, eventually with a file pattern,
position x: horizontal position (in cm),
position y: vertical position (in cm),
width: width of the rectangle (in cm),
height: height of the rectangle (in cm),
page: if not specified, is equal to 1,
flags: one or more of these flags
H the schema is mirrored horizontally
V the schema is mirrored vertically
S the images are read also in the subfolders
zoom: if not specified, is equal to 100
This function creates also a label named namePAGES (where name is the frames’ prefix) with a value equal to the
number of pages resulting.
45
FRAMENET
This function creates a new group of frames, composed with all possible couple from two groups of frames, eventually
including only these contained with a range of distances. The syntax is:
[newframe] = FRAMENET(frame group 1, frame group 2, min dist, max dist, flags)
In the flags parameter, you can use one or more of these flags:
L the frame(s) added is from the center of the starting frame to the center of the ending frame (it can be used for
drawing lines), this is the default option,
N the frame(s) added is the ending frame,
1 the frame(s) added are only from the 1st quadrant (top-right),
2 the frame(s) added are only from the 2nd quadrant (bottom-right),
3 the frame(s) added are only from the 3rd quadrant (bottom-left),
4 the frame(s) added are only from the 4th quadrant (top-left).
If you didn’t specify any of flags 1234, the frames are taken from all the starting lists.
For example, this is a net from all the points in a rectangular grid, with a maximum distance of four units:
[net0] = FRAMEBOX(0, 0, 6, 9, 1, 1, L)
[net1] = FRAMENET(net0*, net0*, 0, 4)
LINERECT = 1, <net1>, #000000
Another example, this is a “star map”, connecting ten random “planets” in a hexagonal grid with a distance from two to
four units:
[map0] = FRAMEHEX(0, 0, 6, 9, 0.1, L, 50%)
[map1] = FRAMELIST(10!~map0*)
[map2] = FRAMENET(map1, map1, 2, 4)
LINERECT = 1, <map2>, #000000
ELLIPSE = 1, <map1>, #0000FF
FRAMEPATH
With this function, you can define a group of frames, specifying a first frame, a last frame, and including all the frames
in the shortest path between the two, and optionally remove a list of frames (specified in the 4th parameter) from the
result. It works with frames created from FRAMEBOX. The syntax is:
[pathgroup] = FRAMEPATH(frame start, frame end, flags, exclusions)
In the flags parameter, you can use one or more of these flags:
F add frame1 to the result group
L add frame2 to the result group
D delete the frames used for the path
S delete the frame used as 1st parameter (start frame)
E delete the frame used as 2nd parameter (end frame)
T use the shortest path
For example:
[grid] = FRAMEBOX(0, 0, 6, 9, 0.5, 0.5, C)
[path1] = FRAMEPATH(grid0203, grid1116, D)
[path2] = FRAMEPATH(grid0203, grid1116, D)
[path3] = FRAMEPATH(grid0203, grid1116, D)
RECTANGLE = 1, <grid*>, #0000FF, #FF0000, 0.1
ELLIPSE = 1, <path1>, #AAAAAA, #00FF00, 0.05
ELLIPSE = 1, <path2>, #AAAAAA, #0000FF, 0.05
ELLIPSE = 1, <path3>, #AAAAAA, #FF0000, 0.05
46
FRAMEPER
This function creates a new group of frames, adding for each starting frame the four frames from its sides (the starting
frame is considered rectangular). The syntax is:
[newframe] = FRAMEPER(frame group, width, flags, margin)
The width parameter specifies the width of the left and right frames, and the height of top and bottom frames. In the
flags parameter, you can use one or more of these flags:
1 a frame for the top side of the rectangular frame is added to the result,
2 a frame for the right side of the rectangular frame is added to the result,
3 a frame for the bottom side of the rectangular frame is added to the result,
4 a frame for the left side of the rectangular frame is added to the result,
V with this flag the frames are created in vertical order (instead of a horizontal order).
If you didn’t specify any of flags 1234, all the four frames are added. The margin parameter specifies how much space
is added to the left and to the right (for horizontal sides) and to the top and to the bottom (for vertical sides) of the
frame.
FRAMERECT
With this function, you can define a group of frames, specifying two frames, and including all the frames in the
rectangle drawn used the first frame as top-left and the latter as bottom-right. It works with frames created from
FRAMEBOX and FRAMEHEX functions. The syntax is:
[rectgroup] = FRAMERECT(frame start, frame end)
For example:
CARDSIZE = 18, 20
HEXGRID = 1, 0, 0, 18, 20, 1,, #000000, EMPTY, 0.1
[base] = FRAMEHEX(0, 0, 18, 20, 1, E)
[rectgroup] = FRAMERECT(baseb3, basei6)
POLYGON = 1, <rectgroup>, 6, 90, #FF0000
FRAMESUB
With this function, you can define a new frame from another frame (1st parameter), removing items from a third frame
(2nd parameter). The syntax is:
[group] = FRAMESUB(frame1, frame2)
For example, this script uses two square group of frames for creating a third hollow group of frames (subtracting the
second from the first):
[grp_a] = FRAMEBOX(0, 0, 6, 6, 1, 1, C)
[grp_b] = FRAMEBOX(1, 1, 4, 4, 1, 1, C)
[grp_c] = FRAMESUB(grp_a*, grp_b*)
ELLIPSE = 1, <grp_c*>, #00FF00
FRAMETRANS
This function creates a new group of frames, taking all the frames from a group, and applying to them a horizontal and a
vertical offset, and optionally a change in width and height. The syntax is:
[newframe] = FRAMETRANS(frame group, x offset, y offset, width change, height
change)
47
For example, this line takes all frames from group test, and creates a group test_trans shifted right of 0.5:
[test_trans] = FRAMETRANS(test, 0.5, 0)
FRAMETRI
With this function, you can define a group of frames, specifying three frames, and including all the frames in the
triangle drawn used the frames as vertexes. It works with frames created from FRAMEBOX and FRAMEHEX
functions. The syntax is:
[trianglegroup] = FRAMETRI(frame1, frame2, frame3, flags)
You can use these flags in the 4th parameter:
O = doesn’t include the outer frames
I = doesn’t include the inner frames
For example:
CARDSIZE = 18, 20
HEXGRID = 1, 0, 0, 18, 20, 1,, #000000, EMPTY, 0.1
[base] = FRAMEHEX(0, 0, 18, 20, 1, E)
[trianglegroup] = FRAMETRI(baseb3, basei6, basec10)
POLYGON = 1, <trianglegroup>, 6, 90, #FF0000
48
Expressions
Expressions may be used to calculate numeric parameters or numbers in TEXT parameters, these delimited with “{”
and “}”. You can use numbers (integer and decimal separated with a dot “.”), parenthesis and these operators:
+ addition
- subtraction
* multiplication
/ division
^ exponentiation
# modulus
£ integer division
For changing the order of operations, you can use “(“, “)”, “{” and “}”, these are treated like the same. You can’t use
“[” and “]” (used for labels).
For example, these are valid expressions:
RECTANGLE = 1, 0, 0, (1+2)*2, (1+2)^2, #FF0000
TEXT = 1, "Result {(2+2)^2}", 0, 0, 6, 9, center
This is a special variable: the paragraph character (§) gives you the current card number; for example, that script creates
ten cards, each with a number from 1 to 10:
FONT = Arial, 32, , #000000
TEXT = 1-10, "{§}", 0, 0, 6, 9, center
That script creates ten cards, each with a random number from 1 to 100:
FONT = Arial, 32, , #000000
TEXT = 1-10, "{1d100}", 0, 0, 6, 9, center
Counters are variables, that can be used in expressions; there are two kind of counter, these are used for integer values:
A B C D E F G H I J
And these are used for floating-point values:
AA BB CC DD EE FF GG HH II JJ
A counter can be initialized with COUNTER directive:
COUNTER = 1, A, 1
and later re-used in an expression:
RECTANGLE = 1, 0, 0, A, A, #00FF00
A counter can be auto-incremented with a pre- and/or a post- number. If A has a value of 10, this command:
TEXT = 1, "{1A2}", 0, 0, 3, 3, center
will give an output of 11, and A will have a value of 13 after that line.
The counter D is a special case, it has been changed for default into a dice (see DICE keyword, page 83), to give a
random value, the syntax is ndf, where n is the number of dice, each with f faces. If not specified, n is set to one, and f is
set to six.
These are special symbols:
49
Z Format
X Repeat
The “Z” symbol may be used when you need to format a decimal value with a fixed number of digits. The syntax is
valueZmask, where the mask is a sequence characters for the integer part, a dot (“.”) and a sequence characters for the
decimal part. The characters that can be used for the mask are:
0 a digit taken from the number, if there isn’t a digit in that position, a zero (“0”) is written instead.
# a digit taken from the number, if there isn’t a digit in that position, a space (“ ”) is written instead.
For example:
FONT = Arial, 32, , #000000
TEXT = 1, "{4/3Z00.00}", 0, 0, 6, 9, center, center
The result will be a “01.33” printed on the card.
The syntax for the “X” symbol is textXnumber, and duplicates the text for a number of times. For example:
FONT = Arial, 32, , #000000
TEXT = 1-5, "{*X§}", 0, 0, 6, 9, center, center
Will output an asterisk on the 1st card, two asterisks on the 2nd card, three on the 3rd and so on.
Comments
Comments can be inserted in scripts, marking them with a character on the start of the line. The character can be an
apostrophe (‘) or a semicolon (;) or a custom character selected from the “Config” window.
Example:
CARDS = 52
‘This is a standard deck
From the “Config” window you can also check the “Use in-line comments marked by …” option, and after that you can
use a syntax like that:
CARDS = 52 ‘‘ This is a standard deck
If you use a custom character, and open your script on another computer (with a different configuration) your comments
will not be evaluated as such. To avoid this problem, you must include a COMMENT directive at the start of your script
(see page 77).
You can apply or remove the current comment’s character in a block of selected text with two buttons on the right side
of the main window: “+Com” for apply comments and “-Com” for removing comments.
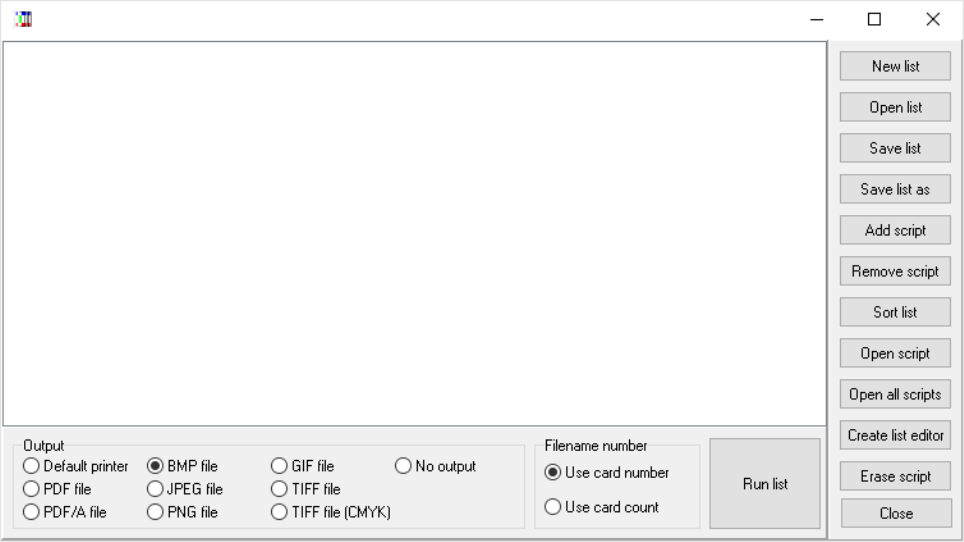
50
Script lists
If you must work on multiple scripts, you can create a list for manipulating them. You can activate this option clicking
on the button “Script list”:
With the buttons on the right side you can create a new list, open an old list, save the current list (with the current name
or specifying another), add another script to the list, remove a script and sort the list. You can also open the selected
script, or open all of them (in multiple tabs), create a list from all the current scripts and erase the selected script.
With the button “Run list” you can launch a “Validate and build” task on all the scripts listed in this window, choosing
the output for them with the “Output” box: you can print the result, create PDF, and save the images in bmp, jpg, png or
tiff format (the latter with standard and CMYK color space). With the “Filename number” box you can choose if the
filename must be chosen from card number or card count: it can be different if you use a PRINT directive (see page
139) in your scripts.
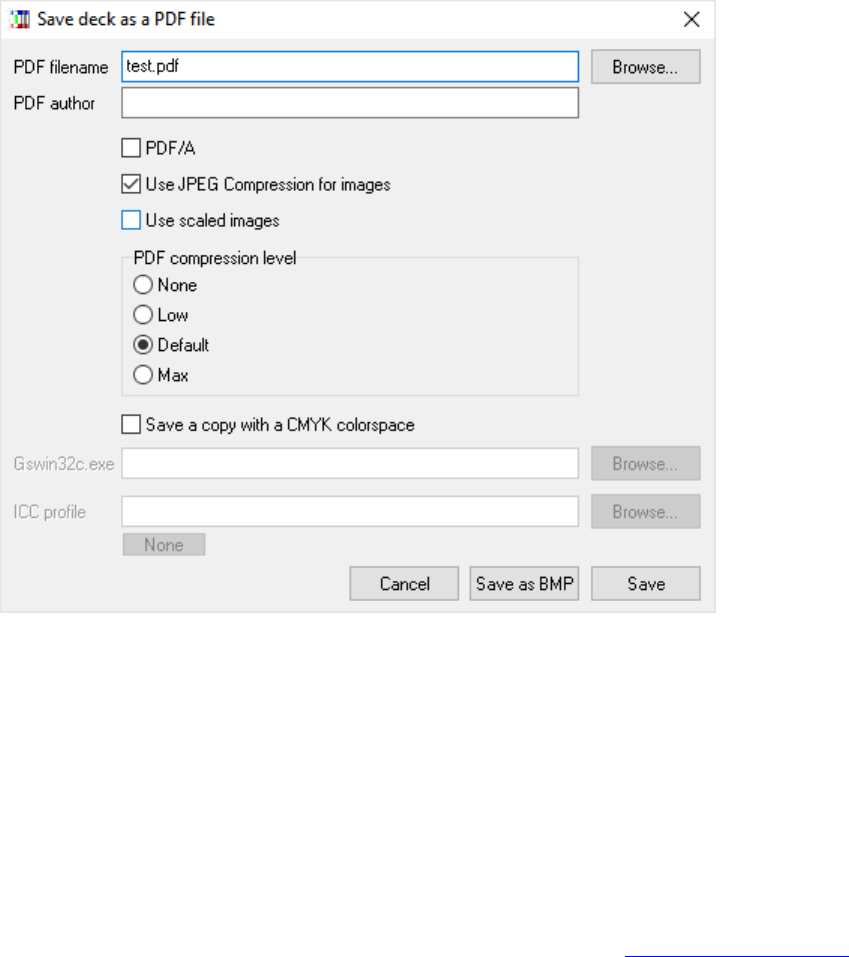
51
Create PDF
The button “PDF” in the main window opens this form:
With this form, you can specify a filename and an author for the PDF file.
PDF/A: with this option, the PDF file is saved in this format.
Use JPEG Compression form images: with this option enabled all the images in the PDF file are internally stored in
JPEG format.
Use scaled images: with this option enabled, the program uses a high image compression for the PDF file, reducing its
size (and its quality).
PDF compression level: you can choose between four standard compression level for the images (None, Low, Default
and Max).
Save a copy with a CMYK color space: if you have installed Ghostscript (http://www.ghostscript.com) you can also
save it with CMYK color space (instead of RGB), specifying the path for the executable (Gswin32c.exe), and use an
ICC color profile.
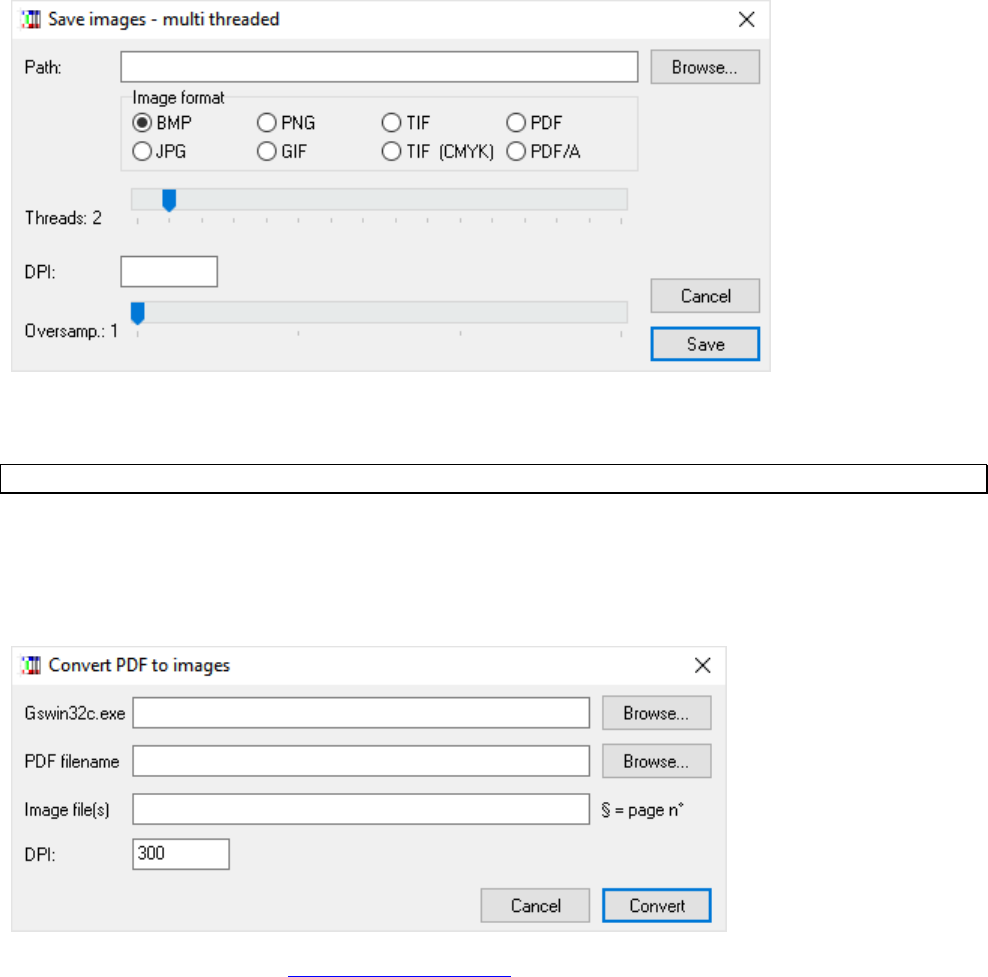
52
Save images
The button “MT” in the main window opens this form:
With this form, you can specify a path for saving the cards’ images, the file format, the number of threads to be used,
the DPI (see page 84) and oversampling (see page 132) values.
Note: every thread uses a separate memory pool, thus it’s possible to use more than 4GBytes of memory.
Convert a PDF to images
The button “CP” in the main window opens this form:
If you have installed Ghostscript (http://www.ghostscript.com) you can convert PDF files into images. The first field is
for the Ghostscript’s executable; the second is the name of the PDF file, the third is for the resulting images (you can
use the § character for the page number); the fourth field is for the DPI resolution of the final images.
53
Command-line parameters
You can run nanDECK from the command line (if you want to execute a script in a batch, for example). The syntax is:
nanDECK <script file> <action>
The action parameter can be one of the following:
/createbmp
the program creates all the cards and saves them in bmp/jpg/png/gif/tif formats (also with CMYK
color space), one file for each card
/createjpg
/createpng
/creategif
/createtif
/createtifcmyk
/creategifa
the program creates all the cards and saves them in one single file in animated-gif or pdf format
/createpdf
/createpdfa
/print
the program creates all the cards and prints them with the default printer
/exec
the program runs the script (useful when using SAVE directive)
/range=
the program creates only a range of the card, with the syntax start-end (for example /range=1-10)
/output=
this is the path for the resulting files
/dpi=
you can specify a different DPI value (the value in the script isn’t used)
/oversample=
you can specify an oversample value (the value in the script isn’t used)
/name=
the program uses a label for the name of the card when saved as individual images
/[label]=value
the program adds a label with that name and that value
For example, to save all images obtained with script “c:\my scripts\test01.txt” in png files, you can write:
nanDECK “c:\my scripts\test01.txt” /createpng
To create a pdf with all the cards, you can write:
nanDECK “c:\my scripts\test01.txt” /createpdf
The images are created in the same folder for the script, and for multiple images, a number will be added to the end of
the filename. In the 1st example, the images will be named:
c:\my scripts\test01_01.png
c:\my scripts\test01_02.png
c:\my scripts\test01_03.png
…
In the 2nd example, the file will be named:
c:\my scripts\test01.pdf
If you leave the action parameter empty, the program will only load the script specified in the 2nd parameter.
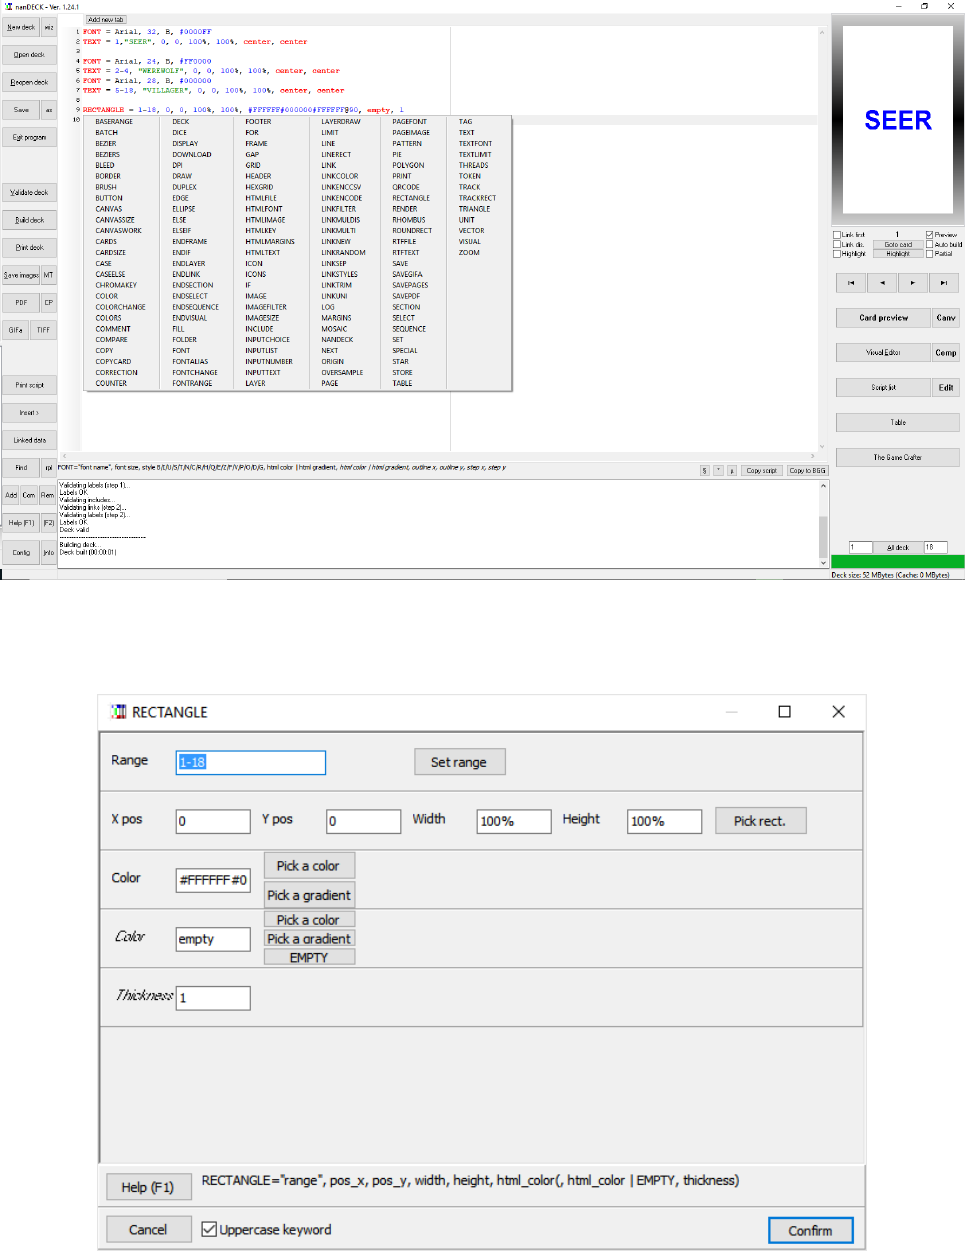
54
Keyword wizards
In this program, you can use a wizard for inserting keywords (and specifying all the parameters). In the main editor, if
you want to insert a directive, right click on an empty row and a menu appears, with all the keywords, if you click on
one entry, the corresponding wizard form will be showed:
For every keyword, a different wizard form appears, with all the parameters (obligatory and optional). The same
window appears if you press “F2” (modify) key on a pre-existent row (or right-click on the same pre-existent row). For
example, this is the RECTANGLE wizard form:
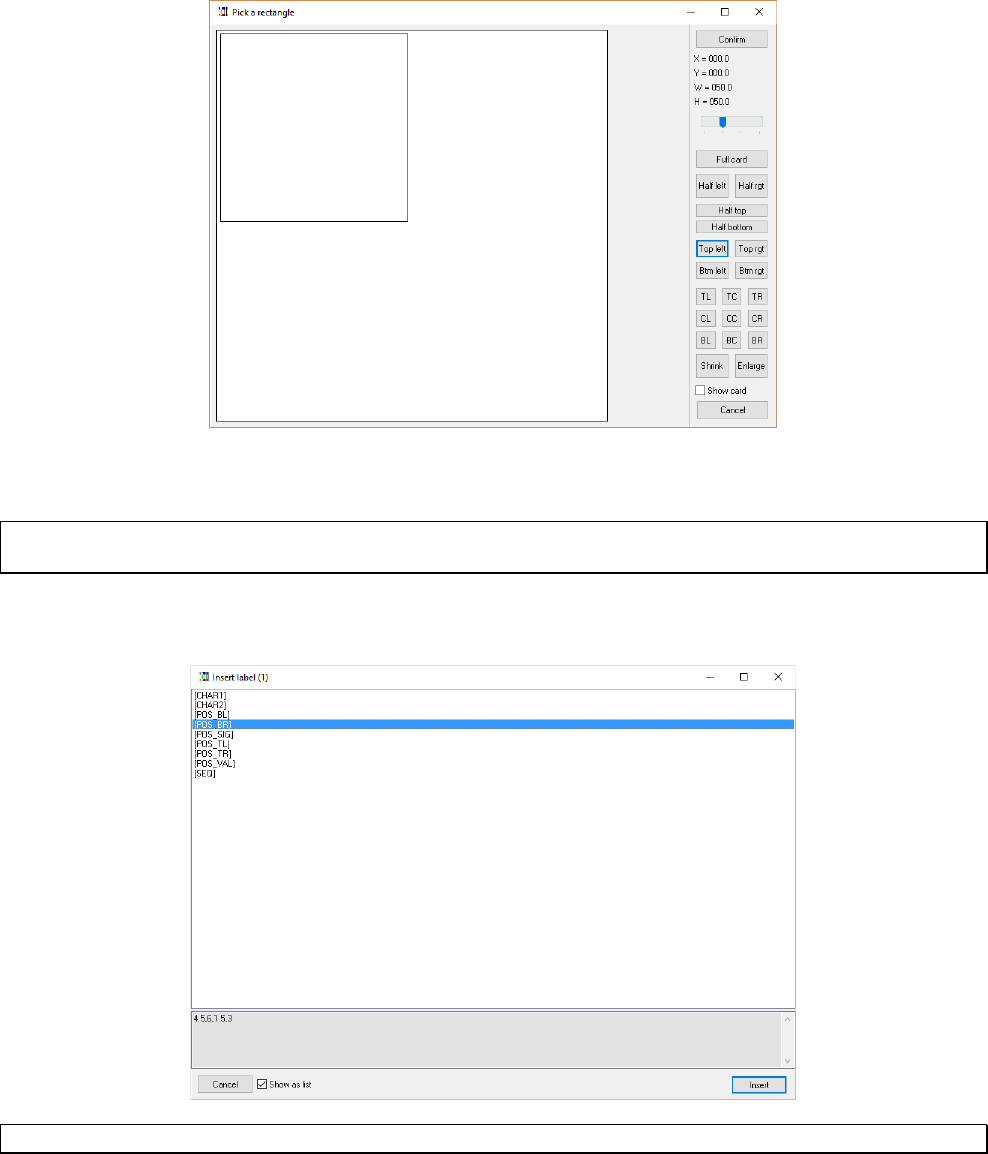
55
Optional parameters are in italic (like Thickness in the above form). A hint for the syntax is show in the bottom of the
form, with the “Confirm”, “Help” (it points to the RECTANGLE help page) and “Cancel” buttons. For some
parameters, there are buttons for inserting specific values (like colors and gradients). For position and size there is a
specific form (“Pick rect.” Button, in the above form):
The rectangle can be moved and resized, dragging it with the mouse; you can use the rightmost buttons to change the
rectangle size or position into some standard values.
Tip: you can go directly to this form, pressing the key F3 (or clicking the “Visual edit” button) where you are on a line
with a graphic directive.
In the wizard form, if you double click in a field, you can choose a label name from a list (you can see also the label’s
value):
Tip: in every field, you can use the mouse wheel to increase / decrease a numeric value.
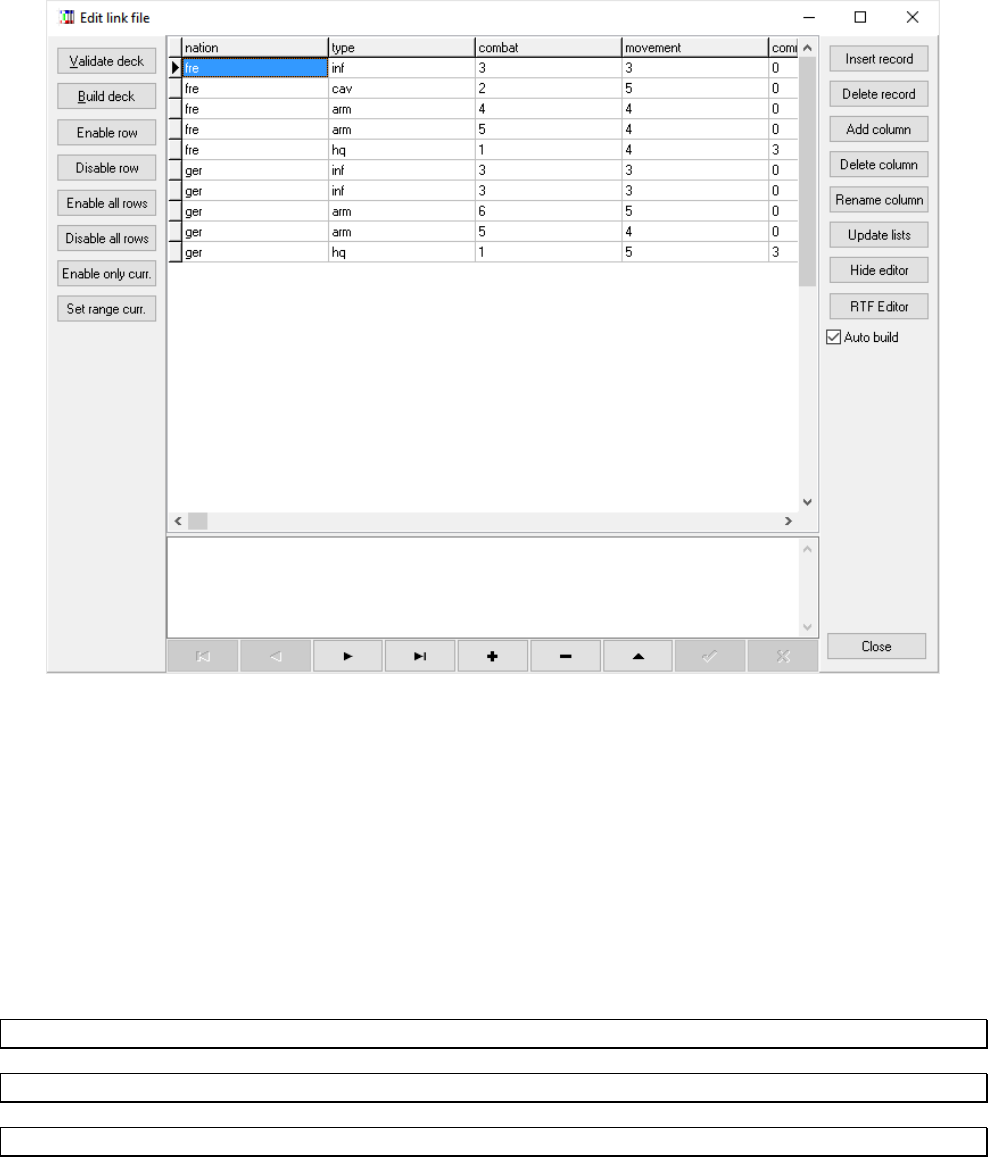
56
Linked data editor
If you use a LINK directive (see page 123) to use a CSV data file, you can edit directly this file using the “Linked data”
button. If you click on it, the program shows you a list of linked files. If you choose one of this, a window opens itself,
showing you a table with the file content. For example:
You can modify directly a cell clicking on it (there is a larger edit box on the bottom of the window), you can also
change the table’ sorting with a click on the column (one click sets an ascending order, another click sets a descending
order, it doesn’t work for larger fields). With the buttons on the right you can do some tasks, like insert or delete a
record, add, delete or rename a column (a field), update the lists of data (in the drop-down menu in each field), hide or
show the editor, open an external RTF editor (for the current field) or close the window.
The two buttons “Validate deck” and “Build deck” on the left are replicated from the main window. With the other
buttons on the left you enable or disable the current row (putting a ‘ in front of it), or enable or disable all the rows. You
can also enable only the current row, or setting the range for the deck building. With the buttons on the lower side of the
window (under the edit box) you can move the current record (first, previous, next and last), add (+), delete (-), edit (the
triangle), confirm (the check sign) or discard (X) the changes in a record.
All the change made in this window to the linked file will be saved if you save the main script file.
Tip: you can instantly build a single card with a double click on one row of data.
Tip: you can instantly open the external RTF editor with a double click on the lower editor.
Tip: you can select the external RTF in the “Config” button from the main window.
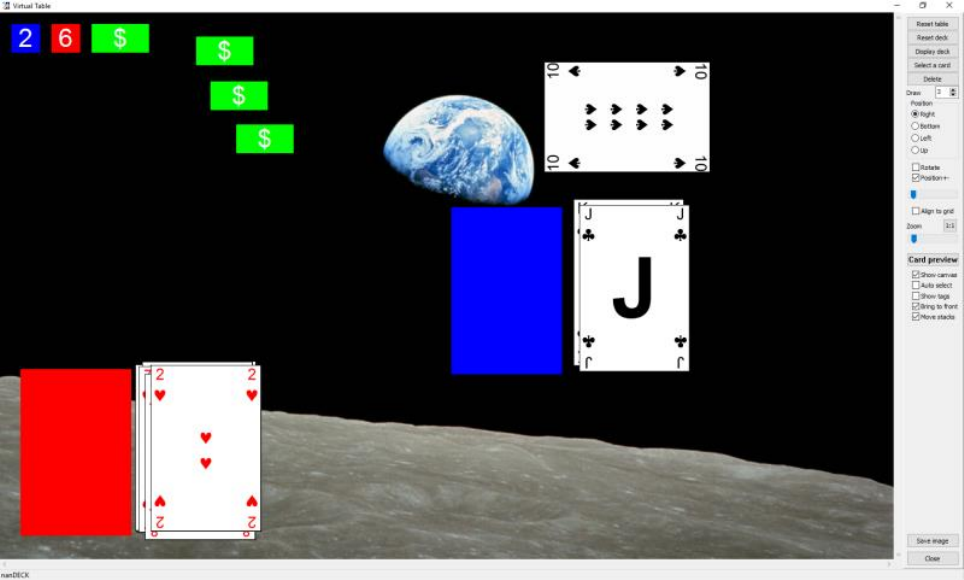
57
Virtual table
The “Virtual table” option is a desktop in which you can put the result of card rendering, you can use it for saving
images for a manual or play test the drawing of cards from a deck. Without modifying your script, you can view the
Virtual table clicking on the button “Table” after building a deck. Then you can see a window with your deck in the
center of the screen, and you can use these commands:
Mouse commands on decks
click select deck
double click draw a card face up
shift double click draw a card face down
right click rotate deck 90°
resize resize deck image
shift resize resize deck image without keeping size ratio
ctrl resize resize deck image from the center
Mouse commands on cards
click select card
double click turn card face down/face up
right click rotate card 90°
resize resize card image
shift resize resize card image without keeping size ratio
ctrl resize resize card image from the center
ctrl click pick all the cards and the decks under the cursor and create a new deck
mouse wheel zoom table
In the bottom line of the window you can read the number of cards in the selected deck. On the right panel, you have
these controls:
Reset table this button reset to the initial state all the decks and the elements on the table
Reset deck this button reset to the initial state the selected deck
Display deck this button draws all cards in the deck, and position them left to right, top to bottom in the table
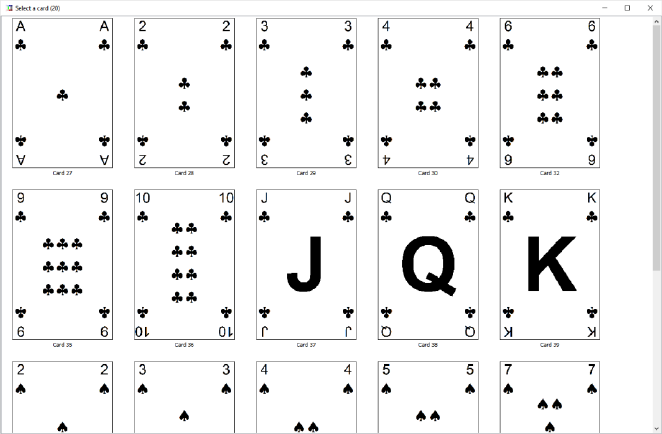
58
Select a card this button lets you to select a single card from a deck
Delete this button deletes the selected object (deck, card, or token)
Draw (number) the number of cards specified is drawn each time you double click on a deck
Position the card drawn from the deck is placed to this position, relative to its deck
Rotate after a card is draw, the position is moved to the next
Position +- the card drawn is placed in a slightly random direction
Position slider the amount of the offset of the position when the last option is enabled
Align to Grid the card drawn is placed in a grid of the same size of the card
Zoom slider this slider enlarges or reduce the table size
1:1 button this button reset the zoom
Card preview this button show the current card, enlarged
Show canvas the canvas is shown as a background image
Auto select the elements of the table are selected automatically when the mouse pass over them
Show tags the tags (see page 152) are shown in the four quadrants of the table
Bring to front an object clicked is pushed to the front, before all the other objects
Move stacks when you move a card, all the other cards on top of it are also moved
Save image the table is saved as a bmp file
Close you close this window
This is the window that the program shows you to select a single card from a deck:
There are two directives that you can use in your script to customize the Virtual table: the DECK directive splits the
cards in more than one deck, and the TOKEN directive creates some elements to be used on the table, with a fixed text
or a randomized value, in the latter case you can “roll” the token with a double click on it.
Example:
…
DECK = "1-26", "Red", #FF0000, 30%
DECK = "27-52", "Black", #0000FF, 30%
TOKEN = "{1d6}", 50, 50, #FFFFFF, #0000FF, 1
TOKEN = "{1d6}", 50, 50, #FFFFFF, #FF0000, 1
TOKEN = "$", 100, 50, #FFFFFF, #00FF00, 10
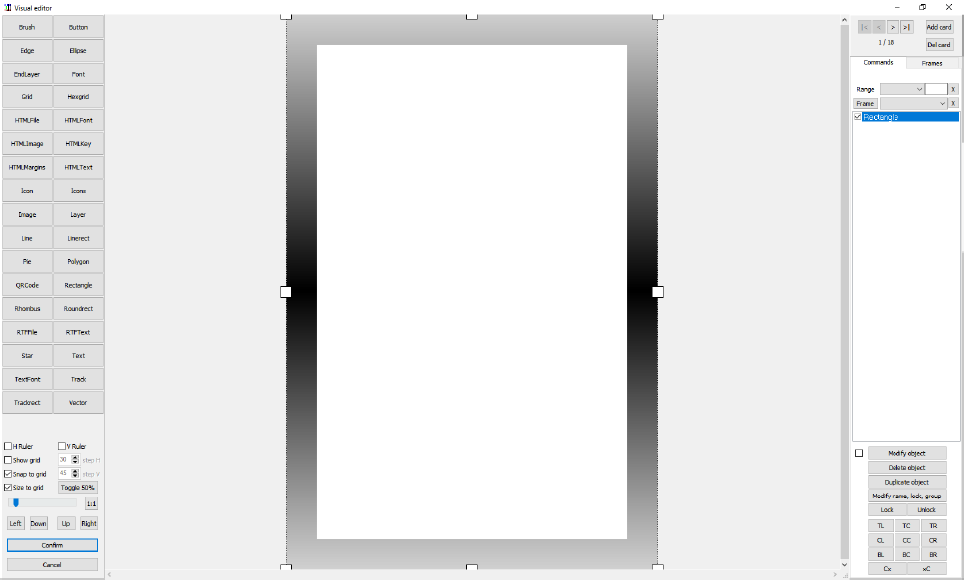
59
Visual editor
You can open the Visual Editor with a click on the “Visual editor” button, or pressing F4 on the keyboard, or by a
middle button (or wheel) click on the mouse, this is the main form:
The visual directives are a subset of the standard ones, and are loaded from a section of the source delimited with
VISUAL / ENDVISUAL directives, for example:
VISUAL
ELLIPSE = 1, 0, 0, 100%, 100%, #0000FF
ENDVISUAL
With this script, when you press the “Visual Editor” button, the program loads the lines between VISUAL /
ENDVISUAL in the visual GUI, and you can modify them, or add new directives (with the toolbox on the left of the
window).
When you press the “Confirm” button, all the objects are inserted in the source, between VISUAL / ENDVISUAL, so
there is a two-way interaction between source and GUI (but only in a section of the source). Non-visual directives are
not allowed in this section (the program gives an error in the validation step).
If the VISUAL / ENDVISUAL section is not present, the program shows you an empty GUI (but you can add new
objects) and when you return to the source, a visual section is added to the end of it.
You can see at the right of the GUI window a list of directives, that will go to the source if confirmed, that are layered
from the top (first, to the rear) to the bottom (last, to the front). They can be drag and dropped across the list to change
their layer position (the result is shown immediately in the main panel).
At the top right of the window there are some buttons to navigate through the deck (and add or delete cards), a combo
box for choosing a label / sequence to be inserted in directives like TEXT or IMAGE and another combo box for
choosing a sequence to be used with a LABELRANGE function to choose a range (the object is shown only when the
item of the sequence is equal to “1”).
The last combo box is when you want to link the object to a frame (only frames defined within VISUAL /
ENDVISUAL section are shown); these frames are shown by clicking on the “Frames” tab (all other objects are
locked); in this tab, you can also enable only a group of frames: to define a group you can create frames with a
group/name syntax (for example: group1/frame1, group1/frame2, etc.). If you enable the option “Change objects’
60
frames”, when you choose a group the program will move all the objects that has frames with compatible names to the
new frames.
In the bottom left of the windows there are the controls for showing h/v rulers, a grid (with the number of horizontal and
vertical steps) and snap/size to the grid, a slider for zooming in and out the card, a button “Toggle 50%” to toggle on/off
50% transparency to the current object (useful to see what lies beneath), and a button “1:1” for restoring a 100% zoom
and four buttons to move the selected object in the four directions (these buttons are linked to the arrows keys on the
keyboard).
In the bottom right there are nine buttons, to move the selected element to these positions. If you use the right mouse,
the element instead of being moved is resized (for example, the CC button resize it to the whole card). The last two
buttons, “Cx” and “xC” centers the element vertically and horizontally, respectively.
Mouse controls:
• double click (on the command, to the right of the screen): modify comment, lock and group of an object,
• right click (on the object and the command): modify the parameters utilized for rendering,
• use mouse wheel for zooming the card’s image,
• use CTRL + mouse wheel to move between cards.
Shortcuts:
F2 modify current element
Del delete current element
CTRL+D duplicate the current object,
CTRL+L lock the position of the current object,
CTRL+U unlock the position of the current object,
CTRL+H toggle 50% transparency on/off,
LEFT move the current object one pixel to the left,
DOWN move the current object down one pixel,
UP move the current object up one pixel,
RIGHT move the current object one pixel to the right.
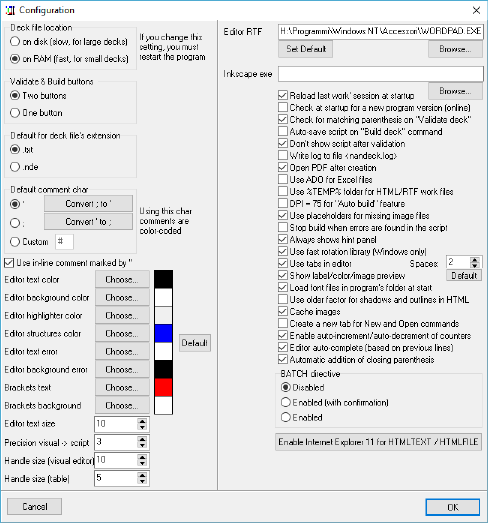
61
Configuration
The “Config” button on the main window brings you to the configuration window:
Deck file location: the program can run in two modes, the default “on RAM” setting uses RAM for the card rendering,
it is fast, but if you have many high-resolution cards it can slow down the whole computer (when the RAM is full).
Instead the “on disk” setting is slower, but it can render many high-resolution cards without slowing down your PC. The
same is true if you have very large decks (thousands of cards).
Validate & Build buttons: usually “Validate” and “Build” are two distinct buttons in the main window. With this
option, you can have one single button “Validate & Build”; if you click it, the script will be first validated, and if valid,
the deck will be built next.
Default for deck file’s extension: with this option, you can choose the default extension between “.txt” and “.nde” (and
assigning these files to the nanDECK program, and open them with a double click).
Default comment char: with this option, you can choose the character used for commenting lines, and changing all of
them from one to another, you can also use a custom character (instead of the default ‘ and ;).
Use in-line comment marked by ;;: if you enable this option, you can use a double comment char for inserting
comments on the same line used for commands. For example (with the default “;” comment char):
CARDSIZE = 6, 9 ;; default card size
Editor text color, Editor background color, Editor highlighter color, Editor structures color, Editor text error,
Editor background error, Brackets text, Brackets background: with these buttons, you can change the default
colors for the editor text, background, highlighted line, lines that contain special directives, text and background for
lines that contain errors and brackets (and re-setting them to the default values by pressing the Default button).
Editor text size: this number sets the size of the font for the editor’s character (the default is 10).
Precision visual → script: this is the number of digits for fractional values that the software uses when an object in
visual editor is converted to a script line.
Handle size (visual editor): this is the size (in pixels) of the eight white squares that you can use to resize an object in
the visual editor.
62
Handle size (table): this is the size (in pixels) of the eight white squares that you can use to resize an object in the
virtual table.
Editor RTF: this is the path to the executable file called when you want to edit a field text in a linked file with an
external RTF editor. You can also choose the default executable linked with an “.rtf” file extension.
Inkscape exe: this is the path to the executable file for Inkscape, used with the VECTOR directive (see page 161) when
you want to use it for the rendering, instead of the internal engine (the default, less accurate).
Reload last work’ session at startup: with this option enabled, at the start the program loads the file(s) opened in the
last session.
Check at startup for a new program version (online): with this option enabled, at the start the program checks online
if a new release is available for the download, and warns you in the window’s title.
Check for matching parenthesis on “Validate deck”: with this option enabled, the program checks if the parenthesis
match in all your script.
Auto-save script on “Build deck” command: with this option enabled, the program always saves the script when you
click on the “Build deck” button.
Don’t show script after validation: usually the program, after the validation procedure, writes the script in the lower
box in the main window. With this option enabled, the script is not written (speeding up the validation process).
Write log to file <nandeck.log>: with this option enable, you can save the program log (all the text shown in the lower
box in the main window) in a text file.
Open PDF after creation: with this option enabled, after a PDF is created, the program opens it, using the default
application associated with “.pdf” extension.
Use ADO for Excel files: with this option for loading files from Excel is used an ADO library, is slower than the
internal method, but you can open files that are concurrently open in Excel.
Use %TEMP% folder for RTF/HTML work files: these directives create a temporary file, if you enable this option
that file will be create in the temporary folder, if you disable this option it will be created in the current folder. Note that
if you have projects in folder linked to a cloud service (like Dropbox™) you should enable this option.
DPI = 75 for “Auto build” feature: if you have enabled the “Auto build” option, if this option is enabled, the preview
is done at a lower resolution (useful for slow PC).
Use placeholders for missing image files: if you specify file images that doesn’t exists, the program creates them (a
random color bitmap with the name of the file repeated on it) and shows you in a window the list of the missing files.
Stop build when errors are found in the script: with this option enabled, the validate procedure is stopped when an
error is found in the editor, if it is disabled, the line with errors are highlighted and the validation is completed.
Always shows hint panel: with this option enabled the bottom panel with the keyword’s help is shown always, and not
only when a keyword is present in the current editor line.
Use fast rotation library (Windows only): use an alternative rotation library that uses routines available only on
Windows (when the program is executed for the first time on Wine, this option is unchecked).
Use tabs in editor: if you enable this option, each tab key is converted to the specified number of spaces.
Show label/color/image preview: with this option enabled, when the caret is on a label, its content (text, color, or
image) is shown in the lower part of the main window (the Default button resets the standard widths of these resizable
panels).
Load font files in program’s folder at start: if this option is enabled, nanDECK, when it’s started, loads all the font
files that are found in the same folder with its executable.
63
Use older factor for shadows and outlines in HTML: when they were first implemented, shadows and outlines with
HTMLFONT use a value for size that wasn't correct; now it’s fixed, but if you want to use the older routines, check this
option.
Cache images: with this option enabled, all the files loaded with an IMAGE directive are stored in RAM, for a faster
reload; if you need more RAM for your deck, uncheck this option.
Create a new tab for New and Open commands: if this option is enabled, when you create a new script or load an
existing one, a new editor tab is created, instead of executing that command in the existing editor tab.
Enable auto-increment/auto-decrement of counters: with this option enabled, you can use numbers before or after
counters to add/subtract a number from them (if before, the number is added/subtracted before using the counter, if
after, the addition/subtraction occurs after having used the counter).
Editor auto-complete (based on previous lines): if this option is enabled, when you digit some characters, if an
existing line is already present in the editor, that starts with these characters, is proposed as selected text.
Automatic addition of closing parenthesis: if this option is enabled, when you digit an open parenthesis (standard,
square, or curly) the corresponding closing parenthesis is automatically added.
BATCH directive: for security reason the BATCH directive (see page 67) must be enabled before use, selecting an
option from “Disabled”, “Enabled (with confirmation)”, and “Enabled”.
Enable Internet Explorer 11 for HTMLTEXT / HTMLFILE: as a default a program can’t use Internet Explorer
features beyond version 6, until there is a specific entry in Windows’ Regedit; by using this button the program writes
that correct entry.
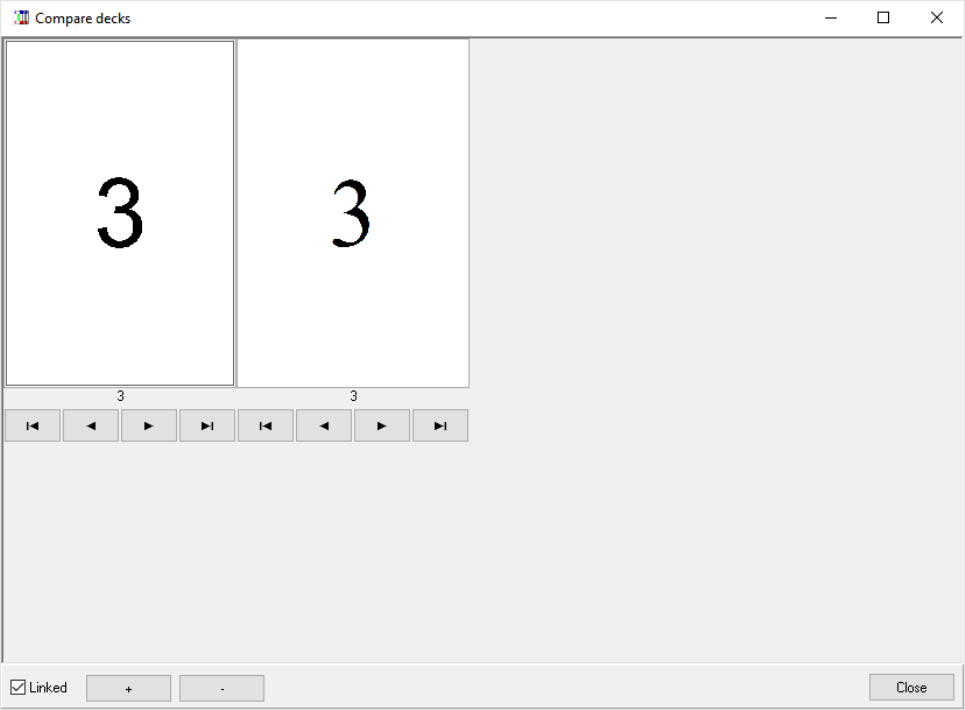
64
Compare decks
When you have loaded more than one deck (adding another tab with CTRL+N) you can view them side to side by
clicking on the “Comp” button in the right side of the main window:
You can browse the decks with the arrow buttons (linked by default, but you can remove this feature with the “Linked”
checkbox) and you can zoom in or out with the two buttons “+” and “-”.

65
Shortcuts
At the start, nanDECK reads a shortcuts.txt file from the same folder, and creates shortcuts for every line read (or
combinations of lines). You can recall these clips of text with combinations of keys like Ctrl + Alt + letter or Ctrl +
Alt + Shift + letter. The lines associated with the letter character, lower of uppercase, (identified before a “:” colon) are
inserted in the main editor (in the current edit position).
For example, if you have this shortcuts.txt file (created with Notepad or another text editor):
r:RECTANGLE = 1, 0, 0, 100%, 100%, #0000FF
T:FONT = ARIAL, 32, , #000000
TEXT = 1, "Test", 0, 0, 100%, 100%
You can press Ctrl + Alt + r for the RECTANGLE line or Ctrl + Alt + Shift + t for the FONT + TEXT lines.
References
E-mail nand@libero.it
Website http://www.nandeck.com
Yahoo! Group http://tech.groups.yahoo.com/group/nandeck
BoardGameGeek Guild http://www.boardgamegeek.com/guild/454
F.A.Q.
1) When I must use quotes (“)?
This program uses an interpreter for the evaluation of all parameters, this code separates them using commas (,). So, if a
parameter has a comma in it, you must enclose the parameter in quotes. Otherwise, if a parameter has no commas, the
quotes are optional (the program will accept the parameter with or without quote), but for some parameter quotes are an
error (for numeric parameters, for example).
Correct examples:
IMAGE = "1-10", "c:\my images\earth.jpg", 0, 0, 6, 9, 0
IMAGE = 1-10, c:\my images\earth.jpg, 0, 0, 6, 9, 0
TEXT = 1-10, "This, is a test", 0, 0, 6, 9
Note: quotes in ranges aren’t needed.
Wrong example:
TEXT = 1-10, This, is a test, 0, 0, 6, 9
The 2nd parameter will be split into “This” for 2nd parameter and “is a test” for 3th.
2) How I can insert quotes (or another character) in a text?
You can use \n\ syntax to insert a character in a text, with n being the ASCII code of that character, for example, if you
want to enclose a text in quotes (ASCII 34) or add a new line (ASCII 13):
FONT = Arial, 32, , #000000
TEXT = 1, "I say \34\Hello\34\", 0, 0, 6, 9, center, center
Note that \13\ works with TEXT directive, instead with HTMLTEXT you must use the HTML tag <br>.
3) Why this program uses so much memory?

66
This program has two settings for storing cards during creation: RAM or disk. The default setting is in RAM, and you
can change that in the “Config” window, remember that RAM is faster (and you can run multiple instances of the
program) but the computer may slow down when it starts using swap space; on disk is slower (can you can’t run
multiple instances) but the speed remains the same even with very large decks (or higher DPI settings).
4) Why there is option (X) if you can use (Y)?
When writing this program, I tried to maintain backward compatibility with previous version, so you can do the same
thing in more than one way. For example: WWTOP option for vertical alignment in TEXT command is equal to
CENTER, for backward compatibility.
5) There is a Linux version?
No, but if you install Wine you can run the same nanDECK version for Windows on your Linux, with all the major
features; also, if you want better compatibility, you can download and install the “Microsoft core fonts”.
Wine
http://www.winehq.org/
Microsoft core fonts
http://sourceforge.net/projects/corefonts/files/the%20fonts/
Note: with a recent update, nanDECK uses a DLL (FONTSUB.DLL) that is not present in every distribution, if this is
the case the program won’t start, you must download a zip that includes this file from here:
http://www.nand.it/nandeck/nandeck_wine.zip
6) There is a Mac version?
No, but if you install Winebottler (and XQuartz) you can run the same nanDECK version for Windows on your OSX,
with all the major features. You can use also an emulator like Virtual Box (free) or Parallels (commercial software).
Winebottler
http://winebottler.kronenberg.org/
XQuartz
http://xquartz.macosforge.org/
Note: with a recent update, nanDECK uses a DLL (FONTSUB.DLL) that is not present in every distribution, if this is
the case the program won’t start, you must download a zip that includes this file from here:
http://www.nand.it/nandeck/nandeck_wine.zip
67
Directives
BASERANGE
For each card in a range an element is extracted from a sequence, and as a default the first element from the sequence is
paired from the first card in the range. The only exception is when you have a LABELRANGE function (see page 30):
in this case, the nth element from the sequence is paired with the nth card from the deck. With this directive, you can
change this behavior.
Syntax:
BASERANGE = “range”, switch
Parameters:
“range”: a range of cards,
switch: values accepted are:
ON the nth element from the sequence is paired with the nth card from the deck
OFF the nth element from the sequence is paired with the nth card from the range
BATCH
This directive executes an external batch script (a text file with a “.bat.” extension). For security reasons, you must
enable the relative option in the Configuration form: here you can choose between “Disabled”, “Enabled (with
confirmation)”, and “Enabled”.
Syntax:
BATCH = “batch file”
Parameters:
“batch file”: path and name for a batch file.
Example:
BATCH = "c:\bat\copy_files.bat"
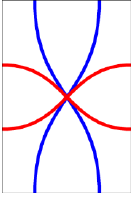
68
BEZIER
This directive draws a Bezier curve from a starting point (x1, y1) to an ending point (x2, y2), using two “handles” (h1
and h2).
Syntax:
BEZIER = “range”, pos x1, pos y1, handle x1, handle y1, handle x2, handle y2, pos x2, pos y2, html color, thickness,
end arrow, start arrow
Parameters:
“range”: a set of cards,
pos x1, pos y1: coordinates of starting point (in cm),
handle x1, handle y1: coordinates of handle for starting point (in cm),
handle x2, handle y2: coordinates of handle for ending point (in cm),
pos x2, pos y2: coordinates of ending point (in cm),
html color: color of the curve, in the same format used for HTML. You can also specify a gradient,
thickness: thickness of the curve (in cm), if omitted, the curve is 1 pixel wide,
end arrow: width of the arrow (in cm), if omitted (or zero) there is no arrow at the end of the curve,
start arrow: width of the arrow (in cm), if omitted (or zero) there is no arrow at the start of the curve.
Example:
BEZIER = 1, 1.5, 0, 1.5, 4.5, 4.5, 4.5, 4.5, 9, #0000FF, 0.15
BEZIER = 1, 4.5, 0, 4.5, 4.5, 1.5, 4.5, 1.5, 9, #0000FF, 0.15
BEZIER = 1, 0, 3, 3, 3, 3, 6, 6, 6, #FF0000, 0.15
BEZIER = 1, 0, 6, 3, 6, 3, 3, 6, 3, #FF0000, 0.15
Result: Image 11
Image 11
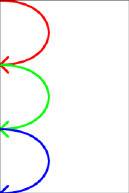
69
BEZIERS
This directive draws a Bezier curve from a starting point (from the last BEZIERS directive) to an ending point (x, y),
using two “handles” (one from the last directive and one from parameter h). The first directive sets only the starting
point, for each subsequent directive a curve is drawn (the starting point for the next curve is the ending point of the
last). For restarting the process, you can specify a BEZIERS with only the range parameter.
Syntax:
BEZIERS = “range”, pos x, pos y, handle x, handle y, html color, thickness, end arrow, start arrow
Parameters:
“range”: a set of cards,
pos x, pos y: coordinates of starting/ending point (in cm),
handle x, handle y: coordinates of handle for starting/ending point (in cm),
html color: color of the curve, in the same format used for HTML. You can also specify a gradient,
thickness: thickness of the curve (in cm), if omitted, the curve is 1 pixel wide,
end arrow: width of the arrow (in cm), if omitted (or zero) there is no arrow at the end of the curve,
start arrow: width of the arrow (in cm), if omitted (or zero) there is no arrow at the start of the
curve.
Example:
BEZIERS = 1, 0, 0, 3, 0, #000000, 0.1
BEZIERS = 1, 0, 3, 3, 3, #FF0000, 0.1, 0.5
BEZIERS = 1, 0, 6, 3, 6, #00FF00, 0.1, 0.5
BEZIERS = 1, 0, 9, 3, 9, #0000FF, 0.1, 0.5
Result: Image 12
Image 12

70
BLEED
This directive fills the space beyond a rectangle with the colors from the border of the rectangle, if you don't specify the
size of the outer rectangle, this directive fills the whole card.
Syntax:
BLEED = “range”, pos x1, pos y1, width1, height1, pos_x2, pos_y2, width2, height2
Parameters:
“range”: a set of cards
pos x1: horizontal position (in cm)
pos y1: vertical position (in cm)
width1: width of the rectangle (in cm)
height1: height of the rectangle (in cm)
pos x2: horizontal position (in cm) of the outer rectangle
pos y2: vertical position (in cm) of the outer rectangle
width2: width of the outer rectangle (in cm)
height2: height of the outer rectangle (in cm)
Examples:
BLEED = "1-10", 1, 1, 4, 7
BLEED = "1-10", 1, 1, 4, 7, 0.5, 0.5, 5, 6
BORDER
This directive draws a border around all the cards.
Syntax:
BORDER = type, html color, thickness, guidelines, guide color, mark size, hor. guide offset, ver. guide offset
Parameters:
type: the type of border can be chosen between:
RECTANGLE draws a rectangle
ROUNDED draws a rectangle with rounded corners
MARK draws cut marks
NONE no border
html color: color of the border, in the same format used for HTML, black if not specified,
Note: if you want a different border color on each card, use instead RECTANGLE or ROUNDRECT
thickness: thickness of the border (in cm), if omitted, it is 1 pixel wide,
Note: the thickness of the border is measured on two cards; if you use a thickness of 1 cm, for example, on each card
the border is 0.5 cm wide.
71
guidelines: this is for drawing lines beyond the card’s boundaries (over the page’s margins). You can choose between:
NONE no guidelines (the default)
DOTTED dotted lines
SOLID solid lines
MARK draws cut marks only (solid lines)
MARKDOT draws cut marks only (dotted lines)
guide color: color of the guidelines, in the same format used for HTML, black if not specified,
mark size: length of the cut marks (in cm) for MARK border type,
hor. guide offset: horizontal guides are displaced of an offset (in cm), zero if not specified,
ver. guide offset: vertical guides are displaced of an offset (in cm), equal to horizontal offset if not specified.
Examples:
BORDER = RECTANGLE
BORDER = ROUNDED, #0000FF, 0.5
BRUSH
This directive changes the style used for filling the shapes in these directives:
ELLIPSE
FILL
HEXGRID
PIE
POLYGON
RECTANGLE
RHOMBUS
ROUNDRECT
STAR
TRIANGLE
Syntax:
BRUSH="range", type, “image file”, width, height
Parameters:
“range”: a set of cards,
type: you can choose a type between these options:
SOLID draws a solid fill (the default),
DIAGLEFT fills with lines, drawn diagonally from top right to bottom left,
DIAGRIGHT fills with lines, drawn diagonally from top left to bottom right,
SQUARE fills with squares,
CROSS fills with squares, rotated 45°,
HORIZONTAL fills with lines, drawn horizontally,
VERTICAL fills with lines, drawn vertically,
CUSTOM fills with an image
“image file”: the image file used for filling the shapes
width: width of the image, in cm
72
height: height of the image, in cm
Examples:
BRUSH="1-10", SQUARE
BRUSH="1-10", CUSTOM, "dots.gif", 5%, 5%

73
BUTTON
This directive draws a 3D rectangle over a set of cards. This directive works only if you have previously drawn
something in the specified area.
Syntax:
BUTTON = “range”, pos x, pos y, width, height, depth, flags
Parameters:
“range”: a set of cards,
pos x: horizontal position (in cm),
pos y: vertical position (in cm),
width: width of the rectangle (in cm),
height: height of the rectangle (in cm),
depth: width of the 3D border,
flags: one or more of the following flags:
I from out to in
O from in to out
G gradient effect
Example:
RECTANGLE = 1, 1, 1, 4, 3, #00FFFF
RECTANGLE = 1, 1, 5, 4, 3, #00FFFF
BUTTON = 1, 1, 1, 4, 3, 0.3, I
BUTTON = 1, 1, 5, 4, 3, 0.3, O
Result: Image 13
Image 13

74
CANVAS
With this directive, the program splits the canvas (card 0) onto a range of cards. The canvas’ size can be decided with a
CANVASSIZE directive (see page 75).
Syntax:
CANVAS = “range”
Parameters:
“range”: a set of cards.
Tip: You can view the content of the canvas bitmap with a click on the button “Canv” (to the right of the “Card
preview” button). You can reduce/enlarge it with a double-click on the image.
For example, if you must draw a large circle, to be split onto six cards, you can use the CANVASSIZE/CANVAS
directives, like in this script:
BORDER = MARK
CANVASSIZE = 18, 18
CANVAS = 1-6
ELLIPSE = 0, 0, 0, 18, 18, #0000FF#FF0000@360
FONT = Arial, 48, , #000000
TEXT= 1-9, {§}, 0, 0, 2, 2, CENTER, CENTER
This is the resulting printed page (I’ve added a number in the top-left corner of each card for helping identify them):
75
CANVASSIZE
This directive sets the size of the canvas (card number 0). If omitted, is considered to be 6 cm x 9 cm. The card 0 is a
card that isn’t printed with the deck, is can have a different size than the standard card and can be used in two ways: as a
drawing board to realize special effects, and to draw a larger card that must be split onto several standard cards, using
the CANVAS directive (see page 74).
Syntax:
CANVASSIZE = width, height
Example:
CANVASSIZE = 12, 18
CANVASWORK
This directive tells the program to draw the canvas (card 0) after drawing the range of cards specified in the parameter.
Syntax:
CANVASWORK = “range”
Parameters:
“range”: a set of cards.
CARDS
This directive can be used to specify the total number of cards that compose the current deck.
Syntax:
CARDS = number
This directive is somehow obsolete, if you don’t specify it, the total number of cards is deducted from the other
directives. For example, in that script the total number of cards is set to 20:
RECTANGLE = "1-5,15-20", 0, 0, 6, 9, #00FF00
But, if you specify also a CARDS directive, the cards’ number is forced. For example, in that script the total number of
cards is set to 15 (and the extra cards specified in RECTANGLE are ignored):
CARDS = 15
RECTANGLE = "1-5,15-20", 0, 0, 6, 9, #00FF00
CARDSIZE
This directive sets the size of cards (in cm). If omitted, is considered to be 6 cm x 9 cm.
Syntax:
CARDSIZE = width, height
Examples:
CARDSIZE = 5, 10
CARDSIZE = 2.5, 2.5
76
CASE
This directive is used in a structure SELECT…ENDSELECT to specify a code that must be executed when the value in
the SELECT is equal to a specific value (see page 148).
Syntax:
CASE = value
Parameters:
value: a string, number, label or expression that can be evaluated.
CASEELSE
This directive is used in a structure SELECT…ENDSELECT to specify a code that must be executed only if all the
CASEs directives are not executed (see page 148).
Syntax:
CASEELSE
Parameters:
None
CHROMAKEY
This directive sets the color to be treated as transparent during image loading (with IMAGE directive, see page 110).
The default transparent color, if CHROMAKEY was not used, is the color in the top-left pixel of the image.
Syntax:
CHROMAKEY = html color | corner type, level
Parameters:
corner type: the color will be picked from one of the four corners:
TOPLEFT
TOPRIGHT
BOTTOMLEFT
BOTTOMRIGHT
level: if specified, are treated as transparent also the colors within a level of difference from the base transparent color
(calculated as a distance in CIELab space).
Examples:
CHROMAKEY = #FFFFFF
CHROMAKEY = TOPLEFT
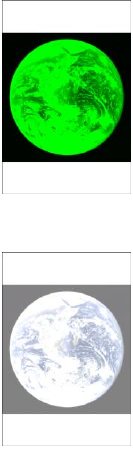
77
COLOR
This directive modifies the colors, brightness, contrast and saturation of images (and text) being rendered on a range of
cards. See directives IMAGE (page 110), ICONS (page 107), PATTERN (page 136) and TEXT (page 152).
Syntax:
COLOR = “range”, html color, bri-con-sat
Parameters:
“range”: a set of cards,
html color: color used for rendering the image, in the same format used for HTML. If you want to
maintain the original colors, you must use a median gray (#808080).
bri-con-sat: a triplet of brightness, contrast and saturation value, used for rendering the image, written
in hexadecimal format (like an html color), starting with an ampersand (&) character. If you want to
maintain some of the original values, use the median value (hexadecimal 80). If this parameter is
omitted, are used three neutral values (&808080).
Examples:
COLOR = 1, #00FF00
IMAGE = 1, "c:\images\earth.jpg", 0, 0, 6, 9, 0, P
Result: Image 14
COLOR = 1, #808080, &FF8080
IMAGE = 1, "c:\images\earth.jpg", 0, 0, 6, 9, 0, P
Result: Image 15
Image 14
Image 15
78
COLORCHANGE
This directive changes one color into another, in a rectangle area of a range of cards.
Syntax:
COLORCHANGE = “range”, pos x, pos y, width, height, html color source, html color destination, level
Parameters:
“range”: a set of cards,
pos x: horizontal position (in cm),
pos y: vertical position (in cm),
width: width of the rectangle (in cm),
height: height of the rectangle (in cm),
html color source: a color value, in HTML format
html color destination: a color value, in HTML format
level: if zero, the source color is exactly the one specified in the 6th parameter, otherwise are taken also colors that differ
from that source a value equal this parameter in one, two, or three RGB components.
COLORS
This directive writes from one to four colors into as many variables, that can be used instead of a color value.
Syntax:
COLORS = “range”, html color1, html color2 , html color3 , html color4, html color5
Parameters:
“range”: a set of cards,
html color1: a color value, in HTML format, that is stored into variable #ZZZZZZ
html color2: a color value, in HTML format, that is stored into variable #YYYYYY
html color3: a color value, in HTML format, that is stored into variable #XXXXXX
html color4: a color value, in HTML format, that is stored into variable #WWWWWW
html color5: a color value, in HTML format, that is stored into variable #VVVVVV
Instead of a color, you can use another variable, or the syntax #XçY to read a color located at position X, Y of the
current card (you can use also % with each value, for example: #50%ç50%).
With the syntax #X1çY1çX2çY2 you can read the most used color in an image, (the image starts from X1, Y1 and end
to X2, Y2).
With the syntax #X1çY1çX2çY2çMinçMax you can read the most used color in an image, (the image starts from X1,
Y1 and end to X2, Y2), excluding colors with percent brightness lower than Min and higher than Max.
With the syntax #AAAAAA>#BBBBBB<#CCCCCC you can select between two color: if the brightness of color #A is
more or equal to 50%, the variable is set to color #B, if the brightness is less than 50%, the variable is set to color #C.
79
Every color can be also modified adding a value for saturation and a value for brightness change (in percent), with the
syntax #000000+saturation+brightness (the values for saturation and brightness can also be negatives).
Example:
COLORS = 1, #FF0000
COLORS = 2, #00FF00
COLORS = 3, #0000FF
RECTANGLE = 1-3, 0, 0, 100%, 100%, #ZZZZZZ
COMMENT
This directive sets the character used for comments, and eventually activate the in-line comments. The utilization of this
directive is equivalent to the settings in the "Config" section of the program.
Syntax:
COMMENT = char, INLINE
Parameters:
char: the character used for comments, it must be the first character of the line,
INLINE: the same character (doubled) will be used for in-line comments.
Examples:
COMMENT = &
& This is a comment
COMMENT = !, INLINE
RECTANGLE=1, 0, 0, 6, 9, #00FF00 !! This is another comment
COMPARE
This directive compares the cards built with the current script with those built with the filename specified as a parameter
and creates a range (to be used with PRINT=COMPARE) with only the cards which are different.
Syntax:
COMPARE = “filename”
Parameter:
“filename”: the filename to be compared with the current script.
Example:
COMPARE="script_ver1.txt"
PRINT=COMPARE

80
COPY
This directive does a copy-and-paste of a section of a card into another position on the same card. If you want to copy a
section of a card onto another card, you must use the SAVE and IMAGE directives (see page 146).
Syntax:
COPY = “range”, pos x1, pos y1, width1, height1, pos x2, pos y2, width2, height2, angle, flags
Parameters:
“range”: a set of cards,
pos x1: starting horizontal position (in cm) of the image,
pos y1: starting vertical position (in cm) of the image,
width1: starting width of the image (in cm),
height1: starting height of the image (in cm),
pos x2: ending horizontal position (in cm) of the image,
pos y2: ending vertical position (in cm) of the image,
width2: ending width of the image (in cm),
height2: ending height of the image (in cm),
angle: angle of image rotation, can be 0 for no rotation,
flags: in this parameter, you can specify a special behavior for the image, possible values are:
H Horizontal mirror
V Vertical mirror
Example:
IMAGE = 1, " c:\images\earth.jpg", 0, 0, 3, 3.5, 0, P
FONT = Arial, 16, , #FFFFFF, #00000
TEXT = 1, "Earth", 0, 3.5, 3, 1, CENTER, CENTER
COPY = 1, 0, 0, 3, 4.5, 3, 0, 3, 4.5, 0, H
COPY = 1, 0, 0, 3, 4.5, 0, 4.5, 3, 4.5, 0, V
COPY = 1, 0, 0, 3, 4.5, 3, 4.5, 3, 4.5, 0, HV
Result: Image 16
Image 16
81
COPYCARD
This directive duplicates cards from a source range to a destination range. Both source and destination ranges can be
single cards.
Syntax:
COPYCARD = “destination range”, “source range”
Parameters:
“destination range”: a set of cards,
“source range”: a set of cards.
Example:
COPYCARD = "5-8", "1-2"
This is the deck, before the directive:
CARD 1
CARD 2
CARD 3
CARD 4
This is the deck, after the directive:
CARD 1
CARD 2
CARD 3
CARD 4
CARD 1
CARD 2
CARD 1
CARD 2
CORRECTION
This directive enables/disables the pixel correction. If enabled, one pixel is added to width and heights of ELLIPSE,
RECTANGLE, ROUNDRECT, and RHOMBUS directives. The correction default is ON.
Syntax:
CORRECTION = “range”, switch
Parameters:
“range”: a range of cards,
switch: values accepted are:
ON Pixel correction enabled
OFF Pixel correction disabled
Example:
CORRECTION = 1, OFF
82
COUNTER
This directive sets a counter to a value. A counter is a variable that can be used in expressions (see page 48). This
directive can be used with a dice (see DICE directive, page 83) to revert it into a counter. Note: after the build a warning
is issued if one counter is used in an expression without being initialized.
Syntax:
COUNTER = “range”, counter name, counter value
Parameters:
“range”: a set of cards,
counter name: a counter letter(s)
counter value: a value, it can be a fixed number or an expression.
Valid counters for integer values:
A B C D E F G H I J
Valid counters for floating values:
AA BB CC DD EE FF GG HH II JJ
Examples:
COUNTER = "1", A, 100
COUNTER = "1-10", B, 2D6
DECK
This directive prepares a deck of cards to be used in the “Virtual table” option (see page 57). If you don’t use this
directive, the program prepares a deck to be used in the virtual table with all the cards.
Syntax:
DECK = “range”, “deck name”, html color, height, flag, back range, pos x, pos y
Parameters:
“range”: a set of cards,
“deck name”: the name of the deck,
html color: deck color in the same format used for HTML,
height: height of the deck (in pixels), you can also specify a % of the screen’s height. The deck’s width is proportional
to the height.
flag: you can specify these options:
R the deck is shuffled (the default)
N the deck is not shuffled (the order of the cards is that one specified in “range” parameter)
back range: if you specify a number for this parameter, for the deck image (back of cards) is used that card (taken from
the deck) instead of a color. You can also use a range of cards for this parameter,
pos x: horizontal position for the deck (in pixels), you can also specify a % of the screen’s width,
83
pos y: vertical position for the deck (in pixels), you can also specify a % of the screen’s height.
Example:
DECK = 1-13, "Hearts", #FF0000, 50%
DICE
This directive converts one counter into a dice (it can be used later in expressions).
Syntax:
DICE = “range”, counter, “dice range”, dice number, flags, default1, default2
Parameters:
“range”: a set of cards,
counter name: valid counters are:
A B C D E F G H I J
“dice range”: a range of values, from which is taken the result of the dice roll,
dice number: the number of dice rolled,
flags: the syntax for this parameter is fng, where f is the flag that specify how the dice are grouped, n is a number that
specify how much dice are used, and g is the flag that specify how the dice to be grouped are chosen from the main
pool.
The 1st flag can be chosen between:
+ sum (the default, if not specified)
* multiply
- subtract
# absolute value after subtracting
£ concatenate
^ concatenate without duplicates
The 2nd flag can be chosen between:
+ upper dice (the default, if not specified)
- lower dice
default1: the value to be used if the number before the dice is missing,
default2: the value to be used if the number after the dice is missing,
Example, for rolling four dice (with values from one to six) and sum the upper three:
DICE = 1, A, "1-6", 4, +3+
DISPLAY
This directive draws a list of cards to the canvas (card 0), resizing it accordingly, and save it with a filename (if
specified). If the range is omitted, all the deck is drawn and saved. The width parameter is the number of cards in
horizontal, if omitted, is chosen the maximum number from the factors of the total number of the cards.
Instead of specifying starting and ending card, you can use a range as 5th parameter (leave the other at zero).
Syntax:

84
DISPLAY = ”filename”, first card, last card, width, “range”
Example:
DISPLAY = "c:\deck.png", 1, 10
DOWNLOAD
This directive downloads a file from Internet, if the file doesn’t already exist in the specified path.
Syntax:
DOWNLOAD = URL, “filename”
Parameters:
URL: the URL for a file, it must start with http:// or https://,
“filename”: the path and filename for the downloaded file, if omitted, the path is the current folder, and the name is
taken from the URL parameter.
Example:
DOWNLOAD = http://game-icons.net/icons/delapouite/originals/png/sheep.png
You can also use two sequences, one for the URLs and one for the filenames.
DPI
This directive sets the resolution of cards (in Dots Per Inch). If omitted, is considered to be 300 (the default for
printing); if you want to show the cards on screen, you can use a value of 150.
Syntax:
DPI = dpi number
Note that with a value too high, the time of rendering can be very long, and the program uses more memory (or disk
space).
Example:
DPI = 150
DRAW
This directive draws a number of cards from a deck in the “Virtual table” option (see page 57). If you don’t use this
directive, the program prepares a deck to be used in the virtual table with all the cards. If you specify a new name, a
deck is created with the card drawn, if you leave the 2nd parameter empty, the cards drawn are shown into the table as
separated objects.
Syntax:
DRAW = “deck name”, “deck name new”, number, flag, pos x, pos y
Parameters:
“deck name”: the name of the deck from which the cards are drawn,
“deck name new”: the name of the deck created with the cards drawn,
85
number: the number of cards drawn,
flag: you can specify these options:
U the cards are drawn face up
D the cards are drawn face down (the default)
pos x: horizontal position for the cards/deck drawn (in pixels), you can also specify a % of the screen’s width,
pos y: vertical position for the cards/deck drawn (in pixels), you can also specify a % of the screen’s height.
Example:
DRAW = "standard", "new", 10, U
DUPLEX
This directive copies a card (or a range of cards) to another position (or range) calculated automatically by the software,
it is useful to manage duplicates or synchronize the front and back of cards for a duplex printing. See also PRINT
directive (see page 139).
Syntax:
DUPLEX = “range front”, “range back”, number
Parameters:
“range front”: a card or a range of card to be copied,
“range back”: a card or a range of card to be copied, front-to-back with the card(s) specified in the 1st parameter,
number: if specified, the card is replicated a number of times; if not specified, it is treated like one copy.
Example:
DUPLEX = 1-10, 11
DUPLEX = 12-21, 22, 2
EDGE
This directive changes the style used for drawing the lines / boundaries with these directives:
BEZIER
BEZIERS
ELLIPSE
HEXGRID
LINE
LINERECT
GRID
PIE
POLYGON
RECTANGLE
RHOMBUS
ROUNDRECT
STAR
TRACK
TRACKRECT
TRIANGLE
Syntax:
86
EDGE = “range”, type, pattern
Parameters:
“range”: a set of cards,
type: you can choose a type between these options:
SOLID draws a solid line (the default),
DASH draws a dashed line,
DOT draws a dotted line,
DASHDOT draws a line alternating a dash and a dot,
DASHDOTDOT draws a line alternating a dash and two dots,
CUSTOM draws a line using a custom pattern
pattern: a pattern for the custom style, this pattern can be composed of:
O dot
D dash
S space
These letters can be repeated, for example “OSDSOS” is a valid pattern.

87
ELLIPSE
This directive draws an ellipse (or a circle) in a set of cards.
Syntax:
ELLIPSE = “range”, pos x, pos y, width, height, html color, html color, thickness
Parameters:
“range”: a set of cards,
pos x: horizontal position (in cm),
pos y: vertical position (in cm),
width: width of the ellipse (in cm),
height: height of the ellipse (in cm),
html color: border color of the ellipse, in the same format used for HTML. You can also specify a
gradient.
html color: inner color of the ellipse, in the same format used for HTML, if not specified the inner
color is the same of border color. You can also specify “EMPTY” for a hollow ellipse or a gradient.
thickness: thickness of the border of the ellipse (in cm), if omitted, the ellipse’s border is 1 pixel wide.
Examples:
ELLIPSE = 1, 1, 1, 4, 7, #00FF00
Result: Image 17
ELLIPSE = 1, 1, 1, 4, 7, #FF00FF, EMPTY, 0.1
Result: Image 18
ELLIPSE = 1, 1, 1, 4, 7, #FF0000#0000FF@90
Result: Image 19
Image 17
Image 18
Image 19
88
ELSE
This directive is used in a structure IF…ENDIF to specify a code that must be executed only if the test in the IF
directive is not true (see page 108).
Syntax:
ELSE
Parameters:
none
ELSEIF
This directive is used in a structure IF…ENDIF to specify a code that must be executed only if the test in this line is
true and the test in the first IF directive is false (see page 108).
Syntax:
…
ELSEIF = value1 oper. value2
…
Parameters:
value: a string, number, label or expression that can be evaluated,
oper.: the condition is evaluated using the two values and this operator, you can use one operator from the same listed
for the IF directive.
END
This directive is used to close a MACRO…END structure (see page 130).
Syntax:
END
Parameters:
none
ENDFRAME
This directive closes a FRAME…ENDFRAME definition (see page 97).
Syntax:
ENDFRAME
Parameters:
none
ENDIF
This directive is used to close an IF…ENDIF structure (see page 108).
89
Syntax:
ENDIF
Parameters:
none
ENDLAYER
This directive closes a LAYER…ENDLAYER definition (see page 119).
Syntax:
ENDLAYER
Parameters:
none
ENDLINK
This directive closes a LINK…ENDLINK definition (see page 119).
Syntax:
ENDLINK
Parameters:
none
Example:
linkmulti=num
link=
num,string
1,alpha
2,beta
3,gamma
endlink
[all]="1-{(num)}"
font=Arial,48,,#000000
text=[all],[num],0,0,100%,50%
text=[all],[string],0,50%,100%,50%
ENDSECTION
This directive closes a SECTION…ENDSECTION definition (see page 147).
Syntax:
ENDSECTION
Parameters:
none
90
ENDSELECT
This directive is used to close a SELECT…ENDSELECT structure (see page 148).
Syntax:
ENDSELECT
Parameters:
none
ENDSEQUENCE
This directive is used to close a SEQUENCE…ENDSEQUENCE structure (see page 149).
Syntax:
ENDSEQUENCE
Parameters:
none
ENDVISUAL
This directive closes a VISUAL…ENDVISUAL definition (see page 59).
Syntax:
ENDVISUAL
Parameters:
none
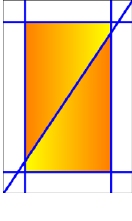
91
FILL
This directive fills a region with a color (the region is delimited by another color).
Syntax:
FILL = “range”, pos x, pos y, html fill color, html border color, flags
Parameters:
“range”: a set of cards,
pos x: horizontal initial position (in cm) of the fill,
pos y: vertical initial position (in cm) of the fill,
html fill color: color of the fill. You can also specify a gradient,
html border color: this is the area color (or boundary color) for the fill,
flags: one of the following flags
A the 5th parameter is the color of the area to be filled
B the 5th parameter is the color of the boundary that enclose the area to be filled
If you don’t specify a flag, it’s considered B as default.
Example:
LINE = 1, 0, 1, 6, 1, #0000FF, 0.1
LINE = 1, 0, 8, 6, 8, #0000FF, 0.1
LINE = 1, 1, 0, 1, 9, #0000FF, 0.1
LINE = 1, 5, 0, 5, 9, #0000FF, 0.1
LINE = 1, 0, 9, 6, 0, #0000FF, 0.1
FILL = 1, 2, 2, #FFFF00#FF8000@0, #0000FF
FILL = 1, 2, 7, #FF8000#FFFF00@0, #0000FF
Result: Image 20
FOLDER
This directive sets the current working directory (if you don't specify it, it will be used the folder where the script is
located).
Syntax:
FOLDER = “folder”
Parameters:
“folder”: the folder to be used as current working directory.
Example:
FOLDER = "c:\projects\test"
Image 20
92
FONT
This directive sets the font for any following TEXT command (see page 154). Note that there isn’t any reference to a
range of cards. If you want a ranged command, you can use FONTRANGE instead (see page 93).
Syntax:
FONT = “font name”, font size, style, html color, html color, outline x, outline y, step x, step y
Parameters:
“font name”: character font name (string),
font size: character font size, in typographical points (1 point = 1/72 of an inch),
style: character font style and flag used for visualization, values accepted are:
B bold
I italic
U underline
S strikeout
T transparent font background
N do not clip text at the boundary
C circular text
R circular text, reversed
H circular text, half circumference
Q circular text, one quarter circumference
E circular text, three quarter circumference
Z the text follows the curve drawn with the last BEZIER directive
F the size is reduced until the text fits in the rectangle specified by TEXT directive (this value is stored in TF var)
V vertical text
P do not clip text area beyond the rectangle
O transparent font text (flag T is ignored)
D the text is placed in the rectangle’s diagonal (from top-left to bottom-right)
G the text is placed in the rectangle’s diagonal (from top-right to bottom-left)
html color: character color, in the same format used for HTML. You can also specify a gradient,
html color: background color, in the same format used for HTML. You can also specify a gradient.
This parameter can be omitted (it will be used the last background color used, or white if none was specified), if you
specified T as a style flag, the background color will not be used.
Tip: you can choose the font with a Windows standard dialog, clicking on the button “Insert” and choosing the menu
voice “Font”.
Examples (the difference was in the T flag in the 2nd FONT command):
RECTANGLE = 1, 0, 0, 6, 4, #FF0000
FONT = "Arial", 32, B, #FFFFFF, #0000FF
TEXT = 1, "TEST", 0, 1, 6, 2, center
Result: Image 21
RECTANGLE = 1, 0, 0, 6, 4, #FF0000
FONT = "Arial", 32, BT, #FFFFFF, #0000FF
TEXT = 1, "TEST", 0, 1, 6, 2, center
Result: Image 22
outline x: horizontal expansion in cm, with that parameter the text will be replicated horizontally from
–x to +x,
Image 21
Image 22

93
outline y: vertical expansion in cm, with that parameter the text will be replicated vertically from –y to +y.
step x: the number of times the text is printed horizontally.
step y: the number of times the text is printed vertically.
Example:
FONT = "Arial", 32, B, #FFFFFF, #0000FF, 0.1, 0.1
TEXT = 1, "TEST", 0, 1, 6, 2, center
Result: Image 23
FONTALIAS
This directive enables/disables the font anti-aliasing, using the Operating System’s routines. It’s useful to remove
colored pixels in the text’s boundaries, especially when using HTMLTEXT (see page 102) or RTFTEXT (see page 145)
directives with transparent background.
Syntax:
FONTALIAS = “range”, switch
Parameters:
“range”: a range of cards,
switch: values accepted are:
ON Font anti-aliasing enabled
OFF Font anti-aliasing disabled
Example:
{[html_on]="<style type='text/css'>p {font-size: 32px}</style><p>
ANTIALIASING ON</p>"}
{[html_off]="<style type='text/css'>p {font-size: 32px}</style><p>
ANTIALIASING OFF</p>"}
ELLIPSE = 1, 0, 0, 6, 3, #FF0000
ELLIPSE = 1, 0, 3, 6, 3, #FF0000
FONTALIAS = 1, ON
HTMLTEXT = 1, [html_on], 0, 0, 6, 3, #FFFFFF, 0, T
FONTALIAS = 1, OFF
HTMLTEXT = 1, [html_off], 0, 3, 6, 3, #FFFFFF, 0, T
Result: Image 24
Image 23
Image 24
94
FONTCHANGE
This directive changes a font in the script with another. It’s useful when you want to test a script on a computer that
doesn’t have a font, and you didn’t want to change all the occurrences (or use a label).
Syntax:
FONTCHANGE = “old font”, “new font”
Parameters:
“old font”: the font that you want to be changed,
“new font”: the font that you want to use instead.
Example:
FONTCHANGE = “Calibri”, “Times New Roman”
FONTRANGE
This command is equivalent to FONT (see page 92) but is applied to a range of cards (specified by the 1st parameter).
Syntax:
FONT = “range”, “font name”, font size, style, html color, html color, outline x, outline y, step x, step y
Parameters:
“range”: a range of cards,
“font name”: character font name (string),
size: character font size, in typographical points (1 point = 1/72 of an inch),
style: character font style and flag used for visualization, values accepted are:
B bold
I italic
U underline
S strikeout
T transparent font background
N do not clip text at the boundary
C circular text
R circular text, reversed
H circular text, half circumference
Q circular text, one quarter circumference
E circular text, three quarter circumference
Z the text follows the curve drawn with the last BEZIER directive
F the size is reduced until the text fits in the rectangle specified by TEXT directive
V vertical text
P do not clip text area beyond the rectangle
O transparent font text (flag T is ignored)
D the text is placed in the rectangle’s diagonal (from top-left to bottom-right)
G the text is placed in the rectangle’s diagonal (from top-right to bottom-left)
html color: character color, in the same format used for HTML. You can also specify a gradient,
html color: background color, in the same format used for HTML. You can also specify a gradient,
outline x: horizontal expansion in cm, with that parameter the text will be replicated horizontally from –x to +x,

95
outline y: vertical expansion in cm, with that parameter the text will be replicated vertically from –y to +y.
step x: the number of times the text is printed horizontally.
step y: the number of times the text is printed vertically.
Tip: you can choose the font with a Windows standard dialog, clicking on the button “Insert” and choosing the menu
voice “Font”.
FOOTER
This directive prints a text in the page’s footer specified by a page range (with a syntax like cards’ range).
Syntax:
FOOTER = “page range”, “text”, horizontal alignment
Parameters:
“page range”: a set of pages, if empty the text is printed onto all the pages,
“text”: the text to be printed, you can also use four variables:
{P} page number
{N} total page number
{D} date
{T} time
horizontal alignment: the text’s horizontal alignment in the page, values accepted are:
LEFT left aligned
CENTER centered
RIGHT right aligned
if not specified, the text is centered.
Examples:
FOOTER = "1-3", "Deck 1", CENTER
FOOTER = "", "printed {D} {T}", RIGHT
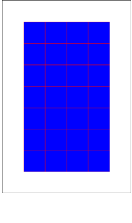
96
FOR
This directive executes the code between a FOR row and a NEXT row (see page 132), exiting when the counter value
is equal to end value, starting from start value and adding a step value at each loop.
Syntax:
FOR = counter name, start, end, step
Parameters:
counter name: the variable counter storing the value, can be chosen between A B C E F G H I J,
start: starting value for the counter,
end: ending value for the counter,
step: increment for counter at each loop, if not specified is assumed to be 1.
Example:
FOR = A, 1, 4
FOR = B, 1, 7
RECTANGLE = 1, A, B, 1, 1, #FF0000, #0000FF
NEXT
NEXT
Result: Image 25
Image 25
97
FRAME
This directive is used in a FRAME…ENDFRAME structure to define frames using characters in rectangular patterns,
for example, if you want to define three frames, one for the card, one for an image and one for the text below, you can
write these lines:
FRAME
AAAAAA
ABBBBA
ABBBBA
ABBBBA
ACCCCA
ACCCCA
AAAAAA
ENDFRAME
The result is equal to these lines:
<A>=0%,0%,100%,100%
<B>=16.7%,14.3%,66.7%,42.9%
<C>=16.7%,57.1%,66.7%,28.6%
With this method, you can create 36 frames (one for each letter/number), the names are case-insensitive.
Syntax:
FRAME = list split frames
Parameters:
list split frames: if you add here some frames, these frames are treated individually, and are not merged in a single
frame. In the last example, if you specify B as a parameter, instead of one frame, the program creates twelve frames (all
named B).
GAP
This directive sets a space between cards in printed pages. If the directive GAP is not specified, there will be no gap
between cards.
Syntax:
GAP = horizontal gap, vertical gap, switch
Parameters:
horizontal gap: horizontal space (in cm),
vertical gap: vertical spaces (in cm).
switch: values accepted are:
ON: to enable a guideline in the mid of the gap
OFF: to disable it (the default)
If the directive GAP is not specified, there is no gap between cards.
Example:
GAP = 1, 1
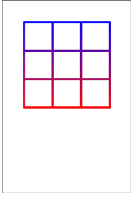
98
GRID
This directive draws a grid in a set of cards.
Syntax:
GRID = "range", pos x, pos y, width, height, html color, thickness, horiz. cells, vert. cells, pattern
Parameters:
“range”: a set of cards,
pos x: horizontal position (in cm),
pos y: vertical position (in cm),
width: width of the rectangle (in cm),
height: height of the rectangle (in cm),
html color: border color of the grid, in the same format used for HTML. You can also specify a gradient,
thickness: thickness of the grid (in cm), if set to zero, the grid’s border will be 1 pixel wide,
horiz. cells: number of horizontal cells,
vert. cells: number of vertical cells,
pattern: a pattern for the line used to draw the grid, this pattern can be composed of:
O dot
D dash
S space
These letters can be repeated, for example “OSDSOS” is a valid pattern.
Example:
GRID = 1, 1, 1, 4, 4, #FF0000#0000FF@90, 0.1, 3, 3
Result: Image 26
Image 26
99
HEADER
This directive prints a text in the page’s header specified by a page range (with a syntax like cards’ range).
Syntax:
HEADER = “page range”, “text”, horizontal alignment
Parameters:
“page range”: a set of pages, if empty the text is printed onto all the pages,
“text”: the text to be printed, you can also use four variables:
{P} page number
{N} total page number
{D} date
{T} time
horizontal alignment: the text’s horizontal alignment in the page, values accepted are:
LEFT left aligned
CENTER centered
RIGHT right aligned
if not specified, the text is centered.
Examples:
HEADER = "1-3", "Deck 1", CENTER
HEADER = "", "printed {D} {T}", RIGHT
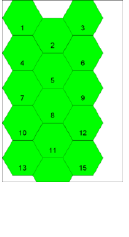
100
HEXGRID
This directive draws a hexagonal grid in a set of cards.
Syntax:
HEXGRID = “range”, pos x, pos y, width, height, hex side, flags, html color, html color, thickness
Parameters:
“range”: a set of cards,
pos x: horizontal position (in cm),
pos y: vertical position (in cm),
width: width of the rectangle (in cm),
height: height of the rectangle (in cm),
hex side: length of the hexagon’ side (in cm),
flags: you can use the following flags:
D add a dot in the center of the hexagon
L add a letter in each hexagon (A, B, C…)
N add a number in each hexagon (1, 2, 3…)
P add a zero-padded number in each hexagon (01, 02, 03…)
C add two numbers in each hexagon (11, 12, 13…21, 22, 23…)
E add a letter and a number in each hexagon (A1, A2, A3…B1, B2, B3…)
. add a dot as a separator for C flag
- add a minus as a separator for C flag
_ add an underscore as a separator for C flag
X doesn’t draws the grid (useful if you want only a dot or a label)
html color: border color of the grid, in the same format used for HTML. You can also specify a gradient,
html color: inner color of the hexagons, in the same format used for HTML, if not specified the inner color is the same
of border color. You can also specify “EMPTY” for a hollow (and transparent) hexagon or a gradient,
thickness: thickness of the grid (in cm), if omitted, the grid’s border is 1 pixel wide.
Example:
FONT = ARIAL, 10, , #000000
HEXGRID = 1, 0, 0, 6, 9, 1, N, #000000, #00FF00
Result: Image 27
Image 27
101
HTMLFILE
This directive prints the HTML text loaded from a filename in the cards specified by a range.
Syntax:
HTMLFILE = “range”, “html file”, pos x, pos y, width, height, html color, angle, flags, alpha
Parameters:
“range”: a set of cards,
“html file”: the HTML filename for text to be printed (eventually with a pathname),
pos x: horizontal position (in cm),
pos y: vertical position (in cm),
width: width of the text’s rectangle (in cm),
height: height of the text’s rectangle (in cm),
html color: background color for text,
angle: angle of text rotation, you must specify 0 for no rotation,
flags: you can specify one or more flags, chosen between:
T Transparent background for text
H Horizontal mirror
V Vertical mirror
I HTML rendering with internal engine
E HTML rendering with Explorer
2 Render a x2 image (don’t use if you already have an OVERSAMPLE directive)
4 Render a x4 image (don’t use if you already have an OVERSAMPLE directive)
8 Render a x8 image (don’t use if you already have an OVERSAMPLE directive)
R Vertical text
B Transparent background, better rendering of png, works only with E flag (MS Explorer)
W Wait 100 msec
O Replace tags also between < and >
C Clear page after rendering (MS Explorer)
N Use always a new instance (MS Explorer)
alpha: level of transparency of text, from 0 (full transparent) to 100 (full solid). If omitted, the level is set to 100 (full
solid). You can also specify an angle for the transparency, with the format level@angle; in this case, the level of
transparency is the starting level, ending with 0 (full transparent).
Example:
HTMLFILE = 1, "c:\test.html", 0, 0, 6, 9, #FFFFFF, 0, T
Result: Image 28
Image 28
102
HTMLFONT
This directive creates a tag that can be used for recalling a font in an HTMLTEXT directive (see page 105). If you
create a tag with name example, in HTML you can assign these characteristics in an HTML text delimited with
<example> and </example> tags. Note that for default the text in HTMLTEXT is word-wrapped, so there isn’t a flag to
enable it.
There are three special tags: th, tr, and td, that are used with the HTML tags of the same names (i.e. in tables).
Syntax:
HTMLFONT = tag, “font name”, font size, style, html color, alignment, shadow x, shadow y, shadow blur, shadow
color, outline color, outline width, indent, highlight color
Parameters:
tag: a name used for referencing the font,
“font name”: character font name (string),
font size: character font size, in typographical points (1 point = 1/72 of an inch),
style: character font style and flag used for visualization, values accepted are:
B bold
I italic
U underline
S strikeout
O shadow over outline (the default is outline over shadow)
N do not resize this font when using F flag in HTMLTEXT (see page 105)
R the outline of the font is done in a more refined way
C break lines at every character
T the HTML syntax is formatted for table cells
A small caps
M multiple shadows (use sequences for parameters from 7th to 10th)
D keep decimals in the font size calculation
L round down to integers the font size calculation
html color: character color, in the same format used for HTML,
alignment: the text’s horizontal alignment, values accepted are:
left left aligned
center centered
right right aligned
justify the text is justified
The horizontal alignment is optional, if omitted is considered to be equal to left,
shadow x: the horizontal offset for a shadow drawn under the text. Note: all the shadow’s parameters work only with
flag E, and Internet Explorer must be version 11 or more,
shadow y: the vertical offset for a shadow drawn under the text,
shadow blur: if you specify this parameter, the shadow is blurred,
shadow color: the color for the text’ shadow, in the same format used for HTML,
outline color: the color for the text’s outline, in the same format used for HTML,
outline width: the width for the text’s outline,

103
indent: the indentation in cm of the first line (you can specify a negative number for hanging indentation),
highlight color: color for the background of the text, in the same format used for HTML.
Note: if an alignment is omitted, the program use a <span> tag with the font info, otherwise, the
program uses a <div> tag. In other words, if you want to use different font on the same line, it’s
possible only with a <span> tag, and you must omit the alignment parameter.
Example:
HTMLFONT = alpha, Arial, 32, , #000000
HTMLFONT = beta, "Times New Roman", 18, I, #0000FF
HTMLTEXT = 1, "<beta>This is a </beta><alpha>test</alpha>", 0, 0,
100%, 100%
Result: Image 29
HTMLIMAGE
To simplify insertion of images in HTMLTEXT directives (see page 105), you can specify a name with this directive,
associated with a filename, width and height. When an HTMLTEXT is rendered, the name is substituted with an HTML
tag for the image, with the correct size.
Syntax:
HTMLIMAGE = “range”, key, “image file”, width, height, flags
“range”: a set of cards,
key: the name associated to the image (replaced in HTML),
“image file”: the filename for the image,
width: width of the image (in cm),
height: height of the image (in cm),
flags: you can specify one or more flags, chosen between:
P Proportional
T Image alignment to the top of text (only with Explorer)
M Image alignment to the middle of text (only with Explorer)
B Image alignment to the bottom of text (only with Explorer)
L Image alignment to the left of the rectangle, text flushing right (only with Explorer)
R Image alignment to the right of the rectangle, text flushing left (only with Explorer)
E Image alignment to the left (under other images with L flag), text flushing right (only with Explorer)
I Image alignment to the right (under other images with R flag), text flushing left (only with Explorer)
Example:
HTMLIMAGE = 1, "(one)", "image.bmp", 1, 1, P
HTMLTEXT = 1, "<p>Test (one)</p>", 0, 0, 6, 9, #FFFFFF, 0, T
HTMLKEY
With this directive, you can create words that are replaced by longer texts in HTMLTEXT directive (see page 105).
Syntax:
HTMLKEY = “range”, key, “text”, htmlfont
Image 29

104
“range”: a set of cards,
key: a string that is searched and replaced with text parameter,
“text”: a string that replaces the key parameter,
htmlfont: add start and end tags for a font defined by an HTMLFONT directive (see page 102)
Example:
HTMLKEY = 1, "(one)", "only <b>one</b> word"
HTMLTEXT = 1, "<p>Test (one)</p>", 0, 0, 6, 9, #FFFFFF, 0, T
HTMLMARGINS
This directive adds the settings for margins and vertical alignment to an existing tag (that was created with
HTMLFONT directive, see page 102) to be used in HTMLTEXT directive (see page 105); this directive works only
with E flag in HTMLTEXT (MS Explorer).
Syntax:
HTMLMARGINS = “html tag”, margin top, margin left, margin right, margin bottom, paragraph alignment, line
spacing, cell width, cell height
Parameters:
“html tag”: a name used for referencing the font,
margin top: the size of the top margin, in cm,
margin left: the size of the left margin, in cm,
margin right: the size of the right margin, in cm,
margin bottom: the size of the bottom margin, in cm,
paragraph alignment: the text’s vertical alignment, values accepted are:
top top aligned
center centered
bottom bottom aligned
line spacing: the text’s line spacing in %, the default is 100 is for a single line,
cell width: the width of a table cell, in cm (it works only when T flag is used in HTMLFONT),
cell height: the height of a table cell, in cm (it works only when T flag is used in HTMLFONT).
Example:
HTMLFONT = alpha, Arial, 32, , #000000
HTMLMARGINS = alpha, 0.5, 1, 1
HTMLTEXT = 1, "<alpha>test</alpha>", 0, 0, 100%, 100%, #FFFFFF, 0, E
Note: using 100 as line spacing gives a different result from leaving that parameter empty, it’s a behavior of HTML.

105
HTMLTEXT
This directive prints a text, using HTML format, in the cards specified by a range. This directive is useful if you want to
print a text with multiple size, font, attributes, colors and so on. For expressions, you must include them in double curly
parentheses {{ … }}. You can add also one or more images, using a keyword(s), coded with the HTMLIMAGE
directive (see page 103).
Syntax:
HTMLTEXT = “range”, “text”, pos x, pos y, width, height, html color, angle, flags, alpha, htmlfont
Parameters:
“range”: a set of cards,
“text”: the HTML text to be printed,
pos x: horizontal position (in cm),
pos y: vertical position (in cm),
width: width of the text’s rectangle (in cm),
height: height of the text’s rectangle (in cm),
html color: background color for text,
angle: angle of text rotation, you must specify 0 for no rotation,
flags: you can specify one or more flags, chosen between:
T Transparent background for text
H Horizontal mirror
V Vertical mirror
I HTML rendering with internal engine
E HTML rendering with MS Explorer
2 Render a x2 image (don’t use if you already have an OVERSAMPLE directive)
4 Render a x4 image (don’t use if you already have an OVERSAMPLE directive)
8 Render a x8 image (don’t use if you already have an OVERSAMPLE directive)
R Vertical text
B Transparent background, better rendering of png, works only with E flag (MS Explorer)
F The text is resized to fit the rectangle (MS Explorer)
S The text is resized to fit the rectangle and the size is saved for the next cards (MS Explorer)
M The images are resized with the text (only if using F flag, MS Explorer)
L TEXTLIMIT variables are calculated more accurately (MS Explorer)
O Replace tags also between < and >
C Clear page after rendering (MS Explorer)
N Use always a new instance (MS Explorer)
alpha: level of transparency of text, from 0 (full transparent) to 100 (full solid). If omitted, the level is
set to 100 (full solid). You can also specify an angle for the transparency, with the format
level@angle; in this case, the level of transparency is the starting level, ending with 0 (full
transparent).
htmlfont: add start and end tags for a font defined by an HTMLFONT directive (see page 102)
Image 30
106
Example:
{[html]="<p><b>Text</b> example</p>
<p><b>Image</b> example</p>
<img src='c:\earth.jpg'>"}
HTMLTEXT = 1, [html], 0, 0, 6, 9, #FFFFFF, 0, T
Result: Image 30
ICON
This directive assigns one or more characters (a “key”) to an image, to be used later with an ICONS directive (see page
101).
Syntax:
ICON = “range”, key, “image file”
Parameters:
“range”: a set of cards,
key: one or more characters used to identify the image (like “A” or “001”),
“image file”: an existent image file (eventually with a path), formats allowed are bmp, gif, png, jpg, and tif.
Example:
ICON = "1-10", A, "c:\images\image1.jpg"
ICON = "1-10", B, "c:\images\image2.jpg"
ICON = "1-10", C, "c:\images\image3.jpg"
107
ICONS
This directive prints a number of images in a rectangular area, like a multi-image PATTERN directive (see page 136),
the “keys” parameter identifies the images used, defined before with some ICON directives (see page 101). For
example, if you write:
ICON = "1-10", A, "c:\images\image1.jpg"
ICON = "1-10", B, "c:\images\image2.jpg"
ICON = "1-10", C, "c:\images\image3.jpg"
Later you can use a key of “ABC” to print the three images all together in a rectangular area. This directive is useful
when you must convert to images an output from the combination/permutation engine. You can also use the “<” special
character to add a backspace and draw two images in the same place; for example, a key like “P<2” means that the
image assigned to “2” is printed over the image assigned to “P”.
Syntax:
ICONS = “range”, keys, pos x, pos y, width, height, obj width, obj height, angle, flags, horizontal alignment, vertical
alignment, alpha, key length, width factor, height factor
Parameters:
“range”: a set of cards,
keys: a string, composed by characters assigned to images with ICON directives,
pos x: horizontal position (in cm),
pos y: vertical position (in cm),
width: width of the rectangle in which the images are printed (in cm),
height: height of the rectangle in which the images are printed (in cm),
obj width: width of the single image to be printed (in cm),
obj height: height of the single image to be printed (in cm),
angle: angle of image rotation, if not specified it is assumed to be 0 (for no rotation),
flags: in this parameter, you can specify a special behavior for images, possible values are:
T Transparent
A Anti-aliasing
R Reverse, reversing the filling order of pattern’s elements (from bottom to top)
N Use PNG transparency
P Proportional
V Vertical pattern
horizontal alignment: the images’ horizontal alignment in the rectangle, values accepted are:
LEFT left aligned
CENTER centered (the default)
RIGHT right aligned
vertical alignment: the images’ vertical alignment in the rectangle, values accepted are:
TOP top aligned
CENTER centered (the default)
BOTTOM bottom aligned
108
alpha: level of transparency of image, from 0 (full transparent) to 100 (full solid). If omitted, the level is set to 100 (full
solid),
key length: the default length of the character string utilized for key is one character, but a
different length can be specified here, the "keys" parameter length must be a multiple,
width factor: the width of the image is adjusted with this factor, adding space if more than 100, removing space if less
than 100 (if not specified, the width factor of the image is 100),
height factor: the height of the image is adjusted with this factor, adding space if more than 100, removing space if less
than 100 (if not specified, the height factor of the image is 100).
Example:
RECTANGLE = 1, 0, 0, 6, 6, #0000FF
ICON = 1, A, "c:\images\dot_red.gif"
ICON = 1, B, "c:\images\dot_blue.gif"
ICON = 1, C, "c:\images\dot_black.gif"
ICONS = 1, BAC, 0, 0, 6, 6, 2, 2, 0, T, CENTER, CENTER
Result: Image 31
IF
The IF…ENDIF structure can be used to create sections of code that must be executed only if are verified some
conditions.
Syntax:
IF = value1 oper. value2
…
ELSEIF = value3 oper. value4
…
ELSEIF = value5 oper. value6
…
…
ELSE
…
ENDIF
Parameters:
value: a string, number, label or expression that can be evaluated,
oper.: the condition is evaluated using the two values and this operator, you can use one operator from this list:
= value1 and value2 are equal
> value1 is major than value2
< value1 is minor than value2
>= value1 is major or equal than value2
<= value1 is minor or equal than value2
<> value1 and value 2 are different
@ value1 is contained into value2
# value1 is not contained into value2
More than one test can be combined using Boolean logic, every test must be enclosed in parenthesis, and these are the
accepted keywords:
_TRUE_
_FALSE_
_NOT_
_AND_
Image 31
109
_OR_
If in an expression there are more than one logic operator, they are evaluated with these priorities (if they have the same
priorities, they are evaluated from left to right):
1) _NOT_
2) _AND_
3) _OR_
Examples:
; choose a value between R, E and T
[check] = R
IF = [check] = R
RECTANGLE = 1, 0, 0, 6, 9, #0000FF
ELSEIF = [check] = E
ELLIPSE = 1, 0, 0, 6, 9, #00FF00
ELSEIF = [check] = T
TRIANGLE = 1, 3, 0, 6, 9, 0, 9, #FF0000
ELSE
RECTANGLE = 1, 0, 0, 6, 9, #000000
ENDIF
; complex logic
if=([a]=1) _AND_ _NOT_ ([b]=3)
; in this example, the _AND_ operator is evaluated first
if=([a]=1) _OR_ ([b]=1) _AND_ ([c]=1)
; in this example, the _OR_ operator is evaluated first
if=(([a]=1) _OR_ ([b]=1)) _AND_ ([c]=1)
Note: if you want to use a sequence as argument for the IF directive, you must extract an element using the ? operator
(and § for the number of the current card) inside an expression (with curly brackets). For example:
IF = {sequence?§} = element

110
IMAGE
This directive can be used to add an external image to a range of cards.
Syntax:
IMAGE = range, image file, pos x, pos y, width, height, angle, flag, alpha, texture width, texture height, skew x, skew y,
img width, img height, loc x, loc y, copy x, copy y
Parameters:
range: a set of cards (the standards rules about ranges will be applied),
image file: an existent image file (eventually with a path), formats allowed are bmp, gif, png, jpg, and tif,
pos x: horizontal position (in cm),
posi y: vertical position (in cm),
width: width of the image (in cm),
height: height of the image (in cm),
angle: angle of image rotation, can be 0 for no rotation.
These are the required parameters. This directive can be used for a background on all your cards, or a
logo on top-right, or a centered image. Simply specify range, image, position and angle. For example:
IMAGE = 1, "c:\images\earth.jpg", 0, 0, 6, 9, 0
Result: Image 32
Note that the image will fill the destination rectangle, the standard behavior of this command is
resizing the original image and altering the aspect ratio for width and height. If you want to maintain
the original aspect you must use a flag, as additional parameter.
RECTANGLE = 1, 0, 0, 6, 9, #0000FF
IMAGE = 1, "c:\images\earth.jpg", 0, 0, 6, 9, 0, P
Result: Image 33
flag: in this parameter you can specify any, some or all of these letters:
P Proportional
A Anti-aliasing
G Grayscale
H Horizontal mirror
V Vertical mirror
T Transparent
X Texture
N Use PNG transparency
R Don’t adjust size for rotated images
D Use DPI from image file
C Extends the image cropping the borders
U Align the image to the upper boundary of the rectangle (with P/C flag)
E Align the image to the right boundary of the rectangle (with P/C flag)
S Align the image to the lower boundary of the rectangle (with P/C flag)
W Align the image to the left boundary of the rectangle (with P/C flag)
With the “P” flag, the image will be resized maintaining the original aspect ratio. The previous background remains
unchanged in the zone not occupied by the image.
With the “A” flag, to the image will be applied a smoothing filter. There aren’t other settings related to that parameter.
Image 32
Image 33

111
With the “G” flag, the image will be reduced to tones of gray (256 levels maximum). There aren’t other settings related
to that parameter.
With the “H” or “V” flags, the image will be mirrored in the corresponding direction (these flags may be used both with
the same image).
If the “T” flag is used, the image will be rendered with a transparent color. If the CHROMAKEY directive was not used
before, the transparent color is assumed to be the first pixel of the image (top left pixel). With the CHROMAKEY
directive (see relative entry, page 76), you can specify a pixel from another corner, or directly a color.
With the “X” flag, the image is used to fill the destination space (see texture width/height parameters).
With the “N” flag, the image is loaded reading the transparency information (only PNG format).
Without the “R” flag, a rotated image is stretched to be fully included in the destination rectangle, with this flag, the
directive maintains the original size for the rotated image.
With the “D” flag, the size of the image is adjusted reading the DPI from the file (only with BMP, PNG, and JPG
formats).
With the “U”, “E”, “S”, and “W” flags (to be used with P/C flag), the image is aligned to the relative
boundaries of the rectangle (if not specified, the image is centered).
alpha: level of transparency of image, from 0 (full transparent) to 100 (full solid). If omitted, the level
is set to 100 (full solid). You can also specify an angle for the transparency, with the format
level@angle; in this case, the level of transparency is the starting level, ending with 0 (full
transparent), for example:
RECTANGLE = 1, 0, 0, 6, 9, #0000FF
IMAGE = 1, "c:\images\earth.jpg", 0, 0, 6, 9, 0, P, 100@90
Result: Image 34
texture width: width of the texture (in cm), used only with “X” flag, if omitted the default is the
image’s width,
texture height: height of the texture (in cm), used only with “X” flag, if omitted the default is the
image’s height.
This is an example of using a texture to fill a space on a card (note, the alpha-channel is specified
because you can’t leave the parameter empty), with texture size 1x1 cm (remember, the card is 6x9
cm):
IMAGE = 1, "c:\images\earth.jpg", 0, 0, 6, 9, 0, X, 100, 1, 1
Result: Image 35
skew x: draw the image shifted horizontally (to the right for positive number, to the left for negative),
the value 1 is the image’s width (you can use a decimal value),
skew y: draw the image shifted vertically (to the bottom for positive number, to the top for negative),
the value 1 is the image’s height (you can use a decimal value).
This is an example for the skew effect (horizontal, value 0.5), note that the second image was vertically
mirrored and printed with an alpha-channel value of 60.
RECTANGLE = 1, 0, 0, 6, 9, #000000
IMAGE = 1, "c:\images\earth.jpg", 0, 0, 6, 6, 0
IMAGE = 1, "c:\images\earth.jpg", 0, 6, 6, 3, 0, V, 60, 0, 0, 0.5, 0
Result: Image 36
img width: if this parameter is specified, the image isn’t enlarged to the whole rectangle, but instead is drawn with this
width (in cm),
Image 34
Image 35
Image 36

112
img height: if this parameter is specified, the image isn’t enlarged to the whole rectangle, but instead is drawn with this
width (in cm),
loc x: if this parameter is a positive value, the image is positioned at that % of width, with a width equal to the
parameter image width; if this parameter is a negative one, the image is split horizontally at that % of his width, and the
two halves are positioned at the edge of the rectangle,
loc y: if this parameter is a positive value, the image is positioned at that % of height, with a height equal to the
parameter image height; if this parameter is a negative one, the image is split vertically at that % of his height, and the
two halves are positioned at the edge of the rectangle,
copy x: if the image is split horizontally, the empty gap between the two halves is filled with a % of the image, starting
from the cut point,
copy y: if the image is split vertically, the empty gap between the two halves is filled with a % of the image, starting
from the cut point.
Tip: you can choose a name (and path) from a Windows standard dialog, clicking on the button “Insert” and choosing
the menu voice “Image”.
Tip: if you drag and drop an image file in nanDECK’s window, an IMAGE line is added with the path and filename of
the image.
113
IMAGEFILTER
This directive sets the filter using when images are loaded and resized in a card (with IMAGE, ICONS, PATTERN,
HTMLTEXT/HTMLFILE, RTFTEXT/RTFFILE, and OVERSAMPLE directives). If not specified, the default filter is
LINEAR.
Syntax:
IMAGEFILTER = filter name
Parameter:
filter name: the filter may be one of the following:
NEAREST
DRAFT
LINEAR
COSINE
SPLINE
LANCZOS
MITCHELL
Example:
IMAGEFILTER=LANCZOS
IMAGESIZE
This directive reads an image and writes in two variables the image’s width and height (in pixel).
Syntax:
IMAGESIZE = “range”, “image file”
The variables are:
IW image’s width
IH image’s height
Parameters:
“range”: a set of cards,
“image file”: an existent image file (eventually with a path), formats allowed are bmp, gif, png and jpg.
Example:
IMAGESIZE = 1, "c:\images\earth.jpg"
IMAGE = 1, "c:\images\earth.jpg", 0, 0, 6, 6, 0, P
FONT = Arial, 16, , #000000
TEXT = 1, "Width={IW}" ,0 ,7 ,6 ,1 ,left, center
TEXT = 1, "Height={IH}" ,0 ,8 ,6 ,1 ,left, center
Result: Image 37
INCLUDE
This directive includes another script file in the current script, as if it was copied and pasted. You can omit the path if
the included file is in the same directory of the including script.
Syntax:
Image 37

114
INCLUDE = “filename”
Examples:
INCLUDE = "c:\test\alpha.txt"
INCLUDE = beta.txt
Tip: you can choose a name (and path) from a Windows standard dialog, clicking on the button “Insert” and choosing
the menu voice “Include”.
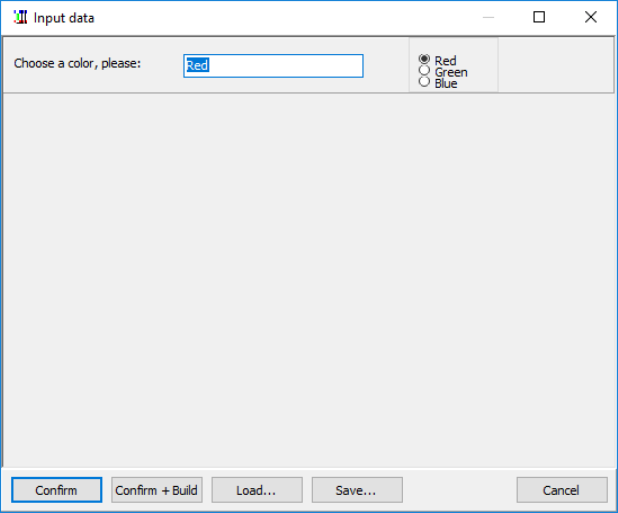
115
INPUTCHOICE
With this directive, the user can input a variable text that can be used as a label value, this text can be chosen between
the values from a sequence. The text confirmed is stored to a file with the same name of the script and “ini” for
extension, or can be saved to a specific configuration file, to be loaded in a subsequent execution.
Syntax:
INPUTCHOICE = “label”, “description”, “default”, “values”
Parameters:
“label”: the label for storing input text,
“description”: a text shown before the input box,
“default”: starting value for the label,
“values”: a sequence with the available choices.
Example:
INPUTCHOICE = "color", "Choose a color, please:", "Red", "Red|Green|Blue"
This is the resulting input form:
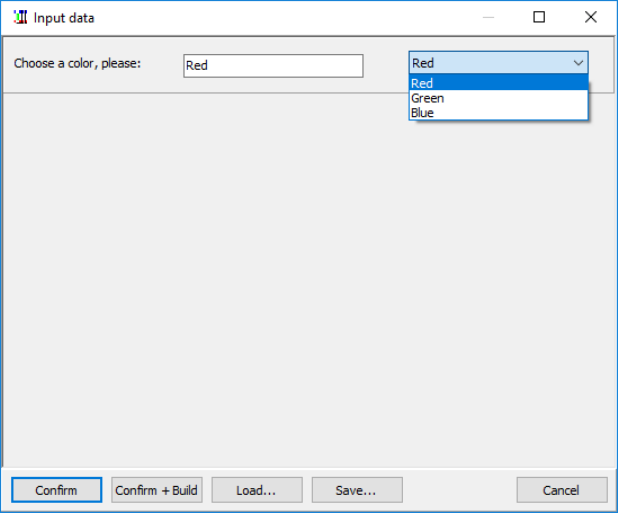
116
INPUTLIST
With this directive, the user can input a variable text that can be used as a label value, this text can be chosen between
the values from a sequence. The text confirmed is stored to a file with the same name of the script and “ini” for
extension, or can be saved to a specific configuration file, to be loaded in a subsequent execution.
Syntax:
INPUTLIST = “label”, “description”, “default”, “values”
Parameters:
“label”: the label for storing input text,
“description”: a text showed before the input box,
“default”: starting value for the label,
“values”: a sequence with the available choices.
Example:
INPUTLIST = "color", "Choose a color, please:", "Red", "Red|Green|Blue"
This is the resulting input form:
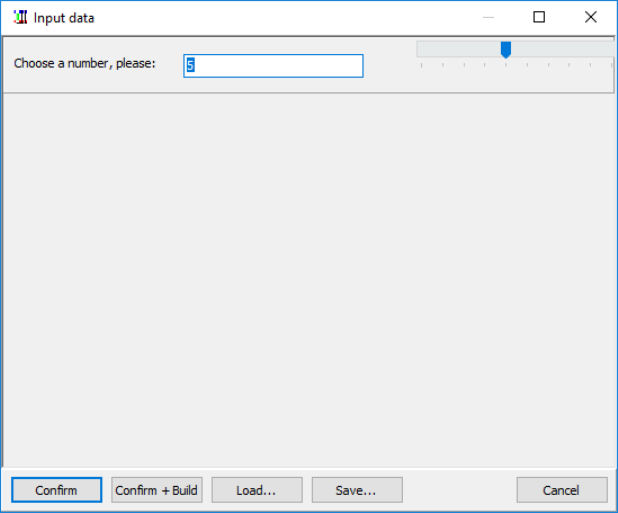
117
INPUTNUMBER
With this directive, the user can input a variable integer number that can be used as a label value, this number can be
chosen between a minimum and a maximum value. The number confirmed is stored to a file with the same name of the
script and “ini” for extension, or can be saved to a specific configuration file, to be loaded in a subsequent execution.
Syntax:
INPUTNUMBER = “label”, “description”, default, min, max
Parameters:
“label”: the label for storing input number,
“description”: a text shown before the input box,
default: starting value for the number,
min: minimum value for the number,
max: maximum value for the number.
Example:
INPUTNUMBER = "name", "Choose a number, please:", 5, 1, 10
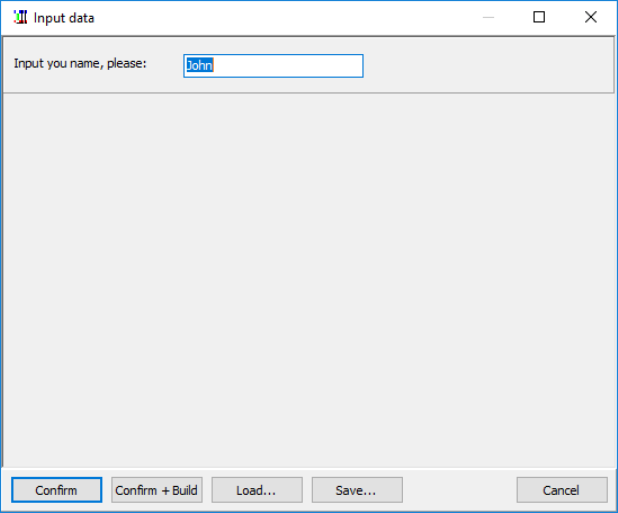
118
INPUTTEXT
With this directive, the user can input a variable text that can be used as a label value. The text confirmed is stored to a
file with the same name of the script and “ini” for extension, or can be saved to a specific configuration file, to be
loaded in a subsequent execution.
Syntax:
INPUTTEXT = “label”, “description”, “default”, flags
Parameters:
“label”: the label for storing input text,
“description”: a text showed before the input box,
“default”: starting value for the label.
flags: in this parameter, you can add a flag for a special effect, like:
F The program shows a button for browsing a file (to be added in the text field),
G The program shows a button for browsing a graphical file (to be added in the text field),
C The program shows a button for selecting a color,
R The program shows a button for selecting a color gradient.
Example:
INPUTTEXT = "name", "Input you name, please:", "John"
119
LAYER
The directives between a structure LAYER…ENDLAYER are drawn in a separate card, then printed on the main card
(or stored for a later use). Since the drawing directives like the RECTANGLE doesn’t support alpha transparency, they
can be drawn in this mode with a LAYER structure. If you specify the 5th parameter the layer is stored in memory
(using that parameter as a name) and drawn later with a LAYERDRAW directive, if the name is not specified, the layer
is drawn immediately.
Syntax:
LAYER = alpha, offset x, offset y, angle, name
Parameters:
alpha: level of transparency of the layer, from 0 (full transparent) to 100 (full solid). If omitted, the level is set to 100
(full solid). You can also specify an angle for the transparency, with the format level@angle; in this case, the level of
transparency is the starting level, ending with 0 (full transparent).
offset x: the horizontal offset of layer
offset y: the vertical offset of layer
angle: the angle of rotation of layer
name: the name of the layer
Example:
LAYER = 50
RECTANGLE = 1, 3, 0.5, 3, 8, #FF0000
FONT = Arial, 24, T, #000000
TEXT = 1, Alpha, 3, 5, 3, 5
ENDLAYER
LAYERDRAW
The directives draws a layer in a range of cards. The layer drawn is specified using its name (defined by the parameter
in the ENDLAYER directive, see page 89), and it must have been created before with a LAYER…ENDLAYER
structure. You can also specify a list of layers, separated by commas.
Syntax:
LAYER = “range”, name, alpha, offset x, offset y, angle
Parameters:
“range”: a set of cards,
name: the name of the layer(s),
alpha: level of transparency of the layer, from 0 (full transparent) to 100 (full solid). If omitted, the level is set to 100
(full solid). You can also specify an angle for the transparency, with the format level@angle; in this case, the level of
transparency is the starting level, ending with 0 (full transparent),
offset x: the horizontal offset of layer,
offset y: the vertical offset of layer,
angle: the angle of rotation of layer.
120
LIMIT
This directive fills four variables with the coordinates of latest drawn object’s boundaries (in cm), from various
command (*). You can use these variables in other commands.
Syntax:
LIMIT = “range”
The four variables are:
PL (left)
PR (right)
PT (top)
PB (bottom)
Parameters:
“range”: a set of cards
(*) This directive works with this list of directives:
BEZIER
BEZIERS
BUTTON
COPY
ELLIPSE
GRID
HEXGRID
HTMLFILE
HTMLTEXT
ICONS
IMAGE
LINE
LINERECT
PATTERN
PIE
POLYGON
RECTANGLE
RHOMBUS
ROUNDRECT
RTFFILE
RTFTEXT
STAR
TEXT
TRACK
TRACKRECT
TRIANGLE
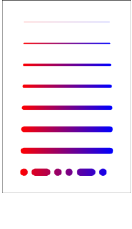
121
LINE
This directive draws a line from a point (x1, y1) to another point (x2, y2).
Syntax:
LINE = “range”, pos x1, pos y1, pos x2, pos y2, html color, thickness, pattern, end arrow, start arrow
Parameters:
“range”: a set of cards,
pos x1, pos y1: coordinates of first point (in cm),
pos x2, pos y2: coordinates of second point (in cm),
html color: color of the line, in the same format used for HTML (black, if not specified). You can also use a gradient,
thickness: thickness of the line (in cm), if omitted, the line is 1 pixel wide,
pattern: a pattern for the line, this pattern can be composed of:
O dot
D dash
S space
These letters can be repeated, for example “OSDSOS” is a valid pattern,
end arrow: width of the arrow (in cm), if omitted (or zero) there is no arrow at the end of the line,
start arrow: width of the arrow (in cm), if omitted (or zero) there is no arrow at the start of the line.
Example:
LINE = 1, 1, 1, 5, 1, #0000FF#FF0000@0
LINE = 1, 1, 2, 5, 2, #0000FF#FF0000@0, 0.05
LINE = 1, 1, 3, 5, 3, #0000FF#FF0000@0, 0.1
LINE = 1, 1, 4, 5, 4, #0000FF#FF0000@0, 0.15
LINE = 1, 1, 5, 5, 5, #0000FF#FF0000@0, 0.2
LINE = 1, 1, 6, 5, 6, #0000FF#FF0000@0, 0.25
LINE = 1, 1, 7, 5, 7, #0000FF#FF0000@0, 0.3
LINE = 1, 1, 8, 5, 8, #0000FF#FF0000@0, 0.35, OSDSOS
Result: Image 38
Image 38
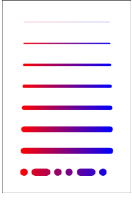
122
LINERECT
This directive draws a line from a vertex of a rectangle to the opposite vertex.
Syntax:
LINERECT = “range”, pos x, pos y, width, height, html color, thickness, pattern, end arrow, start arrow, flags
Parameters:
“range”: a set of cards,
pos x: horizontal position (in cm),
pos y: vertical position (in cm),
width: width of the rectangle (in cm),
height: height of the rectangle (in cm),
html color: color of the line, in the same format used for HTML (black if not specified). You can also use a gradient,
thickness: thickness of the line (in cm), if omitted, the line is 1 pixel wide,
pattern: a pattern for the line, this pattern can be composed of:
O dot
D dash
S space
These letters can be repeated, for example “OSDSOS” is a valid pattern,
end arrow: width of the arrow (in cm), if omitted (or zero) there is no arrow at the end of the line,
start arrow: width of the arrow (in cm), if omitted (or zero) there is no arrow at the start of the line.
flags: you can specify one or more of these flags to choose which lines to draw
T top side
R right side
B bottom side
L left side
D diagonal from top-left to bottom-right
G diagonal from top-right to bottom-left
If you don’t specify a flag, the default is top-left to bottom-right diagonal.
Example:
LINERECT = 1, 1, 1, 4, 0, #0000FF#FF0000@0
LINERECT = 1, 1, 2, 4, 0, #0000FF#FF0000@0, 0.05
LINERECT = 1, 1, 3, 4, 0, #0000FF#FF0000@0, 0.1
LINERECT = 1, 1, 4, 4, 0, #0000FF#FF0000@0, 0.15
LINERECT = 1, 1, 5, 4, 0, #0000FF#FF0000@0, 0.2
LINERECT = 1, 1, 6, 4, 0, #0000FF#FF0000@0, 0.25
LINERECT = 1, 1, 7, 4, 0, #0000FF#FF0000@0, 0.3
LINERECT = 1, 1, 8, 4, 0, #0000FF#FF0000@0, 0.35, OSDSOS
Result: Image 39
Image 39

123
LINK
This directive is used to link data, written as a text file (CSV format) or a spreadsheet (with xls, xlsx, or extensions),
with the current script. The data linked are referenced in the script as sequences. If the fields’ names are omitted, the
fields are referenced using the names contained in the first row of the file.
For text files, the character used to separate fields’ data can be changed using the LINKSEP directive (see page 127).
See also the LINKMULTI directive (page 125) if you need to duplicate the data rows, and the “Linked data editor”
chapter (page 56).
Syntax for text files:
LINK = “filename”, “field1”, “field2”, …“fieldN”
If you omit the “filename” parameter, the program reads the data directly from the script file, until it reads a ENDLINK
directive (see page 89).
Syntax for Excel files:
LINK = “filename!sheet”, “field1”, “field2”, …“fieldN”
If you didn’t specify the sheet’s name, the program reads the 1st sheet in the file (for example, “sheet1”).
Tip: you can choose a name (and path) from a Windows standard dialog, clicking on the button “Insert” and choosing
the menu voice “Link”.
Tip: if you drag and drop a spreadsheet file in nanDECK’s window, a LINK line is added with the path and filename of
the spreadsheet.
If the spreadsheet file doesn’t exist, the program asks if you want to create it (with the names of the fields specified in
the line as the parameters field1, field2, etc.
Examples:
LINK = "c:\test\data01.txt"
LINK = "c:\test\data02.txt", size, speed, weight
LINK = "c:\test\data01.xls"
LINK = "c:\test\data01.xls!sheet2"
With the 2nd example, in the script these fields are referenced as [size], [speed] and [weight].
Example of file “data02.txt”:
1,2,3
4,5,6
7,8,9
10,11,12
The program will translate the data file in these sequences:
[size]=1|4|7|10
[speed]=2|5|8|11
[weight]=3|6|9|12
You can also link a Google Sheet document, using the ID of the file instead of “filename” parameter, but you must
share it first, following these steps:

124
• select the file in Google Drive web page,
• click the Share icon (the icon with the “little man” in top-right button bar),
• click the dropdown menu below “Link sharing on” in the window,
• select a link sharing option, one of the “Anyone with the link…” option.
Now Google shows you a link like this:
https://docs.google.com/spreadsheets/d/1s_p1gcL2BBO_zYIe_v8bADjWzFtc0hh_eY8DIw8OPfY/edit?usp=sharing
The ID of the sheet is the bold part, copy it and paste it in a nanDECK line like this:
LINK=1s_p1gcL2BBO_zYIe_v8bADjWzFtc0hh_eY8DIw8OPfY
You can also select one of the sheets, with this syntax:
LINK=ID!Sheet_name
But you must enable the web sharing, with these steps:
• open the spreadsheet in a browser,
• select from menu File → Publish to the Web,
• click on “Publish” button.
LINKCOLOR
This directive is used to create a sequence with the colors from spreadsheet’s cells; it must be used before the LINK
directive (see page 123).
Syntax:
LINKCOLOR = label, “field”, flag
Parameters:
label: is the name of the sequence
“field”: is the name of the field from the spreadsheet
flag: it specifies if the color read is from the background or the font, if not specified is read from the background
F font
B background
LINKENCCSV
This directive is used to specify which characters are replaced with \n\ encoding (where n is the ASCII code) when read
from a csv file with the LINK directive (see page 123). As default, there aren’t characters encoded.
Syntax:
LINKENCCSV = string
LINKENCODE
This directive is used to specify which characters are replaced with \n\ encoding (where n is the ASCII code) when read
from a spreadsheet file with the LINK directive (see page 123). As default, characters encoded are [ ] { }.

125
Syntax:
LINKENCODE = string
LINKFILTER
This directive is used to filter the rows in a linked file. You can specify more than one LINKFILTER directive for a
linked file, and must be used before the LINK directive (see page 123).
Syntax:
LINKFILTER = CLEAR | field oper. value
Parameters:
field_name: is the name of the field for the filter
operator: these are the possible operators used for the filter
= equal
> major
< minor
>= major or equal
<= minor or equal
<> different
@ contained into
# not contained into
value: is the value used for the filter
Example:
Linked file:
Name, count
Alpha, 1
Beta, 2
Gamma, 3
With this script line:
LINKFILTER = count < 3
LINK = linked.csv
The resulting linked file will be:
Name, count
Alpha, 1
Beta, 2
If you want to clear all filter, you can use this directive with “CLEAR” parameter:
LINKFILTER = CLEAR
LINKMULDIS
When a linked file is used with a LINKMULTI directive (see page 126), you can specify with this directive one or more
fields that aren't replicated; instead of a replica, a single element in a sequence field is taken for each record. It must be
used before the LINK directive (see page 123).
Syntax:
126
LINKMULDIS = “field1”, “field2”, …“fieldN”
For example, if this is a linked file:
name, count, data
Alpha, 1, a
Beta, 2, b|c
Gamma, 3, d|e
And you add these lines to your script:
LINKMULTI = count
LINKMULDIS = data
LINK = linked.csv
The resulting linked file will be:
name, count, data
Alpha, 1, a
Beta, 2, b
Beta, 2, c
Gamma, 3, d
Gamma, 3, e
Gamma, 3, d
Note: if a sequence is smaller than the requested number of replicated rows, it’s extended (like the d|e sequence in the
example, extended to d|e|d for the three rows).
Note: if you use the § symbol in the linked field, it gives you a count starting from one on each new row multiplied by
LINKMULTI.
LINKMULTI
This directive is used to specify a field, used for identifying a multiplier for a line in a linked file. It must be used before
the LINK directive (see page 123) and it must refer an existing field in the linked file (or a field specified in the LINK
directive).
Syntax:
LINKMULTI = field
The field must contain a number. For example, if this is a linked file:
Name, count
Alpha, 1
Beta, 2
Gamma, 3
And you add these lines to your script:
LINKMULTI = count
LINK = linked.csv
The resulting linked file will be:
Name, count
Alpha, 1
Beta, 2
Beta, 2
Gamma, 3

127
Gamma, 3
Gamma, 3
LINKNEW
This directive is used to specify a string, used in substitution for a carriage return read from a spreadsheet file with the
LINK directive (see page 123). If you don’t specify a LINKNEW directive in your script file, every carriage return read
is replaced by \13\.
Syntax:
LINKNEW = string
If you want to use a linked file with an HTMLTEXT directive, you should convert all the carriage returns with the
corresponding HTML code, i.e.:
LINKNEW = <br>
LINKRANDOM
This directive enables/disables the randomization of lines read with a LINK directive (see page 123). It must be used
before the LINK directive (see page 123).
Syntax:
LINKRANDOM = switch
Parameter:
switch: values accepted are:
ON To enable randomization
OFF To disable randomization (the default)
Example:
LINKRANDOM = ON
LINK = linked.csv
LINKSEP
This directive is used to specify the character used in a link file to separate fields. It must be used before the LINK
directive (see page 123).
If this command is omitted, is used the default separator, a comma “,”.
Syntax:
LINKSEP = separator
You can also specify a special character with the syntax \n\. For example, for a tab you can use this line:
LINKSEP = \9\
Example:
LINKSEP = ;
LINK = linked.csv

128
LINKSTYLES
This directive is used to specify alternatives for HTML tags when reading formats from a spreadsheet files. It must be
used before the LINK directive (see page 123).
If this command is omitted, the standard HTML tags are used instead.
Syntax:
LINKSTYLES = bold on, bold off, italic on, italic off, strikeout on, strikeout off, underline on, underline off, superscript
on, superscript off, subscript on, subscript off
LINKTRIM
This directive enables/disables the deletion of empty rows at the end of a spreadsheet file; this directive must be used
before the LINK command (see page 123).
Syntax:
LINKTRIM = switch
Parameter:
switch: values accepted are:
ON to enable the deletion of empty rows (the default)
OFF to disable the deletion of empty rows
LINKUNI
This directive enables/disables the conversion of Unicode characters when read from a spreadsheet file (to be used with
an HTMLTEXT directive, see page 105); this directive must be used before the LINK command (see page 123).
Syntax:
LINKUNI = switch
Parameter:
switch: values accepted are:
ON to enable the Unicode conversion (the default)
OFF to disable the Unicode conversion
LOG
This directive appends a string in a text file, if the file doesn't exist, it will be created. If you don’t specify a value, the
file is deleted instead.
Syntax:
LOG = “range”, “filename”, “string”
Parameters:
“range”: a set of cards,
“filename”: name of the file,
“string”: the string that will be written in the text file
129
Example:
LOG = 1-10, "log.txt", "Card n° {§}"
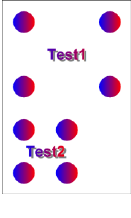
130
MACRO
With this directive, you can create new procedures, to be used like other directives. The END directive marks the end of
the new procedure, and you can specify a list of parameters, delimited with parenthesis, to be reused in the script block.
You can also specify a default value for each parameter, then if you didn’t use a parameter when you call a macro, the
default value is used instead. In a macro, you can recall another macro, but you can’t create recursive macros.
Syntax:
MACRO = name, (parameter1)value1, (parameter2)value2, …
…
END
Example:
[black] = #000000
[red] = #FF0000
[blue] = #0000FF
;
MACRO = dot, (rng), (x), (y), (r)
ELLIPSE = (rng), (x)-(r), (y)-(r), (r)*2, (r)*2, [red][blue]@0
END
;
MACRO = shadow, (rng), (x), (y), (w), (h), (txt), (col)
FONTRANGE = (rng), Arial, 20, B, [black]
TEXT = (rng), "(txt)", (x)+0.08, (y)+0.08, (w), (h), CENTER, CENTER, 0, 50
FONTRANGE = (rng), Arial, 20, BT, (col)
TEXT = (rng), "(txt)", (x), (y), (w), (h), CENTER
END
;
MACRO = card, (rng), (txt), (x), (y), (w), (h), (col)
shadow = (rng), (x), (y), (w), (h), (txt), (col)
dot = (rng), (x), (y), 0.5
dot = (rng), (x)+(w), (y), 0.5
dot = (rng), (x), (y)+(h) ,0.5
dot = (rng), (x)+(w), (y)+(h), 0.5
END
;
card = 1, "Test1", 1, 1, 4, 3, [red][blue]@0
card = 1, "Test2", 1, 6, 2, 2, [red][blue]@0
Result: Image 40
Image 40
131
MARGINS
This directive sets the page’s margins. If the directive MARGINS is not specified, the standard margins are 1 cm (each).
Syntax:
MARGINS = left margin, right margin, top margin, bottom margin, odd horiz, odd vert., even horiz., even vert.
Parameters:
left margin: left margin (in cm),
right margin: right margin (in cm),
top margin: top margin (in cm),
bottom margin: bottom margin (in cm),
odd horiz.: horizontal margins offset in odd pages (in cm),
odd vert.: vertical margins offset in odd pages (in cm),
even horiz.: horizontal margins offset in even pages (in cm),
even vert.: vertical margins offset in even pages (in cm).
Example:
MARGINS = 2, 2, 1, 1
MOSAIC
This directive reads all the images in a folder, and arrange them in a rectangle. If the images fill more than one instance
of that rectangle, you can use a page parameter to specify which rectangle is drawn from all the possible choices.
Syntax:
MOSAIC = “range”, “folder”, pos x, pos y, width, height, page, flags, zoom
Parameters:
“range”: a set of cards,
“folder”: a folder to search, eventually with a file pattern,
pos x: horizontal position (in cm),
pos y: vertical position (in cm),
width: width of the rectangle (in cm),
height: height of the rectangle (in cm),
page: if not specified, is equal to 1,
flags: one or more of these flags
H the schema is mirrored horizontally
V the schema is mirrored vertically
S the images are read also in the subfolders
132
zoom: if not specified, is equal to 100
Example:
MOSAIC = 1, "images\*.png", 0, 0, 0, 100%
NANDECK
This directive executes another instance of the program, loads a script, render all the cards and saves them to disk. Then
the execution continues with the next line. This directive is executed only one time with each run of the script.
Syntax:
NANDECK = “source”, output, “path”, dpi, oversample, “range”
Parameters:
“source”: another nanDECK script,
output: this flag specifies the format of the saved images, you can choose between:
BMP
JPG
PNG
GIF
GIFA
TIF
PDF
“path”: the path for the saved images, if isn't specified, the images are saved in the save folder of the source,
dpi: the resolution for the images (see page 84), the default is 300,
oversample: the value for the oversample (see page 132), the default is 1 (no oversample),
“range”: you can specify a range if you don't want to render all the deck.
Example:
NANDECK = "c:\scripts\test.txt", PNG, "c:\output"
NEXT
This directive closes a FOR…NEXT loop (see page 96).
Syntax:
NEXT
Parameters:
none
ORIGIN
With this directive you can specify values to be added to the horizontal and vertical coordinates of all graphic directives
in a range of cards.
Syntax:

133
ORIGIN = range, pos x, pos y
Parameters:
“range”: a set of cards,
pos x: the offset value for all horizontal coordinates,
pos y: the offset value for all vertical coordinates.
Example:
ORIGIN = 1-10, 0.5, 0.5
OVERSAMPLE
If you specify a parameter greater than one, the program works with cards 2x, 3x, or greater than the size specified, and
then resize them to the original size, using the filter specified with IMAGEFILTER directive (see page 113). It’s useful
to smooth every element of the cards, especially with small size one.
Syntax:
OVERSAMPLE = number
Example:
OVERSAMPLE = 2
With this directive, the memory required (and the rendering time) is much more than usual.
PAGE
This directive sets the paper’ size and orientation (for printing and PDF creation).
Syntax:
PAGE = width, height, orientation, flags, html color, “no border range”
Parameters:
width: page width (in cm)
height: page height (in cm)
orientation: the orientation can be chosen between:
LANDSCAPE horizontal
PORTRAIT vertical
flags: in this parameter, you can specify a special behavior for pages, possible values are:
H the cards are horizontally centered
V the cards are vertically centered
E guides are not printed on even pages
O guides are not printed on odd pages
html color: paper color, in the same format used for HTML; you can also use a sequence of two or more colors, if you
want a different color on each page.
no border range: if a range is specified, the border isn’t printed on these cards.

134
If the directive PAGE is not specified, the standard is 21 x 29.7 (A4), portrait, no flags.
Example:
PAGE = 21, 29.7, LANDSCAPE
PAGEFONT
This directive changes the font’s characteristics for page’s headers (see page 99) and footers (see page 95). If you don’t
specify this directive in your script, it will be used Arial 10, black.
Syntax:
PAGEFONT = “font name”, font size, style, html color
Parameters:
“font name”: character’s name (string),
font size: character’s size (integer), in typographical points = 1/72 of an inch,
style: character’ style, values accepted are:
B bold
I italic
U underline
S strikeout
html color: character’s color, in the same format used for HTML.
Examples:
PAGEFONT = Arial, 10, B, #000000
PAGEFONT = "Times new roman", 16, IU, #FF0000
PAGEIMAGE
This directive draws an image centered on all the printed pages (like a watermark).
Syntax:
PAGEIMAGE = “image file”, flags
Parameters:
“image file”: the image to be printed,
flag: one or more of the following flags:
P proportional
E don’t print on even pages
O don’t print on odd pages
Example:
PAGEIMAGE = watermark.png, P
Note: use only .bmp or .png images
135
136
PATTERN
This directive prints repeated images in a rectangular area. If you want to print different images instead, you can use the
ICON directive (see page 101).
Syntax:
PATTERN = “range”, “image file”, repetition, pos x, pos y, width, height, obj width, obj height, angle, flags, horizontal
alignment, vertical alignment, alpha
Parameters:
“range”: a set of cards,
“image file”: an existent image file (eventually with a path), formats allowed are bmp, gif, png, jpg, and tif,
repetition: the number of images printed (you can also use a sequence here),
pos x: horizontal position (in cm),
pos y: vertical position (in cm),
width: width of the rectangle in which the images are printed (in cm),
height: height of the rectangle in which the images are printed (in cm),
obj width: width of the single image to be printed (in cm),
obj height: height of the single image to be printed (in cm),
angle: angle of image rotation, if not specified it is assumed to be 0 (for no rotation),
flags: in this parameter, you can specify a special behavior for images, possible values are:
T Transparent
A Anti-aliasing
R Reverse, reversing the filling order of pattern’s elements (from bottom to top)
N Use PNG transparency
P Proportional
V Vertical pattern
horizontal alignment: the images’ horizontal alignment in the rectangle, values accepted are:
LEFT left aligned
CENTER centered (the default)
RIGHT right aligned
vertical alignment: the images’ vertical alignment in the rectangle, values accepted are:
TOP top aligned
CENTER centered (the default)
BOTTOM bottom aligned
alpha: level of transparency of image, from 0 (full transparent) to 100 (full solid). If omitted, the level is set to 100 (full
solid).
Examples:
[img] = "c:\images\dot_red.gif"
RECTANGLE = 1, 0, 0, 6, 5, #0000FF
PATTERN = 1, [img], 5, 0, 1, 6, 3, 1.5, 1.5, 0, T, CENTER, CENTER
Result: Image 41
Image 41

137
PIE
This directive draws a pie slice in a set of cards.
Syntax:
PIE = “range”, pos x, pos y, width, height, start angle, end angle, html color, html color, thickness
Parameters:
“range”: a set of cards,
pos x: horizontal position (in cm),
pos y: vertical position (in cm),
width: width of the pie (in cm),
height: height of the pie (in cm),
start angle: start angle of pie (0=north, 90=east, 180=south, 270=west)
end angle: end angle of pie (0=north, 90=east, 180=south, 270=west)
html color: border color of the pie, in the same format used for HTML. You can also specify a
gradient.
html color: inner color of the pie, in the same format used for HTML, if not specified the inner color is
the same of border color. You can also specify “EMPTY” for a hollow pie or a gradient.
thickness: thickness of the border of the pie (in cm), if omitted, the pie’s border is 1 pixel wide.
Examples:
PIE = 1, 1, 3, 4, 4, 0, 90, #00FF00
Result: Image 42
PIE = 1, 1, 3, 4, 4, 90, 270, #FF00FF, EMPTY, 0.1
Result: Image 43
PIE = 1, 1, 3, 4, 4, 0, 270, #FF0000#0000FF@90
Result: Image 44
Image 42
Image 43
Image 44

138
POLYGON
This directive draws a polygon in a set of cards.
Syntax:
POLYGON = “range”, pos x, pos y, width, height, num sides, angle, html color, html color, thickness,
start side, end side
Parameters:
“range”: a set of cards,
pos x: horizontal position (in cm),
pos y: vertical position (in cm),
width: width of the polygon (in cm),
height: height of the polygon (in cm),
num sides: number of sides (3 = triangle, 4 = square, 5 = pentagon, and so on…),
angle: angle of rotation (in degrees),
html color: border color of the polygon, in the same format used for HTML. You can also specify a
gradient,
html color: inner color of the polygon, in the same format used for HTML, if not specified the inner
color is the same of border color. You can also specify “EMPTY” for a hollow polygon or a gradient,
thickness: thickness of the border of the polygon (in cm), if omitted, the polygon’s border is 1 pixel
wide,
start side: the polygon is drawn starting from this side, it omitted is equal to 1,
end side: the polygon is drawn until this side, if omitted is equal to num sides.
Examples:
POLYGON = 1, 1, 1, 4, 7, 3, 45, #00FF00
Result: Image 45
POLYGON = 1, 1, 1, 4, 7, 4, 0, #FF00FF, EMPTY, 0.1
Result: Image 46
POLYGON = 1, 1, 1, 4, 7, 5, 0, #FF0000#0000FF@90
Result: Image 47
Image 45
Image 46
Image 47
139
PRINT
This directive restricts the deck creation to the specified cards.
Syntax:
PRINT = “range” | DUPLEX | COMPARE
Parameters:
“range”: a range of cards. If you specify the “DUPLEX” parameter, the range is built using information from the
DUPLEX directive (see page 84), if you specify the “COMPARE” parameter, is used the range created with a
COMPARE directive (see page 79).
Examples:
PRINT = "1-3, 8, 10-12"
PRINT = DUPLEX
QRCODE
This directive draws a QRCode (useful to be read with a smartphone) in a set of cards.
Syntax:
QRCODE = “range”, “text”, pos x, pos y, width, height, html color, html color
Parameters:
“range”: a set of cards,
“text”: the text written in the QRCode,
pos x: horizontal position (in cm),
pos y: vertical position (in cm),
width: width of the QRCode (in cm),
height: height of the QRCode (in cm),
html color: color of the QRCode, in the same format used for HTML, black if not specified. You can also specify a
gradient,
html color: color of the background, in the same format used for HTML, white if not specified. You can also specify a
gradient.
Example:
QRCODE = "1-10", "http://www.nandeck.com", 1, 1, 4, 4

140
RECTANGLE
This directive draws a rectangle in a set of cards.
Syntax:
RECTANGLE = “range”, pos x, pos y, width, height, html color, html color, thickness
Parameters:
“range”: a set of cards,
pos x: horizontal position (in cm),
pos y: vertical position (in cm),
width: width of the rectangle (in cm),
height: height of the rectangle (in cm),
html color: border color of the rectangle, in the same format used for HTML. You can also specify a
gradient.
html color: inner color of the rectangle, in the same format used for HTML, if not specified the inner
color is the same of border color. You can also specify “EMPTY” for a hollow rectangle or a gradient.
thickness: thickness of the border of the rectangle (in cm), if omitted, the rectangle’s border is 1 pixel
wide.
Examples:
RECTANGLE = 1, 1, 1, 4, 7, #00FF00
Result: Image 48
RECTANGLE = 1, 1, 1, 4, 7, #FF00FF, EMPTY, 0.1
Result: Image 49
RECTANGLE = 1, 1, 1, 4, 7, #FF0000#0000FF@90
Result: Image 50
Image 48
Image 49
Image 50
141
RENDER
With this directive, the program renders only a range of cards. If omitted, all the deck is rendered. If a name is
specified, the range is associated with this string, and can be selected on a window, for a faster switch on multiple
ranges.
Syntax:
RENDER = first card, last card, name
Examples:
RENDER = 10, 20
RENDER = 1, 10, "full deck"
RENDER = 1, 5, "first half"
RENDER = 6, 10, "second half"
142
RHOMBUS
This directive draws a rhombus in a set of cards.
Syntax:
RHOMBUS = “range”, pos x, pos y, width, height, html color, html color, thickness
Parameters:
“range”: a set of cards,
pos x: horizontal position (in cm),
pos y: vertical position (in cm),
width: width of the rhombus (in cm),
height: height of the rhombus (in cm),
html color: border color of the rhombus, in the same format used for HTML. You can also specify a gradient.
html color: inner color of the rhombus, in the same format used for HTML, if not specified the inner color is the same
of border color. You can also specify “EMPTY” for a hollow rhombus or a gradient.
thickness: thickness of the border of the rhombus (in cm), if omitted, the rectangle’s border is 1 pixel wide.
Examples:
RHOMBUS = 1, 1, 1, 4, 7, #00FF00
Result: Image 51
Image 51

143
ROUNDRECT
This directive draws a rounded rectangle in a set of cards.
Syntax:
RECTANGLE = “range”, pos x, pos y, width, height, html color, html color, thickness, round width, round height
Parameters:
“range”: a set of cards,
pos x: horizontal position (in cm),
pos y: vertical position (in cm),
width: width of the rounded rectangle (in cm),
height: height of the rounded rectangle (in cm),
html color: border color of the rounded rectangle, in the same format used for HTML. You can also specify a gradient.
html color: inner color of the rounded rectangle, in the same format used for HTML, if not specified the inner color is
the same of border color. You can also specify “EMPTY” for a hollow rounded rectangle or a gradient.
thickness: thickness of the border of the rounded rectangle (in cm), if omitted, the rectangle’s border is
1 pixel wide.
round width: rounding horizontal factor for the rectangle (1 for a circle), if omitted the default is 5.
round height: rounding vertical factor for the rectangle (1 for a circle), if omitted the default is equal
to horizontal factor parameter (or 5, if the latter is missing).
Note that if you want rounded corners with the same aspect, the horizontal/vertical factors must have a ratio
proportional to the width/height of the rectangle.
Examples:
ROUNDRECT = 1, 1, 1, 4, 7, #00FF00
Result: Image 52
ROUNDRECT = 1, 1, 1, 4, 7, #FF00FF, EMPTY, 0.1, 2
Result: Image 53
ROUNDRECT = 1, 1, 1, 4, 7, #FF0000#0000FF@90
Result: Image 54
Image 52
Image 53
Image 54
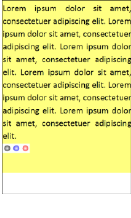
144
RTFFILE
This directive prints the RTF text loaded from a filename in the cards specified by a range. This directive is useful if
you want to print a text from a document written using a word-processor (every program has the option to save a file in
RTF format).
Syntax:
RTFFILE = “range”, “rtf file”, pos x, pos y, width, height, html color , angle, flags, alpha
Parameters:
“range”: a set of cards,
“rtf file”: the RTF filename for text to be printed (eventually with a pathname),
pos x: horizontal position (in cm),
pos y: vertical position (in cm),
width: width of the text’s rectangle (in cm),
height: height of the text’s rectangle (in cm),
html color: background color for text,
angle: angle of text rotation, you must specify 0 for no rotation,
flags: you can specify one or more flags, chosen between:
T Transparent background for text
H Horizontal mirror
V Vertical mirror
alpha: level of transparency of text, from 0 (full transparent) to 100 (full solid). If omitted, the level is set to 100 (full
solid). You can also specify an angle for the transparency, with the format level@angle; in this case, the level of
transparency is the starting level, ending with 0 (full transparent).
Example:
RTFFILE = 1, "c:\temp\document.rtf", 0, 0, 6, 8, #FFFF80, 0
Result: Image 55
Image 55
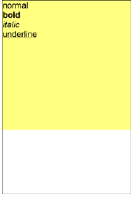
145
RTFTEXT
This directive prints a text, using RTF format, in the cards specified by a range. This directive is useful if you want to
print a text with multiple size, font, attributes, colors and so on. For expression, you must include them in double curly
parentheses {{ … }}.
Syntax:
RTFTEXT = “range”, “text”, pos x, pos y, width, height, html color , angle, flags, alpha
Parameters:
“range”: a set of cards,
“text”: the RTF text to be printed,
pos x: horizontal position (in cm),
pos y: vertical position (in cm),
width: width of the text’s rectangle (in cm),
height: height of the text’s rectangle (in cm),
html color: background color for text,
angle: angle of text rotation, you must specify 0 for no rotation,
flags: you can specify one or more flags, chosen between:
T Transparent background for text
H Horizontal mirror
V Vertical mirror
alpha: level of transparency of text, from 0 (full transparent) to 100 (full solid). If omitted, the level is set to 100 (full
solid). You can also specify an angle for the transparency, with the format level@angle; in this case, the level of
transparency is the starting level, ending with 0 (full transparent).
Example:
RTFTEXT = 1, "{\rtf normal\par{\b bold}\par{\i italic}\par{\ul underline}}", 0,
0, 6, 6, #FFFF80, 0
Result: Image 56
Image 56

146
SAVE
This directive saves the full or partial image(s) of card(s) specified by a range in a file(s). You can use expressions like
{§} to specify different filenames for different cards in the range. The image can also be loaded in another card with
IMAGE directive (see page 110). The formats you can use for the image are BMP, JPG, PNG and GIF, if you didn’t
specify an extension for the filename, the default is BMP. If you didn’t specify a size, the default is all the card.
Syntax:
SAVE = “range”, “image file”, pos x, pos y, width, height, transparent color, “zipfile”, “image file”
Parameters:
“range”: a set of cards,
“filename”: the name of the file created (.bmp extension),
pos x: horizontal start of saved area (in cm),
pos y: vertical start of saved area (in cm),
width: width of the saved area (in cm),
height: height of the saved area (in cm),
transparent color: for PNG and GIF, if this parameter is specified, the file is save with this color as transparent, for
PNG files you can also specify more than one color (for example #0000FF#00FF00 for two colors) and add also a level
of transparency, in the format #xxyyyyyy, where xx = transparency level (from 00 = full transparent to FF = full solid)
and yy = color,
“zipfile”: if this parameter is specified, the image file is added to this zip file,
“image file”: if this parameter is specified (a PNG image), is used as transparency mask for the saved
image.
Examples:
SAVE = 1-3, "card{§}.bmp", 0, 0, 6, 9
RECTANGLE = 1, 1, 1, 4, 7, #0000FF#FF0000@90
RECTANGLE = 1, 0, 0, 6, 9, #000000, EMPTY, 0.5
SAVE = 1, "temp.bmp", 0, 0, 6, 9
IMAGE = 1, "temp.bmp", 3, 0, 3, 4.5, 0, A
Result: Image 57
Image 57

147
SAVEGIFA
This directive saves the full deck of cards in an animated GIF file specified in “filename” parameter.
Syntax:
SAVEGIFA = “filename”, msec, flags, transparent color
Parameters:
“filename”: the name of the file to be created (.gif extension)
msec: the delay between each frame (the default is 1000 = 1 second)
flags: one of the following flags
O all the images use a single color palette,
P the color palette(s) are packed,
T the frames of the image are saved with a transparent color, specified in the 4th parameter
transparent color: the transparent color in HTML format (if not specified, is set to white) to be used with the T flag.
Example:
SAVEGIFA = deck.gif
Note: there isn’t a “range” parameter because only the final deck can be printed (and then exported in an animated
GIF file). If you want a partial deck, add a RENDER directive.
SAVEPAGES
This directive saves the full deck of cards in one or more image files (one for each page), with names specified in
“filename” parameter, adding a progressive number for each page. The file formats accepted are BMP, JPG (or JPEG),
and PNG.
Syntax:
SAVEPAGE = “filename”
Parameters:
“filename”: the name of the file(s) to be created
Example:
SAVEPAGES = page.png
Note: there isn’t a “range” parameter because only the final deck can be printed (and then exported in one or more
image files). If you want a partial deck, add a RENDER directive.
SAVEPDF
This directive saves the full deck of cards in a PDF file specified in “filename” parameter.
Syntax:
SAVEPDF = “pdf file”
Parameters:

148
“pdf file”: the name of the file to be created (.pdf extension)
Example:
SAVEPDF = deck.pdf
Note: there isn’t a “range” parameter because only the final deck can be printed (and then exported in a PDF file). If
you want a partial deck, add a RENDER directive.
SECTION
The directives contained between SECTION and ENDSECTION directives are associated with the parameter “text”,
and can be activated or deactivated (using the switch parameter), this option can be selected on a window, for a faster
activation/deactivation for multiple names. In this window, there are three buttons: one for enabling all the sections, one
for disabling all the sections, and one (named “Cycle build”) that validates and builds in sequence all the sections
(enabling only one at each cycle).
Syntax:
SECTION = “text”, switch
The parameter switch can be set equal to:
ON to enable the section
OFF to disable the section
Example:
SECTION = "Border", ON
BORDER = RECTANGLE
ENDSECTION
SELECT
The SELECT…ENDSELECT structure can be used to create sections of code that must be executed only if are verified
some conditions. In the default mode, a value is evaluated and only the CASE code with the same value is executed;
you can also add an operator to be used for the test evaluation.
Syntax:
SELECT = value
…
CASE = value1
…
CASE = value2
…
…
CASEELSE
…
ENDSELECT
Parameters:
value: a string, number, label or expression that can be evaluated.
Example:
CARDS = 4
[TEST] = 1|2|3|4
SELECT = [TEST]
CASE = 1
149
RECTANGLE = 1-4, 0, 0, 100%, 100%, #FF0000
CASE = <4
ELLIPSE = 1-4, 0, 0, 100%, 100%, #0000FF
CASEELSE
RHOMBUS = 1-4, 0, 0, 100%, 100%, #00FF00
ENDSELECT
SEQUENCE
This directive is used to start a SEQUENCE…ENDSEQUENCE structure, for creating one or more sequences.
Syntax:
SEQUENCE = label name
Parameters:
label name: the name of the label
Each line in this structure is added to the sequence with the name specified as a parameter.
Example:
SEQUENCE = Title
Earth
Moon
Mars
Venus
Jupiter
ENDSEQUENCE
There is an alternative syntax, for creating multiple sequences. Each line in this structure must contains the name of the
sequence and a value, separated with a pipe | character. For example, this script creates five sequences of two elements
each:
SEQUENCE =
Title |Earth
Image |Earth.jpg
Description |Earth is the third planet from the Sun.
Radius |6.371
Orbital Period|365
Title |Moon
Image |Moon.jpg
Description |The Moon is Earth's only natural satellite.
Radius |1.737
Orbital Period|26
ENDSEQUENCE
That script is equivalent to this:
[Title] = Earth|Moon
[Image] = Earth.jpg|Moon.jpg
[Description] = Earth is the third planet from the Sun.| The Moon is Earth's
only natural satellite.
[Radius] = 6.371|1.737
[Orbital Period] = 365|26
150
SET
This directive sets a label with a value. Note: since the syntax [label] is replaced in the validations step, if you want to
read a value memorized with a SET directive, you must use the {label?n} syntax, where n is the index of the sequence
(use 1 if it’s a single value).
Syntax:
SET = “range”, label name, label value
Parameters:
“range”: a set of cards,
label name: the name of the label to be changed (or added, if not exists)
label value: the value of the label
SPECIAL
This directive is used to change the special symbols used for some variables.
Syntax:
SPECIAL = char cardnum, char framenum, char framename
Parameters:
char cardnum: the character used for the number of the current card (default §).
char framenum: the character used for the number of the current frame (default °).
char framename: the character used for the name of the current frame (default µ).
Example:
SPECIAL = $, ^, ?

151
STAR
This directive draws a star in a set of cards.
Syntax:
STAR = “range”, pos x, pos y, width, height, num points, angle, factor, html color, html color,
thickness
Parameters:
“range”: a set of cards,
pos x: horizontal position (in cm),
pos y: vertical position (in cm),
width: width of the star (in cm),
height: height of the star (in cm),
num points: number of points,
angle: angle of rotation (in degrees),
factor: from 0 (very pointy star) to 100 (polygon),
html color: border color of the star, in the same format used for HTML. You can also specify a
gradient.
html color: inner color of the star, in the same format used for HTML, if not specified the inner color
is the same of border color. You can also specify “EMPTY” for a hollow star or a gradient.
thickness: thickness of the border of the star (in cm), if omitted, the star’s border is 1 pixel wide.
Examples:
STAR = 1, 1, 1, 4, 7, 3, 0, 20, #00FF00
Result: Image 58
STAR = 1, 1, 1, 4, 7, 5, 0, 50, #FF00FF, EMPTY, 0.1
Result: Image 59
STAR = 1, 1, 1, 4, 7, 6, 90, 80, #FF0000#0000FF@90
Result: Image 60
Image 58
Image 59
Image 60
152
STORE
This directive enables/disables the storing of cards to the deck. The default behavior is that the program memorizes the
images of the cards, but it can be disabled, useful when you don't want to print them or create a PDF, but need only the
images, to be saved with a SAVE directive (see page 146).
Syntax:
STORE = “range”, switch
Parameters:
“range”: a range of cards,
switch: values accepted are:
ON to enable the storing of cards (the default)
OFF to disable the storing of cards
TABLE
This directive open the virtual table (see page 57) at the end of the building process.
Syntax:
TABLE = num draw, flags
Parameters:
num draw: the number of cards drawn when you double click a deck,
flags: you can choose these flags:
R the drawn card is placed at the right of the deck
L the drawn card is placed at the left of the deck
U the drawn card is placed at the top of the deck
B the drawn card is placed at the bottom of the deck
O the drawn position is rotated
P the drawn position is randomized
A enable the alignment to grid
C show the canvas as a background image
S automatic selection of object
T show the tags
F bring the selected object to the front
M move complete stacks of cards
TAG
This directive assign a label and a numeric value to a card (or a range of cards). This tag is shown in the Virtual Table
(see page 57) when a card is put in a specific location of the table (if more than one card is in one location, the values of
all the tags with the same name are summed up).
Syntax:
TAG = “range”, tag, number
Parameters:
“range”: a set of cards,
153
tag: the name of the tag,
number: the value of the tag (it can be a sequence of values).
Examples:
TAG = 1-10, card, 1
TAG = 1-20, value, 1|2|3|4|5
154
TEXT
This directive writes a text on a range of cards. The font used is specified using FONT (see page 92) or FONTRANGE
(see page 93) command.
Syntax:
TEXT = “range”, “text”, pos x, pos y, width, height, horizontal alignment, vertical alignment, angle, alpha, outline
width, circle offset, circle angle
Parameters:
“range”: a set of cards,
“text”: the text to be printed,
pos x: horizontal position (in cm),
pos y: vertical position (in cm),
width: width of the rectangle used to draw the text (in cm), you can specify a negative number for a text mirrored
horizontally,
height: height of the rectangle used to draw the text (in cm), you can specify a negative number for a text mirrored
vertically,
horizontal alignment: the text’s horizontal alignment in the rectangle, values accepted are:
left left aligned
center centered
right right aligned
The horizontal alignment is optional, if omitted is equal to center.
vertical alignment: the text’s vertical alignment in the rectangle, values accepted are:
top top aligned
center centered
bottom bottom aligned
wordwrap the text is top aligned and word-wrapped in the rectangle
wwtop the text is top aligned and word-wrapped in the rectangle
wwcenter the text is center aligned and word-wrapped in the rectangle
wwbottom the text is bottom aligned and word-wrapped in the rectangle
charwrap the text is centered, spaced and word-wrapped (every character) in a pattern
The vertical alignment is optional, if omitted is equal to center.
angle: angle of text rotation, if omitted is 0 (no rotation),
alpha: level of transparency of text, from 0 (full transparent) to 100 (full solid). If omitted, the level is set to 100 (full
solid). You can also specify an angle for the transparency, with the format level@angle; in this case, the level of
transparency is the starting level, ending with 0 (full transparent),
outline width: if you specify a number, the font is drawn as outlined, with this number as line's width.
circle offset: if you specify a number, this is the offset for a circular text (from 0 to 100), the default is 25.
circle angle: if you specify a number, this is the angle of each letter in a circular text, the default is 0.
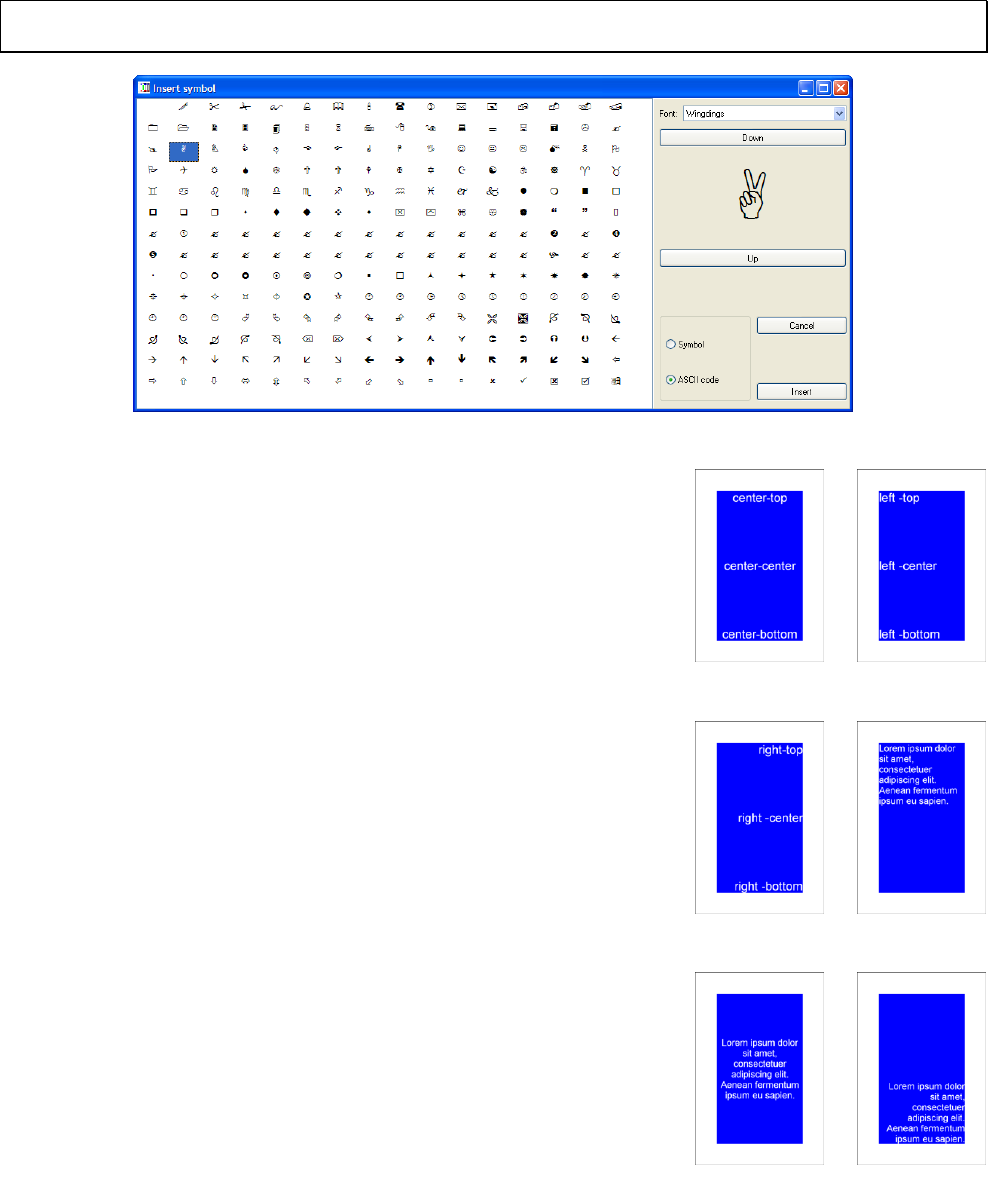
155
If you want a more flexible command for text, you can use RTFTEXT (or RTFFILE). With these commands, you can
use multiple fonts, size, colors, size and more (justified alignment, tab settings), anything you can write with an RTF
editor.
Tip: you can choose a single specific symbol or character from a visual form, clicking on the button “Insert” and
choosing the menu voice “Symbol”.
Examples:
RECTANGLE = 1, 1, 1, 4, 7, #0000FF
FONT = Arial, 16, T, #FFFFFF
TEXT = 1, "center-top", 1, 1, 4, 2, center, top
TEXT = 1, "center-center", 1, 3, 4, 3, center, center
TEXT = 1, "center-bottom", 1, 6, 4, 2, center, bottom
Result: Image 61
RECTANGLE = 1, 1, 1, 4, 7, #0000FF
FONT = Arial, 16, T, #FFFFFF
TEXT = 1, "left-top", 1, 1, 4, 2, left, top
TEXT = 1, "left-center", 1, 3, 4, 3, left, center
TEXT = 1, "left-bottom", 1, 6, 4, 2, left, bottom
Result: Image 62
RECTANGLE = 1, 1, 1, 4, 7, #0000FF
FONT = Arial, 16, T, #FFFFFF
TEXT = 1, "right-top", 1, 1, 4, 2, right, top
TEXT = 1, "right-center", 1, 3, 4, 3, right, center
TEXT = 1, "right-bottom", 1, 6, 4, 2, right, bottom
Result: Image 63
[test] = "Lorem ipsum dolor sit amet, consectetuer
adipiscing elit. Aenean fermentum ipsum eu sapien."
RECTANGLE = 1, 1, 1, 4, 7, #0000FF
FONT = Arial, 12, T, #FFFFFF
TEXT = 1, [test], 1, 1, 4, 7, left, wwtop
Result: Image 64
[test] = "Lorem ipsum dolor sit amet, consectetuer
adipiscing elit. Aenean fermentum ipsum eu sapien."
RECTANGLE = 1, 1, 1, 4, 7, #0000FF
FONT = Arial, 12, T, #FFFFFF
TEXT = 1, [test], 1, 1, 4, 7, center, wwcenter
Result: Image 65
[test] = "Lorem ipsum dolor sit amet, consectetuer adipiscing elit. Aenean
fermentum ipsum eu sapien."
Image 61
Image 62
Image 63
Image 64
Image 65
Image 66
156
RECTANGLE = 1, 1, 1, 4, 7, #0000FF
FONT = Arial, 12, T, #FFFFFF
TEXT = 1, [test], 1, 1, 4, 7, right, wwbottom
Result: Image 66
TEXTFONT
This directive writes a text on a range of cards, it uses the parameters both from TEXT (see page 154) and FONT (see
page 92) directives.
Syntax:
TEXTFONT = “range”, “text”, pos x, pos y, width, height, horizontal alignment, vertical alignment, angle, alpha, “font
name”, font size, style, html color font, html color background, outline width, circle offset, circle angle
TEXTLIMIT
This directive fills four variables with the coordinates of latest drawn text’s boundaries (in cm), from TEXT command
(see page 154). You can use these variables in other commands.
Syntax:
TEXTLIMIT = “range”
The four variables are:
TL (left)
TR (right)
TT (top)
TB (bottom)
Parameters:
“range”: a set of cards
Example:
FONT = Arial, 16, , #000000
TEXT = 1, "This is a test", 0, 0, 6, 2, center, center
TEXTLIMIT = 1
LINE = 1, TL, 0, TL, 2, #000000, 0.05
LINE = 1, TR, 0, TR, 2, #000000, 0.05
LINE = 1, 0, TT, 6, TT, #000000, 0.05
LINE = 1, 0, TB, 6, TB, #000000, 0.05
Result: Image 67
Image 67

157
THREADS
When the deck is built, if you specify a number different from one, nanDECK executes n copies of itself that render a
section of the current deck. The main program waits until all the sections are complete, and loads them in the current
deck. With a multithreaded CPU, the result is a shorter time for building a deck.
Syntax:
THREADS = number
Parameter:
number: the number of threads that must be used.
Example:
THREADS = 4
Note: this method works if the cards are made independently each other, it can't be used if in the script there are
keywords like COPYCARD or DUPLEX.
TOKEN
This directive prepares a token to be used in the “Virtual table” option (see page 57). A token in the Virtual table can be
a simple counter with a text that can be moved or stacked, or a dice that can be rolled to obtain random values.
Syntax:
TOKEN = “formula”, width, height, font color, back color, number, pos x, pos y
Parameters:
“formula”: the text visualized in the token, can be an empty string or it can be used an expression. If you use an
expression with a “d” for a random value, it can be rolled like a die with a double-click of the mouse on the token itself,
width: width of the token (in pixels), you can also specify a % of the screen width,
height: height of the token (in pixels), you can also specify a % of the screen height,
font color: font color in the same format used for HTML,
back color: background color in the same format used for HTML,
number: the number of tokens (one, if not specified), if more than one the tokens are stacked together on the table,
pos x: horizontal position for the token (in pixels), you can also specify a % of the screen’s width,
pos y: vertical position for the token (in pixels), you can also specify a % of the screen’s height.
Examples:
TOKEN = "{1d6}", 50, 50, #FFFFFF, #0000FF
TOKEN = "$", 100, 50, #FFFFFF, #00FF00, 10

158
TRACK
This directive draws a racetrack section from a point (x1, y1) to another point (x2, y2).
Syntax:
TRACK = “range”, pos x1, pos y1, pos x2, pos y2, track width, html color, num lanes, num spaces, flags, thickness, left
factor, right factor, pattern
Parameters:
“range”: a set of cards,
pos x1, pos y1: coordinates of first point (in cm),
pos x2, pos y2: coordinates of second point (in cm),
track width: width of the track (in cm),
html color: color of the track, in the same format used for HTML. You can also specify a gradient,
num lanes: the number of the lanes that compose the track, the minimum is one.
num spaces: the number of spaces long the track, the minimum is one.
flags: you can choose these flags:
S the track section is closed at the start
E the track section is closed at the end
H even lanes are drawn forward one half space
L the track is linked, using a line, to the last track drawn on the same card
C the track is linked, using a curve, to the last track drawn on the same card
R don't draw external right link
F don't draw external left link
thickness: thickness of the track’s line (in cm), if omitted, the line is 1 pixel wide,
left factor: for curved link, this parameter set the width of the curve, for the left side of the track,
left factor: for curved link, this parameter set the width of the curve, for the right side of the track,
pattern: a pattern for the track’s line, this pattern can be composed of:
O dot
D dash
S space
These letters can be repeated, for example “OSDSOS” is a valid pattern.
Example:
TRACK = 1, 1, 8, 5, 1, 1, #000000, 3, 4, SE, 0.1
Result: Image 68
Image 68
159
TRACKRECT
This directive draws a racetrack section from a vertex of a rectangle to the opposite vertex.
Syntax:
TRACK = “range”, pos x, pos y, width, height, track width, html color, num lanes, num spaces, flags, thickness, left
factor, right factor, pattern
Parameters:
“range”: a set of cards,
pos x: horizontal position (in cm),
pos y: vertical position (in cm),
width: width of the rectangle (in cm),
height: height of the rectangle (in cm),
track width: width of the track (in cm),
html color: color of the track, in the same format used for HTML. You can also specify a gradient,
num lanes: the number of the lanes that compose the track, the minimum is one.
num spaces: the number of spaces long the track, the minimum is one.
flags: you can choose these flags:
S the track section is closed at the start
E the track section is closed at the end
H even lanes are drawn forward one half space
L the track is linked, using a line, to the last track drawn on the same card
C the track is linked, using a curve, to the last track drawn on the same card
R don't draw external right link
F don't draw external left link
thickness: thickness of the track’s line (in cm), if omitted, the line is 1 pixel wide,
left factor: for curved link, this parameter set the width of the curve, for the left side of the track,
left factor: for curved link, this parameter set the width of the curve, for the right side of the track,
pattern: a pattern for the track’s line, this pattern can be composed of:
O dot
D dash
S space
These letters can be repeated, for example “OSDSOS” is a valid pattern.

160
TRIANGLE
This directive draws a triangle in a set of cards.
Syntax:
TRIANGLE = “range”, pos x1, pos y1, pos x2, pos y2, pos x3, pos y3, html color, html color,
thickness
Parameters:
“range”: a set of cards,
pos x1, pos y1: coordinates of 1st point (in cm),
pos x2, pos y2: coordinates of 2nd point (in cm),
pos x3, pos y3: coordinates of 3rd point (in cm),
html color: border color of the triangle, in the same format used for HTML. You can also specify a
gradient.
html color: inner color of the triangle, in the same format used for HTML, if not specified the inner
color is the same of border color. You can also specify “EMPTY” for a hollow triangle or a gradient.
thickness: thickness of the border of the triangle (in cm), if omitted, the triangle’s border is 1 pixel
wide.
Examples:
TRIANGLE = 1, 1, 8, 3, 1, 5, 8, #00FF00
Result: Image 69
TRIANGLE = 1, 1, 8, 3, 1, 5, 8, #FF00FF, EMPTY, 0.1
Result: Image 70
TRIANGLE = 1, 1, 8, 3, 1, 5, 8, #FF0000#0000FF@90
Result: Image 71
Image 69
Image 70
Image 71

161
UNIT
This directive chooses a unit to be used with all the numeric size in the script. For a correct use, it’s better to include it
in the first line of the script. The default size unit, if UNIT is not used, is the “cm”.
Syntax:
UNIT = type
Parameters:
type: the type of unit can be chosen between:
CM
MM
INCH
Example:
UNIT = inch
Tip: instead of using absolute values, you can always specify a size (in every directive) as a fraction of the whole card,
using number followed by the percentage “%”.
VECTOR
This directive draws a SVG file in a set of cards.
Syntax:
VECTOR = “range”, “image file”, pos x, pos y, width, height, angle, alpha, flags
Parameters:
“range”: a set of cards
“image file”: an existent .svg image file (eventually with a path)
pos x: horizontal position (in cm)
pos y: vertical position (in cm)
width: width of the image (in cm)
height: height of the image (in cm)
angle: angle of image rotation, can be 0 for no rotation
alpha: level of transparency of image, from 0 (full transparent) to 100 (full solid). If omitted, the level is set to 100 (full
solid)
flags: you can choose these flags:
I use the internal engine (default)
E use Inkscape for image’s rendering (you must specify the path in the Config window)
Example:
IMAGE=1-10, test.svg, 0, 0, 4, 4

162
Note: with the internal engine, the SVG file specifications aren’t fully implemented, some issues exist (for example, in
gradient fill).
VISUAL
This directive is used to open a VISUAL…ENDVISUAL structure (see “Visual editor”, page 59).
Syntax:
VISUAL = flags, horizontal steps, vertical steps
Parameters:
flags: you can choose these flags:
H show the horizontal ruler
V show the vertical ruler
G show the grid
P snap to the grid when you move an object
S snap to the grid when you resize an object
horizontal steps: number of horizontal steps for the grid,
vertical steps: number of vertical steps for the grid.
ZOOM
This directive changes the size of cards (all elements, FONT included). Useful to change the final result without having
to modify all the data. If omitted, is considered to be 100 (and there is no change in size). You can specify a 2nd
parameter for vertical zoom, if it’s different from horizontal one.
Syntax:
ZOOM = width, height
Examples:
;half size
ZOOM = 50
;double size
ZOOM = 200
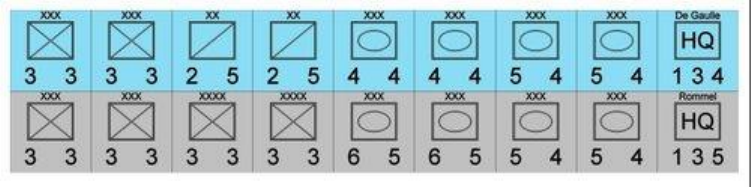
163
Code examples
Wargame counters
cardsize=2,2
dpi=600
linkmulti=number
link=data.txt
[back_ger]=#C0C0C0
[front_ger]=#000000
[out_ger]=#808080
[back_fre]=#8ADDF4
[front_fre]=#000000
[out_fre]=#808080
macro=outline,(range1),(text1),(frame),(font1),(size1),(col1),(col2),(col3)
font=(font1),(size1),,(col3),(col2),0.01,0.01
text=(range1),(text1),(frame)
font=(font1),(size1),T,(col1),(col2)
text=(range1),(text1),(frame)
end
[all]=1-{(number)}
<cnt_all>=0,0,2,2
<val_lft>=0.25,1.25,0.5,0.75
<val_cnt>=0.75,1.25,0.5,0.75
<val_rgt>=1.25,1.25,0.5,0.75
<val_id>=0.25,0,1.5,0.25
<img_cnt>=0.45,0.3,1.1,0.9
<img_cnt2>=0.6,0.5,0.8,0.5
rectangle=[all],0,0,2,2,[back_[nation]]
outline=[all],[combat],<val_lft>,Arial,16,[front_[nation]],[back_[nation]],[out_[nation]]
outline=[all],[movement],<val_rgt>,Arial,16,[front_[nation]],[back_[nation]],[out_[nation]]
if=[command]<>0
outline=[all],[command],<val_cnt>,Arial,16,[front_[nation]],[back_[nation]],[out_[nation]]
endif
outline=[all],[id],<val_id>,Arial,7,[front_[nation]],[back_[nation]],[out_[nation]]
if=[type]=inf
line=[all],<img_cnt,PTL>,<img_cnt,PBR>,[front_[nation]],0.04
line=[all],<img_cnt,PBL>,<img_cnt,PTR>,[front_[nation]],0.04
line=[all],<img_cnt,PTL>,<img_cnt,PBR>,[out_[nation]],0.02
line=[all],<img_cnt,PBL>,<img_cnt,PTR>,[out_[nation]],0.02
endif
if=[type]=cav
line=[all],<img_cnt,PBL>,<img_cnt,PTR>,[front_[nation]],0.04
line=[all],<img_cnt,PBL>,<img_cnt,PTR>,[out_[nation]],0.02
endif
if=[type]=arm
ellipse=[all],<img_cnt2>,[front_[nation]],EMPTY,0.04
ellipse=[all],<img_cnt2>,[out_[nation]],EMPTY,0.02
endif
if=[type]=hq
outline=[all],HQ,<img_cnt>,Arial,16,[front_[nation]],[back_[nation]],[out_[nation]]
endif
rectangle=[all],<img_cnt>,[front_[nation]],"empty",0.05
rectangle=[all],<img_cnt>,[out_[nation]],"empty",0.02
Data file (data.txt):
nation,type,combat,movement,command,id,number
fre,inf,3,3,0,XXX,2
fre,cav,2,5,0,XX,2
fre,arm,4,4,0,XXX,2
fre,arm,5,4,0,XXX,2
fre,hq,1,4,3,"De Gaulle",1
ger,inf,3,3,0,XXX,2
ger,inf,3,3,0,XXXX,2
ger,arm,6,5,0,XXX,2
ger,arm,5,4,0,XXX,2
ger,hq,1,5,3,Rommel,1
164
Dice results
cardsize=18,3
border=rectangle
zoom=50
[all]=1-36
<d4>=0,0,3,3
<d6>=3,0,3,3
<d8>=6,0,3,3
<d10>=9,0,3,3
<d12>=12,0,3,3
<d20>=15,0,3,3
[col]=#000000
font=Arial,32,T,[col]
polygon=[all],<d4>,3,0,[col],EMPTY,0.1
text=[all],"{1d4}",<d4>
polygon=[all],<d6>,4,45,[col],EMPTY,0.1
text=[all],"{1d6}",<d6>
polygon=[all],<d8>,4,0,[col],EMPTY,0.1
text=[all],"{1d8}",<d8>
line=[all],9,1,10.5,0,[col],0.1
line=[all],10.5,0,12,1,[col],0.1
line=[all],12,1,10.5,3,[col],0.1
line=[all],10.5,3,9,1,[col],0.1
text=[all],"{1d10}",<d10>
polygon=[all],<d12>,5,0,[col],EMPTY,0.1
text=[all],"{1d12}",<d12>
polygon=[all],<d20>,3,90,[col],EMPTY,0.1
text=[all],"{1d20}",<d20>
165
Score track
unit=inch
canvassize=15,15
[side_a]=framebox(0,0,14,1,1,1,C)
[side_b]=framebox(14,0,1,14,1,1,C)
[side_c]=framebox(1,14,14,1,1,1,C)
[side_d]=framebox(0,1,1,14,1,1,C)
rectangle=0,<side*>,#000000,empty
font=arial,16,T,#000000
text=0,"{°-1}",<side_a*>
text=0,"{13+°}",<side_b*>,center,center,90
text=0,"{26+16-°}",<side_c*>,center,center,180
text=0,"{40+16-°}",<side_d*>,center,center,270
save=0,"board.png"0,0,15,15
166
Boggle dice
N[a]=01|02|03|04|05|06|07|08|09|10|11|12|13|14|15|16
[range]=1-{(a)}
[d01]=LRYTTE
[d02]=VTHRWE
[d03]=EGHWNE
[d04]=SEOTIS
[d05]=ANAEEG
[d06]=IDSYTT
[d07]=OATTOW
[d08]=MTOICU
[d09]=AFPKFS
[d10]=XLDERI
[d11]=HCPOAS
[d12]=ENSIEU
[d13]=YLDEVR
[d14]=ZNRNHL
[d15]=NMIQHU
[d16]=OBBAOJ
CARDSIZE = 4.5, 4.5
FONT = Arial, 96, , #000000
TEXT = [range], [[d[a]]:d6,1], 0, 0, 100%, 100%
RECTANGLE = [range], 0, 0, 100%, 100%, #0000FF, EMPTY, 10%
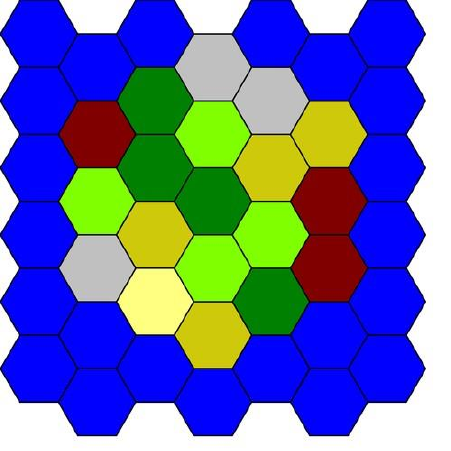
167
Catan map
canvassize=35,35
[sea]=framehex(0,0,35,35,3,C)
[map]=framedisk(sea43,sea41)
'sea
polygon=0,<sea*>,6,90,#000000,#0000FF,0.1
'field
polygon=0,<4~!map*>,6,90,#000000,#CEC90B,0.1
'forest
polygon=0,<4~!map*>,6,90,#000000,#008000,0.1
'pasture
polygon=0,<4~!map*>,6,90,#000000,#80FF00,0.1
'mountain
polygon=0,<3~!map*>,6,90,#000000,#C0C0C0,0.1
'hill
polygon=0,<3~!map*>,6,90,#000000,#800000,0.1
'desert
polygon=0,<~!map*>,6,90,#000000,#FFFF80,0.1
save=0,"catan.jpg",0,0,35,35
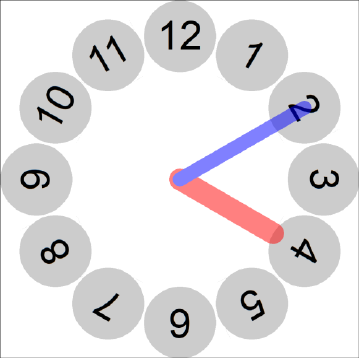
168
Clock
cardsize = 10,10
[clock] = frameclock(1, 1, 8, 8, 2, 2, 12)
ellipse = 1, <clock*>, #CCCCCC
font = Arial, 32, T, #000000
text = 1, "{°}", <clock*>, center, center, °*360/12
layer = 50
;hours
[hour] = frameclock(2, 2, 6, 6, 1, 1, 12)
line = 1, 5, 5, <hour4, PCC>, #FF0000, 0.6
;minutes
line = 1, 5, 5, <clock2, PCC>, #0000FF, 0.4
endlayer
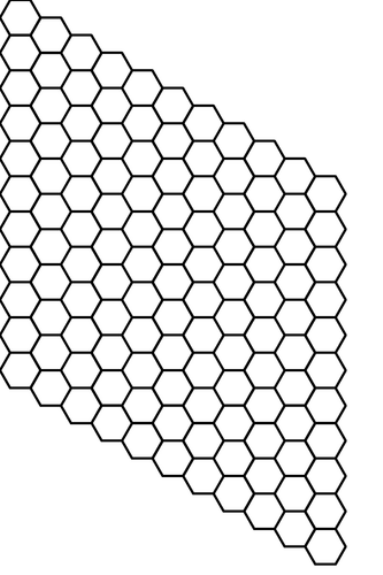
169
Hex board
page=21.59,27.94,portrait,hv
cardsize=16,24
border=none
[base]=framehex(0,0,16,24,0.85,C)
[hex01]=frameline(base0101,base0111)
[hex02]=frameline(base0201,base0211)
[hex03]=frameline(base0302,base0312)
[hex04]=frameline(base0402,base0412)
[hex05]=frameline(base0503,base0513)
[hex06]=frameline(base0603,base0613)
[hex07]=frameline(base0704,base0714)
[hex08]=frameline(base0804,base0814)
[hex09]=frameline(base0905,base0915)
[hex10]=frameline(base1005,base1015)
[hex11]=frameline(base1106,base1116)
polygon=1,<hex*>,6,90,#000000,EMPTY,0.1
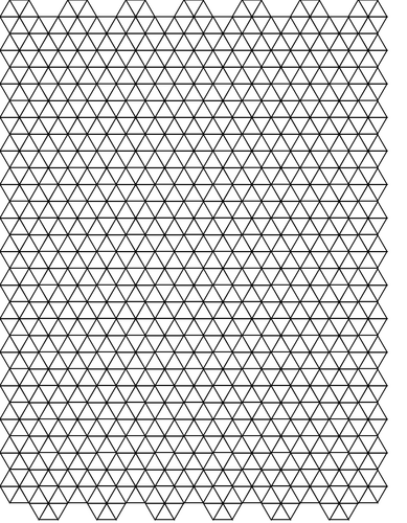
170
Triangle map
canvassize=21,27
[h]=framehex(0,0,21,27,1,C)
star=0,<h*>,6,90,1,#000000,EMPTY,0.05
hexgrid=0,0,0,21,27,1,,#000000,EMPTY,0.05
save=0,"triangle.png",0,0,21,27
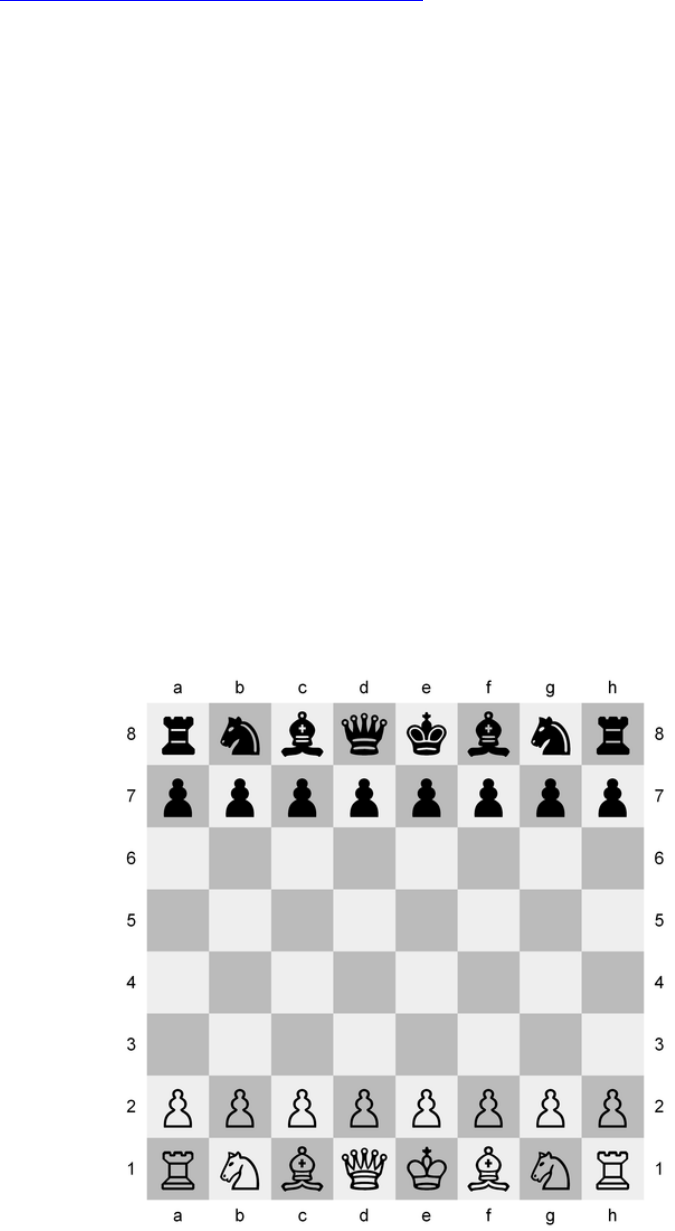
171
Chess board
With font “Chess Cases”. Link: http://www.enpassant.dk/chess/fonteng.htm#CASES
canvassize=18,18
[ch]=framebox(1,1,16,16,2,2,E)
{[ch_white]=framelist(cha1,chc1,che1,chg1,chb2,chd2,chf2,chh2,cha3,chc3,che3,chg3,chb4,chd4,chf4,chh4,
cha5,chc5,che5,chg5,chb6,chd6,chf6,chh6,cha7,chc7,che7,chg7,chb8,chd8,chf8,chh8)}
{[ch_black]=framelist(chb1,chd1,chf1,chh1,cha2,chc2,che2,chg2,chb3,chd3,chf3,chh3,cha4,chc4,che4,chg4,
chb5,chd5,chf5,chh5,cha6,chc6,che6,chg6,chb7,chd7,chf7,chh7,cha8,chc8,che8,chg8)}
rectangle=0,<ch_white>,#EEEEEE
rectangle=0,<ch_black>,#BBBBBB
[tt]=framebox(1,0,16,1,2,1,N)
[tb]=framebox(1,17,16,1,2,1,N)
[t1]=framelist(tt1,tb1)
[t2]=framelist(tt2,tb2)
[t3]=framelist(tt3,tb3)
[t4]=framelist(tt4,tb4)
[t5]=framelist(tt5,tb5)
[t6]=framelist(tt6,tb6)
[t7]=framelist(tt7,tb7)
[t8]=framelist(tt8,tb8)
[sl]=framebox(0,1,1,16,1,2,N)
[sr]=framebox(17,1,1,16,1,2,N)
[s1]=framelist(sl1,sr1)
[s2]=framelist(sl2,sr2)
[s3]=framelist(sl3,sr3)
[s4]=framelist(sl4,sr4)
[s5]=framelist(sl5,sr5)
[s6]=framelist(sl6,sr6)
[s7]=framelist(sl7,sr7)
[s8]=framelist(sl8,sr8)
font=arial,16,,#000000
text=0,a,<t1>
text=0,b,<t2>
text=0,c,<t3>
text=0,d,<t4>
text=0,e,<t5>
text=0,f,<t6>
text=0,g,<t7>
text=0,h,<t8>
text=0,8,<s1>
text=0,7,<s2>
text=0,6,<s3>
text=0,5,<s4>
text=0,4,<s5>
text=0,3,<s6>
text=0,2,<s7>
text=0,1,<s8>
font="chess cases",48,T,#000000
[wpa]=p
[wkn]=n
[wbi]=b
[wro]=r
[wqu]=q
[wki]=k
[bpa]=o
[bkn]=m
[bbi]=v
[bro]=t
[bqu]=w
[bki]=l
text=0,[wpa],<ch?7>
text=0,[wro],<cha8>
text=0,[wkn],<chb8>
text=0,[wbi],<chc8>
text=0,[wqu],<chd8>
text=0,[wki],<che8>
text=0,[wbi],<chf8>
text=0,[wkn],<chg8>
text=0,[wro],<chh8>
text=0,[bpa],<ch?2>
text=0,[bro],<cha1>
text=0,[bkn],<chb1>
text=0,[bbi],<chc1>
text=0,[bqu],<chd1>
text=0,[bki],<che1>
text=0,[bbi],<chf1>
text=0,[bkn],<chg1>
text=0,[bro],<chh1>
save=0,chessboard2.png,0,0,18,18
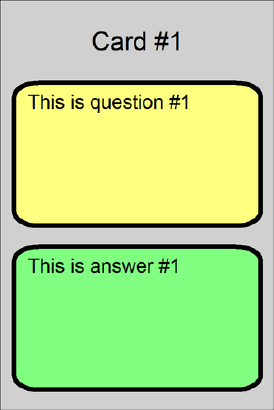
172
Trivia cards
linkmulti=num
link="q&a.txt"
[all]="1-{(id)}"
[card_id]=join("Card #",[id])
[background]=#D0D0D0
[ink]=#000000
[col_q]=#FFFF80
[col_a]=#80FF80
rectangle=[all],0,0,100%,100%,[background]
font=arial,16,,[ink],[background]
text=[all],[card_id],0,0,100%,20%,center,center
roundrect=[all],5%,20%,90%,35%,#000000,[col_q],0.1
font=arial,12,,[ink],[col_q]
text=[all],[question],10%,22%,80%,31%,left,wordwrap
roundrect=[all],5%,60%,90%,35%,#000000,[col_a],0.1
font=arial,12,,[ink],[col_a]
text=[all],[answer],10%,62%,80%,31%,left,wordwrap
Data file (q&a.txt):
id,num,question,answer
1,1,"This is question #1","This is answer #1"
2,1,"This is question #2","This is answer #2"
3,1,"This is question #3","This is answer #3"
4,1,"This is question #4","This is answer #4"
5,1,"This is question #5","This is answer #5"
6,1,"This is question #6","This is answer #6"
7,1,"This is question #7","This is answer #7"
8,1,"This is question #8","This is answer #8"
9,1,"This is question #9","This is answer #9"
10,1,"This is question #10","This is answer #10"
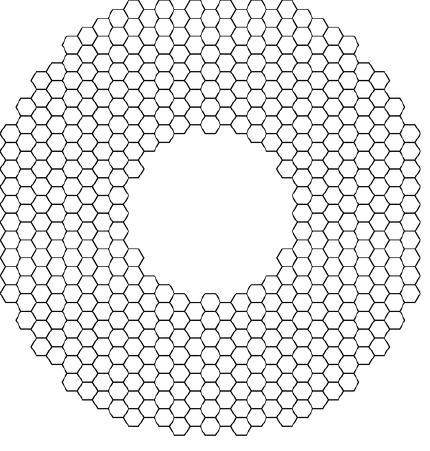
173
Hex racetrack
canvassize=42,44
[hexa]=framehex(0,0,42,44,1,C)
[hexb]=framedisk(hexa1412,hexa0112)
[hexc]=framedisk(hexa1412,hexa0912)
[hexd]=framesub(hexb*,hexc*)
polygon=0,<hexd*>,6,90,#000000,EMPTY,0.1
save=0,"track.png",0,0,42,44
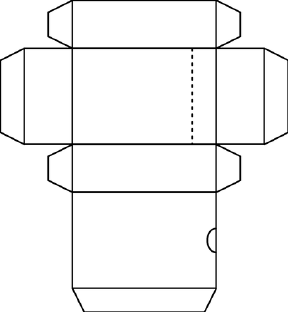
174
Tuckbox
[img1]=none
[img2]=none
INPUTTEXT="wid","Width (cm)","6"
INPUTTEXT="hei","Height (cm)","9"
INPUTTEXT="dep","Depth (cm)","3"
INPUTCHOICE="extra","Add extra lines","Yes","Yes|No"
INPUTTEXT="img1","Box image (front)","",G
INPUTTEXT="img2","Box image (rear)","",G
[fla]=[dep]/2
[ide]=[fla]/2
[col1]=#000000
[col2]=EMPTY
[thi]=0.1
'Uncomment the following line for A4 paper
PAGE=21,29.7,PORTRAIT,HV
'Uncomment the following line for Letter paper
'PAGE=21.59,27.94,PORTRAIT,HV
BORDER=NONE
CARDSIZE=[fla]+[dep]+[hei]+[dep]+[fla],[dep]+[wid]+[dep]+[wid]+[fla]
IF=[img1]=none
ELSE
IMAGE=1,[img1],[fla]+[dep],[dep],[hei],[wid],90,P
ENDIF
IF=[img2]=none
ELSE
IMAGE=1,[img2],[fla]+[dep],[dep]+[wid]+[dep],[hei],[wid],90,P
ENDIF
RECTANGLE=1,[fla]+[dep] ,0 ,[hei],[dep],[col1],[col2],[thi]
RECTANGLE=1,[fla] ,[dep] ,[dep],[wid],[col1],[col2],[thi]
RECTANGLE=1,[fla]+[dep] ,[dep] ,[hei],[wid],[col1],[col2],[thi]
RECTANGLE=1,[fla]+[dep]+[hei],[dep] ,[dep],[wid],[col1],[col2],[thi]
RECTANGLE=1,[fla]+[dep] ,[dep]+[wid] ,[hei],[dep],[col1],[col2],[thi]
RECTANGLE=1,[fla]+[dep] ,[dep]+[wid]+[dep],[hei],[wid],[col1],[col2],[thi]
LINE=1,[fla]+[dep] ,0 ,[fla]+[dep]-[fla],[ide] ,[col1],[thi]
LINE=1,[fla]+[dep]-[fla],[ide] ,[fla]+[dep]-[fla],[dep]-[ide],[col1],[thi]
LINE=1,[fla]+[dep]-[fla],[dep]-[ide],[fla]+[dep] ,[dep] ,[col1],[thi]
LINE=1,[fla]+[dep]+[hei] ,0 ,[fla]+[dep]+[hei]+[fla],[ide] ,[col1],[thi]
LINE=1,[fla]+[dep]+[hei]+[fla],[ide] ,[fla]+[dep]+[hei]+[fla],[dep]-[ide],[col1],[thi]
LINE=1,[fla]+[dep]+[hei]+[fla],[dep]-[ide],[fla]+[dep]+[hei] ,[dep] ,[col1],[thi]
LINE=1,[fla] ,[dep] ,[fla]-[fla],[dep]+[ide] ,[col1],[thi]
LINE=1,[fla]-[fla],[dep]+[ide] ,[fla]-[fla],[dep]+[wid]-[ide],[col1],[thi]
LINE=1,[fla]-[fla],[dep]+[wid]-[ide],[fla] ,[dep]+[wid] ,[col1],[thi]
LINE=1,[fla]+[dep]+[hei]+[dep] ,[dep] ,[fla]+[dep]+[hei]+[dep]+[fla],[dep]+[ide] ,[col1],[thi]
LINE=1,[fla]+[dep]+[hei]+[dep]+[fla],[dep]+[ide] ,[fla]+[dep]+[hei]+[dep]+[fla],[dep]+[wid]-[ide],[col1],[thi]
LINE=1,[fla]+[dep]+[hei]+[dep]+[fla],[dep]+[wid]-[ide],[fla]+[dep]+[hei]+[dep] ,[dep]+[wid] ,[col1],[thi]
LINE=1,[fla]+[dep] ,[dep]+[wid] ,[fla]+[dep]-[fla],[dep]+[wid]+[ide] ,[col1],[thi]
LINE=1,[fla]+[dep]-[fla],[dep]+[wid]+[ide] ,[fla]+[dep]-[fla],[dep]+[wid]+[dep]-[ide],[col1],[thi]
LINE=1,[fla]+[dep]-[fla],[dep]+[wid]+[dep]-[ide],[fla]+[dep] ,[dep]+[wid]+[dep] ,[col1],[thi]
LINE=1,[fla]+[dep]+[hei] ,[dep]+[wid] ,[fla]+[dep]+[hei]+[fla],[dep]+[wid]+[ide],[col1],[thi]
LINE=1,[fla]+[dep]+[hei]+[fla],[dep]+[wid]+[ide] ,[fla]+[dep]+[hei]+[fla],[dep]+[wid]+[dep]-[ide],[col1],[thi]
LINE=1,[fla]+[dep]+[hei]+[fla],[dep]+[wid]+[dep]-[ide],[fla]+[dep]+[hei],[dep]+[wid]+[dep] ,[col1],[thi]
LINE=1,[fla]+[dep] ,[dep]+[wid]+[dep]+[wid] ,[fla]+[dep]+[ide] ,[dep]+[wid]+[dep]+[wid]+[fla],[col1],[thi]
LINE=1,[fla]+[dep]+[ide],[dep]+[wid]+[dep]+[wid]+[fla],[fla]+[dep]+[hei]-[ide],
[dep]+[wid]+[dep]+[wid]+[fla],[col1],[thi]
LINE=1,[fla]+[dep]+[hei]-[ide],[dep]+[wid]+[dep]+[wid]+[fla],[fla]+[dep]+[hei],
[dep]+[wid]+[dep]+[wid],[col1],[thi]
IF=[extra]=Yes
LINE=1,[fla]+[dep]+[hei]-[fla],[dep],[fla]+[dep]+[hei]-[fla],[dep]+[wid],[col1],[thi],DSS
{
BEZIER=1,
[fla]+[dep]+[hei],[dep]+[wid]+[dep]+[wid]/2-[ide],
[fla]+[dep]+[hei]-[ide],[dep]+[wid]+[dep]+[wid]/2-[ide],
[fla]+[dep]+[hei]-[ide],[dep]+[wid]+[dep]+[wid]/2+[ide],
[fla]+[dep]+[hei],[dep]+[wid]+[dep]+[wid]/2+[ide],
[col1],[thi]}
ENDIF
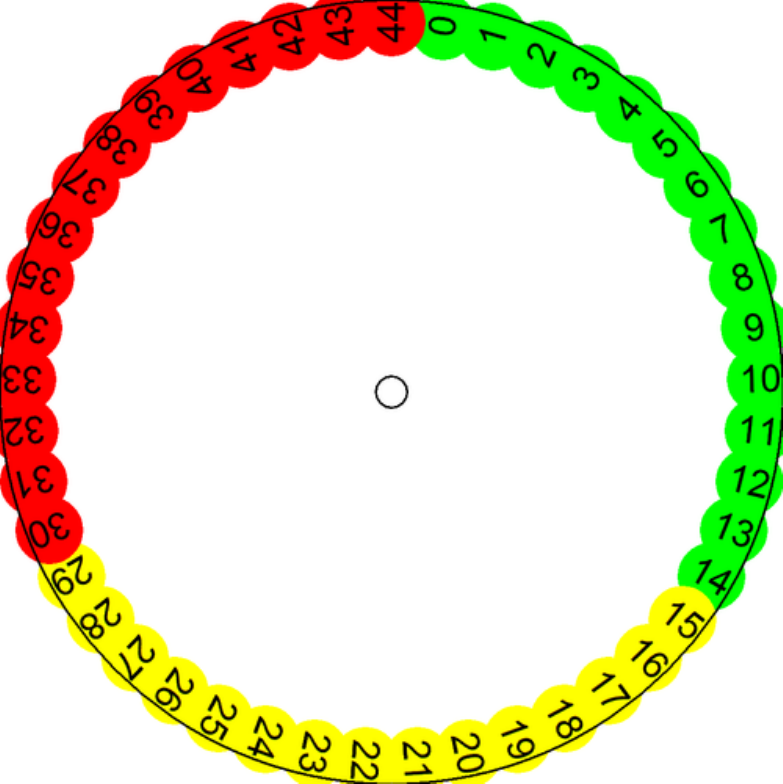
175
Number wheel
[size]=3.5
[numbers]=45
unit=inch
cardsize=[size],[size]
[num]=frameclock(0.1,0.1,[size]-0.2,[size]-0.2,0.3,0.3,[numbers])
[green]=framelist(num1..num15)
[yellow]=framelist(num16..num30)
[red]=framelist(num31..num45)
font=arial,12,T,#000000
ellipse=1,<green>,#00FF00
ellipse=1,<yellow>,#FFFF00
ellipse=1,<red>,#FF0000
text=1,{°-1},<num*>,center,center,°*360/[numbers]-90
ellipse=1,0,0,100%,100%,#000000,empty,0.01
ellipse=1,48%,48%,4%,4%,#000000,empty,0.01
save=1,"wheel_col.png",0,0,100%,100%

176
Tripples tiles
cardsize=2,2
'draw and save an image (an arrow)
line=0,1 ,0.2,1 ,1 ,#000000,0.15
line=0,1 ,0.2,1.2,0.4,#0000FF,0.15
line=0,1.2,0.4,0.8,0.4,#0000FF,0.15
line=0,0.8,0.4,1 ,0.2,#0000FF,0.15
save=0,"arrow.bmp",0,0,2,2
'create all the permutations (256) of two elements (0 and 1) taken eight times
pr[perm]8=0|1
'takes only the tiles with three '1'
[tiles]=filter(+[perm],3)
[all]=1-{(tiles)}
'draws a dot
ellipse=[all],0.95,0.05,0.1,0.1,#000000
'draws the eight arrows
if=[tiles:8,1]=1
image=[all],"arrow.bmp",0,0,2,2,0,T
endif
if=[tiles:7,1]=1
image=[all],"arrow.bmp",-0.5,-0.5,3,3,45,T
endif
if=[tiles:6,1]=1
image=[all],"arrow.bmp",0,0,2,2,90,T
endif
if=[tiles:5,1]=1
image=[all],"arrow.bmp",-0.5,-0.5,3,3,135,T
endif
if=[tiles:4,1]=1
image=[all],"arrow.bmp",0,0,2,2,180,T
endif
if=[tiles:3,1]=1
image=[all],"arrow.bmp",-0.5,-0.5,3,3,225,T
endif
if=[tiles:2,1]=1
image=[all],"arrow.bmp",0,0,2,2,270,T
endif
if=[tiles:1,1]=1
image=[all],"arrow.bmp",-0.5,-0.5,3,3,315,T
endif
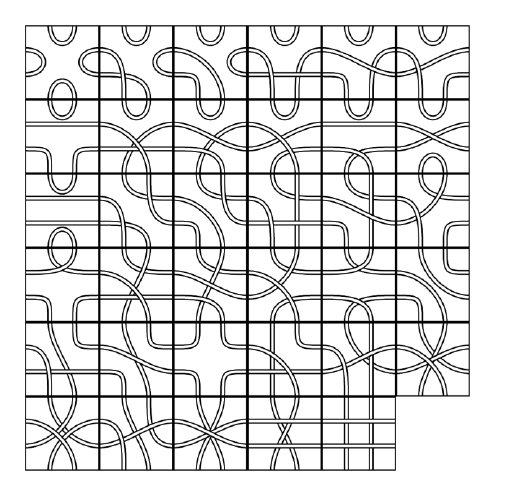
177
Path tiles
oversample=2
macro=tile,(range),(key),(char),(color),(width)
beziers=(range)
if=[(key):1,1]=(char)
beziers=(range),1,0,1,1,(color),(width)
endif
if=[(key):2,1]=(char)
beziers=(range),2,0,2,1,(color),(width)
endif
if=[(key):3,1]=(char)
beziers=(range),3,1,2,1,(color),(width)
endif
if=[(key):4,1]=(char)
beziers=(range),3,2,2,2,(color),(width)
endif
if=[(key):5,1]=(char)
beziers=(range),2,3,2,2,(color),(width)
endif
if=[(key):6,1]=(char)
beziers=(range),1,3,1,2,(color),(width)
endif
if=[(key):7,1]=(char)
beziers=(range),0,2,1,2,(color),(width)
endif
if=[(key):8,1]=(char)
beziers=(range),0,1,1,1,(color),(width)
endif
end
cardsize=3,3
pxxs[list]8=a|a|b|b|c|c|d|d
[range]=1-{(list)}
tile=[range],[list],a,#000000,0.2
tile=[range],[list],a,#FFFFFF,0.1
tile=[range],[list],b,#000000,0.2
tile=[range],[list],b,#FFFFFF,0.1
tile=[range],[list],c,#000000,0.2
tile=[range],[list],c,#FFFFFF,0.1
tile=[range],[list],d,#000000,0.2
tile=[range],[list],d,#FFFFFF,0.1
rectangle=[range],0,0,3,3,#000000,EMPTY,0.1
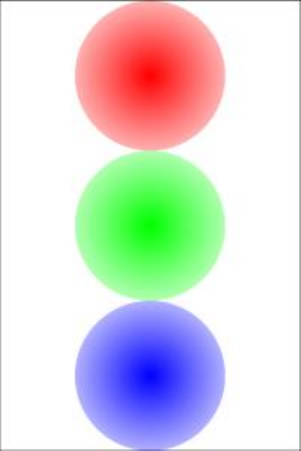
178
Combinations
ellipse=0,0,0,6,6,#FF0000#FFFFFF@360
save=0,a.png,0,0,6,6
ellipse=0,0,0,6,6,#00FF00#FFFFFF@360
save=0,b.png,0,0,6,6
ellipse=0,0,0,6,6,#0000FF#FFFFFF@360
save=0,c.png,0,0,6,6
ellipse=0,0,0,6,6,#FF00FF#FFFFFF@360
save=0,d.png,0,0,6,6
ellipse=0,0,0,6,6,#FFFF00#FFFFFF@360
save=0,e.png,0,0,6,6
ellipse=0,0,0,6,6,#00FFFF#FFFFFF@360
save=0,f.png,0,0,6,6
ellipse=0,0,0,6,6,#000000#FFFFFF@360
save=0,g.png,0,0,6,6
c[comb]3=a|b|c|d|e|f|g
[all]=1-{(comb)}
icon=[all],a,a.png
icon=[all],b,b.png
icon=[all],c,c.png
icon=[all],d,d.png
icon=[all],e,e.png
icon=[all],f,f.png
icon=[all],g,g.png
icons=[all],[comb],1.5,1.5,3,6,3,3,0,P
179
Standard 52-deck of cards
sequence=number
A
2
3
4
5
6
7
8
9
10
endsequence
sequence=face
J
Q
K
endsequence
sequence=
suit |\169\
suit_fnt|Symbol
suit_col|#FF0000
suit |\168\
suit_fnt|Symbol
suit_col|#FF0000
suit |\167\
suit_fnt|Symbol
suit_col|#000000
suit |\170\
suit_fnt|Symbol
suit_col|#000000
endsequence
<corner1_a>=0,0,15%,10%
<corner1_b>=0,10%,15%,10%
<corner1>=0,0,15%,20%
<corner2>=85%,0,15%,20%
<corner3>=0,80%,15%,20%
<corner4>=85%,80%,15%,20%
<core>=15%,20%,70%,60%
cards={(suit)*((number)+(face))+1}
for=a,1,{(suit)}
for=b,1,{(number)}
font=Arial,24,,{suit_col?a}
text={b+((a)-1)*((number)+(face))},{number?b},<corner1_a>
font={suit_fnt?a},32,,{suit_col?a}
text={b+((a)-1)*((number)+(face))},{suit?a},<corner1_b>
copy={b+((a)-1)*((number)+(face))},<corner1>,<corner2>,0
copy={b+((a)-1)*((number)+(face))},<corner1>,<corner3>,180
copy={b+((a)-1)*((number)+(face))},<corner1>,<corner4>,180
text={b+((a)-1)*((number)+(face))},{{suit?a}Xb},<core>,center,charwrap
next
next
for=a,1,{(suit)}
for=b,1,{(face)}
font=Arial,24,,{suit_col?a}
text={b+((a)-1)*((number)+(face))+(number)},{face?b},<corner1_a>
font={suit_fnt?a},32,,{suit_col?a}
text={b+((a)-1)*((number)+(face))+(number)},{suit?a},<corner1_b>
copy={b+((a)-1)*((number)+(face))+(number)},<corner1>,<corner2>,0
copy={b+((a)-1)*((number)+(face))+(number)},<corner1>,<corner3>,180
copy={b+((a)-1)*((number)+(face))+(number)},<corner1>,<corner4>,180
font=Arial,128,,{suit_col?a}
text={b+((a)-1)*((number)+(face))+(number)},{face?b},<core>
next
next
rectangle={(suit)*((number)+(face))+1},0,0,100%,100%,#FF0000#0000FF@90
font=arial,48,TN,#FFFFFF
text={(suit)*((number)+(face))+1},"nanDECK",0,0,100%,100%,center,center,-56.31
