PhotoPlus X6 User Guide Photo Plus Photoplusx6 Us
User Manual: PhotoPlus
Open the PDF directly: View PDF ![]() .
.
Page Count: 189 [warning: Documents this large are best viewed by clicking the View PDF Link!]
- Welcome
- Getting Started
- Layers, Masks, and Blending
- Making Image Adjustments
- Introduction to image adjustments
- Overview: Adjusting image colors
- Using adjustment layers
- Retouching tools
- Using PhotoFix
- Applying Image Effects
- Overview: Applying special effects
- Using filter layers
- Using the Filter Gallery
- Applying 2D layer effects
- Applying 3D layer effects
- Warp tool effects
- Merging bracketed photos
- Manipulating Images
- Color and Grayscale
- Painting, Drawing and Text
- Print, Export, and Share
- Additional Information
- Index
Contents
1. Welcome .......................................................... 1
Welcome ................................................................................................................ 3
New features ......................................................................................................... 4
Installation ............................................................................................................. 6
2. Getting Started ................................................. 7
Startup Wizard ..................................................................................................... 9
Organizing photos ............................................................................................ 10
Starting from scratch ....................................................................................... 11
Opening an existing file.................................................................................. 12
Saving a file ......................................................................................................... 15
3. Layers, Masks, and Blending ......................... 17
Introduction to layers ...................................................................................... 19
Adjusting opacity/transparency .................................................................. 25
Using masks ........................................................................................................ 27
Using blend modes .......................................................................................... 31
4. Making Image Adjustments ............................ 33
Introduction to image adjustments ........................................................... 35
Overview: Adjusting image colors .............................................................. 36
Using adjustment layers ................................................................................. 38
Retouching tools ............................................................................................... 45
Using PhotoFix ................................................................................................... 46
Contents
5. Applying Image Effects .................................. 55
Overview: Applying special effects ............................................................ 57
Using filter layers .............................................................................................. 58
Using the Filter Gallery ................................................................................... 64
Applying 2D layer effects............................................................................... 68
Applying 3D layer effects............................................................................... 70
Warp tool effects ............................................................................................... 73
Merging bracketed photos ........................................................................... 74
6. Manipulating Images ...................................... 79
Making a selection ........................................................................................... 81
Modifying a selection ...................................................................................... 89
Manipulating a selection ............................................................................... 94
Changing image and canvas size ............................................................... 98
Straightening photos .................................................................................... 102
Cropping an image ........................................................................................ 104
Flipping and rotating .................................................................................... 109
Deforming ......................................................................................................... 110
Mesh warping .................................................................................................. 111
Using Cutout Studio ...................................................................................... 113
7. Color and Grayscale .................................... 117
Color modes ..................................................................................................... 119
Choosing colors .............................................................................................. 120
Contents
8. Painting, Drawing and Text .......................... 125
Painting and brushes .....................................................................................127
Stamping and spraying pictures ...............................................................129
Erasing.................................................................................................................131
Using patterns ..................................................................................................134
Filling a region .................................................................................................135
Cloning a region ..............................................................................................140
Drawing and editing lines and shapes ....................................................142
Creating and editing text .............................................................................150
9. Print, Export, and Share ............................... 153
Printing ...............................................................................................................155
Exporting to another file format ...............................................................164
Batch processing .............................................................................................167
10. Additional Information ................................... 171
Contacting Serif ...............................................................................................173
Credits .................................................................................................................174
11. Index ............................................................. 177

Welcome
1
2 Welcome
Welcome 3
Welcome
Welcome to PhotoPlus X6 from Serif—more than ever, the best value in image
creation and editing software for any home, school, organization, or growing
business. PhotoPlus is the number one choice for working with photographs and
paint-type images, whether for the web, multimedia, or the printed page.
PhotoPlus has the features you’ll need... from importing or creating pictures,
through manipulating colors, making image adjustments, applying filter effects
and so much more, all the way to final export. Built-in support for the most
modern digital cameras makes it easy to open your very own digital photos,
either as JPG or as unprocessed raw images.
PhotoPlus also offers on-computer post-shoot development, using Import Raw,
where you're in full control of your raw image's white balance and exposure, and
perform "blown" highlight recovery. For image adjustments, filter effects
(including stunning artistic effects), or layer cutouts, try PhotoFix, Filter
Gallery, and Cutout Studio, respectively.
PhotoPlus and PhotoPlus Organizer: a powerful
combination
PhotoPlus takes care of all your image creation and photo editing needs.
However, if you're looking to take a step back from photo editing and manage
your collection of photos, scanned images, etc. you can use PhotoPlus Organizer.
This is installed automatically with PhotoPlus, and offers a powerful platform for
launching your photos in PhotoPlus. You'll be able to sort, group, rate, and tag
your photos, as well as filter your photos for display by several methods.
Registration
Don’t forget to register your new copy, using the Registration Wizard on the
Help menu. That way, we can keep you informed of new developments and
future upgrades!
4 Welcome
New features
• 64-bit Operation for Faster Photo Editing
PhotoPlus X6 is fully optimized for operation on 64-bit computers,
and will automatically install for 64-bit operation accordingly. Open
photos of large image size, especially raw images, in an instant! Benefit
from all-round faster PhotoPlus performance.
• Intelligent Brush-based Selection
Use the Smart Selection Brush Tool to create fast accurate selections
which intelligently grow to objects and edges in your image. Improve
an existing selection by using smart edge refinement to perfect the
selection boundary.
• Improved Raw Image Control
Use Import Raw dialog for faster image loading and convenient in-
place photo adjustments: more powerful Lighting and Noise
Reduction adjustments; new Curves, HSL, Lens Distortion, Lens
Vignette, Black and White Film, and Unsharp Mask adjustments are
available. Use masks to selectively control areas subject to adjustment.
The Import Raw dialog also hosts Red-eye, Spot-repair, and Crop tools
for photo retouching.
• Tilt-Shift Effects for Miniature Scenes
The Depth of Field filter hosts the new Tilt-shift effect. Simulate
miniature scenes by targeting an area of focus and controlling the
extent of blurring, e.g. in the photo foreground and background.
• Fill Layers for Creative Color Effects
For ease of use, editable fill layers take a solid or gradient fill (Linear,
Radial, Conical, or Square) without the need to define a selection or
shaped region to fill in advance. With opacity adjustment as well as fill
control you'll be able to create semi-transparent color layers or solid-
fill backgrounds with ease. For more creativity, try applying blend
modes to fill layers.
• Vector Masks for Versatile Drawn Mask Control
Create vector masks that give you fully editable smooth curves for
masking on standard or adjustment layers.
Welcome 5
• Latest Noise Reduction Technology
Remove noise from photos taken in low-light conditions or at high
ISO camera settings with the new Noise Reduction filter. Available via
RAW import or PhotoFix, both luma and chroma noise can be
removed using independent controls.
• Non-destructive Cropping
Enjoy the ability to uncrop any previously cropped images at any time
in the future. Ideal if you want to re-crop your image again or if you
change your mind about the original crop.
• Increased Zoom Range
The PhotoPlus zoom range has been doubled to improve detailed
editing of large images or icon creation.
• Sub-pixel Guides for Vector Drawing
Fine-positioning of guides to the sub-pixel level lets you accurately
position lines, shapes, QuickShapes, and paths.
• Enhanced Export Optimizer
Easier than ever exporting is possible! As well as panning your export
preview by default, you can export as TIF, WDP, or PNG using bit
depths of 48 bit or 64 bit. CMYK or MONO (8 or 16bps) export
options are also available. EXIF/IPTC information can be retained or
discarded on export.

6 Welcome
Installation
Minimum:
• Windows-based PC with DVD/CD drive and mouse
• Operating system:
Microsoft Windows® XP* SP2 (32 bit)
Windows® Vista (32 or 64 bit)
Windows® 7 (32 or 64 bit)
Windows® 8 (32 or 64 bit)
• 512MB RAM (1GB RAM for 64-bit operation)
• 821MB free hard disk space (including PhotoPlus Organizer).
• 1024 x 768 monitor resolution
Additional disk resources and memory are required when editing large and/or
complex images.
* Requires Microsoft Windows Imaging Component.
Optional:
• Windows-compatible printer
• Pen (graphics) tablet
• Internet account and connection required for product updates and
accessing online resources
Installation procedure
• Insert your purchased disc into your disc drive.
• If AutoPlay is enabled on the drive, this automatically starts the
Setup Wizard. Follow the on-screen instructions for install.
OR
• If AutoPlay is not enabled (or doesn't start the install
automatically), navigate to your program disc and double-click
autorun.exe.
32 or 64-bit PhotoPlus X6 installs to respective 32 or 64-bit
computers.

Getting Started
2
8 Getting Started
Getting Started 9
Startup Wizard
Once PhotoPlus has been installed, you're ready to start!
• For Windows Vista/7: The Setup routine during install adds a Serif
PhotoPlus X6 entry to the Windows Start menu. Use the Windows
Start button to pop up the Start Menu, click on All Programs and
then click the PhotoPlus icon.
• For Windows 8: The Setup routine during install adds a Serif
PhotoPlus X6 entry to the desktop. Use the Windows Start button to
pop up the desktop, and then click the PhotoPlus icon.
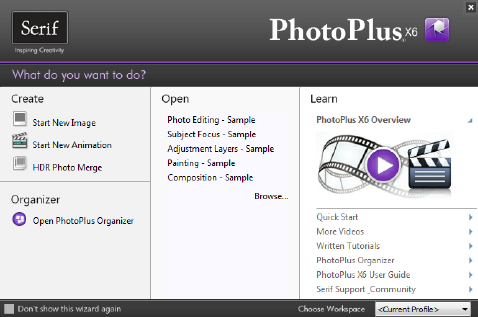
On program launch, the Startup Wizard is displayed which offers different
routes into PhotoPlus:
• Start New Image, to start from scratch.
• Start New Animation, to create an animated GIF.
• HDR Photo Merge, for bracketing photos taken at different exposure
levels.
• Open PhotoPlus Organizer, to manage and filter photos for
PhotoPlus.
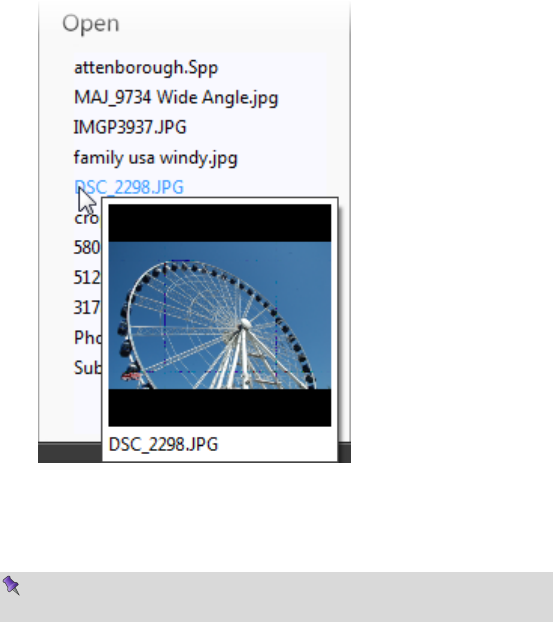
• Open, lists recently opened photos and PhotoPlus projects. Hover
over each entry for a quick preview!
• Learn, to access online tutorial resources.
10 Getting Started
Use the Choose Workspace drop-down list to choose your workspace
appearance (i.e., Studio tab positions, tab sizes, and show/hide tab status). You
can adopt the default workspace profile <Default Profile>, the last used profile
<Current Profile>, a range of pre-defined profiles, or a custom workspace
profile you've previously saved.
As you click on different profiles from the menu, your workspace will
preview each tab layout in turn.
If you don’t want to use the Startup Wizard again, check the "Don't show this
wizard again" box. However, we suggest you leave it unchecked until you’re
familiar with the equivalent PhotoPlus commands. Switch the wizard back on
again by checking Use Startup Wizard via Preferences. (General menu option)
on the File menu.
Organizing photos
PhotoPlus Organizer is Serif's powerful photo management application which
acts as an essential launch point for your photos. From your collection of photos
you'll be able to perform a range of management and filtering operations.
To launch Organizer:
1. Display PhotoPlus's Startup Wizard.
2. Select Open PhotoPlus Organizer. Organizer is launched as a separate
application.
OR
From the Standard toolbar, select Organizer.
OR
From the File menu, select Organizer.
Press your F1 key to view PhotoPlus Organizer Help.
PhotoPlus Organizer is a great starting point for editing photos in PhotoPlus.
Click Edit in PhotoPlus on the top toolbar to open, then edit, your chosen
photo in PhotoPlus.

Getting Started 11
Starting from scratch
PhotoPlus deals with two basic kinds of image files. We'll differentiate them as
pictures (still images) and animations (moving images). The two types are
closely related, and creating either from scratch in PhotoPlus involves the same
series of steps.
PhotoPlus lets you create an image based on a pre-defined canvas size (e.g., 10 x
8 in). Different canvas size options are available from a range of categories
(International/US Paper, Photo, Video, Web, or Animation). Alternatively, you
can create your own custom canvas sizes, and even store them for future use. For
either preset or custom sizes, the resolution can be set independently of canvas
size.
When you create a new image, you can choose to work in different color modes,
i.e. RGB or Grayscale, in either 8- or 16-bits/channel. Use a Bit Depth of 16 bit
for higher levels of image detail.
To create a new image or animation (using Startup Wizard):
1. The first time you launch PhotoPlus, you'll see the Startup Wizard, with a
menu of choices. Click Start New Image or Start New Animation.
2. In the New Image dialog, you can either:
1. For a preset canvas size, select a suitable Category from the drop-
down list. Categories are named according to how your image or
animation is intended to be used, e.g. pick a Photo category for
photo-sized canvases.
2. Pick a canvas Size from the drop-down list.
OR
• For a custom canvas size, enter your own Width and Height. If
the dimensions are non-standard, the Size drop-down list will be
shown as "Custom." For future use, save the custom size with
Add Size (from the button) if necessary.
Although you can resize the image canvas size (width x height)
later, it's usually best to allow some extra canvas area at first.
3. (Optional) Add a Resolution for the new image file. Leave the resolution as
it is unless you're sure a different value is required.

12 Getting Started
4. (Optional) Select a Color Mode, choosing to operate in RGB or Grayscale
mode.
5. (Optional) Select a Bit Depth of 16 bits per channel for projects which
require higher levels of color detail. Otherwise a bit depth of 8 bits/channel
is used as default.
6. (Optional) Select a background type in the Background drop-down list.
• When painting from scratch, you'll normally choose White.
• You can also choose Background Color, to use the current
background color shown on the Color tab.
• When creating an animation, Transparent is often called for.
7. When you've made your selections, click OK.
To create a new picture or animation (during your session):
1. Click New on the Standard toolbar. This will open the Startup
Wizard (see p. 9) or the New Image dialog (if the Startup Wizard is
disabled).
2. In the New Image dialog, set your canvas size (see p. 11) and then check
Animation to create an animation or leave unchecked for a picture.
3. Click OK. The new image or animation opens in a separate untitled
window.
Opening an existing file
You can use the Startup Wizard to access files recently viewed in PhotoPlus or
any file on your computer. PhotoPlus opens all the standard formats for print
and web graphics, in addition to its native SPP format, Adobe Photoshop (PSD)
files, and Paint Shop Pro (PSP) files.
Raw files open in an Import Raw dialog, which offers image adjustment on the
"undeveloped" image before opening. See Adjusting raw images in PhotoPlus
Help. Similarly, intermediate HDR images (OpenEXR and Radiance) can be
opened in a dialog at any time for readjusting your HDR merge results (see
p. 74).
Getting Started 13
To open a recently opened PhotoPlus Picture or graphic (via Startup
Wizard):
1. From the Startup Wizard (at startup time or via File>New from Startup
Wizard.), select your SPP file or graphic file from the Open section. The
most recently opened file will be shown at the top of the list. To see a
thumbnail preview of any file before opening, hover over its name in the
list.
2. Click the file name to open it.
PhotoPlus opens the image as a maximized currently active document; the
document appears in the Documents tab.
Recently viewed files also appear at the bottom of the File menu.
Simply select the file name to open it.

14 Getting Started
To open any image file:
1. From the Startup Wizard (at startup time or via File>New from Startup
Wizard.), click Browse.
OR
Click Open on the Standard toolbar.
2. In the Open dialog, select the folder and file name. To open multiple files,
press the Shift or Ctrl key when selecting their names (for adjacent or non-
adjacent files).
3. Click Open to open the desired image as a maximized document.
To open images by drag-and-drop:
• Drag and drop an image file or preview thumbnail into PhotoPlus
from Windows Explorer either:
• into the current workspace (to create a new layer).
OR
• onto the Documents tab (to create a new image window).
Getting Started 15
Saving a file
The process of saving differs depending on the type of file you are working on,
the file's current saved state and the file type you want to save.
PhotoPlus lets you work on (and save) one of several file types:
• An open PhotoPlus Picture (.spp) file is project-based and so
preserves 'project' information (e.g., layers, masks, paths) when saving
the file.
• For a currently open image file you can edit and save the image back
to its original format. However, if you've added layers, masks, or paths
to your image you'll be prompted to optionally create an spp file to
preserve 'project' information (otherwise it will be lost). If you choose
not to create an spp file, the additional content is included in the now
flattened image.
• An intermediate HDR image can be saved, which stores the results of
an HDR Photo Merge in an HDR file for future use. See Merging
bracketed photos on p. 74 for more information.
To save your PhotoPlus Picture (.spp):
• Click the Save button on the Standard toolbar.
OR
To save under a different path or base name, choose Save As from the
File menu. The window title bar is updated accordingly.
If the current window is untitled or non-native, the Save As dialog
opens, and prompts for an SPP file name based on the base name
shown in the title bar.
The procedure for an altered image is slightly more complicated as PhotoPlus
will assist you in deciding if you want to save or lose any added "project
information" added to the original image.
16 Getting Started
To save your currently open image:
• If you've altered the background layer only and no layers, paths, or
masks have been added, you can save (without prompt) the altered
image to its current base name (shown in the window title bar) by
choosing one of the above Save options. Changes are included in the
image.
OR
• If you've added layers, paths, or masks to your image, when you click a
Save option you'll be asked if you want to preserve the "project"
information.
• In the dialog, click Yes to save your project information (as an
SPP file).
OR
Click No to save as a flattened image (i.e., without layers).
To revert an image file:
• Click Revert from the File menu. The last saved version of your image
is displayed.

Layers, Masks, and
Blending
3
18 Layers, Masks, and Blending
Layers, Masks, and Blending 19
Introduction to layers
If you're accustomed to thinking of pictures as flat illustrations in books, or as
photographic prints, the concept of image layers may take some getting used to.
However, they are one of the most powerful features in PhotoPlus, allowing you
to adjust and manipulate your photos in a variety of ways in a non-destructive
environment.
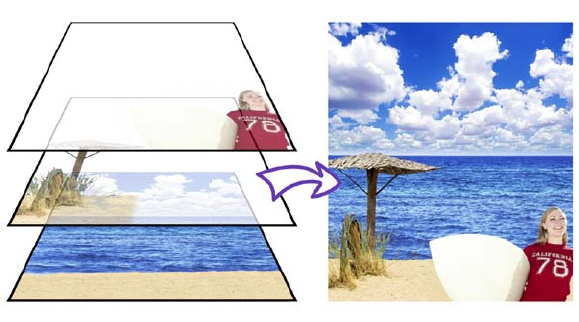
Think of layers as transparent sheets upon which you can add adjustments,
filters, paint colors, and add further images, shapes, and text to build up the
perfect picture.
20 Layers, Masks, and Blending
Kinds of layers
In a typical PhotoPlus image—for example, a photograph you've scanned in, a
new picture file you've just created, or a standard bitmap file you've opened—
there is one layer that behaves like a conventional "flat" image. This is called the
Background layer, and you can think of it as having paint overlaid on an
opaque, solid color surface.
You can create any number of new layers in your image. Each new one appears
on top of the currently active layer, comprising a stack that you can view and
manipulate with the Layers tab.
We call these additional layers standard layers to differentiate them from the
Background layer. Standard layers behave like transparent sheets through which
the underlying layers are visible.
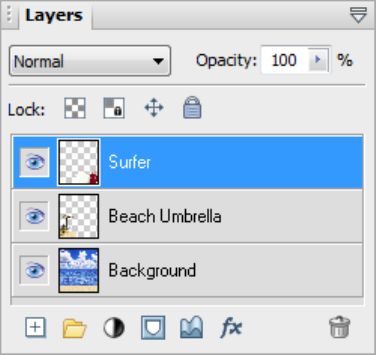
In the example above, the standard layer 'Surfer' is highest in the stack, followed
by 'Beach Umbrella'. The Background layer contains the beach, sea and sky
photo.
Other types of layers also exist in PhotoPlus:
• Shape layers are specifically designed to keep drawn lines and shapes
(including QuickShapes) separate from the other layers so that they
remain editable. (See Drawing and editing lines and shapes; p. 142.)

Layers, Masks, and Blending 21
• Text layers work like Shape layers, but are intended exclusively for
text. (See Creating and editing text; p. 150.)
• Fill layers contain an adjustable solid color or gradient fill. (See Fill
Layers; PhotoPlus Help.)
• Adjustment layers apply corrective image adjustments to lower layers.
(See Using adjustment layers; p. 38.)
• Filter layers, are much like standard layers, but you can apply one or
more filter effects to the layer without permanently altering layer
content. You also have full control over effects in the future. (See
Using filter layers; p. 58.)
For now though we're concerned mainly with the Background and standard
layers.
A key distinction is that pixels on the Background layer are always opaque, while
those on standard layers can vary in opacity (or transparency—another way of
expressing the same property). That’s because standard layers have a "master"
Opacity setting that you can change at any time (with on-screen real-time
preview), while the Background layer does not. A couple of examples will show
how this rule is applied in PhotoPlus:
• Suppose you are creating a new image. The New Image dialog
provides three choices for Background: White, Background Color, and
Transparent. If you pick White or Background Color, the Layers tab
shows a single layer in the new image named "Background". If you
pick Transparent, however, the single layer is named "Layer 1"—and in
this case, the image has no Background layer.
• If you cut, delete, or move a selection on the Background layer, the
"hole" that's left exposes the current background color as shown on the
Color tab (illustrated below on the left). The same operations on a
standard layer exposes a transparent hole (illustrated below on the
right).
22 Layers, Masks, and Blending
Selections and layers
With few exceptions, you will work on just one layer at any given time—click a
layer on the Layers tab to activate and work on that layer. Tools and commands
generally affect the entire active layer. However, if there's a selection in place,
tools and commands are limited to the pixels inside the selection.
Selections are independent from layers. They don't actually include image
content—they just describe a region with boundaries. Therefore, if your image
has multiple layers and you switch to another layer, the selection stays in place
and follows you to the new active layer.
Operations involving layers
Many standard operations, such as painting, selecting and moving, Clipboard
actions, adjusting colors, applying effects, and so on, are possible on both the
Background layer and standard layers.
Others, such as rearranging the order of layers in the stack, setting up different
color interactions (blend modes and blend ranges) between layers, varying layer
opacity (transparency), applying 2D layer effects and 3D layer effects, using
depth maps, creating animation frames, or masking, only work with standard
layers.
Once an image has more than just a background layer, the layer information can
only be preserved by saving the image in the native PhotoPlus (.spp) format.
Multiple layers are merged when you export an image to a standard "flat" bitmap
format (e.g., .png). It’s best to save your work-in-progress as SPP files, and only
export to a different file format as the final step. (See Saving a file and Exporting
to another file format on p. 15 and 164, respectively.)
Some standard operations can be applied to all layers simultaneously by
checking the Use All Layers option from the context toolbar.
To carry out basic layer operations:
• To select a layer, click on its name in the Layers tab. The selected layer
is now the active layer. Note that each layer’s entry includes a preview
thumbnail, which is visible at all times and is especially useful when
identifying layer contents.

Layers, Masks, and Blending 23
• To create a new standard layer above the active layer, click the
New Layer button on the Layers tab. Dragging a file from Windows
Explorer and dropping it onto the current window also creates a new
layer from the dragged image.
• Click the New Fill or Adjustment Layer button to apply a Fill
Layer or an image adjustment layer. (See Fill Layers in PhotoPlus Help
and Using adjustment layers on p. 38.)
• The Add Layer Mask button adds a mask to the currently
selected layer. (See Importance of Masks in PhotoPlus Help and Using
masks on p. 27.)
• The Add Layer Depth Map button creates a depth map for the
selected layer. (See Using depth maps in PhotoPlus Help.)
• The Add Layer Effects button creates a 2D or 3D effect on the
layer. Right-click to copy/paste, clear or hide effects.
• To make a layer's contents visible or invisible, click the
Hide/Show Layer button next to its name on the Layers tab.
• To convert any shape, text or fill layer to a standard layer, right-click
on the layer name and choose Rasterize from the menu.
• To convert the Background layer to a standard layer (which supports
transparency), right-click "Background" on the Layers tab and choose
Promote to Layer. The layer's name changes from "Background" to
"Layer <number>." To convert a standard layer to a Background layer,
right-click the layer and choose Layer to Background.
• To convert the layer to a non-destructive filter layer, for applying and
managing effect and adjustment filters, right-click and select Convert
to Filter Layer. (See Using filter layers in PhotoPlus Help.)
• To access Layer Properties—including Name, Blend Mode, Opacity,
and Blend Ranges—right-click the layer name and choose Properties.

24 Layers, Masks, and Blending
To control layer content:
• To select all layer content use Select>Select All or Ctrl+A. To select
non-transparent regions on a layer, Ctrl-click on a layer thumbnail.
Use Select>Invert or Ctrl+Shift+I to select transparent regions.
• To move layer content, select one or more layers containing the
content to be moved (from the Layers tab), then drag with the Move
Tool with no selection area present (press Ctrl+D to remove any
selection).
• To align layer content, select one or more layers (as above), then
choose Align from the Layers menu, then select an option from the
submenu.
• To distribute layer content, select one or more layers (as above), then
choose Distribute from the Layers menu, then select an option from
the submenu.
Layers, Masks, and Blending 25
Adjusting opacity/transparency
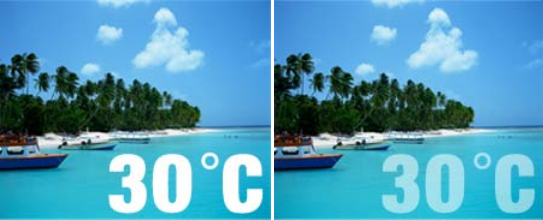
Opacity and transparency describe essentially the same thing. They both
describe the extent to which a particular pixel's color contributes to the overall
color at that point in the image. Fully opaque pixels contribute their full color
value to the image. Fully transparent pixels are invisible: they contribute nothing
to the image. In-between pixels are called semi-transparent.
Fully opaque text
(100% Opacity)
Semi-transparent text
(50% Opacity)
You'll primarily encounter opacity in one of these two contexts:
• As a property of the pixels laid down by individual tools (Paintbrush,
Clone, Eraser, Fill, Smudge, QuickShape, and more).
The map of opacity values for all the pixels on a particular layer is
stored along with the layer and is known as its
• As a property of individual standard layers (in example above). The
layer's opacity setting affects all the pixels on the layer, and is
cumulative with the opacity of individual pixels already there.
26 Layers, Masks, and Blending
To set a tool's opacity:
• Select the tool (e.g., Paintbrush Tool) and from the context toolbar
either enter a percentage Opacity value directly or use the slider (click
the option's right arrow button).
To set a layer's opacity:
• Select the layer in the Layers tab and adjust the Opacity setting at the
top of the tab—either enter a percentage Opacity value directly or use
the slider (click the option's right arrow button).
To read the opacity values of pixels on all visible layers:
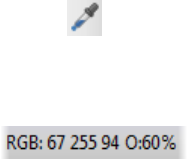
1. Select the Color Pickup Tool from the Tools toolbar and move it
around the image.
2. Read the value shown for "O" (Opacity) on the Hintline (e.g., O:60%).
The readout updates constantly, showing the opacity value of each pixel
under the cursor.
For more useful hints and tips about using opacity, see PhotoPlus Help.
Layers, Masks, and Blending 27
Using masks
Masking can also be applied to adjustment and effect filters, where you can
isolate regions (e.g., an image background) to which you want a filter to be
applied. (See Using filter layers on p. 58). Similarly, you can use studio-based
filter masking on adjustments by using PhotoFix (see p. 46).
Creating the mask
Before you can use a mask, you have to create it on a particular layer. The mask
can start out as transparent (revealing the whole layer), opaque (hiding the
whole layer), or—if you create it from a selection (opposite)—a bit of both (with
only the selected region hidden or revealed). The mask shows as a mask
thumbnail.
The choice depends on how you want to work with the layer's contents. By
darkening portions of a clear mask, you can selectively fade layer pixels. By
lightening an opaque mask, you selectively reveal layer pixels.

28 Layers, Masks, and Blending
To create a mask:
1. Select a layer in the Layers tab. This is the layer where you want to create the
mask, and select specific region(s) if desired.
2. Click the Add Layer Mask button to create a Reveal All mask (or
Reveal Selection if there is one). Instead, Alt-click the button for a Hide All
Mask (or Hide Selection).
OR
Choose Mask>Add Mask from the Layers menu and then one of the
following from the submenu:
• Reveal All for a transparent mask over the whole layer
• Hide All for an opaque mask over the whole layer
• Reveal Selection for an opaque mask with transparent "holes"
over the selected region(s)
• Hide Selection for a transparent mask with opaque "blocks" over
the selected region(s)
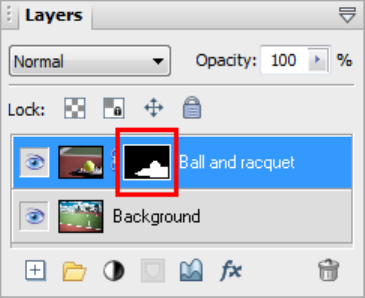
On the Layers tab, a mask preview thumbnail appears, confirming that a mask
exists.
Layers, Masks, and Blending 29
Editing on the mask
When you create your mask you immediately enter Edit Mask mode, where you
can use the full range of painting tools, selection options, flood fills, gradient
fills, and effects to alter the mask's grayscale values. These manipulations cause
corresponding changes in opacity, which in turn changes the appearance of the
pixels on the layer itself.
The image window's titlebar shows "Mask", indicating that a mask is currently
being edited. The Color tab switches to Grayscale mode when you're editing a
mask, and reverts to the previous setting when you exit Edit Mask mode. This
means anything you paste from the Clipboard onto the mask will automatically
be converted to grayscale.
As long as you are editing the mask, you're only seeing a preview of
changes on the layer.
You can switch out of Edit Mask mode at any time to edit the active layer
directly (or any other part of the image), then switch back to resume work on the
mask.
To edit the active layer:
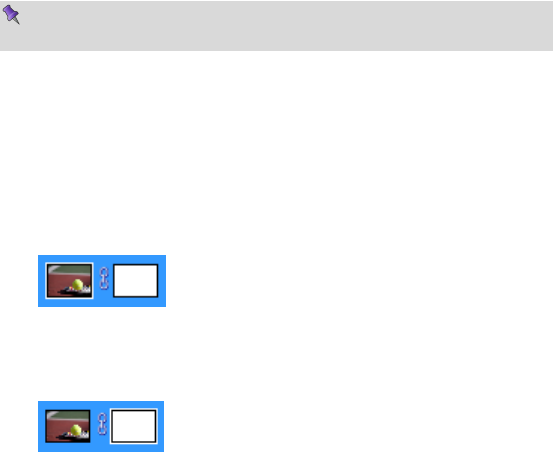
• Click the layer thumbnail to the left of the Mask thumbnail. The
thumbnail is then bordered in white.
To edit the active layer's mask:
• Click the mask thumbnail.
In Edit Mask mode, you're normally viewing not the mask, but rather the effects
of changes "as if" you were making them on the layer below. Adding a Reveal All
mask can be a bit confusing, because there's initially no evidence the mask is
there at all (i.e. the layer appears exactly the same as it did before you added the
mask)!
30 Layers, Masks, and Blending
It's sometimes helpful to switch on the View Mask setting, which hides the layer
and lets you see only the mask, in all its grayscale glory. For example, a Reveal
All mask appears pure white in View Mask mode—the white represents a clear
mask with no effect on the underlying layer pixels' opacity. View Mask can also
be useful in the latter stages of working on a mask, to locate any small regions
that may have escaped your attention.
To view the active layer's mask:
• Alt-click the mask thumbnail, to display the mask in black and white.
Alt-click a second time to view the mask as a tinted overlay.
To stop viewing the mask, click on the layer thumbnail.
White or light portions of the mask reveal layer pixels (make them more
opaque). Black or dark portions hide layer pixels (making them more
transparent).
You can disable the mask to see how the layer looks without the mask's effects.
Note that disabling the mask is not the same as canceling Edit Mask mode—it
only affects your view of the layer, not which plane (i.e. mask or layer) you're
working on.
To disable the active layer's mask:
• Shift-click the mask preview thumbnail. (Shift-click again to enable
masking again.)
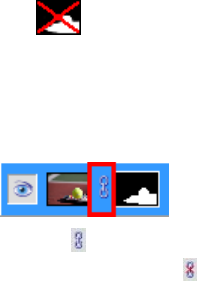
When the mask is disabled, a red "X" appears across its
thumbnail.
If you want to fine-tune a mask or layer's position independently of each other
it’s possible to unlink them. You may have noticed a small link button between
the layer and mask thumbnails on the Layers tab, i.e.
A click on this button will unlink the layer and mask, changing the button to
display a red cross through it ( ). By selecting the layer or mask thumbnail, you
can then drag the layer or mask on the page, respectively. After fine-tuning, click
the button to relink the mask to the layer.
Layers, Masks, and Blending 31
Using blend modes
You can think of blend modes as different rules for putting pixels together to
create a resulting color. In PhotoPlus, you'll encounter blend modes on layers or
effects. The colors of an upper layer blend with colors of the lower layer in
different ways according to the upper layer's blend mode.
To set a tool's blend mode:
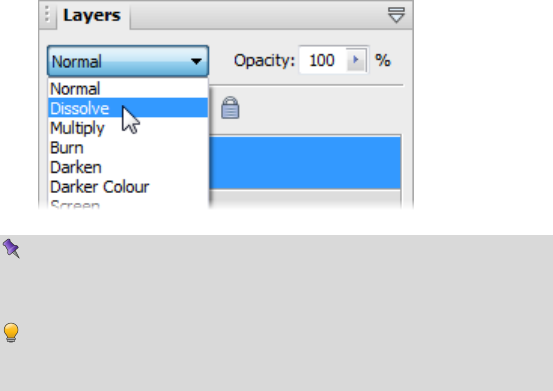
• Select the tool and use the drop-down list (displays Normal by default)
on the tool's context toolbar.
To set a standard layer's blend mode:
• On the Layers tab, select the layer and choose the mode from the blend
mode's drop-down list.
It's also possible to include or exclude tones or colors to be included
in any blending operation by using blend ranges. For more details,
see Using blend ranges in PhotoPlus Help.
A tool or layer's Opacity setting interacts with its blend mode to
produce varying results. For details, see Adjusting
opacity/transparency on p. 25.
32 Layers, Masks, and Blending

Making Image
Adjustments
4
34 Making Image Adjustments
Making Image Adjustments 35
Introduction to image adjustments
A major part of photo-editing is making corrections (i.e., adjustments) to your
own near-perfect images. Whether you’ve been snapping with your digital
camera or you've just scanned a photograph, at some point you may need to call
on PhotoPlus’s powerful photo-correction tools to fix some unforeseen
problems.
For photo-correction, several methods can be adopted. You can use a
combination of:
• Image color adjustments: For applying color adjustments to a
selection or layers.
• PhotoFix: For making cumulative corrective adjustments from within
a studio environment.
• Retouch brush-based tools: Red Eye, Smudge, Blur, Sharpen,
Dodge/Burn (for exposure control), Sponge (for saturation control),
Scratch Remover.
If you work with raw images you can make image adjustments on your
unprocessed raw file (before interpolation). Adjustments include white balance,
exposure, highlight recovery, noise reduction, and chromatic aberration
removal. See Adjusting raw images in PhotoPlus Help.
36 Making Image Adjustments
Overview: Adjusting image colors
PhotoPlus provides a number of different adjustment filters that you can apply
to a selection or to an active standard layer. Typically, these adjustments are used
to correct deficiencies in the original image.
The adjustment can be applied in one of several ways:
• via the Adjustments tab, as an adjustment layer (non-destructive).
• via PhotoFix, a studio environment for managing and applying
cumulative adjustments (non-destructive).
• via Image>Adjust, on a filter layer (non-destructive).
• via Image>Adjust, on a standard layer (destructive).
Here’s a summary of the available PhotoPlus image adjustments:
• Levels: Displays a histogram plot of lightness values in the image, from
which you can adjust the tonal range by shifting dark, light, and
gamma values.
• Curves: Displays lightness values in the image using a line graph, and
lets you adjust points along the curve to fine-tune the tonal range.
• Brightness/Contrast: Brightness refers to overall lightness or
darkness, while contrast describes the tonal range, or spread between
lightest and darkest values.
• Shadow/Highlight/Midtone: Controls the extent of shadows,
highlights, and contrast within the image.
• Hue/Saturation/Lightness: Hue refers to the color’s tint—what most
of us think of as rainbow or spectrum colors with name associations,
like "blue" or "magenta". Saturation describes the color’s purity—a
totally unsaturated image has only grays. Lightness is what we
intuitively understand as relative darkness or lightness—ranging from
full black at one end to full white at the other.
• Colorize: Lets you recolor an image using Hue, Saturation, and
Lightness.
• Vibrance: Boosts low-saturation colors in your image, while high-
saturation colors are less affected.
Making Image Adjustments 37
• Color Balance: Lets you adjust color and tonal balance for general
color correction in the image.
• Replace Color: Tags one or more ranges of the full color spectrum that
require adjustment in the image, then apply variations in hue,
saturation, and/or brightness to just those color regions (not to be
confused with the simpler Replace Color Tool).
• Selective Color: Lets you add or subtract a certain percentage of cyan,
magenta, yellow, and/or black ink for creating effects.
• Channel Mixer: Modifies a color channel using a mix of the current
color channels.
• Gradient Map: Lets you remap grayscale (lightness) information in
the image to a selected gradient. The function replaces pixels of a given
lightness in the original image with the corresponding color value
from the gradient spectrum.
• Lens Filter: Adjusts the color balance for warming or cooling down
your photos. It digitally mimics the placement of a filter on the front of
your camera lens.
• Black and White Film: Used for grayscale conversion with
controllable source channel input.
• Threshold: Creates a monochromatic (black and white) rendering.
You can set the threshold, i.e. the lightness or gray value above which
colors are inverted.
• Equalize: Evenly distributes the lightness levels between existing
bottom (darkest) and top (lightest) values.
• Negative Image: Inverts the colors, giving the effect of a photographic
negative.
• Clarity: Lets you sharpen up your photos using local contrast.
• Posterize: Produces a special effect by reducing the image to a limited
number of colors.

38 Making Image Adjustments
Instead of the manual tonal adjustments above, the PhotoPlus Image menu
affords a number of functions you can apply to correct shadow/highlight values
in an image automatically. Adjust>AutoLevels or Adjust>AutoContrast may
do the job in one go; if not, you can use Adjust>Levels. or
Adjust>Shadow/Highlight/Midtone. (See PhotoPlus Help for details.)
Use the Histogram tab to display statistics and image color values,
helping you to evaluate the kinds of image adjustments that may be
needed.
Using adjustment layers
Adjustment layers are recommended for applying image adjustments
experimentally and non-destructively to your image.
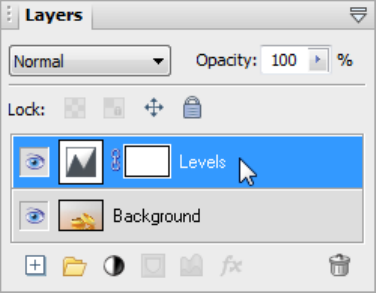
The Adjustments tab lists available adjustments in a selectable adjustments list;
after selection, the tab displays a Settings pane for that adjustment (and for any
selected adjustment layer present in the Layers tab).
Making Image Adjustments 39
An adjustment layer is created by selecting an adjustment from the Adjustments
tab. As its name suggests, an adjustment layer is considered a layer so it will
appear in the Layers tab on creation.
Unlike the other layer types, adjustment layers don't store content in the form of
bitmap images, text, or shapes. Rather, an adjustment layer applies the
adjustment to content on all layers below it (although you can restrict the effects
of the adjustment by adding to a group or by clipping to the immediate layer
below).
The layer is essentially a container in which only the adjustment's settings and its
layer properties are stored.
You can drag an adjustment layer up or down within the list to determine
exactly which other layers are below and therefore affected by it.
Adjustment layers let you revisit the settings for a given adjustment as often as
needed, while continuing to edit the image in other ways. If you later decide you
don't even need an adjustment, you can simply remove it!
40 Making Image Adjustments
The following adjustments are available:
• Levels: Adjust contrast and tonal range by shifting dark, light, and
mid-tone values.
• Curves: Fine-tune lightness (luminance) values in the image or color
channel using a line graph.
• Color Balance: Adjust color and tonal balance for general color
correction in the image.
• Brightness/Contrast: Vary brightness and/or contrast.
• Hue/Saturation/Lightness: Vary hue, saturation, and/or lightness
values.
• Colorize: Vary hue, saturation, and/or lightness to colorize an image.
• Vibrance: Boosts the saturation of low-saturation colors (while
limiting saturation of already saturated colors).
• Selective Color: Add or subtract a certain percentage of cyan,
magenta, yellow, and/or black ink.
• Channel Mixer: Modify a color channel using a mix of the current
color channels.
• Gradient Map: Remap grayscale (lightness) information in the image
to a selected gradient.
• Lens Filter: Apply a color filter to warm up (or cool down) your
image.
• Black & White Film: Convert your color image to black and white
intelligently.
• Threshold Filter: Create a monochromatic (black and white)
representation.
• Posterize: Apply the Posterize effect by limiting the number of
lightness levels.
• Negative Image: Invert each color, replacing it with an "opposite"
value.
For more in-depth details on each adjustment, view the PhotoPlus help, click the
Contents tab, and open the "Making Image Adjustments" book.
Making Image Adjustments 41
To create an adjustment layer:
1. From the Adjustments tab, select an adjustment. You can choose a default
adjustment or a named preset by expanding the adjustment entry (click ).
2. In the Layers tab, the new adjustment layer is inserted above the active layer.
The adjustment is applied to all underlying layers.
3. From the Adjustments tab, change the applied adjustment layer's settings to
suit your requirements. For example, for a levels adjustment, you can drag
the histogram pointers to alter levels.
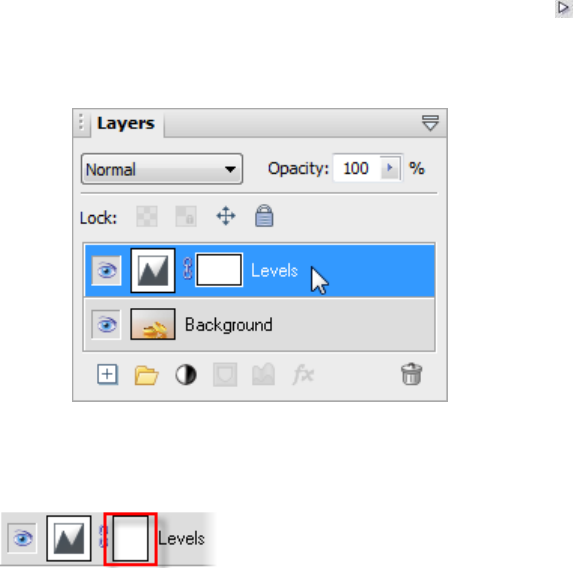
Just like other layer types (Standard, Text,
Shape, Filter, but not Background),
adjustment layers can have a mask applied to
them. By default, a mask thumbnail is shown
on the adjustment layer. Select this to apply a
mask to your adjustment layer. (See Using
masks on p. 27.)
42 Making Image Adjustments
To save an adjustment layer as a new preset:
1. Select and then modify an adjustment layer in the Adjustments tab.
2. Click Add Preset.
3. From the dialog, name your custom adjustment layer, and click OK.
Custom adjustments will appear under the adjustment's type in the tab's
adjustment list.
To modify an adjustment layer:
1. Click the adjustment layer's name in the Layers tab.
2. From the Adjustments tab, modify the applied adjustment layer's settings.
To hide/show an adjustment layer:
• Click Hide/Show Layer on the Layers tab.
To delete an adjustment layer:
• (via Layers tab) Select the adjustment layer and click Delete
Layer.
OR
• (via Adjustments tab) with the adjustment's settings pane
showing, click Delete Layer. This removes the currently selected
adjustment layer, so be careful not to remove additional adjustment
layers in the Layers tab by clicking multiple times.
To reset an adjustment layer:
1. Click the adjustment layer's name in the Layers tab.
2. From the Adjustments tab, select Restore Default Settings.
To access layer properties for an adjustment layer:
• Right-click the layer name and choose Properties..
As with other layers, you can change the adjustment layer’s name, set its opacity,
blend mode, and/or blend ranges.
Making Image Adjustments 43
Clipping adjustment layers
Clipping allows you to restrict the scope of an adjustment layer, i.e. the
adjustment influences only the layer immediately below it, rather than all
underlying layers.
To clip an adjustment layer:
• Click Clip to Layer Below on the selected adjustment layer (in
the Adjustments tab).
OR
Right-click the adjustment in the Layers tab and select the same
option.
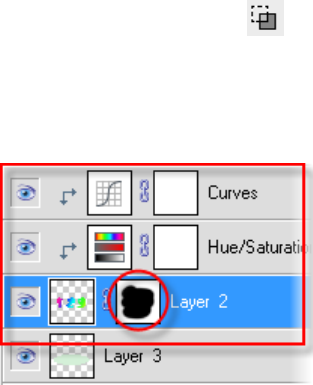
You'll see your adjustment layer become indented, indicating that it is clipped to
the layer below. The circled icon indicates a clipped layer.
44 Making Image Adjustments
To unclip a selected layer:
• In the Adjustments tab, click Clip to Layer Below.
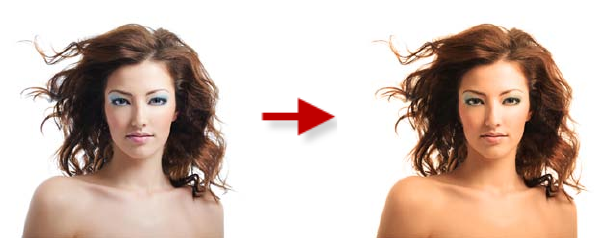
One additional benefit of the clipping feature is that you can apply a mask to a
lower layer (thumbnail circled below) so that adjustment layers above that are
"clipped" to that lower layer. This saves you creating a mask per adjustment
layer.

Making Image Adjustments 45
Retouching tools
The Tools toolbar includes an assortment of comparatively simple pressure-
sensitive brush-based tools that come in handy at various stages of photo editing.
Retouching tools work on Background and standard layers, but not on text
layers or shape layers.
On the Retouch Tools flyout:
Red Eye Tool - for correcting the "red eye" phenomenon common in
color snapshots
Smudge Tool - for picking up color from the click point and
"pushing" it in the brush stroke direction
Blur Tool - for reducing contrast under the brush, softening edges
without smearing colors
Sharpen Tool - for increasing contrast under the brush, enhancing
apparent sharpness
Dodge Tool - for lightening an area
Burn Tool - for darkening an area
Sponge Tool - for increasing or decreasing the color saturation under
the brush
Replace Color Tool - for swapping one color for another
On the Blemish Removal Tools flyout:
Blemish Remover - for intelligently painting out skin blemishes
Scratch Remover - for filling in small gaps or dropouts in an image
Patch Tool - for painting out selected areas
46 Making Image Adjustments
Using PhotoFix
PhotoFix provides an image adjustment environment within PhotoPlus which
simplifies the often complicated process of image correction. The studio
environment offers the following key features:
• Adjustment filters
Apply tonal, color, lens, sharpening, and noise reduction filters.
• Retouching filters
Apply red-eye correction, spot repair, straightening, and cropping.
• Non-destructive operation
All filters are applied without affecting the original picture (by
automatically creating a filter layer), and can be edited at any point in
the future.
• Powerful filter combinations
Create combinations of mixed adjustment filters for savable
workflows.
• Selective masking
Apply filters to selected regions using masks.
• Save and manage favorites
Save filter combinations to a handy Favorites tab.
• Viewing controls
Compare before-and-after previews, with tiled- and split-screen
controls (horizontally and vertically). Use pan and zoom control for
moving around your picture.
Making Image Adjustments 47
To launch PhotoFix:
• Click PhotoFix on the Photo Studio toolbar.
Let's get familiar with the PhotoFix interface showing a non-default Split
horizontal view.
(A) Retouch tools, (B) Main toolbar, (C) Main Workspace,
(D) Histogram, (E) Filters, (F) Favorites.
48 Making Image Adjustments
Adjustments overview
Adjustments are made available to the right of the main window from the Filters
section. Here's a quick overview of all the adjustments hosted in PhotoFix, some
tool-based and some available as filters.
Retouch tools:
• Red Eye
Removes the dreaded red eye effect from subject's eyes—commonly
encountered with flash photography.
• Spot Repair
Removes skin blemishes and other flaws.
• Crop
Retains a print-size portion of your image while discarding the
remainder. Great for home printing, then framing.
• Straighten
Re-aligns slightly or wildly crooked photos by resetting the image's
horizon, then applying an auto-crop.
These tools are supported by How To Help instructions within their dialogs.

Making Image Adjustments 49
Filter-based:
• Noise Reduction
Use Luma and Chroma adjustments to reduce noise in photos taken in
low light or from cameras with high ISO settings.
• White Balance
"Cool down" or "warm up" your photo by adjusting lighting either by
selecting presets or customizing temperature/tint combinations.
• Lighting
Simple adjustments to a photo's exposure, brightness, contrast,
shadows, and highlights.
• Curves
Correct the tonal range of a photo, i.e. the shadow, midtone, and
highlight regions—and control individual color components.
• HSL
Adjust the Hue, Saturation, and Lightness of your image
independently.
• Black and White Film
Intelligently apply grayscale by varying the gray tones of red, green or
blue colors in your original image. Also apply color tints.
• Chromatic Aberration
Reduces red/cyan or blue/yellow fringing on object edges.
• Lens Distortion
Fixes barrelling and pincushion distortion encountered when
photographing straight-edged objects at close range.
• Lens Vignette
Removes darkening in photo corners.
• Unsharp Mask
Makes your image sharper at image edges—great for improving image
quality after other adjustments have been made.
Some adjustments can also be applied independently from the
Effects menu.
50 Making Image Adjustments
To apply an adjustment (from a favorites preset):
1. From the Favorites tab, scroll the tab to review the categorized
adjustments; select a preset or custom thumbnail.
2. Click OK.
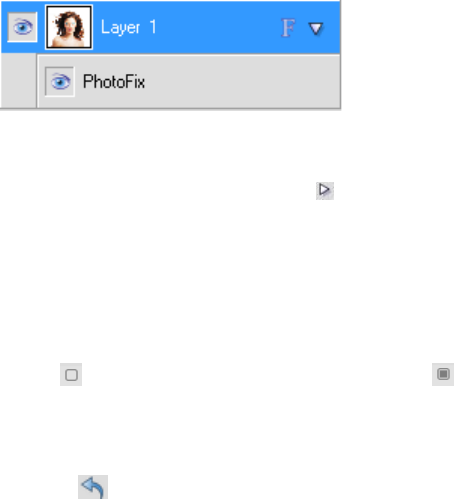
When applied, your image layer is automatically converted to a non-destructive
filter layer with a PhotoFix adjustment entry nested under the filter layer entry.
To apply an adjustment (using custom settings):
1. Review the available adjustments in the Filters section, before expanding the
adjustment you want to apply by clicking Expand filter.
2. Modify the adjustment using sliders, check boxes, graph adjustments, and
drop-down lists (you can also enter absolute values into available input
boxes). The image will be adjusted automatically to reflect the new settings
in the preview window.
You'll notice the adjustment filter is enabled once a setting is changed, i.e.
the Enable/disable filter option becomes grayed out ( ).
3. Click OK. A filter layer is created (as above).
To reset (and disable) a modified adjustment:
• Click Reset settings in the top-right corner of the adjustment's
pane.
To edit PhotoFix adjustments:
• Double-click the PhotoFix entry on the filter layer. PhotoFix is
launched with the previously set adjustments still applied.
Making Image Adjustments 51
Using PhotoFix masks
Masks in PhotoFix adopt the same principles as layer masks (see p. 27). In
PhotoFix however, masking is used to apply adjustment filters to selected
"painted" regions of your image or to protect painted regions from change.
Painting is used exclusively to create PhotoFix masks.
Each new mask comprises the selected mask region, plus a set of adjustments
applied to that mask. You can change the adjustments associated with the mask
at a later date.
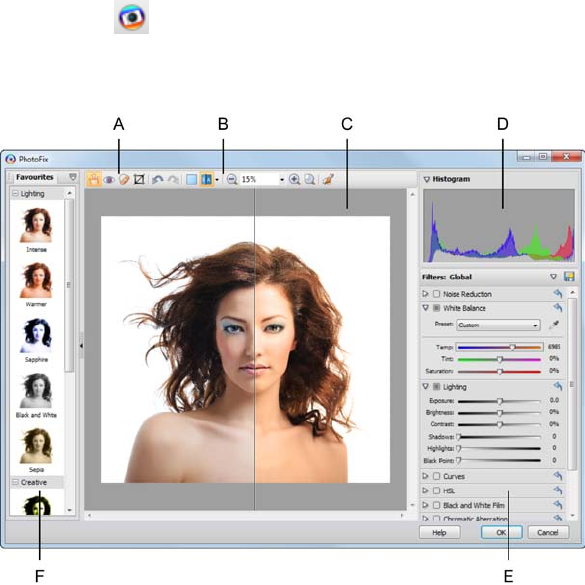
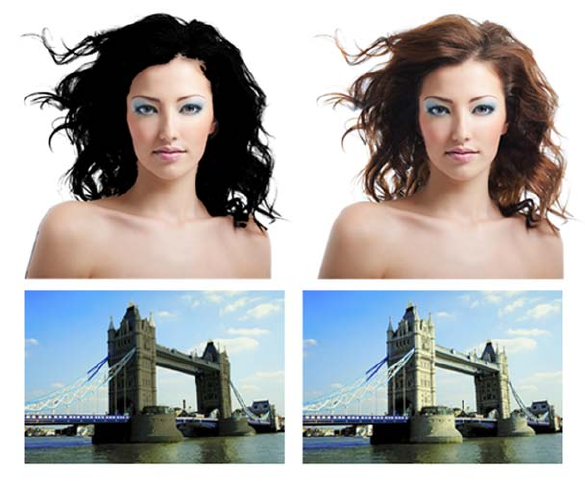
In the first example below, the model's hair has been masked by painting,
allowing White Balance to be adjusted in that painted region only. Conversely,
in the second example, the sky has been painted to protect it from masking,
allowing light levels to be adjusted for Tower Bridge's stonework.
To achieve the above, PhotoFix uses two mask modes, namely Mode Select and
Mode Protect. When you begin masking you'll need to decide which mode you
want to use.
52 Making Image Adjustments
To apply a mask:
1. Select Create Mask from the main toolbar.
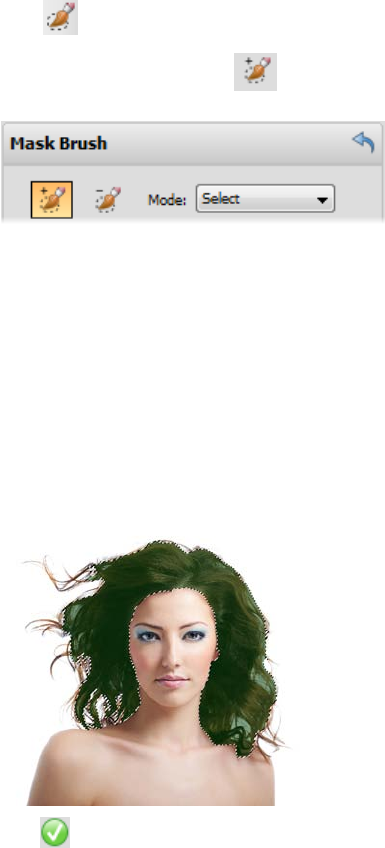
2. In the Mask Brush pane, select the Add Region tool.
3. Adjust the settings to suit your requirements. For example, adjust Brush
Size to paint larger or more intricate regions.
4. In the Mode drop-down list, choose one of the following options:
• Select: Choose this if you want to apply the filter only to the
regions you paint. This is the default setting.
• Protect: Choose this if you want to apply the filter to all areas,
except for those that you paint.
5. Using the brush cursor, paint the regions to be masked (selected areas are
painted in green; protected areas in red).
6. Click Accept.
7. Apply your adjustments as described previously, which will make a change
to your masked regions.

Making Image Adjustments 53
Adding multiple masks
So far we've looked at an individual mask applied to an image. However,
PhotoFix also supports multiple masks where a different set of adjustments can
be applied to each mask. You can therefore build up a patchwork of masked
regions for absolute and selective control of image adjustments.
To apply additional masks:
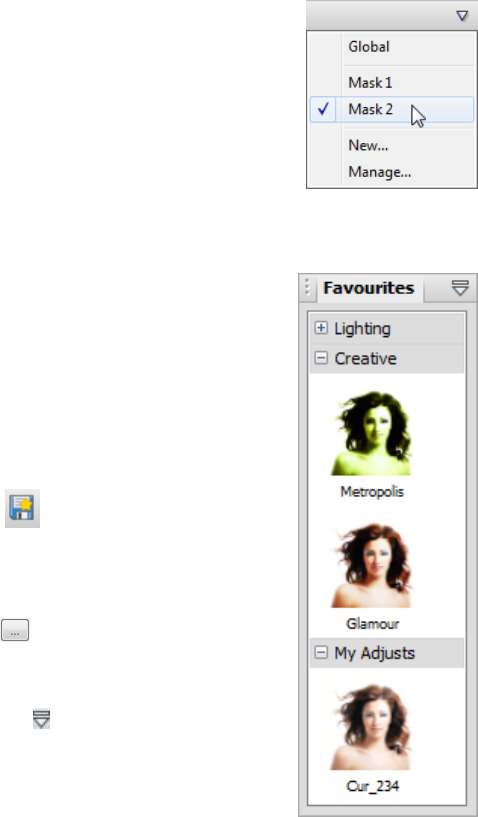
1. In PhotoFix, click the down arrow on the Filters heading.
2. From the drop-down list, select New.
3. In the Mask Brush pane, change settings and paint as described previously
in "To apply a mask".
4. Click OK. The new mask, named Mask 1, Mask 2, etc. is applied to your
image.
5. Apply your adjustments as described previously.
6. Repeat the process for further masks.
Once applied, masks are applied cumulatively. The default global mask is applied
to your image first, then Mask 1, then Mask 2, etc., if present. As a result, you
may wish to rearrange the mask order for different results. You can also rename
and delete masks.
To rearrange, rename or delete a mask:
1. From the down arrow on the Filters heading, select Manage.
2. From the dialog, select a mask and use appropriate supporting buttons.
3. Click OK.
54 Making Image Adjustments
To edit a mask:
1. From the down arrow on the Filters heading,
select your mask name (a check indicates
selection).
2. Modify your adjustments as described
previously.
Saving favorites
If there's a specific filter setting (or combination of
filters) you want to keep for future use it's easy to
save it as a favorite. PhotoFix stores preset and
custom favorites together in the Favorites tab. You
can even create your own categories (e.g.,
MyAdjusts) within the tab for storing your custom
adjustments.
To save a filter(s) as a new favorite:
1. Click Save Filter on the modified filter's
pane.
2. From the dialog, enter a favorite name and
pick a category to save the filter to. Optionally,
click to save to a new category.
If you want to further manage your favorites into
user-defined categories, click Manage Favorites on
the Favorites tab's Tab Menu.

Applying Image
Effects
5
56 Applying Image Effects

Applying Image Effects 57
Overview: Applying special effects
Special effects are grouped into different categories, i.e. distort, blur, sharpen,
edge, noise, render, stylistic, and artistic, which offer you a diverse choice of
creative opportunities in PhotoPlus.
Before going ahead and applying your effects, it's a good idea to review Using
filter layers (see p. 58) before deciding on your approach, i.e. whether you work
non-destructively or destructively.
Each effect can be applied in one of several ways:
• on a filter layer, via an Effects dialog or via the Filter Gallery (non-
destructive).
• on a standard layer, via an Effects dialog or via the Filter Gallery
(destructive).
Equally dramatic effects can be applied by using Warp tools on the
Tools toolbar's flyout or 2D/3D layer effects via the Layers tab.
As with image adjustments (see Introduction to image adjustments
on p. 35), you can use filter effects to improve the image, for
example by sharpening, but more often the emphasis here is on the
"creative" possibilities when effects are applied.
58 Applying Image Effects
Using filter layers
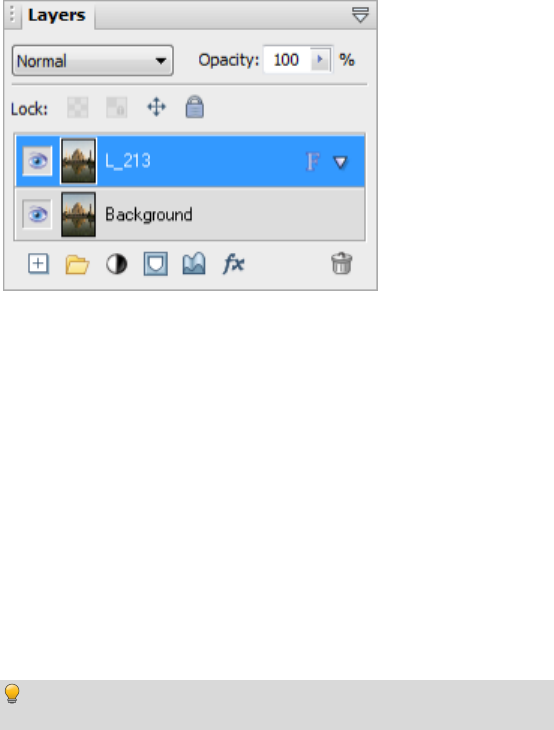
If you apply a filter effect to a standard or background layer, the layer is
permanently altered. However, if you want the flexibility of being able to edit
your filters at any point in the future (and don't want to destroy the layer
contents) you can convert your standard or background layer to a Filter Layer
(e.g., L_213).
Think of a Filter Layer as a way of keeping layer content independent of any
filters you wish to use, with the flexibility of being able to manipulate a filter
layer in the same way as other layers. Otherwise without filter layers, you would
have to repeatedly undo your operations if you've had a rethink and no longer
want to apply a specific filter.
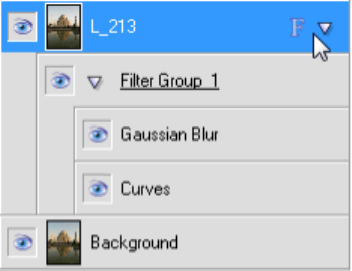
When applied, filters are created within filter groups, nested individually under
the Filter Layer. When you double-click a filter you display its specific settings.
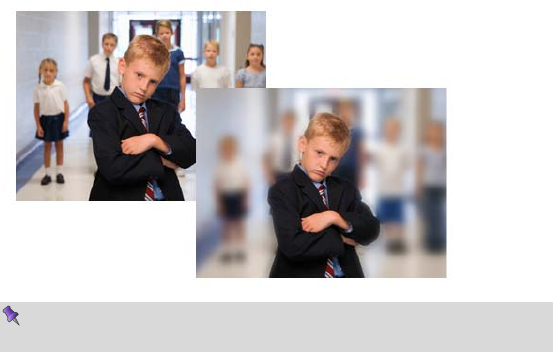
You can apply a blend mode and opacity to each filter, and additionally filter
masking to the filter group.
For added security, it's good practice to create a duplicate of any
background layer you initially have.
Applying Image Effects 59
To convert to a filter layer:
• In the Layers tab, right-click a standard or Background layer and
choose Convert to Filter Layer.
The layer now shows the letter "F" indicating that it is now a filter
layer, and ready to have a filter applied.
To add filters to the filter layer:
1. Select the filter layer.
2. Add an adjustment via the Image menu (see p. 36).
OR
Add an effect via the Effects menu or via the Filter Gallery (see p. 64).
Each filter, as it is applied, is created within a filter group nested under the
selected filter layer. In the example below, the Curves adjustment filter and
Gaussian Blur effect filter is applied to the selected filter layer L_213. They'll
be stored within Filter Group 1.
As a filter layer has all the properties of standard and Background layers, you
may wish to review Introduction to layers (p. 19). Essentially, you can edit,
hide/show, and delete filter layers as for standard layers, as well as apply a blend
mode or opacity level.
To edit filter layer properties:
• In the Layers tab, right-click the filter layer and choose Properties.

60 Applying Image Effects
Managing filter groups and specific filters
When you apply a filter to a filter layer it automatically creates a filter
group. This allows you to store and manage a selection of filters more easily—
you'll be able to control multiple filters in bulk by operating at the group level,
e.g. to hide/show, delete, apply blend modes, and opacity to all filters
simultaneously. Most operations can be applied equally to group or specific
filter, except for masking, which can be used on filter groups but not on
individual filters.
To hide/show a filter group/filter:
• Click the Hide/Show Filter button next to its name on the
Layers tab.
OR
Right-click the filter and select Disable Filter (or Enable Filter).
OR
Right-click the filter group and select Disable Filter Group (or Enable
Filter Group).
To delete a filter group/filter:
• Right-click the filter (or filter group) and select Delete Filter (Group).
To create an empty filter group:
Right-click a filter layer and select Add Filter Group from the flyout menu.
Just as layers can adopt different blend mode and opacity levels the same is true of
filter groups and individual filters. For a refresh on these concepts, see Using blend
modes and Adjusting opacity/transparency on p. 31 and p. 25, respectively.
You can use the Blend Options dialog to make blend mode and opacity changes
with a dynamic preview, updating as you make change.
To apply a blend mode:
1. Right-click the filter group (or filter) and select Blend Options.
2. From the dialog, select an option from the Blend Mode drop-down list.
3. Click OK.
To change opacity:
• From the above dialog, enter an Opacity level.
Applying Image Effects 61
Editing filters
The core objective of filter layers is to host filters applied to your image. Once a
filter is applied, it's likely that you may want to edit it at a later date.
To edit a filter:
1. Double-click the filter entry, e.g. Gaussian Blur.
OR
Right-click the filter and select Edit Filter.
2. The filter can then be edited via dialog or Filter Gallery. Adjust the filter and
click OK.
Using filter masks
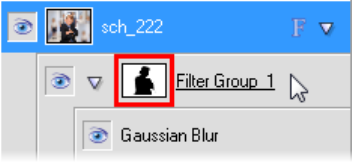
In an identical way to layer masks (see p. 27) you can apply a mask to a filter
layer. However, masks can additionally be used for selective filter control for
image correction or artistic reasons. These are called filter masks, which limit
the influence of any applied filter(s) to that masked region only. Filter masks are
applied either automatically (from a selection existing before applying a filter) or
manually (after you've applied the filter) to a filter group (but never to an
individual filter).
See Using masks (see p. 27) for more details on masking and
masking controls.
62 Applying Image Effects
To create a filter mask (from a selection):
1. Make a selection on which your mask will be based, e.g. a brush selection
around the subject of interest. By default the area outside the selection is
masked (i.e. not affected by the filter), while the selection area retains the
applied filter. If you want to do the opposite, choose Invert from the Select
menu.
2. In the Layers tab, select the filter layer to which you wish to apply a filter.
3. Add an adjustment via the Image menu.
OR
Add an effect via the Effects menu or via the Filter Gallery.
The filter is created within an automatically created filter group, which
applies a mask automatically.
4. (Optional) Fine-tune the filter by double-clicking the filter entry and editing
the settings.
To create a filter mask (by mask painting):
1. With no selections present, in the Layers tab, select the filter layer to which
you wish to apply a filter.
2. Add an adjustment via the Image menu.
OR
Add an effect via the Effects menu or via the Filter Gallery.
Applying Image Effects 63
3. Right-click the created filter group and select Add Mask from the flyout
menu and then one of the following from the submenu:
• Reveal All for a transparent mask
• Hide All for an opaque mask.
A mask thumbnail appears to the left of the filter name.
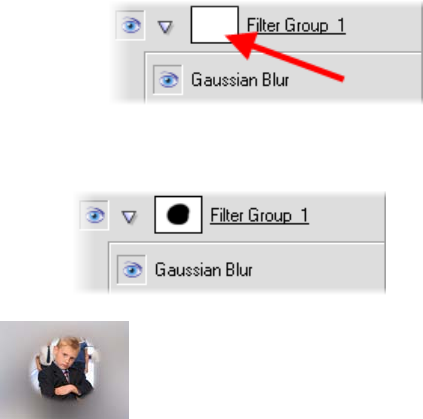
4. Paint or draw on your image using a suitable grayscale value set as your
foreground color. The mask thumbnail updates accordingly.
The mask thumbnail would apply a mask which produces
a vignette effect. As you can also paint with different
grayscale levels you can achieve even more complex
masking effects.
To disable (enable) a mask:
• Right-click the filter group and select Disable Mask (or Enable Mask)
from the flyout menu.
To delete a mask:
• Right-click the filter group and select Delete Mask from the flyout
menu.
64 Applying Image Effects
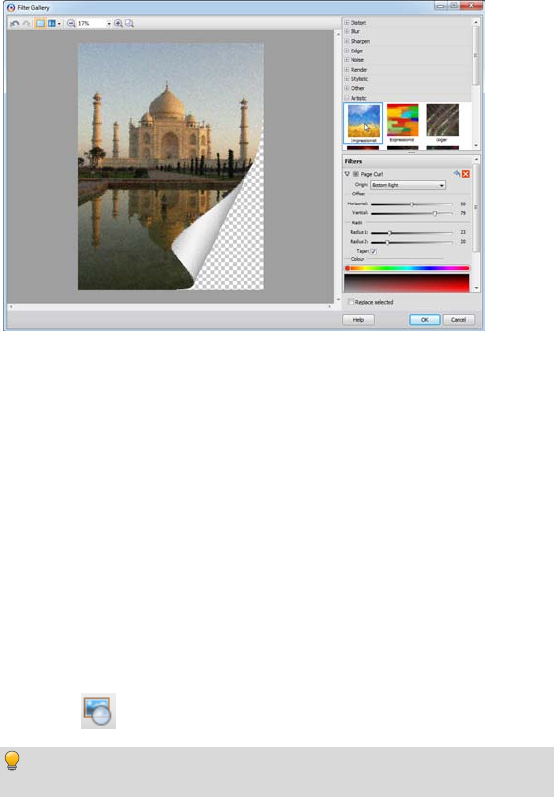
Using the Filter Gallery
The Filter Gallery offers a one-stop studio environment for applying single or
multiple filter effects. The gallery hosts sets of filter thumbnails which are
categorized into different effect categories (e.g., Distort, Blur, Sharpen, Edge,
Artistic, Noise, Render, etc.). Thumbnails are shown in expandable categories.
The Filter Gallery offers the following key features:
• Application of individual or multiple filter effects simultaneously.
• Preview window with zoom and pan support.
• Optional Before and After views arranged as tiles or split-screen, both
horizontally and vertically.
You can apply filters via the Filter Gallery in one of two ways:
• permanently to a standard layer.
OR
on a Filter Layer (see p. 58), allowing you to protect your image layer,
as well as manage your filters at a later date.
To view the Filter Gallery:
• Click Filter Gallery on the Photo Studio toolbar.
For some effects hosted on the Effects menu, the Filter Gallery will
automatically be launched with the effect already applied.
Applying Image Effects 65
To add a filter in the Filter Gallery:
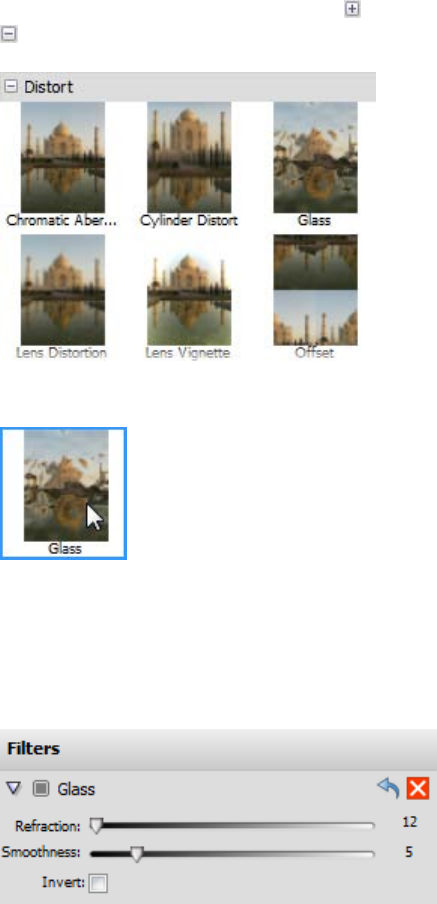
1. Expand your chosen effect category by clicking the Expand button (click
to collapse).
Click on an effect thumbnail to apply it to your image.
The applied filter is shown in a Filters stack in the lower-right corner of the
Filter Gallery. The properties of any selected effect will be displayed in the
expanded area under the effect name—you can alter and experiment with
these at any time. The filter shows on a light background to indicate
selection.
66 Applying Image Effects
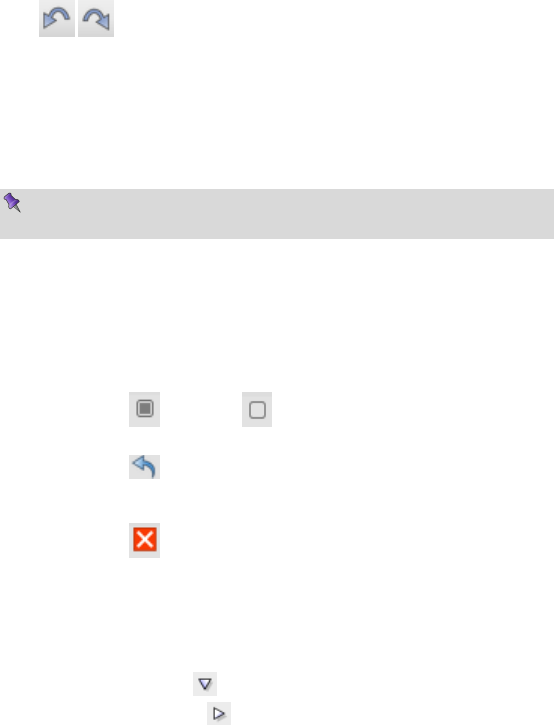
Use the Undo button to undo recent changes to the filter (or
the Redo button to re-apply the changes).
2. Adjust sliders (or enter input values) until your filter suits your
requirements. Some filters offer check boxes, drop-down lists, and
additional controls (e.g., Advanced settings). The large preview window
updates automatically as you adjust any values.
With the Replace selected option checked (default), adding a new
filter will replace any selected filter in your filter stack.
To add multiple filters:
• Uncheck Replace selected, then add one or more additional effects as
described above.
Any filter can be temporarily disabled, reset, or deleted once applied.
To
disable: Click , then click to enable again.
To reset: Click . Any changes to settings are reverted back to the
filter's defaults.
To delete: Click . The filter is removed from the stack.
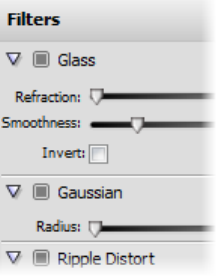
The effect's properties are expanded by default but can be collapsed to make
more of the Filters stack visible.
To collapse/expand filter properties:
• To collapse, click the button preceding the filter effect name. To
expand again, click the button.
Applying Image Effects 67
To replace a filter:
1. Ensure Replace selected is checked.
2. Select the filter you wish to replace by clicking anywhere in the filter's pane.
On selection, the selected filter shows a lighter background, e.g, Gaussian
below.
3. Select a replacement filter from an effect category. Your selected filter is
replaced in the stack with no change made to the existing stack order.
The order in which effects appear in the effect list may produce very different
results. If you’re not happy with the current order, PhotoPlus lets you drag and
drop your effects into any position in the stack. Effects are applied in the same
way that layers are applied, i.e. the most recently added filter always appears at
the bottom of the list and is applied to the picture last (after the other filters
above it).
Filters can be moved around the filter list to change the order in which they are
applied to the photo.
To reorder filters:
• Drag and drop your filter into any position in the stack. A dotted line
indicates the new position in which the entry will be placed on mouse
release.
68 Applying Image Effects
Applying 2D layer effects
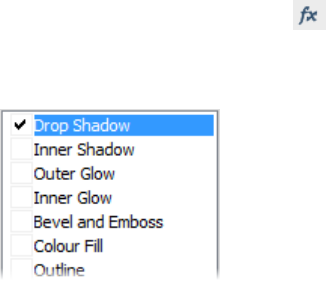
Layer effects can be applied to the contents of standard layers, text layers, or
shape layers. Standard or "2D" layer effects like shadow, glow, bevel, and emboss
are particularly well adapted to text, while 3D layer effects (covered elsewhere;
p. 70) create the impression of a textured surface.
Unlike image adjustments and Effects menu manipulations, layer effects don’t
directly change image pixels—they work like mathematical "lenses" that
transform how a layer’s bitmap appears. Since the settings are independent, you
can adjust them ad infinitum until you get the result you want!
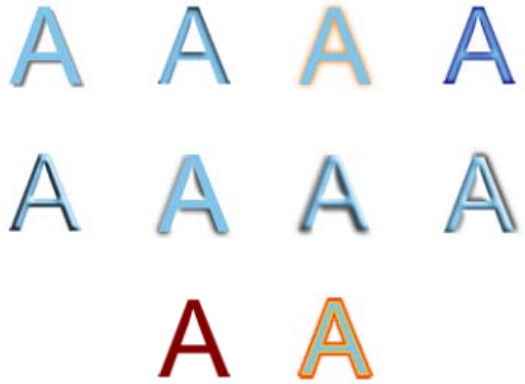
Here's an example of each effect applied to the letter "A".
Drop Shadow Inner Shadow Outer Glow Inner Glow
Inner Bevel Outer Bevel Emboss Pillow Emboss
Color Fill Outline
Applying Image Effects 69
• Drop Shadow adds a diffused shadow "behind" solid regions on a
layer.
• Inner Shadow adds a diffused shadow inside the edge of an object.
• Outer Glow adds a color border outside the edge of an object.
• Inner Glow adds a color border inside the edge of an object.
• Bevel and Emboss/Inner Bevel adds a rounded-edge effect inside an
object.
• Bevel and Emboss/Outer Bevel adds a rounded-edge effect
(resembling a drop shadow) outside an object.
• Bevel and Emboss/Emboss adds a convex rounded edge and shadow
effect to an object.
• Bevel and Emboss/Pillow Emboss adds a concave rounded edge and
shadow effect to an object.
• Color Fill lets you apply a specific color to a layer.
• Outline applies a border effect to the edge of an object. See Creating
outlines in PhotoPlus Help.
To apply a shadow, glow, bevel, or emboss effect:
1. From the Layers tab, select a layer and click Add Layer Effects.
2. In the dialog, apply an effect by checking its check box in the list at left. You
can apply multiple effects to the layer.
3. To adjust the properties of a specific effect, select its name and adjust the
dialog controls. Adjust the sliders, drop-down list, or enter specific values to
vary each effect. Options differ from one effect to another.
4. Click OK to apply the effect or Cancel to abandon changes.
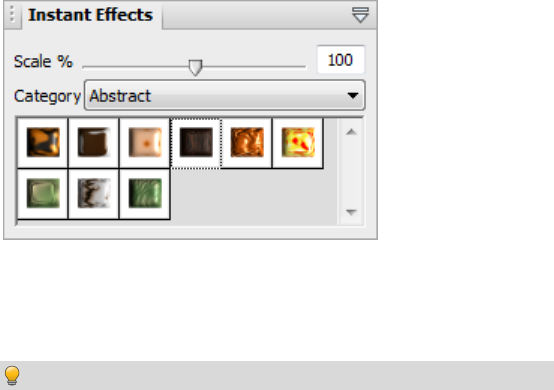
70 Applying Image Effects
Applying 3D layer effects
3D layer effects are just as easy to apply, but they’re a bit more complex than
their 2D cousins (see p. 68). Actually, there’s an easy way to get started with
them: simply display the Instant Effects tab and preview its gallery thumbnails.
In the tab you’ll see a variety of remarkable 3D surface and texture presets
grouped into wide-ranging "themed" categories (e.g., Glass Text, Abstract,
Wood, Metal). Click any thumbnail to apply it to the active layer. Assuming the
layer has some color on it to start with, you’ll see an instant result!
If hidden, make this tab visible via Window>Studio Tabs.
To apply an Instant Effect to the active layer:
• From the Instant Effects tab, select a category, then click a gallery
thumbnail.
• To make the effect appear smaller or larger in relation to the image,
drag the Scale slider or type a value in the tab.
You can apply an effect from the Instant Effects tab, edit it (using the Layer
Effects dialog) and then save it as a custom preset in a user-defined category
(you'll have to create and select the category first). To save the preset, right-click
in the tab and choose Add Item. From the dialog, you can adjust the Scale of the
effect and have your thumbnail preview stored as a Rectangle or as Text (using
the letter "A"). For either type, the thumbnail will appear in the gallery.
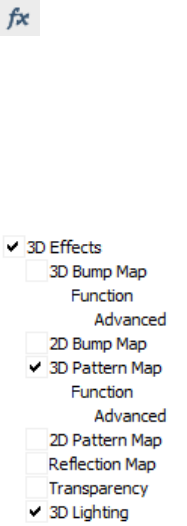
Applying Image Effects 71
If you want to have complete flexibility when creating 3D effects, you can
click the Add Layer Effects button on the Layers tab.. The dialog is shared for
both 2D and 3D effects—simply check the 3D Effects box and experiment with
the settings (enable other 3D check boxes as appropriate).
For more information about creating 3D filter effects, see PhotoPlus Help.
3D effects overview
Suppose you’ve applied a 3D layer effect preset from
the Instant Effects tab, and then you bring up the
Layer Effects dialog. On inspecting the settings used
in the preset, the first thing you’ll notice is that several
boxes may be checked.
• 3D Effects is a master switch for this group,
and its settings of Blur and Depth make a
great difference; you can click the "+" button
to unlink them for independent adjustment.
• 3D Pattern Map allows for blend mode,
opacity, depth, displacement and softening
adjustments, along with a choice of gradient
fills. This is checked depending on the type
of instant effect selected.
• 3D Lighting provides a "light source"
without which any depth information in the
effect wouldn’t be visible. The lighting
settings let you illuminate your 3D
landscape and vary its reflective properties.

72 Applying Image Effects
To apply 3D Effects:
• Click Add Layer Effects on the Layers tab and check 3D Effects
in the Layer Effects dialog. Adjust the "master control" sliders here to
vary the overall properties of any individual 3D effects you select.
• Blur specifies the amount of smoothing applied. Larger blur sizes
give the impression of broader, more gradual changes in height.
• Depth specifies how steep the changes in depth appear.
• The button is normally down, which links the two sliders so
that sharp changes in Depth are smoothed out by the Blur
parameter. To adjust the sliders independently, click the button
so it's up (not blue).
• Check a 3D effect in the 3D Effects list which reflects the 3D effect you
can achieve. Procedures for each are detailed below.
3D Reflection Map
The 3D Reflection Map effect is used to simulate mirrored surfaces by selection
of a pattern (i.e., a bitmap which possesses a shiny surface) which "wraps
around" a selected object. Patterns which simulate various realistic indoor and
outdoor environments can be adopted, with optional use of 3D lighting to
further reflect off object edges. The effect is often used in combination with the
Transparency option.
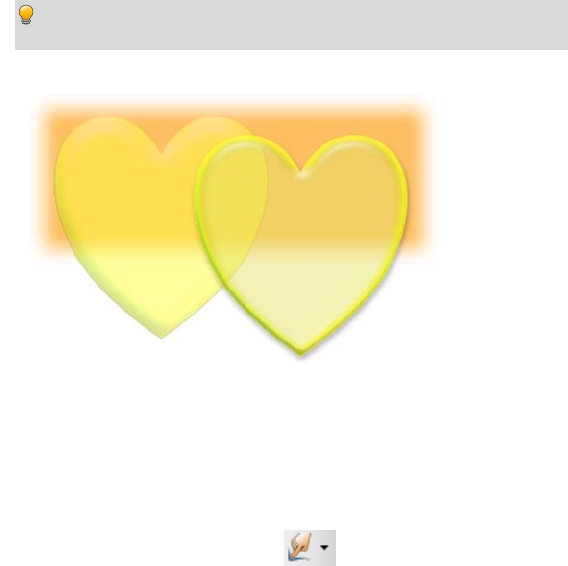
Applying Image Effects 73
Transparency
The uniform transparency of a layer and its objects (with 3D layer effects
applied) can be controlled via the Layers tab with the Opacity option (see rear
heart shape in example below). However, for more sophisticated transparency
control, transparency settings can instead be set within the Layer Effects dialog.
The effect can be used to create more realistic transparency by independently
controlling transparency on reflective (edges) and non-reflective (flat) areas of
the object (see front heart shape below).
Use this effect in conjunction with reflection maps and multiple
directional light sources for ultra-realistic glass effects.
3D Lighting + Layer
Opacity 50%
3D Lighting +
Transparency effect
Warp tool effects
The Warp Tools from the Tools toolbar's Warp Tools flyout work as a
group and act as brush-on effects rather than dialog-based filters. Most of the
tools shift pixels as the brush passes over, while the Unwarp brush undoes the
effects of the other tools. The actual amount of pixel displacement depends on
the direction or amount of brush movement, the brush tip, and the tool's
settings, selectable from the brush context toolbar.
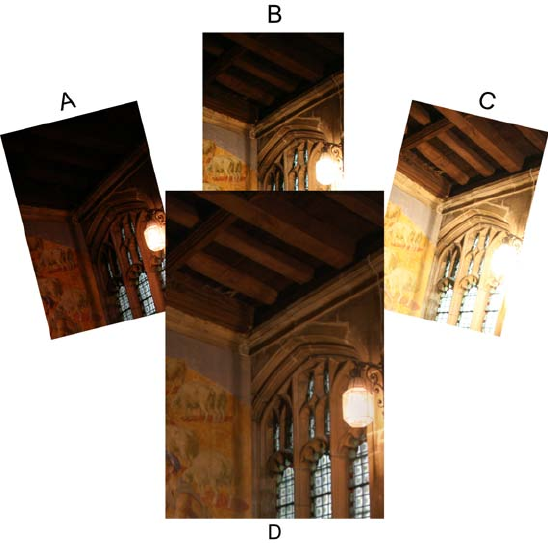
74 Applying Image Effects
Merging bracketed photos
High Dynamic Range (HDR) merge, or tone mapping, is used to combine
bracketed photos or scanned images from film, each shot taken at different
exposure levels (typically one each for highlights, midtones, and shadows) and
within seconds apart. Your camera can't capture all exposure levels in a single
shot, so by bringing together multiple photos you can expand your image's
dynamic range which would otherwise be impossible in a single shot.
Typically, scenes of high contrast such as landscapes, sunsets or indoor
environments (with strong lighting) are suited to HDR Merge.
(A)Exposure for Highlights, (B) Midtones,
(C) Shadows, (D) and the Merged output.
Applying Image Effects 75
For good results, it's important to bear the following points in mind:
• Many modern cameras offer auto-bracketing which automatically
takes several shots at different exposure levels. A two-EV spacing is
considered to be optimum for most occasions. Alternatively, shoot
with manual exposure set.
• Always shoot the same scene! Your output is based on a composite of
the same scene.
• Take as many shots as is needed to cover your required dynamic
range.
• Use a tripod for optimum camera stability. Also avoid photographing
objects affected by windy conditions (e.g., moving tree branches).
• Ensure Aperture priority is set on your camera (see your camera's
operating manual for more details).
The HDR merge is a two-stage process, firstly to select the source files (JPG or
raw) for merging, and then performing the merge itself after having adjusted
merge settings to optimize the output. The process can be carried out directly on
source files without loading them into your project in advance.
PhotoPlus lets you optionally save the merged HDR image to one of several
formats (namely OpenEXR, HDR and HD Photo), which can be opened at a
later date, saving you from having to align and merge your original images
again.
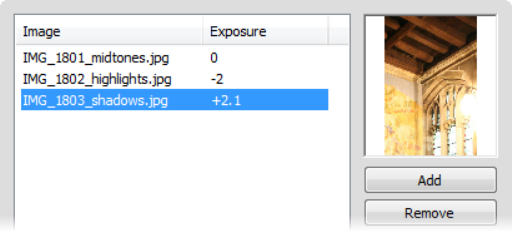
76 Applying Image Effects
To select and merge bracketed photos:
1. From the Startup Wizard, click HDR Photo Merge.
OR
Select HDR Merge from the File menu.
2. From the HDR Source Files dialog, click Add.
3. Browse to, then select multiple files from the chosen folder—use Ctrl-
click or Shift-click for selecting non-adjacent or adjacent images. Click
Open. The files listed show image name and an exposure value
equivalent to your camera's exposure setting (the values are not just
for show—they're crucial for successful HDR merging).
Click the Add button to add more photos or the Remove button to
exclude a selected photo.
For scanned images (from camera film) which won't possess EXIF-
derived Exposure values, you can click the Edit Exposure button to
add your own exposure values to entries if you've kept a record (or you
could just add +2.0, 0, and -2 then experiment with the results).
4. (Optional) Uncheck Align images if you're sure your source images are
perfectly aligned (perhaps by a third-party application). Otherwise,
PhotoPlus will automatically attempt to align each photo's corresponding
pixel data.

Applying Image Effects 77
5. (Optional) Check Infer film response curve to affect a tone curve needed
to accurately process scanned images (from camera film). Otherwise, keep
unchecked for digital camera use.
6. Click OK. The Merge HDR dialog is displayed, showing a preview of your
intermediate HDR image.
Don't worry if your initial results look less than desirable. You're only
half way towards your stunning image but you'll need to modify the
HDR image using a series of adjustments next.
To adjust your intermediate image:
1. From the HDR Merge dialog, an image preview is displayed, along with a
merge file list and merge settings. Optionally, uncheck an image from the
upper-right list to exclude it from the merge.
2. Drag the Compression slider to a new value—use your eye to judge the
best merge results, but also the supporting Histogram to ensure that the
tonal range fits into the visible graph without clipping. The option
compresses or expands the dynamic range by dragging right or left,
respectively.
3. Set a Brightness level to make the image either lighter or darker.
4. Adjust the Black Point slider right to shift the histogram's left-most edge
making all affected pixels in the shadow region turn black.
5. Reduce Local Contrast Radius to alleviate image "flatness" when
compressing the dynamic range (see Compression above).
6. Set the Temperature to give a warmer "reddish" or cooler "blueish" look;
drag to the right or left, respectively.
7. Adjust the Saturation value to reduce or boost the color in your image.
8. Check Output 16-bits per channel if you're looking for the highest level
of detail in your merged output.
9. Click OK.

78 Applying Image Effects
10. From the next dialog, you'll be asked if you want to save the intermediate
HDR Image or just continue as an untitled project.
• Click Yes to preserve the HDR image. This saves having to select,
align, and merge images again, but you'll still need to reapply any
adjustments previously made. Select a file location, file format,
name for your file, then click Save. The file format, OpenEXR
(.exr), Radiance (.hdr), or HD Photo (.hdp), can be chosen from
the drop-down list.
OR
• Click No if you don't need to preserve the HDR image (you'll
have to select, align, and merge again). Your merge results will be
the basis for an Untitled project.
If you've created an intermediate HDR image, it can be opened as
for any other file (see p. 12).

Manipulating
Images
6
80 Manipulating Images
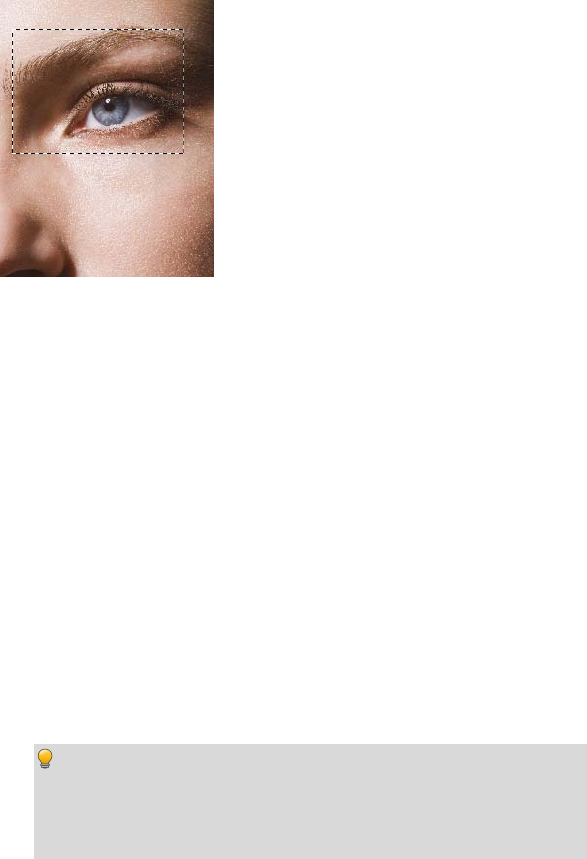
Manipulating Images 81
Making a selection
In any photo editing program, the selection
tools and techniques are as significant as any
of the basic brush tools or commands. The
basic principle is simple: quite often you'll
want to perform an operation on just a portion
of the image. To do this you must define an
active selection area.
The wide range of selection options in PhotoPlus lets you:
• Define just about any selection shape, using various drawing and
painting techniques.
• Modify the extent or properties of the selection (see p. 89)
• Carry out various manipulations on the selected pixels, including cut,
copy, paste, rotate, adjust colors, apply special effects, etc. (see p. 94)
Selection basics
Although the techniques for using the various selection methods differ, the end
result is always the same: a portion of the active layer has been "roped off" from
the rest of the image. The boundary is visible as a broken line or marquee
around the selected region (see above).
Whenever there's a selection, certain tools and commands operate only on the
pixels inside the selection—as opposed to a condition where nothing is selected,
in which case those functions generally affect the entire active layer.
You may occasionally (especially if the marquee is hidden) find
yourself using a tool or command that seems to have no effect... it's
probably because there's still a selection somewhere, and you're
trying to work outside the selection. In this case, just cancel the
selection.
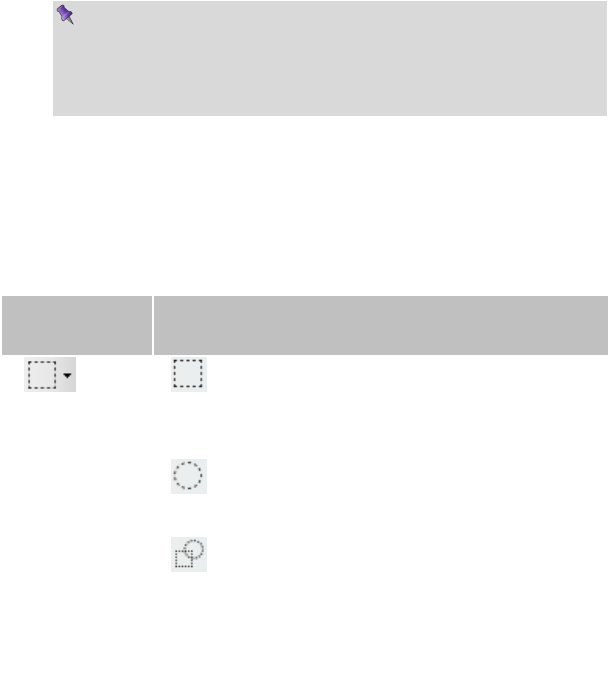
82 Manipulating Images
To cancel the selection (select nothing):
• From the Select menu, click Deselect.
The opposite of selecting nothing is selecting everything...
To select the entire active layer:
• Choose Select All from the Select menu.
For partial selection of opaque pixels, you can Ctrl-click the layer thumbnail (in
Layers tab).
If your image has multiple layers, and you switch to another layer,
the selection doesn't stay on the previous layer—it follows you to
the new active layer. This makes sense when you realize that the
selection doesn't actually include image content—like an outline
map, it just describes a region with boundaries.
Selection tool options
PhotoPlus offers a very wide range of other selection methods, and a variety of
commands for modifying the extent or properties of the selected pixels—all
available from the Tools toolbar. Note that the selection tools work on
Background and standard layers, but not on text layers or shape layers.
Available
from:
Tools
Selection
Tools flyout
Rectangle Selection Tool—drag out a rectangular
selection area of your chosen size (use the Ctrl key to
constrain to a Square area).
Ellipse Selection Tool—drag out an ellipse selection
area (use Ctrl key to constrain to a circle).
QuickShape Selection Tools flyout—provides
different variable shapes, including pie, star, arrow, heart,
spiral, wave, and so on. The shapes can be further
"morphed" into other custom QuickShapes by dragging
node handles around the QuickShape.
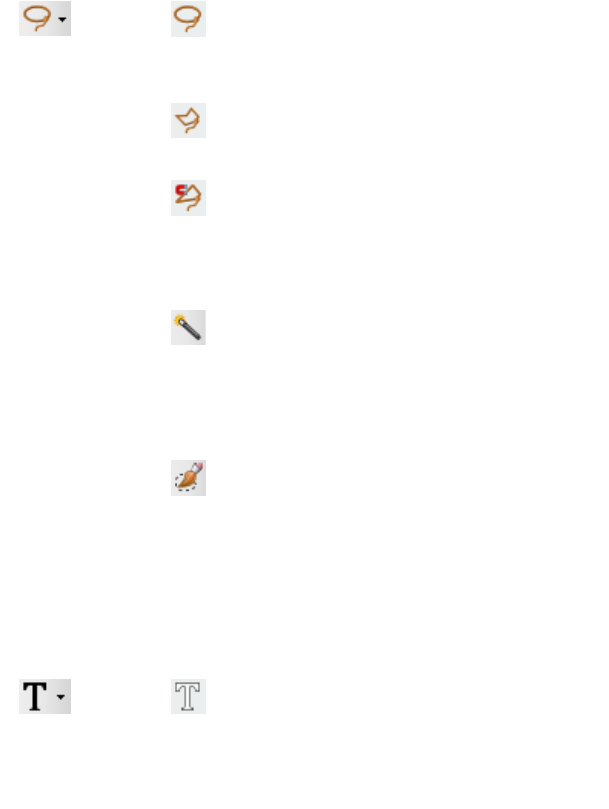
Manipulating Images 83
Lasso
Tools flyout
Freehand Selection Tool—lets you draw a freehand
(irregular) line which is closed automatically to create an
irregularly shaped selection area.
Polygon Selection Tool—lets you draw a series of
straight-line segments (double-click to close the polygon).
Magnetic Selection Tool—lets you trace around an
object edge creating a selection line that snaps to the edge
as you drag.
directly from
toolbar Magic Wand Tool—lets you select a region based
on the color similarity of adjacent pixels—simply click a
starting pixel then set a Tolerance from the context
toolbar. It works much like the fill tool, but the result is a
selected region rather than a region flooded with a color.
Smart Selection Brush—lets you create your
selection as a series of brush strokes.
from the Select
menu
Paint to Select mode—lets you use standard painting or
editing tools as selection tools.
Text
Tools flyout
Text Selection Tool—lets you create a selection in
the form of text. Click with the tool to display the Text
cursor. Type your text, format as needed, and click OK.
(See Creating and editing text on p. 150.)
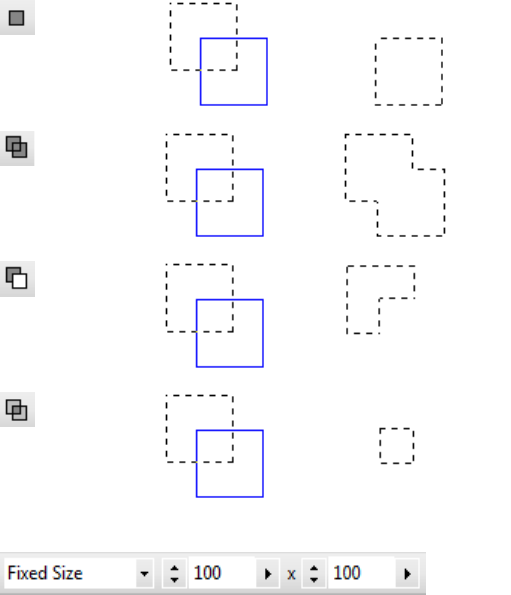
84 Manipulating Images
For any selection tool, the context toolbar includes combination buttons (New*,
Add, Subtract, and Intersect*) that determine the effect of each new selection
operation. For example, starting with a square selection (created with the New
button), here's what a second partly overlaid square (shown with a solid line)
might produce with each setting:
New*
=
Add
=
Subtract
=
Intersect*
=
*Not available for Smart Selection Brush
For Rectangle and Ellipse Selection tools, the context toolbar additionally lets
you set a Fixed Size or Fixed Aspect, or number of Rows or Columns (Rectangle
Selection Tool only) in advance of creating your selection—great if you have a
clear idea of the selection area required!
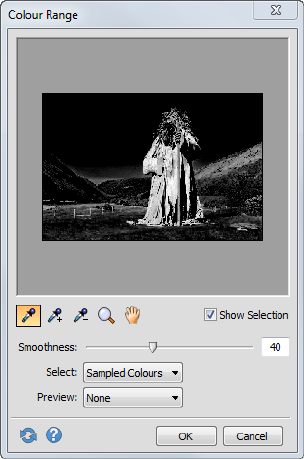
Manipulating Images 85
Selecting layer opacity/transparency
New layers are transparent (they have an alpha channel) , but once you've placed
pixels on the layer you'll be able to select between the layer's pixels (i.e., their
opacity) and remaining transparency.
To create a selection from a layer's opacity/transparency:
• For selection of Opacity:
In the Layers tab, Ctrl-click on the layer’s image thumbnail.
• For selection of Transparency:
As above, but additionally select Invert from the Select menu.
Color Range
As an intelligent color selection method, i.e. where selection is based on
"tagging" a specific range of colors or tones in the image, choose Color Range
from the Select menu.
86 Manipulating Images
To select a color range:
1. Choose Color Range from the Select menu. The Color Range dialog
opens with a selection preview window.
2. To make an initial selection:
• To tag a particular color or tone group, such as "Reds" or
"Midtones," choose the group’s name from the Select drop-down
list.
OR
Click Color Picker to sample a chosen pixel color from the
image in your workspace. With this method, the Tolerance slider
lets you include a wider or narrower range of colors in the
selection, based on the chosen color.
Once you’ve made an initial selection, you can use the Add Color
and Subtract Color buttons to include/exclude further colors in the selection by
single-click or by dragging across the image to tag/untag a color range.
Alternatively, for initial selection, drag across the image to select ranges.
With Add/Subtract Color tools initially selected, you can also drag
across a section of the image.
Meanwhile, the dialog provides visual feedback.
1. If Show Selection is checked, the grayscale preview selection window
shows tagged values as brighter, with untagged pixels darker. To customize
what’s displayed in the workspace, choose an option from the Preview list:
"None" shows the original image, "White Matte" shows tagged pixels
through a white background, and so on.
2. Click OK to confirm the selection, or Cancel to abandon changes.
Restore default settings reverts back to original dialog
settings.
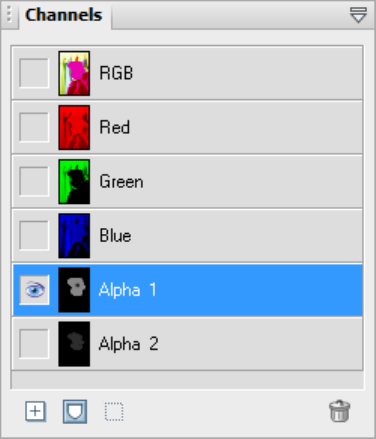
Manipulating Images 87
Storing selections
You can store selections (i.e., just the marqueed region and per-pixel
selectedness data) as part of either the current image or any open image file, and
load a stored selection at any time. It's often useful to be able to "grab" the same
region of an image at different phases of working on it. And, for repetitive tasks
(preparing web buttons, for example) on different but graphically similar files,
by storing a selection you can reuse it rather than having to recreate it for each
file.
Selections are created and stored exclusively as alpha channels in the Channels
tab; Once stored, they can be retrieved from the tab at any time.
As each alpha channel behaves like a mask (p. 27) you can paint on the alpha
channel at different grayscale levels for different levels of "selectedness". The
White or light portions of the mask reveal layer pixels (make them more
opaque). Black or dark portions hide layer pixels (making them more
transparent).
88 Manipulating Images
To store a selection:
1. Make a selection on your image.
2. In the Channels tab, select Create Channel From Selection. The
channel appears with a default name (rename via double-click if needed).
Use New Channel on the Channels tab to create an empty
channel on which you can design (e.g., paint) in grayscale for
different levels of "selectedness".
To load a selection:
• In the Channels tab, select Create Selection From Channel.
To delete a stored selection:
• In the Channels tab, select Delete Channel.
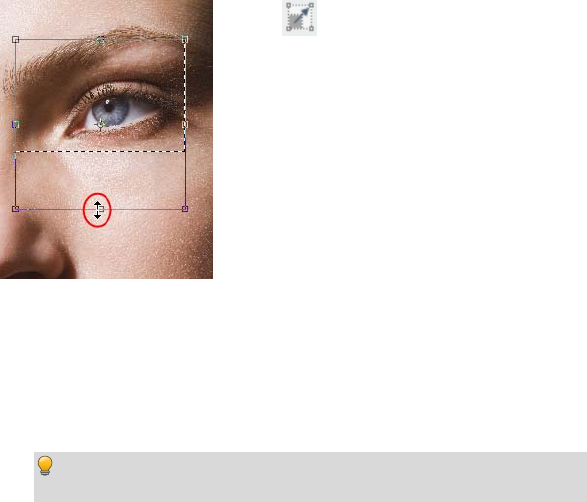
Manipulating Images 89
Modifying a selection
Once you've used a selection tool to select a region on the active layer, you can
carry out a number of additional steps to fine-tune the selection before you
actually apply an effect or manipulation to the selected pixels.
Transforming the selection
The Selection Deform Tool on the
Tools toolbar's Deform Tools flyout lets you
transform, scale or rotate any already drawn
selection area. With the tool enabled, square
nodes on the mid-points and corners of any
selected area can be dragged (opposite).
Look for the cursor changing between resize
and rotate modes when hovering over a node.
Use in conjunction with the Ctrl key to transform the selection area without
constraint, creating a skewed transform (drag nodes as appropriate). The Alt
key resizes the area about its center, while the Shift key maintains the area’s
aspect ratio. It’s also possible to move the small center of rotation "handle" in the
center of the transform to produce an arc rotational movement rather than
rotating around the area’s center (by default).
Holding down the Shift key whilst rotating will cause a movement
in 15 degree intervals.
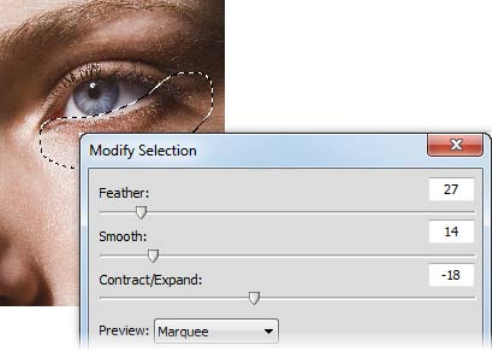
90 Manipulating Images
Making the selection larger or smaller
If the selection you've made isn't quite the right shape, or doesn't quite include
all the necessary pixels (or perhaps includes a few too many), you can continue
to use the selection tools to add to, or subtract from, the selected region.
To add or subtract to/from the existing selection with a selection tool:
• Select the tool and drag while holding down the Shift or Alt key,
respectively. The newly selected pixels don't have to adjoin the current
selection—it's possible to select two or more separate regions on the
active layer.
Modifying the selection
Once you've made a selection, several modify selection operations can be used in
combination to alter the selection area. Feather, smooth, contract, and expand
operations are possible from a single Modify Selection dialog, along with the
popular Grow, Similar, and Invert available separately. Combining the
operations in a dialog improves efficiency, and lets you preview your modified
selection directly on the image as you make changes. Several preview methods
are possible.
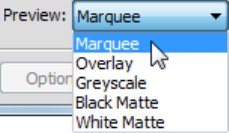
Manipulating Images 91
To modify a current selection:
1. From any Selection context toolbar, select Modify Selection.
2. From the Modify Selection dialog, you can enter a specific pixel value for
the type of operation you require.
• Feather: Use to apply feathering to the edge of an existing
selection (but before applying any editing changes). Enter the
width (in pixels) of the transition area. A higher value produces a
wider, more gradual fade-out. See Soft-edged and hard-edged
selections on p. 93.
• Smooth: If the selected region has ragged edges or discontinuous
regions (for example, if you've just used the Magic Wand Tool),
use the option to control the extent of smoothing.
• Contract/Expand: Move the slider left to contract (shrink) the
borders of the selection, or right to extend its borders.
3. Select a preview method from the Preview drop-down list—choose to
preview as an Overlay, in Grayscale, or use different Mattes.
92 Manipulating Images
The Modify item on the Select menu (or right-click on selection) provides a
submenu with the above options, along with other intelligent selection options:
• Grow and Similar both expand the selection by seeking out pixels
close (in color terms) to those in the current selection. Grow only adds
pixels adjacent to the current selection, while Similar extends the
selection to any similar pixels in the active layer.
Both options use the tolerance setting entered for the Magic Wand
Tool on the context toolbar. As the tolerance increases, a larger region
is selected. Typically when using these tools, you'll start by selecting a
very small region (the particular color you want to "find" in the rest of
the image).
• Choose Border to create a new selection as a "frame" of a specified
pixel width around the current selection.
• The Invert option selects the portion of the active layer outside the
current selection. Unselected pixels become selected, and vice versa.
Manipulating Images 93
Soft-edged and hard-edged selections
Anti-aliasing and feathering are different ways of controlling what happens at
the edges of a selection. Both produce softer edges that result in smoother
blending of elements that are being combined in the image. You can control
either option for the Standard and QuickShape Selection tools, using the Feather
input box (or slider) and Anti-alias check box on the context toolbar.
• Anti-aliasing produces visibly smooth edges by making the selection's
edge pixels semi-transparent. (As a layer option, it's not available on
the Background layer, which doesn't support transparency.)
• If an anti-aliased selection (for example, one pasted from another
image) includes partially opaque white or black edge pixels, you can
use Matting options on the Layers menu to remove these pixels from
the edge region, yielding a smoother blend between the selection and
the image content below. (Fully opaque edge pixels are not affected.)
• Feathering reduces the sharpness of a selection's edges, not by varying
transparency, but by partially selecting edge pixels. If you lay down
paint on a feathered selection, the paint will actually be less intense
around the edges.
• Threshold converts a feathered, soft-edged selection into a hard-edged
selection (use Select>Modify>Threshold). As with feathering, you
won't see an immediate effect on the image, but painting and other
editing operations will work differently inside the selection.
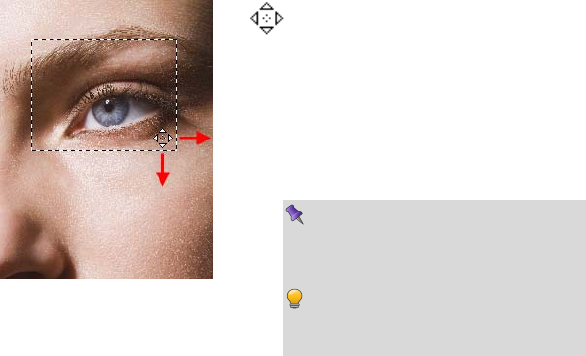
94 Manipulating Images
Manipulating a selection
Moving the selection marquee
Sometimes, you need to adjust the
position of the marquee without affecting the
underlying pixels. Any time you're using one
of the selection tools, the cursor over a
selected region changes to the Move Marquee
cursor, which lets you drag the marquee
outline to reposition it.
You’re only moving the selection
outline—not the image content
inside it.
You can also use the keyboard
arrows to "nudge" the selection
marquee.
Once you have selected your chosen pixels, the operations which can be
performed include moving, cutting, copying, duplicating, pasting and deleting.
You use the Move Tool to drag the selection plus its image content. (See
Modifying a selection on p. 89).
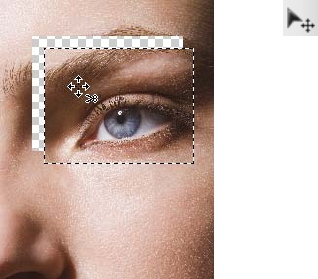
Manipulating Images 95
Using the Move Tool
The Move Tool is for pushing actual
pixels around. With it, you can drag the
content of a selection from one place to
another, rather than just moving the selection
outline. To use it, simply click on the
selection and drag to the new location. The
selected part of the image moves also.
• If nothing is selected, dragging with the Move Tool moves the entire
active layer. (Or, if the Move Tool's Automatically select layer
property is selected on its context toolbar, the tool moves the first
visible item's layer beneath the move cursor when you click to move.)
• When the Move Tool is chosen, you can also use the keyboard arrows
to "nudge" the selection or active layer.
• The "hole" left behind when the image content is moved exposes the
current background color (on the Background layer), or transparency
(see above; on standard layers), shown with a "checkerboard" pattern.
• To duplicate the contents of the selection on the active layer, press the
Alt key and click, then drag with the Move Tool.
• As a shortcut if you're working with any one of the selection tools, you
can press the Ctrl key to switch temporarily to the Move Tool. Press
Ctrl+Alt to duplicate. Release the key(s) to revert to the selection tool.
96 Manipulating Images
Cut/Copy/Delete/Paste
Cut and copy operations on selections involving the Clipboard work just as in
other Windows programs.
• To copy pixels in the selected region, press Ctrl+C or click the
Copy button on the Standard toolbar. (You can also choose Copy
from the Edit menu.)
• To cut the selected pixels, press Ctrl+X or choose Cut from the Edit
menu.
• To delete the selected pixels, press the Delete key or choose Clear
from the Edit menu.
Cut or deleted pixels expose the current background color (on the
Background layer) or transparency (on standard layers). If you want
to create transparency on the Background layer, first "promote" it to
a standard layer by right-clicking its name on the Layers tab and
choosing Promote to Layer.
• If nothing is selected, a cut or copy operation affects the whole active
layer, as if Select All were in effect.

Manipulating Images 97
When pasting from the Clipboard, PhotoPlus offers several options.
• To paste as a new image in an untitled window, press Ctrl+V or
click the Paste as New image button on the Standard toolbar. (Or
select from the Edit>Paste menu.)
• To paste as a new layer above the active layer, press Ctrl+L or choose
Paste>As New Layer from the Edit menu.
• To paste into the current selection, press Shift+Ctrl+L or choose
Paste> Into Selection from the Edit menu. The Clipboard contents
appear centered in the currently selected region. (This choice is grayed
out if there's no selection, or if the active layer is a text layer.) This
option is useful if you’re pasting from one layer to another. Because
the selection marquee "follows" you to the new layer, you can use it to
keep the pasted contents in registration with the previous layer.
• To duplicate part of the active layer on the same layer, press the Alt
key and click, then drag with the Move Tool. (Or if you're working
with a selection tool, press Ctrl+Alt and drag to duplicate.)
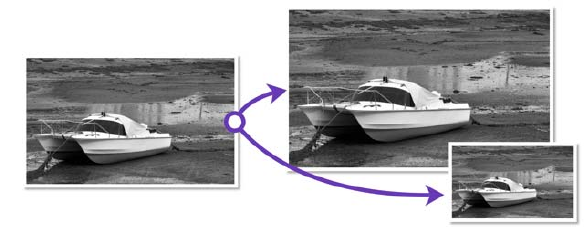
98 Manipulating Images
Changing image and canvas size
You probably know that image dimensions are given in pixels ("dots of paint"
that comprise a screen image). In PhotoPlus there are options to change the
image size and to change the canvas size, but what's the difference and how do
you perform each resize?
Changing image size
Changing the image size means scaling the whole image (or just a selected
region) up or down. Resizing is actually a kind of distortion because the image
content is being stretched or squashed.
You will change the image size when:
• enlarging the image for print.
• reducing the image for on-screen display.
• reducing the image to create a thumbnail for a website.
The Image Size dialog lets you specify a new size for the whole image, in terms of
its screen dimensions and/or printed dimensions.
Manipulating Images 99
To resize the image for on-screen display:
1. Choose Image Size from the Image menu.
2. Select the Resize layers option to link the Pixel Size (screen) settings to the
Print Size or Resolution settings.
3. To retain the current image proportions, check Maintain aspect ratio.
Uncheck the box to alter the dimensions independently.
4. Select a preferred scale (either "Pixels" or "Percent") in the drop-down list.
5. Select a resampling method. As a rule, use Nearest Pixel for hard-edge
images, Bilinear Interpolation when shrinking photos, Bicubic
Interpolation when enlarging photos, and Lanczos3 Window when best
quality results are expected.
6. Enter new Width, Height or Resolution values.
7. Click OK.
To resize the image for print:
1. Choose Image Size from the Image menu.
2. Uncheck Resize layers.
3. To retain the current image proportions, check Maintain aspect ratio.
Uncheck the box to alter the dimensions independently.
4. Select your preferred units of measurement and resolution. The pixel size
will automatically alter with print size adjustment.
5. Click OK.
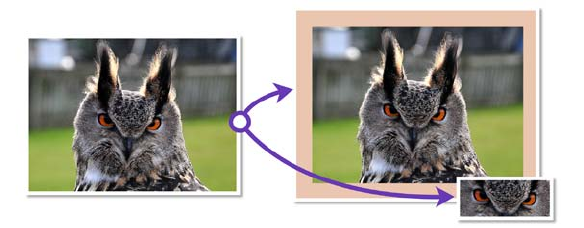
100 Manipulating Images
Changing canvas size
Changing the canvas size just involves adding or taking away pixels around the
edges of the image. It's like adding to the neutral border around a mounted
photo, or taking a pair of scissors and cropping the photo to a smaller size. In
either case, the remaining image pixels are undisturbed so there's no distortion.
You will change the canvas size when:
• you want to add a border to your image (without changing the size of
the image itself).
• you crop an image.
There are several ways of changing the image's native canvas size. You can use
the Crop Tool (see Cropping an image on p. 104) or the Crop to
Selection (p. 108) command. For more accurate canvas resizing (both
enlargements or reductions), the Canvas Size dialog that lets you specify where
pixels should be added or subtracted.

Manipulating Images 101
To change canvas size:
1. Choose Canvas Size from the Image menu.
2. Enter New Width and/or New Height values (the current values are also
shown for comparison). Alternatively, select the Relative check box to
enter the number of units you want to add to the existing width and height
values—for example, 5 pixels, 1 cm, 100 points, 10 percent, and so on.
3. In the Anchor box, click to position the image thumbnail with respect to
edges where pixels should be added or subtracted. For example, if you want
to extend the canvas from all sides of the image, click the center anchor
point.
4. Click OK.
If the canvas size is increased, the new canvas area is filled (on the
Background layer) with the current background color and (on
standard layers) with transparency.

102 Manipulating Images
Straightening photos
As an image adjustment, the Straighten Tool can be used to align a crooked
image back to horizontal (e.g., restoring proper horizontal alignment in a
scanned image that wasn't aligned correctly on the scanner). Use the tool to trace
a new horizon against a line in the image—the image automatically orients itself
to the drawn horizon.
Before
(horizon line drawn by dragging)
After
You can straighten using one of two methods: As a separate tool used directly on
your image (next page) (destructive) or via the PhotoFix (non-destructive)
studio environment (see p. 46).
Manipulating Images 103
To straighten (via Straighten Tool):
1. On the Tools Toolbar, expand the Crop Tools flyout and
click the Straighten Tool.
2. On the context toolbar, choose an option from the Canvas drop-down list.
This lets you decide how your straightened image will be displayed:
• Crop - Crops and adjusts the straightened image so that it
displays on the largest possible canvas size, without displaying
any border.
• Expand to Fit - Increases the canvas size to display the entire
straightened image. The border area is filled with the current
background color.
• Original Size - Displays the straightened image within the
original canvas dimensions. The border area is filled with the
current background color.
On the image that needs straightening, look for a straight line on
the image to which you can set the new horizon (e.g., the divide
between the land and sea above).
3. (Optional) Uncheck Rotate All Layers to restrict the operation to the
active layer only. Otherwise all layers are rotated.
4. Using the Straighten cursor, drag a horizon from one end of the image's line
to the other (the length of the horizon is not important) then release. The
image orients itself to the new line.
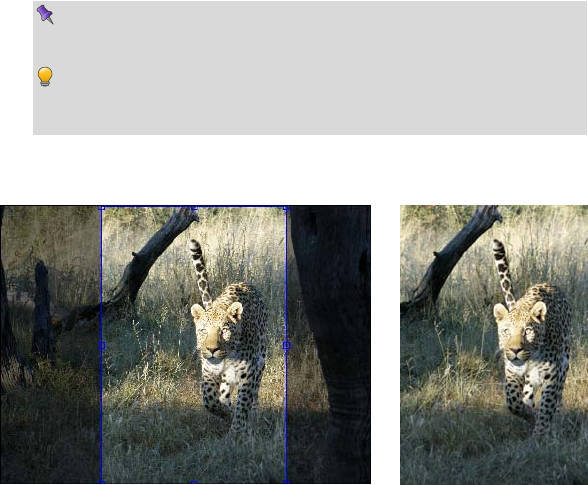
104 Manipulating Images
Cropping an image
Cropping is the electronic equivalent of taking a pair of scissors to a photograph,
except of course with a pair of scissors there is no second chance! Cropping
deletes all of the pixels outside the crop selection area, and then resizes the image
canvas so that only the area inside the crop selection remains. Use it to focus on
an area of interest—either for practical reasons or to improve photo
composition.
For more on why you may wish to crop, or for inspiration, see
Importance of cropping in PhotoPlus Help.
You can crop larger areas when photos are shot at a high resolution.
Keep this in mind before taking photos and make sure your camera
is set to its highest resolution and image quality.
Using the Crop Tool
Before After
(Rectangular Crop)
PhotoPlus allows you to crop unconstrained, or to a standard or custom print
size.
Manipulating Images 105
To crop unconstrained:
1. From the Tools toolbar's Crop Tools flyout, select the Crop
Tool. Ensure the Unconstrained option is set in the context toolbar's first
drop-down list.
2. Drag out a rectangle to create an unconstrained rectangle, then fine-tune
the areas dimensions if needed by dragging the edges.
You can constrain the crop area to a square, by holding down the
Ctrl key while dragging.
3. To crop to the designated size, double-click inside the crop area.
The Shading check box and Opacity option on the context toolbar sets the
shade color and transparency of the unwanted region outside the rectangle,
respectively. Uncheck Shading to view only the rectangle, with no shading and
full transparency.
Cropping with the Crop Tool affects all image layers. Everything
outside the designated region is eliminated. If there's a marquee-
based selection, it is ignored and deselected during cropping.

106 Manipulating Images
To crop to a specific print size or resolution:
1. Select the Crop Tool from the Tools toolbar.
2. Then either:
• For print sizes, choose a pre-defined print size (expressed in
inches or centimeters) from the first drop-down list in the
context toolbar. Both portrait and landscape crop regions can be
selected—e.g., 4 x 6 in for portrait, 6 x 4 in for landscape).
OR
• If you need to set a custom size, enter values into the Height and
Width drop-down lists, choosing inches or centimeters as
measurement units in advance—note that the print size changes
to "Custom" after entering new values. The Print Size resolution
alters automatically while honoring your print Width and Height.
3. Drag out your crop area to create your constrained rectangle or square (if
Custom).
4. Double-click the crop area to crop to the designated size.
By default, the Crop Tool in PhotoPlus is "non-destructive", as the context
toolbar's Destructive option is unchecked. This means that at any point, you can
remove or adjust the original crop applied to a photo (provided the project was
saved as an SPP—see Saving a file on p. 15).
For information on destructive, permanent cropping, see p. 108.
To undo a non-destructive crop:
• From the Image menu, click Reveal All.
The Reveal All command is not available if destructive crop mode
or crop to selection has been used (see p. 108).
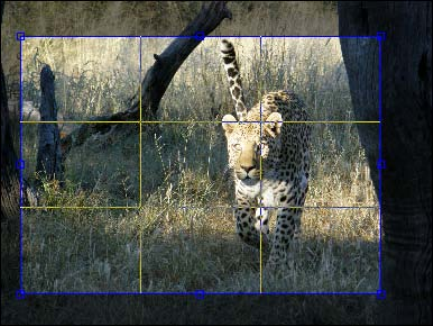
Manipulating Images 107
Using rule of thirds
Use the Thirds grid check box on the context toolbar for improving photo
composition. A 3 x 3 rectangular grid with equally spaced lines (two vertically,
two horizontally) is superimposed on top of your photo when the check box is
selected.
Moving and resizing the grid allows the main subject of your photo to be offset
and balanced against a foreground or background feature within the photo.
Position a main item of interest in the photo where any two lines intersect
within the crop grid (four intersections are possible). This is known as the "rule
of thirds" which will help you find the most balanced composition where your
eyes are drawn to the main subject (for more information, see Rule of Thirds in
PhotoPlus Help).
Double-click to crop the photo to the outer grid dimensions.
108 Manipulating Images
Destructive (or permanent) cropping
Destructive (or permanent) cropping can be applied to any image by selecting
the Destructive option on the Crop Tool's context toolbar before applying the
crop.
Applying a permanent crop to your photo will reduce the file size of
your project.
Cropping in destructive mode permanently discards the pixels
outside of the crop area. If your opened photo is cropped and you
then click Save, it will be permanently altered. It's recommended to
save a copy of your photo first and apply the crop to the copy.
Cropping to a selection
You can also crop an image to any
selection area, no matter what shape, as
defined with one of the selection tools.
If the Rectangle or Ellipse Selection Tool
is used, you can make your selection a
Fixed Size, defined in pixels, from the
tool's context toolbar. This crop to pixel
operation is heavily used when creating
precisely dimensioned web graphics or
specific ebook cover dimensions.
Alternatively you can crop to shape (above) by using one of a range of shaped
selections using the QuickShape Selection Tool.
To crop the image to the selection:
• Choose Crop to Selection from the Image menu.
If the selection region is non-rectangular, the left-over surrounding region will
be either transparent (on a standard layer) or the current background color (e.g.,
white).
Cropping to the selection affects all image layers. Everything
outside the selected region is eliminated.
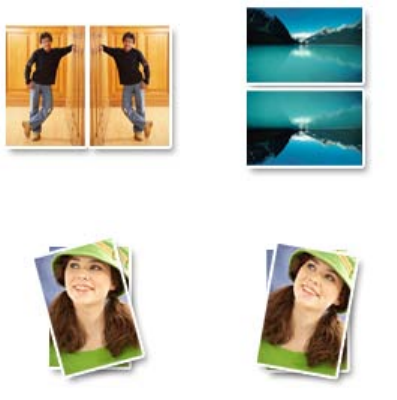
Manipulating Images 109
Flipping and rotating
Flipping and rotating are standard manipulations that you can carry out on the
whole image, the active layer, a path, or just on a selection. Flips are used to
change the direction of a subject's gaze, fix composition, and so on, whereas
rotation is an orientation tool for general purpose use.
Flip Horizontal Flip Vertical
Rotate
15° counter-clockwise
Rotate
10° clockwise
To flip:
• Choose either Flip Horizontally or Flip Vertically from the Image
menu, then select Image, Layer, Selection or Path from the submenu.
To rotate:
1. Choose Rotate from the Image menu.
2. From the flyout menu, select an option based on the object (Image, Layer,
or Selection), rotation angle (90º or 180º), and the direction (Clockwise or
Counter-clockwise) required.
3. You can also select Custom, to display a Rotate dialog, from which you
can do all of the above but instead set your own custom angle, even down to
fractional degrees.
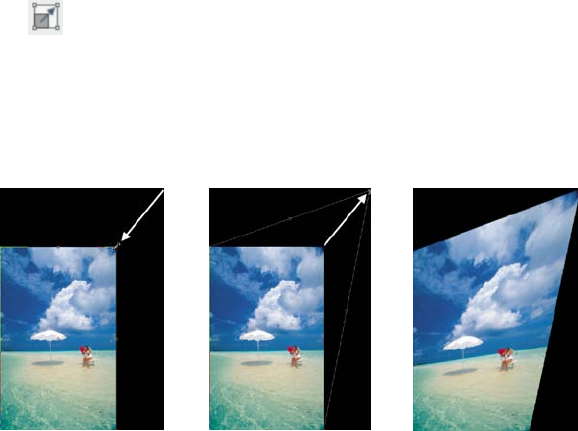
110 Manipulating Images
Deforming
The Deform Tool (Tools toolbar) lets you move, scale, rotate, or skew a
selection or layer. Start by making a selection if desired, then choose the Deform
Tool. For either selection or layer, a rectangle appears with handles at its corners
and edges, and a fixed point (initially in the center of the region). If there's no
selection, the rectangle includes the whole active layer.
For example, a layer can be deformed using scale and skew operations.
Scale down layer
contents from top-right
corner of rectangle;
revealing the
background color.
Skew from top-right
corner handle by
dragging with the Ctrl
key pressed.
The layer contents are
skewed for artistic
effect.
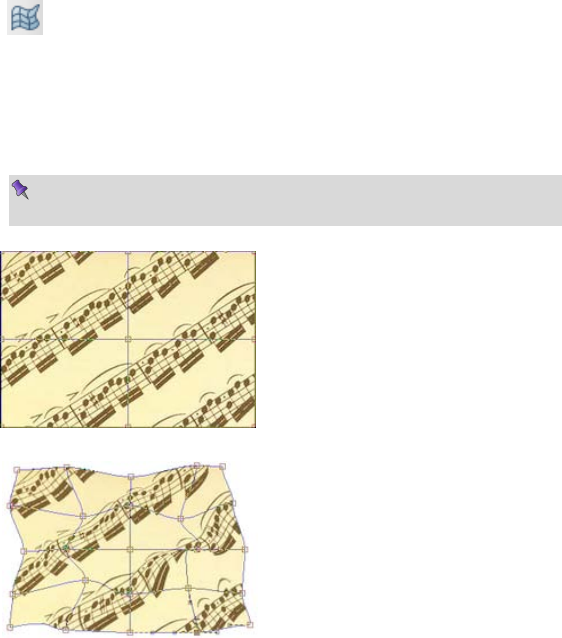
Manipulating Images 111
Mesh warping
The Mesh Warp Tool (Tools toolbar) works like the Deform Tool outfitted
with complex curves. It lets you define a flexible grid of nodes and lines that you
can drag to distort an image, or part of an image (or layer). You can edit the
mesh to vary its curvature, and even custom-design a mesh to match a particular
image's geometry—for example, curves that follow facial contours—for more
precise control of the warp effect.
The Mesh Warp Tool works on Background and standard layers, but
not on text layers or shape layers.
When you first select the tool, a
simple rectangular mesh appears
over the image, with nine nodes: one
at each corner, one at the center, and
one at the midpoint of each edge.
Straight lines connect adjacent
nodes. A context toolbar also appears
to support the Mesh Warp Tool.
The straight line segments are
actually bendable curves. When you
alter the contours of the mesh and
distort the initial rectangular grid,
the underlying image deforms
accordingly. To change the mesh,
you simply move nodes, node
attractor handles, or connecting
lines; add or subtract nodes as
needed; and/or edit nodes to change
the curvature of adjoining lines.

112 Manipulating Images
To hide the mesh for a better preview of the image:
• Click the Hide/Show Mesh button on the Mesh context toolbar.
Click again to reveal the mesh for editing.
The Deform Mesh option makes it easy to move, scale, skew, or rotate a mesh
region about a fixed point; a region is the area enclosed by multiple nodes. It
works just like the standard Deform Tool (described on p. 110) but on multiple
nodes instead of individual ones.
To deform the mesh systematically:
1. Shift-click or drag a marquee to select multiple nodes.
2. Click the Deform Mesh button on the Mesh Warp Tool's context
toolbar. A selection rectangle appears around the designated nodes (you
may need to zoom in to see this), with a fixed point in the center and
handles at its corners, sides, and center.
• To deform the mesh region, drag from any corner or midpoint
handle.
• To rotate the mesh region, drag from just outside any corner
handle.
• To move the fixed point, move the cursor over the fixed point
symbol until the cursor changes, then drag (this then lets you
perform arc rotations). To move the entire region, drag from
elsewhere within the region.
• Watch the Hintline for details on many key-assisted options such
as skew, squash/stretch, and perspective effects. In this respect,
the tool works almost exactly like the regular Deform Tool (see
p. 110).
3. Click the button again to return to standard mesh warping.
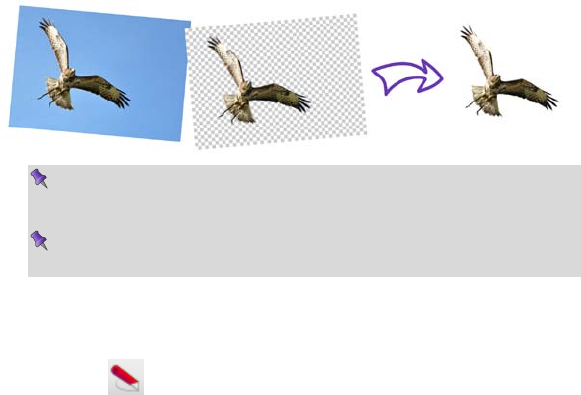
Manipulating Images 113
Using Cutout Studio
Cutout Studio offers a powerful integrated solution for cutting out part of an
image on an active Background or standard layer. In doing so, you can separate
subjects of interest from their backgrounds, either by retaining the subject of
interest (usually people, objects, etc.) or removing a simple uniform background
(e.g., sky, studio backdrop). In both instances, the resulting "cutout" creates an
eye-catching look for your image, and lets you present cutouts layer-by-layer—
great for simulating subject/background combinations and artistic collages.
The latter background removal method is illustrated in the following multi-
image example.
A checkerboard on the second image's background upon preview is
used to indicate areas to be discarded.
Cutout Studio works on Background and standard layers, but not on
text layers or shape layers.
To launch Cutout Studio:
1. Select an image to be cut out.
2. Select Cutout Studio from the Photo Studio toolbar.
OR
Select Cutout Studio from the Edit menu.
Cutout Studio is launched.
114 Manipulating Images
Selecting areas to keep or discard
A pair of brushes for keeping and discarding is used to "paint" areas on your
active layer. The tools are called Keep Brush and Discard Brush, and are either
used independently or, more typically, in combination with each other. When
using either tool, the brush paints an area contained by an outline which is
considered to be retained or discarded (depending on brush type). A
configurable number of pixels adjacent to the outline area are blended.
To select areas for keeping/discarding:
1. In Cutout Studio, click either Keep Brush Tool or Discard
Brush Tool from the left of the Studio workspace.
2. (Optional) Pick a Brush size suitable for the area to be worked on.
3. (Optional) Set a Grow tolerance value to automatically expand the
selected area under the cursor (by detecting colors similar to those within
the current selection). The greater the value the more the selected area will
grow.
4. Using the circular cursor, click and drag across the area to be retained or
discarded (depending on Keep or Discard Brush Tool selection). It's OK to
repeatedly click and drag until your selection area is made.
The Undo button reverts to the last made selection.
To fine-tune your selection, you can switch between Keep and
Discard brushes by temporarily holding down the Alt key.
5. Click OK to create your cutout.
You'll now see your active layer with the selected areas cut away (made
transparent).
Click Reset if you want to revert your selected areas and start
your cutout again.
Manipulating Images 115
Changing output settings
You can set the level of transparency and pixel blending at the cutout edge by
adjusting the Width output settings. Control of the cutout edge lets you blend
your cutout into new backgrounds more realistically.
To change output settings:
1. Drag the Width slider to set the extent (in pixels) to which "alpha" blending
is applied inside the cutout edge. This creates an offset region within which
blending occurs.
2. Adjust the Blur slider to apply a level of smoothing to the region created by
the above Width setting.
You'll need to click Preview in order to check output setting
adjustments each time.
Refining your cutout area
Erase and Restore touch-up tools can be used to refine the cutout area within the
studio before completing your cutout.
The touch-up tools are brush based and are only to be used to fine-
tune your almost complete cutout—use your Keep and Discard
brush tools for the bulk of your work!
To restore or remove portions of your cutout:
1. With your cutout areas already defined, click Preview (Output
settings tab). You can use the button to check your cutout as you progress.
2. Click the Restore Touch-up Tool or Erase Touch-up
Tool button from the left of the Studio workspace.
3. Paint the areas for restoring or erasing as you would with the brush tools.
If you've touched up part of your image between each preview,
you'll be asked if you want to save or discard changes.
116 Manipulating Images

Color and
Grayscale
7
118 Color and Grayscale
Color and Grayscale 119
Color modes
PhotoPlus operates in several color modes to let you work in standard and
higher levels of color or tonal detail—these are 8-bits/channel RGB (or 8-
bits/channel Grayscale) and the more detailed 16-bits/channel RGB (or 16-
bits/channel Grayscale). Editing in 8 bits/channel mode will use 256 levels per
color channel, as opposed to 16-bits/channel, which uses 65,536 levels per
channel.
As a rule of thumb, use 16-bit working for "as-your-eyes-see-it" image accuracy.
If you work with 16-bit images, you'll probably want to benefit from the
optimum color or tonal information throughout your project.
PhotoPlus also lets you manually choose modes:
Choose..
Then pick
.
when creating a new
image
New Image (Startup
Wizard) or
File>New from
Startup Wizard.
or
File>New
Color Mode: RGB or
Grayscale
Bit Depth: 8 or 16 bits per
channel
at any time
Image>Color Mode
RGB 8 Bits/Channel
RGB 16 Bits/Channel
Grayscale 8 Bits/Channel
Grayscale 16 Bits/Channel
importing raw
images
from the Bit Depth
drop-down list
(Output Format
section)
8 Bits/Channel
16 Bits/Channel
when outputting the
results of an HDR
Merge
File>HDR Merge. Output 16-bits per channel
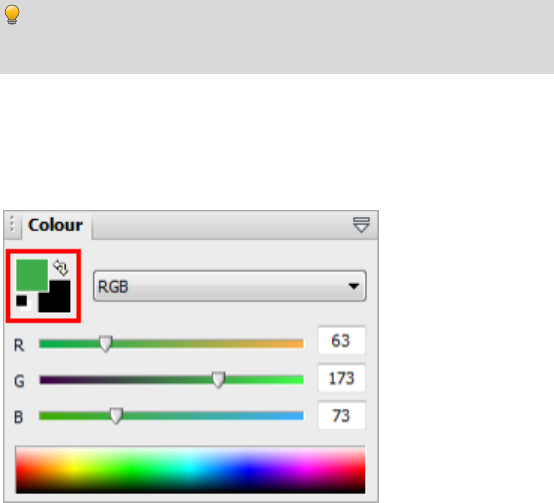
120 Color and Grayscale
If you no longer need to work at a high level of detail (16 Bits/channel), you can
convert your image to 8-bit mode which results in smaller file sizes and allows
you to take advantage of PhotoPlus's range of special filter effects.
To switch from 16-bits/channel to 8-bits/channel working:
• From the Image menu, select Color Mode, and pick an 8-bits/channel
option from the submenu.
To check which mode is currently set, the Title bar shows the mode
after the file name, e.g. CRW_4832.CRW @ 20%, 3088 x 2056, RGB 16
Bits/Channel.
Choosing colors
Foreground and background colors
At any given time, PhotoPlus allows you to work with just two colors—a
foreground color and a background color. These are always visible as two
swatches on the Color tab indicated opposite.
The foreground color is set to green (RGB 63:173:73) and the background color
to black.
The Color tab makes it possible to set the working color model before color
selection: RGB (Red, Green, Blue); CMYK (Cyan, Magenta, Yellow, Black) ;
HSB sliders (Hue, Saturation, Brightness); HSL sliders (Hue, Saturation,
Lightness); HSL Color Wheel; HSL Color Box; or Grayscale.
Color and Grayscale 121
To set the mode:
• Choose an option from the
drop-down list.
Defining colors
Now, a few things to remember about how these colors are used:
• When you draw a selection, shape, or use the paintbrush tools, you
could apply the foreground color.
• However, the black text in the design could be created after swapping
foreground and background colors using the tab's button. Loading
the foreground and background color with two frequently used colors
is a great way to boost productivity when painting and drawing.
Why background color?
When you cut, delete, or erase an area on the Background layer, the
area exposes the currently set background color—as if that color
were there "behind" the portion of the image being removed.
(Layers other than the Background layers behave differently: on
these, a removed area exposes transparency.)
To define foreground and background color:
1. Select the Color Pickup Tool on the Tools toolbar.
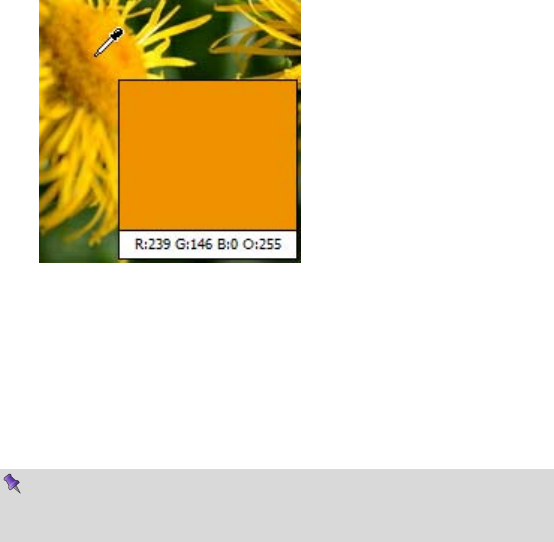
122 Color and Grayscale
As you move the cursor around your photo, a swatch appears displaying the
color under the cursor.
2. (Optional) On the context toolbar, set the Sample Size (pickup region) as a
single "Point Sample", "3 x 3 Average" or "5 x 5 Average" area. The last two
options lets you sample an "averaged" color over a square pixel region, ideal
for sampling halftone images, i.e. when point sampling is not suitable.
3. Left-click with the tool anywhere on an image to "pick up" the color at that
point as the new foreground color. Right-click to define a new background
color.
To switch temporarily to the Color Pickup Tool from a paint, line,
shape, or fill tool, hold down the Alt key, then click to define the
foreground color.
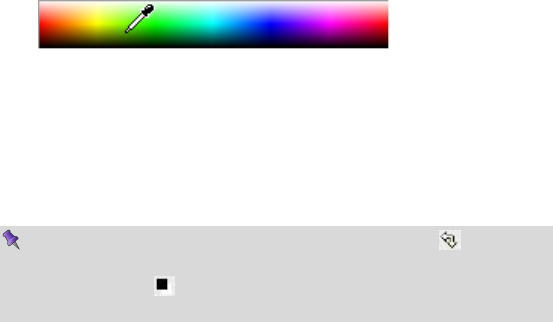
Color and Grayscale 123
OR
1. On the Color tab, click and move the mouse pointer (dropper cursor)
around the Color Spectrum. As you move the dropper cursor around the
spectrum, the tab's active color swatch updates to the color at the cursor
position.
2. Left-click in the spectrum to set a new foreground color, and right-click to
set a new background color.
OR
• On the Color tab, use the slider(s) or enter numeric values in the boxes
to define a specific color. The selected swatch updates instantly.
To swap foreground and background colors, click the double
arrow button next to the swatches. To reset the colors to black and
white, click the black and white mini-swatch at the bottom left of
the swatch.
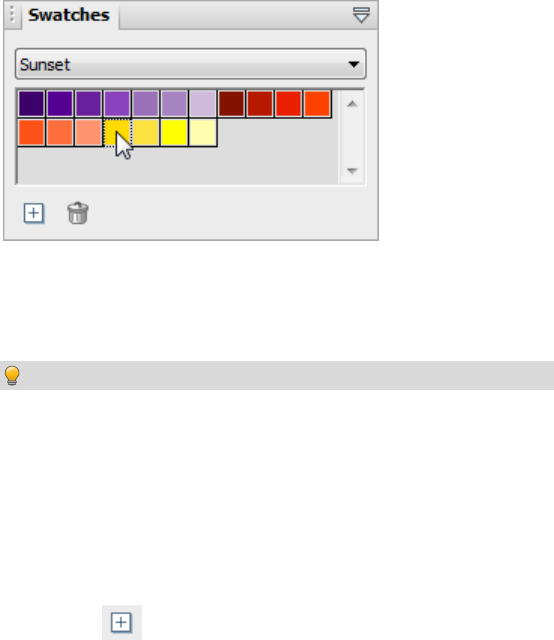
124 Color and Grayscale
Storing colors
If you want to save colors that you want to work with frequently, you can store
them in the Swatches tab as thumbnails (this avoids continually defining colors
in the Color tab). The Swatches tab hosts galleries of categorized color
thumbnails.
If hidden, make this tab visible via Window>Studio Tabs.
You can store your currently selected foreground color (in Color tab) to the
currently selected category (e.g., Sunset); you can also create categories yourself
into which you can add your own thumbnails. The Swatches tab also lets you
choose pre-defined colors from a range of "themed" categories (e.g., Earth,
Fruits, Pastel, and web browser safe).
To add a color to the Swatches tab:
1. From the Swatches tab, pick the correct category to store the color.
2. Click the New Swatch button to add the Color tab's foreground
color to the current gallery.
To apply a color from the Swatches tab:
• Click to select any gallery thumbnail—the Color tab's foreground color
will update ready for use in painting, drawing, filling, etc.

Painting, Drawing
and Text
8
126 Painting, Drawing, and Text
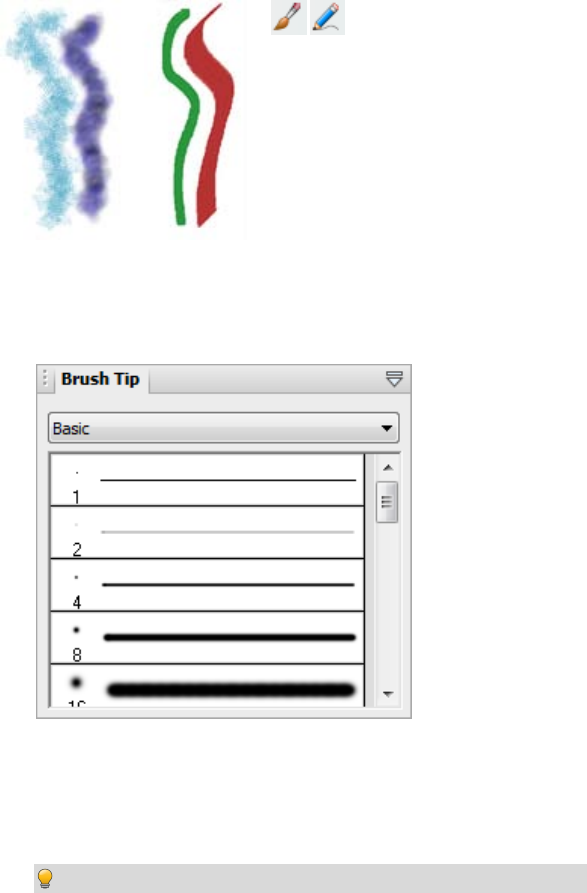
Painting, Drawing, and Text 127
Painting and brushes
The Paintbrush Tool and
Pencil Tool on the Tools toolbar are the
basic tools for painting and drawing
freehand lines on the active layer. They
work on Background and standard layers,
but not on text layers or shape layers. The
tools work by changing pixels on the layer.
The Paintbrush Tool applies anti-aliasing to its brush strokes to ensure brush
edges appear very smooth irrespective of the brush's Hardness setting. In
contrast, the Pencil Tool (used just like the Paintbrush Tool) always creates a
hard-edged line.
The Brush Tip tab hosts a comprehensive collection of brush presets grouped
into various categories; each category can be switched to via a drop-down list
and displays a gallery. Note that each sample clearly shows the brush tip and
stroke; the number indicates the brush diameter. The brush tip determines the
thickness and many other properties of the painted line.
You can also create your own brush from within the tab.

128 Painting, Drawing, and Text
If you scroll down the gallery, you’ll note that some brushes have hard edges,
while others appear fuzzy, with soft edges. The hardness of a brush is expressed
as a percentage of its full diameter. If less than 100%, the brush has a soft edge
region within which the opacity of applied color falls off gradually.
Brush attributes (blend mode, opacity, size, and flow) can be modified via a
context toolbar (along with more advanced Brush Options) and, if necessary,
saved for future use with the Tool Presets tab.
If a more bespoke brush tip is required, you can also customize your own brush
tip and save it in its own user-defined category. (See Creating your own brush
tips in PhotoPlus Help for details.)
An important factor when applying brush strokes is the level of opacity applied
to the brush. This attribute affects brush strokes significantly when the stroke is
applied onto already transparent standard layers. The greater the opacity the
more opaque the brush stroke. Experiment to achieve the right combination of
opacity and color for your brush strokes.
To use the Paintbrush or Pencil tool:
1. From the Tools toolbar's Brush Tools flyout, select the
Paintbrush Tool or Pencil Tool.
2. Choose a brush tip preset on the Brush Tip tab. If you've picked a Basic
brush, set a brush color (i.e. the foreground color) from the Color tab before
painting.
3. (Optional) Change brush tip's attributes, if necessary, on the context
toolbar. These changes do not affect the brush presets present in the Brush
Tip tab.
4. Drag the cursor on the active layer, holding the left mouse button down to
paint in the foreground color.
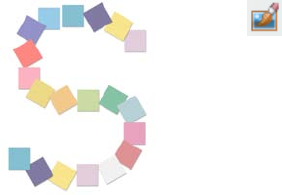
Painting, Drawing, and Text 129
Brush options
The Brush Options dialog, accessible from the context toolbar's Brush option,
lets you customize a brush or define properties for a new one. As you vary the
settings, you can see the effect of each change in the preview window.
Painting using pen tablets
Brush strokes can be applied directly to the page by using your mouse or, if
available, a pen tablet; the latter method is ideally suited for applying pressure-
sensitive strokes to your project. PhotoPlus supports pressure sensitivity, with
tablet calibration and key assignment possible directly from within the program
(via Pressure Studio).
Stamping and spraying pictures
The Picture Brush Tool works like a custom
brush that sprays a series of pre-defined or custom
images at regular intervals as you drag. Used in
conjunction with the Brush Tip tab you can select
from a variety of picture brushes in different
categories, and you can import Paint Shop Pro
"picture tubes".
You can use the tool either to "stamp" single images at specific points or lay out a
continuous stream of repeating pictures as in the letter "S" on the left.
The Picture Brush tool works on Background and standard layers, but not on
text layers or shape layers.

130 Painting, Drawing, and Text
To draw with the Picture Brush:
1. From the Tools toolbar's Brush Tools flyout, select the Picture
Brush Tool.
2. On the Brush Tip tab, pick a brush tip from one of the categories.
To control image elements, right-click a brush from any Brush Tip tab
category, and choose Brush Options.
3. From the context toolbar, set the opacity and size of the image elements
produced by using the Opacity and Diameter option. For pen tablet users,
check stylus Size and/or Opacity to make these brush properties respond
to your pressure device.
4. To "stamp" single images at specific points, click in various places on your
canvas. To spray a continuous line of images, drag a path across the page.
If you right-click on any gallery sample, you can manage categories, and access
brush options.
Creating custom picture brushes
Each picture brush has its own stored master image with image elements
arranged in rows and columns. To define a picture brush, you first create a new
master image and then choose New Brush via right-click in a user-defined
category in the Brush Tip tab. (For details, see PhotoPlus Help.)
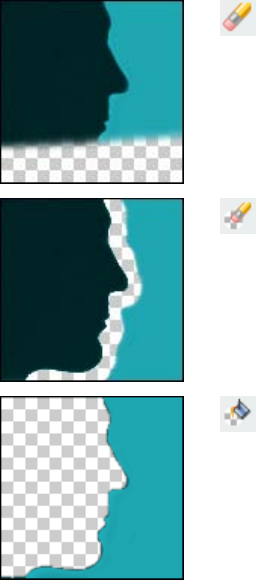
Painting, Drawing, and Text 131
Erasing
Sometimes the rubber end of the pencil can be just as important to an artist as
the pointed one. The Eraser Tools flyout on the Tools toolbar provides ways of
enhancing an image by "painting" with transparency rather than with color.
Use the Standard Eraser for replacing colors
in an image either with the background color or
with transparency (on Background or other
standard layers, respectively).
Use the Background Eraser for erasing
pixels similar to a sampled reference color
underlying the cursor crosshair—great for
painting out unwanted background colors.
Use the Flood Eraser for filling a region
with transparency, erasing pixels similar to the
color under the cursor when you first click.
In general, you can set tool properties for each tool including brush
characteristics, opacity, tolerance, flow, and choose a brush tip. The Eraser tools
work on Background and standard layers, but not on text layers or shape layers.

132 Painting, Drawing, and Text
To erase with the Standard Eraser:
1. Select Standard Eraser from the Tools toolbar's Eraser Tools
flyout.
2. (Optional) Change attributes, especially brush Size and Opacity, on the
context toolbar.
For erasing with an airbrush effect or hard-edged brush, check the
Airbrush or Hard Edge option.
For tablet users, pressure sensitivity can be switched on via Brush Options
(click Brush thumbnail); ensure the Controller drop-down list is set to
"Pressure" on selected attributes.
3. Drag with the tool on the active layer. On the Background layer, erased
pixels expose the current background color. On other layers, they expose
transparency.
To erase with the Background Eraser:
1. Select Background Eraser from the Tools toolbar's Eraser Tools
flyout.
2. (Optional) Change properties on the context toolbar:
• For tablet users, pressure sensitivity can be switched on via Brush
Options (click Brush thumbnail); ensure the Controller drop-
down list is set to "Pressure" on selected attributes.
• The Tolerance setting determines the breadth of the color range
to be erased.
• With "Contiguous" limits (the default), the tool erases only
within-tolerance pixels adjacent to each other and within the
brushes width; this tends to restrict erasure to one side of an edge
or line. When you set "Discontiguous" limits, all matching pixels
are erased under the brush even if they are non-adjacent (great
for removing uniform background like sky). The "Edge Detected"
setting can improve erasure along one side of a contrasting edge
or line.
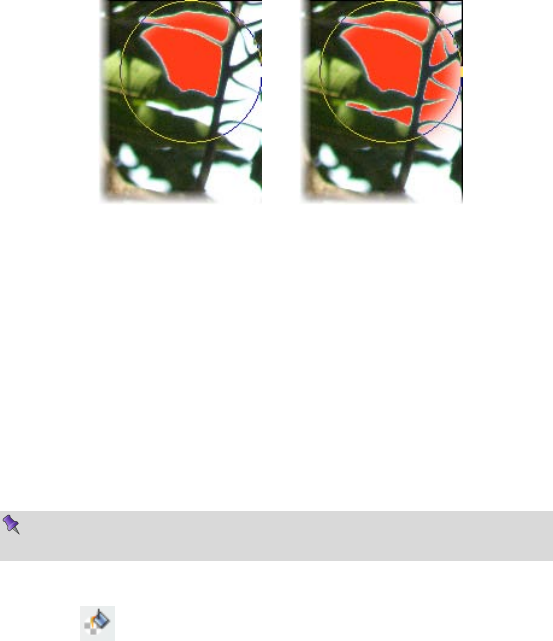
Painting, Drawing, and Text 133
Contiguous Discontiguous
• With "Continual" sampling (the default), the reference color is
repeatedly updated as you move the cursor. Sampling "Once"
means erasure is based on the color under the crosshair when you
first click. Use the "Background Swatch" setting to use the current
background color (Color tab) as the reference.
• You also have the option of protecting the current foreground
color from erasure (Protect foreground).
3. Drag with the tool on the active layer to erase pixels similar to a sampled
reference color directly under the brush tip.
If you use the tool on the Background layer, it's promoted to a
standard layer.
To erase with the Flood Eraser:
1. Select Flood Eraser from the Tools toolbar's Eraser Tools flyout.
2. (Optional) Change properties on the context toolbar.
3. Click (or click and drag) with the tool on the active layer to erase pixels close
in color (based on the Tolerance range) to the color under the cursor when
you first click. If you use the tool on the Background layer, it's promoted to
a standard layer.
Erasing using pen tablets
For tablet users, PhotoPlus supports pressure sensitivity, with tablet calibration
and key assignment possible directly from within the program (via Pressure
Studio).
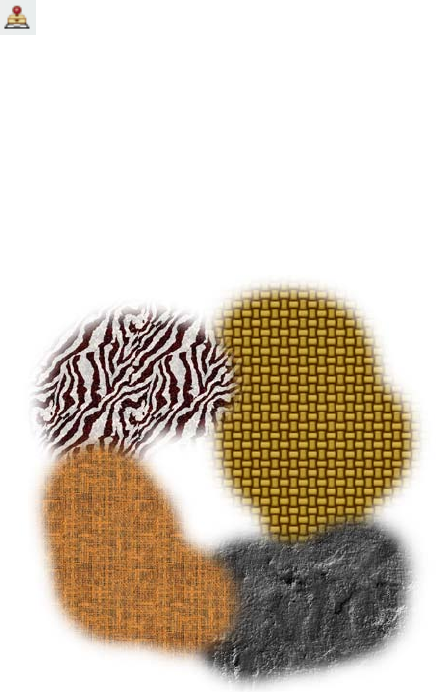
134 Painting, Drawing, and Text
Using patterns
The Pattern Tool (Tools toolbar's Clone Tools flyout) lets you paint a
pattern directly onto your canvas. In effect, it "clones" any pattern bitmap you’ve
selected while providing the flexibility to paint wherever you wish, and control
opacity, blend mode, and so on. Like the Clone Tool, the Pattern brush picks up
pixels from a source—in this case, the bitmap pattern—and deposits them where
you’re drawing. You can choose a pre-defined, tiled bitmap pattern from the
Patterns dialog, or define your own patterns.
As an example, patterns can be used effectively as a painted background, perhaps
when creating web graphics.
Painting, Drawing, and Text 135
Filling a region
Filling regions or layers is an alternative to brushing on colors or patterns.
Making a selection prior to applying a fill, and setting appropriate options, can
spell the difference between a humdrum effect and a spectacular one.
The Fill Tools flyout on the Tools toolbar includes two tools for filling
regions with color and/or transparency: Flood Fill and Gradient Fill. In
addition, you can use the Edit>Fill command to apply either a color or pattern
fill. As with paint tools, if there is a selection, the Fill tools only affect pixels
within the selected region. If you’re operating on a shape or text layer, the
Gradient Fill tool can be used to adjust the interior of the object(s) on the layer.
Flood and pattern fills
The Flood Fill Tool works on Background and standard layers, replacing
an existing color region with the foreground color. How large a region is
"flooded" with the fill color depends on the difference between the color of the
pixel you initially click and the color of surrounding pixels.
To use the Flood Fill Tool:
1. Select the Flood Fill Tool from the Tools toolbar's Fill Tools flyout.
2. Set tolerance and layer fill options on the context toolbar.
• A pattern can be applied as a fill from the context toolbar by
picking a Pattern (click the thumbnail) from the gallery, then
choosing the Fill drop down list to be "Pattern".
3. Click with the tool where you want to start the fill.
The Edit>Fill command lets you flood-fill a region on a standard layer using any
color, not just the foreground color. On the other hand, it’s strictly a solid color
flood without the subtleties of the Flood Fill Tool’s properties. Simply choose the
command to display the Fill dialog.
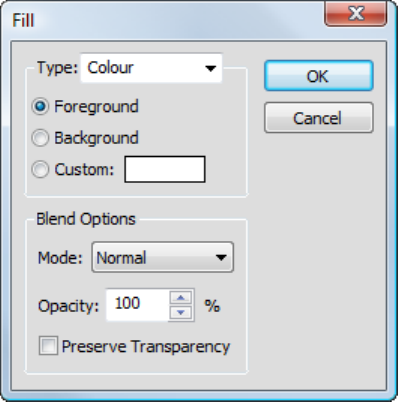
136 Painting, Drawing, and Text
To use the Fill command:
• Choose Fill from the Edit menu. The Fill dialog appears.
• For a flood fill, set the Type to Color.
• Choose whether the fill color is to be the current Foreground color,
Background color or a Custom color.
• Specify the blend mode and opacity of the fill.
If you check Preserve Transparency, transparent areas will resist the
flood color; otherwise, everything in the selection or layer will be
equally washed with the fill.
• For a Pattern fill, set the Type to Pattern.
The blend options are the same, but in this mode instead of choosing a
color you can fill a region with any pattern stored in the Patterns
dialog. Click the pattern sample to bring up the gallery of pattern
thumbnails (see Using patterns on p. 134 for more information).
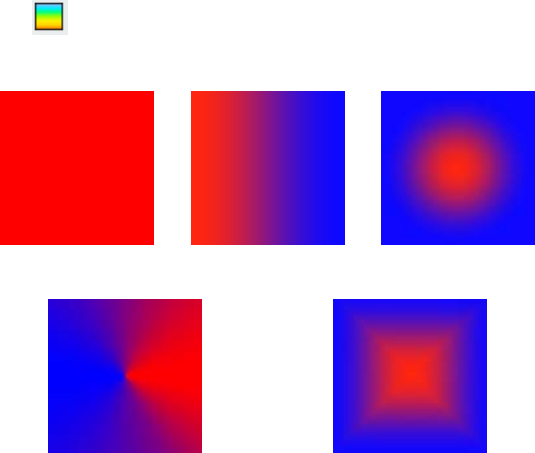
Painting, Drawing, and Text 137
Gradient Fill Tool
Whereas solid fills use a single color, all gradient fills in PhotoPlus utilize at least
two "key" colors, with a spread of hues in between each key color, creating a
"spectrum" effect. You can fine-tune the actual spread of color between pairs of
key colors. Likewise, a gradient fill in PhotoPlus can have either solid
transparency—one level of opacity, like 50% or 100%, across its entire range—
or variable transparency, with at least two "key" opacity levels and a spread of
values in between. (Remember that opacity is simply an inverse way of
expressing transparency.)
The Gradient Fill Tool lets you apply variable color and/or transparency
fills directly to a layer.
Solid Linear Radial
Conical Square
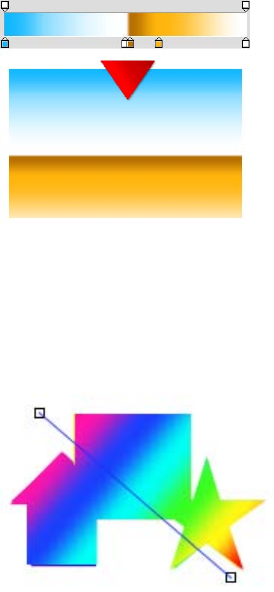
138 Painting, Drawing, and Text
Applying a gradient fill on any kind of layer entails selecting one of the fill types,
editing the fill colors and/or transparency in a Gradient dialog, then applying the
fill. However, gradient fills behave differently depending on the kind of layer
you're working on.
On standard and Background layers,
the tool creates a "spectrum" effect, filling
the active layer or selection with colors
spreading between the key colors in the
selected gradient fill. The fill is applied
rather like a coat of spray paint over
existing pixels on the layer; color and
transparency properties in the fill
gradient interact with the existing pixels
to produce new values. In other words,
once you've applied the fill, you can't go
back and edit it (except by undoing it
and trying again).
Transparency works in a comparable way, affecting how much the paint you
apply is "thinned." At full opacity, the fill completely obscures pixels underneath.
On text and shape layers, the Gradient
Fill Tool is even more powerful—the
fill’s color and transparency properties
remain editable. Technically, the fill is a
property of the layer, and the shape(s)
act as a "window" enabling you to see the
fill. Thus a single fill applies to all the
shapes on a particular layer—note the
gradient fill opposite which is applied
across three QuickShapes present on the
same layer.
Transparency gradients determine which portions of the object you can see
through. Note that the Flood Fill Tool doesn't work with text or shapes. When
first drawn, a shape takes a Solid fill using the foreground color. You can change
the fill type as described below.
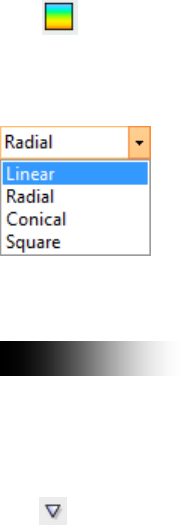
Painting, Drawing, and Text 139
To apply a gradient fill:
1. Select Gradient Fill Tool from the Tools toolbar's Fill Tools flyout.
2. Select a fill type from the context toolbar. Choose Linear, Radial, Conical or
Square.
3. To choose a preset or to edit the fill's colors and/or transparency values,
click the color sample on the context toolbar.
The Gradient dialog appears, where you can select a preset fill from the
default or a pre-defined gallery (select a category e.g., Blues, Greens, from
the drop-down list).
Click to access further options such as adding, editing or deleting
categories and adding and deleting custom fills. See PhotoPlus Help for
details on how to edit gradient fills.
4. (Optional) Check Reverse to swap the direction of your chosen fill.
5. (Optional) Uncheck Transparency if you don't want transparency (if
present) in your chosen gradient fill to be preserved; otherwise, the fill's
transparency is maintained when the fill is applied.
6. Once you've defined the fill, click with the tool where you want to start the
fill and drag to the point where you want it to end.
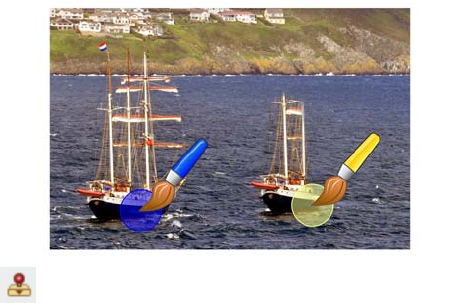
140 Painting, Drawing, and Text
To change a text or shape layer’s fill type, or edit its color(s):
• Double-click the text/shape layer (or right-click and choose Edit Fill).
OR
• Choose the Gradient Fill Tool and use the context toolbar.
Either option lets you choose a fill type, and/or click the color (or gradient)
sample to edit the fill.
On text or shape layers, the fill path (the line in the illustration above) remains
visible even after you’ve applied the fill, and you can adjust the fill’s placement
after the fact by dragging the fill path’s end nodes with the Gradient Fill Tool.
Cloning a region
The Clone Tool is like two magic brushes locked together. While you trace
or "pick up" an original drawing with one brush, the other draws ("puts down")
an exact duplicate somewhere else—even in another image.
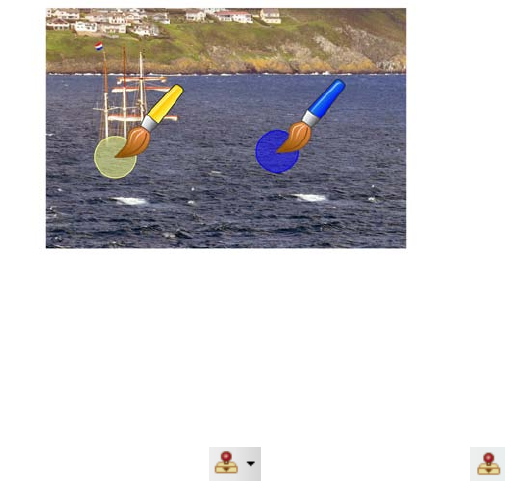
Painting, Drawing, and Text 141
When retouching, for example, you can remove an unwanted object from an
image by extending another area of the image over it (note the pickup area is
positioned over the sea rather than the original boat).
The tool acts on the active Background or standard layer, and can even clone all
layers (including Text layers or Shape layers).
To clone a region:
1. From the Tools toolbar's Clone Tools flyout, select the
Clone Tool.
2. Change properties, if necessary, on the context toolbar.
3. To define the pickup origin, Shift-click with the tool.
4. Click again where you want to start the copy, then drag to paint the copy
onto the new location. Repeat as needed. A crosshair marks the pickup
point, which moves relative to your brush movements.
142 Painting, Drawing, and Text
Drawing and editing lines and shapes
For drawing and editing lines and shapes, the Tools toolbar includes the
following drawing tool flyouts:
The QuickShape Tools flyout featuring an assortment of tools for
creating rectangles, ellipses, polygons, and other shapes.
The Line Tools flyout features straight lines, plus freehand pen and
curved pen lines.
Overview
Each of the drawing tools has its own creation and editing rules, as detailed
below. Before continuing, let's cover some things that all shape objects have in
common:
• Shapes have outlines known as paths. In a nutshell, shapes as
discussed here are filled lines (i.e., they’re closed, with color inside).
Later, we’ll cover unfilled lines (paths) separately, and consider their
special properties. The various drawing tools are all path-drawing
tools, applicable to both the filled and unfilled kind of line.
• Unlike painted regions you create on raster (bitmap) layers, both
QuickShapes and lines are vector objects that occupy special shape
layers, marked with an symbol on the Layers tab. Each shape layer
includes a path thumbnail representing the shape(s) on that layer.
• A QuickShape or straight line can be drawn directly as a shape layer,
path or as a filled bitmap. The context toolbar hosts buttons which
allow you to decide how your lines and shapes are to be drawn, i.e.
Shape Layer—create your QuickShape or line on a new shape
layer or add to an existing shape layer.
Paths—add your shape or line directly as a path rather than as
a new/existing shape layer.
Fill Bitmaps—creates a filled bitmap of the shape or straight
line on any selected raster layer (e.g., the Background layer).
Curved and freehand pen lines cannot be drawn as filled bitmaps.
Painting, Drawing, and Text 143
Creating additional shapes
Shape layers can store more than one shape, and it’s up to you where additional
shapes are created. This decision is made easy by use of the context toolbar when
the QuickShape or line tool is selected. The toolbar displays a series of
combination buttons which determine the layer on which the shape will be
placed and the relationship the new shape will have on any existing shapes on
the same layer.
New—adds the shape to a new shape layer.
Add—adds the shape to the currently selected layer.
Subtract—removes overlap region when a new shape is added over existing
shapes on the currently selected layer. The new shape itself is not included.
Intersect—includes the intersection area only when a new shape is added
onto existing selected shapes on the currently selected layer.
Exclude—excludes the intersection area when a new shape is added onto
existing selected shapes on the currently selected layer.
The combination buttons are also available for shapes created as
paths. The buttons determine how the new shape paths interact
with previously created paths.
To change the fill type, or edit its color(s):
• Double-click the shape layer.
OR
• Choose the Gradient Fill Tool and use the context toolbar.
Either approach lets you update a solid color fill, a gradient fill and/or
a transparency gradient to a shape.
A single fill is shared by all the shapes on a particular layer.
(Technically the fill is a property of the layer, and the shape(s) act
like a "window" that lets you see the fill.) So if you want to draw a
red box and a yellow box, for example, you'll need two shape layers.
You can also alter a shape layer's Opacity using the Layers tab.
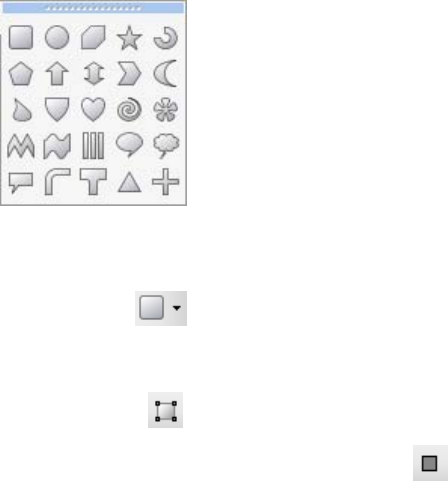
144 Painting, Drawing, and Text
Creating and editing QuickShapes
QuickShapes in PhotoPlus are pre-designed contours that let you instantly add
all kinds of shapes to your image, then adjust and vary them using control
handles—for innumerable possibilities!
The QuickShape Tools flyout lets you choose
from a wide variety of commonly used shapes,
including boxes, ovals, arrows, polygons, stars, and
more. Each shape has its own built-in "intelligent"
properties, which you can use to customize the
basic shape.
QuickShapes can also be drawn as paths as
described elsewhere in Using paths (see PhotoPlus
Help).
To create a QuickShape :
1. Click the QuickShapes flyout on the Tools Toolbar and select a
shape from the flyout menu. (To choose the most recently used shape, just
click the toolbar button directly.)
2. Ensure the Shape Layers button is selected on the context toolbar.
3. If creating the shape on a new layer, make sure the New button on the
context toolbar is selected. If creating multiple shapes on the same layer,
select one of the other combination buttons on the context toolbar to
specify how the multiple shapes will interact (see p. 143).
4. For shapes on a new layer only, select a foreground color for the
QuickShape. Multiple shapes on the layer will adopt the layer's current
color.
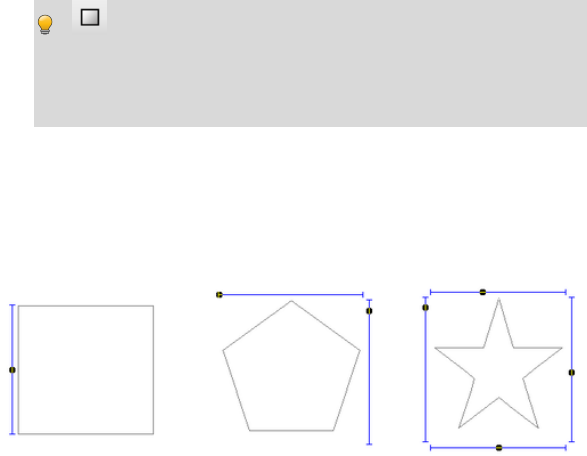
Painting, Drawing, and Text 145
5. Drag out the shape on the image. It displays as an outline; hold down the
Ctrl key while drawing to constrain the aspect ratio.
To create a filled bitmap from your QuickShape instead, choose
the Fill Bitmaps button instead of the Shape Layers button. Filled
bitmap QuickShapes can only be created using the shape's default
settings, and once created, cannot be adjusted using the Node Edit
Tool.
Each QuickShape is adjustable, so you can experiment before committing to a
particular figure and edit it later—with innumerable possibilities!
If you switch to the Node Edit Tool, you can adjust the shape. The number of
displayed "edit" control handles varies according to the shape; for example, the
rectangle has just one control, the polygon has two, and the star has four.
Using the middle Quick Pentagon shape as an example:
• Dragging the top control handle to the right will morph the shape to a
hexagon, heptagon, octagon, and so on.
• Dragging the side control handle downwards will rotate the shape
counter-clockwise.
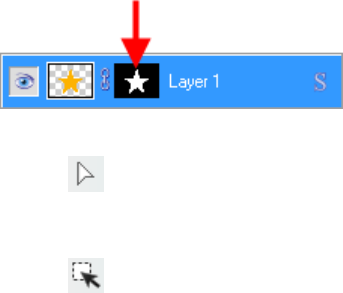
146 Painting, Drawing, and Text
To edit a QuickShape:
1. Click its layer or path name in the Layers or Paths tab, respectively, to select
it. If on a Shape layer, make sure the layer's path thumbnail is selected (it
has a white border; arrowed below) to allow the path to be edited with the
Node Edit Tool or Shape Edit Tool, i.e.
2. From the Node Tools flyout, use either:
• The Node Edit Tool (Tools toolbar) to click on the shape
and readjust any of the shape's handles.
OR
• The Shape Edit Tool to select, move, resize, and deform
individual shapes.
(If you only have one shape on a layer, you can use the Move
Tool and Deform Tool.) To resize without constraint, you can
drag any shape's handle; to constrain the shape's proportions,
hold down the Shift key while dragging. To deform the shape,
drag a node while the Ctrl key is pressed.

Painting, Drawing, and Text 147
Creating and editing lines
Lines can be drawn by using dedicated tools from the Tools toolbar's Line Tools
flyout.
The
Line Tool
produces an anti-aliased straight line in PhotoPlus,
which is just a very thin shape. The line can be of varying Weight
(thickness) and can be constrained to 15-degree increments, by
holding down the Shift key as you drag.
The
Freehand Pen Tool
, as its name implies, lets you draw a squiggly
line made up of consecutive line segments and nodes (each new
segment starting from another’s end node), which can be attached
back to itself to create a closed shape. Use the Smoothness setting on
the context toolbar to even out ragged contours automatically.
The Pen Tool can produce complex combination curves (and shapes)
in a highly controlled way.
Each tool's supporting context toolbar lets you create the line on
a shape layer or as a path. The Line Tool can also be used to create a filled
bitmap directly. Additionally, combination buttons let you add the line to its
own layer (or path), and can also be used to control how the new line interacts
with existing shapes on the layer.
Besides being useful with QuickShapes, the Node Edit and Shape Edit tools
really come into their own when editing lines.
148 Painting, Drawing, and Text
To edit a line:
1. Click its layer name to select the layer.
2. To move, resize, scale, skew, or rotate the line, choose the Shape Edit
Tool. This deform tool works by manipulation of the bounding box around
the line—drag on a corner or edge. (For details on its use, see Deforming on
p. 110.)
3. To reshape the line, choose the Node Edit Tool. The line consists of
line segments and nodes (points where the line segments meet). You can
drag one or more individual nodes, or click and drag directly on a line
segment.
When you select a node, control handles for the adjacent line segments appear;
each segment in the line has a control handle at either end. The selected node is
drawn with a red center, with the control handle(s) attached to the nodes by blue
lines.
Any node can be one of several node types: sharp, smooth, or symmetric.
Depending on node type, the node's control handles behave a bit differently, as
you can tell with a bit of experimentation. Essentially, the node type determines
the slope and curvature of each adjoining segment, and can be chosen from the
context toolbar, i.e.
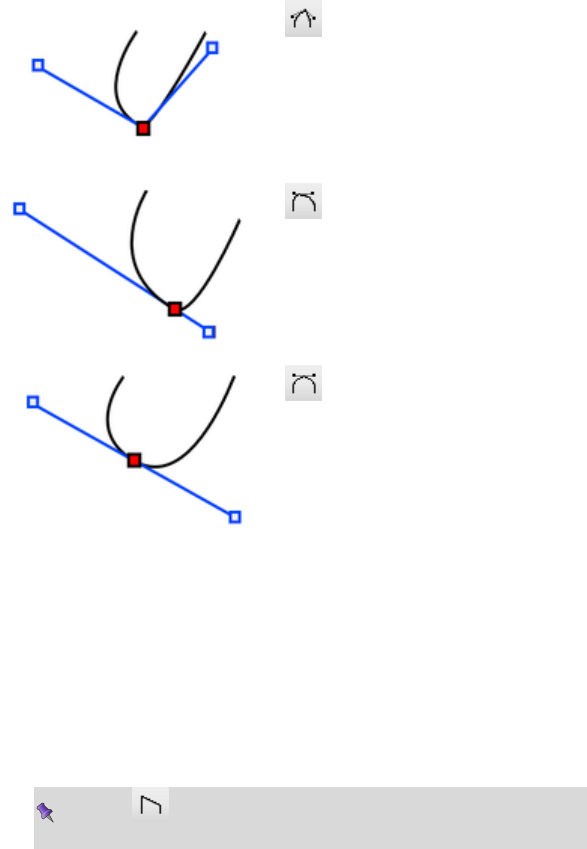
Painting, Drawing, and Text 149
Sharp Corner means that the
segments either side of the node are
completely independent so that the
corner can be quite pointed.
Smooth Corner means that the
slope of the line is the same on both sides
of the node, but the depth of the two
joined segments can be different.
Symmetric Corner nodes join line
segments with the same slope and depth
on both sides of the node.
To edit a node:
1. Select it with the Node Edit Tool.
2. Drag its control handle(s) to fine-tune the curve.
You can also use the context toolbar to define a line segment as either straight or
curved.
To add a node, double-click on a line segment. To remove a selected node, press
the Delete key.
Use the Straighten Line button to make an line segment
straight.
150 Painting, Drawing, and Text
Creating and editing text
PhotoPlus makes use of two text tools, i.e.
• The Text Tool, for
entering solid text on a new
layer. Use for eye-catching or
subtle captioning (opposite) and
titling equally.
• The Text Selection Tool,
for creating a selection in the
shape of text (for filling with
unusual fills).
The Layers tab designates text layers with a symbol. Like shapes, solid text in
PhotoPlus is editable: as long as it remains on a separate text layer, you can
retype it or change its properties at a later date.
To create new solid text:
1. Click the Text Tools flyout on the Tools toolbar and choose
the standard Text Tool.
2. Click on your image with the text cursor to set where you want to insert
text. Then set text attributes (font, point size, bold/italic/underline,
alignment, anti-alias and color) on the Text context toolbar.
OR
Drag across the page to size your text according to requirements. Release
the mouse button to set the point size. Then set text attributes on the Text
context toolbar.
3. Type your text. The text appears on a new transparent text layer in the
image. You can now use the Move Tool or other tools and commands to
manipulate it, just like the contents of any layer.
Painting, Drawing, and Text 151
To edit existing text:
1. With the text layer to be edited as the active layer, choose the standard Text
Tool and move the mouse pointer over the text until it changes to the
(I-beam) cursor.
2. Click on or drag to select areas of text—this lets you insert or overwrite
selected text, respectively. Equally, you can set new text attributes (font,
point size, bold/italic/underline, alignment, anti-alias, or color) to be
adopted by the selected text area—all made from the Text context toolbar.
Fine-tune your character size and positioning by using the Character
tab. If hidden, make this tab visible via Window>Studio Tabs.
To change text's solid color:
1. Select all or part of any text.
2. Click the color swatch on the context toolbar to display the Color Selector
dialog. (See Choosing colors on p. 120.)
3. Select your new color and click OK.
To swap to a gradient color:
This applies a gradient fill to all of your text on the layer and not to
selected text.
1. On the Layers tab, right-click the Text layer and choose Edit Fill.
2. Change the Fill Type from Solid to one of Linear, Radial, Conical, or
Square.
3. Click on the Fill gradient swatch and select a preset gradient fill or create
your own gradient from the dialog (see Filling a region on p. 135). The
gradient fill is immediately applied to your text.
To convert any text layer to a standard layer:
• Right-click on the layer name and choose Rasterize from the menu.
152 Painting, Drawing, and Text
To create a text selection:
1. Click the Text Tools flyout (Tools toolbar) and choose the
Text Selection Tool.
2. Click at the location on the image where you want to begin the selection.
OR
Drag across the page to size your text selection according to requirements.
Release the mouse button to set the point size.
3. (Optional) On the Text context toolbar, set the selection text attributes to be
adopted by the new selection (e.g., the font and point size).
4. Type your text directly onto the page.
5. When you're done, click the OK button on the context toolbar. A
selection marquee appears around the text's outline.
6. You can now cut, copy, move, modify, and of course fill the selection.
Unlike solid text, the text selection doesn't occupy a separate layer.

Print, Export, and
Share
9
154 Print, Export, and Share
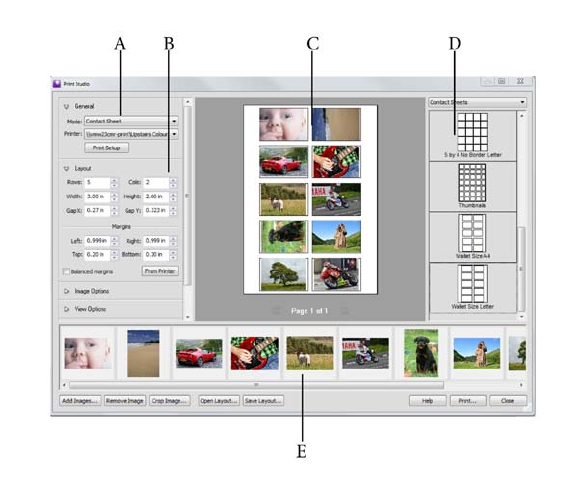
Print, Export, and Share 155
Printing
For basic printing primarily to desktop printers, Print Studio offers an exciting,
comprehensive, and versatile printing solution for your photos.
(A) Print Mode, (B) Print Mode Options,
(C) Page Layout,(D) Templates, (E) Open Images
The easy-to-use studio environment lets you select from a variety of print
templates, each designed for either single- or multi-image printing. Multi-
image printing in PhotoPlus lets you make the most of expensive photo-quality
printing paper by "ganging" several images onto a single output sheet using a
print layout or contact sheet template (shown above).
• Single Image templates
Use for basic desktop printing of an individual image, with supporting
Layout options (custom or standard print sizes, positioning, tiling, and
image-to-cell fitting).
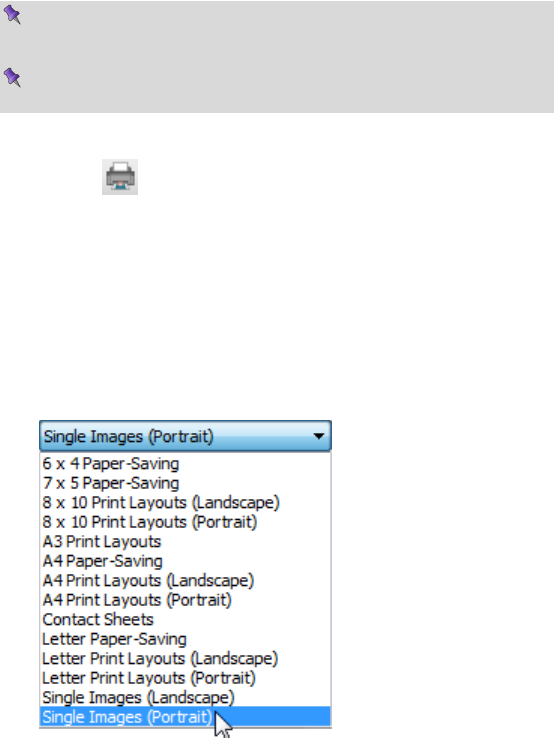
156 Print, Export, and Share
• Print Layout templates
Use for multi-image standard print sizes (in portrait/landscape
orientation), passport sizes, and mixed print sizes.
• Contact Sheet templates
Use for multi-image template-driven thumbnail prints—great for
creating labels!
For any mode, you can also create your own custom template from
an existing template.
Currently open documents will be used for printing, although you
can add more directly within Print Studio.
To print (using templates):
1. Click the Print button on the Standard toolbar.
The Print Studio appears.
2. (Optional) To open additional images for printing, click Add Images.
Select a photo for addition then click Open. The images are added as a
thumbnail to the gallery.
3. From the right-hand templates list, select a template category, e.g. Single
Images (Portrait).
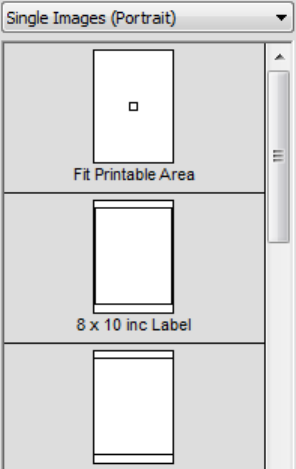
Print, Export, and Share 157
4. To insert a particular template into the central page layout region, simply
click its gallery thumbnail.
5. Depending on print mode, decide on which image(s) are to be used for
printing, i.e.
• For Single Image templates, you can select a different image from
the lower image gallery.
• For Print Layout templates, right-click a gallery thumbnail and
select Fill Layout with Image. All occupied or empty cells in your
layout are replaced. Alternatively, to fill an individual cell, drag a
replacement image from the lower image gallery onto the "target"
cell. A print layout’s cells need to be manually populated; other
modes will auto-populate cells.
• For Contact Sheet templates, use the Distribution option in
Image Options to control image replacement.

158 Print, Export, and Share
6. (Optional) From the left-hand pane, click the button to expand Image
Options for sizing and rotating images (see below) in cells:
• Enable Fit image to cell to make the image fit within the cell
boundaries.
• Enable Fill cell with image to scale the image to fit all of the cell.
• Check Rotate for best fit to make portrait images fit cells of
landscape orientation (and vice versa) to make maximum use of
cell space.
7. (Optional) Check Border to add a border of a configurable width (use
input box) and Color (click the swatch to select color from a dialog).
8. (Optional) To caption your images, check Label. Then, from the drop-
down list, select either the Date, image Filename, or Sequence number to
appear under each image. For a combination of label formats, click Modify,
add tokens to assemble a sample name, then click OK and the drop-down
list automatically changes to Custom. See Changing file names on p. 170
for more information.
9. Click Print or Close to save settings (but not print).
If you want to create your own layouts instead of templates you can switch print
modes and customize settings for that mode.
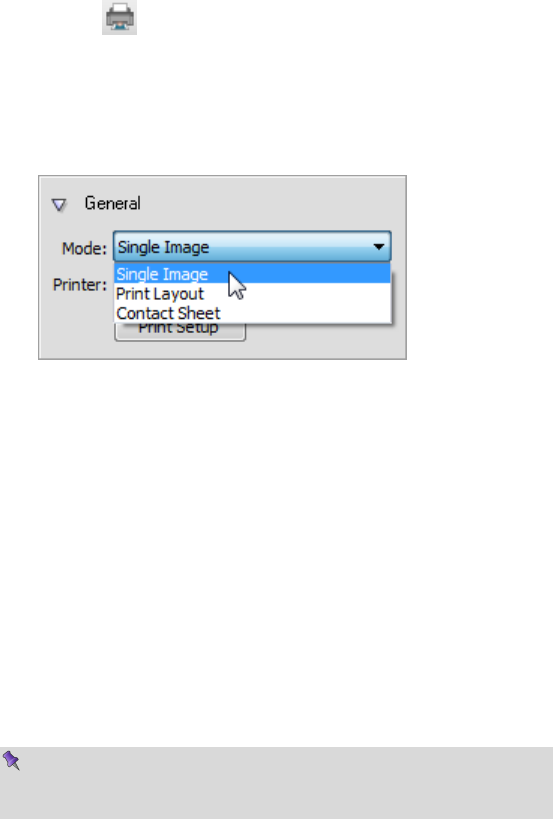
Print, Export, and Share 159
To print using your own layouts:
1. Click the Print button on the Standard toolbar.
The Print Studio appears.
2. From the Mode drop-down list, select Single Image, Print Layout, or
Contact Sheet.
3. In the Layout section, select a custom or standard print Size.
4. (Optional) Follow image sizing and rotating instructions described above.
To store the current page layout with images:
• Click Save Layout on the image gallery. PhotoPlus saves your layout
exactly as is, with or without images in the cells.
To open a new layout, click Open Layout on the gallery.
To store the current page layout as a template without images:
• Right-click on the right-hand template list to pop up a menu that lets
you add or delete templates and categories. After creating a custom
category using Add Category (or selecting an existing category), right-
click to save your template exactly as is (without images in the cells) by
using Add Template.
Print modes are reset each time PhotoPlus is restarted. Changes you
make during a session are only "remembered" for the duration of
the session.
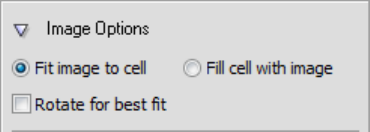
160 Print, Export, and Share
Sizing and rotating images in cells
The Print dialog helps
you size or rotate your
image(s) to fit a cell(s)
according to Image
Options settings.
When the dialog is opened, the default settings above will be adopted. It's likely
that some fine tuning might be needed, e.g. a portrait image may best be rotated
to fit a cell of landscape orientation.
If further images are added from the image gallery, they will also adopt these
settings. You can select an individual cell to affect the scaling or rotation on that
cell only at a later time. To again apply a setting to all cells, first deselect a cell by
clicking outside the grid.
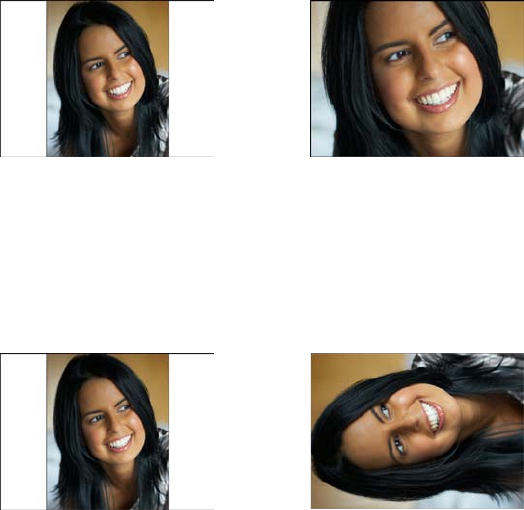
Print, Export, and Share 161
Here's a visual breakdown of the different options.
Fit image to cell/Fill cell with image
These options toggle respectively between fitting the image to cell dimensions (it
will scale the image width to cell width or image height to cell height) or making
the image completely fill the cell, losing portions of the image from view.
Fit image to cell
enabled
Fill cell with image
enabled
Rotate for best fit
You can re-orient your image to fit cells using the Rotate for best fit check
box—great for fitting a portrait image into landscape-oriented cells (and vice
versa).
Rotate for best fit
unchecked
Rotate for best fit
checked
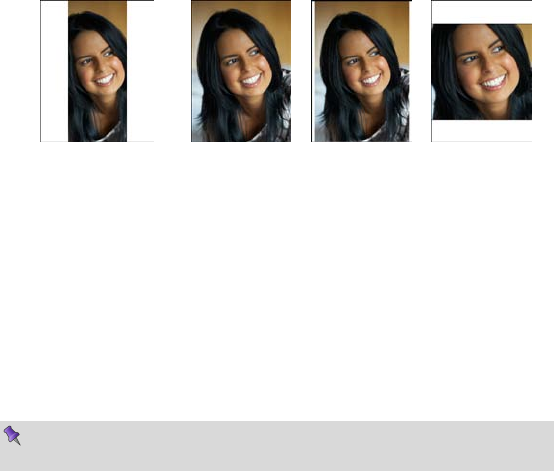
162 Print, Export, and Share
Cropping images in cells
If you're looking to be more specific about which areas of your image to print,
you can crop your image instead of using the above Image Options. PhotoPlus
supports some sophisticated cropping options, especially the ability to crop
using the image or the image's cell dimensions.
To crop an image:
1. From the dialog, select an image from the lower gallery and click Crop
Image.
2. From the Crop Image dialog, choose an Aspect Ratio from the drop-down
list which dictates the proportions of your crop area grid: Unconstrained
creates a grid which can be proportioned in any way; Cell matches to cell
dimensions; Image maintains image dimensions; Custom uses a custom
constrained ratio (e.g., a square) that you define yourself in the adjacent
input boxes.
Unconstrained Cell Image
(default)
Custom
(e.g., 1.00 x 1.00 in)
3. Drag a crop area's corner to size your crop according to requirements, then
move the grid around the image to choose the preferred image area to be
cropped. To revert, click Clear to reset your crop grid.
4. Click OK.
If your image is already present in your layout then it will update automatically
to reflect the new cropping applied. If it hasn't yet been used, the crop is still
applied to the image in the image gallery.
Cropping affects every instance of the image. Once applied, all
images are updated.
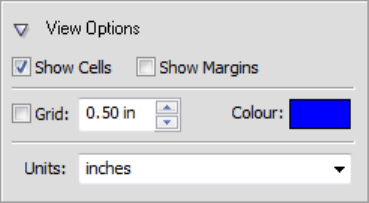
Print, Export, and Share 163
Setting viewing options
The following global viewing options will be applied to every page.
Show
Cells
When checked, each cell border is displayed within which the
image is placed.
Show
Margins
When checked, margin guides are shown in blue.
Grid When checked, a dot snapping grid is applied to the layout—cells
will snap to the grid to aid cell positioning. Use the input box
and/or Color swatch to enter a grid interval (spacing) or pick a
different grid color via a dialog.
Units Use the drop-down menu to select a different measurement unit
used in the Layout and Image Options panes.
For professional printing, the Separations and Prepress options control CMYK
color separations and printer marks.
Printing using color separations
The Separations and Prepress options, shown for every mode, are used for
professional printing with CMYK color separations. This process is now a less
popular printing method compared to electronic PDF publishing (using PDF/X1
compliance). See PhotoPlus Help for more details.
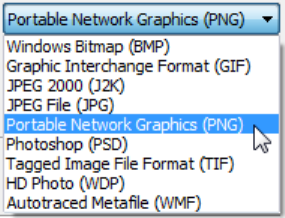
164 Print, Export, and Share
Exporting to another file format
In many situations, you’ll want to save a file to one of the standard graphics
formats. In PhotoPlus, this is known as exporting.
Exporting an image means converting it to a specified graphic file format other
than the native PhotoPlus (.spp) format. This flattens the image, removing layer
information.
Only the SPP and the Photoshop PSD formats preserves image information,
such as multiple layers, masks, or image map data that would be lost in
conversion to another format.
The Export process itself can be carried out by using an Export Optimizer
where you can compare export previews for multiple file formats before export.
The Export Optimizer consists of a right-hand preview display (single, dual, or
quad) and a left-hand settings region, with additional View and Zoom buttons
along the bottom of the dialog. Dual and quad previews let you test and compare
between different export formats in each pane—simply select a preview pane
and then test various quality settings, change format-specific options or resize
before going ahead with your optimized file's export—it even retains your
preferred settings for each format!
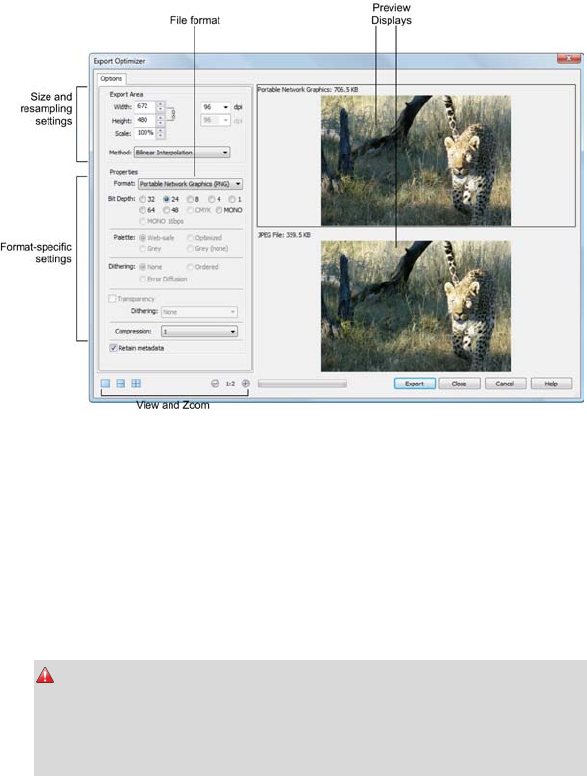
Print, Export, and Share 165
Exporting images
To export an image:
1. Click Export from the File menu.
2. From the Export Optimizer dialog, use the Options tab to specify the
Export Area, resampling method, file Format, and format-specific
options such as bit depth, dithering, palette, and compression.
32-bit install only: If the Width/Height, Scale or dpi settings are
set too high, a cross will appear over the image preview and the
Export button will appear grayed out. You will not be able to export
your photo at these settings. Reduce the specified settings to allow
exporting.
3. Review your optimized image, and when you're happy with it, click Export.
The Close button will instead abort the export but save any format-specific
option changes made in the dialog.
4. From the Save As dialog, choose a folder and enter a file name. The export
format and custom settings will be remembered for future exports. Click
OK.
166 Print, Export, and Share
To adjust the preview display:
• To change the display scale, click the Zoom Out or Zoom In
buttons, or rotate your mouse wheel (if available).
• When zoomed in, you can also pan around different portions of the
image, by clicking and dragging on the image with the hand cursor.
• For various preview displays, click one of the View
buttons to select Single Preview, Dual Preview, or Quad Preview. The
multi-pane (Dual and Quad) settings allow for before-and-after
comparison of export settings.
To compare export settings:
1. Set the preview display to be either Dual Preview or Quad Preview.
2. Click one of the preview display panes to select it as the active pane.
3. In the Properties section, choose an export format and specific settings.
Each time you make a new choice, the active pane updates to show the
effect of filtering using the new settings, as well as the estimated file size.
4. To compare settings, select a different display pane and repeat the process.
The Export Optimizer lets you experiment freely and evaluate the results.
To revert back to a single pane, click Single Preview.
To proceed with exporting:
1. Make sure the active preview pane is using the settings you want to apply to
the image.
2. Click the dialog's Export button to display the Export dialog.
The dialog includes additional options for use with web images (see
Slicing images and Creating image maps in PhotoPlus Help).
To preview an image in your web browser:
• Choose Preview in Browser from the File menu. PhotoPlus exports
the image as a temporary file, then opens the file for preview in your
web browser.
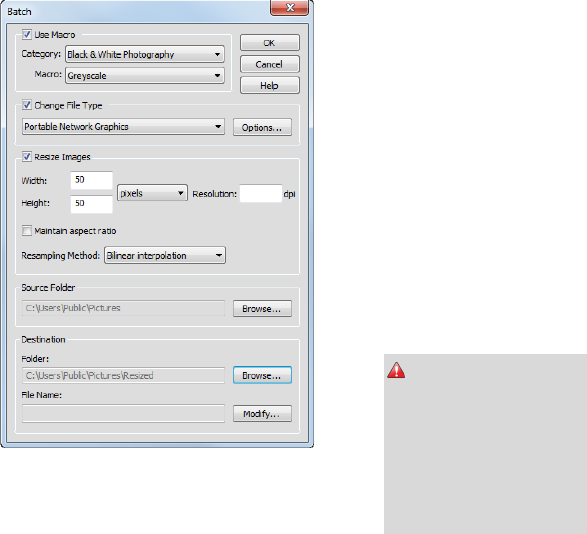
Print, Export, and Share 167
Batch processing
The batch processing feature is especially useful if you want to repeat the same
operation again and again... Batch processing allows you to:
• Use Macros: uses preset or custom macros as part of the batch process.
• Change File Type: to bulk convert images to a new file type (with
different file properties if needed).
• Resize Images: to resample images to various widths, heights, or
resolutions (using different resampling methods).
• Change File Name: to alter the file names of images in bulk.
For any of the above, you specify separate source and destination folders as your
input and output. There are several advantages to this, mainly that your original
photos are not overwritten.
The Batch dialog, available
from the File menu, is used to
perform all of the above
operations.
As a pre-requisite, you have to
define a specific Source Folder
for any batch processing
operation, whether using a
macro or not, or if converting
photos to a different file format.
A Destination folder can
optionally be defined, creating
new files in that new location.
If you don’t select a
destination folder,
the source files will
be processed and
your original files will
be overwritten—
exercise caution with
these settings!
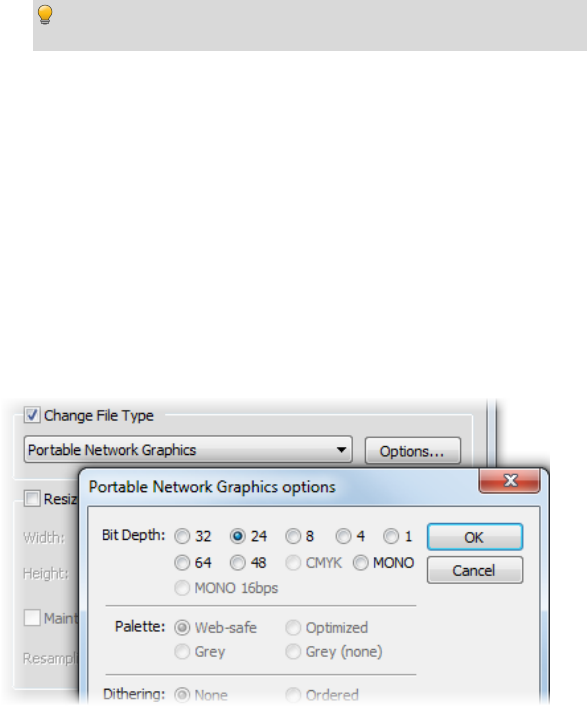
168 Print, Export, and Share
You may be wondering how batch processing affects photos currently loaded in
PhotoPlus. PhotoPlus’s batch processing only operates on source folder contents
and not on the currently loaded photos themselves—so these remain unaffected.
However, as a visual check, you will see each photo temporarily being loaded
and converted one-by-one in the Photo window during batch processing.
Check the output folder via Windows Explorer to ensure the results
are as you expect.
Using macros
Macros (see PhotoPlus Help) can be applied to a batch process easily (via Use
Macros). PhotoPlus doesn’t differentiate between pre-recorded and recorded
macros. If available, they are selected from the same Category and Macro drop-
down lists equally.
Changing file type
It is possible to convert your photos into one of many different file types
available in PhotoPlus (via Change File Type). In addition, conversion options
such as bit depth, palette, dithering, compression/quality, and matte can be
selected depending on the file type.
File conversions can be carried out independently or in conjunction with macros
(the dialogs shown opposite converts each image to 24-bit PNG format).

Print, Export, and Share 169
Changing image size
As well as changing file formats, PhotoPlus can use batch processing to alter
image sizes in bulk (using a choice of resampling methods) via Resize Images.
Typically, this is a quick and easy way to make your images scale to a maximum
image dimension (height or width) with aspect ratio maintained, to absolute
image dimensions (with stretching/shrinking to fit), scale by percentage, and
scale by resolution (DPI). Use for sending your digital photos via email or
perhaps to publish your images online via a website.
• Check Maintain aspect ratio
then enter values for Max
Width and Max Height to
scale to maximum intended
dimensions while preserving
the image's original aspect
ratio.
• With Maintain aspect ratio
unchecked, enter values for
absolute Width and Height to
make images of a fixed size. As
aspect ratio is not maintained,
images may be stretched
horizontally or vertically.
• Change the units of
measurement to percent, then
enter identical percentage
values to scale Width and
Height in proportion
(maintain aspect ratio);
otherwise, different values will
stretch images horizontally or
vertically.
• Enter a DPI value to alter the
original resolution of the
images.

170 Print, Export, and Share
Resampling Method • Pick a method from the drop-
down list. Use Nearest Pixel for
hard-edge images, Bilinear
Interpolation when shrinking
photos, Bicubic Interpolation
when enlarging photos, and
Lanczos3 Window when best
quality results are expected.
The list is ordered according to
processing times (fastest to
slowest).
Changing file names
It is also possible to define a Destination File Name for the files to be processed
by selecting the dialog's Modify button. In the File Name Format dialog you can
select new file names that can be built up using the current date/time, document
names, sequence number, or text string, individually or in combination.
Use the sequence number to generate a separate file for every file to
be converted—otherwise your first converted file will be
overwritten continually!

Additional
Information
10
172 Index
Index 173
Contacting Serif
Contacting Serif Support
Our support mission is to provide fast, friendly technical advice and support
from a team of experts.
Serif Support on the web
Service and Support support.serif.com
Twitter twitter.com/serifsupport
Facebook www.facebook.com/SerifSupport
Additional Serif information
Serif on the web
Serif website www.serif.com
Forums http://forums.serif.com
http://youtube.com/serifsoftware
Main office (UK, Europe)
Address The Software Center, PO Box 2000
Nottingham, NG11 7GW, UK
Phone (0115) 914 2000
Phone (Registration) (0800) 376 1989
+44 800 376 1989
Phone (Sales) (0800) 376 7070
+44 800 376 7070
Phone (Service and
Support)
0845 345 6770
Fax (0115) 914 2020

174 Index
North American office (US, Canada)
Phone (Registration) 800-794-6876
Phone (Sales) 800-489-6703
Phone (Customer Service) 800-489-6720
Support 603-886-6642
For international enquiries, please contact our main office.
Credits
This User Guide, and the software described in it, is furnished under an end user License
Agreement, which is included with the product. The agreement specifies the permitted and
prohibited uses.
Trademarks
Serif is a registered trademark of Serif (Europe) Ltd.
PhotoPlus is a registered trademark of Serif (Europe) Ltd.
All Serif product names are trademarks of Serif (Europe) Ltd.
Microsoft, Windows and the Windows logo are registered trademarks of Microsoft
Corporation. All other trademarks acknowledged.
Windows Vista and the Windows Vista Start button are trademarks or registered
trademarks of Microsoft Corporation in the United States and/or other countries.
Adobe Photoshop is a registered trademark of Adobe Systems Incorporated in the United
States and/or other countries.
Index 175
Copyrights
Digital Images © 2008 Hemera Technologies Inc. All Rights Reserved.
Digital Images © 2008 Jupiterimages Corporation, All Rights Reserved.
Digital Images © 2008 Jupiterimages France SAS, All Rights Reserved.
Portions Images ©1997-2002 Nova Development Corporation; ©1995 Expressions
Computer Software; ©1996-98 CreatiCom, Inc.; ©1996-99 Cliptoart; ©1996-99 Hemera;
©1997 Multimedia Agency Corporation; ©1997-98 Seattle Support Group. Rights of all
parties reserved.
This application was developed using LEADTOOLS, copyright ©1991-2007 LEAD
Technologies, Inc. ALL Rights Reserved.
Caroline (cazcarrot) Wilson © 2011, All Rights Reserved.
The Radiance Software License, Version 1.0
Copyright © 1990 - 2002 The Regents of the University of California, through Lawrence
Berkeley National Laboratory. All rights reserved.
This product includes Radiance software (http://radsite.lbl.gov/) developed by the
Lawrence Berkeley National Laboratory (http://www.lbl.gov/).
Copyright © 2002-2011, Industrial Light & Magic, a division of Lucasfilm Entertainment
Company Ltd. All rights reserved.
©2012 Serif (Europe) Ltd. All rights reserved. No part of this User Guide may be
reproduced in any form without the express written permission of Serif (Europe) Ltd.
Serif PhotoPlus X6 © 2012 Serif (Europe) Ltd. All rights reserved.
Companies and names used in samples are fictitious.
176 Index

Index 177
Index
11
178 Index
Index 179
16 bit images, 119
2D layer effects, 68
3D layer effects, 70
8 bit images, 119
Add Layer Mask, 28
Add Mask, 28
adjustment layers
clipping, 43
using, 38
alpha (opacity) channel, 85
antialiasing, 93, 127, 147
background color, 12, 120
Background Eraser Tool, 132
Background layer, 20, 96
batch processing, 167
bevel (layer effects), 69
blend modes, 31, 129
bracketed photos, 74
Brightness/Contrast (adjustment),
49
browser (web), 166
Brush Tip tab, 127
brushes
custom picture, 130
hard-edged, 127
bump maps (layer effects), 71
canvas size
changing, 100
for new image, 11
Character tab, 151
Chromatic Aberration Remover
(distortion effect), 49
circle
drawing, 144
selecting, 82
Clip to Layer Below, 43
Clipboard operations, 96
Clone Tool, 140
CMYK
modes, 120
separations, 163
color
adjusting, 36
choosing, 120
defining custom, 122
foreground and background,
120
modes, 119
palettes, 124
saving, 124
separations, 163
storing, 124
swatches, 124
wheel, 120
Color Pickup Tool, 122
Color Range, 85
Color tab, 120
combination buttons
for lines, 143
for selection, 84
for shapes, 143
Conical (gradient fill), 137
copying, 96
correction (of images), 35, 45, 46
credits, 174
Crop Tool, 104
cropping
image, 104
in PhotoFix, 48
to pixels, 108
to selection, 108
custom
canvas sizes, 11
colors, 122
picture brushes, 130
Cut/Copy, 95, 96
cutouts, 113
180 Index
Deform Tool, 110
deforming
meshes, 111
scale and skew, 110
selections, 89
Deselect, 82
Disable Mask, 30
Documents tab, 13
downsampling, 169
drawing and painting, 127, 142
Drop Shadow (layer effect), 69
effects
filter, 57
layer (2D), 68
layer (3D), 70
special, 57
ellipse
drawing, 144
selecting, 82
Emboss (layer effect), 69
Eraser tools, 131
erasing, 131
Export Optimizer, 165
exporting an image, 164
extracting images, 113
feathering, 91, 93
features, new, 4
fills
flood, 135
gradient, 137
pattern, 135
solid, 135, 137
tolerance in, 135
Filter Gallery, 64
filter groups (on filter layers), 60
filter layers
managing, 60
masks on, 61
using, 58
filters
adjustment, 36
special effects, 57
flattening an image, 15
flipping, 109
Flood Eraser Tool, 133
Flood Fill Tool, 135
fonts, 150
foreground color, 120
Freehand Pen Tool, 147
Gradient Fill Tool, 137
gradients, 137
Grayscale color mode, 120
HDR Photo Merge, 9, 74
HSB mode, 120
HSL mode, 120
hue, 120
image
creating new, 11
exporting, 164
fixing, 46
formats for Web, 166
opening file, 12
saving file, 15
Image Cutout Studio, 113
image size, 11, 98, 169
Inner Bevel (layer effect), 69
Inner Glow (layer effect), 69
Inner Shadow (layer effect), 69
installation, 6
Instant Effects tab, 70
Invert (selection), 92
Layer to Background command, 23
layers
about, 19
adjustment, 38
Background layer, 96
blend modes, 31
clipping, 43
Index 181
creating, 23
extracting parts of, 113
filter, 58
hide/show, 23
Layer to Background, 23
opacity of, 26
Promote to Layer, 23, 96
selecting, 22
shape, 142
soloing, 23
text, 150
using 2D effects, 68
using 3D effects, 70
Lens Distortion (distortion effect),
49
Lens Vignette (distortion effect),
49
letter spacing, 151
lighting, for 3D layer effects, 71
lightness, 120
Linear (gradient fill), 137
lines, drawing, 142
Load Selection, 88
luminance, 120
Magic Wand Tool, 83
Magnetic Selection Tool, 83
mask commands, 29
masks
in filter layers, 61
PhotoFix, 51
using, 27
Mesh Warp Tool, 111
mesh warping, 111
modes, color, 119
monochrome, 119
Move Tool, 95
navigating, between documents, 13
New Adjustment Layer, 41
New Animation, 9, 11
new features, 4
New Image, 9, 11
New Layer, 23
Node Edit Tool, 146, 148
nodes (Mesh Warp Tool), 111
opacity
adjusting, 25
selecting, 85
opening an image file, 12
optimizing an image, 165
organizing photos, 10
Outer Bevel (layer effect), 69
Outer Glow (layer effect), 69
Paint to Select mode, 83
Paintbrush Tool, 127
painting, 127
palettes, color, 124
Paste, 96
paths, 142
pattern maps, 71
Pattern Tool, 134
patterns, 134
pen tablet, 129
Pen Tool, 147
Pencil Tool, 127
perspective, 110
PhotoFix
masking in, 51
retouch tools in, 48
saving favorites in, 54
using, 46
PhotoPlus Picture (.SPP), 15
Photoshop (.PSD), 12, 164
Picture Brush Tool, 129
Pillow (layer effect), 69
polygon
drawing, 144
selecting, 83
Preview in Browser, 166
182 Index
Print Studio, 155
printing
cropping to print sizes, 106
images, 155
profiles (for color management),
119
Promote to Layer, 23, 96
PSD format, 12, 164
PSP format, 12
QuickShape tools, 144
Radial (gradient fill), 137
Rasterize, 23, 151
rectangle
drawing, 144
selecting, 82
red eye (removing), 48
resampling, 170
resizing
images, 98
in bulk, 169
on export, 165
selection, 90
resolution, changing (via Batch
processing), 169
Retouch tools, 45
Revert, 16
RGB color mode, 120
rotating, 109
Rule of thirds, 107
saturation, 120
saved work, opening, 9, 12
saving an image, 15
scaling
image size, 98
in printing, 160
selections, 90
Select All, 82
selection
cropping to, 108
defining region, 82
deforming, 89
duplicating, 95
manipulating, 94
modifying, 89
of non-transparent regions, 85
rotating, 89
storing, 87
text, 152
Selection Deform Tool, 89
Selection tools, 82
separations, CMYK color, 163
Serif contact details, 173
Shape Edit Tool, 146, 148
shape layers
rasterizing, 23
using, 142
shaped regions, selecting, 82
sharpening, 49
size
canvas, 11, 100
image, 98, 165
skewing, 110
Solid fill, 137
soloing (layers), 23
special effects, 57
SPP (PhotoPlus Picture), 15
square
drawing, 144
selecting, 82
Square (gradient fill), 137
stamping pictures, 129
standard layers, 20
Startup Wizard, 9, 11, 13
Store Selection, 87
Straight Pen Tool, 147
Straighten Tool, 103
Index 183
straightening, 48, 102
support, 173
Swatches tab, 124
system requirements, 6
technical support, 173
text
adjusting size and position of,
151
creating and editing, 150
creating selection in shape of,
152
layers, 21, 150
typographic control, 151
using layer effects on, 68
Text Selection Tool, 83, 150
Text Tool, 150
tiling (print option), 156
Tolerance property, 83, 132, 135
tone mapping, 74
transparency, 25, 73, 136
Use all layers, 22
vector shapes, 142
vignetting, 49
Warp tools, 73
warping, 73, 111
Web images
formats for, 166
previewing in browser, 166
workspaces, 10