Adding New Data Formats And Converters Texmacs Manual.en
texmacs-manual.en
User Manual:
Open the PDF directly: View PDF ![]() .
.
Page Count: 263 [warning: Documents this large are best viewed by clicking the View PDF Link!]
- 1. Getting started
- 2. Writing simple documents
- 3. Mathematical formulas
- 3.1. Incorporating mathematical formulas into documents
- 3.2. Typing mathematical symbols
- 3.3. Main mathematical constructs
- 3.4. Typing large delimiters
- 3.5. Typing big operators
- 3.6. Wide mathematical accents
- 3.7. Semantic editing facilities
- 3.8. Common errors and syntax correction
- 3.9. Semantics of mathematical symbols
- 3.10. Customized mathematical semantics
- 4. Tabular material
- 5. Links and automatically generated content
- 6. Creating technical pictures
- 7. Advanced layout features
- 8. Editing tools
- 9. Laptop presentations
- 10. Using GNU TeXmacs as an interface
- 11. Writing TeXmacs style files
- 11.1. Writing a simple style package
- 11.2. Rendering of style files and packages
- 11.3. The style-sheet language
- 11.4. Customizing the standard TeXmacs styles
- 11.4.1. Organization of style files and packages
- 11.4.2. General principles for customization
- 11.4.3. Customizing the general layout
- 11.4.4. Customizing list environments
- 11.4.5. Customizing numbered textual environments
- 11.4.6. Customizing sectional tags
- 11.4.7. Customizing the treatment of title information
- 11.5. Further notes and tips
- 12. Customizing TeXmacs
- 13. The TeXmacs plug-in system
- 14. The TeXmacs format
- 15. Built-in environment variables
- 16. Built-in TeXmacs primitives
- 17. Primitives for writing style files
- 18. The standard TeXmacs styles
- 18.1. General organization
- 18.2. The common base for most styles
- 18.3. Standard environments
- 18.4. Headers and footers
- 18.5. LaTeX style sections
- 19. Compatibility with other formats
- Appendix A. Configuration of TeXmacs
- Appendix B. About GNU TeXmacs-1.99.9
- B.1. Summary
- B.2. The philosophy behind TeXmacs
- B.3. The authors of TeXmacs
- B.4. Important changes in TeXmacs
- B.4.1. Improved spacing inside formulas \(1.0.7.10\)
- B.4.2. Auto-matching brackets \(1.0.7.9\)
- B.4.3. More context dependent interface \(1.0.7.8\)
- B.4.4. Default look and feel \(1.0.7.7\)
- B.4.5. Linking tool \(1.0.6.3\)
- B.4.6. Type 1 fonts become the default \(1.0.5.10\)
- B.4.7. New multi-part document mechanism \(1.0.5.6 -- 1.0.5.7\)
- B.4.8. Improved scheme interface \(1.0.5.1 -- 1.0.5.6\)
- B.4.9. Improved titles \(1.0.4.1\)
- B.4.10. Improved style sheets and source editing mode \(1.0.3.5\)
- B.4.11. Renaming of tags and environment variables \(1.0.2.7 -- 1.0.2.8\)
- B.4.12. Macro expansion \(1.0.2.3 -- 1.0.2.7\)
- B.4.13. Formatting tags \(1.0.2 -- 1.0.2.1\)
- B.4.14. Keyboard \(1.0.0.11 -- 1.0.1\)
- B.4.15. Menus \(1.0.0.7 -- 1.0.1\)
- B.4.16. Style files \(1.0.0.4\)
- B.4.17. Tabular material \(0.3.5\)
- B.4.18. Document format \(0.3.4\)
- Appendix C. Contributing to GNU TeXmacs
- C.1. Use TeXmacs
- C.2. Making donations to the TeXmacs project
- C.3. Contribute to the GNU TeXmacs documentation
- C.4. Internationalization
- C.5. Writing data converters
- C.6. Porting TeXmacs to other platforms
- C.7. Interfacing TeXmacs with other systems
- C.8. TeXmacs over the network and over the web
- C.9. Become a TeXmacs developer
- Appendix D. Interfacing TeXmacs with other programs
- D.1. Introduction
- D.2. Basic input/output using pipes
- D.3. Formatted and structured output
- D.4. Output channels, prompts and default input
- D.5. Sending commands to TeXmacs
- D.6. Background evaluations
- D.7. Mathematical and customized input
- D.8. Tab-completion
- D.9. Dynamic libraries
- D.10. Miscellaneous features
- D.11. Writing documentation
- D.12. Plans for the future
- Index

GNU T
E
X
MACS user manual


Table of contents
1. Getting started ...................................... 13
1.1. Conventions for this manual . . . . . . . . . . . . . . . . . . . . . . . . . . . . . . . . . 13
Menuentries ..................................... 13
Keyboardmodifiers................................. 13
Keyboardshortcuts ................................ 13
Specialkeys ..................................... 14
1.2. Configuring T
EXMACS ..................................... 14
1.3. Creating, saving and loading documents . . . . . . . . . . . . . . . . . . . . . . . . . 14
1.4. Printingdocuments ...................................... 15
2. Writing simple documents ............................. 17
2.1. Generalities for typing text . . . . . . . . . . . . . . . . . . . . . . . . . . . . . . . . . 17
2.2. Typingstructuredtext .................................... 17
2.3. Content-basedtags ...................................... 18
2.4. Lists ................................................ 19
2.5. Environments .......................................... 20
2.6. Layoutissues .......................................... 20
2.7. The font selection system . . . . . . . . . . . . . . . . . . . . . . . . . . . . . . . . . . 21
2.8. Masteringthekeyboard ................................... 22
2.8.1. Generalprefixrules ................................... 22
2.8.2. Keyboard shortcuts for text mode . . . . . . . . . . . . . . . . . . . . . . . . . . 23
2.8.3. Hybrid commands and L
A
T
EXsimulation ..................... 24
2.8.4. Dynamicobjects ..................................... 25
2.8.5. Various useful keyboard shortcuts . . . . . . . . . . . . . . . . . . . . . . . . . . 25
3. Mathematical formulas ............................... 27
3.1. Incorporating mathematical formulas into documents . . . . . . . . . . . . . . . . . 27
3.2. Typing mathematical symbols . . . . . . . . . . . . . . . . . . . . . . . . . . . . . . . 28
3.3. Main mathematical constructs . . . . . . . . . . . . . . . . . . . . . . . . . . . . . . . 29
3.4. Typinglargedelimiters .................................... 29
3.5. Typingbigoperators ..................................... 30
3.6. Wide mathematical accents . . . . . . . . . . . . . . . . . . . . . . . . . . . . . . . . . 31
3.7. Semantic editing facilities . . . . . . . . . . . . . . . . . . . . . . . . . . . . . . . . . . 31
3.8. Common errors and syntax correction . . . . . . . . . . . . . . . . . . . . . . . . . . 32
3.9. Semantics of mathematical symbols . . . . . . . . . . . . . . . . . . . . . . . . . . . . 34
3.10. Customized mathematical semantics . . . . . . . . . . . . . . . . . . . . . . . . . . . 35
4. Tabular material .................................... 37
4.1. Creatingtables ......................................... 37
4.2. Theformattingmode ..................................... 38
4.3. Specifying the cell and table alignment . . . . . . . . . . . . . . . . . . . . . . . . . . 38
4.4. Specifying the cell and table size . . . . . . . . . . . . . . . . . . . . . . . . . . . . . . 39
4.5. Borders, padding and background color . . . . . . . . . . . . . . . . . . . . . . . . . 39
5

4.6. Advanced table features . . . . . . . . . . . . . . . . . . . . . . . . . . . . . . . . . . . 39
5. Links and automatically generated content .............. 41
5.1. Creating labels, links and references . . . . . . . . . . . . . . . . . . . . . . . . . . . . 41
5.2. Insertingimages ........................................ 41
5.3. Generating a table of contents . . . . . . . . . . . . . . . . . . . . . . . . . . . . . . . 42
5.4. Compiling a bibliography . . . . . . . . . . . . . . . . . . . . . . . . . . . . . . . . . . 42
Editing files with bibliographic entries . . . . . . . . . . . . . . . . . . . . . . . . . 42
Inserting citations and compiling bibliographies . . . . . . . . . . . . . . . . . . . 43
5.5. Generatinganindex ...................................... 43
5.6. Compilingaglossary ..................................... 44
5.7. Multipleextractions ...................................... 44
5.8. Books and multifile documents . . . . . . . . . . . . . . . . . . . . . . . . . . . . . . . 45
6. Creating technical pictures ........................... 47
6.1. Startinganewpicture .................................... 47
6.2. Insertingnewobjects ..................................... 47
6.3. Editingobjects ......................................... 48
6.4. Specification of style properties . . . . . . . . . . . . . . . . . . . . . . . . . . . . . . . 49
Color .......................................... 49
Fillcolor ....................................... 49
Opacity ........................................ 50
Pointstyle ...................................... 50
Linewidth ...................................... 50
Linedashes ...................................... 50
Linearrows ...................................... 50
Textalignment ................................... 51
6.5. Editing groups of objects . . . . . . . . . . . . . . . . . . . . . . . . . . . . . . . . . . . 51
7. Advanced layout features ............................. 53
7.1. Flows ............................................... 53
7.2. Floatingobjects ........................................ 53
7.3. Pagebreaking .......................................... 53
8. Editing tools ........................................ 55
8.1. Cutandpaste .......................................... 55
8.2. Searchandreplace ....................................... 56
8.3. Spellchecking .......................................... 57
8.4. Undoandredo ......................................... 57
8.5. Structuredediting ....................................... 58
8.6. Structured cursor movement . . . . . . . . . . . . . . . . . . . . . . . . . . . . . . . . 59
Structured traversal of the document . . . . . . . . . . . . . . . . . . . . . 59
Traversal of tags that are similar to the innermost tag . . . . . . . . . . 59
Movements inside the innermost tag . . . . . . . . . . . . . . . . . . . . . . 59
8.7. Structuredvariants ...................................... 59
8.8. Positioning and resizing objects . . . . . . . . . . . . . . . . . . . . . . . . . . . . . . 60
8.9. Versioningtools ......................................... 61
Comparingtwoversions .............................. 61
6Table of contents

Visualization of the differences . . . . . . . . . . . . . . . . . . . . . . . . . 61
Retaining a specific version . . . . . . . . . . . . . . . . . . . . . . . . . . . . 61
Grain control and reactualizing the differences . . . . . . . . . . . . . . . 62
Using external programs such as Subversion for version control . . . 62
9. Laptop presentations ................................. 65
9.1. Beamerstyles .......................................... 65
9.2. Traversal of a presentation . . . . . . . . . . . . . . . . . . . . . . . . . . . . . . . . . . 65
9.3. Overlays ............................................. 66
9.4. Decorations ........................................... 67
9.5. Animations ........................................... 68
9.6. Exporting beamer presentations . . . . . . . . . . . . . . . . . . . . . . . . . . . . . . 68
10. Using GNU T
E
X
MACS as an interface .................... 71
10.1. Creatingsessions ....................................... 71
10.2. Editingsessions ........................................ 71
10.3. Selecting the input method . . . . . . . . . . . . . . . . . . . . . . . . . . . . . . . . . 72
10.4. Plug-ins as scripting languages . . . . . . . . . . . . . . . . . . . . . . . . . . . . . . 73
10.5. Spreadsheets .......................................... 74
10.6. Remoteplug-ins ........................................ 75
11. Writing T
E
X
MACS style files .......................... 77
11.1. Writing a simple style package . . . . . . . . . . . . . . . . . . . . . . . . . . . . . . 77
11.2. Rendering of style files and packages . . . . . . . . . . . . . . . . . . . . . . . . . . . 79
11.2.1. ASCII-based or tree-based editing: an intricate choice . . . . . . . . . . . . 79
11.2.2. Global presentation . . . . . . . . . . . . . . . . . . . . . . . . . . . . . . . . . . 80
11.2.3. Local customization . . . . . . . . . . . . . . . . . . . . . . . . . . . . . . . . . . 83
11.3. The style-sheet language . . . . . . . . . . . . . . . . . . . . . . . . . . . . . . . . . . 84
11.3.1. Assignments ....................................... 84
11.3.2. Macroexpansion .................................... 84
11.3.3. Formatting primitives . . . . . . . . . . . . . . . . . . . . . . . . . . . . . . . . . 85
11.3.4. Evaluationcontrol ................................... 87
11.3.5. Flowcontrol ....................................... 88
11.3.6. Computational markup . . . . . . . . . . . . . . . . . . . . . . . . . . . . . . . . 89
11.4. Customizing the standard T
EXMACS styles ....................... 89
11.4.1. Organization of style files and packages . . . . . . . . . . . . . . . . . . . . . 90
11.4.2. General principles for customization . . . . . . . . . . . . . . . . . . . . . . . 91
11.4.3. Customizing the general layout . . . . . . . . . . . . . . . . . . . . . . . . . . . 91
11.4.4. Customizing list environments . . . . . . . . . . . . . . . . . . . . . . . . . . . 92
11.4.5. Customizing numbered textual environments . . . . . . . . . . . . . . . . . . 93
Defining new environments . . . . . . . . . . . . . . . . . . . . . . . . . . . . 94
Customization of the rendering . . . . . . . . . . . . . . . . . . . . . . . . . 94
Customization of the numbering . . . . . . . . . . . . . . . . . . . . . . . . 95
11.4.6. Customizing sectional tags . . . . . . . . . . . . . . . . . . . . . . . . . . . . . . 95
11.4.7. Customizing the treatment of title information . . . . . . . . . . . . . . . . . 97
11.5. Furthernotesandtips .................................... 98
11.5.1. Customizing arbitrary tags . . . . . . . . . . . . . . . . . . . . . . . . . . . . . 98
11.5.2. Standardutilities ................................... 99
12. Customizing T
E
X
MACS ................................ 101
Table of contents 7

12.1. Introduction to the Guile extension language . . . . . . . . . . . . . . . . . . . 101
12.2. Writing your own initialization files . . . . . . . . . . . . . . . . . . . . . . . . . . 101
12.3. Creating your own dynamic menus . . . . . . . . . . . . . . . . . . . . . . . . . . . 102
12.4. Creating your own keyboard shortcuts . . . . . . . . . . . . . . . . . . . . . . . . 103
12.5. Other interesting files . . . . . . . . . . . . . . . . . . . . . . . . . . . . . . . . . . . 104
13. The T
E
X
MACS plug-in system .......................... 105
13.1. Installing and using a plug-in . . . . . . . . . . . . . . . . . . . . . . . . . . . . . . 105
13.2. Writing your own plug-ins . . . . . . . . . . . . . . . . . . . . . . . . . . . . . . . . 105
13.3. Example of a plug-in with Scheme code ....................... 107
The world plug-in ................................ 107
Howitworks .................................... 107
13.4. Example of a plug-in with C++ code ......................... 107
The minimal plug-in ............................... 107
Howitworks .................................... 108
13.5. Summary of the configuration options for plug-ins . . . . . . . . . . . . . . . . . 108
14. The T
E
X
MACS format ................................ 111
14.1. T
EXMACS trees ........................................ 111
Internal nodes of T
EXMACS trees ........................ 111
Leafs of T
EXMACS trees ............................. 111
Serialization and preferred syntax for editing . . . . . . . . . . . . . . . 112
14.2. T
EXMACS documents .................................... 112
14.3. Defaultserialization .................................... 113
Main serialization principle . . . . . . . . . . . . . . . . . . . . . . . . . . . 113
Formatting and whitespace . . . . . . . . . . . . . . . . . . . . . . . . . . . 114
Rawdata ...................................... 115
14.4. XMLserialization...................................... 115
The encoding for strings . . . . . . . . . . . . . . . . . . . . . . . . . . . . 115
XML representation of regular tags . . . . . . . . . . . . . . . . . . . . . 115
Specialtags .................................... 115
14.5. Scheme serialization ................................... 116
14.6. The typesetting process . . . . . . . . . . . . . . . . . . . . . . . . . . . . . . . . . . 117
14.7. Data relation descriptions . . . . . . . . . . . . . . . . . . . . . . . . . . . . . . . . 118
The rationale behind D.R.D.s . . . . . . . . . . . . . . . . . . . . . . . . . 118
Current D.R.D. properties and applications . . . . . . . . . . . . . . . . 118
Determination of the D.R.D. of a document . . . . . . . . . . . . . . . . 119
14.8. T
EXMACS lengths ...................................... 119
Absolutelengthunits .............................. 120
Rigid font-dependent length units . . . . . . . . . . . . . . . . . . . . . . 120
Stretchable font-dependent length units . . . . . . . . . . . . . . . . . . . 120
Boxlengths ..................................... 121
Otherlengthunits ................................ 121
Different ways to specify lengths . . . . . . . . . . . . . . . . . . . . . . . 121
15. Built-in environment variables ....................... 123
15.1. General environment variables . . . . . . . . . . . . . . . . . . . . . . . . . . . . . . 124
15.2. Specifying the current font . . . . . . . . . . . . . . . . . . . . . . . . . . . . . . . . 126
8Table of contents

15.3. Typesetting mathematics . . . . . . . . . . . . . . . . . . . . . . . . . . . . . . . . . 128
15.4. Paragraphlayout ...................................... 129
15.5. Pagelayout .......................................... 132
Paper specific variables . . . . . . . . . . . . . . . . . . . . . . . . . . . . . 133
Screen specific variables . . . . . . . . . . . . . . . . . . . . . . . . . . . . . 133
Specifyingthemargins ............................. 134
Pagedecorations ................................. 136
15.6. Tablelayout ......................................... 137
Layout of the table as a whole . . . . . . . . . . . . . . . . . . . . . . . . . 137
Layout of the individual cells . . . . . . . . . . . . . . . . . . . . . . . . . 138
15.7. Editingsourcetrees .................................... 140
15.8. Miscellaneous environment variables . . . . . . . . . . . . . . . . . . . . . . . . . . 140
16. Built-in T
E
X
MACS primitives .......................... 141
16.1. Fundamental primitives . . . . . . . . . . . . . . . . . . . . . . . . . . . . . . . . . . 141
16.2. Formatting primitives . . . . . . . . . . . . . . . . . . . . . . . . . . . . . . . . . . . 142
16.2.1. White space primitives . . . . . . . . . . . . . . . . . . . . . . . . . . . . . . . 142
16.2.2. Line breaking primitives . . . . . . . . . . . . . . . . . . . . . . . . . . . . . . 144
16.2.3. Indentation primitives . . . . . . . . . . . . . . . . . . . . . . . . . . . . . . . 145
16.2.4. Page breaking primitives . . . . . . . . . . . . . . . . . . . . . . . . . . . . . . 145
16.2.5. Box operation primitives . . . . . . . . . . . . . . . . . . . . . . . . . . . . . . 146
16.3. Mathematical primitives . . . . . . . . . . . . . . . . . . . . . . . . . . . . . . . . . 148
16.4. Tableprimitives ....................................... 151
16.5. Linkingprimitives ..................................... 152
16.6. Miscellaneous physical markup . . . . . . . . . . . . . . . . . . . . . . . . . . . . . 154
17. Primitives for writing style files ..................... 155
17.1. Environment primitives . . . . . . . . . . . . . . . . . . . . . . . . . . . . . . . . . . 155
17.2. Macroprimitives ...................................... 156
17.3. Flow control primitives . . . . . . . . . . . . . . . . . . . . . . . . . . . . . . . . . . 159
17.4. Evaluation control primitives . . . . . . . . . . . . . . . . . . . . . . . . . . . . . . 160
17.5. Functionaloperators .................................... 161
17.5.1. Operationsontext.................................. 161
17.5.2. Arithmetic operations . . . . . . . . . . . . . . . . . . . . . . . . . . . . . . . . 162
17.5.3. Boolean operations . . . . . . . . . . . . . . . . . . . . . . . . . . . . . . . . . 163
17.5.4. Operations on tuples . . . . . . . . . . . . . . . . . . . . . . . . . . . . . . . . 163
17.6. Transientmarkup ...................................... 164
17.7. Miscellaneous style-sheet primitives . . . . . . . . . . . . . . . . . . . . . . . . . . 166
17.8. Internalprimitives ..................................... 167
18. The standard T
E
X
MACS styles ......................... 171
18.1. Generalorganization .................................... 171
18.1.1. Standard T
EXMACS styles .............................. 171
18.1.2. Standard T
EXMACS packages ............................ 172
18.2. The common base for most styles . . . . . . . . . . . . . . . . . . . . . . . . . . . . 173
18.2.1. Standardmarkup .................................. 173
18.2.2. Standardsymbols .................................. 177
18.2.3. Standard mathematical markup . . . . . . . . . . . . . . . . . . . . . . . . . 178
18.2.4. Standardlists ..................................... 178
18.2.4.1. Using list environments . . . . . . . . . . . . . . . . . . . . . . . . . . . 178
Table of contents 9

18.2.4.2. Customization of list environments . . . . . . . . . . . . . . . . . . . . 179
18.2.5. Automatic content generation . . . . . . . . . . . . . . . . . . . . . . . . . . 180
18.2.5.1. Bibliographies . . . . . . . . . . . . . . . . . . . . . . . . . . . . . . . . . 180
18.2.5.2. Tables of contents . . . . . . . . . . . . . . . . . . . . . . . . . . . . . . . 181
18.2.5.3. Indexes ..................................... 182
18.2.5.4. Glossaries .................................... 183
18.2.6. Utilities for writing style files . . . . . . . . . . . . . . . . . . . . . . . . . . . 183
18.2.7. Counters and counter groups . . . . . . . . . . . . . . . . . . . . . . . . . . . 185
18.2.8. Special markup for programs . . . . . . . . . . . . . . . . . . . . . . . . . . . 187
18.2.9. Special markup for sessions . . . . . . . . . . . . . . . . . . . . . . . . . . . . 187
18.3. Standard environments . . . . . . . . . . . . . . . . . . . . . . . . . . . . . . . . . . 188
18.3.1. Defining new environments . . . . . . . . . . . . . . . . . . . . . . . . . . . . 188
18.3.2. Mathematical environments . . . . . . . . . . . . . . . . . . . . . . . . . . . . 189
18.3.3. Theorem-like environments . . . . . . . . . . . . . . . . . . . . . . . . . . . . 190
18.3.3.1. Using the theorem-like environments . . . . . . . . . . . . . . . . . . . 190
18.3.3.2. Customization of the theorem-like environments . . . . . . . . . . . 191
18.3.4. Environments for floating objects . . . . . . . . . . . . . . . . . . . . . . . . 192
18.3.4.1. Using the environments for floating objects . . . . . . . . . . . . . . . 192
18.3.4.2. Customization of the environments for floating objects . . . . . . . 192
18.4. Headersandfooters .................................... 193
18.4.1. Standardtitles .................................... 193
18.4.1.1. Entering titles and abstracts . . . . . . . . . . . . . . . . . . . . . . . . 193
18.4.1.2. Customizing the global rendering of titles . . . . . . . . . . . . . . . . 194
18.4.1.3. Customizing the rendering of title fields . . . . . . . . . . . . . . . . . 195
18.4.2. Standardheaders .................................. 197
18.5. L
A
T
EXstylesections .................................... 197
18.5.1. Using sectional tags . . . . . . . . . . . . . . . . . . . . . . . . . . . . . . . . . 197
18.5.2. Customization of the sectional tags . . . . . . . . . . . . . . . . . . . . . . . 198
18.5.3. Helper macros for rendering section titles . . . . . . . . . . . . . . . . . . . 199
19. Compatibility with other formats ..................... 201
19.1. Converters for L
A
T
EX ................................... 201
19.1.1. Introduction ...................................... 201
19.1.2. Conversion from T
EXMACS to L
A
T
EX ....................... 202
19.1.3. Conversion from L
A
T
EX to T
EXMACS ....................... 204
19.1.4. Limitations of the current L
A
T
EXconverters .................. 205
Limitations of the T
EXMACS to L
A
T
EX converter . . . . . . . . . . . . . . 205
Limitations of the L
A
T
EX to T
EXMACS converter . . . . . . . . . . . . . . 205
19.2. Converters for Html and MathML .......................... 206
Html generation ............................... 206
Customized Html generation ......................... 206
Htmlimportation ................................. 207
Declaringnewformats .............................. 207
Declaring new converters . . . . . . . . . . . . . . . . . . . . . . . . . . . . 208
Appendix A. Configuration of T
E
X
MACS ................... 209
A.1. Userpreferences ....................................... 209
A.2. Keyboard configuration . . . . . . . . . . . . . . . . . . . . . . . . . . . . . . . . . . 210
Standardconformance .............................. 210
Potentialconflicts ................................. 211
10 Table of contents

System-wide shortcuts which may take precedence . . . . . . . . . . . . 211
User-defined shortcuts . . . . . . . . . . . . . . . . . . . . . . . . . . . . . . 212
A.3. Notes for users of Cyrillic languages . . . . . . . . . . . . . . . . . . . . . . . . . . 212
A.4. Notes for users of oriental languages . . . . . . . . . . . . . . . . . . . . . . . . . . 214
Appendix B. About GNU T
E
X
MACS-1.99.9 ................... 215
B.1. Summary ........................................... 215
Disclaimers ..................................... 215
B.2. The philosophy behind T
EXMACS ............................. 215
B.2.1. A short description of GNU T
EXMACS ...................... 215
B.2.2. Why freedom is important for scientists . . . . . . . . . . . . . . . . . . . . . 216
B.3. The authors of T
EXMACS .................................. 216
B.3.1. Developers of T
EXMACS ............................... 217
B.3.2. Authors and maintainers of plugins for T
EXMACS ............... 219
B.3.3. Administration of T
EXMACS and material support . . . . . . . . . . . . . . 220
B.3.4. Porting T
EXMACS to other platforms . . . . . . . . . . . . . . . . . . . . . . . 220
B.3.5. Contributors to T
EXMACS packages ........................ 221
B.3.6. Internationalization of T
EXMACS .......................... 221
B.3.7. Othercontributors .................................. 222
B.3.8. Contactingus ..................................... 223
B.4. Important changes in T
EXMACS .............................. 224
B.4.1. Improved spacing inside formulas (1.0.7.10) . . . . . . . . . . . . . . . . . . 224
B.4.2. Auto-matching brackets (1.0.7.9) . . . . . . . . . . . . . . . . . . . . . . . . . 224
B.4.3. More context dependent interface (1.0.7.8) . . . . . . . . . . . . . . . . . . . 225
B.4.4. Default look and feel (1.0.7.7) . . . . . . . . . . . . . . . . . . . . . . . . . . . 225
B.4.5. Linking tool (1.0.6.3) . . . . . . . . . . . . . . . . . . . . . . . . . . . . . . . . 225
B.4.6. Type 1 fonts become the default (1.0.5.10) . . . . . . . . . . . . . . . . . . . 225
B.4.7. New multi-part document mechanism (1.0.5.6 – 1.0.5.7) . . . . . . . . . . 226
B.4.8. Improved scheme interface (1.0.5.1 – 1.0.5.6) . . . . . . . . . . . . . . . . . 226
B.4.9. Improved titles (1.0.4.1) . . . . . . . . . . . . . . . . . . . . . . . . . . . . . . . 226
B.4.10. Improved style sheets and source editing mode (1.0.3.5) . . . . . . . . . . 226
B.4.11. Renaming of tags and environment variables (1.0.2.7 – 1.0.2.8) . . . . . 226
B.4.12. Macro expansion (1.0.2.3 – 1.0.2.7) . . . . . . . . . . . . . . . . . . . . . . . 226
B.4.13. Formatting tags (1.0.2 – 1.0.2.1) . . . . . . . . . . . . . . . . . . . . . . . . . 227
B.4.14. Keyboard (1.0.0.11 – 1.0.1) . . . . . . . . . . . . . . . . . . . . . . . . . . . . 227
B.4.15. Menus (1.0.0.7 – 1.0.1) . . . . . . . . . . . . . . . . . . . . . . . . . . . . . . . 227
B.4.16. Style files (1.0.0.4) . . . . . . . . . . . . . . . . . . . . . . . . . . . . . . . . . 228
B.4.17. Tabular material (0.3.5) . . . . . . . . . . . . . . . . . . . . . . . . . . . . . . 228
B.4.18. Document format (0.3.4) . . . . . . . . . . . . . . . . . . . . . . . . . . . . . 228
Appendix C. Contributing to GNU T
E
X
MACS ............... 229
C.1. Use T
EXMACS ......................................... 229
C.2. Making donations to the T
EXMACS project ...................... 229
Making donations to TeXmacs through the SPI organization . . . . . 229
Details on how to donate money . . . . . . . . . . . . . . . . . . . . . . . 229
Importantnotes .................................. 230
C.3. Contribute to the GNU T
EXMACS documentation . . . . . . . . . . . . . . . . . . 230
C.3.1. Introduction on how to contribute . . . . . . . . . . . . . . . . . . . . . . . . 230
C.3.2. Using SVN ....................................... 231
C.3.3. Conventions for the names of files . . . . . . . . . . . . . . . . . . . . . . . . 231
Table of contents 11

C.3.4. Specifying meta information for documentation files . . . . . . . . . . . . . 231
C.3.5. Traversing the T
EXMACS documentation ..................... 232
C.3.6. Using the tmdoc style . . . . . . . . . . . . . . . . . . . . . . . . . . . . . . . . 233
C.3.6.1. Explanations of macros, environment variables, and so on . . . . . . 233
C.3.6.2. Graphical user interface related markup . . . . . . . . . . . . . . . . . 233
C.3.6.3. Common annotations . . . . . . . . . . . . . . . . . . . . . . . . . . . . . 234
C.3.6.4. Miscellaneous markup . . . . . . . . . . . . . . . . . . . . . . . . . . . . . 235
C.4. Internationalization ..................................... 235
C.5. Writing data converters . . . . . . . . . . . . . . . . . . . . . . . . . . . . . . . . . . 236
C.6. Porting T
EXMACS tootherplatforms .......................... 236
C.7. Interfacing T
EXMACS with other systems . . . . . . . . . . . . . . . . . . . . . . . . 236
C.8. T
EXMACS over the network and over the web . . . . . . . . . . . . . . . . . . . . . 236
C.9. Become a T
EXMACS developer .............................. 237
Appendix D. Interfacing T
E
X
MACS with other programs ..... 239
D.1. Introduction ......................................... 239
D.2. Basic input/output using pipes . . . . . . . . . . . . . . . . . . . . . . . . . . . . . 239
D.3. Formatted and structured output . . . . . . . . . . . . . . . . . . . . . . . . . . . . 241
The formula plug-in ............................... 241
The markup plug-in ................................ 242
D.4. Output channels, prompts and default input . . . . . . . . . . . . . . . . . . . . . 243
The prompt plug-in ................................ 243
D.5. Sending commands to T
EXMACS ............................. 244
The menus plug-in ................................ 244
D.6. Background evaluations . . . . . . . . . . . . . . . . . . . . . . . . . . . . . . . . . . 245
The substitute plug-in............................. 245
The secure plug-in ................................ 246
D.7. Mathematical and customized input . . . . . . . . . . . . . . . . . . . . . . . . . . 247
The input plug-in ................................ 247
D.8. Tab-completion ....................................... 249
The complete plug-in .............................. 250
D.9. Dynamiclibraries ...................................... 251
The dynlink plug-in ............................... 252
D.10. Miscellaneous features . . . . . . . . . . . . . . . . . . . . . . . . . . . . . . . . . . 253
Interrupts ...................................... 253
Testing whether the input is complete . . . . . . . . . . . . . . . . . . . . 254
D.11. Writing documentation . . . . . . . . . . . . . . . . . . . . . . . . . . . . . . . . . . 254
D.12. Plansforthefuture .................................... 254
Index ................................................ 255
12 Table of contents
Chapter 1
Getting started
1.1. Conventions for this manual
Menu entries.
Throughout the T
EXMACS manual, menu entries will be typeset using a sans serif font, like
in Document,File!Load or Format!Font shape!Italic.
Keyboard modifiers.
T
EXMACS makes use of the following keyboard modifiers:
⇧.For shift key combinations.
⌃.For control key combinations.
⌥.For alternate key combinations.
⌘.For meta key combinations.
For instance, ⌘⇧Xstands for the action which consists of simultaneously pressing the three
keys ⌘,⇧and X.
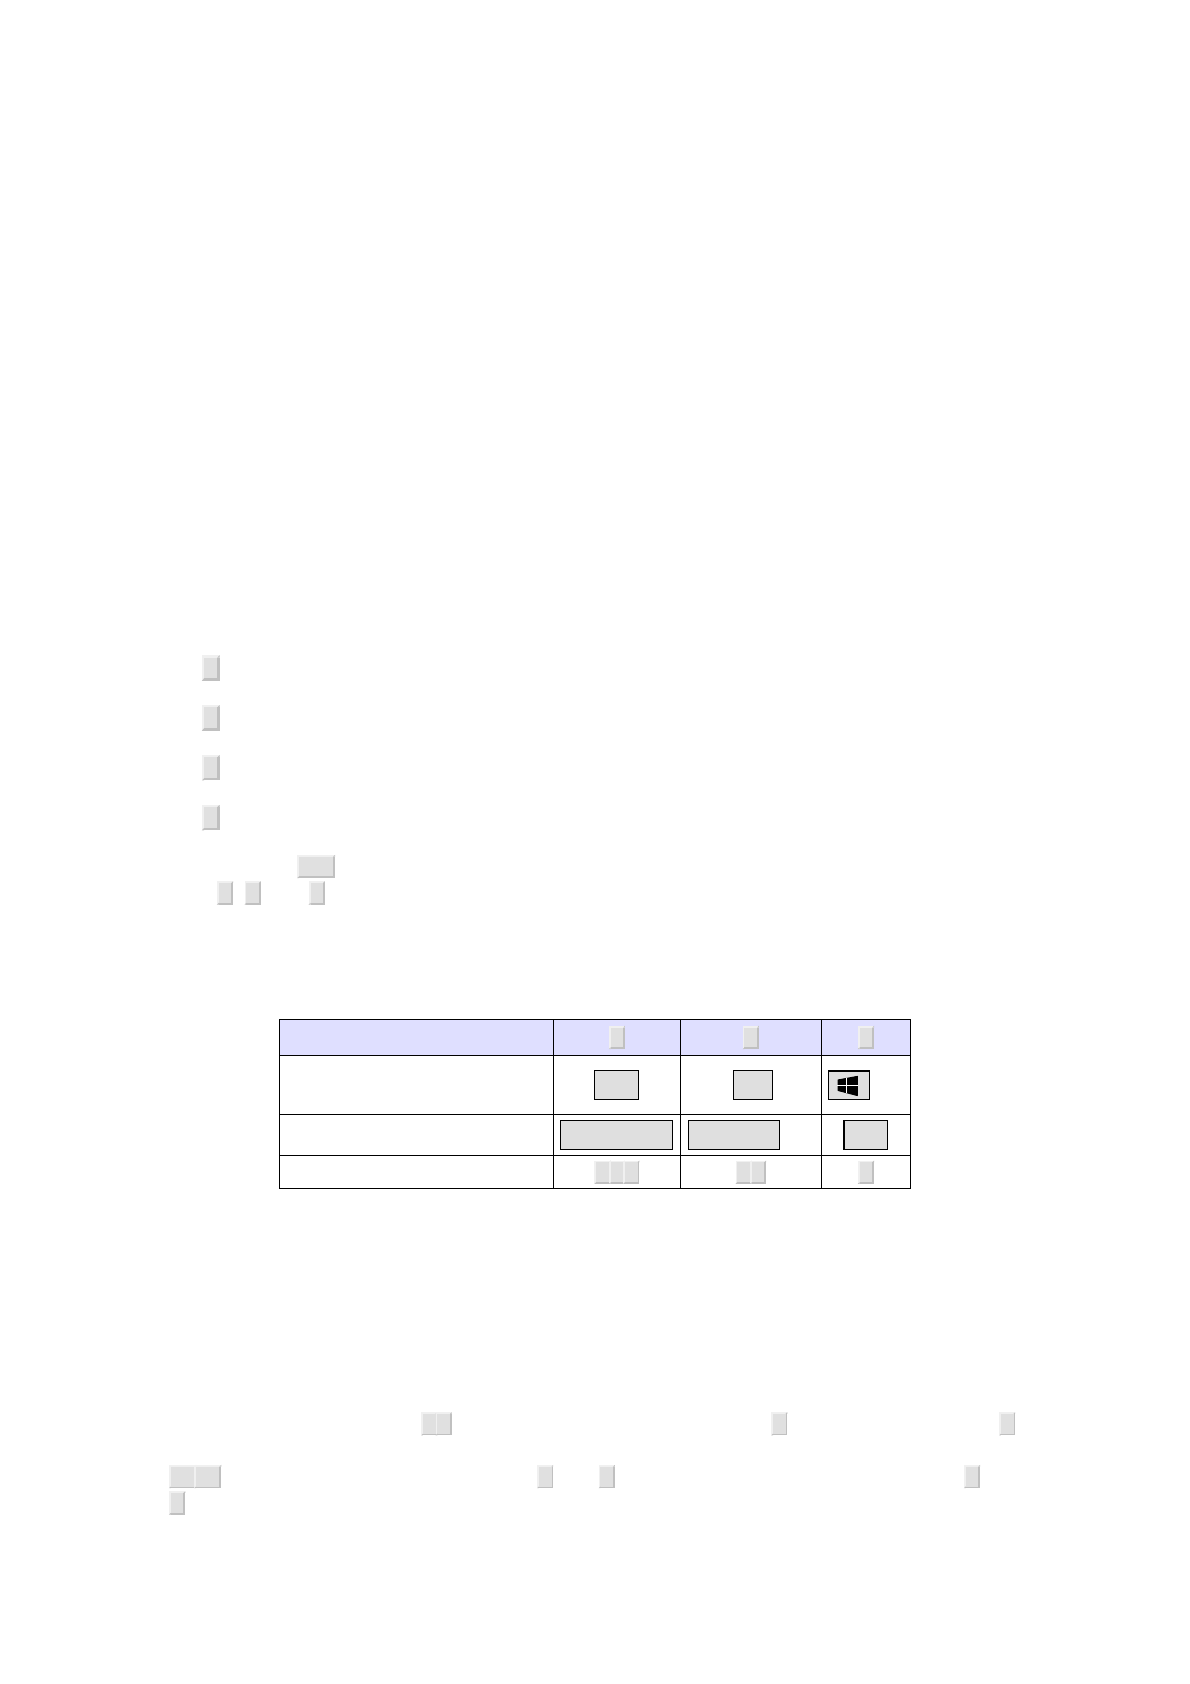
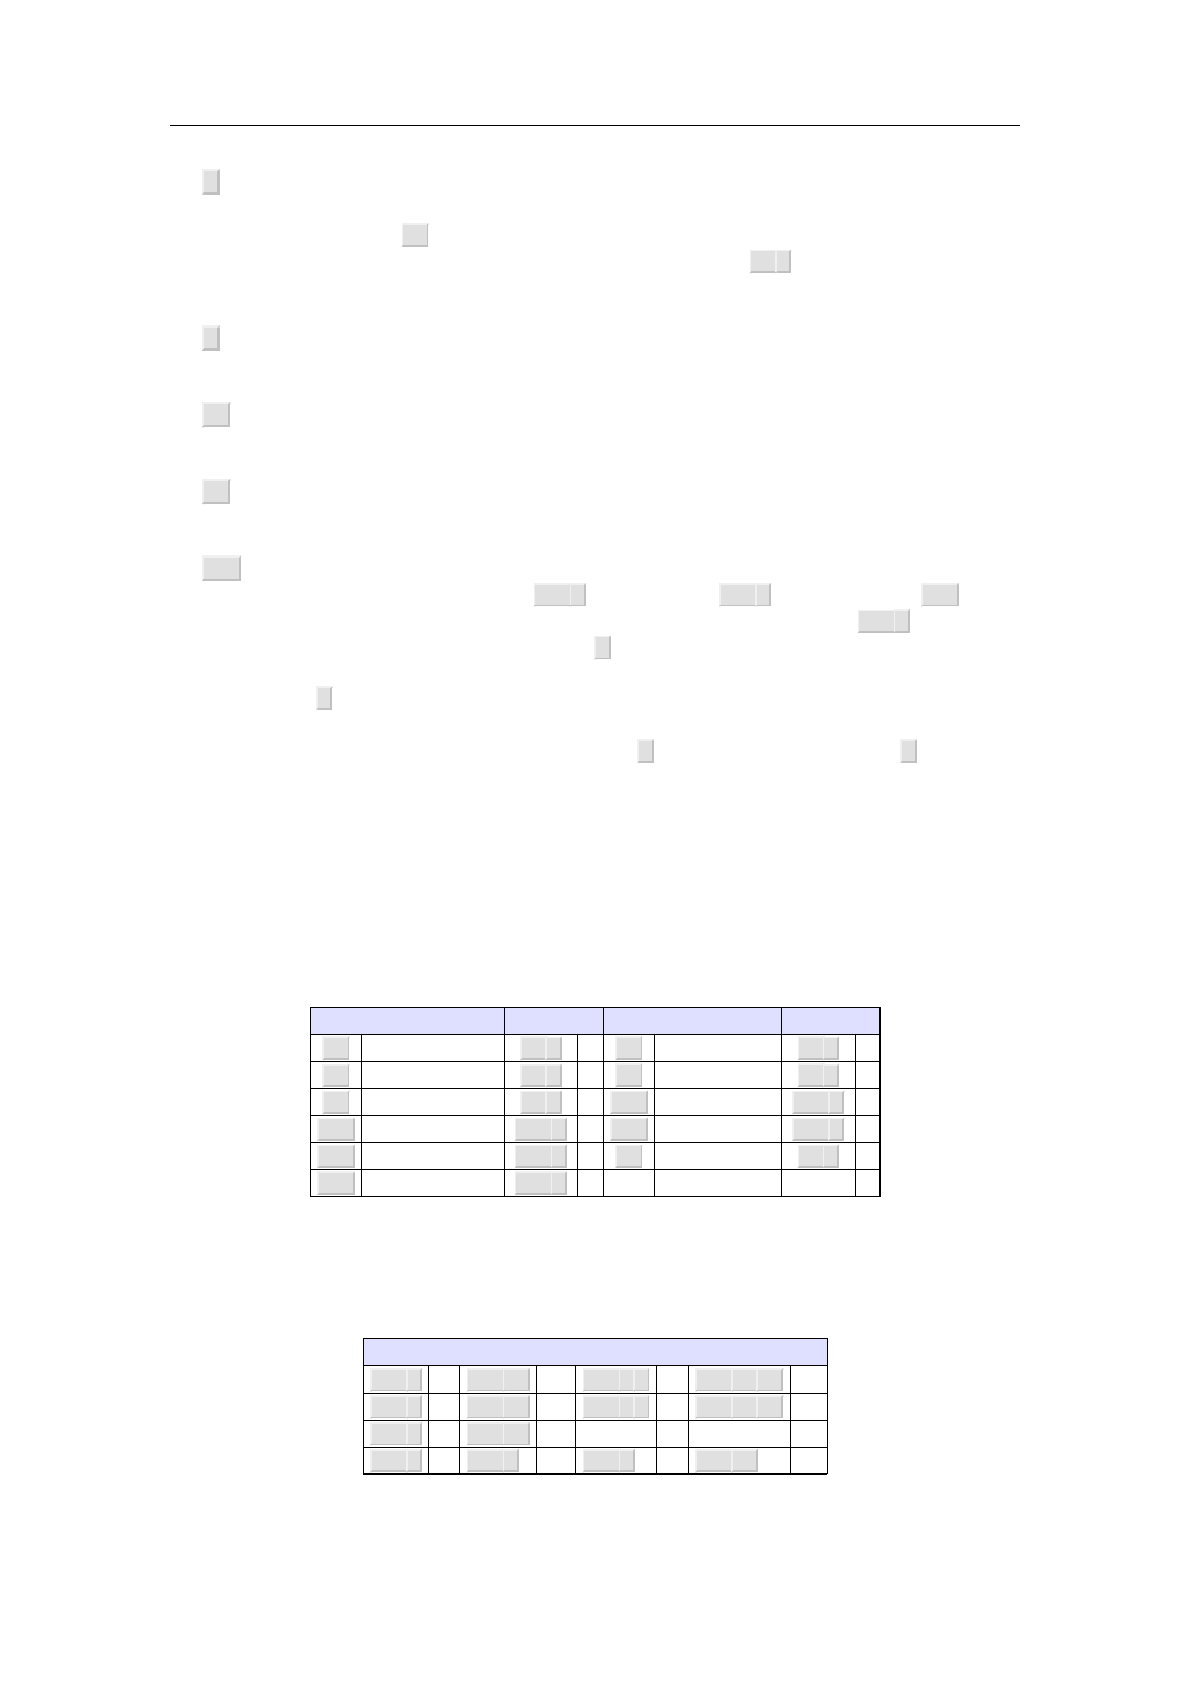
The actual keyboard modifier keys depend on your system as indicated in the following
table
⌃ ⌥ ⌘
Windows or Linux/Unix
with Windows keyboard Ctrl left Alt (y) (y)
Apple ⌘Command ⌥Option (y)Ctrl
fallback combination ⎋ ⎋ ⎋ ⎋ ⎋ ⎋
Table 1.1. Actual modifier keys on common platforms.
ySome modifier key combinations are preempted by the operating
system. The behavior may be different for the right and left modifier
key.
Keyboard shortcuts.
Keyboard shortcuts are obtained by pressing several keys or “modified keys” in succession.
For instance, the shortcut - > corresponds on first pressing the -key and then the key >.
Inside mathematical formulas, this shortcut inserts the arrow !. Similarly, the shortcut
⌃X⌃Fconsists of first pressing the keys ⌃and Xtogether, and next pressing the keys ⌃and
Fagain together. In the Emacs “look and feel”, this shortcut enables you to open a new file.
13
Some common keyboard prefixes are detailed in the section on general keyboard rules. In
cases when T
EXMACS keyboard shortcuts are superseded by shortcuts from the operating
system, equivalents for the keyboard modifiers can be obtained using the ⎋key. For
instance, ⎋is equivalent to ⌘and ⎋ ⎋ is equivalent to ⌥.
Notice that the T
EXMACS menus and keyboard behavior are contextual, i.e. they depend on
the current mode (i.e. text mode or “math mode”), the current language and the position
of the cursor inside your document. For instance, inside math mode, you have special
keyboard shortcuts which are handy for typing mathematical formulas, but which are
useless in text mode.
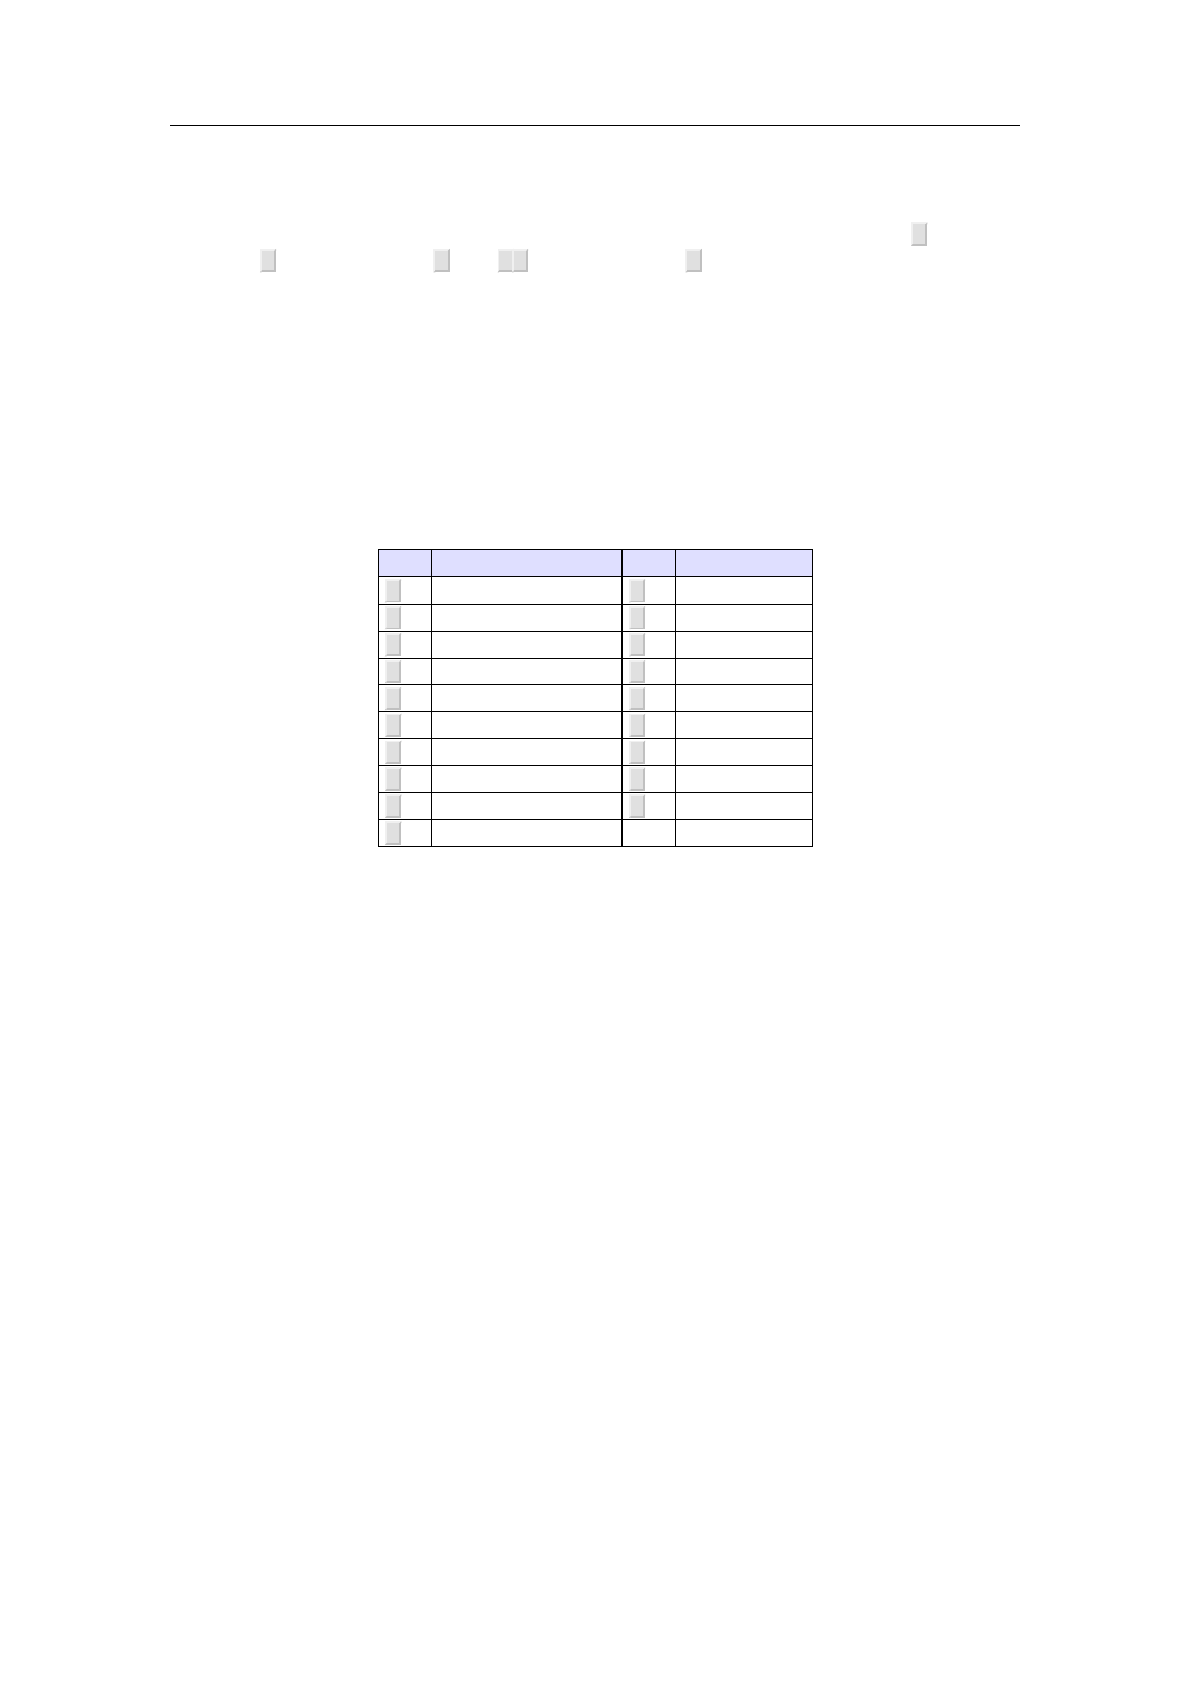
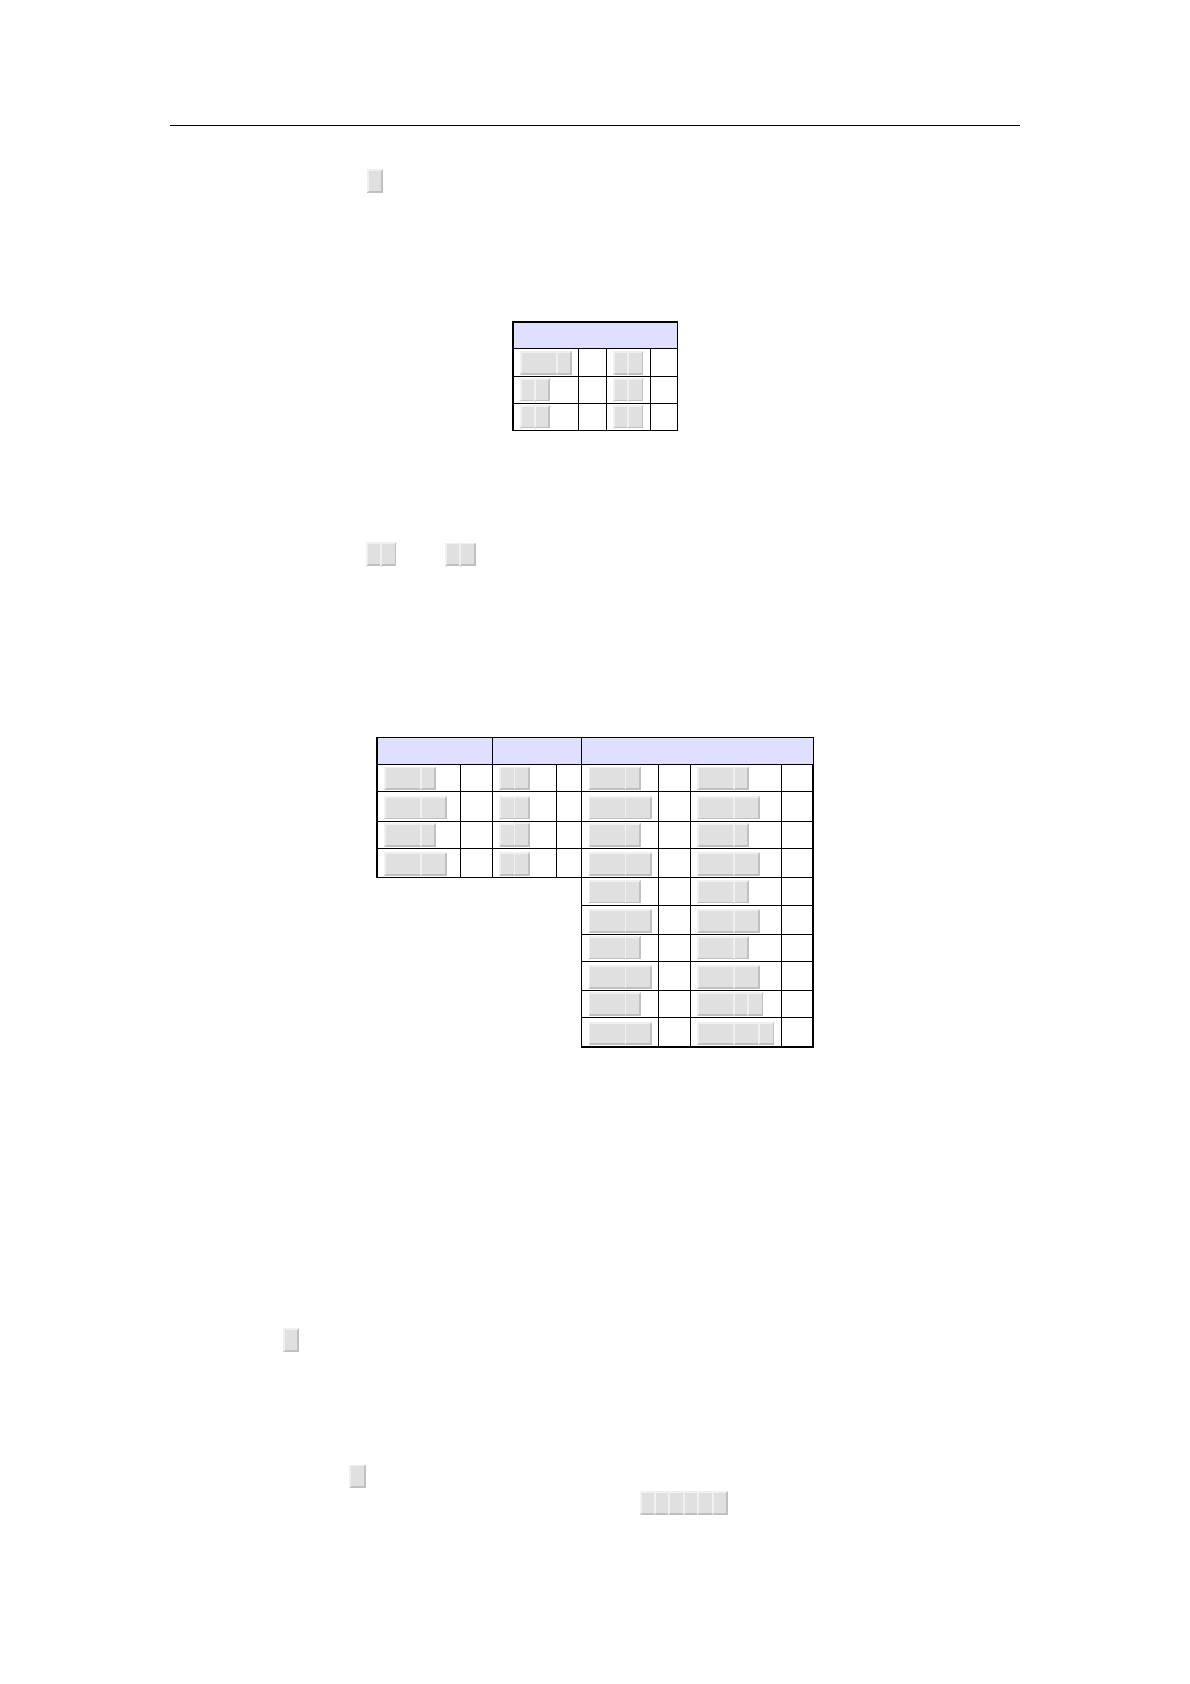
Special keys.
On some platforms, some special keys such as the Return key are depicted by short glyphs.
Below follows the table with all such special keys and there meaning.
Key Meaning Key Meaning
⇧Shift modifier ←Cursor left
⇪Caps lock →Cursor right
⌃Control modifier ↑Cursor up
⌥Alternate modifier ↓Cursor down
⌘Meta modifier ↖Home
↩Return ↘End
⌦Forward delete ⇞Page up
⌫Backspace ⇟Page down
⎋Escape ␣Space
⇥Tab
Table 1.2. Special keys.
1.2. Configuring TE
XMACS
When starting T
EXMACS for the first time, the program automatically configures itself in
a way which it thinks to be most suitable for you. For instance, T
EXMACS will attempt
to determine your systems settings for the language and the paper type of your printer.
However, the automatic configuration may sometimes fail or you may want to use an
alternative configuration. In that case, you should go to the Edit!Preferences menu and
specify your preferences.
In particular, we recommend you to configure the desired “look and feel” of T
EXMACS. By
default, we use a native look and feel, which will ensure that keyboard shortcuts and menu
layout are similar to other applications on your system. But we also provide an Emacs
look and feel, which ensures a limited compatibility of the T
EXMACS keyboard shortcuts
with those of Emacs.
1.3. Creating, saving and loading documents
When launching T
EXMACS without any command line options, the editor automatically
creates a new document for you. You may also create a new document yourself using
File!New. Newly created documents do not yet carry a name. In order to give them a
name, you should click on File!Save as. We recommend you to give documents a name
immediately after their creation; this will avoid you to loose documents.
14 Getting started

It is also recommended to specify the global settings for your document when necessary.
First of all, you may specify a document style like article, book or seminar using Docu-
ment!Style. If you write documents in several languages, then you may want to specify
the language of your document using Document!Language. Similarly, you may specify a
paper type using Document!Page!Size.
For newly started documents, the style and page size can also be specified in the Focus menu
or buttons on the focus toolbar. In general, the focus menu and toolbar are useful for editing
structured documents, and their contents will be highly dependent on the current context.
After modifying your document, you may save it using File!Save. Old documents can be
retrieved using File!Load. Notice that you can edit several documents in the same window
using T
EXMACS; you can switch between different buffers using Go.
1.4. Printing documents
You can print the current file using File!Print!Print all. By default, T
EXMACS assumes
that you have a 600dpi printer for a4 paper. These default settings can be changed in
Edit!Preferences!Printer. You can also print to a postscript file using File!Print!Print
all to file (in which case the default printer settings are used for creating the output) or
File!Export!Postscript (in which case the printer settings are ignored).
You may export to PDF using File!Export!Pdf. Notice that you should set Edit!Prefer-
ences!Printer!Font type!Type 1 if you want the produced Postscript or PDF file to use
Type 1 fonts. However, only the CM fonts admit Type 1 versions. These CM fonts are of
a slightly inferior quality to the EC fonts, mainly for accented characters. Consequently,
you might prefer to use the EC fonts as long as you do not need a PDF file which looks
nice in Acrobat Reader.
When adequately configuring T
EXMACS, the editor is guaranteed to be wysiwyg: the result
after printing out is exactly what you see on your screen. In order to obtain full wysiwyg-
ness, you should in particular select Document!Page!Type!Paper and Document!Page!
Screen layout!Margins as on paper. You should also make sure that the characters on your
screen use the same number of dots per inch as your printer. This rendering precision of
the characters may be changed using Document!Font!Dpi. Currently, minor typesetting
changes may occur when changing the dpi, which may globally affect the document through
line and page breaking. In a future release this drawback should be removed.
1.4 Printing documents 15


Chapter 2
Writing simple documents
2.1. Generalities for typing text
The usual English characters and punctuation symbols can easily be obtained on most
keyboards. Most modern system also implement standard shortcuts in order to obtain
accented characters and other special symbols. If necessary, accented characters can also
be obtained using the ⌘prefix. For instance, “é” is obtained by typing ⌘' E. Similarly, we
obtain “à” via ⌘` A and so on.
Long words at borders of successive lines are automatically hyphenated. In order to
hyphenate foreign languages correctly, you should specify the language of the document
in the menu Document!Language.
At the left hand side of the footer, you see the document style, the text properties at the
current cursor position. Initially, it displays “generic text roman 10”, which means that you
type in text mode using a 10 point roman font and the generic document style. You can
change the text properties (font, font size, color, language) in the Format menu. You can
also change the text properties of the text you have already typed by selecting a region
and then using the Format menu. Some text properties can also be changed for all the
document with the Document menu.
At the right hand side of the footer, the character or object (like a change in the text
properties) just before the cursor is displayed. We also display all environments which are
active at the cursor position. This information should help you to orient yourself in the
document.
2.2. Typing structured text
Usually, long documents have a structure: they are organized in chapters, sections and
subsections, they contain different types of text, such as regular text, citations, footnotes,
theorems, etc. After selecting a document style in Document!Style, T
EXMACS takes care of
specific layout issues, such as numbering of sections, pages, theorems, typesetting citations
and footnotes in a nice way and so on.
Currently, several standard document styles have been implemented: generic,article,
book,letter,exam,beamer,seminar,source. For instance, the article style can be used
for writing articles. Besides, there are styles for common journals and special purposes,
such as the T
EXMACS documentation.
As soon as you have selected a document style, you can organize your text into sections
(see Insert!Section) and use specific environments (also called tags). Examples of environ-
ments are theorem, proposition, remark and so on (see Insert!Enunciation). Other examples
are lists of items (see Insert!Itemize) or numbered lists (see Insert!Enumerate). Further
examples of frequently used tags are strong (for writing “important” text), name (for writing
names of persons), etc.
17
When you get more acquainted with T
EXMACS, it is possible to add your own new envi-
ronments in your own style file. Assume for instance that you often make citations and
that you want those to appear in italic, with left and right margins of 1cm. Instead of
manually changing the text and paragraph properties each time you make a citation, it is
better to create a citation environment. Not only it will be faster to create a new citation
when doing so, but it is also possible to systematically change the layout of your citations
throughout the document just by changing the definition of the citation environment. The
latter situation occurs for instance if you discover a posteriori that you prefer the citations
to appear in a smaller font.
There are a few general editing principles which make it easy to manipulate structured
documents using T
EXMACS. One major concept is the current focus, which is best illustrated
on an example. Assume that we are in the process of entering a classical theorem:
The following theorem is due to Euler:
Theorem 2.1.epi=¡1j.
At the position of the cursor, the grey and cyan boxes indicate the active tags: in this case,
the cursor is both inside a theorem and a formula. The innermost active tag (the formula
epi=¡1in our example) is surrounded by a cyan box and called the current focus.
The contents of the Focus menu and focus toolbar (the lowest toolbar) are highly context
dependent and determined as a function of the current focus. In our example, the focus
toolbar contains a popup menu button Formula; when selecting Equation in this menu, the
text will change into
The following theorem is due to Euler:
Theorem 2.2.
epi=¡1j:
Similarly, the arrow buttons on the left hand side of the focus toolbar allow you to jump to
similar tags. In this case, they will allow you to quickly traverse all formulas and equations
in your document. For more information on “structured editing operations” we refer to the
chapter on editing tools.
A second important concept is the current editing mode. Currently, there are five major
modes: text mode, mathematics mode, program mode, graphics mode and source mode.
In principle, the current mode can be determined from the current focus, but the mode
is likely to change less often than the focus. The mode dependent toolbar above the focus
toolbar contains several buttons which are useful in the current mode. The contents of the
Insert and Format menus are also mode dependent.
2.3. Content-based tags
The simplest examples of structure in a text are content-based tags. In Insert!content
tags you see a list of them. Content based tags indicate that a given portion of text is of a
particular kind or that it serves a specific purpose. For instance, important text should be
marked using the strong tag. Its default rendering uses a bold type face, like in this strong
text. However, strong text might be rendered in a different way according to the document
style. For instance, strong text may be rendered in a different color on transparencies for
presentations. Here follows a short list of the most common content-based tags and their
purpose:
18 Writing simple documents

Tag Example Purpose
strong this is important Indicate an important region of text
em the real thing Emphasize a region of text
dfn Agnu is a horny beast Definition of some concept
samp the ae ligature æ A sequence of literal characters
name the Linux system The name of a particular thing
person I am Joris The name of a person
cite* Melville’s Moby Dick A bibliographic citation
abbr I work at the C.N.R.S. An abbreviation
acronym the HTML format An acronym
verbatim the program said hello Verbatim text like computer program output
kbd Please type return Text which should be entered on a keyboard
code* cout << 1+1; yields 2Code of a computer program
var cp src-file dest-file Variables in a computer program
Table 2.1. Some of the most common content-based tags.
2.4. Lists
Using Insert!Itemize you may start an unnumbered list. You may either select a particular
tag like •(bullets), ¡(dashes) or !(arrows) to indicate entries in the list or the default
tag. Lists may be nested inside other tags, like in the following list:
•First item.
•Now comes the sublist:
◦A subitem.
◦Another one.
•A final item.
The default tag is rendered in a different way depending on the level of nesting. At the
outermost level, we used the •tag, at the second level ◦, and so on. When you are inside
a list, notice that pressing ↩automatically starts a new item. If you need items which are
several paragraphs long, then you may always use ⇧↩ in order to start a new paragraph.
Enumerate environments, which are started using Insert!Enumerate, behave in a similar
way as itemize, except that the items are numbered. Here follows an example of an enu-
meration which was started using Insert!Enumerate!Roman:
I. A first item.
II. A second one.
III. And a last one.
The last type of lists are descriptive lists. They are started using Insert!Description and
allow you to describe a list of concepts:
Gnu. A hairy but gentle beast.
2.4 Lists 19

Gnat. Only lives in a zoo.
2.5. Environments
In a similar way as content-based tags, environments are used to mark portions of text
with a special meaning. However, while content-based tags usually enclose small portions
of text, environments often enclose portions that are several paragraphs long. Frequently
used environments in mathematics are theorem and proof, like in the example below:
Theorem 2.3.There exist no positive integers a,b,cand nwith n>3, such that an+bn=
cn.
Proof. I do not have room here to write the proof down.
You may enter environments using Insert!Environment. Other environments with a similar
rendering as theorems are proposition,lemma,corollary,axiom,definition. You may use the
dueto macro (entered using \DUETO↩) in order to specify the person(s) to which the
theorem is due, like in
Theorem 2.4. (Pythagoras) Under nice circumstances, we have a2+b2=c2.
Other frequently used environments with a similar rendering as theorems, but which do
not emphasize the enclosed text, are remark,note,example,warning,exercise and problem.
The remaining environments verbatim,code,quote,quotation and verse can be used in order
to enter multiparagraph text or code, quotations or poetry.
2.6. Layout issues
As a general rule, T
EXMACS takes care of the layout of your text. Therefore, although we
did not want to forbid this possibility, we do not encourage you to typeset your document
visually. For instance, you should not insert spaces or blank lines as substitutes for hor-
izontal and vertical spaces between words and lines; instead, additional space should be
inserted explicitly using Insert!Space. This will make your text more robust in the sense
that you will not have to reconsider the layout when performing some minor changes, which
affect line or page breaking, or major changes, such as changing the document style.
Several types of explicit spacing commands have been implemented. First of all, you can
insert rigid spaces of given widths and heights. Horizontal spaces do not have a height
and are either stretchable or not. The length of a stretchable spaces depends on the way
a paragraph is hyphenated. Furthermore, it is possible to insert tabular spaces. Vertical
spaces may be inserted either at the start or the end of a paragraph: the additional vertical
space between two paragraphs is the maximum of the vertical space after the first one and
the vertical space before the second one (contrary to T
EX, this prevents from superfluous
space between two consecutive theorems).
As to the paragraph layout, the user may specify the paragraph style (justified, left ragged,
centered or right ragged), the paragraph margins and the left (resp. right) indentation
of the first (resp. last) line of a paragraph. The user also controls the spaces between
paragraphs and successive lines in paragraphs.
20 Writing simple documents
You can specify the page layout in the Document!Page menu. First of all, you can specify
the way pages are displayed on the screen: when selecting “paper” as page type in Doc-
ument
!
Page
!
Type
, you explicitly see the page breaks. By default, the page type is
“papyrus”, which avoids page breaking during the preparation of your document. The
“automatic” page type assumes that your paper size is exactly the size of your window.
The page margins and text width are specified in Document!Page!Layout. Often, it
is convenient to reduce the page margins for usage on the screen; this can be done in
Document!Page!Screen layout.
2.7. The font selection system
In T
EXMACS, the global document font can be specified using Document!Font. It is also pos-
sible to locally use another font using Format!Font. Both Document!Font and Format!
Font open the T
EXMACS font browser. Fonts have three main characteristics:
Family. Fonts are grouped together into families with a similar design.
Shape. Inside the same font family, individual fonts have different shapes, such as
bold, italic, small capitals, etc.
Size. The font size in points.
The user may directly specify these three characteristics in the font browser, which also
displays some sample text for the selected font.
The font browser also provides a way to quickly select fonts based on desirable font prop-
erties. For instance, by filtering on a “bold weight” and “sans serif”, one may find a bold
sans serif font which mixes as well as possible with the main font. T
EXMACS allows you to
filter on the following criteria:
Weight. The font weight corresponds to the “thickness” of the font:
Thin Light Medium Bold Black
Slant. The font slant determines the angle of the font:
Normal Italic Oblique
Stretch. This property determines the horizontal width for a fixed vertical height:
Condensed Unextended Wide
Case. This property determines how lowercase letters are capitalized:
Mixed Small capitals
Serif. This feature corresponds to the projecting features called “serifs” at the end of
strokes:
Serif Sans Serif
Spacing. This feature corresponds to the horizontal spacing between characters:
2.7 The font selection system 21

Proportional Monospaced
Device. This property can be used to imitate specific “writing devices”:
Print Typewriter Digital Pen Art pen Chalk Marker
Category. Various other font features:
Ancient Attached Calligraphic Comic Decorative
Distorted Gothic Handwritten Initials Medieval
Miscellaneous Retro Scifi Title
Each of the above properties really constitutes a hint on how the kind of font which should
be used. If no suitable font can be found on your particular system, then setting these
properties may have no effect. Whenever you apply one or more filters, the font browser
indicates which fonts match the selected properties. It also indicates the closest match
for the current font in use. When pressing the Ok button without selecting any particular
matching font, then the selected font properties will be inserted as T
EXMACS markup and
used as rendering hints. In that case, the rendering may change when selecting another
global document font (for instance).
It should be noticed that T
EXMACS comes with a limited number of preinstalled fonts,
such as the Stix fonts and several fonts prefixed by “TeXmacs”. Documents which only
use these fonts will be rendered the same on different systems (assuming the same version
of T
EXMACS). When your documents contain other fonts as well, then these fonts may
be replaced by closest matches when opening your document under a different operating
system.
2.8. Mastering the keyboard
We recall that the section on general conventions contains explanations on the way key-
board shortcuts are printed in this manual. It may also be useful to take a look at the
section on keyboard configuration.
2.8.1. General prefix rules
Since there are many keyboard shortcuts, it is important to have some ways of classifying
them in several categories, in order to make it easier to memorize them. As a general rule,
keyboard shortcuts which fall in the same category are identified by a common prefix. The
active prefixes heavily depend on the selected “look and feel” in Edit!Preferences. In the
current look and feel of your T
EXMACS system,the main common prefixes are as follows:
⌃.Standard shortcuts, which are similar to shortcuts used by other applications (for
the selected look and feel). For instance, ⌃Ycan be used for pasting text on your
system.
⌥.T
EXMACS shortcuts, which often rely on the current editing mode. For instance, ⌥S
produces strong text in text mode and a square root pin math mode.
22 Writing simple documents
⌘.Compound T
EXMACS shortcuts. Usually, these shortcuts first indicate the kind of
markup to which the command will apply and then specify the specific command.
For instance, the ⌘Eprefix is used for inserting executable markup, which is useful
for writing style files. One example is the shortcut ⌘E + for the insertion of an
addition.
⌘.This prefix is used in combination with arrow keys and certain other special keys
for positioning and resizing objects
⌘⌥ .This prefix is used in combination with arrow keys and some other special keys for
structured cursor movements.
⌘⌃ .This prefix is occasionally used in combination with letters and punctuation sym-
bols for creating some additional easy to remind shortcuts.
⇧F5 .This prefix can be used in combination with normal letters for the insertion of
special symbols. For instance, ⇧F5 S yields ß and ⇧F5 A yields q. The ⇧F5prefix
is also used for the insertion of “literal characters”. For instance, ⇧F5 \ will always
produce the \ character, whereas the \key is used for entering hybrid commands.
Unfortunately, ⌘-based shortcuts are superseded by system shortcuts on several systems.
For instance, accented characters and common special symbols are entered using this prefix
under Mac OS. In that case, you may use the ⎋key as an equivalent for ⌘. For more
information, we refer to the section on keyboard configuration.
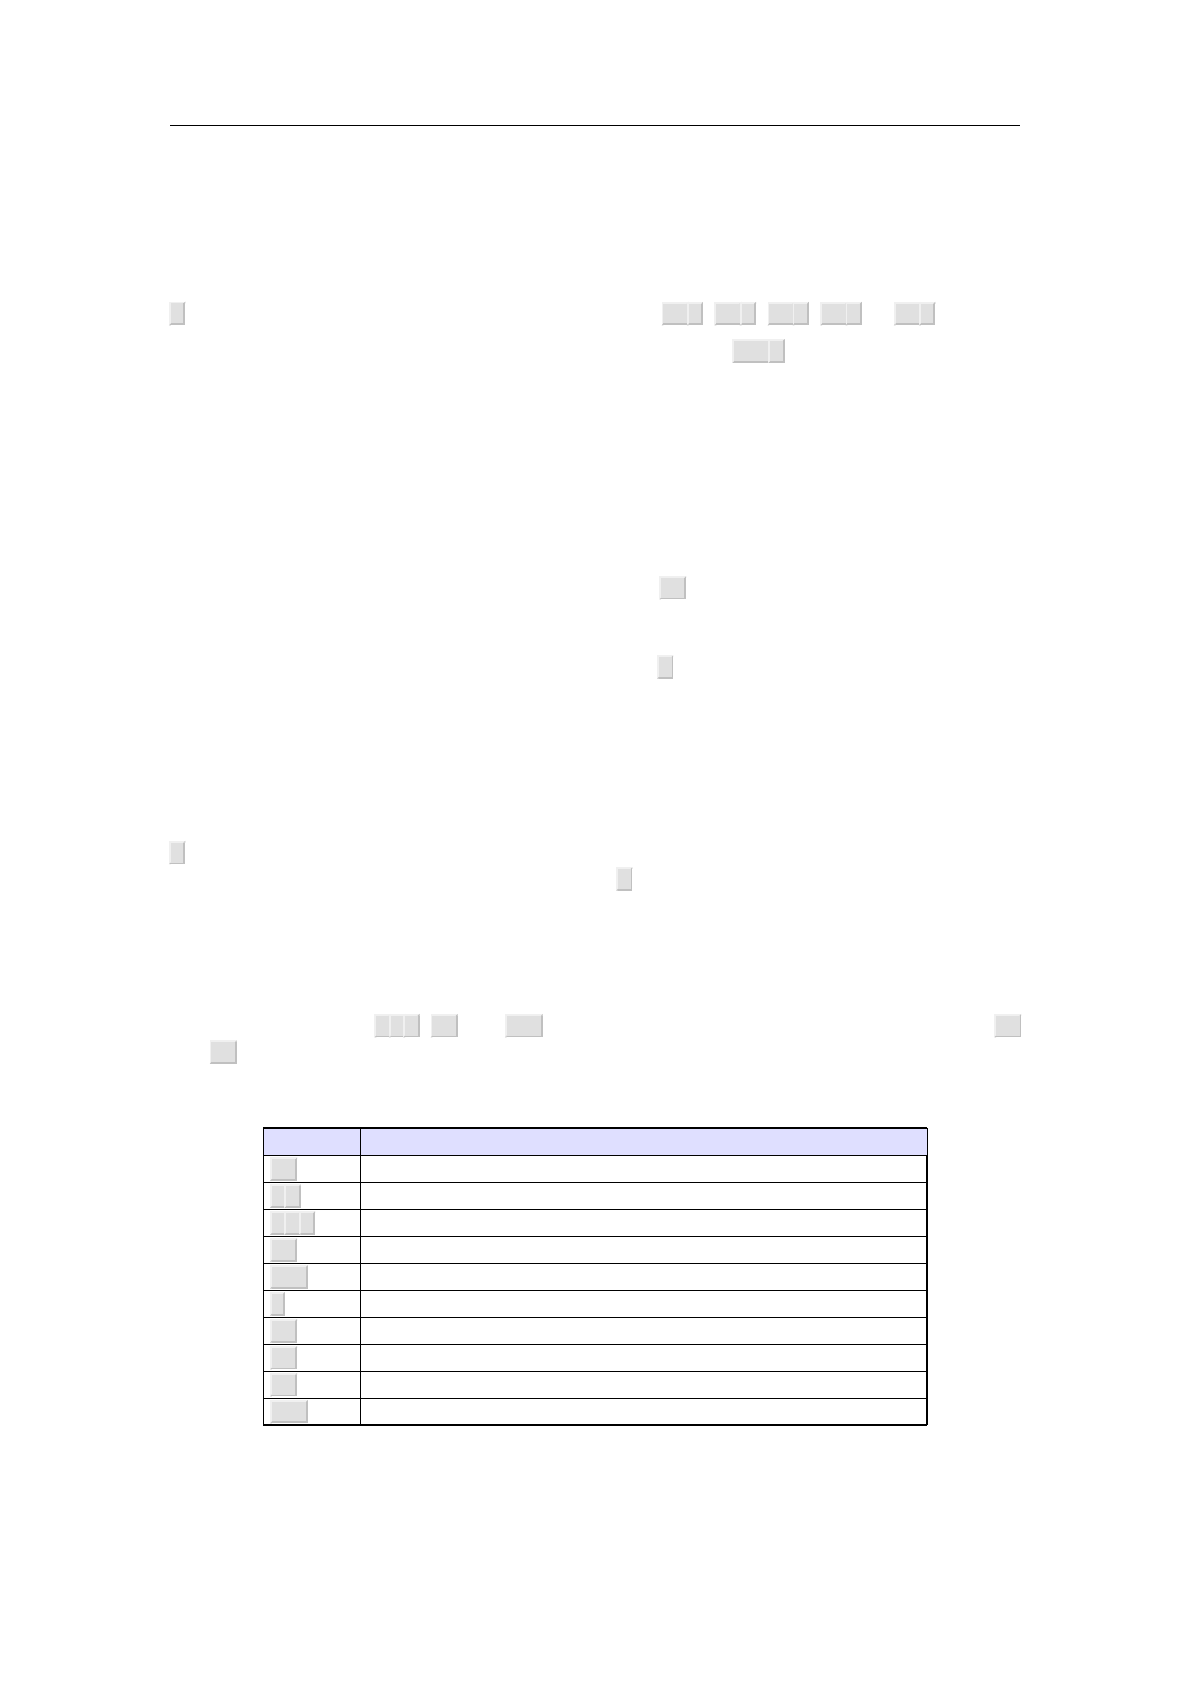
2.8.2. Keyboard shortcuts for text mode
To write a text in an european language with a keyboard which does have the appropriate
special keys, you can use the following shortcuts to create accented characters. Note that
they are active regardless of the current language setting.
Shortcut Example Shortcut Example
⌘'Acute ´ ⌘' E é⌘`Grave ‘ ⌘` E è
⌘^Hat ˆ ⌘^ E ê⌘"Umlaut ¨ ⌘" E ë
⌘~Tilde ˜ ⌘~ A ã⌘⇧CCedilla ¸ ⌘⇧C C ç
⌘⇧UBreve ˘ ⌘⇧U G ğ⌘⇧VCheck ˇ ⌘⇧V S š
⌘⇧OAbove ring ˚ ⌘⇧O A å⌘.Above dot ˙ ⌘. Z ż
⌘⇧HHungarian ˝ ⌘⇧H O ő
Table 2.2. Typing accented characters.
Special characters can also be created in any language context:
Shortcuts
⇧F5 A æ⇧F5⇧AÆ⇧F5AE æ⇧F5⇧A⇧EÆ
⇧F5 O ø⇧F5⇧OØ⇧F5OE œ⇧F5⇧O⇧EŒ
⇧F5 S ß⇧F5⇧S
⇧F5 ! ¡⇧F5 ? ¿⇧F5 P §⇧F5⇧P£
Table 2.3. Typing special characters.
2.8 Mastering the keyboard 23
When you press the "key, an appropriate quote will be inserted. The quote character is
chosen according to the current language and the surrounding text. If the chosen quoting
style is not appropriate, you can change it in
Edit
!
Preferences
!
Keyboard
!
Automatic
quotes. You can also insert raw quotes:
Shortcuts
⇧F5 " ", , „
<⇥‹>⇥›
< < «> > »
Table 2.4. Typing raw quotes.
“English” quotes are considered ligatures of two successive backticks or apostrophes. They
can be created with ` ` and ' ' but these are not actual keyboard commands: the result
is two characters displayed specially, not a special single character.
Some shortcuts are available in specific language contexts. You can set the text language
for the whole document with Document!Language or only locally with Format!Language
(see generalities for typing text).
Hungarian Spanish Polish
⇧F5 O ő!⇥¡⇧F5 A ą⇧F5 O ó
⇧F5⇧OŐ?⇥¿⇧F5⇧AĄ⇧F5⇧OÓ
⇧F5 U ű! ` ¡⇧F5 C ć⇧F5 S ś
⇧F5⇧UŰ? ` ¿⇧F5⇧CĆ⇧F5⇧SŚ
⇧F5 E ę⇧F5Xź
⇧F5⇧EĘ⇧F5⇧XŹ
⇧F5 L ł⇧F5 Z ż
⇧F5⇧LŁ⇧F5⇧ZŻ
⇧F5 N ń⇧F5Z⇥ź
⇧F5⇧NŃ⇧F5⇧Z⇥Ź
Table 2.5. Language-specific text shorthands.
Language-specific shortcuts override generic shortcuts; for example, you cannot easily type
“ø” in hungarian context.
2.8.3. Hybrid commands and L
AT
E
X simulation
T
EXMACS allows you to enter L
A
T
EX commands directly from the keyboard as follows. You
first hit the \-key in order to enter the hybrid L
A
T
EX/T
EXMACS command mode. Next you
type the command you wish to execute. As soon as you finished typing your command,
the left footer displays something like
<return>: action to be undertaken
When you hit the ↩-key at this stage, your command will be executed. For instance, in
math-mode, you may create a fraction by typing \FRAC↩.
24 Writing simple documents
If the command you have typed is not a (recognized) L
A
T
EX command, then we first look
whether the command is an existing T
EXMACS macro, function or environment (provided by
the style file). If so, the corresponding macro expansion, function application or environ-
ment application is created (with the right number of arguments). Otherwise, it is assumed
that your command corresponds to an environment variable and we ask for its value. The
\-key is always equivalent to one of the commands ⌘I L ,⌘I E,⌘I A,⌘I # or ⌘I V.
To insert a literal \(backslash) character, you can use the ⇧F5 \ sequence.
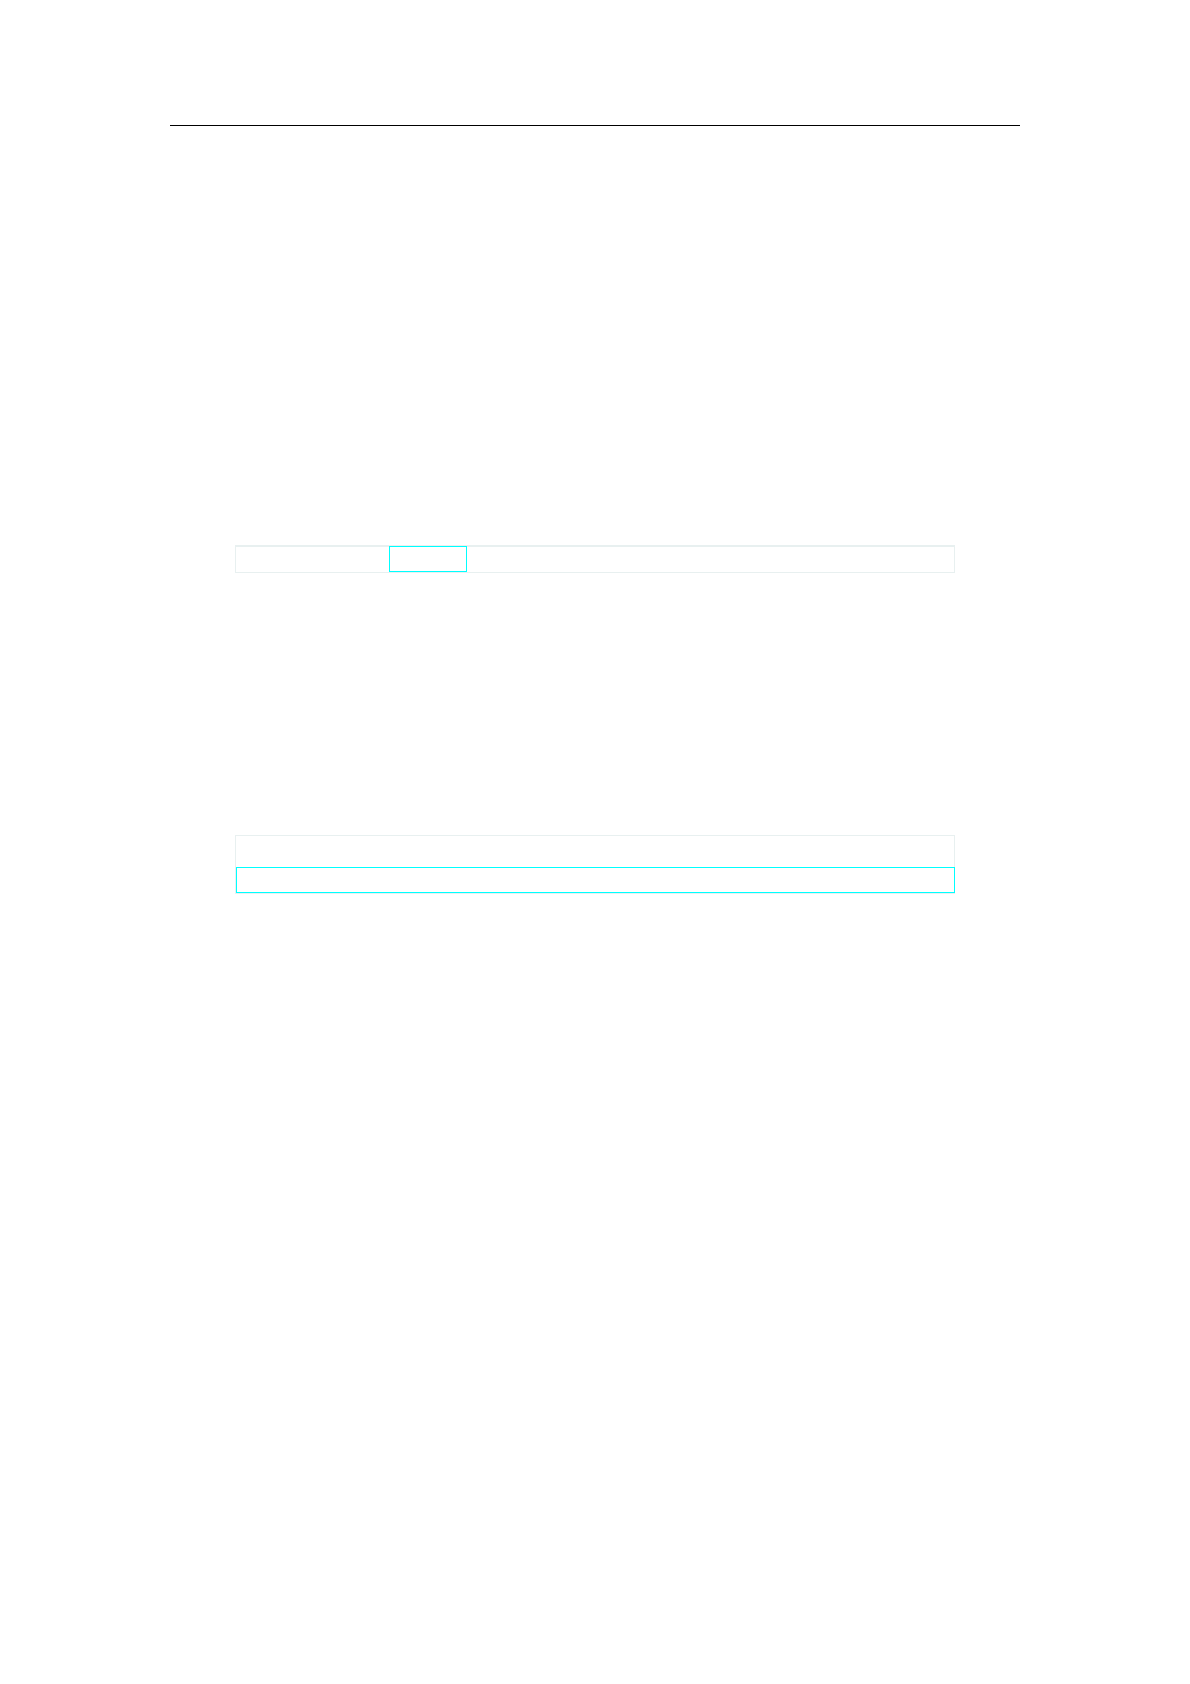
2.8.4. Dynamic objects
Certain more complex objects can have several states during the editing process. Examples
of such dynamic objects are labels and references, because the appearance of the reference
depends on a dynamically determined number. Many other examples of dynamic markup
can be found in the documentation about writing style files.
When entering a dynamic object like a label using ⌘!, the default state is inactive. This
inactive state enables you to type the information which is relevant to the dynamic object,
such as the name of the label in our case. Certain dynamic objects take an arbitrary number
of parameters, and new ones can be inserted using ⇥.
hlabeljpythagorasi
Figure 2.1. Inactive label
When you finished typing the relevant information for your dynamic object, you may type
↩in order to activate the object. An active dynamic object may be deactivated by placing
your cursor just behind the object and hitting ⌫.
2.8.5. Various useful keyboard shortcuts
Some assorted shortcuts which are often useful are displayed in table 2.6. Notice that
spaces inserted using ␣⇥⇥,⌘␣ and ⌘⇧␣ can be resized a posteriori using the shortcuts ⌘←
and ⌘→. This kind of resizing actually works for more general horizontal and vertical spaces
inserted from the menu Format!Space, as well as several other objects, such as images.
Shortcut Action
⌃⌫ Remove the containing object or environment.
␣ ⇥ Insert a non breaking space.
␣⇥⇥ Insert a quad space.
⌘␣ Insert a small space.
⌘⇧␣ Insert a small negative space.
?Insert a “tab”
⌘<Go to the start of the document.
⌘>Go to the end of the document.
⌘:Insert a line break.
⌘⇧RInsert a “rigid” piece of text, which cannot be line-broken.
Table 2.6. Various useful keyboard shortcuts
2.8 Mastering the keyboard 25


Chapter 3
Mathematical formulas
One of the main purposes of T
EXMACS is to edit mathematical formulas. If the cursor
is inside a formula (i.e. inside “math mode”), then the mode sensitive menus and tool-
bars provide buttons for entering common mathematical constructs. Similarly, as will be
detailed in this section, the bahaviour of the keyboard changes so as to allow for the rapid
typing of mathematical symbols. For instance, typing - > inserts the arrow !.
Starting with version 1.0.7.10, T
EXMACS also incorporates several features for the “semantic”
editing of mathematical formulas, which will be described at the end of this section. When
used appropriately, this allows you to write documents in which all formulas are at least
correct from a syntactical point of view. A “syntax corrector” is included to assist you with
this task. Documents with more semantics are for instance useful when using formulas
as inputs for a computer algebra system. Such documents are also less likely to contain
“typos”. Other interesting features, such as semantic search and replace, should be devel-
oped in the future.
3.1. Incorporating mathematical formulas into docu-
ments
T
EXMACS provides three main ways in order to enter a mathematical formulas into the main
text:
Insert!Mathematics!Inline formula or $.
This entry corresponds to small inline formulas like a2+b2=c2inside a textual
paragraph. Note that formulas are typeset specially so they do not take too much
vertical space. For example, limits are always displayed on the right. Limits can
be displayed below in formulas with Format!Display style!on. In formulas, display
style is off by default.
Insert!Mathematics!Displayed formula or ⌥$.
This entry is used for entering bigger displayed equations, like
xn+yn=zn;
which are typeset in a paragraph of their own. You may use the shortcut ⌃#in order
to give the equation a number (or to remove the number of an equation). Also, ⌃⇥
allows you to switch between inline formulas and displayed equations.
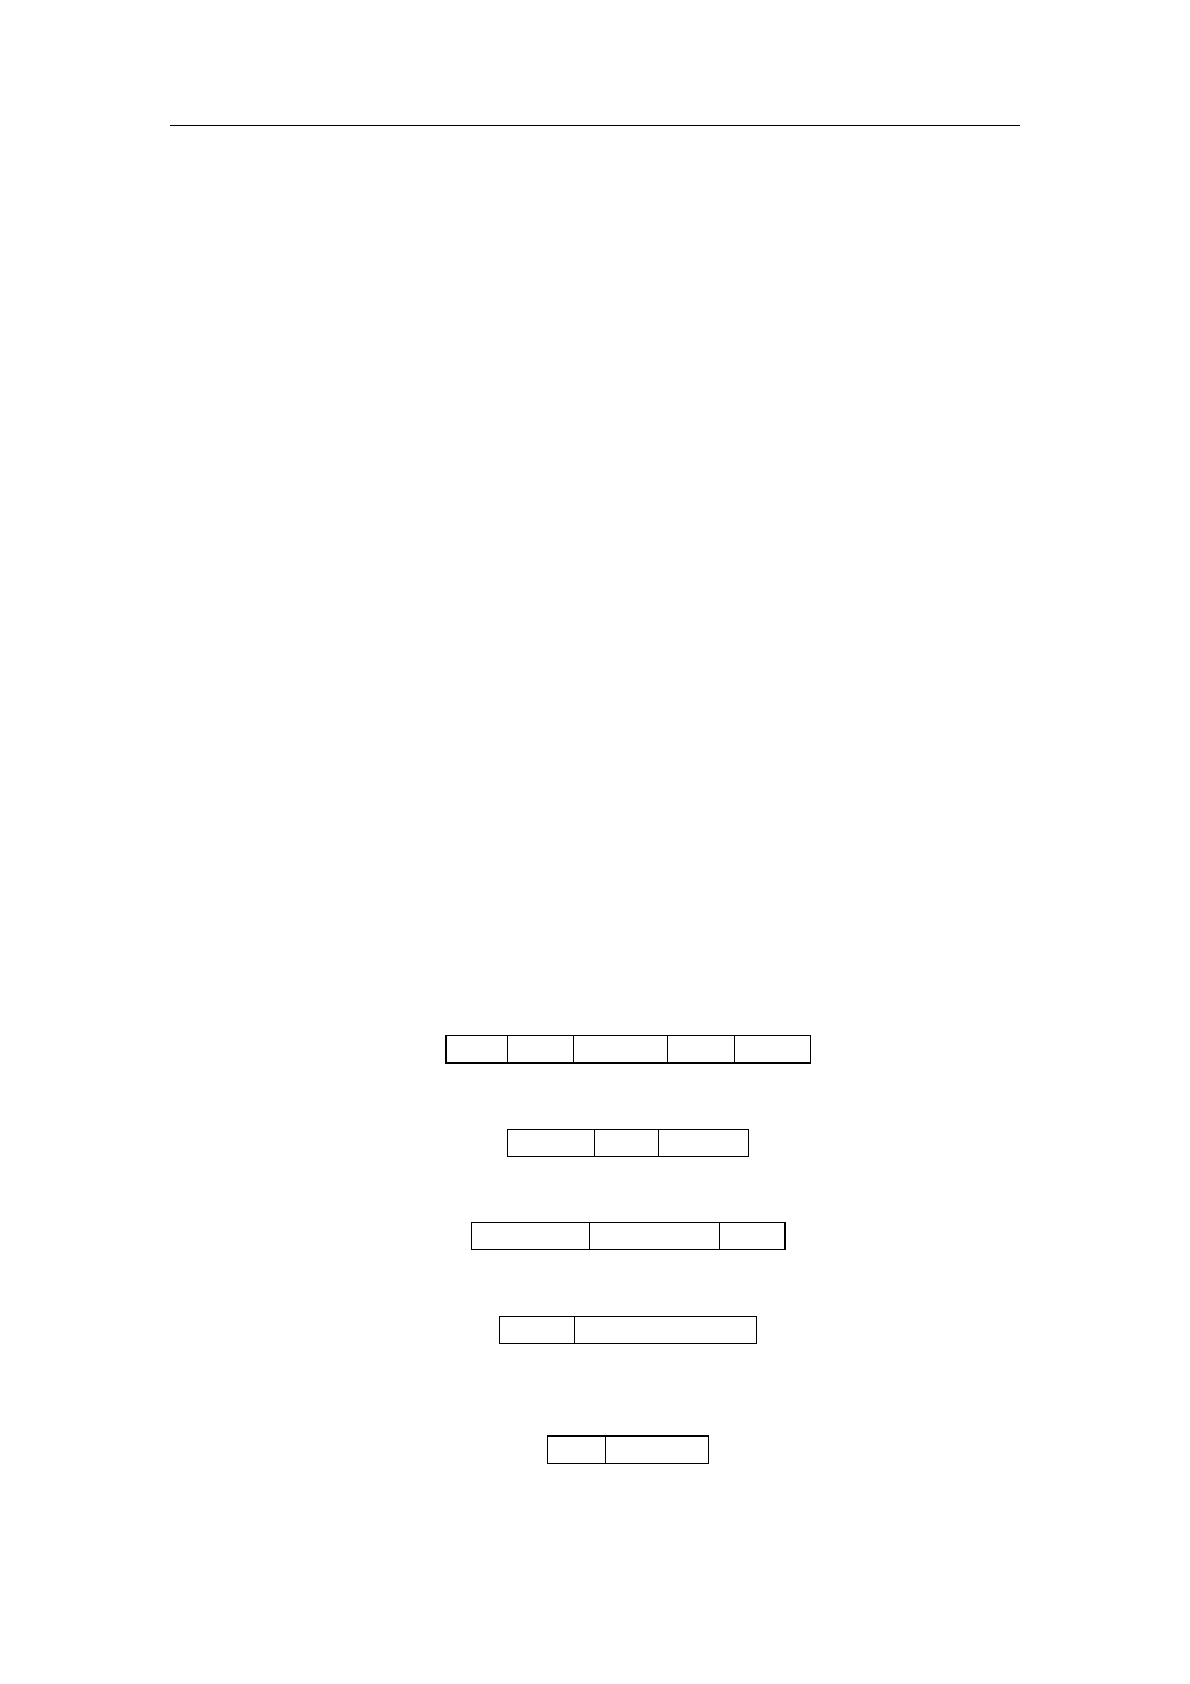
Insert!Mathematics!Several equations or ⌥&.
27

This entry allows you to create an eqnarray*, a three columns wide table-like envi-
ronment (see creating tables). This environment is typically used for lists of multiple
relations like
x+ 0 = x
x+ (¡x) = 0
x+y=y+x
(x+y) + z=x+ (y+z)
The first column is centered to the right, the second one at the middle and the last
one at the left. Another typical use of the eqnarray* environment is a step by step
computation
(esinx+sin ex)0= (esinx)0+ (sin ex)0
= (sin x)0esinx+ (ex)0cos ex
= esinxcos x+ excos ex;
in which many entries of the left column are left open.
3.2. Typing mathematical symbols
The Greek characters are obtained in T
EXMACS using the ⇧F7-key. For instance, ⇧F7 A
yields αand ⇧F7⇧Gyields ¡. Similarly, F6,F7,F8and ⇧F6can be used in order to type
bold, calligraphic, fraktur and blackboard bold characters. For instance, F8 M yields m,
⇧F6⇧Ryields Rand F6F7⇧Zyields Z.
Greek characters can also be obtained as “variants” of Latin characters using the ⇥-key.
For instance, P⇥yields π. The ⇥-key is also used for obtaining variants of the Greek letters
themselves. For instance, both ⇧F7P⇥and P⇥ ⇥ yield $. An alternative way to enter
blackboard bold characters is to type the same capital twice. For instance, ⇧Z⇧Zyields Z.
Some symbols admit many variants. For instance, <yields <,<⇥yields 2,<⇥ ⇥ yields
⊂,<⇥⇥⇥ yields ≺, and so on. You may “cycle back” among the variants using ⇧⇥. For
instance, <⇥ ⇥ ⇧⇥ is equivalent to <⇥.
Many other mathematical symbols are obtained by “natural” key-combinations. For instance,
- > yields !,--> yields ¡! and >=yields >. Similarly, |⇥-yields `,|- > yields 7! and
-><-yields . The following general rules hold in order to enter mathematical symbols:
⇥.is the main key for obtaining variants. For instance, >=yields >, but >=⇥yields ≥.
Similarly, <⇥ ⇥ yields ⊂,<⇥⇥=yields ⊆and <⇥⇥=⇥yields j. Also, ⇧P⇥yields }
and E⇥yields the constant e = exp(1).
@.is used for putting symbols into circles or boxes. For instance, @ + yields ⊕and @X
yields ⊗. Similarly, @⇥+yields .
/.is used for negations. For instance, = / yields =/ and <=/ yields 6. Notice that
<=⇥⇥/yields , while <=⇥⇥/⇥yields .
!.is used after arrows in order to force scripts to be placed above or below the arrow.
For instance, -->^Xyields ¡!x, but -->!^Xyields ¡!
x.
The logical relations ^and _are obtained using &and %. The operators \and [are
natural variants &⇥and %⇥. Various miscellaneous symbols can be obtained using the ⇧F5
prefix.
28 Mathematical formulas
Notice that certain symbols with a different mathematical meaning are sometimes denoted
in a similar way; such symbols are called homoglyphs. For instance, the vertical bar jcan
be used as a separator for defining sets R>=fx2Rjx > 0g, but also as the binary relation
“divides” 11 j1001. Often, but not always, homoglyphs admit a different spacing. The most
annoying ambiguity is between invisible multiplication x y and function application sinx,
which are entered using the shortcuts *resp. ␣.
In order to facilitate certain automated treatments of your documents, such as mathemat-
ical syntax checking, we incite authors to pay attention to the homoglyph problem when
entering formulas. For more information on this issue and how T
EXMACS can assist you to
use the appropriate notations, we refer to our section on the semantics of mathematical
symbols.
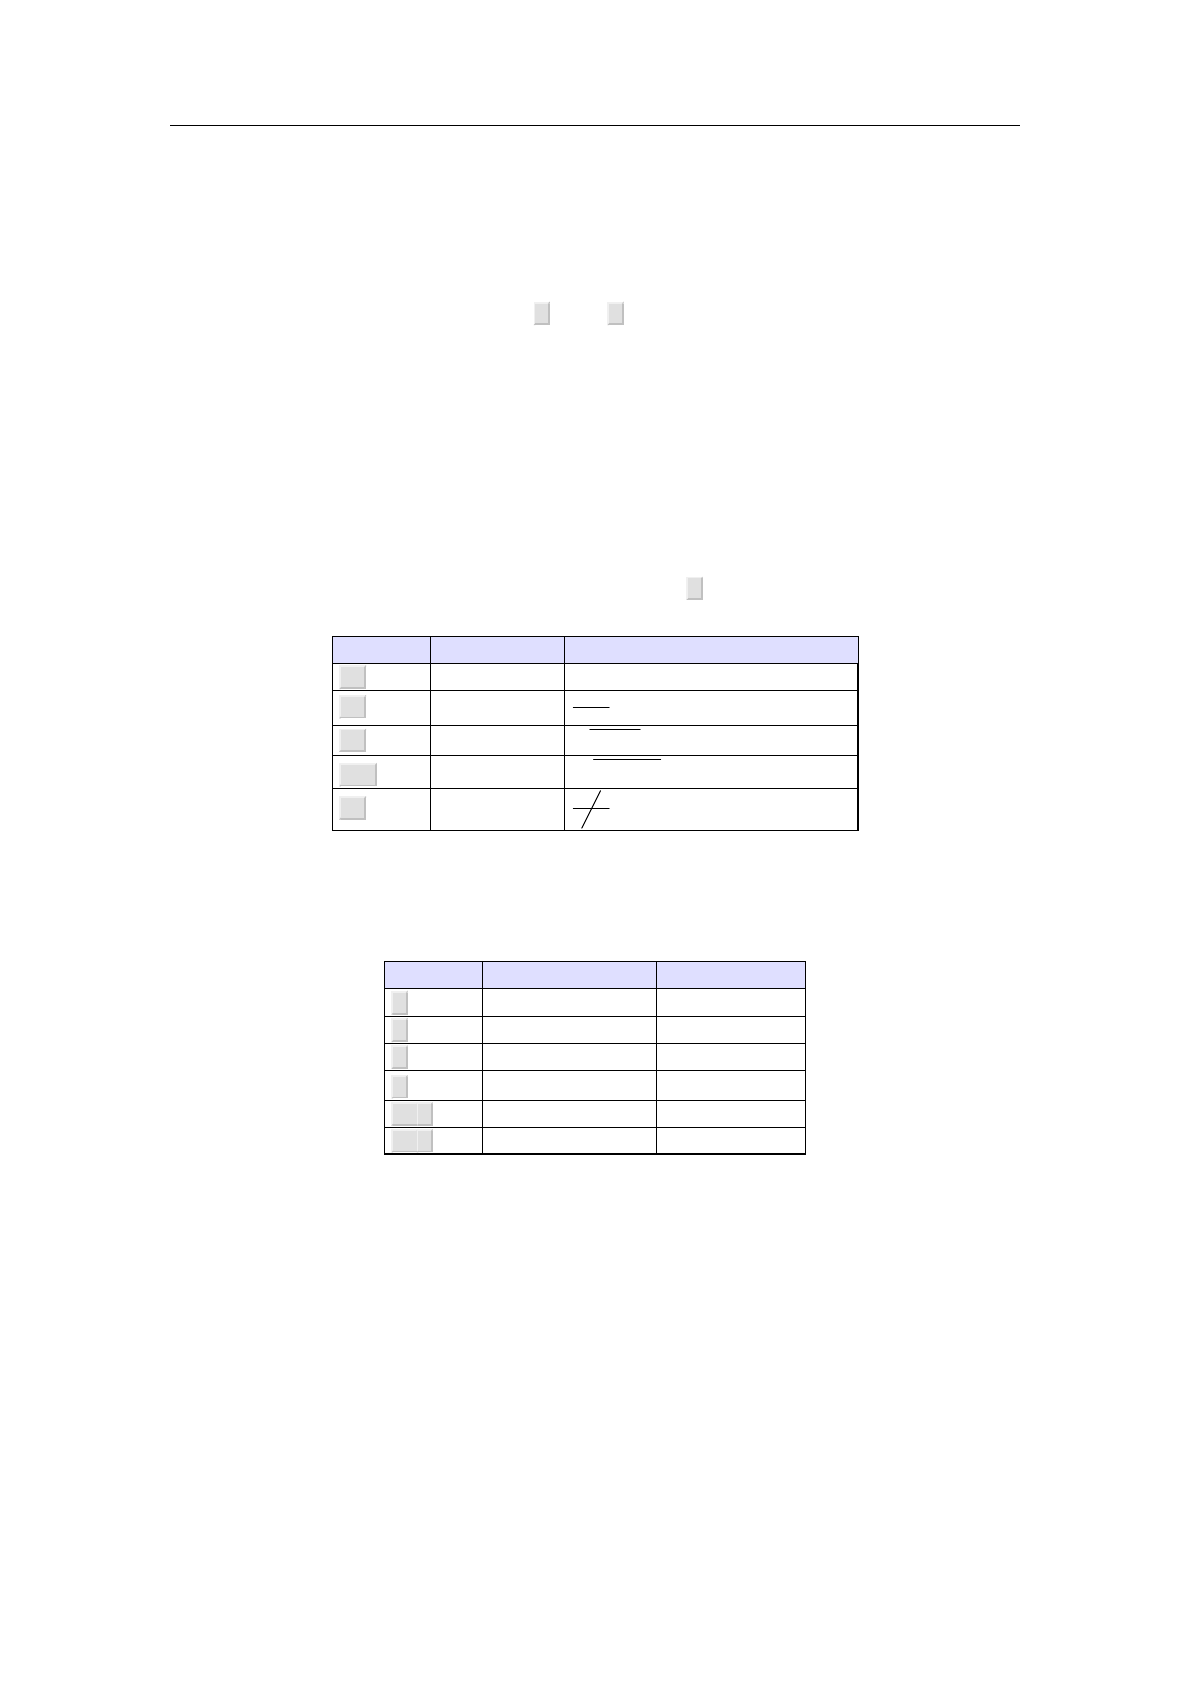
3.3. Main mathematical constructs
The main mathematical objects are created using the ⌥prefix as follows:
Shortcut Purpose Example
⌥$Text L=fxjxis sufficiently largeg
⌥FFractions a
b+c
⌥SSquare roots x+y
p
⌥⇧Sn-th Roots x3+y3
3
p
⌥NNegations a
b+c
Table 3.1. Creation of major mathematical markup.
Primes, subscripts and superscripts are created as follows:
Shortcut Purpose Example
'Primes f0or (g+h)000
`Back-primes f
8
_Subscripts xnor xi3
^Superscripts x2,xn
2or eex
⌥L _ Left subscripts x
2
⌥L ^ Left superscripts x
πor He
∗
∗∗
∗
Table 3.2. Creation of primes, subscripts and superscripts
Some important mathematical constructs are actually tabular constructs and are docu-
mented separately.
3.4. Typing large delimiters
Brackets inside mathematical formulas should always match: as soon as you enter an
opening bracket “(”, T
EXMACS will automatically insert the matching closing bracket “)”.
You may disable this feature using Edit!Preferences!Keyboard!Automatic brackets!Dis-
able. Attention (see also below): brackets in old documents will be automatically upgraded
to matching brackets.
3.4 Typing large delimiters 29

Sometimes, you do not want the closing bracket, or you may want to replace it by another
closing bracket. No problem: if your cursor is just before the closing bracket inside (a; bj),
then pressing ]will turn the expression into (a; b]j. Alternatively, deletion of a bracket will
actually turn it into an invisible bracket, after which you can replace it by an arbitrary
opening or closing bracket.
By default, the sizes of the brackets are adjusted to the expression between the brackets.
Small delimiters, which are created using the ⌥-prefix, keep their sizes independently of
the enclosed expression. Alternatively, you may use ⌃*in order to toggle between large
and small delimiters.
For some delimiters, such as j, the opening and closing delimiters coincide. For instance,
entering a vertical bar |will produce an absolute value. The (small) bar-separator jis
obtained using F5 |, or as a variant using |⇥. The big bar-separator is entered using ⌥M |.
In T
EX and L
A
T
EX, such large separators do not exist; they are used for producing the
vertical bars in formulas like a
b+cp
q+ra
b+c:
There may be as many middle delimiters between a left and a right delimiter as one wishes.
Notice that there are still another number of variants of vertical bars. For instance, the
binary relation “divides” is entered using F5|⇥ ⇥ or |⇥⇥⇥⇥.
In T
EXMACS, large delimiters may either be “left delimiters”, “right delimiters” or “middle
delimiters”. By default, (;[;fand hare left delimiters, );];gand iare right delimiters. But
there status can be changed using the ⌥L,⌥Rand ⌥Mkey combinations. For instance, ⌥L )
produces ), considered as a large left delimiter.
Sometimes you may want large delimiters of a particular size, instead of self-adjusting ones.
This can be achieved by resizing the expression in between the brackets using the items in
Format!Adjust.
Notice that it is possible to insert a pair of invisible brackets using ?. This is for instance
useful in computational contexts, in which formulas should admit a precise, not merely
visual semantics. Alternatively, one may put the formula inside a “rigid box” using ⌘⇧R,
which additionally prevents the formula from being hyphenated.
3.5. Typing big operators
The following key-combinations are used in order to create big symbols:
Shortcut Result Shortcut Result
⇧F5⇧IZ⇧F5⇧OI
⇧F5⇧PY⇧F5⇧Aa
⇧F5⇧SX⇧F5@+ M
⇧F5 @ XO⇧F5@. K
⇧F5⇧U[⇧F5⇧N\
⇧F5⇧V_⇧F5⇧W^
Table 3.3. Big mathematical operators.
30 Mathematical formulas
The scopes of big operators are indicated visually, through the light cyan boxes around
the tags which contain the cursor.
The big integral signs admit two variants, depending on where you want to place subscripts
and superscripts. By default, the scripts are placed as follows:
Z0
1dx
1 + x2:
The alternative rendering “with limits”
Z
0
1dx
1 + x2:
is obtained using ⇧F5⇧L⇧I. Similarly, you may type ⇧F5⇧L⇧Oin order to obtain Hwith
limits.
3.6. Wide mathematical accents
The table below shows how to type mathematical accents above symbols or entire formulas.
Indeed, some of these accents automatically become as wide as the formulas below them.
Shortcut Example Wide variant Shortcut Result
⌥~x~x+y
g⌥'x´
⌥^x^x+y
d⌥`x`
⌥⇧Bx¯x+y⌥.x_
⌥⇧Vx
~AB ⌥"x
¨
⌥⇧Cxˇx+y
⌥⇧Ux
˘x+y
Table 3.4. Keyboard shortcuts for wide mathematical accents.
The same accents may be inserted below the expressions using the ⌥Uprefix. For instance,
⌥U⇧BX+ Y can be used in order to enter x+y.
3.7. Semantic editing facilities
Starting with version 1.0.7.10, T
EXMACS incorporates several features for the “semantic”
editing of mathematical formulas. When used appropriately, this allows you to write doc-
uments in which all formulas are at least correct from a syntactical point of view. For
instance, in the formulas a+b, the computer will understand that +is an operator which
applies to the arguments aand b. Notice that our “semantics” does not go any further:
T
EXMACS is unaware of the mathematical nature of addition.
3.7 Semantic editing facilities 31

Semantic editing does require additional efforts from the user, at least a little adaptation.
For instance, it is the user’s job to enter multiplications using the shortcut *and function
applications using ␣. Indeed, from the graphical point of view, these operations cannot be
distinguished, since they are both printed as invisible whitespace. However, the semantics
of these operations is clearly very different.
Although semantically correct documents are usually not very different from informal
presentation-oriented documents as far as typesetting is concerned, the additional user
effort may pay off for several reasons:
•Documents with more semantics are for instance useful when using formulas as
inputs for a computer algebra system.
•Syntactically correct documents are less likely to contain “typos” or more intricate
mathematical errors.
•For certain editing operations, such as cut and paste, one may directly select sub-
formulas which are meaningful from the syntactical point of view.
•It reduces the risk of using non standard notations, which will be difficult to under-
stand for potential readers of your work.
Furthermore, other semantic facilities might be integrated in the future, such as semantic
search and replace, or semantic search on the web.
In order to activate the semantic editing facilities, please toggle Edit!Preferences!Math-
ematics!Semantic editing. In the semantic editing mode, several of the structured editing
features of T
EXMACS apply to the syntactic structure of the formula, rather than the visual
structure of the document. For instance, the semantic focus is usually a subformula of the
current focus. Similarly, only syntactically meaningful subformulas can be selected when
making a selection.
The semantic focus is useful for several reasons. First of all, it is displayed in green if the
formula is syntactically correct and in red if you made an error. This allows to quickly notice
any typos while entering a formula. Secondly, if you have any doubt on the precedence of
a mathematical operator or relation, then the semantic focus will inform you on the default
interpretation: by putting your cursor right next to your operator, the subexpression to
which the operator applies will be highlighted. In the case of an addition, or a more general
associative operator, all summands are highlighted.
3.8. Common errors and syntax correction
By default, the semantic editing mode “understands” most classical mathematical nota-
tions. This is achieved through the use of a carefully designed grammar for mainstream
mathematics. Obviously, the use of a fixed grammar may cause the following problems:
•Mathematical formulas frequently contain ad hoc notations. For instance, the for-
mulas might contain some text or meaningful whitespace. Another example of an ad
hoc notation is the sign sequence ++¡+¡+. In such cases, the user should explicitly
annotate the appropriate parts of the formula in order to make them semantically
meaningful.
32 Mathematical formulas

•The T
EXMACS grammar used for the interpretation of mathematical formulas may
be incomplete or inadequate for certain situations. It is possible to customize or
extend the grammar using the standard T
EXMACS macro mechanism. Notations for
specific areas may be grouped together in dedicated style packages.
Besides these intrinsically hard to avoid problems, the following common and “easy-to-
make” mistakes are a further source of trouble for associating semantics to mathematical
formulas:
•Since T
EXMACS is a wysiwyg editor, some of the structure of the document is invisible
for the user. For instance, the presence of a mathematical formula x+yis indicated
through the use of an italic slant and special spacing. However, in the formula f(x)
it is easy to type the closing bracket outside the formula, with no visual difference.
•Various mathematical notations are visually ambiguous. For instance, a(b+c)
would usually be understood as a·(b+c), whereas f(x+y)rather corresponds
to a function application. In the semantic editing mode, the user is expected to
resolve this ambiguity by hand by entering multiplications using *and spaces using
␣. The multiply/apply ambiguity is one of the main sources of syntax errors, since
many users do not pay attention to invisible differences. Similarly, the ^glyph
could be the “logical and” or the “wedge product”. This “homoglyph” issue will be
addressed in more detail in the section on the semantics of mathematical symbols.
•It could be that a text was originally written in L
A
T
EX or an old version of T
EXMACS.
In that case, the document contains no special indication on matching brackets or
the scopes of big operators. For instance, in the formula [x; y[, should we interpret
the second bracket as a closing bracket? This is indeed the standard french nota-
tion for an interval with an open right end. More generally, all problems that we
have mentioned so far tend to be present simultaneously when trying to associate
semantics to existing documents.
After activation of the semantic editing mode, you may check whether a formula is correct
by positioning your cursor inside it and looking at the color of the bounding box of the
semantic focus: a green color corresponds to a correct formula and a red color indicates an
error in the formula. Alternatively, assuming that the focus is on a mathematical formula,
you may select Focus!Preferences!Highlight incorrect formulas, in which all incorrect for-
mulas are highlighted inside red boxes.
For the second kind of “easy-to-make” errors, T
EXMACS includes an automatic syntax cor-
rector. Assuming that your cursor is inside a formula, you may use Edit!Correct!Correct
all for the correction of all formulas in your document, or the correction of the current selec-
tion. If the versioning tool is activated, then you may use Edit!Correct!Correct manually
to show the differences between the original and the corrected versions. You may then use
the versioning tool to go through these differences and select the preferred versions.
The precise algorithms which are used for the correction may be enabled or disabled from
Edit!Preferences!Mathematics!Manual correction:
Remove superfluous invisible operators.This algorithm is used in order to remove any
superfluous function applications or multiplications. For instance, users who are
accustomed to editing ASCII files often type spaces around binary infixes such as
addition. Such “function applications” will be removed by this algorithm.
3.8 Common errors and syntax correction 33

Insert missing invisible operators.In L
A
T
EX, multiplications and function applications
are never entered explicitly. When importing a L
A
T
EX document, it is therefore
important to detect and insert missing multiplications and function applications.
Homoglyph substitutions.This algorithm may perform some other useful substitutions
of symbols by visually similar, but semantically distinct symbols. For instance, the
backslash symbol nis replaced by the binary set differences infix (as in XnY),
whenever appropriate.
From the Edit!Preferences!Mathematics!Automatic correction, you may also select those
corrections algorithms which should be applied automatically whenever you open a file.
The various corrections are always carried out when importing a L
A
T
EX file.
After syntax correction, the remaining errors indicate genuine typos at worst or non stan-
dard or non supported notations at best. We also notice that “correct” formulas do not
necessarily have the intended meaning. In order to check whether the operators indeed
apply to the intended arguments, you should keep an eye on the current focus while typing
your formulas.
3.9. Semantics of mathematical symbols
The mathematical symbols in T
EXMACS all come with a certain number of properties which
correspond to their intended meaning. For instance, T
EXMACS is aware that +is an infix
operator, whereas ! is rather a postfix, and , a separator.
T
EXMACS has special symbols e= 2.71828···,p=3.14159··· and ifor important mathematical
constants, which display differently from the mere characters e,πand i, and which can
be entered using the shortcuts E⇥ ⇥,P⇥ ⇥ and I⇥ ⇥. We recommend to systematically use
these shortcuts.
Inversely, semantically distinct symbols may display in a similar way. For instance, the
comma separator, as in f(x; y), is different from the decimal comma, as in 3,14159···.
Notice that the two symbols admit different spacing rules. Semantically distinct symbols
which are rendered by the same glyph are called homoglyphs. Notice that our semantics is
purely syntactic: for instance, the +infix is commonly used for addition, but sometimes also
for the concatenation of strings. Nevertheless, these two uses do not differ from a syntactical
point of view, since the +symbol remains a binary infix with the same precedence with
respect to other symbols.
The most confusing homoglyphs are the various invisible symbols supported by T
EXMACS:
•The multiplication, entered by *. Example: a b.
•Function application, entered by ␣. Example: sin x.
•An invisible separator, entered by ,⇥ ⇥. Example: the matrix A= (aij).
•An invisible addition, entered by +⇥⇥⇥⇥. Example: 17 /
38.
•An invisible symbol, entered by .⇥⇥⇥. Example: the increment + 1.
•An invisible bracket (mainly for internal use). A matching pair of invisible brackets
is entered using (⇥.
34 Mathematical formulas
Again it is recommended that authors carefully enter these various invisible symbols when
appropriate. It is particularly important to distinguish between multiplication and function
application, since there is no 100% safe automatic way to make this distinction (we already
mentioned the formulas a(b+c)and f(x+y)before).
T
EXMACS supports two quite general schemes for entering homoglyphs. On the one hand, we
often rely on the standard variant system. For instance, ×and ∗are obtained using *⇥and
*⇥ ⇥. In table 3.5 we have given the complete list of homoglyphs supported by T
EXMACS.
Shortcut Glyph Example Semantics
*a b Multiplication
␣sin xFunction application
,⇥ ⇥ aij =aji Invisible separator
+⇥⇥⇥⇥ 17 /
38Invisible addition
.⇥⇥⇥ + 1 Invisible symbol
(⇥Φ≡8x; P (x)Invisible bracket(s)
|j j¡xj=jxjAbsolute value
|⇥j fx2Rjx > 0gSeparating bar
|⇥ ⇥ j hai
2jaj
2iExtensible middle bar
|⇥⇥⇥⇥ j11 j1001 Divides relation
,,f(x; y)Comma separator
,⇥, 123,456 Decimal comma
.. 123.456 Decimal point
.⇥.lx.x2Dot connector
*⇥⇥⇥ ·v·wDot multiplication
.⇥ ⇥ · ·+ 1 Dummy wildcard
::fx2E:P(x)gSeparator
:⇥:x:Int Type satisfaction
/⇥:121 :11 =11 Division
\⇥n nxBackslash
\⇥ ⇥ nN>=Nnf0gSet minus
&^1=1^2 = 2 Logical and
* & ^dx^dyWedge product
Table 3.5. Homoglyphs supported by T
EXMACS.
3.10. Customized mathematical semantics
We have done our best to support most of the classical mathematical notations. Never-
theless, the user may sometimes want to define notations with a non standard semantics.
Certain areas may also require special notations which are not supported by default.
T
EXMACS provides a very simple syntax primitive, which allows the user to manually over-
ride the default syntactical semantics of a formula. Assuming that semantic editing was
activated, you may insert the syntax primitive using ⌥X X or Insert!Semantics!Other. The
first argument contains the formula as it should be displayed, whereas the second argument
contains the formula as it should be interpreted.
3.10 Customized mathematical semantics 35
For instance, if we enter Ras the first argument and <as the second one, then the Rwill
be interpreted as a binary relation, exactly in the same way as <. Moreover, the spacing
around Rwill be adapted, so as to mimic the spacing around <. In this particular example,
we might have obtained the same result by using the math-relation primitive, which is
equivalent to syntax with <as its second argument. Most standard operator types are
available from Insert!Semantics, or using the ⌥Xkeyboard prefix. In particular, you may
use ⌥X␣to simply ignore a formula and ⌥XOin order to make the formula behave as an
ordinary symbol (such as the letter “o”).
The syntax primitive is especially powerful when used in combination with the T
EXMACS
macro language. For instance, consider the formula C= 1/2 piHf(z) dz. It is likely that
the intended interpretation of 1/2piis 1/(2 pi) and not (1/2) pi. Therefore, if we often
use the constant 2pi, then we might want to define a macro twopii by
hassignjtwopiijhmacrojhsyntaxj2πij(2 πi)iii
Such macros may be grouped together into a style package with the user’s favourite
notations. Future versions of T
EXMACS might also provide style packages with notations
dedicated to specific areas.
Let us finally notice that there are usually several ways for redefining the semantics of a
formula. For instance, an alternative way to define the macro twopii is using
hassignjtwopiijhmacroj2piii
where we inserted a pair of invisible brackets around 2pi. Similarly, in the formula
ex
p+e log x
p+e log log x
p+·
·
·
·
·
·+log log log x+log log x+logx;
we may either select the whole formula and give it the semantics of an ordinary symbol,
by pressing ⌥XO. However, a nicer solution is to only select the subformula ·
·
····, and
give it the semantics of an ordinary symbol. Yet another example is the sign sequence
++¡+¡+mentioned earlier. This sequence can be interpreted correctly by inserting
invisible separators between the different signs using the ,␣shortcut.
36 Mathematical formulas

Chapter 4
Tabular material
Tables offer a general way to align markup in complex manners. They can be useful for
the presentation of data, but also for typesetting computer programs or the design of web
sites. T
EXMACS provides a wide variety of parameters to control the precise layout of tables
and its cells.
4.1. Creating tables
In order to create a table, you may either use Insert!Table or one of the following keyboard
shorthands:
⌘T⇧N T .Create a plain table.
⌘T⇧N⇧T.Create a table whose cells are centered.
⌘T⇧N B .Create a “block”, whose cells all have a small border.
⌘T⇧N⇧B.Create a block whose cells are centered.
In math mode, a few other table-like structures are provided:
⌘T⇧N M .Create a matrix.
⌘T⇧N D .Create a determinant.
⌘T⇧N C .Create a choice list.
Examples of a plain table, a centered block and a matrix are shown below. Notice that
the environments with the explanatory text below the tables were created using Insert!
Table!Small table. The use of “small tables” allows you to put several tables besides each
other on the same line. For a single large table, one may use Insert!Table!Big table.
boom tree
hallo hello
wiskunde mathematics
Table 4.1. A plain table.
boom tree
hallo hello
wiskunde mathematics
Table 4.2. A centered block.
a b
c d
Table 4.3. A matrix.
There are several other table-like environments and new ones may be created by the user.
For instance, using Insert!Mathematics!Equations or ⌥&, you may insert an eqnarray*
environment, which allows mathematically oriented users to align a list of equations which
span over entire lines. An example of such a list of equations is
sin (f(x)g(x))0= (f(x)g(x))0cos (f(x)g(x))
= (f0(x)g(x) + f(x)g0(x)) cos (f(x)g(x))
37

When starting a new table, its size is minimal (usually 1×1) and its cells are empty. New
rows and columns are inserted using the ⌥←,⌥→,⌥↑and ⌥↓shorthands. For instance, ⌥→
creates a new column at the right of the current cursor position, as illustrated in the figure
below. You may also start a new row below the current cursor position by hitting ↩.
ajb
c d ¡! ajb
c d
Figure 4.1. Example of the insertion of a new column in a matrix. Assuming that the cursor is
at the position indicated in the left-hand matrix, insertion of a new column using ⌥→results in
the right-hand matrix.
4.2. The formatting mode
In T
EXMACS, arbitrary blocks of cells in the table may be formatted in particular ways.
For instance, you may give individual cells a background color, but you may also decide
an entire column to be horizontally centered. By default, formatting commands operate
on individual cells, but this may be changed via Table!Cell operation mode. The following
operation modes are available:
⌘T M C .Operate on individual cells.
⌘T M H .Operate on rows.
⌘T M V .Operate on columns.
⌘T M T .Operate on the entire table.
It is also possible to select a block of cells using the mouse and perform a single operation
on that rectangle.
4.3. Specifying the cell and table alignment
The most frequent formatting operation is the horizontal or vertical alignment of a block
of cells. You may use the ?,?,?and ?keystrokes to quickly align more to the left, right,
top or bottom.
A specific alignment can also be selected in the Table!Horizontal cell alignment and Table!
Vertical cell alignment menus. Alternatively, you may use keyboard shorthands of the types
⌘THxand ⌘T V xfor horizontal resp. vertical alignment.
Similarly, you may specify how the table itself should be aligned with respect to the
surrounding text. This is either done via the Table!Horizontal table alignment and Table!
Vertical table alignment submenus, or using keyboard shorthands of the form ⌘T⇧Hxor
⌘T⇧Vx. Here xrepresents Lfor “left”, Cfor “centered”, Rfor “right”, Bfor “bottom” and T
for “top”.
38 Tabular material

4.4. Specifying the cell and table size
Using Table!Cell width!Set width resp. Table!Cell height!Set height you may specify the
width or height of a cell. In fact, the specified width (or height) may be taken into account
in three different ways:
Minimum mode. The actual width of the cell will be the minimum of the specified
width and the width of the box inside the cell.
Exact mode. The width of the cell will be precisely the specified one.
Maximum mode. The actual width of the cell will be the maximum of the specified
width and the width of the box inside the cell.
The border width and the cell padding (to be explained below) are taken into account in
the size of the box inside the cell.
You may also specify the width and the height of the entire table in Table!Special table
properties. In particular, you may specify the table to run over the entire width of a
paragraph. When specifying a width (or height) for the entire table, you may specify how
the unused space is distributed over the cells using Table!Special cell properties!Distribute
unused space. By default, the unused space is equally distributed.
4.5. Borders, padding and background color
You may specify the border widths and padding spaces of a cell in all possible four direc-
tions: on the left, on the right, at the bottom and at the top (see Table!Cell border). You
have keyboard shorthands of the forms ⌘TBxand ⌘T P xin order to specify border widths
and cell padding.
The default border width for cells in the block environment is 1ln, i.e. the standard line
width in the current font (like the width of a fraction bar). This width occurs at the right
and the bottom of each cell (except when the cell is on the first row or column). The default
horizontal cell padding is 1spc: the width of a white space in the current font. The default
vertical cell padding is 1sep: the standard minimal separation between two close boxes.
Cells may be given a background color via Table!Cell background color.
The entire table may also be given a border and a table padding in Table!Special table
properties!Border. In this case, the padding occurs outside the border.
4.6. Advanced table features
In the menus, you also find some other more special features for tables. Very briefly, these
include the following:
•Change the “span” of a cell and let it run over its neighbouring cells on its right and
below.
•Creation of entire subtables inside cells.
•Correction of the depth and height of text, in order to let the baselines match.
4.6 Advanced table features 39

•Horizontal hyphenation of cell contents and vertical hyphenation of the entire table.
•Gluing several rows and/or columns together, so that the glued cells become “part
of the borders” of the remaining cells.
•Deactivation of the table, in order to see its “source code”.
•Setting the “extension center” of a table. From now on, the formatting properties
of this cell will be used for new cells created around this center.
•Specification of the minimal and maximum size of a table, which will be respected
during further editing. (this is mainly useful when creating table macros).
Currently, all tables come inside an environment like tabular,block,matrix, etc. When
creating your own table macros, you may use Table!Special table properties!Extract format
to extract the format from a given table.
40 Tabular material

Chapter 5
Links and automatically generated content
5.1. Creating labels, links and references
You may create a new inactive label using ⌘!or Insert!Link!Label and a reference to this
label using ⌘?or Insert!Link!Reference. After typing the name of the label or reference,
remember to hit ↩in order to activate it. You may also type the first characters of the
name of a reference and use the ⇥key in order to automatically complete it.
You should be careful to put the label at a point where its number will be correct. When
labeling sections, the recommended place is just after the sectional tag. When labeling
single equations (created using Insert!Mathematics!Equation), the recommended place is
at the start inside the equation. When labeling multiple equations (created using Insert!
Mathematics!Equations), you must put the labels just behind the equation numbers. Recall
that you may use ⌃#in order to transform an unnumbered environment or equation into
a numbered one, and vice versa.
It is possible to create hyperlinks to other documents using ⌘I>or Insert!Link!Hyperlink.
The first field of the hyperlink is the associated text, which is displayed in blue when
activated. The second field contains the name of a document, which may be on the web. As
is usual for hyperlinks, a link of the form #label points to a label in the same document
and a link of the form url #label points to a label in the document located at url.
In a similar fashion, an action may be associated to a piece of text or graphics using ⌘I *
or Insert!Link!Action. The second field now contains a Guile/Scheme script command,
which is executed whenever you double click on the text, after its activation. For security
reasons, such scripts are not always accepted. By default, you are prompted for acceptation;
this default behaviour may be changed in Options!Security. Notice that the Guile/Scheme
command
(system "shell-command")
evaluates shell-command as a shell command.
Finally, you may directly include other documents inside a given document using ⌘I I or
Insert!Link!Include. This allows you for instance to include the listing of a program in
your text in such a way that your modifications in your program are automatically reflected
in your text.
5.2. Inserting images
You can include images in the text using the menu Insert!Image. Currently, T
EXMACS
recognizes the ps,eps,tif,pdf,pdm,gif,ppm,xpm and fig file formats. Here, gs (i.e.
Ghostscript) is used to render postscript images. If Ghostscript has not yet been
installed on your system, you can download this package from
www.cs.wisc.edu/~ghost/index.html
41

Currently, the other file formats are converted into postscript files using the scripts tiff2ps,
pdf2ps,pnmtops,giftopnm,ppmtogif,xpmtoppm. If these scripts are not available on
your system, please contact your system administrator.
By default, images are displayed at their design sizes and aligned at their bottom lines.
Alternative widths, heights and alignment offsets may be specified in the image chooser
dialogue window.
•When specifying a new width, but no height at the prompt (or vice versa), the
image is resized so as to preserve the aspect ration. For instance, entering a width
of 1par will make the image span over the entire paragraph width and adjust the
height proportionally.
You may use wand has special lengths for the default width and height of the
image. For instance, specifying 2w and 2h for the width and the height, the image
will be displayed at twice its default size.
•When specifying an alternative alignment, you may use the wand hlengths for the
displayed width and height (i.e. wand hno longer stand for the default width and
height). For instance, using -0.5h for the y-offset will vertically align the image at
its center.
We also included a script to convert Xfig pictures, with optional L
A
T
EX formulas in it,
into encapsulated postscript. In order to include a L
A
T
EX formula in an xfig picture, we
recall you should enter the formula as text, while selecting a L
A
T
EX font and setting the
special flag in the text flags.
5.3. Generating a table of contents
It is very easy to generate a table of contents for your document. Just put your cursor at
the place where you want your table of contents and click on Insert!Automatic!Table of
contents.
In order to generate the table of contents, you should be in a mode where page breaks
are visible (select paper in Document!Page!Type), so that the appropriate references
to page numbers can be computed. Next, use Document!Update!Table of contents or
Document!Update!All to generate the table of contents. You may have to do this several
times, until the document does not change anymore. Indeed, the page numbers may change
as a result of modifications in the table of contents!
5.4. Compiling a bibliography
Editing files with bibliographic entries
T
EXMACS uses the BibT
EX model for its bibliographies. Manuals about BibT
EX can easily
be found at various places on the web. BibT
EX files can either be entered and edited using
T
EXMACS itself or using an external tool. Some external tools offer possibilities to search
and retrieve bibliographic entries on the web, which can be a reason to prefer such tools
from time to time. T
EXMACS implements good converters for BibT
EX files, so several editors
can easily be used in conjunction.
42 Links and automatically generated content

The built-in editor for BibT
EX files is automatically used for files with the .bib extension.
New items can easily be added using Insert!Database entry. When creating a new entry,
required fields appear in dark blue, alternative fields in dark green and optional fields in
light blue. The special field inside the header of your entry is the name of your entry,
which will be used later for references to this entry. When editing a field, you may use ↩
to confirm it and jump to the next one (blank optional fields will automatically be removed
when doing this). When the cursor is inside a bibliographic entry, additional fields may
also be added using Focus!Insert above and Focus!Insert below.
BibT
EX contains a few unnatural conventions for entering names of authors and managing
capitalization inside titles. When editing BibT
EX files using T
EXMACS, these conventions
are replaced by the following more user friendly conventions:
•When entering authors (inside “Author” or “Editor” fields), use the name tag for
specifying last names (using Insert!Last name or ⇧F6) For instance, “Albert Ein-
stein” should be entered as “Albert Einstein” or as “A. Einstein”. Special particles
such as “von” can be entered using Insert!Particle. Title suffices such as “Jr.” can
be entered similarly using Insert!Title suffix.
•When entering titles, do not capitalize, except for the first character and names or
concepts that always must be. For instance, use “Riemannian geometry” instead
of “Riemannian Geometry” and “Differential Galois theory” instead of “Differential
Galois Theory”.
Inserting citations and compiling bibliographies
Assuming that you have created a .bib file with your bibliographic references, the mech-
anism to automatically compile a bibliography is the following:
•
Use
Insert
!
Link
!
Citation
and
Insert
!
Link
!
Invisible citation
to insert citations, which
correspond to entries in your .bib file.
•At the place where your bibliography should be compiled, click on Insert!Auto-
matic!Bibliography. At the prompt, you should enter a bibtex style (such as plain,
alpha,abbrv, etc.) and your .bib file.
•Use Document!Update!Bibliography in order to compile your bibliography.
Notice that additional BiBT
EX styles should be put in the directory ~/.TeXmacs/system/
bib.
5.5. Generating an index
For the generation of an index, you first have to put index entries in your document using
Insert!Link!Index entry. At a second stage, you must put your cursor at the place where
you want your index to be generated and click on Insert!Automatic!Index. The index is
than generated in a similar way as the table of contents.
5.5 Generating an index 43

In the Insert!Link!Index entry menu, you find several types of index entries. The simplest
are “main”, “sub”, “subsub”, which are macros with one, two and three arguments respec-
tively. Entries of the form “sub” and “subsub” may be used to subordinate index entries
with respect to other ones.
A complex index entry takes four arguments. The first one is a key how the entry has to
be sorted and it must be a “tuple” (created using ⌘I <) whose first component is the main
category, the second a subcategory, etc. The second argument of a complex index entry
is either blank or “strong”, in which case the page number of your entry will appear in a
bold typeface. The third argument is usually blank, but if you create two index entries
with the same non-blank third argument, then this will create a “range” of page numbers.
The fourth argument, which is again a tuple, is the entry itself.
It is also possible to create an index line without a page number using “interject” in
Insert!Link!Index entry. The first argument of this macro is a key for how to sort the
index line. The second argument contains the actual text. This construct may be useful
for creating different sections “A”, “B”, etc. in your index.
5.6. Compiling a glossary
Glossaries are compiled in a similar way as indexes, but the entries are not sorted. A
“regular” glossary entry just contains some text and a page number will be generated for
it. An “explained” glossary entry contains a second argument, which explains the notation.
A “duplicate” entry may be used to create a page number for the second occurrence of an
entry. A glossary line creates an entry without a page number.
5.7. Multiple extractions
T
EXMACS allows users to create multiple bibliographies, tables of contents, indexes, etc.
inside the same document. Let us explain how to do this for bibliographies; the procedure
is similar for other types of automatically generated content.
First of all, every separate bibliography is identified by a “name”. The default name of the
bibliography is bib. Using Insert!Link!Alternate!Bibliography, it is possible to specify a
different bibliography (than the default one) for a certain region of text.
For instance, to specify that a given citation should appear in a second bibliography with
name bib2, you should proceed as follows:
•Click on Insert!Link!Alternate!Bibliography and enter bib2 on the prompt. This
will insert an empty with-bib tag into your document, with the cursor inside.
•Inside this with-bib tag, enter your citation, using Insert!Link!Citation.
If needed, the with-bib tag can be made to span over a large portion of text. All citations
inside this span will be be put into the bibliography with name bib2.
The bibliography bib2 itself should be created in a similar way: first click on Insert!Link!
Alternate!Bibliography and enter bib2 on the prompt. Next insert the bibliography as
usual, via Insert!Automatic!Bibliography. Now do Document!Update!All as many times
as need in order to generate the bibliography and get all links right.
44 Links and automatically generated content

5.8. Books and multifile documents
When a document gets really large, you may want to subdivide it into smaller pieces. This
both makes the individual pieces more easily reusable in other works and it improves the
editor’s responsiveness. An entire file can be inserted into another one using Insert!Link!
Include. In order to speed up the treatment of included documents, they are being buffered.
In order to update all included documents, you should use Tools!Update!Inclusions.
When writing a book, one usually puts the individual chapters in files c1.tm,c2.tm until
cn.tm. One next creates one file book.tm for the whole book, in which the files c1.tm,c2.tm
until cn.tm are included using the above mechanism. The table of contents, bibliography,
etc. are usually put into book.tm.
In order to see cross references to other chapters when editing a particular chapter ci.tm,
one may specify book.tm as a “master file” for the files c1.tm to cn.tm using Tools!
Project!Attach master.... Currently, the chapter numbers themselves are not dealt with by
this mechanism, so you may want to manually assign the environment variable chapter-nr
at the start of each chapter file in order to get the numbering right when editing.
5.8 Books and multifile documents 45


Chapter 6
Creating technical pictures
Besides the possibility to include pictures which were created using other programs,
T
EXMACS includes a rudimentary tool for creating your own drawings. Although this tool
has less features than several most special purpose graphical editors, it does have the
advantage that it is fully integrated with T
EXMACS. In particular, it is easy to insert
text, mathematics and hyperlinks inside your pictures. Moreover, pictures which are cre-
ated in this way often look nicer, because they use the same fonts and default line width
as the surrounding text.
6.1. Starting a new picture
You may start drawing a new picture using Insert!Image!Draw image. In some cases, you
may also want to draw something on top of an existing image (or other kinds of content).
This can be done by selecting the image or content on top of which you want to draw, and
then click on Insert!Image!Draw over selection.
By default, the inserted image spans over the whole paragraph. You may adjust its size
using the keyboard shortcuts ⌥←,⌥→,⌥↑,⌥↓(to adjust the size a bit faster, you may use
⌥⇧←,⌥⇧→,⌥⇧↑,⌥⇧↓). You may also specify an explicit size using Insert!Geometry!Size.
After completion of your drawing, you may automatically crop the size of your picture to
its actual size (plus some additional padding), using Insert!Geometry!Crop.
For technical pictures, it is often useful to display a grid while you are drawing. This can
be done using Insert!Grid!Type!Cartesian. In the menu Insert!Grid it is also possible to
adjust the colors of the axes and the grid-lines, as well as the number of subunit grid-lines
per unit grid-line. By default, grids will also be printed; you need to remove them after
completing your drawing if you do not want this.
By default, T
EXMACS places the origin of the grid at the center of the screen and uses a
1cm unit. You may scroll the picture using the arrow keys ←,→,↑,↓(or ⇧←,⇧→,⇧↑,⇧↓if
you want to move fast). You may specify a different unit using the Insert!Geometry!Unit
menu. You may also zoom in and out using +and -, or from the Insert!Geometry!Zoom
menu.
6.2. Inserting new objects
After insertion of a new picture or clicking inside an existing picture, the second mode
dependent toolbar shows a list of icons which are useful in graphics mode. In particular,
the second group of icons , , , , , , , , on this toolbar allows you to select
the kind of objects that you want to insert. T
EXMACS currently implements the following
primitive graphical objects:
Points. When selecting point mode using or Insert!Point, you may insert simple
points with the left mouse button.
Lines and polygons. When selecting line mode using or Insert!Line, you may
insert a new broken line with the left mouse button: at every new click a new point
is inserted and the last point is inserted using a double click. Polygon mode ( or
Insert!Polygon) is a variant of line mode, with this difference that an additional
segment is inserted between the first and the last points.
47
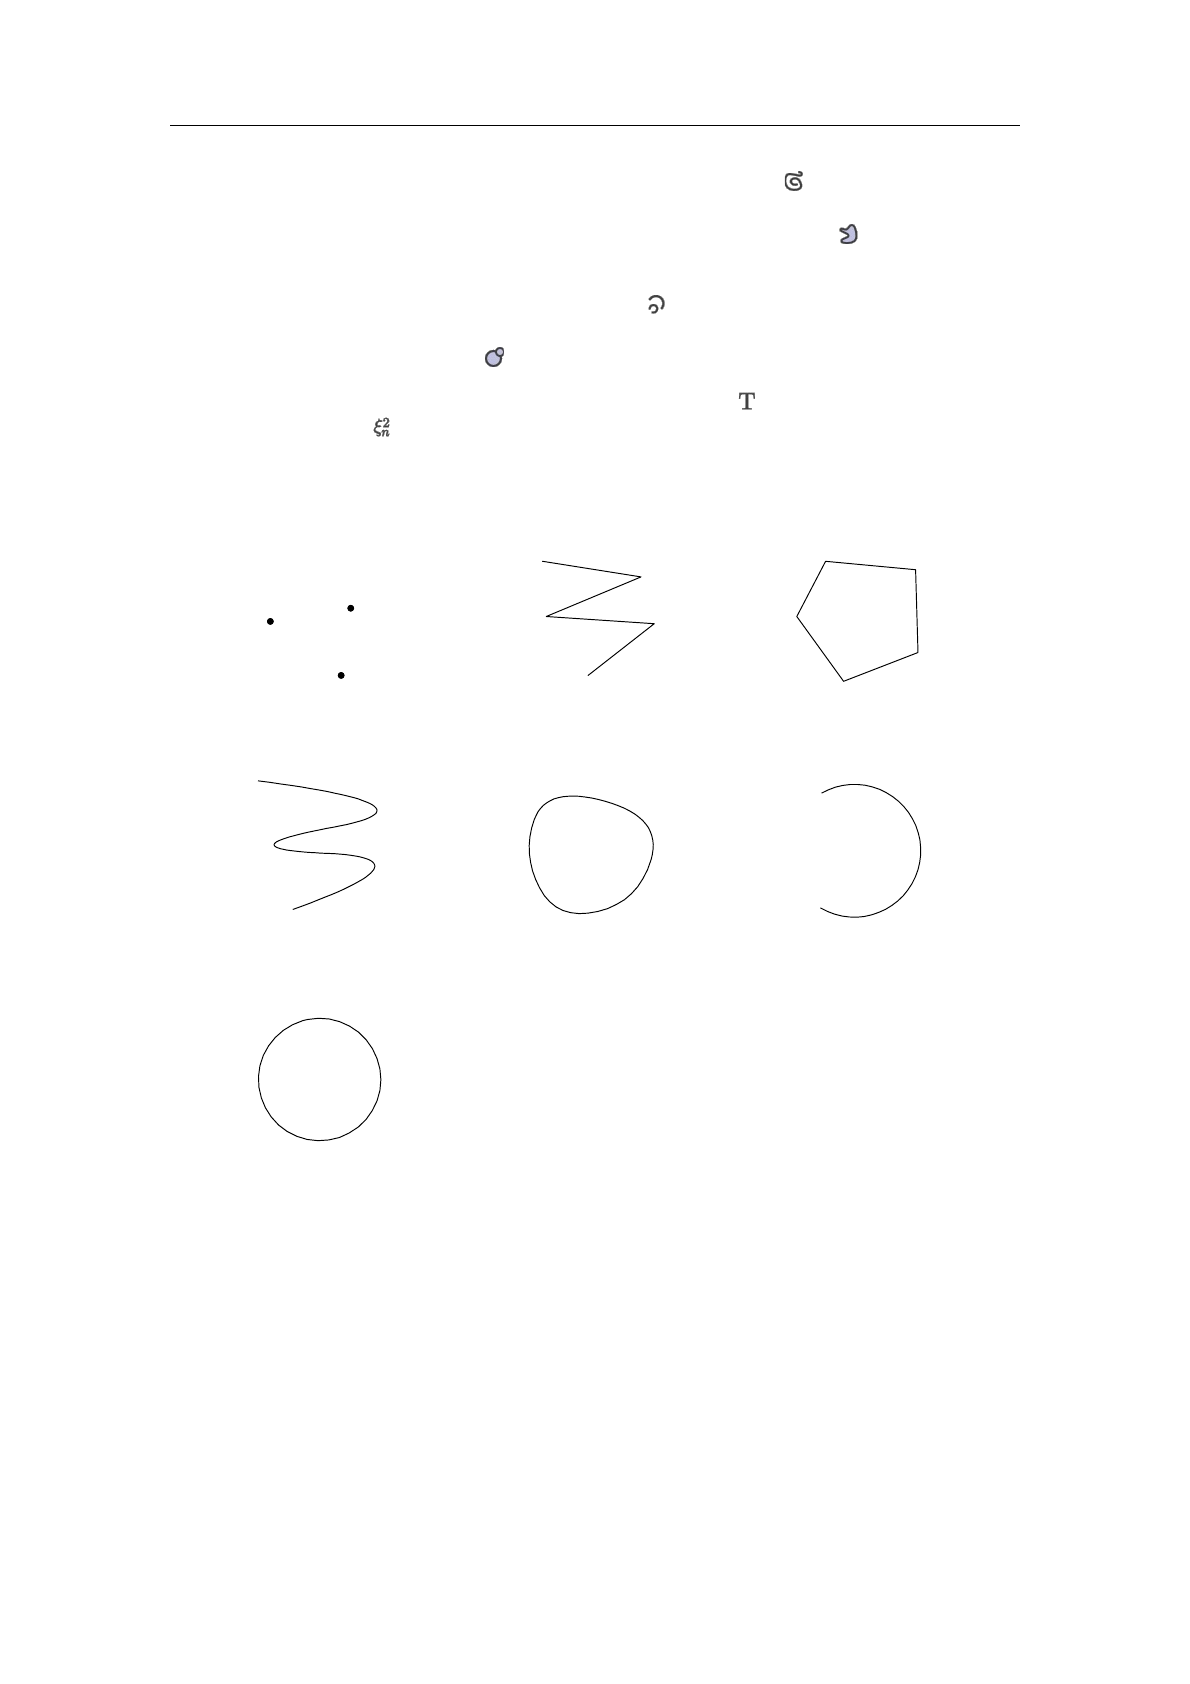
Splines and closed splines. Spline mode is selected using or Insert!Spline. This
mode is similar to line mode, except that we now draw a smooth curve through
the specified points. Again, this mode admits a closed variant ( or Insert!Closed
spline).
Arcs and circles. Arc mode is selected using or Insert!Arc. In this mode, you may
insert arcs going through three points specified through left mouse clicks. Similarly,
you may use circle mode ( or Insert!Circle) for drawing circles.
Text and mathematics. When selecting text mode ( or Insert!Text) or mathe-
matics mode ( or Insert!Mathematics), you may enter text (or mathematics) at
an arbitrary position in the picture, again using the left mouse button.
Typical examples of these basic objects are shown in the figures below:
Figure 6.1. Points. Figure 6.2. Lines. Figure 6.3. Polygons.
Figure 6.4. Splines. Figure 6.5. Closed splines. Figure 6.6. Arcs.
Figure 6.7. Circles.
Hello
Figure 6.8. Text.
epi=¡1
Figure 6.9. Mathematics.
6.3. Editing objects
Any of the modes which allows for the insertion of new objects (points, lines, polygons,
etc.) also allows you to directly edit existing objects. More precisely, as soon as you go
over an existing object with your mouse, then the control points for that object will be
highlighted automatically. Several editing operations are supported:
Moving control points. When your mouse is sufficiently close to a control point,
then it will be possible to drag and drop the control point to somewhere else using
the left mouse button.
48 Creating technical pictures

Inserting new control points.
For objects with an arbitrary number of control
points, such as broken lines, polygons, splines and closed splines, it is possible
to insert new points on existing edges. In order to do so, move the mouse pointer
on the edge where you want to insert a new point; the two neighbouring con-
trol points should be highlighted. Then insert a new point drag and move it around
using drag and drop for the first mouse button.
Removing control points. Using the middle mouse button, it is possible to remove
control points (and eventually the object itself).
Removing the entire object. Using the middle mouse button while simultaneously
pressing the shift key ⇧removes the entire object which is currently highlighted.
While editing, it should also be noticed that T
EXMACS attempts to automatically snap
the mouse pointer to control points or edges of existing objects, as well as to intersection
points of two curves and points on the grid. This makes it possible to quickly draw complex
pictures which are exact, and not merely exact up to one or more pixels (and ugly when
magnified or printed). Around boxes with text or mathematical formulas, there are also
eight invisible control points to which T
EXMACS will attempt to snap the mouse pointer.
This makes it easier to draw diagrams as in figure 6.10 below.
Graphical objects are drawn in a specific stacking order which has the effect that certain
objects may be hidden by other objects. Using ⌃⇞ and ⌃⇟, you may move the currently
highlighted object closer to or farther away from the eye for this stacking order. In a similar
vein, certain control points may become unaccessible, because hidden by closer control
points. In that case, you may use ⇥to cycle through all possibilities for the current cursor
position.
A B
C D
X
Y
Figure 6.10. Example of a diagram which was drawn by using snapping to the eight control
points around each box with a mathematical formula. Notice also that we cropped the graphics
to its actual size.
6.4. Specification of style properties
Each of the fundamental types of graphical objects also admits a certain number of style
properties which affect the rendering. The following style properties exist:
Color. This property applies to any of the graphical object types and specifies the color.
Fill color. This property applies to all graphical object types except text and mathe-
matics. It specifies a fill color for the object.
Figure 6.11. Examples of a few closed splines with different colors and fill colors.
6.4 Specification of style properties 49
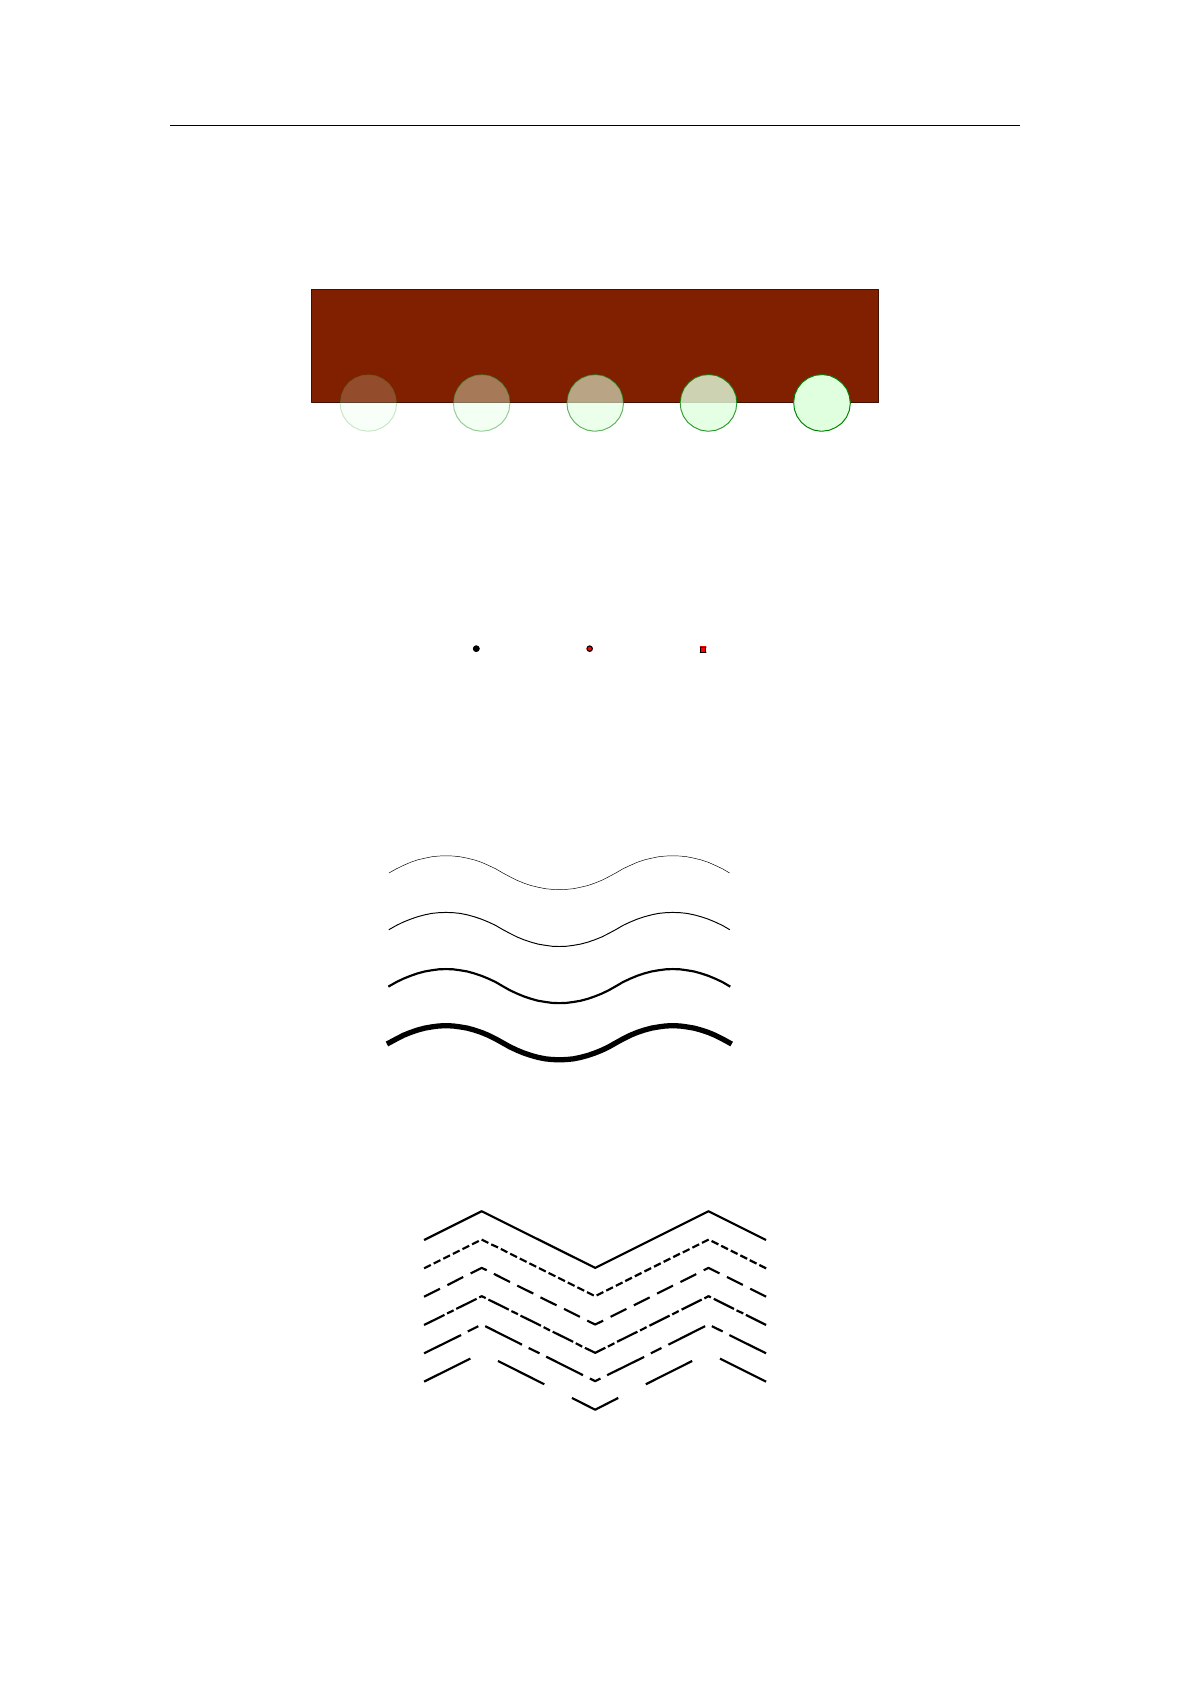
Opacity. This property also applies to any of the graphical object types and specifies
an opacity between 0% and 100%. The default is 100% and lower opacities will make the
object more transparent.
Figure 6.12. Examples of the same object with increasing opacities on top of another object.
Point style. A few different point styles are supported for displaying points: solid disks,
round circles and squares.
SquareRoundDisk
Figure 6.13. The different point styles for black color and red fill color.
Line width. The line width property applies to all curves (that is, to broken lines,
polygons, splines, closed splines, arcs and circles). By default it is 1ln, the width of the
fraction bar in mathematical formulas, but any T
EXMACS length unit can be used instead.
0.5ln
1ln
2ln
5ln
Figure 6.14. The same curve using different line widths.
Line dashes. Various dash styles are available for curves in Focus!Line dashes.
Figure 6.15. The same curve using different dashing styles.
Line arrows. Various arrows at the ends of curves are supported in Focus!Line arrows.
50 Creating technical pictures
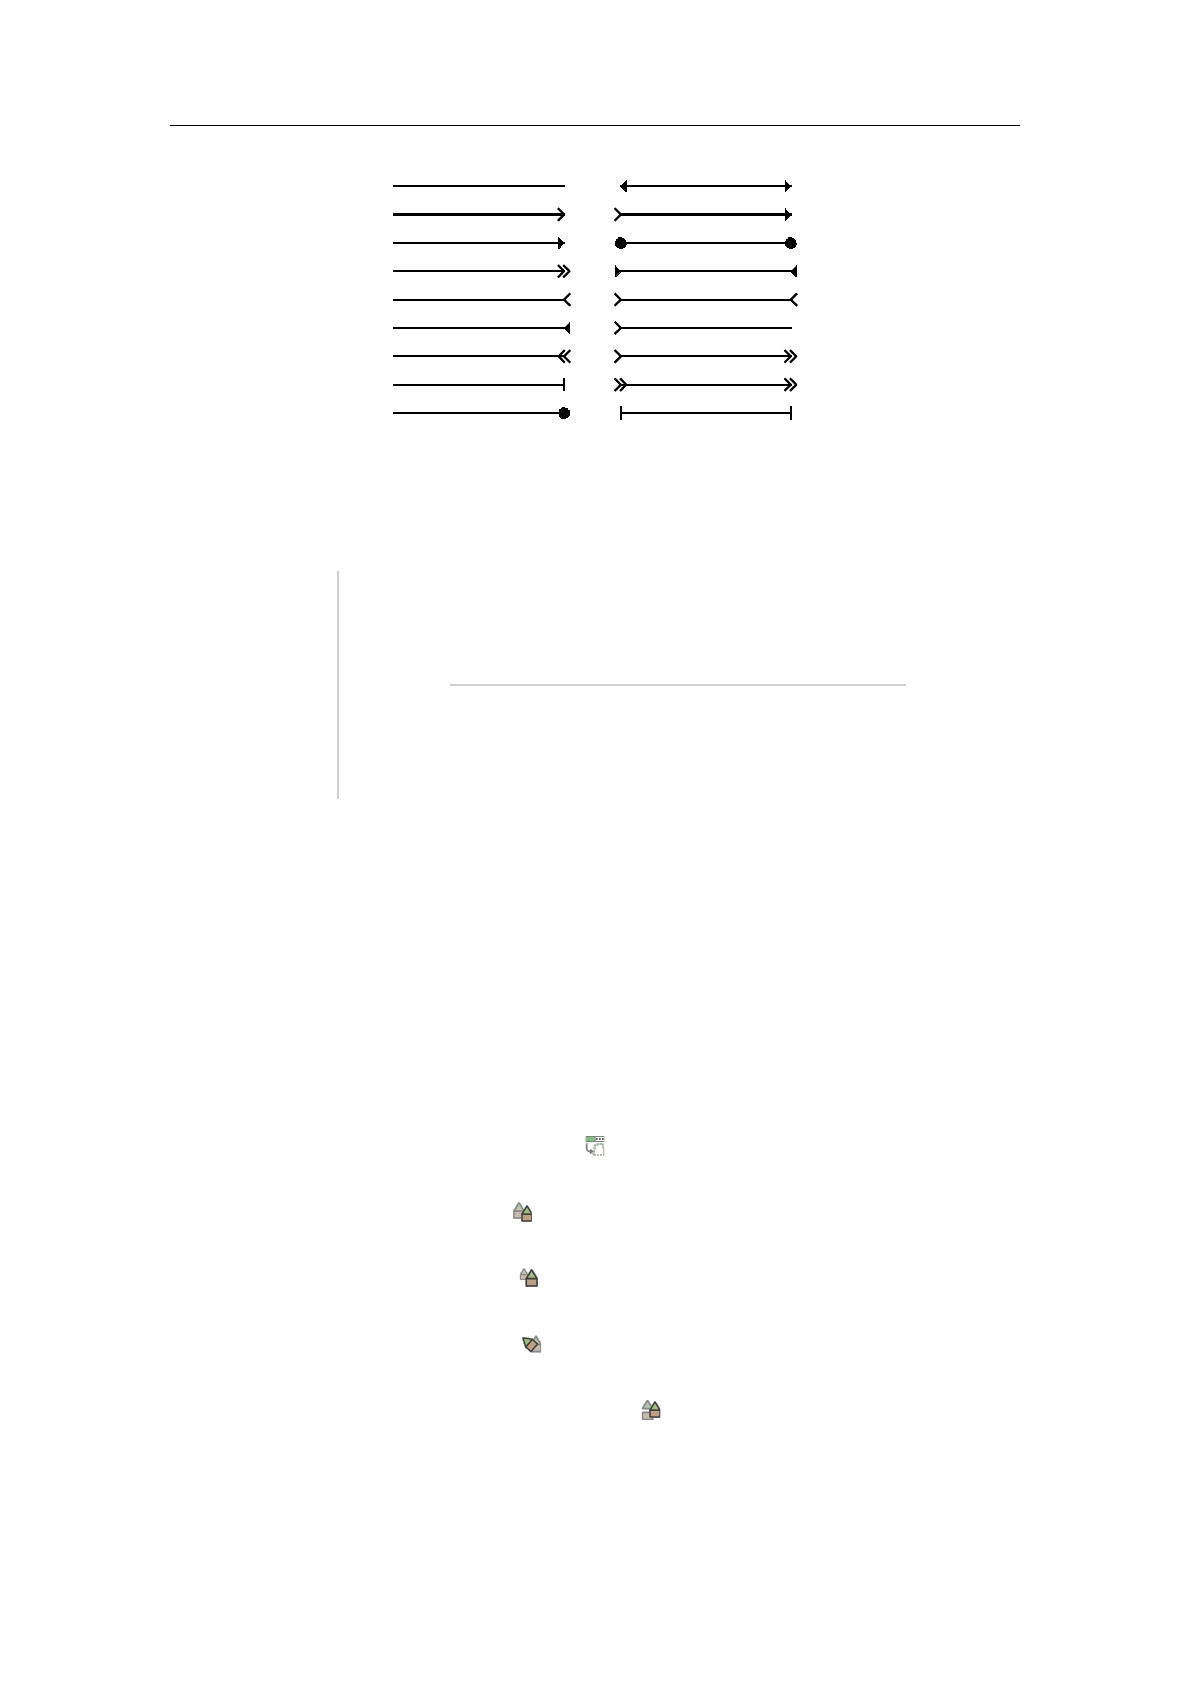
Figure 6.16. The same segment using different types of arrows at the extremities.
Text alignment. For textual and mathematical boxes, its is possible to specify the
horizontal and vertical alignment properties, as indicated in the figure below:
Left
Center
Right
Bottom yBase yAxis yCenter yTop y
Figure 6.17. Illustration of horizontal and vertical alignment of text boxes.
6.5. Editing groups of objects
The rightmost series of icons on the second mode dependent toolbar is used for editing
groups of graphical objects. In group editing mode, you may select or unselect objects
using right mouse clicks. You may also select all objects in a rectangle by dragging using
the right mouse button. When pressing the left mouse button, the current group operation
is performed jointly on all selected objects.
The following kinds of group operations are supported:
Changing properties. Selected using or Insert!Set properties. The current prop-
erties (as indicated in the focus bar) are applied to the selected objects.
Move objects. Selected using or Insert!Move objects. The selected objects are
moved until you press the left mouse button a second time.
Resize objects. Selected using or Insert!Resize objects. The selected objects are
resized until you press the left mouse button a second time.
Rotate objects. Selected using or Insert!Rotate objects. The selected objects are
rotated until you press the left mouse button a second time.
Group or ungroup objects.
Selected using or
Insert
!
Group/ungroup
. The selected
objects are grouped together into a single object. If you selected one grouped object,
then this object will be ungrouped.
In the group editing mode, it is also possible to copy and paste groups of objects.
6.5 Editing groups of objects 51


Chapter 7
Advanced layout features
7.1. Flows
Complex documents often contain footnotes or floating objects, which appear differently on
pages as the main text. In fact, the content of such complex documents use several flows,
one for the main text, one for the footnotes, one for floats, and still another one for two
column text. The different flows are broken across pages in a quite independent way.
In order to insert a footnote, you may use Format!Page insertion!Footnote. The number
of columns of the text may be changed in Paragraph!Number of columns.
7.2. Floating objects
Floating objects are allowed to move on the page independently from the main text.
Usually they contain figures or tables which are too large to nicely fit into the main text.
A floating object may be inserted using Insert!Note!Floating object.
You may also create a floating object and directly insert a figure or table inside it using
Insert!Note!Floating figure resp. Insert!Note!Floating table. However, sometimes you
might want to insert several smaller figures or tables inside one floating object. You may
do this using Insert!Image!Small figure resp. Insert!Table!Small table.
After creating a floating object, you may control its position using Focus!Allowed positions
(when inside the float). You may specify whether you allow the floating object to appear
at the top of the page, at the bottom, directly in the text, or on the next page. By default,
the float may appear everywhere. However, a floating object will never appear inside the
main text at less than three lines from the bottom or the top of a page.
7.3. Page breaking
The page breaking may be controlled very precisely by the user inside Document!Page!
Breaking. In the submenu Algorithm, you may specify the algorithm being used. Professional
page breaking is best in print, but may slow down the editing when being used interactively
in paper mode. Sloppy page breaking is fastest and medium is professional except for
multicolumn material, for which the professional algorithm is significantly slower.
You may also allow the page breaking algorithm to enlarge or reduce the length of pages
in exceptional cases in the submenu Limits. The stretchability of vertical space between
paragraphs and so may be specified in Flexibility. The factor 1is default; a smaller factor
enforces a more rigid spacing, but the quality of the breaks may decrease.
53


Chapter 8
Editing tools
In this chapter, we discuss some of the general editing facilities that are implemented in
T
EXMACS. Of course, this includes basic operations that can also be found in other editors:
“cut and paste”, “search and replace”, etc. But, more interestingly, some of these facilities
take advantage of the additional structure of T
EXMACS documents. Typical examples of
“structured editing features” are “structured cursor movement” and “structured variants”.
Traditional operations such as “search and replace” also attempt to exploit the document
structure. For instance, when searching xin math mode, you will only find matches that
are also in math mode.
8.1. Cut and paste
You can select text and formulas by maintaining the left mouse button. In order to delete
the selected region, use Edit!Cut or ⌃W. In order to copy the selected region, first click
on Edit!Copy or hit ⌘W. Next, paste it as many times as you want to the location of your
cursor, using Edit!Paste or ⌃Y. Alternatively, you may copy a selected region using the
middle mouse button.
It is also possible to change the text properties of a selected region. For instance, in order
to transform some black text in red, you select it using the left mouse button and click
on Format!Color!. Similarly, if you select a formula and you click on Insert!Fraction,
then the formula becomes the numerator of the newly created fraction.
When using the copy and paste mechanism to communicate with other applications, text
is copied and pasted using the T
EXMACS data format. You may specify other import and
export formats using Tools!Miscellaneous!Import selections as resp. Tools!Miscellaneous!
Export selections as. Alternatively, you may directly copy to or paste from an external
format using the first group of entries in the Edit!Copy to and Edit!Paste from submenus.
For instance, a L
A
T
EX formula can be pasted inside a T
EXMACS formula using Edit!Paste
from!LaTeX.
By default, copying and pasting uses the “primary clipboard”. Using the remaining entries
in the Edit!Copy to and Edit!Paste from menus, you may specify as many other clipboards
as you like. This allows you to keep multiple selections in memory, ready to be pasted.
There are two ways to make selections using the keyboard. When using the cursor keys ←,
→, etc. while holding down the ⇧button, you may select text while moving around the
cursor. Alternatively, you may press ⌃␣ once to fix a starting position. When moving
around using the cursor keys, the text between the starting position and the current
position keeps being selected. The selection gets cleared by pressing ⌃G.
Notice that the ⌃␣ shortcut also allows you to make structured selections. You may select
the current word you are in by pressing ⌃␣ twice. Each additional time you press ⌃␣ results
in the selection of the smallest structure that englobes the current selection. Ultimately,
when the entire document gets selected, pressing ⌃␣ once more clears the selection.
55

8.2. Search and replace
You can start searching text by pressing ⌃Sor Edit!Search. Doing this, a new special
“search toolbar” will appear below the main text, just above the footer. When typing text
in the search field of the toolbar, all occurrences of this text will be highlighted in the main
document. Moreover, one “principal” occurrence will be highlighted in red and you may
navigate through all occurrences using ⇞and ⇟(or ↑and ↓, or ↩). Using ↖and ↘, you may
jump to the first and last occurrences respectively. As soon as you press the escape key ⌘,
the search toolbar will be closed, searching stops and focus returns to the main document.
During a search, T
EXMACS only looks for text in the same mode and language as at the
position where you started your search. In other words, when searching an xin math-
mode, you will not find any x’s in the ordinary text. As a current limitation, the search
string on the search toolbar can only contain ordinary text and no math-symbols or more
complicated structured text. More complex searches will be discussed below.
In order to replace text, you should use Edit!Replace or press ⌃=. This will cause a special
“replace toolbar” to appear below the main text, just above the footer. You are prompted
for the string that is to be replaced and the string by which to replace. Again, you may
use the ⇞and ⇟keys in order to navigate through the occurrences of the search string.
When pressing ⇥or ↩in the search field, focus will be moved to the replace field. You
may still use the ⇞and ⇟keys in order to navigate through the occurrences of the search
string. In addition, pressing ↩will replace the principal occurrence of the search string
by the replace string. Using ⇧↩, you may undo the last replacement. You may replace
all remaining occurrences by pressing ⌃↩. Like in the case of searching, the query-replace
command is mode and language sensitive.
The search and replace toolbars are quite rudimentary in the sense that they only allow
for searching and replacing plain text. By pressing the icon on either of these toolbars,
you may expand the toolbar into a full blown widget with larger search and replace fields
that may contain arbitrary markup. Searching and replacing can be done using more or
less the same keyboard shortcuts as in the case of the toolbars, but you may now search
and replace arbitrary content.
When searching non textual content, the conditions for having a hit are somewhat released.
For instance, assume that you are just starting a new search with an empty search field.
Then typing F6inserts the strong tag with no text inside yet. Instead of looking only for
“strong empty strings”, T
EXMACS will rather look for all strong markup in your document.
If you next enter the letter “a”, then T
EXMACS will look for all strong text that contains the
letter “a”. In a similar way, when searching for the formula x, T
EXMACS will highlight all
fractions in which the numerator contains the variable x. Yet another example: a search for
x
pwill highlight all formulas in which the denominator contains a square root that contains
the variable x. For instance, the fraction a+b
c+x+y
pwill be highlighted, but not x+y
p
a+y
p.
When using the structured text and replace widgets, T
EXMACS also implements a few
additional special tags for enhancing structured searching. First of all, it can happen that
you would like to search for certain content inside a special context. For instance, you might
want to search for all occurrences of the letter “a” inside a strong tag. When searching for
a, as above, T
EXMACS will highlight all strong tags that contain the letter “a”. In order to
highlight the letters “a” themselves, you should first enter the strong tag inside an empty
search field using F6. You next enter a special select-region tag using ⌃?, and finally insert
the letter “a” inside this tag. Other special markup that can be used inside search fields
are the “wildcards” x,yand z, which are entered using ⌃1,⌃2and ⌃3.
56 Editing tools

As soon as you start using the structured text and replace widgets instead of the toolbars,
this will be remembered as a user preference: any subsequent searches or replacements will
again use the widgets. In order to switch back to the less intrusive toolbar methods for
searching and replacing, you should press the icon.
8.3. Spell checking
If the program ispell has been installed on your system, then you may use it to check
your text for misspelled words by pressing ?or Edit!Spell. Notice that you might have to
verify that the dictionaries corresponding to the languages in which your texts have been
written have been installed on your system; this is usually the case for English.
When you launch the spell checker (either on the whole text or on a selected region), you
will be prompted at each misspelled word and the footer displays the available options:
a). Accepts the misspelled word and all its future occurrences in the text.
r). Replace the misspelled word by a correction that you have to enter.
i). Indicate that the “misspelled” word is actually correct and that it has to be inserted
in your personal dictionary.
1-9). Several suggested corrections for your misspelled word.
Notice that ispell just checks for misspelled words. No grammatical faults will be detected.
When starting the spell checker, it will use the dictionary of the language that is active at
the current cursor position (or the start of a selection). Only text in that language will be
checked. If your document contains text in several languages, then you will have to launch
the spell checker once for each language being used.
8.4. Undo and redo
It is possible to gradually undo the changes you made in a document from the moment
that you launched T
EXMACS. This can be done via Edit!Undo or using the keystroke ⌘[.
Undone changes can be “redone” using Edit!Redo or ⌘]. T
EXMACS maintains the entire
“history tree” of all your edits. Sometimes, after multiple undo and redo actions, this means
that there can be several ways to redo some modification; in that case, Edit!Redo becomes
a menu in which you can select the appropriate branch.
We notice that only changes in the document itself are taken into account by the undo
system. In particular, modifications of most of the global document properties can not be
undone. This includes modifications of the document style, the page size, the main font,
etc. The same remark applies to any modifications outside T
EXMACS that were triggered by
your actions. For instance, in a computer algebra session, you can undo your edits inside
T
EXMACS, but not the computations in the external computer algebra system.
8.4 Undo and redo 57

8.5. Structured editing
As a general rule, the behaviour of most structured editing operations is conditioned by
the current focus. By default, the focus is on the innermost tag that contains the cursor.
Whenever some selection is active, the focus is rather on the innermost tag that contains
the selection. During structured operations, such as navigating among similar tags, the
focus may temporarily be set to something else. The current focus is visually indicated by
the innermost cyan box around the cursor.
For instance, the structured insertion commands ⌥←,⌥→,⌥↑and ⌥↓have a particular
meaning both inside tables and trees. Inside tables, they allow you to insert new rows and
columns (see figure 8.1). Inside trees, they correspond to the insertion of new nodes (see
figure 8.2). If you are inside a tree inside a table, then the innermost tag is a tree, and
node insertions will take precedence over the insertion of new rows and columns.
For most editing operations, a “default particular behaviour” has been defined. This behav-
iour may potentially be overridden for a few exceptional tags. In our example of structured
insertion, the default behaviour of ⌥←and ⌥→is to insert a new argument to the tag at the
left or at the right of the cursor (when allowed). Inside tables, this behaviour is overridden
so as to insert entire columns.
a bjc
d e f a b jc
d e f ajb c
d e f 0
@a b c
j
d e f
1
A0
@j
a b c
d e f
1
A
Figure 8.1. Assume that the cursor is at the position of |inside the left-most matrix. Then the
four other matrices respectively correspond to the insertion of a new column at the left (⌥←) or
right (⌥→), resp. a new row above (⌥↑) or below (⌥↓).
a
b c|d
a
b|c d
a
b c |d
a
b|
c
d
a
b c
|
d
Figure 8.2. Assume that the cursor is at the position of |inside the left-most tree. Then the
four other trees respectively correspond to the insertion of a new node at the left (⌥←), at the
right (⌥→), above (⌥↑) or below (⌥↓).
Similarly, still in the case of matrices, the keys ⌥↖,⌥↘,⌥⇞ and ⌥⇟ can be used for inserting
a new first or last column, resp. a new first or last row. The keys ⌥⌫ and ⌥⌦ are mapped
to the commands for backward resp. forward structured deletion. For matrices, this will
result in the removal of the column before or after the cursor (see figure 8.3). In order to
remove the enclosing environment you may use ⌃⌫ or ⌃⌫.
a bjc
d e f bjc
e f ajc
d f bj
Figure 8.3. Assume that the cursor is at the position of|inside the left-most matrix. Then pressing
the keys ⌥⌫ and ⌥⌦ respectively result in the next two matrices. Pressing either ⌃⌫ or ⌃⌫ replaces
the matrix by the content of the cell in which you are, leaving you with the bat the right-hand side.
58 Editing tools

8.6. Structured cursor movement
T
EXMACS implements the three main mechanisms for structured cursor movement:
1. Traversal of the entire structure of the document.
2. Traversal of tags that are similar to the innermost tag.
3. Movements inside the innermost tag.
Most keyboard shortcuts for structured cursor movements can be used in combination with
the ⇧-key so as to simultaneously select text while moving around.
Structured traversal of the document.
The ⌃←,⌃→,⌃↑and ⌃↓keys are used for the structured traversal of the entire document.
Inside plain text, ⌃←and ⌃→allow you to move in a word-by-word manner, whereas ⌃↑
and ⌃↓correspond to paragraph-by-paragraph motion.
In the presence of other markup, the ⌃←and ⌃→keys allow you to visit all accessible
cursor positions in the document, except that we keep moving in a word-by-word manner
inside plain text. The behaviour of the ⌃↑and ⌃↓keys is more context-dependent. Inside
matrices, they typically allow you to move one row up or down.
Traversal of tags that are similar to the innermost tag.
This type of cursor movement allows you to quickly visit all other tags in the document
that are similar to the innermost tag. The ⌃⇞ and ⌃⇟ keys allow you move to the previous
or next similar tags, whereas ⌃↖ and ⌃↘ directly jump to the first or last similar tags.
For instance, if you are inside a section title, then you may move to the previous sectional
title using ⌃⇞. Subsection and chapter titles are in particular understood to be “similar”
to section titles. Notice that you may use ⌃§to jump to the previous section title.
Movements inside the innermost tag.
It is also possible to quickly move inside the innermost tag without quitting it. The short-
cuts ⌘⌥←,⌘⌥→,⌘⌥↖ and ⌘⌥↘ provide a way to move to the previous, next, first or last
argument of the innermost tag. Furthermore, the shortcuts ⌘⌥⌫ and ⌘⌥⌦ may be used to
exit the innermost tag on the left or on the right.
This default behaviour may be overridden in special contexts. For instance, inside tables or
trees, they rather correspond to cell-by-cell or node-by-node cursor movement. In addition,
these cases associate vertical cursor movements to ⌘⌥↑,⌘⌥↓,⌘⌥⇞ and ⌘⌥⇟.
8.7. Structured variants
When creating an environment like a theorem, an equation or a list, it frequently happens
that one would like to change the environment a posteriori. The keyboard shortcuts ⌃⇥
and ⌃⇧⇥ allow you to cycle through the list of structured variants of the innermost tag, in
forward or backward direction, respectively.
For instance, assuming that you are inside a theorem, pressing ⌃⇥ several times will change
the theorem into a proposition, a lemma, a corollary, a conjecture, and finally back into a
theorem. The ⌃⇧⇥ key allows you to cycle in the reverse direction: theorem !conjecture !
corollary !lemma !proposition !theorem.
8.7 Structured variants 59

In the case of mathematical formulas, the ⌃⇥ shortcut allows you to change an inline
formula such as a2+b2=c2into the displayed formula
a2+b2=c2
while taking care of potential “trailing spaces and punctuation signs”.
T
E
X
MACS
also provides the
⌃#
shortcut for turning numbered environments into unnumbered
environments and vice versa. This works for most common environments like theorems,
remarks, tables, equations, etc. Notice that ⌃#also turns an unnumbered itemize envi-
ronment into an enumeration and vice versa, whereas ⌃⇥ allows you to cycle between
the available kinds of list items (bullets, dashes, arrows, etc.).
Folding and unfolding provides yet another example of an interesting way to toggle between
several environments. Inside a computer algebra session such as
Pari] factor (x^15 - 1)
%1 = 0
B
B
B
B
B
B
@
x¡1 1
x2+x+ 1 1
x4+x3+x2+x+ 1 1
x8¡x7+x5¡x4+x3¡x+ 1 1
1
C
C
C
C
C
C
A
you may click on “Pari]” in order to fold the output (only the input remains visible) and
click once again in order to unfold back to the original state. The ⌃*shortcut achieves
the same effect. There various other foldable environments, most of which are available
through Insert!Fold.
8.8. Positioning and resizing objects
The ⌘prefix may be used for positioning and resizing objects. For instance, inside a cell
of a table, you may use ⌘→to align the cell more to the right. Behind a space introduced
via Format!Space, the same key allows you to increase the width of space. More generally,
the following shortcuts are implemented:
⌘← .Decrease the horizontal size of an object, or align more to the left.
⌘→ .Increase the horizontal size of an object, or align more to the right.
⌘↓ .Decrease/increase the vertical size of an object, or align more to the bottom.
⌘↑ .Increase/decrease the vertical size of an object, or align more to the top.
⌘↖ .Decrease the horizontal offset of an object, or left align.
⌘↘ .Increase the horizontal offset of an object, or right align.
⌘⇟ .Decrease the vertical offset of an object, or align at the bottom.
⌘⇞ .Increase the vertical offset of an object, or align at the top.
⌘⌫ .Revert the geometry (size, position, alignment) to the defaults.
⌘⌃⇥ ,⌘⌃⇧⇥ .Circulate among the available length units for specifying the geometry.
60 Editing tools

⌘⌃[,⌘⌃].Decrease or increase the step size when positioning or resizing.
Particular tags to which the shortcuts apply are the following:
Spaces. Both horizontal and vertical spaces from the Format!Space menu. You should
put the cursor just after the space tag for the shortcuts to apply.
Box modifiers. The tags move,shift,resize,extend,clipped,smashed,swell from the
Format!Adjust menu.
Animations. The durations of animations can be modified using ⌘←and ⌘→.
Images. The size and alignment of images can be changed.
8.9. Versioning tools
When writing documents in collaboration with other authors, it frequently arises that
one wants to go through changes made by the other authors, and either accept, discard
or further correct them. After enabling the versioning tool through Edit!Preferences!
Utilities!Versioning tool, a special menu Version appears in the main menu bar, which makes
this process automatic. Below, we will describe in more detail how this tool works.
In addition, there exist many stand-alone programs for maintaining several versions of
a same file, such as Subversion,Git,Darcs,GNU Arch, just to mention a few of
them. T
EXMACS currently provides a rudimentary support for Subversion and Git, but
interfaces for the other systems could easily be added.
Comparing two versions.
Assume that we have two versions old.tm and new.tm of the same document. In order to
see the changes, first load the newer version new.tm, then click on Version!Compare!With
older version and select the older version old.tm. The buffer will still be named new.tm,
and the changes between both versions will be indicated by special markup. If there are
any changes, then the cursor will be positioned at the first difference. In a similar way, you
may compare the current buffer with a newer version on disk using Version!Compare!With
newer version.
It is possible to go through all the differences between the old and new versions either from
the items in the submenu Version!Move, or using the keyboard shortcuts ⌃↑and ⌃↓. One
may also use the more general structured navigation shortcuts ⌃↖,⌃↘,⌃⇞ and ⌃⇟.
Visualization of the differences.
Differences between the two versions can be displayed in three ways: by showing only the
old version, only the new version, or both versions simultaneously. In all cases, the old
version is displayed in dark red and the new version in dark green.
The visualization style can be specified individually for each individual change, via Ver-
sion!Show or the keyboard shortcuts ⌃←(old version), ⌃→(new version) and ⌃|(both
versions). One may also cycle through the different style using the structured variant key
⌃⇥. If you selected some text, then the above actions will apply to the whole selection. In
particular, by selecting the entire file, you can visualize the older or the newer version, or
both versions.
Retaining a specific version.
8.9 Versioning tools 61

It often occurs that we want to go through the changes between two versions and pro-
gressively retain either one or the other version for each individual difference. Assuming
that the cursor is inside a given difference, this can be done from entries in the submenu
Version!Retain. Alternatively, one may use the shortcuts ⌃1,⌃2and ⌃↩ to retain the old,
new and currently displayed version, respectively. If both versions are displayed, then ⌃↩
retains the new version. After retaining one of the versions, we automatically jump to the
next difference, which can then be processed.
If you selected some text, then any of the above action will retain the appropriate version
for each of the differences in the selection. This applies in particular to the case when you
select the entire document. A convenient alternative way to process all differences is to use
⌃↑and ⌃↓to go through the differences, use ⌃←and ⌃→to select the preferred version. As
soon as all differences have been processed, you select the entire document and click on
Version!Retain!Current version.
Grain control and reactualizing the differences.
The entries in the submenu Version!Grain allow you to control the grain with which
differences between versions are computed. By default, we use the finest grain Detailed.
It is also possible to compute differences on a paragraph-based level, using Block. In that
case, the entire paragraphs in which a change occurs will be highlighted. The roughest
grain Rough will highlight the entire text, if a change occurs somewhere inside.
The grain is used when comparing two documents using Version!File!Compare, but it is
also possible to change the grain for a selected portion of text: simply select the text and
choose the new grain in the submenu Version!Grain. This can in particular be applied on
the entire buffer. Similarly, if you change the grain inside a difference, then the difference
will be recomputed using the new grain.
Notice that you may also “change” the grain to the current grain. This has the effect of
reactualizing the differences of a selected portion or of the current difference at the cursor
position. This may be useful, if you made some changes to one of the versions. For instance,
assume that the old version contained a theorem and that we changed it into a lemma in
the new version and also modified part of its inside text. When visualizing the changes,
the whole theorem will be highlighted, since there is no appropriate markup to indicate
that we just changed from a theorem to a lemma. Nevertheless, if we want to compare the
inside texts, we may turn the old theorem into a lemma and then reactualize.
Using external programs such as Subversion for version control.
If the file you are editing belongs to a directory that is under version control (only Sub-
version and Git is currently supported, although other systems might follow), then the
first part of the Version menu will contain some clickable entries.
First of all, if the current buffer is under version control, then you may take a look at its
history using Version!History. The history contains a list of hyperlinks to older revisions,
together with short information about who changed what and when. Older revisions cannot
be saved, but you may compare them to the current user version (on disk or being edited)
using Version!Compare!With current user version.
After making some changes to a file under version control, the version inside the editor
or on disk no longer corresponds to the version in the repository. Using Version!Commit,
the current user’s version can be committed to the repository. When doing so, you will
be prompted for a small explanatory message about the changes that you have made. A
file that is not yet under version control can be added to the version control system using
Version!Register. Registering a file does not commit it to the repository: you still have to
use Version!Commit in order to do so.
62 Editing tools

If, while you were editing, changes to the file were made in the repository, then you may
merge the result with your current version using Version!Update. At the moment, no
conflict resolution has been implemented yet, although this is planned for the future.
8.9 Versioning tools 63


Chapter 9
Laptop presentations
T
EXMACS features a “presentation mode”, for making presentations from a laptop. The
presentation mode is activated/deactivated using View!Presentation mode or ⌃F9. In this
chapter, we describe several dedicated style packages and markup elements which can be
used for making slick presentations.
Several types of remote controllers are supported for laptop presentations. Some of them
(such as Apple infrared controllers) should work out of the box (at least for the Qt version).
Others map the buttons on the remote controller to certain keys on your keyboard, and you
will need to toggle View!Remote control in order to remap these keys to the right actions
during presentations. If necessary, the appropriate mappings may be specified in Edit!
Preferences!Keyboard!Remote control. By activating the debugging tool Tools!Debugging
tool and Debug!keyboard, you may find out the particular mappings used by your remote
control.
9.1. Beamer styles
In order to start writing a laptop presentation, you should first select the beamer style
using Document!Style!beamer. There are several main “themes” for presentations, such as
Bluish,Ice,Metal,Reddish,Ridged paper, which can be selected from the Document!Beamer
theme menu.
The presentation style includes the alt-colors style package, which features the use
of colors for mathematical formulas, enunciations, etc. Additional customizations of the
presentation style are available in the Focus!Preferences menus for the various tags to
which they apply. For instance, the rendering of slide titles and theorems can be further
customized.
9.2. Traversal of a presentation
One major family of markup tags for presentations concerns the traversal of the document
during a presentation. The keys F10 and F11 are used respectively for going back and
forth in the presentation. The keys F9and F12 are used to go to the start resp. end of the
presentation. When using the beamer style or when enabling the “presentation tool” in the
Tools menu, a Dynamic menu and additional icons will appear, which can also be used for
the traversal of your presentation.
The most basic traversal tag is called a “switch”, and allows the user to show different pieces
of text in successive and mutually exclusive manner. The entire presentation itself usually
consists of a screens switch, where the pieces are the successive “slides” of the presentation.
After selection of the beamer style, this switch can be inserted using Focus!Screens or
Insert!Fold!Switch!Screens. You may jump from one screen to another one using ⇞and
⇟.
65

Inside a switch, new “branches” can be inserted after or before the currently visible branch
using Focus!Insert argument after or Focus!Insert argument before. Besides the screens
switch, you may use Insert!Fold!Switch!Standard to insert paragraph-wide switches,
and Insert!Fold!Switch!Standard to insert inline switches (similarly to displayed and
inline formulas).
Another popular way to traverse is presentation is to progressively unroll content. This can
be done by inserting an unroll tag using Insert!Fold!Unroll. Using a “hack” this tag can be
combined with the itemize and enumerate tags: first create the list environment, but remove
the first (automatically inserted) item tag. Next insert the unroll tag. When pressing enter
inside the unroll tag, new items are created; you still have to use Focus!Insert argument
after for inserting new branches to the unroll structure (in particular, several items could
be unrolled at once).
A variant of unrolling is unfolding. This is basically an unroll tag with exactly two branches,
but different variants are available in Insert!Fold!Folded depending on the desired ren-
dering. In particular, some of the renderings display a button which may be pushed in
order to fold or unfold some content. The input-output fields inside computer algebra
sessions are also foldable. Similarly, the tags in Insert!Fold!Summarize are switches with
two branches, again with different kinds of rendering.
When using T
EXMACS in combination with an external plug-in, such as a computer algebra
system, you will notice that all input-output fields in sessions are foldable. In addition, you
can create so called “executable switches” using the items in the Insert!Fold!Executable
submenu. This allows you to switch back and forth between a given input to the system
and the corresponding output.
All markup for the traversal of presentations may be nested in a natural way. In the Insert!
Fold!Traversal menu, you may specify whether unrolled and folded structures should be
folded back after traversal.
9.3. Overlays
The standard “fold”, “unroll” and “switch” tags implement the most frequent kinds of tra-
versal of a slideshow. However, there are cases in which more complex successions are
needed.
Elimination of xfrom
xsin y¡3x y =α
yields
x=α
sin y¡3y:
Elimination of xfrom
xsin y¡3xy=α
yields
x=α
sin y¡3y:
Figure 9.1. Example of highlighting a variable xwhen switching from one slide to a next one.
For instance, imagine that we are given a slide, and that we wish to highlight all occurrences
of some variable xin red on the next slide (see figure 9.1). This could be achieved by using
a switch tag: we just copy the whole slide both in the first and in the second branch of the
switch, and next color all instances of xred in the second branch. However, this solution
has the disadvantage that any a posteriori modification on the slide has to be made both
in the first and in the second branch.
66 Laptop presentations

T
EXMACS provides a so called “overlay” mechanism for this kind of more complex successions
of slides. You may insert a pile of overlays using Insert!Fold!Overlays!Standard. At the
start, the pile contains a unique overlay, but new overlays can then be added using the
standard keyboard shortcuts ⌥→and ⌥←for structured insertion. When applied to overlays,
the standard keys F10 and F11 for traversing the presentation have the effect of going up
and down in the pile of overlays.
By default, all text which is typed by the user will be visible on all overlays. But, using
the filters in the menu Insert!Fold!Overlay, it is also possible to create text which is only
visible on specified overlays of the pile. There are four basic types of filters:
Visible from here on.Text that will be visible on this and all subsequent overlays.
Visible until here.Text that will be visible on this and all previous overlays.
Visible only here.Text that will be visible only on this overlay.
Visible except here.Text that will be visible on all but the current overlays.
In a similar way, T
EXMACS provides tags for alternate views: depending on whether a
certain predicate is met, we show the “main content” on certain overlays and the “alternate
content” on the remaining overlays. We use the same four types of predicates:
Alternate from here on.The alternate text will be used on this and all subsequent
overlays.
Alternate until here.The alternate text will be used on this and all previous overlays.
Alternate only here.The alternate text will only be used on this overlay.
Alternate except here.The alternate text will be used on all but the current overlays.
T
EXMACS finally provides a means of customizing the way that “hidden” and “shown” content
should be rendered: user determined coloring schemes can be used using the alter-colors tag
which can be inserted from Insert!Fold!Overlay!Specify color alternation. For instance, in
order to achieve the effect mentioned in the example from Figure 9.1, you may specify a
“black to red” color alternation, and then use a Visible from here on type of overlay.
9.4. Decorations
In order to decorate your laptop presentations, T
EXMACS provides a few extra markup
elements: granite,manila-paper,metal,pine,ridged-paper and rough-paper. These tags will put
your content on a nice, natural background, as illustrated in the figure below. You may
also use the tit tag for giving individual slides a title.
Granite
a2+b2=c2
Metal
a2+b2=c2
Pine
a2+b2=c2
Manila paper
a2+b2=c2
Ridged paper
a2+b2=c2
Rough paper
a2+b2=c2
Figure 9.2. Some standard ornaments for decorating your presentations.
9.4 Decorations 67

9.5. Animations
T
EXMACS provides some rudimentary support for animations inside laptop presentations.
This support is likely to be further improved in future T
EXMACS distributions.
The simplest animations are available from the menus Insert!Animation!Translate and
Insert!Animation!Progressive. Using the first menu, it is possible to create moving content:
you first specify a duration for the full animation and then enter the content which has to
be moved. The different kinds of moving content are illustrated in figure 9.3. Similarly,
using the second menu, it is possible to create content which only progressively appears
on the screen. The various kinds of progressive content are illustrated in figure 9.4. The
duration of the animations can be modified a posteriori by putting your cursor inside them
and using the shortcuts ⌘←and ⌘→.
Hello world
Rightwards
Hello world
Leftwards
Hello world
Upwards
Hello world
Downwards
Figure 9.3. Moving content, as inserted from Insert!Animation!Translate.
Hello
Rightwards
Hello
Leftwards
Hello world
From center
Hello
Upwards
Hello
Downwards
Figure 9.4. Progressive content, as inserted from Insert!Animation!Progressive.
Other basic animations are “animated gif pictures”, which can be inserted from Insert!
Animation!Animation, and sounds, which can be inserted from Insert!Animation!Sound.
Support for movies should be added later.
It is also possible to combine animation, so as to form larger animations. For instance,
using Insert!Animation!Compose you can play several animations one after another. Often
the individual elements of a composed animations are fixed animation of a given duration,
which can be inserted using Insert!Animation!Fixed. Of course, you may also use moving
or progressive content or even composed animations as building blocks. An animation
can be repeated indefinitely using Insert!Animation!Repeat. This may for instance be
used to create a blinking effect. Some examples of the various possibilities can be found
in figure 9.5.
World
Compose
World
Blinking
TeXmacs
T
EXMACS logo
Mathe
Magix animation
Figure 9.5. Different kinds of composed animations.
9.6. Exporting beamer presentations
Once you have created a file with the beamer style you may want to export it to PDF in
order to be able to give your presentation without using T
EXMACS. There are two ways in
which this can be done: expanded and unexpanded.
1. Expanded means that folds of all kinds are “flattened” out before they are exported.
This is useful if you intend the resulting PDF file to be distributed and printed,
since it will have exactly as many pages as slides your presentation.
68 Laptop presentations

2. Unexpanded means that the PDF file will have as many pages as steps your presen-
tation, which depending on your use of fold,switch,overlay, etc. will typically result
in many more pages.
You can select which of these methods will be used with Preferences!Converters!TeXmacs-
>Pdf/Postscript!Expand beamer slides.
9.6 Exporting beamer presentations 69


Chapter 10
Using GNU T
E
X
MACS as an interface
An important feature of T
EXMACS is it’s ability to communicate with extern systems. For
computer algebra systems or other scientific computation systems, this is typically done in
shell-like sessions, in which it is possible to evaluate commands and display the results in
a nice, graphical way. Some systems can also be used more in the background as scripting
languages.
See Help!Plug-ins for a list of existing plug-ins and more documentation on these systems.
10.1. Creating sessions
A session can be started from the Insert!Session menu. Since T
EXMACS is based on the
Scheme language, it is always possible to start a Scheme session using Insert!Session!
Scheme. On Unix systems, it is usually also possible to start Bash shell sessions using
Insert!Session!Shell. The remainder of the items in the Insert!Session menu depend on
the plug-ins which are installed on your system.
A session consists of a sequence of input and output fields and possible text between
them. When pressing ↩inside an input field of a session, the text inside the environment
is evaluated and the result is displayed in an output field.
When entering a command in a session, the application attempts to execute it. Several
commands may be launched concurrently in the same document, but the output will only
be active in the session where the cursor is and at the place of the cursor. Therefore, we
recommend to use different buffers for parallel executions.
For each type of extern application, one may choose between sharing a single process by
different sessions, or launching a separate process for each different session. More precisely,
when inserting a session using Insert!Session!Other, you may specify both a “session type”
(Shell, Pari, Maxima, etc.) and a “session name” (the default name is “default”). Sessions
with different names correspond to different processes and sessions with the same name
share a common process.
In order to finish the process which underlies a given session, you may use Session!Close
session. When pressing ↩in the input of a non-connected system, the system will be
restarted automatically. You may also use Session!Interrupt execution in order to interrupt
the execution of a command. However, several applications do not support this feature.
In order to evaluate all fields of e.g. a previously created session, you may use Session!
Evaluate!Evaluate all. Similarly, Session!Evaluate!Evaluate above and Session!Evaluate!
Evaluate below allow you to evaluate all field above or below the current field.
10.2. Editing sessions
Inside input fields of sessions, the cursor keys have a special meaning: when moving upwards
or downwards, you will move to previous or subsequent input fields. When moving to the
left or to the right, you will never leave the input field; you should rather use the mouse
for this.
71

Some facilities for editing input, output and text fields are available in the Session!Field
menu. Keyboard shortcuts for inserting fields are ⌥↑(insert above) and ⌥↓. Keyboard
shortcuts for removing matching text/input/output fields are ⌥⌫ (remove backwards) and
⌥⌦ (remove current fields).
It is possible to create “subsessions” using Session!Session!Create subsession or ⌥→. In that
case, the current input-output field becomes the body of an unfolded subsession. Such a
subsession consists of an explanatory text together with the subsession body. Subsessions
can be folded and unfolded using ⇧F10 resp. ⇧F11. Subsessions have a nice rendering on
the screen when using the framed-session package in Document!Use package!Program.
Notice that input/output fields and subsessions are foldable: when clicking on the prompt
with the mouse, you may fold or unfold the entry to hide or show the output. For laptop
presentations, this folding and unfolding process is done automatically when traversing
your presentation. It is also possible to fold or unfold all fields in a session using Session!
Session!Fold all fields and Session!Session!Unfold all fields.
Other useful editing operations are Session!Session!Clear all fields, which is useful for
creating a demo session which will be executed later on, and Session!Split session, which
can be used for splitting a session into parts for inclusion into a paper.
Example 10.1. A typical Maxima session is given below. If Maxima is present on your
system, then you may put your cursor in one of the inputs, perform some edits, and try
to reexecute it.
Maxima 5.25.1 http://maxima.sourceforge.net
using Lisp SBCL 1.0.51
Distributed under the GNU Public License. See the file COPYING.
Dedicated to the memory of William Schelter.
The function bug_report() provides bug reporting information.
(%i1) diff (x^x^x, x)
(%o1) xxx(xxlog (x) (log (x) + 1) + xx¡1)
(%i2) integrate (%o1, x)
(%o2) eexlog (x)log(x)
(%i3) integrate (x^5 / (x^2 - x + 17), x)
(%o3) 239 log (x2¡x+17)
2+
1361 arctan2x¡1
67
p
67
p+3x4+ 4 x3¡96 x2¡396 x
12
10.3. Selecting the input method
By default, T
EXMACS will attempt to evaluate the input field when pressing ↩. Multiline
input can be created using ⇧↩. Alternatively, when selecting the multiline input mode
using Session!Input mode!Multiline input, the ↩key will behave as usual and ⇧↩ may be
used in order to evaluate the input field. Notice finally that certain systems admit built-in
heuristics for testing whether the input has been completed; if not, then the ↩may behave
as usual.
72 Using GNU TE
XMACS as an interface

Certain applications allow you to type the mathematical input in a graphical, two dimen-
sional form. This feature can be used by selecting Session!Input mode!Mathematical input.
If this feature is available, then it is usually also possible to copy and paste output back
into the input. However, it depends on the particular application how well this works.
Keep in mind that some key combinations may be used by the Mathematical input mode: for
instance the key $is usually redefined inside math mode, so if you want to input it you’ll
have to type ⇧F5 $. You can read more about the prefix key ⇧F5in “Keyboard shortcuts
for text mode”.
Example 10.2. Below, you will find the previous example session, but now using math-
ematical input:
Maxima 5.25.1 http://maxima.sourceforge.net
using Lisp SBCL 1.0.51
Distributed under the GNU Public License. See the file COPYING.
Dedicated to the memory of William Schelter.
The function bug_report() provides bug reporting information.
(%i1) diff(xxx; x)
(%o1) xxx(xxlog (x) (log (x) + 1) + xx¡1)
(%i2) Z%o1 dx
(%o2) eexlog (x)log(x)
(%i3) Zx5
x2¡x+17 dx
(%o3) 239 log (x2¡x+17)
2+
1361 arctan2x¡1
67
p
67
p+3x4+ 4 x3¡96 x2¡396 x
12
10.4. Plug-ins as scripting languages
T
EXMACS provides a few other kinds of additional interfaces to external systems in addition
to shell-like interfaces. First of all, it is possible to insert a so called “executable switch”
anywhere in the document using Insert!Fold!Executable.
For instance, if Maxima is installed on your system, then Insert!Fold!Executable!Maxima
should yield something like Maxima . You may enter a Maxima expression in the yellow
part of this markup, say Maxima diff(x^x,x) . Using ↩, you may now switch back and
forth between the unevaluated input and the evaluated output xx(log (x) + 1). Using
⇧↩, you enable multi-line input. This kind of executable switches are very useful for plug-
ins such as DraT
E
X,Eukleides,Feynmf, etc., which are mainly used for the effi-
cient computation and insertion of special graphics inside T
EXMACS documents.
Some plug-ins such as Maxima can even be selected as a scripting language using Docu-
ment!Scripts!Maxima. When doing so, a special Maxima menu will appear, which allows
for many useful operations directly on formulas. For instance, when putting the cursor
inside the formula 1+1 and pressing ?or Evaluate, the formula gets evaluated automatically
to yield 2.
10.4 Plug-ins as scripting languages 73

If a plug-in can be used as a scripting language, then it is possible to create executable
switches with links between them. More precisely, assuming that you selected a scripting
language from Document!Scripts, you may insert a new executable input field using \ !
or Insert!Link!Executable input field. As before, when pressing ↩, the current input is
evaluated and you will see the corresponding output; you may switch back to the input by
pressing ↩once more.
Contrary to executable switches, you may attach an identifier to the executable input field
by deactivating the field or by editing the Ref field in the focus bar. Inside other executable
input fields, you may then refer to the value of the field by inserting a field reference
using \ ? or Insert!Link!Field reference. As a variant to executable input fields, you may
sometimes prefer to insert plain input fields using \ \ or Insert!Link!Input field. These
fields can only be used as inputs and pressing ↩inside such a field will only recompute
those other fields which depend on it.
Example 10.3. The executable input fields may for instance be nice in pedagogic doc-
uments in which parts of the document may be modified and recomputed by the reader.
For instance, evaluation of the input fragment
The derivative of xxequals diff(function,x).
The second derivative is given by diff(derivative,x).
yields
The derivative of xxequals xx(log (x) + 1).
The second derivative is given by xx(log (x) + 1)2+xx¡1.
Of course, if the reader changes the input function xxinto something else and presses ↩,
then the first and second derivatives will be updated automatically.
10.5. Spreadsheets
T
EXMACS provides rudimentary spreadsheet-like facilities with the advantage that the com-
putations can be carried out using any of the plug-ins that can be used as a scripting
language. In order to use the spreadsheet facilities, you should therefore start with the
selection of a scripting language in the menu Document!Scripts.
As soon as you have selecting a scripting language, such as Maxima, then you may enter
a new spreadsheet using Insert!Table!Textual spreadsheet or Insert!Table!Numeric spread-
sheet. You may edit the spreadsheet as an ordinary table, except that the ↩key will attempt
to reevaluate the cells of the table.
In addition, when preceding the contents of a cell by =, then cell will be considered as an
input-output switch. More precisely, the input is a formula which will be evaluated using
the current scripting language. After the evaluation, only the result of the evaluation is
shown in the cell. After pressing ↩a second time in the cell, it will be possible switch back
and edit the input. In the formulas, one may refer to the others using names such as c5
for the third row and the fifth column.
Example 10.4. On the left-hand side of the figure below, we have displayed a simple table
with formulas for evaluating the sums of the first two items of each row. On the right-hand
side, we have shown the result after evaluation.
74 Using GNU TE
XMACS as an interface
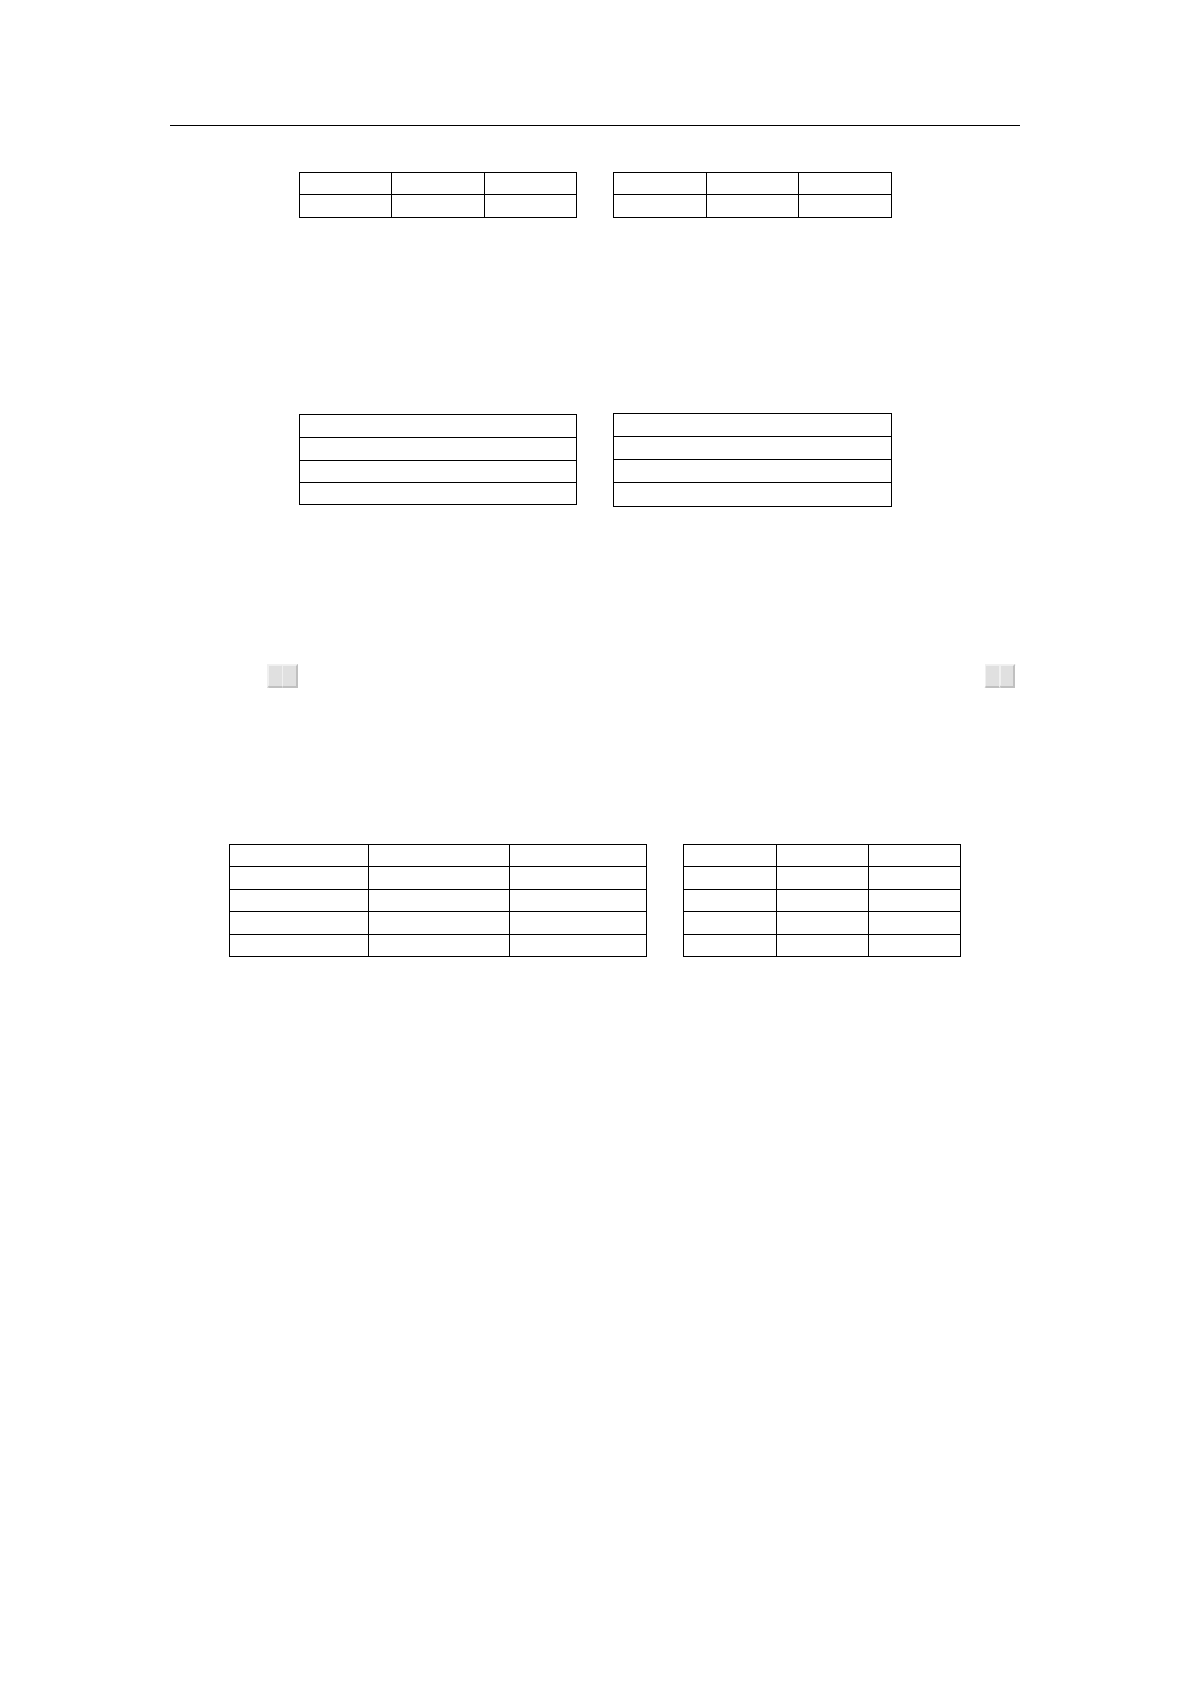
1 10 =a1+b1
100 1000 =a2+b2
1 10 11
100 1000 1100
Figure 10.1. Evaluation of a simple spreadsheet.
Example 10.5. The cells may contain mathematical formulas and the spreadsheet may
take advantage of any of the capacities of the scripting language. For instance, the figure
below demonstrates another possible use of Maxima.
sin(x2)
=diff(a1,x)
=diff(a2,x)
=diff(a3,x)
sin(x2)
2xcos (x2)
2cos (x2)¡4x2sin (x2)
¡12 xsin (x2)¡8x3cos (x2)
Figure 10.2. Computation of successive derivatives using Maxima.
T
EXMACS supports a few special notations for applying operations on all cells in a subtable.
For instance, as in Excel, one may use the notation c3:d5 for indicating all cells c3,c4,
c5,d3,d4,d5 in the block from c3 to d5. An alternative notation ; :::; for :can be entered
by typing , ,. In a similar way, one may enter the special notation +···+by typing + +.
For instance, c3+···+d5 stands for the sum of all cells between c3 and d5.
Example 10.6. The figure below shows an example on how to use taking sums of cells.
Notice that empty cells count for zero.
15.10 15.10 30.20
100 125 75
28.50 14.25
12 16 20
=a1+··· +a4 =b1+··· +b4 =c1+··· +c4
15.10 15.10 30.20
100 125 75
28.50 14.25
12 16 20
155.6 156.1 139.45
Figure 10.3. Evaluation of a simple spreadsheet.
Notice that copying and pasting of subtables works in the same way as for ordinary tables,
with the additional features that the names of the cells and references to cells in the
formulas are renumbered automatically. Similarly, automatic renumbering is used when
inserting new columns or rows, or when removing existing columns or rows.
We also notice that field references can be used inside spreadsheet cells in order to refer to
some computational markup outside the table. Inversely, each spreadsheet also carries an
invisible Ref field which can be edited by deactivating the spreadsheet or from the focus bar
(when selecting the entire spreadsheet). The Ref field of the spreadsheet is used as a prefix
for referring to the contents of cells outside the table or from within other spreadsheets.
For instance, if Ref equals sheet, then sheet-c4 will refer to the field c4 inside the spreadsheet.
10.6. Remote plug-ins
It sometimes happens that certain plug-ins are only installed on a remote computer. In
many cases, it will still be possible to use such a plug-in inside T
EXMACS over an SSH
connection.
10.6 Remote plug-ins 75

In order to make this work, you first have to make sure that SSH is installed on both
computers and that connecting by SSH to the remote machine can be done automatically,
without having to type a password. This can be done by copying your public identity
on the local server to the remote server into the file ~/.ssh/authorized_keys; see the
documentation on SSH for more information.
As the next step, you have to make sure that T
EXMACS has been installed on both com-
puters. The remote T
EXMACS installation will mainly be used in order to detect which plug-
ins can be used on the remote computer.
When everything has been set up correctly in this way, select Insert!Session!Remote in
order to open the remote plug-in selector. Add the name of the remote server by typing
its name or IP address and clicking on Add. After a small pause, the remote server should
appear in the list together with the remote plug-ins which are supported. You may now
simply select the plug-in you want to use from the list. Notice that remote plug-ins may
take a few seconds in order to boot. Please be patient while booting is in progress.
Servers which have been added to the list of remote plug-in servers will be remembered
at the next time when you start T
EXMACS. You may use the buttons Remove and Update
in order to remove a server from the list and to redetermine the list of supported remote
plug-ins.
76 Using GNU TE
XMACS as an interface

Chapter 11
Writing T
E
X
MACS style files
One of the fundamental strengths of T
EXMACS is the possibility to write your own style
files and packages. The purpose of style files is multiple:
•They allow the abstraction of repetitive elements in texts, like sections, theorems,
enumerations, etc.
•They form a mechanism which allow you to structure your text. For instance, you
may indicate that a given portion of your text is an abbreviation, a quotation or
“important”.
•Standard document styles enable you to write professionally looking documents,
because the corresponding style files have been written with a lot of care by people
who know a lot about typography and aesthetics.
The user may select a major style from the Document!Style menu. The major style usually
reflects the kind of document you want to produce (like a letter, an article or a book) or
a particular layout policy (like publishing an article in a given journal).
Style packages, which are selected from the Document!Style menu, are used for further
customization of the major style. For instance, the number-europe package enables Euro-
pean-style theorem numbering and the maxima package contains macros for customizing
the layout of sessions of the Maxima computer algebra system. Several packages may be
used together.
When you want to add your own markup to T
EXMACS or personalize the layout, then you
have to choose between writing a principal style file or a style package. In most cases, you
will probably prefer to write a style package, since this will allow you to combine it arbitrary
other styles. However, in some cases you may prefer to create a new principal style, usually
by personalizing an existing style. This is usually the case if you want to mimic the layout
policy of some journal. In this chapter, we will both explain how to write your own style
packages and how to customize the standard styles.
11.1. Writing a simple style package
Let us explain on an example how to write a simple style package. First of all, you have to
create a new buffer using File!New and select the source document style using Document!
Style!source. Now save your empty style package in your personal style package directory
$HOME/.TeXmacs/packages
Notice that the button Texts in the file browser corresponds to the directory
$HOME/.TeXmacs/texts
Consequently, you can go to the style package directory from there, by double clicking on
.. and next on packages. Similarly, the directory
77
$HOME/.TeXmacs/styles
contains your personal style files. After saving your empty style package, it should auto-
matically appear in the Document!Package menu. Notice that style files must be saved
using the .ts file extension. If you save the style file in a subdirectory of $HOME/.TeXmacs/
packages, then it will automatically appear in the corresponding submenu of Document!
Package.
Let us now create a simple macro hi which displays “Hello world”. First type ⌘⌃=, so as to
create an assignment. You should see something like
hassignjji
Now enter “hi” as the first argument and type ⌘⌃Minside the second argument in order to
create a macro. You should now see something like
hassignjhijhmacrojii
Finally, type the text “Hello world” in the body of the macro. Your document should now
consist of the following line:
hassignjhijhmacrojHello worldii
After saving your style package, opening a new document and selecting your package in the
Document!Use package menu, you may now use the macro hi in your document by typing
\HI and hitting ↩.
In a similar way, you may create macros with arguments. For instance, assume that we
started entering a macro hello in a similar way as above. Instead of typing “Hello world”,
we first type ⌥←inside the macro body so as to create an additional argument on the left
hand side of the cursor. We next enter the name of the argument, say “name”. You should
now see something like below:
hassignjhellojhmacrojnamejii
In the second argument of the body, we now type “Hello ”, ⌘⌃#, “name”, →and “, how are
you today?”. After this you should see
hassignjhellojhmacrojnamejHello name, how are you today?ii
The ⌘⌃#shortcut is used to retrieve the macro argument name. Instead of typing ⌘⌃#,
“name” and →, you may also use the hybrid \-key and type \NAME followed by ↩. After
saving your style package, you may again use the macro in any document which uses your
package by typing \HELLO and hitting ↩.
From the internal point of view, all macro definitions are stored in the environment of the
T
EXMACS typesetter. Besides macros, the environment also contains normal environment
variables, such as section counters or the font size. The environment variables can either
be globally changed using the assign primitive, or locally, using the with primitive. For
instance, when including the line
hassignjsection-nrj-1i
78 Writing TE
XMAC S style files

in your package, and using article as your major style, then the first section will be
numbered 0. Similarly, the variant
hassignjhellojhmacrojnamejHello hwithjfont-shapejsmall-capsjnamei!ii
of the hello macro displays the name of the person in Small Capitals. Notice that the
with primitive can also be used to locally redefine a macro. This is for instance used in the
definitions of the standard list environments, where the macro which renders list icons is
changed inside the body of the list. Yet another variant of the hello macro relies on the
standard person macro:
hassignjhellojhmacrojnamejHello hpersonjnamei!ii
In order to produce the macro application hpersonjnamei, you first have to start a com-
pound tag using ⌘⌃C, type the name “person”, insert an argument ⌥→, and enter the
argument name as before. When you are done, you may press ↩in order to change the
compound tag into a person tag. Alternatively, you may type \, “person”, ⌥→and “name”.
By combining the above constructs, an ordinary user should already be able to produce
style packages for all frequently used notations. An interesting technique for writing macros
which involve complex formulas with some subformulas which may change goes as follows:
1. Type the formula, say (a1; :::; an), in an ordinary document.
2. Create the skeleton of your macro in your style package:
hassignjn-tuplejhmacrojajii
3. Copy the formula and paste it into the body of your macro:
hassignjn-tuplejhmacrojaj(ahrsubj1i,:::,ahrsubjni)ii
4. Replace the subformulas you want to parameterize by macro arguments:
hassignjn-tuplejhmacrojaj(ahrsubj1i,:::,ahrsubjni)ii
5. You may now use the macro in documents which use your package:
(a1; :::; an) = (b1; :::; bn):
11.2. Rendering of style files and packages
11.2.1. ASCII-based or tree-based editing: an intricate choice
Most users are used to edit source code using a conventional editor like Emacs, while
presenting the source code in ASCII format. Since all T
EXMACS documents are stored as
trees, an interesting but complicated question is which format is most suitable for editing
such documents. One option is to represent the tree using an ASCII-based format, such
as XML, Scheme, or the native format for storing files on a disk. The other option is to
edit the trees as such, making no fundamental distinction between source code and normal
documents.
11.2 Rendering of style files and packages 79

In T
EXMACS we have chosen to implement the second option. More precisely, any document
can be edited in “source mode”, which is merely a mode for rendering the document in a
way which makes its tree structure particularly apparent. It may be instructive to take
an arbitrary document of yours and to take a look at it in “source mode” by enabling
Document!Source!Edit source tree.
The choice between ASCII-based editing and tree-based editing is non-trivial, because
T
EXMACS style files and packages have a double nature: they may be seen as programs which
specify how to render macros, but these programs naturally contain ordinary content.
There are several reasons why users often prefer to edit source code in an ASCII-based
format:
1. It is easy to manually format the code so as to make it more readable.
2. In particular, it is easy to add comments.
3. Standard editors like Emacs provide tools for automatic highlighting, indentation,
etc.
4. One is not constraint by any “structure” during the editing phase.
Our approach is to reproduce as much of the above advantages in a structured docu-
ment environment. Although point 4will obviously be hard to meet when following this
approach, we believe that the first three advantages might actually become greater in a
structured environment. However, this requires a more profound understanding of how
users format and edit source code.
For instance, consider a piece of manually formatted code like
if (cond) hop = 2;
else holala= 3;
Clearly, the user had a particular formatting policy when writing this code. However,
this policy does not appear in the document: manual intervention will be necessary if the
variable cond is renamed c, or if the variable holala is renamed hola.
At the moment, T
EXMACS provides no tools for dealing with the above example in an
automatic way, but a few tools are already provided. For instance, the user is given a great
amount of control on how to indent source code and reasonable defaults are provided as
a function of the structure. We also provide high level environments for comments and
structured highlighting. Further tools will be developed later and we are open for any
suggestions from our users.
11.2.2. Global presentation
In the Source tags group of the Document!Source menu, you find several ways to customize
the rendering of source trees in your document. We recommend you to play around with the
different possibilities in a document of your own (after enabling Document!Source!Source
tree) or a standard style package in $TEXMACS_PATH/packages.
First of all, you may choose between the different major styles “angular”, “scheme”, “func-
tional” and “L
A
T
EX” for rendering source trees, as illustrated in the figure below:
80 Writing TE
XMAC S style files
Angular Scheme
hassignjquick-theoremj
hmacrojbodyj
hsurroundjhno-indentiTheorem. jj
bodyiii
(assign “quick-theorem”
(macro “body”
(surround (no-indent)“Theorem. ”
“”
(arg “body”))))
Functional L
AT
E
X
assign (quick-theorem,
macro (body,
surround (no-indentTheorem. , ,
body)))
assignfquick-theorem gf
macrofbodygf
surroundfno-indentTheorem. gfg
f
bodyggg
Figure 11.1. Different styles for rendering the same source tree.
Secondly, you may wish to reserve a special treatment to certain tags like concat and
document. In the menu Document!Source!Special you may specify to which extent you
want to treat such tags in a special way:
None. No tags receive a special treatment.
Formatting. Only the formatting tags concat and document are represented as usual.
Normal. In addition to the formatting tags, a few other tags like compound,value and
arg are represented in a special way.
Maximal. At the moment, this option is not yet implemented. The intention is to
allow the user to write his own customizations and to allow for special rendering of
basic operations like plus.
These different options are illustrated below:
None Formatting
hassignjquick-theoremj
hmacrojbodyj
hdocumentj
hsurroundjhconcatjhno-indentij
Theorem. ijj
hargjbodyiiiii
hassignjquick-theoremj
hmacrojbodyj
hsurroundjhno-indentiTheorem. jj
hargjbodyiiii
Normal Maximal
hassignjquick-theoremj
hmacrojbodyj
hsurroundjhno-indentiTheorem. jj
bodyiii
hassignjquick-theoremj
hmacrojbodyj
hsurroundjhno-indentiTheorem. jj
bodyiii
Figure 11.2. Different ways to render special tags.
Another thing which may be controlled by the user is whether the presentation of tags
should be compact or stretched out across several lines. Several levels of compactification
may be specified in the Document!Source!Compactification menu:
Minimal. The tags are all stretched out across several lines.
11.2 Rendering of style files and packages 81
Only inline tags. All non-inline tags are stretched out across several lines.
Normal. All inline arguments at the start of the tag are represented in a compact
way. As soon as we encounter a block argument, the remainder of the arguments
are stretched out across several lines.
Inline arguments. All inline arguments are represented in a compact way and only
block tags are stretched out across several lines.
Maximal. All source code is represented in a compact way.
The “normal” and “inline arguments” options rarely differ. The visual effect of the different
options is illustrated below:
Minimal Only inline tags
hassignj
quick-theoremj
hmacroj
bodyj
hsurroundj
hconcatj
hno-indentij
Theorem. ij
j
bodyiii
hassignj
quick-theoremj
hmacroj
bodyj
hsurroundj
hno-indentiTheorem. j
j
bodyiii
Normal Maximal
hassignjquick-theoremj
hmacrojbodyj
hsurround j hno-indentiTheorem.
jj
bodyiii
hassign jquick-theorem j hmacro jbody j hdoc-
ument j hsurround j hno-indentiTheorem. j j
bodyiiii
Figure 11.3. Different levels of compactification.
Finally, the user may specify the way closing tags should be rendered when the tag is
stretched out across several lines. The rendering may either be minimalistic, compact, long,
or recall the matching opening tag. The different options are illustrated below:
Minimal Compact
assign quick-theorem
macro body
surround hno-indentiTheorem. j
body
hassignjquick-theoremj
hmacrojbodyj
hsurroundjhno-indentiTheorem. jj
bodyiii
Stretched Repeat
hassignjquick-theoremj
hmacrojbodyj
hsurroundjhno-indentiTheorem. jj
body
i
i
i
hnassignjquick-theoremi
hnmacrojbodyi
hnsurroundjhno-indentiTheorem. ji
body
h/surroundi
h/macroi
h/assigni
Figure 11.4. Different ways to render closing tags.
82 Writing TE
XMAC S style files
11.2.3. Local customization
Even though T
EXMACS tries hard to render source code in a nice way following the global
rendering options that you specified, the readability of the source code often needs to
be further enhanced locally. In source mode, this can be done using the menus Source!
Activation and Source!Presentation. Any local hints on how to render source code are
automatically removed from the document when it is being used as a style file or package.
First of all, for certain pieces of content the user may prefer to see them in their “activated”
form instead as dead source code. This may for instance be the case for embedded images,
or for mathematical symbols, like in
hassignjRjhmacrojRii
Such an active presentation may also be preferred for certain more complex macros:
hassignjdiagjhmacrojvarjdimj0
B
B
@
var10
···
0vardim
1
C
C
Aii
A piece of code can be activated by selecting it and using Source!Activation!Activate
or ⌘+. Similarly, a piece of content may be deactivated using ?(we used this in the
second example above for the rendering of the arguments var and dim). Activation and
deactivation either apply to the whole tree, or to the root only (e.g. Source!Activation!
Activate once).
Another way to customize the rendering is to override some of the global rendering options.
This is mainly interesting for controlling more precisely which tags have to be stretched
across several lines and which tags have to be represented in a compact fashion. For
instance, the concat tag can be used in order to concatenate content, as well as for specifying
a block of sequential statements, or a combination of both. For instance, in the piece of code
hassignjmy-sectionj
hmacrojtitlej
hconcatj
hheader-hookjtitleij
htoc-hookjtitleij
hmy-section-titlejtitleiiii
we have stretched the concat tag along several lines using Source!Presentation!Stretched
(notice that this implies the concat tag to appear explicitly, so as to avoid confusion with
the document tag). Similarly, if a part of the concatenation were to be displayed as usual,
then one may use Source!Presentation!Compact:
hassignjmy-sectionj
hmacrojtitlej
hconcatj
hheader-hookjtitleij
htoc-hookjtitleij
hwithjfont-seriesjboldjSection:ititleiii
At present, we did not implement a way to mark arguments as inline or block, but we
might do this later.
A final way to customize the rendering of source code is to apply an arbitrary macro using
Source!Presentation!Apply macro or Source!Presentation!Apply macro once. This macro
will be automatically removed when you use your document as a style file or package.
11.2 Rendering of style files and packages 83

11.3. The style-sheet language
In the section about writing a simple style package we already gave you a first impression
about the style-sheet language of T
EXMACS. In this section, we will give a more complete
survey of the available features. For more detailed descriptions, we refer to the chapter
about the T
EXMACS primitives.
The style-sheet primitives can be obtained from the Source menu when you are in source
mode. In all other modes, the Source menu becomes visible after enabling the Source macros
tool in the Tools menu. Alternatively, you may use the ⌥and ⌘Ekeyboard prefixes in source
mode and the ⌘Iand ⌘Eprefixes otherwise. Furthermore, we recall that the hybrid \-
key may be used for creating macro-applications or arguments, depending on the context.
Finally, the ⌥→and ⌥←keys are used for inserting arguments.
11.3.1. Assignments
All user defined T
EXMACS macros and style variables are stored in the “current typesetting
environment”. This environment associates a tree value to each string variable. Variables
whose values are macros correspond to new primitives. The others are ordinary envi-
ronment variables. The primitives for operating on the environment are available from
Source!Define.
You may permanently change the value of an environment variable using the assign prim-
itive, as in the example
hassignjhijhmacrojHi there!ii
You may also locally change the values of one or several environment variables using the
with primitive:
hwithjfont-seriesjboldjcolorjredjBold red texti
The value of an environment variable may be retrieved using the value primitive. This may
for instance be used in order to increase a counter:
hassignjmy-counterjhplusjmy-counterj1ii
Finally, you may associate logical properties to environment variables using the drd-props
primitive. This is explained in more detail in the section about macro primitives.
11.3.2. Macro expansion
The main interest of the T
EXMACS’ style-sheet language is the possibility to define macros.
These come in three flavours: ordinary macros, macros which take an arbitrary number of
arguments and external macros, whose expansion is computed by Scheme or a plug-in.
The macro-related primitives are available from the Source!Macro menu. Below, we will
only describe the ordinary macros. For more details, we refer to the section about macro
primitives.
Ordinary macros are usually defined using
hassignjmy-macrojhmacrojx1j···jxnjbodyii
84 Writing TE
XMAC S style files
After such an assignment, my-macro becomes a new primitive with narguments, which
may be called using
hmy-macrojy1j···jyni
Inside the body of the macro, the arg primitive may be used to retrieve the values of the
arguments to the macro.
hassignjhellojhmacrojnamejHello name, you look nice today!ii
It is possible to call a macro with less or more arguments than the expected number. Super-
fluous arguments are simply ignored. Missing arguments take the nullary uninit primitive
as value:
hassignjheyj
hmacrojfirstjsecondj
hifjhequaljsecondj?ij
Hey first, you look lonely today...j
Hey first and second, you form a nice couple!iii
We finally notice that you are allowed to compute with macros, in a similar way as in
functional programming, except that our macros are not closures (yet). For instance:
hassignjmy-macro-copyjmy-macroi
The compound tag may be used to apply macros which are the result of a computation:
hassignjoverloaded-hij
hmacrojnamej
hcompoundj
hif jhnice-weatherijhappy-hijsad-hiij
nameiii
11.3.3. Formatting primitives
This section contains some important notes on formatting primitives which are not really
part of the style-sheet language, but nevertheless very related.
First of all, most T
EXMACS presentation tags can be divided in two main categories: inline
tags and block tags. For instance, frac is a typical inline tag, whereas theorem is a typical
block tag. Some tags, like strong are inline if their argument is and block in the contrary
case. When writing macros, it is important to be aware of the inline or block nature of
tags, because block tags inside a horizontal concatenation are not rendered in an adequate
way. If you need to surround a block tag with some inline text, then you need the surround
primitive:
hassignjmy-theoremj
hmacrojbodyj
hsurroundjhno-indentihwithjfont-seriesjboldjTheorem. ijhright-flushij
bodyiii
11.3 The style-sheet language 85
In this example, we surrounded the body of the theorem with the bold text “Theorem.”
at the left hand side and a “right-flush” at the right-hand side. Flushing to the right is
important in order to make the blue visual border hints look nice when you are inside the
environment.
In most cases, T
EXMACS does a good job in determining which tags are inline and which
ones are not. However, you sometimes may wish to force a tag to be a block environment.
For instance, the tag very-important defined by
hassignjvery-importantjhmacrojbodyjhwithjfont-seriesjboldjcolorjredjbodyiii
may both be used as an inline tag and a block environment. When placing your cursor
just before the with-tag and hitting ↩followed by ⌫, you obtain
hassignjvery-importantj
hmacrojbodyj
hwithjfont-seriesjboldjcolorjredjbodyiii
Since the body of the macro is now a block, your tag very-important will automatically
become a block environment too. In the future, the drd-props primitive will give you even
more control over which tags and arguments are inline and which ones are block.
Another important property of tags is whether they contain normal textual content or
tabular content. For instance, consider the definition of the standard eqnarray* tag (with
a bit of presentation markup suppressed):
hassignjeqnarray* j
hmacrojbodyj
hwithjpar-modejcenterjmodejmathjmath-displayjtruejpar-sepj0.45fnj
hsurroundjhno-page-break*ihvspace*j0.5fnijhvspacej0.5fnihno-indent*ij
htformatj
htwithjtable-hyphenjyij
htwithjtable-widthj1parij
htwithjtable-min-colsj3ij
htwithjtable-max-colsj3ij
hcwithj1j-1j1j1jcell-hpartj1ij
hcwithj1j-1j-1j-1jcell-hpartj1ij
bodyiiiii
The use of surround indicates that eqnarray* is a block environment and the use of tformat
specifies that it is also a tabular environment. Moreover, the twith and cwith are used
to specify further formatting information: since we are a block environment, we enable
hyphenation and let the table span over the whole paragraph (unused space being equally
distributed over the first and last columns). Furthermore, we have specified that the table
contains exactly three columns.
Finally, it is important to bear in mind that style-sheets do not merely specify the final
presentation of a document, but that they may also contain information for the authoring
phase. Above, we have already mentioned the use of the right-flush tag in order to improve
the rendering of visual border hints. Similarly, visual hints on invisible arguments may
be given in the form of flags:
86 Writing TE
XMAC S style files

hassignjlabeled-theoremj
hmacrojidjbodyj
hsurroundj
hconcatj
hno-indentij
hflagjId: idjbluejidij
hwithjfont-seriesjboldjTheorem. iij
hright-flushij
bodyiii
More generally, the specific tag with first argument “screen” may be used to display visual
hints, which are removed when printing the document.
11.3.4. Evaluation control
The Source!Evaluation menu contains several primitives to control the way expressions in
the style-sheet language are evaluated. The most frequent use of these primitives is when
you want to write a “meta-macro” like new-theorem which is used for defining or computing
on other macros. For instance:
hassignjnew-theoremj
hmacrojnamejtextj
hquasij
hassignjhunquotejnameij
hmacrojbodyj
hsurroundjhno-indentihstrongjhunquotejtexti.ijhright-flushij
bodyiiiiii
When calling hnew-theoremjtheoremjTheoremiin this example, we first evaluate all unquote
instructions inside the quasi primitive, which yields the expression
hassignjtheoremj
hmacrojbodyj
hsurroundjhno-indentihstrongjTheorem. ijhright-flushij
bodyiii
Next, this expression is evaluated, thereby defining a macro theorem.
It should be noticed that the T
EXMACS conventions for evaluation are slightly different
then those from conventional functional languages like Scheme. The subtle differences are
motivated by our objective to make it as easy as possible for the user to write macros for
typesetting purposes.
For instance, when T
EXMACS calls a macro hmacrojx1j···jxnjbodyiwith arguments y1until
yn, the argument variables x1until xnare bound to the unevaluated expressions y1until
yn, and the body is evaluated with these bindings. The evaluation of yitakes place each
time we request for the argument xi. In particular, when applying the macro hmacrojxjx
and again xito an expression y, the expression yis evaluated twice.
11.3 The style-sheet language 87

In Scheme, the bodies of Scheme macros are evaluated twice, whereas the arguments of
functions are evaluated. On the other hand, when retrieving a variable (whether it is an
argument or an environment variable), the value is not evaluated. Consequently, a T
EXMACS
macro
hassignjfoojhmacrojxjhblahjxjxiii
would correspond to a Scheme macro
(define-macro (foo x)
`(let ((x (lambda () ,x)))
(blah (x) (x)))
Conversely, the Scheme macro and function
(define-macro (foo x) (blah x x))
(define (fun x) (blah x x))
admit the following analogues in T
EXMACS:
hassignjfoojhmacrojxjhevaljhblahjhquote-argjxijhquote-argjxiiiii
hassignjfunjhmacrojxjhwithjx* jxjhblahjhquote-valuejx* ijhquote-valuejx* iiiii
Here the primitives quote-arg and quote-value are used to retrieve the value of an argument
resp. an environment variable. The T
EXMACS primitives eval,quote,quasiquote and unquote
behave in the same way as their Scheme analogues. The quasi primitive is a shortcut for
quasi-quotation followed by evaluation.
11.3.5. Flow control
Besides sequences of instructions, which can be achieved using the concat primitive, and
the mechanism of macro expansion, the T
EXMACS style-sheet language provides a few other
primitive for affecting the control flow: if,case,while and for-each. These primitives are
available from the Source!Flow control menu. However, we have to warn the user that
the conditional constructs are quite fragile: they only apply to inline content and the
accessibility of macro arguments should not to much depend on the conditions.
The most important primitive if, which can be entered using ⌘⌃?, allows for basic condi-
tional typesetting:
hassignjappendixj
hmacrojtitlejbodyj
hcompoundj
hif jhlong-documentijchapter-appendixjsection-appendixij
titlej
bodyiii
In this example, appendix is a block environment consisting of a title and a body, and which
is rendered as a chapter for long documents and as a section for short ones. Notice that
the following implementation would have been incorrect, since the if primitive currently
only works for inline content:
88 Writing TE
XMAC S style files
hassignjappendixj
hmacrojtitlejbodyj
hifjhlong-documentij
hchapter-appendixjtitlejbodyij
hsection-appendixjtitlejbodyiiii
The if primitive may also be used in order to implement optional arguments:
hassignjheyj
hmacrojfirstjsecondj
hifjhequaljsecondj?ij
Hey first, you look lonely today...j
Hey first and second, you form a nice couple!iii
However, T
EXMACS is not clever enough to detect which arguments are optional and which
arguments are accessible (i.e. which arguments can be edited by the user). Therefore, you
will have to manually give this information using the drd-props primitive. The case,while
and for-each primitives are explained in more detail in the corresponding section on the
T
EXMACS primitives.
11.3.6. Computational markup
In the menus Source!Arithmetic,Source!Text,Source!Tuple and Source!Condition you
will find different primitives for computing with integers, strings, tuples and boolean values.
For instance, in the following code, the new-important tag defines a new “important tag” as
well as a variant in red:
hassignjnew-importantj
hmacrojnamej
hquasij
hconcatj
hassignj
hunquotejnameij
hmacrojxjhwithjfont-seriesjboldjxiiij
hassignj
hunquotejhmergejnamej-rediij
hmacrojxjhwithjfont-seriesjboldjcolorjredjxiiiiiii
Here we use the merge primitive in order to concatenate two strings. The different computa-
tional primitives are described in more detail in the corresponding section on the T
EXMACS
primitives.
11.4. Customizing the standard TE
XMACS styles
Whenever the standard T
EXMACS style files are inadequate for a given purpose, it is possible
to write your own style files. However, designing your own style files from scratch may be
a complex task, so it is usually preferable to customize the existing styles. This requires
some understanding of the global architecture of the standard style files and a more precise
understanding of the parts you wish to customize. In this section, we will explain the
general principles. For more details, we refer to the chapter on the principal T
EXMACS tags.
11.4 Customizing the standard TE
XMAC S styles 89
11.4.1. Organization of style files and packages
Each standard T
EXMACS style file or package is based on a potentially finite number of
subpackages. From an abstract point of view, this organization may be represented by a
labeled tree. For instance, the tree which corresponds to the article style is represented
below:
article
std
std-markup
std-symbol
std-math
std-list
std-utils
std-counter
std-automatic
list
session
env
env-base
env-math
env-theorem
env-float
title-base
title-generic
header-article section-article
section-base
Figure 11.5. The tree with the packages from which the article style has been built up. In
order to save space, we have regrouped the numerous children of std and env in vertical lists.
Most of the style packages correspond to a d.t.d. (data type definition) which contains the
“abstract interface” of the package, i.e. the exported tags. For instance, the package std-
markup corresponds to the d.t.d. std-markup. Sometimes however, several style packages
match the same d.t.d.. For instance, both header-article and header-book match the
d.t.d. header, since they merely implement different ways to render the same tags.
When building your own style files or packages, you may use the use-package primitive in
order to include other packages. For instance, the article style essentially consists of the
line
huse-packagejstdjenvjtitle-genericjheader-articlejsection-articlei
More precisely, the use-package package sequentially includes the style packages corre-
sponding to its arguments. The packages should be in $TEXMACS_PACKAGE_PATH, which
contains .,~/.TeXmacs/packages and $TEXMACS_PATH/packages by default. Furthermore
rendering information for the source code like style-with tags are discarded before evaluation
of the files.
Remark 11.1. We strongly recommend the user to take a look at some of the standard
style files and packages which can be found in
$TEXMACS_PATH/styles
$TEXMACS_PATH/packages
When loading using ⌃X⌃F, these paths are in the standard load path. For instance, if you
want to take a look at the std-markup package, then it suffices to type ⌃X⌃F, followed by
the file name std-markup.ts and ↩.
90 Writing TE
XMAC S style files

Remark 11.2. It is also possible to customize the presentation of the source code of the
style files and packages themselves, by using other packages in addition to source or by
using another major style file based on source. In that case, the extra markup provided
by such packages may be used for presentation purposes of the source code, but it is not
exported when using your package in another file.
11.4.2. General principles for customization
Style files and packages basically enrich the current typesetting environment with a com-
bination of
•Environment variables.
•Tags for the end-user.
•Customizable macros.
Furthermore, they may define some tags for intern implementation purposes, which will
not be documented in this manual. They may also specify some logical properties of tags
using the drd-props primitive.
Environment variables are almost always attributes for controlling the rendering of content,
or counters for sections, equations, etc.. Although several simple tags for the end-user
like strong may be redefined in your own style files, this practice is not recommended for
more complex tags like section. Indeed, the section tag involves many things like resetting
subcounters, entering the title into the table of contents and so on. Therefore, special
additional macros are provided the customization of such tags, like section-title,section-
clean and section-toc.
11.4.3. Customizing the general layout
The general layout of a document is mainly modified by setting the appropriate envi-
ronment variables for page layout and paragraph layout. For instance, by including the
following lines in your style file, you can set the page size to letter and the left and right
margins to 2in:
hassignjpage-typejletteri
hassignjpage-oddj2ini
hassignjpage-evenj2ini
hassignjpage-rightj2ini
It should be noticed that the environment variables for page layout are quite different in
T
EXMACS and T
EX/L
A
T
EX. In order to make it easier to adapt L
A
T
EX style files to T
EXMACS,
we have therefore provided the std-latex package, which emulates the environment vari-
ables from T
EX/L
A
T
EX. Typically, this allows you determine the global layout by lines like
hassignjtex-odd-side-marginjhmacroj20ptii
hassignjtex-even-side-marginjhmacroj20ptii
hassignjtex-text-widthjhmacroj33pcii
11.4 Customizing the standard TE
XMAC S styles 91
We notice that macros which return lengths are considered as lengths themselves. In the
case of the T
EX/L
A
T
EX emulation package, we actually require all lengths to be macros.
The page headers and footers are usually not determined by global environment variables
or macros, since they may change when a new chapter or section is started. Instead,
T
EXMACS provides the call-back macros header-title,header-author,header-primary and header-
secondary. These macros are called when the document title or author are specified or when
a new primary or secondary section is started (primary sections are typically chapters in
books, or sections in articles). For instance, the following redefinition makes the principal
section name appear on even pages, together with the current page number and a wide
underline.
hassignjheader-primaryj
hmacrojtitlejnrjtypej
hassignjpage-even-headerj
hquasiquotej
hwide-std-underlinedj
hconcatj
hpage-the-pageij
hhtabj5mmij
hunquotejtitleiiiiiii
11.4.4. Customizing list environments
Lists are made up of two principal ingredients: the outer list environment and the inner
items. List environments may either be customized by customizing or redefining the ren-
dering macros for these environments, or defining additional list environments which match
the same abstract interface.
The rendering of the outer list environment is controlled by the render-list macro which
takes the body of the list as its argument. For instance, consider the following redefinition
of render-list:
hassignjrender-listj
hmacrojbodyj
hsurroundj
hno-page-break*ihvspace*j0.5fnij
hright-flushihvspacej0.5fnihno-indent*ij
hwithjpar-leftjhplusjpar-leftj3fnijpar-rightjhplusjpar-rightj3fnijbodyiiii
This redefinition affects the rendering of all list environments (itemize, enumerate, etc.) by
reducing the right margin with a length of 3fn:
•This text, which has been made so long that it does not fit on a single line,
is indented on the right hand side by 3fn.
1. This text is indented by an additional 3fn on the right hand
side, since it occurs inside a second list environment.
•Once again: this text, which has been made so long that it does not fit on a
single line, is indented on the right hand side by 3fn.
92 Writing TE
XMAC S style files

In a similar way, you may customize the rendering of list items by redefining the macros
aligned-item and compact-item. These macros both take one argument with the text of the
item and render it either in a right-aligned way (such that subsequent text is left aligned)
or in a left-aligned way (such that subsequent text may not be aligned). For instance,
consider the following redefinition of aligned-item:
hassignjaligned-itemj
hmacrojxj
hconcatj
hvspace*j0.5fnij
hwithjpar-firstj-3fnjhyes-indentiij
hresizejhwithjcolorjredjxijhminusj1rj2.5fnijjhplusj1rj0.5fnijiiii
Then items inside all list environments with compact items will appear in red:
•This list and aligned descriptions have red items.
C1. First condition.
C2. Second condition.
•The items of compact description lists are rendered using compact-item.
Gnus and gnats. Nice beasts.
Micros and softies. Evil beings.
Remark 11.3. The macros aligned-item and compact-item are required to produce inline
content, so that they may be used in order to surround blocks. In particular, several other
internal macros (aligned-space-item,long-compact-strong-dot-item, etc.) are based on aligned-
item and compact-item, and used for the rendering of the different types of lists (itemize-
arrow,description-long, etc.). In the future, we also plan to extend item and item* with a
compulsory body argument. When customizing the list environments, it is important to
keep that in mind, so as to make your style-sheets upward compatible.
The std-list d.t.d. also provides a macro new-list to define new lists. Its syntax is hnew-listj
namejitem-render jitem-transformi, where name is the name of the new list environment,
item-render an (inline) macro for rendering the item and item-transform an additional
transformation which is applied on the item text. For instance, the enumerate-roman envi-
ronment is defined by
hnew-listjenumerate-romanjaligned-dot-itemjhmacrojxjhnumberjxjromaniii
11.4.5. Customizing numbered textual environments
T
EXMACS provides three standard types of numbered textual environments: theorem-like
environments, remark-like environments and exercise-like environments. The following
aspects of these environments can be easily customized:
•Adding new environments.
11.4 Customizing the standard TE
XMAC S styles 93

•Modifying the rendering of the environments.
•Numbering the theorems in a different way.
Defining new environments.
First of all, new environments can be added using the meta-macros new-theorem,new-remark
and new-exercise. These environments take two arguments: the name of the environment
and the name which is used for its rendering. For instance, you may wish to define the
environment experiment by
hnew-theoremjexperimentjExperimenti
When available in the T
EXMACS dictionaries, the text “Experiment” will be automatically
translated when your document is written in a foreign language. In the section about how
to define new environments, it is also explained how to define other numbered textual
environments (besides theorems, remarks and exercises).
Customization of the rendering.
The principal rendering of the environments can be customized by redefining the render-
theorem,render-remark and render-exercise macros. These macros take the name of the
environment (like “Theorem 1.2”) and its body as arguments. For instance, if you want
theorems to appear in a slightly indented way, with a slanted body, then you may redefine
render-theorem as follows:
hassignjrender-theoremj
hmacrojwhichjbodyj
hpadded-normalj1fnj1fnj
hsurroundjhtheorem-namejwhichhtheorem-sepiijj
hwithjfont-shapejslantedjpar-leftjhplusjpar-leftj1.5fnijbodyiiiii
This redefinition produces the following effect:
Theorem 11.4.This is a theorem which has been typeset in a slanted font.
By default, the theorems are rendered as remarks with the only difference that their bodies
are typeset in an italic font. Hence, redefining the render-remark macro will also affect the
rendering of theorems. The default render-proof macro is also based on render-remark.
Instead of redefining the entire rendering, the user might just wish to customize the way
names of theorems are rendered or redefine the separator between the name and the body.
As the user may have noticed by examining the above redefinition of render-theorem, these
aspects are controlled by the macros theorem-name and theorem-sep. For instance, consider
the following redefinitions:
hassignjtheorem-namejhmacrojnamejhwithjcolorjdark redjfont-seriesjboldjnameiii
hassignjtheorem-sepjhmacroj:ii
Then theorem-like environments will be rendered as follows:
94 Writing TE
XMAC S style files

Proposition 11.5: This proposition is rendered in is a fancy way.
Customization of the numbering.
In the sections about counters and counter groups, it is explained how to customize the
counters of numbered environments for particular purposes. For instance, by redefining
inc-theorem, you may force theorems to reset the counter of corollaries:
hquasij
hassignj
inc-theoremj
hmacrojhcompoundjhunquotejinc-theoremiihreset-corollaryiiii
Notice the trick with quasi and unquote in order to take into account additional action
which might have been undertaken by the previous value of the macro inc-theorem.
The following code from number-long-article.ts is used in order to prefix all standard
environments with the number of the current section:
hassignjsection-cleanjhmacrojhreset-subsectionihreset-std-enviii
hassignjdisplay-std-env jhmacrojnrjhsection-prefixinrii
11.4.6. Customizing sectional tags
By default, T
EXMACS provides the standard sectional tags from L
A
T
EXpart,chapter,sec-
tion,subsection,subsubsection,paragraph,subparagraph, as well as the special tag appendix.
T
EXMACS also implements the unnumbered variants part*,chapter*, etc. and special section-
like tags bibliography,table-of-contents,the-index,the-glossary,list-of-figures,list-of-tables.
Remark 11.6. Currently, the sectional tags take one argument, the section title, but a
second argument with the body of the section is planned to be inserted in the future (see
the experimental structured-section package). For this reason (among others), style files
should never redefine the main sectional tags, but rather customize special macros which
have been provided to this effect.
From a global point of view, an important predicate macro is sectional-short-style. When it
evaluates to true, then appendices, tables of contents, etc. are considered to be at the same
level as sections. In the contrary case, they are at the same level as chapters. Typically,
articles use the short sectional style whereas book use the long style.
The rendering of a sectional tag xis controlled through the macros x-sep,x-title and x-
numbered-title. The x-sep macro prints the separator between the section number and the
section title. It defaults to the macro sectional-sep, which defaults in its turn to a wide
space. For instance, after redefining
hassignjsectional-sepjhmacroj–ii
sectional titles would typically look like
11.1 – Hairy GNUs
11.4 Customizing the standard TE
XMAC S styles 95

The x-title and x-numbered-title macros respectively specify how to render unnumbered and
numbered section titles. Usually, the user only needs to modify x-title, since x-numbered-
title is based on x-title. However, if the numbers have to be rendered in a particular way,
then it may be necessary to redefine x-numbered-title. For instance, consider the redefinition
hassignjsubsection-numbered-titlej
hmacrojnamej
hsectional-normalj
hwithjfont-seriesjboldjhthe-subsectioni.inameiii
This has the following effect on the rendering of subsection titles:
2.3. Very hairy GNUs
Notice that the section-base package provides several useful helper macros like sectional-
normal.
Remark 11.7. Sectional titles can either be rendered in a “short” or in the “long” fashion.
By default, paragraphs and subparagraphs use the short rendering, for which the body
starts immediately at the right of the title:
My paragraph. Blah, blah, and more blahs...
All other sectional tags use the long rendering, in which case the section title takes a
separate line on its own:
My section
Blah, blah, and more blahs...
We do not recommend to modify the standard settings (i.e. to render paragraphs in a
long way or sections in a short way). If you really want to do so, then we recommend to
redefine the corresponding environment variables enrich-x-long. This will ensure upward
compatibility when sectional tags will take an additional argument (see remark 11.6).
Besides their rendering, several other aspects of sectional tags can be customized:
•The call-back macro x-clean can be used for cleaning some counters when a new
section is started. For instance, in order to prefix all standard environments by the
section counter, you may use the following lines:
hassignjsection-cleanjhmacrojhreset-subsectionihreset-std-enviii
hassignjdisplay-std-env jhmacrojnrjhsection-prefixinrii
•The call-back macro x-header should be used in order to modify page headers and
footers when a new section is started. Typically, this macro should call header-
primary, or header-secondary, or do nothing.
•The call-back macro x-toc should be used in order to customize the way new sections
appear in the table of contents.
96 Writing TE
XMAC S style files
11.4.7. Customizing the treatment of title information
T
EXMACS uses the doc-data tag in order to specify global data for the document. These data
are treated in two stages by the doc-data macro. First, the document data are separated
into several categories, according to whether the data should be rendered as a part of the
main title or in footnotes or the abstract. Secondly, the data in each category are rendered
using suitable macros.
Each child of the doc-data is a tag with some specific information about the document.
Currently implemented tags are doc-title,doc-subtitle,doc-author,doc-date,doc-running-
title,doc-running-author,doc-keywords,doc-msc and doc-note. The doc-author tag may occur
several times. The author-data tag is used in order to specify structured data for each of
the authors of the document. Each child of the author-data tag is a tag with information
about the corresponding author. Currently implemented tags with author information are
author-name,author-affiliation,author-email,author-homepage and author-note.
Most of the tags listed above also correspond to macros for rendering the corresponding
information as part of the main title. For instance, if the date should appear in bold italic
at a distance of at least 1fn from the other title fields, then you may redefine doc-date as
hassignjdoc-datej
hmacrojbodyj
hconcatj
hvspace*j1fnij
hdoc-title-blockjhwithjfont-shapejitalicjfont-seriesjboldjbodyiij
hvspacej1fniiii
The title-block macro is used in order to make the text span appropriately over the width
of the title. The doc-title and author-name are special in the sense that they also render
possible references to footnotes. For this reason, you should rather customize the doc-render-
title and author-render-name macros in order to customize the rendering of the title and the
name themselves.
Notice also that the doc-running-title and author-running-author macros do not render any-
thing, but rather call the header-title and header-author call-backs for setting the appropriate
global page headers and footers. By default, the running title and author are extracted
from the usual title and author names.
In addition to the rendering macros which are present in the document, the main title
(including author information, the date, etc.) is rendered using the doc-make-title macro.
The author information, as part of the main title, is rendered using render-doc-author or
render-doc-authors, depending on whether the document has one or more authors. Footnotes
to the title or to one of the authors are rendered using doc-title-note resp. doc-author-note.
These footnote macros always expect a document tag on input, because they may compress
it into a horizontal concatenation.
The first stage of processing the document data is more complex and the reader is invited
to take a look at the short descriptions of the macros which are involved in this process.
It is also good to study the definitions of these macros in the package itself. In order to
indicate the way things work, we finish with an example on how the email address and
homepage of an author can be rendered in a footnote instead of the main title:
11.4 Customizing the standard TE
XMAC S styles 97
hassignjdoc-author-mainj
hmacrojdataj
hquasij
hunquote*jhselectjhquote-argjdataijauthor-nameii
hunquote*jhselectjhquote-argjdataijauthor-affiliationiiiii
hassignjdoc-author-data-notej
hxmacrojdataj
hquasij
hunquote*jhselectjhquote-argjdataijauthor-emailii
hunquote*jhselectjhquote-argjdataijauthor-homepageii
hunquote*jhselectjhquote-argjdataijauthor-notejdocumentjhpat-anyiiiiii
11.5. Further notes and tips
11.5.1. Customizing arbitrary tags
Imagine that you want to change the rendering of a given tag, like lemma. As a general
rule, T
EXMACS provides a set of well-chosen macros which can be customized by the user so
as to obtain the desired effect. For instance, as we have seen above, you should use modify
one of the macros render-theorem,theorem-name or theorem-sep in order to customize the
rendering of lemma and all other theorem-like environments.
However, in some cases, it may not be clear which “well-chosen” macro to customize. If
we just wanted to change the presentation of lemmas and not of any other theorem-like
environments, then we clearly cannot modify render-theorem,theorem-name or theorem-sep.
In other cases, the user may not want to invest his time in completely understanding the
macro hierarchy of T
EXMACS, and find out about the existence of render-theorem,theorem-
name and theorem-sep.
So imagine that you want all lemmas to appear in red. One thing you can always do is
copy the original definition of lemmas in a safe place and redefine the lemma macro on top
of the original definition:
hassignjorig-lemmajlemmai
hassignjlemmajhmacrojbodyjhwithjcolorjredjhorig-lemmajbodyiiii
Alternatively, if only the text inside the lemma should be rendered in red, then you may do:
hassignjorig-lemmajlemmai
hassignjlemmajhmacrojbodyjhorig-lemmajhwithjcolorjredjbodyiiii
Of course, you have to be careful that the name orig-lemma is not already in use.
Another frequent situation is that you only want to modify the rendering of a tag when it
is used inside another one. On the web, the Cascading Style Sheet language (CSS) provides
a mechanism for doing this. In T
EXMACS, you may simulate this behaviour by redefining
macros inside a with. For instance, imagine that we want the inter-paragraph space inside
lists inside theorem-like environments to vanish. Then we may use:
98 Writing TE
XMAC S style files

hassignjorig-render-theoremjrender-theoremi
hassignjrender-theoremj
hmacrojnamejbodyj
hwithjorig-render-listjrender-listj
hwithjrender-listjhmacrojxjhorig-render-listjxiij
horig-render-theoremj
namej
bodyiiiii
On the one hand side, this mechanism is a bit more complex than CSS, where it suffices
to respecify the par-par-sep attribute of lists inside theorems. On the other hand, it is also
more powerful, since the render-theorem macro applies to all theorem-like environments at
once. Furthermore, if the above mechanism is to be used frequently, then real hackers may
simplify the notations using further macro magic.
11.5.2. Standard utilities
In the package std-utils, the user may find several useful additional macros for writing
style files. It mainly contains macros for
•Writing block environments which span over the entire paragraph width. Notice that
the title-base package provides some additional macros for wide section titles.
•Writing wide block environments which are underlined, overlined or in a frame box.
•Recursive indentation.
•Setting page headers and footers.
•Localization of text.
It is good practice to use these standard macros whenever possible when writing style files.
Indeed, the low-level T
EXMACS internals may be subject to minor changes. When building
upon standard macros with a clear intention, you increase the upward compatibility of
your style-sheets.
11.5 Further notes and tips 99


Chapter 12
Customizing T
E
X
MACS
One major feature of T
EXMACS is that it can be highly customized. First of all, the most
important aspects of the program can be configured in Edit!Preferences. Most other parts
of T
EXMACS can be entirely adapted or reprogrammed using the Guile/Scheme extension
language. In the sequel, we give a short overview of how this works in simple cases.
12.1. Introduction to the Guile extension language
Like Emacs, T
EXMACS comes with a Lisp-like extension language, namely the Guile
Scheme dialect from the GNU project. For documentation about Guile Scheme, we
refer to
http://www.gnu.org/software/guile/guile.html
Scheme has the advantage that it may be extended with extern C and C++ types and
routines. In our case, we have extended Scheme with routines which you can use to create
your own menus and key-combinations, and even to write your own extensions to T
EXMACS.
If you have downloaded the source files of T
EXMACS, then it may be interesting for you to
take a look at the files
Guile/Glue/build-glue-basic.scm
Guile/Glue/build-glue-editor.scm
Guile/Glue/build-glue-server.scm
These three “glue” files contain the C++ routines, which are visible within Scheme. In
what follows, we will discuss some of the most important routines. We plan to write a more
complete reference guide later. You may also take a look at the scheme .scm files in the
directory $TEXMACS_PATH/progs.
12.2. Writing your own initialization files
When starting up, T
EXMACS executes the file
$TEXMACS_PATH/progs/init-texmacs.scm
as well as your personal initialization file
$TEXMACS_HOME_PATH/progs/my-init-texmacs.scm
if it exists. By default, the path $TEXMACS_HOME_PATH equals .TeXmacs. Similarly, each
time you create a new buffer (either by creating a new file or opening an already existing
one), the file
$TEXMACS_PATH/progs/init-buffer.scm
is executed, as well as
$TEXMACS_HOME_PATH/progs/my-init-buffer.scm
101
if it exists.
Example 12.1. Suppose you want to add a style package CustomStyle.ts of your own to
every new document you create. You can add the following lines to $TEXMACS_HOME_PATH/
progs/my-init-buffer.scm:
(when (buffer-newly-created? (current-buffer))
(set-style-list (append (get-style-list) '("CustomStyle")))
(buffer-pretend-saved (current-buffer)))
First we check whether the current-buffer has been newly created in order not to apply
the style to existing files when we open them. Then we add the new package (instead of
changing it with init-style) using set-style-list and finally we call buffer-pretend-
saved to prevent T
EXMACS from thinking the buffer has been modified by the change of
style, or it would always prompt asking for confirmation before closing an empty buffer.
12.3. Creating your own dynamic menus
You may define a menu with name name either using
(menu-bind name .def)
or
(tm-menu (name) .def)
Here def is a program which represents the entries of the menu. In particular, you may
take a look at the files in the directory
$TEXMACS_PATH/progs/menu
in order to see how the standard T
EXMACS menus are defined. In the case of tm-menu, it is
possible to specify additional arguments, which makes it possible to dynamically construct
more complex menus which depend on parameters.
More precisely, the program def in menu-bind or tm-menu is a list of entries of one of the
following forms:
(=> "pulldown menu name" menu-definition)
(-> "pullright menu name" menu-definition)
("entry" action)
---
(if condition menu-definition)
(when condition menu-definition)
(link variable)
(former)
The constructors => and -> are used to create pulldown or pullright menus and menu-
definition should contain a program which creates the submenu. In the main (or system)
menu bar all root items are pulldown menus and all submenus of these are pullright. Both
pulldown and pullright may be used in toolbars or other widgets.
102 Customizing TE
XMACS
The constructor ("entry" action) creates an ordinary entry, where action will be com-
piled and executed when you click on entry. Items of a menu may be separated using -
--. The constructor if is used for inserting menu items only if a certain condition is
satisfied (for instance, if we are in math mode), whereas while always inserts the item but
deactivates (e.g. greying it out) it condition is not met.
If you declared a menu name, then you may use this menu indirectly using the link
constructor, thus one may link any such “indirect” submenu to as many menus as desired.
Finally, new items may be added to any given menu a posteriori using former, as in the
following example:
(tm-menu (tools-menu)
(former)
---
("New item" (noop)))
The main T
EXMACS menus are:
•texmacs-menu: contains the root entries of the main menu bar at the top of the
window (or desktop under MacOS). It uses link to display file-menu,edit-menu,
insert-menu,text-menu,paragraph-menu,document-menu and help-menu among
others.
•texmacs-main-icons: contains the main toolbar, which typically features buttons
to open and save files, copy and paste text, etc.
•texmacs-mode-icons: contains the icons which depend on the current editing mode,
that is: mathematics, text, code, etc.
•texmacs-focus-icons: these icons change with the cursor. One should install here
any icons that are specific to a particular tag or context.
•texmacs-extra-icons: custom icons for user extensions.
•texmacs-popup-menu: the menu which pops up when the user right-clicks on a
T
EXMACS document. Extending or replacing this menu is useful for instance for
plugin writers: you may want to display some extra actions while removing others
when the user in inside a session for your plugin.
12.4. Creating your own keyboard shortcuts
Keymaps are specified using the command
(kbd-map .keymaps)
Optionally, you may specify conditions which must be satisfied for the keymap to be valid
using the :mode option. For instance, the command
(kbd-map (:mode in-math?).keymaps)
12.4 Creating your own keyboard shortcuts 103

specifies a list of keyboard shortcuts which will only be valid in math-mode. Each item in
keymaps is of one of the following forms:
(key-combination action_1 ... action_n)
(key-combination result)
(key-combination result help-message)
In the first case, the action_i are Scheme commands associated to the string key-
combination. In the second and third case, result is a string which is to be inserted in
the text when the key-combination has been completed. An optional help-message may
be displayed when the key-combination is finished.
12.5. Other interesting files
Some other files may also be worth looking at:
•$TEXMACS_PATH/fonts/enc contains encodings for different T
EX fonts.
•$TEXMACS_PATH/fonts/virtual contains definitions of virtual characters.
•
$TEXMACS_PATH/langs/natural/dic contains the current dictionaries used by
T
EXMACS.
•$TEXMACS_PATH/langs/natural/hyphen contains hyphenation patterns for various
languages.
•$TEXMACS_PATH/progs/fonts contains Scheme programs for setting up the fonts.
104 Customizing TE
XMACS

Chapter 13
The T
E
X
MACS plug-in system
There are many ways in which T
EXMACS can be customized or extended: users may define
their own style files, customize the user interface, or write links with extern programs. The
plug-in system provides a universal mechanism to combine one or several such extensions
in a single package. Plug-ins are both easy to install by other users and easy to write and
maintain.
13.1. Installing and using a plug-in
From the user’s point of view, a plug-in myplugin will usually be distributed on some web-
site as a binary tarball with the name
myplugin-version-architecture .tar.gz
If you installed T
EXMACS yourself in the directory $TEXMACS_PATH, then you should unpack
this tarball in the directory $TEXMACS_PATH/plugins, using
tar -zxvf myplugin-version-architecture.tar.gz
This will create a myplugin subdirectory in $TEXMACS_PATH/plugins. As soon as you
restart T
EXMACS, the plug-in should be automatically recognized. Please read the docu-
mentation which comes with your plug-in in order to learn using it.
Remark 13.1. If you did not install T
EXMACS yourself, or if you do not have write access to
$TEXMACS_PATH, then you may also unpack the tarball in $TEXMACS_HOME_PATH/plugins.
Here we recall that $TEXMACS_HOME_PATH defaults to $HOME/.TeXmacs. When starting
T
EXMACS, your plug-in should again be automatically recognized.
Remark 13.2. If the plug-in is distributed as a source tarball like myplugin-version-
src.tar.gz, then you should first compile the source code before relaunching T
EXMACS.
Depending on the plug-in (read the instructions), this is usually done using
cd myplugin; make
or
cd myplugin; ./configure; make
Remark 13.3. In order to upgrade a plug-in, just remove the old version in $TEXMACS_PATH/
plugins or $TEXMACS_HOME_PATH/plugins using
rm -rf myplugin
and reinstall as explained above.
13.2. Writing your own plug-ins
In order to write a plug-in myplugin , you should start by creating a directory
105

$TEXMACS_HOME_PATH/plugins/myplugin
where to put all your files (recall that $TEXMACS_HOME_PATH defaults to $HOME/.TeXmacs).
In addition, you may create the following subdirectories (when needed):
bbbbbbbbbiiiiiiiiinnnnnnnnn — For binary files.
dddddddddoooooooooccccccccc — For documentation (not yet supported).
lllllllllaaaaaaaaannnnnnnnngggggggggsssssssss — For language related files, such as dictionaries (not yet supported).
llllllllliiiiiiiiibbbbbbbbb — For libraries.
pppppppppaaaaaaaaaccccccccckkkkkkkkkaaaaaaaaagggggggggeeeeeeeeesssssssss — For style packages.
ppppppppprrrrrrrrrooooooooogggggggggsssssssss — For Scheme programs.
sssssssssrrrrrrrrrccccccccc — For source files.
ssssssssstttttttttyyyyyyyyyllllllllleeeeeeeeesssssssss — For style files.
As a general rule, files which are present in these subdirectories will be automatically
recognized by T
EXMACS at startup. For instance, if you provide a bin subdirectory, then
$TEXMACS_HOME_PATH/plugins/myplugin/bin
will be automatically added to the PATH environment variable at startup. Notice that
the subdirectory structure of a plug-in is very similar to the subdirectory structure of
$TEXMACS_PATH.
Example 13.4. The easiest type of plug-in only consists of data files, such as a collection
of style files and packages. In order to create such a plug-in, it suffices to create directories
$TEXMACS_HOME_PATH/plugins/myplugin
$TEXMACS_HOME_PATH/plugins/myplugin/styles
$TEXMACS_HOME_PATH/plugins/myplugin/packages
and to put your style files and packages in the last two directories. After restarting T
E
X
MACS
,
your style files and packages will automatically appear in the Document!Style and Doc-
ument!Use package menus.
For more complex plug-ins, such as plug-ins with additional Scheme or C++ code, one
usually has to provide a Scheme configuration file
$TEXMACS_HOME_PATH/plugins/myplugin/progs/init-myplugin .scm
This configuration file should contain an instruction of the following form
(plugin-configure myplugin
configuration-options)
Here the configuration-options describe the principal actions which have to be under-
taken at startup, including sanity checks for the plug-in. In the next sections, we will
describe some simple examples of plug-ins and their configuration. Many other examples
can be found in the directories
106 The TE
XMACS plug-in system

$TEXMACS_PATH/examples/plugins
$TEXMACS_PATH/plugins
Some of these are described in more detail in the chapter about writing new interfaces.
13.3. Example of a plug-in with Scheme code
The
www
wwwwww
ooooooooorrrrrrrrrlllllllllddddddddd plug-in.
Consider the world plug-in in the directory
$TEXMACS_PATH/examples/plugins
This plug-in shows how to extend T
EXMACS with some additional Scheme code in the file
world/progs/init-world.scm
In order to test the world plug-in, you should recursively copy the directory
$TEXMACS_PATH/examples/plugins/world
to $TEXMACS_PATH/plugins or $TEXMACS_HOME_PATH/plugins. When relaunching T
E
X
MACS
,
the plug-in should now be automatically recognized (a World menu should appear in the
menu bar).
How it works.
The file init-world.scm essentially contains the following code:
(plugin-configure world
(:require #t))
(when (supports-world?)
(display* "Using world plug-in!\n"))
The configuration option :require specifies a condition which needs to be satisfied for the
plug-in to be detected by T
EXMACS (later on, this will for instance allow us to check whether
certain programs exist on the system). The configuration is aborted if the requirement is
not fulfilled.
Assuming that the configuration succeeds, the supports-world? predicate will evaluate
to #t. In our example, the body of the when statement corresponds to some further ini-
tialization code, which just sends a message to the standard output that we are using our
plug-in. In general, this kind of initialization code should be very short and rather load a
module which takes care of the real initialization. Indeed, keeping the init-myplugin.scm
files simple will reduce the startup time of T
EXMACS.
13.4. Example of a plug-in with C++ code
The
mmmmmmm
mm
iiiiiiiiinnnnnnnnniiiiiiiii
mmmmmmm
mm
aaaaaaaaalllllllll plug-in.
Consider the example of the minimal plug-in in the directory
$TEXMACS_PATH/examples/plugins
It consists of the following files:
13.4 Example of a plug-in with C++ code 107

minimal/Makefile
minimal/progs/init-minimal.scm
minimal/src/minimal.cpp
In order to try the plug-in, you first have to recursively copy the directory
$TEXMACS_PATH/examples/plugins/minimal
to $TEXMACS_PATH/progs or $TEXMACS_HOME_PATH/progs. Next, running the Makefile
using
make
will compile the program minimal.cpp and create a binary
minimal/bin/minimal.bin
When relaunching T
EXMACS, the plug-in should now be automatically recognized.
How it works.
The minimal plug-in demonstrates a minimal interface between T
EXMACS and an extern
program; the program minimal.cpp is explained in more detail in the chapter about writing
interfaces. The initialization file init-minimal.scm essentially contains the following code:
(plugin-configure minimal
(:require (url-exists-in-path? "minimal.bin"))
(:launch "minimal.bin")
(:session "Minimal"))
The :require option checks whether minimal.bin indeed exists in the path (so this will
fail if you forgot to run the Makefile). The :launch option specifies how to launch the
extern program. The :session option indicates that it will be possible to create sessions
for the minimal plug-in using Insert!Session!Minimal.
13.5. Summary of the configuration options for plug-
ins
As explained before, the Scheme configuration file myplugin/progs/init-myplugin.scm
of a plug-in with name plugin should contain an instruction of the type
(plugin-configure myplugin
configuration-options)
Here follows a list of the available configuration-options:
(:winpath package-path inner-bin-path)— Specify where to search for the plug-
in under windows. The package-path is the usual place where the plug-in is
installed. The inner-bin-path is the place where to look for the binary executable
corresponding to the plug-in, relative to the package-path .
(:winpath package-path inner-bin-path)— Analogous to :winpath, but under
MacOS.
108 The TE
XMACS plug-in system

(:require condition)— This option specifies a sanity condition which needs to
be satisfied by the plug-in. Usually, it is checked that certain binaries or libraries
are present on your system. If the condition fails, then T
EXMACS will continue as
whether your plug-in did not exist. In that case, further configuration is aborted.
The :require option usually occurs first in the list of configuration options.
(:versions version-cmd)— This option specifies a Scheme expression version-
cmd which evaluates to a list of available versions of the plug-in.
(:setup cmd)— This command is only executed when the version of the plug-in
changed from one execution of T
EXMACS to another one. This occurs mainly when
installing new versions of T
EXMACS or helper applications.
(:launch shell-cmd )— This option specifies that the plug-in is able to evaluate
expressions over a pipe, using a helper application which is launched using the shell-
command shell-cmd.
(:link lib-name export-struct options)—
This option is similar to :launch,
except that the extern application is now linked dynamically. For more informa-
tion, see the section about dynamic linking.
(:session menu-name)— This option indicates that the plug-in supports an eval-
uator for interactive shell sessions. An item menu-item will be inserted to the
Insert!Session menu in order to launch such sessions.
(:serializer ,fun-name)— If the plug-in can be used as an evaluator, then this
option specifies the Scheme function fun-name which is used in order to transform
T
EXMACS trees to strings.
(:commander ,fun-name)—
This command is similar to the :serializer option
except that it is used to transform special commands to strings.
(:tab-completion #t) — This command indicates that the plug-in supports tab-com-
pletion.
(:test-input-done #t) — This command indicates that the plug-in provides a rou-
tine for testing whether the input is complete.
It should be noticed that the configuration of the plug-in myplugin automatically creates
a few predicates:
supports-myplugin?.Test whether the plug-in is fully operational (all requirements
are met).
in-myplugin ?.Test whether myplugin is the current programming language.
myplugin-scripts?.Test whether myplugin is the current scripting language.
13.5 Summary of the configuration options for plug-ins 109


Chapter 14
The T
E
X
MACS format
14.1. TE
XMACS trees
All T
EXMACS documents or document fragments can be thought of as trees. For instance,
the tree
with
mode math concat
x+y+frac
1 2
+sqrt
y+z
typically represents the formula
x+y+1
2+y+z
p(14.1)
Internal nodes of T
E
XMACS trees.
Each of the internal nodes of a T
EXMACS tree is a string symbol and each of the leafs is an
ordinary string. A string symbol is different from a usual string only from the efficiency
point of view: T
EXMACS represents each symbol by a unique number, so that it is extremely
fast to test weather two symbols are equal.
Leafs of T
E
XMACS trees.
Currently, all strings are represented using the universal TE
X
MACS encoding. This encoding
coincides with the Cork font encoding for all characters except “<” and “>”. Character
sequences starting with “<” and ending with “>” are interpreted as special extension char-
acters. For example, <alpha> stands for the letter α. The semantics of characters in the
universal T
EXMACS encoding does not depend on the context (currently, cyrillic characters
are an exception, but this should change soon). In other words, the universal T
EXMACS
encoding may be seen as an analogue of Unicode. In the future, we might actually switch
to Unicode.
The string leafs either contain ordinary text or special data. T
EXMACS supports the fol-
lowing atomic data types:
Boolean numbers. Either true or false.
Integers. Sequences of digits which may be preceded by a minus sign.
Floating point numbers. Specified using the usual scientific notation.
Lengths. Floating point numbers followed by a length unit, like 29.7cm or 2fn.
111

Serialization and preferred syntax for editing.
When storing a document as a file on your hard disk or when copying a document fragment
to the clipboard, T
EXMACS trees have to be represented as strings. The conversion without
loss of information of abstract T
EXMACS trees into strings is called serialization and the
inverse process parsing. T
EXMACS provides three ways to serialize trees, which correspond
to the standard T
EXMACS format, the XML format and the Scheme format.
However, it should be emphasized that the preferred syntax for modifying T
EXMACS docu-
ments is the screen display inside the editor. If that seems surprising to you, consider that
a syntax is a way to represent information in a form suitable to understanding and modi-
fication. The on-screen typeset representation of a document, together with its interactive
behaviour, is a particularly concrete syntax. Moreover, in the Document!Source menu,
you may find different ways to customize the way documents are viewed, such as different
levels of informative flags and a “source tree” mode for editing style files.
14.2. TE
XMACS documents
Whereas T
EXMACS document fragments can be general T
EXMACS trees, T
EXMACS documents
are trees of a special form which we will describe now. The root of a T
EXMACS document is
necessarily a document tag. The children of this tag are necessarily of one of the following
forms:
hTeXmacsjversioni(T
EXMACS version)
This mandatory tag specifies the version of T
EXMACS which was used to save the doc-
ument.
hprojectjref i(part of a project)
An optional project to which the document belongs.
hstylejversioni
hstylejhtuplejstylejpack-1 j···jpack-nii (style and packages)
An optional style and additional packages for the document.
hbodyjcontenti(body of the document)
This mandatory tag specifies the body of your document.
hinitialjtablei(initial environment)
Optional specification of the initial environment for the document, with information
about the page size, margins, etc.. The table is of the form hcollection jbinding-1 j···j
binding-ni. Each binding-i is of the form hassociatejvar-ijval-iiand associates the initial
value val-i to the environment variable var-i. The initial values of environment variables
which do not occur in the table are determined by the style file and packages.
hreferencesjtablei(references)
An optional list of all valid references to labels in the document. Even though this
information can be automatically recovered by the typesetter, this recovery requires
several passes. In order to make the behaviour of the editor more natural when loading
files, references are therefore stored along with the document.
112 The TE
XMACS format
The table is of a similar form as above. In this case a tuple is associated to each label.
This tuple is either of the form htuplejcontentjpage-nrior htuplejcontent jpage-nr jfilei.
The content corresponds to the displayed text when referring to the label, page-nr to
the corresponding page number, and the optional file to the file where the label was
defined (this is only used when the file is part of a project).
hauxiliaryjtablei(auxiliary data attached to the file)
This optional tag specifies all auxiliary data attached to the document. Usually, such
auxiliary data can be recomputed automatically from the document, but such recompu-
tations may be expensive and even require tools which are not necessarily installed on
your system. The table, which is specified in a similar way as above, associates auxiliary
content to a key. Standard keys include bib,toc,idx,gly, etc.
Example 14.1. An article with the simple text “hello world!” is represented as
document
TeXmacs
1.99.9
style
article
body
document
hello world!
14.3. Default serialization
Documents are generally written to disk using the standard T
EXMACS syntax (which cor-
responds to the .tm and .ts file extensions). This syntax is designed to be unobtrusive
and easy to read, so the content of a document can be easily understood from a plain text
editor. For instance, the formula (14.1) is represented by
<with|mode|math|x+y+<frac|1|2>+<sqrt|y+z>>
On the other hand, T
EXMACS syntax makes style files difficult to read and is not designed
to be hand-edited: whitespace has complex semantics and some internal structures are not
obviously presented. Do not edit documents (and especially style files) in the T
EXMACS
syntax unless you know what you are doing.
Main serialization principle.
The T
EXMACS format uses the special characters <,|,>,\and /in order to serialize trees.
By default, a tree like
f
x1··· xn
(14.2)
is serialized as
<f|x1|...|xn>
If one of the arguments x1; :::; xnis a multi-paragraph tree (which means in this context
that it contains a document tag or a collection tag), then an alternative long form is used
for the serialization. If ftakes only multi-paragraph arguments, then the tree would be
serialized as
14.3 Default serialization 113
<\f>
x1
<|f>
...
<|f>
xn
</f>
In general, arguments which are not multi-paragraph are serialized using the short form.
For instance, if n=5 and x3and x5are multi-paragraph, but not x1, x2and x4, then (14.2)
is serialized as
<\f|x1|x2>
x3
<|f|x4>
x5
</f>
The escape sequences \<less\>,\|,\<gtr\> and \may be used to represent the characters
<,|,>and \. For instance, α+βis serialized as \<alpha\>+\<beta\>.
Formatting and whitespace.
The document and concat primitives are serialized in a special way. The concat primitive is
serialized as usual concatenation. For instance, the text “an important note” is serialized as
an <em|important> note
The document tag is serialized by separating successive paragraphs by double newline
characters. For instance, the quotation
Ik ben de blauwbilgorgel.
Als ik niet wok of worgel,
is serialized as
<\quote-env>
Ik ben de blauwbilgorgel.
Als ik niet wok of worgel,
</quote-env>
Notice that whitespace at the beginning and end of paragraphs is ignored. Inside para-
graphs, any amount of whitespace is considered as a single space. Similarly, more than two
newline characters are equivalent to two newline characters. For instance, the quotation
might have been stored on disk as
<\quote-env>
Ik ben de blauwbilgorgel.
Als ik niet wok of worgel,
</quote-env>
The space character may be explicitly represented through the escape sequence “\”. Empty
paragraphs are represented using the escape sequence “\;”.
114 The TE
XMACS format

Raw data.
The raw-data primitive is used inside T
EXMACS for the representation of binary data, like
image files included into the document. Such binary data is serialized as
<#binary-data>
where the binary-data is a string of hexadecimal numbers which represents a string of
bytes.
14.4. XML serialization
For compatibility reasons with the XML technology, T
EXMACS also supports the serializa-
tion of T
EXMACS documents in the XML format. However, the XML format is generally
more verbose and less readable than the default T
EXMACS format. In order to save or load
a file in the XML format (using the .tmml extension), you may use File!Export!XML
resp. File!Import!XML.
It should be noticed that T
EXMACS documents do not match a predefined DTD, since the
appropriate DTD for a document depends on its style. The XML format therefore merely
provides an XML representation for T
EXMACS trees. The syntax has both been designed to
be close to the tree structure and use conventional XML notations which are well supported
by standard tools.
The encoding for strings.
The leafs of T
EXMACS trees are translated from the universal T
EXMACS encoding into Uni-
code. Characters without Unicode equivalents are represented as entities (in the future,
we rather plan to create a tmsym tag for representing such characters).
XML representation of regular tags.
Trees with a single child are simply represented by the corresponding XML tag. In the
case when a tree has several children, then each child is enclosed into a tm-arg tag. For
instance, x+y
pis simply represented as
<sqrt>y+z</sqrt>
whereas the fraction 1
2is represented as
<frac>
<tm-arg>1</tm-arg>
<tm-arg>2</tm-arg>
</frac>
In the above example, the whitespace is ignored. Whitespace may be preserved by setting
the standard xml:space attribute to preserve.
Special tags.
Some tags are represented in a special way in XML. The concat tag is simply represented
by a textual concatenation. For instance, 1
2+x+y
pis represented as
<f rac><t m-arg>1 </tm-arg><t m-arg>2 </tm-arg></frac>+ <s qrt>y +z</
sqrt>
14.4 XML serialization 115

The document tag is not explicitly exported. Instead, each paragraph argument is enclosed
within a tm-par tag. For instance, the quotation
Ik ben de blauwbilgorgel.
Als ik niet wok of worgel,
is represented as
<quote-env>
<tm-par>
Ik ben de blauwbilgorgel.
</tm-par>
<tm-par>
Als ik niet wok of worgel,
</tm-par>
</quote-env>
Awith tag with only string attributes and values is represented using the standard XML
attribute notation. For instance, “some blue text” would be represented as
some <with color="blue">blue</with> text
Conversely, T
EXMACS provides the attr primitive in order to represent attributes of XML
tags. For instance, the XML fragment
some <mytag beast="heary">special</mytag> text
would be imported as “some hmy-tagjhattrjbeast jhearyijspecialitext”. This will make it
possible, in principle, to use T
EXMACS as an editor of general XML files.
14.5. Scheme serialization
Users may write their own extensions to T
EXMACS in the Scheme extension language. In
that context, T
EXMACS trees are usually represented by Scheme expressions. The Scheme
syntax was designed to be predictable, easy to hand-edit, and expose the complete internal
structure of the document. For instance, the formula (14.1) is represented by
(with "mode" "math" (concat "x+y+" (frac "1" "2") "+" (sqrt "y+z")))
The Scheme representation may also be useful in order to represent complex macros with
a lot of programatic content. Finally, Scheme is the safest format when incorporating
T
EXMACS snippets into emails. Indeed, both the standard T
EXMACS format and the XML
serialization may be quite sensitive to white-space.
In order to save or load a document in Scheme format, you may use File!Export!Scheme
resp. File!Import!Scheme. Files saved in Scheme format can easily be processed by
external Scheme programs, in the same way as files saved in XML format can easily be
processed by tools for processing XML, like XSLT.
In order to copy a document fragment to an email in Scheme format, you may use Edit!
Copy to!Scheme. Similarly, you may paste external Scheme fragments into T
EXMACS using
Edit!Paste from!Scheme. The Scheme format may also used interactively inside Scheme
sessions or interactive commands. For instance, typing ⌘Xfollowed by the interactive
command
116 The TE
XMACS format

(insert '(frac "1" "2"))
inserts the fraction 1
2at the current cursor position.
14.6. The typesetting process
In order to understand the T
EXMACS document format well, it is useful to have a basic
understanding about how documents are typeset by the editor. The typesetter mainly
rewrites logical T
EXMACS trees into physical boxes, which can be displayed on the screen or
on paper (notice that boxes actually contain more information than is necessary for their
rendering, such as information about how to position the cursor inside the box or how to
make selections).
The global typesetting process can be subdivided into two major parts (which are currently
done at the same stage, but this may change in the future): evaluation of the T
EXMACS tree
using the stylesheet language, and the actual typesetting.
The typesetting primitives are designed to be very fast and they are built-in into the editor.
For instance, one has typesetting primitives for horizontal concatenations (concat), page
breaks (page-break), mathematical fractions (frac), hyperlinks (hlink), and so on. The precise
rendering of many of the typesetting primitives may be customized through the built-in
environment variables. For instance, the environment variable color specifies the current
color of objects, par-left the current left margin of paragraphs, etc.
The stylesheet language allows the user to write new primitives (macros) on top of the
built-in primitives. It contains primitives for defining macros, conditional statements, com-
putations, delayed execution, etc. The stylesheet language also provides a special extern tag
which offers you the full power of the Scheme extension language in order to write macros.
It should be noticed that user-defined macros have two aspects. On the one hand they
usually perform simple rewritings. For instance, the macro
hassignjseqjhmacrojvarjfromjtojvarfrom; :::; vartoii
is a shortcut in order to produce sequences like a1; :::; an. When macros perform simple
rewritings like in this example, the children var,from and to of the seq tag remain accessible
from within the editor. In other words, you can position the cursor inside them and modify
them. User defined macros also have a synthetic or computational aspect. For instance,
the dots of a seq tag as above cannot be edited by the user. Similarly, the macro
hassignjsquarejhmacrojxjhtimesjxjxiii
serves an exclusively computational purpose. As a general rule, synthetic macros are some-
times easier to write, but the more accessibility is preserved, the more natural it becomes
for the user to edit the markup.
It should be noticed that T
EXMACS also produces some auxiliary data as a byproduct of
the typesetting product. For instance, the correct values of references and page numbers,
as well as tables of contents, indexes, etc. are determined during the typesetting stage and
memorized at a special place. Even though auxiliary data may be determined automatically
from the document, it may be expensive to do so (one typically has to retypeset the
document). When the auxiliary data are computed by an external plug-in, then it may
even be impossible to perform the recomputations on certain systems. For these reasons,
auxiliary data are carefully memorized and stored on disk when you save your work.
14.6 The typesetting process 117

14.7. Data relation descriptions
The rationale behind D.R.D.s.
One major advantage of T
EXMACS is that the editor uses general trees as its data format.
Like for XML, this choice has the advantages of being simple to understand and making
documents easy to manipulate by generic tools. However, when using the editor for a
particular purpose, the data format usually needs to be restricted to a subset of the set of
all possible trees.
In XML, one uses Data Type Definitions (D.T.D.s) in order to formally specify a subset
of the generic XML format. Such a D.T.D. specifies when a given document is valid for a
particular purpose. For instance, one has D.T.D.s for documents on the web (XHTML),
for mathematics (MathML), for two-dimensional graphics (SVG) and so on. Moreover,
up to a certain extent, XML provides mechanisms for combining such D.T.D.s. Finally,
a precise description of a D.T.D. usually also provides some kind of reference manual for
documents of a certain type.
In T
EXMACS, we have started to go one step further than D.T.D.s: besides being able to
decide whether a given document is valid or not, it is also very useful to formally describe
certain properties of the document. For instance, in an interactive editor, the numerator
of a fraction may typically be edited by the user (we say that it is accessible), whereas the
URL of a hyperlink is only editable on request. Similarly, certain primitives like itemize
correspond to block content, whereas other primitives like sqrt correspond to inline content.
Finally, certain groups of primitives, like chapter,section,subsection, etc. behave similarly
under certain operations, like conversions.
A Data Relation Description (D.R.D.) consists of a Data Type Definition, together with
additional logical properties of tags or document fragments. These logical properties are
stated using so called Horn clauses, which are also used in logical programming languages
such as Prolog. Contrary to logical programming languages, it should nevertheless be
relatively straightforward to determine the properties of tags or document fragments, so
that certain database techniques can be used for efficient implementations. At the moment,
we only started to implement this technology (and we are still using lots of C++ hacks
instead of what has been said above), so a more complete formal description of D.R.D.s
will only be given at a later stage.
One major advantage of the use of D.R.D.s is that it is not necessary to establish rigid
hierarchies of object classes like in object oriented programming. This is particularly useful
in our context, since properties like accessibility, inline-ness, etc. are quite independent one
from another. In fact, where D.T.D.s may be good enough for the description of passive
documents, more fine-grained properties are often useful when manipulating documents in
a more interactive way.
Current D.R.D. properties and applications.
Currently, the D.R.D. of a document contains the following information:
•The possible arities of a tag.
•The accessibility of a tag and its children.
In the near future, the following properties will be added:
•Inline-ness of a tag and its children.
118 The TE
XMACS format

•Tabular-ness of a tag and its children.
•Purpose of a tag and its children.
The above information is used (among others) for the following applications:
•Natural default behaviour when creating/deleting tags or children (automatic inser-
tion of missing arguments and removal of tags with too little children).
•Only traverse accessible nodes during searches, spell-checking, etc.
•Automatic insertion of document or table tags when creating block or tabular envi-
ronments.
•Syntactic highlighting in source mode as a function of the purpose of tags and
arguments.
Determination of the D.R.D. of a document.
T
EXMACS associate a unique D.R.D. to each document. This D.R.D. is determined in two
stages. First of all, T
EXMACS tries to heuristically determine D.R.D. properties of user-
defined tags, or tags which are defined in style files. For instance, when the user defines a
tag like
hassignjhijhmacrojnamejHello name!ii
T
EXMACS automatically notices that hi is a macro with one element, so it considers 1to be
the only possible arity of the hi tag. Notice that the heuristic determination of the D.R.D.
is done interactively: when defining a macro inside your document, its properties will
automatically be put into the D.R.D. (assuming that you give T
EXMACS a small amount
of free time of the order of a second; this minor delay is used to avoid compromising the
reactivity of the editor).
Sometimes the heuristically defined properties are inadequate. For this case, T
EXMACS
provides the drd-props tag in order to manually override the default properties.
14.8. TE
XMACS lengths
A simple T
EXMACS length is a number followed by a length unit, like 1cm or 1.5mm. T
EXMACS
supports three main types of units:
Absolute units. The length of an absolute unit like cm or pt on print is fixed.
Context dependent units. Context-dependent length units depend on the current
font or other environment variables. For instance, 1ex corresponds to the height of
the “x” character in the current font and 1par correspond to the current paragraph
width.
User defined units. Any nullary macro, whose name contains only lower case roman
letters followed by -length, and which returns a length, can be used as a unit itself.
For instance, the following macro defines the dm length:
hassignjdm-lengthjhmacroj10cmii
14.8 TE
XMACS lengths 119

Furthermore, length units can be stretchable. A stretchable length is represented by a triple
of rigid lengths: a minimal length, a default length and a maximal length. When justifying
lines or pages, stretchable lengths are automatically sized so as to produce nicely looking
layout.
In the case of page breaking, the page-flexibility environment provides additional control
over the stretchability of white space. When setting the page-flexibility to 1, stretchable
spaces behave as usual. When setting the page-flexibility to 0, stretchable spaces become
rigid. For other values, the behaviour is linear.
Absolute length units.
ccccccccc
m
mmmmmmm
m
.One centimeter.
mmmmm
mmmmmmmmm
mmmm
.One millimeter.
iiiiiiiiinnnnnnnnn.One inch.
pppppppppttttttttt.The standard typographic point corresponds to 1/72.27 of an inch.
bbbbbbbbbppppppppp.A big point corresponds to 1/72 of an inch.
dddddddddddddddddd.The Didôt point equals 1/72 of a French inch, i.e. 0.376mm.
pppppppppccccccccc.One “pica” equals 12 points.
cccccccccccccccccc.One “cicero” equals 12 Didôt points.
Rigid font-dependent length units.
fffffffffsssssssss.The font size. When using a 12pt font, 1fs corresponds to 12pt.
fffffffffbbbbbbbbbsssssssss.The base font size. Typically, when selecting 10 as the font size for your document
and when typing large text, the base font size is 10pt and the font size 12pt.
lllllllllnnnnnnnnn.The width of a nicely looking fraction bar for the current font.
ssssssssseeeeeeeeeppppppppp.A typical separation between text and graphics for the current font, so as to keep
the text readable. For instance, the numerator in a fraction is shifted up by 1sep.
yyyyyyyyyfffffffffrrrrrrrrraaaaaaaaaccccccccc.The height of the fraction bar for the current font (approximately 0.5ex).
eeeeeeeeexxxxxxxxx.The height of the “x” character in the current font.
eeeeeeeee
mmmmmm
mmm
uuuuuuuuunnnnnnnnniiiiiiiiittttttttt.The width of the “M” character in the current font.
Stretchable font-dependent length units.
fffffffffnnnnnnnnn.This is a stretchable variant of 1quad. The default length of 1fn is 1quad. When
stretched, 1fn may be reduced to 0.5fn and extended to 1.5fn.
fffffffffnnnnnnnnnsssssssss.This length defaults to zero, but it may be stretched up till 1fn.
bbbbbbbbblllllllllsssssssss.The “base line skip” is the sum of 1quad and par-sep. It corresponds to the
distance between successive lines of normal text.
120 The TE
XMACS format

Typically, the baselines of successive lines are separated by a distance of 1fn (in
T
EXMACS and L
A
T
EX a slightly larger space is used though so as to allow for sub-
scripts and superscripts and avoid a too densely looking text. When stretched, 1fn
may be reduced to 0.5fn and extended to 1.5fn.
ssssssssspppppppppccccccccc.The (stretchable) width of space character in the current font.
xxxxxxxxxssssssssspppppppppccccccccc.The additional (stretchable) width of a space character after a period.
Box lengths.
Box length units can only be used within some special markup elements, such as move,shift,
resize,clipped and image. The principal body of this content (e.g. the content being “moved”
in the case of move) is typeset as a box. The following lengths units then correspond to
the size and the extents of the box.
wwwwwww
ww
.The width of the box.
hhhhhhhhh.The height of the box.
lllllllll.The logical left x-coordinate of the box.
rrrrrrrrr.The logical right x-coordinate of the box.
bbbbbbbbb.The logical bottom y-coordinate of the box.
ttttttttt.The logical top y-coordinate of the box.
For instance, the code
hmovejHello therejjhplusj-0.5bj-0.5tii
can be used to center Hello there at the base-line.
Other length units.
pppppppppaaaaaaaaarrrrrrrrr.The width of the paragraph. That is the length the text can span. It is affected
by paper size, margins, number of columns, column separation, cell width (if in a
table), etc.
pppppppppaaaaaaaaaggggggggg.The height of the main text in a page. In a similar way as par, this length unit
is affected by page size, margins, etc.
pppppppppxxxxxxxxx.One screen pixel, the meaning of this unit is affected by the shrinking factor.
ttttttttt
mmm
mmmmmm
pppppppppttttttttt.
The smallest length unit for internal length calculations by T
E
X
MACS
.1px
divided by the shrinking factor corresponds to 256tmpt.
Different ways to specify lengths.
There are three types of lengths in T
EXMACS:
Simple lengths. A string consisting of a number followed by a length unit.
Abstract lengths. An abstract length is a macro which evaluates to a length. Such
lengths have the advantage that they may depend on the context.
Normalized lengths. All lengths are ultimately converted into a normalized length,
which is a tag of the form htmlenjli(for rigid lengths) or htmlenjminjdef jmaxi(for
stretchable lengths). The user may also use this tag in order to specify stretchable
lengths. For instance, htmlen jhminus j1quad j1ptij1quad j1.5quadievaluates to a
length which is 1quad by default, at least 1quad-1pt and at most 1.5quad.
14.8 TE
XMACS lengths 121


Chapter 15
Built-in environment variables
The way T
EXMACS typesets documents is influenced by so called environment variables.
The style-sheet language uses a so called environment (or context) to store both environ-
ment variables and macros. The environment variables are subdivided into two categories:
built-in variables and additional variables provided by style files. Built-in variables usually
affect the layout, while additional variables mostly serve computational purposes. In the
next sections of this chapter, we will describe all built-in environment variables.
A typical built-in environment variable is color. The value of an environment variable may
be changed permanently using assign and temporarily using the with primitive:
Some colored text.
Some hwithjcolorjdark redjcoloreditext.
Counters are typical environment variables defined in style-sheets.
1. A weirdly
4. numbered list...
henumeratej
hitemiA weirdly
hassignjitem-nrj3ihiteminumbered list...i
The typesetting language uses dynamic scoping of variables. That means that macros can
access and modify variables in their calling context. In the previous example, the enumerate
macro locally initializes item-nr to 0(uses with) and the item macro increments it by one
and shows its value. Since enumerate locally redefines item-nr, the original value of item-
nr is restored on exit.
Each document comes with an initial environment with the initial values of environment
values, i.e. their values just before we typeset the document. If an environment variable
does not occur in the initial environment, then its initial value defaults to its value after
typesetting the document style and possible additional packages. The initial environment
before typesetting the style files and packages is built-in into the editor.
Some variables, like header and footer variables, must be set inside the document, their
initial environment value is ignored. Generally, they should be set by header and sectioning
markup.
123

15.1. General environment variables
mode := text (major mode)
This very important environment variable determines the current mode. There are
four possible values: text (text mode), math (mathematical mode), prog (program-
ming mode) and src (source mode). The behaviour of the editor (menus, keystrokes,
typesetting, etc.) depends heavily on the mode. For example, the following code may
be used in order to include a mathematical formula inside text:
The formula a2+b2=c2is well known.
The formula hmathjahrsupj2i+bhrsupj2i=chrsupj2ii is well known.
Some other environment variables (mainly the language and the font) also depend on
the current mode (in this context, the source mode always behaves in a similar way as
the text mode). During copy&paste and search&replace operations, T
EXMACS tries to
preserve the mode.
language := english
math-language := texmath
prog-language := scheme (language)
A second major environment variable is the current language. In fact, there are three
such environment variables: one for each mode. The language in which content is
written is responsible for associating a precise semantics to the content. This semantics
is used for different purposes:
•The language may specify rules for typesetting content. For instance, the text
language specifies punctuation and hyphenation rules. Similarly the mathemat-
ical language containns spacing information for mathematical operators.
•Several editing operations depend on the current language: when performing
a search or replace operation, T
EXMACS is both mode and language sensitive.
Similarly, the text language determines the dictionary to use when spell-checking
the document.
•The language controls (among other parameters like the mode and the document
format) the way content is being converted from one context to another.
Currently, no real language-dependent conversions have been implemented yet.
But in the future one may imagine that copying a piece of English text to a
document written in French will perform an automatic translation. Similarly, a
mathematical document might be converted from infix to postfix notation.
•The programming language determines the current scripting language in use.
Other scripting languages than Scheme are currently only used for interactive
sessions, but primitives like extern might become language-sensitive in the future.
At the moment, the current language is mainly used as a hint for indicating the seman-
tics of text: it is not required that a text written in English contains no spelling errors,
or that a formula written in a mathematical language is mathematically or even syn-
tactically correct. Nevertheless, the editor is intended to enforce correctness more and
more, especially for mathematics.
124 Built-in environment variables

The language may be specified globally for the whole document in Document!Language
and locally for a piece of text in Format!Language.
prog-session := default (name of programming session)
This environment variables is used in addition to the prog-language variable in order
to determine a concrete implementation as well as a particular instance of the current
programming language. For instance, in case of the Maxima language, different imple-
mentation may be used fooor the underlying Lisp. Similarly, one may wish to run two
different instances of Maxima in parallel.
magnification := 1(magnification)
This variable determines the magnification which is applied to all content. Magnifi-
cations bigger than one are typically useful for presentations (from slides or from a
laptop):
normal big huge
normalhhtabj5mmihwithjmagnificationj2jbigihhtabj5mmihwithjmagnificationj3jhugei
The magnification should not be confused with the font size: contrary to the magni-
fication, the font size may also affect the shapes of the glyphs. The magnification is
usually specified for the entire document in Document!Magnification.
bg-color := white (background color)
The background color for your document, as specified in Document!Color!Background.
color := black (foreground color)
The current foreground color of text and graphics, as specified in Document!Color!
Foreground or Format!Color. Named colors, like “Salmon”, are supported for different
color charts: dvips,x11 and html.
preamble := false (edit source tree?)
This flag determines whether we are editing normal text or a style-sheet. The source
tree or preamble mode may be selected in Document!Source!Edit source tree.
info-flag := short (informative flags style)
This variable controls the rendering of informative flags, which are for instance used to
indicate the locations of otherwise invisible labels or typesetting directives. The info-
flag may take the values none,short and detailed:
Label 1, Label 2, Label 3.
hwithjinfo-flagjnonejLabel 1hlabeljflag-label-1ii,hwithjinfo-flagjshortjLabel 2hlabelj
flag-label-2ii,hwithjinfo-flagjdetailedjLabel 3hlabeljflag-label-3ii.
Usually, the rendering of informative flags is specified document-wide in Document!
Informative flags.
15.1 General environment variables 125
15.2. Specifying the current font
In this section, we describe the environment variables which control the rendering of fonts.
Font properties may be controlled globally for the whole document in Document!Font and
locally for document fragments in Format!Font.
From an abstract point of view, a font is defined to be a graphically consistent way of
rendering strings. Fonts are usually made up from glyphs like “x”, “ffi”, “α”, “P”, etc. When
rendering a string, the string is decomposed into glyphs so as to take into account ligatures
(like fi, fl, ff, ffi, ffl). Next, the individual glyphs are positioned while taking into account
kerning information (in “xo” the “o” character is slightly shifted to the left so as to take
profit out of the hole in the “x”). In the case of mathematical fonts, T
EXMACS also provides
a coherent rendering for resizable characters, like the large brackets in
¡(()):
Similarly, a font family is a family of fonts with different characteristics (like font weight,
slant, etc.), but with a globally consistent rendering. One also says that the fonts in a font
family “mix well together”. For instance, the standard computer modern roman font and
its bold and italic variants mix well together, but the computer modern roman font and
the Avant Garde font do not.
Remark 15.1. In versions of T
EXMACS prior to 1.99.1, the fonts for the mathematical
and programming modes could be controlled independently using the environment vari-
ables math-font,math-font-family,math-font-series,math-font-shape,prog-font,prog-font-
family,prog-font-series,prog-font-shape. In more recent versions of T
EXMACS, the environ-
ment variables font,font-family,font-series and font-shape directly control the font for
all modes.
font := roman (font name)
These variables control the main name of the font, also called the font family. For
instance:
Computer modern roman, Pandora,Chancery,Palatino
Similarly, T
EXMACS supports various mathematical fonts:
Roman: a2+b2=c2
Adobe: a2+b2=c2
New roman: a2+b2=c2
Concrete: a b c
Most fonts only implement a subset of all Unicode glyphs. Sometimes, the user might
wish to combine several fonts to cover a larger subset. For instance, when specifying
roman,IPAMincho or cjk=IPAMincho,roman as the font name, ordinary text and math-
ematics will be typeset using the default roman font, whereas Chinese text will use
the IPAMincho font. Similarly, when specifying math=Stix,roman as the font name,
ordinary text will be typeset using the default roman font, but mathematical formulas
using the Stix font.
126 Built-in environment variables

font-family := rm (font variant)
This variable selects a variant of the major font, like a sans serif font, a typewriter font,
and so on. As explained above, variants of a given font are designed to mix well together.
Physically speaking, many fonts do not come with all possible variants (sans serif,
typewriter, etc.), in which case T
EXMACS tries to fall back on a suitable alternative font.
Typical variants for text fonts are rm (roman), tt (typewriter) and ss (sans serif):
roman, typewriter and sans serif
Sans serif formula: sin (x+y) = sin xcos y+cos xsin y
font-series := medium (font weight)
The font series determines the weight of the font. Most fonts only provide regular and
bold font weights. Some fonts also provide light as a possible value.
medium, bold
font-shape := right (font shape)
The font shape determines other characters of a font, like its slant, whether we use
small capitals, whether it is condensed, and so on. For instance,
upright, slanted,italic,left slanted,Small Capitals,proportional typewriter,bold
condensed,flat sans serif,long
font-base-size := 10 (font base size)
The base font size is specified in pt units and is usually invariant throughout the
document. Usually, the base font size is 9pt,10pt,11pt or 12pt. Other font sizes are
usually obtained by changing the magnification or the relative font-size.
9pt,10pt, 11pt, 12pt
font-size := 1(font size)
The real font size is obtained by multiplying the font-base-size by the font-size multi-
plier. The following standard font sizes are available from Format!Size:
size multiplier size multiplier
Tiny 0.59 Very small 0.71
Small 0.84 Normal 1
Large 1.19 Very large 1.41
Huge 1.68 Really huge 2
Table 15.1. Standard font sizes.
From a mathematical point of view, the multipliers are in a geometric progression with
factor 2
4
p. Notice that the font size is also affected by the index level.
15.2 Specifying the current font 127

dpi := 600 (fonts rendering quality)
The rendering quality of raster fonts (also called Type 3 fonts), such as the fonts
generated by the Metafont program is controlled through its discretization precision
in dots per inch. Nowadays, most laser printers offer a printing quality of at least
600dpi, which is also the default dpi setting for T
EXMACS. For really high quality
printing, professionals usually use a precision of 1200dpi. The dpi is usually set once
and for all for the whole document.
15.3. Typesetting mathematics
math-level := 0(index level)
The index level increases inside certain mathematical constructs such as indices and
fractions. When the index level is high, formulas are rendered in a smaller font. Nev-
ertheless, index levels higher than 2are all rendered in the same way as index level 2;
this ensures that formulas like
eeeex
=1 + 1
x+ ex
1 + 1
ex+1
eex
remain readable. The index level may be manually changed in Format!Index level, so
as to produce formulas like
xyz
xhrsupjhwithjmath-level j0jyhrsupjziii
math-display := false (display style)
This environement variable controls whether we are in display style or not. Formulas
which occur on separate lines like
n
H(α1; :::; αn)=1
α1+···+1
αn
are usually typeset in display style, contrary to inline formulas like n
H(α1; :::; αn)=1
α1+···+
1
αn. As you notice, formulas in display style are rendered using a wider spacing. The
display style is disabled in several mathematical constructs such as scripts, fractions,
binomial coefficients, and so on. As a result, the double numerators in the formula
H(α1; :::; αn) = n
1
α1+···+1
αn
are typeset in a smaller font. You may override the default settings using Format!
Display style.
128 Built-in environment variables
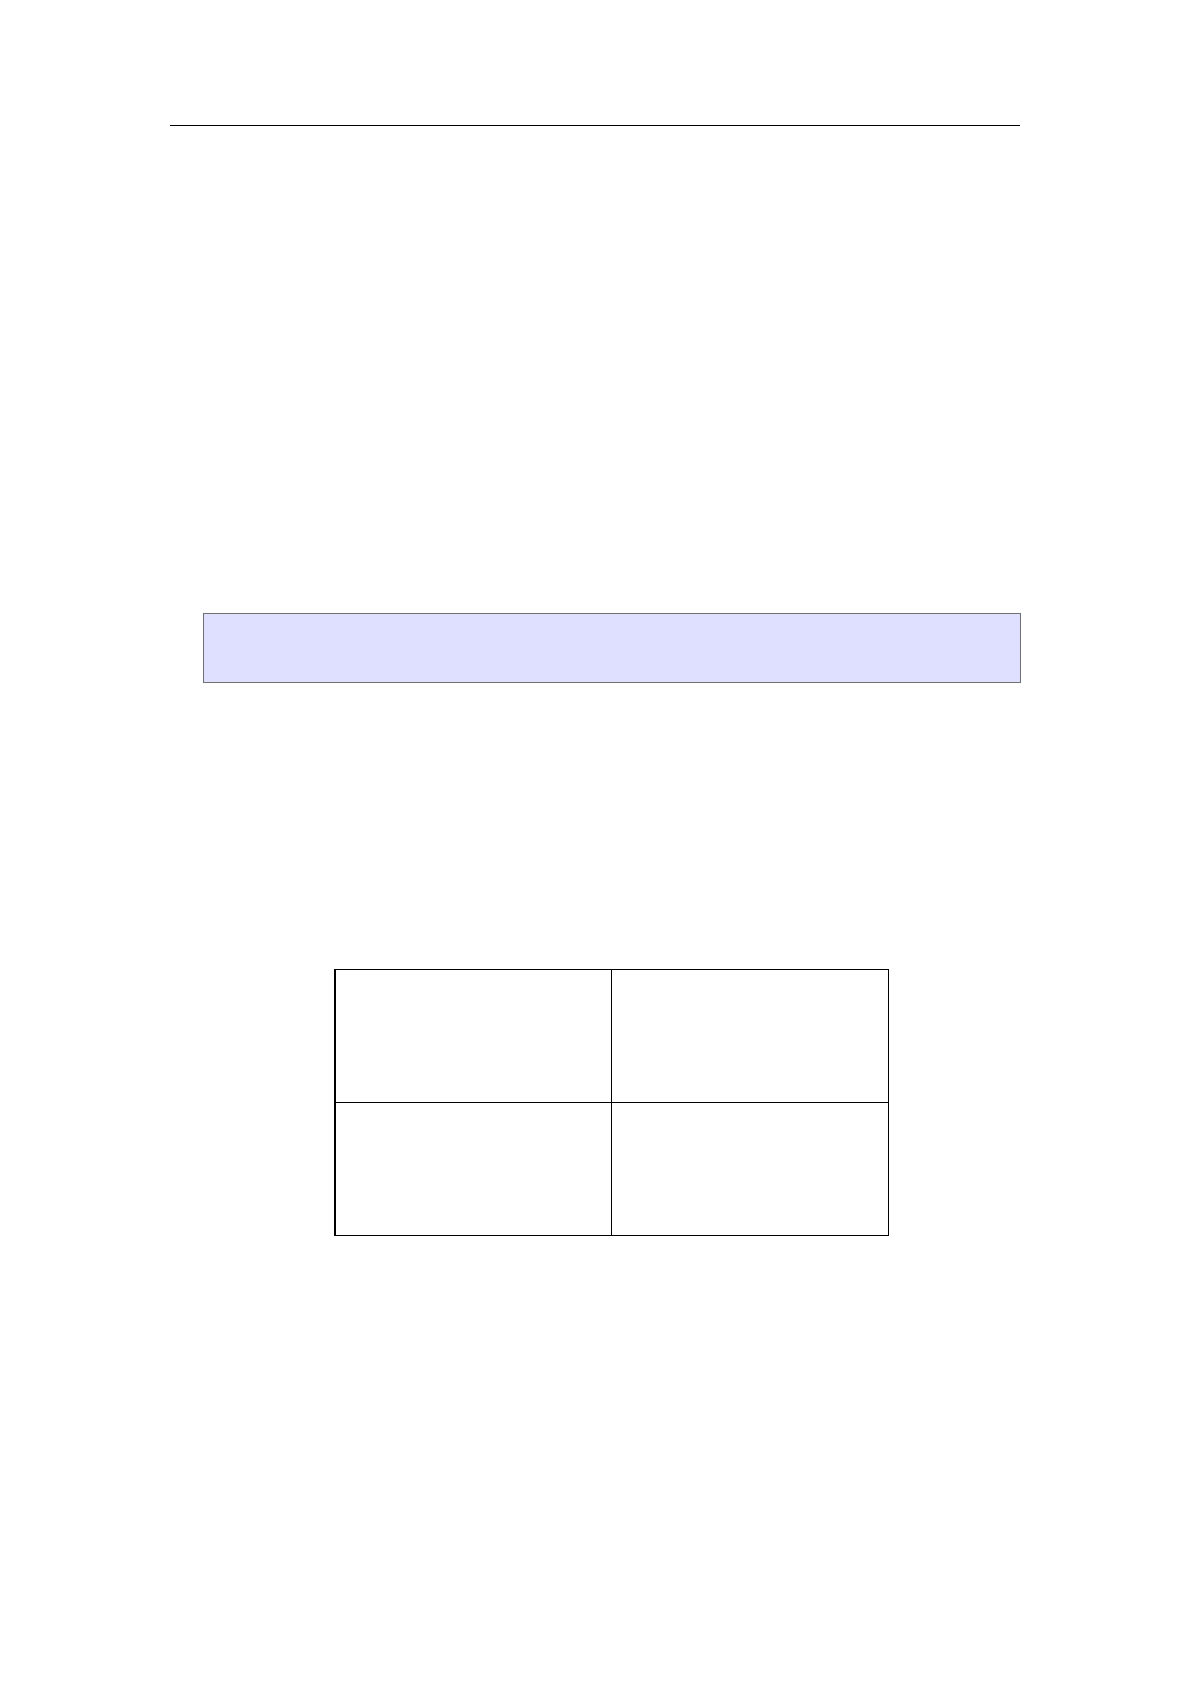
math-condensed := false (condensed display style)
By default, formulas like a+···+zare typeset using a nice, wide spacing around the
+symbol. In formulas with scripts like ea+···+z+ eα+···+ζthe readability is further
enhanced by using a more condensed spacing inside the scripts: this helps the reader
to distinguish symbols occurring in the scripts from symbols occurring at the ground
level when the scripts are long. The default behaviour can be overridden using Format!
Condensed.
math-vpos := 0(position in fractions)
For a high quality typesetting of fraction, it is good to avoid subscripts in numerators to
descend to low and superscripts in denominators to ascend to high. T
EXMACS therefore
provides an additional environment variable math-vpos which takes the value 1inside
numerators, ¡1inside denominators and 0otherwise. In order to see the effect the
different settings, consider the following formula:
a¡1
2+a0
2+a1
2
hwithjmath-vpos j-1jhrigidja¡1
2ii+hwithjmath-vpos j0jhrigidja0
2ii+hwithjmath-vpos j1j
hrigidja1
2ii
In this example, the grouping is necessary in order to let the different vertical positions
take effect on each ai
2. Indeed, the vertical position is uniform for each horizontal
concatenation.
15.4. Paragraph layout
par-mode := justify (paragraph alignment)
This environment variable specifies the alignment of the different lines in a paragraph.
Possible values are left,center,right and justify:
This paragraph is aligned
to the left. This paragraph
is aligned to the left. This
paragraph is aligned to the
left.
This paragraph is has been
centered. This paragraph
is has been centered. This
paragraph is has been cen-
tered.
This paragraph is aligned to
the right. This paragraph is
aligned to the right. This
paragraph is aligned to the
right.
This paragraph has been
justified. Justification is the
default alignment mode for
paragraphs. So be it.
Table 15.2. The supported modes for alignment.
par-flexibility := 1000.0 (paragraph flexibility)
When using the justified alignment mode, it sometimes occurs that certain lines need to
be stretched a lot, thereby leaving abnormally large spaces in the middle of those lines.
This is typically the case inside bibliographies with unbreakable hyperlinks. The par-
flexibility variable specifies a threshold above which justification of a line is abandoned.
More precisely, we switch to left alignment whenever the remaining space on a line
exceeds par-flexibility times the maximal amount of stretching which still “looks nice”
for the given font.
15.4 Paragraph layout 129
For certain paragraphs with
wide unbreakable pieces of
text, such as the hyperlink
http://www.texmacs.org it is
sometimes preferrable to switch
from justified to left aligned text
when the spacing between words
becomes to wide.
For certain paragraphs with
wide unbreakable pieces of
text, such as the hyperlink
http://www.texmacs.org it is
sometimes preferrable to switch
from justified to left aligned text
when the spacing between words
becomes to wide.
Table 15.3. Difference between a large and small flexibility (on the left and right hand sides
respectively).
par-hyphen := normal (quality of hyphenation)
This parameter controls the quality of the hyphenation algorithm. Possible values are
normal and professional. The professional hyphenation algorithm uses a global algo-
rithm on the entire paragraph, whereas the normal one uses a faster first-fit algorithm.
The difference between the dif-
ferent hyphenation algorithms
provided by T
E
X
MACS
is seen
best for long paragraphs which
are typeset into a narrow
column. The professional
hyphenation usually succeeds
to minimize the number of
ugly gaps between words.
The difference between the
different hyphenation algo-
rithms provided by T
E
X
MACS
is seen best for long para-
graphs which are typeset into
a narrow column. The profes-
sional hyphenation usually suc-
ceeds to minimize the number
of ugly gaps between words.
Table 15.4. Comparison different hyphenation algorithms. At the left hand side, we have used
the normal algorithm and on the right hand side the professional one. Even though there are
some ugly gaps at the right hand side around “hyphenation”, the really bad gap around “The”
on the left hand side has been avoided.
par-width := auto (paragraph width)
This environment variable controls the width of paragraphs. By default, it is automat-
ically determined as a function of the page (or screen) size and margins.
par-left := 0cm
par-right := 0cm (left and right margins)
These environment variables specify absolute left and right margins for the paragraph,
with respect to the default left and right margins (which are determined as a function
of the page layout). For instance:
This text uses the default margins.
This text uses a left margin of 1cm
This text uses a left margin of 2cm
This text uses a left margin of 3cm
The left and right margins of this text have both
been set to 3cm.
Environments like itemize and quote-env which maybe nested usually compute new
margins as a function of the old values by adding or subtracting some space:
130 Built-in environment variables
hassignjquote-envj
hmacrojbodyj
hsurroundj
hvspace*j0.5fnij
hright-flushihvspacej0.5fnij
hwithjpar-leftjhplusjpar-leftj3fnijpar-rightjhplusjpar-rightj3fnijpar-firstj0fnj
par-par-sepj0.25fnjbodyiiii
par-first := 1.5fn (first indentation)
The par-first parameter specifies the additional indentation which is used for the first
line of the paragraph. The aim of first indentations is to indicate the starts of new
paragraphs. An alternative technique is the use of vertical whitespace.
The article and book
styles in T
EXMACS indictate
the starts of new paragraphs
through the use of a first
indentation.
The generic and
letter styles rather use ver-
tical whitespace.
The generic and letter
styles in T
EXMACS indictate
the starts of new paragraphs
through the use of vertical
whitespace.
The article and book
styles rather use a first
indentation.
Table 15.5. Two classical ways to indicate the starts of new paragraphs.
par-sep := 0.2fn (extra separation between successive lines)
The sum of the font size and par-sep determines the ideal distance between two suc-
cessive base lines in a paragraph (also called the “base line skip”). Of course, when the
lines contain large boxes, then this distance may need to be increased. When 1fn for
par-sep, one may for instance produce documents with a double interline space:
A double interline space corresponds to par-sep := 1fn. Double interline spaces are
often used by lazy people who want to pretend that they have written many pages.
They generally do not care about tropical rain forests.
In the case when two successive lines use different base line skips, then the maximal
value is used in order to compute the ideal distance between their baselines. This allows
for a reasonable spacing when the font size is changed from one paragraph to another:
Normal text.
Some very large text.
And back to normal.
par-line-sep := 0.025fn* (extra space between lines)
This parameter corresponds an additional stretchable amount of whitespace between
successive lines in a paragraph. Setting par-line-sep to a small stretchable value which
defaults to 0allows the page breaker to correctly stretch pages which contain a very
long textual paragraph. Indeed, par-line-sep vanishes, then the height of a textual
paragraph is of the form a+b n, where aand bare constants and nis the number of
lines. There is no reason why the usable height of a page should be of this form.
15.4 Paragraph layout 131
par-par-sep := 0.5fn* (extra space between paragraphs)
The par-par-sep parameter specifies the amount of vertical whitespace which separates
two successive paragraphs. This space is determined in stretchable length units. By
default, T
EXMACS does not use any whitespace between successive paragraphs, except
when no nice page breaks could be found (this explains the use of the fn* length unit).
Starts of new paragraphs are rather indicated through the use of first indentations (see
table 15.5).
In the case when two successive paragraph use different paragraph separations, then
the maximum of the two is taken. In fact, the par-par-sep length is added to both the
vertical spacing before and the vertical spacing after the paragraph.
par-hor-sep := 0.5fn
par-ver-sep := 0.2fn (minimal space between ink)
When a paragraph contains several exceptionally large boxes, then T
EXMACS attempts
to “shove successive lines into another” as long as none of the boxes collide:
Consider a fraction which decends more than usual like 1
x+ 1 at the end of a line and an
expression like eexwhich is higher than usual.
When these expressions occur at different places, then T
EXMACS tries to render the successive
lines in a compact manner.
In the case of a fraction 1
x+ 1 and an exceptionally high expression at the wrong place, like
the expression eexhere, the boxes are separated by env-ver-sep.
As soon as the horizontal distance between two large boxes is less than par-hor-sep,
then they are considered to be in collision. In that case, the vertical distance between
them must be at least par-ver-sep. Also, the amount of showing never exceeds 1ex.
When using an interline space of 1.5 or 2, the default value of par-ver-sep allows the
user to type larger formulas in the text while preserving a uniform layout. When using a
small par-sep and a large par-ver-sep, the distance between two successive lines remains
small, except when their contents are horizontally close. This may for instance be used
to reduce the space between a short like followed by a centered equation.
par-fnote-sep := 0.2fn (minimal space between different footnotes)
This parameter controls the amount of vertical space between successive footnotes.
par-columns := 1(number of columns)
This environment variable specifies the number of columns into which the text is being
typeset. Different numbers of columns may be used successively in the same document.
par-columns-sep := 2fn (distance between columns)
This environment variable specifies the amount of horizontal whitespace which sepa-
rates different columns in multi-column mode.
15.5. Page layout
In this section, we describe how T
EXMACS fills pages with typesetted content. Besides
specifying the settings on how to print a document, the user may also determine the way
pages should be rendered on screen. It should be noticed that the number of environment
variables is redundant in the sense that some variables are computed as a function of other
ones. For instance, by default, the paragraph width is computed as a function of the page
size and the left and right margins.
132 Built-in environment variables

Paper specific variables.
page-type := a4 (the size of pages)
Specify the size of a page when printing out. Most standard formats are available in
Document!Page!Size. By default, the paper size is the one of your printer (the default
printer settings may be changed in Edit!Preferences!Printer). When the page-type is
set to user, then the page size is given by page-width and page-height.
page-orientation := portrait (page orientation)
The orientation of pages can be either portrait or landscape.
page-nr := 0(current page number)
The current page number. This environment variable should be manipulated with care,
since it is not yet available at typesetting time. For a reliable determination of page
numbers, one may combine the label and page-ref primitives. Nevertheless, the page-nr
variable can be used in the macros which render page headers and footers.
page-the-page (display the page number)
This environment variable really contains the macro which is used for rendering the
page-number. By default, it renders page-nr. The macro takes no arguments. In order
to simulate a document whose first page number is 123, one may redefine
hassignjpage-the-pagejhmacrojhplusjpage-nrj122iii
page-breaking := optimal (page breaking algorithm)
This parameter specifies the page breaking algorithm. The default optimal algorithm
takes into account the global document and tries hard to avoid bad page breaks. The
alternative sloppy algorithm uses a fast first-fit algorithm, but produces bad page break
with a higher probability. The medium quality algorithm is the same as the optimal
algorithm, except for two column content.
page-flexibility := 1.0 (flexibility for stretching)
This parameter specifies how much stretchable spaces may be extended or reduced in
order to fill pages which are too short or too long. A page flexibility of 1allows spaces
to be stretched to their minimal and maximal values. A page flexibility of 0prevents
spaces to be stretched. For other values of page-flexibility the behaviour is linear.
page-shrink := 1fn (allowed amount of page shrinking)
In the case when it is very hard to find good page breaks, this parameter specifies an
additional amount of space by which a page is allowed to be reduced.
page-extend := 0fn (allowed amount of page extensions)
In the case when it is very hard to find good page breaks, this parameter specifies an
additional amount of space by which a page is allowed to be extended.
Screen specific variables.
15.5 Page layout 133

page-medium := papyrus (the page medium)
This environment variable, which is initialized using Document!Page!Type, specifies
how pages are rendered on the screen. The following values are available:
pppppppppaaaaaaaaapppppppppeeeeeeeeerrrrrrrrr.Page breaks are visually indicated on the screen. This mode is useful
for ajusting the final version of a document before printing or sending it to
a publisher. However, the use of this mode slows down the editor since every
modification in the document triggers the page-breaking algorithm.
Notice also that the mere selection of this mode does not imply the screen
margins and page decorations to be as on paper. In order to previsualize a
document in a fully realistic way, you should also set Document!Page!Screen
margins!Show header and footer and Document!Page!Screen margins!Margins
as on paper.
pppppppppaaaaaaaaapppppppppyyyyyyyyyrrrrrrrrruuuuuuuuusssssssss.The paragraph width is the same as on paper, but page breaking is
disabled. This mode is most useful during the editing phase of a document
which will ultimately be printed out. It combines a reasonable editing speed
with realistic line breaks.
aaaaaaaaauuuuuuuuutttttttttooooooooo
mmmmmmm
mm
aaaaaaaaatttttttttiiiiiiiiiccccccccc.The paragraph width is as large as possible so as to fit into the current
window and page breaking is disabled. This setting, which makes optimal use
of the available space on your screen, is useful for documents which are not
intended to be printed out. It may for instance be selected when using T
EXMACS
as a browser or as an interface to computer algebra systems.
page-screen-width := 10cm (width of the rendering window)
In automatic mode, this environement variable contains the width of the screen.
page-screen-height := 10cm (height of the rendering window)
In automatic mode, this environement variable contains the height of the screen.
page-screen-margin := true (special margins for screen editing?)
This flag specifies whether the screen margins are manually specified by the user, or
whether they are the same as on paper.
page-screen-left := 5mm
page-screen-right := 5mm
page-screen-top := 15mm
page-screen-bot := 15mm (left margin on screen)
When page-screen-margin is true, then these environment variables determine the
margins which are to be used for rendering on the screen.
page-show-hf := false (show headers and footers on screen?)
This flag determines whether the page headers and footers should be visible on the
screen. When set to true, it should be noticed that the headers and footers are not
always correctly updated when editing. In the case when you suspect them to be wrong,
refreshing the display by scrolling down and up should display the correct values.
Specifying the margins.
134 Built-in environment variables

The parameters for page margins are represented schematically at the left hand side in
figure 15.1. One may either specify the paragraph width as a function of the left and right
margins, or vice versa. The left and right margins may depend on whether the page number
is odd or even.
page-width-margin := false
page-height-margin := false (compute margins from main text dimensions?)
When page-width-margin is set to false, then the paragraph width par-width is deter-
mined automatically from the page size and the left and right margins. When set to
true, the left and right margins are determined as a function of the page size, the para-
graph width, page-odd-shift and page-even-shift. For compatability with T
EX/L
A
T
EX, it
is also possible to set page-width-margin to tex, in which case the horizontal margins are
determined from page-odd,page-even and par-width. The page-height-margin variable
plays a similar role for the vertical margins.
page-width := auto
page-height := auto (page width)
By default, the width and height of a page are automatically determined from the page
type. When page-type is set to user, then the user may manually specify the page size
using page-width and page-height.
page-odd := auto
page-even := auto (left margin)
If page-width-margin is set to false, then page-odd and page-even specify the left
margins for odd and even pages. If page-width-margin is true, then these values are
computed as a function of the page size, the paragraph width, page-odd-shift and page-
even-shift. When page-odd and page-even are set to auto, then a nice default left
margin is determined as a function of the specified page type.
page-right := auto (right margin)
If page-width-margin is set to false, then page-right specifies the right margin for odd
pages. The right margin for even pages is given by the formula
page-right+page-even¡page-odd
If page-width-margin is true or when page-right is set to auto, then the right margin
is determined in a similar way as the left margin.
page-odd-shift := 0mm
page-even-shift := 0mm (margin shifts)
If page-width-margin is set to true, then the left margins for odd and even pages
are determined from the page size, paragraph width and the margin shifts using the
formulas
page-even =page-width¡par-width
2+page-odd-shift
page-odd =page-width¡par-width
2+page-even-shift
The right margin is always taken to be such that the paragraph width and the left and
right margins sum up to the page width.
15.5 Page layout 135
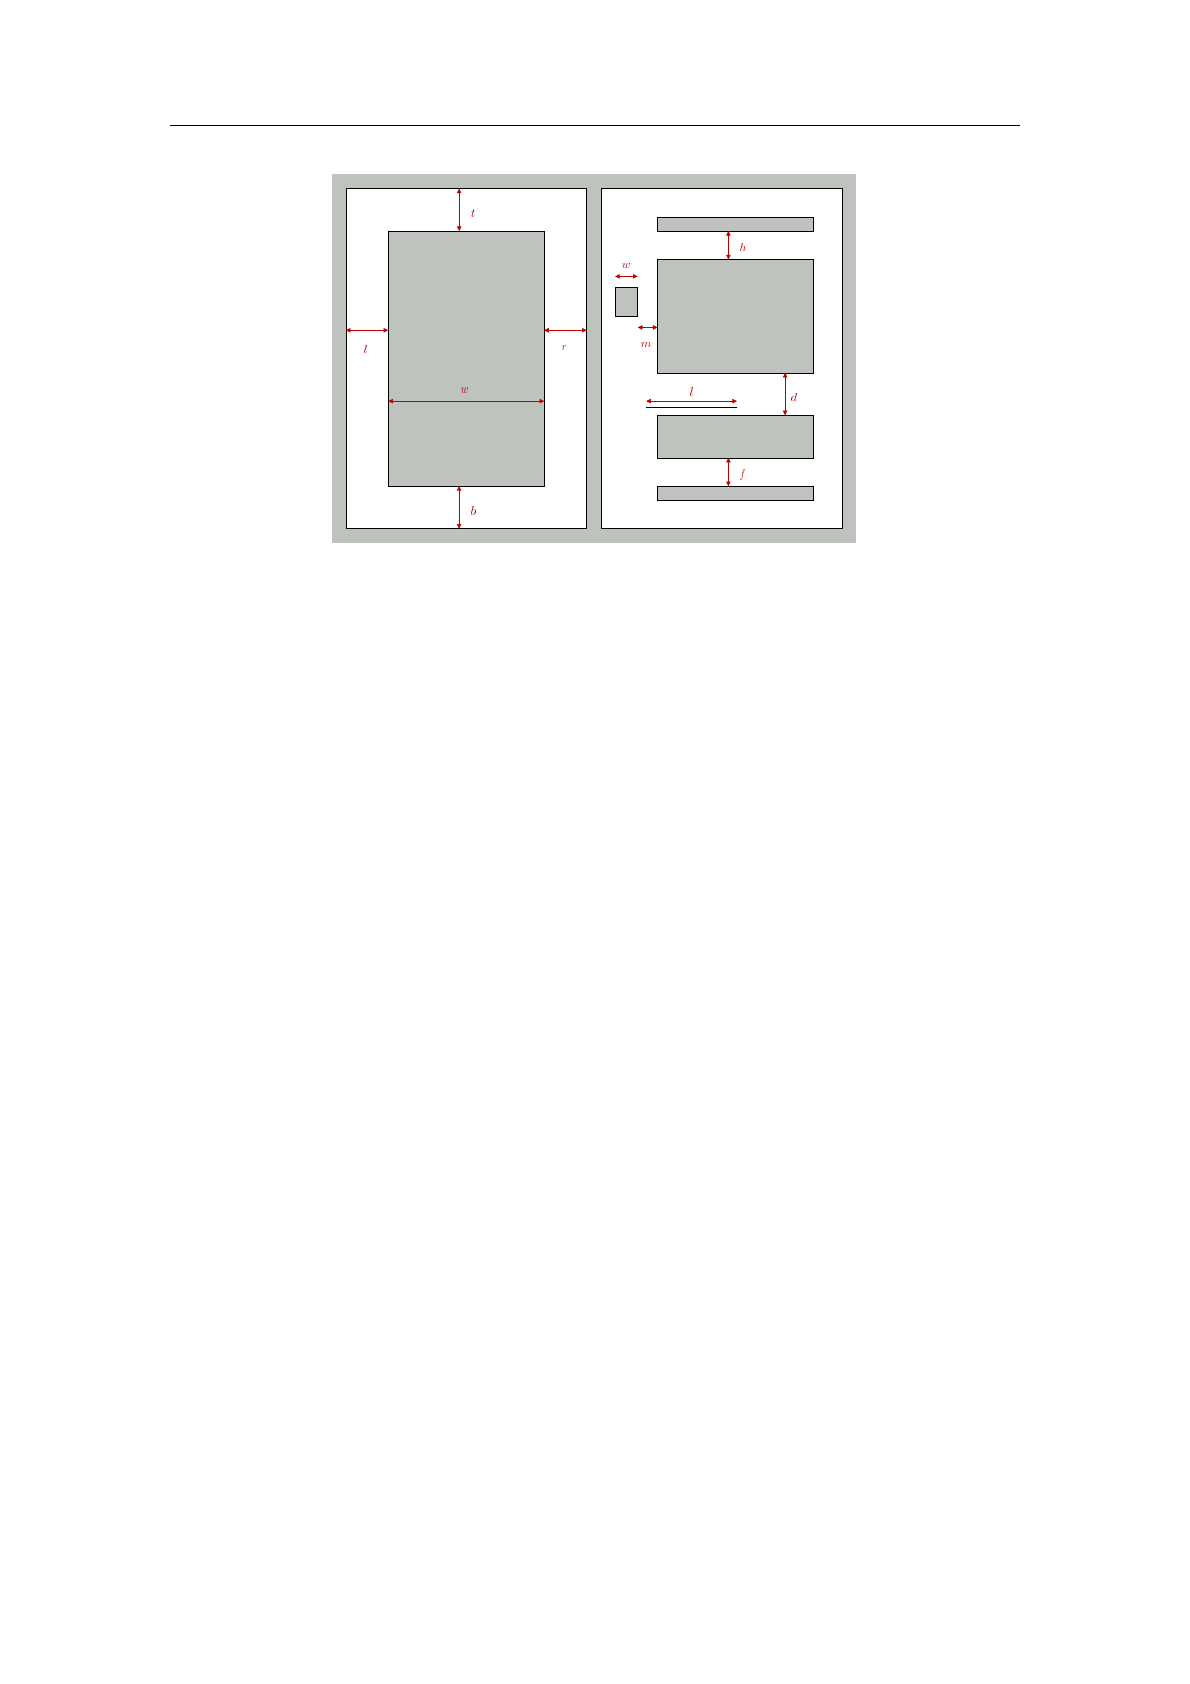
Figure 15.1. Schematic representation of the layout of pages. On the left hand
side, the parameters l,r,tand brespectively correspond to the left, right, top and
bottom margins, and wcorresponds to the paragraph width. On the right hand
side, h,f,dand mcorrespond to the header, footer, footnote and marginal note
separations, wto the width of marginal notes, and lto the length of the footnote
bar.
Page decorations.
page-odd-header :=
page-odd-footer :=
page-even-header :=
page-even-footer := (header for odd pages)
These environment variables contain the header and footer texts for odd and even pages.
page-head-sep := 8mm
page-foot-sep := 8mm (separation between headers/fotters and text)
These parameters determine the space between the main text and page headers and
footers. They correspond to the hand fdistances at the right hand side of figure 15.1.
page-fnote-sep := 1.0fn (space between footnotes and text)
The separation between the main text and footnotes, i.e. the distance din figure 15.1.
page-fnote-barlen := 7.5fn (length of footnote bars)
The length of the foornote bar.
page-float-sep := 1.5fn (separation between floats and text)
The separation between the main text and floating objects.
page-mnote-sep := 5mm (separation between marginal notes and text)
The separation between marginal notes and the main text (not implemented yet).
page-mnote-width := 15mm (width of marginal notes)
The width of marginal notes (not implemented yet).
136 Built-in environment variables

15.6. Table layout
The environment variables for tables can be subdivided in variables (prefixed by table-)
which apply to the whole table and those (prefixed by cell-) which apply to individual cells.
Whereas usual environment variables are set with assign and with, the tabular environment
variables are rather set with the tformat primitive. This makes it possible to apply certain
settings to any rectangular subtable of the entire table and in particular to rows or columns.
For more details, see the documentation of the twith and cwith primitives.
Layout of the table as a whole.
table-width :=
table-height := (hint for table dimensions)
These parameters indicate a hint for the dimensions of the table. The table-hmode and
table-vmode variables determine how to take into account these settings.
table-hmode :=
table-vmode := (determination of table dimensions)
These parameters specify how to determine the dimensions of the table. At the moment,
the values of table-hmode and table-vmode are actually ignored and table-width and
table-height are interpreted as the minimal width and height of the table.
table-halign := l
table-valign := f(alignment inside text)
These parameters determine how the table should be aligned in the surrounding text.
Possible values for table-halign are l(left), c(center) and r(right), and possible
values for table-valign are t(top), f(centered at fraction bar height), c(center) and
b(bottom).
In addition to the above values, the alignment can take place with respect to the
baselines of particular cells. Such values for table-halign are L(align w.r.t. the left
column), C(align w.r.t. the middle column), R(align w.r.t. the right column) and O
(align w.r.t. the priviledged origin column table-col-origin). Similarly, table-halign may
take the additional values T(align w.r.t. the top row), C(align w.r.t. the middle row),
B(align w.r.t. the bottom row) and O(align w.r.t. the priviledged origin row table-row-
origin).
table-row-origin := 0
table-col-origin := 0(priviledged cell)
Table coordinates of an priviledged “origin cell” which may be used for aligning the
table in the surrounding text (see above).
table-lsep := 0fn
table-rsep := 0fn
table-bsep := 0fn
table-tsep := 0fn (padding around table)
Padding around the table (in addition to the padding of individual cells).
table-lborder := 0ln
table-rborder := 0ln
table-bborder := 0ln
15.6 Table layout 137

table-tborder := 0ln (border around table)
Border width for the table (in addition to borders of the individual cells).
table-hyphen := n(allow for hyphenation?)
A flag which specifies whether page breaks may occur at the middle of rows in the table.
When table-hyphen is set to y, then such page breaks may only occur when
1. The table is not surrounded by other markup in the same paragraph.
2. The rows whether the page break occurs has no borders.
An example of a tabular environment which allows for page breaks is eqnarray*.
table-min-rows :=
table-min-cols :=
table-max-rows :=
table-max-cols := (constraints on the table’s size)
It is possible to specify a minimal and maximal numbers of rows or columns for the
table. Such settings constraint the behaviour of the editor for operations which may
modify the size of the table (like the insertion and deletion of rows and columns). This
is particularly useful for tabular macros. For instance, table-min-columns and table-
max-columns are both set to 3for the eqnarray* environment.
Layout of the individual cells.
cell-background := (background color)
A background color for the cell.
cell-width :=
cell-height := (hint for cell dimensions)
Hints for the width and the height of the cell. The real width and height also depend
on the modes cell-hmode and cell-vmode, possible filling (see cell-hpart and cell-vpart
below), and, of course, on the dimensions of other cells in the same row or column.
cell-hpart :=
cell-vpart := (fill part of unused space)
When the sum sof the widths of all columns in a table is smaller than the width w
of the table itself, then it should be specified what should be done with the unused
space. The cell-hpart parameter specifies a part in the unusued space which will be
taken by a particular cell. The horizontal part taken by a column is the maximum of
the horizontal parts of its composing cells. Now let pithe so determined part for each
column (i2f1; :::; ng). Then the extra horizontal space which will be distributed to
this column is pi(w¡s)/(p1+···+pn). A similar computation determines the extra
vertical space which is distributed to each row.
cell-hmode := exact
cell-vmode := exact (determination of cell dimensions)
These parameters specify how to determine the width and the height of the cell. If cell-
hmode is exact, then the width is given by cell-width. If cell-hmode is min or max, then
the width is the minimul resp. maximum of cell-width and the width of the content.
The height is determined similarly.
138 Built-in environment variables

cell-halign := l
cell-valign := B(cell alignment)
These parameters determine the horizontal and vertical alignment of the cell. Possible
values of cell-halign are l(left), c(center), r(right), .(decimal dot), ,(decimal
comma) and R(vertical baseline). Possible values of cell-valign are t(top), c(center),
b(bottom) and B(baseline).
cell-lsep := 0fn
cell-rsep := 0fn
cell-bsep := 0fn
cell-tsep := 0fn (cell padding)
The amount of padding around the cell (at the left, right, bottom and top).
cell-lborder := 0ln
cell-rborder := 0ln
cell-bborder := 0ln
cell-tborder := 0ln (cell borders)
The borders of the cell (at the left, right, bottom and top). The displayed border
between cells Ti;j and Ti;j+1 at positions (i; j)and (i; j + 1) is the maximum of the
borders between the right border of Ti;j and the left border of Ti; j+1. Similarly, the
displayed border between cells Ti;j and Ti+1;j is the maximum of the bottom border of
Ti;j and the top border of Ti+1;j.
cell-vcorrect := a(vertical correction of text)
As described above, the dimensions and the alignment of a cell may depend on the
dimensions of its content. When cells contain text boxes, the vertical bounding boxes
of such text may vary as a function of the text (the letter “k” resp. “y” ascends resp.
descends further than “x”). Such differences sometimes leads to unwanted, non-uniform
results. The vertical cell correction allows for a more uniform treatment of text of the
same font, by descending and/or ascending the bounding boxes to a level which only
depends on the font. Possible values for cell-vcorrect are n(no vertical correction),
b(vertical correction of the bottom), t(vertical correction of the top), a(vertical
correction of bottom and the top).
cell-hyphen := n(allow for hyphenation inside cells)
By default, the cells contain inline content which is not hyphenated. By selecting
Table!Special cell properties!Hyphenation!Multi-paragraph, the cell contents becomes
multi-paragraph. In that case, cell-hyphen determines how this content is hyphenated.
Possible values are n(disable line breaking) and b,cand t(enable line breaking and
align at the bottom, center resp. top line).
cell-row-span := 1
cell-col-span := 1(span of a cell)
Certain cells in a table are allowed to span over other cells at their right or below them.
The cell-row-span and cell-col-span specify the row span and column span of the cell.
cell-decoration := (decorating table for cell)
This environment variable may contain a decorating table for the cell. Such a decoration
enlarges the table with extra columns and cells. The tmarker primitive determines the
location of the original decorated cell and its surroundings in the enlarged table are
filled up with the decorations. Cell decorations are not really used at present and may
disappear in future versions of T
EXMACS.
15.6 Table layout 139

cell-orientation := portrait (orientation of cell)
Other orientations for cells than portrait have not yet been implemented.
cell-row-nr := 1
cell-col-nr := 1(current cell position)
In the future, these environment variables should contain the current cell position
during the typesetting process.
15.7. Editing source trees
The different rendering styles for source trees are described in more detail in the section
about the global presentation of source trees. The corresponding environment variables
are briefly described here.
src-style := angular (rendering style for source tags)
The principal rendering style for source trees as specified in Document!Source!Style.
Possible values are angular,scheme,functional and latex.
src-special := normal (how to render special tags)
How to render special tags like concat,document,compound, etc., as specified in Docu-
ment!Source!Special. Possible values are raw,format,normal and maximal.
src-compact := normal (compactication level)
How compact should tags be rendered, as specified in Document!Source!Compactifi-
cation. Possible values are none,inline,normal,inline tags and all.
src-close := compact (closing style for long tags)
The rendering style of closing tags as specified in Document!Source!Closing style.
Possible values are repeat,long,compact and minimal.
15.8. Miscellaneous environment variables
The following miscellaneous environment variables are mainly intended for internal use:
save-aux := true (save auxiliary content)
This flag specifies whether auxiliary content has to be saved along with the document.
sfactor := 5(shrinking factor)
The shrinking factor which is used for rendering.
par-no-first := false (disable first indentation for next paragraph?)
This flag disables first indentation for the next paragraph.
cell-format (current cell format)
This variable us used during the typsetting of tables in order to store the with-settings
which apply to the current cell.
atom-decorations
line-decorations
page-decorations
xoff-decorations
yoff-decorations (auxiliary variables for decorations)
These environment variables store auxiliary information during the typsetting of dec-
orations.
140 Built-in environment variables
Chapter 16
Built-in T
E
X
MACS primitives
In this chapter, we describe those built-in T
EXMACS primitives which are intended to be
used in normal documents. The additional primitives which are used for writing style files
are described in a separate chapter.
16.1. Fundamental primitives
hdocumentjpar-1 j···jpar-ni(vertical sequence of paragraphs)
This primitive is used for sequences of logical paragraphs. A simple, plain text docu-
ment is made of a sequence of paragraphs. For instance,
A simple document.
Made of several paragraphs. The second paragraph is very long, so that it is hyphen-
ated across several line.
is internally represented as a document with two subtrees:
hdocumentj
A simple document.j
Made of several paragraphs. The second paragraph is very long, so that it is
hyphenated across several line.i
From the visual point of view, different paragraphs are often separated by some ver-
tical whitespace. Alternatively, new paragraphs are indicated through the use of an
additional indentation. The root of a T
EXMACS document is usually a document node.
The document tag is also used for marking multi-paragraph content inside other tags,
such lists or theorem-like environments. Environments which require the use of a doc-
ument tag for at least one argument are called “block environments”.
hparagraphjunit-1 j···junit-ni(vertical sequence of paragraph units)
This not yet implemented primitive is a variant of document. While a document is
made up of logical paragraphs, a paragraph is made up of “paragraph units”. From a
visual point of view, different paragraphs are singled out using some additional space
or indentation. New paragraph units rather correspond to simple new lines. Typically,
displayed equations are also paragraph units in a larger paragraph.
hconcatjitem-1 j···jitem-ni(horizontal sequence of inline markup)
This primitive is used for sequences of line items, also called “inline content”. For
instance,
141
Some emphasized text.
is internally represented as:
hconcatjSome jhemjemphasizedij text.i
The concat operator is essential to put compound structures in trees taking multiple
parameters. For example, let us place the previous fragment in a multi-paragraph
context:
Multiple paragraphs.
Some emphasized text.
In this example, we need the concat tag in order to indicate that “Some emphasized
text.” corresponds to a single paragraph:
hdocumentj
A simple document.j
hconcatjSome jhemjemphasizedij text.ii
Notice that block tags like document may contain inline tags such as concat as its
children, but not vice versa. In order to typeset line content before or after block
content, one has to use the surround tag below.
hsurroundjleftjrightjbodyi(surround block content with inline content)
Although it is not possible in T
EXMACS to use block content inside horizontal concate-
nations, it is sometimes useful to add some additional inline content before or after a
block environment. The surround primitive serves this purpose, by adding a left and
right surrounding to some block content body. For instance,
hsurroundj jj
htheoremj
Given P2TfFgand f < g 2Twith P(f)P(g)<0, there exists an h2Twith
P(h) = 0.ii
produces
Theorem 16.1.Given P2TfFgand f < g 2Twith P(f)P(g)<0, there exists
an h2Twith P(h) = 0.
In general, the surround is mainly used in style files, but it occasionally turns out to be
useful in regular documents as well.
16.2. Formatting primitives
16.2.1. White space primitives
hvspacejleni
142 Built-in TE
XMACS primitives

hvspacejlenjminjmaxi(vertical space after)
This primitive inserts an elastic vertical space after the current paragraph. All operands
must be length values. The len argument specifies the default length and the min and
max arguments the bounds to vertical stretching for page breaking and filling. If min
and max are not specified, then they are determined implicitly from the length unit of
len.
Notice that operands are not evaluated, so they must be literal strings.
hvspace*jleni
hvspace*jlenjminjmaxi(vertical space before)
This primitive is similar to vspace, except that the vertical space is inserted before the
current paragraph. The actual vertical space between two consecutive paragraphs is the
maximum, not the sum, of the vertical spaces specified by the the vspace and vspace*
tags in the surrounding paragraphs.
hspacejleni
hspacejlenjbotjtopi(rigid horizontal space)
This primitive inserts an empty box whose width is len, and whose bottom and top
sides are at distances bot and top from the baseline.
If bot and top are not specified, then an empty box is inserted whose bottom is on the
baseline and whose height is the same as the lowercase letter xin the current font.
Notice that operands are not evaluated, so they must be literal strings.
hhspacejleni
hhspacejlenjminjmaxi(stretchable horizontal space)
This primitive inserts a stretchable horizontal space of nominal width len, which must
be a length value. The min and max arguments specify bounds to horizontal stretching
for line breaking and filling. If min and max are not specified, then they are determined
implicitly from the length unit of len.
Notice that operands are not evaluated, so they must be literal strings.
hhtabjmini
hhtabjminjweighti(horizontal spring)
Springs are horizontal spaces which extend so the containing paragraph takes all the
available horizontal space. When a paragraph is line wrapped, split in several visual
lines, only springs in the last line are extended.
A spring has a minimal width and a weight. If the weight is 0, the spring is weak,
otherwise it is strong. If a line contains mixed weak and strong springs, only the strong
springs extend.
The fraction of the available horizontal space taken up by each strong spring is propor-
tional to its weight. If there are only weak springs, they share the available space evenly.
hhtabjminiinserts a strong spring of minimal width min and of weight unity. The
min operand must be a length value.
16.2 Formatting primitives 143

hhtabjminjweightispecifies the weight, which can be a positive decimal number or
one of the two special values documented below.
hhtab jmin jfirstiinserts a tail weak spring, only the first one in a paragraph is
significant.
hhtab jmin jlastiinserts a head weak spring, only the last one in a paragraph is
significant.
Operands are not evaluated and must be literal strings.
Weak springs are useful in style-sheets. For example, tail weak springs are used to make
the list environment extend to across the full paragraph, so vertical motion commands
in nested lists behave as expected. In regular documents, springs are often used to place
some text on the right side of the page and some other text on the left side.
16.2.2. Line breaking primitives
A simple document is a sequence of logical paragraphs, one for each subtree of a document
or paragraph node. Paragraphs whose width exceed the available horizontal space are broken
into physical lines by the hyphenation algorithm. By default, hyphenated lines are justified:
horizontal spaces can be shrunk or extended in order to produce a good-looking layout.
hnew-linei(start a new paragraph)
This is a deprecated tag in order to split a logical paragraph into several logical para-
graphs without creating explicit subtrees for all paragraphs.
We recall that logical paragraphs are important structures for the typesetting process.
Many primitives and environment variables (vertical spacing, paragraph style, inden-
tation, page breaking, etc.) operate on whole paragraphs or at the boundaries of the
enclosing paragraph.
hnext-linei(start a new line)
This is a tag which will become deprecated as soon as the paragraph primitive will be
correctly implemented. Its usage is similar to the new-line tag with the difference that
we start a new logical paragraph unit instead of a new logical paragraph.
Currently, the next-line tag can also be used in order to force a line break with the
additional property that the line before the break is not justified or filled.
hline-breaki(line breaking hint, with filling)
Print an invisible space with zero hyphenation penalty. The line breaking algorithm
searches for the set of hyphenation points minimizing the total penalty, so line breaking
is much more likely to occur at a line-break than anywhere else in its vicinity.
Unlike next-line, this is a hint which may or may not be obeyed by the typesetter, and
it does not prevent the previous line from being filled.
hno-breaki(forbid line breaking at this point)
Set an hyphenation point with an infinite penalty. That is useful when the hyphenation
patterns for a language fall short of preventing some forbidden patterns like “arse-nal”
or “con-genital”. An alternative way to prevent breaks is to use the rigid tag.
144 Built-in TE
XMACS primitives
16.2.3. Indentation primitives
There are two main ways to distinguish between successive paragraphs: separate them by
a small vertical space, or use an indentation for each new paragraph. The indentation can
be explicitly controlled using the no-indent,yes-indent,no-indent* and yes-indent* tags. The
no-indent and yes-indent primitives apply to the current paragraph, while the no-indent* and
yes-indent* apply the next paragraph.
hno-indenti
hyes-indenti
Disable or enable indentation for the current paragraph. For instance, the code
hno-indentiThis is a long paragraph which demonstrates the disabling indentation
using the hmarkupjno-indentiprimitive.
hyes-indentiThis is a long paragraph which demonstrates enabling indentation using
the hmarkupjyes-indentiprimitive.
typically produces
This is a long paragraph which demonstrates the disabling indentation using the no-
indent primitive.
This is a long paragraph which demonstrates enabling indentation using the yes-
indent primitive.
hno-indent*i
hyes-indent*i
Disable or enable indentation for the next paragraph. For instance,
A first paragraph.hyes-indent*i
A second paragraph.
typically produces
A first paragraph.
A second paragraph.
Notice that no-indent and yes-indent override no-indent* and yes-indent* directives in the
previous paragraph.
Currently, the no-indent* and yes-indent* tags are mainly used in order to control the
indentation after section titles or environments like equation which usually correspond
to paragraph units. In the future, when sectional tags will take the section bodies as
arguments, and when the paragraph tag will be correctly implemented, the no-indent*
and yes-indent* will become deprecated.
16.2.4. Page breaking primitives
The physical lines in a document are broken into pages in a way similar to how paragraphs
are hyphenated into lines. The page breaker performs page filling, it tries to distribute page
items evenly so text runs to the bottom of every page. It also tries to avoid orphans and
widows, which are single or pairs of soft lines separated from the rest of their paragraph
by a page break, but these can be produced when there is no better solution.
16.2 Formatting primitives 145

hno-page-breaki(prevent automatic page breaking after this line)
Prevent the occurrence of an automatic page break after the current line. Set an infinite
page breaking penalty for the current line, similarly to no-break.
Forbidden page breaking points are overridden by “new page” and “page break” primi-
tives.
hno-page-break*i(prevent automatic page breaking before this line)
Similar to no-page-break, but set the page breaking penalty of the previous line.
hnew-pagei(start a new page after this line)
Cause the next line to appear on a new page, without filling the current page. The page
breaker will not try to position the current line at the bottom of the page.
hnew-page*i(start a new page before this line)
Similar to new-page, but start the new page before the current line. This directive is
appropriate to use in chapter headings.
hpage-breaki(force a page break after this line)
Force a page break after the current line. A forced page break is different from a new
page, the page breaker will try to position the current line at the bottom of the page.
Use only to fine-tune the automatic page breaking. Ideally, this should be a hint similar
to line-break, but this is implemented as a directive, use only with extreme caution.
hpage-break*i(force a page break before this line)
Similar to page-break, but force a page break before the current line.
When several “new page” and “page break” directives apply to the same point in the
document, only the first one is effective. Any new-page or page-break after the first one in a
line is ignored. Any new-page or page-break in a line overrides any new-page* or page-break*
in the following line. Any new-page* or page-break* after the first one in a line is ignored.
16.2.5. Box operation primitives
hmovejcontentjdelta-xjdelta-yi(adjust position)
This primitive moves the box with the specified content by delta-x to the right and
delta-y upwards. It may be used for fine-grained positioning. During the evaluation of
delta-x and delta-y, the box lengths w,h,l,r,band tof content are defined.
hshiftjcontentjdelta-x jdelta-yi(shift contents, not the bounding box)
This primitive is similar to move, except that the bounding box of the shifted content
is the same as the bounding box of the original content.
hresizejcontentjleft-limjbot-limjright-limjtop-limi(adjust size)
Resize the box for the content according to new left, bottom, right and top limits left-
lim,bot-lim,right-lim and top-lim. The limits may be specified in terms of the box
lengths w,h,l,r,band tof content. For instance, the code
146 Built-in TE
XMACS primitives
(hresizejHopsajhminusj1lj5mmijjhplusj1rj5mmiji)
widens the box for “Hopsa” by 5mm on each side:
( Hopsa )
hclippedjcontentjleft-limjbot-limjright-limjtop-limi(adjust size and clip)
This primitive is similar to resize, except that the content is clipped so as to fit in the
specified new bounding box.
hif*jconditionjcontenti(conditional appearance of box)
The box with the content is displayed as usual if the condition is satisfied and displayed
as whitespace otherwise. This primitive is used in particular for the definition of the
phantom macro. For instance, the non-text “ ” is produced using hif* jfalse j
phantomi.
hrepeatjcontentjpatterni(fill line)
This primitive can be used to decorate some content with a given pattern. For instance,
when defining the macro
hassignjwipe-outjhmacrojxjhrepeatjxjhwithjcolor jredj/iiii
the code hwipe-outjobsoleteiproduces obsolete///////. The repeat primitive may also be used
to fill the current line with a given content, like the dots in tables of contents.
hdatomsjfoojcontenti
hdlinesjfoojcontenti
hdpagesjfoojcontenti(decorations)
These primitives are used to decorate a posteriori the lines of a paragraph, the lines of
a page, or the pages of a document. Currently, only decorations of atoms on lines of a
paragraph have been implemented.
The first argument foo is a macro which will be applied to all boxes in the line and the
second argument content is the part of the paragraph to which the decoration will be
applied. For instance, the construction
hdatomsj
hmacrojxjxij
bodyi
may be used in order to visualize the boxes in a given paragraph:
Here is a sufficiently long paragraph. Here is a sufficiently long paragraph.
Here is a sufficiently long paragraph. Here is a sufficiently long paragraph.
Here is a sufficiently long paragraph. Here is a sufficiently long paragraph.
When used in combination with the repeat primitive, one may for instance produce the
dotted lines in tables of contents using the macro
16.2 Formatting primitives 147

hassignj
toc-dotsj
hmacroj
hdatomsj
hmacrojxjhrepeatjxjhspacej0.2fni.hspacej0.2fniiij
hhtabj5mmiiii
Notice that the datoms primitive is quite fragile, because the foo macro has no access
to the environment in which content is typeset.
16.3. Mathematical primitives
hleftjlarge-delimiteri
hleftjlarge-delimiterjsizei
hleftjlarge-delimiterjbottomjtopi
hmidjlarge-delimiterj···i
hrightjlarge-delimiter j···i(large delimiters)
These primitives are used for producing large delimiters, like in the formula
1
a11
a2···1
an:
Matching left and right delimiters are automatically sized so as contain the enclosed
expression. Between matching left and right delimiters, the formula may contain an
arbitrary number of middle delimiters, which are sized in a similar way. Contrary
to T
EX, the depth of a large delimiter is not necessarily equal to its height, so as to
correctly render formulas like
f0
@1
x+1
y+1
z
1
A
The user may override the automatically determined size by specifying additional length
parameters size or bottom and top. For instance,
fhleftj(j-8mmj4mmixhmidj|j8mmiyhrightj)j-4mmj8mmi
is rendered as
fxy
The size may also be a number n, in which case the n-th available size for the delimiter
is taken. For instance,
ghleftj(j0ihleftj(j1ihleftj(j2ihleftj(j3izhrightj)j3ihrightj)j2ihrightj)j1ihrightj)j0i
is rendered as
g((((z))))
148 Built-in TE
XMACS primitives

hbigjbig-symboli(big symbols)
This primitive is used in order to produce big operators as in
X
i=0
1aizi(16.1)
The size of the operator depends on whether the formula is rendered in “display style”
or not. Formulas in separate equations, like (16.1), are said to be rendered in display
style, contrary to formulas which occur in the main text, like Pi=0
1aizi. The user may
use Format!Display style to override the current settings.
Notice that the formula (16.1) is internally represented as
hbigjsumihrsubji=0ihrsupj1iahrsubjii*zhrsupjiihbigj.i
The invisible big operator hbigj.iis used to indicate the end of the scope of hbigjsumi.
hfracjnumjdeni(fractions)
The frac primitive is used in order to render fractions like x
y. In display style, the
numerator num and denominator den are rendered in the normal size, but display style
is turned of when typesetting num and den. When the display style is turned of, then
the arguments are rendered in script size. For instance, the content
hfracj1jahrsubj0i+hfracj1jahrsubj1i+hfracj1jahrsubj2i+···iii
is rendered in display style as
1
a0+1
a1+1
a2+·
·
·
hsqrtjcontenti
hsqrtjcontentjni(roots)
The sqrt primitive is used in order to render square roots like x
por n-th roots like x
3
p.
The root symbol is automatically sized so as to encapsulate the content:
f(x)
y2+z2
i+j
r
hlsubjscripti
hlsupjscripti
hrsubjscripti
hrsupjscripti(scripts)
These primitives are used in order to attach a script to the preceding box in a horizontal
concatenation (in the case of right scripts) or the next one (in the case of left scripts).
When there is no such box, then the script is attached to an empty box. Moreover,
when both a subscript and a superscript are specified on the same side, then they are
merged together. For instance, the expression
hrsubjaihrsupjbi+hlsubj1ihlsupj2ixhrsubj3ihrsupj4i=yhrsubj1i+hlsubjci
16.3 Mathematical primitives 149

is rendered as
a
b+x
1
23
4=y1+c
When a right script is attached to an operator (or symbol) which accepts limits, then
it is rendered below or above instead of beside the operator:
lim
n!1an
Scripts are rendered in a smaller font in non-display style. Nevertheless, in order to
keep formulas readable, the size is not reduced below script-script-size.
hlprimejprime-symbolsi
hrprimejprime-symbolsi(primes)
Left and right primes are similar to left and right superscripts, except that they behave
in a different way when being edited. For instance, when your cursor is behind the prime
symbol in f0and you press backspace, then the prime is removed. If you are behind fn
and you press backspace several times, then you first enter the superscript, next remove
nand finally remove the superscript. Notice also that prime-symbols is necessarily a
string of concatenated prime symbols. For instance, f0y is represented by fhrprimej’yi.
hbelowjcontentjscripti
habovejcontentjscripti(scripts above and below)
The below and above tags are used to explicitly attach a script below or above a given
content. Both can be mixed in order to produce content with both a script below and
above:
xor
i=1
1xi
can be produced using
habovejhbelowjxorji=1ij1ixhrsubjii
hwidejcontentjwide-symboli
hwide*jcontentjwide-symbol i(wide symbols)
These primitives can be used in order to produce wide accents above or below some
mathematical content. For instance x+ycorresponds to the markup hwidejx+yj¯i.
hnegjcontenti(negations)
This primitive is mainly used for producing negated symbols or expressions, such as
or a.
htreejrootjchild-1 j···jchild-ni(trees)
This primitive is used to produce a tree with a given root and children child-1 until
child-n. The primitive should be used recursively in order to produce trees. For instance,
+
x y ×
2y z
150 Built-in TE
XMACS primitives

corresponds to the markup
htreej+jxjyjhtreej×j2jyjzii
In the future, we plan to provide further style parameters in order to control the
rendering.
16.4. Table primitives
Tables are always present in documents inside evaluable tags which take a tformat operand.
All fundamental table structures have inaccessible borders. The basic top-level table tag
is tabular.
htformatjwith-1 j···jwith-njtablei(table formatting container)
Every tabular structure in a document contains a tformat tag.
htformatjtableimeans the table and cell variables defined in the top-level table tag are
not modified. The table argument may be a table or a nested tformat tag, the latter
does not appear in documents but is produced by the evaluation of the top-level tag.
htformat jwith-1 j···jwith-n jtableiis used when the table contains specific formatting
information. The with-1 to with-n arguments must all be twith or cwith tags.
htwithjvarjvali(set a table variable)
The formatting of the table as a whole is specified by a number of table variables,
which are used internally and do not appear in the environment like regular typesetter
variables.
The twith primitive sets the table variable var (literal string) to the value val (evalu-
ated).
hcwithjtop-rowjbot-rowjleft-coljright-coljvarjvali(set a cell variable for a range)
The formatting of cells is specified by a number of cell variables, which are used inter-
nally and do not appear in the environment like regular typesetter variables. Rows,
columns, and generally any rectangular range of cells can associated to a cell variable
setting by a single cwith tag.
The cwith primitive sets the cell variable var (literal string) to the value val (evaluated)
for the range of cells spanning rows top-row to bot-row and columns left-col to right-
col (literal non-zero integers).
Range coordinates must be non-zero literal integers, positive values are counted left to
right and top to bottom, negative values are counted right to left and bottom to top.
For example, 2 means the second row or column and -1 means the last row or column.
Typical values for (top-row ;bot-row ;left-col ;right-col )are (r; r; 1;¡1) for “row r”, (1;
¡1; c; c)for “column c”, and (r; r; c; c)for “the cell at row r, column c”. When new cells
are inserted, it makes a difference whether the rows are counted from the top or bottom,
and the columns are counted from the left or right. If mis the number of rows and n
the number of columns, then rand r¡m¡1represent the same row—the former is
relative to the top border while the latter is relative the bottom border. Similarly, c
and c¡n¡1represent the same column.
16.4 Table primitives 151

htablejrow-1 j···jrow-ni(row container)
The only purpose of the table tag is to contain row tags. The number of rows in a table
is the number of subtrees in its table tag.
hrowjcell-1 j···jcell-ki(cell container)
The only purpose of the row tag is to contain cell tags. All row tags in a given table
must have exactly as many subtrees, all cell tags, as there are columns in the table.
hcelljcontenti(cell data container)
Table cells can contain any document fragment. A cell may directly contain an inline
content tag or a concat, if it has block content it must always contain a document tree.
Acell whose operand is a document is a multi-paragraph cell . Since tables are allowed
in line context, this is the only construct which allows, indirectly, the nesting of a
block context within a line context. Note that most block content can only be typeset
correctly within an hyphenated cell, this is controlled by the cell-hyphen table variable.
hsubtablejtablei(subtable cell data)
In addition to regular markup, cells can accept subtable as an operand. The operand
of subtable is a tformat tree containing regular table data.
A similar effect can be obtained with normal table by setting the cell’s padding to zero
in all directions, the extra twist of a subtable is its inaccessible border positions.
htmarkerjtablei(decoration origin marker)
This tag is used in the definition of cell decorations, see the documentation of the cell-
decoration environment variable.
It is also used outside tables, in the switch tag to mark the currently displayed position.
htabularjtablei(built-in tabular macro)
This macro implements standard left aligned tables without borders. Although the
tabular macro is built-in into T
EXMACS, it should not really be considered as a primitive.
However, it is not part of any style file either.
16.5. Linking primitives
hlabeljnamei(reference target)
The operand must evaluate to a literal string, it is used as a target name which can be
referred to by reference,pageref and hlink tags.
Label names should be unique in a document and in a project.
Examples in this section will make references to an example label named “there”.
hlabeljtherei
hreferencejnamei(reference to a name)
The operand must evaluate to a literal string, which is the name of a label defined in
the current document or in another document of the current project.
152 Built-in TE
XMACS primitives

hreferencejtherei
The reference is typeset as the value of the variable the-label at the point of the target
label. The the-label variable is set by many numbered structures: sections, figures,
numbered equations, etc.
Areference reacts to mouse clicks as an hyperlink.
hpagerefjnamei(page reference to a name)
The operand must evaluate to a literal string, which is the name of a label defined in
the current document or in another document of the current project.
hpagerefjtherei
The pageref is typeset as the number of the page containing the target label. Note that
page numbers are only computed when the document is typeset with page-breaking,
that is not in “automatic” or “papyrus” page type.
Apageref reacts to mouse clicks as an hyperlink.
hhlinkjcontentjurli(inline hyperlink)
This primitive produces an hyperlink with the visible text content pointing to url.
The content is typeset as inline url. The url must evaluate to a literal string in URL
syntax and can point to local or remote documents, positions inside documents can be
be specified with labels.
The following examples are typeset as hyperlinks pointing to the label “there”, respec-
tively in the same document, in a document in the same directory, and on the web.
hhlinkjsame documentj../devel/format/regular/#therei
hhlinkjsame directoryj../devel/format/regular/file.tm#therei
hhlinkjon the webjhttp://example.org/#therei
If the document is not editable, the hyperlink is traversed by a simple click, if the
document is editable, a double-click is required.
hincludejurli(include another document)
The operand must be a literal string and is interpreted as a file name. The content of
this file is typeset in place of the include tag, which must be placed in block context.
hactionjcontentjscripti(attach an action to content)
Bind a Scheme script to a double mouse click on content. For instance, when clicking
here, you may launch an xterm. This action is encoded by
hactionjherej(lambda () (system "xterm &"))i
When clicking on actions, the user is usually prompted for confirmation, so as to avoid
security problems. The user may control the desired level of security in Edit!Prefer-
ences!Security. Programmers may also declare certain Scheme routines to be “secure”.
Scheme programs which only use secure routines are executed without confirmation
from the user.
16.5 Linking primitives 153

16.6. Miscellaneous physical markup
hrigidjcontenti(atomic entity)
Typeset the content, which must be line content, as an atomic line item. Hyphenation
within the rigid and special spacing handling on its borders are disabled.
hfloatjtypejwherejbodyi(floating page insertion)
Floating insertions are page items which are typeset “out of band”, they are associated
to two boxes: the anchor box marks the structural position of the float, the floating box
contains the typeset body operand. This facility is used by footnotes and floating blocks.
The first and second operands are evaluated, but for clarity the first operand appears as
a literal string in the examples. Since the body is typeset out of band, it may be block
content even if the float occurs in line context.
hfloatjfootnotejjbodyiproduces a footnote insertion, this should only be used within
the footnote macro and is considered style markup. The floating box of a footnote
is typeset at the end of the the page containing the anchor box.
hfloat jfloat jwhere jbodyiproduces a floating block, this is considered physical
markup. The position of the floating box is chosen by the page breaker, which uses
this extra freedom to minimize the page breaking penalty.
The where operand must evaluate to a string which may contain the following
characters:
t. Allow the floating box at page top.
b. Allow the floating box at page bottom.
h. Allow the floating box “here”, in the middle of the page near the anchor box.
f. Force the floating box within the same page as the anchor box.
hspecificjmediumjbodyi(medium-specific content)
This primitive marks body for output only on the specified medium. The following
values of medium are supported:
texmacs. The body is typeset as usual line content.
latex. The body, which must be a string, is not visible from within T
EXMACS, but
it will be included in a verbatim way when the document is exported to L
A
T
EX.
html. Similar to the latex medium, but for HTML exports.
screen. The body is only typeset when the document is visualized on a screen. This
may be useful to provide additional visual information to the user during the
editing phase which should disappear when printing out. A similar tag which
may be used for this purpose is flag.
printer. This medium is complementary to screen, when the body should only be
visible when printing out, but not when the document is displayed on the screen.
hraw-datajdatai(binary content)
In some contexts you need to embed uneditable data inside a document, most of the
time this is uneditable binary data. The raw-data primitive makes it impossible to view
or modify its subtree from within the editor.
154 Built-in TE
XMACS primitives

Chapter 17
Primitives for writing style files
17.1. Environment primitives
The current environment both defines all style parameters which affect the typesetting
process and all additional macros provided by the user and the current style. The primitives
in this section are used to access and modify environment variables.
hassignjvarjvali(variable mutation)
This primitive sets the environment variable named var (string value) to the value of the
val expression. This primitive is used to make non-scoped changes to the environment,
like defining markup or increasing counters.
This primitive affects the evaluation process —through value,provides, and macro def-
initions— and the typesetting process —through special typesetter variables.
Example 17.1. Enabling page breaking by style.
The page-medium is used to enable page breaking. Since only the initial environment
value for this variable is effective, this assignation must occur in a style file, not within
a document.
hassignjpage-mediumjpaperi
Example 17.2. Setting the chapter counter.
The following snippet will cause the immediately following chapter to be number 3.
This is useful to get the the numbering right in book style when working with projects
and include.
hassignjchapter-nrj2i
The operand must be a literal string and is interpreted as a file name. The content of
this file is typeset in place of the include tag, which must be placed in block context.
hwithjvar-1 jval-1 j···jvar-njval-njbodyi(variable scope)
This primitive temporarily sets the environment variables var-1 until var-n (in this
order) to the evaluated values of val-1 until val-n and typesets body in this modified
environment. All non-scoped change done with assign to var-1 until var-n within body
are reverted at the end of the with.
This primitive is used extensively in style files to modify the typesetter environment.
For example to locally set the text font, the paragraph style, or the mode for mathe-
matics.
155

hvaluejvari(variable value)
This primitive evaluates the current value of the environment variable var (literal
string). This is useful to display counters and generally to implement environment-
sensitive behavior.
This primitive is used extensively in style files to modify the typesetter environment.
For example to locally set the text font, the paragraph style, or the mode for mathe-
matics.
hprovidesjvari(definition predicate)
This predicate evaluates to true if the environment variable var (string value) is
defined, and to false otherwise.
That is useful for modular markup, like the session environments, to fall back to a
default appearance when a required package is not used in the document.
17.2. Macro primitives
Macros can be used to define new tags and to build procedural abstractions in style files.
Older versions of T
EXMACS used to make a distinction between macros (all children acces-
sible) and functions (no accessible child). In modern T
EXMACS there are only macros: the
accessibility of children is determined heuristically and can be controlled with drd-props.
hmacrojvar-1 j···jvar-njbodyi(macro of fixed arity)
This primitive returns a macro (the T
EXMACS analogue of a λ-expression) with nargu-
ments, named after the literal strings var-1 until var-n.
New tags are defined by storing macros in the environment. Most of the time, macros
are stored without scope with assign, but it is sometimes useful to redefine a tag locally
within the scope of a with. For example, itemized and enumerated environment redefine
item locally.
Example 17.3. Definition of the abbr tag
hassignjabbrjhmacrojxjhrigidjxiii
Storing a macro in the environment defines a tag whose arity is fixed to the number of
arguments taken by the macro.
hargjvarjindex-1 j···jindex-ni(retrieve macro arguments)
This primitive is used to retrieve the arguments of a macro within its body. For instance,
hargjvariexpands the content of the macro argument with name var (literal string).
Of course, this argument must be defined by a macro containing the arg tag.
This tag is similar to value, but differs in important ways:
•The argument namespace is distinct from the environment, hargjvariand hvaluej
variwill generally evaluate to different values (although you should not rely on
this).
156 Primitives for writing style files

•The value of arg retains the position of the macro argument in the document
tree, that makes it possible to edit the arguments of a macro-defined tag while
it is active.
When more than one argument is specified, hargjvarjindex-1 j···jindex-niexpands to a
subtree of the argument var. The value of the named argument must be a compound
tree (not a string). The operands var until index-n must all evaluate to positive integers
and give the path to the subtree of the macro argument.
hxmacrojvarjbodyi(macro with a variable arity)
This primitive returns a macro (the T
EXMACS analogue of a λ-expression) capable of
taking any number of arguments. The arguments are stored in the macro variable
with name var (a literal string) during the evaluation of the body. The i-th individual
argument can then be accessed using hargjvar jii.
hmap-argsjfoojrootjvari
hmap-argsjfoojrootjvarjfirsti
hmap-argsjfoojrootjvarjfirstjlasti(map a tag on subtrees of an argument)
This primitive evaluates to a tree whose root is labeled by root and whose children are
the result of applying the macro foo to the children of the macro argument with name
var.
By default, the macro foo is applied to all children. If first has been specified, then
we rather start at the i-th child of var, where iis the result of evaluating first. If last
has been specified too, then we stop at the j-th child of var (the j-th child not being
included), where jis the result of evaluating last. In this last case, the arity of the
returned tree is therefore j¡i.
Stated otherwise, map-args applies foo to all subtrees of the macro argument var (or a
range of subtrees if first and last are specified) and collects the result in a tree with label
root. In addition, the second argument to foo gives its position of the first argument
in the expansion of var.
The map-args is analogue to the Scheme function map. Since T
EXMACS use labeled trees,
the label of the mapping list must also be specified.
Example 17.4. Comma-separated lists.
The comma-separated tag has any arity (though it does not make much sense with arity
zero) and typesets its operands interspersed with commas.
hassignjcomma-extrajhmacrojxj,xii
hassignjcomma-separatedj
hxmacrojargsj
hconcatj
hargjargsj0ij
hmap-argsjcomma-extrajconcatjargsj1iiii
heval-argsjvari(macro with a variable arity)
This primitive evaluates to the tree with the same label as the expansion of the argu-
ment var and whose subtrees are the result of the evaluation of the subtrees of the
expansion of var.
17.2 Macro primitives 157
hcompoundjfoojarg-1 j···jarg-ni(expand an unnamed macro)
This primitive is useful to expand macros which are the result of a computation: it
applies the macro which is the result of the evaluation of foo to the arguments arg-1
until arg-n. The compound primitive is useful in call-back and lambda programming
idioms, where a higher-level macro is given a macro as an operand, which it may later
apply under certain conditions or with operands which are not known to the client code.
Actually, in the current implementation, foo may either evaluate to a macro or to a
literal string which gives the name of a macro. However, we discourage users to rely on
the second case.
Example 17.5. Lambda programming with macros.
In the code below, hfilterjpredjtiexpects a macro pred and a tuple ton input and returns
a tuple containing the elements of tfor which pred evaluates to true.
hassignjfilterj
hmacrojpredjtj
hifjhequaljhlengthjtij0ij
htupleij
hmergej
hifjhcompoundjpredjhlook-upjtj0iij
htuplejhlook-upjtj0iij
htupleiij
hfilterjpredjhrangejtj1jhlengthjtiiiiiii
As an application, we may define a macro hevens jti, which expects tto be a tuple
containing integers, and which returns the tuple of integers in twhich are divisible by 2.
hassignjevensjhmacrojtjhfilterjhmacrojxjhequaljhmodjxj2ij0iijtiii
hdrd-propsjvarjprop-1 jval-1 j···jprop-njval-ni(set D.R.D. properties of a tag)
The arity and children accessibility of tags defined by macros are determined heuris-
tically by default. The drd-props primitive overrides this default for the environment
variable (usually a macro) with name var. The currently supported property-value
pairs are:
(arity, n)— Sets the arity to the given fixed value n(literal integer).
(accessible, all) — Make it impossible to deactivate the tag with normal editor
actions. Inaccessible children become effectively uneditable.
(accessible, none) — Make it impossible to position the caret within the tag when
it is active, so children can only be edited when the tag is inactive.
hget-labeljexpressioni(label of an expression)
Returns the label of the tree obtained when evaluating expression.
hget-arityjexpressioni(arity of an expression)
Returns the arity of the tree obtained when evaluating expression.
158 Primitives for writing style files
17.3. Flow control primitives
hifjconditionjif-bodyi
hifjconditionjif-bodyjelse-bodyi(conditional markup)
This primitive can be used to typeset if-body only if the condition is satisfied. If the
optional else-body is specified, then it is typeset if and only if the condition fails.
Remark 17.6. It should be noticed that the use of conditional markup can be a bit
tricky due to the fact that the accessibility of arguments cannot necessarily be checked
beforehand. For instance, in the macro definition
hmacrojxjhifjhvisibility-flagijxii
the macro argument xis accessible if and only if hvisibility-flagievaluates to true. This
condition cannot necessarily be checked a priori. For certain editing operations, like
searches or spell checking, the incorrect determination of the accessibility may lead
to the positioning of the cursor at unaccessible places, or to the ignorance of certain
markup. In the future, we plan to improve this aspect of the editor, but it is better to
avoid conditional markup whenever another solution can be found.
Remark 17.7. The conditional constructs are only fully implemented for inline markup.
In the case when you need conditional markup for block structures you currently have
to write macros for the if-case and the else-case and use the compound tag. For instance:
hassignjcoldjhmacrojxjhwithjcolor jbluejxiii
hassignjhotjhmacrojxjhwithjcolorjredjxiii
hassignjadaptivejhmacrojxjhcompoundjhif jhsummerijhotjcoldijxiii
hcasejcond-1 jbody-1 j···jcond-njbody-ni
hcasejcond-1 jbody-1 j···jcond-njbody-njelse-bodyi(case distinction)
These commands are respectively equivalent to
hifjcond-1 jbody-1 j···hifjcond-njbody-nii
hifjcond-1 jbody-1 j···hifjcond-njbody-njelse-bodyii
hwhilejconditionjbodyi(repeated evaluation)
This construct maybe used in order to repeatedly execute a given body while a given
condition is satisfied. For instance, when declaring
hassignjcountj
hmacrojfromjtoj
hwithjijfromj
hconcatj
hwhilejhlessjijtoiji,hassignjijhplusjij1iiij
toiiii
the code hcountj1j50iproduces
1, 2, 3, 4, 5, 6, 7, 8, 9, 10, 11, 12, 13, 14, 15, 16, 17, 18, 19, 20, 21, 22, 23, 24, 25, 26,
27, 28, 29, 30, 31, 32, 33, 34, 35, 36, 37, 38, 39, 40, 41, 42, 43, 44, 45, 46, 47, 48, 49, 50
17.3 Flow control primitives 159

17.4. Evaluation control primitives
This section describes several primitives for controlling the way expressions in the style-
sheet language are evaluated. The primitives are analogous to the Scheme primitives
eval,quote,quasiquote, etc., although the T
EXMACS conventions are slightly different
than those used by conventional functional languages like Scheme.
hevaljexpri(force evaluation)
Typeset the result of the evaluation of expr. This primitive is usually combined with
a tag like quote or quasiquote for delaying the evaluation.
hquotejexpri(delayed evaluation)
Evaluation of the expression hquote jexpriyields expr itself. This kind of delayed
evaluation may be useful in combination with the eval primitive which forces evaluation.
hquasiquotejexpri(delay evaluation and substitution)
This tag is a variant of the quote tag, which returns the expression expr in which all
subexpressions of the form hunquotejsubexprihave been replaced by the evaluations of
subexpr. For instance,
hassignjhellojhquasiquotejhmacrojnamejhunquotejhlocalizejHelloii name.iii
may be used to define a macro hello whose value is localized for the current language.
In a French document, the declaration would typically be equivalent to
hassignjhellojhmacrojnamejBonjour name.ii
Notice however that it is usually better not to use the quasiquote primitive for such
applications. When defining
hassignjhellojhmacrojnamejhlocalizejHelloiname.ii
the typesetting of hhello jNameiwould naturally adapt itself to the current language,
while the above version would always use the language at the moment of the definition
of the macro. Nevertheless, the first form does have the advantage that the localization
of the word “Hello” only has to be computed once, when the macro is defined. Therefore,
the quasiquote primitive may sometimes be used in order to improve performance.
hunquotejsubexpri(mark substitutable subexpressions)
This tag is used in combination with quasiquote and quasi in order to mark the subex-
pressions which need to be evaluated.
hunquote*jsubexprsi(unquote splicing)
This tag is similar to unquote, except that the argument subexprs now evaluates to a
list of subexpressions, which are inserted into the arguments of the parent node. For
instance, consider the macro
hassignjfunj
hxmacrojxj
hquasij
htreejdupjhunquote*jhquote-argjxiijhunquote*jhquote-argjxiiiiii
160 Primitives for writing style files
Then hfunjajbjciis typeset as
dup
a b c a b c
hquasijexpr i(substitution)
This tag is a shortcut for hevaljhquasiquotejexprii. This primitive is often used in the
T
EXMACS style files in order to write macros which define sets of other macros. For
instance, the macro
hassignjnew-theoremj
hmacrojnamejtextj
hquasij
hassignjhunquotejnameij
hmacrojbodyj
hsurroundjhno-indentihstrongjhunquotejtexti.ijhright-flushij
bodyiiiiii
may be used in order to define new theorem-like environments.
hquote-valuejvari(retrieve a value but don’t evaluate)
When retrieving an environment variable var, one is usually interested in its typeset
value, as given by hvaluejvari. In some cases, it may be useful to access the real, non-
typeset value. This can be done with hquote-valuejvari.
hquote-argjvarjindex-1 j···jindex-ni(retrieve an argument but don’t evaluate)
When retrieving (a subexpression of) a macro argument var, one is usually interested
in its typeset value, as given by hargjvarjindex-1 j···jindex-ni. In some cases, it may be
useful to access the real, non-typeset value. This can be done with hquote-argjvarjindex-
1j···jindex-ni.
17.5. Functional operators
Functional operators are used for computational purposes during the typesetting phase,
such as increasing counters, localizing strings like “theorem” and so on. A fundamental set
of basic functional operators are built-in primitives. New functional operators can easily
be added using the extern primitive. Functional operators operate on five main types of
arguments: strings, numbers, lengths, booleans and tuples. Some operators are overloaded,
so that they can be used for several types.
17.5.1. Operations on text
hlengthjexpr i(length of a string)
If expr is a string, the length of the string is returned. For instance, hlength jHelloi
evaluates to 5.
hrangejexprjstartjendi(extract a substring)
Return the substring of expr starting at position start and ending at position end (not
included). For instance, hrange jhottentottententententoonstelling j9j15ievaluates to
tenten.
17.5 Functional operators 161

hmergejexpr-1 j···jexpr-ni(concatenate strings)
This primitive may be used to concatenate several strings expr-1 until expr-n. For
instance, hmergejHellojWorldiproduces HelloWorld.
hnumberjnumberjrender-asi(alternative rendering of numbers)
Renders a number in a specified way. Supported values for render-as are
roman. Lower case Roman: hnumberj18jromani¡! xviii.
Roman. Upper case Roman: hnumberj18jRomani¡! XVIII.
alpha. Lower case letters: hnumberj18jalphai¡! r.
Alpha. Upper case letters: hnumberj18jAlphai¡! R.
arabic. Arabic numbers: hnumberj18jarabici¡! 18.
fnsymbol. Footnotes symbols: hnumberj2jfnsymboli¡! y.
hdatei
hdatejformati
hdatejformatjlanguagei(obtain the current date)
Returns the current date in a specified format (which defaults to a standard language-
specific format when empty) and a specified language (which defaults to English). The
format is similar to the one used by the Unix date command. For instance, hdatei
evaluates to “June 1, 2019”, hdatejjfrenchito “1 juin 2019” and hdatej%d %B om %k:%Mj
dutchito “01 June om 11:51”.
htranslatejwhatjfromjintoi(translation of strings)
Returns the translation of a string what of the language from into the language into,
using the built-in T
EXMACS dictionaries. The languages should be specified in lowercase
letters. For instance, htranslatejFilejenglishjfrenchiyields “Fichier”.
The list of currently available languages can be checked in the Document!Language
menu. The built-in T
EXMACS dictionaries can be found in
$TEXMACS_PATH/languages/natural/dic
When attempting to use a non-existing dictionary, the program may quit. For most
purposes, it is more convenient to use the localize macro, which converts a string from
English into the current language.
17.5.2. Arithmetic operations
hplusjexpr-1 j···jexpr-ni
hminusjexpr-1 j···jexpr-ni(addition and subtraction)
Add or subtract numbers or lengths. For instance, hplusj1j2.3j5iyields 8.3 and hplusj
1cmj5mmiproduces htmlenj90708.6i. In the case of subtractions, the last argument is
subtracted from the sum of the preceding arguments. For instance, hminusj1iproduces
-1 and hminusj1j2j3j4iyields 2.
162 Primitives for writing style files

htimesjexpr-1 j···jexpr-ni(multiplication)
Multiply two numbers expr-1 until expr-n. One of the arguments is also allowed to be
a length, in which case a length is returned. For instance, htimesj3j3ievaluates to 9 and
htimesj3j2cmito htmlenj362835i.
hoverjexpr-1 j···jexpr-ni(division)
Divide the product of all but the last argument by the last argument. For instance,
hoverj1j2j3j4j5j6j7ievaluates to 102.857, hoverj3spcj7ito htmlenj2214j3318.86j4976.57i,
and hoverj1cmj1ptito 28.4528.
hdivjexpr-1 jexpr-2 i
hmodjexpr-1 jexpr-2 i(division with remainder)
Compute the result of the division of an integer expr-1 by an integer expr-2 , or its
remainder. For instance, hdivj18j7i=2 and hmodj18j7i=4.
hequaljexpr-1 jexpr-2 i
hunequaljexpr-1 jexpr-2 i
hlessjexpr-1 jexpr-2 i
hlesseqjexpr-1 jexpr-2 i
hgreaterjexpr-1 jexpr-2 i
hgreatereqjexpr-1 jexpr-2 i(comparing numbers or lengths)
Return the result of the comparison between two numbers or lengths. For instance,
hlessj123j45iyields false and hlessj123mmj45cmiyields true.
17.5.3. Boolean operations
horjexpr-1 j···jexpr-ni
handjexpr-1 j···jexpr-ni
Returns the result of the boolean or/and on the expressions expr-1 until expr-n. For
instance, horjfalsejhequalj1j1ijfalseiyields true.
hxorjexpr-1 jexpr-2 i
Returns the exclusive or of two expressions expr-1 and expr-2 , i.e. hxorjtruejtrueiyields
false.
hnotjexpri
Returns the negation of expr.
17.5.4. Operations on tuples
htuplejexpr-1 j···jexpr-ni(construct a tuple)
Forms a tuple from the expressions expr-1 until expr-n.
his-tuplejexpri(tuple predicate)
Tests whether a given expression expr evaluates to a tuple.
hlengthjexpr i(length of a tuple)
If expr is a tuple, then we return its arity. For instance, hlength j htuple jhop jholaii
evaluates to 2.
17.5 Functional operators 163

hlook-upjtuplejwhichi(access an entry in a tuple)
Returns the element with index which in tuple. For instance, hlook-upjhtuplejajbjcij1i
yields b.
hrangejexprjstartjendi(extract a subtuple)
Return the subtuple of expr starting at position start and ending at position end (not
included). For instance, hrangejhtuplejajholajhopjbjcij2j4ievaluates to htuplejhopjbi.
hmergejexpr-1 j···jexpr-ni(concatenate tuples)
This primitive may be used to concatenate several tuples expr-1 until expr-n. For
instance, hmergejhtuplej1j2ijhtuplej3j4j5ii produces htuplej1j2j3j4j5i.
17.6. Transient markup
The tags described in this section are used to control the rendering of style files and style
file elements. It both contains markup for activation and deactivation of content and for
the rendering of tags.
hactivejcontenti
hactive*jcontenti
hinactivejcontenti
hinactive*jcontenti(activation/deactivation of content)
These tags can be used to temporarily or permanently change the activity of the con-
tent. In usual documents, tags are by default active. In style files, they are by default
inactive. For instance, an activated fraction is rendered as 1
2; when deactivated, it is
rendered as hfracj1j2i.
The active and inactive tags only activate or deactivate the root tag of the content.
Typically, a tag which contains hidden information (like hlink) can be deactivated by
positioning the cursor just behind it and pressing ⌫. This action just deactivates the
hyperlink, but not the potentially complicated body of the hyperlink. Therefore, the
hyperlink is transformed into an inactive tag of the form hinactivejhhlinkjbodyjref ii.
The active* and inactive* variants are used to activate or deactivate the whole content
(except when other (dis-)activation tags are found inside the content). The inactive* is
used frequently inside the present documentation in order to show the inactive represen-
tation of T
EXMACS content. Nevertheless, it is sometimes desirable to reactivate certain
subtrees inside deactivated content. For instance, the following piece of deactivated
code (using disactive*) contains the reactivated subexpression ~~~ (using active*):
hassignjlovejhmacrojfromj~~~ from from.ii
hinline-tagjnamejarg-1 j···jarg-ni(rendering of inline tags)
This tag is used for the default inline rendering of an inactive tag with a given name
and arguments arg-1 until arg-n. For instance, hinline-tagjfoojxjyiproduces hfoojxjyi.
The style of the rendering may be customized in the Document!Source!Source tags
menu, or by modifying the src-style,src-special,src-compact and src-close environment
variables.
hopen-tagjnamejarg-1 j···jarg-ni
hmiddle-tagjnamejarg-1 j···jarg-ni
164 Primitives for writing style files
hclose-tagjnamejarg-1 j···jarg-ni(rendering of multi-line tags)
These tags are similar to inline-tag, when some of the arguments of the tag run over
several lines. Typical HTML-like tags would correspond to hopen-tagjnameiand hclose-
tagjnamei. Since T
EXMACS macros may take more than one argument, a middle-tag is
provided for separating distinct multi-paragraph arguments. Moreover, the opening,
middle and closing tags may take additional inline arguments for rendering in a compact
fashion. For instance, the code
hopen-tagjtheoremi
hindentjThe weather should be nice today.i
hclose-tagjtheoremi
is rendered by default as
htheoremj
The weather should be nice today.
i
The rendering may be customized in a similar way as in the case of inline-tag.
hstyle-withjvar-1 jval-1 j···jvar-njval-njbodyi
hstyle-with*jvar-1 jval-1 j···jvar-njval-njbodyi(alter presentation in style files only)
This tag may be used in order to temporarily modify the rendering of inactive tags,
by setting each environment variable var-i to val-i in the local typesetting context of
body. When importing a style file, each style-with/style-with* tag is replaced by its body.
In the case of style-with, the modified rendering is only applied to the root tag of the
body. In the case of style-with*, the rendering is modified for the entire body.
hstyle-onlyjhfoojcontentii
hstyle-only*jhfoojcontentii (content for use in style files only)
This tag may be used in order to render an inactive tags as whether we applied the
macro foo on it. When importing a style file, each style-only/style-only* tag is replaced
by its content. In the case of style-only, the modified rendering is only applied to the
root tag of the content. In the case of style-only*, the rendering is modified for the entire
content.
hsymboljsymboli
hlatexjcmdi
hhybridjcmdi
hhybridjcmdjargi(auxiliary tags for entering special content)
These tags are used only temporarily when entering special content.
When pressing ⌃Q, a symbol tag is created. After entering the name of the symbol, or
the ASCII-code of the symbol and pressing return, the symbol tag is replaced by the
corresponding symbol (usually a string enclosed in <>).
When pressing \, a hybrid tag is created. After entering a string and pressing return, it
is determined whether the string corresponds to a L
A
T
EX command, a macro argument,
a macro or an environment variable (in this order). If so, then the hybrid tag is replaced
by the appropriate content. When pressing \while a selection is active, then the
selection automatically becomes the argument of the hybrid command (or the hybrid
command itself, when recognized).
17.6 Transient markup 165

The latex tag behaves similarly as the hybrid tag except that it only recognizes L
A
T
EX
commands.
The rendering macros for source trees are built-in into T
EXMACS. They should not really
be considered as primitives, but they are not part of any style file either.
hindentjbodyi(indent some content)
Typeset the body using some indentation.
hrightflushi(indent some content)
Flush to the right. This macro is useful to make the end of a block environment run
until the right margin. This allows for more natural cursor positioning and a better
layout of the informative boxes.
hsrc-macrojmacro-namei
hsrc-varjvariable-namei
hsrc-argjargument-namei
hsrc-ttjverbatim-contenti
hsrc-integerjintergeri
hsrc-lengthjlengthi
hsrc-errorjmessagei(syntactic highlighting on purpose)
These macros are used for the syntactic highlighting of source trees. They determine
how to render subtrees which correspond to macro names, variable names, argument
names, verbatim content, integers, lengths and error messages.
hsrc-titlejtitlei
hsrc-style-filejnamejversioni
hsrc-packagejnamejversioni
hsrc-package-dtdjnamejversionjdtdjdtd-versioni(style and package administration)
These macros are used for the identification of style files and packages and their corre-
sponding D.T.D.s. The src-title is a container for src-style-file,src-package,src-package-
dtd as well as src-license and src-copyright macros.
The src-style-file tag specifies the name and version of a style file and sets the environ-
ment variable with name-style to version. The src-package-dtd specifies the name and
version of a package, as well as the corresponding dtd and its version dtd-version. It
sets the environment variable name-package to version and dtd-dtd to dtd-version. The
src-package tag is a shorthand for src-package-dtd when the name of the D.T.D. coincides
with the name of the package.
17.7. Miscellaneous style-sheet primitives
hexternjscheme-foojarg-1 j···jarg-ni(apply extern typesetting macro)
This primitive allows the user to implement macros in Scheme. The primitive applies
the Scheme function or macro scheme-foo to the arguments arg-1 until arg-n. For
instance, the code hexternj(lambda (name) `(concat "hi " ,name))jdudeiyields “hi
dude”.
The arguments arg-1 until arg-n are evaluated and then passed as trees to scheme-foo.
When defining a macro which relies on extern scheme code, it is therefore recommended
to pass the macro arguments using the quote-arg primitive:
166 Primitives for writing style files

hassignjinc-divj
hmacrojxjyj
hexternj
(lambda (x y) `(frac ,x (concat "1+" ,y)))j
hquote-argjxij
hquote-argjyiiii
It has been foreseen that the accessibility of the macro arguments xand yis preserved
for this kind of definitions. However, since T
EXMACS does not heuristically analyze your
Scheme code, you will have to manually set the D.R.D. properties using drd-props.
Notice also that the Scheme function scheme-foo should only rely on secure scheme
functions (and not on functions like system which may erase your hard disk). User
implemented Scheme functions in plug-ins may be defined to be secure using the
:secure option. Alternatively, the user may define all Scheme routines to be secure
in Edit!Preferences!Security!Accept all scripts.
hwritejauxjcontenti(write auxiliary information)
Adds content to the auxiliary section aux of the document. This tag is used for instance
by hnocitejcitekeyito add entries to the automatically generated bibliography at the
end of the document, without inserting a citation in the text.
hflagjcontentjcolori
hflagjcontentjcolorjvari(display an informative flag)
This tag is used to in order to inform the user about information which is present in the
document, but not visible when printed out. T
EXMACS displays such informative flags for
labels, formatting directives such as page breaks, and so on. In Document!Informative
flags, the user may specify how the informative flags should be rendered.
The two-argument variant displays an informative flag with a given content and color.
The content is only rendered when selecting Document!Informative flags!Detailed. For
instance, hflagjwarningjrediis rendered as . The optional var argument may be used
in order to specify that the flag should only be visible if the macro argument var
corresponds to an accessible part of the document. For instance, T
EXMACS automatically
generates labels for section titles (so as to include them in the table of contents), but
it is undesirable to display informative flags for such labels.
17.8. Internal primitives
The primitives in this section are merely for internal use by T
EXMACS only. They are
documented for the sake of completeness, but you should only use them if you really know
what you are doing.
huniniti(unknown content or uninitialized data)
This primitive is mainly used for default uninitialized value of environment variables;
the main advantage of this tag is to be distinct from the empty string.
hunknowni(unknown content or uninitialized data)
This primitive is mainly used for default uninitialized value of environment variables;
the main advantage of this tag is to be distinct from the empty string.
17.8 Internal primitives 167

This value is less likely to be encountered than uninit
herrorjmessagei(error messages)
This primitive should never appear in documents. It is provided as aid in tracking down
invalid constructs. It is produced at evaluation time by any kind of primitive which is
given improper operands.
hcollectionjbinding-1 j···jbinding-ni
hassociatejkeyjvaluei(collections of bindings)
The collection tag is used to represent hash tables with bindings binding-1 until binding-
n. Each binding is of the form hassociatejkeyjvaluei, with a key and an associated value.
hattrjkey-1 jval-1 j···jkey-njval-ni(XML-like attributes)
This tag is included for future compatibility with XML. It is used for encoding XML-
style attributes by T
EXMACS trees. For instance, the fragment
<blah color="blue" emotion="verbose">
Some XML stuff
</blah>
would typically be represented as
hblahjhattrjcolorjbluejemotionjverboseijSome XML stuffi
htagjcontentjannotationi
hmeaningjcontentjannotationi(associate a meaning to some content)
Associate a special meaning to some content. Currently, no real use has been made of
these tags.
hbackupjsavejstacki(save values on stack)
Used to represent temporarily saved values on a stack.
hdboxi(marker for decorations)
This primitive is only intended for internal use by the datoms,dlines and dpages prim-
itives.
hrewrite-inactivejtjvari(internal primitive for rendering inactive markup)
This internal primitive is used for rewriting an inactive tree into a new tree whose
rendering corresponds to the rendering of the inactive tree. It may be successfully
invoked from within a macro.
e.g. hassignjshow-inactivejhmacrojxjhrewrite-inactivejxjiii
which might be invoked to show itself or another assigned variable using quasiquote in
this manner: hquasiquotejhshow-inactivejhunquotejshow-inactiveiii
hnew-dpagei
hnew-dpage*i(new double page)
Yet to be implemented primitives for starting a new double page.
168 Primitives for writing style files

hidentityjmarkupi(identity macro)
The identity macro is built-in into T
EXMACS. It should not really be considered as a
primitive, but it is not part of any style file either.
In addition to these primitives for internal use only, there are also quite a few obsolete
primitives, which are no longer being used by T
EXMACS, but whose names should be avoided
when creating your own macros. The full list of obsolete primitives is: format,line-sep,with-
limits,split,old-matrix,old-table,old-mosaic,old-mosaic-item,set,reset,expand,expand*,hide-
expand,apply,begin,end,func,env,authorize.
17.8 Internal primitives 169


Chapter 18
The standard T
E
X
MACS styles
The user may select a major style from the Document!Style menu. The major style usually
reflects the kind of document you want to produce (like a letter, an article or a book) or
a particular layout policy (like publishing an article in a given journal).
The user may further customize the main style, by selecting one or more additional style
packages. Some of these packages are available in the menu Document!Style!Add package.
Other style packages mainly customize specific tags, and they can be selected from the
Focus!Preferences!Style options menu group, whenever available. For instance, inside a
theorem, you may use Focus!Preferences!European numbering to enable European style
numbering for theorem-like environments (that is, theorems, propositions, lemmas, etc. are
all numbered using their own individual counters).
In this chapter, we will survey the standard document styles and packages provided by
T
EXMACS. Most style files and packages have an abstract interface, the d.t.d. (data domain
definition), which specifies which macros are exported by the style or package, and how to
use them. Distinct styles or packages (like header-article and header-book) may share
the same abstract interface, but differ in the way macros are rendered. For this reason,
we will mainly be concerned with the description of the standard d.t.d.s, except when we
focus on the rendering. Users may customize standard styles by defining new ones which
match the same abstract interface (see the chapter on writing T
EXMACS style files).
18.1. General organization
18.1.1. Standard T
E
XMACS styles
The main T
EXMACS styles are:
generic
This is the default style when you open a new document. The purpose of this style is
to produce quick, informal documents. For this reason, the layout of paragraphs is very
simple: instead of indenting the first lines of paragraphs, they are rather separated by
white-space.
article
This style may be used for writing short scientific articles, which are subdivided into
sections. The numbering of environments like theorems, remarks, etc. is relative to the
entire document. If you use the number-long-article package, then the numbers are
prefixed by the section number.
beamer
This style may be used for the creation of highly interactive laptop presentations. By
default, we use a “bluish” theme similar to the L
A
T
EX beamer package, but other themes
can be selected from the menus.
171

book
This is the basic style for writing books. Books are assumed to be subdivided into
chapters and numbers of environments are prefixed by the chapter number. In general,
it is also comfortable to store each chapter in a separate file, so that they can be edited
more efficiently. This issue is explained in more detail in the section about books and
multifile documents.
seminar
Documents based on this style are typically printed on slides for presentations using
an overhead projector. You may also want to use it when making presentation directly
from your laptop, after selecting View!Presentation mode. Notice however, that slides
correspond to real pages, whereas you rather should use “switches” in presentation
mode.
source
This is the privileged style for editing style files and packages. It enables “source mode”,
so that documents are rendered in a way which makes the structure fully apparent. For
more details, we refer to the section on the rendering of style files.
The article style admits several variants, so as to make the layout correspond to the policy
of specific journals. Currently, we have implemented T
EXMACS analogues of the common
L
A
T
EX styles amsart,acmconf,elsart,ieeeconf,aip,aps,svjour, etc. Similarly, we are
developing styles tmarticle and tmbook which provide an alternative layout for articles
and books.
In addition to variants of the article and book styles, T
EXMACS provides also a few other
styles, which are based on the main styles, but which provide some additional markup.
letter
This style is based on the informal generic style, but it provides additional markup
for writing letters. The additional macros are mainly used for headers and endings of
letters.
exam
This style, which is again based on generic, provides some additional markup for
headers of exams. It also customizes the rendering of exercises.
tmdoc
This style is used for writing the T
EXMACS documentation. It contains several tags for
special types of content and extensions for linking, indexing, document traversal, etc..
Some aspects of this style are still under heavy development.
18.1.2. Standard T
E
XMACS packages
First of all, T
EXMACS provides several packages for customizing the behaviour of the stan-
dard styles:
number-long-article
This package induces all numbers of environments (theorems, remarks, equations, fig-
ures, etc.) to be prefixed by the current section number. It is usually used in combination
with the article style (for long articles) and the book style (for books with long
chapters).
172 The standard TE
XMAC S styles

number-europe
By default, T
EXMACS uses “American style numbering”. This means that the same
counter is used for numbering similar environments like theorem and proposition. In
other words, a remark following “Theorem 3” will be numbered “Remark 4”. If you want
each environment to have its individual counter, then you should enable “European
style numbering”, by selecting the number-europe package.
number-us
This package may be used in order to switch back to American style numbering in the
case when a third parties style file enforces European style numbering.
structured-list
This is an experimental package. By default, items in unnumbered lists or enumer-
ations take no arguments and items in descriptions one argument. When using the
structured-list package, they take an optional additional argument with the body
of the item.
structured-section
This is an experimental package. By default, sectional tags only take a title argument.
When using the structured-section package, they take an optional additional argu-
ment with the body of the section. Moreover, the environment rsection for recursive
sections is provided.
framed-session
This package may be used in order to obtain an alternative rendering of interactive
sessions. The rendering is designed to be nice for interactive use, although less adequate
for printing.
In addition to these packages, and the many packages for internal use, T
EXMACS also
provides a few personal example style packages allouche,bpr and vdh and several style
packages for use in combination with external plug-ins (axiom,giac,macaulay2, etc.).
18.2. The common base for most styles
The std d.t.d. contains the markup which is common to virtually all styles. It is subdivided
into the following parts:
18.2.1. Standard markup
Various standard markup is defined in std-markup. The following textual content tags all
take one argument. Most can be found in the Insert!Content tag menu.
hstrongjcontenti
Indicates an important region of text. You can enter this tag via Insert!Content
tag!Strong.
hemjcontenti
Emphasizes a region of text like in “the real thing”. This tag corresponds to the menu
entry Insert!Content tag!Emphasize.
18.2 The common base for most styles 173

hdfnjcontenti
For definitions like “a gnu is a horny beast”. This tag corresponds to Insert!Content
tag!Definition.
hsampjcontenti
A sequence of literal characters like the ae ligature æ. You can get this tag via Insert!
Content tag!Sample.
hnamejcontenti
The name of a particular thing or concept like the Linux system. This tag is obtained
using Insert!Content tag!Name.
hpersonjcontenti
The name of a person like Joris. This tag corresponds to Insert!Content tag!Person.
hcite*jcontenti
A bibliographic citation like a book or magazine. Example: Melville’s Moby Dick. This
tag, which is obtained using Insert!Content tag!Cite, should not be confused with cite.
The latter tag is also used for citations, but where the argument refers to an entry in
a database with bibliographic references.
habbrjcontenti
An abbreviation. Example: I work at the C.N.R.S. An abbreviation is created using
Insert!Content tag!Abbreviation or the ⌥Akeyboard shortcut.
hacronymjcontenti
An acronym is an abbreviation formed from the first letter of each word in a name or
a phrase, such as HTML or IBM. In particular, the letters are not separated by dots.
You may enter an acronym using Insert!Content tag!Acronym.
hverbatimjcontenti
Verbatim text like output from a computer program. Example: the program said hello.
You may enter verbatim text via Insert!Content tag!Verbatim. The tag may also be
used as an environment for multi-paragraph text.
hkbdjcontenti
Text which should be entered on a keyboard. Example: please type return. This tag
corresponds to the menu entry Insert!Content tag!Keyboard.
hcode*jcontenti
Code of a computer program like in “cout << 1+1; yields 2”. This is entered using
Insert!Content tag!Code. For longer pieces of code, you should use the code environ-
ment.
hvarjcontenti
Variables in a computer program like in cp src-file dest-file. This tag corresponds
to the menu entry Insert!Content tag!Variable.
174 The standard TE
XMAC S styles
hmathjcontenti
This tag is used for mathematics inside regular text. Example: the formula sin2x+
cos2x= 1 is well-known.
hopjcontenti
This is a tag which can be used inside mathematics for specifying that an operator
should be considered on itself, without any arguments. Example: the operation +is a
function from R2to R. This tag may become depreciated.
httjcontenti
This is a physical tag for typewriter phase. It is used for compatibility with HTML,
but we do not recommend its use.
Most of the following logical size tags can be found in Insert!Size tag (or Insert!Size tag):
hreally-tinyjcontenti,htinyjcontenti
hreally-smalljcontenti,hvery-smalljcontenti,hsmallerjcontenti,hsmalljcontenti
hnormal-sizejcontenti
hlargejcontenti,hlargerjcontenti,hvery-largejcontenti,hreally-largejcontenti
hhugejcontenti,hreally-hugejcontenti
These logical size tags should be used by preference when typesetting parts of your
document in a larger or smaller font. Environments like footnotes or captions of tables
may also be based on logical size tags. Document styles from professional publishers
often assign very precise font settings to each of the logical size tags. By default, the
size tags are rendered as follows:
Really tiny
Tiny
Really small
Very small
Smaller
Small
Normal size
Large
Larger
Very large
Really large
Huge
Really huge
The following are standard environments:
hverbatimjbodyi
Described above.
hcodejbodyi
Similar to code*, but for pieces of code of several lines.
18.2 The common base for most styles 175

hquote-envjbodyi
Environment for short (one paragraph) quotations.
hquotationjbodyi
Environment for long (multi-paragraph) quotations.
hversejbodyi
Environment for poetry.
hcenterjbodyi
This is a physical tag for centering one or several lines of text. It is used for compatibility
with HTML, but we do not recommend its use.
Some standard tabular environments are
htabular*jtablei
Centered tables.
hblockjtablei
Left aligned tables with a border of standard 1ln width.
hblock*jtablei
Centered tables with a border of standard 1ln width.
The following tags are used to adjust the typesetting of content whenever necessary:
hsmashjbodyi
hsmash-topjbodyi,hsmash-bottomjbodyi(smash vertical size to the size of an ’x’)
These macros can be used to adjust the vertical extents of the body to those of the
character ’x’. In the case of smash-top and smash-bottom, only the top resp. bottom are
changed.
hswelljbodyi
hswell-top jbodyi,hswell-bottom jbodyi(increase vertical size to the largest character in
font)
These macros can be used to increase the vertical extents of the body to those of the
largest character in the current font. In the case of swell-top and swell-bottom, only the
top resp. bottom are changed. This kind of adjustments may for instance be used in
order to ensure that 2×2matrices with simple textual contents always have the same
size: f0
0f;a x
0aversus f0
0f;a x
0a
In fact, for a more uniform appearance, swelling is activated by default inside matrices.
hextendjcontentjleft-limjbot-limjright-limjtop-limi(extend the size)
This primitive is similar to resize, except that the new size of the content is always
larger than the original size.
The following miscellaneous tags don’t take arguments:
176 The standard TE
XMAC S styles

hTeXmacsi
The T
EXMACS logo.
hTeXmacs-versioni
The current version of T
EXMACS (1.99.9).
hmade-by-TeXmacsi
A macro which may be used to indicate that your document was written using T
EXMACS.
hTeXi
The T
EX logo.
hLaTeXi
The L
A
T
EX logo.
hhrulei
A horizontal rule like the one you see below:
-------------------------------------------------------------------------------------------------------------------------------------------------------------------------------------------------------------------------------------------------------------------------------------------------------------------------------------------------
The following miscellaneous tags all take one or more arguments:
hphantomjcontenti
This tag takes as much space as the typeset argument content would take, but content
is not displayed. For instance, hphantomjphantomiyields “ ”.
hoverlinejcontenti
For overlined text, which can be wrapped across several lines.
hunderlinejcontenti
For underlined text, which can be wrapped across several lines.
hfoldedjsummaryjbodyi
The summary is displayed and the body ignored: the macro corresponds to the folded
presentation of a piece of content associated to a short title or abstract. The second
argument can be made visible using Insert!Switch!Unfold.
hunfoldedjsummaryjbodyi
Unfolded presentation of a piece of content body associated to a short title or abstract
summary. The second argument can be made invisible using Insert!Switch!Fold.
hswitchjcurrentjalternativesi
Content which admits a finite number of alternative representation among which the
user can switch using the function keys F9,F10,F11 and F12. This may for instance
be used in interactive presentations. The argument current correspond to the currently
visible presentation and alternative to the set of alternatives.
18.2.2. Standard symbols
The std-symbol d.t.d. defines the special symbols ¢,¤,¥,©,«,®,°,²,³,¹,µ,¶,¼,½,
¾,¿and ™. It also provides the macro nbsp for non-breakable spaces.
18.2 The common base for most styles 177

As soon as the font support will be further improved, this d.t.d. should become obsolete.
18.2.3. Standard mathematical markup
Standard mathematical markup is defined in std-math.
hbinomjamongjnri
For binomial coefficients, like n
m.
hchoosejamongjnri
Alternative name for binom, but depreciated.
hshrink-inlinejamongjnri
A macro which switches to scriptsize text when you are not in display style. This macro
is mainly used by developers. For instance, the binom macro uses it.
The following are standard mathematical tabular environments:
hmatrixjtablei
For matrices M=1 2
3 4 .
hdetjtablei
For determinants ∆ =
1 2
3 4
.
hchoicejtablei
For choice lists jxj=¡x; if x60
x; if x>0.
18.2.4. Standard lists
18.2.4.1. Using list environments
The standard T
EXMACS lists are defined in std-list. The unnumbered lists environments
are:
hitemizejbodyi
The tag before each item depends on the nesting depth.
hitemize-minusjbodyi
Uses ¡for the tag.
hitemize-dotjbodyi
Uses •for the tag.
hitemize-arrowjbodyi
Uses !for the tag.
The following environments can be used for producing numbered lists:
henumeratejbodyi
The kind of number before each item depends on the nesting depth.
178 The standard TE
XMAC S styles

henumerate-numericjbodyi
Number the items by 1, 2, 3, etc.
henumerate-romanjbodyi
Number the items by i, ii, iii, etc.
henumerate-Romanjbodyi
Number the items by I, II, III, etc.
henumerate-alphajbodyi
Number the items by a), b), c), etc.
henumerate-Alphajbodyi
Number the items by A), B), C), etc.
The following environments can be used for descriptive lists:
hdescriptionjbodyi
The environment for default descriptive lists (usually description-compact).
hdescription-compactjbodyi
Align the left hand sides of the items in the list and put their descriptions shortly behind
it.
hdescription-dashjbodyi
Similar to description-compact, but use a — to separate each item from its description.
hdescription-alignjbodyi
Align the left hand sides of the descriptions, while aligning the items to the right.
hdescription-longjbodyi
Put the items and their descriptions on distinct lines.
New items in a list are indicated through the item tag or the item* tag in the case of
descriptions. The item tag takes no arguments and the item* tag one argument. When
using the experimental structured-list package, these tags may take an optional body
argument. In the future, all list items should become structured.
By default, items in sublists are numbered in the same way as usual lists. Each list envi-
ronment list admits a variant list*whose items are prefixed by the last item in the parent
list. Of course, this feature can be used recursively.
18.2.4.2. Customization of list environments
The std-list provides the following redefinable macros for customizing the rendering of
lists and items in lists:
hrender-listjbodyi
This block environment is used to render the body of the list. Usually, the macro indents
the body and puts some vertical space around it.
18.2 The common base for most styles 179

haligned-itemjitem-texti
This inline macro is used to render the item-text in a right-aligned way. As a conse-
quence, text after such items will appear in a left-aligned way.
hcompact-itemjitem-texti
This inline macro is used to render the item-text in a left-aligned way. As a consequence,
text after such items may be indented by the width of the item-text (except when the
text is rendered on a different paragraph).
18.2.5. Automatic content generation
The std-automatic d.t.d. contains macros for the automatic generation and rendering of
auxiliary content. There are four main types of such content in T
EXMACS: bibliographies,
tables of contents, indexes and glossaries. Other types of automatically generated content
like lists of figures are usually similar to one of the four above types (in the case of
lists of figures, we use glossaries). The rendering of the entire sections which contain the
bibliographies, tables of contents, etc. are specified in the section-base d.t.d..
18.2.5.1. Bibliographies
The following macros may be used in the main text for citations to entries in a bibliographic
database.
hcitejref-1 j···jref-ni
Each argument ref-i is a citation corresponding to an item in a BiB-T
EX file. The
citations are displayed in the same way as they are referenced in the bibliography and
they also provide hyperlinks to the corresponding references. The citations are displayed
as question marks if you did not generate the bibliography. Once you’ve added a
bibliography file, pressing ⇥inside the arguments will auto-complete with the cite-keys
in your file.
hnocitejref-1 j···jref-ni
Similar as cite, but the citations are not displayed in the main text.
hcite-detailjref jinfoi
A bibliographic reference ref like cite and nocite, but with some additional information
info, like a chapter or a page number.
The following macros may be redefined if you want to customize the rendering of citations
or entries in the generated bibliography:
hrender-citejref i
Macro for rendering a citation ref at the place where the citation is made using cite.
The content may be a single reference, like “TM98”, or a list of references, like “Euler1,
Gauss2”.
hrender-cite-detailjref jinfoi
Similar to render-cite, but for detailed citations made with cite-detail.
hrender-bibitemjcontenti
180 The standard TE
XMAC S styles

htransform-bibitemjcontenti
At the moment, bibliographies are generated by BibT
EX and imported into T
EXMACS.
The produced bibliography is a list of bibliographic items with are based on special
L
A
T
EX-specific macros (bibitem,block,protect, etc.). These macros are all defined inter-
nally in T
EXMACS and eventually boil down to calls of the render-bibitem, which behaves
in a similar way as item*, and which may be redefined by the user.
The transform-bibitem is used to “decorate” the content. For instance, transform-bibitem
may put angular brackets and a space around content.
hbib-listjlargestjbodyi
The individual “bibitems” are enclosed in a bib-list, which behaves in a similar way as
the description environment, except that we provide an extra parameter largest which
contains a good indication about the largest width of an item in the list.
18.2.5.2. Tables of contents
The following macros may be used in the main text for adding entries to the table of
contents. They are automatically called by most sectional macros, but it is sometimes
desirable to manually add additional entries.
htoc-main-1jentryi
htoc-main-2jentryi
Create an important entry in the table of contents. The macro toc-main-1 is intended
to be used only for very important entries, such as parts of a book; it usually has to be
added manually. The macro toc-main-2 is intended to be used for chapter or sections.
Important entries are usually displayed in a strong font.
htoc-normal-1jentryi
htoc-normal-2jentryi
htoc-normal-3jentryi
Add a normal entry to the table of contents, of different levels of importance. Usually,
toc-normal-1 corresponds to sections, toc-normal-2 to subsections and toc-normal-3 to
subsubsections.
htoc-small-1jentryi
htoc-small-2jentryi
Add an unimportant entry to the table of contents, like a paragraph. Since such entries
are not very important, some styles may simply ignore the toc-small-1 and toc-small-2
tags.
By redefining the following macros, it is possible to customize the rendering of tables of
contents:
htoc-strong-1jcontentjwherei
htoc-strong-2jcontentjwherei
Used for rendering table of contents entries created using toc-main-1 resp. toc-main-2.
htoc-1jcontentjwherei
htoc-2jcontentjwherei
htoc-3jcontentjwherei
18.2 The common base for most styles 181

htoc-4jcontentjwherei
htoc-5jcontentjwherei
Used for rendering table of contents entries created using toc-normal-1,toc-normal-2,
toc-normal-3,toc-small-1 resp. toc-small-2.
htoc-dotsi
The separation between an entry in the table of contents and the corresponding page
number. By default, we use horizontal dots.
18.2.5.3. Indexes
The following macros may be used in the main text for inserting entries into the index.
hindexjprimaryi
Insert primary as a primary entry in the index.
hsubindexjprimaryjsecondaryi
Insert secondary in the index as a subentry of primary.
hsubsubindexjprimaryjsecondaryjternaryi
Similar to subindex but for subsubentries ternary.
hindex-complexjkeyjhowjrangejentryi
Insert complex entries into the index. This feature is documented in detail in the section
about index generation.
hindex-linejkeyjentryi
Adds entry to the index, by sorting it according to key.
The following macros may be redefined if you want to customize the rendering of the index:
hindex-1jentryjwherei
hindex-2jentryjwherei
hindex-3jentryjwherei
hindex-4jentryjwherei
hindex-5jentryjwherei
Macro for rendering an entry in the index on page(s) where. The macro index-1 corre-
sponds to principal entries, the macro index-2 to secondary entries, and so on.
hindex-1*jentryi
hindex-2*jentryi
hindex-3*jentryi
hindex-4*jentryi
hindex-5*jentryi
Similar to index-1 until index-5, but without the page number(s).
hindex-dotsi
Macro for producing the dots between an index entry and the corresponding page
number(s).
182 The standard TE
XMAC S styles

18.2.5.4. Glossaries
The following macros may be used in the main text for inserting glossary entries.
hglossaryjentryi
Insert entry into the glossary.
hglossary-dupjentryi
For creating an additional page number for an entry which was already inserted before.
hglossary-explainjentryjexplanationi
A function for inserting a glossary entry with its explanation.
hglossary-linejentryi
Insert a glossary entry without a page number.
The following macros can be redefined if you want to customize the rendering of the
glossary:
hglossary-1jentryjwherei
Macro for rendering a glossary entry and its corresponding page number(s).
hglossary-2jentryjexplanationjwherei
Macro for rendering a glossary entry, its explanation, and its page number.
hglossary-dotsi
Macro for producing the dots between a glossary entry and the corresponding page
number(s).
18.2.6. Utilities for writing style files
The std-utils package provides several macros which may be useful when writing style
files. First of all, the following macros may be used for rendering purposes:
hhflushi
hleft-flushi
hright-flushi
Low level tags for flushing to the right in the definition of environments. One usually
should use wide-normal or wide-centered instead.
hwide-normaljbodyi
hwide-centeredjbodyi
These tags are used to make the body span over the entire paragraph width. The text is
left-aligned in the case of wide-normal and centered in the case of wide-centered. Making
a body span over the entire paragraph width does not change the rendering on paper,
but it facilitates the editing on the document. Indeed, on the one hand, the box which
indicates that you are inside the environment will span over the entire paragraph width.
On the other hand, when clicking sufficiently close to the text inside this box, it becomes
easier to position your cursor at the start or at the end inside the environment. You
may check this by clicking on one of the texts below:
18.2 The common base for most styles 183

>Some text inside a wide-normal environment. <
>Some text inside a wide-centered environment. <
hpadded-normaljspace-abovejspace-belowjbodyi
hpadded-centeredjspace-abovejspace-belowjbodyi
These tags are variants of hwide-normaljbodyiand hwide-centeredjbodyi, which put some
vertical white space space-above and space-below above and below the body.
hwide-bothlinedjtop-borderjbot-border jtop-sepjbot-sepjbodyi
hwide-std-bothlinedjbodyi
hpadded-bothlinedjspace-abovejspace-belowjtop-border jbot-border jtop-sepjbot-sepjbodyi
hpadded-std-bothlinedjspace-abovejspace-belowjbodyi
hwide-underlinedjbborderjbsepjbodyi
hwide-std-underlinedjbodyi
These tags are used to make the body span over the entire paragraph width and to
put a horizontal rule above and/or below it. The widths of the rules are given by top-
border and bot-border and the separation between the rules by top-sep and bot-sep.
The standard width and separation (used by wide-std-bothlined,padded-std-bothlined and
wide-std-underlined) are 1ln and 1sep. The padded variants specify additional spaces
space-above and space-below above and below the rules. As an example, hwide-std-
underlinedjlefthhtabj5mmirightiyields:
left right
Wide underlined environments are typically used for page headers. Wide environments
which are both overlined and underlined are typically used for abstracts or floating
figures and tables.
hwide-framedjborder-widthjhsepjvsepjbodyi
hwide-std-framedjbodyi
hwide-framed-coloredjborder-colorjbody-colorjborder-widthjhsepjvsepjbodyi
hwide-std-framed-coloredjborder-color jbody-colorjbodyi
These tags put the body inside a frame box which spans over the whole paragraph.
The user may specify a border-width, horizontal and vertical separations hsep and
vsep between the border and the text, and colors border-color and body-color for the
border and the background. For instance, hwide-std-framed-coloredjbrownjpastel greenj
Hi there!iyields
Hi there!
hindent-leftjleft-amountjbodyi
hindent-rightjright-amountjbodyi
hindent-bothjleft-amountjright-amountjbodyi
These environments may be used in order to increase the current left and/or right
indentation by the amounts left-amount and/or right-amount.
hmargin-first-otherjfirst-marginjother-marginjbodyi
This environment allows to set the margin first-margin for the first lines of paragraphs
in the body, as well as the margin other-margin for the other lines. This environment
is for instance useful for glossaries, indexes, etc., in which case other-margin is often
larger than first-margin. Notice that this environment enables indentation for the first
line of body.
184 The standard TE
XMAC S styles

The following macros may be used in order to set headers and footers:
hset-headerjheader-texti
A macro for permanently changing the header. Notice that certain tags in the style
file, like sectional tags, may override such manual changes.
hset-footerjfooter-texti
A macro for permanently changing the footer. Again, certain tags in the style file may
override such manual changes.
hblanc-pagei
Remove all headers and footers from this page.
hsimple-pagei
Remove the header of this page and set the footer to the current page number (cen-
tered). This macro is often called for title pages or at the start of new chapters.
Other macros provided by std-utils are:
hlocalizejtexti
This macro should be used in order to “localize” some English text to the current
language. For instance, hwithjlanguagejfrenchjhlocalizejTheoremii yields Théorème.
hmapjfunjtuplei
This macro applies the macro fun to each of the entries in a tuple (or the children of
an arbitrary T
EXMACS tag) and returns the result as a tuple. For instance, hmapjhmacroj
xjhemjxiijhtuplej1j2j3ii yields hquotejhtuplej1j2j3ii (the quote only appears when
rendering the result, not when performing further computations with it).
18.2.7. Counters and counter groups
In T
EXMACS, all automatic numbering of theorems, sections, etc. is done using “counters”.
Such counters may be individual counters (like equation-nr) or belong to a group of similar
counters (like in the case of theorem-nr). T
EXMACS allows for the customization of counters
on an individual or groupwise basis. Typically, you may redefine the rendering of a counter
(and let it appear as roman numerals, for instance), or undertake special action when
increasing the counter (such as resetting a subcounter).
New individual counters are defined using the following meta-macro:
hnew-counterjxi
Defines a new counter with name x. The counter is stored in the numerical environment
variable x-nr and in addition, the following macros are defined:
hthe-xi
Retrieve the counter such as it should be displayed on the screen.
hreset-xi
Reset the counter to 0.
18.2 The common base for most styles 185

hinc-xi
Increase the counter. This macro may also be customized by the user so as to reset
other counters (even though this is not the way things are done in the standard
style files).
hnext-xi
Increase the counter, display the counter and set the current label.
For the purpose of customization, the new-counter macro also defines the following
macros:
hdisplay-xjnri
This is the macro which is used for transforming the numerical value of the counter
into the value which is displayed on the screen.
hcounter-xjxi
This internal macro is used in order to retrieve the name of the environment variable
which contains the counter. By default, this macro returns “nr-x”, but it may be
redefined if the counter belongs to a group.
As noticed in the introduction, T
EXMACS uses counter groups in order to make it possible
to treat similar counters in a uniform way. For instance the counter group theorem-env
regroups the counters theorem,proposition,lemma, etc. New counter groups are defined
using:
hnew-counter-groupjgi
Create a new counter group with name g. This results in the creation of the following
macros:
hdisplay-in-gjxjnr i
hcounter-in-gjxi
These macros are similar to the macros display-xand counter-xfrom above, but
relative to the counter group. The name xof the counter in consideration is passed
as an argument.
New counters can be added to the group using:
hadd-to-counter-groupjxjgi
Defines a new counter xand add it to the counter group g. For counters in groups,
the macros display-xand counter-xare replaced with the corresponding macros display-
in-gand counter-in-gfor their groups. Nevertheless, two new macros ind-display-xand
ind-counter-xare defined which may take over the roles of display-xand counter-xin the
case when the group consists of individual counters.
At any moment, you may decide whether the counters of a group share a common group
counter, or whether they all use their individual counters. This feature is used for instance
in order to switch between American style numbering and European style numbering:
hgroup-common-counterjgi
Use a common counter for the group (which is stored in the environment variable g-nr).
186 The standard TE
XMAC S styles

hgroup-individual-countersjgi
Use an individual counter for each member of the group (this is the default).
We notice that group counters may recursively belong to super-groups. For instance, the
following declarations are from env-base.ts:
hnew-counter-groupjstd-envi
hnew-counter-groupjtheorem-envi
hadd-to-counter-groupjtheorem-envjstd-envi
hgroup-common-counterjtheorem-envi
18.2.8. Special markup for programs
The program d.t.d. provides markup for the layout of computer programs. However, these
tags should be considered as very unstable, since we plan to replace them by a set of more
detailed tags:
halgorithmjnamejbodyi
The name of the algorithm and its body, which includes its possible specification.
hbodyjbodyi
The real body of the algorithm.
hindentjcontenti
For indenting part of an algorithm.
18.2.9. Special markup for sessions
The session d.t.d. provides the following environments for computer algebra sessions:
hsessionjbodyi
Environment for marking a session. All macros below are only for use inside sessions.
hinputjpromptjbodyi
An input field with a prompt and the actual input.
houtputjbodyi
An output field.
htextputjbodyi
Fields with ordinary text. These may for instance be used for comments and explana-
tions.
herrputjbodyi
This macro is used inside output fields for displaying error messages.
18.2 The common base for most styles 187

In fact, these environments are based on environments of the form lan-session,lan-input,
lan-output,lan-textput and lan-errput for every individual language lan.
If language-specific environments do not exist, then generic-session,generic-input,generic-
output,generic-textput and generic-errput are taken instead. It is recommended to base the
language-specific environments on the generic ones, which may have different implemen-
tations according to the style (e.g. the framed-session package). For this purpose, we
also provide the generic-output* environment, which is similar to generic-output, except that
margins remain unaltered.
18.3. Standard environments
The env d.t.d. contains the standard environments which are available in most styles. It
is subdivided into the following parts:
18.3.1. Defining new environments
The env-base d.t.d. contains high-level markup which can be used by the user to define
new numbered environments for theorems, remarks, exercises and figures:
hnew-theoremjenv-namejdisplay-namei
This meta-macro is used for defining new theorem-like environments. The first argument
env-name specifies the name for the environment (like “experiment”) and display-name
the corresponding text (like “Experiment”). When defining a new theorem-like envi-
ronment like experiment, an unnumbered variant experiment* is automatically defined
as well.
hnew-remarkjenv-namejdisplay-namei
Similar as new-theorem, but for remarks.
hnew-exercisejenv-namejdisplay-namei
Similar as new-theorem, but for exercises.
hnew-figurejenv-namejdisplay-namei
Similar as new-theorem, but for figures. When defining a new type of figure, like “pic-
ture”, the new-figure macro defines both the inline environment small-picture and the
block-environment big-picture, as well as the unnumbered variants small-picture* and big-
picture*.
The theorem-like and remark-like environments belong to a common counter-group
theorem-env. By default, we use American-style numbering (one common counter for
all environments). When selecting the package number-europe, each environment uses
its own counter. All exercises and figures use their own counter-group.
More generally, the std-env counter-group regroups the counters for all standard T
EXMACS
environments. Typically, all counters in this group are prefixed in a similar way (for
instance by the number of the chapter). Figure 18.1 shows how the hierarchical organiza-
tion of this counter group.
188 The standard TE
XMAC S styles
std-env
theorem-env
theorem
proposition
remark
·
·
·
exercise-env
exercise
problem
figure-env
figure
table
equation footnote
Figure 18.1. Organization of the counters for the standard T
EXMACS environments.
In addition to the standard theorem-like, remark-like, exercise-like and figure-like envi-
ronments, other numbered textual environments may be defined using the new-env macro.
These environments may be based on arbitrary counter-groups:
hnew-envjenv-namejdisplay-namejgroupjrenderi
The first argument env-name specifies the name for the environment (like “experiment”)
and the second, display-name, the corresponding text (like “Experiment”). The third
argument is the name of the counter group to which the new environment belongs. The
last argument render is the name of a binary macro for rendering the environment.
The arguments of the rendering macro are a name (like “Theorem 3.14”) and its body.
You may use this macro to define new environments based on counter-groups other
than the standard five theorem-env,exercise-env, etc. For instance, in the standard
style-sheets, new-theorem is defined by
hassign jnew-theorem jhmacro jenv jname jhnew-env jenv jname jtheorem-env jrender-
theoremiii
We recall that you may add new counters or counter-groups to the theorem-env counter-
group using the new-counter-group and add-to-counter-group macros, as described in the
section about counters.
18.3.2. Mathematical environments
The env-math d.t.d. specifies which mathematical environments can be used inside text-
mode. In other words, the environments should be used inside text-mode, but their bodies
contain mathematical formulas or tables of mathematical formulas.
hequationjbodyi
A numbered equation. Use a label to be able to reference this equation elsewhere.
hequation*jbodyi
An unnumbered equation.
hequation-labjbodyjlabi
An equation with an arbitrary text label to be displayed in references (e.g. reference or
eqref). Notice that the label tag is not created automatically.
heqnarrayjtablei
An array of numbered equations (not yet implemented).
18.3 Standard environments 189

heqnarray*jtablei
An array of unnumbered equations. You can use the eq-number tag in order to number
the equation.
Warning 18.1. The numbering of equations inside tables is not yet as it should be. In
particular, the eqnarray tag is equivalent to eqnarray* at the moment. Later on, when the
eqnarray tag will be implemented correctly, you will also have a no-number tag in order to
suppress the number of an equation, and a style package for numbering equations at the
left hand side.
Warning 18.2. There is no option for numbering equations at the left hand side available
yet. Nevertheless, you may use the manual tag leq-number for this. You also have a tag
next-number which directly display the next number and increases the equation counter.
Warning 18.3. We do not encourage the use of the AMS-T
EX environments align,
gather and split. Nevertheless, they are available under the names align,gather,eqsplit
together with their variants align*,gather* and eqsplit*. In the future, we plan to provide
more powerful environments.
18.3.3. Theorem-like environments
18.3.3.1. Using the theorem-like environments
The env-theorem d.t.d. contains the default theorem-like and other textual environments,
which are available through Insert!Environment. They are subdivided into three main
categories:
Variants of theorems. The bodies of theorem-like environments are usually empha-
sized. By default, the following such environments are available via Insert!Environ-
ment:theorem,proposition,lemma,corollary,axiom,definition,notation,conjecture.
Variants of remarks.
The following ones are available via
Insert
!
Environment
:
remark
,
example,note,warning,convention.
Variants of exercises. Two such environments are provided by default and available
via Insert!Environment:exercise and problem.
The environments are all available in unnumbered versions theorem*,proposition*, etc. as
well. You may use ⌃#in order to switch between the unnumbered and numbered version.
The following tags are also provided:
hproofjbodyi
For proofs of theorems.
hduetojwhoi
An environment which can be used to specify the inventors of a theorem. It should be
used at the start inside the body of a theorem, like in
Theorem. (Pythagoras) a2+b2=c2.
190 The standard TE
XMAC S styles

18.3.3.2. Customization of the theorem-like environments
The following customizable macros are used for the rendering of textual environments:
hrender-enunciationjnamejbodyi
This macro is used for displaying a theorem-like and remark-like environments. The first
argument name specifies the name of the theorem, like “Theorem 1.2” and the second
argument body contains the body of the theorem.
hrender-theoremjnamejbodyi
This macro, based on render-enunciation, is used for displaying a theorem-like environ-
ments, and used for environments defined by new-theorem.
hrender-remarkjnamejbodyi
This macro, based on render-enunciation, is used for displaying a remark-like environ-
ments, and used for environments defined by new-remark.
hrender-exercisejnamejbodyi
Similar to render-enunciation, but for exercise-like environments.
hrender-proofjnamejbodyi
Similar to render-enunciation, but for proofs. This environment is mainly used for cus-
tomizing the name of a proof, like in “End of the proof of theorem 1.2”.
Notice that you may also use these macros if you want an environment which is rendered
in a similar way as a theorem, but with another name (like “Corollary of Theorem 7”).
The following tags can be used for further customization of the rendering:
henunciation-namejnamei
This macro controls the appearance of the names of theorem-like, remark-like and
exercise-like environments. Most styles use bold face or small capitals.
htheorem-namejnamei
hremark-namejnamei
hexercise-namejnamei
These macros default to enunciation-name, but can be customized individually.
henunciation-sepi
The separator between the name of a theorem-like, remark-like or exercise-like environ-
ment and its main body. By default, this is a period followed by a space.
htheorem-sepi
hremark-sepi
hexercise-sepi
These macros default to enunciation-sep, but can be customized individually.
Each standard environment xalso comes with a customizable macro x-text which renders
the localized name of the environment. For instance, hwithjlanguagejdutchjhtheorem-textii
yields “Stelling”.
18.3 Standard environments 191

18.3.4. Environments for floating objects
18.3.4.1. Using the environments for floating objects
The env-float d.t.d. provides the following environments for floating objects:
hsmall-figurejbodyjcaptioni
This macro produces an inline figure with body as its main body and caption as a
caption. Inline figures may for instance be used to typeset several small figures side by
side inside a floating object.
hbig-figurejbodyjcaptioni
This macro produces a big figure with body as its main body and caption as a caption.
Big figures span over the whole paragraph width.
hsmall-tablejbodyjcaptioni
Similar to small-figure, but for tables.
hbig-tablejbodyjcaptioni
Similar to big-figure, but for tables.
hfootnotejbodyi
Produces a footnote.
The figure-like environments also admit unnumbered versions small-figure*,big-figure*, etc.,
which are obtained using ⌃#.
18.3.4.2. Customization of the environments for floating objects
The following macros can be used for customizing the rendering of figure-like environments:
hrender-small-figurejaux jnamejbodyjcaptioni
This macro is used for rendering small figure-like environments. The first argument aux
specifies an auxiliary channel (like “figure” or “table”) which is used for inserting the
caption inside the list of figures. The second argument name specifies the name of the
figure (like “Figure 2.3” or “Table 5”). The last arguments body and caption correspond
to the figure itself and a caption.
hrender-big-figurejauxjnamejbodyjcaptioni
Similar to render-small-figure, but for displaying a big figure-like environments.
The following tags can be used for customizing the appearance the text around figures,
tables and footnotes:
hfigure-namejnamei
This macro controls the appearance of the text “Figure”. By default, we use bold face.
hfigure-sepi
This macro produces the separator between the figure and its number and the caption.
By default, it produces a period followed by a space.
192 The standard TE
XMAC S styles

hfootnote-sepi
This macro produces the separator between the number of the footnote and the text.
By default, it produces a period followed by a space.
18.4. Headers and footers
18.4.1. Standard titles
18.4.1.1. Entering titles and abstracts
The header-title d.t.d. provides tags for entering information about the entire document.
The two top-level tags are
hdoc-datajdata-1 j···jdata-ni
Specify data attached to your document (title, authors, etc.; see below) and render the
title.
habstractjbodyi
The abstract for your paper.
When creating a doc-data tag using Insert!Title!Insert title, T
EXMACS automatically inserts
adoc-title tag as its first arguments. New data may be inserted from the Insert!Title menu.
Each child data-1 ,:::,data-n of the doc-data tag is of one of the following forms:
hdoc-titlejtitlei
Specify the title of the document.
hdoc-subtitlejsubtitlei
Specify the subtitle of the document.
hdoc-authorjdata-1 j···jdata-ni
Specify datas for one of the authors of the document (name, affiliation, etc.; see below).
hdoc-datejdatei
The creation date of the document. In particular you may take hdateifor the value of
date for the current date.
hdoc-running-titlejtitlei
Specify a running title for your document which may be used in page headers.
hdoc-running-authorjauthori
Specify a running author for your document which may be used in page headers.
hdoc-keywordsjkw-1 j···jkw-ni
Specify keywords kw-1 until kw-n for your document.
hdoc-mscjnr-1 j···jnr-ni
Specify A.M.S. subject classification numbers nr-1 until nr-n for your document.
18.4 Headers and footers 193

hdoc-notejnotei
A note about your document. In particular, you may take hwith-TeXmacs-textifor the
value of note in order to indicate that your document has been written using T
EXMACS.
hauthor-datajdata-1 j···jdata-ni
Specify structured datas for one of the authors of the document (name, affiliation, etc.;
see below).
When inserting an additional author using Insert!Title!Author!Insert author, T
EXMACS
inserts a hdoc-authorjhauthor-dataj...ii tree with an author-name tag as its first argument.
New author data may be inserted from the Insert!Title!Author menu. Each child data-
1,:::,data-n of the author-data tag is of one of the following forms:
hauthor-namejnamei
Specify the name of the author.
hauthor-affiliationjaffiliationi
The affiliation of the author.
hauthor-emailjemaili
An email address for the author.
hauthor-homepagejhomepagei
The homepage of the author.
hauthor-notejnotei
A miscellaneous note attached to the author, like a thank-word.
As a general rule, the use of any of the subtags of doc-data or author-data is optional. An
individual subtag may also be specified several times. This is useful for documents with
several authors, or authors with several addresses. The rendering of title information is
very style-dependent: some styles render addresses in a single line or even as a footnote,
where other styles use a more widely spaced presentation. Often, some information like
keywords or AMS subject classification numbers are only rendered as a part of the abstract.
18.4.1.2. Customizing the global rendering of titles
Depending on the kind of attributes, complex titles often use several rendering styles in a
simultaneous version. More precisely, a title usually consists of the following parts:
•A well visible part at the top of the title page.
•Additional notes, which are displayed in the footer.
•An potentially invisible part, with information like running titles and authors.
•A postponed part, which is only rendered in the abstract.
Similarly, individual authors may also contain a main part, which is rendered as part of
the title, and an additional part, which is rendered as a footnote. Moreover, the layout
often changes if the paper has more than one author.
194 The standard TE
XMAC S styles
The T
EXMACS mechanism for rendering titles therefore relies on several macros which
extract the information corresponding to each of the above parts. This process may also
involve some sorting, like putting the authors before the date or vice versa. At a second
stage, each extracted part of the title is passed to the appropriate rendering macro. The
following macros are used for extracting title information:
hdoc-data-mainjdata-1 j···jdata-ni
hdoc-data-main*jdata-1 j···jdata-ni
This macro only keeps and sorts the data which should be displayed in the main title.
The doc-data-main* variant is used in the case when the document has more than one
author.
hdoc-data-notejdata-1 j···jdata-ni
This macro only keeps and sorts the data which should be displayed as a footnote.
hdoc-data-abstractjdata-1 j···jdata-ni
This macro only keeps and sorts the data which should be displayed in the abstract.
hdoc-data-hiddenjdata-1 j···jdata-ni
This macro only keeps and sorts the data which might or should not be displayed at all.
In a similar fashion, the following macros are used for extracting author information:
hdoc-author-mainjhauthor-datajdata-1 j···jdata-nii
This macro only keeps and sorts the data which should be displayed inside the main
title.
hdoc-author-notejdata-1 j···jdata-ni
This macro only keeps and sorts the data which should be displayed as a footnote.
It should be noticed that each of the above macros should return a document tag with the
selected data as its children. For instance,
hdoc-author-mainj
hauthor-affiliationjSomewhere in Africaij
hauthor-namejThe big GNUij
hauthor-notejVery hairy indeed!ii
should typically return
hdocumentj
hauthor-affiliationjSomewhere in Africaij
hauthor-namejThe big GNUii
The only exception to this rule is doc-data-hidden which should return a concat tag instead.
18.4.1.3. Customizing the rendering of title fields
Both title information and author information is rendered as a vertical stack of “title blocks”
and “author blocks”. The following macros may be used to customize the global rendering
of such blocks:
18.4 Headers and footers 195

hdoc-title-blockjcontenti
hdoc-author-blockjcontenti
Macros for rendering one component of the title or author information.
The following macros may be used to customize the rendering of title information; notice
that they are usually built on top of doc-title-block.
hdoc-make-titlejcontenti
This macro is used for the rendering of the main title information. Usually, it contains
at least the title itself, as well as one or several authors.
hdoc-render-titlejtitlei
This macro is used for rendering the title of the document. The doc-title macro also
takes care of rendering references to potential footnotes.
hdoc-subtitlejtitlei
This macro is used for rendering the subtitle of the document.
hrender-doc-authorjcontenti
In the case when the document has a single author, then this macro is used for rendering
the content information about him or her.
hrender-doc-authorsjcontenti
In the case when the document has several authors, then this macros is used for ren-
dering all author-related content which is part of the main title.
hdoc-datejdatei
This macro is used for rendering the creation date of the document.
The following macros may be used to customize the rendering of author information; notice
that they are usually built on top of doc-author-block.
hauthor-render-namejnamei
Renders the name of the author.The author-name macro also takes care of rendering
references to potential footnotes.
hauthor-byjnamei
A macro which may put the text “by ” in front of the name of an author.
hauthor-affiliationjaffiliationi
Renders the affiliation of the author.
hauthor-emailjemaili
Renders the email address of the author.
hauthor-homepagejemaili
Renders the homepage of the author.
The following macros are used for information which is usually not rendered as a part of
the main title, but rather as a footnote or part of the abstract.
196 The standard TE
XMAC S styles

hdoc-title-notejnotei
hdoc-author-notejnotei
A macro for rendering a note attached to the document or one of its authors. The note
will usually appear as part of a footnote. By default, notes that consist of several lines
are compressed into a single paragraph.
hdoc-keywordsjkw-1 j···jkw-ni
A macro for displaying a list of keywords.
hdoc-mscjnr-1 j···jnr-ni
A macro for displaying a list of A.M.S. subject classification numbers.
18.4.2. Standard headers
The header d.t.d. provides call-back macros which allow page headers and footers to change
automatically when specifying the title information of the document or when starting
a new section.
hheader-titlejtitlei
This macro is called when specifying the title of a document.
hheader-authorjauthori
This macro is called when specifying the author(s) of a document.
hheader-primaryjsection-titlejsection-nrjsection-typei
This macro is called at the start of each new primary section (e.g. chapter for book style,
or section for article style). The section-type is a literal text like “Chapter” or “Section”.
hheader-secondaryjsection-titlejsection-nrjsection-typei
This macro is called at the start of each new secondary section (e.g. section for book
style, or subsection for article style). The section-type is a literal text like “Section”
or “Paragraph”.
In style files, page headers and footers are usually set by the above call-back macros, and
not manually. You may directly modify headers and footers by setting the corresponding
environment variables or using several helper macros supplied by std-utils.
18.5. L
A
TE
X style sections
18.5.1. Using sectional tags
The section-base d.t.d. provides the standard tags for sections, which are the same as in
L
A
T
EX. Most sectional tags take one argument: the name of the section. The intention of
the following tags is to produce numbered sections:
hpartjtitlei,hchapterjtitlei
hsectionjtitlei,hsubsectionjtitlei,hsubsubsectionjtitlei
hparagraphjtitlei,hsubparagraphjtitlei
18.5 L
ATE
X style sections 197

happendixjtitlei
The intention of these macros is to produce a numbered title for a part (resp. chapter,
section, subsection, etc.). The numbering is not required, but merely an intention: the
paragraph and subparagraph tags are usually not numbered and some styles may not
produce numbers at all.
The tags part*,chapter*,section*,subsection*,subsubsection*,paragraph*,subparagraph* and
appendix* can be used for producing the unnumbered variants of the above tags.
By default, all sectional only produce the section title. When using the experimental
package structured-section, all sectional tags are enriched, so that they take the body
of the section as an optional argument. Moreover, an additional tag rsection is provided in
order to produce recursively embedded sections. For instance, an rsection inside a section
behaves like a subsection. In the future, all list items should become structured.
The section-base d.t.d. also provides the following sectional environments with automat-
ically generated content
hbibliographyjauxjstylejfile-namejbodyi
This macro is used for producing bibliographies. The first argument aux specifies the
auxiliary channel with the data for generating the bibliography (bib, by default). The
arguments style and file-name contain the bibliography style and the file with the
bibliographic database. The body argument corresponds to the automatically generated
content.
htable-of-contentsjauxjbodyi
This macro is used for producing tables of contents. The first argument aux specifies
the auxiliary channel with the data for generating the bibliography (toc, by default).
The body argument corresponds to the automatically generated content.
hthe-indexjaux jbodyi
Similar to table-of-contents but for indices and default channel idx.
hthe-glossaryjauxjbodyi
hlist-of-figuresjauxjbodyi
hlist-of-tablesjauxjbodyi
Similar to table-of-contents but for glossaries (default channel gly), lists of figures
(default channel figure) and lists of tables (default channel table).
The above tags also admit the variants bibliography*,table-of-contents*,the-index* and the-
glossary* with an additional argument name before body, which specifies the name of the
section. For instance, the the-glossary* was formerly used for lists of figures and lists of
tables.
18.5.2. Customization of the sectional tags
The section-base d.t.d. also contains many tags for customizing the rendering of sections
and other section-related behaviour. The following two tags affect all sections:
hsectional-sepi
A macro for customizing the separator between the number of a section and its title.
By default, we use two spaces.
198 The standard TE
XMAC S styles

hsectional-short-stylei
A predicate which tells whether documents for this style are intended to be short or
long. When sectional-short-style evaluates to true, then appendices, bibliographies, etc.
are supposed to be special types of sections. Otherwise, they will be special types of
chapters.
For each sectional tag x, the following tags are provided for customization:
hx-texti
A macro which displays the (localized) name of the sectional environment. For instance,
hwithjlanguagejfrenchjhappendix-textii produces “Annexe”.
hx-titlejtitlei
A macro for displaying the unnumbered section title.
hx-numbered-titlejtitlei
A macro for displaying the numbered section title.
hx-display-numbersi
A predicate which specifies whether numbers will really be displayed. For instance,
in the case of paragraph, this macro evaluates to false. Consequently, even though x-
numbered-title does display the paragraph number, the main macro xwill call x-title and
not x-numbered-title, so that paragraph titles are not numbered.
hx-sepi
A macro for customizing the separator between the number of a section and its title.
By default, we call sectional-sep.
hx-cleani
A hook for resetting all subcounters of the section.
hx-headerjnamei
A hook for changing the page headers.
hx-tocjnamei
A hook for putting the section title into the table of contents.
Finally, the section-base d.t.d. provides rendering macros render-table-of-contents,render-
bibliography,render-index and render-glossary, each of which takes two arguments: the name of
the section and its body. It also provides the macros prologue-text,epilogue-text,bibliography-
text,table-of-contents-text,index-text,glossary-text,list-of-figures-text and list-of-tables-text for
customizing the names of special sections.
18.5.3. Helper macros for rendering section titles
The section-base d.t.d. contains several helper macros which can (should) be used when
customizing the rendering of section titles:
hsectional-shortjbodyi
18.5 L
ATE
X style sections 199

hsectional-short-italicjbodyi
hsectional-short-boldjbodyi
These macros should be used for rendering “short section titles”, for which the section
body starts immediately at the right of the title. Usually, titles of paragraphs and
subparagraphs are rendered in a short fashion, while the other section titles span over
the entire width of a paragraph.
hsectional-normaljbodyi
hsectional-normal-italicjbodyi
hsectional-normal-boldjbodyi
These macros should be used for rendering “normal left-aligned section titles”. Such
titles span over the entire paragraph width.
hsectional-centeredjbodyi
hsectional-centered-italicjbodyi
hsectional-centered-boldjbodyi
These macros should be used for rendering “normal centered section titles”. Such titles
span over the entire paragraph width.
200 The standard TE
XMAC S styles

Chapter 19
Compatibility with other formats
T
EXMACS documents can be saved without loss of information in three formats: the native
T
EXMACS format, Xml and as a Scheme expression. T
EXMACS documents can be converted
in a wysiwyg (what-you-see-is-what-you-get) way to either Postscript or Pdf, which are
used as the primary formats for printing documents. T
EXMACS finally provides converters
for L
A
T
EX, Html and MathML.
T
EXMACS documents can be converted to other formats using the different items in the
File!Export menu. Similarly, the File!Import menu contains all formats which can be
imported into T
EXMACS. Besides exporting or importing entire documents, it is also pos-
sible to copy and paste document fragments using Edit!Copy to and Edit!Paste from.
The default formats for copy and pasting can be specified in Tools!Miscellaneous!Export
selections as and Tools!Miscellaneous!Import selections as.
19.1. Converters for L
A
TE
X
19.1.1. Introduction
T
EXMACS offers high quality converters to and from L
A
T
EX. For simple documents, it suf-
fices to use File!Export!LaTeX resp. File!Import!LaTeX. However, in order to take fully
advantage out of the converts, it is necessary to understand some particularities of L
A
T
EX.
First of all, it should be emphasized that T
EX/L
A
T
EX is not a data format. Indeed, T
EX is
a programming language for which no real standardization process has taken place: valid
T
EX programs are defined as those which are recognized by the T
EX program. In particular,
there exists no formal specification of the language and it is not even clear what should
be considered to be a valid T
EX document. As a consequence of this, a converter from
L
A
T
EX to T
EXMACS can only be designed to be 100% reliable for a (substantial) subset of
the T
EX/L
A
T
EX language.
A second important point is that publishers usually impose additional constraints on the
kind of L
A
T
EX documents which they accept for submissions. For instance, certain journals
provide additional macros for title information, theorems, specific layout features, etc.
Other journals forbid for the definition of new macros in the preamble. Since T
EXMACS
is not a T
EX/L
A
T
EX front-end, it is difficult for us to write specific code for each possible
journal. Nevertheless, some general principles do hold, and we will describe below how to
customize the converter so as to make the conversion process as simple and automatic as
possible.
Another point which should be stressed is that T
EXMACS aims to provide a strict superset
of T
EX/L
A
T
EX. This not completely the case yet, but it is already true that many features
in T
EXMACS admit no direct analogues in T
EX/L
A
T
EX or one of its packages. This is for
instance the case for computer algebra sessions, folding, actions, graphics and presenta-
tions, but also for certain typesetting constructs, like vertical alignment and background
filling in tables. When using such additional features, you should be prepared that they
will not be converted correctly to L
A
T
EX.
201

Finally, when preparing journal papers with T
EXMACS,please consider submitting them in
T
EXMACS format. The editors of the journal will probably force you to convert your paper
to L
A
T
EX, but repeated submissions in T
EXMACS format will put pressure upon them to
accept this new format.
19.1.2. Conversion from T
E
XMACS to L
AT
E
X
A T
EXMACS document can be exported to L
A
T
EX using File!Export!LaTeX. In the case
of certain journal styles like svjour or elsart, the user should also make sure that the
appropriate style files can be found by L
A
T
EX, when compiling the result of the conversion.
Please consult your L
A
T
EX documentation for how to do this; one solution which usually
works is to put the style file in the same directory as your file.
Notice that the exportation of a T
EXMACS document with images may cause the creation
of additional image files. If your destination file is called name.tex, these files are named
name-1.eps,name-2.eps, etc. and they are stored in the same directory. In particular,
all pictures drawn with the editor and all images which are not already in Postscript
format will be converted to encapsulated Postscript files.
In order to ensure that the generated L
A
T
EX document compiles, style files and packages or
macros with no L
A
T
EX equivalents are either ignored or replaced by a reasonable substitute.
The precise behaviour of the converter may be customized using several user preferences
in the Edit!Preferences!Converters!LaTeX!TeXmacs–>LaTeX menu:
Replace unrecognized styles.
This option (which is set by default) tells T
EXMACS to replace style files with no
L
A
T
EX equivalents by the article style. Furthermore, all additional style packages
are ignored.
In case you know how to write your own style files, you might wish to create
T
EXMACS equivalents of those journal styles which you use often. Similarly, you
might wish to create a style package with your own macros together with its L
A
T
EX
counterpart. In both cases, you might want to disable the style replacement option.
Replace unrecognized macros.
By default, all T
EXMACS macros are expanded until they admit direct L
A
T
EX coun-
terparts. Primitives with no L
A
T
EX counterparts (like graphics or trees) are ignored.
Moreover, in order to convert certain frequently used macros like theorem or strong,
T
EXMACS may put additional definitions in the preamble.
In some cases, the user may wish to keep unrecognized macros in their unexpanded
form. For instance, this may be convenient if you want to import the generated doc-
ument back into T
EXMACS. Another typical situation is when you defined additional
macros in a style package. In these cases, you may disable to macro replacement
option. Of course, any missing macro definitions may result in L
A
T
EX errors during
the compilation.
Expand user-defined macros.
When your document or its preamble contains macro definitions, then T
EXMACS will
convert these macro definitions into L
A
T
EX macro definitions and keep all macro
applications in their unexpanded forms. This allows you to preserve as much struc-
ture of your document as possible. When enabling the Expand user-defined macros
option, all macro definitions in your document will be ignored and all macro appli-
cations will be expanded.
202 Compatibility with other formats

Export bibliographies as links.
In order to produce stand-alone L
A
T
EX files whenever possible, it is assumed that
you generate your bibliographies from within T
EXMACS. When exporting to L
A
T
EX,
the generated bibliography will be directly included into your L
A
T
EX file. In some
cases however, the user might wish to regenerate the bibliography from the L
A
T
EX
and the bibliography files, using BibT
E
X. In this case, you need to enable the Export
bibliographies as links option.
Allow for macro definitions in preamble.
Certain T
EXMACS macros like strong have no direct L
A
T
EX analogues. For a certain
number of frequently used macros, T
EXMACS automatically generates macro defini-
tions in the preamble of the L
A
T
EX target file. This allows you to preserve as much
structure as possible of your document, which is for instance useful if you import
the document back into T
EXMACS.
However, certain journals instruct authors to refrain from the definition of addi-
tional macros in the preamble. When disallowing for macro definitions in preambles,
T
EXMACS will automatically expand all corresponding macro applications.
Dump T
E
XMACS document into L
A
T
E
X code.
When this option is set, a copy of the T
EXMACS document is appended to the
L
A
T
EX export in a lossless kind. This allows to re-import the document with as few
conversion artifacts as possible .
Character encoding.
This option defines the behavior of the converter with respect to character encoding.
There are three possible choices:
Utf-8 with inputenc. This will generate utf-8 document with the package
inputenc loaded. If for any reason you don’t want to rely on inputenc, you
should consider other options.
Cork with catcodes. Keeps accented characters “as is”. This can be achieved
by allowing T
E
X
MACS
to put additional catcode definitions into your preamble.
This provides a good trade-off between readability (accented characters
are kept in an 8 bit charset) and simplicity (you don’t need the inputenc
package).
Ascii. This will generate pure ascii characters, using plain T
EX sequences to
compose non-ascii symbols.
Sometimes, the converter does not produce a satisfactory L
A
T
EX file even after some tin-
kering with the above preferences. The most frequent problem concerns bad line breaks.
Occasionally, certain document fragments are also better converted by hand. In order
to minimize the need for corrections in the generated L
A
T
EX file (which would be lost
when re-exporting the T
EXMACS source file after some modifications), T
EXMACS provides
a mechanism to specify manual conversions to L
A
T
EX in the T
EXMACS source file: using
Format!Specific!Texmacs and Format!Specific!Latex, you may force certain document
fragments to appear only in the source file or the L
A
T
EX target.
For instance, assume that the word “blauwbilgorgel” is hyphenated correctly in the T
EXMACS
source, but not in the L
A
T
EX conversion. Then you may proceed as follows:
1. Select “blauwbilgorgel”.
19.1 Converters for L
ATE
X203

2. Click on Format!Specific!Texmacs to make the text “blauwbilgorgel” T
EXMACS-
specific.
3. Click on Format!Specific!Latex.
4. Type the latex code blauw\-bil\-gor\-gel with the correct hyphenation.
5. Press ↩to activate the L
A
T
EX-specific text.
In a similar fashion, you may insert L
A
T
EX-specific line breaks, page breaks, vertical space,
style parameter modifications, etc. You may also force arbitrary content to be exported as
an image using Format!Specific!Image.
19.1.3. Conversion from L
AT
E
X to T
E
XMACS
In order to import a L
A
T
EX document into T
EXMACS, you may use File!Import!Latex.
Don’t forget to save the file under a new name with the .tm extension, if you want to edit it.
As explained in the introduction, the conversion of L
A
T
EX documents into T
EXMACS is
more problematic than conversions the other way around. As long as you restrict yourself
to using the most common L
A
T
EX commands, the conversion process should not give rise
to any major difficulties. However, as soon as your documents contain “weird T
EX primi-
tives” (think about \csname...), then the converter may get confused. We also notice that
T
EXMACS is currently unable to convert L
A
T
EX style files and no plans exist to enhance the
converter in this direction.
There are two major reasons for L
A
T
EX documents to get imported in an inappropriate way,
and which can easily be corrected by the user. First of all, the parser may get confused
because of some exotic syntactic construct. This typically happens in presence of catcodes
or uncommon styles of macro definitions. Sometimes, the parser may also be mistaken
about the current mode, in which case text gets parsed as a mathematical formula or vice
versa. In both cases, the imported document usually becomes “weird” at a certain point. In
order to solve the problem, we suggest you to identify the corresponding point in the L
A
T
EX
source file and to make an appropriate change which avoids the parser of getting confused.
A second common error is that certain L
A
T
EX macros are not recognized by the converter,
in which case they will appear in red. This typically happens if you use one of the hundreds
additional L
A
T
EX packages or if you defined some additional macros in another document.
In the case when the troublesome macro occurs only a few times, then we suggest you
to manually expand the macro in the L
A
T
EX source file before importation. Otherwise,
you may try to put the definitions of the missing macros in the preamble of the L
A
T
EX
document. Alternatively, you may create a small style package with T
EXMACS counterparts
for the macros which were not recognized.
The behaviour of the converter may be customized using several user preferences in the
Edit!Preferences!Converters!LaTeX!LaTeX–>TeXmacs menu:
Import sophisticated objects as pictures.
This option allows T
EXMACS to compile the L
A
T
EX document in a temporary direc-
tory, with the package preview installed, in order to import some macros or environ-
ments as pictures. The source of each picture is also imported in order to be re-
exported if needed. Currently, the following macros are imported as pictures when
this option is set: \xymatrix,pspicture,tikzpicture.
204 Compatibility with other formats

Keep track of the L
A
T
E
X source code.
One should be interested in this option in order to use T
EXMACS to make small or
isolated modifications into a L
A
T
EX file (e.g. for a proofreading). This option allows
T
EXMACS to import the L
A
T
EX document with added markup in order to track the
original sources of the document paragraphs. These tracked sources are, as far as
possible, re-used during a L
A
T
EX re-export.
Ensure transparent tracking.
This option, subject to the above, verify that the added markup does not change
the result of the conversion. It has been added for testing purpose and may strongly
increase the time of the import process (at least it double it).
19.1.4. Limitations of the current L
AT
E
X converters
Limitations of the T
E
XMACS to L
A
T
E
X converter.
Some of the T
EXMACS primitives have no analogues in L
A
T
EX. When converting such prim-
itives from T
EXMACS into L
A
T
EX, they will usually be either ignored or replaced by an
approximative translation. A (probably incomplete) list of T
EXMACS features with no L
A
T
EX
counterparts is as follows:
•Left primes.
•Big separators between big parentheses.
•Trees.
•Certain features of tables (background color, cell span, vertical alignment, etc.).
•Complex user macros.
•Vertical spaces “before” and “after”.
•Indentation flags “before” and “after”.
•Most types of interactive content: hyperlinks, actions, sessions, tags for the presen-
tation mode, animations and sounds, etc.
In addition, several issues are only partially implemented:
•Non standard fonts.
•Certain table properties
•Style parameters.
Of course, there are also differences between the typesetting algorithms used by T
EXMACS
and T
EX/L
A
T
EX, so the T
EXMACS to L
A
T
EX is not intended to be wysiwyg.
Limitations of the L
A
T
E
X to T
E
XMACS converter.
As explained in the introduction, the conversion of L
A
T
EX documents into T
EXMACS is
more problematic than conversions the other way around. Only a subset of L
A
T
EX can be
converted to T
EXMACS in a fully reliable way. This subset comprises virtually all common
constructs, including macro definitions and the additional macros uses by the T
EXMACS
to L
A
T
EX converter. However, the converter has no knowledge about style parameters. In
particular, it cannot be used for the conversion of L
A
T
EX style files.
19.1 Converters for L
ATE
X205

19.2. Converters for Html and MathML
Html generation.
T
EXMACS supports reasonably good converters to Html and MathML. A document can
be exported to Html using File!Export!Html. T
EXMACS makes moderate use of Css in
order to improve the presentation of the generated Html.
By default, T
EXMACS does its best in order to render formulas using existing Html/Css
primitives. When selecting Edit!Preferences!Converters!TeXmacs->Html!Use MathML,
all formulas will be exported as MathML. Notice that this requires you to save the
generated documents using the .xhtml extension.
Similarly, the user may force T
EXMACS to export all mathematical formulas as images
using Edit!Preferences!Converters!TeXmacs->Html!Export formulas as images. If your
destination file is called name.html, then the images are stored in the same directory in
files name-1.png,name-2.png and so on. Even when formulas are not exported as images,
notice that all graphics drawn using T
EXMACS are exported in this way. In particular, the
exportation of a T
EXMACS file with pictures may give rise to the creation of additional
image files. You may also force arbitrary content to be exported as an image using Format!
Specific!Image.
T
EXMACS also provides a facility for the creation of entire websites. For this, you just have to
regroup the files for your website into a single directory. Using Tools!Web!Create website
you may now convert all T
EXMACS files in this directory to Html files in a new directory.
The conversion procedure recursively traverses all subdirectories and all non-T
EXMACS files
are simply copied.
Customized Html generation.
The following T
EXMACS environment variables can be used to customize the Html gener-
ation:
html-title.The title of your exported document.
html-css.A cascaded style sheet for your exported document.
html-head-javascript-src.An external Javascript file to be executed before the
body.
html-head-javascript.AJavascript script to be executed before the body.
You may also use the following macros:
hhtml-classjclassjbodyi
hhtml-div-classjclassjbodyi
Associate a CSS class to the content body, optionally inside a separate div tag.
hhtml-stylejstylejbodyi
hhtml-div-stylejclassjbodyi
Associate a CSS style to the content body, optionally inside a separate div tag.
hhtml-javascript-srcjsrci
Execute a Javascript script from the file src.
206 Compatibility with other formats
hhtml-javascriptjcodei
Execute the Javascript script code.
In addition, given a macro my-tag, you may customize the rendering of the tag when
exporting to Html by defining a macro tmhtml-my-tag with the same number of arguments.
For instance, by putting the declaration
hassignjtmhtml-strongjhmacrojbodyjhwithjcolorjredjfont-seriesjboldjbodyiii
inside your style file, all strong text will be exported to Html using a bold red font.
Html importation.
T
EXMACS also contains a rudimentary input converter for Html in File!Import!Html.
Most of HTML 2.0 and parts of HTML 3.0 are currently supported. However, no browsing
facilities have been added yet. The converter also contains a reasonably complete input
converter for embedded MathML fragments.
When importing HTML documents, files whose names start with http: or ftp: will be
downloaded from the web using wget. If you compiled T
EXMACS yourself, then you can
download wget from
ftp://ftp.gnu.org/pub/gnu/wget/
In the binary distributions, we have included wget.
Adding new data formats and converters
Using the Guile/Scheme extension language, it is possible to add new data formats and
converters to T
EXMACS in a modular way. Usually, the additional formats and converters
are declared in your personal ~/.TeXmacs/progs/my-init-texmacs.scm or a dedicated
plug-in. Some examples may be found in the directory $TEXMACS_PATH/progs/convert,
like init-html.scm.
Declaring new formats.
A new format is declared using the command
(define-format format
(:name format-name)
options)
Here format is a symbol which stands for the format and format-name a string which
can be used in menus. In fact, a data format usually comes in several variants: a format
format-file for files, a format format-document for entire documents, a format format-
snippet for snippets, like selections, and format-object for the preferred internal scheme
representation for doing conversions (i.e. the parsed variant of the format). Converters
from format-file to format-document and vice versa are provided automatically.
The user may specify additional options for the automatic recognition of formats by their
file suffix and contents. The possible suffixes for a format, with the default one listed first,
may be specified using
(:suffix default-suffix other-suffix-1 ... other-suffix-n)
19.2 Converters for Html and MathML 207
A (heuristic) routine for recognizing whether a given document matches the format can be
specified using either one of the following:
(:recognize predicate)
(:must-recognize predicate)
In the first case, suffix recognition takes precedence over document recognition and in the
second case, the heuristic recognition is entirely determined by the document recognition
predicate.
A format can be removed from menus using the following:
(:hidden)
Declaring new converters.
New converters are declared using
(converter from to
options)
The actual converter is specified using either one of the following options:
(:function converter)
(:function-with-options converter-with-options)
(:shell prog prog-pre-args from progs-infix-args to prog-post-args)
In the first case, the converter is a routine which takes an object of the from format and
returns a routine of the to format. In the second case, the converter takes an additional
association list as its second argument with options for the converter. In the last case, a
shell command is specified in order to convert between two file formats. The converter is
activated only then, when prog is indeed found in the path. Also, auxiliary files may be
created and destroyed automatically.
T
EXMACS automatically computes the transitive closure of all converters using a shortest
path algorithm. In other words, if you have a converter from xto yand a converter from
yto z, then you will automatically have a converter from xto z. A “distance between two
formats via a given converter” may be specified using
(:penalty floating-point-distance)
Further options for converters are:
(:require cond)
(:option option default-value)
The first option specifies a condition which must be satisfied for this converter to be used.
This option should be specified as the first or second option and always after the :penalty
option. The :option option specifies an option for the converter with its default value.
This option automatically become a user preference and it will be passed to all converters
with options.
208 Compatibility with other formats

Appendix A
Configuration of T
E
X
MACS
A.1. User preferences
For an optimal typing experience, you may wish to configure T
EXMACS in a way which
suits your needs best. This can be done from within the Edit!Preferences menu. Most
importantly, you should choose a “look and feel” in Edit!Preferences!Look and feel. This
will enable you for instance to let the keyboard shortcuts used by T
EXMACS be similar to
what you are used to in other applications.
The following user preferences are available:
Look and feel.This preference controls the general “look and feel” of T
EXMACS, and
mainly affects the behaviour of the keyboard. The default look and feel depends
on your system (Gnome,KDE or Emacs under Linux,Mac OS under Mac OS, and
Windows under Windows). The Emacs look and feel can be used as an alternative
on all systems; it has been the default for all T
EXMACS versions prior to 1.0.7.6.
More details on the keyboard configuration on different systems can be found below.
Interactive questions.This preference specifies how the user will be prompted for input
when required. Questions may either be displayed in separate windows or on the
status bar of T
EXMACS.
Details in menus.This preference specify the level of detail in the menus. The less
frequently used features will be left out when selecting Simplified menus.
View.The preference corresponds to the same viewing options as in the top-level
View menu.
Language.Your preferred language for the T
EXMACS interface.
Keyboard.In addition to the general look and feel, a few additional settings determine
the behaviour of the keyboard:
•The Cyrillic input method specifies how to type text in Cyrillic languages.
•Quotes can be automatically closed according to the Automatic quotes style.
•Brackets can be automatically closed by enabling Automatically close brackets.
Printer.The printer setup can be configured from this submenu.
Security.In theory, T
EXMACS documents may embed macros or hyperlinks which give
rise to the execution of arbitrary commands (as specified by the author). In practice,
this feature may involve a security risk,. Therefore, the Security preference allows
the user to specify what should be done with untrusted executable code.
209

Converters.The behaviour of converters between T
EXMACS various other data formats
may be configured from this menu. For more details, we refer to the chapter on
compatibility with other formats.
Scripts.Specify a default scripting language for all external scripts.
Tools.T
EXMACS features a few additional tools which the user may wish to work under
certain circumstances:
•A debugging tool for T
EXMACS developers.
•A linking tool for entering typed hyperlinks and complex annotations.
•A versioning tool for comparing two versions of a T
EXMACS document.
•A remote connection tool (which currently does not work anymore).
Autosave.This preference specifies how often documents will be “autosaved”. Any edits
to a file which was not autosaved will be lost on undesired termination of T
EXMACS.
This typically occurs after an erroneous manipulations by the user, certain bugs in
T
EXMACS, or a power problem.
Bibtex command.The user may specify an alternative to bibtex for the compilation
of bibliographies using BibT
EX. Notice that recent versions of T
EXMACS integrate
a native alternative tool for the compilation of bibliographies.
A.2. Keyboard configuration
The behaviour of keyboard inside T
EXMACS depends on a few user preferences, as specified
in the menu Edit!Preferences:
•The Look and feel determines the main rules for keyboard shortcuts and attempts to
make the behaviour as close as possible to the standards for the selected look and
feel.
•Some minor customizations are possible via Edit!Preferences!Keyboard.
We will now detail specific issues related to the keyboard configuration on various systems.
Please refer to the section on general conventions for explanations on the way keyboard
shortcuts are printed in this manual. For more information on keyboard shortcuts, we refer
to the general section on how the master the keyboard.
Standard conformance.
T
EXMACS attempts to be as standard-conformant regarding the various look and feels.
However, there are a few general situations in which T
EXMACS reserves some keyboard
shortcuts for the sake of user-friendliness:
•The function keys F5–F12 are reserved for special actions.
•Most standards admit a “principal modifier key” for forming keyboard shortcuts
(⌃for your look and feel) and sometimes another modifier key for other shortcuts
(e.g. the Windows key under Windows and ⌥under Mac OS). The remaining free
modifier (⌥for your look and feel) is reserved for T
EXMACS.
210 Configuration of TE
XMACS
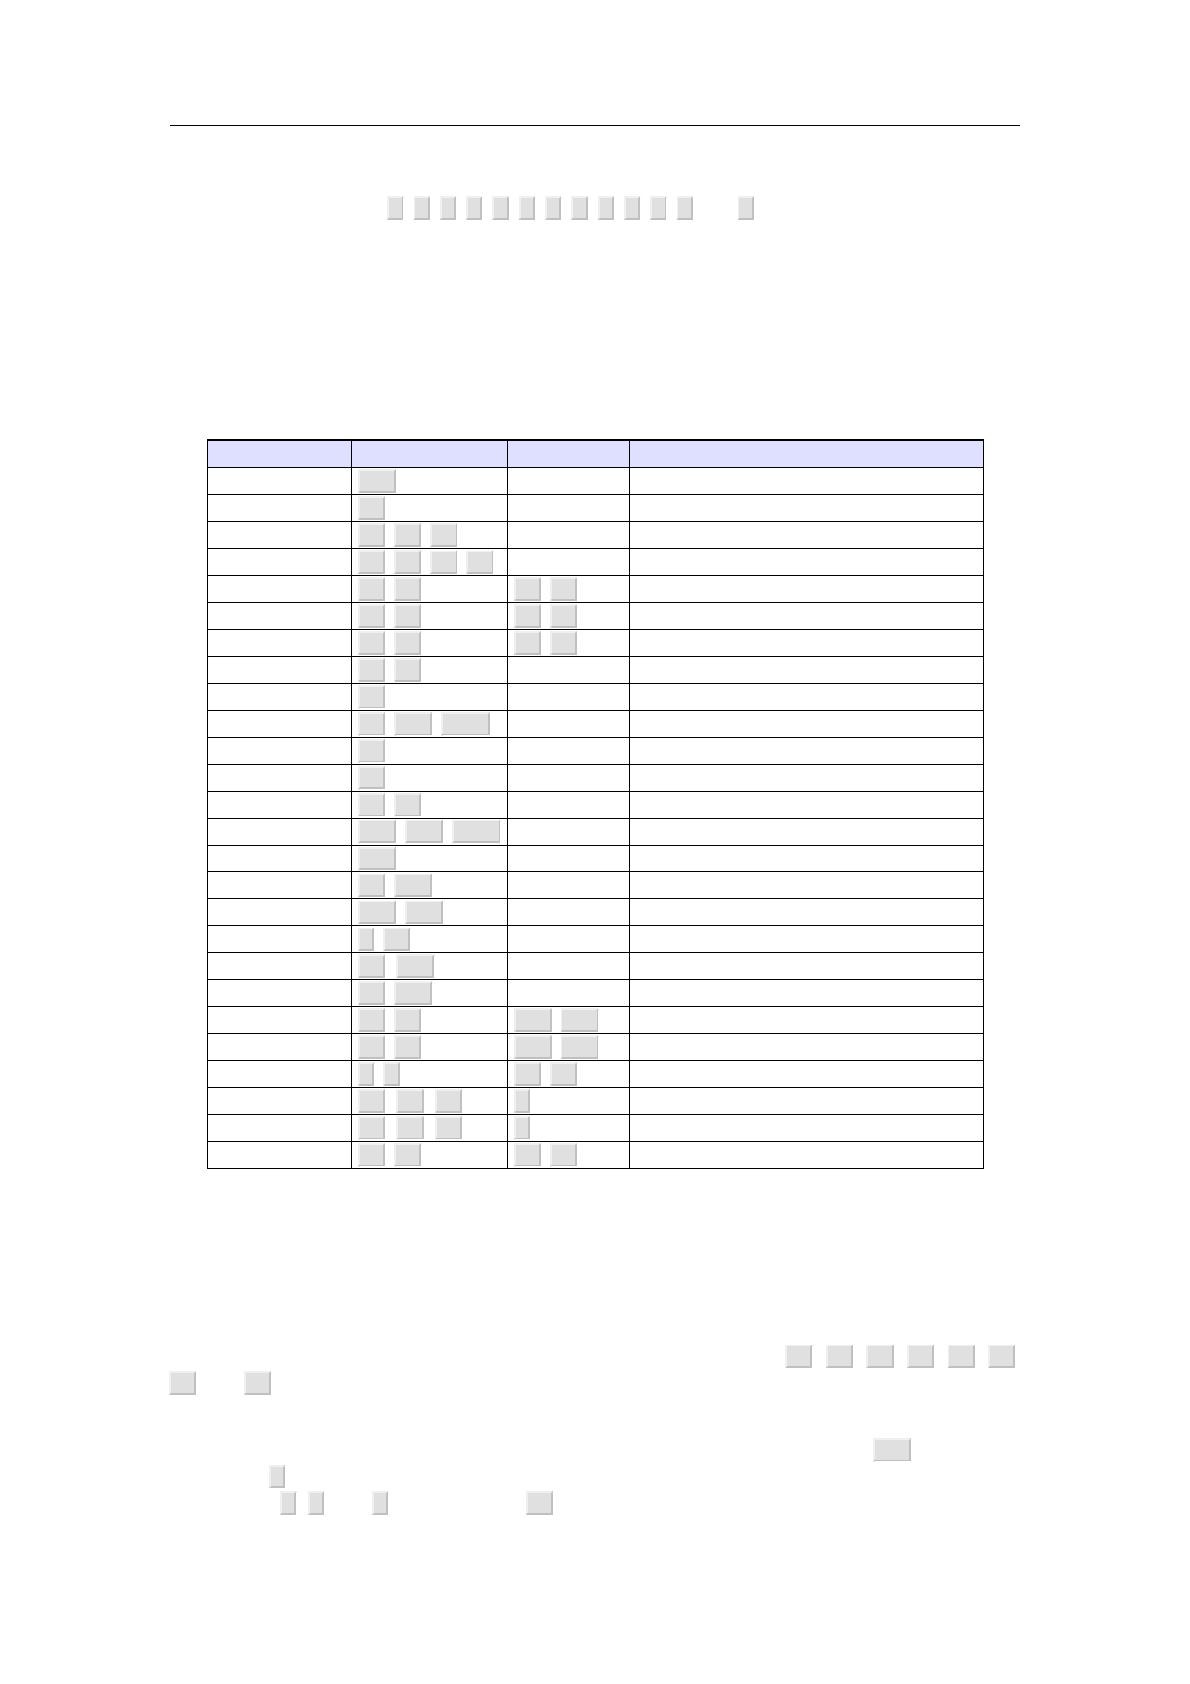
•T
EXMACS contains many keyboard macros involving one or more modifier keys and
the special keys ←,→,↑,↓,↖,↘,⇞,⇟,⌫,⌦,␣,⇥and ↩. The behaviour of shortcuts
of this kind is occasionally non standard.
Potential conflicts.
The T
EXMACS-specific shortcuts are rarely in conflict with standard conventions. Never-
theless, in table A.1, we have displayed some more or less standard shortcuts, which might
work in other applications, but which will usually not work inside T
EXMACS.
Look and feel Shortcut Alternative Meaning
Emacs F10 Show menu bar in window
Emacs ⌘!Shell command
Emacs ⌘'/⌘`/⌘^Needed for T
EXMACS accents
Emacs ⌘//⌘\/⌘:/⌘;
Emacs ⌘←/⌘→⌃←/⌃→Move word back/forward
Emacs ⌘A/⌘E⌃↑/⌃↓Move paragraph back/forward
Emacs ⌘B/⌘F⌃←/⌃→Move word back/forward
Emacs ⌘L/⌘TLocase/transpose words (not impl.)
Windows F5Refresh/Switch to next pane
Windows F6/⌃F6/⌃⇧F6Switch to next/previous pane/tab
Windows ⌃␣ Remove formatting
Windows ⌃⇥ Switch to next child window
Windows ⌃⌫ /⌃⌦ Delete word
Mac OS ⌃F5/⌃F6/⌃⇧F6Move focus to toolbar/panels
Mac OS ⌃F7Override keyboard access mode
Mac OS F9/F10 Tile or untile windows
Mac OS F11/F12 Hide or show windows/dashboard
Mac OS ⇥/⇧⇥ Navigate through controls
Mac OS ⌃⇥,⌃⇧⇥ Move focus within control groups
Mac OS ⌃␣/⌘⌃␣ Toggle between input sources
Mac OS ⌃←/⌃→⌘⌥←/⌘⌥→Move one cell left/right in table
Mac OS ⌃↑/⌃↓⌘⌥↑/⌘⌥↓Move one cell up/down in table
Mac OS ↖/↘ ⌘↑/⌘↓Move to start/end of document
Mac OS ⌥⇞,⌃↑,⌃⇞ ⇞ Page up
Mac OS ⌥⇟,⌃↓,⌃⇟ ⇟ Page down
Mac OS ⌃A/⌃E⌥↑/⌥↓Move to start/end of block
Table A.1. Some shortcuts that might work in other applications, but usually not in T
EXMACS.
System-wide shortcuts which may take precedence.
In addition to the above standard shortcuts, some system-wide applications may define addi-
tional global shortcuts, which take precedence over the T
EXMACS shortcuts. For instance,
under Mac OS X, the application Spaces uses the shortcuts ⌃←,⌃→,⌃↑,⌃↓,⌃1,⌃2,
⌃3and ⌃4to switch between multiple screens.
One solution to the above problems is to change the problematic global shortcuts in the
responsible applications. For instance, Spaces can be configured to use ⌘⌥⌃ as a prefix
instead of ⌃(click on the popup menu behind “To switch between spaces” and simultane-
ously press ⌘,⌥and ⌃). Notice that fn is another key which is not used by T
EXMACS.
A.2 Keyboard configuration 211

If you cannot or do not want to change the system-wide shortcuts, then you may use the
⎋-key in order to produce equivalents for the modifier keys ⌘,⌥and ⌃. For instance, under
Mac OS,⌃is equivalent to ⎋ ⎋. Hence, the T
EXMACS shortcut ⌃→can also be obtained by
typing ⎋⎋→, which may coexist with the Spaces shortcut ⌃→. Table A.2 shows the modifier
key combinations which can be obtained using ⎋.
Shortcut Modifier keys
⎋ ⌘
⎋ ⎋ ⌥
⎋ ⎋ ⎋ ⌃
⇧⎋ ⌘⌥
⇧⎋ ⇧⎋ ⌘⌃
⇧⎋ ⇧⎋ ⇧⎋ ⌥⌃
Table A.2. Keyboard shortcuts for modifier keys or modifier key combinations.
User-defined shortcuts.
If, for some reason, the standard T
EXMACS shortcuts are not sufficient or suitable for you,
then you may define your own shortcuts.
A.3. Notes for users of Cyrillic languages
In order to type Russian (and similarly for other Cyrillic languages) text, you have several
options:
•Select Russian as your default language in Edit!Preferences!Language!Russian. If
T
EXMACS starts with Russian menus, then this is done automatically if the Russian
locale is set.
•Select Russian for an entire document using Document!Language!Russian.
•Select Russian for a portion of text in another document using Format!Language!
Russian.
If your X server uses the Xkb extension, and is instructed to switch between the Latin and
Russian keyboard modes, you need not do anything special. Just switch your keyboard to
the Russian mode, and go ahead. All the software needed for this is included in modern
Linux distributions, and the Xkb extension is enabled by default in XF86Config. With
the Xkb extension, keysyms are 2-byte, and Russian letters are at 0x6??. The keyboard
is configured by setxkbmap. When X starts, it issues this command with the system-wide
Xkbmap file (usually living in /etc/X11/xinit), if it exists; and then with the user’s ~/
.Xkbmap, if it exists. A typical ~/.Xkbmap may look like
ru basic grp:shift_toggle
This means that the keyboard mode is toggled by l-shift r-shift. Other popular choices
are ⌃⇧ or ⌥⌃, see /usr/X11R6/lib/X11/xkb/ for more details. This is the preferred key-
board setup for modern Linux systems, if you plan to use Russian often.
212 Configuration of TE
XMACS
In older Linux systems, the Xkb extension is often disabled. Keysyms are 1-byte, and
are configured by xmodmap. When X starts, it issues this command with the system-wide
Xmodmap (usually living in /etc/X11/xinit), if it exists; and then with the user’s ~/
.Xmodmap, if it exists. You can configure the mode toggling key combination, and use a 1-
byte Russian encoding (such as koi8-r) in the Russian mode. It is easier to download the
package xruskb, and just run
xrus jcuken-koi8
at the beginning of your X session. This sets the layout jcuken (see below) and the
encoding koi8-r for your keyboard in the Russian mode. If you use such keyboard setup,
you should select Options !international keyboard !russian !koi8-r.
It is also possible to use the Windows cp1251 encoding instead of koi8-r, though this is
rarely done in UNIX. If you do use xrus jcuken-cp1251, select cp1251 instead of koi8-r.
All the methods described above require some special actions to “russify” the keyboard.
This is not difficult, see the Cyrillic-HOWTO or, better, its updated version
http://www.inp.nsk.su/~baldin/Cyrillic-HOWTO-russian/Cyrillic-HOWTO-
russian.html
Also, all of the above methods globally affect all X applications: text editors (Emacs,
Nedit,Kedit...), xterms, T
EXMACS etc.
If you need to type Russian only once, or very rarely, a proper keyboard setup may be more
trouble than it’s worth. For the benefit of such occasional users, T
EXMACS has methods
of Russian input which require no preliminary work. Naturally, such methods affect only
T
EXMACS, and no other application.
The simplest way to type some Russian on the standard US-style keyboard with no software
setup is to select Edit!Preferences!Keyboard!Cyrillic input method!translit. Then, typing
a Latin letter will produce “the most similar” Russian one. In order to get some Russian
letters, you have to type 2- or 3-letter combinations:
Shorthand for Shorthand(s) for
⌥" E ¼⌘"⇧EIJ
Y O ¼⇧Y O ⇧Y⇧OIJ
Z H æ⇧Z H ⇧Z⇧HÆ
J⇥æ⇧J⇥Æ
C H ÷⇧C H ⇧C⇧H×
S H ø⇧S H ⇧S⇧HØ
SCH ù⇧SCH ⇧S⇧C⇧HÙ
E⇥ý⇧E⇥Ý
Y U þ⇧Y U ⇧Y⇧UÞ
Y A ÿ⇧Y A ⇧Y⇧Aß
Table A.3. Typing Cyrillic text on a Roman keyboard.
If you want to get, e.g., “ñõ”, and not “ø”, you have to type S/H. Of course, the choice of
“optimal” mapping of Latin letters to Russian ones in not unique. You can investigate the
mapping supplied with T
EXMACS and, if you don’t like something, override it in your ~/
.TeXmacs/progs/my-init-texmacs.scm.
A.3 Notes for users of Cyrillic languages 213
If you select jcuken instead of translit, you get the “official” Russian typewriter layout. It
is so called because the keys “qwerty” produce “éöóêåí”. This input method is most useful
when you have a Russian-made keyboard, which has additional Russian letters written on
the key caps in red, in the jcuken layout (a similar effect can be achieved by attaching
transparent stickers with red Russian letters to caps of a US-style keyboard). It is also
useful if you are an experienced Russian typist, and your fingers remember this layout.
Those who have no Russian letters indicated at the key caps often prefer the yawerty
layout, where the keys “qwerty” produce “ÿâåðòû”. Each Latin letter is mapped into a
“similar” Russian one; some additional Russian letters are produced by ⇧-digits. T
EXMACS
comes with a slightly modified yawerty layout, because it does not redefine the keys $,¿,
\, which are important for T
EXMACS, are not redefined. The corresponding Russian letters
are produced by some ⇧-digit combinations instead.
A.4. Notes for users of oriental languages
In order to type oriental languages, you first have to start a conversion server which
can be used in combination with the X input method and set the environment variables
accordingly. For instance, in the case of Japanese, one typically has to execute the following
shell commands:
kinput2 &
export LANG="ja_JP.eucJP"
export LC_ALL="ja_JP.eucJP"
export XMODIFIERS="@im=kinput2"
You also have to install Japanese fonts. For instance, you may download the Ipag fonts
ipam.ttf,ipag.ttf,ipamp.ttf,ipagm.ttf and ipagui.ttf and copy them to
~/.TeXmacs/fonts/truetype
After doing this, you may launch T
EXMACS using
texmacs --delete-font-cache
and select Japanese from the icon on the first icon bar. If everything went allright, the
menus should now show up in Japanese and the current document is also in Japanese.
Notice that you may also select Japanese as your default language in Edit!Preferences!
Language!Japanese. It is also possible to select Japanese for a portion of text in a document
using Format!Language!Japanese.
Inside a Japanese portion of text, and depending on your input method, you usually have
to type ⇧␣ in order to start Kana to Kanji conversion. A small window shows up where you
can type phonetic characters and use ␣in order to start conversion to Kanji characters.
When pressing ↩, the text is inserted into the main T
EXMACS window. Pressing ⇧␣ once
again returns to the classical T
EXMACS input method.
214 Configuration of TE
XMACS
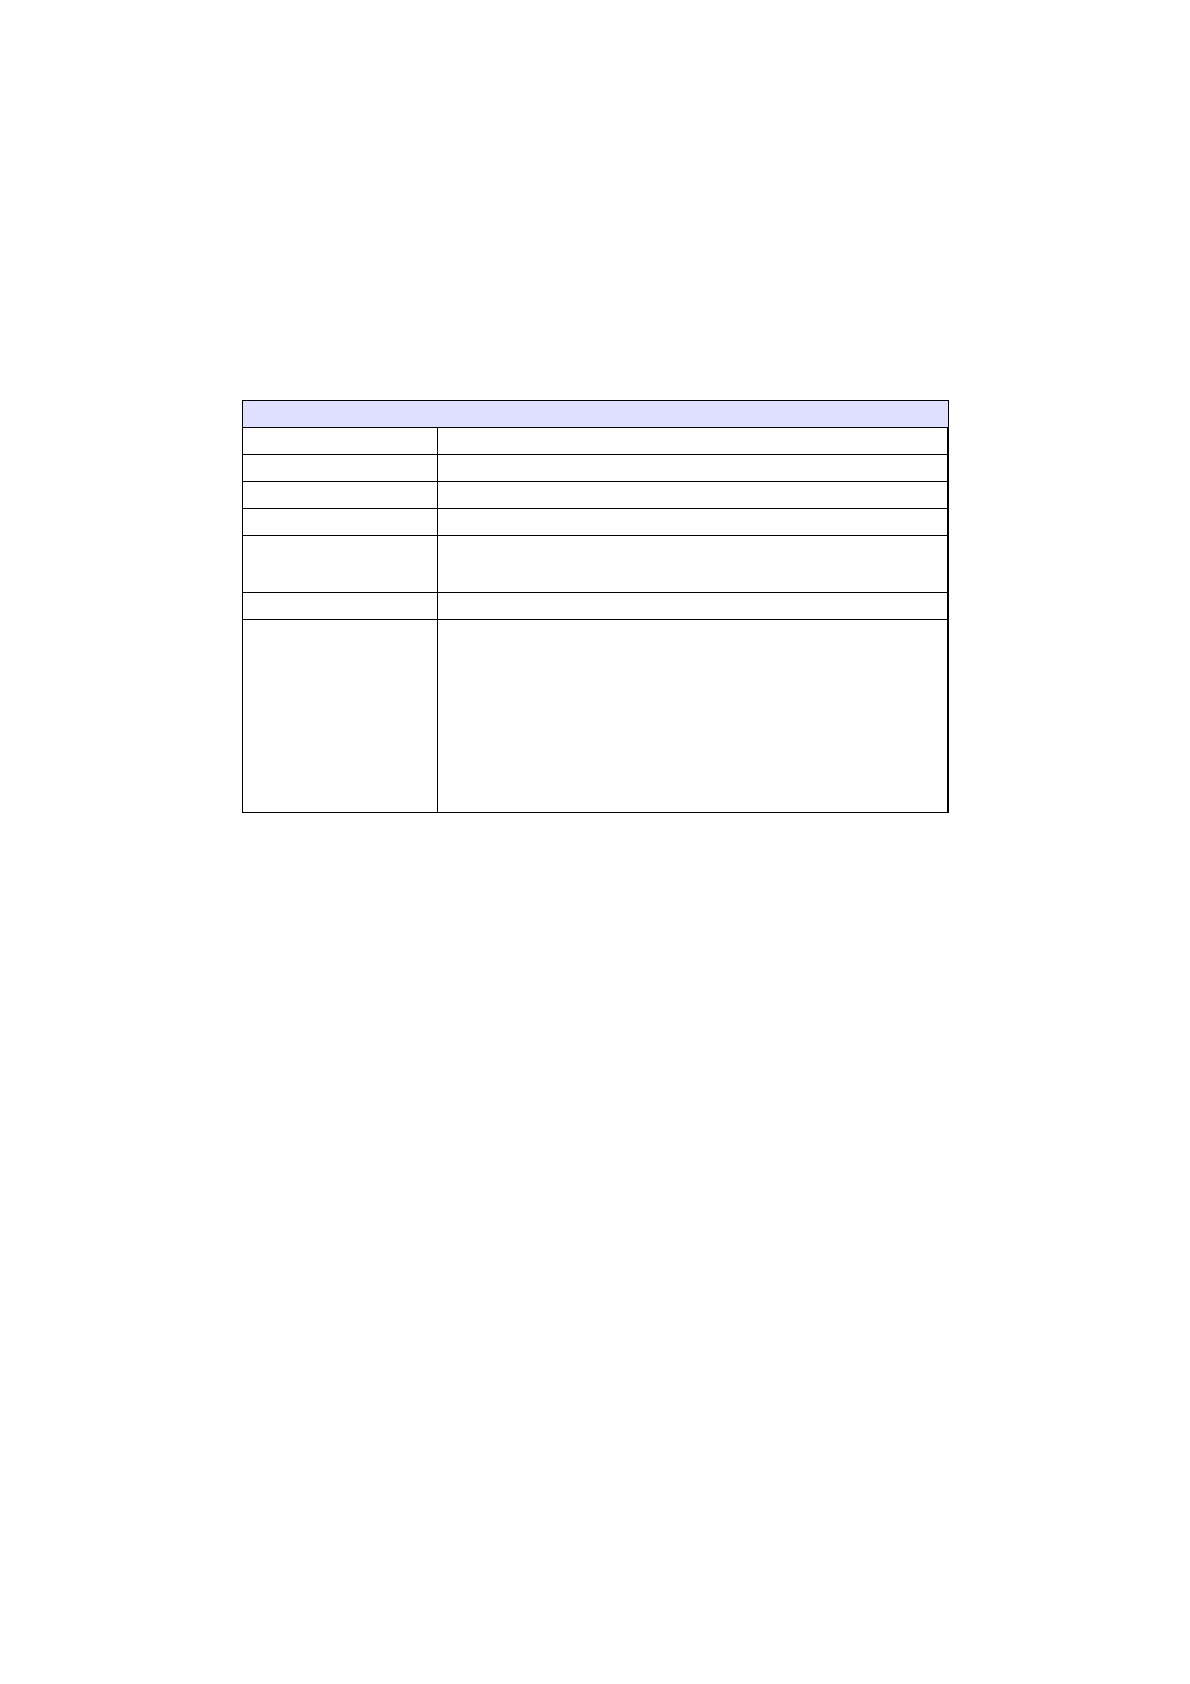
Appendix B
About GNU T
E
X
MACS-1.99.9
B.1. Summary
GNU T
EXMACS
Installed version 1.99.9
Supported systems Most GNU/Linux systems
Copyright ©1998–2017 by Joris van der Hoeven
License GNU General Public License
Web sites http://www.texmacs.org
http://www.gnu.org/software/texmacs
Contact contact@texmacs.org
Regular mail Prof. dr. Joris van der Hoeven
Laboratoire d’informatique de l’École polytechnique
LIX, UMR 7161 CNRS
Campus de l’École polytechnique
1, rue Honoré d’Estienne d’Orves
Bâtiment Alan Turing, CS35003
91120 Palaiseau, France
Table B.1. Summary of the principal information about GNU T
EXMACS.
Disclaimers.
•T
EXMACS includes the LibAes library with the following copyright notice:
Copyright (c) 1998-2013, Brian Gladman, Worcester, UK. All rights reserved.
The redistribution and use of this software (with or without changes)
is allowed without the payment of fees or royalties provided that:
source code distributions include the above copyright notice, this
list of conditions and the following disclaimer;
binary distributions include the above copyright notice, this list
of conditions and the following disclaimer in their documentation.
This software is provided 'as is' with no explicit or implied warranties
in respect of its operation, including, but not limited to, correctness
and fitness for purpose.
B.2. The philosophy behind TE
XMACS
B.2.1. A short description of GNU T
E
XMACS
GNU T
EXMACS is a free wysiwyw (what you see is what you want) editing platform with
special features for scientists. The software aims to provide a unified and user friendly
framework for editing structured documents with different types of content (text, graphics,
mathematics, interactive content, etc.). The rendering engine uses high-quality typesetting
algorithms so as to produce professionally looking documents, which can either be printed
out or presented from a laptop.
215

The software includes a text editor with support for mathematical formulas, a small tech-
nical picture editor and a tool for making presentations from a laptop. Moreover, T
EXMACS
can be used as an interface for many external systems for computer algebra, numerical
analysis, statistics, etc. New presentation styles can be written by the user and new features
can be added to the editor using the Scheme extension language. A native spreadsheet
and tools for collaborative authoring are planned for later.
T
EXMACS runs on all major Unix platforms and Windows. Documents can be saved in
T
EXMACS,Xml or Scheme format and printed as Postscript or Pdf files. Although
T
EXMACS is not based on T
EX/L
A
T
EX, high quality converters exist for L
A
T
EX. Documents
can also be exported to Html/Mathml for publication on the web.
B.2.2. Why freedom is important for scientists
One major objective of T
EXMACS is to promote the development of free software for and
by scientists, by significantly reducing the cost of producing high quality user interfaces. If
you plan to write an interface between T
EXMACS and other software, then please contact us.
As a mathematician, I am deeply convinced that only free programs are acceptable from
a scientific point of view. I see two main reasons for this:
•A result computed by a “mathematical” system, whose source code is not public,
can not be accepted as part of a mathematical proof.
•Just as a mathematician should be able to build theorems on top of other theorems,
it should be possible to freely modify and release algorithms of mathematical soft-
ware.
However, it is strange, and a shame, that the main mathematical programs which are
currently being used are proprietary. The main reason for this is that mathematicians often
do not consider programming as a full scientific activity. Consequently, the development
of useful software is delegated to “engineers” and the resulting programs are used as black
boxes.
This subdivision of scientific activity is very artificial: it is often very important from a
scientific point of view to know what there is in the black box. Inversely, deep scientific
understanding usually leads to the production of better software. Consequently, I think
that scientists should advocate the development of software as a full scientific activity,
comparable to writing articles. Then it is clear too that such software should be diffused
in a way which is compatible with the requirements of science: public availability, repro-
ducibility and free usability.
B.3. The authors of TE
XMACS
The GNU T
EXMACS system, which is part of the GNU project, was designed and written
by Joris van der Hoeven. The system was inspired both by the T
EX system, written by D.
Knuth, and by Emacs, written by R. Stallman. Special thanks goes to them, as well as
to the C.N.R.S. (the French national institute for scientific research), which employs me
and authorized me to freely distribute this program. Further thanks go to the contributors
below.
216 About GNU TE
XMAC S-1.99.9

B.3.1. Developers of T
E
XMACS
•Massimiliano Gubinelli is responsible for the Qt port and several improvements for
the MacOS X platform.
•Andrey Grozin has constantly helped us with many issues: interfaces to several
computer algebra systems, support for Cyrillic, tools for the manipulation of dic-
tionaries, etc.
•François Poulain has made significant improvements in the L
A
T
EX import and export
converters and has contributed numerous other patches.
•David Allouche replaced the gencc preprocessor by the more standard C++ tem-
plate system. He also made many other patches, bug reports and he did a lot of the
administration of T
EXMACS.
•Denis Raux maintains the website, the mailing lists and the Windows version. He
also works on T
EXMACS packages for various platforms.
•Grégoire Lecerf helped us with many issues: document encryption, Pdf export,
extensive testing, bug reports and fixes, etc.
•Miguel de Benito Delgado works on the Qt port, the usage of T
EXMACS to develop
and browse its Scheme code and general improvements to the user experience.
•
Henri Lesourd developed a native mode for drawing technical pictures inside
T
EXMACS. He also fixed a bug in the presentation mode.
•Philippe Joyez provided help concerning the support of various image formats and
the compatability with Inkscape.
•Darcy Shen is the main translator for Chinese. He also helped with the CJK support,
contributed various patches, and provided a lot of community work.
•Dan Martens made a first Windows port that is no longer maintained.
•David Michel provided help concerning the Qt-based Windows port and several
portability issues.
•Andreas Seidl has been helping with documentation, a Cygwin package and several
other things.
•Dan Grayson helped me to implement communications with computer algebra sys-
tems via pipes. He also provided some money support for T
EXMACS, and he made
many useful comments and suggestions.
•Fabrice Rouillier provided help on a simplified T
EXMACS installer based on Cygwin.
•Nobuki Takayama invited me to Japan in order to add CJK support to T
EXMACS.
He also provided a lot of help with this task.
B.3 The authors of TE
XMAC S 217

•Karim Belabas designed and developed with me the first protocol for interfacing
T
EXMACS with scientific computation or computer algebra systems. He also imple-
mented the interface with the Pari system.
•Felix Breuer helped with the support of Unicode and other character encodings. He
also made a donation to the project.
•Norbert Nemec contributed a series of patches.
•Josef Weidendorfer made several patches for improving the performance of T
EXMACS.
•Basile Audoly contributed a series of detailed bug descriptions and suggestions for
improvements.
•Sam Liddicott for several patches, including hyperlink support for Pdf files.
•Zou Hu for his help on CJK support and the Windows port.
•Stéphane Payrard made an important bugfix for destroying windows.
•Bruno Rino has helperd us migrating from CVS to SVN.
•Fabien Chéreau has helped us with the Qt port of T
EXMACS.
•Johann Dréo for the new T
EXMACS icon and many other graphics.
•Bill Page and David Mentré for the support of the free version of Axiom.
•Chu-Ching Huang for writing CAS documentation and making a Knoppix CD for
T
EXMACS.
•Nelson Beebe helped with manifacturing a more robust configure.in.
•Kai Krüger fixed several details for the new Maple interface.
•Mickael Floc’hlay and Arnaud Ébalard for their work on searching for help.
•Gwenael Gabard for some fixes in the L
A
T
EX to T
EXMACS converter.
•Igor V. Kovalenko and Teemu Ikonen for their help on debugging TeXmacs and a
few patches.
•Gareth McCaughan made several patches and comments.
•Immanuel Normann is working on an OpenMath converter.
•Jonas Lööf for a precise installation procedure on Cygwin.
•Rob Clark made a patch which improves the system time support.
218 About GNU TE
XMAC S-1.99.9

•Stanislav Brabec for several patches so as to increase portability.
•Bruno Haible helped coining the name T
EXMACS, thereby acknowledging some initial
inspiration from both T
EX and Emacs.
B.3.2. Authors and maintainers of plugins for T
E
XMACS
Asymptote — Yann Dirson and Emmanuël Corcelle.
Axiom — Andrey Grozin, Bill Page, David Mentré and Tim Daly.
Cadabra — Kasper Peeters.
CLisp — Michael Graffam.
CMucl — Michael Graffam.
DraTeX — Nicolas Ratier.
Eukleides — Mark Arrasmith.
Feynmf — Maarten Wegewijs.
Giac — Bernard Parisse.
GNUplot — Stephan Mucha.
Graphviz — Jorik Blaas.
GTybalt — Stefan Weinzierl.
Lush — Michael Graffam.
Macaulay 2 — Dan Grayson.
Maple — Joris van der Hoeven.
Mathemagix — Joris van der Hoeven and Grégoire Lecerf.
Matlab — Michael Graffam.
Maxima — Andrey Grozin and James Amundson.
Mupad — Christopher Creutzig and Andrey Grozin.
Octave — Michael Graffam.
Pari — Karim Belabas.
Python — Ero Carrera.
B.3 The authors of TE
XMAC S 219

Qcl — Andrey Grozin.
R— Michael Lachmann.
Reduce — Andrey Grozin.
Scilab — François Poulain, Serge Steer and Claude Gomez.
Shell — Joris van der Hoeven.
TeXgraph — Emmanuël Corcelle.
XYpic — Nicolas Ratier.
Yacas — Ayal Pinkus.
B.3.3. Administration of T
E
XMACS and material support
•Rennes Métropôle and the C.N.R.S. for financially supporting the development of
T
EXMACS.
•Christoph Benzmueller and his team for financially supporting the development of
T
EXMACS.
•Springer-Verlag for their financial support for making a better Windows version.
•Jean-Claude Fernandez, Fabien Salvi and the other persons from the CRI host and
administrate the T
EXMACS website.
•Álvaro Tejero Cantero maintains up the T
EXMACS Wiki.
•Loic Dachary made T
EXMACS accessible on Savannah.
B.3.4. Porting T
E
XMACS to other platforms
•Dan Martens is working on a the experimental Windows port.
•Marciano Siniscalchi ported T
EXMACS to Cygwin. His work was further perfected
by Loïc Pottier. Andreas Seidl made a the standard Cygwin package.
•Martin Costabel ported T
EXMACS to MacOSX.
•Ralf Treinen and others has been ensuring the portability of T
EXMACS to all archi-
tectures supported by Debian Gnu/Linux.
•Bruno Haible and Gregory Wright helped with porting T
EXMACS to the SUN system
and maintaining it.
•Philipp Tomsich and Chuck Sites for their help with the IRIX port.
220 About GNU TE
XMAC S-1.99.9

B.3.5. Contributors to T
E
XMACS packages
•
Atsuhito Kohda and Kamaraju Kusumanchi maintain the Debian package for
T
EXMACS.
•Christophe Merlet and Bo Forslund helped with making a portable RPM package.
•Lenny Cartier maintains the T
EXMACS RPM for Mandrake Cooker.
•Jean Pierre Demailly and Yves Potin made T
EXMACS part of the CNDP project to
support free software.
B.3.6. Internationalization of T
E
XMACS
Chinese. Chu-Ching Huang, Zou-Hu, Darcy Shen.
Croatian. Luka Marohnić.
Czech. David Rezac.
Danish. Magnus Marius Rohde.
Dutch. Joris van der Hoeven.
Finnish. Teemu Ikonen.
French. Michèle Garoche, Joris van der Hoeven.
German. Dietmar Jung, Hans Dembinski, Jan Ulrich Hasecke, Christoph Strobel,
Joris van der Hoeven, Thomas Langen, Ralf Treinen.
Greek. Alkis Akritas.
Hungarian. András Kadinger.
Italian. Andrea Centomo, Lucia Gecchelin, Xav and Daniele Pighin, Gian Luigi Grag-
nani.
Japanese. Nobuki Takayama.
Korean. Karnes Kim.
Polish. Robert Janusz, Emil Nowak, Jan Alboszta.
Portuguese. Ramiro Brito Willmersdorf, Márcio Laurini, Alexandre Taschetto de
Castro.
Romanian. Dan Ignat.
Russian. Andrey Grozin.
Slovene. Ziga Kranjec.
Spanish. Álvaro Cantero Tejero, Pablo Ruiz Múzquiz, David Moriano Garcia, Offray
Vladimir Luna Cárdenas.
B.3 The authors of TE
XMAC S 221

Swedish. Harald Ellmann.
Taiwanese. Chu-Ching Huang.
Ukrainian. Volodymyr Lisivka.
B.3.7. Other contributors
Final thanks go to all others who have contributed to T
EXMACS, for instance by sending
bug reports or by giving suggestions for future releases: Alexandre Abbes, Alessio Abo-
gani, Aaron Acton, Till Adam, Murali Agastya, Eizo Akiyama, Javed Alam, Doublet
Alban, Michele Alessandrin, Guillaume Allègre, Andreas Almroth, Tom Alsberg, James
Amundson, Piero D’Ancona, Daniel Andor, Ayal Anis, Larry D’Anna, Javier Arantegui
Jimenez, André Arnold, Uwe Assmann, Philippe Audebaud, Daniel Augot, Olaf Bachmann,
Franky Backeljauw, Nick Bailey, Adrian Soto Banuelos, Pierre Barbier de Reuille, Marc
Barisch, Giovanni Maniscalco Basile, Claude Baudouin, Marten Bauer, Luc Béhar, Roman
Belenov, Odile Bénassy, Paul Benham, Roy C. Bentley, Attila Bergou, Christophe Bernard,
Konrad Bernloehr, Karl Berry, Matthias Berth, Matteo Bertini, Cédric Bertolini, Matthew
Bettencourt, Raktim Bhattacharya, Giovanni Biczó, Anne-Laure Biolley, Benedikt Birken-
bach, Jim Blandy, Sören Blom, François Bochatay, Christof Boeckler, Anton Bolfing,
Robert Borys, Didier Le Botlan, Mohsen Bouaissa, Thierry Bouche, Adrien Bourdet, Michel
Brabants, Didier Bretin, Jean-Yves Briend, Henrik Brink, Simon Britnell, Alexander M.
Budge, Daniel Bump, Yoel Callev, José Cano, Charles James Leonardo Quarra Cap-
piello, Patrick Cardona, Niclas Carlsson, Dominique Caron, António Carvalho, Michel
Castagner, Topher Cawlfield, Carlo Cecati, Beni Cherniavsky, Kuo-Ping Chiao, Teddy
Fen-Chong, Henri Cohen, Johann Cohen-Tanugi, Dominique Colnet, Vincenzo Colosimo,
Claire M. Connelly, Christoph Conrad, Riccardo Corradini, Paulo Correia, Olivier Cortes,
Robert J. Cristel, Maxime Curioni, Allan Curtis, Jason Dagit, Stefano Dal Pra, Thierry
Dalon, François Dausseur, Jon Davidson, Mike Davidson, Thomas Delzant, Jean-Pierre
Demailly, Peter Denisevich, Alessio Dessi, Benno Dielmann, Lucas Dixon, Mikael Djurfeldt,
Gabriel Dos Reis, Alban Doublet, Steingrim Dovland, Michael John Downes, Benjamin
Drieu, Jose Duato, Amit Dubey, Daniel Duparc, Guillaume Duval, Tim Ebringer, Dirk
Eddelbuettel, Magnus Ekdahl, Ulf Ekström, Sreedhar Ellisetty, Luis A. Escobar, Thomas
Esser, Stephan Fabel, Robin Fairbairns, Tony Falcone, Vladimir Fedonov, Hilaire Fer-
nandes, Ken Feyl, Jens Finke, Thomas Fischbacher, Juan Flynn, Cedric Foellmi, Enrico
Forestieri, Ted Forringer, Christian Forster, Charlie Fortner, Stefan Freinatis, Michael
P Friedlander, Nils Frohberg, Rudi Gaelzer, Maciej Gajewski, Lionel Garnier, Philippe
Gogol, Björn Gohla, Patrick Gonzalez, Nirmal Govind, Albert Graef, Michael Graffam,
Klaus Graichen, Ian Grant, Frédéric Grasset, Guido Grazioli, Wilco Greven, Cyril Grun-
span, Laurent Guillon, Yves Guillou, Tae-Won Ha, Harri Haataja, Sébastien Hache, Irwan
Hadi, James W. Haefner, Sam Halliday, Ola Hamfors, Aaron Hammack, Guillaume Hanrot,
Alexander K. Hansen, Peter I. Hansen, Zaid Harchaoui, Jesper Harder, Philipp Hartmann,
P. L. Hayes, Karl M. Hegbloom, Jochen Heinloth, Gunnar Hellmund, Ralf Hemmecke,
Roy Henk, John Hernlund, Alain Herreman, Alexander Heuer, Johannes Hirn, Santiago
Hirschfeld, Andreas Horn, Peter Horn, Chu-Ching Huang, Sylvain Huet, Ed Hurst, Karl
Jarrod Hyder, Richard Ibbotson, Benjamin T. Ingram, Alexander Isacson, Michael Ivanov,
Vladimir G. Ivanovic, Maik Jablonski, Frederic de Jaeger, Pierre Jarillon, Neil Jerram,
Paul E. Johnson, Pierre-Henri Jondot, Peter Jung, Mukund S. Kalisi, Antoun Kanawati,
Yarden Katz, Tim Kaulmann, Bernhard Keil, Samuel Kemp, Jeremy Kephart, Michael
Kettner, Salman Khilji, Iwao Kimura, Simon Kirkby, Ronny Klein, Peter Koepke, Matthias
Koeppe, John Kollar, Denis Kovacs, Jeff Kowalczyk, Dmitri Kozionov, Ralph Krause,
222 About GNU TE
XMAC S-1.99.9

Neel Krishnaswami, Friedrich Laher, Winter Laite, Anthony Lander, Russell Lang, David
Latreyte, Christopher Lee, Milan Lehocky, Torsten Leidig, Patrick Lenz, Kalle Lertola,
Tristan Ley, Joerg Lippmann, Marc Longo, Pierre Lorenzon, Ralph Lõvi, V. S. Lugovsky,
Gregory Lussiana, Bud Maddock, Duraid Madina, Camm Maguire, Yael Maguire, Paul
Magwene, Jeremiah Mahler, Vincent Maillot, Giacomo Mallucci, Lionel Elie Mamane,
Sourav K. Mandal, Andy P. Manners, Yun Mao, Chris Marcellin, Sylvain Marchand,
Bernd Markgraf, Eric Marsden, Chris Marston, Evan Martin, Carlos Dehesa Martínez,
Paulo Jorge de Oliveira Cantante de Matos, Tom McArdell, Alisdair McDiarmid, Bob
McElrath, Robert Medeiros, Phil Mendelsohn, Sébastien de Menten, Jean-Michel Mermet,
Jon Merriman, Herve le Meur, Ingolf Meyer, Amir Michail, Franck Michel, Arkadiusz
Miśkiewicz, Sasha Mitelman, Dirk Moebius, Jack Moffitt, Jan David Mol, Klaus-Dieter
Möller, Harvey Monder, Juan Fresneda Montano, André Moreau, Guillaume Morin, Julian
Morrison, Bernard Mourrain, Stephan Mucha, Toby Muhlhofer, Vijayendra Munikoti,
Nathan Myers, Norbert Nemec, Thomas Neumann, Thien-Thi Nguyen, Han-Wen Nienhuys,
Nix N. Nix, Eduardo Nogueira, Immanuel Normann, Jean-Baptiste Note, Ralf Nuetzel,
Kostas Oikonomou, Ondrej Pacovsky, Bill Page, Santtu Pajukanta, Pierre Pansu, Ilya Papi-
ashvili, Bernard Parisse, Frédéric Parrenin, André Pascual, Fernández Pascual, Yannick
Patois, Alen L. Peacock, François Pellegrini, Antonio Costa Pereira, Enrique Perez-Terron,
Jacob Perkins, Bernard Perrot, Jan Peters, Jean Peyratout, Jacques Peyriere, Valery
Pipin, Dimitri Pissarenko, Yves Pocchiola, Benjamin Podszun, Martin Pollet, Benjamin
Poussin, Isaías V. Prestes, Rui Prior, Julien Puydt, Nguyen-Dai Quy, Manoj Rajagopalan,
Ramakrishnan, Adrien Ramparison, Nicolas Ratier, Olivier Ravard, Leo Razoumov, Ken-
neth Reinhardt, Cesar A. Rendon, Christian Requena, Diego Restrepo, Chris Retford,
Robert Ribnitz, Thomas CLive Richards, Staffan Ringbom, Eric Ringeisen, Christian
Ritter, William G. Ritter, Will Robinson, Juan Pablo Romero, Pascal Romon, Juergen
Rose, Mike Rosellini, Mike Rosing, Bernard Rousseau, Eyal Rozenberg, Olivier Ruatta,
Filippo Rusconi, Gaetan Ryckeboer, Philippe Sam-Long, John Sandeman, Duncan Sands,
Breton Saunders, Claire Sausset, David Sauzin, Gilles Schaeffer, Guido Schimmels, Rainer
Schöpf, David Schweikert, Stefan Schwertheim, Rui Miguel Seabra, Chung-Tsun Shieh,
Sami Sieranoja, Vasco Alexandre da Silva Costa, Marciano Siniscalchi, Daniel Skarda,
Murray Smigel, Václav Šmilauer, Dale P. Smith, Luke Snow, René Snyders, Pekka Sor-
jonen, Kasper Souren, Rodney Sparapani, Bas Spitters, Ivan Stanisavljevic, Starseeker,
Harvey J. Stein, Peter Sties, Bernard Stloup, Peter Stoehr, Thierry Stoehr, James Su, Prze-
myslaw Sulek, Ben Sussman, Roman Svetlov, Milan Svoboda, Dan Synek, Pan Tadeusz,
Luca Tagliacozzo, Sam Tannous, John Tapsell, Dung TaQuang, Gerald Teschl, Laurent
Thery, Eric Thiébaut, Nicolas Thiery, Helfer Thomas, Reuben Thomas, Dylan Thurston,
Kurt Ting, Janus N. Tøndering, Philippe Trébuchet, Marco Trevisani, Boris Tschirschwitz,
Elias Tsigaridas, Michael M. Tung, Andreas Umbach, Miguel A. Valle, Rémi Vanicat,
Harro Verkouter, Jacques Vernin, Sawan Vithlani, Philip A. Viton, Marius Vollmer, Guy
Wallet, Adam Warner, Thomas Wawrzinek, Maarten Wegewijs, Duke Whang, Lars Willert,
Grayson Williams, Barton Willis, Claus-Peter Wirth, Ben Wise, Wiebe van der Worp,
Pengcheng Wu, Damien Wyart, Wang Yin, Lukas Zapletal, Volker Zell, Oleg Zhirov, Vadim
V. Zhytnikov, Richard Zidlicky, Sascha Ziemann, Reinhard Zierke, Paul Zimmermann.
B.3.8. Contacting us
You can either contact us by email at
contact@texmacs.org
or by regular mail at
B.3 The authors of TE
XMAC S 223

Joris van der Hoeven
Laboratoire d'informatique de l'École polytechnique
Campus de l'École polytechnique
1, rue Honoré d'Estienne d'Orves
Bâtiment Alan Turing, CS35003
91120 Palaiseau, France
There are also several T
EXMACS mailing lists:
dtexmacs-users@texmacs.org
texmacs-info@texmacs.org
texmacs-dev@gnu.org
B.4. Important changes in TE
XMACS
Below, we briefly describe the most important changes which have occurred in T
EXMACS
since version 0.3.3.15. We also maintain a more detailed change log.
In general, when upgrading to a new version, we recommend you to make backups of your
old T
EXMACS files before opening them with the newer version of T
EXMACS. In the unlikely
case when your old file does not open in the correct way, please send a bug report to
bugs@texmacs.org
and send your old document as an attached file. Do not forget to mention your version of
T
EXMACS and the system you are using.
B.4.1. Improved spacing inside formulas (1.0.7.10)
In the new version, the spacing around mathematical operators has been made dependent
on the semantic context. For instance, when used as an infix operator in a subtraction
x¡y, there are small spaces around the minus sign ¡; this is no longer the case in ¡x,
where we use the minus as a prefix. Similarly, the spacing inside lists of operators +;¡;×
is now correct. However, the modification may alter the spacing inside some formulas in
existing documents. For critical documents, you may thus want to review the line breaking.
Some of the keyboard shortcuts inside formulas have also been modified. For instance, ^
and _are now obtained by typing &resp. %. The shortcuts for 2,≺and jhave also been
changed. For more information, please refer to the documentation on editing mathematical
formulas. At this place, you will also find more information about the newly added semantic
editing features.
B.4.2. Auto-matching brackets (1.0.7.9)
From now on, inside mathematical formulas, all brackets have to match and all big oper-
ators should admit well-specified scopes. To this effect, the way parenthesized expressions
are edited has changed, although the old non-matching editing style can be restored using
Edit!Preferences!Keyboard!Automatic brackets!Disable.
Documents for previous versions of T
EXMACS will be upgraded automatically in order to
make all brackets match and determine the scopes of big operators. Although this task is
accomplished using heuristics, the result should be correct most of the time. In any case,
from the typesetting point of view, the upgraded documents will always look the same.
224 About GNU TE
XMAC S-1.99.9

B.4.3. More context dependent interface (1.0.7.8)
The interface of the new version of T
EXMACS is more context dependent. On the one hand,
the menus and toolbars have been reorganized. Several items from the Insert menu have
been moved to the Format menu, whereas the context dependent menus Text,Mathematics,
Table,Session, etc. have disappeared, their contents being moved to the Insert menu.
On the other hand, a new top-level Focus menu has been created. Its contents is highly
context dependent and determined as a function of the current focus. Similarly, a third
focus toolbar has been introduced. For more information, we refer to the section on typing
structured text.
T
EXMACS developers should also notice that the introduction of the focus has modified the
way contextual overloading is done. For more details, we refer to the sections on contextual
overloading and the T
EXMACS editing model.
B.4.4. Default look and feel (1.0.7.7)
From this version on, the default look and feel of T
E
X
MACS
depends on your operating system
and environment. The implemented look and feels (Emacs,Gnome,KDE,MacOS,Win-
dows) attempt to be as compatible as possible with the look and feel of other applications
on your system. You may choose an alternative look and feel in Edit!Preferences!Look
and feel.
In order to make the T
EXMACS keyboard shortcuts as compatible as possible with the
standards on your system, we have redefined many of the keyboard shortcuts. Although
these changes will only marginally affect the Emacs look and feel, there will be substential
changes for all other look and feels.
If you upgrade from a previous T
EXMACS version with the Emacs look and feel, then
you will be able to keep most of your habits. In all contrary cases, including installation
of T
EXMACS on a new computer, you probably need to retake a look at our sections on
keyboard configuration and mastering the keyboard. In cases of doubt, please refer to the
user manual; the keyboard shortcuts in the manual are automatically adapted to the active
look and feel.
B.4.5. Linking tool (1.0.6.3)
From this version on, T
EXMACS includes a linking tool, as well as a tool for remote connec-
tions to a T
EXMACS server. In the 1.0.6.* series, these tools are still under development, so
we ask users for their kind feedback. In order to enable the tools, you have to activate them
in Edit!Preferences!Utilities. Notice that the linking tool replaces the Proclus plug-in.
If you were a user of this plug-in, then please check with its author Alain Herreman
whether an automatic upgrade facility is available.
B.4.6. Type 1 fonts become the default (1.0.5.10)
From now on, T
EXMACS uses Type 1 fonts by default, which enable you to generate higher
quality Pdf files. The basic T
EXMACS distribution (for Unix) comes with a minimal set of
EC fonts for European languages, but an additional font package can be downloaded from
our web site (the additional fonts are directly included in the Windows version). When-
ever a given font is not available as a type 1 font, then T
EXMACS falls back on Metafont
in order to generate a Type 3 substitute. This behaviour can be further customized in
Edit!Preferences!Printer!Font type.
B.4 Important changes in TE
XMAC S 225

B.4.7. New multi-part document mechanism (1.0.5.6 – 1.0.5.7)
Previous versions of T
EXMACS provided the “project” mechanism for dealing with large
documents like books. In the new version, any large structured document can be trans-
formed into a multi-part document whose individual parts can be viewed and edited in
an efficient way (see Document!Part). Former multi-file projects are deprecated although
still supported. They can be transformed into multi-part documents using Tools!Project!
Expand inclusions. A new multi-part document corresponds to a single file.
B.4.8. Improved scheme interface (1.0.5.1 – 1.0.5.6)
The Scheme interface has been further improved and stabilized. For those users who cus-
tomized the behaviour of T
EXMACS using a personal initialization file, it may be necessary
to make a few corrections. Some information about the new Scheme interface can be found
in Scheme!Extensions. Further documentation will be written later.
B.4.9. Improved titles (1.0.4.1)
From now on, titles of documents are more structured. This makes it easier to render
the same title information in the appropriate ways for different styles. Old-style titles are
automatically upgraded, but the result is only expected to be correct for documents with
a single author. For documents with multiple authors, you may have to re-enter the title
using our new interface.
B.4.10. Improved style sheets and source editing mode (1.0.3.5)
We are making it easier for users to edit style sheets. This improvement made it necessary
to simplify many of the standard T
EXMACS styles and packages, so that it will be easier to
customize them. However, if you already designed some style files, then this may break
some of their features. We mainly redesigned the list environments, the section environ-
ments and automatic numbering. Please report any problems to us.
B.4.11.
Renaming of tags and environment variables (1.0.2.7 --
1.0.2.8)
Most environment variables and some tags have been renamed, so that these names no
longer contain whitespace and only dashes (and no underscores) as separators.
B.4.12. Macro expansion (1.0.2.3 – 1.0.2.7)
An important internal change concerning the data format has been made: macro expan-
sions and function applications like
(expand tag arg-1 ... arg-n)
(apply tag arg-1 ... arg-n)
are now replaced by hard-coded tags
226 About GNU TE
XMAC S-1.99.9

(tag arg-1 ... arg-n)
Moreover, functions have systematically been replaced by macros. The few built-in func-
tions which may take an arbitrary number of arguments have been rewritten using the new
xmacro construct. If you ever wrote such a function yourself, then you will need to rewrite
it too.
The new approach favorites a uniform treatment of macros and functions and makes the
internal representation match with the corresponding Scheme representation. More and
more information about tags will gradually be stored in the D.R.D. (Data Relation Defi-
nition). This information is mostly determined automatically using heuristics.
Notice that some perverse errors might arise because of the above changes. Please keep
copies of your old files and report any suspicious behaviour to us.
B.4.13. Formatting tags (1.0.2 – 1.0.2.1)
All formattings constructs without arguments (like line breaks, indentation directives, etc.)
have been replaced by tags of arity zero. This makes most new documents badly unreadable
for older versions of T
EXMACS and subtle errors might occasionnaly occur when saving or
loading, or during other editing operations.
B.4.14. Keyboard (1.0.0.11 – 1.0.1)
The T
EXMACS keybindings have been rationalized. Here follows a list of the major changes:
•The E-prefix has been renamed to ⌘.
•⌘is equivalent to ⌘and ⌘-⌘to ⌥.
•Mode dependent commands are now prefixed by ⌥. In particular, accents are typed
using ⌥instead of E-.
•Variants are now obtained using ⇥instead of *and you can circle back using ⇧⇥.
•Greek characters are now typed using ⌥⌃,⇧F7, or the hyper modifier, which can be
configured in Edit!Preferences. You may also obtain Greek characters as variants
of Latin characters. For instance, P⇥yields π.
•The signification of the cursor keys in combination with control, alt and meta has
changed.
You may choose between several “look and feels” for the keyboard behaviour in Edit!
Preferences!Look and feel. The default is Emacs, but you may choose Old style if you want
to keep the behaviour to which you may be used now.
B.4.15. Menus (1.0.0.7 – 1.0.1)
Several changes have been made in the menus. Here follows a list of the major changes:
•Buffer has been renamed as Go.
B.4 Important changes in TE
XMAC S 227

•Several items from File have been moved to View.
•The Edit!Import and Edit!Export items have been moved to Tools!Selections.
•The Insert menu has been split up into the menus Insert,Text and Mathematics.
•The Text and Paragraph menus have been merged together in one Format menu.
•Options has been spread out across Document,View,Tools and Edit!Preferences.
B.4.16. Style files (1.0.0.4)
Many changes have been made in the organization of the T
EXMACS style files. Personal style
files which depend on intermediate T
EXMACS packages may require some slight adaptations.
We are working towards a stabilization of the standard style files and packages. At the end
of this process, it should be easy to adapt existing L
A
T
EX style files for journals to T
EXMACS
by customizing these standard style files and packages. As soon as we have time, we plan
to provide online documentation on how to do this at Help!Online documentation.
B.4.17. Tabular material (0.3.5)
The way tabular material is treated has completely changed. It has become much easier to
edit tables, matrices, equation arrays, etc. Also, many new features have been implemented,
such as background color, border, padding, hyphenation, subtables, etc. However, the
upgrading of old tabular material might sometimes be erroneous, in which case we invite
you to submit a bug report.
B.4.18. Document format (0.3.4)
The TeXmacs document format has profoundly changed in order to make TeXmacs com-
patible with XML in the future. Most importantly, the old style environments like
<assign|env|<environment|open|close>>,
which are applied via matching pairs <begin|env>text<end|env>, have been replaced by
macros
<assign|env|<macro|body|open<body>close>>,
which are applied via single macro expansions <expand|env|text>. Similarly, matching
pairs <set|var|val>text<reset|var> of environment variable changes are replaced by a
<with|var|val|text> construct (close to XML attributes). From a technical point of view,
these changes lead to several complications if the text body consists of several paragraphs.
As a consequence, badly structured documents may sometimes display differently in the
new version (although I only noticed one minor change in my own documents). Further-
more, in order to maintain the higher level of structure in the document, the behaviour of
the editor in relation to multiparagraph environments has slightly changed.
228 About GNU TE
XMAC S-1.99.9

Appendix C
Contributing to GNU T
E
X
MACS
C.1. Use TE
XMACS
One of the best ways to contribute to GNU T
EXMACS is by using it a lot, talk about it
to friends and colleagues, and to report me about bugs or other unnatural behaviour.
Please mention the fact that you wrote articles using T
EXMACS when submitting them.
You can do this by putting the made-by-TeXmacs tag somewhere inside your title using
Insert!Title!TeXmacs notice.
Besides these general (but very important) ways to contribute, your help on the more
specific subjects below would be appreciated. Don’t hesitate to contact us if you want
to contribute to these or any other issues. In the Help menu you can find documentation
about the source code of T
EXMACS, its document format, how to write interfaces with other
formats, and so on.
C.2. Making donations to the TE
XMACS project
Making donations to TeXmacs through the SPI organization.
One very important way to support T
EXMACS is by donating money to the project. T
EXMACS
is currently one of the projets of SPI (Software in the Public Interest; see http://
www.spi-inc.org). You may make donations of money to TeXmacs via this organization,
by noting on your check or e-mail for wire transfers that your money should go to the TeX-
macs project. You may also make donations of equipment or services or donations through
vendors. See the SPI website for more information. The list of donators is maintained at
our website.
Details on how to donate money.
To make a donation, write a check or money order to:
Software in the Public Interest, Inc.
and mail it to the following address:
Software in the Public Interest, Inc.
P.O. Box 502761
Indianapolis, IN 46250-7761
United States
To make an electronic transfer (this will work for non-US too), you need to give your bank
the routing number and account number as follows:
The SPI bank account is at American Express Centurion Bank.
229

RR
RRRRRRR
ooooooooouuuuuuuuutttttttttiiiiiiiiinnnnnnnnnggggggggg
NN
NNNNNNN
uuuuuuuuu
mm
mmmmmmm
bbbbbbbbbeeeeeeeeerrrrrrrrr::::::::: 124071889
AAAA
AAAAA
ccccccccccccccccccooooooooouuuuuuuuunnnnnnnnnttttttttt
NNNN
NNNNN
uuuuuuuuu
mmmm
mmmmm
bbbbbbbbbeeeeeeeeerrrrrrrrr::::::::: 1296789
Don’t forget to note on your check or e-mail for wire transfers that the money should be
spent on the TeXmacs projet. In addition you may specify a more specific purpose on
which you would like us to spend the money. You may also contact us for a more detailed
discussion on this issue.
Important notes.
Let the SPI Treasurer (treasurer@spi-inc.org) know if you have problems. When you
have completed the electronic wire, please send a copy of the receipt to the above address
so there is a copy of your donation. The copy you send to the treasurer is important. You
may also want to contact the TeXmacs team in order to make sure that the money arrived
on the TeXmacs account.
Note: The SPI address and account numbers may change from time to time. Please do
not copy the address and account numbers, but rather point to the page http://www.spi-
inc.org/donations to ensure that donors will always see the most current information.
Donations in Europe can be done through our partner in Germany, ffis e.V. If you are
interested in using their bank account (to save international money transfer costs), please
check the instructions on http://www.ffis.de/Verein/spi-en.html.
C.3. Contribute to the GNU TE
XMACS documentation
There is a high need for good documentation on T
EXMACS as well as people who are willing
to translate the existing documentation into other languages. The aim of this site is to
provide high quality documentation. Therefore, you should carefully read the guide-lines
on how to write such documentation.
C.3.1. Introduction on how to contribute
High quality documentation is both a matter of content and structure. The content itself
has to be as pedagogic as possible for the targeted group of readers. In order to achieve
this, you should not hesitate to provide enough examples and illustrative screen shots
whenever adequate. Although the documentation is not necessarily meant to be complete,
we do aim at providing relatively stable documentation. In particular, you should have
checked your text against spelling errors.
It is also important that you give your documentation as much structure as possible,
using special markup from the tmdoc style file. This structure can be used in order to
automatically compile printable books from your documentation, to make it suitable for
different ways of viewing, or to make it possible to efficiently search a certain type of
information in the documentation. In particular, you should always provide copyright and
license information, as well as indications on how to traverse your documentation, if it
contains many files.
When selecting the tmdoc document style, the top level Manual menu will appear automat-
ically, together with some additional icons. The most important tags for documentation
purposes can be found in this menu.
230 Contributing to GNU TE
XMACS

Warning C.1. Don’t forget to select Document!Language!Your language for each trans-
lated file. This will cause some content to be translated automatically, like the menus
or some names of keys. Also, we recommend to run the T
EXMACS spell checker on each
translated document; this also requires the prior selection of the right document language.
C.3.2. Using SVN
The present T
EXMACS documentation is currently maintained on texmacs.org using SVN.
In order to contribute, you should first create an account as explained on
http://www.texmacs.org/tmweb/download/svn.en.html
In fact, SVN is not ideal for our documentation purpose, because it is not very dynamic.
In the future, we plan to create a dedicated publication website, which will allow you to
save documents directly to the web. It should also allow the automatic conversion of the
documentation to other formats, the compilation of books, etc.
C.3.3. Conventions for the names of files
Most documentation should be organized as a function of the topic in a directory tree. The
subdirectories of the top directory are the following:
about. Various information about the T
EXMACS system (authors, changes, etc.).
devel. Documentation for developers.
main. The main documentation.
Please try to keep the number of entries per directory reasonably small.
File names in the main directory should be of the form type-name.language.tm. In the
other directories, they are of the form name.language.tm. Here type is a major indication
for the type of documentation; it should be one of the following:
man. For inclusion in the T
EXMACS manual.
tut. For inclusion in the T
EXMACS tutorial.
You should try to keep the documentation on the same topic together, regardless of the
type. Indeed, this allows you to find more easily all existing documentation on a particular
topic. Also, it may happen that you want to include some documentation which was
initially meant for the tutorial in the manual. The language in which is the documen-
tation has been written should be a two letter code like en,fr, etc. The main name of
your file should be the same for the translations in other languages. For instance, man-
keyboard.en.tm should not be translated as man-clavier.fr.tm.
C.3.4. Specifying meta information for documentation files
Appropriate meta data for T
EXMACS documentation can be entered from the Manual!Meta
data menu. In particular, you should specify a title for each documentation file using
Manual!Meta data!Title, or by directly clicking on the Title button on the focus bar after
creating a new document with the tmdoc style.
C.3 Contribute to the GNU TE
XMACS documentation 231

All T
EXMACS documentation falls under the GNU Free Documentation License. If you
want your documentation to be included in T
EXMACS, then you have to agree that it will
be distributed under this license too. The license information
Permission is granted to copy, distribute and/or modify this
document under the terms of the GNU Free Documentation License,
Version 1.1 or any later version published by the Free Software
Foundation; with no Invariant Sections, with no Front-Cover
Texts, and with no Back-Cover Texts. A copy of the license
is included in the section entitled "GNU Free Documentation
License".
should be specified at the end of each file. This can be done by clicking on Manual!Meta
data!GNU FDL.
In a similar manner, you may add a copyright notice by clicking on Manual!Meta data!
Copyright. You keep (part of) the copyright of any documentation that you will write for
T
EXMACS. When you or others make additions to (or modifications in, or translations of)
the document, then you should add your own name (at an appropriate place, usually at
the end) to the existing copyright information. The first argument of the tmdoc-copyright
macro contains a year or a period of years. Each remaining argument indicates one of the
copyright holders. When combining (pieces of) several documents into another one, you
should merge the copyright holders. For cover information (on a printed book for instance),
you are allowed to list only the principal authors, but a complete list should be given at a
clearly indicated place.
C.3.5. Traversing the T
E
XMACS documentation
As a general rule, you should avoid the use of sectioning commands inside the T
EXMACS
documentation and try to write small help pages on well identified topics. At a second
stage, you should write recursive “meta help files” which indicate how to traverse the
documentation in an automatic way. This allows the reuse of a help page for different
purposes (a printed manual, a web-oriented tutorial, etc.).
The tmdoc style provides three markup macros for indicating how to traverse documenta-
tion. The traverse macro is used to encapsulate regions with traversal information. It can
be inserted using the Traverse entry in the Manual!Traversal or menu. The branch and
extra-branch macros indicate help pages which should be considered as a subsection and
an appendix respectively, whereas the continue macro indicates a follow-up page. Each of
these macros should be used inside a traverse environment and each of these macros takes
two arguments. The first argument describes the link and the second argument gives the
physical relative address of the linked file.
Typically, at the end of a meta help file you will find several branch or continue macros,
inside one traverse macro. At the top of the document, you should also specify a title for
your document using the tmdoc-title macro, as described before. When generating a printed
manual from the documentation, a chapter-section-subsection structure will automatically
be generated from this information and the document titles. Alternatively, one might
automatically generate additional buttons for navigating inside the documentation using
a browser.
232 Contributing to GNU TE
XMACS

C.3.6. Using the tmdoc style
Besides the copyright information macros and traversal macros, which have been docu-
mented before, the tmdoc style comes with a certain number of other macros and functions,
which you should use whenever appropriate.
Notice that the tmdoc style inherits from the generic style, so you should use macros
like em,verbatim,itemize, etc. from this style whenever appropriate. In particular, when
documenting program code, you should use Insert!Program!Inline code and Insert!Pro-
gram!Block of code in order to mark such pieces of code.
C.3.6.1. Explanations of macros, environment variables, and so on
The main environment which is used for explanations of macros, environment variables,
Scheme functions, etc. is inserted using the Explanatory item entry of the Manual!Explain
and menus. The environment comes with two arguments: the first argument consists of
the concept or concepts to be explained, and the second one contains the actual explana-
tion. A typical example would be the following:
hdemo-tagjbodyi
hdemo-tagjextrasjbodyi(short and long versions of a demo tag)
The demo-tag is used for demonstration purposes and decorates the body argument. An
optional argument extras can be given with details on the way to decorate the body.
In this example, we used Manual!Explain!TeXmacs macros twice in order to insert the
macros to be described. We also used Manual!Explain!Synopsis in order to give a short
description of the tags (in grey). In a similar way, one may use Manual!Explain!Environ-
ment variable in order to describe an environment variable. Another example is:
(foo-bar K x)
The function foo-bar computes the foo-bar transform of the operator Kand applies it
to x.
In this example, we notice that all Scheme code was encapsulated into scm tags (see
Insert!Program!Inline code!Scheme) and arguments were tagged using scm-arg.
C.3.6.2. Graphical user interface related markup
The following markup elements can be used in order to describe various graphical user
interface elements, such as keyboard shortcuts, menus or icons.
shortcut
This macro is used to indicate a keyboard shortcut for a Scheme command. For
instance, the shortcut for (new-buffer)is ?.
key
This unary macro is used for explicit keyboard input. For instance, when giving
A C-b return as argument, the result is ⇧A⌃B↩.
menu
This function with an arbitrary number of arguments indicates a menu like File or
Document!Language. Menu entries are automatically translated by this function.
C.3 Contribute to the GNU TE
XMACS documentation 233

submenu
Consider the following sentence:
“You may use the Load and Save entries of the File menu in order to load
and save files.”
In this example, the menu entries Load and Save were marked using the submenu tag,
which takes the implicit File menu as its first invisible argument. This invisible argument
is still taken into account when building the index (for instance). In a similar way, we
provide subsubmenu and subsubsubmenu tags.
icon
Can be used in order to specify one of the T
EXMACS icons, such as and . The macro
takes one argument with the file name of the icon (the full path is not needed).
screenshot
Similar to the icon tag, but for screenshots.
cursor
This macro can be used to indicate a cursor position, as in a2+b2j=c2.
small-focus,small-envbox
This macro can be used for indicating the visual aids around the current focus and the
further outer context (e.g. a+b
c), in the case of inline elements.
big-focus,big-envbox
Block versions of small-focus and small-envbox.
Notice that the contents of none of the above tags should be translated into foreign lan-
guages. Indeed, for menu tags, the translations are done automatically, so as to keep the
translations synchronized with the translations of the actual T
EXMACS menus. In the cases
of markup, styles, packages and d.t.d.s, it is important to keep the original name, because
it often corresponds to a file name.
C.3.6.3. Common annotations
The Manual!Annotate and menus contain the following useful macros for common
annotations. You should use them whenever appropriate.
markup
This macro is used in order to indicate a macro or a function like section.
src-arg
This macro should be used in order to indicate macro arguments such as body.
src-var
This macro is used for the indication of environment variables such as font-size.
234 Contributing to GNU TE
XMACS
src-length
This macro is used in order to indicate a length such as 12em.
tmstyle
This macro indicates the name of a T
EXMACS style file or package like article.
tmpackage
This macro indicates the name of a T
EXMACS package like std-markup.
tmdtd
This macro indicates the name of a T
EXMACS d.t.d. like number-env.
C.3.6.4. Miscellaneous markup
Some other potentially useful macros are the following:
tm-fragment
For indicating some T
EXMACS document fragment. This macro is especially useful for
T
EXMACS source code, as in
hassignjred-textjhmacrojbodyjhwithjcolorjredjbodyiii
In this example, we used the keyboard shortcut ⌘-in order to deactivate the source
code inside an active outer document.
descriptive-table
For descriptive tables; such tables can be used to document lists of keyboard shortcuts,
different types of markup, etc.
C.4. Internationalization
The support of a maximal number of foreign languages is another major challenge in
which your help would be appreciated. Making the translations to support a new language
usually requires several days of work. We therefore recommend you to find some friends
or colleagues who are willing to help you.
The procedure for adding a new language is as follows
•
You copy the file english-new.scm to english-yourlanguage.dic in langs/
natural/dic and fill out the corresponding translations. You may want to use
Andrey Grozin’s dictionary tool at
http://www.texmacs.org/Data/dictool.py.gz
In order to use it, may sure that Python is installed on your system, download the
file, gunzip it, make it executable and run it.
•You tell me about any special typographical rules in your language and handy
keystrokes for producing special characters.
•I take care of the hyphenation and typographical issues, but you test them.
C.4 Internationalization 235

•If you have enough time, you may also consider the translation of (part of) the
existing documentation.
Of course, the support for languages get out of date each time that new features are added
to T
EXMACS. For this reason, we also maintain a file miss-english-yourlanguage .dic
with all missing translation for your language, once that it has been added. Please do not
hesitate to send inclomplete versions of english-yourlanguage .dic or miss-english-
yourlanguage.dic; someone else may be willing to complete them.
C.5. Writing data converters
If you are familiar with T
EX, L
A
T
EX, Html, Xml, Sgml, Mathml, Pdf, Rtf, or any other
frequently used data format, please consider contributing to writing good converters for one
or more of these formats. In Help!Source code!Data format you will find details about the
T
EXMACS data format and in Help!Source code!Data conversion we give some suggestions
which might be helpful for these projects.
C.6. Porting TE
XMACS to other platforms
Currently, T
EXMACS is supported on most major Unix/X-Window platforms and a Win-
dows port should be ready soon. Nevertheless, your help is appreciated in order to keep
the existing ports working. Some remaining challenges for porting T
EXMACS are:
•A native port for MacOS-X.
•Ports to PDAs, first of all those which run Linux. It should be noticed that, with
the current support for Freetype, T
EXMACS no longer depends on T
EX/L
A
T
EX for
its fonts. We expect it to be possible to obtain a reasonable ports for T
EXMACS on
PDAs with 32Mb and at least 100MHz clock-speed. Of course, one also needs to
customize the menus and/or icon bars, but this should not be hard.
T
EXMACS ports to PDAs would be particularly interesting in combination with the
available plug-ins for doing scientific computations.
C.7. Interfacing TE
XMACS with other systems
It is quite easy to write interfaces between T
EXMACS and computer algebra systems or other
scientific programs with structured output. Please consider writing interfaces between
T
EXMACS and your favorite system(s). T
EXMACS has already been interfaced with several
other free systems, like Giac, Macaulay 2, Maxima, GNU Octave, Pari, Qcl, gTybalt, Yacas.
Detailed documentation on how to add new interfaces is available in the Help!Interfacing
menu.
C.8. TE
XMACS over the network and over the web
It should be quite easy to write a plug-in for T
EXMACS for doing instant messenging or live-
conferencing. We are very interested in people who would like to help with this. The same
techniques might be used for collaborative authoring and educational purposes.
236 Contributing to GNU TE
XMACS

Besides live conferencing, we are also interested by people who are willing to program better
integration of T
EXMACS with the web. As a first step, this would require an internal C++
plug-in based on Wget or Curl for accessing web-pages, which supports cookies, security,
etc. At a second stage, these features should be exploited by the Html converters. At the
last stage, one might develop more general web-based services.
C.9. Become a TE
XMACS developer
Apart from the kind of contributions which have been described in more detail above,
there are many more issues where your help would be appreciated. Please take a look at
our plans for the future for more details. Of course, you should feel free to come up with
your own ideas and share them with us on the texmacs-dev@gnu.org mailing list!
C.9 Become a TE
XMACS developer 237


Appendix D
Interfacing T
E
X
MACS with other programs
D.1. Introduction
In this chapter we describe how to interface T
EXMACS with an extern application. Such
interfaces should be distributed in the form of plugins. The plug-in may either contain the
extern application, or provide the “glue” between T
EXMACS and the application. Usually,
interfaces are used interactively in shell sessions (see Insert!Session). But they may also
be designed for background tasks, such as spell checking or typesetting.
The communication between T
EXMACS and the application takes place using a customizable
input format and the special T
E
X
MACS meta-format for output from the plug-in. The meta-
format enables you to send structured output to T
EXMACS, using any common format like
verbatim, L
A
T
EX, Postscript,HTML, or T
EXMACS itself. This is useful when adding a
T
EXMACS interface to an existing system, since L
A
T
EX or Postscript output routines are
often already implemented. It will then suffice to put the appropriate markers in order to
make a first interface with T
EXMACS.
As soon as basic communication between your application and T
EXMACS is working, you
may improve the interface in many ways. Inside shell sessions, there is support for prompts,
default inputs, tab-completion, mathematical and multi-line input, etc. In general, your
application may take control of T
EXMACS and modify the user interface (menus, keyboard,
etc.) or add new Scheme routines to T
EXMACS. Your application may even extend the
typesetter.
In the directory $TEXMACS_PATH/examples/plugins, you can find many examples of simple
plug-ins. In the next sections, we will give a more detailed explanation of the interfacing
features of T
EXMACS on the hand of these examples. In order to try one of these examples,
we recall that you just have to copy it to either one of the directories
$TEXMACS_PATH/plugins
$TEXMACS_HOME_PATH/plugins
and run the Makefile (if there is one).
D.2. Basic input/output using pipes
The configuration and the compilation of the minimal plug-in is described in the chapter
about plug-ins. We will now study the source file minimal/src/minimal.cpp. Essentially,
the main routine is given by
239
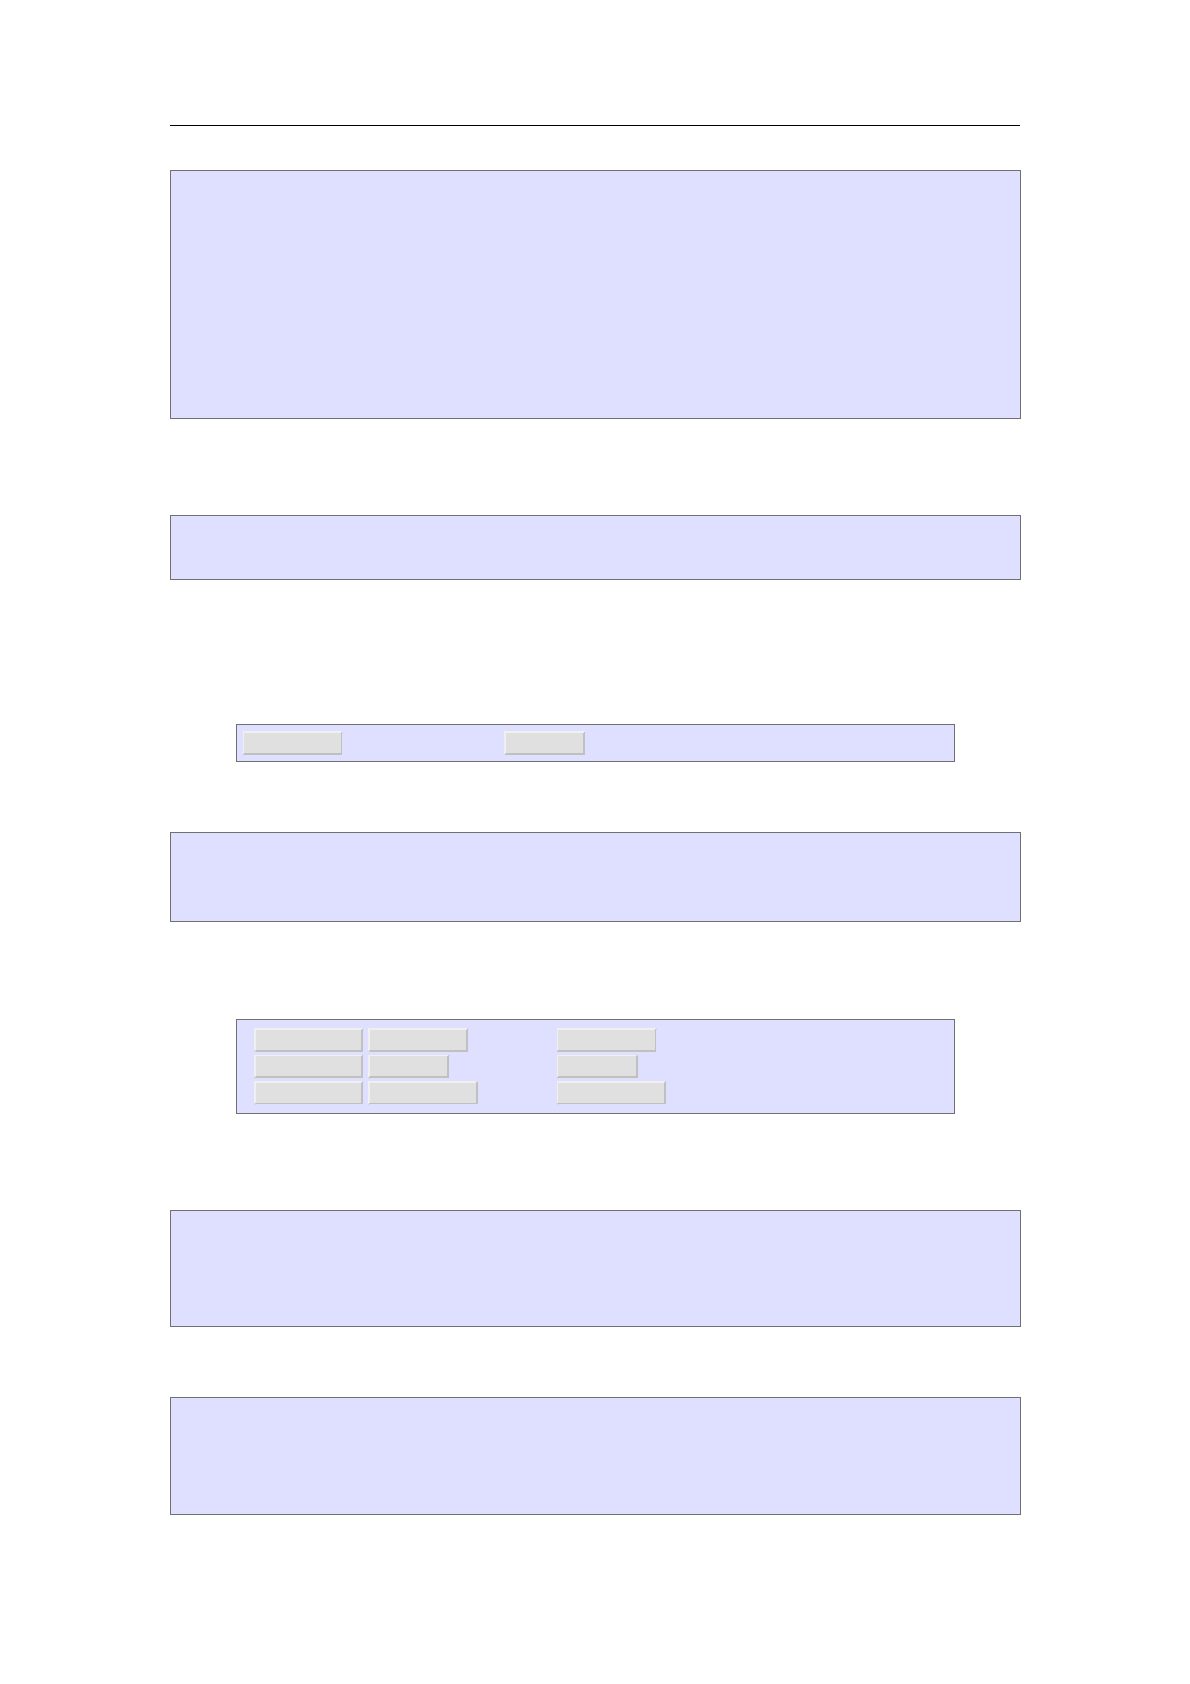
int
main () {
display-startup-banner
while (true) {
read-input
display-output
}
return 0;
}
By default, T
EXMACS just send a '\n'-terminated string to the application as the input.
Consequently, the code for read-input is given by
char buffer[100];
cin.getline (buffer, 100, '\n');
The output part is more complicated, since T
EXMACS needs to have a secure way for
knowing whether the output has finished. This is accomplished by encapsulating each piece
of output (in our case both the display banner and the interactive output) inside a block
of the form
DATA_BEGINformat :message DATA_END
Here DATA_BEGIN and DATA_END stand for special control characters:
#define DATA_BEGIN ((char) 2)
#define DATA_END ((char) 5)
#define DATA_ESCAPE ((char) 27)
The DATA_ESCAPE is used for producing the DATA_BEGIN and DATA_END characters in the
message using the rewriting rules
DATA_ESCAPE DATA_BEGIN ¡! DATA_BEGIN
DATA_ESCAPE DATA_END ¡! DATA_END
DATA_ESCAPE DATA_ESCAPE ¡! DATA_ESCAPE
The format specifies the format of the message. For instance, in our example, the code
of display-startup-banner is given by
cout << DATA_BEGIN << "verbatim:";
cout << "Hi there!";
cout << DATA_END;
cout.flush ();
Similarly, the code of display-output is given by
cout << DATA_BEGIN << "verbatim:";
cout << "You typed " << buffer;
cout << DATA_END;
cout.flush ();
240 Interfacing TE
XMACS with other programs
Remark D.1. For synchronization purposes, T
EXMACS will assume that the output is
finished as soon as it encounters the DATA_END which closes the initial DATA_BEGIN. So all
output has to be inside one single outer DATA_BEGIN-DATA_END block: if you send more blocks,
then T
EXMACS will retake control before reading all your output. For certain formats (such
as verbatim), it is possible to nest DATA_BEGIN-DATA_END blocks though, as we will see below.
Remark D.2. In our example, the C++ code for the application is included in the plug-in.
In the case when you are writing a T
EXMACS interface for an existing application myapp, the
convention is to create a --texmacs option for this program. Then it is no longer necessary
to have myapp/src and myapp /bin directories for your plug-in and it suffices to configure
the plug-in by putting something like the following in myapp/progs/init-myapp.scm:
(plugin-configure myapp
(:require (url-exists-in-path? "myapp"))
(:launch "myapp --texmacs")
(:session "Myapp"))
In the case when you do not have the possibility to modify the source code of myapp, you
typically have to write an input/output filter tm_myapp for performing the appropriate
rewritings. By looking at the standard plug-ins distributed with T
EXMACS in
$TEXMACS_PATH/plugins
you can find several examples of how this can be done.
D.3. Formatted and structured output
In the previous section, we have seen that output from applications is encapsulated in
blocks of the form
DATA_BEGINformat :message DATA_END
Currently implemented formats include verbatim,latex,html,ps, and scheme. Certain
formats, such as verbatim, allow the message to recursively contain blocks of the same
form. The scheme format is used for sending T
EXMACS trees in the form of Scheme expres-
sions.
The fffffffffooooooooorrrrrrrrr
mmmmmmmm
m
uuuuuuuuulllllllllaaaaaaaaa plug-in.
The formula plug-in demonstrates the use of L
A
T
EX as the output format. It consists of
the files
formula/Makefile
formula/progs/init-formula.scm
formula/src/formula.cpp
The body of the main loop of formula.cpp is given by
D.3 Formatted and structured output 241

int i, nr;
cin >> nr;
cout << DATA_BEGIN << "latex:";
cout << "$";
for (i=1; i<nr; i++)
cout << "x_{" << i << "}+";
cout << "x_{" <<i<<"}$";
cout << DATA_END;
cout.flush ();
Similarly, the use of nested output blocks is demonstrated by the nested plug-in; see in
particular the source file nested/src/nested.cpp.
Remark D.3. At the moment, we only implemented L
A
T
EX as a standard transmission
format for mathematical formulas, because this is the format which is most widely used. In
the future, we intend to implement more semantically secure formats, and we recommend
you to keep in mind the possibility of sending your output in tree format.
Nevertheless, we enriched standard L
A
T
EX with the \* and \bignone commands for mul-
tiplication and closing big operators. This allows us to distinguish between
a \* (b + c)
(i.e. amultiplied by b+c) and
f(x + y)
(i.e. fapplied to x+y). Similarly, in
\sum_{i=1}^m a_i \bignone + \sum_{j=1}^n b_j \bignone
the \bignone command is used in order to specify the scopes of the \sum operators.
It turns out that the systematic use of the \* and \bignone commands, in combination
with clean L
A
T
EX output for the remaining constructs, makes it a priori possible to asso-
ciate an appropriate meaning to your output. In particular, this usually makes it possible
to write additional routines for copying and pasting formulae between different systems.
The
m
mmmmmmm
m
aaaaaaaaarrrrrrrrrkkkkkkkkkuuuuuuuuuppppppppp plug-in.
It is important to remind that structured output can be combined with the power of
T
EXMACS as a structured editor. For instance, the markup plug-in demonstrates the defini-
tion of an additional tag foo, which is used as an additional primitive in the output of the
application. More precisely, the markup plug-in consists of the following files:
markup/Makefile
markup/packages/session/markup.ts
markup/progs/init-markup.scm
markup/src/markup.cpp
The style package markup.ts contains the following definition for foo:
hmathjhassignjfoojhmacrojxjhfracj1j1+xiiii
The foo tag is used in the following way in the body of the main loop of markup.cpp:
242 Interfacing TE
XMACS with other programs
char buffer[100];
cin.getline (buffer, 100, '\n');
cout << DATA_BEGIN << "latex:";
cout << "$\foo{" << buffer << "}$";
cout << DATA_END;
cout.flush ();
Notice that the style package markup.ts also defines the markup-output environment:
hassignjmarkup-outputjhmacrojbodyjhgeneric-outputjhwithjpar-modejcenterjbodyiiii
This has the effect of centering the output in sessions started using Insert!Session!Markup.
D.4. Output channels, prompts and default input
Besides blocks of the form
DATA_BEGINformat :message DATA_END
the T
EXMACS meta-format also allows you to use blocks of the form
DATA_BEGINchannel#message DATA_END
Here channel specifies an “output channel” to which the body message has to be sent.
The default output channel is output, but we also provide channels prompt and input for
specifying the prompt and a default input for the next input in a session. Default inputs
may be useful for instance be useful for demo modes of computer algebra systems. In the
future, we also plan to support error and status channels.
The ppppppppprrrrrrrrrooooooooo
mmmmmm
mmm
pppppppppttttttttt plug-in.
The prompt plug-in shows how to use prompts. It consists of the files
prompt/Makefile
prompt/progs/init-prompt.scm
prompt/src/prompt.cpp
The routine for displaying the next prompt is given by
void
next_input () {
counter++;
cout << DATA_BEGIN << "prompt#";
cout << "Input " << counter << "] ";
cout << DATA_END;
}
This routine is both used for displaying the startup banner
D.4 Output channels, prompts and default input 243
cout << DATA_BEGIN << "verbatim:";
cout << "A LaTeX -> TeXmacs converter";
next_input ();
cout << DATA_END;
cout.flush ();
and in the body of the main loop
char buffer[100];
cin.getline (buffer, 100, '\n');
cout << DATA_BEGIN << "verbatim:";
cout << DATA_BEGIN;
cout << "latex:$" << buffer << "$";
cout << DATA_END;
next_input ();
cout << DATA_END;
cout.flush ();
D.5. Sending commands to TE
XMACS
The application may use command as a very particular output format in order to send
Scheme commands to T
EXMACS. In other words, the block
DATA_BEGINcommand:cmd DATA_END
will send the command cmd to T
EXMACS. Such commands are executed immediately after
reception of DATA_END. We also recall that such command blocks may be incorporated
recursively in larger DATA_BEGIN-DATA_END blocks.
The
mm
mmmmmmm
eeeeeeeeennnnnnnnnuuuuuuuuusssssssss plug-in.
The nested plug-in shows how an application can modify the T
EXMACS menus in an inter-
active way. The plug-in consists of the files
menus/Makefile
menus/progs/init-menus.scm
menus/src/menus.cpp
The body of the main loop of menus.cpp simply contains
char buffer[100];
cin.getline (buffer, 100, '\n');
cout << DATA_BEGIN << "verbatim:";
cout << DATA_BEGIN << "command:(menus-add ""
<< buffer << "")" << DATA_END;
cout << "Added " << buffer << " to menu";
cout << DATA_END;
cout.flush ();
The Scheme macro menus-add is defined in init-menus.scm:
244 Interfacing TE
XMACS with other programs

(define menu-items '("Hi"))
(tm-menu (menus-menu)
(for (entry menu-items)
((eval entry) (insert entry))))
(tm-define (menus-add entry)
(set! menu-items (cons entry menu-items)))
(plugin-configure menus
(:require (url-exists-in-path? "menus.bin"))
(:launch "menus.bin")
(:session "Menus"))
(menu-bind plugin-menu
(:require (in-menus?))
(=> "Menus" (link menus-menu)))
The configuration of menus proceeds as usual:
(plugin-configure menus
(:require (url-exists-in-path? "menus.bin"))
(:launch "menus.bin")
(:session "Menus"))
D.6. Background evaluations
Until now, we have always considered interfaces between T
EXMACS and applications which
are intended to be used interactively in shell sessions. But there also exists a Scheme
command
(plugin-eval plugin session expression)
for evaluating an expression using the application. Here plugin is the name of the plug-in,
session the name of the session and expression aScheme expression which represents
a T
EXMACS tree.
The sssssssssuuuuuuuuubbbbbbbbbssssssssstttttttttiiiiiiiiitttttttttuuuuuuuuuttttttttteeeeeeeee plug-in.
Background evaluations may for instance be used in order to provide a feature which
allows the user to select an expression and replace it by its evaluation. For instance,
the substitute plug-in converts mathematical L
A
T
EX expressions into T
EXMACS, and it
provides the ?keyboard shortcut for replacing a selected text by its conversion. The plug-
in consists of the following files
substitute/Makefile
substitute/progs/init-substitute.scm
substitute/src/substitute.cpp
The main evaluation loop of substitute.cpp simply consists of
D.6 Background evaluations 245
char buffer[100];
cin.getline (buffer, 100, '\n');
cout << DATA_BEGIN;
cout << "latex:$" << buffer << "$";
cout << DATA_END;
cout.flush ();
Moreover, the configuration file init-substitute.scm contains the following code for
replacing a selected region by its evaluation
(define (substitute-substitute)
(import-from (texmacs plugin plugin-cmd))
(if (selection-active-any?)
(let* ((t (tree->stree (the-selection)))
(u (plugin-eval "substitute" "default" t)))
(clipboard-cut "primary")
(insert (stree->tree u)))))
as well as the keyboard shortcut for ?:
(kbd-map
("C-F12" (substitute-substitute)))
Notice that these routines should really be defined in a separate module for larger plug-ins.
The ssssssssseeeeeeeeecccccccccuuuuuuuuurrrrrrrrreeeeeeeee plug-in.
Another example of using an interface in the background is the secure plug-in which
consists of the files
secure/Makefile
secure/packages/secure.ts
secure/progs/init-secure.scm
secure/progs/secure-secure.scm
secure/src/secure.cpp
Just as substitute.cpp above, the main program secure.cpp just converts mathemat-
ical L
A
T
EX expressions to T
EXMACS. The secure-secure.scm module contains the secure
Scheme routine latexer:
(tm-define (latexer s)
(:type (tree -> object))
(:synopsis "convert LaTeX string to TeXmacs tree using plugin")
(:secure #t)
(plugin-eval "secure" "default" (tree->string s)))
It is important to define latexer as being secure, so that it can be used in order to define
additional markup using the extern primitive. This is done in the style file secure.ts:
See a LaTeX math command as a TeXmacs expression via plug-in
hassignjlatexerjhmacrojxjhexternjlatexerjxiii
246 Interfacing TE
XMACS with other programs

After compilation, installation, relaunching T
E
X
MACS
and selecting
Document
!
Use package
!
secure, you will now be able to use latexer as a new primitive. The primitive takes a
mathematical L
A
T
EX expression as its argument and displays its T
EXMACS conversion.
D.7. Mathematical and customized input
The T
EXMACS meta-format allows application output to contain structured text like math-
ematical formulas. In a similar way, you may use general T
EXMACS content as the input
for your application. By default, only the text part of such content is kept and sent to the
application as a string. Moreover, all characters in the range 0–31 are ignored, except for
'\t' and '\n' which are transformed into spaces. There are two methods to customize
the way input is sent to your application. First of all, the configuration option
(:serializer ,routine)
specifies a scheme function for converting T
EXMACS trees to string input for your applica-
tion, thereby overriding the default method. This method allows you for instance to treat
multi-line input in a particular way or the perform transformations on the T
EXMACS tree.
The :serialize option is a very powerful, but also a very abstract way to customize input:
it forces you to write a complete input transformation function. In many circumstances,
the user really wants to rewrite two dimensional mathematical input to a more standard
form, like rewriting a
bto ((a)/(b)). Therefore, a second way for customizing the input is
to use the command
(plugin-input-converters myplugin
rules)
This command specifies input conversion rules for myplugin for “mathematical input” and
reasonable defaults are provided by T
EXMACS. Each rule is of one of the following two forms:
Leaf transformation rules.
Given two strings symbol and conversion, the rule
(symbol conversion)
specifies that the T
EXMACS symbol symbol should be converted to conversion.
Tag transformation rules.
Given a symbol tag and a Scheme function routine, the rule
(tag routine)
specifies that routine will be used as the conversion routine for tag. This routine
should just write a string to the standard output. The Scheme function plugin-
input may be used for the recursive transformation of the arguments of the tag.
The iiiiiiiiinnnnnnnnnpppppppppuuuuuuuuuttttttttt plug-in.
D.7 Mathematical and customized input 247
The input plug-in demonstrates the use of customized mathematical input. It consists of
the files
input/Makefile
input/packages/session/input.ts
input/progs/init-input.scm
input/progs/input-input.scm
input/src/input.cpp
The Scheme configuration code in init-input.scm is given by
(plugin-configure input
(:require (url-exists-in-path? "input.bin"))
(:launch "input.bin")
(:session "Input"))
(when (supports-initialize?)
(lazy-input-converter (input-input) input))
The predicate supports-initialize? tests whether the plug-in is indeed operational (that
is, whether input.bin exists in the path). The conversion rules in the module (input
input) are added in a lazy manner. In other words, the file input-input.scm will only be
loaded when we explicitly request to make a conversion. The conversion rules in input-
input.scm are given by
(plugin-input-converters input
(frac input-input-frac)
(special input-input-special)
("<vee>" "||")
("<wedge>" "&&"))
This will cause _and ^to be rewritten as || and && respectively. Fractions a
bare rewritten
as ((a):(b)) using the routine
(define (input-input-frac t)
(display "((")
(plugin-input (car t))
(display "):(")
(plugin-input (cadr t))
(display "))"))
In the additional style file input.ts we also defined some additional markup special:
hassignjspecialj
hmacrojbodyj
hblockj
htformatj
hcwithj1j1j1j1jcell-backgroundjpastel greenij
htablej
hrowjhcelljbodyiiiiiii
248 Interfacing TE
XMACS with other programs
This tag is rewritten using the special conversion rule
(define (input-input-special t)
(display "[[[SPECIAL:")
(plugin-input (car t))
(display "]]]"))
As to the C++ code in input.cpp, the startup banner automatically puts the shell session
in mathematical input mode:
cout << DATA_BEGIN << "verbatim:";
cout << DATA_BEGIN << "command:(session-use-math-input #t)"
<< DATA_END;
cout << "Convert mathematical input into plain text";
cout << DATA_END;
cout.flush ();
In the main loop, we content ourselves the reproduce the input as output:
char buffer[100];
cin.getline (buffer, 100, '\n');
cout << DATA_BEGIN << "verbatim:";
cout << buffer;
cout << DATA_END;
cout.flush ();
D.8. Tab-completion
By default, T
EXMACS looks into your document for possible tab-completions. Inside sessions
for your application, you might wish to customize this behaviour, so as to complete built-
in commands. In order to do this, you have to specify the configuration option
(:tab-completion #t)
in your init-myplugin.scm file, so that T
EXMACS will send special tab-completion requests
to your application whenever you press ⇥inside a session. These commands are of the form
DATA_COMMAND(complete input-string cursor-position )↩
Here DATA_COMMAND stands for the special character '\20' (ASCII 16). The input-string
is the complete string in which the ⇥occurred and the cursor-position is an integer
which specifies the position of the cursor when you pressed ⇥. T
EXMACS expects your
application to return a tuple with all possible tab-completions of the form
DATA_BEGINscheme:(tuple root completion-1 ··· completion-
n)DATA_END
D.8 Tab-completion 249
Here root corresponds to a substring before the cursor for which completions could be
found. The strings completion-1 until completion-n are the list of completions as they
might be inserted at the current cursor position. If no completions could be found, then
you may also return the empty string.
Remark D.4. In principle, the tab-completion mechanism should still work in mathe-
matical input mode. In that case, the input-string will correspond to the serialization
of the T
EXMACS input.
Remark D.5. The way T
EXMACS sends commands to your application can be customized
in a similar way as for the input: we provide a :commander configuration option for this,
which works in a similar way as the :serializer option.
The cccccccccooooooooo
mmmmmmm
mm
pppppppppllllllllleeeeeeeeettttttttteeeeeeeee plug-in.
A very rudimentary example of how the tab-completion mechanism works is given by the
complete plug-in, which consists of the following files:
complete/Makefile
complete/progs/init-complete.scm
complete/src/complete.cpp
The startup banner in complete.cpp takes care of part of the configuration:
cout << DATA_BEGIN << "verbatim:";
format_plugin ();
cout << "We know how to complete 'h'";
cout << DATA_END;
fflush (stdout);
Here format_plugin is given by
void
format_plugin () {
// The configuration of a plugin can be completed at startup time.
// This may be interesting for adding tab-completion a posteriori.
cout << DATA_BEGIN << "command:";
cout << "(plugin-configure complete (:tab-completion #t))";
cout << DATA_END;
}
In the main loop, we first deal with regular input:
char buffer[100];
cin.getline (buffer, 100, '\n');
if (buffer[0] != DATA_COMMAND) {
cout << DATA_BEGIN << "verbatim:";
cout << "You typed " << buffer;
cout << DATA_END;
}
We next treat the case when a tab-completion command is sent to the application:
250 Interfacing TE
XMACS with other programs
else {
cout << DATA_BEGIN << "scheme:";
cout << "(tuple "h" "ello" "i there" "ola" "opsakee")";
cout << DATA_END;
}
cout.flush ();
As you notice, the actual command is ignored, so our example is really very rudimentary.
D.9. Dynamic libraries
Instead of connecting your system to T
EXMACS using a pipe, it is also possible to connect
it as a dynamically linked library. Although communication through pipes is usually easier
to implement, more robust and compatible with gradual output, the second option is faster.
In order to dynamically link your application to T
EXMACS, you should follow the T
EXMACS
communication protocol, which is specified in the following header file:
$TEXMACS_PATH/include/TeXmacs.h
In this file it is specified that your application should export a data structure
typedef struct package_exports_1 {
char* version_protocol; /* "TeXmacs communication protocol 1" */
char* version_package;
char* (*install) (TeXmacs_exports_1* TeXmacs,
char* options, char** errors);
char* (*evaluate) (char* what, char* session, char** errors);
} package_exports_1;
which contains an installation routine for your application, as well as an evaluation routine
for further input (for more information, see the header file). T
EXMACS will on its turn export
a structure
typedef struct TeXmacs_exports_1 {
char* version_protocol; /* "TeXmacs communication protocol 1" */
char* version_TeXmacs;
} TeXmacs_exports_1;
It is assumed that each application takes care of its own memory management. Hence,
strings created by T
EXMACS will be destroyed by T
EXMACS and strings created by the
application need to be destroyed by the application.
The string version_protocol should contain "TeXmacs communication protocol 1" and
the string version_package the version of your package. The routine install will be
called once by T
EXMACS in order to initialize your system with options options. It com-
municates the routines exported by T
EXMACS to your system in the form of a pointer
to a structure of type TeXmacs_exports_1. The routine should return a status message like
"yourcas-version successfully linked to TeXmacs"
If installation failed, then you should return NULL and *errors should contain an error
message.
D.9 Dynamic libraries 251

The routine evaluate is used to evaluate the expression what inside a T
EXMACS-session
with name session. It should return the evaluation of what or NULL if an error occurred.
*errors either contains one or more warning messages or an error message, if the evalua-
tion failed. The formats being used obey the same rules as in the case of communication
by pipes.
Finally, the configuration file of your plug-in should contain something as follows:
(plugin-configure myplugin
(:require (url-exists? (url "$LD_LIBRARY_PATH" "libmyplugin.so")))
(:link "libmyplugin.so" "myplugin_exports" "")
further-configuration)
Here myplugin_exports is a pointer to a structure of the type package_exports_1.
Remark D.6. It is possible that the communication protocol changes in the future. In that
case, the data structures TeXmacs_exports_1 and package_exports_1 will be replaced by
data structures TeXmacs_exports_n and package_exports_n, where nis the version of the
protocol. These structures will always have the abstract data structures TeXmacs_exports
and package_exports in common, with information about the versions of the protocol,
T
EXMACS and your package.
The dddddddddyyyyyyyyynnnnnnnnnllllllllliiiiiiiiinnnnnnnnnkkkkkkkkk plug-in.
The dynlink plug-in gives an example of how to write dynamically linked libraries. It
consists of the following files:
dynlink/Makefile
dynlink/progs/init-dynlink.scm
dynlink/src/dynlink.cpp
The Makefile contains
tmsrc = /home/vdhoeven/texmacs/src/TeXmacs
CXX = g++
LD = g++
lib/libtmdynlink.so: src/dynlink.cpp
$(CXX) -I$(tmsrc)/include -c src/dynlink.cpp -o src/
dynlink.o
$(LD) -shared -o lib/libtmdynlink.so src/dynlink.o
so that running it will create a dynamic library dynlink/lib/libdynlink.so from
dynlink.cpp. The tmsrc variable should contain $TEXMACS_PATH, so as to find the include
file TeXmacs.h. The configuration file init-dynlink.scm simply contains
(plugin-configure dynlink
(:require (url-exists? (url "$LD_LIBRARY_PATH"
"libtmdynlink.so")))
(:link "libtmdynlink.so" "dynlink_exports" "")
(:session "Dynlink"))
As to the C++ file dynlink.cpp, it contains a string
252 Interfacing TE
XMACS with other programs
static char* output= NULL;
with the last output, the initialization routine
char*
dynlink_install (TeXmacs_exports_1* TM, char* opts, char** errs) {
output= (char*) malloc (50);
strcpy (output, "\2verbatim:Started dynamic link\5");
return output;
}
the evaluation routine
char*
dynlink_eval (char* what, char* session, char** errors) {
free (output);
output= (char*) malloc (50 + strlen (what));
strcpy (output, "\2verbatim:You typed ");
strcat (output, what);
strcat (output, "\5");
return output;
}
and the data structure with the public exports:
package_exports_1 dynlink_exports= {
"TeXmacs communication protocol 1",
"Dynlink 1",
dynlink_install,
dynlink_eval
};
Notice that the application takes care of the memory allocation and deallocation of output.
D.10. Miscellaneous features
Several other features are supported in order to write interfaces between T
EXMACS and
extern applications. Some of these are very hairy or quite specific. Let us briefly describe
a few miscellaneous features:
Interrupts.
The “stop” icon can be used in order to interrupt the evaluation of some input. When
pressing this button, T
EXMACS will just send a SIGINT signal to your application. It expects
your application to finish the output as usual. In particular, you should close all open
DATA_BEGIN-blocks.
D.10 Miscellaneous features 253
Testing whether the input is complete.
Some systems start a multiline input mode as soon as you start to define a function or
when you enter an opening bracket without a matching closing bracket. T
EXMACS allows
your application to implement a special predicate for testing whether the input is complete.
First of all, this requires you to specify the configuration option
(:test-input-done #t)
As soon as you will press ↩in your input, T
EXMACS will then send the command
DATA_COMMAND(input-done? input-string)↩
Your application should reply with a message of the form
DATA_BEGINscheme:done DATA_END
where done is either #t or #f. The multiline plug-in provides an example of this mech-
anism (see in particular the file multiline/src/multiline.cpp).
D.11. Writing documentation
Documentation for your plug-in myplugin should be put in the doc subdirectory of the
main directory myplugin. We recommend to write at least the following three documen-
tation files:
mmmmm
mmmm
yyyyyyyyypppppppppllllllllluuuuuuuuugggggggggiiiiiiiiinnnnnnnnn.........eeeeeeeeennnnnnnnn.........ttttttttt
mmmmm
mmmm
.
This file should mainly contain a traverse tag with links to the other documentation
files, as described in the section “traversing the T
EXMACS documentation”.
mmmmm
mmmm
yyyyyyyyypppppppppllllllllluuuuuuuuugggggggggiiiiiiiiinnnnnnnnn---------aaaaaaaaabbbbbbbbbssssssssstttttttttrrrrrrrrraaaaaaaaacccccccccttttttttt.........eeeeeeeeennnnnnnnn.........ttttttttt
mmmmm
mmmm
.
This file should contain a short description of the purpose of the plugin-in. If
appropriate, then you should also describe how to get the plug-in and how to install
it. The contents of this file should also be suitable for publication on the web site
of T
EXMACS.
mmmmm
mmmm
yyyyyyyyypppppppppllllllllluuuuuuuuugggggggggiiiiiiiiinnnnnnnnn---------dddddddddeeeeeeeee
mmmmm
mmmm
ooooooooo.........eeeeeeeeennnnnnnnn.........ttttttttt
mmmmm
mmmm
.
This file should contain a short demonstration of your plug-in, such as an example
session.
The first two files are mandatory, if you want your plug-in to show up in the Help!Plug-
ins menu. Please refrain from putting too many images in the documentation files, so as
to keep the size of the documentation reasonable when integrated into the main T
EXMACS
distribution.
D.12. Plans for the future
There are many improvements to be made in the T
EXMACS interface to computer algebra
systems. First of all, the computer algebra sessions have to be improved (better hyphen-
ation, folding, more dynamic subexpressions, etc.).
As to interfaces with computer algebra systems, out main plans consist of providing tools
for semantically safe communication between several system. This probably will be imple-
mented in the form of a set of plug-ins which will provide conversion services.
254 Interfacing TE
XMACS with other programs

Index
abbr ......................174
above ..................... 150
abstract .................... 193
acmconf .................... 172
acronym .................... 174
action .....................153
active .....................164
active* .....................164
Add ...................... 76
add-to-counter-group .............186
aip ......................172
Algorithm ................... 53
algorithm ...................187
aligned-item ..................180
allouche ...................173
Allow for macro definitions in preamble .... 203
alt-colors .................. 65
amsart ....................172
and ...................... 163
appendix ....................198
aps ......................172
arg ................. 156–157,161
article ...... 17,79,90,131,171–172,235
assign .....................155
associate ................. 112,168
attr ...................... 168
author-affiliation ............. 194,196
author-by ................... 196
author-data ............... 194–195
author-email ............... 194,196
author-homepage ............ 194,196
author-name ..................194
author-note .................. 194
author-render-name ..............196
Automatic quotes ...............209
Automatically close brackets ..........209
Autosave ...................210
auxiliary ....................113
axiom .....................173
backup .....................168
beamer ..............17,65,68,171
below .....................150
bib-list .....................181
bibliography .................. 198
Bibtex command ................210
big ....................... 149
big-figure ...................192
big-table .................... 192
binom ..................... 178
blanc-page ...................185
Block ..................... 62
block .....................176
block content .............. 152,154
block context ........... 152–153,155
block* ..................... 176
body ................... 112,187
book ................. 17,131,172
bpr ...................... 173
case ...................... 159
cell ...................... 152
center ..................... 176
chapter .................... 197
choice ..................... 178
choose ..................... 178
cite ...................... 180
cite* ...................... 174
cite-detail ................... 180
clipped ..................... 147
close-tag .................... 165
code ...................... 175
code* ..................... 174
collection ................ 112,168
compact-item ................. 180
compound ................... 158
concat ..................... 141
Converters ................... 210
counter-in-g.................. 186
counter-x................... 186
cwith ..................... 151
Cyrillic input method ............. 209
date ...................... 162
datoms .................... 147
dbox ...................... 168
Debug
keyboard .................. 65
default ..................... 209
demo-tag ................... 233
description ................... 179
description-align ................ 179
description-compact .............. 179
description-dash ................ 179
description-long ................ 179
det ...................... 178
Detailed .................... 62
Details in menus ................ 209
dfn ...................... 174
display-in-g.................. 186
display-x.................... 186
div ....................... 163
dlines ..................... 147
doc-author ................ 193–194
doc-author-block ................ 196
doc-author-main ................ 195
255

doc-author-note ............. 195,197
doc-data ....................193
doc-data-abstract ...............195
doc-data-hidden ................195
doc-data-main ................. 195
doc-data-main* ................195
doc-data-note ................. 195
doc-date ................. 193,196
doc-keywords .............. 193,197
doc-make-title .................196
doc-msc ................. 193,197
doc-note ....................194
doc-render-title ................196
doc-running-author .............. 193
doc-running-title ................193
doc-subtitle ............... 193,196
doc-title ....................193
doc-title-block .................196
doc-title-note .................197
Document ................. 13,17
document ................... 141
Beamer theme ............... 65
Bluish ................. 65
Ice ................... 65
Metal ................. 65
Reddish ................ 65
Ridged paper .............. 65
Color
Background ..............125
Foreground ...............125
Font ..................21,126
Dpi ................... 15
Informative flags ........... 125,167
Detailed ................167
Language ..... 15,17,24,125,162,233
Russian ................. 212
Your language ............. 231
Magnification ...............125
Package .................. 78
Page .................... 21
Breaking ................ 53
Layout ................. 21
Screen layout .............. 21
Margins as on paper ........ 15
Screen margins
Margins as on paper ........ 134
Show header and footer ......134
Size ................ 15,133
Type ..............21,42,134
Paper ................ 15
Part .................... 226
Scripts ................... 74
Maxima ................ 73
Source .................80,112
Closing style .............. 140
Compactification ..........81,140
Edit source tree ..........80,125
Source tags ..............164
Source tree ............... 80
Special ...............81,140
Style .................. 140
Style ........... 15,17,77,106,171
Add package .............. 171
beamer ................. 65
source ................. 77
Update
All ................. 42,44
Bibliography .............. 43
Table of contents ............ 42
Use package ..............78,106
Program ................ 72
secure ................. 247
document style ................ 17
Downwards .................. 68
dpages ..................... 147
drd-props ................... 158
dueto ..................... 190
Dynamic .................... 65
dynamic scoping ............... 123
Edit
Copy .................... 55
Copy to ................55,201
Scheme ................ 116
Correct
Correct all ............... 33
Correct manually ............ 33
Cut .................... 55
Paste ................... 55
Paste from ...............55,201
LaTeX ................. 55
Scheme ................ 116
Preferences ...... 14,22,101,209–210
Converters
LaTeX
LaTeX–>TeXmacs ....... 204
TeXmacs–>LaTeX ....... 202
TeXmacs->Html
Export formulas as images ... 206
Use MathML .......... 206
Keyboard ................ 210
Automatic brackets
Disable ........... 29,224
Automatic quotes .......... 24
Cyrillic input method
translit ............. 213
Remote control ........... 65
Language
Japanese .............. 214
Russian ............... 212
Look and feel ........... 209,225
Mathematics
Automatic correction ........ 34
Manual correction ......... 33
Semantic editing .......... 32
Printer ...............15,133
Font type .............. 225
Type 1 ............. 15
Security ................ 153
Accept all scripts .......... 167
Utilities ................. 225
256 Index

Versioning tool ........... 61
Redo .................... 57
Replace .................. 56
Search ................... 56
Spell .................... 57
Undo .................... 57
elsart ....................172
em .......................173
Emacs .....................209
enumerate ...................178
enumerate-alpha ................179
enumerate-Alpha ................179
enumerate-numeric ..............179
enumerate-roman ...............179
enumerate-Roman ...............179
enunciation-name ...............191
enunciation-sep ................ 191
env ...................... 90
env ......................188
env-base ................... 90
env-base ...................188
env-float .................. 90
env-float ..................192
env-math ................... 90
env-math ...................189
env-theorem ................. 90
env-theorem .................190
environments ................. 17
eqnarray .................... 189
eqnarray* ................... 190
equal .....................163
Equation .................... 18
equation .................... 189
equation* ...................189
equation-lab ..................189
error ......................168
errput .....................187
eval ................... 160–161
eval-args ....................157
Evaluate .................... 73
evens .....................158
exam .................... 17,172
exercise-name .................191
exercise-sep .................. 191
Expand user-defined macros ..........202
Export bibliographies as links .........203
extend .....................176
extern .....................166
figure-name ..................192
figure-sep ...................192
File ................... 233–234
Export ...................201
Html ..................206
LaTeX .............. 201–202
Pdf ................... 15
Postscript ............... 15
Scheme ................116
XML .................. 115
Import ...................201
Html ..................207
LaTeX ................. 201
Latex .................. 204
Scheme ................ 116
XML .................. 115
Load ................13,15,234
New .................. 14,77
Print
Print all ................ 15
Print all to file ............. 15
Save .................. 15,234
Save as .................. 14
filter ...................... 158
flag ...................... 167
Flexibility ................... 53
float ...................... 154
Focus .................15,18,225
Allowed positions ............. 53
Insert above ................ 43
Insert argument after ............ 66
Insert argument before ........... 66
Insert below ................ 43
Line arrows ................ 50
Line dashes ................ 50
Preferences ................ 65
European numbering .......... 171
Highlight incorrect formulas ...... 33
Style options .............. 171
Screens .................. 65
folded ..................... 177
foo ...................... 165
footnote .................... 192
footnote-sep .................. 193
Format ................ 17–18,225
Adjust ................. 30,61
Color .................... 125
Condensed ................. 129
Display style ............. 128,149
on ................... 27
Font ..................21,126
Font shape
Italic .................. 13
Index level ................. 128
Language ...............24,125
Japanese ................ 214
Russian ................. 212
Page insertion
Footnote ................ 53
Size .................... 127
Space ............... 25,60–61
Specific
Image .............. 204,206
Latex ............... 203–204
Texmacs ............. 203–204
Formula .................... 18
frac ...................... 149
framed-session .......... 72,173,188
From center .................. 68
generic .......... 17,131,171–172,233
get-arity .................... 158
get-label .................... 158
Index 257

giac ...................... 173
glossary ....................183
glossary-1 ...................183
glossary-2 ...................183
glossary-dots ..................183
glossary-dup ..................183
glossary-explain ................183
glossary-line ..................183
Gnome .....................209
Go ....................... 15
greater .....................163
greatereq ...................163
group-common-counter ............ 186
group-individual-counters ...........187
header ..................90,197
header-article .............90,171
header-author ................. 197
header-book ...............90,171
header-primary .................197
header-secondary ...............197
header-title ................193
header-title ..................197
Help ...................... 229
Interfacing .................236
Plug-ins ................71,254
Source code
Data conversion ............ 236
Data format ..............236
hflush .....................183
higher-level macro ..............158
hlink ................... 153,164
Homoglyph substitutions ............ 34
hrule ......................177
hspace .....................143
htab ................... 143–144
html-class ...................206
html-div-class .................206
html-div-style .................206
html-javascript .................207
html-javascript-src ...............206
html-style ...................206
huge ......................175
hybrid ..................... 165
identity ....................169
ieeeconf ...................172
if .......................159
if* .......................147
inactive .................... 164
inactive* .................... 164
inc-x......................186
include .....................153
indent .................. 166,187
indent-both .................. 184
indent-left ...................184
indent-right .................. 184
index ..................... 182
index-1 ....................182
index-1* .................... 182
index-2 ....................182
index-2* .................... 182
index-3 .................... 182
index-3* .................... 182
index-4 .................... 182
index-4* .................... 182
index-5 .................... 182
index-5* .................... 182
index-complex ................. 182
index-dots ................... 182
index-line ................... 182
initial ..................... 112
initial environment .............. 155
inline content ................. 152
inline-tag ................... 164
input ..................... 187
Insert ...................18,225
Animation
Animation ............... 68
Compose ................ 68
Fixed .................. 68
Progressive ............... 68
Repeat ................. 68
Sound ................. 68
Translate ................ 68
Arc .................... 48
Automatic
Bibliography ............ 43–44
Index .................. 43
Table of contents ............ 42
Circle ................... 48
Closed spline ................ 48
Content tag ................ 173
Abbreviation .............. 174
Acronym ................ 174
Cite .................. 174
Code .................. 174
Definition ............... 174
Emphasize ............... 173
Keyboard ................ 174
Name ................. 174
Person ................. 174
Sample ................. 174
Strong ................. 173
Variable ................ 174
Verbatim ................ 174
content tags ................ 18
Database entry ............... 43
Description ................. 19
Enumerate ............... 17,19
Roman ................. 19
Enunciation ................ 17
Environment .............. 20,190
Fold .................... 60
Executable ............. 66,73
Maxima .............. 73
Folded ................. 66
Overlay ................. 67
Alternate except here ........ 67
Alternate from here on ....... 67
Alternate only here ......... 67
Alternate until here ......... 67
258 Index

Specify color alternation ...... 67
Visible except here ......... 67
Visible from here on ........ 67
Visible only here .......... 67
Visible until here .......... 67
Overlays
Standard .............. 67
Summarize ............... 66
Switch
Screens ............... 65
Standard .............. 66
Traversal ................ 66
Unroll ................. 66
Fraction .................. 55
Geometry
Crop .................. 47
Size .................. 47
Unit .................. 47
Zoom ................. 47
Grid .................... 47
Type
Cartesian .............. 47
Group/ungroup .............. 51
Image ................... 41
Draw image .............. 47
Draw over selection .......... 47
Small figure .............. 53
Itemize ................. 17,19
Last name ................. 43
Line .................... 47
Link
Action ................. 41
Alternate
Bibliography ............ 44
Citation .............. 43–44
Executable input field ......... 74
Field reference ............. 74
Hyperlink ................ 41
Include ............... 41,45
Index entry ............. 43–44
Input field ............... 74
Invisible citation ............ 43
Label .................. 41
Reference ............... 41
Mathematics ................ 48
Displayed formula ........... 27
Equation ................ 41
Equations ............. 37,41
Inline formula ............. 27
Several equations ............ 27
Move objects ................ 51
Note
Floating figure ............. 53
Floating object ............. 53
Floating table ............. 53
Particle .................. 43
Point .................... 47
Polygon .................. 47
Program
Block of code .............233
Inline code ............... 233
Scheme ............... 233
Resize objects ............... 51
Rotate objects ............... 51
Section ................... 17
Semantics ................. 36
Other ................. 35
Session .............. 71,109,239
Markup ................. 243
Minimal ................ 108
Other ................. 71
Remote ................. 76
Scheme ................ 71
Shell .................. 71
Set properties ............... 51
Size tag .................. 175
Space ................... 20
Spline ................... 48
Switch
Fold .................. 177
Unfold ................. 177
Table ................... 37
Big table ................ 37
Numeric spreadsheet .......... 74
Small table ............. 37,53
Textual spreadsheet .......... 74
Text .................... 48
Title .................... 193
Author ................. 194
Insert author ............ 194
Insert title ............... 193
TeXmacs notice ............ 229
Title suffix ................. 43
Insert missing invisible operators ........ 34
Interactive questions .............. 209
is-tuple .................... 163
itemize ..................... 178
itemize-arrow ................. 178
itemize-dot .................. 178
itemize-minus ................. 178
Japanese .................... 214
kbd ...................... 174
KDE ...................... 209
Keyboard ................... 209
label ...................... 152
Language ................... 209
large ...................... 175
larger ..................... 175
latex ...................... 165
LaTeX ..................... 177
left ...................... 148
left-flush .................... 183
Leftwards ................... 68
length .................. 161,163
less ...................... 163
lesseq ..................... 163
letter ............... 17,131,172
Limits ..................... 53
line content .................. 154
line context ............... 152,154
Index 259

line-break ...................144
list ...................... 90
list-of-figures ..................198
list-of-tables .................. 198
localize ....................185
logical paragraphs ..............144
Look and feel .............. 209–210
look-up ....................164
lprime ..................... 150
lsub ...................... 149
lsup ...................... 149
Mac OS ....................209
macaulay2 ..................173
macro .....................156
made-by-TeXmacs ............... 177
Manual .................... 230
Annotate ..................234
Explain ...................233
Environment variable .......... 233
Explanatory item ............233
Synopsis ................233
TeXmacs macros ............233
Meta data .................231
Copyright ............... 232
GNU FDL ...............232
Title ..................231
Traversal ..................232
Traverse ................232
map ...................... 185
map-args ...................157
margin-first-other ............... 184
markup.ts ............... 242–243
math ..................... 175
Mathematics .................. 225
matrix .....................178
Maxima .................... 73
maxima .................... 77
meaning .................... 168
merge .................. 162,164
mid ......................148
middle-tag ...................164
minus .....................162
mod ......................163
move .....................146
multi-paragraph cell ............. 152
name .....................174
neg ...................... 150
new-counter .................. 185
new-counter-group ...............186
new-dpage ...................168
new-dpage* ..................168
new-env .................... 189
new-exercise .................. 188
new-figure ...................188
new-line .................... 144
new-list .................... 93
new-page ................... 146
new-page* ...................146
new-remark ..................188
new-theorem ..................188
next-line .................... 144
next-x..................... 186
no-break .................... 144
no-indent ................... 145
no-indent* ................... 145
no-page-break ................. 146
no-page-break* ................ 146
nocite ..................... 180
normal-size .................. 175
not ...................... 163
number .................... 162
number-env .................. 235
number-europe ........... 77,173,188
number-long-article ......... 171–172
number-us .................. 173
Ok ....................... 22
op ....................... 175
open-tag ................. 164–165
Options
Security .................. 41
or ....................... 163
orphans and widows ............. 145
output ..................... 187
over ...................... 163
overline .................... 177
padded-bothlined ............... 184
padded-centered ................ 184
padded-normal ................. 184
padded-std-bothlined ............. 184
page filling .................. 145
page-break ................... 146
page-break* .................. 146
pageref .................... 153
paragraph ................ 141,197
Number of columns ............ 53
part ...................... 197
pdf ...................... 15
person ..................... 174
phantom .................... 177
plus ...................... 162
Preferences
Converters
TeXmacs->Pdf/Postscript
Expand beamer slides ........ 69
Printer ..................... 209
program .................... 187
project ..................... 112
proof ..................... 190
provides .................... 156
quasi ...................... 161
quasiquote ................ 160–161
quotation ................... 176
quote ..................... 160
quote-arg ................... 161
quote-env ................... 176
quote-value .................. 161
range .................. 161,164
raw-data .................... 154
really-huge ................... 175
really-large ................... 175
260 Index

really-small ..................175
really-tiny ...................175
reference .................... 152
references ...................112
remark-name ..................191
remark-sep ................... 191
Remove .................... 76
Remove superfluous invisible operators ..... 33
render-bibitem ................. 180
render-big-figure ................ 192
render-cite ...................180
render-cite-detail ................180
render-doc-author ...............196
render-doc-authors ...............196
render-enunciation ...............191
render-exercise .................191
render-list ...................179
render-proof .................. 191
render-remark ................. 191
render-small-figure ...............192
render-theorem ................ 191
repeat ..................... 147
Replace unrecognized macros .........202
Replace unrecognized styles ..........202
reset-x.....................185
resize .....................146
rewrite-inactive ................ 168
right ...................... 148
right-flush ...................183
rightflush ................... 166
Rightwards ................... 68
rigid ...................... 154
Rough ..................... 62
row ...................... 152
rprime ..................... 150
rsub ...................... 149
rsup ...................... 149
samp .....................174
Scheme
Extensions .................226
Scripts .....................210
section .....................197
section-article ............... 90
section-base .............. 90,96
section-base .......... 180,197–199
sectional-centered ...............200
sectional-centered-bold .............200
sectional-centered-italic ............ 200
sectional-normal ................ 200
sectional-normal-bold .............200
sectional-normal-italic .............200
sectional-sep .................. 198
sectional-short ................. 199
sectional-short-bold .............. 200
sectional-short-italic ..............200
sectional-short-style .............. 199
Security ....................209
seminar .................. 17,172
session .................... 90
Session ....................225
Close session ................ 71
Evaluate
Evaluate above ............. 71
Evaluate all .............. 71
Evaluate below ............. 71
Field .................... 72
Input
Mathematical input .......... 73
Input mode
Mathematical input .......... 73
Multiline input ............. 72
Interrupt execution ............. 71
Session
Clear all fields ............. 72
Create subsession ............ 72
Fold all fields .............. 72
Unfold all fields ............. 72
Split session ................ 72
session .................... 187
session ..................... 187
set-footer ................... 185
set-header ................... 185
shift ...................... 146
shrink-inline .................. 178
simple-page .................. 185
Simplified menus ................ 209
small ...................... 175
small-figure .................. 192
small-table ................... 192
smaller ..................... 175
smash ..................... 176
smash-bottom ................. 176
smash-top ................... 176
source ..............17,77,91,172
Source ..................... 84
Activation ................. 83
Activate ................ 83
Activate once .............. 83
Arithmetic ................. 89
Condition ................. 89
Define ................... 84
Evaluation ................. 87
Flow control ................ 88
Macro ................... 84
Presentation ................ 83
Apply macro .............. 83
Apply macro once ........... 83
Compact ................ 83
Stretched ................ 83
Text .................... 89
Tuple ................... 89
Source macros tool .............. 84
Source tags .................. 80
space ..................... 143
specific .................... 154
sqrt ...................... 149
src-arg ..................... 166
src-error .................... 166
src-integer ................... 166
src-length ................... 166
Index 261

src-macro ...................166
src-package ..................166
src-package-dtd ................166
src-style-file ..................166
src-title .................... 166
src-tt .....................166
src-var ..................... 166
std ...................... 90
std ......................173
std-automatic ................ 90
std-automatic ................180
std-counter ................. 90
std-latex .................. 91
std-list ................... 90
std-list .............. 93,178–179
std-markup ................ 90,235
std-markup ................ 90,173
std-math ................... 90
std-math ...................178
std-symbol .................. 90
std-symbol .................. 177
std-utils ..............90,99,197
std-utils ............... 183,185
strong .....................173
structured-list ...............173
structured-list ...............179
structured-section ........ 95,173,198
style ......................112
style-only ...................165
style-only* ................... 165
style-with ...................165
style-with* ................... 165
subindex .................... 182
subparagraph .................197
subsection ...................197
subsubindex .................. 182
subsubsection .................197
subtable .................... 152
surround .................... 142
svjour ....................172
swell ......................176
swell-bottom ..................176
swell-top ....................176
switch .....................177
symbol .....................165
table ...................... 152
Table .....................225
Cell background color ........... 39
Cell border ................. 39
Cell height
Set height ............... 39
Cell operation mode ............ 38
Cell width
Set width ................ 39
Horizontal cell alignment .......... 38
Horizontal table alignment ......... 38
Special cell properties
Distribute unused space ........ 39
Hyphenation
Multi-paragraph ..........139
Special table properties .......... 39
Border ................. 39
Extract format ............. 40
Vertical cell alignment ........... 38
Vertical table alignment .......... 38
table-of-contents ................ 198
tabular ..................... 152
tabular* .................... 176
tag ...................... 168
TeX ...................... 177
TeXmacs ................ 112,177
TeXmacs-version ................ 177
Text ...................... 225
textput .................... 187
Texts ..................... 77
tformat .................... 151
the-glossary .................. 198
the-index ................... 198
the-x..................... 185
theorem-name ................. 191
theorem-sep .................. 191
times ..................... 163
tiny ...................... 175
Title ...................... 231
title-base ................ 90,99
title-generic ................ 90
tmarker .................... 152
tmarticle .................. 172
tmbook .................... 172
tmdoc ............... 172,230–233
tmlen ..................... 121
toc-1 ..................... 181
toc-2 ..................... 181
toc-3 ..................... 181
toc-4 ..................... 182
toc-5 ..................... 182
toc-dots .................... 182
toc-main-1 ................... 181
toc-main-2 ................... 181
toc-normal-1 .................. 181
toc-normal-2 .................. 181
toc-normal-3 .................. 181
toc-small-1 .................. 181
toc-small-2 .................. 181
toc-strong-1 .................. 181
toc-strong-2 .................. 181
Tools .................65,84,210
Debugging tool .............. 65
Miscellaneous
Export selections as ........55,201
Import selections as ........55,201
Project
Attach master... ............ 45
Expand inclusions ........... 226
Update
Inclusions ................ 45
Web
Create website ............. 206
transform-bibitem ............... 181
translate .................... 162
262 Index

tree ...................... 150
tt .......................175
tuple ................ 112–113,163
twith ......................151
underline ....................177
unequal .................... 163
unfolded .................... 177
uninit .....................167
unknown ....................167
unquote .................... 160
unquote* ...................160
Update .................... 76
Upwards .................... 68
value ................... 156,161
var ....................... 174
vdh ......................173
verbatim ................. 174–175
verse ......................176
Version .................. 61–62
Commit .................. 62
Compare
With current user version ........ 62
With newer version ........... 61
With older version ........... 61
File
Compare ................ 62
Grain .................... 62
History ................... 62
Move ................... 61
Register .................. 62
Retain ................... 62
Current version ............. 62
Show .................... 61
Update ................... 63
very-large ...................175
very-small ................... 175
View ...................... 209
Presentation mode ...........65,172
Remote control .............. 65
vspace .................. 142–143
vspace* .................... 143
while ...................... 159
wide ...................... 150
wide* ..................... 150
wide-bothlined ................. 184
wide-centered .............. 183–184
wide-framed .................. 184
wide-framed-colored .............. 184
wide-normal ............... 183–184
wide-std-bothlined ............... 184
wide-std-framed ................ 184
wide-std-framed-colored ............ 184
wide-std-underlined .............. 184
wide-underlined ................ 184
Windows .................... 209
with ...................... 155
World ..................... 107
write ...................... 167
x-clean .................... 199
x-display-numbers ............... 199
x-header .................... 199
x-numbered-title ................ 199
x-sep ..................... 199
x-text ..................... 199
x-title ..................... 199
x-toc ..................... 199
xmacro .................... 157
xor ....................... 163
yes-indent ................... 145
yes-indent* .................. 145
Index 263
