End User Guide
userGuide
User Manual:
Open the PDF directly: View PDF ![]() .
.
Page Count: 20
End User Guide
i

End User Guide
ii
Table of Contents
1 Introduction …………………………………………………………………………………………………………
1.1 About Anchel End User……………………………………………………………………………
1.2 Supported Browsers…………………………………………………………………………………
1.2.1 Windows………………………………………………………………………………
1.2.2 Mac………………………………………………………………………………………
1.2.3 Linux………………………………………………………………………………………
1.3 History……………………………………………………………………………………………………….
2 System Setup …………………………………………………………………………………………………......
Software System Requirement…………………………………………………………………….
Installation………………………………………………………………………………………………….
3 Configuration Anchel End User………………………………………………………………………………
4 Anchel Web portal …………………………………………………………………….. ……………………..
4.1 Structure of Anchel End User………………………………………………………………..
4.2 Login End User ………………………………………………………………………………………
4.1.1 Login ……………………………………………………………………………………..
4.2.2 Welcome Page ……………………………………………………………………...
4.3 Host your File…………………………………………………………………………………………..
4.3.1Welcome Page ………………………………………………………………………..
4.3.2Upload File ……………………………………………………………………………….
4.3.3 Status ……………………………………………………………………………………..
4.3.4 Operations ……………………………………………………………………………….
4.4 Upload to a Group…………………………………………………………………………………….
4.4.1 Creating workgroup…………………………………………………………………………
4.4.2 Creating Folder………………………………………………………………………………
4.4.3 Upload File………………………………………………………………………………………
4.5 Preferences……………………………………………………………………………………………..
4.5.1 Contact List………………………………………………………………………………………………
4.5.1.1 Add contact list………………………………………………………………………..
4.5.1.2 Delete contact list…………………………………………………………………..
4.5.1.3 Add contact………………………………………………………………………………
4.5.1.4 Delete contact ……………………………………………………………………….
4.5.1.5 Search by or Filter by ……………………………………………………………
4.5.1.6 Sort by ………………………………………………………………………………..
4.5.1.7 More Action ……………………………………………………………………….
4.6 Activity Logs……………………………………………………………………………………………..
4.6.1 Activity Log page ………………………………………………………………………….

End User Guide
iii
4.6.2 Calendar ………………………………………………………………………………………..
4.6.3 Activity log Function ………………………………………………………………………
4.6.4 Sort by Order…………………………………………………………………………………..
4.6.5 Information …………………………………………………………………………………..
4.6.6Pagination ……………………………………………………………………………………………..
5 Report…………………………………………………………………………………………………………………….

End User Guide
iv
Introduction :.
1.1 About Anchel End User :
Anchel is a secure file sharing enterprise application with strong security constraints between users. The application consists of a
web interface for end users and administrators and a standalone multi-platform desktop client for file sharing. This guide documents
the usage of the ‘End User’ part of the application
1.2 Supported Browsers
1.2.1 Windows :
OPERATING SYSTEM
BROWSER( VERSION)
Windows
IE 11 , Firefox 52 , Chrome 54
MAC
Safari 4.1.3 , Opera 12 , Chrome 54 , Firefox 52
Linux
Firefox 52 , Chrome 54
1.3 History :
2 System Setup:
3 Configuration Anchel End User :
End User Guide
v
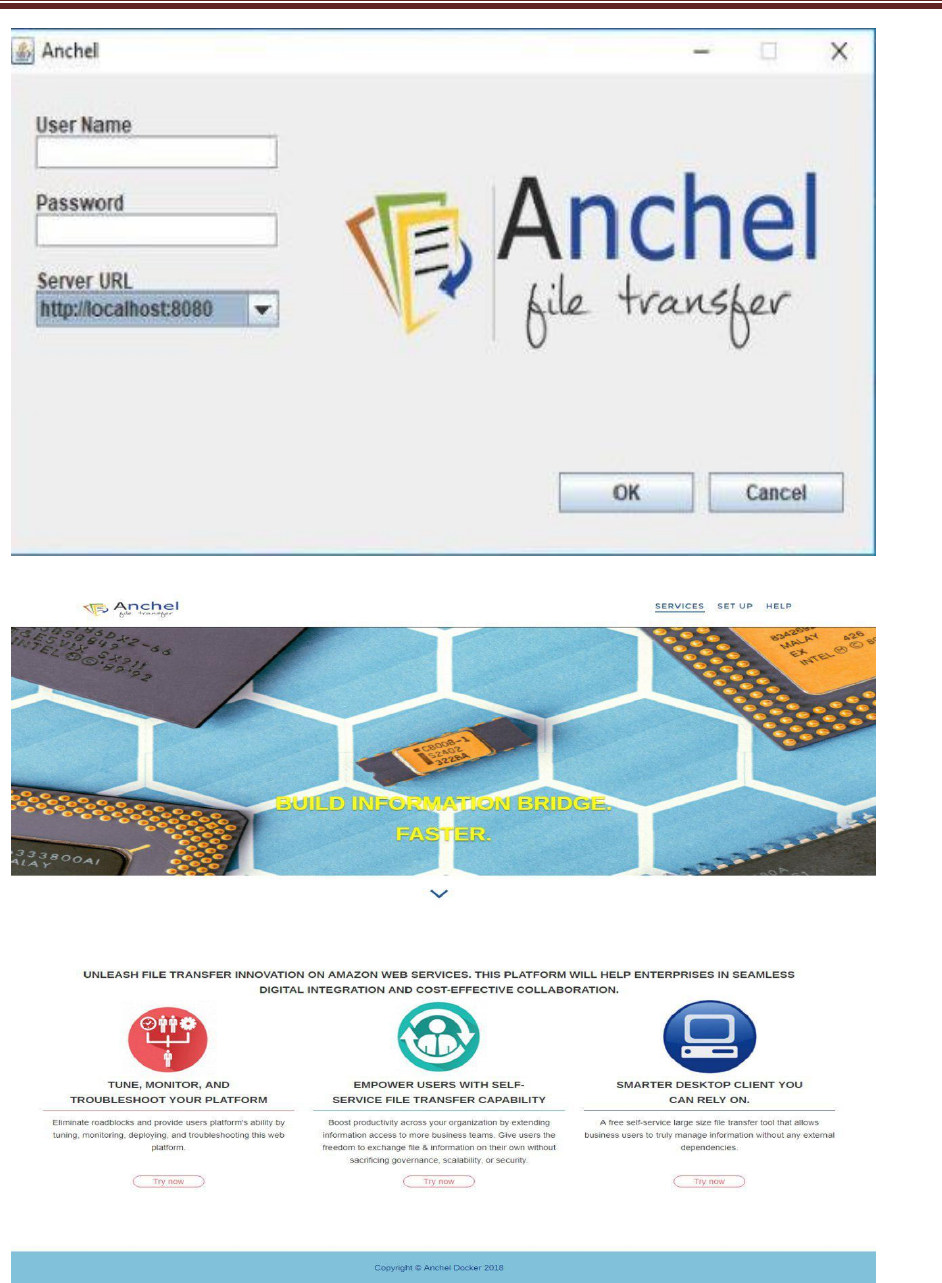
4 Anchel Web Portal :
Launch any of the supported web browsers on your system and enter “<https://anchel.io/>” in the address
bar. The Anchel landing page is then presented.
Click on the icon in Services to launch the ‘End User’ landing page.
The user will then be presented with a login dialog. Enter the registered user name and password
in the dialog.
After successful authentication, depending on the roles (refer to the admin guide in <Admin Guide
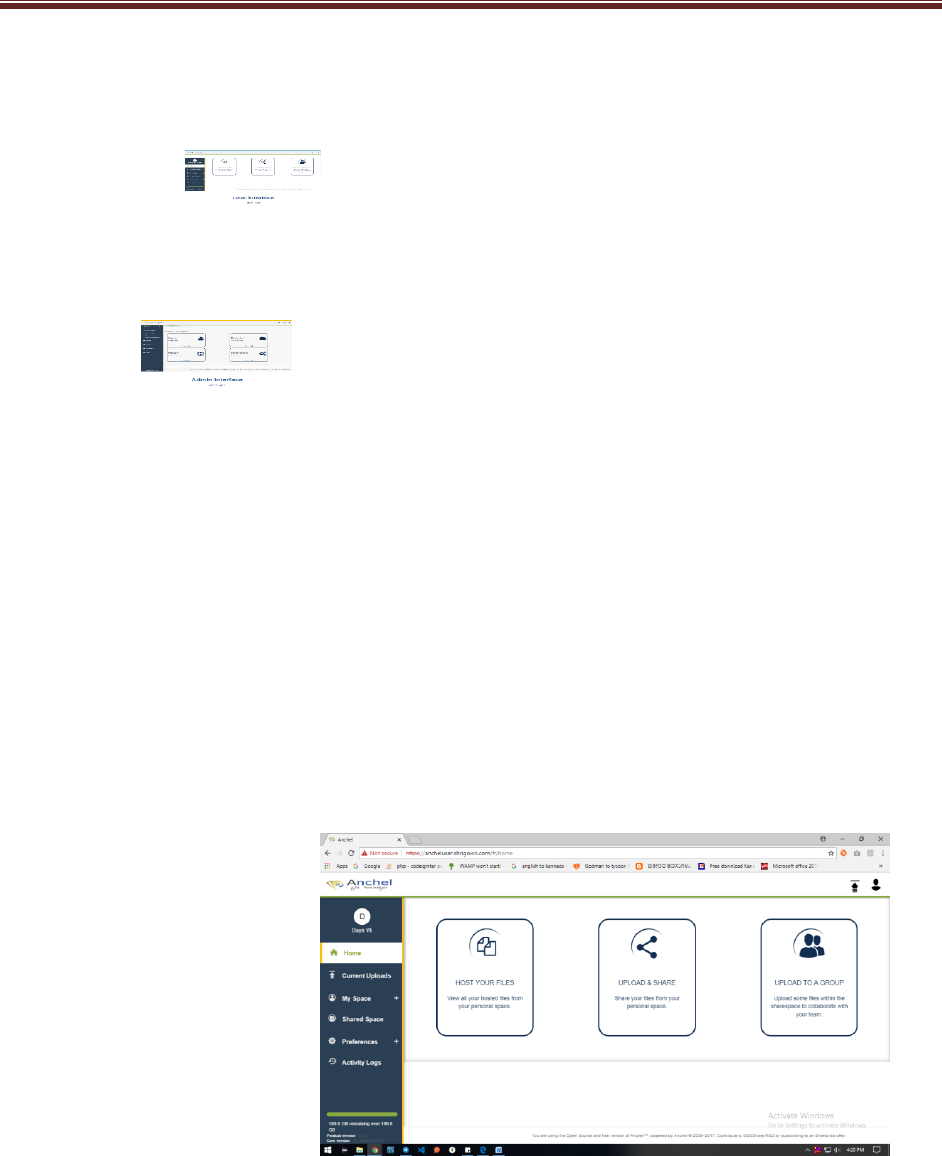
Portal > for roles in Services) available to the user, the home page will be
Presented.
The minimal modules and information available in the home page include:
Copyright
Version of the application
Available storage space
User information
Preferences
Host your Files module
Activity logs
Upload and Share
Upload to a workgroup (Role based access)
The various actions available in the index page are discussed in the following sections.
4.1 Structure of Anchel End User
End User Guide
vi
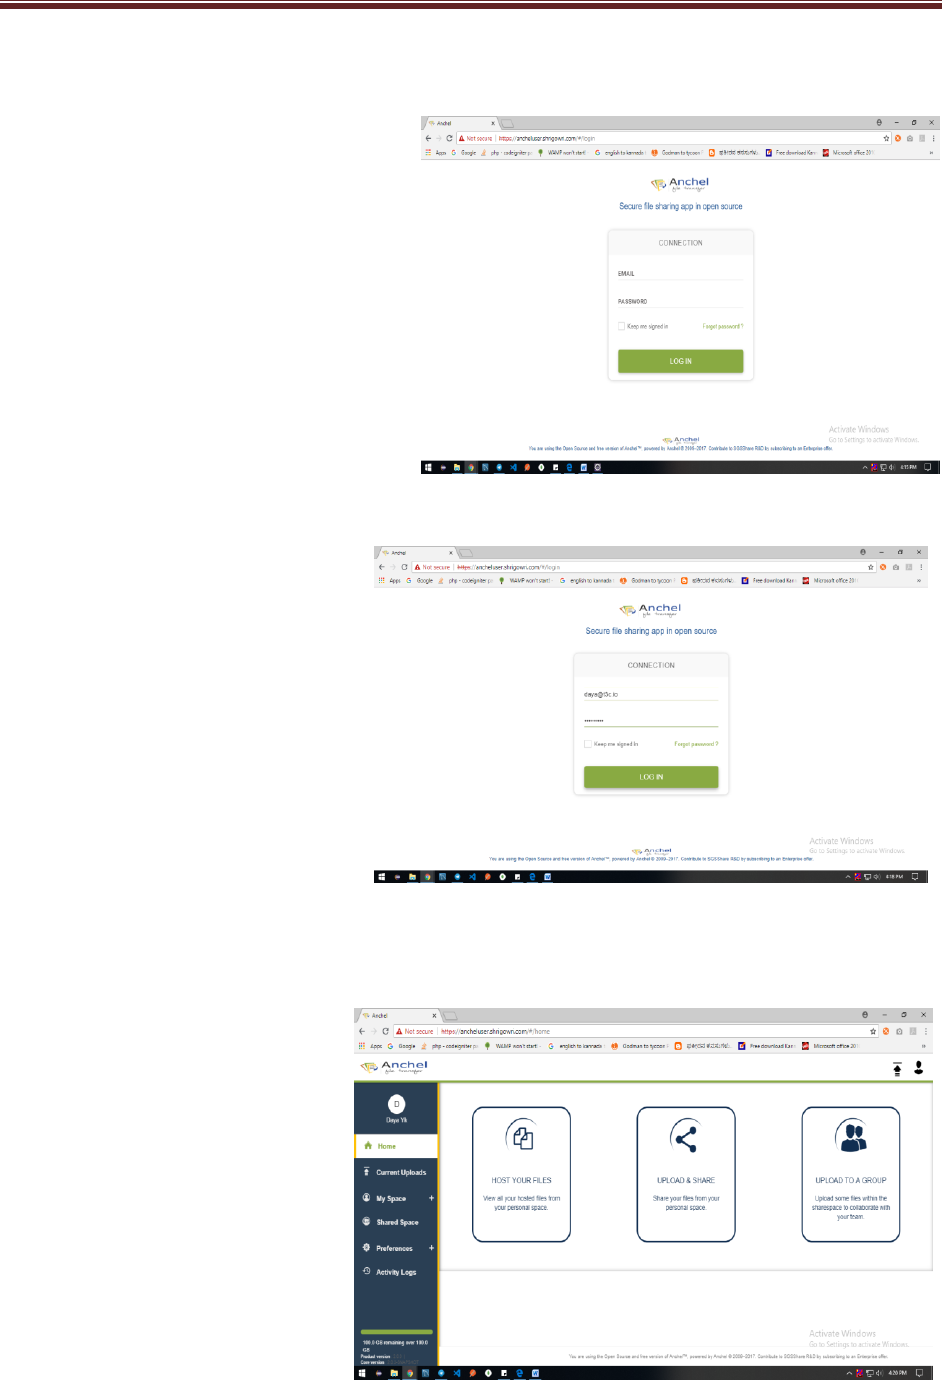
4.2 Login End User
4.1.1 Login
1 Go to the Tab Bar and Enter Application
Address ( https://ancheluser.shrigowri.com/#/login).
2 Enter your login and password
Note: Your username is your full email
Address (that is to say with the domain).
Click the "Login" button
4.2.2 Welcome Page
1 Welcome Pages or Landing Page
Should display.
End User Guide
vii
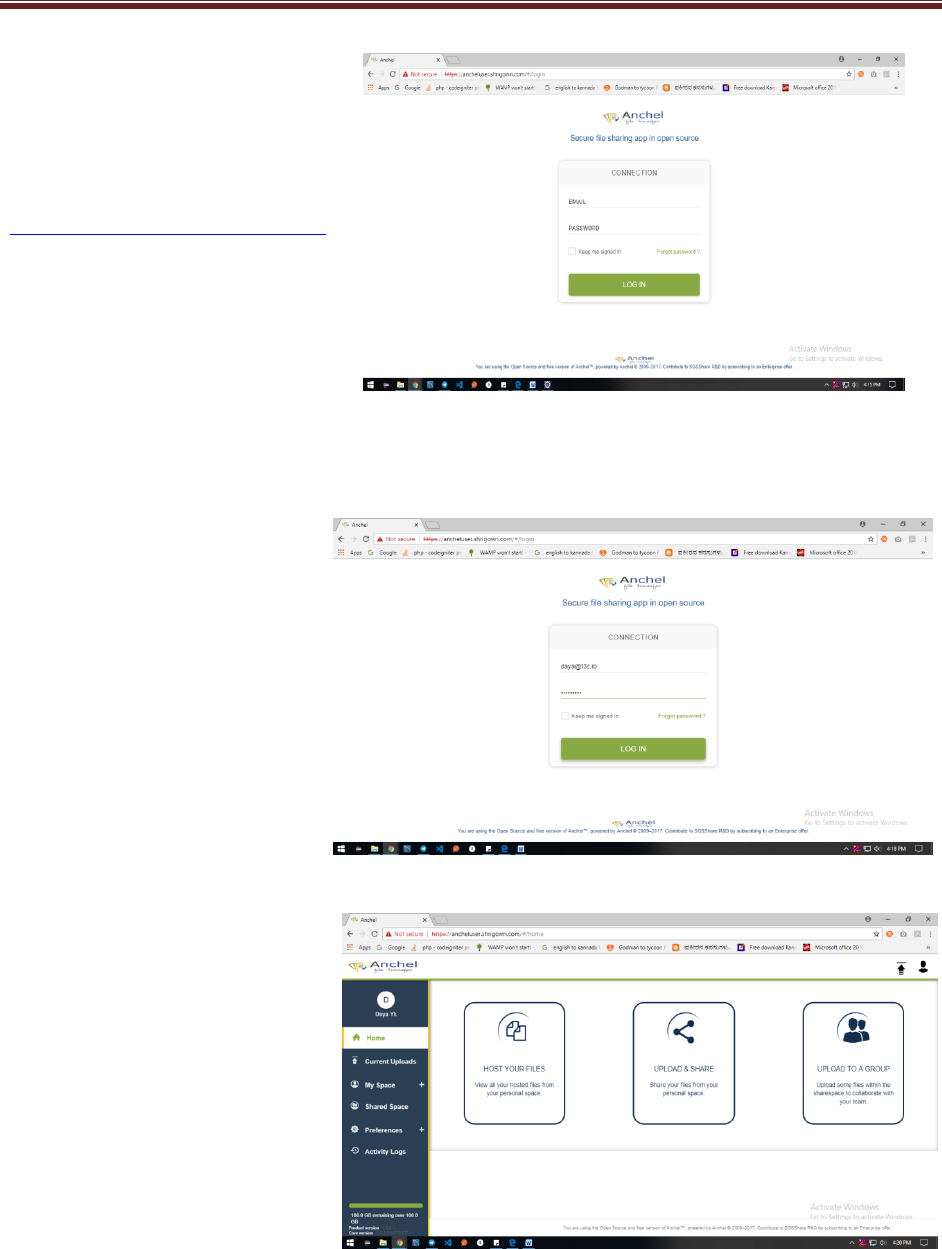
4.3 Host your File
4.3.1 Welcome Page
1 Go to login page of Anchel end User
Or enter URL in tab bar
(https://ancheluser.shrigowri.com/#/login).
It should display login page
2 Enter your login and password
.Note: Your username is your full
Email address (that is to say with the domain
and user should be existing).
Click the "Login" button
3 Welcome Page or Landing Page
Should display.
End User Guide
viii
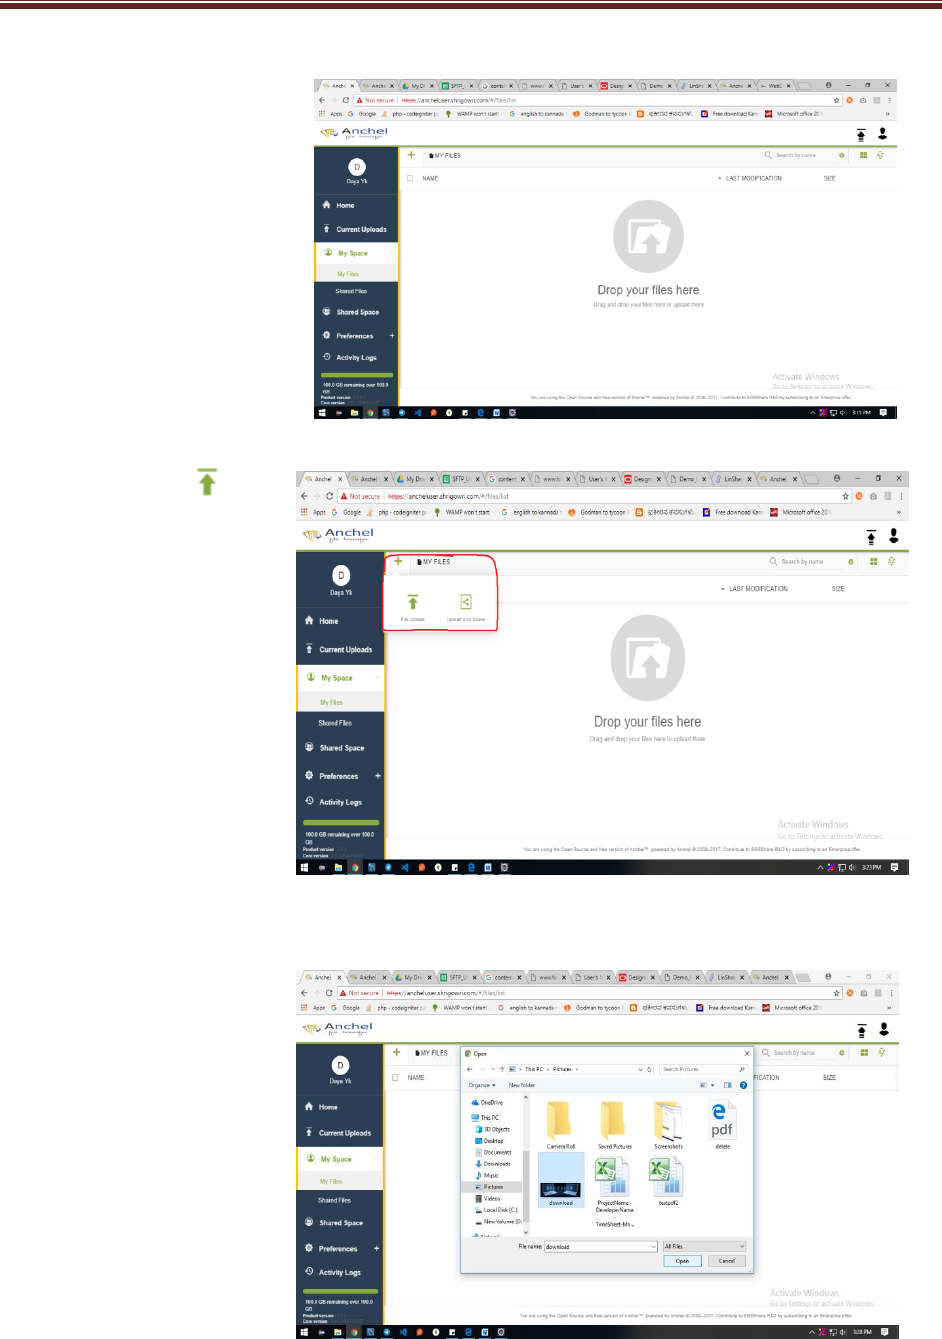
4 Click on HOST YOUR FILE
MySpace/File page should
Display.
4.3.2 Upload File
1 Click on Upload File
(marked in red circle)and
then click on File Upload
2 Select file from system
Disk as given.
End User Guide
ix
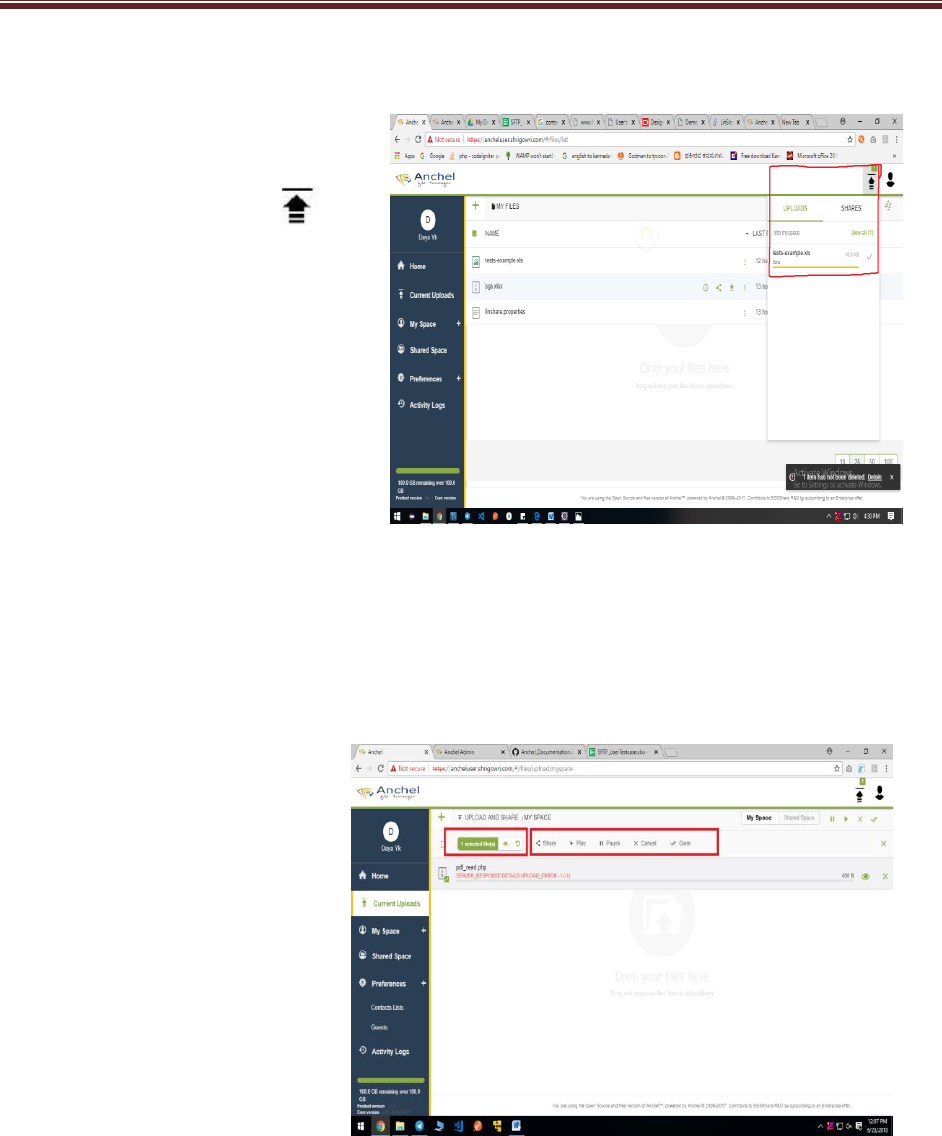
4.3.3
Status
1Once File selected it will start downloading
File and shown in Status Button
as display.
4.3.4 Operations
1 User can do operation (Share
, show information) as given below.
End User Guide
x
4.4 Upload to a Group
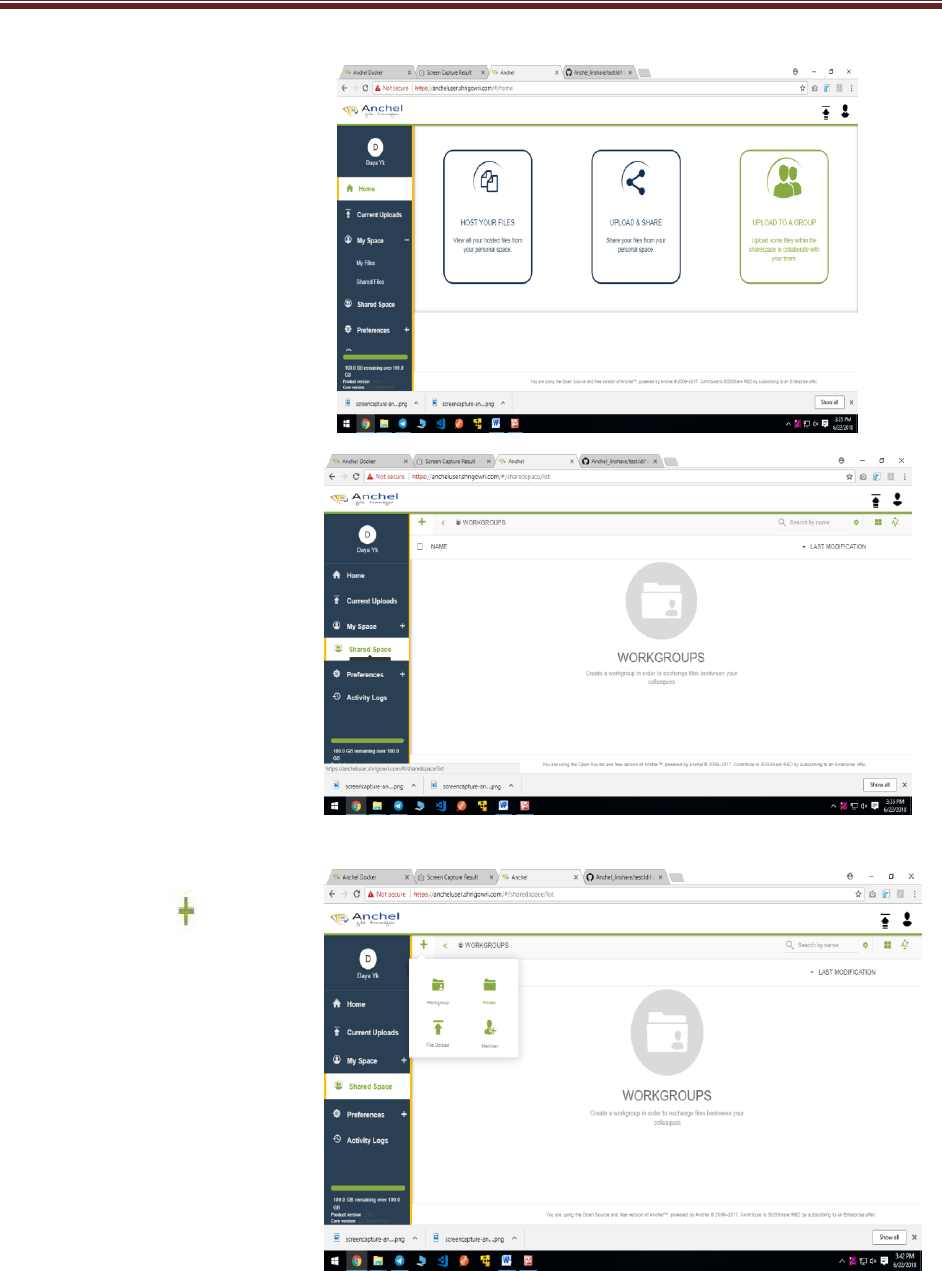
1 Click on upload to group in
Home page it should display
Shared space page as given.
2 Or directly click on Shared Space
it should display shared space
Page as given below.
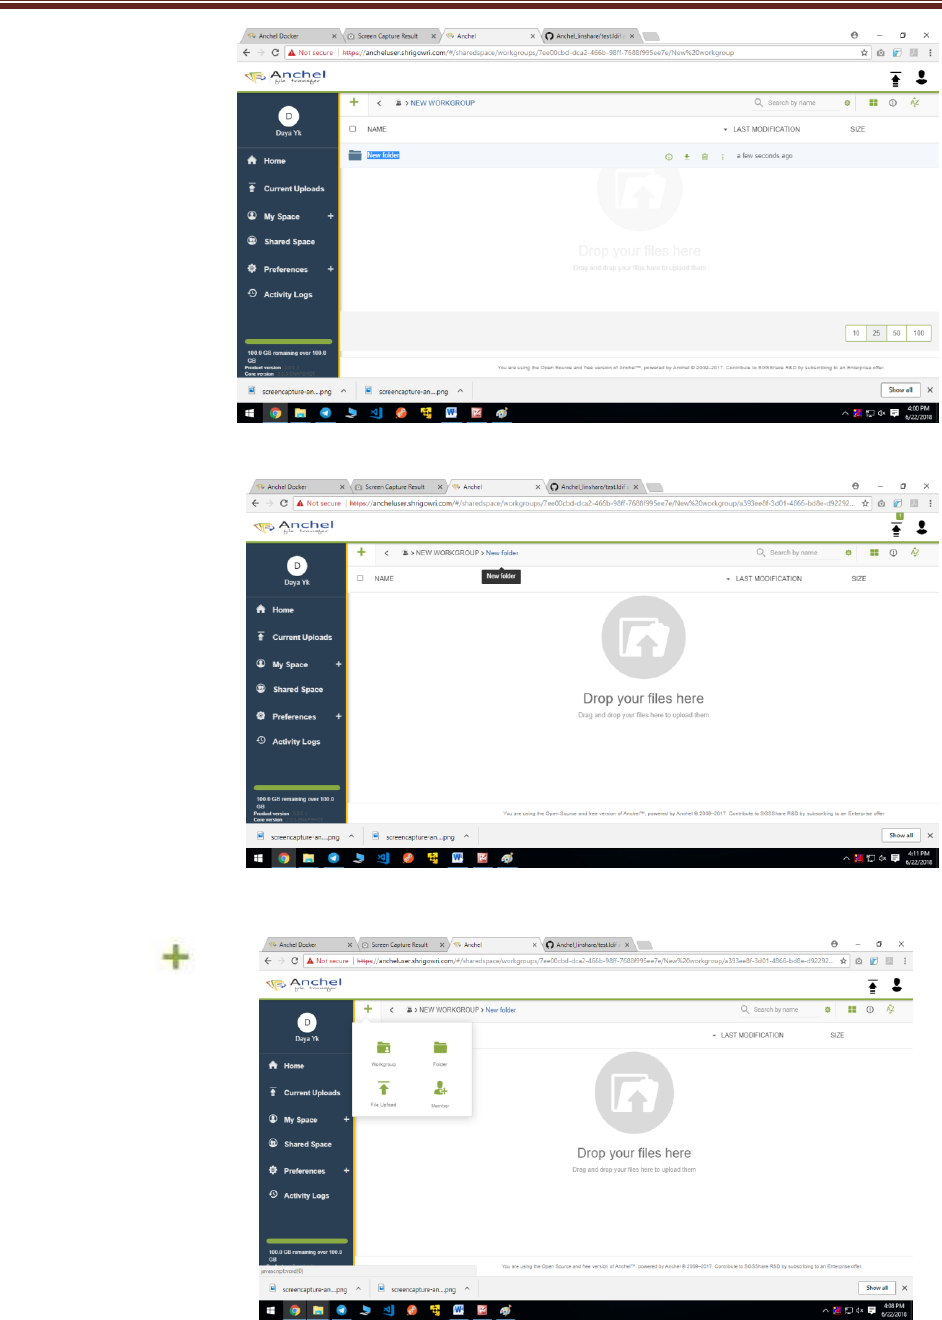
3Click on upload file it should
Display all functionality (workgroup,
Folder, File upload, member) as given.
End User Guide
xi
4.4.1
Creating workgroup
1 Click on workgroup to
Create workgroup list
2 Click on new workgroup
Page. Workgroup page
Will display.
4.4.2 Creating Folder
1 Click on upload file and
Click on Folder
End User Guide
xii
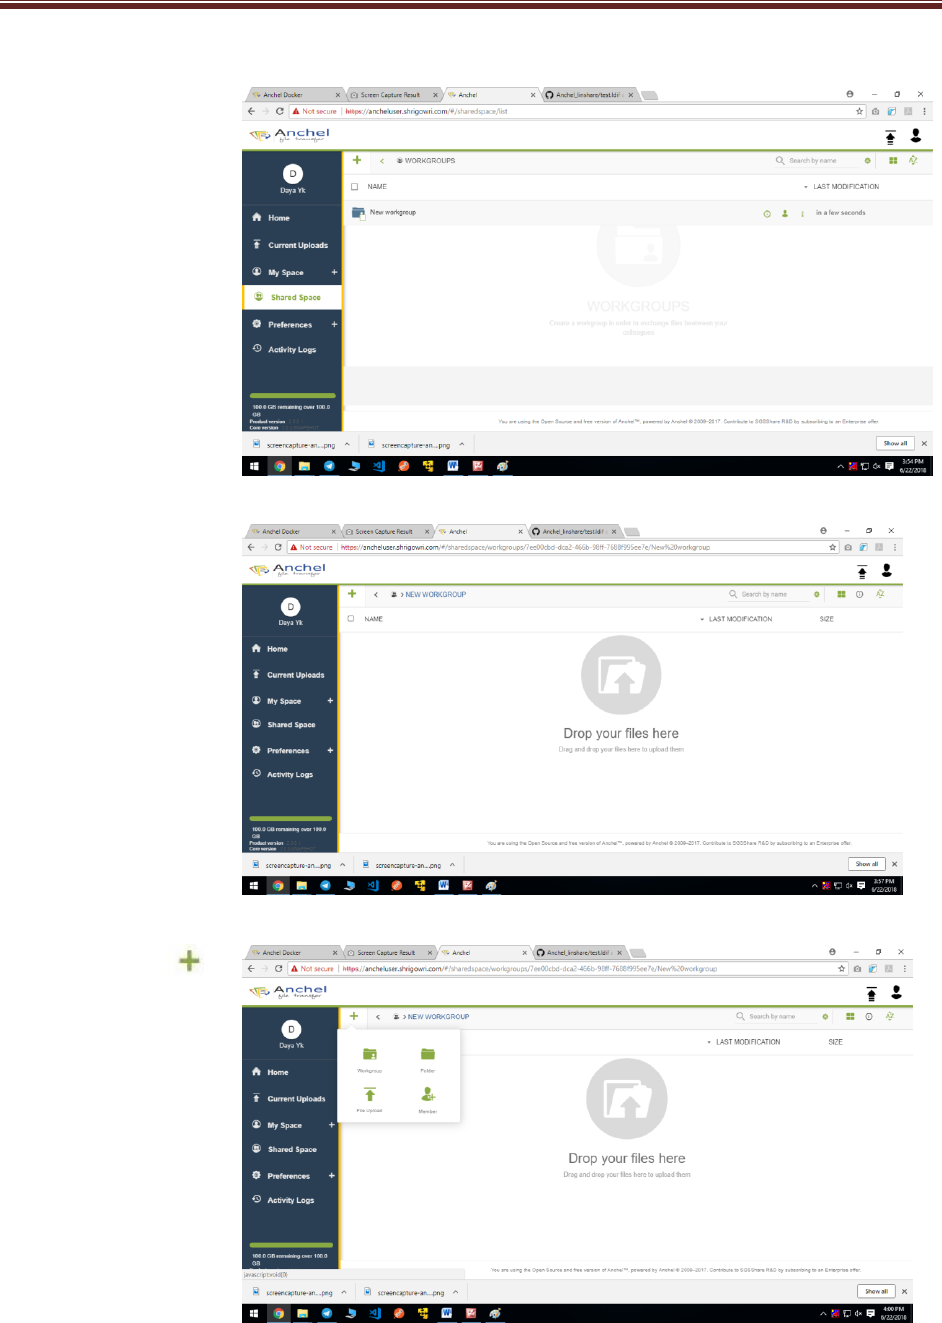
2 It should create a
New folder as given.
3 Click on new folder it should
Open new folder page as
given below.
6 Click on Upload
Button in new folder page as
given.
End User Guide
xiii
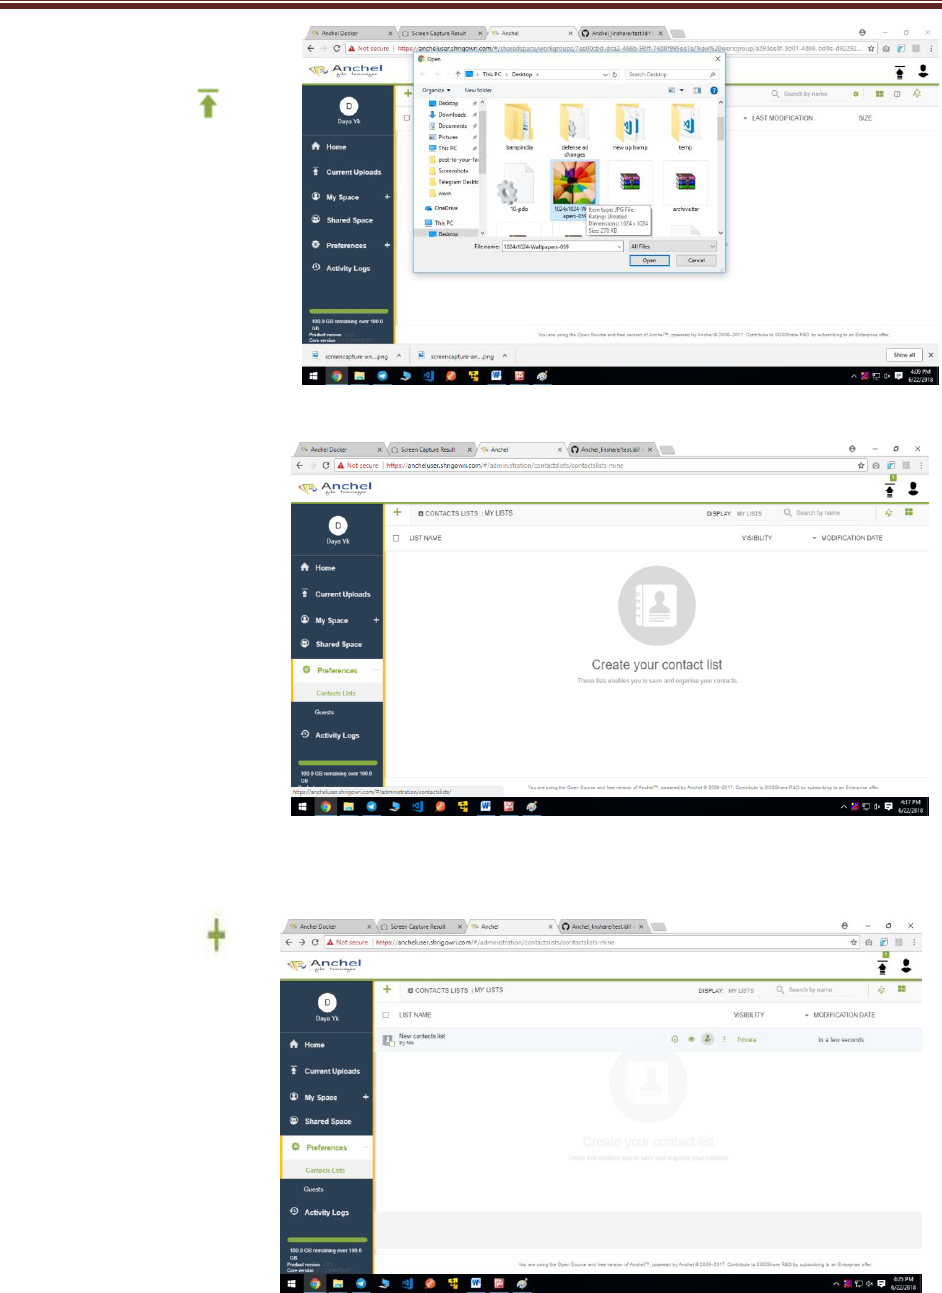
4.4.3
Upload File
1Click on file Upload
Button it should go
to system to select file
4.5 Preferences
4.5.1 Contact List
1 Click on preferences it should
display contact list and guest as
given below. Click on contact list
or by default it should display
contact list page.
4.5.1.1 Add contact list
1Click on upload button .It
Should create contact list
as given.
End User Guide
xiv
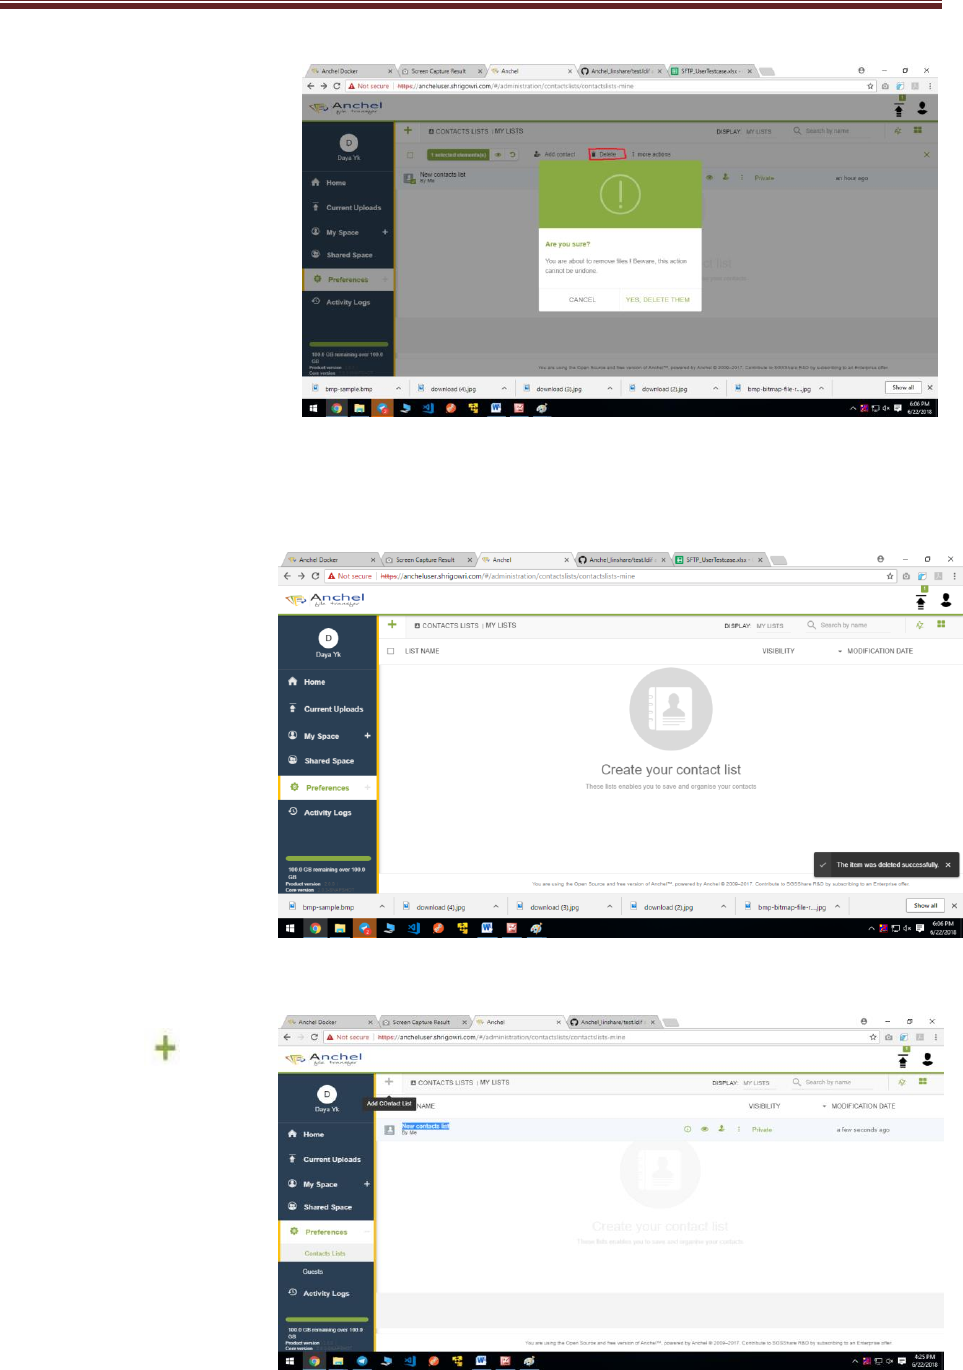
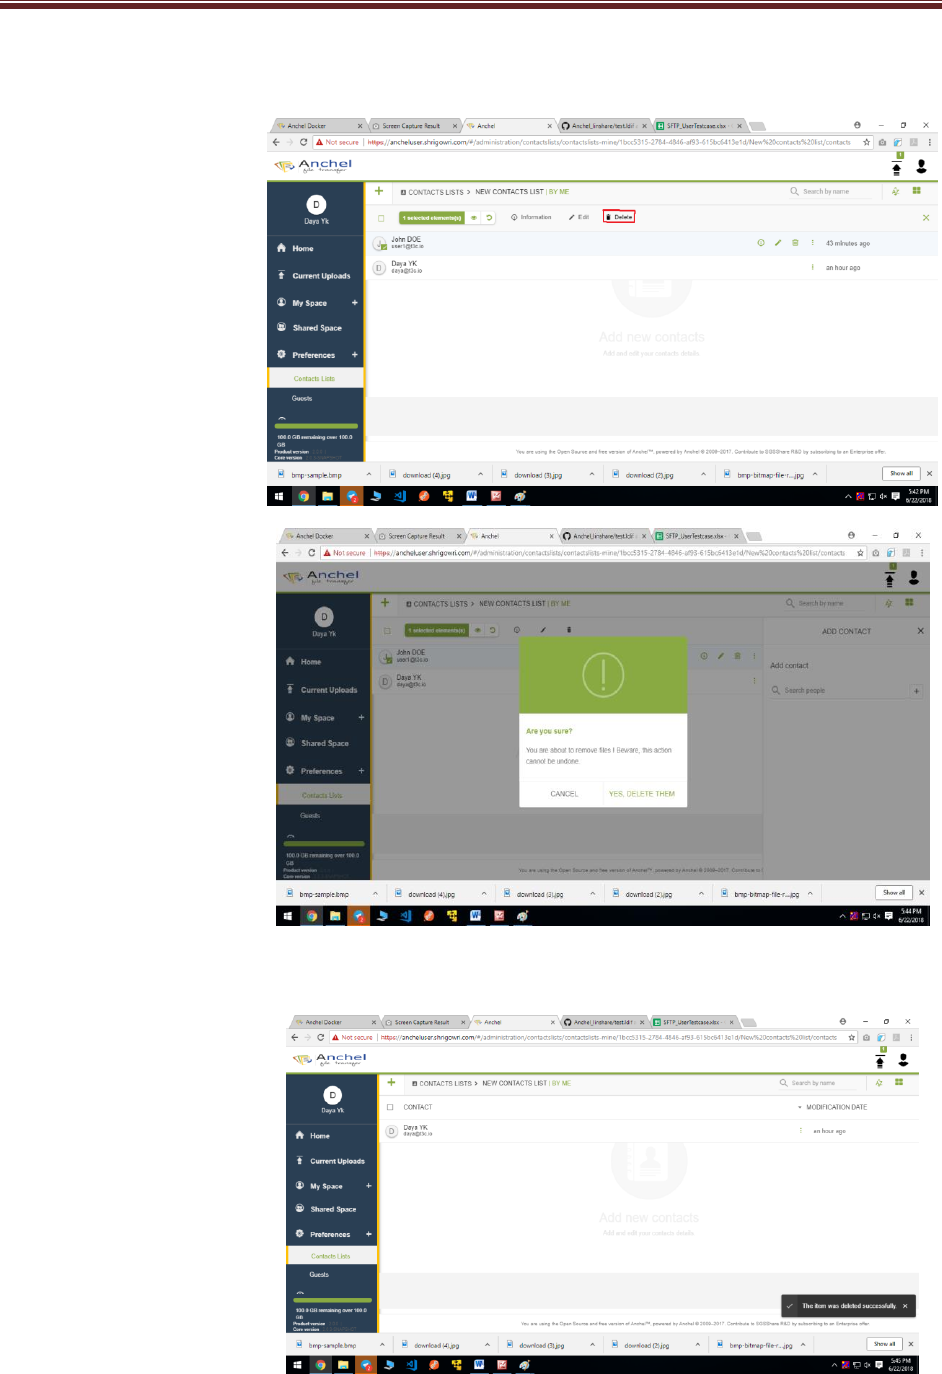
4.5.1.2
Delete contact list
1 Select contact list and
Click on delete button
in header menu it should
display alert popup.
Click on YES DELETE THEM.
2After delete contact
4.5.1.3 Add contact
1 Click on upload contact
List It will create contact list.
End User Guide
xv
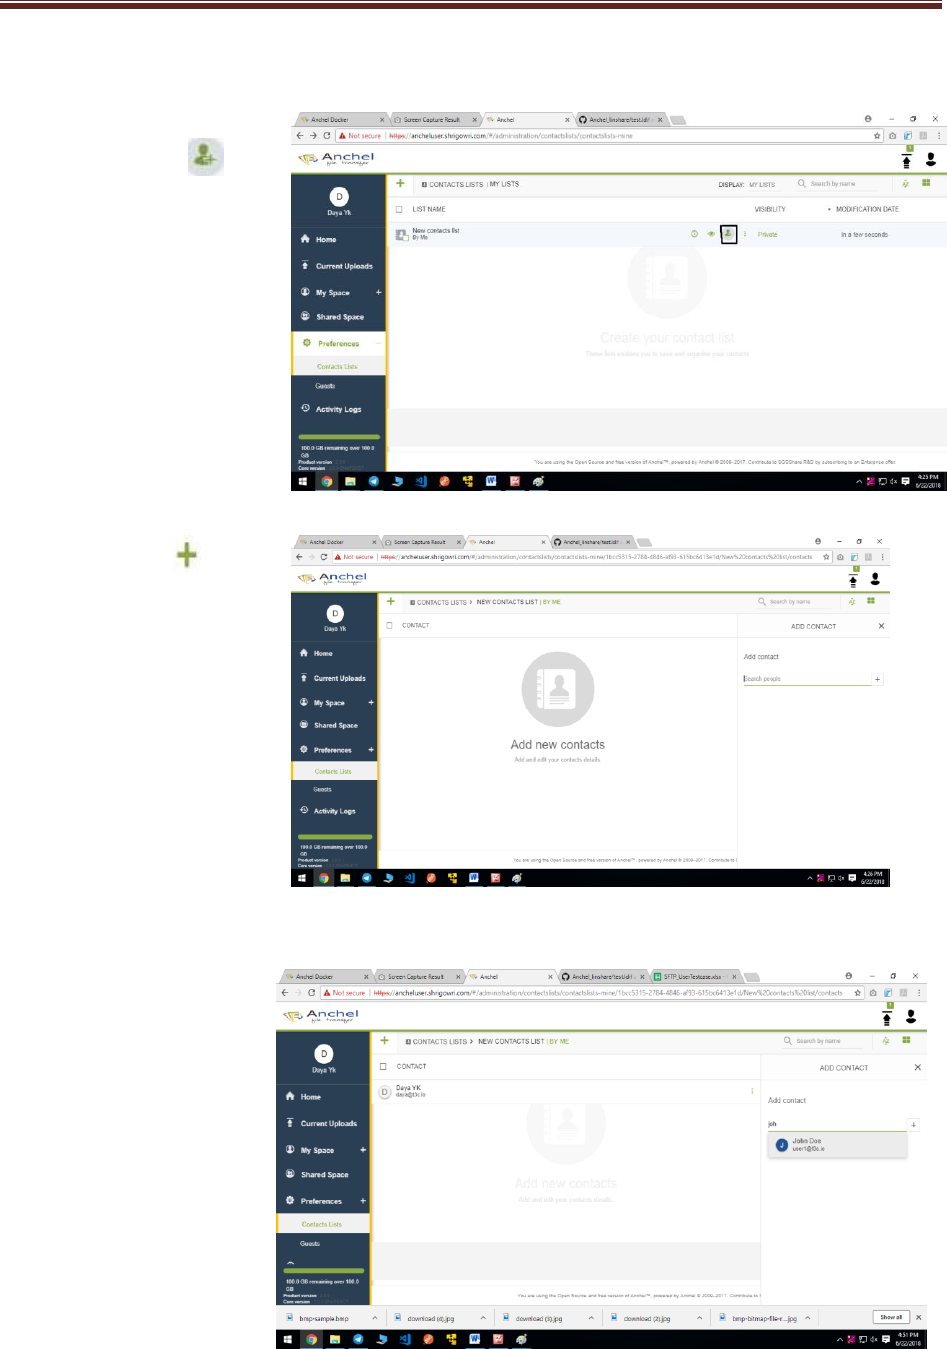
2 Click on add contact
button in item menu.
3 Once add Contact Button
Click it should display add
contact popup.
4Search contact by email and
click on email. It should add
contact as given.
End User Guide
xvi
4.5.1.4 Delete contact
1 Select single contact and
click on delete button in
Heder menu.
2 It should display alert
Popup Now click on YES DELETE
THEM.
3 Once click on delete contact
it will delete contact.

End User Guide
xvii
4.5.1.5
Search by or Filter by
1 User can use Filter by option
to check my list and Order list. User
can Search contact by Search by
Name tab bar.
4.5.1.6 Sort by
1 Click on sort by button.
User can see all options
(List name, private/public,
modification date and
create date) of sort type.
4.5.1.7 More Action
1 User can click on more
Action button in item
menu to perform (information
, show contact, add contact,
delete and rename).
End User Guide
xviii
4.6Activity Logs
4.6.1 Activity Log page
1 Click on Activity log page
it should open activity
log page.
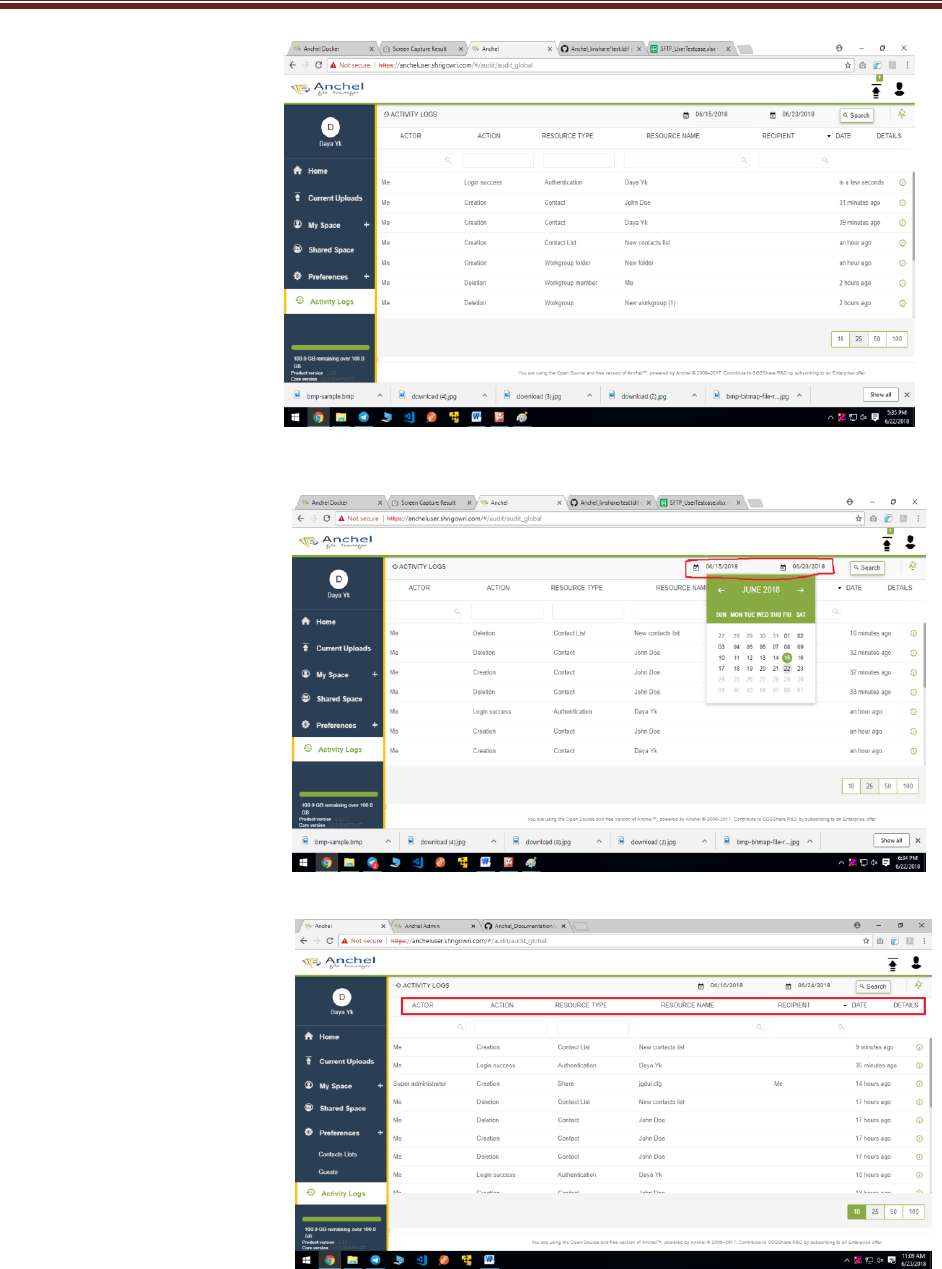
4.6.2 Calendar
1 Set Calendars and Click on
Search button. User can
View all activity in calendar
tenure.
4.6.3 Activity log Function
1 User can search activity by given
Functions (Actor, Action,
Resource type, Resource name
, Recipient , date , details)
End User Guide
xix
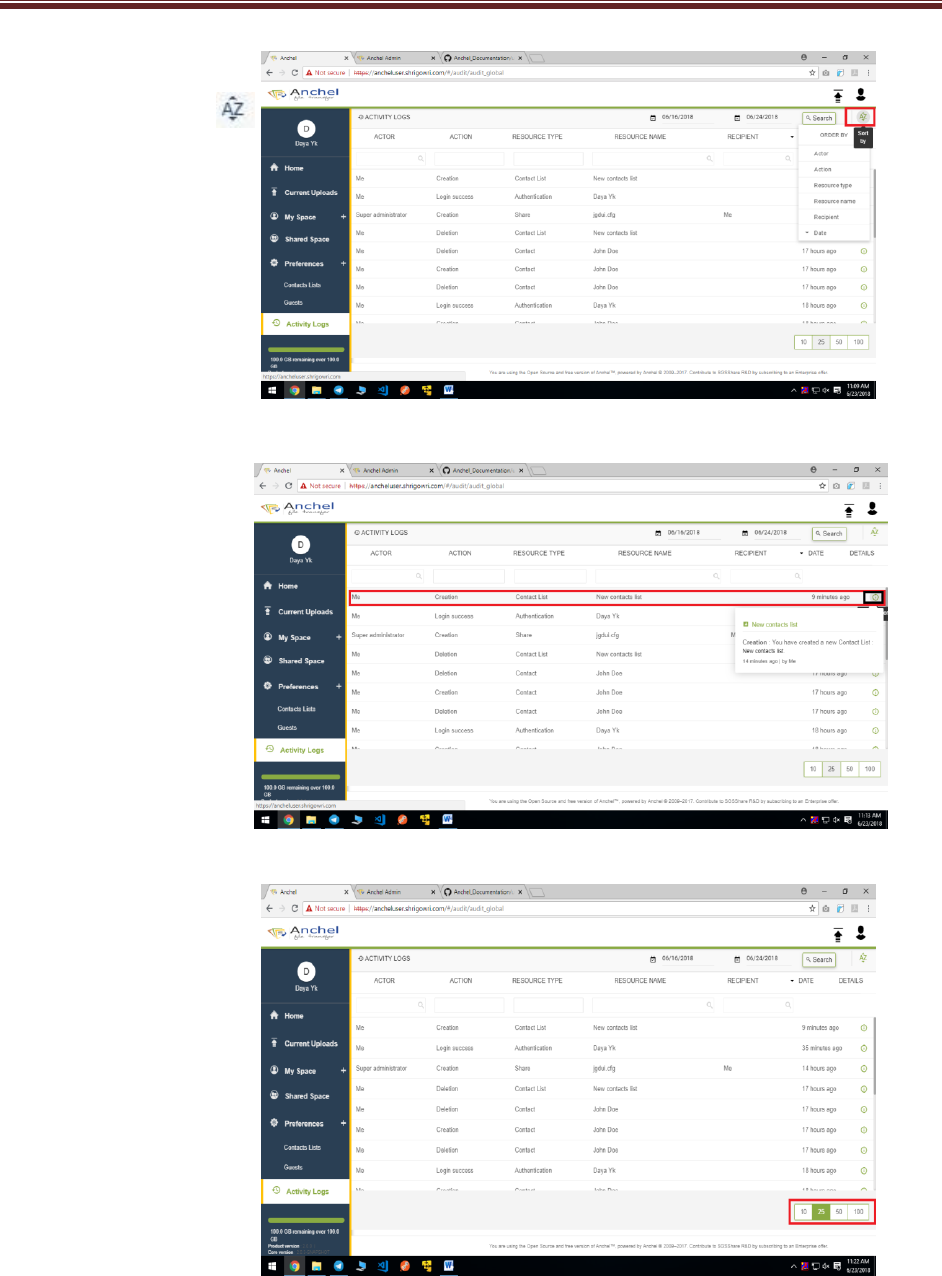
4.6.4 Sort by Order
1User can sort all activity
(Actor, Action, Resource type
, Resource name, Recipient
and date) by sort by or order
by button as given below.
4.6.5 Information
1 User can see information
of one Action by click on
information button as
given.
4.6.6 Pagination
1 User can view next page
by click on pagination
Button.

End User Guide
xx
5 Reports
