Introduction V420 Userman Mill Plus V500 GB
User Manual: V420
Open the PDF directly: View PDF ![]() .
.
Page Count: 532 [warning: Documents this large are best viewed by clicking the View PDF Link!]
- Introduction
- Safety
- Keyboard and screen layout
- Screen display
- Screen and keyboard of LE412
- Machine control panel
- Hand wheel HR410 (HCU)
- Exiting a function
- Return to previous softkey level
- Superimposition of softkey groups
- Switching between upper and lower case characters
- Making selections in the Easy Operate, ICP and IPP menus
- Quick mode selection
- Softkey Status
- User softkeys
- Process level Manual
- Process level Automatic
- Process level Program
- Process level Monitor
- Starten und schließen der Software auf ein Doppe
- Workpiece coordinates
- Start machine / reference point
- Manual operation
- Free entry (MDI)
- Set axis value
- Data input / output and file management
- Enter / edit program
- Program dry run
- Activate / execute program
- Interrupt/cancel program, search block
- Technology
- Tool
- Tool addresses
- Tool identification
- Calling tool data
- Input of the tool memory
- Tool parking time monitoring
- Tool breakage monitoring
- Manual change of tool (Example)
- Tool management
- To update enhanced tool measurement
- Tool measurement using the laser measurement system
- Laser measurement cycles in the program
- Tool fault reports
- Tool measurement using the TT120/TT130
- Calibration of the TT120/TT130
- Update machine settings
- TT120/TT130 measurement cycles for automatic operation
- Tables
- Automation
- Installation
- Easy Operate
- Interactive contour programming (ICP)
- Interactive part programming (IPP) / GRAPHIPROG
- General
- IPP graphic main menu symbols
- IPP graphic symbol menu
- New IPP-program
- Editing IPP programs (change line)
- IPP programming tips
- IPP program examples
- Preparations for programming the examples
- Definition of blank
- Clamping
- Facing
- Tapping a rectangle
- Milling a freely formed pocket
- Milling circular groove
- Milling round pocket (for thread)
- Milling round pocket (50 mm dia)
- Freely formed contour
- Boring and countersinking (8.5 mm dia)
- Boring and threading (M6)
- Threading (M20 x 1.5)
- End of program
- IPP start macro
- Program structure and block format
- G-Functions
- Rapid traverse G0
- Linear interpolation G1
- Circular clockwise / circular counter clockwise G2/G3
- Dwell time G4
- Spline Interpolation G6
- Tilt operating planes G7 (starting with V400)
- Tilting of the operating plane (from V400)
- Swivel tool G8 (from V410)
- Defining polar point (measurement reference point) G9 (from V320 onwards)
- Polar coordinate, Rounding, Chamfering G11
- Repeat function G14
- Main plane XY, tool Z G17
- Main plane XZ, tool Y G18
- Main plane YZ, tool X G19
- Macro call G22
- Main program call G23
- Enable/disable feed and spindle override G25/G26
- Reset/activate positioning functions G27/G28
- Conditional jump G29
- Activate/deactivate offset G39 (from V320 onwards
- Cancel tool radius compensation G40
- Tool radius compensation (left/right) G41/G42
- Tool radius compensation to end point G43/G44
- Measuring a point G45
- Measuring a circle G46
- Calibrating the measuring probe G46 + M26
- Checking on tolerances G49
- Processing measuring results G50
- Cancel/activate G52 zero point shift G51/G52
- Cancel/activate zero point shift G53/G54...G59
- Extended zero offset G54 MC84>0 (from V320 onwards)
- Tangential approach G61
- Tangential exit G62
- Cancel / activate geometric calculations G63/G64
- INCH / METRIC programming G70/G71
- Cancel / activate mirror image and scaling G72/G73
- Absolute position G74
- Bolt hole cycle G77
- Point definition G78
- Activate cycle G79
- Drilling cycle G81
- Deep hole drilling cycle G83
- Tapping cycle G84
- Reaming cycle G85
- Boring cycle G86
- Rectangular pocket milling cycle G87
- Groove milling cycle G88
- Circular pocket milling cycle G89
- Absolute/incremental programming G90/G91
- Wordwise absolute/incremental programming (from V320 onwards)
- Zero point shift incremental / rotation or absolute rotation G92/G93
- Feed in mm/min (inch/min) / mm/rev (inch/rev) G94/G95
- Graphic window definition G98
- Graphic: material definition G99
- 3D tool correction G141
- Linear measuring movement G145
- Reading measuring probe status
- Reading tool or offset values G149
- Change tool or offset values G150
- Cancel cylinder interpolation or activate basic coordinate system G180
- Cancel / activate cylinder interpolation G182
- Graphic window definition G195
- End graphic model description G196
- Begin inside / outside contour description G197/G198
- Begin graphic model description G199
- Universal pocket milling cycleG200- G208
- Create pocket cycle macro's G200
- Start contour pocket cycle G201
- End contour pocket cycle G202
- Start pocket contour description G203
- End pocket contour description G204
- Start island contour description G205
- End island contour description G206
- Call island contour macro G207
- Quadrangle contour description G208
- Special G functions for macros
- Programming error messages G300
- Error message in read-in program or macro G301
- Query active technology - G319
- Query tool table G321
- Calling machine constant values G322
- Query current modal G function G324 (from V400)
- Query current modal M function G325 (from V400)
- Calling up the current axis position values G326
- Scan current operating mode G327 (from V410)
- Write to the tool table G331 (from V400)
- Writing to the machine settings store G332 (from V400)
- G-functions produced by cycle design
- Cycle Design
- Laser: Calibration G600 (from V410)
- Laser: Measure tool length G601 (from V410)
- Laser: Measureng length and radius G602 (from V410)
- Check of individual edge G603 (from V410)
- Laser: Tool breakage control G604 (from V410)
- TT120/TT130: Calibration G606 (from V410)
- TT120/TT130: Measure tool length G607 (from V410)
- TT120/TT130: Measuring tool radius G608 (from V410)
- TT120/TT130: Measure length and radius G609 (from V410)
- Liste der G-Funktionen und M-Funktionen
- Technological commands
- E Parameters and arithmetic functions
- Miscellaneous
- v420-erw-gb.pdf
- Introduction
- Expanded G functions and calculation operations
- G174 Tool withdrawal movement
- G141 3D tool correction with dynamic TCPM
- Tool measurement cycles for laser measurements
- Specific G functions for macros
- G300 Programming error messages
- G302 Overwriting radius correction parameters
- G303 M19 with programmable direction
- G319 Query active technology
- G320 Query current G data
- G325 Query current modal M function
- G326 Query current axis position values
- G329 Query programmable kinematic elements
- G339 Write programmable kinematic elements
- Formatted write functions
- Turning
- Introduction
- Machine constants
- G36/G37 Switching turning mode on and off
- G17 Plane for turning mode (G17 Y1=1 Z1=2)
- G94/G94 Expanded choice of feed unit
- G96/G97 Constant cutting speed
- Defining turning tools in the tool table
- G302 Superimposing tool data
- Unbalance cycles
- Turning cycles
- G822 Longitudinal cut
- G823 Cutting plan
- G826 Finish machining longitudinal cut
- G827 Cutting plan, finish machining
- G832 Longitudinal reverse boring
- G833 Reverse boring plan
- G836 Finish machining longitudinal reverse boring
- G837 Reverse boring plan, finish machining
- G842 Axial plunge cutting
- G843 Radial plunge cutting
- G846 Axial plunge cutting, finish machining
- G847 Radial plunge cutting, finish machining
- Examples

Controller manual
V420-V500
MillPlus
Teil 1: Extension V420-V500
Teil 2: Controller manual V410
HEIDENHAIN NUMERIC B.V.
Eindhoven (NL)
Tel: 31.40.250 13 00
Fax: 31.40.250 13 01
04/2001
344 938-20

Extension
V420-V500
HEIDENHAIN NUMERIC B.V.
Eindhoven (NL)
Tel: 31.40.250 13 00
Fax: 31.40.250 13 01
21/03/2001
First edition Software Version V420-V500 20010321
© HEIDENHAIN NUMERIC B.V. EINDHOVEN, NIEDERLANDE 2001
The publisher accepts no liability in respect of specifications on the basis of the information contained in
these instructions.
For the specifications of this numerical controller please refer to the order data and corresponding
specification description only.
All rights reserved. Copying of this manual or parts thereof only permitted with the written consent of the
copyright holder.
Changes to and errors in this publication cannot be excluded. Therefore no claims can be laid to the
information, figures and descriptions contained in this publication.
344 938-10 DER6-32.8-2574_000

TABLE OF CONTENTS
20010321 MillPlus V420-V500 3
1. Introduction.................................................................................................................................................. 5
1.1 MillPlus software and functions ................................................................................................... 5
1.2 Software version V420................................................................................................................. 6
2. Expanded G functions and calculation operations...................................................................................... 7
2.1 Expanded G functions.................................................................................................................. 7
2.1.1 G8 Selectable tool radius correction .......................................................................... 7
2.1.2 G197/G198 Start of internal/external contour description.......................................... 7
2.1.3 G199 Start of graphic contour description.................................................................. 7
2.1.4 G321 Query tool table ................................................................................................ 7
2.1.5 G324 Query current modal G function ....................................................................... 7
2.1.6 G331 Writing to the tool table..................................................................................... 7
2.2 Expanded calculation operations.................................................................................................7
2.2.1 E parameters ............................................................................................................... 7
2.2.2 Whole numbers ........................................................................................................... 7
2.2.3 Whole numbers with largest value .............................................................................. 7
2.2.4 Whole numbers with smallest value............................................................................ 8
2.2.5 Rounding .................................................................................................................... 8
2.2.6 Remainder of division.................................................................................................. 8
2.2.7 Sign .................................................................................................................... 8
2.2.8 Variable parameter no.:............................................................................................... 8
3. G174 Tool withdrawal movement............................................................................................................... 9
4. G141 3D tool correction with dynamic TCPM .......................................................................................... 11
5. Tool measurement cycles for laser measurements ..................................................................................20
5.1 General notes ............................................................................................................................ 20
5.2 G600 laser system: Calibration.................................................................................................21
5.3 G601 laser system: Measuring length ...................................................................................... 22
5.4 G602 laser system: Measuring length and radius .................................................................... 23
5.5 G603 laser system: Individual cutting tip monitoring ................................................................ 23
5.6 G604 laser system: Tool breakage monitoring......................................................................... 24
6. Specific G functions for macros ................................................................................................................ 25
6.1 G300 Programming error messages ........................................................................................ 25
6.2 G302 Overwriting radius correction parameters....................................................................... 25
6.3 G303 M19 with programmable direction................................................................................... 25
6.4 G319 Query active technology ................................................................................................. 26
6.5 G320 Query current G data ......................................................................................................27
6.6 G325 Query current modal M function...................................................................................... 30
6.7 G326 Query current axis position values.................................................................................. 30
6.8 G329 Query programmable kinematic elements ...................................................................... 31
6.9 G339 Write programmable kinematic elements........................................................................ 32
6.10 Formatted write functions........................................................................................................... 33
6.10.1 File to define an array and fill it with basic settings. .................................................. 33
E parameter array................................................................................................................ 33
6.10.2 Configuration file to define a file or window (display/input) ....................................... 34
6.10.3 G350 Writing to a window ........................................................................................ 35
6.10.4 G351 Writing to a file................................................................................................ 37
7. Turning ................................................................................................................................................... 41
7.1 Introduction ................................................................................................................................ 41
7.2 Machine constants ..................................................................................................................... 42
7.3 G36/G37 Switching turning mode on and off............................................................................. 43
7.4 G17 Plane for turning mode (G17 Y1=1 Z1=2) ........................................................................ 44
7.5 G94/G94 Expanded choice of feed unit.................................................................................... 45
7.6 G96/G97 Constant cutting speed ............................................................................................. 46

TABLE OF CONTENTS
4 Heidenhain 20010321
7.7 Defining turning tools in the tool table ........................................................................................47
7.8 G302 Superimposing tool data..................................................................................................48
7.9 Unbalance cycles .......................................................................................................................50
7.9.1 General information....................................................................................................50
7.9.2 Description of unbalance............................................................................................50
7.9.3 G691 Measure unbalance.........................................................................................51
7.9.4 G692 Unbalance checking........................................................................................53
7.9.5 Unbalance example ...................................................................................................54
7.10 Turning cycles ............................................................................................................................55
7.10.1 G822 Longitudinal cut ...............................................................................................56
7.10.2 G823 Cutting plan .....................................................................................................58
7.10.3 G826 Finish machining longitudinal cut ....................................................................60
7.10.4 G827 Cutting plan, finish machining .........................................................................62
7.10.5 G832 Longitudinal reverse boring.............................................................................64
7.10.6 G833 Reverse boring plan ........................................................................................66
7.10.7 G836 Finish machining longitudinal reverse boring..................................................68
7.10.8 G837 Reverse boring plan, finish machining ............................................................70
7.10.9 G842 Axial plunge cutting .........................................................................................72
7.10.10 G843 Radial plunge cutting ......................................................................74
7.10.11 G846 Axial plunge cutting, finish machining.............................................76
7.10.12 G847 Radial plunge cutting, finish machining ..........................................78
7.11 Examples ...................................................................................................................................80

INTRODUCTION
20010321 MillPlus V420-V500 5
1. Introduction
Dear Customer,
These instructions are intended to assist you in operating and programming the controller.
Please read the information in this manual carefully before you start your new machine. It contains
important information on machine operation and safety to enable you to use your machine safely and
effectively.
The following advice is important for your safety:
This manual is essential for safe use of the machine.
Please ensure that it is in the vicinity of the machine.
The machine should not be operated, even for a short period, by anyone who has not received suitable
training, either in the company, at an Institute of Further Education or in one of the Training Centres.
Please read the general safety regulations issued by your professional association.
If they are not on display in the company, contact your appointed safety representative.
Observe the instructions for proper use of the machine.
The controller and the machine are coordinated using machine constants. Some of these constants are
accessible to the user. Caution!
The meaning and function of the constants must be fully understood before any changes are made to
these constants. If in doubt, please consult our service department.
The controller is fitted with a backup battery that safeguards the memory content for up to three years
after the machine is switched off (but only if the battery is serviceable).
The user should always save the programs and specific data (e.g. technology data, machine constants,
etc.) to a PC or to diskette. This will avoid the data becoming irrecoverably lost if the system or backup
battery becomes defective.
We reserve the right to make changes to the design, equipment and accessories in the interest of
further development. No liability will be accepted for any errors in the data, illustrations or descriptions.
1.1 MillPlus software and functions
This manual describes functions available in MillPlus (VME and LE4xx hardware) for the following or
higher software versions:
- V410 (VME, LE4xx) Software number 341 482-xx
- V420 (VME, LE4xx) Software number 344 198-xx
The machine builder adapts the versatile capability of MillPlus to the machine in question by means of
machine parameters. That is why some functions described in this manual are not available with every
version of MillPlus.
MillPlus functions that are not available on every machine include, for example:
- Digitising option
- Tool measurement with laser system or with TT120/TT130
- DNC Plus (DNET) interface
- Ethernet interface (TCP/IP)
- Autostart (warm machine startup program)
- Milling/turning
Please contact the machine builder for individual support for the particular machine being controlled.

INTRODUCTION
6 Heidenhain 20010321
1.2 Software version V420
Note
The V420 software only functions in 16 Mbyte DRAM systems.
Operation:
Expanded calculation operations
- The number of possible addresses in Cycle Design is expanded and OPTIONAL and ACTIVE
have been added.
- Calculations for E parameters expanded with the floor(E2), ceil(E2), round(E2,n), mod(E2,E3),
sign(E2), atan(E2,E3), acos(E2,E3) and asin(E2,E3) functions.
New G functions:
Dynamic TCPM (Tool Centre Point Management) (G141)
Tool withdrawal movement (G174)
M19 with programmable direction (G303)
Query current G data (G320)
Query programmable kinematic elements (G329)
Write programmable kinematic elements (G339)
Writing to a window (G350)
Writing to a file (G351)
Milling/turning
G17 expanded
G36 and G37 turning
G94 and G95 expanded
G96 and G97 constant cutting speed
G302 overwrite tool orientation radius correction
G691 unbalance detection
G692 unbalance checking
G822, G823, G826 and G827 machining
G832, G833, G836 and G837 hollow boring
G842, G843, G846 and G847 plunge cutting
Expanded G functions:
Expansions: tool measurement cycles for laser measuring system
G600 laser system: calibration
G601 laser system: measuring length
G602 laser system: measuring length and radius
G603 laser system: individual cutting tip monitoring
G604 laser system: tool breakage monitoring
G8 selectable tool radius correction
Start of contour description (G198) expanded with I1 address.
Start of graphic contour description (G199) expanded with B=4.
Query active technology (G139) expanded with S1 address.
Query tool table (G321) expanded with O address.
Query current modal G function (G324) expanded.
Schreiben in die Werkzeugtabelle (G331) erweitert mit O Adresse.

EXPANDED G FUNCTIONS AND CALCULATION OPERATIONS
20010321 MillPlus V420-V500 7
2. Expanded G functions and calculation operations
2.1 Expanded G functions
2.1.1 G8 Selectable tool radius correction
L3=0 with radius correction (standard value)
L3=1 no radius correction
2.1.2 G197/G198 Start of internal/external contour description
Defines the start point of a geometry element:
N... G198 X... Y... {Z...} {I1=..}.
Possible colours (I1=):
1 red 11 light red
2 green 12 light green
3 yellow 13 light yellow
4 blue 14 light blue
5 grey 15 light magenta
6 cyan 16 light cyan
7 white 17 bright white
8 black 18 black
9 foreground 19 foreground
10 background 20 background
2.1.3 G199 Start of graphic contour description
Draw one or more geometry elements (line or circle) during the wire model graphic simulation.
N... G199 [co-ordinates of position] B4 {C1} {C2}
2.1.4 G321 Query tool table
I1=29 O tool orientation (with turning option only)
2.1.5 G324 Query current modal G function
11 G96, G97 (turning only)
12 G36, G37 (turning only)
2.1.6 G331 Writing to the tool table
I1=29 O tool orientation (turning only)
2.2 Expanded calculation operations
2.2.1 E parameters
Format: Arc sine E1=asin(E2,E3)
Arc cosine E1=acos(E2,E3)
Arc tangent E1=atan(E2,E3)
Whole number conversion with large value E1=ceil(E2)
Whole number conversion with small value E1=floor(E2)
Rounding E1=round(E2,n) (n is no. of decimal places)
Remainder of division E1=mod(E2,E3)
Sign E1=sign(E2)
Remark: The integer function is changed with the floor function in V420 and higher.
2.2.2 Whole numbers
When using the integer function, the numerical value is rounded, i.e. all
figures after the decimal point are ignored.
E1=int(E2)
Example: E2=8.9 results in 8, E2=-8.9 results in –8
2.2.3 Whole numbers with largest value
When using the integer function with the largest value, the numerical value is rounded

EXPANDED G FUNCTIONS AND CALCULATION OPERATIONS
8 Heidenhain 20010321
according to the largest argument.
E1=ceil(E2)
Example: E2=8.9 results in 9, E2=-8.9 results in –8
2.2.4 Whole numbers with smallest value
When using the integer function with the smallest value, the numerical value is rounded
according to the smallest argument.
E1=floor(E2)
Example: E2=8.9 results in 8, E2=-8.9 results in –9
2.2.5 Rounding
When the rounding function is used, the numerical value is rounded according to the number
of decimal places.
E1=round(E2,n) (n is number of decimal places)
Remark: If the number of decimal places is not entered, zero is assumed.
Example: n=1 and E2=8.94 results in 8.9, n=1 and E2=-8.94 results in -8.9
n=1 and E2=8.96 results in 9.0, n=1 and E2=-8.96 results in -9.0
2.2.6 Remainder of division
When the remainder function is used, the remainder is returned by the argument.
E1 =mod(E2,E3)
Remarks:
-E1=E2-int(E2:E3)*E3
- If E3 is 0, E2 is returned.
- If E3 is not entered, 1 is assumed.
- The sign is the same as the sign of E1.
Example: E2=5 and E3=3 results in 2, E2=-5 and E3=3 results in –2
2.2.7 Sign
When the sign function is used, the sign is returned.
E1 =sign(E2)
Example: E2=8.9 results in 1, E2=0 results in 0, E2=-8.9 results in -1
Also possible (V429 and higher):
E1=asin(E3,E4) E1=acos(E3,E4) E1=atan(E3,E4) where E2=E3:E4
Remark: - abs(E2) must be less than or equal to 1 for acos and asin.
- the angle created lies between 0° and +360°
2.2.8 Variable parameter no.:
E(value or expression)=<value or expression>
Examples:
E(1)=
E(1.2e1)
E(E1)=
E(E1+E2)=
E(sin(45)*100)=
G174 TOOL WITHDRAWAL MOVEMENT
20010321 MillPlus V420-V500 9
3. G174 Tool withdrawal movement
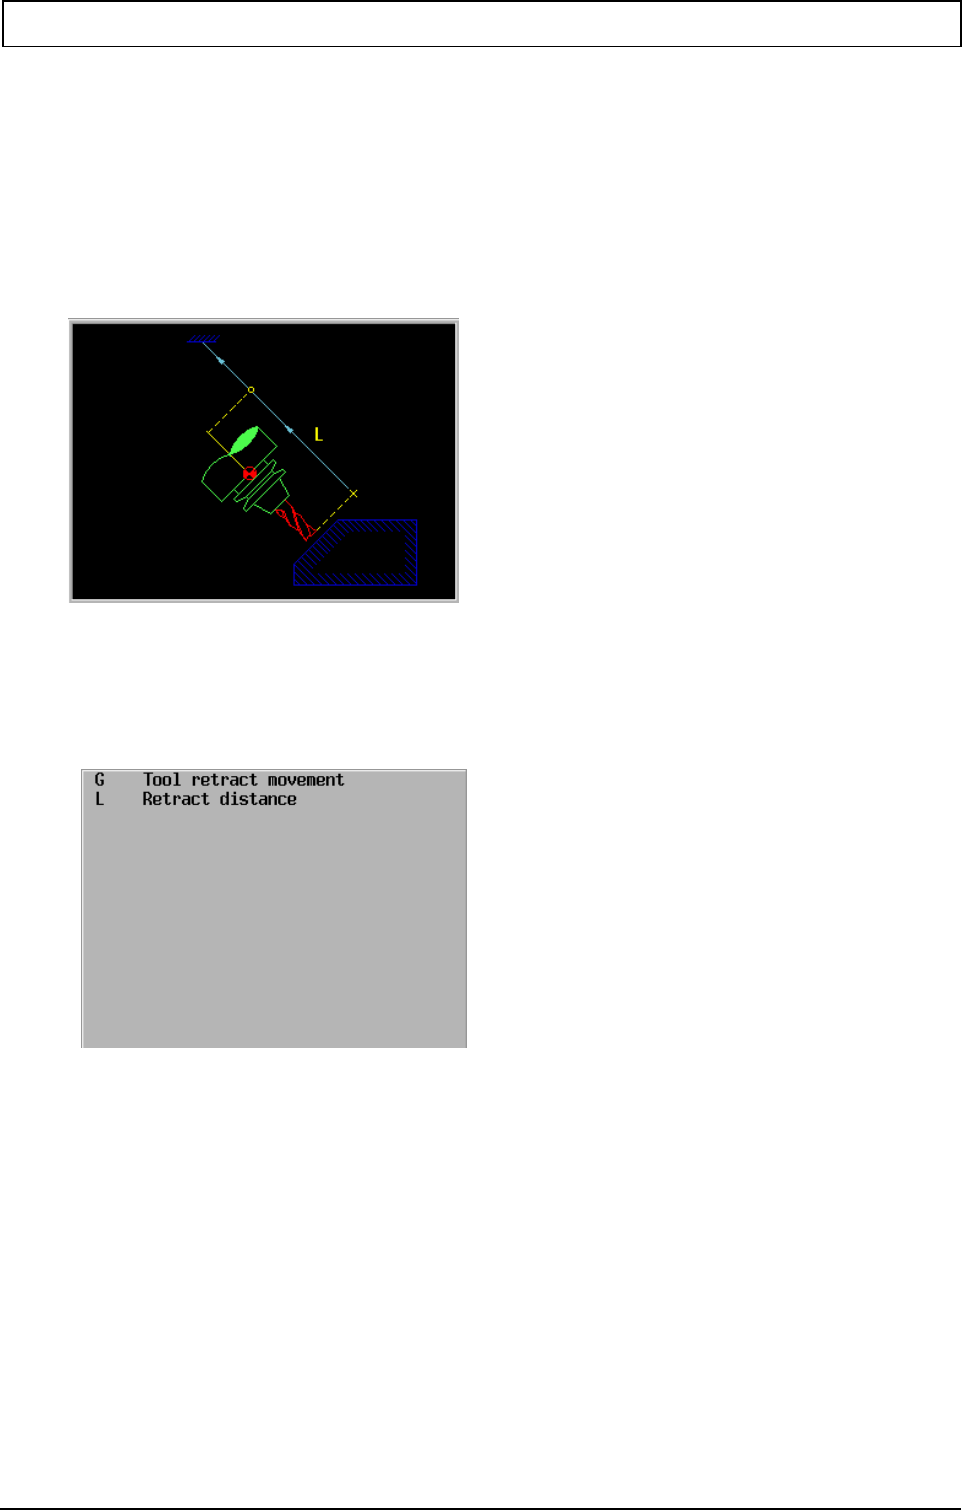
Movement to move the tool axis clear during 5-axis milling.
With this function, you are always able to move away in the direction of the tool axis (only if Z axis is
programmed). The tool is withdrawn until the ‘first’ SW limit switch is reached. The direction of
movement is determined by the position of the milling head. The calculation is carried out with the
help of the kinematic model.
Format
N.. G107 {L....}
Parameter
Modal words
F6=
Type of function
Non-modal
G174 TOOL WITHDRAWAL MOVEMENT
10 Heidenhain 20010321
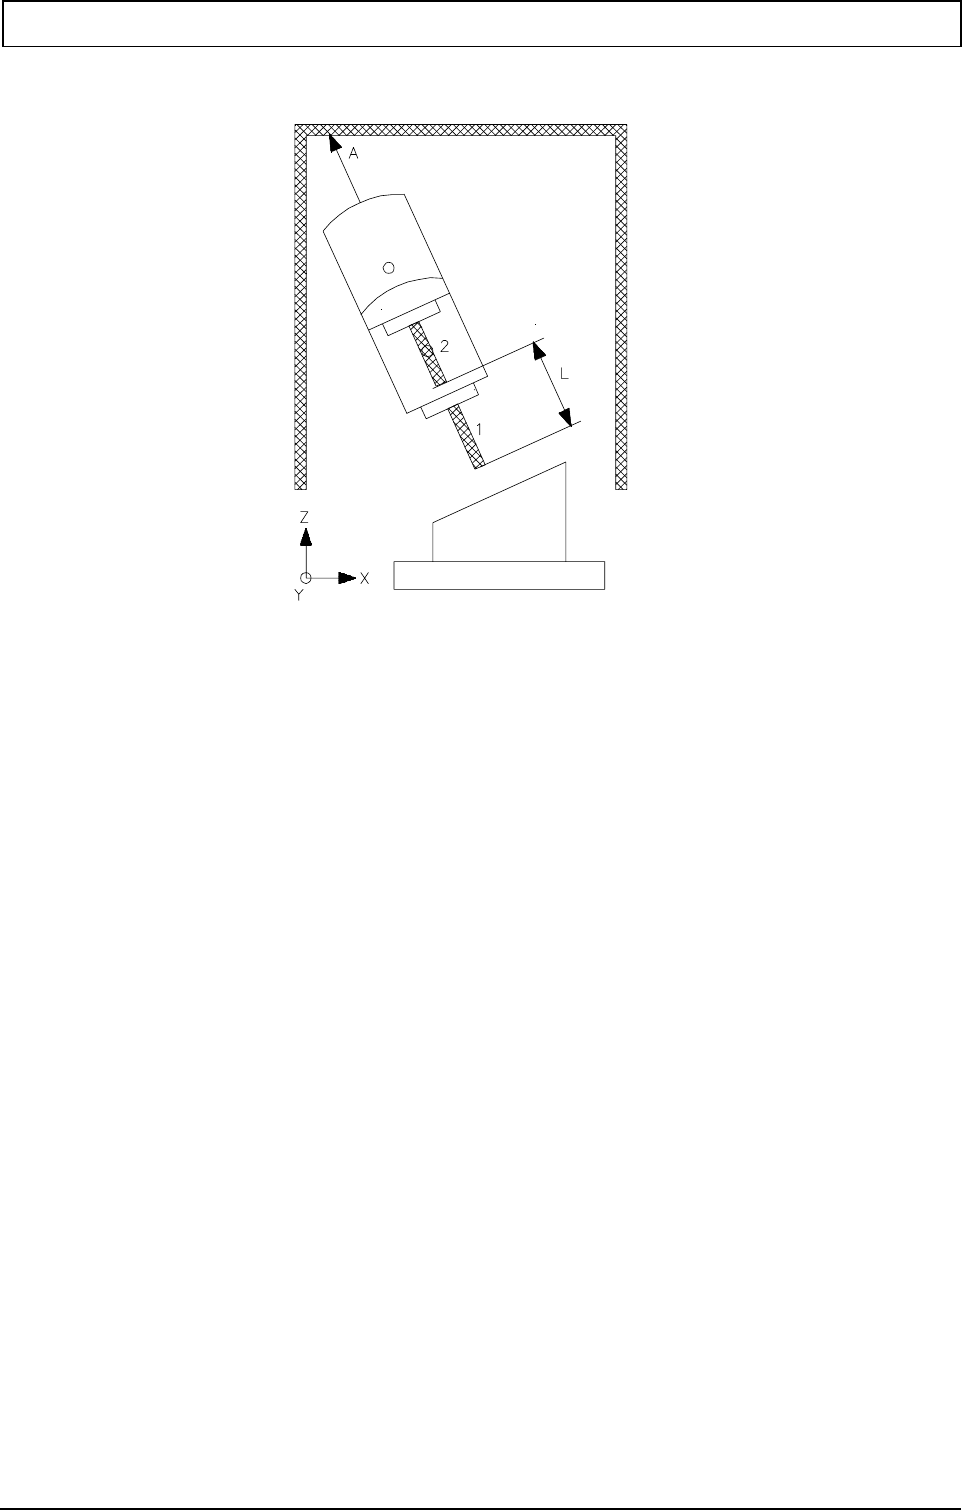
Notes and application
1 Starting position
L Withdrawal distance
2 End position
A Limitation by software limit switch
WITHDRAWAL DISTANCE (L)
The withdrawal distance defines the distance travelled in the direction of the tool.
L is always positive. The maximum travel distance is limited by the software limit switch.
The basic setting is with the software limit switch.
DIRECTION OF MOVEMENT
The direction of movement is determined by turning the milling head. This is calculated with
the help of the kinematic model.
The function is always active.
EXECUTION (G0 or G1)
G174 is executed in rapid motion or if F6= <Feed per block> is programmed with F6=.
Following G107, G0 or G1 from the previous block is modally active again.
Example Tool withdrawal movement.
N10 G174 L100 Werkzeug zieht sich 100 mm zurück oder fährt bis Software Endschalter.
G141 3D TOOL CORRECTION WITH DYNAMIC TCPM
20010321 MillPlus V420-V500 11
4. G141 3D tool correction with dynamic TCPM
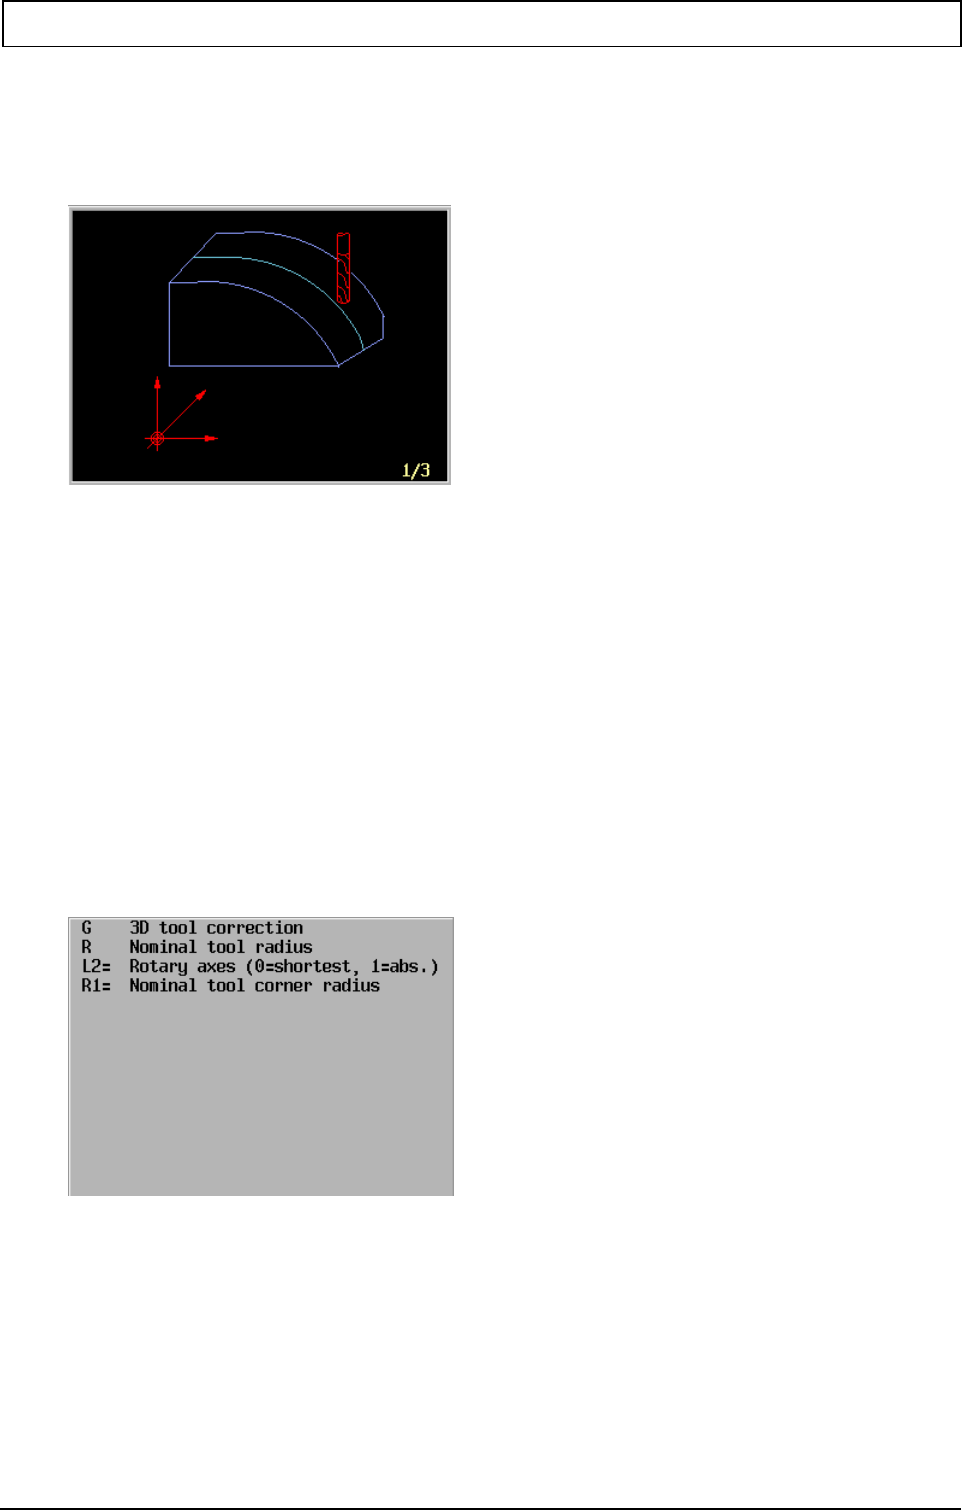
Permits the correction of tool dimensions for a 3D tool path that is programmed in these points by its end
point co-ordinates and normalised vectors perpendicular to the surface.
Format
To activate 3D tool correction:
N... G141 {R..} {R1=..} {L2=}
To program straight-line movements:
G141
N... G0/G1 [end point co-ordinates] [I.. J.. K..]
TCPM with active kinematic model
N... G0/G1 [end point co-ordinates] {I.. J.. K..} {I1=.. J1=.. K1=..} {A, B, C} {F..}
To delete 3D tool correction:
N... G40
Parameters
For G141
R nominal tool radius
R1= nominal tool corner radius
L2= circular axes (0=shortest, 1=absolute)
For G0/G1
X, Y, Z linear end point co-ordinates
I, J, K axis components of surface normal vector
I1=, J1=, K1= (TCPM) axis components of tool vector

G141 3D TOOL CORRECTION WITH DYNAMIC TCPM
12 Heidenhain 20010321
A, B, C (TCPM) circular axis components of tool vector
F feed along the path
Modal words
M functions determined by F, S
Type of function
modal
Associated functions
G40 and G412 to G44 for radius correction in a plane
For TCPM G8
General principles of G141
When milling a 3D surface, a given tool is moved along the surface in straight-line movements with a
particular tolerance.
The calculation of the tool path on a 3D surface requires many calculations that are usually carried out
by an NC programming system or a CAD system.
The calculated tool path depends on the shape of the tool, the dimensions of the tool and the
tolerance to the surface.
When executing the appropriate program without G141, the milling tool used must have the same
dimensions as in the calculations, i.e. a standard milling tool must be used.
If a new tool is required while machining a 3D surface, this tool must also have the same dimensions
as the standard tool.
If dimensional deviations are detected on the workpiece, a new calculation must be made using the
programming system.
The 3D tool correction (G141) allows the use of tools whose dimensions differ from the dimensions of
the standard milling tool. The corrections are carried out with the help of the direction vectors that are
created by the programming system together with the end point co-ordinates.
In addition, the workpiece dimensions can be calculated by the programming system and the tool path
by the CNC from the normalised vectors and the tool dimensions.
G141 3D TOOL CORRECTION WITH DYNAMIC TCPM
20010321 MillPlus V420-V500 13
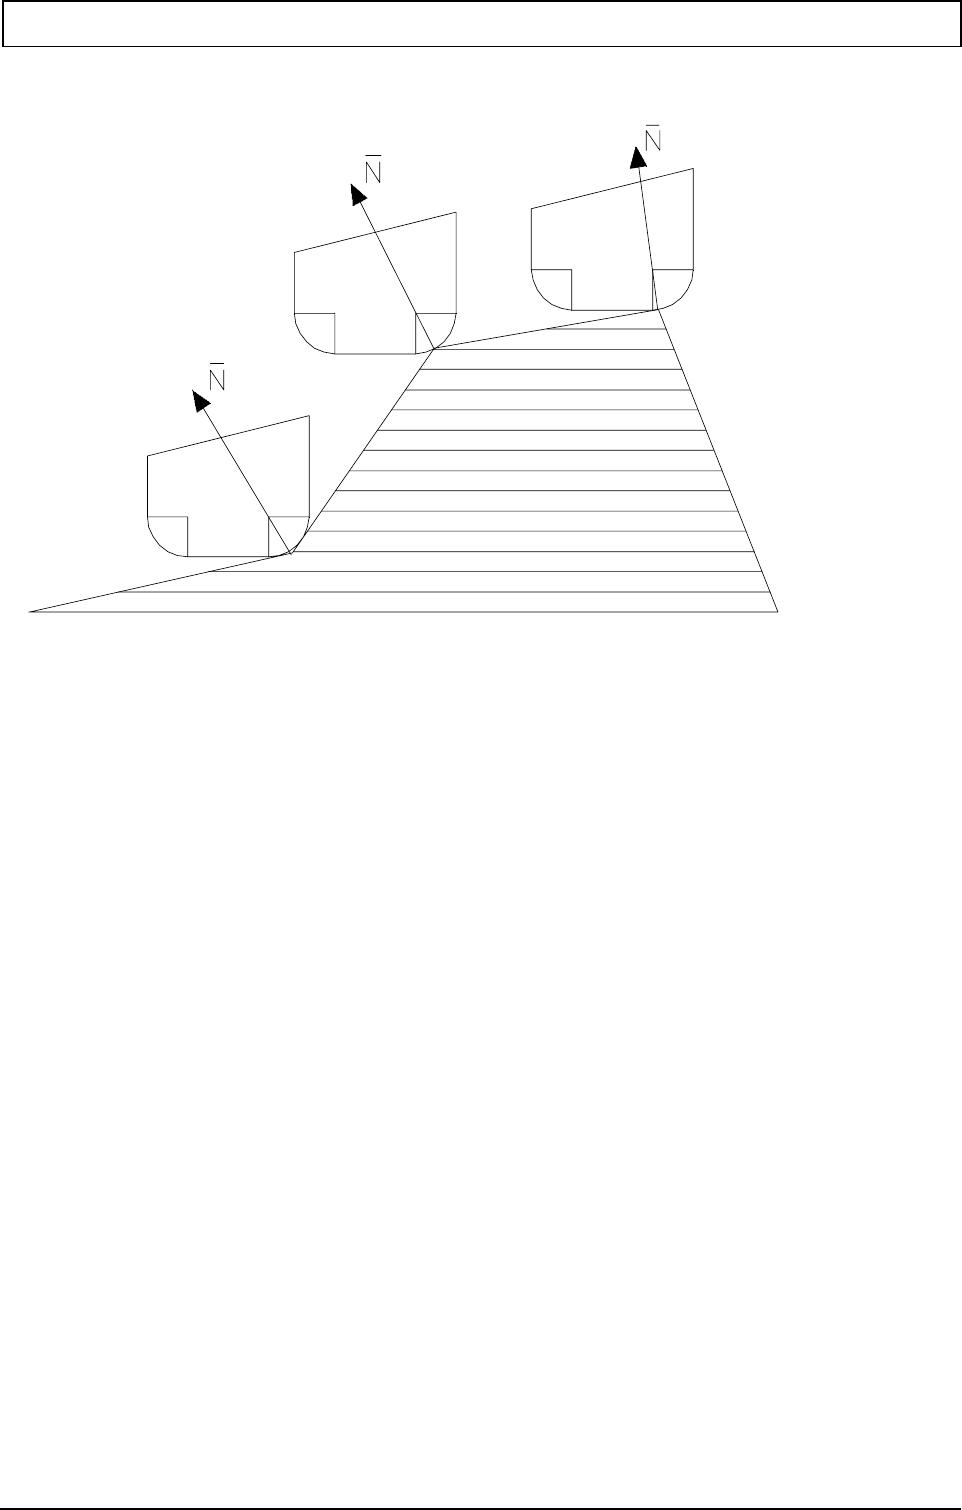
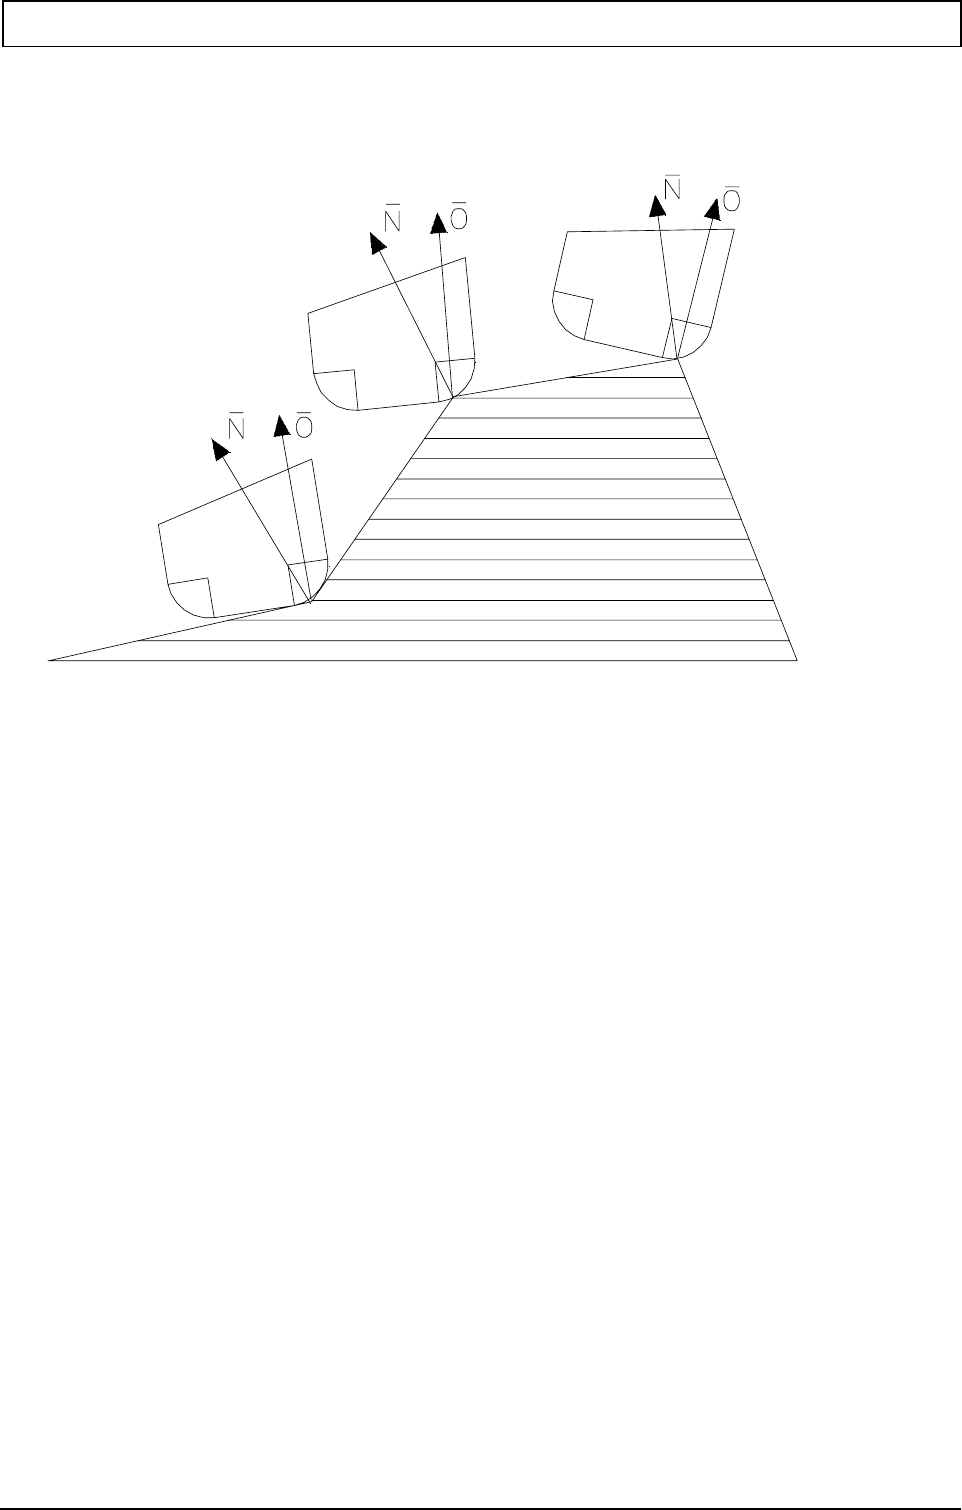
_
N = surface normal vector (I, J, K)
Notes and application
The values of R.. and R1=.. should correspond to the nominal tool dimensions as used by the
programming system for calculating the tool path. If these values are not programmed, they
automatically become zero.
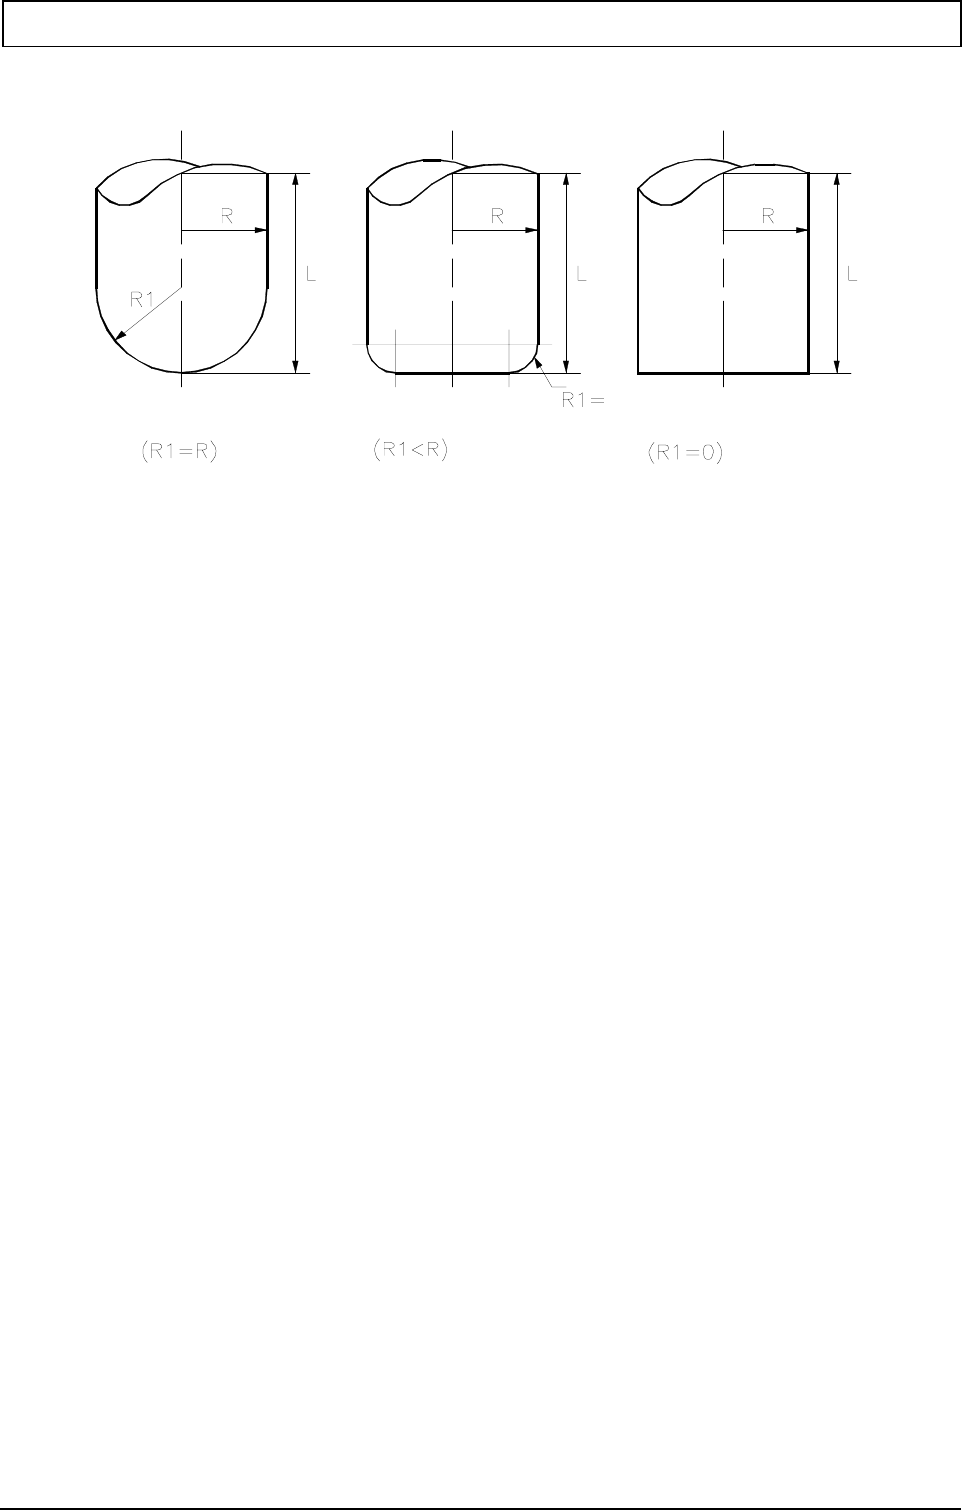
RADIUS (R, R1=)
R defines the tool radius with which the end points of the G0/G1 blocks are calculated in the
CAD system.
R1= defines the tool corner radius with which the end points of the G0/G1 blocks are
calculated in the CAD system.
General principles of TCPM
Maintaining position of tool tip when positioning swinging axes (TCPM)
(TCPM stands for "Tool Centre Point Management").
With G141 ‘3D tool correction without TCPM’, a curved (CAD) surface can be travelled taking the
current tool dimensions into account. In this case, the path is described by end point co-ordinates and
vectors perpendicular to the surface. The G141 function only guides the three linear axes but not the
circular axes. In this way, the tool is always used in the same direction and is not guided over the
workpiece surface at the optimum angle.
With G8 ‘Tool orientation’ (static TCPM), the tool can be placed on the surface of the workpiece at
an optimum angle. The G8 function is a feed movement and cannot be used continuously on a curved
surface during a path movement.
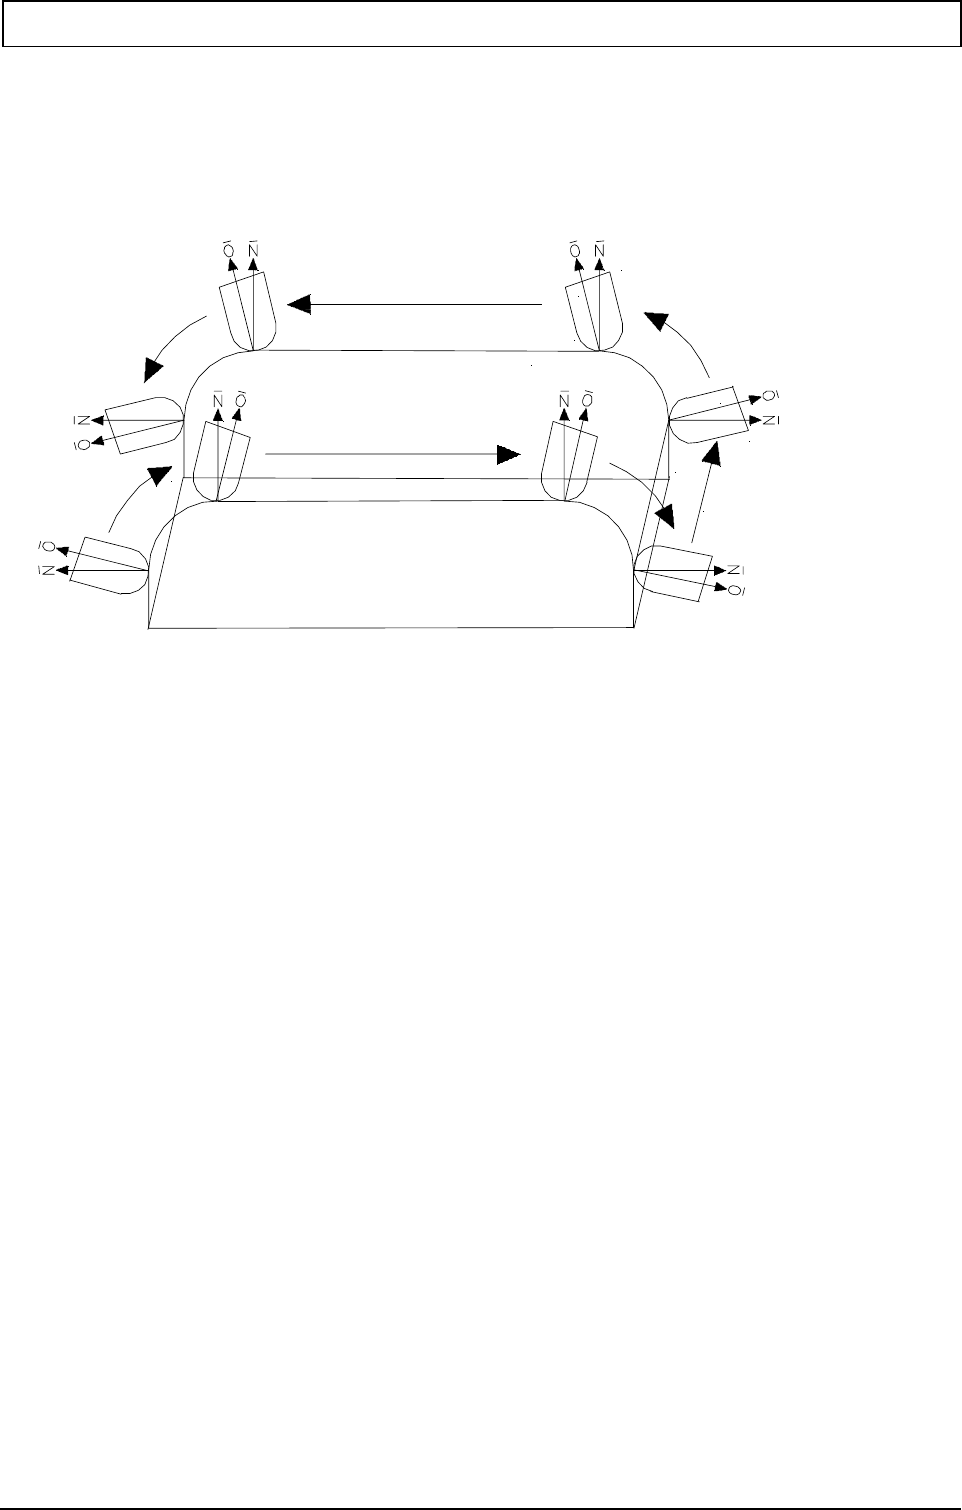
In the case of G141 with dynamic TCPM, the tool is guided on a curved workpiece surface at an
optimum angle. The current workpiece dimensions are taken into account. Dynamic TCPM is used for
G141 3D TOOL CORRECTION WITH DYNAMIC TCPM
14 Heidenhain 20010321
5-axis milling. Dynamic TCPM also controls the circular axes. The tool is guided on the curved
workpiece surface either vertically or at a programmed orientation.
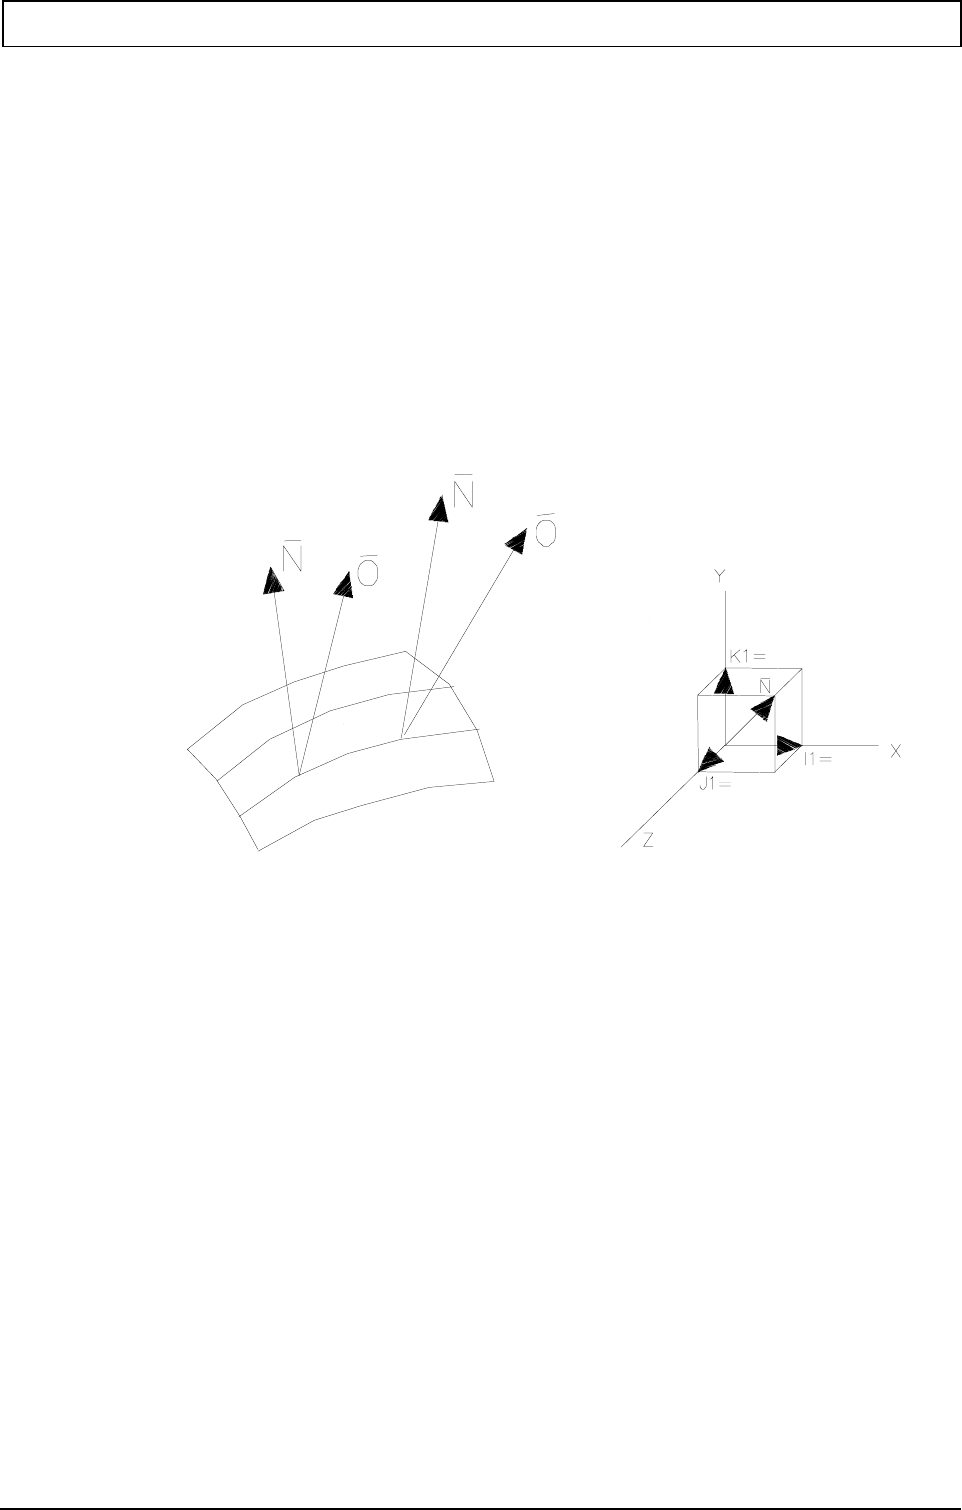
_
N = surface normal vector (I, J, K)
_
O = tool vector (I1=, J1=, K1=) or (A, B, C)
The programming format of the linear blocks within G141 is expanded to include the option of
programming a tool vector. Possible combinations are surface normal vectors and/or tool vectors. If
only the tool vector is used, the tool correction must be calculated in the CAD system.
G7 may be active. In this case, the surface normal vectors and the tool vectors are defined in the G7
level.
Notes and application
ADDRESSES (R, R1=, L2=) (TCPM)
R defines the tool radius with which the end points of the G0/G1 blocks are calculated in the
CAD system.
R1= defines the tool corner radius with which the end points of the G0/G1 blocks are
calculated in the CAD system.
L2= 0 Circular axes travel the shortest distance (basic setting)
1 Circular axes travel to their absolute position (with circular axis programming).
G141 3D TOOL CORRECTION WITH DYNAMIC TCPM
20010321 MillPlus V420-V500 15
POSSIBLE TOOLS
Tools used for the G141 function
TOOL MEMORY
The following dimensional details must be loaded into the tool memory to enable different
types of tools to be used:
Radius milling tool : R (tool radius), L (tool length), C (=tool radius)
Radius end milling tool : R (tool radius), L (tool length), C (=rounding radius)
End milling tool : R (tool radius), L (tool length), C0
If no value of C is entered, C automatically becomes 0.
The standard milling tool is thus an end milling tool.
Note: The rounding radius in the G141 block is programmed with the word R1=. The rounding
radius is stored in the tool memory with the C word.
CREATED TOOL PATH
When the programming system creates the tool path (surface normal vector is programmed),
the dimensions of the nominal tool (R.. and R1=) are programmed in the G141 block. The tool
dimensions stored in the tool memory are used by the CNC to correct the tool path.
WORKPIECE DIMENSIONS
When the programming system creates the workpiece dimensions (surface normal vector and
tool vector are programmed), the R.. and R1= words are not programmed in the G141 block.
The tool dimensions stored in the tool memory are used by the CNC to calculate the tool
path.
ACTIVATING G141
In the first block after G141, the milling tool travels from the current tool position to the
corrected position in this block.
END POINT CO-ORDINATES
Only absolute or incremental (X, X90, X91) Cartesian dimensional data can be used.
Up to V420, the co-ordinates in the first G141 block must be absolute and are measured from
the programming zero point W.
G141 3D TOOL CORRECTION WITH DYNAMIC TCPM
16 Heidenhain 20010321
MIRRORING
If the mirroring function (G73 and axis co-ordinates) is active before G141 is activated, the
mirrored co-ordinates are used during the 3D tool correction.
Mirroring is possible as before once G141 is activated. Mirroring is cancelled by the G73
function.
RADIUS CORRECTION G41...G44
After activating a G141 block, the effective radius correction programmed with G41...G44 is
deleted.
SURFACE NORMAL VECTOR (I, J, K) (TCPM)
Defines the surface normal vector perpendicular to the surface.
The surface normal vector is perpendicular to the workpiece surface. The tool is positioned so
that this vector always passes through the centre point of the tool corner rounding. This vector
controls the positioning of the linear axes within G141.
VECTOR COMPONENTS
The vector components of the axes are independent of the level selected.
If no vector components are programmed in a block, the values last programmed are used.
If no components are programmed in the first block, the components not programmed are set
at zero.
DIMENSION FACTOR
The input format of the vectors (I, J, K, I1=, J1=, K1= words) is limited to three decimal places.
The surface normal and tool vectors do not, however, have to have the length 1. To increase
the dimensional accuracy, the values in question can be multiplied by a dimension factor
between 1 and 1000. With the factor 1000, for example, the input accuracy of the vector
components is increased to six significant figures.
BACK CUTTING
Back cutting or collisions between tool and material at points not to be machined are not
detected by the CNC.

G141 3D TOOL CORRECTION WITH DYNAMIC TCPM
20010321 MillPlus V420-V500 17
KINEMATIC MODEL (TCPM)
The kinematic model is used for calculations within G141.
If no kinematic model is active (MC312 ‘Free machining level’ = 0), G141 remains compatible
with the G141 functions in older CNC versions.
TOOL VECTOR (TCPM)
I1=, J1=, K1= axis components of tool vector
or
A, B, C circular axis components of tool vector
The tool vector or the circular axis co-ordinates indicate the direction of the tool axis. The tool
is turned so that it is parallel to this vector. This vector controls the positioning of the circular
axes (and the associated compensation movement with linear axes) within G141.
DELETING
Function G141 is deleted by G40, M30, the program interrupt softkey or the CNC reset
softkey. The milling tool stops at the last corrected position. The circular axes are not turned
back automatically.
FUNCTIONS TO BE DELETED
When working with G141, functions G64, scale change (G73 A4=..), axis rotation (G92/G93
B4=..) and G182 must be deleted.
The following G functions are permitted if G141 (TCPM) is switched on:
Basic motions 0, 1, 7
Levels 17, 18
Program control 14, 22, 23, 29
Positioning feed 4, 25, 26, 27, 28, 94, 95, 96, 97
Radius correction 39, 40, 141
Zero points 51, 52, 53, 54, 92, 93
Geometry 72, 73
Co-ordinate measurement modes 70, 71, 90, 91
Graphics 195, 196, 197, 198, 199
If a G function that is not permissible is programmed, error message P77 ‘G function and
Gxxx not permitted’ is issued.
The following G functions are permitted if G141 (TCPM) is active:
Basic motions 0, 1
Parameters of G0 and G1 are limited
G0 without positioning logic
Program control 14, 22, 23, 29
Positioning feed 4, 25, 26, 27, 28, 94, 95, 96, 97
Radius correction 40, 141
G40 switches G141 off
Zero points 51, 52, 53, 54, 92, 93
Geometry 72, 73
Co-ordinate measurement modes 90, 91
If a G function that is not permissible is programmed, error message P77 ‘G function and
G141 not permitted’ is issued.
PROGRAMMING LIMITATIONS
G functions that are not listed above may not be used.
Point definitions (P) and E parameters may not be used.
No tool change may be made after activating G141.

G141 3D TOOL CORRECTION WITH DYNAMIC TCPM
18 Heidenhain 20010321
Notes and application for TCPM
RISK OF COLLISION
When G141 is switched on, compensation movements similar to those in G8 may occur.
In the case of the switch-on movement, the tool tip must not be resting on the surface of the
workpiece and should be programmed with a distance from the material at least equal to the
tool diameter.
Remark: If G141 is switched off via G40, M30 or program cancel, there is no
compensation movement and the circular axes remain in their last positions.
When approaching the contour, it may happen that the table with the workpiece is turned
through 180 degrees to achieve the programmed tool direction. ATTENTION! RISK OF
COLLISION!
UNDERCUTTING
If the tool direction changes within a G1 block, this tool direction change is carried out
interpolating with the movement to the end point. In doing this, the path between the start
and end points is corrected for undercutting.
Undercutting is not detected during block transitions. This undercutting should be corrected
by inserting a block without an end point and with only one change of the tool vector by the
CAD system. In this case, the tool turns about the tool contact point until the new tool
direction is reached.
DISPLAY
When G141 is active, a yellow icon is displayed behind the tool number and the programmed
G141 tool vectors (I1, J1, K1) can be seen in the machining status (on the G7/G8 positions).
Remark: If G7 and G141 are active at the same time, the G7 angle or vector can be
seen.
A small ‘p’ at the bottom right, near the ‘axis letters’, shows whether the position of the tool
contact point or the position is in machine co-ordinates. The display changes with the same
softkey as with G7.
FEED RATE
The programmed feed rate applies to the contact point between the surface and the tool. The
tool head may make other movements.
ERROR MESSAGES
P341 Tool vector incorrect
The tool vector (I1=, J1=, K1=) is incorrect. This error message is generated if all the
components of the vector are zero.
P342 Surface normal vector incorrect
The surface normal vector (I, J, K) is incorrect. This error message is generated if all
the components of the vector are zero.
G141 3D TOOL CORRECTION WITH DYNAMIC TCPM
20010321 MillPlus V420-V500 19
Example: G141 and TCPM
Tool vector with (I1=, J1=, K1=)
This programming is independent of the machine.
N113 (square material with top rounding (R4) and swung tool (5 degrees)
N1 G17
N2 T6 M67 (10 round spherical milling tool: T6 R5 C5 in tool table)
N3 G54 I10
N4 G0 X0 Y0 Z0 B0 C0 S6000 M3
N5 F50 E1=0
N6 G141 R0 R1=0 L2=0 (all basic settings, do not need to be programmed)
N7 (R is 0 mm in CAD system)
N8 (R is 0 mm in CAD system)
N9 (L2=0 circular axes move shortest distance)
N10
N11 G0 X-1 Y=E1 Z0 I1=-1 K1=0
N12 (generated in CAD system)
N13 (front left arc)
N14 G1 X=0 Y=E1 Z=-4 I1=-0.996194698 K1=0.087155743
N15 G1 X=0.000609219 Z=-3.930190374 I1=-0.994521895 K1=0.104528463
N16 G1 X=0.002436692 Z=-3.860402013 I1=-0.992546152 K1=0.121869343
N17 G1 X=0.005481861 Z=-3.790656175 I1=-0.990268069 K1=0.139173101
N... (each degree one point)
N100 G1 X=3.790656175 Z=-0.005481861 I1=0.034899497 K1=0.999390827
N101 G1 X=3.860402013 Z=-0.002436692 I1=0.052335956 K1=0.998629535
N102 G1 X=3.930190374 Z=-0.000609219 I1=0.069756474 K1=0.99756405
N103 G1 X=4 Z=0 I1=0.087155743 K1=0.996194698
N104 (front right arc)
N105 G1 X=36 Z=0 I1=0.087155743 K1=0.996194698
N106 G1 X=36.06980963 Z=-0.000609219 I1=0.104528463 K1=0.994521895
N107 G1 X=36.13959799 Z=-0.002436692 I1=0.121869343 K1=0.992546152
N…
N194 G1 X=39.99756331 Z=-3.860402013 I1=0.998629535 K1=-0.052335956
N194 G1 X=39.99756331 Z=-3.930190374 I1=0.998629535 K1=-0.069756474
N196 G1 X=40 Z=-4 I1=0.996194698 K1=-0.087155743

TOOL MEASUREMENT CYCLES FOR LASER MEASUREMENTS
20 Heidenhain 20010321
N197 G40
N1971 (back right arc)
N1972 (move up to next cut)
N1973 G174 L100 (tool withdrawal movement)
N1974 G0 B0 C0 (rotate circular tables to original co-ordinate system)
N198 E1=E1+0.25
N1981 G1 Y=E1 (movement in normal X, Y, Z co-ordinate system)
N1982 G141
Or without deactivation of G141
N197 (back right arc)
N198 E1=E1+0.25 (move up to next cut)
N199 G1 X=40 Y=E1 Z=-4 I1=0.996194698 K1=0.087155743
N200 G1 X=39.99939078 Z=-3.930190374 I1=0.994521895 K1=0.104528463
N201 G1 X=39.99756331 Z=-3.860402013 I1=0.992546152 K1=0.121869343
N…
N287 G1 X=36.13959799 Z=-0.002436692 I1=-0.052335956 K1=0.998629535
N288 G1 X=36.06980963 Z=-0.000609219 I1=-0.069756474 K1=0.99756405
N289 G1 X=36 Z=0 I1=-0.087155743 K1=0.996194698
N290 (back left arc)
N291 G1 X=4 Z=0 I1=-0.087155743 K1=0.996194698
N292 G1 X=3.930190374 Z=-0.000609219 I1=-0.104528463 K1=0.994521895
N293 G1 X=3.860402013 Z=-0.002436692 I1=-0.121869343 K1=0.992546152
N…
N379 G1 X=0.002436692 Z=-3.860402013 I1=-0.998629535 K1=-0.052335956
N380 G1 X=0.000609219 Z=-3.930190374 I1=-0.99756405 K1=-0.069756474
N381 G1 X=0 Z=-4 I1=-0.996194698 K1=-0.087155743
N382 E1=E1+0.25
N383 G14 N1=10 N2=389 J40
N384 G40
N385 G174 L100 (tool withdrawal movement)
N386 G0 B0 C0 (rotate circular tables to original co-ordinate system)
N387 M30
5. Tool measurement cycles for laser measurements
5.1 General notes
MC 859 =1: signal type of second stylus (V410 only)
New machine constants
MC 360 -- MC 369 are intended for a second laser measurement device in another work area
or an adapter spindle. The area used is determined by the IPLC.
MC 373 free space behind the laser beam in µm
TOOL MEASUREMENT CYCLES FOR LASER MEASUREMENTS
20010321 MillPlus V420-V500 21
5.2 G600 laser system: Calibration
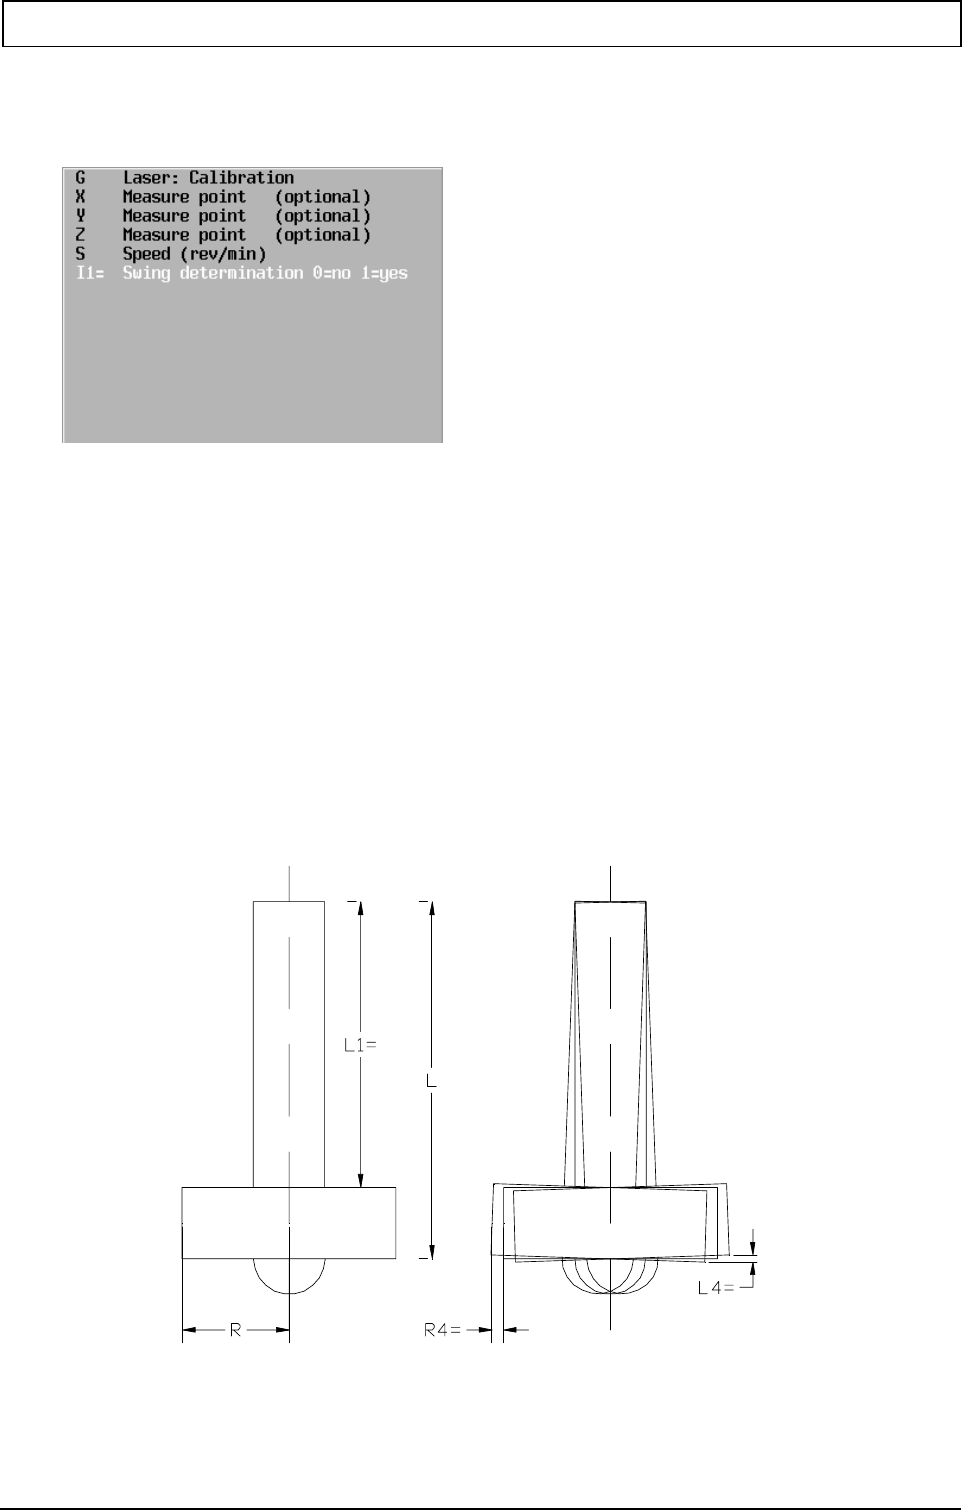
{I1=..}
DETERMINING CONCENTRICITY ERROR (I1=)
Use address I1 to specify whether the concentricity error is to be measured and saved in the
tool table against the calibration tool. It is recommended that the concentricity error should be
determined once using a clean calibration stylus.
I1= 0 Do not determine concentricity error (basic setting)
1 Determine the concentricity error
The radial concentricity error is written to the tool memory under R4=.
The axial concentricity error is written to the tool memory under L4= and the length L is
reduced by the L4 value. The sum L+L4 remains constant.
CALIBRATION STYLUS, TOOL MEMORY ADDRESSES
The concentricity errors R4 and L4 of the calibration stylus are written to the tool memory by
the calibration cycle.
R4= Radial concentricity error of calibration stylus.
L4= Axial concentricity error of calibration stylus.
TOOL MEASUREMENT CYCLES FOR LASER MEASUREMENTS
22 Heidenhain 20010321
POSITION OF MEASURING UNIT
When determining the position of the measuring unit for the calibration, the centre of the
bottom edge of the pin (dimension L) must be set in the light beam (+/- 5 mm).
- The free machining plane G7 and axis rotation G92/G93 B4 must not be active
SPEED
Coolant will be thrown off by clockwise-anticlockwise-clockwise rotation.
The spindle is switched off with M5 at the end of the cycle.
Example
Example: calibration of laser measuring unit, determining concentricity error.
N... G600 X300 Y500 Z600 I1=1 S3000
Concentricity errors L4 and R4 are saved in the tool table, length is matched (I1=1).
The exact X, Y and Z positions are saved in the machine constants.
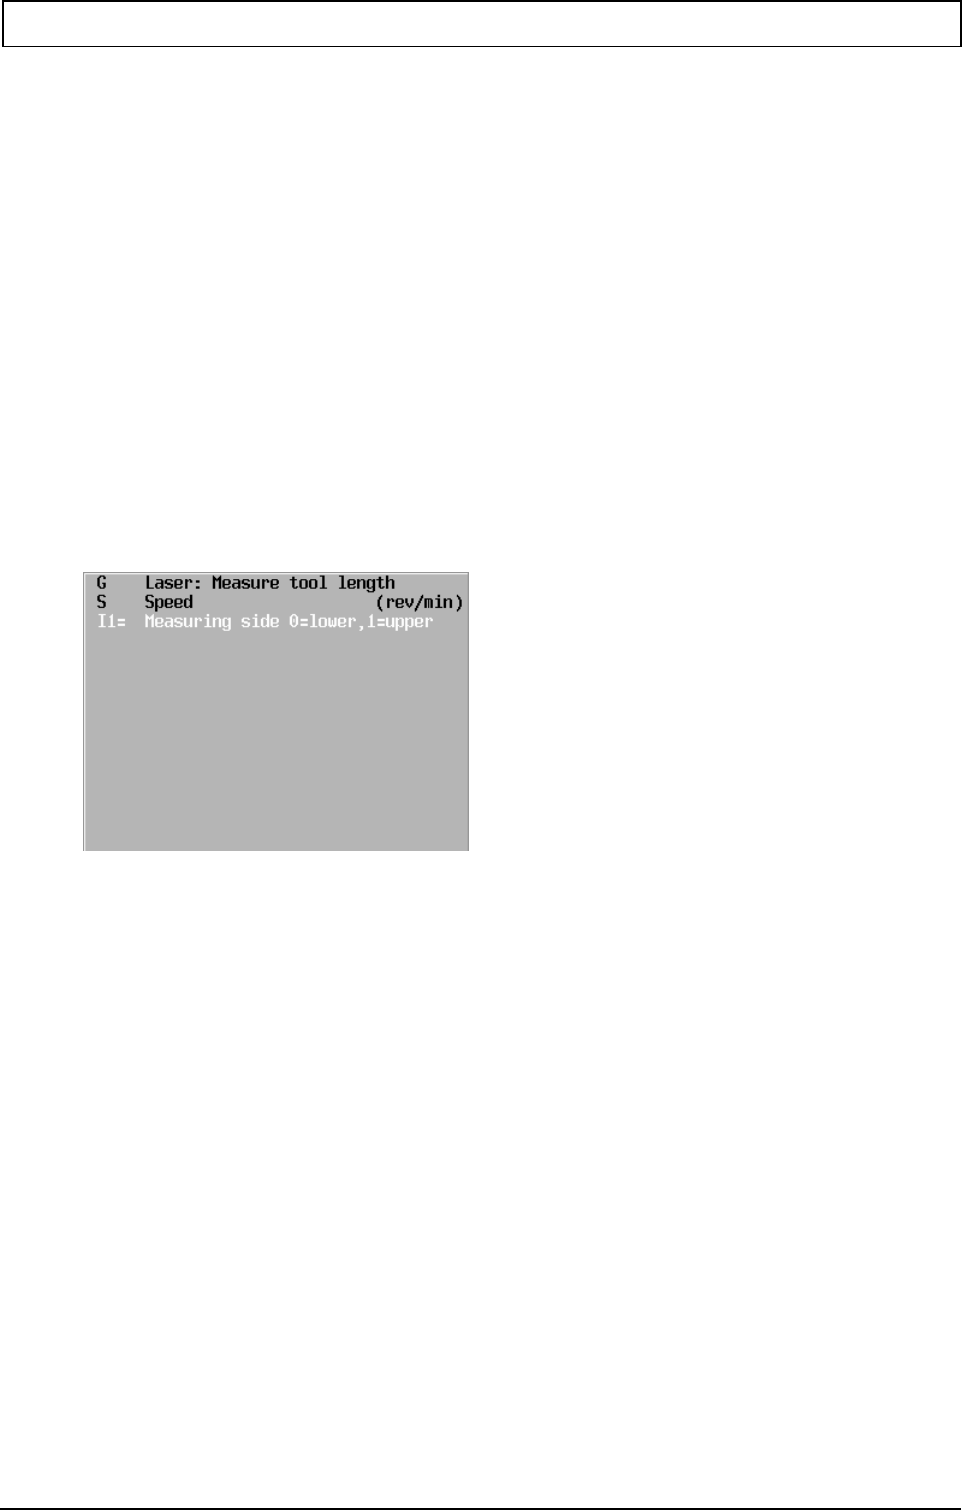
5.3 G601 laser system: Measuring length
{I1=}
SELECTING THE TOOL EDGE (I1=)
The lower edge or the upper edge of the tool can be measured.
I1= 0 measure lower edge (basic setting)
1 measure upper edge
SPEED
If the spindle is not first switched off (M5 or M19), then:
- Coolant will be thrown off by clockwise-anticlockwise-clockwise rotation.
- The spindle is switched off with M5 at the end of the cycle.
If the spindle is already switched off (M3 or M4), change of direction or spindle stop does not
occur at the end of the cycle
TOOL MEMORY ADDRESSES
R6= Radius position for measuring length.
LENGTH MEASUREMENT
- If the tool radius is greater than MC373 and R6 is not programmed, the length is
measured eccentrically.
- If R6 is programmed and R-R6 > MC373, an error message is issued

TOOL MEASUREMENT CYCLES FOR LASER MEASUREMENTS
20010321 MillPlus V420-V500 23
5.4 G602 laser system: Measuring length and radius
{I1=..} {I2=..}
SELECTING THE TOOL EDGE (I1=)
The lower edge or the upper edge of the tool can be measured.
I1= 0 measure lower edge (basic setting)
1 measure upper edge
SELECTING MEASUREMENT OF ONE OR BOTH EDGES (I2=)
One or both edges of the tool can be measured.
I2= 0 measure one side (basic setting)
1 measure both sides
When measuring both edges, temperature errors and tool obliquity have no influence on the
measured radius.
SPEED
If the spindle is not first switched off (M5 or M19), then:
- Coolant will be thrown off by clockwise-anticlockwise-clockwise rotation.
- The spindle is switched off with M5 at the end of the cycle.
If the spindle is already switched off (M3 or M4), change of direction or spindle stop does not
occur at the end of the cycle
LENGTH MEASUREMENT
- If the tool radius is greater than MC373 and R6 is not programmed, the length is
measured eccentrically.
- If R6 is programmed and R-R6 > MC373, an error message is issued.
RADIUS MEASUREMENT
If L6 is greater than MC372, an error message is issued.
5.5 G603 laser system: Individual cutting tip monitoring
If I1+L6 is greater than MC372, an error message is issued
TOOL MEASUREMENT CYCLES FOR LASER MEASUREMENTS
24 Heidenhain 20010321
5.6 G604 laser system: Tool breakage monitoring
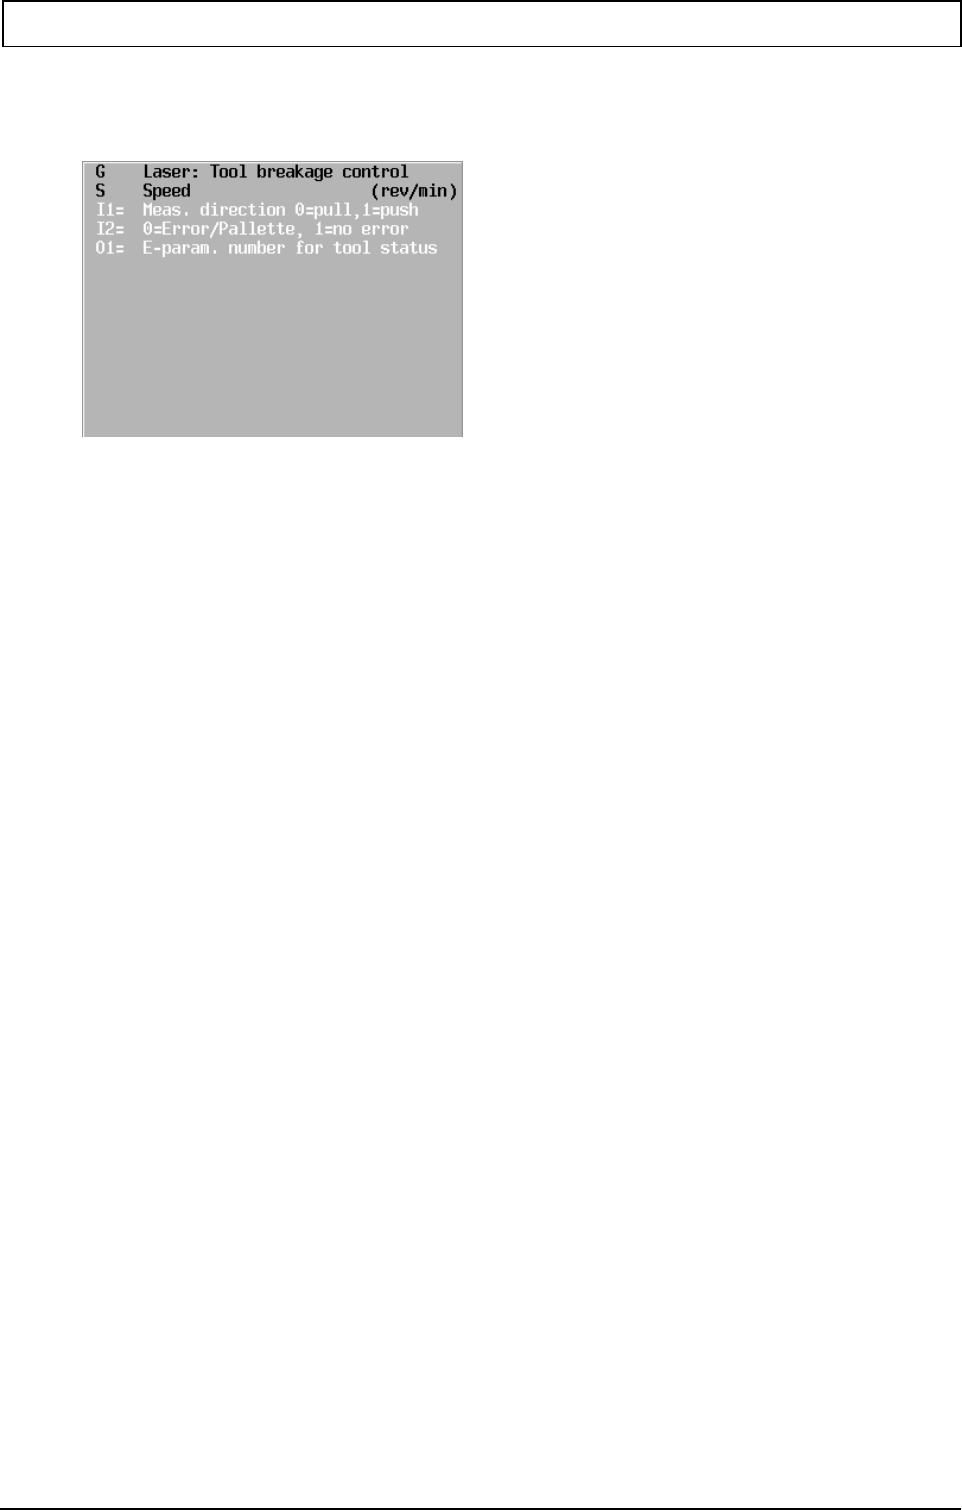
{I1=..}
MEASURING DIRECTION (I1=)
The measuring direction can be pushing or pulling.
I1= 0 pulling (basic setting)
1 pushing
The fast pulling measurement is preferred, but tools with pronounced concave grinding must
be measured pushing, as otherwise the hollow grinding will be detected as a break.
ERROR EVALUATION (I2=)
If a break is detected, various actions can follow:
I2= 0 error message or reject pallet (basic setting)
1 no error message
If I2=0 is selected, function M105 (tool break detected) is issued in the case of tool breakage.
The IPLC switches the laser off and the controller issues an error message.
If, however, a pallet system is present, the pallet is rejected if possible, the current program is
interrupted and a new pallet is brought in.
If I2=1 is selected, no error message is issued on tool breakage. Every action must be
programmed in the part program. To achieve this, the tool status (value E from the tool
memory) can be written directly to an E parameter. See address O1.
TOOL STATUS OUTPUT TO E PARAMETER (O1=)
The tool status (definition E in the tool memory) is written to the specified E parameter. Based
on this parameter, the program can determine whether a tool breakage has been detected
(status –4). This is only meaningful if the error message has been switched off with I2=1.
SPEED
If the spindle is not first switched off (M5 or M19), then:
- Spindle is switched on clockwise (M3).
- The spindle is switched off with M5 at the end of the cycle.
If the spindle is already switched off (M3 or M4), spindle stop does not occur at the end of the
cycle.
TOOL STATUS
The basic setting for tolerance B is entered in MC33. Only 1 or 2 mm is possible. The setting
of MC133 is in mm even in inches mode.
BREAKAGE MEASUREMENT
If the tool radius is greater than MC373 and R6 is not programmed, the length is measured
eccentrically.
If R6 is programmed and R-R6 > MC373, an error message is issued
SPECIFIC G FUNCTIONS FOR MACROS
20010321 MillPlus V420-V500 25
6. Specific G functions for macros
6.1 G300 Programming error messages
D are general milling error messages (P), D1= are error messages (R) in turning mode (G38).
6.2 G302 Overwriting radius correction parameters
The G302 function overwrites the active tool parameters during execution. The tool parameters in
the tool memory are not changed.
In this version, only the O parameter for tool orientation can be overwritten.
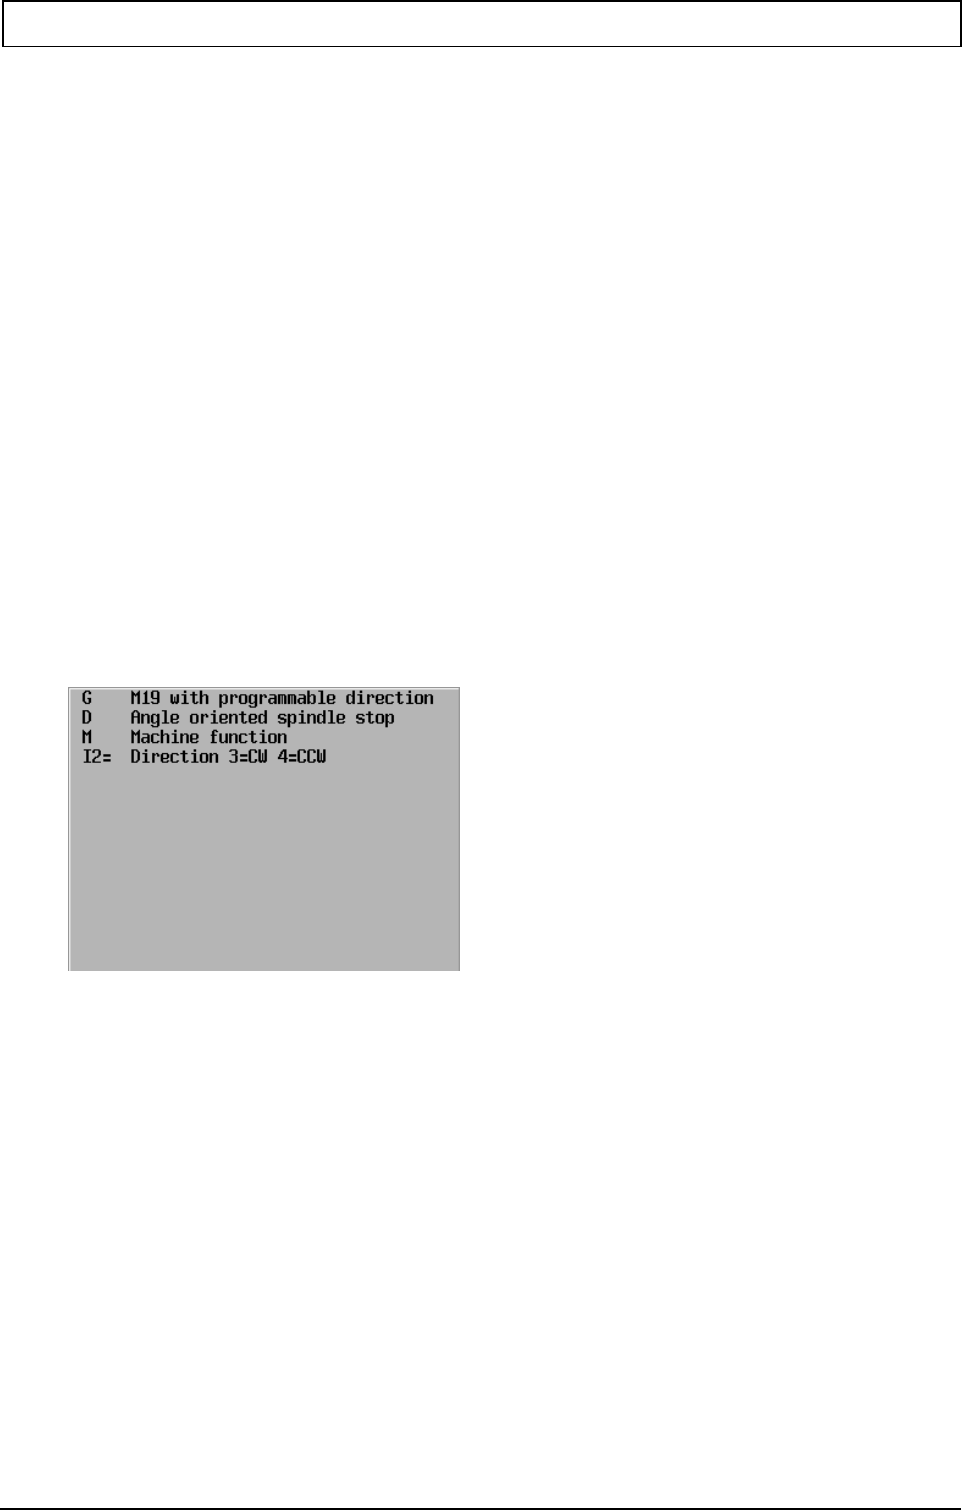
6.3 G303 M19 with programmable direction
M19 with programmable direction (CW or CCW).
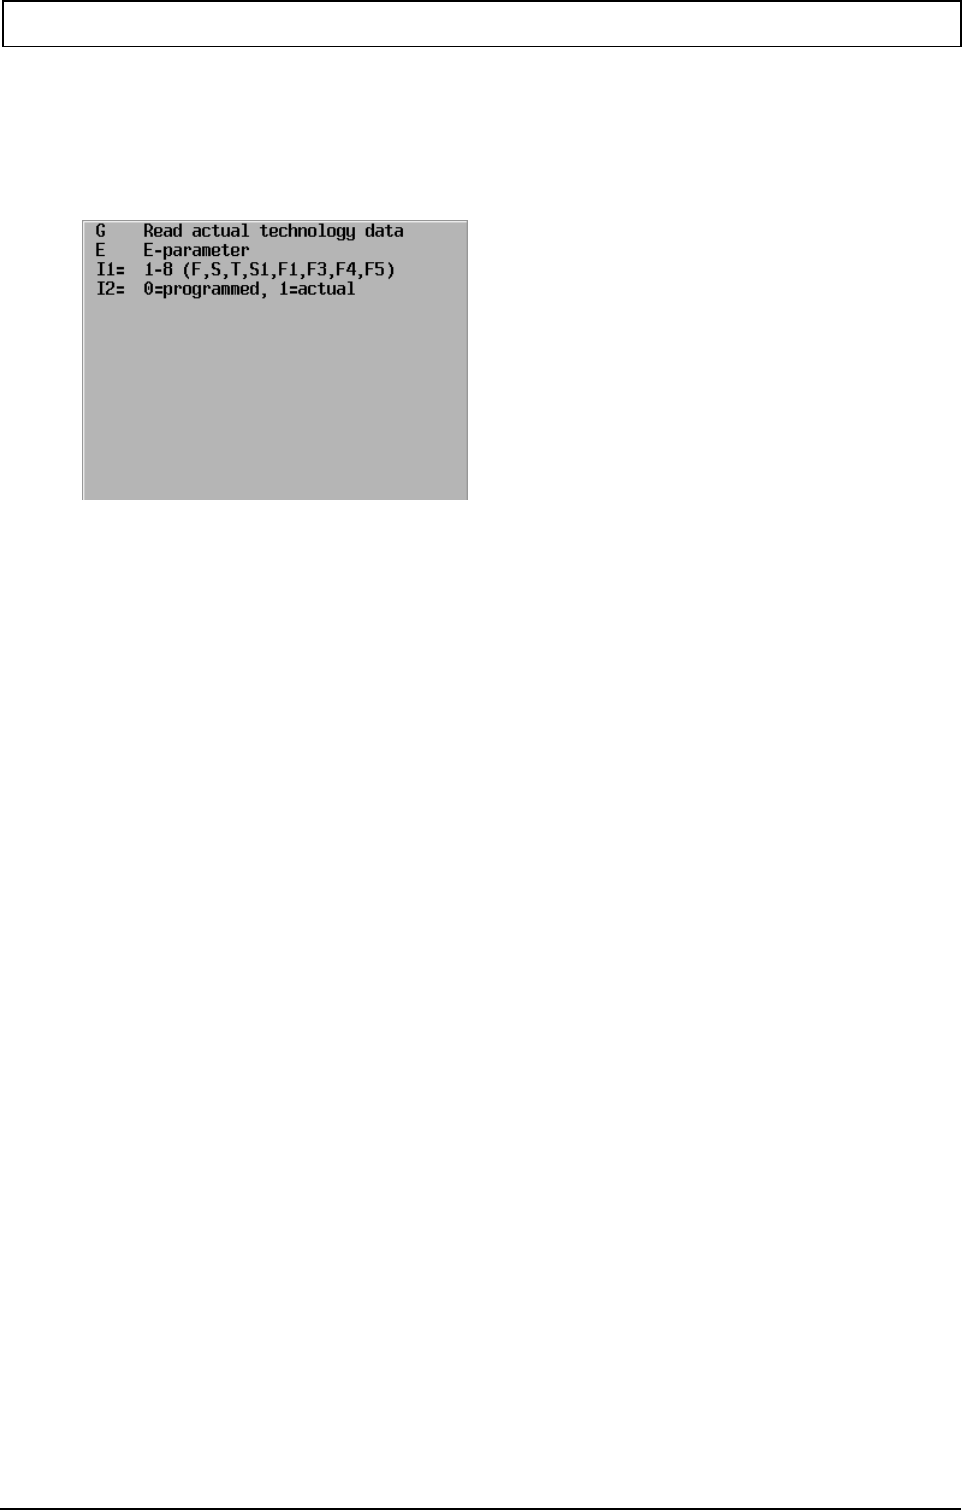
Format
N... G303 M19 D... {I2=...}
Parameters
Notes and application
Only the M19 function can be programmed.
The basic setting for I2=3.
Example
Stopping spindle with M19.
N100 G303 M19 D75 I2=4
Explanation:
N100: Oriented spindle stop
Angle 75 degrees
CCW
SPECIFIC G FUNCTIONS FOR MACROS
26 Heidenhain 20010321
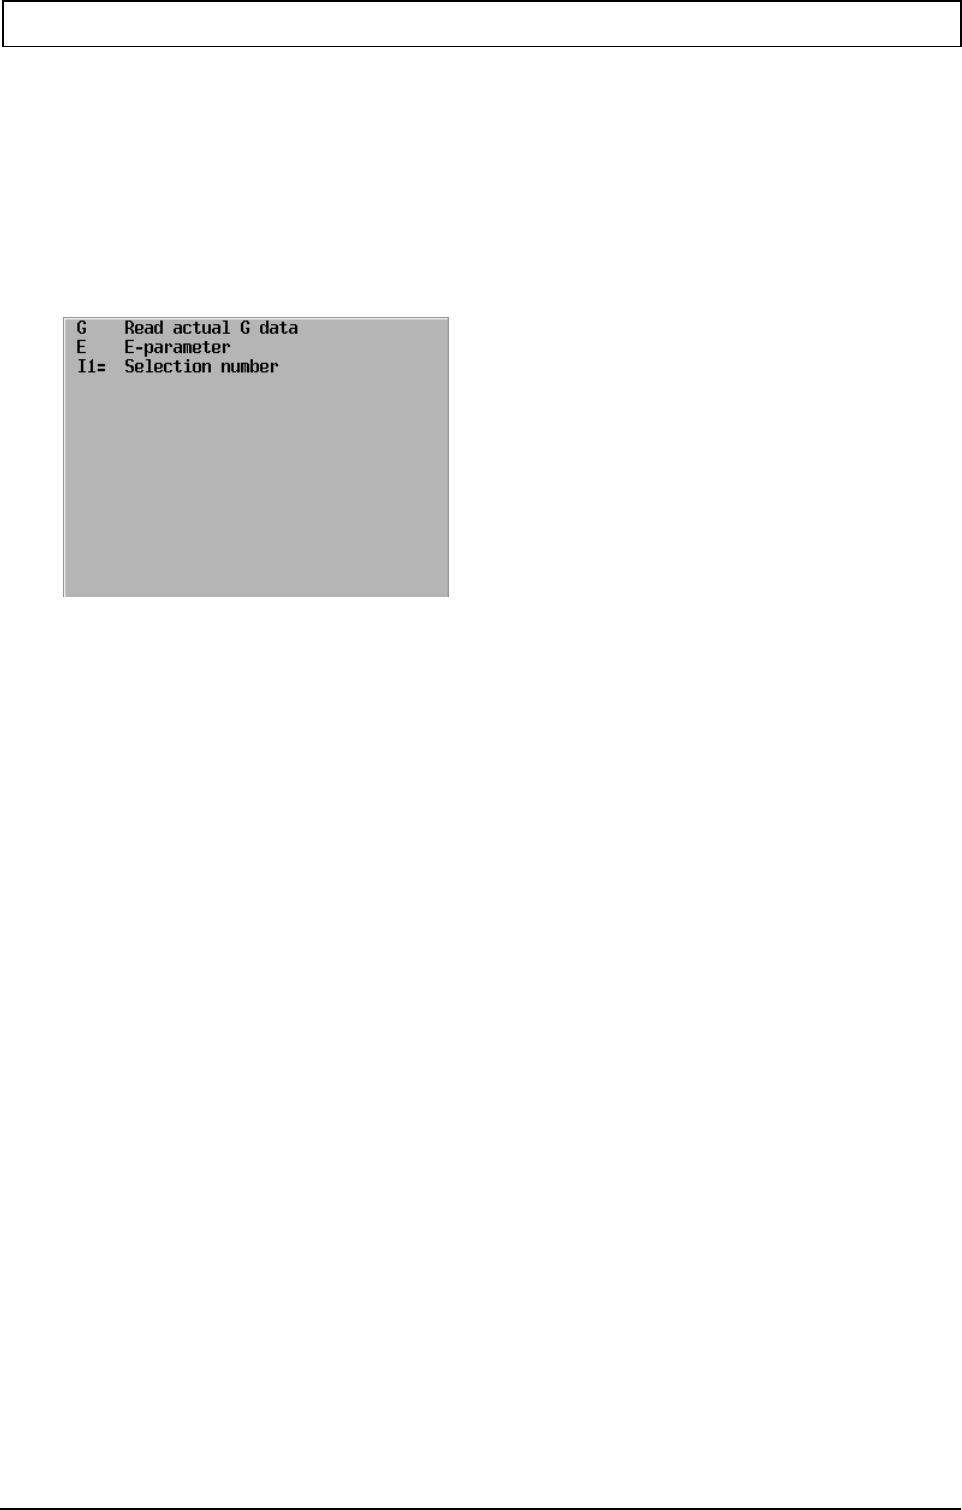
6.4 G319 Query active technology
S1 (cutting speed/rotational speed) or T (tool number).
Format
N... G319 I1=.. E... {I2=..}
Selectable functions:
I1=4 Cutting speed/rotational speed (S1=) (turning only)
I1=5 Constant cutting feed (F1= with G41/G42)
I1=6 Plunge feed (F3=)
I1=7 Planar feed (F4=)
I1=8 Circular axis feed (F5=)
I2=0 Programmed value (basic setting)
I2=1 Current value.
Notes and application
READING ADDRESS WITHOUT VALUE
If the address does not exist, the E parameter is filled with –999999999.
SPECIFIC G FUNCTIONS FOR MACROS
20010321 MillPlus V420-V500 27
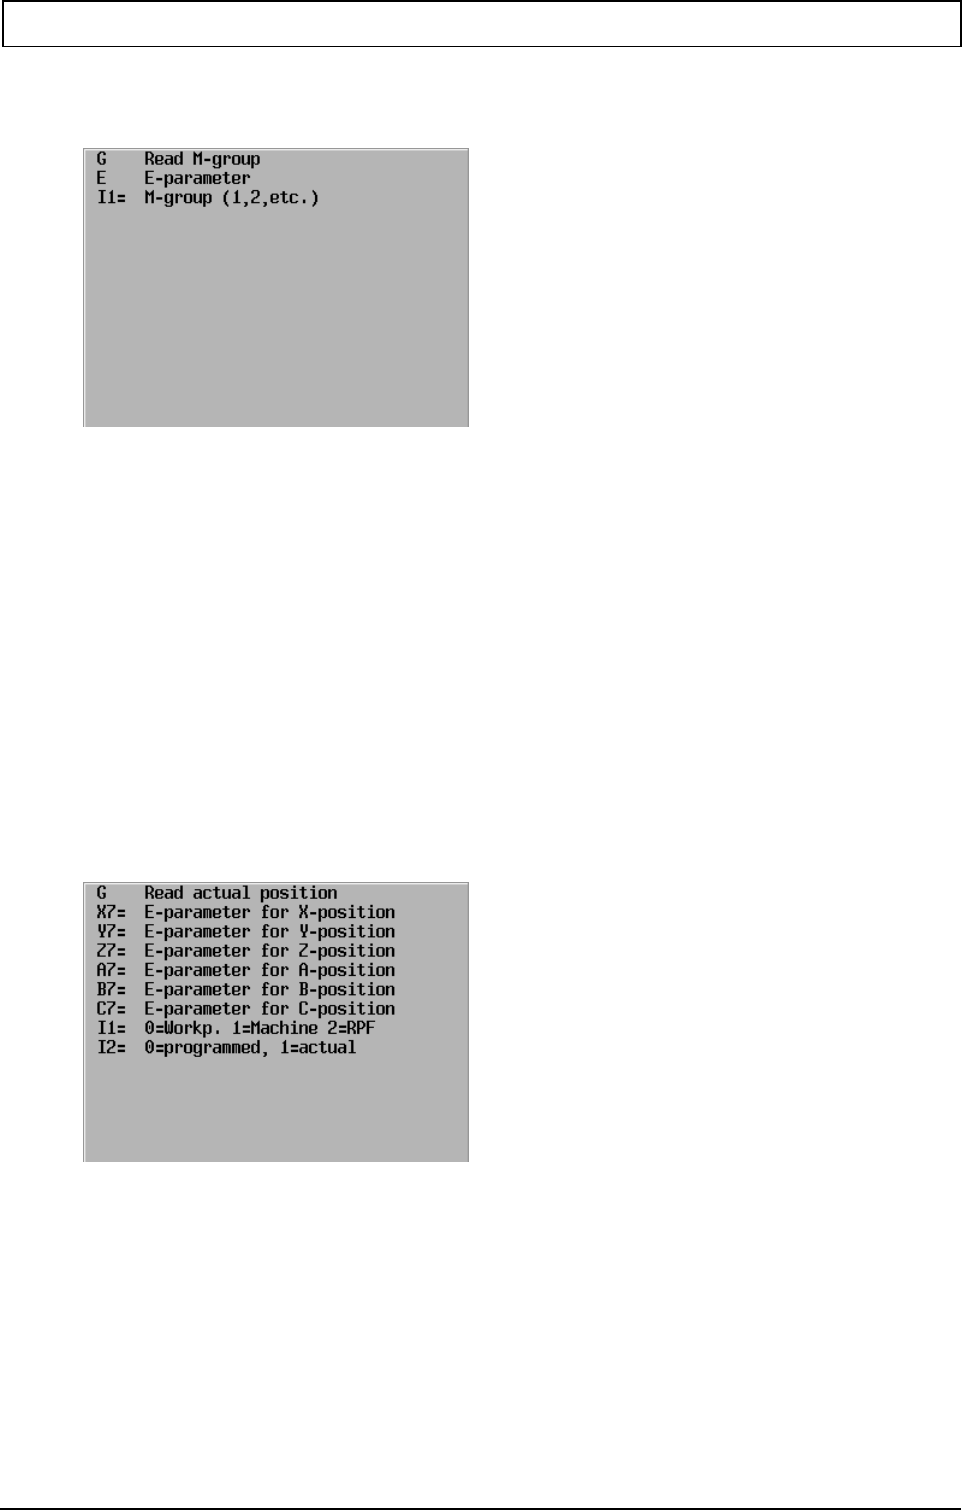
6.5 G320 Query current G data
Query address value of current modal G function and save this value in the E parameter provided for
this purpose.
Format
N... G320 I1=.. E...
Parameters
Type of function
Non-modal
Notes and application
BASIC SETTINGS
All values are initialised when the machine is started. Most values are set to zero.
READING ACTIVE MODAL G_FUNCTIONS
G324 can be used to query whether a G function is active.
Particular information can always be queried with G320.
UNIT OF RESULT
The unit of the result is mm or inches for positions. Degrees for angles.
SELECTION NUMBER
G function Result Basic setting
I1= selection number min—max.
G7 Swing machining plane
1 A axis solid angle -180--180° 0
2 B axis solid angle -180--180° 0
3 C axis solid angle -180--180° 0
G8 Swing tool
4 A axis solid angle -180--180° 0
5 B axis solid angle -180--180° 0
6 C axis solid angle -180--180° 0
G9 Pole point (define dimension reference point)
7 X axis polar co-ordinate 0
8 Y axis polar co-ordinate 0
9 Z axis polar co-ordinate 0
Result of G17, G18, G19, G180 and G182
10 First main axis 1--3
11 Second main axis 1--6
12 Tool axis 1--3
1=X, 2=Y, 3=Z, 4=A, 5=B, 6=C
G25 Feed and spindle override effective
13 Feed and spindle override active 0
G26 Feed and spindle override not effective

SPECIFIC G FUNCTIONS FOR MACROS
28 Heidenhain 20010321
13 Feed and spindle override not active 1--3
1=F=100%, 2=S=100%, F and S=100%
G27 Positioning functions
14 Feed motion (I3=) 0
15 Rapid motion (I4=) 0
16 Positioning logic (I5=0) 0
17 Acceleration reduction (I6=) 100%
18 Contour accuracy (I7=0) MC765
G28 Positioning functions
14 Feed motion (I3=) 0--1
15 Rapid motion (I4=) 0--1
16 Positioning logic (I5=0) 0--1
17 Acceleration reduction (I6=) 5—100%
18 Contour accuracy (I7=0) 0—10.000µm or MC765
G39 Activate/deactivate allowance
19 Length allowance (L) 0
20 Radius allowance )R) 0
G52 Pallet zero point displacement
21 Zero point displacement in X axis 0
22 Zero point displacement in Y axis 0
23 Zero point displacement in Z axis 0
24 Zero point displacement in A axis 0
25 Zero point displacement in B axis 0
26 Zero point displacement in C axis 0
G54 Standard zero point displacement
27 Zero point displacement in X axis 0
28 Zero point displacement in Y axis 0
29 Zero point displacement in Z axis 0
30 Zero point displacement in A axis 0
31 Zero point displacement in B axis 0
32 Zero point displacement in C axis 0
33 Rotation angle -180--180° 0
G92/G93 Incremental or absolute zero point displacement
34 Zero point displacement in X axis 0
35 Zero point displacement in Y axis 0
36 Zero point displacement in Z axis 0
37 Zero point displacement in A axis 0
38 Zero point displacement in B axis 0
39 Zero point displacement in C axis 0
40 Rotation angle -180--180° 0
Total zero point displacement (G52 + G54 + G92/G93)
41 Zero point displacement in X axis 0
42 Zero point displacement in Y axis 0
43 Zero point displacement in Z axis 0
44 Zero point displacement in A axis 0
45 Zero point displacement in B axis 0
46 Zero point displacement in C axis 0
47 Rotation angle -180--180° 0
G72 Activate mirroring and dimension factor
48 Plane scale (factor or %) (A4=) 1
49 Tool axis scale (factor or %) (A4=) 1
50 Mirroring in X axis 1
51 Mirroring in Y axis 1
52 Mirroring in Z axis 1
53 Mirroring in A axis 1
54 Mirroring in B axis 1
55 Mirroring in C axis 1
G73 Activate mirroring and dimension factor
48 Plane scale (factor or %) (A4=) 0—100% or factor
49 Tool axis scale (factor or %) (A4=) 0—100% or factor
depending on MC714
MC714 0= machining plane factor
1= machining plane percent
2= all linear axes factor
2= all linear axes percent
50 Mirroring in X axis -1--1
51 Mirroring in Y axis -1--1

SPECIFIC G FUNCTIONS FOR MACROS
20010321 MillPlus V420-V500 29
52 Mirroring in Z axis -1--1
53 Mirroring in A axis -1--1
54 Mirroring in B axis -1--1
55 Mirroring in C axis -1--1
System axis number determined by machine constants (MC103, MC105, etc.)
56 X axis 0--6
0= not active, 1—6 axis number
For example, information about axis number 1 is
located in the MC3100 and MC4700 row, etc.
57 Y axis 0--6
58 Z axis 0--6
59 A axis: 0--6
60 B axis 0--6
61 C axis 0—6
Examples
Querying current G data and saving the values in the E parameter.
N11 G320 I1=10 E11
N12 G320 I1=11 E12
N12 G320 I1=12 E13
Explanation:
N11: I1=10 Query first main axis
E11 contains the result
E11 =1 X axis is the first main axis.
N12: I1=11 Query second main axis
E12 contains the result
E12 =2 Y axis is second main axis
N13: I1=12 Query tool axis
E13 contains the result
E13 =1 Z axis is the tool axis.
SPECIFIC G FUNCTIONS FOR MACROS
30 Heidenhain 20010321
6.6 G325 Query current modal M function
Group division
Group
11 off, M56, M57, M58
12 off, M72, M73
13 off, M1=..
SIGNIFICANCE OF M FUNCTIONS
Some of these M functions are basic M functions and are described in the M functions
chapter. The others are machine-dependent M functions. Please refer to the machine
builder’s manual for a description.
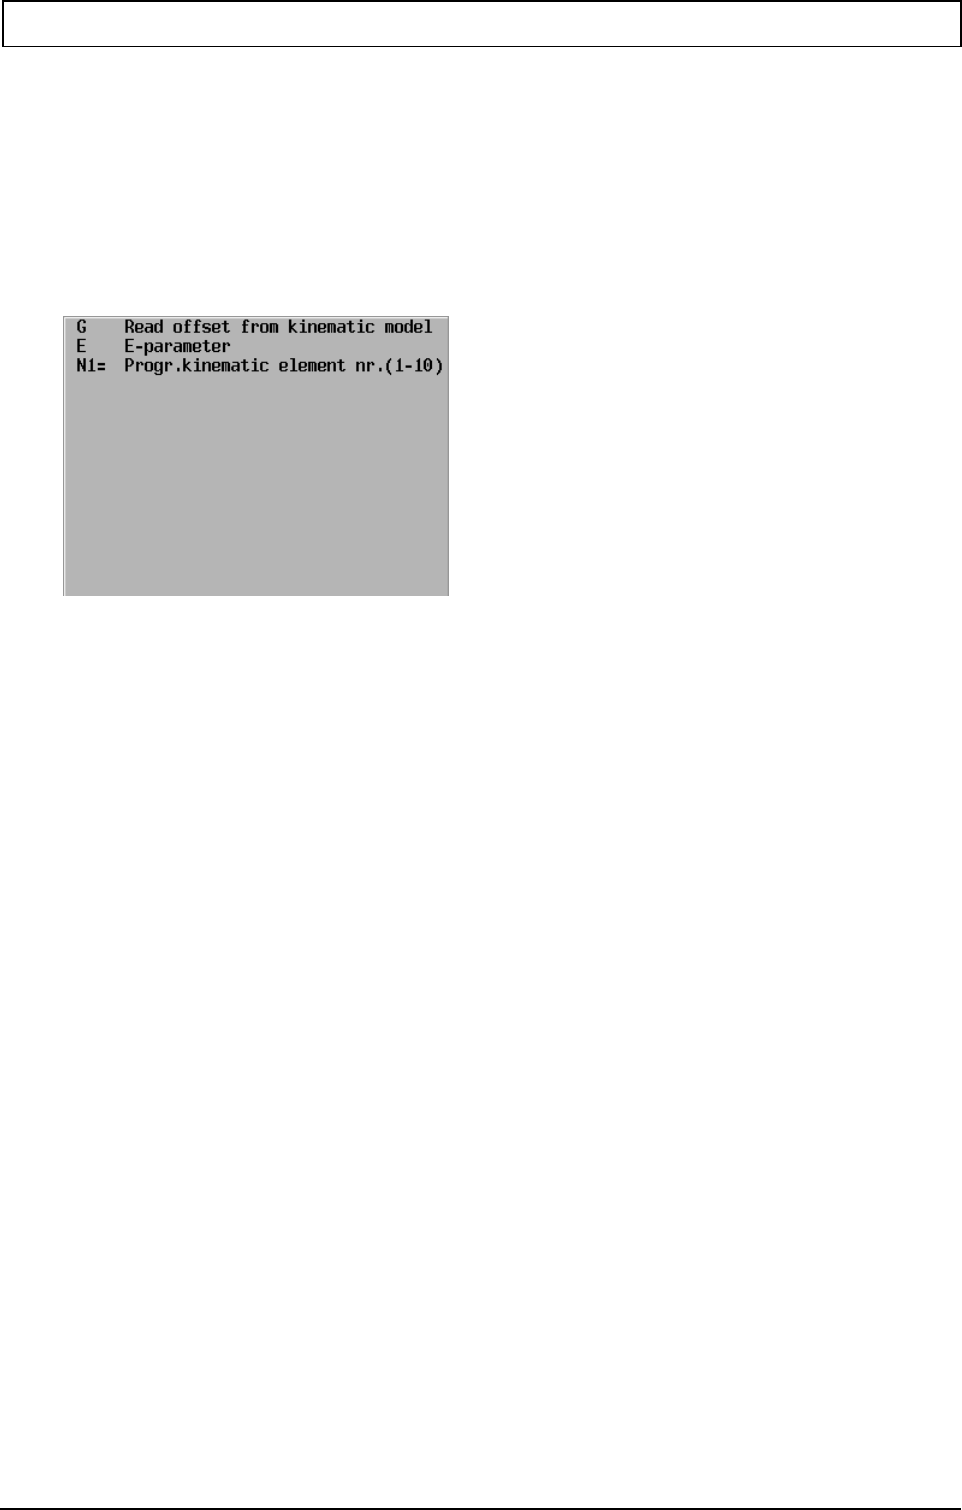
6.7 G326 Query current axis position values
{I1=..} {I2=..}
Parameters
I1= 0 Position to workpiece zero point (basic position)
1 Position to machine zero point
2 Position to reference point
I2= 0 Programmed value (basic setting)
1 Current value.
Notes and application
QUERYING NON-EXISTENT AXES
If the axis does not exist, the E parameter is filled with –999999999.
SPECIFIC G FUNCTIONS FOR MACROS
20010321 MillPlus V420-V500 31
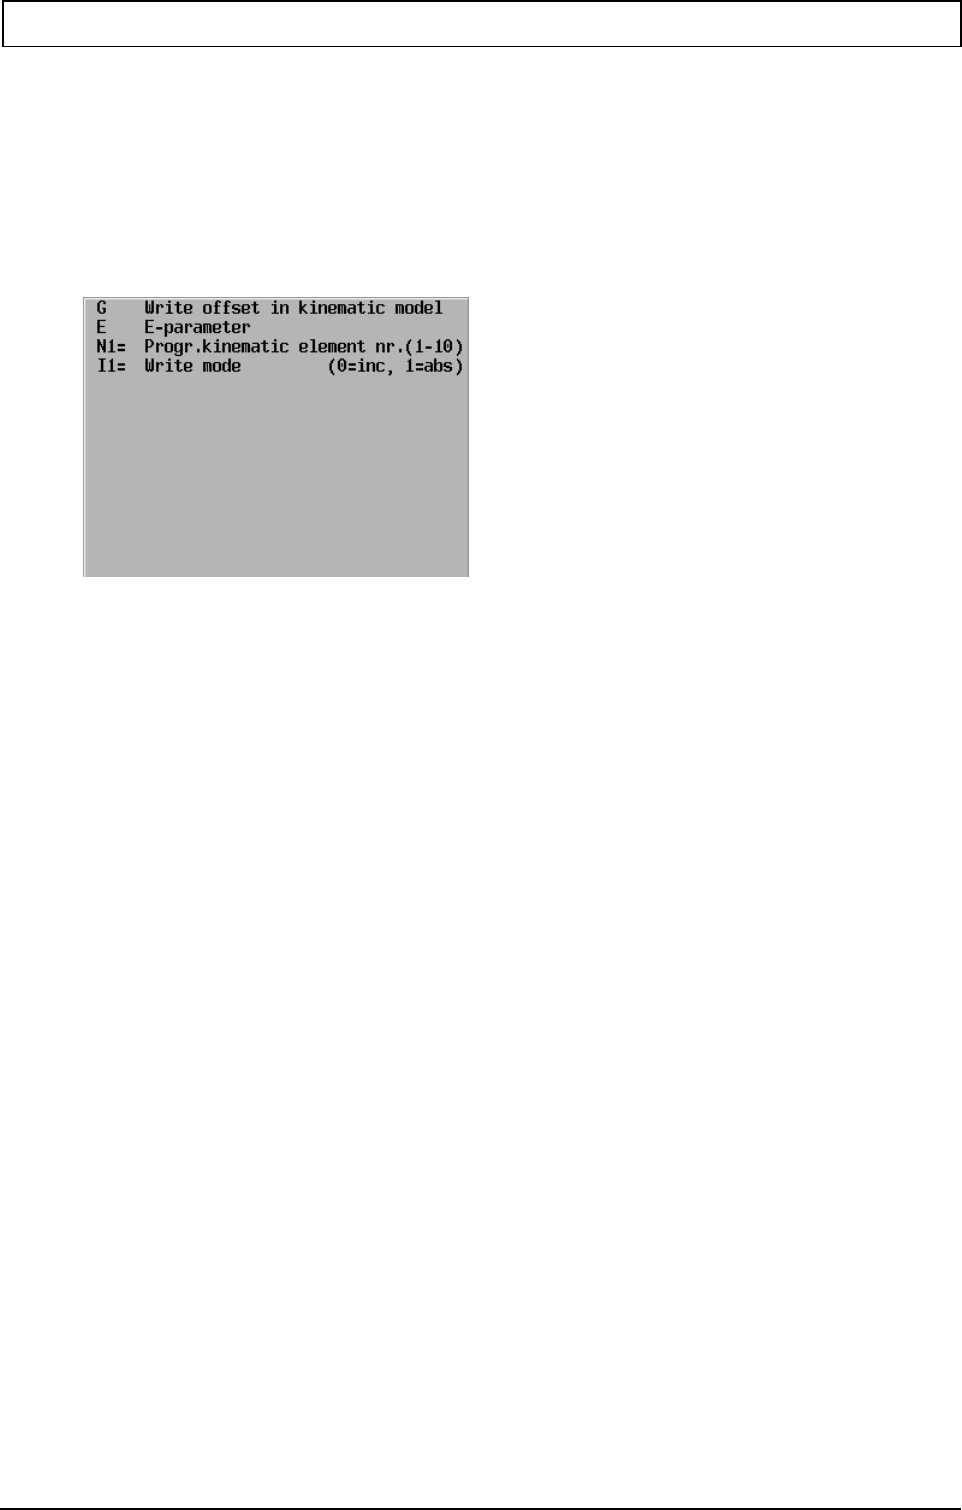
6.8 G329 Query programmable kinematic elements
Query programmable kinematic elements and save these values in the E parameter provided for this
purpose.
Format
N... G329 N1=.. E...
Parameters
Notes and application
PROGRAMMABLE KINEMATIC ELEMENTS
A kinematic element is defined by a group of 4 machine constants.
The machine builder can enter whether a particular kinematic element is programmable. To
do this, the third machine constant of the group (MC602, MC606, etc.) must have the value 2.
The values of these programmable kinematic elements can be programmed using G339. In
doing this, the value of the fourth machine constant of the group (MC603, MC607, etc.) is
overwritten.
PROGRAMMABLE KINEMATIC ELEMENT NUMBER
Defines the number of the programmable element of the kinematic model to be queried. The
value lies between 1 and 10.
Examples
Read a programmable kinematic element and save the value in the E parameter.
N... G329 N1=1 E10
Explanation:
E10 contains the contents of programmable kinematic element 1 (in mm or inches).
SPECIFIC G FUNCTIONS FOR MACROS
32 Heidenhain 20010321
6.9 G339 Write programmable kinematic elements
Write programmable kinematic elements.
Format
N... G339 N1=.. E... {I1=...}
Parameters
Notes and application
PROGRAMMABLE KINEMATIC ELEMENTS
A kinematic element is defined by a group of 4 machine constants.
The machine builder can enter whether a particular kinematic element is programmable. To
do this, the third machine constant of the group (MC602, MC606, etc.) must have the value 2.
The values of these programmable kinematic elements can be programmed using G339. In
doing this, the value of the fourth machine constant of the group (MC603, MC607, etc.) is
overwritten.
PROGRAMMABLE KINEMATIC ELEMENT NUMBER
Defines the number of the programmable element of the kinematic model to be written. The
value lies between 1 and 10.
NOTATION
“Incremental” notation (basic setting) means that the programmed value is added to the
existing value.
“Absolute” notation means that the existing value is overwritten by the programmed value.
The programmed values remain in the kinematic model and are not reset following M30,
<Cancel program> or <Reset CNC>.
Example: Write a programmable kinematic element.
A circular table is defined in the kinematic model. This circular table is defined by two
kinematic elements for each X axis. The first is defined by the machine builder and
determines the position of the circular table. The second is a programmable element. Using
this, the exact position can be corrected in the kinematic model after measurement.
N100 G145... (measure)
N105 (calculate all parameters)
N110 G339 N1=1 E10 I1=1
Explanation: N100 Measuring the exact position.
N110 The contents of E10 are written to the first programmable kinematic
element.

SPECIFIC G FUNCTIONS FOR MACROS
20010321 MillPlus V420-V500 33
6.10 Formatted write functions
Previously, only write functions to the internal memory were possible.
Using the formatted write function, it is now possible:
- to write to the screen
- to write to the file on the hard disc
- to fill an array
- to read a number from an array.
Configuration file
Configuration files are required for these actions to describe how and where to write or read.
These configuration files are saved on the hard disk and are read when the system is started.
Two configuration files are possible.
1) File to define an array and fill it with basic settings.
ARRnnnnn.CFG
nnnnn is the file number from 1 to 99999.
2) File to define a print file.
D:\STARTUP|CYCLES\FORMnnnn.CFG.
nnnn is the file number from 1 to 9999.
6.10.1 File to define an array and fill it with basic settings.
An array is defined with a configuration file. This is activated when the system is started.
A maximum of 10 arrays can be defined. End users can define files themselves.
The maximum array size is 5000 elements.
An element can be read from the array with arrayread(nnnnn, row, column).
If an element is read that does not exist, the value 999999999 is returned.
Description of array configuration file:
;Comments start with ';'
;
;Sections:
;[element] defines an element in the array
;row = row number where row number = [1|...|9999]
;col = column number where column number = [1|...|9999]
; row * column <= 5000
;val = value where value = real number (double)
;
Example: Array configuration file:
ARRnnnnn.CFG
[element]
row = 1
col = 1
val = 0 ; element (1,1).=.0
[element]
row = 3
col = 66
val = 397.01 ; element (3,66) = 397.01
[element]
row = 9999 ;maximum row size
col = 9999
val = -123456789.123456789
E parameter array
Several arrays can be filled using a configuration file. These arrays can be read with E parameters
during execution. For unbalance detection, the calibration curves are read and interpolated in this

SPECIFIC G FUNCTIONS FOR MACROS
34 Heidenhain 20010321
manner.
arrayread (arraynumber, row, column)
Where: arraynumber is the number of the array Every array has its own configuration file.
Arraynumber between 1 and 89999.
Row is the row number in the array that is to be read. Row between 1 and
999999.
Column is the position in the row of the array that is to be read. Column between 1
and 999999.
Fixed arrays can be read with the arrayread function. The arrays are filled from a configuration file
D:\STARTUP\CYCLES\ARRnnnnn.CFG).
Empty ‘elements’ in the array have the value <–999999999>.
Example arrayread
E300 = arrayread(100,1,2)
E300 has the value of array 100, row 1, column 2.
6.10.2 Configuration file to define a file or window (display/input)
A print file is defined with a configuration file. This is activated when the system is started.
A maximum of 10 files can be defined. End users can define files themselves.
The file size is unlimited.
Description of print file configuration file:
:Commentary starts with a ';'
;
;Sections:
Only for one window:
;[window] defines present window
;number= windowId where windowId = 1 = output, centre, 5x40
; 2 = input, centre, 1x40;
; 3 = graphic, above dashboard
;[file] defines file (only for G351')
;name = file name where filename is 8.3 ASCII characters
; The directory is always D:\STARTUP\
;
;[string] defines position and content of the block
;line = line number where line number = [1|...|n] basic setting = 1
;position= position number where position number = [1|...|n] basic setting = 1
;gb = "string" where block is <n> ASCII characters
;d = "string"
; Texts are defined for various languages
; Code gb=, d=, f= .. or defined independent of language with: txt =
;
;[value] defines position, format and E parameter of the value
;line = line number
;position= position number
;eparam= E parameter where E parameter number = [1|...|1250]
;form = digit decimal where digit decimal = <digits>.<decimals>
;sign = yesNo where yesNo = y = space for sign
; n = no space for sign
;
Only for input window:
;[input] defines position, format and E parameter before an input field
; only for G350 and windowId = 2
; only one [input] section is allowed
;line = line number
;position= position number
;eparam= E parameter number where E parameter number = [1|...|1250]
;form = digitDecimal where digitDecimal = <digits>.<decimals>
;sign = yesNo where yesNo = y =space for sign
; n = no space for sign
SPECIFIC G FUNCTIONS FOR MACROS
20010321 MillPlus V420-V500 35
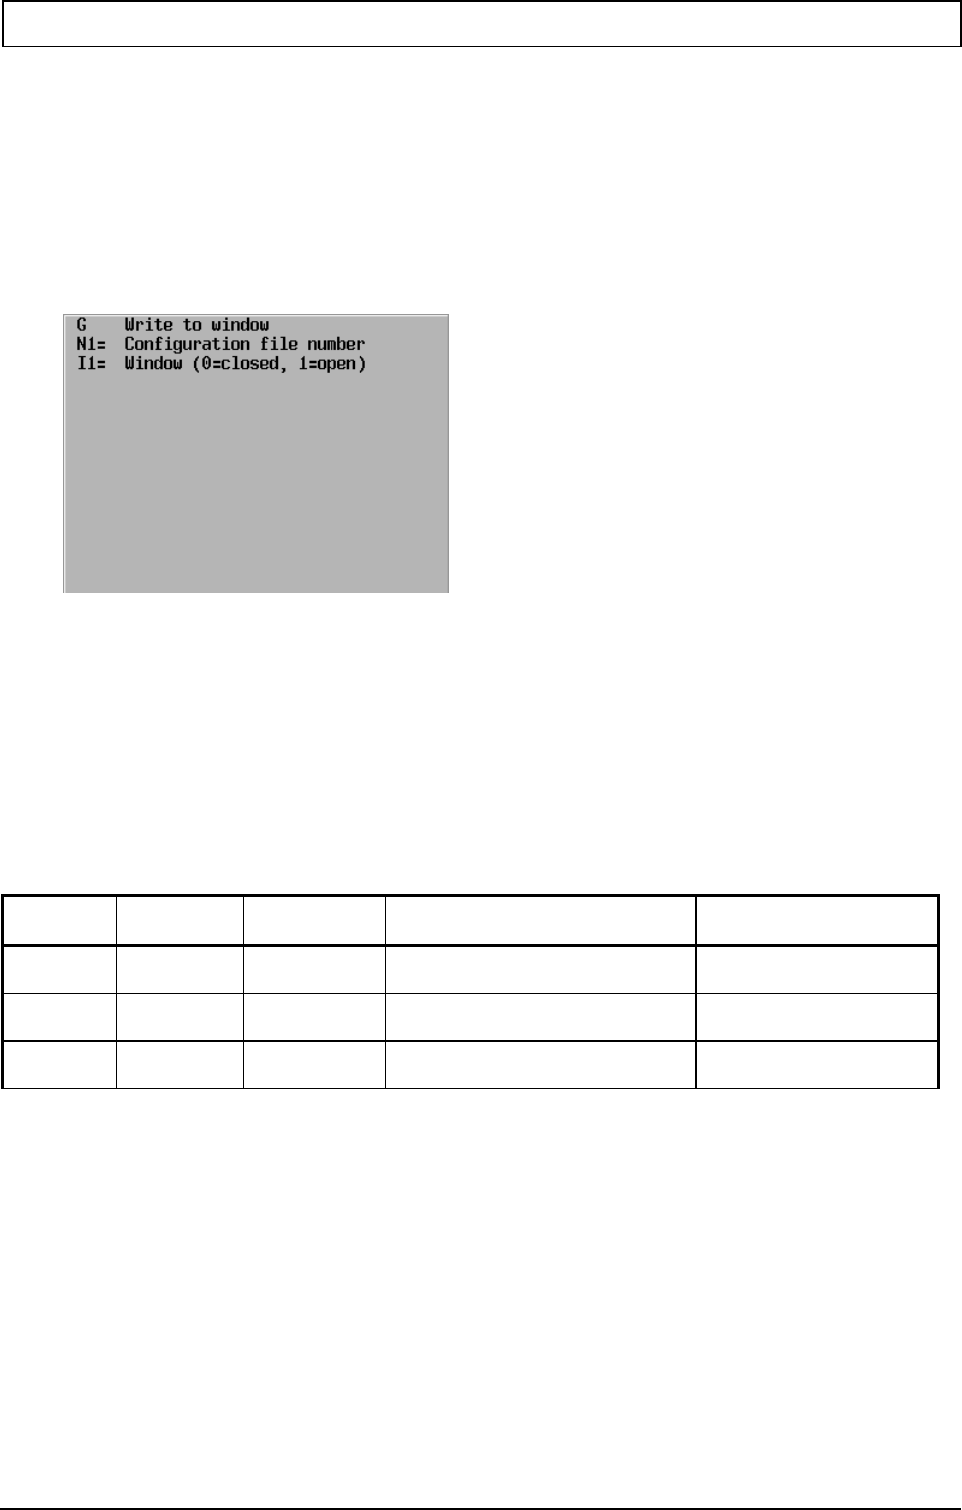
6.10.3 G350 Writing to a window
Specific lines and values can be written to a window using E parameters and a configuration file. In
addition, a particular input can be expected. For unbalance detection, the result can be displayed to
the operator in this way.
Format
N... G350 N1=.. {I1...}
Parameters
N1= Defines the configuration file 'D:\STARTUP\CYCLES'\FORMnnnn.CFG> that is used for the
format, lines and E parameters that are written. File number between 1 and 8999.
I1= 0 = window not visible. Setting on switch-on:
1 = window visible.
Notes and application
G350 can be used to make a previously defined window visible. The texts in the window are fixed,
the values are continuously updated according to the defined E parameters.
When an input field is defined, the program waits until the entry is made and <Start> is pressed.
Only one entry window can be active at any one time.
Up to now, 3 windows are defined:
Number Window
type Mode Position Size
1 Display Manual
Automatic Right side of screen
Top 'Dashboard' 14 lines, 35 characters
2 Input Manual
Automatic Right side of screen
Top 'Dashboard' 1 line, 35 characters
3 Graphics Manual
Automatic Up to machine function keys
Top 'Dashboard' 14 lines, 70 characters
Please see also the configuration file.
The window also appears in graphics, but not during block search.
the window becomes invisible following M30 and <Cancel program>.
Example Writing to a window
N1 E300=8 Hole number
N2 E301=5 Number
N3 E350=6 Suggested input value
N10.. G350 N1=6789 Write to window
File D:\STARTUP\CYCLES\FORM6789.CFG is used
N
; The window is:

SPECIFIC G FUNCTIONS FOR MACROS
36 Heidenhain 20010321
+-----------------------------------+
¦Drilling pattern ¦
¦------------------------------------¦
¦Holes 8 Number 5 ¦
¦ ¦
¦Restart at number ¦¦¦ ¦
+----------------------------------+
E350 is changed following user input.
Display window configuration file
FORM6789.CFG
[window]
number = 1 ;Uses window number 1 of the available windows.
[string]
line = 1
gb = "drilling pattern"
d = "Bohrbild"
[string]
line = 2
gb = '----------------------------------'
d = '----------------------------------'
[string]
line = 3
gb = "holes"
d = "Locher"
[value]
line = 3
position = 8 ;Print value in field at position 8 and onwards
eparam = 300 ;E parameter E300 is given the value
form = 3.0 ;format 3 figures and 0 decimals
sign n ;No space reserved for sign
[string]
line = 3
position = 17 ;Print value at position 17 and onwards
gb = "number"
d = "Nummer"
[value]
line = 3
position = 26 ;Print value in field at position 26 and onwards
eparam = 301 ;E parameter E301 is given the value
form = 3.0 ;format 3 figures and 0 decimals
sign = n ;No space reserved for sign
[string]
line = 4
gb = '----------------------------------'
d = '----------------------------------'
[string]
line = 5
gb = "restart at number:"
d = "Neustart bei Nummer:"
[input]
line = 5
position = 26 ;Define input field at position 26 and onwards
eparam = 350 ;E parameter E350 suggests an input value
;and later received the operator input
form = 3.0 ;format 3 figures and 0 decimals
sign = n ;No space reserved for sign
SPECIFIC G FUNCTIONS FOR MACROS
20010321 MillPlus V420-V500 37
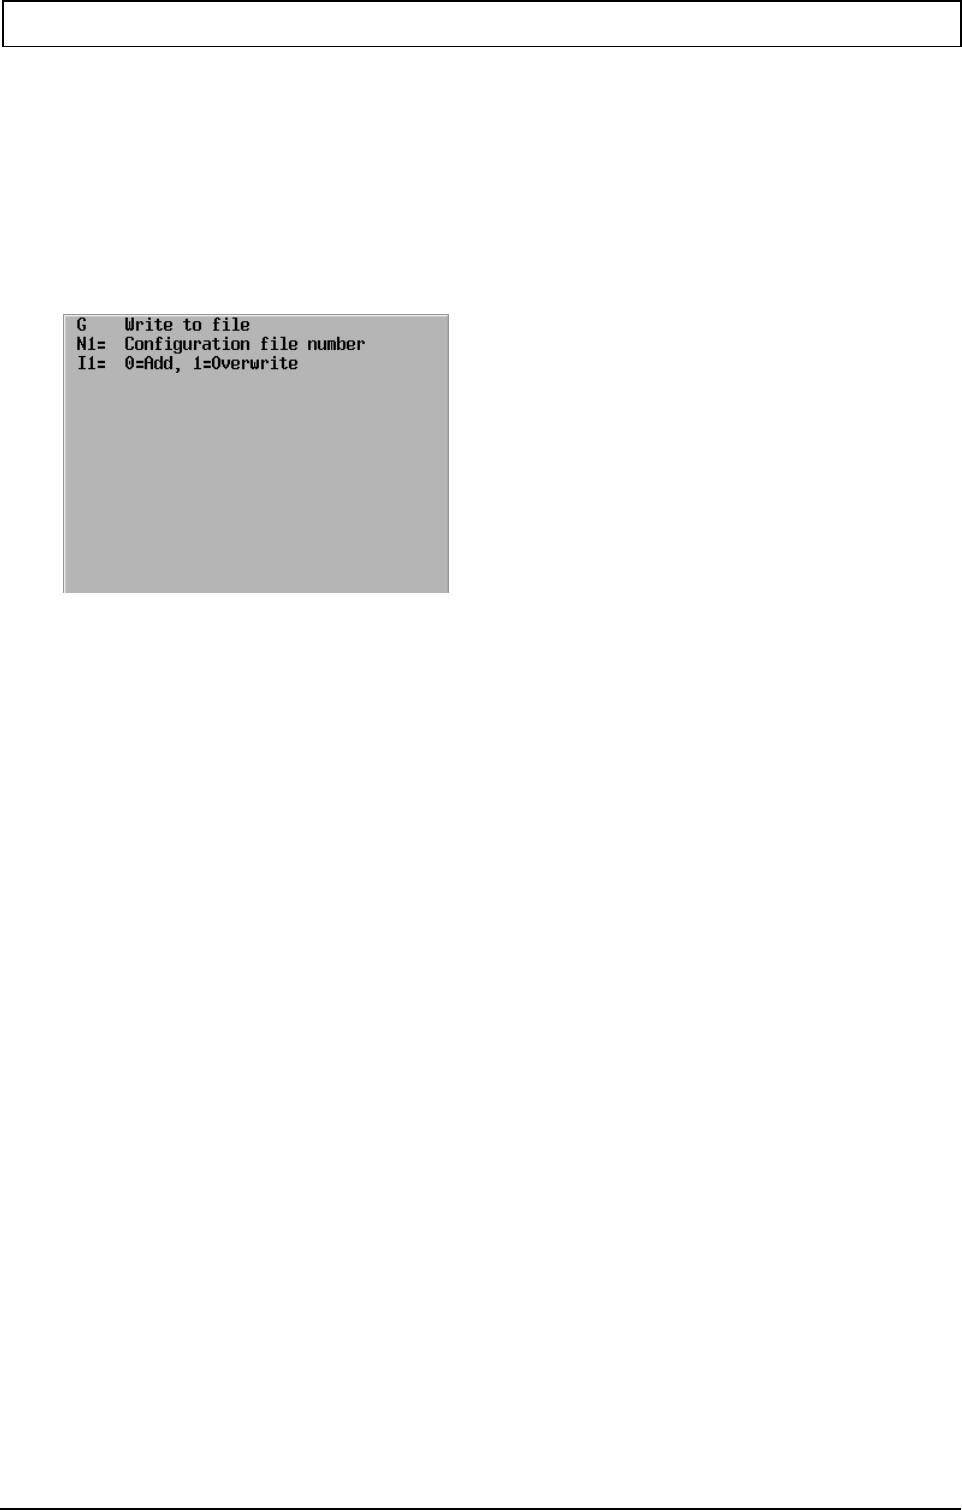
6.10.4 G351 Writing to a file
Specific lines and values can be written to a text file in D:\Startup\ using E parameters and a
configuration file. This can be used to create the calibration curves for unbalance detection.
Format
N... G351 N1=.. {I1=...}
Parameters
N1= Defines the configuration file <'Directory'\FORMnnnn.CFG> that is used for the format, lines
and E parameters that are written. File number between 1 and 9999.
The directory can be any 'Cycle Design' directory.
The configuration file is the same as for writing to a window, but ‘section’ [window] and [input] are
ignored.
I1= States whether the data is to be inserted at the end of an existing file or whether a file that
may exist is to be overwritten. Basic setting <0> for insertion.
Notes and application
G351 writes the lines and values of the configuration file and E parameters to the hard disk.
A maximum of 50 lines of 255 characters can be written at the same time.
The file is not written during graphics or block search.
Example Listing measurement data and writing to a file.
The radius of a pocket is measured in the program
The following data available in the E parameters must be listed:
N10 (measurement programmed in blocks N12 to N16)
N11 (in this case as example of just the results from e.g. measurement cycle G145)
N12 E50=34.1 (setpoint) (entered)
N13 E51=34.05 (lower tolerance) (entered)
N14 E52=34.15 (upper tolerance) (entered)
N15 E53=34.108 (actual value) (measured)
N16 E54=0.008 (difference) (calculated)
N20 G351 N1=0002 I1=0 (write file)
File D:\STARTUP\CYCLES\FORM0002.CFG is used.
I1=0 is insert
The file messdat.txt is:
Radius
Setpoint = 34.1
Lower tolerance =34.5
Upper tolerance =34.5

SPECIFIC G FUNCTIONS FOR MACROS
38 Heidenhain 20010321
Actual value = 34.108
Difference = 0.008
*****************************
Configuration file for listing measurement data
FORM0002.CFG
;*******************************************************************
; CFG file for writing measurement data
;*******************************************************************
;---- Name of file to be written to startup\ --------
[file]
name = Messdat.txt
;---- Type of measurement ------------------------------
[string]
line = 1
position = 1
d = Radius
;---- Setpoint --------------------------
[string]
line = 2
position = 1
d = Sollwert =
[value]
line = 2
position = 20
eparam = 50
form = 4.3
sign = y
;---- Lower tolerance --------------------------
[string]
line = 3
position = 1
d = Untere Toleranz =
[value]
line = 3
position = 20
eparam = 51
form = 4.3
sign = y
;---- Upper tolerance --------------------------
[string]
line = 4
position = 1
d = Obere toleranz =
[value]
line = 4
position = 20
eparam = 52
form = 4.3
sign = y
;---- Actual value --------------------------
[string]
line = 5
position = 1
d = Istwert =
[value]
line = 5
position = 20
eparam = 53
form = 4.3
sign = y

SPECIFIC G FUNCTIONS FOR MACROS
20010321 MillPlus V420-V500 39
;---- Difference --------------------------
[string]
line = 6
position = 1
d = Differenz =
[value]
line = 6
position = 20
eparam = 54
form = 4.3
sign = y
;---------------------------------------
[string]
line = 7
d = *****************************************************

TURNING
20010321 MillPlus V420-V500 41
7. Turning
7.1 Introduction
The turning mode has been developed for machines with a C axis that can turn continuously. In this
way, turning operations can be carried out on a milling machine.
The C axis can be switched to turning mode. The C axis is then programmed as a turning spindle via
S1= and M1=. The turning tools are mounted in the milling spindle and clamped at the desired
orientation.
In special cases, the milling spindle can be programmed parallel to the turning spindle via S and M. A
second milling spindle is not possible on machines with turning mode.
Notes and application
AVAILABILITY
Machine and CNC must be prepared for turning mode by the machine builder. If your
machine is not equipped with all the G functions described here, please refer to your machine
manual.
GRAPHICS
The graphic is not displayed symmetrically to the rotation.
DISPLAY
If G36 is active, the display of the C axis position changes to display S1=.
The machining status is expanded with G36/G37.
The spindle power display shows the power of the second spindle even if both spindles are
active.
REFERENCE POINT
When the controller runs up, it is always in milling mode G37. The C axis can only be
switched to turning mode after the reference points have been approached.
ZERO POINT
In turning mode, the workpiece zero point in X should lie in the centre of rotation of the S1
axis. It is recommended that the workpiece zero point in Y should also lie in the centre of
rotation of the S1 axis.
SPINDLE OVERRIDE
Spindle override is effective for both spindles in turning mode (G36).

TURNING
42 Heidenhain 20010321
7.2 Machine constants
New machine constants
MC 314 Turning mode (0=off, 1=on)
Activated:
- G functions G36 and G37
- Turning cycles
- Machine constants MC2600 - MC27xx, MC45xx
MC 450 Balancing: measurement axis (1=X, 2=Y, 3=Z)
This MC determines the axis on which the rotary table is installed. Unbalance is
easiest to measure in this axis. Normally, 2 = Y axis
The MC is used in the ‘unbalance calibration’ (installation), G691 ‘unbalance
detection’ and G692 ‘unbalance checking’ cycles.
MC 451 Balancing: maximum amplitude [µm]
This MC specifies the permissible residual amplitude in the measuring axis. The
measurement is cancelled if the measured amplitude is greater than MC451 at a
particular speed. Normally 5 [µm].
The MC is used in the ‘unbalance calibration’ (installation), G691 ‘unbalance
detection’ and G692 ‘unbalance checking’ cycles. The C1 parameter can be
superimposed on this in the G691 and G692 cycles.
MC 452 Balancing: initial radial position [µm]
This MC specifies the radial position (distance from centre point) of the rotary table
(S1 axis) at which a balancing mass is normally mounted to compensate for
unbalance.
The MC is used in the G691 ‘unbalance detection’ cycle.
MC 453 Balancing: rotary table displacement [mGrad]
This MC specifies the 0 position of the rotary table and the position (door) where
the operator fits the mass to compensate (and calibrate) the unbalance.
The MC is used in the ‘unbalance calibration’ (installation) and G691 ‘unbalance
detection’ cycles.
Existing machine constants
MC 268 second spindle (0=no, 1=yes)
MC2600 - MC2799, MC4500 - MC4599 second spindle
Remark: The inverter output of the 2nd spindle (MC2600) should be equal to the
inverter output of the C axis (MC3400).

TURNING
20010321 MillPlus V420-V500 43
7.3 G36/G37 Switching turning mode on and off
G36 Switches the machine from milling mode on the C axis to turning mode with turning spindle
S1.
G37 Terminates turning mode. Switches the machine back to milling mode.
Format
N... G36 or N... G36
Parameters
none.
Type of function
modal
Notes and application
G36
The CNC switches the C axis to turning mode.
In turning mode, the circular axis is programmed as a second spindle using S1= and M1=. C
parameters can no longer be programmed.
The display of C (setpoint and actual value) on the screen is switched to S1. If the turning
spindle is stationary, the position (0-359.999 degrees) is displayed.
G95 is active, assigned to the second spindle.
All G functions can be programmed, but not all the G functions are meaningful. For instance,
a pocket has no meaning in turning mode. The C parameters and certain other parameters
can no longer be programmed in certain G functions.
The effect of G36 remains active until it is cancelled by G37, runup or <CNC reset>. G36 is
not cancelled by M30 or <Cancel program>.
G37
The CNC switches the C axis on again.
If the rotary spindle is still turning at the start of G37, it is first stopped.
The position of the circular axis is displayed on the screen with a value between 0 and
359.999 degrees.
G94 becomes active.
The effect of G37 remains active until it is cancelled by G36. G37 is not cancelled by M30 or
<Cancel program>. G27 is always active following runup or <CNC reset>.
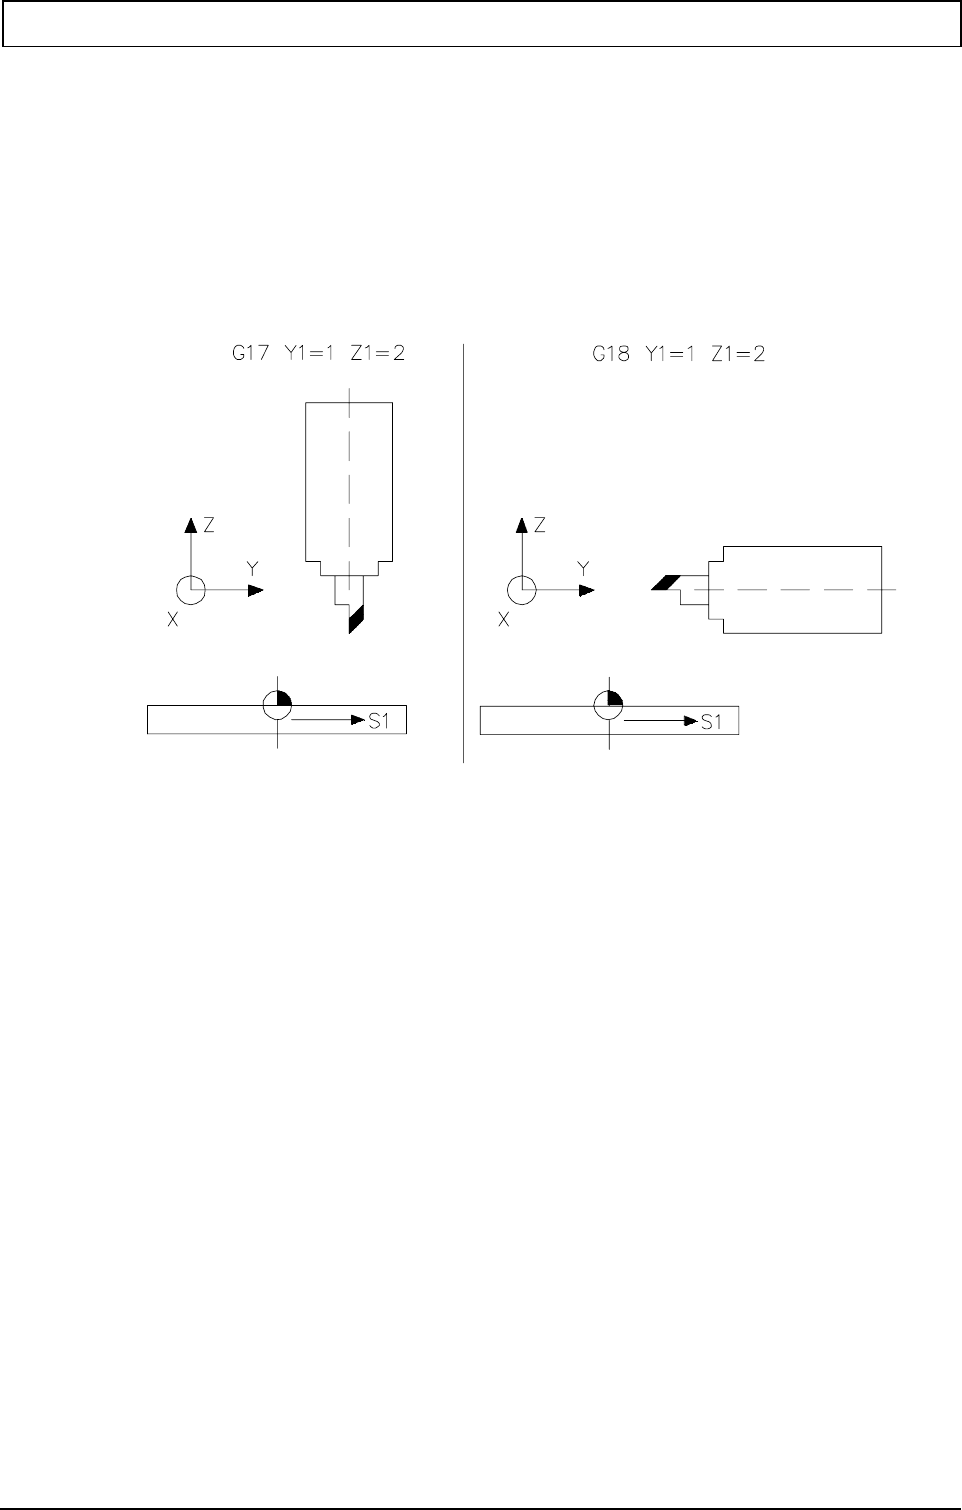
TURNING
44 Heidenhain 20010321
7.4 G17 Plane for turning mode (G17 Y1=1 Z1=2)
In turning mode, the machine is in G17 or G18. The determines the direction of tool length correction (Z
direction in G17, Y direction in G18).
In turning mode, machining takes place in the YZ plane. These planes are automatically taken into
account in the turning cycles. The special machining plane is indicated in G17 by Y1=1 (first main axis)
and Z1=2 (second main axis).
Angles (positive) and circular directions (CW) are defined from the Y axis to the Z axis.
Remark: The special plane must be reset at the end of turning mode by programming a
‘normal’ G17 or G18 without addresses.

TURNING
20010321 MillPlus V420-V500 45
7.5 G94/G94 Expanded choice of feed unit
Informs the CNC how to evaluate the programmed speed (S).
This function is expanded for turning mode.
The spindle and the circular table must be programmed for turning.
Notes and application
In addition, the rotary table (second spindle) must be programmed with S1= and M1= for turning.
In milling mode (G37): N... G95 F.. {S..} {M..}
In turning mode (G36): N... G95 F.. {S1=..} {M1=..}
S and M refer to the spindle
S1= and M1= refer to the second spindle
PRIORITY
The active spindle speed is either S or S1=. If S and S1= are both programmed, S1 is used.
MAXIMUM SPEED
The value of the second spindle speed (S1=) lies between 0 and ‘Max. output voltage speed’
(MC2691).
MACHINE FUNCTION
Second spindle machine functions:
M1=3 second spindle clockwise
M1=4 second spindle anticlockwise
M1=5 second spindle stop
Positioning of the second spindle (M1=19) is not possible. Positioning takes place in milling
mode.
The S1= and M1= addresses can also be programmed in the following G functions: G0, G1,
G2, G3, G94.
The G95 function calculates the feed in [mm/min (inches/min)] based on the programmed
feed in [mm/rev], [inches/rev] and the active spindle speed.
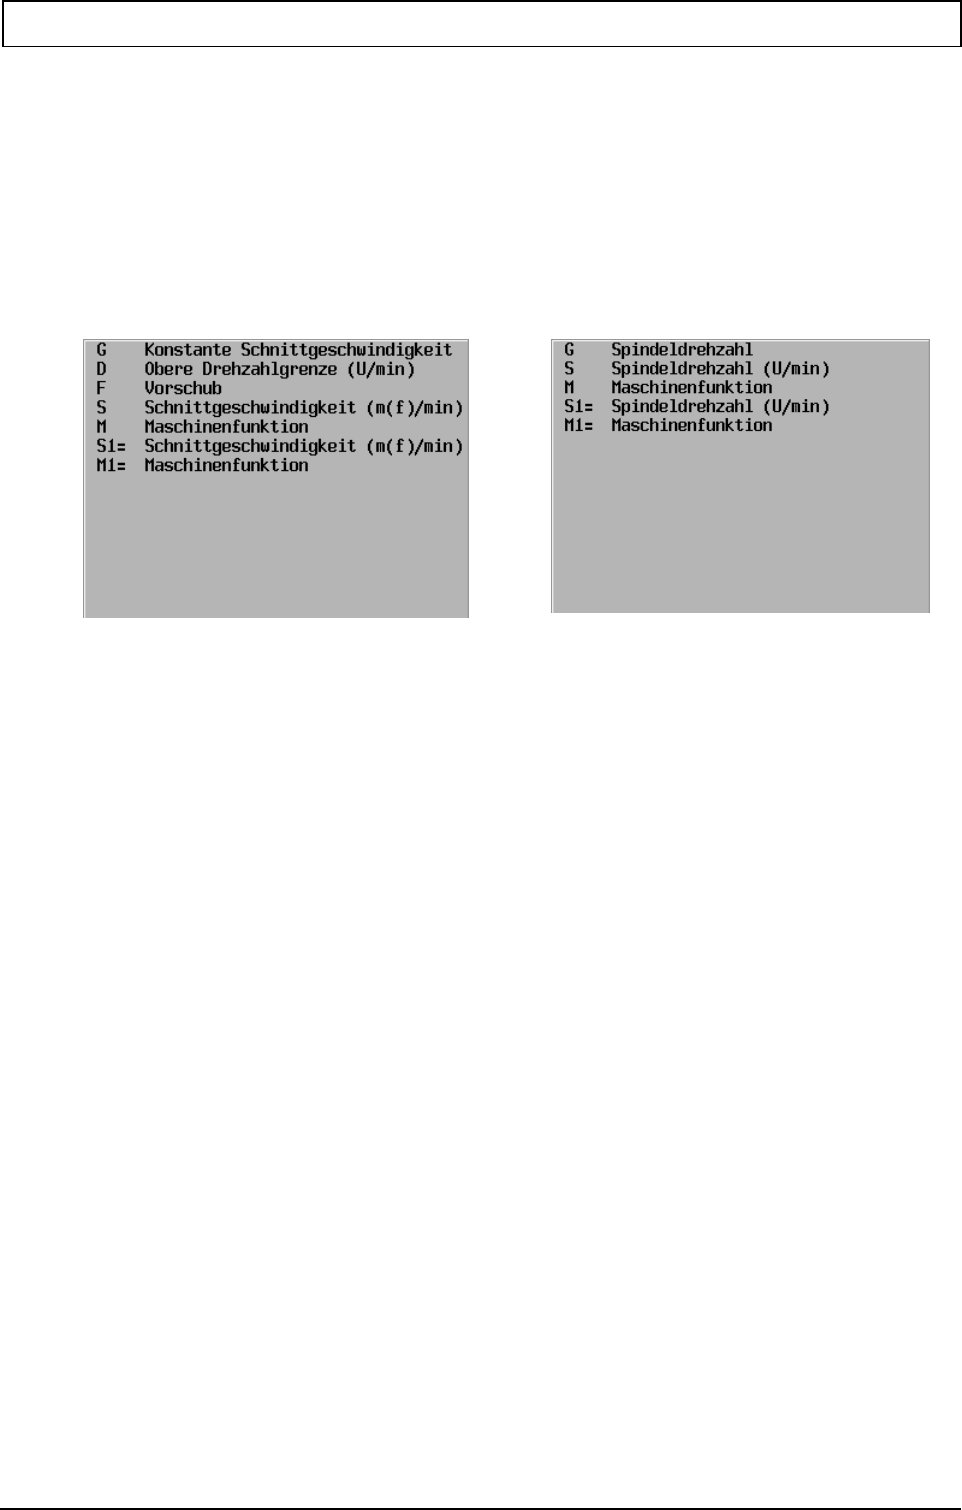
TURNING
46 Heidenhain 20010321
7.6 G96/G97 Constant cutting speed
G96 Programming constant cutting speed.
G97 Switching off constant cutting speed.
Format
N... G96 F.. D.. {S..} {M..} {S1=..} {M1=..}
N... G97 F.. {S..} {M..} {S1=..} {M1=..}
Parameters
G96 G97
S and M refer to the spindle
S1= and M1= refer to the second spindle (rotary table)
Type of function
modal
Notes and application
MAXIMUM SPEED (D)
The value of the second spindle speed lies between 0 and ‘Max. output voltage speed’
(MC2691).
MACHINE FUNCTION
Second spindle machine functions:
M1=3 second spindle clockwise
M1=4 second spindle anticlockwise
M1=5 second spindle stop
Positioning of the second spindle (M1=19) is not possible. Positioning takes place in milling
mode.
The G96 function calculates the feed in [mm/min (inches/min)] based on the programmed
feed in [mm/rev], [inches/rev] and the active spindle speed.
The active spindle speed is either S or S1=. If S and S1= are both programmed, S1 is used.
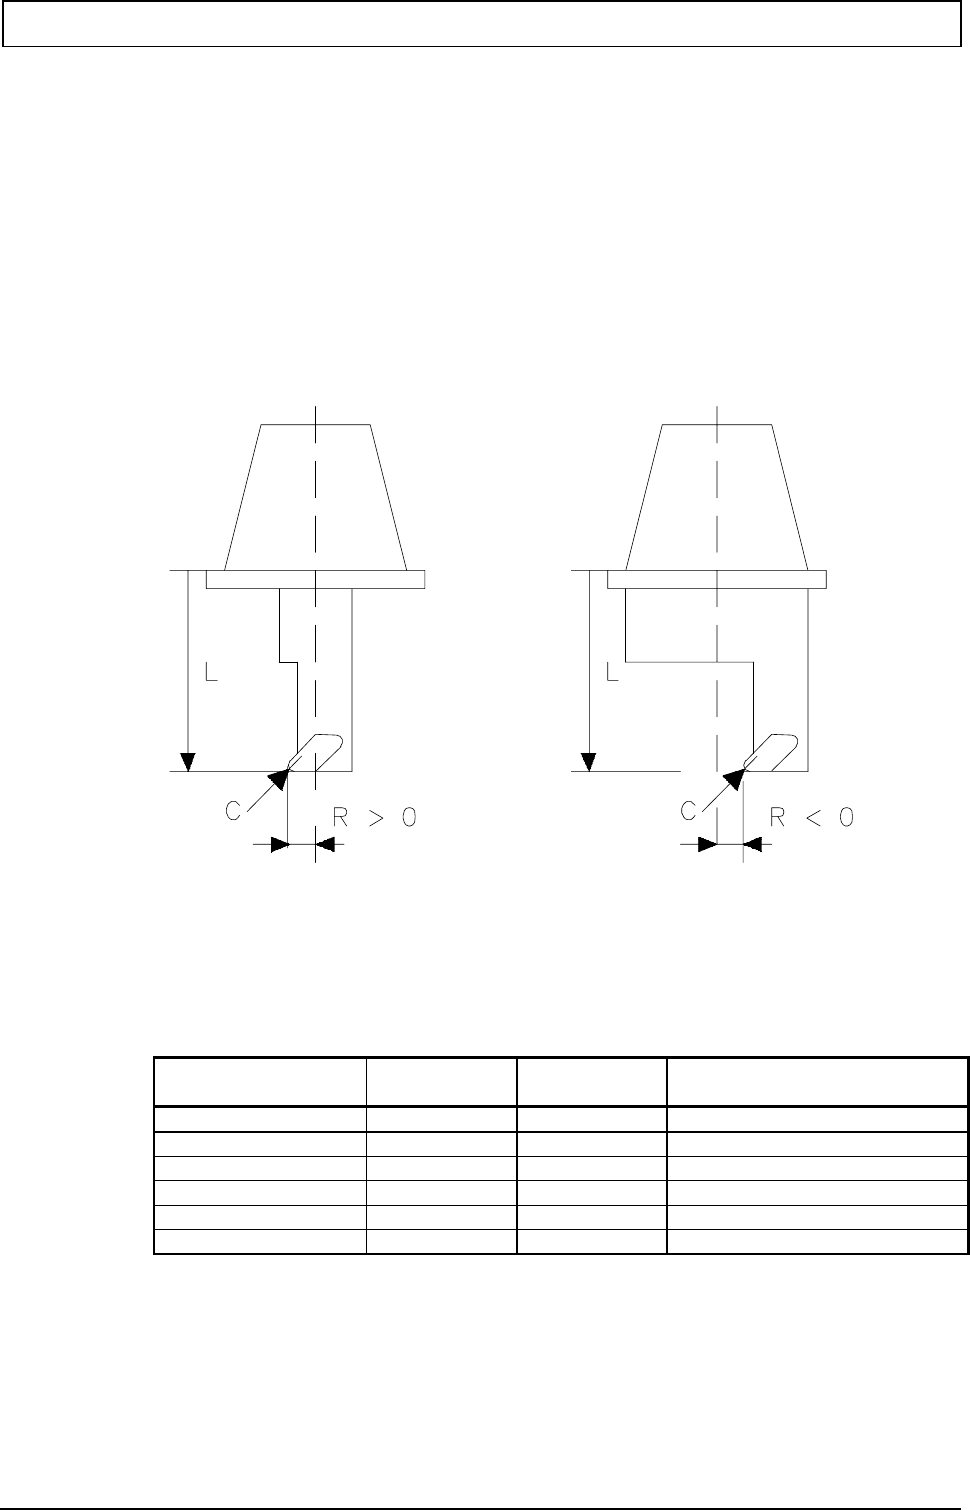
TURNING
20010321 MillPlus V420-V500 47
7.7 Defining turning tools in the tool table
Tool correction and orientation
The tool dimensions are stored as tool length L, tool radius R and tool corner radius C. The
tool radius correction refers to the corner radius C and the necessary tool orientation is
entered in address O in the tool memory.
Tool memory
The turning tools can be placed in any position in the tool magazine. The tool is marked as a
turning tool by parameter Q3= ‘tool type’. This also locks the spindle.
Q3= ‘tool type’ = 8xx turning tool.
Q3 is taken into account by the PLC. Please see the machine manual for further information.
Tool dimensions for turning tools.
If turning mode is active (or in general, when the main plane is parallel to the tool axis), the
radius R is regarded as a displacement. The radius correction is also calculated in this
case using the tool corner radius C and the orientation O. If the orientation is in the
negative direction, the tool radius is also calculated as a negative displacement.
The orientation must be defined in the tool memory for G17 Y1=1 Z1=2 (vertical operation).
The controller adapts the active orientation when G18 Y1=1 Z1=2 (horizontal operation) is
activated.
Level Orientation Radius
correction Radius as displacement
G17 not active R not active
G17 Y1=1 Z1=2 1, 2, 3, 4, 8 C and O R in negative Y direction
G17 Y1=1 Z1=2 5, 6, 7 C and O R in positive Y direction
G18 not active R not active
G18 Y1=1 Z1=2 1, 2, 6, 7, 8 C and O R in negative Z direction
G18 Y1=1 Z1=2 3, 4, 5 C and O R in positive Z direction
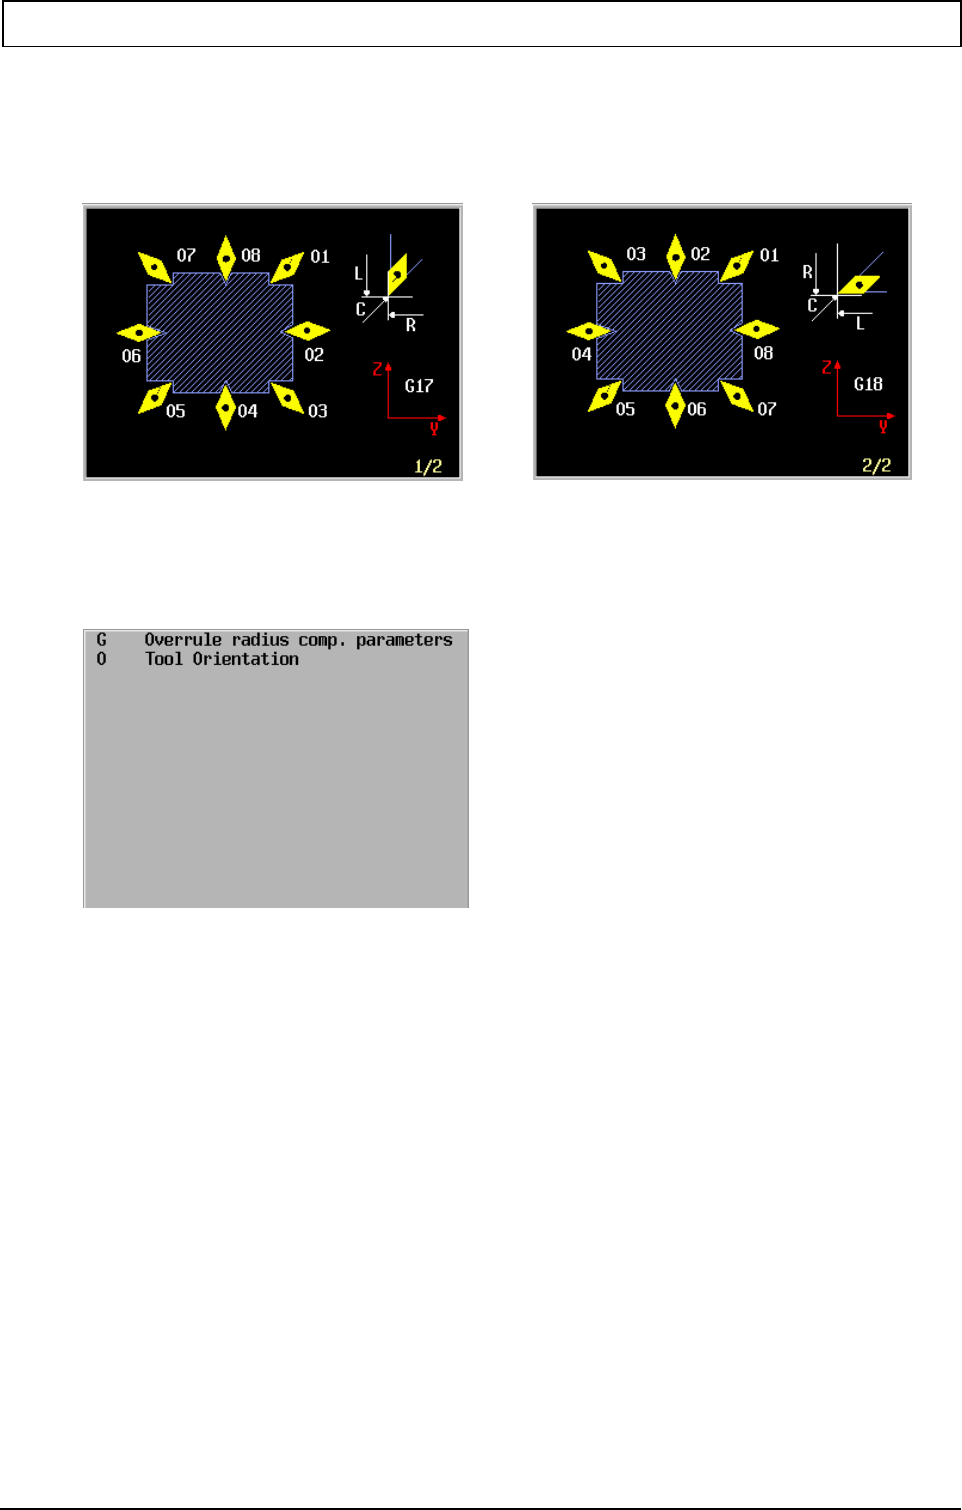
TURNING
48 Heidenhain 20010321
7.8 G302 Superimposing tool data
The G302 function determines the tool orientation during execution. The tool parameters in the
tool memory are not changed.
Format
N.. G302 O
Parameters
O Defines the tool orientation used during execution.
The value lies between 0 and 8.
Type of function
Non-modal
Notes and application
Remarks:
If the active tool orientation is overwritten, the direction of the R displacement may also
change.
In G18, the active tool orientation is already changed by the CNC. See chapter ‘Tool
correction’.
USE
The G302 function should be used if. for example, the main spindle has been turned
through 180 degrees with M19 D90. In this case, the orientation is mirrored compared with
the status with M19 D90. The orientation should also be mirrored when turning takes place
‘across the centre’.
Remark: In these cases, the direction of rotation of the 2nd spindle should also be
reversed.
DELETING

TURNING
20010321 MillPlus V420-V500 49
G302 is switched off again with G302 without parameter, set plane (G17, G18, G19), tool
change, M30 and <Cancel program>.

TURNING
50 Heidenhain 20010321
7.9 Unbalance cycles
7.9.1 General information
To machine workpieces to be turned on an FP machine, both the machine (rotary table) and
workpiece must be balanced, otherwise the life of the machine, the quality of the workpiece or even
the safety of the operator cannot be guaranteed.
First, the unbalance properties of the rotary table must be determined. Usually, this unbalance
calibration takes place when the machine is handed over or during servicing.
To determine the unbalance of the clamped workpiece, a new cycle has been introduced: G691
unbalance detection.
This cycle can be called up directly in manual mode under the FST menu.
The result is a suggestion for compensating for the measured unbalance: what mass should be
attached at what radial position from the turning centre. The rotary table is automatically turned to
the position where the mass should be attached.
The radial position for an available compensating mass can be calculated in the dialog window. The
relationship between mass and position are shown graphically.
To ensure that no turning operations take place in automatic mode with too great an unbalance, a
new G function can be called in the program: G692 unbalance check.
This G function checks the unbalance present against the permissible unbalance. If this is
exceeded, an error message is issued, following which the operator can cancel the automatic mode
and carry out a new unbalance detection with correction in manual mode.
7.9.2 Description of unbalance
When working in turning mode, centrifugal forces occur if the clamped part (e.g. a pump housing)
has an unbalance. This influences concentric accuracy because the second spindle (= circular axis
C) is configured on the Y axis.
Unbalance U = m . R
where:
m = mass [g]
R = distance form centre of mass to centre of table [mm]
The unbalance is given in [gmm} (grammes*mm). This means that 500 [grammes] at 300 [mm]
(=150000 [gmm]) has the same effect as 1000 [grammes] at 150 [mm].
The centrifugal force is proportional to the unbalance and rises quadratically with rising speed.
Centrifugal force Fc = m . R : 1000000 . (S . 2 . PI : 60) ^ 2
where:
Fc = centrifugal force [N]
m = mass [g]
R = distance form centre of mass to centre of table [mm]
S = speed [rpm]
The unbalance must be compensated by a balance weight. For this purpose, the available
measuring systems of the circular axis C and the linear axis Y are used to detect the unbalance that
exists.
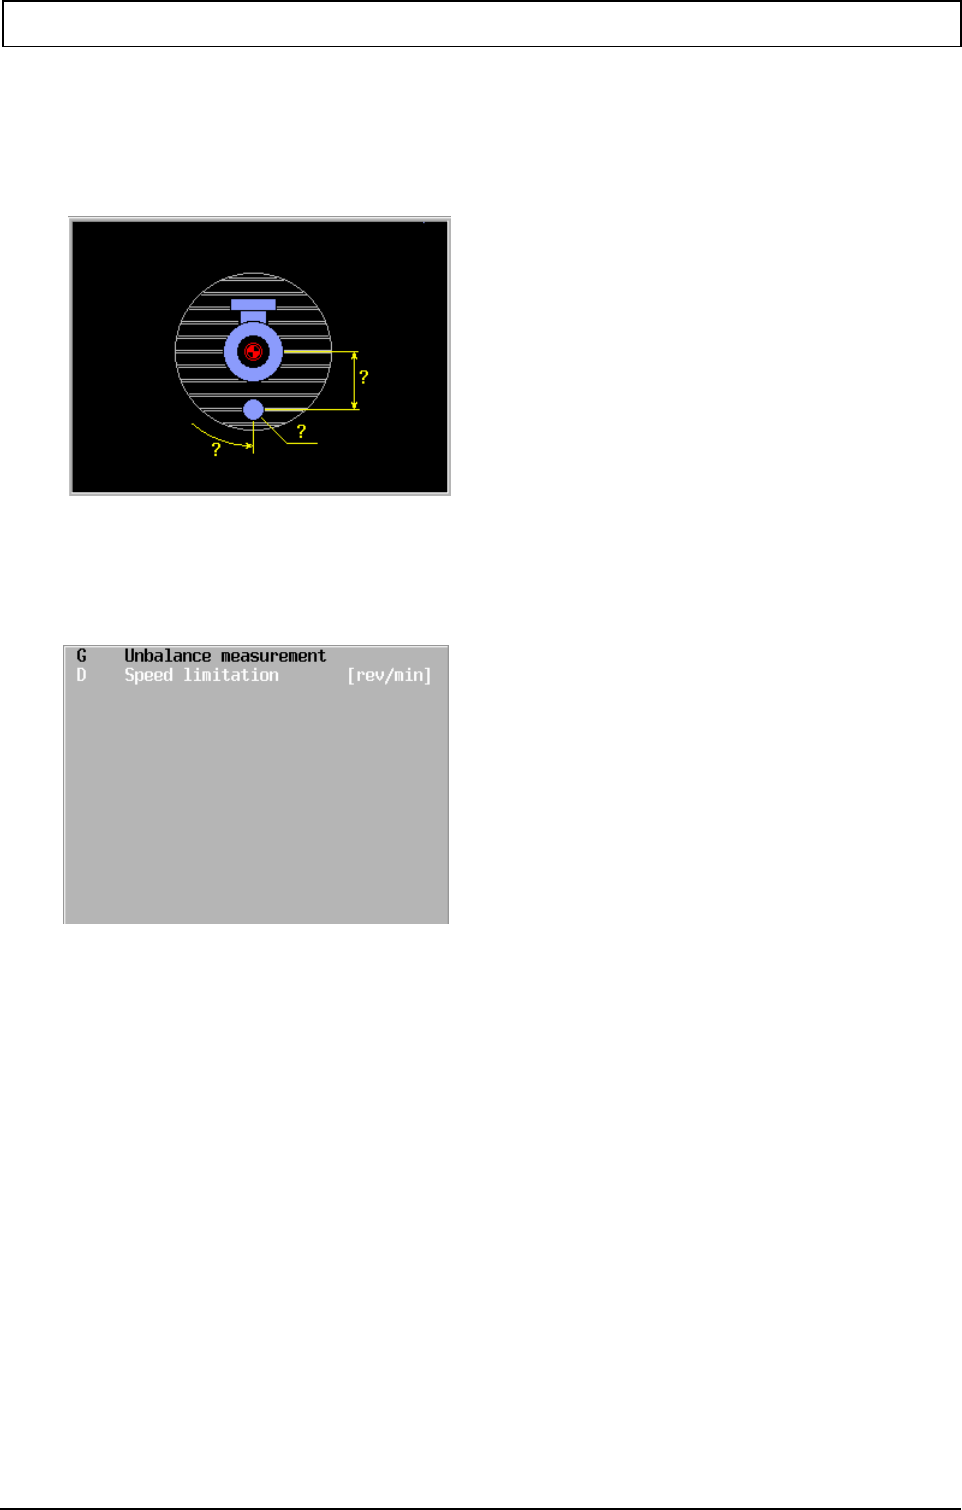
TURNING
20010321 MillPlus V420-V500 51
7.9.3 G691 Measure unbalance
This cycle calculates the instantaneous unbalance. It gives the operator a suggestion how to
compensate for the unbalance. This cycle should be called after each clamping operation and after
milling mode.
Format
N.. G691 {D..}
Parameters
D Maximum speed for terminating the measurement
Basic setting MC2691 ‘maximum speed’
Minimum value 50 [rpm]
The speed limit should be at least as high as the programmed speed for turning machining.
Type of function
Non-modal
Associated functions
G692
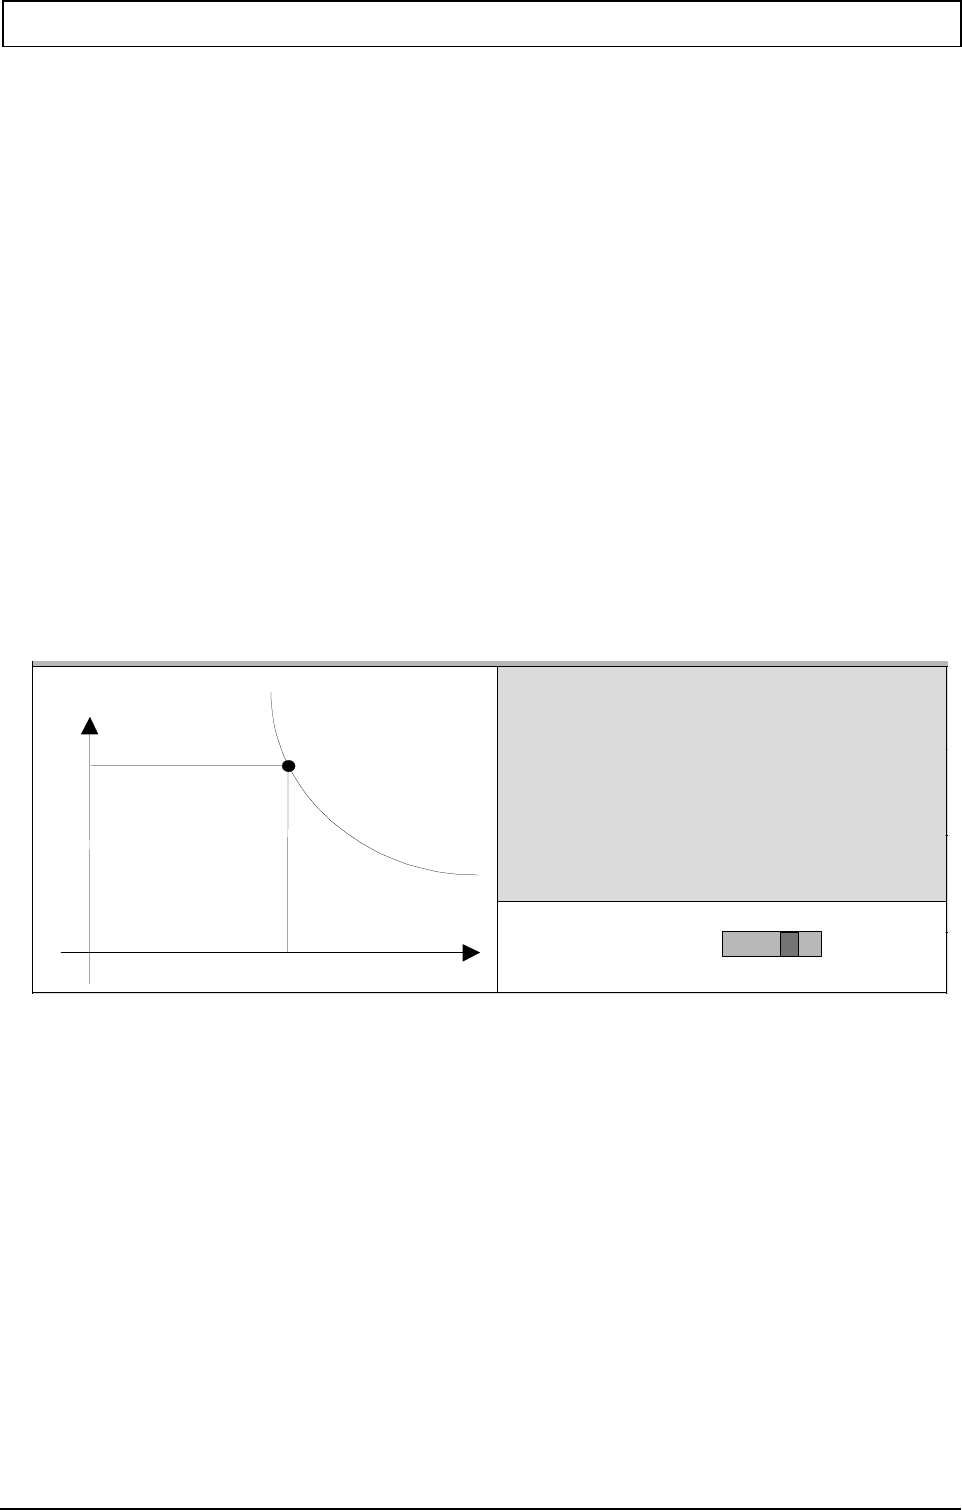
TURNING
52 Heidenhain 20010321
Notes and application
When detecting unbalance, the position error of the linear axis is measured with rising speed. The
speed is increased in steps of 25 rpm. When the position error has reached the maximum value
(MC451) or the maximum speed has been reached, the measurement is terminated. The unbalance
is calculated from the measured error and the stored calibration data.
The unbalance (gmm) and compensation position (degrees) are displayed. This position is
approached at the end of the cycle.
Example: Balancing a workpiece
G691 D500
Explanation:
1 Start balancing cycle with maximum speed of 500 rpm.
2 Unbalance is measured. Calculated mass and radial position (distance and angle) are
shown in the window. The balance position is automatically positioned.
3 Enter the weight of an available mass in the window.
4 The CNC displays the new radial distance for the available mass.
5 Fit the mass at the radial position (distance and angle). Terminate with start.
6 Check the balance quality by repeating the balancing cycle G691. The unbalance mass
must be very small. If necessary, balance again with the displayed mass.
Representation of measurement results
Once the unbalance detection measurement is terminated, the measurement results are displayed
instead of the input and support fields. This image is created by G350.
Left:
The relationship between mass and position are shown graphically.
Top right:
The measured unbalance causes a deflection at the speed displayed. This unbalance can be
compensated in accordance with the balancing suggestion.
Bottom right:
The radial position for a selected mass is calculated in the dialog window. The calculation takes
place after pressing the <ENTER> key. The START key terminates the cycle and closes this
window.
In automatic mode, the left graphical window is not shown so that the program pointer remains
visible.
Radial position Unbalance
Deflection: 0.00014 [mm]
Speed: 500 [U/min]
Balancing suggestion
A
ngle: 318 [Grad]
Mass: 1562 [g]
Radial position: 300 [mm]
Mass
1600
293
Setting
Mass: 1600 [g]
Radial position: 293 [mm]
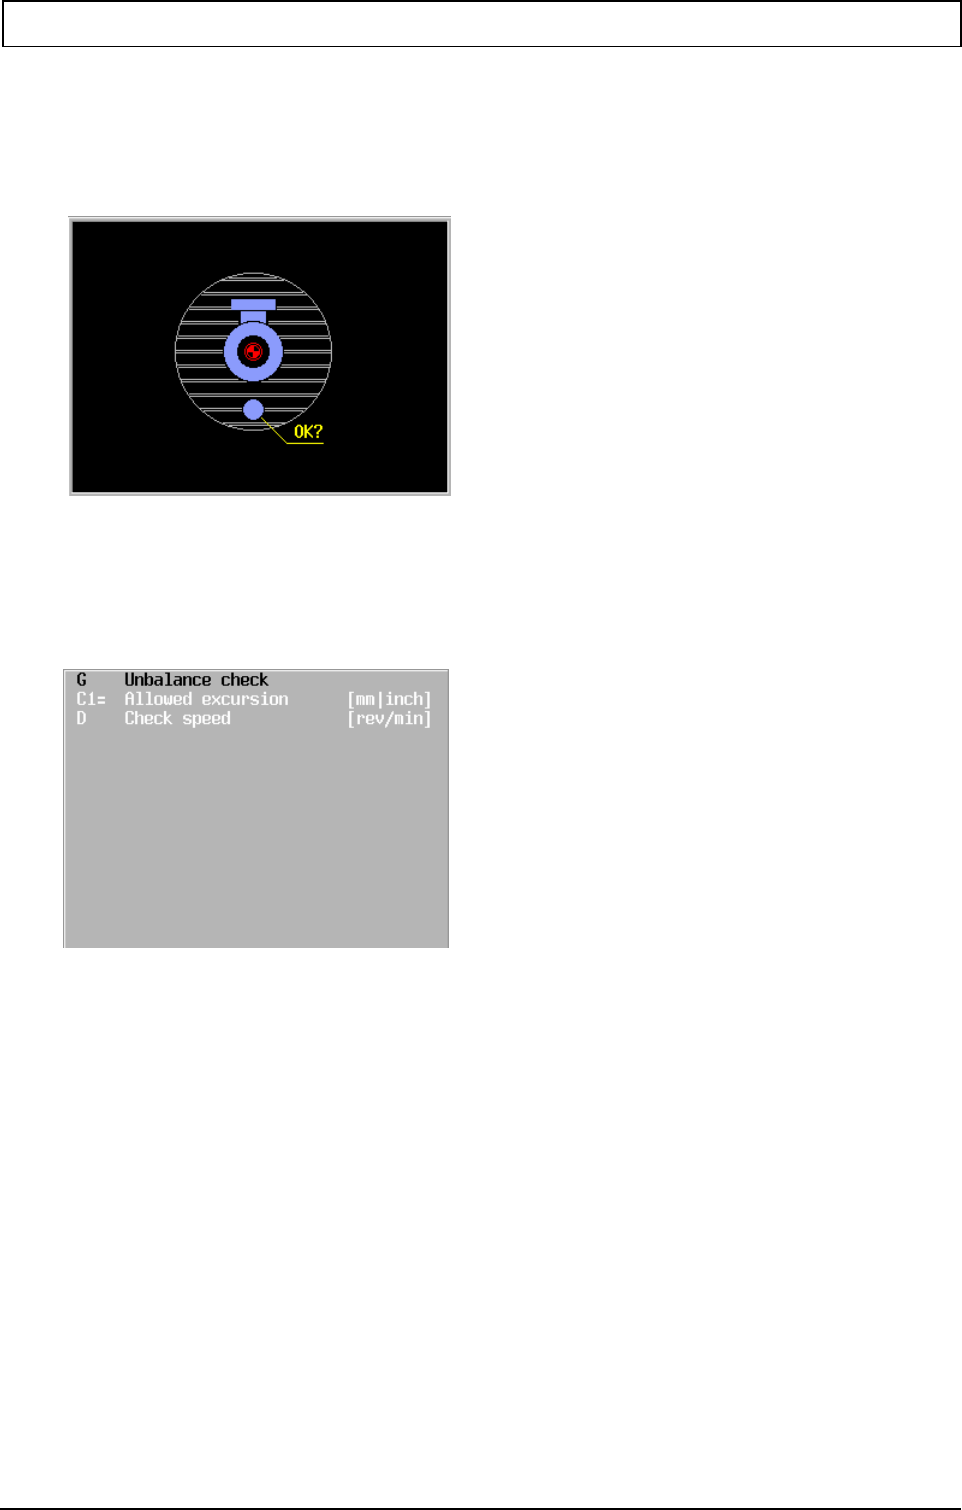
TURNING
20010321 MillPlus V420-V500 53
7.9.4 G692 Unbalance checking
This cycle checks that the unbalance does not exceed a particular value. It should be called at the
start of every turning operation to ensure that the concentric error does not exceed the desired
tolerance or the specified limit.
Format
N... G692 {C1=..} {D..}
Parameters
C1= Maximum unbalance for message
Basic setting MC451 “maximum deflection”.
D Programmed speed for checking
Basic setting MC2691 “maximum speed”
Type of function
modal
Associated functions
G691

TURNING
54 Heidenhain 20010321
Notes and application
When checking unbalance, the deflection of the linear axis is measured at a specified speed. If the
deflection reaches the value C1=, an error message is issued.
Example: Checking unbalance.
G692 C1=0.003 D500
Explanation:
The CNC detects whether the deflection of the table is within the limit of 0.003 mm at a speed of
500 rpm. If the deflection is greater than the value entered (C1=), the program is stopped.
7.9.5 Unbalance example
N1 G691 D500
N2 G691 D500
N... milling
N30 G37
N31 G692 D500
N... turning
Explanation:
N1 G691 D500
1 Start balancing cycle with maximum speed of 500 rpm.
2 Unbalance is measured. Calculated mass and radial position (distance and angle) are
shown in the window. The balance position is automatically located.
3 Enter the weight of an available mass in the window.
4 The CNC displays the new radial distance for the available mass.
5 Fit the mass at the radial position (distance and angle). Terminate with start.
N2 G691 D500
Check the balance quality by repeating the balancing cycle G691. The unbalance mass
must be very small. If necessary, balance again with the displayed mass.
N...milling
Unbalance may change due to milling processes or changes in the clamping.
N30 G37
Start turning mode
N31 G692 D500
Check whether unbalance is still correct.

TURNING
20010321 MillPlus V420-V500 55
7.10 Turning cycles
AVAILABILITY
Machine and CNC must be prepared for turning operations by the machine builder. If your
machine is not equipped with all the G functions described here, please refer to your machine
manual.
The tuning cycles are executed as macros, every block can be seen in the display and each
block is processed as a single block.
General notes and application
STARTING POINT
The starting point determines the place where the tool starts machining. The cutting steps
start from this position. If the tool is a long distance away, several cutting steps take place. If
the tool is between Y1= and Y2=, cutting will start there and the cutting may not all be carried
out.
If the co-ordinate of the starting point Y is smaller than the co-ordinate of the machining
starting point Y1, the machine first travels to co-ordinate Z1.
TOOL MEMORY ADDRESSES
The following addresses are used in the tool memory:
C Tool tip radius
O Tool orientation
If no O is entered in the tool memory, a standard orientation is assumed depending on the
machining.
RADIUS COMPENSATION
Tool tip radius compensation is carried out automatically in this G function.
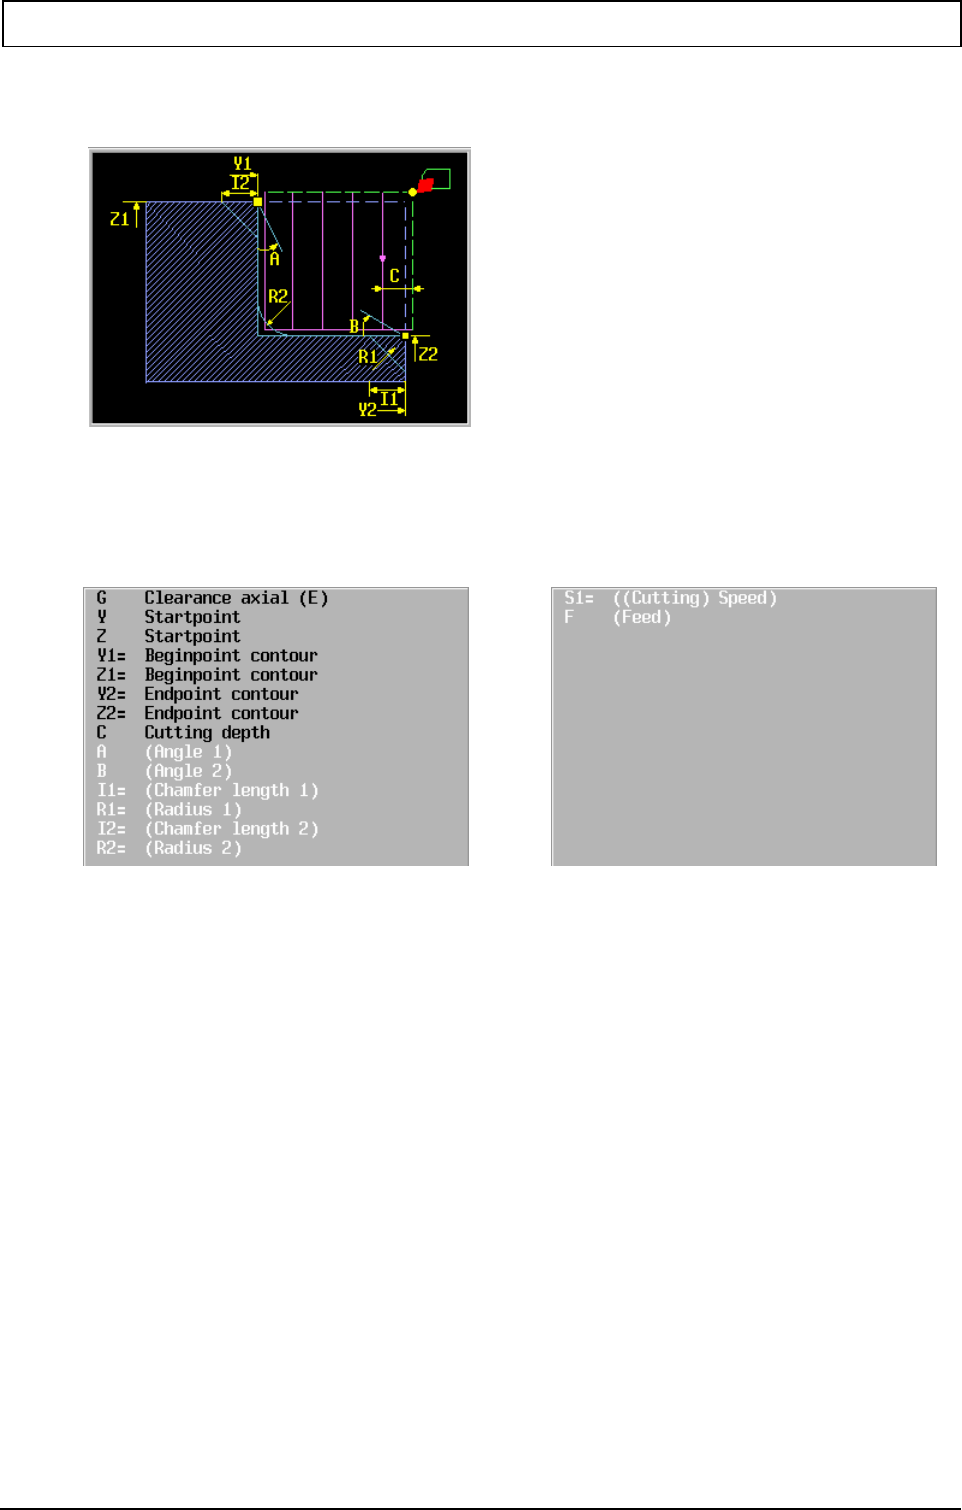
TURNING
56 Heidenhain 20010321
7.10.1 G822 Longitudinal cut
Format N... G822 Y.. Z.. Y1=.. Z1=.. Y2=.. Z2=.. C.. {A..} {B..} [{I1=..}|{R1=..}] [{I2=..}|{R2=..}] {S1=..} {F}
Parameters
Y Starting point. (Recommended value: safety distance up to Y2=)
Position of tool in radial direction. This position is the starting point for machining. Y is
reduced with C until Y1= is reached.
Z Starting point. (Recommended value: safety distance up to Z1=)
Position of tool in axial direction. This position is the starting point for machining.
Machining starts at Z until Z2 is reached.
Y1= Contour starting point
Starting point of the contour to be machined.
Z1= Contour starting point
Starting point of the contour to be machined.
Y2= Contour end point
End point of the contour to be machined.
Z2= Contour end point
End point of the contour to be machined.
C Radial feed depth (incremental):
Dimension by which the tool is fed in the radial direction in each case. The depth
does not have to be a multiple of the feed depth.
A Angle: Basic setting A=0.
Angle (>0) at contour starting point. Angle A or B must be chosen so that the tool
does not undercut.
B Angle: Basic setting B=0.
Angle (>0) at contour end point.
I1= Chamfer length: Basic setting I1=0.

TURNING
20010321 MillPlus V420-V500 57
Chamfer length at contour end point.
Only I1= or R1= may be programmed.
R1= Rounding: Basic setting R1=0.
Rounding at contour end point.
I2= Chamfer length: Basic setting I2=0.
Chamfer length at contour starting point.
R2= Rounding: Basic setting R2= tool tip radius.
Rounding between angles A and B.
F Feed rate: Traverse speed of tool in mm/min
S1 Spindle speed
Type of function
Non-modal
Associated functions
G827 for finish machining
Notes and application
Cutting takes place first, then finish machining.
Tool orientation may only be 4, 5 or 6.
The tool path is corrected for the tip radius.
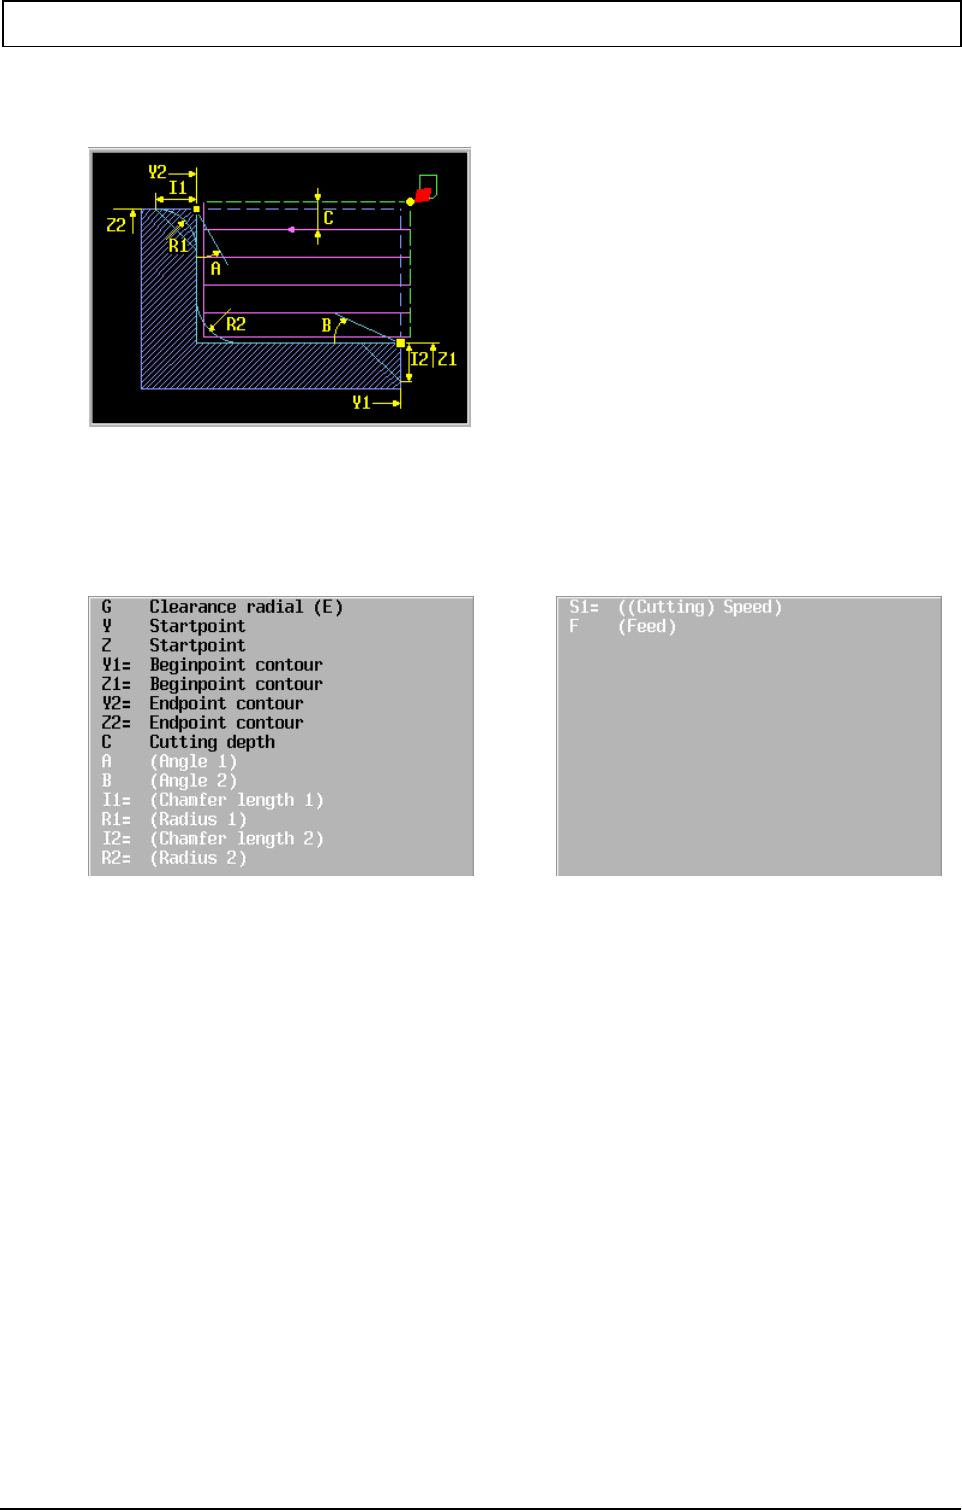
TURNING
58 Heidenhain 20010321
7.10.2 G823 Cutting plan
Format N... G823 Y.. Z.. Y1=.. Z1=.. Y2=.. Z2=.. C.. {A..} {B..} [{I1=..}|{R1=..}] [{I2=..}|{R2=..}] {S1=..} {F}
Parameters
Y Starting point. (Recommended value: safety distance up to Y1=)
Position of tool in radial direction. This position is the starting point for machining.
Machining starts at Y until Y2 is reached.
Z Starting point. (Recommended value: safety distance up to Z2=)
Position of tool in axial direction. This position is the starting point for machining. Z is
reduced with C until Z1= is reached.
Y1= Contour starting point
Starting point of the contour to be machined.
Z1= Contour starting point
Starting point of the contour to be machined.
Y2= Contour end point
End point of the contour to be machined.
Z2= Contour end point
End point of the contour to be machined.
C Radial feed depth (incremental):
Dimension by which the tool is fed in the axial direction in each case. The depth does
not have to be a multiple of the feed depth.
A Angle: Basic setting A=0.
Angle (>0) at contour starting point.
Angle A or B must be chosen so that the tool does not undercut.
B Angle: Basic setting B=0.
Angle (>0) at contour end point.

TURNING
20010321 MillPlus V420-V500 59
I1= Chamfer length: Basic setting I1=0.
Chamfer length at contour end point.
Only I1= or R1= may be programmed.
R1= Rounding: Basic setting R1=0.
Rounding at contour end point.
I2= Chamfer length: Basic setting I2=0.
Chamfer length at contour starting point.
R2= Rounding: Basic setting R2= tool tip radius.
Rounding between angles A and B.
F Feed rate: Traverse speed of tool in mm/min
S1 Spindle speed
Type of function
Non-modal
Associated functions
G827 for finish machining
Notes and application
Cutting takes place first, then finish machining.
Tool orientation may only be 4, 5 or 6.
The tool path is corrected for the tip radius.
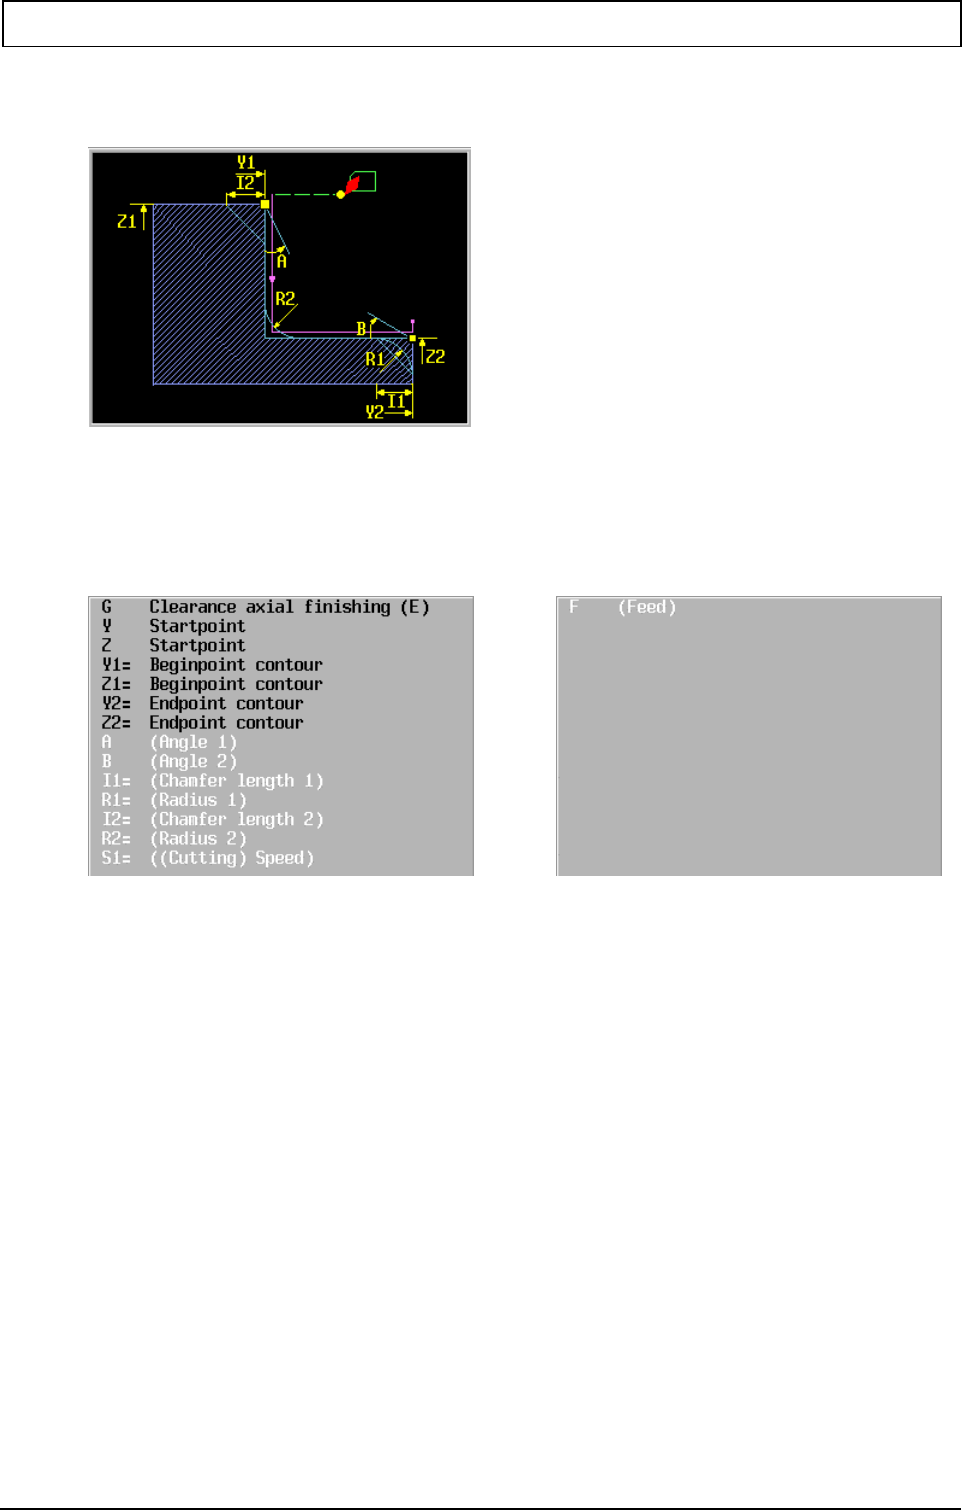
TURNING
60 Heidenhain 20010321
7.10.3 G826 Finish machining longitudinal cut
Format N... G826 Y.. Z.. Y1=.. Z1=.. Y2=.. Z2=.. {A..} {B..} [{I1=..}|{R1=..}] [{I2=..}|{R2=..}] {S1=..} {F}
Parameters
Y Starting point. (Recommended value: safety distance up to Y1=)
Position of tool in radial direction. This position is the starting point for finish
machining.
Z Starting point. (Recommended value: safety distance up to Z1=)
Position of tool in axial direction. This position is the starting point for finish
machining. Finish machining starts at Y.
Y1= Contour starting point
Starting point of the contour to be machined.
Z1= Contour starting point
Starting point of the contour to be machined.
Y2= Contour end point
End point of the contour to be machined.
Z2= Contour end point
End point of the contour to be machined.
A Angle: Basic setting A=0.
Angle (>0) at contour starting point.
Angle A or B must be chosen so that the tool does not undercut.
B Angle: Basic setting B=0.
Angle (>0) at contour end point.
I1= Chamfer length: Basic setting I1=0.
Chamfer length at contour end point.
Only I1= or R1= may be programmed.

TURNING
20010321 MillPlus V420-V500 61
R1= Rounding: Basic setting R1=0.
Rounding at contour end point.
I2= Chamfer length: Basic setting I2=0.
Chamfer length at contour starting point.
R2= Rounding: Basic setting R2= tool tip radius.
Rounding between angles A and B.
F Feed rate: Traverse speed of tool in mm/min
S1 Spindle speed
Type of function
Non-modal
Associated functions
G822 for rough machining
Notes and application
Finish machining goes from Y1/Z1 to Y2/Z2.
Tool orientation may only be 4, 5 or 6.
The tool path is corrected for the tip radius.
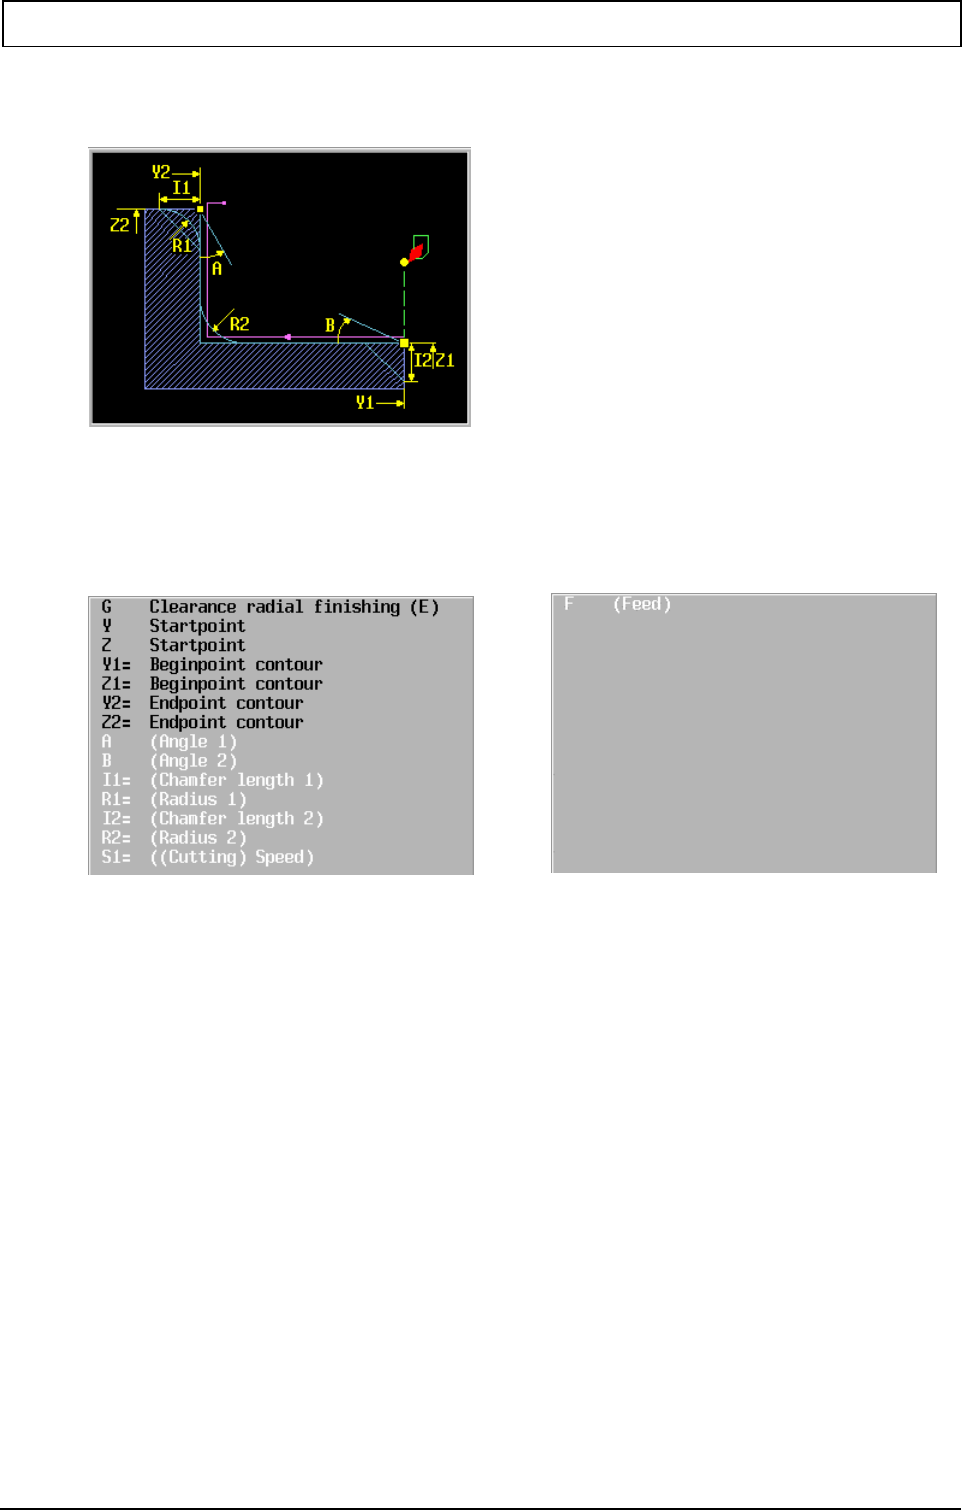
TURNING
62 Heidenhain 20010321
7.10.4 G827 Cutting plan, finish machining
Format N... G827 Y.. Z.. Y1=.. Z1=.. Y2=.. Z2=.. {A..} {B..} [{I1=..}|{R1=..}] ]{I2=..}|{R2=..}] {S1=..} {F}
Parameters
Y Starting point. (Recommended value: safety distance up to Y1=)
Position of tool in radial direction. This position is the starting point for finish
machining. Finish machining starts at Y until Y2 is reached.
Z Starting point. (Recommended value: safety distance up to Z2=)
Position of tool in axial direction. This position is the starting point for finish
machining.
Y1= Contour starting point
Starting point of the contour to be machined.
Z1= Contour starting point
Starting point of the contour to be machined.
Y2= Contour end point
End point of the contour to be machined.
Z2= Contour end point
End point of the contour to be machined.
A Angle: Basic setting A=0.
Angle (>0) at contour starting point.
Angle A or B must be chosen so that the tool does not undercut.
B Angle: Basic setting B=0.
Angle (>0) at contour end point.
I1= Chamfer length: Basic setting I1=0.
Chamfer length at contour end point.
Only I1= or R1= may be programmed.

TURNING
20010321 MillPlus V420-V500 63
R1= Rounding: Basic setting R1=0.
Rounding at contour end point.
I2= Chamfer length: Basic setting I2=0.
Chamfer length at contour starting point.
R2= Rounding: Basic setting R2= tool tip radius.
Rounding between angles A and B.
F Feed rate: Traverse speed of tool in mm/min
S1 Spindle speed
Type of function
Non-modal
Associated functions
G823 for rough machining
Notes and application
Finish machining goes from Y1/Z1 to Y2/Z2.
Tool orientation may only be 4, 5 or 6.
The tool path is corrected for the tip radius.
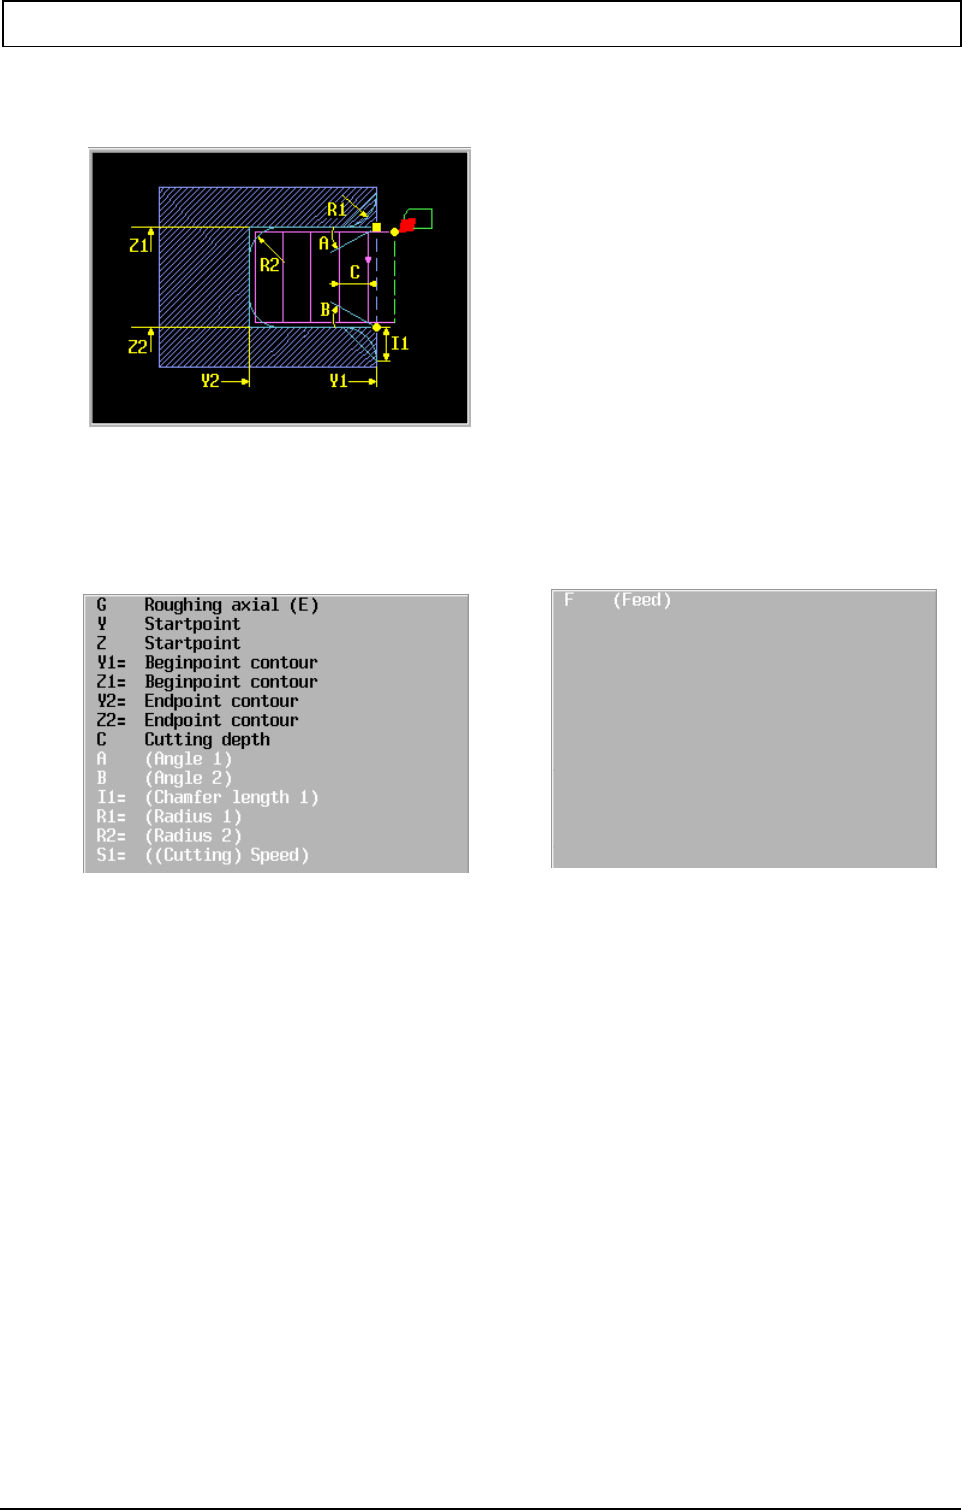
TURNING
64 Heidenhain 20010321
7.10.5 G832 Longitudinal reverse boring
Format N... G832 Y.. Z.. Y1=.. Z1=.. Y2=.. Z2=.. C.. {A..} {B..} [{I1=..}|{R1=..}] {R2=..} {S1=..} {F}
Parameters
Y Starting point. (Recommended value: safety distance up to Y1=)
Position of tool in radial direction. This position is the starting point for machining.
Machining starts at Y and is reduced with C until Y2= is reached.
Z Starting point. (Recommended value: safety distance up to Z1=)
Position of tool in axial direction. This position is the starting point for machining.
Machining starts at Z1= until Z2= is reached.
Y1= Contour starting point
Starting point of the contour to be machined.
Z1= Contour starting point
Starting point of the contour to be machined.
Y2= Contour end point
End point of the contour to be machined.
Z2= Contour end point
End point of the contour to be machined.
C Radial feed depth (incremental):
Dimension by which the tool is fed in the radial direction in each case. The depth
does not have to be a multiple of the feed depth.
A Angle: Basic setting A=0.
Angle (>0) at contour starting point. (Z1=)
Angles A and B must be chosen so that the tool does not undercut.
B Angle: Basic setting B=0.
Angle (>0) at contour end point. (Z2=)

TURNING
20010321 MillPlus V420-V500 65
I1= Chamfer length: Basic setting I1=0.
Chamfer length at start and end of contour.
Only I1= or R1= may be programmed.
R1= Rounding: Basic setting R1=0.
Rounding at start and end of contour.
R2= Rounding: Basic setting R2= tool tip radius.
Rounding at the bottom of the contour.
F Feed rate: Traverse speed of tool in mm/min
S1 Spindle speed
Type of function
Non-modal
Associated functions
G837 for finish machining
Notes and application
Rough cutting takes place first, then finish machining.
Tool orientation may only be 3, 4 or 5.
The tool path is corrected for the tip radius.
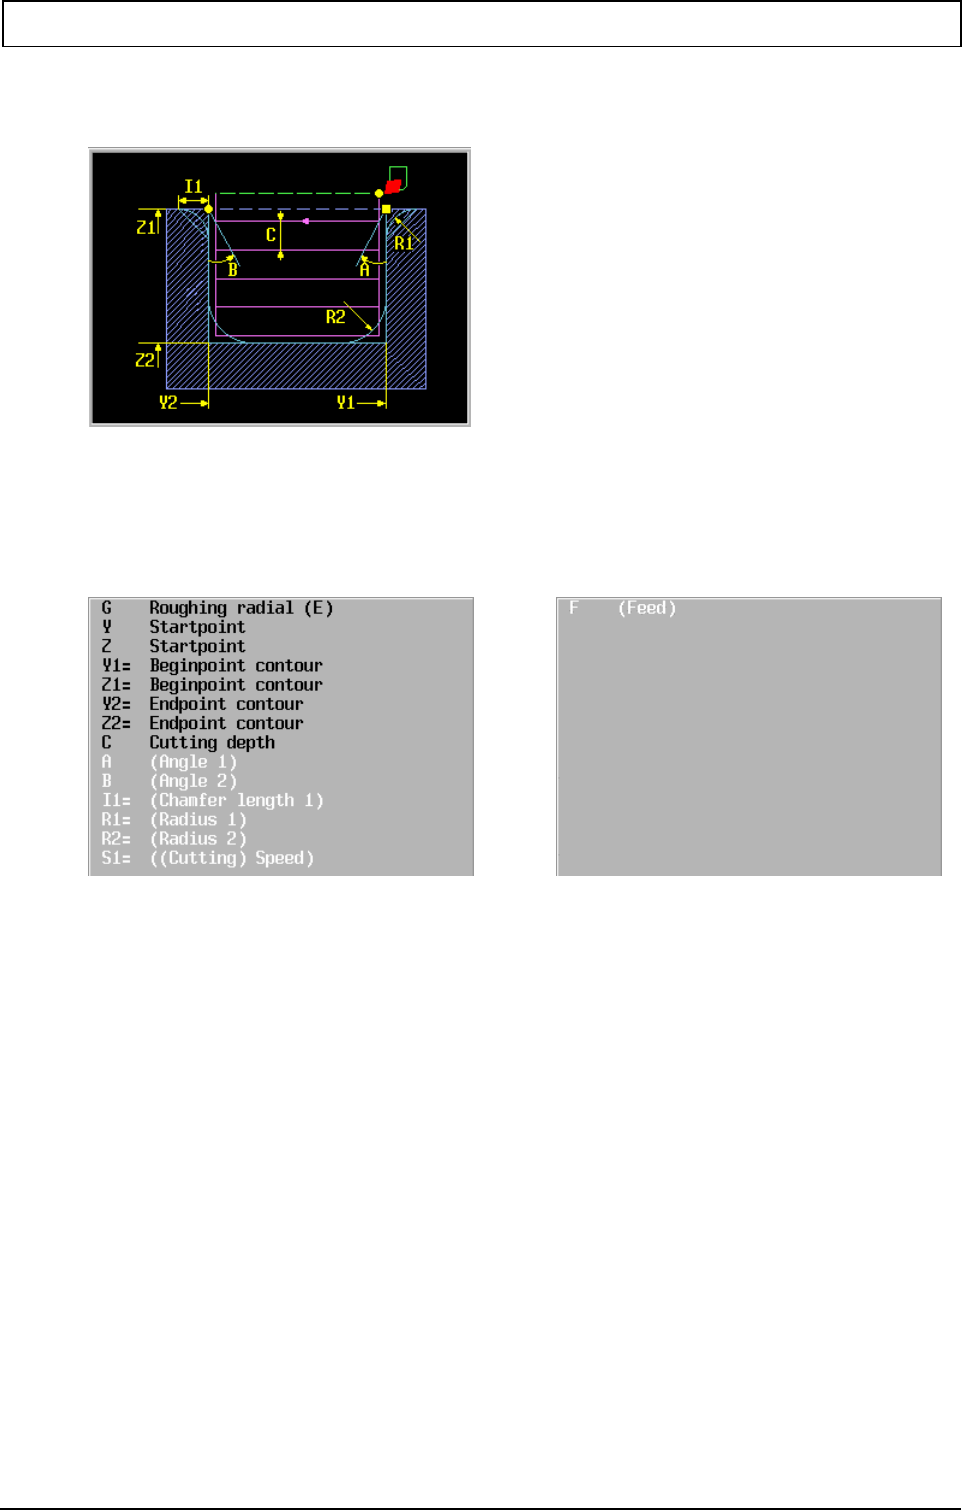
TURNING
66 Heidenhain 20010321
7.10.6 G833 Reverse boring plan
Format N... G833 Y.. Z.. Y1=.. Z1=.. Y2=.. Z2=.. C.. {A..} {B..} [{I1=..}|{R1=..}] {R2=..} {S1=..} {F}
Parameters
Y Starting point. (Recommended value: safety distance up to Y1=)
Position of tool in radial direction. This position is the starting point for machining.
Machining starts at Y1= until Y2= is reached.
Z Starting point. (Recommended value: safety distance up to Z1=)
Position of tool in radial direction. This position is the starting point for machining.
Machining starts at Z and is reduced with C until Z2= is reached.
Y1= Contour starting point
Starting point of the contour to be machined.
Z1= Contour starting point
Starting point of the contour to be machined.
Y2= Contour end point
End point of the contour to be machined.
Z2= Contour end point
End point of the contour to be machined.
C Radial feed depth (incremental):
Dimension by which the tool is fed in the axial direction in each case. The depth does
not have to be a multiple of the feed depth.
A Angle: Basic setting A=0.
Angle (>0) at contour starting point. (Y1=)
Angles A and B must be chosen so that the tool does not undercut.
B Angle: Basic setting B=0.
Angle (>0) at contour end point. (Y2=)
I1= Chamfer length: Basic setting I1=0.

TURNING
20010321 MillPlus V420-V500 67
Chamfer length at start and end of contour.
Only I1= or R1= may be programmed.
R1= Rounding: Basic setting R1=0.
Rounding at start and end of contour.
R2= Rounding: Basic setting R2= tool tip radius.
Rounding at the bottom of the contour.
F Feed rate: Traverse speed of tool in mm/min
S1 Spindle speed
Type of function
Non-modal
Associated functions
G837 for finish machining
Notes and application
Rough cutting takes place first, then finish machining.
Tool orientation may only be 5, 6 or 7.
The tool path is corrected for the tip radius.
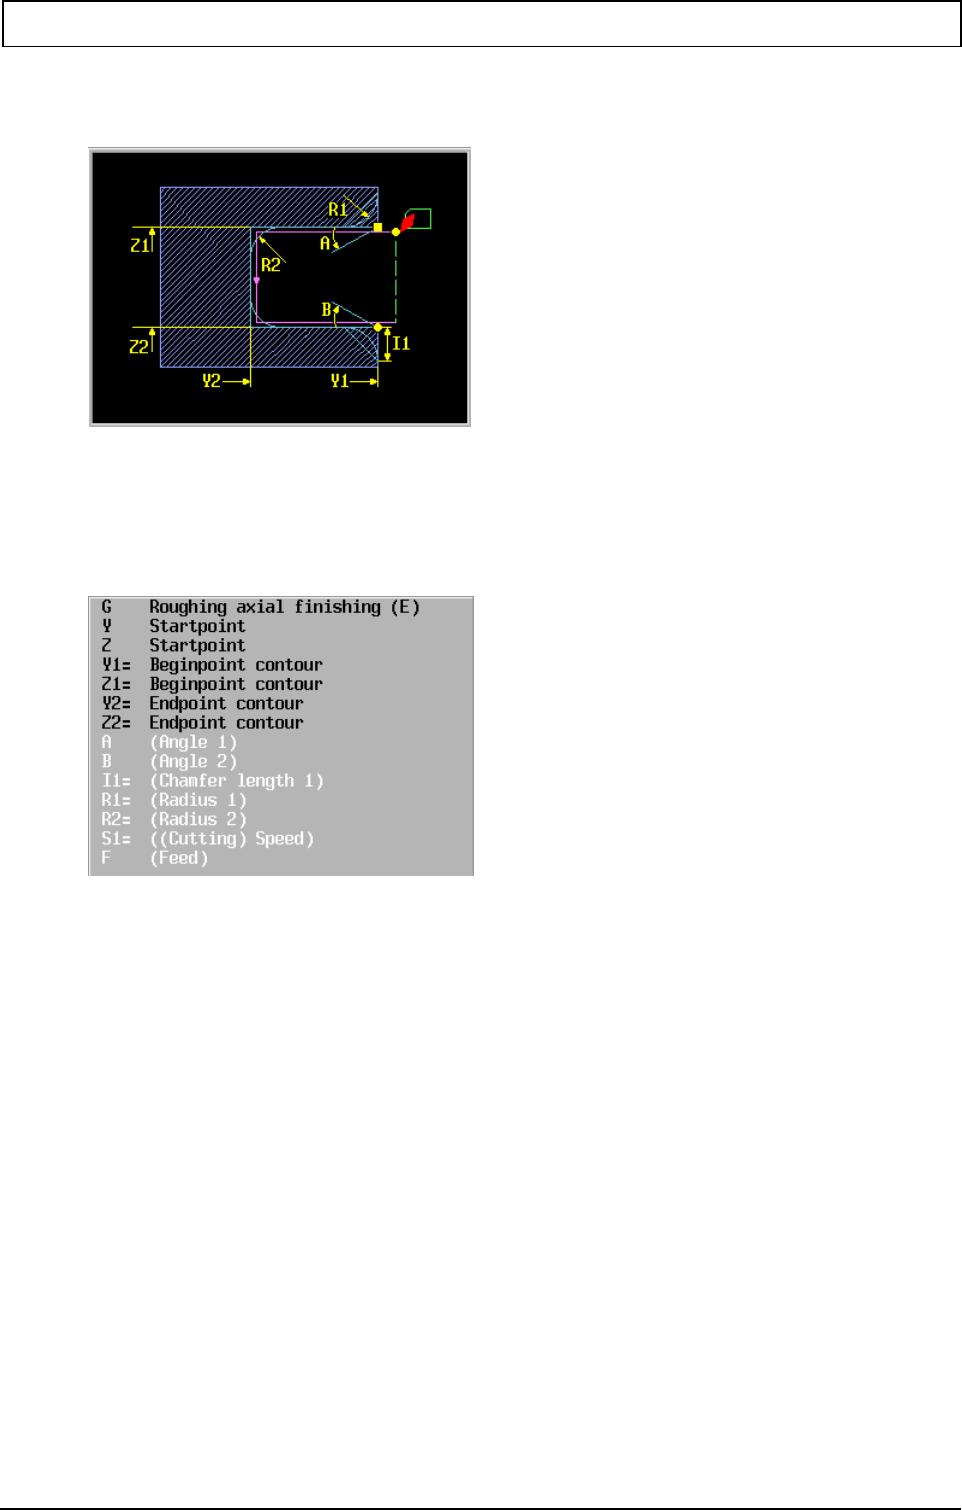
TURNING
68 Heidenhain 20010321
7.10.7 G836 Finish machining longitudinal reverse boring
Format N... G836 Y.. Z.. Y1=.. Z1=.. Y2=.. Z2=.. {A..} {B..} [{I1=..}|{R1=..}] {R2=..} {S1=..} {F}
Parameters
Y Starting point. (Recommended value: safety distance up to Y1=)
Position of tool in radial direction. This position is the starting point for finish
machining.
Z Starting point. (Recommended value: safety distance up to Z1=)
Position of tool in axial direction. This position is the starting point for finish
machining. Finish machining starts at Z1= until Z2= is reached.
Y1= Contour starting point
Starting point of the contour to be machined.
Z1= Contour starting point
Starting point of the contour to be machined.
Y2= Contour end point
End point of the contour to be machined.
Z2= Contour end point
End point of the contour to be machined.
A Angle: Basic setting A=0.
Angle (>0) at contour starting point. (Z1=)
Angles A and B must be chosen so that the tool does not undercut.
B Angle: Basic setting B=0.
Angle (>0) at contour end point. (Z2=)
I1= Chamfer length: Basic setting I1=0.
Chamfer length at start and end of contour.
Only I1= or R1= may be programmed.

TURNING
20010321 MillPlus V420-V500 69
R1= Rounding: Basic setting R1=0.
Rounding at start and end of contour.
R2= Rounding: Basic setting R2= tool tip radius.
Rounding at the bottom of the contour.
F Feed rate: Traverse speed of tool in mm/min
S1 Spindle speed
Type of function
Non-modal
Associated functions
G832 for finish machining
Notes and application
Finish machining goes from Y1/Z1 to Y1/Z2.
Tool orientation may only be 3, 4 or 5.
The tool path is corrected for the tip radius.
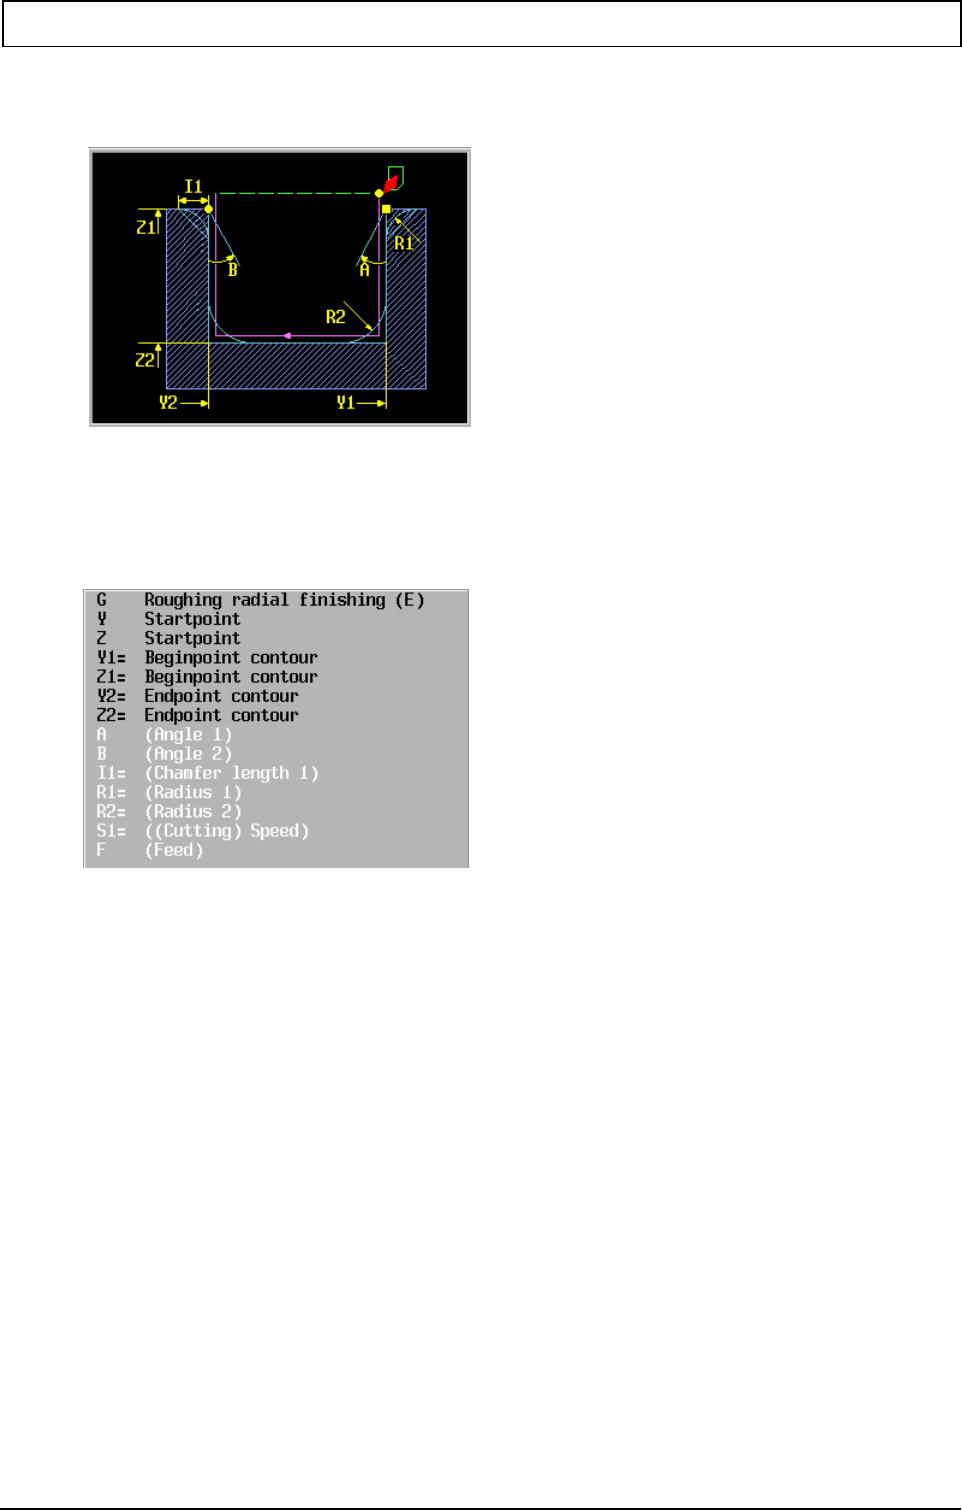
TURNING
70 Heidenhain 20010321
7.10.8 G837 Reverse boring plan, finish machining
Format N... G837 Y.. Z.. Y1=.. Z1=.. Y2=.. Z2=.. {A..} {B..} [{I1=..}|{R1=..}] {R2=..} {S1=..} {F}
Parameters
Y Starting point. (Recommended value: safety distance up to Y1=)
Position of tool in radial direction. This position is the starting point for finish
machining. Finish machining starts at Y1= until Y2= is reached.
Z Starting point. (Recommended value: safety distance up to Z1=)
Position of tool in radial direction. This position is the starting point for finish
machining.
Y1= Contour starting point
Starting point of the contour to be machined.
Z1= Contour starting point
Starting point of the contour to be machined.
Y2= Contour end point
End point of the contour to be machined.
Z2= Contour end point
End point of the contour to be machined.
A Angle: Basic setting A=0.
Angle (>0) at contour starting point. (Y1=)
Angles A and B must be chosen so that the tool does not undercut.
B Angle: Basic setting B=0.
Angle (>0) at contour end point. (Y2=)
I1= Chamfer length: Basic setting I1=0.
Chamfer length at start and end of contour.
Only I1= or R1= may be programmed.

TURNING
20010321 MillPlus V420-V500 71
R1= Rounding: Basic setting R1=0.
Rounding at start and end of contour.
R2= Rounding: Basic setting R2= tool tip radius.
Rounding at the bottom of the contour.
F Feed rate: Traverse speed of tool in mm/min
S1 Spindle speed
Type of function
Non-modal
Associated functions
G833 for finish machining
Notes and application
Finish machining goes from Y1/Z1 to Y1/Z2.
Tool orientation may only be 5, 6 or 7.
The tool path is corrected for the tip radius.
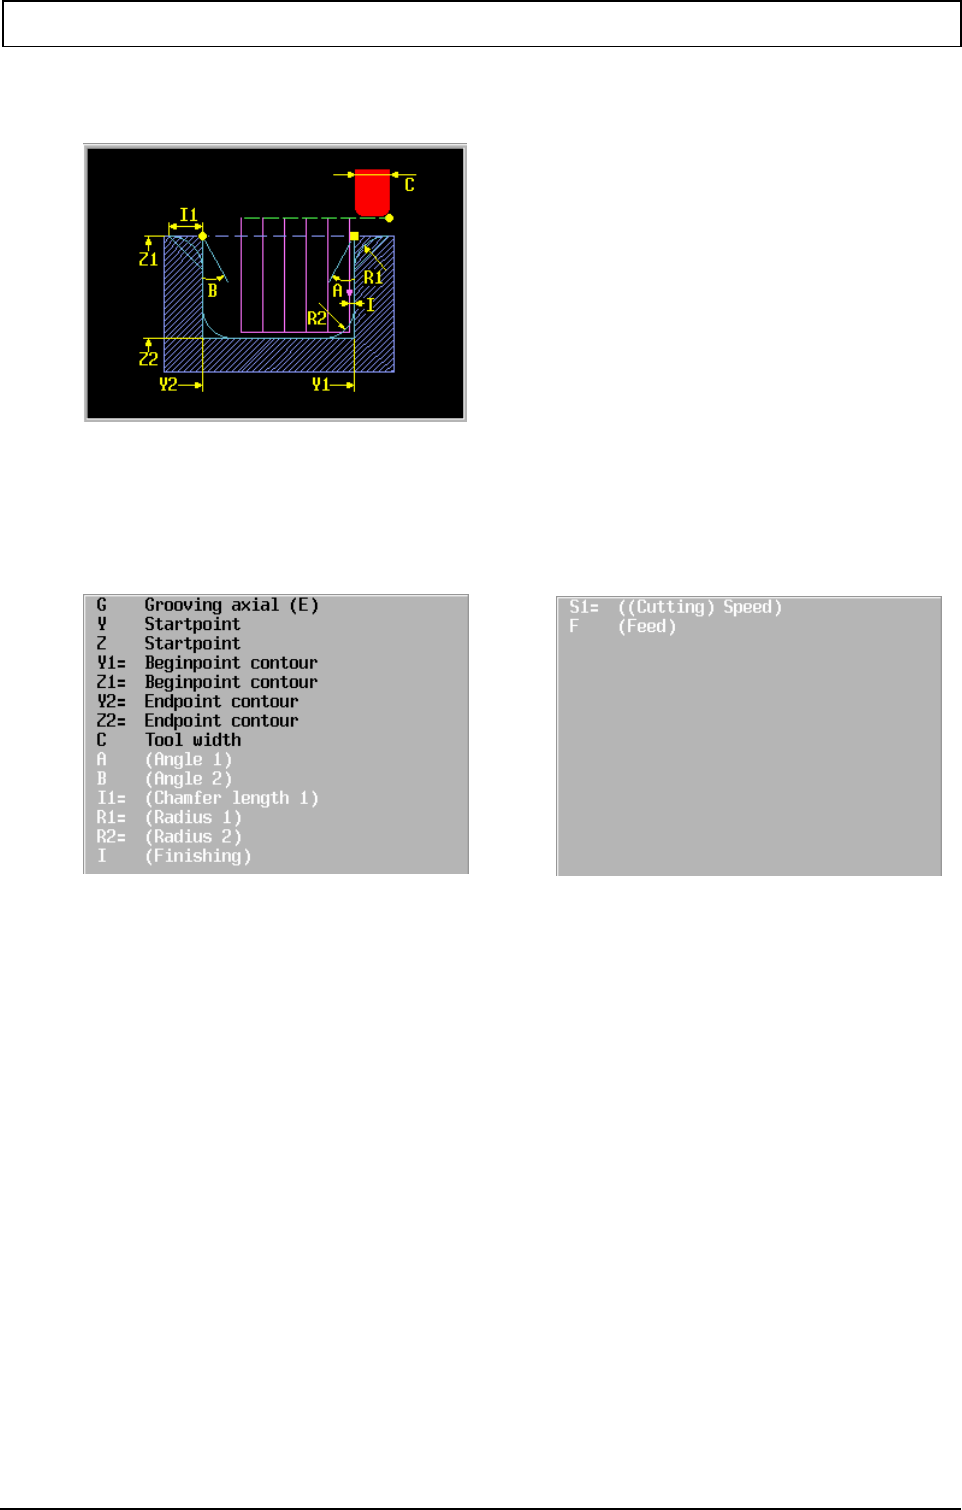
TURNING
72 Heidenhain 20010321
7.10.9 G842 Axial plunge cutting
Format N... G842 Y.. Z.. Y1=.. Z1=.. Y2=.. Z2=.. C.. {A..} {B..} [{I1=..}|{R1=..}] {R2=..} {I..} {S1=..} {F}
Parameters
Y Starting point. (Recommended value: safety distance up to Y1=)
Position of tool in radial direction. This position is the starting point for machining.
Machining starts at Y1= with the feed width until Y2= is reached.
Z Starting point. (Recommended value: safety distance up to Z2=)
Position of tool in axial direction. This position is the starting point for machining.
Y1= Contour starting point
Starting point of the contour to be machined.
Z1= Contour starting point
Starting point of the contour to be machined.
Y2= Contour end point
End point of the contour to be machined.
Z2= Contour end point
End point of the contour to be machined.
C Chisel width
Width of tool. The feed width is C minus twice the tip radius
A Angle: Basic setting A=0.
Angle (>0) at contour starting point. (Y1=)
B Angle: Basic setting B=0.
Angle (>0) at contour end point. (Y2=)
I1= Chamfer length: Basic setting I1=0.
Chamfer length at start and end of contour.
Only I1= or R1= may be programmed.
R1= Rounding: Basic setting R1=0.

TURNING
20010321 MillPlus V420-V500 73
Rounding at start and end of contour.
R2= Rounding: Basic setting R2= tool corner radius.
Rounding at the bottom of the contour.
I Finish machining allowance: basic setting I=0.
F Feed rate: Traverse speed of tool in mm/min
S1 Spindle speed
Type of function
Non-modal
Associated functions
G846 for finish machining
Notes and application
Rough cutting takes place first, then finish machining.
Tool orientation may only be 5, 6 or 7.
The tool path is corrected for the tip radius.

TURNING
74 Heidenhain 20010321
7.10.10 G843 Radial plunge cutting
Format N... G843 Y.. Z.. Y1=.. Z1=.. Y2=.. Z2=.. C.. {A..} {B..} [{I1=..}|{R1=..}} {R2=..} {K..} {S1=..} {F}
Parameters
Y Starting point. (Recommended value: safety distance up to Y1=)
Position of tool in radial direction. This position is the starting point for machining.
Machining starts at Y until Y2 is reached.
Z Starting point. (Recommended value: safety distance up to Z2=)
Position of tool in axial direction. This position is the starting point for machining.
Machining starts at Z2= with the feed width until Z1= is reached.
Y1= Contour starting point
Starting point of the contour to be machined.
Z1= Contour starting point
Starting point of the contour to be machined.
Y2= Contour end point
End point of the contour to be machined.
Z2= Contour end point
End point of the contour to be machined.
C Chisel width
Width of tool. The feed width is C minus twice the tip radius
A Angle: Basic setting A=0.
Angle (>0) at contour starting point. (Z1=)
B Angle: Basic setting B=0.
Angle (>0) at contour end point. (Z2=)
I1= Chamfer length: Basic setting I1=0.
Chamfer length at start and end of contour.
Only I1= or R1= may be programmed.

TURNING
20010321 MillPlus V420-V500 75
R1= Rounding: Basic setting R1=0.
Rounding at start and end of contour.
R2= Rounding: Basic setting R2= tool tip radius.
Rounding at the bottom of the contour.
K Finish machining allowance: basic setting K=0.
F Feed rate: Traverse speed of tool in mm/min
S1 Spindle speed
Type of function
Non-modal
Associated functions
G847 for finish machining
Notes and application
Rough cutting takes place first, then finish machining.
Tool orientation may only be 3, 4 or 5.
The tool path is corrected for the tip radius.
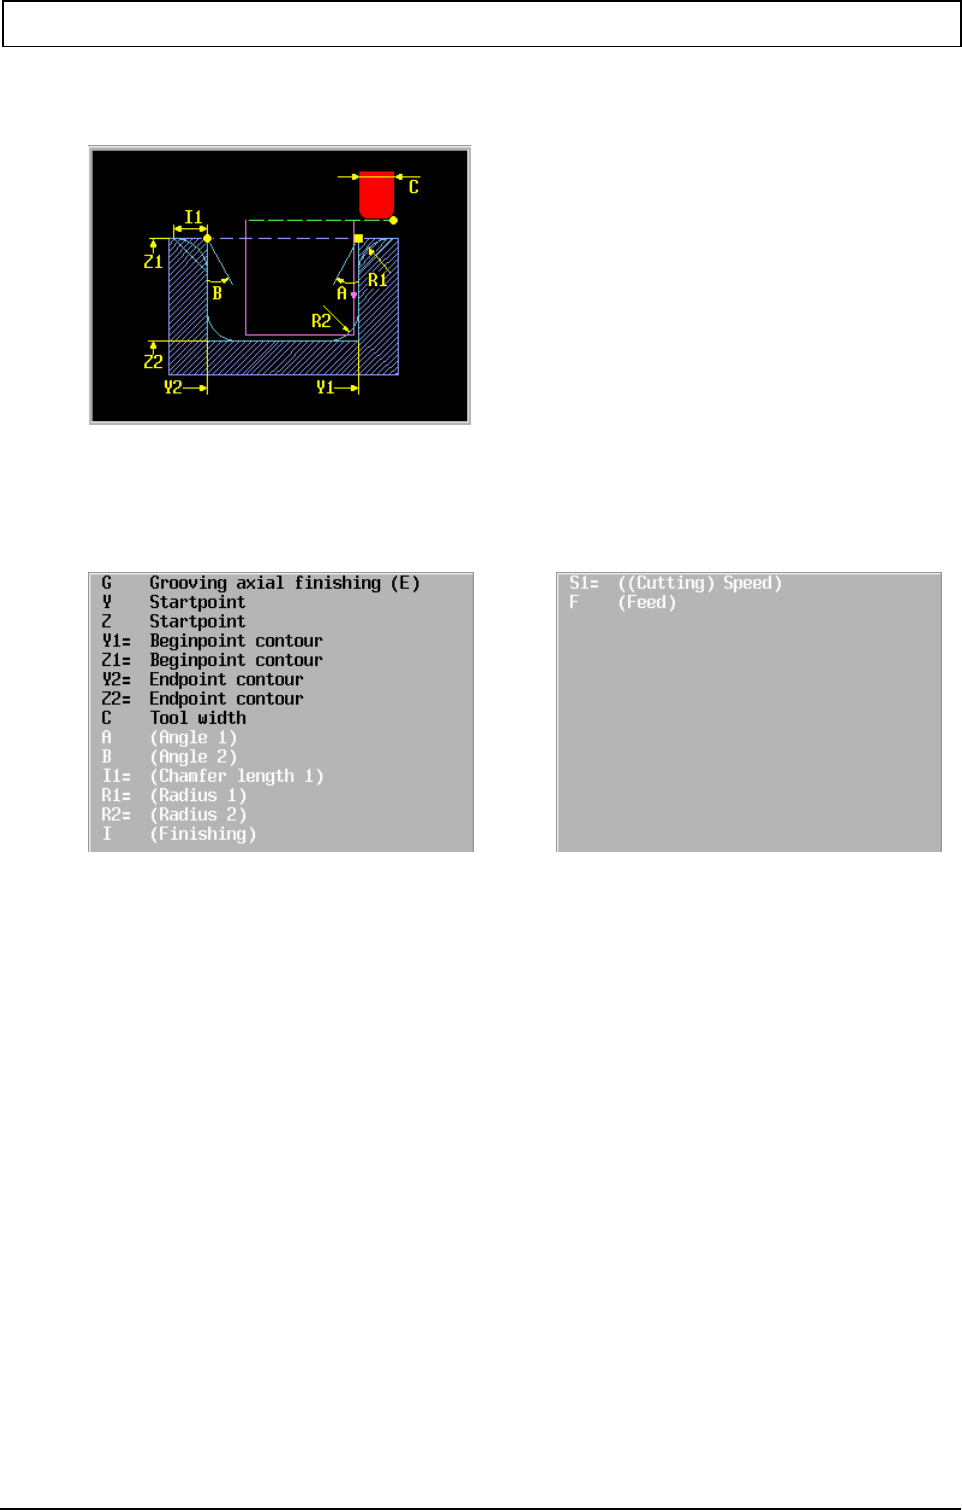
TURNING
76 Heidenhain 20010321
7.10.11 G846 Axial plunge cutting, finish machining
Format N... G846 Y.. Z.. Y1=.. Z1=.. Y2=.. Z2=.. C.. {A..} {B..} [{I1=..}|{R1=..}] {R2=..} {I..} {S1=..} {F}
Parameters
Y Starting point. (Recommended value: safety distance up to Y1=)
Position of tool in radial direction. This position is the starting point for machining.
Machining starts at Y until Y2 is reached.
Z Starting point. (Recommended value: safety distance up to Z1=)
Position of tool in axial direction. This position is the starting point for machining.
Starts at Z2= until Z1= is reached.
Y1= Contour starting point
Starting point of the contour to be machined.
Z1= Contour starting point
Starting point of the contour to be machined.
Y2= Contour end point
End point of the contour to be machined.
Z2= Contour end point
End point of the contour to be machined.
C Chisel width
Width of tool. The feed width is C minus twice the corner radius
A Angle: Basic setting A=0.
Angle (>0) at contour starting point. (Y1=)
B Angle: Basic setting B=0.
Angle (>0) at contour end point. (Y2=)
I1= Chamfer length: Basic setting I1=0.
Chamfer length at start and end of contour.
Only I1= or R1= may be programmed.

TURNING
20010321 MillPlus V420-V500 77
R1= Rounding: Basic setting R1=0.
Rounding at start and end of contour.
R2= Rounding: Basic setting R2= tool tip radius.
Rounding at the bottom of the contour.
I Finish machining allowance: basic setting I=0.
F Feed rate: Traverse speed of tool in mm/min
S1 Spindle speed
Type of function
Non-modal
Associated functions
G842 for finish machining
Notes and application
Finish machining goes from Y1/Z1 to Y1/Z2.
Tool orientation may only be 5, 6 or 7.
The tool path is corrected for the tip radius.
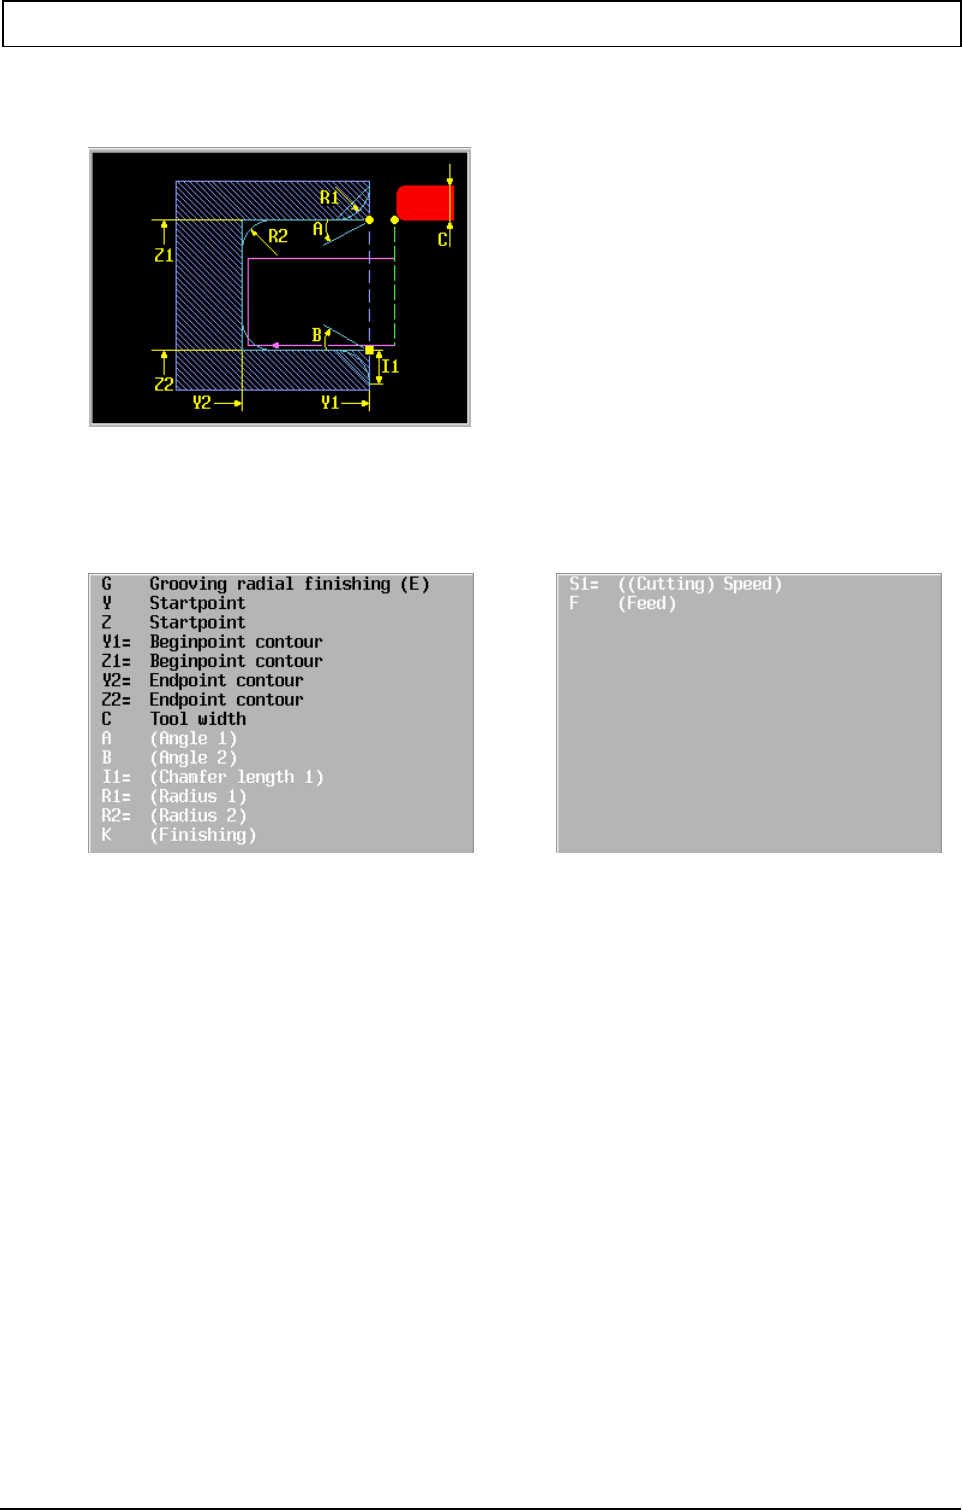
TURNING
78 Heidenhain 20010321
7.10.12 G847 Radial plunge cutting, finish machining
Format N... G847 Y.. Z.. Y1=.. Z1=.. Y2=.. Z2=.. C.. {A..} {B..} [{I1=..}|{R1=..}] {R2=..} {K..} {S1=..} {F}
Parameters
Y Starting point. (Recommended value: safety distance up to Y1=)
Position of tool in radial direction. This position is the starting point for finish
machining. Finish machining starts at Y until Y2 is reached.
Z Starting point. (Recommended value: safety distance up to Z2=)
Position of tool in axial direction. This position is the starting point for finish
machining.
Y1= Contour starting point
Starting point of the contour to be machined.
Z1= Contour starting point
Starting point of the contour to be machined.
Y2= Contour end point
End point of the contour to be machined.
Z2= Contour end point
End point of the contour to be machined.
C Chisel width
Width of tool. The feed width is C minus twice the corner radius
A Angle: Basic setting A=0.
Angle (>0) at contour starting point. (Z1=)
B Angle: Basic setting B=0.
Angle (>0) at contour end point. (Z2=)
I1= Chamfer length: Basic setting I1=0.
Chamfer length at start and end of contour.
Only I1= or R1= may be programmed.

TURNING
20010321 MillPlus V420-V500 79
R1= Rounding: Basic setting R1=0.
Rounding at start and end of contour.
R2= Rounding: Basic setting R2= tool tip radius.
Rounding at the bottom of the contour.
K Finish machining allowance: basic setting K=0.
F Feed rate: Traverse speed of tool in mm/min
S1 Spindle speed
Type of function
Non-modal
Associated functions
G843 for rough machining
Notes and application
Finish machining goes from Y1/Z2 to Y1/Z1.
Tool orientation may only be 3, 4 or 5.
The tool path is corrected for the tip radius.

TURNING
80 Heidenhain 20010321
7.11 Examples
Example 1:
N9999
N1 G17
N2 G37
N3 M54
N4 T1 M6
N5 S1000 F1000 M3
N...
N100 G17 Z1=1 Y1=2
N101 G36
N102 T7 M6
N103 S1=100 M1=3
N104 G0 X0 Y100 Z100
N105 G822 ....
N...
N200 G17
N201 G37
N203 T1 M6
N204 S1000 M3
N205 ....
N300 M30
Explanation:
N1 Set planes for milling.
Length compensation in Z direction.
N2 Milling mode
N3 Head is in the Z direction
N4 Insert milling tool
N5 Start Spindle
N...
N... Milling
N100 Set planes for turning.
Main axis 1 is Z, main axis 2 is Y.
Radius correction in ZY plane.
N101 Turning
N102 Insert tool
N103 Start rotary table for continuous turning
N104 Position turning tool
N105 Start longitudinal cutting cycles
N...
N... Turning
N200 Set planes for milling.
Length compensation in Z direction.
N201 Milling mode
N202 Insert milling tool
N103 Start Spindle
N104 Position milling tool
N...
N... Milling
N300 Program end
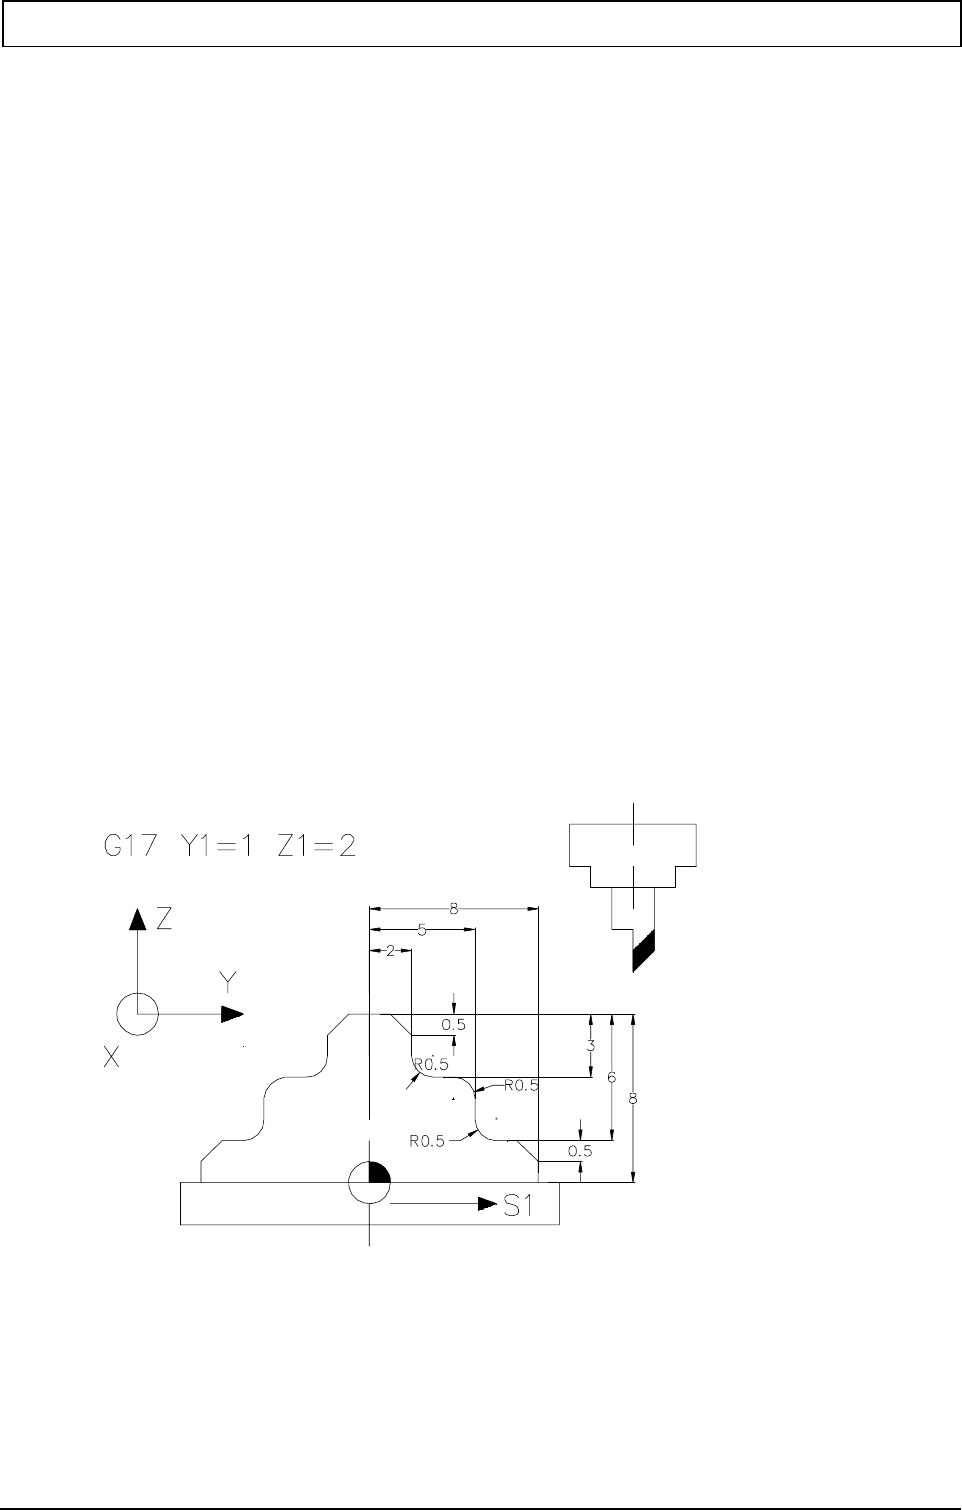
TURNING
20010321 MillPlus V420-V500 81
Example 2:
N9999
N1 G17
N2 G37
N3 G54 I1 Z8
N4 G36 (continuous turning)
N5 M54
N6 G17 Z1=1 Y1=2
N7 G195 X-1 Y-1 Z1 I2 J12 K-11
N8 G199 X0 Y0 Z0 B4 C2
N9 G198 I1=14 X0 Y8 Z0
N10 G2 X0 Y8 I0 J0
N11 G1 X0 Y8 Z-8
N12 G2 X0 Y8 I0 J0
N13 G196
N14 T1 M6 (L100 R5 C0.3 Q3=800)
N15 S1=1000 M1=3
N16 G0 X0 Y8 Z3 F1000 S1000 M5
N17 (rough machining)
N18 G823 Y8 Z0.3 Y1=8 Z1=-3 Y2=2 Z2=0 I1=0.5 R2=0.5 C0.2
N19 G823 Y8 Z-2.7 Y1=8 Z1=-6 Y2=5 Z2=-3 R1=0.5 I2=0.5 R2=0.5 C0.2
N20 (fine machining)
N21 G827 Y8 Z-6.7 Y1=8 Z1=-6 Y2=5 Z2=-3 R1=0.5 I2=0.5 R2=0.5
N22 G827 Y8 Z-2.7 Y1=8 Z1=-3 Y2=2 Z2=0 I1=0.5 R2=0.5
N23 G0 Z10
N24 T0 M6
N25 G37
N26 G53
N27 M30
Explanation:
N1 Set planes for milling. Length compensation in Z direction.
N2 Milling mode
N3 Zero point displacement for Z direction. Upper edge of material is zero.
N4 Turning
N5 Head is in the Z direction

TURNING
82 Heidenhain 20010321
N6 Set planes for turning.
Main axis 1 is Z, main axis 2 is Y.
Radius correction in ZY plane.
N7 Set graphics window
N8 Start of material graphical contour description. B4 means automatic drawing.
N9 Start of contour description. I1=14 is light blue colour
N10 Upper circle of cylinder.
N11 Line
N12 Lower circle of cylinder.
N13 End of graphical contour description
N14 Insert turning tool (length, radius, corner radius and type)
N15 Start rotary table for continuous turning
N16 Position turning tool
N18 G823 start cutting plan cycles. Turn upper part
Y8 Starting point
Z0.3 Starting point
Y1=8 Contour starting point
Z1=-3 Contour starting point
Y2=2 Contour end point
Z2=0 Contour end point
C0.2 Feed depth
I1=0.5 Chamfer length 1
R2=0.5 Radius 2
N19 G823 start cutting plan cycles. Turn lower part
Y8 Starting point
Z-2.7 Starting point
Y1=8 Contour starting point
Z1=-6 Contour starting point
Y2=5 Contour end point
Z2=0 Contour end point
C0.2 Feed depth
R1=0.5 Radius 1
I2=0.5 Chamfer length 2
R2=0.5 Radius 2
N21 G827 start finish machining cutting plan cycles. Finish machine lower part
Y8 Starting point
Z-6.7 Starting point
Y1=8 Contour starting point
Z1=-6 Contour starting point
Y2=5 Contour end point
Z2=-3 Contour end point
R1=0.5 Radius 1
I2=0.5 Chamfer length 1
R2=0.5 Radius 2
N22 G827 start finish machining cutting plan cycles. Finish machine upper part
Y8 Starting point
Z-2.7 Starting point
Y1=8 Contour starting point
Z1=-3 Contour starting point
Y2=2 Contour end point
Z2=0 Contour end point
I1=0.5 Chamfer length 1
R2=0.5 Radius 2
N23 Move tool clear
N24 Reset tool
N25 Milling mode
N26 Deactivate zero point displacement

TURNING
20010321 MillPlus V420-V500 83
N27 Program end

Control system manual
V410
HEIDENHAIN NUMERIC B.V.
Eindhoven (NL)
Tel: 31.40.250 13 00
Fax: 31.40.250 13 01
11/07/2001
First edition Software Version V410 20000710
© HEIDENHAIN NUMERIC B.V. EINDHOVEN, Netherlands 2001
The publisher accepts no liability in respect of specifications on the basis of the information contained in
these instructions.
For the specifications of this numerical controller please refer to the order data and corresponding
specification description only.
All rights reserved. Copying of this manual or parts thereof only permitted with the written consent of the
copyright holder.
Changes to and errors in this publication cannot be excluded. Therefore no claims can be laid to the
information, figures and descriptions contained in this publication.
Xxx xxx-20 DER6-32.8-2607_000

INTRODUCTION
20000710 MillPlus V410 3
1. Introduction ............................................................................................................................................... 11
1.1 MillPlus software and functions .................................................................................................11
1.2 Software version V420 .............................................................................................................. 12
1.3 Software-Version V410.............................................................................................................. 12
1.4 Software-Version V400.............................................................................................................. 13
2. Safety 15
3. Keyboard and screen layout ..................................................................................................................... 17
3.1 Screen display ........................................................................................................................... 17
3.2 Screen and keyboard of LE412................................................................................................. 17
3.2.1 Screen adjusting keys................................................................................................ 18
3.3 Machine control panel ............................................................................................................... 19
3.4 Hand wheel HR410 (HCU) ......................................................................................................... 20
3.4.1 Selecting/deselecting the hand wheel........................................................................ 20
3.5 Exiting a function ........................................................................................................................ 21
3.6 Return to previous softkey level.................................................................................................. 22
3.7 Superimposition of softkey groups .............................................................................................. 22
3.8 Switching between upper and lower case characters.................................................................. 22
3.9 Making selections in the Easy Operate, ICP and IPP menus ...................................................... 23
3.10 Quick mode selection ................................................................................................................. 23
3.11 Softkey Status............................................................................................................................ 23
3.12 User softkeys.............................................................................................................................. 24
3.12.1 Defining the user softkeys.......................................................................................... 24
3.13 Process level Manual.................................................................................................................. 27
3.14 Process level Automatic ............................................................................................................. 28
3.15 Process level Program................................................................................................................ 28
3.16 Process level Monitor ................................................................................................................. 29
3.17 Starten und schließen der Software auf ein Doppel-Prozessor-System................................... 30
3.17.1 Steuerungsbetrieb starten......................................................................................... 30
3.17.2 Steuerungsbetrieb schließen .................................................................................... 30
4. Workpiece coordinates ............................................................................................................................. 33
4.1 Coordinate system and direction of movement ........................................................................... 33
4.2 Axes 33
4.3 Zero points ................................................................................................................................. 33
4.4 Cartesian coordinates................................................................................................................. 34
4.5 Polar coordinates........................................................................................................................ 34
4.5.1 Assignment of polar coordinates................................................................................ 34
4.6 FSP coordinates......................................................................................................................... 35
5. Start machine / reference point................................................................................................................. 37
5.1 Start machine (example)............................................................................................................. 37
5.2 Approach reference points.......................................................................................................... 37
5.3 Select level................................................................................................................................. 38
6. Manual operation ...................................................................................................................................... 39
6.1 Move axes.................................................................................................................................. 39
6.1.1 Step movement, continuous movement..................................................................... 39
6.1.2 Continuous movement............................................................................................... 40
6.1.3 Rapid traverse motion................................................................................................ 40
6.1.4 Free step size............................................................................................................ 41
6.1.5 Move spindle and other axes..................................................................................... 41
6.2 Procedure in FSP ....................................................................................................................... 42
6.3 Switch over rate of advance/continue procedure......................................................................... 44
6.4 F, S, T input................................................................................................................................ 45
7. Free entry (MDI)........................................................................................................................................ 47

INTRODUCTION
4 Heidenhain
7.1 Free entry 47
7.2 Cancel block (MDI)......................................................................................................................48
8. Set axis value ............................................................................................................................................49
8.1 Determine side............................................................................................................................49
8.2 Determine centre.........................................................................................................................51
8.3 Set actual value...........................................................................................................................51
8.4 Measure tool...............................................................................................................................52
9. Data input / output and file management ..................................................................................................55
9.1 Data transfer ...............................................................................................................................55
9.2 Coordinate controller with peripheral device ................................................................................55
9.3 Reading 55
9.3.1 Reading in the program (PM,MM) ..............................................................................55
9.3.2 Reading in tables (TM..PO)........................................................................................56
9.4 Output program...........................................................................................................................57
9.4.1 Data back-up..............................................................................................................57
9.4.2 Reading out the program (PM,MM ) ...........................................................................57
9.4.3 Reading out a table (TM-LB) ......................................................................................57
9.5 Memory name abbreviations.......................................................................................................58
9.6 Mini-PC 58
9.7 Select files...................................................................................................................................59
9.8 File management ........................................................................................................................61
9.8.1 Delete file 62
9.8.2 Copy file 64
9.8.3 Rename/shift file.........................................................................................................69
9.8.4 Attribute file (lock/unlock)............................................................................................69
9.8.5 Make directory............................................................................................................71
9.8.6 Remove directory .......................................................................................................73
9.9 Ethernet interface........................................................................................................................74
9.9.1 Select server ..............................................................................................................74
9.9.2 Write to server............................................................................................................75
9.9.3 Read from server........................................................................................................75
10. Enter / edit program...................................................................................................................................77
10.1 DIN/ISO Editor ............................................................................................................................77
10.2 IPP Editor 77
10.3 Input help 77
10.4 Enter new program number (main program / macro)...................................................................77
10.5 Program selection (main program / macro)..................................................................................78
10.6 Save to hard disk ........................................................................................................................80
10.7 Enter program block....................................................................................................................80
10.8 Insert program block....................................................................................................................80
10.9 Text entry 81
10.10 Mathematical entry .....................................................................................................81
10.11 Position transfer in the program (DIN editor)...............................................................81
10.12 Delete address ...........................................................................................................83
10.13 Editing function...........................................................................................................83
10.13.1 Erase line...................................................................................................83
10.13.2 Search & replace .......................................................................................83
10.13.3 Find............................................................................................................84
10.13.4 Renumber..................................................................................................84
10.13.5 Block (delete, renumber)............................................................................84
10.13.6 Block (Move, Copy)....................................................................................85
10.14 File editor....................................................................................................................86
10.14.1 Undo..........................................................................................................87
10.14.2 Go to line number ......................................................................................87
11. Program dry run.........................................................................................................................................89
11.1 Dry run mode..............................................................................................................................89

INTRODUCTION
20000710 MillPlus V410 5
11.1.1 Select dry run option.................................................................................................. 89
11.1.2 Perform dry run.......................................................................................................... 89
11.2 Graphics dry run......................................................................................................................... 90
11.2.1 Graphic functions....................................................................................................... 90
11.2.2 Graphical representation............................................................................................ 90
11.2.3 Graphic options.......................................................................................................... 90
11.2.4 Wire plot 91
11.2.5 Working with graphics (example)............................................................................... 91
11.2.6 Solids 92
11.3 Estimation of run time using graphics operation.......................................................................... 92
11.3.1 Time for each tool...................................................................................................... 93
12. Activate / execute program ....................................................................................................................... 95
12.1 Activate program ........................................................................................................................ 95
12.2 Direct activation of an edited program......................................................................................... 95
12.3 CAD mode.................................................................................................................................. 96
12.4 Execute program........................................................................................................................ 97
12.5 Single block operation ................................................................................................................ 97
12.6 Delete block................................................................................................................................ 97
12.7 Optional halt ............................................................................................................................... 97
12.8 Execution status ......................................................................................................................... 98
12.9 Program status........................................................................................................................... 98
12.10 Reload (BTR)........................................................................................................... 100
12.11 Autostart .................................................................................................................. 102
12.11.1 Setting up Autostart................................................................................. 102
12.11.2 Activate Autostart .................................................................................... 103
12.12 Digitizing .................................................................................................................. 104
13. Interrupt/cancel program, search block .................................................................................................. 107
13.1 Interrupt/cancel program execution........................................................................................... 107
13.2 Erase errors and messages on the screen................................................................................ 107
13.3 Cancel program........................................................................................................................ 107
13.4 Interrupt cycle........................................................................................................................... 108
13.5 Reset CNC............................................................................................................................... 108
13.6 Search block............................................................................................................................. 109
14. Technology.............................................................................................................................................. 112
14.1 Technology table ...................................................................................................................... 112
14.1.1 Tools with more than one radius.............................................................................. 113
14.1.2 Table values for tapping........................................................................................... 113
14.1.3 Relationship between F1 and F2 ............................................................................. 113
14.1.4 Relationship between S1 and S2............................................................................. 113
14.2 Storing the technology tables.................................................................................................... 114
14.3 Material type............................................................................................................................. 114
14.4 Machining type ......................................................................................................................... 115
14.5 Tool type 116
14.6 Using the technology ................................................................................................................ 117
15. Tool 121
15.1 Tool addresses......................................................................................................................... 121
15.2 Tool identification...................................................................................................................... 123
15.3 Calling tool data........................................................................................................................ 123
15.4 Input of the tool memory........................................................................................................... 124
15.5 Tool parking time monitoring..................................................................................................... 126
15.6 Tool breakage monitoring ......................................................................................................... 126
15.7 Manual change of tool (Example) ............................................................................................. 127
15.8 Tool management .................................................................................................................... 128
15.8.1 Werkzeugkorrektur.................................................................................................. 129
15.8.2 To take a tool out of the tool magazine (example) ................................................... 132
15.9 To update enhanced tool measurement.................................................................................... 133

INTRODUCTION
6 Heidenhain
15.10 Tool measurement using the laser measurement system .........................................134
15.10.1 Calibration of the laser measurement system ..........................................135
15.10.2 Measurement of the length of concentric tools.........................................137
15.10.3 Measurement of the length and radius of eccentric tools .........................138
15.10.4 Individual cutting control...........................................................................139
15.11 Laser measurement cycles in the program ...............................................................140
15.11.1 Beispiel....................................................................................................140
15.12 Tool fault reports.......................................................................................................140
15.13 Tool measurement using the TT120/TT130 ..............................................................141
15.14 Calibration of the TT120/TT130 ................................................................................143
15.14.1 Tool length measurement ........................................................................144
15.14.2 Measurement of tool radius......................................................................146
15.14.3 Measure the tool completely ....................................................................147
15.15 Update machine settings ..........................................................................................148
15.16 TT120/TT130 measurement cycles for automatic operation......................................149
15.16.1 Example...................................................................................................149
16. Tables 150
16.1 Zero offset.................................................................................................................................150
16.2 Parameter(E) ............................................................................................................................151
16.3 Point (P) 152
16.4 Pallet zero point ........................................................................................................................153
17. Automation...............................................................................................................................................155
18. Installation................................................................................................................................................157
18.1 Logbook 157
18.1.1 Error log 157
18.2 Diagnostics ...............................................................................................................................158
18.2.1 Remote diagnosis.....................................................................................................158
18.3 Clock 159
18.4 IPLC monitor.............................................................................................................................160
18.4.1 I/O layout 160
18.5 Temperature compensation ......................................................................................................161
18.6 Axes diagnose ..........................................................................................................................161
19. Easy Operate...........................................................................................................................................162
19.1 Contours 162
19.2 Facing / edging .........................................................................................................................163
19.3 Pockets 164
19.4 Drilling / tapping ........................................................................................................................166
19.5 Boring 167
19.5.1 Boring: single............................................................................................................167
19.6 Reverse sinking ........................................................................................................................168
19.6.1 Reverse sinking point ...............................................................................................168
19.7 Example of Easy Operate: Mill workpiece face..........................................................................169
20. Interactive contour programming (ICP) ...................................................................................................175
20.1 Allgemeines..............................................................................................................................175
20.2 ICP graphic symbol menu .........................................................................................................176
20.3 New ICP programs....................................................................................................................178
20.3.1 Einstieg in den ICP-Modus ......................................................................................178
20.3.2 Exiting ICP ...............................................................................................................179
20.4 Editing existing programs..........................................................................................................180
20.4.1 Edit element .............................................................................................................180
20.4.2 Insert element...........................................................................................................183
20.4.3 Delete element .........................................................................................................183
20.4.4 Graphial display of the contour.................................................................................184
20.5 ICP programming notes ............................................................................................................185
20.5.1 Auxiliary elements in ICP..........................................................................................185

INTRODUCTION
20000710 MillPlus V410 7
20.5.2 Help points............................................................................................................... 186
20.5.3 Required angle parameters ..................................................................................... 186
20.5.4 Line intersects circle ................................................................................................ 186
20.5.5 Rounding 186
20.6 ICP programming example....................................................................................................... 187
20.6.1 ICP-generated program ........................................................................................... 189
20.6.2 Alternative ICP programming methods .................................................................... 191
21. Interactive part programming (IPP) / GRAPHIPROG ............................................................................. 193
21.1 General 193
21.1.1 Introduction to Interactive Parts Programming (IPP) ................................................ 193
21.1.2 Preparation for IPP programming ............................................................................ 193
21.1.3 IPP programming sequence .................................................................................... 193
21.2 IPP graphic main menu symbols .............................................................................................. 194
21.3 IPP graphic symbol menu......................................................................................................... 195
21.4 New IPP-program..................................................................................................................... 197
21.4.1 Entering IPP mode................................................................................................... 197
21.4.2 Exiting IPP ............................................................................................................... 197
21.4.3 Entering program data............................................................................................. 198
21.4.4 IPP program list ....................................................................................................... 199
21.5 Editing IPP programs (change line) .......................................................................................... 199
21.5.1 Change features ...................................................................................................... 200
21.5.2 Inserting a feature.................................................................................................... 203
21.5.3 Delete feature.......................................................................................................... 203
21.5.4 Select tool during editing.......................................................................................... 203
21.5.5 Graphic display of contour (test run) ........................................................................ 205
21.5.6 Executing IPP programs .......................................................................................... 205
21.5.7 Converting active plane G17 <-> G18...................................................................... 205
21.6 IPP programming tips ............................................................................................................... 206
21.6.1 Using ICP to define contours ................................................................................... 206
21.6.2 IPP proposals .......................................................................................................... 206
21.6.3 Maximum feed rates and spindle speeds................................................................. 206
21.6.4 Optimizing programming and machining times ........................................................ 206
21.6.5 Changing IPP programs using the DIN editor .......................................................... 206
21.7 IPP program examples............................................................................................................. 207
21.7.1 Preparations for programming the examples ........................................................... 208
21.7.2 Definition of blank .................................................................................................... 208
21.7.3 Clamping 209
21.7.4 Facing 210
21.7.5 Tapping a rectangle ................................................................................................. 211
21.7.6 Milling a freely formed pocket .................................................................................. 212
21.7.7 Milling circular groove .............................................................................................. 216
21.7.8 Milling round pocket (for thread) .............................................................................. 217
21.7.9 Milling round pocket (50 mm dia) ............................................................................. 218
21.7.10 Freely formed contour ............................................................................. 220
21.7.11 Boring and countersinking (8.5 mm dia) .................................................. 224
21.7.12 Boring and threading (M6)....................................................................... 226
21.7.13 Threading (M20 x 1.5) ............................................................................. 228
21.7.14 End of program........................................................................................ 229
21.8 IPP start macro......................................................................................................................... 230
22. Program structure and block format ....................................................................................................... 239
22.1 Program extract........................................................................................................................ 239
22.2 Memory identifier...................................................................................................................... 239
22.3 Program number ...................................................................................................................... 239
22.4 Program block .......................................................................................................................... 239
22.5 Block number ........................................................................................................................... 239
22.6 Program word........................................................................................................................... 239
22.7 Input formats for axis addresses............................................................................................... 239

INTRODUCTION
8 Heidenhain
23. G-Functions .............................................................................................................................................241
23.1 Rapid traverse G0.....................................................................................................................241
23.2 Linear interpolation G1..............................................................................................................242
23.3 Circular clockwise / circular counter clockwise G2/G3 ...............................................................246
23.4 Dwell time G4............................................................................................................................254
23.5 Spline Interpolation G6..............................................................................................................255
23.6 Tilt operating planes G7 (starting with V400) .............................................................................258
23.7 Tilting of the operating plane (from V400)..................................................................................267
23.7.1 Introduction...............................................................................................................267
23.7.2 Machine types..........................................................................................................268
23.7.3 Kinematic model.......................................................................................................270
23.7.4 Manual operation......................................................................................................271
23.7.5 Display 271
23.7.6 Axis selection/positioning axis ..................................................................................272
23.7.7 Reference point........................................................................................................272
23.7.8 Interruption ...............................................................................................................273
23.7.9 Fault reports .............................................................................................................273
23.7.10 Machine settings......................................................................................274
23.8 Swivel tool G8 (from V410).......................................................................................................275
23.9 Defining polar point (measurement reference point) G9 (from V320 onwards)..........................279
23.10 Polar coordinate, Rounding, Chamfering G11...........................................................284
23.11 Repeat function G14.................................................................................................285
23.12 Main plane XY, tool Z G17........................................................................................286
23.13 Main plane XZ, tool Y G18........................................................................................286
23.14 Main plane YZ, tool X G19........................................................................................286
23.15 Macro call G22 .........................................................................................................287
23.16 Main program call G23..............................................................................................287
23.17 Enable/disable feed and spindle override G25/G26 ..................................................289
23.18 Reset/activate positioning functions G27/G28...........................................................290
23.18.1 Positioning functions G27/G28 (to V320) ...............................................290
23.18.2 Look Ahead Feed (from V320 onwards) ..................................................291
23.18.3 Positioning functions G27/G28 (from V320 onwards)..............................291
23.19 Conditional jump G29 ...............................................................................................293
23.20 Activate/deactivate offset G39 (from V320 onwards..................................................294
23.21 Cancel tool radius compensation G40.......................................................................296
23.22 Tool radius compensation (left/right) G41/G42 ..........................................................297
23.23 Tool radius compensation to end point G43/G44 ......................................................301
23.24 Measuring a point G45..............................................................................................302
23.25 Measuring a circle G46.............................................................................................305
23.26 Calibrating the measuring probe G46 + M26.............................................................307
23.27 Checking on tolerances G49.....................................................................................308
23.28 Processing measuring results G50 ...........................................................................310
23.29 Cancel/activate G52 zero point shift G51/G52 ..........................................................316
23.30 Cancel/activate zero point shift G53/G54...G59.........................................................317
23.31 Extended zero offset G54 MC84>0 (from V320 onwards) .........................................318
23.32 Tangential approach G61 .........................................................................................320
23.33 Tangential exit G62...................................................................................................324
23.34 Cancel / activate geometric calculations G63/G64 ....................................................327
23.35 INCH / METRIC programming G70/G71 ..................................................................328
23.36 Cancel / activate mirror image and scaling G72/G73.................................................329
23.37 Absolute position G74...............................................................................................331
23.38 Bolt hole cycle G77...................................................................................................334
23.39 Point definition G78 ..................................................................................................337
23.40 Activate cycle G79....................................................................................................338
23.41 Drilling cycle G81......................................................................................................340
23.42 Deep hole drilling cycle G83 .....................................................................................342
23.43 Tapping cycle G84....................................................................................................344
23.44 Reaming cycle G85 ..................................................................................................346
23.45 Boring cycle G86 ......................................................................................................347
23.46 Rectangular pocket milling cycle G87 .......................................................................348

INTRODUCTION
20000710 MillPlus V410 9
23.47 Groove milling cycle G88 ......................................................................................... 350
23.48 Circular pocket milling cycle G89.............................................................................. 352
23.49 Absolute/incremental programming G90/G91........................................................... 354
23.50 Wordwise absolute/incremental programming (from V320 onwards) ........................ 356
23.51 Zero point shift incremental / rotation or absolute rotation G92/G93.......................... 357
23.52 Feed in mm/min (inch/min) / mm/rev (inch/rev) G94/G95.......................................... 361
23.53 Graphic window definition G98................................................................................. 362
23.54 Graphic: material definition G99 ............................................................................... 363
23.55 3D tool correction G141 ........................................................................................... 364
23.56 Linear measuring movement G145 .......................................................................... 366
23.57 Reading measuring probe status.............................................................................. 370
23.58 Reading tool or offset values G149 .......................................................................... 371
23.59 Change tool or offset values G150 ........................................................................... 373
23.60 Cancel cylinder interpolation or activate basic coordinate system G180 ................... 375
23.61 Cancel / activate cylinder interpolation G182 ............................................................ 376
23.62 Graphic window definition G195............................................................................... 380
23.63 End graphic model description G196........................................................................ 381
23.64 Begin inside / outside contour description G197/G198 ............................................. 382
23.65 Begin graphic model description G199..................................................................... 383
23.66 Universal pocket milling cycle G200- G208 .............................................................. 386
23.67 Create pocket cycle macro's G200........................................................................... 387
23.68 Start contour pocket cycle G201............................................................................... 388
23.69 End contour pocket cycle G202................................................................................ 389
23.70 Start pocket contour description G203...................................................................... 389
23.71 End pocket contour description G204....................................................................... 389
23.72 Start island contour description G205....................................................................... 390
23.73 End island contour description G206........................................................................ 390
23.74 Call island contour macro G207 ............................................................................... 391
23.75 Quadrangle contour description G208..................................................................... 393
24. Special G functions for macros............................................................................................................... 397
24.1 Programming error messages G300......................................................................................... 397
24.2 Error message in read-in program or macro G301.................................................................... 398
24.3 Query active technology - G319............................................................................................... 399
24.4 Query tool table G321............................................................................................................... 400
24.5 Calling machine constant values G322..................................................................................... 402
24.6 Query current modal G function G324 (from V400)................................................................... 403
24.7 Query current modal M function G325 (from V400)................................................................... 404
24.8 Calling up the current axis position values G326....................................................................... 405
24.9 Scan current operating mode G327 (from V410)...................................................................... 406
24.10 Write to the tool table G331 (from V400) .................................................................. 407
24.11 Writing to the machine settings store G332 (from V400)........................................... 409
25. G-functions produced by cycle design.................................................................................................... 411
25.1 Cycle Design ............................................................................................................................ 411
25.2 Laser: Calibration G600 (from V410) ........................................................................................ 411
25.3 Laser: Measure tool length G601 (from V410) .......................................................................... 412
25.4 Laser: Measureng length and radius G602 (from V410)............................................................ 413
25.5 Check of individual edge G603 (from V410).............................................................................. 414
25.6 Laser: Tool breakage control G604 (from V410) ....................................................................... 415
25.7 TT120/TT130: Calibration G606 (from V410)............................................................................ 416
25.8 TT120/TT130: Measure tool length G607 (from V410).............................................................. 417
25.9 TT120/TT130: Measuring tool radius G608 (from V410) ........................................................... 418
25.10 TT120/TT130: Measure length and radius G609 (from V410)................................... 419
26. Liste der G-Funktionen und M-Funktionen ............................................................................................. 421
26.1 G-Funktionen........................................................................................................................... 421
26.2 Liste der G-Funktionen für Makros und IPLC.......................................................................... 423
26.3 Liste der G-Funktionen Zyklen Design.................................................................................... 423
26.4 Basis M-Funktionen................................................................................................................. 425

INTRODUCTION
10 Heidenhain
26.5 Maschinenabhängige M-Funktionen........................................................................................426
27. Technological commands........................................................................................................................427
27.1 Feed rate 427
27.2 Spindle speed...........................................................................................................................427
27.3 Tool number..............................................................................................................................428
28. E Parameters and arithmetic functions ...................................................................................................429
28.1 E parameters ............................................................................................................................429
28.2 Arithmetic functions...................................................................................................................429
28.3 Expanded calculation operations .............................................................................................430
28.3.1 E parameters ...........................................................................................................430
28.3.2 Whole numbers........................................................................................................430
28.3.3 Whole numbers with largest value...........................................................................430
28.3.4 Whole numbers with smallest value ........................................................................430
28.3.5 Rounding 431
28.3.6 Remainder of division ..............................................................................................431
28.3.7 Sign 431
28.3.8 Variable parameter no.: ...........................................................................................431
29. Miscellaneous..........................................................................................................................................432
29.1 Operator machine constants .....................................................................................................432
29.2 Machine settings monitoring file ................................................................................................432
29.2.1 List of user machine constants.................................................................................432
29.3 Connecting cable for data interfaces .........................................................................................435
29.4 Configuring the Ethernet interface .............................................................................................436
29.4.1 Ethernet interface connection options.......................................................................436
29.4.2 Connecting cable for Ethernet interface....................................................................437
29.4.3 Configure MillPlus Ethernet interface (file tcpip.cfg)..................................................437
29.5 Digitizing 444
29.5.1 Installation................................................................................................................444

INTRODUCTION
20000710 MillPlus V410 11
1. Introduction
These instructions are intended to assist you in operating and programming the controller.
Please read the information in this manual carefully before you start your new machine. It contains
important information on machine operation and safety to enable you to use your machine safely and
effectively.
The following advice is important for your safety:
This manual is essential for safe use of the machine.
Please ensure that it is in the vicinity of the machine.
The machine should not be operated, even for a short period, by anyone who has not received suitable
training, either in the company, at an Institute of Further Education or in one of the Training Centres.
Please read the general safety regulations issued by your professional association.
If they are not on display in the company, contact your appointed safety representative.
Observe the instructions for proper use of the machine.
The controller and the machine are coordinated using machine constants. Some of these constants are
accessible to the user. Caution!
The meaning and function of the constants must be fully understood before any changes are made to
these constants. If in doubt, please consult our service department.
The controller is fitted with a backup battery that safeguards the memory content for up to three years
after the machine is switched off (but only if the battery is serviceable).
The user should always save the programs and specific data (e.g. technology data, machine constants,
etc.) to a PC or to diskette. This will avoid the data becoming irrecoverably lost if the system or backup
battery becomes defective.
We reserve the right to make changes to the design, equipment and accessories in the interest of
further development. No liability will be accepted for any errors in the data, illustrations or descriptions.
1.1 MillPlus software and functions
This manual describes functions available in MillPlus (VME and LE4xx hardware) for the following or
higher software versions:
- V410 (VME, LE4xx) Software number 341 482-xx
- V420 (VME, LE4xx) Software number 344 198-xx
The machine builder adapts the versatile capability of MillPlus to the machine in question by means of
machine parameters. That is why some functions described in this manual are not available with every
version of MillPlus.
MillPlus functions that are not available on every machine include, for example:
- Digitising option
- Tool measurement with laser system or with TT120/TT130
- DNC Plus (DNET) interface
- Ethernet interface (TCP/IP)
- Autostart (warm machine startup program)
- Milling/turning
Please contact the machine builder for individual support for the particular machine being controlled.

INTRODUCTION
12 Heidenhain
1.2 Software version V420
Note
The V420 software only functions in 16 Mbyte DRAM systems.
Operation:
Expanded calculation operations
- The number of possible addresses in Cycle Design is expanded and OPTIONAL and ACTIVE
have been added.
- Calculations for E parameters expanded with the floor(E2), ceil(E2), round(E2,n), mod(E2,E3),
sign(E2), atan(E2,E3), acos(E2,E3) and asin(E2,E3) functions.
New G functions:
Dynamic TCPM (Tool Centre Point Management) (G141)
Tool withdrawal movement (G174)
M19 with programmable direction (G303)
Query current G data (G320)
Query programmable kinematic elements (G329)
Write programmable kinematic elements (G339)
Writing to a window (G350)
Writing to a file (G351)
Milling/turning
G17 expanded
G36 and G37 turning
G94 and G95 expanded
G96 and G97 constant cutting speed
G302 overwrite tool orientation radius correction
G691 unbalance detection
G692 unbalance checking
G822, G823, G826 and G827 machining
G832, G833, G836 and G837 hollow boring
G842, G843, G846 and G847 plunge cutting
Expanded G functions:
Expansions: tool measurement cycles for laser measuring system
G600 laser system: calibration
G601 laser system: measuring length
G602 laser system: measuring length and radius
G603 laser system: individual cutting tip monitoring
G604 laser system: tool breakage monitoring
G8 selectable tool radius correction
Start of contour description (G198) expanded with I1 address.
Start of graphic contour description (G199) expanded with B=4.
Query active technology (G139) expanded with S1 address.
Query tool table (G321) expanded with O address.
Query current modal G function (G324) expanded.
Writing to the tool table (G331) expanded with O address.
1.3 Software-Version V410
Hinweis
Die V410 Software funktioniert allein in 16Mbyte DRAM Systemen.
Bedienung:

INTRODUCTION
20000710 MillPlus V410 13
Dateien markieren
Easy Operate Taschen und Nuten mit besserer Technologie
Autostart Warmlaufprogramm
Werkzeugkorrektur
Neue G-Funktionen:
-G8 Werkzeugrichtung schwenken
-G327 Abfragen aktive Betiebsart
-G600-G609 Werkzeugmeßzyklen für Lasermessung und TT120/TT130
-Zyklen Design
Geänderte G-Funktionen:
-G0/G1 Berechneter Rundachsenradius
-G28 Programmierbare Konturgenauigkeit
-G84 Gewindebohren bei aktivem G7 in der Hauptebene mit offenem Regelkreis
-G93 Rücksetz Funktion
-G94 Aktivieren Rundachsenberechnung
-G324 Erweitert mit I1=28
1.4 Software-Version V400
Neue G-Funktionen:
-G7 Freie Bearbeitungsebene
-G319 Lese aktuelle F, S oder T
-G321 Werkzeugtabelle abfragen
-G324 Abfragen G-Gruppe
-G325 Abfragen M-Gruppe
-G331 Schreiben nach Werkzeugtabelle
-G332 Schreiben in Maschinenkonstantenspeicher
Geänderte G-Funktionen:
-Erweiterte Werkzeugtabelle
-Vorschub-Override wirksam/nicht wirksam G25/G26 erweitert mit Spindeloverride
-Gewindeschneid Zyklus G84 ist geändert in Synchron Bewegung (Rigid Tapping)
-Der Meßzyklus G145 ist erweitert mit des Meßposition der Spindel (S1=)
-Meßtasterstatus G148 ist erweitert
-Abfrage Werkzeug-Länge und Radius G149 an Aufmaß angepaßt
-Ändern Werkzeug-Länge und Radius G150 an Aufmaß angepaßt
B. Software version V410
Note Software version V410 will only run on 16 Mbyte DRAM systems.
Operation:
Select files
Easy Operate pockets and keyways with better technology
Autostart or warm start program
Tool correction
New G functions:
-G8 Swivel tool direction
-G327 Query active operating mode
-G600-G609 Tool measuring cycles for laser measurement and TT120/TT130
-Cycle design
Modified G functions:
-G0/G1 Calculated radius of rotary axes
-G28 Programmable contour precision

INTRODUCTION
14 Heidenhain
-G84 Tapping with active G7 at top level with open control loop
-G93 Reset function
-G94 Activate rotary axes calculation
-G324 Extended with I1=28
C. Software version V400
New functions:
-G7 Free operating planes
-G319 Read current F, S or T
-G321 Query the tool table
-G324 Query the G group
-G325 Query the M group
-G331 Write to the tool table
-G332 Write to the machine settings memory
Changed functions:
-Extended tool table
-Advance override active/inactive G25/G26 enhanced with spindle override
-Tapping cycle G84 has been changed to synchronous motion (rigid tapping)
-Measurement cycle G145 has been enhanced by the spindle measuring position (S1=)
-Measuring key status G148 has been enhanced
-Query tool length and radius G149 adapted for oversize
-Change tool length and radius G150 adapted for oversize
SAFETY
20000710 MillPlus V410 15
2. Safety
Meaning of symbols and notices:
Signifies immediate danger to persons
"LIVE COMPONENTS" Access through authorized personnel
only! Indicates
danger due to live components, which must be isolated prior to
commencing
repairs.
Applies to operating or plant procedures which have to be followed precisely to
avoid danger or injury to persons and damage to the installation.
Applies to situations which may pose a danger to persons.
For special technical features which the user must note.
General safety and accident prevention regulations must be heeded as well as the advice given in the
operating instructions.
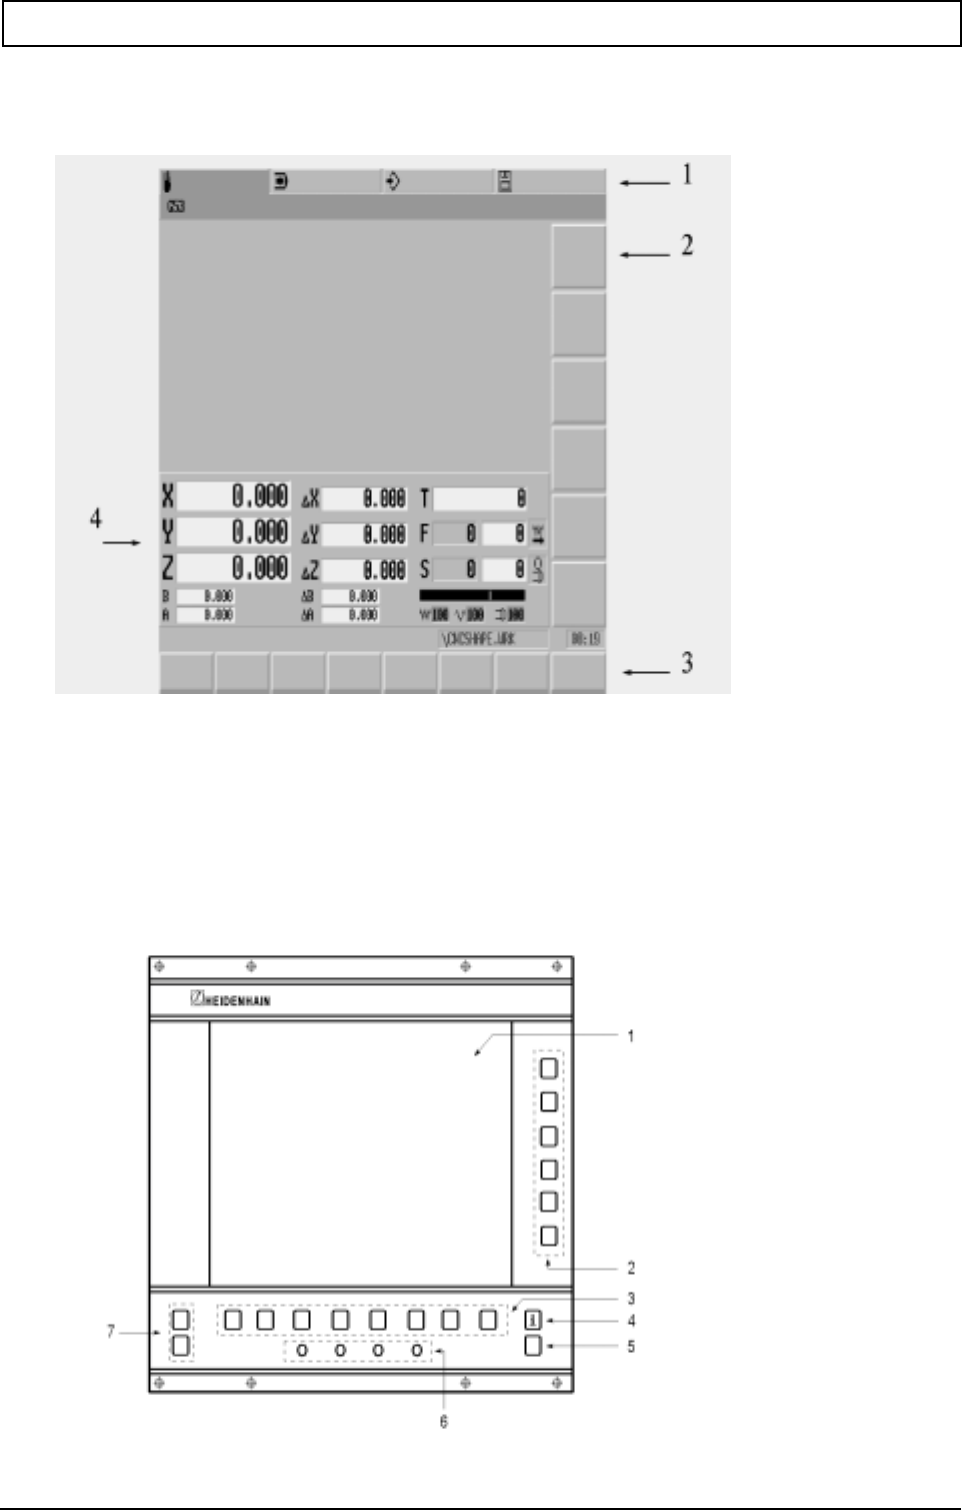
KEYBOARD AND SCREEN LAYOUT
20000710 MillPlus V410 17
3. Keyboard and screen layout
3.1 Screen display
1 Process level
2 Machine function softkeys
3 Softkeys
4 Machine information
3.2 Screen and keyboard of LE412
1 VGA monitor
2 Machine function softkeys
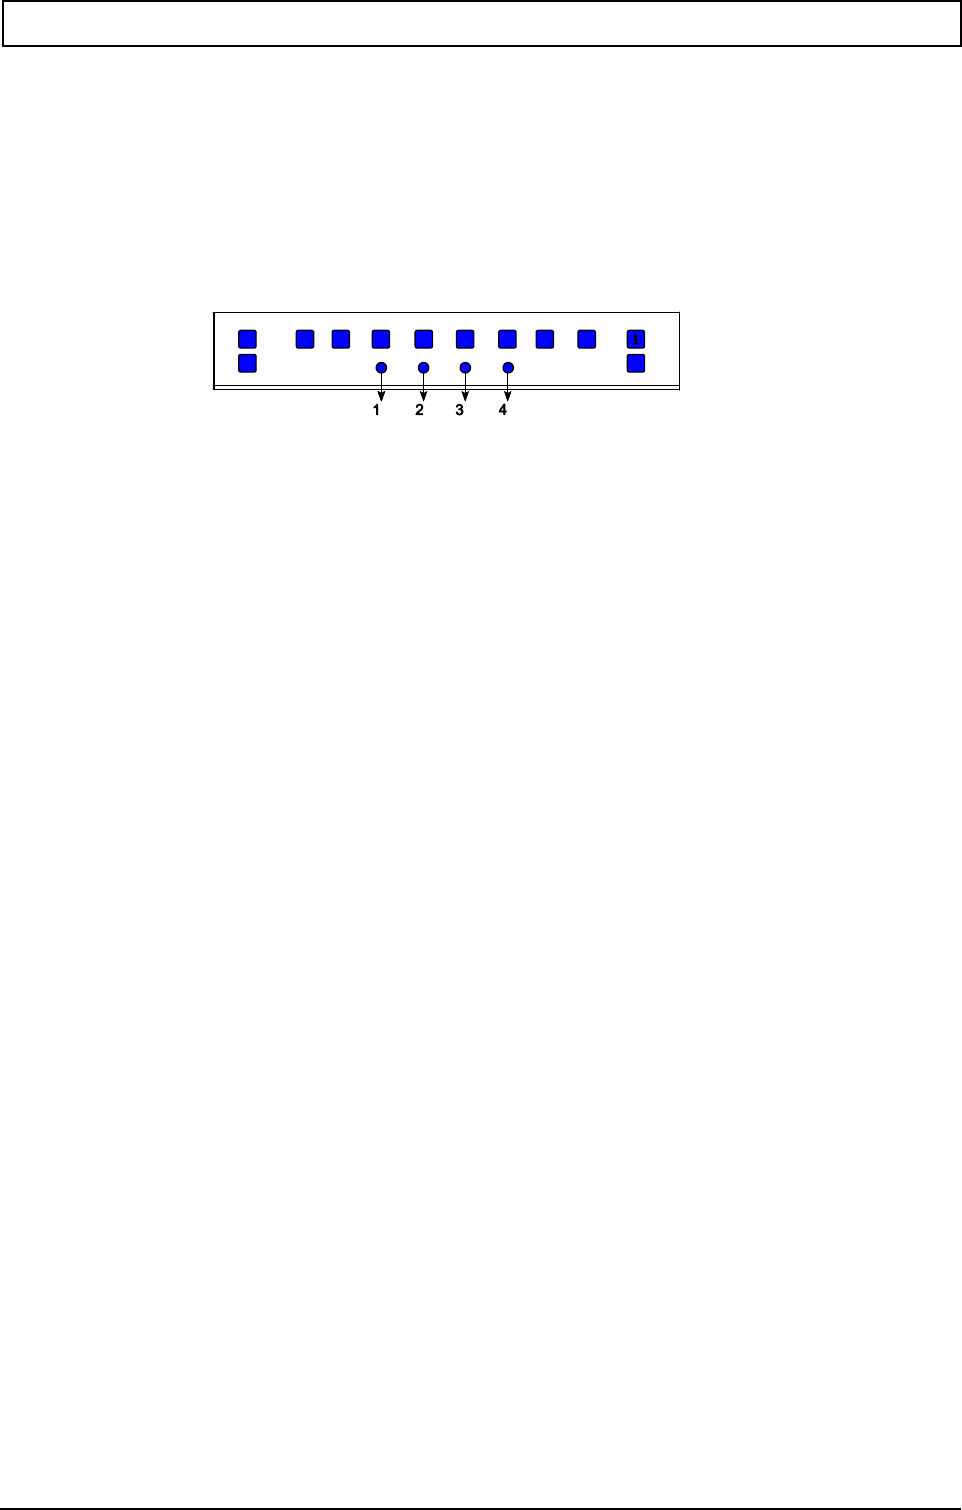
KEYBOARD AND SCREEN LAYOUT
18 Heidenhain
3 Softkeys
4 Information key
5 Key without function
6 VGA monitor controls
7..Keys without function
3.2.1 Screen adjusting keys
The screen adjusting keys have different functions depending on the selected mode.
No function selected yet:
1 Demagnetising
2-4 Accessing set-up menu
Set-up menu on screen:
1 Exiting set-up menu (new settings are saved)
2 Moving highlighting of submenu downward (when bottom line of menu 1 is reached and the key is
pressed again, menu 2 is selected automatically)
3 Moving highlighting of submenu upward (when the top line of menu 2 is reached and the key is
pressed again, menu 1 is selected automatically)
4 Activating the highlighted submenu
Submenu on screen:
1 Exiting set-up menu (new settings are saved)
2 Reducing the value means
Image moves to the left, or downward
3 Increasing the value means
Image moves to the right, or upward
4 Back to menu 1 or menu 2 (new settings are saved)
Screen settings (preferences)
CONTRAST Adjusting the contrast
BRIGHTNESS Adjusting the brightness
H-POSITION Adjusting horizontal image position
H-SIZE Adjusting image size
V-POSITION Adjusting vertical image position
V-SIZE Adjusting image height
SIDE-PIN Pin-cushion correction
TRAPEZOID Correcting trapezium (keystone) distorsion
ROTATION Correcting image rotation
COLORTEMP Adjusting the colour temperature
R-GAIN Adjusting red colour intensity
B-GAIN Adjusting blue colour intensity
RECALL Not used
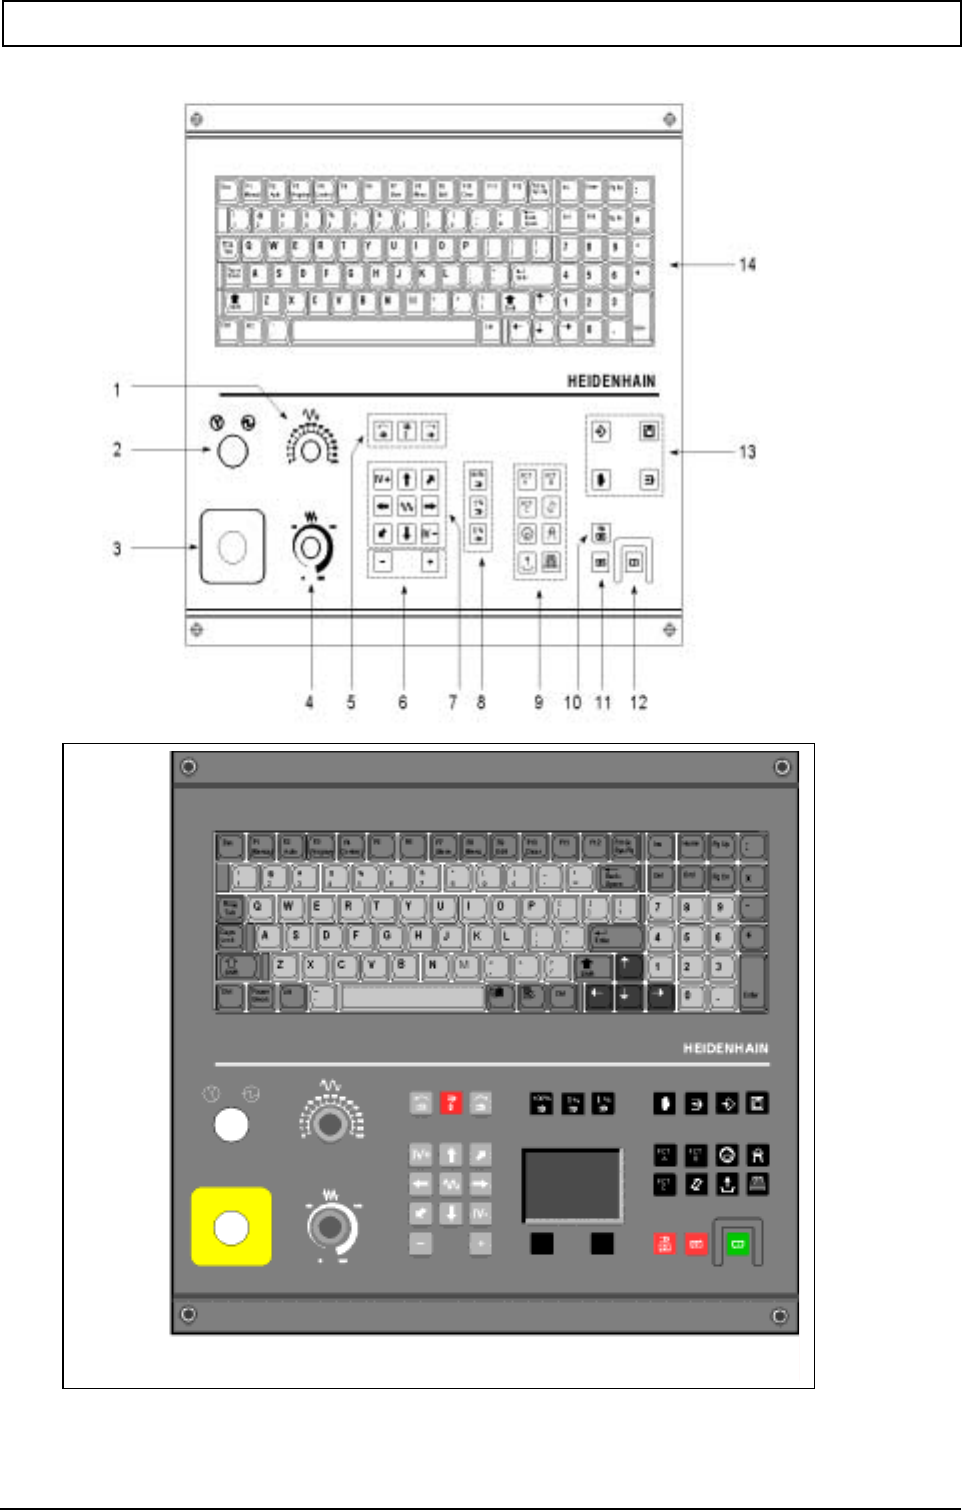
KEYBOARD AND SCREEN LAYOUT
20000710 MillPlus V410 19
3.3 Machine control panel
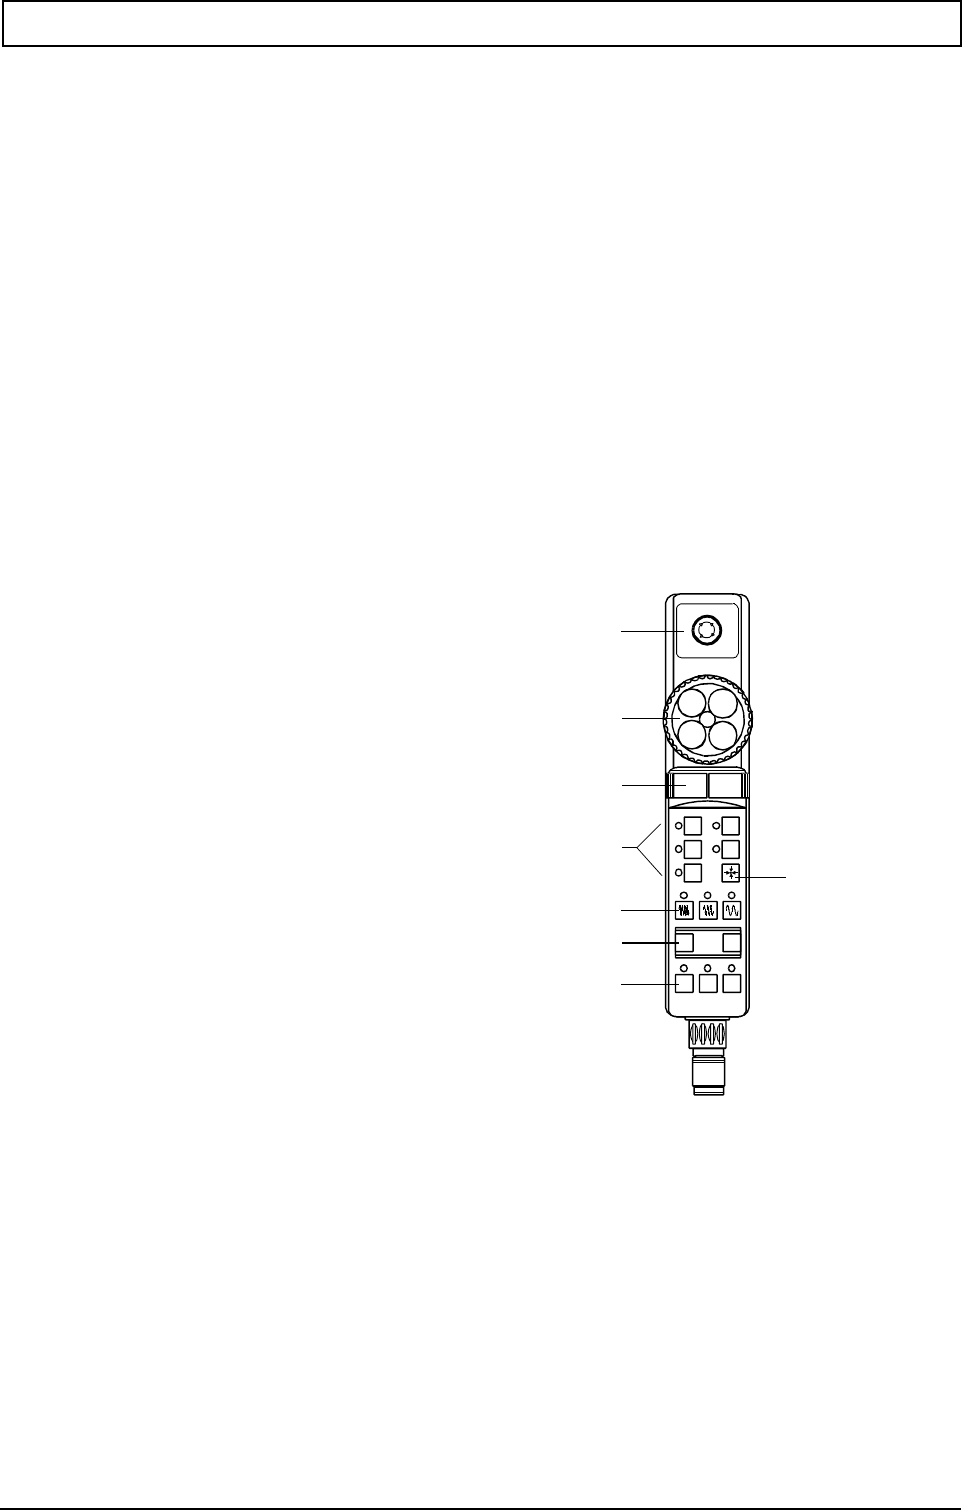
KEYBOARD AND SCREEN LAYOUT
20 Heidenhain
1 Rapid traverse rate control.
2 Machine ON
3 EMERGENCY STOP
4 Feed rate control
5 Spindle On Clockwise Rotation, Stop, On Anticlockwise Rotation
6 Axial movement keys for other axes
7 Axial movement keys and rapid traverse
8 Spindle speed control
9 Machine function keys; the function of the keys is determined by the machine tool builder.
Please refer to your machine tool manual
10 Feed and spindle STOP
11 Feed STOP
12 START
13 Main modes of operation
14 Standard PC-keyboard
Note The keys (F11, F12, Prt Sc Sys Rq, Pause Break) must not be activated, because no function has
been assigned to them.
3.4 Hand wheel HR410 (HCU)
1. Emergency stop button
2. Hand wheel 1
3. Safety keys
4. Axis selection keys 2
5. Keys for setting the feed (slow, medium, fast); feed rates
are defined by the machine manufacturer
6. Direction into which the CNC moves the selected axis
7. Machine function keys
(defined by the machine manufacturer)
6
8. Key for taking over the actual position
- setting the actual value
- tool measurement
- Program Editor
The red LED displays indicate the axis and feed you selected.
3.4.1 Selecting/deselecting the hand wheel
The hand wheel is selected by pressing the left safety key. In the right top of the display appears
HCU. For deselection let go the left safety key.
Hinweis
Die Bedienung wird vom Maschinenhersteller festgelegt. Beachten Sie Ihr Maschinenhandbuch.
X
Y
Z
V
IV
-+
FCT
A
FCT
B
FCT
C
3
4
5
6
7
1
2
8

KEYBOARD AND SCREEN LAYOUT
20000710 MillPlus V410 21
3.5 Exiting a function
To exit a function or a mode, press "Menu" again,
or
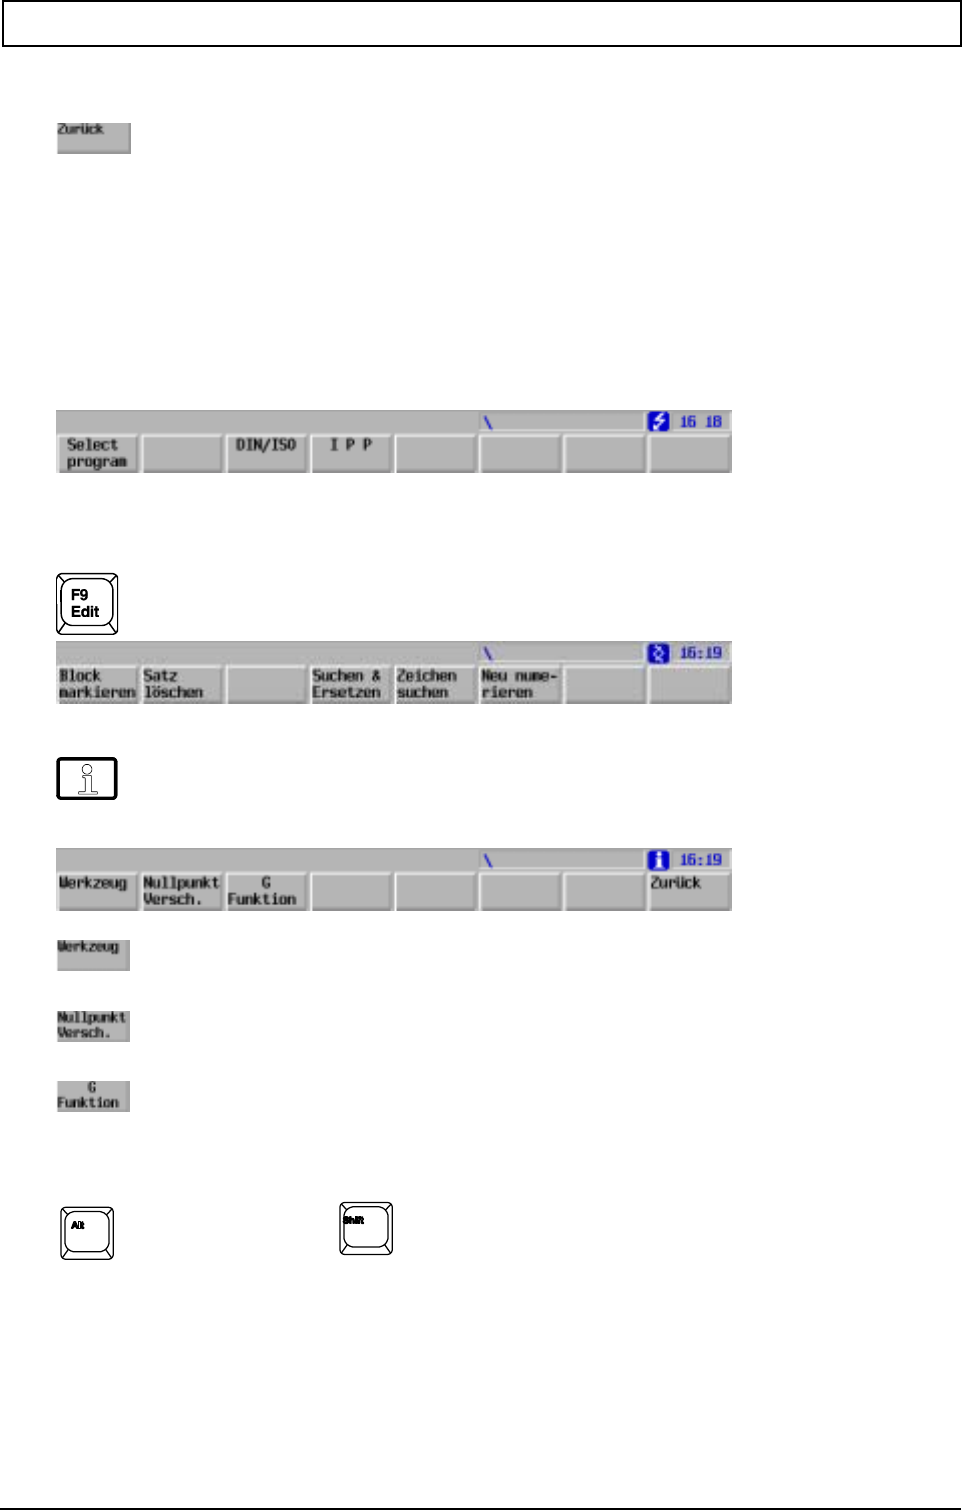
KEYBOARD AND SCREEN LAYOUT
22 Heidenhain
3.6 Return to previous softkey level
Press to return to previous softkey group (if one exists).
3.7 Superimposition of softkey groups
In addition to the current softkey group, other softkey groups may be active in the same mode.
User softkey group for editing DIN/ISO programs
Press a mode key twice:
Example
Edit softkey group
Info softkey group
Indication of the tools entered in the tool table.
Indication of the zero offset table.
Indication of the list of G functions.
3.8 Switching between upper and lower case characters
with
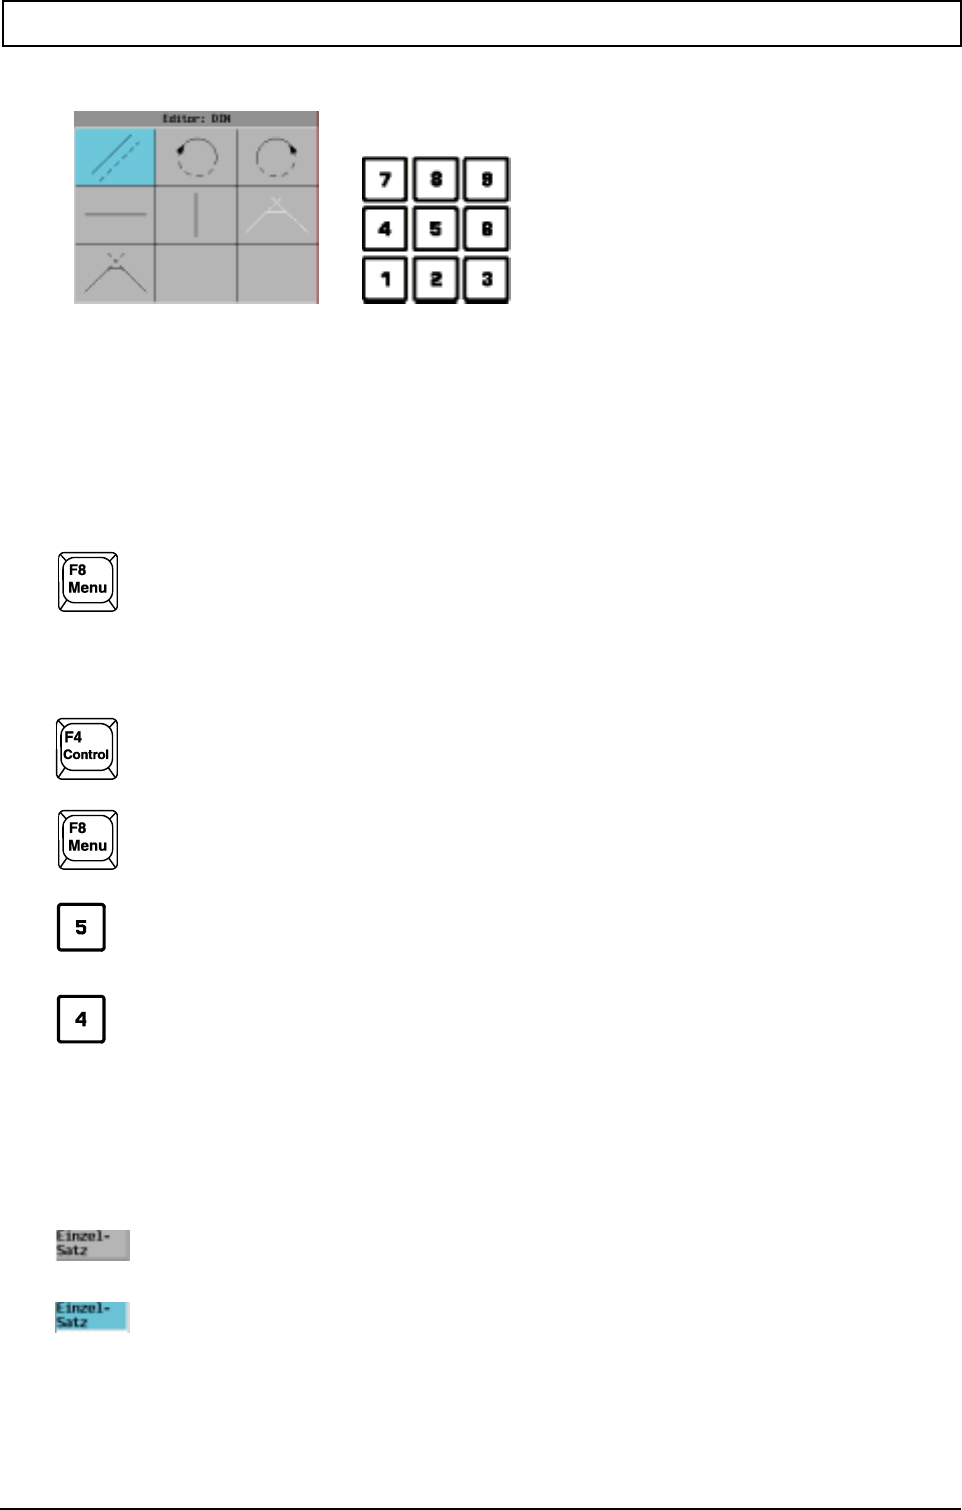
KEYBOARD AND SCREEN LAYOUT
20000710 MillPlus V410 23
3.9 Making selections in the Easy Operate, ICP and IPP menus
1. Use the cursor keys to move left, right, up and down through the menu.
To choose a menu item, press ENTER
2. or press one of the number keys 1-9. The ENTER key is not used in this case.
3.10 Quick mode selection
Two-digit mode number. (first digit: menu position, second digit: mode position)
Example: Select clock
3.11 Softkey Status
The status indicator of the softkeys shows the actual condition. For instance:
Softkey blue (Softkey active)
Softkey grey (Softkey not active)
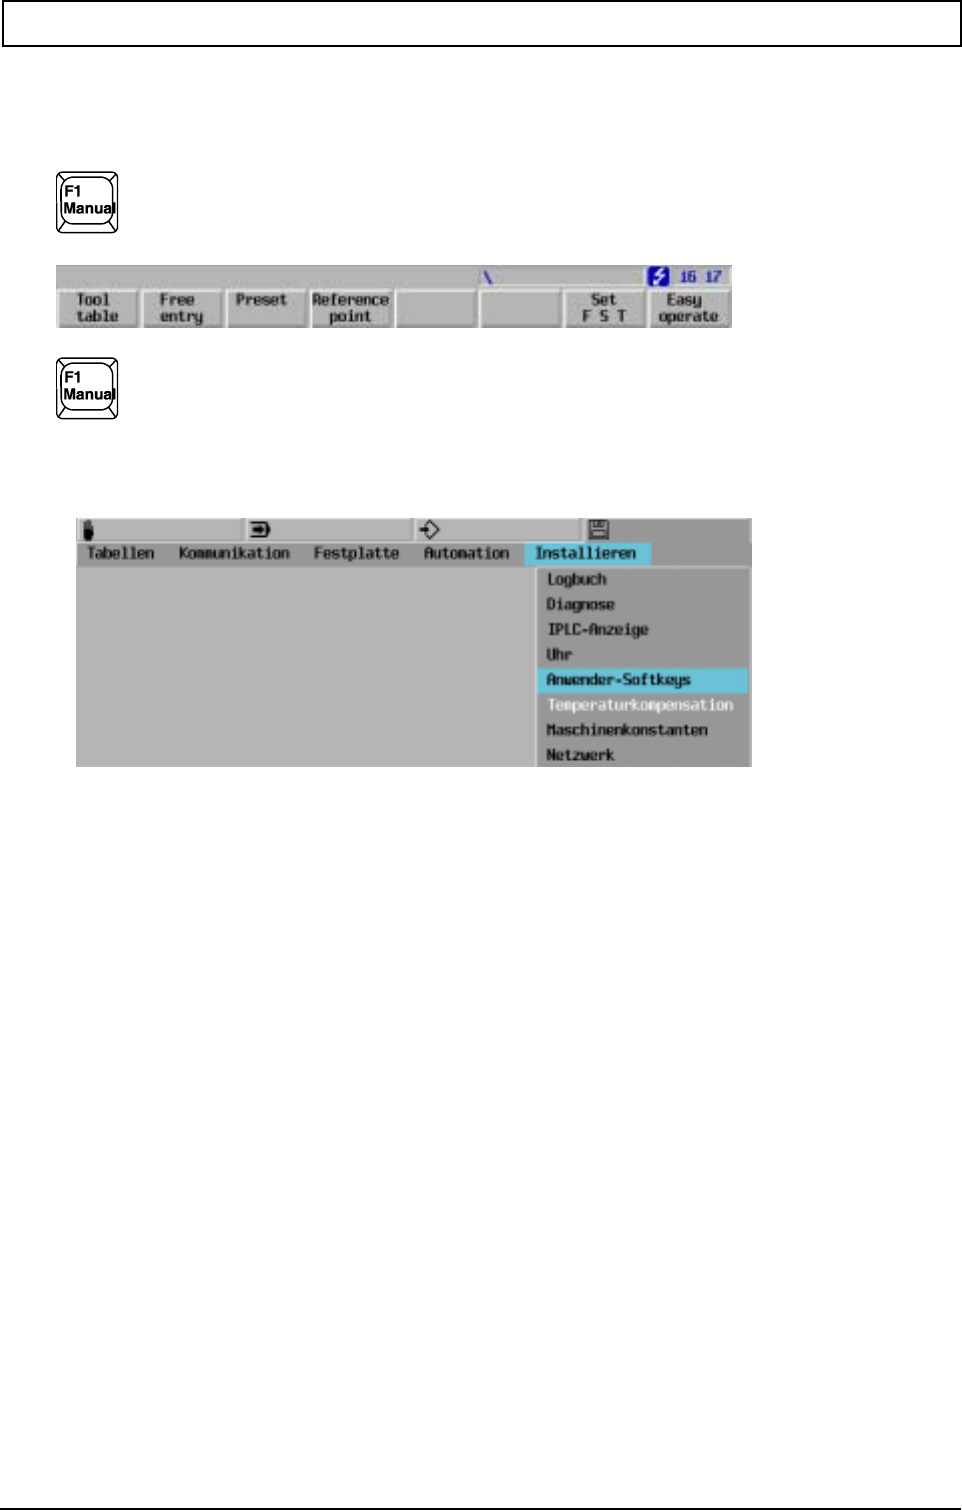
KEYBOARD AND SCREEN LAYOUT
24 Heidenhain
3.12 User softkeys
The user softkeys are used to initiate the most common functions quickly.
The user softkeys appear when the current process mode key is pressed a second
time.
Pressing the key again causes the user softkeys to disappear. The previous softkey level
becomes active again.
3.12.1 Defining the user softkeys
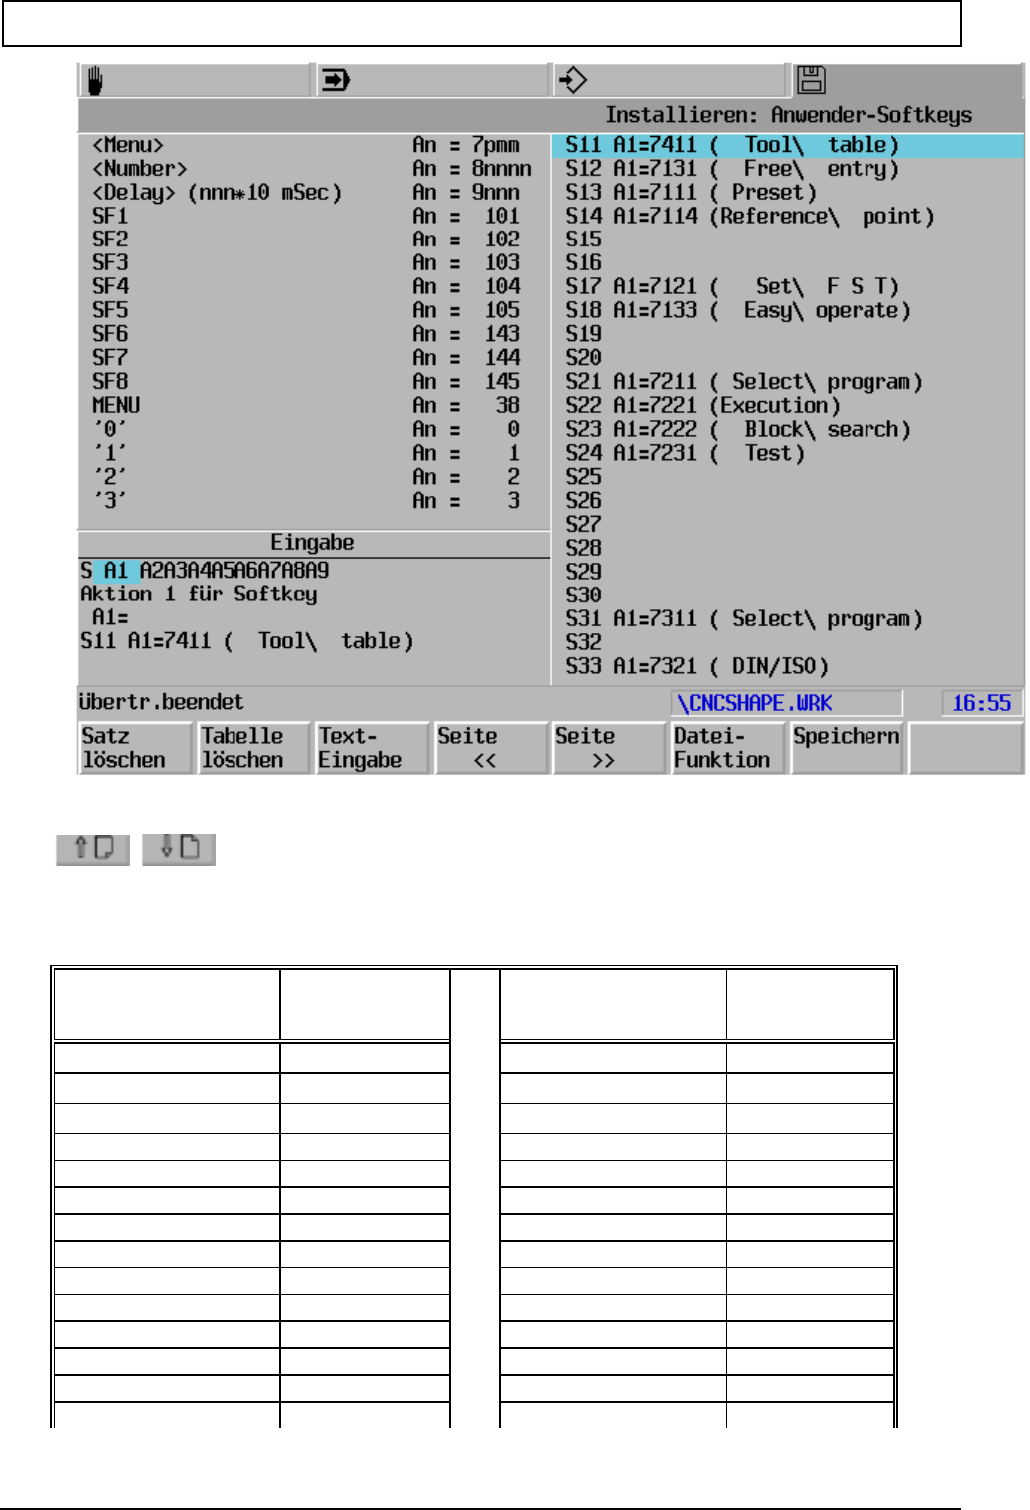
KEYBOARD AND SCREEN LAYOUT
20000710 MillPlus V410 25
Search auxiliary window
Table with key
Key command
Action
value
t
Key command Action
value t
direct menu command 7000-7499 <-- (Cursor left) 49
number command 80000-89999 ^ (Cursor Up) 51
Delay command 9000-9999 v (Cursor Down) 52
hor. softkey 1 101 --> (Cursor right) 50
hor. softkey 2 102 clear 15
hor. softkey 3 103 escape 166
hor. softkey 4 104 back space 154
hor. softkey 5 105 key pad "." 39
hor. softkey 6 143 key pad "=" 40
hor. softkey 7 144 key pad "+" 45
hor. softkey 8 145 key pad "-" 46
menu 38 key pad "/" 47
number "0" 0 key pad "*" 48
number "1" 1 help 153
KEYBOARD AND SCREEN LAYOUT
26 Heidenhain
Key command
Action
value
t
Key command Action
value t
number "2" 2 store/select 53
number "3" 3 tab 171
number "4" 4 ASCII "(" 1044
number "5" 5 ASCII ")" 1045
number "6" 6 ASCII "*" 1046
number "7" 7 ASCII "+" 1047
number "8" 8 ASCII "," 1048
number "9" 9 ASCII "-" 1049
process manual 139 ASCII "." 1050
process automatic 162 ASCII "/" 1051
process program 140 ASCII "0"
│
ASCII "9"
1052
│
1061
process control 141
store 53 ASCII "A"
│
ASCII "Z"
1068
│
1094
enter 54
insert 168 ASCII "a"
│
ASCII "z"
1101
│
1127
home 176
page Up 170
delete 163
end 165
page Down 169
Process level Manual: S11 to S18 (Softkey 1-8)
Process level Automatic: S21 to S28 (Softkey 1-8)
Process level Program: S31 to S38 (Softkey 1-8)
Process level Monitor: S41 to S48 (Softkey 1-8)
Entering softkey text:
- The softkey text should be in brackets.
- 2 lines, not more than 9 characters per line.
- Character "\" defines the line break.
Examples
SF1: S31 A1=38 A2=1 A3=1 Select file/program
SF3: S33 A1=38 A2=2 A3=1 DIN/ISO input
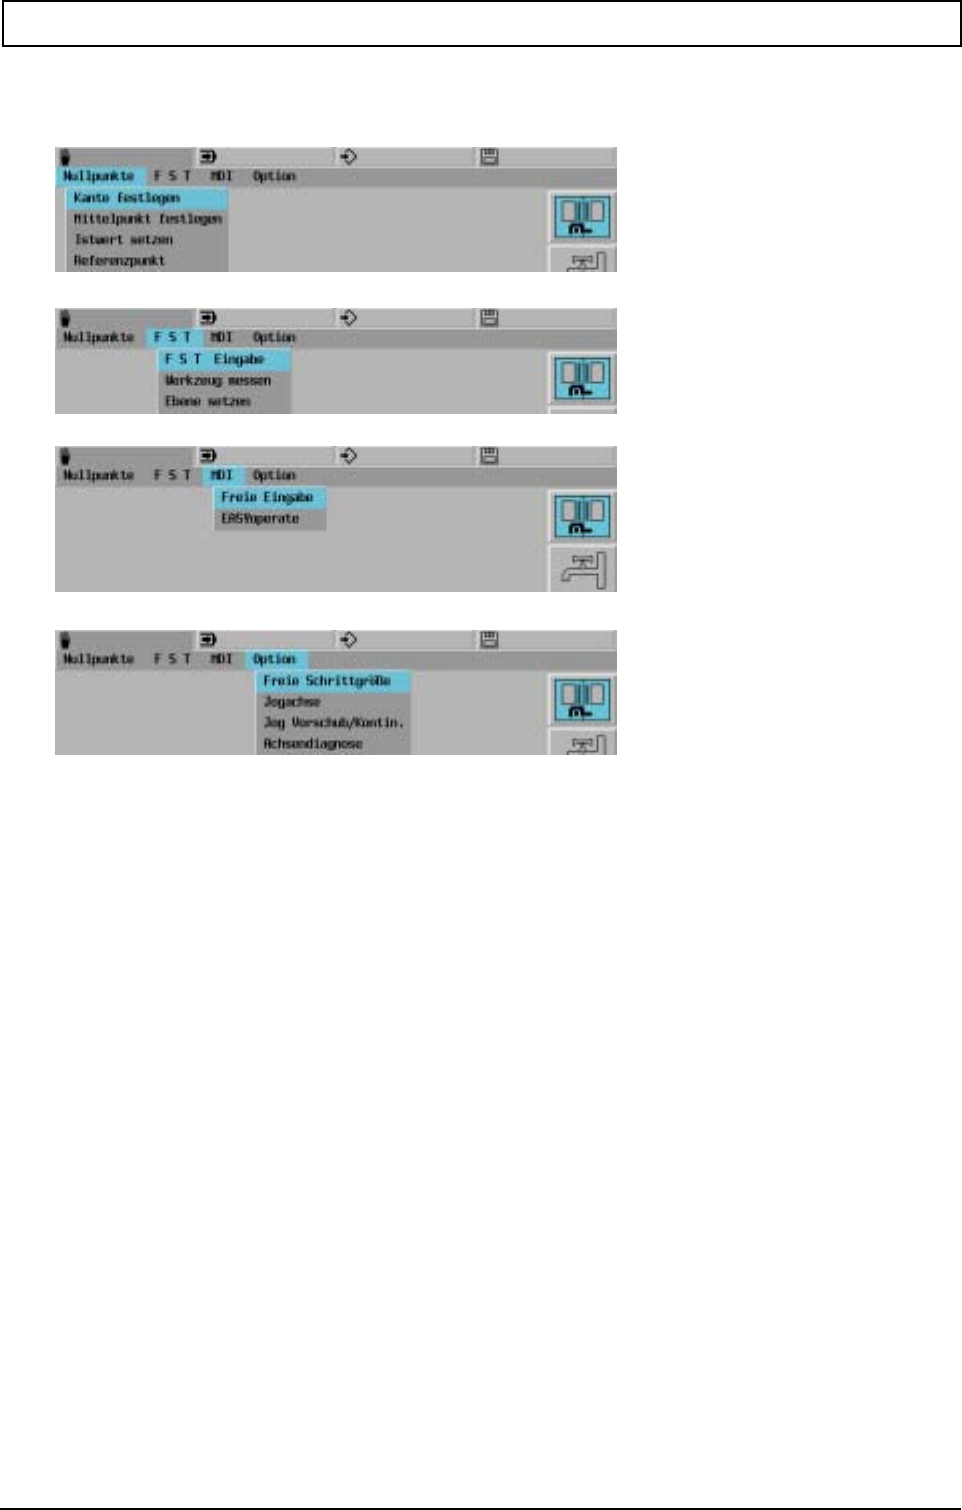
KEYBOARD AND SCREEN LAYOUT
20000710 MillPlus V410 27
3.13 Process level Manual
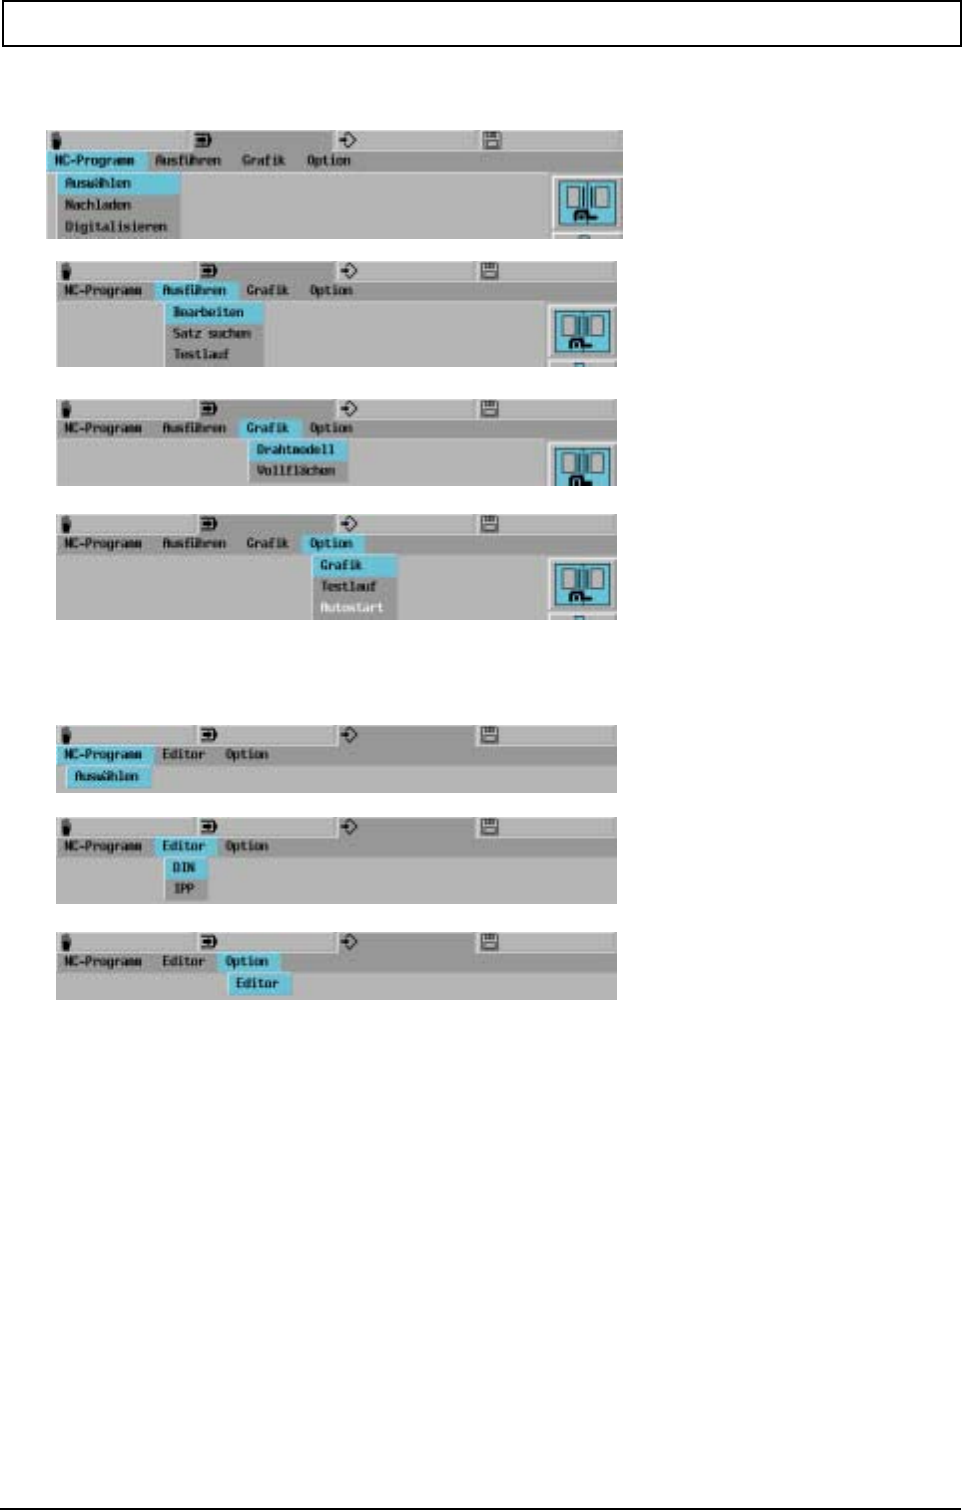
KEYBOARD AND SCREEN LAYOUT
28 Heidenhain
3.14 Process level Automatic
3.15 Process level Program
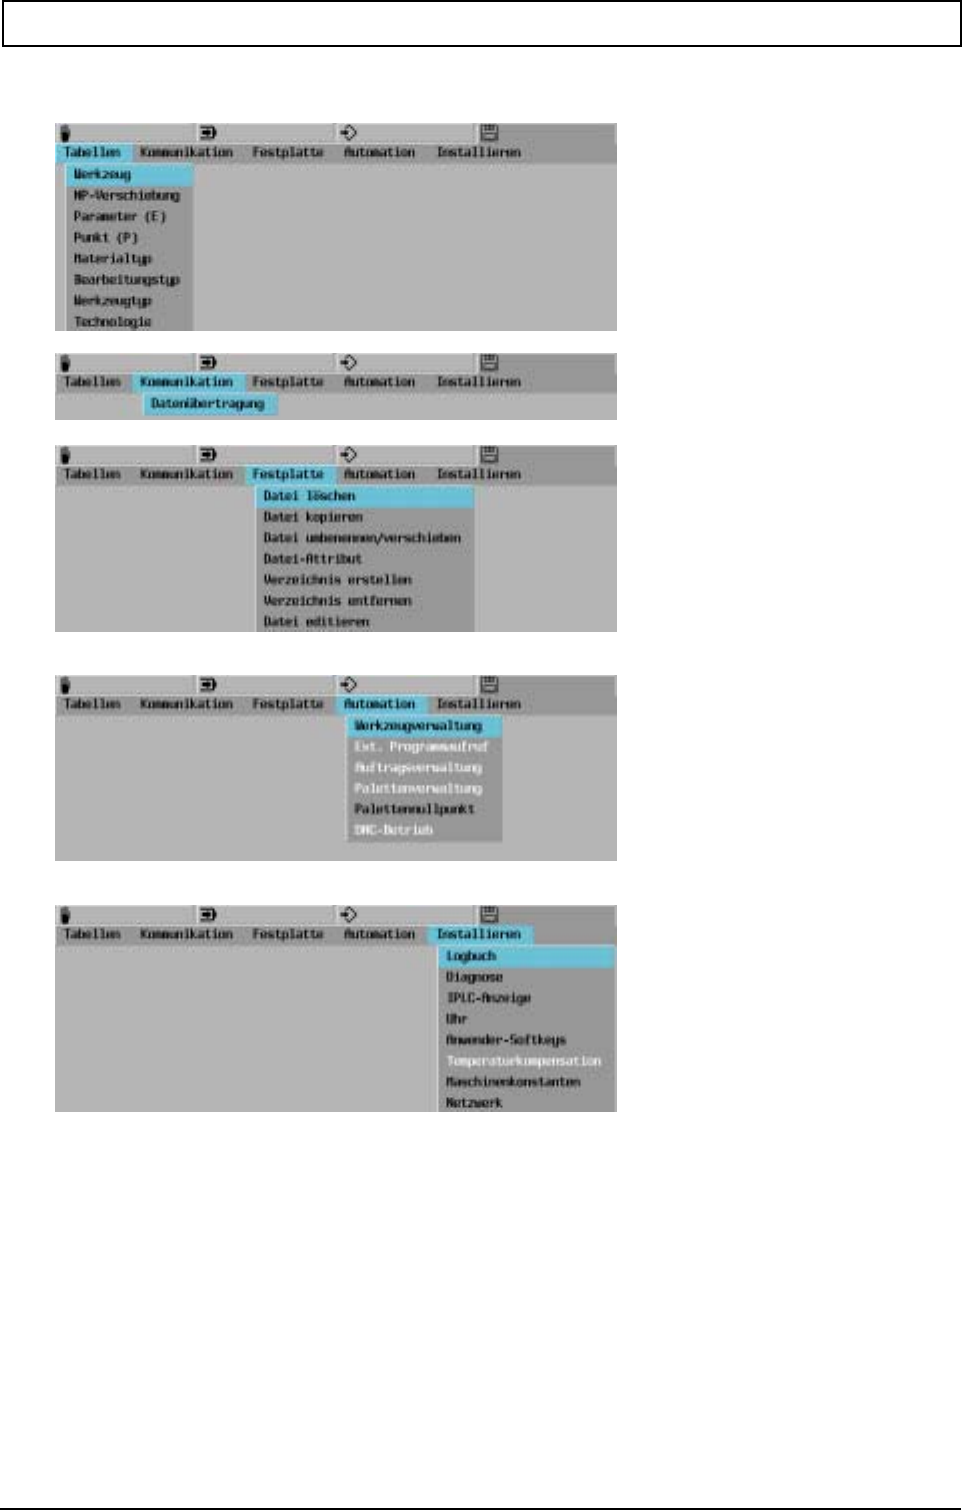
KEYBOARD AND SCREEN LAYOUT
20000710 MillPlus V410 29
3.16 Process level Monitor
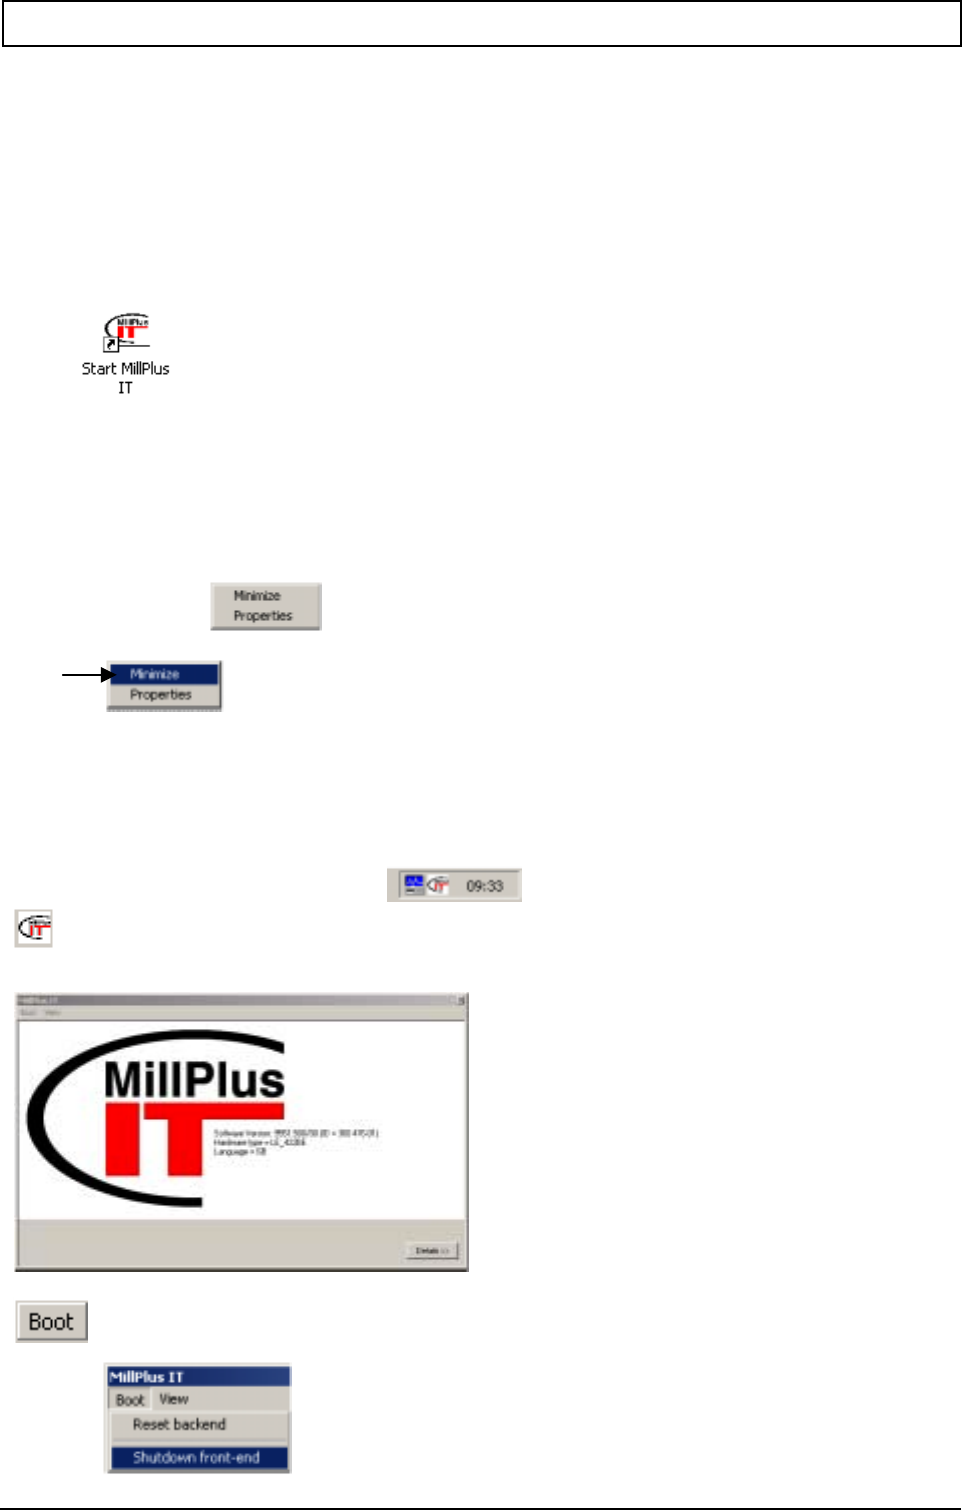
KEYBOARD AND SCREEN LAYOUT
30 Heidenhain
3.17 Starten und schließen der Software auf ein Doppel-Prozessor-System
Bei eine erstmalige Installation beachten Sie Ihr Technisches Handbuch, Installieren der Software auf ein
Doppel-Prozessor-System.
3.17.1 Steuerungsbetrieb starten
Die Steuerungssoftware kann gestartet werden durch Doppelklicken auf die neue Ikone auf dem
Desktop
3.17.2 Steuerungsbetrieb schließen
Drücken Sie vorab auf Not Aus, damit sichergestellt wird daß die Motoren-Hardware ausgeschaltet wurde!
Klicken Sie die rechten Maustaste auf einer beliebigen Stelle im Bildschirm.
Beim Cursor erscheint:
Klicke
Bemerkung
Falls Sie die Steuerung gerade einschalten, brauchen Sie nicht zu warten bis die Steuerungs-Software
aufgestartet ist. Sobald der Aufstartvorgang läuft, können Sie bereits Ctrl/Esc drücken wodurch auch
nachvolgende Vorgang erreicht wird.
Rechtsunten erscheint auf dem Bildschirm:
Klicken
Auf dem Bildschirm erscheint:
Klicken
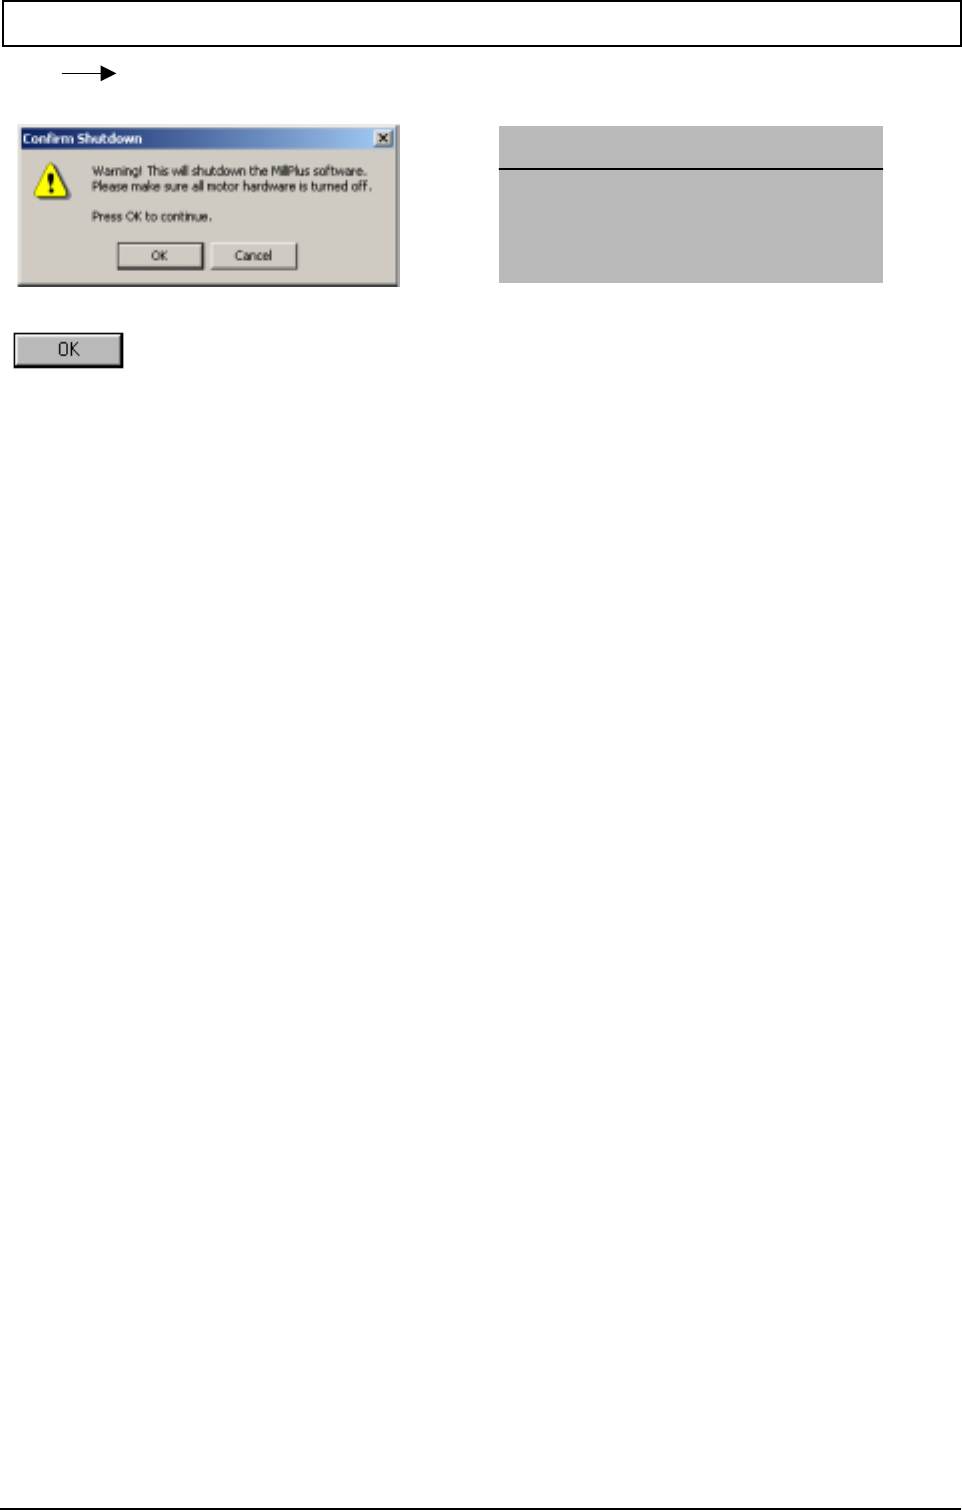
KEYBOARD AND SCREEN LAYOUT
20000710 MillPlus V410 31
Klicke
Bestätigungsfenster erscheint:
Klicken
Bestätigung Schließen
Warnung! Die MillPlus-Software wird
abgeschlossen. Bitte überzeugen Sie sich daß
alle Motoren-Hardware ausgeschaltet wurde.
Drücke "OK" um fortzufahren.
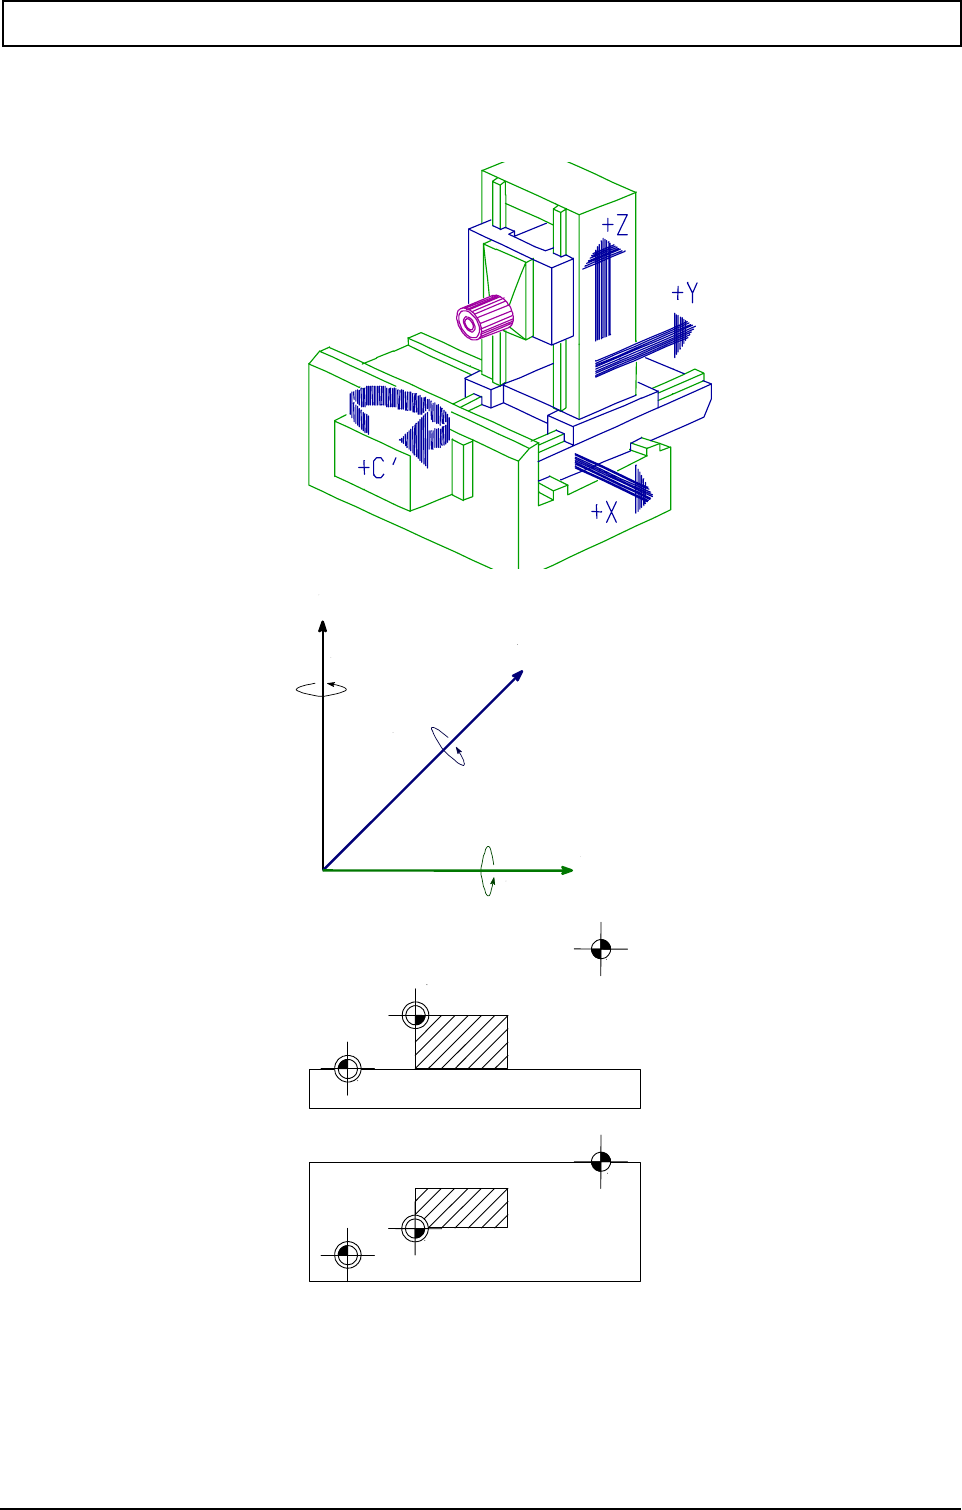
WORKPIECE COORDINATES
20000710 MillPlus V410 33
4. Workpiece coordinates
4.1 Coordinate system and direction of movement
4.2 Axes
4.3 Zero points
R Referenzpunkt
M Maschinennullpunkt
W Werkstücknullpunkt
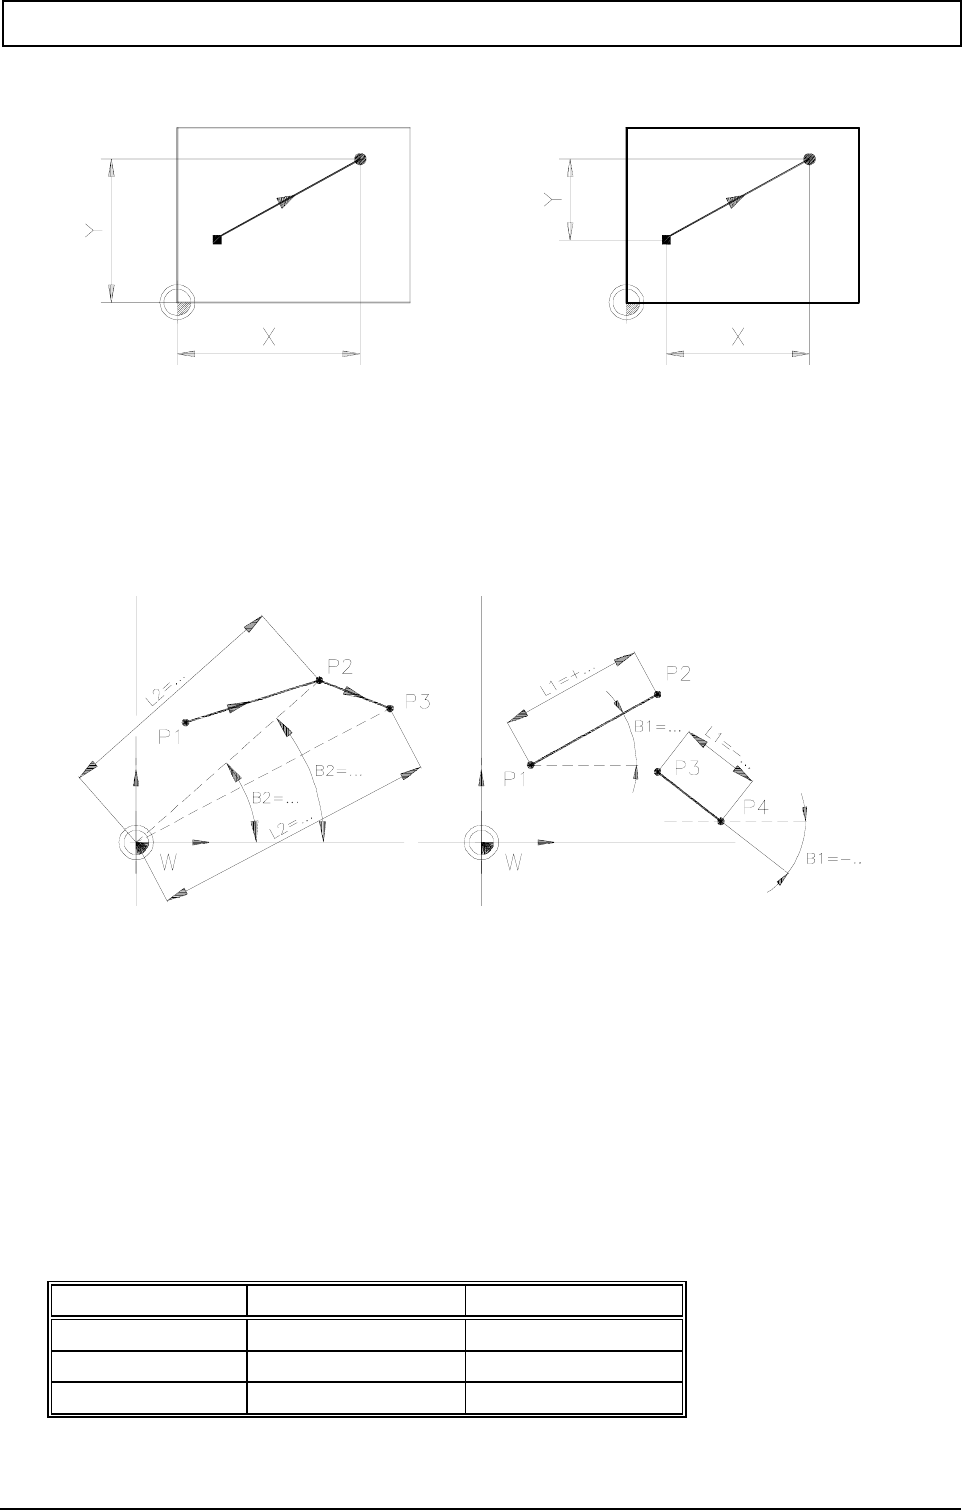
WORKPIECE COORDINATES
34 Heidenhain
4.4 Cartesian coordinates
Absolute coordinates (G90) Incremental coordinates (G91)
Wordwise absolute/incremental programming (X90,X91,Y90...) does not depend on the modally valid
G90/G91 system of measurement.
4.5 Polar coordinates
Absolute coordinates (G90) Incremental coordinates (G91)
Programming in polar coordinates is not affected by wordwise absolute/incremental programming.
Note
If a pole point has been programmed (see G9), program blocks that use polar programming (angle
and length) no longer refer to the zero point, but to the most recently programmed pole point.
4.5.1 Assignment of polar coordinates
Polar coordinates Angle reference axis Movement B1=+
X Y G17 +X +X to +Y
Z X G18 +Z +Z to +X
Y Z G19 +Y +Y to +Z
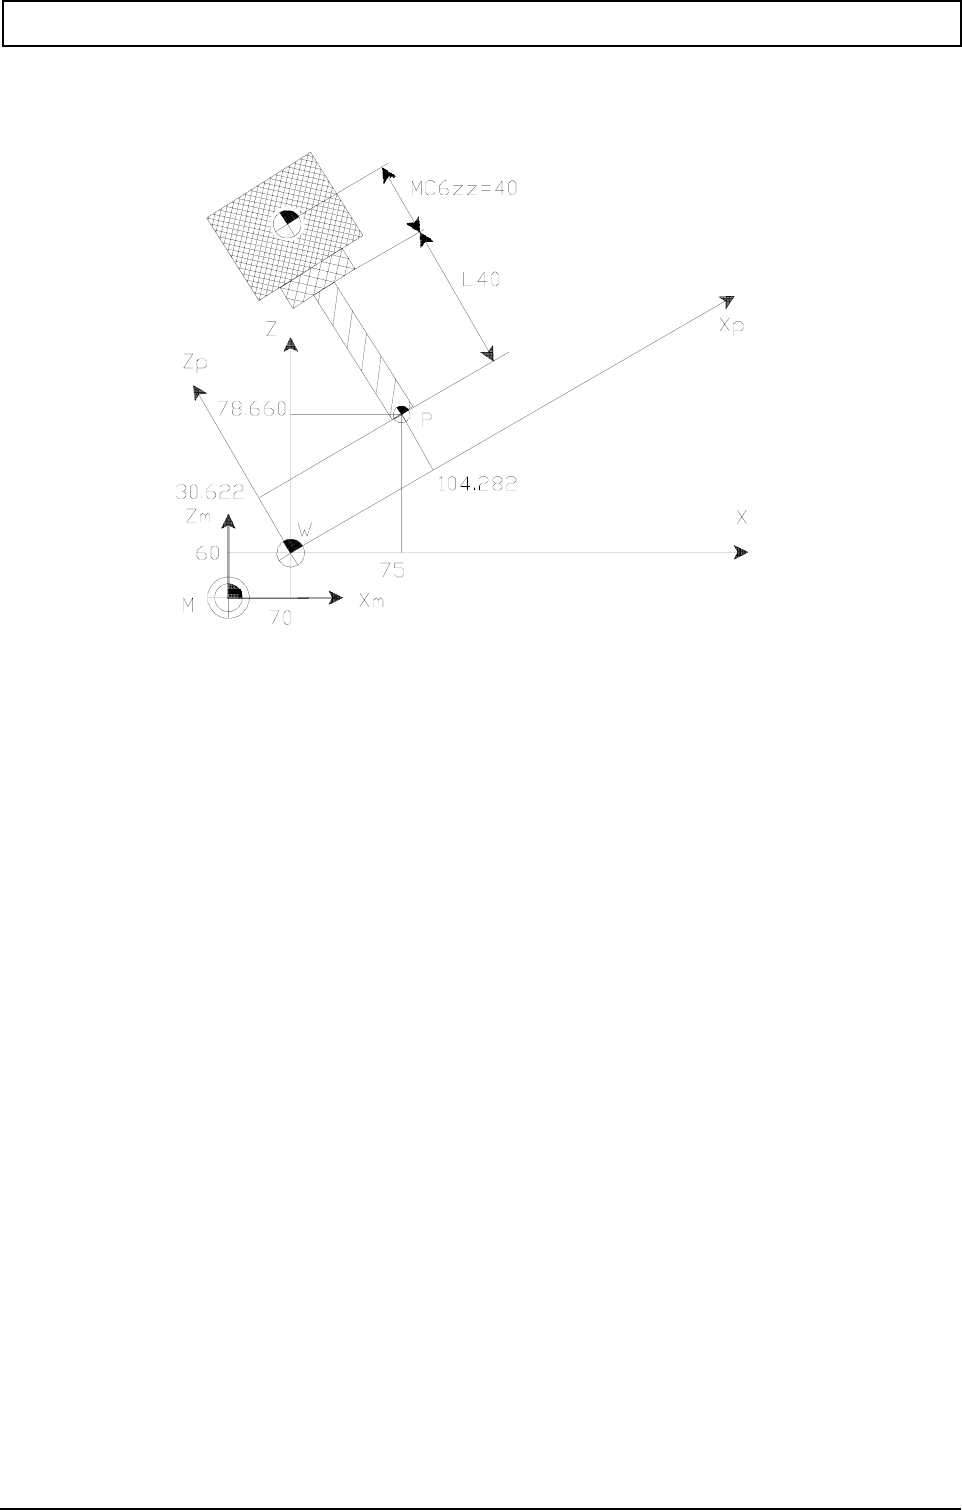
WORKPIECE COORDINATES
20000710 MillPlus V410 35
4.6 FSP coordinates
The position display on the screen can change between the position in the G7 plane (Xp,Zp) or in
machine coordinates (X,Z).
Both are based on the active null point G52 + G54 + G92/G93.
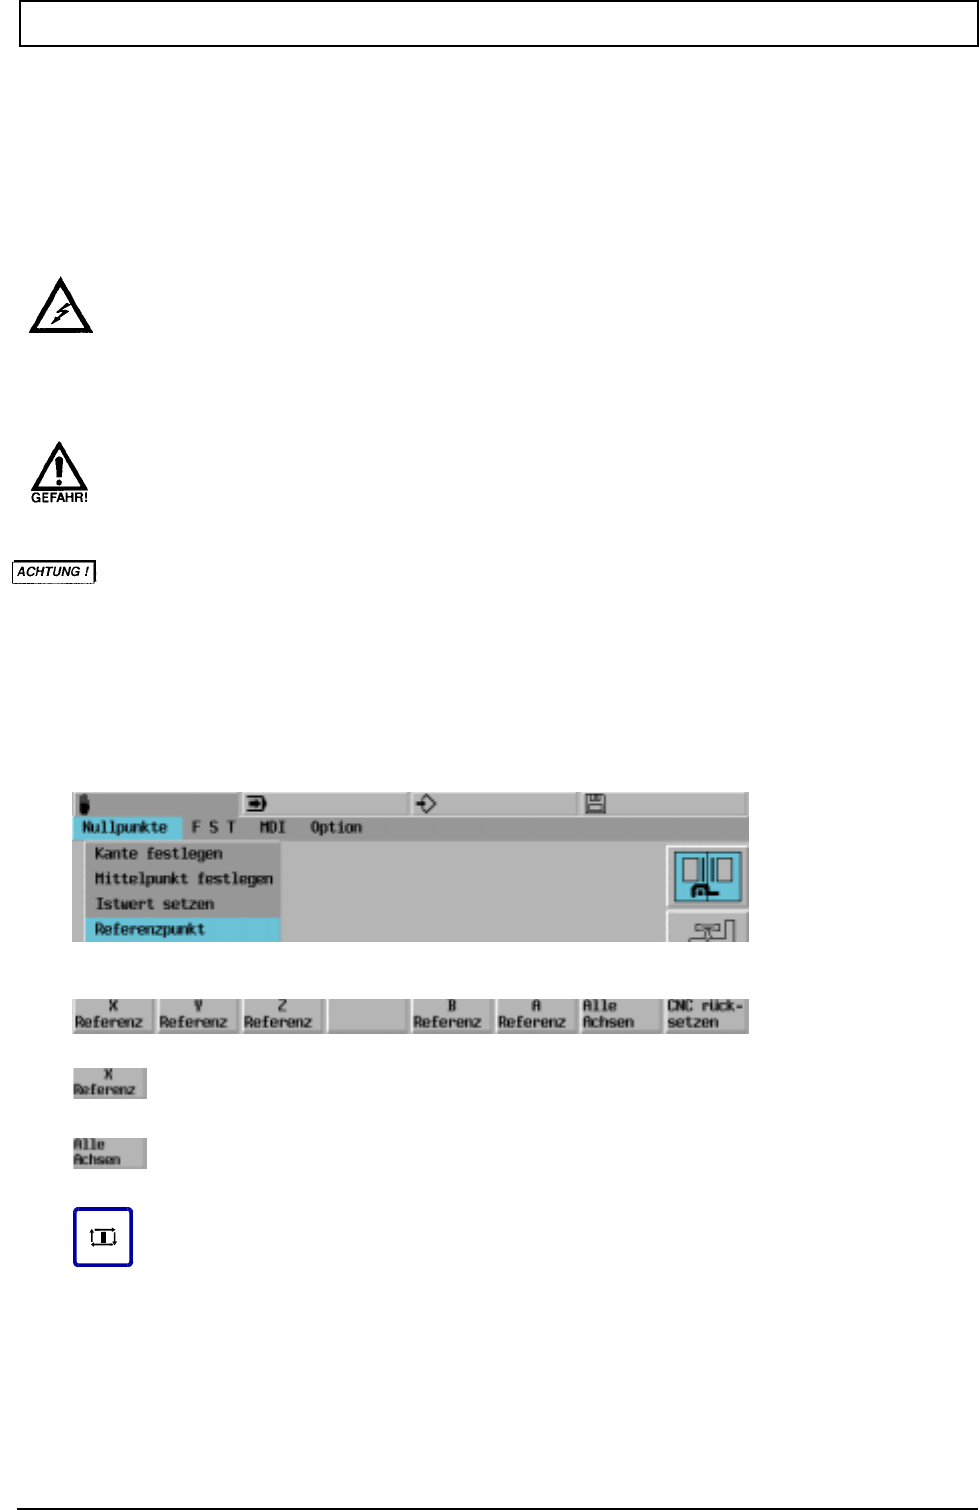
START MACHINE / REFERENCE POINT
20000710 MillPlus V410 37
5. Start machine / reference point
5.1 Start machine (example)
Main switch ON
Power supplied to controller and measuring system.
Danger! High voltage!
Do not touch any exposed components in the switchgear cubicle as they may be live.
Before starting or operating the machine, ensure that noone is likely to be endangered as a
result.
Ensure that only authorised personnel operate the machine!zzz
Release the EMERGENCY STOP switch.
Machine ON (keep key depressed) and press CLEAR.
5.2 Approach reference points
Selection of
one or more axes
Approach reference point (RPF)
Note
Beware of collision!
The software limit switches are not active prior to "Approach reference points", and the axis slides are
able to run up to the mechanical end stop.
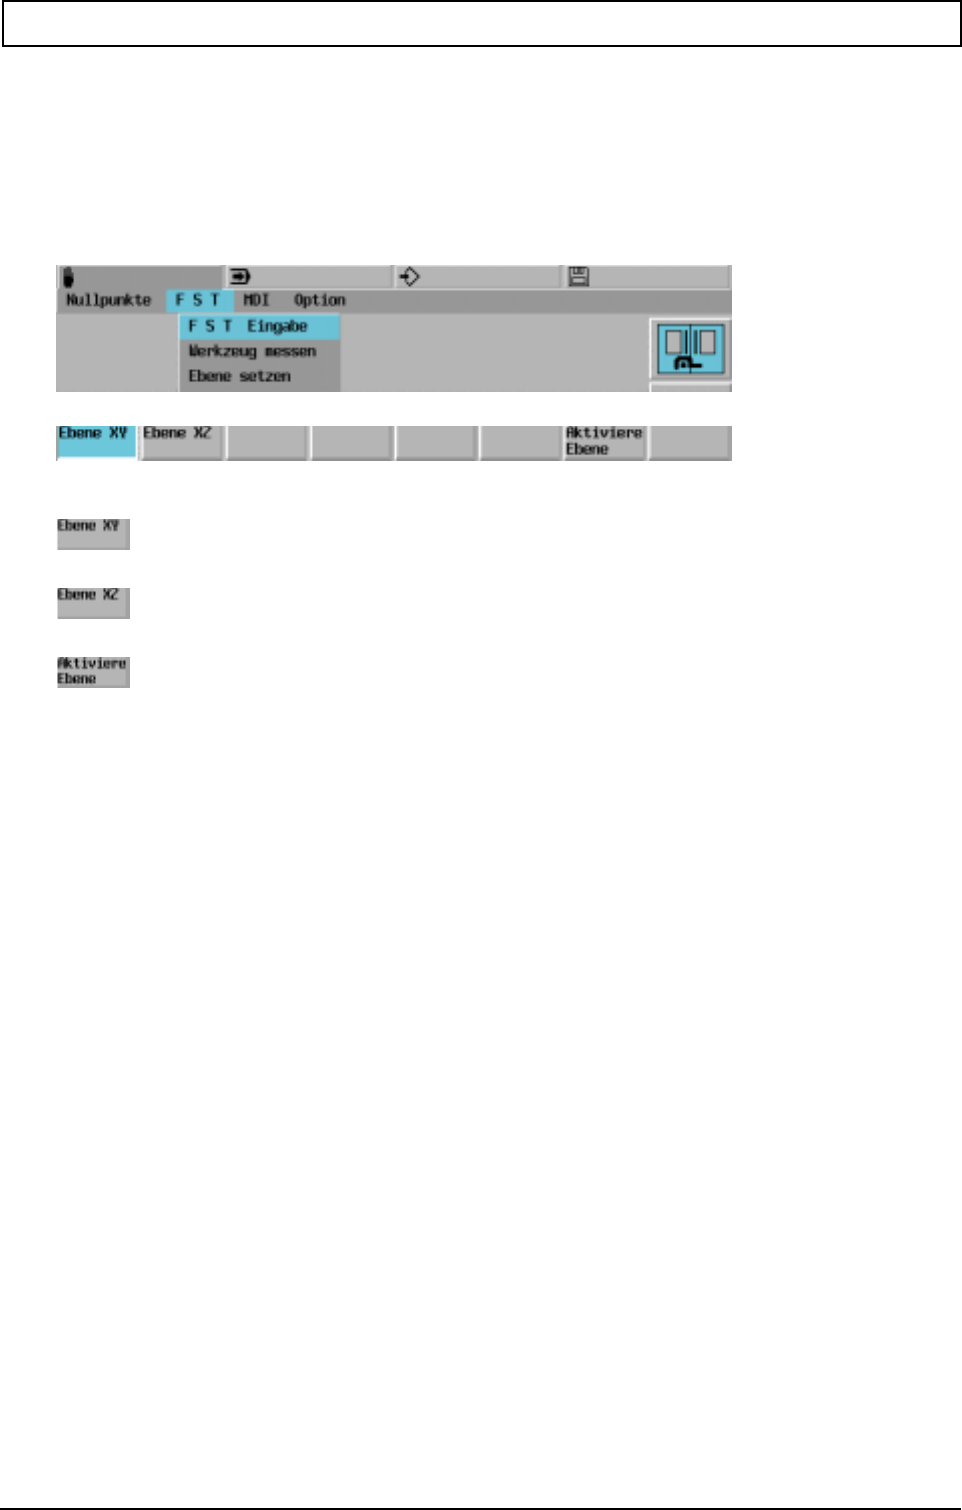
START MACHINE / REFERENCE POINT
38 Heidenhain
Before "Approach reference points", the machine operator should ensure that no collision with the
machine will occur when approaching the reference points.
5.3 Select level
The active plane can be selected by using the softkey. The functions G17, G18 or G19 are decisive in
the machining program and the softkey setting is overwritten.
Selection level
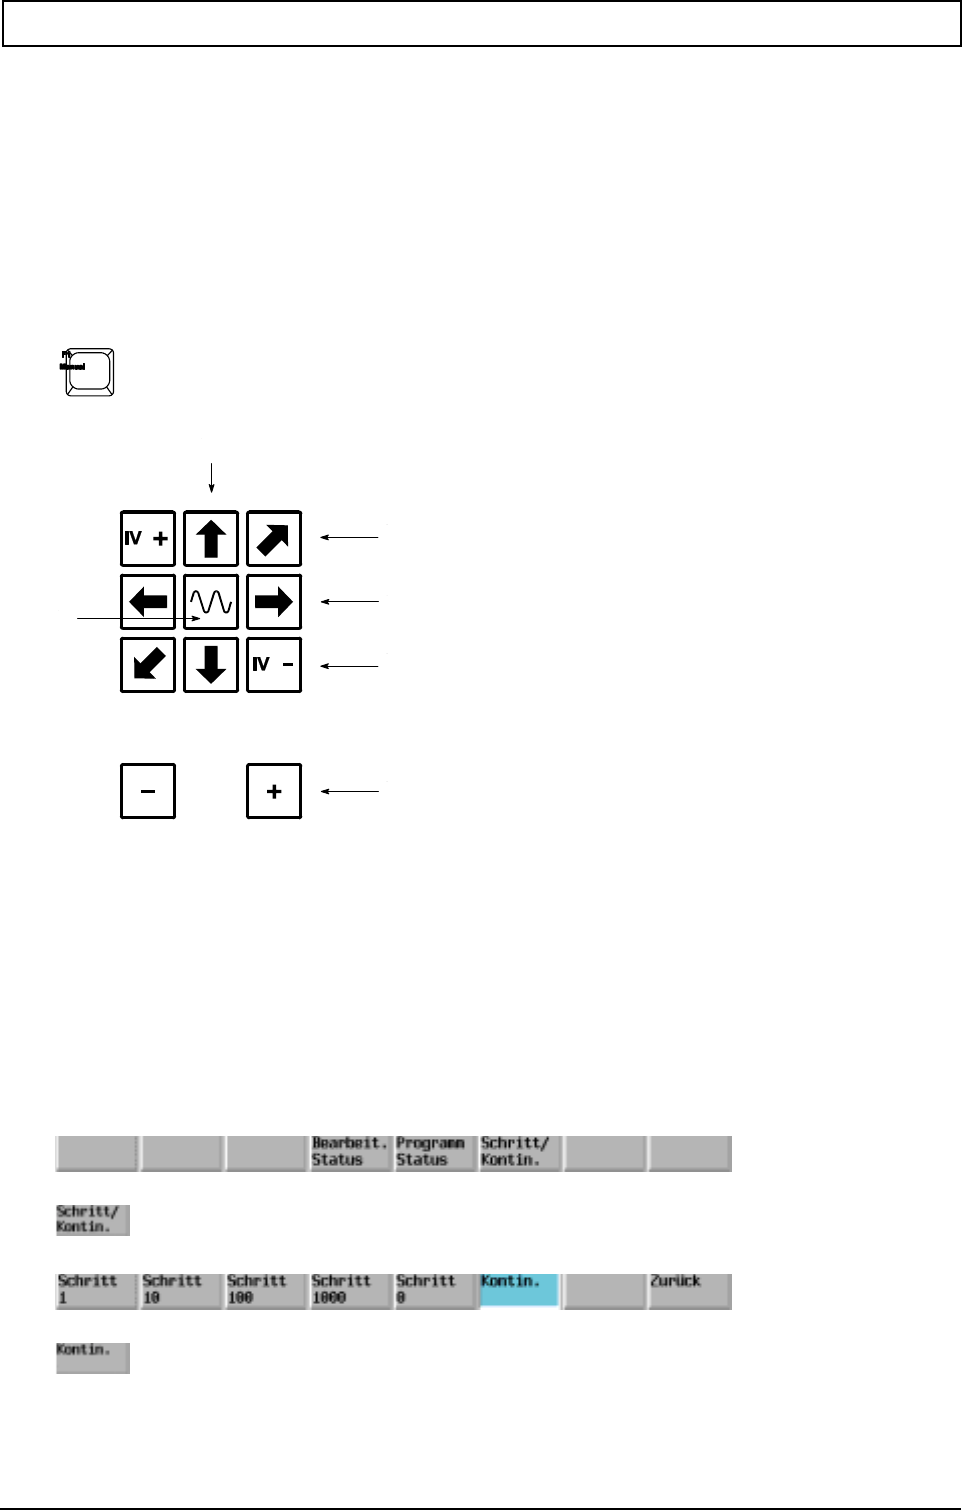
MANUAL OPERATION
20000710 MillPlus V410 39
6. Manual operation
The machine axes can be moved continuously and manually by adjustable movement steps. The
speed of movement can be regulated using the feed override. It is also possible to move two axes
simultaneously. The work spindle may also be moved manually. Other axes, e.g. the fifth axis or
spindle, must first be selected.
6.1 Move axes
The axes are moved using the axis movement keys.
1. Z-axis 2 Y-axis
3 X-axis 4 Axis 4
5 Axis 5 6 Rapid traverse
Note
Select axis 4 with mc153.
Select axis 5 with mc154.
6.1.1 Step movement, continuous movement
It is determined whether the machine axis moves stepwise or continuously when the axis movement
key is depressed.
MANUAL OPERATION
40 Heidenhain
6.1.2 Continuous movement
Kontinuierlich verfahren mit Achsenbewegungstaste und Start. Die Achse verfährt bis sie angehalten
wird.
Press at the same time as
-Feed from MC
-A maximum of 2 axes can be moved at the same time.
-Stop using 'Feed STOP' or 'Feed and Spindle STOP' keys
6.1.3 Rapid traverse motion
Press at the same time as
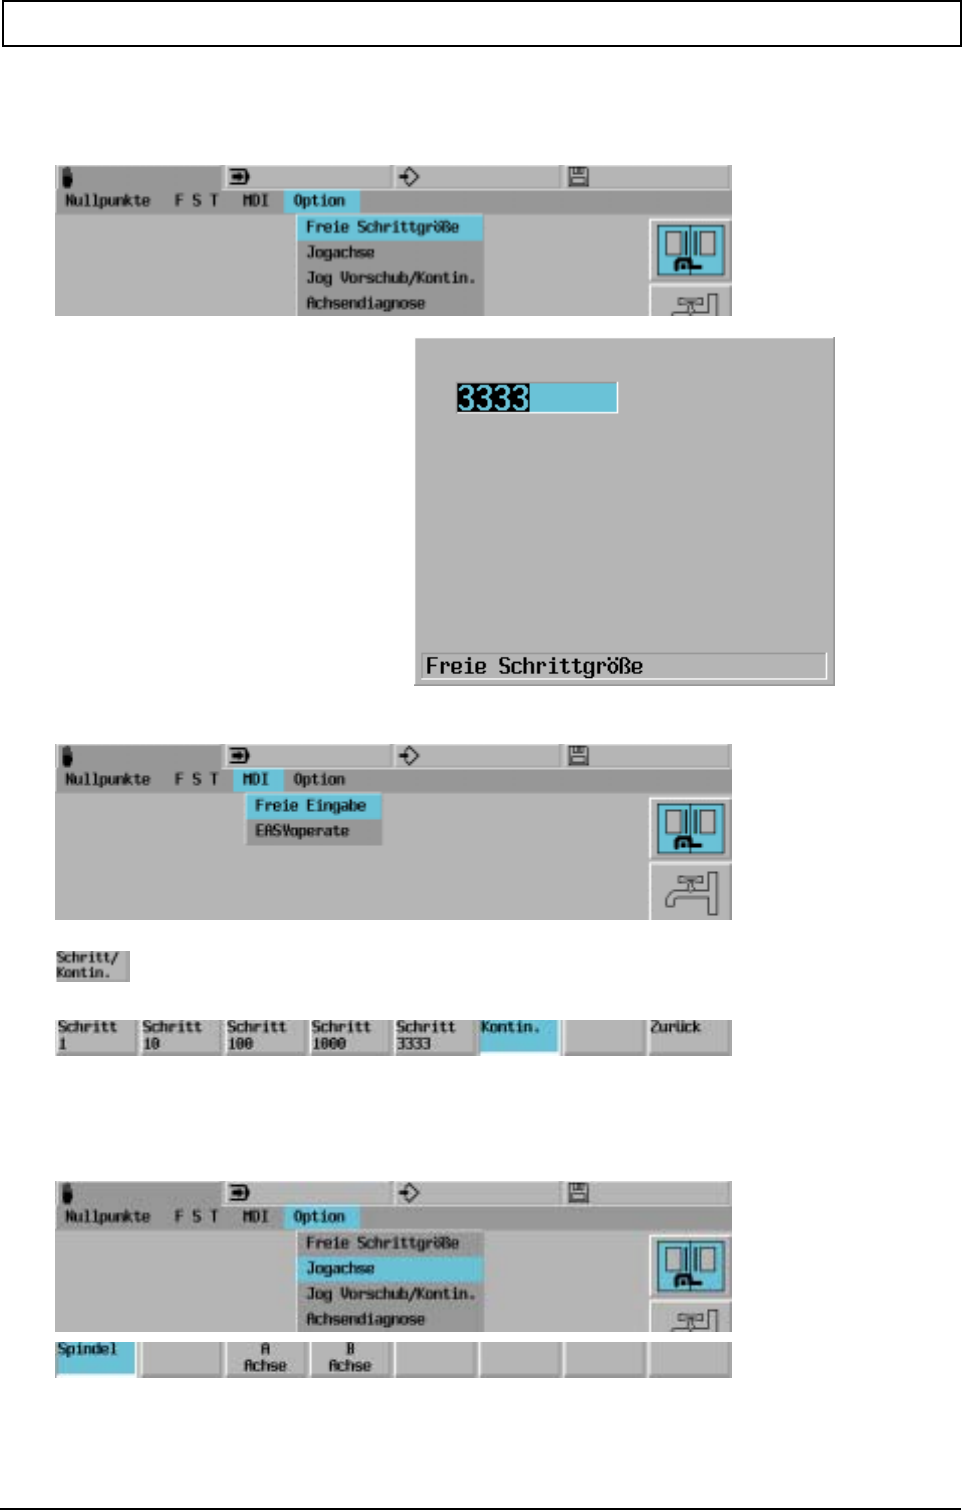
MANUAL OPERATION
20000710 MillPlus V410 41
6.1.4 Free step size
The free increment allows you to set the appropriate increment for your machine.
Use free step size:
6.1.5 Move spindle and other axes
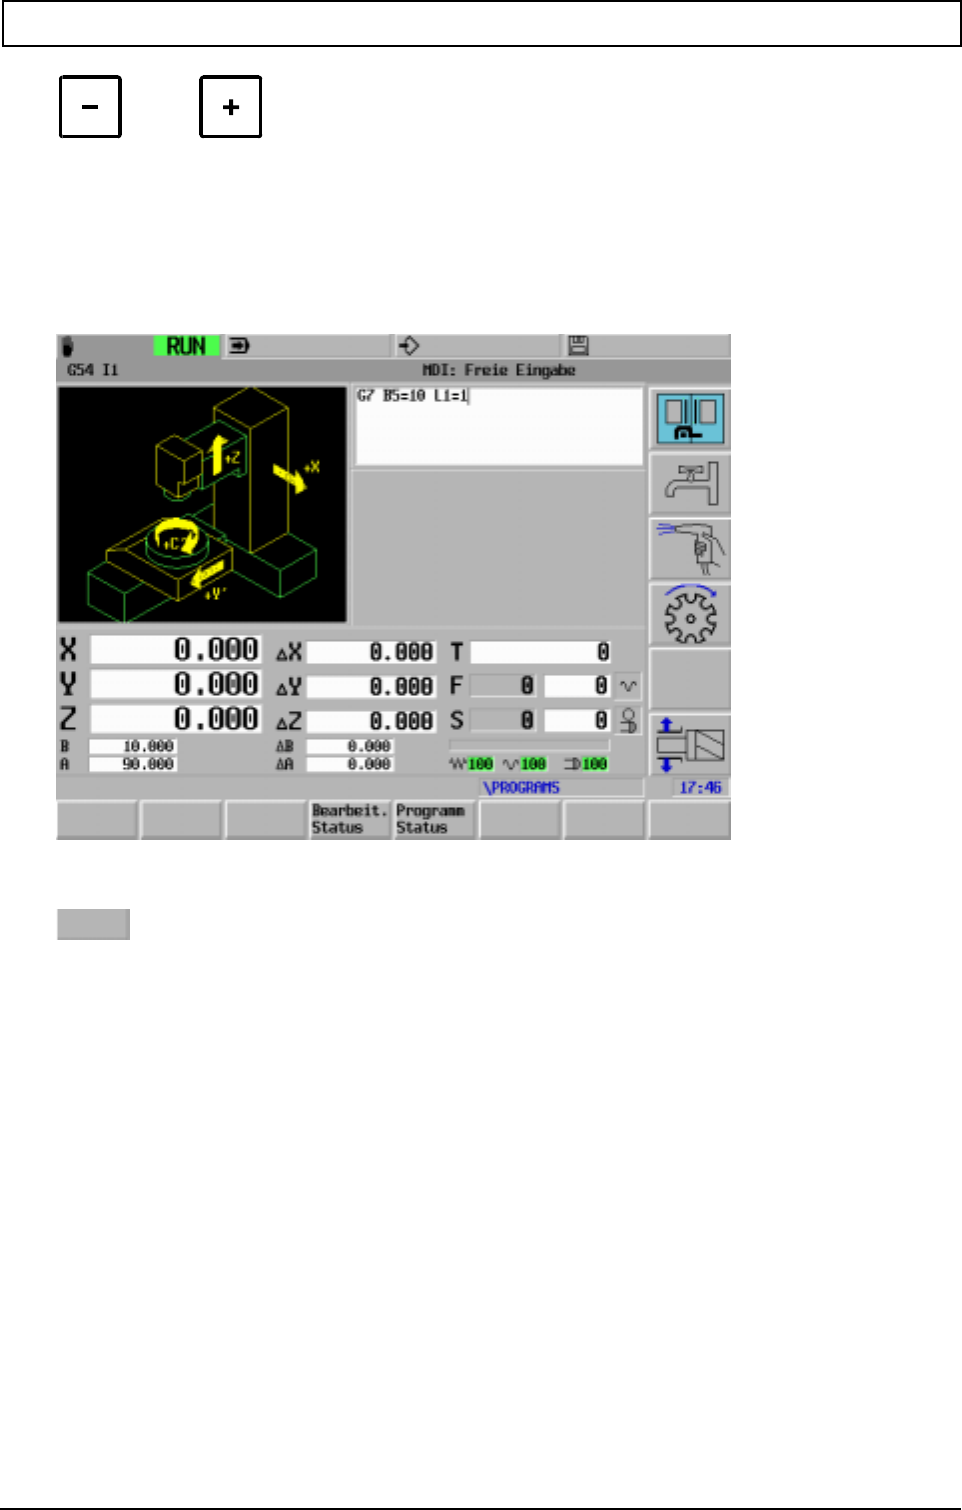
MANUAL OPERATION
42 Heidenhain
6.2 Procedure in FSP
It is possible to proceed on the FSP level or in the machine axes after enabling the "Free process
level"
Procedure on the free process level.
Procedure in the machine axes.
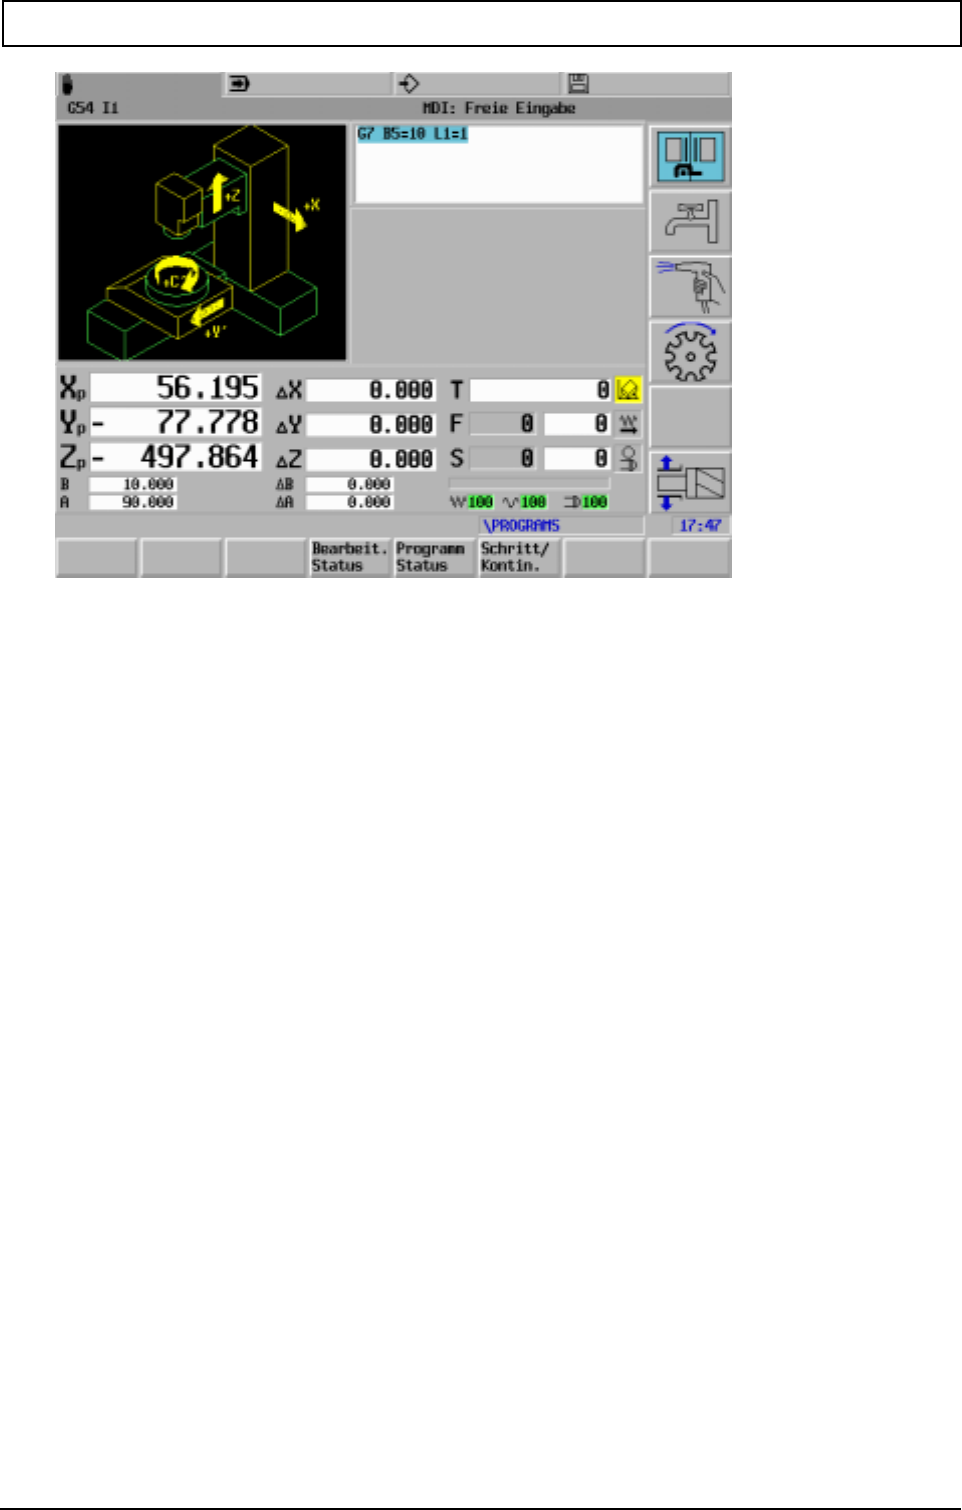
MANUAL OPERATION
20000710 MillPlus V410 43
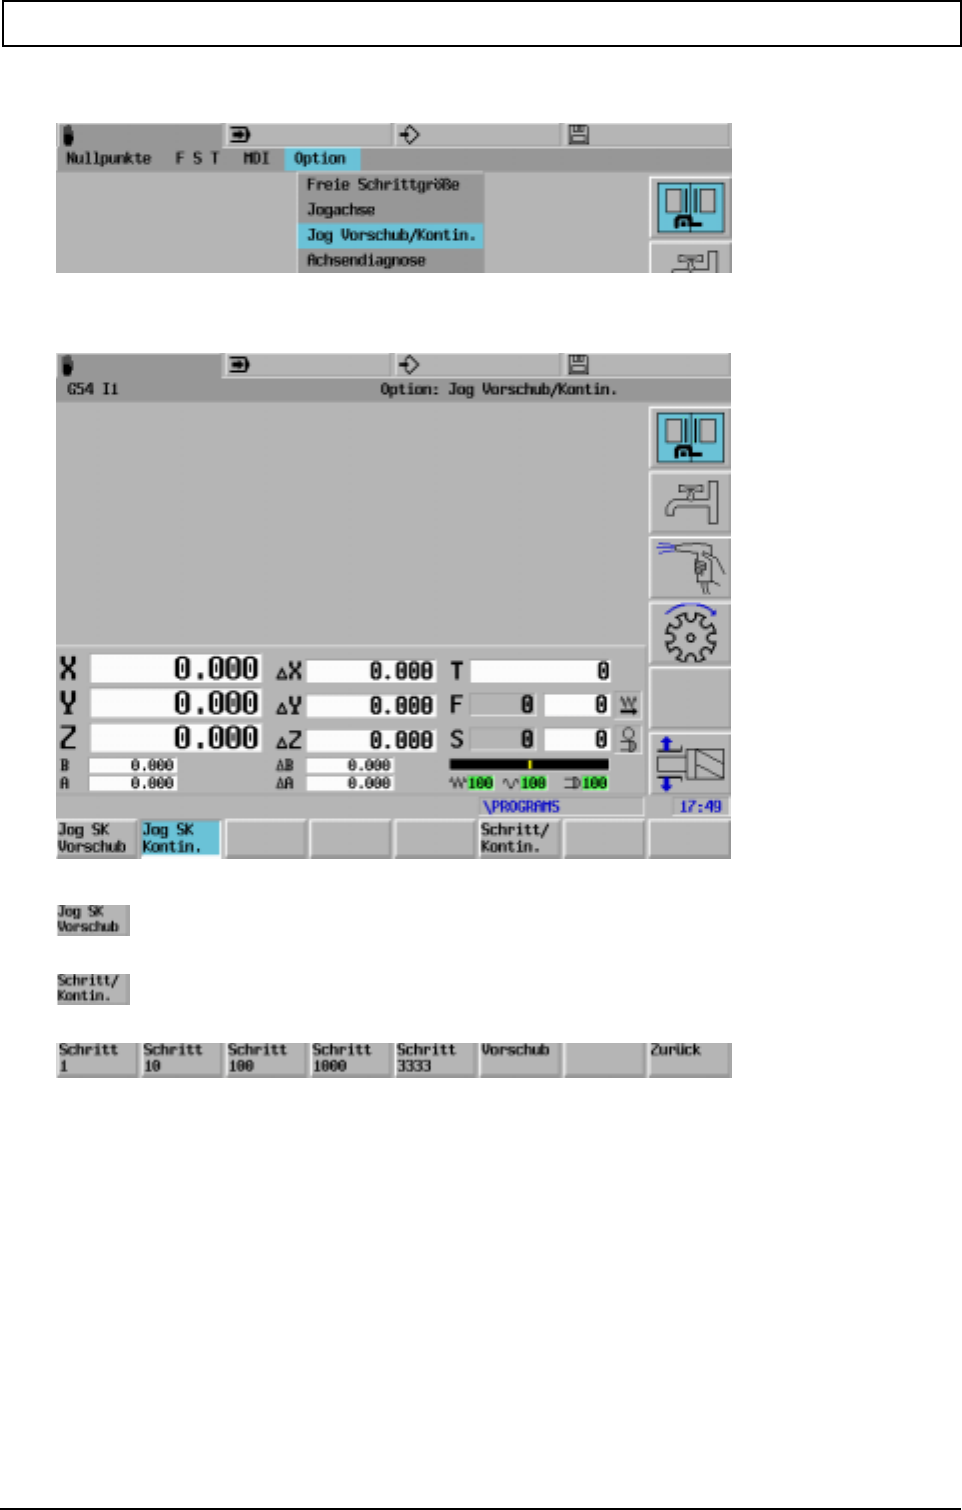
MANUAL OPERATION
44 Heidenhain
6.3 Switch over rate of advance/continue procedure
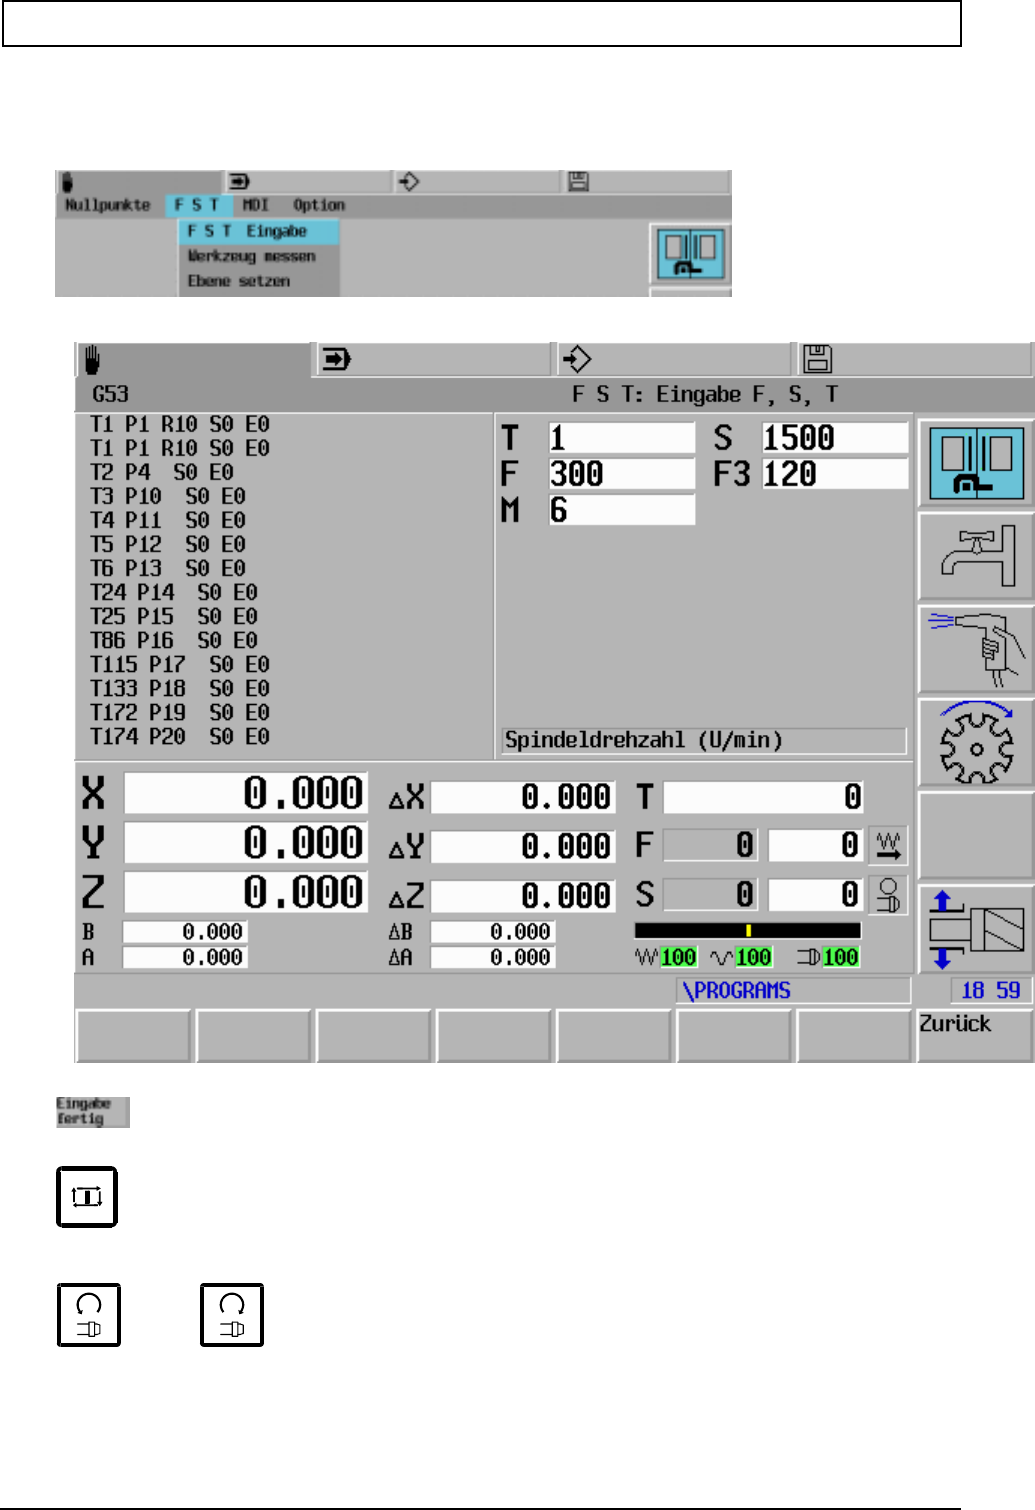
MANUAL OPERATION
20000710 MillPlus V410 45
6.4 F, S, T input
Entry of tool number, spindle speed, feed and M-function.
Activate tool change
Start spindle (M3 or M4)
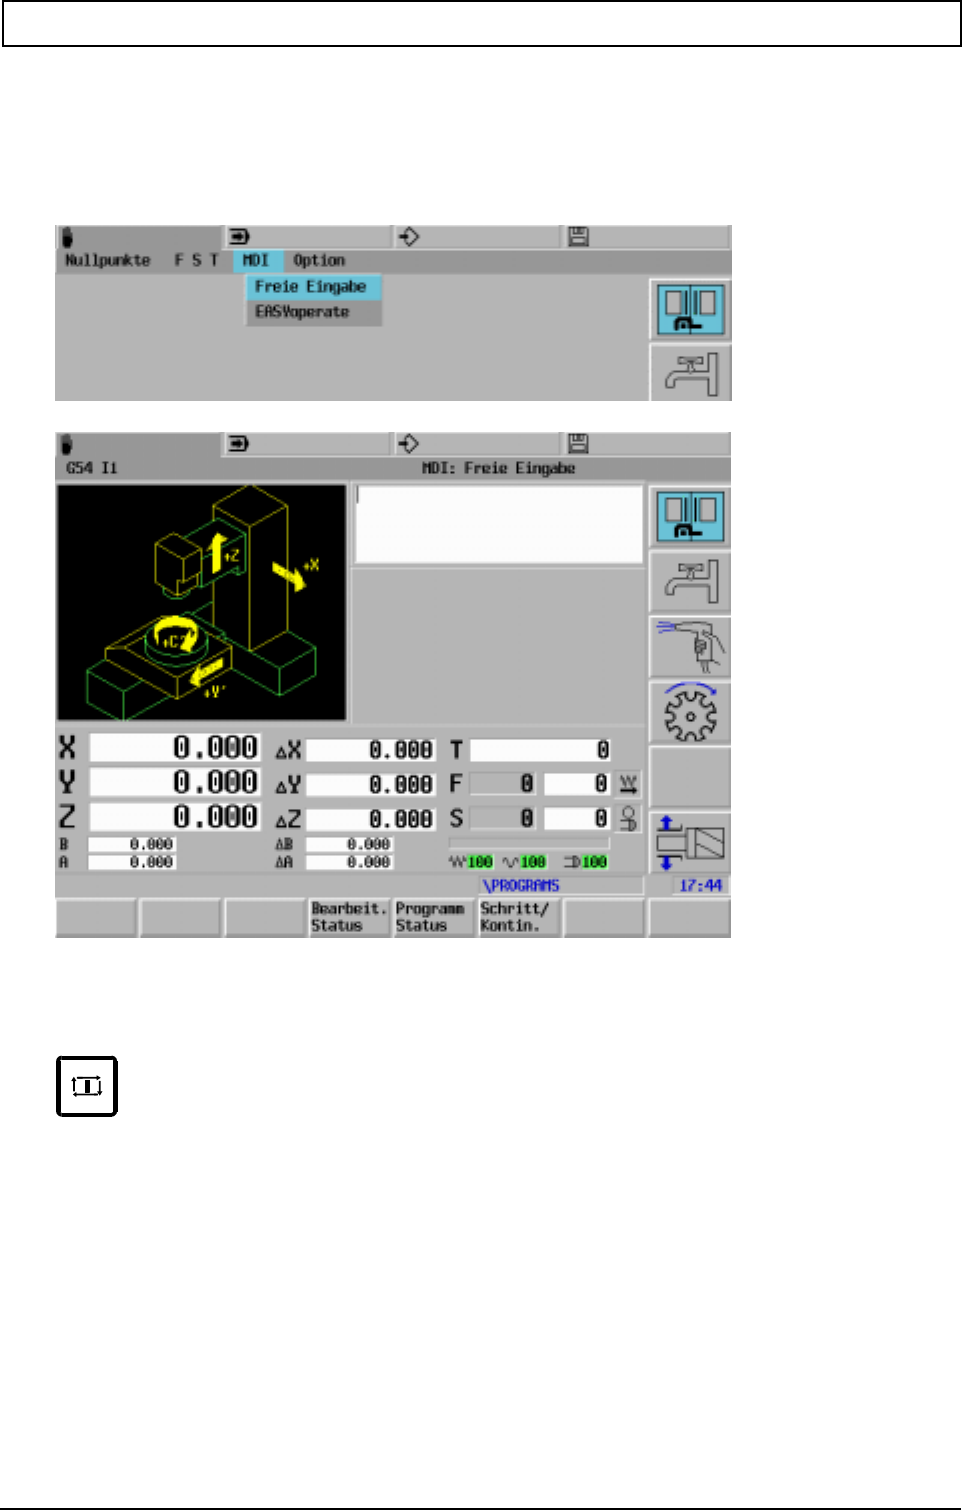
FREE ENTRY (MDI)
20000710 MillPlus V410 47
7. Free entry (MDI)
7.1 Free entry
Entry of an instruction in the command line followed by execution.
Enter address and address value from keyboard.
Execute program block.
When execution of the block has been completed, the Free Entry mode remains active.
Note
Please refer to the chapter Easy Operate.

FREE ENTRY (MDI)
48 Heidenhain
7.2 Cancel block (MDI)
or
Interrupt program block run
The current block is interrupted.
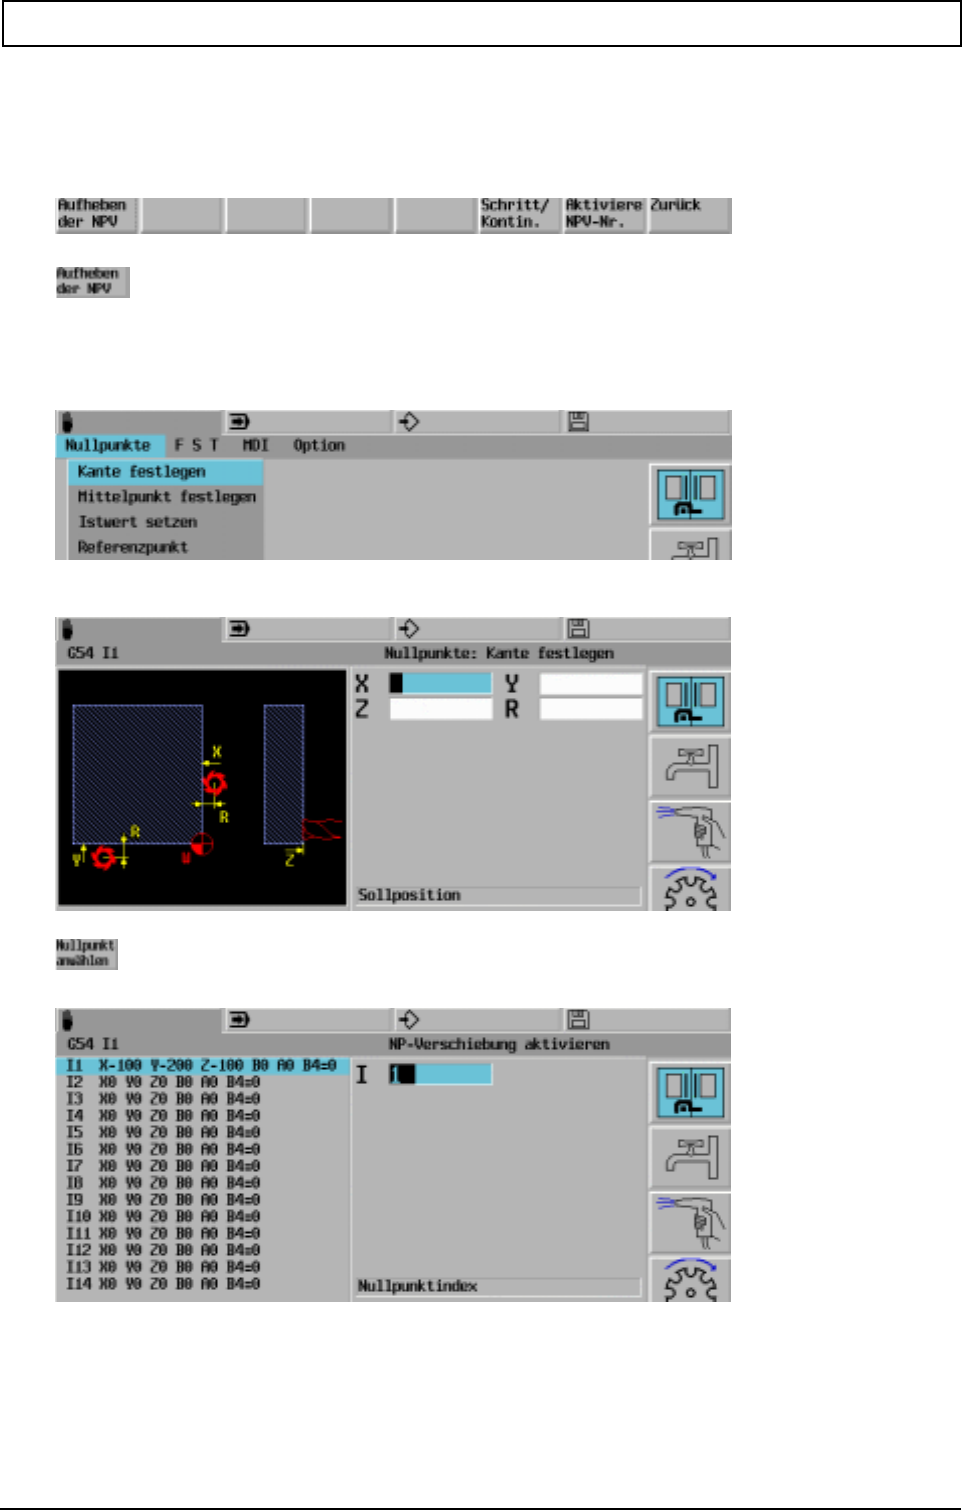
SET AXIS VALUE
20000710 MillPlus V410 49
8. Set axis value
With "Touch side", "Determine centre" and "preset axes" it is possible, after selection of softkey
"Select zeropoint", to undo the current zero offset.
8.1 Determine side
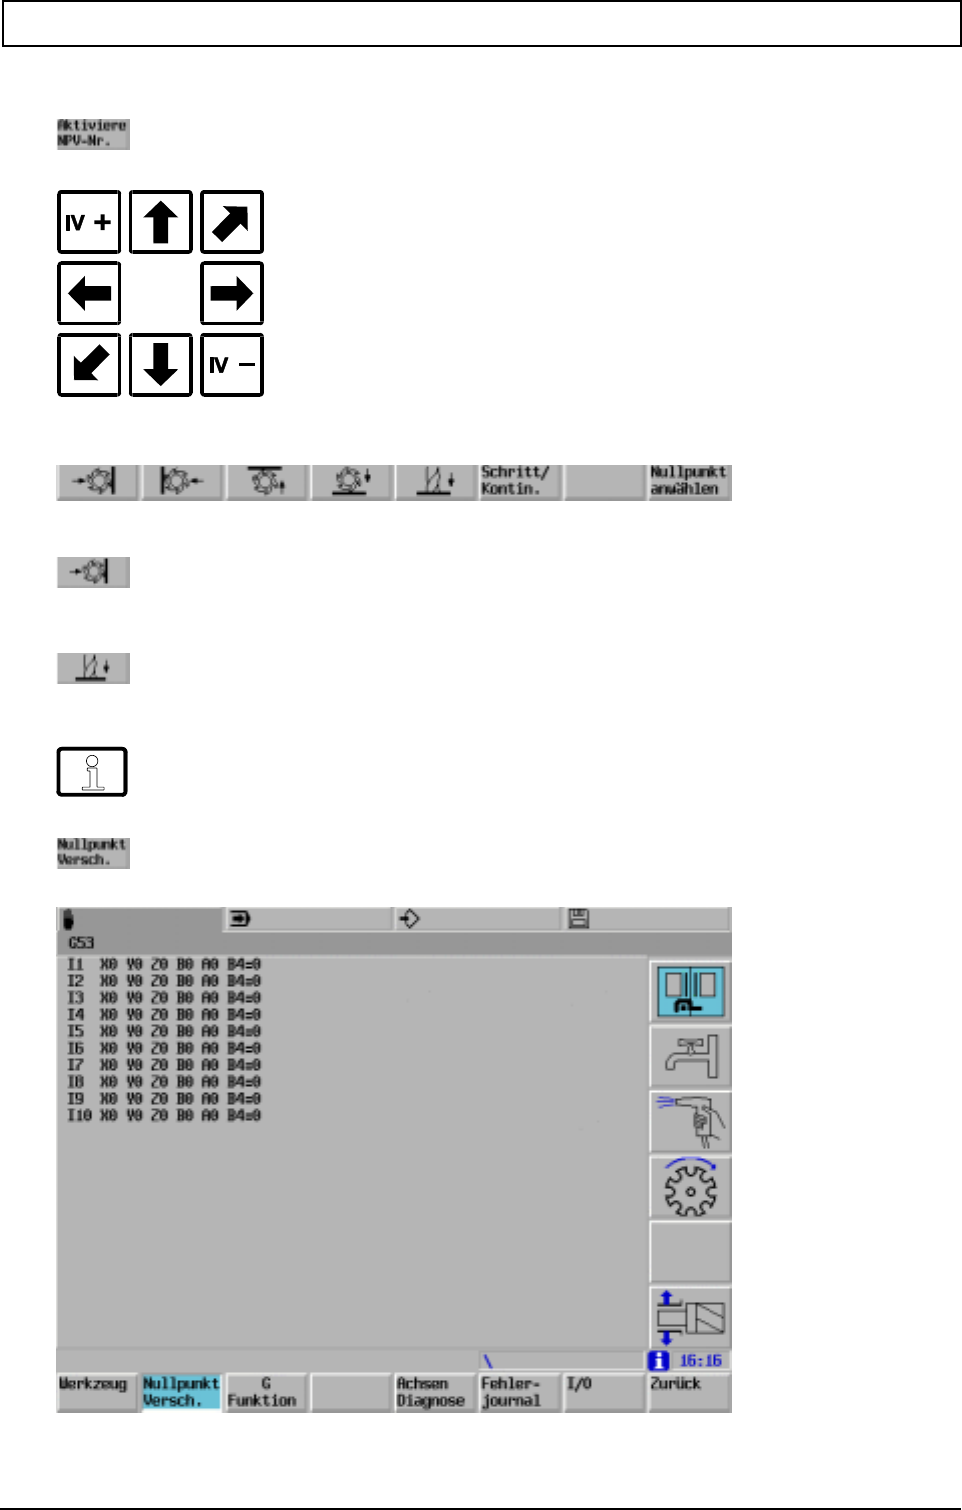
SET AXIS VALUE
50 Heidenhain
Input W activate zero offset
Approach side
Enter offset value (X, Y, Z, R)
Press the softkey to indicate from which direction the side was approached. The zero offset
for the selected axis and direction is calculated and stored in the zero offset
memory. The offset value in the current axis screen is also updated.
to
Display of zero offset memory.
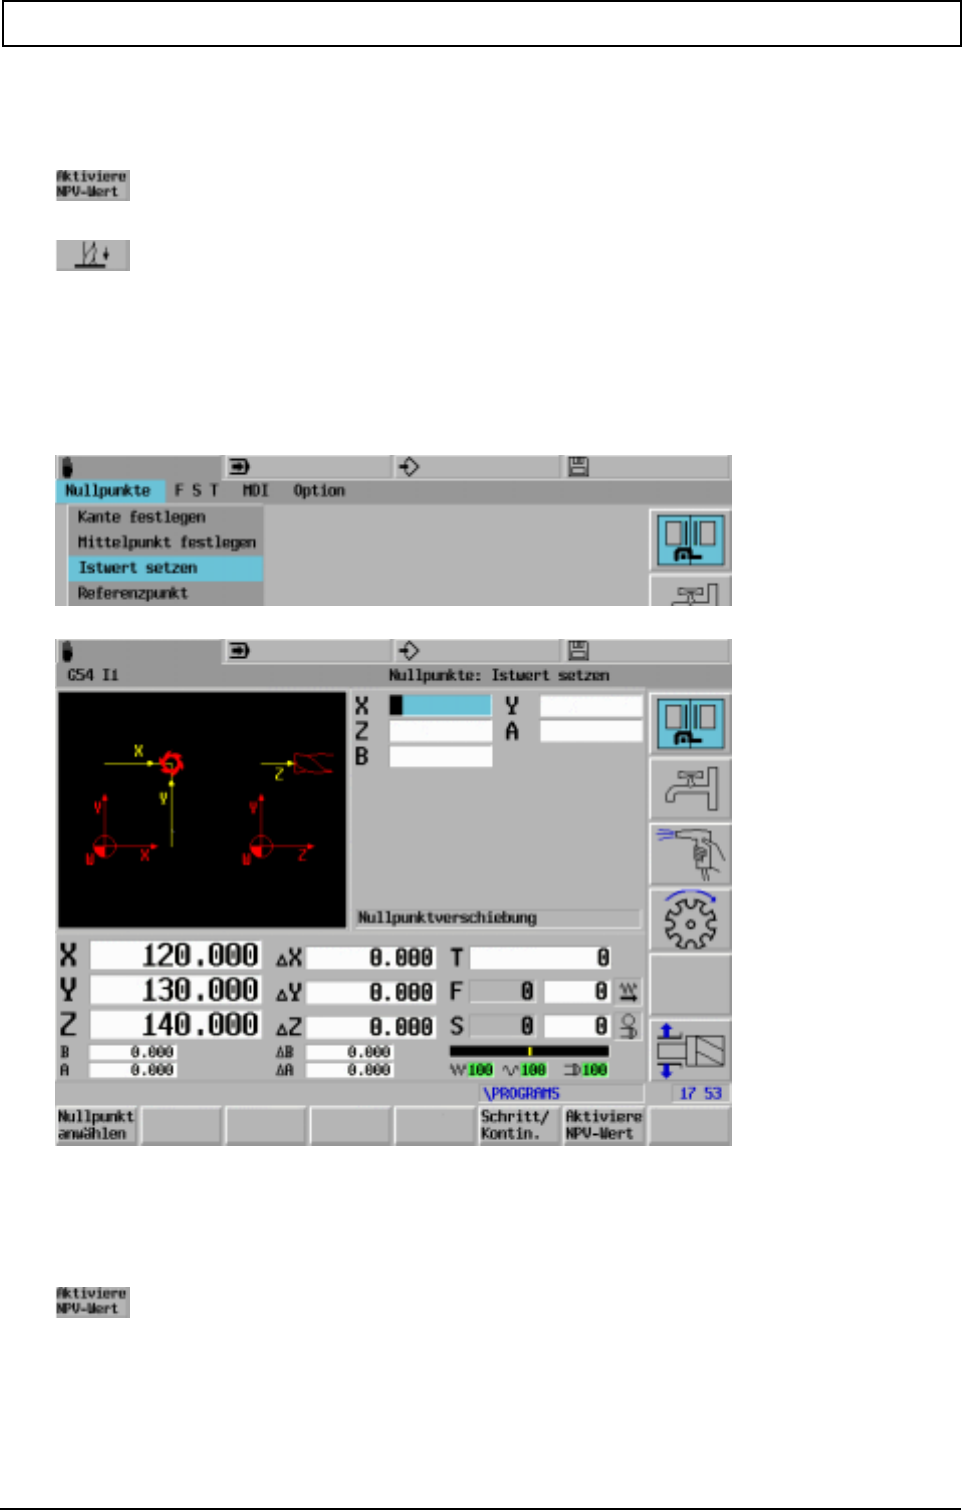
SET AXIS VALUE
20000710 MillPlus V410 51
8.2 Determine centre
Procedure: as for Determine side.
Activate values in main plane
Activate values in tool axis
8.3 Set actual value
To machine a workpiece, the machine zero points must be synchronised with each other. The
workpiece zero point is determined by the machine operator and passed to the controller via the zero
offset.
- Select zero point
- Approach position using axis movement keys
- Enter the actual axis values
Update the axis display with the present axis values and add the zero point to the zero offset table.
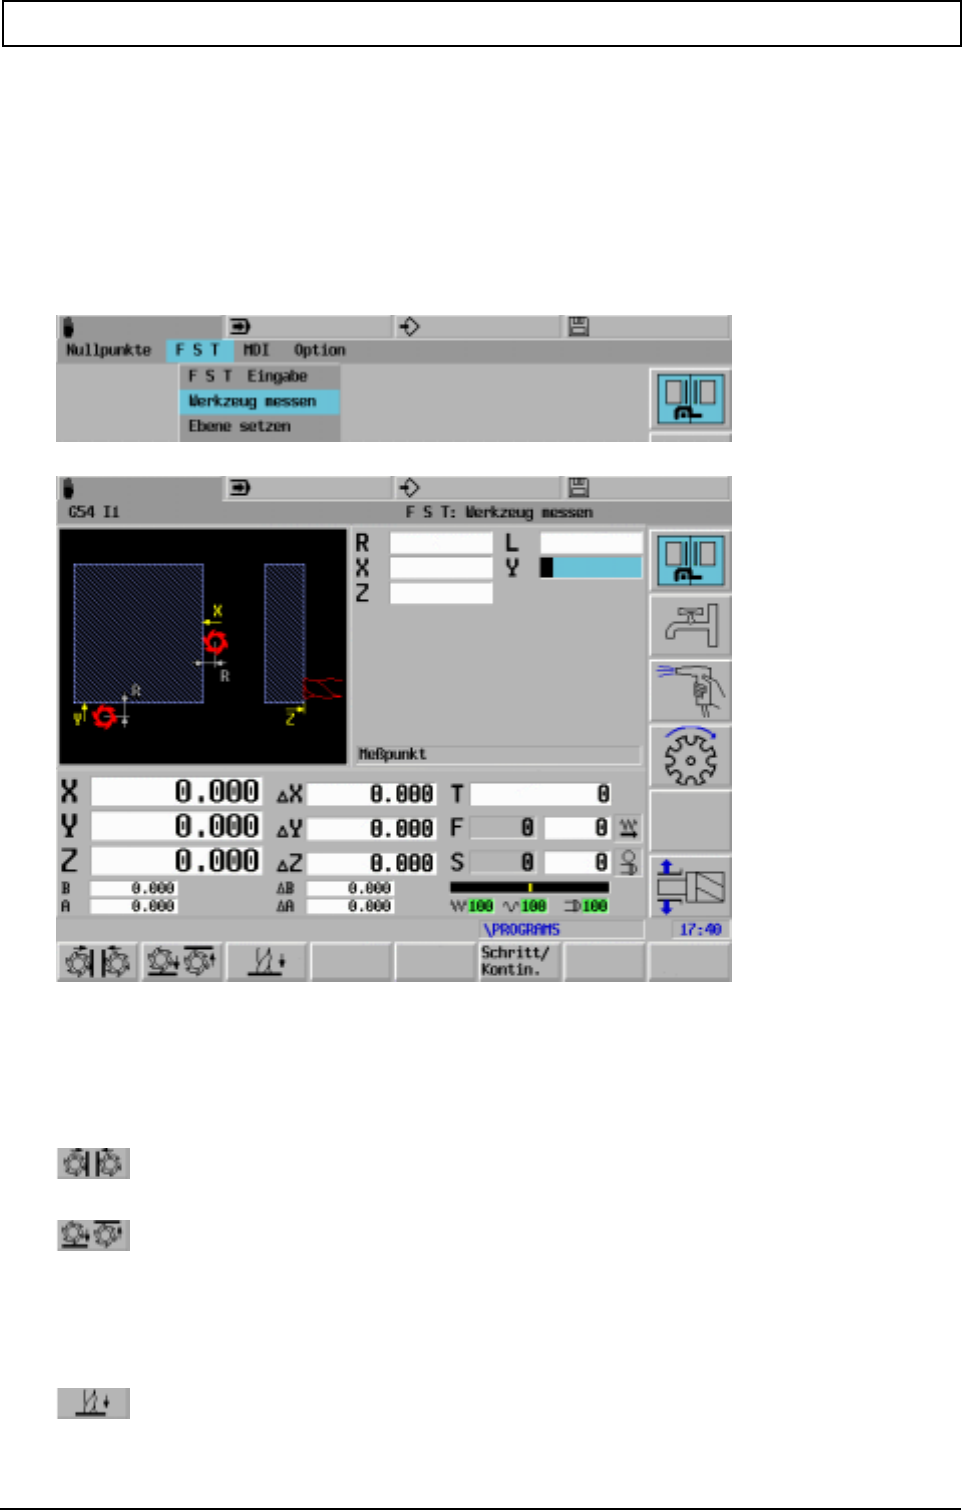
SET AXIS VALUE
52 Heidenhain
8.4 Measure tool
The Measure tool function is used to determine tool offset values (radius and length) for the active
tool. The offset values are added to the Tool table.
Example: tool length measurement.
- Activate machining levels (e.g. G17)
- Activate zero offset (e.g. G54 or G54 I10)
- Change tool in the spindle (e.g. T1)
The actual tool values are shown under R and L
Radius measurement:
- Enter reference position (e.g. X20).
- Approach reference position.
- Establish tool radius, using softkeys
Length measurement:
- Enter reference position (e.g. Z0).
- Approach reference position.
- Establish tool length, using softkey

SET AXIS VALUE
20000710 MillPlus V410 53
Note
Please refer to the chapter Tools.
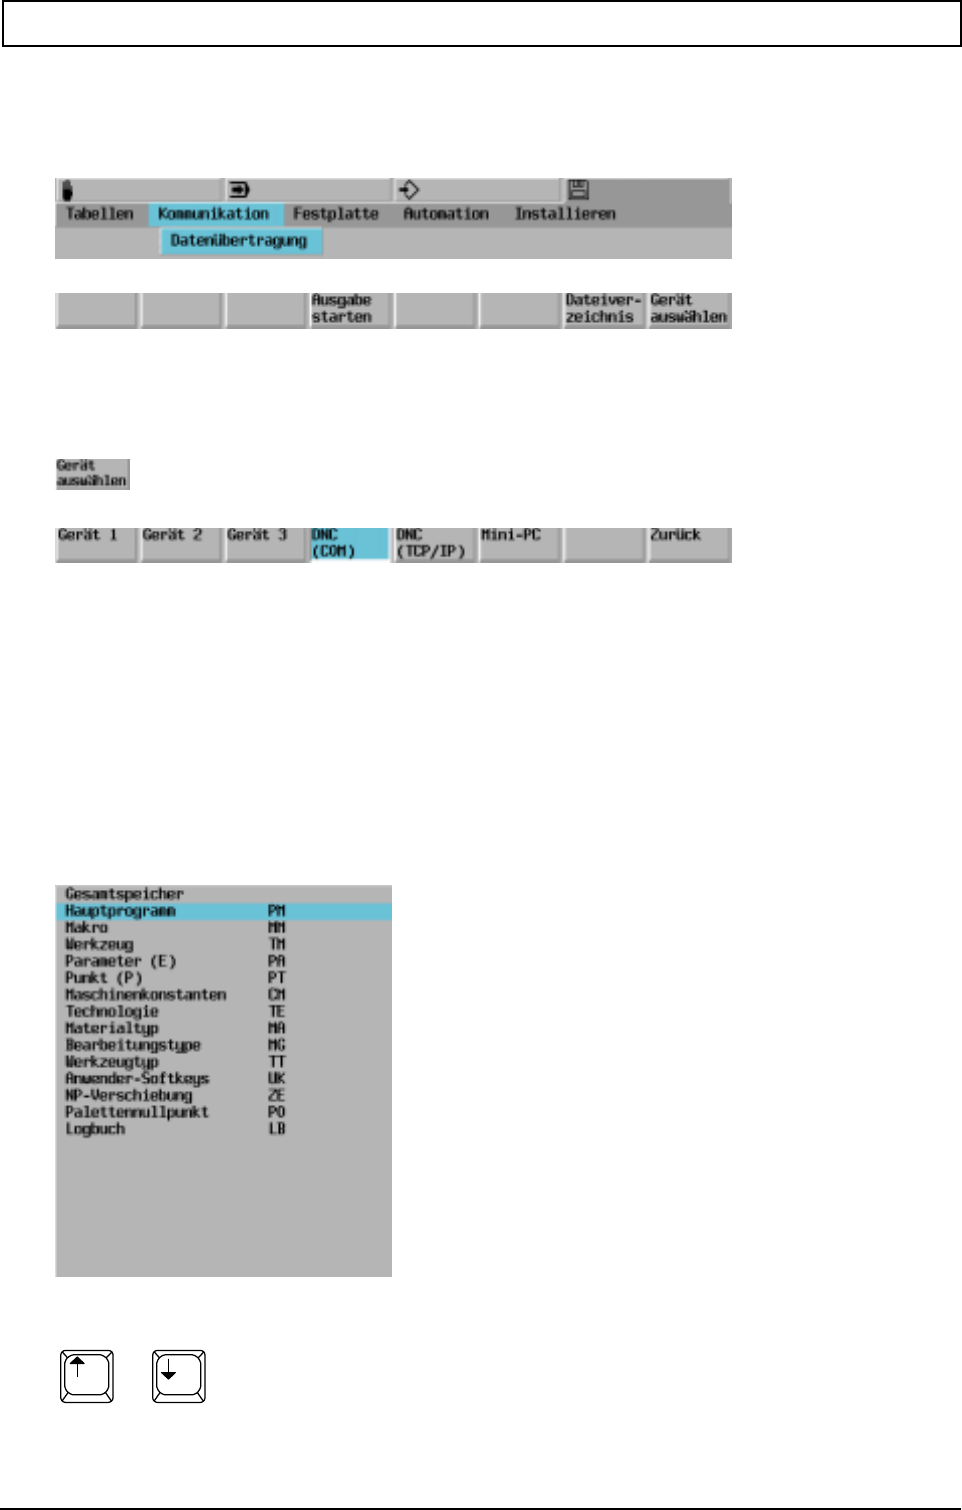
DATA INPUT / OUTPUT AND FILE MANAGEMENT
20000710 MillPlus V410 55
9. Data input / output and file management
9.1 Data transfer
9.2 Coordinate controller with peripheral device
Note
Machine constants for units:
900- 910- 920- 780-783 790- 797-
908 918 928 930-936 795 799
Block number > 9000, refer to user machine constant list (MC772-774).
9.3 Reading
9.3.1 Reading in the program (PM,MM)
Select the main program or macro from the list.
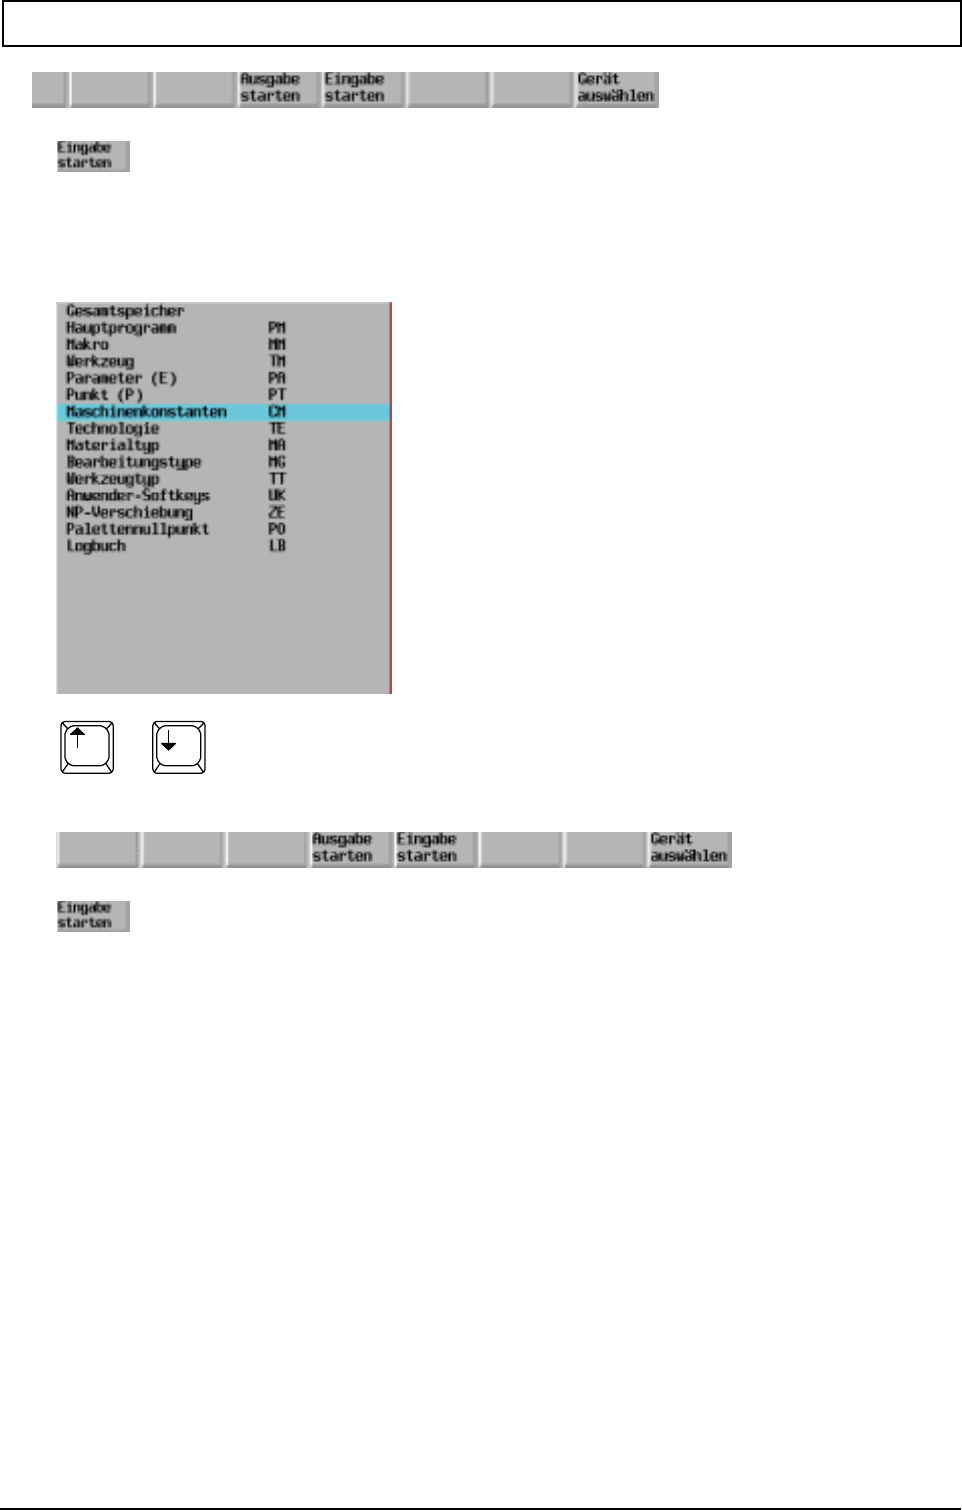
DATA INPUT / OUTPUT AND FILE MANAGEMENT
56 Heidenhain
9.3.2 Reading in tables (TM..PO)
Select a table from the list.
Note
When the technology tables have been read in, they must be saved on the hard disk enabling them to
be activated after the controller has been switched on/off (the CNC always saves in the startup
directory).
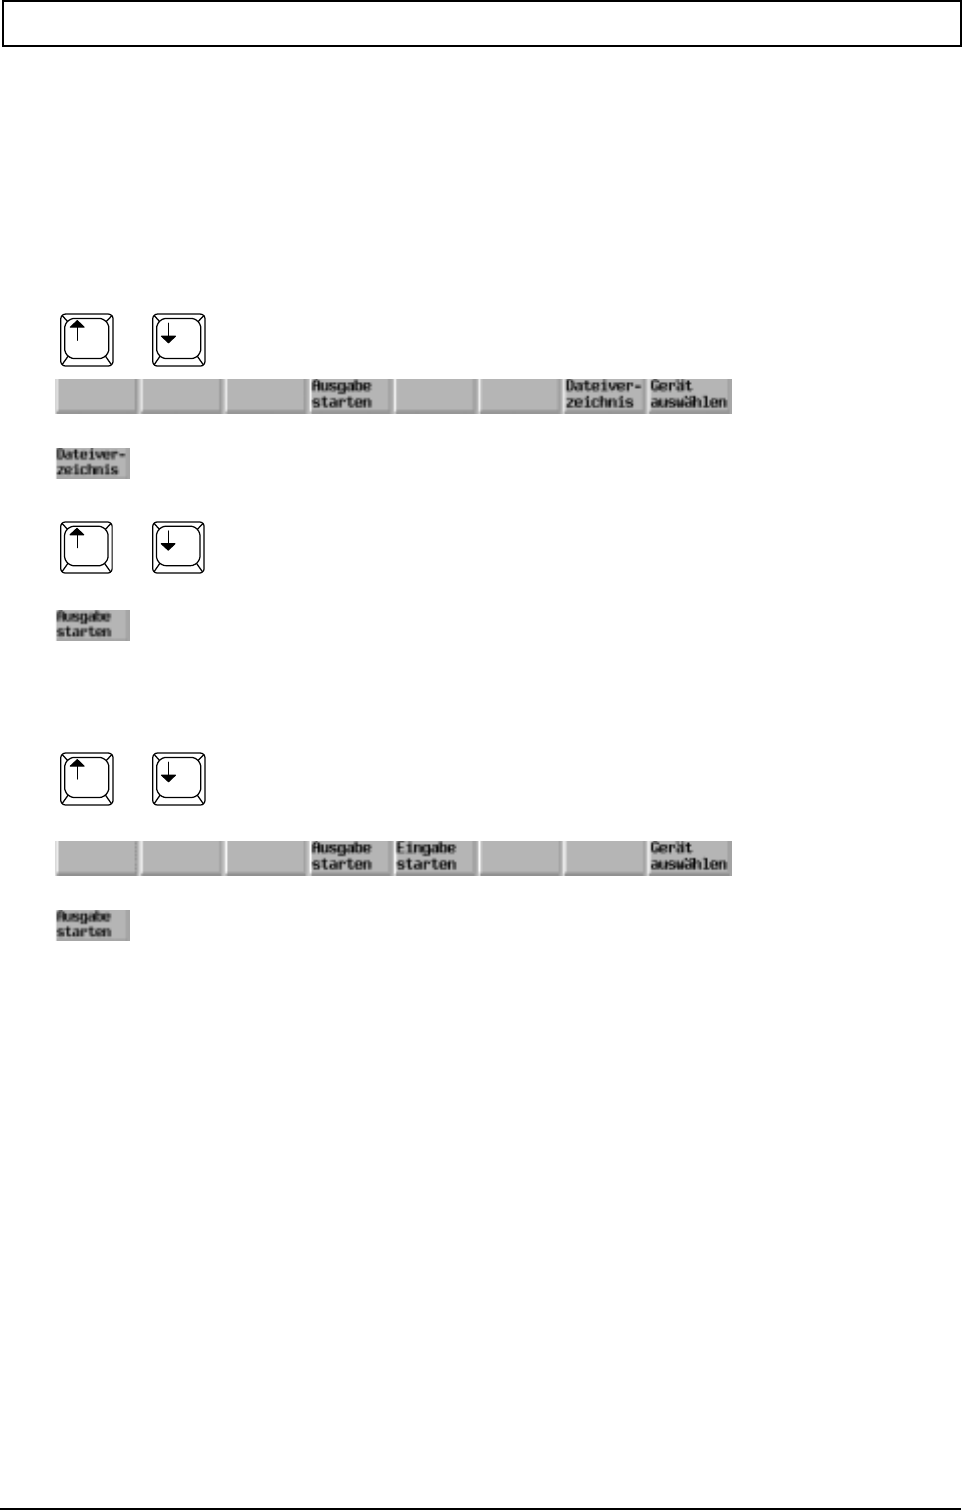
DATA INPUT / OUTPUT AND FILE MANAGEMENT
20000710 MillPlus V410 57
9.4 Output program
9.4.1 Data back-up
The user should regularly save his programs (PM and MM) and important data (e.g. technology data,
machine constants, tools, etc.) onto his PC or onto a floppy to prevent irretrievable data loss.
9.4.2 Reading out the program (PM,MM )
Select the main program or macro from the list.
Select a program
9.4.3 Reading out a table (TM-LB)
Select a table from the list.
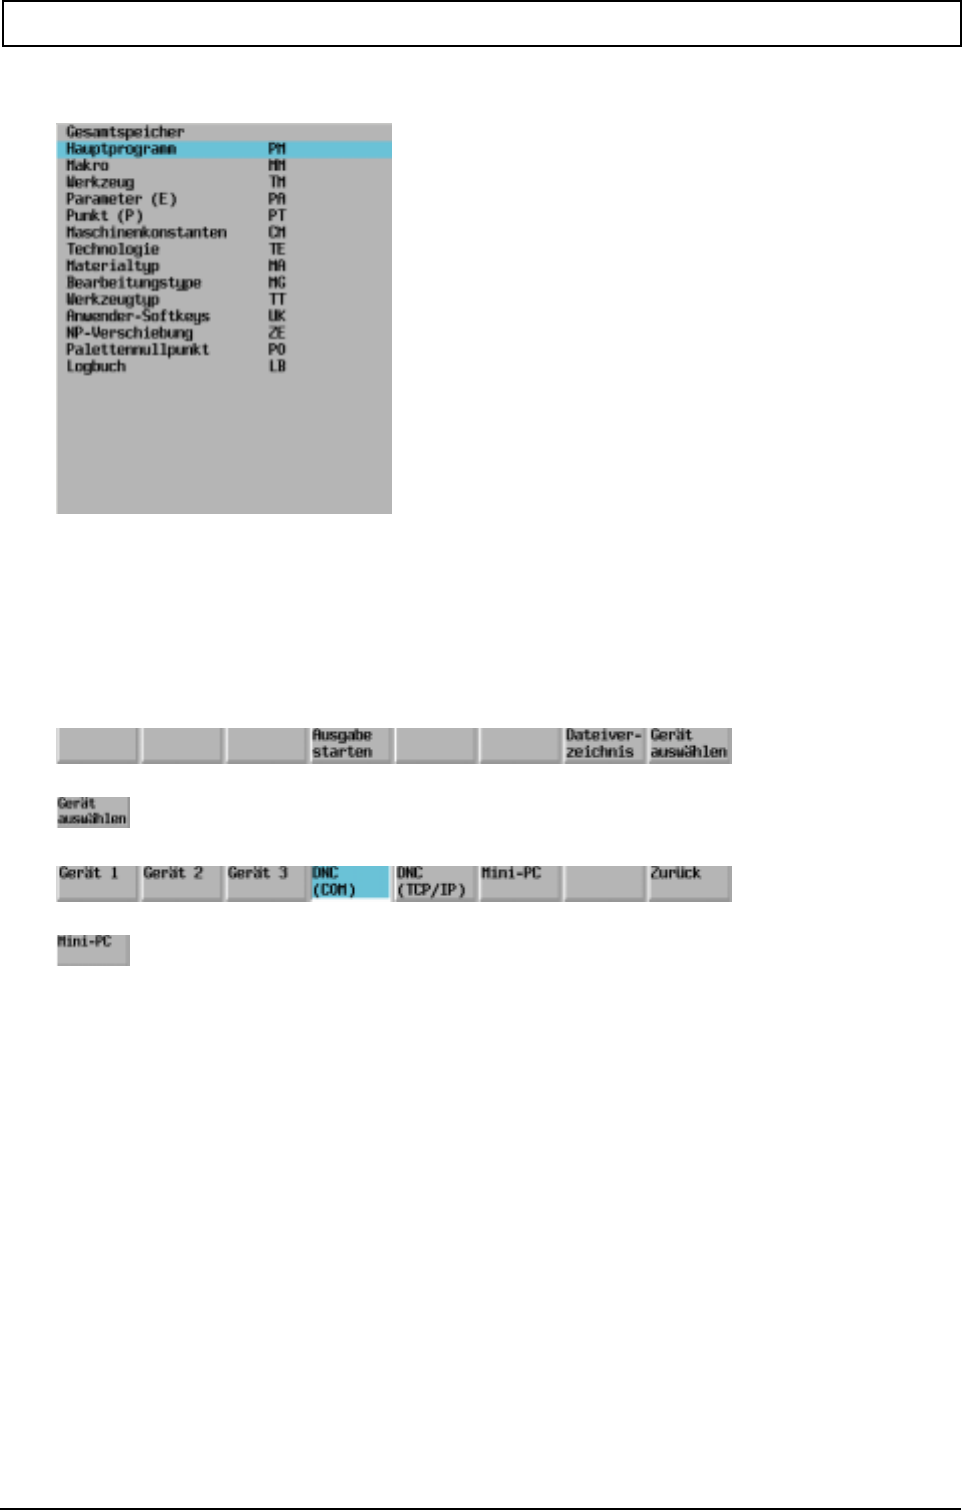
DATA INPUT / OUTPUT AND FILE MANAGEMENT
58 Heidenhain
9.5 Memory name abbreviations
Note
- At mc84=0 the zero offset identifier is ZO.ZO and at mc84>0 ZE.ZE.
9.6 Mini-PC
3,5" disk drive
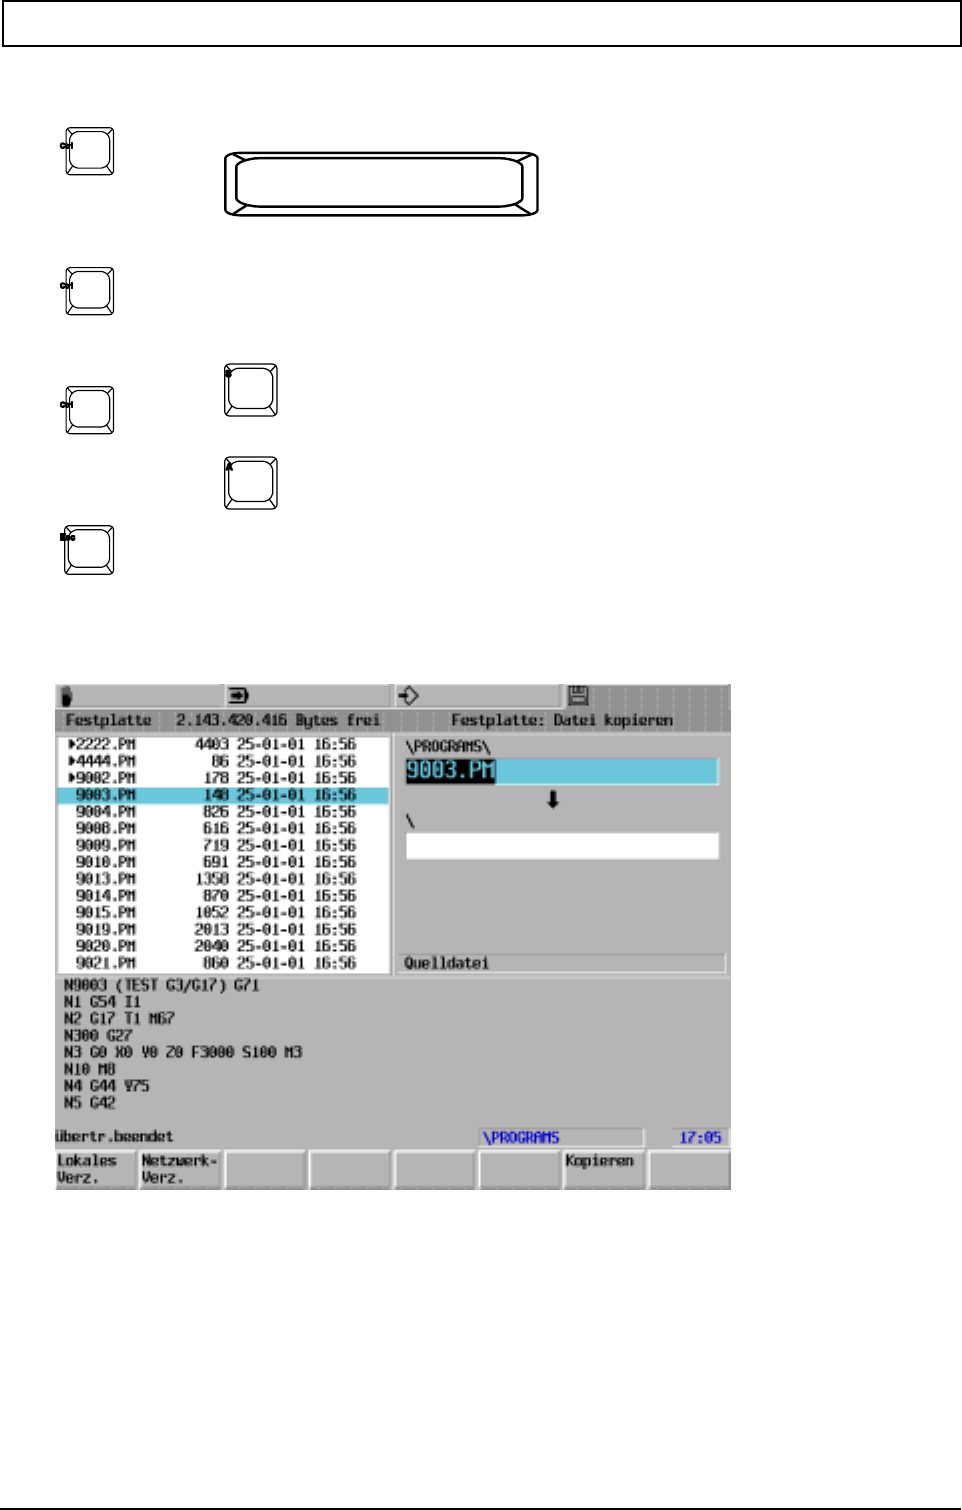
DATA INPUT / OUTPUT AND FILE MANAGEMENT
20000710 MillPlus V410 59
9.7 Select files
with Select a file
or with Select a file. A toggle function
(between <selected>/<not selected>) for the
file where the cursor is currently positioned;
the cursor moves to the next file.
with All files in the directory are selected
The current selections are cleared
Files that have been selected have a ! character in front of their name.
Files can be selected in this way in the following menus:
Fixed disk:
Delete file
Copy file
Rename/move file
File properties
Communication:
Upload
Download

DATA INPUT / OUTPUT AND FILE MANAGEMENT
60 Heidenhain
function is then applied to all the selected files.
Notes:
A destination file that is entered when more than one source file has been selected will be ignored.
The destination is then assumed to be the destination directory.
ted file at the current cursor position will not be included in the operation.
Copy and Rename/Move have the same format. If, during a Copy or Move operation, one of the
selected files already exists in the destination directory, a new softkey group, as shown below, is
displayed.
lways appears when a file exists until the
key is pressed or all files have been processed. If F4 is pressed, the remaining steps are performed
automatically and no further confirmation will be required.
Selections can always be deleted by pressing the <Esc> key at any time; this also has the effec of
cancelling the processing of any more files.

DATA INPUT / OUTPUT AND FILE MANAGEMENT
20000710 MillPlus V410 61
9.8 File management
Speicherstruktur
CNC Speicher
Festplatte (Massenspeicher)
Bearbeiten - *.PM
DRAM - *.MM DNC
- 1.PM - Verzeichnisse Remote
- *.MM
Dateiverwaltung
- Verzeichnis
- Kopie usw.
- Ethernet
Editieren
DRAM Datenübertragung
- 1.PM/MM
A hierarchical directory structure is present on the hard disk supplied. The structure looks like this:
\─┬──── STARTUP
└──── WORK
└──── TEMP
The technology tables and subprograms in the startup directory are loaded into the CNC DRAM when
the CNC is initialised.
Executing a faulty program can lead to dangerous situations.
In the Automatic and Edit operating modes, the programs are always selected from the harddisk. The
directory can be changed in the modes of operation.
Selected programs are loaded into the working memory (DRAM).
Notes
- If a faulty file is found during loading, loading is stopped.
- Programs are checked as they are loaded. If an error occurs during loading, an error message (in
brackets) is appended to the relevant program block.
Example: N.. G301 (O... "Original block contents incorrect")
- The startup directory contains the technology tables and the IPP setup macro. We recommend not
to store other programs in the startup directory. The only exceptions are e.g. subprograms which
are invoked in several main programs.
- During copying, renaming or loading, the program number in the first program block is adapted to
the file name, provided the name of the file matches a valid program number.
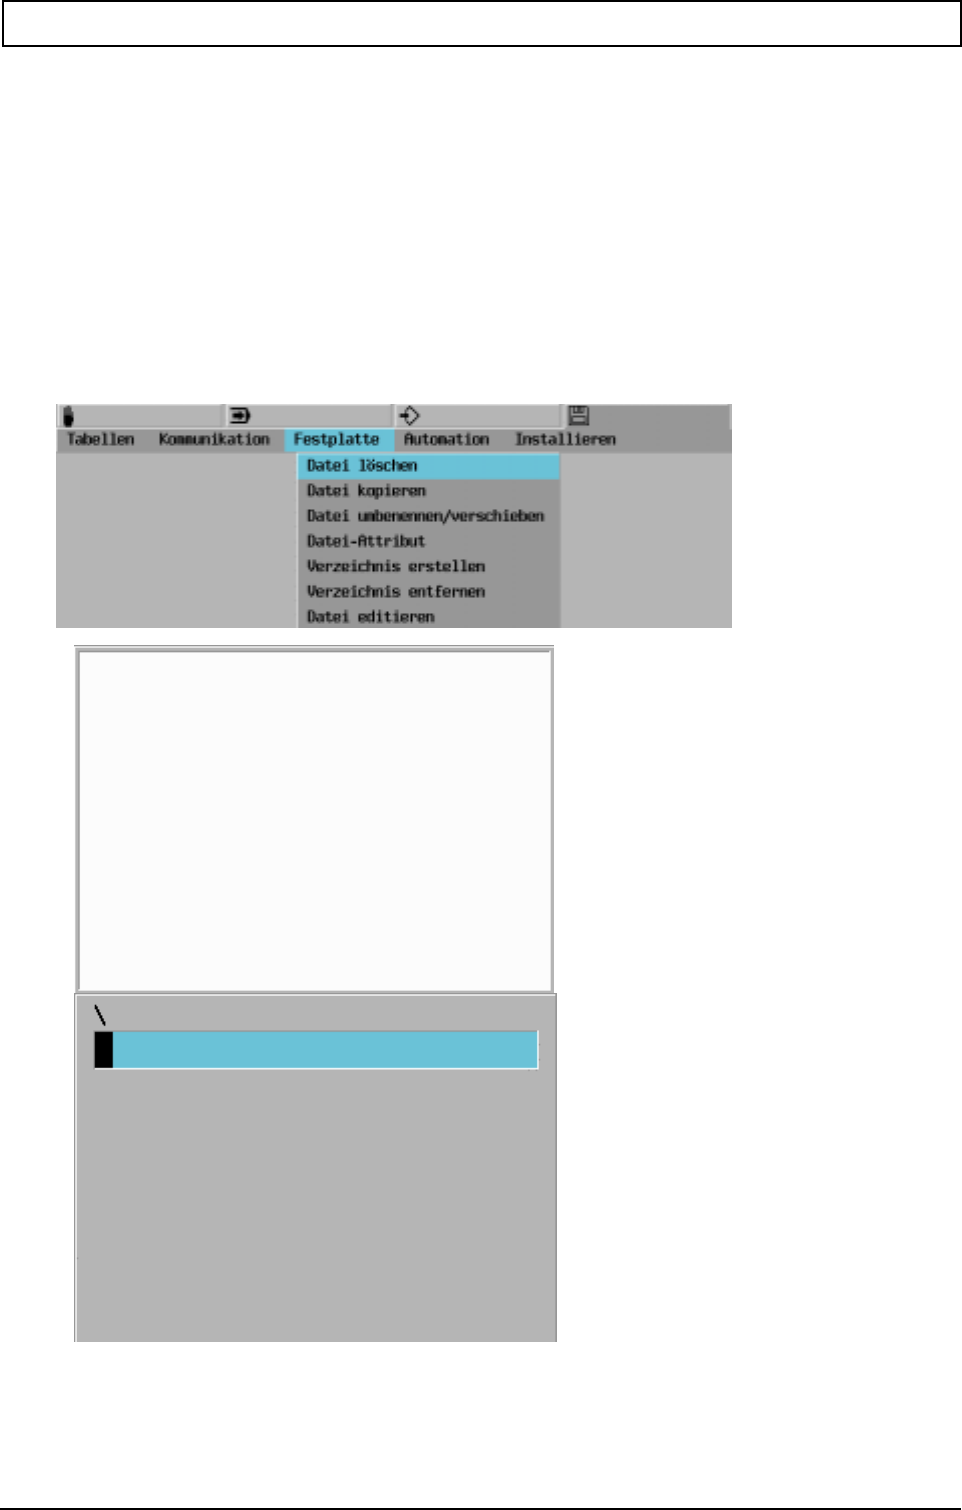
DATA INPUT / OUTPUT AND FILE MANAGEMENT
62 Heidenhain
- Main programs (invoked with G23) and subprograms (invoked with G22) have to be in the directory
of the active main program.
- When leaving the editor, the program will ask whether the changes are to be stored. Changes in the
active main program and in the accessory subprograms are stored automatically.
- Large programs that do not fit into the working memory have to be executed with softkey "CAD-
Betrieb". However, when in a program that is not executed in "CAD-Betrieb", it is still possible to
invoke and execute a large program via G23.
9.8.1 Delete file
Only programs in the current directory can be deleted.
When deleting a complete directory (*.*), the contents of the directory are deleted. The directory itself
is not deleted.

DATA INPUT / OUTPUT AND FILE MANAGEMENT
20000710 MillPlus V410 63
Select program or enter program number
Delete program No or Yes.
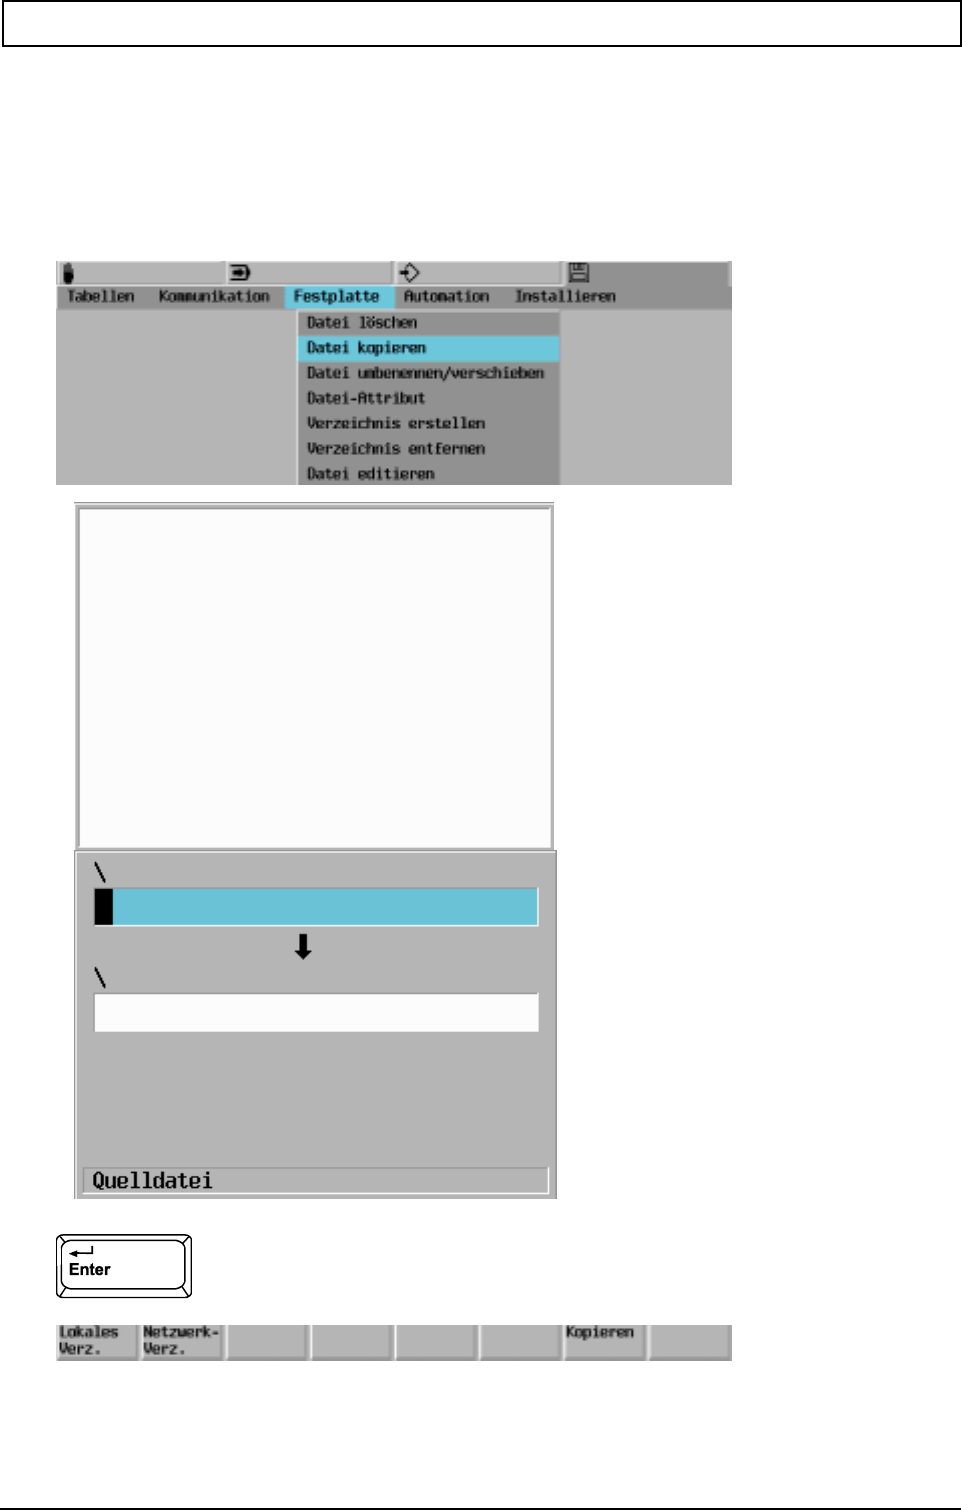
DATA INPUT / OUTPUT AND FILE MANAGEMENT
64 Heidenhain
9.8.2 Copy file
The <File: copy> function is identical regardless of whether the file is being copied across the Ethernet
or from one location to another on the local hard disk. The choice of source or target directory
determines whether the Ethernet is used or not.
Copy to current directory:
Enter name of target file (e.g. 20001.PM):
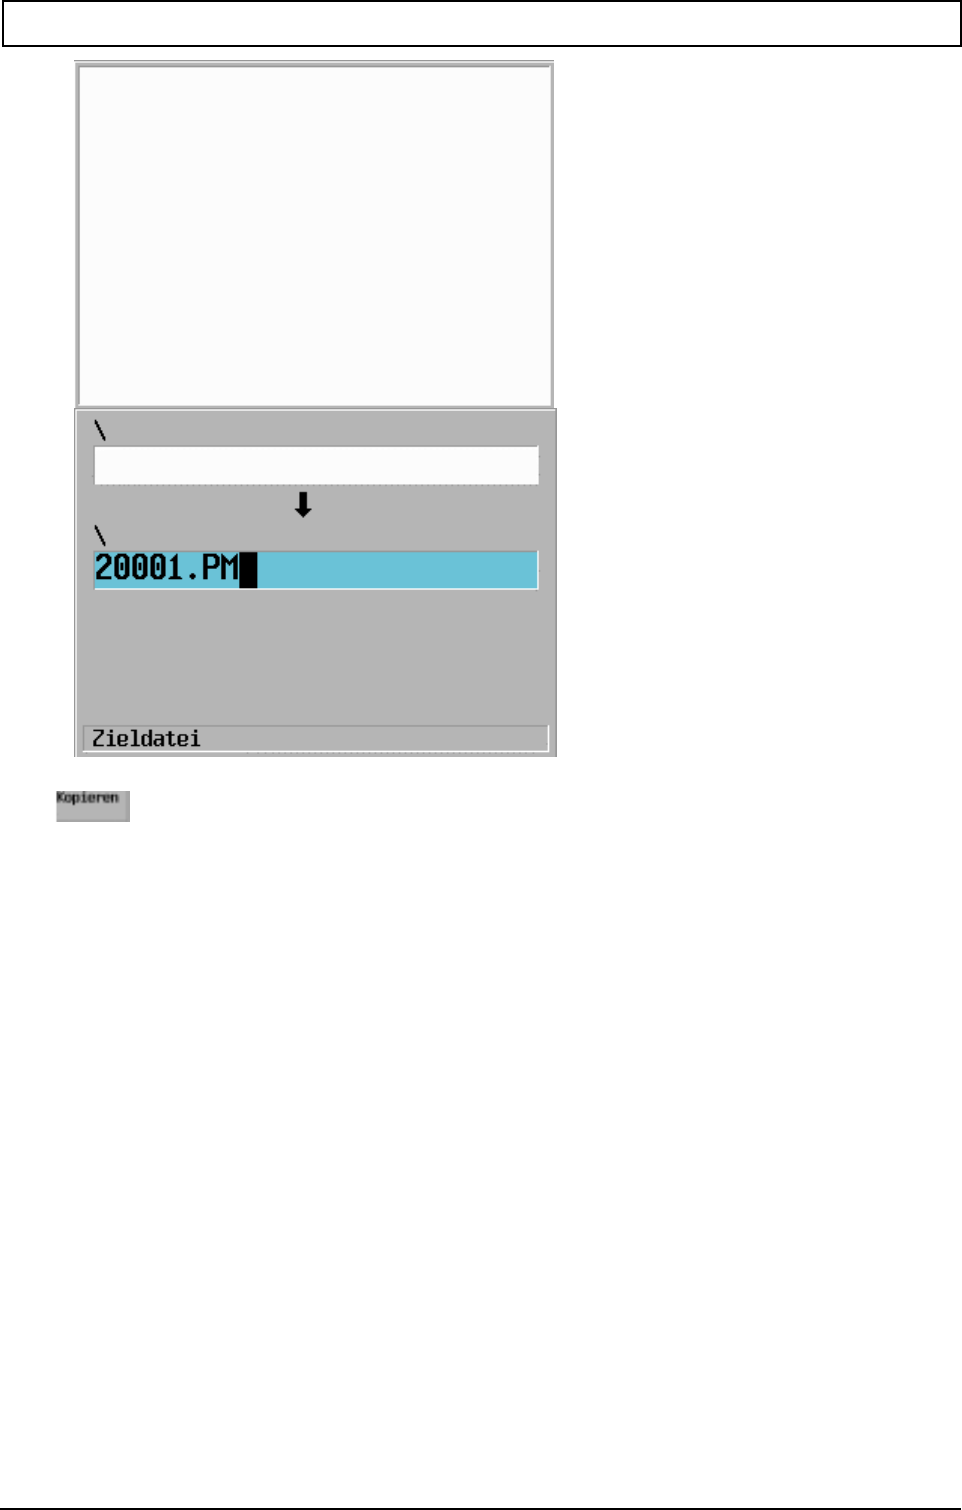
DATA INPUT / OUTPUT AND FILE MANAGEMENT
20000710 MillPlus V410 65
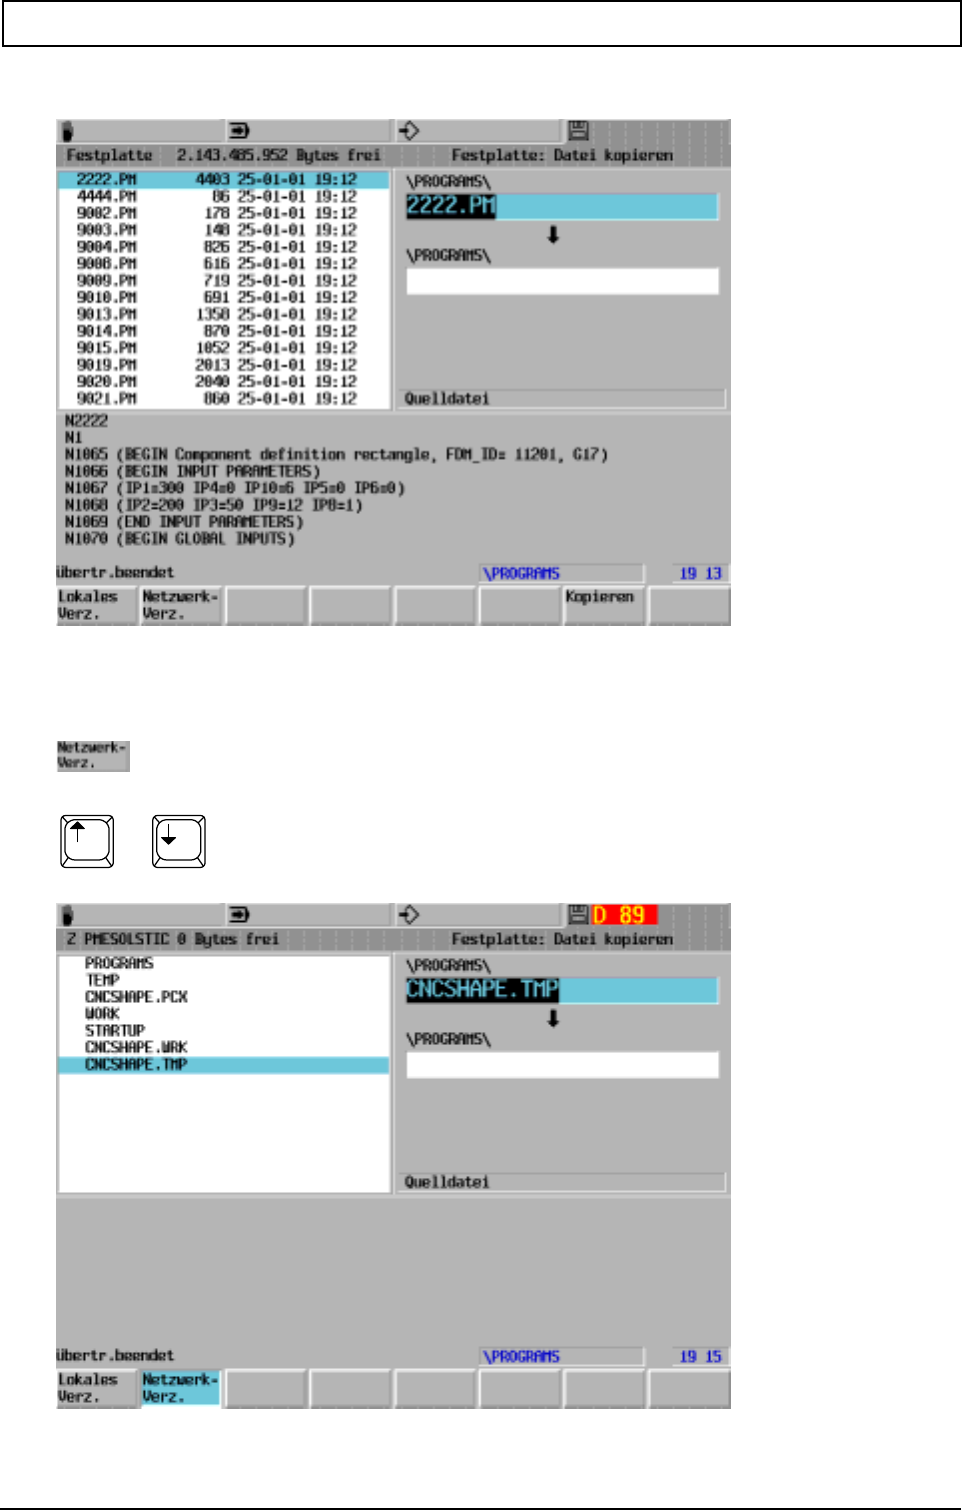
DATA INPUT / OUTPUT AND FILE MANAGEMENT
66 Heidenhain
Copy across the Ethernet:
source file:
Select directory
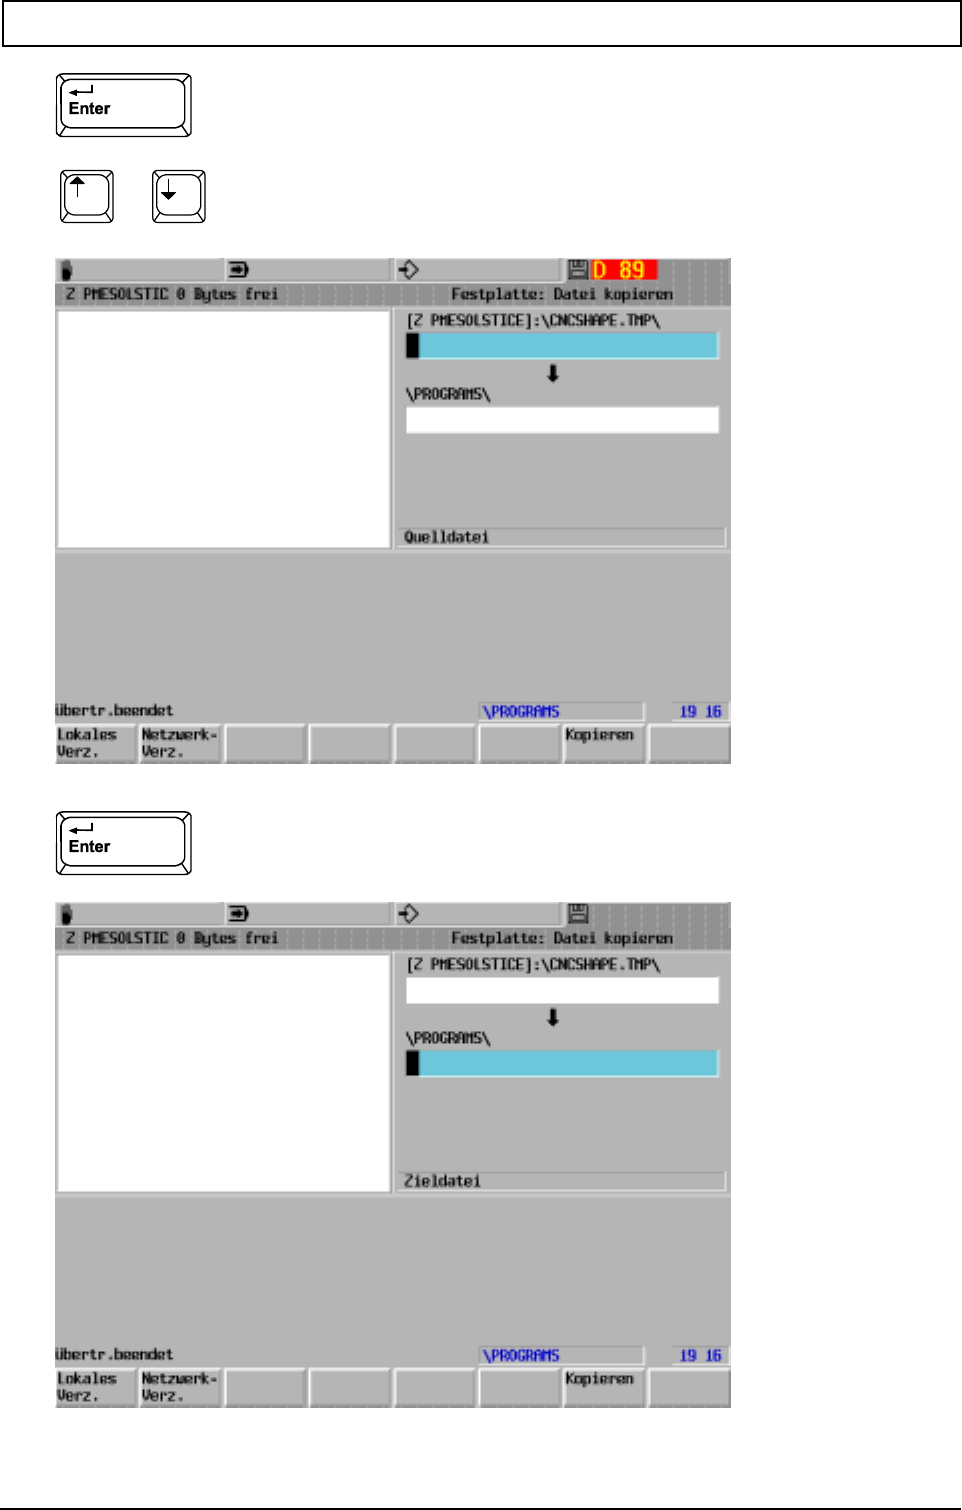
DATA INPUT / OUTPUT AND FILE MANAGEMENT
20000710 MillPlus V410 67
Open directory
Select program
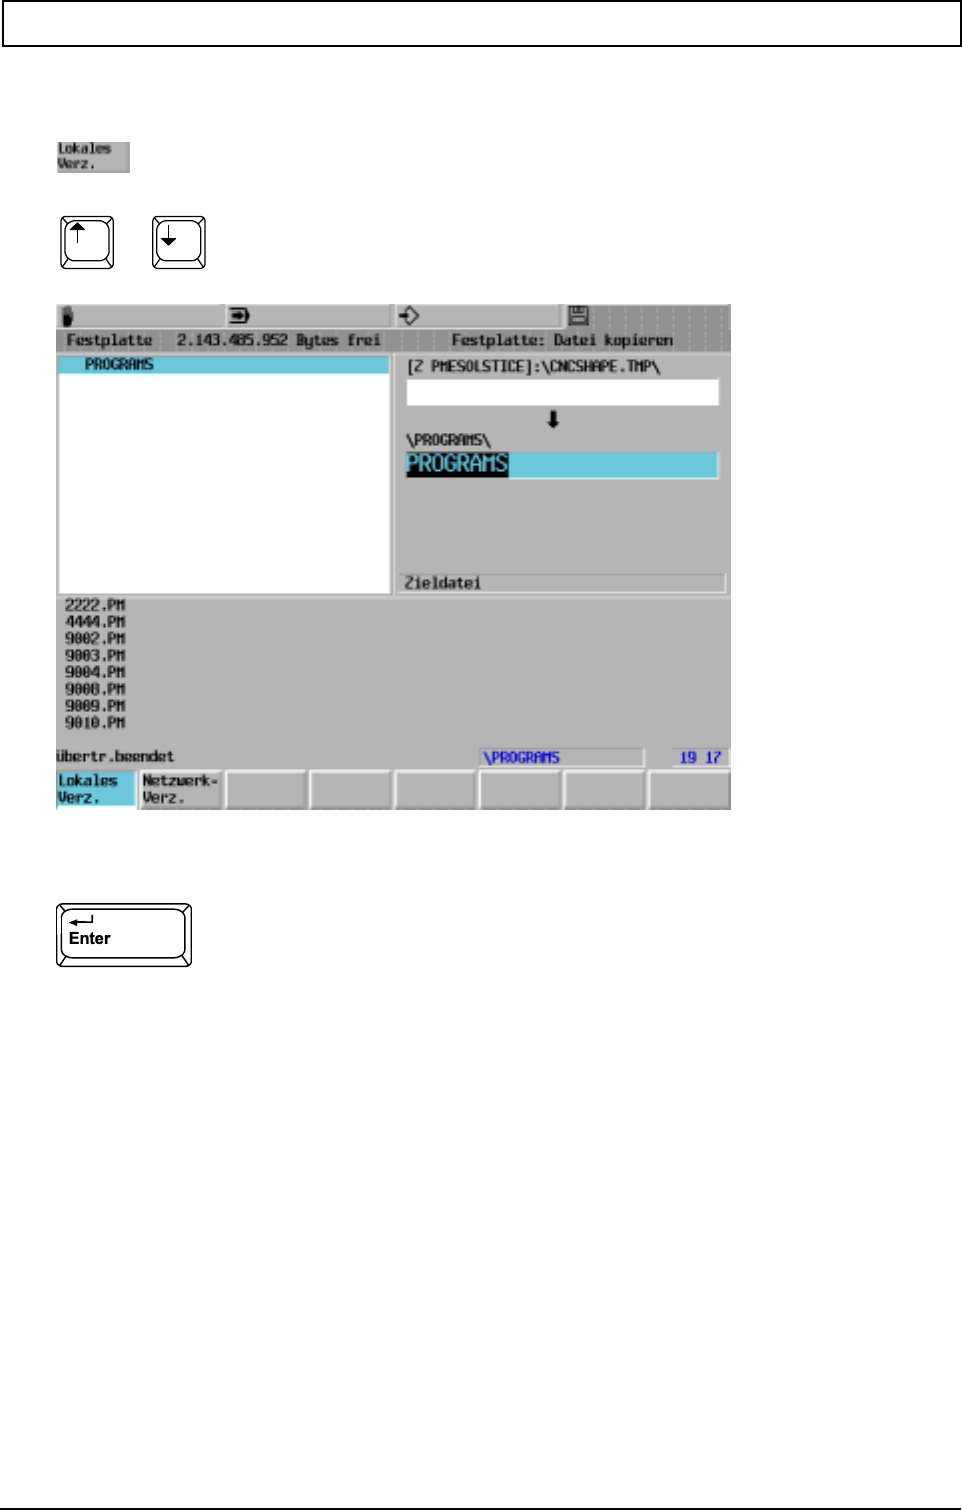
DATA INPUT / OUTPUT AND FILE MANAGEMENT
68 Heidenhain
Select directory
Select directory
Open directory
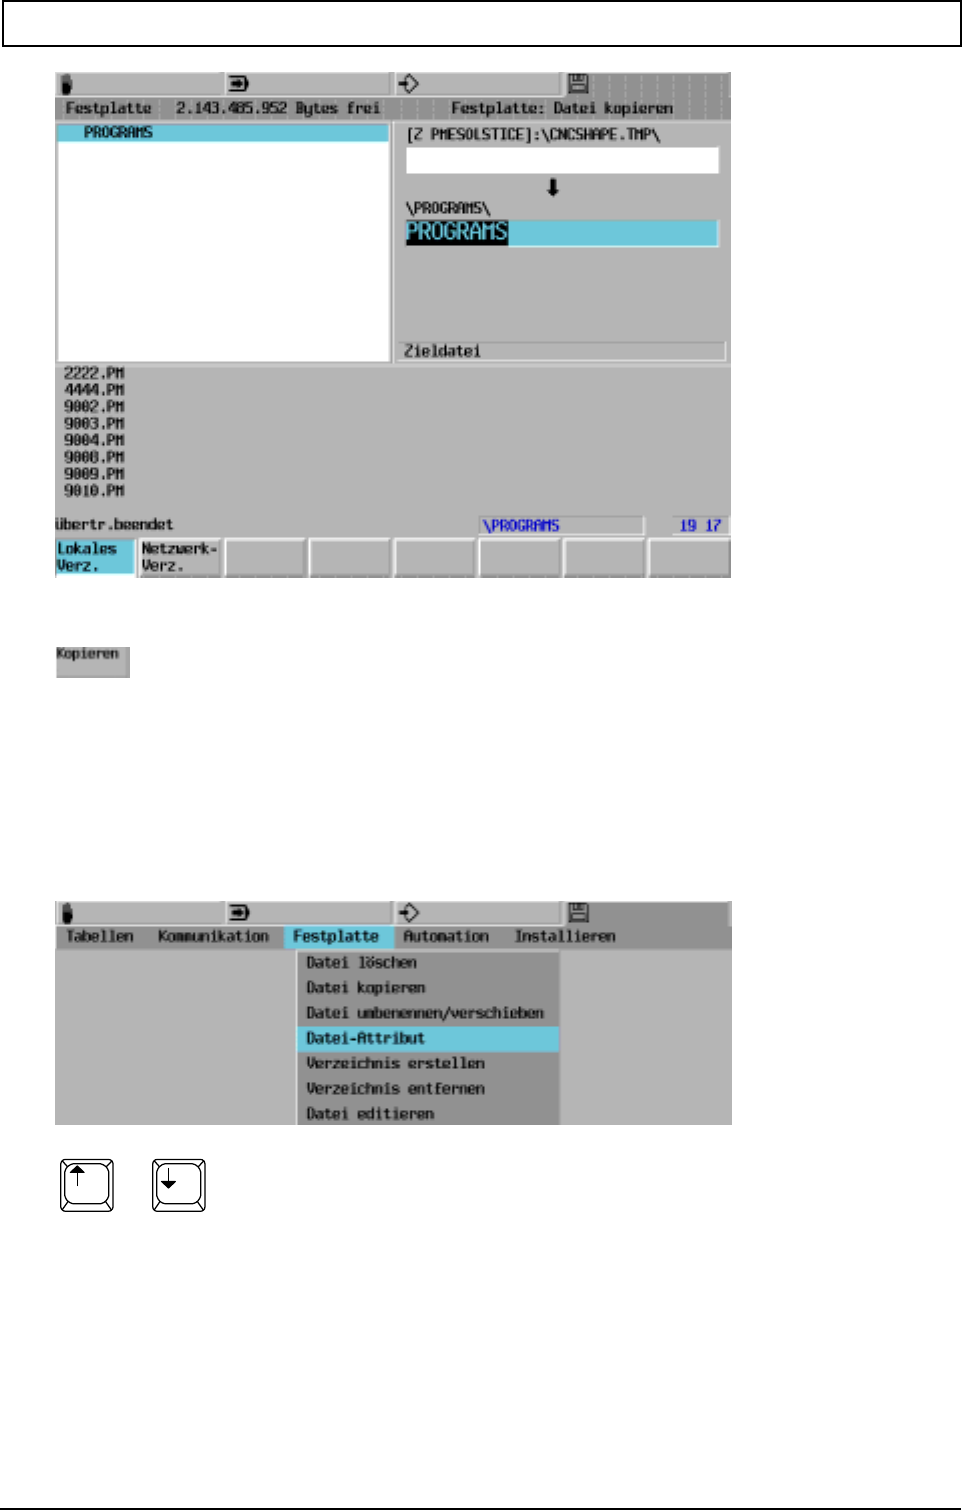
DATA INPUT / OUTPUT AND FILE MANAGEMENT
20000710 MillPlus V410 69
9.8.3 Rename/shift file
Rename/shift file copy analog file operation.
9.8.4 Attribute file (lock/unlock)
Select program

DATA INPUT / OUTPUT AND FILE MANAGEMENT
70 Heidenhain
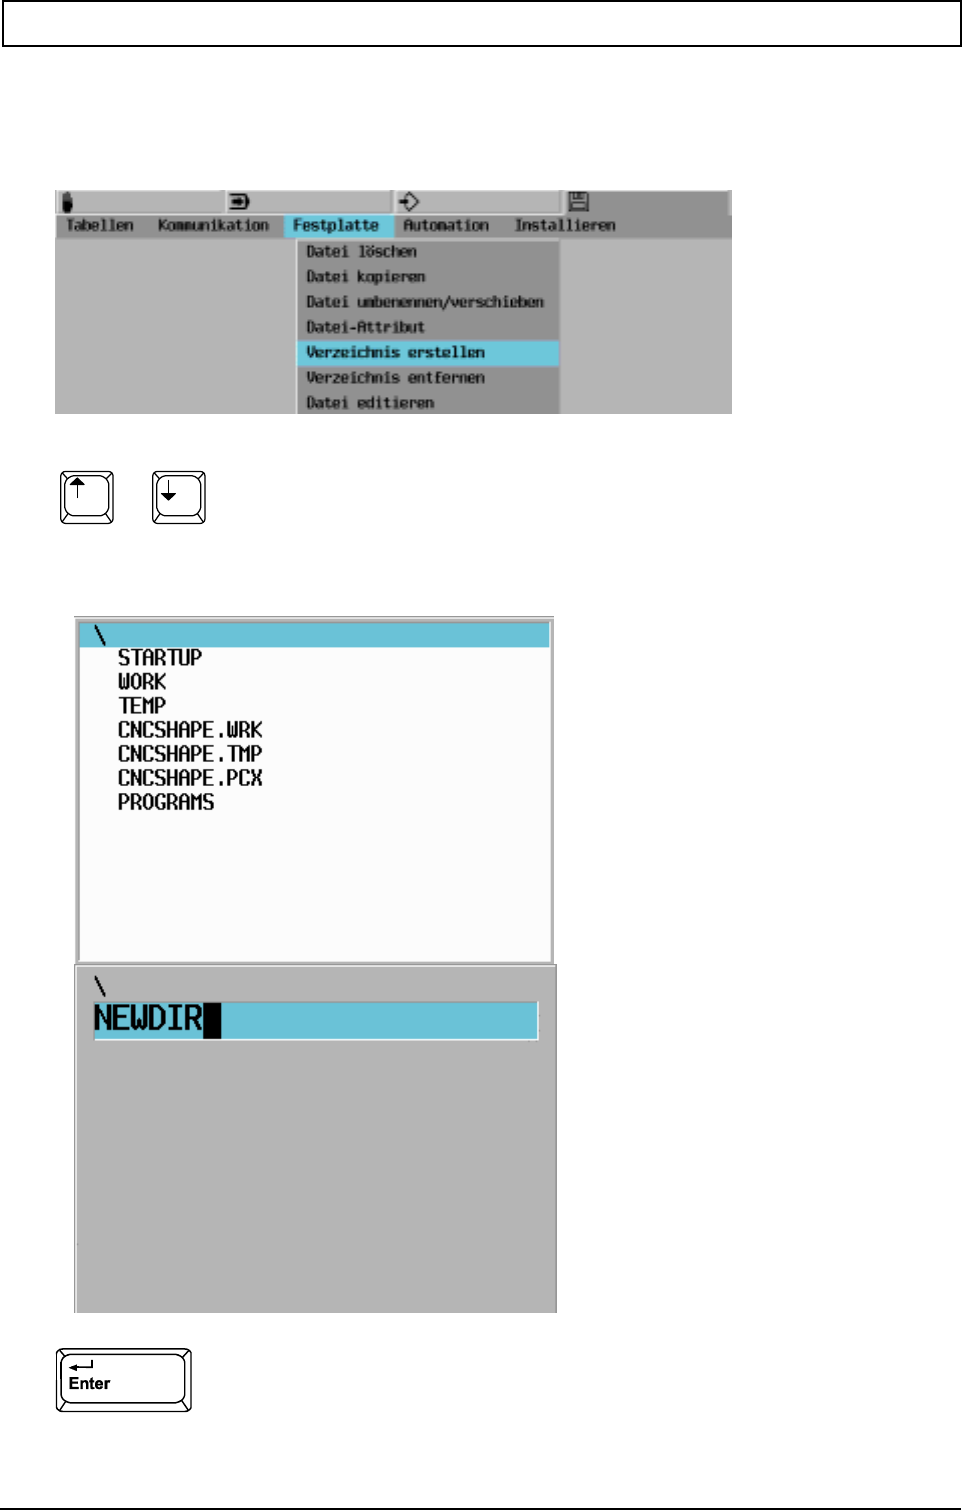
DATA INPUT / OUTPUT AND FILE MANAGEMENT
20000710 MillPlus V410 71
9.8.5 Make directory
This enables you to create a new directory. The name of the directory consists of a maximum of 11
characters (DOS format 8.3 characters). The directory can have up to 5 levels.
Select directory
Enter directory name (NEWDIR)

DATA INPUT / OUTPUT AND FILE MANAGEMENT
72 Heidenhain
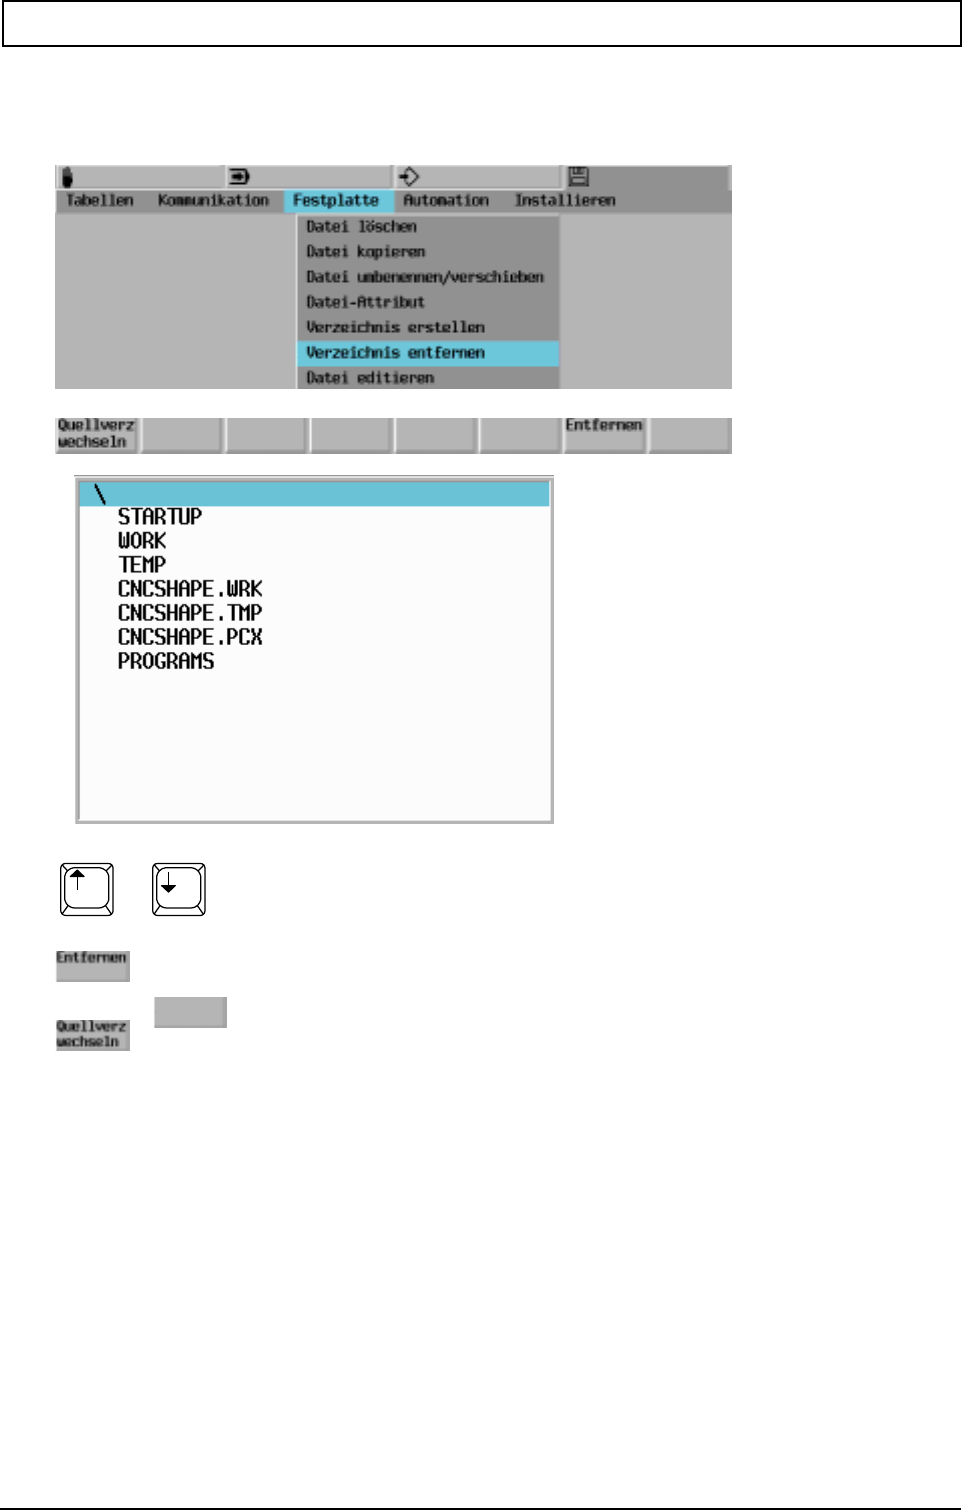
DATA INPUT / OUTPUT AND FILE MANAGEMENT
20000710 MillPlus V410 73
9.8.6 Remove directory
The directory must be empty. The current directory cannot be removed.
Select directory
Remove directory
Remove directory No or Yes?
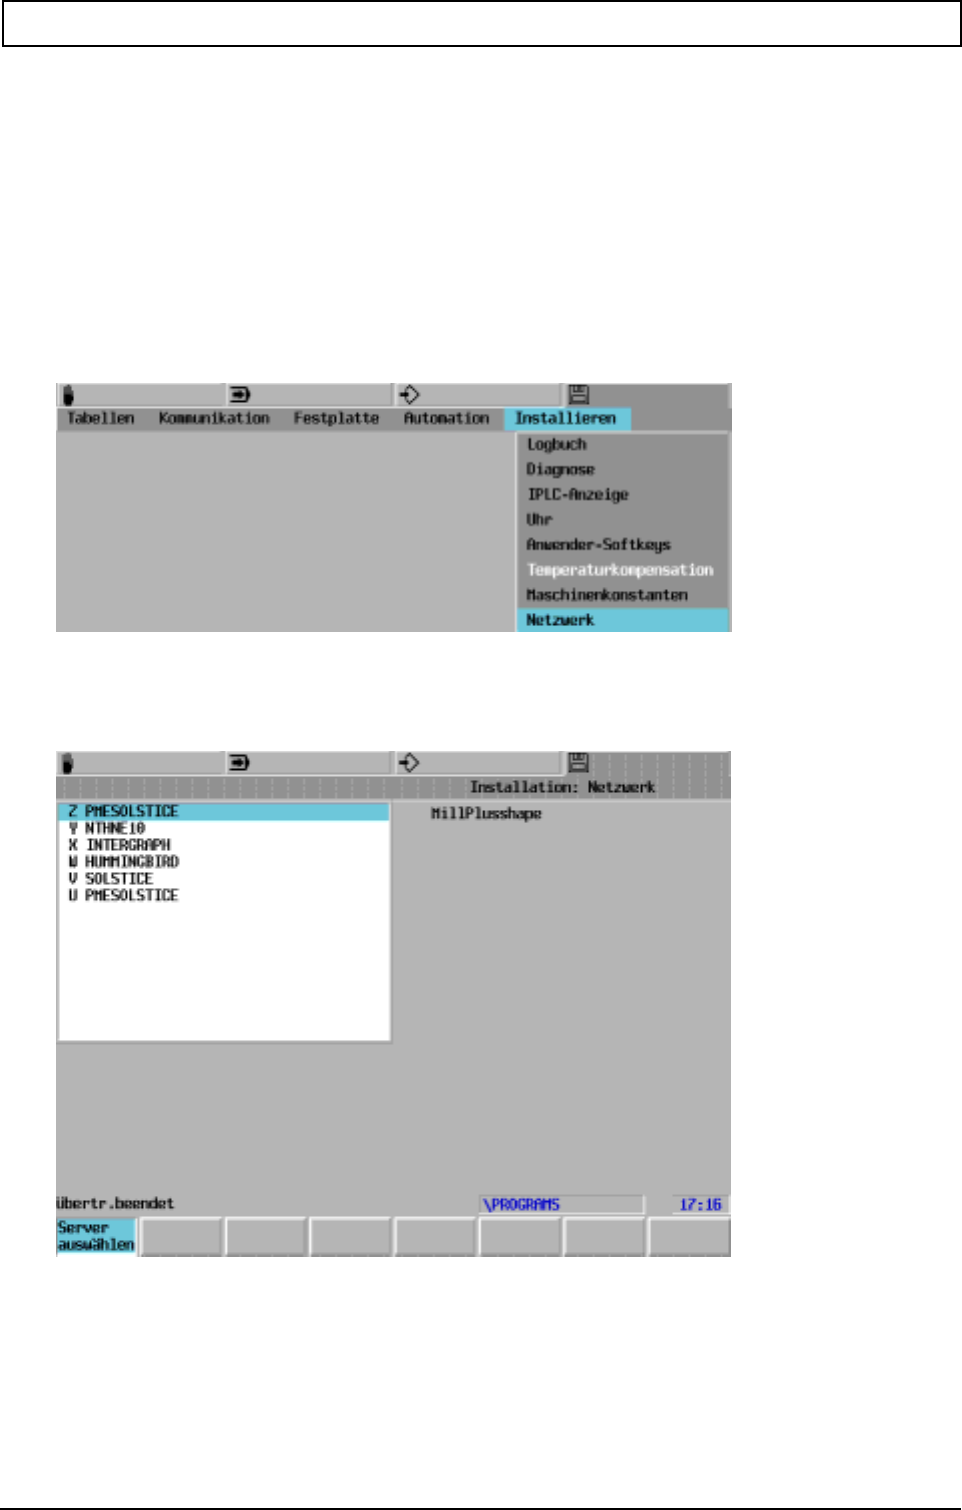
DATA INPUT / OUTPUT AND FILE MANAGEMENT
74 Heidenhain
9.9 Ethernet interface
Additional disk drives become available if MillPlus is connected to a network. The Copy File function is
the only one that can also be used on network drives.
For details on how to set up the interface, refer to the chapter entitled Miscellaneous.
9.9.1 Select server
The server is the network node that is used to transfer data. Only one server can ever be active at a
time.
The configuration file contains a list of possible servers. The server that is selected must be an active
server.
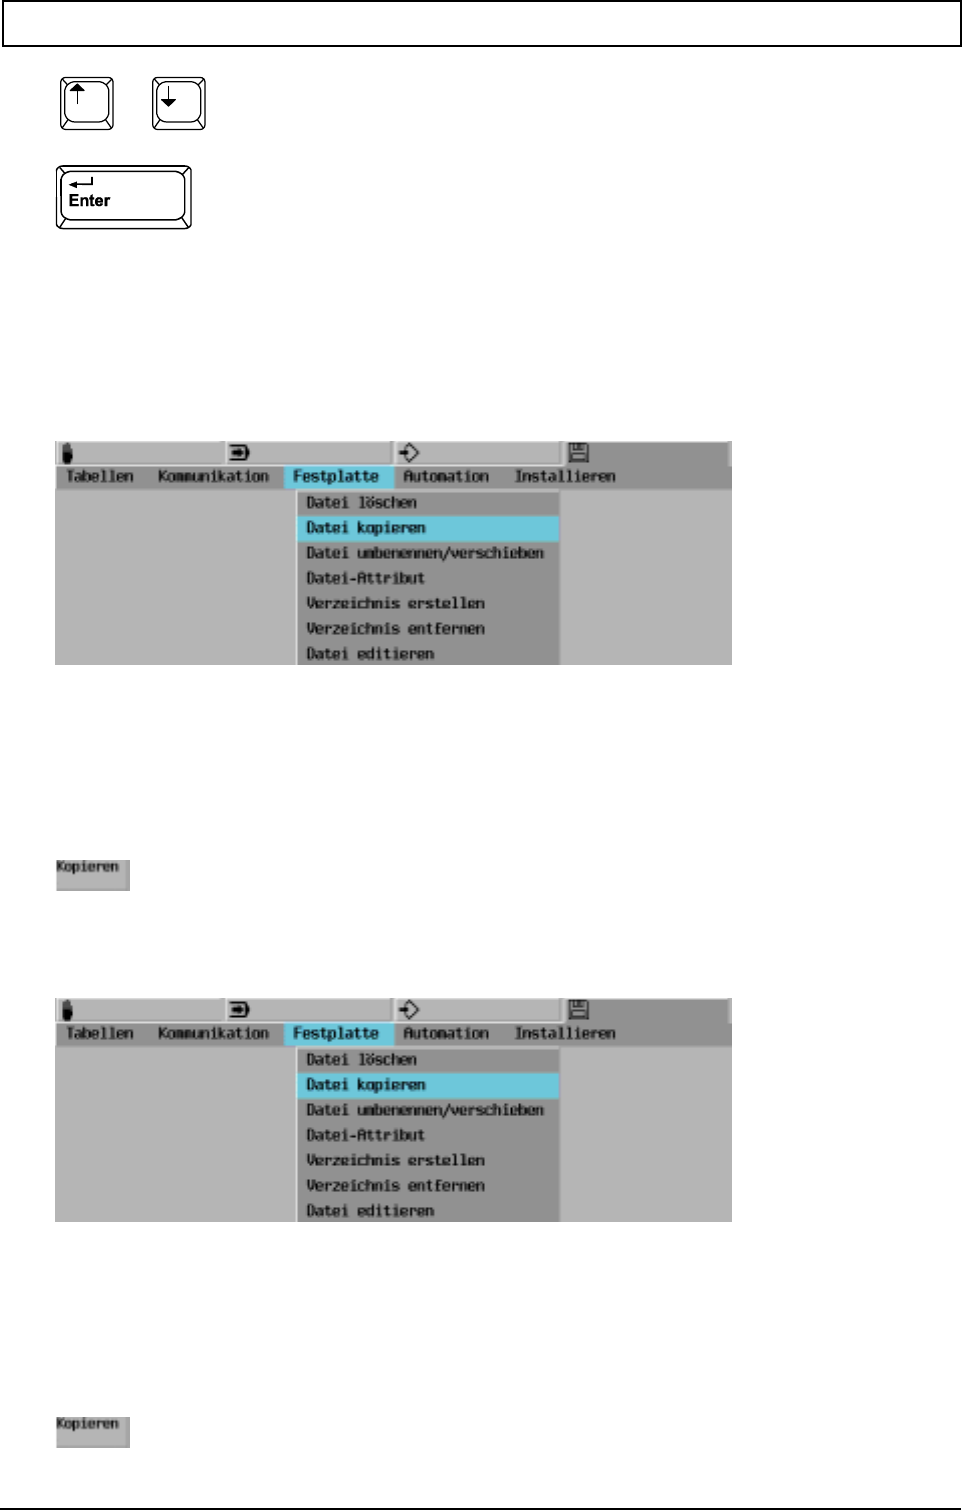
DATA INPUT / OUTPUT AND FILE MANAGEMENT
20000710 MillPlus V410 75
Select server
Make server active
Note
Ethernet provides no way of preventing two clients from accessing the same file on the server at the
same time. This may result in corruption of one of the files.
9.9.2 Write to server
Send the files from the current directory on the CNC hard disk to the specified directory on the server.
-Select source directory on CNC
-Select target directory on server
-Select or enter file name
Write file to server
9.9.3 Read from server
Copy the files from the server to the current directory on the CNC hard disk.
-Select source directory on server
-Select target directory on CNC
-Select or enter file name
Read file from server

DATA INPUT / OUTPUT AND FILE MANAGEMENT
76 Heidenhain
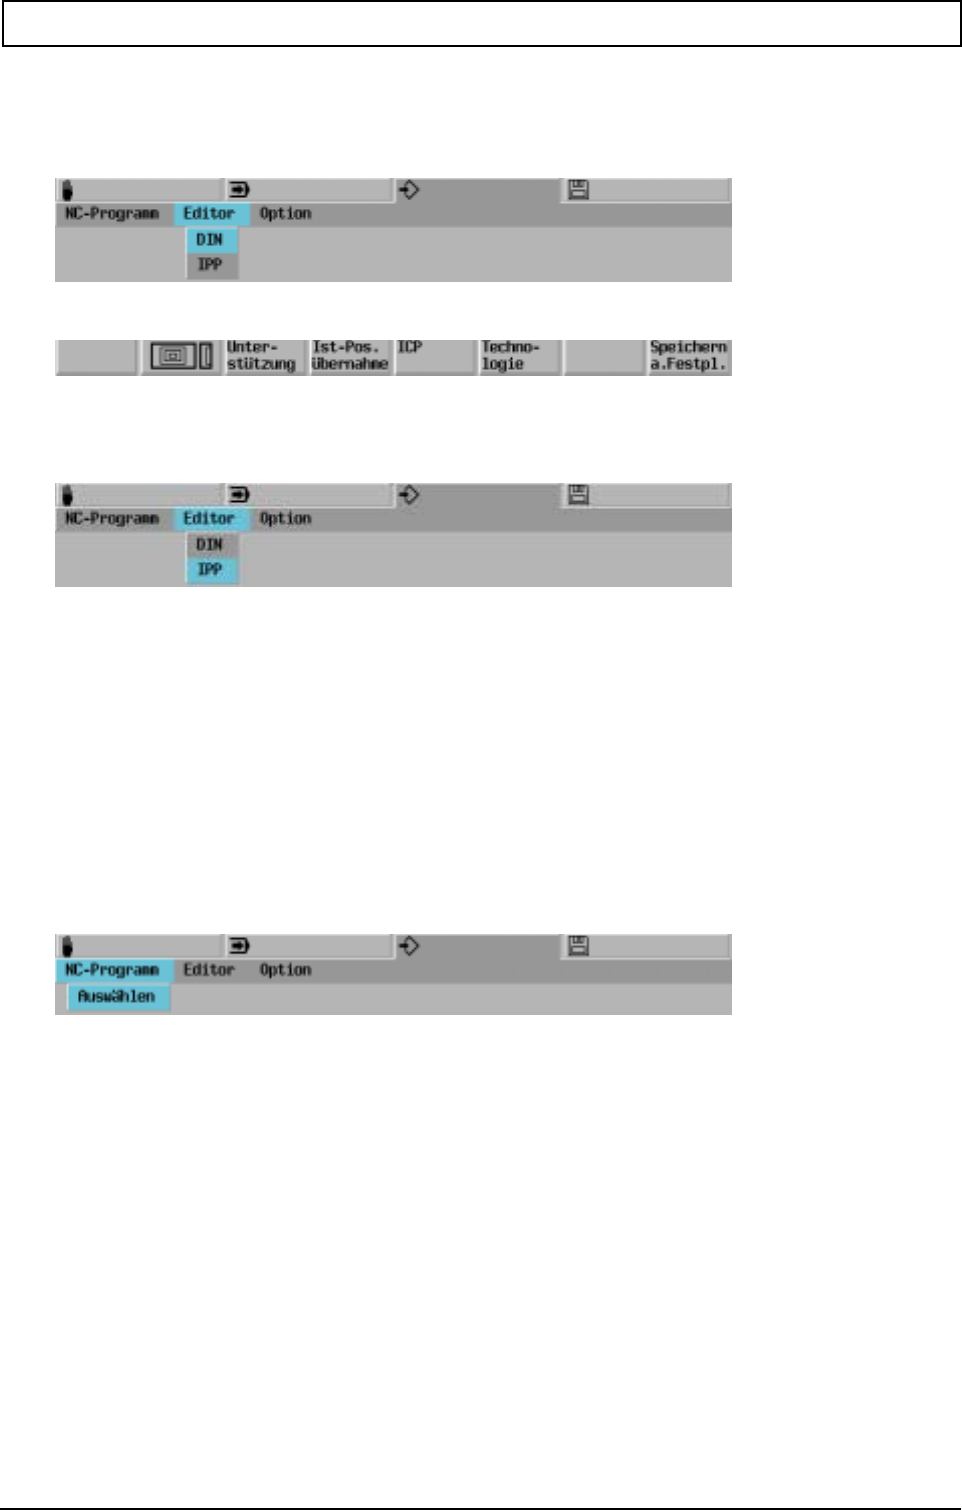
ENTER / EDIT PROGRAM
20000710 MillPlus V410 77
10. Enter / edit program
10.1 DIN/ISO Editor
To edit DIN/ISO programs.
10.2 IPP Editor
To edit IPP programs.
10.3 Input help
The following are available:
Interactive parts programming (IPP)
Interactive contour programming (ICP)
Support for G-Functions
10.4 Enter new program number (main program / macro)
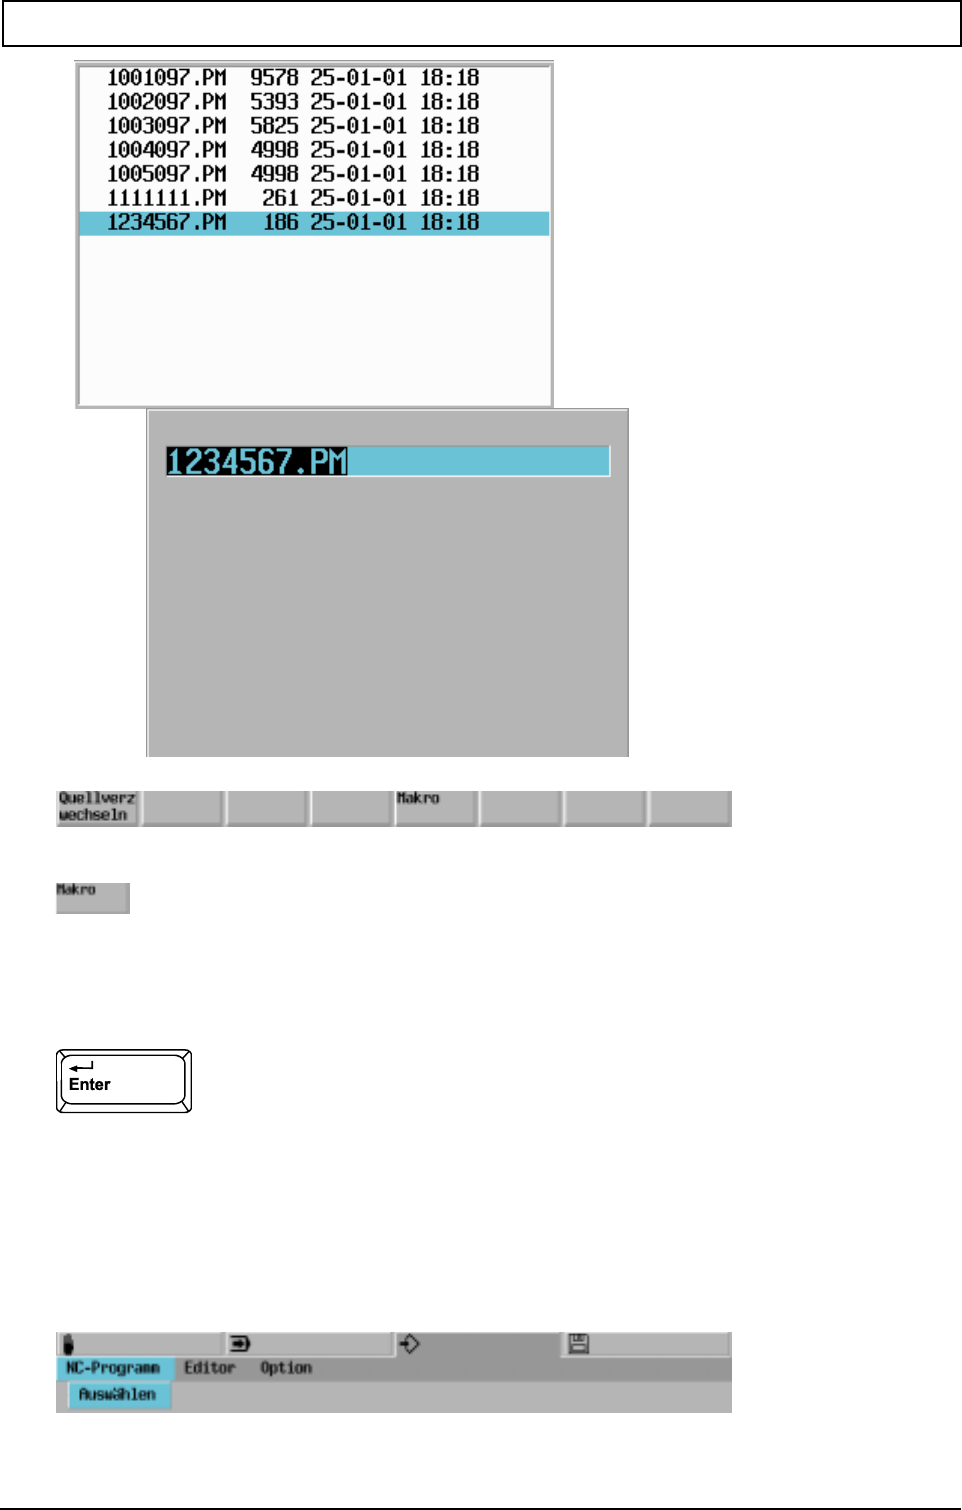
ENTER / EDIT PROGRAM
78 Heidenhain
Select program type.
Enter program number (1-999 999 9)
Example: 777777
Start the active editor with the new program number.
Note
Main programs (invoke with G23) and subprograms (invoke with G22) should be in the directory of the
active main program.
10.5 Program selection (main program / macro)
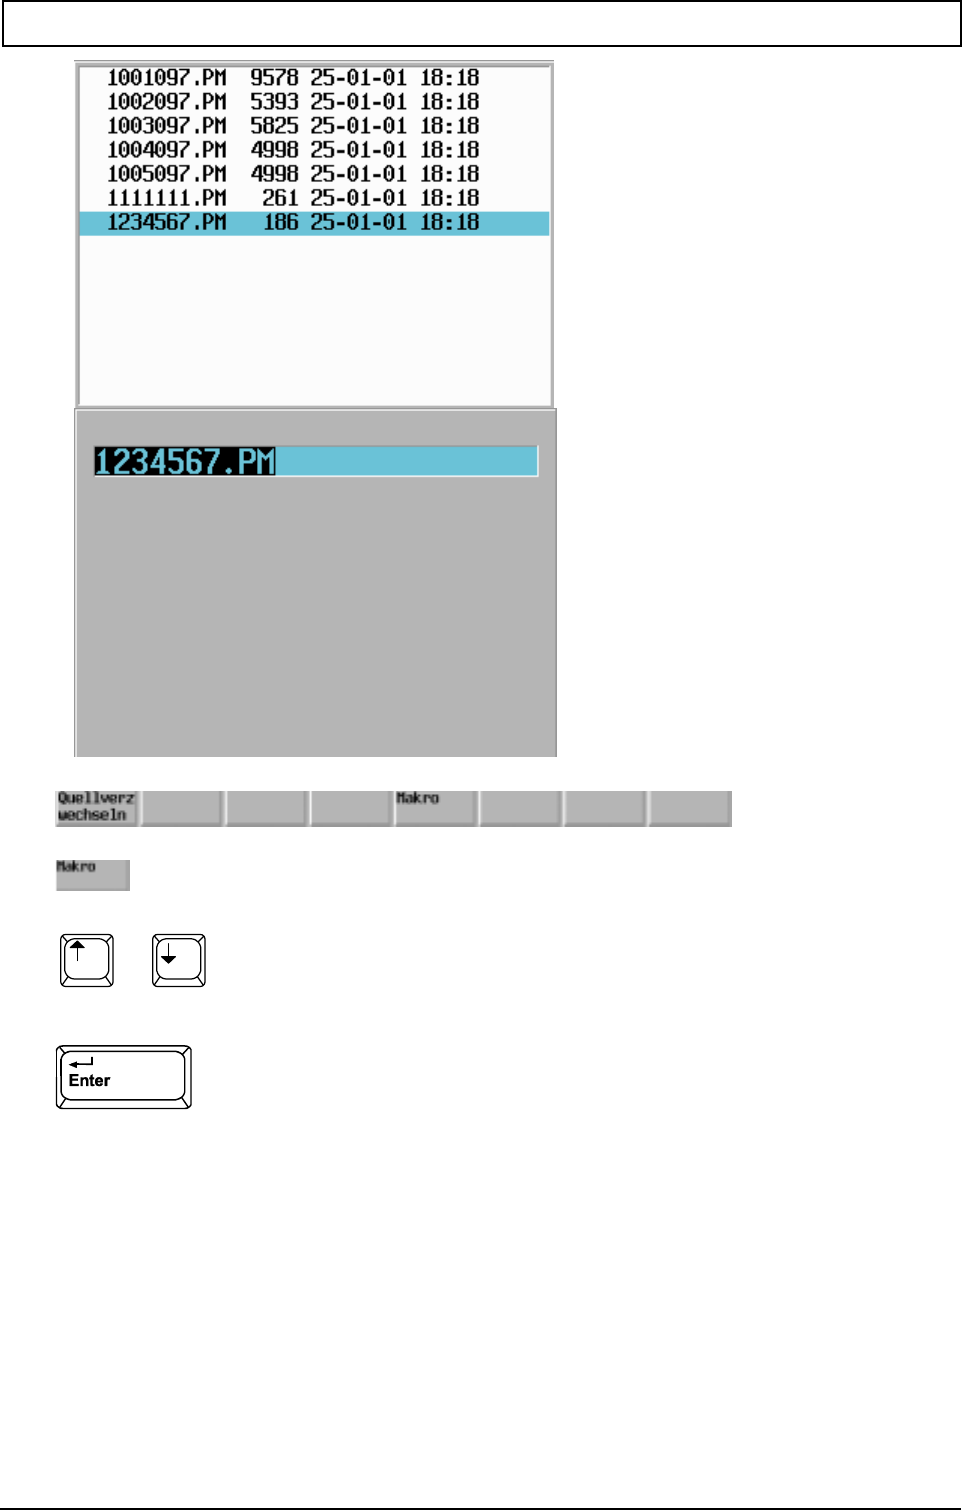
ENTER / EDIT PROGRAM
20000710 MillPlus V410 79
Softkey nur für die Anzeige der Makroliste drücken.
Programm anwählenz. B.1234567.PM.
Bei der Eingabe der Programmnummer, braucht
man die Erweiterung .PM oder .MM nicht eingeben.
Activate the program for editing.
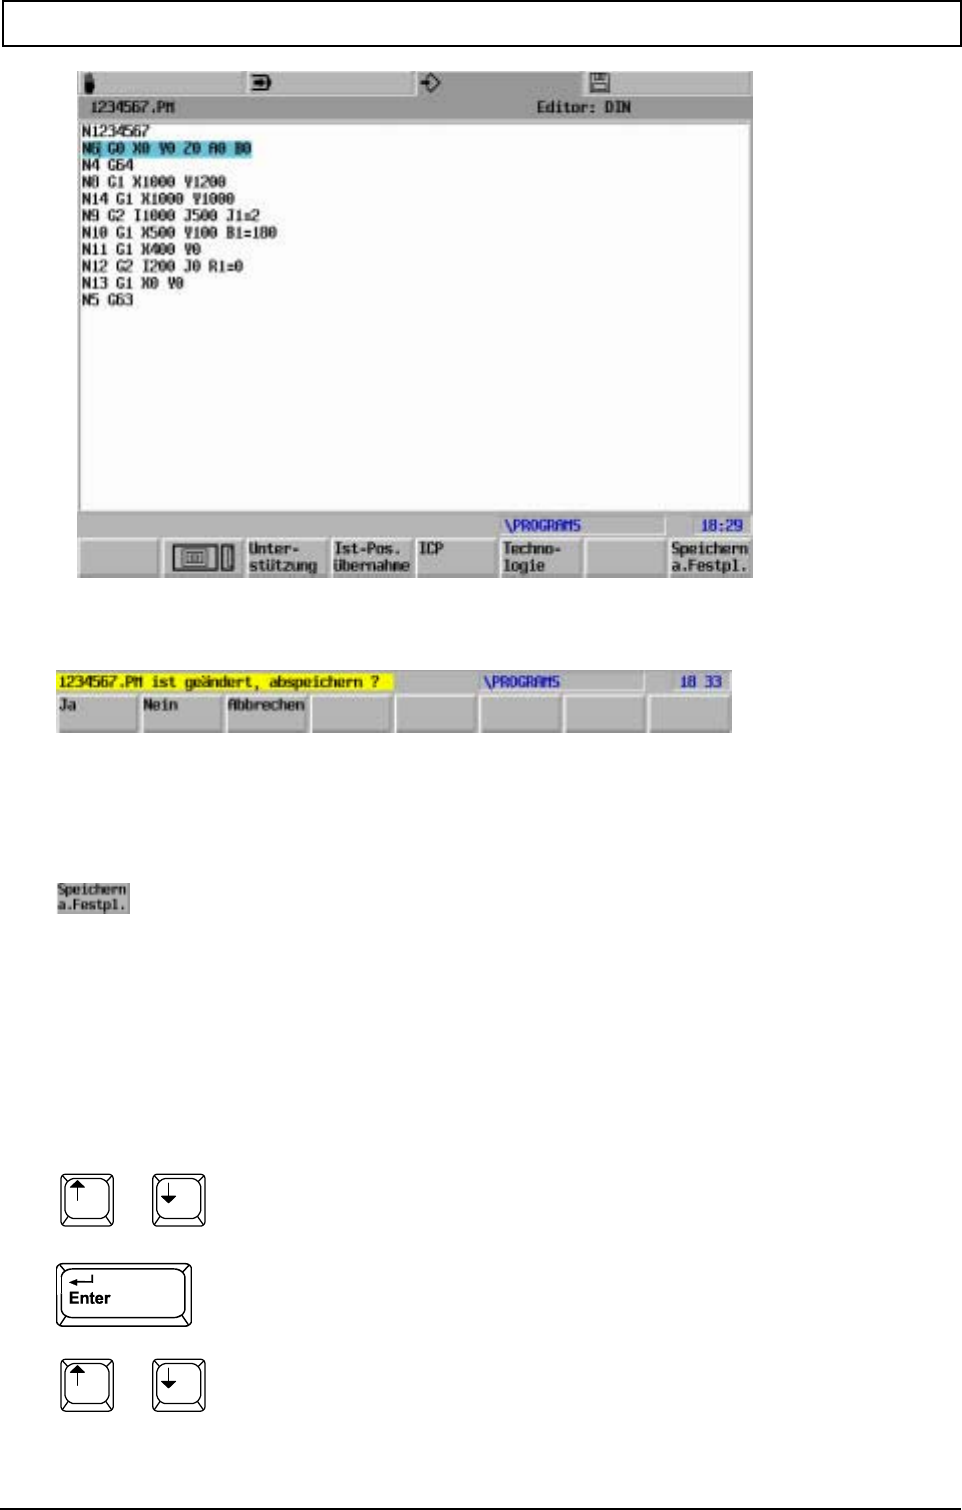
ENTER / EDIT PROGRAM
80 Heidenhain
Storage request after editing and selection of edited NC program via the menu.
Changes in the active main program and in the accessory subprograms are stored automatically.
10.6 Save to hard disk
Save program to hard disk.
10.7 Enter program block
Directly at cursor position using ASCII keyboard
10.8 Insert program block
Select sentence number after which a sentence is to be added.
Edit block and close.
ENTER / EDIT PROGRAM
20000710 MillPlus V410 81
10.9 Text entry
Text in brackets after parameters, maximum length 124 characters.
Example:
G1 X50 Y83 M13 (turn on coolant)
10.10 Mathematical entry
The functions sin(..) cos(..) tan(..) asin(..) acos(..) atan(..) sqrt(..) abs(..) int(..) may only be written in
lower case.
Spaces are not permitted in functions.
Maximum size of on one line: 248 Characters.
10.11 Position transfer in the program (DIN editor)
Selects the axes which should be transferred.
Transfers the current position of the selected axes into the program
to the DIN editor
Transfer position using HR410.
Select the axes which should be transferred.
Transfers the current position of the selected axes into the program at the cursor point. Afterwards an
<Enter> is automatically executed.
The position can also be transferred while the machine is in motion.

ENTER / EDIT PROGRAM
82 Heidenhain
Note
If G0 X100 is written in the line and position X121 Y122 is transferred, the final line entry is G0 X100
X121 Y122. Subsequently the programmer must delete one of the two X addresses.
ENTER / EDIT PROGRAM
20000710 MillPlus V410 83
10.12 Delete address
Deletes character to left of cursor.
Undelete the most recently deleted addresses in a block.
10.13 Editing function
Activate the EDIT softkeys.
Quit the EDIT function.
10.13.1 Erase line
This enables you to erase the active line (indicated by the cursor)
10.13.2 Search & replace
Enter character string
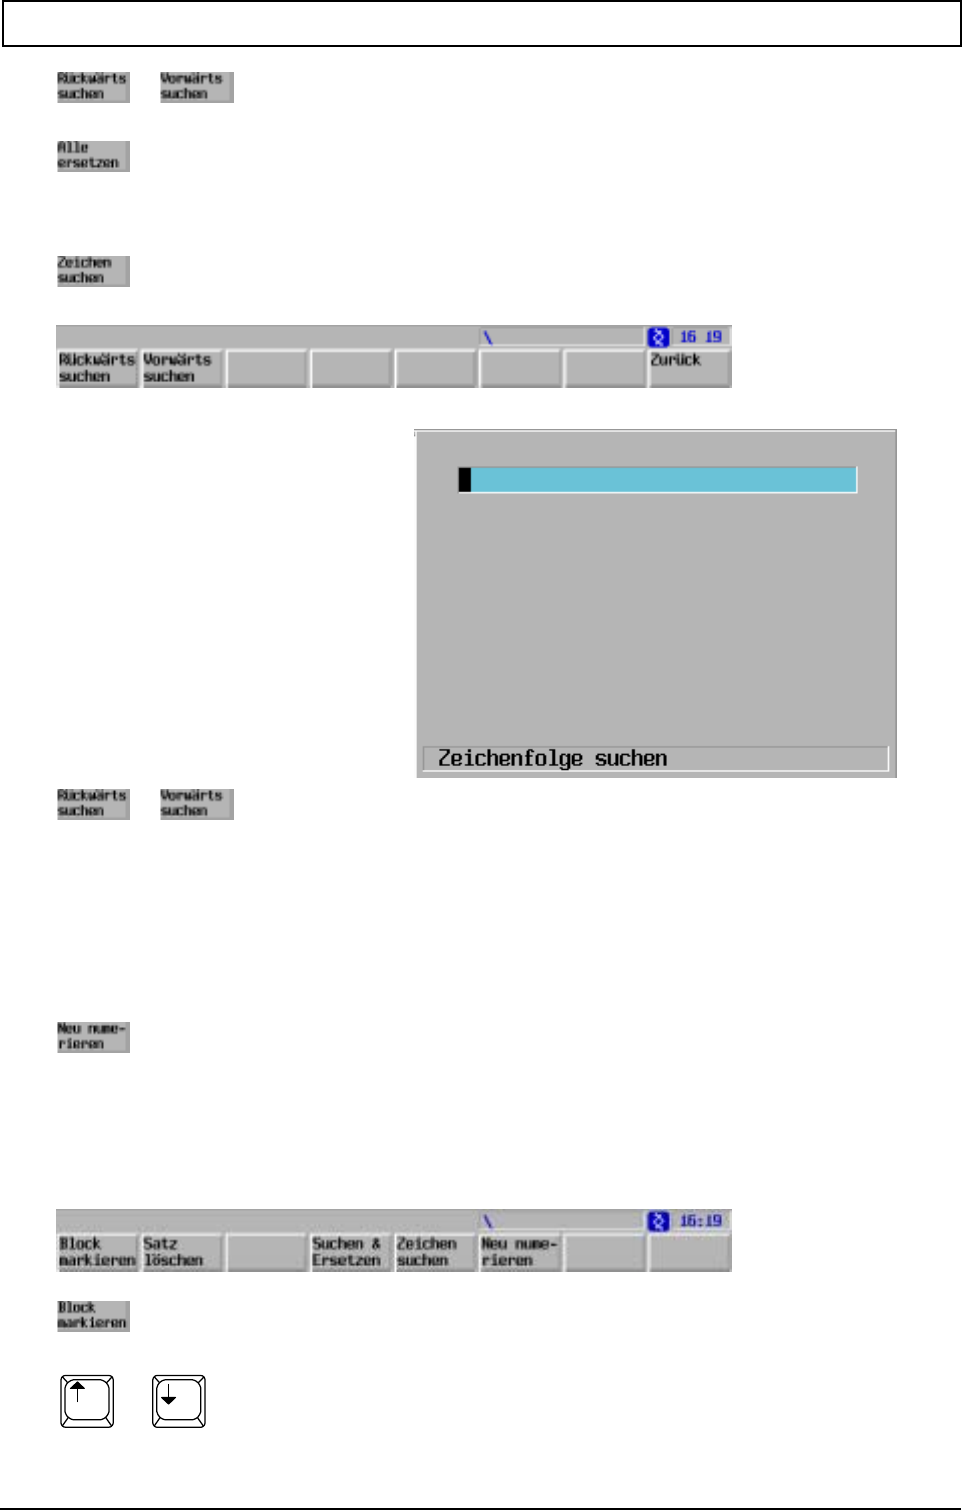
ENTER / EDIT PROGRAM
84 Heidenhain
10.13.3 Find
Enter character string
Note
The new numbering begins with the sentence number of the first (marked) sentence.
10.13.4 Renumber
Line number in the program blocks are renumbered.
Note
The new numbering begins with the sentence number of the first (marked) sentence.
10.13.5 Block (delete, renumber)
Mark a program record/block.
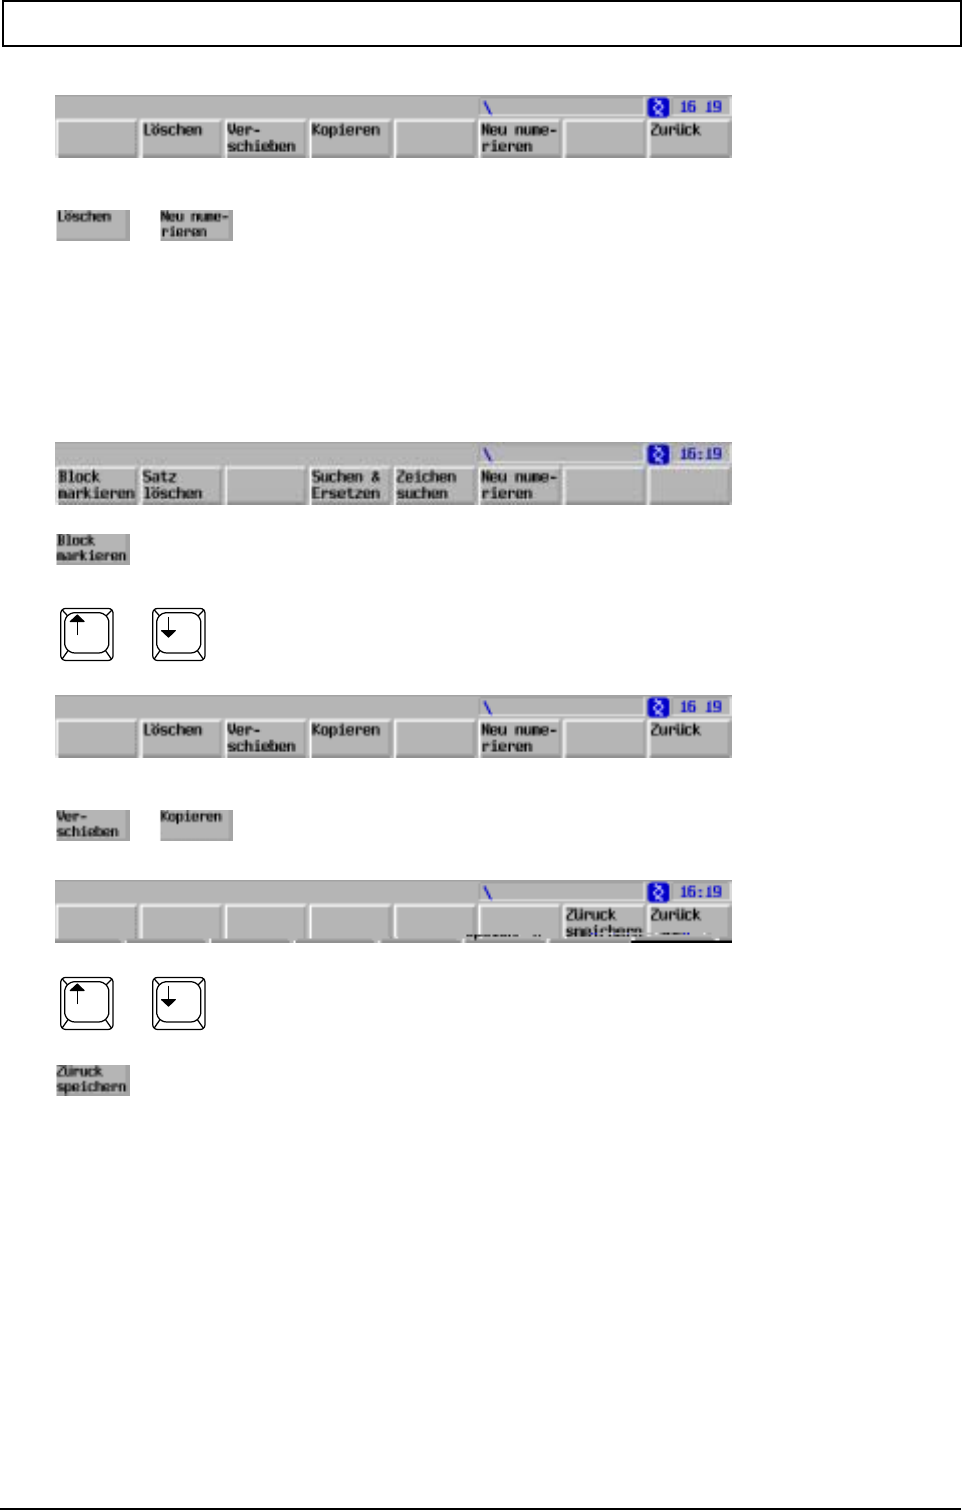
ENTER / EDIT PROGRAM
20000710 MillPlus V410 85
Perform operation
Note
The new numbering starts with the block number of the first highlighted block.
10.13.6 Block (Move, Copy)
Mark a program record/block
Save program record/block in intermediate storage
Select record number
Save program record/block in program
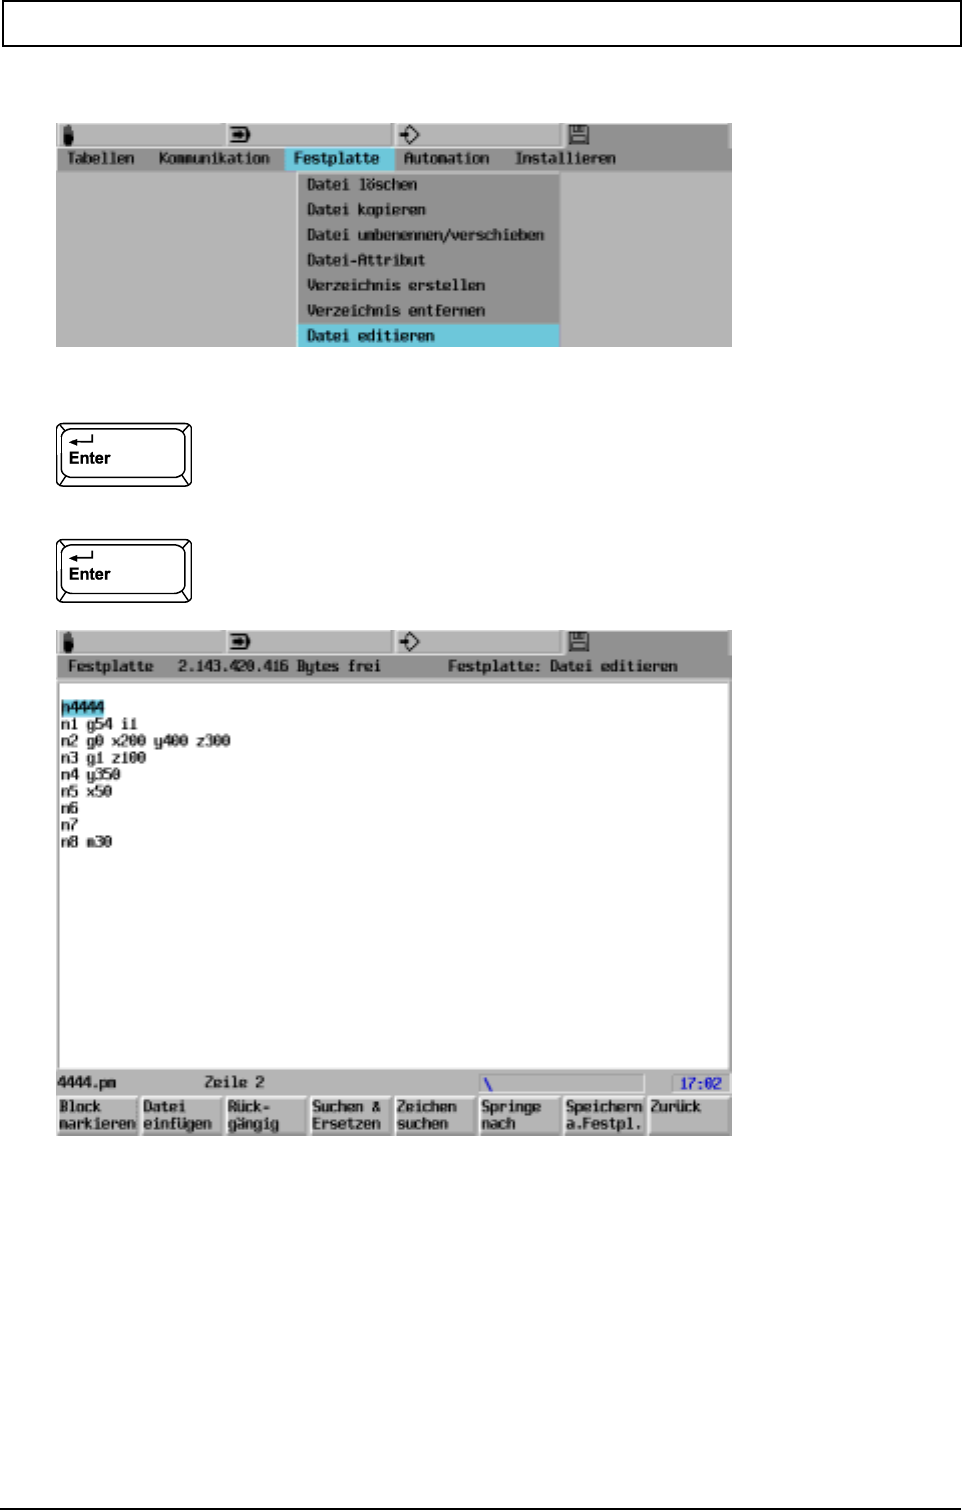
ENTER / EDIT PROGRAM
86 Heidenhain
10.14 File editor
Enter program number, example: 4444.pm
Changes take effect immediately.
The file editor does not check blocks as they are entered and saving. Test the program using the
graphic test run function.
The graphic test, support, ICP and technology functions are not supported by the file editor.
Features:
For editing programs larger than 1 Mbyte
Blocks are not checked as they are entered and saved
Editing of active programs not possible
No NC language support while editing

ENTER / EDIT PROGRAM
20000710 MillPlus V410 87
10.14.1 Undo
Up to 100 operations can be undone.
The following operations cannot be undone:
-Select, Delete, Move, Copy Block
-Write Block/Insert File
-Search & Replace
10.14.2 Go to line number
Note:
The line number refers to the line number in the file, not the record number N in a program.
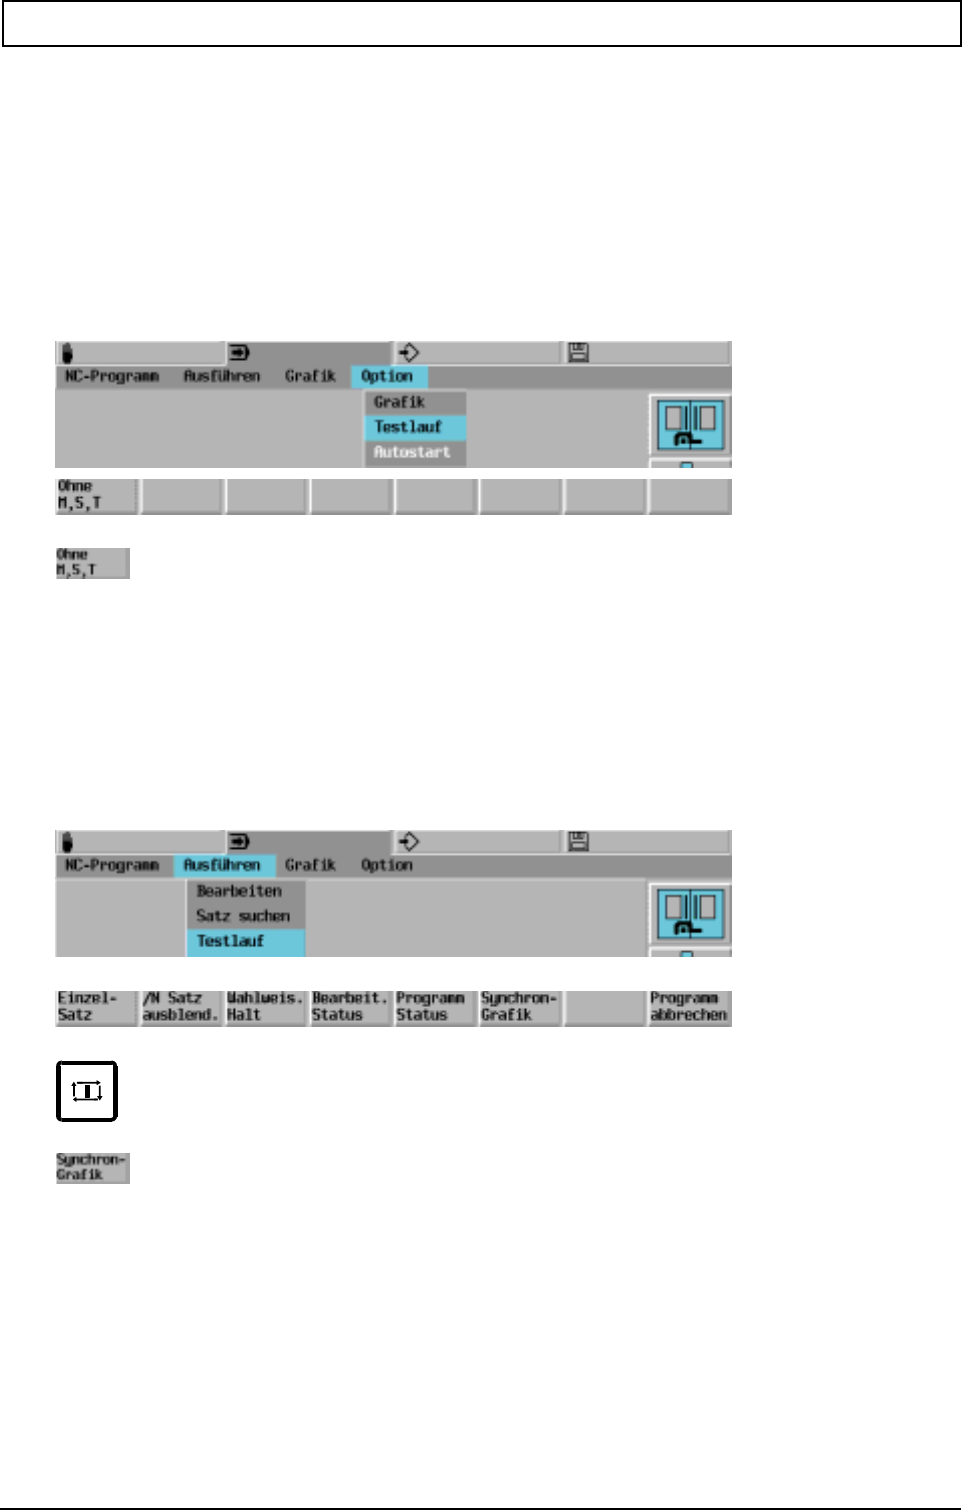
PROGRAM DRY RUN
20000710 MillPlus V410 89
11. Program dry run
11.1 Dry run mode
The test run takes place at an increased feed rate (MC 741).
Activate the program.
11.1.1 Select dry run option
M,S and T not output
Note: Lock axis
MC 100 C3 (1st axis)
MC 105 C3 (2nd axis)
MC 110 C3 (3rd axis)
MC 115 C3 (4th axis)
11.1.2 Perform dry run
Start dry run
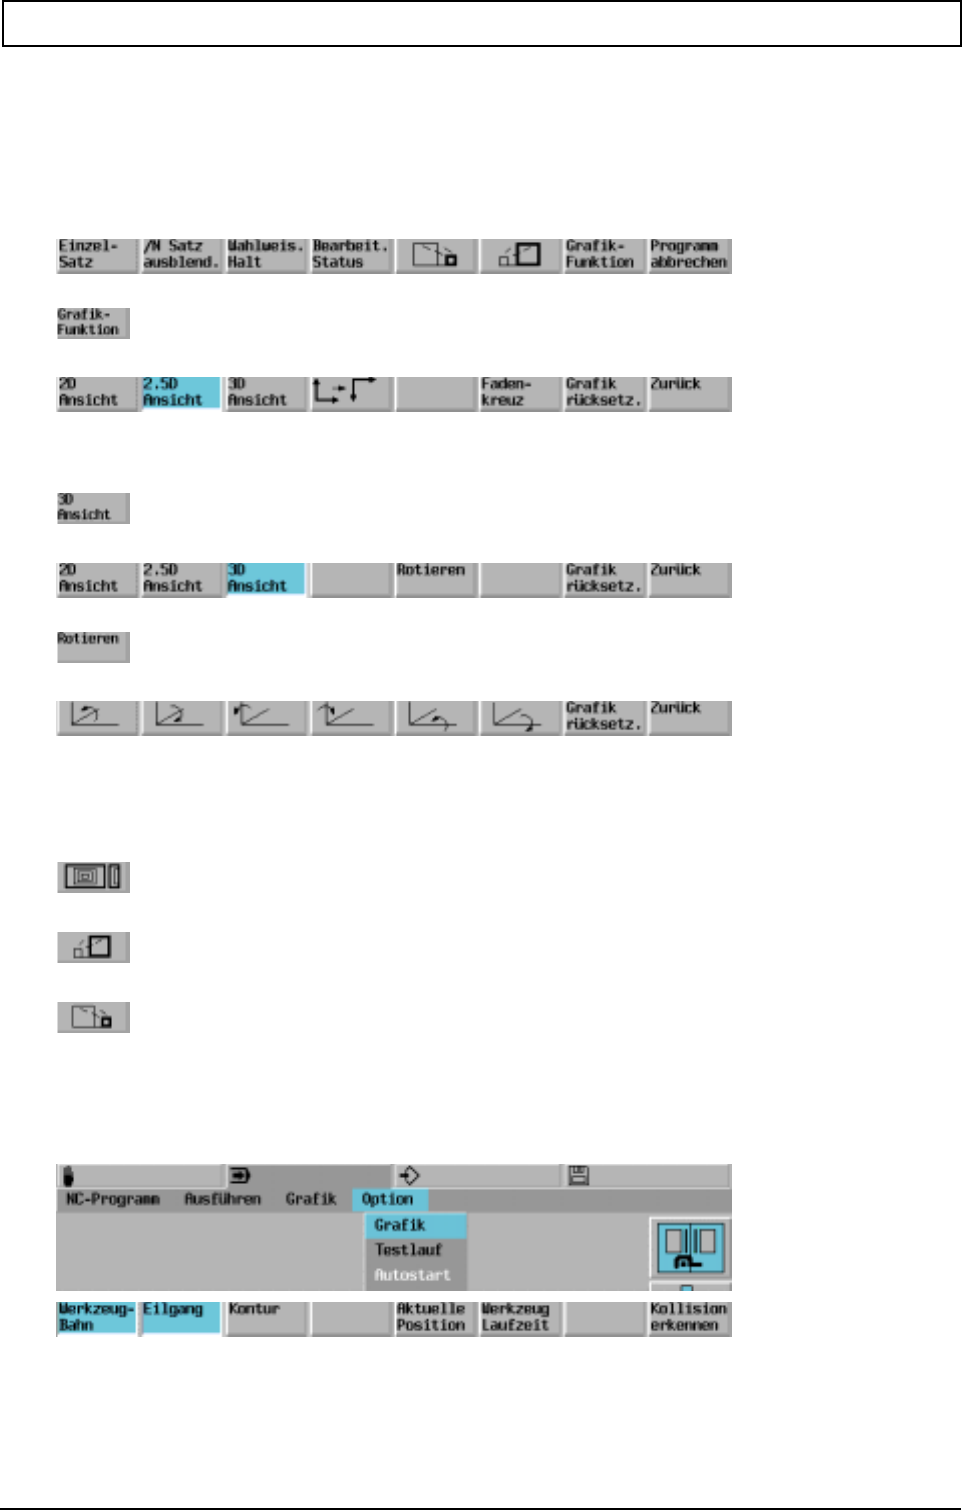
PROGRAM DRY RUN
90 Heidenhain
11.2 Graphics dry run
Activate the program.
11.2.1 Graphic functions
Select 2/2.5/3D view
e.g. 3D view
11.2.2 Graphical representation
Graphical representation
Enlarge drawing step by step
Reduce drawing step by step
11.2.3 Graphic options
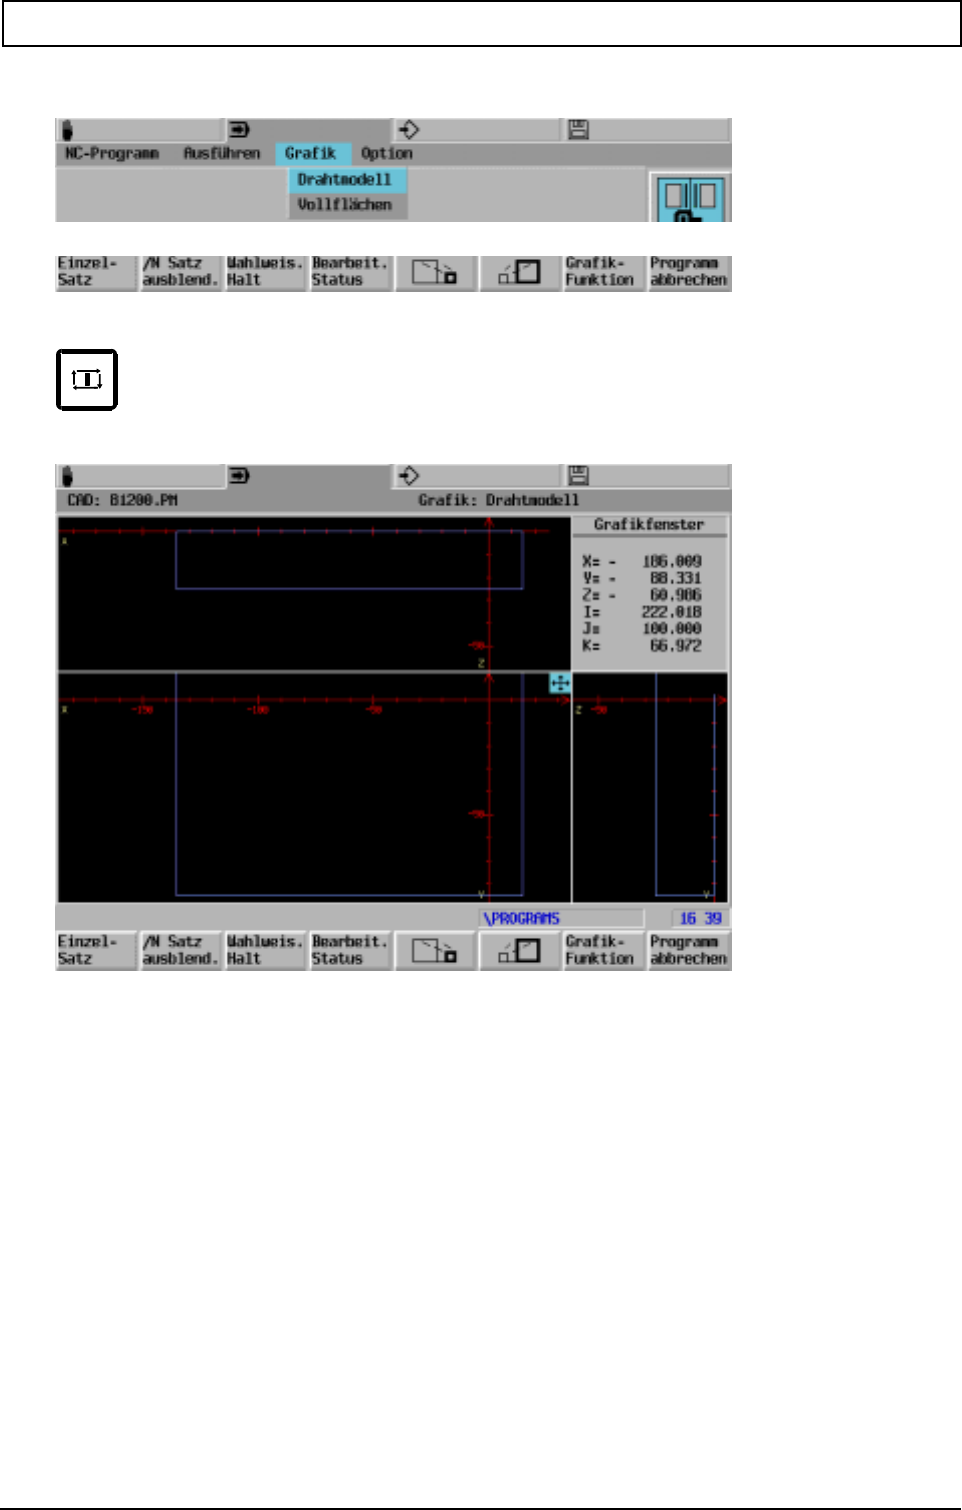
PROGRAM DRY RUN
20000710 MillPlus V410 91
11.2.4 Wire plot
Start wire plot
11.2.5 Working with graphics (example)
- Activate the program.
- Select the Graphics option.
- Select Wire or solid graphic.
- Start the program.
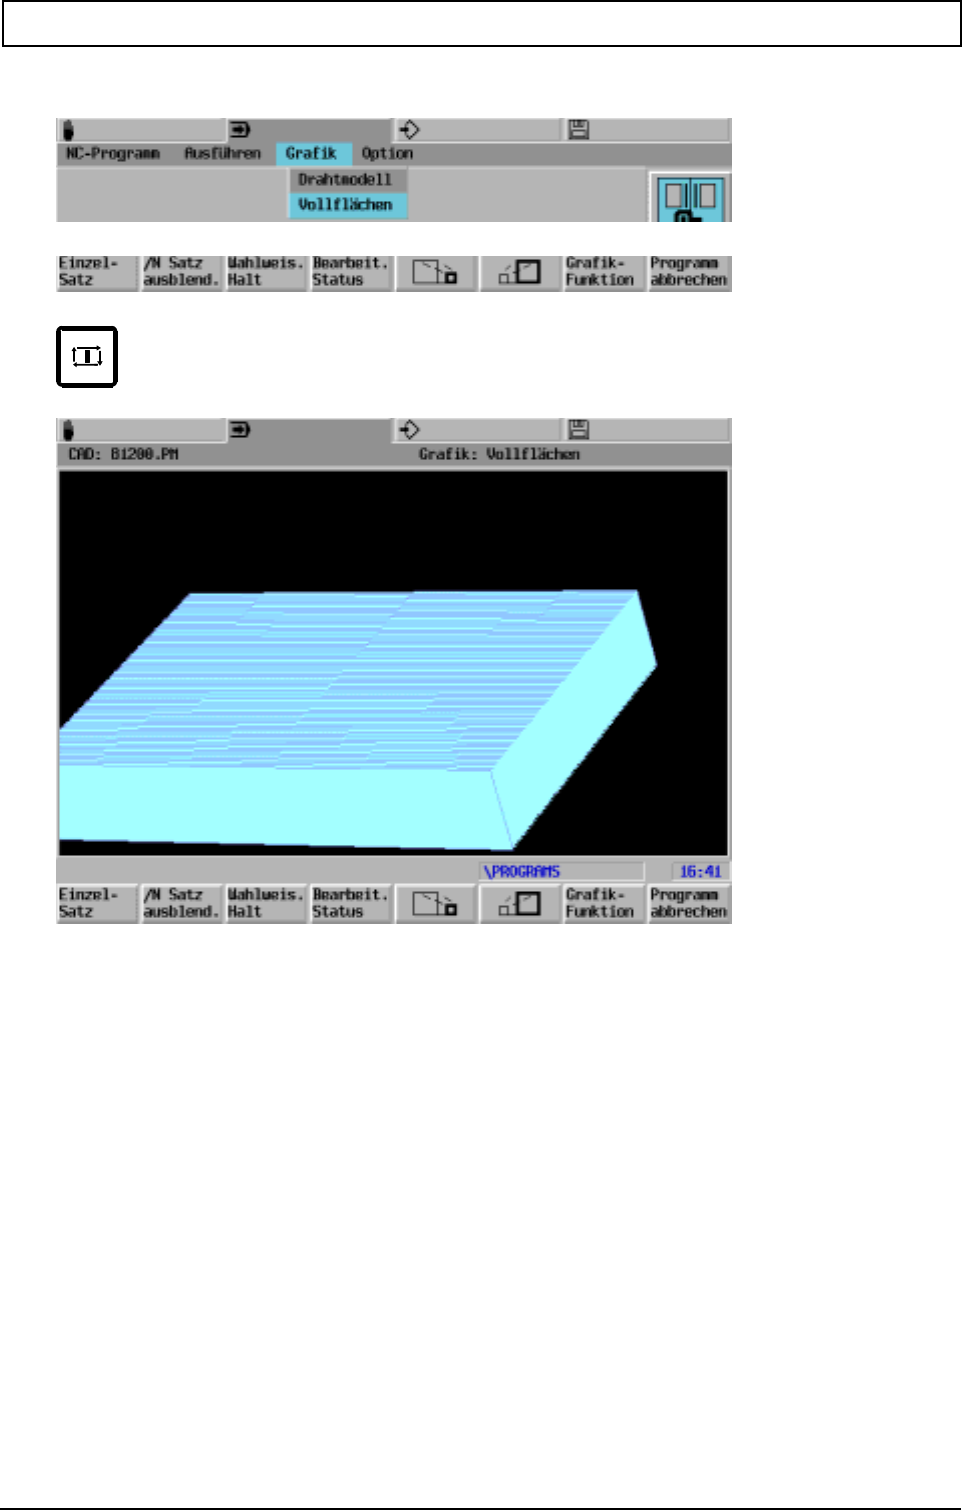
PROGRAM DRY RUN
92 Heidenhain
11.2.6 Solids
Start graphics solid
11.3 Estimation of run time using graphics operation
During graphics operation the graphics run time is displayed in the operating status.
The run time is calculated from the tool length and the feed rate (correction = 100%). 10% is added to
this calculated time to allow for braking and accelerating in the corners. During programmes at high
rates of advance the estimated run time is less than the actual run time, because the machine cannot
track the program.
Note
Time taken by the M functions is not taken into account in the estimation.
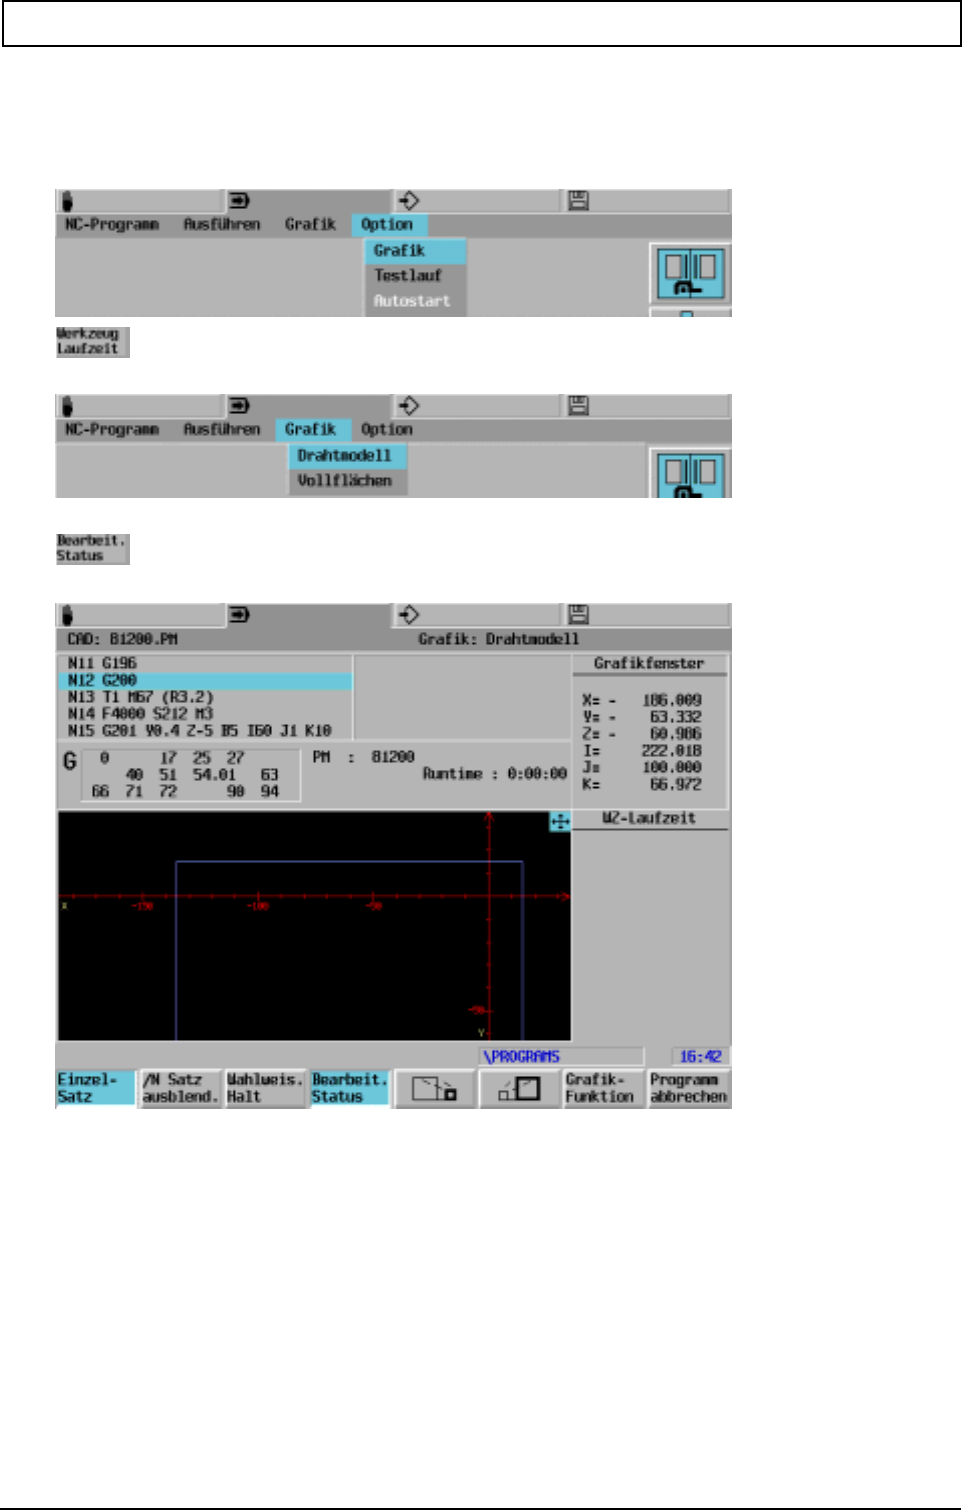
PROGRAM DRY RUN
20000710 MillPlus V410 93
11.3.1 Time for each tool
The estimation of operating time is also calculated for each tool. In the course of this, only the time
that elapses with the set rate of advance is taken into account.
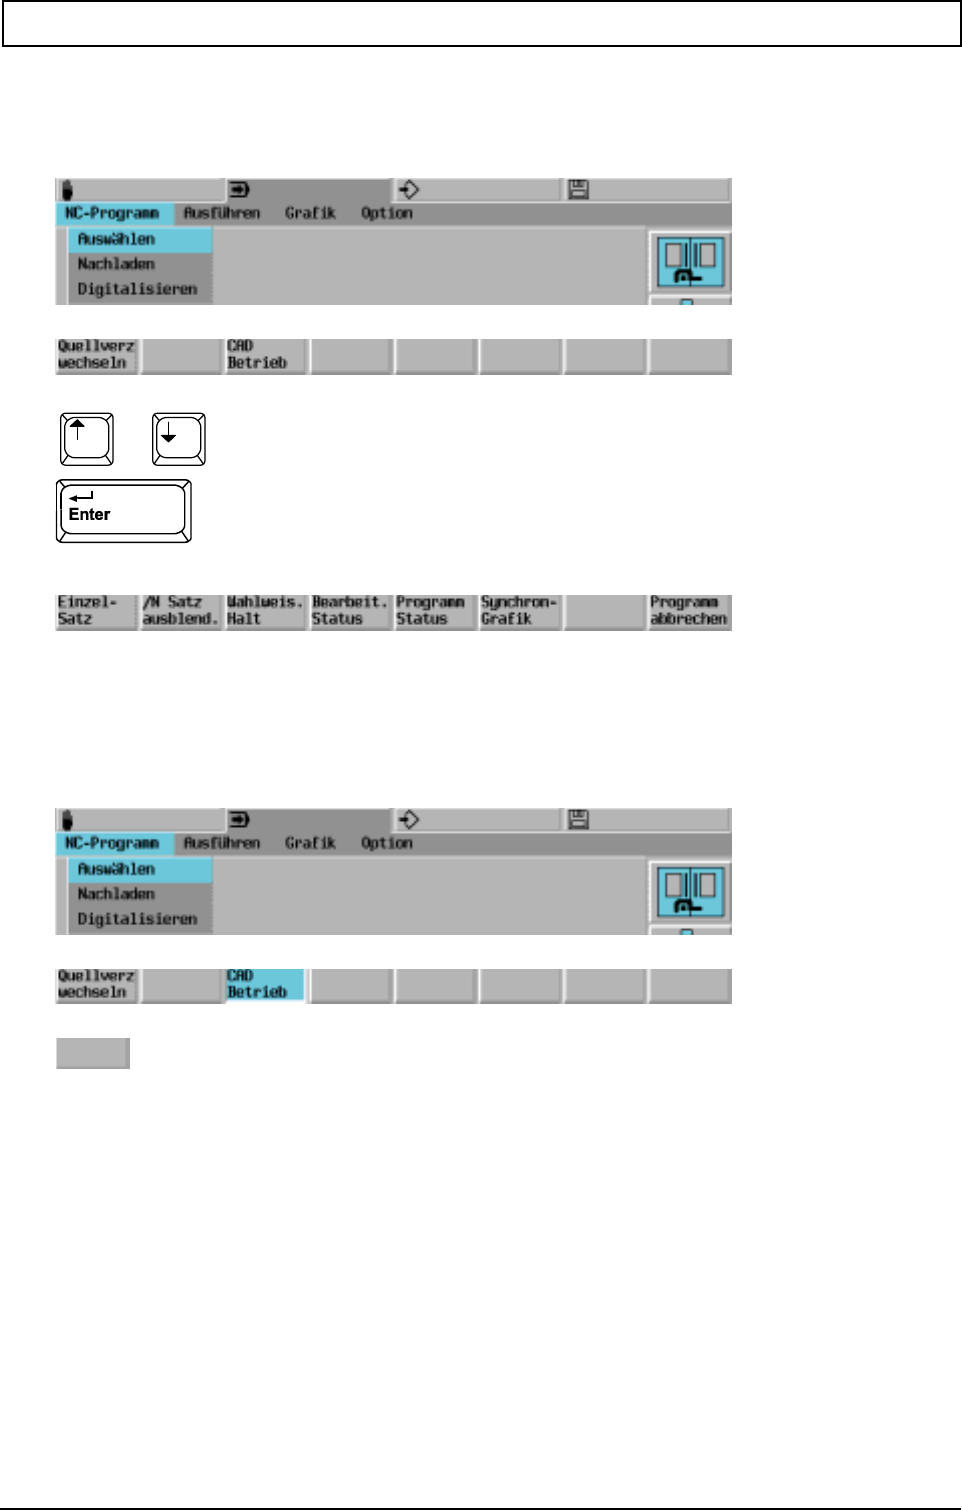
ACTIVATE / EXECUTE PROGRAM
20000710 MillPlus V410 95
12. Activate / execute program
12.1 Activate program
Position the cursor on the desired program or enter program number.
Operating mode "Execution: Machining" is automatically activated.
12.2 Direct activation of an edited program
Editing a program
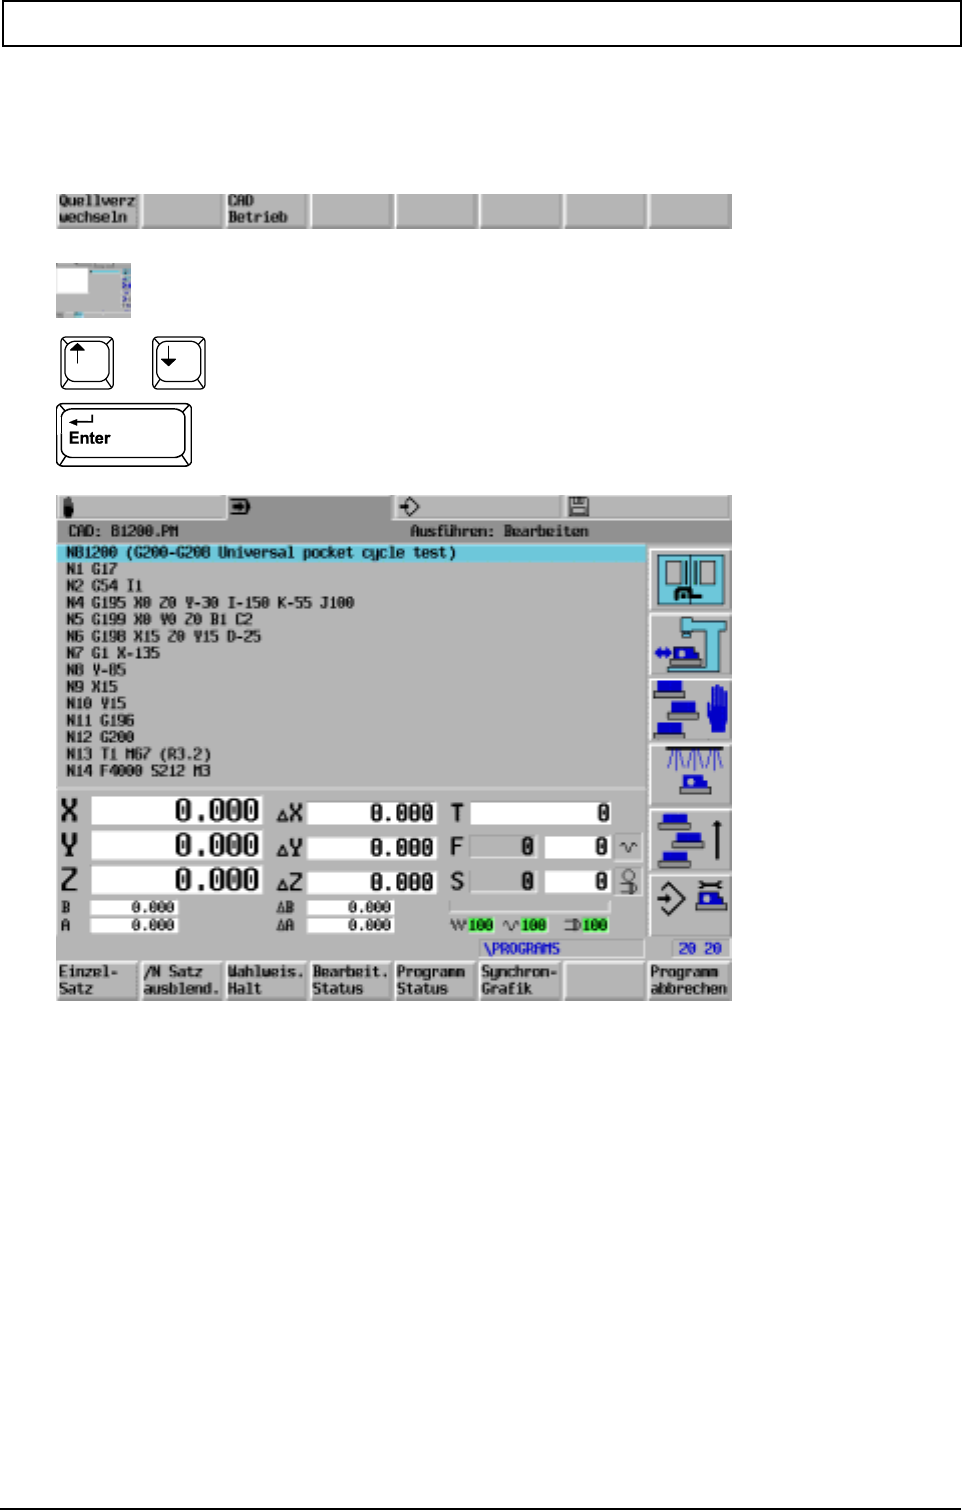
ACTIVATE / EXECUTE PROGRAM
96 Heidenhain
12.3 CAD mode
The "CAD mode" function enables you to process programs that require more memory than is
available in the CNC-RAM. The size of BTR memory is defined in MC93. (Example 128kbyte).
Position the cursor on the desired program or enter program number.
Operating mode "Execution: Machining" is automatically activated.
Note:
The main programs must not contain G23, G14, G29 functions or E0 parameters.
"Satz suchen" backwards is not possible.
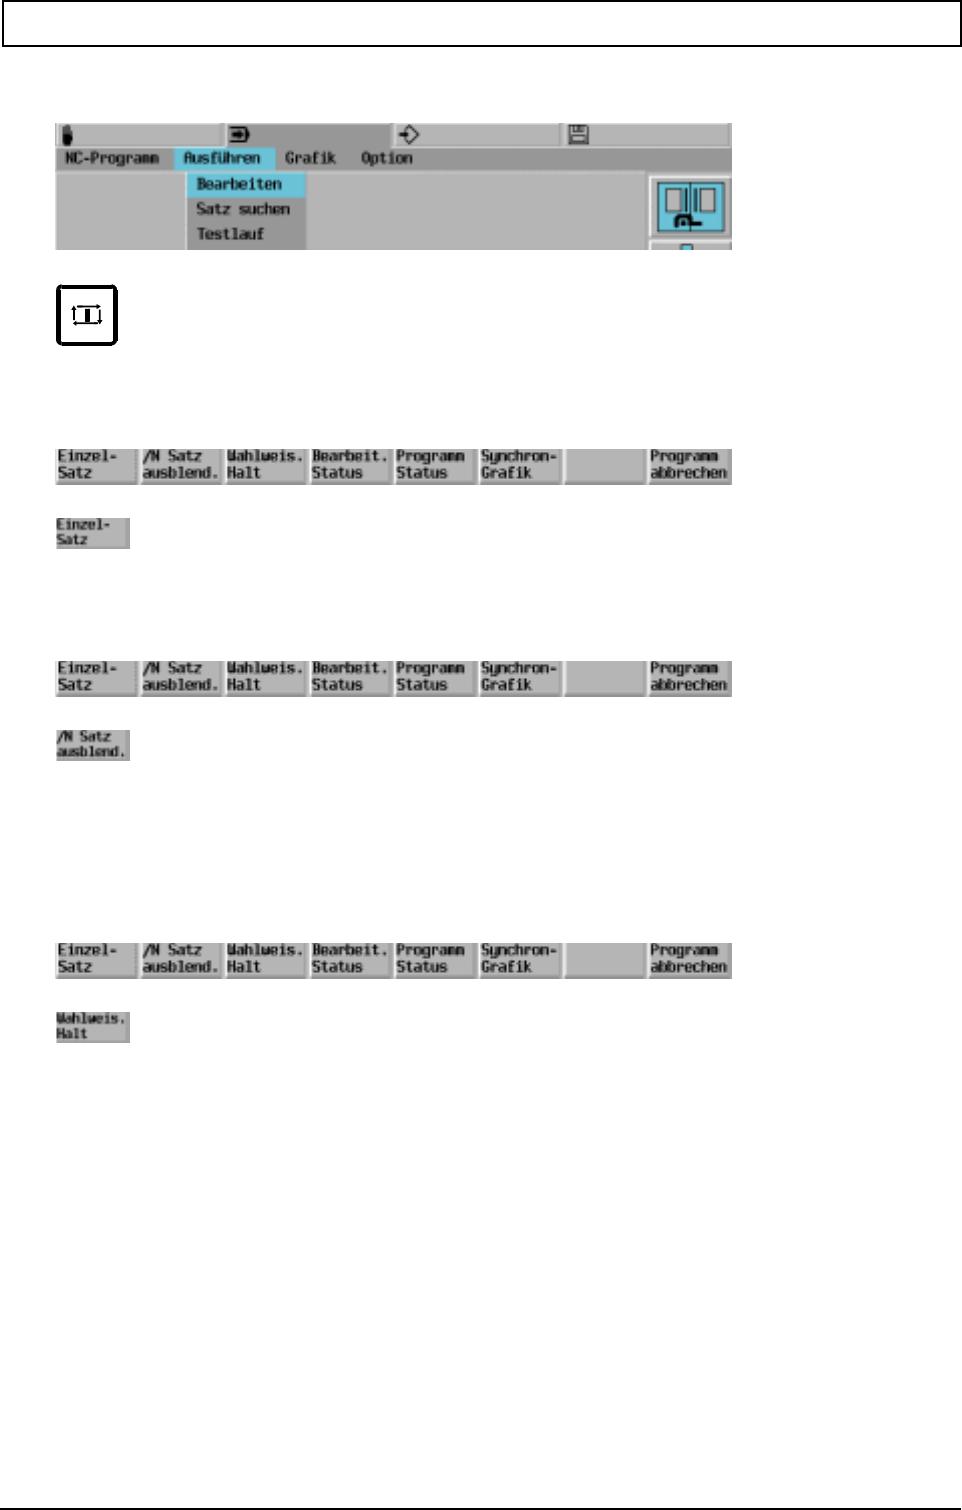
ACTIVATE / EXECUTE PROGRAM
20000710 MillPlus V410 97
12.4 Execute program
12.5 Single block operation
12.6 Delete block
Note:
The program block must start with a '/', e.g.: /N5 G1 X100
12.7 Optional halt
Halt following execution of M1.
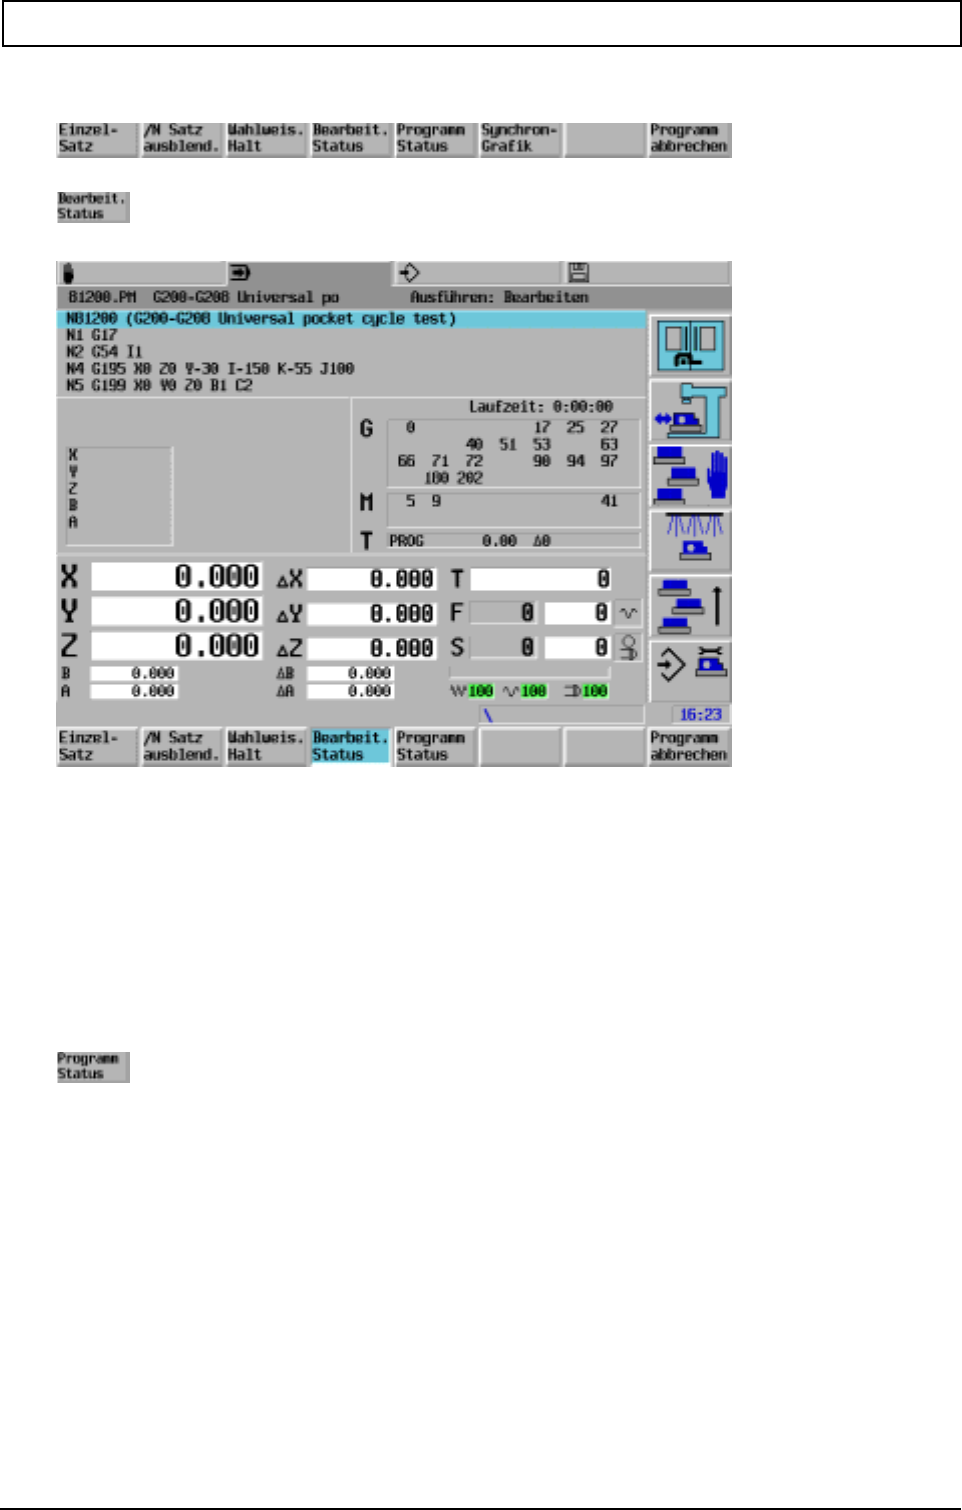
ACTIVATE / EXECUTE PROGRAM
98 Heidenhain
12.8 Execution status
The overlap depth is indicated in the operating status behind MM:
Notes
- During BTR and CAD operation the overlap depth is not calculated by the BTR macro.
- The first overlap or repeat depth is "1" and is not displayed.
Im Bearbeitungsstatus wird die Schachtelungstiefe hinter MM angegeben:
12.9 Program status
The following elements are displayed concurrently:
- current tool length (L+L4=) and tool radius (R+R4=).
- current tool oversize G39 L and R
- the position with reference to the machine null point
- the current G52, G54 (Inn or G54-G59) null point displacement
- the current G92 and/or G93 null point displacement
- the complete "overlap tree" of the main programs, the macros and the repetitions
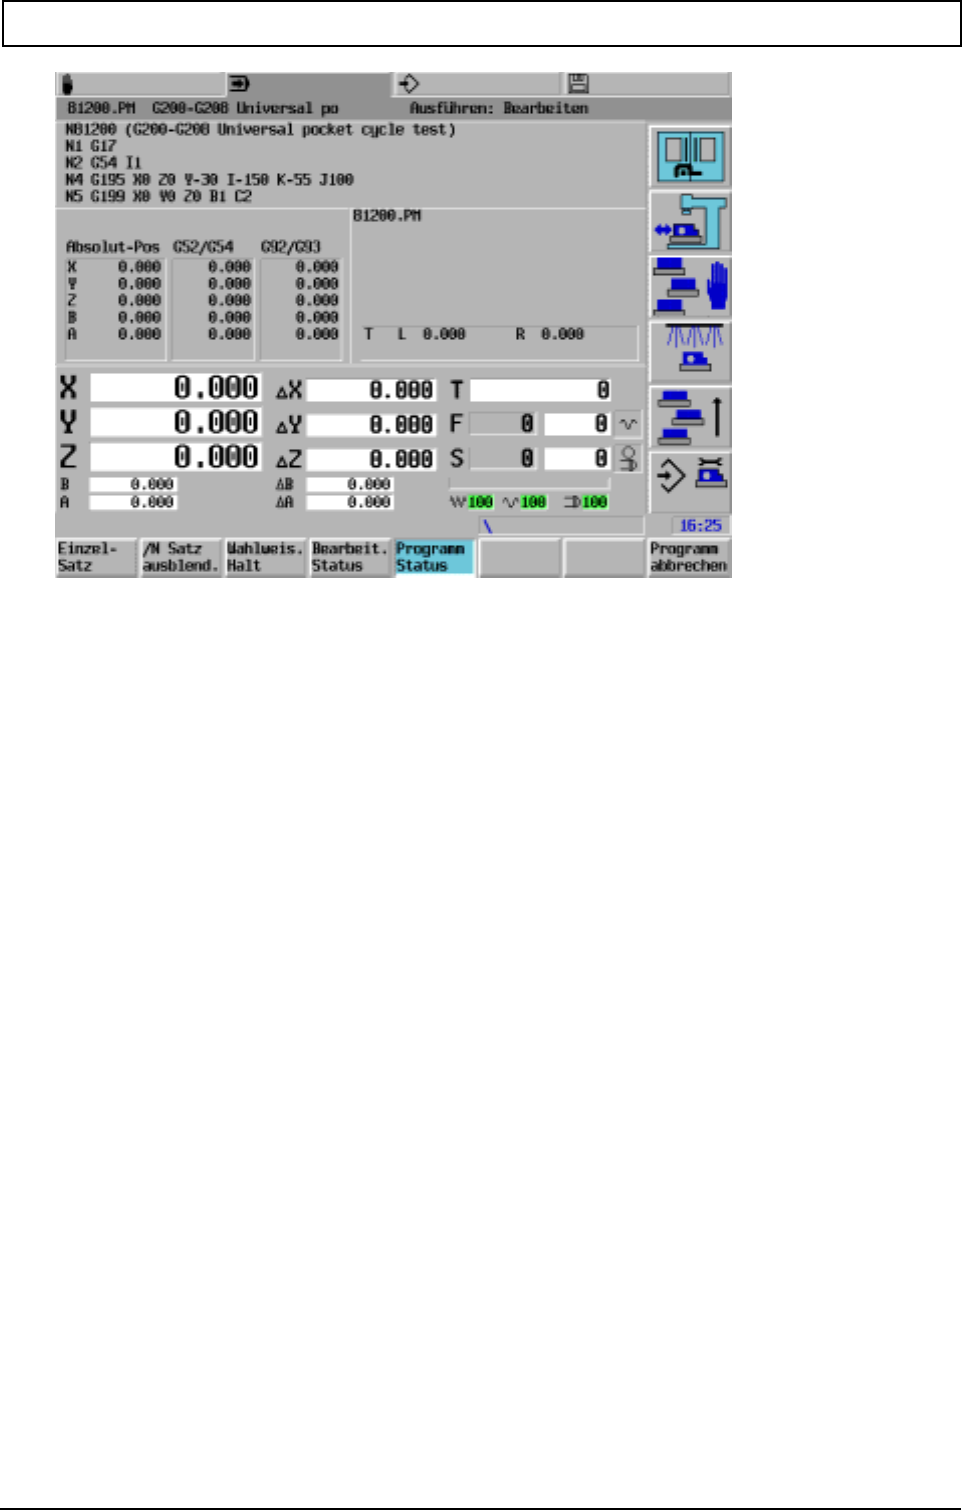
ACTIVATE / EXECUTE PROGRAM
20000710 MillPlus V410 99
Notes
- The overlap tree can hold a maximum of two main programs, eight secondary programs and four
repetitions. It "scrolls" automatically in the window as necessary.
- During repetition only the number "still to run" is displayed in Repetitions.
- The command <Program status> cannot be selected during graphics operation.
- Jumps in the program are not displayed in the overlap tree.
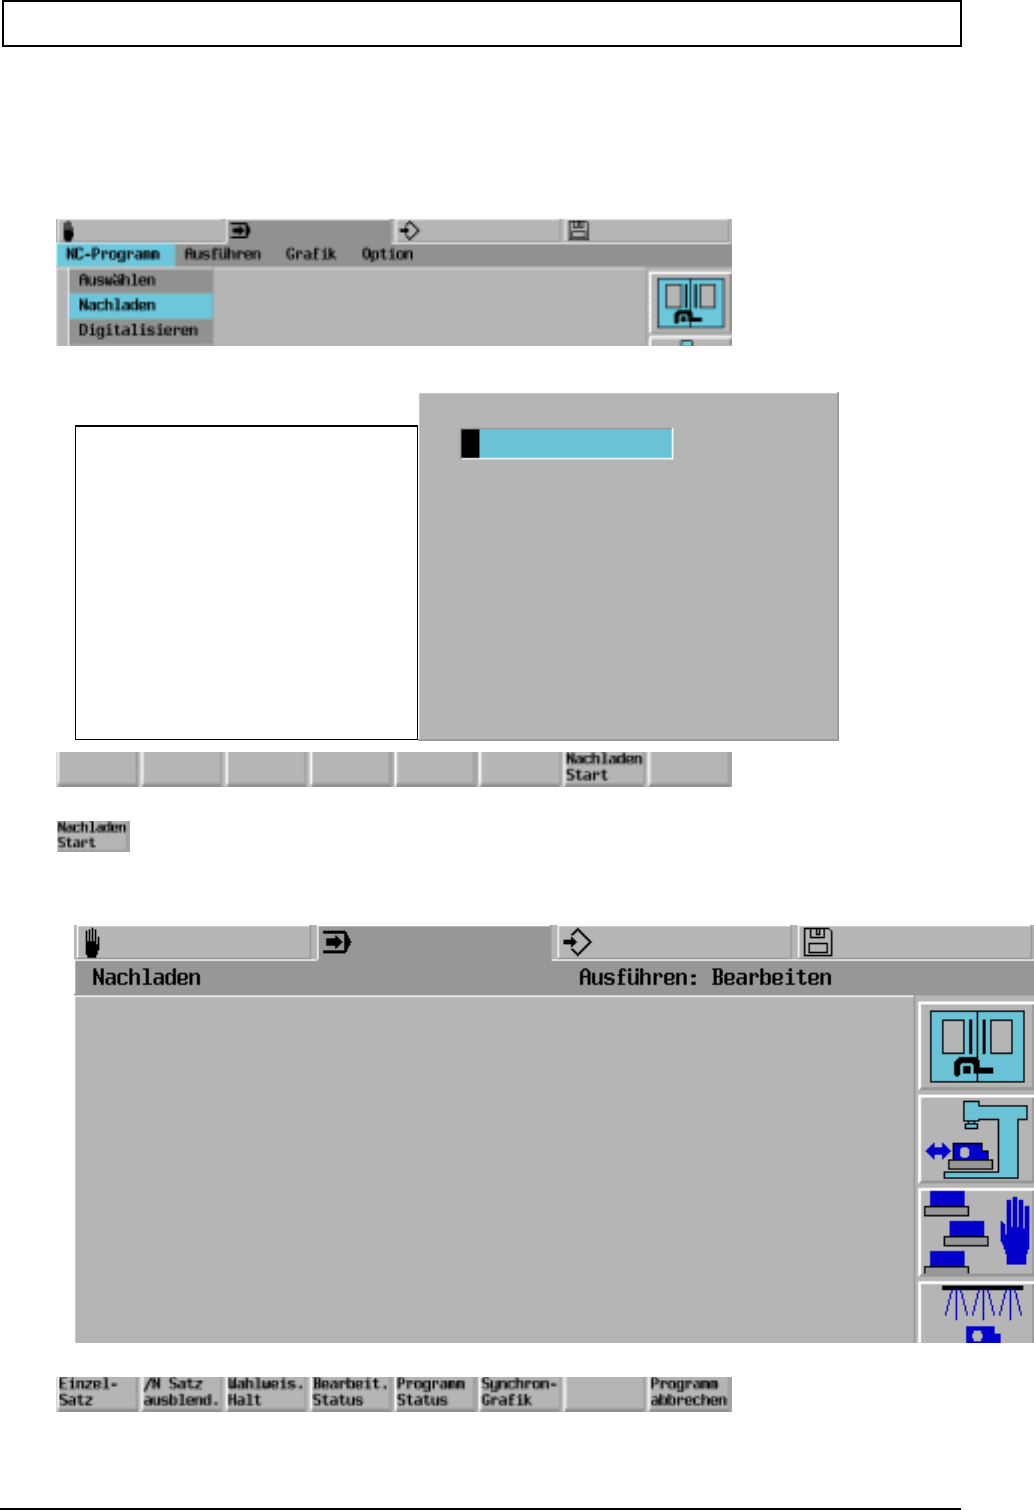
ACTIVATE / EXECUTE PROGRAM
100 Heidenhain
12.10 Reload (BTR)
The Reloading function is used to execute programs that need a larger storage volume than the CNC
working memory directly from external devices. The size of BTR memory is defined in MC93.
Programs from external equipment may be executed by reloading.
Provide data transfer peripheral. (external device with DNC link)
Input program number or select program using the cursor keys.
From external equipment

ACTIVATE / EXECUTE PROGRAM
20000710 MillPlus V410 101
The program will be executed.
Note:
Main programs may not contain any G23,G14,G29 functions or the E0 parameter. A "Search block" is
not possible.
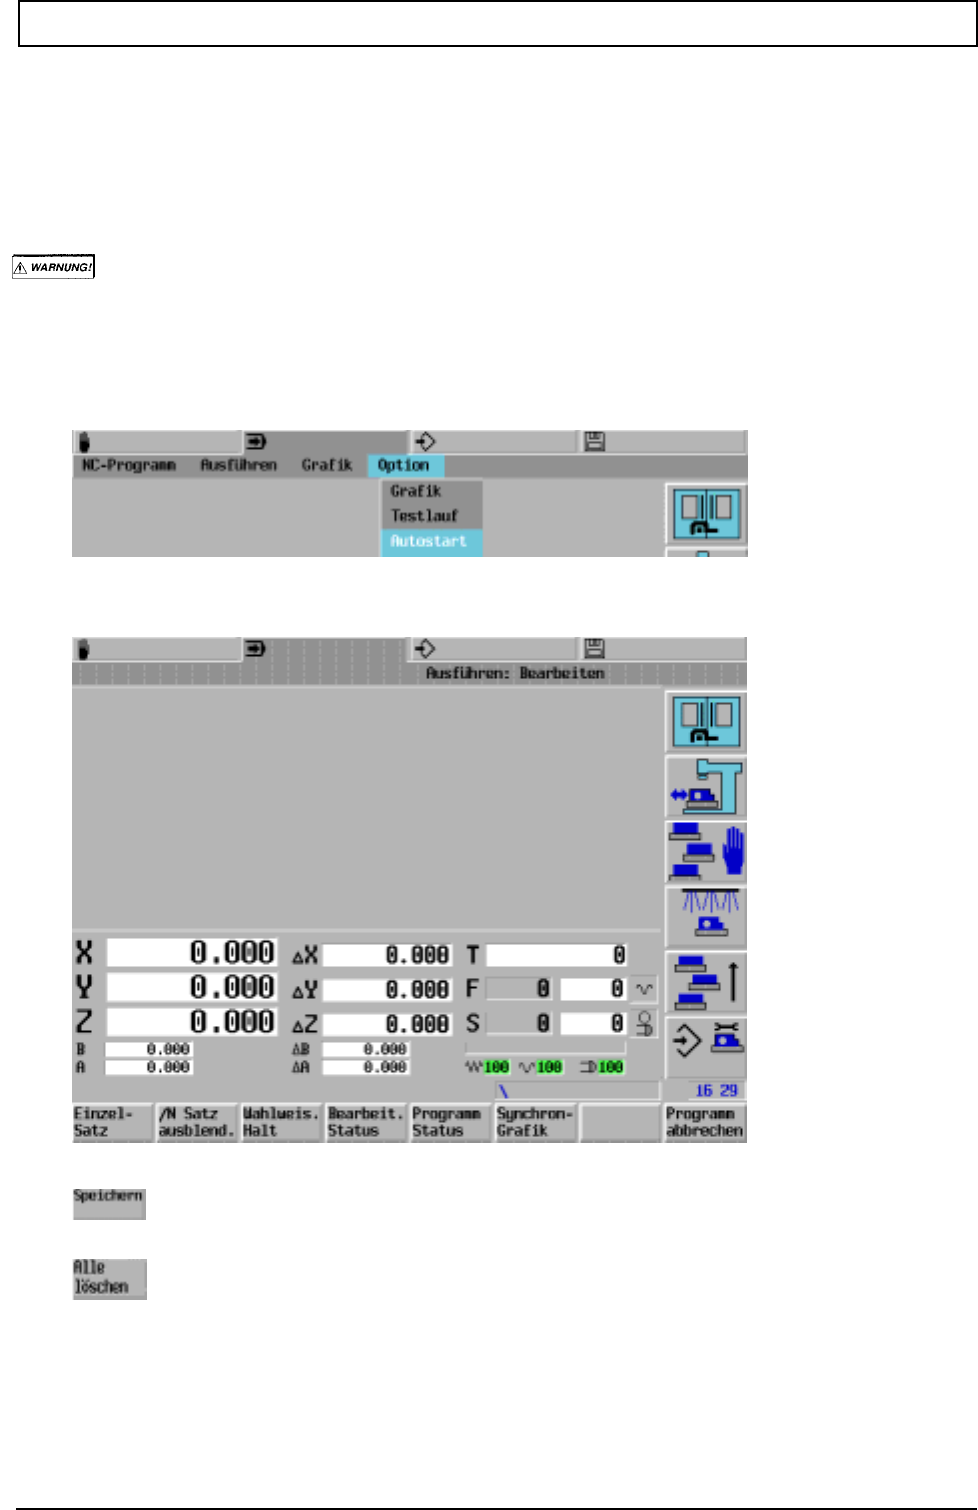
ACTIVATE / EXECUTE PROGRAM
102 Heidenhain
12.11 Autostart
The machine should be at operating temperature before machining the first workpiece each morning.
The machine is run up to operating temperature by starting a running in program that, for example,
lets the spindle rotate for a while. This running in program should be started automatically some time
before starting work.
The operator is responsible for ensuring that the machine is in the correct operating mode when
the <Autostart> is issued. It can happen, for example, that the operator is running a
program in single block mode at the same time that the Autostart issues a <Start>. In
such a case the active block will be 'unexpectedly' executed.
12.11.1 Setting up Autostart
Validates and saves the entered values
Input fields on this page are to be deleted
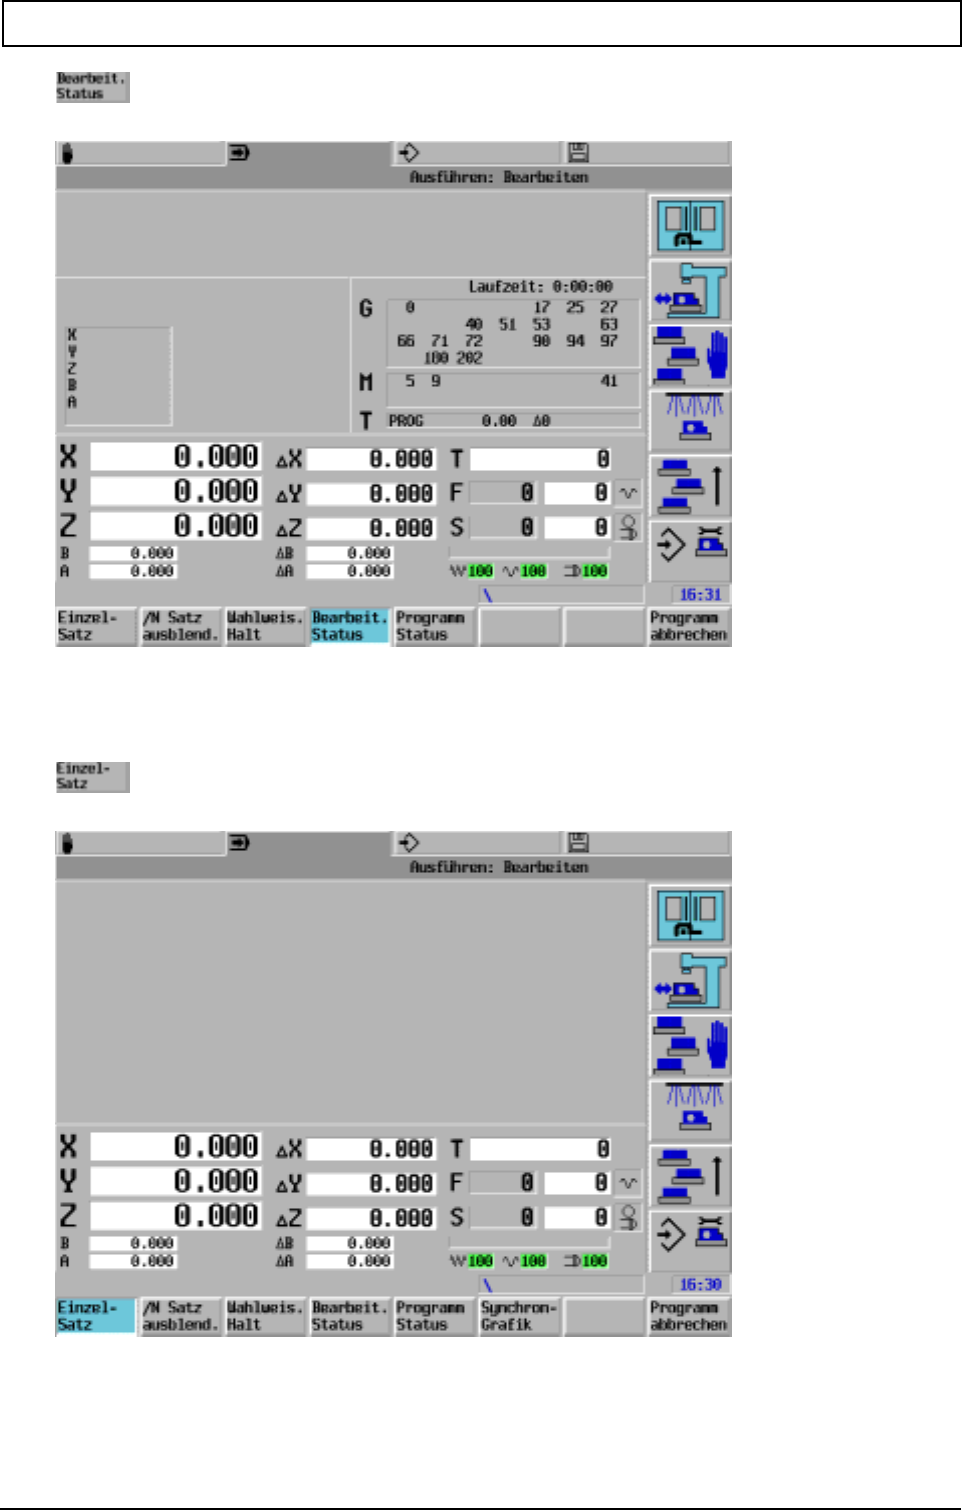
ACTIVATE / EXECUTE PROGRAM
20000710 MillPlus V410 103
12.11.2 Activate Autostart
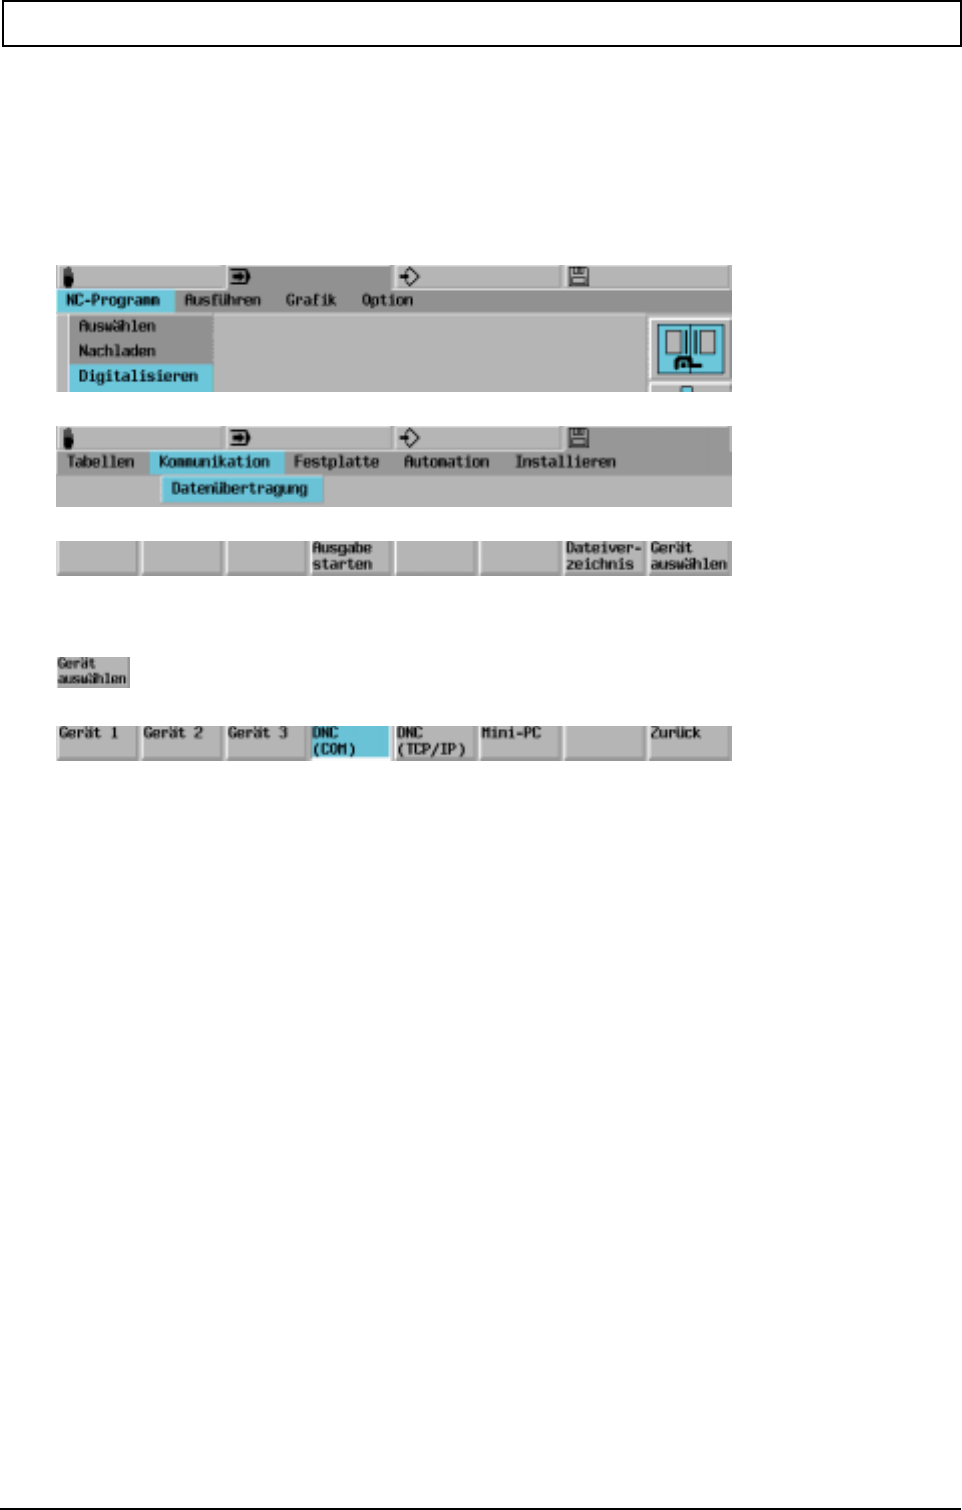
ACTIVATE / EXECUTE PROGRAM
104 Heidenhain
Note:
The CNC and machine tool must be left in the correct operating mode.
If no program is entered, the active program is started.
Autostart active is indicated by a yellow background to the timers.
12.12 Digitizing
Synchronise controller and peripheral device.
Note
Refer to Renishaw Trace documentation and the chapter Miscellaneous for further details.

20000710 MillPlus V410 105

106 Heidenhain
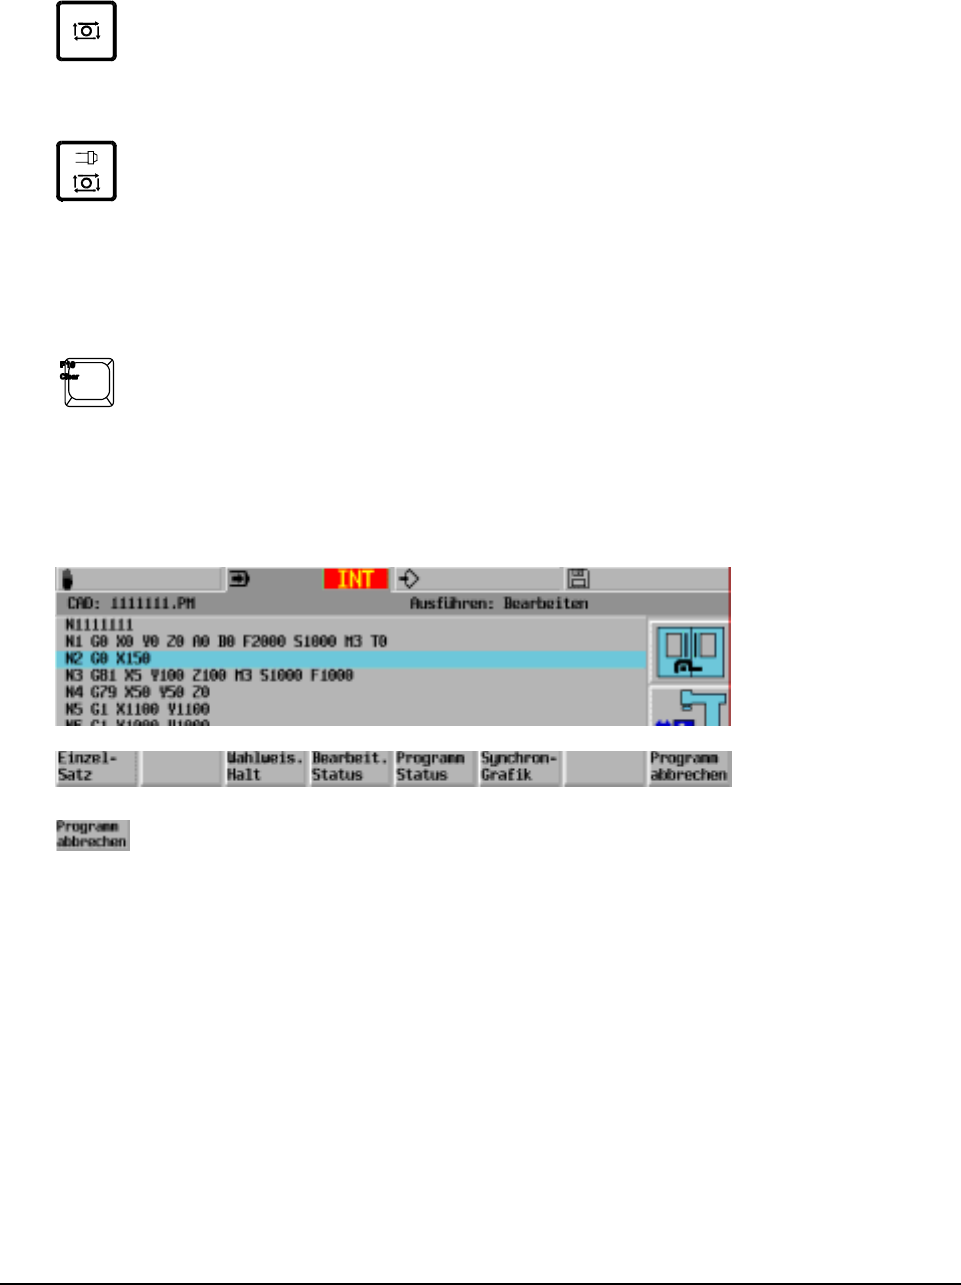
20000710 MillPlus V410 107
13. Interrupt/cancel program, search block
13.1 Interrupt/cancel program execution
Program execution may be aborted at any time during machining and in single block mode.
Feed stop
or
Feed and spindle stop
"Interrupt program" enables programmed feed movement, using the axis movement keys.
13.2 Erase errors and messages on the screen
Erase errors and messages on the screen. The program is not cancelled.
13.3 Cancel program
Interrupt program execution
Return to start of program. Only the offset of the current tool, the machining level and the
zero offsets remain active. Activated errors and messages will be deleted.
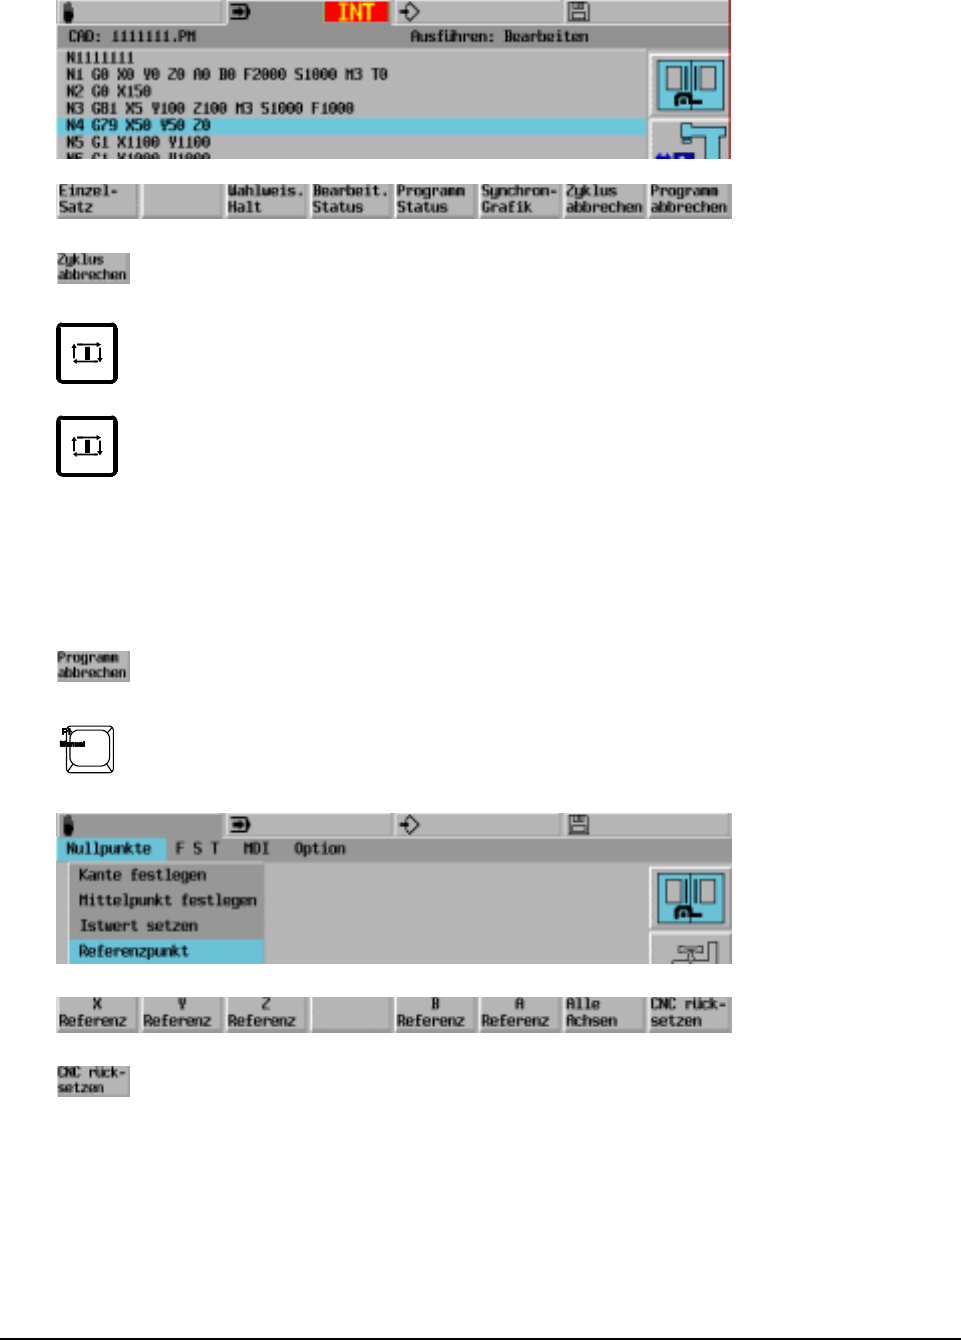
108 Heidenhain
13.4 Interrupt cycle
Interrupt the cycle program run.
Cancel cycle and movement to starting point.
Continue the program from the next block.
13.5 Reset CNC
Reset all functions (predefined values still apply) and clear all modal parameters.
Cancel program.
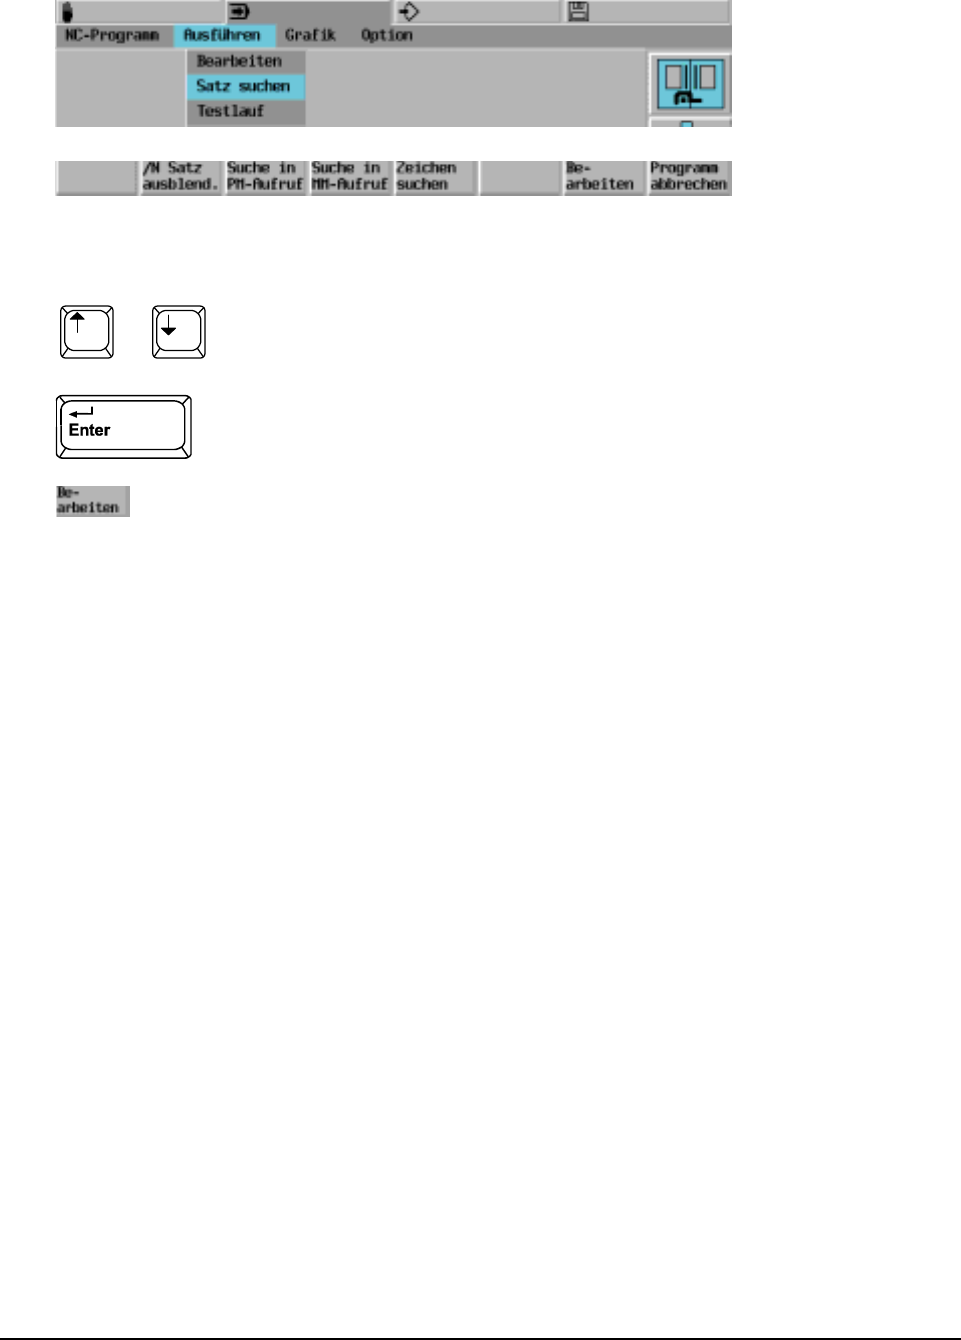
20000710 MillPlus V410 109
13.6 Search block
Find block (e.g. program resumed after program interruption)
Entry of block number
or select block
Return to program
Note
Search for block in repetition part (G14) or subprogram (G22):
- search for program block G14 or G22
- execute G14 or G22 block (single block)
- search for block in repetition part or subprogram
Search in macros:
It is only possible to search for blocks, not for characters.

20000710 MillPlus V410 111
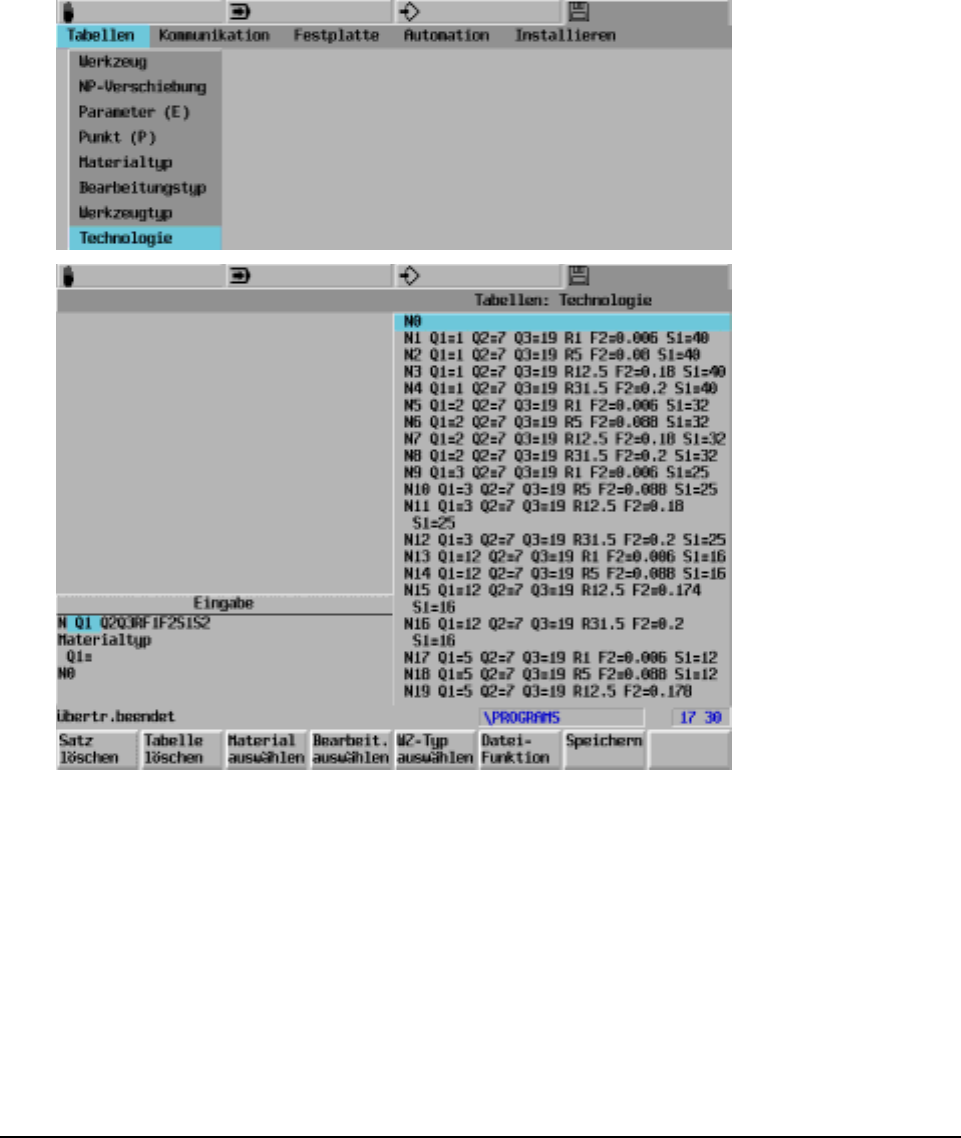
112 Heidenhain
14. Technology
Establishing the cutting values in a practice-oriented fashion is a most comprehensive task because
of the various tools, materials to be cut, coatings, cutting geometries, range of applications, workpiece
materials etc.
The feed and speed values suggested by the cutting value calculator may therefore not suit all
conditions. Where appropriate, the user should optimise these values.
The cutting values recommended by the tool manufacturer may be useful.
14.1 Technology table
Q1= Material code, which is taken from the file for the material texts.
Q2= Machining process code, which is taken from the file for the machining texts
Q3= Tool type code, which is taken from the file for the tool type texts.
R Tool radius (in mm). If R = 0 is entered, you will be asked to enter the workpiece radius in
case the feed rate or spindle speed has to be calculated in a unit of measurement other than
that specified in the technology table (the programmed data is specified in rpm, for example,
while in the technology table it is given in m/min).

20000710 MillPlus V410 113
F1 Feed rate in mm/rev. The feed rate for the combination of material, machining process, tool
type and tool radius given in the other parameters must be taken from special tables or
calculated.
F2 Feed rate per tooth in mm/rev. Refers to tool types with more than one cutting surface. The
feed rate for the combination of material, machining process, tool type and tool radius given in
the other parameters must be taken from special tables or calculated.
S1 Cutting rate in m/min. This value should be taken from the appropriate documents of the tool
manufacturer or empirical values should be used.
S2 Spindle speed in rpm. This value should be taken from the appropriate documents of the tool
manufacturer or empirical values should be used.
14.1.1 Tools with more than one radius
In situations where identical tools can have different radii, it is not necessary to enter values in the
table for each tool. If the combination of material, machining process and tool type stays the same,
only two values need to be entered in the table, one for the smallest tool raadius and one for the
largest. The system then uses these two values to interpolate the feed rate and speed and puts
forward suggestions for F1 and S1.
14.1.2 Table values for tapping
In some cases, interpolation of the values in the table is not desirable or is not possible, e.g. when
tapping. In such situations the feed rate (F1) must be identical to the thread pitch. Interpolation is not
possible in such cases.
14.1.3 Relationship between F1 and F2
Both F1 and F2 are used to specify the feed rate. Generally, F1 is used to define the feed rates used
in tapping or for drilling using a milling machine. Milling machines usually have more cutting surfaces
(teeth). F2 is normally used to specify the feed rate for milling work.
F1 = F2 x number of cutting surfaces
14.1.4 Relationship between S1 and S2
S1 is specified in meters/minute. S2 is displayed in rpm.
S1 = (S2 x 2 x π x R) / 1000
R is the tool radius.
Note
A value is assigned either to parameter F1 or F2 but not to both. The same applies to parameters S1
and S2.
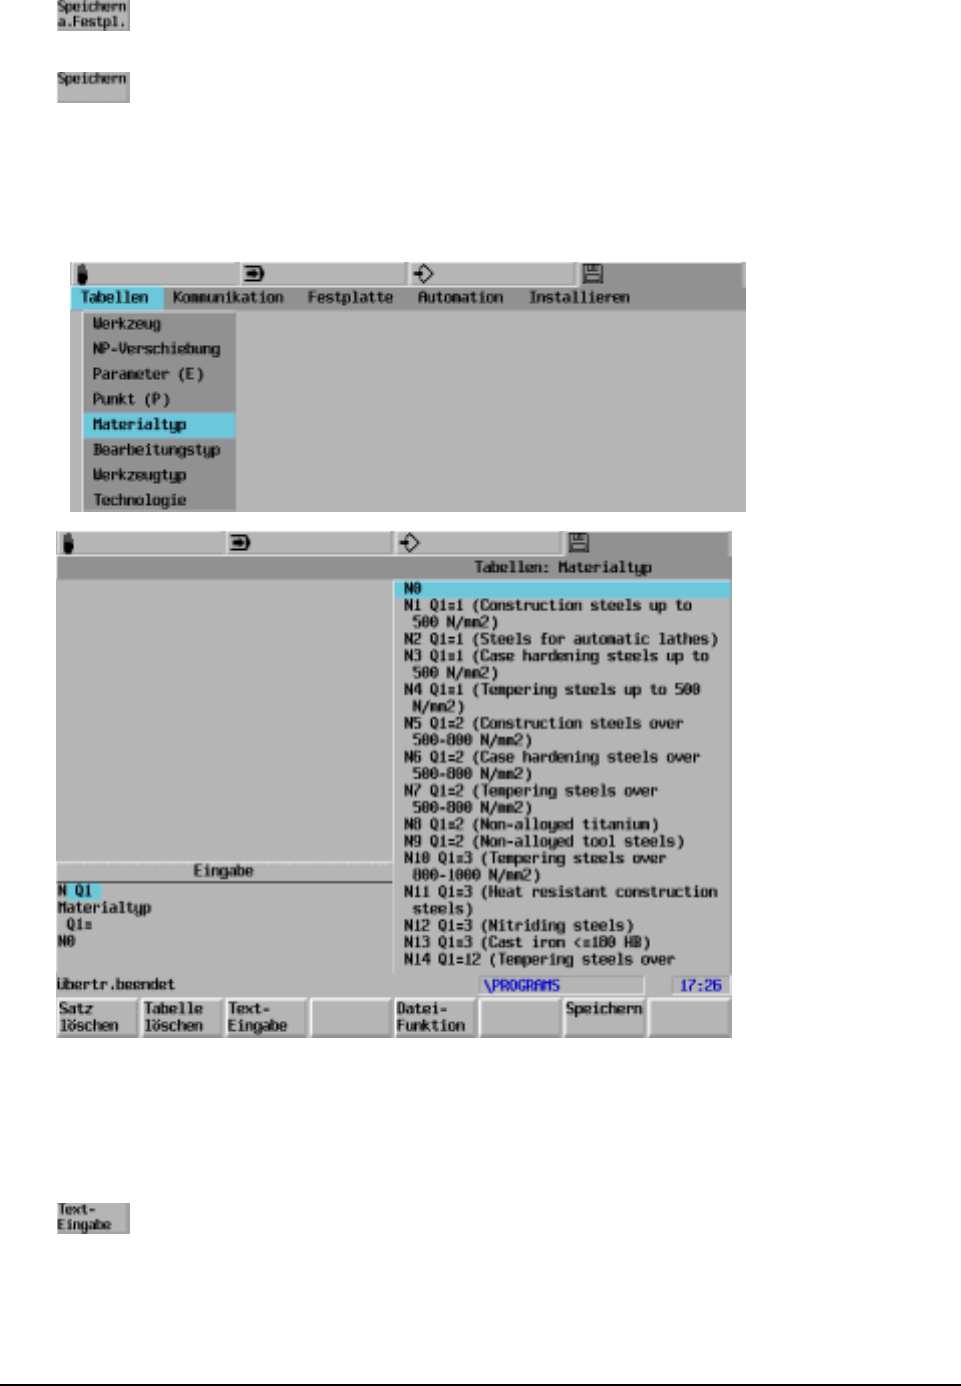
114 Heidenhain
14.2 Storing the technology tables
Storing technology tables on hard disk.
Storing technology tables in CNC_RAM.
14.3 Material type
Defining the materials to be machined.
Q1= Material code
Materials having the same machining properties may be assigned the same material codes.
The texts on the material must be in brackets.
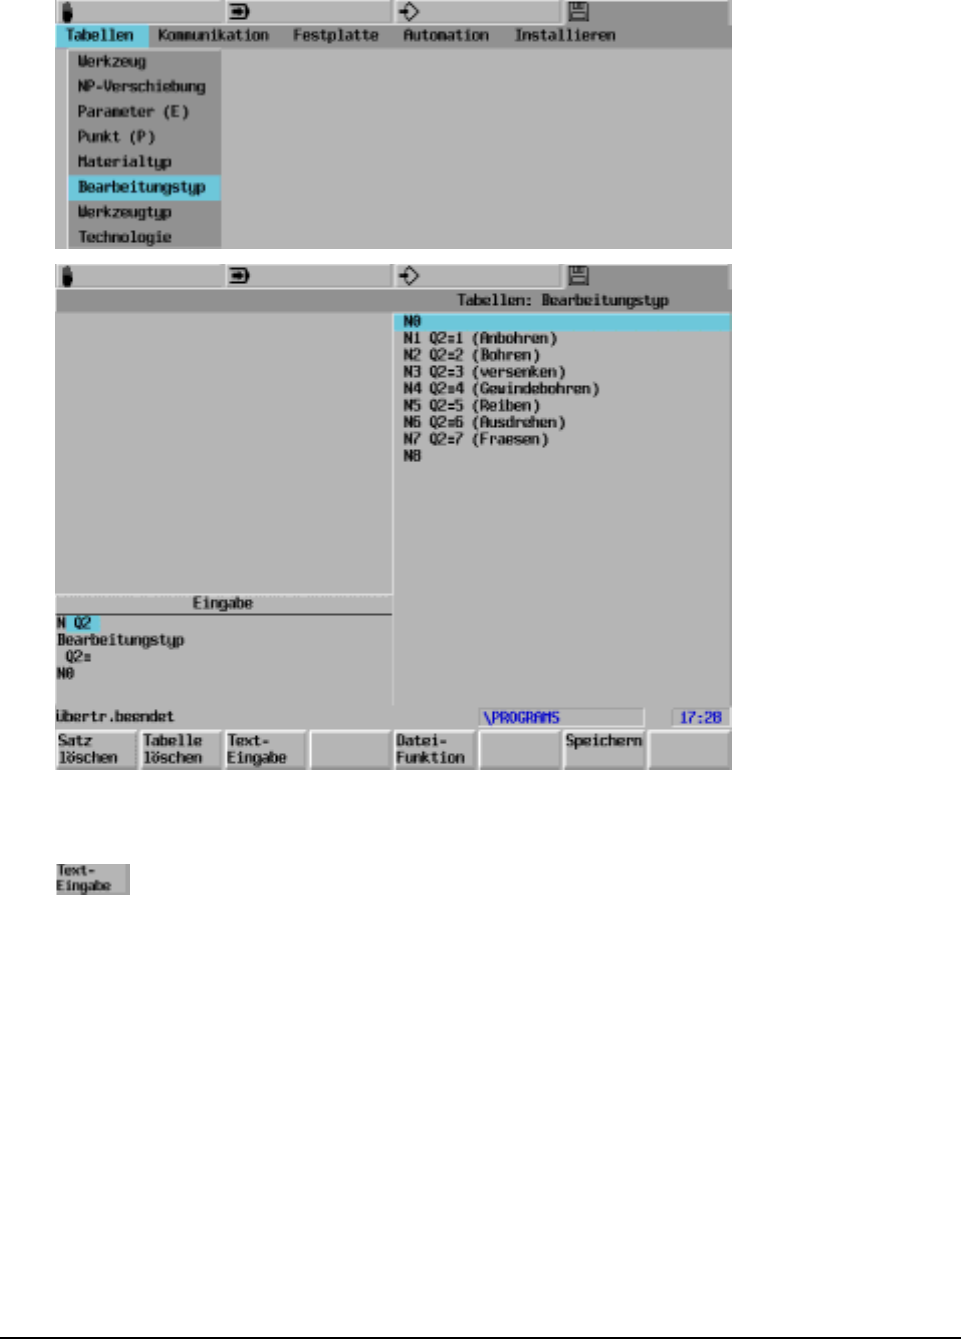
20000710 MillPlus V410 115
14.4 Machining type
Defining the machining process.
Q2= Machining operation
The texts on the material must be in brackets.
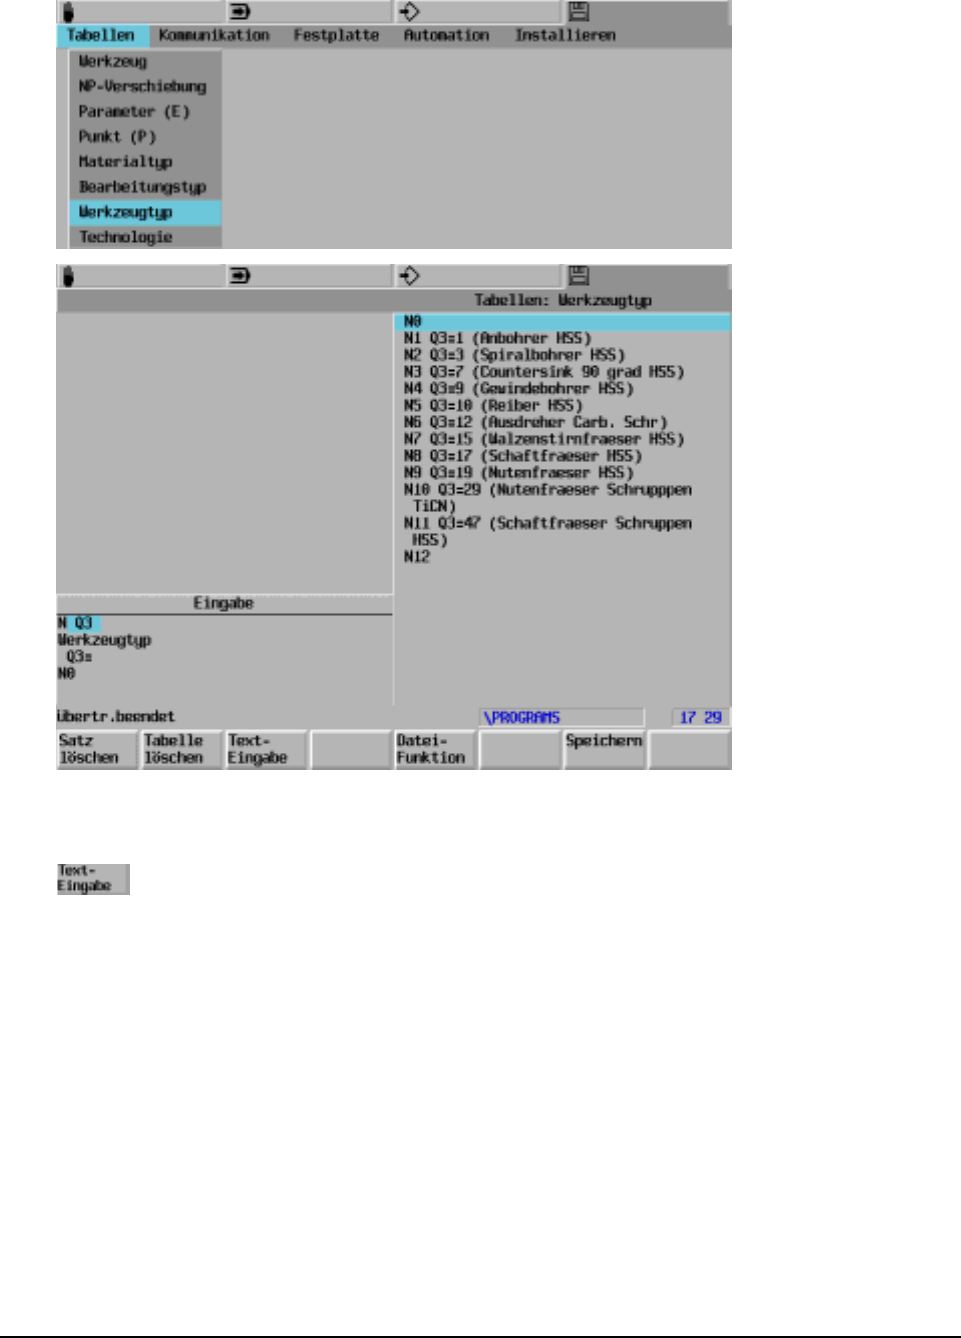
116 Heidenhain
14.5 Tool type
Defining the tools.
Q3= Tool type
The texts on the material must be in brackets.
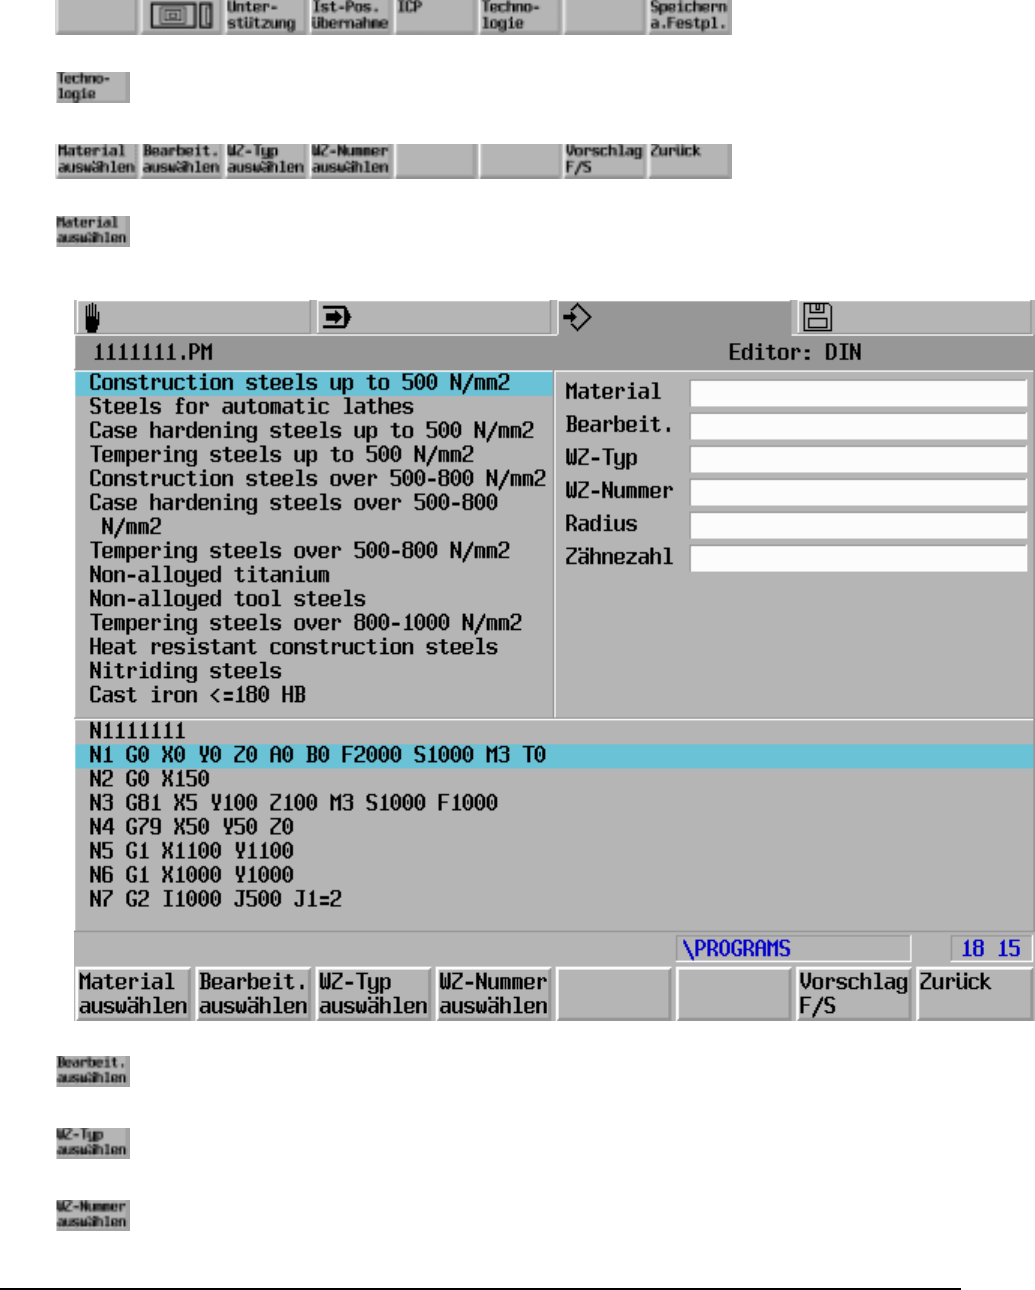
20000710 MillPlus V410 117
14.6 Using the technology
Select program process level and program
The proposed feed rate and spindle speed can be generated using the following key sequence:
Select the desired material.
Select the desired machining operation.
Select the type of tool.
Select the desired tool identification number.

118 Heidenhain
The propsed F, S and T values are transferred to the selected program block.

20000710 MillPlus V410 119

120 Heidenhain
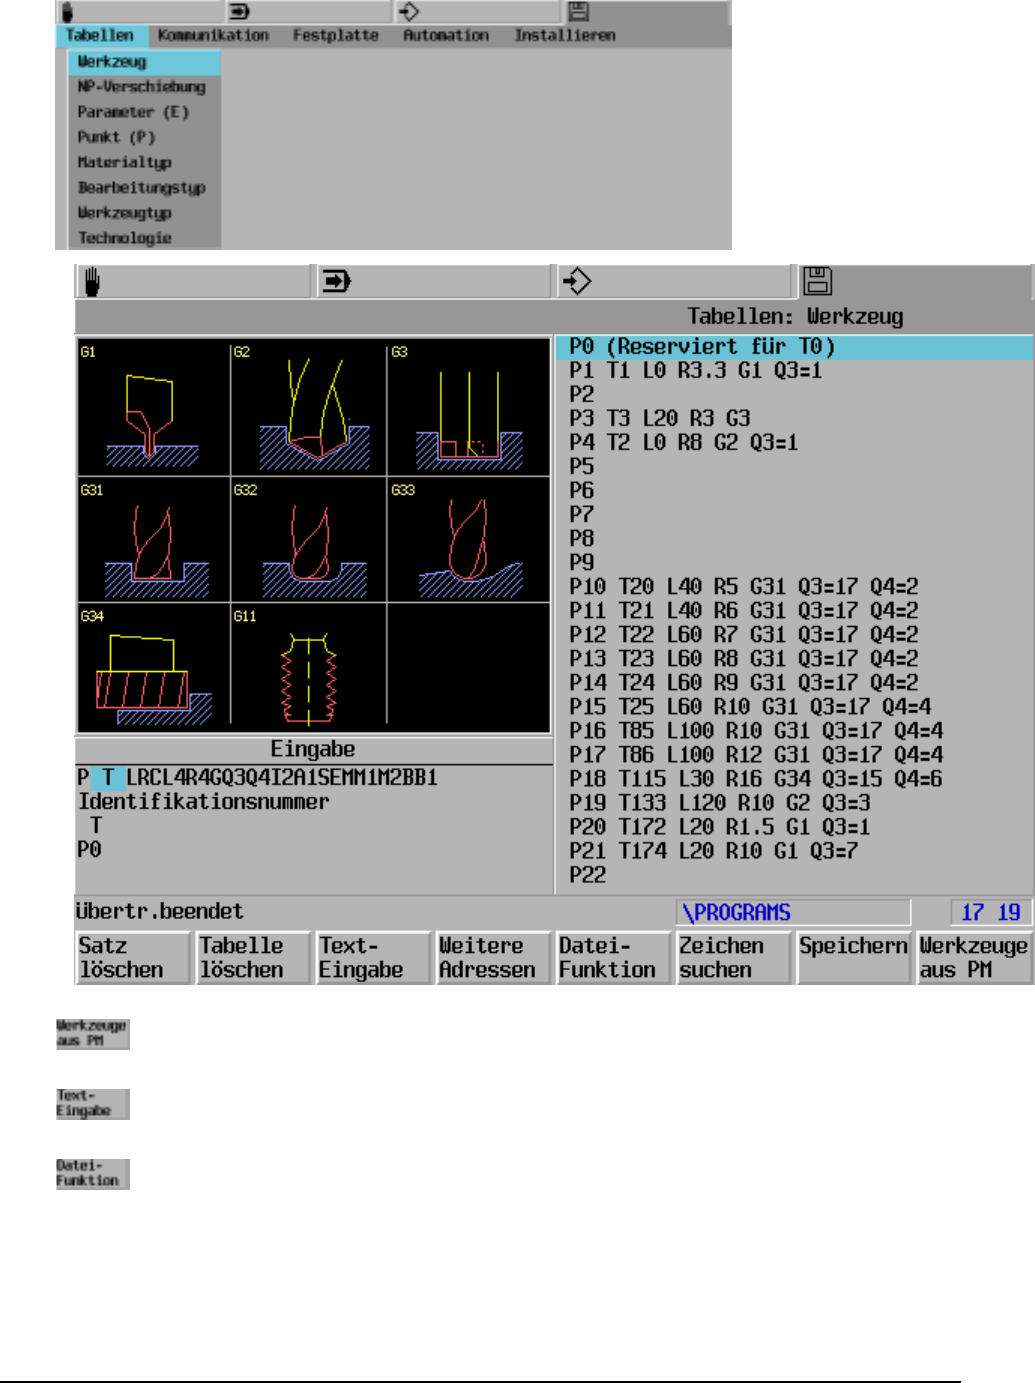
20000710 MillPlus V410 121
15. Tool
Tool used in current program
Plaintext input in table. Enter text in brackets.
File function.
15.1 Tool addresses

122 Heidenhain
P Magazine pocket. Location of the tool in the tool magazine (if present). Location P0 is
reserved for the new tool and cannot be used to store tool parameters. Pocket 1 is indicated
by P1, pocket 2 by P2, etc. The actual number of tool pockets in the magazine is saved as a
machine constant.
T Identification number, e.g. T 12345678.00
L Length
R Radius
C Corner radius
L4= Length allowance
R4= Radius allowance
L and/or R are adjusted when measuring. L4= and/or R4= are set to zero.
L and R are not adjusted when checking. Only L4= and/or R4= will be modified.
G Graphics. Define the tool shape in graphics mode.
Q3 Type. The numbers to identify the tool type are entered in this parameter.
Measuring probe Q3=9999: no spindle rotation possible and rapid motion (MC) restricted.
Q4 Number of cutting tips
I2= Cutting direction
3 clockwise M3
4 anti-clockwise M4
A1 Heel angle (0.1-15 degrees)
S Size (0=normal, 1=oversize). The maximum tool dimensions and diameter above which a tool
is classified as oversize are specified in the supplied machine tool manual. The control keeps
a magazine pocket in front of and behind an oversize tool free.
E Status. The normal setting is E0 (tool enabled, not measured). When the specified tool life is
exceeded, E-1 is set automatically. When the tool has been enabled or measured, E1 is set.
E-2,-3,-4 tool disabled (new as of V321).
The machine tool builder may define other negative status values. Refer to your machine tool
manual.
M Tool life (mins.)
M1 Current tool life (mins.)
M2 Tool life monitoring (0 = off, 1 = on)
B Break tolerance (0 = MC value) (maximum 255)
B1 Break monitoring (0 = off, 1 = on)
Next address selector
P Magazine pocket. Location of the tool in the tool magazine (if present). Location P0 is
reserved for the new tool and cannot be used to store tool parameters. Pocket 1 is indicated
by P1, pocket 2 by P2, etc. The actual number of tool pockets in the magazine is saved as a
machine constant.
T Identification number, e.g. T 12345678.00
L Length
R Radius
L1 First additional length
R1 First additional radius
C1 First additional corner radius
L2 Second additional length
R2 Second additional radius
C2 Second additional corner radius
Q5 Break monitoring cycle (0-9999)

20000710 MillPlus V410 123
S Size (0=normal, 1=oversize). The maximum tool dimensions and diameter above which a tool
is classified as oversize are specified in the supplied machine tool manual. The control keeps
a magazine pocket in front of and behind an oversize tool free.
L5= Wear tolerance length (mm)
R5= Wear tolerance radius (mm)
A fault is signalled if the deviation is greater than the values specified here.
L6= Offset length (mm)
Displacement (>=0) of measuring position compared to tool tip.
R6= Offset radius (mm)
Displacement (>=0) of measuring position compared to centre of tool.
15.2 Tool identification
The tool identification number may contain up to eight digits for the tool number plus 2 decades (00)
for identifying the tool (original tool or replacement tool). The decade entry may be omitted for the
original tool. If a replacement tool is entered for a tool, e.g. T1, this is indicated by the information in
the decades (e.g. T1.01, T1.02 etc, i.e. these tools are replacements for T1).
15.3 Calling tool data
The T address and M-function are used to call a tool in the machining program.
Example of calling a tool:
Tool number T.. [Format 8.2] N.. T1 M..
(255 tools max.)
Original tool (T1-T99999999) N.. T1
Replacement tool (Tx.01-Tx.99) N.. T1.01
Activation:
Automatic tool change N.. T.. M6
Manual tool change N.. T.. M66
Activate tool data N.. T.. M67
First additional tool offset N.. T.. T2=1 M6/M66/M67
Second additional tool offset N.. T.. T2=2 M6/M66/M67
Tool life T3=..[0-9999,9min] N.. T.. T3=x M6/M66
Cutting force control T1=..[1..99] N.. T.. T1=x M6/M66
Deactivate (T1=0 or T1= not
programmed) N.. T1=0
Modal parameters T, T1=, T2=
Tool preselection in the machining program:
The next tool to be used is preselected by programming the tool number T without a tool change
command.
124 Heidenhain
15.4 Input of the tool memory
Options during input of the tool memory. The options are changed by means of MC774:
0 The input addresses are loaded or overwrite the existing addresses.
1 First, the tool memory is cleared. Subsequently, the new addresses are loaded.
2 The existing tools are not changed and, during input, are missed without a fault report.
3 Tool without P overwrites the tool currently existing.
The input addresses are loaded or overwrite the existing addresses.
MC774 = 0 Bestehendes TM Ein zu lesen TM Ergebnis
Normal P1 T1 L1
P2 T2 L2 P3 T3 R3 P1 T1 L1
P2 T2 L2
P3 T3 R3
Ohne T P1 T1 L1
P2 T2 L2 P3 R3 Fehler O/D 61
Ohne P P1 T1 L1
P2 T2 L2 T3 R3 P1 T1 L1
P2 T2 L2
P25 T3 R3 (außerhalb Magazin)
T besteht schon P1 T1 L1
P2 T2 L2 P3 T1 R1 Fehler O/D 60
Kein P
T besteht schon P1 T1 L1
P2 T2 L2 T1 R1 Fehler O/D 62
First, the tool memory is cleared. Subsequently the new addresses are loaded.
MC774 = 1 Bestehendes TM Ein zu lesen TM Ergebnis
Normal P1 T1 L1
P2 T2 L2 P3 T3 R3 P3 T3 R3
Ohne T P1 T1 L1
P2 T2 L2 P3 R3 Fehler O/D 61
Ohne P P1 T1 L1
P2 T2 L2 T3 R3 P25 T3 R3 (außerhalb Magazin)
T besteht schon P1 T1 L1
P2 T2 L2 P3 T1 R1 P3 T1 R1
Kein P
T besteht schon P1 T1 L1
P2 T2 L2 T1 R1 P25 T3 R3 (außerhalb Magazin)

20000710 MillPlus V410 125
The existing tools are not changed and, during input, are missed without a fault report.
MC774 = 2 Bestehendes TM Ein zu lesen TM Ergebnis
Normal P1 T1 L1
P2 T2 L2 P3 T3 R3 P1 T1 L1
P2 T2 L2
P3 T3 R3
Ohne T P1 T1 L1
P2 T2 L2 P3 R3 Fehler O/D 61
Ohne P P1 T1 L1
P2 T2 L2 T3 R3 P1 T1 L1
P2 T2 L2
P25 T3 R3 (außerhalb Magazin)
T besteht schon P1 T1 L1
P2 T2 L2 P3 T1 R1 Fehler O/D 60
Kein P
T besteht schon P1 T1 L1
P2 T2 L2 T1 R1 überspringen
Tool without P overwrites the currently existing tool.
MC774 = 3 Bestehendes TM Ein zu lesen TM Ergebnis
Normal P1 T1 L1
P2 T2 L2 P3 T3 R3 P1 T1 L1
P2 T2 L2
P3 T3 R3
Ohne T P1 T1 L1
P2 T2 L2 P3 R3 Fehler O/D 61
Ohne P P1 T1 L1
P2 T2 L2 T3 R3 P1 T1 L1
P2 T2 L2
P25 T3 R3 (außerhalb Magazin)
T besteht schon P1 T1 L1
P2 T2 L2 P3 T1 R1 Fehler O/D 60
Kein P
T besteht schon P1 T1 L1
P2 T2 L2 T1 R1 P1 T1 R1
P2 T2 L2

126 Heidenhain
15.5 Tool parking time monitoring
If the parking time of a tool (M) or the required parking time (T3=..) of a tool is reached, during the next
tool change the replacement tool is loaded automatically.
Addresses in the tool memory:
M tool parking time in minutes
M1 residual tool parking time (only an indication)
M2 tool parking time monitoring (0 = OFF 1 = ON).
The parking time M1 remaining =... can be queried with the function G149 and changed in the tool
memory using the function G150.
15.6 Tool breakage monitoring
Machines can be fitted out with a tool breakage monitoring. This function can only be programmed
with the help of macros.
The following addresses are used by the tool memory:
B breakage tolerance in mm
R6= radius position for breakage control
In the event of the breakage tolerance being exceeded, tool status E=4 is set and a fault is
output in addition.
Also, if at the start of the cycle the tool status is E=1, the breakage control is implemented.
Default value for tolerance is input in MC33.
The breakage monitoring is activated by means of MC32.
The tool breakage monitoring is a machine dependent function. Please consult your user handbook.
Note
If an original tool is blocked, a replacement tool is automatically loaded in its place (if available).
See G604
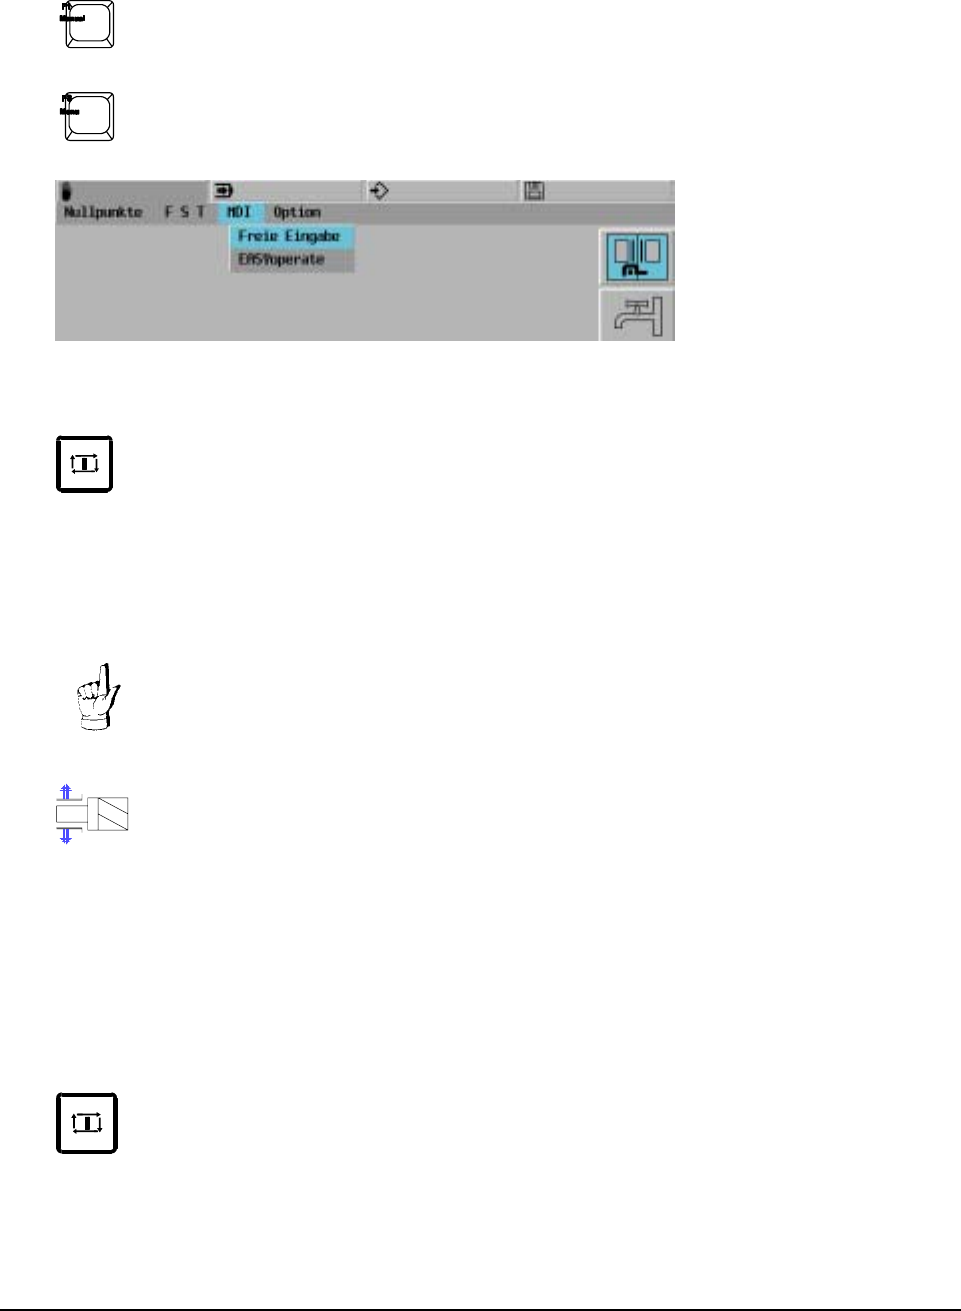
20000710 MillPlus V410 127
15.7 Manual change of tool (Example)
Change of tool is a machine dependent function. Please consult your user handbook.
Call-up tool change:
T... M66
Report: int T..
The working area door is unlocked.
Open the working area door.
Please look up the notes on general security
Press "Select tool holder"
Take hold of the tool and use the rotating key or the foot lever "Release tool holder" to halt the
machine. The tool holder is released.
Take the tool out of the tool holder.
Insert a new tool.
Release the rotating key or the foot lever and support the tool holder while inserting the tool.
Close the working area doors.
The working area doors are locked.
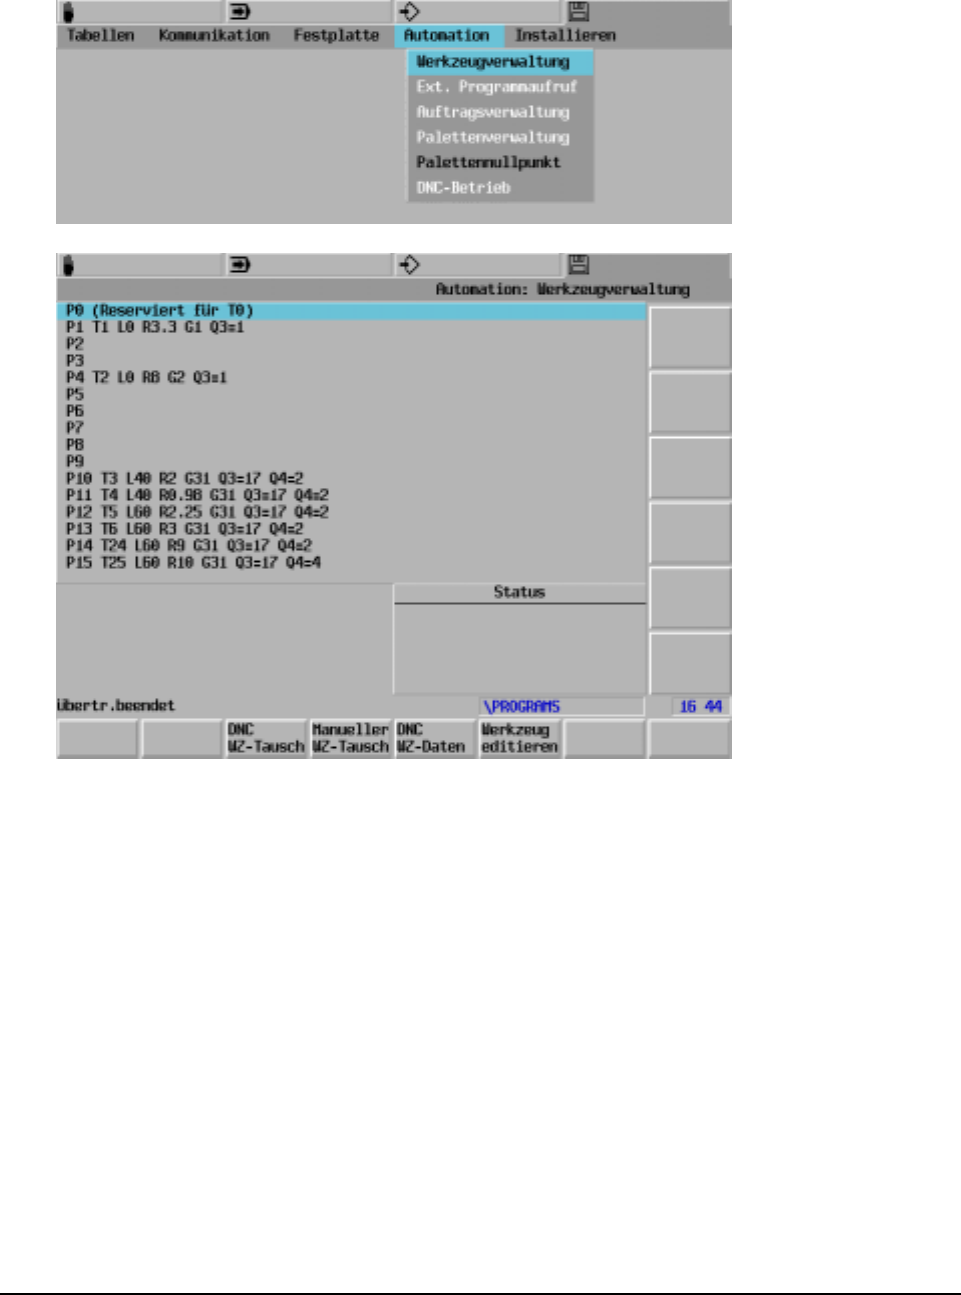
128 Heidenhain
15.8 Tool management
Die Werkzeugverwaltung erlaubt die Eingabe bzw. Entnahme der Werkzeuge aus dem
Werkzeugmagazin bei gleichzeitiger Aktualisierung der Werkzeugdaten im Werkzeugspeicher.
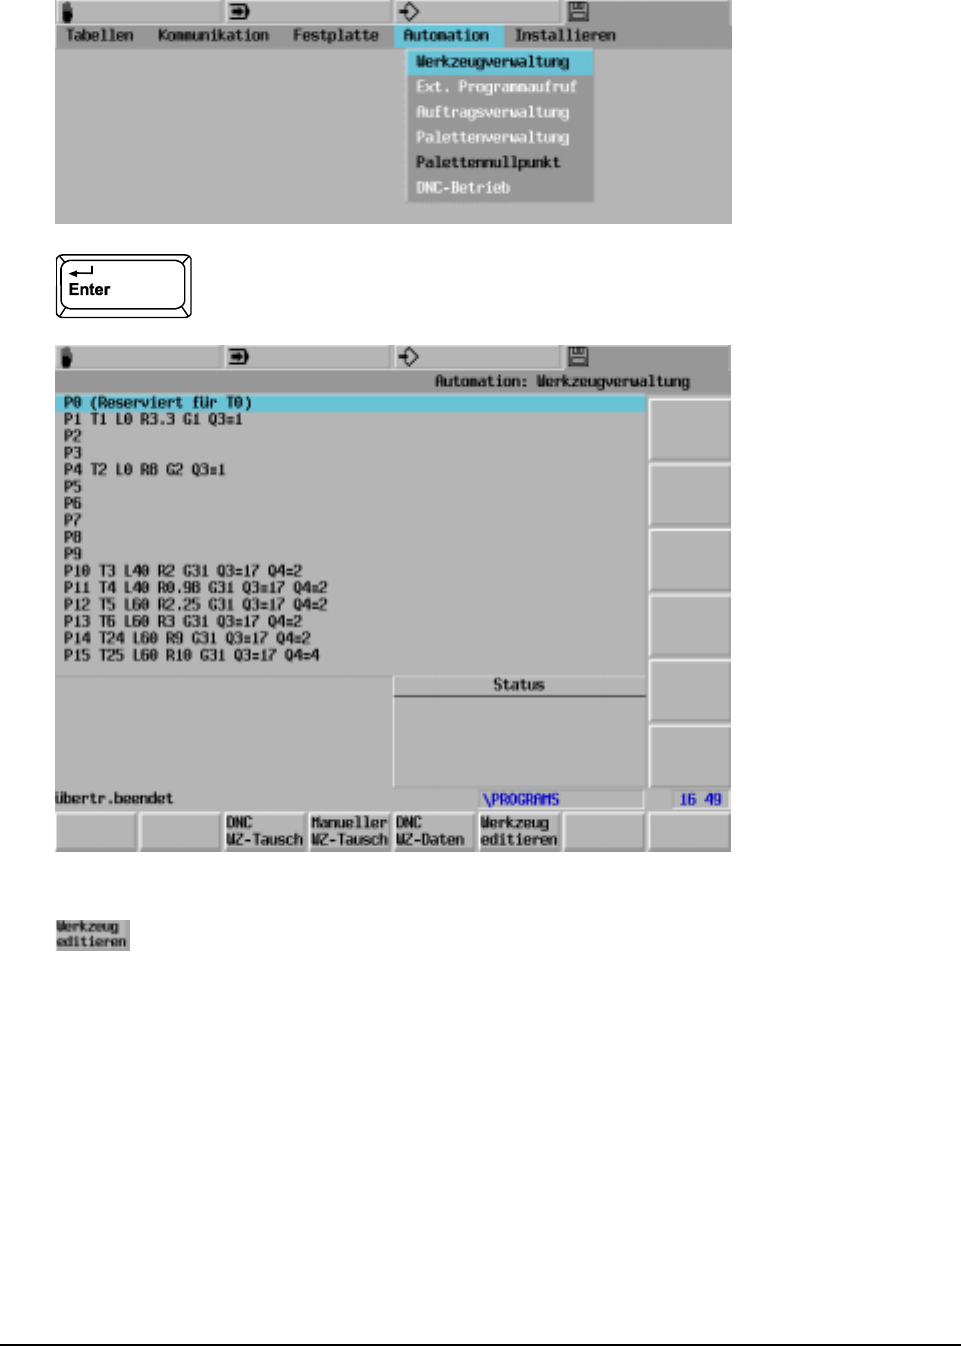
20000710 MillPlus V410 129
15.8.1 Werkzeugkorrektur
Während der Bearbeitung sein alle Werkzeugdaten bis auf das Spindelwerkzeug editierbar.
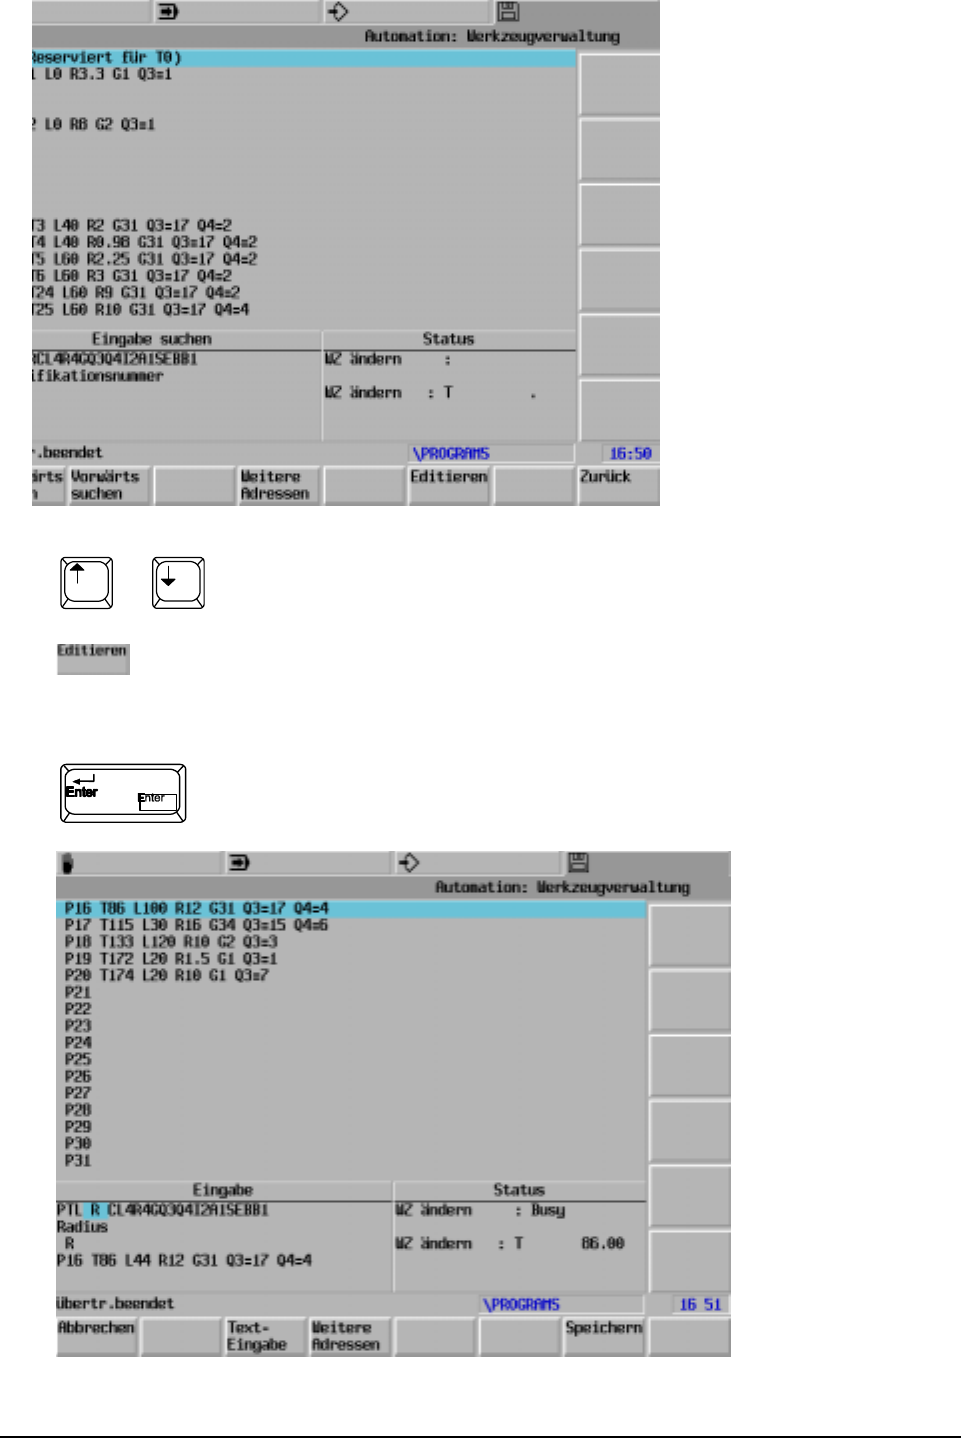
130 Heidenhain
Satz anwählen
Eingabe L44
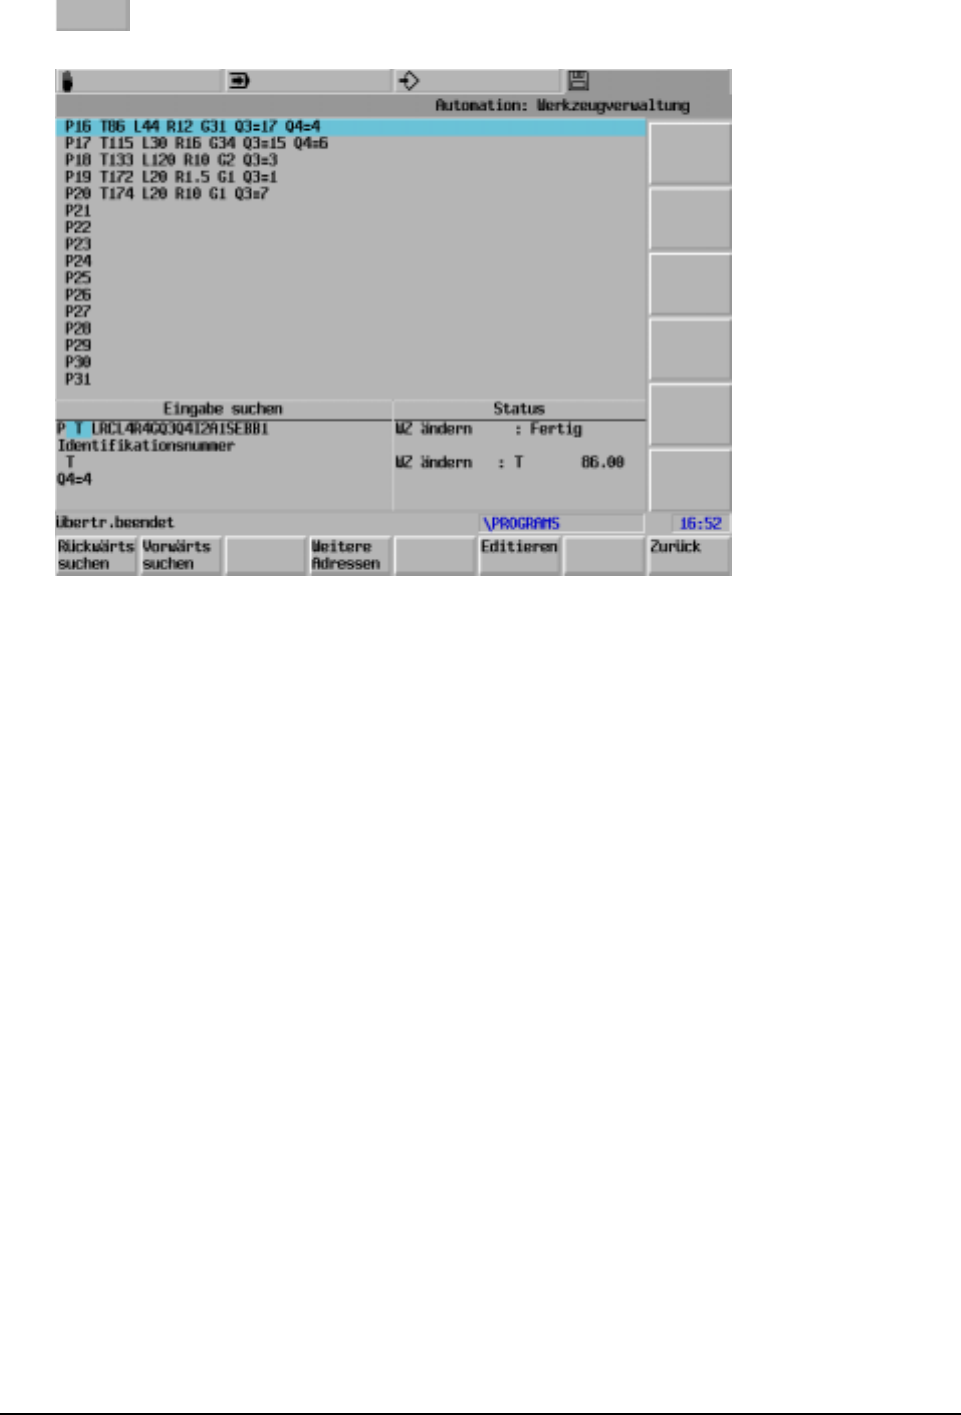
20000710 MillPlus V410 131
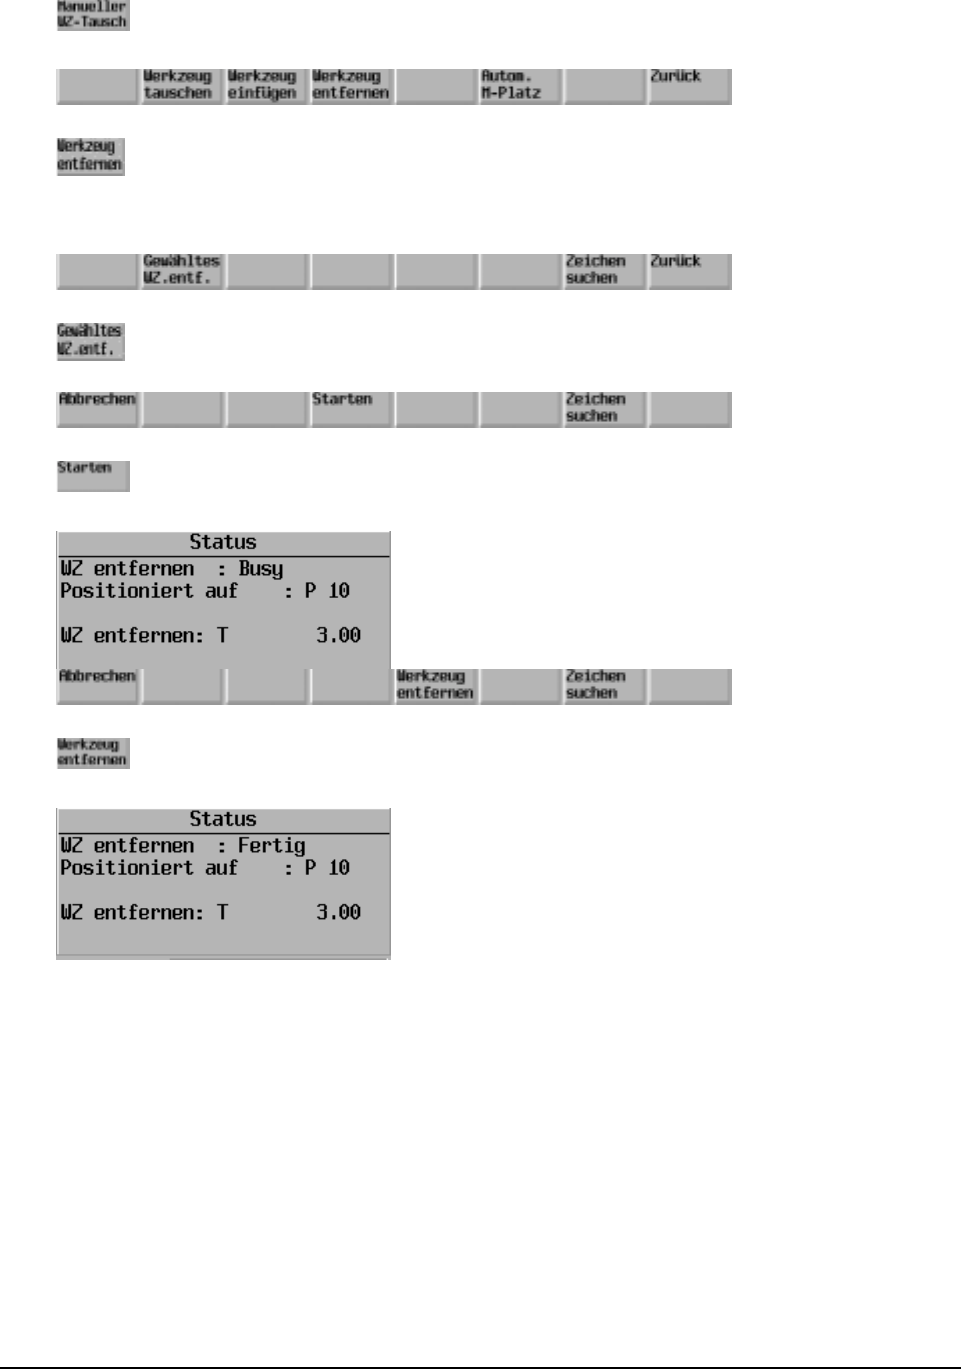
132 Heidenhain
15.8.2 To take a tool out of the tool magazine (example)
Select the tool or enter the tool number.
The tool magazine is in position.
Confirmation that the tool has been removed.

20000710 MillPlus V410 133
15.9 To update enhanced tool measurement
The machine and MillPlus must be prepared by the machine manufacturer for the TT120/TT130
measuring key system or the laser measurement system. Please consult your user handbook.
The menu and the corresponding machine settings are updated using the following machine settings:
MC261 >0: measurement cycle functions
MC254 >0: tool measurement
MC840 =1: present measuring key
MC854 =1: tool measuring equipment type (0=none, 1=laser, 2=TT120/TT130)
MC859 =1: signal type 2 measuring key
MC356 measurement: radial axis: 1=X, 2=Y, 3=Z
MC357 measurement: tool axis: 1=X, 2=Y, 3=Z
MC358 measurement: 3 axis 0=off, 1=on
MC359 radial measurement: -1=neg, 0=aut, 1=pos
MC370 measurement: maximum tool radius
MC371 measurement: maximum tool length
MC372 free space under the laser beam
MC350 position 1 negative axis
MC351 position 1 positive axis
MC352 position 2 negative axis
MC353 position 2 positive axis
MC354 position 3 negative axis
MC355 position 3 positive axis
Following calibration, the exact values are stored in MC350 to MC355.
MC392 Maximum measuring error with tool rotating [µm]
MC394 Inching motion with tool not rotating [mm/min]
MC395 Gap between bottom edge of tool and bottom edge of stylus [µm]
MC396 Diameter of TT120/TT130 stylus [µm]
MC397 Pre-positioning safety zone [µm]
MC398 Rapid motion in inching cycle [mm/min]
MC399 Maximum speed of rotation [m/min]
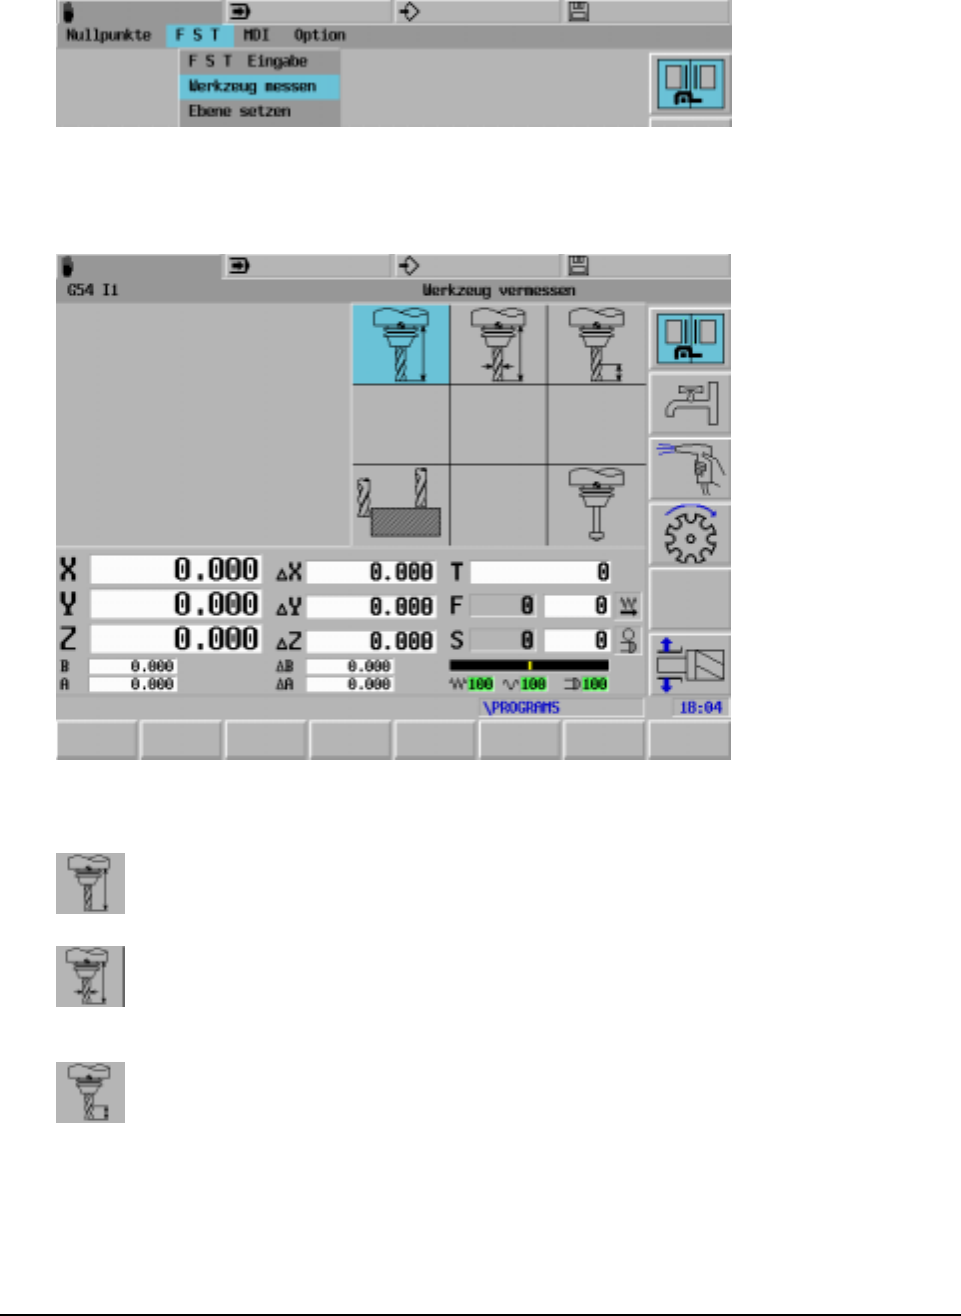
134 Heidenhain
15.10 Tool measurement using the laser measurement system
You can measure tools automatically using the laser measurement system and the MillPlus tool
measurement cycle. The correction values for length and radius are placed in the tool memory.
After selecting "Measure tool" the following menu screen appears (MC254=1):
The following cycles are available:
Measurement of the tool length of concentric tools
Measurement of tool length and radius of eccentric tools
Individual cutting control
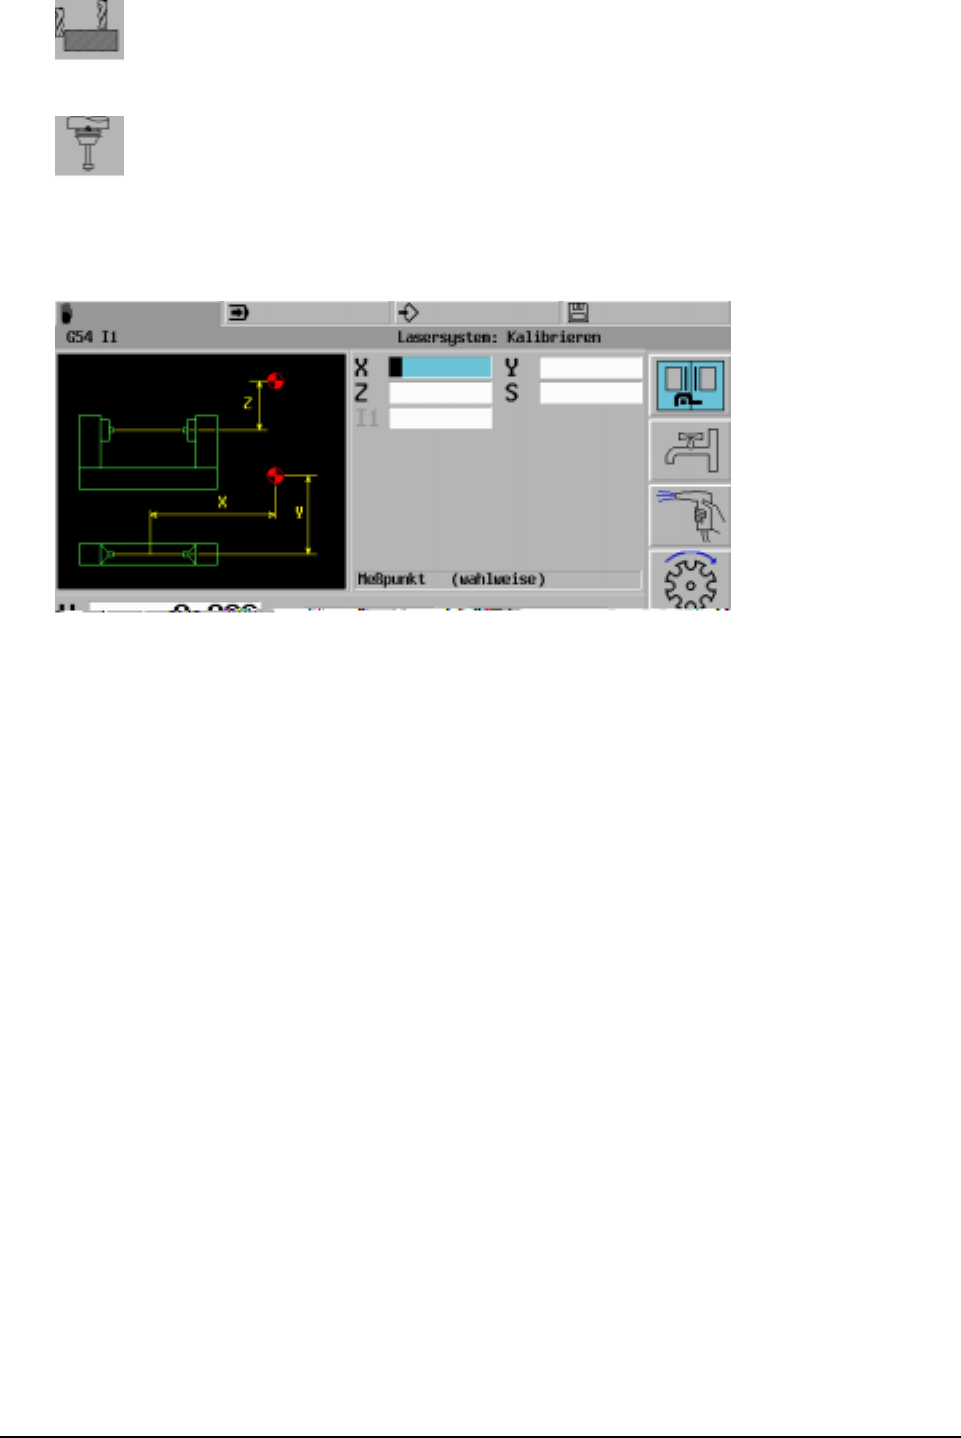
20000710 MillPlus V410 135
Measure tool manually (see the chapter on setting the axis value)
Calibration of the laser measurement system
15.10.1 Calibration of the laser measurement system
Addresses:
X1 = measuring equipment - X position
Y1 = measuring equipment - Y position
Z1 = measuring equipment - Z position
S = revolutions per minute (recommended value for S = 3000)
During calibration the exact position of the measuring equipment is measured and stored in MC350-
MC355. The stored values refer to the machine reference point.
X1,Y1,Z1 is the global position (+/- 5 mm exactly) of the measuring equipment referred to the
machine null point.
If X1,Y1 or Z1 have not been entered, the calibrated settings from the machine constants are used.
- Rotary axes are not taken into account or positioned.
- Null point displacements are not allowed to be active if X1,Y1 or Z1 have been entered.
- G7 free operating planes are not allowed to be active.
- A calibrator tool must be chosen. T0 is not allowed.
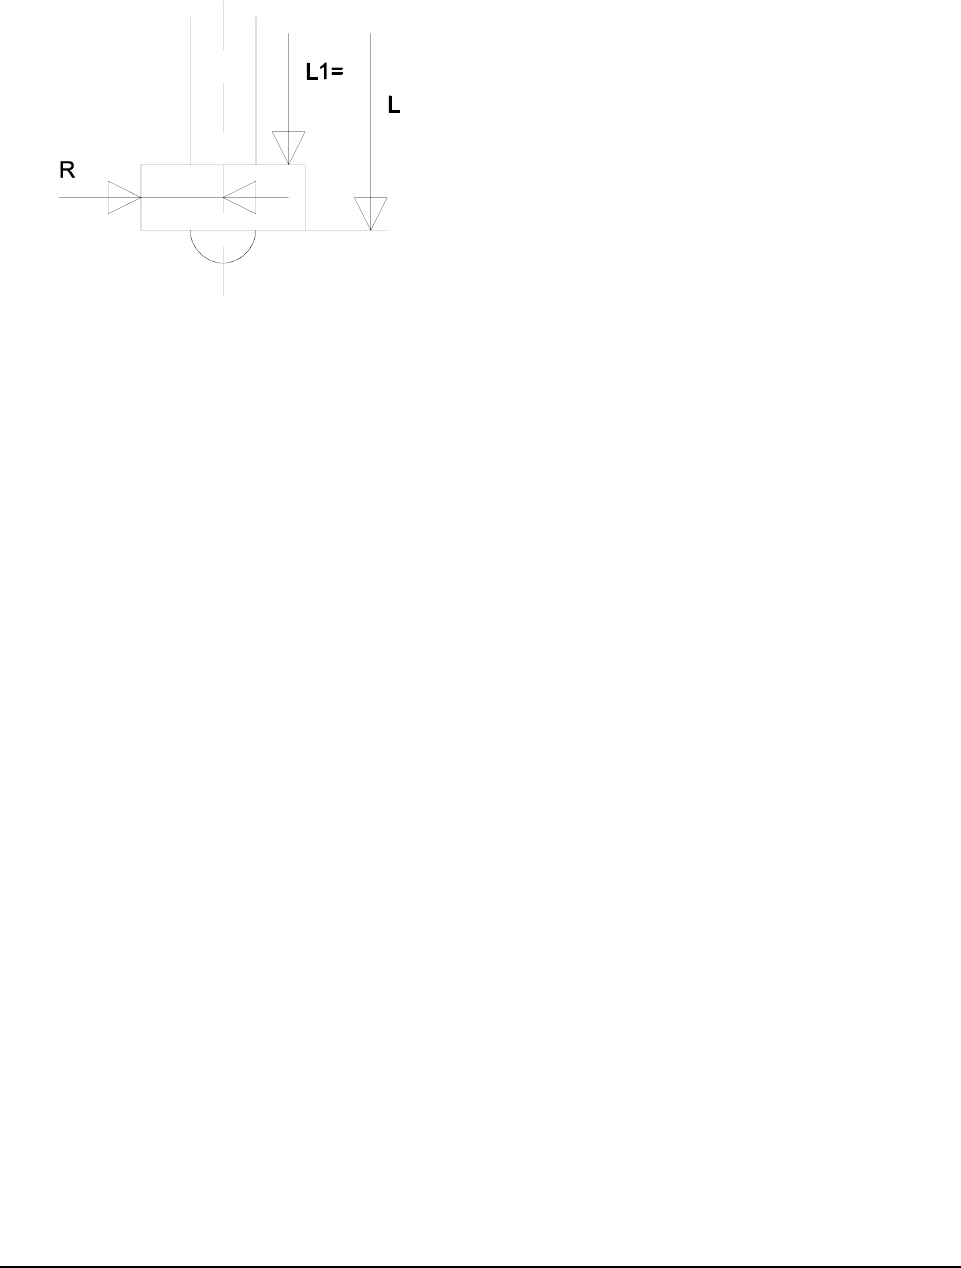
136 Heidenhain
The dimensions of the calibrator spike are entered in the tool memory.
L = length of the calibrator spike (lower surface of the cylindrical part)
R = radius
L1= first additional length (upper surface of the cylindrical part)
The length L1= is not entered if a cylinder pin is employed. In this case, only the upper
surface of the laser beam is calibrated.
Calibrator tool definition in the tool memory
Note:
See G600
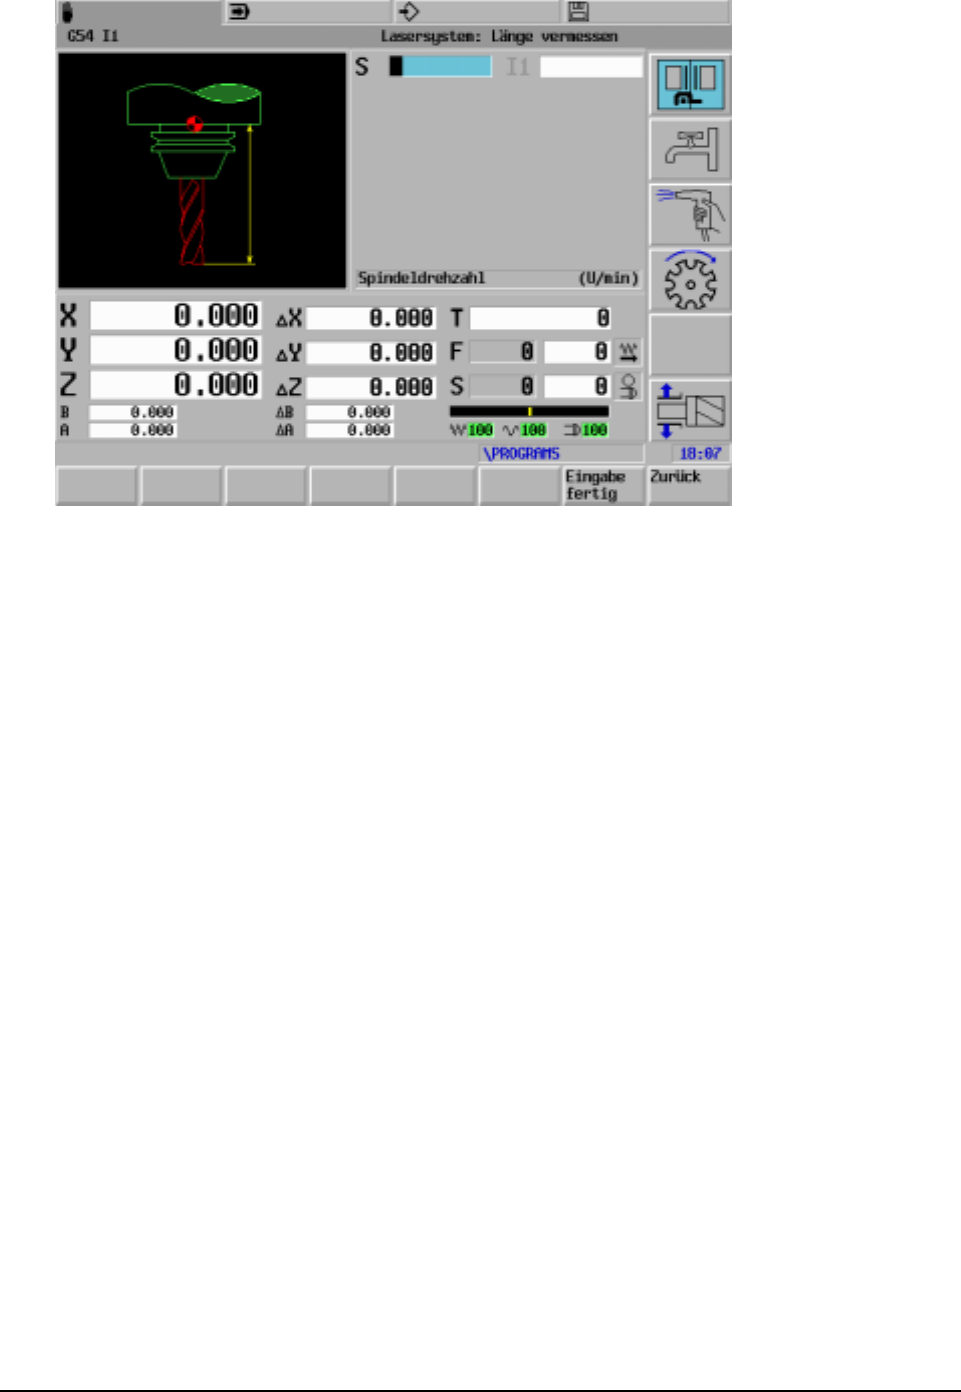
20000710 MillPlus V410 137
15.10.2 Measurement of the length of concentric tools
Addresses:
S = Speed in revolutions per minute (recommended value for S = 3000)
The following addresses from the tool memory are used:
L5= length tolerance
"Measure" (E=0 or no value): During the initial measurement the tool length is overwritten, the
oversize L4 =0 and the tool status is set to E =1.
"Check" (E=1): The measured variance is added to the tool table at L4.
- If the tolerance is exceeded, the tool status is set to E1 and, in addition, a fault is displayed
in Easy Operate.
- If the tool status is at E1 during start-up, then a fault is displayed in Easy Operate.
- The advance measurement is calculated from the speed in rpm.
- The measurement is effected while the spindle is rotating.
Note:
See also G601
The measuring cycle is suitable for measuring the length of the following tools:
twist drills, centre drills, tapping drills, countersinks, reamers, grinding points, etc.

138 Heidenhain
15.10.3 Measurement of the length and radius of eccentric tools
Addresses:
S = speed in revolutions per minute (recommended value S=3000)
The following addresses from the tool memory are used:
L5= wear tolerance - length
R5= wear tolerance - radius
L6= length offset
R6= radius offset
Q4= cutting number
Checking (E=1):
The measured variance is added to the tool table at L4 and R4.
Measurement (E=0 or no value):
During the initial measurement,the tool length and radius are overwritten, the oversize L4 and R4=0
and the tool status is set to E=1.
- If the tolerance is exceeded, the tool status is set to E1 and, in addition, a fault is displayed
in Easy Operate.
- If the tool status is at E1 during start-up then a fault is displayed in Easy Operate and the
cycle is stepped forward to automatic operation.
- The advance measurement is calculated from the speed in rpm.
- The measurement is effected while the spindle is rotating.
Measurement of the radius:
- If L6>0 or has not been entered (in the tool table) a radius measurement is carried out.
Circular working check:
- If Q4>0 (Number of cogs from the tool table) then, following the measurement of the radius
a circular working check is carried out.
- The circular working check is carried out using a calculated speed in rpm.
- The speed override is inactive.
- The maximum tolerance is determined using L5.
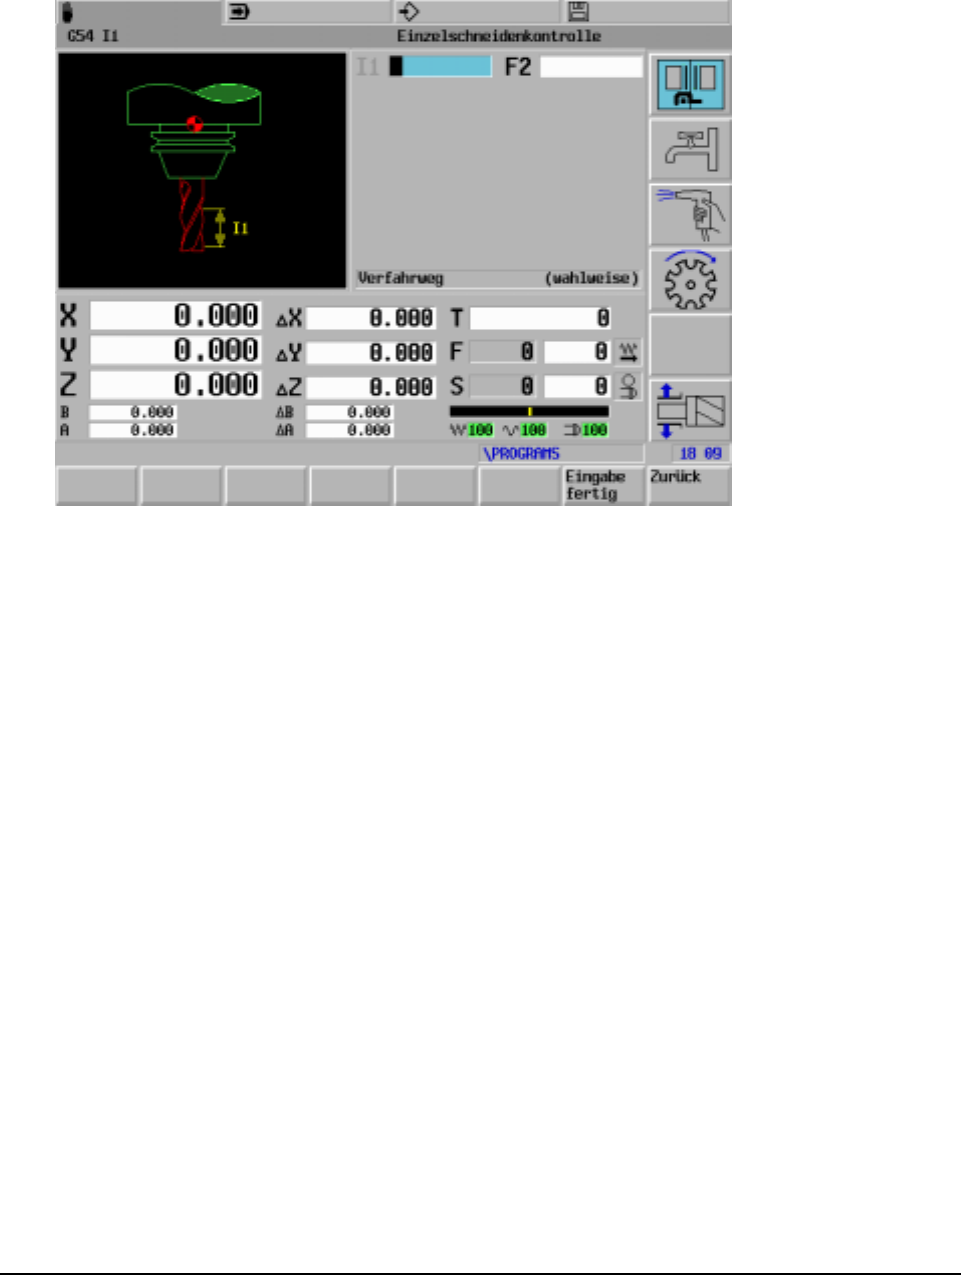
20000710 MillPlus V410 139
Note:
See G602
15.10.4 Individual cutting control
Addresses:
I1 = Travel
F2 = Scan advance
The following addresses from the tool memory are used:
R5= radius wear tolerance
L6= length offset
Q4= cutting number
- If the tolerance is exceeded, the tool status is set to E-1 and, in addition, a fault is displayed
in Easy Operate.
- If, during the start-up of the cycle, the tool status is E=1, then a fault is displayed in Easy
Operate and the cycle is advanced to automatic operation.
- If I1=0 only the circular working check is carried out.
- The cutting control is implemented with a calculated speed in rpm.
- The speed override is inactive.
- The maximum error is determined using R5.
Note:
See G603

140 Heidenhain
15.11 Laser measurement cycles in the program
15.11.1 Beispiel
N12345
N1 G54 I1
N100 T1 M6 ... (mill D50)
... \
... milling operation
... /
N191 G602 S3000 (measurement of length and radius wear)
N200 T2 M6 ... (drill D4)
... \
... drill operation
... /
N291 G604 S3000 (breakage monitoring)
N300 M30
Tool memory of program start-up.
Tools are measured beforehand using the measurement cycles.
The mill is blocked (E-1) if the parking time has elapsed or the wear limit is exceeded.
The drill is blocked (E-1) if the parking time has elapsed. During a breakage the drill is blocked (E-4)
and a program stoppage with faults is executed.
50mm diameter milling with replacement tool:
P.. T1.01 L102.023 R24.978 L4=0 R4=0 E1 M15 M2=1
P.. T1.02 L102.167 R24.986 L4=0 R4=0 E1 M15 M2=1
4mm diameter drill with replacement tool:
P.. T2.01 L85.467 L4=0 E1 B1 M15 M2=1
P.. T2.02 L85.246 L4=0 E1 B1 M15 M2=1
15.12 Tool fault reports
If a tool fault (breakage, wear or concentric operation) is identified, then the E status is changed in the
tool table.
E= -1 Tool is outside tolerance.
E= -4 Tool is broken.
Particulars are recorded by the cycles affected.
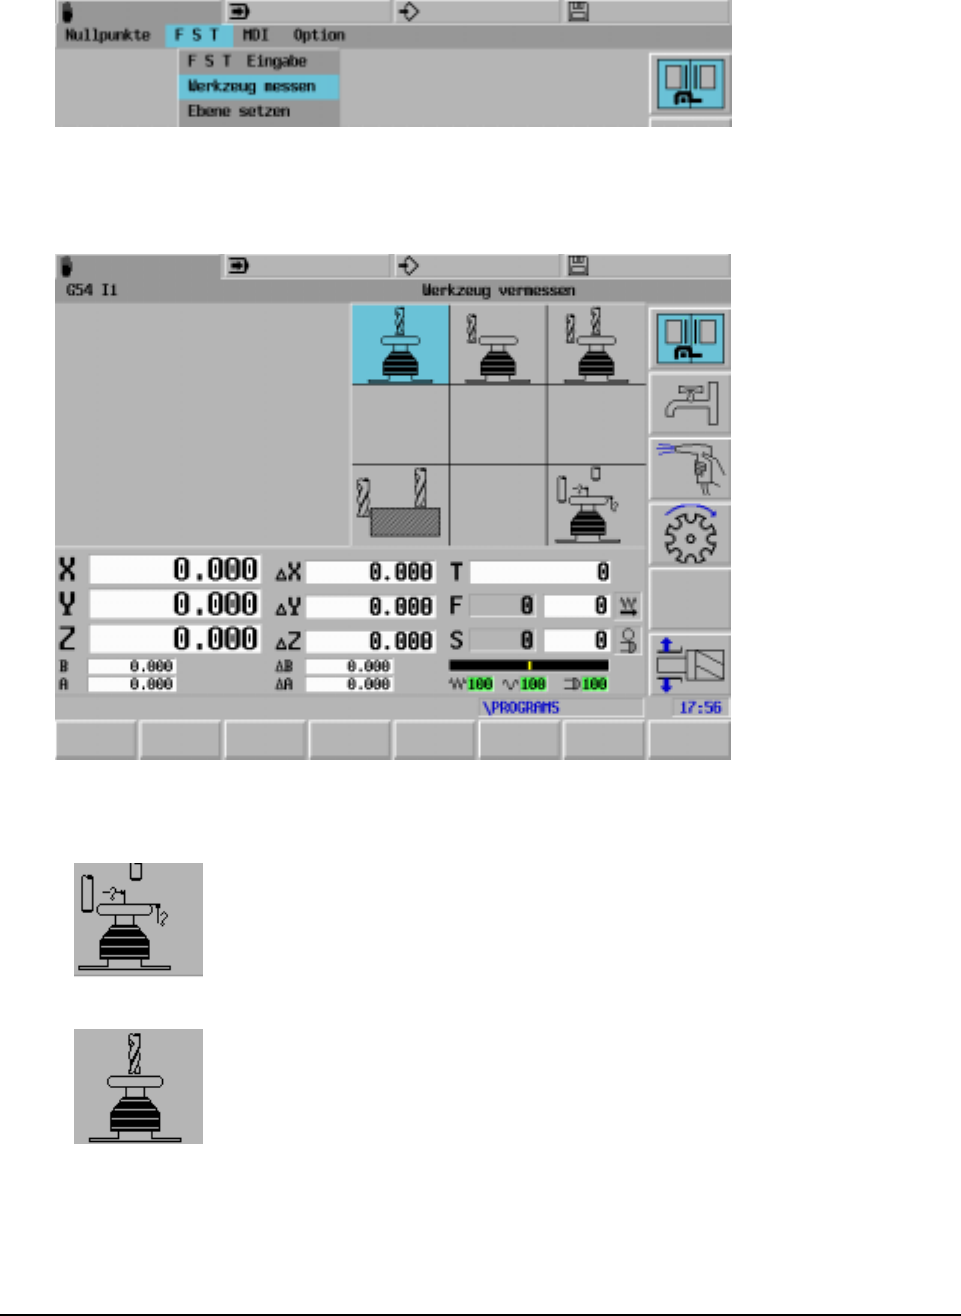
20000710 MillPlus V410 141
15.13 Tool measurement using the TT120/TT130
Using the TT130 and the MillPlus tool measurement cycles you can measure tools automatically. The
correction values for length and radius are placed in the tool memory.
After selecting "Measure tool", the following menu screen appears (MC854=2):
The following cycles are available:
Calibration of the TT120/TT130
Tool length measurement

142 Heidenhain
Tool radius measurement
Tool length and radius measurement
Tool length and radius
Before you measure tools for the first time, enter the approximate radius (R10), the approximate
length (L100), the number of cuts (Q4=4) and the cutting direction (I2=0) of the tool to be used in the
tool table.
Measurement results
During the initial measurement, MillPlus overwrites the tool radius (R10 with R10.012) and the tool
length (L100 with L99.456) in the tool memory and sets the oversizes R4 and L4 = 0.
Checking the tool
In the event that you check a tool, the measured tool data is compared with the tool data extracted
from the tool memory. MillPlus calculates the mathematically correct variances and enters these as
oversizes (R4=0.015 and L4=0.06) in the tool memory.
Radial axis approach direction
The approach direction depends on the position of the masuring key system. It is automatically keyed
from the direction in which the greatest travel range is available.
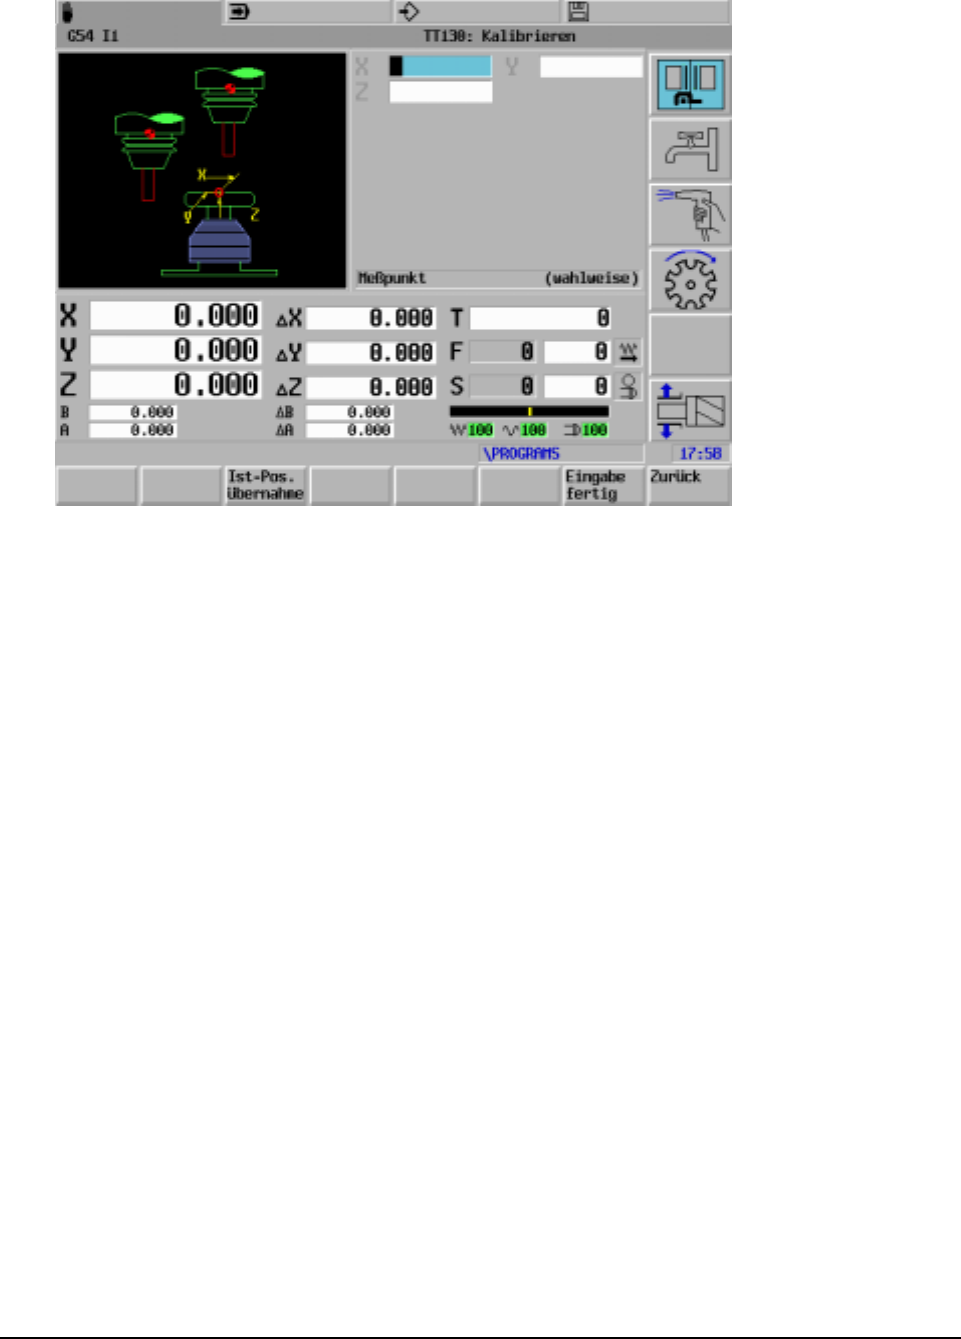
20000710 MillPlus V410 143
15.14 Calibration of the TT120/TT130
The way in which the calibration cycle functions depends on MC854.
Before you calibrate, you must enter the exact radius and the exact length of the calibration tool in the
tool table.
The location of the TT120/TT130 must be set down in the working area of the machine in MC350
MC352 MC354. If you change any of MC350 MC352 MC354, you must recalibrate.
You calibrate the TT120/TT130 using the measurement cycle dialog entry. The calibration process
starts up automatically. MillPlus also determines the mean setting of the calibrator tool automatically.
To achieve this, MillPlus rotates the spindle through 180° at the halfway point of the calibration cycle.
As the calibrator tool you employ an exactly cylindrical component, for example a cylinder pin. MillPlus
stores the calibration values with the machine settings and takes account of them in subsequent tool
measurements.
Position:
Enter the position in the X, Y and Z axes, such that a crash with workpieces or tool holders is
excluded. If the position height input is so small that the tool tip would lie below the upper surface of
the plate, MillPlus automatically positions the calibrator tool over the plate.
Note:
See G606
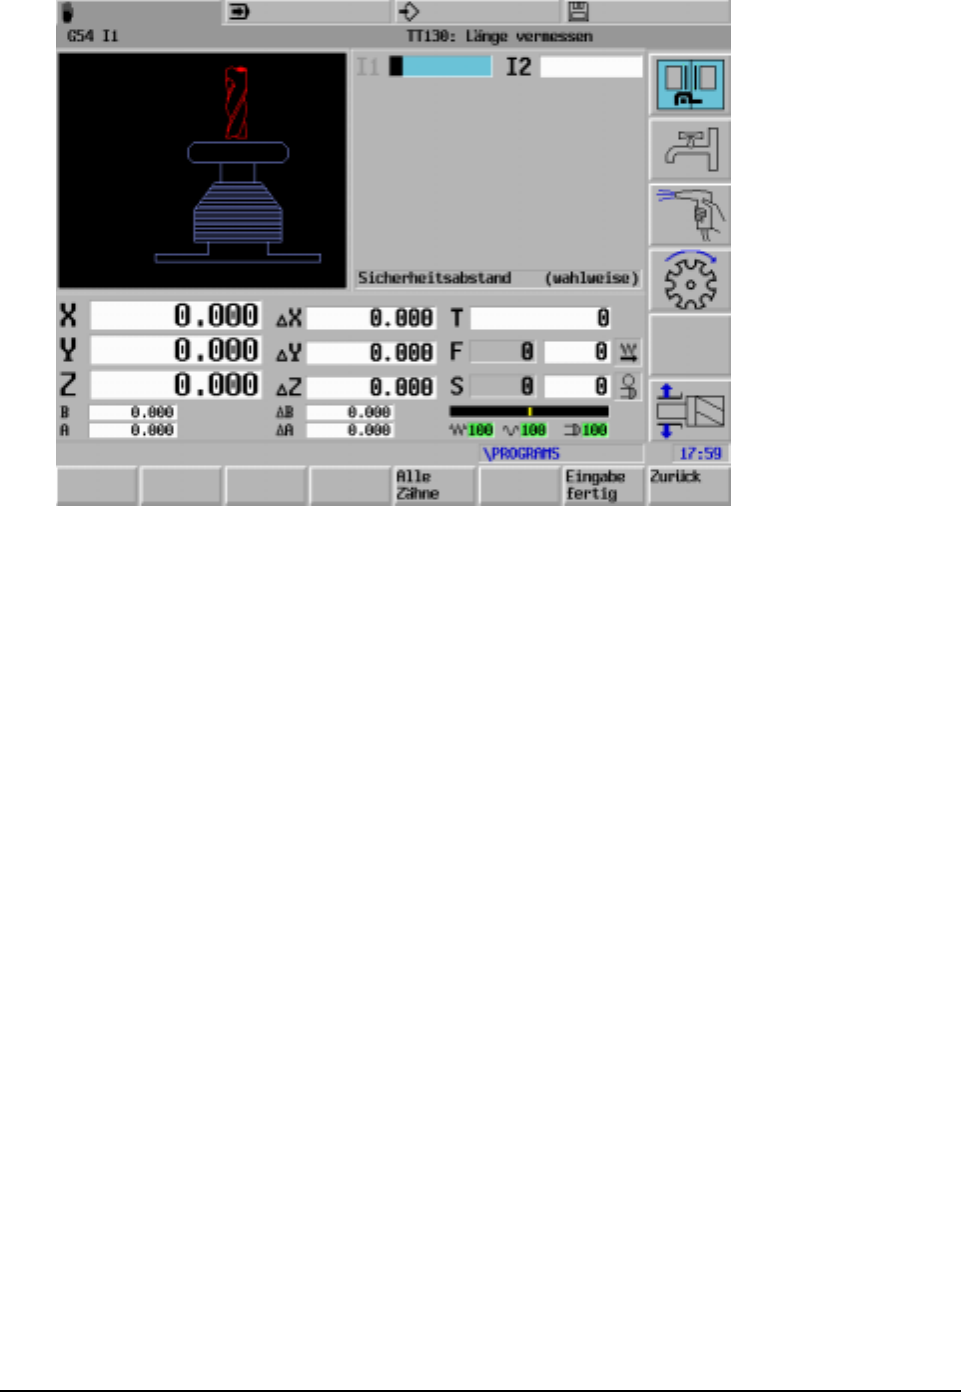
144 Heidenhain
15.14.1 Tool length measurement
You can determine the tool length in three different ways:
If the tool diameter is greater than the diameter of the measuring area of the TT120/TT130, then you
measure with the tool rotating.
If the tool diameter is smaller than the diameter of the measuring area of the TT120/TT130 or if you
are determining the length of drills or radius form millers, then you measure with the tool stationary.
All cogs are measured using the soft key "All teeth". The measurement is effected with the spindle
stationary. The largest cog lengths are stored in the tool table.
Measurement start-up:"Measurement with the tool rotating".
In order to determine the longest cuts the tool is set at the midpoint of the measuring key system and
rotating on the measuring area to be traversed. You program the setting in the tool table under the
tool setting; radius (R6=).
Measurement start-up:"Measurement with the tool stationary" (e.g. for drills).
The tool to be measured is moved to the dead centre position over the measuring area. Finally it is
moved on to the measuring area with the spindle stationary. To make this measurement, you enter
the tool setting: radius (R6=0) in the tool table.
Measurement start-up:"Individual cut measurement"
MillPlus pre-positions the tool to be measured to the side of the probe. In this way, the tool face is
positioned below the top of the probe, as prescribed in MC395. In the tool table, under tool setting;
length (L6=) you can prescribe an additional setting. MillPlus approaches radially with the tool rotating
in order to determine the start angle for individual cut measurement. Finally, the length of all cuts is
measured by changing the orientation of the spindle. You select the soft key "All teeth" to make this
measurement.

20000710 MillPlus V410 145
Checking the tool:
During the initial measurement, MillPlus overwrites the tool length L in the tool memory and sets the
oversize L4=0. In the event that you are checking a tool, the actual length measured is compared with
tool length L extracted from the tool table. MillPlus calculates the mathematically correct variance and
enters this as the oversize L4 in the tool table. If this oversize is greater than the permissible wear or
breakage tolerance for the tool length, then a fault report is made.
Safe height:
Enter a position in the spindle axis, by means of parameters from the entry dialog (I1 = safety
distance), such that a crash with pieces of work or their supporting holders is excluded. The safe
height refers to the reference point for the active piece of work. If the safe height entered is so small
that the tool tip would lie below the top surface of the plate, MillPlus does not automatically place the
tool over the plate (security zone from MC397)
Cut measurement:
switch on or off individual cut measurement (Parameter I2=)
Note:
See G607
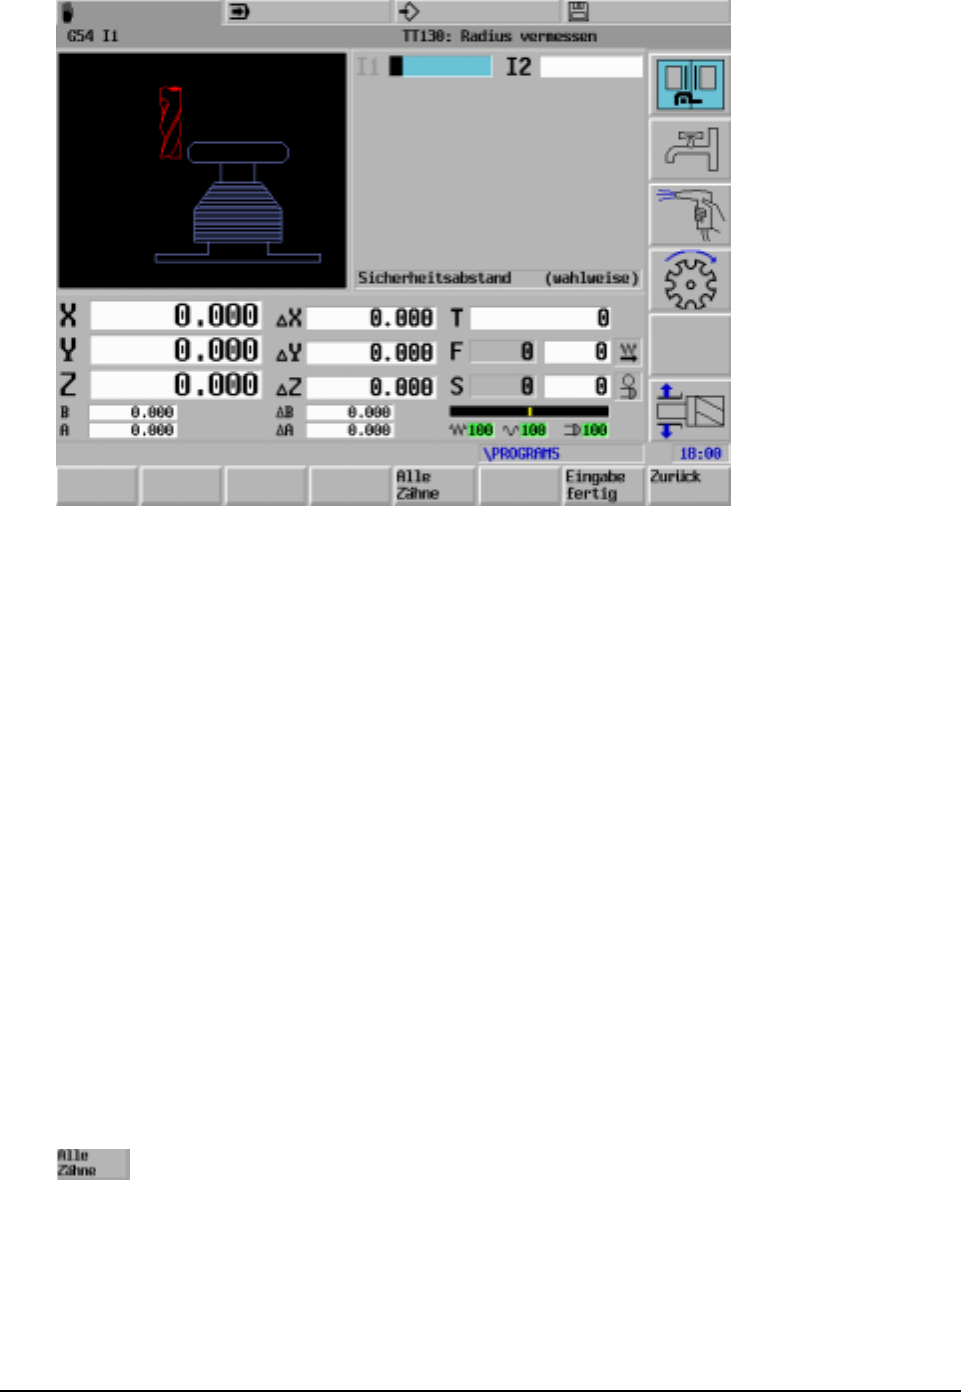
146 Heidenhain
15.14.2 Measurement of tool radius
You can determine the tool radius in two ways:
Measurement with the tool rotating.
Measurement with the tool rotating, followed by individual cut measurement
Measurement start-up
MillPlus pre-positions the tool to be measured to the side of the probe. In this way, the mill face is
placed below the top of the probe, as prescribed in MC 395. MillPlus approaches with the rotating tool.
In the event that an individual cut measurement should be implemented as well, the radii of old cuts
are measured by means of the spindle orientation.
Checking the tool:
During the initial measurement MillPlus overwrites the tool radius R in the tool memory and sets the
oversize R4=0. In the event that you are checking a tool, the measured radius is compared with the
tool radius R extracted from the tool table. MillPlus calculates the mathematically correct variance and
enters it as oversize R4 in the tool table. If this oversize is greater than the permissible wear or
breakage tolerance for the tool radius, then a fault report is generated.
Safe height:
Enter a position in the spindle axis, by means of parameters from the entry dialog (I1 = safety
distance), such that a crash with pieces of work or their supporting holders is excluded. The safe
height refers to the active workpiece reference point. If the safe height entered is so small that the tool
tip would lie below the top surface of the plate, MillPlus does not automatically place the tool over the
plate (security zone from MC397)
Cut measurement:
switch on or off individual cut measurement (Parameter I2=)
Note:
See G608
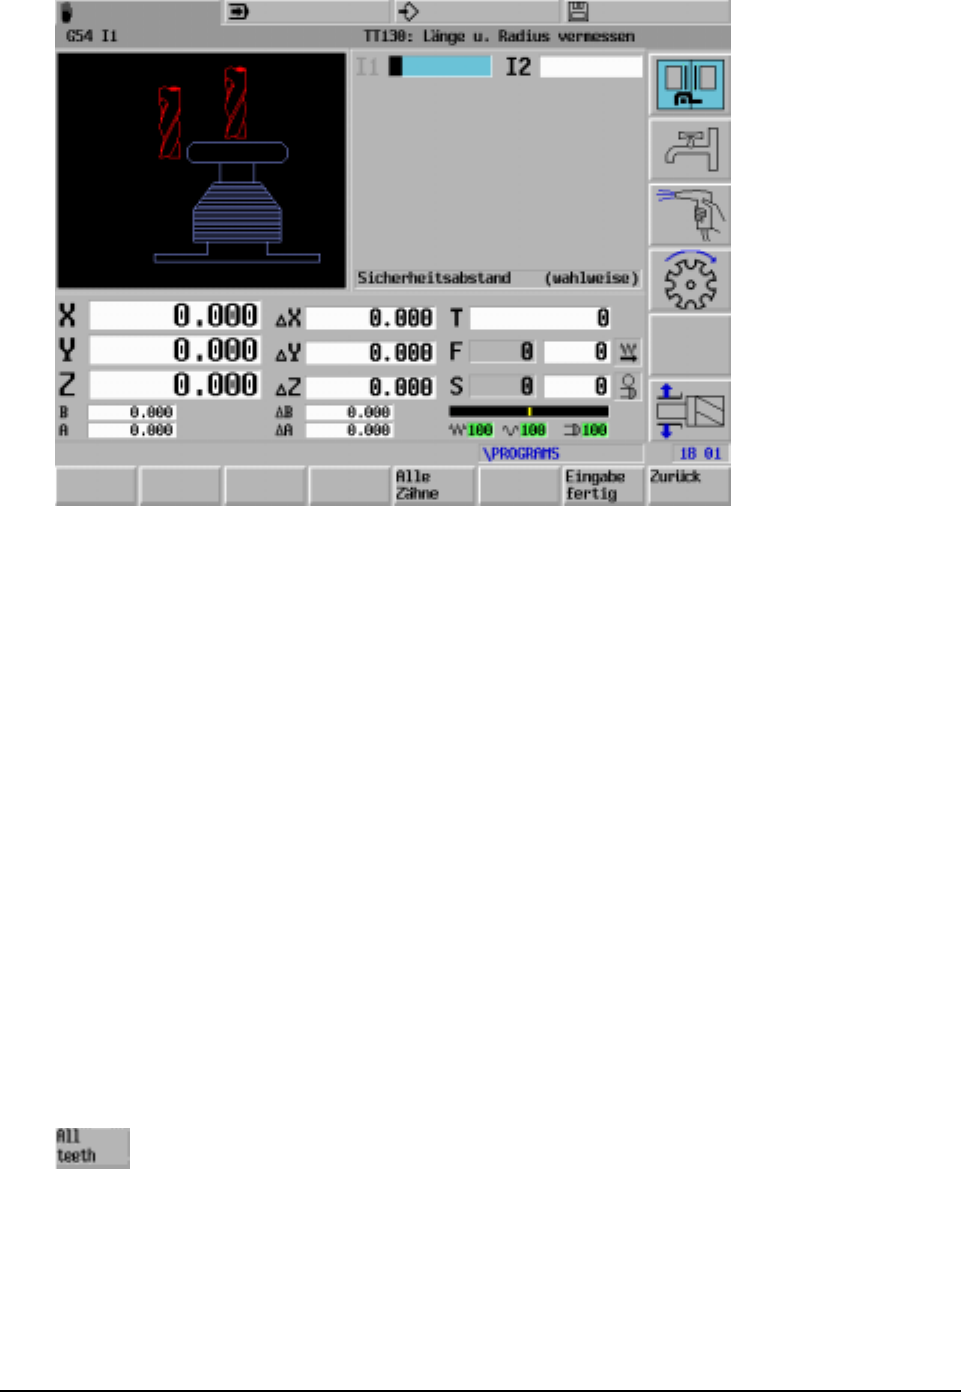
20000710 MillPlus V410 147
15.14.3 Measure the tool completely
You can measure the tool in two ways:
Measurement with the tool rotating
Measurement with the tool rotating, followed by individual cut measurement
Measurement start-up
MillPlus measures the tool in accordance with a pre-programmed start-up routine. The tool radius is
measured first, followed by measurement of the tool length.
Checking the tool:
During the initial measurement MillPlus overwrites the tool radius R and the tool length L in the tool
memory and sets the oversizes R4 and L4 = 0. In the event that you are checking a tool,the
measured tool data is compared with the tool data in the tool table. MillPlus calculates the
mathematically correct variances and enters these as oversizes R4 and L4 in the tool table. If any of
the oversizes is greater than the permissible wear or breakage tolerances, then a fault report is
generated.
Safe height:
Enter a position in the spindle axis, by means of parameters from the entry dialog (I1 = safety
distance), such that a crash with pieces of work or their supporting holders is excluded. The safe
height refers to the active workpiece reference point. If the safe height entered is so small that the tool
tip would lie below the top surface of the plate, MillPlus does not automatically place the tool over the
plate (security zone from MC397)
Cut measurement:
switch on or off individual cut measurement (Parameter I2=)
Note:
See G608

148 Heidenhain
15.15 Update machine settings
MillPlus employs the approach rate from MC394 for measurement with the spindle stationary.
MillPlus automatically calculates the spindle speed in rpm and the approach rate during measurement
with the tool rotating. The spindle speed in rpm is calculated in the following way:
MC399
n = ------------------
r • 0.0063
where:
n = turning speed in revolutions/min
MC399 = maximum permissible turning speed in metres per minute [m/min]
R = active tool radius [mm]
The approach rate is calculated from:
V = measurement tolerance • n
where:
V = approach rate [mm/min]
measurement tolerance
= measurement tolerance [mm], dependent on MC391
N = speed in revolution per minute [1/min]
where:
You enter in MC391 the calculation for the approach rate:
MC391=0:
the measurement tolerance remains constant - independent of the tool radius. However, with very
large tools the approach rate is reduced to zero. The lower you choose the maximum turning speed
(MC399) and the permissible tolerance (MC392), this effect is produced in order to make it perceptible
earlier.
MC391=1:
The measurement tolerance is altered with increasing tool radius. This guarantees an approach rate
which is still appropriate for large radius tools. MillPlus alters the measurement tolerance in
accordance with the following table:
Tool radius Measurement tolerance
up to 30 mm MC392
30 to 60 mm 2 • MC392
60 to 90 mm 3 • MC392
90 to l20 mm 4 • MC392
MC391=2:
The approach rate remains constant; however, the measurement error increases linearly as the tool
radius becomes larger:
r • MC392
measurement tolerance = -----------------
5mm
where:
r = tool radius [mm]
MC392 = maximum permissible measurement error

20000710 MillPlus V410 149
Synopsis of machine settings:
The TT120/TT130 function can be activated by means of MC854. Following a reboot of the CNC the
following machine settings are then available.
MC NUMMER FUNKTION EINGABE
MC391 Berechnung des Antastvorschubs. 0 Berechnung des Antastvorschubs mit konstanter Toleranz.
1 Berechnung des Antastvorschubs mit variabeler Toleranz.
2 Berechnung Antastvorschub
MC392 Maximal zulässiger Meßfehler bei
Werkzeug-Vermessung mit
rotierendem Werkzeug
2 1000 m
MC394 Antastvorschub bei Werkzeug-
Vermessung mit nicht rotierendem
Werkzeug
10 3000 mm/min
MC395 Abstand Werkzeug-Unterkante zu
stylus Oberkante bei Werkzeug
Radius-Vermessung.
1 100000 m
MC396 Dürchmesser bzw. Kantenlänge des
Stylus des TT120/TT130. 1 - 100000 m
MC397 Sicherheidszone um den Stylus des
TT120/TT130 für vorpositionierung. 1 10000 m
MC398 Eilgang im Antast-Zyklus für
TT120/TT130. 10 10000 mm/min
MC399 Maximal zulässige
Umlaufgeschwindigkeit an der
Werkzeugschneide.
1 120 m/min
MC854 Werkzeug-Vermessungs-Type 0=kein,1=Laser,2=TT120/TT130
MC350
MC352
MC354
Koordinaten des TT120/TT130
Stylus-Mittelpunkts bezogen auf den
Machinen-Referenzpunkt.
-max - +max m
15.16 TT120/TT130 measurement cycles for automatic operation
15.16.1 Example
N66666
N1 G54 I1
N100 T1 M6 ... (mill D50)
... \
... milling operation
... /
N191 G609 (measurement of length, radius wear)
N200 T2 M6 ... (drill D4)
... \
... drill operation
... /
N291 G607 (measurement of length, breakage monitoring)
N300 M30
Tool memory at program start-up.
Tools are measured beforehand using the measurement cycles.
The mill is blocked (E-1) if the parking time has elapsed or if the wear limit has been exceeded.
The drill is blocked (E-1) if the parking time has elapsed. During a breakage the drill is blocked (E-4)
and a program stoppage with fault executed.
50mm diameter milling with replacement tool:
P.. T1.01 L102.023 R24.978 L4=0 R4=0 E1 M15 M2=1
P.. T1.02 L102.167 R24.986 L4=0 R4=0 E1 M15 M2=1
4mm diameter drill with replacement tool:
P.. T2.01 L85.467 L4=0 E1 B1 M15 M2=1 R6=0
P.. T2.02 L85.246 L4=0 E1 B1 M15 M2=1 R6=0
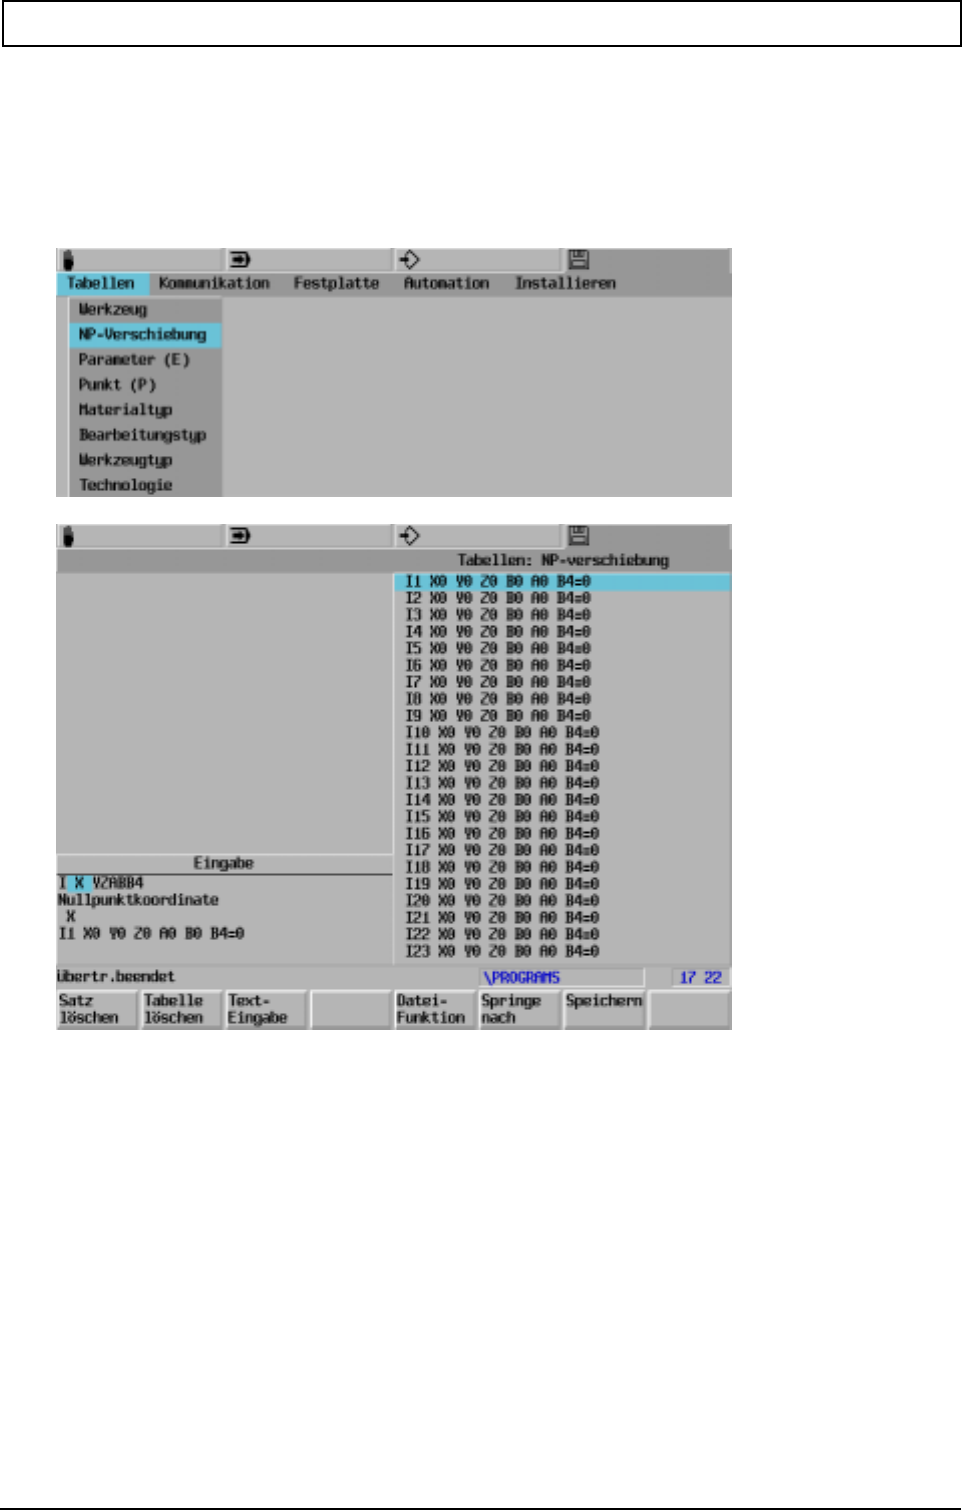
TABLES
150 Heidenhain
16. Tables
16.1 Zero offset
Display and entry
Note
mc84>0
Zero offset G54 I1-I99
Storage name ZE.ZE
mc84=0
Zero offset G51-G59
Storage name ZO.ZO
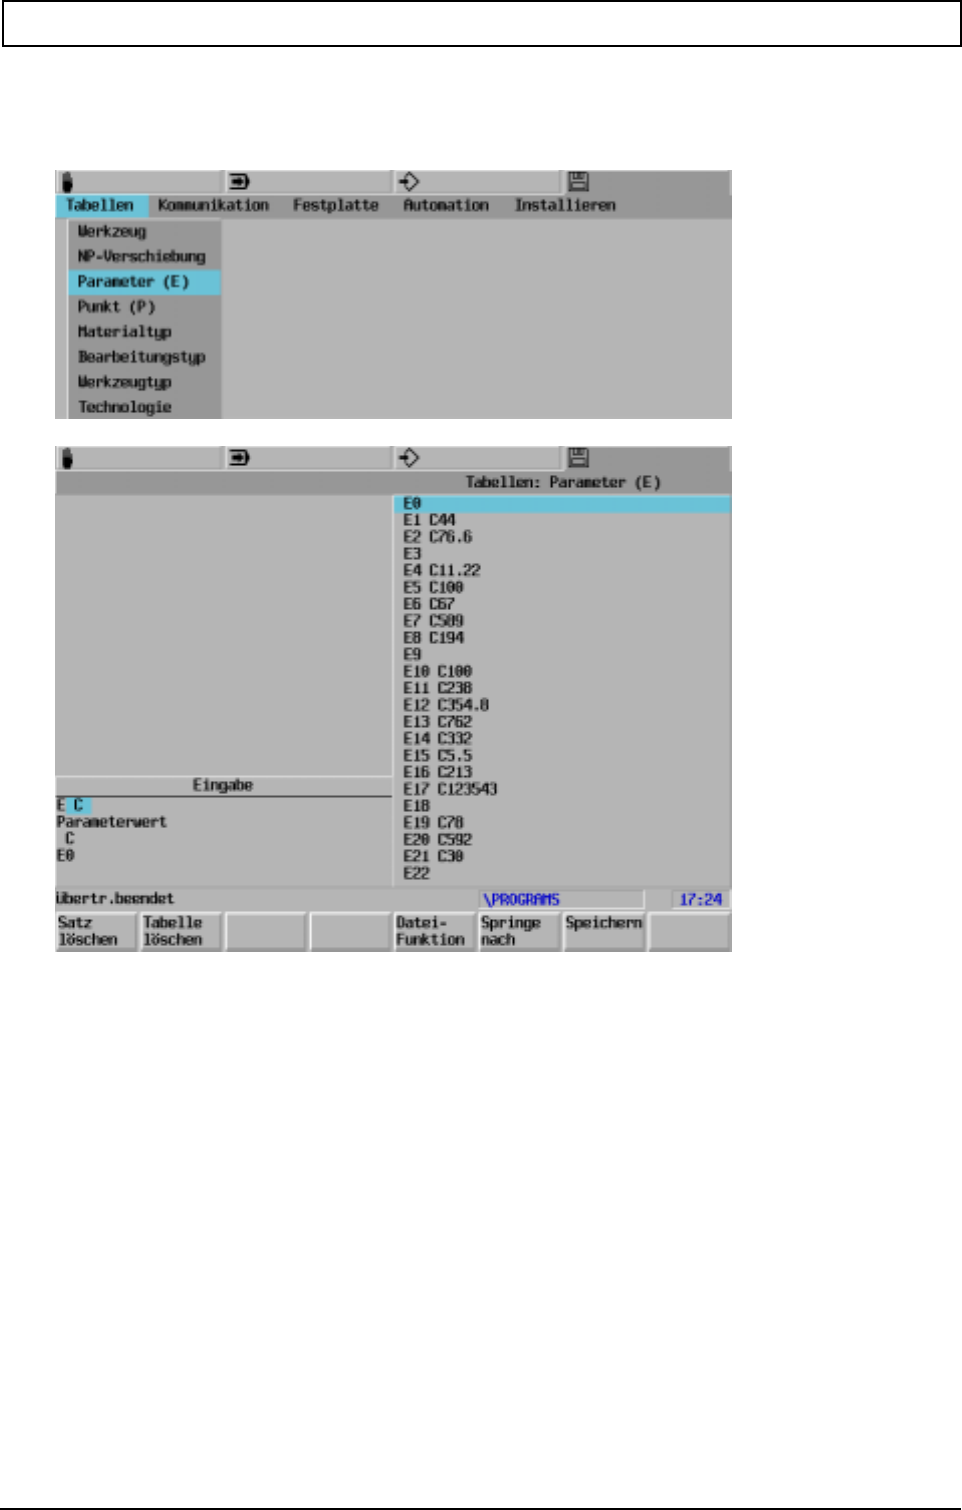
TABLES
20000710 MillPlus V410 151
16.2 Parameter(E)
Display and entry of the E parameters
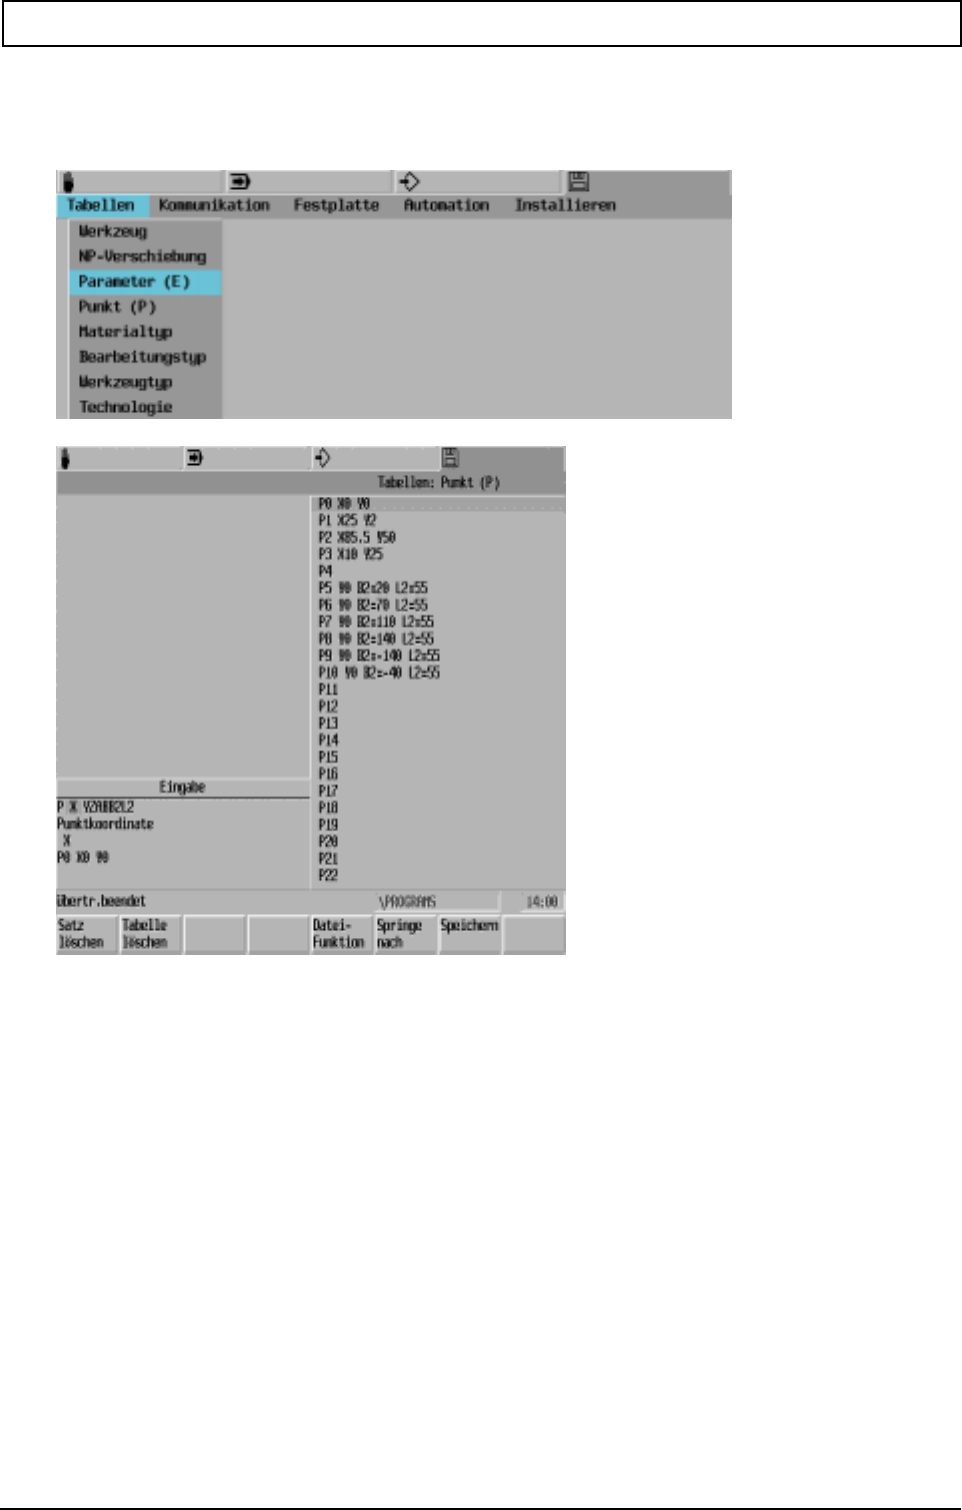
TABLES
152 Heidenhain
16.3 Point (P)
Display and entry of the point definitions
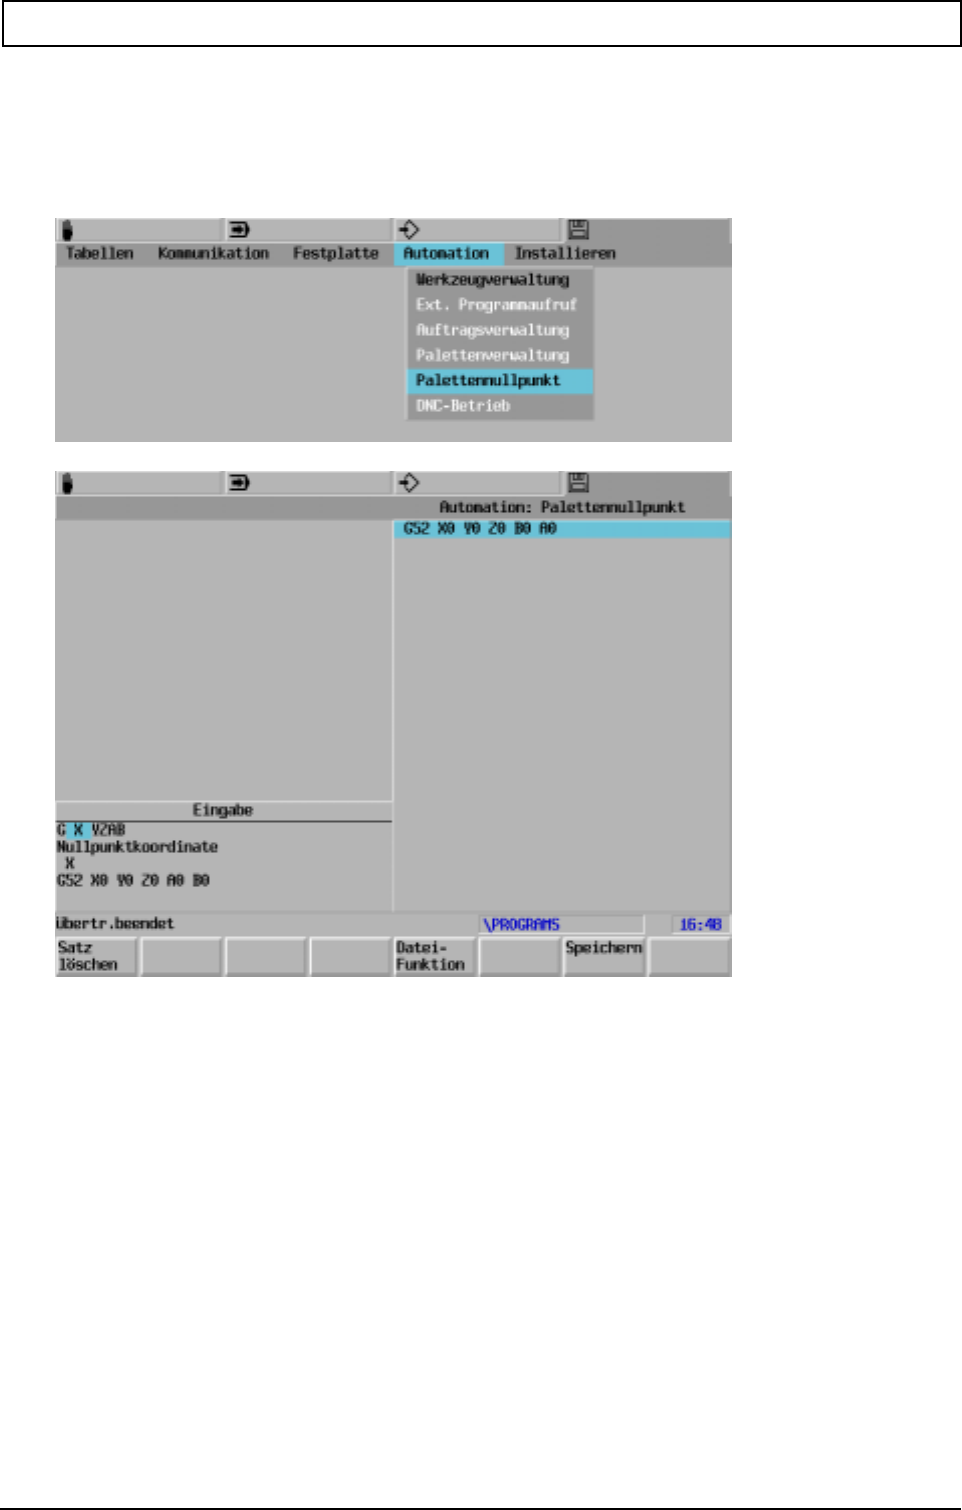
TABLES
20000710 MillPlus V410 153
16.4 Pallet zero point
Only with activated ZE.ZE-memory: (see zero offset).
Storing the pallet zero point.
Note:
See Technical Handbook for more information.
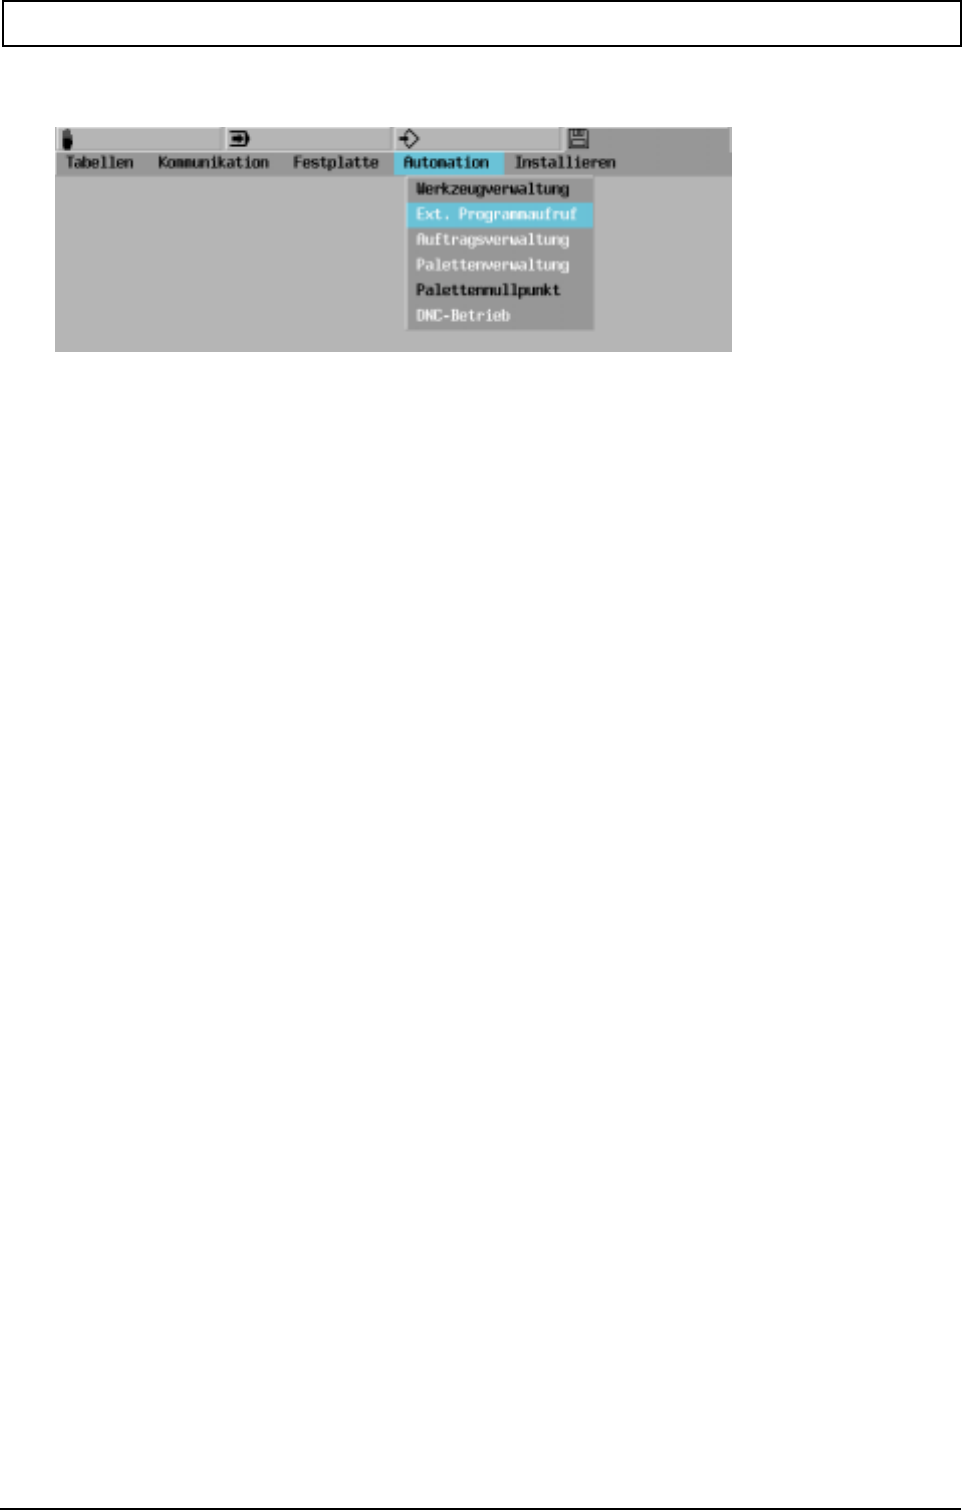
AUTOMATION
20000710 MillPlus V410 155
17. Automation
Refer to the documentation provided by the machine builder for information regarding the Ext.
program call, job administration, palette management and DNC mode functions.
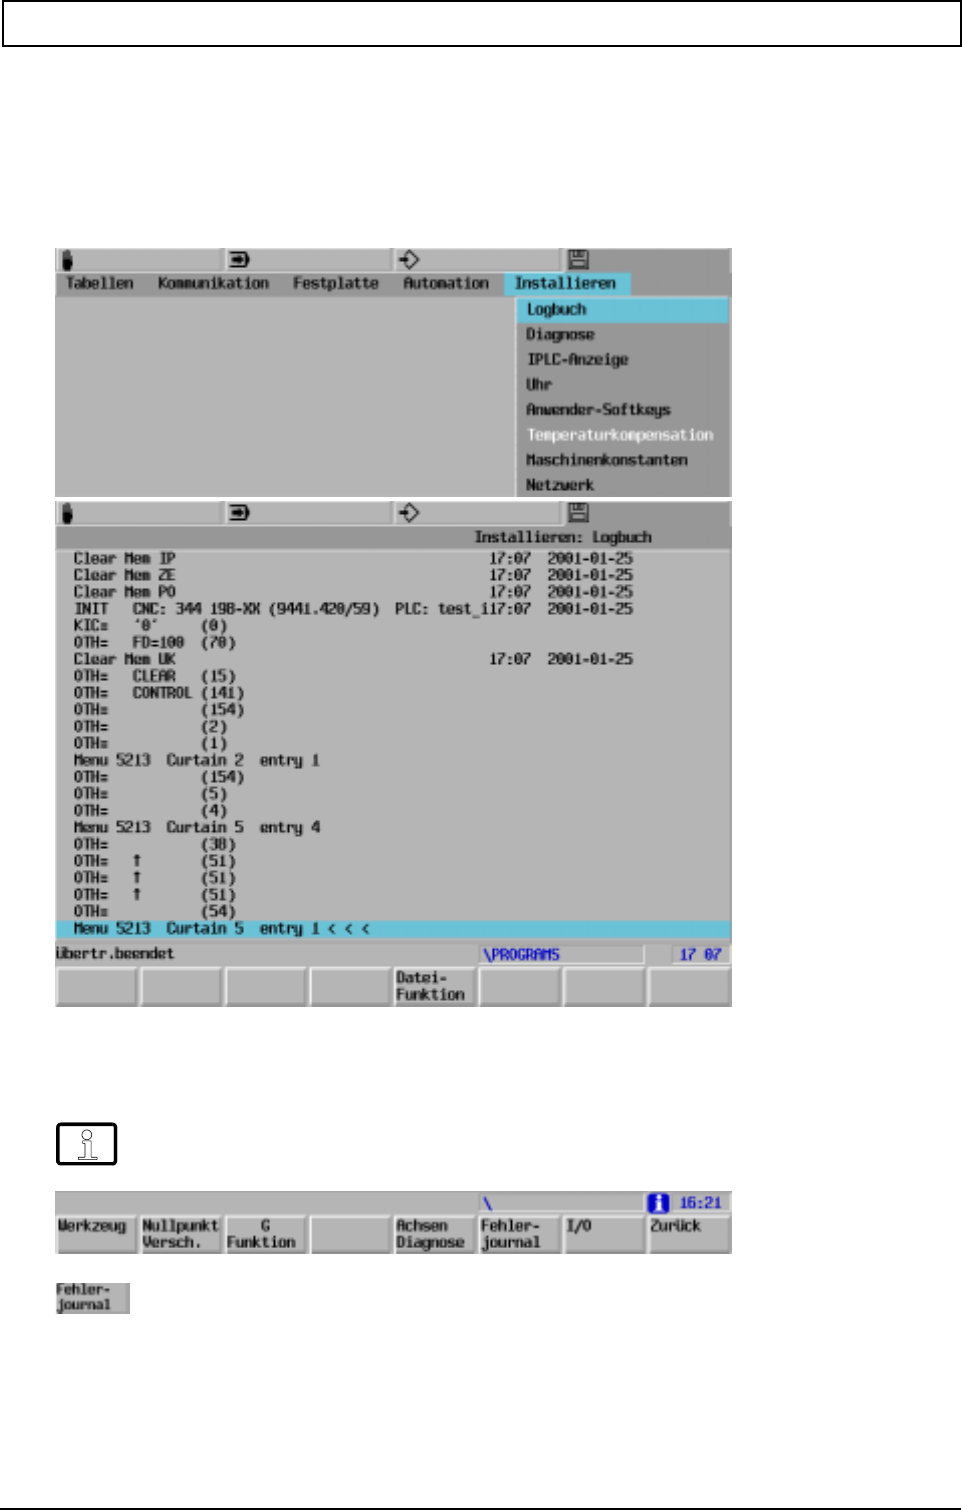
INSTALLATION
20000710 MillPlus V410 157
18. Installation
18.1 Logbook
The most recent inputs from the keyboard are stored in the logbook.
18.1.1 Error log
Display of the last error messages (only in Manual and Automatic operating modes).
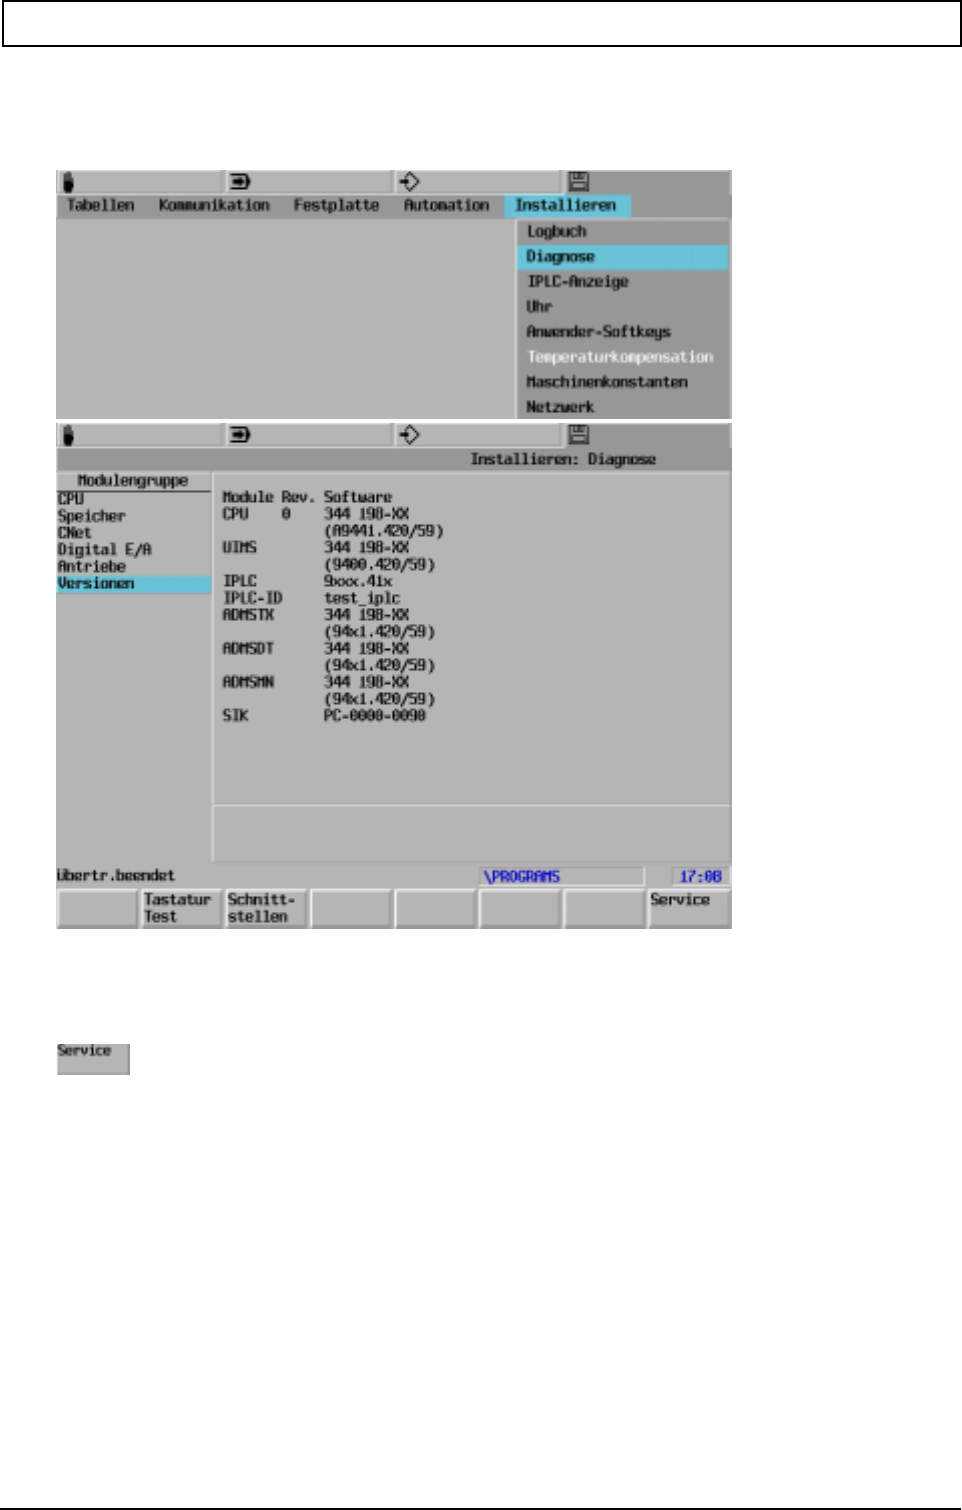
INSTALLATION
158 Heidenhain
18.2 Diagnostics
System information may be displayed in Diagnosics.
18.2.1 Remote diagnosis
Setting the CNC up for remote diagnosis. The display changes to black/white.
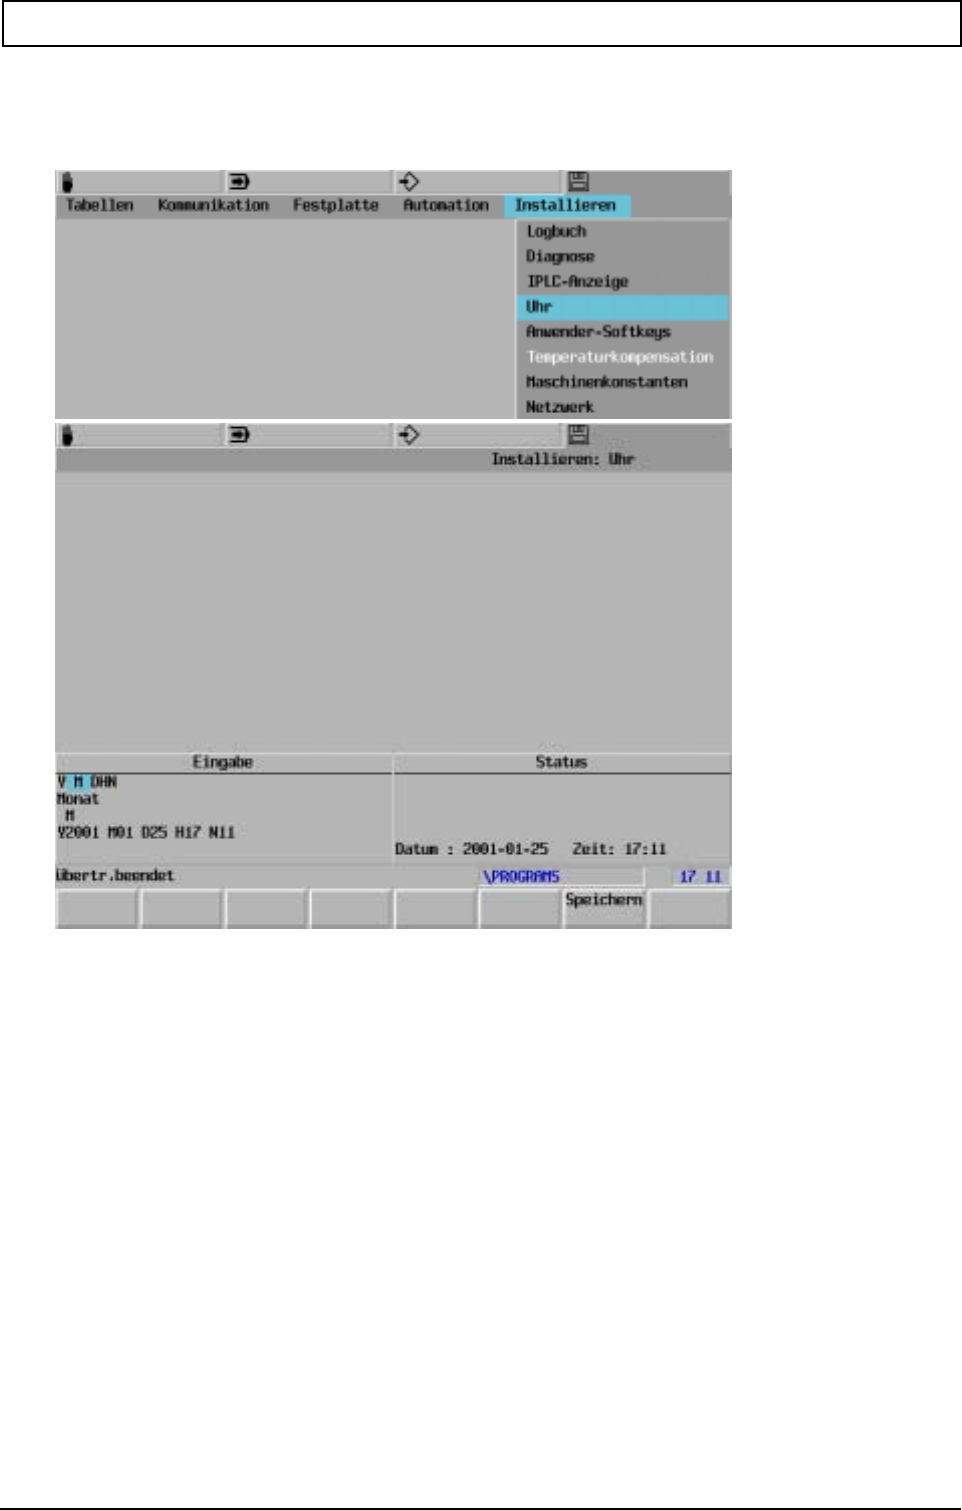
INSTALLATION
20000710 MillPlus V410 159
18.3 Clock
Entering and storing the real time.
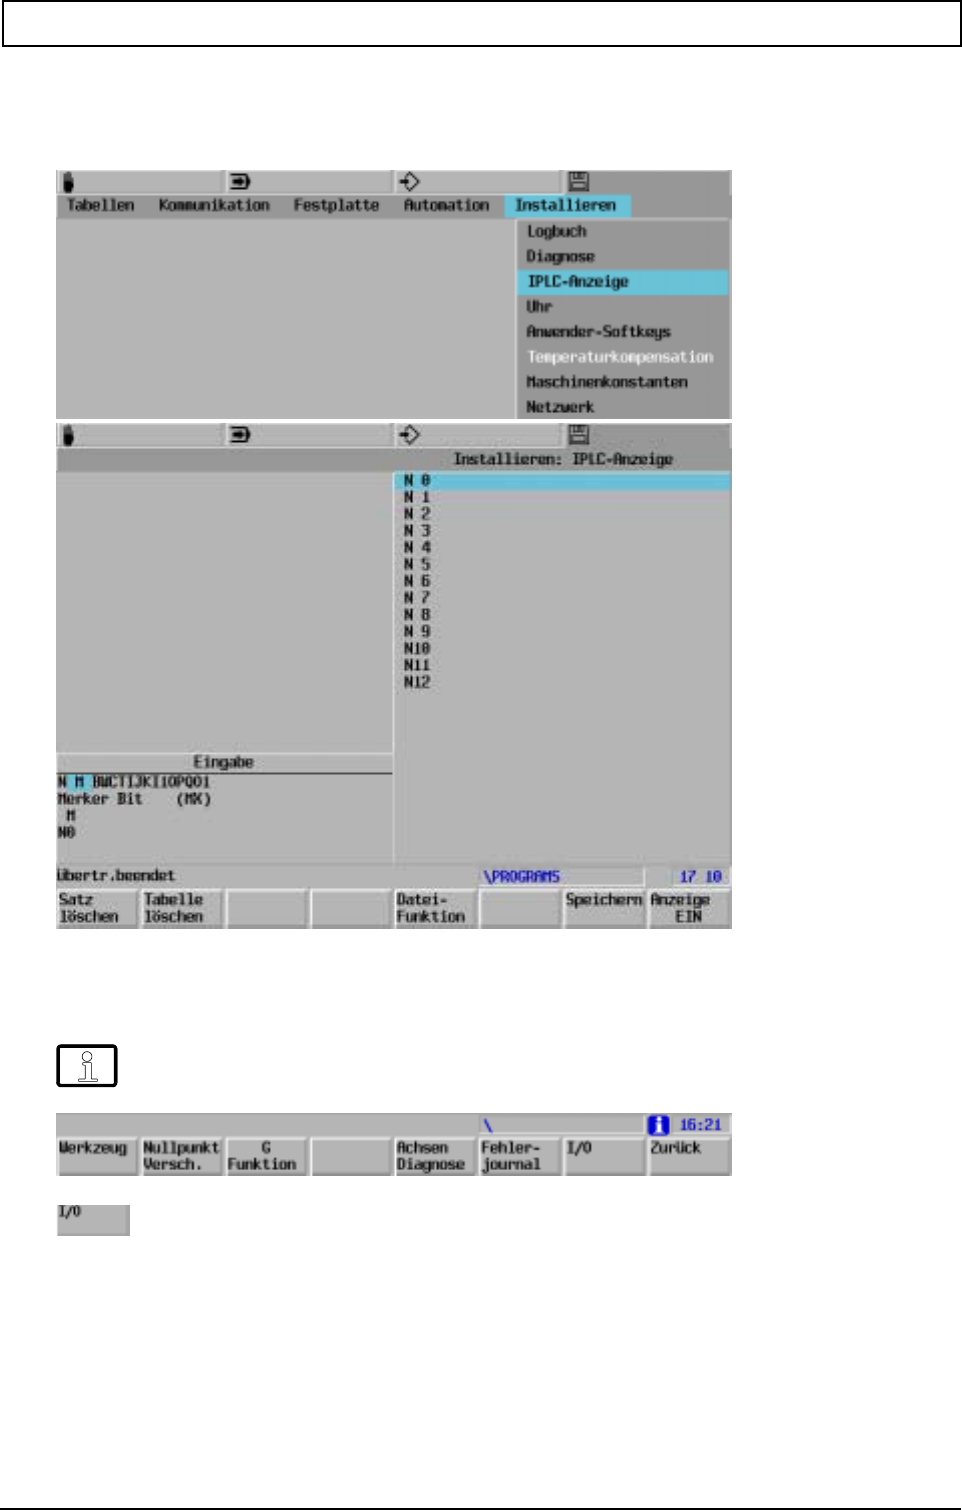
INSTALLATION
160 Heidenhain
18.4 IPLC monitor
This function only to be used by maintenance/customer service personnel.
18.4.1 I/O layout
Status indication of I / O layout (only in Manual and Automatic operating modes)
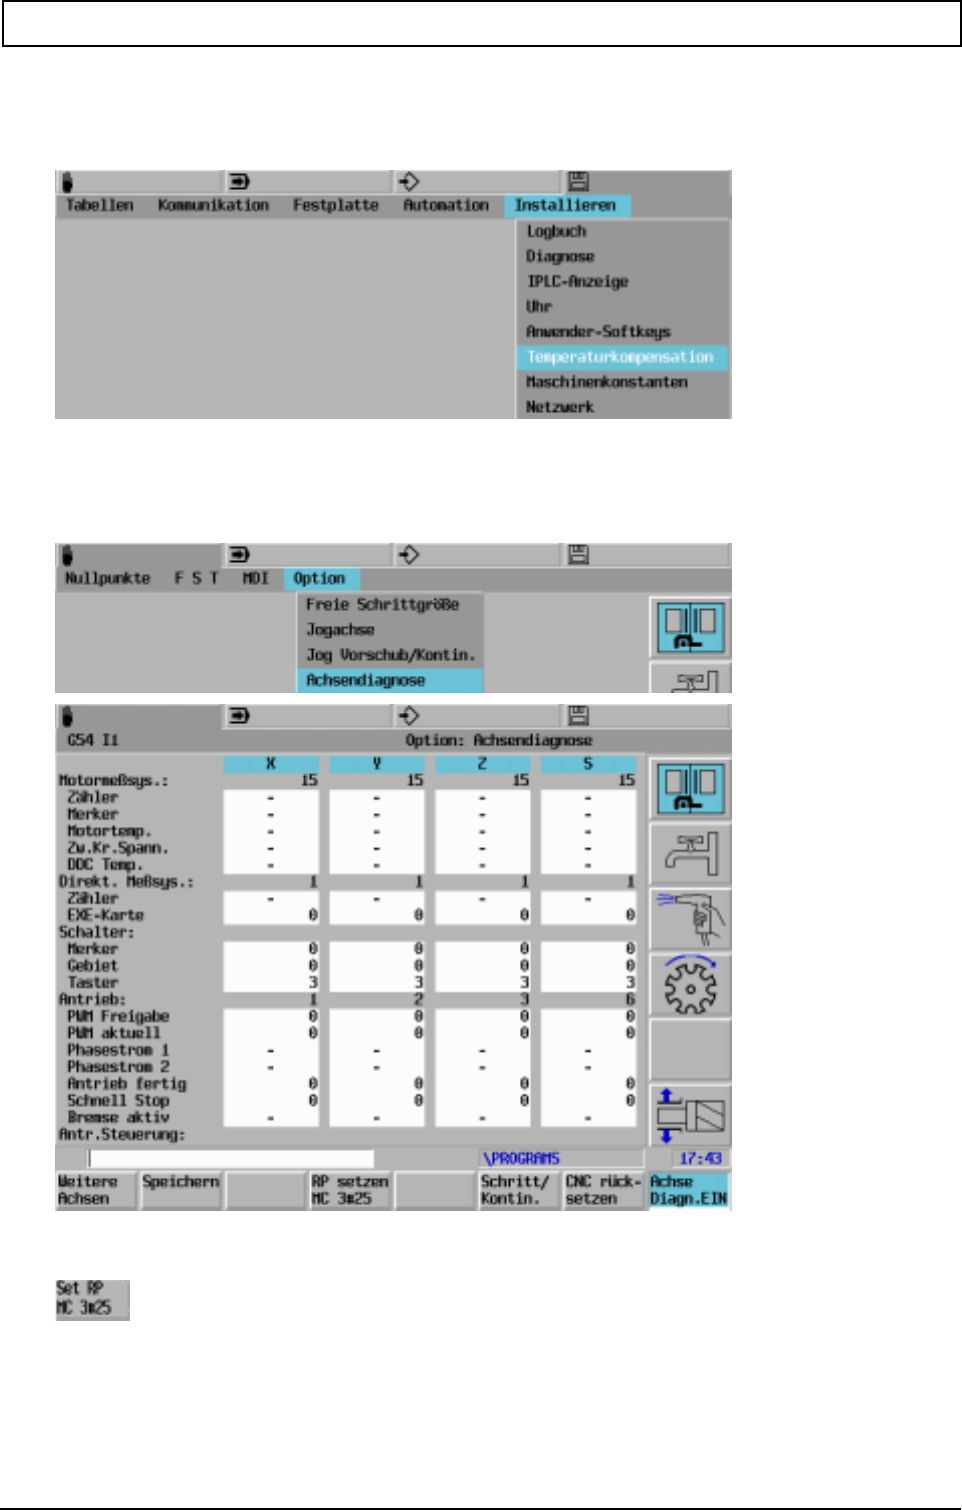
INSTALLATION
20000710 MillPlus V410 161
18.5 Temperature compensation
This function only to be used by maintenance/customer service personnel.
18.6 Axes diagnose
This function only to be used by maintenance/customer service personnel.
Note Displayed only when diagnosis switch on.
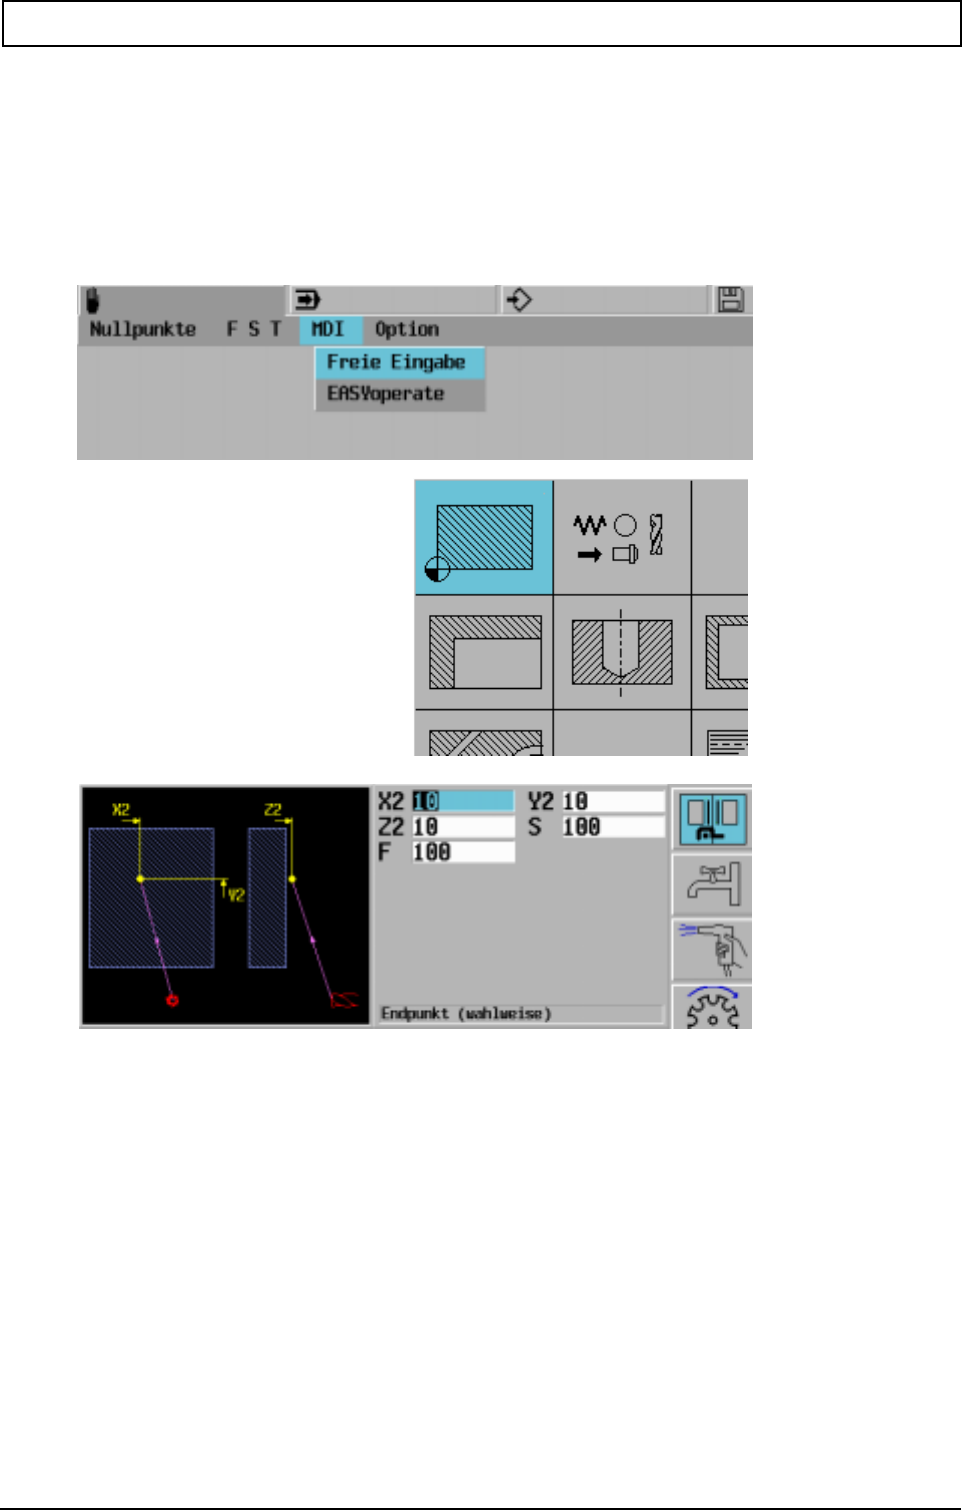
EASY OPERATE
162 Heidenhain
19. Easy Operate
Easy Operate is used for the programming on the machine of simple machining operations.
Before machining can be started, F,S,T are to be activated and the spindle must be switched on (not
with Graphic mode).
19.1 Contours
Parameters
X2,Y2,Z2 Endpunkt (wahlweise)
S Spindeldrehzahl (U/Min)
F Vorschub
Note:
Whether or not radius corrections is performed depends on the present tool position;
if the present tool position is inside/outside the contour being programmed, radius correction is
performed inside/outside the equidistant path.
* = S and F must be activated in advance, by means of F,S,T or MDI
EASY OPERATE
20000710 MillPlus V410 163
19.2 Facing / edging
Parameters
X2,Y2 Endpunkt (wahlweise)
C1 Zustellbreite (wahlweise)
C2 Zustelltiefe (wahlweise)
Z2 Tiefe
S Spindeldrehzahl (U/Min) *
F Vorschub *
* = S und F müssen vorher aktiviert werden, mittels F,S,T oder MDI
Notes:
- Facing
If C1 is not programmed the infeed width is 75% * Tooldiameter.
If Tooldiameter = 0, minimum value = 0.1.
- Edging
The infeed width is 75% * Tooldiameter.
If Tooldiameter = 0, minimum value = 0.1.
The finishing allowance is 10% * toolradius.
EASY OPERATE
164 Heidenhain
19.3 Pockets
optional
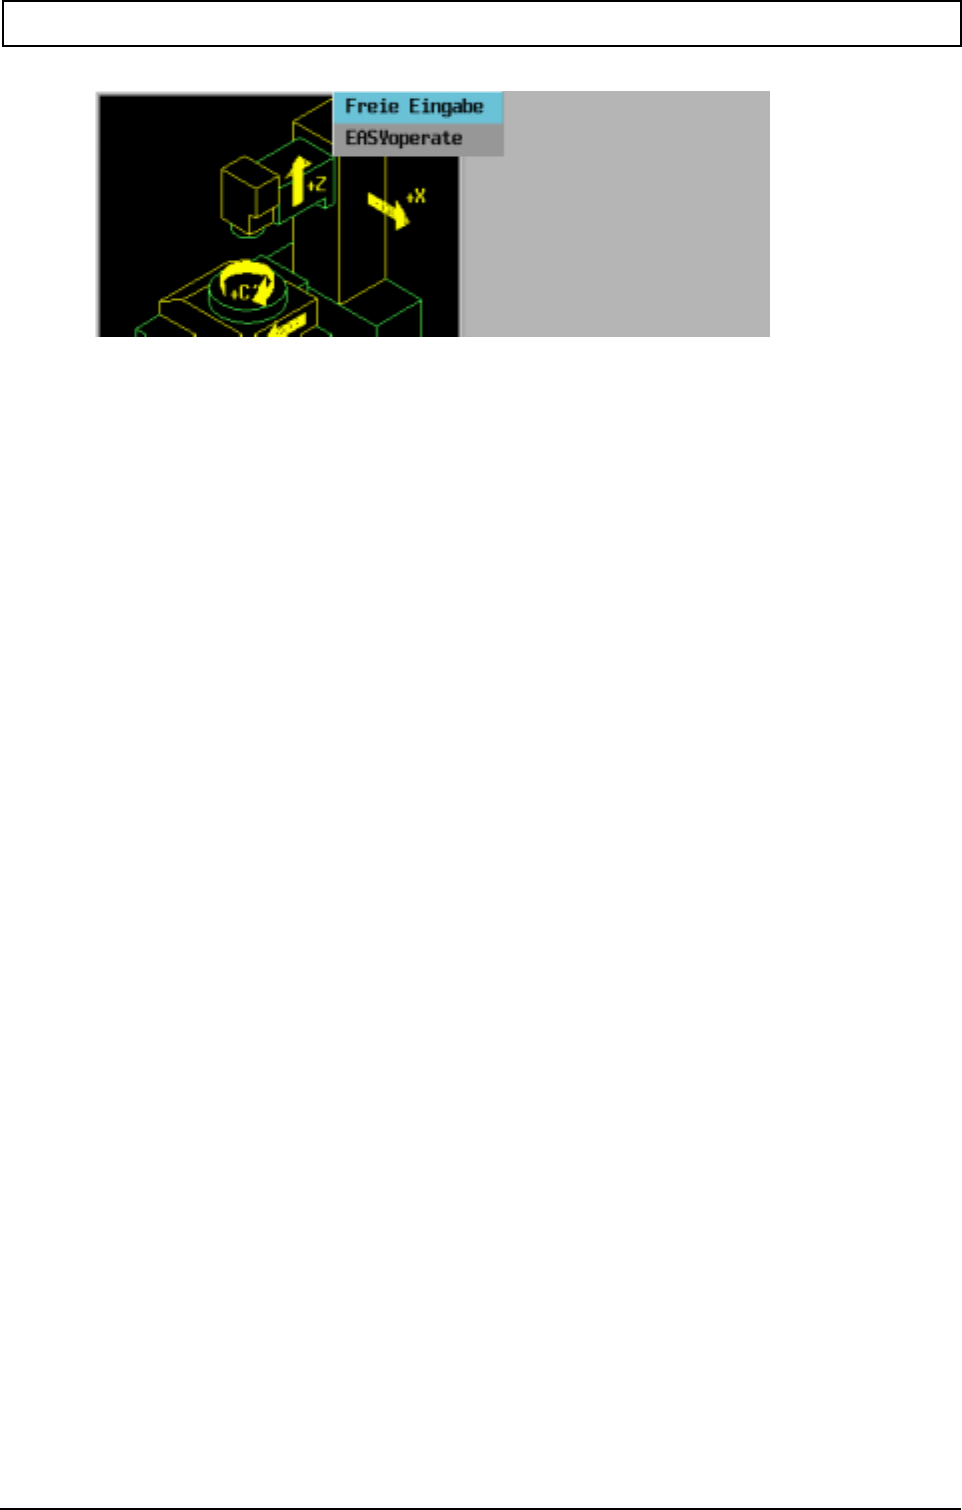
EASY OPERATE
20000710 MillPlus V410 165
, S und F müssen vorher aktiviert werden, mittels F,S,T oder MDI
S and F must be activated in advance, by means of F,S,T or MDI
Note:
If C1 is not programmed, the infeed width is set to the value of machine constant MC720.
If the centre point (X1,Y1) has not been programmed, the tool position (X,Y) becomes the centre point
of the pocket.
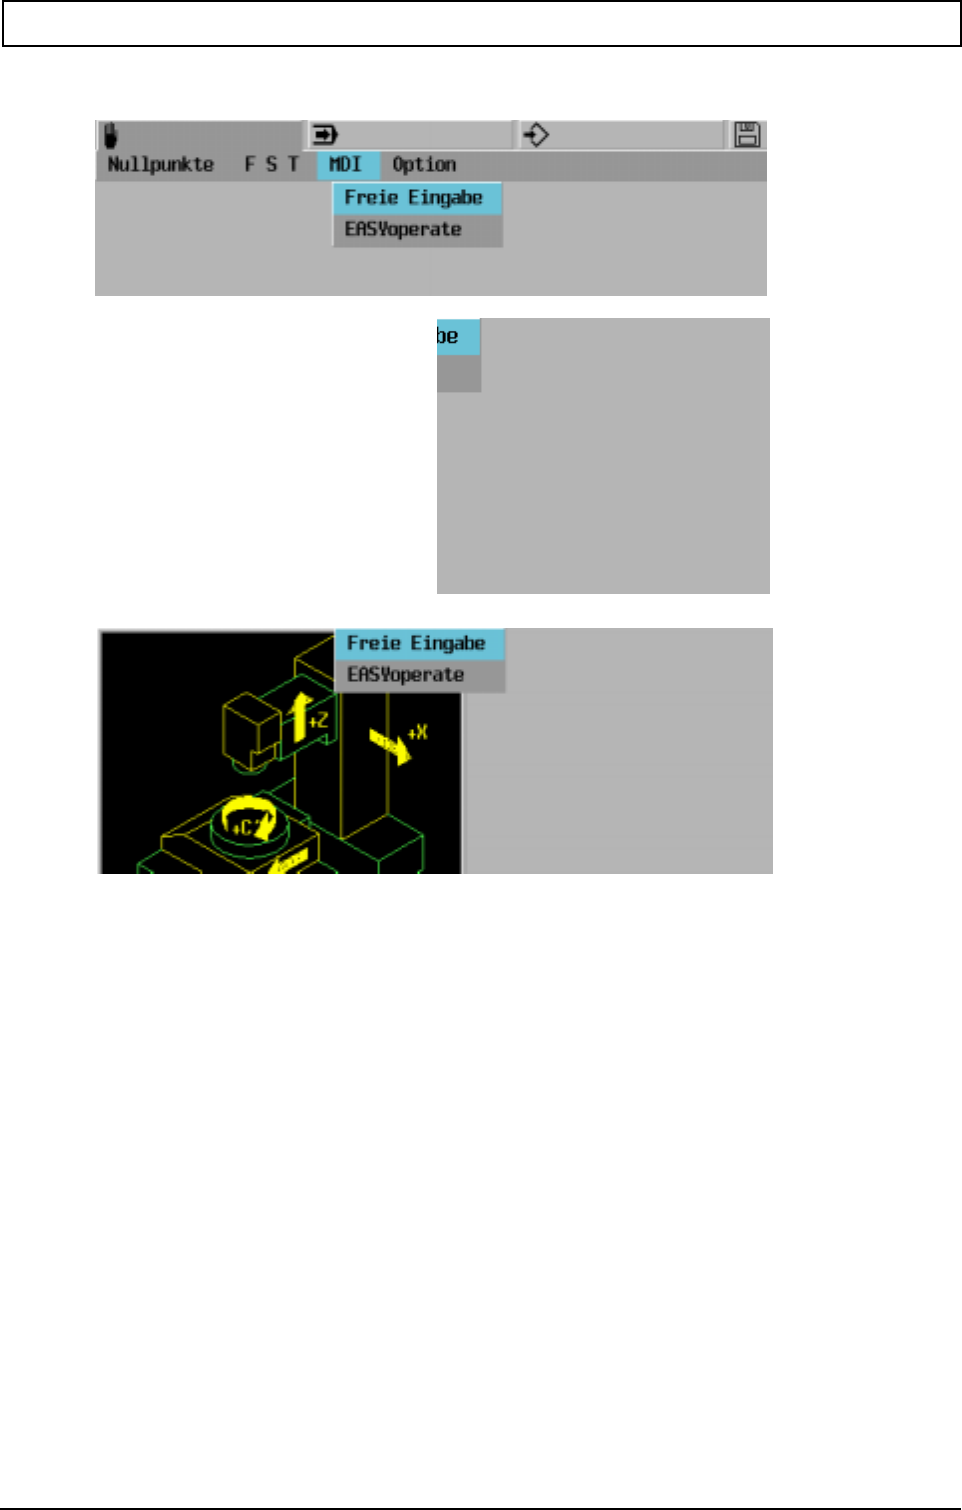
EASY OPERATE
166 Heidenhain
19.4 Drilling / tapping
Parameters
X1,Y1 Punktkoordinate (wahlweise)
C2 Reduzierwert Zustelltiefe (wahlweise)
Z2 Tiefe
S Spindeldrehzahl (U/Min) *
F Vorschub *
* = S and F must be activated in advance, by means of F,S,T or MDI
Notes:
- General
If the (Tap)Hole Position (X1,Y1) is not programmed, the Toolposition (X,Y) is the position of the
tap(hole).
- Circle Pattern
If the Angle between the first/last Hole (A2) is not programmed, the holes will be equally divided over
360 degrees.
- Taphole
If F1 is not programmed, the feed of the tool is F.
- Rectangular Pattern
If the Angle between the first/last Hole (A2) is not programmed, the angle is 90 degrees.
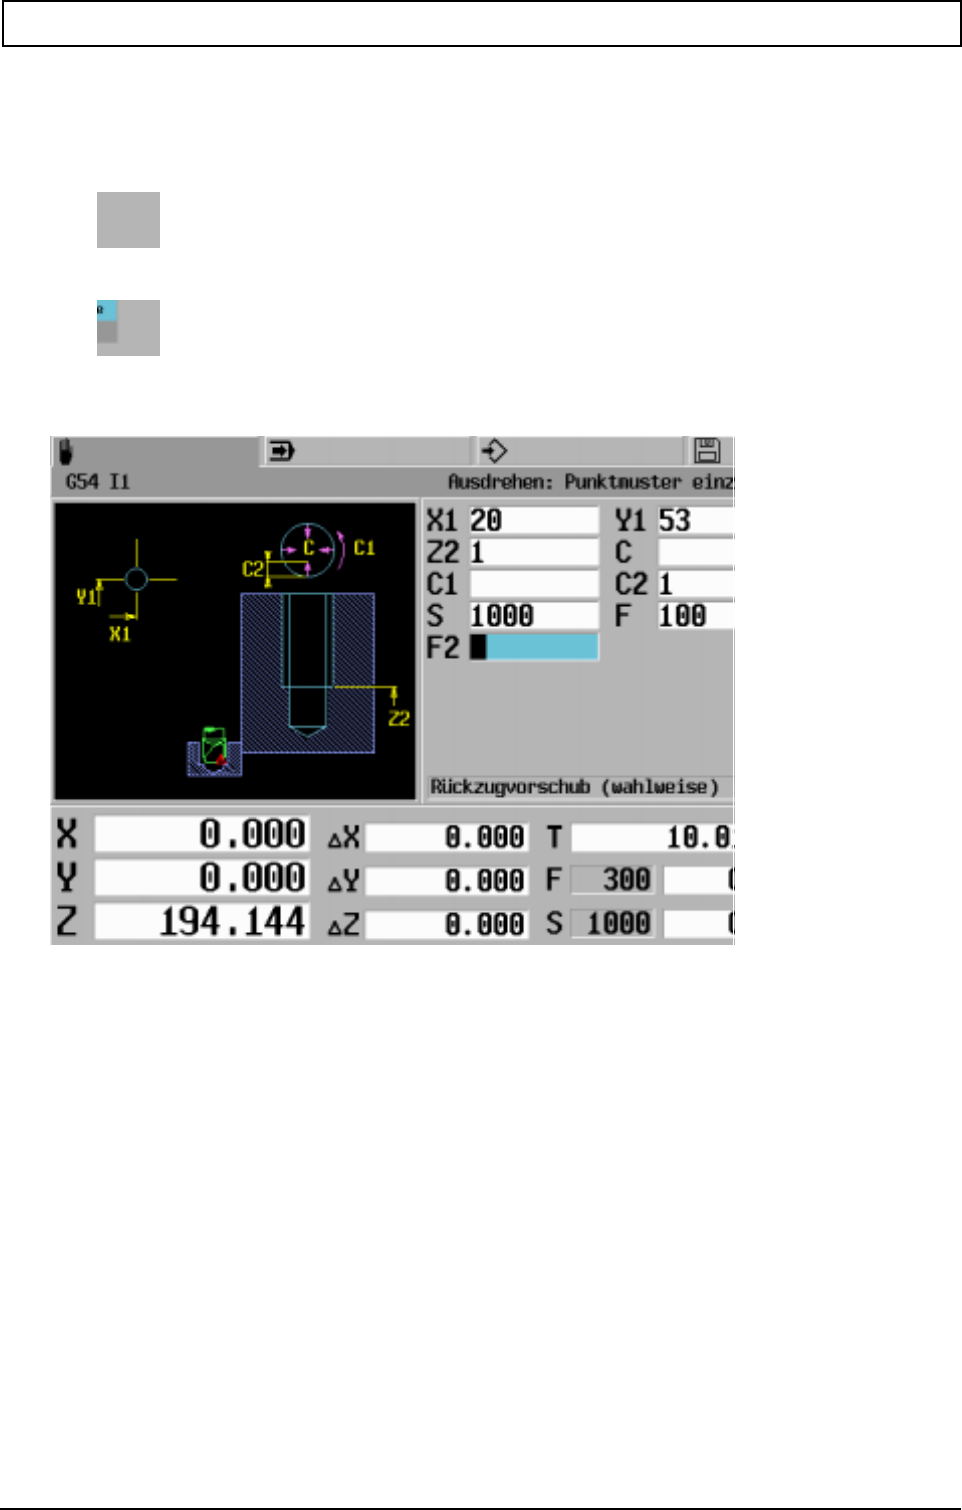
EASY OPERATE
20000710 MillPlus V410 167
19.5 Boring
19.5.1 Boring: single
Boring point:
X1 point coordinates (according to choice)
Y1 point coordinates (according to choice)
Z2 depth
C return traverse distance 1=X 2=Y (according to choice)
C1 1=0 2=90 3=180 4=270 (according to choice)
C2 safety distance (according to choice)
S spindle speed (revolutions/min)
F advance
F2 programmable power traverse (according to choice)
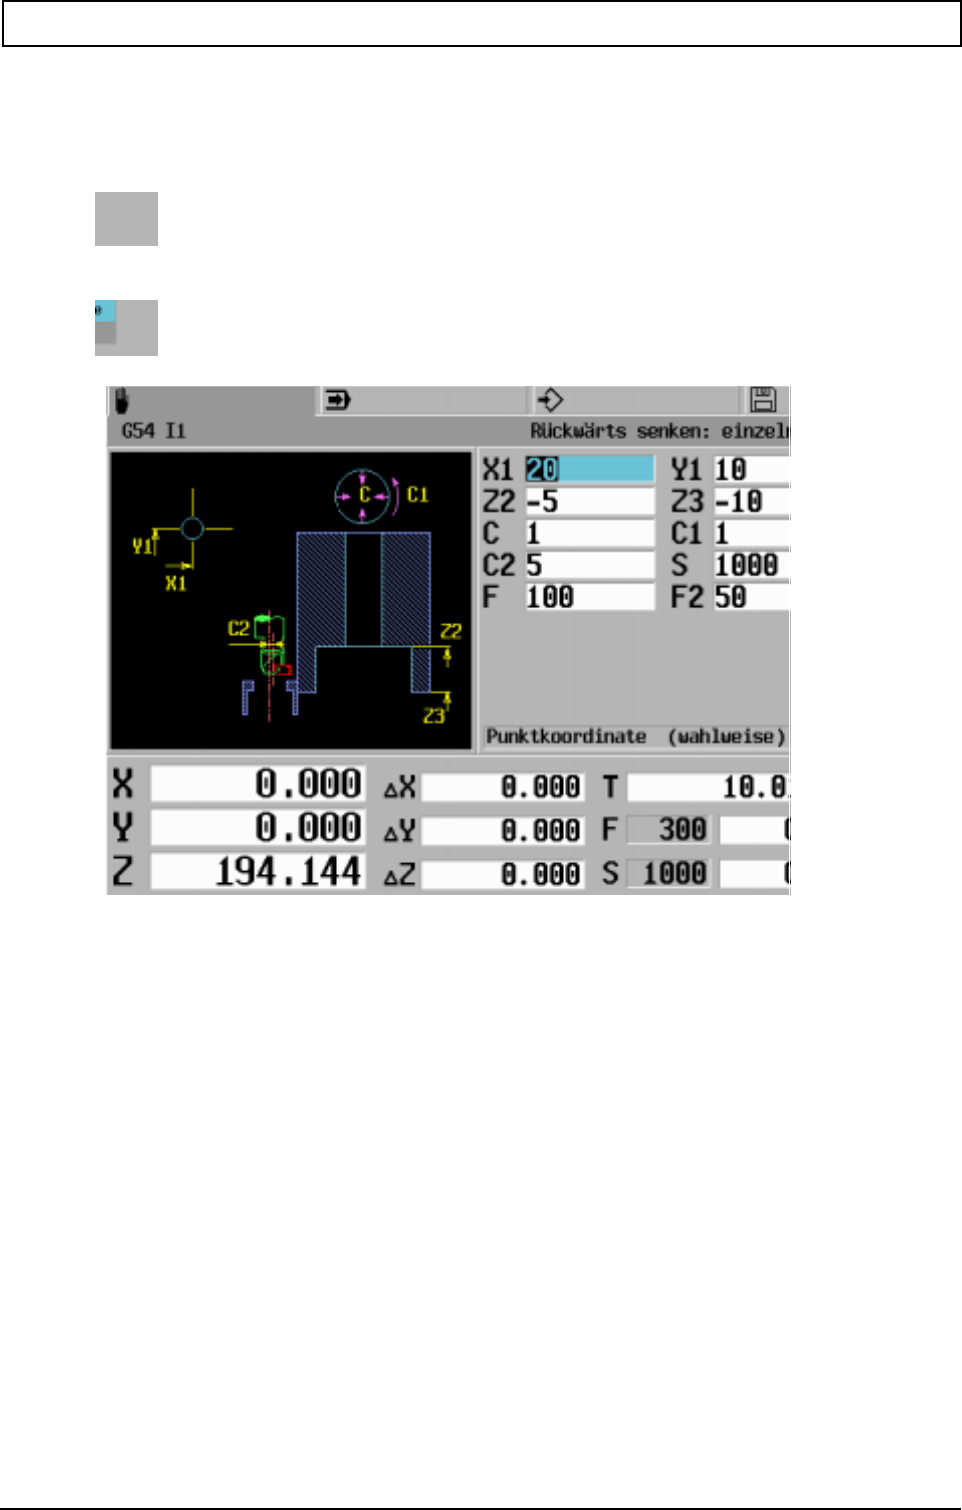
EASY OPERATE
168 Heidenhain
19.6 Reverse sinking
19.6.1 Reverse sinking point
Reverse sinking point:
X1 point coordinates (according to choice)
Y1 point coordinates (according to choice)
Z2 depth
Z3 depth of sinking
C Reverse traverse distance 1=X 2=Y (according to choice)
C1 1=0 2=90 3=180 4=270 (according to choice)
C2 {Excenter} dimension
S Spindle speed (revolutions/min)
F Advance
F2 Programmable power traverse (according to choice)
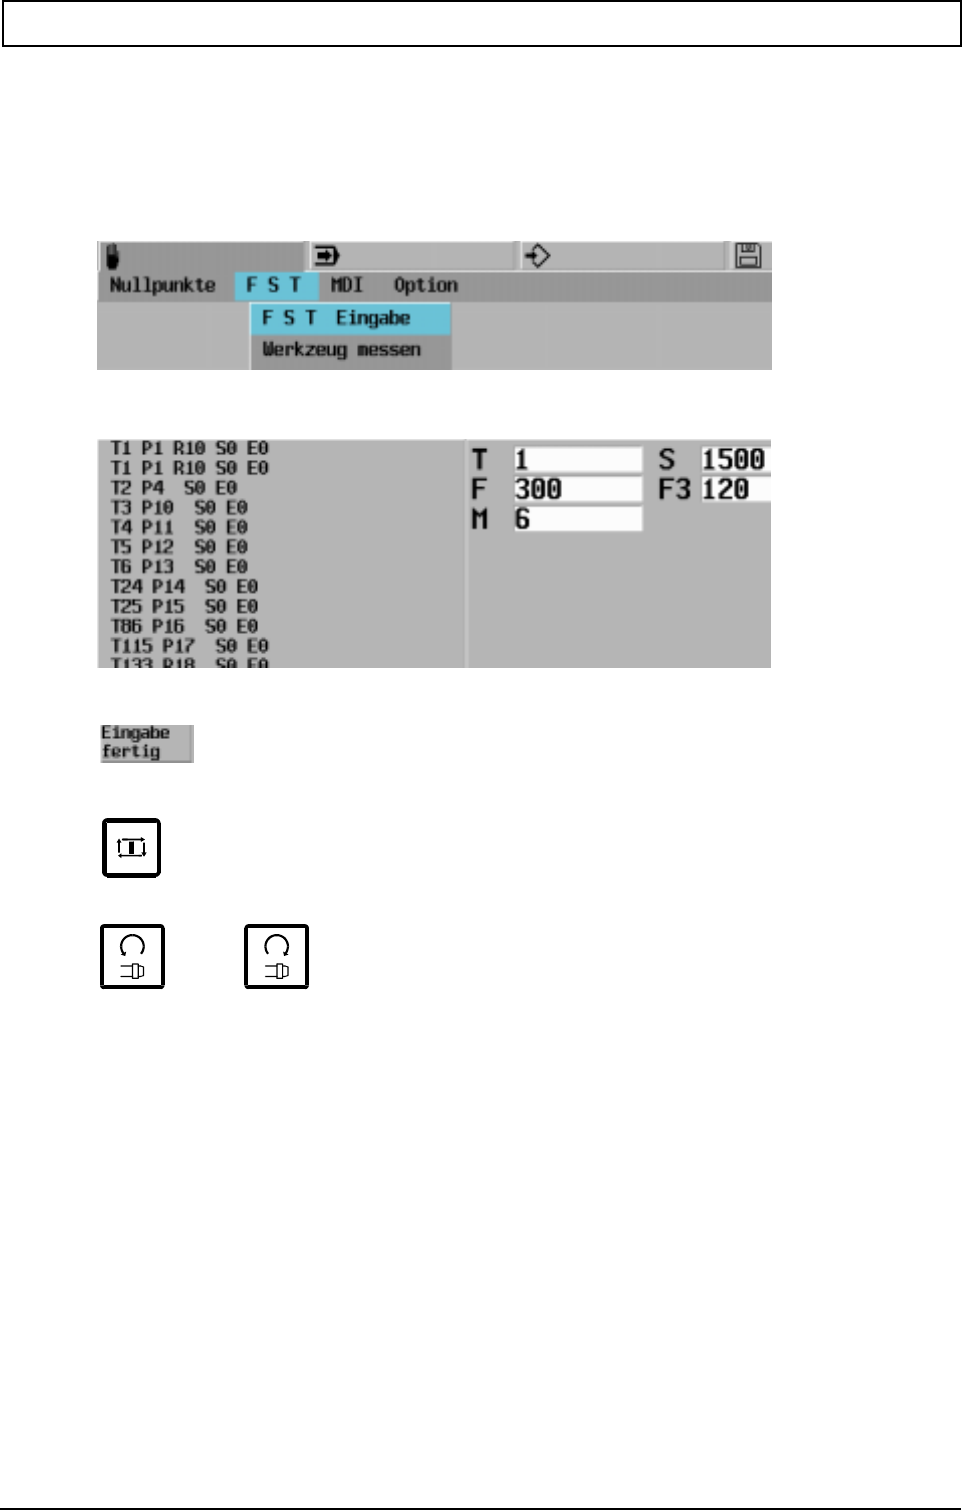
EASY OPERATE
20000710 MillPlus V410 169
19.7 Example of Easy Operate: Mill workpiece face
Enter in tool memory
T1 L50 R10
T2 L60 R3
Step 1
Enter T1, S1500, F300, F2=120, M6
Initiate tool change
Switch on spindle (M3 or M4)
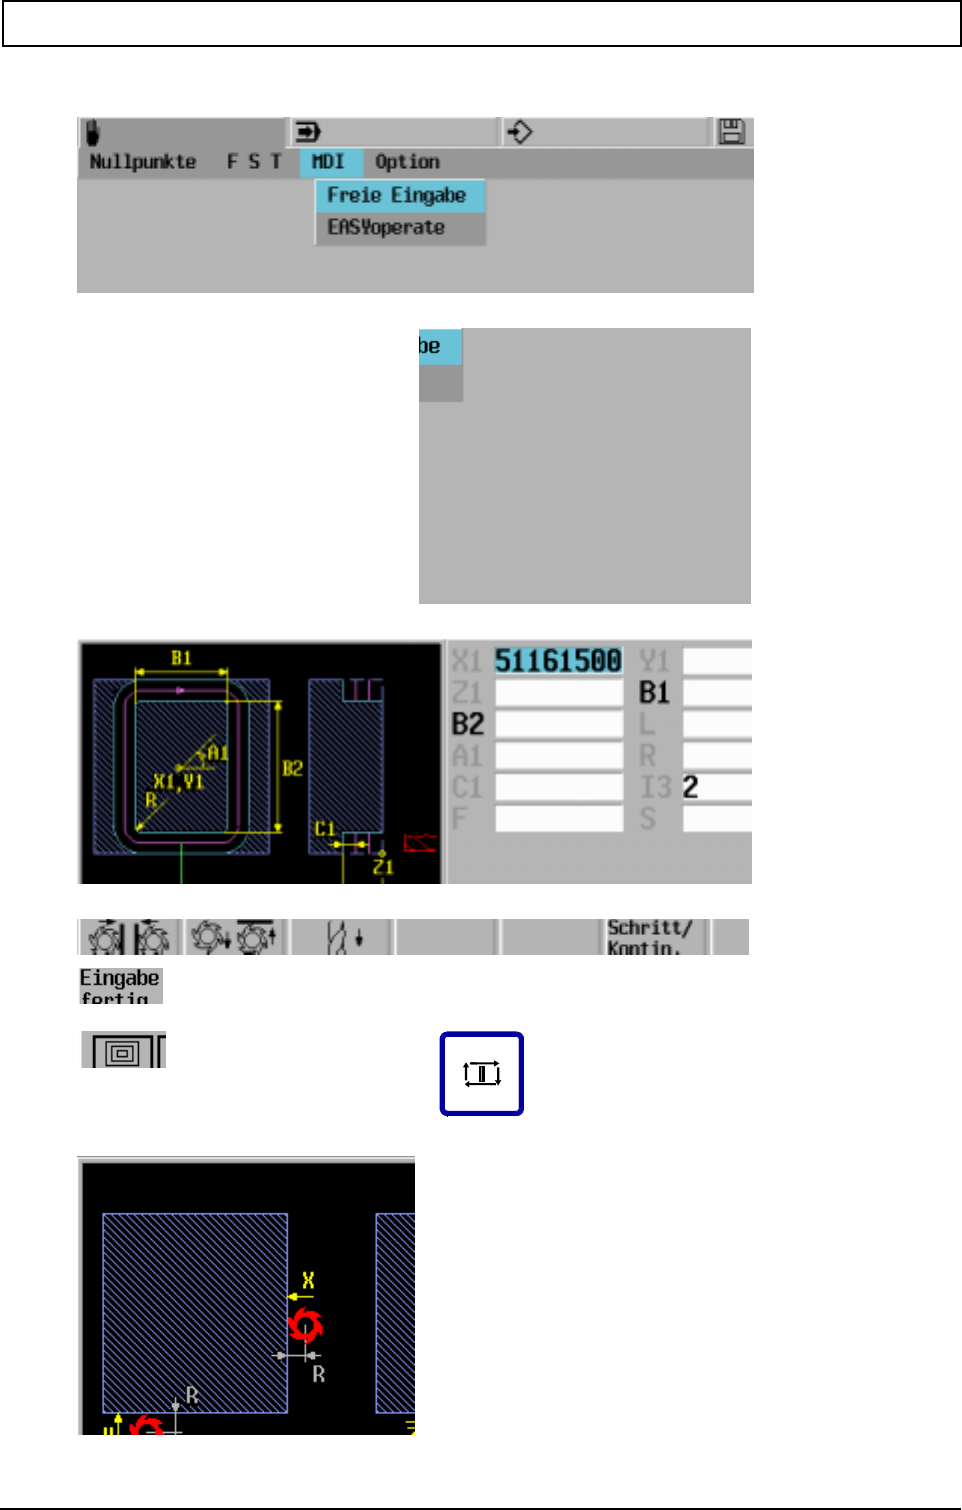
EASY OPERATE
170 Heidenhain
Step 2
Move to starting point: X-15, Y-15, Z0
optional
easyfxp.sp
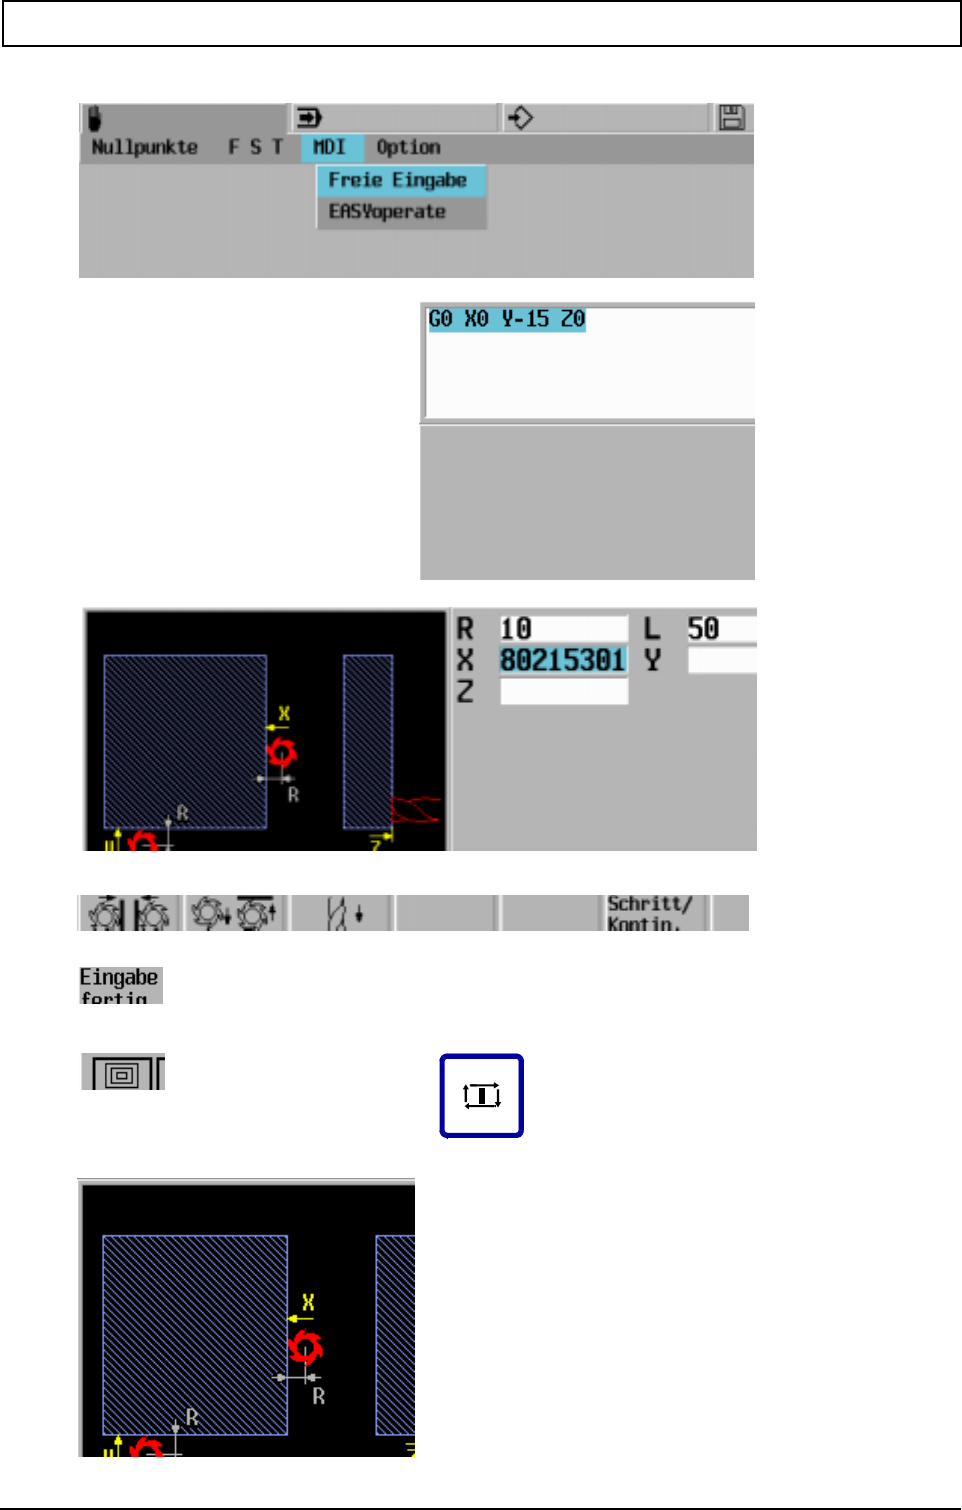
EASY OPERATE
20000710 MillPlus V410 171
Step 3
optional
EASY OPERATE
172 Heidenhain
Step 4 Tool change.
See Step 1 for input T2, S1500, F300, F2=120, M6.
Start spindle.
Move to correct Z position.
Step 5
Move to first drill position: X90, Y15, Z-3
Enter C2=5, Z2=-25
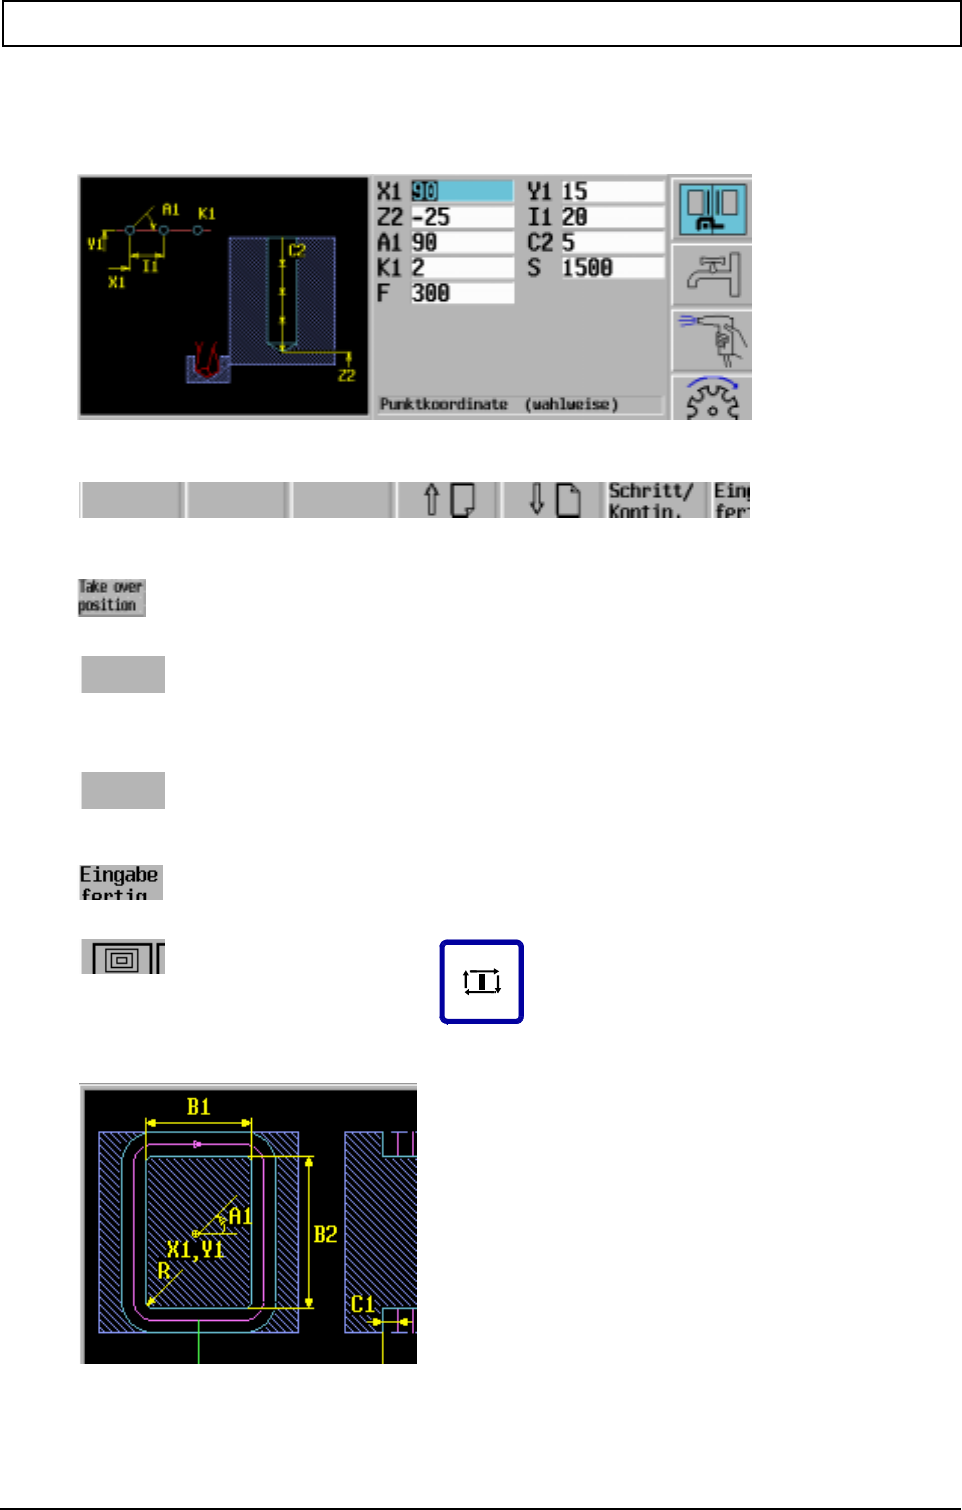
EASY OPERATE
20000710 MillPlus V410 173
Select parameter X1
Select parameter Y1
optional
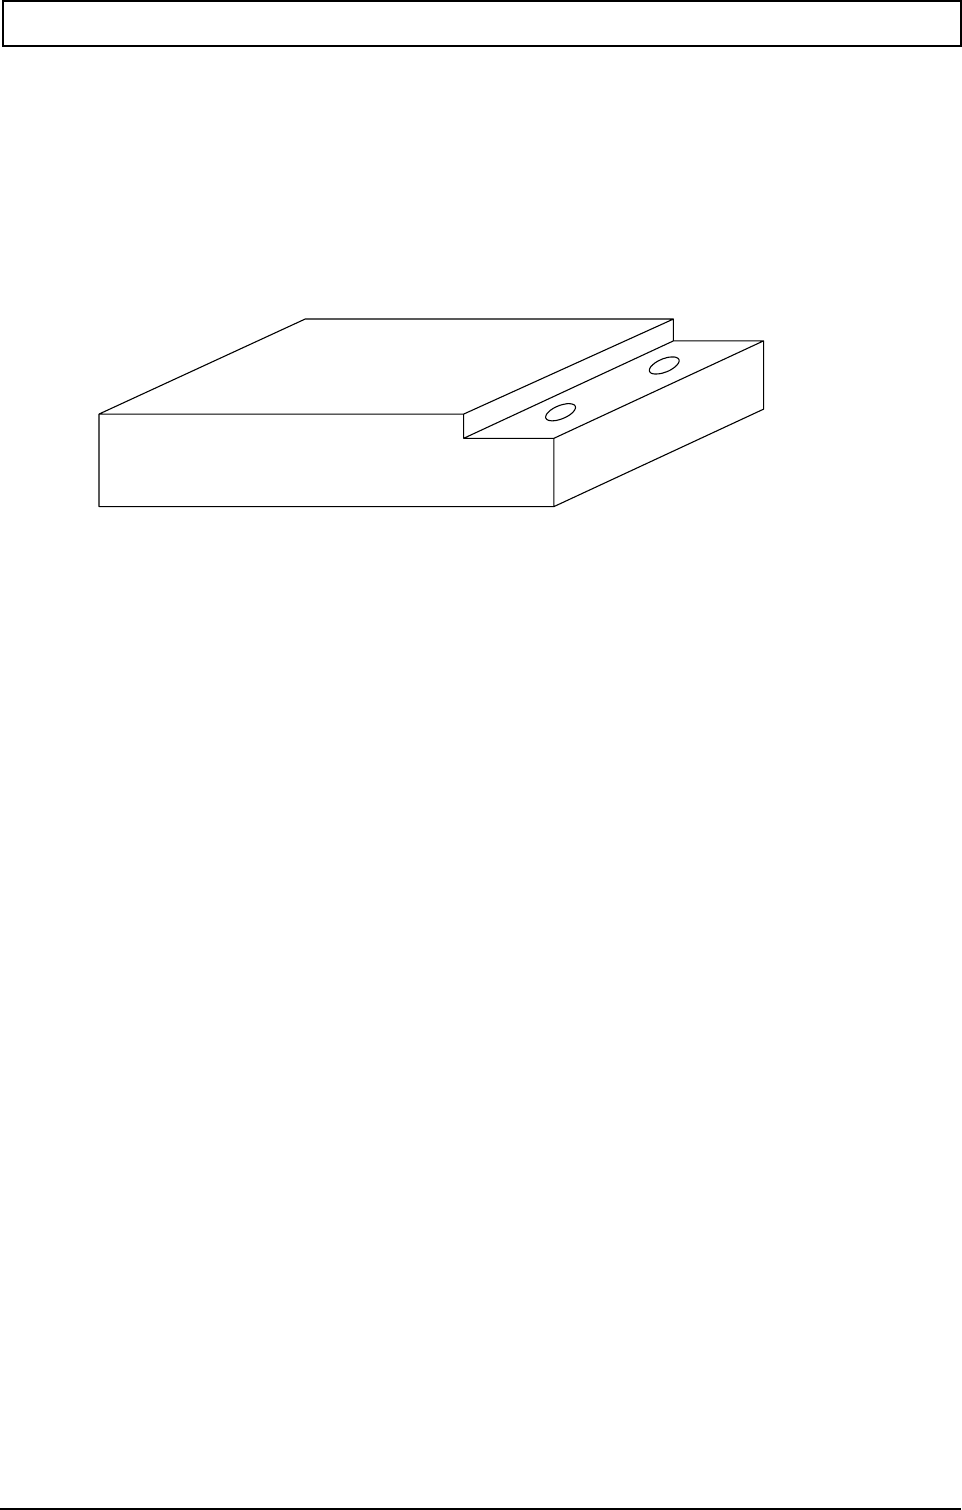
EASY OPERATE
174 Heidenhain
Figure: machined workpiece

INTERACTIVE CONTOUR PROGRAMMING (ICP)
20000710 MillPlus V410 175
20. Interactive contour programming (ICP)
20.1 Allgemeines
ICP can be used with new or existing main programs or macros.
ICP can be used with DIN/ISO and IPP.
The programmer begins at a certain point of the contour and processes the entire workpiece in either
a clockwise or anticlockwise direction, each contour being described as a linear or circular movement.
Following this initial selection other options are offered until the movement is defined. You are then
requested to enter positional data.
Using ICP each contour is drawn as soon as its position is known, to be precise once the Store key is
pressed. However, this does not always have to be the case. If a contour cannot be classified
immediately it is joined to the following contour until sufficient positional data is available to calculate
its exact position.
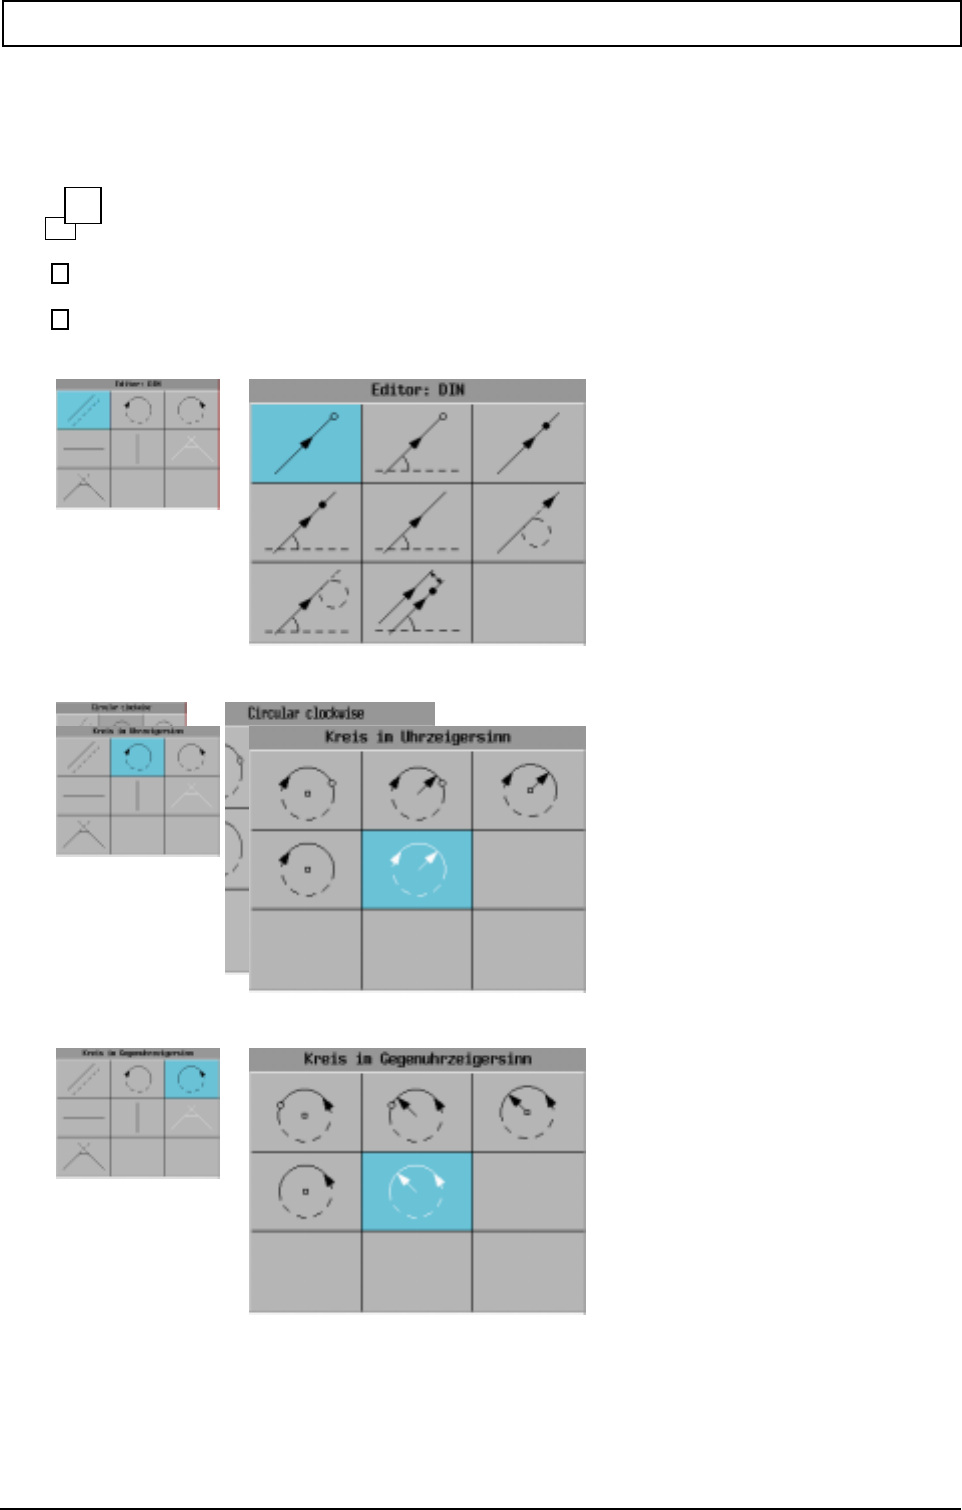
INTERACTIVE CONTOUR PROGRAMMING (ICP)
176 Heidenhain
20.2 ICP graphic symbol menu
ICP has a dynamic menu structure. Options are enabled or blocked depending on the previous option
selected.
Mittelpunkt
Endpunkt
Hilfspunkt
Main menu level Menu for linear movement
Menu for circular movement in a clockwise direction
Menu for circular movement in an anti-clockwise direction
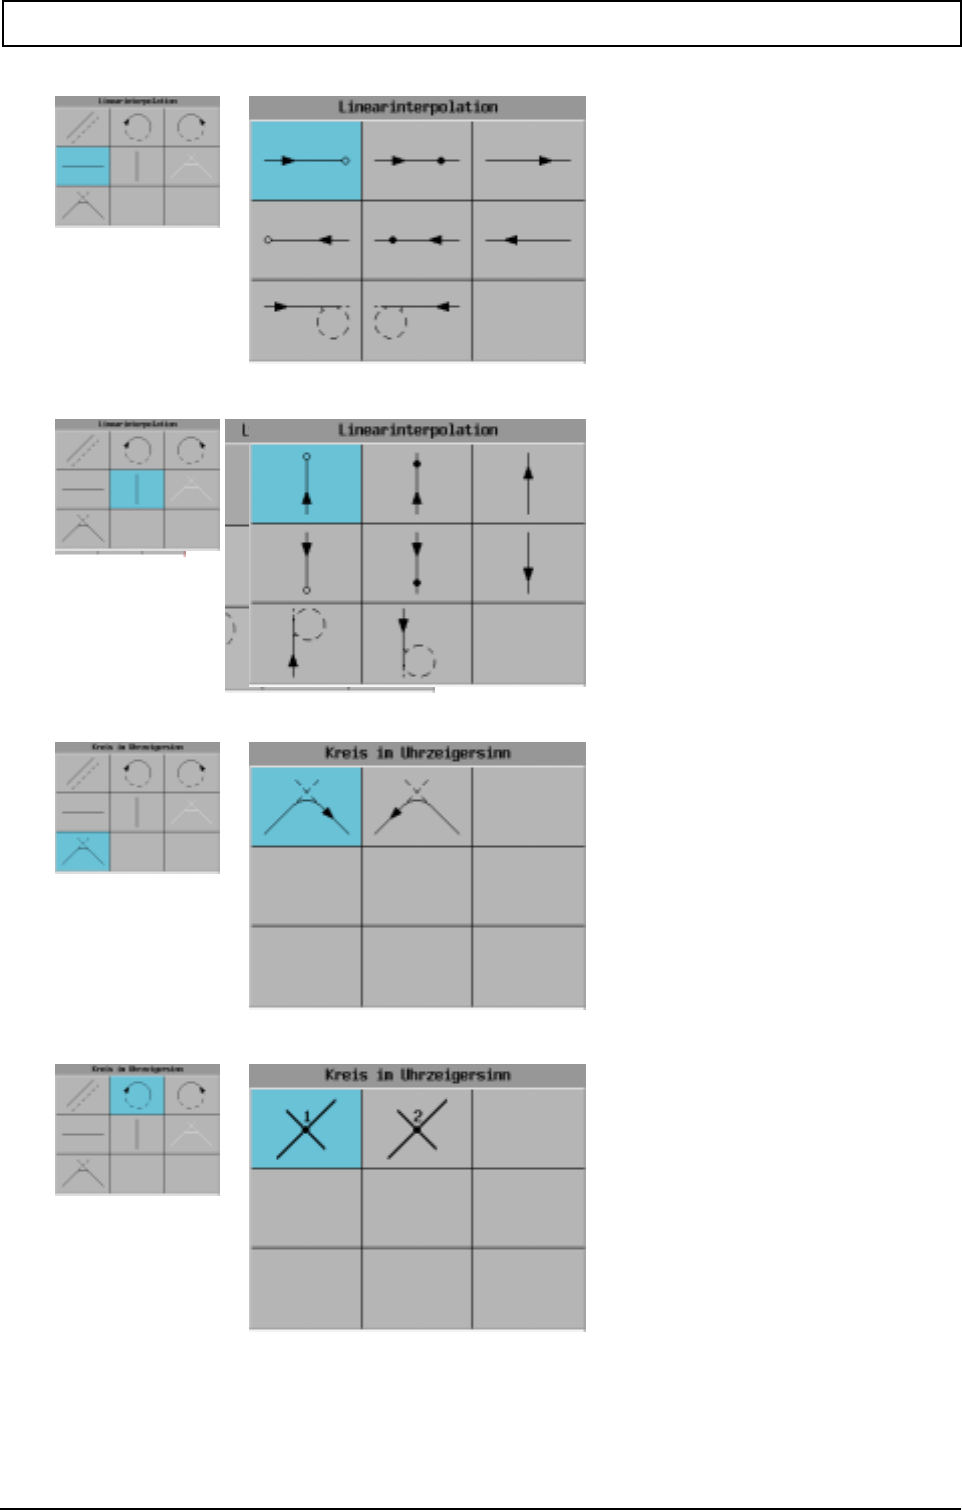
INTERACTIVE CONTOUR PROGRAMMING (ICP)
20000710 MillPlus V410 177
Menu for linear movement horizontally
Menu for linear movement vertically
Menu for rounding
Menu for point of intersection
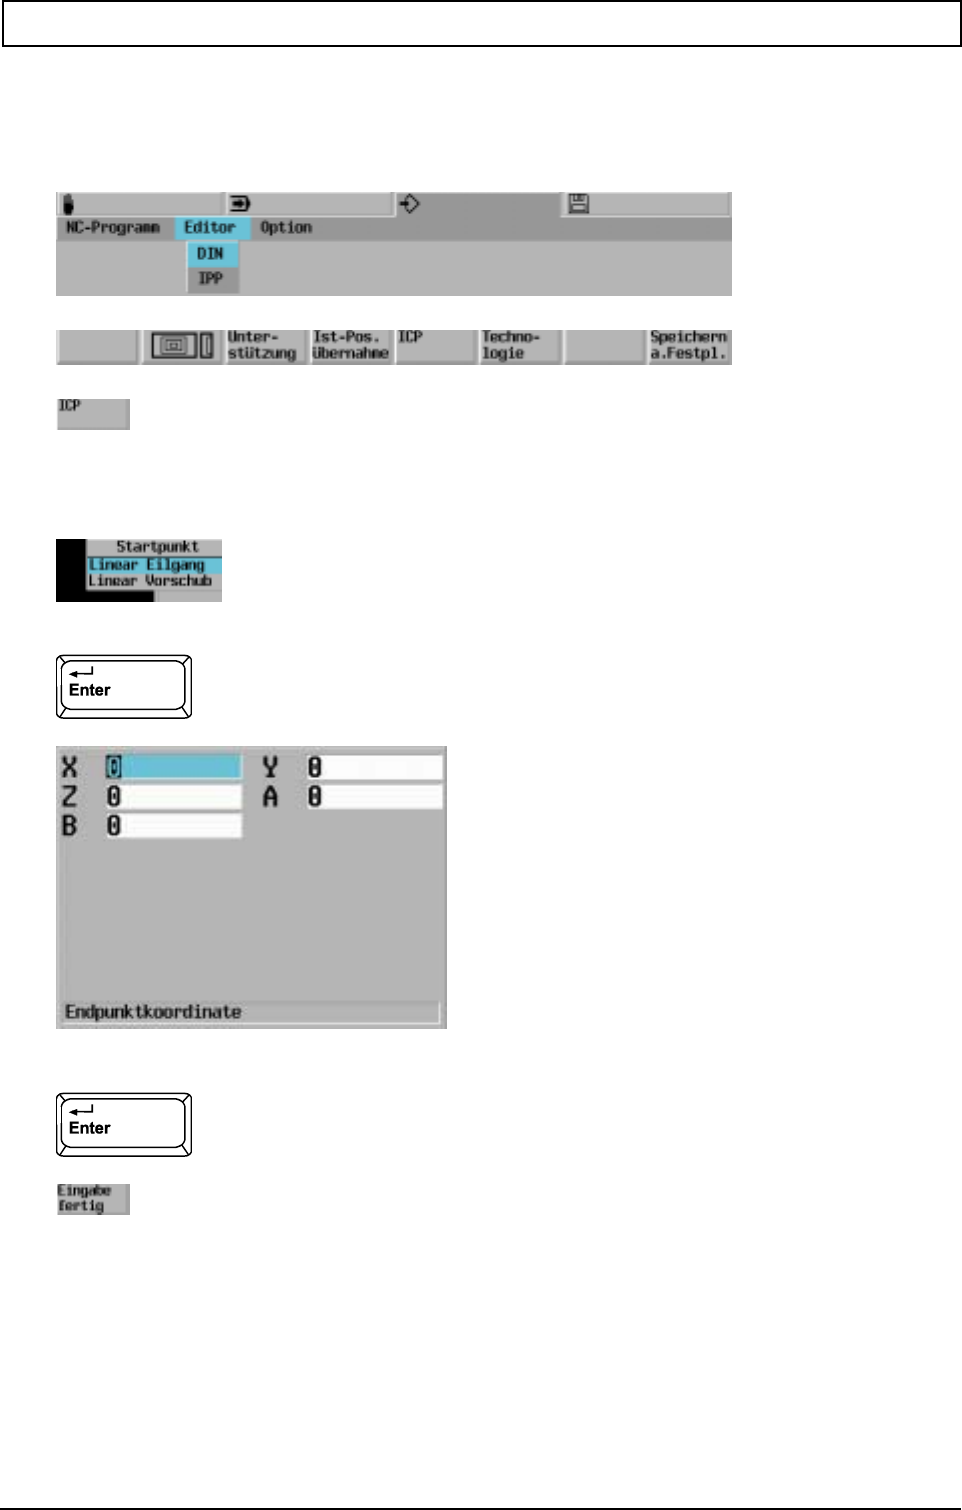
INTERACTIVE CONTOUR PROGRAMMING (ICP)
178 Heidenhain
20.3 New ICP programs
20.3.1 Einstieg in den ICP-Modus
New programs may be completely empty apart from the header line. In this case the programmer is
prompted to enter a starting point.
Enter a value for all parameters specified, even if this value is 0.
Note
No allowance is made in ICP for a pole position predefined with G9. G9 must be deselected before
ICP.
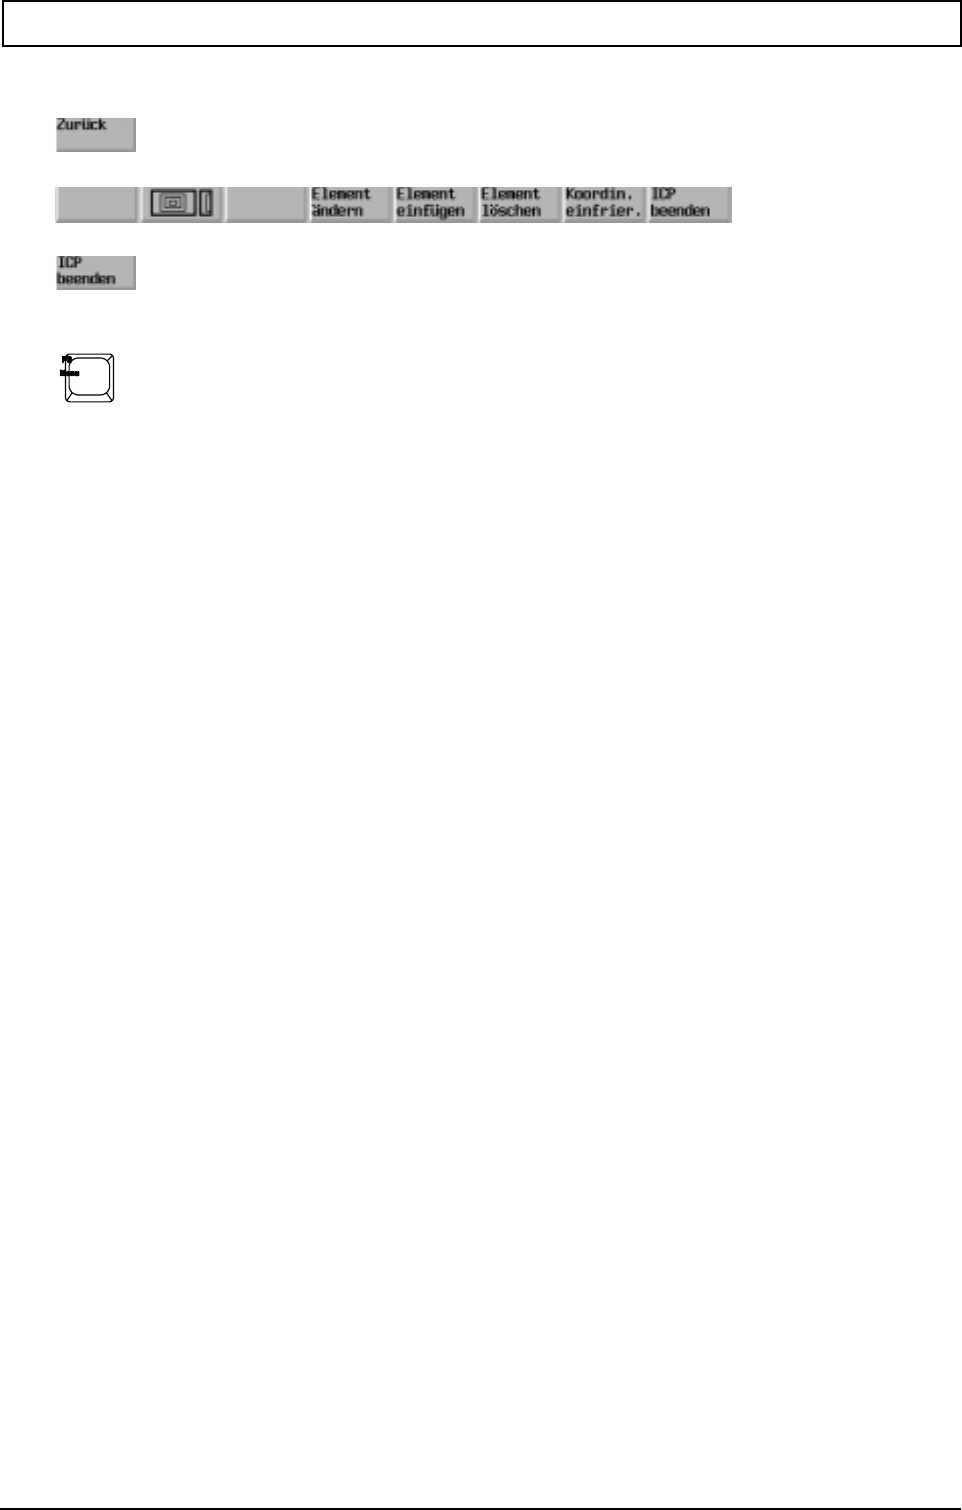
INTERACTIVE CONTOUR PROGRAMMING (ICP)
20000710 MillPlus V410 179
20.3.2 Exiting ICP
ICP beenden durch Betätigen des Softkeys.
or
It is possible to exit the ICP INPUT mode at any time during data input, although exiting ICP during
contour programming may result in an error message when ICP is re-entered.
The program line or lines affected must then be found and deleted.
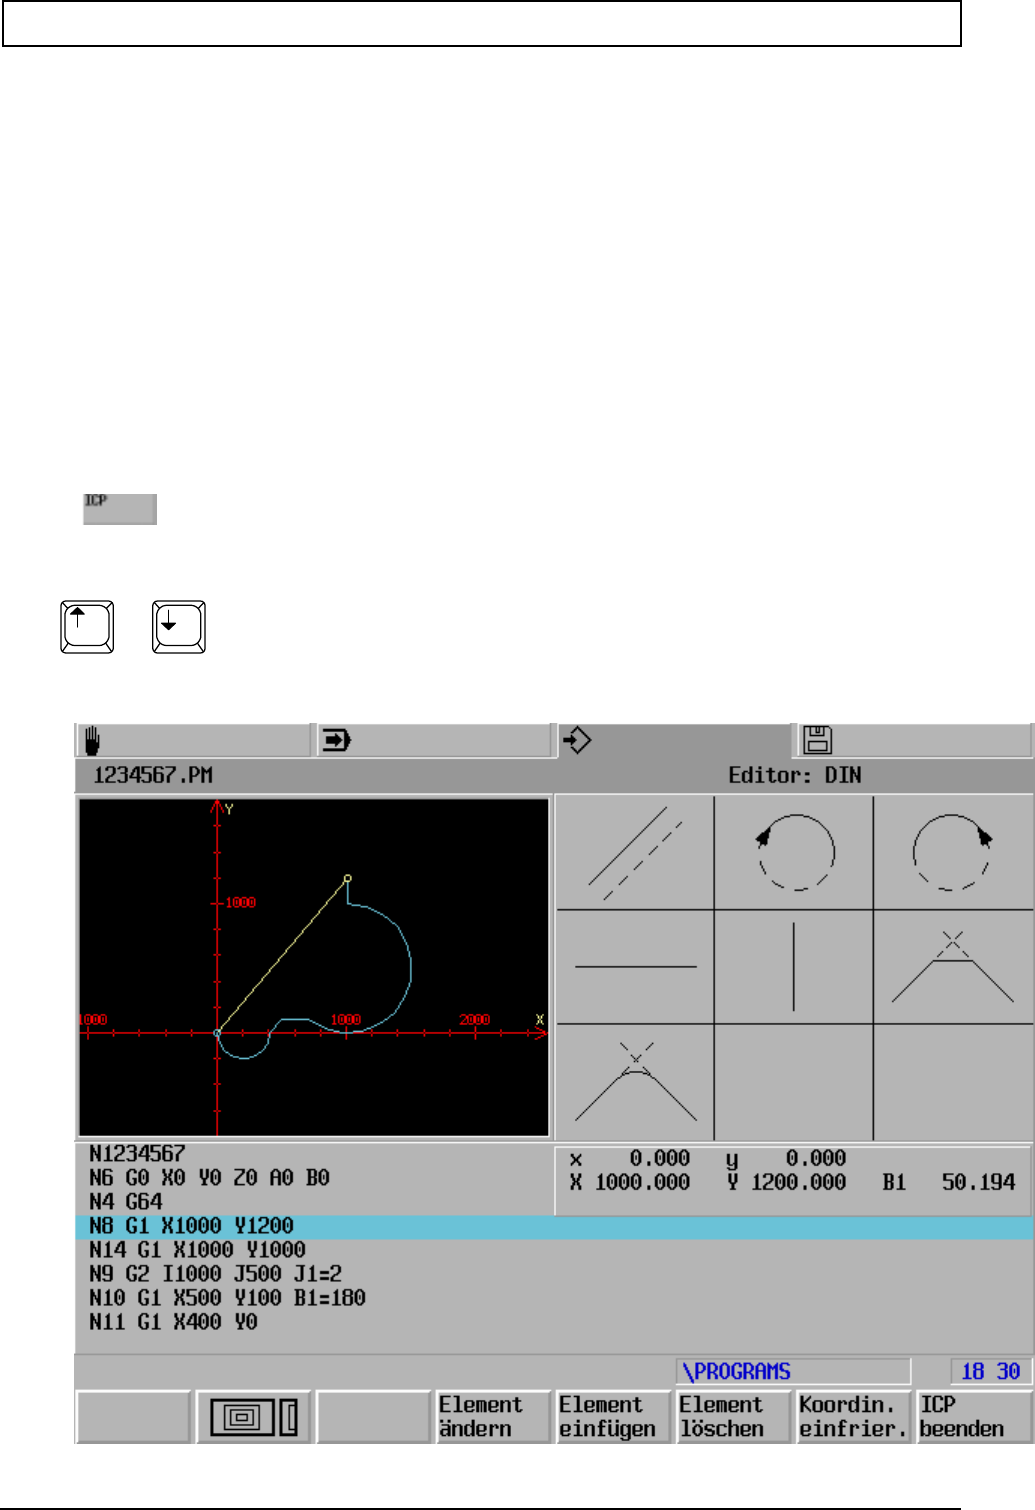
INTERACTIVE CONTOUR PROGRAMMING (ICP)
180 Heidenhain
20.4 Editing existing programs
When using an existing program, the cursor is positioned at that point in the program at which ICP is
to commence.
Using the cursor keys, scroll upwards and downwards through the program. The relevant contour
section is shown white in the graphic window.
ICP scans the program section before the cursor position for a G64 function without G63 (the cursor is
in an ICP section in the program). If the cursor is located outside a G64-G63 area, these ICP G-
functions are situated in successive program lines.
The program is checked in advance as to whether at least a feed movement has been programmed
for the addresses of the main plane. If not, the user is requested to enter a traversing movement.
20.4.1 Edit element
Select ICP.
Select program block, e.g. N8.
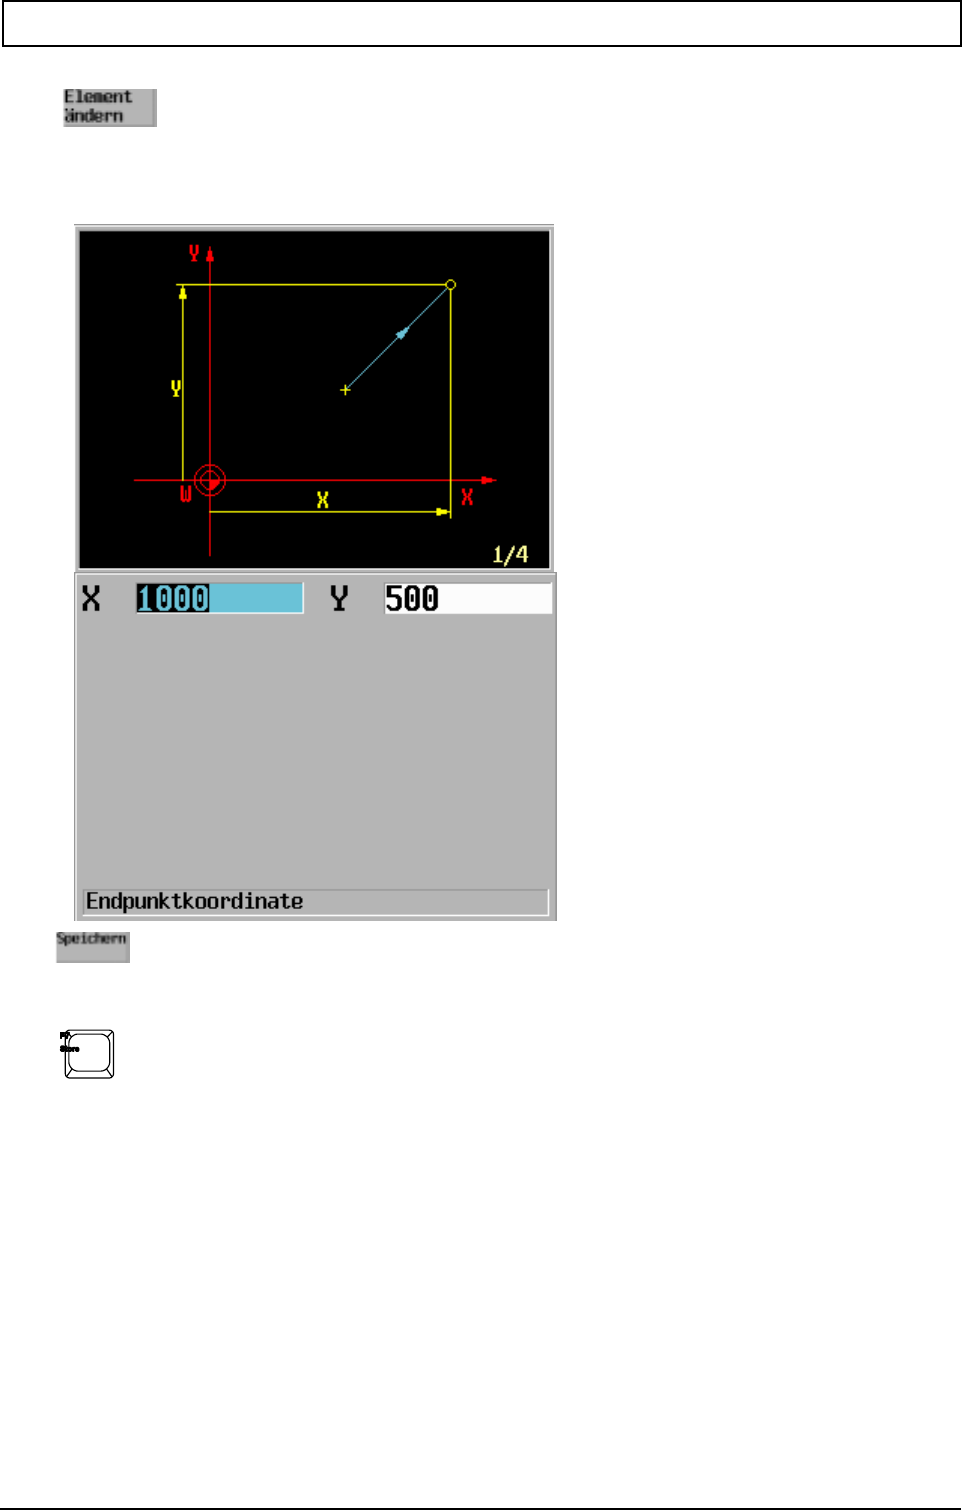
INTERACTIVE CONTOUR PROGRAMMING (ICP)
20000710 MillPlus V410 181
The contour element can be defined differently,
e.g. an address value can now be changed.
Enter addresses.
or
The element is stored and the contour recalculated and displayed.
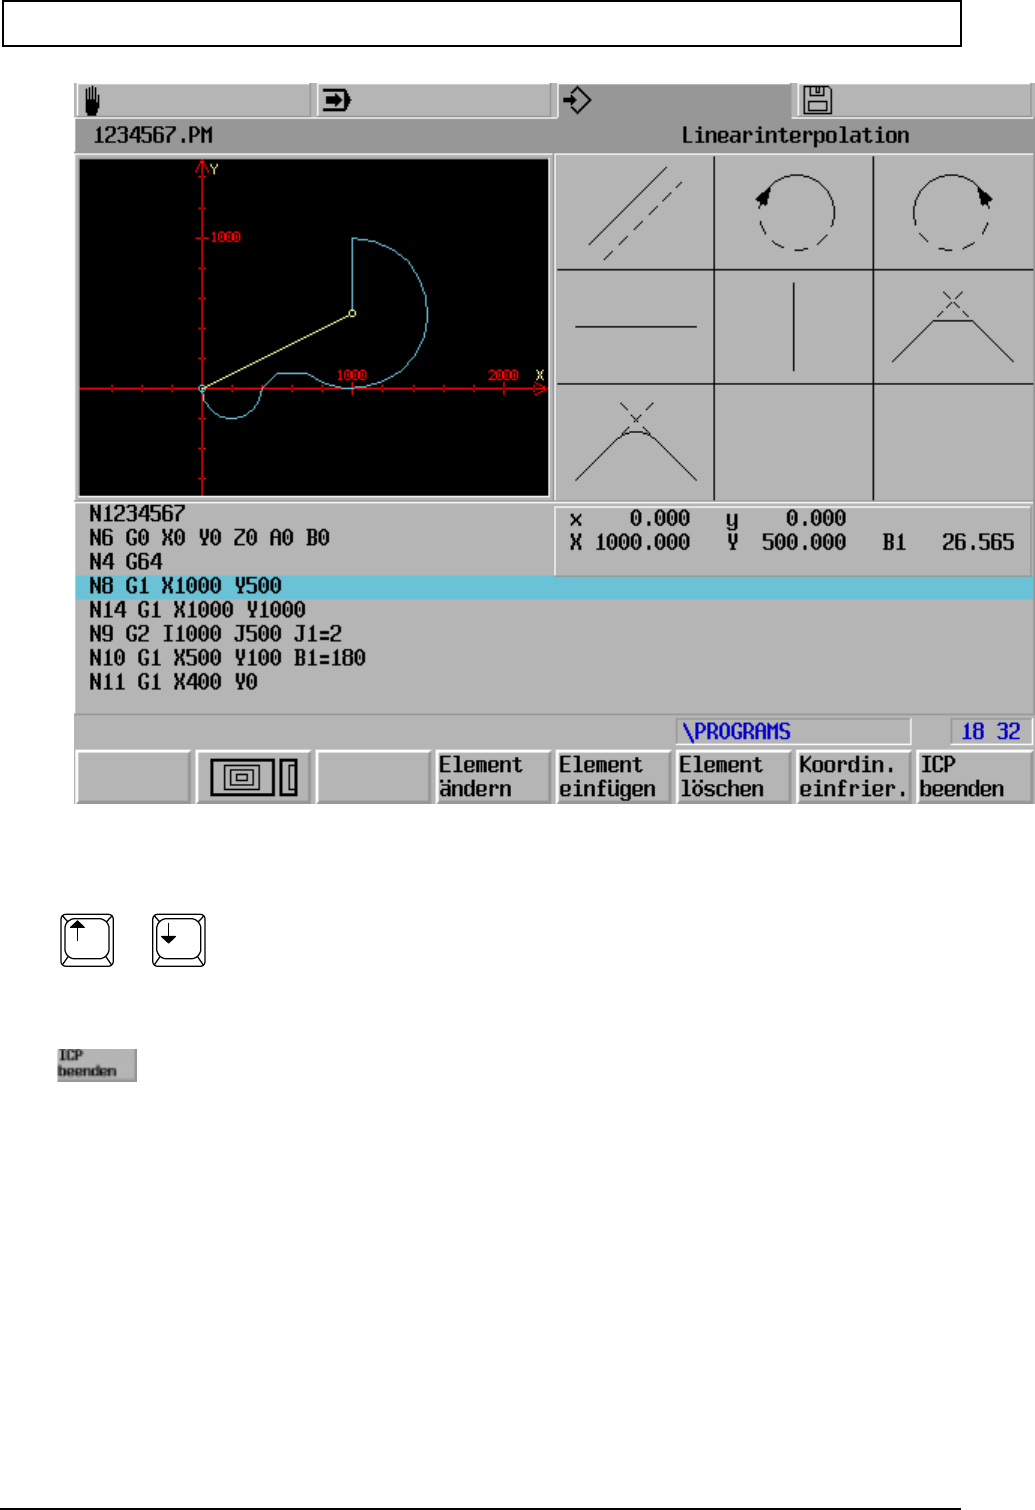
INTERACTIVE CONTOUR PROGRAMMING (ICP)
182 Heidenhain
Have all the changes in change mode been implemented?
No?
Next element.
Yes?
INTERACTIVE CONTOUR PROGRAMMING (ICP)
20000710 MillPlus V410 183
Note
For specific elements (rounding circles) there are additional solution variants. These variants can only
20.4.2 Insert element
Insert contour element / select block
Note:
For specific elements there are several input options:
Selection of the options
20.4.3 Delete element
Select the contour element / block to be deleted
Note
By deleting, changing or inserting elements, it is possible to create non-continuous contours. The
modified element or subsequent elements are shown as dotted lines.
INTERACTIVE CONTOUR PROGRAMMING (ICP)
184 Heidenhain
20.4.4 Graphial display of the contour
Zooming out
Zooming in
Original size
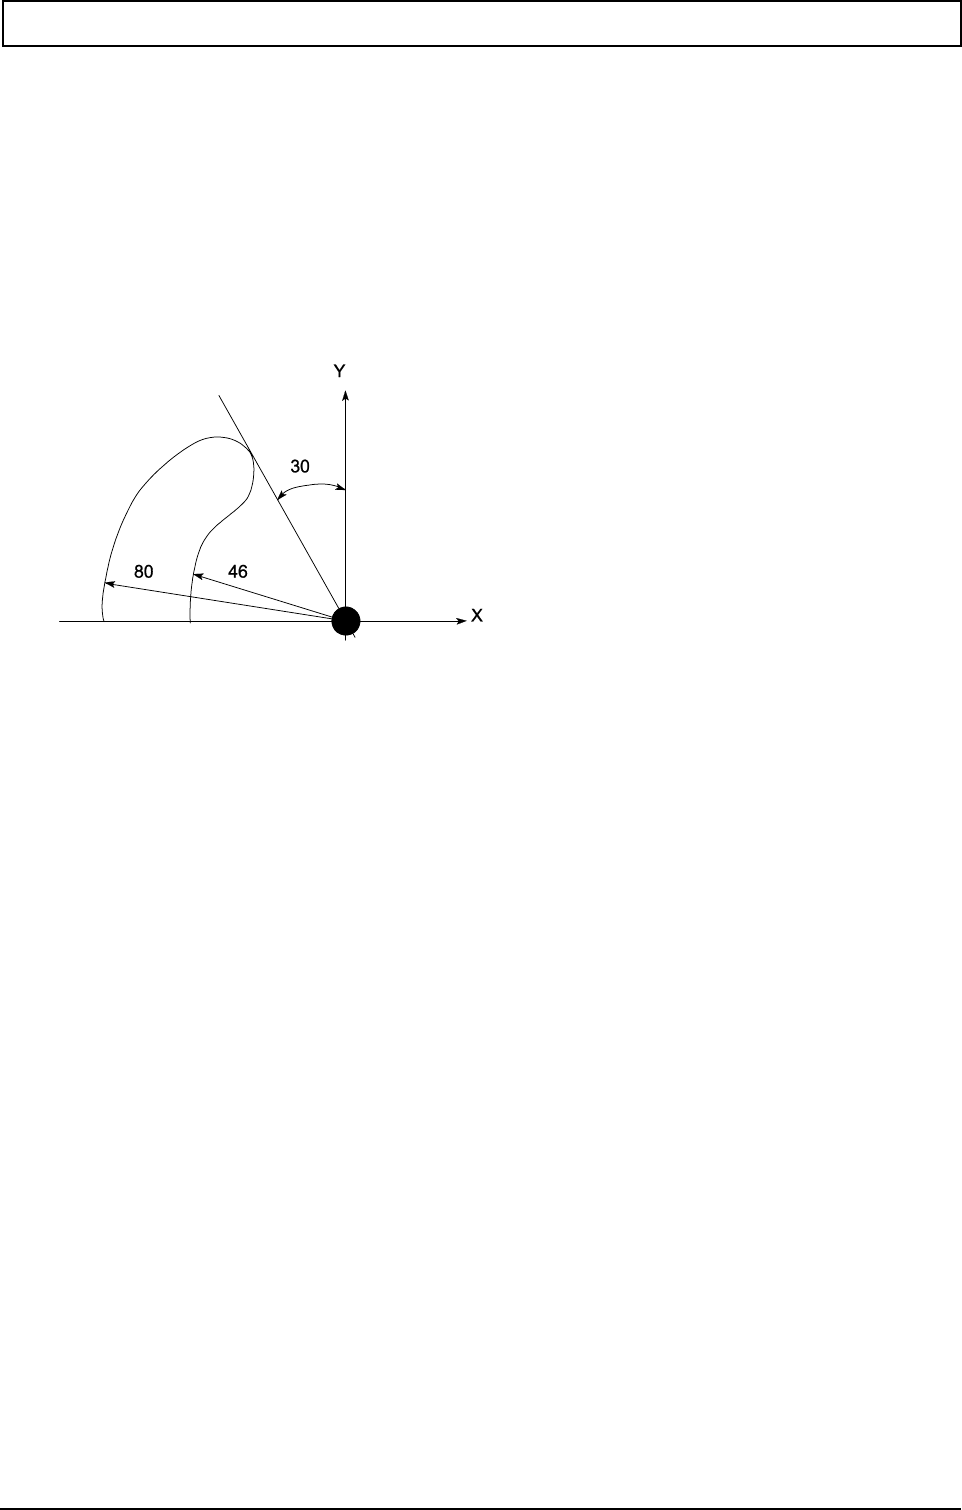
INTERACTIVE CONTOUR PROGRAMMING (ICP)
20000710 MillPlus V410 185
20.5 ICP programming notes
20.5.1 Auxiliary elements in ICP
Lines and circles may be defined by auxiliary elements, for instance tangents or circles. Missing
coordinates or angles can be calculated with the auxiliary elements. These calculated values are
always displayed for every element.
These calculated values are saved by the "Freeze coordin." softkey. The auxiliary elements may then
be deleted and the required circle or straight line can be re-entered.
Example:
N100 G0 X-80 Y0 Starting point
N101 G64 Select ICP
N102 G2 I0 J0 Circle with centre
N103 G2 R17 Rounding (clockwise)
N104 G1 X0 Y0 B1=-60 Auxiliary line with end point and angle, select intersection 2
- Place cursor on block N103.
- Display: x -57.211 y 55.918 Starting point (lower case)
X -30.332 Y 52.536 End point (capital)
I -45.054 J 44.036 R17 Centre and radius
- Save these coordinates by pressing F7 "Freeze coordin.".
- Delete auxiliary line N104 and circle N103.
- Re-enter program blocks N103 (circle with centre) and N104:
N103 G2 I-45.054 J44.036 Circle (clockwise) with centre
N104 G3 X-46 Y0 R46 Circle (counterclockwise) with end point and radius
N105 G63
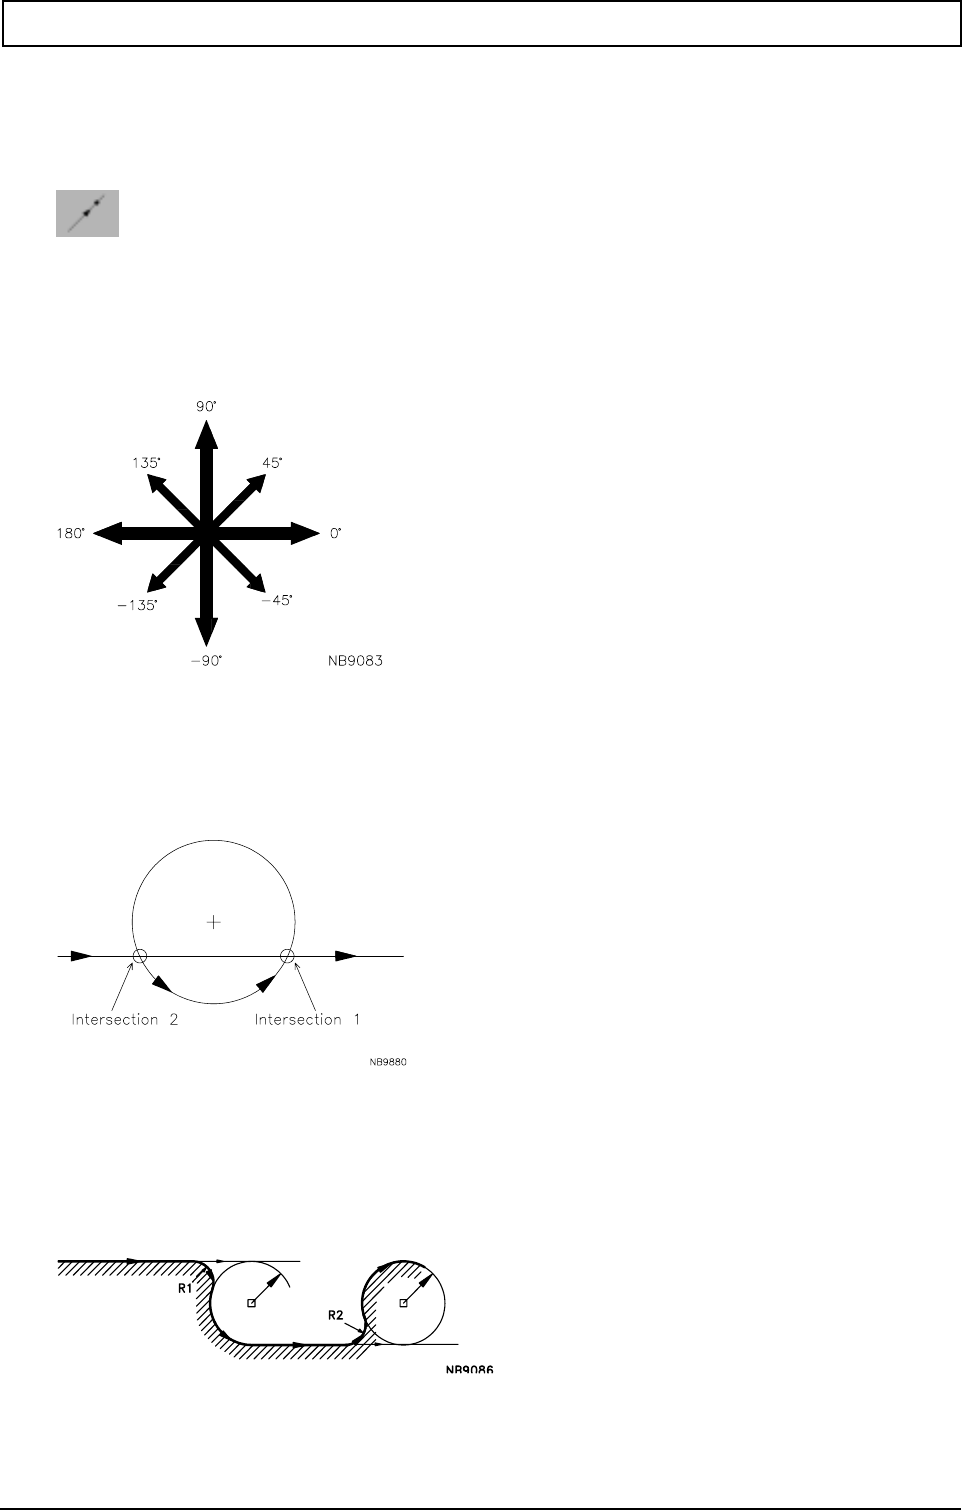
INTERACTIVE CONTOUR PROGRAMMING (ICP)
186 Heidenhain
20.5.2 Help points
The "Help point" programming option in ICP offers a simple solution to the problem of defining axis
end points in complex contours. The option is used when the axis end point is unknown. As soon as
the axis end point is determined by the next movement or those following on from it, it is classified.
20.5.3 Required angle parameters
Some of the linear interpolation movements call for an angle parameter (specified relative to the
horizontal).
20.5.4 Line intersects circle
ICP draws the line which passes through the circle and the points of intersection (1 and 2) are
marked. The programmer is requested to select the correct point of intersection.
20.5.5 Rounding
The movement preceding the rounding may be designed in any manner, including with an endpoint.
The rounding is specified purely as a radius. Its position and its start and end point are calculated by
ICP as soon as sufficient data is available to classify it.
INTERACTIVE CONTOUR PROGRAMMING (ICP)
20000710 MillPlus V410 187
20.6 ICP programming example
First create a new program N111111 with the start point X0, Y0, Z0.
L1
X0
Y=12.7
Enter, Store
C1
I=12.7
J=12.7
Enter, Store
L2
C2
I = 76.2
J = 63.5
R = 7.94 Enter, Store
L3
B1 = -135
Enter, Store
INTERACTIVE CONTOUR PROGRAMMING (ICP)
188 Heidenhain
C3
R = 10
Enter, Store
L4
X = 120
Y = 19.05
Enter, Store
C4
I = 96.2
J = 25
R = 12 Enter, Store
L5
X = 120
Y = 19.05
Enter, Store
C5
I = 114.3
J = 6.35
R = 12.7 Enter, Store
L6
X = 120.65
Y = 0
B1 = -135 Enter, Store
INTERACTIVE CONTOUR PROGRAMMING (ICP)
20000710 MillPlus V410 189
L7
C6
R = 1
Enter, Store
C7
I = 38.1
J = 0
R = 10 Enter, Store
C8
R = 1
Enter, Store
L8
X = 0
Y = 0 Enter, Store
20.6.1 ICP-generated program
N111111 (ICP-generated program)
N1 G0 X0 Y0 Z0
N2 G64
N4 G1 X0 Y12.7
N5 G2 I12.7 J12.7 R1=0
N6 G1 R1=0

INTERACTIVE CONTOUR PROGRAMMING (ICP)
190 Heidenhain
N7 G2 I76.2 J63.5 R7.94 R1=0
N8 G1 B1=-135
N9 G3 R10
N10 G1 X120 Y19.05 B1=0 I1=0 J1=2
N11 G3 I96.2 J25 R12 J1=1
N12 G1 X120 Y19.05 B1=0 I1=0 J1=2
N13 G2 I114.3 J6.35 R12.7 J1=1
N14 G1 X120.65 Y0 B1=-135
N15 G1 B1=180 J1=1
N16 G2 R1
N17 G3 I38.1 J0 R10 J1=1
N18 G2 R1
N19 G1 X0 Y0 B1=180
N3 G63
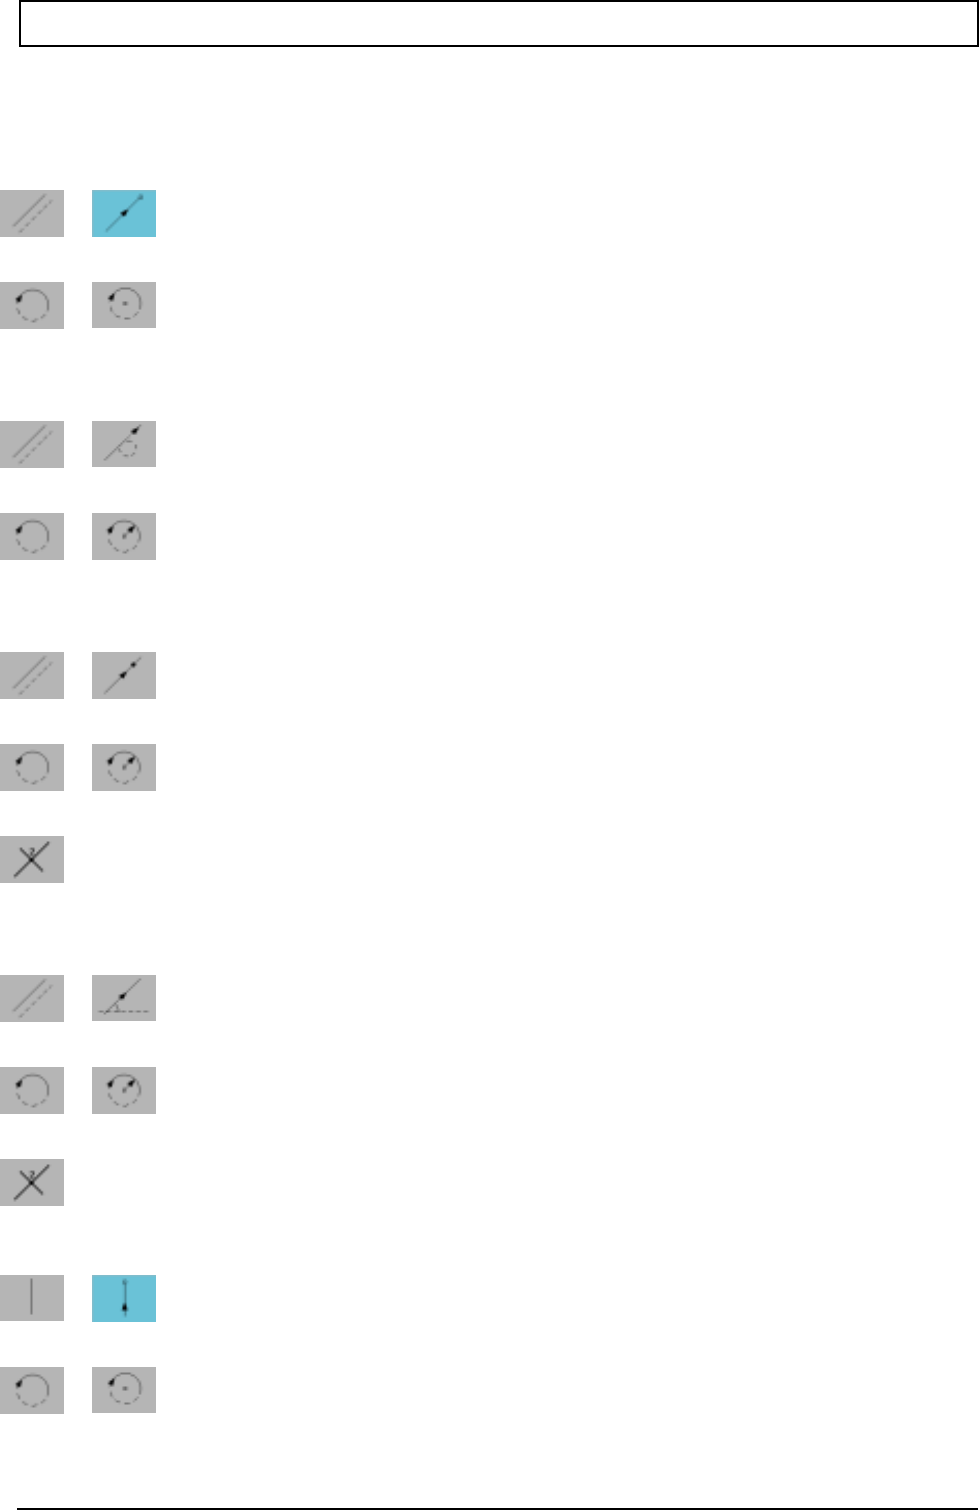
INTERACTIVE CONTOUR PROGRAMMING (ICP)
20000710 MillPlus V410 191
20.6.2 Alternative ICP programming methods
The previous example showed only one possible method of programming the individual movements.
The same result can be achieved in several ways. The various options for programming a line 1 and
circle 1 are shown below:
X = 0 N4 G1 X0 Y12.7
Y = 12.7 N5 G2 I12.7 J12.7 R1=0
I = 12.7
J = 12.7
1. Line as tangent
I = 12.7 N4 G1 R1=0
J = 12.7 N5 G2 I12.7 J12.7 R12.7 R1=0
R = 12.7
2. Line with help point
X = 0 N4 G1 X0 Y10 I1=0 J1=2
Y = 10 N5 G2 I12.7 J12.7 R12.7 R1=0
I = 12.7
J = 12.7
R = 12.7
3. Line with angle
B1 = 90 N4 G1 B1=90 J1=2
N5 G2 I12.7 J12.7 R12.7 R1=0
I = 12.7
J = 12.7
R = 12.7
4. Line, vertical
Y12.7
N4 G1 Y12.7 B1=90
N5 G2 I12.7 J12.7
I = 12.7
J = 12.7

INTERACTIVE CONTOUR PROGRAMMING (ICP)
192 Heidenhain

INTERACTIVE PART PROGRAMMING (IPP) / GRAPHIPROG
20000710 MillPlus V410 193
21. Interactive part programming (IPP) / GRAPHIPROG
21.1 General
21.1.1 Introduction to Interactive Parts Programming (IPP)
When using interactive parts programming you must select from a number of features and machining
strategies to create a program. For the most part no knowledge of DIN programming is assumed.
IPP technology proposals are derived from the information in the technology database. The
information stored therein is based on your own experience in the workplace. Please refer to the
chapter on technology.
Each feature begins with a block, which contains the feature description and an identification. You
can switch from IPP to DIN programming at any time.
The machining sequence can be simulated at any time during the creation of a program.
21.1.2 Preparation for IPP programming
- The technology tables must contain suitable data.
- The IPP start macro must contain the right data (see 21.8)
Note
- Always make sure that the retract movement of the tool axis in parameter E714 is large
enough to avoid a collision between tool and workpiece or fixture.
- The tool table must display a list of the tools used most frequently.
- If there is no suitable tool in the tool table, IPP will generate a new tool in this table.
All tools created with the aid of IPP should be entered in the tool table.
During simulation M6 is changed to M67.
21.1.3 IPP programming sequence
The procedure for programming a new program in IPP is described below:
1. First define a blank.
2. You also have the option of defining the type of workpiece clamping device to be used.
3. Program the workpiece with the aid of IPP features.
4. Select the M30 feature to conclude the program.
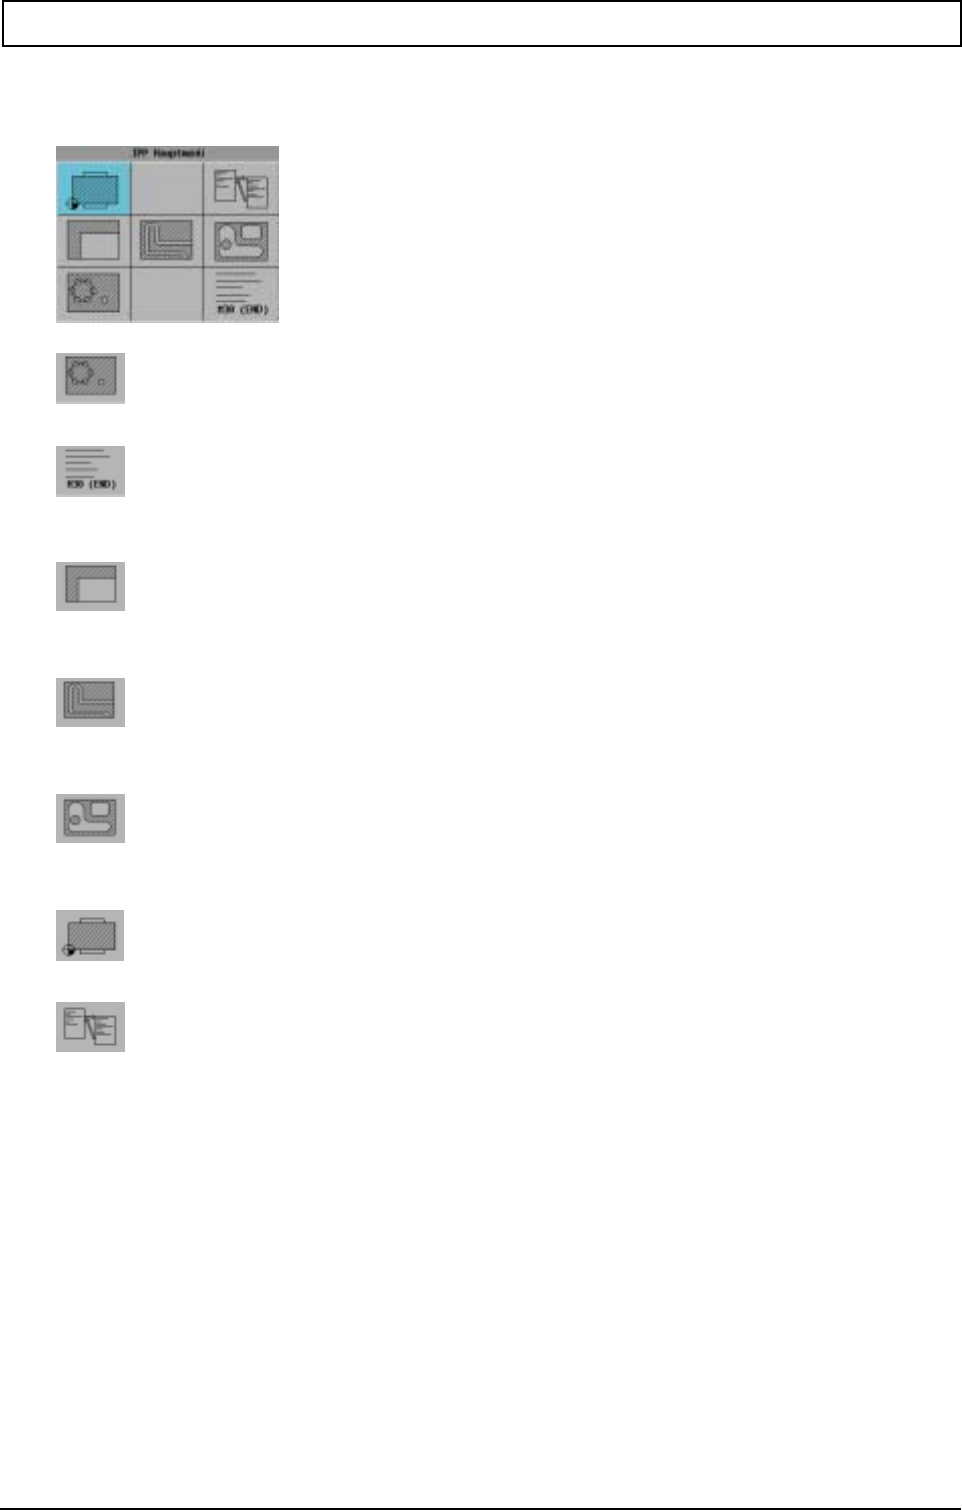
INTERACTIVE PART PROGRAMMING (IPP) / GRAPHIPROG
194 Heidenhain
21.2 IPP graphic main menu symbols
Drilling operations
End of program
Facing and edge milling
Contour input, thread milling
Pocket with or without islands
Invoke macro or main program
Set-up (material, zero points and clamping)
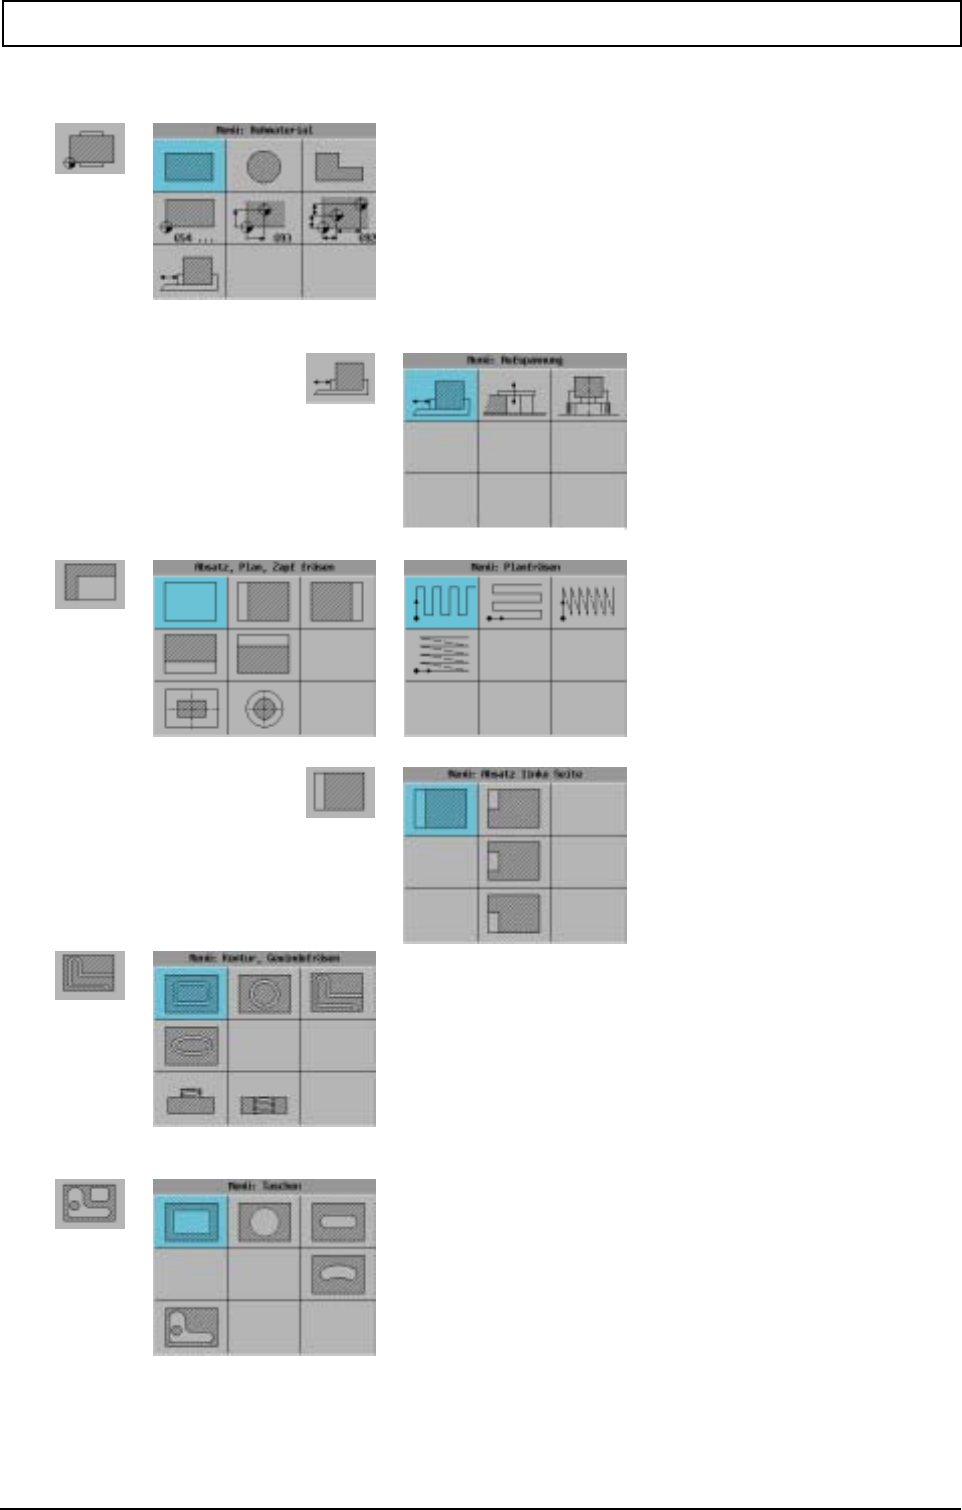
INTERACTIVE PART PROGRAMMING (IPP) / GRAPHIPROG
20000710 MillPlus V410 195
21.3 IPP graphic symbol menu
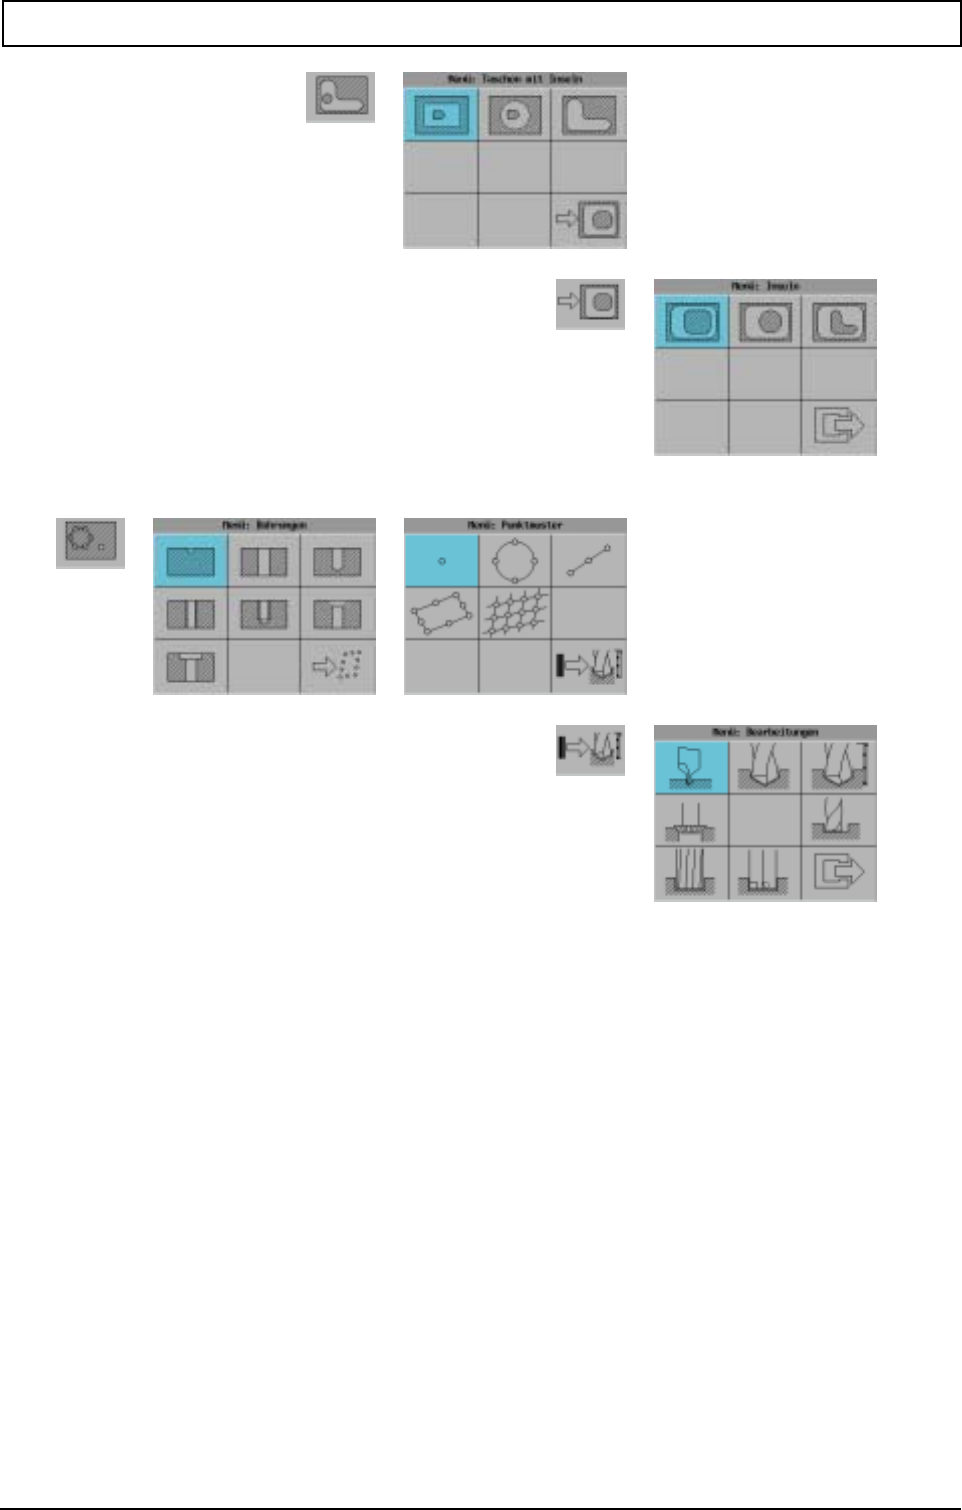
INTERACTIVE PART PROGRAMMING (IPP) / GRAPHIPROG
196 Heidenhain
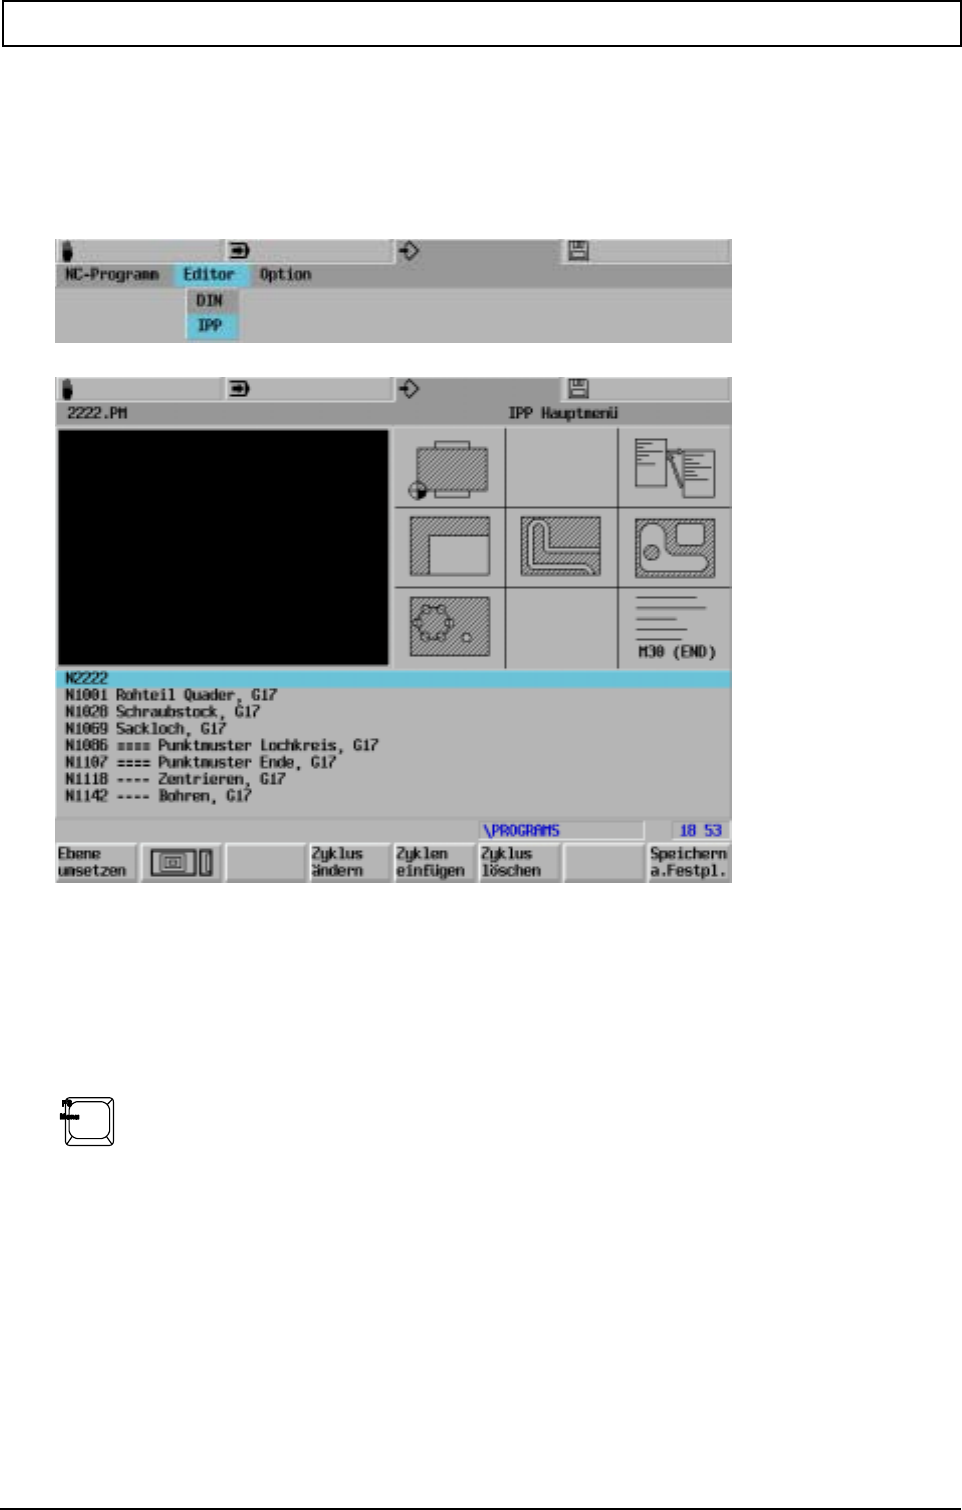
INTERACTIVE PART PROGRAMMING (IPP) / GRAPHIPROG
20000710 MillPlus V410 197
21.4 New IPP-program
21.4.1 Entering IPP mode
Select program
Note
If it is impossible to access IPP, it should be checked whether the reference point has been
approached in all axes or whether G19, G91, G182, G201, G64 or G199 is active.
21.4.2 Exiting IPP
Exit IPP.
Note
Exiting IPP during programming will result in an incomplete program.
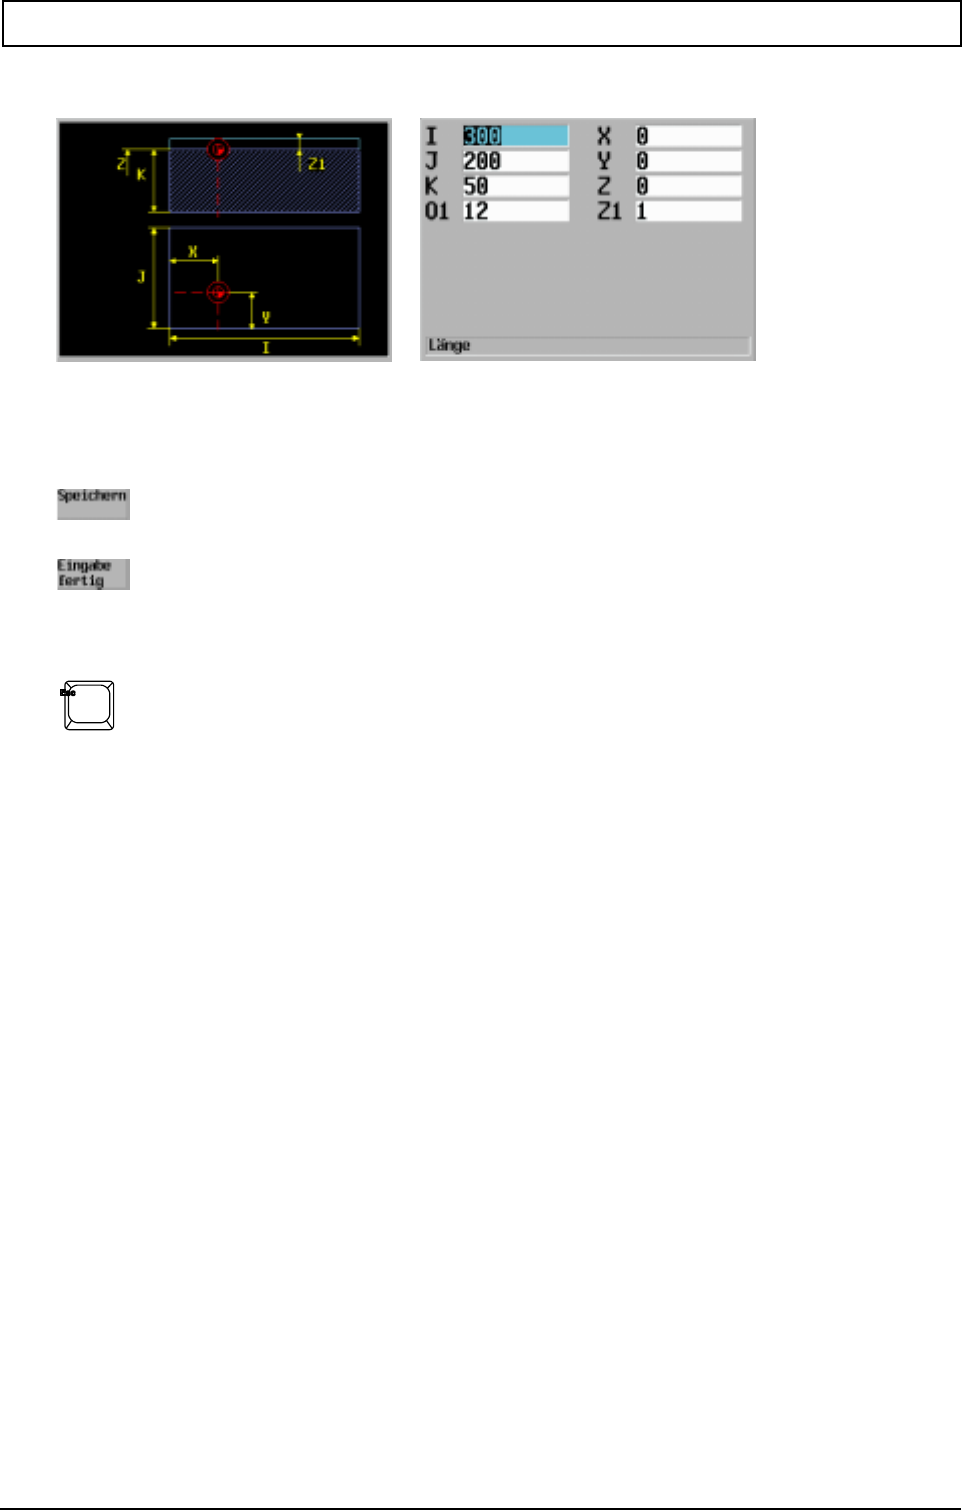
INTERACTIVE PART PROGRAMMING (IPP) / GRAPHIPROG
198 Heidenhain
21.4.3 Entering program data
Once a machining operation has been defined by means of Feature, the data entry window appears
with the addresses required for complete definition.
A value must be entered for each address. A value is already suggested for many addresses.
Storing the input values and displaying the next data entry.
Storing the input values and exiting the data entry.
Note Return without saving data.
Exiting the data input mode during programming often results in an incomplete program.
The relevant feature must then be deleted and reprogammed.
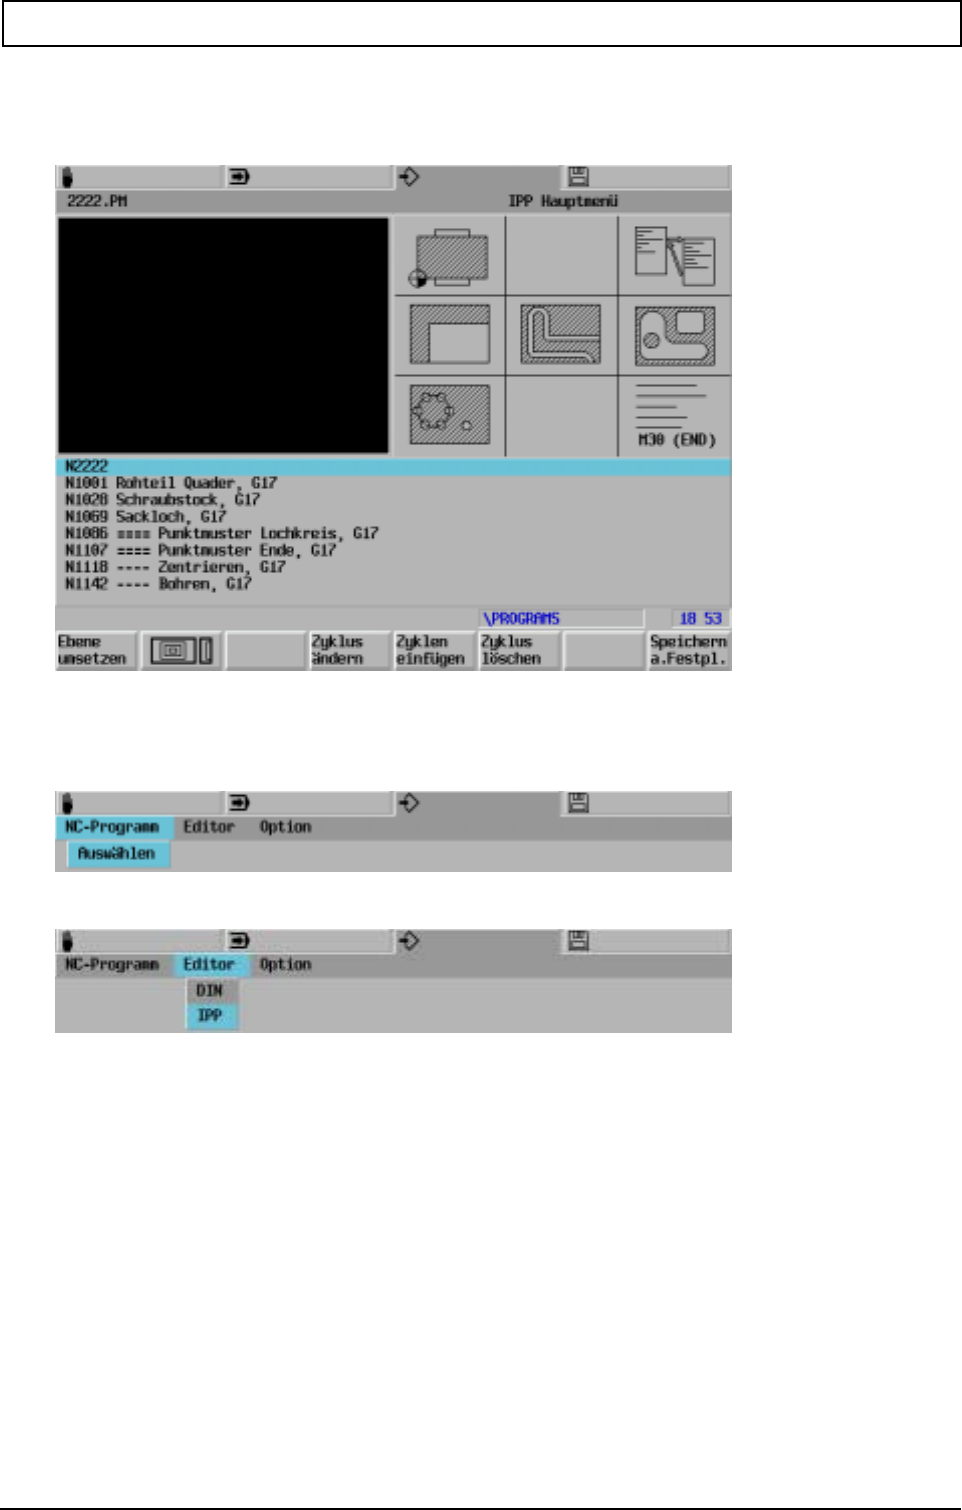
INTERACTIVE PART PROGRAMMING (IPP) / GRAPHIPROG
20000710 MillPlus V410 199
21.4.4 IPP program list
The program window only displays the names of the features used in the parts program.
21.5 Editing IPP programs (change line)
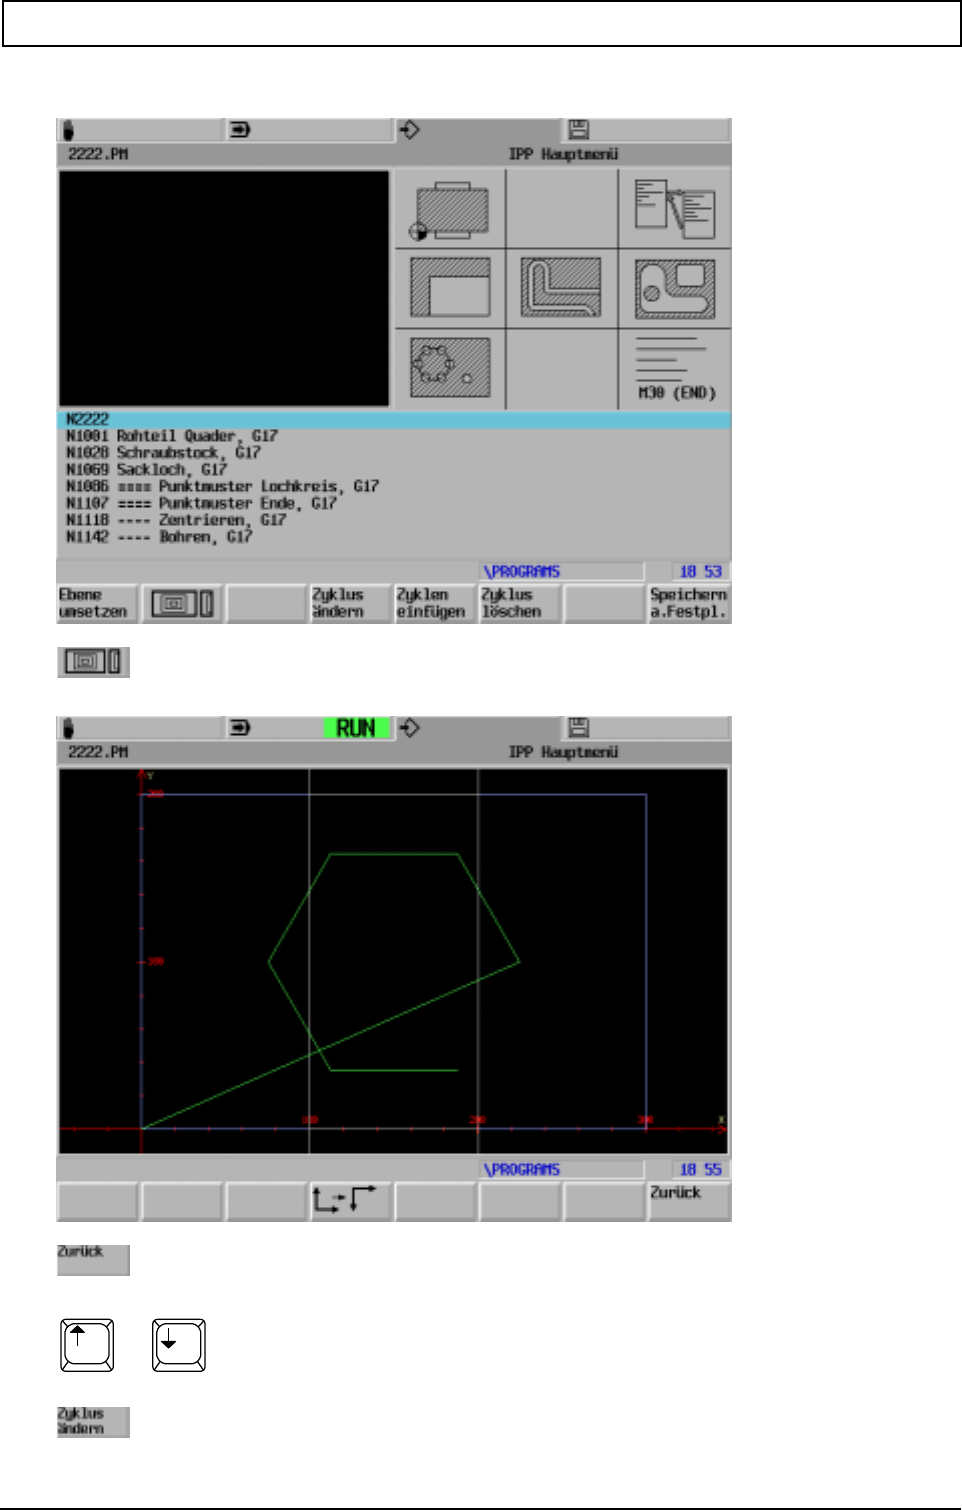
INTERACTIVE PART PROGRAMMING (IPP) / GRAPHIPROG
200 Heidenhain
21.5.1 Change features
Select the feature to be changed.
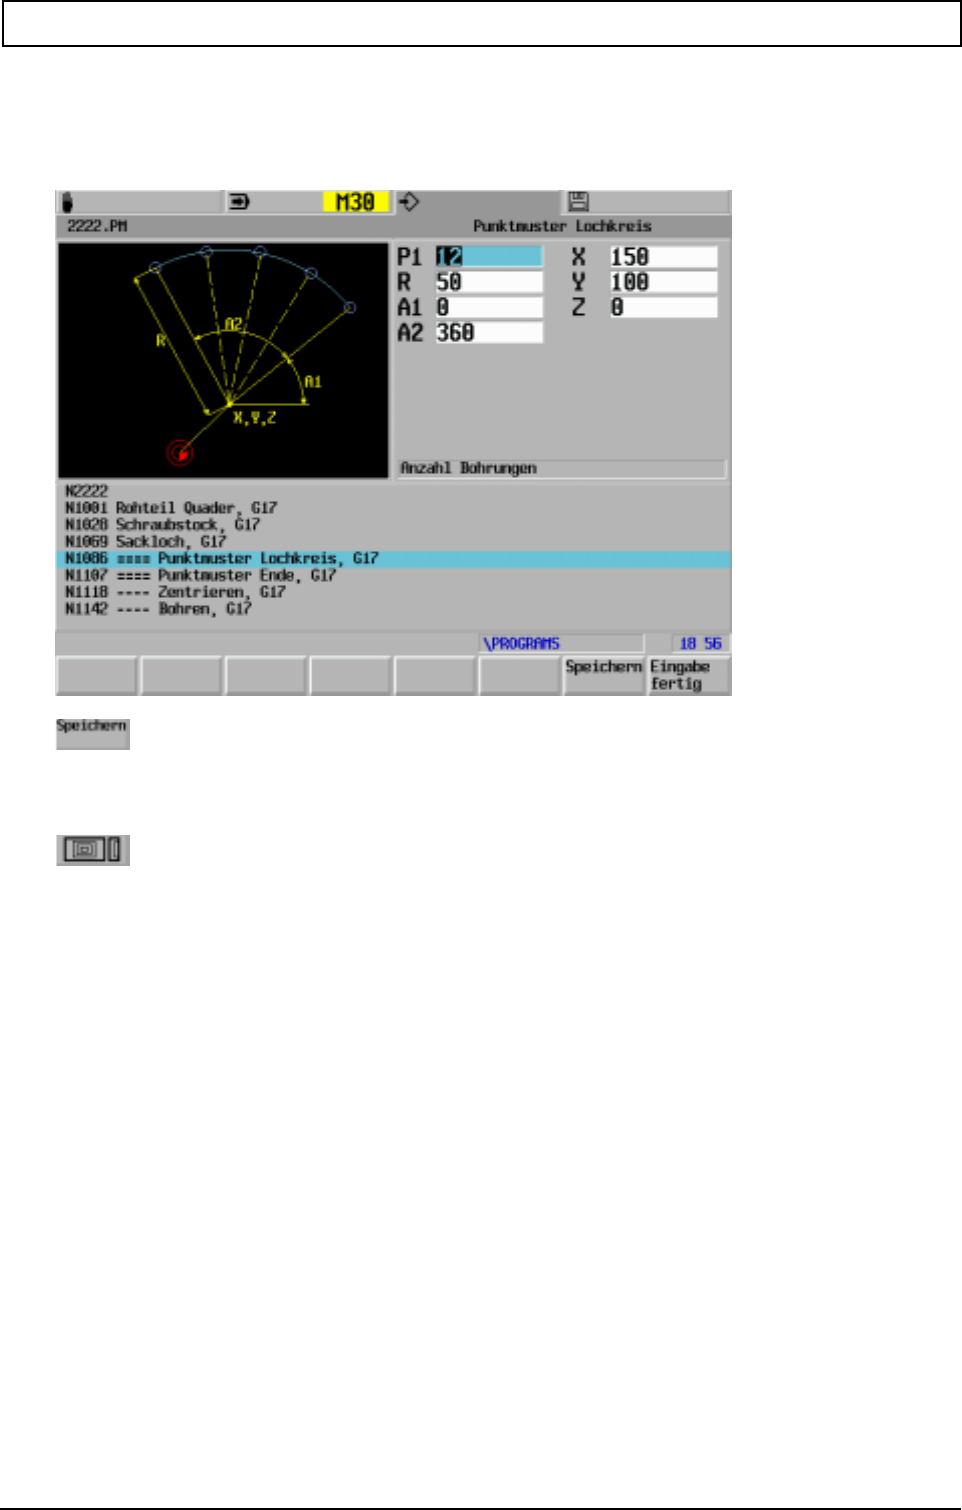
INTERACTIVE PART PROGRAMMING (IPP) / GRAPHIPROG
20000710 MillPlus V410 201
The feature can be redefined.
For example, it is now possible to change an address value.
Enter address values.
The feature is directly generated.
Checking changes with graphic.
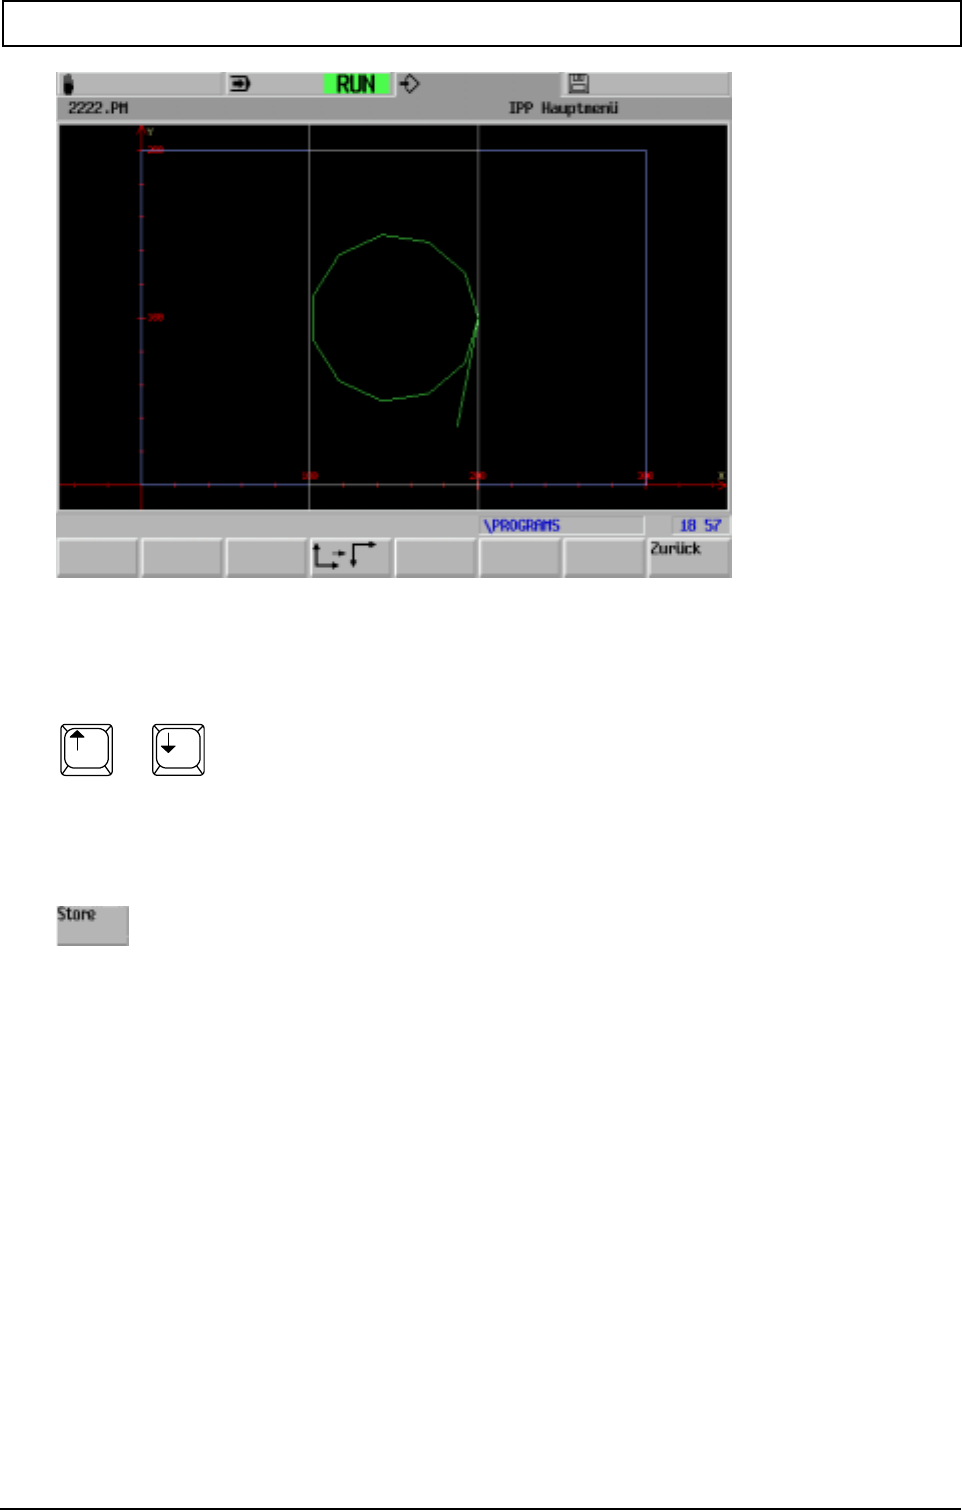
INTERACTIVE PART PROGRAMMING (IPP) / GRAPHIPROG
202 Heidenhain
Have all changes in the program been made?
If not, select next feature.
Next feature.
Note
If a feature is changed within an IPP program block, the entire IPP program block
must be run through. Changes that have been made will be accepted in the subsequent features of
the IPP program block.
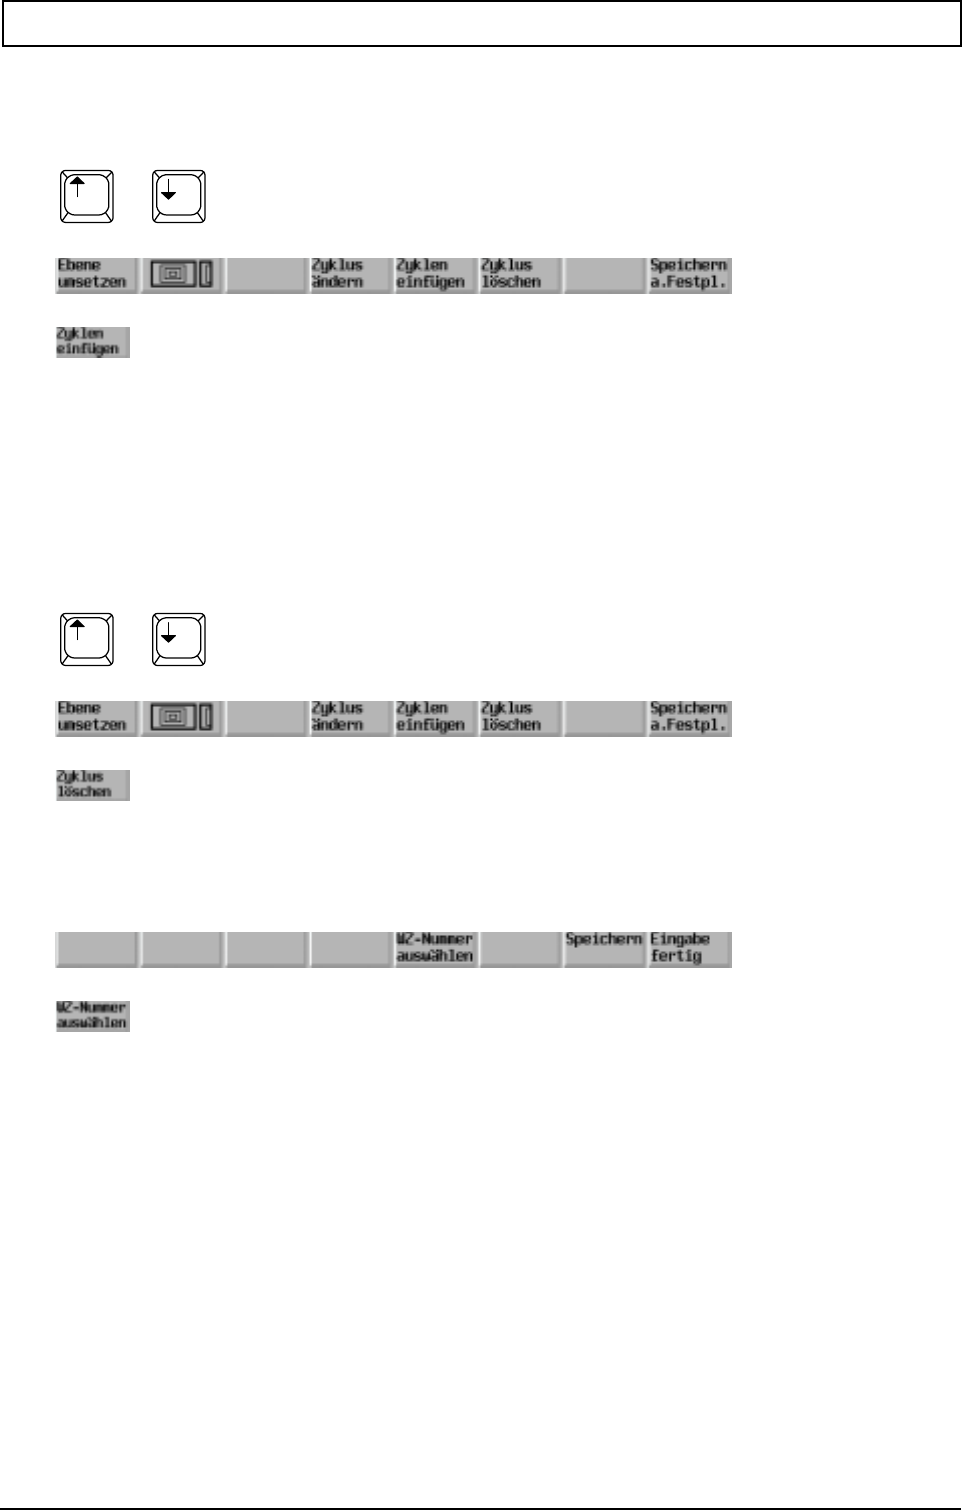
INTERACTIVE PART PROGRAMMING (IPP) / GRAPHIPROG
20000710 MillPlus V410 203
21.5.2 Inserting a feature
When an IPP feature is inserted, the feature is inserted after the position indicated.
Select insert position of feature.
Defining a feature and entering program data.
Note
Macro number 8000 is suggested for pocket milling. If the macro number already exists, change the
number.
21.5.3 Delete feature
When deleting an IPP feature, all the accompanying instructions in the program are deleted.
Select the feature to be deleted.
The feature to be deteted is cleared immediately.
21.5.4 Select tool during editing
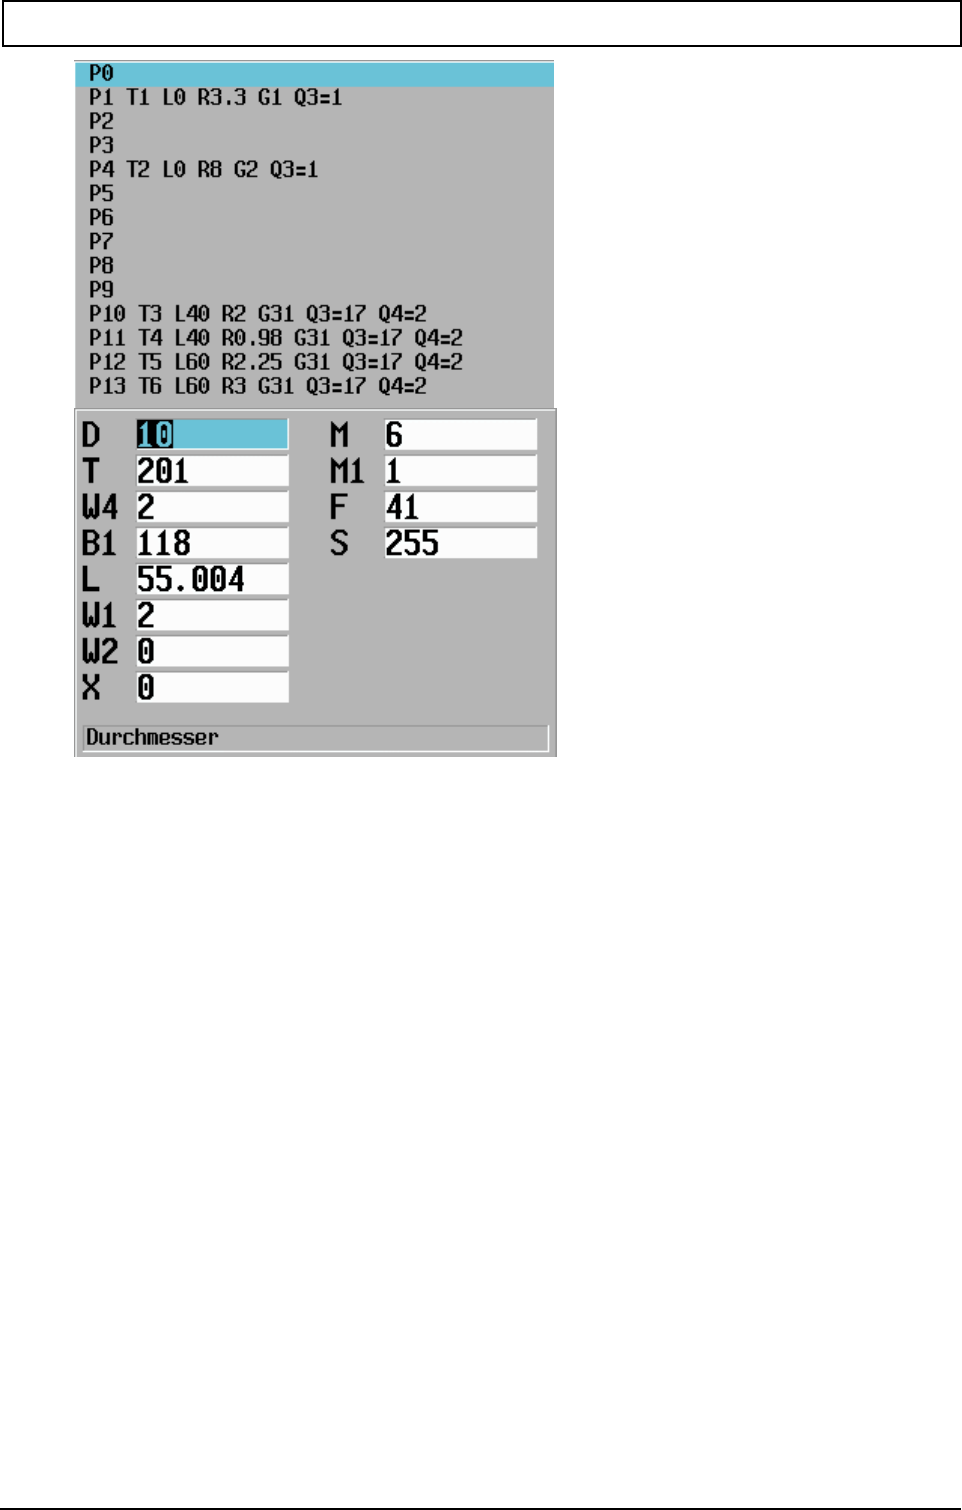
INTERACTIVE PART PROGRAMMING (IPP) / GRAPHIPROG
204 Heidenhain
INTERACTIVE PART PROGRAMMING (IPP) / GRAPHIPROG
20000710 MillPlus V410 205
Select tool.
Copy tool in dialogue box.
21.5.5 Graphic display of contour (test run)
Check the parts program briefly for the right sequence and to see whether it is correct.
grafwin.sk
Return to input.
21.5.6 Executing IPP programs
Before executing a parts program the operator must:
Enter all the tools created with the aid of IPP into the magazine and the current tool table.
21.5.7 Converting active plane G17 <-> G18
Programs in IPP are basically made in active plane G17 (XY plane). If the machining operation on the
machine has to be carried out in active plane G18 (XZ plane), the program must first be converted
from G17 to G18. Reconversion is possible.
Editing is also only possible in G17.

INTERACTIVE PART PROGRAMMING (IPP) / GRAPHIPROG
206 Heidenhain
21.6 IPP programming tips
21.6.1 Using ICP to define contours
Once one of the options for the freely designed pocket contour or the contour recess has been
selected, ICP is loaded automatically.
The program is checked beforehand to see whether a traversing movement has been programmed at
least for the X- and Y-axes. If not, the user is requested to enter a traversing movement.
21.6.2 IPP proposals
The proposals generated during data entry in IPP are based on the table data stored in the CNC (tool
and technology tables) and on a special IPP start macro. The proposals made in the IPP start macro
can be adapted to suit individual requirements.
21.6.3 Maximum feed rates and spindle speeds
The feed rates and spindle speeds proposed in IPP operation are calculated from the data contained
in the technology tables. If the limitations of the machine tool used are not taken into account in this
process, the possibility exists that the proposed feed rates and spindle speeds will exceed the
maximum values applicable to this machine tool.
For this reason the data stored in the technology tables should take account of the limitations of the
machine tool used.
The machine constant memory contains the maximum allowable values of the feed speeds and
spindle speeds for this machine tool.
21.6.4 Optimizing programming and machining times
1. Centre drill hole, change tool and drill. Repeat operation for each drill hole.
2. Centre all drill holes, change tool and finish all drill holes.
Note
Always decide on the optimization strategy before IPP programming, never afterwards!
21.6.5 Changing IPP programs using the DIN editor
We would like to advise you to change all IPP-generated programs with the aid of IPP. If this should
not be possible or desirable, then it is easy to change programs manually thanks to the standard DIN
code programs generated by IPP.
Program changes which are made manually are lost if a feature which has been changed manually is
later modified in the IPP mode "Change line", to be precise for the reason that IPP deletes the entire
feature and regenerates it.
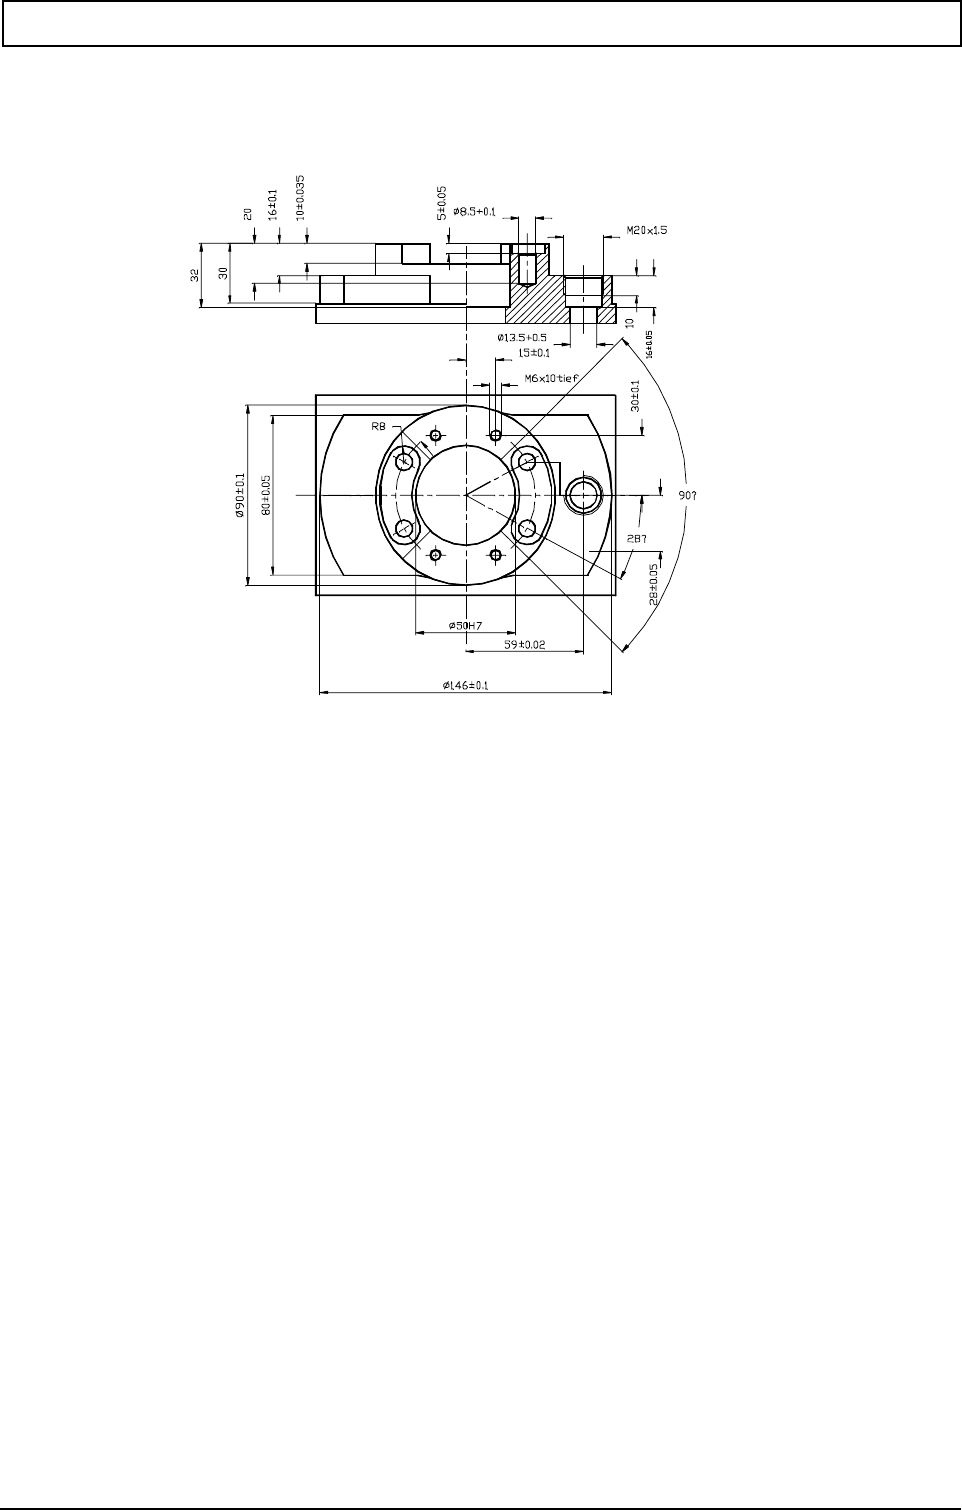
INTERACTIVE PART PROGRAMMING (IPP) / GRAPHIPROG
20000710 MillPlus V410 207
21.7 IPP program examples
This example discusses some features of IPP. The workshop drawing shown below represents a
workpiece whose manufacturing sequence is determined by the programmer.
The following sequence was selected for this example:
- Definition of blank 21.7.2
- Clamping 21.7.3
- Facing 21.7.4
- Tapping a rectangle 21.7.5
- Milling freely formed pocket 21.7.6
- Milling circular groove 21.7.7
- Milling round pocket (for thread) 21.7.8
- Milling round pocket (50 mm dia.) 21.7.9
- Milling freely formed contour 21.7.10
- Boring and countersinking (8.5 mm dia.) 21.7.11
- Boring and threading (M6) 21.7.12
- Threading (M20 x 1.5) 21.7.13
INTERACTIVE PART PROGRAMMING (IPP) / GRAPHIPROG
208 Heidenhain
21.7.1 Preparations for programming the examples
To complete the present example, the tool table should at least contain the following tools:
- End milling cutter radius 10 mm
- Groove milling cutter radius 5 mm
- Drill bit radius 4.25 mm
- Drill bit radius 2.5 mm
- Screw tap M20 x 1.5
- Screw tap M6
- Centre drill radius 6 mm
Make sure that the tool table is completely defined, so that the recommended feed rates and spindle
speeds are given.
Adoption of the IPP program example requires creation of a new program.
21.7.2 Definition of blank
The dimensions of the blank are: 150 mm, 100 mm, 45 mm.
Enter: I150, J100, K45, Q1=12, X75, Y50, Z0, Z1=1
Note
Z1 is the offset of the upper surface for facing.
The zero point is placed at the centre of the blank. The graphic window is based on the co-ordinates
and the zero point of the blank.
INTERACTIVE PART PROGRAMMING (IPP) / GRAPHIPROG
20000710 MillPlus V410 209
21.7.3 Clamping
Select the IPP feature for a vice:
Enter: I1, V100, L34
Note
The workpiece should protrude at least 33 mm from the top edge of the vice.
INTERACTIVE PART PROGRAMMING (IPP) / GRAPHIPROG
210 Heidenhain
21.7.4 Facing
In this stage the offset (Z1 of the definition of the blank) is removed.
Enter: U150 V100 W1 X0 Y0 Z0
Facing tool R10
Enter: K1=1 K4=67 W5=10 W1=2 W2=0 F148 S254
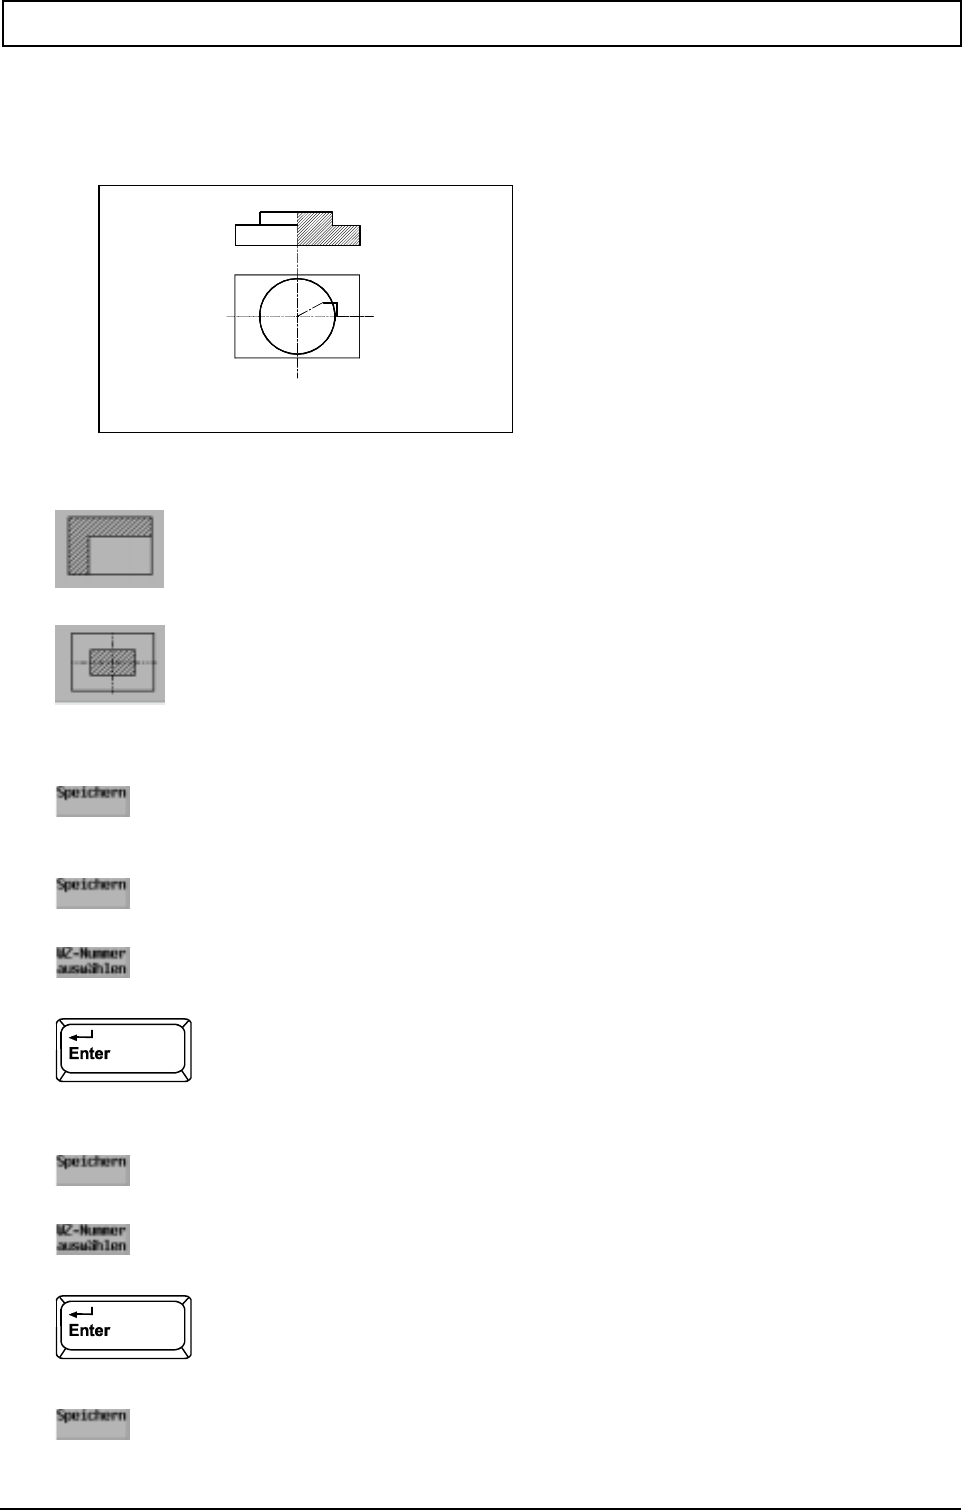
INTERACTIVE PART PROGRAMMING (IPP) / GRAPHIPROG
20000710 MillPlus V410 211
21.7.5 Tapping a rectangle
Mill the round cam on the rectangular blank.
Enter: U1=90 V1=90 R1=45 U150 V100 R0 L16 A1=0 X0 Y0 Z0
Enter: A4=2 K2=0.1 K3=0.1 W1=2 K5=1 K4=80 K1=5
Facing tool R10
Enter: F148 S254
Facing tool R10
Enter: F148 S254
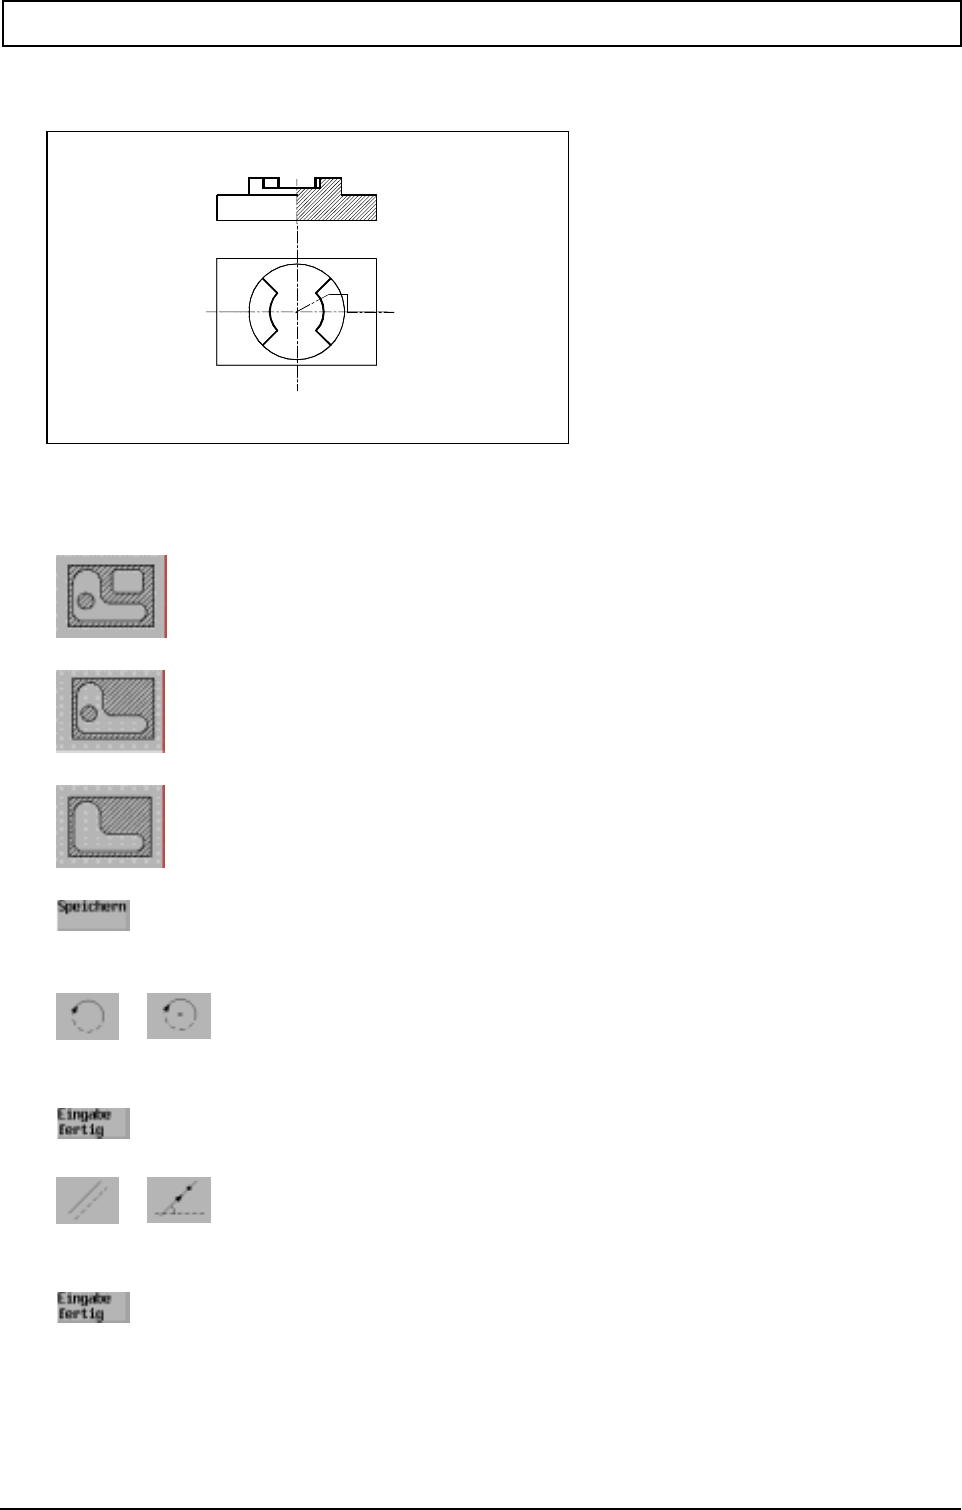
INTERACTIVE PART PROGRAMMING (IPP) / GRAPHIPROG
212 Heidenhain
21.7.6 Milling a freely formed pocket
Enter: X0 Y50 Z0 L10
A freely formed contour is created with the aid of ICP.
Enter: I0 J0
Enter: X0 Y0 B1=-135
INTERACTIVE PART PROGRAMMING (IPP) / GRAPHIPROG
20000710 MillPlus V410 213
Enter: I0 J0 R25
Enter: X0 Y0 B1=-45
Enter: I0 J0 R50
Enter: X0 Y0 B1=45
Enter: I0 J0 R25
INTERACTIVE PART PROGRAMMING (IPP) / GRAPHIPROG
214 Heidenhain
Enter: X0 Y0 B1=135
Enter: X0 Y50 I0 J0
Enter: A3=0 A4=1 N=8000 K2=0.2 W1=2 K5=1 K4=50 K1=5
Groove milling cutter R5
Enter: F90 S509 F1=90
Groove milling cutter R5

INTERACTIVE PART PROGRAMMING (IPP) / GRAPHIPROG
20000710 MillPlus V410 215
Enter: F90 S509
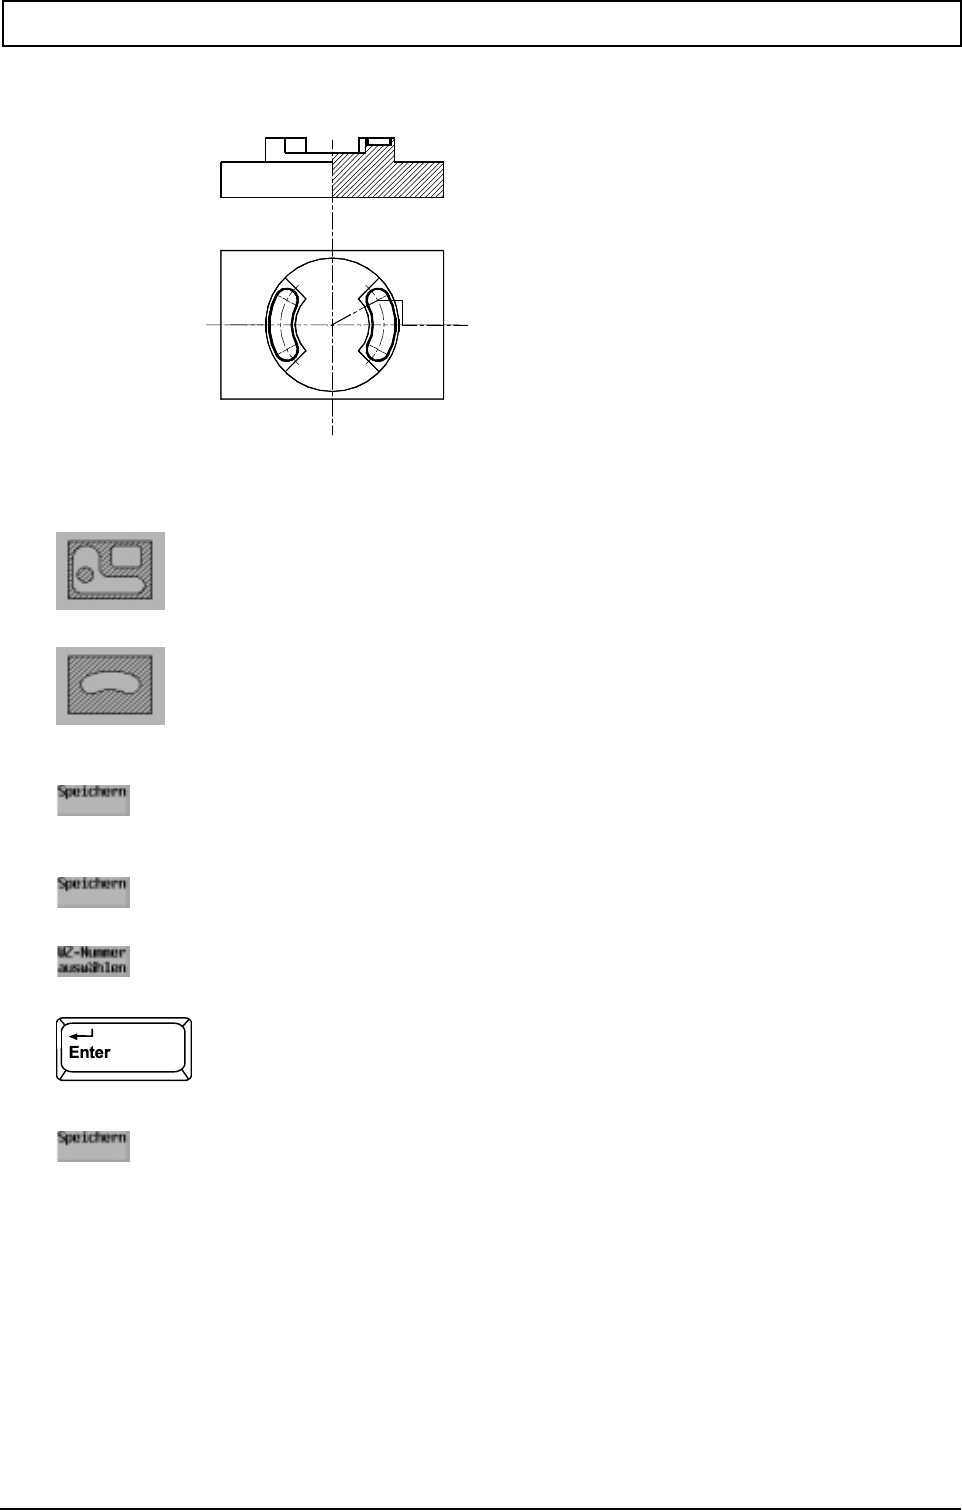
INTERACTIVE PART PROGRAMMING (IPP) / GRAPHIPROG
216 Heidenhain
21.7.7 Milling circular groove
Enter: A1=-28 A2=56 R8 R1=35 L5 X0 Y0 Z0 P1=2 A3=124
Enter: A1=0 A2=1 A3=0 W1=2 K1=5 K5=1 A5=90 K2=0
Groove milling cutter R5
Enter: F90 S509 F1=90
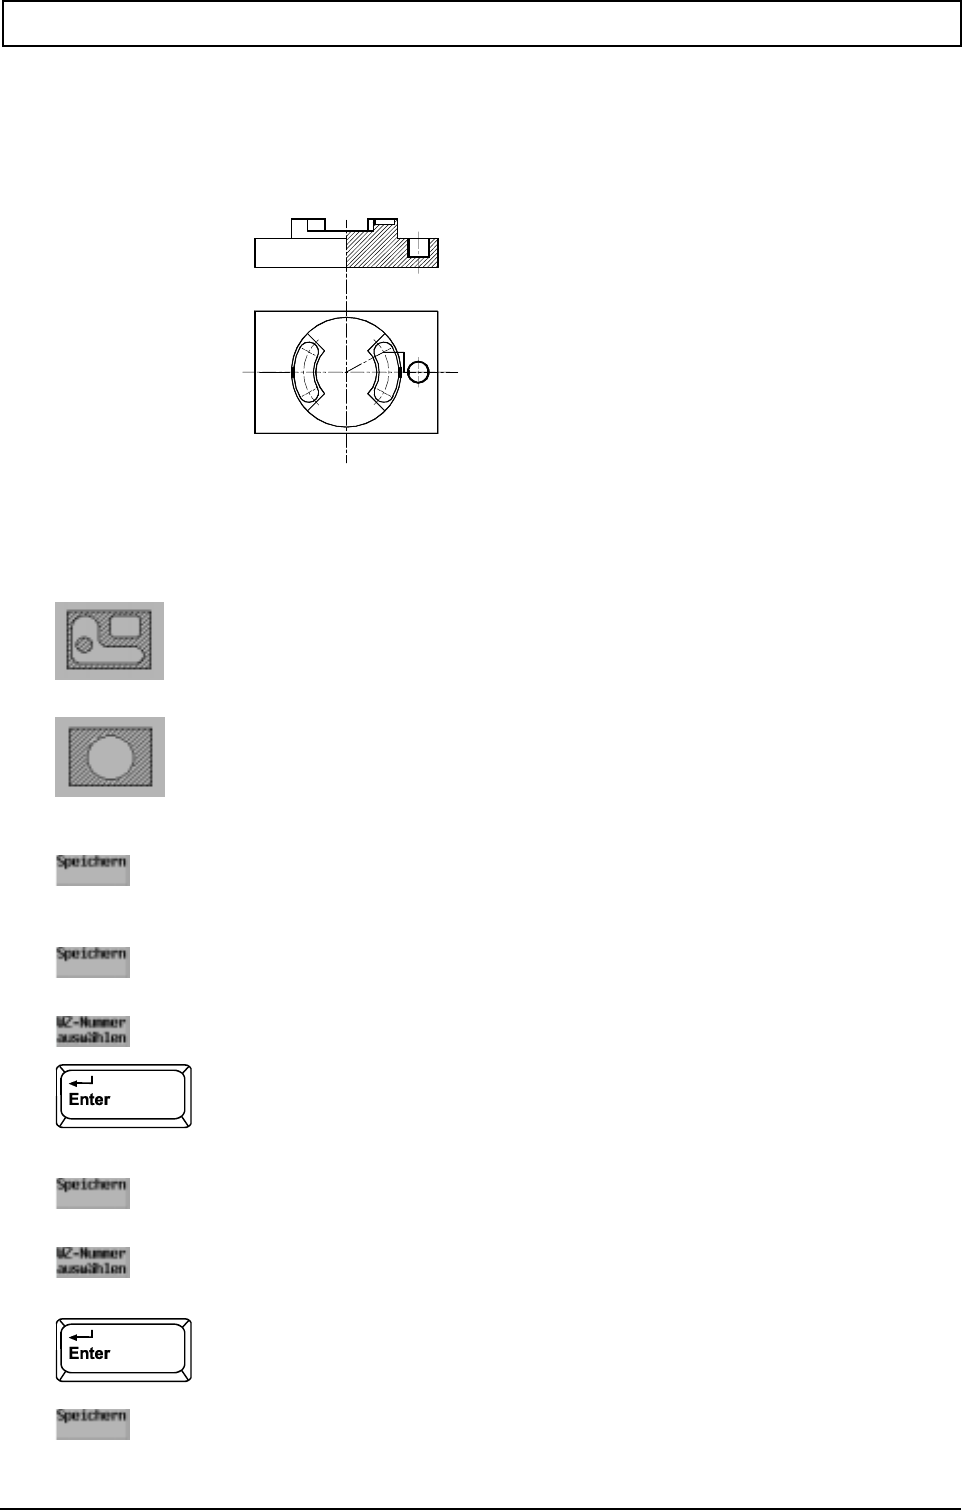
INTERACTIVE PART PROGRAMMING (IPP) / GRAPHIPROG
20000710 MillPlus V410 217
21.7.8 Milling round pocket (for thread)
Mill round pocket, into which the thread (M20 x 1.5) is subsequently cut.
Enter: R9.25 L16 X59 Y0 Z-16
Enter: A3=0 A4=2 A5=90 K2=0.1 K3=0.1 W1=2 K5=1 K4=50 K1=5
Groove milling cutter R5
Enter: F90 S509 F1=90
Groove milling cutter R5
Enter: F90 S509 F1=90
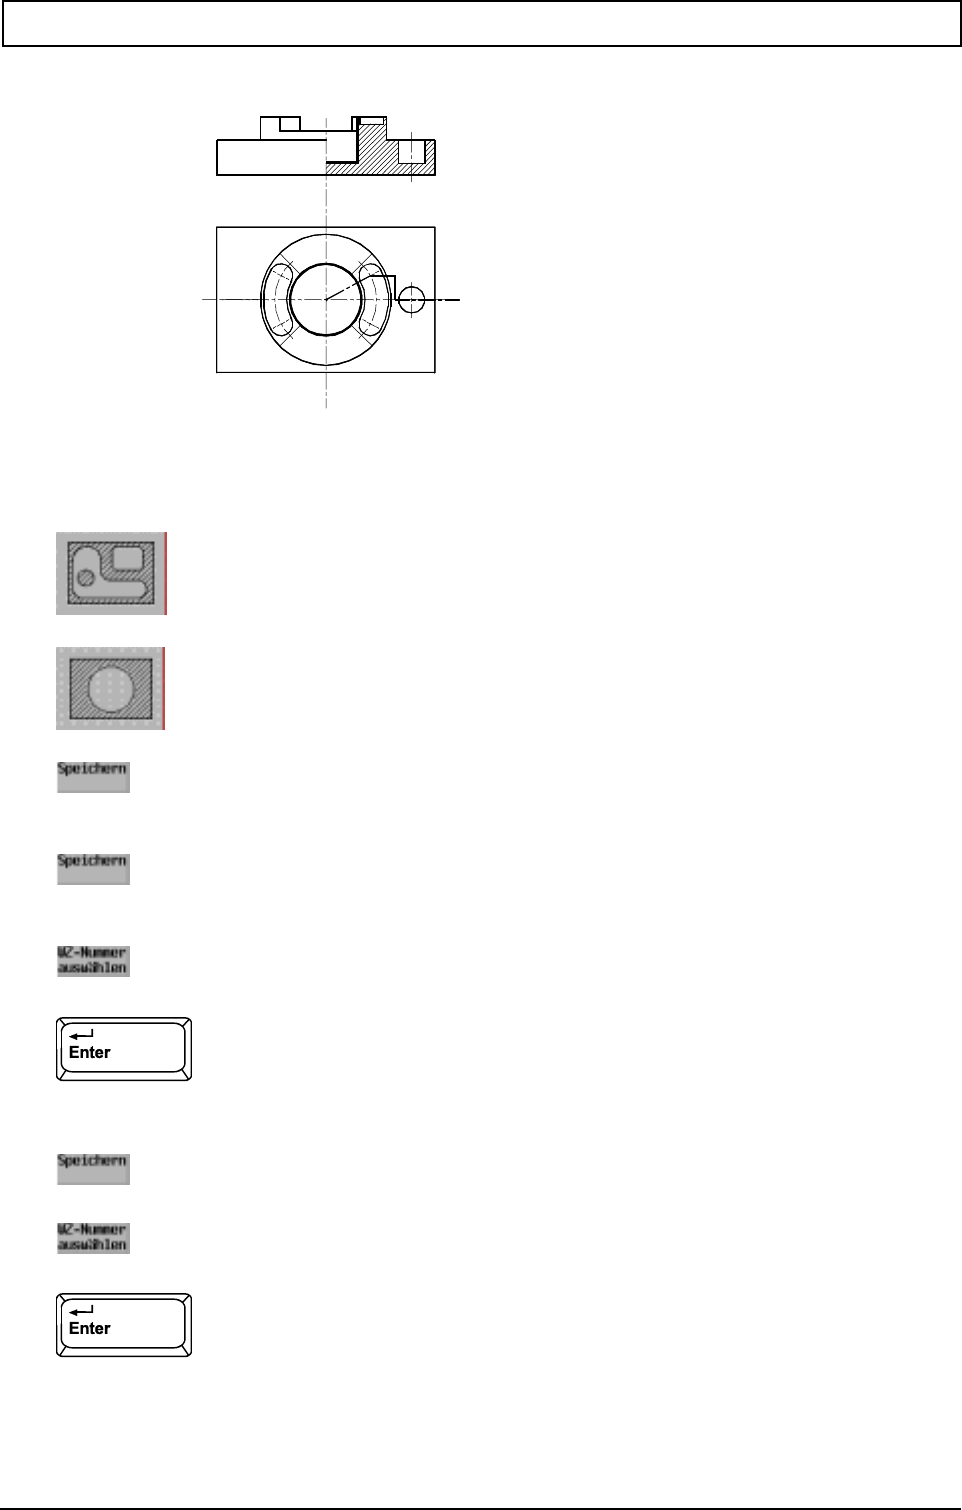
INTERACTIVE PART PROGRAMMING (IPP) / GRAPHIPROG
218 Heidenhain
21.7.9 Milling round pocket (50 mm dia)
Enter: R25.01 L22 X0 Y0 Z-10
Enter: A3=0 A4=1 A5=90 K2=0.2 K3=0 W1=2 K5=1 K4=50 K1=5
Groove milling cutter R5
Enter: F90 S509 F1=90
Groove milling cutter R5
Enter: F90 S509

INTERACTIVE PART PROGRAMMING (IPP) / GRAPHIPROG
20000710 MillPlus V410 219
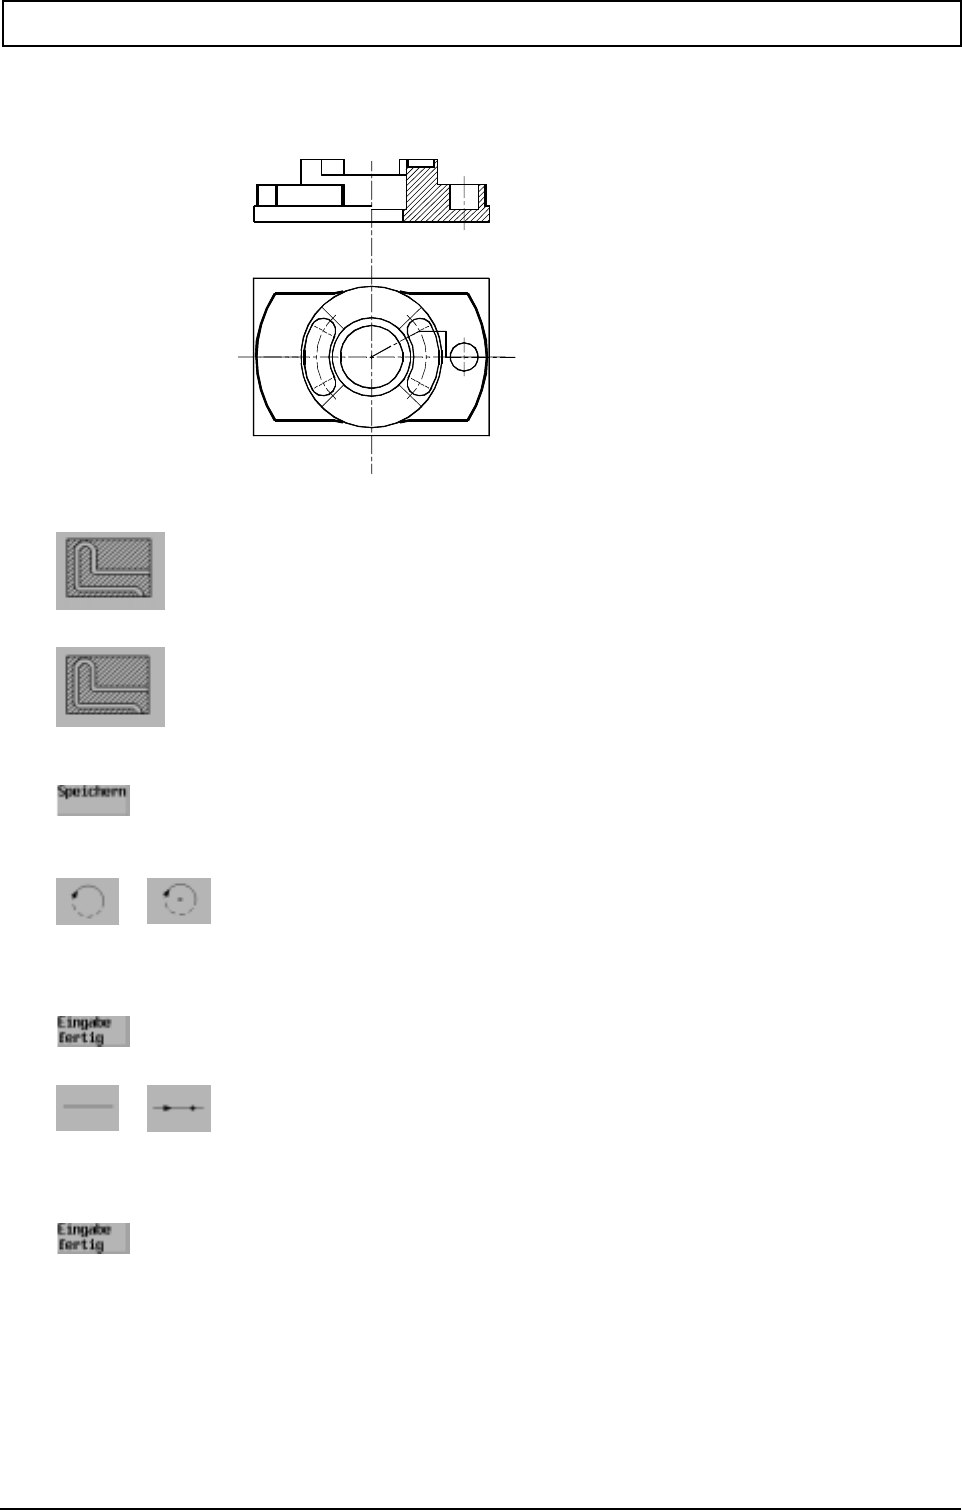
INTERACTIVE PART PROGRAMMING (IPP) / GRAPHIPROG
220 Heidenhain
21.7.10 Freely formed contour
Enter: X-73 Y0 Z-16 I2=1 R2 L14 K5=1
A freely formed contour is created with the aid of ICP.
Enter: I0 J0
Enter: X0 Y40
INTERACTIVE PART PROGRAMMING (IPP) / GRAPHIPROG
20000710 MillPlus V410 221
Enter: R15
Enter: I0 J0 R45
Enter: R15
Enter: X50 Y40
Enter: I0 J0 R73
INTERACTIVE PART PROGRAMMING (IPP) / GRAPHIPROG
222 Heidenhain
Enter: X0 Y-40
Enter: R15
Enter: I0 J0 R45
Enter: R15
Enter: X-50 Y-40
INTERACTIVE PART PROGRAMMING (IPP) / GRAPHIPROG
20000710 MillPlus V410 223
Enter: X-73 Y0 I0 J0
Enter: A4=1 K2=0.2 R2 W1=2 K1=5
End milling cutter R10
Enter: F148 S254 F1=148
End milling cutter R10
Enter: F148 S254
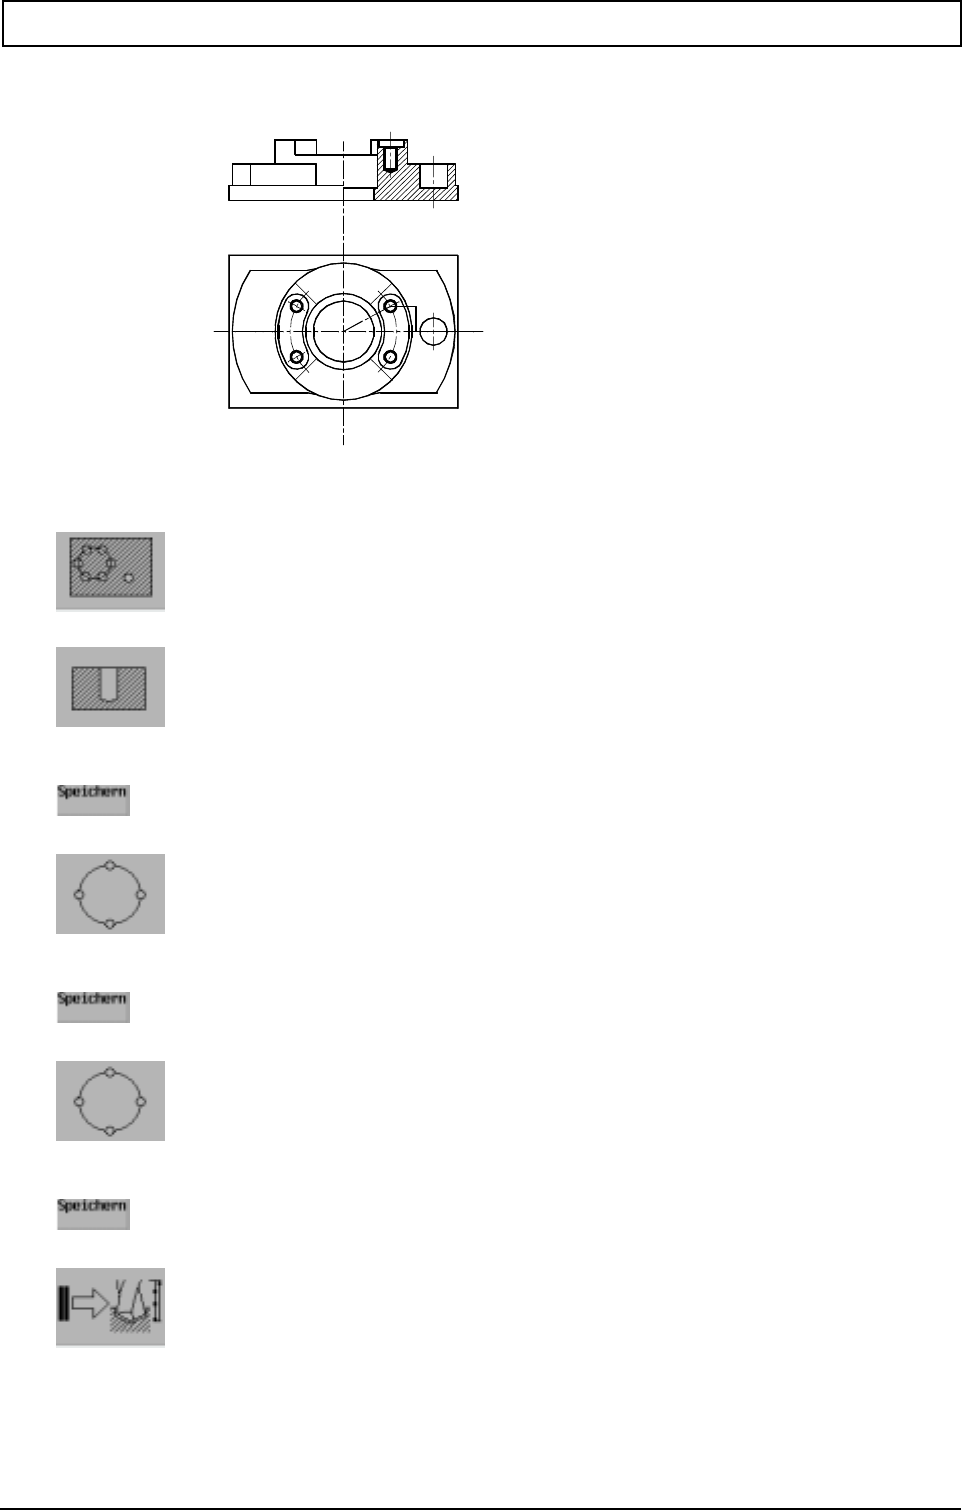
INTERACTIVE PART PROGRAMMING (IPP) / GRAPHIPROG
224 Heidenhain
21.7.11 Boring and countersinking (8.5 mm dia)
Enter: D8.5 L1=15 I1
Enter: P1=2 R35 A1=-28 A2=56 X0 Y0 Z-5
Enter: P1=2 R35 A1=152 A2=56 X0 Y0 Z-5
INTERACTIVE PART PROGRAMMING (IPP) / GRAPHIPROG
20000710 MillPlus V410 225
Drill R4.25
Enter: W1=2 W2=5 K5 F40 S299
Note
Value 5 is to be entered for W2, as the zero point is located in the Z axis, 5 mm above the holes.
Centre drill R6
Enter: W2=5 F30 S238 F1=30
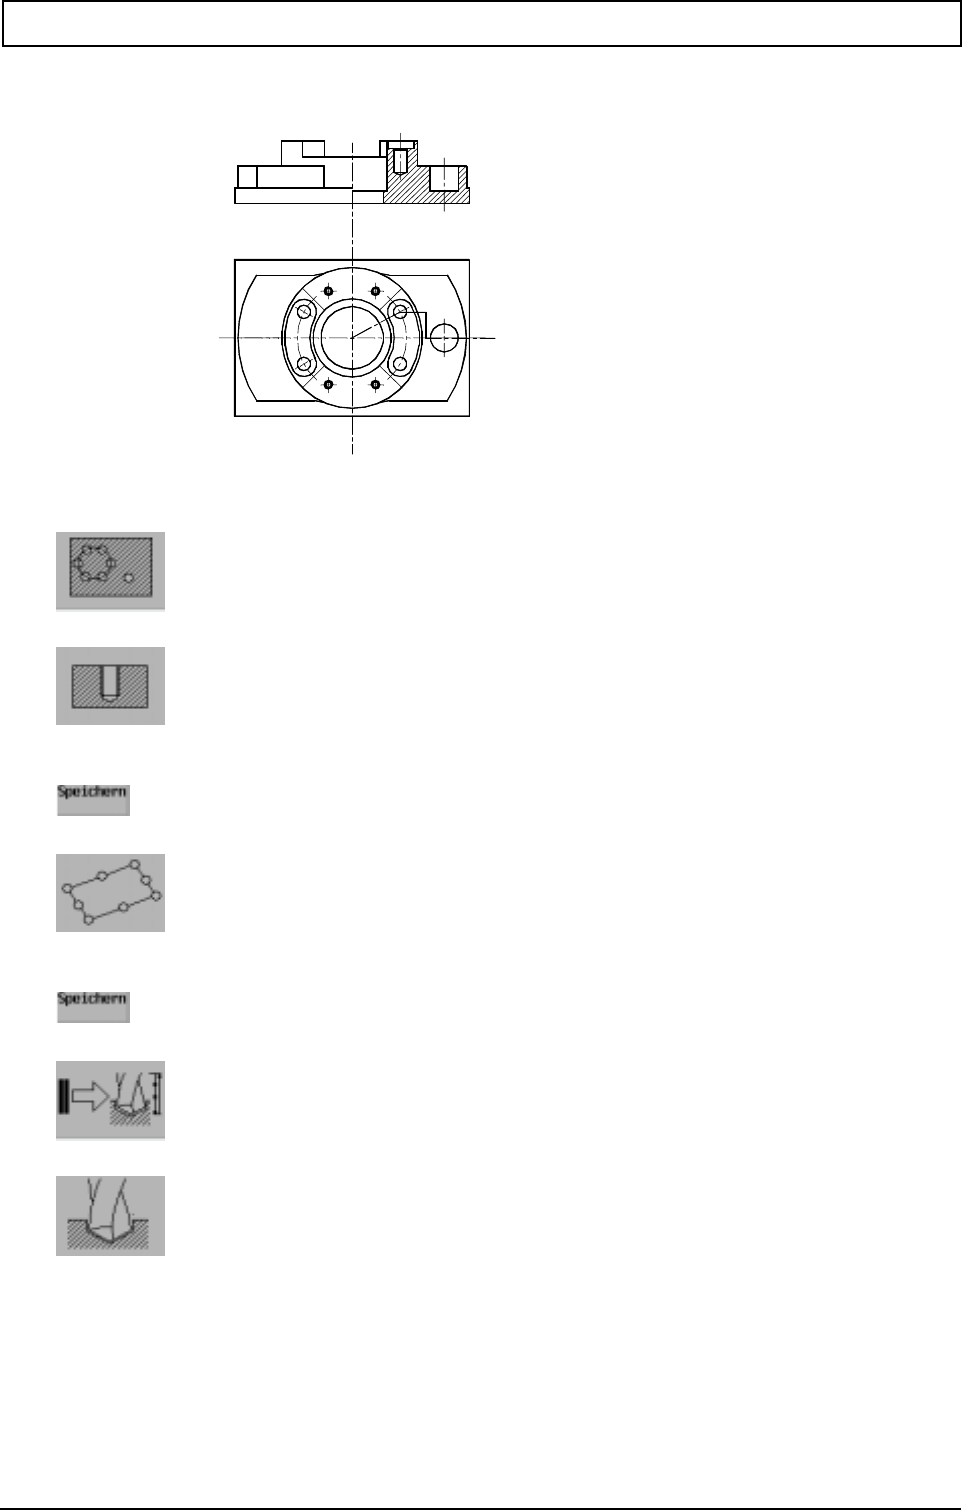
INTERACTIVE PART PROGRAMMING (IPP) / GRAPHIPROG
226 Heidenhain
21.7.12 Boring and threading (M6)
Enter: D6 L2=10 I0
Enter: P1=2 U30 A1=0 P2=2 V60 A2=90 X-15 Y-30 Z-10
INTERACTIVE PART PROGRAMMING (IPP) / GRAPHIPROG
20000710 MillPlus V410 227
Drill bit R2.5
Enter: W1=2 W2=10 F40 S509
Screw tap M6
Enter: W1=2 W2=10 F318 S318
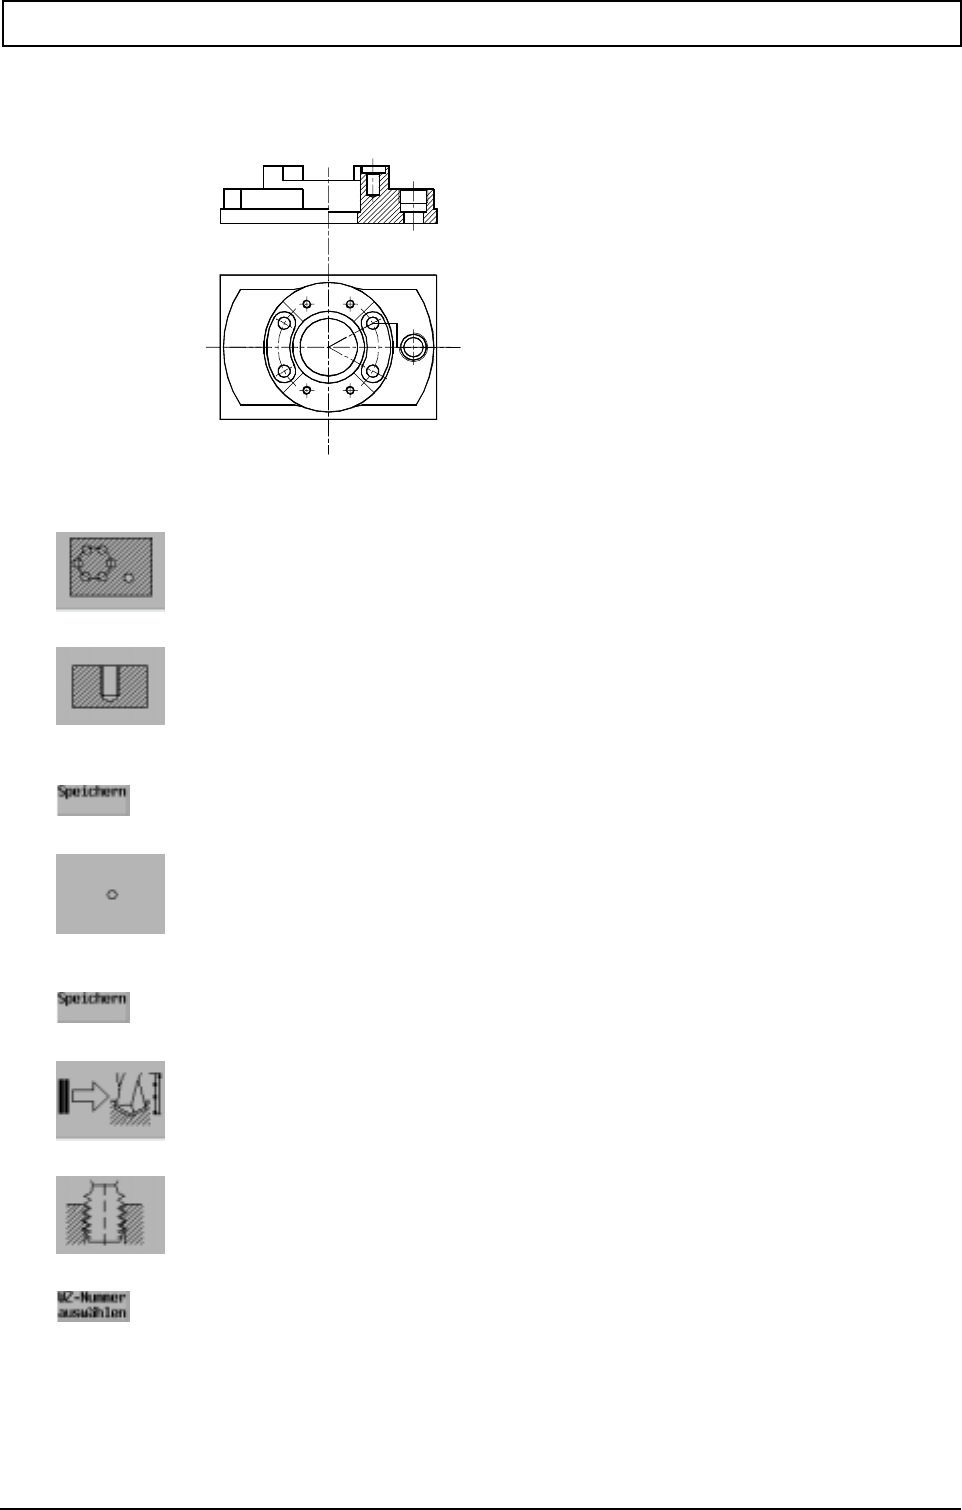
INTERACTIVE PART PROGRAMMING (IPP) / GRAPHIPROG
228 Heidenhain
21.7.13 Threading (M20 x 1.5)
Enter: D20 F1.5 L2=10 I0
Enter: X59 Y0 Z-16
Screw tap M20 x 1.5
INTERACTIVE PART PROGRAMMING (IPP) / GRAPHIPROG
20000710 MillPlus V410 229
Enter: W2=16 F142.5 S95
21.7.14 End of program

INTERACTIVE PART PROGRAMMING (IPP) / GRAPHIPROG
230 Heidenhain
21.8 IPP start macro
IPP operation calls for a special file in the macro memory before a complete program can be created,
to be precise the macro N9999998. This file is to be created specially for the machine tool and the
most common application. Users can tailor this file if necessary to suit their own requirements.
The values contained in the start file are purely initial values (or proposals).
An example of a standard start macro is shown below. The values assigned to the parameters are
used in IPP as standard values for specific addresses.
INTERACTIVE PART PROGRAMMING (IPP) / GRAPHIPROG
20000710 MillPlus V410 231
N9999998 (IPP Milling default setup macro)
N1
N1 (Graphic of blank contour)
N1
N100 E701=100 (X Length component)
N101 E702=100 (Y Length component)
N102 E703=100 (Z Length component)
N103 E704=1 (Stock on top plane)
N104 E705=100 (Diameter component)
N1
N1 (Shifting of blank)
N1
N105 E707=-50 (X Distance to zero point)
N106 E708=-50 (Y Distance to zero point)
N107 E709=0 (Z Distance to zero point)
N108 E710=1 (Zero point material 0=Middle 1=Left/Front)
N1
N1 (General parameters)
N1
N109 E712=15 (Extra space window)
N110 E713=10 (Label number)
N111 E714=50 (Retract after action)
N112 E715=1 (Coolant 0=Off 1=M8 2=M7)
N113 E717=1 (Auto-tool generate 0=No 1=Yes)
N1
N1 (Machine table dimensions)
N1
N114 E720=900 (X Length machine plate)
N115 E721=480 (Y Length machine plate)
N1
N1 (Fixture for jaw chuck)
N1
N116 E723=210 (Round clamp diameter)
N117 E724=30 (Yaw height)
N118 E725=130 (Round clamp height)
N119 E726=40 (Yaw length round clamp)
N1
N1 (Fixture for vice)
N1
N120 E728=100 (Clamp length)
N121 E729=40 (Yaw width)
N122 E730=30 (Clamp height)
N123 E731=100 (Bench clamp thickness)
N124 E732=150 (Bench clamp length)
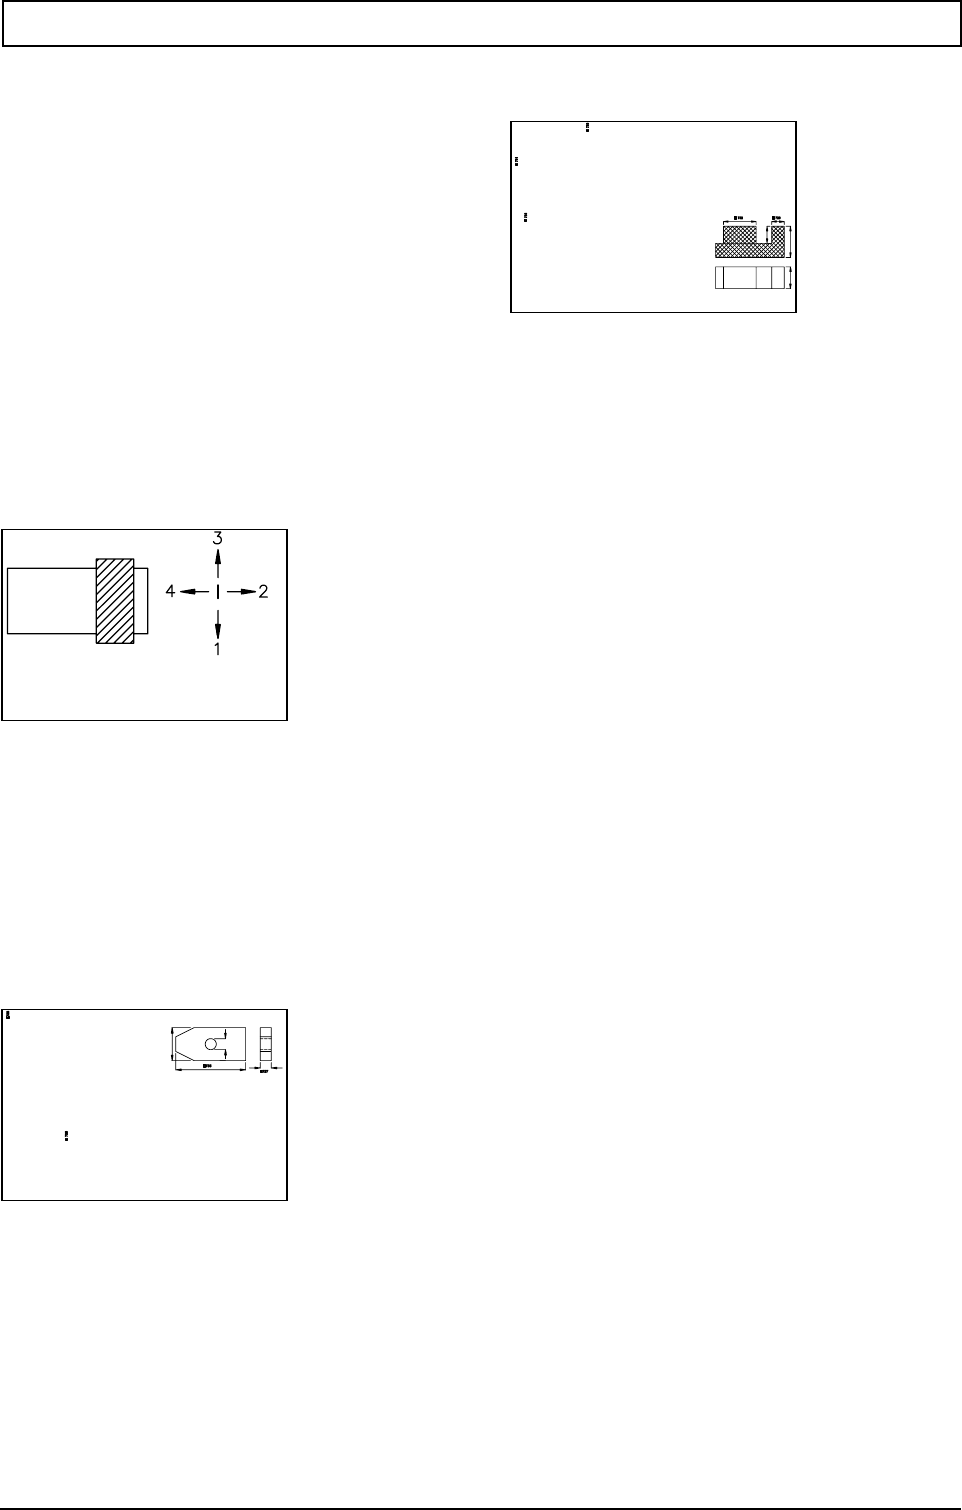
INTERACTIVE PART PROGRAMMING (IPP) / GRAPHIPROG
232 Heidenhain
N125 E733=1 (Clamping orientation)
N1
N1 (Gripping jaws)
N1
N126 E735=160 (Clamping bar length)
N127 E736=40 (Clamping bar width)
N128 E737=20 (Clamping bar thickness)
N129 E738=12 (Clamping bold diameter)
N1
N1 (Facing)
N1
N130 E740=10 (Incremental depth facing)
N131 E741=115 (Toolnumber for facing)

INTERACTIVE PART PROGRAMMING (IPP) / GRAPHIPROG
20000710 MillPlus V410 233
N132 E742=67 (Cutting width % face milling)
N133 E743=10 (Clearance in plane face milling)
N134 E744=2 (Clearance tool axis face milling)
N135 E745=7 (Machining code face milling)
N136 E746=0 (Facing-tool 0=On 1=Outside 2=Rapid)
N1
N1 (Drillings)
N1
N137 E750=0 (Chamfer)
N138 E751=118 (Drill top angle)
N139 E752=90 (Sink top angle)
N1
N1 (Reaming)
N1
N140 E755=10 (Tooltype code reaming)
N141 E756=5 (Machining code reaming)
N142 E757=3 (Space for blind hole reaming)
N143 E758=5 (Overshoot for hole reaming)
N1
N1 (Sinking)
N1
N144 E760=174 (Toolnumber sinking)
N145 E761=3 (Machining code sinking)
N146 E763=2 (Tooltip distance sink)
N1
N1 (Centering)
N1
N147 E765=0 (Dwell time general operations)
N148 E766=172 (Toolnumber centering)
N149 E767=1 (Machining code centering)
N150 E768=3 (Depth center)
N1
N1 (General cycles)
N1
N151 E769=2 (Clearance in tool axis)
N152 E770=0 (Safety clearance in tool axis)
N1
N1 (Drilling)
N1
N153 E773=3 (Tooltype code drilling)
N154 E774=2 (Machining code drilling)
N155 E775=2 (Overshoot for drilled through hole)
N1
N1 (Deep-hole drilling)
N1
N156 E777=10 (Incremental depth deep first drill)
N157 E778=0.5 (Incremental decrease after each step)
N158 E779=0.1 (Clearance after each step)
N1
N1 (Boring)
N1
N159 E783=13 (Tooltype code boring)

INTERACTIVE PART PROGRAMMING (IPP) / GRAPHIPROG
234 Heidenhain
N160 E784=2 (Clearance boring in tool axis)
N161 E785=0 (Extra clearance boring in tool axis)
N162 E788=6 (Machining code boring)
N163 E789=3 (Space for blind hole boring)
N164 E790=4 (Overshoot for hole boring)
N165 E792=0.2 (Dwell time boring)
N1
N1 (Tapping)
N1
N166 E795=9 (Tooltype code tapping)
N167 E796=0 (Dwell time tapping)
N168 E797=3 (Clearance tapping in tool axis)
N169 E798=4 (Machining code tapping)
N170 E799=2 (Minimum thread runout tapping)
N171 E800=2 (Number of revolutions for stop tapping)
N172 E801=5 (Safety clearance tapping in tool axis)
N173 E802=3 (Space for blind hole tapping)
N1
N1 (Milling or countersinking of blind hole)
N1
N174 E805=23 (Toolnumber milling)
N175 E806=7 (Machining code milling)
N176 E807=10 (Incremental depth milling)
N177 E808=83 (Cutting width % milling)
N178 E809=1 (Drill or mill operation)
N1
N1 (Countersinking or bevelling of blind hole)
N1
N179 E811=133 (Toolnumber for drilling)
N180 E812=2 (Machining code drilling)
N1
N1 (General milling, pocket, recess and contours)
N1
N181 E813=86 (Toolnumber roughing)
N182 E814=7 (Machining code roughing)
N183 E815=7 (Machining code rough/drill)
N184 E816=87 (Toolnumber finishing)
N185 E817=7 (Machining code finishing)
N1
N1 (Pocket)
N1
N186 E820=10 (Incremental depth pocket)
N187 E821=8000 (Macro number counter)
N188 E822=50 (Cutting width % pocket)
N189 E823=1 (Finishing pocket 0=No 1=Yes)
N190 E824=1 (Mill direction 1=Climb -1=Conv)
N191 E825=0.4 (Finishing allowance pocket)
N192 E826=1 (Drilling pocket 0=No 1=Yes)
N193 E827=0 (Radius of the corner)
N1
N1 (Contours)
N1
N194 E830=10 (Start distance contour)
N195 E831=10 (Incremental depth contour)
N196 E832=0.4 (Finishing allowance contour)
N197 E833=1 (Finishing contour 0=No 1=Yes)
N198 E834=0 (Drilling contour 0=No 1=Yes)

INTERACTIVE PART PROGRAMMING (IPP) / GRAPHIPROG
20000710 MillPlus V410 235
N1
N1 (Recess milling)
N1
N199 E838=0.4 (Finishing allowance edge)
N200 E839=10 (Incremental depth edge)
N201 E840=1 (Finishing edge 0=No 1=Yes)
N202 E841=83 (Cutting width % edge)
N1
N1 (Tapping)
N1
N203 E899=10 (Number tap diameters max 16)
N204 E900=2 (Diameter tap 1)
N205 E901=0.4 (Pitch 1)
N206 E902=1.6 (Diameter drill hole 1)
N207 E903=3 (Diameter tap 2)
N208 E904=0.5 (Pitch 2)
N209 E905=2.5 (Diameter drill hole 2)
N210 E906=4 (Diameter tap 3)
N211 E907=0.7 (Pitch 3)
N212 E908=3.3 (Diameter drill hole 3)
N213 E909=5 (Diameter tap 4)
N214 E910=0.8 (Pitch 4)
N215 E911=4.2 (Diameter drill hole 4)
N216 E912=6 (Diameter tap 5)
N217 E913=1 (Pitch 5)
N218 E914=5 (Diameter drill hole 5)
N219 E915=8 (Diameter tap 6)
N220 E916=1.25 (Pitch 6)
N221 E917=6.8 (Diameter drill hole 6)
N222 E918=10 (Diameter tap 7)
N223 E919=1.5 (Pitch 7)
N224 E920=8.5 (Diameter drill hole 7)
N225 E921=12 (Diameter tap 8)
N226 E922=1.75 (Pitch 8)
N227 E923=10.2 (Diameter drill hole 8)
N228 E924=16 (Diameter tap 9)
N229 E925=2 (Pitch 9)
N230 E926=14 (Diameter drill hole 9)
N231 E927=20 (Diameter tap 10)
N232 E928=2.5 (Pitch 10)
N233 E929=17.5 (Diameter drill hole 10)
N234 E930=20 (Diameter tap 11)
N235 E931=2.5 (Pitch 11)
N236 E932=17.5 (Diameter drill hole 11)
N237 E933=20 (Diameter tap 12)
N238 E934=2.5 (Pitch 12)
N239 E935=17.5 (Diameter drill hole 12)
N240 E936=20 (Diameter tap 13)
N241 E937=2.5 (Pitch 13)
N242 E938=17.5 (Diameter drill hole 13)
N243 E939=20 (Diameter tap 14)
N244 E940=2.5 (Pitch 14)
N245 E941=17.5 (Diameter drill hole 14)
N246 E942=20 (Diameter tap 15)
N247 E943=2.5 (Pitch 15)
N248 E944=17.5 (Diameter drill hole 15)
N249 E945=20 (Diameter tap 16)

INTERACTIVE PART PROGRAMMING (IPP) / GRAPHIPROG
236 Heidenhain
N250 E946=2.5 (Pitch 16)
N251 E947=17.5 (Diameter drill hole 16)
N1
N1 (Material code)
N1
N252 E950=12 (Material code)
N1
N1 (Reserved parameter)
N1
N253 E961=1 (Reserved for internal use)
N254 E962=0 (Reserved for internal use)
N255 E963=0 (Reserved for internal use)
N256 E964=0 (Reserved for internal use)
N257 E965=0 (Reserved for internal use)
N258 E966=0 (Reserved for internal use)

INTERACTIVE PART PROGRAMMING (IPP) / GRAPHIPROG
20000710 MillPlus V410 237
Note
Before installation of IPP the IPP Startup Macro must be removed from the Startup directory

PROGRAM STRUCTURE AND BLOCK FORMAT
20000710 MillPlus V410 239
22. Program structure and block format
22.1 Program extract
%PM9001
N9001
N1 G17 S630 T1 M6
N2 G54
N3 G0 X60 Y30 Z-8 M3
N4 G1 Z-10 F50
N5 G43 X80 F100
N6 G42
:
M30
22.2 Memory identifier
Main program: program number.PM or %PM
Subprogram: program number.MM or %MM
22.3 Program number
N1 - N9999999
22.4 Program block
A program block consists of a several program words (max. 255 characters). Each address can only
be used once in the program block.
1 Block number N1
2 Geometric commands G17 S630
3 Technological commmands (S,F,T,M) T1 M3
Total N1 G17 S630 T1 M3
22.5 Block number
N1 - N9999999
The sequence of the block numbers is unimportant.
The blocks are executed in the programmed sequence.
22.6 Program word
Address, sign, number
(Positive sign can be deleted)
Positive word X21.43
Negative word Y-13.8
Indexed word X1=15.3
Calculated word =12.5+30
Y=2^5
Y=sqrt(25)
22.7 Input formats for axis addresses
Metric 6.3 X123456.789
Inch 5.4 X12345.6789
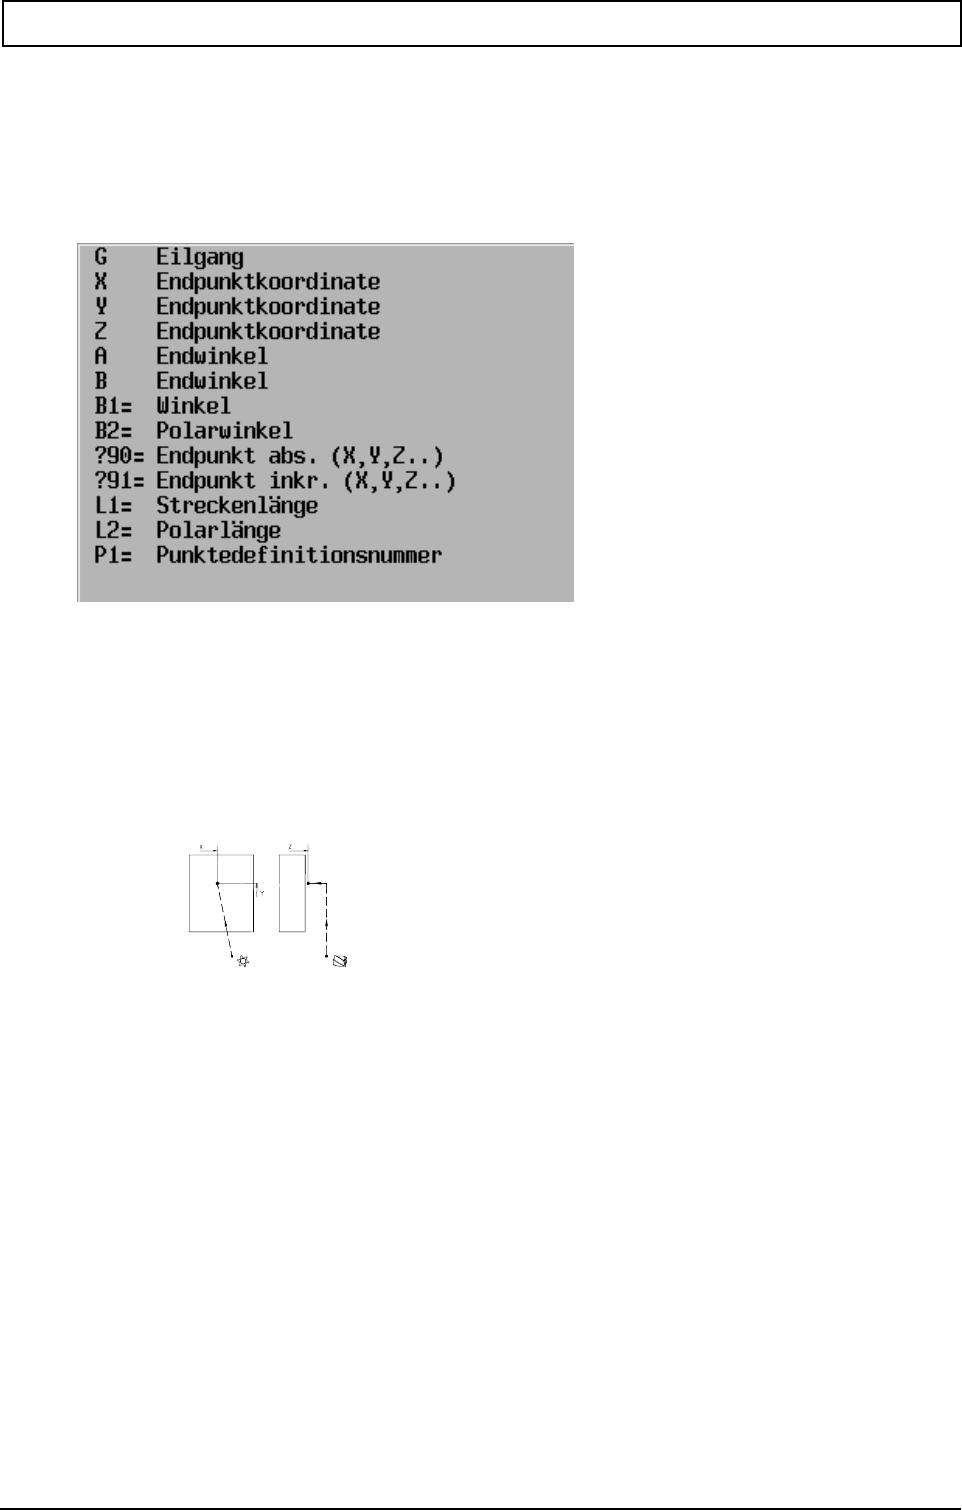
G-FUNCTIONS
20000710 MillPlus V410 241
23. G-Functions
23.1 Rapid traverse G0
N... G0 [axis coordinates]
Parameters
Example
N... G0 X25 Y15 Z30
Simultaneous movement in main plane XY, followed by movement in tool axis Z
Notes
At the start of a program and following each change of tool or swivel head, each active axis must be
programmed in a program block for traversing movements. Every axis is thus in the start position.
The positioning logic determines the sequence of the traverse movements in rapid traverse.
Tool movement: to workpiece G17,18,19 away from workpiece G17,18,19
1st axis movement 4.+5 4.+5 4.+5 Z Y X
2nd axis movement X+Y X+Z Y+Z X+Y X+Z Y+Z
3rd axis movement Z Y X 4.+5. 4.+5. 4.+5.
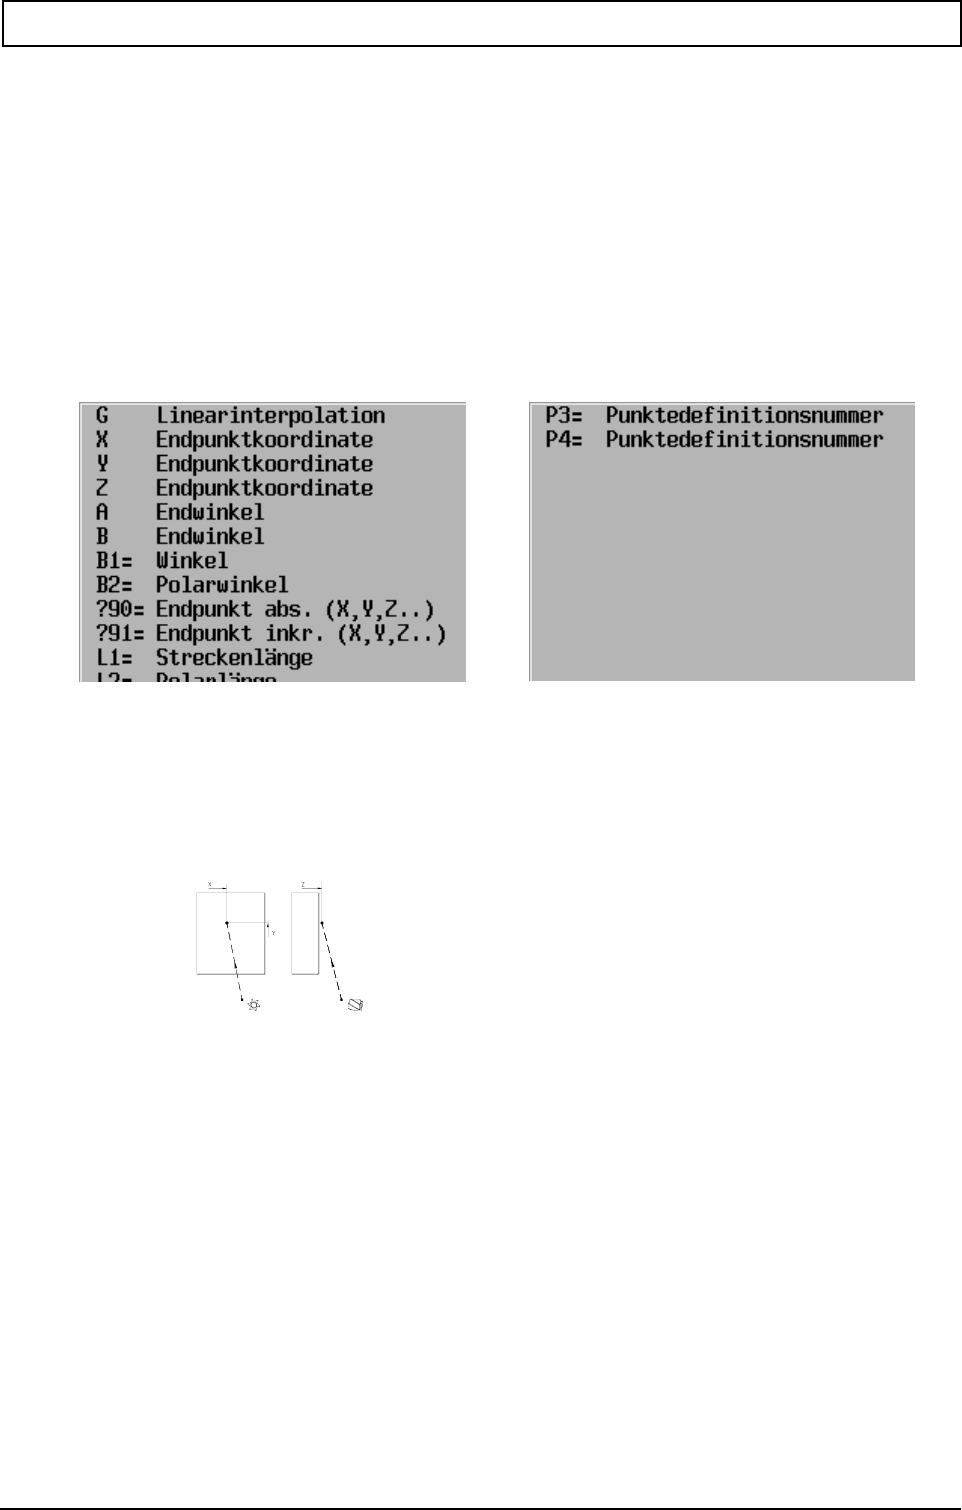
G-FUNCTIONS
242 Heidenhain
23.2 Linear interpolation G1
Linear interpolation in the main level:
N.. G1 {X..} {Y..} {Z..} {F..}
3 D interpolation:
N.. G1 X.. Y.. Z.. {F..}
One axis of rotation:
N.. G1 {A..} {B..} {C..} {A40=..} {B40=..} {C40=..} {F...}
Several axes:
N... G1 {X..} {Y..} {Z..} {A..} {B..} {C..} {A40=..} {B40=..} {C40=..} {F...}
Parameters
Examples
1. 3 D interpolation
:
N14 G0 X10 Y5 Z20
N15 G1 X20 Y10 Z40 F100 Simultaneous movement of the axes
:
:
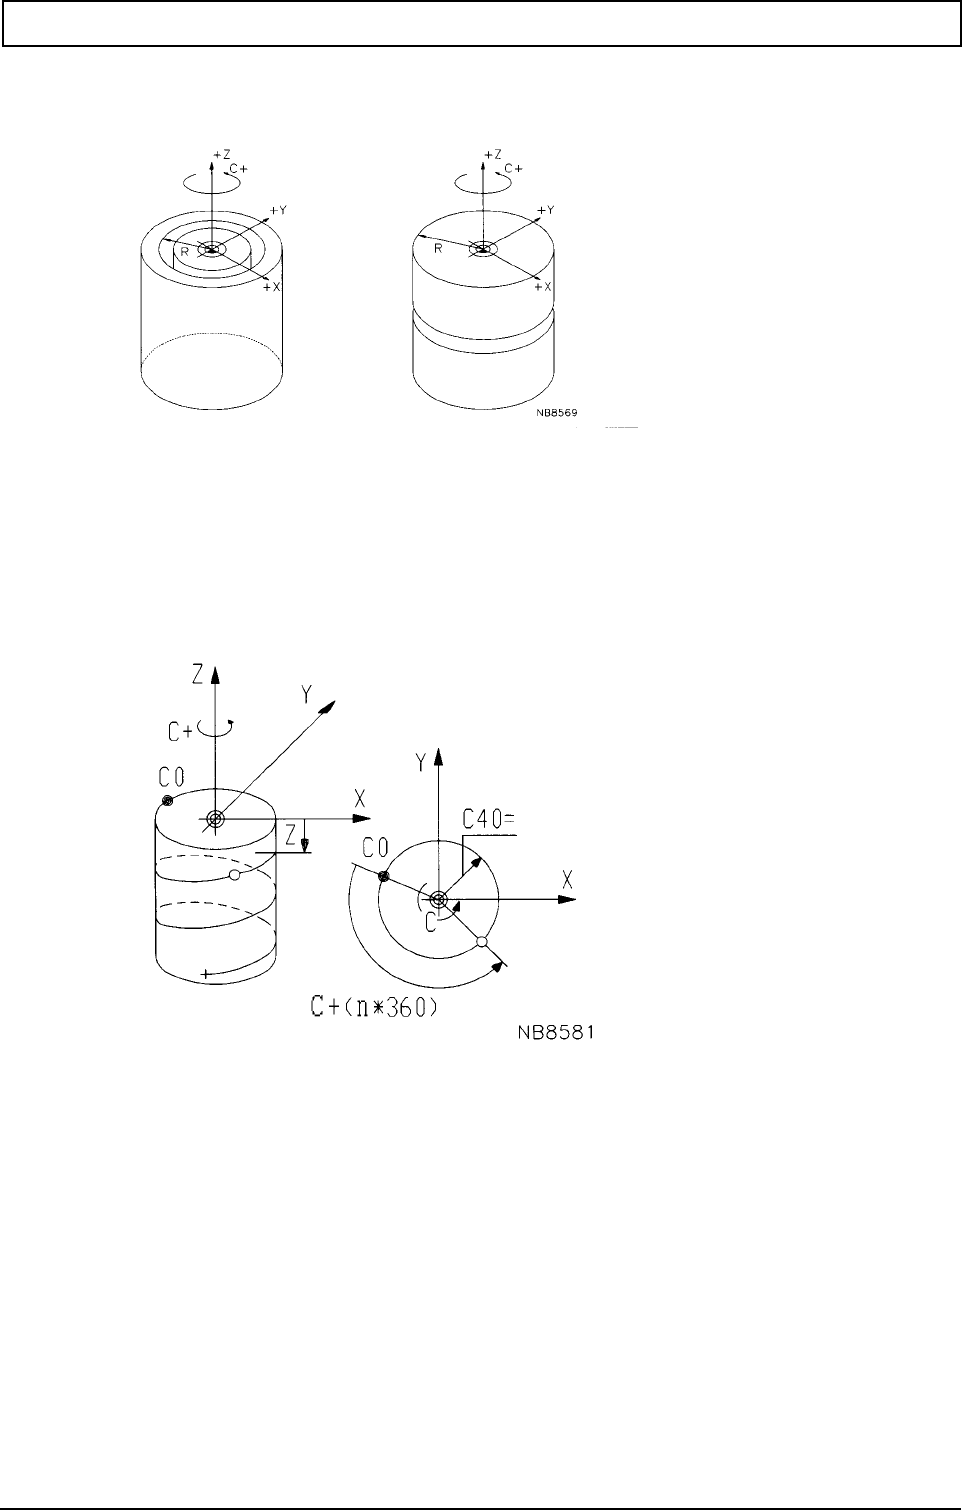
G-FUNCTIONS
20000710 MillPlus V410 243
2. Programming rotary axes, with and without linear axis
One rotary axis and one linear axis:
Z and C axis
(X and A axis)
(Y and B axis)
Thread on a cylindrical surface:
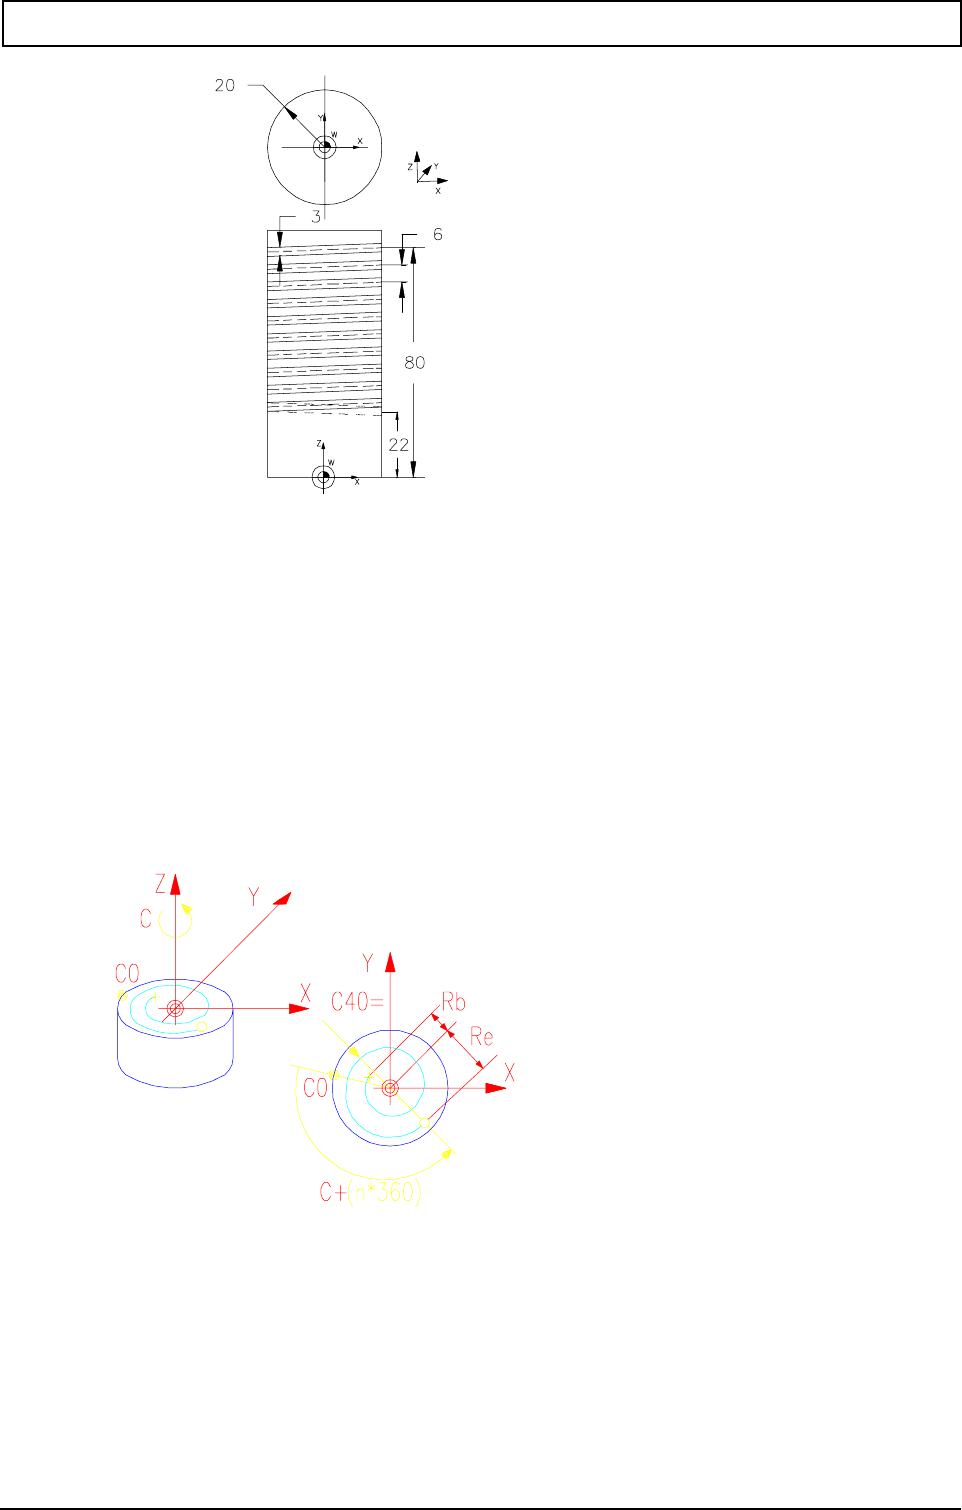
G-FUNCTIONS
244 Heidenhain
:
N10 G18
N11 T1 M6 S2000 F200 Change tool
N12 G0 X0 Z80 Y22 C0 M3
N13 G1 Y18 Set tool to required position
N14 Z20 C3600 C40=18 Mill spiral, 10 turns
N15 G0 Y25
:
Linear axis with additional rotary axis:
C40=..(central path radius)
C40=(Rb+Re)2
Rb(start radius)
Re(end radius)
8
563
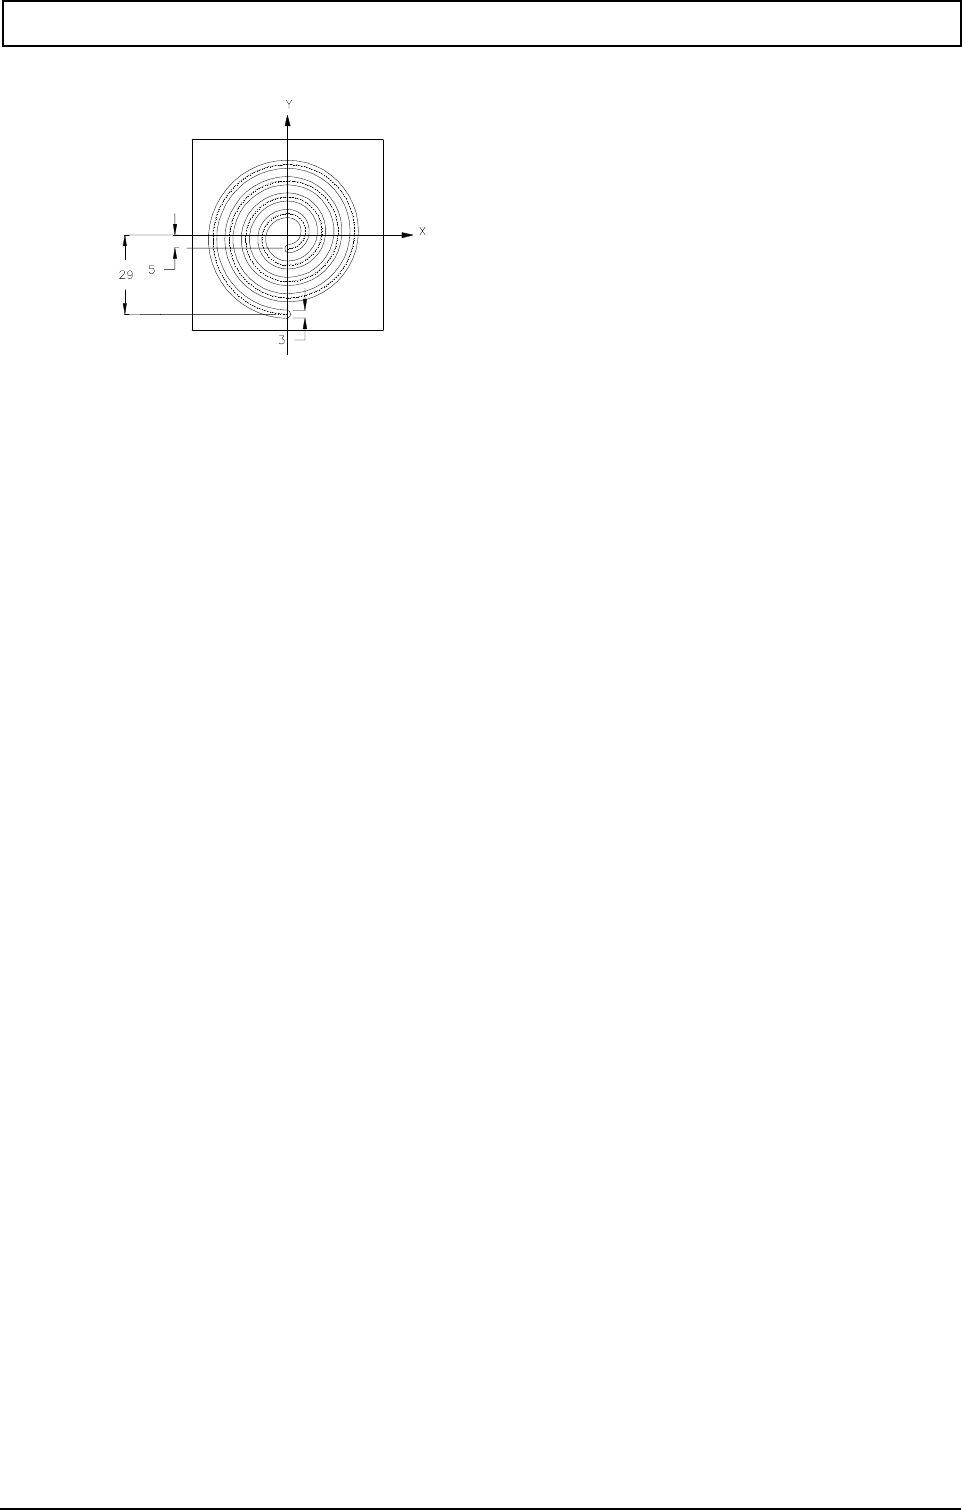
G-FUNCTIONS
20000710 MillPlus V410 245
Spiral:
:
N10 G17 T1 M6 Change tool
N11 G54 Zero offset
N12 G0 X0 Y5 Z3 C0 S200 M3
N13 G1 Z-2 F100 Approach start position
N14 Y29 C1440 C40=17 F200 Mill spiral, 4 turns
N15 G0 Z100
:
Note:
MACHINES WITH KINEMATIC MODEL (as of V410)
The radius of the rotating axis is calculated automatically in machine tools with a kinematic model.
A40=, B40= or C40= no longer need to be programmed. The new option is programmed with G94
F5=1.
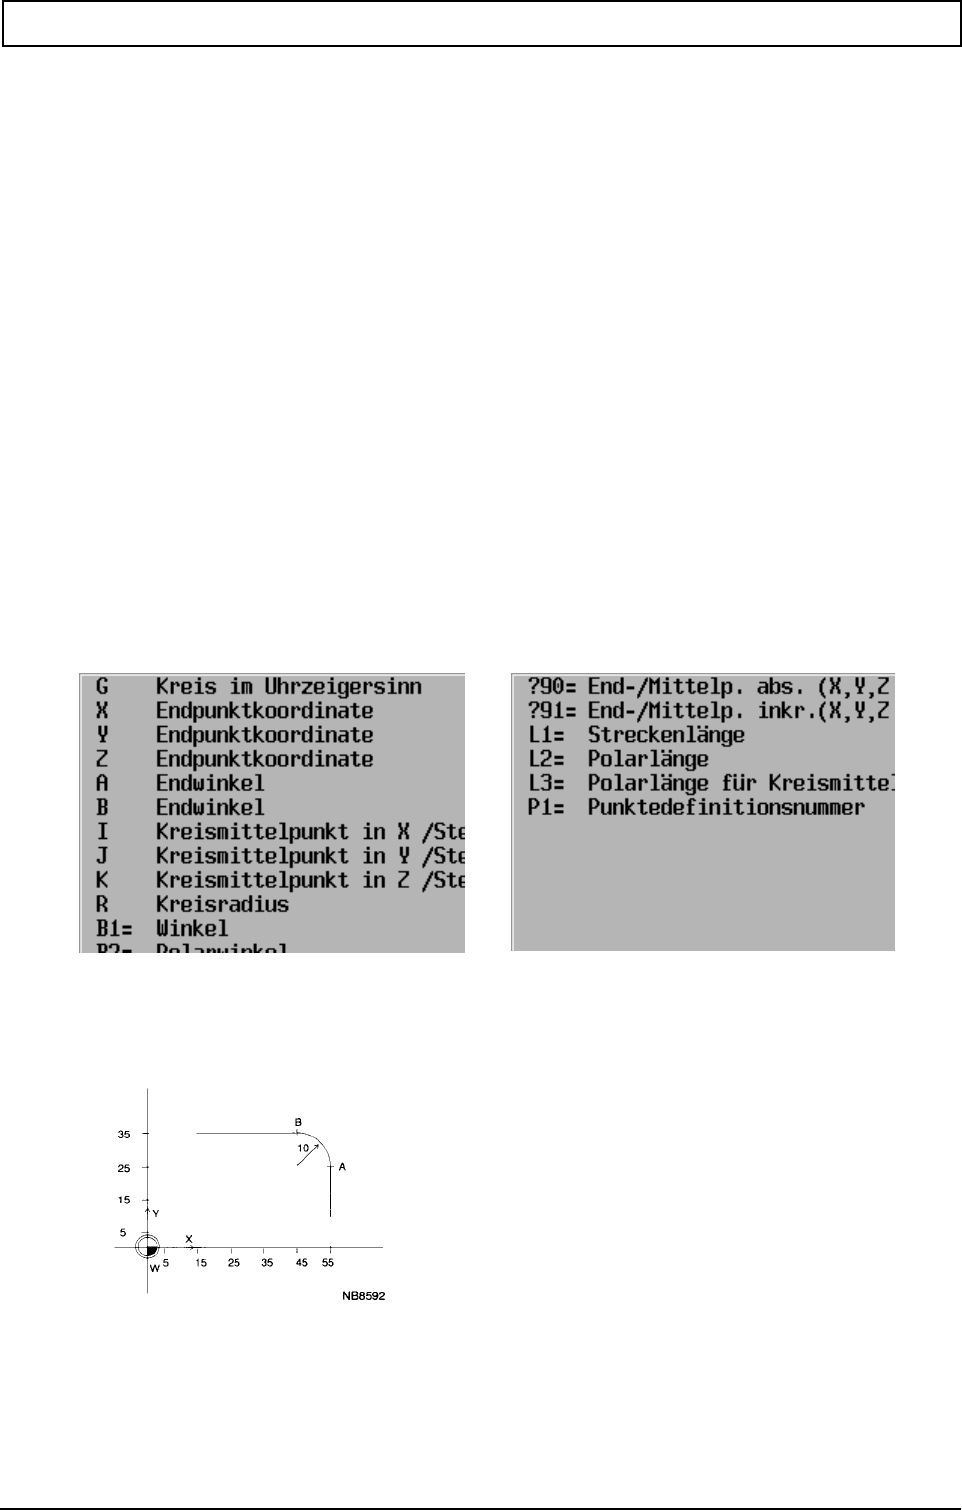
G-FUNCTIONS
246 Heidenhain
23.3 Circular clockwise / circular counter clockwise G2/G3
Full circle:
N.. G2/G3 [centre point]
Circular arc less than or equal to 180:
N.. G2/G3 [end point] R..
Circular arc greater than 180 :
N.. G2/G3 [centre point] [end point]
N.. G2/G3 [centre point] B5=..
2.5D-Interpolation:
N... G2/G3 [centre point] [end point of arc] [end point
on the linear or rotary axis]
Spiral:
N... G2/G3 [centre point] [end pointof arc] [end point on
the linear or rotary axis] [pitch]
N... G2/G3 [centre point] [pitch] B5=...
Parameters G2 / G3
Examples
Circular arc less than or equal to 180°
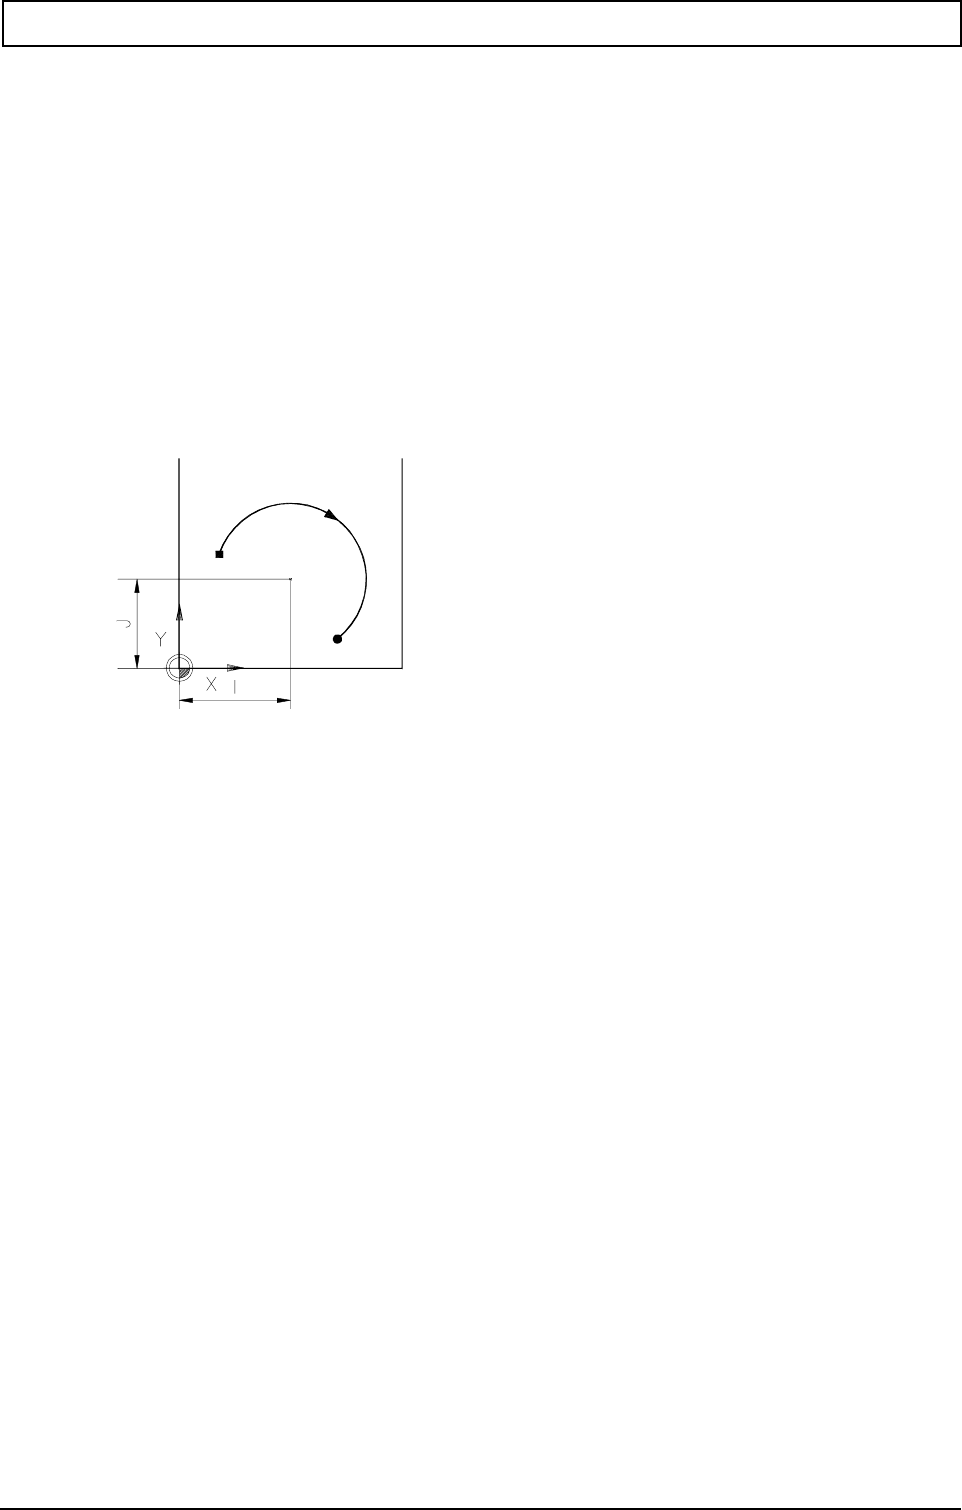
G-FUNCTIONS
20000710 MillPlus V410 247
N10 G1 X55 Y25 F100 Linear movement
N20 G3 X45 Y35 R10 Circular counterclockwise movement
Circular arc greater than 180°
Centre point coordinates:
G17
N.. G2/G3 I.. J..
G18
N.. G2/G3 I.. K..
G19
N.. G2/G3 J.. K..
Absolute centre point coordinates (G90):
Centre point coordinates in relation to program zero point
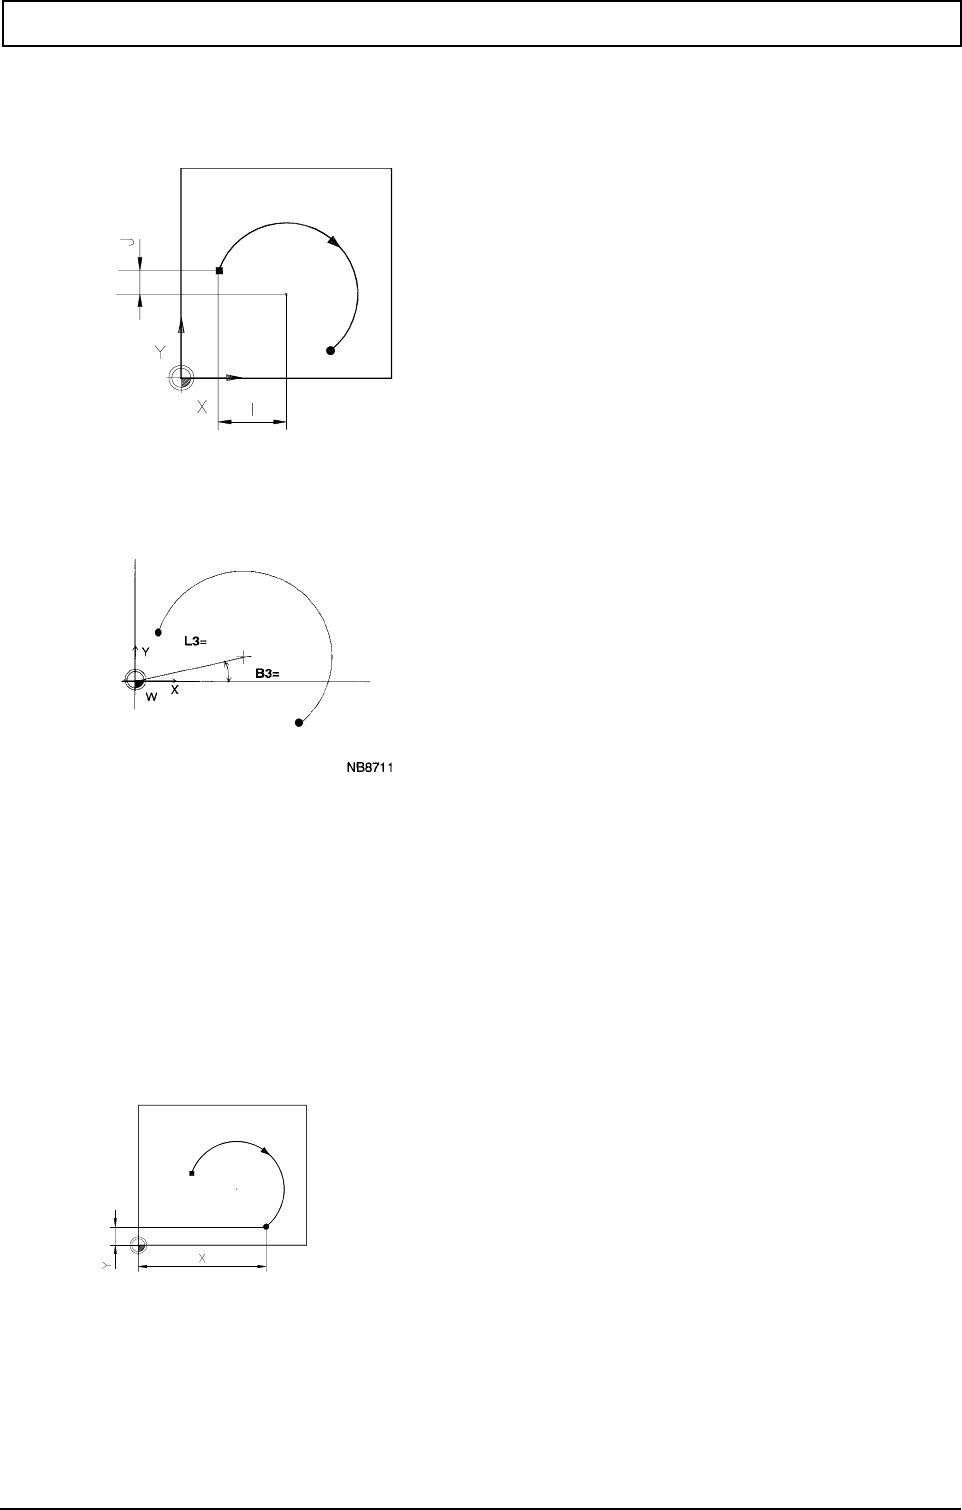
G-FUNCTIONS
248 Heidenhain
Incremental centre point coordinates (G91):
Centre point coordinates in relation to the start point
Polar centre point coordinates
N.. G2/G3 L3=.. B3=.. (G17/G18/G19)
End point coordinates:
Cartesian end point coordinates
G17
N.. G2/G3 X.. Y..
G18
N.. G2/G3 X.. Z..
G19
N.. G2/G3 Y.. Z..
Absolute end point coordinates (G90):
End point coordinates in relation to the program zero point
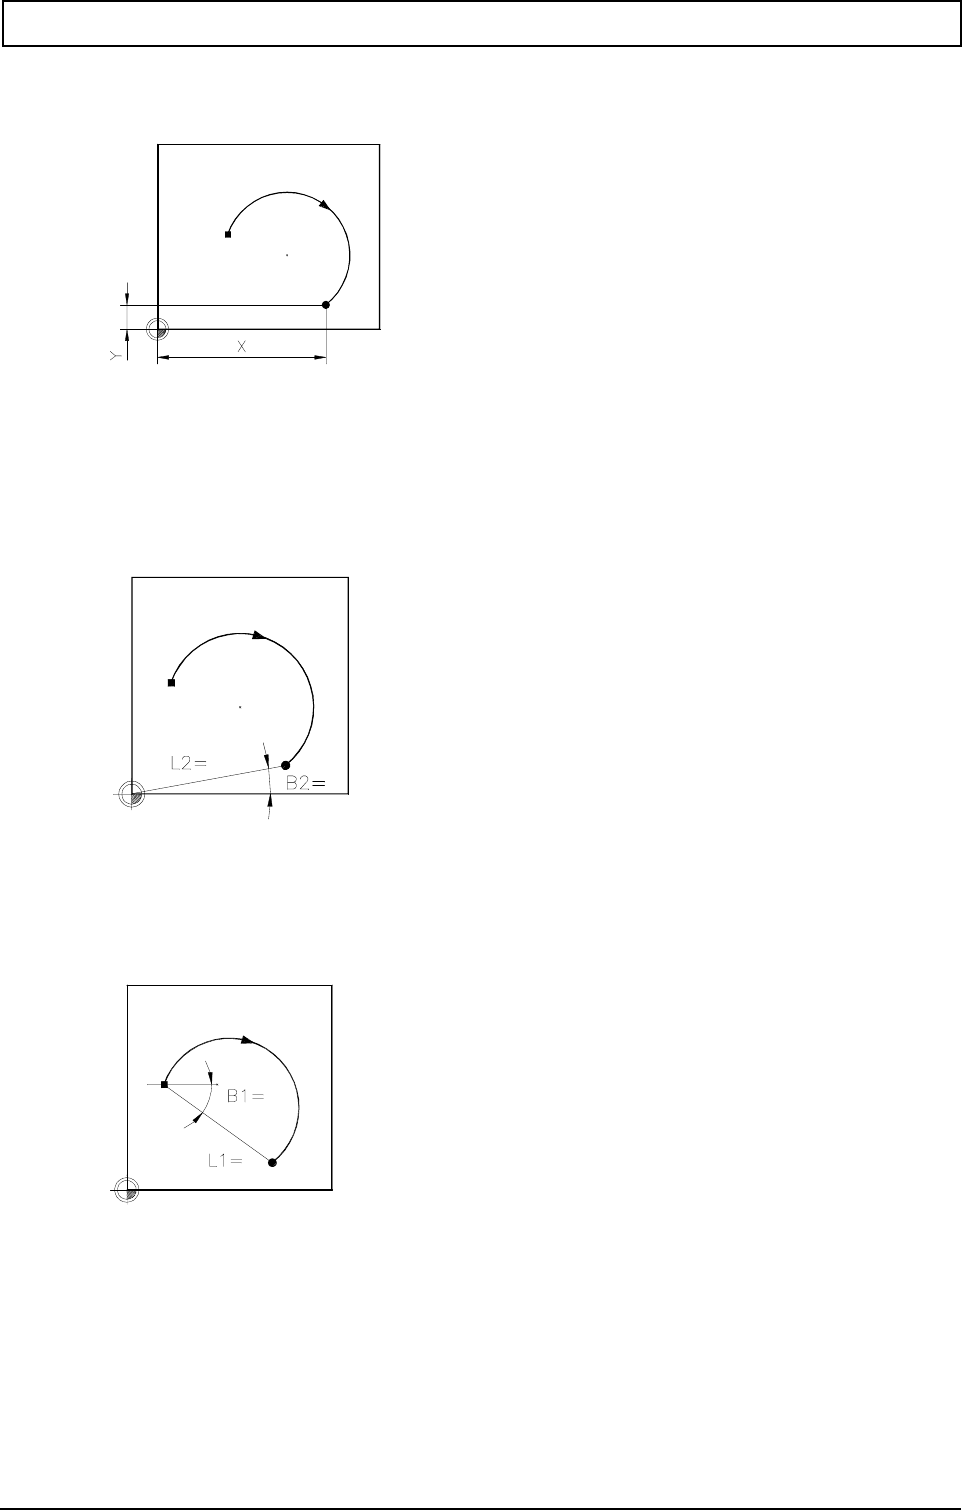
G-FUNCTIONS
20000710 MillPlus V410 249
Incremental end point coordinates (G91):
End point coordinates in relation to the start point
Polar end point coordinates:
End point coordinates in relation to the program zero point
N.. G2/G3 L2=.. B2=.. (G17/G18/G19)
End point coordinates in relation to the start point
N.. G2/G3 L1=.. B1=.. (G17/G18/G19)
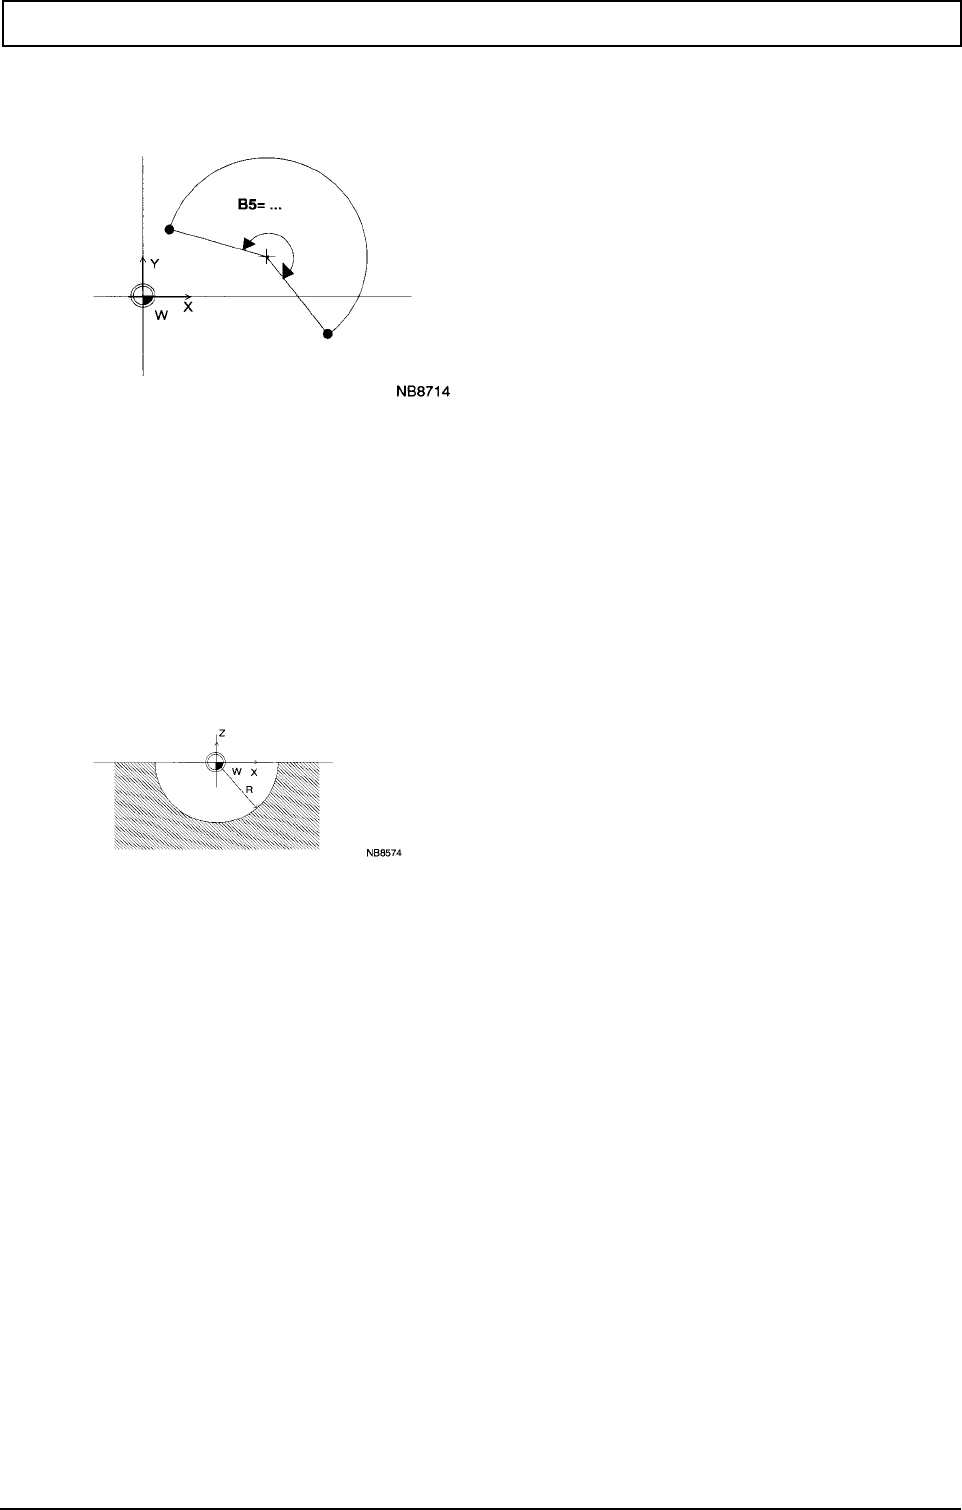
G-FUNCTIONS
250 Heidenhain
Angle of circular arc:
N2.. G2/G3 B5=.. (G17/G18/G19)
Circular movement not in the main level
Circular arc smaller than or equal to 180°:
N2.. G2/G3 [end point coordinates of the linear axes] R..
N2.. G2/G3 [cartesian coordinates of circle centre point]
Circular arc greater than 180°:
N2.. G2/G3 [cartesian coordinates of the end point andcircle centre point]
Use of the radius correction is not possible.
Circular movement with simultaneous movement in a third axis (2.5D)
Circle in the main level:
N.. G2/G3 [circle definition][tool axis]
Level G17 G18 G19
Tool axis Z Y X
Circle not in the main level:
N.. G2/G3 [cartesian coordinates of end point and circle centre point] [tool axis]
Level G17 G18 G19
End point X..Y.. X..Z.. Y..Z..
Centre point I..J.. I..K.. J..K..
Tool axis Z Y X
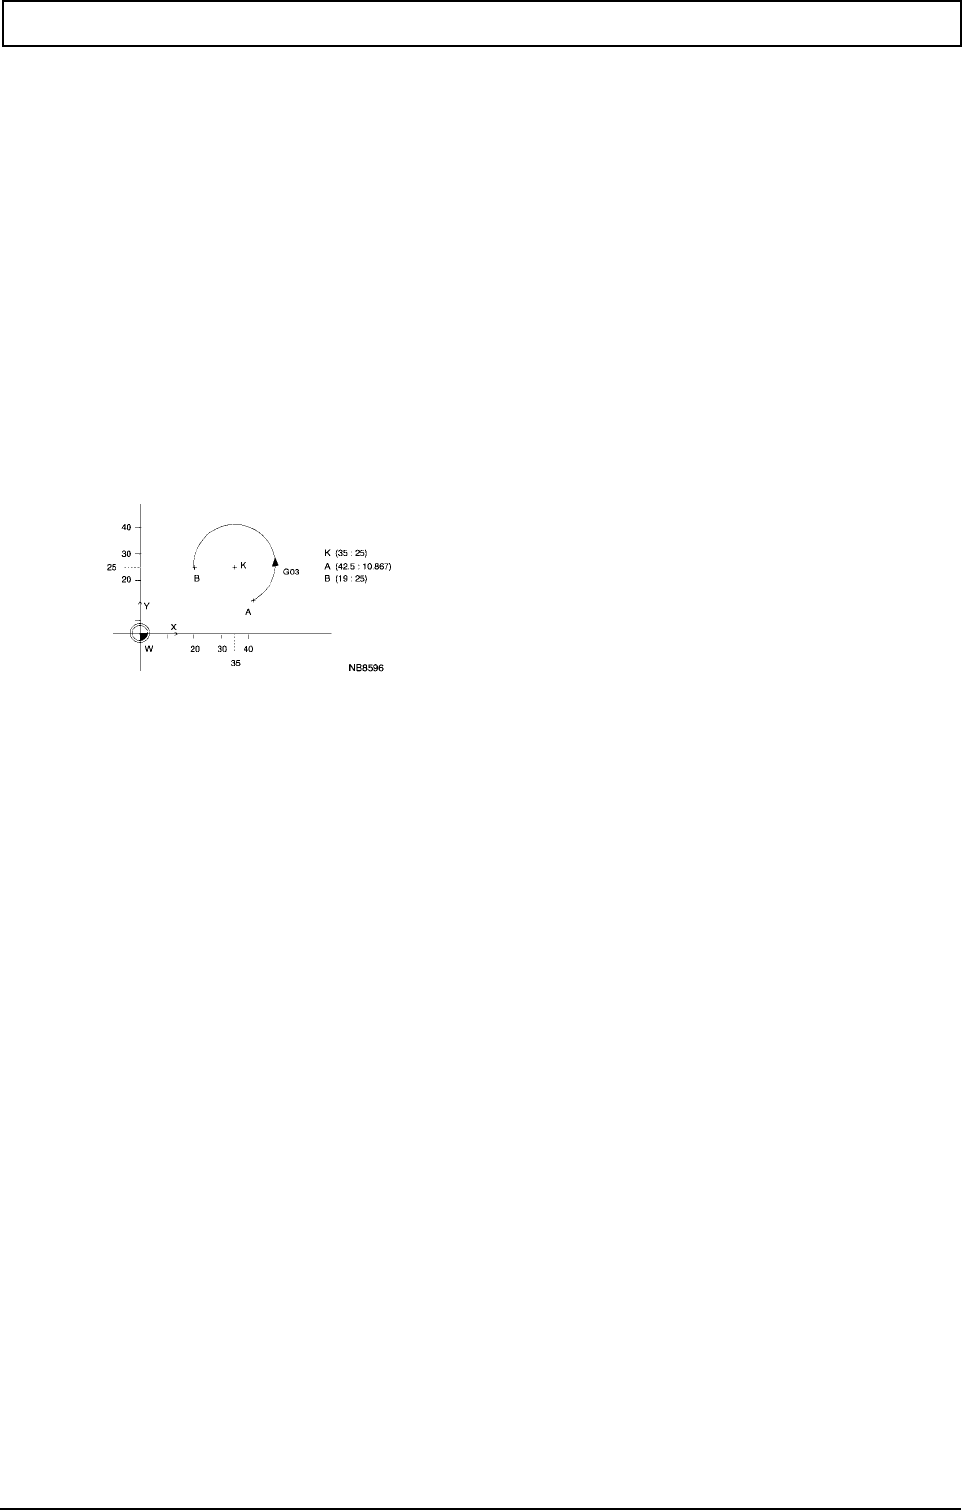
G-FUNCTIONS
20000710 MillPlus V410 251
Spiral interpolation
Level G17 G18 G19
Tool axis Z Y X
Centre point I..J.. I..K.. J..K..
/ / /
B3=..L3=.. B3=..L3=.. B3=..L3=..
Circular arc angle B5=.. B5=.. B5=..
Spiral pitch K J I
The value of (B5=) can lie between 0 und 999999 degrees (approx. 2777 rotations)
Level G17 G18 G19
Tool axis Z Y X
Circle end point X..Y.. X..Z.. Y..Z..
Centre point I..J.. I..K.. J..K..
Spiral pitch K J I
Absolute coordinates
N82000
N1 G17
N2 G98 X0 Y0 Z10 I60 J60 K-30
N3
N4 G0 X0 Y0 Z-10
N5
N6 G1 X42.5 Y10.867 F200 Linear movement
N7 G3 X19 Y25 I35 J20 Circular counterclockwise movement (absolute)
N8
N9 G0 Z100 M30
Incremental coordinates
N82001
N1 G17
N2 G98 X0 Y0 Z10 I60 J60 K-30
N3
N4 G0 X0 Y0 Z-10
N5
N6 G1 X42.5 Y10.867 F200 Linear movement
N7 G91 Incremental size programming
N8 G3 X-23.5 Y14.133 I-7.5 J9.133 Circular counterclockwise movement (incremental)
N9
N10 G0 Z100 M30
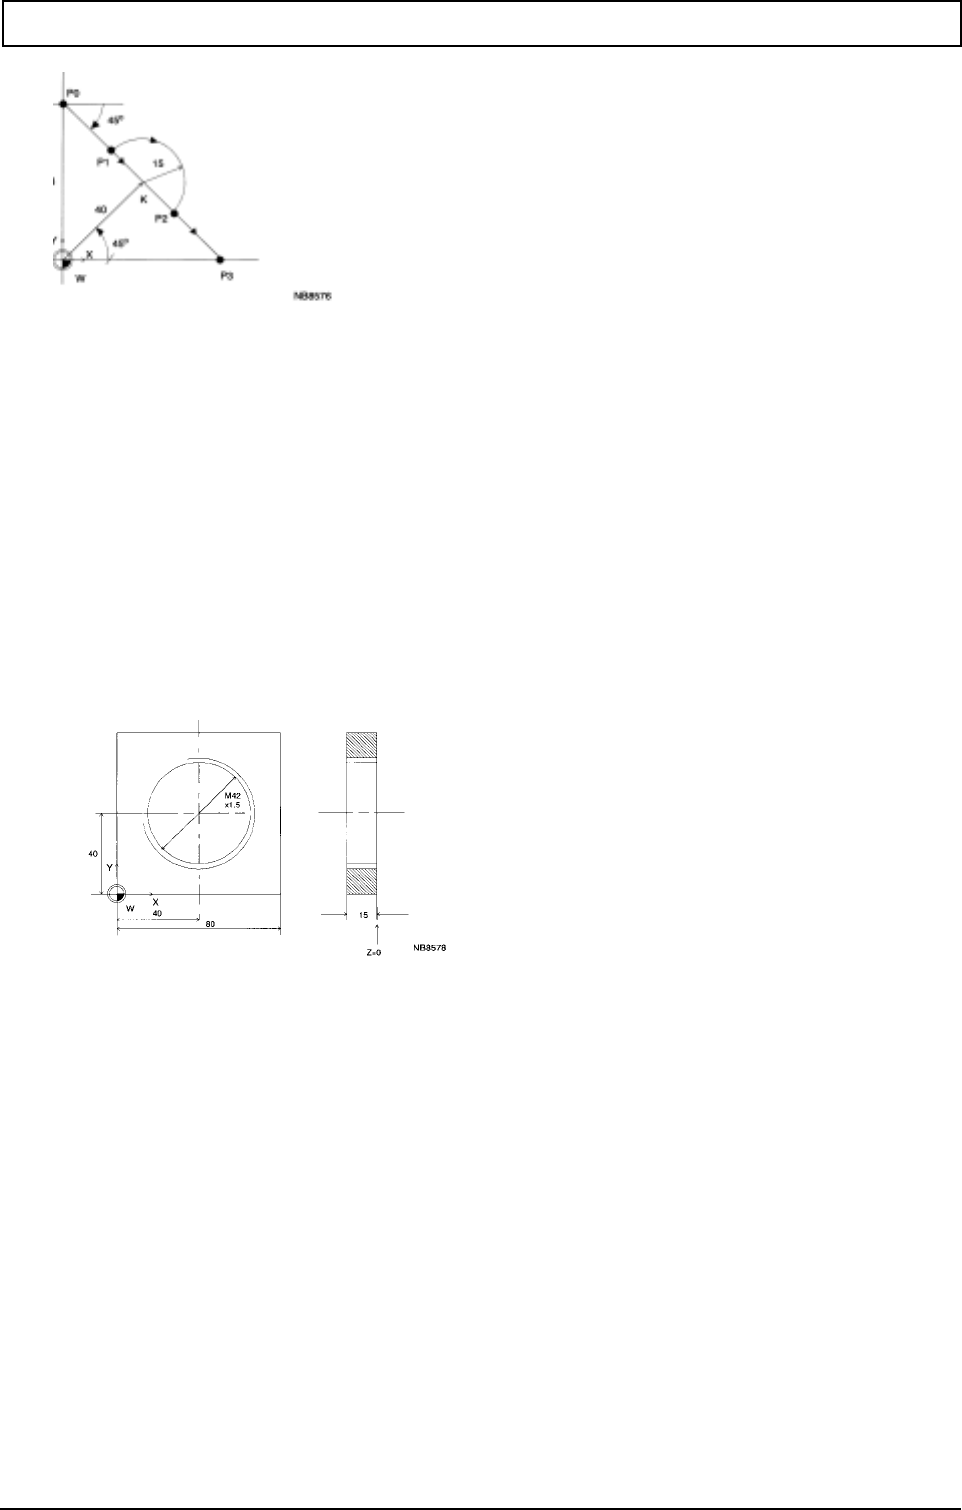
G-FUNCTIONS
252 Heidenhain
N82030
N1
N2 G17
N3 G98 X-10 Y-10 Z10 I80 J80 K-30 Definition of graphic window
N4
N5 G0 X0 Y56.568 Z0
N6 G1 F200 B1=-45 L1=25
N7 G2 B1=-45 B3=45 L1=30 L3=40 Circular clockwise movement
N8 G1 B1=-45 L1=25
N9
N10 G0 Z100 M30
N82040
N10 G17 T1 M6 Active plane, change tool
N11 G0 X40 Y40 Z1.5 S400 M3
N12 G1
N13 G43 Y61 F120 Tool radius compensation to end point
N14 G42 Tool radius compensation to the right
N15 G2 I40 J40 K1.5 B5=4320 Circular clockwise movement (thread)
N16 G40 Cancel tool radius compensation
N17 G1 Y40
N18 G0 Z100 M30
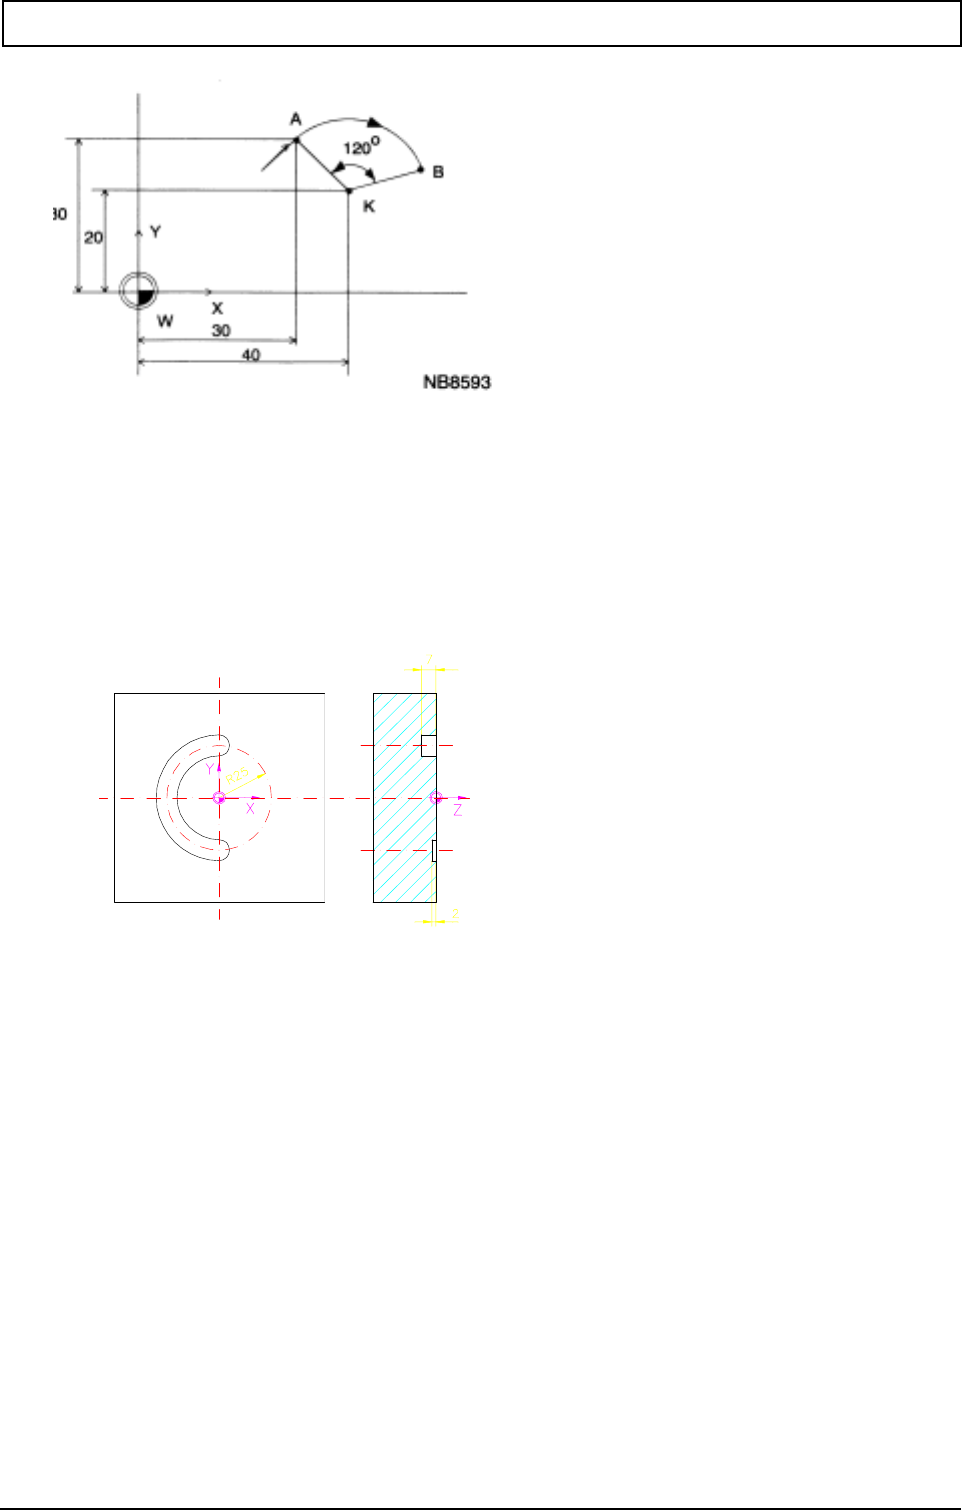
G-FUNCTIONS
20000710 MillPlus V410 253
:
N10 G1 X30 Y30 F500
N11 G2 I40 J20 B5=120 Circular clockwise movement
:
N85770
N1 G17
N2 G54
N3 G98 X20 Y50 Z10 I-100 J-100 K-20
N4
N5
N6 S650 T1 M6 Change tool
N7 G0 X0 Y-25 Z5 M3 Spindle ON clockwise; rapid traversing movement
N8 G1 Z-2 F100 Move to machining depth
N9 G2 X0 Y25 Z-7 I0 J0 F200 Circular clockwise movement
N10 G1 Z5 Retract tool from material
N11
N12
N13 M30
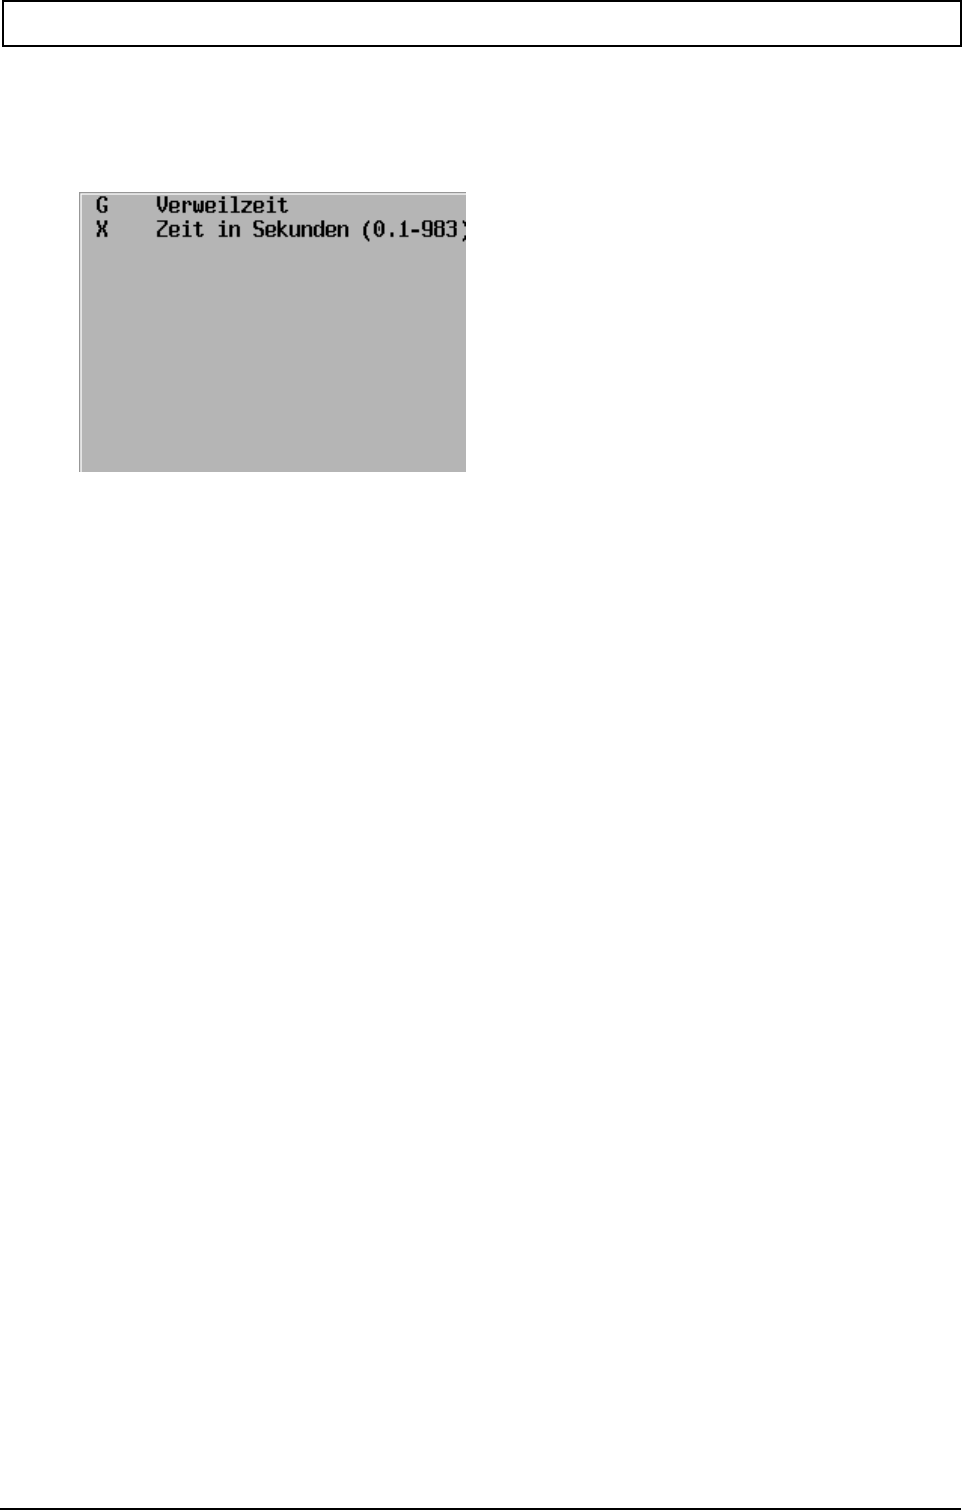
G-FUNCTIONS
254 Heidenhain
23.4 Dwell time G4
N... G4 X...
Parameters
Dwell time: 0.1 - 983 seconds (approx. 16 minutes)
Example
:
N50 G4 X2.5 Dwell time 2.5 seconds
:
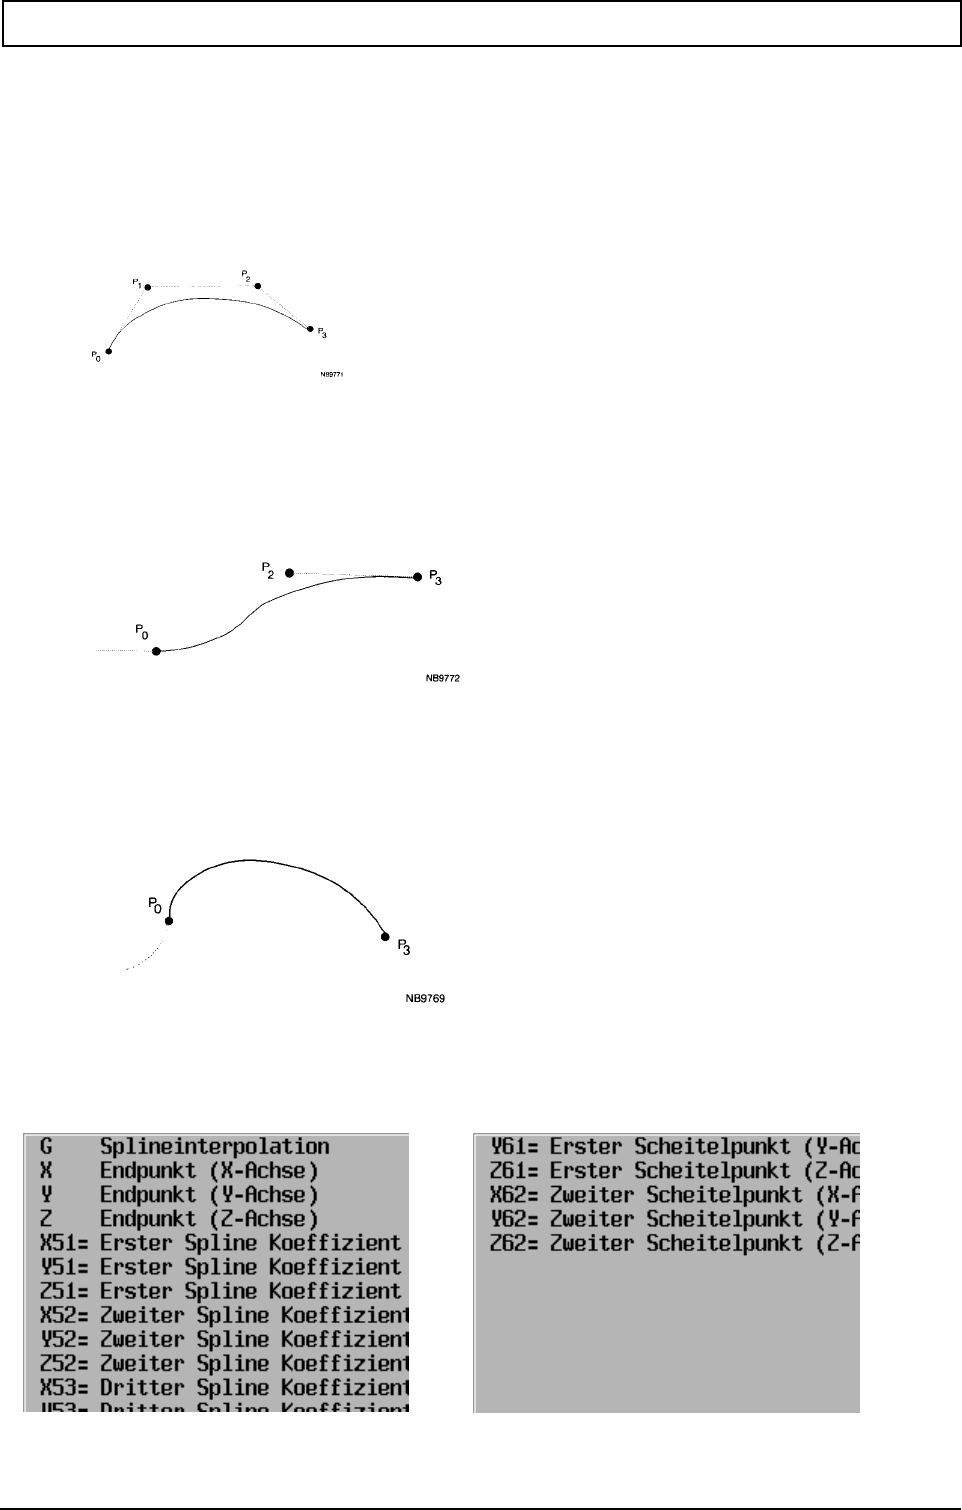
G-FUNCTIONS
20000710 MillPlus V410 255
23.5 Spline Interpolation G6
Spline interpolation allows the programmer to create a uniform and smooth curve by entering a few
points.
Formats with Bezier splines
Spline with three vertices:
G6 X61=.. Y61=.. Z61=.. X62=.. Y62=.. Z62=.. X.. Y.. Z..
Spline with two vertices and constant tangents to the spline:
G6 X62=.. Y62=.. Z62=.. X.. Y.. Z..
Spline with constant curvature to the previous spline:
G6 X.. Y.. Z..
Parameters Bezier-Splines
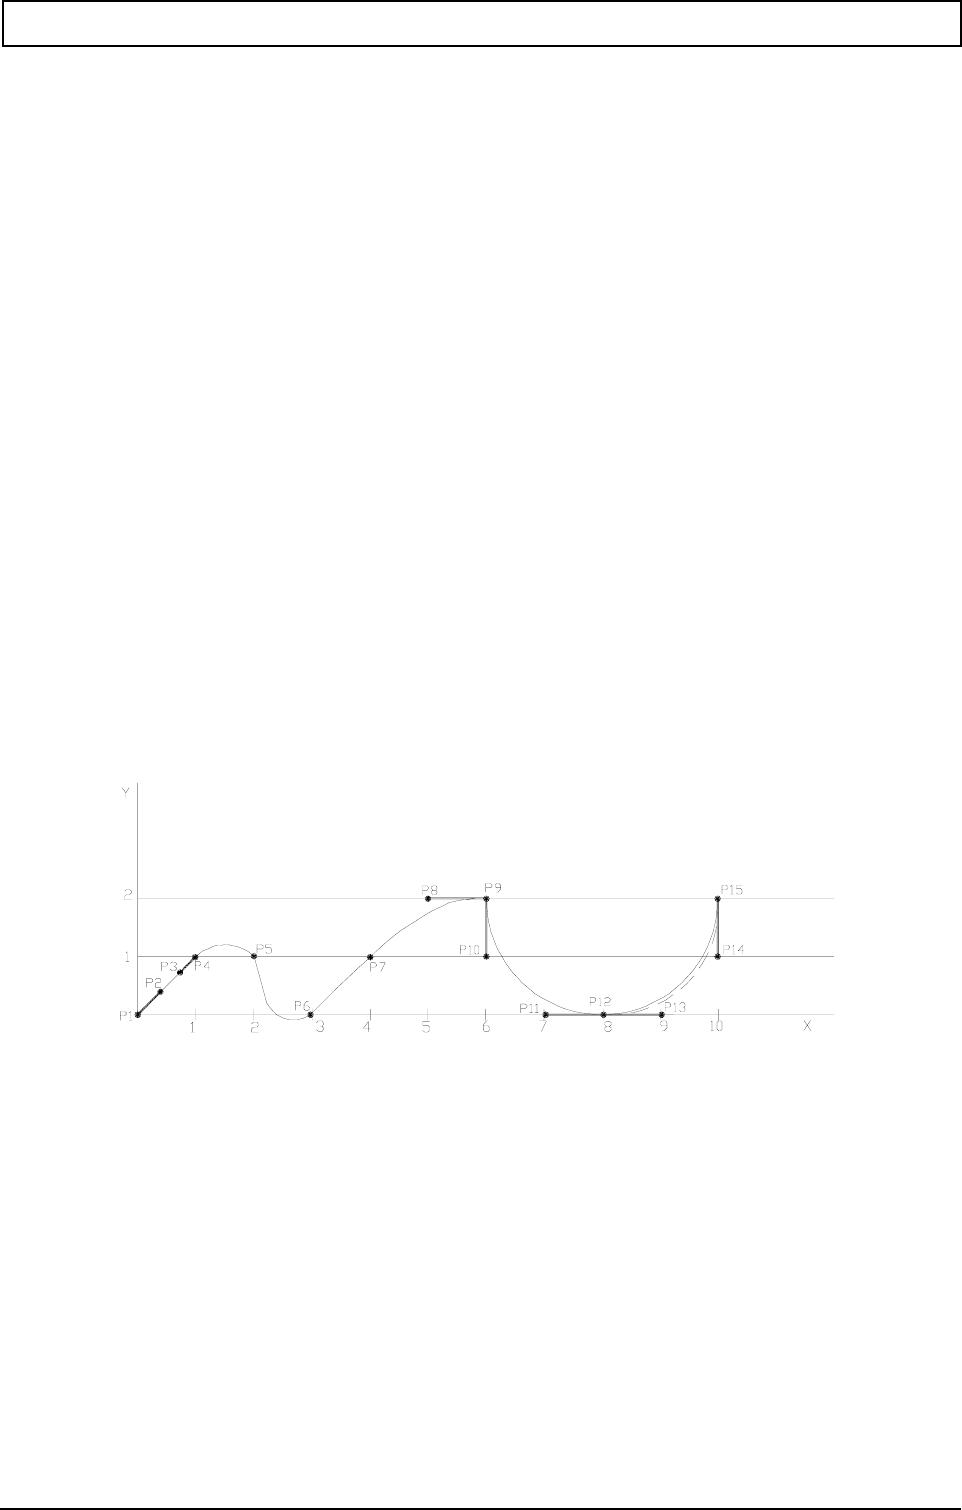
G-FUNCTIONS
256 Heidenhain
Formats with cubic splines
Spline with all coefficients defined:
G6 X51=.. Y51=.. Z51=.. X52=.. Y52=.. Z52=.. X53=.. Y53=.. Z53=..
Spline with constant tangents to the previous spline:
G6 X52=.. Y52=.. Z52=.. X53=.. Y53=.. Z53=..
Spline with constant curvature to the previous spline:
G6 X53=.. Y53=.. Z53=..
Parameters
Cubic splines
Example:
Bezier splines
Spline mit konstanter Krümmung mit der vorherigen Spline:
G6 X53=.. Y53=.. Z53=..
N17001 (Spline Kurve)
N1 G98 X2 Y-6 Z-2 I10 J10 K10
N2 G17
N101 G0 X0 Y0 Z0 F500
N102 G6 X1 X61=0.3 X62=0.7 Y1 Y61=0.3 Y62=0.7 Z0.001 Z61=0 Z62=0
N103 X2 Y1.001 Z0
N104 X3 Y0 Z0.001
N105 X4 Y1 Z0
N106 X6 X62=5.7 Y2 Y62=2 Z0.001 Z62=0
X51=,Y51=,Z51= First spline coefficient
5
2=,Z52= Second spline coefficient
5
3=,Z53= Third spline coefficient

G-FUNCTIONS
20000710 MillPlus V410 257
N107 X8 X61=6 X62=7.5 Y0 Y61=1.5 Y62=0 Z0 Z61=0 Z62=0.001
N108 X10 X61=8.5 X62=10 Y2 Y61=0 Y62=1.5 Z0.001 Z61=0.001 Z62=0
N109 G0 X0 Y0 Z0
N110 M30
N101: Approach start position (P1)
N102: First element. Straight line. Touches P1-P2 and P3-P4. End point is P4. All coordinates must
be entered. For this purpose, select a straight line.
N103: Curve passes through P5
N104: Curve passes through P6
N105: Curve passes through P7. If the curve does not have the required shape, add more
points.
N106: Curve passes through P9 and touches line P8-P9.
N107: New curve with sharp transition is defined. First curve element starts in P9 and touches P9-
P10 and P11-P12. End point is P12.
N108: New curve with tangential transition is defined. First curve element starts in P12 and touches
P12-P13 and P14-P15. End point is P15. The radius of curvature can be adjusted in P15 by
changing distance P14-P15.
Note:
In G6 identical coordinates must be different in two blocks (Z0 and Z0.001)
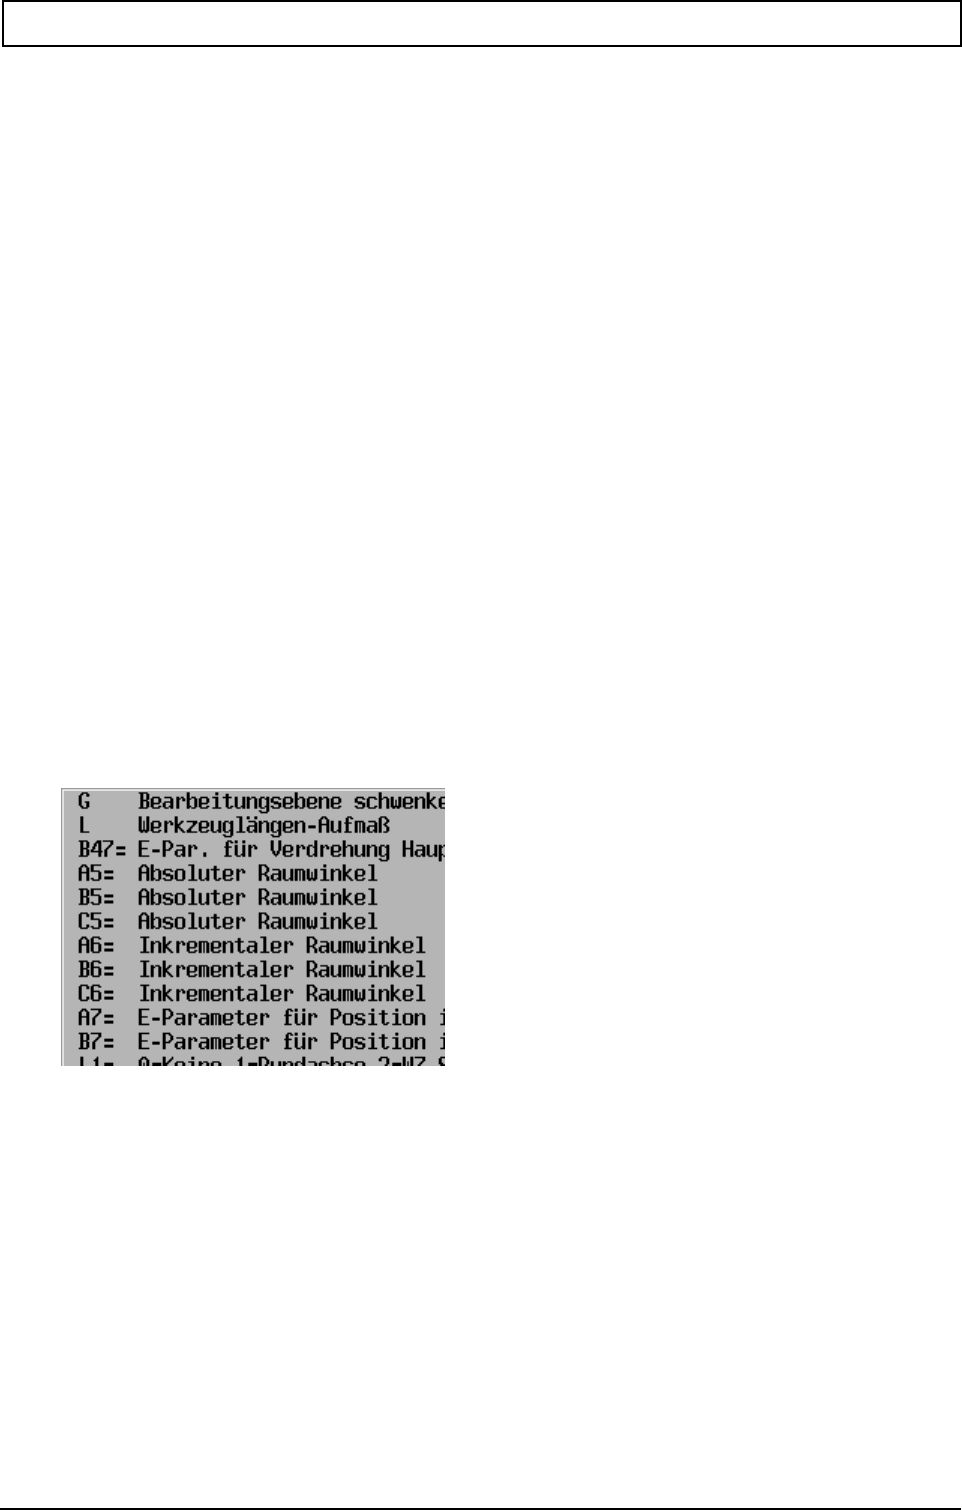
G-FUNCTIONS
258 Heidenhain
23.6 Tilt operating planes G7 (starting with V400)
Programming of a tilt operating plane for four or five axis machines.
The position of the operating plane can be tilted using the function "Tilt operating plane". The
operation which has then been programmed in the principal plane (G17, G18) can then be
implemented within the tilt operating plane. The tool axis is then orientated vertically in the new plane.
The tilt of the operating planes is defined and implemented using the G7 function.
Format
N.. G7 {A5=.. | A6=..} {B5=.. | B6=..} {C5=.. | C6=..} {A7=..} {B7=..} {C7=..} {B47=..} {L1=..} {L..}
Parameters
Raumwinkel
Parameternummer
Bewegungsarten
Ancillary function
G FUNCTIONS WHICH ARE NOT PERMITTED, IF G7 IS SWITCHED ON
If G7 is switched on, the following (modal) G functions are not allowed to be active:
G6, G9, G19, G41, G42, G43, G44, G61, G64, G73, G141, G182, G197, G198, G199, G200, G201,
G203, G204, G205, G206, G207, G208
G FUNCTIONS WITHIN G7 WHICH ARE NOT PERMITTED
If G7 is active, the following G functions are not permitted:
G6, G19, G182
A5=,B5=,C5= Absoluter Raumwinkel
=
,C6= Inkrementaler Raumwinkel
A7=,B7=,C7= E-Parameter für berechnete Position
E-Parameter für Verdrehung Hauptebene
L1= 0=Keine,1=Rundachse,2=WZ-Spitze
Werkzeuglängenaufmaß

G-FUNCTIONS
20000710 MillPlus V410 259
G FUNCTIONS WHICH ARE NOT PERMITTED, IF G7 IS SWITCHED OFF
If G7 is switched off, the following (modal) G functions are not allowed to be active:
G9, G41, G42, G43, G44, G61, G64, G73, G141, G197, G198, G199, G200, G201, G203, G204,
G205, G206, G207, G208
If one of these G functions which are not permitted is active, the fault report P77 "G function and Gxxx
are not permitted" is generated.
Type of function
modal
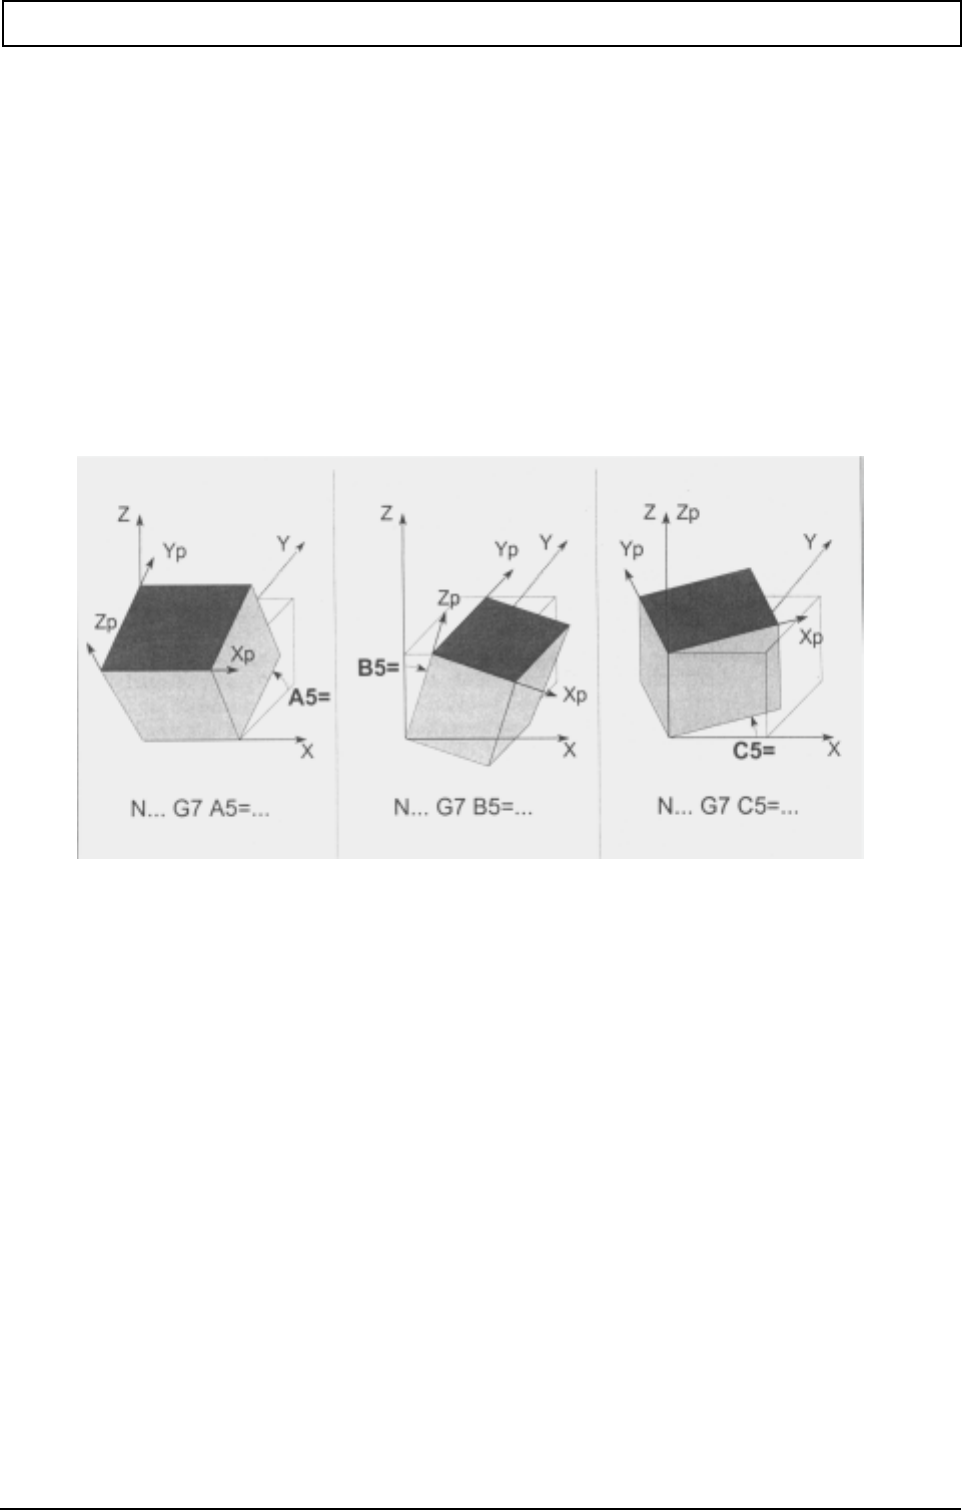
G-FUNCTIONS
260 Heidenhain
Notes and employment
G7 FUNCTION
The freely programmable operating plane is defined using the new G7 function:
The new plane becomes active with the original null point.
The tool is orientated vertically in the new plane. The axes which move depend upon the machine
configuration and the programming.
The display shows the coordinates in the new (tilt) plane.
The manual operation is orientated in accordance with the new plane.
DEFINITION OF NEW OPERATING PLANES
Tilting of the operational plane can be defined in two ways:
- Programming with A5=, B5= or C5= parameters. In this way, the absolute tilts about the
corresponding positive axes are defined. The tilts are implemented as follows:
1. the active G7 tilt is raised
2. C5= tilt about the machine fixed positive Z axis
3. B5= tilt about the positive Y axis
4. A5= tilt about the positive X axis
- Programming with A6=, B6= or C6= parameters. The incremental tilts about the current
corresponding positive axes are defined in this way. The tilts are implemented as follows:
1. C6= tilt about the current G7 positive Z axis
2. B6= tilt about the current G7 positive Y axis
3. A6= tilt about the current G7 positive X axis
The programming is independent of the machine configuration. The plane tilt is calculated with
reference to the current null point. The movement is dependent upon the machine configuration.
ABFRAGEN EINER BERECHNETEN WINKELPOSITION
A7=, B7=, C7= Enthält die Nummer des E-Parameters, in dem der errechnete
Winkel der entsprechenden Rundachse gesetzt wird.

G-FUNCTIONS
20000710 MillPlus V410 261
B47= Enthält die Nummer des E-Parameters, in dem der errechnete Winkel der
Hauptebene gesetzt wird.
TOOL VERTICAL ON THE DEFINED TILT PLANE
The G7 tilt movement takes place interpolating with the power traverse. It tilts the tool axis to the
defined plane. The axes which are moved depend upon the type of movement L1=:
- L1=0 The rotary axes do not move (start position).
Comment:
The tilt movement can then be implemented, using the E parameters loaded into A7=, B7= or
C7=. This movement must then be programmed manually.
- L1=1 Interpolate only the rotary axes, which do not move the linear axes.
- L1=2 Interpolate the rotary axes and to that end execute a "compensatory movement". In
this way the tool tip remains in the same position with respect to the workpiece.
WERKZEUGLÄNGENAUFMAß (L)
Wenn die Schwenkbewegung um die Werkzeugspitze stattfindet (L1=2), definiert L ein Aufmaß in der
Werkzeugrichtung, zwischen dem programmierten Endpunkt und der Werkzeugspitze.
SWITCHING OFF THE G7 FUNCTION
The operation of G7 remains active until G7 is switched off. G7 is switched off by the programming of
G7 without parameters or by G7 L1=1 positioning of the rotary axes on the workpiece null point.
G7 is not switched off by M30 or <Program interrupt>. After switching on the control G7 is
permanently active. Travel in the G7 plane is then possible. G7 is switched off in accordance with
reference point travel or <Reset CNC>.
Note:
It is recommended that, at the start of every G7 program, that a G7 without parameters is
programmed. In this way, during the start-up of the program (interrupt within the tilted plane and the
new start), the plane is always reset. Without this G7 at the start, the first part of the program will be
implemented in the tilted plane rather than in the untilted plane.
This programming is similar to programming with G17/G18 - different null points or different tools.
ROTARY AXES
Rotary axes can be programmed in the tilted planes in the normal way. It is the programmer's
responsibility to ensure compatibility of the rotary axes with the G7 tilt.
ABSOLUTE POSITION G74
If G7 is active, the "Absolute position" G74 is referred to the machine coordinates. This is the same
as in V3.3x.
GRAPHICS
The graphics display the G7 plane as the main picture. The screen is refreshed whenever G7
becomes active.
If G7 is active, the position between tool and workpiece is displayed.
DISPLAY
If G7 is active, a yellow icon is displayed on the screen behind the tool number. By means of a small
"p" on the right next to the "axes characters", an indication is given as to whether the display relates to
the tilted operating planes or to the machine coordinates. The operating status has been enhanced
with the current reading of the programmed G7 space angle.

G-FUNCTIONS
262 Heidenhain
A new soft key (Jog to the G7 plane) appears in the "Jog operation type" soft key group. This soft key
is used to switch between the tilted operating planes and the machine coordinates. If the position is
displayed in machine coordinates, the actual position of the tool tip is shown.
CHANGE OF TOOL
If G7 is active, a tool change is not permitted (fault report). G7 must first be deselected. G7 must then
be selected again, in order to resume work in the tilted plane following the tool change.
Example:
N100 G7 B5=45 L1=1 (plane is set)
N110 T14 (tool preselect)
..
N200 G0 Z200 (the tool axis is withdrawn)
N210 G7 B5=0 L1=1 (deselect G7)
N220 M6 (tool change)
N230 G0 X.. Y.. Z.. (power traverse to the new start position)
N240 G7 L1=1 B5=45 (face is rotated again in the G7 plane)
PALETTE, TILT FACE OR TOOL CHANGE
While G7 is active a change of palette, tilt face or tool cannot be implemented. A fault is displayed and
the program must be interrupted. Before such a change, G7 must be deactivated.
TILT OPERATING PLANE WITH M53/M54
During mixed operation with G7 and M53/M54, the tilt face positioning M53/M54 with M55 must be
relinquished before programming G7. In this way, the face offset which is active under these
conditions is relinquished.
M FUNCTIONS WHICH ARE NOT PERMITTED IF G7 IS SWITCHED ON
If G7 is switched on, the following M functions are not permitted to be active:
M53, M54
M FUNCTIONS WHICH ARE NOT PERMITTED WITHIN G7
If G7 is active, the following M functions are not permitted:
M6, M46, M53, M54, M60, M61, M62, M63, M66
FAULT REPORTS
P77 G-Funktion und Gxxx nicht erlaubt
Dieser Fehlertext gibt an, welche Kombination von G-funktionen nicht zugelassen ist. Z.B. wird
G7 programmiert, wenn G41 aktiv ist, kommt der Fehler P77 'G-Funktion und G41 nicht
erlaubt'.
P306 Plane not clearly defined
The G7 plane is defined with a mix of absolute (A5=, B5=, C5=) and incremental (A6=, B6=,
C6=) angles.
Resolution: Use only absolute or incremental angles. If required, several G7 definitions
with incremental angles behind one another can be defined.
P307 Programmed plane not attainable
The defined G7 tilt position, owing to the restricted range of the rotary axis, cannot be
attained.
MACHINE SETTINGS
MC312 free operating plane (0=off, 1=on)
activates the free operating plane. The G7 function can be programmed.

G-FUNCTIONS
20000710 MillPlus V410 263
MC755 free operating plane: rotation (0=coordinates cross,1=axes)
If the desired rotation of the operating plane is compatible with the rotation of a rotary
axis, an adjustment may be made to determine whether the relevant rotary axis or
the coordinates cross is rotated.
e.g. on a machine with (real C axis) the programming G7 C5=30 and MC755=0 generates a
rotation of the coordinates cross through -30° and, if MC755=1, a rotation of the C axis
through 30°.
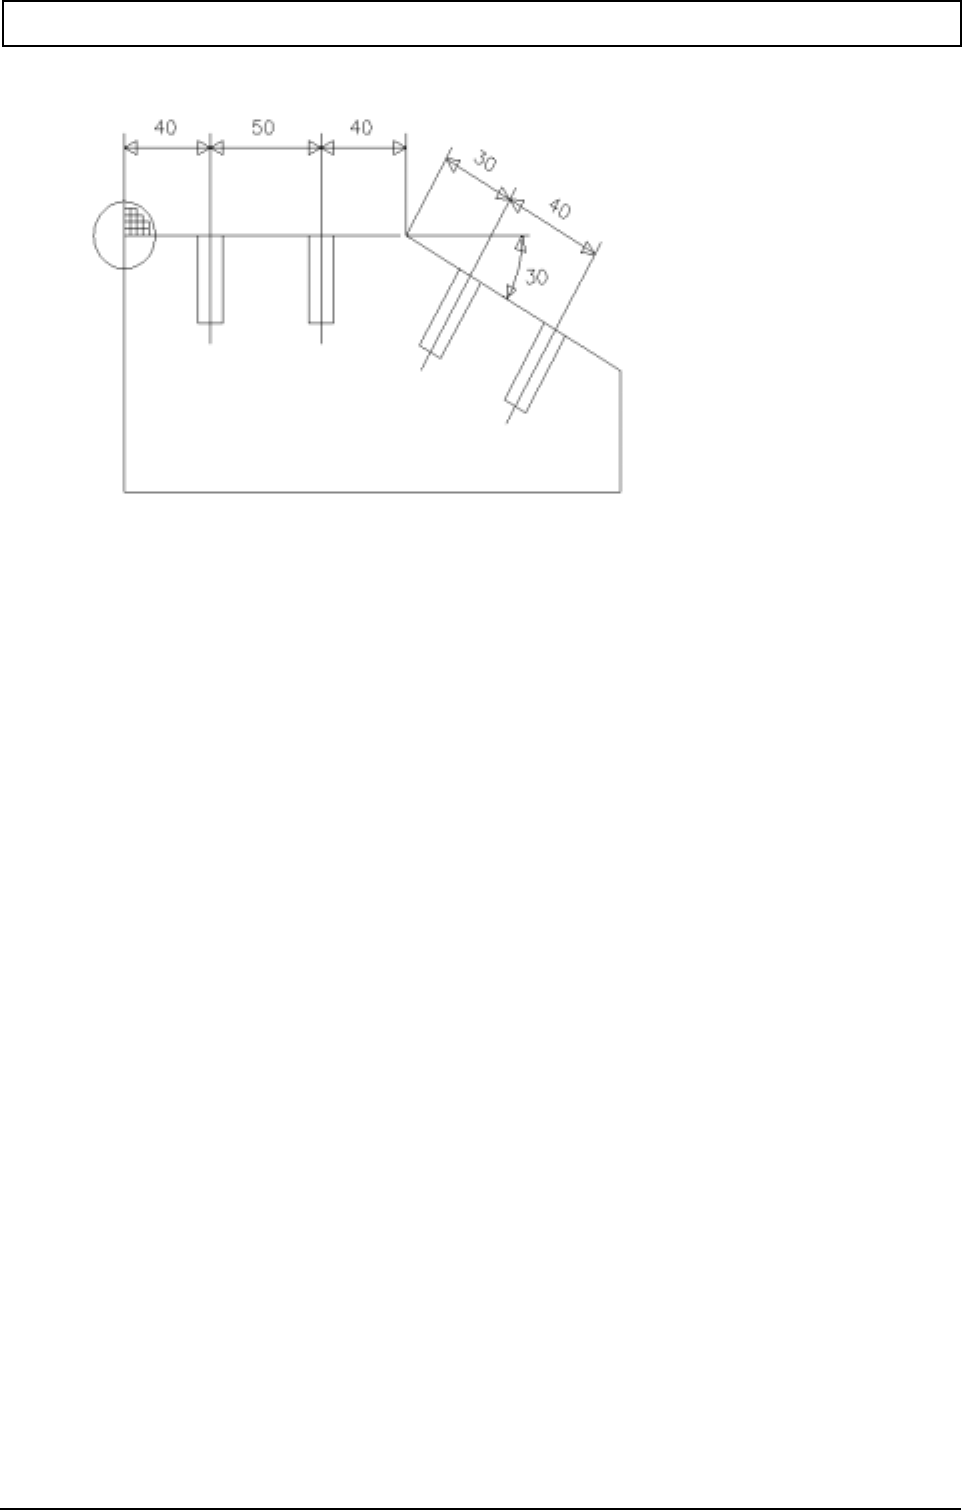
G-FUNCTIONS
264 Heidenhain
Example 1 Workpiece with tilted operating plane.
N10 G17
N20 G54
N30 M55
N40 G7 L1=1
N..
N100 G81 Y1 Z-30
N110 G79 X40 Z0
N120 G79 X90
N..
N200 G0 X130 Z50
N210 G93 X130
N220 G7 B5=30 L1=2 L50
N230 G79 X30 Z0
N240 G79 X70
N..
N300 G7 L1=2 L50
Explanation:
N10 define operating plane
N20 null point insertion
N30 deselection of M53/M54
N40 reset G7
N100 drill cycle definition
N110 drill the first hole in the horizontal plane
N120 drill the second hole in the horizontal plane
N.. other movements in the horizontal plane
N200 tool is set at the safety distance.
N210 null point is set at the start of the tilted operating plane.
N220 G7 define new operating plane
B5=30 angle of rotation
L1=2 tool/table is rotated about the tool tip
L50 extra oversize in the direction of the tool. In this way, the tool is rotated about the null
point. The distance from the tool tip to the null point is 50 mm.
N230 drill the first hole in the tilted operating plane
N240 drill the second hole in the tilted operating plane
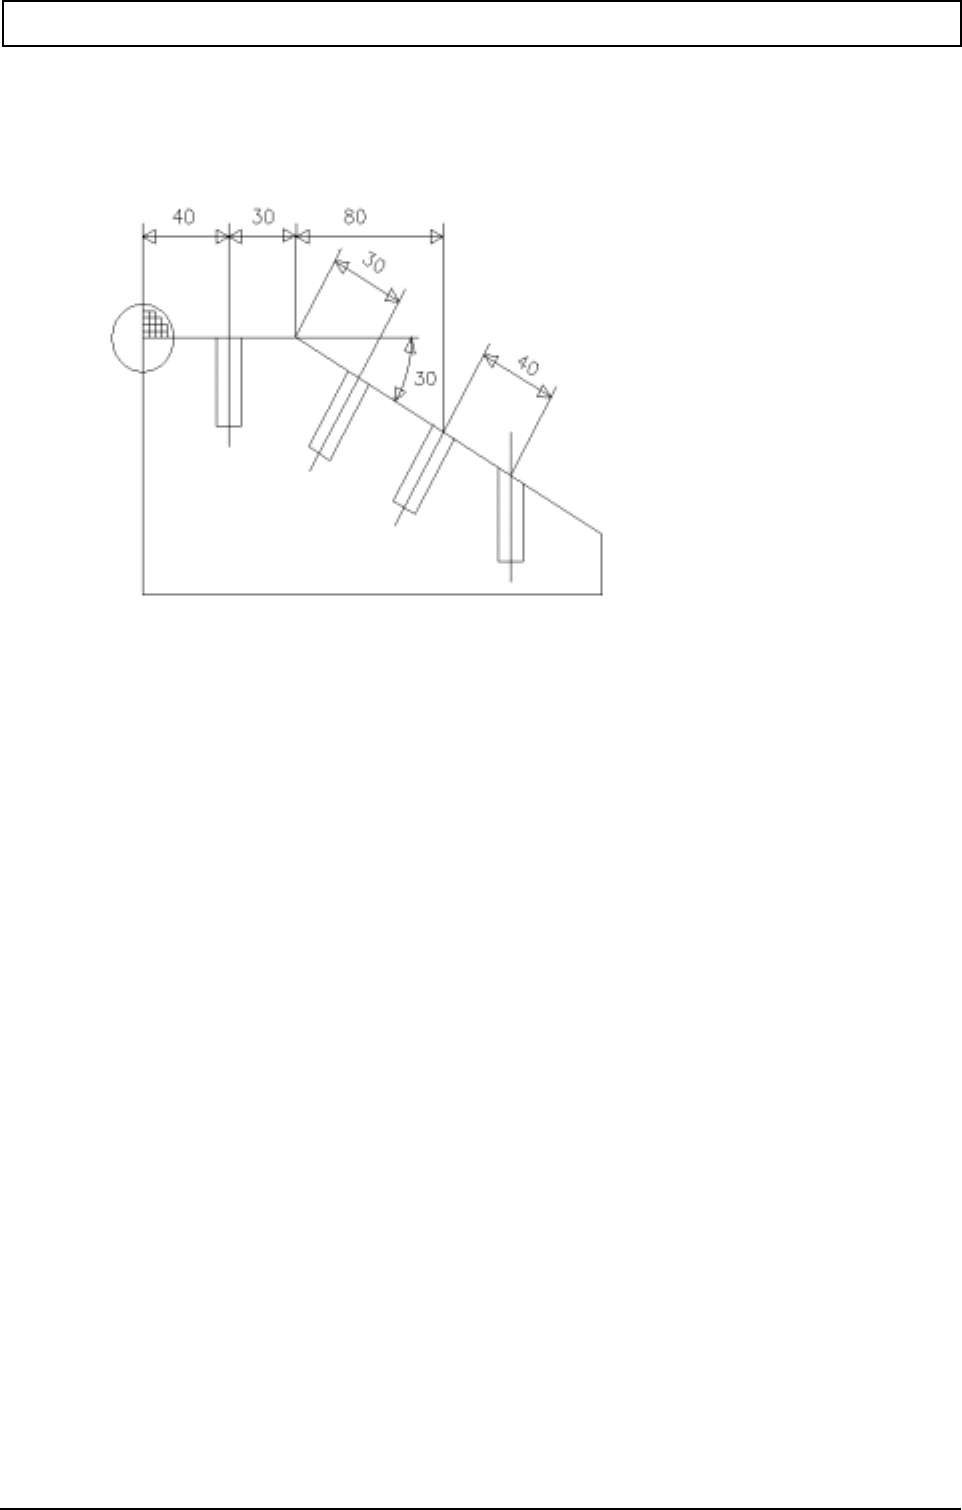
G-FUNCTIONS
20000710 MillPlus V410 265
N.. other movements in the tilted operating plane
N300 reverse rotation in the horizontal plane.
Example 2 Workpiece using tilted operating plane.
N10 G17
N20 G54
N30 M55
N40 G7 L1=1
N..
N100 T1 M6
N110 G81 Y1 Z-30
N120 G79 X40 Z0
N..
N200 T2 M6
N210 X70 Z50
N220 G93 X70
N230 G7 B5=30 L1=2 L50
N240 G1 X0 Z0
N250 X150
N..
N300 T1 M6
N310 G79 X30 Z0
N320 G93 X=80:cos(30)
N330 G79 X0 Z0
N..
N400 G93 X=40
N410 G0 X0 Z50
N420 G7 B5=0 L1=2 L50
N430 G79 X0 Z0
N..
N500 M30
Explanation:
N10 define operating plane
N20 null point insertion
N30 deselection of M53/M54
N40 reset G7

G-FUNCTIONS
266 Heidenhain
N100 change the drill
N110 define the drilling cycle
N120 drilling of a hole in the horizontal plane
N.. other movements in the horizontal plane
N200 change the mill
N210 tool is set at the safety distance
N220 null point insertion
N230 G7 define new operating plane
B5=30 angle of rotation
L1=2 tool/table is rotated about the tool tip
L50 extra oversize in the direction of the tool. In this way the tool is rotated about the null
point. The distance of the tool tip from the null point is 50 mm.
N240 positioning of the mill in the tilted plane
N250 mill in the tilted plane
N.. other movements in the tilted operating plane
N300 change the drill
N310 drill the first hole in the tilted operating plane
N320 null point insertion
N330 drill the second hole in the tilted operating plane
N.. other movements in the tilted operating plane
N400 null point insertion
N410 tool is set at the safety distance
N420 G7 deselect "Tilt operating plane" reverse rotation in the horizontal plane
B5=0 angle of rotation
L1=2 tool/table is rotated about the tool tip
L50 extra oversize in the direction of the tool. In this way, the tool is rotated about the null
point. The distance of the tool tip from the null point it 50 mm.
N430 drill the third hole in the horizontal operating plane
N.. other movements in the horizontal operating plane
N500 end of program.
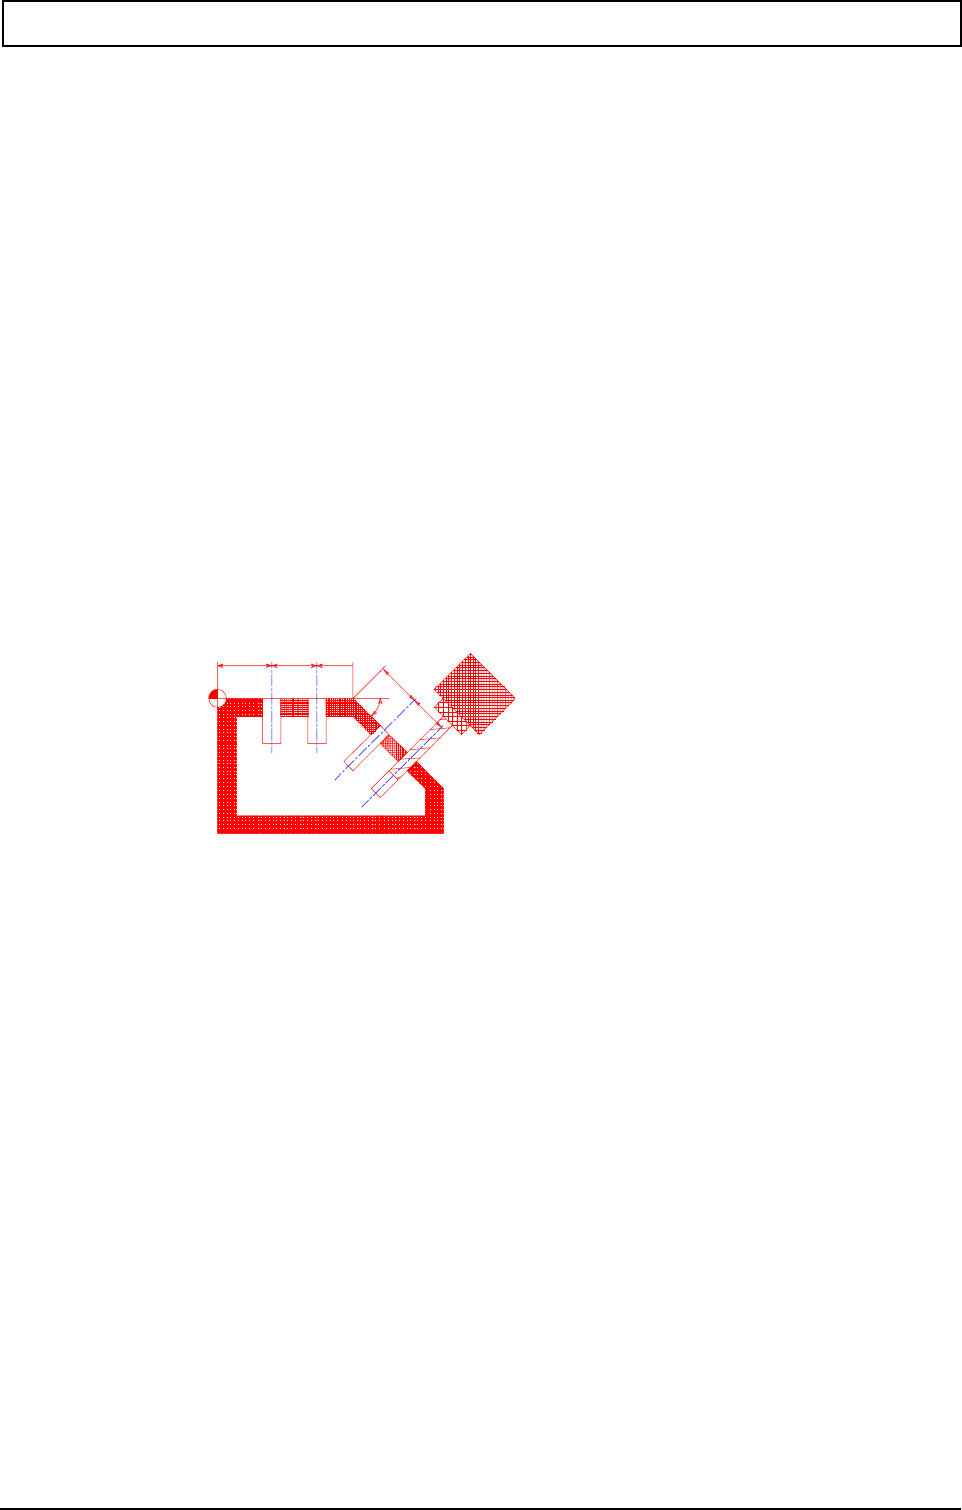
G-FUNCTIONS
20000710 MillPlus V410 267
23.7 Tilting of the operating plane (from V400)
23.7.1 Introduction
The control supports the tilting of operating planes on tool machines with tilting faces or tilting tables.
Please consult your user handbook.
Typical applications, for example, are oblique drilling or contours which lie obliquely in the operating
area. In this way, the operating plane is always tilted about an active null point. Normally, the
operation is programmed in a principal plane, e.g. X/Y plane; however, it is executed in the plane
which was tilted to the principal plane.
Consult the description of the G7 function for the programming of the freely programmable operating
plane.
The tilting of the operating plane is defined and implemented using the G7 function. The G7 function
is made up of two components:
- definition of new operating planes, rotation of the coordinate system.
- in the event that it is programmed, tilt the tool vertically to the defined operating plane.
An operation on an oblique workpiece plane is programmed in local coordinates. In this way, the local
X and Y coordinates lie in the oblique plane and the Z coordinate is fixed vertically in the plane.
The machine recognizes the link between the local coordinates and the true machine axes and
calculates this. The control calculates the tool correction factor.
Millplus distinguishes two machine types during tilting of the operating plane:
1) Machine with a tilting table
The location of the transformed machine axis is not changed with reference to the
coordinates system fixed in the machine. If you rotate your table, and thus the workpiece,
through 90°, for example, the coordinate system is not rotated through 90° with it. If, in the
operating mode "Manual operation", you press the axis direction key Z+, the tool travels in the
direction Z+.
2) Machine with a tilting face
the location of the tilted (transformed) machine axis is changed with reference to the
coordinates system fixed in the machine:
If you rotate the tilting face of your machine and hence the tool, e.g. in the B axis about +90°,
the coordinates system is rotated with it. If, in the operating mode "Manual operation", you
press the axis direction key Z+, the tool travels in the direction Z+ and X+ of the coordinates
system fixed in the machine.

G-FUNCTIONS
268 Heidenhain
Using the G7 function you define the location of the operating plane by the input of tilt angles. The
angles entered describe the angular components of a space vector.
If you program the angular components of the space vector, the control automatically calculates the
angular position of the tilt axes. MillPlus calculates the location of the space vector and thus the
location of the spindle axis, by means of rotation about the coordinates system fixed in the machine.
The sequence of rotations for the calculation of the space vector is fixed: MillPlus turns the A axis first,
next the B axis and finally the C axis.
The G7 function is effective from the start of its definition in the program.
MillPlus can only position controlled axes automatically.
In the G7 definition, you can, in addition, input a safety distance to the tilt angles, with which the tilt
axes are positioned.
Use only pre-set tools (full tool length in the tool table).
During the tilting process the position of the tool tip opposite the workpiece remains virtually
unchanged (depending on the type of movement L1=).
MillPlus implements the tilting process using the power traverse.
23.7.2 Machine types
Milling machines with four or five axes can be used for the oblique machining of a workpiece.
Depending on the plane which is tilted, other types of machine are needed for the working. At least
two rotary axes and three linear axes are needed, in order to reach all sides and planes (except the
under surface) without the need for remounting.
The possible types of machine are:
90° tilting face and turntable
The tilting face can be in two states. The upper and reverse sides can be worked by means of
the tilting face. The four side surfaces can be worked using the turntable (C axis). The
machine is only suited to all oblique operating planes if the tilting face can also be set in the
oblique position manually.
Double turntable
The tables (A and C axes) are stacked. In this way, all sides and oblique operating planes
can be worked.
Double turntable and 45° tilting face
The tables (A and C axes) are stacked. The A axis is limited in its angular movement. In
conjunction with the two tilting face states all sides and oblique operating planes can be
worked.
45° double turntable
The tables (B and C axes) are stacked. The B axis is fixed in this way at an angle of 45°. All
sides and oblique operating planes can be worked.
Turntable and rotating face
The face (B axis) can be freely positioned. In conjunction with the table (C axis) all sides and
oblique operating planes can be worked.
Turntable and 45° rotating face
The face (B axis) is set at an angle of 45°. In conjunction with the table (C axis) all sides and
oblique operating planes can be worked.

G-FUNCTIONS
20000710 MillPlus V410 269
Outline of the most suitable machine types for use with oblique operating planes.
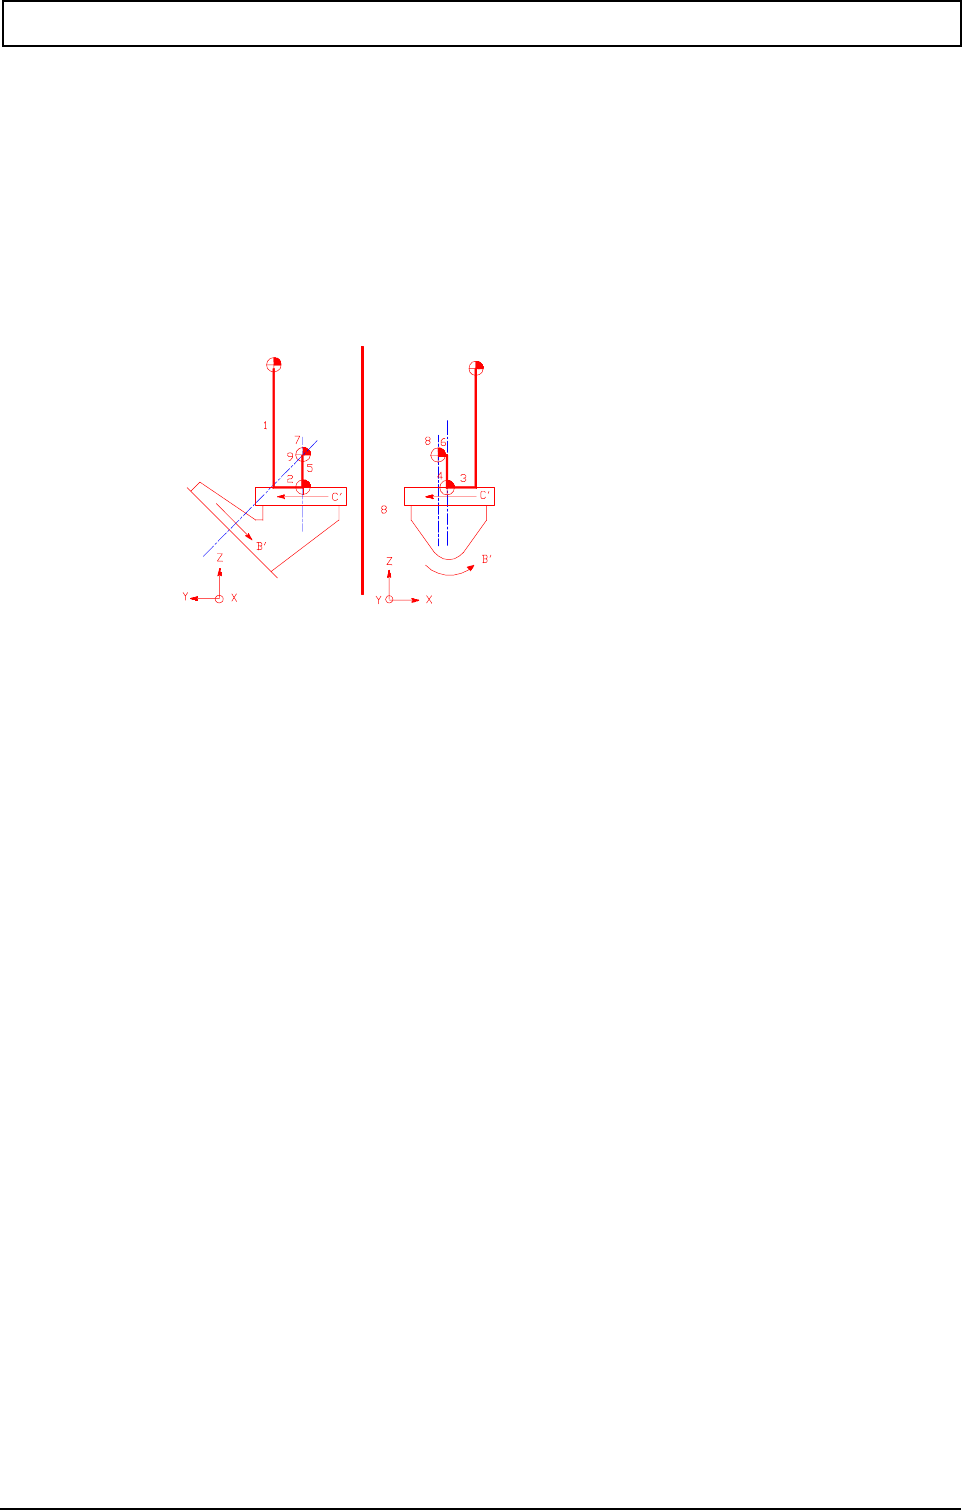
G-FUNCTIONS
270 Heidenhain
23.7.3 Kinematic model
The control needs a kinematic model of the machine in order to reset the programmed local
coordinates in the oblique plane to the movements of the machine axes. A kinematic model describes
the "construction" of the axes and the exact position of the different turning points on the rotary axes.
As an example, a kinematic model of the DMU 50 V machine is shown.The kinematic model is made
up of a chain stretching from the work piece to the machine frame. It is not necessary to describe the
chain from the workpiece to the machine frame, because it includes no rotary axes.
Kinematic model for the DMU 50 V
Explanation of the drawing:
-1,2,3 three elements in the X, Y, and Z directions in order to fix the (absolute) centre
position of the workpiece table with reference to the marker positions.
-4 element for definition of the C axis.
It is only necessary to describe the rotating axis of a rotary axis, not the centre point.
-5,6 two elements in order to obtain the rotating axis of the second (incremental) rotary
axis.
-7 element for definition of the (incremental) direction of the second rotating axis. This
direction is -45° in the A axis (all around the X axis).
-8 element for definition of the B axis.
-9 element in order to raise the -45° tilt (Element 7) again. In this way, the kinematic
chain ends without rotation.
The kinematic model is entered by means of the machine settings MC600 to MC699.
To determine the connection between the operating planes and the positions of the axes, the stacking
and the exact position of the different rotating points of the rotary axes are needed. A description of
this stacking is called the kinematic model. The kinematic model is defined in the form of two "chains".
One chain defines the axis stacking of the tool as far as the machine frame, the other chain from the
workpiece to the machine frame. In this way, it is only necessary to describe a chain if it contains
rotary axes.
A kinematic chain defines, by means of displacements and tiltings, the way in which the rotary axes lie
with respect to one another. Every displacement or tilting is determined as an element of the

G-FUNCTIONS
20000710 MillPlus V410 271
kinematic chain in three machine settings. Thus, a total of 25 elements of the kinematic chain can be
determined. All rotary axes and positioning axes which are present should be described.
Only the machine types with rotary axes in the X, Y or Z direction, in which the sequence of
rotary axes from workpiece to tool is as follows, are supported:
- A C
- C A
- C B
- C A fixed B -A fixed (DMUxx0hain c-3000(2gs45-3000(-l(DMUx)4 fsrMCxx(U)57.5(nin)50.9h )-6 whichAl is )-6 fi(ed= -45 c-30/T142 1 Tf-6.65345-3000 Tc0 Tw! )Tj/TT2 1 Tf06.3912 0 TD-0.0907 Tc()( )Tj-432.7215 -120376 TD3.315 Tc[( -)3324.7( )323.4(C)3324.6( )]TJ0 -1.1976 TD-0.012l(DMUx26 Tw[( )-3329.4( )-3329.4(- )-306(Chang(edaxias)-8ainvarU)57.5(i)9.4an(ts(C)57.6(bn)50.9(e)(comxesBs, in)50.9d Bbecomxes )-6C)((arealsod pn)50.9ssible.( )]TJT*0 Tc0 Tw( )TjT*-0.0176 Tc0.0426 Tw[( )-2817.5( )-3817.5If to)-64(t)-2.7here types )-6 of machinearU)8(e senered,f )-6(tho)-64(5 ec-3000(185645-3000(-43 Tc0.0419 Tw[rr orreppor 02564" machine)-6.2( typ nro)-6.1(rrecognized"l is )]TJ-2.59.28 -1.1976 TD3.2646 Tw[(generatbed. -3329.4( )]TJ-.59.28 -1.1976 TD0 Tc0 Tw( )TjT*( )Tj/T42 1 Tf0 -1..497 TD0(-43 Tc055319 Tw[2 )-16.13 )-16.1.)-9(7 )-16.1.)-9(4o)-6.1 Manutalag -43 Tc0.0419 Tw[: isdisplao oin te scremesbechidf the toolnumberU.( )-6By means to f39h
oin therigotsinxtn tn(tho)-639h chractere":(an idtiaec-3003.206565-300[2ctio ia(go)-6.3(i)(vmesao)-6.3sf)-26( tnwhethere Te eisplay:relatbes to)-163(. )]TJ-2320656 -1.9976 TD.10531 Tw[(the )-6(iltbeo)-64(5opern)8(attngo)-64(5planees )-6 r to(tho)-64(5(mas)-87(hg)-0.5(inecec-300)0580s45-3000(-12 Tc010463 Tw[oordina )50.9((s.( )-6Ttheopern)57.5attngo)50.9 sta )50.9(x)32(us h )50.9aessbemesenh
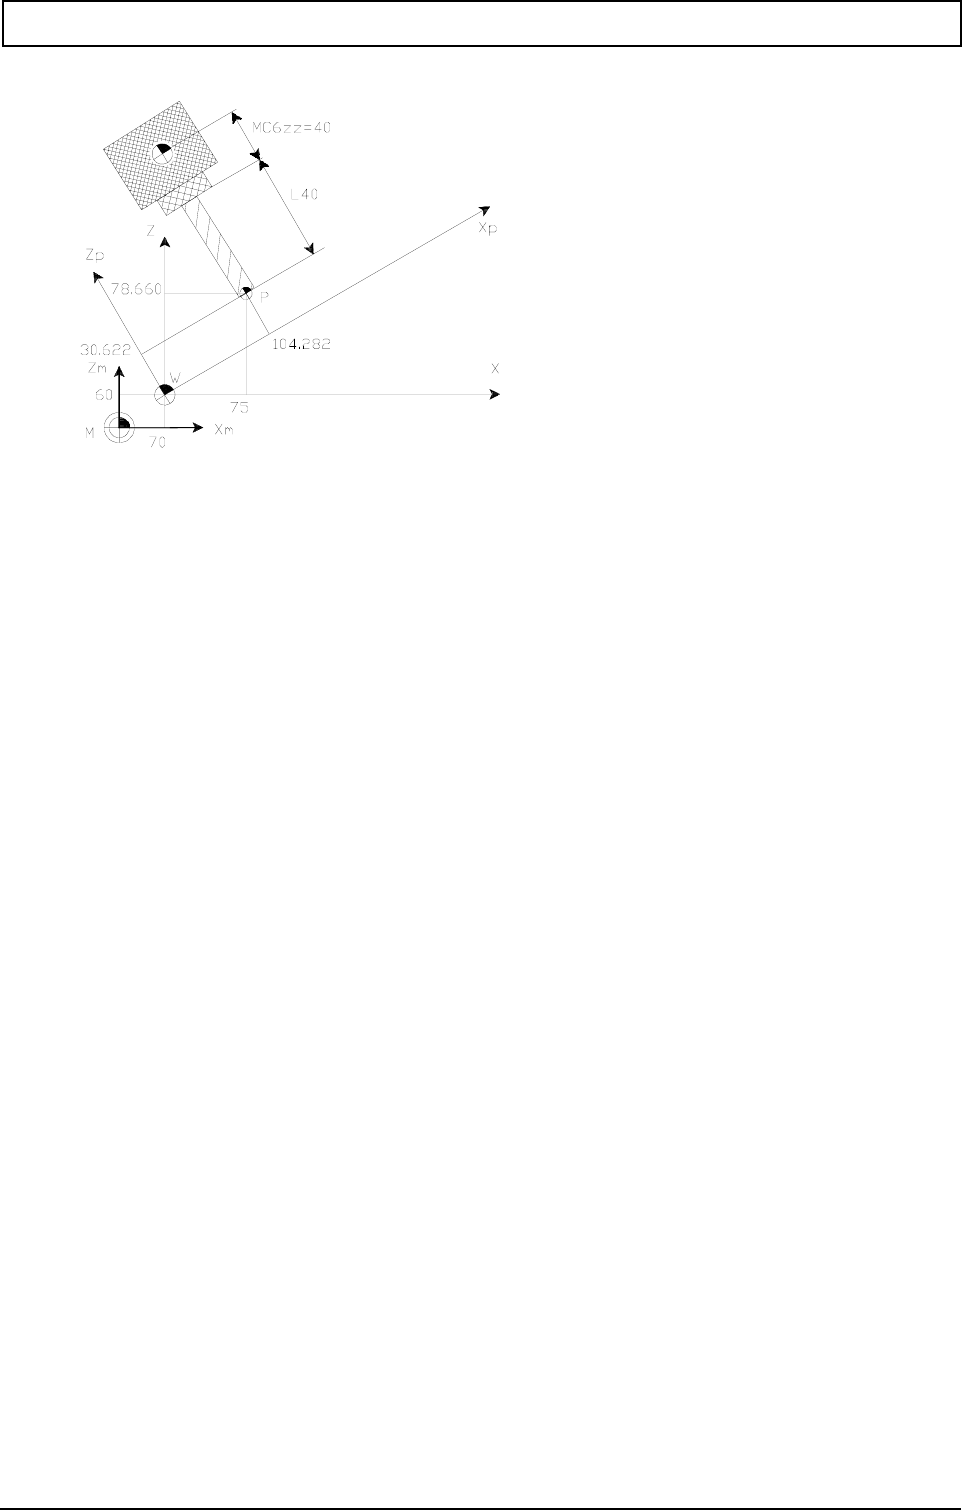
G-FUNCTIONS
272 Heidenhain
The position display on the screen can change between the position in the G7 plane (Xp,Zp) or in
machine coordinates (X,Z).
Both are based on the active null point G52 + G54 + G92/G93.
23.7.6 Axis selection/positioning axis
An axis which is not regulated must be set to the correct position by hand. However, either before or
after this, the oblique setting of the tool must also be entered by means of G7. Otherwise it will not be
checked.
Comment: The expected position of the rotary axes is set parametrically in G7 using
n7=<parameter number>. An axis selection or a positioning axis can be set manually
using this information.
The axis selection or the positioning axis should also be followed in the kinematic model.
23.7.7 Reference point
If the reference point is approached during G7, the rotary axes remain in their reference position
following the approach. The G7 plane is deactivated and the G17 plane is activated.
After running up the machine, but before approaching the reference point, the G7 plane is still active.
After < reset CNC> the G7 plane is deactivated.

G-FUNCTIONS
20000710 MillPlus V410 273
23.7.8 Interruption
If the G7 movement is interrupted, the exact position of the tool tip is displayed on the screen.
Following interruption, the axes can be used in manual operation [mode].
Following <Start> a move in position back to the interrupted point is effected. At the same time the
axes run with positional logic corresponding with the G7 plane. Concurrently, the rotary axes rotate to
the initial position.
23.7.9 Fault reports
P306 plane not clearly defined
The G7 plane is defined using a mix of absolute angles (A5=, B5=, C5=) and
incremental angles (A6=, B6=, C6=).
Solution: Use only absolute or incremental angles. If necessary, several G7 definitions
with incremental angles can be defined, one behind the other.
P307 program plane not attainable
The G7 oblique setting defined cannot be attained, on account of the limited range of
the rotary axes.
Solution: Machines with a tilting face should tilt the face (by means of the M function)
from the instantaneous position (horizontal or vertical) following the other
position
O256 Machine type not recognized
The kinematic model in MC600 to MC699 is defining a type of machine which is not
supported for the oblique operating plane (G7). Only machine types with the following
sequence of rotary axes, as viewed from the workpiece to the to tool, are supported:
- A C
- C A
- C B
- C A fixed B -A fixed
(A fixed is a fixed tilt in the direction of the A axis, as, for example,
the DMU50V has with -45°)
- C
- Axis change variants (C becomes B, and B becomes C) are also possible.
Solution: The kinematic model should be entered in detail, with at least a description of
those rotary axes present. The control must be run up once more.

G-FUNCTIONS
274 Heidenhain
23.7.10 Machine settings
MC312 free operating plane (0=off, 1=on)
activates the free operating plane. The G7 function can be programmed.
MC600 - MC699
There are 100 new machine settings (MC600 – MC699) for the description of
the kinematic model. The model is described using a maximum of 25
elements, in which each element is described by means of four machine
settings.
The following machine settings are used:
MC600 Kinematic chain (0=end,1=tool,2=workpiece)
MC601 Element (0,1=X,2=Y,3=Z,4=A,5=B,6=C)
MC602 Element type (0=incremental,
1=absolute)
MC603 Element insertion [:m/mdegrees]
MC604, 608, 612, 616, 620, …. , 696 as MC600
MC605, 609, 613, 617, 621, …. , 697 as MC601
MC606, 610, 614, 618, 622, .... , 698 as MC602
MC607, 611, 615, 619, 623, …. , 699 we MC603
MC755 Free operating plane: rotation (0=coordinates cross,1=axes)
If the desired rotation of the operating plane corresponds with the rotation of
a rotary axis, the control has the choice between rotten using the relevant
rotary axis or rotation using the coordinates cross. This choice is made with
MC755.
E.G on a machine with a (true) C axis the program instruction G7 C5=30 and
MC755=0 produces a rotation of the coordinates cross over -30° and
MC755=1 a rotation of the C axis over 30°.
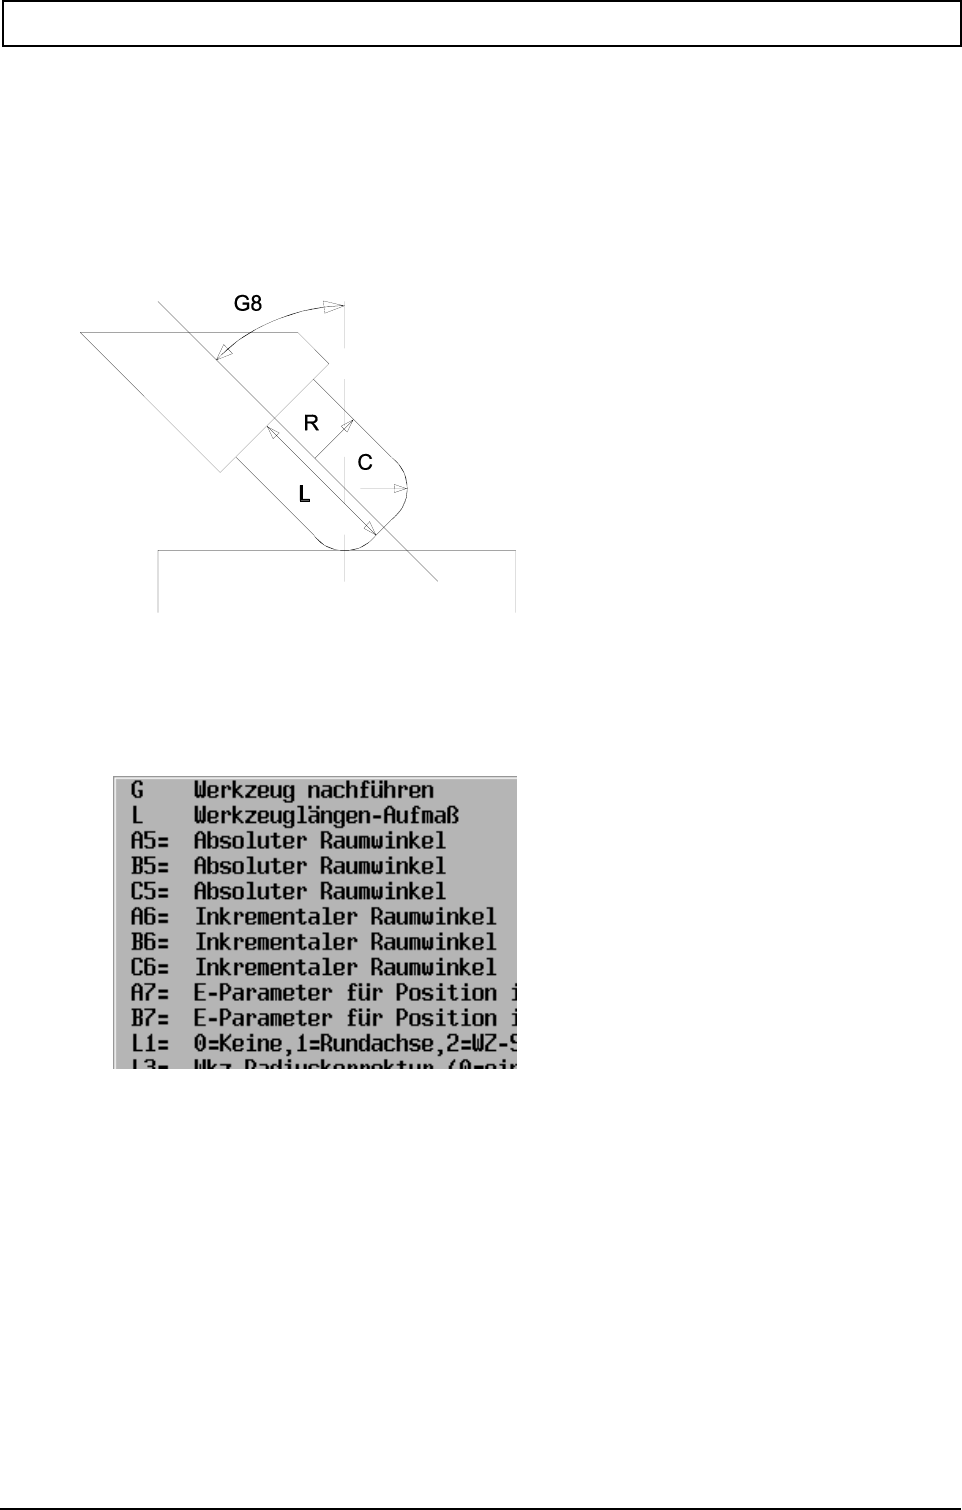
G-FUNCTIONS
20000710 MillPlus V410 275
23.8 Swivel tool G8 (from V410)
To program a swivelled tool for four or five-axis machines.
With the function "Swivel tool" the tool axis can be set obliquely relative to the machining plane. This
makes angle milling possible and substantially improves cutting conditions and thus surface quality.
The programming of G8 is identical to G7. G7 should therefore also be read.
L, R and C from the tool table.
N.. G8 {A5=.. | A6=..} {B5=.. | B6=..} {C5=.. | C6=..} {A7=..} {B7=..} {C7=..} {L} {L1=..} {F}
Parameters
Associated function
G FUNCTIONS NOT PERMITTED WITHIN G8
The following G functions are not permitted when G8 is active:
G6, G19, G40, G41, G42, G43, G44, G141, G180, G182
The rotation of the tool direction can be defined in two ways:
- Programming with A5=, B5= or C5= parameters. The absolute rotations about the
corresponding positive axes are defined by this. The rotations are calculated as
follows:
1. the active G8 rotation is cancelled
2. C5= rotation about the positive Z axis fixed with respect to the machine
3. B5= rotation about the positive Y axis
4. A5= rotation about the positive X axis
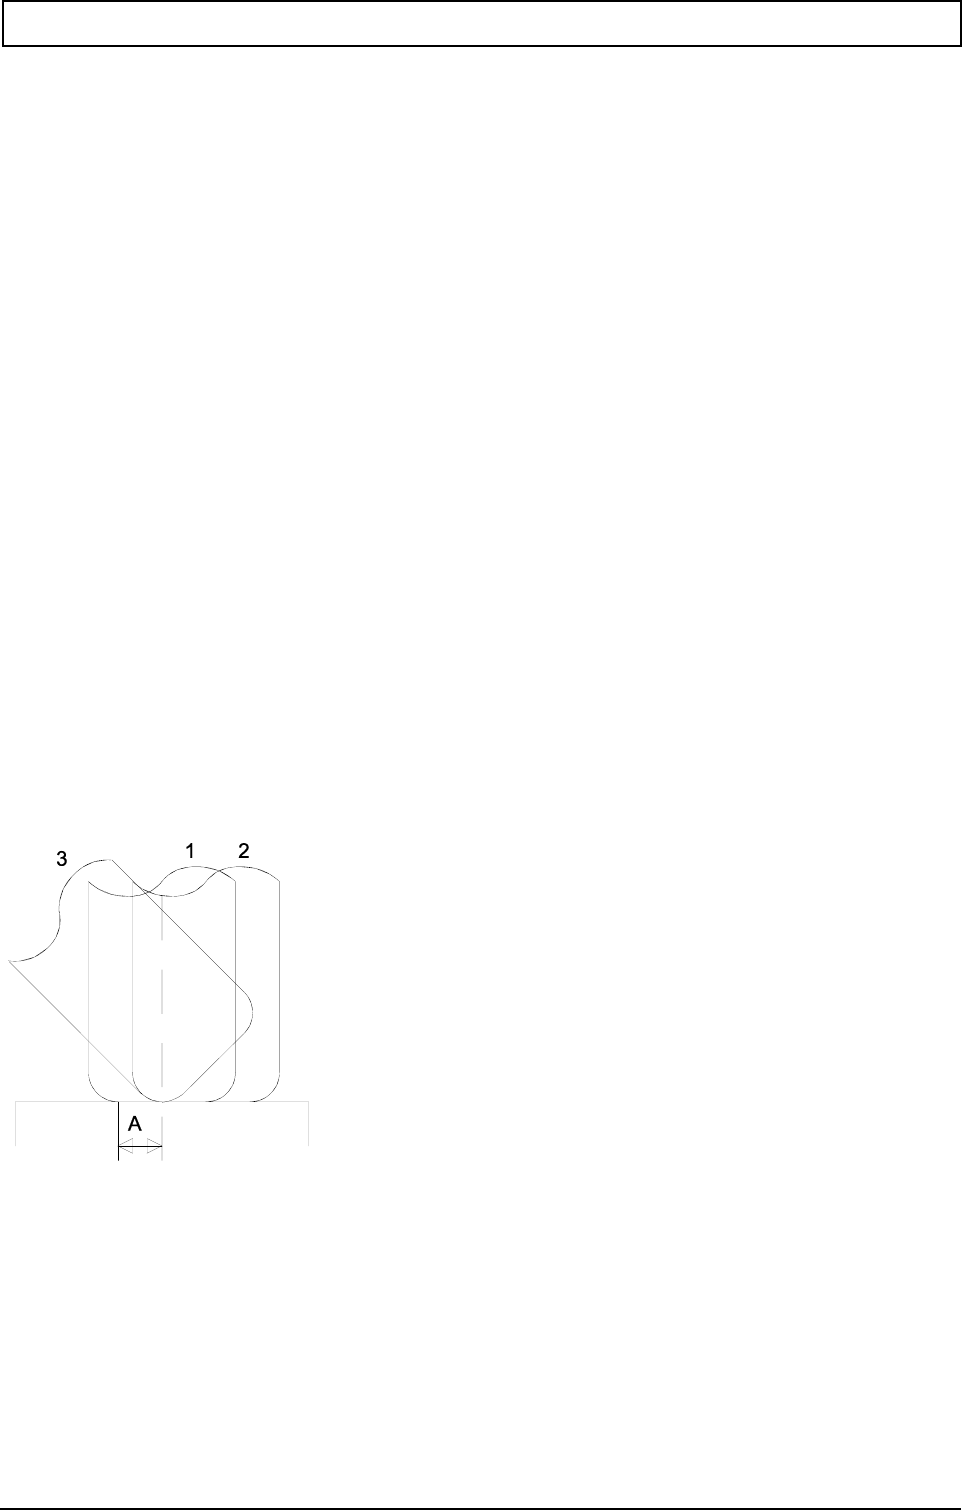
G-FUNCTIONS
276 Heidenhain
- Programming with A6=, B6= or C6= parameters. The incremental rotations about the
corresponding current positive axes are defined by this. The rotations are calculated
as follows:
1. C6= rotation about the current G8 positive Z axis
2. B6= rotation about the current G8 positive Y axis
3. A6= rotation about the current G8 positive X axis
Programming is independent of the machine configuration. The plane rotation is calculated
relative to the current zero point. The motion is dependent on the machine configuration.
SCANNING A CALCULATED ANGULAR POSITION
A7=, B7=, C7= Contains the number of the E parameter in which the calculated angle of the
corresponding rotary axis is set.
SWIVEL MOTION
The G8 swivel motion is performed by interpolating with feed (F6=). It swivels the tool axis
onto the defined plane. Which axes move depends on the type of motion L1= :
- L1=0 The rotary axes do not move (default).
Note: The swivel motion can be programmed or performed manually by means of the E parameters
that are loaded with A7=, B7= or C7=.
- L1=1 Only the rotary axes swivel, while the linear axes do not move.
- L1=2 The rotary axes swivel and the linear axes perform a movement. This means that the
contact point position remains X, Y, Z.
If the contact point lies on the tool corner radius, the movement is only a rotation.
If the contact point is the tool tip and the corner radius (C) is smaller than the tool radius (R), a
compensating movement occurs so that the contact point is shifted from the tool tip to the
corner radius.
With cylindrical cutters (with corner radius C < cutter radius R), the following particular point
applies:
When swivelling from the vertical (1) to the oblique (2--> 3) position or vice versa, the contact
point moves from the centre of the cutter to the corner radius (A) and vice versa. A
compensating movement at the tool tip ensures that the current contact position X, Y, Z
remains unchanged.
TOOL LENGTH_ALLOWANCE
If the swivel motion takes place about the tool contact point (L1=2), L defines an extra
allowance in the tool direction between the rotation point and the tool tip.
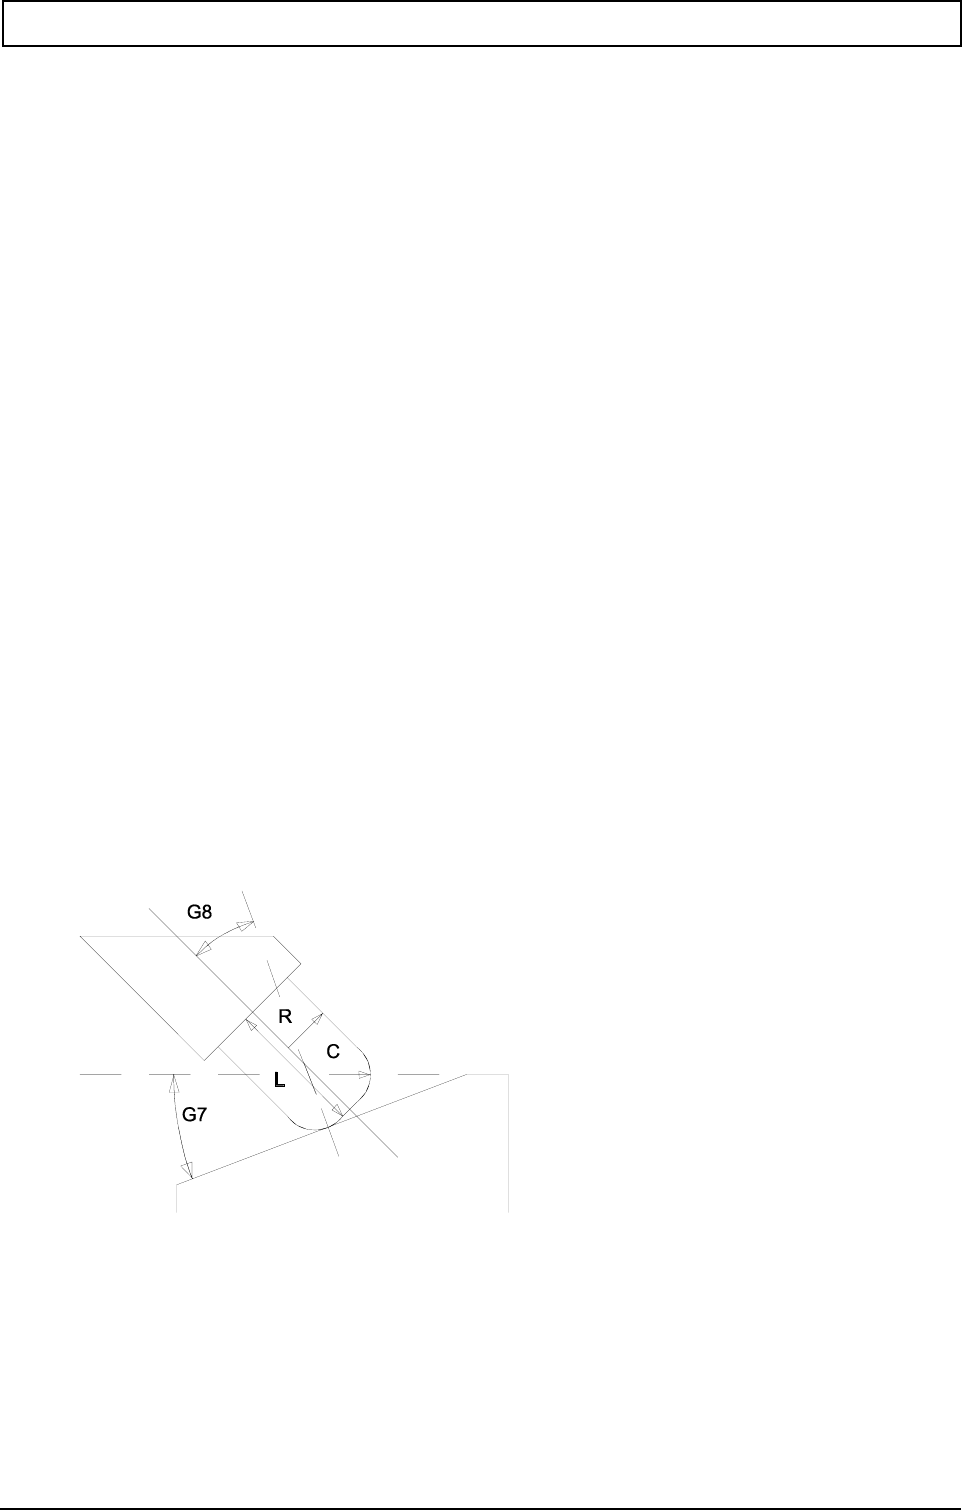
G-FUNCTIONS
20000710 MillPlus V410 277
TOOL CORRECTION
During the function "swivel tool" (G8) the values L, R and C for the tool are corrected.
This G8 tool correction is independent of G40, G41, G42, G43, G44 and is always effective.
At the beginning and end of the tool correction, a compensation movement is carried out if the
corner radius (C) is smaller than the tool radius (R).
If the tool dimensions (L,R,C) change with G8 active, the current position of the linear axes is
re-calculated.
TURNING OFF THE G8 FUNCTION
G8 remains active until it is cancelled. G8 is cancelled by programming G8 without angle
parameters.
G8 is not cancelled by M30 or <program abort>. After the control is turned on, G8 is still
active. After search for reference points or <CNC reset> G8 is cancelled.
Note: At the start any program that uses G8, we recommend that a G8 is programmed with no
parameters. This ensures that the tool direction is always reset as the program is starting up
(abort with swivelled tool and new start). Without this G8 at the beginning, the first part of the
program is executed in the swivelled instead of the unswivelled plane.
The programming is similar to programming with G7/G17/G18 - different zero points or
different tools.
CONFIGURATION
Swivel tool (G8) can be used for machines where a kinematic model is defined and entered. See
description of the kinematic model.
DISPLAY
When G8 is active, a yellow icon is displayed in the display behind the tool number.
A small 'p' on the right, next to the 'axis letters', is used to display whether the position of the tool tip is
displayed or the position in machine coordinates.
Example 1 Workpiece with oblique machining plane and oblique tool.
N10 G17
N20 G54
N30 M55
N40 G7 L1=1
N50 G8 L1=1
..
N100 G0 X130 Z50
N110 G93 X130

G-FUNCTIONS
278 Heidenhain
N120 G7 B5=-30 L1=2
N130 G8 B5=30 L1=2
..
N200 G8
N210 G7 L1=2
Key:
N10 Define machining plane
N20 Zero point offset
N30 Deselect M53/M54
N40 Reset G7
N50 Reset G8
N100 Tool set to safety distance
N110 Zero point set to the beginning of the swivelled machining plane.
N120 G7 Define new oblique position of the tool.
B5=-30 Angle of rotation
L1=2 Tool/table revolves about the tool tip
N130 G8 Define new oblique position of the tool.
B5=30 Angle of rotation
L1=2 Tool rotates about the tool tip and a compensation movement is performed.
N200 Turn tool perpendicular to the machining plane again (rotary and compensation movement).
N210 Rotate back to the horizontal plane.
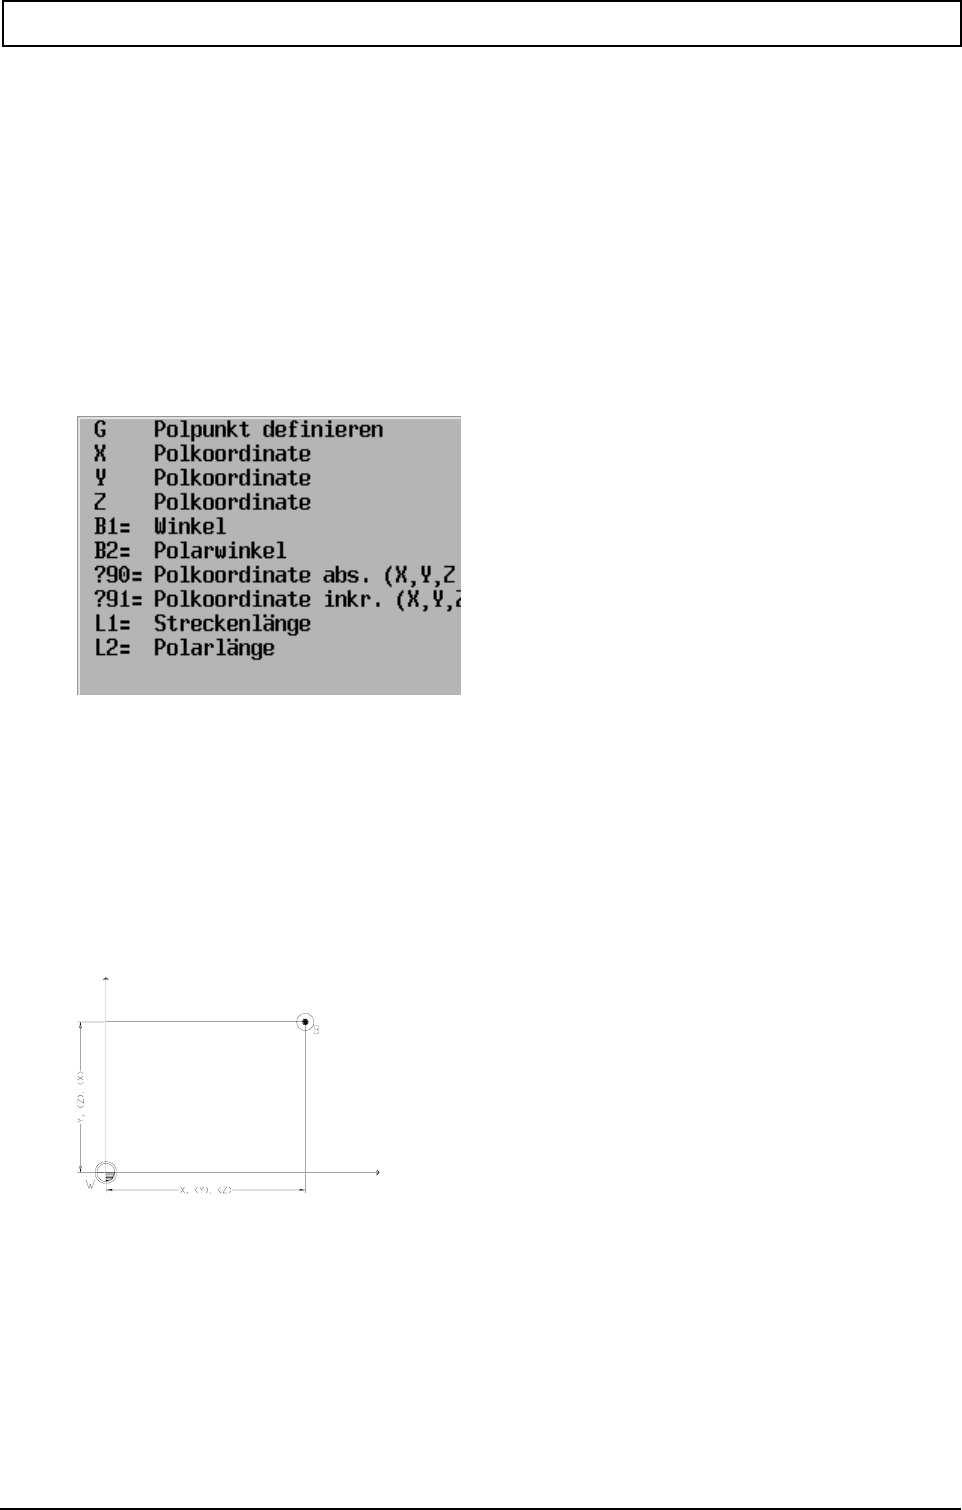
G-FUNCTIONS
20000710 MillPlus V410 279
23.9 Defining polar point (measurement reference point) G9 (from V320 onwards)
Programming a polar point. If a polar point has been programmed, program blocks with polar
programming (angle and length) no longer relate to the zero point but to the last programmed polar
point.
N.. G9 X.. Y.. {X90=...} {X91=...} {Y90=...} {Y91=...} {Z90=...} {Z91=...}
N.. G9 X0 Y0 Deactivate pole (same as workpiece zero point)
N.. G9 B2=.. L2=.. {B1=..} {L1=..} (polar point in polar coordinates)
Parameters
End point coordinates
Wortweise Absolut-/Inkremental-Programmierung
Notes and usage
Polar point in absolute coordinates:
B = polar point
N.. G9 X.. Y..
X90=,Y90=,Z90= Polkoordinate absolut
9
1=,Z91= Polkoordinate inkremental
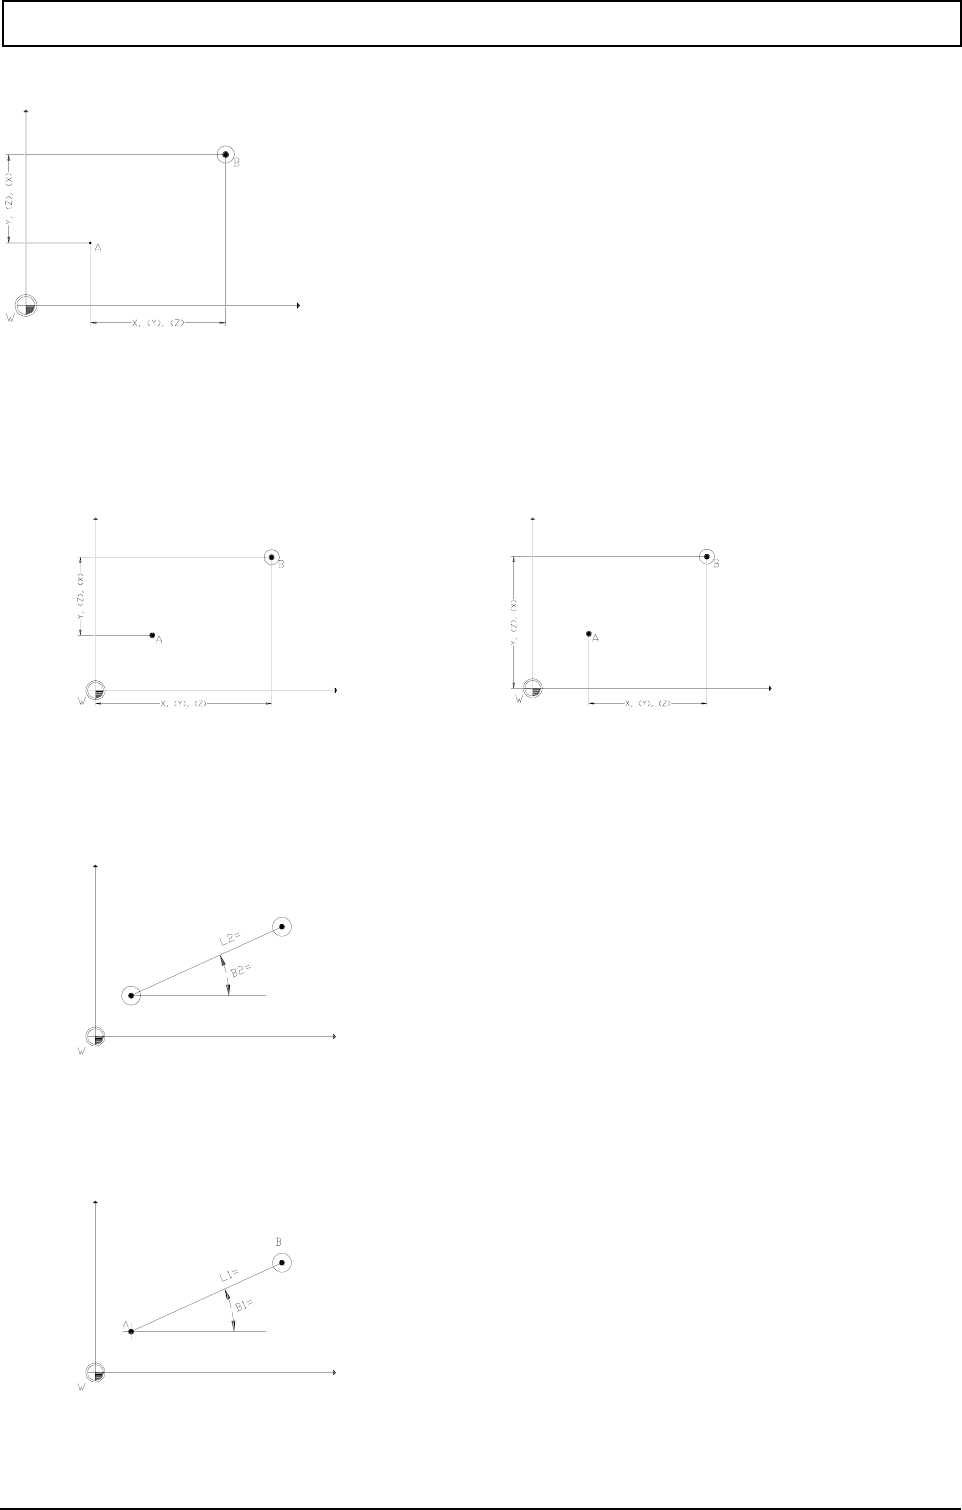
G-FUNCTIONS
280 Heidenhain
Polar point in incremental coordinates:
A = existing polar point B = new polar point
N... G9 X91=... Y91=...
Polar point in combined absolute/incremental coordinates:
A = existing polar point B=new polar point
N... G9 X... Y91=... N.. G9 X91=.. Y..
Polar point in absolute polar coordinates:
A = existing polar point B = new polar point
N.. G9 B2=.. L2=..
Polar point in incremental polar coordinates:
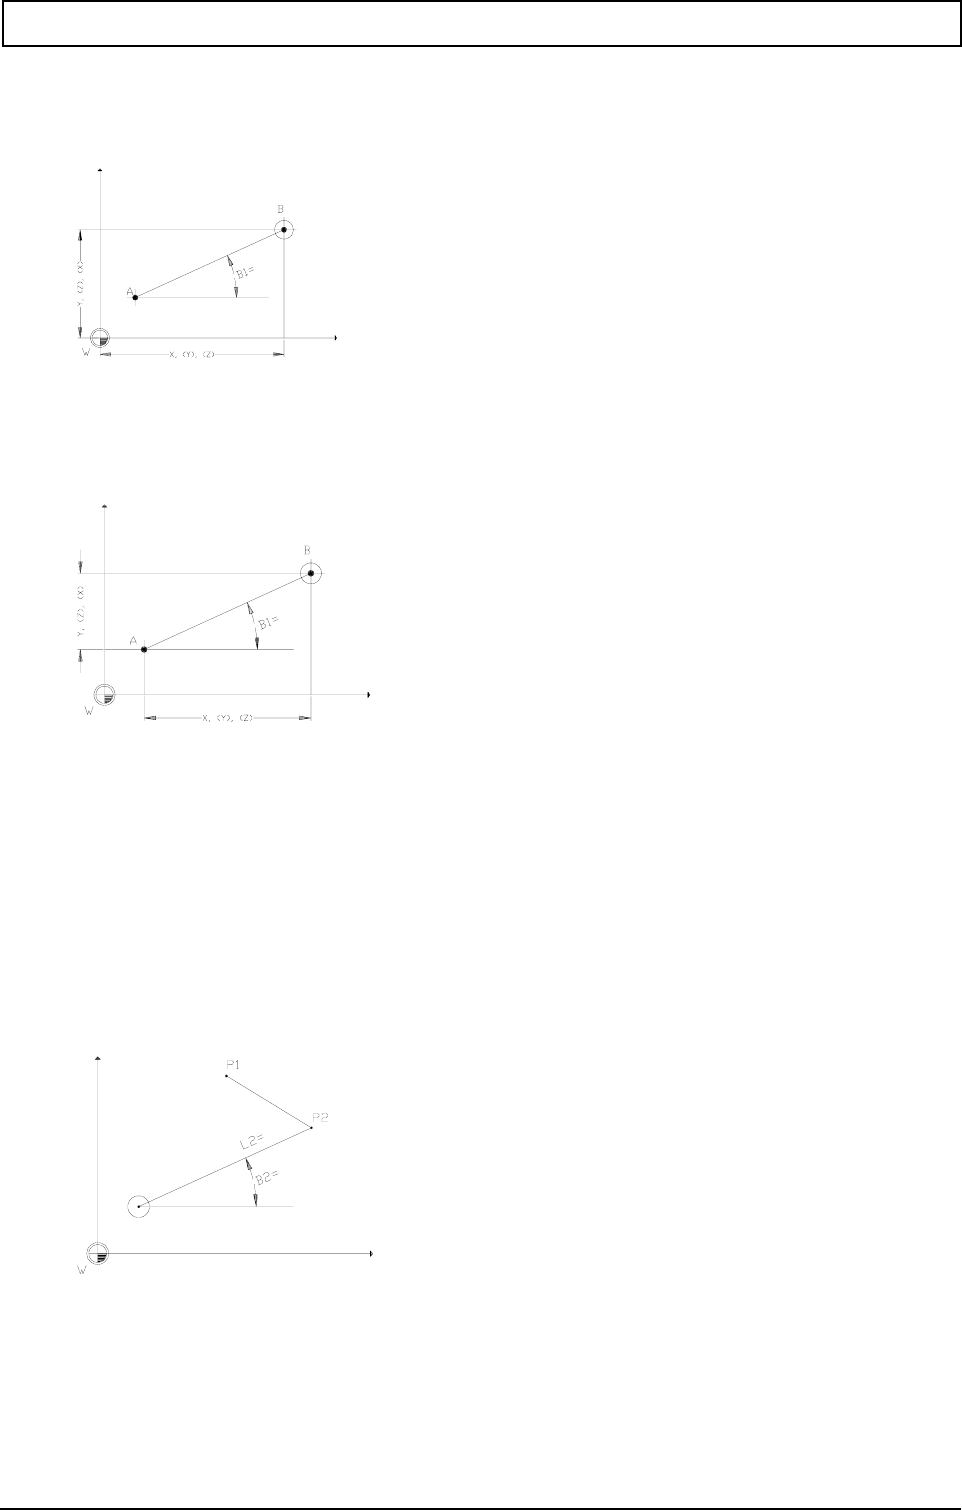
G-FUNCTIONS
20000710 MillPlus V410 281
A = end point of last movement B = new polar point
N.. G9 B1=.. L1=..
Combined programming: Cartesian absolute/polar:
A = existing polar point B = new polar point
N.. G9 X.. B1=..
Combined programming: Cartesian incremental/polar:
A = existing polar point B = new polar point
N.. G9 X91=.. B1=..
- pole definitions are only permitted in the active working plane
- before the G9 block is called, the polar point is located at the workpiece zero point (polar point = 0)
- when the plane is changed using G17, G18, G19, the polar point is zeroed (0).
Polar end point definition:
During absolute polar programming polar length L2= or L3= and polar angle B2= or B3= no longer
relate to the zero point, but to the polar point.
Polar point definition
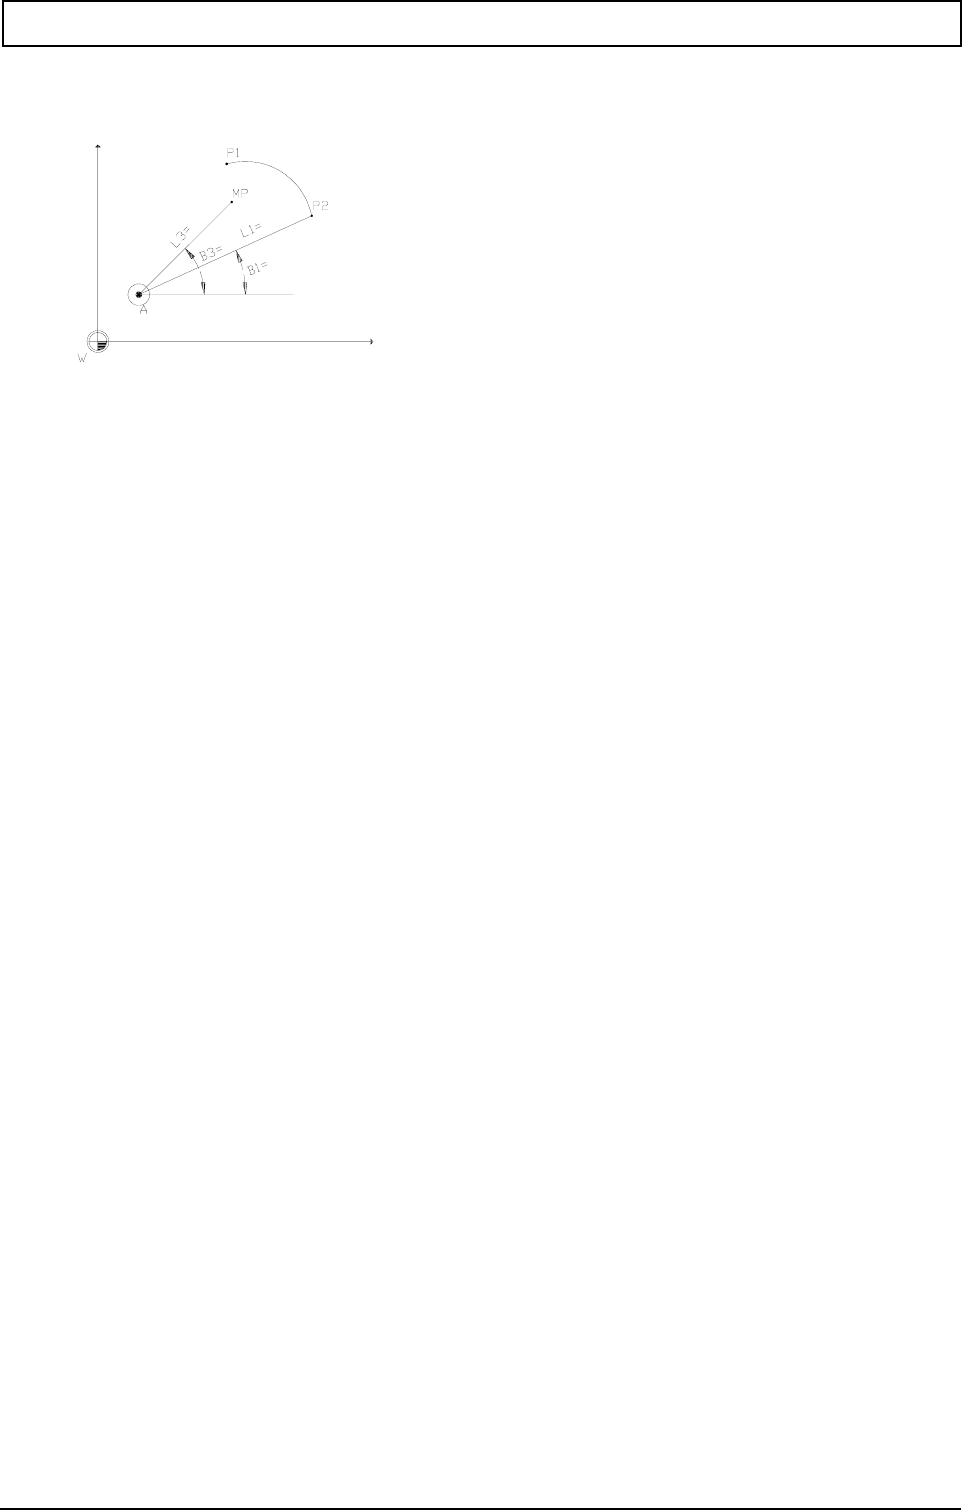
G-FUNCTIONS
282 Heidenhain
Polar circle definition
In G2 and G3 blocks polar programming with polar point of centre and end point is possible.
ICP/geometry calculation G64
G1, G2 and G3 blocks with B2=, B3= and L3= programming may be programmed in G64 and ICP.
They relate to the active polar point. However, the polar point itself can only be changed in G64, not
in ICP.
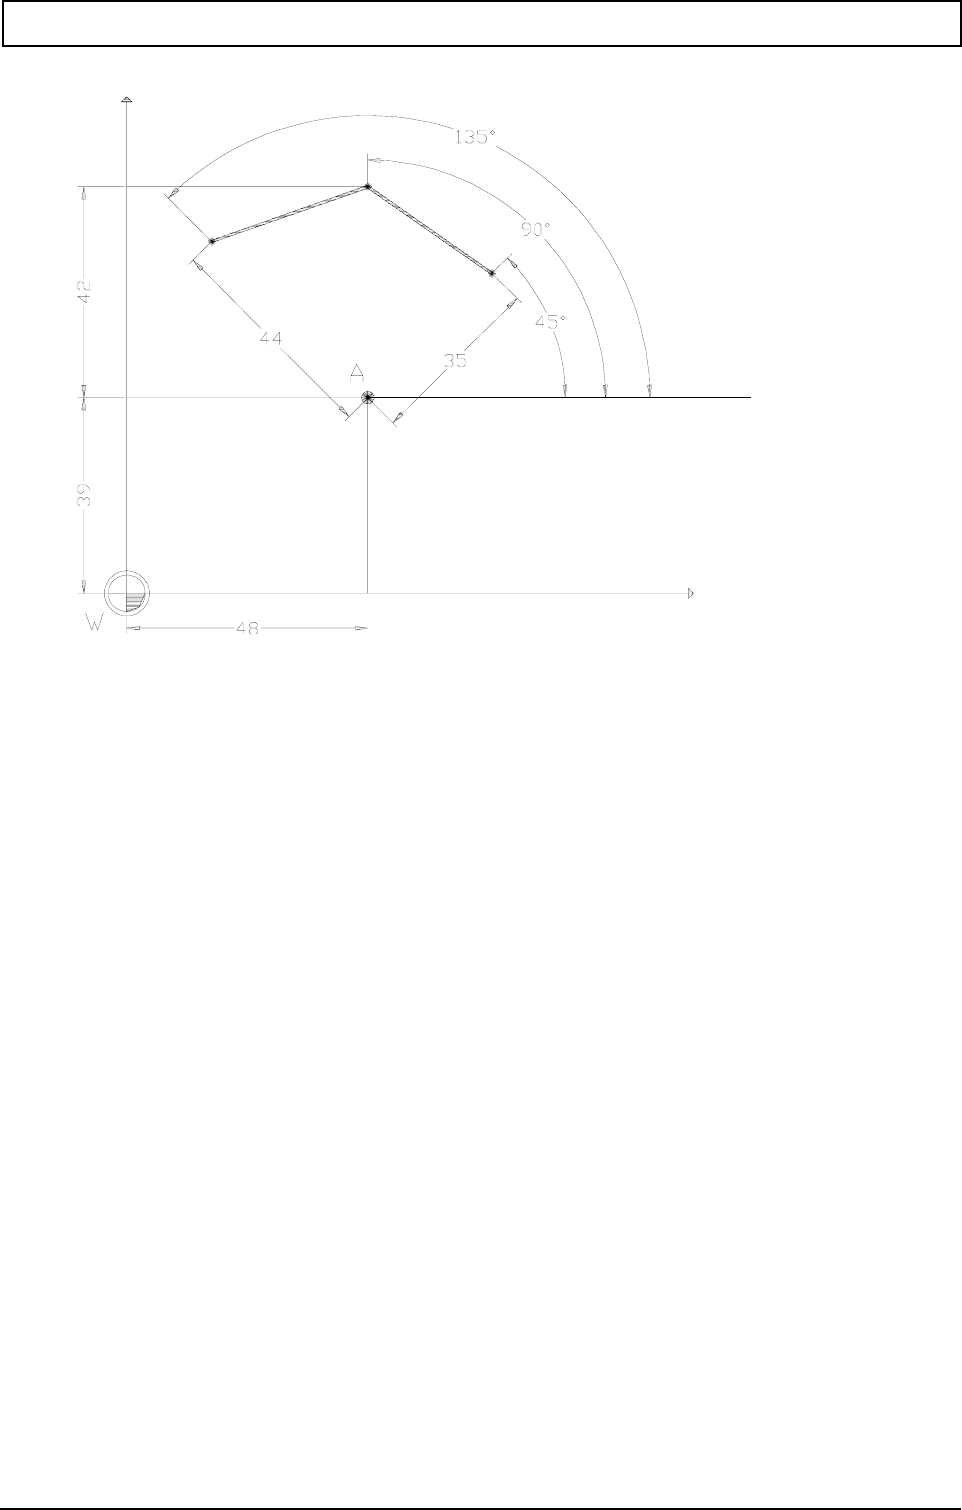
G-FUNCTIONS
20000710 MillPlus V410 283
Example
A = new polar point
N30 G9 X48 Y39 Definition of new polar point
N40 G1 B2=135 L2=44 Definition of end point coordinate related to the new polar point
N50 G1 B2=90 L2=42
N60 G1 B2=45 L2=35

G-FUNCTIONS
284 Heidenhain
23.10 Polar coordinate, Rounding, Chamfering G11
The use of the function is limited to programs that have been created with previous types of controller.
Programs that require geometric calculations can be easily created by the user with the Interactive
Contour Programming (ICP).
(See chapter on Interactive Contour Programming)
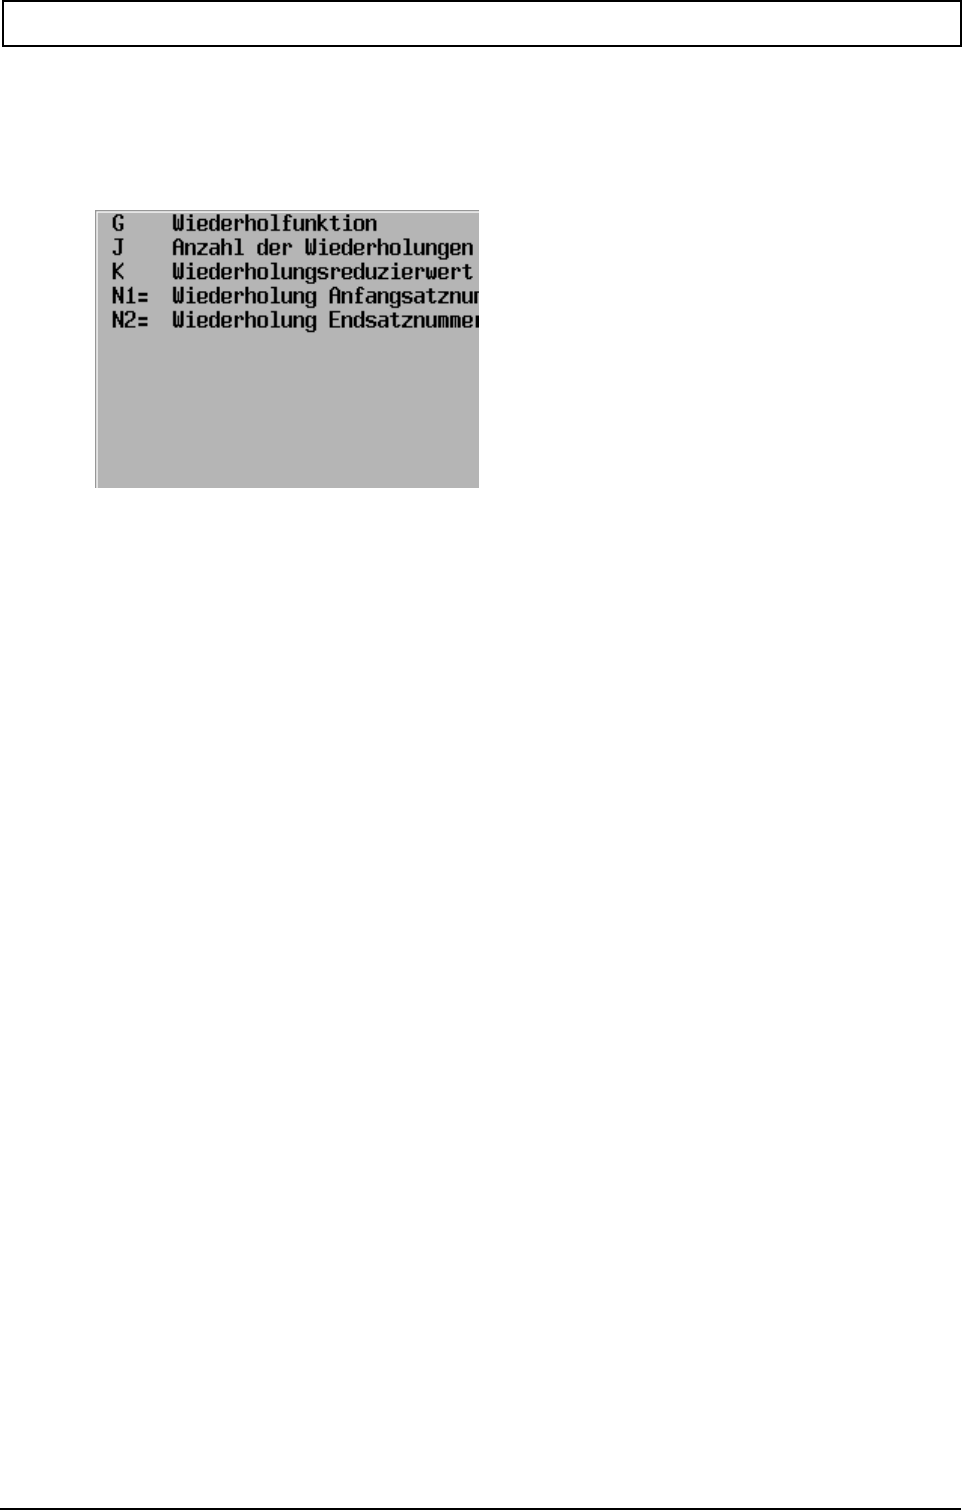
G-FUNCTIONS
20000710 MillPlus V410 285
23.11 Repeat function G14
N... G14 N1=.. {N2=..} {J..} {K..} {E..}
Parameters
Beispiel
Example
Repear program blocks N12-N19 four times. (2 methods)
:
N12
:
N19
:
N90 G14 N1=12 N2=19 J4
Repeat program blocks N12-N19 four times
:
:
N5 E2=4
:
N12
:
N19
:
N90 G14 N1=12 N2=19 E2
Repeat program blocks N12-N19 four times
:
Note
The block numbers of N1=.. and N2=.. must both be in the same part program or subprogram.
If N2=is not programmed, only the block marked N1= will be repeated.
If parameters J and E are not programmed, the block sequence will only be repeated once. A
repeating block sequence can be contained in another repeating block sequence (can be nested four
times).
A repeat only takes place in a G14 block if E>0. If the K parameter is not programmed, the CNC uses
the standard value K1.
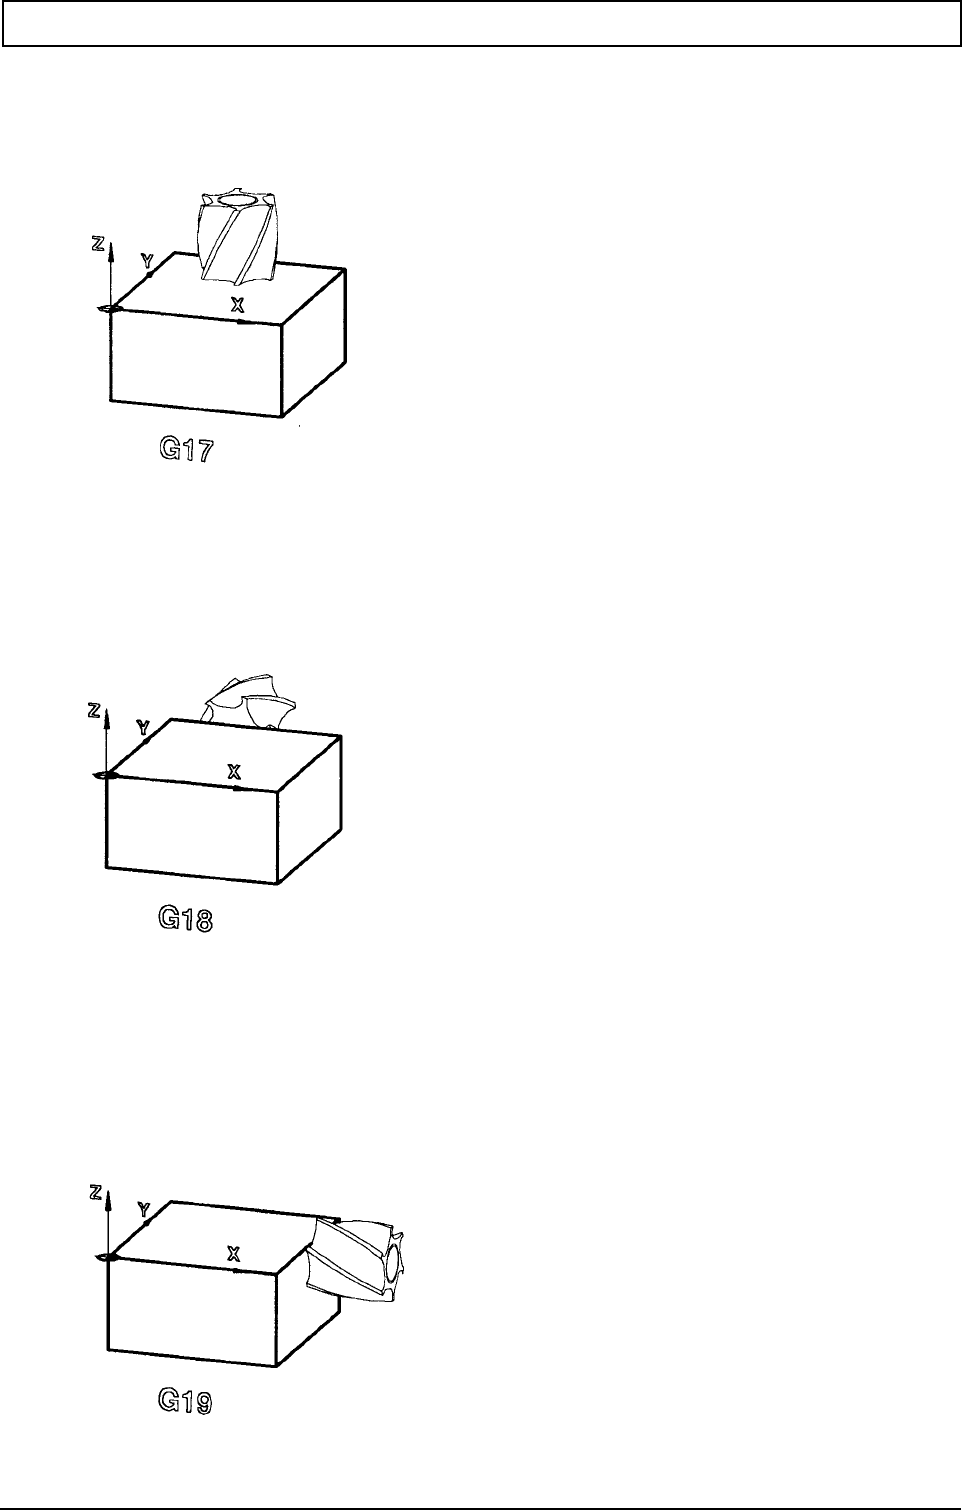
G-FUNCTIONS
286 Heidenhain
23.12 Main plane XY, tool Z G17
N... G17
23.13 Main plane XZ, tool Y G18
N... G18
23.14 Main plane YZ, tool X G19
N... G19
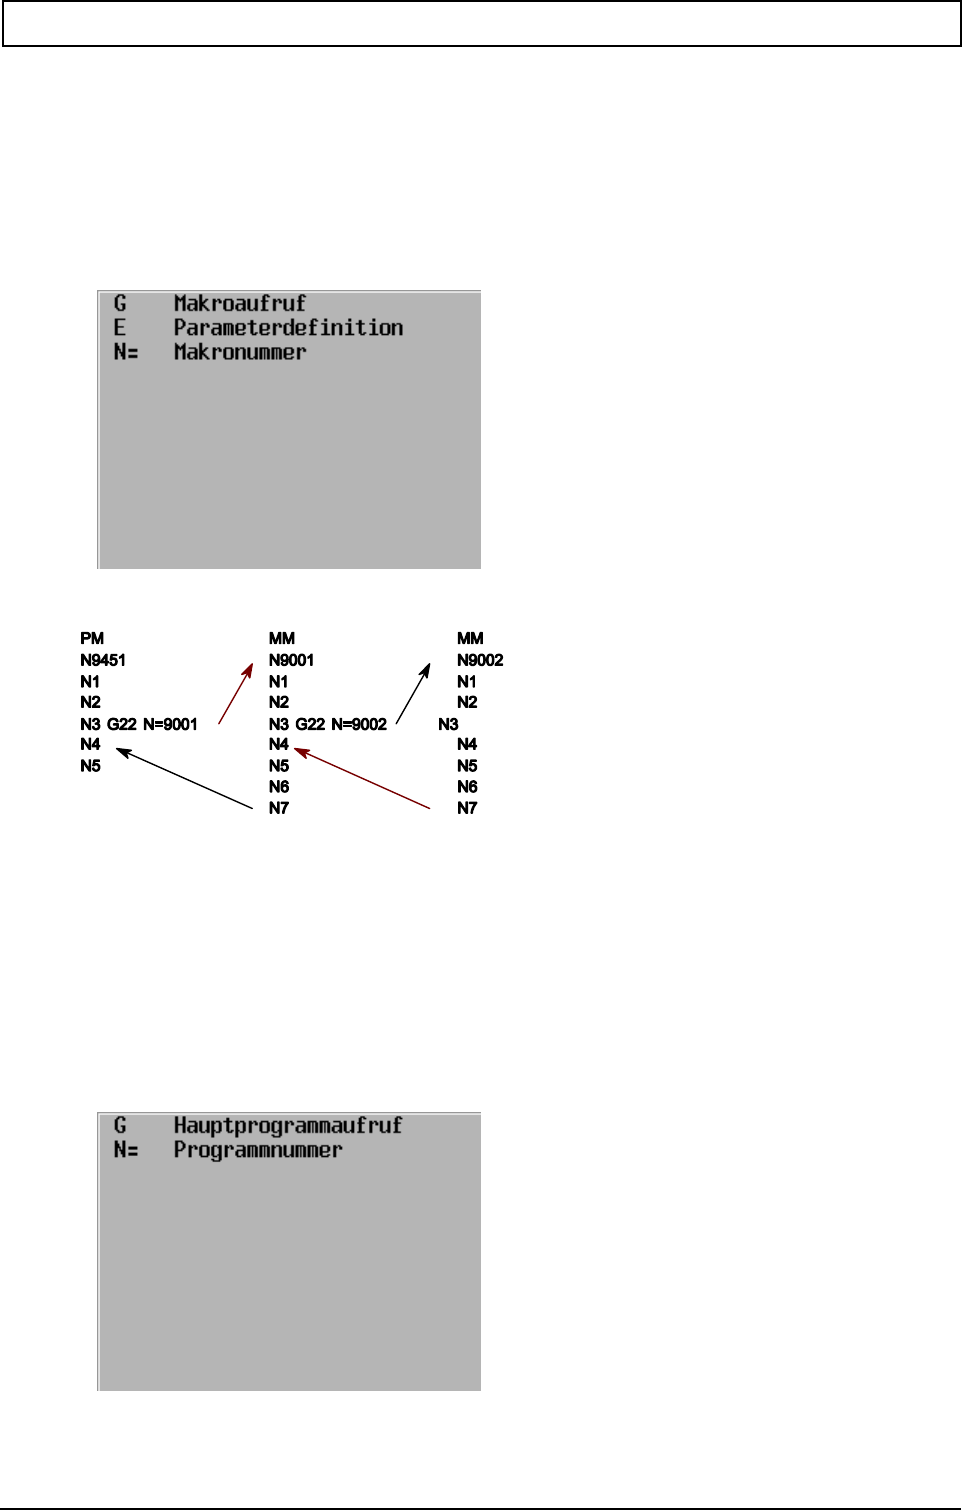
G-FUNCTIONS
20000710 MillPlus V410 287
23.15 Macro call G22
Call subprogram:
N... G22 N=..
Call subprogram if E..>0:
N... G22 E.. N=.. {E..=..}
Parameters
Example
Note
A subprogram can be called from another subprogram (can be nested eight times).
23.16 Main program call G23
N.. G23 N=..
Parameters
Example
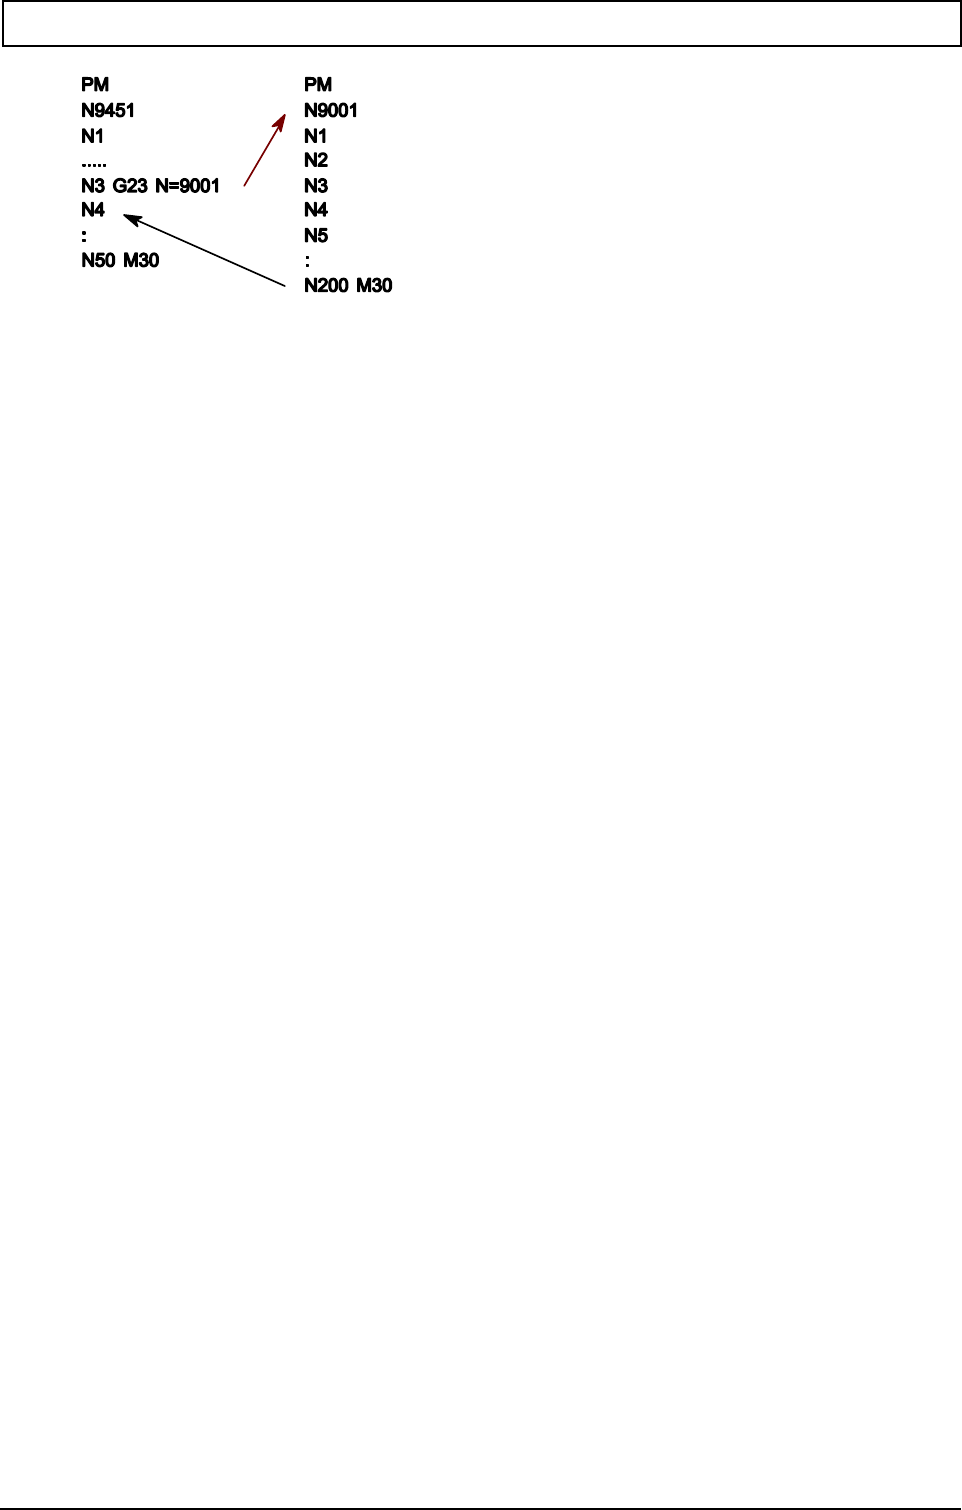
G-FUNCTIONS
288 Heidenhain
Notes
The main program or subprogram must not contain any G23 functions, so it may not be nested.
Programs larger than 100 KByte must not contain any jump commands.

G-FUNCTIONS
20000710 MillPlus V410 289
23.17 Enable/disable feed and spindle override G25/G26
Activates (G25) or deactivates (G26) the feed and spindle override, for the purpose of the
programmed feed and spindle movements. This is fixed at 100% with the feed and spindle override
deactivated.
Enable feed and spindle override:
N... G25
Disable feed override (F=100%):
N... G26 I2=1 or without I2=
Disable spindle override (S=100%):
N... G26 I2=2
Disable feed and spindle override (F and S= 100%):
N... G26 I2=3
Parameters
Example
N66 G26 I2=1 Deactivate feed override, i.e. fix at 100%
:
N70 G25 I2=2 Activate feed override
:
N68 G26 I2=3 Deactivate feed and spindle override that is to say F and S fixed at 100 %
:
N70 G25 Activate feed override and spindle override
Note
Reactivate feed override and spindle override using G25, M30, soft key Cancel program or soft key
Clear control.

G-FUNCTIONS
290 Heidenhain
23.18 Reset/activate positioning functions G27/G28
23.18.1 Positioning functions G27/G28 (to V320)
Reduces the corner radius that occurs due to tool lag (lag error) on change of direction.
Activate:
N... G28 {I3=...} {I4=...} {I5=...} {I6=...} {I7=..}
Delete individual parameter:
N... G28 {I3=0} {I4=0} {I5=0} {I6=0}
Delete all parameters:
N... G27
Without In-Position:
The next movement is started when the setpoint position is reached. This may cause corner radii.
With In-Position:
The next movement is only started after all axes have reached the programmed positions.
1. G28 without parameter
G1,G2,G3 with In-Position G28
2. Movement with feed
G2,G3 without In-Position (initial setting) G28 I3=0
G1,G2,G3 with In-Position G28 I3=1
G1,G2,G3 with corner release distance (MC136) G28 I3=2
G1 with programmable contour accuracy
- Contour accuracy (MC137) G28 I3=3
- Programmable contour accuracy
I7=.. [0-10000mm] G28 I3=3 I7=..
3. Rapid traverse movements G0
G0 with In-Position (initial setting) G28 I4=0
G0 without In-Position G28 I4=1
G0 with corner release distance (MC136) G28 I4=2
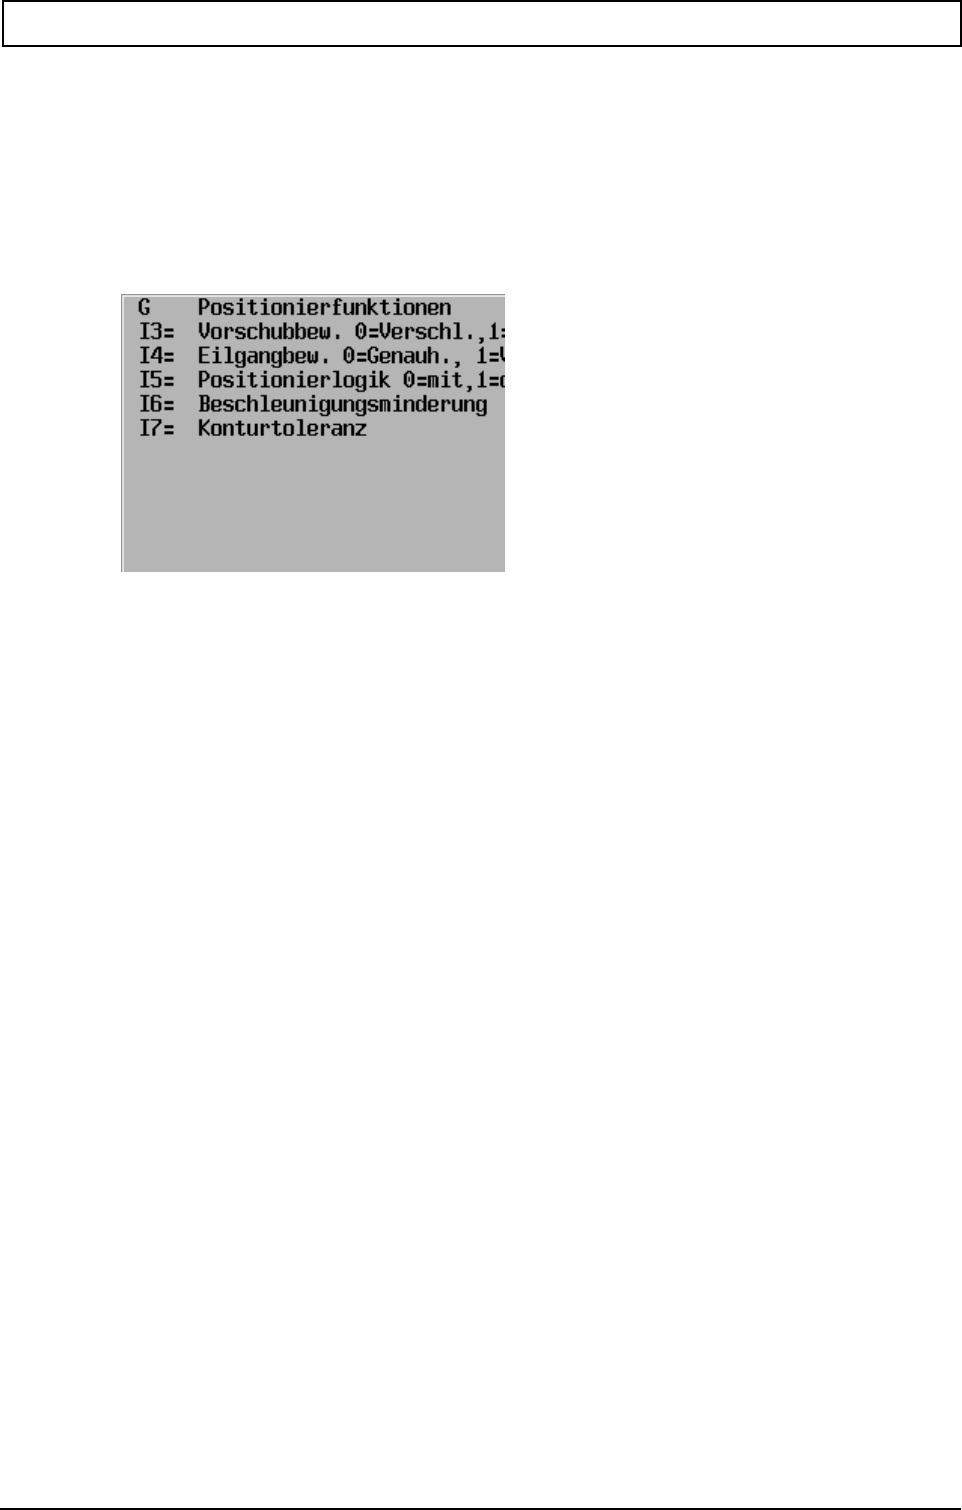
G-FUNCTIONS
20000710 MillPlus V410 291
4. Positioning logic with G0
G0 with positioning logic (initial setting) G28 I5=0
G0 with positioning logic G28 I5=1
5. Feed limiting for circular movements
G2, G3 with standard value (initial setting) G28 I6=0
G2, G3 with standard value (MC135) G28 I6=1
Parameters
23.18.2 Look Ahead Feed (from V320 onwards)
Look Ahead Feed is used for precalculation on the programmed tool path, while taking account of the
dynamics of all axes involved. The path speed is adjusted to achieve the highest contour accuracy at
the highest possible speed. The programmed feed is, however, never exceeded.
Taking the programmed feed and actual feed override settings into account, special high-performance
algorithms ensure a homogeneous feed at fast processing times.
With respect to Look Ahead Feed users need not pay attention to anything else.
This function cannot be influenced.
Existing programs need not be adjusted. They can be run as before.
During Look Ahead Feed the end point and centre of a circle should match to within 64 µm. In this
case the centre is corrected automatically. Unlike V310 there is no "compensation movement" at the
end point. An error message follows if the end point and centre do not match to within 64 µm. The
same applies also to helix interpolation.
The running speed of CAD-generated programs is increased substantially.
Only the G28 function has been changed. The addresses for feed limitation were cancelled (refer to
G27/G28 from V320 onwards).
23.18.3 Positioning functions G27/G28 (from V320 onwards)
1. G28 without parameter
G1,G2,G3 with In-Position G28
2. Movement with feed
G1,G2,G3 without In-Position (initial setting) G28 I3=0
G1,G2,G3 with In-Position G28 I3=1
3. Rapid traverse movements G0
G0 with In-Position (initial setting) G28 I4=0
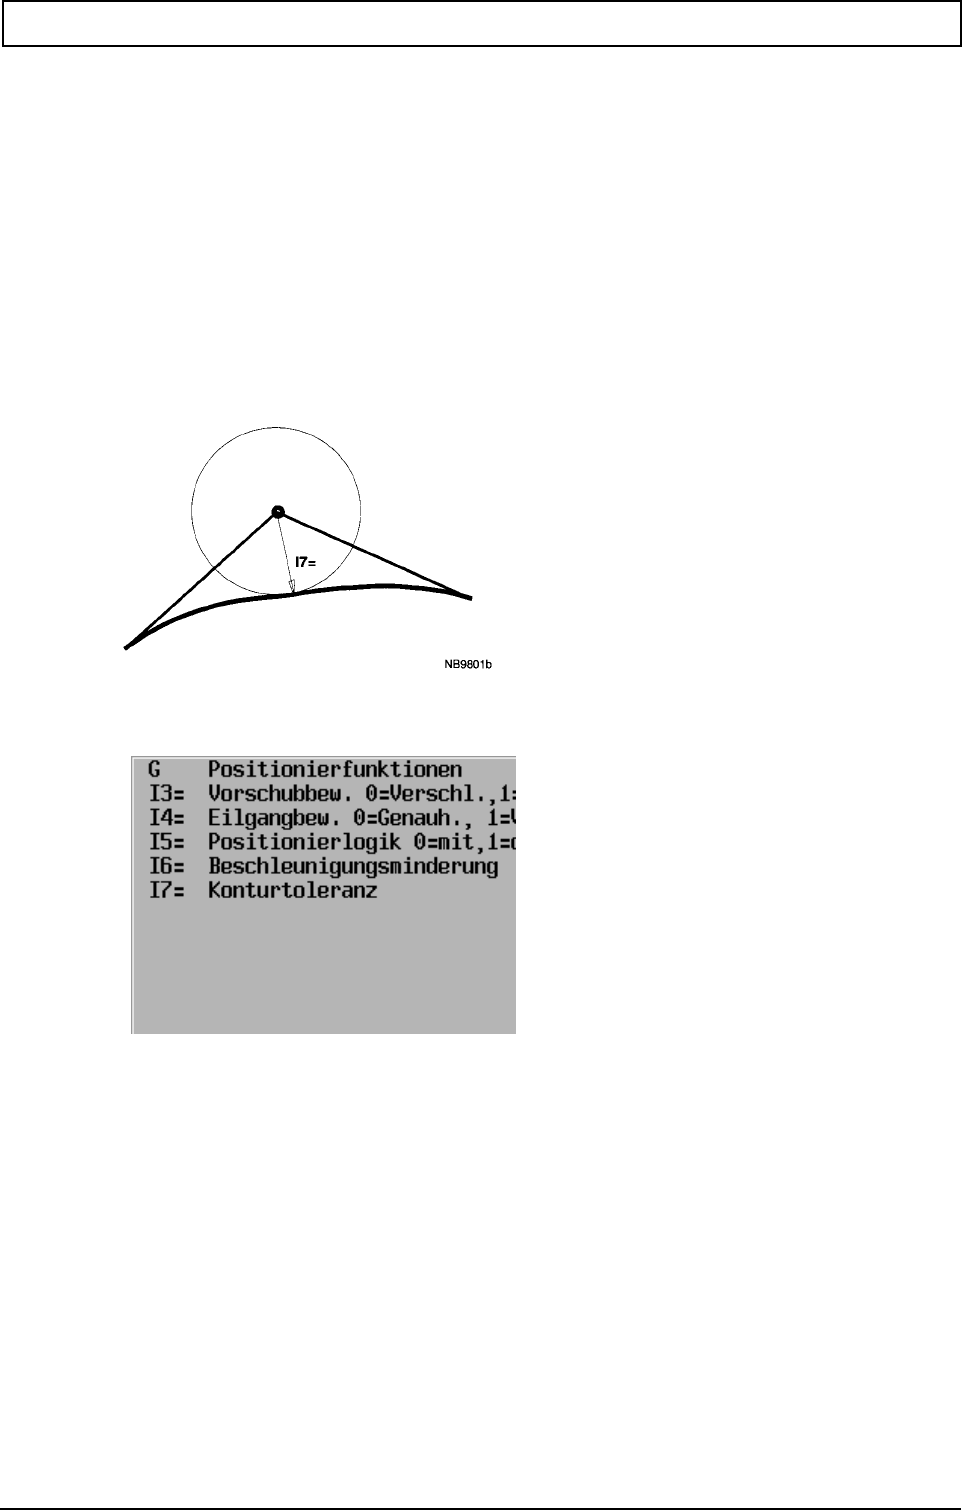
G-FUNCTIONS
292 Heidenhain
G0 without In-Position G28 I4=1
4. Positioning logic with G0
G0 with positioning logic (initial setting) G28 I5=0
G0 with positioning logic G28 I5=1
5. Movements with user-definable contour accuracy
G0,G1,G2,G3
-contour accuracy (MC765)
-user-definable contour accuracy
I7=... (0-10000 mm) G28 I7=...
User-definable contour accuracy (rapid motion and feed)
Parameters
Note
G28 I3= is only active in G74
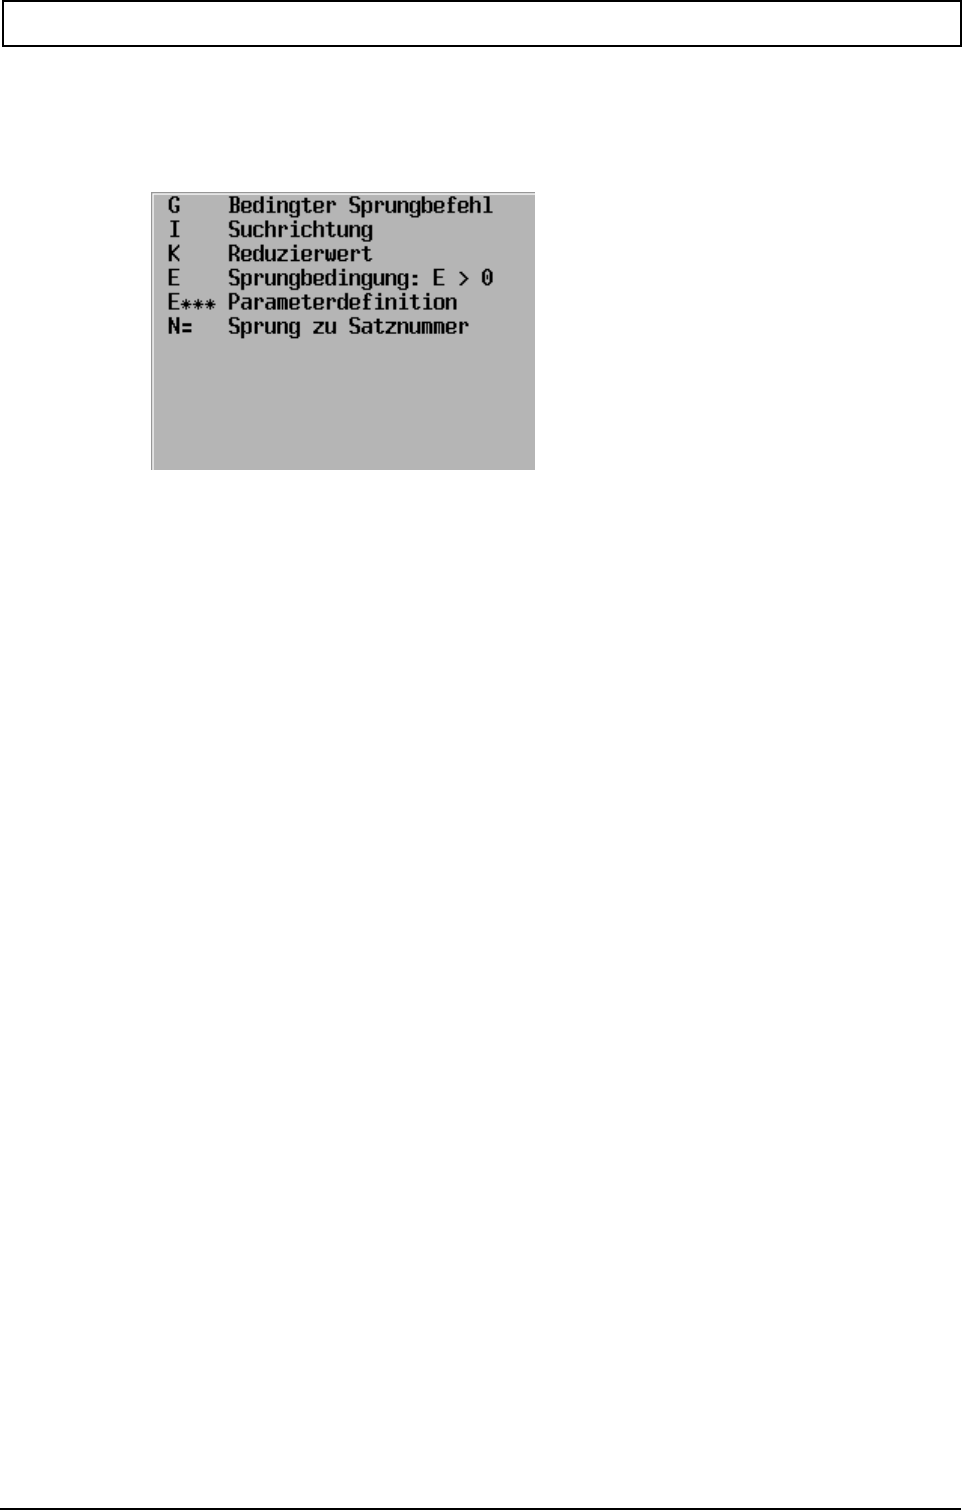
G-FUNCTIONS
20000710 MillPlus V410 293
23.19 Conditional jump G29
N.. G29 E.. N=.. {K..} {I..}
Parameters
Example
:
N50 E2=3 Parameter E2 will have value 3
N51
:
:
N100 G29 E2 N=51 At E2 > 0 there will be a jump to N51; E2 is reduced by 1. At E2=0 the
program run is continued after N100.
:
Note
The value of the E parameter is reduced by the value of the K address. The E parameter is used as
the new branch condition.
If the K address is not programmed, the E parameter is reduced by 1 after each branch.
Forward and backward jumping is possible in a subprogram or program. This is controlled by
parameter I. If I=1 or I=0, searching will only be in forward direction. If I=-1 or no value is shown, there
will first be a jump backwards to the beginning of the subprogram or program, which is followed by
forward searching for the block number.
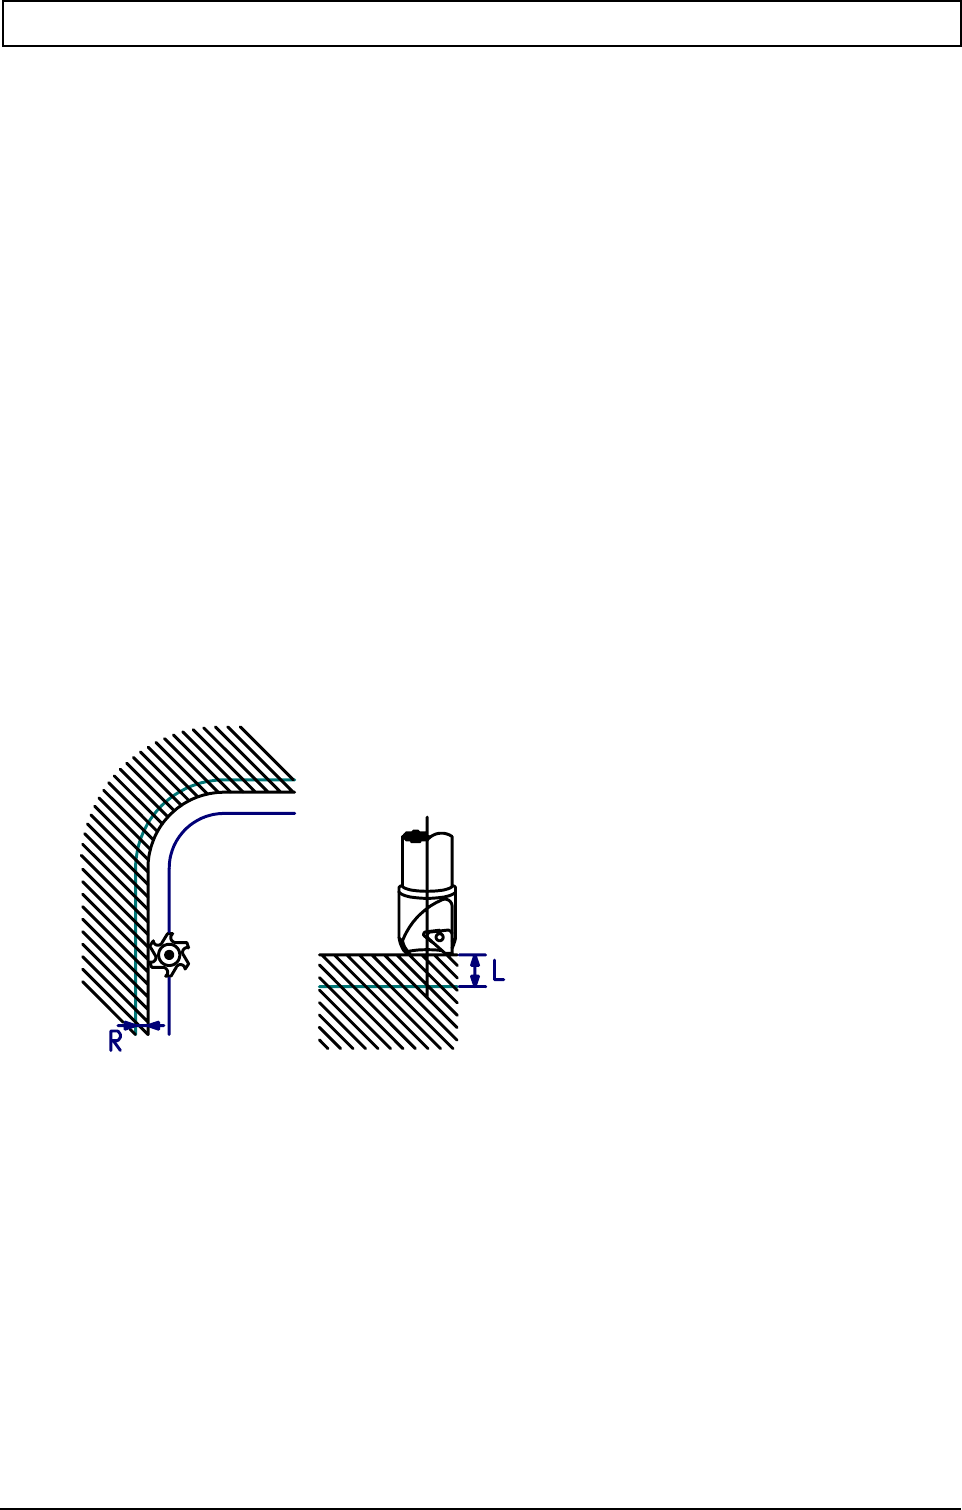
G-FUNCTIONS
294 Heidenhain
23.20 Activate/deactivate offset G39 (from V320 onwards
The programmed contour may be changed by offset.
Activate offset:
N... G39 {R...} {L...}
R: tool radius offset
L: tool length offset
Deactivate:
N... G39 L0 and/or R0
Parameters
Notes and usage
Changes made to the tool length offset will be activated with the next in-feed movement.
The tool radius offset is only active with active cutter radius compensation.
With inactive cutter radius compensation, tool radius offset changes will be activated when cutter
radius compensation (G41/G42, G43/G44) has been activated.
With activated cutter radius compensation, tool radius offset changes will be corrected linearly over
the entire path in the next movement block.
Note:
Tool radius offset is suppressed when the following functions have been activated: G6, G83-G89,
G141, G182. Length offset remains active. Offset programming should be deactivated before these
functions.
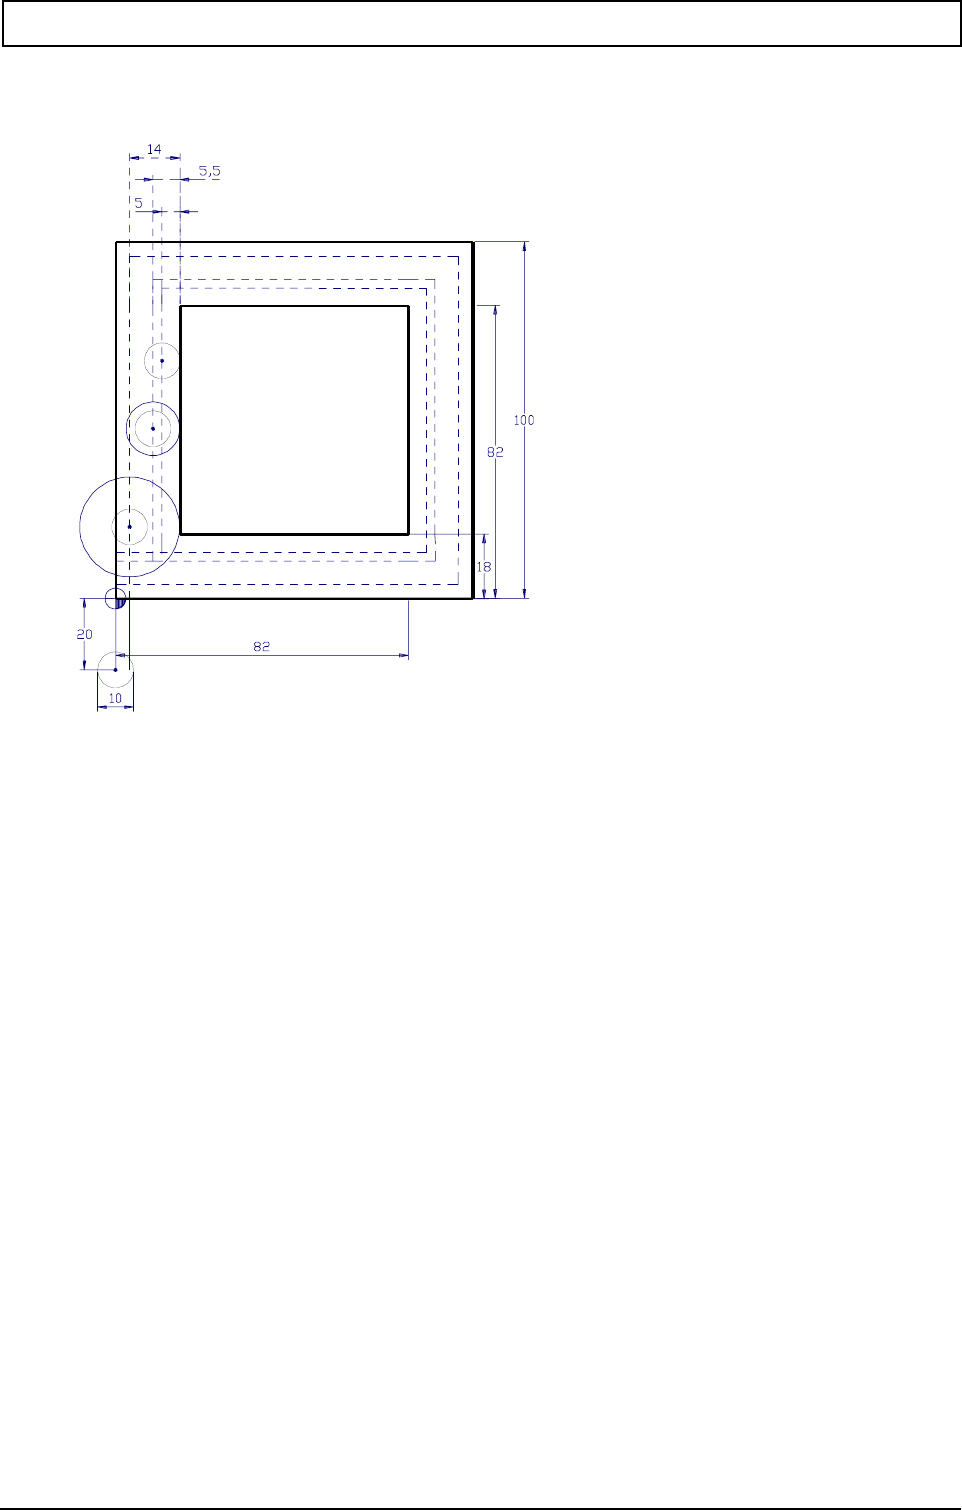
G-FUNCTIONS
20000710 MillPlus V410 295
Example
Rectangular milling by roughing twice and finishing once
N39001
N1 G98 X-10 Y-10 Z10 I120 J120 K-60
Define the graphic window
N2 G99 X0 Y0 Z0 I100 J100 K-40
Define the material
N3 T1 M6 Change tool (cutter radius: 5 mm)
N4 G39 L0 R9 Activate tool radius offset. The offset is 9 mm. (cutter radius for radius
compensation is (5+9 =) 14 mm).
N5 F500 S1000 M3 Activate feed and spindle speed
N6 G0 X0 Y-20 Z5 Approach start position
N7 G1 Z-10 Move to depth
N8 G43 X18 Approach contour with radius compensation
N9 G41 Y82 First roughing of the rectangle
N10 X82
N11 Y18
N12 X0
N13 G40 Turn off radius compensation
N14 G39 R0.5 Change tool radius offset. The offset is 0.5 mm. (cutter radius for radius
compensation is (5+0.5 =) 5.5 mm)
N15 G14 N1=8 N2=13 Repeat the rectangle (2nd roughing movement)
N16 G39 R0 Change tool radius offset. The offset is 0 mm. (cutter radius for radius
compensation is 5 mm)
N17 G14 N1=8 N2=13 Finish the rectangle
N18 G0 Z10 Retract tool from material
N19 M30 End of program
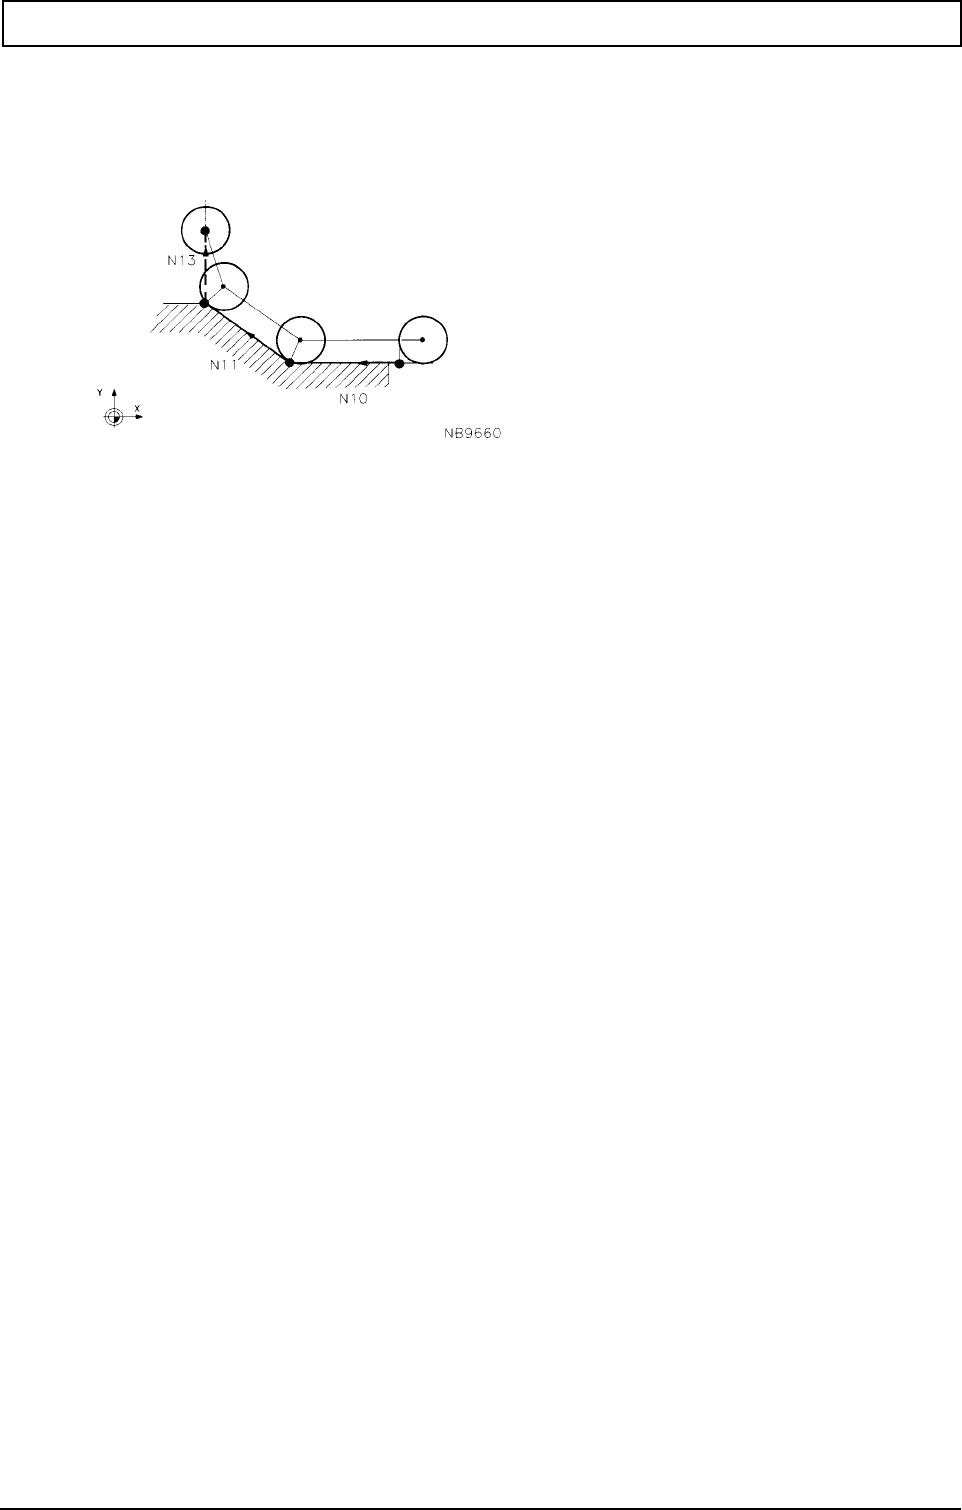
G-FUNCTIONS
296 Heidenhain
23.21 Cancel tool radius compensation G40
N.. G40
Example
:
:
N9 G42 Activate radius compensation to the right
N10 G1 X..
N11 X.. Y..
N12 G40 Cancel radius compensation
N13 G0 Y..
:
Notes
G40 comes in to effect automatically after:
- Switching the controller on
- Softkey Clear control
- Softkey Cancel program
- M30
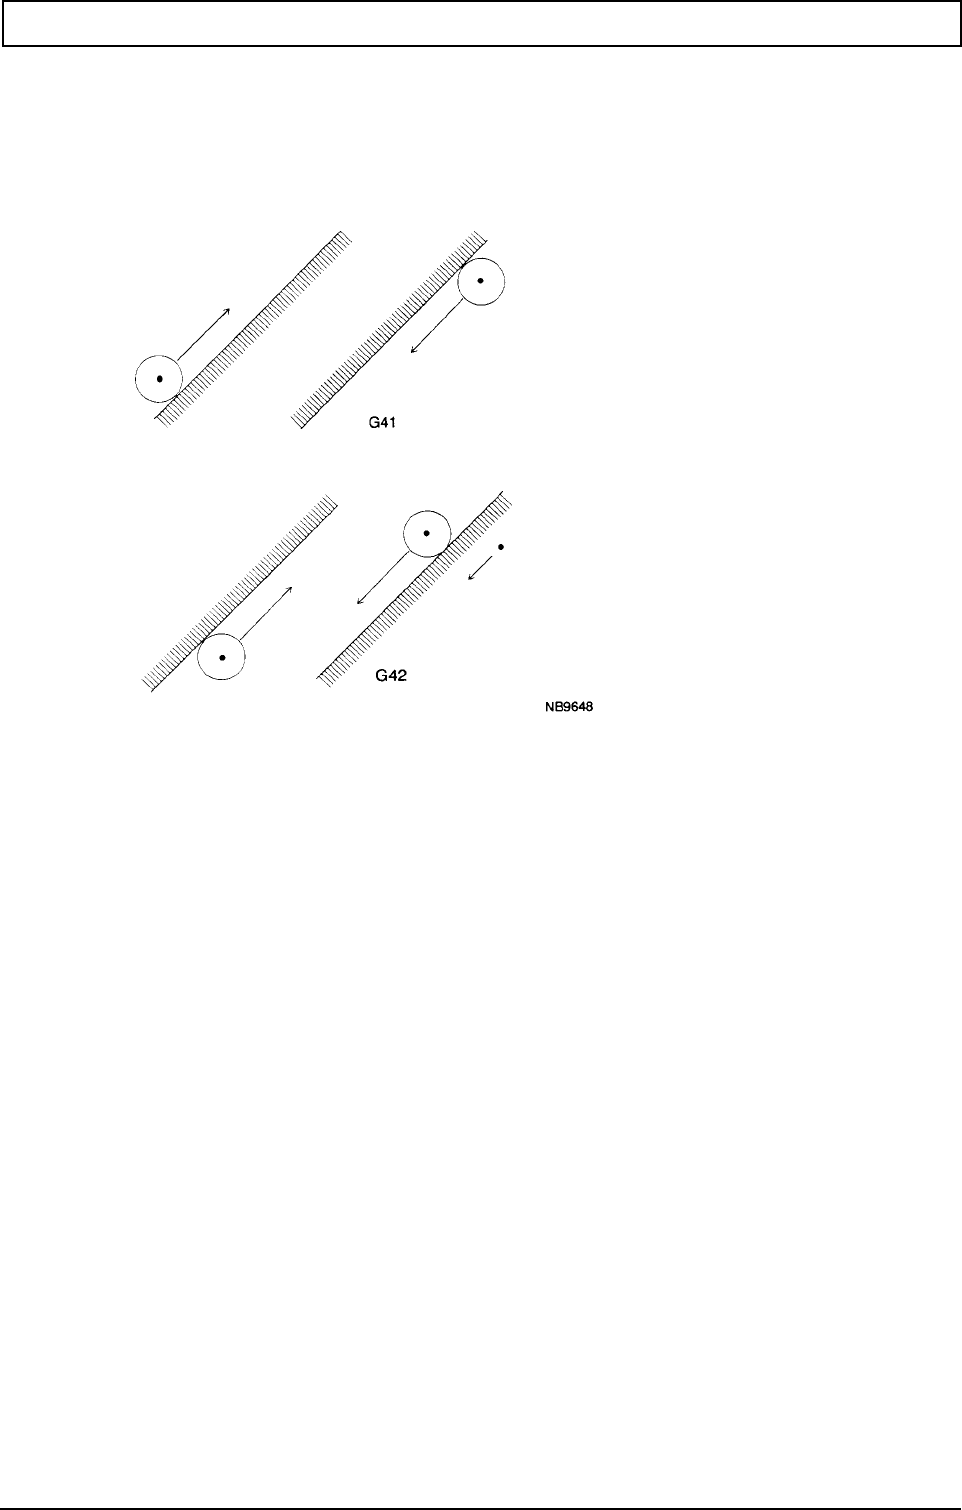
G-FUNCTIONS
20000710 MillPlus V410 297
23.22 Tool radius compensation (left/right) G41/G42
N.. G41/G42
In both cases, the view direction is the direction of tool movement.
Constant feed for radius compensation of circles
Parameter F1= is used to keep the programmed feed on the workpiece contour constant
regardless of the cutter radius and contour shape.
F1=0 feed not constant (switch-on condition, M30, Cancel program softkey or after Clear control
softkey). The programmed feed should represent the tool tip speed.
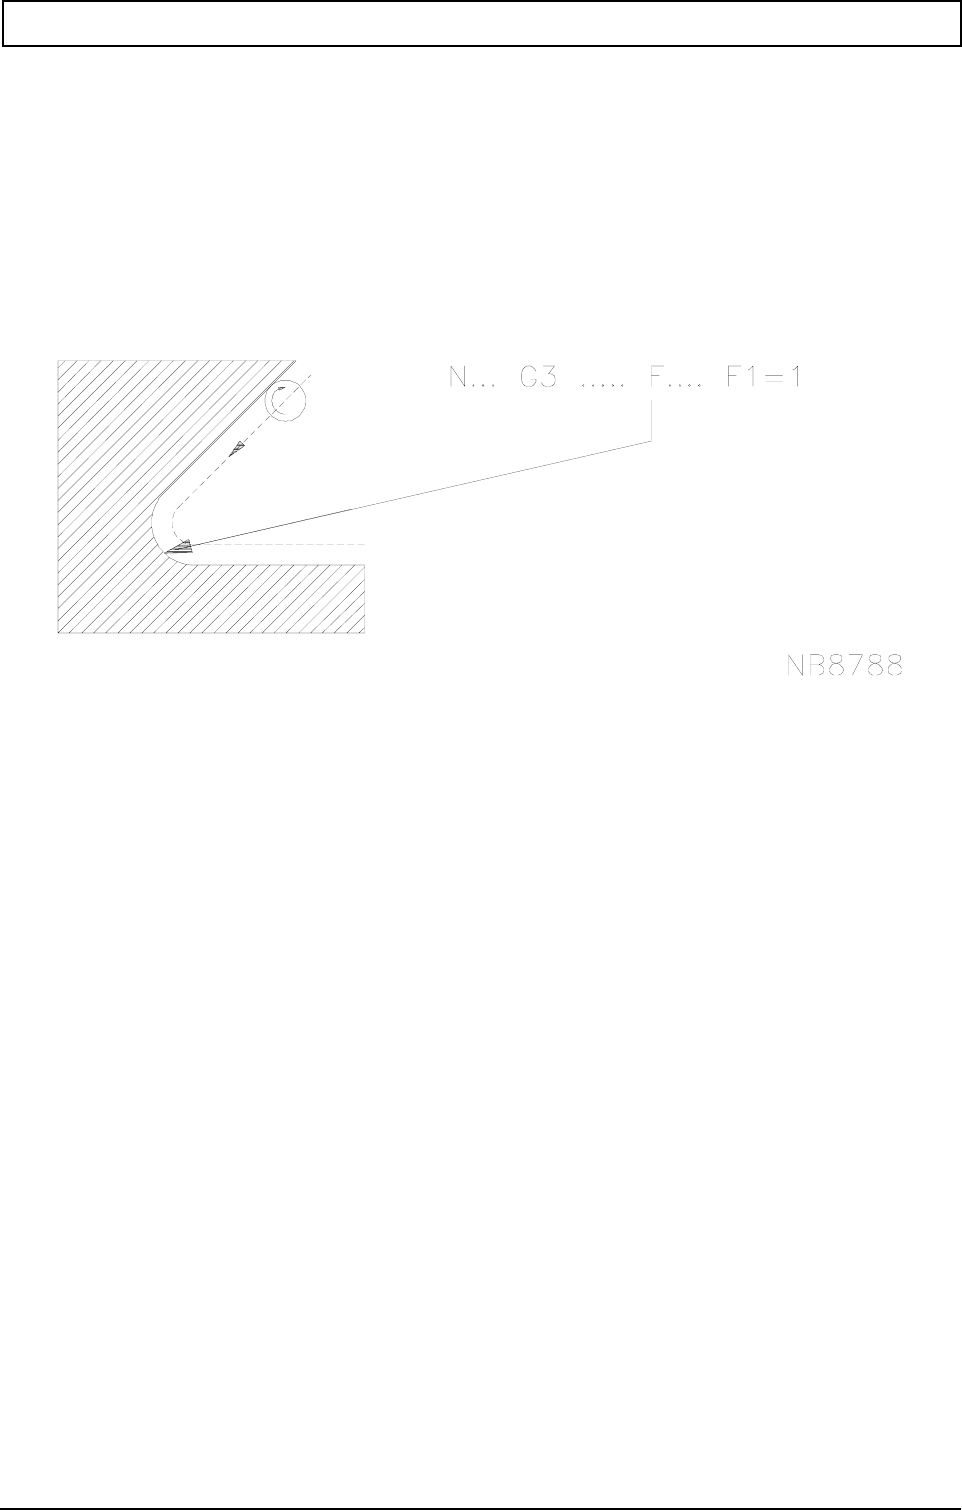
G-FUNCTIONS
298 Heidenhain
* = feed too large ** = feed too small
F1=1 constant feed only on the inside of circular arcs. The programmed feed is reduced to ensure
that the tool tip moves along the inside of a circular arc at reduced speed.
F1=2 constant feed on the inside and outside of circular arcs. The programmed feed is reduced
(inside of circular arcs) or increased (outside of circular arcs) to ensure that the tool tip moves
at the calculated new speed. If the increased speed exceeds the maximum feed defined by a
machine constant, the maximum feed is used.
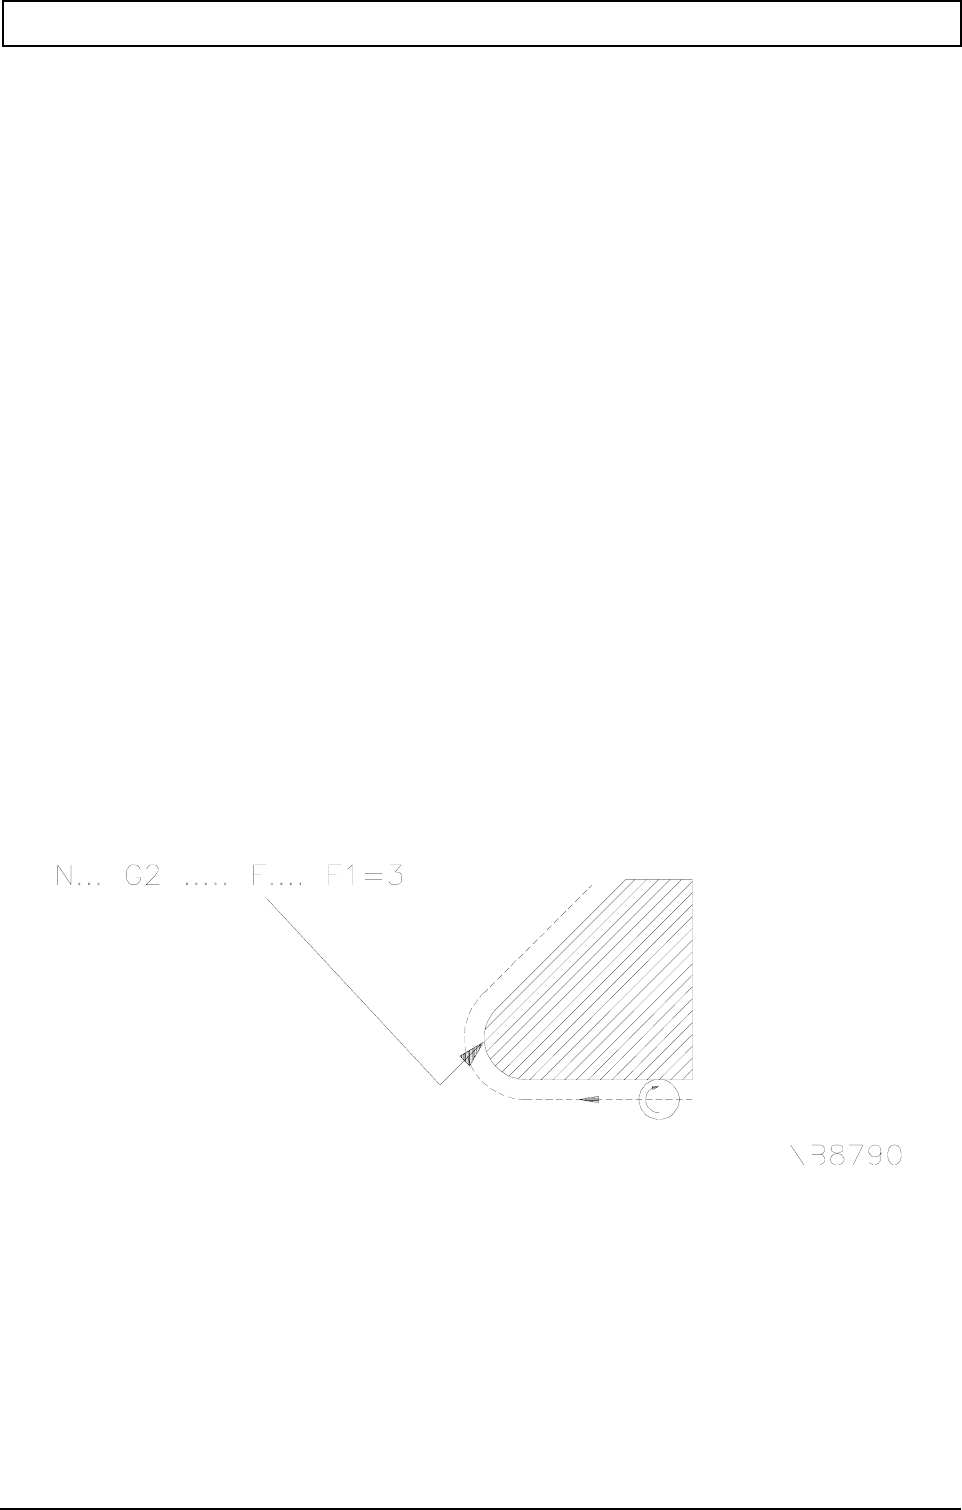
G-FUNCTIONS
20000710 MillPlus V410 299
F1=3 constant feed only on the outside of circular arcs. The programmed feed is increased to
ensure that the tool tip moves along the outside of a circular arc at the increased speed.
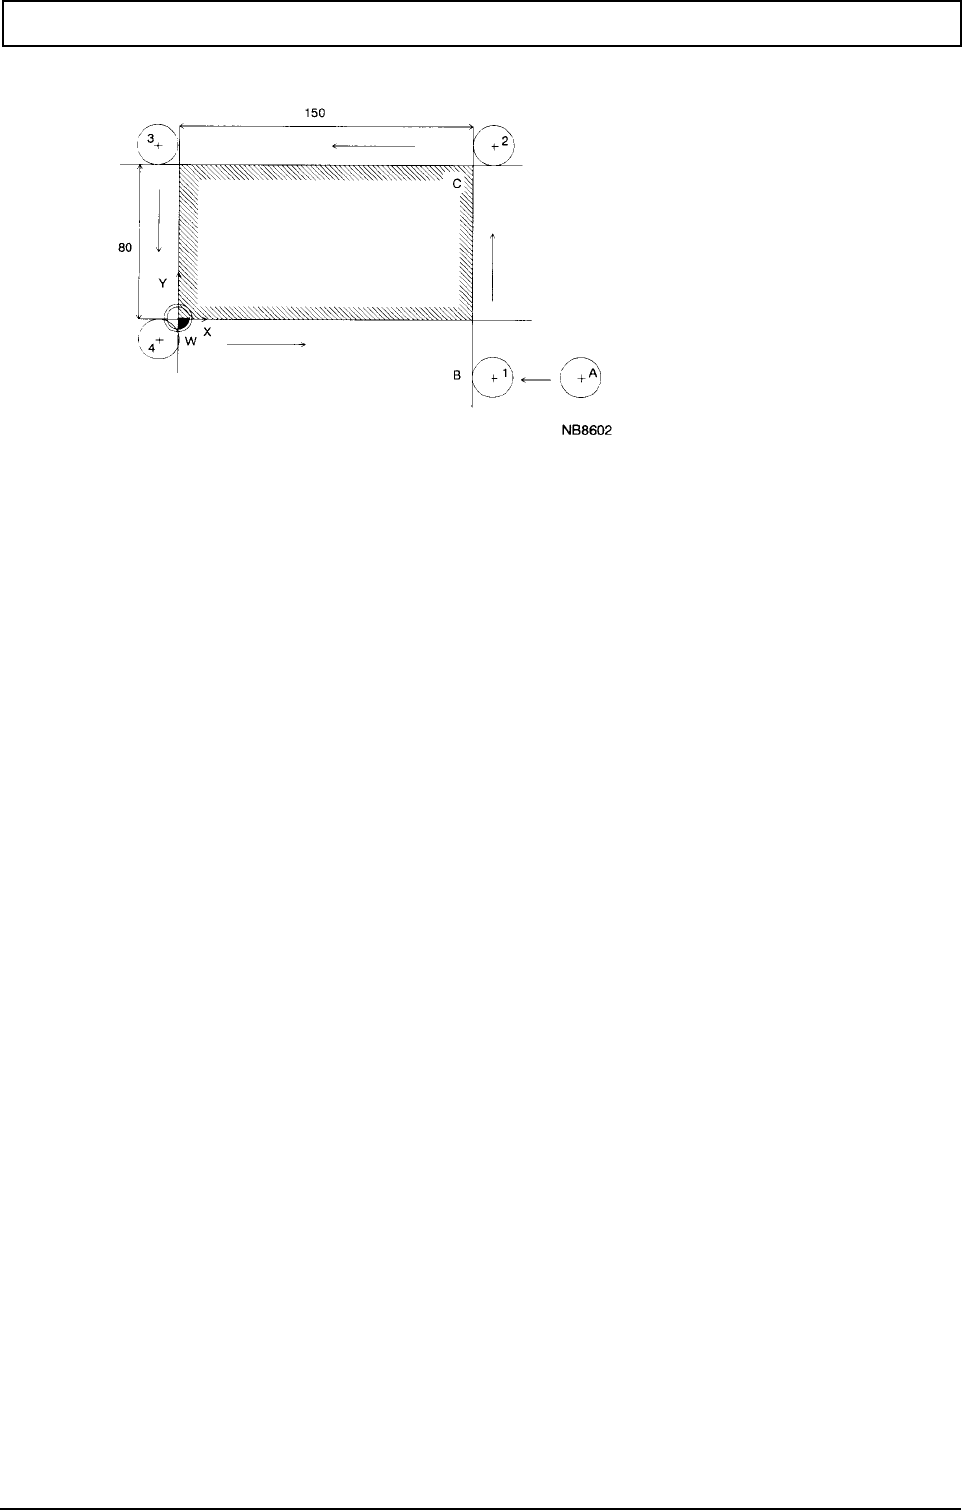
G-FUNCTIONS
300 Heidenhain
Example
N9999
N1 G17
N2 G54
N3 T1 M6 Change tool
N4 G0 X200 Y-20 Z-5 S500 M3 Spindle start, move tool to X120,Y-20 at traversing speed
N5 G43 Radius compensation to end point
N6 G1 X150 F150
N7 G42 Y80 Activate radius compensation to the right
N8 X0
N9 Y0
N10 X150
N11 G40 Cancel radius compensation
N12 G0 X200 Y-20
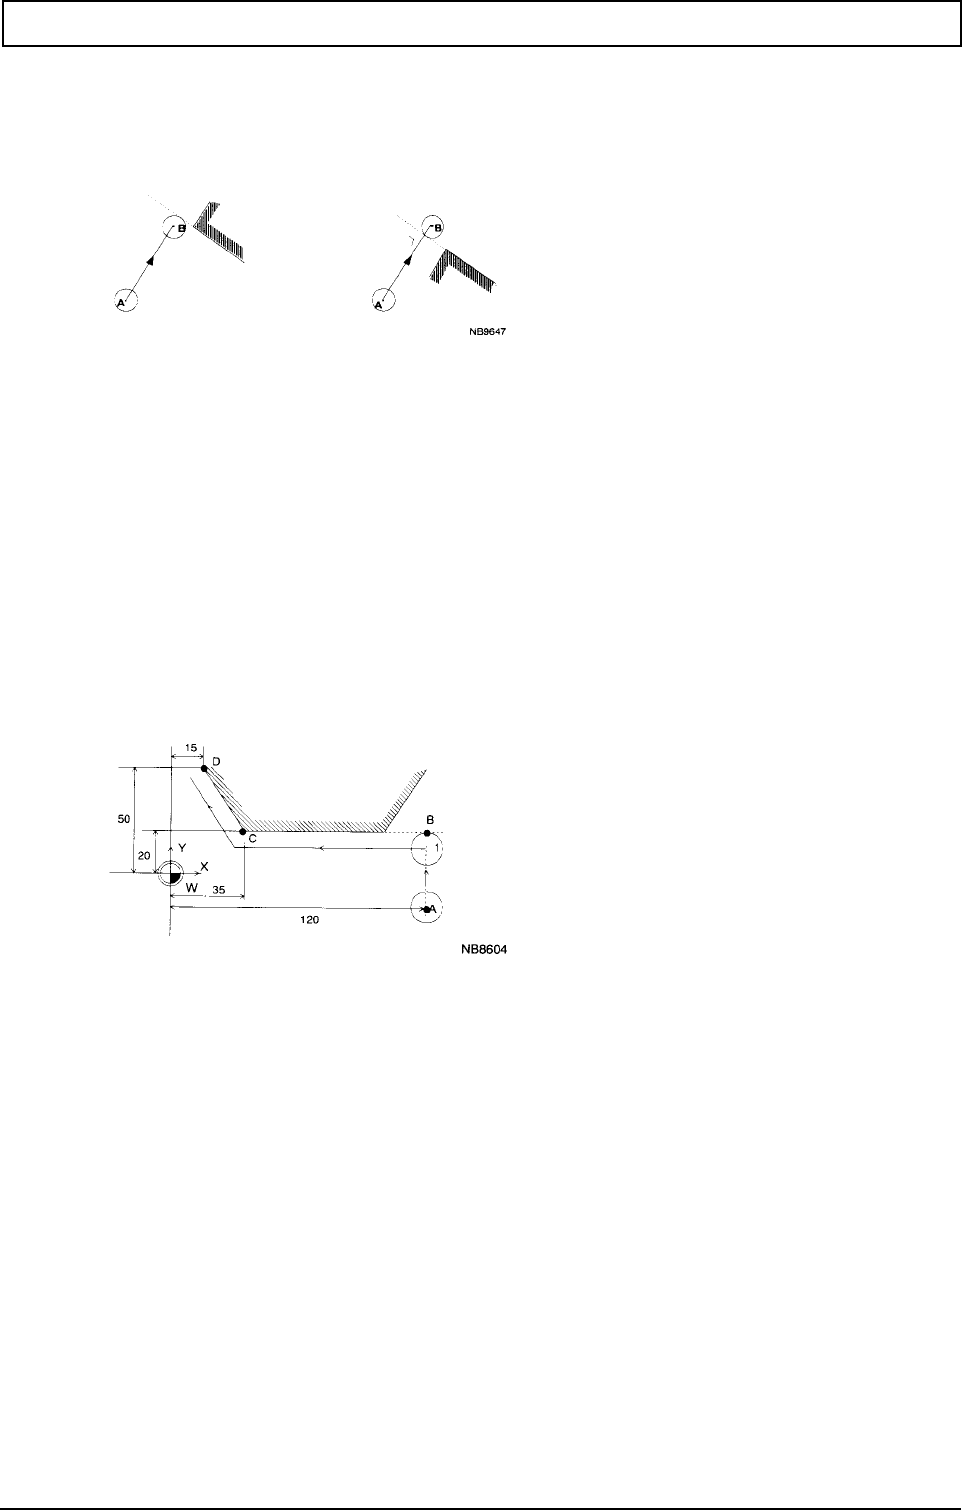
G-FUNCTIONS
20000710 MillPlus V410 301
23.23 Tool radius compensation to end point G43/G44
N.. G43/G44
G43 G44
Example
:
N40 G0 X120 Y-15 Z10
N41 G1 Z-10 F500
N42 G43 Y20 Radius compensation to end point
N43 G41 X35 Activate radius compensation to the left
N44 X15 Y50
:
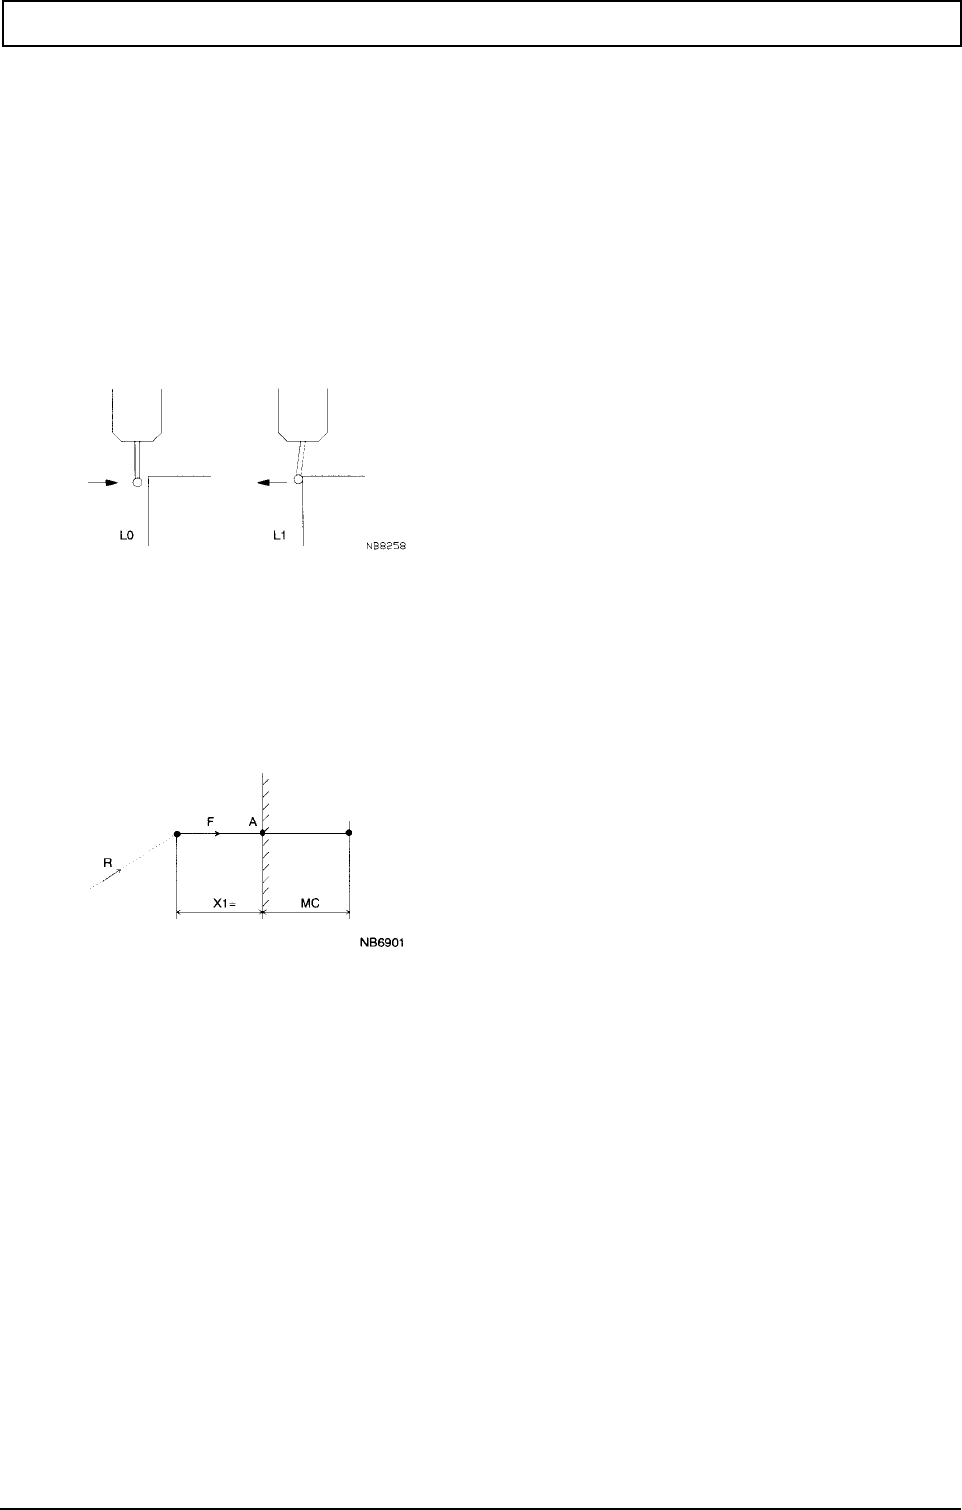
G-FUNCTIONS
302 Heidenhain
23.24 Measuring a point G45
Determines coordinate values with the measurement probe. The clamping position of the work piece
and the work piece dimensions can be measured. The measurement results can be further processed
by G49 and G50. The freely programmable measurement cycle G145-G150 can be used as an
alternative to G45.
N.. G45 [measurement position] {I+/-1} {J+/-1} {K+/-1} {L+/-1} {X1=..} {N=..} {P1=..}
The plane of the rotary table is determined by definition of the 4th axis in the machine constant list.
(MC117 should be 4 and MC118 should be B(66) or C(67)). L relates to the 4th axis B or C. Rotary
axis A is not allowed.
Parameters
Meßposition
Meßparameter
X,Y,Z Meßpunktkoordinate
Endwinkel vom Meßpunkt
Punktedefinitionsnummer
I Meßrichtung in X
Meßrichtung in Y
Meßrichtung in Z
Meßrichtung in Rund-Achse
Meßpunktvorlauf
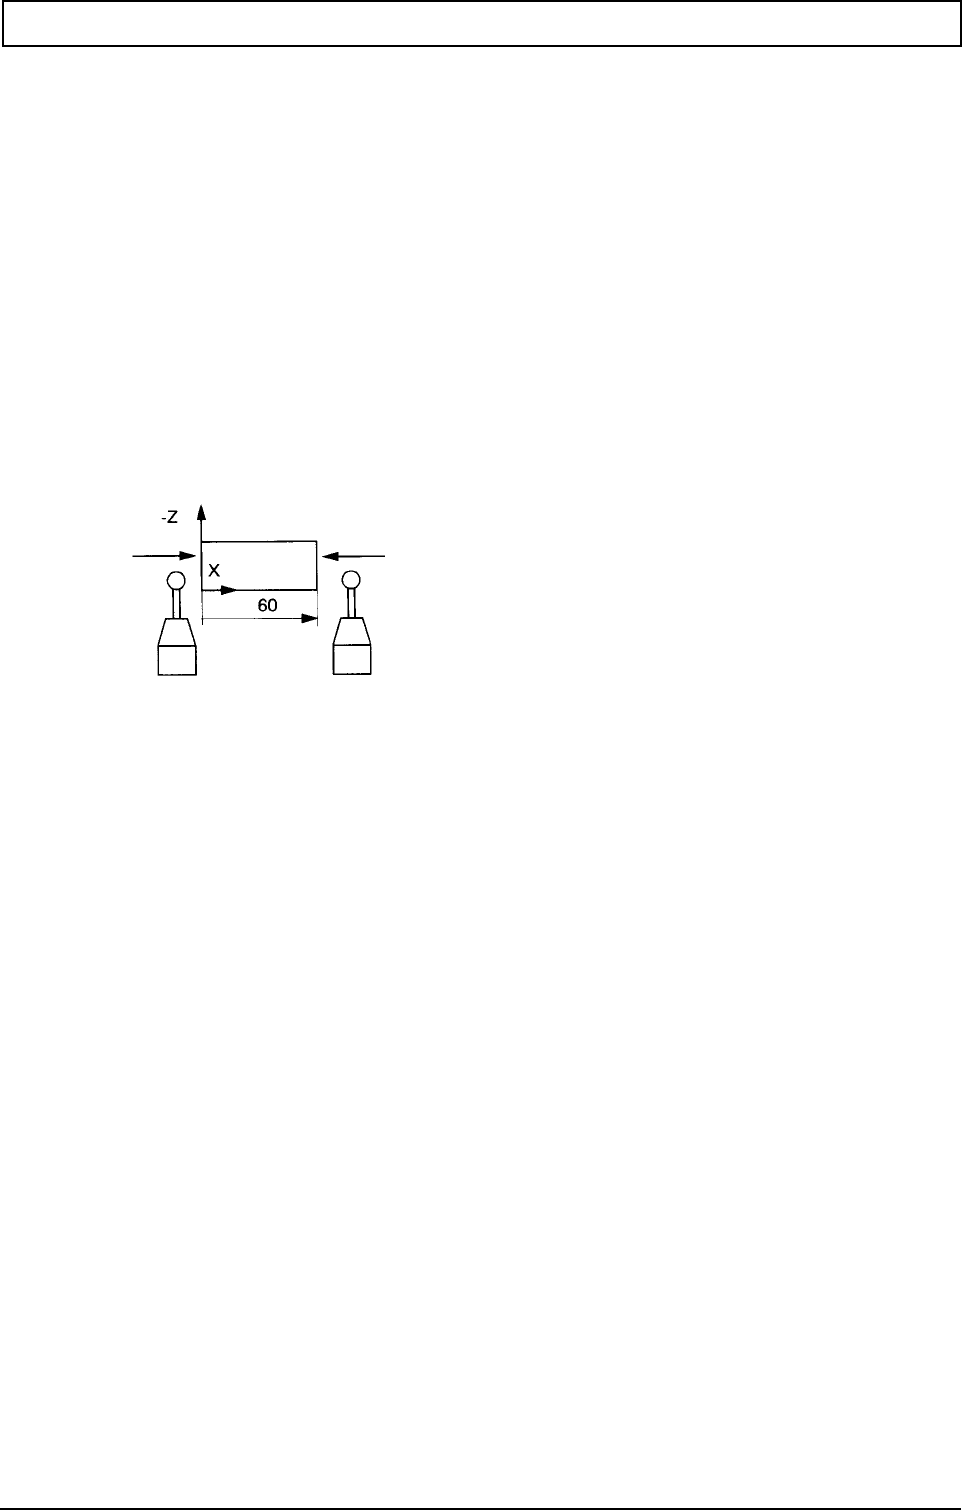
G-FUNCTIONS
20000710 MillPlus V410 303
Meßergebnisse
Wortweise Absolut-/Inkremental-
Programmierung
Examples
Measuring a point in the X axis :
Measuring in the positive direction
N.. G45 X0 Y20 Z-10 I1 E1 N=1
Measure point, calculate measurement position, store in point memory N= or in parameter E1.
Measuring in the negative direction
N.. G45 X60 Y20 Z-10 I-1 E1 N=1
Notes
- Only one axis coordinate can be measures with a G45 block.
- Measurements can only be made in the negative direction in the tool axis.
- The spindle speed must not be activated or switched on.
- Locate block.
N105 ...
N110 G148 E20
N115 G29 E21=E20=2 E21 N=125
N120 G45/G46
N125 ...
The tool type Q3=9999 can be entered for the measurement key.
M27 Activate measuring probe.
E Parameternr. gemessene Koordinate
Punktnr. für gemessene Koordinate
X90=,Y90=,Z90= Meßpunkt absolut
9
0=,C90= Winkel absolut vom Meßpunkt
9
1=,Z91= Meßpunkt inkremental
9
1=,C91= Winkel inkremental vom Meßpunkt

G-FUNCTIONS
304 Heidenhain
M28 Turn off measuring probe.
Example: P5 T5 Q3=9999 L150 R4
When tool T5 is called, the controller recognises that this tool is the measuring probe. The “spindle on”
function (M3, M4, M13, M14) is suppressed and a fault message is issued.
Function G45 operates only parallel to the axis. The function of G145 has improved and now includes
measurement unparallel to the axis. We therefore recommend that you should use the new basic
measurement movement G145.
The difference between the measured and the programmed coordinate is calculated and stored
internally to be used in operation with G49 or G50.
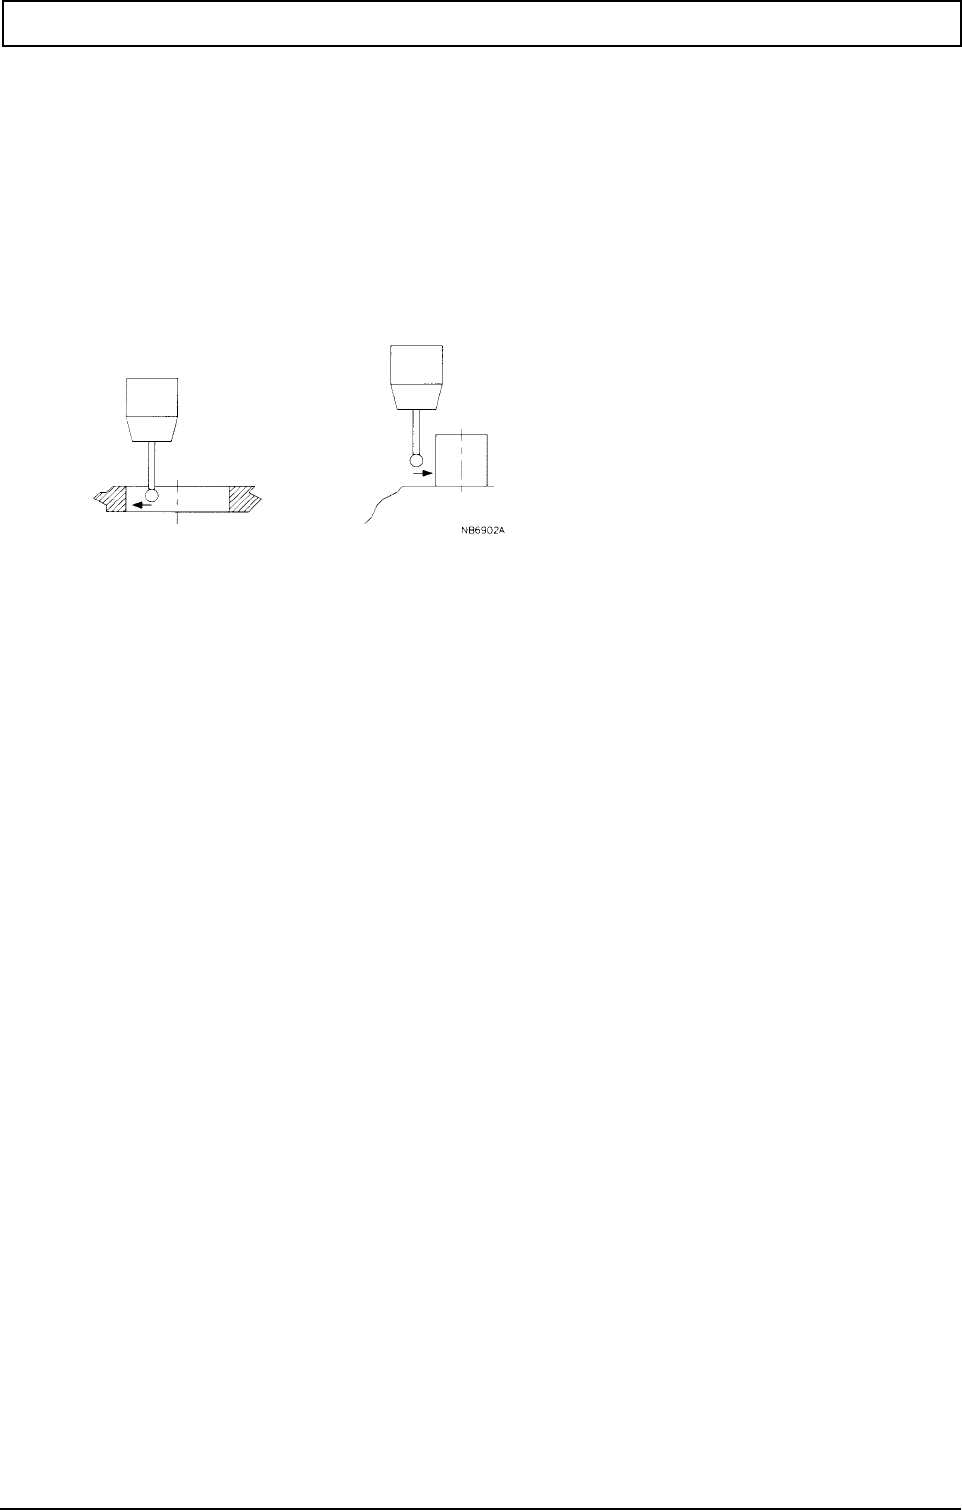
G-FUNCTIONS
20000710 MillPlus V410 305
23.25 Measuring a circle G46
Measures a full circle (internally or externally) with a 4-point measurement. The measurement can be
processed further by G49 or G50.
Measure inner circle:
N.. G46 [circle centre point coordinates] R.. {I+1 J+1} {I+1 K+1} {J+1 K+1} {F..} {X1=..} {P1=..} N=.. E..
Measure outer circle:
N... G46 [circle centre point coordinates] R.. {I-1 J-1} {I-1 K-1} {J-1 K-1} {F..} {X1=..} {P1=..} N=.. E..
Parameters
Kreisparameter
Meßparameter
Meßergebnisse
Wortweise Absolut-/Inkremental-
Programmierung
X,Y,Z Lochkreismittelpunkt
Endwinkel vom Meßpunkt
Punktedefinitionsnummer
Kreisradius
I Meßrichtung in X
Meßrichtung in Y
Meßrichtung in Z
Vorschub zwischen den Meßpunkten
Meßpunktvorlauf
E Parameternr. gemessener Radius
Punktnr. gemessener Mittelpunkt
X90=,Y90=,Z90= Mittelpunkt absolut
9
0=,C90= Winkel absolut vom Meßpunkt
9
1=,Z91= Mittelpunkt inkremental
9
1=,C91= Winkel inkremental vom Meßpunkt
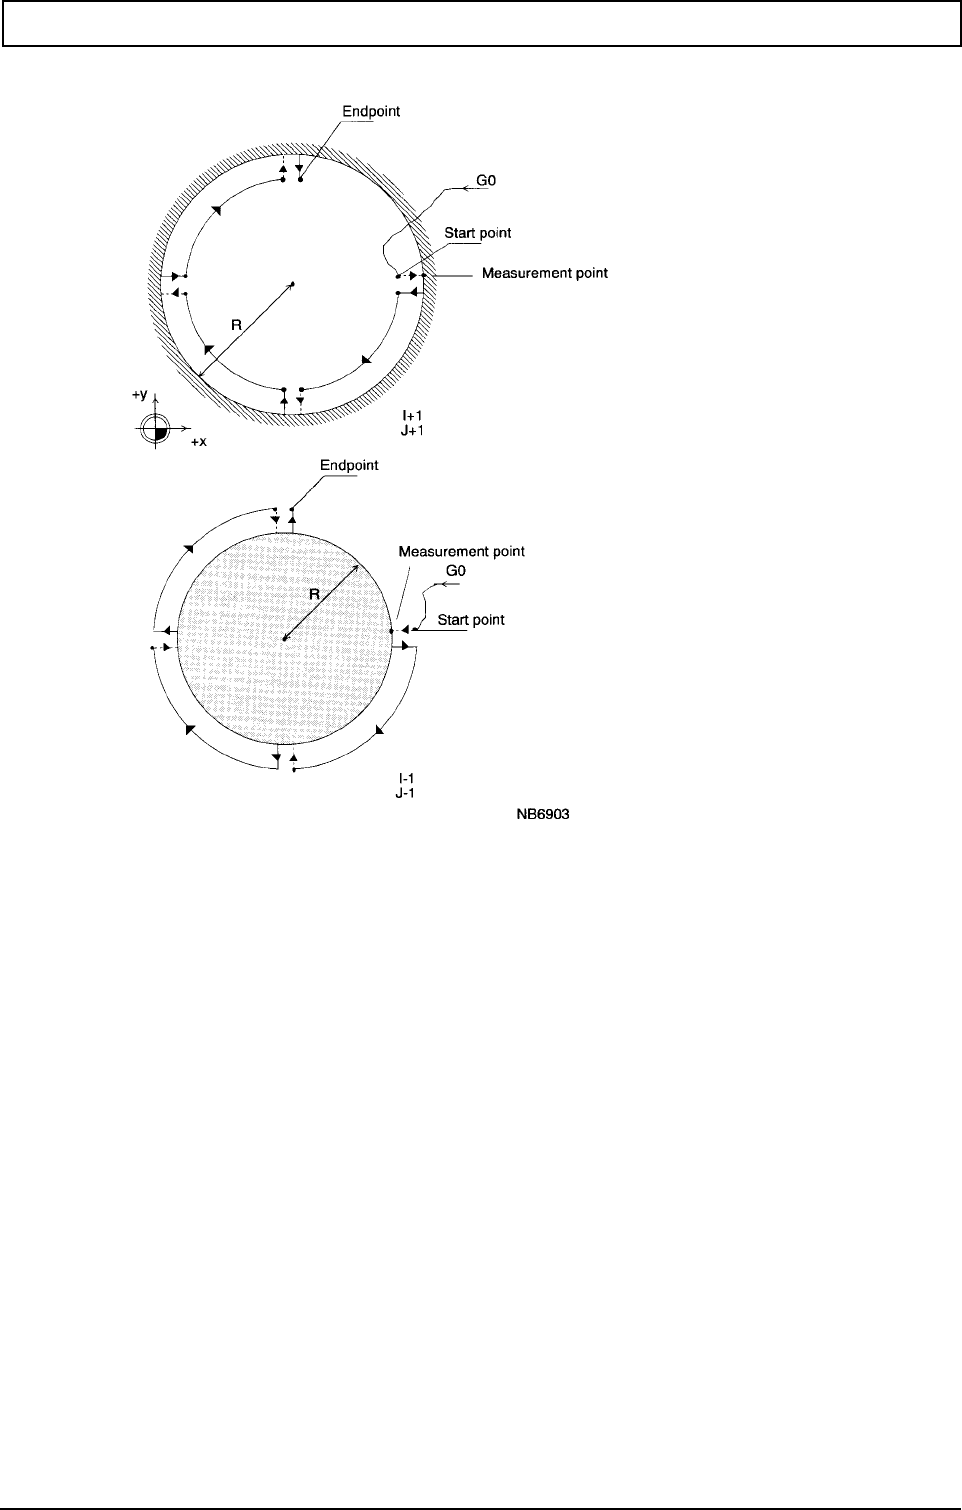
G-FUNCTIONS
306 Heidenhain
Example
Measurement of an internal and an external circle in the XY level:
Internal circle:
N... G46 X30 Y25 Z20 I+1 J+1 R12.5 F3000 N=59 E24 Measure circle, store centre in
point memory N=59 and radii in
parameter memory E24.
External circle:
N... G46 X30 Y25 Z20 I-1 J-1 R20 F3000 N=58 E23
Level Internal circle External circle
XY (G17) I+1 J+1 I-1 J-1
XZ (G18) I+1 K+1 I-1 K-1
XZ (G19) J+1 K+1 J-1 K-1
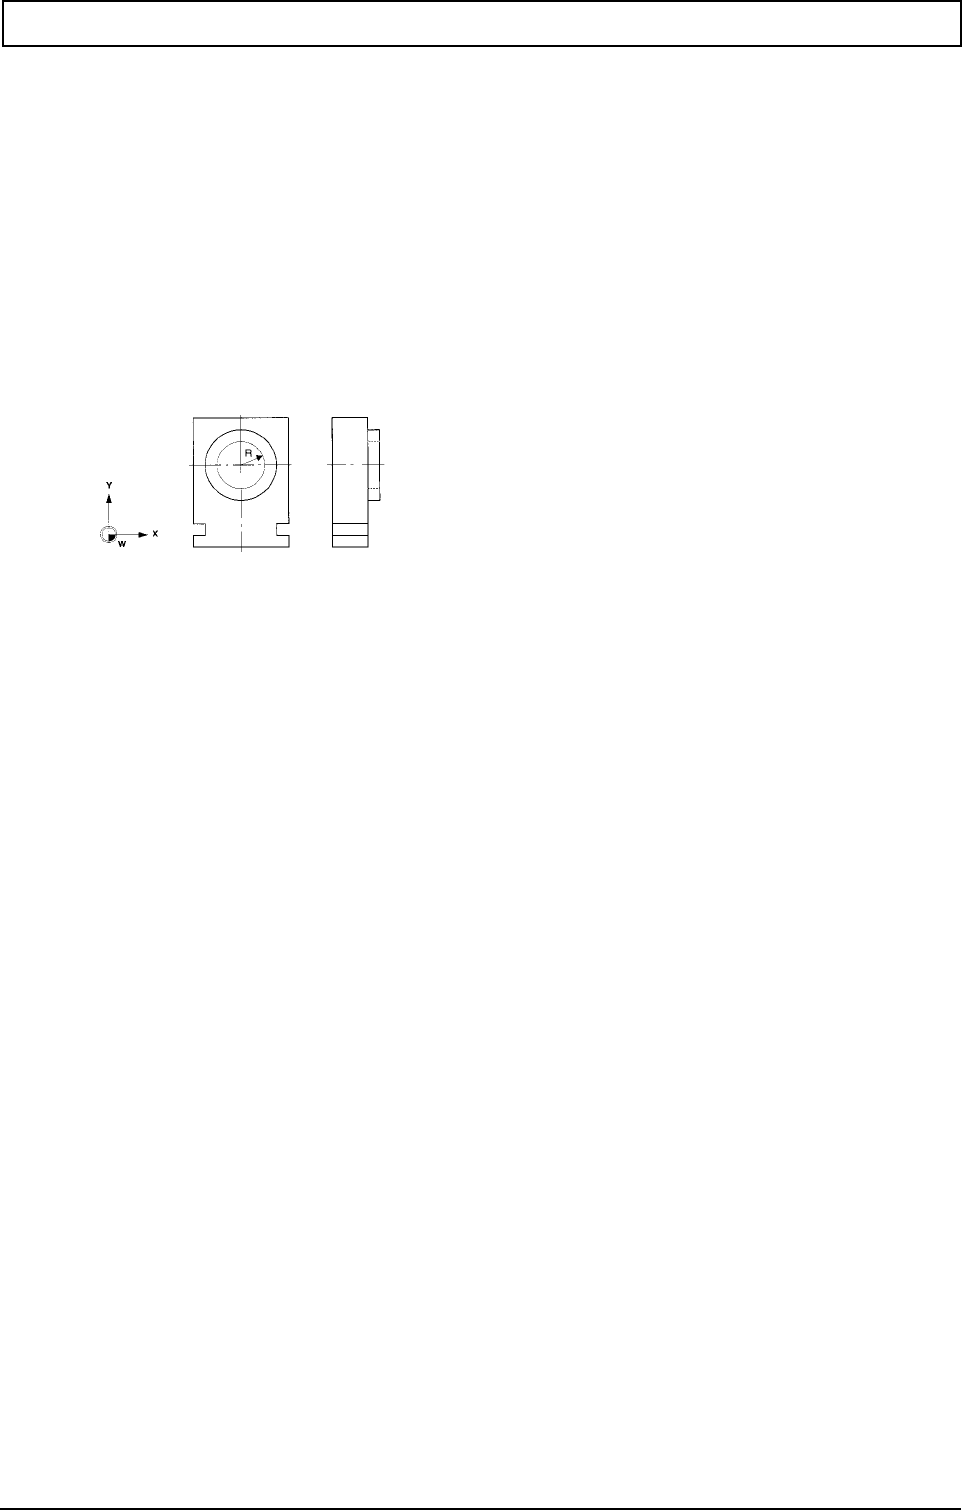
G-FUNCTIONS
20000710 MillPlus V410 307
23.26 Calibrating the measuring probe G46 + M26
The measuring probe radius is determined by touching the calibration ring. The controller calculates
the probe radius from the measured radius of the calibration ring and the programmed radius. The
new radius value is stored in tool memory.
The centre point coordinates and the radius of the calibration ring are entered as machine constants.
Measuring the internal gauge ring:
N... G46 {I+1 J+1} {I+1 K+1} {J+1 K+1} {F...} {X1=...} M26
Measuring the external gauge ring:
N... G46 {I-1 J-1} {I-1 K-1} {J-1 K-1} {F...} {X1=...} M26
Parameters
I+/-1 Measurement in the X-Achse
J+/-1 Measurement in the Y-Achse
K+/-1 Measurement in the r Z-Achse
F Feed during measurement movement
X1= Predetermined distance
Example
N46002
N1 G17
N2 T1 M6
N3 D207 M19 defined spindle stop
N4 G46 I1 J1 M26 calibrate measuring probe, store measuring probe radius for T1 in tool
memory
N5 Z200 M30
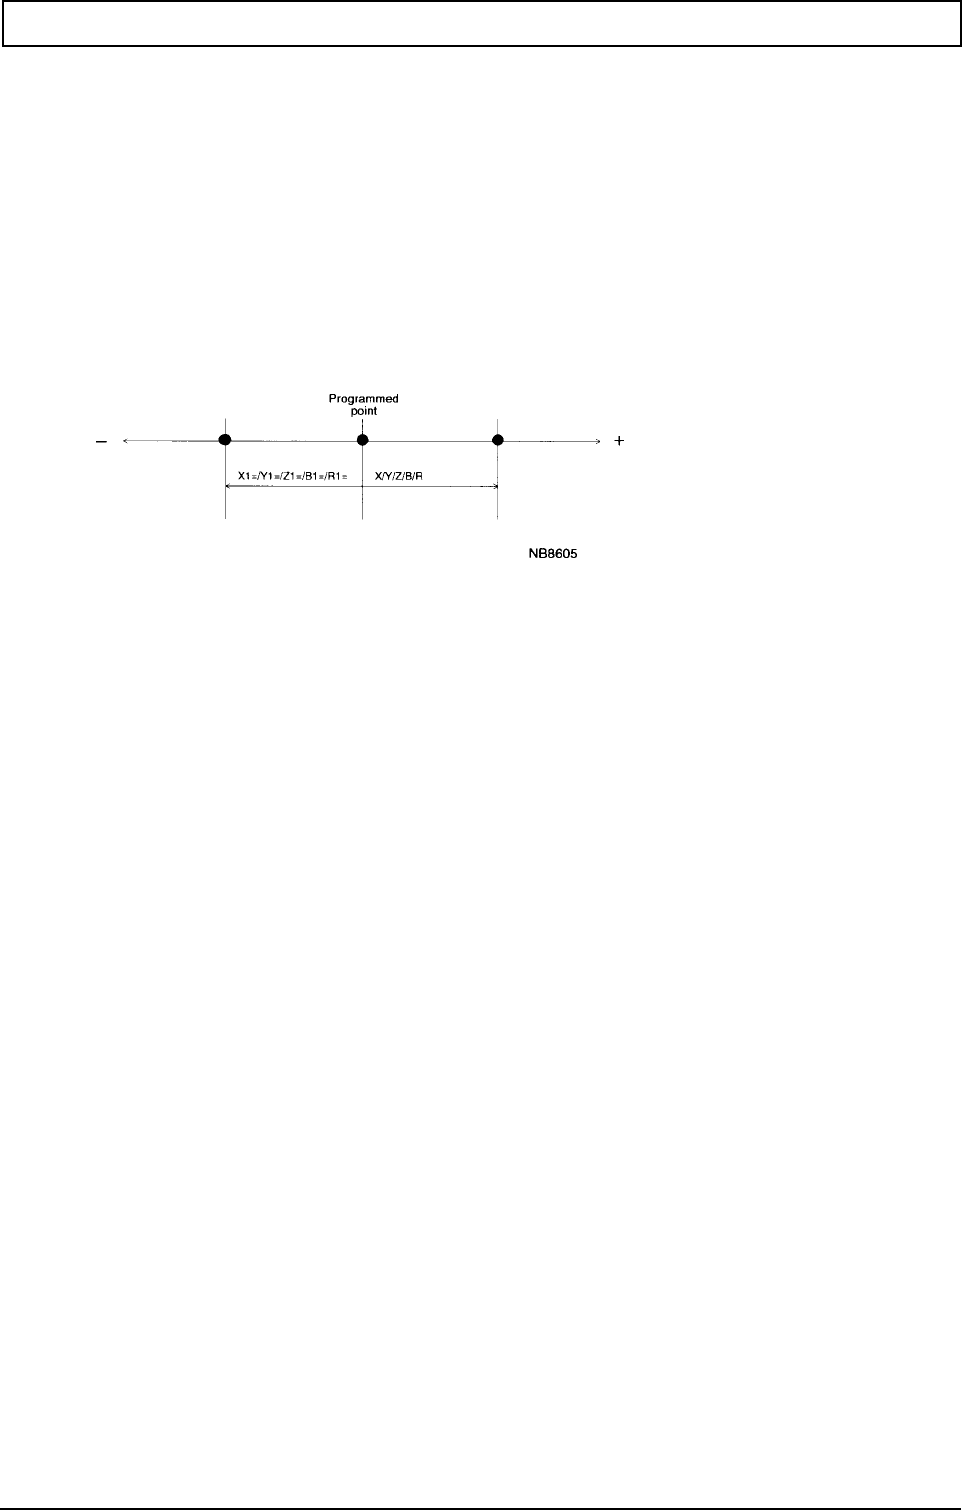
G-FUNCTIONS
308 Heidenhain
23.27 Checking on tolerances G49
Compares whether the difference between the programmed value and the value measured during the
G45 or G46 block lies within the dimensional tolerance limits.
If the difference lies within the tolerance limits, program processing continues.
If the difference lies outside the tolerance limits, the following options are available:
Repetition of the program section:
N.. G49 {X.., X1=..} {Y.., Y1=..} {Z.., Z1=..} {B.., B1=..} {R.., R1=..} N1=.. N2=.. {E..}
Conditional branch:
N.. G49 {X.., X1=..} {Y.., Y1=..} {Z.., Z1=..} {B.., B1=..} {R.., R1=..} N=.. E..
The measurement point must lie between the upper limit dimension (X/..) and the lower limit
dimension (X1=/..) of the tolerance range.
Parameters
Toleranzwerte
Bedingter Sprung
Wiederholung eines Programmteils
X Positiver Toleranzwert in X
Negativer Toleranzwert in X
Positiver Toleranzwert in Y
Negativer Toleranzwert in Y
Positiver Toleranzwert in Z
Negativer Toleranzwert in Z
Positiver Toleranzwert in B
Negativer Toleranzwert in B
Positive Toleranz für Kreisradius
Negative Toleranz für Kreisradius
E Sprungbedingung: E > 0
Sprung zu Satznummer
N1= Wiederholung Anfangsatznummer
Wiederholung Endsatznummer

G-FUNCTIONS
20000710 MillPlus V410 309
Example
:
N10 G49 R.02 R1=2 E1 N=13
N11 G49 R2 R1=.02 N1=1 N2=6
:
N10 1st tolerance comparison:
If the upper tolerance limit (R0.02) is exceeded (bore too large), a branch to block N13 takes
place. The lower tolerance limit must not be reached (conditional branch).
N11 2nd tolerance comparison:
If the lower tolerance limit (R1=0.02) is exceeded (bore too small), the program section
between N1 and N6 is repeated. The upper tolerance limit must not be reached (repetition of
program section)
Note
Where there are two consecutive G49 blocks in the program, it must be ensured that the conditional
branch is in the first block and the program section repetition is in the second block (otherwise an
error message will appear!)

G-FUNCTIONS
310 Heidenhain
23.28 Processing measuring results G50
Changes the zero point offset or tool dimensions according to the correction values derived from the
measured difference values.
Zero point offset correction:
With standard zero points or MC84=0:
N.. G50 {X1} {I..} {Y1} {J..} {Z1} {K..} {B1} {C1} {C2} {B1=} {C1=} {L..} N=..
With extended zero points and MC84>0:
N.. G50 {X1} {I..} {Y1} {J..} {Z1} {K..} {B1} {C1} {C2} {B1=} {C1=} {L..} N=54.00 .. 54.99
Tool length correction:
N.. G50 T.. L1=1 {I..} {J..} {K..} {T2=..}
Tool radius correction:
N.. G50 T.. R1=1 {X1=..} {T2=..}
Parameters
Nullpunktverschiebungen
Werkzeugmaße
N= Meßwert NPV G52-G59 verrechnen
X1: Nullpunktverschiebung in X
Y1: Nullpunktverschiebung in Y
Z1: Nullpunktverschiebung in Z
B1: Nullpunktverschiebung in B
C1: Nullpunktverschiebung in C
Korrekturfaktor für X
Korrekturfaktor für Y
Korrekturfaktor für Z
Korrekturfaktor für Rund-Achse
Prog.Winkel in B nach Verrechnung
Prog.Winkel in C nach Verrechnung
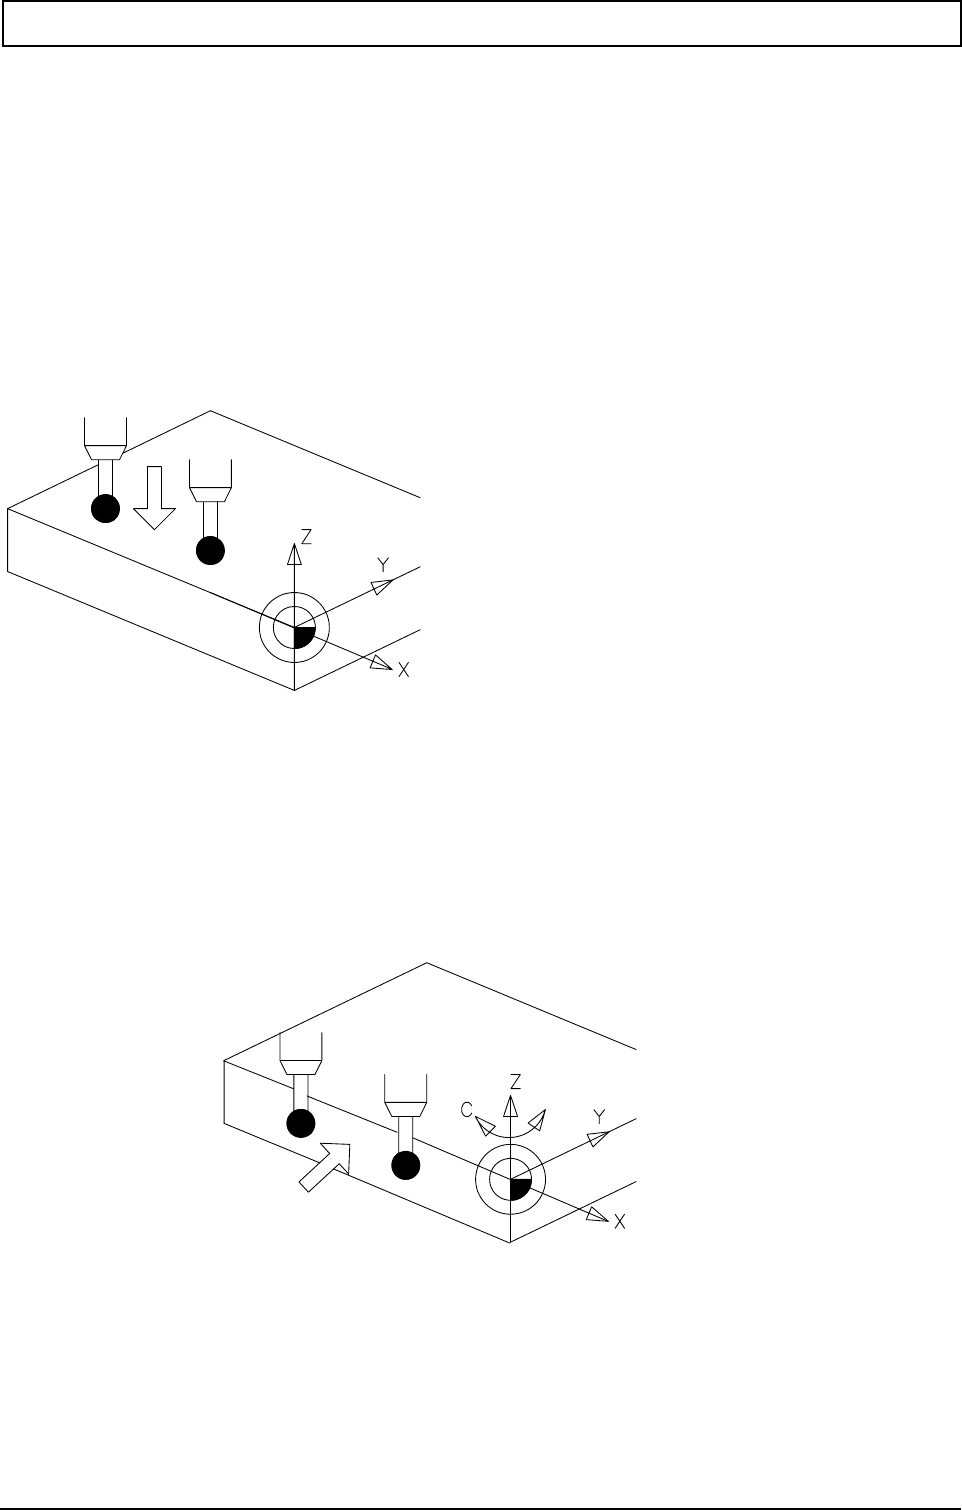
G-FUNCTIONS
20000710 MillPlus V410 311
Notes
Machine configurations (B1,C1,C2)
B-axis B1: All that is required to align a clamped work piece with a rotary table (B-axis)
rotating about the Y-axis is to measure two points on the X-axis:
-the angle of rotation is relative to the X-axis.
-the tool rotates about the Y-axis.
-the tool axis with the probe is the Z-axis or the Y-axis.
C-axis C1: All that is required to align a clamped work piece with a rotary table (C-axis)
rotating about the Z-axis is to measure two points on the X-axis:
-the angle of rotation is relative to the X-axis.
-the tool rotates about the Z-axis.
-the tool axis with the probe is the Z-axis.
X1=Kor
L1=L1
R1=R1
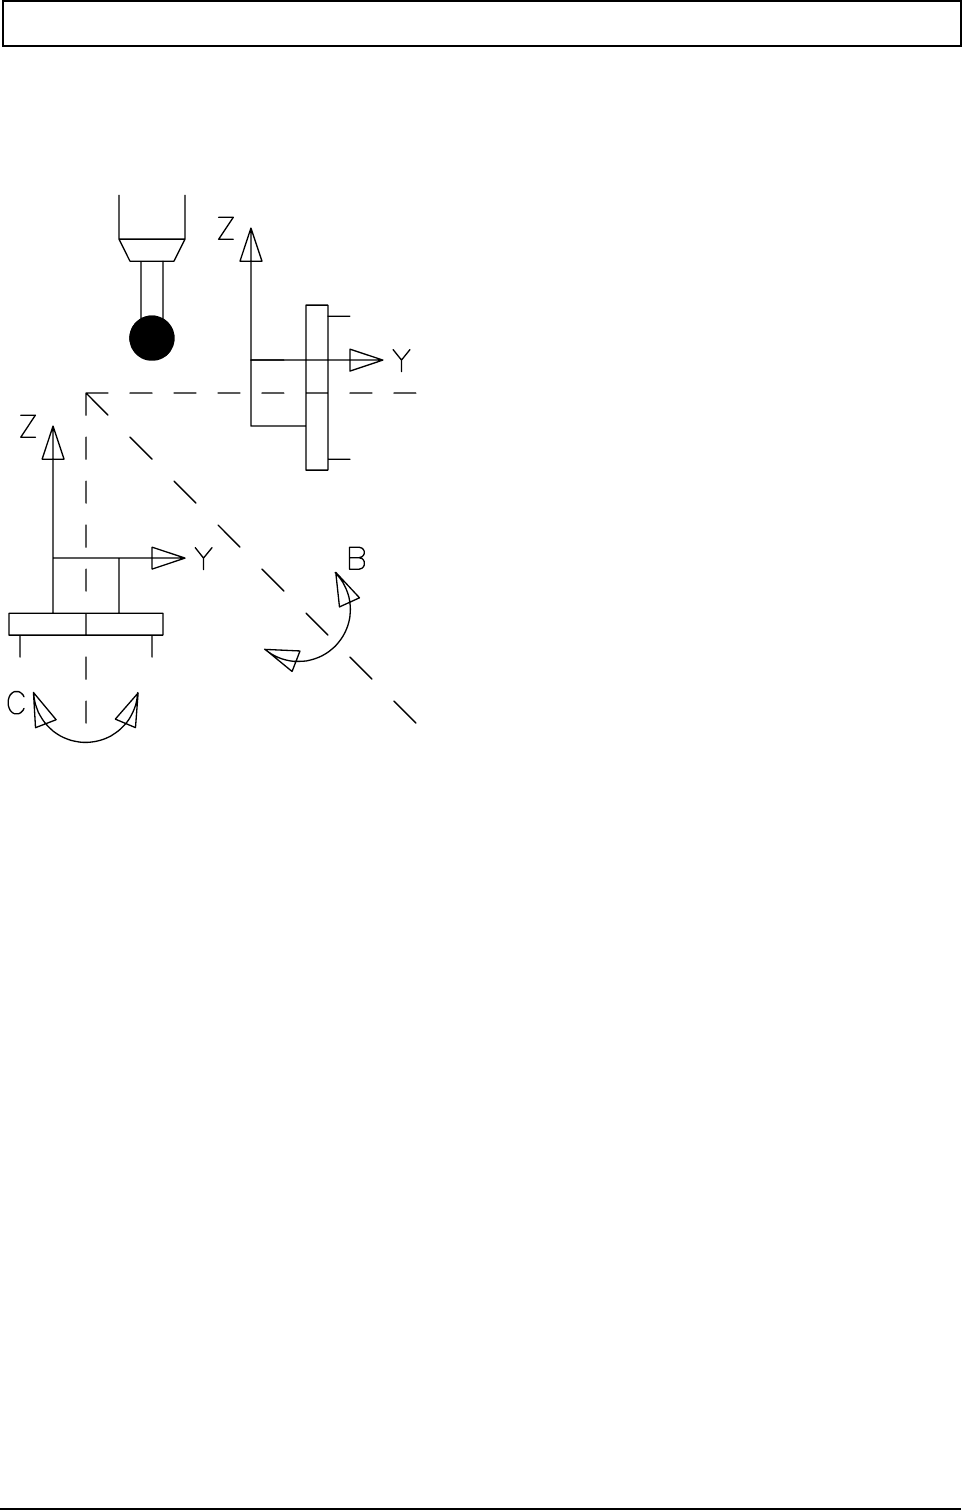
G-FUNCTIONS
312 Heidenhain
C-axis C2: This is an extension of the C1 option:
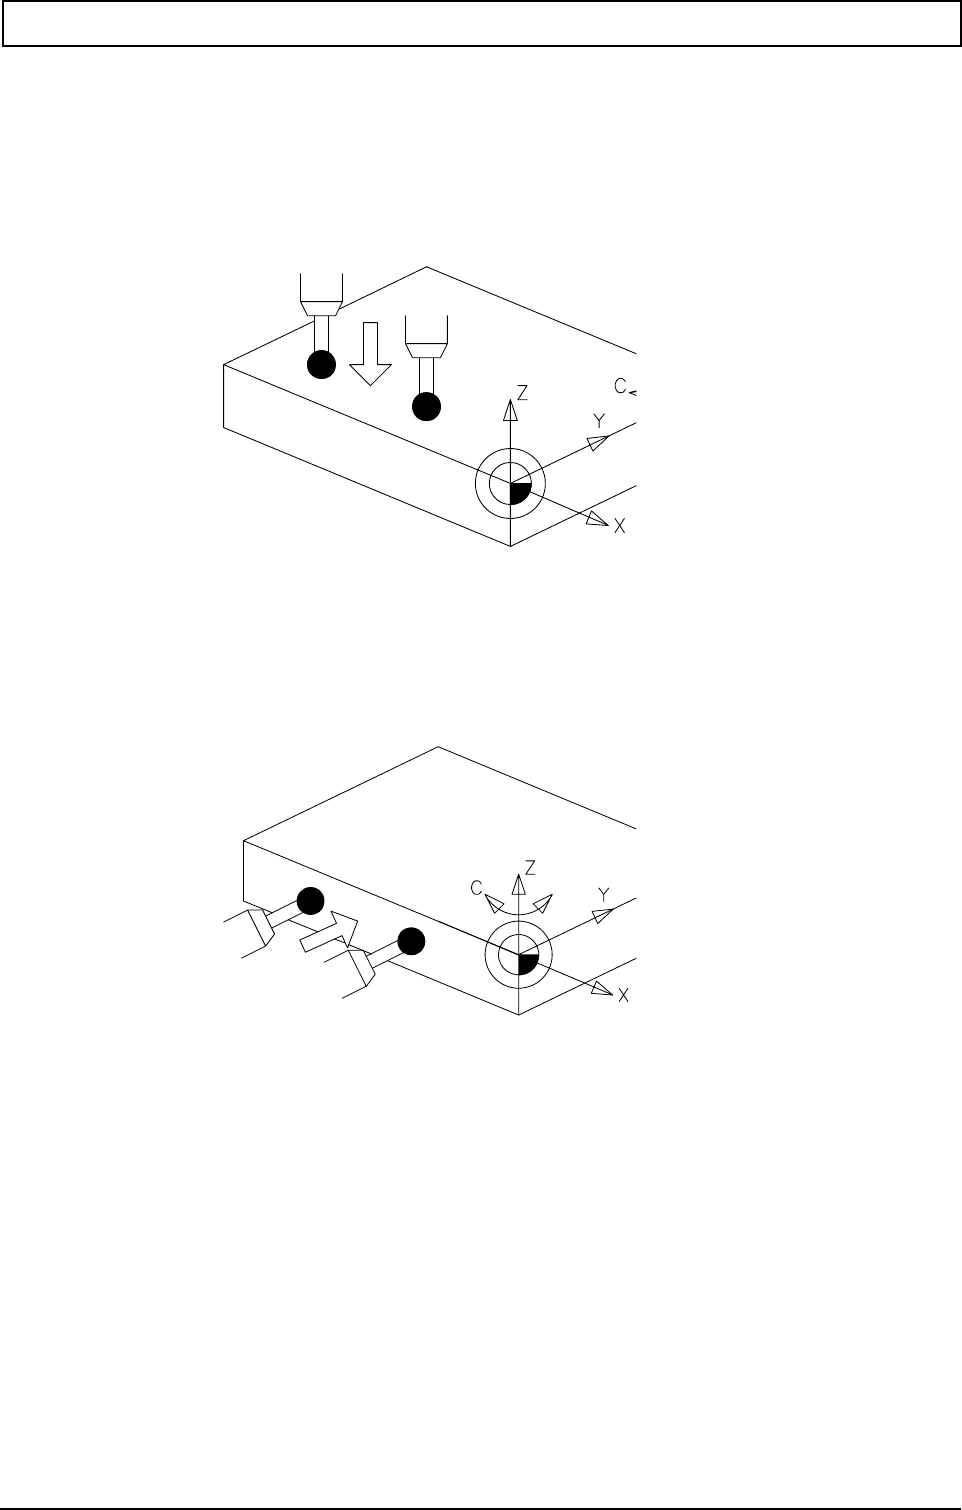
G-FUNCTIONS
20000710 MillPlus V410 313
1. The C-axis is rotated through 90 degrees and rotates about the Y-axis instead of the Z-axis.
All that is required to align a clamped work piece with a rotary table (C-axis) rotating
about the Y-axis is to measure two points on the X-axis:
-the angle of rotation is relative to the X-axis.
-the tool rotates about the X-axis.
-the tool axis with the probe is the Z-axis.
2. Zum Ausrichten eines aufgespannten Werkstückes auf einen um die Z-
A
chse drehenden Rund
t
-der Rotationswinkel ist bezogen auf die X-Achse.
-das Werkstück dreht sich um die X-Achse.
2. All that is required to align a clamped work piece with a rotary table (C-axis) rotating about the Z-
axis is to measure two points on the X-axis:
-the angle of rotation is relative to the X-axis.
-the tool rotates about the X-axis.
-the tool axis with the probe is the Y-axis.
Examples
N.. G50 X1 I0.8 N=54
Change the X coordinates of the G54 offset by multiplying the correction value by 0.8 and enter the
new X coordinate value of G54 in the zero point memory.
N.. G50 T5 L1=1 K0.97 R1=1
Correct the length of tool 5 by multiplying the difference in Z (tool in Z axis) by 0.97, and enter the new
dimension in the tool memory.
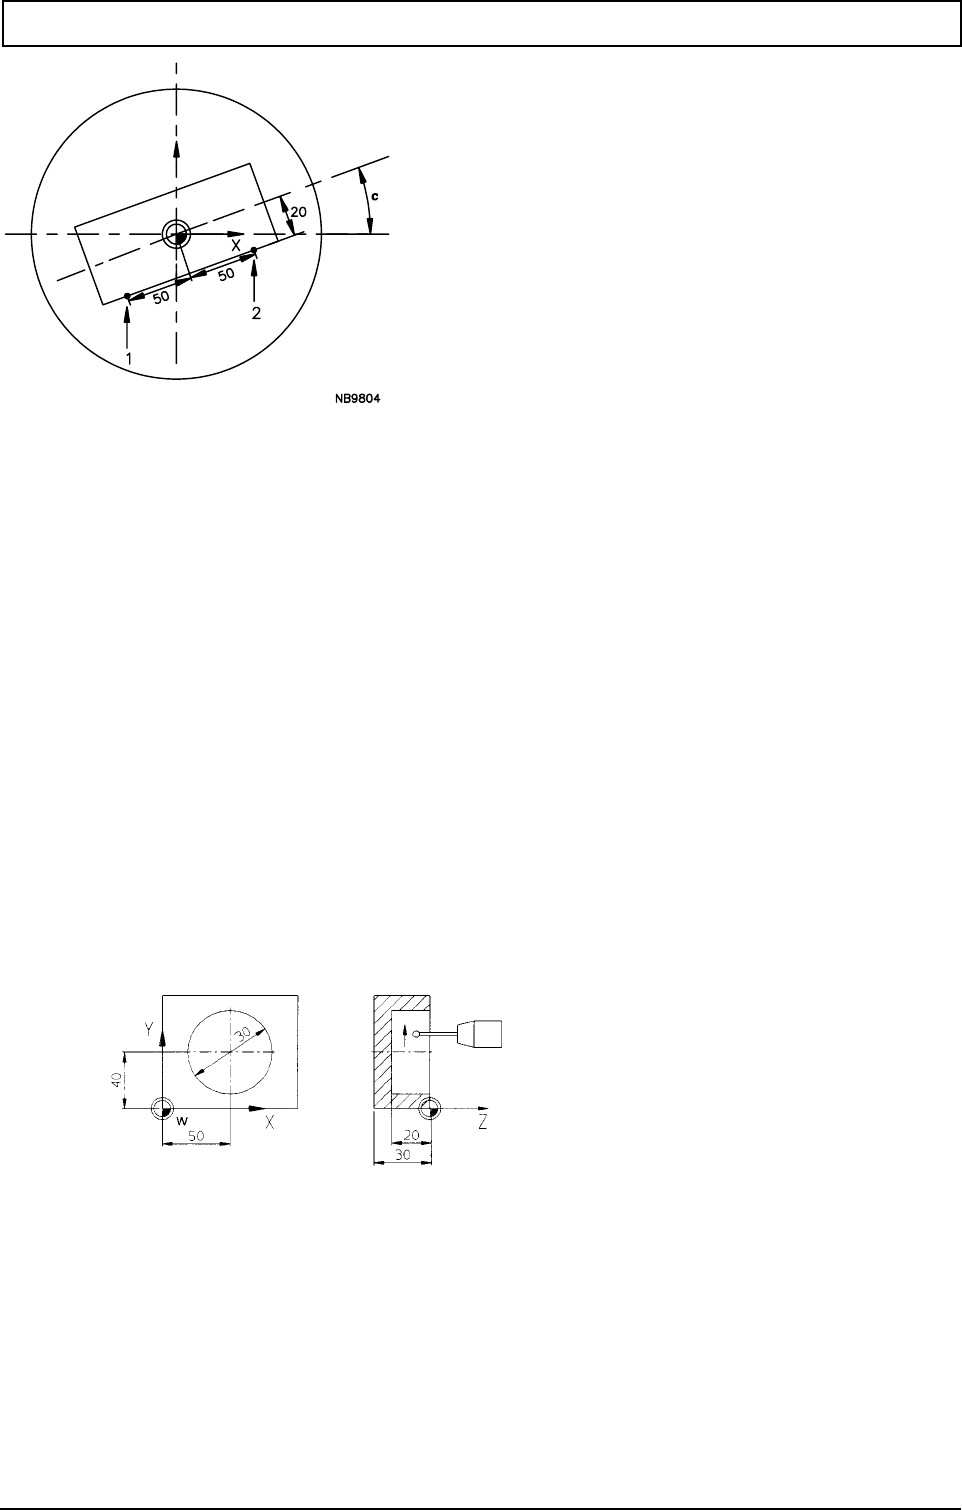
G-FUNCTIONS
314 Heidenhain
N50003
N1 G17 T1 M6
N2 G54
N4 G45 X-50 Z0 Y-20 C0 J1 N=1 Measurement at point 1
N5 G45 X50 Z0 Y-20 J1 N=2 Measurement at point 2
N6 G50 C1 N=54 Settlement of zero offset
N7 G54 Reactivate zero offset
N8 G0 Z100 B0
N50006
N1 G54
N2 G17 T1 M67 (Mill R5)
N3 G89 Z-20 B2 R15 F1000 S50 M3
N4 G79 X0 Y0 Z0
N5 G0 Z50 M5
N6 T31 M67 (Measuring probe)

G-FUNCTIONS
20000710 MillPlus V410 315
N7 M19
N8 M27 Activate measuring probe
N12 G46 X50 Y40 Z-5 R15 I1 J1 F500 E5 Measuring a full circle
N13 G0 Z50
N14 G49 R0.02 R1=2 N=21 E5 (bore > (15+0.02) jump-> N=21) Tolerance comparison
N15 G49 R2 R1=.02 N=17 E5 (bore < (15-0.02) jump-> N=17) Tolerance comparison
N16 G29 E10 E10=1 N=23 Conditional jump to end of program
N17 G50 T1 R1=1 Settlement of tool radius
N18 M28 Turn off measuring probe
N19 G14 N1=2 N2=5
N20 G29 E1 E1=1 N=23
N21 M0
N22 (Bore outside tolerance area)
N23 M30

G-FUNCTIONS
316 Heidenhain
23.29 Cancel/activate G52 zero point shift G51/G52
Determines the work piece zero point with the stored values.
Activate:
N... G52
Cancel:
N... G51
Note
The use of the functions is limited to programs that were created with previous types of controllers.
Function G52 is cancelled by the Clear control softkey or by programming G51.
Functions G51 and G52 remain active after Cancel program and M30.
If a G54 .. G59 zero point offset is already active, G52 is effective from the point of this offset. If G52 ia
active, G54 .. G59 are effective from the point of this offset.
FROM V320
If MC84 = 0, G52 is in the ZO.ZO (zero point) memory.
If MC84 > 0, G52 is in the PO.PO (pallet offset) memory.
The zero points can be edited in both memories.
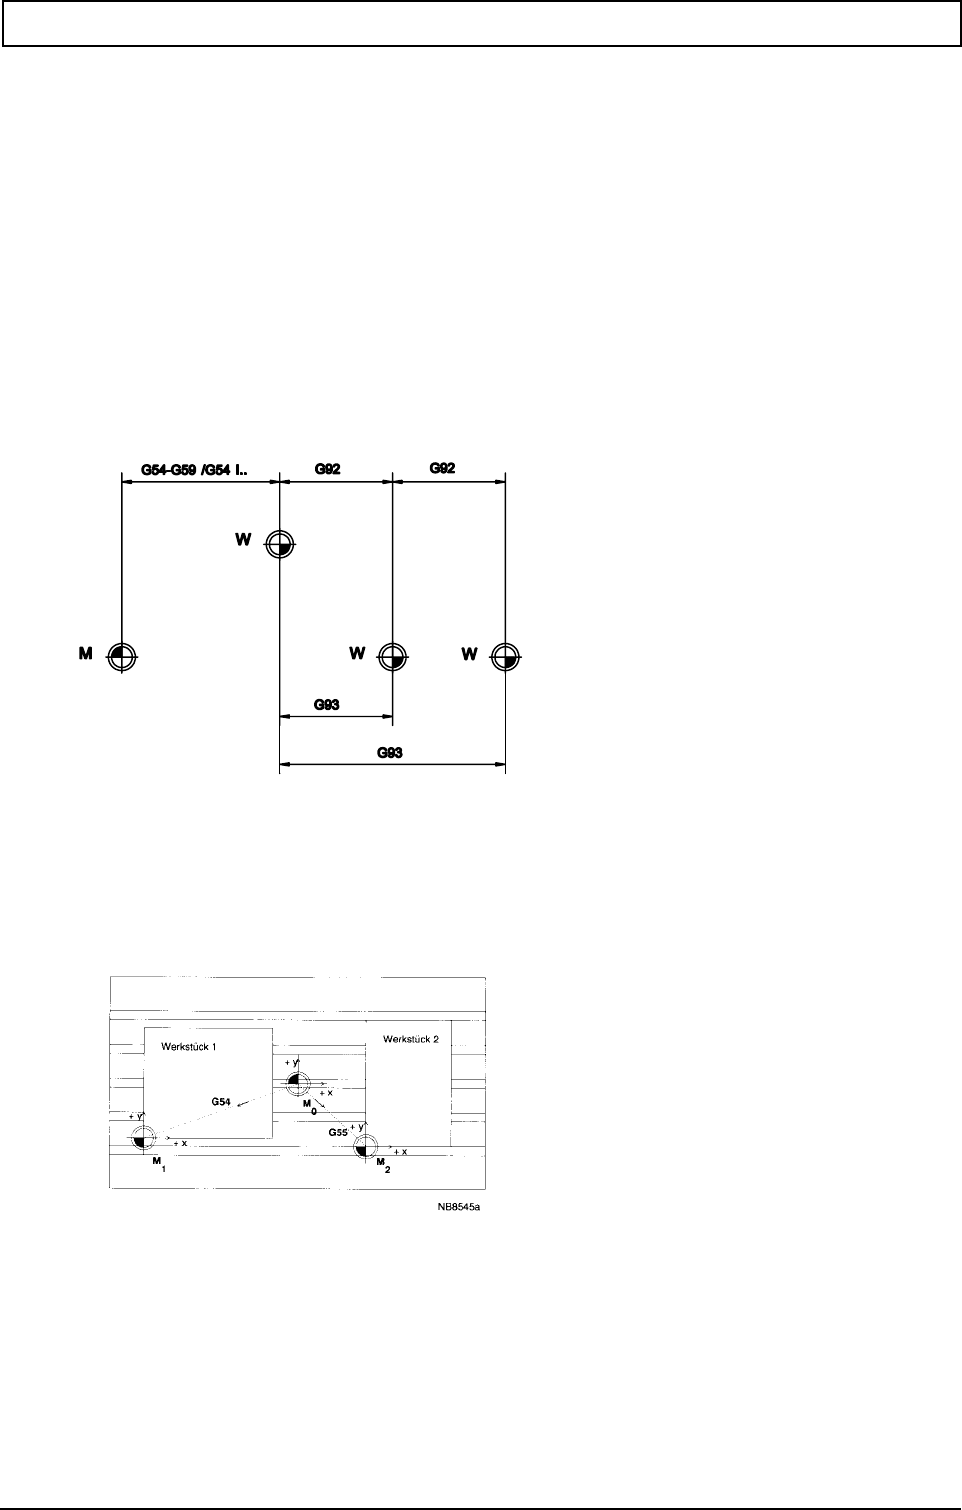
G-FUNCTIONS
20000710 MillPlus V410 317
23.30 Cancel/activate zero point shift G53/G54...G59
Offsets the work piece zero point to a new position, the coordinate values of which are stored in the
zero point memory (under the relevant number).
Activate:
N.. G54
N.. G55
N.. G56
N.. G57
N.. G58
N.. G59
Delete:
N.. G53
Example
:
N60 G54 Activate zero offset G54
:
N600 G55 Activate zero offset G55. The coordinates relate to the new zero point.
:

G-FUNCTIONS
318 Heidenhain
23.31 Extended zero offset G54 MC84>0 (from V320 onwards)
Additionally to the current zero offset table G54..G59 there is another zero offset table G54 I[nr] with a
maximum of 99 zero offsets. The relevant zero offset is selected by machine constant MC84.
- Identifier of zero offset memory Ze.Ze (MC84 > 0)
- Programming (offset values) of zero offset in NC program
- Programming an angle of rotation (B4=) in zero offset
- Entering comment in zero offset memory
Define and call zero offset:
G54 I[nr] [axis coordinates] {B4=..}
Call zero offset:
G54 I[nr]
Parameters
Notes and use
The zero offset table is adjusted during scaling (MC84 > 0). The existing zero points are maintained.
Extended zero points are initialised to zero.
Attention: If MC84 is zeroed, the table is changed (ZE.ZE to ZO.ZO). The new zero point
table is initialised to zero.
Offset values may be entered in the zero point memory in two different ways:
- The values of zero offsets G54 I[nr] are entered in the zero offset memory
prior to execution of the program, via the control panel or from a data carrier.
- The values of zero offset G54 I[nr] X.. Y.. Z.. A.. B.. C.. B4=.. are
programmed in an NC program block. During execution of the program, the
programmed values are accepted and activated in the zero offset memory.
Attention: If no new zero offset values have been programmed in the program block, the
zero offset values already existing in the memory must not be overwritten or
deleted. The unprogrammed axis coordinates are taken from the memory.
Collision hazard!
Every zero offset in the table may also involve comments.
Every zero offset in the table may also involve axis rotation. First the offset is carried out, then the
coordinate system is rotated through angle B4=.
G52 does not affect the functions G53...G59. If G52 is active, G54..G59 will be active from this offset.
A programmed zero offset (G92 or G93) will be cancelled by any of the G54 I[nr] functions.
G54 I[nr] is automatically cancelled by the Clear control softkey or by programming G53. The
functions G54...G59 are not cancelled by the Cancel Program softkey or M30.
X,Y,Z Nullpunktkoordinate
Maschinenfunktion
Nullpunktwinkel
Nullpunktwinkel
Nullpunktindex
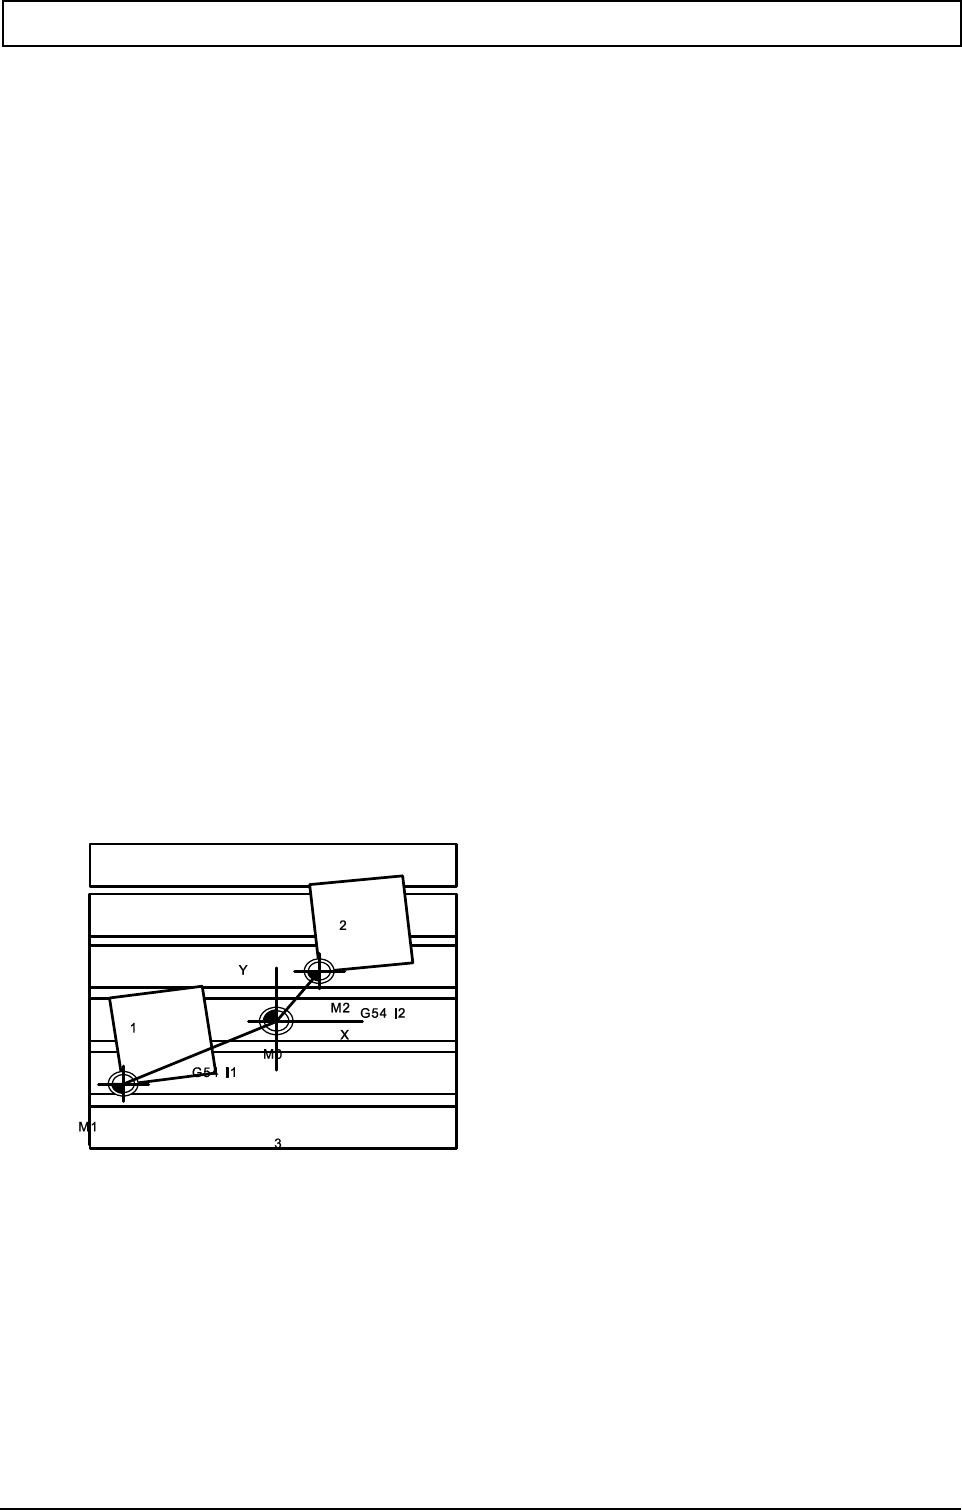
G-FUNCTIONS
20000710 MillPlus V410 319
Example
1.
N60 G54 I1 Selection of zero point W1. Its coordinates (X40,Y100,Z300) are taken from the zero
offset memory.
All programmed coordinates are measured from W1.
N600 G54 I2 Selection of zero point W2. Its coordinates (X200,Y100,Z100) are taken from the zero
offset memory.
Zero point W1 is cancelled and W2 activated. As a result, all programmed
coordinates are measured from W2.
N700 G53 Turn off zero point W2. The coordinates (X0,Y0,Z0) are taken from the G53 zero
offset memory.
Zero point W2 is cancelled and M is activated. As a result, all programmed
coordinates are measured from M.
2.
Axis rotation
1 Workpiece 1
2 Workpiece 2
3 Machine table
Entry in the zero point table and calling:
N60 G54 I1 X-42 Y-15 B4=14 (Z0 C0) The zero offset values are entered in the zero offset table.
Machine workpiece 1. All programmed coordinates are
measured from M1.
N120 G54 I2 X10 Y24 B4=-17 Machine workpiece 2. All programmed coordinates are
measured from M2.
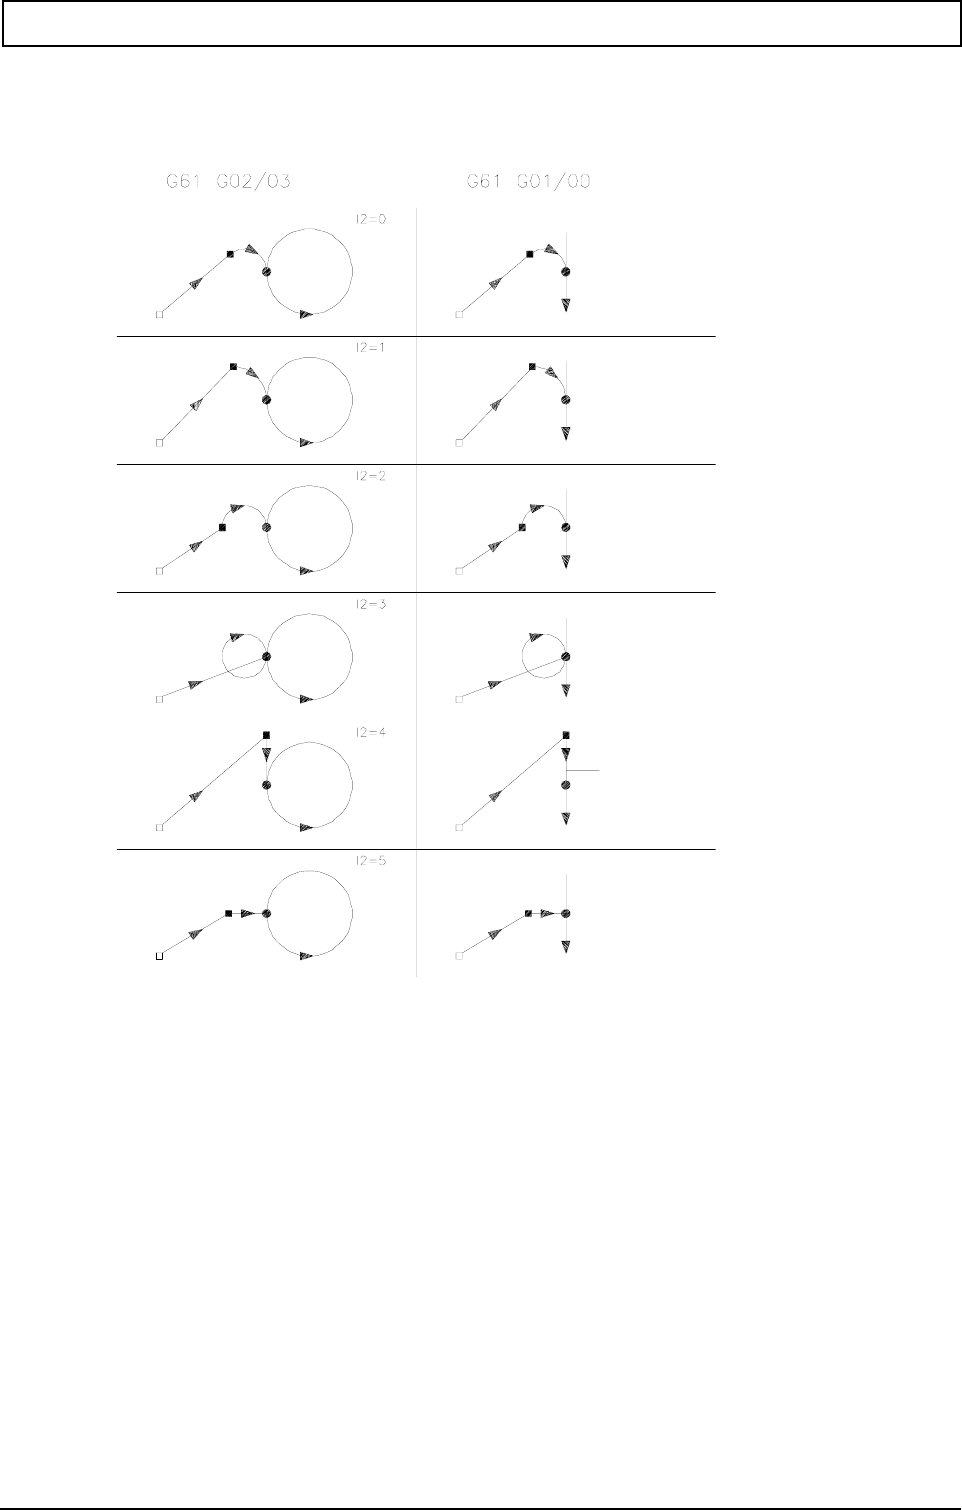
G-FUNCTIONS
320 Heidenhain
23.32 Tangential approach G61
Programs a tangential approach movement between a starting point and the start of a contour.
G-FUNCTIONS
20000710 MillPlus V410 321
TANGENTIAL CONTOUR APPROACH G61
Actual position.
Calculated starting position in the plane. Tool axis Z (G17). Z1 can
be programmed. If Z1 has not been programmed, Z1=Z.
Contour starting position (X, Y, Z).
N... G61 {I2=..} X... Y... Z... R... [{X1=..} {Y1=..} {Z1=}] {I1=} {F2=}
N... G61 {I2=..} B2=... L2=... Z... R... [{X1=} {Y1=}] {Z1=} {I1=} {F2=}
Parameters
I2=1 mit Viertelkreis.
I2=2 mit Halbkreis.
I2=3 Helix für Zustellen (für Taschen).
I2=4 Konturparallel.
I2=5 Senkrecht
X,Y,Z Konturstartpunkt
Punktedefinitionsnummer
Radius
Startpunkt in Z
Startpunkt in X
Startpunkt in Y
Polarwinkel
Polarlänge
Linearbewegung 0=Eilg.,1=Vorsch.
¼,½-Kreis,Helix,Konturp.,senkr.
Vorschub Kreisbewegung

G-FUNCTIONS
322 Heidenhain
Wortweise Absolut-/Inkremental-Programmierung
Notes
The control system itself calculates a starting position. The first movement is a positioning movement
to the calculated starting point. The approach movement starts from this point.
The approach movement consists of two different movements. First, the rapid traversing or feed
movement (determined by I1=) to the (calculated) starting point of the approach movement. Secondly,
a feed movement along the approach contour to the starting point of the contour.
The approach side is determined by the active function G41/G42. When G40 is active, there will be an
approach movement, similarly to G41.
If radius compensation (G41/G42 without travel in the program block) is activated directly before the
G61 block, compensation takes place during linear movement. Depending on the actual position, the
movement will be closer to or farther away from the approach circle.
If radius compensation is already active, both the linear and circular movements will be carried out
with radius compensation.
If no G function has been programmed after the G61 block, G1 is not active automatically. The last
movement of the G61 function may be G1, G2 or G3.
If the distance between the actual position and the approach circle exceeds the milling radius (I2=0),
the approach movement consists of a line and circular arc.
If the distance between the actual position and the approach circle is smaller than the milling radius,
I2=0 is changed to I2=1, and the approach movement will be a quarter circle.
G61 programming is subject to the following limitations: G61 is not allowed in the ICP and G64
modes, in the MDI mode and in the G182 mode.
Specific limitations apply to the blocks immediately following the approach movement (G61). Only the
following functions G64, G0, G1, G2 and G3 with movements in the active plane are allowed.
Falls nach dem G61-Satz keine G-Funktion programmiert worden ist, wird G1 nicht automatisch
wirksam. Die letzte Bewegung der G61 Funktion kann G1, G2 oder G3 sein.
X90=,Y90=,Z90= Endpunkt absolut
9
1=,Z91= Endpunkt inkremental
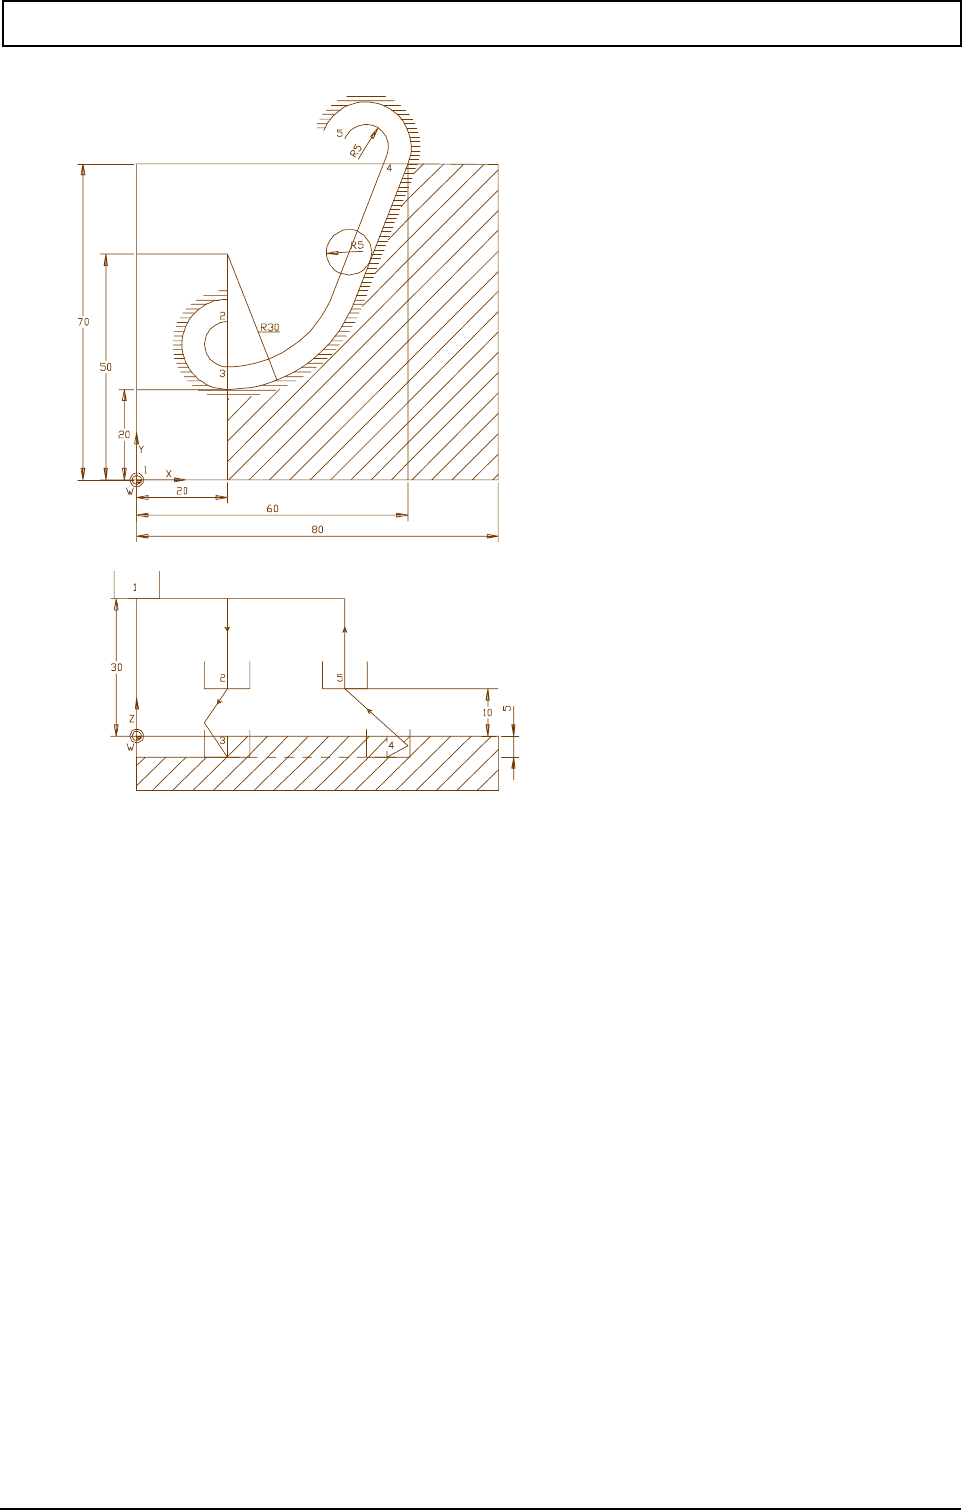
G-FUNCTIONS
20000710 MillPlus V410 323
Example
N1 G17
N2 T1 M6 (cutter R5)
N3 F500 S1000 M3
N4 G0 X0 Y0 Z30 Approach starting position. (position 1: X0 Y0 Z30).
N5 G41 Radius compensation to the left.
N6 G61 I2=2 X20 Y20 Z-5 Z1=10 R5 I1=0 F2=200
Tangential approach movement (I2=2) with semicircle. The initial
part of the approach movement is a rapid traversing movement with
positioning logic to the starting point of the semicircle (position 2: X..
Y.. Z10). Radius compensation is activated for this movement. The
circular arc is made as a helix. The contour starts at position X20
Y20 Z0 (position 3: X20 Y25 Z-5)
N7 G64
N8 G3 I20 J50 R1=0
N9 G1 X60 Y60
N10 G63
N11 G62 I2=2 Z1=10 R5 Tangential exit (I2=2) with semicircle. The semicircle is made as a
helix. Starting height of Z axis -5. The end height is 10. (position 5:
X.. Y.. Z10).
N12 G40
N13 G0 X0 Y0 Z30
N14 M30
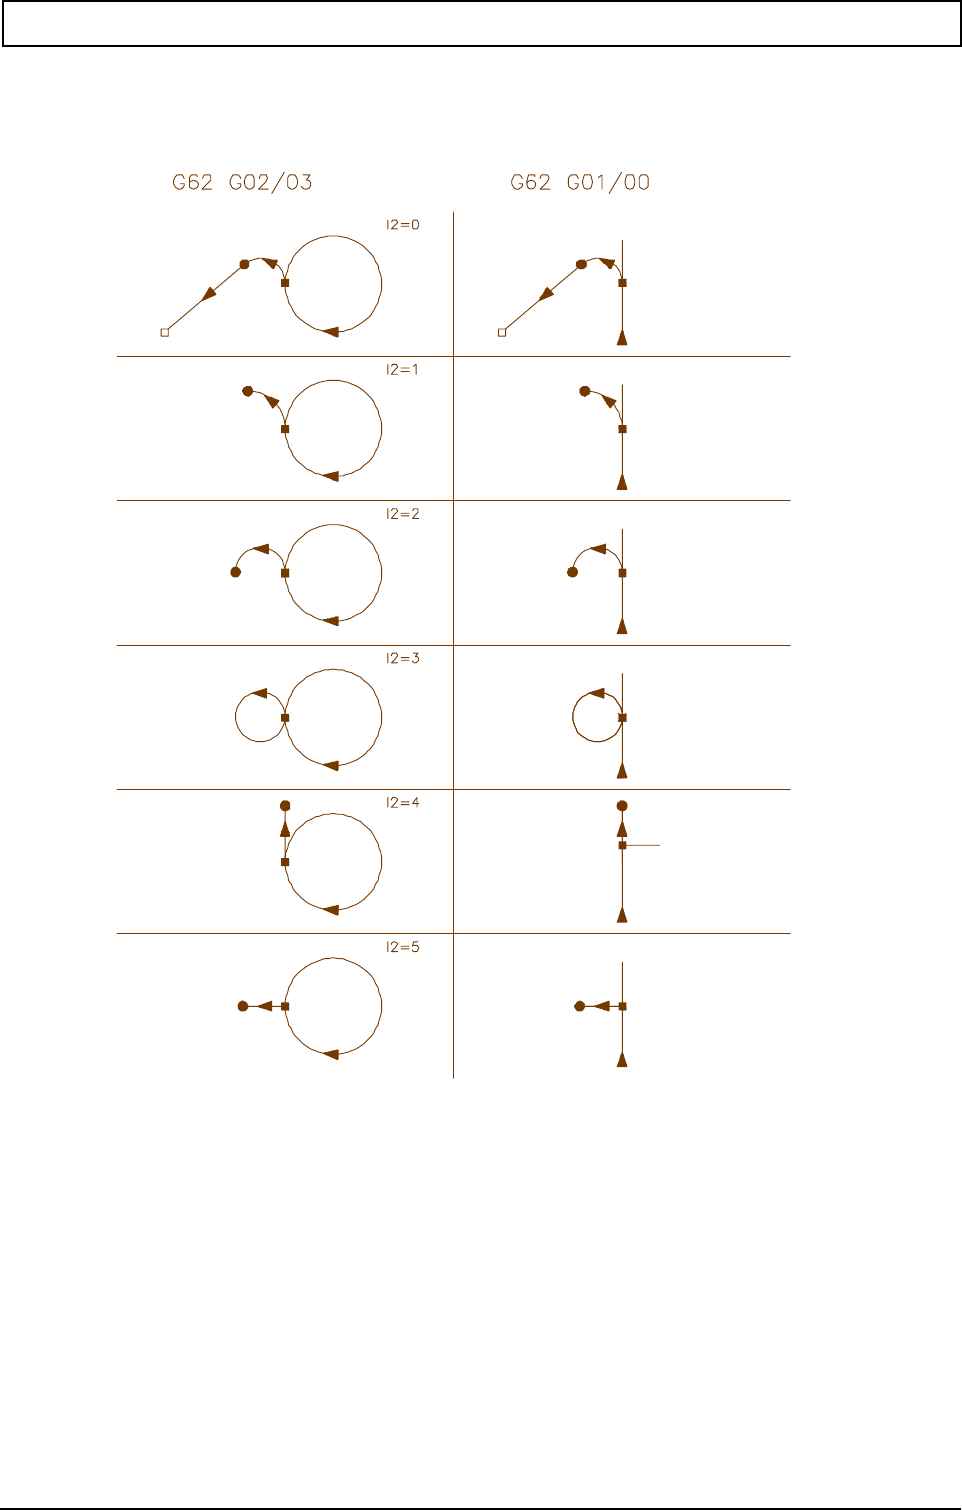
G-FUNCTIONS
324 Heidenhain
23.33 Tangential exit G62
Programs a tangential exit after the end of the contour.

G-FUNCTIONS
20000710 MillPlus V410 325
TANGENTIAL EXIT FROM THE CONTOUR G62:
End position of the contour.
Calculated end position the plane. Tool axis Z (G17). Z1 can be
programmed.
The height remains unchanged when Z1 has not been
programmed.
Programmed end position of the exit movement (X, Y, Z) (only
I2=0).
N... G62 I2>0 Z1=... R... {I1=} {F2=}
N... G62 I2=0 X... Y... Z... Z1=... R... {I1=} {F2=}
N... G62 I2=0 B2=... L2=... Z... R... {I1=} {F2=}

G-FUNCTIONS
326 Heidenhain
Parameters
I2=0 mit Endpunkt und Kreisbogen
I2=1 mit Viertelkreis
I2=2 mit Halbkreis
I2=3 mit Helix für Zustellen
I2=4 Konturparallel
I2=5 Senkrecht
Wortweise Absolut-/Inkremental-Programmierung
Notes
First read G61 to understand G62.
Notes and usage
If radius compensation (G40 without travel in the program block) is turned off immediately before the
G62 block, compensation will be deactivated during the tangential exit movement. If radius
compensation with G40 is not deactivated, both the circular and the linear movement will be with
radius compensation.
Limitations
Programming of G62 is subject to the following limitations:
- G62 is not allowed in the ICP and G64 modes
- G62 is not allowed in the MDI mode
- G62 is not allowed in the G182 mode
Specific limitations apply to the blocks immediately following the approach movement (G61).
Only the following functions are allowed:
- G64
- G0, G1, G2, G3 with movements in the active plane
Example
Refer to example of G61.
X,Y,Z Endpunkt tangentiales Wegfahren
Punktedefinitionsnummer
Radius
Startpunkt in X
Startpunkt in Z
Startpunkt in Y
Polarwinkel
Polarlänge
Linearbewegung 0=Eilg.,1=Vorsch.
¼-,½-Kreis,Helix,Konturp.,senkr.
Vorschub Kreisbewegung
X90=,Y90=,Z90= Endpunkt absolut
9
1=,Z91= Endpunkt inkremental

G-FUNCTIONS
20000710 MillPlus V410 327
23.34 Cancel / activate geometric calculations G63/G64
G63: Cancels the geometry calculation
G64: Activates the geometry calculation
Parameters: G64 active
Note
Programs that require geometry calculation can be easily created by the user with Interactive Contour
Programming (ICP).
(see chapter on Interactive Contour Programming)

G-FUNCTIONS
328 Heidenhain
23.35 INCH / METRIC programming G70/G71
Loads and calls part programs that are described in the alternative unit of measurement to that
specified in the CNC (unit of measurement defined in the machine constants)
Inch programming:
N... (PROGRAM NAME) G70
Metric programming:
N... (PROGRAM NAME) G71
Examples
1st unit of measurement: CNC: Metric Program: Inch
9001.PM
N9001 G70
:
N50 G1 X2 Y1.5 F8 Read-in ensures storage of X50.8 Y38.1 and F203.2.
:
2nd unit of measurement: CNC: Inch Program: Metric
9001.PM
N9002 G71
:
N50 G1 X50.8 Z38.1 F203.2 Read-in ensures storage of X2 Y1.5 and F8.
:

G-FUNCTIONS
20000710 MillPlus V410 329
23.36 Cancel / activate mirror image and scaling G72/G73
Enable zoom/reduce:
N.. G73 A4=.. (factor or percentage, setting in machine constants)
Disable zoom/reduce:
N.. G73 A4=1 (factor)
N.. G73 A4=100 (percentage)
Mirroring about an axis or sign change per axis:
N.. G73 {X-1} {Y-1} {Z-1} {A-1} {B-1} {C-1}
Disable mirroring/sign change per axis:
N.. G73 {X1} {Y1} {Z1} {A1} {B1} {C1}
Disable zoom/reduce and mirroring:
N.. G72
G73 A4=2 G73 A4=0.5
8
684 vergrößern
verkleinern
8
684 vergrößern
verkleinern
8
685 spiegeln

G-FUNCTIONS
330 Heidenhain
Parameters
G72 No parameters
G73 Zoom / reduce
Mirroring / sign change
Example
N7273 (MIRROR AN ISLAND)
N1 G17
N2 G54
N3 T1 M6 S2000 F200 Change tool
N4 G0 X-60 Y20 Z0 M3
N5 G1 Z-9
N6 G43 Y0
N7 G41 X-10
N8 G3 X0 Y10 R10
N9 G1 X0 Y45
N10 G1 X45 Y45
N11 G1 X45 Y-10
N12 G40
N13 G1 Z10
N14 G73 X-1 Y-1 Mirror coordinates around X and Y axes
N15 G14 N1=4 N2=13 Repeat the blocks 4-13
N16 G72 Cancel mirroring
N17 S1000 F100 T6 M6 Change tool 6
N18 G81 Y5 Z-20
N19 G79 X30 Y14
N20 G79 X10 Y32
N21 G79 X20 Y32
N22 G79 X30 Y32
N23 G79 X40 Y32
N24 G73 X-1 Y-1 Mirror coordinates around X and Y axes
N25 G14 N1=19 N2=23 Repeat the blocks 19-23
N26 G72 Cancel mirroring
N27 G0 Z50 M30
A4= Scaling factor
A4= Maßfaktor

G-FUNCTIONS
20000710 MillPlus V410 331
23.37 Absolute position G74
Rapid movement to a position whose coordinates refer to the reference point
N... G74 X.. Y.. Z.. {X1=..} {Y1=..} {Z1=..} {K...} {L...} {K2=...)
Parameter
Notes and usage
The G74 function is mainly used in programming cycles for tool changers, pallet stations etc., if the
programmed coordinates should not depend on the coordinates used to define machining of the
workpiece.
The end point coordinate may be defined in two different ways:
1) X100: relative position to reference point
2) X100 X1=2: relative position to the absolute position of the machine constant
X,Y,Z Endpunktkoordinate
Endwinkel
0=Genauhalt,1=verschleifen,2=MC
Inpoc Fenster (0: MC, 1-32767 µm)
0=mit WZ-Länge, 1=ohne WZ-Länge

G-FUNCTIONS
332 Heidenhain
Machine positions 1 to 10 for the first axis can be determined using the machine settings MC3145 --
MC3154. The machine settings MC3245 -- MC3254 etc are used for the second axis.
If the value in the machine setting being used is zero, no drive movement is implemented.
With G74 there will be travel simultaneously in all programmed axes. The next travel does not start
until the required position is reached in all axes.
K0: Allowance is made for an (accurate) stop between the movement of block G74 and the
movement in the next block, as is usual for rapid traversing movements.
(K0 is the switch-on position).
K1: No allowance is made for a stop between the movement of block G74 and the movement in
the next block (rounding). The next movement starts when the required position has almost
been reached in all axes.
K2: No allowance is made for a stop between the movement of block G74 and the movement in
the next block. The next movement starts when the required position has almost been
reached in all axes. This position is defined by the machine constant (MC136) (K2=0) or the
window size (K2=...) for the corner release distance.
K2= window size in mm (0-32.766 mm)
If an incremental movement is programmed after a G74 movement, the coordinates relate to the
position indicated in the G74 block.
Tool length compensation is usually not applied in G74 (L0 is switch-on position). L1 must be
programmed for tool length compensation.
Radius compensation (G41...G44) should be cancelled before activation of the G74 function.
Geometry function G64 must not be active during G74.
The active zero offset is ignored for the G74 block.
The travel immediately preceding G74 should be programmed with G0 or G1. The travel immediately
following G74 is automatically executed with the same G function.
Example
The coordinates of P in relation to R are known. P is programmed as follows:
:
N10 G0 X95 Y10
N11 G74 X-120 Y-115 Movement from X95 Y10 to P

G-FUNCTIONS
20000710 MillPlus V410 333
:
Example of block:
N20 G74 X100 X1=1 Y123.456 Z1=10 K2 K2=25.2
X100 X1=1 Relative position to the absolute position of the machine constant.
Y123.456 Relative position to the reference point.
Z1=10 (Z0) Position related to the absolute position of the machine constant.
K2 No allowance is made for a stop between the movement of block G74 and
the movement in the next block. The next movement starts when the
required position has almost been reached in all axes. This position is
defined by the window size (K2=...) for the corner release distance.
K2= Window size in mm

G-FUNCTIONS
334 Heidenhain
23.38 Bolt hole cycle G77
Executes a previously programmed drilling or milling cycle at points spaced equally on a circular arc
or full circle.
Points on a circular arc:
N.. G77 [centre point] R.. J.. I.. K.. {B1=..}
Points on a full circle:
N... G77 [centre point] R.. J.. I.. {B1=..}
Parameter
Wortweise Absolut-/Inkremental-
Programmierung
Hinweis
B1= hat zwei Bedeutungen:
Es stellt den Winkel für das Drehen
einer Tasche bzw. Nute dar, oder die Lage des Kreismittelpunktes (B1= mit L1=, oder X/Y mit B1=).
X,Y,Z Lochkreismittelpunkt
Endwinkel
Anfangswinkel zum ersten Punkt
Anzahl der Punkte
Endwinkel zum letzten Punkt
Punktnr. von Lochkreismittelpunkt
Lochkreisradius
Winkel
Polarwinkel
Streckenlänge
Polarlänge
Punktnr. von Lochkreismittelpunkt
Parameterdefinition
X90=,Y90=,Z90= Mittelpunkt absolut
9
0=,C90= Endwinkel absolut
9
1=,Z91= Mittelpunkt inkremental
9
1=,C91= Endwinkel inkremental

G-FUNCTIONS
20000710 MillPlus V410 335
Examples
:
N40 G78 P2 X.. Y.. Z.. Second defined point
:
N50 G81 Y1 Z-10 F100 S1000 M3 Define cycle
:
N60 G77 P2 R25 I30 K150 J4 Repeat cycle four times on circular arc
:
:
N41 G78 P1 X.. Y.. Z.. First defined point
:
N50 G81 Y1 Z-10 F100 S1000 M3 Define cycle
:
N60 G77 P1 R25 I0 J6 Repeat cycle six times on full cycle
:
Turned grooves.
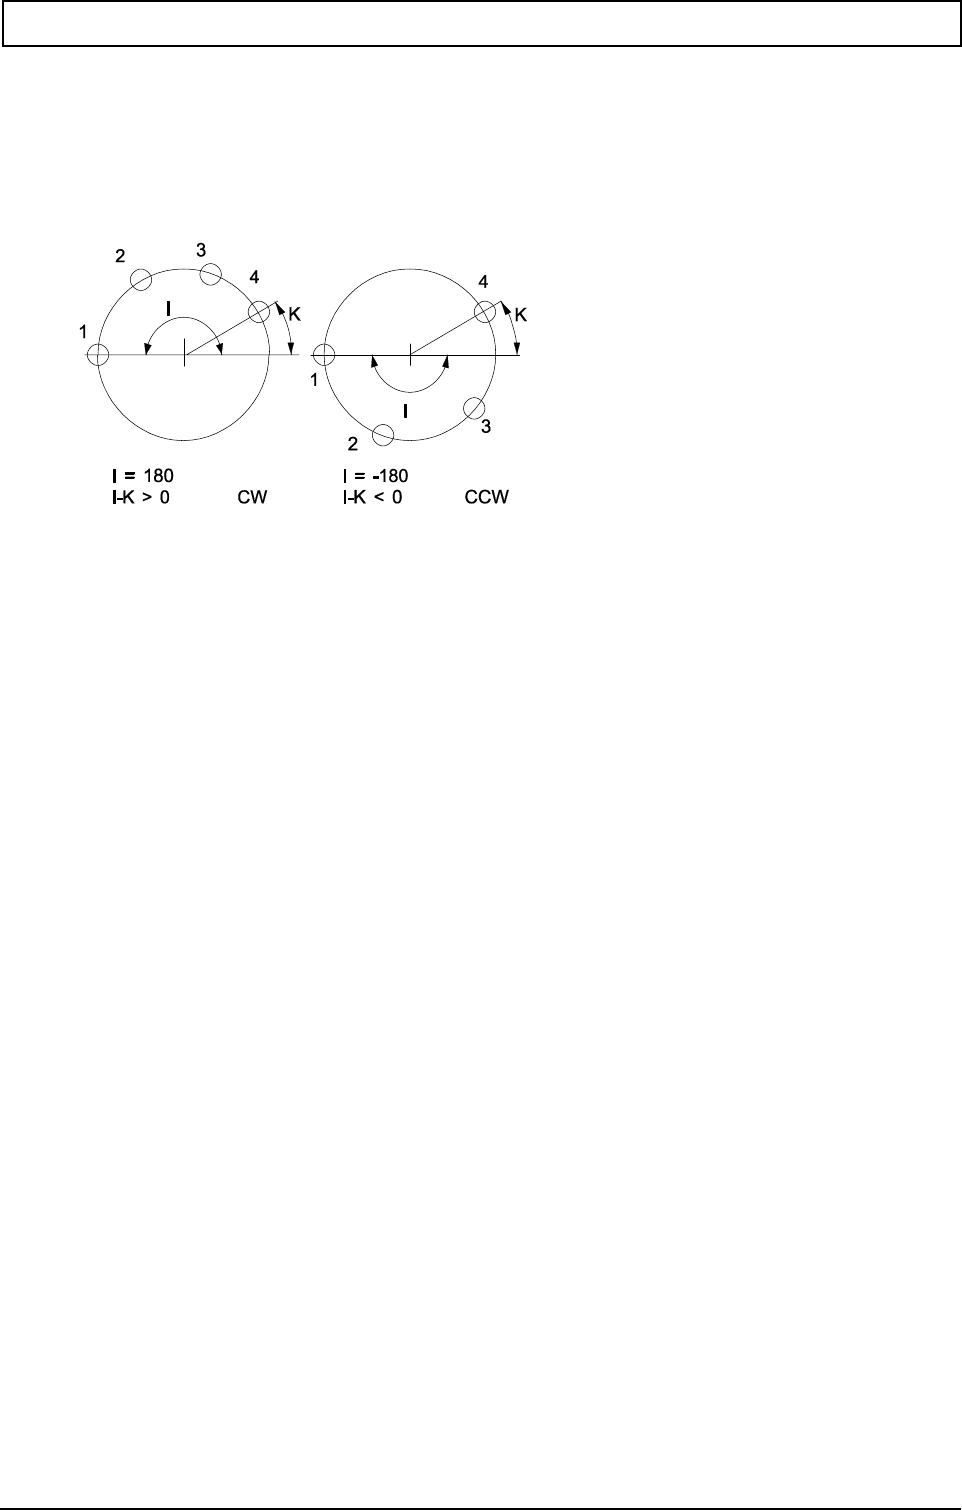
G-FUNCTIONS
336 Heidenhain
N60 T1 M6 Change tool 1 (cutter with radius of 4.8 mm)
N65 G88 X20 Y10 Z-10 B1 F100 S1000 M3 Define the groove as if the sides were parallel to the
X and Y axes.
N70 G77 X78 Y56 Z0 R24 I0 J6 B1=30 The turned grooves are milled.
Direction of the bores on a circular arc
N50 G81 Y1 Z-10 F100 S1000 M3
N60 G77 X0 Y0 Z0 R25 I180 K30 J4
N70 G77 X0 Y0 Z0 R25 I-180 K30 J4
Explanation:
N50 : Define cycle
N60 : Repeat cycle four times on the circular arc; start at 180 degrees, end at 30 degrees in
clockwise direction (CW).
N70 : Repeat cycle four times on the circular arc; start at -180 degrees, end at 30 degrees in
counter-clockwise direction (CCW).
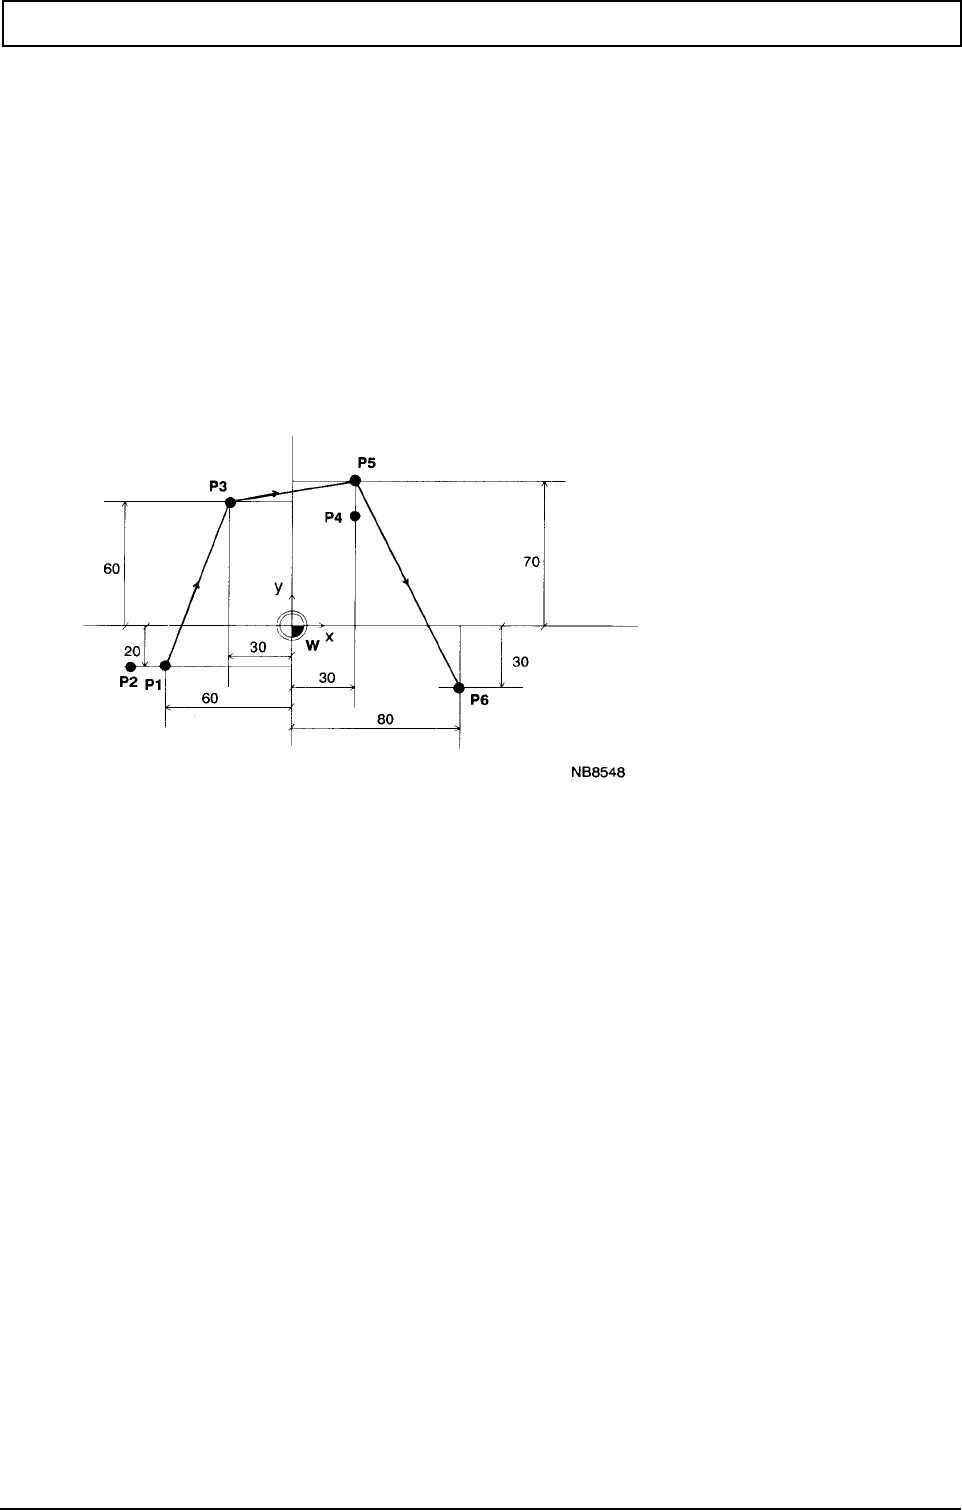
G-FUNCTIONS
20000710 MillPlus V410 337
23.39 Point definition G78
Defines the coordinates of a point once in a program. For subsequent travel to this point, only its
number needs to be programmed.
N... G78 P... [Point coordinates]
Parameters
Example
N10 G78 X-60 Y-20 P1 Define point 1
N11 G78 X-70 Y-20 P2
N12 G78 X-30 Y60 P3
N13 G78 X30 Y55 P4
N14 G78 X30 Y70 P5
N15 G78 X80 Y-30 P6
:
N90 G0 P1=1 Move tool in rapid traversing to the position defined by P1.
:
N91 G1 P1=3 P2=5 P3=6 F1000 Move tool with programmed feed to P3, P5
: and then to P6.
Note
Only one point can be defined in each G78 block. All the point coordinates are in relation to the active
work piece zero point W.
Program blocks with G1 or G79 can contain up to 4 points. In all other cases, there can only be one
point in a program block.
Example: N.. G1 P1=9 P2=1 P3=3 P4=8
P adresses with index:
The index value (1-4) determines the priority for the machining sequence (1=highest priority, 4=lowest
priority). The entry after the equals sign gives the number of points in the points memory.
Another possibility is to enter the point definitions as parameters, the index again denoting the priority.
P-Adresse mit Index:
X,Y,Z Punktkoordinate
Punktwinkel
Polarwinkel
Polarlänge
Punktedefinitionsnummer

G-FUNCTIONS
338 Heidenhain
23.40 Activate cycle G79
Executes previously programmed drilling cycles (G81, G83-G86) or milling cycles (G87-G89) at
defined positions.
N... G79 [point coordinates] {B1=..}
Parameters
Wortweise Absolut-/Inkremental-
Programmierung
Example
Three holes are to be drilled
:
N50 G78 P1 X50 Y20 Z0 Define point
N55 G78 P2 X50 Y80 Z0
N60 T1 M6
N65 G81 Y1 Z-30 F100 S1000 M3 Define drilling cycle
N70 G79 P1 P2 Drill holes at positions 1 and 2
N75 T2 M6
N80 G79 X50 Y50 Z0 M3 Drill hole
:
X,Y,Z Punktkoordinate
Punktwinkel
Winkel
Streckenlänge
Polarwinkel
Polarlänge
Punktedefinitionsnummer (P1-P4)
=
,P3=,P4= Punktedefinitionsnummer
X90=,Y90=,Z90=,A90=,B90=,C90= Punkt absolut
9
1=,Z91= Punkt inkremental
9
1=,C91= Punktwinkel inkremental

G-FUNCTIONS
20000710 MillPlus V410 339
Note
B1= has two meanings:
It represents the angle for machining a pocket or slot, or the position of the circle centre point (B1=
with L1=, or X/Y with B1=).
See example G77 "Turned grooves"
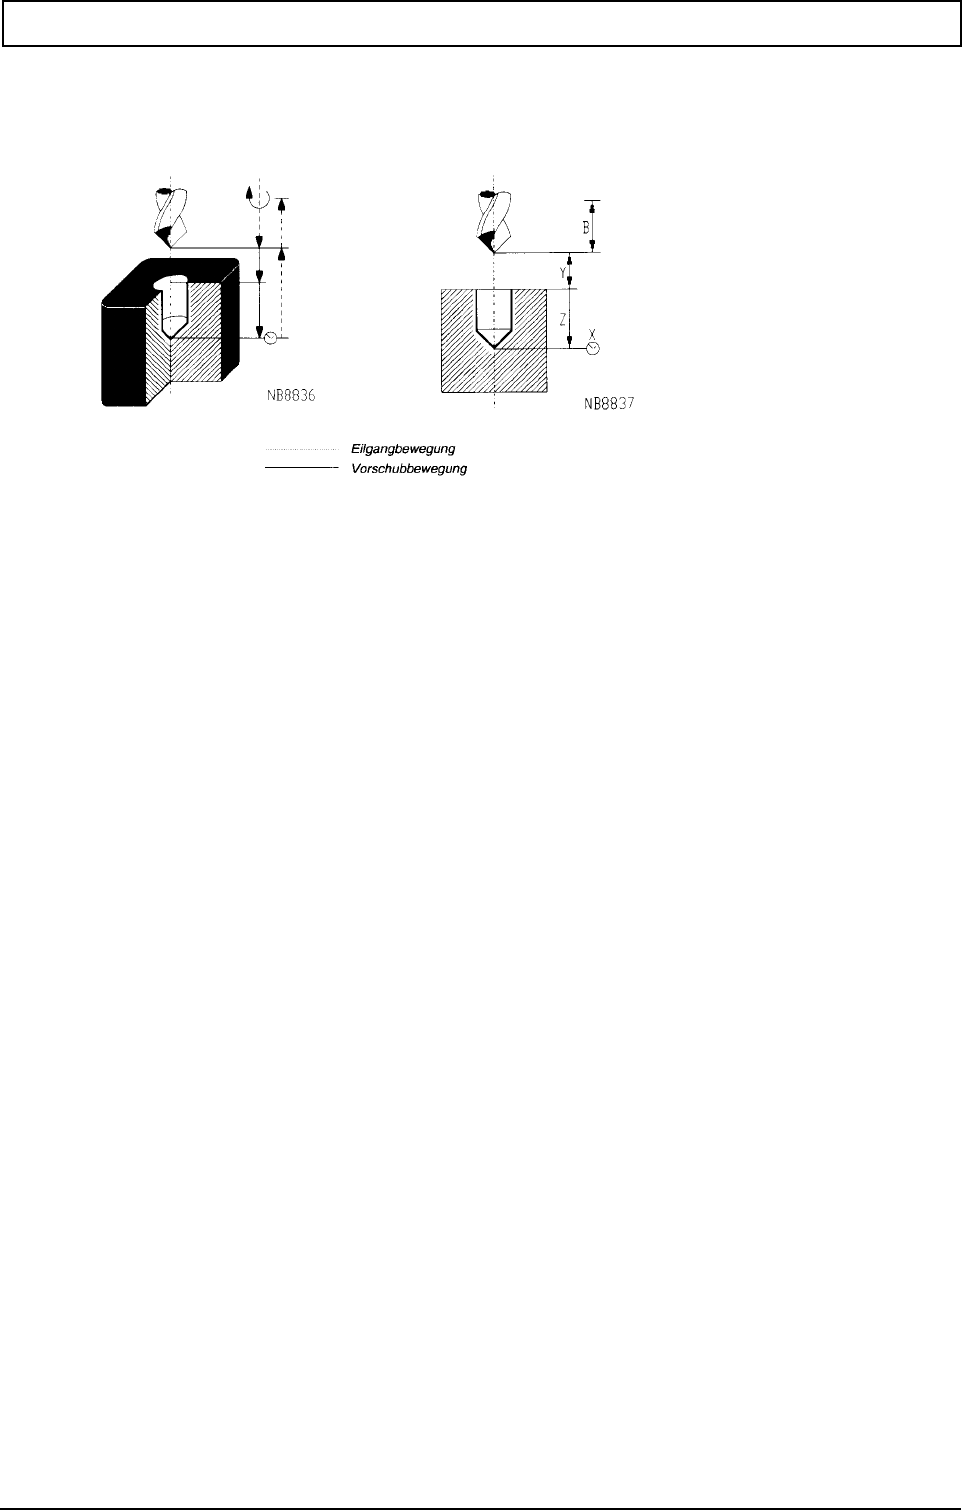
G-FUNCTIONS
340 Heidenhain
23.41 Drilling cycle G81
N.. G81 Z.. {X..} {Y..} {B..}
Parameter
Example
:
N50 G78 P1 X50 Y20 Z0 Define point 1
N55 G78 P2 X50 Y80 Z0 Define point 2
N60 G0 Z10 T1 M6
N65 G81 X1.5 Y1 Z-30 F100 S500 M3 Define cycle
N70 G79 P1 P2 Execute cycle at positions 1 and 2
:
Y Sicherheitsabstand
Bohrtiefe
Verweilzeit (s)
Erhöhter Rückzugsabstand

G-FUNCTIONS
20000710 MillPlus V410 341
Note
A machining cycle (G81-G89) is executed with G77 or G79.
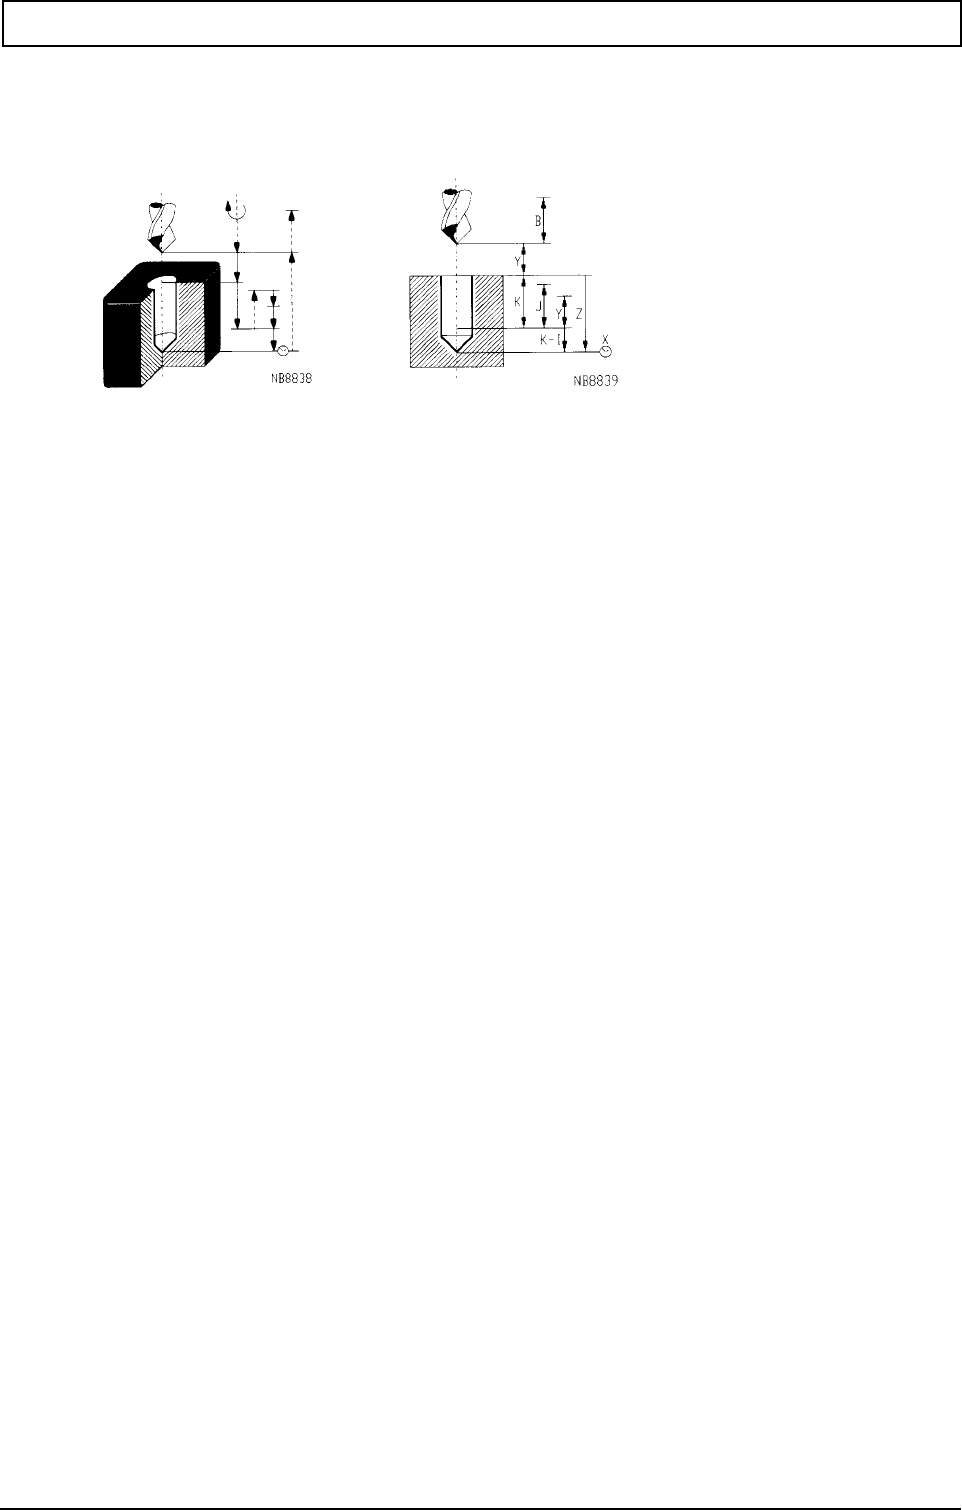
G-FUNCTIONS
342 Heidenhain
23.42 Deep hole drilling cycle G83
N.. G83 Z.. {X..} {Y..} {B..} {I..} {J..} {K..} {K1=..}
Parameter
Examples
1.
:
N5 T1 M6
N10 G83 Y4 Z-150 I2 J6 K20 F200 S500 M3 Define cycle
N20 G79 X50 Y50 Z0 Execute cycle
:
Y Sicherheitsabstand
Gesamte Bohrtiefe
Verweilzeit (s)
Erhöhter Rückzugsabstand
Reduzierwert der Bohrtiefe
Rückzugsabstand nach Bohrschritt
Bohrtiefe für ersten Bohrschritt
Anzahl Zustellungen bis Ausspanen

G-FUNCTIONS
20000710 MillPlus V410 343
2.
:
N.. G83 Y4 Z-150 I2 J6 K20 K1=3 Define cycle
N20 G79 X50 Y50 Z0 Execute cycle
:
Note
A machining cycle (G81-G89) is executed with G77 or G79.
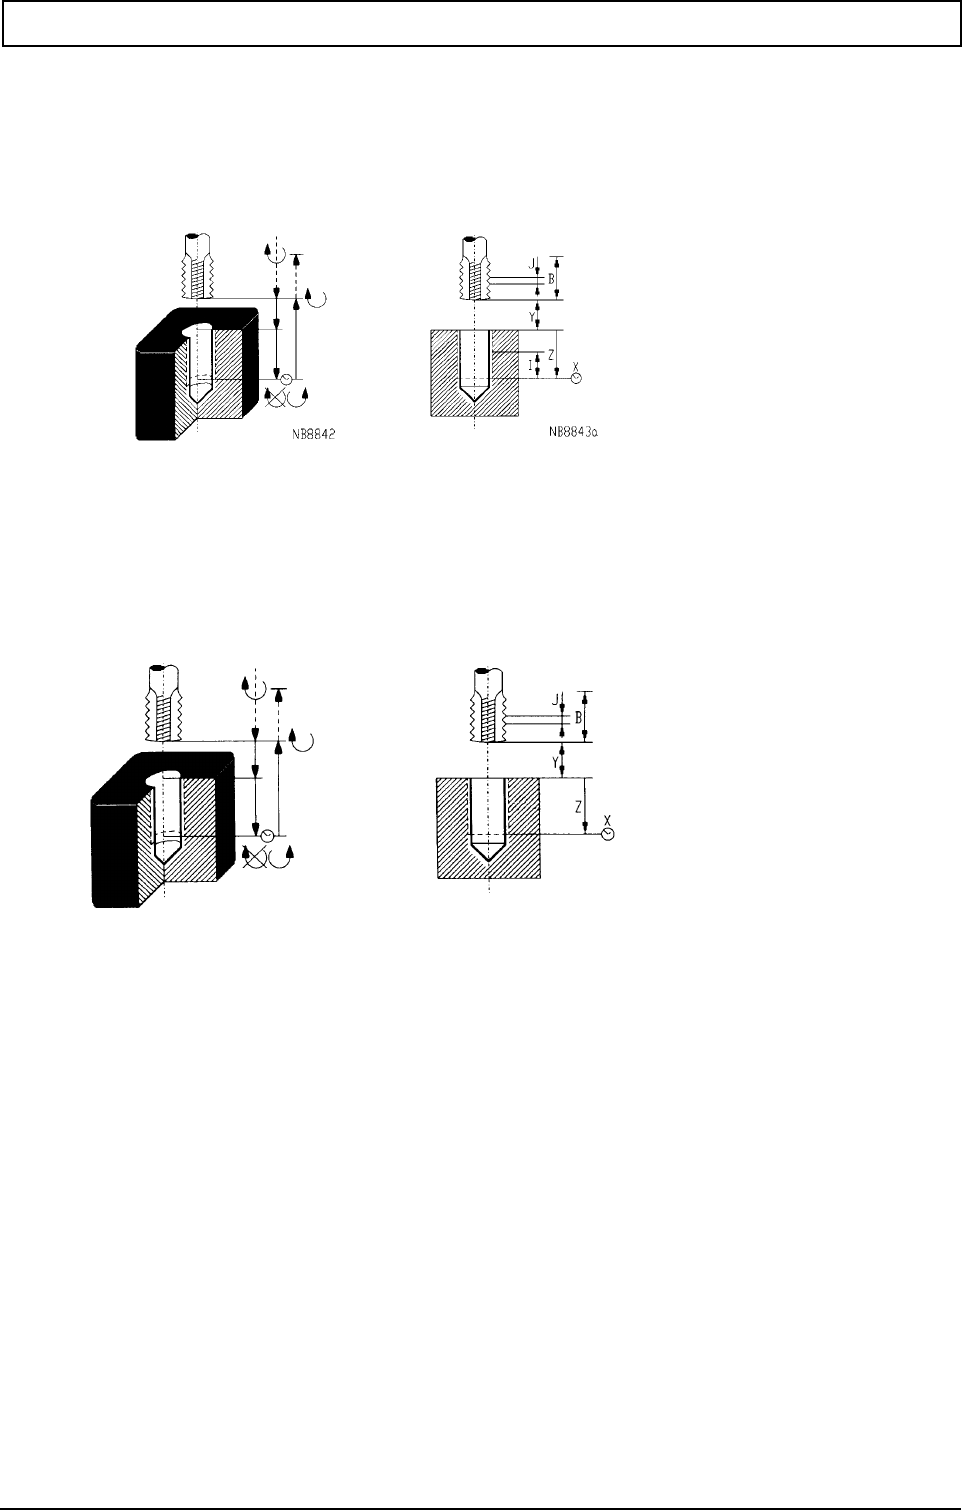
G-FUNCTIONS
344 Heidenhain
23.43 Tapping cycle G84
N... G84 Z... {Y...} {B...} {J...} {X...}
or
N... G84 I1=0 Z... {Y...} {B...} {J...} {X...}
from V400:
Tapping can also be implemented in a closed control loop, as an interpolation between the tool axis
and the spindle. The accelerating power of the spindle is taken up in this interpolation. In this way, the
running of the spindle in the desired position and at the correct speed in rpm is guaranteed
("synchronous tapping").
N... G84 I1=1 Z... {Y...} {B...} {J...} {X...}
Parameter
F(feed) = J(pitch) * S(speed)
Y Sicherheitsabstand
Gewindetiefe
Verweilzeit (s)
Erhöhter Rückzugsabstand
Gewindesteigung

G-FUNCTIONS
20000710 MillPlus V410 345
Example
N14 T3 M6
N15 G84 Y9 Z-22 J2.5 S56 M3 F140 Define cycle
N20 G79 X50 Y50 Z0 Execute cycle
Note
A machining cycle (G81-G89) is executed with G77 or G79.
During call-up of a G84 cycle by means of G79 the soft key Clear control must be set for G94
operation (feed in mm/min) and not for G95 operation (feed in mm/360 degree turn). G94 is always to
be programmed before G84.
From V400:
Tapping can be programmed with or without interpolation.
I1=0 guided (basic position, open position control loop)
I1=1 interpolating (closed position control loop)
An active "Process level G7 traverse" can only be operated with interpolation (I1=1)
As of V410,
if "Swivel working plane (G7)" is active, and the head has not been swivelled (tool axis is same as the
Z axis), guided tapping can also be performed (I1=0).
Machine settings
MC723 and MC727 are no longer required during interpolation. The machine settings of the spindle
should be set correctly during tapping. The spindle acceleration is calculated for every operation with
the help of MC2491, 2521, 2551, 2581 and MC2495, 2525, 2555, 2585. In every case, MC4430
should be active for good control.

G-FUNCTIONS
346 Heidenhain
23.44 Reaming cycle G85
N.. G85 Z.. {X..} {Y..} {B..} {F2=..}
Parameter
Example
:
N25 T4 M6
N30 G85 X2 Y3 Z-30 F50 S100 F2=200 M3 Define cycle
N35 G79 X50 Y50 Z0 Execute cycle
:
Note
A machining cycle (G81-G89) is executed with G77 or G79.
Y Sicherheitsabstand
Reibtiefe
Verweilzeit (s)
Erhöhter Rückzugsabstand
Rückzugsvorschub
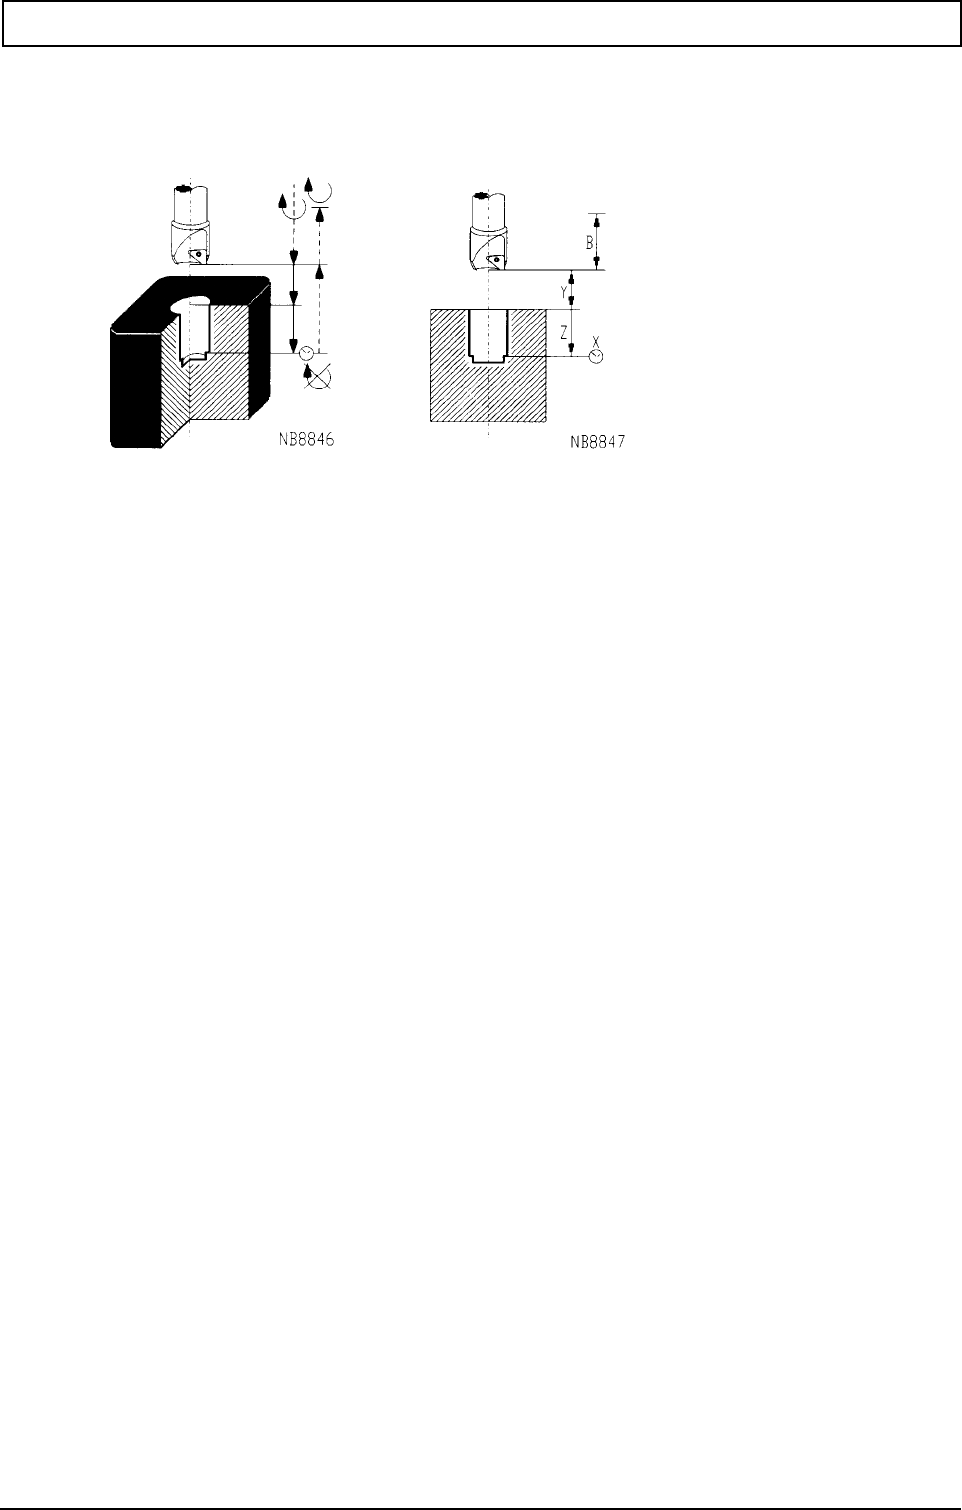
G-FUNCTIONS
20000710 MillPlus V410 347
23.45 Boring cycle G86
N.. G86 Z.. {X..} {Y..} {B..}
Parameter
Example
N45 T5 M6
N50 G86 X1 Y9 Z-27 B10 F20 S500 M3 Define cycle
N55 G79 X50 Y50 Z0 Execute cycle
Note
A machining cycle (G81-G89) is executed with G77 or G79.
Y Sicherheitsabstand
Ausdrehtiefe
Verweilzeit (s)
Erhöhter Rückzugsabstand
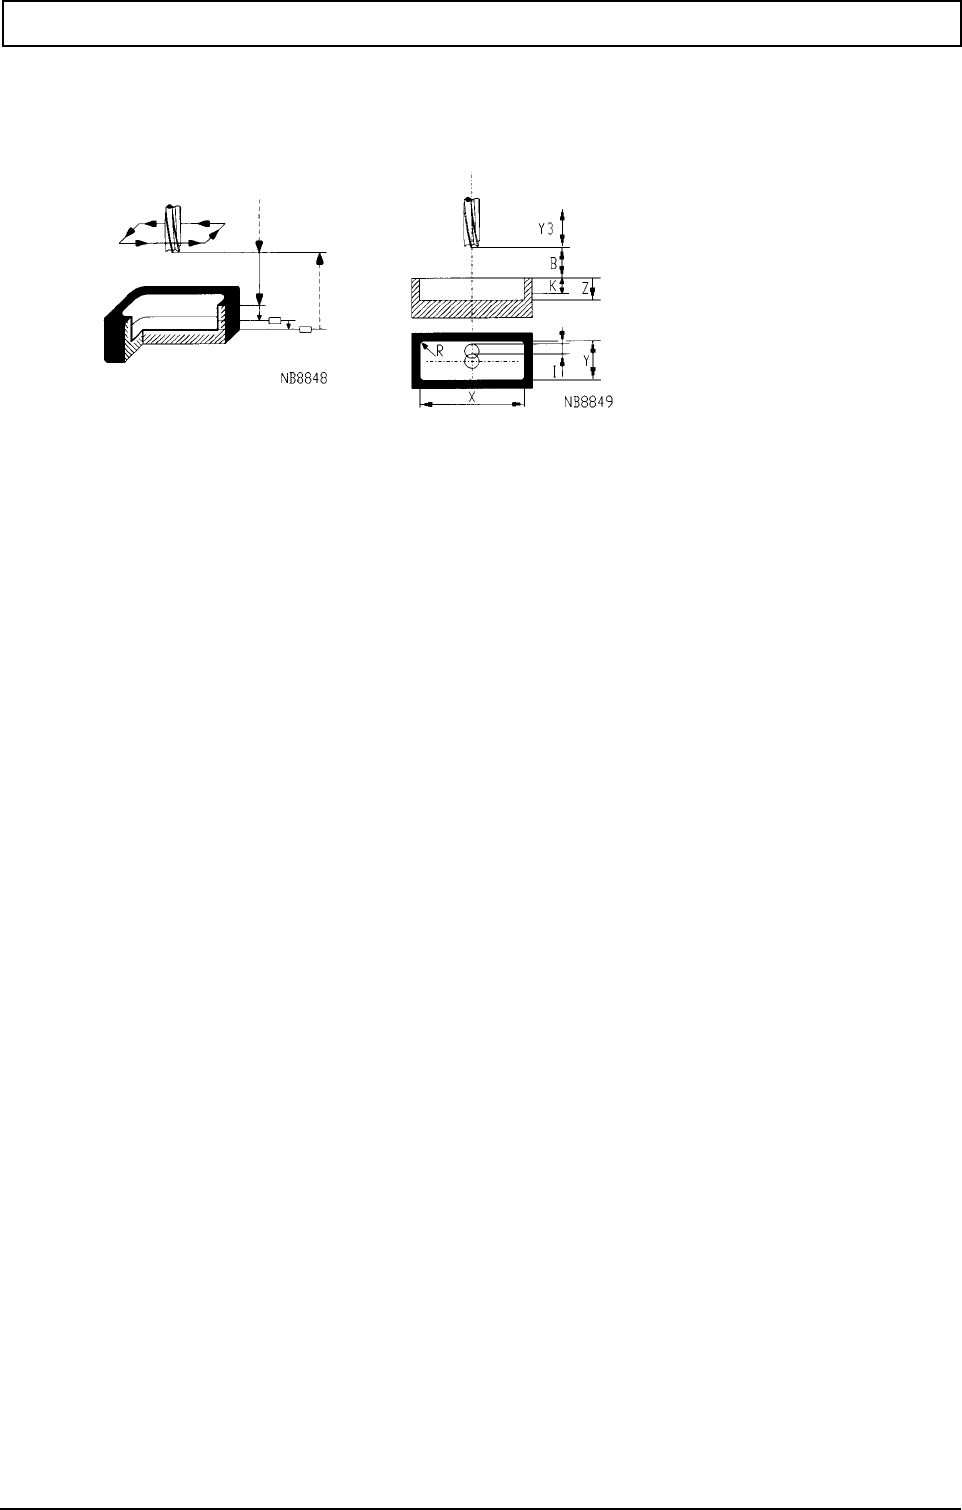
G-FUNCTIONS
348 Heidenhain
23.46 Rectangular pocket milling cycle G87
N.. G87 X.. Y.. Z.. {R..} {B..} {I..} {J..} {K..} {Y3=..} {F2=..}
Parameter
Taschengeometrie
Bearbeitungsparameter
Example
X Abmessung parallel zu X
Abmessung parallel zu Y
Gesamte Taschentiefe
Eckenradius
Eintauchvorschub (Satzweise)
B Sicherheitsabstand
Schnittbreite des Fräsers in %
J1:Gleichlauf / J-1:Gegenlauf
Zustelltiefe
Erhöhter Rückzugsabstand

G-FUNCTIONS
20000710 MillPlus V410 349
N10 T1 M6
N20 G87 X200 Y100 Z-6 J+1 B1 R40 I75 K1.5 F200 S500 M3 Define cycle
N30 G79 X120 Y70 Z0 Execute cycle
Note
A machining cycle (G81-G89) is executed with G77 or G79.

G-FUNCTIONS
350 Heidenhain
23.47 Groove milling cycle G88
N.. G88 X.. Y.. Z.. {B..} {J..} {K..} {Y3=..} {F2=..}
Parameter
Nutengeometrie
Bearbeitungsparameter
Example
N10 S500 T1 M6
N20 G88 X55 Y15 Z-5 B1 K1 F350 Y3=10 F2=200 M3 Define cycle
X Abmessung parallel zu X
Abmessung parallel zu Y
Gesamte Nutentiefe
Eintauchvorschub (Satzweise)
B Sicherheitsabstand
J1:Gleichlauf / J-1:Gegenlauf
Zustelltiefe
Erhöhter Rückzugsabstand

G-FUNCTIONS
20000710 MillPlus V410 351
N30 G79 X22.5 Y22.5 Z0 Execute cycle
N40 G88 X15 Y-55 Z-5 B1 K1 Y3=10 F2=200
N50 G79 X90 Y62.528 Z0
Notes
A machining cycle (G81-G89) is executed with G77 or G79.
The signs of X and Y determine the direction of the slot from the start point S.

G-FUNCTIONS
352 Heidenhain
23.48 Circular pocket milling cycle G89
N.. G89 Z.. R.. {B..} {I..} {J..} {K..} {Y3=..} {F2=..}
Parameter
Taschengeometrie
Bearbeitungsparameter
Example
Z Gesamte Taschentiefe
Radius der Kreistasche
Eintauchvorschub (Satzweise)
B Sicherheitsabstand
Schnittbreite des Fräsers in %
J1:Gleichlauf / J-1:Gegenlauf
Zustelltiefe
Erhöhter Rückzugsabstand

G-FUNCTIONS
20000710 MillPlus V410 353
N10 T1 M6
N20 G89 Z-15 B1 R25 I75 K6 F200 S500 M3 Define cycle
N30 G79 X50 Y50 Z0 Execute cycle
N40 G0 Z200
Note
A machining cycle (G81-G89) is executed with G77 or G79.

G-FUNCTIONS
354 Heidenhain
23.49 Absolute/incremental programming G90/G91
G90: Absolute coordinates, measured from the program zero point W.
G91: Incremental coordinates, relative to the last position.
N.. G90/G91
Parameters
Achsenkoordinaten bei
G90
Achsenkoordinaten bei
G91
Example
N88550
N1 G17
N2 G54
N3 G98 X0 Y0 Z60 I100 J100 K-80 Graphic window definition
N4 S1300 T1 M6
N5 G81 Y2 Z-10 F200 M3 Define cycle
N6 G79 X50 Y50 Z0 Execute cycle
N7 G91 Change to incremental size programming
N8 G79 Y20 Execute cycle
N9 G79 X20
N10 G79 Y-20
X,Y,Z Endpunktkoordinate
Endwinkel
X,Y,Z Endpunktkoordinate
Endwinkel

G-FUNCTIONS
20000710 MillPlus V410 355
N11 G90 Change to absolute size programming
Note
An absolute position must be programmed before the entry of the incremental dimension G91.

G-FUNCTIONS
356 Heidenhain
23.50 Wordwise absolute/incremental programming (from V320 onwards)
Wordwise absolute/incremental programming independently of G90/G91.
absolute programming:
N.. G.. [axis name]90=...
incremental programming:
N.. G.. [axis name]91=...
Parameter
Achsname: X, Y, Z, U, V, W, I, J, K, A, B, C
Hinweise und Verwendung
Kartesische Koordinaten:
Die wortweise Absolut-
/Inkremental-Programmierung ist
unabhängig vom modal gültigen Maßsystem G90/G91.
Polarkoordinaten:
Die Programmierung in Polarkoordinaten wird nicht beeinflußt.
Example
N88550
N1 G17
N2 G54
N3 G195 X0 Y0 Z60 I100 J100 K-80 Define graphic window
N4 S1300 T1 M6 (drill bit R5) Change tool 1
N5 G81 Y2 Z-10 F200 M3 Define drilling cycle
N6 G79 X50 Y50 Z0 Cycle call for 1st drilling
N7 G79 Y91=20 Cycle call for 2nd drilling, incremental movement
N8 G79 X91=20 Cycle call for 3rd drilling, incremental movement
N9 G79 Y91=-20 Cycle call for 4th drilling, incremental movement
N10 M30
X90=,Y90=,Z90= Endpunkt absolut
9
0=,C90= Endwinkel absolut
9
1=,Z91= Endpunkt inkremental
9
1=,C91= Endwinkel inkremental
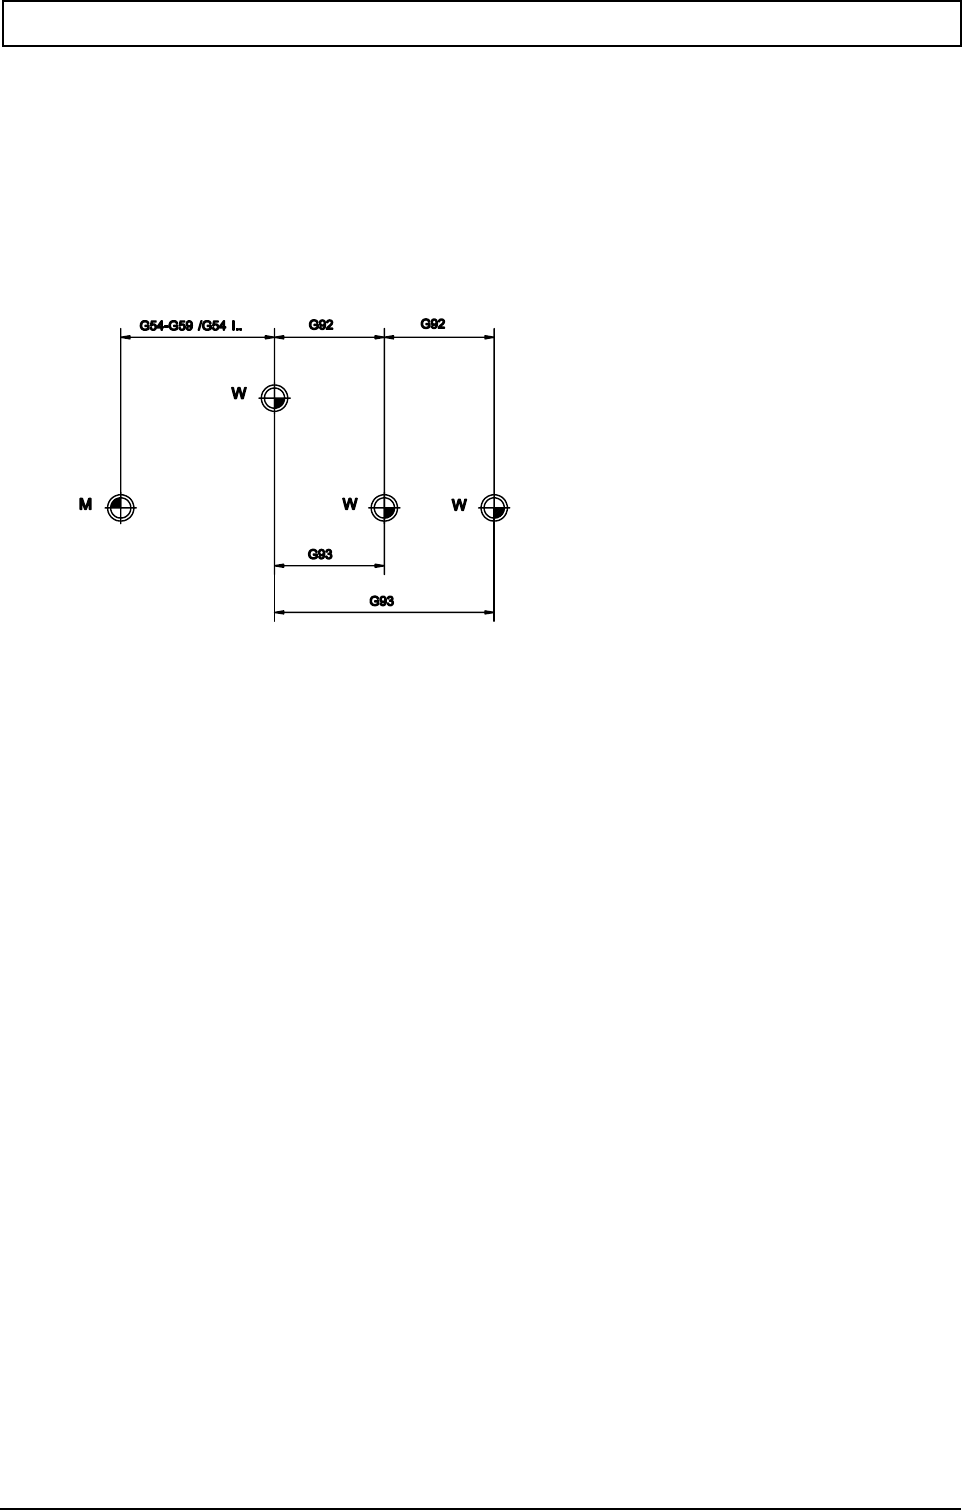
G-FUNCTIONS
20000710 MillPlus V410 357
23.51 Zero point shift incremental / rotation or absolute rotation G92/G93
Zero point offset:
N.. G92 [incremental coordinate(s), in relation to the last program zero point]
N.. G93 [absolute coordinates, in relation to the zero point that was defined by G54-G59]
Rotation of the coordinates system:
N... G92/G93 B4=..
Zero point offset:
Rotation of the coordinate system:
FSP: Driving up from the traverse position by the shortest route
FSP now always outputs an angle between -180 and +180 degrees. This is changed so that an angle
is output between the end switches. This angle is then the shortest route. The disadvantage is that the
position of the circular axis can climb to very high values which should be reset to a moment.
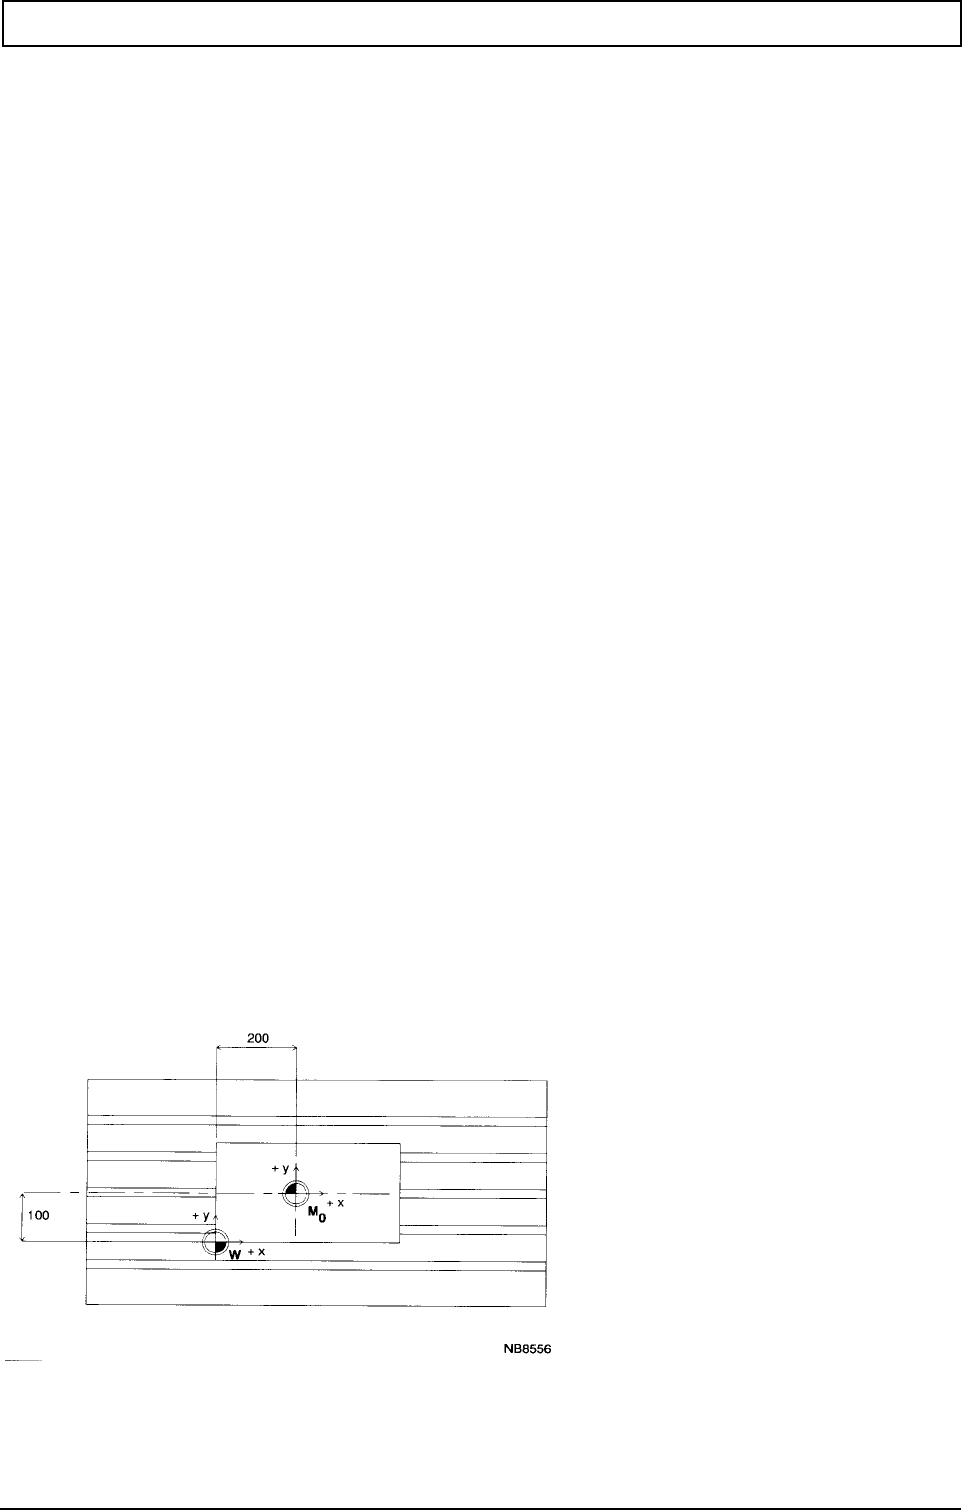
G-FUNCTIONS
358 Heidenhain
The disadvantage of very high positions is resolved with a separate function with which the (internal)
position is reset to a value between 0 and 360 degrees.
G93 {X},{Y},{Z},{A},{B},{C},{B2=},{L2=},{P},{P1=},{B4=},{A3=1},{B3=1},{C3=1}
in which:
A3=1, B3=1, C3=1
The corresponding axial position is reset to a value between 0 and 360 degrees.
Parameter bei G92
1. Nullpunktverschiebung
2. Achsendrehung
Parameter bei G93
1. Nullpunktverschiebung
2. Achsendrehung
3. Rücksetz Funktion (ab V400)
A3=,B3=,C3= Rücksetz Parameter
Mit G93 A3=1 wird die entsprechende Rundachseposition auf einen Wert zwischen 0 und 360 Grad
zurück gesetzt.
Beispiel: Eine A-Achse mit der Position 370 Grad, wird nach der Programmierung von G93 A3=1 auf
10 Grad geändert.
Examples
1. The centre point of the work piece coincides with the machine centre point (M). The program zero
point (W) is placed in the left corner of the work piece.
X,Y,Z Nullpunktkoordinate
Nullpunktwinkel
Winkel
Streckenlänge
B4= Inkrementaler Rotationswinkel
X,Y,Z Nullpunktkoordinate
Nullpunktwinkel
Polarwinkel
Polarlänge
Punktedefinitionsnummer
B4= Absoluter Rotationswinkel

G-FUNCTIONS
20000710 MillPlus V410 359
N30 G93 X-200 Y-100
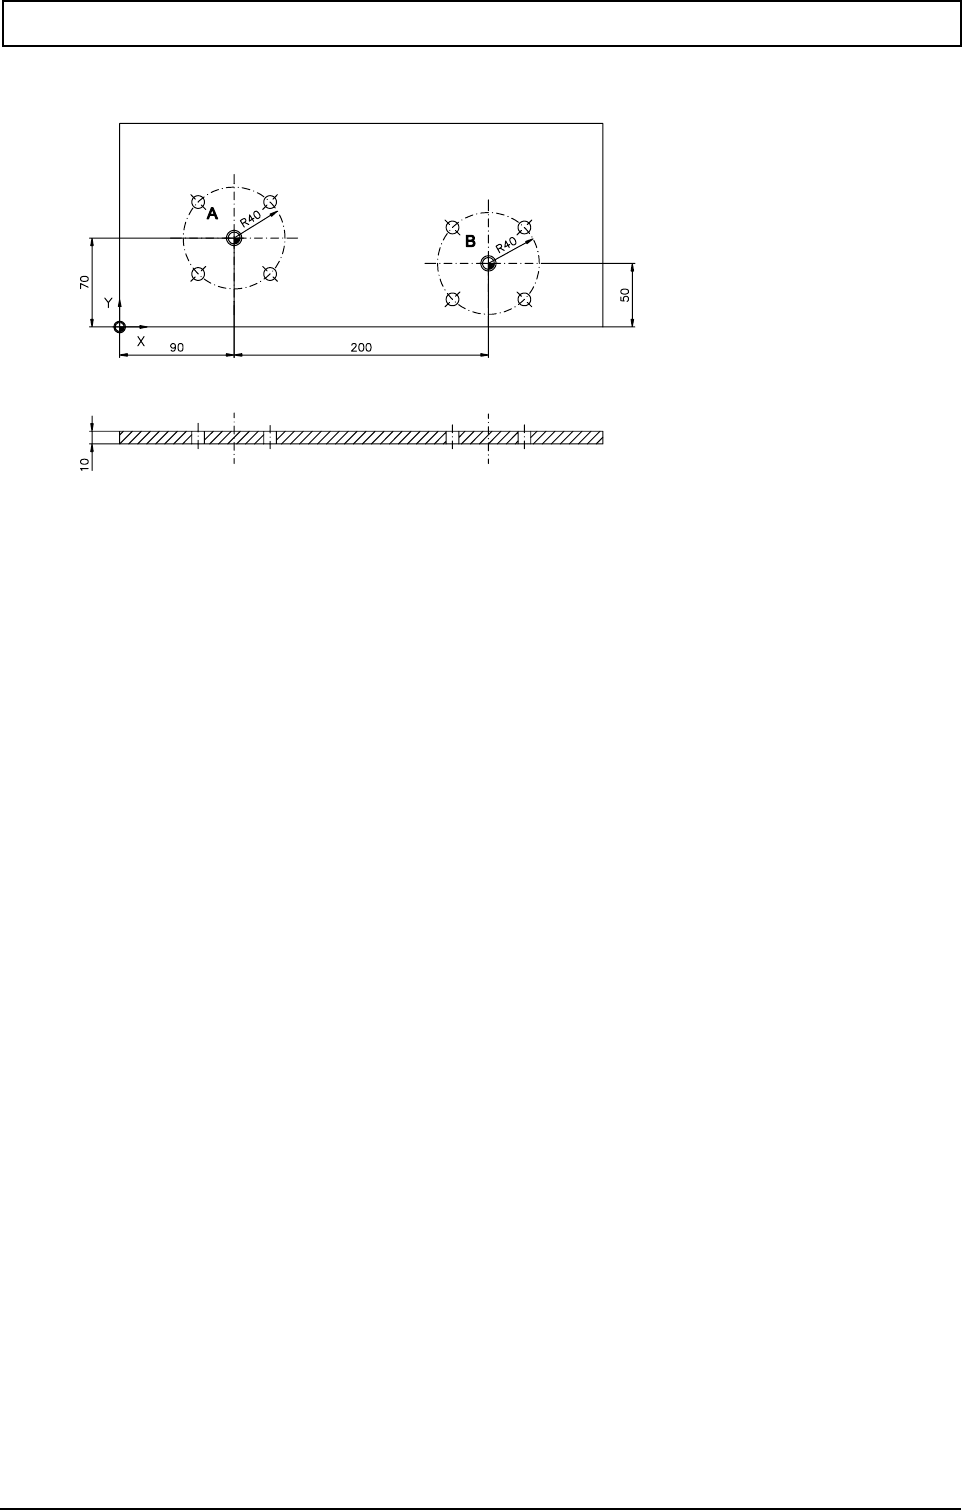
G-FUNCTIONS
360 Heidenhain
2. The four holes around points A and B are to be drilled. In the program, the program zero point (W)
lies in A and B.
Program with G92
N79560
N1 G17
N2 G54
N3 G98 X-10 Y-10 Z10 I420 J180 K-30
N4 G99 X0 Y0 Z0 I420 J160 K-10
N5 F200 S3000 T1 M6
N6 G92 X90 Y70 Incremental zero offset
N7 G81 Y1 Z-12 M3 Define cycle
N8 G77 X0 Y0 Z0 I45 J4 R40 Call cycle
N9 G92 X200 Y-20 Incremental zero offset
N10 G14 N1=8 Repeat function
N11 G93 X0 Y0 Cancel incremental zero offset
N12 G0 Z100 M30
Program with G93
The program appears as follows in relation to the clamping zero point:
N79561
N1 G17
N2 G54
N3 G98 X-10 Y-10 Z10 I420 J180 K-30
N4 G99 X0 Y0 Z0 I420 J160 K-10
N5 F200 S3000 T1 M6
N6 G93 X90 Y70 Absolute zero offset
N7 G81 Y1 Z-12 M3
N8 G77 X0 Y0 Z0 I45 J4 R40
N9 G93 X290 Y50 Absolute zero offset
N10 G14 N1=8
N11 G93 X0 Y0 Cancel absolute zero offset
N12 G0 Z100 M30
Notes
If no G54-G59 has previously been activated, G92/G93 is effective from the machine zero point.
If rotation of the coordinate system (G92/G93 B4=..) is active, a zero point offset programmed with
G92/G93 is no longer allowed.

G-FUNCTIONS
20000710 MillPlus V410 361
23.52 Feed in mm/min (inch/min) / mm/rev (inch/rev) G94/G95
Information to the controller about how the programmed feed is to be evaluated.
N.. G94/G95 F..
G94 : Feed in mm/min or inches/min.
G95 : Feed in mm/rev or inches/rev.
N... G94 F5=.
G94 : Feed in mm/min or inch/min
G95 : Feed in mm/rev or inch/rev
G94 F5= : Feed of rotary axes (V410 and higher)
F5=0 degrees/min (default)
F5=1 mm/min or inches/min
Parameters
Notes:
MACHINES WITH KINEMATIC MODEL
The G94 F5= function is only present if a kinematic model has been defined for the machine (MC312
must be active).
CALCULATION OF RADIUS OF ROTARY AXIS G94 F5=1
In machines with a kinematic model, the radius of the rotary axis between the centre point of the
rotary axis and the workpiece can be calculated. This means that A40=, B40= or C40= no longer need
to be programmed.
CANCEL G94 F5=1
G94 F5=1 is cancelled by: G94 F5=0, G95, programming with A40=, B40= or C40= in G0 or G1, M30,
<Program abort> or <Reset CNC>.
Examples
:
N.. G94 Feed in mm/min
N.. G1 X.. Y.. F200 Move to X.. Y.. at a feed of 200 mm/min
:
:
N.. G95 Feed in mm/rev.
N.. G1 X.. Y.. F.5 Move to X.. Y.. at a feed of 0.5 mm/rev.
:
F Vorschub
Spindeldrehzahl (U/min)
Werkzeugnummer
Maschinenfunktion

G-FUNCTIONS
362 Heidenhain
23.53 Graphic window definition G98
Defines the position relative to the program zero point W and the dimensions of a 3D graphics window
in which the machining of the work piece is to be simulated graphically.
N.. G98 X.. Y.. Z.. I.. J.. K.. {B..} {B1=..} {B2=..}
Parameters
Example
N9000
N1 G98 X-20 Y-20 Z-75 I140 J90 K95 Starting point and dimensions of the 3D graphic window
N2 G99 X0 Y0 Z0 I100 J50 K-55 Define blank as 3D area
:
X,Y,Z Anfangskoordinate
Abmessung parallel zu X
Abmessung parallel zu Y
Abmessung parallel zu Z
Rotation Rundachse hor. (3D)
Rotation Rundachse vert. (3D)
Rotation dritte Rundachse (3D)

G-FUNCTIONS
20000710 MillPlus V410 363
23.54 Graphic: material definition G99
Defines a three-dimensional blank and its position in relation to the program zero point W. The
dimensions are needed for the graphical simulation.
N... G99 X... Y... Z... I... J... K...
Parameters
Example
N9000
N1 G98 X-20 Y-20 Z-75 I140 J90 K95 Starting point and dimensions of the 3D graphic window
N2 G99 X0 Y0 Z0 I100 J50 K-55 Define blank as 3D area
:
X,Y,Z Anfangskoordinate
Abmessung parallel zu X
Abmessung parallel zu Y
Abmessung parallel zu Z

G-FUNCTIONS
364 Heidenhain
23.55 3D tool correction G141
Permits the correction of the tool dimensions for a 3D tool path that is programmed in these points by
its end point coordinates and standardised vectors perpendicular to the surface.
Activate 3D tool correction:
N.. G141 {R..} {R1=..}
Program straight line movements:
N.. G0/G1 [end point coordinates X.. Y.. Z..] [I.. J.. K..]
Deactivate 3D tool correction:
N.. G40
or M30, Cancel program softkey, Clear control softkey
Parameters
Im Satz G141:
Die Werte von R.. und R1=.. sollten den
nominalen Werkzeugmaßen entsprechen, wie sie vom Programmiersystem zur Berechnung der
Werkzeugbahn herangezogen werden. Wenn diese Werte nicht programmiert sind, werden sie
automatisch Null.
Im Satz G0/G1:
X,Y,Z, Endpunktkoordinaten
I,J,K Achsenkomponenten des normalisierten Vektors (X,Y,Z)
Es können nur absolute oder inkrementale kartesische Maßangaben verwendet werden.
Example
:
N19
8
221m
R Nominaler Werkzeugradius
Nominaler Werkzeugeckenradius

G-FUNCTIONS
20000710 MillPlus V410 365
N20 G141 R.. R1=.. F..
N21 G1 X.. Y.. Z.. I.. J.. K.. (first scale factor)
:
N300 G141 R.. R1=.. F..
N301 G1 X.. Y.. Z.. I.. J.. K.. (second scale factorr)
:
N2400 G141 R.. R1=.. F..
N2401 G1 X.. Y.. Z.. I.. J.. K.. (third scale factor)
Notes
If G141 is active, the following functions, for example, can no longer be programmed:
G2/G3, G64, G73, G182.
The following are not permitted:
Point definition, E parameter, polar coordinates, programming of rotation axes.
Rotation of the coordinates system (G93 B4=..) is not permitted.
G73 can only be programmed before G141 is activated.
A standardised vector must be calculated for each end point.
The rounding radius in G141 is programmed witht R1=. The rounding radius is stored in the tool
memory by the C wordt.
Undercuts or collisions at the 3D surface cannot be recognised by the controller.

G-FUNCTIONS
366 Heidenhain
23.56 Linear measuring movement G145
Executes a freely programmable linear measurement movement to determine axis positions.
N... G145 [Meesuring point coordinates] [(axis address) 7=..] {S7=..} E.. {F2=..} {K..} {L..} {I3=..}
Parameter
Zu messender Punkt
Achsenadresse
Messung
Wortweise Absolut-/Inkremental-
Programmierung
Example
A slot is to be milled and its width measured. If the slot width is too small, the milling radius must be
corrected and the slot re-worked.
X,Y,Z Endpunktkoordinate
Endwinkel
Winkel
Polarwinkel
Streckenlänge
Polarlänge
Punktedefinitionsnummer
X7= E-Parameter für Meßwert in X
E-Parameter für Meßwert in Y
E-Parameter für Meßwert in Z
E-Parameter für Meßwert in A
E-Parameter für Meßwert in B
E-Parameter für Meßwert in C
E-Parameter für Meßwert in S
K K0:Werkzeugkorrektur ein / K1:aus
0:Messen bei Berühr.,1:beim Lösen
Status-Überwachung (0=EIN, 1=AUS)
E-Parameter für Meßstatus
Meßvorschub
X90=,Y90=,Z90= Endpunkt absolut
9
0=,C90= Endwinkel absolut
9
1=,Z91= Endpunkt inkremental
9
1=,C91= Endwinkel inkremental

G-FUNCTIONS
20000710 MillPlus V410 367

G-FUNCTIONS
368 Heidenhain
N14504 (Milling and measuring a slot)
N1 G17
N2 G54
N3 E15=20.02 (Maximal slot width)
N4 E16=19.98 (Minimum slot width)
N5 E3=(E15+16):2
N6 S1000 T1 M6 (Milling tool d=18 mm)
N7 G0 X-25 Y50 Z-10 B0 F400 M3
N8 G1 X140
N9 G43
N10 G1 Y60
N11 G41
N12 X-25
N13 Y40
N14 X140
N15 G40
N16 Y50
N17 G0 Z50 M5
N18 G149 T0 E30
N19 T30 M6 (Measuring probe)
N20 M19 (D address optional)
N21 M27
N22 G0 X60 Y50 Z-8 B0
N23 M29
N24 G145 Y65 E10 Y7=1 F2=500
N25 GO Y50
N26 G29 E11=E10=0 E11 N=30
N27 M29
N28 G145 Y35 E10 Y7=2 F2=500
N29 G0 Y50
N30 M28
N31 G29 E11=E10=0 E11 N=41
N32 E5=E1-E2
N33 E6=(E5-E3):2
N34 G29 E20=E5>E15 E20 N=44
N35 G29 E20=E5>E16 E20 N=46
N36 G149 T=E30 R1=4
N37 G150 T=E30 R1=E4+E6
N38 S1000 T1 M6 (Milling tool d=18 mm)
N39 G0 X140 Y50 Z-10 B0 F400 M3
N40 G29 E20 E20=1 N=9
N41 M0
N42 (Measuring probe has not made contact, no measurement carried out)
N43 G29 E20 E20=1 N=46
N44 M0
N45 (Slot width too large)
N46 M30

G-FUNCTIONS
20000710 MillPlus V410 369
Notes
Tool correction:
K0: Tool correction on.
Measuring positions are corrected to take account of tool length and tool radius. Measuring
positions in rotational axes do not take tool data into account.
K1: Tool correction off. Measuring positions will not be corrected.
The following assumptions are made if the measuring positions are corrected to take account of the
size of the measuring probe:
- the measuring probe lies parallel to the tool axis
- the measuring probe is completely spherical
- the measuring probe moves vertically in relation to the surface being examined.
E parameter:
The number of the E parameter in which the measured axis position is stored (e.g. X7=2 indicates that
the measured value in the X axis will be stored in parameter E2. X7=E1 (E1=5) signifies that the
measured value will be stored in E5.
Measuring probe status:
E...=0: the programmed end position has been reached, but no measuring point has been detected.
The associated E parameters containing the measured values remain unchanged.
E...=1: a measuring point was detected during the measuring operation. The measuring position has
been saved in the E parameters.
E...=2: block G145 was executed during a block search operation, a test run or while in Demo mode.
Status monitoring (I3=)
Monitoring of the measuring key status within G145 can be disabled for certain equipments (laser).
The laser has no signal. The standard value is zero.
The functions G145 to G150 must not be used when G182 is being used.
In all the specified operating modes, a value of 2 is allocated to the E parameter for the status of the
measuring probe. The use of parameters without measuring data can be prevented by testing the
value of this parameter in the measuring macros.

G-FUNCTIONS
370 Heidenhain
23.57 Reading measuring probe status
N... G148 {I1=...} E...
Parameters
Example
:
N110 G148 E27
N115 G29 E91=E27=2 E91 N=300
:
N300 M0 (Present mode: block search, test run, demo)
:
N400 M30
Note
Measuring probe status:
I1=1 or is not programmed (standard value)
E...=0: The programmed end position has been reached, but nor mwasuring point has been
detected. The assigned E parameters containing measured values have not been modified.
E...=1: A measuring point has been detected. The measuring position has been stored in the E
parameters.
E...=2: The G145 block was executed during a block search, test run or demo.
E...=3: Measuring probe error; no measurement possible.
The priority for the measuring key status codes is as follows:
1 : Code 2 (active mode)
2 : Code 3 (measuring key error)
3 : Code 0 or 1 (measuring key contact)
I1=2
E...= 0: no measuring point has been determined during the measurement
E...= 1: a measuring point has been determined during the measurement
I1=3
E...= 0: information from the IPLC (information program logic control): key/laser not enabled
E...= 1: information from the IPLC (information program logic control): key/laser enabled
See the probe system documentation.
During operation with G182 the use of the functions G148 to G150 is not permitted.
E E-Parameter für Meßtasterstatus
Status-Gruppe (1-3)

G-FUNCTIONS
20000710 MillPlus V410 371
23.58 Reading tool or offset values G149
Interrogate current tool :
N.. G149 T0 E..
Interrogate tool dimensions:
N.. G149 T.. {T2=..} {L1=..} {R1=..} {M1=}
Interrogate tool status:
N.. G149 T.. E..
Interrogate current zero point offsets:
N.. G149 N1=0/1 E..
Interrogate pallet offset values:
N.. G149 N1=0/1 E..
Interrogate saved zero point offsets:
With standard zero points or MC84=0:
N.. G149 N1=51..59 [(axis address)7=..] {(axis address)7=..}
With extended zero points and MC84>0:
N.. G149 N1=54.[NR] [(axis address)7=..] {(axis address)7=..} {B47=...}
N.. G149 N1=51..59 [(axis address)7=..] {(axis address)7=..}
Interrogate programmable zero point offsets:
N... G149 N1=92 {93} [(axis address)7=...] {(axis address)7=...}
Interrogate current position values of the axes.
N... G149 [(Axis address)7=...]{(Axis address)7=...}
Parameters
Werkzeugdaten
Nullpunktverschiebungen
Notes
The tool status can be loaded from the tool memory into the stated E-parameter.
The tool status can have the following values:
E... = 1 Tool has been released and measured
E... = 0 Tool has been released, but has not yet been measured
E... = -1 Tool is blocked
T Werkzeugnummer
Werkzeugkorrekturindex
E-Parameter
E-Parameter für WZ-Länge
E-Parameter für WZ-Radius
E-param. Wkzg.standzeit
N1= Nullpunktverschiebung
E-Par. für NPV/Position in X
E-Par. für NPV/Position in Y
E-Par. für NPV/Position in Z
E-Par. für NPV/Position in A
E-Par. für NPV/Position in B
E-Par. für NPV/Position in C
E-Parameter für verdr. in B4=

G-FUNCTIONS
372 Heidenhain
E... = -2 Tool life has been reached
E... = -4 Tool fracture error
E... = -8 Tool cutting force reached
E... = -16 Tool life programmed shorter than T3
A combination of error messages is possible as well:
E... = -13 means: error message -8 and -4 and -2 and 1.
Examples
1: Interrogate number of current tool.
N100 G149 T0 E1
E1 contains the number of the current tool
2: Interrogate dimensions of the current tool.
N100 G149 T12 L1=5 R1=6
E5 contains the tool length
E6 contains the tool radius
3: Interrogate the active zero point offset function
N100 G149 N1=0 E2
N110 G149 N1=1 E3
E2 contains the current zero point offset (51 or 52)
E3 contains the current saved zero point offset (53...59) or G54.[nr]
4: Interrogate the offset G54
N100 G149 N1=54 X7=1 Z7=2
or
N100 G149 N1=54.[nr] X7=1 Z7=2
E1 contains the offset in X
E2 contains the offset in Z
5: Calling G54 offset with rotary angle (MC84>0)
N100 G149 N1=54.[nr] X7=1 B47=2
E1 contains offset in X
E2 contains rotary angle of coordinate system
6: Call up the remaining tool life M1=:
N100 G149 T1 M1=3 (Store remaining tool life of T1 in parameter E3)
E3 enthält die aktive gespeicherte Nullpunktverschiebung (53...59) oder G54.[nr]
Notes
The tool correction index 0, 1 or 2 can be specified. The default value is T2=0.
From V400:
T2=0: Tool radius = radius (R) + dimension (R4=).
Tool length = length (L) + dimension (L4=).
It is better to use G321.

G-FUNCTIONS
20000710 MillPlus V410 373
23.59 Change tool or offset values G150
Modify tool data in tool memory:
N.. G150 T.. {T2=..} L1=.. R1=.. M1=..
…………………………
…………………………
Modify tool status in tool memory:
N.. G150 T.. E..
Modify zero point offset data in tool memory:
With standard zero points or MC84=0:
N.. G150 N1=51..59 [(axis address)7=..] {(axis address)7=..}
With extended zero points and MC84>0:
N.. G150 N1=54.[NR] [(axis address)7=..] {(axis address)7=..} {B47=...}
Parameters
Werkzeugdaten
Nullpunktverschiebungen
Notes
The tool status can be loaded from the tool memory into the stated E-parameter.
The tool status can have the following values:
E... = 1 Tool has been released and measured
E... = 0 Tool has been released, but has not yet been measured
E... = -1 Tool is blocked
E... = -2 Tool life has been reached
E... = -4 Tool fracture error
E... = -8 Tool cutting force reached
E... = -16 Tool life programmed shorter than T3
A combination of error messages is possible as well:
E... = -13 means: error message -8 and -4 and -2 and 1.
T Werkzeugnummer
Werkzeugkorrekturindex
E-Parameter
WZ-Länge Wert in T
WZ-Radius Wert in T
N1= Nullpunktverschiebung
NP-Verschiebung in X
NP-Verschiebung in Y
NP-Verschiebung in Z
NP-Verschiebung in A
NP-Verschiebung in B
NP-Verschiebung in C
Rotationswinkel in B4=

G-FUNCTIONS
374 Heidenhain
Examples
1. Modify tool data in tool memory:
N50 G150 T1 L1=E2 R1=4
2. Modify zero point offset data in tool memory:
N70 G150 N1=57 X7=E1 Z7=E6
or
N70 G150 N1=54.[nr] X7=E1 Z7=E6
3. Changing a zero offset with rotary angle of the coordinate system:
N70 G150 N1=54.[nr] X7=E1 B47=E2
4. Change the remaining tool life M1=:
N110 G150 T1 M1=10 (Change the new remaining tool life of T1 to 10 minutes)

G-FUNCTIONS
20000710 MillPlus V410 375
23.60 Cancel cylinder interpolation or activate basic coordinate system G180
Cancel the cylindrical coordinate system or define the main plane and tool axis (basic coordinate
system).
N... G180 [main axis 1] [main axis 2] [tool axis] Basic coordinate system
Parameters
General principles
The normal expression is G180 X1 Y1 Z1
Only the following configurations are possible:
Main axis 1 X
Main axis 2 Y
Tool axis Z or W
The correct procedure depends on three different items of information:
1) G17/G18/G19 determines the tool axis (G17 Z).
2) G180 determines the axes to be changed (G17 W in Z)
3) The machine constants for the tool axis definition should be OK. (Tool axis W
belongs to Z).
Example
N12340
N1 G17 T1 M6
N2 G54
N3 F1000 S1000 M3
N4 G180 X1 Y1 Z1 Activate main plane XY and tool axis Z.
N5 G81 Y2 B10 Z-22 Define cycle.
N6 G79 X0 Y0 Z0 Drill with the feed movement in the Z axis.
Notes and usage
Functions G41...G44, G64, axis rotation (G92/G93 B4=) and G141 should be cancelled before G180
is activated.
Tool length compensation is active in the defined tool axis. Radius compensation is active in the main
plane.
The machine constants must be used correctly. If the tool axis is the fourth axis, MC117 should be 3
(MC117 = 3) (same as Z axis). MC3401 = 0 (tool axis is a linear axis).
Only Cartesian coordinates can be used.
If G180 is programmed and radius compensation is still active, it will be cancelled by G180.
We recommend to cancel radius compensation, using G40, and to change to the basic coordinate
system.
X,Y,Z Zylinderebene:2 / Werkzeugachse:3
Zylinderebene:1
Radius Zylinder

G-FUNCTIONS
376 Heidenhain
23.61 Cancel / activate cylinder interpolation G182
Selection of the cylindrical coordinate system. This system simplifies the programming of contours
and positions on the curved cylinder surface.
Activate the cylindrical coordinate system:
N.. G182 [cylinder axis] [rotational axis] {tool axis}
Rapid feed when G182 in effect:
N.. G0 [cylinder axis] [rotational axis] (tool axis}
Linear feed movement:
N.. G1 [cylinder axis] [rotational axis] (tool axis} {F..}
Circular feed movement:
N.. G2/G3 [cylinder axis] [rotational axis] R..
Return to basic coordinate system:
N.. G180
or
M30, Cancel program softkey, Clear control softkey.
Parameters
Bei G182:
Bei Bewegungen:
X,Y,Z,U,V,W Linearachsenkoordinate
A,B,C Rotationsachsenkoordinate
F Vorschub auf der Zylinderfläche
X,Y,Z Zylinderebene:2 / Werkzeugachse:3
Zylinderebene:1
Radius Zylinder

G-FUNCTIONS
20000710 MillPlus V410 377
G182 A1 X2 Z3 R.. G182 B1 Y2 Z3 R..
or (as until now) or (as until now)
G182 A1 X1 Z1 R.. G182 B1 Y1 Z1 R..
G182 C1 Z2 X3 R.. G182 C1 Y2 Z3 R..
or (as until now)
G182 C1 X1 Z1 R..
Specification of the cylinder plane
Notes
The words X,Y,Z,A,B,C must not be programmed without a value.
The configuration for the cylinder interpolation is programmed in block G182:
- standard configuration
rotational axis A1 B1 C1
cylinder axis X1 Y1 Z1
tool axis Y1/Z1 X1/Z1 X1/Y1
cylinder radius R R R
- enhanced configuration (V321)

G-FUNCTIONS
378 Heidenhain
rotational axis marked 1 A1 B1 C1
cylinder axis marked 2 X2/Y2/Z2 X2/X2/Z2 Z2/X2/Y2
tool axis marked 3 Y3/Z3/X3 X3/Z3/Y3 X3/Y3/Z3
cylinder radius R R R
Machine constants
The machine constants for the axis definitions have to be correct.
MC 102 = 1, MC103 = 88 (X-axis)
MC 107 = 2, MC108 = 89 (Y-axis)
MC 112 = 3, MC113 = 90 (Z-axis)
MC 117 = 4 belongs to axis 1 (4-3), MC118 = 65 (A-axis turning around X-axis)
MC 122 = 6 belongs to axis 3 (6-3), MC123 = 67 (C-axis turning around Z-axis)
Example
The recess on the curved surface of a cylinder (diameter 40 mm) is to be milled using a dual-point
endmilling cutter (diameter 9.5 mm). The working depth is to be 4 mm. The horizontal working of the
workpiece is to be performed on the rotational axis C, the cylinder axis Z and the tool axis Y.
N12340
N1 G18 S1000 T1 M66
N2 G54
N3 G182 Y1 C1 Z1 R20
N4 G0 Y22 C0 Z15 M3
N5 G1 Y16 F200
N6 G43 Z10
N7 G41
N8 G1 C23.84
N9 G3 Z14.963 C55.774 R15
N10 G1 Z38.691 C116.98
N11 G2 Z42 C138.27 R10
N12 G1 C252.101
N13 G2 Z37 C266.425 R5
N14 G1 Z26
N15 G3 Z10 C312.262 R16

G-FUNCTIONS
20000710 MillPlus V410 379
N16 G1 C365
N17 G40
N18 G41 Z20
N19 G1 C312.262
N20 G2 Z26 C295.073 R6
N21 G1 Z37
N22 G3 Z52 C252.101 R15
N23 G1 C138.27
N24 G3 Z45.383 C95.691 R20
N25 G1 Z21.654 C34.484
N26 G2 Z20 C23.84 R5
N27 G1 C0
N28 G40
N29 G180
N30 G0 Y100 M30
Notes
Only cartesian coordinates can be used.
The following functions must not be active when G182 is active:
G41-G44, G64, G92/G93 B4=, G141
The following cannot be programmed when G182 is active:
G25/G26, G27/G28, G51-G59, G61/G62, G70/G71, G73, G92/93.
The selected tool radius should only be fractionally smaller than the width of the recess (undercutting
!)
Limitation:
Cylinder radius >5mm <500mm

G-FUNCTIONS
380 Heidenhain
23.62 Graphic window definition G195
Specify the dimensions and length of a 3D graphics window with reference to the zero point W.
N.. G195 X.. Y.. Z.. I.. J.. K.. {B..} {B1=..} {B2=..}
Parameters
Example
N9000
N1 G17
N2 G195 X-30 Y-30 Z-70 I170 J150 K100 Graphic window definition
N3 G199 Start of graphic contour description
:
X,Y,Z Anfangskoordinate
Abmessung parallel zu X
Abmessung parallel zu Y
Abmessung parallel zu Z
Rotation Rundachse hor. (3D)
Rotation Rundachse vert. (3D)
Rotation dritte Rundachse (3D)

G-FUNCTIONS
20000710 MillPlus V410 381
23.63 End graphic model description G196
N.. G196
Example
:
N2 G195 X... Y... Z... I... J... K... Graphic window definition
N3 G199 X... Y... Z.. B.. C.. Start of graphic contour description
N4 G198 X.. Y.. Z.. D.. Start of outside contour description
:
:
N25 G197 X.. Y.. D.. Start of inside contour description
:
:
N35 G196 End of graphic contour description
:

G-FUNCTIONS
382 Heidenhain
23.64 Begin inside / outside contour description G197/G198
Define the start point of an internal contour:
N.. G197 X.. Y.. {Z..} D..
Define the start point of an external contour:
N.. G198 X.. Y.. {Z..} D..
Parameters
Example
See G199
Notes
The start point of the contour is based on the offset in G199.
The contour must be complete.
The internal contour must lie within the external contour.
An internal contour cannot lie within another internal contour.
X,Y,Z Anfangskoordinate
Tiefe der Kontur
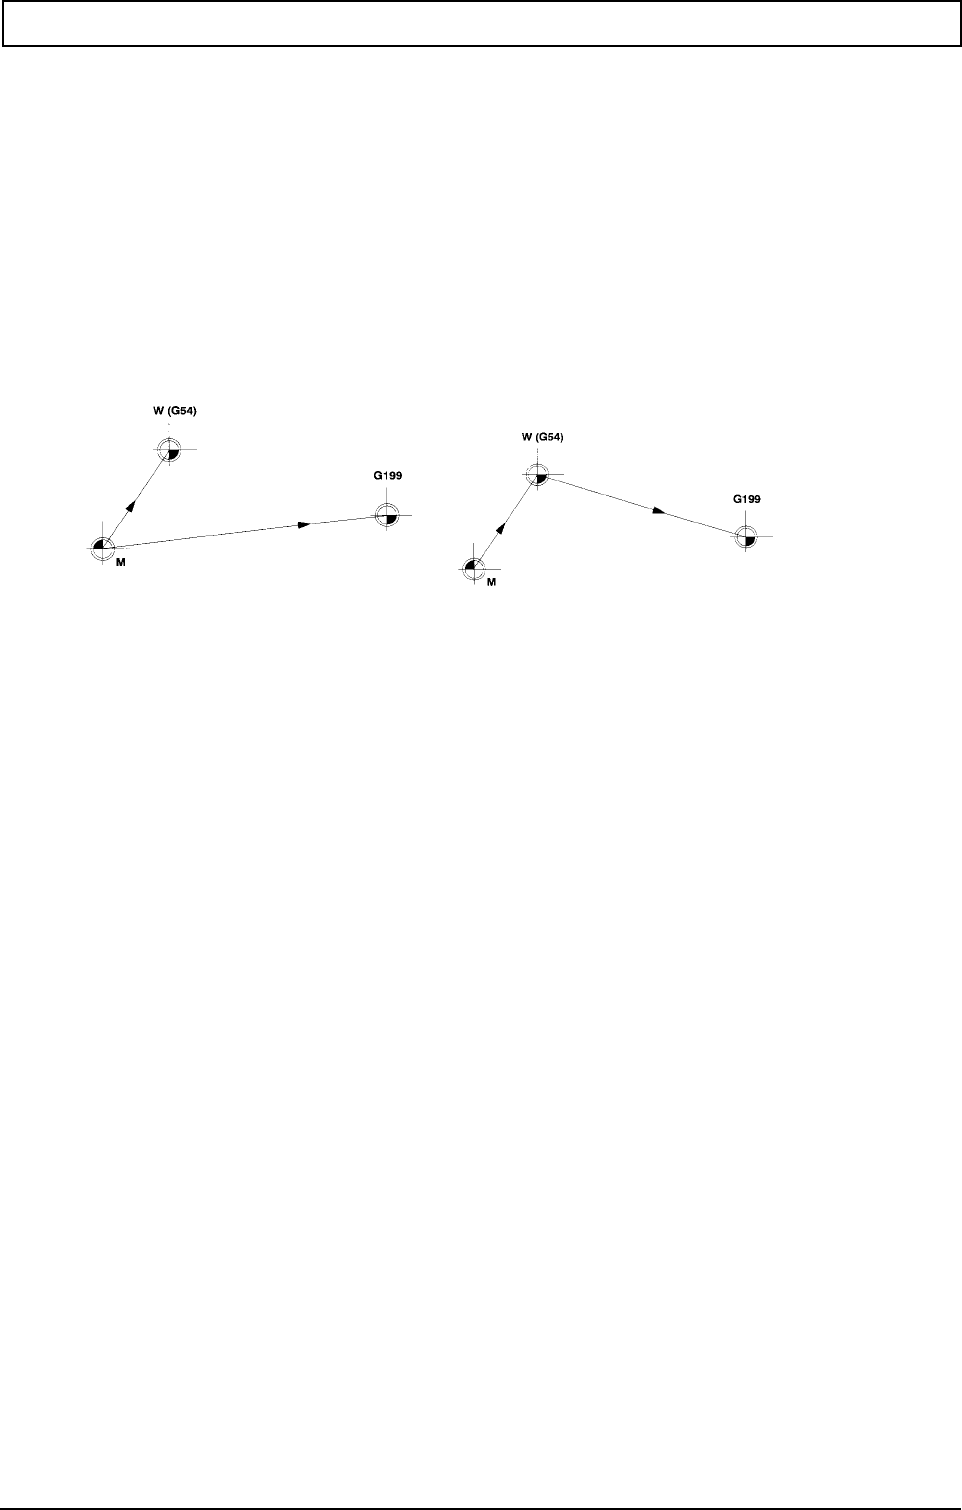
G-FUNCTIONS
20000710 MillPlus V410 383
23.65 Begin graphic model description G199
Define the position of a blank contour or a machine part (e.g. chucking equipment) that the tool could
collide with. A collision can be detected during the graphical simulation.
Define a blank contour:
N.. G199 [start coordinates] B1 {C1} {C2}
Define a machine part contour:
N... G199 [start coordinates] B2 {C1} {C2}
Drawing a contour during simulation of the wire plot graph.
N... G199 [initial co-ordinates] B3 {C1} {C2}
Parameters
Example
B
eschreibung bezogen auf M
C2 Beschreibung bezogen
auf W
X,Y,Z Anfangskoordinate
Model 1=Mat.,2=Masch.,3=Kontur
Nullpunkt 1=Maschine,2=Werkstück

G-FUNCTIONS
384 Heidenhain
Example
Each chucking tool is described in its own macro. The start point of the chucking tool contour is
programmed using two parameters:
E1: X coordinate of the contour start point, in relation to the program zero point
E2: Y coordinate of the contour start point, in relation to the Program zero point
Macro for the left chucking tool:
N1991
N1 G92 X=E1 Y=E2
N2 G199 X0 Y0 Z0 B2 C2 Start of graphic contour description
N3 G198 X0 Y0 Z0 D10 Start of outside contour description
N4 G1 X45
N5 Y5
N6 X53
N7 Y25
N8 X45
N9 Y30
N10 X0
N11 Y0
N12 G197 X30 Y15 D-10 Start of inside contour description
N13 G2 I35 J15
N14 G196 End of graphic contour description
N15 G92 X=-E1 Y=-E2
Macro for the right chucking tool (top figure, rotated 180°)
N1992
N1 G92 X=E1 Y=E2
N2 G199 X0 Y0 Z0 B2 C2
N3 G198 X0 Y0 Z0 D10
N4 G1 X-45
N5 Y-5
N6 X-53
N7 Y-25
N8 X-45
N9 Y-30
N10 X0

G-FUNCTIONS
20000710 MillPlus V410 385
N11 Y0
N12 G197 X-30 Y-15 D-10 Start of inside contour description
N13 G2 I-35 J-15
N14 G196 End of graphic contour description
N15 G92 X=-E1 Y=-E2
Graphical section of the part program:
N199000 (Main program)
N1 G17
N2 G54
N3 S1200 T1 M6
N4 G195 X-20 Y-20 Z-60 I180 J110 K70
N5 G199 X0 Y0 Z0 B1 C2 Start of inside contour description
N6 G198 X0 Y0 D-50 Start of outside contour description
N7 G1 X70
N8 Y20
N9 X120
N10 Y60
N11 X70
N12 Y80
N13 X0
N14 Y0
N15 G197 X31 Y40 D-20 Start of inside contour description
N16 G2 I36 J40
N17 G196 End of graphic contour description
N18 G22 N=1991 E1=-48 E2=25 Macro call - LH fixture
N19 G22 N=1992 E1=168 E2=55 Macro call - RH fixture
:
N200 M30

G-FUNCTIONS
386 Heidenhain
23.66 Universal pocket milling cycle G200- G208
The universal pocket cycle is an easy and fast way of making CNC-programs for milling pockets of
any shape with or without islands.
Program format:
N99999
N1 G17
N2 G54
N3 \
: > Normal working
N96 /
N97 G200
N98 G81
N99 G22 N=.. Rough drill start point
N100 G201 N1=.. N2=.. Start of pocket description for milling the pocket
N101 G203 N1=.. Start of pocket contour description
N102 \
: > Pocket contour description
N109 /
N110 G204 End of pocketncontour description
N111 G205 N1=.. Start of island contour description
N112 \
: > Contour description island 1
N118 /
N119 G206 End of island contour description
N120 G205 N1=.. Start of island contour description
N121 \
: > Contour description island 2
: /
N130 G206 End of island contour description
N220 G207 X.. Y.. N=.. N1=.. Call island contour macro
N221 G203 / G205 Start pocket / island contour description
N222 G208 Contour description for parallelogramm
N223 G204 / G206 End of pocket / island contour description
N131 G202 End of pocket contour cycle
N350 G22 N=.. Rework the contour
N351 G22 N=.. Rework island 1
N352 G22 N=.. Rework island 2
:
N500 M30

G-FUNCTIONS
20000710 MillPlus V410 387
23.67 Create pocket cycle macro's G200
N.. G200
This function must be programmed before the universal pocket cycle and indicates that:
- the coordinates for the milling paths must be calculated (if they have not already been
calculated).
- the milling paths are programmed in a macro generated by the CNC; the number (N1=..) of
this macro is specified in a G201 block.
- if necessary (indicated by N2=.. in a G201 block) a second macro to drill the start point will be
generated.
- if necessary (indicated in a G203 or G205 block) the macros (N1=..) for reworking the
contours will be generated.
All operating conditions, such as processing level, zero point offsets and tool corrections should be
specified before the G200 function is executed.
Point definitions (G78), which are used to specify the pocketn contour, should be defined before the
G200 block.
A G200 block can be incorporated in a macro; the pocket will, however, only be searched for in
macros nested at a lower level.
The CNC expands the macros before the program is executed. Blocks between G200 and G201 are
therefore ignored at first. These blocks are processed once the macros have been generated.
All universal pocket cycles programmed between a block G200 and G202 or M30 are calculated
simultaneously.
The machining level (G17/G18/G19) has to be defined before G200 or after G202 was programmed.
Note
As of V321 the user can no longer see generated macros in the macro memory. If a macro is to be
used in another program, the relevant macro number must first be entered in the macro memory. Only
then will the macro be visible in the macro memory and can it be read in/out.

G-FUNCTIONS
388 Heidenhain
23.68 Start contour pocket cycle G201
Start of the definition of a pocket (possibly including islands). The block contains the technological
data required for calculating the milling paths. The milling of the pocket starts from the G201 block.
N... G201 Y... Z... N1=.. N2=.. {B...} {I..} {J..} {K..} {R..} {F..} {F2=..}
Parameters
Diese Wörter werden durch die gewählte Bearbeitungsebene bedingt.
Das I-Wort ist vorzeichenlos. Wenn I
nicht programmiert ist, wird der unter MC720 gespeicherte Wert verwendet.
Notes
The addresses (especially Y and Z) are independent of the active level.
The functions G90, G40 and G63 are activated automatically when the G201 function is executed.
The functions G201/G202, G203/G204 and G205/G206 must all be in the same program/macro.
The only blocks that may appear between G201 and G202 are: G203/G204, G205/G206 and G207.
The only blocks that may appear between G203/G204 and G205/G206: G1, G2/G3, G208, G63/G64,
G90, G91.
The movements G1, G2/G3 are limited to the main level. Tool axes and rotary axis coordinates are
not permitted.
The program is to be continued from an absolute position after describing the pocket.
E parameters can be used for contour descriptions. Calculations must be performed before G200 is
executed.
Y Bearbeitungsaufmaß
Gesamte Taschentiefe
B Sicherheitsabstand
WZ-Radius für Berechnung
Schnittbreite des Fräsers in %
J J1:Gleichlauf / J-1:Gegenlauf
Zustelltiefe
Vorschub Taschenfräsen
Eintauchvorschub
Makronummer für Ausfräsen
Startpunkt Makronummer

G-FUNCTIONS
20000710 MillPlus V410 389
23.69 End contour pocket cycle G202
Termination of the full pocket description.
N.. G202
Note
The functions G0, G40, G63 and G90 are activated automatically when the G202 function is
executed.
With G202 the calculation of universal pocket cycles is stopped. Calculation is continued with the next
G200.
23.70 Start pocket contour description G203
N.. G203 X.. Y.. Z.. N1=.. {P..} {B1=..} {B2=..} {L2=..} {P1=..}
Parameters
Die Werkzeugachsenkoordinaten
müssen immer im G203-Satz enthalten sein.
Notes
G1, G63 and G90 are activated automatically when G203 is executed.
The first point of a contour description must be specified in a G203 block. Reworking of the contour
also starts at this point.
The bottom of the pocket must lie parallel to the processing level.
The edges of the pocket must be at right angles to the bottom of the pocket.
Two elements of the same pocket must not intersect or touch.
During finish-cutting, the programmer must ensure that a tool diameter is selected that is smaller than
the narrowest section in the pocket of the work piece. Contour violations during finishing are not
detected by the controller.
23.71 End pocket contour description G204
This function terminates the description of the pocket contour.
N.. G204
X Startpunkt in X
Startpunkt in Y
Startpunkt in Z
Makronummer für Nachbearbeitung
Punktedefinitionsnummer
Rotationswinkel Taschenkontur
Startpunkt Polarwinkel
Startpunkt Polarlänge
Punktedefinitionsnummer

G-FUNCTIONS
390 Heidenhain
23.72 Start island contour description G205
The contour of an island is described in the same way as the contour of a pocket. The description
begins with G205 and the absolute start position of the island.
N.. G203 X.. Y.. N1=.. {Z..} {P..} {B1=..} {B2=..} {L2=..} {P1=..}
Parameter
Notes
The CNC assumes that the tops of the island and the pocket are at the same level.
If the island is higher than the top of the pocket, the B word in the G201 block can be used to prevent
a collision between the milling tool and the work piece while moving from one starting point to the
next.
G205 activates G1, G63 and G90.
The tool axis must not be programmed.
The contour of an island must be complete.
Two islands may not intersect or touch.
Islands must be situated in the pocket and must not intersect or touch the edges.
The sides of an island must be at right angles to the bottom.
23.73 End island contour description G206
The contour description is terminated by G206. The description for pocket contours applies equally to
island contours.
N.. G206
X Startpunkt in X
Startpunkt in Y
Startpunkt in Z
Makronummer für Nachbearbeitung
Punktedefinitionsnummer
Rotationswinkel Inselkontur
Startpunkt Polarwinkel
Startpunkt Polarlänge
Punktedefinitionsnummer

G-FUNCTIONS
20000710 MillPlus V410 391
23.74 Call island contour macro G207
N... G207 X.. Y.. Z.. N=.. N1=..
There are three possibilities:
1. The same island appears at another place in the same pocket contour.
2. The same island contour appears in another pocket contour.
3. The same island contour appears in another program.
As the island contour is included in a macro, the three options can all be handled in the same way.
Parameters
Das Makro der Inselkontur lautet:
N9xxx G205 X=X2 Y=Y2 N1=..
N.. \
: > Inselkontur
N.. /
N.. G206
N9xxx stellt hier die Makrokennzeichnung dar.
Das Makro wird mit der Funktion G207 aufgerufen.
N.. G201
:
N.. G207 N=9xxx
N.. G207 N=9xxx X=(X1-X2) Y=(Y1-Y2)
N.. G202
Example
1 : An island whose contours are programmed as a macro
P1 : Starting point of the contour description (G205 block)
2 : Desired position of the island
P2 : Starting point of the moved contour
X Verschiebung in X
Verschiebung in Y
Verschiebung in Z
Makro mit Inselkonturbeschreibung
Makronummer für Nachbearbeitung

G-FUNCTIONS
392 Heidenhain
X..: Distance parallel to the X axis of P1 to P2
Y..: Distance parallel to the Y axis of P1 to P2
Notes
The subprogram called up in the G207 block must not contain any references to G63/G64.
The best procedure is to start an island contour with the coordinates X0,Y0 (zero offset).The starting
point can be programmed in the G207 block without calculation.
The identical macro of the island contour will then be as follows:
N9xxx G205 X0 Y0 N1=..
N.. \
: > Island contour with zero offset
N.. /
N.. G206
N9xxx represents the macro identification.
The macro is called with the G207 function.
N.. G201
:
N.. G207 N=9xxx X=X2 Y=Y2
N.. G207 N=9xxx X=X1 Y=Y1
N.. G202
The subprogram for the island contours can be programmed in absolute or incremental dimensions.

G-FUNCTIONS
20000710 MillPlus V410 393
23.75 Quadrangle contour description G208
The G208 function enables a regular quadrangle, particularly a rectangle or a parallelogram, to be
programmed very easily.
N... G208 X.. Y.. {Z..} {I..} {J..} {R..} {B1=..}
Parameter
Example
G203 X (=X1) Y (=Y1) Z (=Z1) B1= (=A)
G208 X (=X) Y (=Y) B1= (=B)
G204
Note
The bottom of the pocket must always be parallel to the main level.
X Länge in X
Länge in Y
Länge in Z
Fasenlänge
J1:Gleichlauf / J-1:Gegenlauf
Rundungsradius
Winkel Viereckkontur

G-FUNCTIONS
394 Heidenhain
Example of a pocket contour
Pocket with islands. Rough drilling of the starting point and reworking of the contours are taken into
account.
N82150
N1 G17
N2 G54
N3 G98 X-10 Y-10 Z10 I320 J320 K-60
N4 G99 X0 Y0 Z0 I300 J300 K-40
N5 F200 S3000 T2 M6
N6 G200
N7 G81 Y2 Z-20 M3 (Predrill start point)
N8 G22 N=9992
N9 S2500 T3 M6 (Evacuate pocket)
N10 G201 Y0.1 Z-20 B2 I50 R10 F200 N1=9991 N2=9992 F2=100
N11 G203 X70 Y40 Z0 N1=9993 |
N12 G64 |
N13 G1 X260 B1=0 I1=0 |
N14 G1 I30 |
N15 G1 X260 Y260 B1=90 I1=0 |(Pocket contour)
N16 G1 I30 |
N17 G1 X40 Y260 B1=180 I1=0 |
N18 G1 I30 |
N19 G1 X40 Y70 B1=270 |
N20 G63 |
N21 G204 |
N22 G205 X100 Y80 N1=9994
N23 G208 X-30 Y30 J-1 (Island 1)
N24 G206
N25 G205 X190 Y80 N1=9995

G-FUNCTIONS
20000710 MillPlus V410 395
N26 G91
N27 Y50 (Island 2)
N28 X40 Y-50
N29 G90
N30 G206
N31 G205 X150 Y130 N1=9996
N32 G2 I150 J150 (Island 3)
N33 G206
N34 G205 X110 Y210 N1=9997
N35 G208 X-40 Y40 J-1 B1=135 (Island 4)
N36 G206
N37 G205 X180 Y200 N1=9998
N38 G91
N39 G1 Y30
N40 X20 (Island 5)
N41 X30 Y-30
N42 G90
N43 G206
N44 G202
N45 F200 S2200 T4 M6 |
N46 G22 N=9993 |
N47 F200 S2500 T5 M6 |
N48 G22 N=9994 |(Reworking)
N49 G22 N=9995 |
N50 G22 N=9996 |
N51 G22 N=9997 |
N52 G22 N=9998 |
N53 G0 Z100 M30

SPECIAL G FUNCTIONS FOR MACROS
20000710 MillPlus V410 397
24. Special G functions for macros
The range G300 upto G399 (exept G301) is for special functions. These functions are used in the
macro development for Cycle Design, Easy Operate and IPLC.
24.1 Programming error messages G300
Programming of error messages when universal programs or macros are executed.
N... G300 D...
Parameters
Example
Defining error messages if a programmed angle is not allowed.
N9999 (macro for calculating table rotation)
: (E4 is input value for angle phi)
:
N110 G29 I1 E30 N=180 E30=(E4>360) If E4 > 360°, jump to N180
N120 G29 I1 E30 N=210 E30=(E4<0) If E4 < 0°, jump to N210
N150 G29 I1 E30 N=290 E30=1 Jump to N290 (0° <= E4 <= 360°)
:
N180 G300 D190 Error message (phi >360°):
Programmed value > maximum value
Program should be ended and a modified E4 must
be entered
N190
N210 G300 D191 (programmed value < minimum value)
:
N290 Normal program
Notes and usage
This function may only be used in programs and macros.
Only error messages from the existing P-error list may be used. (See error lists P, O and F in chapter:
Miscellaneous).
D Feh
lermeldungs
-Nummer

SPECIAL G FUNCTIONS FOR MACROS
398 Heidenhain
24.2 Error message in read-in program or macro G301
Error message in read-in program or macro.
N... G301 (O... wrong original block)
Parameters
keine
Example
Correct program stored on hard disk.
Program was made with MC84 = 0.
N9999 (program ...)
N1 G17
N2 G57
N3 T1 M6
N4 F200 S1000 M3
:
N99 M30
Faulty program in RAM.
Extended zero offset is active (MC84 > 0)
N9999 (ERR*) (program ...)
N1 G17
N2 G301 (O138 G57) G301 indicates that the block is incorrect. G57 should be G54 I3.
N3 T1 M6
N4 F200 S1000 M3
:
N99 M30
This faulty program can be executed. It will stop at the G301 block. Error P33 (other text in defined
block) appears. Change this block and restart the program.
Notes and usage
G301 is generated when a reading error is found when a program or macro is read-in. The function
can only be used in faulty programs and macros.
The function cannot be entered in MDI.
The error messages relate to the existing O-errors. (See error lists P, O and F in chapter
Miscellaneous).

SPECIAL G FUNCTIONS FOR MACROS
20000710 MillPlus V410 399
24.3 Query active technology - G319
Query active F (advance), S (speed in rpm) or T (tool number).
N... G319 I1=.. E...
Parameters
Which function:
I1=1 Advance (F)
I1=2 speed in rpm (S)
I1=3 tool number (T)
Example
Selection of the active advance and storing the value in E parameter 10.
N... G319 I1=1 E10 (I1=1 query advance value, E10 then contains the value)
Notes
This function is only allowed to be used within the programs and the macros.
I1= 1=Vorschub, 2=Drehzahl, 3=WZ-Nr

SPECIAL G FUNCTIONS FOR MACROS
400 Heidenhain
24.4 Query tool table G321
Query values extracted from the tool table.
N... G321 T.. I1=.. E...
Parameters
Assignment:
I1=1 L tool length
I1=2 R tool radius
I1=3 C tool corner radius
I1=4 L4= length oversize
I1=5 R4= radius oversize
I1=6 G graphics
I1=7 Q3= tool type
I1=8 Q4= number of tool cogs
I1=9 I2= direction of cut
I1=10 A1= entry angle
I1=11 S tool size
I1=12 E tool status
I1=13 M tool parking time
I1=14 M1= residual tool parking time
I1=15 M2= tool parking time monitoring
I1=16 B tool breakage tolerance
I1=17 B1= tool breakage monitoring
I1=18 L1= first supplementary tool length
I1=19 R1= first supplementary tool radius
I1=20 C1= first supplementary tool corner radius
I1=21 L2= second supplementary tool length
I1=22 R2= second supplementary tool radius
I1=23 C2= second supplementary tool corner radius
I1=24 L5= wear tolerance length
I1=25 R5= wear tolerance radius
I1=26 L6= measurement offset length
I1=27 R6= measurement offset radius
I1=28 Q5= tool breakage monitoring cycle (0-9999)
I1=28 Q5= WZ-Bruchübewachungs Zyklus (0-9999)
Example
Program sentences for querying the tool table.
N30 G321 T10 I1=1 E1 (Read command, T (tool number), I1=1 information about the tool address,
E1 is the E parameter, L (tool length) is set in E parameter 1)
N40 G321 T10 I1=2 E10 (R (tool radius) is set in E parameter 10)
N50 G321 T10 I1=3 E20 (C (tool corner radius) is set in E parameter 20. If C has no value, E20=-
999999999 is set)
N60 G321 T10 I1=4 E2 (L4 (length oversize) is set in E parameter 2)
N70 G321 T10 I1=5 E11 (R4 (radius oversize) is set in E parameter 11)
N80 E3=E1+E2 (the correct tool length (E3) is L+L4 (E1+E2))
T Werkzeugnummer
=
WZ-Adresse (1=L .. 28=Q5)
E-Parameter

SPECIAL G FUNCTIONS FOR MACROS
20000710 MillPlus V410 401
N90 E12=E10+E11 (the correct tool radius (E12) is R+R4 (E10+E11))
Notes
This function is only allowed to be used within programs and macros.
The tool number (T) must be known. The position (P) in the tool table cannot be queried.
If the E parameter contains the number -999999999, the address in the tool table is empty.

SPECIAL G FUNCTIONS FOR MACROS
402 Heidenhain
24.5 Calling machine constant values G322
Readout of a machine constant value and storing this value in the relevant E-parameter.
N... G322 E.. N1=...
Parameters
Example
Universal program blocks which can be used for either type of zero point table.
N40 E5= E6=
N50 G322 N1=84 C10 Machine constant 84 is defined in E10
N60 G29 E1 N=90 E1=E10>0 Compare if MC84 > 0. If so, jump to N90
N70 G150 N1=57 X7=E5 Z7=E6 Changing the zero offset table ZO.ZO
N80 G29 E1 N=100 E1=1 Jump to N100
N90 G150 N1=54.03 X7=E5 Z7=E6 Changing the zero offset table ZE.ZE
N100 ..
Notes and usage
This function may only be used in programs and macros.
If invisible addresses are called in the machine constant table, the E-parameter is not changed.
N1= Maschinenkonstantennummer
E-Parameter

SPECIAL G FUNCTIONS FOR MACROS
20000710 MillPlus V410 403
24.6 Query current modal G function G324 (from V400)
Query current modal G function and stores with this value in the E parameters pre-programmed for
this purpose.
N... G324 I1=.. E...
Parameters
Assignment:
I1= G function
1 G0,Gg1,G2,G3,G6,G9
2 G17,G18,G19
3 G40,G41,G42,G43,G44,G141
4 G53,G54,G54_I,G55,G56,G57,G58,G59
5 G64,G63
6 off,G81,G83,G84,G85,G86,G87,G88,G89,G98
7 G70,G71
8 G90,G91
10 G94,G95
13 G72,G73
14 G66,G67
15 off,G39
16 G51,G52
17 G196,G199
19 G27,G28
20 G25,G26,G26_S,G26_F_S
21 off,G9
22 G202,G201
24 G180,G182,G180_XZC
27 off,G7
28 off,G8
Example
Selection of the G function (I1=2) and storage of the value in E parameter 10.
N... G324 I1=2 E10
I1=2 query Group 2 G function
E10 holds the result
E10 =17 G17 is active
E10 =18 G18 is active
E10 =19 G19 is active
Notes
This function is only allowed to be used within programs and macros.
If the group or the G function does not exist, the E parameters are unchanged.
I1= G-Gruppe (1 - 27)
E-Parameter

SPECIAL G FUNCTIONS FOR MACROS
404 Heidenhain
24.7 Query current modal M function G325 (from V400)
Query current modal M function and store this value in the E parameter pre-programmed for this
purpose.
N... G325 I1=.. E...
Parameters
Assignment:
I1= M function
1 M5,M3,M4,M13,M14,M19,No_dir
2 M40,M41,M42,M43,M44,No_range
3 M9,M7,M8
4 off,M17,M18,M16
5 off,M10,M11
6 off,M22,M23
7 off,M32,M33
8 off,M55
9 off,M51,M52
10 off,M53,M54
Example
Selection of the M function (I1=1) and storage of its value in the E parameter 10.
N... G325 I1=1 E10
I1=1 Query Group 1 function
E10 holds the result
E10 =5 M5 is active
E10 =3 M3 is active
E10 =4 M4 is active
Notes
This function is only allowed to be used within programs and macros.
If the group or the M function does not exist, the E parameter is unchanged.
(off equates to 0).
I1= M-Gruppe (1 - 10)
E-Parameter

SPECIAL G FUNCTIONS FOR MACROS
20000710 MillPlus V410 405
24.8 Calling up the current axis position values G326
Calling up a current axis position value and storing this value in the E-parameter provided for this
purpose.
N... G326 {X7=..} {Y7=..} {Z7=..} {A7=..} {B7=..} {C7=..}
Parameters
Examples
Calling up current axis position values of X,Y and Z and storing the values in the E-parameters 20, 21
and 22.
N... G326 X7=20 Y7=21 Z7=22
Continuation of program after universal pocket milling cycle.
N30 G202 End of pocket milling cycle
N40 G326 X7=20 Y7=21 Unknown current end position of X and Y
N50 G29 E1 N=90 E1=E20>100 When current X-position >100, jump to N90
N60 G29 E1 N=90 E1=E20<-100 When current X-position <-100, jump to N90
N70 G0 X-110 G0 movement to X-110, when the current X-position is
between 100 and -100. In this way one can, for instance,
bypass an obstacle
N80 G0 Y 100 Further evasive movement
N90 ..
Notes and use
This function is only to be used within programs and macros.
If the axis does not exist, the E-parameter is not changed.
With graphic simulation the X-,Y- and Z-axes are called up correctly. The rotary axes remain zero.
Y7= E-Parameter für Meßwert in Y
=
E-Parameter für Meßwert in Z
= E-Parameter für Meßwert in X
= E-Parameter für Meßwert in A
= E-Parameter für Meßwert in B
= E-Parameter für Meßwert in C

SPECIAL G FUNCTIONS FOR MACROS
406 Heidenhain
24.9 Scan current operating mode G327 (from V410)
To scan the current operating mode and store this value in the E parameter provided.
Format
N... G327 I1=.. E...
Parameters
Notes and use
This function must only be used within programs and macros.
Arrangement of group
Group
I1= Operating mode
1 Easy Operate 0 = not active, 1=active
2 Single record 0 = not active, 1=active
3 Graphic 0 = not active, 1=active
4 Test run 0 = not active, 1=active
5 Search 0 = not active, 1=active
6 Demo 0 = not active, 1=active
Examples
Fetch operating mode (I1=1) and store the value in E parameter 10.
N... G327 I1=1 E10
Explanation
I1=1 : Check whether Easy Operate is active.
E10 contains the result: 0= not active, 1=active.
I1= Lese Betriebsart
E-Parameter

SPECIAL G FUNCTIONS FOR MACROS
20000710 MillPlus V410 407
24.10 Write to the tool table G331 (from V400)
Write from values in the tool table.
N... G331 T.. I1=.. E...
Parameters
Assignment
I1=1 L tool length
I1=2 R tool radius
I1=3 C tool corner radius
I1=4 L4= length oversize
I1=5 R4= radius oversize
I1=6 G graphics
I1=7 Q3= tool type
I1=8 Q4= number of tool cogs
I1=9 I2= direction of cut
I1=10 A1= entry angle
I1=11 S tool size
I1=12 E tool status
I1=13 M tool parking time
I1=14 M1= residual tool parking time
I1=15 M2= tool parking time monitoring
I1=16 B tool breakage tolerance
I1=17 B1= tool breakage monitoring
I1=18 L2= first supplementary tool length
I1=19 R2= first supplementary tool radius
I1=20 C2= first supplementary tool corner radius
I1=21 L3= second supplementary tool length
I1=22 R3= second supplementary tool radius
I1=23 C3= second supplementary tool corner radius
I1=24 L5= wear tolerance length
I1=25 R5= wear tolerance radius
I1=26 L6= measurement offset length
I1=27 R6= measurement offset radius
I1=28 Q5= tool breakage monitoring cycle (0-9999)
The tool commentary cannot be changed.
Example
N10 E5=100 (tool length)
N11 E6=10 (tool radius)
N12 E7=-999999999 (tool corner radius)
N13 E8=0 (length oversize)
N14 E9=0 (radius oversize)
N..
N20 G331 T10 I1=1 E5
N21 G331 T10 I1=2 E6
N22 G331 T10 I1=3 E7
N23 G331 T10 I1=4 E8
N23 G331 T10 I1=5 E9
T Werkzeugnummer
=
WZ-Adresse (1=L .. 28=Q5)
E-Parameter

SPECIAL G FUNCTIONS FOR MACROS
408 Heidenhain
N30 T10 M67
N..
N40 G321 T10 I1=4 E8
N41 E8=0.3
N42 G331 T10 I1=4 E8
N43 T10 M67
Explanation:
N10 : L (tool length) is set in E parameter 5
N11 : R (tool radius) is set in E parameter 6
N12 : C (tool corner radius is set in E parameter 7 (if C has no value, E7= must be set to -
999999999)
N13 : L4 (length oversize) is set in E parameter 8
N14 : R4 (radius oversize) is set in E parameter 9
N20 : L (tool length) writing of E parameter 5 in the tool table
N21 : R (tool radius) writing of the E parameter 6 in the tool table
N22 : C (tool corner radius) writing of the E parameter 7 in the tool table
N23 : L4 (length oversize) writing of the E parameter 8 in the tool table
N24 : R4 (radius oversize) writing of the E Parameter 9 in the tool table
N30 : the tool must be activated once more with the changed information
N40 : L4 (length oversize) E parameter 8 is set to 0.3
N41 : L4 (length oversize) writing of E parameter 8 in the tool table
N50 : the tool must be activated once more with the changed information
Notes
This function is only allowed to be used within programs and macros.
The tool number (T) must be known. The position (P) in the tool table cannot be changed.
If the E parameter contains the value -999999999, the address in the tool table becomes empty.
The changed tool information must be activated again following the writing. (T.. M67)

SPECIAL G FUNCTIONS FOR MACROS
20000710 MillPlus V410 409
24.11 Writing to the machine settings store G332 (from V400)
Writing of a machine setting value.
N... G332 E.. N1=...
Parameters
Example
Writing of several machine setting values.
N30 E5=... (measured X value, e.g using calibration) E5 contains the measured X value
N40 E6=... (measured Y value)
N50 E7=... (measured Z value)
N60 G332 N1=3155 E5 Changing of the machine setting value
3155 using E parameter 5
N70 G332 N1=3255 E6
N80 G332 N1=3355 E7
N90 ..
Notes
This function is only allowed to be used within programs and macros.
Only machine settings which can be changed by the operator (OPER_MC) can be entered. If the
machine settings are not allowed to be changed, Error P195 (Only OPER_MCs) is generated.
If the value of the machine settings is not allowed, error message P190 (Programmed value > highest
value) is generated.
N1= Maschinenkonstantennummer
E-Parameter

G-FUNCTIONS PRODUCED BY CYCLE DESIGN
20000710 MillPlus V410 411
25. G-functions produced by cycle design
25.1 Cycle Design
Cycle Design allows the user to define his own G functions and integrate them in the control. These G
functions can be programmed within part programs using graphics support.
Note
Refer as well to your Programming manual.
25.2 Laser: Calibration G600 (from V410)
To determine the position of the laser measuring instrument and store this position value in the
machine constants provided.
Format
N... G600 {X... Y... Z...} {S...}
Parameters
X Position measuring instrument
Y Position measuring instrument
Z Position measuring instrument
S Speed (recommended value S3000)
Associated functions
G601, G602, G603, G604
Notes and use
The machine and MillPlus must be prepared by the machine manufacturer for the measuring
instrument. If not all the G functions described here are available on your machine, consult your
machine handbook.
Example
Calibrating laser measuring instrument and storing the position value in the E parameter.
N... G600 X300 Y500 Z600 S3000
Note
Refer as well to chapter Calibration of the laser measurement system.

G-FUNCTIONS PRODUCED BY CYCLE DESIGN
412 Heidenhain
25.3 Laser: Measure tool length G601 (from V410)
To measure the length of centric tools.
Format
N... G601 {S...}
Parameter
S Speed (recommended value S3000)
Folgende Adressen vom Werkzeugspeicher werden verwendet:
L Werkzeuglänge
L4= Aufmaß Länge
L5= Längentoleranz
E Werkzeugstatus
Associated functions
G600, G602, G603, G604
Notes and use
The machine and MillPlus must be prepared by the machine manufacturer for the measuring
instrument. If not all the G functions described here are available on your machine, consult your
machine handbook.
Note
Refer as well to chapter Measurement of the length of concentric tools.

G-FUNCTIONS PRODUCED BY CYCLE DESIGN
20000710 MillPlus V410 413
25.4 Laser: Measureng length and radius G602 (from V410)
To measure the length and radius of acentric tools with laser measuring instrument
Format
N... G602 {S...}
Parameters
S Speed (recommended value S3000)
Folgende Adressen vom Werkzeugspeicher werden verwendet:
L Werkzeuglänge
L4= Aufmaß Länge
L5= Längentoleranz
R Werkzeugradius
R4= Aufmaß Radius
R5= Radiustoleranz
L6= Position oberhalb der Werkzeugspitze für Rundlaufkontrolle.
R6= Radius-Position für Längenvermessung.
Q4= Anzahl der Zähne
E Werkzeugstatus
Associated functions
G600, G601, G603, G604
Notes and use
The machine and MillPlus must be prepared by the machine manufacturer for the measuring
instrument. If not all the G functions described here are available on your machine, consult your
machine handbook.
Note
Refer as well to chapter Measurement of the length and radius of eccentric tools.

G-FUNCTIONS PRODUCED BY CYCLE DESIGN
414 Heidenhain
25.5 Check of individual edge G603 (from V410)
To monitor the lower part (inspection height) of the tool with a laser measuring instrument.
Format
N... G603 {I1=...} {F2=...}
Parameters
I1= Inspection height
F2= Inspection feed
Folgende Adressen vom Werkzeugspeicher werden verwendet:
L Werkzeuglänge
L4= Aufmaß Länge
R Werkzeugradius
R4= Aufmaß Radius
R5= Radiustoleranz
L6= Position oberhalb der Werkzeugspitze für Rundlaufkontrolle.
Q4= Anzahl der Zähne
E Werkzeugstatus
Associated functions
G600, G601, G602, G604
Notes and use
The machine and MillPlus must be prepared by the machine manufacturer for the measuring
instrument. If not all the G functions described here are available on your machine, consult your
machine handbook.
Note
Refer as well to chapter Individual cutting control.

G-FUNCTIONS PRODUCED BY CYCLE DESIGN
20000710 MillPlus V410 415
25.6 Laser: Tool breakage control G604 (from V410)
Tool breakage check
Format
N... G604 {S...}
Parameters
S Speed (recommended value S3000)
Folgende Adressen vom Werkzeugspeicher werden verwendet:
L Werkzeuglänge
L4= Aufmaß Länge
R Werkzeugradius
R4= Aufmaß Radius
B Bruchtoleranz in mm.
R6= Radius-Position für Bruchkontrolle.
E Werkzeugstatus
Associated functions
G600, G601, G602, G603
Notes and use
The machine and MillPlus must be prepared by the machine manufacturer for the measuring
instrument. If not all the G functions described here are available on your machine, consult your
machine handbook.
Note
Refer as well to chapter .

G-FUNCTIONS PRODUCED BY CYCLE DESIGN
416 Heidenhain
25.7 TT120/TT130: Calibration G606 (from V410)
To determine the position of the measuring instrument and store this position value in the machine
constants provided.
Format
N... G606 {X... Y... Z...}
Parameter
X Position of measuring instrument
Y Position of measuring instrument
Z Position of measuring instrument
Associated functions
G607, G608, G609
Notes and use
The machine and MillPlus must be prepared by the machine manufacturer for the measuring
instrument. If not all the G functions described here are available on your machine, consult your
machine handbook.
Note
Refer as well to chapter Calibration of the TT120/TT130.

G-FUNCTIONS PRODUCED BY CYCLE DESIGN
20000710 MillPlus V410 417
25.8 TT120/TT130: Measure tool length G607 (from V410)
To measure the length of tools.
Format
N... G607 {I1=...} {I2=...}
Parameter
I1= safety distance
I2= 0=complete 1=per tooth
Folgende Adressen vom Werkzeugspeicher werden verwendet:
L Werkzeuglänge
L4= Aufmaß Länge
R Werkzeugradius
R4= Aufmaß Radius
R6= Meßversatz Radius
E Werkzeugstatus
Associated functions
G606, G608, G609
Notes and use
The machine and MillPlus must be prepared by the machine manufacturer for the measuring
instrument. If not all the G functions described here are available on your machine, consult your
machine handbook.
Note
Refer as well to chapter Tool length measurement……

G-FUNCTIONS PRODUCED BY CYCLE DESIGN
418 Heidenhain
25.9 TT120/TT130: Measuring tool radius G608 (from V410)
To measure the tool radius.
Format
N... G608 {I1=...} {I2=...}
Parameter
I1= safety distance
I2= 0=complete, 1=per tooth
Folgende Adressen vom Werkzeugspeicher werden verwendet:
L Werkzeuglänge
L4= Aufmaß Länge
R Werkzeugradius
R4= Aufmaß Radius
E Werkzeugstatus
Associated functions
G606, G607, G609
Notes and use
The machine and MillPlus must be prepared by the machine manufacturer for the measuring
instrument. If not all the G functions described here are available on your machine, consult your
machine handbook.
Note
Refer as well to chapter Measurement of tool radius

G-FUNCTIONS PRODUCED BY CYCLE DESIGN
20000710 MillPlus V410 419
25.10 TT120/TT130: Measure length and radius G609 (from V410)
To measure tool length and radius.
Format
N... G609 {I1=...} {I2=...}
Parameter
I1= Safety distance
I2= 0=complete, 1=per tooth
Folgende Adressen vom Werkzeugspeicher werden verwendet:
L Werkzeuglänge
L4= Aufmaß Länge
R Werkzeugradius
R4= Aufmaß Radius
R5= Radiustoleranz
E Werkzeugstatus
Associated functions
G606, G607, G608
Notes and use
The machine and MillPlus must be prepared by the machine manufacturer for the measuring
instrument. If not all the G functions described here are available on your machine, consult your
machine handbook.
Note
Refer as well to chapter Measure the tool completely

LISTE DER G-FUNKTIONEN UND M-FUNKTIONEN
20000710 MillPlus V410 421
26. Liste der G-Funktionen und M-Funktionen
26.1 G-Funktionen
G..
Beschreibung
Modal
G0
Eilgang
*
G1
Linearinterpolation
*
G2
G3
Kreis im Uhrzeigersinn
Kreis im Gegenuhrzeigersinn
*
G4
Verweilzeit
-
G6
Splineinterpolation
*
G7
Bearbeitungsebene schwenken
G8
Werkzeugrichtung schwenken
G9
Definier Polposition
*
G11
Polarkoordinate,Eckenrundung,Fase
-
G14
Wiederholfunktion
G17
G18
G19
Bearbeitungsebene XY, Werkzeug Z
Bearbeitungsebene XZ, Werkzeug Y
Bearbeitungsebene YZ, Werkzeug X
*
G22
G23
Makroaufruf
Hauptprogrammaufruf
-
G25
G26
Vorschuboverride wirksam
Vorschuboverride nicht wirksam
*
G27
G28
Positionierfunktionen löschen
Positionierfunktionen
*
G29
Bedingter Sprungbefehl
-
G39
Werkzeug-Aufmaß aktivieren
*
G40
G41
G42
G43
G44
Keine Werkzeugradiuskorrektur
Werkzeugradiuskorrektur, links
Werkzeugradiuskorrektur, rechts
WZ-Radiuskorrektur bis Endpunkt
WZ-Radiuskorrektur über Endpunkt
*
G45
G46
Messen eines Punktes
-

LISTE DER G-FUNKTIONEN UND M-FUNKTIONEN
422 Heidenhain
G..
Beschreibung
Modal
G46 +
M26
G49
G50
Messen eines Vollkreises
Messtaster kalibrrieren
Vergleich der Toleranzwerte
Verrechnung der Meßwerte
G51
G52
Aufheben G52 Achsenverschiebung
Aktivieren G52 Achsenverschiebung
*
G53
G54
G55
G56
G57
G58
G59
G54 I1
..
G54
I99
Aufheben der NPV (G54-59)
NP-Verschiebung aktivieren
NP-Verschiebung aktivieren
NP-Verschiebung aktivieren
NP-Verschiebung aktivieren
NP-Verschiebung aktivieren
NP-Verschiebung aktivieren
NP-Verschiebung aktivieren
*
G61
G62
Tangentiales Anfahren
Tangentiales Wegfahren
-
G63
G64
Aufheben der Geometrieberechnung
Geometrieberechnung aktivieren
*
G70
G71
Maßeinheit: Inch
Maßeinheit: Metrisch
*
G72
G73
Spiegeln und Maßfaktor aufheben
Spiegeln und Maßfaktor aktivieren
*
G74
Absolutposition
-
G77
Lochkreiszyklus
-
G78
Punktedefinition
-
G79
Zyklusaufruf
-
G81
G83
G84
G85
G86
G87
G88
G89
Bohrzyklus
Tieflochbohrzyklus
Gewindebohrzyklus
Reibzyklus
Ausdrehzyklus
Rechtecktaschenfräszyklus
Nutenfräszyklus
Kreistaschenfräszyklus
*
G90
G91
Absolutprogrammierung
Inkrementalprogrammierung
*
G92
G93
NP-Verschiebung inkr./Rotation
NP-Verschiebung abs./Rotation
*
LISTE DER G-FUNKTIONEN UND M-FUNKTIONEN
20000710 MillPlus V410 423
G..
Beschreibung
Modal
G94
G95
Vorschub in mm/min (Inch/min)
Vorschub in mm/U (Inch/U)
*
G98
G99
Grafikfensterdefinition
Grafik: Materialdefinition
-
G141
3D-Werkzeugkorrektur
*
G145
G148
G149
G150
Lineare Meßbewegung
Meßtasterstatus abfragen
Werkzeug- oder NPV-Werte abfragen
Ändern Werkzeug- oder NPV-Werte
-
G180
G182
Zylinderinterpolation aufheben
Zylinderinterpolation aktivieren
*
G195
G196
G197
G198
G199
Grafikfensterdefinition
Grafikkonturbeschreibungsende
Anfang Innenkonturbeschreibung
Anfang Außenkonturbeschreibung
Anfang Grafikkonturbeschreibung
-
G200
G201
G202
G203
G204
G205
G206
G207
G208
Taschenfräszyklenmakros erzeugen
Konturtaschenfräszyklusanfang
Konturtaschenfräszyklusende
Konturtaschenbeschreibungsanfang
Konturtaschenbeschreibungsende
Inselkonturbeschreibungsanfang
Inselkonturbeschreibungsende
Aufruf Inselkonturmakro
Viereckkonturbeschreibung
*
26.2 Liste der G-Funktionen für Makros und IPLC
G..
Beschreibung
Modal
G300
G301
G319
G321
G322
G324
G325
G326
G327
G331
G332
Program error call
Program halt
Read actual technology data
Read tool data
Read machine constant memory
Read G-group
Read M-group
Read actual position
Abfragen aktuelle Betriebsart
Schreiben in die Werkzeugtabelle
Schreiben in den Maschinenkonstantenspeicher
-
26.3 Liste der G-Funktionen Zyklen Design
G..
Beschreibung
Modal
G600
Lasersystem: Kalibrieren

LISTE DER G-FUNKTIONEN UND M-FUNKTIONEN
424 Heidenhain
G..
Beschreibung
Modal
G601
G602
G603
G604
G606
G607
G608
G609
Lasersystem: Länge vermessen (zentrischen
Werkzeugen)
Lasersystem: Länge und Radius (azentrischer
Werkzeuge) vermessen
Lasersystem: Einzelschneidenkontrolle
Lasersystem: Werkzeugbruchkontrolle
TT130: Kalibrierung
TT130: Länge vermessen
TT130: Radius vermessen
TT130: Werkzeug Länge und Radius vermessen
-

LISTE DER G-FUNKTIONEN UND M-FUNKTIONEN
20000710 MillPlus V410 425
26.4 Basis M-Funktionen
M..
Frü
h
Spä
t
Beschreibung
Modal mit:
M0
M1
M30
X
X
X
Programm-Halt
Wahlweiser Halt
Programmende.
-
-
-
M3
M4
M5
M19
X
X
X
X
Spindel EIN Rechtslauf
Spindel EIN Linkslauf
Spindel STOP
Spindel STOP in bestimmter
Winkellage.
M4,M5,M14,M19
M3,M5,M13,M19
M3,M4,M13,M14
M3,M4,M13,M14
M6
M66
X
X
Automatischer
Werkzeugwechsel ausführen
Manueller Werkzeugwechsel
-
-
M7
M8
M9
X
X
X
Kühlmittel Nr. 2
einschalten
Kühlmittel Nr. 1
einschalten
Kühlmittel ausschalten
M9
M9
M7,M8,M13,M14
M13
M14
X
X
Spindel EIN, Rechtslauf und
Kühlmittel EIN
Spindel EIN, Linkslauf und
Kühlmittel EIN
M9
M9
M25
M26
M27
M28
M24
M29
X
X
X
X
Zum Aktivieren der WKZ-
Messung
Meßtaster kalibrieren
Meßtaster aktivieren
Meßtaster ausschalten
Tastsystem aktivieren
Blasluft beim Meßtaster
einschalten
-
-
M28
M27
M41
M42
M43
M44
X
X
X
X
Auswahl Getriebestufe
Spindelantrieb.
M42,M43,M44
M41,M43,M44
M41,M42,M44
M41,M42,M43
M67
X
Werkzeugkorrektur
aktivieren
-

LISTE DER G-FUNKTIONEN UND M-FUNKTIONEN
426 Heidenhain
26.5 Maschinenabhängige M-Funktionen
M..
Frü
h
Spä
t
Beschreibung
Modal mit:
M10
M11
M22
M23
M32
M33
x
x
x
x
x
x
Klemmung der 4.Achse ZU
AUF
Klemmung der 5.Achse ZU
AUF
Klemmung der 6.Achse ZU
AUF
M16
M18
x
x
Werkstückreinigung AUS
Werkstückreinigung EIN
M20
x
Freibelegbarer NC-Ausgang
M46
x
Automatischer
Werkzeugwechsel (ohne
Rückzug der nicht am
Werkzeugwechsel beteiligten
Achsen)
M53/M54
x
Schwenkfräskopf für
horizontale/vertikale
Bearbeitung
M55
x
Gesteuerten NC-Fräskopf in
0-Gradstellung richten und
fixieren
M56
M57
M58
1. Fahrbereich
(Einschaltstellung) für X-
Achse freigeben (Modal)
2. Fahrbereich für X-Achse
freigeben (Modal)
3. Fahrbereich für X-Achse
freigeben (Modal)
M60/M61
/M62
-
Palettenwechsel-Befehle
M68
Werkzeugmagazin im
Arbeitsraum
beladen/entladen
M70
M71
x
x
Späneförderer EIN
Späneförderer AUS
M74
M75
M76
M77
-
-
-
-
Rettungsfunktionen:
Paletten-Rundspeicher
Palettenwechsler
Schwenkfräskopf
Werkzeugwechsler
M80-M89
-
Reserviert für Software-
Option

TECHNOLOGICAL COMMANDS
20000710 MillPlus V410 427
27. Technological commands
27.1 Feed rate
Feed rate F.. [mm/min | inch/min]
N.. F100
Constant feed rate:
F1=0 Feed rate relative to equidistant. (Starting position)
N.. F.. F1=0
F1=1 Feed rate relative to workpiece contour. The feed is reduced in the case of inside radii.
N.. F.. F1=1
F1=2 Feed rate relative to workpiece contour. The feed is reduced in the case of inside radii and
increased for outside radii.
N.. F.. F1=2
F1=3 Feed rate relative to workpiece contour. The feed is increased in the case of outside radii.
N.. F.. F1=3
F2=... Retract feed at G85, infeed at G86/G89, G201 or measuring feed at G145.
F3=... Feed for (negative) infeed movement (insertion).
F4=... Feed for plane movement.
F5=... Feed unit for rotating axes
F5=0 degrees/min (default)
F5=1 mm/min or inches/min
F6=... Local feed within a block
Tool axis: axis perpendicular to plane of operation (G17, G18, ...).
radial milling direction: milling in the plane of operation
axial milling direction: milling in direction of tool axis (only in infeed direction)
Modal parameters F, F1=
27.2 Spindle speed
Spindle speed S.. [rpm]
S parameters are modal.
N.. S600

TECHNOLOGICAL COMMANDS
428 Heidenhain
27.3 Tool number
Tool number T.. [Format 8.2] N.. T1 M..
(255 tools max.)
Original tool (T1-T99999999) N.. T1
Replacement tool (Tx.01-Tx.99) N.. T1.01
Activation:
Automatic tool change N.. T.. M6
Manual tool change N.. T.. M66
Activate tool data N.. T.. M67
First additional tool offset N.. T.. T2=1 M6/M66/M67
Second additional tool offset N.. T.. T2=2 M6/M66/M67
Tool life T3=..[0-9999,9min] N.. T.. T3=x M6/M66
Cutting force control T1=..[1..99] N.. T.. T1=x M6/M66
Deactivate (T1=0 or T1= not
programmed) N.. T1=0
Modal parameters T, T1=, T2=

E PARAMETERS AND ARITHMETIC FUNCTIONS
20000710 MillPlus V410 429
28. E Parameters and arithmetic functions
28.1 E parameters
Parameter E.. N.. E..
Format:
Integer E1=20
Fixed-point number E1=200.105
Floating point number (exponent
value: -99 - +99) E1=1.905e5
Change unit of measurement G70 <--> G71:
All values are converted. In this case information such as spindle speed, feed rate, etc., should not be
defined as parameters.
E parameters are modal.
Note
The address 'E' (parameter) must be entered into the program as an upper case character.
28.2 Arithmetic functions
Standard arithmetic functions
(Blanks not permitted in functions) E1=E2
E1=E2+E3
E1=E2-E3
E1=E2*E3
E1=E2:E3
Exponentiation
E1=E2^2
E1=(-3)^E3
Reciprocal values
E1=E2^-2(E1=1:E2^2)
Square root
(value must be positive) E1=sqrt(E2)
Absolute values
E1=abs(E2)
Integers
E1=int(E2)
Angle definition
Format: Degree/Minutes/Seconds
(cannot be entered directly)
Input formats 44° 12' 33.5":
Decimal format E1=44.209303
Angular conversion E1=44+12:60+33.5:3600
(gives an angle of) E1=44.209303
Circle constants 'pi' or π (3.14) E1=(E2*pi):2

E PARAMETERS AND ARITHMETIC FUNCTIONS
430 Heidenhain
Radian format E1=44+12:60+33.5:3600
E2=((E1:360)*2*pi)rad
Trigonometric functions sin(E..) cos(E..) tan(E..)
asin(E..) acos(E..) atan(E..)
Comparison functions
E1=E2=E3 --> E1=1
(Condition satisfied --> E..=1) E1=E2<>E3 --> E1=1
(Condition not satisfied --> E..=0) E1=E2>E3 --> E1=1
E1=E2>=E3 --> E1=1
E1=E2<E3 --> E1=1
E1=E2<=E3 --> E1=1
Evaluation priority of arithmetic expressions and comparison functions
1. sin, cos, tan, asin, acos, atan, sqrt, abs, int
2. Exponentiation (^), reciprocal values (^-1)
3. Multiplication (*), division (:)
4. Addition (+), subtraction (-)
5. Relational expressions (=, <>, >, >=, <, <=)
If a block contains operations of the same priority, they are executed in sequence from the start of the
block to the end.
28.3 Expanded calculation operations
28.3.1 E parameters
Format: Arc sine E1=asin(E2,E3)
Arc cosine E1=acos(E2,E3)
Arc tangent E1=atan(E2,E3)
Whole number conversion with large value E1=ceil(E2)
Whole number conversion with small value E1=floor(E2)
Rounding E1=round(E2,n) (n is no. of decimal places)
Remainder of division E1=mod(E2,E3)
Sign E1=sign(E2)
Remark: The integer function is changed with the floor function in V420 and higher.
28.3.2 Whole numbers
When using the integer function, the numerical value is rounded, i.e. all
figures after the decimal point are ignored.
E1=int(E2)
Example: E2=8.9 results in 8, E2=-8.9 results in –8
28.3.3 Whole numbers with largest value
When using the integer function with the largest value, the numerical value is rounded
according to the largest argument.
E1=ceil(E2)
Example: E2=8.9 results in 9, E2=-8.9 results in –8
28.3.4 Whole numbers with smallest value
When using the integer function with the smallest value, the numerical value is rounded
according to the smallest argument.
E1=floor(E2)
Example: E2=8.9 results in 8, E2=-8.9 results in –9

20000710 MillPlus V410 431
28.3.5 Rounding
When the rounding function is used, the numerical value is rounded according to the number
of decimal places.
E1=round(E2,n) (n is number of decimal places)
Remark: If the number of decimal places is not entered, zero is assumed.
Example: n=1 and E2=8.94 results in 8.9, n=1 and E2=-8.94 results in -8.9
n=1 and E2=8.96 results in 9.0, n=1 and E2=-8.96 results in -9.0
28.3.6 Remainder of division
When the remainder function is used, the remainder is returned by the argument.
E1 =mod(E2,E3)
Remarks:
-E1=E2-int(E2:E3)*E3
- If E3 is 0, E2 is returned.
- If E3 is not entered, 1 is assumed.
- The sign is the same as the sign of E1.
Example: E2=5 and E3=3 results in 2, E2=-5 and E3=3 results in –2
28.3.7 Sign
When the sign function is used, the sign is returned.
E1 =sign(E2)
Example: E2=8.9 results in 1, E2=0 results in 0, E2=-8.9 results in -1
Also possible (V429 and higher):
E1=asin(E3,E4) E1=acos(E3,E4) E1=atan(E3,E4) where E2=E3:E4
Remark: - abs(E2) must be less than or equal to 1 for acos and asin.
- the angle created lies between 0° and +360°
28.3.8 Variable parameter no.:
E(value or expression)=<value or expression>
Examples:
E(1)=
E(1.2e1)
E(E1)=
E(E1+E2)=
E(sin(45)*100)=
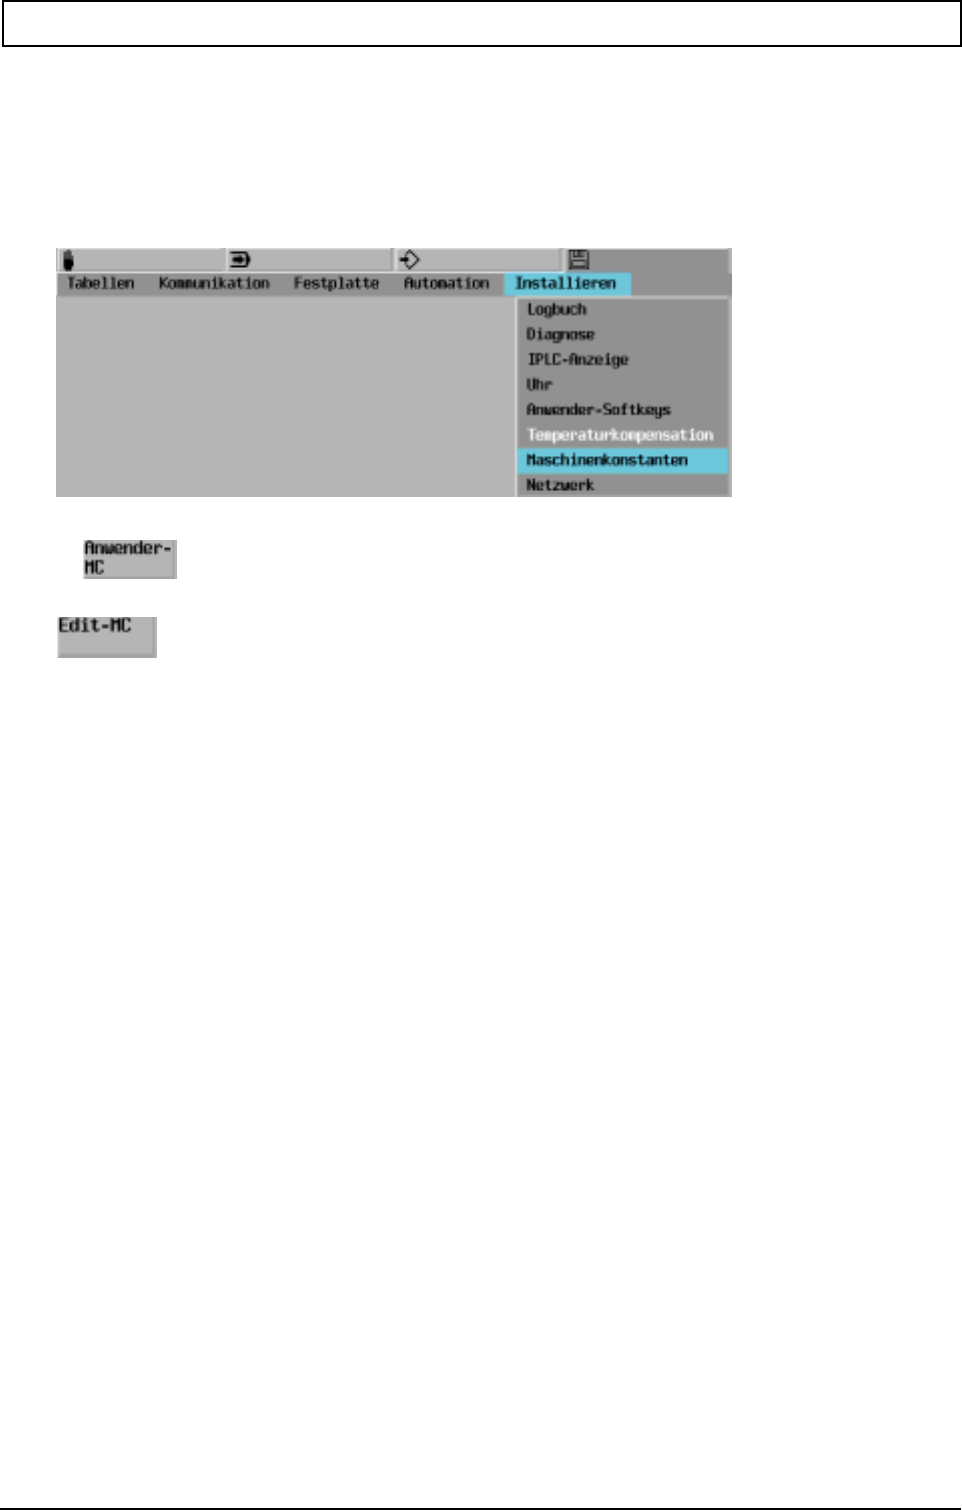
MISCELLANEOUS
432 Heidenhain
29. Miscellaneous
29.1 Operator machine constants
Refer to the documentation provided by the machine builder.
For user
For maintenance/customer service personnel only
29.2 Machine settings monitoring file
In Edit-MC the machine settings which also exist in the monitoring file are displayed with a lock
indicator. These machine settings then cannot be edited.
Release for editing purposes is achieved by means of a password.
Machine settings which exist in the monitoring file can only be overwritten if the password has been
entered. In this way, the unintentional changing of machine settings is precluded.
Note
The machine settings 250 to 316 inclusive are used for selection of the available options.
29.2.1 List of user machine constants
20 Axes orientation (0=0,1=-90,2=180,3=90) O
21 Spindle power display (0=off, 1=on) O
22 Display G181 (0=fictive, 1=real) O
24 Screensaver time out (0=off,1-255[min]) O
80 Selection demo mode (0=off,1=on,2=IPLC) O
93 BTR memory size (4-1024)[kB] O
251 Technology entry (0=off, >0 = on) O
252 DNC remote function (0=off, >0 =on) O
254 Tool measurement entry (0=off,1=on) O
255 Int.act.contour prog. (0=off, >0 = on) O
262 BTR function (0=off, >0 = on) O
262 BTR function (0=off, >0 = on) O
263 3D tool function (0=off,1=on) O
264 Cylinder interpolator (0=off,1=on) O
265 G6 (spline) function (0=off,1=on) O
266 Universal pocket cycle (0=off, >0 = on) O
271 Erase graphics (0=off, >0 = on) O
272 Synchrone graphics (0=off, >0 = on) O
292 Memory MEX 1 (0=off,??????=on) O
293 Memory MEX 2 (0=off,??????=on) O
294 Memory MEX 3 (0=off,??????=on) O
295 Memory MEX 4 (0=off,??????=on) O
296 Memory MEX 5 (0=off,??????=on) O
297 Memory MEX 6 (0=off,??????=on) O
350 Probe position 1st axis negative [µm] O
351 Probe position 1st axis positive [µm] O
352 Probe position 2nd axis negative [µm] O
353 Probe position 2nd axis positive [µm] O
354 Probe position 3rd axis negative [µm] O
355 Probe position 3rd axis positive [µm] O

MISCELLANEOUS
20000710 MillPlus V410 433
714 Scaling mode (0+2=factor,1+3=%,2+3=3D) O
715 Decimal point scaling (0-6) O
772 DIO: line syntax check (0=off,1=on) O
773 DIO: block numbers > 9000 (0=off,1=on) O
774 Tool in (0,1=clear,2=protect,3=replace) O
782 DNC remote directory (0=no, 1=yes) O
783 DNC disk format function (0=no, 1=yes) O
792 IPC remote directory (0=no, 1=yes) O
793 IPC disk format function (0=no, 1=yes) O
795 IPC %-protocol in file (0=no, 1=yes) O
799 MPC %-protocol in file (0=no, 1=yes) O
847 Width fixed measuring probe [µm] O
848 Radius calibration ring [µm] O
901 Dev1: baudrate (110-57600) O
903 Dev1: number of stopbits (1 or 2) O
904 Dev1: leader/trailer length (0-120) O
905 Dev1:data carrier (0=ASCII,1=ISO,2=EIA) O
906 Dev1:auto code recognition (0=off 1=on) O
907 Dev1: flowcontrol (0=RTS,1=RTS-f,2=XON) O
908 Dev1: check DTR (0=no, 1=yes) O
911 Dev2: baudrate (110-57600) O
913 Dev2: number of stopbits (1 or 2) O
914 Dev2: leader/trailer length (0-120) O
915 Dev2:data carrier (0=ASCII,1=ISO,2=EIA) O
916 Dev2:auto code recognition (0=off 1=on) O
917 Dev2: flowcontrol (0=RTS,1=RTS-f,2=XON) O
918 Dev2: check DTR (0=no, 1=yes) O
921 Dev3: baudrate (110-57600) O
923 Dev3: number of stopbits (1 or 2) O
924 Dev3: leader/trailer length (0-120) O
925 Dev3:data carrier (0=ASCII,1=ISO,2=EIA) O
926 Dev3:auto code recognition (0=off 1=on) O
927 Dev3: flowcontrol (0=RTS,1=RTS-f,2=XON) O
928 Dev3: check DTR (0=no, 1=yes) O
931 LSV/2 baudrate (110-57600) O
932 LSV/2 characterset (0=ASCII,1=ISO) O
933 LSV/2 time out period (0-128)[s O
934 LSV/2 nr.of repeats (0=no limit,1-12) O
935 LSV/2 delay time (0-128)[ms] O
936 LSV/2 check DTR (0=no, 1=yes) O
2455 Position fixed measuring probe 1 O
2456 Position fixed measuring probe 2 O
2457 Position calibration ring O
2655 Position fixed measuring probe 1 O
2656 Position fixed measuring probe 2 O
2657 Position calibration ring O
2855 Position fixed measuring probe 1 O
2856 Position fixed measuring probe 2 O
2857 Position calibration ring O
2955 Position fixed measuring probe 1 O
2956 Position fixed measuring probe 2 O
2957 Position calibration ring O
3055 Position fixed measuring probe 1 O
3056 Position fixed measuring probe 2 O
3057 Position calibration ring O
3155 Position fixed measuring probe 1 O
3156 Position fixed measuring probe 2 O
3157 Position calibration ring O
3255 Position fixed measuring probe 1 O
3256 Position fixed measuring probe 2 O
3257 Position calibration ring O
3355 Position fixed measuring probe 1 O
3356 Position fixed measuring probe 2 O
3357 Position calibration ring O
3455 Position fixed measuring probe 1 O
3456 Position fixed measuring probe 2 O
3457 Position calibration ring O
3555 Position fixed measuring probe 1 O
3556 Position fixed measuring probe 2 O
3557 Position calibration ring O
3655 Position fixed measuring probe 1 O
3656 Position fixed measuring probe 2 O
3657 Position calibration ring O
3755 Position fixed measuring probe 1 O
3756 Position fixed measuring probe 2 O
3757 Position calibration ring O
3855 Position fixed measuring probe 1 O
3856 Position fixed measuring probe 2 O
3857 Position calibration ring O
3955 Position fixed measuring probe 1 O
3956 Position fixed measuring probe 2 O
3957 Position calibration ring O
4055 Position fixed measuring probe 1 O
4056 Position fixed measuring probe 2 O
4057 Position calibration ring O
4155 Position fixed measuring probe 1 O
4156 Position fixed measuring probe 2 O
4157 Position calibration ring O
4255 Position fixed measuring probe 1 O
4256 Position fixed measuring probe 2 O
4257 Position calibration ring O

MISCELLANEOUS
434 Heidenhain

MISCELLANEOUS
20000710 MillPlus V410 435
29.3 Connecting cable for data interfaces
Client must ensure that an external interface cable is being used which is shielded on either side.
If a T-switch is being used, the signal ground and shield must not be connected. Mechanical switch-
over is only permitted to signal lines.
Should any problems be encountered with the data interface, check for the following:
Is a shielded data cable being used?
Does the length of the data line not exceed 15 metres?
Is the machine connected to the machine socket?

MISCELLANEOUS
436 Heidenhain
29.4 Configuring the Ethernet interface
Note
The MillPlus should be configured by a network specialist.
The MillPlus is fitted with an Ethernet interface to allow the control to be integrated into your network
as a client. The MillPlus transfers data across the Ethernet interface using the TCP/IP protocol
(Transmission Control Protocol/Internet Protocol) and the NFS (Network File System). TCP/IP and
NFS are widespread in UNIX systems, so you should normally be able to integrate MillPlus into the
UNIX world without having to use additional software.
The PC world with its Microsoft operating systems also uses TCP/IP for networking, but not NFS. You
will therefore need to install some additional software to enable MillPlus to be integrated into a PC
network.
NFS Client in the CNC has been tested with the following network software:
Operating system Network software
Windows NT 4.0 Diskshare NFS server for Windows NT, version 03.02.00.07 (Intergraph, web site:
www.intergraph.com).
Maestro NFS server for Windows NT, version 6.10 (Hummingbird
Communications, web site: http:\\www.hummingbird.com). e-mail:
support@hummingbird.com
Windows 95 Solstice NFS server, a component from the Solstice Network Client for
Windows package, version 3.1 (Sun Microsystems, web site: www.sun.com).
Windows 95/98, NT4.0 Omni-NFS server, (Xlink Technologies Inc., web site: http:\\www.xlink.com).
CimcoNFS server, (CIMCO Integration, web site: http:\\www.cimco.dk).
29.4.1 Ethernet interface connection options
You can connect the MillPlus Ethernet interface to your network using the RJ45 connector (10BaseT).
The connector is galvanically isolated from the control electronics.
RJ45 connector (10BaseT)
Use twisted-pair cables to connect the MillPlus to your network if using the 10BaseT connector.
If using screened cables, the maximum cable run between MillPlus and a node is 400m.
Note
If you connect the MillPlus directly to a PC, crossover cables must be used.
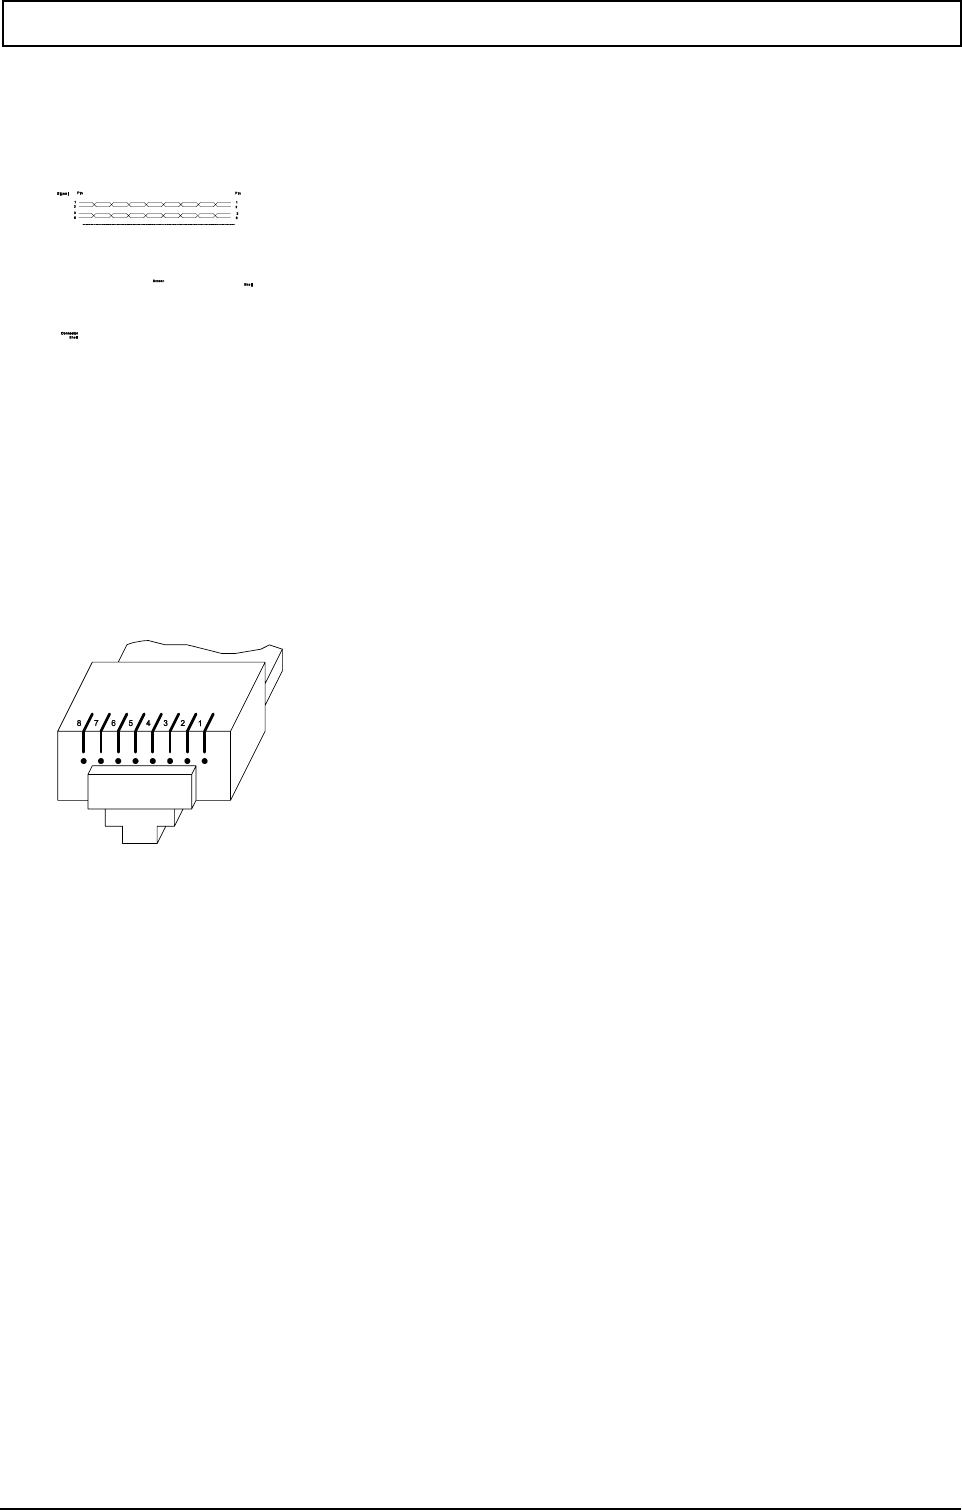
MISCELLANEOUS
20000710 MillPlus V410 437
29.4.2 Connecting cable for Ethernet interface
Ethernet interface RJ45 socket
Maximum screened cable run :400 m
Maximum transmission rate :200 kBaud to 1 MBaud
Pin Signal description
1 TX+ Transmit Data
2 TX– Transmit Data
3 REC+ Receive Data
4 spare –
5 spare –
6 REC– Receive Data
7 spare –
8 spare –
Front view of connector
The interface complies with the safe mains isolation requirements of IEC 742 EN 50 178.
29.4.3 Configure MillPlus Ethernet interface (file tcpip.cfg)
Note
The MillPlus should be configured by a network specialist.
Setting up machine constants:
Mc311=0 DNC Plus (0=off, on=??????)
Mc313=Password NFS Server (0=off, on=??????)
??????=Password
The data connection can be configured using the tcpip.cfg file. The tcpip.cfg file must always be on
the C:\ hard disk. A maximum of one local, four hardware, one service, ten NFS servers and ten DNC
servers can be defined and managed. The language is always English.
The tcpip.cfg file can be modified from the "HEIDENHAIN NUMERIC Service Menu". The Service
menu can be called up while the CNC system is being initialised by pressing the S key on the ASCII
keyboard. Select the tcpip.cfg editor using "TCP/IP configuration". A line should have no more than
128 characters. No distinction is made between upper and lower case characters. A comment line is
indicated by a semicolon ‘;’. Configuration sections can be repeated. A section is defined by a name in
square brackets. ‘[ Name ]’

MISCELLANEOUS
438 Heidenhain
Hardware section
This is indicated by the section name [Hardware] and contains the network device parameters. The
configuration file may have a number of hardware sections containing settings for several network
devices. The 'local' section determines which network device is to be used.
Parameter Meaning
Type = <device name> Name of the network device, e.g. SMC, NE2000, i8255x or AT-lantic
i0 = <irq number>
i1 = <irq number>
i2 = <irq number>
i3 = <irq number>
The parameters i0 to i3 control the allocation of the four interrupt outputs of
the network device to the IRQ lines of the CPU. This is determined by the
CNC hardware. See "Sample tcpip.cfg file".
Irq = <irq number> Defines which IRQ the driver software uses. This number must be one of the
numbers defined through i0 to i3.
Iobase = <iobase address> Setting of the I/O base address of the network device.
Local section
[local] contains the local parameters for the TCP/IP data communications protocol. There may only be
one local section.
Parameter Meaning
Type = <device name> Defines the type of network device in the CNC. The name must correspond
to the device name specified in one of hardware sections under
Type_Parameter.
Connector = 10baseT | 10base2 Defines which connection is to be used, 10BaseT (RJ45) or 10Base2 (BNC).
HostName = < network name> The name that the MillPlus uses to log on to the network. Network name:
must contain no more than 17 letters.
If you do not enter a name, the MillPlus will use the Null authentication and
not the normal Unix authentication; the parameters UserId, GroupID,
DirCreateMode and FileCreateMode will be ignored.
IpAddress = <IP address> Address that your network administrator must assign for the MillPlus. Input:
four integer values separated by decimal points (0 to 255). Ask your network
administrator for the number, e.g. 192.168.0.17
SubnetMask = <IP adress mask> The subnet mask used to save on addresses within your network. This
defines how many bits of the 32 bit Internet address are to be used for the
Subnet-ID and how many for the station ident number e.g. 255.255.255.0
defines 24 bits for the subnet number and 8 bits for the station ident number.
Again, ask your network administrator what value to enter.
DefaultRouter = < Router addr> Internet address of your default router. Only to be specified if your neetwork
consists of various subnets. Input: four integer values separated by decimal
points (0 to 255). Ask your network administrator for the number. Enter
0.0.0.0 if your network does not have a router.
Protocol = rfc | ieee Definition of the transmission protocol.
rfc: Ethernet protocol according to RFC 894
ieee: IEEE 802.2/802.3 protocol according to RFC 1042 Default value is 'rfc'.
Timezone = <time zone> The time parameter of files addressed by NFS. Shown in UTC (Universal
Time Coding), commonly known as GMT (Greenwich Mean Time). The
Timezone parameter indicates the difference between local time and UTC,
e.g. in Frankfurt the local time is UTC+1 (hours), in other words Timezone = -
1.
Default value is -1.
DncPort = <port number>
Defines the port number for the DNC service in both the Mill Plus CNC and
the DNC service of a remote system.
Default port number = 19000
SummerTime = y | n The SummerTime parameter determines whether the system is to switch
automatically from summer to winter time and vice versa.
Default value is y.

MISCELLANEOUS
20000710 MillPlus V410 439
NFS server section
[NFS server] marks the start of the NFS server section. This section contains the remote parameter
values for the NFS server. The configuration file may have a number of remote sections containing
settings for several NFS servers.
Parameter Meaning
IpAddress = <IP address> Defines the IP address of your server. Input: four integer values separated by
decimal points. Ask your network administrator for the number, e.g.
192.168.0.1
DeviceName = <server name> Name of the NFS server as shown in the MillPlus file administration, e.g.
Server_NT1.
RootPath = <Path name> Directory on the NFS server to which you want to link the MillPlus. The
MillPlus is only able to access this directory and its sub-directories. Watch
out for upper/lower case when typing the path name.
TimeOut = <Timeout in ms> Time in ms that the MillPlus allows to elapse before repeating a Remote
Procedure Call that the server did not respond to. Input range: 0 to 100 000.
The default value '0' corresponds to a timeout of 700 ms. You should only
use higher values if the MillPlus has to communicate with the Server via a
number of routers, e.g. for Intergraph and Hummingbird Servers, 1000 ms is
sufficient; for Sun’s Solstice Server, 5000 ms is necessary. Ask your network
administrator for the value.
rwtimeOut = 30 Timeout before retrying a read/write operation on NFS files (the time is
doubled on each retry of the same record until the timeout value is reached).
ReadSize = <packet size> Packet size in bytes when receiving data. Input range: 512 to 4096. Input 0:
MillPlus uses the optimum packet size as reported by the server.
Default value is 1300.
WriteSize = <packet size> Packet size in bytes when sending data. Input range: 512 to 4096. Input 0:
MillPlus uses the optimum packet size as reported by the server.
Default value is 1300
HardMount = y | n Specifies whether the MillPlus should repeat the Remote Procedure Call until
the NFS server responds.
y: always repeat
n: do not repeat
Do not use y if there is no active server on the network.
AutoMount = y | n Specifies whether MillPlus should be automatically mounted on the network
when it is switched on.
y: automount
n: no automount
UseUnixId = y | n Use 'Unix style' authentication for NFS.
y: Unix authentication, uses Userid, GroupId,
DirCreateMode and FileCreateMode
n: no authentication. Userid, GroupId,
DirCreateMode and FileCreateMode are not used.
Default value is y.
UserId = <user Id> User identification (Unix style): used by NFS to identify the user (the CNC)
on the server, e.g. 100. Ask your network administrator for the value.
GroupId = <group Id> Specifies which group_identification (Unix style) you use to access files on
the network, e.g. 100. Ask your network administrator for the value.
DirCreateMode = <mode> Specifies the access rights to directories on the NFS server. Enter value in
binary format.
Example: 111101000
0: access not permitted
1: access permitted
Default value is 0777 (octal).

MISCELLANEOUS
440 Heidenhain
CaseSensitive = y | n Uses or ignores the difference between capitals and small letters when
comparing directory or file names during directory searching. Defaults to ‘y’.
y: Case sensitive searches. E.g. 1234.pm is different from
1234.PM
n: Not case sensitive searches. E.g. 1234.pm is equal to 1234.PM
DncPort = <port number> Defines the port number for the DNC service in both the Mill Plus CNC and
the DNC service of a remote system.
Default port number = 19000
FileCreateMode = <mode> Specifies the access rights to files on the NFS server. Enter value in binary
format.
Example: 111101000
0: access not permitted
1: access permitted
Default value is 0777 (octal).
DncServer
[DncServer] indicates a DNC remote server section. It contains the parameter settings for a remote
DNC server. One or more DNC remote server sections can be present in the configuration file to
define one or more DNC servers. The remote section contains the following parameters:
Parameter Meaning
IpAddress = <IP address> Defines the IP address of your server. Input: four integer values separated by
decimal points. Ask your network administrator for the address, e.g.
192.168.0.1
DeviceName = <server name> Name of the DNC server as shown in the MillPlus file management, e.g.
DMG_Service_1.
TimeOut = <Timeout in sec.> Defines the connection timeout in s for the connection between local DNC
client and remote DNC server. When the remote DNC server is on the local
network set TimeOut to zero. Use non-zero values when the remote DNC
server is reached through an external connection such as an ISDN router.
1 1 1 1 0 1 0 0 0 = 0750 (Oktalzahl)
│ │ │ │ │ │ │ │ │
│ │ │ │ │ │ │ │ └───────── Alle anderen Benutzer: Suchen
│ │ │ │ │ │ │ └─────────── Alle anderen Benutzer: Schreiben
│ │ │ │ │ │ └───────────── Alle anderen Benutzer: Lesen
│ │ │ │ │ └─────────────── Arbeitsgruppe: Suchen
│ │ │ │ └───────────────── Arbeitsgruppe: Schreiben
│ │ │ └─────────────────── Arbeitsgruppe: Lesen
│ │ └───────────────────── Benutzer: Suchen
│ └─────────────────────── Benutzer: Schreiben
└───────────────────────── Benutzer: Lesen

MISCELLANEOUS
20000710 MillPlus V410 441
Service
[Service] indicates a DNC remote server section. It contains the parameter settings for a remote DNC
server. One or more DNC remote server sections can be present in the configuration file to define one
or more DNC servers. The remote section contains the following parameters:
Parameter Meaning
IpAddress = <IP address> Specifies the IP address of your server. Input: four integer values separated
by decimal points. Ask your network administrator for the address, e.g.
192.168.254.3
serverName = <server name> Name of the DNC server as shown in the MillPlus file management, e.g.
DMG_Service_1.
port = <port number> Default = 19001
repeatTime = <Time in sec.> Default = 10 Sec.
idleTimeout = <Time in min.> Default = 15 Min.
request = @<File name> or
<Ascii string> e.g. @c:\OEM\request.txt.
Sample tcpip.cfg file
; TCP/IP configuration file
; More sections of [remote] are allowed --> more NFS servers to choose
; More sections of [hardware] are allowed --> actually used hw is defined in [local] section
; The keywords with an ';" placed in front can be omitted. The value shown is the default
; value
;
;[hardware] ; LE412 HARDWARE
;type = smc ; this hw is an smc network device
;irq = 9 ; irq used by network device driver
;i0 = 9 ; hardware connections of network device to irq's
;i1 = 3
;i2 = 10
;i3 = 11
;iobase = 0x300 ; io base address of network device
;
;[hardware] ; LE422 HARDWARE
;type = i8255x ; this hw is an i8255x network device
;irq = 10 ; irq used by network device driver
;iobase = 0xE400 ; io base address of network device
;
[hardware] ; VMEBUS HARDWARE
type = at-lantic ; this hw is a ne2000 compatible network device
; note: the VMEbus at/lantic is used in ne2000 compatible mode
irq = 5 ; irq used by network device driver
i0 = 3 ; hardware connections of network device to irq's
i1 = 5
i2 = 9
i3 = 15
iobase = 0x300 0x240 ; io base address of network device
;
[hardware] ; dos_shape_pc
type = ne2000 ; this hw is a ne2000 compatible network device
; note: the VMEbus at/lantic is used in ne2000 compatible mode
irq = 5 ; irq used by network device driver
iobase = 0x300 ; io base address of network device
;
[local] ; configuration of CNC
type = ne2000 ; the type of network device used:

MISCELLANEOUS
442 Heidenhain
; must match a [hardware] type
connector = 10base2 ; 10baseT: RJ45 (twisted pair), 10base2: bnc (coax)
hostName = MillPlusshape ; CNC network name, maximum of 17 characters
ipAddress = 170.4.100.16 ; internet address of the CNC ==> ask your network
subnetMask = 255.255.0.0 ;subnet mask of network ==> administrator for values
defaultRouter = 0.0.0.0 ;internet address of default router, 0.0.0.0: no router
; ==> ask your network
; administrator for value
;protocol = rfc ; Link layer protocol used rfc: Ethernet, ieee: IEEE 802
;timezone = -1 ; + 1 hour of gmt :gmt + tz == local-> gmt=local - tz!!
;summerTime = y ; use automatic summertime correction (daylight saving)
port = 19000 ; portnumber DNC service
;
[nfsServer] ; configuration of a remote server.
; more than one remote sections allowed
ipAddress = 170.4.100.140 ; internet address of the server ==> ask your network
; administrator for value
deviceName = Intergraph ; Server name used inside CNC
rootPath = c:\temp ; server directory to be mounted as network drive on CNC
; This must be a shared directory on the NFS server
timeOut = 50000 ; units in milliseconds for timeout in server connection
; 0..100 000, 0: timeout set to 700 ms
;rwtimeOut = 30 ; timeout used for retry at read/write of NFS-files
; (time is doubled for each retry of same packet until timeOut)
;readSize = 1300 ; packet size for data reception: 512 to 4096, or 0 = use
; server reported packet size
;writeSize = 1300 ; packet size for data transmission
;hardMount = n ; yes/no continue mouting until succesfull
; don't use 'y' if you're uncertain server is running
autoMount = n ; yes/no automatically mount when CNC initialises
;useUnixId = y ; use UserId/groupId to identify to the server
userId = 100 ; Unix style user id for Authentication ==> ask your network
groupId = 100 ; Unix style group id ==> administrator
;dirCreateMode = 0777 ; Unix style access right for dir-create: Octal number
;fileCreateMode = 0777 ; Unix style access rights for file-create: Octal number
;
[nfsServer] ; configuration of a remote server.
; more than one remote sections allowed
ipAddress = 170.4.100.171 ; internet address of the server ==> ask your network
; administrator for value
deviceName = Hummingbird ; Server name used inside CNC
rootPath = c:\NFS_DATA ; server directory to be mounted as network drive on CNC
; This must be a shared directory on the NFS server
timeOut = 1000 ; units in milliseconds for timeout in server connection
; 0..100 000, 0: timeout set to 700 ms
;rwtimeOut = 30 ; timeout used for retry at read/write of NFS-files
; (time is doubled for each retry of same packet until timeOut)
;readSize = 1300 ; packet size for data reception: 512 to 4096, or 0 = use
; server reported packet size
;writeSize = 1300 ; packet size for data transmission
;hardMount = n ; yes/no continue mouting until succesfull
; don't use 'y' if you're uncertain server is running
autoMount = n ; yes/no automatically mount when CNC initialises
;useUnixId = y ; use UserId/groupId to identify to the server
userId = 100 ; Unix style user id for Authentication ==> ask your network
groupId = 100 ; Unix style group id ==> administrator
;dirCreateMode = 0777 ; Unix style access right for dir-create: Octal number
;fileCreateMode = 0777 ; Unix style access rights for file-create: Octal number
;
;
[NFSserver] ; configuration of a remote server.
; more than one remote sections allowed
ipAddress = 170.4.100.194 ; internet address of the server ==> ask your network
; administrator for value
deviceName = Solstice ; Server name used inside CNC
rootPath = C:\solstice ; server directory to be mounted as network drive on CNC
; This must be a shared directory on the NFS server
timeOut = 6000 ; units in milliseconds for timeout in server connection
; 0..100 000, 0: timeout set to 700 ms
rwtimeOut = 600 ; timeout used for retry at read/write of NFS-files
; (time is doubled for each retry of same packet until timeOut)
;readSize = 1300 ; packet size for data reception: 512 to 4096, or 0 = use
; server reported packet size
;writeSize = 1300 ; packet size for data transmission

MISCELLANEOUS
20000710 MillPlus V410 443
;hardMount = n ; yes/no continue mouting until succesfull
; don't use 'y' if you're uncertain server is running
autoMount = n ; yes/no automatically mount when CNC initialises
;useUnixId = y ; use UserId/groupId to identify to the server
userId = 100 ; Unix style user id for Authentication ==> ask your network
groupId = 100 ; Unix style group id ==> administrator
;dirCreateMode = 0777 ; Unix style access right for dir-create: Octal number
;fileCreateMode = 0777 ; Unix style access rights for file-create: Octal number
;
[NFSserver] ; configuration of a remote server.
; more than one remote sections allowed
ipAddress = 170.4.100.143 ; internet address of the server ==> ask your network
; administrator for value
deviceName = pmeSolstice ; Server name used inside CNC
rootPath = d:\solstice ; server directory to be mounted as network drive on CNC
; This must be a shared directory on the NFS server
timeOut = 5000 ; units in milliseconds for timeout in server connection
; 0..100 000, 0: timeout set to 700 ms
rwtimeOut = 100 ; timeout used for retry at read/write of NFS-files
; (time is doubled for each retry of same packet until timeOut)
;readSize = 1300 ; packet size for data reception: 512 to 4096, or 0 = use
; server reported packet size
;writeSize = 1300 ; packet size for data transmission
;hardMount = n ; yes/no continue mouting until succesfull
; don't use 'y' if you're uncertain server is running
autoMount = n ; yes/no automatically mount when CNC initialises
;useUnixId = y ; use UserId/groupId to identify to the server
userId = 100 ; Unix style user id for Authentication ==> ask your network
groupId = 100 ; Unix style group id ==> administrator
;dirCreateMode = 0777 ; Unix style access right for dir-create: Octal number
;fileCreateMode = 0777 ; Unix style access rights for file-create: Octal number
;
[dncServer]
serverName = Teleservice ; alias name for this server (PME-pc)
ipAddress = 170.4.100.143 ; its ip address
;timeOut = 1000 ; timeout in connection
;port = 19000 ; port number for dnc services
[Service] ; (MAHO) service centre
serverName = "Maho Service"; alias name for this service
ipAddress = 170.4.100.140 ; its ip address
request = "here I am" ; @fileName/tekst to identify yourself
;IdleTimeOut = 15 ; disconnect after .. minutes
;port = 19001 ; port number for service
;repeatTime = 10 ; repeat time in seconds to connect
;
; end of file
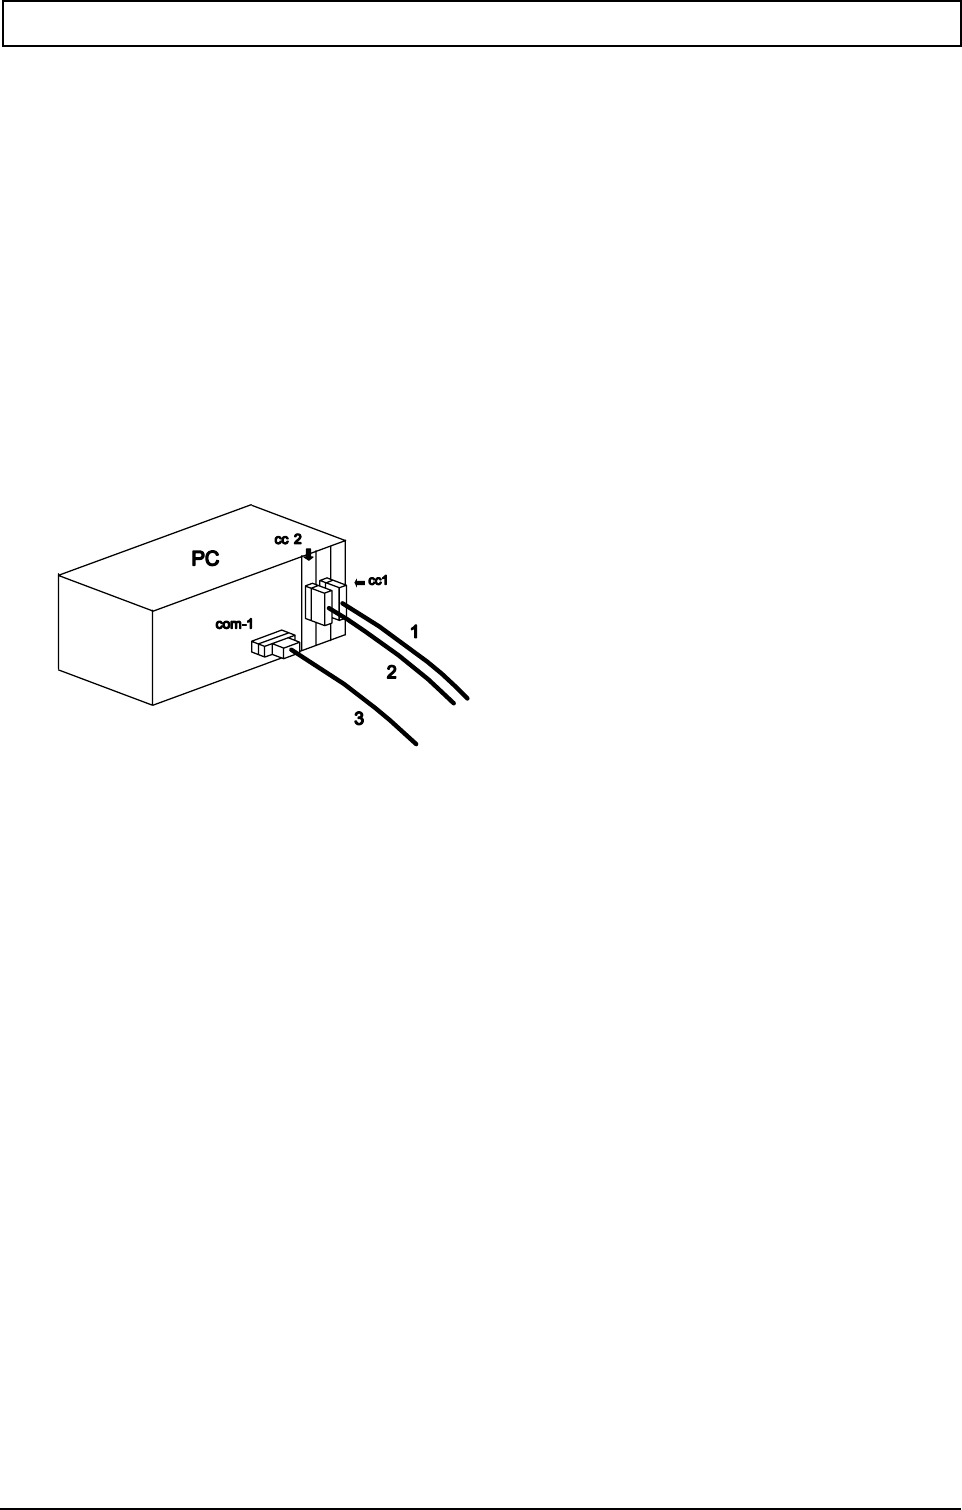
MISCELLANEOUS
444 Heidenhain
29.5 Digitizing
The purpose of digitization is to make the machining program for complex products in a relatively
simple fashion.
To this end, a measuring probe scans an area to be defined in which the product to be reproduced is
located. This measuring probe is linked to an external PC and transmits the coordinates of all contact
points with the product to the PC. The Renishaw Trace software package is run on the PC, which
shows every contact point on the screen, thus scanning the shape.
The second digitization phase is making the machining program. The technological information
required for machining is added to the scanned shape. The pattern is then transformed into a control
program by a machine-dependent postprocessor.
29.5.1 Installation
The basic hardware configuration for the Trace program is shown below.
1 PL79 cable to measuring probe
2 PL84 cable to measurement system
3 Cable from PC to CNC (refer to Installation Manual V320 Part 1,
Chapter "Connection information" cable 11a or 11b)
The machine should also be set to the Digitizing mode. For this purpose, set the CNC to Device 3,
which enables you to use the Xon/Xoff protocol. The following machine constant settings are also
required:
-MC10 (Number of Axes) = 3
-MC303 (Digitizing mode; 0=off, ???????=on) = ???????
-MC775 (Pipelined Digitizing; 0=off, 1=on) = 1
-MC920 (Channel; 0=none, 1=RS232C, 2=RS422) = 1
-MC921 (Baudrate; 110-38400) = 38400
-MC923 (Number of stopbits; 1 or 2) = 2
-MC924 (Leader/Trailer length; 0-120) = 120
-MC925 (Data Carrier; 0=ASCII, 1=ISO, 2=EIA) = 0
-MC926 (Auto Code Recognition; 0=off, 1=on) = 1
-MC927 (Flowcontrol; 0=RTS, 1=RTS-F, 2=Xon) = 2
-MC928 (Check DTR; 0=no, 1=yes) = 0
If an older Trace version is used, set MC921 to 19200.
To enable communication between CNC and PC, the CNC should be in the Digitizing mode.
A holder should be inserted into the spindle before the spindle can be fitted with the measuring probe.
The measuring probe is then mounted in the holder. We recommend that you should not mount the

MISCELLANEOUS
20000710 MillPlus V410 445
measuring probe entirely in the holder, but to retain some clearance. Refer to the Trace instructions
for more details of the mounting procedure.
As a next step, the three links between PC and CNC should be made. Two of these links go from
CNC to PC. For this reason, two cards (CC1 and CC2) have to be inserted into the PC. The
procedure for introducing these cards is set out in the Trace instructions.
The first link goes from the CNC to the CC1 card of the PC via the PL79 cable. As soon as the
measuring probe reaches a contact point with the product, the measuring probe transmits a signal to
this card.
The second link goes from the machine to the CC2 card via the PL84 cable. As soon as the CC1 card
is informed of a contact point being reached, the CC2 card reads out the relevant coordinates. The
standard measures (rulers) of the X, Y and Z axes are the input to this link. The method of linking to
the rulers depends on the specific machine.
The third link goes from PC to CNC. Being a serial link, it is led via the COM1 interface. Where
appropriate, the COM2 connection may also be used; the relevant software settings have to be made
for this purpose. If a serial dongle is used, it must be placed between the serial cable and the COM
interface. The PC transmits commands to the CNC via this link, for instance the command to proceed
when a contact point has been reached.
Note
Refer to the Renishaw Trace documentation and the chapter on activate/execute Program.

MISCELLANEOUS
446 Heidenhain