Wee WX Weather34 HS3 Setup Guide V1
User Manual:
Open the PDF directly: View PDF ![]() .
.
Page Count: 8
P a g e 1 | 8
weeWX-Weather34-HomeSeer HS3 Setup Guide
This is a general guide on integrating weeWX weather software with the weather34 web template adapted for
weeWX by Ian Steeple and getting the weather data into HomeSeer HS3. In this example, the weeWX server
and the web server are on separate systems (Ubuntu 18.04 virtual machines on VMware ESXi 6.5) The web
server runs Apache 2.4 and PHP 7.2. HomeSeer HS3 is running on Windows 10 Pro. The weather station is a
Davis Vantage Pro2 Model 6153 with 24hr Fan Aspirated Radiation Shield and uses the WeatherlinkIP data
logger.
Step 1:
Install, configure and test weeWX on first server (weeWX server).
a) The assumption is that Ubuntu 18.04 has already been installed.
b) The guide here describes how to install weeWX as a DEB package
c) Customize the weewx.conf file in /etc/weewx based on your location, station hardware and uploads to
WU, PWS, archive interval etc.
d) Restart weeWX.
e) At this point weeWX should be getting your weather station into the database and creating new web
pages and chart images in /var/www/html/weewx/ at every archive interval as well as uploading the
data to WU, PWS etc.
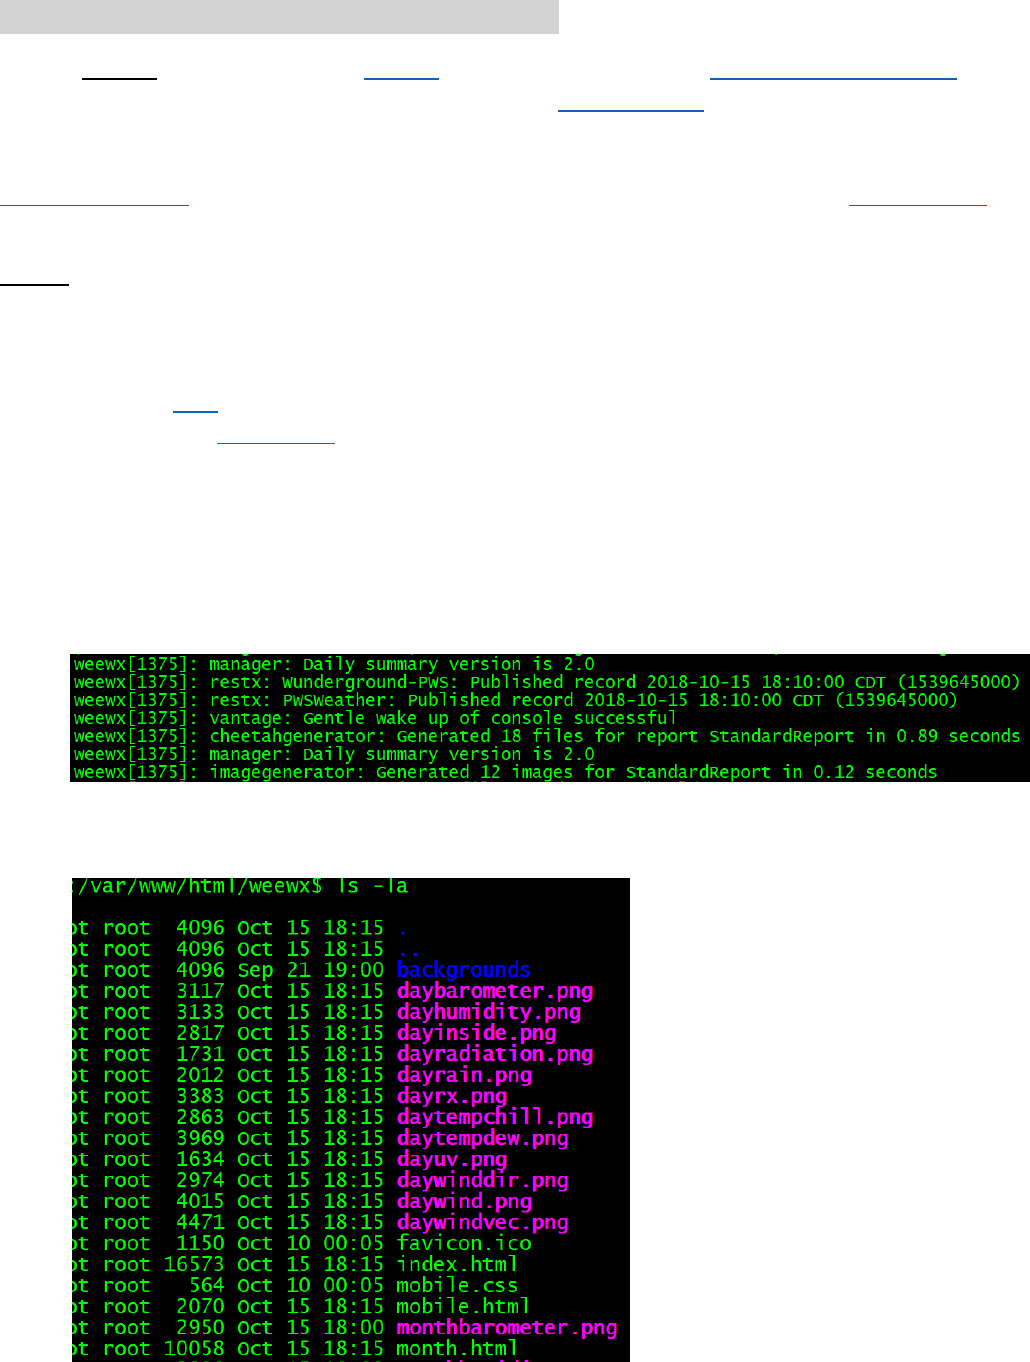
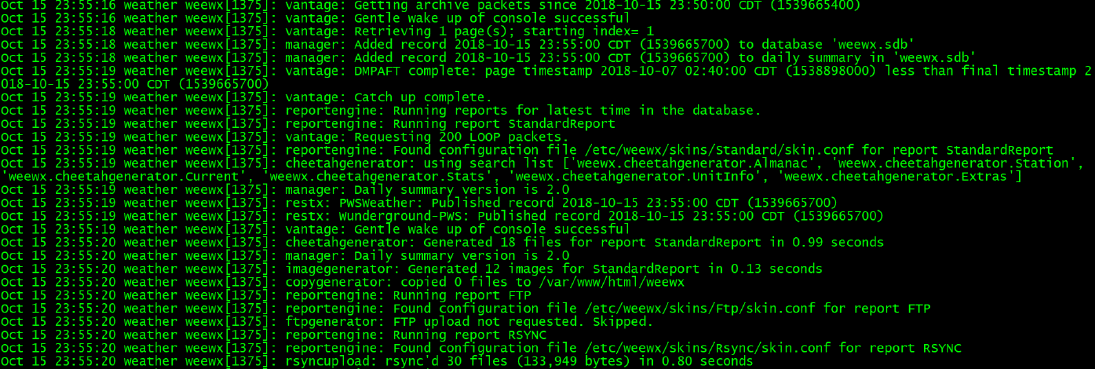
f) Your weewx log should show messages like this:
g) Your /var/www/html/weewx directory should look something like this containing the updated web
pages, chart images etc. generated at every archive interval.
P a g e 2 | 8
Step 2:
Install Ubuntu 18.04, Apache 2.x and PHP 7.x on second server (web server).
a) Here’s a good guide. Make sure the php-curl and php-mbstring modules are installed for PHP. Here’s a
solution if you are not able to install php-mbstring.
Step 3:
Configure RSYNC in weeWX and verify that your default weeWX web page/skin works .
a) The RSYNC feature of weeWX requires “passwordless ssh” configured for the user that runs weeWX so
that weeWX can copy the files to the web server. Here’s a guide on configuring “passwordless ssh”.
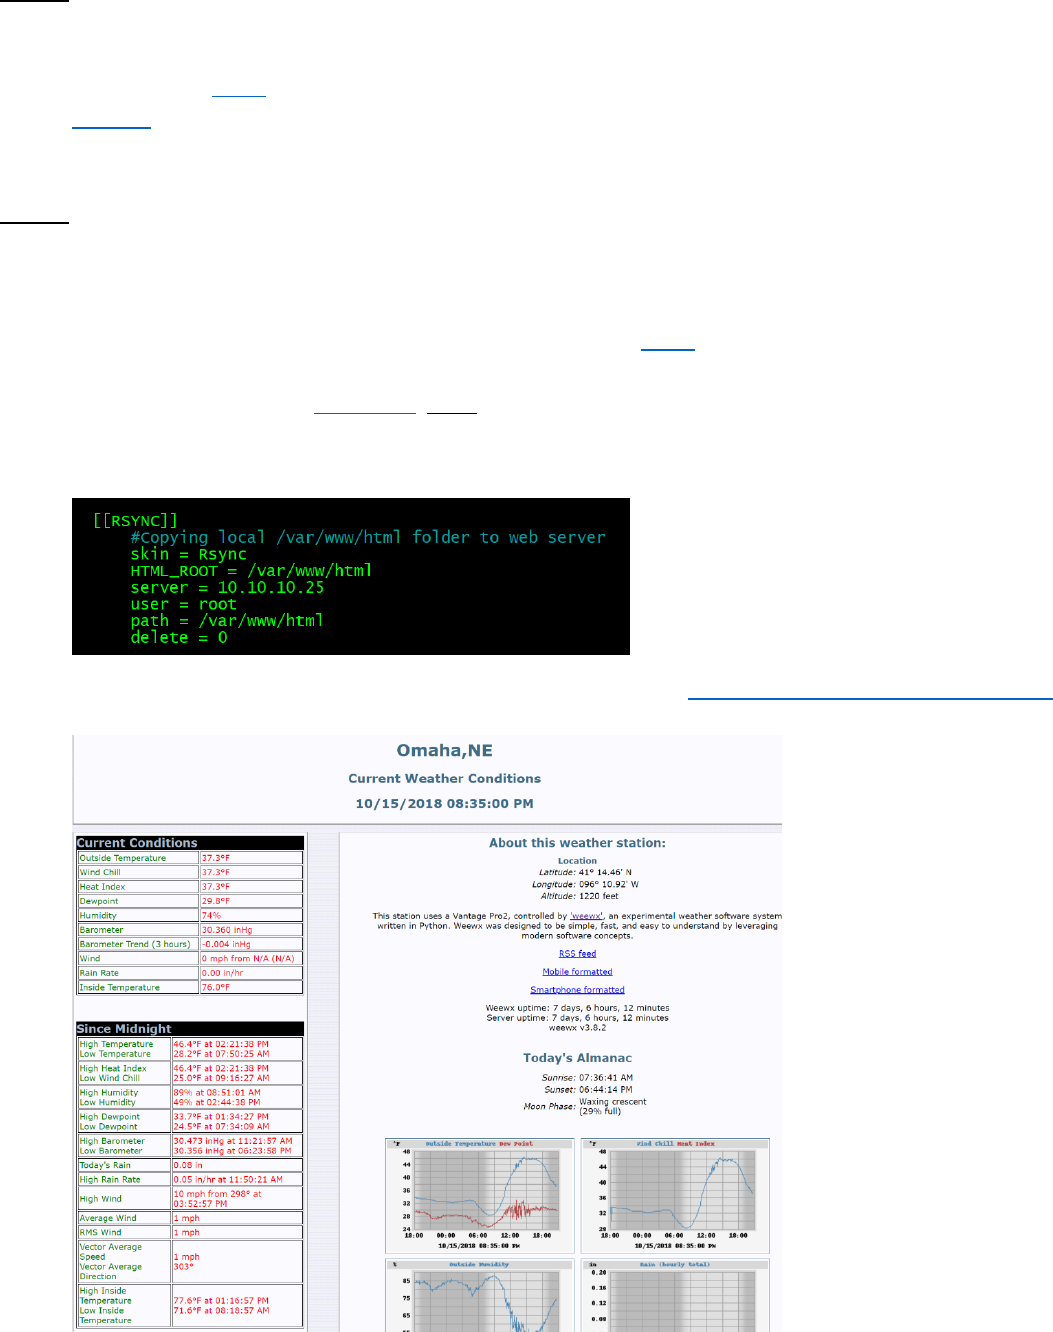
b) Change the RSYNC section of the weewx.conf file with your details. Here’s an example. This section is
explained in the weeWX user guide. Note that here we are copying not just the “weewx” directory
within the html folder but the whole “html” folder – to the web server. This is important when we get
to the end of Step 4.
c) Verify that the default weeWX web page works by browsing to http://webserver_IP_address/weewx
Here’s an example of the default weeWX skin:
P a g e 3 | 8
Step 4:
Configure weather34 template.
a) Use this Quick Start Guide to set up the weather34 template on the web server. The template on the
web server has yet to have access to the “realtime.txt” file generated by the “CRT” extension to get it’s
weather data.
b) Install and configure NFS server on the weeWX system to mount the /var/tmp directory (which is the
location of the “realtime.txt” file) on the web server. NFS client should be installed and configured on
the web server. Here is a good general guide on installing NFS server and client.
Here is the NFS snippet from the /etc/exports file on the weeWX server (NFS Server):
Here is the NFS mount line on the /etc/fstab file on the web server (NFS Client).
After the NFS configuration above, the “realtime.txt” file will be available to the weather34
template in the /nfs/weather directory of the web server.
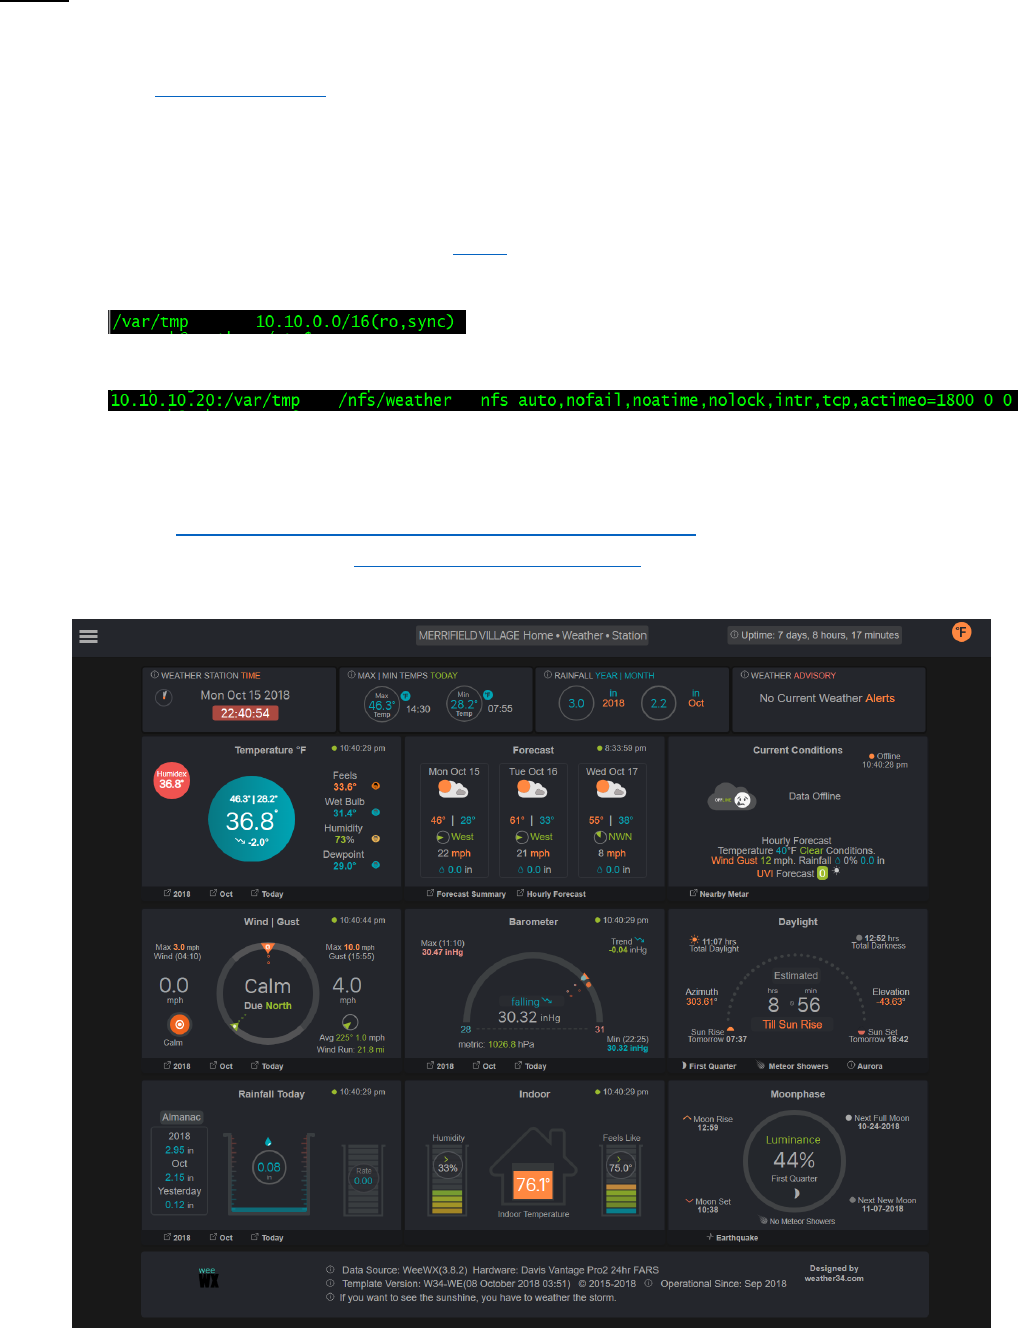
c) Browse to http://webserver_IP_address/easyweathersetup.php ,configure your template, save
configuration and browse to http://webserver_IP_address . Your weather34 template should look
something like this:
P a g e 4 | 8
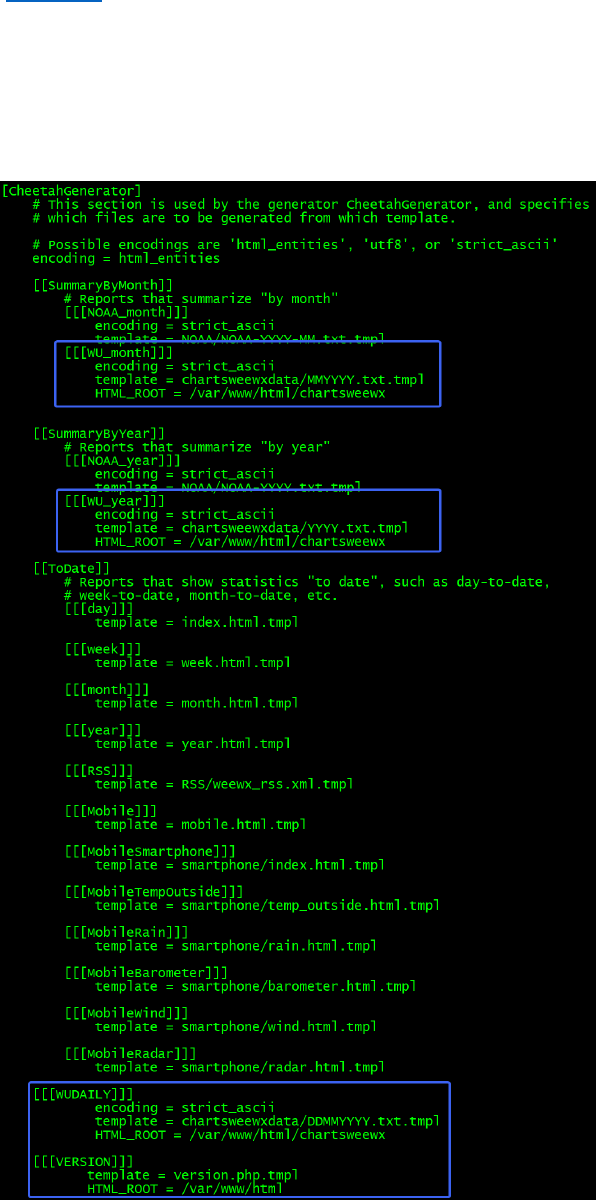
d) Use Method 2 in the Archive Charts Setup Guide with this change:
• Instead of pasting the contents of the “skinconf-snippets.txt” file into the end of the
[CheetahGenerator] section of the /etc/weewx/skins/Standard/skin.conf file – you will have to
merge the items from the file into the [CheetahGenerator] section – else you will get errors
when weeWX starts. The resulting skin.conf [CheetahGenerator] section looks like this with the
merged items highlighted:
• Restart weeWX
P a g e 5 | 8
• The RSYNC configuration in the weewx.conf file performed in Step 3b allows the complete
/var/www/html directory on the weeWX server to be copied to the web server and therefore at every
archive interval the following should be taking place.
o the default weewx web pages and charts are generated in the weeWX server’s
“/var/www/html/weewx” directory and copied to the same location on the web server by the
RSYNC process.
o the chartsweewx data is generated in the weeWX server’s
“/var/www/html/chartsweewx/chartsweewxdata” folder and the
“/var/www/html/chartsweewx/” folder and contents are copied to the same location on the
web server by the RSYNC process
o the “version.php” file is generated in the “/var/www/html/” directory of the weeWX server and
copied to the same location on the web server via the RSYNC process.
• The weewx log looks like this at archive interval:
P a g e 6 | 8
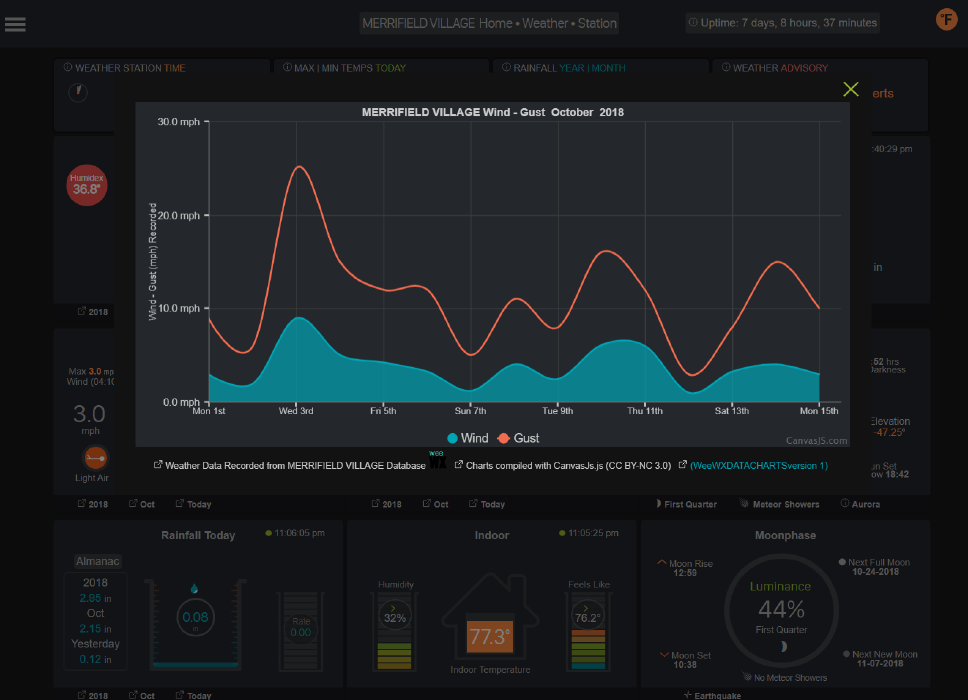
• The weeWX data is now directly available to the weather34 template to generate the CanvasJS charts
from the weather station data and history rather than from a Weather Underground API feed. The
charts should now look like this:
P a g e 7 | 8
Step 5:
Getting weeWX data into HomeSeer HS3
We use the excellent Jon00 Cumulus Weather script that reads the weeWX CRT generated
“realtime.txt” file (see Step 4) to create devices in HS3.
o Configure NFS client on HS3 Windows 10 Pro
✓ This will allow the /var/tmp directory on the weeWX server to be mounted as a drive on
the HS3 machine to make the “realtime.txt” file available to the Jon00 Cumulus Weather
script. Here’s a guide to install and configure NFS client on Windows 10 Pro.
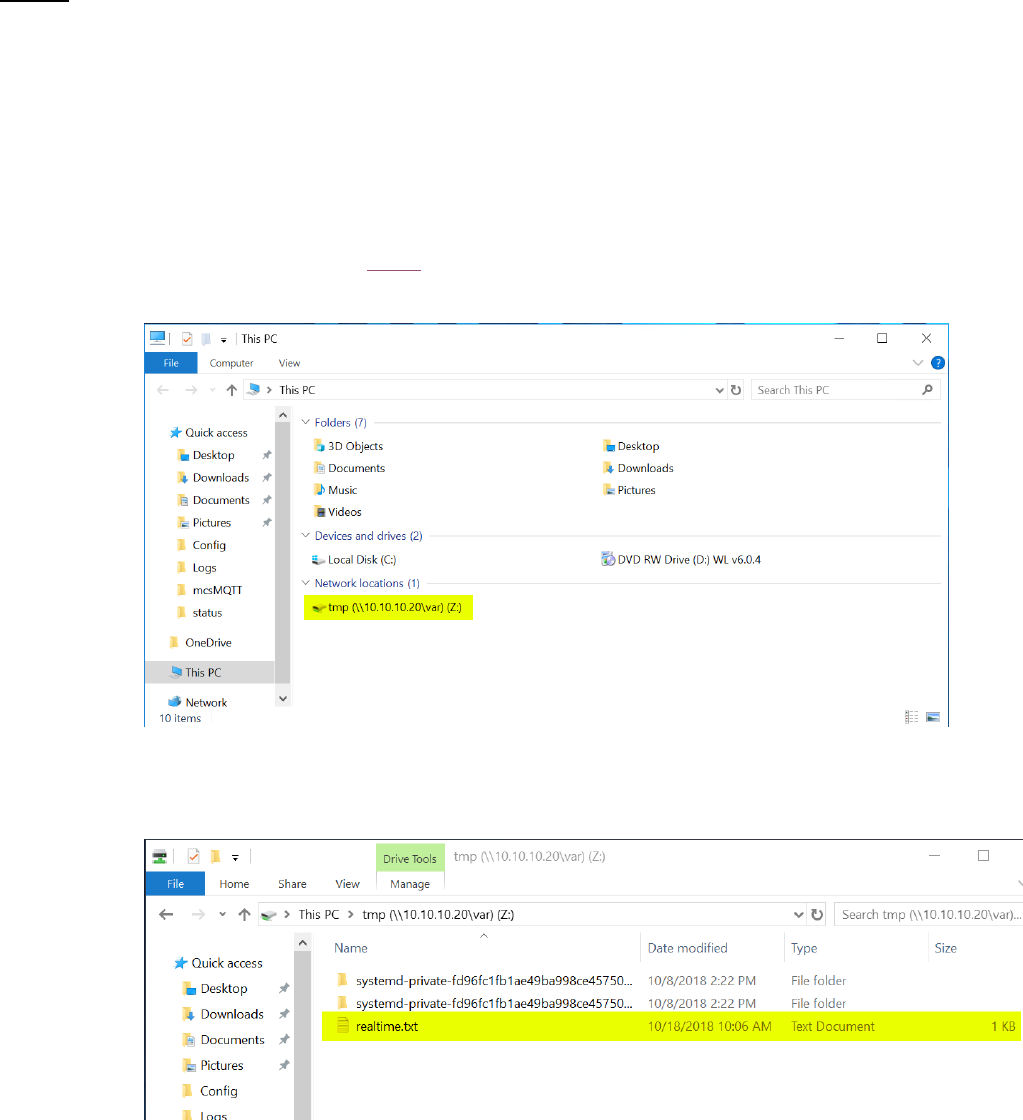
✓ The mounted drive on the HS3 machine looks like this:
✓ ..and the contents of the drive look like this:
P a g e 8 | 8
o Install and setup the Jon00 Cumulus Weather script from this website . Instructions are in Docs
folder of the script bundle.
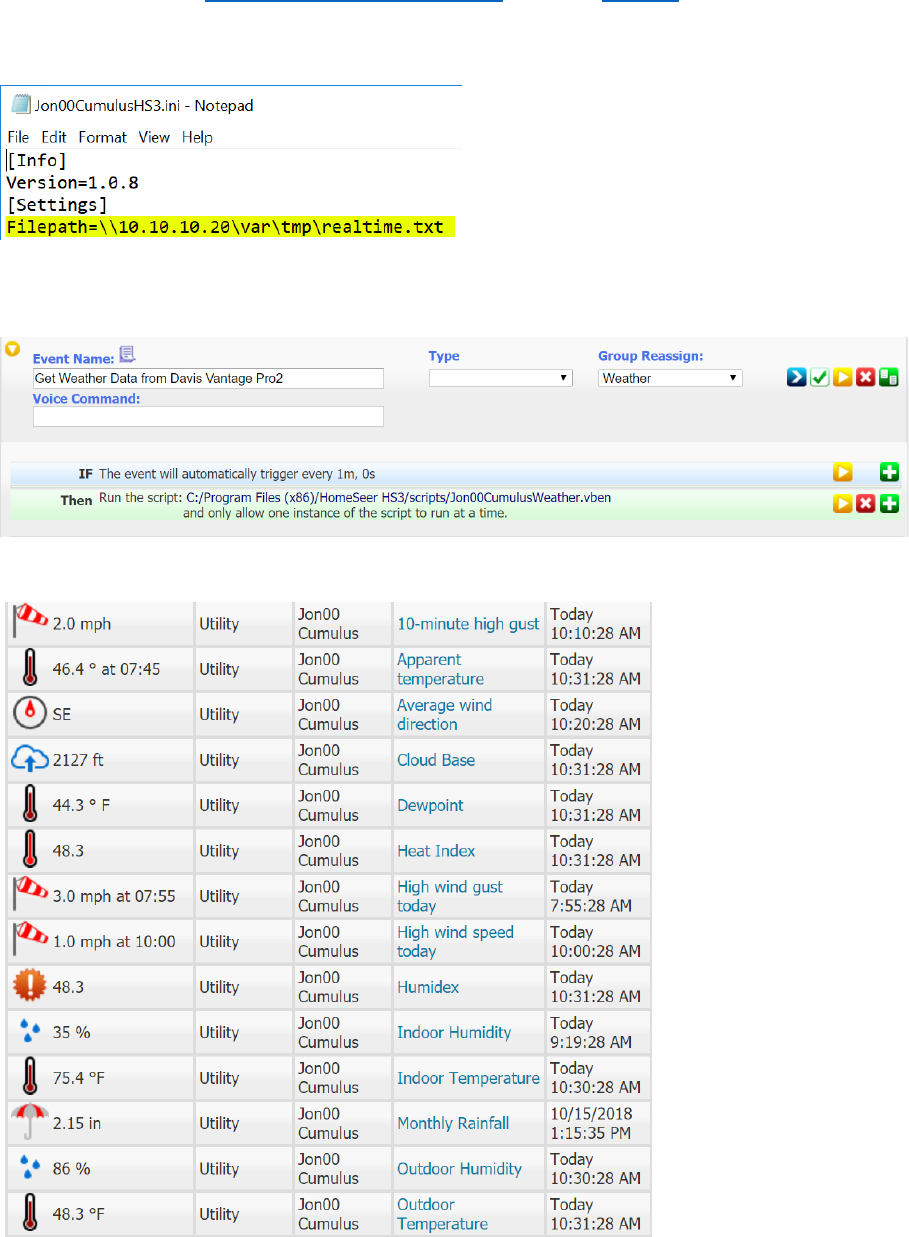
o This is what the file path to the “realtime.txt” file looks in the Jon00CumulusHS3.ini file:
o Create an Event in HS3 to run the Jon00 Cumulus script at specified intervals. Here’s an
example:
o Weather devices are created in HS3 and they are updated each time the script runs:
• Enjoy!
--taylormia
