ZView User Guide Z View_User Guide_4.0 View 4.0
User Manual: zView_UserGuide_4.0
Open the PDF directly: View PDF ![]() .
.
Page Count: 17
zspace.com zView User Guide
770-00035-01 Rev B
zView User Guide
Before You Begin
This zView User Guide describes how to set up and use zView to share and record zSpace sessions. This
guide applies to zView version 4.0.
Audience
Read this guide if you need to set up zView or use it to share or record zSpace sessions.
Scope
This guide introduces you to zView, describes how to set up the hardware and software, and how to
share and record zSpace sessions.
Prerequisites
• You should be familiar with zSpace applications.
• A second computer display (monitor) you can connect to the zSpace system.
• For Augmented Reality View you also need a webcam.
Document Organization
This guide is organized into the following chapters:
• Introduction
• Set Up zView
• Configure zView
• Share and Record zSpace Sessions
Related Documents
• The zSpace Support pages include zView setup and quick reference documents.
• The zSpace zView Releases page includes system requirements and release notes.
• The Developer Documentation page includes links to zView SDK documents.
• On YouTube Brain Snack: zView, in a nutshell provides an overview of how zView captures
zSpace sessions.
• On YouTube Setting Up zView Kit (on zSpace 300) describes how to set up the zView kit and
webcam.
Copyright © zSpace, Inc. 2015-2016. zSpace is a registered trademark of zSpace, Inc. All other
trademarks are the property of their respective owners.

Contents
Introduction 1
Modes 1
Requirements 2
Compatible zSpace Applications 3
zView User Interface 4
Set Up zView 7
Connect a Second Display 7
Set Up the Camera 8
Configure zView 9
Augmented Reality View 9
Adjust the Overlay 11
Share and Record zSpace Sessions 13
Share a zSpace Session 13
Record a zSpace Session 14
zspace.com
Introduction
Use zView to share a zSpace session. Normally, only the person at the zSpace can see the application in
stereoscopic 3D. zView projects the user’s experience onto a screen or a second monitor. You can use
zView to share the application in real time, record the zSpace session, or both.
Modes
zView provides two different modes:
• Augmented Reality View shows the application from a fixed viewpoint, without head tracking.
This mode requires a camera.
• Standard View shows the application with head tracking. Use this view to demonstrate how the
application adjusts the viewpoint as the user’s head moves. This mode does not require a
camera.

zspace.com
Requirements
zView has minimum requirements for Standard view, and additional requirements for Augmented
Reality view.
Standard View requirements:
• zSpace System Software
• zSpace 200: Version 4.0 or later
• zSpace 300: Version 5.0 or later
• zView-enabled application
• A second display for the zView application window
Augmented Reality View additional requirements:
• A webcam that supports HD resolutions (1280x720 or 1920x1080) at 15 frames per second (FPS)
or higher. zView works well using the Logitech C920 and Microsoft LifeCam Pro webcams.
• A zSpace camera mount or a tripod.
You can purchase a zView kit from zSpace that includes a webcam and a camera mount to attach the
webcam to the zSpace display.
The zSpace application you want to view must be enabled for zView. All zSpace STEM applications are
enabled and have zView controls embedded in them. If you are developing your own application, you
can enable it using the zView Unity plug-in.

zspace.com
Compatible zSpace Applications
zView works with the following zSpace applications:
• Newton’s Park
• Franklin’s Lab
• Studio
• Euclid’s Shapes
• Curie’s Elements
• Leopoly
• Visible Body
• Cyber Science 3D
• CyberAnatomy
From Newton’s Park, Franklin’s Lab, Euclid’s Shapes, Curie’s Elements, and Studio you can run zView
using built-in controls.
1. From the Home Control Bar on the left side of the application, select the Start zView icon.
The zView Control Bar appears at the top of the application.
2. From the zView Control Bar you can:
Toggle between Share Screen and Pause Sharing.
Start and Stop Recording.
View elapsed time while recording.
Open zView Settings to choose between low, medium, and high
quality video resolution.

zspace.com
Note: From the zSpace Experience only, you can use keyboard shortcuts to control zView
from the application.
Z – Start zView
X – Toggle between Augmented Reality View and Standard View
C – Pause zView
M – Toggle between Connect/Disconnect zView from the application
3. To exit zView click the Home Control Bar zView icon again or close the zView window.
For other applications, refer to the application and documents for information about starting zView.
zView User Interface
You can start zView from the desktop icon or from the in-app zView icon on the Home Control Bar of
some applications.
Note: When using a zView-enabled application, start zView using the controls in the application.
Desktop Icon In-App Icon
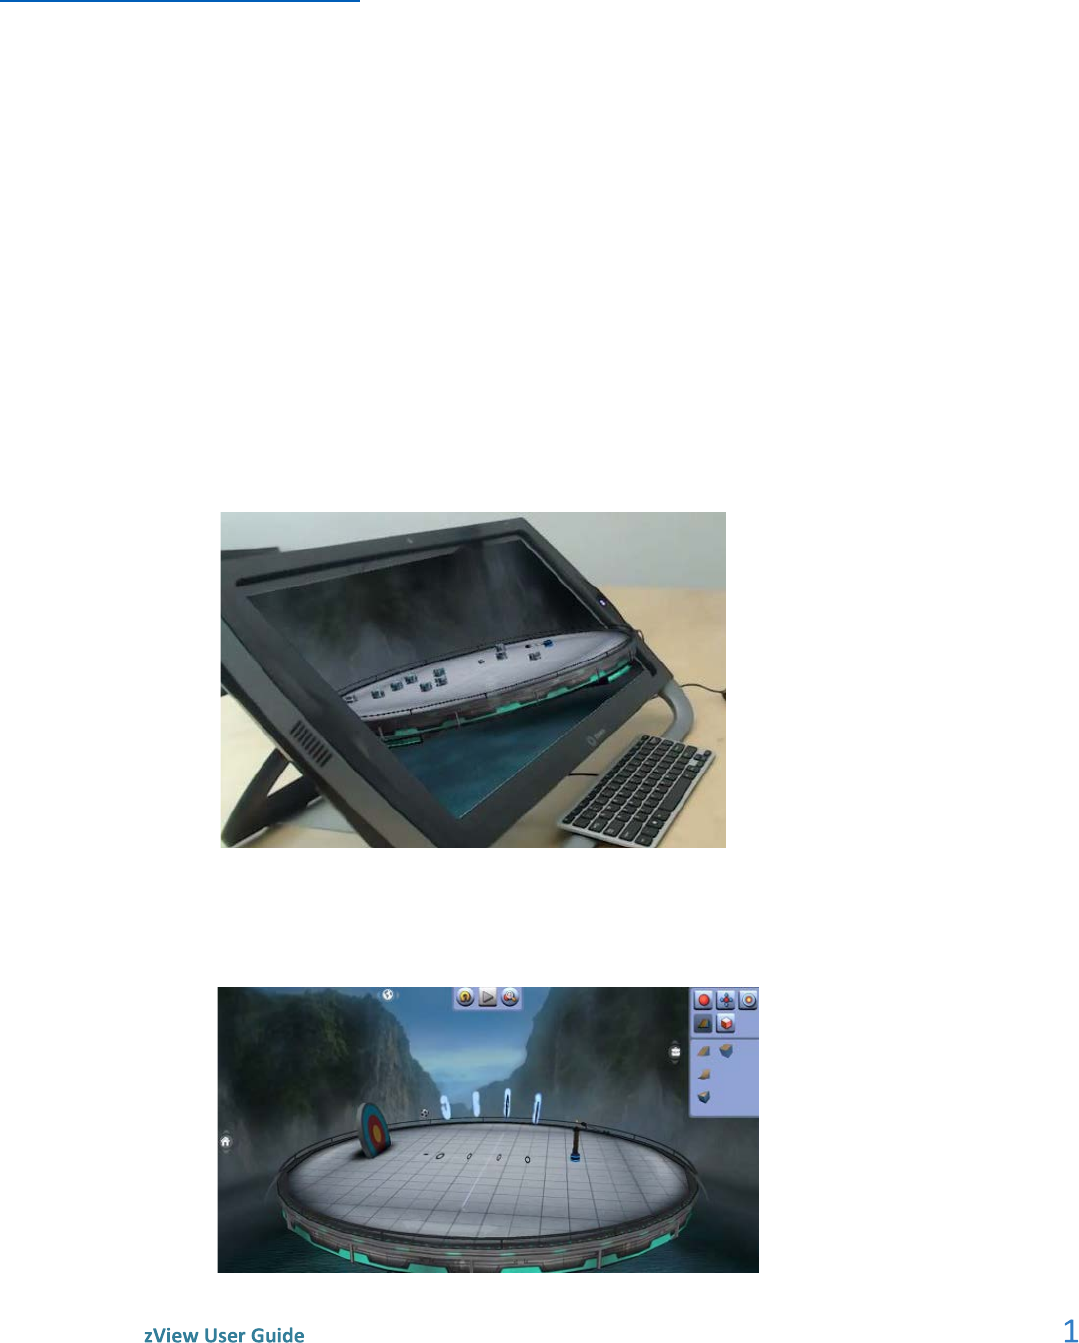
When started from the desktop icon, zView opens with a blank screen.

zspace.com
When started from inside a zSpace application, zView opens showing the application.
The zView Toolbar includes the following controls:
User Interface Controls
Share Screen
Click to share the zView feed with connected computers.
Pause Share Screen
Click to hide the shared zView feed.
Start Recording
Click to show start recording the current zSpace session.
Stop Recording
Click to stop recording. The system prompts you to save the video file when you stop
recording.

zspace.com
Standard View
Click to switch the zView feed to standard 2D display. Use Standard View to
demonstrate head tracking. This is the default mode if the webcam is not connected or
set up.
Augmented Reality View
Click to switch the zView feed to Augmented Reality view. Use Augmented Reality
View when talking to an audience while using zSpace. This is the default mode if the
webcam is set up and connected.
Fullscreen
Click to toggle between running zView in full-screen mode or in a window. Use
Fullscreen when projecting the recording onto a large screen, such as a television. You
can also press F11 to toggle the fullscreen view.
Connect
Click to connect to the current zSpace session. This feature does not work unless a
compatible zSpace application is also running.
Disconnect
Click to disconnect from the current zSpace session.
Setup
Click to open the USB Camera Setup dialog box.
Settings
Click to show the Adjust Overlay, Video Quality, and Language options.
Info
Click to show the About zView dialog box.
zspace.com
Set Up zView
zView runs on the same hardware required for zSpace applications. You must attach a second monitor
to use zView. You need a webcam to share and record zSpace sessions.
Connect a Second Display
You can connect the zSpace computer to a second monitor, a projection screen, or a TV.
1. Connect the second display using a DVI, HDMI, VGA, or DisplayPort connector as needed.
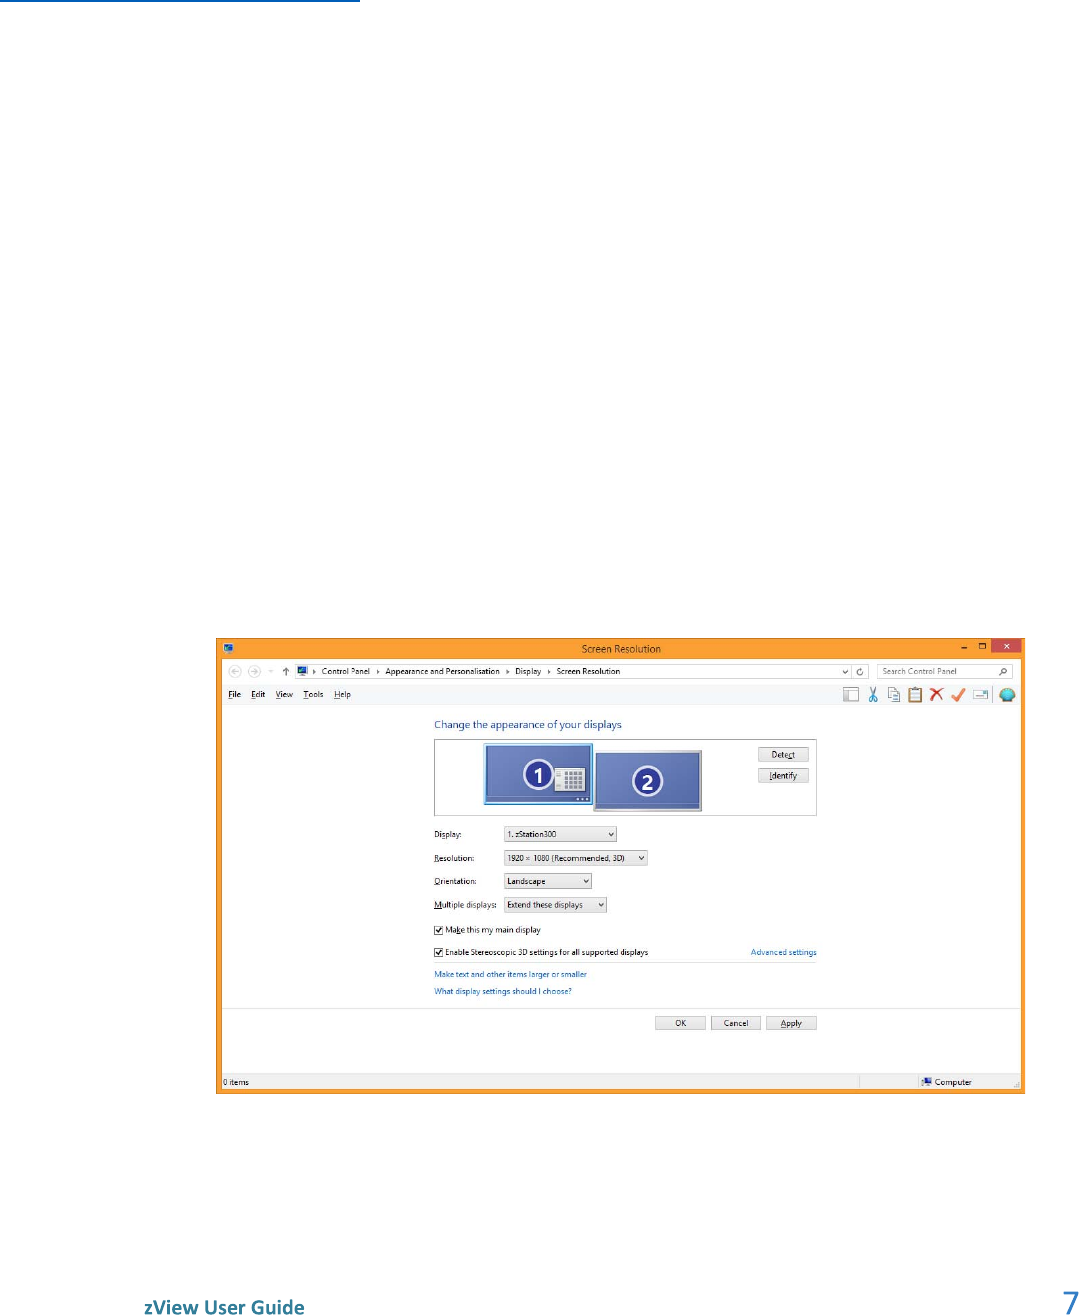
2. Open Windows Screen Resolution from Control Panel > Display > Adjust Resolution or right-
click on the desktop and select Screen Resolution.
3. Make sure that the Screen Resolution dialog box shows two displays in the same left-to-right
order as the displays are physically placed. For example, in the following figure, the zSpace
display is to the right of the second display.
Note: When connecting a secondary display, Windows sometimes arbitrarily changes the
resolution of your zSpace system to something other than 1920x1080. After connecting the
second display, verify that the resolution of your zSpace is 1920x1080 to avoid display problems.

zspace.com
4. If the displays are not arranged correctly, click and drag the zStation display to the number 1
position.
5. Make sure Multiple displays is set to Extend these displays.
6. Click Apply to test the settings.
7. When the settings are correct, click OK.
For more information, see Display Configurations - Managing Multiple Displays at zSpace Support.
Set Up the Camera
If you are only using the Standard View, you can skip this section.
Refer to the documents for your system when setting up the tripod or camera and mounting kit.
Plug the webcam USB cable into your PC. On the zSpace 300, use the USB 2.0 port on the back of the
zSpace.
Note: On many PCs, the webcam functions best in a USB 2.0 port instead of a USB 3.0 port. For
information about identifying USB ports, see Identifying USB 3.0 Ports at zSpace Support.
zspace.com
Configure zView
When you start zView, if it does not appear on your secondary display, drag the zView window to that
display.
• If you are using Standard View, you do not need to configure zView.
• If you are running zView in Augmented Reality View, which includes sharing the head-tracked
experience, you must configure zView to work with your camera. You can configure zView from
the Setup menu.
Augmented Reality View
Make adjustments to the camera position during Setup. This includes making sure that the camera
captures the user’s expression, if desired, and that lighting does not cause a glare on the zSpace. If you
adjust the camera later, you must run Setup again.
Note: Make sure the camera is connected to the zSpace and facing the zSpace display.
Follow these steps to run Setup:
1. Start zView.
2. Click Setup to start the configuration.
3. From the USB Camera Setup dialog box, make sure the camera is listed. Choose the
recommended resolution.
4. Click Next to continue.
zspace.com
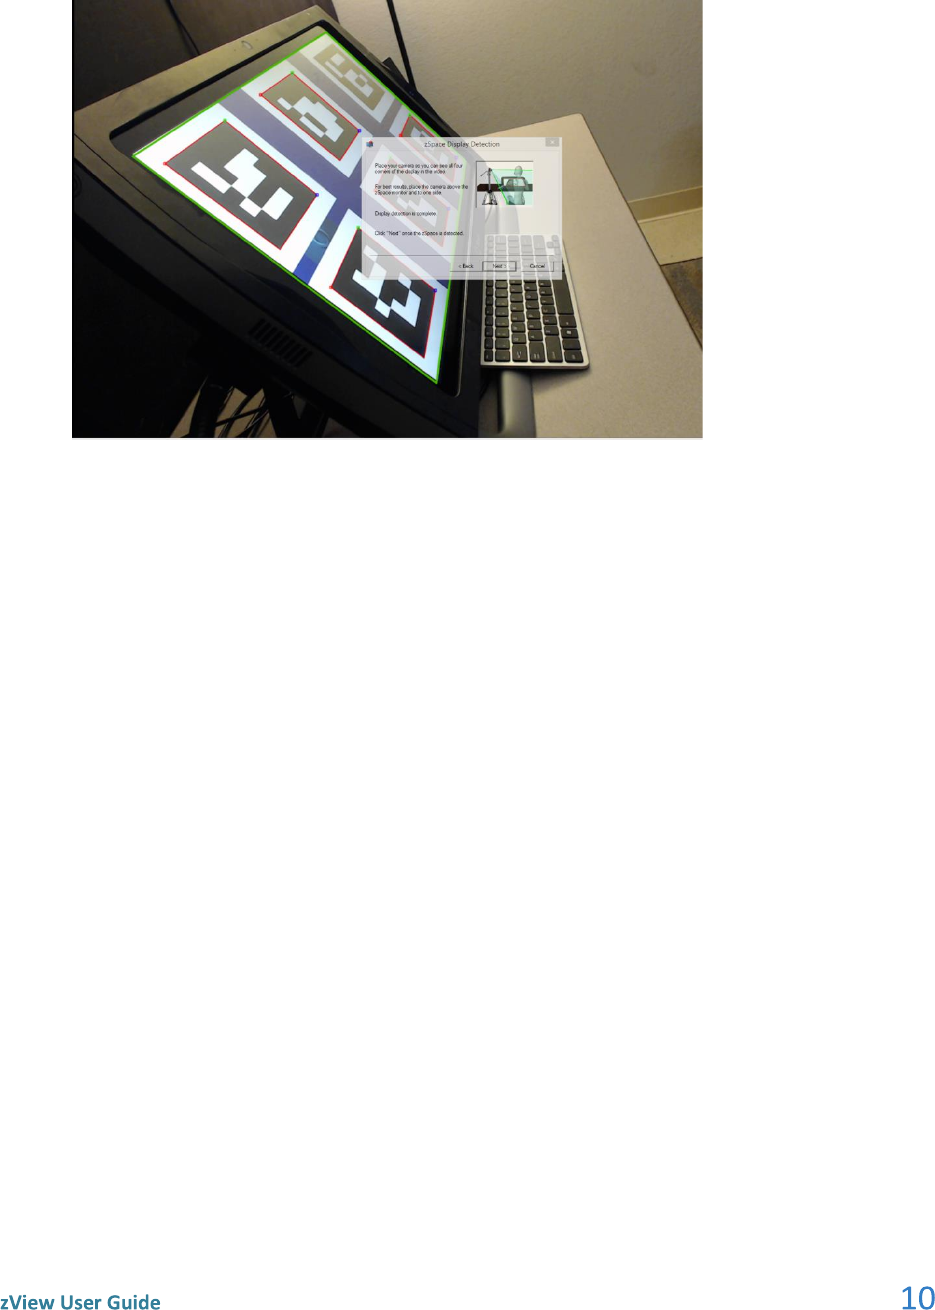
5. The zView Display Detection dialog box appears and is semi-transparent.
Six test patterns appear on the zSpace. Check the zView window. At least two markers must be
outlined in red before you can continue. zView also outlines the zSpace screen in red.
6. For the best results, adjust the camera until zView detects all six markers and the outline turns
green, then click Next.
Note: If zView cannot detect the display, make sure the camera view includes all four corners of
the zSpace display. Next, try lowering or adjusting the lights to avoid glare on the camera and
zSpace.
7. Click Finish.
zspace.com
Adjust the Overlay
You can adjust how the zView-enabled application displays in Augmented Reality View.
Complete the following steps:
1. Open a compatible application in zView.
2. When the application appears in the zView window, select Tools > Show Display Bounds. This
makes it easier to check the fit of the zSpace display in zView.
3. In zView, select Tools > Adjust Overlay.
4. If the application does not fit in the zView window correctly, make the following adjustments:
o To move the display right or left, enter a positive or negative number in the X Offset
text box.
o To move the display up or down, enter a positive or negative number in the Y Offset
text box.
o To adjust the size of the display, enter the percentage to scale the display as a decimal
number in the Scale field.
The following figure shows an overlay out of position.

zspace.com
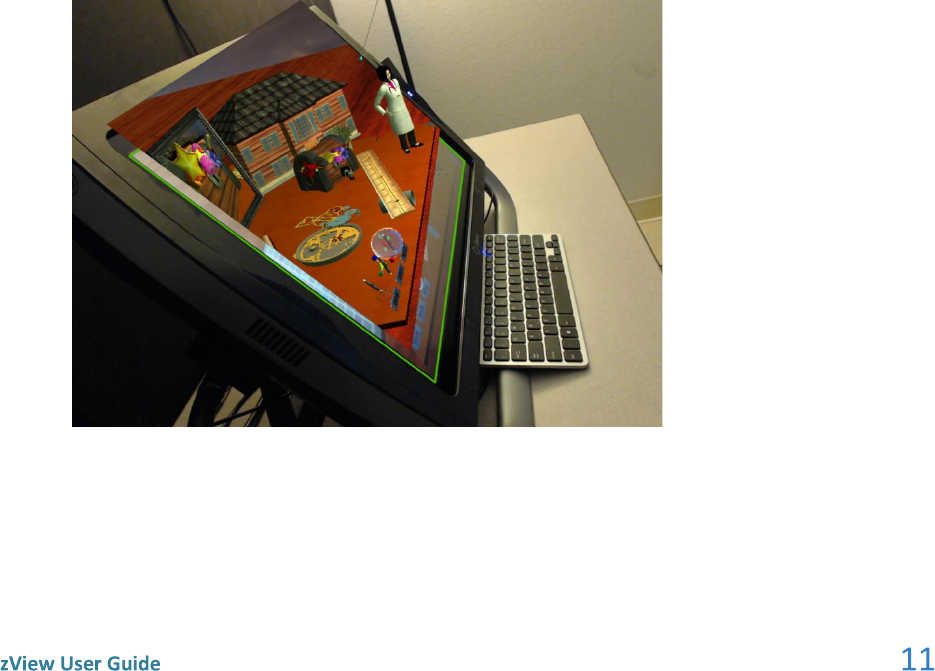
The following figure shows an overlay correctly adjusted.
5. When the overlay is correctly adjusted, hide the display bounds by clearing the Tools > Show
Display Bounds menu option.
6. Click OK.
When you run zView again, the system prompts you to reuse the current settings or run the Setup
Wizard again.
If the application you are running includes zView controls, the next time you run the application you can
launch zView from within the application. However, if you move the camera you must repeat these
configuration steps.
When you are done configuring zView, you can share or record a zSpace session. See the next section
for more information.

zspace.com
Share and Record zSpace
Sessions
When you are done configuring the system as described in Configure zView, you can share and record
zSpace sessions.
Share a zSpace Session
Using zView, you can share a zSpace session in real time. To share a zSpace session, start zView then
launch your zSpace application.
Tip: The zSpace STEM applications are integrated with zView. Once you complete configuration, you can
start zView by clicking on the zView icon in the STEM application’s Control Bar.
If needed, use the following steps to fine-tune the zSpace display in zView.
1. Make sure you can see your zSpace session in zView. Move the zView window from the zSpace
display to your second monitor if necessary.
2. Choose Standard View or Augmented Reality View as described in Configure zView. You must
have a webcam for Augmented Reality View.
3. Set zView to full-screen mode, if desired, using the toolbar button or by pressing F11. Full-screen
mode is recommended if you are projecting onto a large screen.
4. For Augmented Reality View only, adjust the overlay as described in the Adjust the Overlay
section.
5. When the zSpace display is correct, choose Share Screen from the toolbar.

zspace.com
Record a zSpace Session
Using zView, you can record a zSpace session. You can record in either Standard View or Augmented
Reality View.
Tip: The zSpace STEM applications are integrated with zView. Once you complete configuration, you can
start zView by clicking on the zView icon in the STEM application’s Control Bar.
Record your session as follows:
1. Make sure you have turned off the display bounds by deselecting the Tools > Show Display
Bounds menu option.
2. Select Settings > Video Quality from the toolbar to adjust the quality of your recording. A higher
quality results in a larger video file.
3. To start recording, select the Start button from the toolbar. You can also use the keyboard
shortcut Ctrl R.
When you start recording the Record button is replaced by the Stop button.
4. You can select the Pause button from the toolbar to pause while recording.
5. To stop recording, select the Stop button. You can also use the keyboard shortcut Ctrl T.
6. By default the video is saved in the Users\Public\Public Videos folder. The system prompts you
for a file name when you stop recording.
Note: Choose Cancel to discard the video without saving.
