Dongguan Koppo Electronics BT513 Bluetooth Headset User Manual BT513 bluetooth headphone V3 0
Dongguan Koppo Electronics CO.,Ltd Bluetooth Headset BT513 bluetooth headphone V3 0
Manual
BT513
User Manual
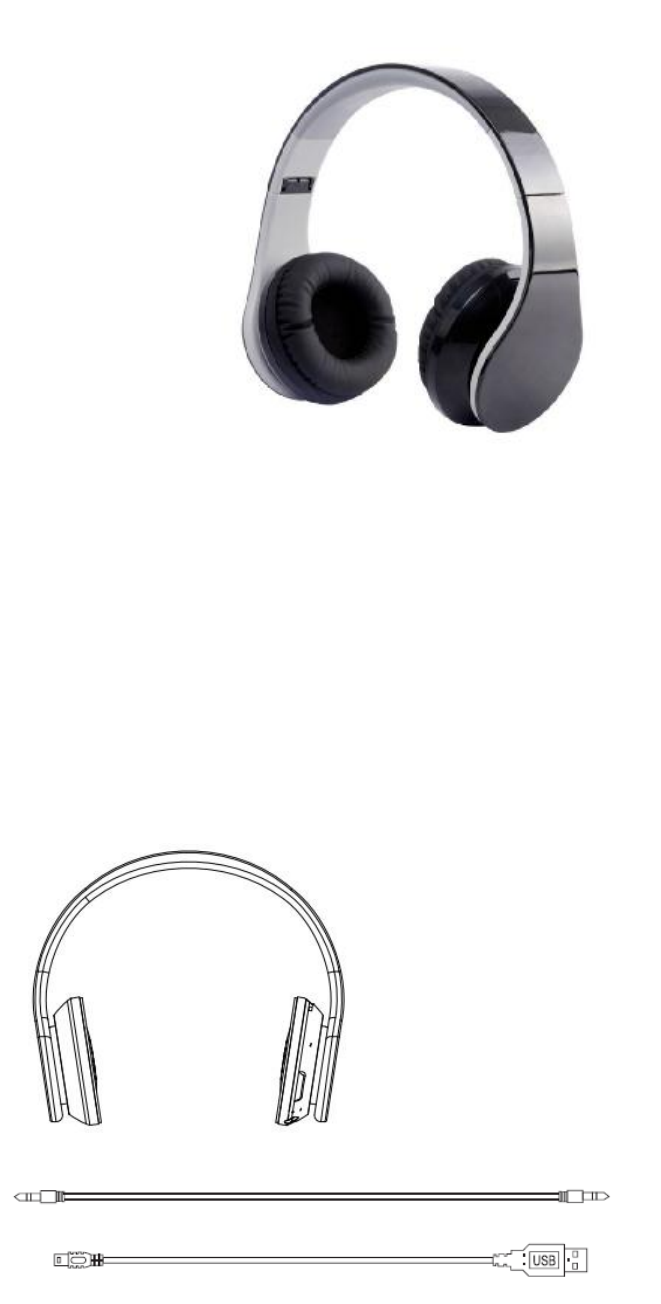
Accessories
1. User Manual
2. Warranty Card
3. Micro USB Cable
4. 3.5mm audio cable
Please read carefully the manual before using and keep it as a record.
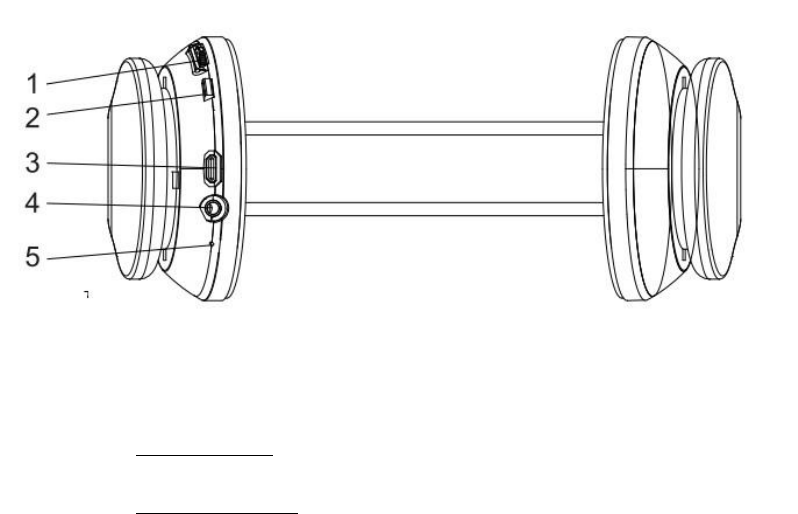
Know your headphone:
1. Volume button -
a. Move Upwards: Volume +
b. Move Downwards: Volume -
2. power button / Bluetooth power button
3. Micro USB slot
4. Line in slot
5. Mic
■Specification and technical features:
Dimension :170x200x75(mm)
Weight :189g(bare headphone, without packing)
Charging interface: Micro USB
Press buttons: two (power button + volume button )
Battery :3.7V/250mAh
Charging specification:Micro USB
Charging input :5V/1.0A
Charging indication :Red LED light is continuously on
Please use standard charging accessory to charge for this headphone, the normal charging time
is about 2 to 3 hours.
Standby time : more than 100 hours
Successive talking time: about 8 hours
Volume control:16 ranks, 3dB variation in each rank
Working temperature : -20~70℃ during the charging period
Storage temperature: -40~80℃
■Speaker and MIC
Speaker diameter: Φ40mm
Impedance:Impedance: 32Ω
Sensitivity:S.P.L:110dB S.P.L.at 1KHz
Rated power: 1mW
Frequency Response: 100Hz-9000Hz
MIC Type : Capacitance
Microphone Unit: Φ4*1.5mm
Directivity: Full direction
S.P.L:-42±3dB
Impedance: ≤2.2KΩ
Frequency Response: 30-16,000HZ
■Bluetooth Mode:
Bluetooth Protocol version: CSR Ver 3.0
Profile:HSP1.2/HFP1.6
Remote control to the player: Volume up and down
Device Mode Number: BT513
Matching code: 0000
RF transmit:0dBm(Max)
Receiving sensitivity:-90dBm
Transmission Range (Hz) 20 - 20,000
Antenna Gain: above -3.5dB
Human Gain: above -6.5dB
Communication distance :10m
■Mechanical Reliability
Press button :200,000 times
Micro USB interface : Pull out and pull in no less than 5000 times
LED: brightness/light-leakage/luminosity must be the same.
■Operation

Turn ON: In the state of power-off, press and hold the power button for 1, the headset will send
out two “di-di” Prompt tones and blue LED will be on ; the blue and red LED light will glitters in
turn if holding power button for 2 sec ; there will be 4 “du-du” rising Prompt tone if holding for 5
seconds.
Turn OFF: In the state of power-on, press and hold power button for 5 seconds till the red LED
light glitters three times. There will be four "dodo” voices from loud to low. Now the unit is
turned off.
Pairing: In the state of power-off , press and hold power button for 3s until red and blue LED
light glitters in turn, the headphone enters into pairing mode. In this case, the headset can be
paired with the Bluetooth enabled devices.
※Usually,Setup procedure relates to the “setup”,” connection” or “Bluetooth” menu in your
cellphone, click “search for Bluetooth device”, your cell phone will find out headphone
name ”513” or other pairing name and ask if you want to connect, then click “confirm” or “yes”.
Afterwards, input pairing password or PIN code ”0000” and click ”yes” or “confirm”, the
headphone will connect with your Bluetooth device successfully.
※The headphone will enter in power-on mode if releasing power button before red and blue LED
light glitters in turn. In this case, please turn off the power and operate it once again.
Answering calls: Press the power button once to answer the incoming calls.
Dialing calls: If the headset is paired with the cell phone, dialing the numbers on the cell
phone will enable the conversation on the headset automatically.
Ending calls: Ongoing conversation on cell phone can be ended by pressing the power key
once. .
Redial latest number: The cell phone will automatically dial the last dialed phone number by
double pressing power key on the Bluetooth headset. We can hear the prompt tone from the
headset.
Volume control: In the state of music or calls, move volume button upwards to increase the
sound and move it downwards to decrease the sound.
Wired headphone Function
The headphone can be used as the wired headphone. Just simply attach 3.5mm audio cable.
In the state of power off: It can be used as the wired stereo headphone by inserting the
3.5mm audio cable. Please adjust the volume of sound sources when it is as the wired
headphone. In this case, the volume control of the headphone can' t be workable.
■Symbol of LED Light :
Charging--- The red light is on. The blue light will be on when it is full of power after charging.
Standby----blue light quickly glitters once per 5 seconds
Conversation/ Music---blue light glitters once per 5 seconds
Power Shortage---red light glitters (with prompt tone)
Pairing---red and blue light glitters in turn
FCC Caution: Any changes or modifications not expressly approved by the party responsible for
compliance could void the user's authority to operate this equipment.
This device complies with Part 15 of the FCC Rules. Operation is subject to the following two
conditions: (1) This device may not cause harmful interference, and (2) this device must accept
any interference received, including interference that may cause undesired operation.
This device and its antenna(s) must not be co-located or operating in conjunction with any
other antenna or transmitter.
NOTE: This equipment has been tested and found to comply with the limits for a Class B digital
device, pursuant to Part 15 of the FCC Rules. These limits are designed to provide reasonable
protection against harmful interference in a residential installation. This equipment generates,
uses and can radiate radio frequency energy and, if not installed and used in accordance with
the instructions, may cause harmful interference to radio communications. However, there is no
guarantee that interference will not occur in a particular installation.
If this equipment does cause harmful interference to radio or television reception, which can be
determined by turning the equipment off and on, the user is encouraged to try to correct the
interference by one or more of the following measures:
-- Reorient or relocate the receiving antenna.
-- Increase the separation between the equipment and receiver.
-- Connect the equipment into an outlet on a circuit different
from that to which the receiver is connected.
-- Consult the dealer or an experienced radio/TV technician for help.
changes or modifications not expressly approved by the party responsible for compliance
could void the user's authority to operate the equipment.