Dongguan Yuanfeng Technology MR73-7023 Tablet PC User Manual MR73
Dongguan Yuanfeng Technology Co., Ltd Tablet PC MR73
User manual
1
MR73
User Manual
2
1.Appearance ...............................................................................................................................1
2. Beginning Use...............................................................................................................................2
2.1 Charge the battery ...............................................................................................................2
2.2 Use the storage card............................................................................................................2
2.3 Hot plug of storage card......................................................................................................2
2.4 Memory space.....................................................................................................................3
2.5 Power on/off........................................................................................................................3
2.6 Connect to wireless networks..............................................................................................3
3. Home Screen.................................................................................................................................5
3.1 Status and notifications .......................................................................................................5
3.2 Shortcuts to Add widgets ....................................................................................................7
3.3 Finger gestures....................................................................................................................7
3.4 Coping files to and from the storage card ...........................................................................8
3.5 Searching the device and the web.......................................................................................9
4. Personalizing...............................................................................................................................10
4.1 Change the Notification ringtone......................................................................................10
4.2 Change your wallpaper .....................................................................................................10
4.3 Personalize your Home screen with widgets.....................................................................11
4.4 Rearrange or remove widgets and icons on your Home screen ........................................12
5. Web browsing..............................................................................................................................13
6 Manage Applications....................................................................................................................14
7. Typical applications introduction................................................................................................15
7.1 Music Player .....................................................................................................................15
7.2 Video Player......................................................................................................................17
7.3 Gallery...............................................................................................................................18
7.4 Explorer.............................................................................................................................21
7.5 Instant Messaging tools.....................................................................................................22
7.6 Emails ...............................................................................................................................22
8. Settings........................................................................................................................................23
8.1 Wireless & networks.........................................................................................................23
8.2 Sound ................................................................................................................................23
8.3 Display..............................................................................................................................24
8.4HDMI.................................................................................................................................25
8.5 Screen shot setting ............................................................................................................25
8.6 Storage ..............................................................................................................................26
8.7 Apps ..................................................................................................................................26
8.8 Accounts& Sync................................................................................................................27
8.9 Location service................................................................................................................28
8.10 Security settings..............................................................................................................28
8.11 Language & Keyboard setting.........................................................................................28
8.12 Backup &reset.................................................................................................................28
8.13Date & Time setting.........................................................................................................29
8.14Accessibility.....................................................................................................................30
8.15Developer options ............................................................................................................30
8.16About Device ...................................................................................................................31
9. Troubleshooting ..........................................................................................................................32
9.1 Force shutdown.................................................................................................................32
9.2 Restore default settings.....................................................................................................32
9.3 System updating................................................................................................................32
9.4 Reset..................................................................................................................................32
10 FCC Statement

1
1. Appearance
MR71 series include several products with different physical dimensions. In this
manual, MR71-7022 is taken as the example to illustrate its appearance. The pictures
in the manual are subject to the material object.
1 Mini HDMI port
2 Micro USB port: support communicating with PC, and also support connecting
external U disk, mobile hard drive and 3G dongle via switch wiring
3 Microphone
4 Speaker
5 3.5mm earphone jack
6 T-Flash card slot
7 DC-IN port for charging
8 Power button: power on\off, wake up from sleep mode
9 Volume control button
10 Camera
2
2. Beginning Use
Statement: The software updates sporadically since we continuously devote to
product quality improvements. When operation for the product(s) your
purchased differs from that described in this manual, please follow your
product(s).
2.1 Charge the battery
MR71-7022 comes with a built-in polymer rechargeable battery and is designed
to use only manufacture-specified original batteries and accessories. When the battery
is low, please charge it timely.
Charge by Charger
Plug one terminal of the charger into the power adapter socket, and the other to
the power jack of the device to charge it.
2.2 Use the storage card
Insert the storage card
The storage card slot is on the right panel, just insert the TF Flash card with its
gold contacts facing down and push it in until it licks into place.
Browse files in the storage card
To browser the files in the storage card, do one of the following:
● run “File Manager to view files in the storage card
● you can also install and run any other third party file browser applications
Remove the storage card
Simply push the storage card in to eject it from its slot.
To avoid data loss or damage, please stop using files/ programs in the storage
card before remove the T-Flash card, and then tap Settings> Storage> Unmount
storage to remove it safely.
[Note]:
1. Make sure the location and direction of the storage card is correct when
inserting, otherwise it is easy to cause damage/destroy to the storage card.
2. To avoid incompatibility or unrecognized of the storage card, major
brands of storage card are recommended.
2.3 Hot plug of storage card
Please do not hot plug the storage card when using or browsing its files.
3
For example, when you are running the Music/Video Player/ Gallery, the storage
card may damage if you push out the storage card directly and the running program
will stop automatically to protect the device. As for details of inserting/removing
storage card, see 2.2 Use the storage card.
2.4 Memory space
The device contains 2 memory spaces: local storage & extended storage card.
Local storage appears as “Local” and extended storage card as “EXTSD” in the
device. The capacity of built-in flash varies from 8GB and 16GB because of different
model of the MR71 series. The built-in flash capacity of your device depends on the
model your purchased. MR71 series support extended storage card of capacity
maximum 32GB.
2.5 Power on/off
Power on: press down the Power Button to turn on the device when the battery is full
enough
Power off: press down the Power Button for about 3 seconds and then a menu with
options will popup, select Power Off to turn off the device
Screen Lock:press down the Power Button to shutdown the screen to save battery
life. Press down the Power Button again to activate the locked Home Screen. After
unlocking, the device will resume the screen before locking the screen.
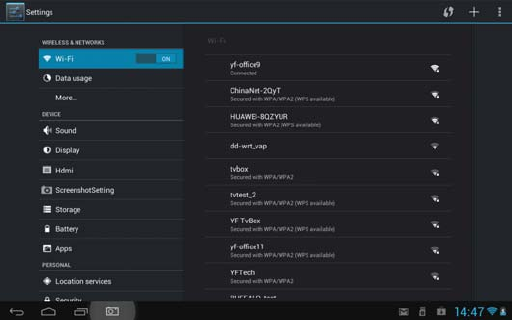
2.6 Connect to wireless networks
To connect to a wireless network, you should follow:
1. tap Settings on the Home screen;
2. tap Wi-Fi;
3. select ON;
4
4. the network names and security settings of detected Wi-Fi networks are
displayed in the Wi-Fi networks section;
5. tap a Wi-Fi network to connect. If you selected an open network, you will be
automatically connected to the network. If you selected a network that is secured with
WEP, enter the key and then tap Connect.
Depending on the network type and its security settings, you may also need to enter
more information or choose a security certificate.
6. after successful connection, the Wi-Fi connected icon will appears on the
status bar.
5
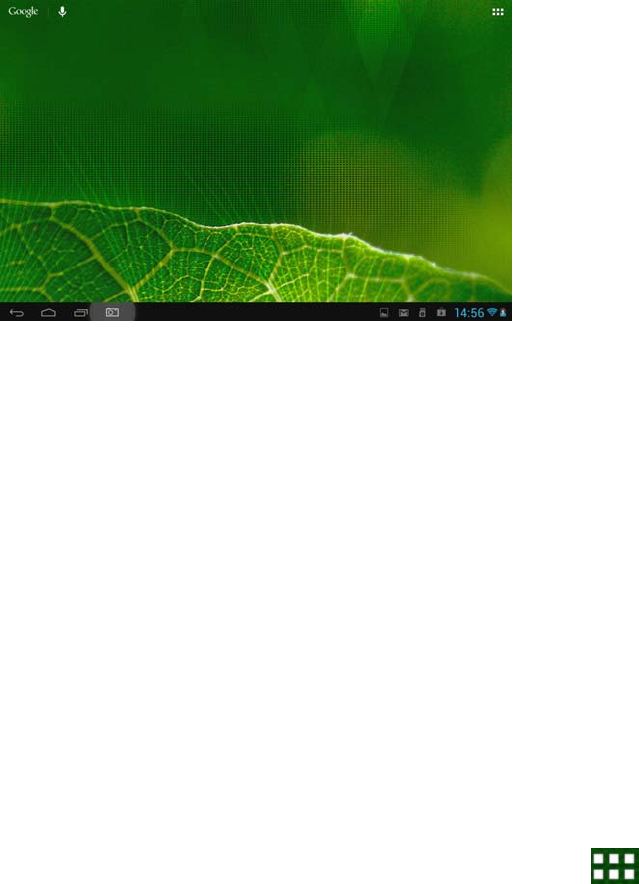
3. Home Screen
The Home screen is your starting point to access all the features on you device. It
displays application icons, widgets, shortcuts, and other features. You can customer
the Home screen with different wallpaper& widgets and display items you want. See
the Personalizing chapter.
When you sign in, the Home screen opens.
Sleep mode
Sleep mode suspends your device to a low power state while the display is off in
order to save battery power. You will still be able to receive messages and calls while
the device is in Sleep mode.
[Note]: If the device in sleep mode more than 30 minutes, the device will
automatically turn off to save electricity.
Switch to sleep mode
Simply press down the Power Button; and the device will automatically
shutdown the display screen when there is no operation on the screen for a period
of time.
Wake up from sleep mode
To wake up your device manually, press the Power Button. You will then see that
the device has locked the screen.
Unlocking the screen
Press the bar on the lock screen and then slide your finger upwards to unlock the
screen.
Browse Home Screen
You can go to the extended Home screen by sliding your finger horizontally
across the screen to go to the left or right side of the Home screen. Tap the icon
to view all applications on your device.
3.1 Status and notifications
Status and Notification Icons may appear
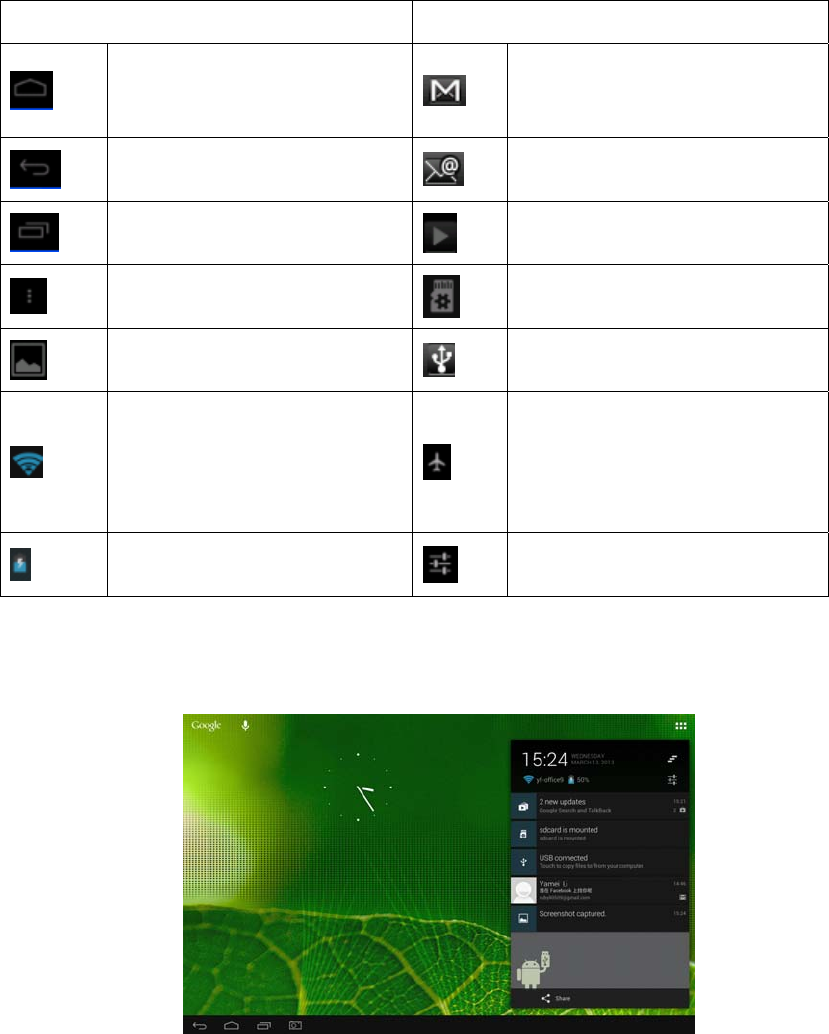
6
The status bar presents media volume, networks condition, battery condition, time and
so on. When an application is running, corresponding notification icon will appear in
the notification area. Icons you may often see are listed as follows:
Status icons and its meanings Notification icons its meanings
Tap to go to the Home screen New Gmail/Google Mail
message
Back New Email message
Recently windows viewed Music player is ongoing
Menu icon SD card is mounted
Screenshot captured USB Connected
Connected to a Wi-Fi
network and display the
signal strength
Airplane mode
Battery is charging Settings
Open notification panel
When new notification icon displays in the status bar, tap the status bar to open
the Notifications panel as follows:
If you have several notifications, you can scroll down the screen to view more
notifications.
[Tip]: You can also open the Notifications panel on the Home screen by pressing
Menu icon on the panel and then tapping Notifications.
In the popping notification panel, there are shortcut buttons for turning on/off Wi-Fi,
airplane mode, auto-rotate screen and for adjusting screen brightness.
7
Close the Notifications panel
Simply press the Back button on the device panel.
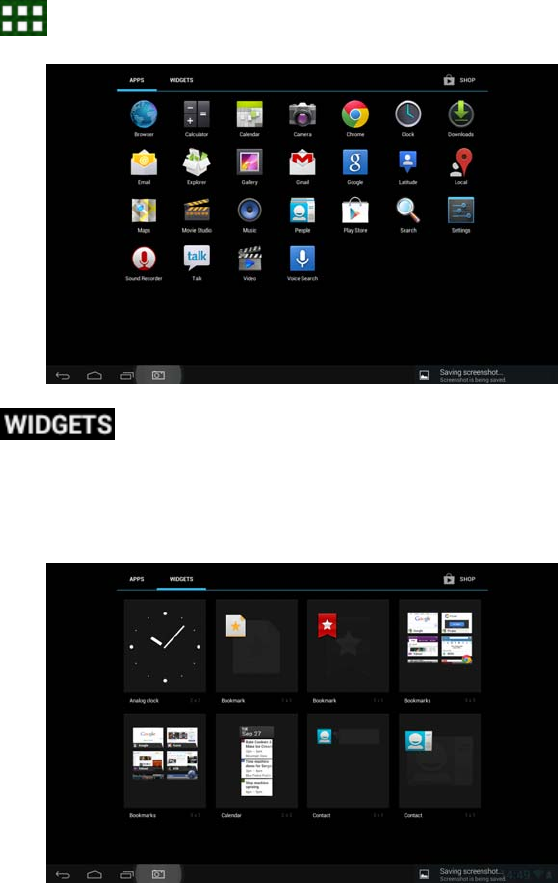
3.2 Shortcuts to Add widgets
To add widgets to Home screen, you can
1. tap on the home screen to enter into all apps interface as follows
2. tap
3. select one item.
Slide your finger horizontally on the home screen to check widgets that can be
added to the home screen. Widgets selectable are as follows:
3.3 Finger gestures
Tap: When you want to type using the keyboard, select items onscreen such as
application and settings icons, or press onscreen buttons, simply tap them with your
8
finger.
Press and hold: To open the available option for an item (e.g. contact or link in a web
page), simply press and hold the item.
Swipe or slide: To swipe or slide means to drag your finger vertically or horizontally
across the screen.
Drag: Press and hold your finger with some pressure before you start to drag. While
dragging, do not release your finger until you have reached the target position.
Rotate: For most screens, you can automatically change the screen orientation from
portrait to landscape by turning the device sideways. When entering text, you can turn
the device sideways to bring up a bigger keyboard. Refer to Settings chapter for more
details.
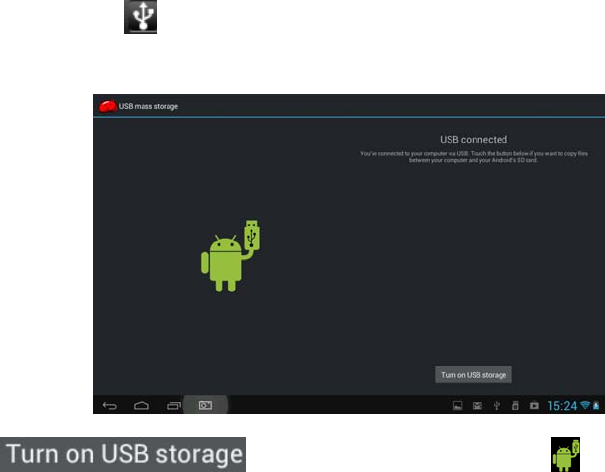
3.4 Coping files to and from the storage card
You can copy music, photos/pictures and others to your device to personalize your
device.
1. Use the USB cable that came with your device to connect it to a USB port on your
computer.
2. when the icon appears in the notification area, open the notification panel
and tap USB Connected to popup the following screen:
3. tap , when the notification icon turns yellow, the
computer will recognize your device as a removable disk;
4. find the removable disk and open it. Do one of the followings:
z Copy the files from the computer to the storage card’s root folder.
9
z Copy the files from the storage card to a folder in your computer or computer
desktop.
5. after copying the files, unmount the removable disk (that is, your device) as
required by your computer’s operating system to safely remove your device.
6. disconnect your device from the computer.
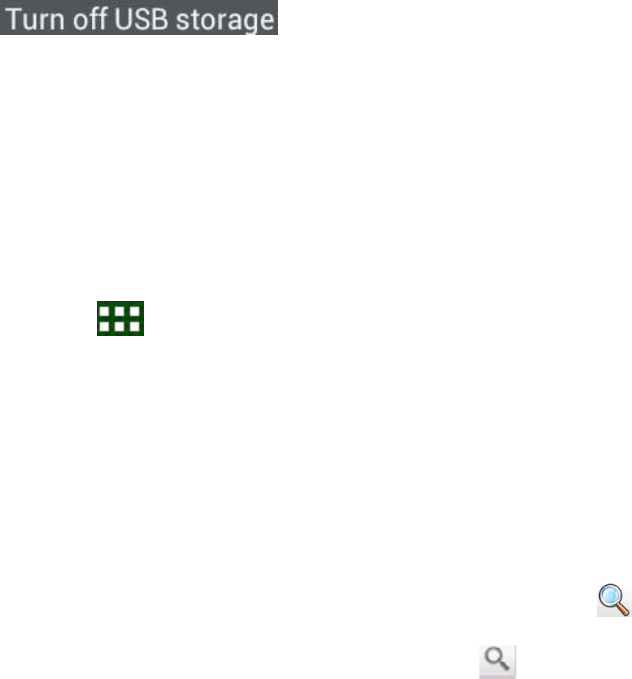
If your want your device remain connecting to the computer and enable reading its
storage card, you can open the Notifications panel and tap
.
[Note]: you can also realize communication between the device and the computer by
tapping Settings> Developer options>USB Debugging.
3.5 Searching the device and the web
You can search for information on your device and on the Web by using the Quick
Search Box.
1. press on the home screen to enter into all apps interface;
2. tap Search and then enter the search item in the Quick Search Box
As you type, matching items on your device and suggestions from Google web search
are shown as a list. The suggested items that appear will depend on the options that
you have selected in the search settings.
3. Do one of the following:
z If what you’re searching for is in the list of suggestions, tap it in the list. The
item opens in the appropriate application.
z If what you’re searching for is not in the list, tap to open the search
option menu. Tap Web and then tap to search the Web. The web
browser opens, displaying results of a Google search on the Web
10
4. Personalizing
4.1 Change the Notification ringtone
Choose from the available selections of notification ringtones on your device. You can
also download or copy notification ringtones or songs to your device' storage card and
choose one to use as your notification ringtone. To find out how you can copy files to
your storage card, see “Coping files to and from the storage card”.
1. In the Home screen, tap Settings > Sound > Default notification.
2. Tap the notification ringtone you want to use. The notification ringtone briefly
plays when selected.
3. Tap OK.
4.2 Change your wallpaper
Personalizing your Home screen wallpaper with your favorite photo is a quick and
easy way to change the feel of your device and give it a fresh look. Browse the
collection of wallpapers included in your device or choose from photos that you have
taken with the camera.
To change your Home screen or lock screen wallpaper, you can:
1. tap settings>display
2. and then tap Wallpaper.
【Note】: you can also press and hold the Home screen until the “Choose wallpaper
from” option menu popup.
3. choose source of wallpaper
you can do one of the following:
z Tap Gallery to select a photo/picture that you have taken using the camera
or copied to your storage card. Tap Crop to crop the photo/picture and set the
cropped picture as wallpaper.

11
z Tap Wallpapers gallery to choose from preset wallpapers and then tap Set
wallpaper.
z Tap Live Wallpapers gallery to choose from preset wallpapers and then tap
Set wallpaper.
4.3 Personalize your Home screen with widgets
Widgets put at-a-glance important information and media content up front on your
Home screen. Some widgets are already added to your Home screen for your
convenience. You can add more from the available selections of widgets, or download
more widgets.
① adding a widget to your Home screen
For details on how to add a widget to your Home screen, please refer to section 3.2
Shortcuts to Add widgets.
[Note]: To remove a widget, press and hold the widget until the icon appears,
drag the widget onto it and release your finger.
②Adding folders on your Home screen
Use folders to group related applications and other shortcuts to keep your Home
screen tidy and organized.
Press and hold the application shortcut and stack it onto another shortcut to create a
folder for the applications you want to file together, and then release your finger to
finish creating a folder. You can drag any other application shortcut into the new
folder.
To rename a folder:
1. Tap the folder to open it.
2. Tap Unnamed Folder to prompt the keyboard.
3. Enter a new folder name and then tap OK.

12
4.4 Rearrange or remove widgets and icons on your Home screen
Rearrange the widgets and icons on your Home screen to give room for adding more
items to the Home screen. You can also remove widgets and icons that you don’t
frequently use.
① Moving a widget or icon
1. Press and hold the widget or icon you want to move.
You’ll see a yellow box around the widget or icon. Don’t release your finger.
2. Drag the widget or icon to a new location on the screen.
Pause at the left or right edge of the screen to drag the widget or icon onto another
Home screen panel.
3. When the widget or icon is where you want it, release your finger.
If you’ve released your finger but a message shows that there’s no space to place
the widget or icon, drag it right or left again to another Home screen panel.
② Removing a widget or icon
1. Press and hold the widget or icon you want to remove. You’ll see a yellow box
around the widget or icon. Don’t release your finger.
2. Drag the widget onto the cross icon on the screen.
3. When the widget or icon also turns red, release your finger.
13
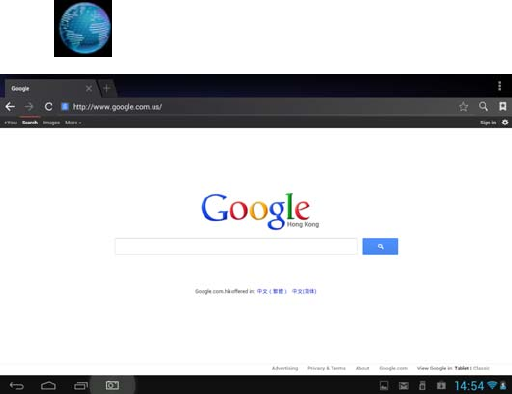
5. Web browsing
User can connect to the network via the browser.
Tap the browser icon on the Home screen to open it as follows:
14
6 Manage Applications
You can personalize and enrich your MR71-7022 by installing a wide variety of
free and paid apps ranging from productivity apps, entertainment, to games. When
you find a program you want, you can easily download and install it on your
MR71-7022with just a few steps as follows:
How to install Android third-party programs
1. download the programs you want from web sites and store them into your
storage card or local memory. You can also copy programs downloaded on
your computer into your storage card or local memory;
2. run the application APK Installer
3. find the third-party program you want, and then use functions of APK
Installer o install it to your device.
How to uninstall Android third-party programs
To dismount the program, you can also use functions of APK Installer and you
can also by tapping Settings > Apps> Downloaded to uninstall a third-party
application.
15
7. Typical applications introduction
7.1 Music Player
Enjoy listening to songs and music on your MR71-7022 using the Music application.
You need to copy music files to your storage card first to use the Music application to
play music. To find out how to copy files, see “Copying files to and from the storage
card”. Audio formats supported include/wav/ac3/aac/ogg /ra/amr/m4a/wma and so
on.
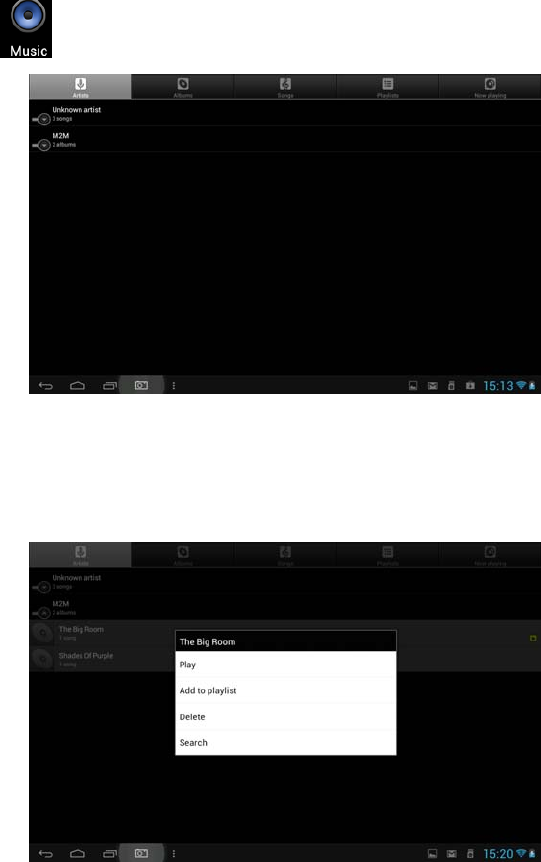
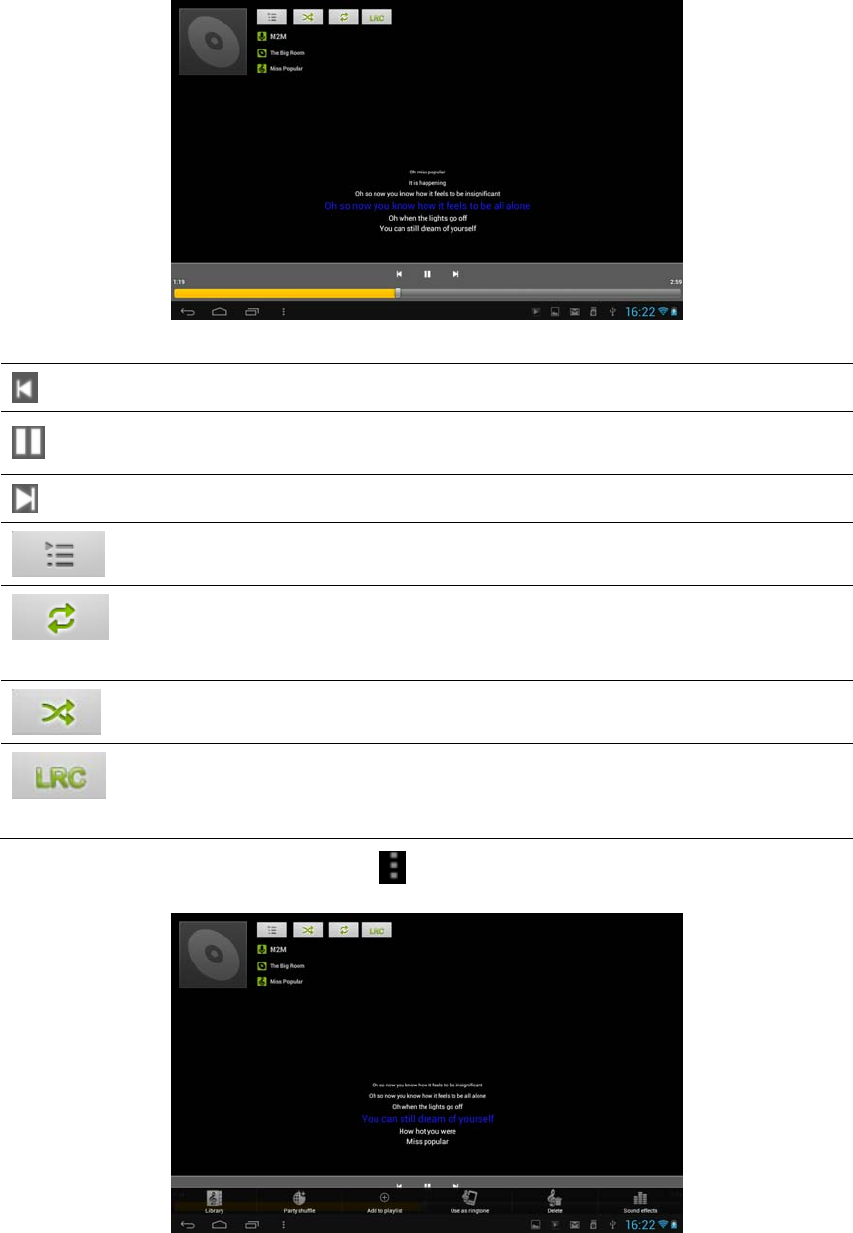
Tap the icon on the Home screen to enter the following screen:
Your music is organized into different categories such as Artists, Songs and Albums.
Tap one of the category tabs to view a category.
Press and hold one song in the above interface until the operation menu as follows:
Tap Play to play the selected item.
Tap Add to playlist to add the selected song into Current playlist or into a new
playlist created as you like.
Tap Delete to delete the song rong the list.
16
Tap Search to search the song on the internet or in the device.
Select a song in the playlist and tap on it to start playing as follows:
Tap to go to the previous song.
Tap to play, pause, or resume playing the song
Tap to go to the next song
Tap to go to the now playing list
Tap to switch the following repeat modes: repeat all songs;
repeat current songs; do not repeat
Tap to shuffle the current playlist.
Tap to display the lyrics if there is corresponding lyrics in
the device, tap again to stop displaying lyrics.
When the music is on, tap menu icon to prompt the operation bar as follows:
Here you can turn on/off party shuffle, or use the song as ringtone, or add the song to the playlist,
17
or set the sound effect of the song or go to the Library directly. And you can also delete the song
by tapping corresponding buttons in the operation bar.
When screen turns off, you can control the music playback right from the Lock screen
when you “wake up” the device by pressing POWER button. If you do not see the
playback controls on the Lock screen, tap anywhere on the screen to display the
playback controls.
7.2 Video Player
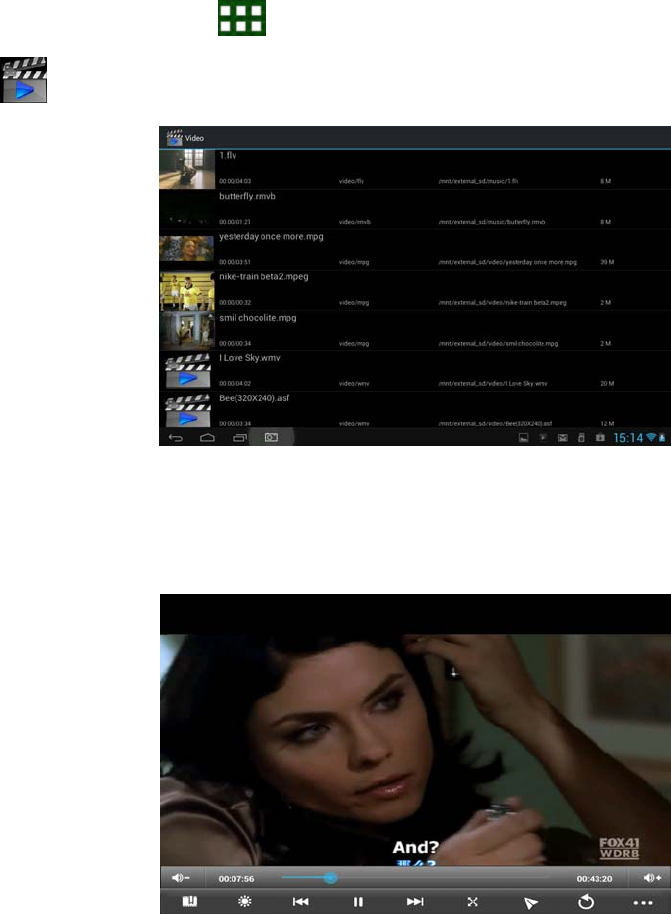
Tap the launcher icon on the Home screen and the tap the Video player icon
to go to the following interface:
To delete a video, you can press and hold one video file until a dialog box prompt
and then select OK.
Double tap on a video file to start playing it.
On the video playing screen, tap on the screen to popup the control bar as follows:
18
volume down
volume up
Drag the slider to adjust playing progress
Tap to set bookmark, the video will play from the bookmark if a bookmark is
setted.
Tap to adjust Screen brightness, five levels brightness is provided.
Tap to play the previous video file in the video list
Long click to go backwards rapidly
Tap to play/pause the Now playing video file
Tap to play the next video file in the video list
Long click to move forwards rapidly
Tap to adjust the screen size, there are four modes: original size, full screen,
16:9 and 4:3.
Tap to go to picture-in-picture play mode. To quit picture-in-picture mode,
simply drag the video out of the screen(or press and hold on the screen until
the shutdown icon appears and then tap the icon to turn off the video.
Tap this icon to go back to the video file list interface
Tap to unfold the control bar for more operation, such as deleting the
bookmark, select a play mode, set the audio track and so on.
7.3 Gallery
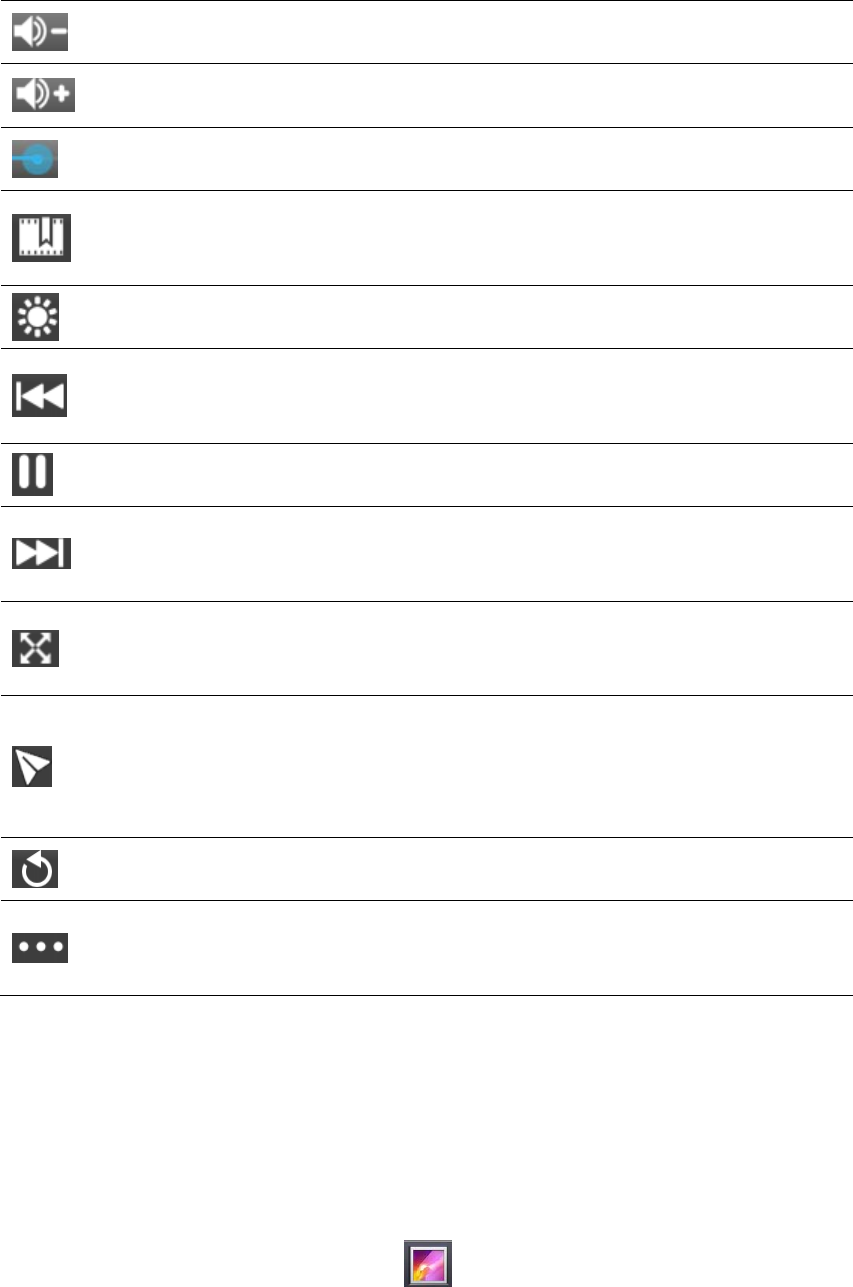
You use Gallery to view pictures and play videos that you’ve taken with Camera,
downloaded, or copied onto your SD card. You can perform basic editing tasks on
pictures and set them as your wallpaper or contact picture. You can also share your
pictures and videos with friends.
On the Home screen tap the Gallery icon , photos and videos are classified
automatically for easy view. The gallery application will run.
19
Browse & edit pictures/photos
Tap an album to open it and view its contents;
Tap on upper right corner of the screen to browse all photos/pictures in slideshow
mode.
Select a picture to view it in full screen mode; drag left or right to view the next or
previous picture in the album; move you fingers inward/outward to zoom out/zoom in
the selected photo/picture. Tap to share it with friends via email, tap to
delete/cancel deleting it, tap to pop up the following control bars:
FCC Statement
This equipment has been tested and found to comply with the limits for a Class B digital device,
pursuant to Part 15 of the FCC Rules. These limits are designed to provide reasonable protection
against harmful interference in a residential installation. This equipment generates uses and can
radiate radio frequency energy and, if not installed and used in accordance with the instructions,
may cause harmful interference to radio communications. However, there is no guarantee that
interference will not occur in a particular installation. If this equipment does cause harmful
interference to radio or television reception, which can be determined by turning the equipment
off and on, the user is encouraged to try to correct the interference by one or more of the
following measures:
-- Reorient or relocate the receiving antenna.
-- Increase the separation between the equipment and receiver.
-- Connect the equipment into an outlet on a circuit different from that to which the receiver is
connected.
-- Consult the dealer or an experienced radio/TV technician for help.
This device complies with part 15 of the FCC Rules. Operation is subject to the following two
conditions:
(1) This device may not cause harmful interference, and (2) this device must accept any
interference received, including interference that may cause undesired operation.
Changes or modifications not expressly approved by the party responsible for compliance could
void the user's authority to operate the equipment.