Dongguan Yuanfeng Technology PF100001 CONNECTED PND-FM FUNCTION User Manual PF10
Dongguan Yuanfeng Technology Co., Ltd CONNECTED PND-FM FUNCTION PF10
UserManual.wiki
>
Dongguan Yuanfeng Technology
>
PF100001 User Manual
Users Manual
Navigation menu
Upload a User Manual
Namespaces
Wiki Guide
HTML
PDF
Info
Views
User Manual
Discussion / Help
Navigation
![1 Chapter I Welcome Thanks for using the GPS PF10-5002 featured with navigation as the major function as well as other functions like SMS, GPRS, GSM, audio play, video play, flash play, photo browsing and e-book reading, etc. 9 SiRF Atlas-Ⅴ, dual-core CPU with high performance and low power consumption 9 Friendly user interfaces for simple operation 9 Power management for longer and more stable operation 9 Data transmission with computers via Mini USB 9 Quality reception for accurate positioning and satisfactory navigation service 9 Leisure partner with audio/video/amusement functions 9 Multi-touch(2 points) function and automatic rotation when browsing photos You may use the GPS navigator anytime anywhere, for example while driving, walking or cycling. Its navigation and amusement functions will enrich your life and work! To fully exert the functions of GPS PF10-5002 and to understand the operation details, please read the manual carefully. You may see the following supplemental information in the manual. [Note]: Explanation of relevant subjects [Relevant Information]: Extra information of relevant subjects [Attention]: Precautions or warnings of relevant subjects. Please pay attention to this information and follow the instructions to avoid devastating influence on yourself and others. This manual is applicable only to the GPS PF10-5002.](https://usermanual.wiki/Dongguan-Yuanfeng-Technology/PF100001/User-Guide-1435507-Page-6.png)

![3 9 Speaker Sound is given out here. 10 Reset button Reboot the device. 2.2 Power Supply & Charging Charge the GPS navigator fully with the charger before first use. 2.2.1 Power Supply The GPS PF10-5002 can be powered by the built-in battery or external power supply. When the GPS navigator is unconnected to the charger, it is powered by the Li-polymer battery. The battery capacity icon in the system main interface shows current residual battery capacity. When the GPS navigator is connected to the charger, it is powered by external power and the battery is charged. [Attention] The GPS navigator adopts non-removable Li-polymer battery. To avoid battery rupture, explosion, release of hazardous substance or burn, do not unpack, pierce, strike on or discard the battery in fire or water. The navigator has a working temperature of 0~50°C and storage temperature -10~60°C. Do not expose the device in excessive heat or hot areas, for example in the car under strong sunlight. To avoid damaging the device, keep it away from direct sunlight. Follow local regulations while disposing the battery. 2.2.2 Charge by DC Charger The GPS navigator must be charged with the DC charger before first use.](https://usermanual.wiki/Dongguan-Yuanfeng-Technology/PF100001/User-Guide-1435507-Page-8.png)
![4 Plug the USB terminal of the charger into the USB port on the left side of the GPS navigator and the other to the power socket to supply power and charge the GPS navigator. [Note]: The charging indicator light is red during charging. Do not unplug the charge until the battery is fully charged and the indicator light turns green. Please charge the GPS navigator when the battery is low or used up in succeeding use. 2.2.3 Charge by Car Charger Plug one terminal of the car charger into the USB port on the left side of the GPS navigator and the other to the charging port to supply power and charge the GPS navigator. [Note]: Plug in the car charger after the automobile is started to avoid damage due to current surge. 2.3 Power on Press the power key on the top of the device and let go after two seconds to power it on and enter the welcome interface. [Note]: Great humidity fluctuation may lead to short circuit of the GPS navigator. Power on the navigator after it has accommodated to new environment. 2.4 Power off & Sleep Press the power key and let go after two seconds when the power-off interface prompts, and tap “Power off”. If is selected, the navigator will enter sleep](https://usermanual.wiki/Dongguan-Yuanfeng-Technology/PF100001/User-Guide-1435507-Page-9.png)
![5 mode, and will automatically resume the state before entering sleep mode when it is powered on again (refer to 2.3 Power on). 2.5 Reset When the device has no response, press the reset button on the back side to reset the system.. [Relevant Information] The following situations might lead to no response of the system. 1. Failure of function activation with overlong execution; 2. Failure to power on/off the GPS navigator by pressing the power key [Note]: Loss of unsaved data may incurred when resetting the system. Please backup your data timely. 2.6 Fix the GPS Navigator The mounting kit is composed of a cradle and a bracket. To use the GPS navigator](https://usermanual.wiki/Dongguan-Yuanfeng-Technology/PF100001/User-Guide-1435507-Page-10.png)
![6 in an automobile, fix it on the dashboard under the front windshield. [Note]: Do not place the GPS navigator in positions obstructing the driver’s vision, for example at the steering wheel, pedal or gear lever. Do not place it without fixing it or in the place of air bag or the area after the air bag is inflated. While using the mounting kit, follow local regulations. YF will have no responsibility for any penalty or damage resulting from traffic violation. 2.7 Use T-FLASH Card You may copy mapping applications, map data and media files in a T-flash card. Insert the card in the corresponding slot. [Note]: 1. Do not take out the T-Flash card while a navigation program is being run or a media file is being played. 2. To avoid drop or crash of the T-Flash card, do not exert heavy pressure on it or bend it. 3. Avoid using or storing the T-Flash card in high temperature, high humidity or direct sunlight. Keep the card away from liquid or corrosive substance. 4. Mind the direction while inserting the T-Flash card to avoid damaging the slot or the card. 2.8 Use Touch Screen To protect the touch screen, do not operate it with acute objects. To cleanse the](https://usermanual.wiki/Dongguan-Yuanfeng-Technology/PF100001/User-Guide-1435507-Page-11.png)
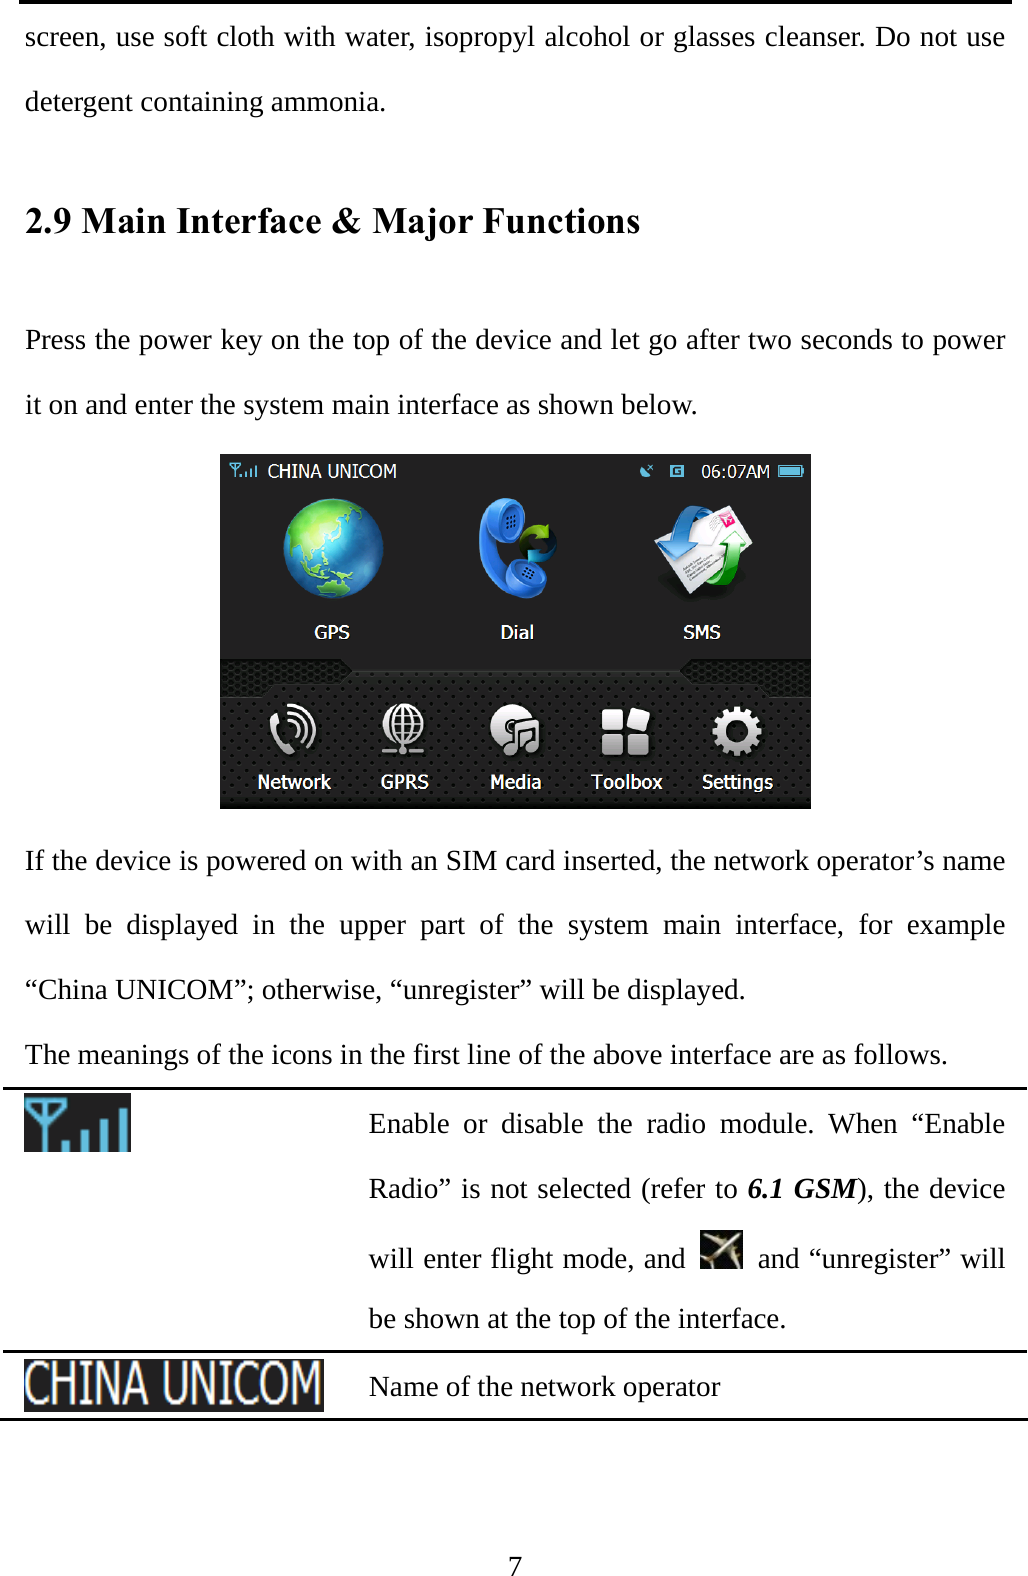
![8 GPS information: display the signal state, TUC, latitude and longitude etc. GPRS setting, including auto dialing, creating or editing operator information. It is in grey when disconnected to network. Setting the system date and time Display the battery capacity [Relevant Information]: In the following situations, the SIM card cannot be registered to network after the device is powered on, and “unregister” will be displayed instead of the network operator name. 1. No SIM card is inserted; 2. The Radio Module (refer to 6.1 GSM) is disabled; 3. PIN code is not input (when PIN code is enabled). Refer to 6.5 Pin. 2.10 Network Connection You may make calls or send messages after connecting the device to network. Take the following steps to set up network connection: 1. Insert an SIM card; [Attention]: This device does not support hot-plugging. Do not unplug/insert the SIM card when the device is on.](https://usermanual.wiki/Dongguan-Yuanfeng-Technology/PF100001/User-Guide-1435507-Page-13.png)
![9 2. Enable the Radio module (refer to 6.1 GSM); 3. Input the PIN code if the Pin code is enabled for the SIM card (refer to 6.5 Pin). [Relevant Information]: Enable PIN code for your SIM card on a mobile phone. The initial PIN code provided by your service provider and is modifiable. Note if the PIN code is input for successes three times, the SIM card will be locked and a PUK code is required to unlock. Do remember your PIN code. You may visit and download from the Internet after connecting the device to GPRS network. Take the following steps to set up GPRS network connection: 1. Insert an SIM card supporting GPRS service; 2. Enable the radio function (refer to 6.1 GSM); 3. Input the PIN code when the device is powered on if it has been enabled (refer to 6.5 Pin); 4. Enter the GPRS Setting interface (refer to Chapter Ⅶ GPRS) and tap “Connect”.](https://usermanual.wiki/Dongguan-Yuanfeng-Technology/PF100001/User-Guide-1435507-Page-14.png)
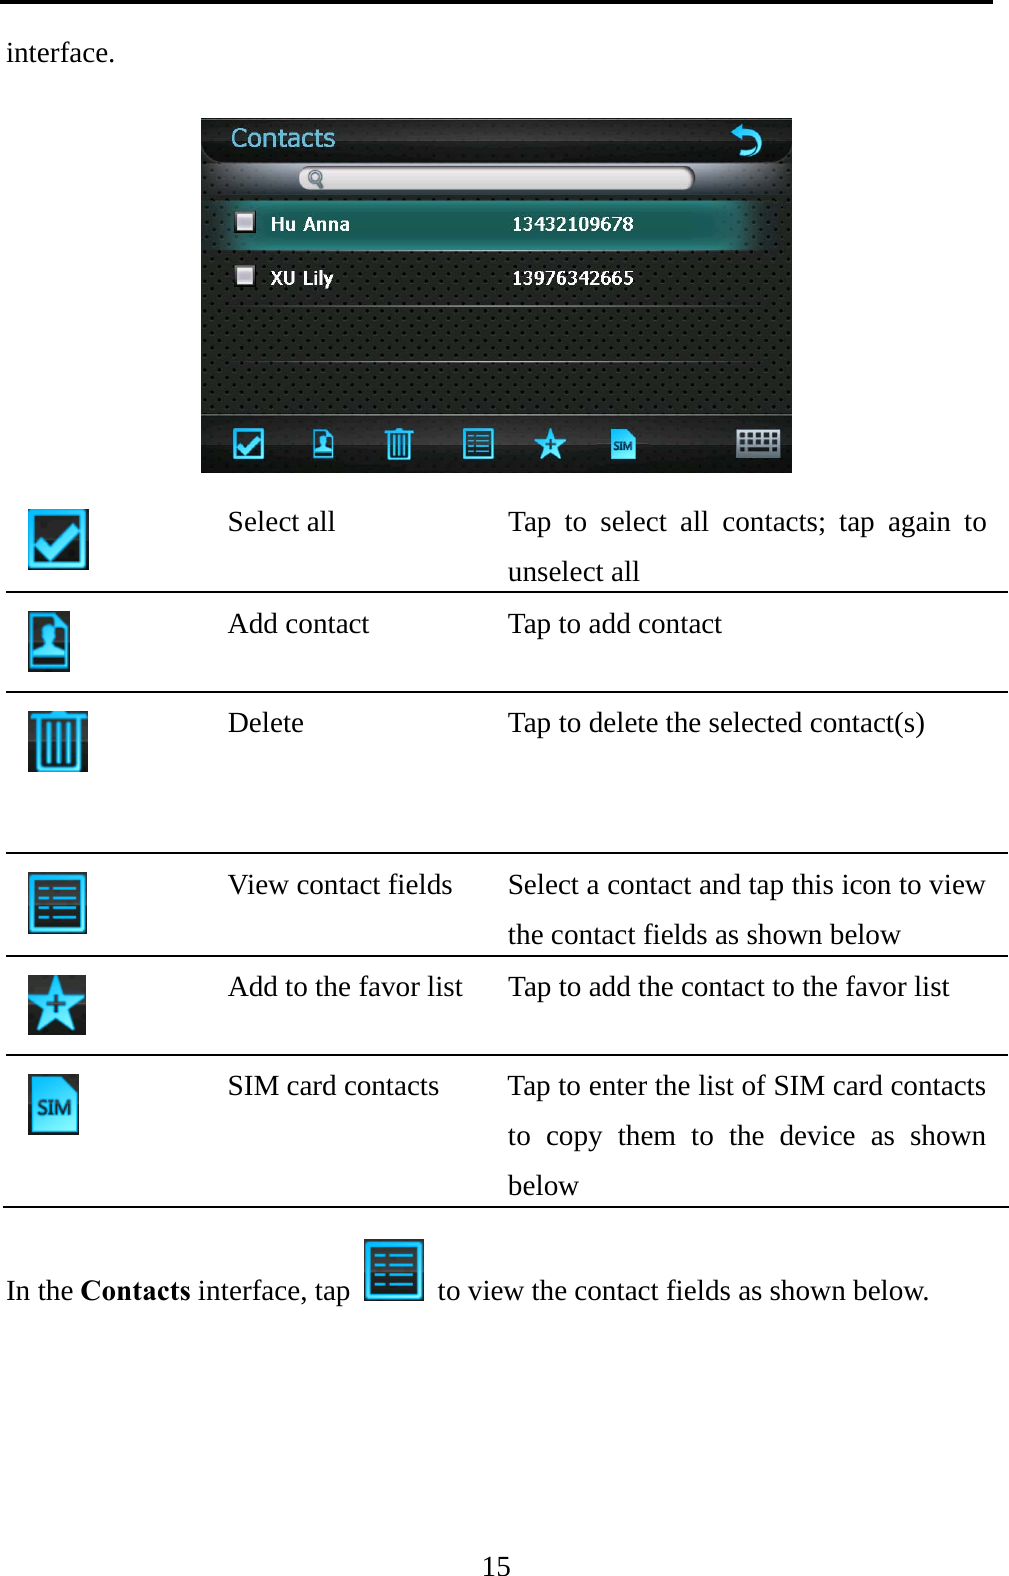
![14 Tap on to open the keypad, set cursor after a field and type in information as follows. [Relevant Information] In the above interface, you may tap on the keypad to select from upper case, lower case, numbers or switch between big and small keypad. Tap to save the info, and then tap to exit. To add more contacts, repeat the above steps and you will get the following](https://usermanual.wiki/Dongguan-Yuanfeng-Technology/PF100001/User-Guide-1435507-Page-19.png)

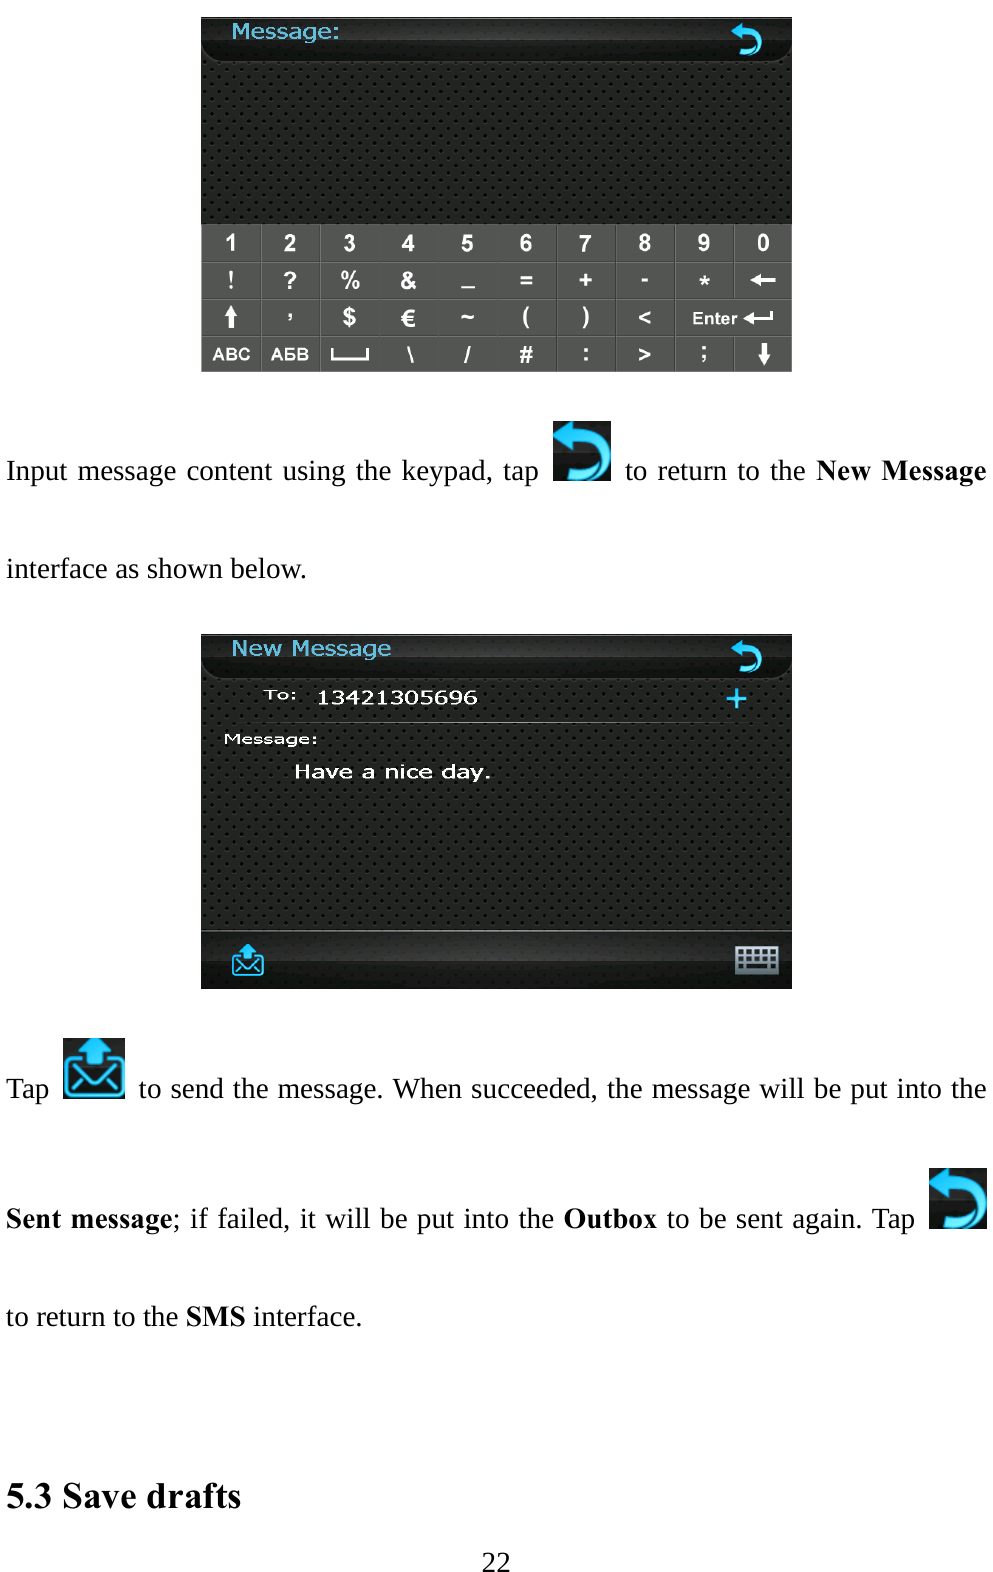
![21 2. Tap to enter the Contacts interface as follows. Select a contact (or tap to select multiple numbers), and tap . [Note]: While inputting multiple mobile phone numbers, input “;” between every two numbers. After entering mobile phone number(s), double tap the “Message” area to enter the interface of message input and prompt the keypad as shown below.](https://usermanual.wiki/Dongguan-Yuanfeng-Technology/PF100001/User-Guide-1435507-Page-26.png)

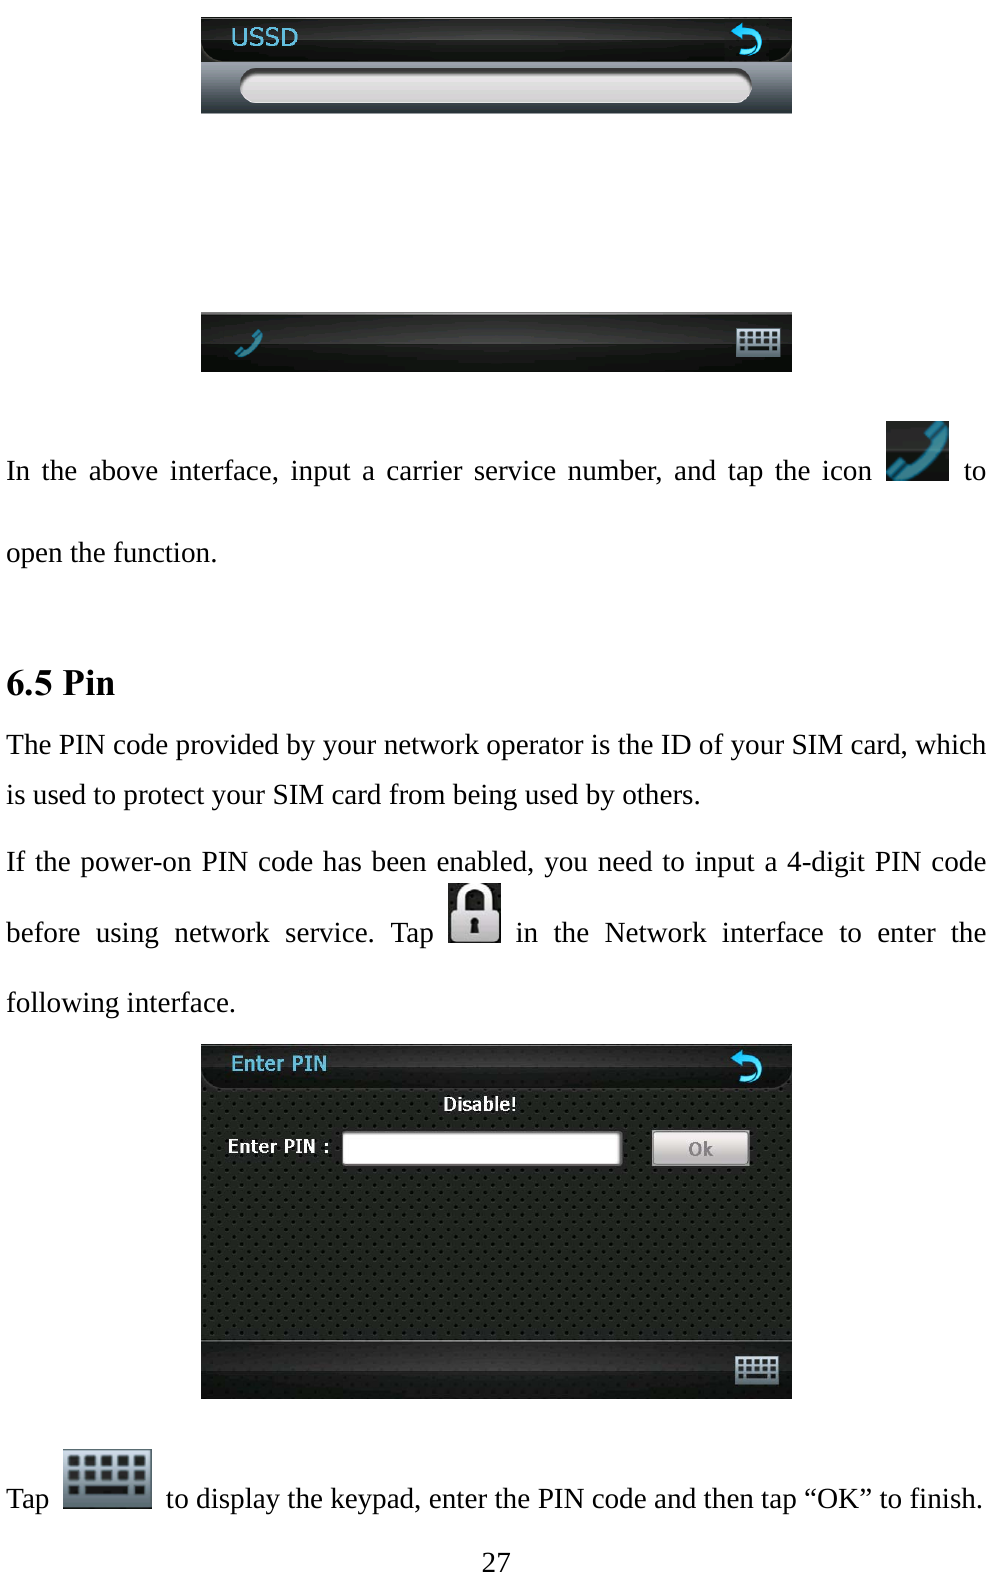
![28 [Attention]: The PIN code is modifiable. Note if a false PIN code is input for consecutive three times, the mobile will be locked and a PUK code will be required to unlock it. You are supposed to always remember the PIN code. 6.6 Home page Tap in the Network interface to enter the IE Home Page interface as follows. Tap to open the keypad, input an IE home address in the “Main Interface” input box and tap to save the setting. 6.7 SMS Center Tap in the Network interface to enter the Service Center interface as follows.](https://usermanual.wiki/Dongguan-Yuanfeng-Technology/PF100001/User-Guide-1435507-Page-33.png)
![29 [Note]: The service center number is displayed only when the Radio module is enabled and the PIN code (when enabled) is input. To change the number, tap to prompt a keypad, set the cursor in the input box, and type in a number by tapping on the keypad. For keypad operation, refer to 6.8 Carrier This function enables you to switch from one carrier to another for a dual-network SIM card. After network connection is established (refer to 2.10 Network Connection), tap in the Network interface to enter the following interface. The system automatically selects a carrier by default. You may choose China](https://usermanual.wiki/Dongguan-Yuanfeng-Technology/PF100001/User-Guide-1435507-Page-34.png)
![30 Mobile, China Unicom or Automatic and then save the setting by tapping . After successful saving, the following interface will be displayed. [Relevant Information]: This function works only when the Radio module is enabled and the PIN code (when enabled) is input.](https://usermanual.wiki/Dongguan-Yuanfeng-Technology/PF100001/User-Guide-1435507-Page-35.png)
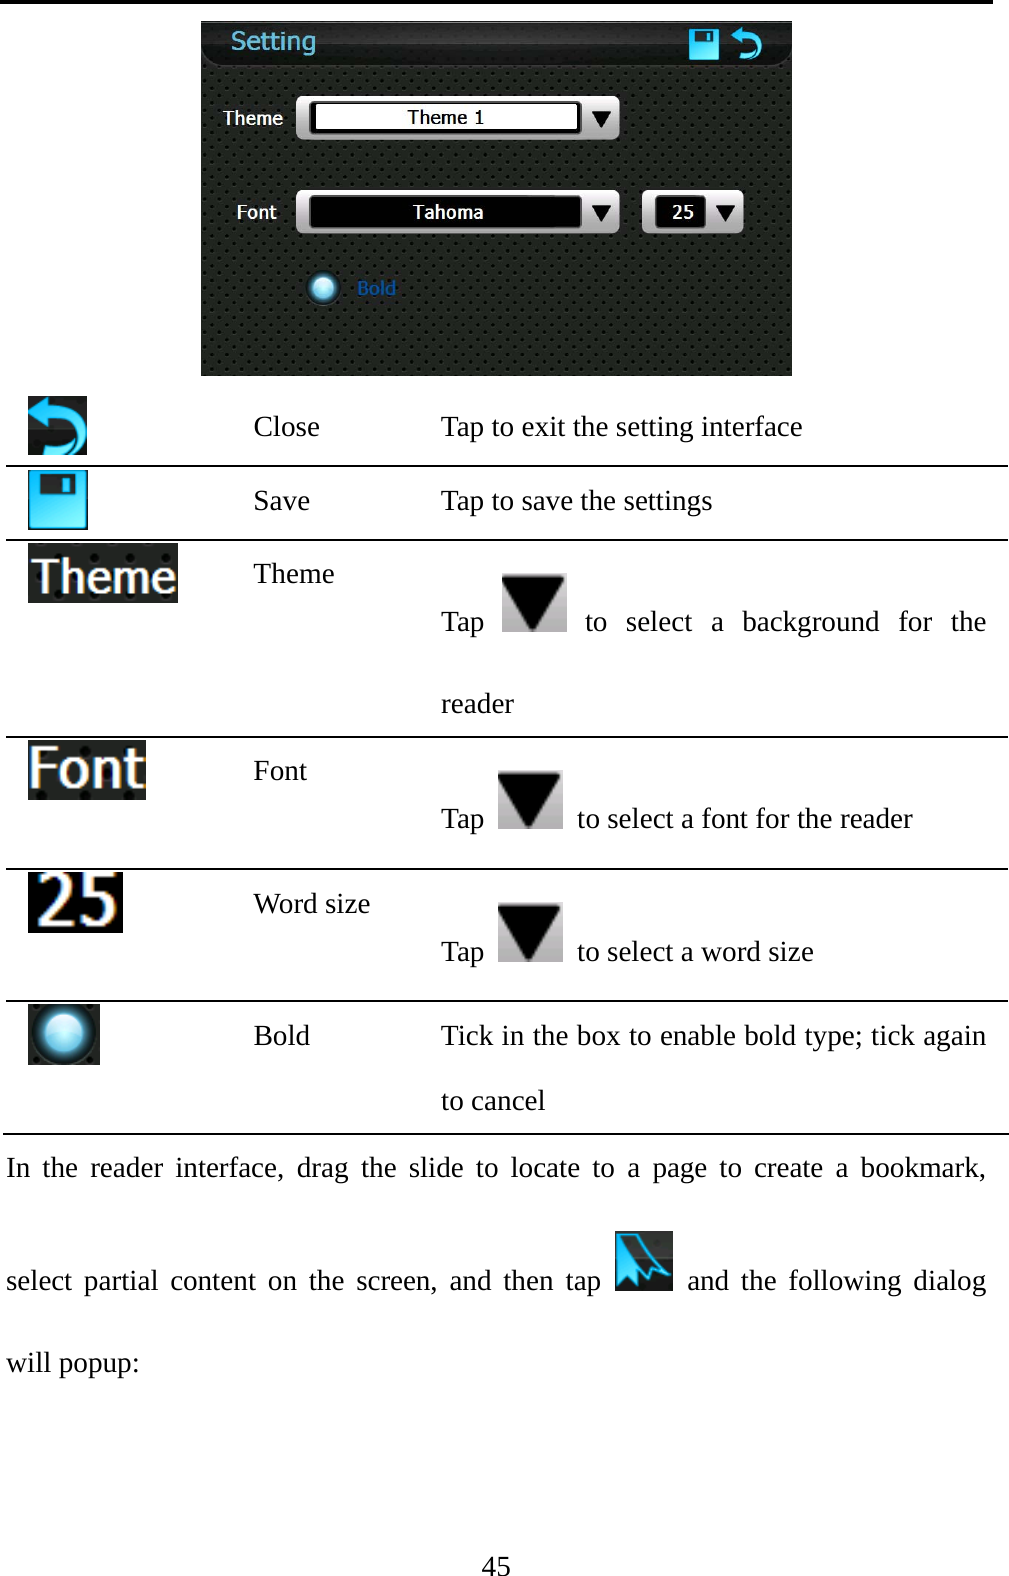
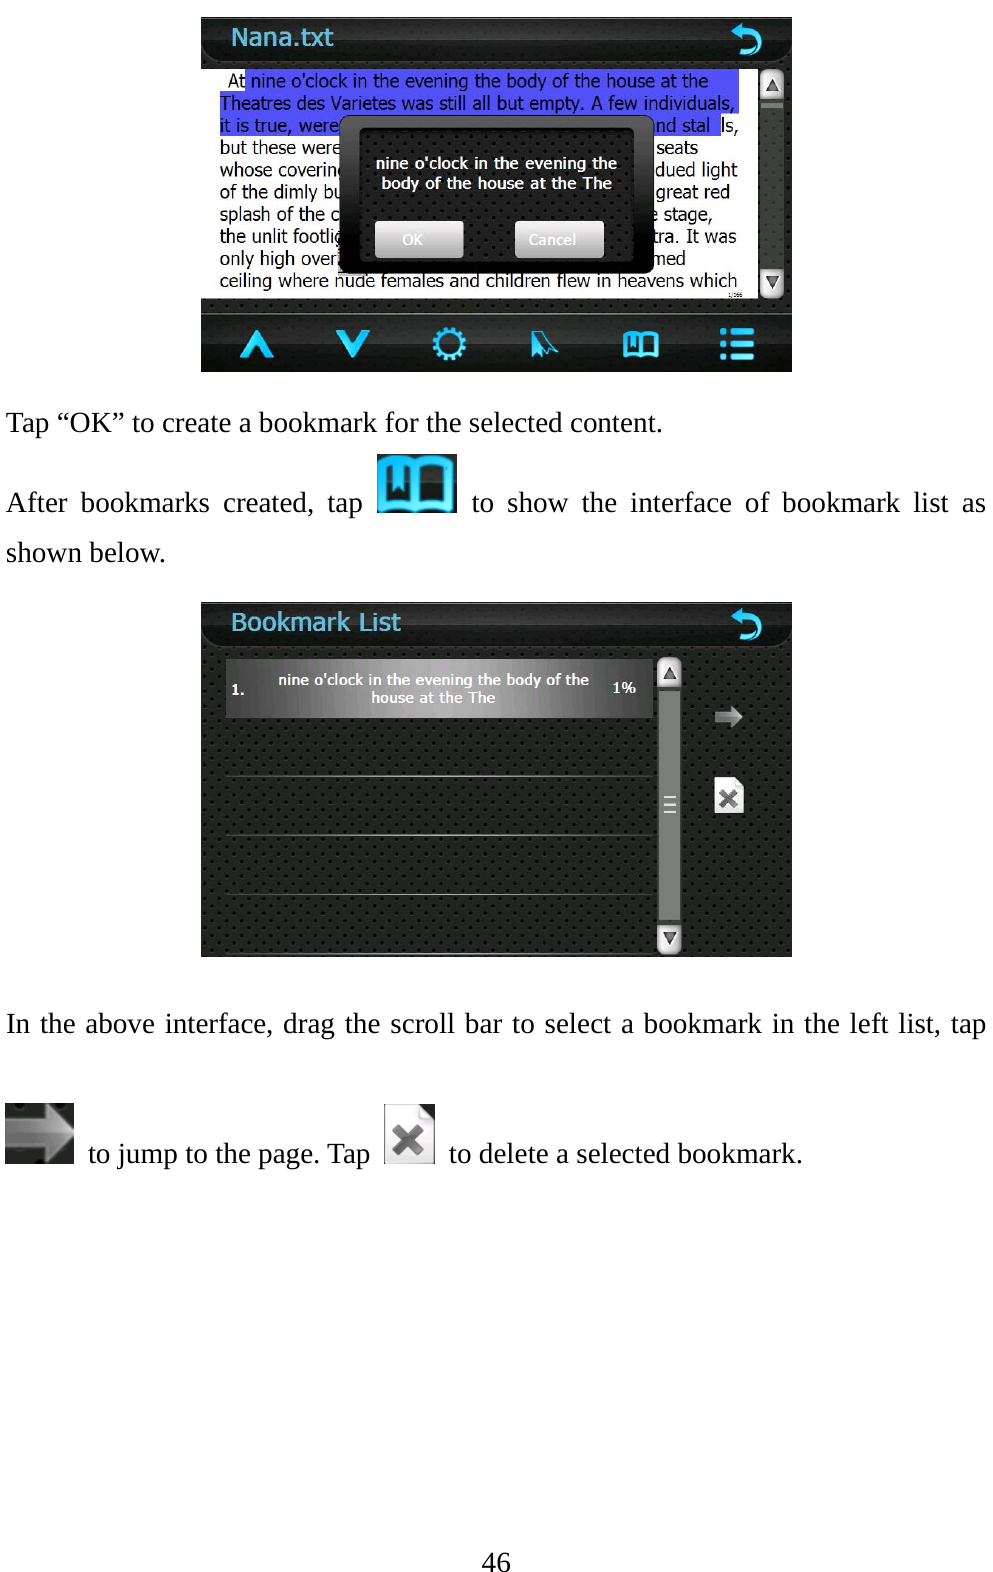
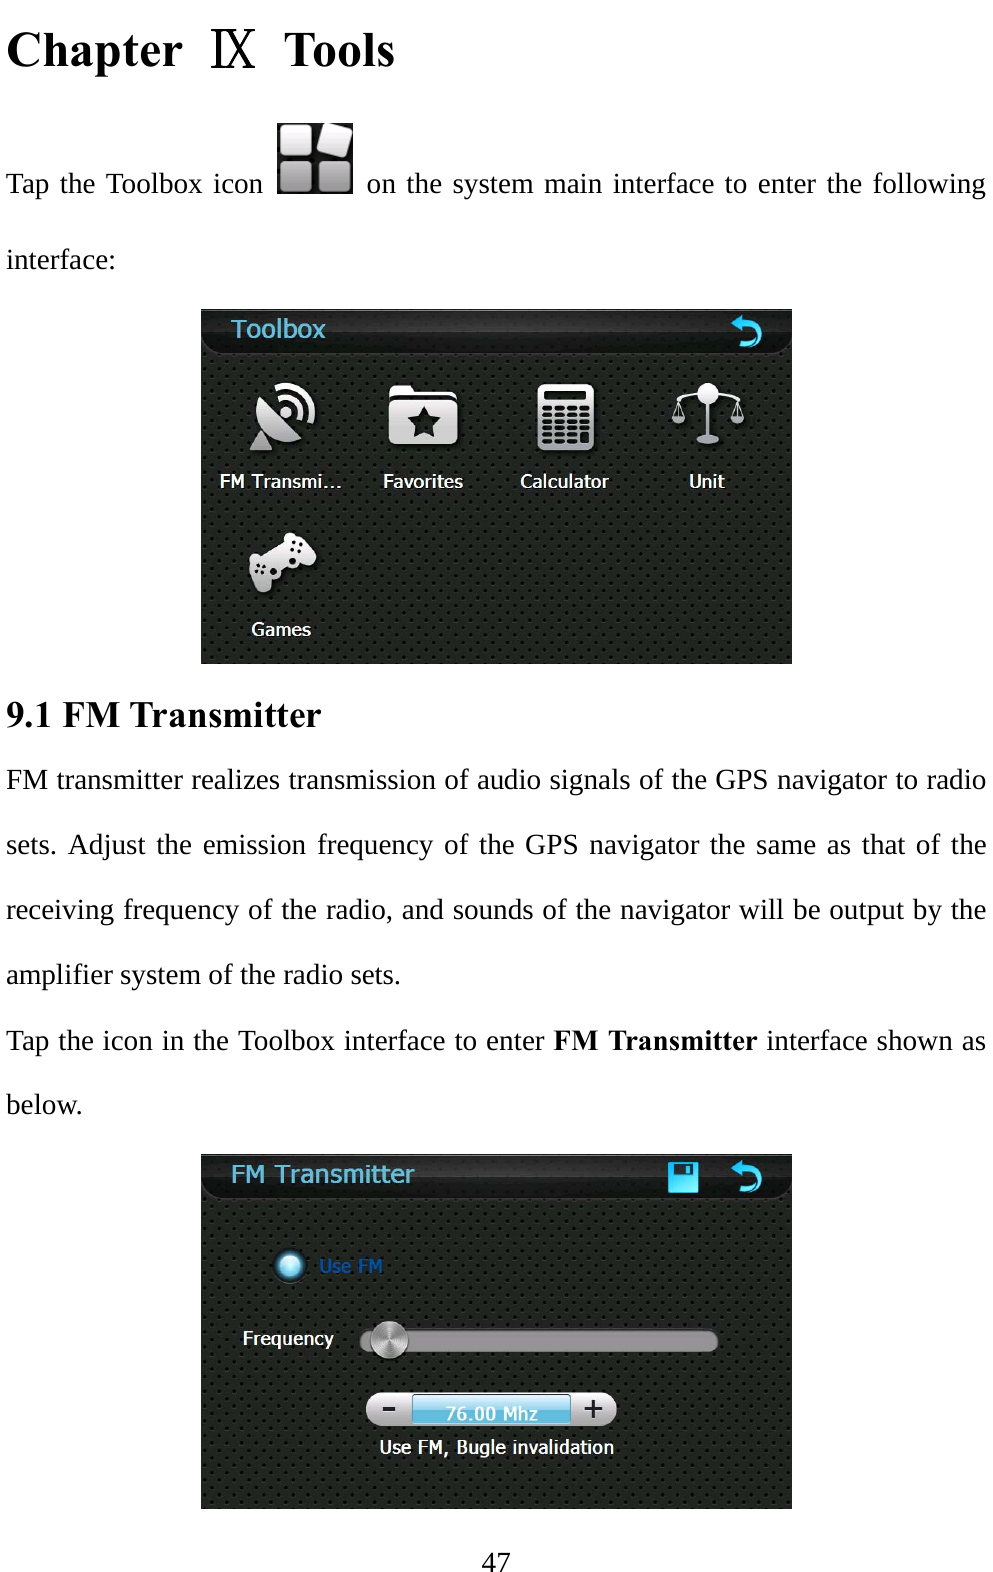
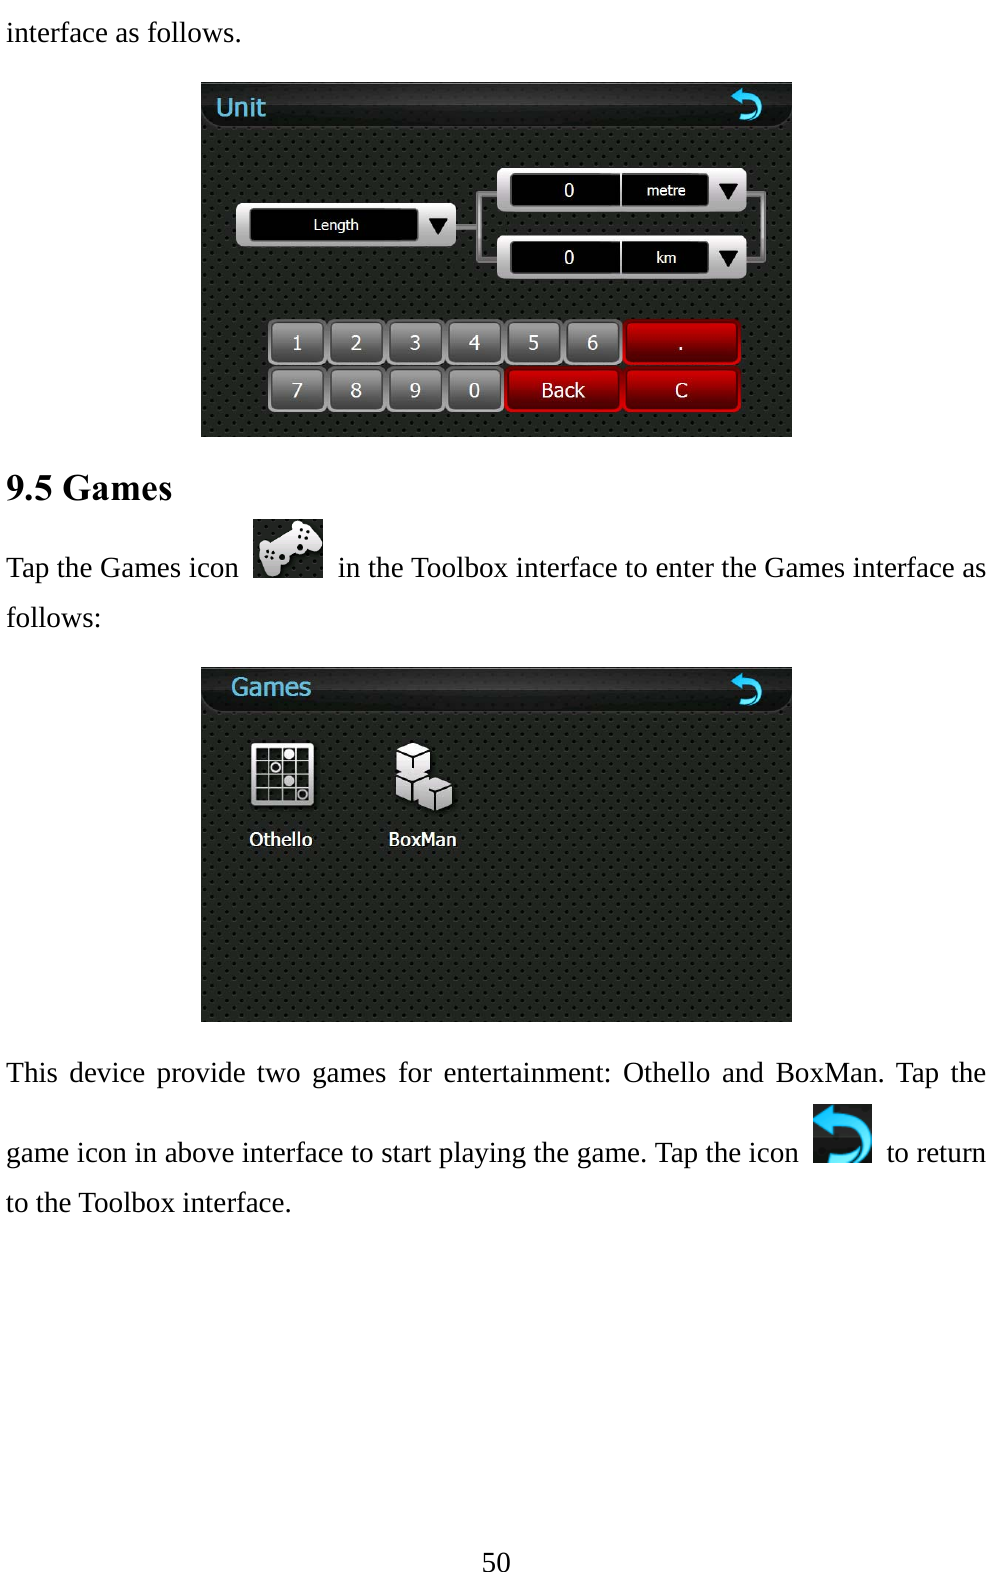
![49 To delete applications from the Favorite, select the application in the above interface and tap . [Note]: While deleting the application, the shortcuts instead of application itself will be deleted. 9.3 Calculator Tap the Calculator icon in the Toolbox interface to enter the Calculator interface as follows. 9.4 Unit Tap the Unit icon in the Toolbox interface to enter the Unit converter](https://usermanual.wiki/Dongguan-Yuanfeng-Technology/PF100001/User-Guide-1435507-Page-54.png)
![54 Tap or to select a system language and tap to save the selection. 10.4 Date & Time Tap the DateTime icon in the Settings interface to enter the date & time setting interface as shown below. Date & Time setting includes system date setting, time setting and time zone setting. ● Setting the system date and time In the above interface, tap or to set the year, month, day, hour and minute. [Note]: Time format options are 12-hour and 24-hour. You may select one of them. ● Setting the system time zone](https://usermanual.wiki/Dongguan-Yuanfeng-Technology/PF100001/User-Guide-1435507-Page-59.png)
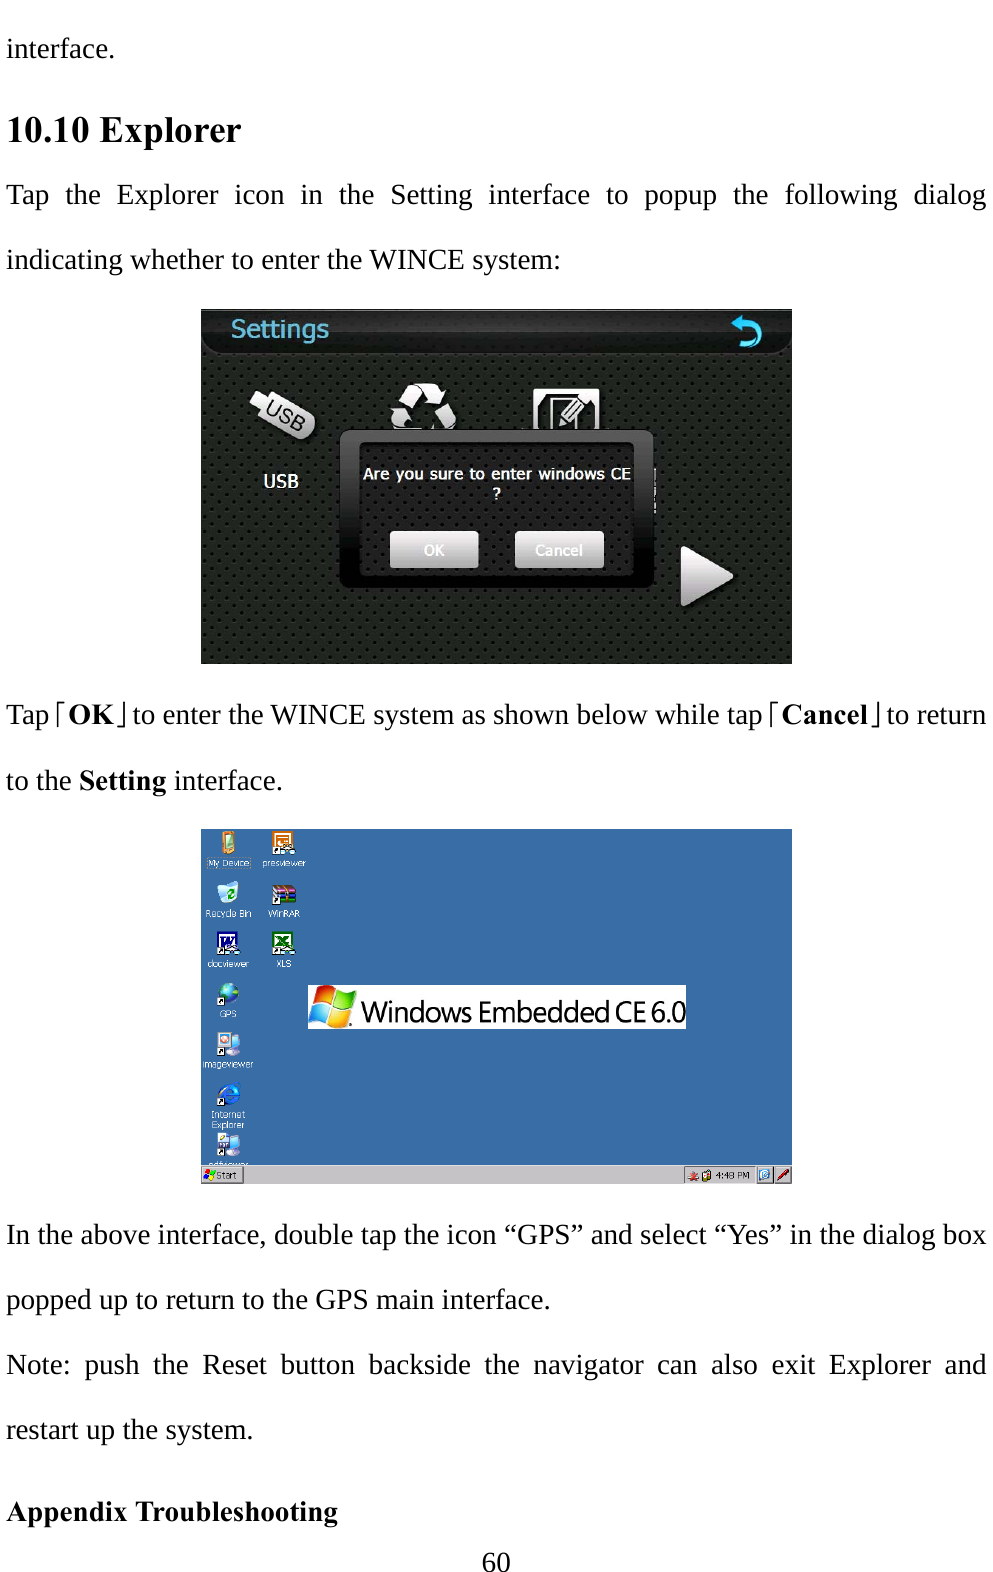
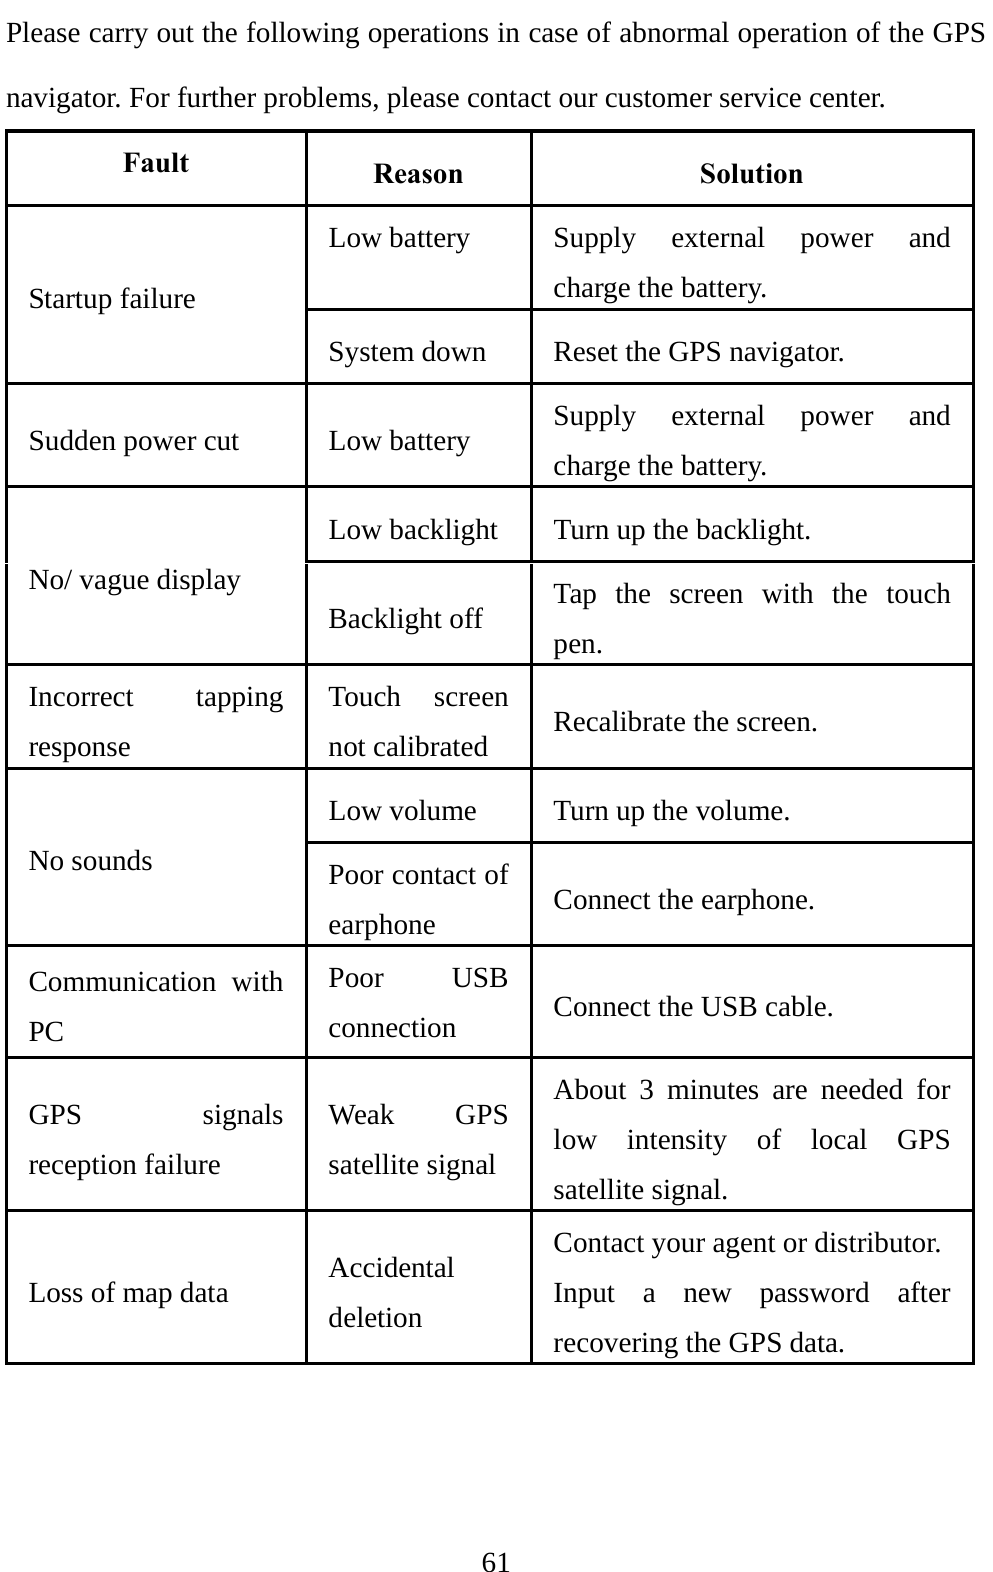
![59 5. After transmission, unplug the USB cable. [Attention] For data safety, please back up your system data in external storage. Our company has no responsibility for lost or damage of system data. [Note] If MASS STORAGE is selected while the GPS navigator is connected with PC, other operations will be suspended. [Attention] The following operations will stop suspend the communication of the system and PC and unsaved data will be lost. 1. Unplugging the MINI USB cable; 2. Powering off the GPS navigator; 3. Resetting the system; 4. Tap the on close button on the top right. 10.9 Restore Factory Settings Tap the Factory Reset icon in the Setting interface to restore the factory settings. The following dialog will be prompted. Tap 「OK」to restore the default setting or 「Cancel」to return to the setting](https://usermanual.wiki/Dongguan-Yuanfeng-Technology/PF100001/User-Guide-1435507-Page-64.png)