Draytek V2760VN VDSL2 Router with WLAN/VoIP User Manual QS Vigor2760 V1 0 draft
Draytek Corporation VDSL2 Router with WLAN/VoIP QS Vigor2760 V1 0 draft
UserManual.wiki
>
Draytek
>
V2760VN User Manual
user manual
Navigation menu
Upload a User Manual
Namespaces
Wiki Guide
HTML
PDF
Info
Views
User Manual
Discussion / Help
Navigation

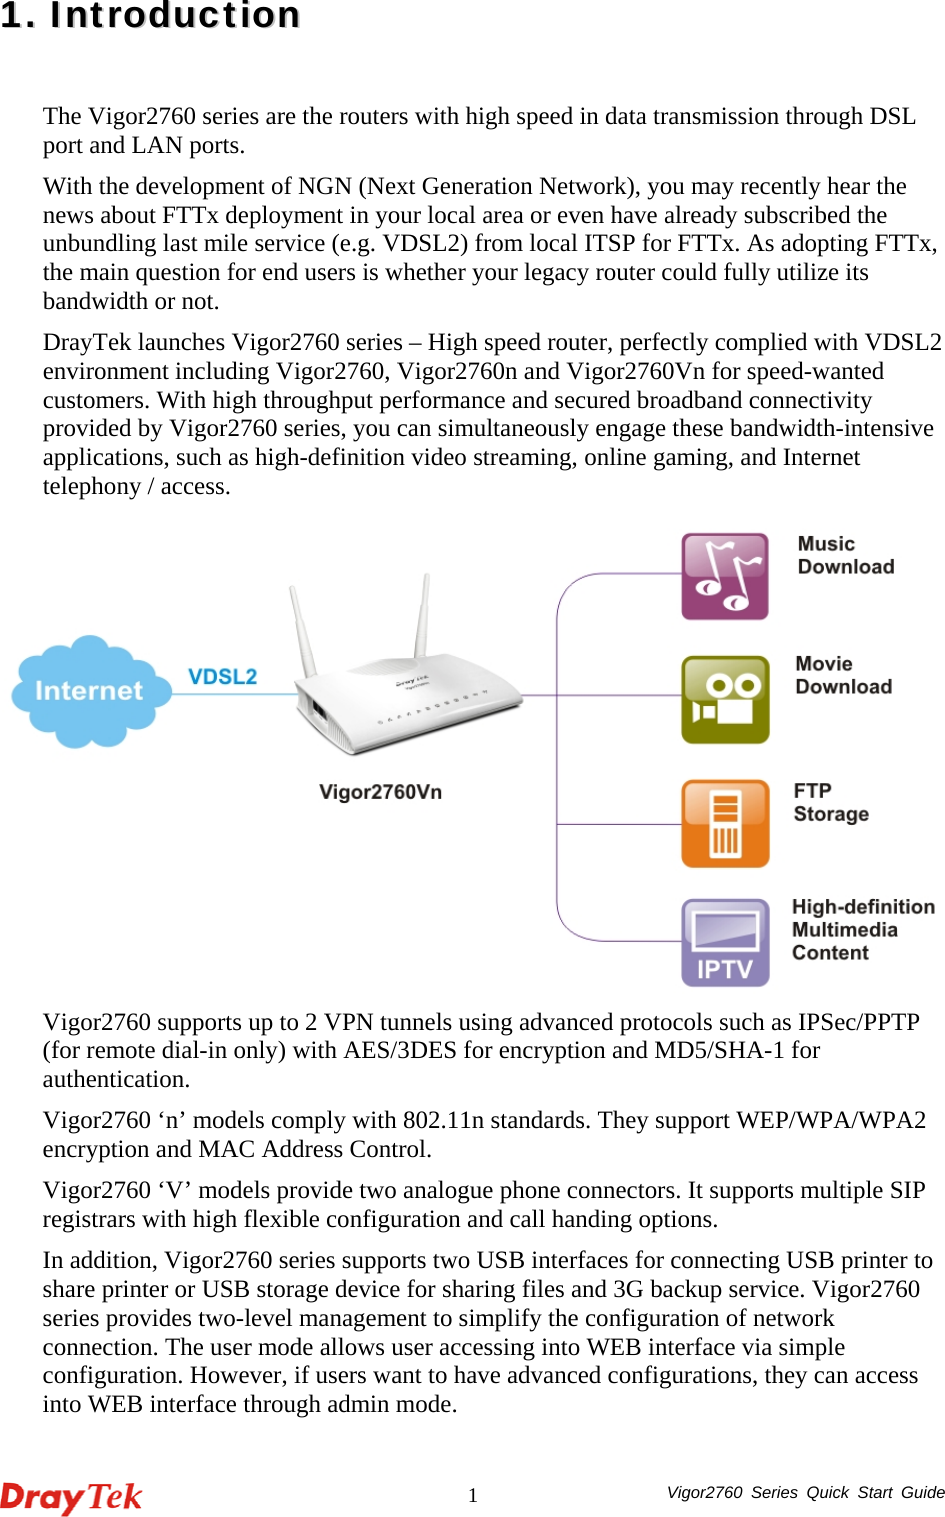
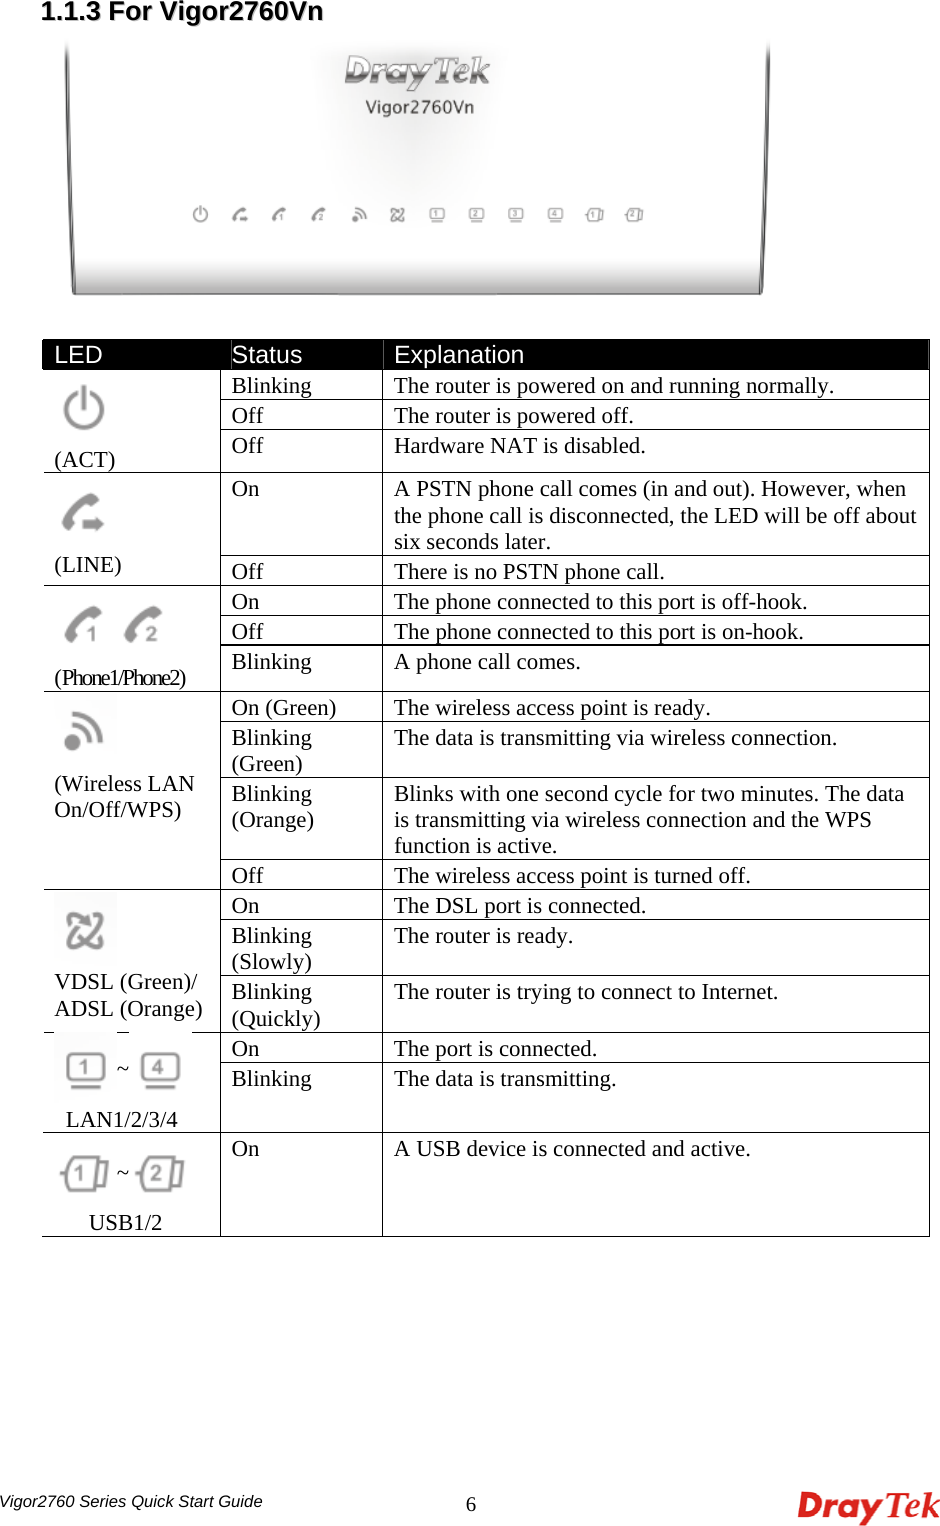
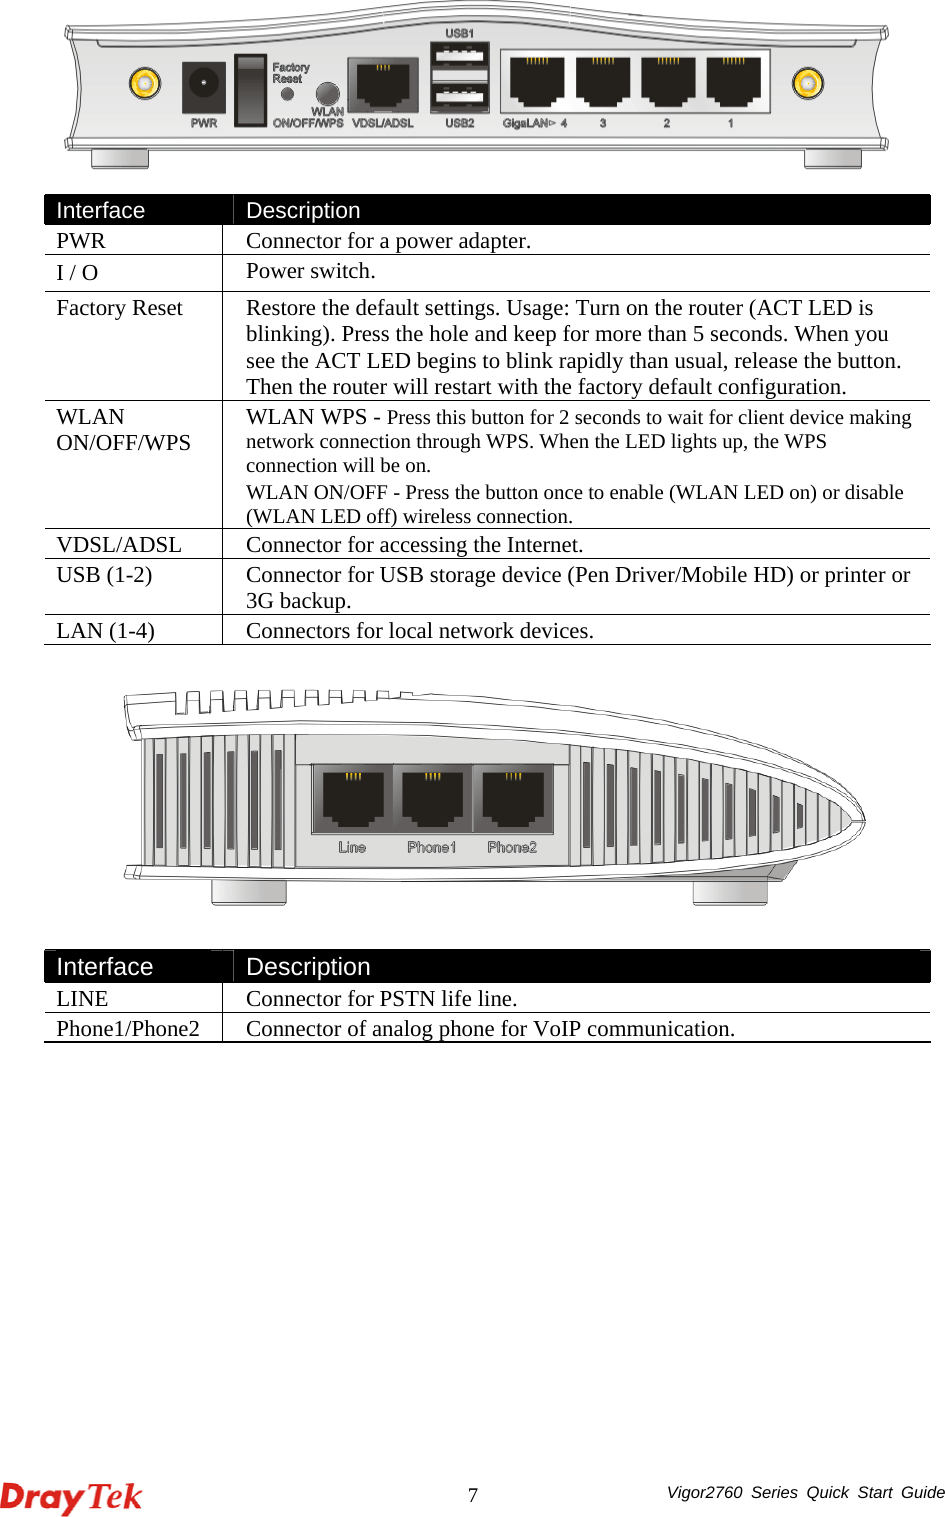
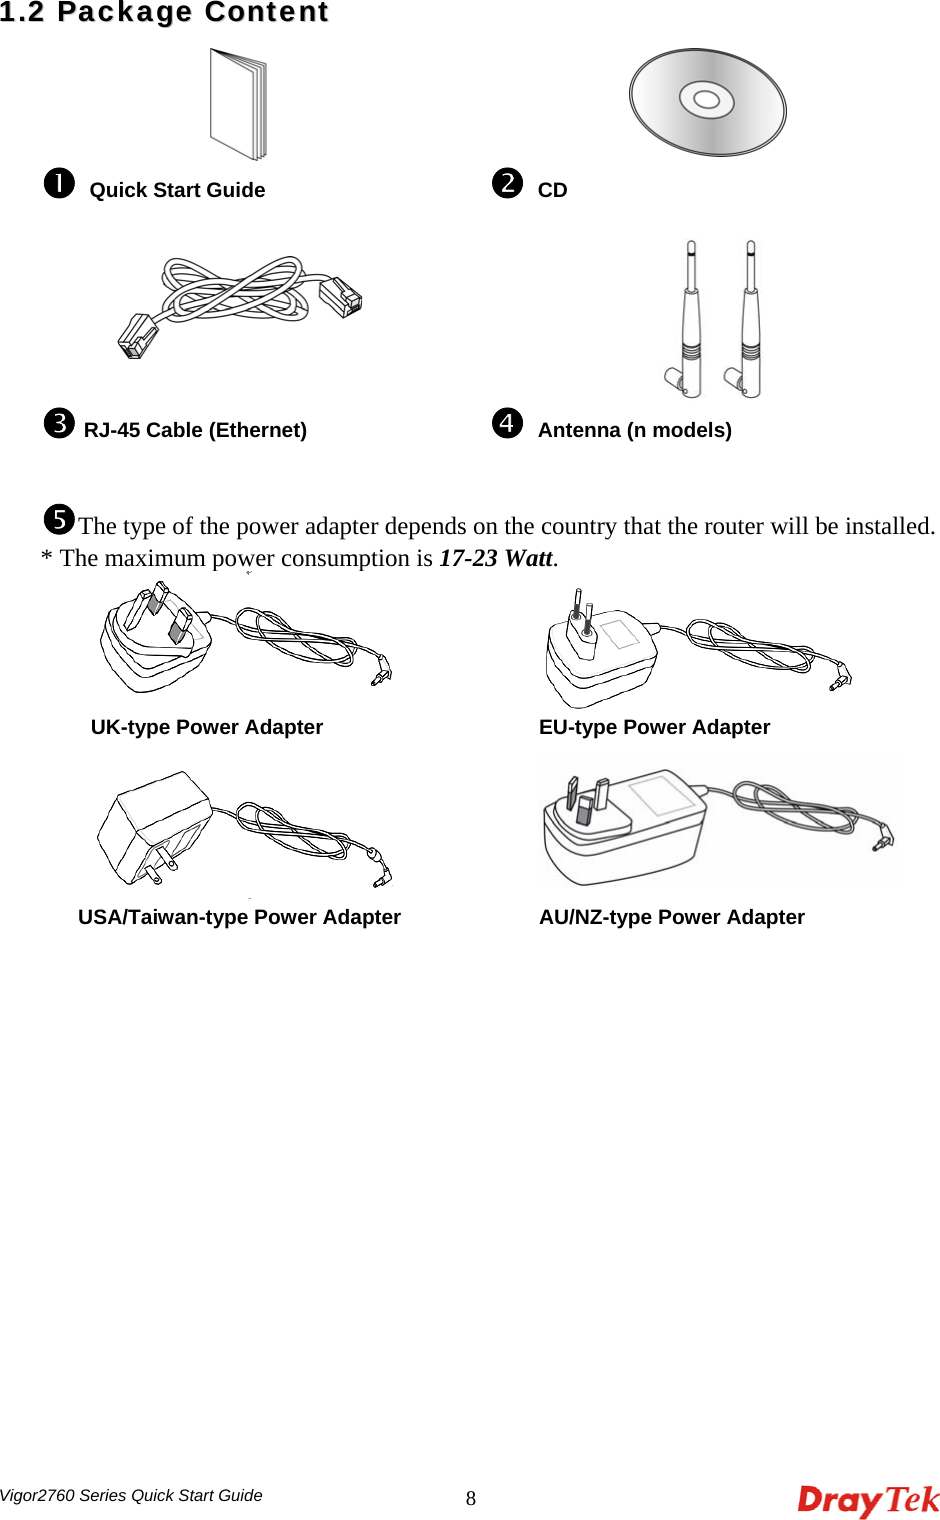
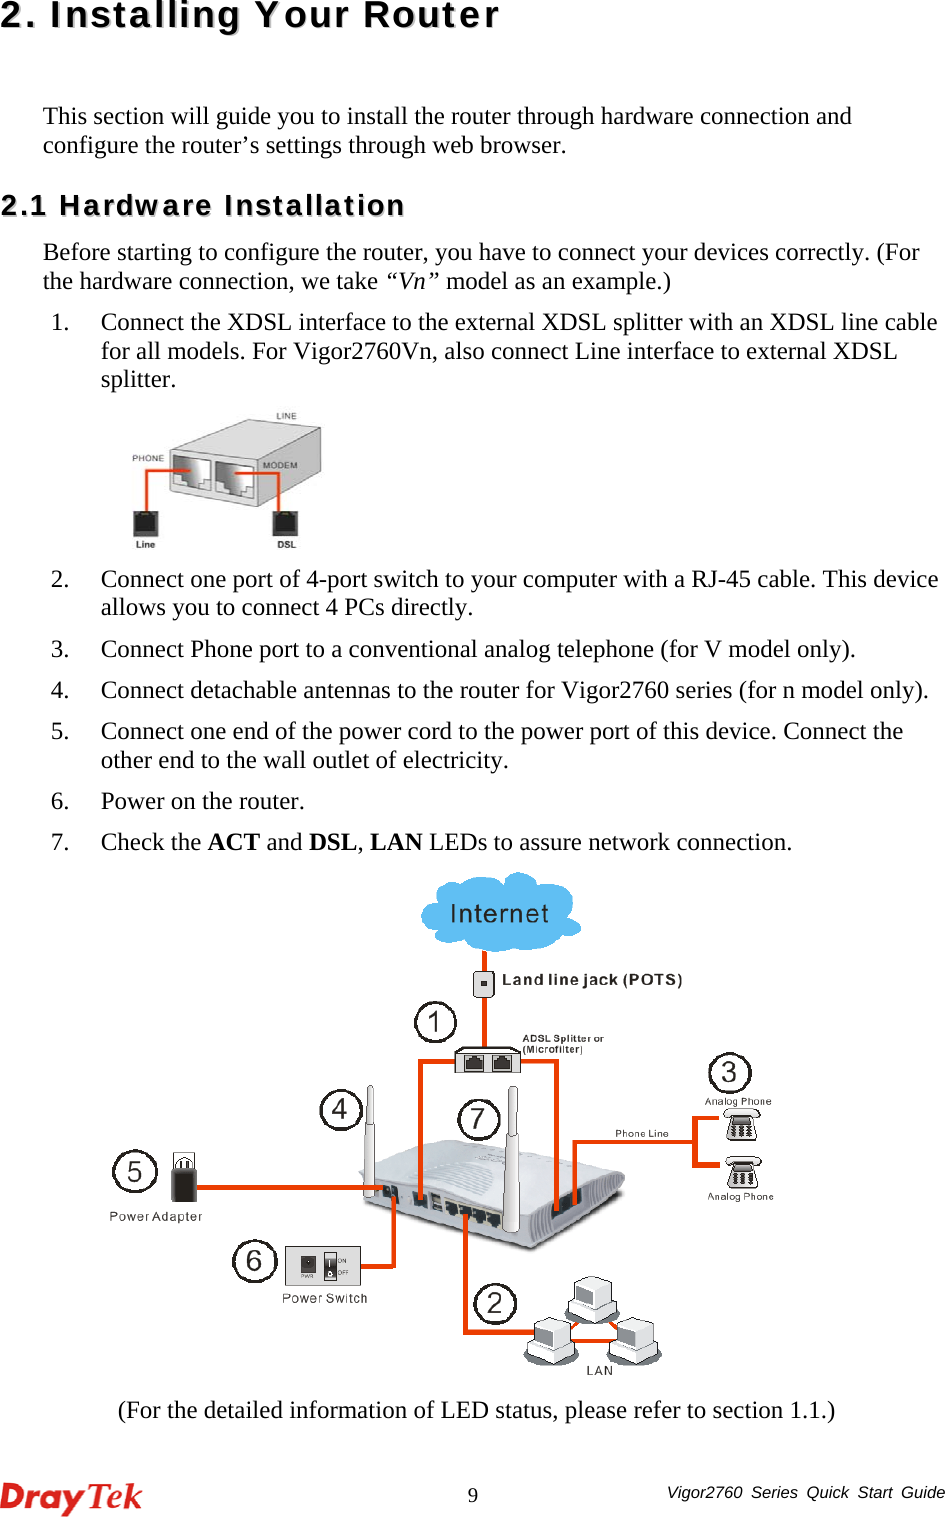
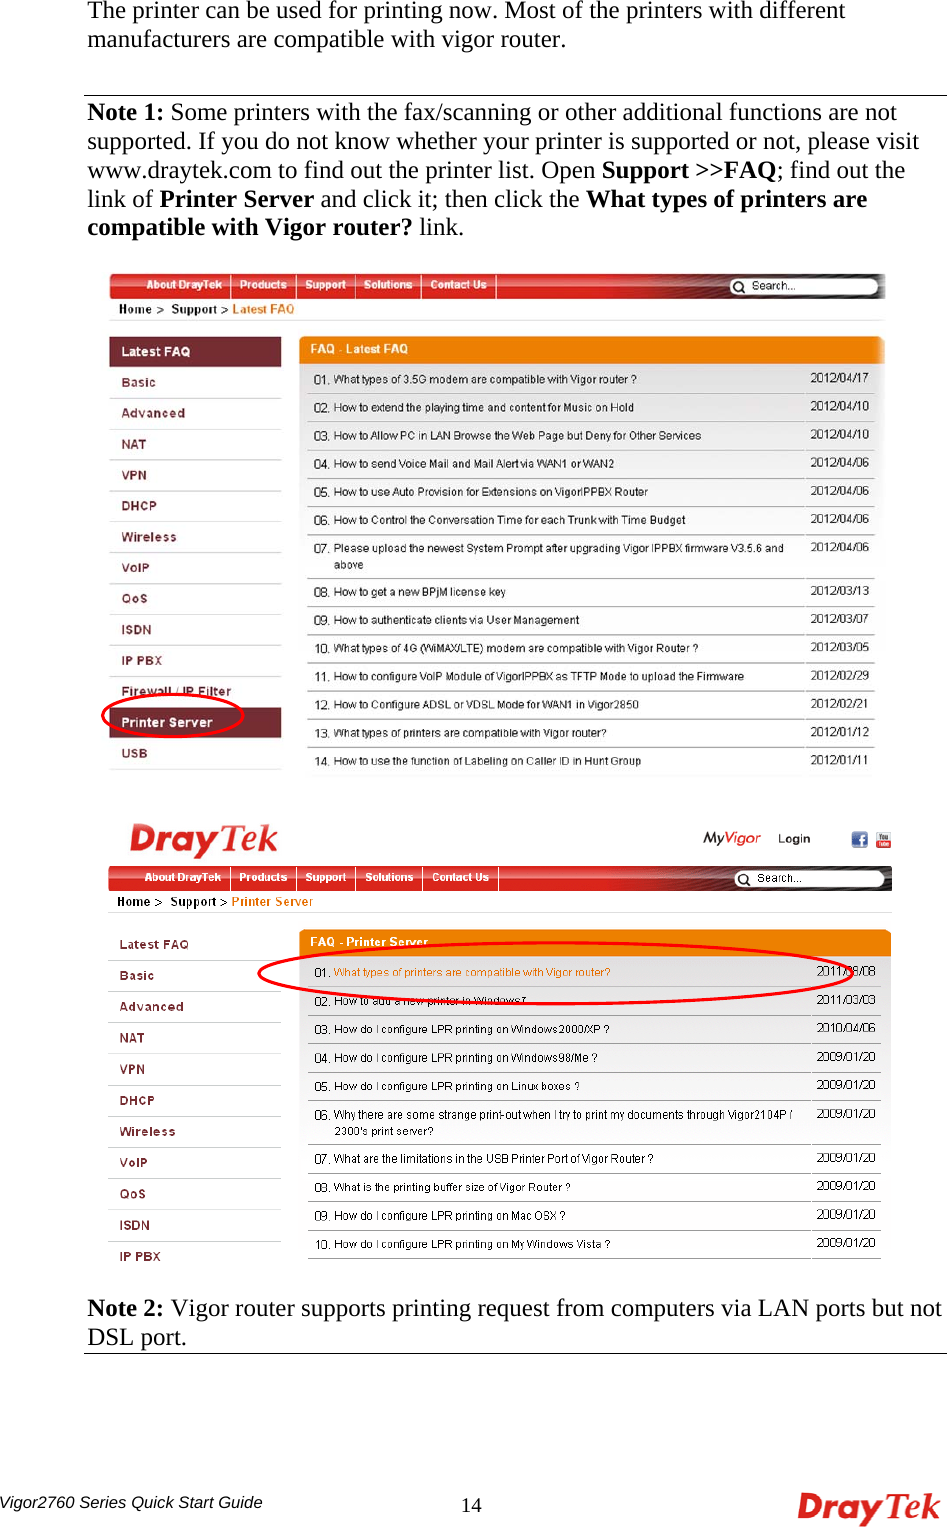

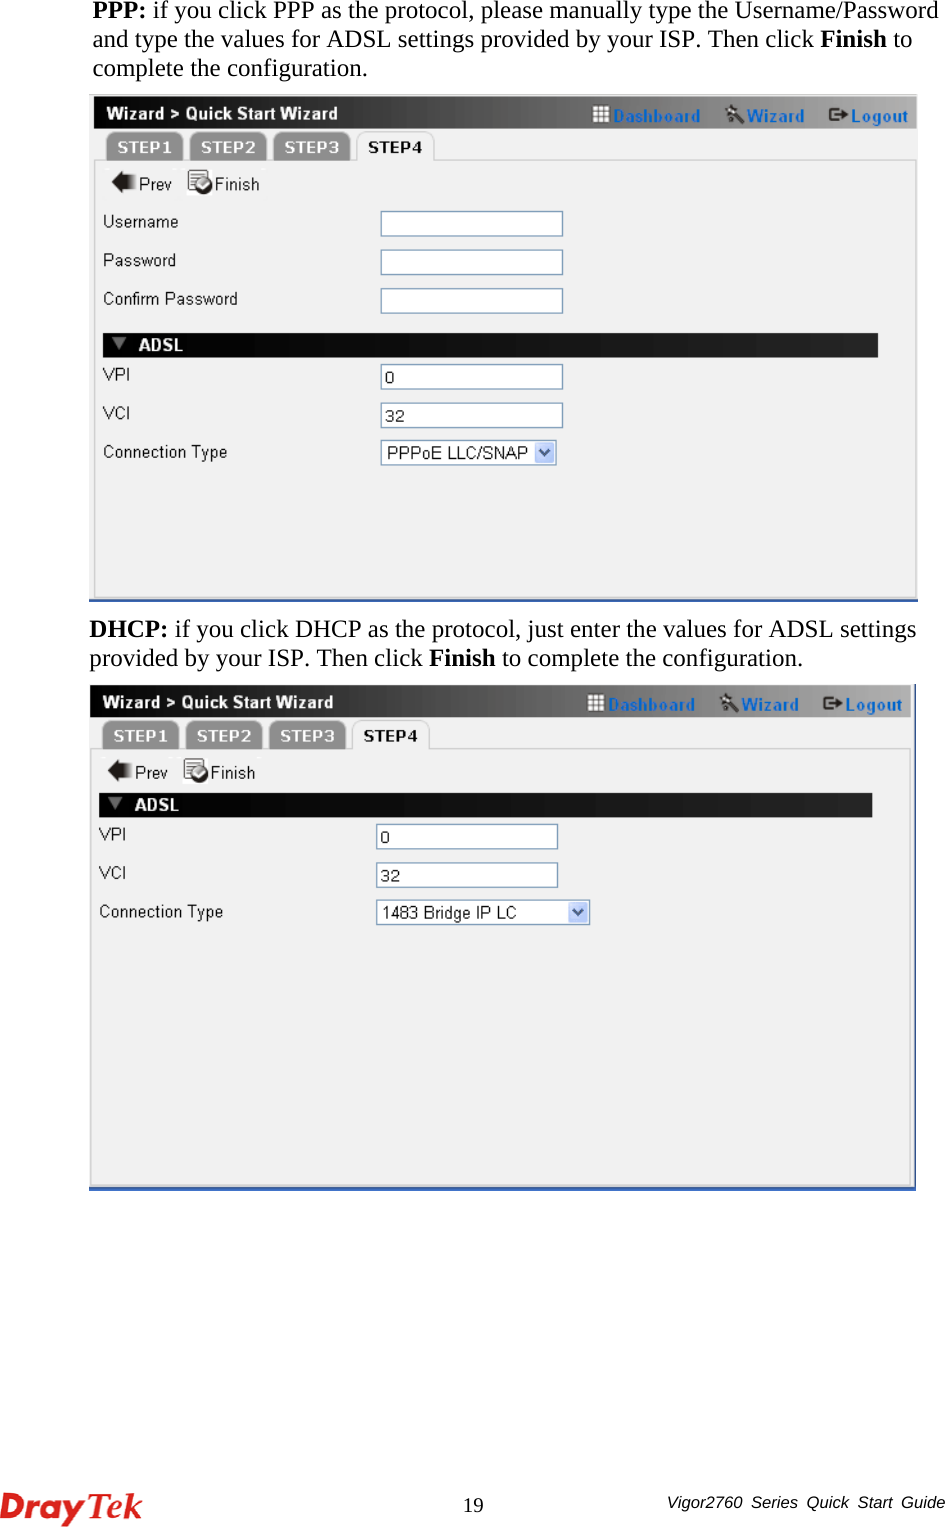
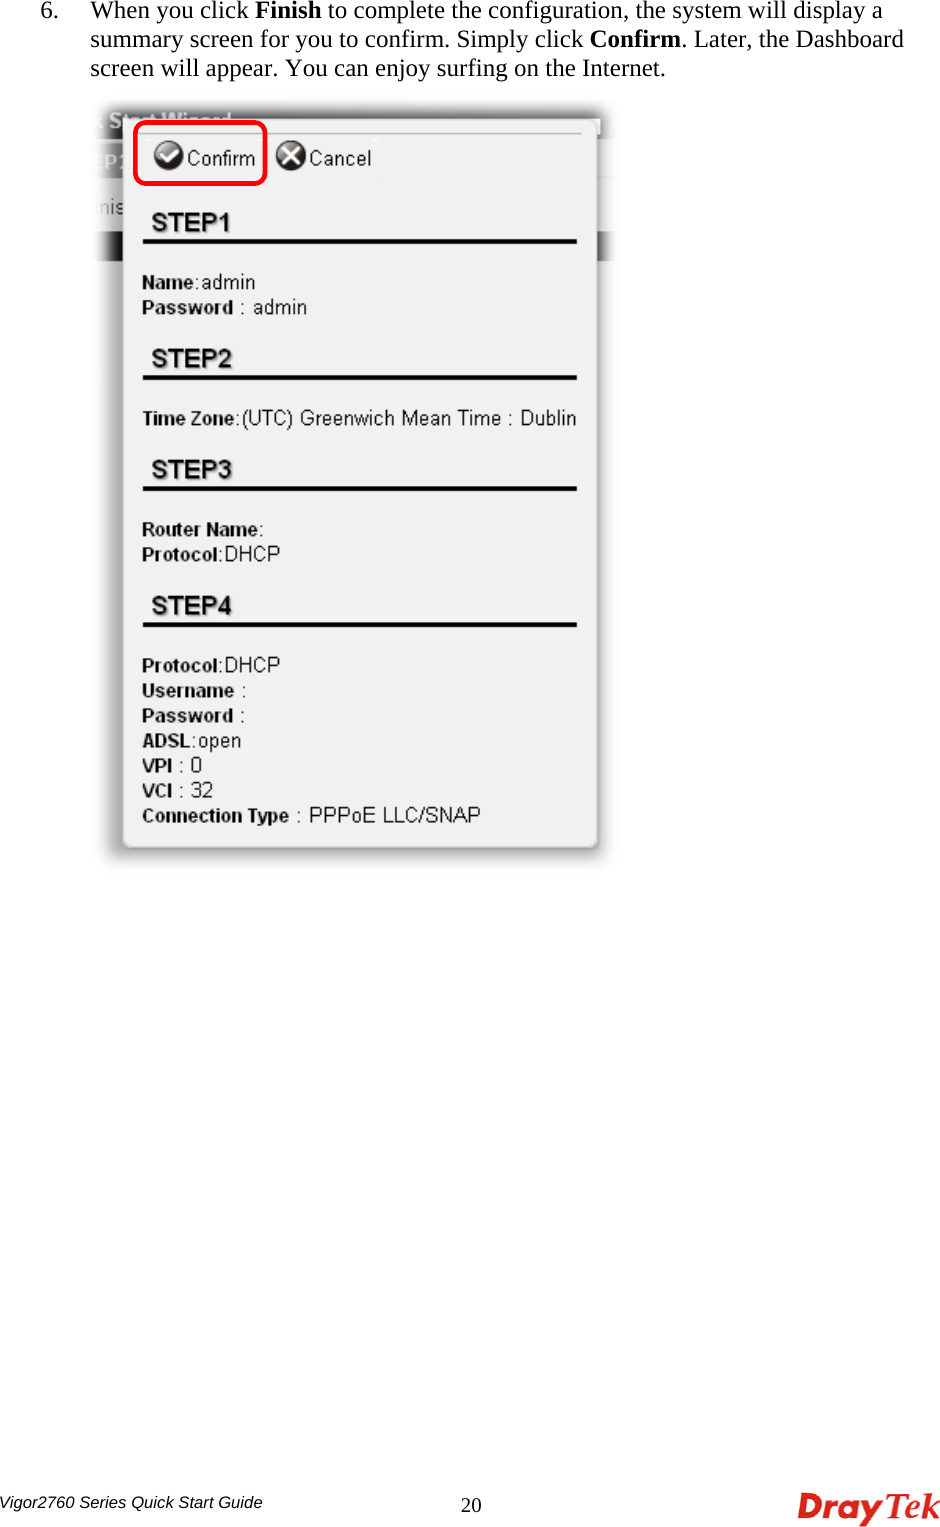
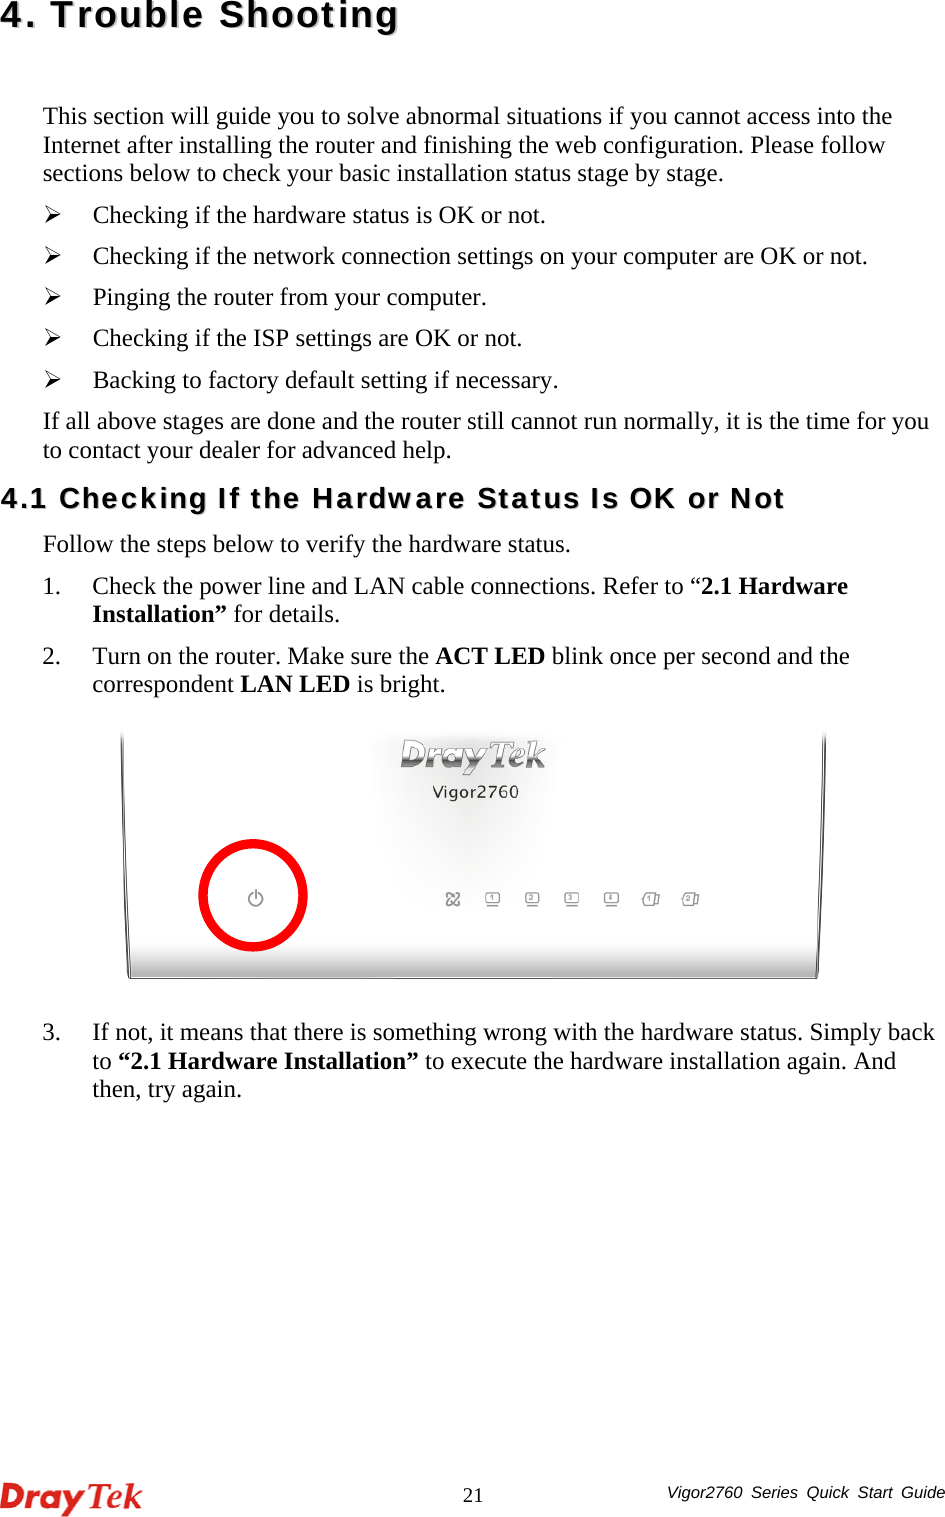
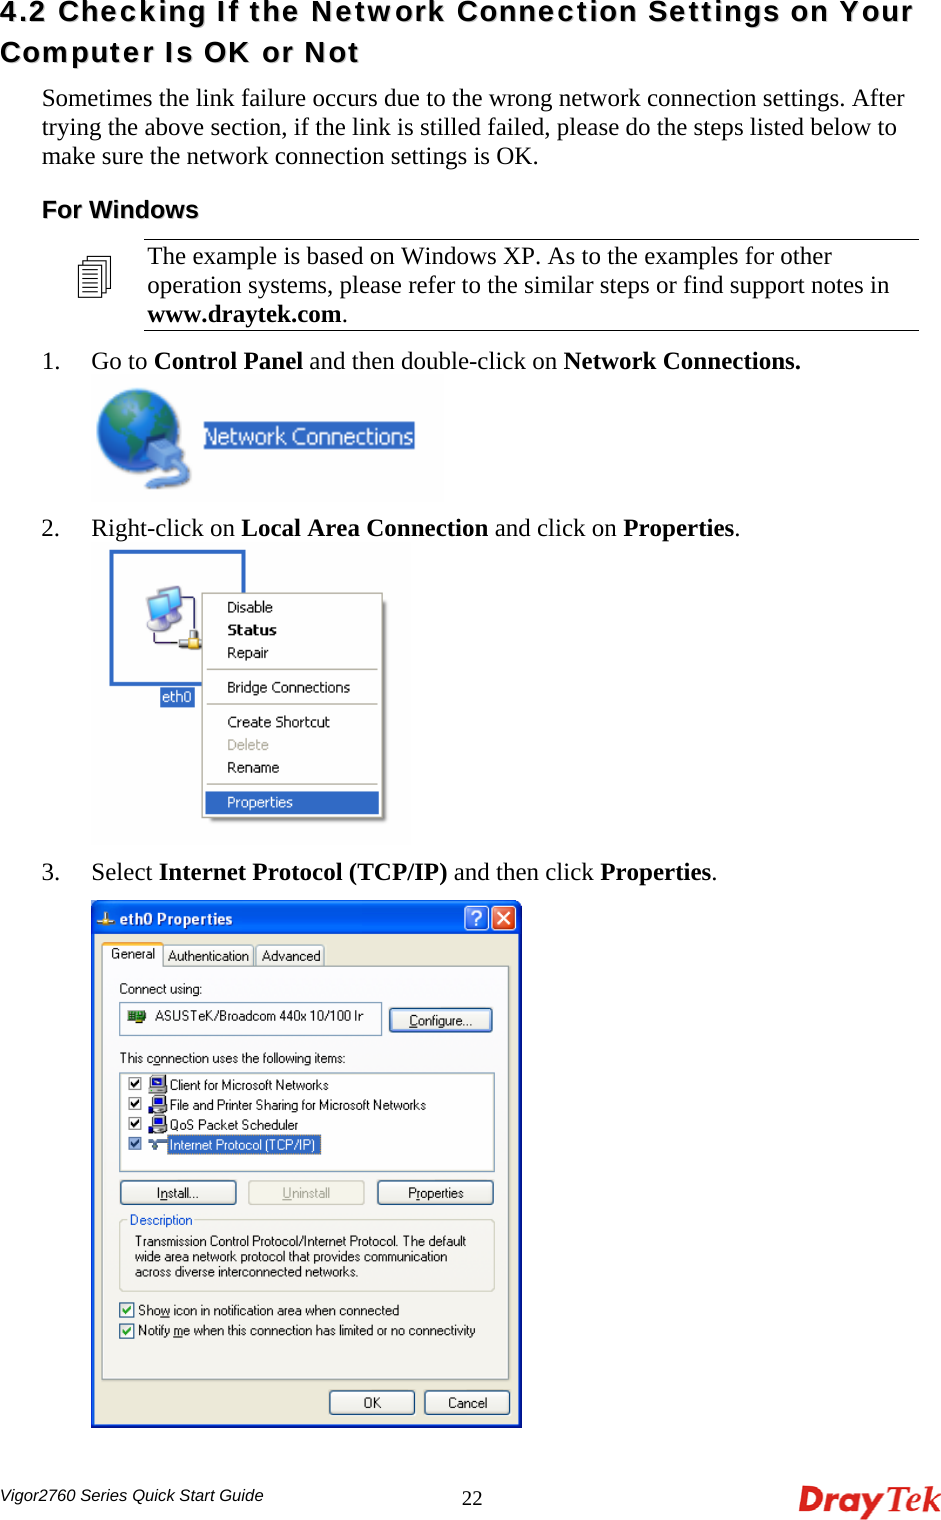
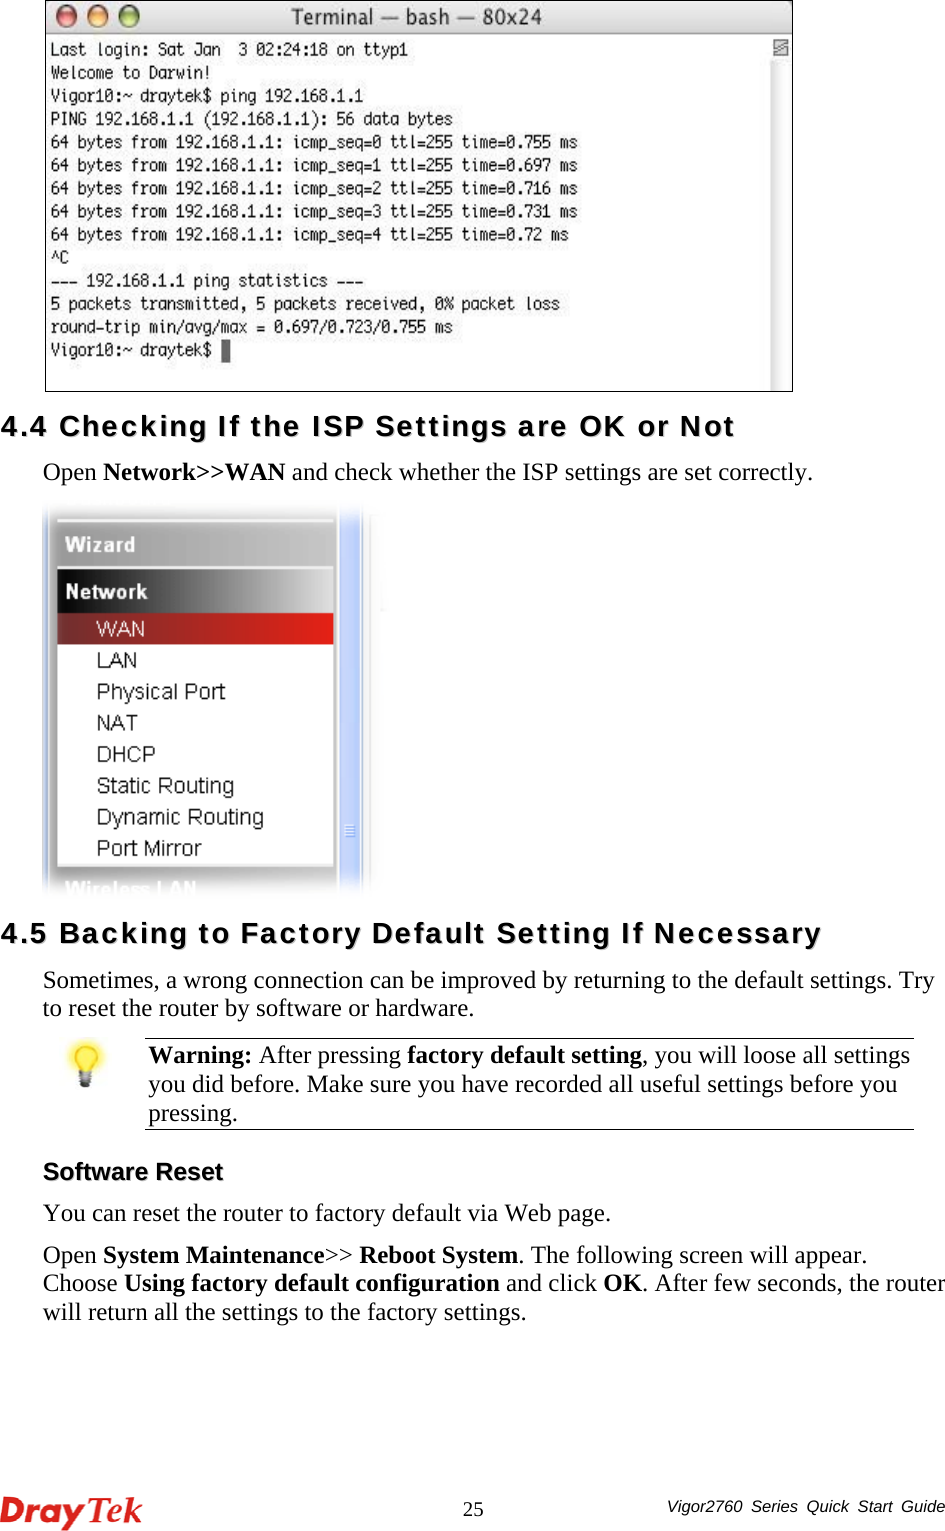
![Vigor2760 Series Quick Start Guide 2444..33 PPiinnggiinngg tthhee RRoouutteerr ffrroomm YYoouurr CCoommppuutteerr The default gateway IP address of the router is 192.168.1.1. For some reason, you might need to use “ping” command to check the link status of the router. The most important thing is that the computer will receive a reply from 192.168.1.1. If not, please check the IP address of your computer. We suggest you setting the network connection as get IP automatically. (Please refer to the section 4.2) Please follow the steps below to ping the router correctly. FFoorr WWiinnddoowwss 1. Open the Command Prompt window (from Start menu> Run). 2. Type command (for Windows 95/98/ME) or cmd (for Windows NT/ 2000/XP/Vista). The DOS command dialog will appear. 3. Type ping 192.168.1.1 and press [Enter]. If the link is OK, the line of “Reply from 192.168.1.1:bytes=32 time<1ms TTL=255” will appear. 4. If the line does not appear, please check the IP address setting of your computer. FFoorr MMaacc OOSS ((TTeerrmmiinnaall)) 1. Double click on the current used Mac OS on the desktop. 2. Open the Application folder and get into Utilities. 3. Double click Terminal. The Terminal window will appear. 4. Type ping 192.168.1.1 and press [Enter]. If the link is OK, the line of “64 bytes from 192.168.1.1: icmp_seq=0 ttl=255 time=xxxx ms” will appear.](https://usermanual.wiki/Draytek/V2760VN/User-Guide-1768926-Page-32.png)