Duravit 596000098001 Remote Control User Manual SeWa i USA Operating Instructions Draft
Duravit AG Remote Control SeWa i USA Operating Instructions Draft
Duravit >
SeWa i USA Operating Instructions_Draft
SensoWash®
i
HEADQUARTERS
Duravit AG
Werderstr. 36
78132 Hornberg
Germany
Phone +49 7833 70 0
Fax +49 7833 70 289
info@duravit.com
www.duravit.com
www.sensowash.com
2
Contents
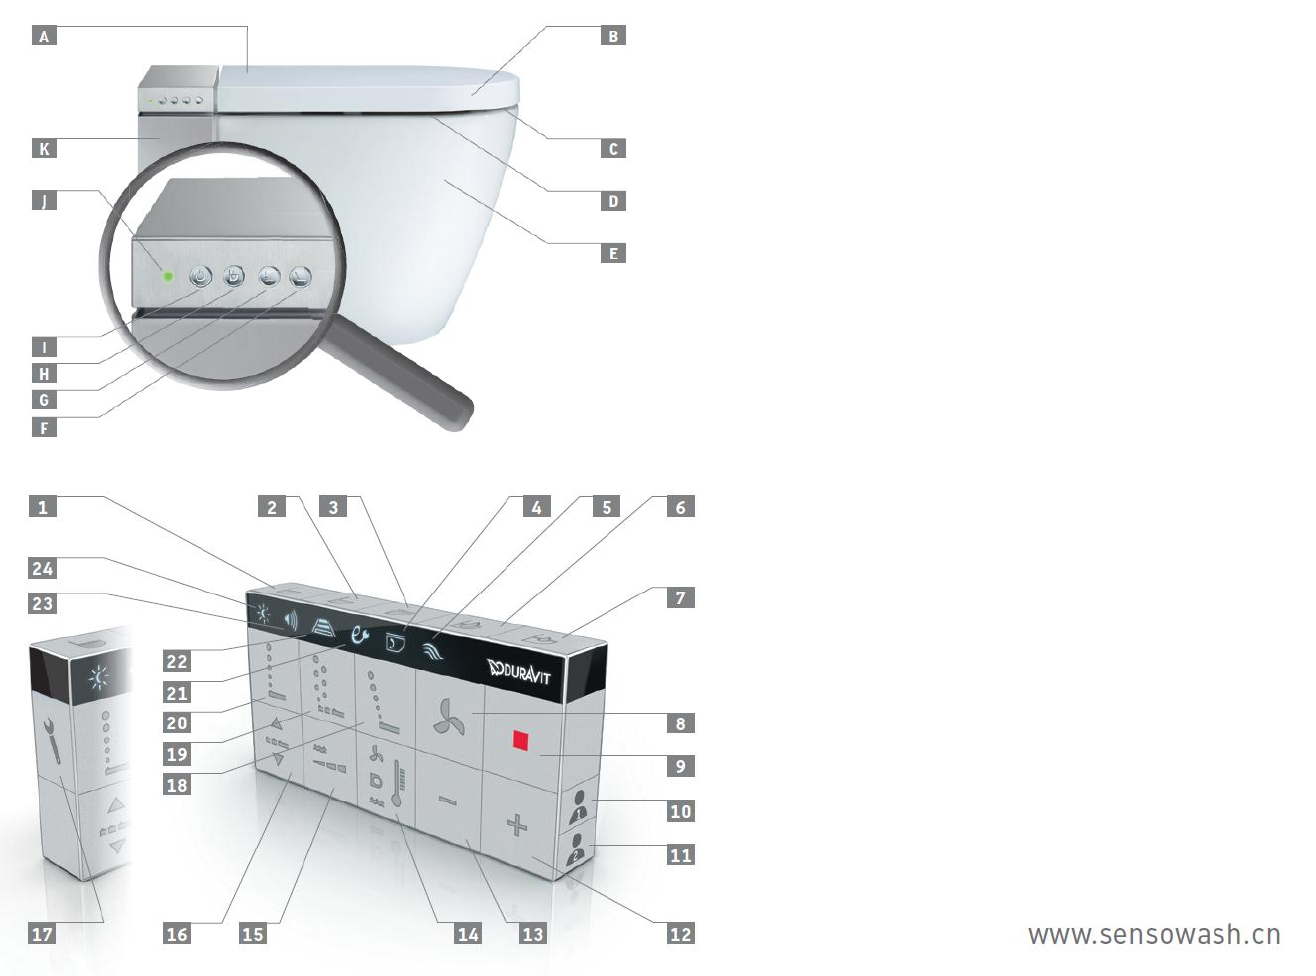
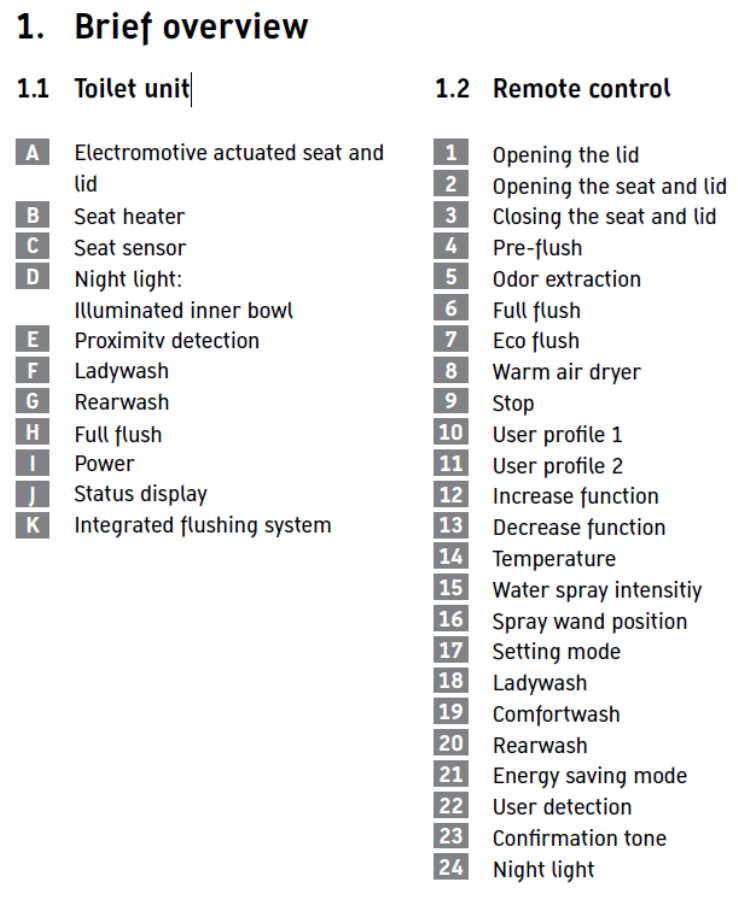
1. Brief overview............................................................................................. 5
1.1 Toilet unit.............................................................................................. 5
1.2 Remote control...................................................................................... 5
1.3 Functional area..................................................................................... 6
1.4 Right product side................................................................................. 6
1.5 Left product side .................................................................................. 7
2. Description of Symbols................................................................................ 8
3. For your safety............................................................................................ 8
3.1 Normal Use........................................................................................... 8
3.2 Safety instructions................................................................................ 8
4. Product information.................................................................................. 10
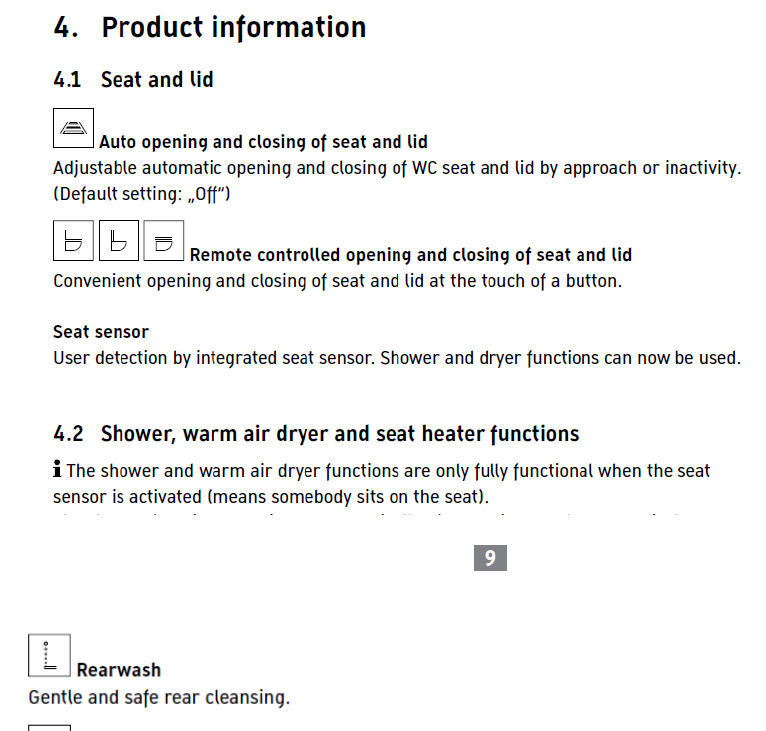
4.1 Seat and lid......................................................................................... 10
Auto opening and closing of seat and lid................................................. 10
4.2 Shower, warm air dryer and seat heater functions.............................. 11
Comfortwash........................................................................................... 11
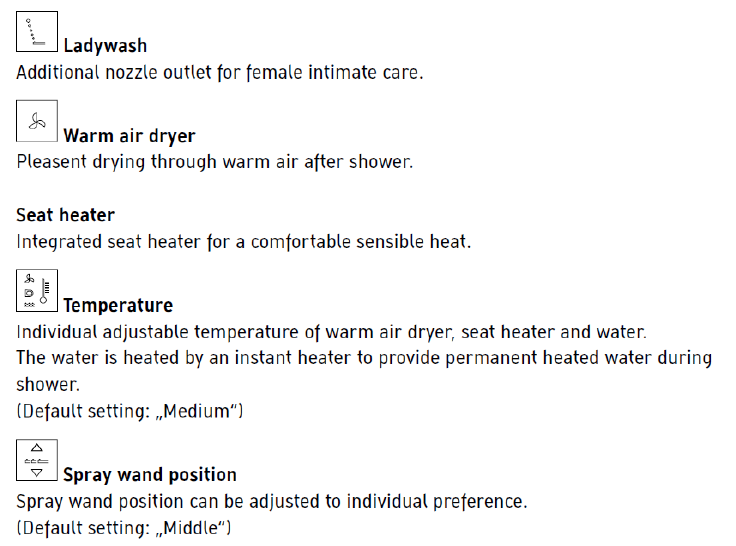
Ladywash................................................................................................ 11
Warm air dryer........................................................................................ 11
Temperature............................................................................................ 11
Spray wand position................................................................................. 11
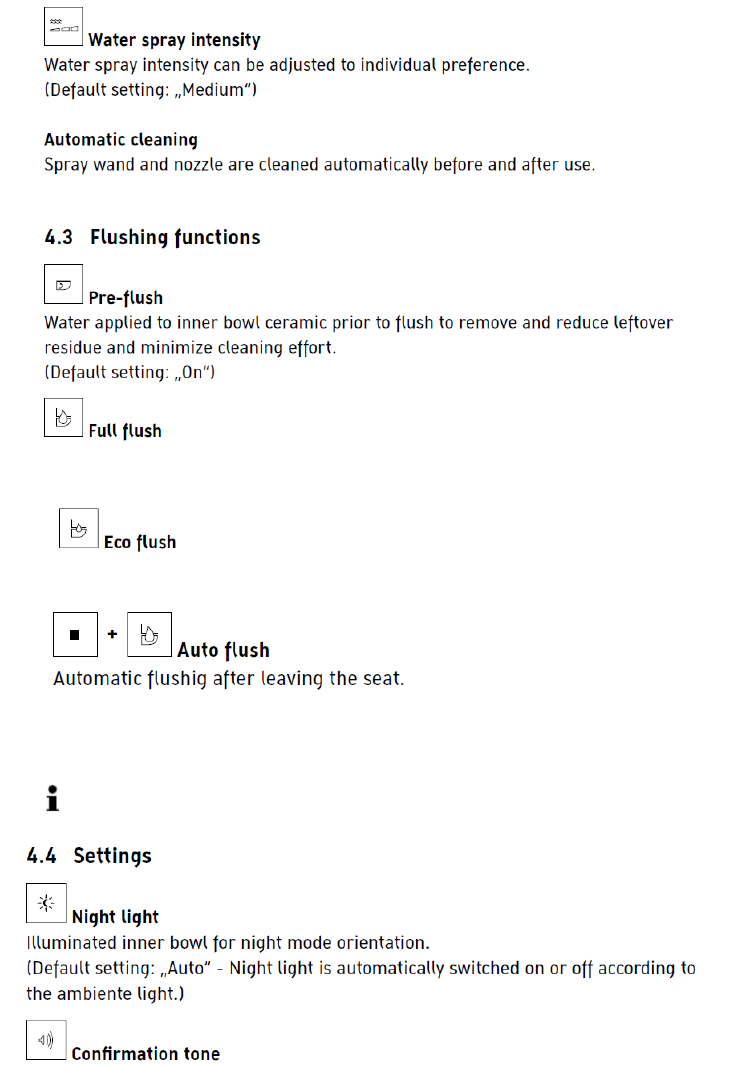
Water spray intensity............................................................................... 11
Automatic cleaning.................................................................................. 12
4.3 Flushing functions................................................................................ 12
Pre-flush.................................................................................................. 12
Full flush.................................................................................................. 12
Eco flush.................................................................................................. 12
Auto flush................................................................................................. 12
4.4 Settings................................................................................................ 12
Night light................................................................................................. 12
Confirmation tone..................................................................................... 12
Auto opening and closing of seat and lid.................................................. 13
Energy saving mode................................................................................. 13
Pre-flush.................................................................................................. 13
Odor extraction........................................................................................ 13
User profile.............................................................................................. 13
5. Basics of operation..................................................................................... 14
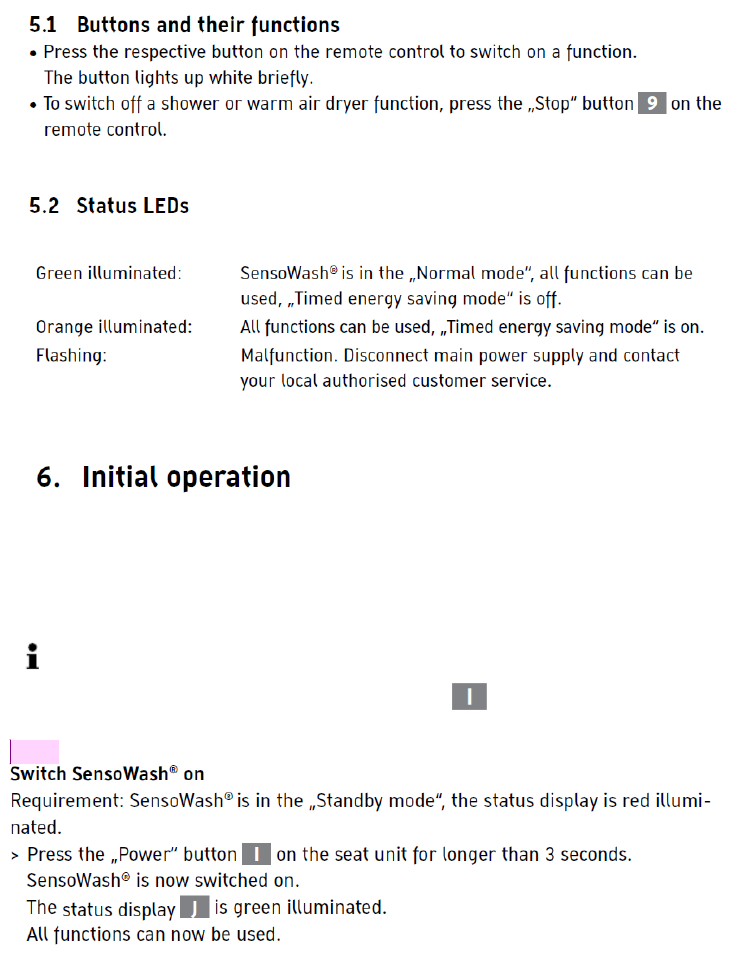
5.1 Buttons and their functions................................................................... 14
5.2 Status LEDs .......................................................................................... 14
6. Initial operation........................................................................................... 14
Remote control......................................................................................... 14
Power supply............................................................................................ 14
Switch SensoWash on............................................................................... 15
7. Operating................................................................................................... 15
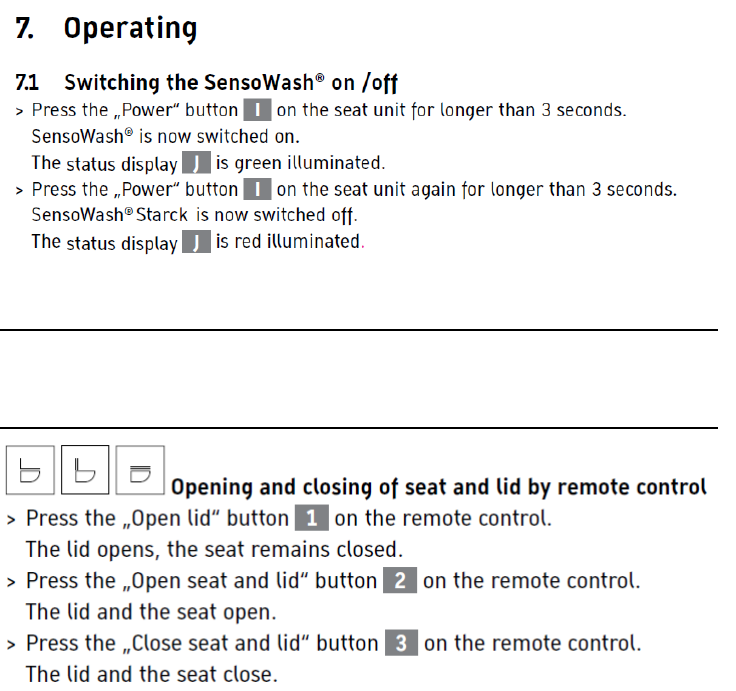
7.1 Switching the SensoWash? on /off....................................................... 15
3
7.2 Seat and lid......................................................................................... 15
Opening and closing of seat and lid by remote control........................... 15
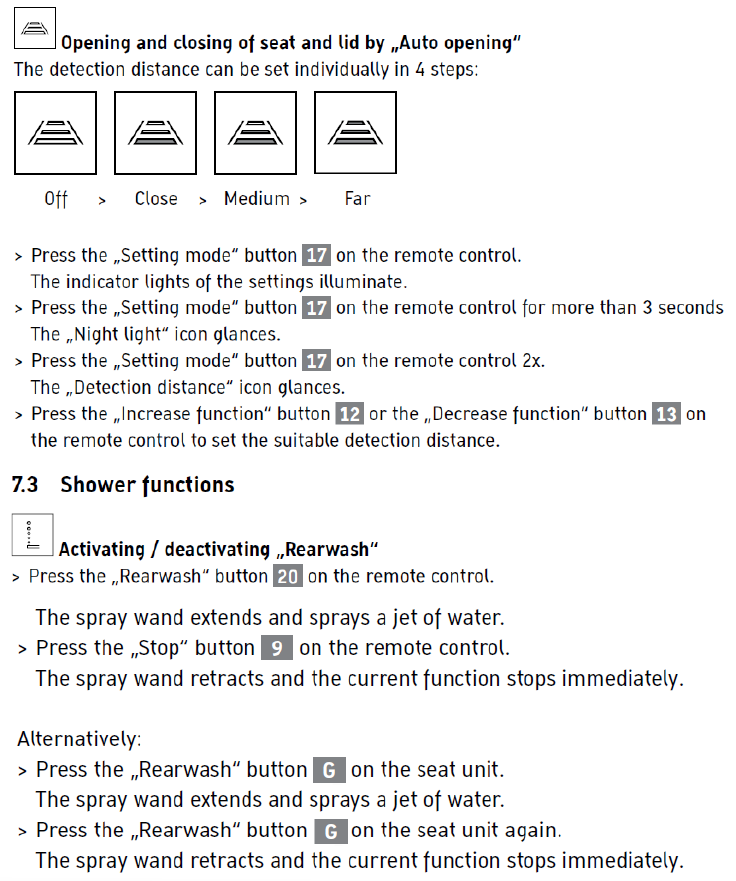
Opening and closing of seat and lid by „Auto opening“........................... 16
7.3 Shower functions................................................................................. 16
Activating / deactivating „Rearwash“....................................................... 16
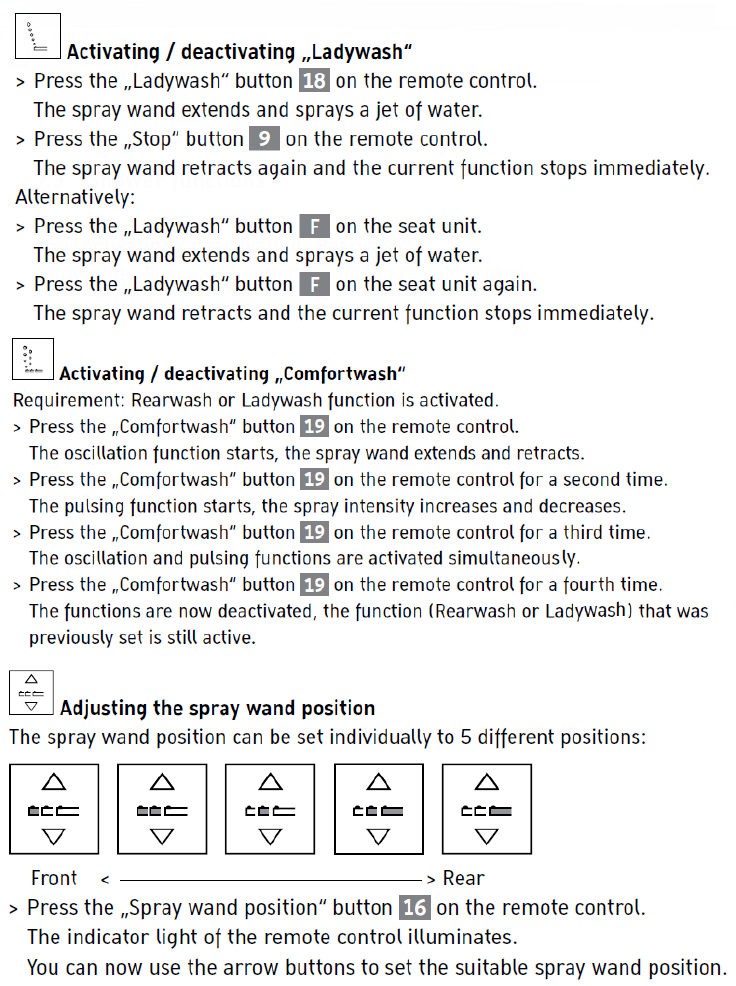
Activating / deactivating „Ladywash“....................................................... 16
Activating / deactivating „Comfortwash“.................................................. 17
Requirement: Rearwash or Ladywash function is activated. ................... 17
Adjusting the spray wand position............................................................ 17
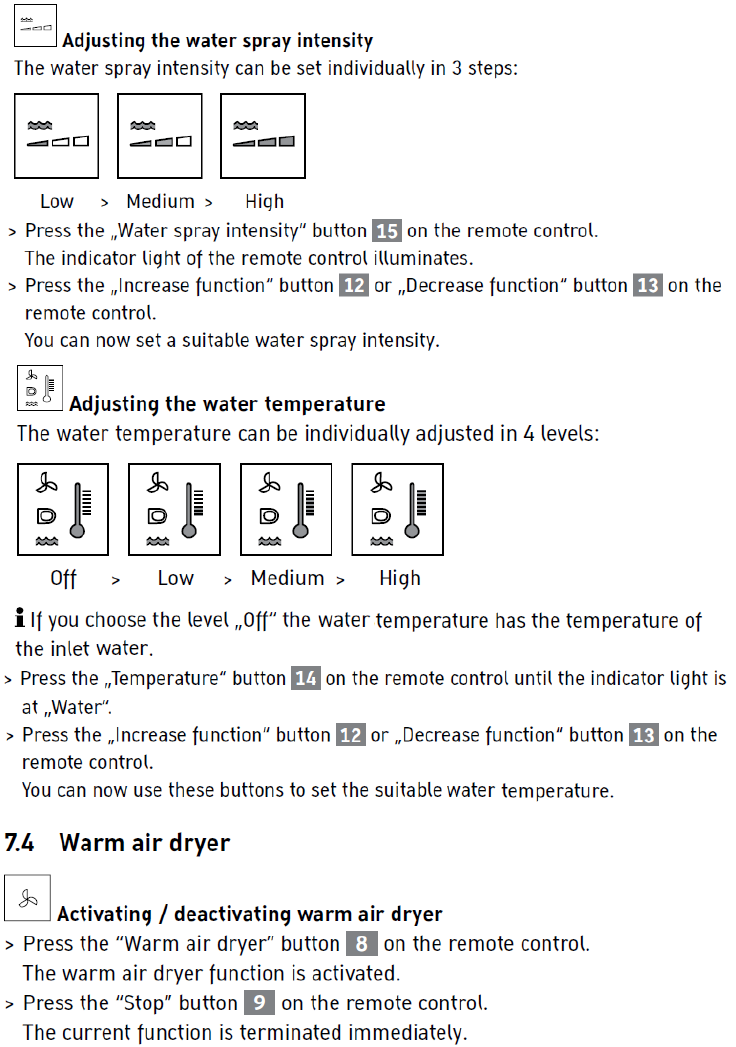
Adjusting the water spray intensity.......................................................... 17
Adjusting the water temperature............................................................ 18
7.4 Warm air dryer..................................................................................... 18
Activating / deactivating warm air dryer.................................................. 18
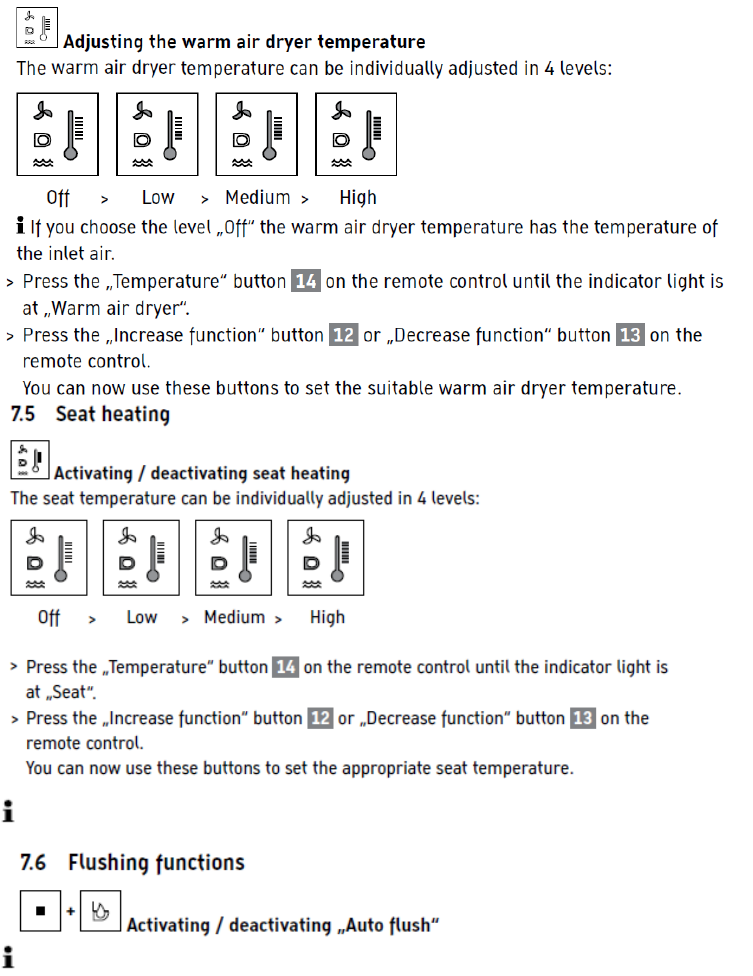
Adjusting the warm air dryer temperature.............................................. 18
7.5 Seat heating........................................................................................ 19
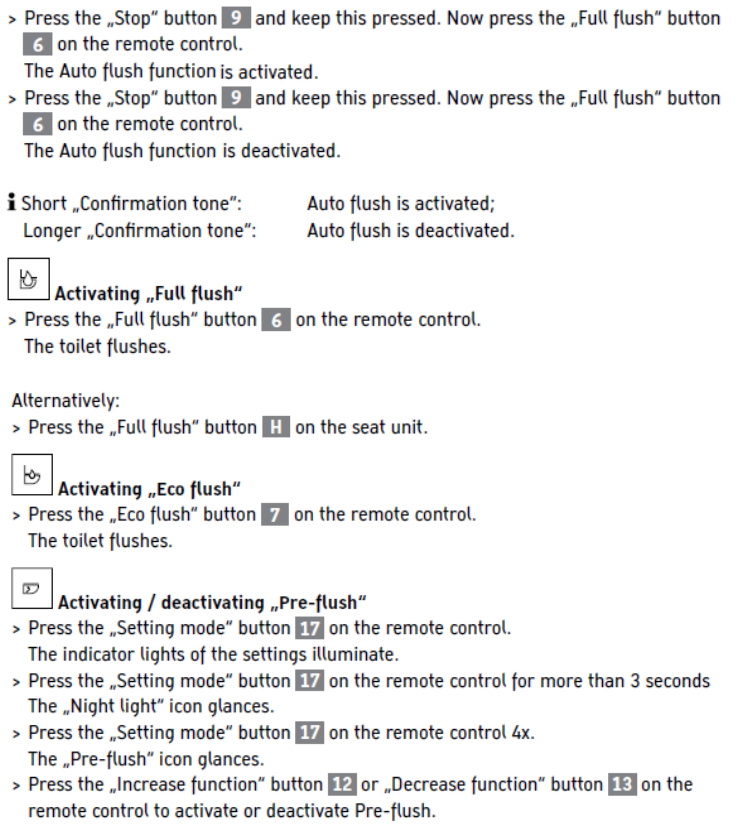
Activating / deactivating seat heating...................................................... 19
7.6 Flushing functions................................................................................. 19
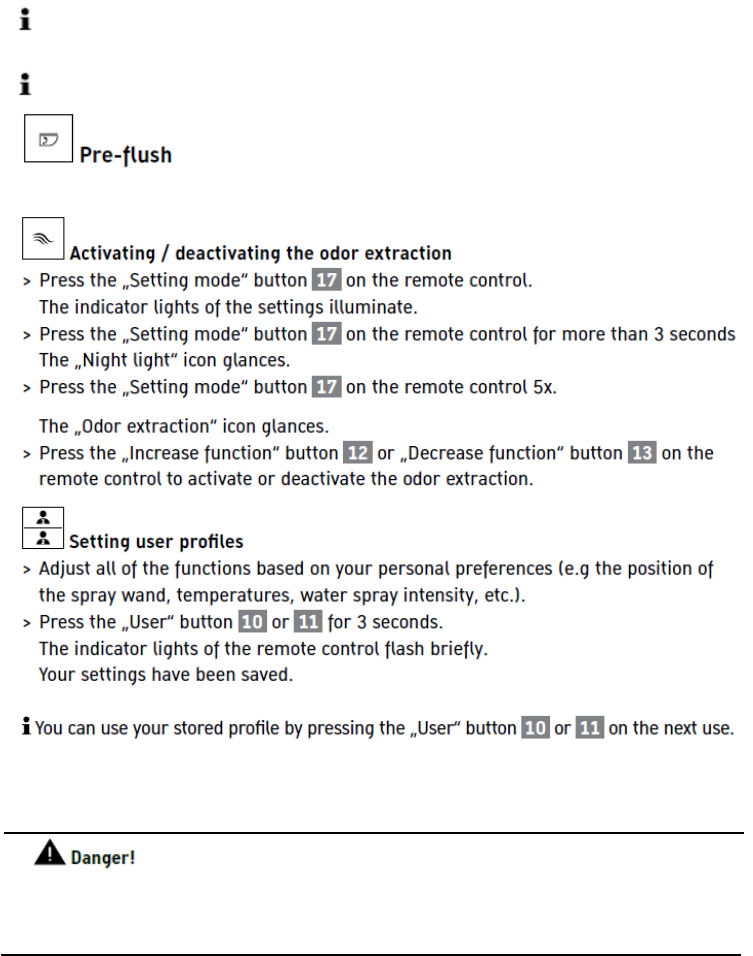
Activating / deactivating „Auto flush“....................................................... 19
Activating „Full flush“............................................................................... 20
Activating „Eco flush“............................................................................... 20
Activating / deactivating „Pre-flush“........................................................ 20
7.7 Settings............................................................................................... 20
Adjusting the night light........................................................................... 20
Activating / deactivating the confirmation tone........................................ 21
Auto opening and closing of seat and lid.................................................. 21
Adjusting the energy saving mode........................................................... 21
Pre-flush.................................................................................................. 22
Activating / deactivating the odor extraction............................................ 22
Setting user profiles................................................................................. 22
8. Cleaning and Care ...................................................................................... 22
8.1 Seat Unit................................................................................................ 22
Seat and lid.............................................................................................. 22
Manual cleaning of the spray wand and nozzle........................................ 23
Self-cleaning of the spray wand............................................................... 23
8.2 Ceramic............................................................................................... 24
8.3 Stainless steel covers.......................................................................... 25
8.4 Remote control.................................................................................... 25
8.5 Prolonged disuse................................................................................. 25
8.6 Water filter......................................................................................... 25
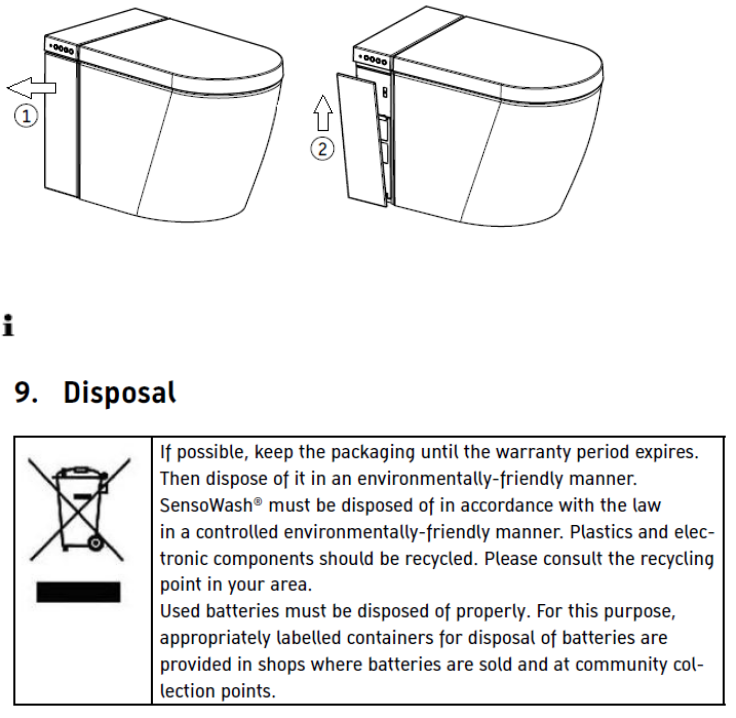
9. Disposal..................................................................................................... 26
10. Troubleshooting support............................................................................ 27
11. Technical Data............................................................................................ 32
4

5
6
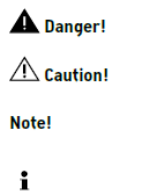
2. Description of Symbols
The following warning signs warn you of dangerous situations and their severity:
High risk, lethal hazards, severe injuries
Low risk, minor injuries
Damage to property
The following symbols are used:
Hints and tips are provided here.
> This is a prompt requesting your input.
3. For your safety
To ensure that you will enjoy your SensoWash® i, read these operating instructions carefully, particularly
the safety instructions.
Keep the operating instructions in a safe place and in the case of a change in ownership, ensure they are
given to the new owner.
The installation and repair of this product should only be done by qualified service personnel.
When using electrical products, especially when children are present, basic safety precautions should
always be followed, including the following:
READ ALL INSTRUCTIONS BEFORE INSTALLATION AND USE.
3.1 Normal Use
SensoWash®
i is a toilet with spray attachment for Rearwash and Ladywash cleansing functions with an
integrated flushing system. Its use is limited exclusively to enclosed spaces.
Any other usage will be deemed as not corresponding with normal usage. Duravit undertakes no liability for
abnormal usage.
3.2 Grounding instructions
This product must be grounded. This product should be connected to a grounded, metallic,
permanent wiring system, or an equipment‐grounding conductor should be run with the circuit
conductors and connected to the equipment grounding terminal or lead on the product.
In the event of an electrical short circuit, grounding reduces the risk of electric shock by providing an
escape wire for the electrical current. This product does not use an electrical plug and is equipped
with a conduit and two conduit hubs for power cord connection.
This product must be on a separate circuit. No other appliance should share the circuit with this
product. Sharing a circuit could cause the branch circuit fuse to blow or the circuit breaker to trip.
Continuous usage under these conditions could result in fire or property damage. The circuit must be
protected by a Ground-Fault Circuit-Interrupter (GFCI) or Earth-Leakage Circuit-Breaker (ELCB) or
Residual Current Device (RCD).

7
Disconnection device having a contact separation in all poles that provide full disconnection under
overvoltage category III conditions must be incorporated in the fixed wiring in accordance with the
wiring rules.The nominal cross-sectional area of the conductors should be AWG16(1.5mm2), and the
spec of wire shall be at least H05VV-F or above. The length of the power cord should be 19 5/8” (50
cm) for the convenience of installation. Power supply cord need to be prepared at the customer end.
Electric wiring has to be done in accordance with all local codes, or in the absence of local codes,
with the National Electrical Codes.
3.3 Safety instructions
Read and observe the following safety instructions carefully!
Requirements for the user
For the disabled: this product is not intended for use by persons with reduced physical, sensory or mental
capabilities or lack of experience and knowledge unless they have been given supervision or instructions
concerning the use of the product by a person responsible for their safety.
For children: children should be supervised to ensure that they do not play with the product. This product
can be used by children aged from 8 years and above.
Health damage
Do not use the product while bathing.
If the product is standing in the water, please cut off the power supply immediately.
The product must be grounded.
Do not insert a finger into or keep hands near the air dryer outlet.
Only use tap water or potable well water (underground water). Do not use seawater.
When the product is in use again after a long period of time of not using, please re-circulate the water first
using wand self-cleaning, otherwise stagnant water may cause skin irritation.
Only use the device when it is fully functional
• Make sure that the power cable is not damaged.
• The power cable must not become jammed or pinched.
• Keep the power cable away from hot surfaces and sharp edges.
• Never touch the power cable with wet hands.
• Do not use the product if it is not working properly. Disconnect it from the mains immediately. Close
the water cut-off valve to interrupt the water supply. Contact your installer.
Avoid malfunctions and damage to the product as a result of improper use.
• Do not install the SensoWash® in a room exposed to excessive moisture. Please ensure sufficient
ventilation and no condensation shall be formed on the product.
• Do not install or use the SensoWash® in rooms where there is a danger of frost or water may freeze.
The room temperature must not be less than 4°C. Freezing water may cause product damage.

8
• If the SensoWash® is moved from a cold location to a warm location, condensation may form. Leave
the unit switched off for a few hours.
• Do not use the product outdoors or operate where aerosol (spray) products are being used or where
oxygen is being administered.
• Do not supply electrical power to the unit until the plumbing installation work has been completed; it
could cause the product to malfunction.
• Do not use any power supply other than the one specified.
• Keep the SensoWash® away from heated surfaces to prevent a fire hazard. Also, keep any flammable
materials such as candles, cigarettes or the like away from the product at all times.
• Do not expose the SensoWash® directly to water.
• Do not splash water on the product.
• Do not climb on or stand on the product.
• Do not lean on lid or seat when they are opened.
• Do not place any heavy objects on the lid.
• Allow the seat and lid to close automatically. Do not apply excessive force on the lid and seat, the
buttons of the Remote Control and the spray wand.
• Do not deliberately soil, spray or block the spray wand.
• Do not attempt to flush items other than bodily waste and the toilet paper.
• If the product becomes clogged, please make sure the “Auto flush” and “Pre-flush” functions are
disabled, otherwise it may cause the clogged toilet bowl to overflow. Please unclog the toilet immediately.
• Do not use the product while there is thunder or lighting. Disconnect the power supply immediately.
• Do not expose the product directly to sunlight. Color change, irregular temperature, Remote Control
malfunction and sensor malfunction may result.
• After using an assisting seat or soft height seat for children, please remove it. Otherwise, some
functions might not be available.
Repairs must only be carried out by a person with the necessary expertise
• Do not carry out modifications, tamper with, install additional equipment or attempt to repair the
SensoWash® by yourself.
• Improperly performed repairs can lead to accidents, damage and malfunctions.
• If it is necessary to change the power supply cord, this must be done by a qualified person.
• The new hose-sets supplied with the appliance are to be used and the old hose-sets should not be
reused.
• Do not use attachments not recommended by Duravit.
Use of batteries
Health damage
> Avoid contact with skin, eyes and mucous membranes if battery acid has leaked.

9
> In case of contact with the acid, flush the affected areas with large amounts of clean water and consult a
doctor immediately.
• Keep batteries out of the reach of small children. Batteries can be life-threatening if swallowed. If a
battery has been swallowed, call for medical assistance immediately.
• Batteries may not be recharged, reactivated by other means, dismantled, exposed to fire or
short-circuited.
• Always remove empty batteries from the remote control immediately. They may leak and cause
damage.
• Do not insert new and old batteries together in the remote control.
• Clean the battery and contacts before inserting the battery. Note the proper polarity.
• Remove the batteries if you do not use the remote control for an extended period.
• Do not expose the batteries to extreme conditions: avoid contact with hot surfaces or direct sunlight.
Otherwise there is a risk of leakage.
Compliance
Compliance Statement (Part 15.19)
This device complies with Part 15 of the FCC Rules. Operation is subject to the following two
conditions:
1. This device may not cause harmful interference, and
2. This device must accept any interference received, including interference that may cause
undesired operation.
Warning (Part 15.21)
Changes or modifications not expressly approved by the party responsible for compliance could
void the user’s authority to operate the equipment.
FCC Interference Statement (Part 15.105 (b))
This equipment has been tested and found to comply with the limits for a Class B digital device,
pursuant to Part 15 of the FCC Rules. These limits are designed to provide reasonable protection
against harmful interference in a residential installation. This equipment generates, uses, and can
radiate radio frequency energy and, if not installed and used in accordance with the instructions,
may cause harmful interference to radio communications. However, there is no guarantee that
interference will not occur in a particular installation. If this equipment does cause harmful
interference to radio or television reception, which can be determined by turning the equipment
off and on, the user is encouraged to try to correct the interference by one of the following
measures:
• Reorient or relocate the receiving antenna.
• Increase the separation between the equipment and receiver.
• Connect the equipment into an outlet on a circuit different from that to which the receiver is
connected.
10
• Consult the dealer or an experienced radio/TV technician for help.
SAVE THESE INSTRUCTIONS.
The shower functions terminate automatically after 3 minutes, the warm air dryer after 5 minutes or all
functions immediately when the user press the „Stop“ button on the remote control or leaves the
seat.
11
Forward and backward movement of spray wand during use of shower, a pulsating water jet can
additionally be activated.
12
Enables a water consumption of 1.1gal /4.2 lpf (liter per flush).
Enables a water consumption of 0.8gal /3.0 lpf.
Auto flush is only working when the user is seated for more than 6 seconds, 10 seconds after leaving the
toilet it flushes automatically.
(Default setting: „Off”)
Do not flush the toilet continuously. Please allow at least 25 seconds for the water tank to refill.

13
To indicate any remote controlled command and the activating/deactivating of the seat sensor.
(Default setting: „On“)
See chapter 4.1 „Seat and lid“.
II.) Auto energy saving mode
If all functions have been inactive and there is no human movement detected for 48 hours, the „Auto
energy saving mode“ will active automatically. The seat heating is now inactive. When any function is used
or any human movement is detected, all previous settings will automatically be reactivate.
See chapter 4.3 „Flushing functions“.
Automatic odor extraction with long-lasting, maintenance-free catalytic filter. The odor extraction is
activated when the user is seated. It will be terminated automatically when washing or warm air dryer is
functioning and will automatically start as soon as washing or warm air dryer stops. 60 seconds after the
user leaves the seat, odor extraction will automatically stop.
(Default setting: „On“)
5. Basics of operation
SensoWash® is operated via the remote control. Settings are altered via the remote control as well.
14
If the remote control is not available or the batteries are empty then basic functions can also be switched
on or off from the side control buttons.
SensoWash® automatically cleans the retracted spray wand when the seat sensor is activated, and both
before and after washing.
Red illuminated: SensoWash® is in the „Standby mode“, all functions cannot be used.
Remote control
> Push up and pull the battery compartment open.
> Insert three alkaline batteries in the right polarity.
Power supply
>Connect the power supply.
SensoWash® will start self-check when it is connected to the power supply. The self-check takes
about 15 seconds, and during which time, only “Power” button on the seat unit can work, other
operation (RC command, or push Ladywash/Rearwash on the seat unit) will not be taken by the unit.
[ZP1]
15
7.2 Seat and lid
Note!
Damage of seat and lid
> Open and close seat and lid only via remote control.
> Do not apply excessive force on the seat and lid.
16
17
18
19
How to save energy see chapter 7.7 „Settings“.
Auto flush is only triggered when the user is seated for more than 6 seconds.
20

21
See chapter 7.2 „Seat and lid“.
22
To change the point of time of the „Timed energy saving mode“, deactivated the „Timed energy saving
mode“ and set it according to your desired time again.
To deactivate the seat heating permanently see chapter 7.5.
See chapter 7.6 „Flushing functions“.
8. Cleaning and Care
8.1 Seat Unit
Seat and lid
Health damage
> Disconnect your SensoWash® from the power supply before starting the cleaning, except for wand
cleaning.
Avoid malfunctions and damage to the product as a result of improper use.
• This product is an electrical product. Water should NOT be allowed to seep inside the product.
23
Detergent should NOT be left in any gaps after cleaning.
Note!
Yellow discoloration due to incorrect cleaner
> Do not use abrasive cleaning agents or cleaning agents containing chlorine or acid.
> Only use cleaning agents and equipment which is intended for this area of application.
> Follow the instructions of the cleaning agent manufacturer.
Neutral soap or a mild commercially-available detergent is suitable for daily cleaning.
Damage to surface due to incorrect cleaning
> Do not use a dry cloth or dry paper to clean the plastic parts. Using dry paper or dry cloth may degrade
the antibacterial coating on the plastic parts and scratch the surface.
> Only use soft damp cloth or sponge to clean the plastic parts.
Clean the seat unit regularly, or immediately if it is soiled. If the cleaning is not carried out regularly enough,
soiling may become visible which can lead to stubborn dirt.
> Clean the toilet seat and lid with warm water and a cleaning agent.
> Wipe slightly damp afterwards.
> Leave the toilet seat up while the toilet contains powerful cleaning agent.
> In case of excessive dirt, use a soft damp cloth wet with water and a thin neutral detergent to clean, and
then use a soft damp cloth wet with water only to remove the detergent.
> If detergent adheres to the product, use a soft damp cloth wet with water to wipe it off.
Manual cleaning of the spray wand and nozzle
Manual cleaning is only possible if the seat sensor is not activated.
Clean the spray wand and nozzle regularly, or immediately if they are soiled.
> Press the „Stop“ button and hold this pressed. Now press the „Rearwash“ button on the
remote control.
The spray wand extends.
> Clean the spray wand and nozzle with a soft cloth, soft sponge or a small brush and mild cleaning agent.
>Press the „Stop“ button again.
The spray wand retracts.
Alternatively:
> Press the „Rearwash“ button on the seat unit.
The spray wand extends.
> Clean the spray wand, use a soft cloth, soft sponge or a small brush and a mild cleaning agent.
> Press the „Rearwash“ button on the seat unit again or press the „Stop“ button on the remote
control.
The current function stops immediately.
24
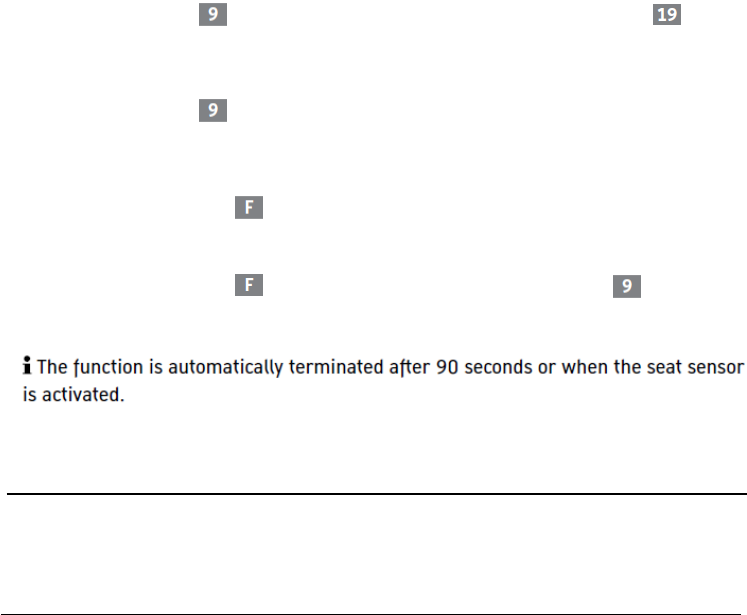
The spray wand retracts automatically after 3 minutes or when the seat sensor is activated.
Self-cleaning of the spray wand
Clean the spray wand regularly, or immediately if it is soiled.
> Press the „Stop“ button and hold this pressed. Now press the ”Comfortwash“ button 9 on the
remote control.
The spray wand cleans itself.
The spray wand is flushed with water in the concealed position.
> Press the „Stop“ button again.
The current function stops immediately.
Alternatively:
> Press the „Ladywash“ button E on the seat unit.
The spray wand cleans itself.
The spray wand is flushed with water in the concealed position.
> Press the „Ladywash“ button E on the seat unit again or press the „Stop“ button on the
remote control.
The current function stops immediately.
8.2 Ceramic
Note!
Damage to surface due to incorrect cleaning!
• Only use suitable cleaners and equipment.
• Follow the manufacturer‘s instructions for the cleaner.
• Never mix cleaners.
A mild commercially available sanitary cleaner is suitable for daily cleaning; limescale stains can be
removed using an acidic vinegar or citrus based cleaner (pH value
1-4). The harder the water is, the greater the quantity of cleaner should be used.
Metallic marks resulting from use (black dots/lines, e.g. due to rubbing of rings) cannot be removed using
mild cleaners. Only treat the affected area with stainless steel cleaner, car polish or a ceramic hob cleaner.
Clean the coated surface regularly, or immediately if it is soiled. If the cleaning is not carried out regularly
enough, soiling, e.g. limescale and soap stains, cosmetic residues, rust and mould, may become visible
and subsequently more difficult to remove.
> Clean the surface with a soft cleaning cloth and warm water.
> When tackling stubborn dirt, wait a few minutes to allow the cleaner to take effect.
Tip! An advantage of using gels and foaming cleaners is that they also adhere well to sloping surfaces. You
25
can also soak a cloth in the cleaner then place it on the soiled area.
> Rinse with clean warm water to remove all traces of the cleaner (when detergent evaporates, the fumes
may seep into the top unit and cause damage to the product).
> Dry the surface.
8.3 Stainless steel covers
Only use soft damp cloth to wipe the stainless steel covers, otherwise it might scratch the covers. When
using cleaning sponges ensure that the scrubbing side does not contain metal particles. Do not use metal
items to remove scaling.
> Clean scaling from stainless steel parts immediately.
> Clean stainless steel with detergents that DO NOT contain either hydrochloric acid or chloride.
> Rinse off deposited materials with soft damp cloth and remove stubborn chloride deposits manually.
8.4 Remote control
> Clean the remote control and bracket with a soft, damp cloth.
8.5 Prolonged disuse
If you do not use SensoWash® for two weeks or above, please drain the water inside the product.
> Disconnect the water supply.
> Press the „Full flush“ button on the remote control.
> Switch off the power supply.
> Remove the batteries from the remote control.
Skin irritation
> Use the self-cleaning of the spray wand to re-circulated the water.
Note!
Product damage due to freezing water in winters
> Drain the water inside the product.
8.6 Power or water supply failure
The product will not flush properly if there is power or water failure. In such a situation, please pour a big
bucket of water (8L) into the center of the toilet bowl to induce flushing. Be careful not to splash water from
the toilet bowl.
If the water level is too low in the toilet bowl after the bucket is poured, add more water. The water prevents
odors from coming out of the sewer pipes through the toilet bowl drain.
26
Note!
Turn off “Auto flush” in case of water supply failure
> If the water supply fails, please set the “Auto flush” function to “OFF”, see chapter 4.3.
8.7 Change new remote control
If the remote control is lost or faulty, a new remote control needs to be changed and matched.
Do not to activate the seat sensor while doing the match.
> Check the unit mode. The SensoWash should be turned on. The status display should be
green or orange illuminated.
> Press the „Power“ button on the seat unit to switch the SensoWash® off and the status
display should be red illuminated.
> Press the „Ladywash“ button and „Rearwash” button on the seat unit in order.
You will hear a “beep” tone to indicate entering the “Remote Control matching mode”.
> Press any button on the new Remote Control.
You should hear three “beep” tones, which indicates the Remote Control matching is successful.
The above operations should be finished within 10 seconds.
8.8 Water filter
Clean the water filter regularly or when the water flow becomes smaller than usual.
> Dismantle right side panel.
> Clean the water filter according to the instructions next to it.
> Install right side panel.
Dismantle and assemble the side panel please see chapter 8.9.
Note!
Product damage due to wrong cleaning
> Do NOT use detergent.
> Do NOT use excessive force
> Do NOT distort the O-rings.
> DO NOT use screw drivers to dismantle and assemble the water filter.
27
8.9 Dismantle and assemble the side panels
> Pull the side panel by hand along the arrowhead.
> Move up the side panel till the hook of the side panel is removed from the frame.
> Take away the side panel.
Install the side panel back according to reversed steps of above.

28
10. Troubleshooting support
If your unit does still not work properly after following the instructions mentioned below, contact your local
customer service. Have the article and serial number ready.
These can be found on the label behind the side panel on the left.
Problem
Potential cause
Solution
Ch.
Indicator lamps and alarm function
The status display
on the unit
flashes red, green or
orange.
Malfunction.
>Remove the
connection to the mains
supply and stop using
the unit. Contact your
local authorised
customer service in
order to service the unit.
There is “BiBi” alarm
sound from the buzzer.
General function
SensoWash® is not
working.
SensoWash® is not
switched on (Status
display is not
illuminated).
> Switch on the main
power supply.
SensoWash® is in the
„Standby“ mode
(Status display is red
illuminated).
> Press the
„Power“ button I to
return to the
„normal“ mode.
7.1
A water leak exists
>Close the main valve
for the water supply.
> Disconnect the power
supply.
> Call your installer.
Problem
Potential cause
Solution
Ch.
Remote control
The remote control does
not work.
No batteries are
inserted.
> Insert batteries.

29
The batteries are flat.
> Change the batteries.
The battery connections
are reversed.
> Insert the batteries
the correct way round.
The contact between
the battery and the
battery spring is poor.
> Make sure the battery
spring contact is good.
The remote control is
defective.
> Contact your installer.
The Remote Control is
not matched properly.
> Match the Remote
Control again.
8.7
Heatable seat
The seat is not warm
enough.
The seat temperature
has been set to "Off" or
"Low".
> Adjust the seat
temperature to
"Medium" or "High".
7.5
The product is in the
8-hour-seat-off
“Timed Energy Saving
mode”.
This is normal.
> To heat the seat
continuously, please
switch off the "timed
energy saving mode".
7.7
The seat temperature is
too high.
The seat temperature
has been set to "High".
> Adjust the seat
temperature to
"Medium" or "Low".
7.5
Problem
Potential cause
Solution
Ch.
Rearwash/Ladywash
Switching between the
Rearwash and
Ladywash takes too
long.
When switching
between Rearwash and
Ladywash, the spray
wand moves back and
then forward again after
self-cleaning is
complete.
This is normal.
The water spray
intensity is too weak.
The water spray
intensity has been set
to "Low".
> Adjust the water spray
intensity to “Medium“ or
“High“.
7.3
The water supply hose
has buckled.
> Contact your installer.
The water spray
The water filter is
> Clean the water
8.6

30
intensity is not
stable.
clogged.
filter.
The water
temperature is not
warm enough.
The water
temperature has
been set to "Off" or
"Low".
>Adjust the water
temperature to
“Medium“ or “High“.
7.3
The water
temperature is not
stable.
The water filter is
clogged.
> Clean the water
filter.
8.6
The water spray
from the spray
wand suddenly
stops.
The function
automatically stops
after 3 minutes.
This is normal.
The seat sensor is
not in contact with
the user due to
seated position
movement.
>Sit down and carry
out the function
again.
A jet of water is not
emerging from the
spray wand.
The seat sensor is
not in contact with
the user due to
seated position
movement.
>Sit down and carry
out the function
again.
The spray nozzle is
clogged.
> Clean the spray
nozzle.
8.1
The water spray
function does not
work.
No one has sat
down or the person
is not sitting on the
seat sensor.
> Sit down and carry
out the function
again.
Problem
Potential cause
Solution
Ch.

31
Warm air dryer
The warm air dryer
temperature is not
warm enough.
The warm air dryer
temperature has
been set to "Off" or
"Low".
> Adjust the warm
air dryer temperature
to “Medium“ or
“High“.
7.4
The warm air dryer
function suddenly
stops.
The function
automatically stops
after 5 minutes.
This is normal.
The seat sensor
has lost contact
with the user due to
seated position
movement.
> Sit down and carry
out the function
again.
The warm air dryer
function does not
work.
No one has sat
down or the person
is not sitting on the
seat sensor.
> Sit down and carry
out the function
again.
Problem
Potential cause
Solution
Ch.
Integrated flushing system
SensoWash® does not
flush.
The time between two
flushes is too short.
This is normal.
The water tank must be
refilled. This takes
approx. 25 seconds.
The stop valve is closed.
Open the stop valve.
> Remove right side
panel.
> Open stop valve.
> Install right side panel.
„Auto flush“ is not
working.
„Auto flush“ is
deactivated.
> Activate „Auto flush“.
7.6
The user was not seated
during the use of the
toilet.
This is normal. „Auto
flush“ is only working
when the user is seated.
> Sit on the seat for more
than 6 seconds.
The user set less than 6
seconds on the seat.
This is normal.
> Sit on the seat for more
than 6 seconds.
32
The place around the
seat sensor is dirty or
wet. Seat sensor may
continuously detect a
“person”.
> Clean the area of the
seat sensor.
Problem
Potential cause
Solution
Ch.
Night light
The night light does not
come on.
The night light has been
set to „Off“ mode.
This is normal.
>Set the night light to
„Auto“ or „On“ mode.
7.7
The night light is in
"auto“ mode and the
ambient light is bright.
This is normal.
The night light stays on
continuously.
The night light has been
set to „On“ mode.
This is normal.
>Set the night light to
„Auto“ or „Off“ mode.
7.7
The night light is in
"auto“ mode and the
ambient light is dim.
This is normal.
Manual cleaning function of the spray wand
The spray wand retracts
automatically.
The function
automatically stops
after 3 minutes.
This is normal.
The spray wand ejects
water during manual
cleaning.
The seat sensor is
activated by something
(e.g. liquid, damp cloth,
moist paper etc.).
> Clean the surface
or/and remove the
foreign objects.
Automatic self-cleaning
Water is dripping
out of the retracted
spray wand.
The spray wand is
cleaned
automatically when
the seat sensor is
This is normal.

33
activated and
before/after
washing.
11. Technical Data
Article number
620000 00 100 1300
Rated voltage
120 V
Frequency
60 Hz
Nominal power consumption
1080 w
Standby power consumption
< 1.0 W
Maximum current
10 A
Net weight
106lb (48 Kg)
Heat output
• Continuous-flow heater
1600 W
• Seat heater
50 W
• Warm air dryer
220 W
Temperature range
• Operating temperature
39.2~104℉ (4~40℃)
• Water temperature
89.6~104℉ (32~40℃)
• Seat temperature
91.4~98.6℉ (33~37℃)
• Warm air dryer temperature
104~131℉ (40~55℃)
Flushing volume
• Full flush
1.1 gal (4.2 Lpf)
• Eco flush
0.8 gal (2.8 Lpf)
Protection class
IP X4,
Protection against water spray from all sides