Dynabook PA3121BT Bluetooth Module User Manual
Toshiba Corporation Bluetooth Module Users Manual
Dynabook >
Contents
- 1. Manual
- 2. Installation manual
- 3. Revised user manual for 21416 responses
- 4. Revised installers guide for 21416 responses
- 5. Exhibit 8 installation instruction for dealers only for BT
- 6. Exhibit 8 installation instructions for dealers only for WLAN
- 7. Exhibit 8 users manual for colocated WLAN functionality
Manual
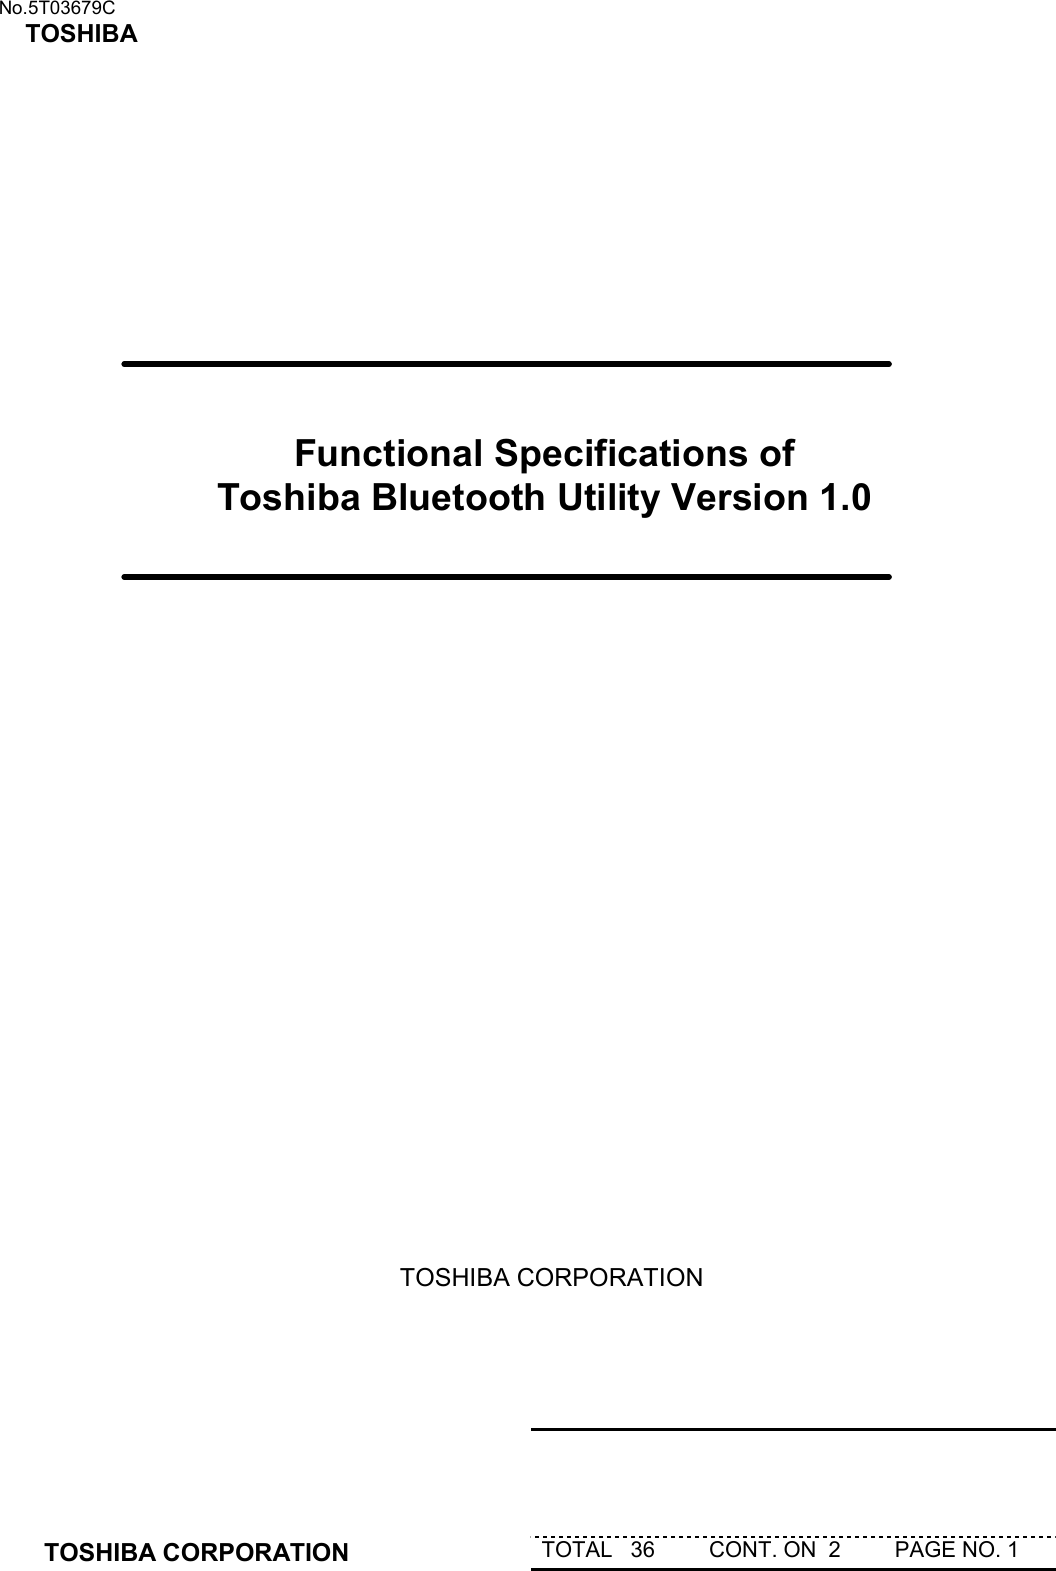
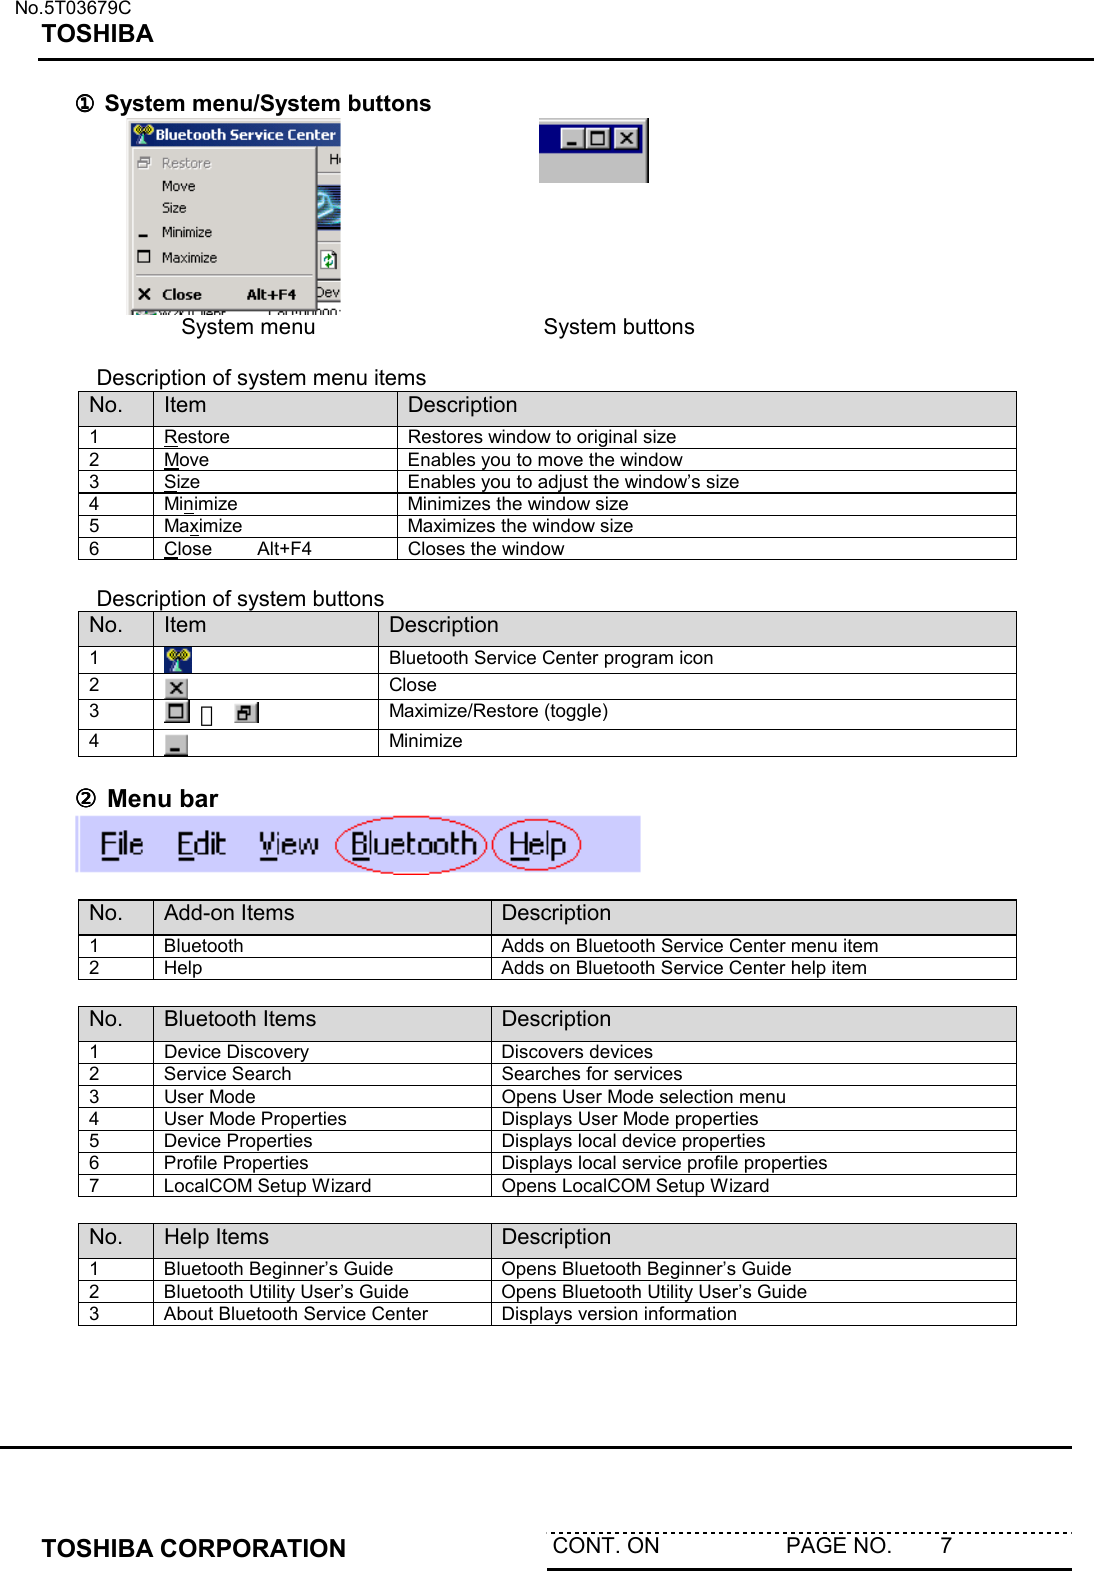
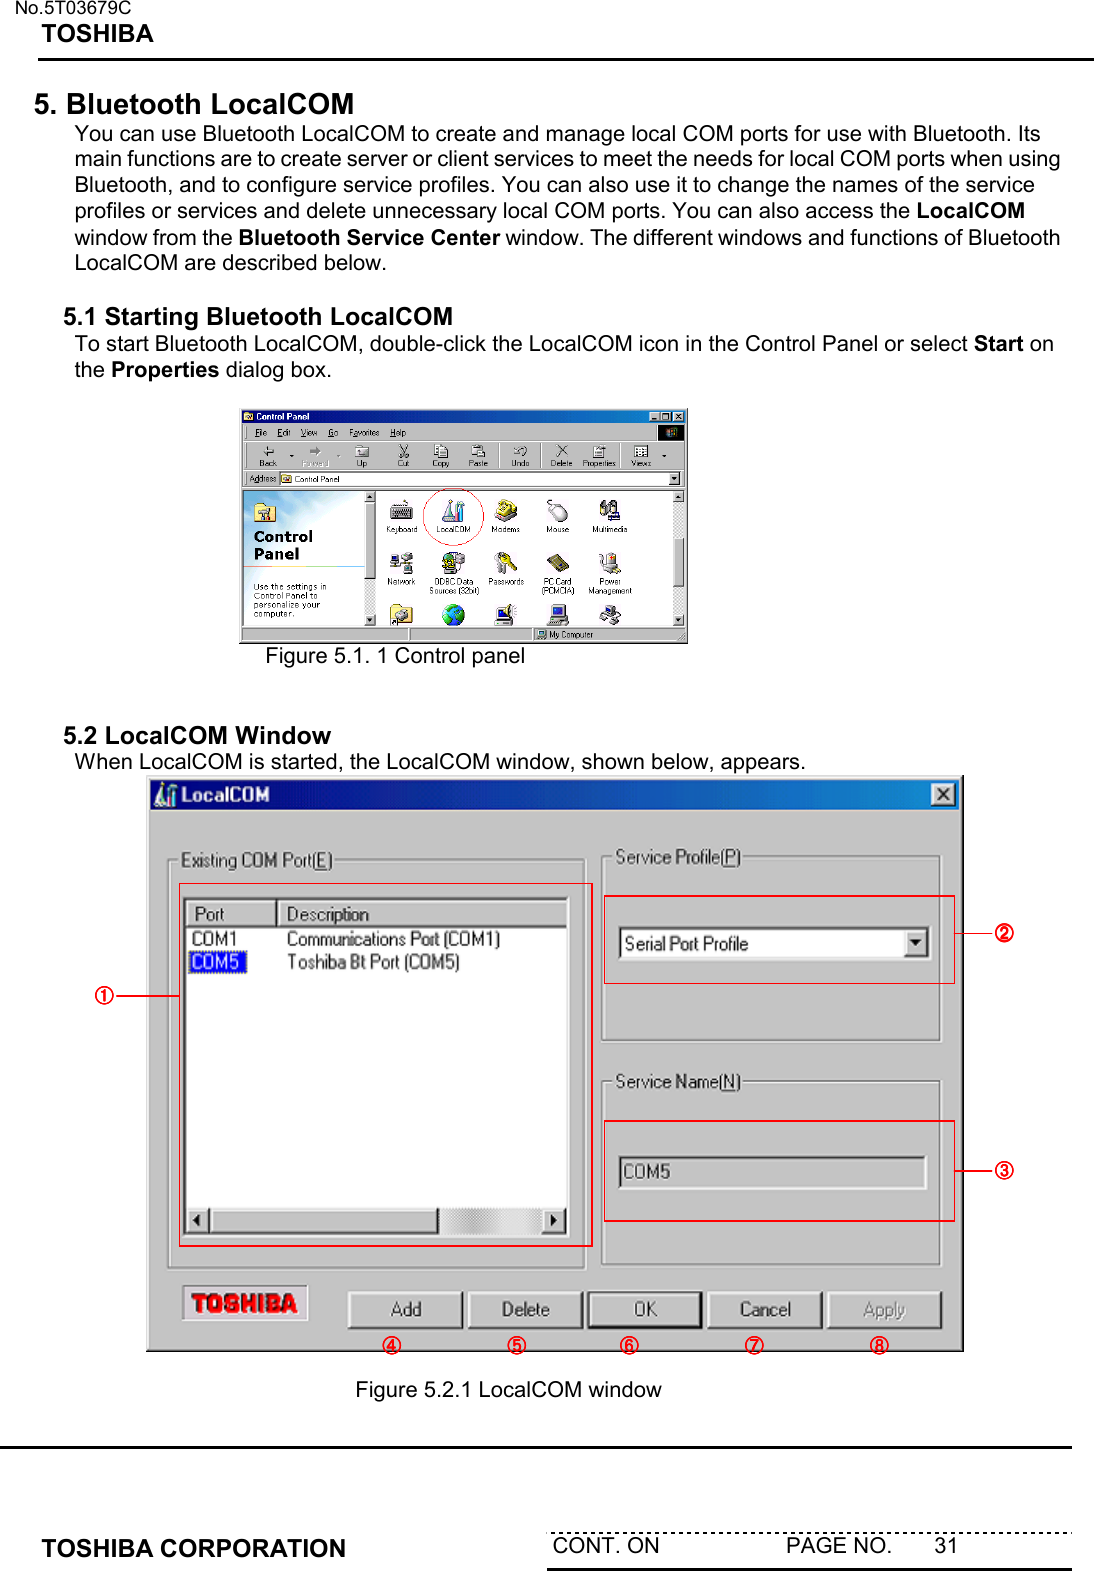
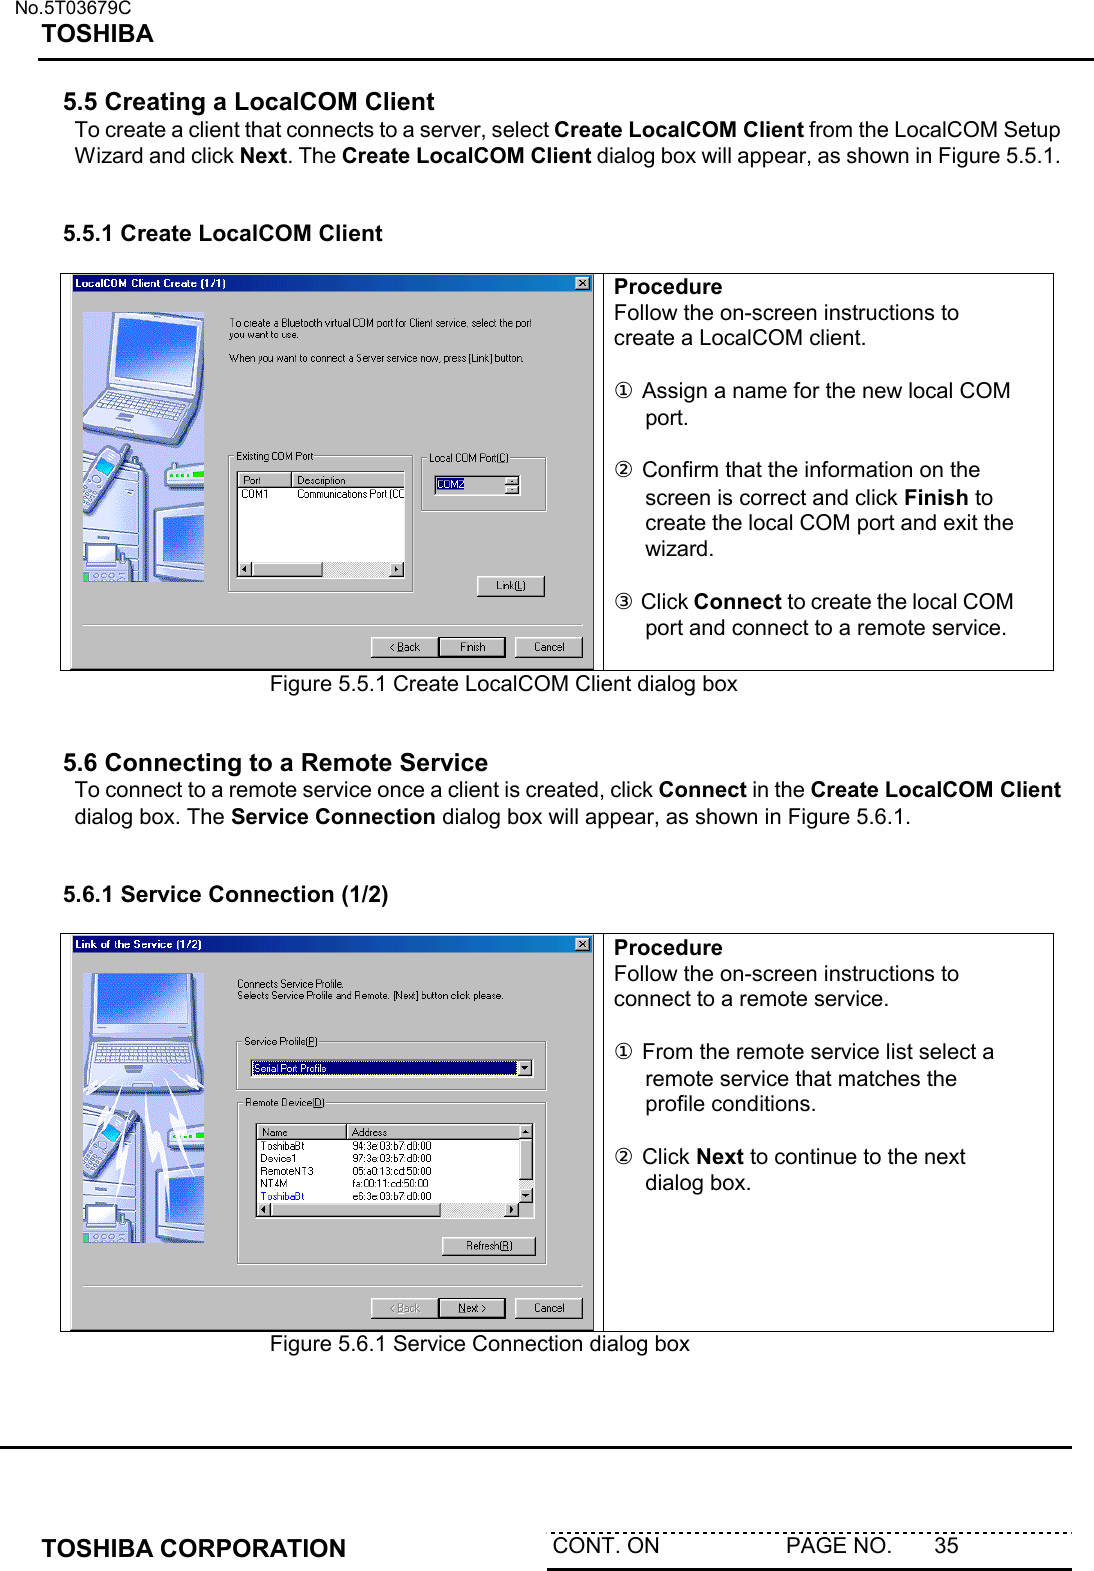
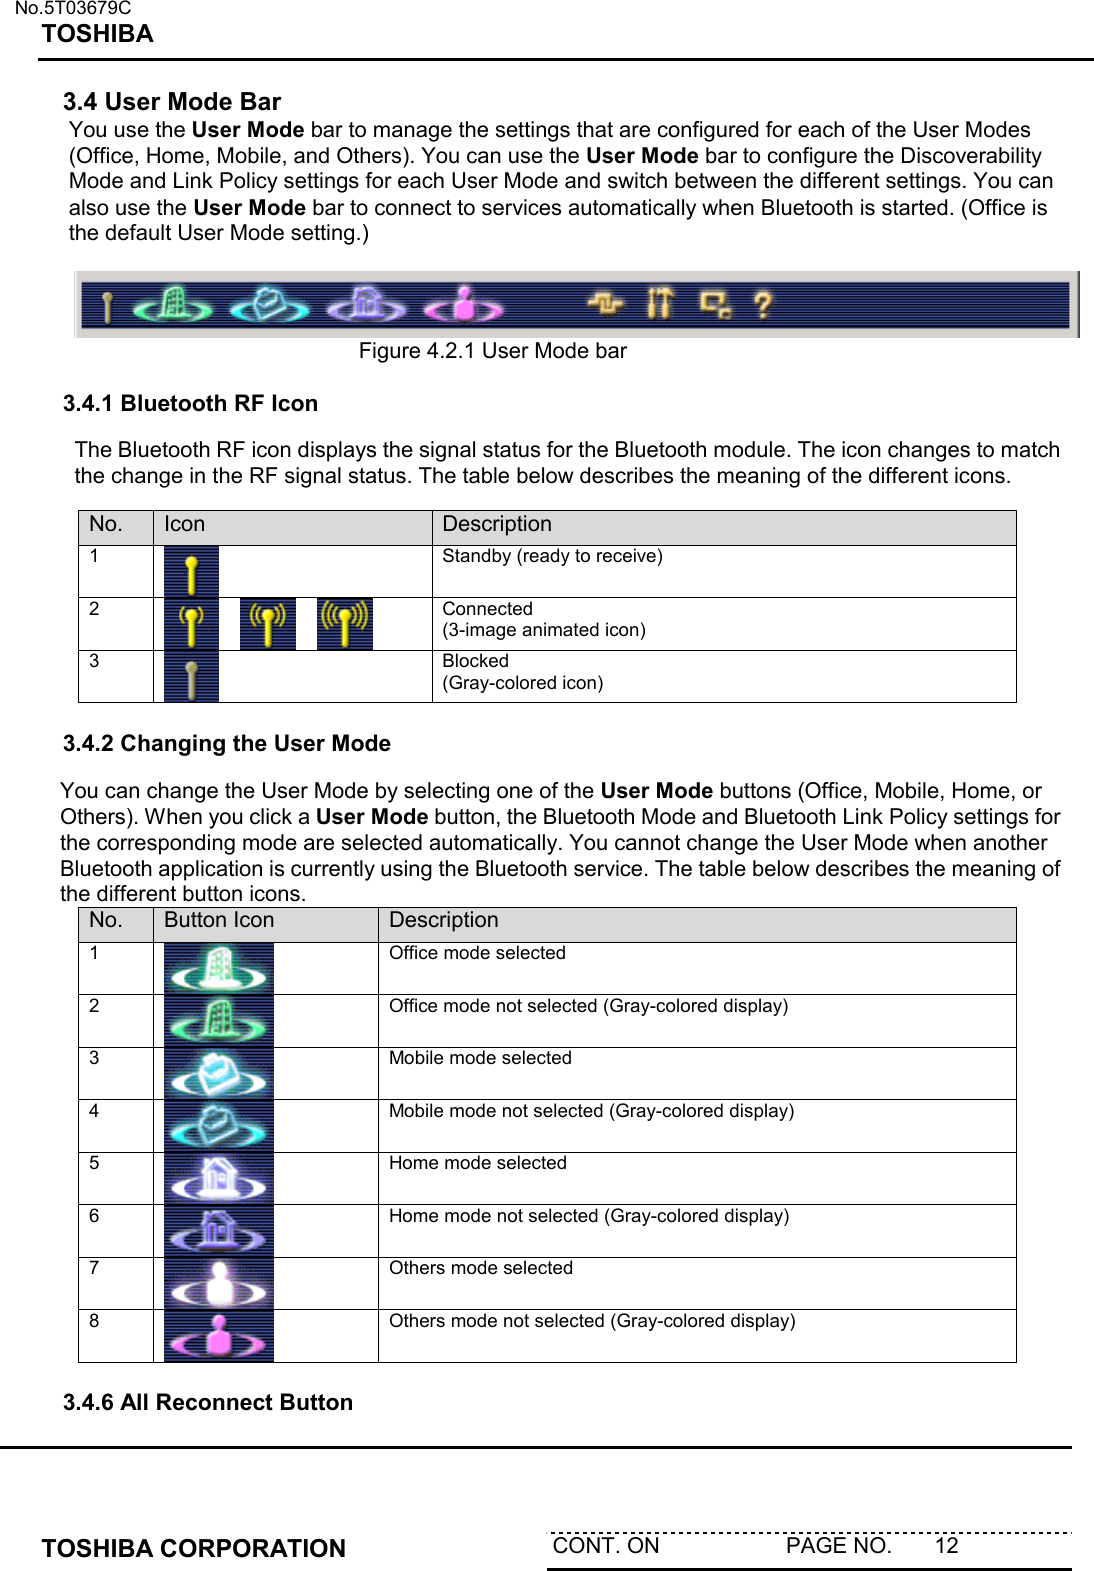
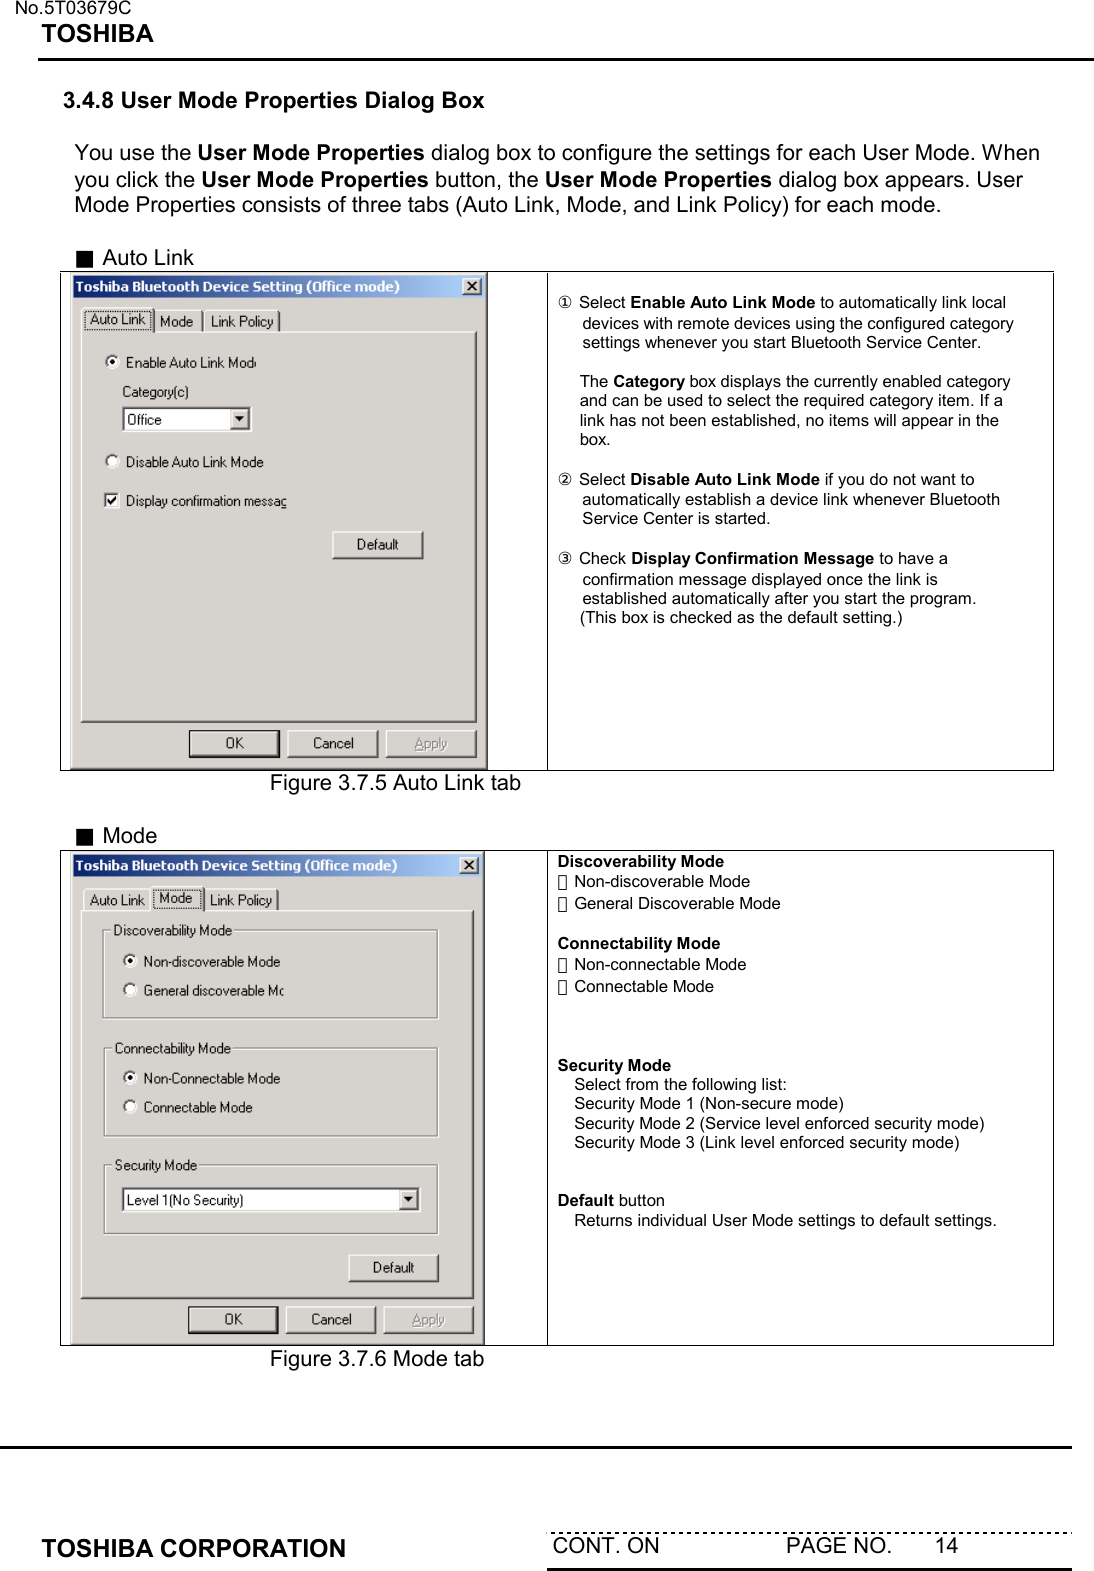
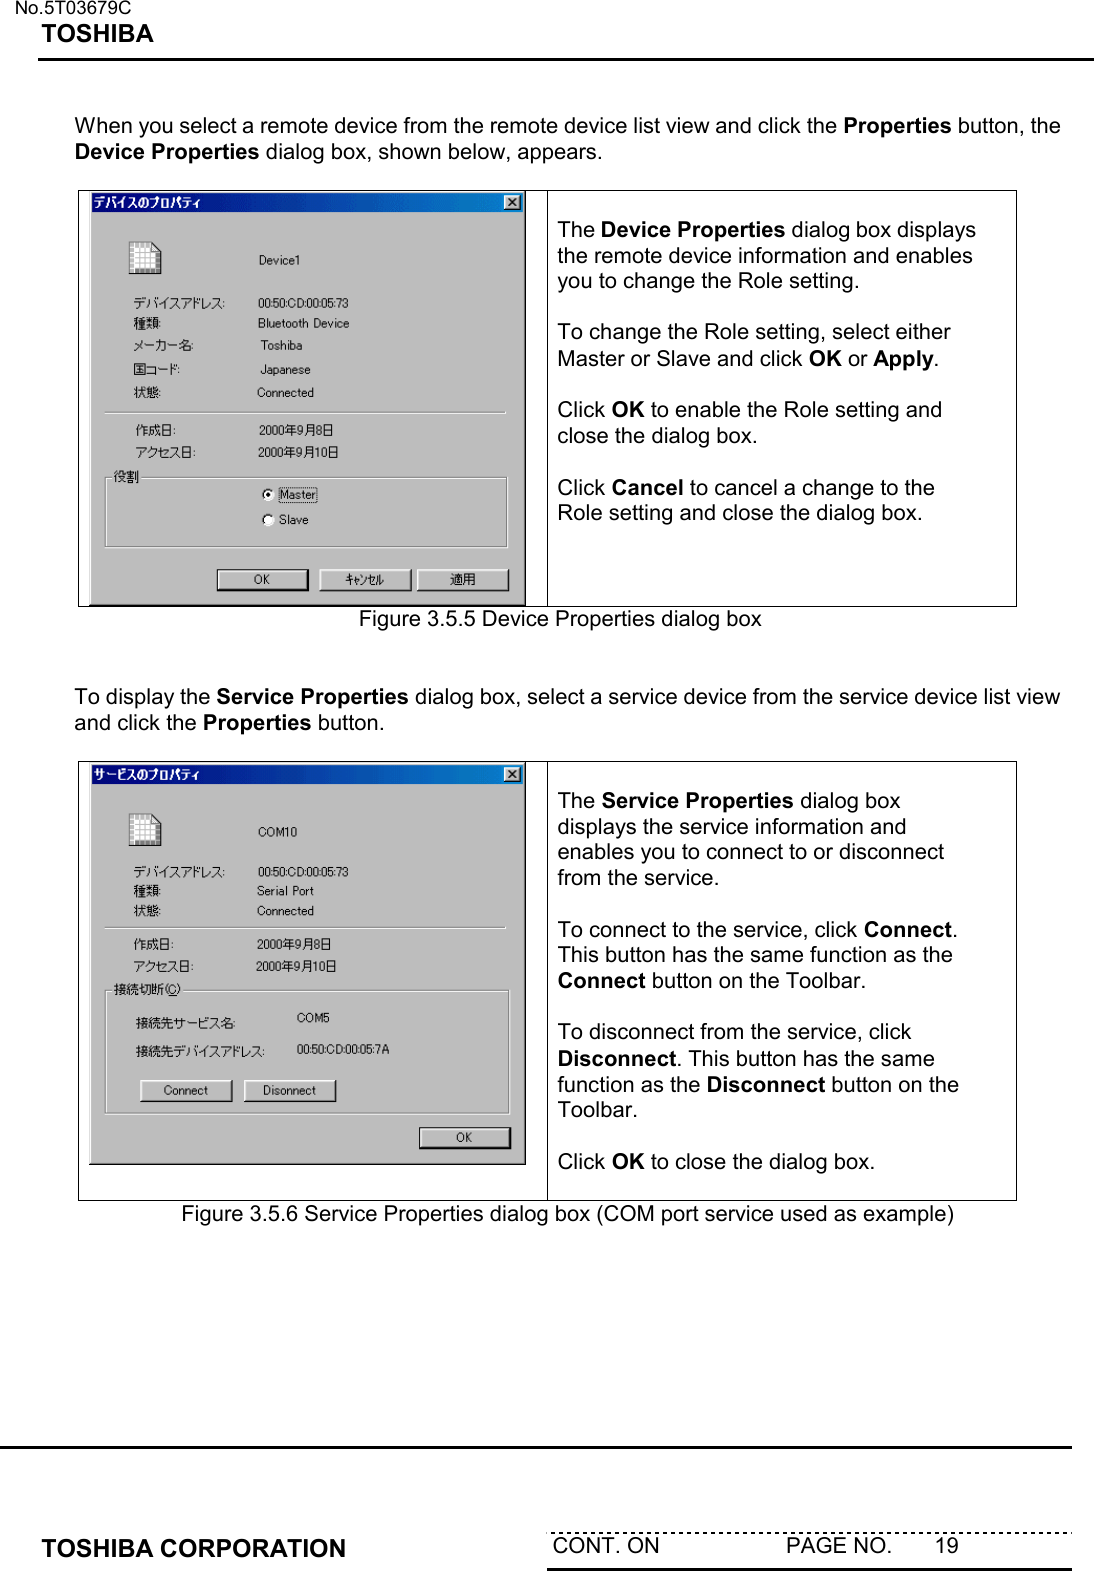
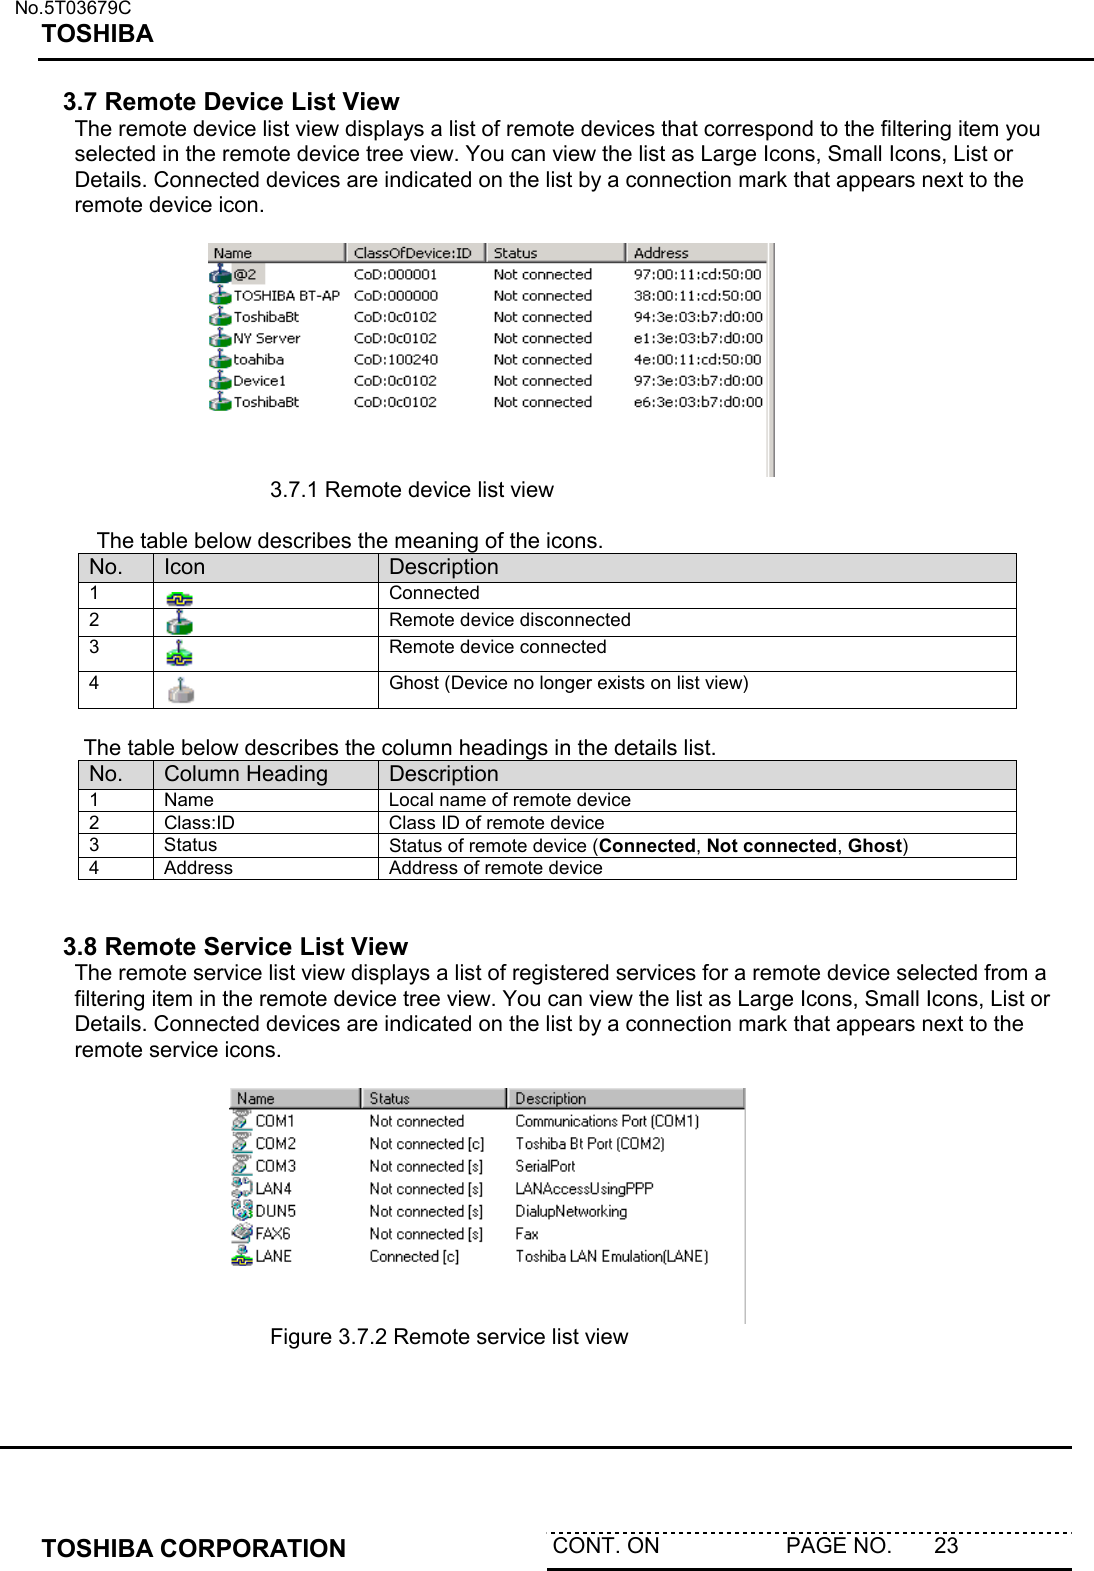
![No.5T03679C TOSHIBA TOSHIBA CORPORATION CONT. ON PAGE NO. 8 ③③③③ User Mode bar No. Item Description 1 Bluetooth RF Icon Displays signal status for Bluetooth module 2 Office Office mode button 3 Mobile Mobile mode button 4 Home Home mode button 5 Others Others mode button 6 All Reconnect Service reconnection button 7 User Mode Properties User Mode properties button 8 Screen Selection Show/hide info toggle button 9 Help Help button You use the User Mode bar to manage the settings that are configured for each of the User Modes (Office, Home, Mobile, and Others). You can use the User Mode bar to configure the Discoverability Mode and Link Policy settings for each User Mode and switch between the different settings. You can also use the User Mode bar to connect to services automatically when Bluetooth is started. (Office is the default User Mode setting.) ④④④④ Toolbar No. Item Description 1 Connect Connects to device or service 2 Disconnect Disconnects from device or service 3 Refresh Updates device and service information 4 Service Search Searches for devices and services 5 Properties Displays device and service properties 6 Delete Item Deletes device or item 7 View Changes view display format [TBD] [Additional buttons may be added.]](https://usermanual.wiki/Dynabook/PA3121BT.Manual/User-Guide-160780-Page-10.png)
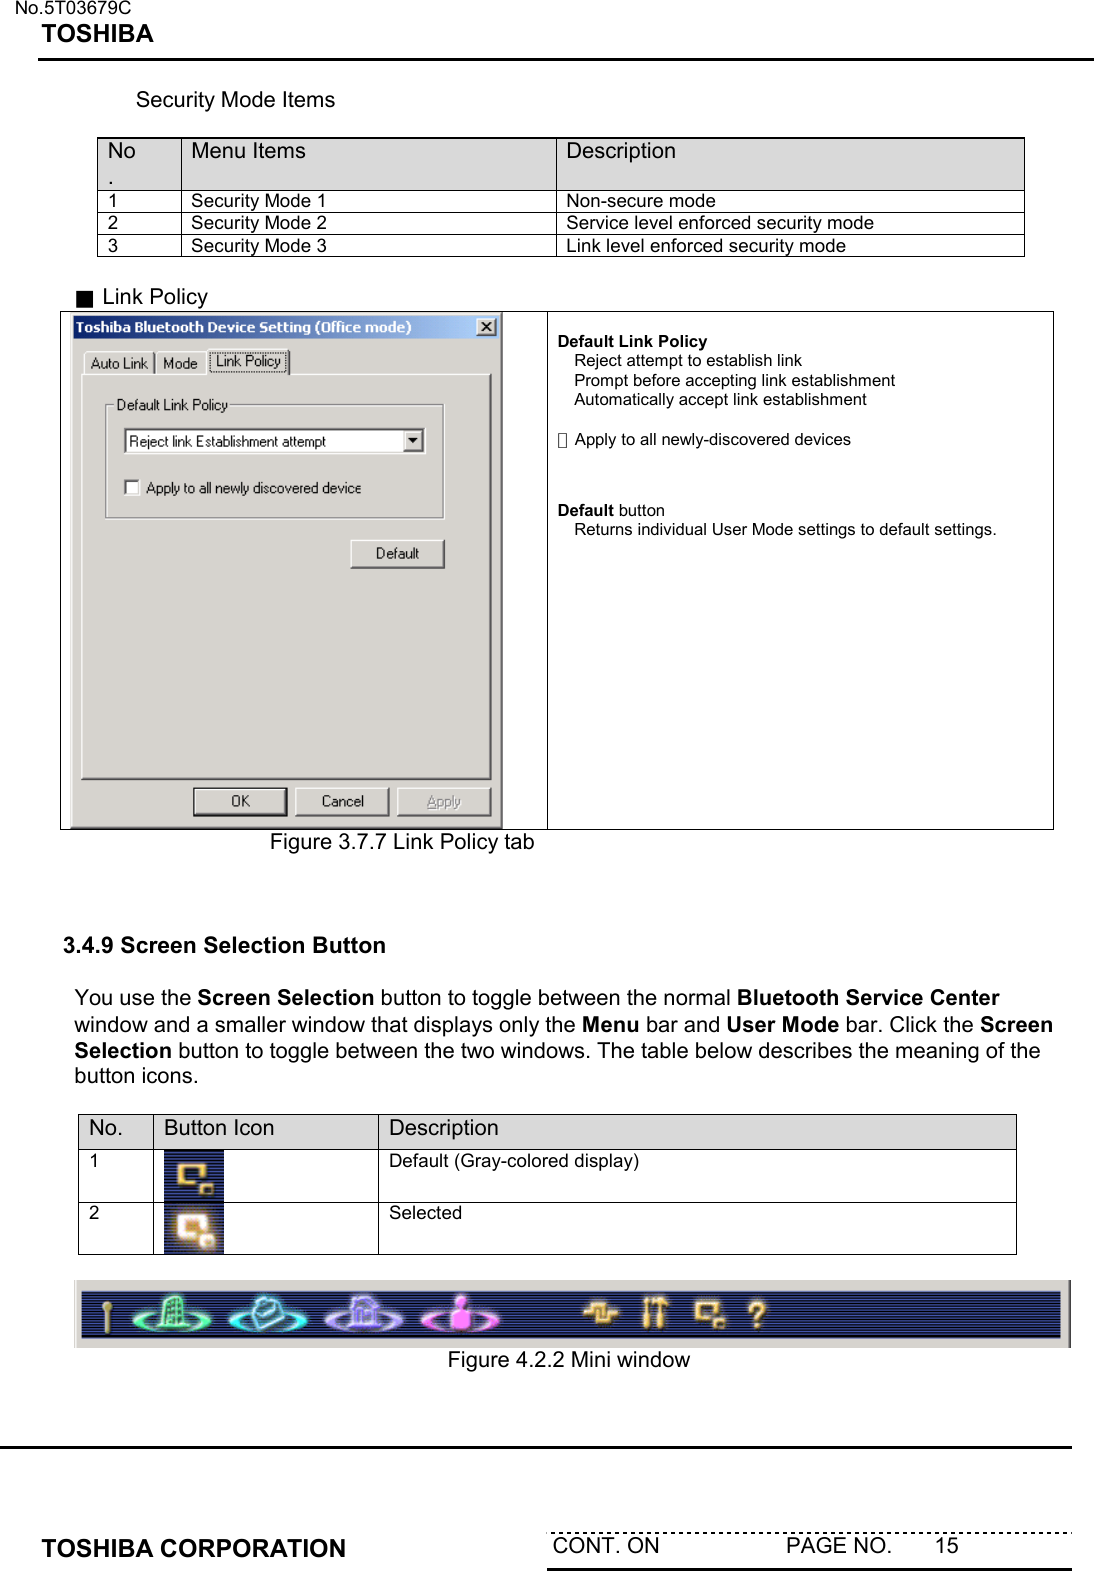

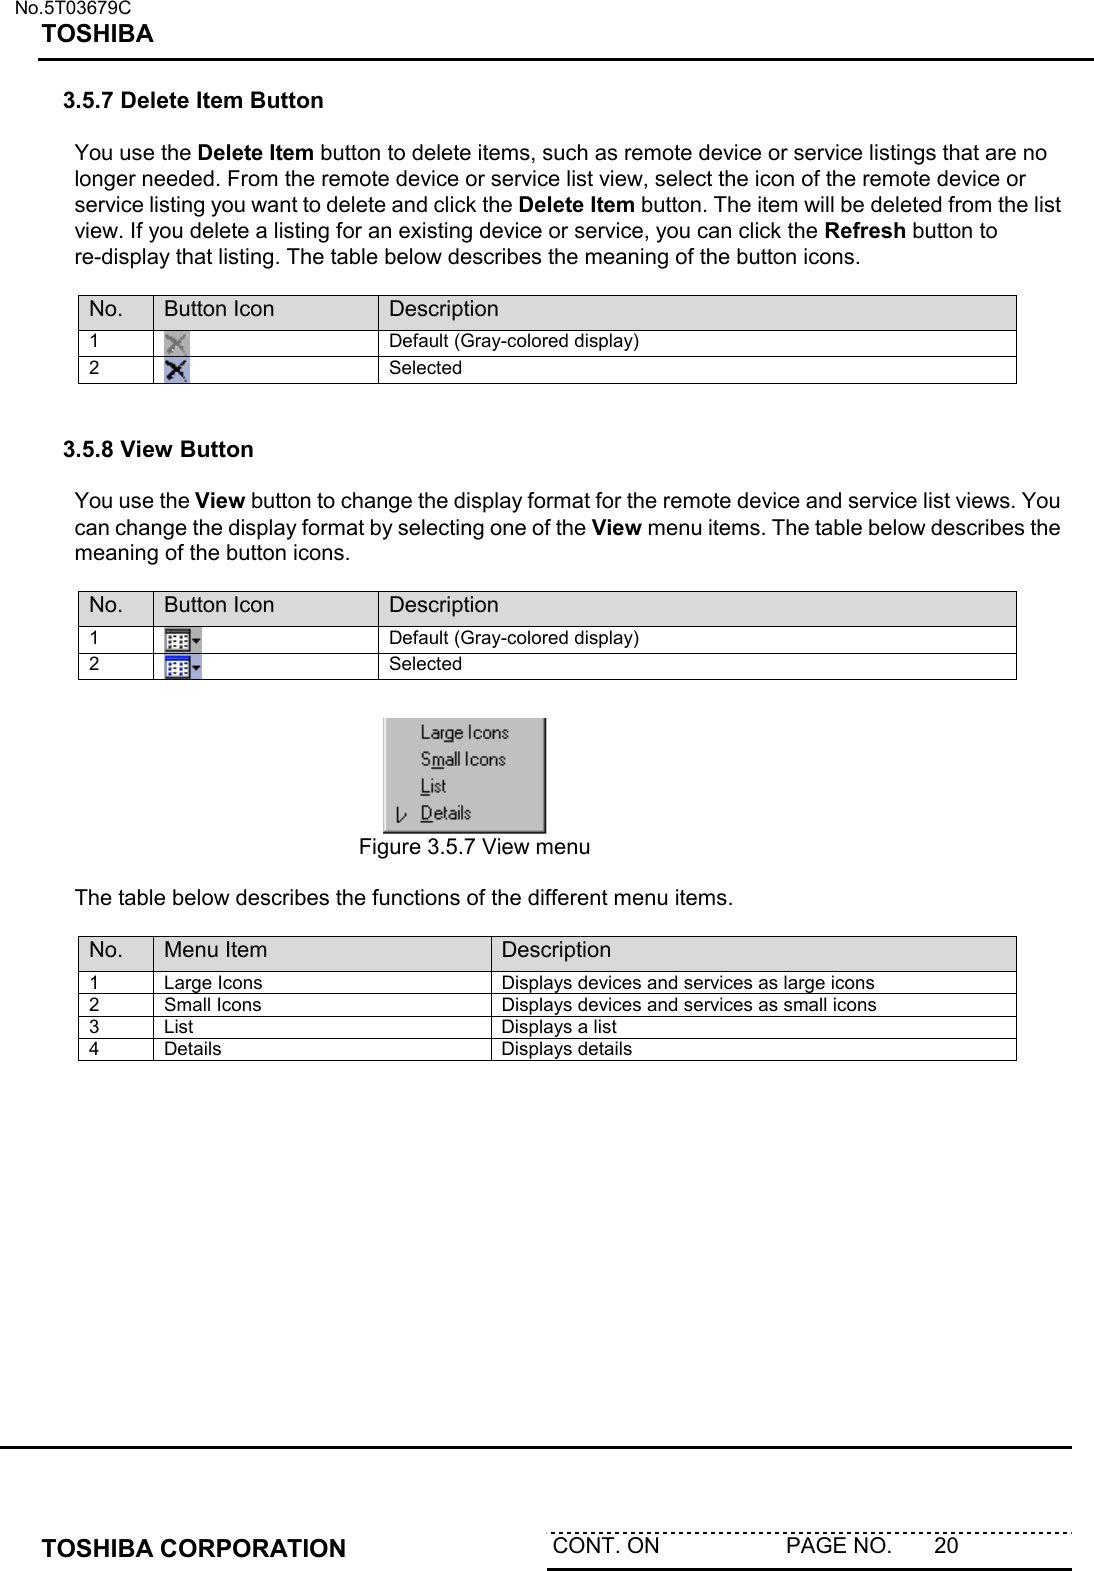
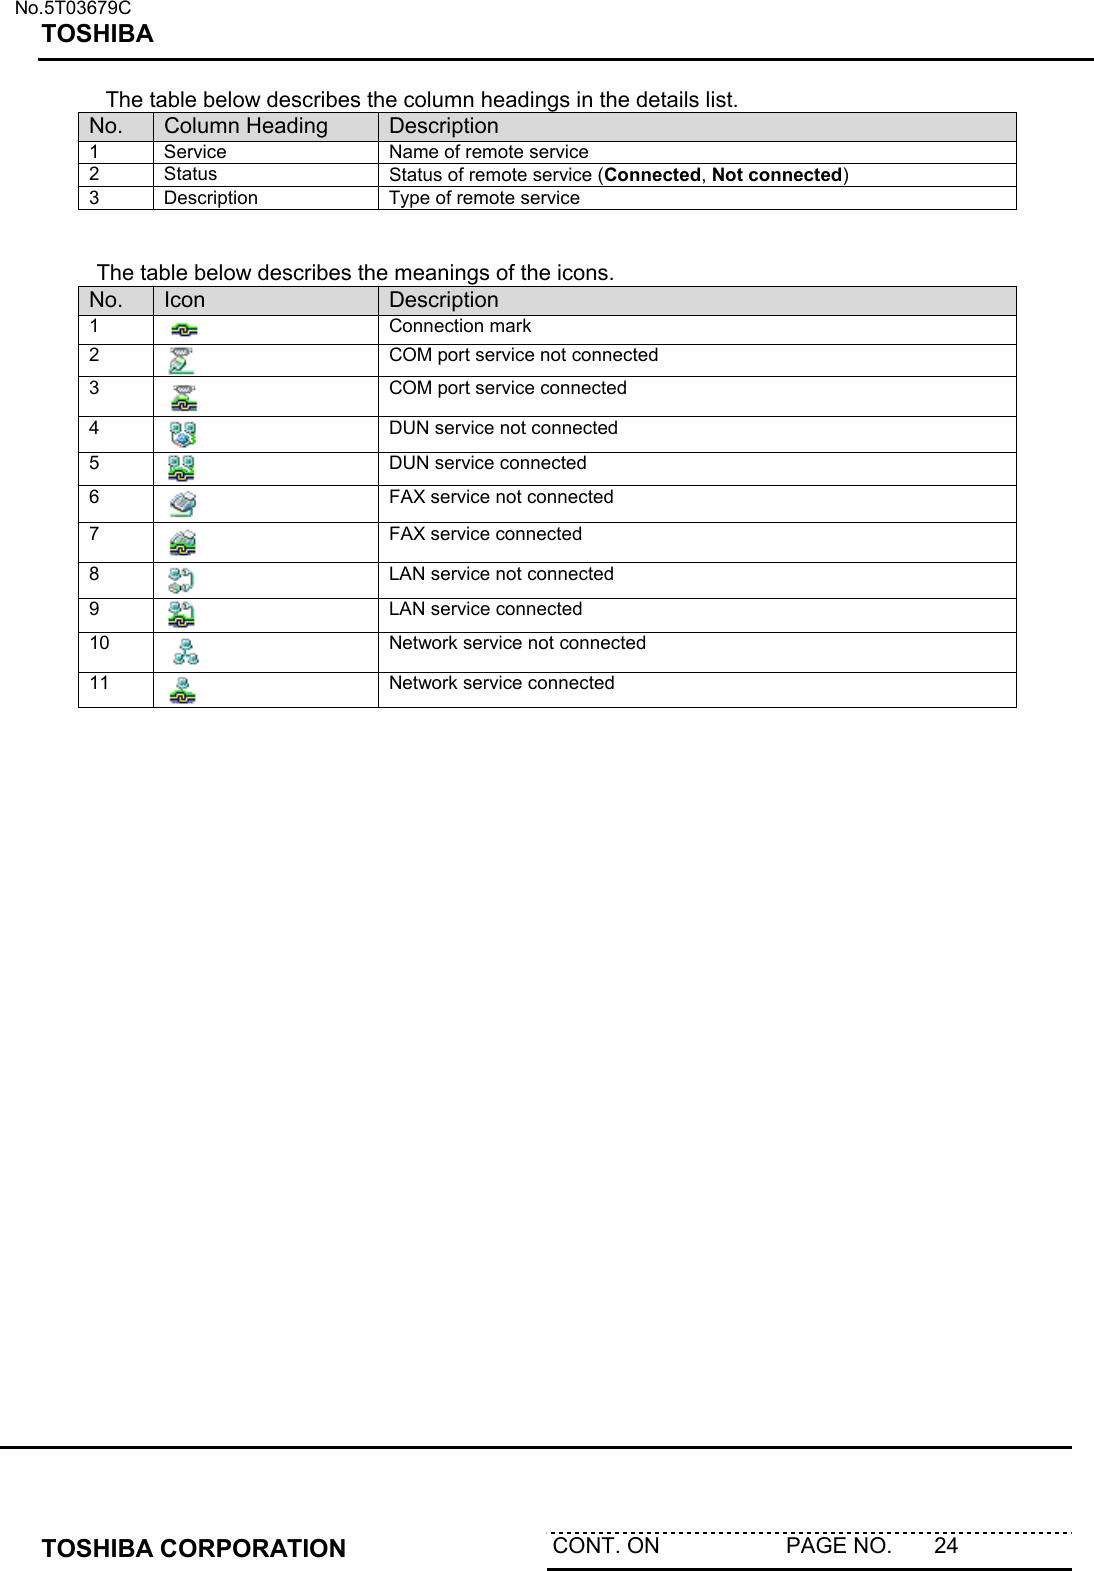
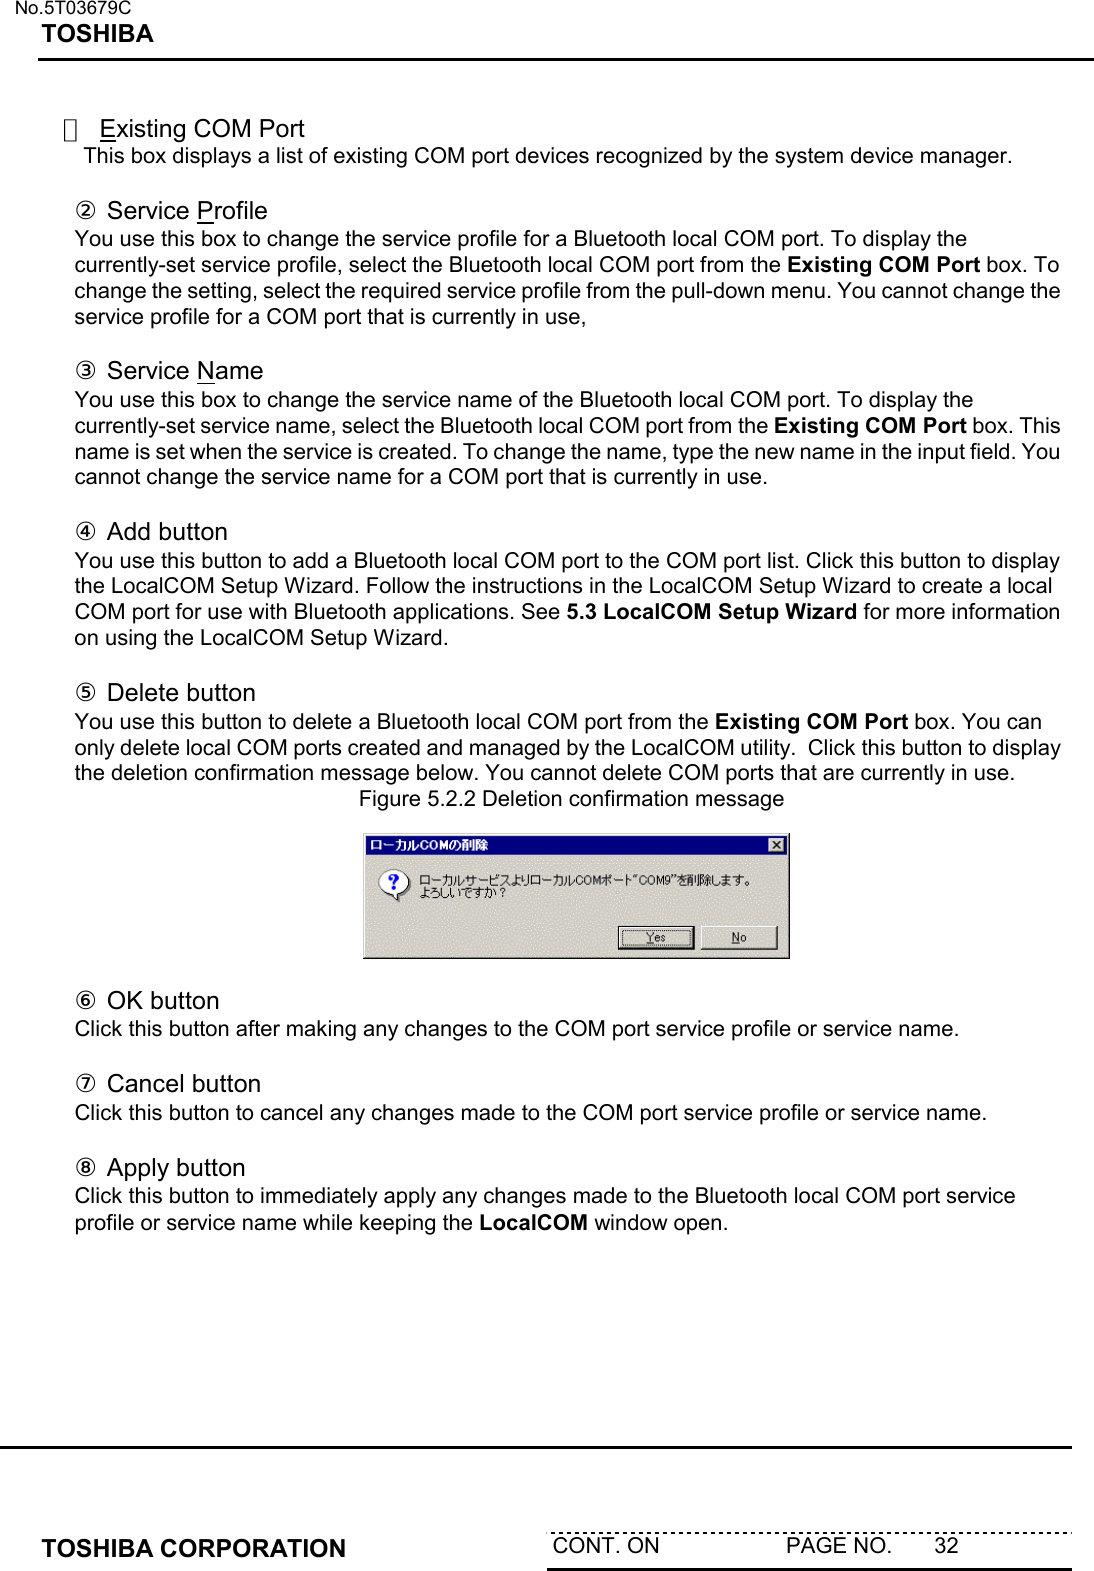
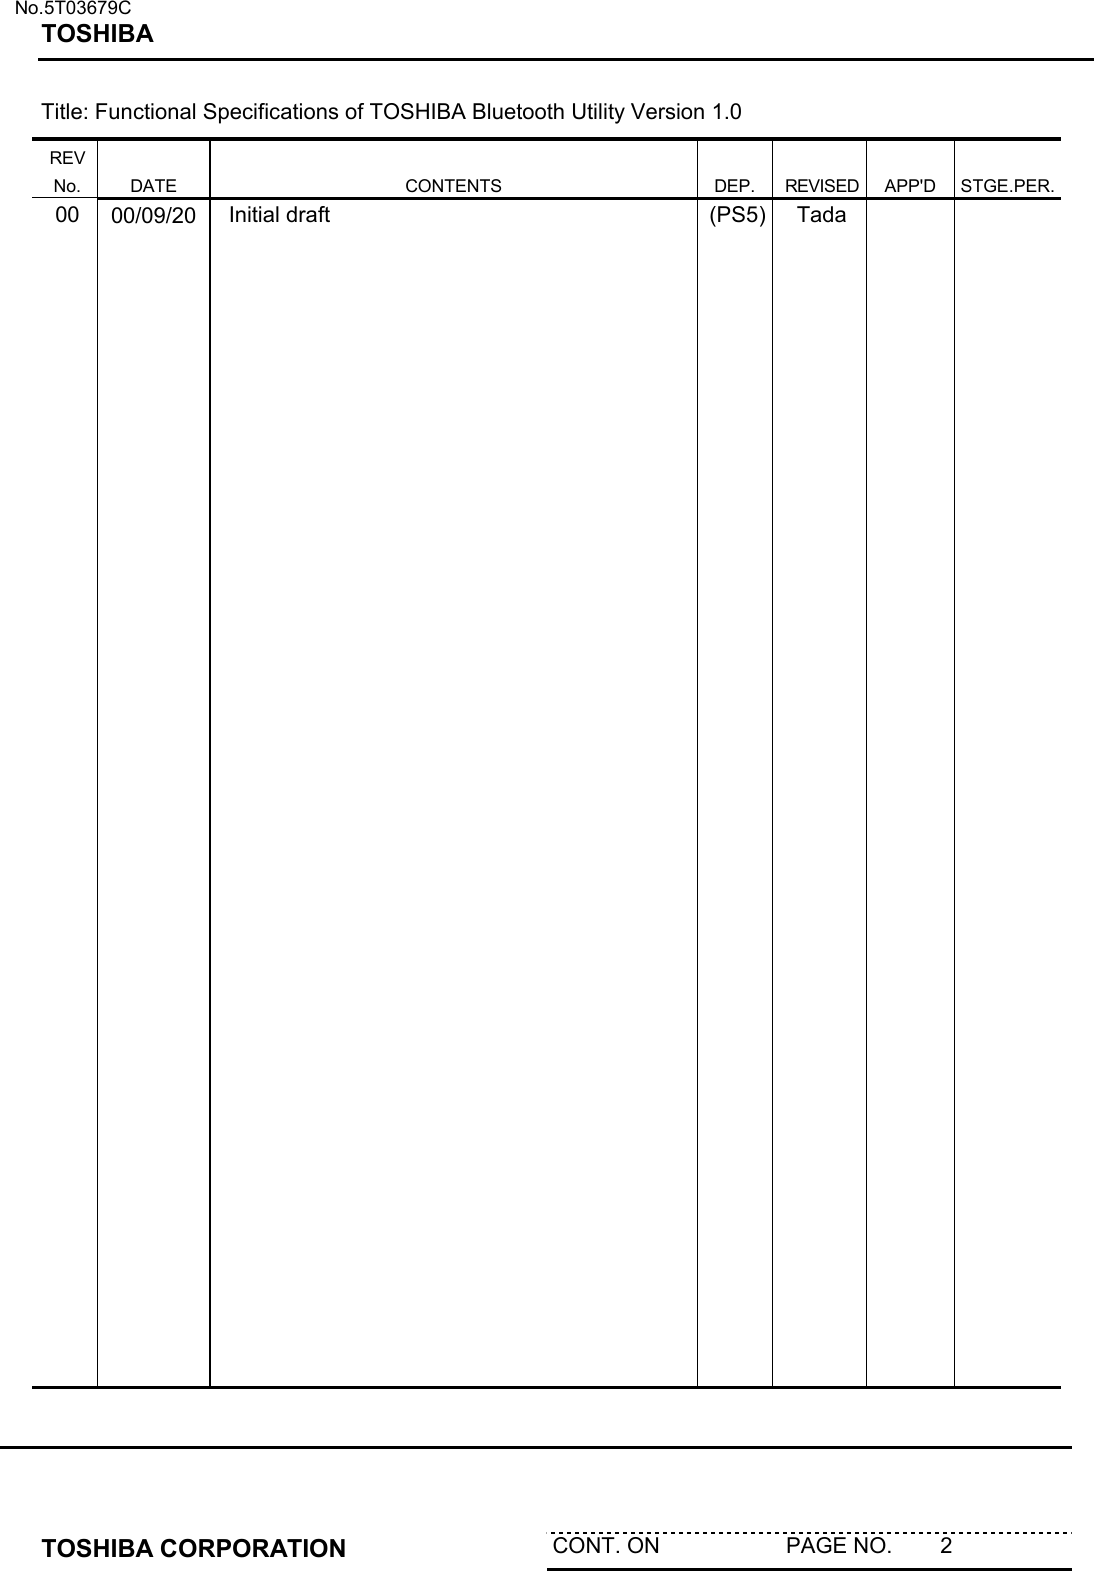
![No.5T03679C TOSHIBA TOSHIBA CORPORATION CONT. ON PAGE NO. 28 4.4.2 Power Management Properties Power policy Power OFF in Standby Power OFF in Hibernation Periodic Inquiry Mode Max Period Length [ ] hrs Min Period Length [ ] hrs Inquiry Length [ ] sec Automatic battery shutdown ON/OFF Reduce RF ON/OFF Wakeup Policies Inquiry Result Filter [Display new devices that respond to the inquiry process] [Display devices with a specific device class that respond to the inquiry process] [Display devices with a specific device address that respond to the inquiry process] Connection Setup Filter [Allow connection to all devices] [Allow connection to devices with specific device class] [Allow connection to device with specific device address] Default button Returns all settings to default Bluetooth device settings. Figure 4.4.2. Power Management tab](https://usermanual.wiki/Dynabook/PA3121BT.Manual/User-Guide-160780-Page-30.png)
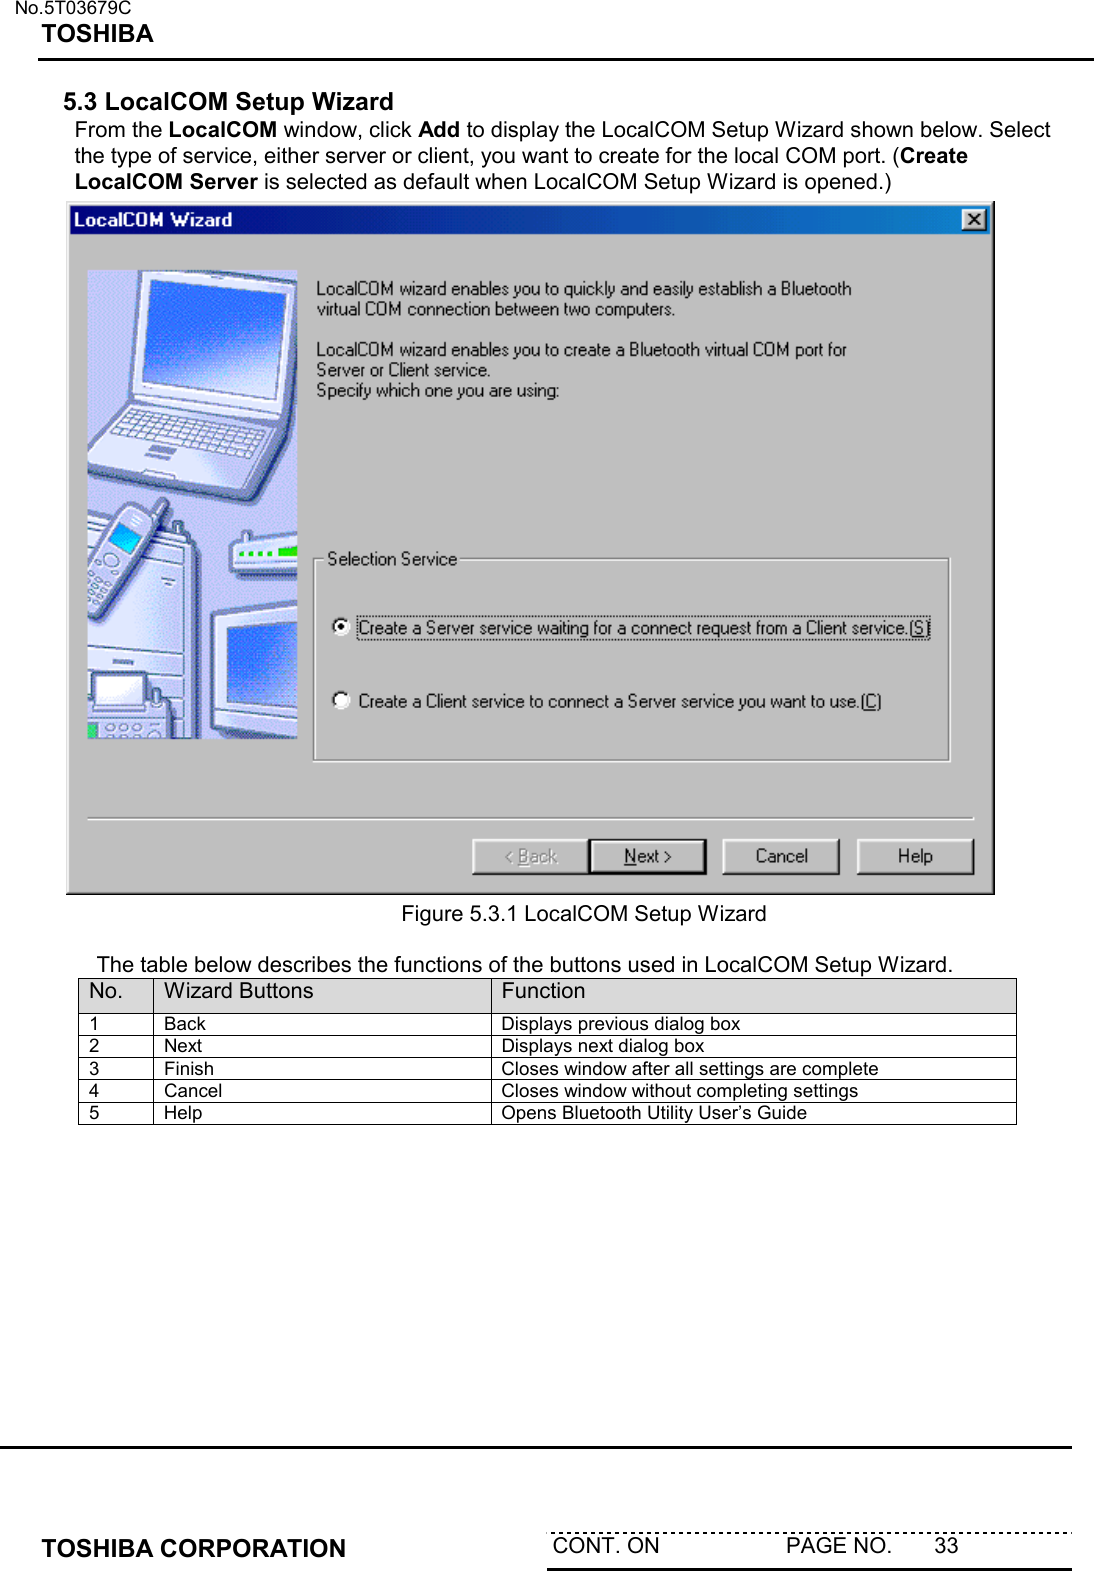
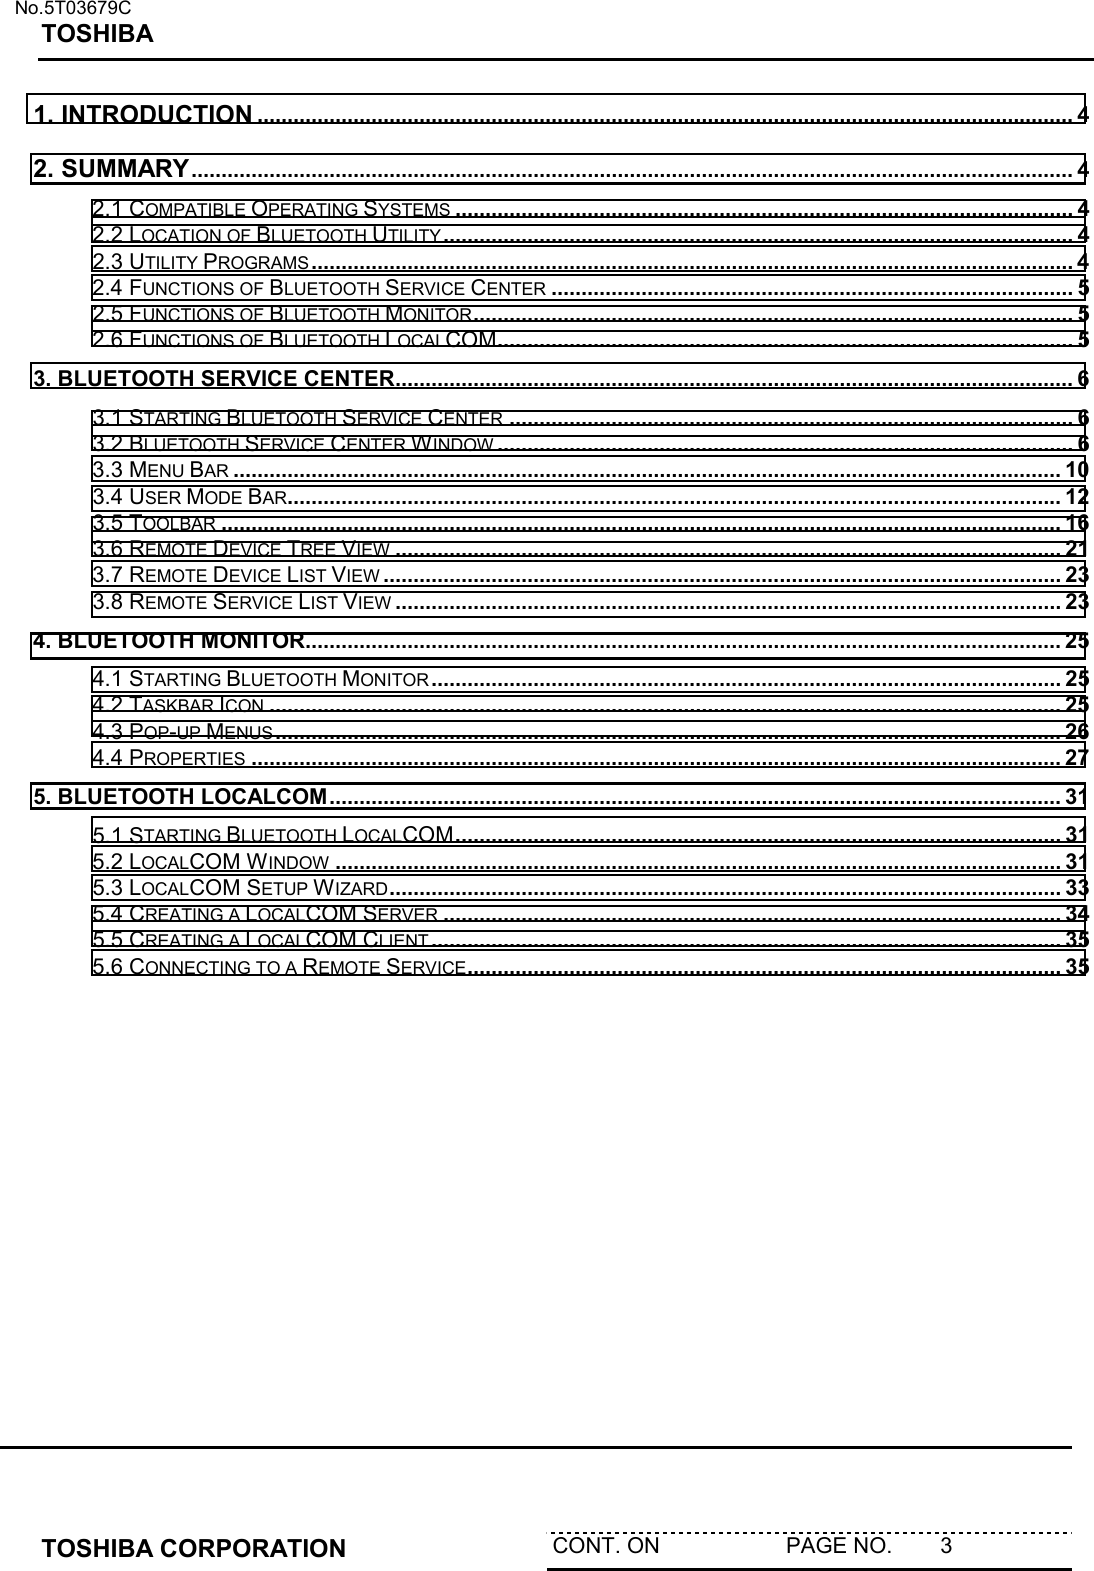
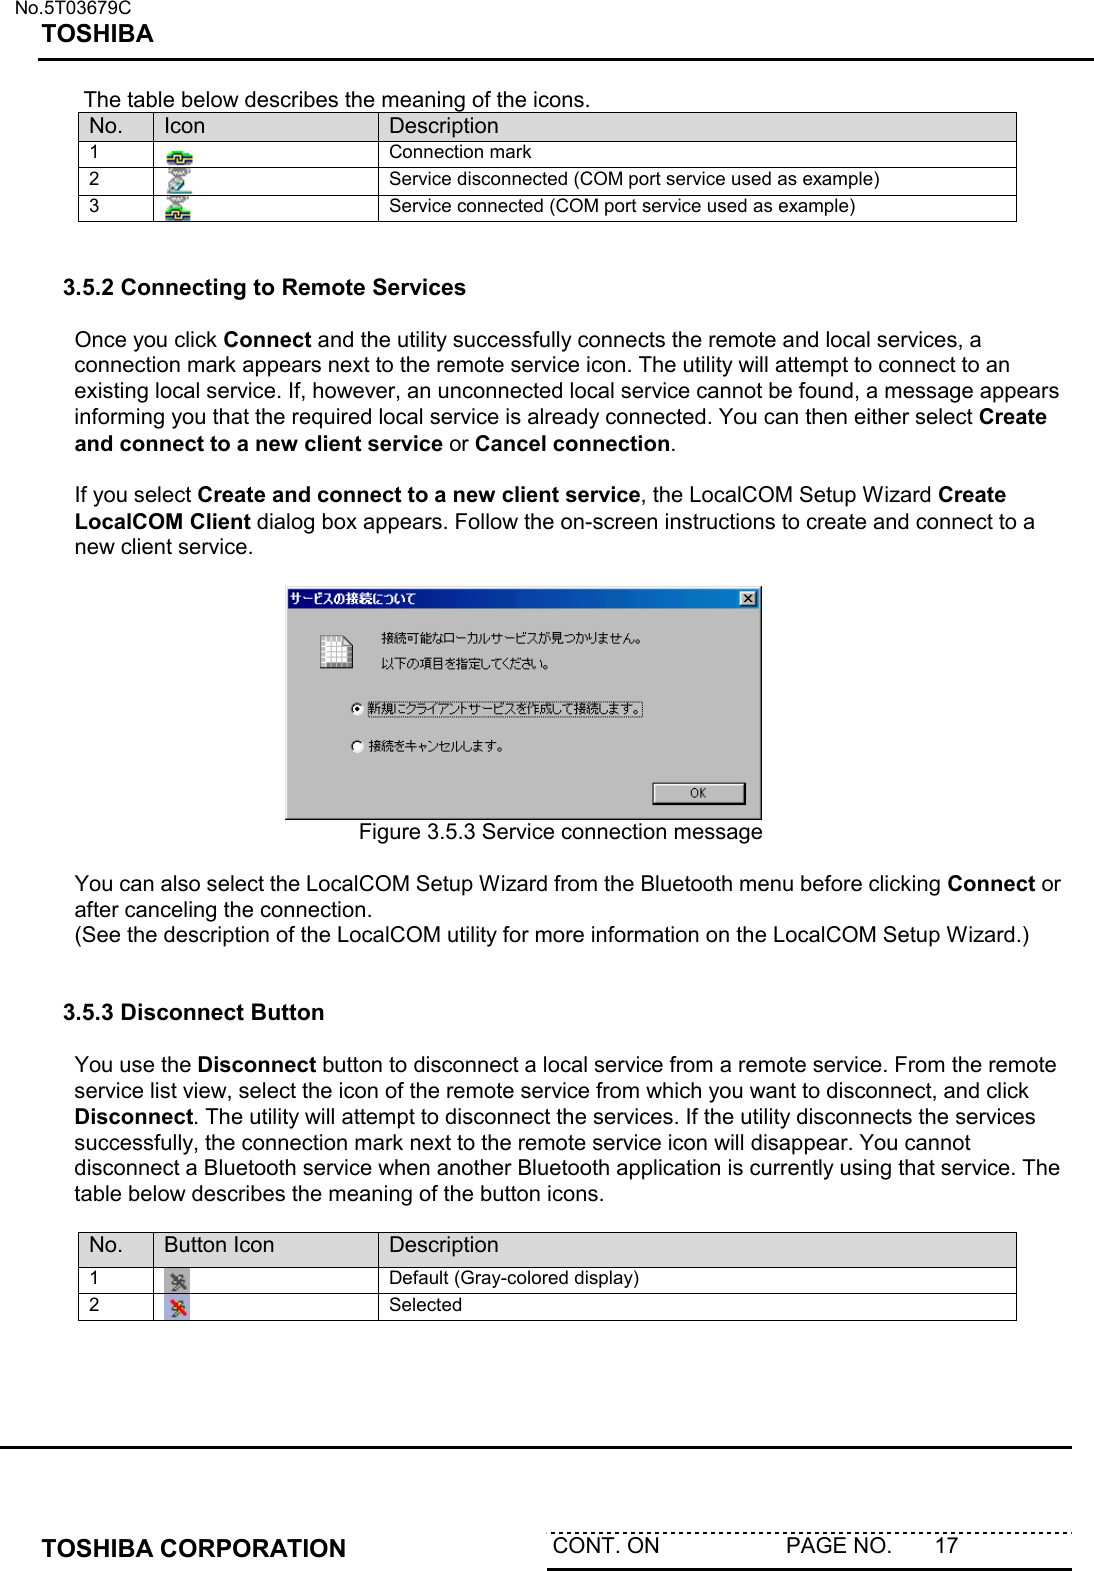
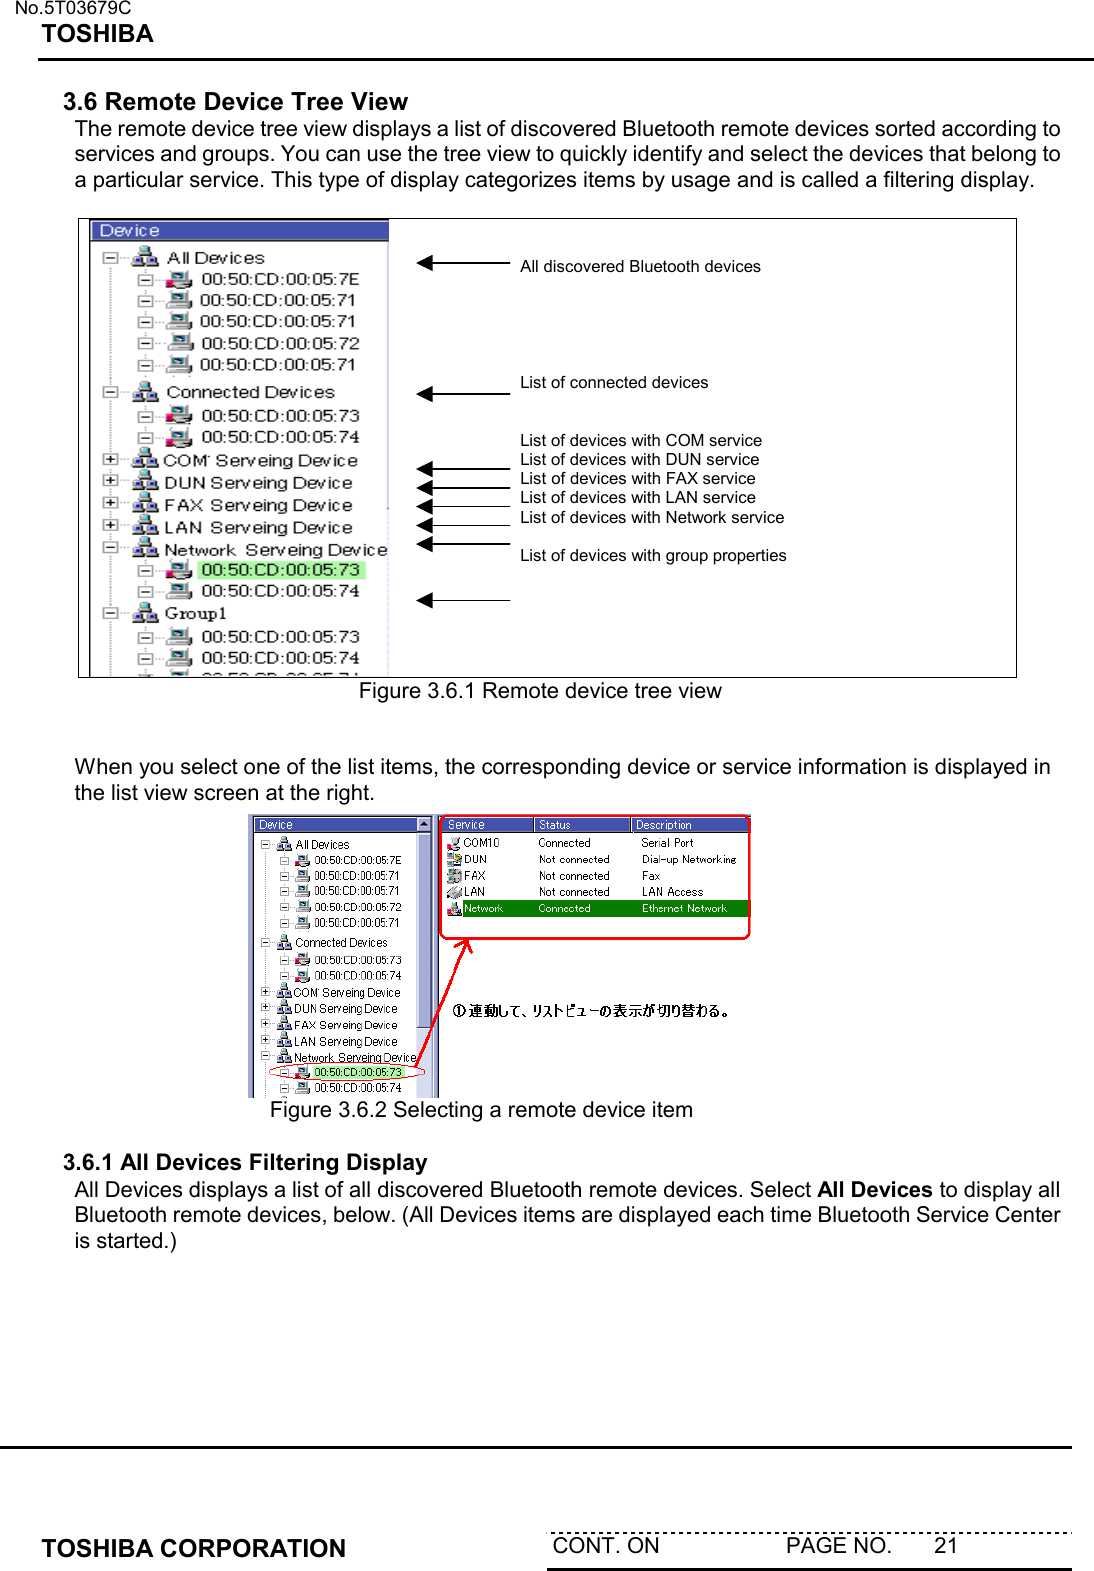
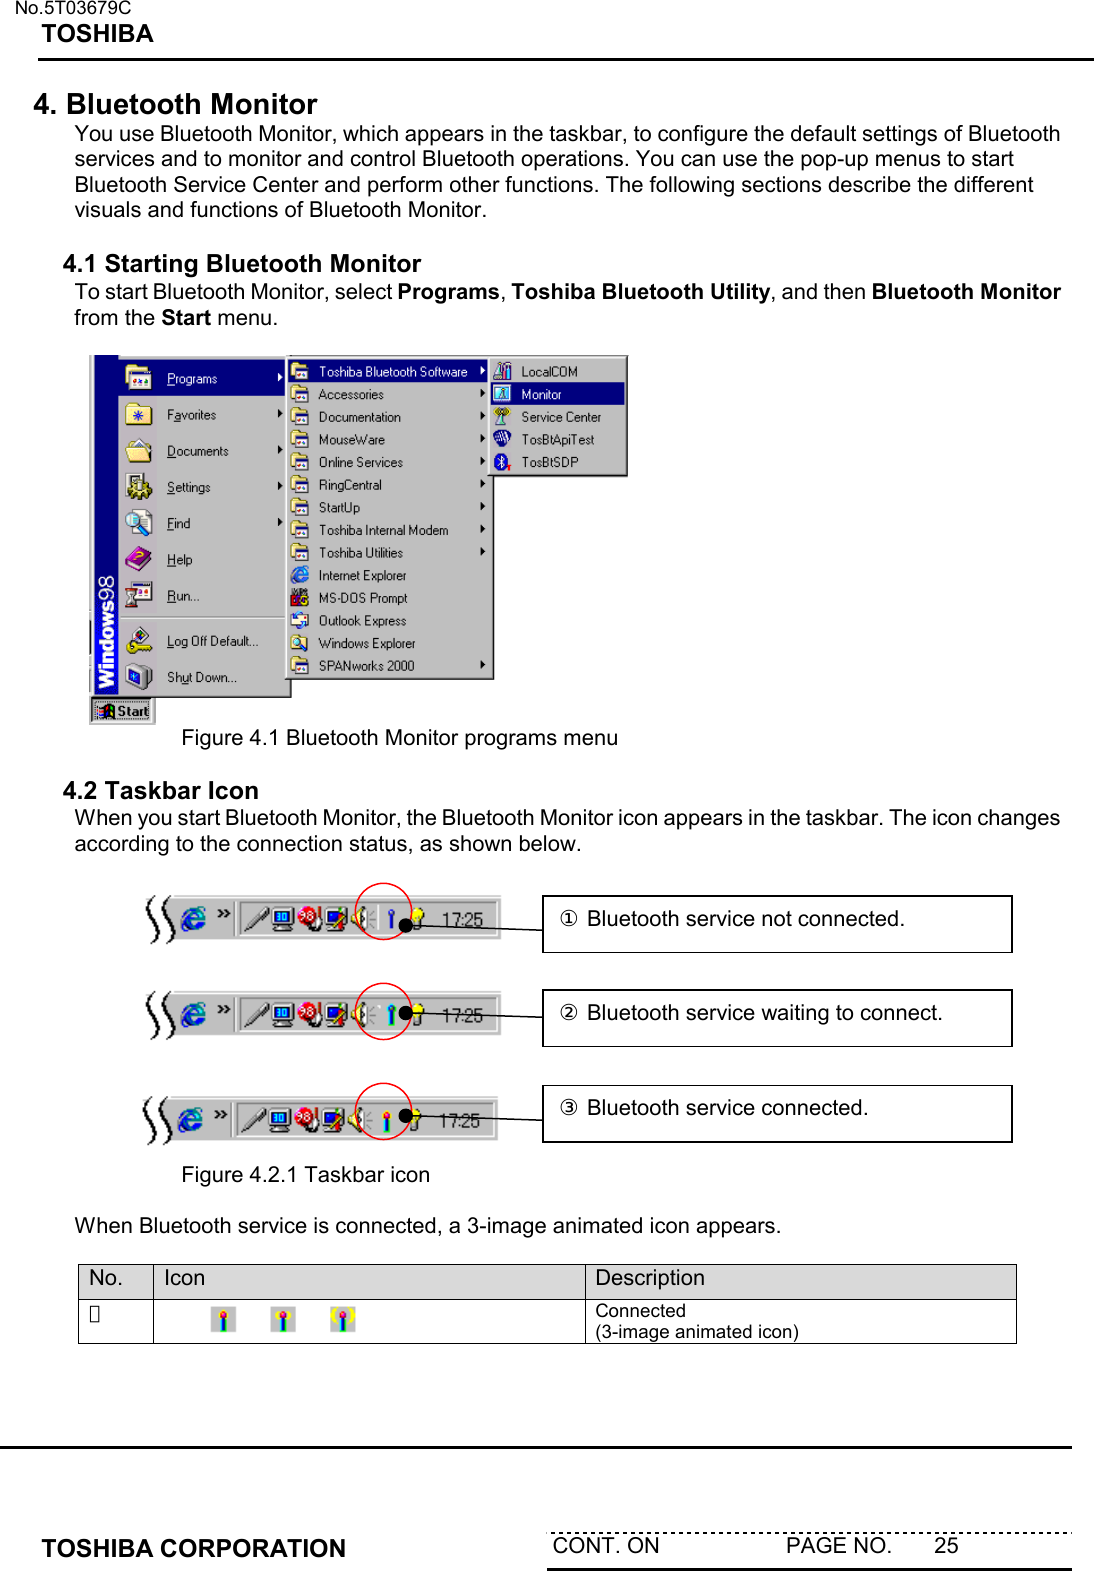
![No.5T03679C TOSHIBA TOSHIBA CORPORATION CONT. ON PAGE NO. 29 4.4.3 Mode Properties Discoverability Mode ◎ Non-discoverable Mode ○ General Discoverable Mode Connectability Mode ○ Non-connectable Mode ◎ Connectable Mode Security Mode [Security Mode 1 (Non-secure mode)] [Security Mode 2 (Service level enforced security)] [Security Mode 3 (Link level enforced security)] Default button Returns all settings to default Bluetooth device settings. Figure 4.4.3. Mode tab](https://usermanual.wiki/Dynabook/PA3121BT.Manual/User-Guide-160780-Page-31.png)
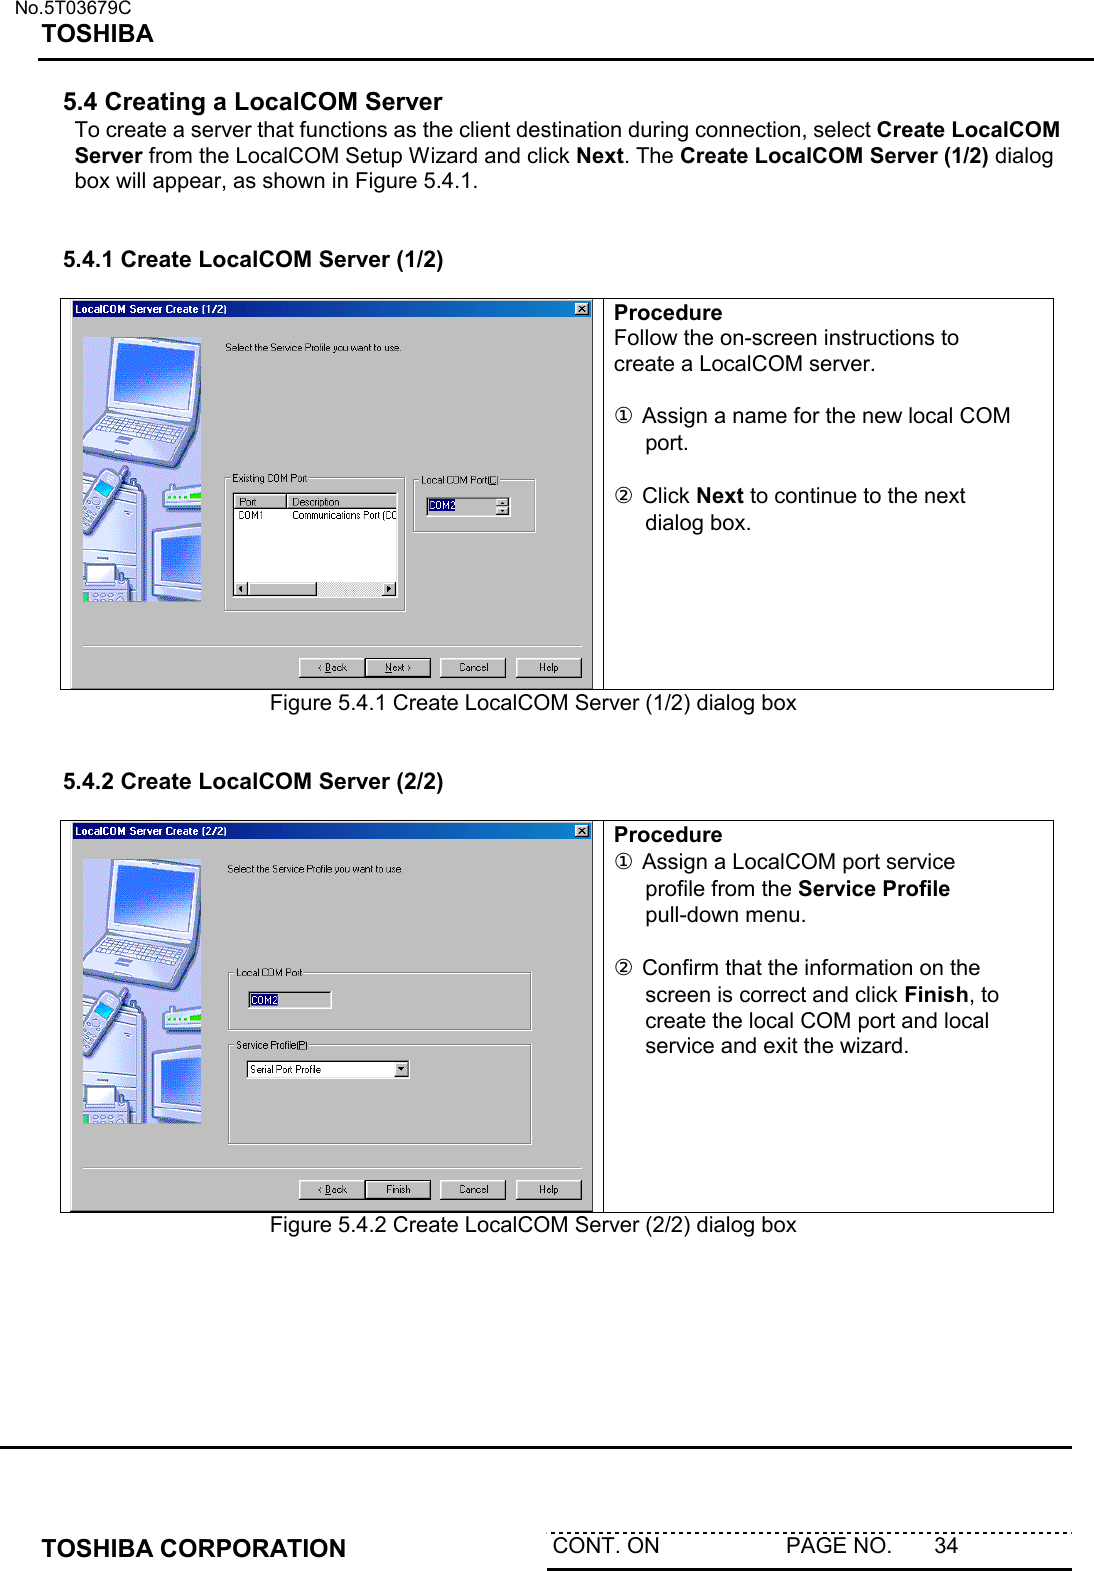
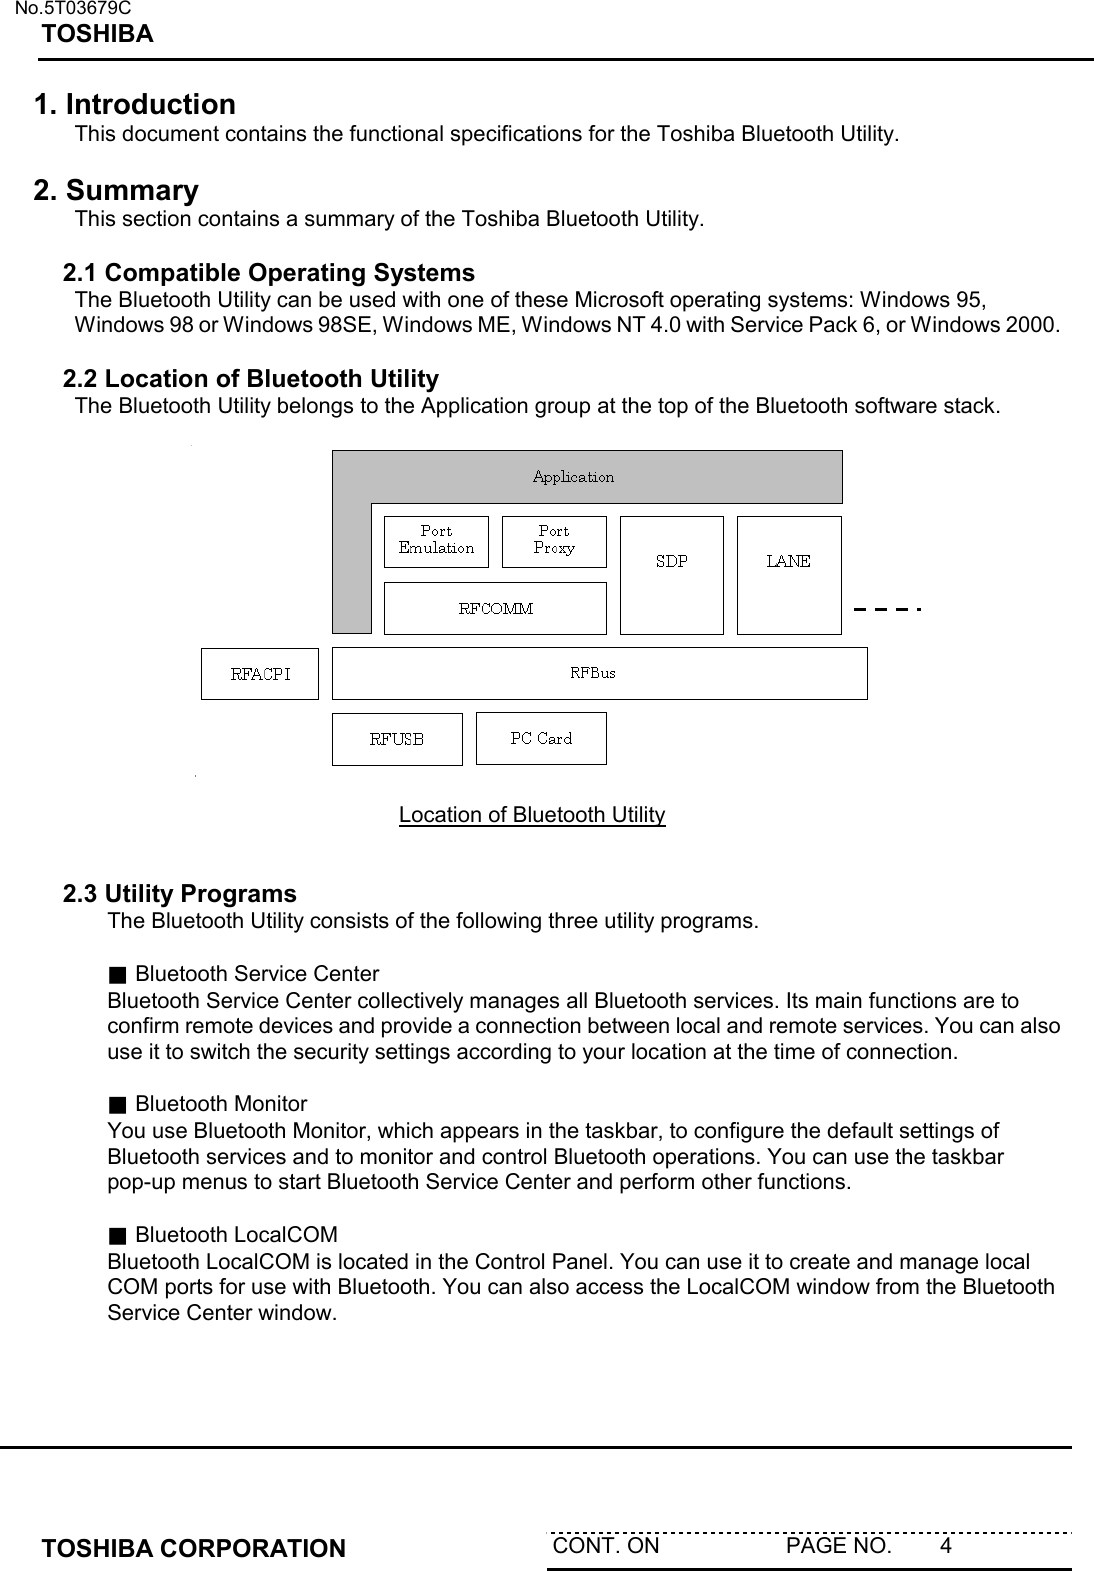
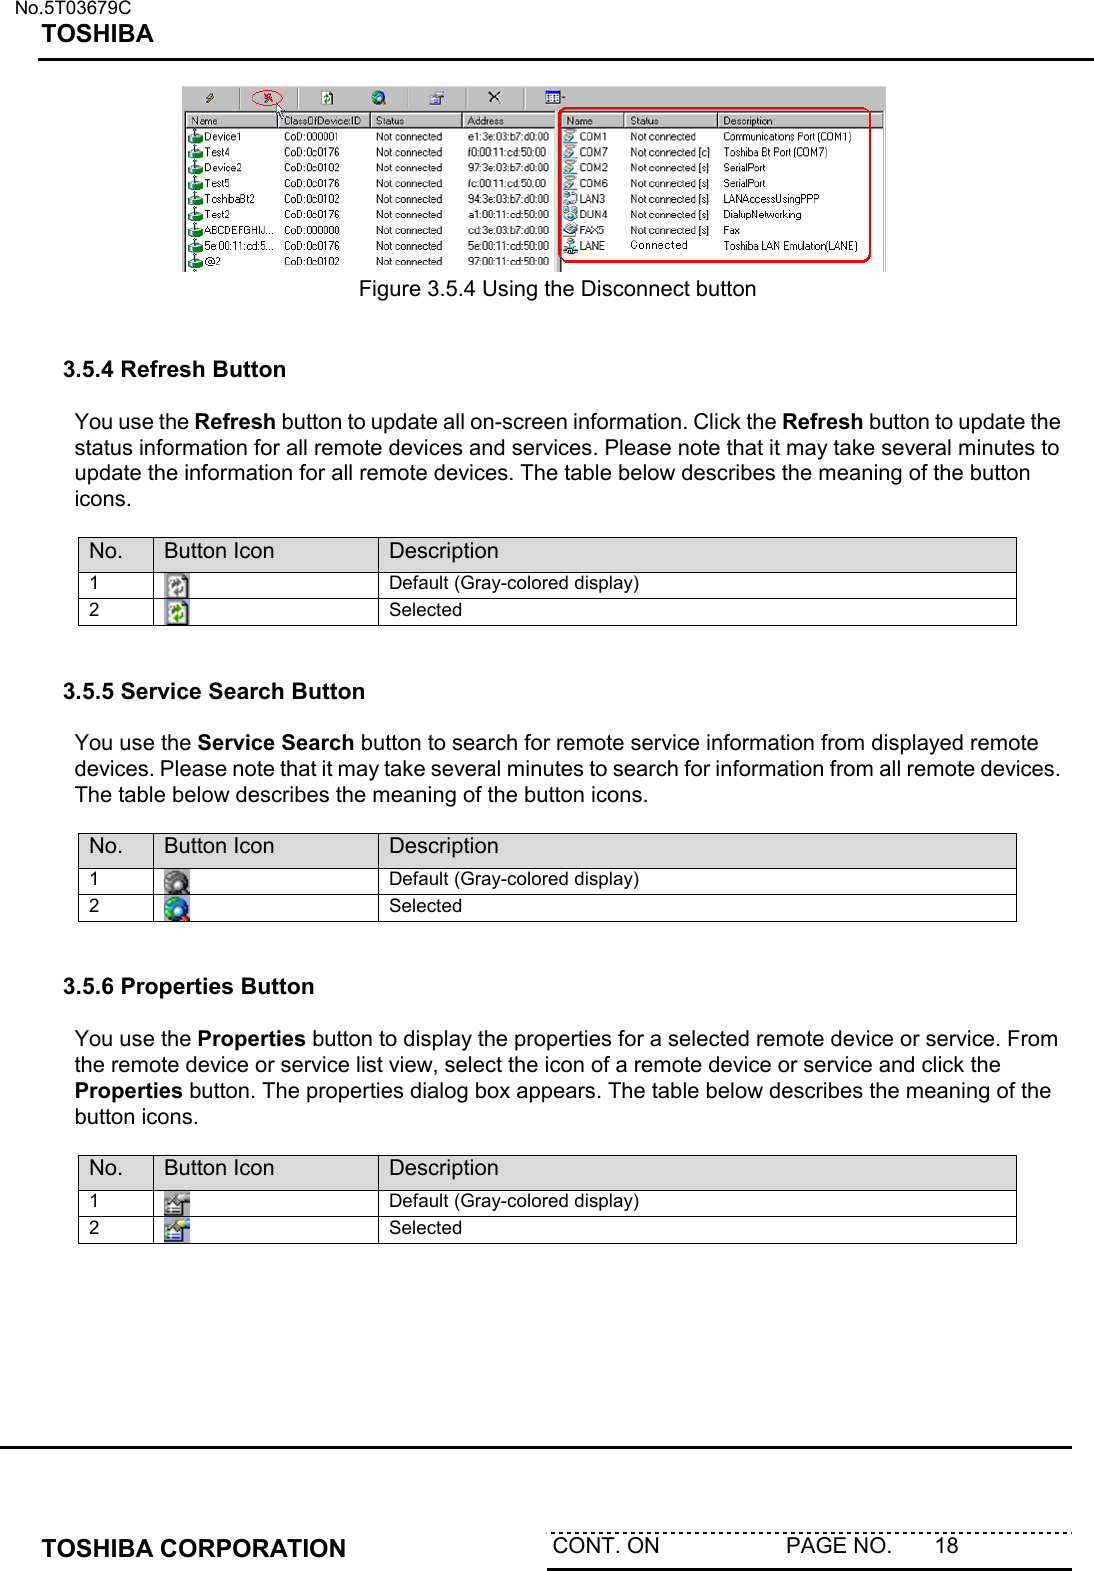
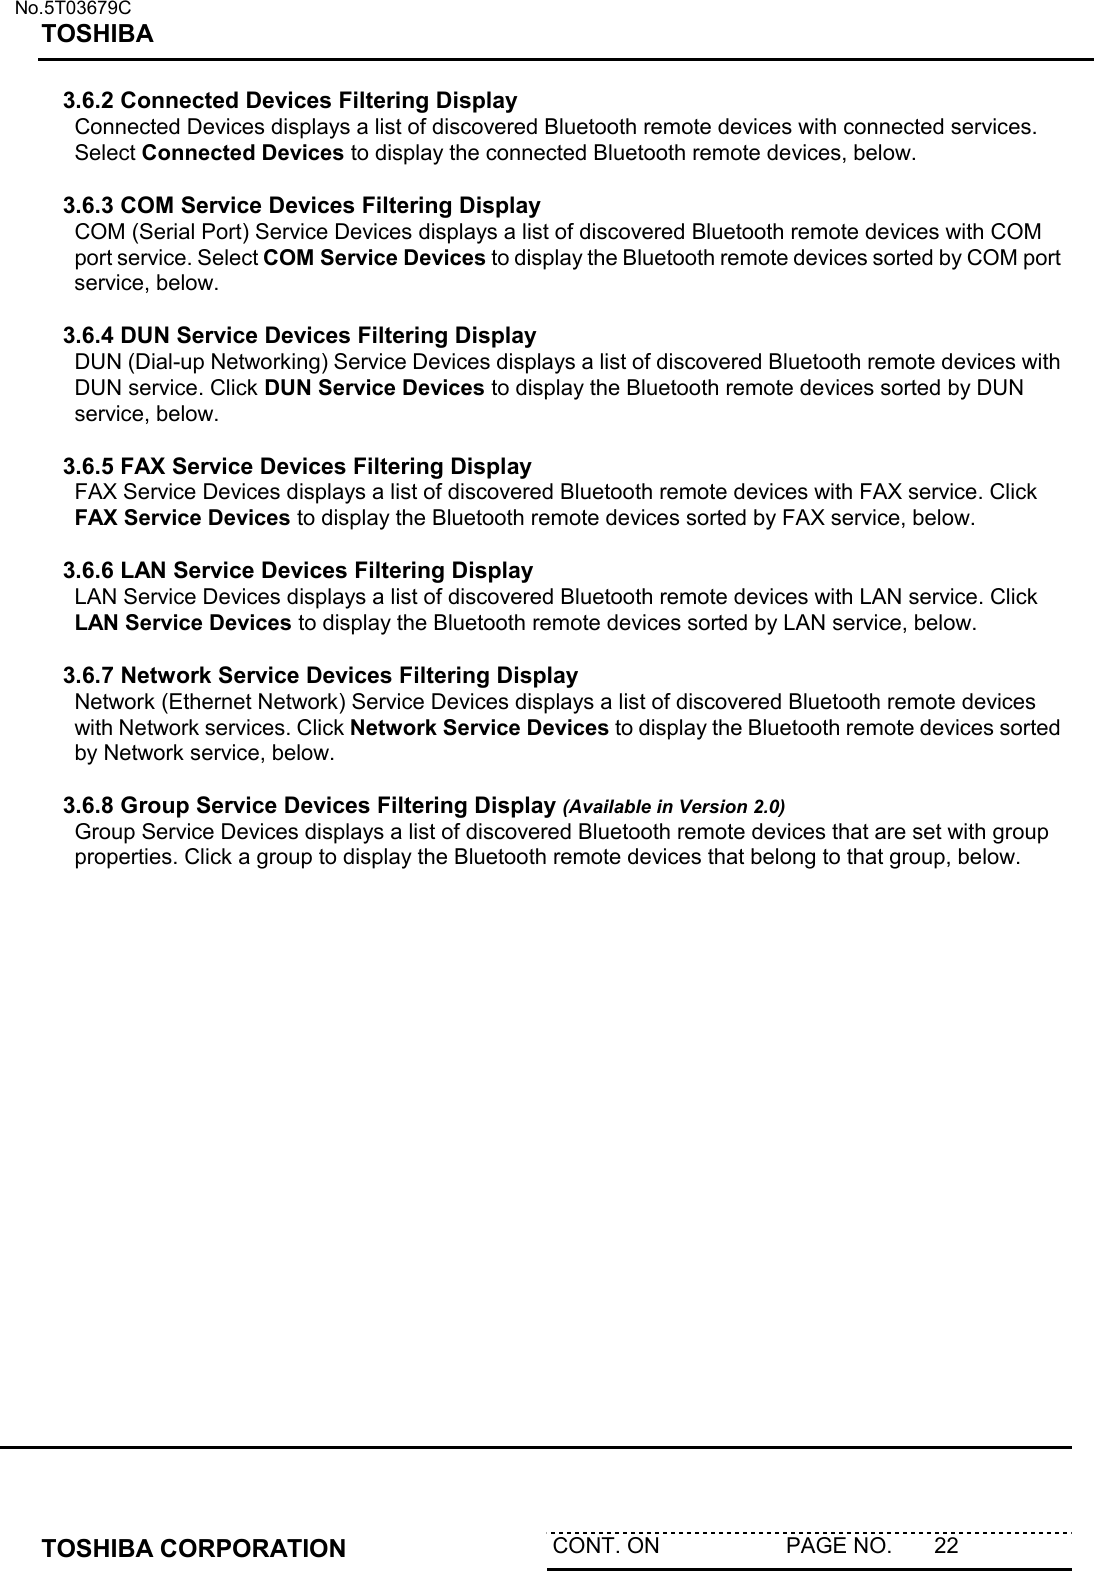
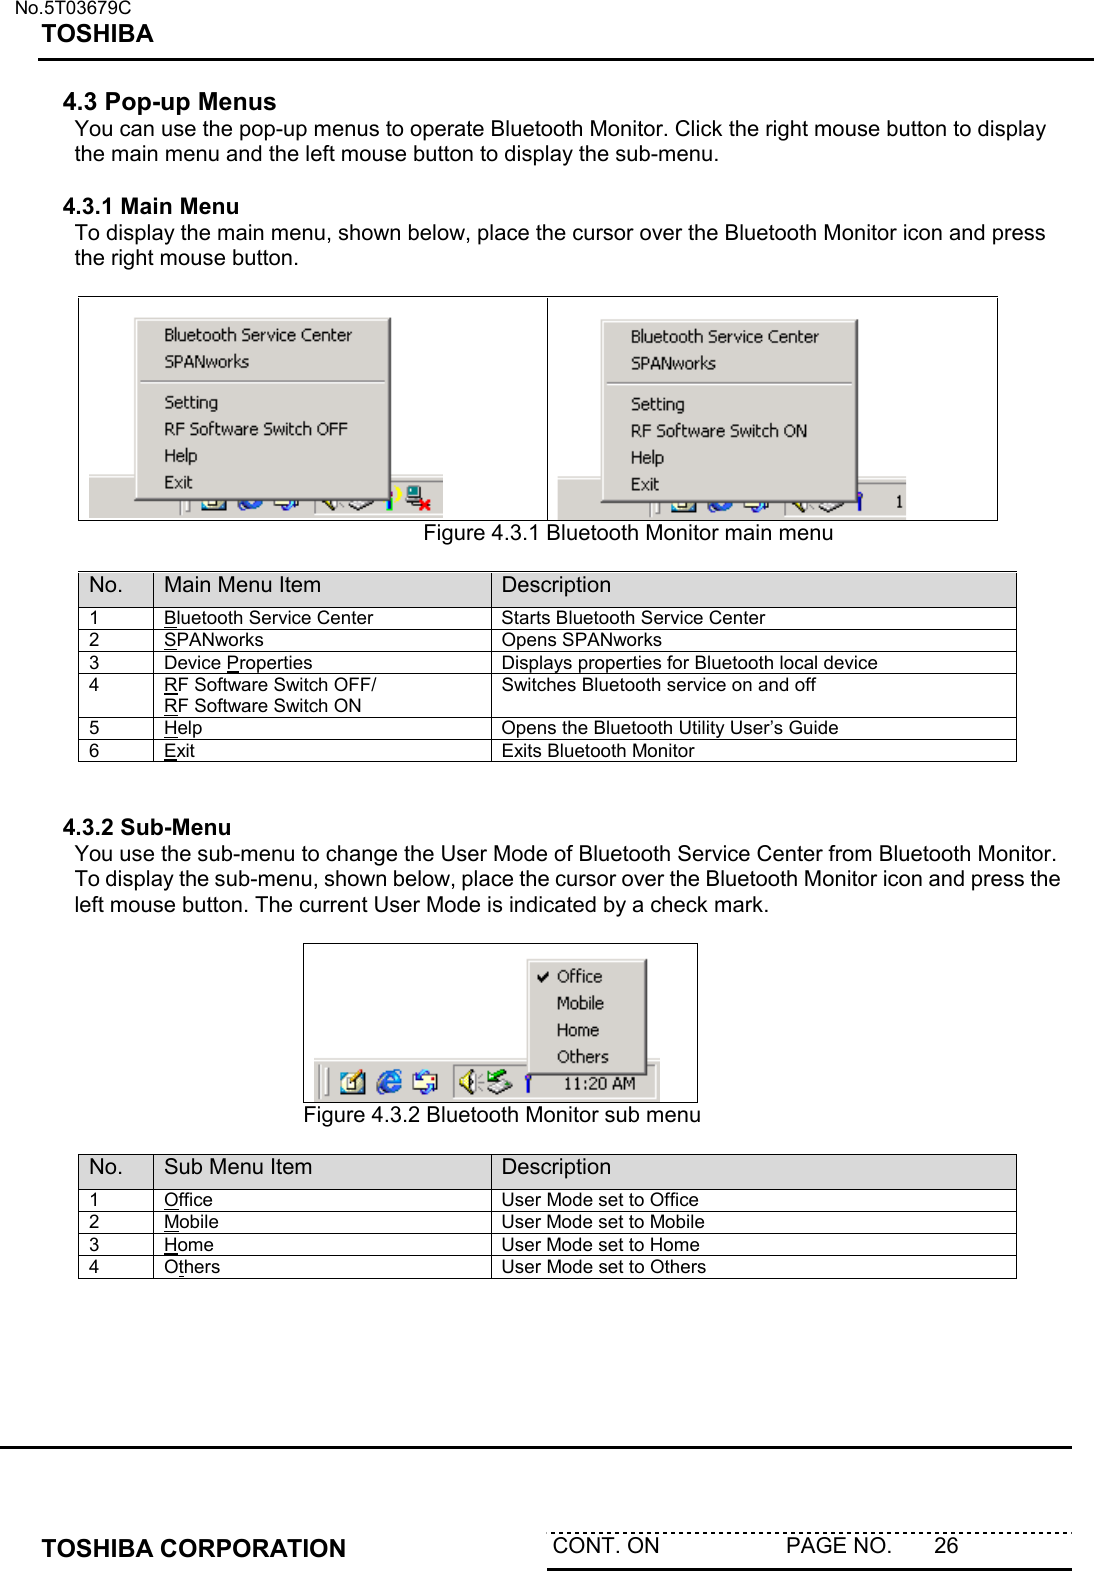
![No.5T03679C TOSHIBA TOSHIBA CORPORATION CONT. ON PAGE NO. 30 4.4.4 Link Policy Default Link Policy [Reject attempt to establish link] [Prompt before accepting link establishment] [Automatically accept link establishment] Apply to all newly-discovered devices Device Discovery Remove stored discovered devices not found for the past [ ] days Display previously-discovered devices ◎ Display all Bluetooth Devices ever discovered ○ Display Bluetooth Devices discovered during the past [ ] days Default button Returns all settings to default Bluetooth device settings. Figure 4.4.4. Link Policy tab](https://usermanual.wiki/Dynabook/PA3121BT.Manual/User-Guide-160780-Page-32.png)