User Manual

Color-screen Call Phone
User’s Manual
Contents
1 General Information ....................................................................................................................... 3!
1.1 Introduction ......................................................................................................................... 3!
1.2 Safety ................................................................................................................................... 3!
1.3 Warning and Notice ............................................................................................................. 3!
1.3.1 Basic Notices .................................................................................................................... 3!
1.3.2 Notices of Your Phone ...................................................................................................... 4!
1.3.3 Notices of Battery Use ...................................................................................................... 4!
1.3.4 Notices of Charger Use .................................................................................................... 5!
1.3.5 Care and Maintenance ..................................................................................................... 6!
1.3.6 General Notices ................................................................................................................ 6!
2 Getting Started ................................................................................................................................ 6!
2.1 Overview and Introduction .................................................................................................. 6!
2.1.1 Product Specification ....................................................................................................... 6!
2.1.2 Icon ................................................................................................................................... 7!
2.2 Keypad ................................................................................................................................. 7!
2.3 Battery ................................................................................................................................. 9!
2.4 Network Connections ........................................................................................................ 10!
2.4.1 SIM Card ........................................................................................................................ 10!
2.4.2 Insert and Remove the SIM Card ................................................................................... 10!
2.4.3 Turn Your Phone On or Off ............................................................................................ 10!
2.4.4 Phone unlock .................................................................................................................. 10!
2.4.5 Unlock the SIM Card ...................................................................................................... 11!
2.4.6 Connect to the Network .................................................................................................. 11!
2.4.7 Make Calls ...................................................................................................................... 11!
2.4.8 Make Domestic Calls ...................................................................................................... 11!
2.4.9 Dial Extension ................................................................................................................ 11!
2.4.10 International telephone Calls ....................................................................................... 12!
2.4.11 Dial the Numbers of Phonebook ................................................................................... 12!
2.4.12 Emergency Number ...................................................................................................... 12!
2.4.13 Answer Calls ................................................................................................................. 12!

2
2.4.14 Call Records ................................................................................................................. 13!
2.4.15 Call Menu ..................................................................................................................... 13!
3 Function Menus ............................................................................................................................ 13!
3.1 Use of Function Menus ..................................................................................................... 13!
Scroll Searching and Selection Function ................................................................................ 13!
Exit Menus ............................................................................................................................... 13!
3.2 File Manager ...................................................................................................................... 14!
3.3 Phonebook ......................................................................................................................... 14!
3.4 Fun & Games ..................................................................................................................... 14!
3.5 Call Center ......................................................................................................................... 14!
3.5.1 Call history ..................................................................................................................... 14!
3.5.2 Call Settings .................................................................................................................... 15!
3.6 Messages ............................................................................................................................ 16!
3.6.1 Write Message ................................................................................................ 16!
3.6.1.1 Text Message ............................................................................................... 16!
3.6.1.2 Multimedia Message .................................................................................... 16!
3.6.2 Inbox ............................................................................................................... 16!
3.6.3 Drafts .............................................................................................................. 16!
3.6.4 Outbox ............................................................................................................ 16!
3.6.5 Sent messages ................................................................................................. 17!
3.6.6 Delete messages .............................................................................................. 17!
3.6.7 Broadcast Messages ........................................................................................ 17!
3.6.8 Message Settings ............................................................................................ 17!
3.6.8.1 Text message ............................................................................................... 17!
3.6.8.2 multimedia message .................................................................................... 17!
3.7 Multimedia ........................................................................................................................ 18!
3.8 Organizer ........................................................................................................................... 19!
3.8.1 Calendar ......................................................................................................................... 19!
3.8.2 Tasks ............................................................................................................................... 20!
3.8.3 Alarm .............................................................................................................................. 20!
3.8.4 World clock ..................................................................................................................... 20!
3.9 Settings .............................................................................................................................. 20!
3.10 User Profiles .................................................................................................................... 22!
3.11 Extra ................................................................................................................................. 23!
3.11.1 Calculator ..................................................................................................................... 23!
3.12 Services ............................................................................................................................ 23!
3.12.1 Internet service ............................................................................................................. 23!
3.13 Shortcuts .......................................................................................................................... 23!
4 Input Method ................................................................................................................................ 23!
General Outline ........................................................................................................................ 23!
Screen Key values ................................................................................................................... 24!
5 T-flash Card and USB .................................................................................................................. 24!
5.1 Insert and Remove T-flash Card ........................................................................................ 24!
5.2 Use of T-flash Card ........................................................................................................... 24!

3
5.3 USB ................................................................................................................................... 24!
6 Troubleshooting ............................................................................................................................ 25!
1 General Information
1.1 Introduction
We are pleased that you have chosen this color-screen mobile phone. For your safe and
efficient use of the phone, you can read this manual before you use the phone.
The phone is designed for GSM/GPRS network environment. Apart from calling, it also
provides some practical functions, such as associative English input method, card-folder
phonebook, individualized sound and pictures of incoming calls, 64 polyphonic ringtone, SMS &
MMS, camera & video recorder, music & media player, voice recorder, clock, alarm clock,
calculator, automatic turn-on & turn-off, scheduler management, T-flash, GPRS, STK, keypad
lock, USB, Bluetooth. Moreover, its individualized user interface and functional design can meet
your various requirements.
The phone is designed in accordance with the technical specifications of GSM/GPRS. It also
obtains authentication of domestic and international authorities.
Manufacturers reserve the right to revise this manual without giving advance notice.
1.2 Safety
If your phone has been lost or stolen, contact telecommunication department or its agencies so
as to forbid the use of your phone and SIM card. Your prompt action can prevent others from
personator calls which will result in your pecuniary loss.
When you contact telecommunication department or its agencies, they will require IMEI code.
The IMEI code is printed on the label of the phone back and you can see it when you remove the
battery. You should copy the code and keep it properly for future need.
In order to avoid the misuse of your phone, you shall take the following measures:
Set PIN code of your SIM card and alter it before others have known it.
Do not put your phone in the visible places before you leave the car. You’d better keep
it with you or lock it in the boot.
Set Call Barring.
1.3 Warning and Notice
For your safe and proper use of the phone, read these guidelines before you use the phone.
1.3.1 Basic Notices
Do use the batteries and chargers approved by the manufacturer. The disapproved products
may cause battery leakage, overheating, burst or fire.
Do not strike, shake or sling your phone. It can prevent damage or fire.
Do not place your phone, battery or charger in microwave oven or high-voltage equipment;
otherwise it may cause accidents, such as circuit damage or fire.
Do not use your phone in the place where there is inflammable and explosive gas; otherwise
it may cause your phone failure or fire.
4
Do not put your phone in the place of high temperature, high humidity or the place where
there is a lot of dust; otherwise it may cause your phone failure.
Keep your phone out of the reach of children. It can prevent children from playing your
phone as a toy and the subsequent body injury.
Do not place your phone at the unsmooth or unstable table; otherwise your phone may fall
from the table and get damage.
1.3.2 Notices of Your Phone
Turn off your phone in any facility where using mobile phone is forbidden. These facilities
may include airplanes and hospitals. The phone can influence the regular operation of
electronic devices and medical devices. Therefore, any use of the phone must be in
accordance with applicable regulations of the facility. Your phone is of automatic turn-on
function. You should check the setting of clock alarm in order to ensure your phone will not
be automatically turned on while the airplane is flying.
Do not use your phone in the place of poor signal or near the electronic devices of high
definition. The interference of radio wave may cause electronic devices’ misoperation or
other problems, especially to audiphones, pacemakers and other medical electronic devices,
fire detectors, automatic doors and other automatic control devices. You can consult the
manufacturer or seller of the medical device about the influence of the phone on the
pacemaker or other medical devices.
Do not press the LCD strongly or strike other things with your phone; otherwise it can cause
damage to LCD or leakage of LCD liquid. If LCD liquid accidentally gets into your eye, you
may become blind. At this very moment, do not knead your eye. You should immediately
wash your eye with water and then go to hospital.
Do not dismantle or refit your phone; otherwise it will cause damage to your phone, leakage
of electricity and circuit failure.
In few situations, your phone may have bad influence on electronic devices in some car. Do
not use your phone so as not to lose security.
Do not press the keys with sharp things, such as needle or nib; otherwise it may cause
damage to your phone or misoperation.
Do not use your phone if its antenna is damaged; otherwise it may cause injury to the person.
Do not put your phone too near magnetic objects, such as the magnetic card; otherwise the
radiation wave of the phone may eliminate the information stored in floppy disk, debit card
and credit card
Do put the small metal objects such as thumbtack far away from the earphone because the
loudspeaker is magnetic while it is working and it can attract these small metal objects. It
may cause injury to the person or damage to the phone.
Keep your phone dry. If water or other liquid gets into the phone, it may cause overheating,
leakage of electricity or failure of your phone.
1.3.3 Notices of Battery Use
Do not cast the battery into the fire; otherwise it can cause fire or burst.
Do not install the battery strongly; otherwise it can cause leakage of electrolyte, overheating,
5
burst or fire.
Do not short-circuit the battery with metal objects, such as electrical wiring or needle. Do not
put the battery together with metal objects such as necklace; otherwise it may result in
leakage of electrolyte, overheating, burst or fire.
Do not weld the positive (+) and negative (-) of the battery; otherwise it may result in leakage
of electrolyte, overheating, burst or fire.
If battery electrolyte accidentally gets into your eye, you may become blind. At this very
moment, do not kneading your eye. You should immediately wash your eye with water and
then go to hospital.
Do not dismantle or refit the battery; otherwise it can cause leakage of electrolyte,
overheating, burst or fire.
Do not use or put your phone near the fire or in the place where is of high temperature;
otherwise it can cause leakage of electrolyte, overheating, burst or fire.
If the battery is calefactive, color-changing or transformative while is it is charging, using or
preserve, do stop using it and change a new battery.
If battery electrolyte contacts skin or clothes, it may burn the skin. Do wash the skin with
water immediately and go to hospital if necessary.
If electrolyte leaks out of the battery or send out strange smell, put the battery far away from
the fire immediately in order to avoid fire or burst.
Keep the battery dry; otherwise it can cause overheating, smoking or erosion of the battery.
Do not use or put the battery in the places of sunlit or high temperature; otherwise it can
cause leakage of electrolyte or overheating. Moreover, it can reduce the capacity and lifetime
of the battery.
Do not charge the battery continuously over 24 hours.
1.3.4 Notices of Charger Use
You can use Charger or connect it to PC for your phone with dateline.
Do use alternating current of 220V. Using other voltage can cause leakage of electricity, fire
or damage to your phone and the charger.
Do not short-circuit the charger; otherwise it can cause electric shock, smoking or damage to
the charger.
Do use the charger while the power line is damaged; otherwise it can cause fire or electric
shock.
Do wipe the socket and remove the dust in time
Do not place the container filled with water near the charger; otherwise it can cause
overheating, leakage of electricity and failure if water spills out.
If the charger accidentally contacts water or other liquid, you should immediately unplug the
charger so as to avoid overheating, fire, electric shock or failure of the charger.
Do not dismantle or refit the charger; otherwise it can cause electric shock, fire, damage to
the charger or injury to the person.
Do not use the charger in the place of high humidity, such as bathroom; otherwise it can
cause electric shock, fire or damage to the charger.
Do not touch the charger, power line and socket with wet hand; otherwise you can get an
electric shock.

6
Do not put heavy things on the power line or refit the wire; otherwise it can cause electric
shock or fire.
Do unplug the charger before you clean and maintain it.
Do Hold the charger if you unplug it. Do not pull the power line. It may damage the wire and
cause electric shock or fire.
1.3.5 Care and Maintenance
Your phone, battery and charger are not waterproof. Therefore, do not use them in the place
of high humidity, such as bathroom. They should also avoid shower.
Do clean your phone, battery and charger with the soft and dry cloth.
Do not wipe your phone with alcohol, diluents or benzene.
Do wipe the socket regularly. The dirty socket can result in bad contact, unsteady power and
no recharge.
1.3.6 General Notices
The Phone
Your phone must be used in the places where the temperature is below 40°C and above 5°C
and the humidity is below 85% and above 35%.
Do stay way from telephone, television, and radio and office automatic instrument while you
are using the mobile phone. It can prevent the interference of your phone and the
abovementioned instruments.
The Battery
Do put the battery in the ventilated place and keep it away from the sunlit place.
The battery is of limited lifetime and frequent charging can reduce its capacity. If the battery
cannot be charge, change a new approved battery.
Do not dispose of the battery as household waste. The battery must be disposed of in
accordance with the regulations.
The Charger
Do not charge the battery in the following places: the sunlit place, the place where the
temperature is below 40°C and above 5°C, the place of humility, dust or severe shake and the
place near the television, radio or other electrical appliances.
2 Getting Started
2.1 Overview and Introduction
2.1.1 Product Specification
Phone
Model
Dimension
7
Weight
Battery
Model
Nominal Voltage 3.7V
Limiting Voltage 4.2V
Rated Capacity
Standby Time
Talk Time
Model
Input
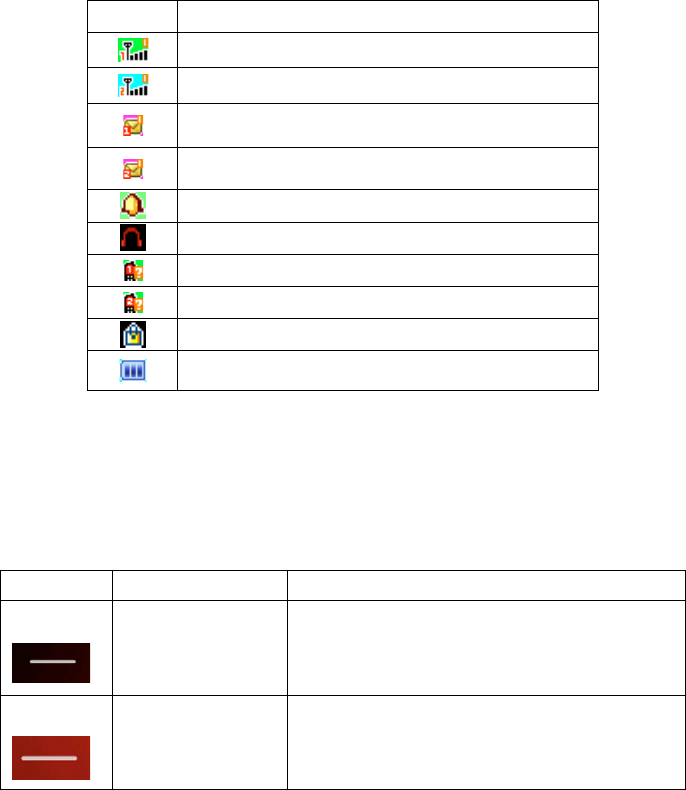
2.1.2 Icon
In idle mode the LCD may display the following icons.
图标
说明
SIM Card 1 Signal Strength
SIM Card 2 Signal Strength
SIM Card 1 New Messages
SIM Card 2 New Messages
Alarm clock is activated
Headset is inserted
SIM Card 1 is missed call
SIM Card 2 is missed call
The keypad is locked.
Battery Level
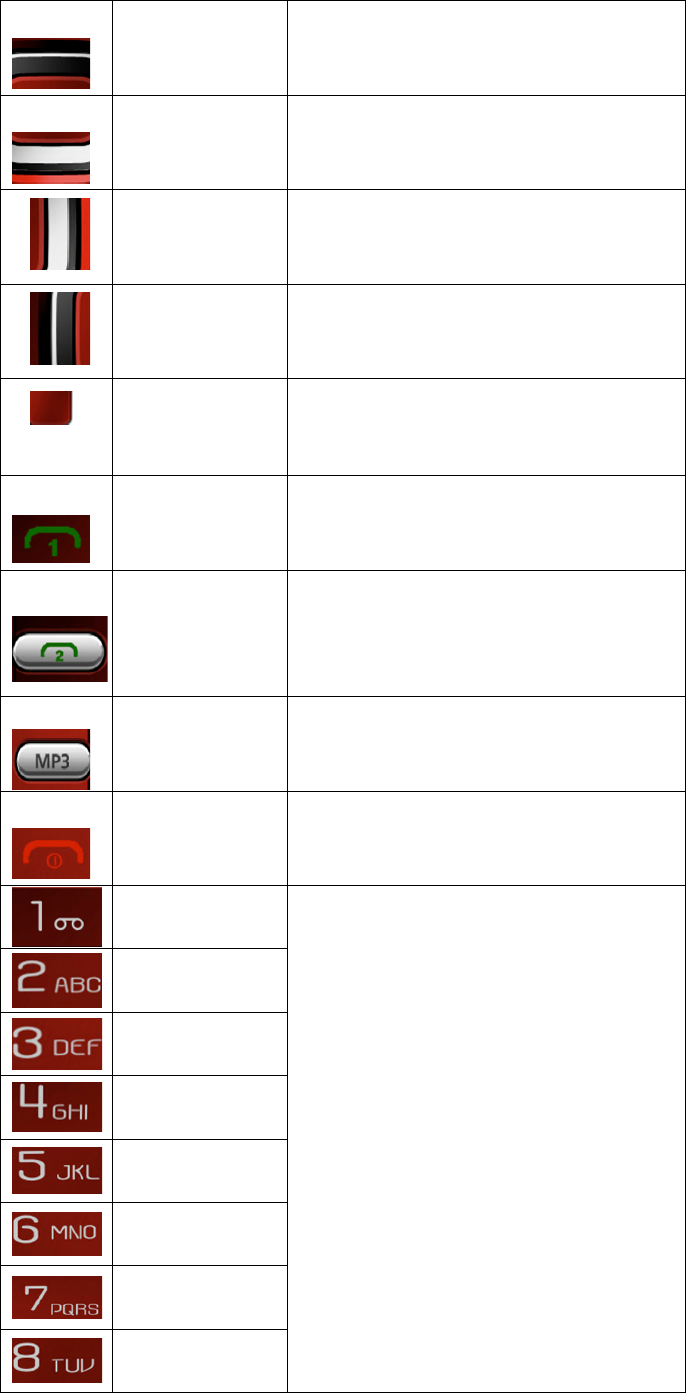
2.2 Keypad
Phone Sketch Map
Keypad’ s manual:
Icon
Name
Function
.
Left soft Key
Enter main menu
.
Right soft Key
Exit current menu, if on standby press thi
key you can enter phonebook
8
.
Up Key
Scroll to view names, phone numbers, SMS,
MMS etc, moves the cursor up when editing
text.
.
Down Key
Scroll to view names, phone numbers, SMS,
MMS etc, moves the cursor down when
editing text.
.
Right Key
Move the cursor to the left.
.
Left Key
Move the cursor to the right.
.
OK key
in menu press it is same function to left soft
key; in camera mode it is shutter; on
standby, Click button long flashlight can be
turned on or off.
.
Dial 1 key
in the call record interface or in the dial-up
interface that it is dial-up button of SIM
card 1.
.
Dial 2 key
In the call record interface or in the dial-up
interface that it is dial-up button of SIM
card 2.
.
MP3 key
MP3 shortcuts directly into the MP3 menu.
.
End key
to end a call or reject incoming calls; under
most circumstances pressing this key will
put the mobile phone into standby mode.
1 Key
Input digits and characters; Number 2-9 can
be set as the shortcut keys of quick dial.
2 Key
3 Key
4 Key
5 Key
6 Key
7 Key
8 Key

9
9 Key
0键
# key
Press it to shift the input methods.
*
Press it to unlock the keypad and input the
interpunction.
Notice: “Press some key” hereof indicates that press the key and then relax it; “Press and
hold some key” hereof indicates that press and hold the key for two or more seconds.
2.3 Battery
The initial state of battery charge of about 50% the electricity. The first three complete charge
please run out of power after the full use of this battery easy to achieve the best use of state.
Install and Remove the Battery
You should follow these steps to remove the battery: ① Open the battery back; ② Remove the
battery from back-end mobile phones.
You should follow these steps to install the battery: ① Insert the front-end of the battery into the
phone; ② Put the rear cover back.
Charge the Battery
Plug in the charger.
Insert the connector plug into the connector port on the bottom of your phone.
Then the Battery Level icon displays in top right corner of the screen will flicker regularly. If
your phone is power off, a charge indicator will display in the screen and indicates that the
battery is charging. If the battery is too low the charge indicator will display in the screen for
a moment.
When the icon is full and does not flicker, it indicates that the battery is completely charged.
If your phone is power off, the system will display “charging complete”. The charging
process usually spend 3-4 hours. In the process of charging your phone、battery and charger
will become hot that it is a normal phenomenon.
Notice:
The phone must be charged with the approved charger in the ventilated places where
temperature is below 40°C and above 5°C.The use of any other disapproved battery may
invalidate any warranty, and may be dangerous.
When your phone is automatically turned off or indicates the power will be exhausted, you
should charge the battery in time. If the battery is not exhausted, the charging time will be
shorter than the normal time.
The data of suspended time and talk time is provided by manufacturer is based on the ideal
working environment. But actual working time depends on the network environment,
working environment and usage method.
Do check if the battery has been well installed before charging. Do not remove the battery
10
while charging.
Remove the connection between charger and batter after the battery is completely charged.
If you do not remove the connection between charger and batter, the battery will be charged
in 5-8 hours. We suggest that you don’t do it, because it can shorten battery lifetime.
2.4 Network Connections
2.4.1 SIM Card
You must insert an effective SIM card into your phone before you use the phone. SIM card into
your digital GSM network key.
All the information of network connection and the initial call record is stored in the metal area
of SIM card. It also stores your phonebook and SMS. SIM card can be removed from your phone
and used in any mobile phone of GSM network. (The new phone will automatically read the SIM
card)
In order to avoid the SIM card information will be lost, you should put SIM card far away from
the place of electricity or magnetism and do not touch the metal area of SIM card. Once SIM card
is damaged, you cannot logging in GSM network.
Caution: Do turn off your phone before you remove SIM card. Do not insert or remove SIM
card when the phone is power on; otherwise SIM card can be damaged.
2.4.2 Insert and Remove the SIM Card
SIM card is usually placed in a card. You should take it out carefully before you insert it into your
phone.
Turn off your phone and remove the battery or external power.
Insert SIM card into the card slot as shown below
When you want to remove SIM card, turn off your phone and remove the battery. Then you
can take out SIM card.
2.4.3 Turn Your Phone On or Off
Press and hold Power Key to turn on your phone. Do the same thing to turn off your phone.
If you have not installed SIM card, your phone will request you to insert SIM card. The phone
check if the card can be used after the card has been installed. Then the screen will display the
following indications sequentially.
Input SIM1(2) PIN: was set up SIM password..
Input Phone lock code: was set up cell phone password.
Searching: phone will search until found a suitable network connection.
2.4.4 Phone unlock
In order to prevent the illegal use your mobile phone can be set up password-protected.
Elected to user this feature, you must enter a password so you can unlock the phone when you turn
on phone every time, and send or receive calls. You can remove passwords (see 3.9.5 of the
“Security setting”).In this case, the phone cannot prevent the illegal use of.
Enter the password phone, right soft key can clear input error. For example, if the phone
password is set to 1122, you must enter “1122”.
If you forget your phone password, you must contact your local retailer or authorized service
11
center, in order to unlock your phone password.
2.4.5 Unlock the SIM Card
In order to prevent the illegal use, SIM card PIN1 (personal identification number) code
encryption protection. Elected to user this feature, you must enter PIN 1 code to unlock SIM card
when you turn on phone every time, and send or receive calls. You can remove the S protection
IM card (See 3.9.5 Security setup). In this case, the SIM card cannot prevent the illegal use of.
By hanging up the phone key to open.
Enter PIN 1 code and then select Confirm. right soft key can clear input error. For example, if
the PIN 1 code is set to “1234”, you should enter “1 2 3 4”.
If three consecutive input error, your SIM card will be locked Network. Phone will be asked
whether the PUK 1 code. If you do not know PUK 1 code, do not enter on its own, SIM card
should be paid to deal with network operators(See 3.9.5 Security setup)
Notice: The network operator suppliers for you SIM card to set a standard of PIN1(4 to 8),
You as soon as change to your private password(See 3.9.5 Security setup)
2.4.6 Connect to the Network
If SIM card is success in unlock, phone will automatically search for an effective network. Once
contacted, the network provider’s name will appear on the screen.
Notice: If the screen displays “EMERGENCY”, means that you don’t in network service’s
coverage area. But you can still send an emergency call according to the signal strength.
2.4.7 Make Calls
When the network provider’s logo appears on the screen, you can call or answer the phone. The
icon be displayed in the top left corner of screen is the network signal strength.
The barrier can influence call quality. Therefore, you can mobile in small area so that
effectively call quality.
2.4.8 Make Domestic Calls
Press Number Keys to enter the phone number and then press dial-up button to begin to call. If
you want to change the number, press Right Soft Key to delete the number. The screen will show
animation while dial-up call. After answer each other, the screen will show call state. If you have
set extra tone , you will hear ring tone.( network support)
Press Power/End Key to hang up the call.
Dialing Code Phone Number Dial-up button
2.4.9 Dial Extension
Some fixed-line extensions cannot dial directly, you need to dial the switchboard, dial extension.
If you insert “P” between the switchboard number and the extension number while entering the
phone numbers, the phone will automatic dial-up extension. Press and hold “ * ” Key to input
“ P ”.
12
Dialing Code fixed-line telephone number P extension number Dial-up
button
For example, if you have a number 8880000 to use a dial-up voice-mail system, mail for the
6666 and 8888 for the password, well , you can dial in the following manner:
8880000 P 6666 P 8888
The first part of number is dial-up voice-mail system.
After telephone response, send 6666 to choice voice-mail.
Before number 8888 is sent out the second “P” will have a 5 seconds delay.
2.4.10 International telephone Calls
When you want to make international call, you may keep pressing “*” key till the screen
displays international long-distance telephone prefix symbol "+". his allows you to dial a number
from any country even unknowing prefix number (e.g. which in china is “86”)
With prefix number inputted,input your desired district number and complete phone number.
The country code in accordance with usual practice. For example, district number of Germany is
49,that of UK is 44,and of Sweden is 46, etc.
For example: to dial hotline for service, you should dial:
+86 21 114
+ County Code Phone Number Dial-up button
2.4.11 Dial the Numbers of Phonebook
Every call you dialed or received can be saved and listed in your phone. The recent dialed and
received calls are on the top of the list (See 3.5 Call Center). Every dialed call, received call or
missed call is listed in dialed calls group, received calls group or missed calls group respectively.
You can view all the call records. When the groups are full, the old records will be automatically
deleted. You should follow these steps to view the list.
Press Call Key to view Call history
All the numbers in the list can be directly dialed by pressing Call Key.
You can select ok to view detailed information of the chosen number. Enter Options and
select Save to Phonebook to save the chosen number in your phonebook.
2.4.12 Emergency Number
If you are in network service’s coverage area (check the upper left corner of the screen mobile
phone network signal strength), you can make an emergency number. If your network provider
fails to provide roaming service on such location, the screen will display “EMERGENCY” and
you can only make an emergency numbers. If you are in the network coverage area, you can call
emergency numbers without SIM car.
2.4.13 Answer Calls
If you set “press any key to answer a call”, then pressing any key will answer a call(but don’t

13
press the “right soft key” and “end key” ), Otherwise, you have to press Call Key or Left Soft
Key to answer call. If the headset has been inserted, you can press the headset button to answer the
call. If it's not convenient for you press button, can be set to auto answer. Then your phone, if the
headset has been inserted, in the ringing tone or vibration after 5 seconds, telephone automatically
connect
2.4.14 Call Records
Your phone can record the latest call record and the total call duration (See 3.5 Call Center).
2.4.15 Call Menu
Select H-Free to activate Hands-Free function or Options to enter Options Menu. The
operation is the same as that of function menu. Such call menu can only be seen during a call,
and call waiting, call holding, and multi-parties conference need network support, please contact
your network service provider.
Select Options Menu to perform the following operations.
Hold/Retrieve single call:
Hold a current call or resume a held call.
End single call:
End a current call.
New Call:
Call new call(s).
Phonebook:
Allow you to search a number in your phone book.
Message Center:
Edit and send a message.
Sound recorder:
For audio record, long press “volume up key” to activate recorder function during a call.
Mute:
Not to send (send) local voice.
DTMF:
Press “left soft key” to activate or deactivate dual
3 Function Menus
3.1 Use of Function Menus
Scroll Searching and Selection Function
Press the left soft key to enter Function Menus in idle mode.
In all the main menu or submenu level, the left soft key to choose functions.
Exit Menus
Generally, you can press Right Soft Key to exit from some menu item. Press Power/End Key to
14
return to idle mode.
3.2 File Manager
Save user documents, into the Folder Options
Open: View the contents.
Format: Format the folder
3.3 Phonebook
Phonebook allows you to store some important people‘s name, phone number, home number,
company name, etc. From the main menu to select the phonebook or press right soft key in idle
mode. Your phone can store 300 phone numbers.
In the phonebook menu, Press Options to perform following operations.
Select:
To add a new directory to telephone book, we can choose to storage in SIM card or the
phone.
Caller Groups:
The mobile phone offer you 20 incoming call groups. You can personalized set name
changing, ring type, Incoming call pictures for every group.
Phonebook Settings: The settings of Phonebook.
Preferred Storage: Select priority storage location. Phone or SIM 1/SIM 2.
My Number: You can edit record of phonebook and send it
Extra numbers: You can edit owner number of SIM1/SIM2.
Memory Status: SIM card 1/SIM card 2 and phone phonebook store information.
Copy contacts: To choose from phone to the SIM card or SIM card to the phone to copy
all records of SIM cards and phones.
Move contacts: To choose from phone to the SIM card or SIM card to the phone to copy
all records of SIM cards and phones.
Delete all contacts: Delete Choose from the phone /from SIM 1 /from SIM 2
3.4 Fun & Games
3.4.1Games
UFO Control the fighter to shoot UFO and prevent being attacked by them.
3.5 Call Center
3.5.1 Call history
3.5.1.1 Missed Calls: Select OK to view the list of missed calls.
3.5.1.2 Dialed Calls: Select OK to view the list of dialed calls.
3.5.1.3Received Calls: Select OK to view the list of received calls.
Select OK to view the information of the chosen entry, such as date, duration, number and dial
times. Select Options to perform following operations on the chosen entry.
Call: Dial this number.
15
Send Text message: Send message to the number.
Send Multimedia message:Send MMS to the number.
Save to phonebook: Save this number to the SIM card or mobile phone.
Edit before call: Edit this number and Select Options to call or save to Phonebook.
Delete: Delete this record.
3.5.1.4 Delete Call Logs
Missed Calls
Dialed Calls
Received Calls
All Calls
3.5.2 Call Settings
3.5.2.1 Call settings
Call waiting: To open or close the call waiting feature. Select status inquiry to check the
current status of call waiting.
Call Divert:
Divert All Voice Calls:With this option on, any incoming call will be forwarded to the
number you set.
Divert If Unreachable:With this option on, the incoming call will, when you are
unreachable, be forwarded to the number you set.
Divert If No Answer:With this option on, the incoming call will, when there is no reply,
be forwarded to the number you set。
Divert If Busy:With this option on, the incoming call will, when you are on the phone
with other person, be forwarded to the number you set.
Divert All Date Calls:The incoming call will, if it is data call, be forwarded
Cancel All Diverts:Cancel all call forward.
Call barring:
Outgoing Calls:Bar any outgoing call or international call or international exclusive of
national call.
Incoming Calls:Bar any incoming or roaming call.
Cancel All:Cancel all barred call settings(password required) to allow normal calls.
Change Barring password:Change password.
This function requires support from your network operator.
Line switching: Switch to line 1 or 2 lines for use.
3.5.2 Advance settings
3.5.2.1 Auto redial
With this option on, this phone will automatically redial if any call fails.
3.5.2.2 IP dial
You can IP dialing after turn on this function
3.5.2.3 Call time reminder
To set the call time reminder.
3.5.2.3 Answer mode
To set the Answer mode.
16
3.6 Messages
If your network support message service and you have applied to network service providers for
this business, you can arbitrarily send and receive English message and multimedia information by
the message service center.
3.6.1 Write Message
3.6.1.1 Text Message
Select text message and write a new message (See 4. Input Method)
Send to: End write message and start the next step.
Input method: Change the input method when editing message.
Advanced: Insert the phone number or Insert the name of your phone memory in the
message
Save to Drafts: Save the current message
Notice: In some city or region the SMS center can not send or receive messages of over 70
Chinese characters or 160 English letters.
3.6.1.2 Multimedia Message
Write a new MMS. You have to Add picture, Add sound, Add video, Add subject etc.
3.6.2 Inbox
Enter Inbox you can view SIM 1/SIM 2 Message. The screen will show the date of receiving
the news and the number or names when you view Message in the inbox. You can use Navigation
Key or to select message. Select OK to view the chosen message.
According to the options do the following:
View: View the Message.
Reply by SMS: Send a SMS to current Message sender.
Reply by MMS : Sender of current MMS sending a MMS.
Call sender: dial the number.
Forward: Forward the current message.
Delete: Delete the current message.
Delete All: Delete all the messages from Inbox.
3.6.3 Drafts
Enter Drafts you can view have been save message. You select OK to view the chosen message.
Select Options to perform following operations on the chosen message.
View: View the Message.
Send: Send the current message from SIM1/SIM2.
Edit: Edit the current message.
Delete: Delete the current message.
Delete All: Delete all have been send SMS.
3.6.4 Outbox
Enter Outbox you can view the message is not sent successfully. You select OK to view the
17
chosen message. Select Options to perform following operations on the chosen message.
View: View the Message.
Resend: Resend the current message from SIM1/SIM2.
Edit: Edit the current message.
Delete: Delete the current message.
Delete All: Delete all have been send SMS.
3.6.5 Sent messages
Enter Drafts you can view have been send message. You select OK to view the chosen message.
Select Options to perform following operations on the chosen message.
View: View the Message.
Forward: Forward the current message from SIM1/SIM2.
Delete: Delete the current message.
Delete All: Delete all have been send SMS.
3.6.6 Delete messages
Delete all the message in the Inbox, Drafts, Outbox, Sent messages or All messages.
3.6.7 Broadcast Messages
Receive Mode: Enable and disable.
Channel Settings:Select a channel for receiving message send by cell broadcast.
Languages:Select a language used in receiving message.
Read Message:Read a message received.
Notice: Voice Mail and Cell Broadcast service depend on the support of the network
service operators. Contact them about detailed information.
3.6.8 Message Settings
3.6.8.1 Text message
You have to make some necessary settings before you use the message function. Enter SMS
Settings and perform the following settings.
Profile Settings: Choose an appropriate mode for phone text message. Enter different modes
to set responding names of files, message center number, message expiration and format of
massage to be sent.
Voicemail server: You rcecive voice mail will be stored in the network. If you want listen to
the message, you must call the voice mail number.
Common Settings: perform On/Off settings for Delivery report and replay path.
Memory Status: Browse storing conditions of messages stored in SIM card or in the phone.
Preferred Storage: Save the message to your phone memory or T-flash card.
3.6.8.2 multimedia message
Where relevant parameters of sending and receiving concerning multimedia can be set.
18
3.7 Multimedia
3.7.1 Camera
You mobile phone has camera function.
Select Options to perform following operations.
Photos: Enter Album.
Camera Settings: Setting the parameters.
Image Settings: Setting Image size and quality.
White Balance: Setting the white balance.
Scene mode: Select scene mode
Effect Settings: Select the effect of taking pictures.
Storage: Save the files to your phone memory or T-flash card.
Reset Default: Reset all the settings to default.
Notice: In the viewfinder camera interface pressed the corresponding number key on the
corresponding image set.
3.7.2 Image Viewer
Photos can be related to the operation, such as: view、browse style、send、rename, etc.
3.7.3 Video recorder
Your phone has video recording function. Select animation recorder icon and press <ok> or
Click the icon to enter animation recorder interface.In animation recording interface, press the
Central Key or animation recording key to start recording. Press the key once again to pause; or
Click corresponding icon to start/pause recording; Press Right Soft Key or press corresponding
icon to stop recording. Meanwhile, in animation recording interface, regulate exposure
compensation and foci by direction keys or Click corresponding icons.Press <Options> to enter
submenus and perform the following operations:
CamCorder Settings: Settings for animation recorder.
video settings: Quality video and other related parameters set.
White Balance: Setting the white balance.
Effect settings: Setting video effect.
Storage: Choose to store phone or memory card.
Restore default: All the settings to their default values.
Notice: In the viewfinder camera interface pressed the corresponding number key on the
corresponding image set.
3.7.4 Video player
Your phone has Video playing function which supports 3GP formats. Inserting the
memory card , connecting the phone and computer with USB and copying the AVI format to
memory card menu list to enter video player; Select an animation to enter Video playing interface
where you can play, transmit, rename, delete, delete all, ordering and store animation.
3.7.5 Audio player
Your phone has music player function which supports the following file formats: MIDI,
WAV, MP3, AMR and AAC.Inserting the memory card , connecting the phone and computer with
USB and copying the AVI format to memory card menu list to enter MP3 Music Player
interface.The functions of each key are as follows:
Play:Play current song.
Details:View the details of the song.
19
Refresh List:Update play list.
Settings:
Pre. Play List: Select from phone or memory card with left/right key.
List Auto Gen: Automatically produce play list.
Repeat:Activate the feature to repeat song playing. Select repeating songs with
left/right keys.
Shuffle:Activate the feature to repeat song playing randomly. Open/close the feature
with left/right key.
Background Play: Activate the feature, and the music will not stop along with exit of
menu. Open/close the feature with left/right keys.
3.7.6 Sound Recorder
Press “OK” to enter the submenu to choose the audio record. To choose any record,
press “Options” to enter the submenu to do the following operations: Record, Play, Append,
Rename, Delete, Delete all, Setting, and forward
New Record: Create a new record.
Play: Play the record.
Append: Add a new voice to the chosen record.
Rename: Rename the current record.
Delete: Delete the current record.
Delete all files: Delete all records.
Settings: Set the format of the voice file.
Send: Transmitting the chosen record via BlueTooth .
3.7.7 FM radio
Press“OK”to enter FM radio player interface, you select right soft key can exit FM. If you
select left soft key, it will show below menu:
Channel list: Save search channels, and can be edited.
Manual input: Manually enter the frequency.
Auto search: Auto search and save channel list.
Settings: Press the left soft key to set the background play and loudspeaker.
Note: Listen to the radio plug in your headphones before
3.8 Organizer
3.8.1 Calendar
Enter submenu of tool box, select calendar and press “OK” to display the calendar. Press
Up,Down,Left,Right keys to set date, and press “Options” to enter submenu before proceeding
with the following operations:
View: Look up the current routing.
View all: Look up All current routing.
Add event:Create a new schedule and set it as a Reminder, Meeting, Course, Date, Call
or Anniversary as needed. The editable items are date, time, remarks and alarm reminder
added. You may set the reminder type as one of the five including once, every day
self-definition, weekly, monthly by pressing the Left and Right keys.
- Once:Remind you this schedule once
20
- Everyday:Remind you this schedule everyday at specified time
- Days:Set when the alarm will go off in a week.
- Weekly:Remind you weekly at set time.
- Monthly:Remind you monthly at set time.
Delete event: Delete the current routing.
Jump To Date:Set the current date of the schedule as the specified date.
Go to Tody:Jump the date to today.
3.8.2 Tasks
This phone is capable of storing 50 pieces of memo messages. Select Memo in the submenu
to browse, add, edit and delete memo message.
3.8.3 Alarm
This phone allows you set five alarms. Select one to edit and set it. Under the alarm setting
option menu you can set alarm on or off, alarm time, ring type, ring setting and lingering time,
press left or right key to select the ring type as once, everyday or self-definition; with
self-definition option on, you can set your alarm by pressing the left and right keys to go off in any
day from Mon to Sun.
3.8.4 World clock
Cities around the world to see the local time
3.9 Settings
3.9.1 Dual SIM switch
Manually selected: Select the network manually before Power on
Automatically by SIM cards: Automatic search network
3.9.2 Dual SIM settings
Dual SIM open: Open to be dual-card dual-function
Only SIM 1 open: Only open SIM 1
Only SIM 2 open: Only open SIM 2
3.9.3 Phone settings:
Time and date
Set Home City: choose a city for the time settings of the phone. Choose City through
the UP and DOWN keys.
Set Time/Date: set the current time and date. Choose to open or close the
daylight-saving time through left and right keys.
Set Format: set the display format of time and date. Set the formats of the time and date
through left and right keys.
Schedule Power On/Off
You can set four different time intervals to edit and define the automatic switch on/off of the
phone.
Language
Your phone can support languages: English,etc.
Preferred Input Methods
21
You can preset the word-entering methods for text.
Display
Wallpaper: Select interface standby wallpaper
Screen Saver: The main standby screen interface selection screen image or animation,
and set the wait time
Show date and time: Choose to open or close the idle interface shows the current time.
Shortcuts
You can setting Shortcuts
Flight mode
You can switching mode to Normal mode or Flight mode.
Misc. settings
Settings the LCD brightness and time delay.
3.9.4 Network setup
Network setup
New search: To automatic search and connect to the first available network.
Select network: Research the network which belong SIM card.
Selection mode: Select of manual or automatic network selection
3.9.5 Security Setup
SIM lock
You may set for your phone security options in this menu to avoid unauthorized use of phone
of SIM card, and PIN code may serve the purpose.
If currently the PIN code is disenabled, select Enable to actuate PIN code protection, and the
PIN code will be demanded in the next power-on, if this code is currently enabled, select
Disenable to cancel PIN code , or Change PIN number to set a new one, please follow the prompt
to input old PIN code, new and repeat new.
Notice: Upon three incorrect inputs of PIN code in a row , the SIM card will be locked
up, by then, you need to input PUK code to unlock the SIM card, both codes might have
been provided along with the SIM card to you, if not, please contact your network operator.
The PIN code default is normally 1234, please change it into your own code.
Phone Security
Phone Security is provided to prevent your phone from unauthorized use.
Phone lock: Select Phone lock to enable the protection by phone password which will
be demanded in the next power-on, press the selection again to disenable the protection.
Change Password: Change password including Phone lock and private lock codes.
Notice: The password default of phone lock is1234, please change it into your own password.
Auto Keypad Lock
Set idle time of keyboard, when set as desired, if the phone is not used in the specified time,
the keyboard will be automatically locked up.
3.9.6 Connectivity
Bluetooth
◆ Power: Activate Bluetooth.
22
◆ Inquiry Audio Device: Inquiry Bluetooth headset. (See Bluetooth headset user’s
manual.)
◆ My Device: You can read list of all linked Bluetooth.
◆ Active Device: You can see the linking Bluetooth.
◆ Settings: Set Bluetooth.
◆ About: Service List.
Data account
Select one account and enter it.
1. Account Name: the name of the account
2. APN: Enter APN.
3. User Name: the name of dial-up server
4. Password: the password of dial-up server
5. Auth. Type:Select the identified manner of encryption.
3.9.7 Anti Theft Setting
You can turn anti-theft tracking,the Password is 1122.
3.9.8 Restore factory settings.
The password default of phone lock is 1122.
3.10 User Profiles
Your phone provides 8 kind of phone mode for you to select or edit. They are General, Silent
Meeting, Outdoor, Indoor, Headset and My style.
General
Enter Normal Mode and select Activate or Customize.
Activate: Activate Normal Mode.
Customize: Edit the settings of Normal Mode. The editable settings include ringtone, volume,
ringer, reminder tone and answer mode.
Silent
The operations are the same as Normal Mode.
Meeting
The operations are the same as Normal Mode.
Outdoor
The operations are the same as Normal Mode.
Lowpower
When lowpower profile is actived, these functions will be set and can not be modified:
keypad light will be shut off; all these tones such as power on, Power off key pad and extra
tone will be silent; ring volume level will be set to 2; ring type will be ring tone; ring style
will be single and LCD wait time will be 5 seconds
Headset
When you insert headset, your phone will automatically activate Headset Mode.
Indoor
The operations are the same as Normal Mode.
My style
The operations are the same as Normal Mode.

23
3.11 Extra
3.11.1 Calculator
Enter Calculator and it can do some simple calculation. Enter the calculated number through
keypad. Press Right Soft Key to cancel the result or exit from Calculator. Press Left Soft Key to
output the result.
3.12 Services
3.12.1 Internet service
Your phone supports services subject to WAP. You can access the services provided by
network service operator. You can acquire the information about news, weather forecast, flight,
etc.
Notice: GPRS service needs the support of network. You can enjoy it in the coverage areas
of GPRS network.
Homepage: Access the Home page. Home page is your preset website of WAP. If you do not
set the Home Page, your phone will access the default website.
Bookmarks: View the bookmarks. You can select one of them to access the website.
Input address: This function for the input you want to connect the web site
Recent Pages: the option will record the web addresses you viewed before.
Settings: Some settings of surfing the Internet
1. Select profile: Select SIM 1 or SIM 2
2. Edit account: Select the service groups and some settings of browsing websites.
2. Browser options: Setting parameters of visit website
3. Service message settings: Open or closed services news
4. Clear cache: Delete the cache.
5. Clear cookies: Clear personal data.
3.13 Shortcuts
You can setting shortcuts.
4 Input Method
General Outline
This mobile phone provides many input methods. Character entry functions permitted by this
mobile phone are:
- Inputting and editing of short messages
- Inputting and editing of names in the phonebook
- Looking up the phone entry by name
- - ……

24
Screen Key values
The keyboard values are as follows:
Generally the Left soft Key indicates confirmation; the right soft key is to return or
eliminate.
Navigation keys (up/down and left/right keys): Generally used to move the cursor or
candidate characters for inputting.
a/A key: to switch between different input methods.
Number keys from 2 to 9: in the English input modes, indicate the letters on the
corresponding key
5 T-flash Card and USB
You can purchase a compatible T-flash card and use it as extra storage space to save the
memory on your phone.
5.1 Insert and Remove T-flash Card
The card slot is on the right-upper of the battery. Insert the card in the slot and ensure that the
contact area on the card is facing up. Press the card to release it from the slot. Do not pull the card
directly; otherwise the card slot and T-flash card can be permanently damaged.
Notice: Your phone supports plug and play. However, you’d better turn off your phone to
insert or remove T-flash card when your phone is on. It can ensure the normal usage of the
information. Generally speaking, you’d better not insert or remove T-flash card.
5.2 Use of T-flash Card
T-flash, which is one kind of phone storages, is set as the default storage. You do not make any
setting and use it directly.
When you first insert T-flash card, you have to set it as the default storage of Music Player,
Media Player, Camera, Voice Recorder, etc. Then you can use it to store or read the
information.
When you phone is connected to the computer with USB line, you can copy the data between
your phone and the computer. Your T-flash is used as USB flash drives.
(MP3 is discovered by Audio player just when it is saved in My Music folder;
E-book is discovered just when it is saved in E-book folder;
Video is discovered by Video player just when it is saved in Video folder;
Picture is discovered by Album just when it is saved in Photos folder.)
5.3 USB
You can connect the USB to phone or PC with dateline.
usb portable drive

25
Power off: You can copy the data between your phone and the computer. (See the usb
portable drive user’s manual)
Power on: Select Pocket and copy date from PC.
Webcam
Power on: Select webcam, you can use QQ, MSN etc.
6 Troubleshooting
If your phone does not work normally, read the following problems and solutions for reference. If
you still can't solve the problems, consult the seller or service centre.
Problems
Reasons
Solutions
Bad reception
Use the phone in bad reception
areas such as near the high
buildings or in the basement
where radio wave can not be
transmitted effectively.
Try to avoid it.
Use the phone in busy-line
period.
Try to avoid it.
It has something to do with the
distance of the base stations
built by the network service
provider.
Request the network service provider to
provide the map of service areas.
Echo or noise
Bad trunk line of network
Hang up the phone and redial the number
or change the line.
The line of some area is bad.
Standby time
becomes short.
Standby time is related to the
setting of network.
Turn off the phone temporarily in the
areas of poor signal.
The battery needs to be
changed.
Change for a new battery.
In the poor signal areas, the
phone has to consume more
power to search the base
station. It shortens the standby
time.
Move to the areas of good signal or turn
off the phone temporarily.
The phone can
not be turned on.
The battery is out of power.
Check the battery level or charge the
battery.
SIM Card Error
SIM card is damaged.
Contact your network service provider.
SIM card is not well inserted.
Ensure SIM card is well inserted.
There is filth on the metal area
of SIM card.
Wipe the metal area with a clean cloth.
The phone can
SIM card is invalid.
Contact your network service provider.

26
not connect to
network.
Out of GSM service areas
Consult the network service provider
about the service areas.
Poor signal
Move to the areas of good signal.
The phone can
not make calls.
Call Barring is activated.
Inactivate Call Barring.
Fixed Dial is activated.
Inactivate Fixed Dial.
Incorrect PIN
Code
Enter an incorrect PIN code 3
times in a row
Contact your network service provider.
The phone can
not be charged.
The battery or charger is
damaged.
Change for a new battery or charger.
The temperature of charging
environment is below -10°C or
above 55°C.
Change the charging environment.
Bad contact
Check the connection of the connector.
New entries can
not be added to
the phonebook.
The phonebook is full.
Delete some entries of the phonebook.
Some functions
can not be set.
The network service provider
does not provide this service or
you do not apply for this
service.
Contact your network service provider.

FCC RF EXPOSURE INFORMATION:
WARNING!! Read this information before using your phone
In August 1986 the Federal Communications Commission (FCC) of the United States with its
action in Report and Outer FCC 96-326 adopted an updated safety standard for human exposure
to radio frequency (RF) electromagnetic energy emitted by FCC regulated transmitters. Those
guidelines are consistent with the safety standard previously set by both U.S. and international
standards bodies. The design of this phone complies with the FCC guidelines and these
international standards. Use only the supplied or an approved antenna. Unauthorized antennas
modifications, or attachments could impair call quality, damage the phone, or result in violation
of FCC regulations. Do not use the phone with a damaged antenna. If a damaged antenna comes
into contact with the skin, a minor burn may result. Please contact your local dealer for
replacement antenna.
BODY-WORN OPERATION:
This device was tested for typical body-worn operations with the back of the phone kept 1.5cm
from the body. To comply with FCC RF exposure requirements, a minimum separation distance
of 1.5cm must be maintained between the user's body and the back of the phone, including the
antenna, whether extended or retracted. Third-party belt-clips, holsters and similar accessories
containing metallic components shall not be used. Body-worn accessories
that cannot maintain 1.5cm separation distance between the user’s body and the back of the
phone, and have not been tested for typical body-worn operations may not comply with FCC RF
exposure limits and should be avoided.
For more information about RF exposure, please visit the FCC website at www.fcc.gov
Your wireless handheld portable telephone is a low power radio transmitter and receiver. When
it is ON, it receives and also sends out radio frequency (RF) signals. In August, 1996, the Federal
Communications Commissions (FCC) adopted RF exposure guidelines with safety levels for
hand-held wireless phones. Those guidelines are consistent with the safety standards previously
set by both U.S. and international standards bodies:
<ANSIC95.1> (1992) / <NCRP Report 86> (1986) / <ICIMIRP> (1996)
Those standards were based on comprehensive and periodic evaluations of the relevant
scientific literature. For example, over 120 scientists, engineers, and physicians from universities,
government health agencies, and industry reviewed the available body of research to develop
the ANSI Standard (C95.1). Nevertheless, we recommend that you use a hands-free kit with
your phone (such as an earpiece or headset) to avoid potential exposure to RF energy. The
design of your phone complies with the FCC guidelines (and those standards).
Use only the supplied or an approved replacement antenna. Unauthorized antennas,
modifications, or attachments could damage the phone and may violate FCC regulations.
NORMAL POSITION:
Hold the phone as you would any other telephone with the antenna pointed up and over your
shoulder.
TIPS ON EFFICIENT OPERATION:
For your phone to operate most efficiently:
• Extend your antenna fully.
• Do not touch the antenna unnecessarily when the phone is in use. Contact with the antenna
affects call quality and may cause the phone to operate at a higher power level than otherwise
needed.
Vehicle mounted external antenna (Optional, if available))
A minimum separation distance of 7.9 inches (20cm) must be maintained between the user / by
stander and the vehicle mounted external antenna to satisfy FCC RF exposure requirements.
RF
Exposure Information:
FCC RF Exposure requirements: The highest SAR value reported under this standard
during product certification for use next to the body is 0.287
W
/
kg
, next to the head
is 0.243
W/kg.
This transmitter must not be collocated or operating in conjunction with
any other antenna or transmitter.
This device complies with part 15 of the FCC rules. Operation is subject to the following
two conditions:
(1) this device may not cause harmful interference, and
(2) this device must accept any interference received, including interference that may
cause undesired operation.
NOTE: The manufacturer is not responsible for any radio or TV interference caused by
unauthorized modifications to this equipment. Such modifications could void the user’s
authority to operate the equipment.
NOTE: This equipment has been tested and found to comply with the limits for a Class B
digital device, pursuant to part 15 of the FCC Rules. These limits are designed to provide
reasonable protection against harmful interference in a residential installation. This
equipment generates uses and can radiate radio frequency energy and, if not installed and
used in accordance with the instructions, may cause harmful interference to radio
communications. However, there is no guarantee that interference will not occur in a
particular installation. If this equipment does cause harmful interference to radio or
television reception, which can be determined by turning the equipment off and on, the
user is encouraged to try to correct the interference by one or more of the following
measures:
- Reorient or relocate the receiving antenna.
- Increase the separation between the equipment and receiver.
-Connect the equipment into an outlet on a circuit different from that to which the receiver
is connected.
-Consult the dealer or an experienced radio/TV technician for help
Changes or modifications not expressly approved by the party responsible for compliance
could void the user’s authority to operate the equipment.