E Core Technology LF1500 OHANA MAUI User Manual
ECORE TECHNOLOGY COMPANY LIMITED OHANA MAUI
User Manual

2
About Ohana
Thanks for purchasing the bem wireless Maui Speaker! This speaker is Bluetooth
enabled (40ft), capable of broadcasting at 5.8 GHZ (120ft) (great for connecting
multiple units in the Ohana Collection), and easy to use. But to make sure you get
the best possible results from your new Maui speaker, please thoroughly read and
carefully follow all instructions in this User Guide. This short guide explains every-
thing you need to know to start using your speaker.
Please keep this User Guide in a convenient location for future reference and visit
bemwireless.com for additional information.

3
Table of Contents
7 Product Overview
9 Getting Started
11 Operation Details
17 Troubleshooting
18 Maintenance
19 TechnicalSpecications
20 Stay in Touch
21 FCC Statement
23 Safety Instructions
25 Warranty

4
Product Overview
The bem wireless Maui Speaker is the perfect combination of great sound, ambient
lighting, and easy connectivity. Simply pair your Maui with your Bluetooth enabled
device and enjoy your favorite music while the LED candle light glows.
Package Contents
Your Maui should include:
Maui Speaker x 1
Auxiliary (AUX) Cable x 1
USB/AC Power Adaptor x 1
Micro USB Charging Cable x 1
User Guide x 1
If any items are missing or damaged, please call bem wireless customer support at
1-855-839-8616 or email admin@bemwireless.com to arrange for replacements.
Compatibility
All devices enabled with Bluetooth technology or AUX connectivity, including
iPhones, iPads, iPods, smartphones, laptops, tablets and more.

5
Meet Your New Maui Speaker
1. Mode Button
2. Volume Down Button
3. Play/Pause Button
4. Volume Up Button
5. Bluetooth Indicator LED
6. AUX IN Port
7. Power switch 5.8/Off/BT
8. Micro USB Charging Port
9. Charging/Battery Indicator LED
M
12345
6789

6
Getting Started
We know you’re excited to start using your new Maui Speaker. And you should be.
Luckily, these three easy steps will get you up and running quickly.
Step 1: Charge It
Connect your Maui to a wall outlet using the USB/AC adaptor and the micro USB
charging cable. The Charging/Battery Indicator LED will light red while charging
and will turn off when the speaker is fully charged. Please allow approximately 3-4
hours to fully charge. You may use your Maui while it’s charging.
Step 2: Connect it
Pair Maui with your smartphone or other Bluetooth enabled device.
1. Slide the POWER switch to the “Bluetooth” position (“BT”) to power on Maui.
A voice alert will sound (“Power On”), the blue Bluetooth indicator LED will
ashrapidly,andanothervoicealert(“Pairing”)willsound.
2. Activate Bluetooth on your smartphone or other Bluetooth enabled device
(refer to your device user guide for details). Your smartphone/device will now
begin searching for Bluetooth devices.

7
3. Whenyoursmartphone/devicenishessearching,select“MAUI”fromthe
device list. When connected, a voice alert (“Pairing completed”) will sound to
conrmasuccessfulconnection.
After initial pairing, “Maui” will appear in your device list and a connection will
automatically be established if the speaker is turned on and Bluetooth is already
activatedonyourdevice.Avoicealert(“Pairingcompleted”)willsoundtoconrm
a successful connection
NOTE: When you end the Bluetooth connection from your device, a voice alert
(“Disconnected”)willsoundandtheblueBluetoothindicatorLEDwillashrapidly
to indicate that the connection has been lost.
Auxiliary
Your Maui can also connect to audio devices that are not Bluetooth enabled.
Connect your device to your Maui using an auxiliary (AUX) cable (included) by
inserting one end of the plug into the AUX IN port on the base of the Maui and the
otherendintoyourdeviceasspecied.
Getting Started (con’t)

8
Step 3: Play it
Useyourdevicetondthemusicyoulove.Hitplayonyourdevice(youcanplay/
pause on the Maui after initially playing from your device). Enjoy the music and
candlelight!
The below instructions will help you get the most use out of your Maui Speaker.
Charge
Connect your Maui to a wall outlet using the USB/AC adaptor and the micro USB
charging cable. The Charging/Battery Indicator LED will light red while charging
and will turn off when the speaker is fully charged. Please allow approximately 3-4
hours to fully charge. You may also use your Maui while it’s charging.
NOTE: If the battery dies, your Maui must charge for 10 minutes before being
restarted to prolong battery life.
Operation Details

9
Operation Details (con’t)
Power On/Off
Slide the power switch to the “Bluetooth” position (“BT”) to power on your Maui.
Avoicealertwillsound(“PowerOn”),theblueBluetoothindicatorLEDwillash
rapidly, and another voice alert (“Pairing”) will sound.
Slide the power switch to the center position (“OFF”) to power off your Maui.
No chime will sound when the unit is turned off, but the Bluetooth LED will stop
glowing.
Connectivity Options
Maui can connect to your Bluetooth-enabled device of choice. If you own the
Ohana Kona speaker (sold separately), Maui can also connect to other speakers
and accessories in the Ohana Collection via 5.8 GHZ technology. To connect your
device to your new Maui speaker and, if desired, to connect additional Ohana com-
ponents, follow the simple steps outlined below:

10
Bluetooth (Maui only 40ft range)
1. Slide the POWER switch to the “Bluetooth” position (“BT”) to power on the
speaker. A voice alert will sound (“Power On”), the blue Bluetooth indicator
LEDwillashrapidly,andanothervoicealert(“Pairing”)willsound.
2. Activate Bluetooth on your smartphone or other Bluetooth enabled device
(refer to your device user guide for details). Your smartphone/device will now
begin searching for Bluetooth devices.
3. Whenyoursmartphone/devicenishessearching,select“MAUI”fromthe
device list. When connected, the Bluetooth indicator light will remain lit and a
voicealert(“Pairingcompleted”)willsoundtoconrmasuccessfulconnection.
After initial pairing, “MAUI” will appear in your device list and a connection will
automatically be established if the speaker is turned on and Bluetooth is already
activatedonyourdevice.Avoicealert(“Pairingcompleted”)willsoundtoconrm
a successful connection
NOTE: When you end the Bluetooth connection from your device, a voice alert
(“Disconnected”)willsoundandtheblueBluetoothindicatorLEDwillashrapidly
to indicate that the connection has been lost.

11
Auxiliary
1. Slide the POWER switch to the “Bluetooth” position (“BT”) to power on the
speaker. A voice alert will sound (“Power On”), the blue Bluetooth indicator
LEDwillashrapidly,andanothervoicealert(“Pairing”)willsound.
2. Connect your device to your Maui using an auxiliary (AUX) cable (included) by
inserting one end of the plug into the AUX IN port on the base of the Maui and
theotherendintoyourdeviceasspecied.
3. After connecting, play and control your music from your device as you normal-
ly would.
5.8 GHZ (Multiple Ohana units 120ft range)
1. Slide the POWER switch to “Bluetooth” on any Maui or Kona Speaker (sold
separately) and connect your bluetooth enabled device. Refer to the Kona
user guide for details.
2. Connect additional Maui speakers by sliding the POWER switch to the “5.8
GHZ” position (“5.8G”). A voice alert will sound (“Power On”) and the blue
Bluetooth indicator LED will glow.
Operation Details (con’t)

12
Operation Details (con’t)
3. Now all speakers powered on will play the same music from your bluetooth
enabled device.
Music Controls
1. On your Maui: Press the PLAY/PAUSE button to play/pause your music after
initially playing from your device.
2. On your device: control your music as you normally would.
Volume Controls
1. On your Maui: Repeatedly press the VOLUME UP button to increase the
volume incrementally or hold the VOLUME UP button to steadily increase the
volume. Repeatedly press the VOLUME DOWN button to decrease the volume
incrementally or hold the VOLUME DOWN button to steadily decrease the
volume.
2. On your device: Adjust the volume of your music as you normally would.
NOTE: When maximum volume is reached, the VOLUME UP button will no longer
increase the volume. If the VOLUME DOWN button is pressed often enough or held
long enough, the speaker will stop producing sound until the volume is increased
again, but the speaker will remain on and the music will continue to play.

13
Light Controls
Your music is great on its own, but a little mood lighting never hurts. That’s why
Maui has lighting built right in. There are two modes for the Maui Speaker. The sim-
ple steps outlined below will walk you through switching between the two modes:
1. Power on your Maui Speaker
2. Turn the LED candle on by pressing and holding the MODE button
for 3 seconds.
3. Turn the LED candle off by pressing and holding the MODE button
for 3 seconds.
4. Whenthecandlerstpowerson,itwillglowsteadily.A*
5. PresstheMODEbuttononceandthecandlewillstartickering
6. Press the MODE button again and the candle will glow steadily.
*A.Thisisthedefaultmode
Note: Using your Maui light with the Kona Control Center. The Maui can be con-
trolled by the Kona Control Center, giving you the ability to turn them on or off and
changing the LED light modes from a distance of 40ft.
Operation Details (con’t)

14
Troubleshooting
Your Maui is designed to operate easily and reliably. However, problems can arise
from time to time. If you need a little help, check out these common issues and
solutions.
Will Not Turn On
• Make sure your Maui is charged or plugged into a working wall outlet.
• Make sure POWER switch has been switched completely into the ON position.
Bluetooth Won’t Connect
• Make sure your Maui is attempting to pair with your Bluetooth device (blue
BluetoothindicatorLEDashingrapidly).
• Make sure the Bluetooth function on your smartphone or other Bluetooth
enabled device is activated.
• Make sure you are within Bluetooth connectivity range (40 feet).

15
Poor Sound Quality/Volume
• Make sure your Maui speaker is sitting on a level surface.
• Make sure the volume on your Maui Speaker and your device are at your
desired level.
Restart/Reset
Ifissuespersist,youcanndadditionalsuggestionsandtechnicalsupportat
bemwireless.com/support.
Maintenance
To keep your Maui working well and looking sharp, simply wipe with a dry cloth as
needed.Donotusecleaningagentsastheymaydamagethenish.
16
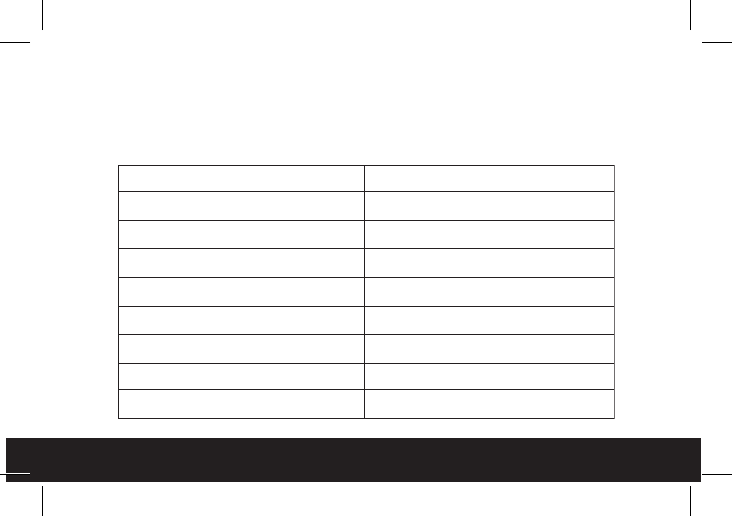
Technical Specications
Note:Allspecicationsaresubjecttochangewithoutnotice
Product Name Maui
Model Number LF1500
Bluetooth V4.0 with auto pairing
Candle 5MM warm white (2800K-3200K)
Power Supply Micro USB
Dimensions L 9” x W 6” x H 4.5”
Audio Distance BT 40 Ft / 5.8GHz 120 Ft
Light Distance 40 Ft
Battery 3.7V/1800mAh Lithium

17
Stay in Touch!
For questions, comments, or to purchase additional bem wireless products, go to:
bemwireless.com.
You can also follow us at:
facebook.com/bemwireless
twitter.com/bemwirelessco
youtube.com/bemwireless
18
FCC Statement
This device complies with Part 15 of the FCC Rules. Opera-
tion is subject to the following two conditions:
(1) This device may not cause harmful interference.
(2) This device must accept any interference received,
including interference that may cause undesired operation.
(3)Changesormodi icationsnotexpresslyapprovedby
the party responsible for compliance could void the user’s authority to operate the
equipment.
NOTE: This equipment has been tested and found to comply with the limits for
a Class B digital device, pursuant to Part 15 of the FCC Rules. These limits are
designed to provide reasonable protection against harmful interference in a resi-
dential installation.
This equipment generates, uses, and can radiate radio frequency energy and, if not
installed and used in accordance with the instructions, may cause harmful interfer-
ence to radio communications. However, there is no guarantee that interference
will not occur in a particular installation. If this equipment does cause harmful
2200

19
interference to radio or television reception, which can be determined by turning
the equipment off and on, the user is encouraged to try to correct the interference
by one or more of the following measures:
• Reorient or relocate the receiving antenna.
• Increase the separation between the equipment and receiver.
FCC Radiation Exposure Statement
The device has been evaluated to meet general RF exposure requirement. The device can be used in
portable exposure condition without restriction.
bem wireless
http://bemwireless.com/
bem wireless LLC.
1725 Kilkenny Court
Woodstock, IL. USA
Made in China
•Connect the equipment into an outlet on a circuit different from that to which the receiver is connected.
•Consult the dealer or an experienced radio/TV technician for help.

20
Safety Instructions
This product is specially designed based on full attention to safety; in order to
encourage accident-free operation, please follow the guidelines listed below:
• Do not drop, unpack, open, hit, bend, puncture, burn or otherwise attempt to
damage/modify the speaker
• Avoid using the speaker near basins or sinks where they may come in contact
with water
• Protect the speaker from all heat-producing devices, including radiators,
forced air vents, cooking surfaces, and other heat-producing devices
• Set the volume properly to prevent damage to the unit and personal injury
Correct Disposal of this Product
This marking indicates that this product should not be disposed of
with other household wastes throughout the EU. To prevent possible
harm to the environment or human health from uncontrolled waste
disposal, recycle it responsibly to promote the sustainable reuse of
material resources. To return your used device, please use the return
and collection systems or contact the retailer where the product was
purchased. Retailers can take this product for environmentally safe
recycling.

21
Warning
• The battery (battery or batteries or battery pack) shall not be exposed to
excessiveheatsuchassunshine,reorthelike.
• CAUTION: Danger of explosion if battery is incorrectly replaced. Replace only
with the same or equivalent type.

22
90-Day Limited Warranty
bem wireless warranties this product against defects in materials and/or work-
manship under normal use for a period of NINETY (90) DAYS from the date of
purchase by the original purchaser (“Warranty Period”). If a defect arises and a
valid claim is received within the Warranty Period, at its option bem wireless will ei-
ther 1) Repair the defect at no charge, using new or refurbished replacement parts
or 2) Replace the product with a new product that is at least functionally equiv-
alent to the original product. A replacement product or part, including a user-in-
stallable part installed in accordance with instructions provided by bem wireless,
assumes the remaining warranty of the original product. When a product or part is
exchanged, any replacement item becomes your property and the replaced item
becomes bem wireless’s property.
Obtaining Service: To obtain warranty service, call bem wireless at 1-815-337-0541
or e-mail customerservice@bemwireless.com. Please be prepared to describe the
product that needs service and the nature of the problem. A purchase receipt will
be required. All repairs and replacements must be authorized in advance. Service

23
options, parts availability and response times will vary. You are responsible for
delivery including the cost of delivery of the product or any parts to the authorized
service center for replacements, per our instructions.
Limits and Exclusions: Coverage under this Limited Warranty is limited to the
United States of America, including the District of Columbia and the U.S. Territories
of Guam, Puerto Rico and U.S. Virgin Islands. This Limited Warranty applies only to
productsmanufacturedbyorforbemwirelessthatcanbeidentiedbythebem
wirelesstrademark,tradename,orlogoafxedtothemoritspackaging.TheLimit-
ed Warranty does not apply to any non-bem wireless products.
bem wireless
1725 Kilkenny Court
Woodstock, IL 60098 USA
www.bemwireless.com
©2016 bem wireless All Rights Reserved.
Made in China

24

bemwireless.com
bem wireless | 1725 Kilkenny Court | Woodstock IL 60098
© 2016 bem wireless