E Lead Electronic EL311R Smart HUD User Manual EN EL 311 R 101 20140603
E-Lead Electronic Co., Ltd Smart HUD EN EL 311 R 101 20140603
UserManual.wiki
>
E Lead Electronic
>
EL311R User Manual
User manual
Navigation menu
Upload a User Manual
Namespaces
Wiki Guide
HTML
PDF
Info
Views
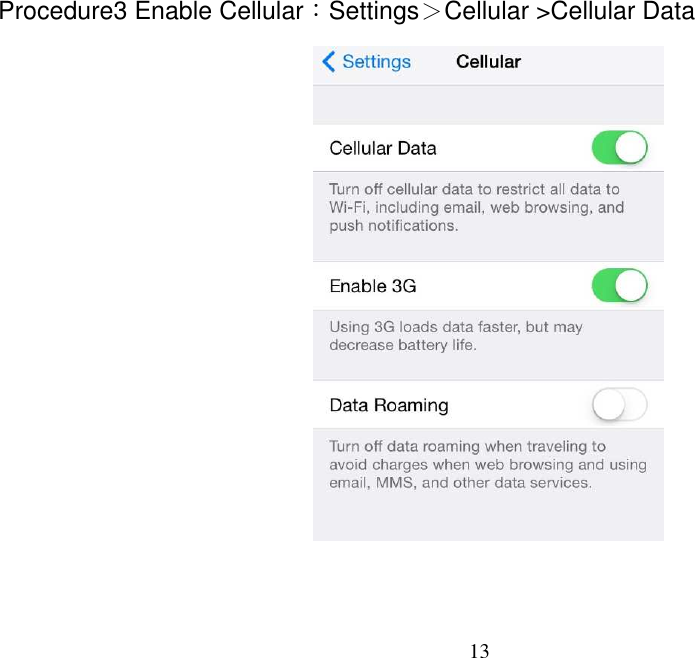
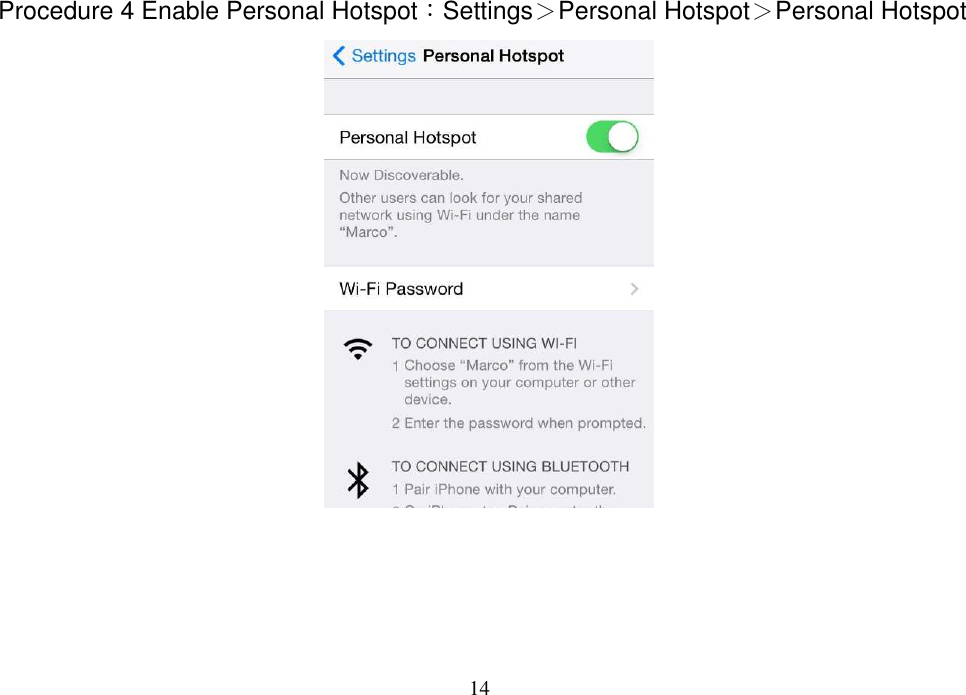
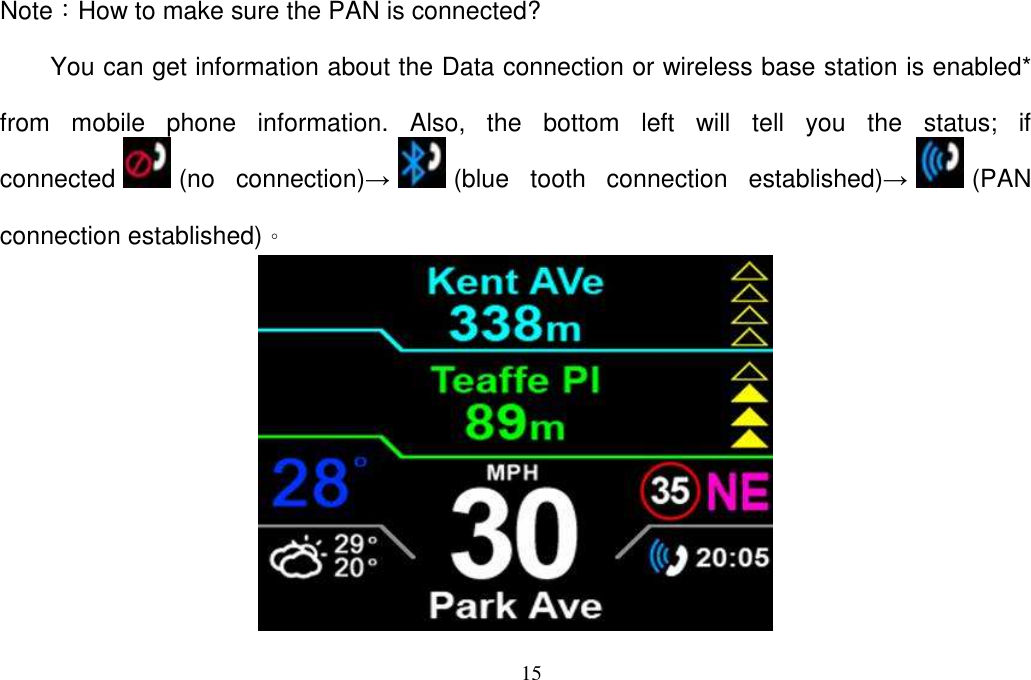
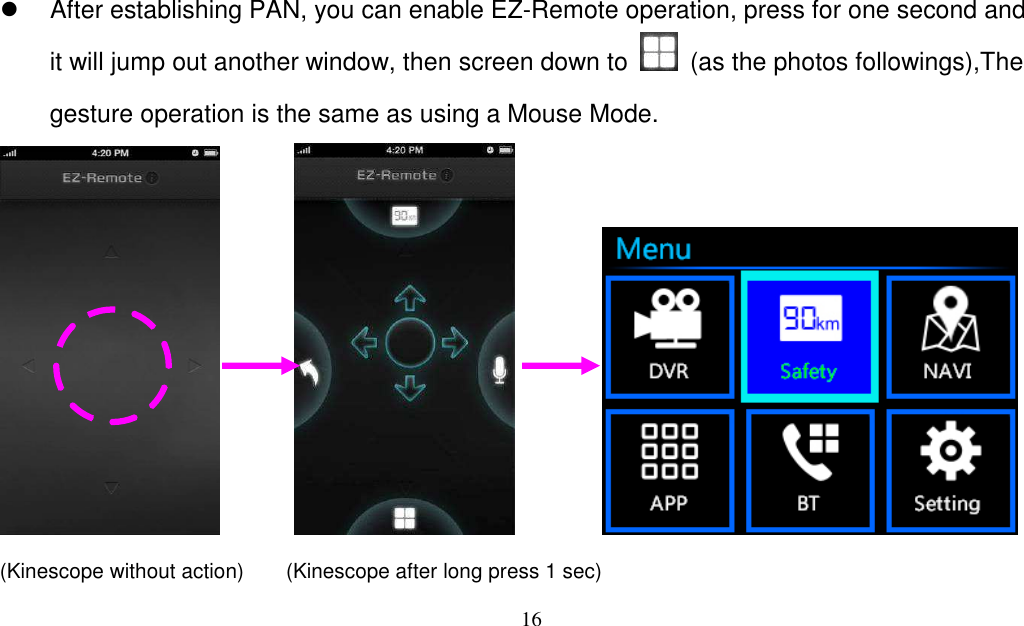
User Manual
Discussion / Help
Navigation

![8 四、Instructions for starting the Product [Preface] Before using the product, please follow the procedures in order to sure the regular connections. View for first power on View of normal power on](https://usermanual.wiki/E-Lead-Electronic/EL311R/User-Guide-2472189-Page-8.png)